Summer is known to be the perfect season for weddings as it unveils beautiful setups locked throughout the year offering us thousands of locations to choose from, thousands of flowers and scents to work with. Summer is known to be the perfect season as it offers us the opportunity to have our wedding outdoors in the immense beauty of greenery at the sounds of crickets nestled between fresh grass scents underneath the moon. In this romantic scenery romantic outdoor bar wedding ideas or summer wedding centerpiece ideas really catch on, particularly through freshness and naturalness.
Simple elements are able to set the design theme with ease outdoors where ambient light can sculpt greenery and highlight the coziness and sensibility of the wooden texture in elegant setups that seem torn from fairy tales. Cast a glance at the gallery below and pick the centerpiece that will beautify your event.
Summer Wedding Centerpiece Ideas
#1 Airy Transparent Decor Focused on Beautiful and Sensible Flower Centerpieces
Outdoor weddings are a highly discussed subject thanks to their immense beauty and simply breathtaking possibilities. Pick your favorite wedding centerpiece from the selection showcased and share your valuable feedback in the comment section below.
It is Halloween? Christmas? Easter? Valentine's Day? Friday or Monday? You have millions of reasons, seconds and minutes to justify the purchase of a ring for your loved one. A ring should make a statement for itself and in a direct connection, the ring box or way in which you reveal it, present it, gift it, should be unique as well. It should match your personality, hers, his and add romance and beauty to this special moment. You don`t buy a ring everyday. With this thought in mind we have presented further on 21 DIY Ring Boxes Projects that you can do and use in the comfort of your own home. Some easy, some are really hard to realize. It is up to you to decide how much time, money and dedication is worth investing in this moment, in this gift and statement.
Your lady, your mother or daughter, your loved one regardless of color,age and sex is probably one of the few reasons for which you smile everyday. For these individuals that find and ignite the joy and happiness is worth pushing every boundary, pursuing every goal, giving up everything. Life is pulsatory, everything is repetitive, circular, in a permanent movement and engaged dynamic from which we barely get our heads out from time to time. Stop for a moment, take a breath, make something different. We all know the red heart shaped soft ring boxes that we get free or for a small fee at a ring purchase. Stop being simple, stop being part of the crowd for a moment, differentiate yourself with something original and memorable.
The images and designs showcased below are just fuel for your creativity, they are here to feed your imagination, as a seed for your creativity. Feel free to experiment and contact us with your result, we would be delighted to add your idea in this small guide.
Romantic Small Wooden Log With a Carved Compartment
DIY Ring Bearer in Wood With Pillows
Baroque Jewelry Box Sheltering A Ring
White Wooden Box Sheltering A Pair
Realistic DIY Ring Box Resembling a Police Box
Walnut DIY Ring Box-Natural Splendour in Natural Shape
DIY Macaron Ring Box With Shabby Chic Apparel
DIY Wooden Ring Box With a Scandinavian Design
DIY Wooden Ring Box With Extremely Sensible Details
DIY Nut Ring or Jewelry Box
Small Book Sheltering an Unforgetable Story
Carved Log Transformed Into an Original Ring Box
Simple Divided Box Sheltering Jewelry or a Pair of Rings
Vintage Ring Boxes in White and Pink
Normal Sized Book Sheltering Jewelry
Leather Heart Shaped Vintage Looking Box
Wooden Circular Box With Interior Markings
Extremely Creative Simple Cardboard Boxes
DIY Wooden Ring High End Design Realized on a CNC Machine
What do you think about these DIY Ring Boxes? Would you devote time to such a project? We would love to hear your opinion in the comment section below.
There are a variety of ideas to choose from for a perfect wedding centerpiece. I came up with 17 wedding centerpieces but am sure you can figure out a lot more. However, planning for a wedding can leave a hole in your pocket. I mean, it's the biggest day of your life, you want everything to be perfect and you want the best. That's not always the case with everyone. Some people are not that fortunate so they have to just settle for whatever they can afford. By the way, you don't need all the money in the wold to have a romantic, beautiful wedding. Just two people who love each other, witnesses, a place to get married and have a reception. Some food, drinks and good friends and family to share your memorable moment with. From my experience, one of the biggest decisions is always, what centerpiece to use on the reception tables? Something that won't cost too much, but at the same time will blend in with the rest of the ambiance. Here are 17 wedding centerpieces that you can consider or maybe get ideas from, if you are in this predicament.
Low Budget Wedding Centerpieces
#1 Opt for a trail centerpiece for your wedding tables
With this unique idea, you can forget about putting together special hand made single centerpiece for each table. Just throw this baby on, how gorgeous is this?!
#2 Floating bowl surrounded by lighted candles for a great wedding centerpiece
Having lighted candles in glasses positioned simultaneously throughout your reception tables or room does carry a warm, romantic ambiance at your party. The reflection of the lights from the candles is what really illuminated the surrounding and beautifies the each table.
#4 Choose a glass with water that will magnify the size of your flower
You don't always have to use real flowers for your wedding for it to be classy and superb. Just a creative mind with a great sense of style and an eye for beauty.
#5 Water beads in stacked fish bowls great for a wedding centerpiece
Another great wedding centerpiece idea only you could change the color of the flower to blend in with the colors of your wedding.
#6 Red petals along side white lighted candles for a valentine's day wedding centerpiece
This looks like a lot of effort and time was placed into this skillful creation. This table looks romantic all by itself. Imagine seeing the entire wedding reception with this centerpiece.
#7 Breath taking baby's breath floral arrangement for this wedding centerpiece
Without the lighting fixtures here, the beauty of this wedding centerpiece would be lost in the shadows. Somewhat rustic style is a perfection addition in this put together.
#8 A single flower in a glass rolled in silver dust for your wedding centerpiece
I always say, while a bunch of flowers makes a romantic statement or shows gratitude, one flower says a million more words. Surprising how they chose to leave the leaves on the flower in this wedding centerpiece, yet it looks better than if they had cut it out.
#9 A wedding centerpiece that looks expensive but was made on a reasonable budget
Using bright colors for your wedding centerpiece would draw the attention of your guest. Yellow leaves a warm, friendly feeling. Great for a summer wedding.
#11 Simple vase of flowers for a 'ball' of a wedding centerpiece
When in doubt about coming up with the right wedding centerpiece on a low budget, just go with your natural instincts and you just may surprise yourself.
#12 When gold is the color scheme and your out of ideas for a wedding centerpiece
Just throw some gold or silver balls on a glass server with a lighting fixture close by for a more glossy appearance. I'm thinking a winter wedding for this wedding centerpiece.
#15 White roses in a cut glass bowl with water -soft, delicate wedding centerpiece
Rananculus and baby's breath alongside this piece of lace, really says wedding. This wedding centerpiece to me seems as though it would also be great as a bridal bouquet.
#16 If you desire to have a tall tree as your wedding centerpiece
This wedding centerpiece makes the point of these centerpieces clear, to draw the attention of the guest to the center of the table.
#17 A battery operated gold and silver wedding centerpiece
Loving this led glitter branch for a funky styled wedding centerpiece.
A great way to decide on what wedding centerpiece you would like to have on your reception table is to go with your favorite flowers and the season it blooms in.
As much as we don't like to admit it, Ikea has become an important part of our life. Everyone owns at least one Ikea item, and we have been subdued by our consumerist society. However, we have come to get past this aspect we consider disagreeable and to look for unique methods and hacks of using Ikea items differently than their initial purpose.
In the end, it's a matter of transforming something no longer useful into a piece that can serve another, better purpose in your home. Furniture transformation can be categorized, as appearance transformations using stencils, spray paints, and other techniques, or repurposing the pieces, as is the case in the gallery showcased below.
It is amazing how a simple repositioning of an item can turn its whole purpose upside down! We invite you to explore the gallery below and to think about new innovative ways you can repurpose your Ikea items before throwing the unnecessary pieces away.
The "Ekby Alex" shelf can serve as a console with the addition of hairpin legs.
Yellow is definitely not everyone's cup of tea yet yellow means happiness. Yellow dares to create a vibe comparable with no other color. It contrasts by default with almost any color and it is the color able to create the highest contrast possible when paired with solid black. Consider this color a valuable weapon in your arsenal and wherever you need it, liven up your world with bright yellow painted furniture ideas for a change of scenery. The refresh will be substantial and in most design lines this triggers smiles and a healthy positive attitude at a first glance. We have showcased underneath a few isolated yellow furniture ideas that are worth using in your household, cast a glance and tell us what can blend in your decor.
Yellow Furniture Ideas
#1 Powerful Yellow Apothecary Unit
#2 Vibrant Dresser Boosting Textures
#3 Small Side Table In a Discrete Yellow
#4 Small End Table Emphasizing a Small Reading Nook
#5 Subtle Simple Nightstand
#6 Yellow Bench Welcoming Guests
#7 Restored Side Table Wearing a Bold Yellow
#8 Small Chest With Colorful Cushions
#9 Up-cycled Furniture Piece Floating Thanks To The Yellow/White Setup
#10 Positive Yellow Dresser
#11 TV Sitting on a Yellow Stand In Airy Decor
#12 Apothecary Table Complementing a Beautiful Orange Fridge
#13 Simple Yellow Nightstand
#14 Bookshelf Up-cycled Into a Vibrant Yellow Life
#15 Shabby Chic Yellow Nightstand
#16 Yellow-One Pillow and One Chair
#17 Wire-frame Terrace Set in Yellow
#18 Space Efficient Yellow Dinning Setup
#19 Yellow Desk With Textured Drawers
#20 Simply Colorful
#21 Up-cycled Furniture Pieces in Yellow
#22 Small Side-table With Storage
#23 Vintage Drawer Unit in Yellow
#24 Black and Yellow Contrast
#25 Reading Nook Emphasized by Yellow
#26 Yellow Origami Chair
#27 Up-cycled Yellow Chair
If you want to refresh your interior fast, a simple yellow chair will do. If you are bold enough you can go even further. We would love to hear which scenery from the one above seems the happiest in your opinion in the comment section below.
You need so many things to decorate a good-looking dining room, but do you know what is the first thing that people notice when they enter yours? The dining chairs! That's why we decided to pay special attention to dining chairs, we`re going to talk about them a little today. It's not easy to choose the design of your dining room table and chairs because there are lots of things that you should take in consideration such as design, style, color, comfort and of course quality. If you are having a hard time picking them, and you can't decide on a single design, then we suggest you to choose various of them. The playful game of chairs is a hot trend nowadays, so take a look at the Mismatched Chairs That Will Add A Unique Touch To Your Dining Room.
If you want to try out this trend, but you don't have the guts, then we suggest you to add only two mismatched chairs to your dining table. In this way you will still have mismatched chairs, but you will keep the symmetry and your dining room will still look elegant and gracious.
Mismatched chairs don't always require different designs. Sometimes you can stick to a single design but go for different colors. I really like the gradient change of colors to the chairs in the dining room below. How do you like them?
What do you say about sticking to the same color but going for different chair design? Be creative and go for some fun and modern designs that still tie the whole dining room together.
Three on three! This is the perfect balance for your dining room. The wooden chairs add warmth to the space while the blue ones give it a more modern and contemporary look.
The strong contrast of mismatched chairs looks incredibly interesting and fun and your dining room will never look boring. They will immediately grab your attention and you will be fascinated by their striking beauty.
These chairs will help you add character to the dining room, so take the risk and go for a more dramatic look. Play with different colors and textures, and see how the chairs transform the space with ease.
When you are choosing the chairs for the mismatched look keep in mind to always check the height of each chair and choose chairs of similar height. You probably don't want your guests to bob up and down all over the place.
The mismatched chairs can be found in all of the styles, so don't have second thought about your room, but just go for it.
The possibilities are endless when it comes to mismatched chairs, so let these photos serve you as guidance when you are decorating your dining room.
Whether you’re remodeling your home or moving into a new place, reshuffling furniture can be a backbreaking task.
And not to mention, dragging furniture across the house without the help of movers can leave nasty scratch marks on your beautiful hardwood floors and ruin your delicate carpet.
It can also take you an entire day to move all your furniture. So, even if remodeling the house sounds fun, moving your furniture is not.
That’s why you’ve got furniture sliders. These sliding pads can be a lifesaver when it comes to arranging furniture. But, all furniture sliders are not suitable for every type of floor. Hence, you have to be careful while choosing the right sliders — and here’s where we come in.
We’ll discuss some of the best furniture sliders for carpets and hardwood floors in this article. So, without further ado, let’s begin!
First up on our list is the carpet-friendly furniture slider from Waxman Consumer Products, cleverly dubbed as SuperSliders. These are heavy-duty, reusable and versatile sliders that make moving furniture a piece of cake, no matter the size or shape of the furniture legs.
MOVE FURNITURE WITH EASE - Moving furniture can be the worst...
PERFECT FOR ALL FURNITURE - There is no piece of furniture...
Why Did We Like It?
When we talk about furniture, it’s not just a single chair or a small bookcase. Bigger and heavier furniture like beds, couches, or cabinets are the most difficult to move and reshuffle — and that’s where these SuperSliders shine. That said, you can use these to move all types of furniture, from small to XL pieces.
Plus, you don’t have to worry about throwing away the sliders after one move. On that note, the durable rubber foam base makes the furniture sliders reusable and won’t give in to wear. So, if you’re big on house remodeling, this product can be an excellent investment.
On top of this, the smooth, plastic design of these sliders makes them perfect for your plush and soft carpeted floors. The smooth and sleek plastic bottom can effortlessly drag even the heaviest furniture over rugs and carpets without pulling on their threads and ruining them — it doesn’t get better than this.
What Could’ve Been Better?
Even though the sliders protect your delicate carpet from getting ruined while moving furniture, the floor under it may get scratched if you are working with heavier weights. On that note, you won’t be able to use these padded sliders on hardwood floors or tiles. So, if you have tiled floors or hardwood floors, steer clear of these sliders.
The X-Protector furniture sliders for carpet from NeoSales are available in a 16-piece pack that makes moving heavy furniture safe and hassle-free. Just put the sliders under your furniture and move it without scratching or ruining your rugs and carpets. The sliders are made from premium material, so durability will not be an issue.
✌ IS YOUR FURNITURE TOO HEAVY TO MOVE IT EASILY? ARE YOU...
✌ HEAVY FURNITURE SLIDERS FOR CARPET - just put our moving...
Why Did We Like It?
The most attractive feature of these X-Protector sliders is perhaps their premium quality material and build. Also, there’s no glue on top of the sliders, and the strong plastic and rubber foam can handle the weight of heavier furniture pieces. Needless to say, NeoSales offers durability with this handy product.
Not to mention how the company has designed these furniture coasters so that they don’t leave any permanent dent or impression on your expensive rug or carpet. Here, the strong rubber foam of the sliders offers a secure grip, which facilitates smooth movement without any accidents.
Moreover, these sliders are suitable for any furniture, including chairs, recliners, sofas, cabinets, dressers, beds, or tables. As an added tip, you can use these furniture coasters to make cleaning under the sofa so much easier. So, save your energy and try out these carpet sliders.
What Could’ve Been Better?
While the furniture sliders are durable and reusable, sliding the furniture itself requires some elbow grease. Additionally, there are limited customer reviews as NeoSales is not a well-established brand in the business.
Next up on our list is the self-stick furniture sliders from Wehotection, which are perfect for moving furniture on carpeted floors. The sliders have a durable design that makes them reusable and suitable for moving heavy furniture pieces, which glide smoothly over carpeted floors without causing any wear and tear.
Easy Moving: Chair Sliders Furniture moving pads with smooth...
Why Did We Like It?
The beautiful beige color of the padded plastic sliders is an instant attraction, in addition to their premium material. These furniture sliders are made from high-quality felt and foam, and come complete with a hard plastic bottom.
They are also extremely durable owing to the extra 2 mm Eva foam under the adhesive pads of the sliders. This super-strong adhesive foam base acts as a protective pad that prevents the furniture legs from leaving scratch marks on the carpet.
What’s more, these are multipurpose sliders that you can use on chairs, desks, tables, beds, and even electric appliances. So, whether you’re trying to shift the entertainment set from the living room to your bedroom, don’t hesitate to use these versatile felt furniture sliders.
Also, since they are self-stick models that you can place underneath any furniture piece, almost anyone can use them with ease. Just pull the protective films off the sliders and stick the adhesive foam base under the furniture leg, and you’re good to go.
What Could’ve Been Better?
These sliders are not suitable for wooden floors. They can slip quite easily and leave scratch marks on polished wood finishes. So, if you have wood floors, these plastic sliders might not be your best choice. Also, they have a loose grip on the furniture, even on carpeted floors. Thus, they might slide off from under the furniture.
Moving on, we bring you the furniture sliders from Smart Surface that are specially designed for your carpeted floors. They are perfect for all carpeted surfaces, whether it’s your living room, dining room, bedroom, or office. So, you can use these carpet sliders on any piece of furniture anywhere around the house. Reshuffling the furniture has never been easier.
A Must-Have for Every Home: Easily move your living room...
Easily and Safely Move Furniture: Create a flexible living...
Why Did We Like It?
We were most impressed with the versatility of these carpet furniture sliders, which work well on all types of carpeted surfaces. So, whether your rugs are thin or thick, polyester or plush, you can use the sliders on rugs without worrying about ruining them. Plus, they can slide under any furniture piece with ease despite its size, height, or weight. Whatever the furniture, just use the sliders to move them without a sweat.
Furthermore, the soft EVA foam base of the carpet coasters keeps the furniture legs from ripping or tearing your carpets and rugs. The high-quality EVA foam also makes the sliders suitable for everyday use. So, if you’re planning to rearrange all your furniture pieces or move them for daily cleaning, these carpet coasters can be a perfect choice.
On top of this, these furniture sliders are ideal for the easy and noiseless moving of furniture pieces. The high-quality plastic bottoms of the coaster discs help you to move the furniture without causing any noise or strain. They can make your dream of noiseless and frictionless furniture reshuffling a reality.
What Could’ve Been Better?
Even though the furniture sliders are multipurpose, they are smaller compared to similar products. Their assembled diameter of 3.5 inches is often not enough to hold larger and heavier furniture legs. So, these carpet sliders may not be ideal for holding heavy cabinets or dressers. Plus, they are not very attractive, which can inconvenience your aesthetic room decor.
We now come to the best furniture sliders for hardwood floors, and the first product under this sub-category is the X-Protector furniture sliders for hard surfaces. These are heavy-duty felt sliders that are designed to move bulky furniture pieces across hard surfaces without any hitch. They are also designed to offer long-term durability.
👍 IS YOUR FURNITURE TOO HEAVY TO MOVE IT EASILY? DO YOU...
👍 16 HARD FLOOR SLIDERS WILL HELP You TO MOVE THE...
Why Did We Like It?
The foam sliders are designed for heavy-duty applications and thus can be reused time and again for moving and adjusting all types of furniture pieces. So, if you are struggling with bulky furniture pieces, such as dressers or cabinets, just put these sliders under the furniture legs, and moving them will be a breeze.
Also, the felt pads are truly effective in preventing the furniture legs from leaving scratch marks on your hardwood floor while transporting furniture across it. They offer a secure and long-lasting grip on bulky furniture pieces, allowing them to glide gracefully.
What’s more, these foam sliders are easy to use; all you need to do is place them under a sofa, table, bed, or dresser. Additionally, the premium rubber and felt foam base of the sliders are made of high-quality material, allowing you to use them for heavy objects throughout multiple moves.
What Could’ve Been Better?
Even though the sliders are easy to place under furniture legs, taking them out can be tricky. Furthermore, if you keep these sliders under a heavy piece of furniture for a long time, you may find dents on your hardwood surfaces.
Next up on our list of best furniture sliders for hardwood floors, we have the Ruby plastic sliders from BulbHead. These sliders are ideal for protecting your polished hardwood floors from getting scratched by furniture legs. They are compatible with most pieces and perfect for moving heavy objects around the house.
Pack of 8 Chair Leg Sliders: One package contains 8 AS SEEN...
Furniture Movers Protect Your Hard Surface & Tile Floors:...
Why Did We Like It?
The Ruby Sliders fit perfectly over the furniture legs of large and heavy pieces to prevent them from leaving scratch marks on any hard surface, such as tile or hardwood floors. So, your floors stay beautiful without getting any nasty dents or marks from the furniture.
Moreover, the distinct red felt pads are responsible for a soundless gliding of the furniture pieces over a hard surface. In other words, no more scratches and no more screeching sounds.
Additionally, the sliders can stretch to fit any furniture leg. Square, circle, thick, or thin, whatever the size or shape of the furniture leg might be, the sliders will fit right over them without any trouble. Plus, the premium nano-weave felt pad is glued to the bottom of each slider with industry-grade adhesive so that it doesn’t fall off easily.
What Could’ve Been Better?
These sliders are not designed for carpeted floors and should not be used to move furniture pieces over rugs and carpets. The available sizes are suitable for larger pieces, and the company does not offer smaller models. You may have to look elsewhere for furniture with smaller legs.
Next product is the SuperSliders from Waxman that are designed for hardwood floors. These are reusable furniture movers that can help you quickly and easily move all sorts of furniture across hard surfaces. They are suitable for dragging furniture across hardwood, linoleum, tile, and other hard surfaces. So, moving or remodeling becomes quite easy with these felt sliders.
Moving and reshuffling heavy furniture is pretty much the worst part of house remodeling. However, these SuperSliders make moving furniture pieces so much easier. Simply place the sliders under your heavy furniture and drag them effortlessly across any hard surfaces. Just be aware not to drag them across carpets or rugs.
Also, they are perfect for all furniture. Whether you’re trying to remodel your living room, bedroom or office, don’t hesitate to use these sliders for reshuffling and readjusting the furniture pieces. In addition to moving furniture, you can use these foam coasters to readjust any heavy electric appliances. They have multipurpose applications.
Furthermore, the dimension of each furniture mover is perfect for supporting large furniture. Each slider measures 3.5 inches x 6 inches and comes in an oval shape. Hence, you can easily put them under square or circular furniture legs without worrying about leaving dents on your hardwood floor.
What Could’ve Been Better?
Even though the sliders are good for moving bulky furniture, they slide out right underneath small or light furniture pieces. So, if you try to fit them under your small coffee table, they might just slide out. Moreover, we were also concerned about the quality of felt and rubber used in the foam base of the furniture sliders.
Pros
Perfect for bulky furniture
Durable and reusable
Easy to use
Ideal size
Suitable for easy cleaningSuitable for easy cleaning
Moving on with our list, we have the 24-piece furniture sliders from Trushome. These are reusable felt pads designed for heavy-duty uses, which help you move heavy furniture easily and quickly. Also, they are specially designed for protecting any hard floor surfaces. The rubber material of the sliders prevents the heavy furniture legs from scratching your hardwood floor.
The sliders are excellent for easily and quickly moving heavy furniture pieces. Reshuffling and arranging furniture can become a piece of cake while remodeling your house. So, why hire movers when you can do it all yourself? It is so very effortless.
Also, you don’t have to deal with the annoying noise that comes from dragging furniture pieces when you use these foam sliders. The foam base of the sliders ensures a noiseless gliding of furniture on any hard floor surface. Plus, they reduce friction, preventing the hardwood floor and the furniture legs from scuffing and scratching. Moving furniture becomes easy and neat with these sliders.
On top of all this, they have a durable, non-stick grip that helps hold onto the furniture. There’s no glue present on the sliders so that they won’t stain your furniture. The felt and rubber foam also offer a superior grip on the furniture, resulting in a quick and effortless gliding across hard surfaces.
What Could’ve Been Better?
The furniture sliders are not ideal for moving light furniture as they tend to slip right underneath small furniture pieces. So, naturally, you cannot use them to glide small chairs or tables. Additionally, these are not permanent furniture sliders, which means you can’t hold furniture for a long time using them.
Pros
Noiseless, effortless gliding
Prevents scratching
Prevents scuffing
Suitable for all furniture
Non-stick, durable gripper
Cons
Not for light furniture
Not permanent furniture sliders
Best Furniture Sliders For Both Carpet And Hardwood Floors
As we move on to our final sub-category, we bring you the furniture sliders suitable for both carpet and hardwood floors. And the first product of this sub-category is the furniture moving kit from Flerise. These felt pads can protect carpets, hardwood floors, ceramic tile, linoleum floors, and all other hard surfaces from noise and scratches.
High quality EVA foam felt pads,16 pieces value pack protect...
EVA foam sliders keep your wooden floors no scratches and...
Why Did We Like It?
The most attractive of these furniture sliders is their versatility. They work well on carpets and all other hard surfaces, including hardwood floors. The high-quality Eva foam felt pads prevent the scratching of your polished hardwood floors and the ripping of your carpets while moving furniture.
Also, these Eva foam sliders help in the noiseless reshuffling of your furniture pieces while remodeling. Plus, they are reusable. So, you can leave them under furniture for easy moving and cleaning. Now you don’t have to waste your effort on pushing around the couch or wardrobe to clean the living room corners.
Moreover, these are non-stick gripper sliders that you can use on any furniture, including sofas, beds, tables, dressers, electrical appliances, and much more. The durable and reusable features of the Eva foam sliders help them provide a solid and secure grip for a long time.
What Could’ve Been Better?
Although the sliders work well on carpet and hardwood floors, they are not suitable for moving heavy furniture. You can use it mostly for adjusting light furniture. Also, gliding furniture pieces aren’t quick and easy. You need to put in some extra effort for reshuffling the furniture using these sliders.
Pros
Suitable for carpet and hardwood floors
Easy to use
Premium materials
Reusable purpose
Durable Eva foam
Cons
Not suitable for heavy furniture
Gliding takes some effortGliding takes some effort
The next product in this sub-category is the EZ Moves furniture sliders from Allstar Innovations suitable for all floor types, including carpeted and hard floor surfaces. This furniture moving system is ideal for moving heavy appliances and furniture easily and quickly without a sweat. No furniture will seem too heavy or too large to move if you choose to use these sliders.
MOVING MADE EASY! – The do yourself furniture moving...
PERFECT FOR ALL FURNITURE – There is no piece of furniture...
Why Did We Like It?
We were instantly attracted to the furniture lifter with this furniture moving system. Lifting and moving heavy furniture becomes a breeze with the lifter and the sliders. So, no need to worry about hurting your back while reshuffling furniture when remodeling the house.
Also, this is a DIY furniture moving system. You can easily do all the heavy lifting and moving by yourself without hiring professional movers. Hence, you can actually end up saving a lot of money if you choose to use this furniture moving kit.
Additionally, the sliders are perfect for moving all types of furniture pieces. You can easily move and clean your furniture without any hassle. The sliders are also reusable. Thus, you need not worry about changing them anytime soon. Plus, the kit comes with plastic and felt sliders. So, you can use them on carpet and hardwood floors.
What Could’ve Been Better?
The biggest drawback about these sliders and the furniture lifter is their poor design. The design of the lifter makes it extremely difficult and time-consuming to lift heavy furniture. At the same time, the poor design of the sliders results in falling away of the felt pads. Hence, the foam pads of the sliders come off easily only after a few uses.
Finally, the last item on our list is the X-Protector multi-surface furniture sliders that can move your furniture on any surface easily and quickly. These are 2-in-1 sliders that work well on carpets and hard floor surfaces. So, if you are trying to shift your study table from the carpeted bedroom floor to the hardwood office floor, these furniture la sliders will work like magic.
✌ IS YOUR FURNITURE TOO HEAVY TO MOVE IT EASILY? DO YOU...
✌ FURNITURE MOVING PADS FOR ALL SURFACES - 8 furniture...
Why Did We Like It?
The 2-in-1 sliders come with hardwood socks and normal plastic sliders. If you want to move to furniture on carpets and rugs, use the plastic sliders. But, if you have a hardwood floor, just put on the hardwood socks over the plastic sliders and glide the furniture effortlessly on the hard surface.
The plastic sliders and hardwood socks also work well together to prevent causing dents and scratches on all types of carpets and hard floor surfaces. Hence, they are incredibly versatile for moving furniture pieces across any floor surface.
On top of all this, the premium quality materials of the sliders and hardwood socks make them durable and reusable. So, they can serve you again and again for a long time. No need to worry about replacing them anytime soon. Furthermore, if you’re not satisfied with the quality of the sliders, the manufacturer will refund your money without any question.
What Could’ve Been Better?
The hardwood socks that come with the plastic sliders tend to get dirty quite easily. And dirty hardwood socks can ruin the aesthetic appeal of your furniture. Also, the product information is outright misleading as it says that the package comes with eight pieces of hardwood socks and eight pieces of plastic sliders. Whereas in reality, four pieces of each are included.
Pros
Hardwood socks included
Prevent scratches and dents
Suitable for all furniture pieces
Reusable premium-quality sliders
Easy refund policy
Cons
Dirty hardwood socks
Misleading product information
Furniture Sliders Buying Guide
Now that we’ve talked about all the major furniture sliders, it’s important to discuss the key factors that come into play while you’re choosing the right sliders for your furniture. So, let’s take a look!
1. Floor Type
Always consider the floor of your room before purchasing furniture sliders. Some work well on carpet flooring, while some are good for hardwood floors. Also, there are some sliders that work as multi-surface movers. So, it is always essential to buy furniture sliders based on the floor type.
2. Furniture Type
Although most furniture sliders are advertised to work for all furniture, the reality is very different. Large, oval felt sliders usually work well on tall and bulky furniture pieces. If you’re trying to move heavy furniture, try to look for sliders that come with a thick, high-quality Eva foam for better grip and durability.
3. Durability
When you’re buying furniture sliders, you usually want them to last for a long time. It is best to choose furniture sliders with premium quality materials, like a hard plastic bottom and a thick rubber foam. Such premium quality sliders offer a secure grip on your furniture and can be reused again and again.
Verdict
After going through our list of best furniture sliders, we hope you’ll feel much more confident about choosing the right sliders to drive away all your worries about all the heavy lifting and furniture moving.
If you ask us about our top favorite, we think the Waxman SuperSliders 4744095N is the best choice if you have carpets. But, if you have polished hardwood floors, we’ll suggest you go for the X-Protector Furniture Sliders 1. Or, you can also check out the multi-surface Flerise furniture sliders.
Whichever product you choose, just make sure it meets your needs. You can also roll up your sleeves and do some more research before deciding on a product.
And on that note, we’ll be signing off. Take care, and we’ll see you next time. Happy shopping!
Arranging furniture has never been an easy task. We tend to shop uncontrollably up to a central point where we find it difficult to organize and place all those items around the house. Every piece of furniture can influence a room, from the way it is perceived to its atmosphere, functionality and overall design line. Every furniture arrangement influences the entire room so if you get tired someday and don't really afford a real makeover you can try mixing things up and changing the layout of your room for a fresh look. Here are some Furniture Arranging Tricks And Diagrams to help you in your endeavors meant to revive your home. We will focus on the living room set up as it is the focal point and heart of any home.
The first thing you should try before starting to move things around is simulating your desired room on a computer. Try the room planner at Urban Barn, Arrange a Room at BHG, or the room planner at Pottery Barn. They are very easy to use and permit you to recreate your room and then arrange it in different ways so you can get an idea on how certain changes will influence your room.
Now you can start by cleaning the room from all the unnecessary clutter and small items. Leave the big volumes though because they are the ones that generate the entire design scheme. Try and move them around until you find that perfect position for every item. Try to create more than one focus point in the room rather than simply arranging the furniture aligned with your walls. The diagram below is such an example where several interest points and sitting areas were created.
If you are tired of the classical "everything aligned" scheme, go diagonal all the way! A diagonal arrangement offers a wider angle of perception of the room and a more dynamic feel to it. If you can not really place every single item diagonally try moving the smaller ones for creating different angles and generating alveolar spaces.
You can still make your room cozy and functional even if the space is very small. It's just a matter of rearranging the smaller items of furniture and positioning them to generate intimate functional spaces.
There are many possibilities for arranging a small living room with just 5 pieces of furniture or less. But we recommend you to use small items and to avoid big heavy furniture pieces. As you can see in the diagrams below, although you can find a proper arrangement, the room seems suffocated by the big sofas.
A very important aspect for every room is natural light. The lack of it limits the room, making it feel cluttered and suffocating. Limit yourself to low pieces of furniture placed in front of the windows. Keep the walking corridors and paths unblocked and clear all the time to let the room be visible from the adjacent room and make it thus seem larger.
Clutter is your biggest enemy so try and sort out all your furniture pieces and decide if they are used properly or if you could rethink their purpose all together and upcycle them. They might serve perfectly in another room or context. Sometimes less is more so don't be afraid to give up on old items and let your room breathe.
Bigger rooms allow multiple variations for furniture arrangements and possible multiple entries into the room so the furniture must be kept out of those paths and the visibility not blocked. You can create one big ample space with every item in direct relation with the other pieces. The 4 5 and 6 diagrams offer multiple sitting spaces including spaces destined especially for the coffee ritual.
Moving on to spaces that include an additional function like a desk or a dinning table you can choose to adopt a separative attitude and place the furniture with its back to these spaces or one of communication where every piece is in a visual relationship with the others.
Don't arrange your furniture accordingly to the TV placement. It should never be your focus point. “You don’t want to ignore the fireplace or something else that would architecturally be a natural main element in the room,” “It benefits the layout to group main items together.”
Couches should be surrounded by a little space.“Placing a couch even a few inches away from the wall will create a little breathing room and make a space seem larger.”
Arranging furniture in a long and narrow living room with many entrance doors, archways and windows might seem complicated but simply keep the furniture away from the walls and use the length of the room to your advantage.
In the end we recommend you a few other articles regarding small spaces and methods of un-cluttering your home we hope you will find helpful.
Reupholstering furniture can be left up to the experts, or you can take a tutorial and learn for yourself. One benefit of this of course being the fact that it would be easier on your pocket. Then there is the satisfaction of sitting back and enjoying your own handiwork. You know what you want and how you want it done, so no one to complain too if it does not come out the way you expected. Reupholstering old furniture is also for the purpose of giving your home or office a new look without having to empty your wallet.
The good thing about reupholstering furniture, is that once you start to take the pieces apart, you'll soon realize that it was meant to be replaced when it got worn out. All you will need are a little sewing skills, and some tools like a staple gun, screwdriver and hammer to begin with. Start with something simple like a single chair then when you have built up your confidence and knowledge, you can move on to the living room sofa. Start by shopping around for the color fabric you desire and foam if needed.
You have the choice of sewing your fabric and then pull it over the worn furniture - this would be called the slip cover method. However, most of the pictures in this article deals mainly with totally reupholstering furniture from scratch.
Take a look at the pictures in this article and you will have a great idea on how to reupholster your own furniture.
Enjoy!
Before And After DIY Reupholstering Furniture Ideas
29 great reupholstering ideas. This is a great project to take up next summer. Share your comments with us on this article in the comment section below.
The industrial design line can benefit from multiple resources when it comes to sculptural pieces, it can surge power allure color and texture from the time`s footprint through rust, through oxidation or simply discoloring, earning unmatched authenticity and original aesthetic values. Time tells the story of a sculpture that thrived where the rest haven`t for various reasons. 23 clever diy industrial furniture projects have showcased underneath; each and every one is able to make a statement for itself and for the industrial design movement in which they blend.
We invite you to cast a glance at the gallery below and explore your surroundings. Every item has the potential to enhance your world in a manner; invest time, gain knowledge and experience and progress. Keep in mind that the objects themselves can be new; you can empower them along with the test of time in your ensemble.
Clever DIY Industrial Furniture Projects
1. Gas Station Sinks Realized From Tires and Old Fuel Pumps Transformed Into Water Faucets
22. Old Washing Machine Transformed Into a Breathtaking Night Stand
23. Old Tractor Farming Part Reused Along With Salvaged Wood in a Sculptural Piece
We would love to hear your opinion on these diy projects in the comment section below and see your latest crafts; don`t be a stranger, share your knowledge and experience .
We are all passing through these uncertain times with a drop of care and insanity. We have to take our time to meditate, think, and create anchors for ourselves and the ones around us. We have found DIY projects to be pieces of this anchor. By slowly upcycling and recycling as much as possible around us we strengthen our belief that small things do matter the most. We are shaping our small world as much as possible. Through simple backyard projects, DIY wall art projects,DIY furniture hacks, and paper crafts alike we are becoming more of an individual than we were before. Different is good. Different is better. Be yourself and craft your way to happiness !
# 1. Transform 2 Dining Room Chairs in a Bench
Upcycle a couple of dining room chairs in cozy and beautiful indoor or outdoor benches with ease. If you don`t feel up to the task call a friend or just paint the pieces and refresh them with a new look. You can find more details here.
Everyone has stumbled across one of these metal cabinets at a certain point. You can take advantage of the huge hunk of metal and transform it into a side garage storage space for tools, rakes, shovels, and other things that are usually lying around in your garage. Pegboards can be used at the sides to accommodate garage items. You can find the details here.
# 3. Create a Kid's Craft Table From A Crib
At a certain point, the crib will just occupy space in your home. If you have no relatives or friends that can make use of this crib you can transform it into a small craft table for your little loved ones. Be sure to personalize it and make it your own.
These antique TVs can barely be found anymore these days but if you find it, take it! You can make use of the extremely graphic and solid wood structures to make a hutch.
Probably the easiest furniture hacks existent, this storage bench has been transformed from Ikea`s iconic bookshelves. Turn it over, craft the seat cushion, add wheels, and voila!
Go treasure hunting and look for an old furniture piece that can be transformed with ease into a small piece of Lego Land. The piece below is extremely good because it accommodates the basket when game time is done but we are sure you can find similar furniture pieces to nestle in your playroom.
By creating this piece yourself you can customize the piece with colors and textures in an inexpensive manner. Just look at the small window in the transformed kitchen. You will need a good amount of patience to go with your creativity but this is without a doubt a great weekend project that can make your kid insanely happy. Full instructions here.
By simply removing some drawers and a few pieces of trim and wrapping everything in new clothes this old dresser has been updated; the DIY'er managed to obtain a new set of aesthetic values through a new side piece or TV console. Details and instructions here.
New paint, a few hooks and you are good to go. You have a new set of coat racks that you can use in your mud room or entry hall. Moreover, their depth can be used to obtain a small storage space by simply placing a board at the top. You can find more details here.
Update your Ice Chest instead of replacing it. By positioning it higher above the ground you enhance its functionality and improve its life span. Now it can stay outside near your entertaining area again, keeping your drinks cold.
Original bookshelves are quite rare mainly because designer furniture pieces are insanely expensive and huge retailers focus on practicality rather than design. There is one method to get both through DIY projects. You can find old furniture pieces or bookshelves and transform them as you like. Underneath a piano has been converted into graphic sculptural bookshelves. You can find all sorts of bookshelves here. Draw inspiration and craft away!
World-renowned furniture hack for its insane practicality: ladder towel rack. Grab some sandpaper and a piece of paint that fits or contrasts your color scheme and transform your old ladder into your bathroom towel rack.
A bathroom can become the best room in your home with ease. Shelter vanity items that you have created or obtained in treasure hunts and refurbished. Make sure that every piece is extraordinarily unique and it perfectly links with your taste. A bicycle sink can become a complementary item in your decor, shaping the space around it, giving it a direction and a very vintage-like appeal.
Architects have already found this craft by now and they store their rolled projects like they should. You can now store your wrapping paper and craft supplies in harmony too. Turn a stool into the perfect storage option. Add wheels for mobility and roll your way into great craft projects with your new piece of storage.
If you need extra storage for clothes as we all do you can use this practice. Two simple chairs can accommodate a decent amount of coat hangers and on top through a board or without you can shelter pants or T-shirts with ease.
# 17. Mini Office Chest
Transform a small chest in a seamless office chest that can accommodate exactly what you need. You can use it as a sitting bench as well if your office space is limited.
By using three Ikea bookshelves you can create a small and space-efficient command center. Rotate the last one and paint a framed area in chalk paint to create a writing board. In the rest shelter boxes and documents in a graphic manner. This can welcome guests beautifully in your hallway.
What do you think? Are these furniture hacks worth performing? We have found them very inspiring and we would love to hear your opinion on the matter.
What is the Difference Between Wicker and Rattan Furniture?
"Rattan" and " Wicker" are terms often confused, and interchanged by mistake due to their popularity for both indoor and outdoor furniture alike. Despite the confusion, both "rattan furniture" and "wicker furniture" have simply mesmerized the patios of millions of households, living rooms with airy ambiance, and households that seek to embrace the natural material as much as possible. Long story short, rattan is a material used to make furniture whereas wicker is actually a technique that involves weaving natural materials like willow or bamboo in complex, intricate patterns.
The beautiful intricate solutions of wicker are known to have been used as far back as ancient Egypt, mesmerizing our world throughout its existence.
In the following article, we will go into detail about the difference between the two and showcase simply extraordinary design solutions from both spheres. Cast a glance and don`t be a stranger, leave your valuable feedback in the comment section below.
the roots
The process that used reeds, rushes, willow, and even bamboo, and wicker, is known to have been used by ancestors for thousands of years. In ancient Egypt and in the ash-covered Pompeii alike wicker baskets and stools have been discovered, the exact same weaving techniques used back then, thousands of years ago, are used today to shape recycled materials into eco-friendly furniture and home furnishing, a beautiful technique that we use today to emphasize sustainability and the correct, responsible, use of materials.
Jungle Vine
Southeast Asia produces intensively the jungle vine from which Rattan is produced, one could say that rattan is a jungle vine, it is basically a solid cane, a strong vertical grain that when harvested is sliced into standard lengths and most often than not steamed so it can be shaped into curves. The new pieces of cane are to shape indoor or outdoor furniture of great sturdiness with a really exotic vibe as these furnishings are highly popular in tropical climates. Rattan is actually the skin of the vine in question, the rattan peel is stripped of the cane and soaked well to produce a thing, pliable strips that will enclose the structures once the peel dries.
The video illustrates how the jungle vine is manipulated prior to peeling and how it reaches the right form that is to be used for weaving. The skin will now create beautiful patterns of great furnishing.
Resilience versatility durability
Known to be one very strong natural material, rattan comes in a wide variety of colors yet the canes can be painted and the Victorians were renowned for painting the rattan to resemble the bamboo canes thus reaching the "faux bamboo" status, having the bamboo`s distinctive rings painted on as well.
the canes of antiquity
Antiques of old rattan and wicker furniture are at a high level, with individuals parting great amounts of money to own Victorian wicker and various vintage rattan pieces sculpted in the Hawaiian Islands or the Philippines in the 1940s and 1950s. The exquisite pieces of rattan often feature colorful bark-cloth cushions and present a tropical design of great beauty.
WHAT IS WICKER?
Basically, any product that contains woven vines or stems is or should be referred to as a wicker. The world is believed to have a Scandinavian origin, the words "wika" translates into "to bend" and "vikker" means willow in Swedish. The rattan vine is a material used for wicker products traditionally in this country, the practice going back at least 150 years; to date, rattan is still the most sought material for wicker furniture. Located in Southeast and East Asia, Africa, and South and Central America, rattan plants are climbing plants that thrive in rain forests only; the highest quality type is the honey rattan and it can be found in Southeast Asia.
Rattan, if woven properly, should last at least 100 years old if the materials are picked right and the procedure is respected, this being said there is no surprise that wicker antiques from the Victorian period are still used effortlessly yet the most surprising and impressive pieces of wicker furniture to date have been created in the midst of the Egyptian Empire. These exotics include chests made from reed and papyrus, wig boxes made from both reed and rush, and splendid wicker hassocks and chairs.
The property of the materials involved naturally dictates the wicker`s durability. The rattan vine can be sliced to various lengths and widths and it contains fibers running lengthwise through it offering the vine the immense strength of a multi-strand cable, the dense the fibers the more powerful the material. The vine can be bent yet unlike wood it would not splinter nor break. It is known that many individuals mistake the wicker's flexibility for weakness yet this is certainly not the case.
The process that would transform harvested vines into a piece of furniture involves numerous steps, most of them being realized by hand. Each thorny leaf is removed by pulling across each length a forked stick driven into the ground. In the harvesting process, the bundles of rattan often use water power, floating down the river through the jungle till they reach the sea in most cases, at this point the sun`s warmth would have cured the material well thus making it ready to be shipped to the factory. Once they reach the factory certain machines cut the vines into different shapes and lengths. The strongest part, the smooth outer skin known as "the cane" is used to make the chair seats, "cane seats" as they are referred to locally. The cane seats are most often than not woven by a machine.
Workers are used to manipulating the rattan core products that are still pliable, and green. If the material dries out, rigidly, it will be soaked for a few minutes to regain its flexibility in the manufacturing process. When the material is steamed, rattan vines can be twisted and bent, as soon as the material cools and dries it gains rigidity and the molded shapes can remain permanent making the process ideal in the manufacturing process.
The original form of rattan is a close relative to a tropical palm tree, rattan starts to grow in a vertical direction, upwards yet it bends back to the ground and snakes through the rain forest soon afterward, very much like a vine. The vines is being harvested after years of growth and after harvest, they`re sliced into 12 to 18-foot or 3.7 to 5.5 meters sections to be dried efficiently.
Today, rattan is considered one of the strongest types of wood available as its grains grow vertically rather than horizontally in concentric rings like other hardwood. Certain pieces of straight rattan are always steamed and shaped directly into certain standard forms that will be used industrially when the rattan dries, retaining its shape forever. These standard pieces do form most of the structure of the end furnishing pieces, pieces we are to call later on either rattan or wicker furniture.
The difference between rattan and wicker lies here, where rattan is a specific material, and wicker is the general process that will shape finished goods from certain vines, these vines can be rattan, willow, bamboo, or any other vine. No material in our world is called wicker, the internet clearly proves that even manufacturers can misuse the terms yet you now know the difference, a wicker furniture piece may contain rattan as a structure for example yet the woven pieces may or may not be rattan but any other vine.
It is worth noting that rattan vines can be mechanically peeled to form the thin slats later used for weaving. The curved outer layer can also be used as a decorative trim as this can cover some rough areas in the wicker process. Bamboo can also be used for trimming yet it cannot successfully form the frame as it's hollow and it can easily crack when steamed and bent whereas Rattan is a very lightweight-solid material.
Rattan comes from the Malay word "rotan", a word known to cover no less than 600 old species of climbing plants that fall under the subfamily of Calamoideae. Rattan has also been named after the main ports of shipment, Manila and Malacca City, today being able to be identified as manila or malacca as well. In southeast Asia, rattan can also be called manau from the Malay "rottan manau", the trade name for canes.
Rattan has been a material that has shaped tools for fishing, planting, harvesting, and construction of homes and furniture for centuries in the midst of the Egyptian Empire as the earliest piece of wicker found in Egypt dated back to 1400 B.C. In the late 1800s, Rattan became along with wicker easier to access, boosting the popularity of both. Today Rattan is known to be part of the palm family also known as Genus Clamu.
The plant grows in a long slender stem that maintains a uniform diameter on its entire length. Its growth is very similar to a vine yet it has an inner core and is not hollow as bamboo is. Rattan grows in such a manner due to the dense rain forests in which it grows, climbing on tree limbs being one option to reach light throughout the dense shade of the forests. The inner portion of the plant is somewhat porous and soft, and light, whereas the outer portion is extremely durable, hard, and resilient.
Rattan has now declared harvesting season as it grows all year round. Due to the difficult landscape and great inaccessibility of the jungle in which it can be found the rattan can be only harvested manually, by hand. The largest poles will be used for frame and structure construction. The making of the wicker is realized semi-automatically, a machine extrudes the outer layer to produce the wicker that will, later on, be weaved onto a frame.
What do you think? Do you have wicker furniture pieces in your household? We would love to hear your valuable feedback on the subject in the comment section below.
Keeping a small bedroom clean and tidy isn’t easy. Right?
Well, in our opinion, it’s almost next to impossible. With no extra space for furniture or to store essential items, the compact area is bound to get cluttered and messy.
But this can be avoided. How? It’s really simple! Instead of cramping up your room with cupboards and cabinets, just opt for an ottoman bed. It will solve all your problems related to space and clutter within no time whatsoever, thanks to its built-in storage system and compact design.
Seeing its popularity and functionality, we decided to take you through an in-depth analysis of an ottoman bed. For this reason, we’ve come forward with this informative and comprehensive guide, where we address two primary questions to know whether it ticks all the right boxes.
Firstly, what is an ottoman bed? And secondly, how to use them?
So, without further ado, let’s get straight to the deets.
What Is An Ottoman Bed?
We’ll begin our informative guide by answering the most crucial question - “what exactly is an ottoman bed?” Well, it’s a bed that comes with a built-in hidden storage system beneath the mattress. You can access this storage space using the hydraulic lift system, which allows you to lift the top of the bed, either from the foot-end or side.
Unlike regular bed frames, ottoman beds have no empty space underneath them. Instead, their attractive bases feature seamless finishes to enhance the modern aesthetics of your room. What’s more? The built-in storage space helps in decluttering your compact bedroom.
Origin Of Ottoman Beds
Now that you’ve understood the basic concept and design of an ottoman bed, it makes sense to know more about its origin. That being said...
It’s interesting to note that the modern-day ottoman bed that’s available in a variety of styles has come a long way since its inception in Turkey. In fact, the term “ottoman” itself was derived from its place of origin - the Ottoman Empire. This was a ruling power founded during the thirteenth century.
By the end of the eighteenth century, the distinctive design of ottoman furniture comprising footstools, wooden chests, and beds became immensely popular. And since then, manufacturers have been customizing upholstery, finishes, colors, and storage spaces to create standout statement pieces to suit modern and traditional tastes.
Opening Of An Ottoman Bed
As mentioned earlier, ottoman beds utilize a gas hydraulic lift system, allowing you to easily open or close the top of the bed for accessing its built-in storage. In this section, we’ll be discussing the two primary opening mechanisms of this type of bed.
Foot-End Opening
The foot-end opening ottoman usually opens from the end of the bed’s base. That being said, there are two types of ottoman beds based on their foot-end opening mechanism.
Full Ottoman
A full ottoman is hinged from the headboard. So, when you open the storage space, it raises the foot of your mattress to the ceiling.
Half Ottoman
Unlike the previous type, a half ottoman is hinged in the middle of your bed, opening only halfway. You may install drawers in the unopened section to maximize storage in a room with a slanting ceiling.
Side-Opening
These Ottomans open from the side, instead of the foot-end of the bed, allowing you to access the entire storage space from one side. You may consider opting for these beds depending on the placement of the bed and the area around it.
How To Use An Ottoman Bed?
Just like any other bed, ottomans are constructed with lightweight frames and robust fittings to ensure maximum comfort and support to your body. But that’s not all it’s used for. There are a ton of benefits of an ottoman bed, provided you utilize its functions to the fullest.
In this section, we’ll be discussing how you should use an ottoman bed. So, without further delay, let’s get going!
A Comfortable & Supportive Bed
First things first, it’s imperative to use an ottoman bed how it’s intended to be used, i.e., as a comfortable and supportive bed. The frame itself plays a vital role in determining the overall comfort level, but like any other bed, an ottoman needs a mattress for the purpose.
You’ll need to consider certain factors while choosing the right mattress for your ottoman bed, such as the level of firmness, material, or if you want to go for latex or allergen-free variants. That said, it’s advisable to choose a lightweight option to make sure the gas hydraulic system works smoothly.
Traditional metal-sprung variants tend to be heavier, restricting the opening mechanism. But even then, if you’re set on going for this mattress, we’d suggest looking for a slightly thinner one.
For Decluttering Your Room
The built-in storage space of an ottoman bed plays a significant role in changing the appearance and feel of your bedroom. It gives you the opportunity of decluttering the room with minimal effort.
You can use the bed to keep all your essential items, including towels, beddings, and linens such as sheets, pillows, and duvets inside its storage space. That’s not all. It also enables you to store away seasonal and occasionally used items like blankets and curtains.
Being contained within a closed space, you won’t have to worry about them gathering dust. In fact, all your valuables will remain clean, even if enclosed for over a year, while you get to unwind in a calm and tidy space of your own. You won’t even have to bother pulling out boxes from under the bed for regular cleaning.
Use It In Smaller Rooms
Extra storage space always comes to our rescue at the time of need. However, modern apartments and homes are being made to meet smaller specifications, leading to a shortage of sufficient space.
To overcome this, you should use the space underneath ottoman beds, especially in smaller rooms and apartments. They serve as excellent space-savers, allowing you to store all your essential items.
You may not have additional space for extra furniture in a guest room, loft room, or even a box room. Ottoman beds are perfect for these areas of your home as they help reduce the reliance on extra storage.
To Enhance Home Decor
Ottomans aren’t just clever built-in storage systems in a bed frame. Available in a variety of styles and finishes, you can use them to add a touch of elegance and sophistication to your overall home decor. The standout bed can also be customized to meet your personal style requirements.
Final Words
Ottoman beds come with sturdy construction that offers greater weight load and storage capacities than most storage beds, such as divans. It requires minimal space and can be used to declutter compact bedrooms.
Furthermore, the bed frame is capable of delivering optimal support and comfort. However, you’ll need to invest in a good quality and lightweight mattress if you wish to enjoy restful sleep in a calm and tidy environment.
To sum up, there’s no doubt that ottomans are comfortable to sleep in. But you can also use this highly functional bed to ensure several other benefits. On that note, we now come to the end of our informative guide.
Any space, irrespective of its design and lighting, remains incomplete without suitable furniture - it just revamps the entire decor.
A house turns into a picture-perfect home with the right decor that suits your vibe. We don't even notice how our furniture is extremely influential in creating some memorable moments in our lives. However, the love for mid-century modern furniture has been a statement for around 50 years. You'll find the impact of this iconic design era as an epitome of style in modern homes.
And, while we search for modern designs, it's all about finding the pieces that will complement your natural surroundings.
We can't help but marvel at the resilience of the mid-century designs, which is ingrained in our aesthetic ideals. Modern furniture is like a piece of art - clean lines, minimalism, simplicity, and profuse with elegance.
But, what gives this design its longevity? What are the different mid-century furniture styles? In the following guide, we'll be diving into these questions and so much more. Let's get started, shall we?
Types of Mid-Century Modern Furniture
When you start looking for mid-century modern furniture, you'll find an endless variety. The buzz for this design is not going to die, but instead, it keeps getting louder with more people opting for these products each day. Few of these pieces have gained immense popularity and have continued to rule the mid-century modern furniture market. So, without further ado, let's cast a glance over the legendary pieces that have contributed immense to the style!
Most Iconic Mid-Century Furniture Pieces
[easyazon_link identifier="B004I3ZRQM" locale="US" tag="homesthetics0a-20" type="link" link_id="276942"]Wassily Chair Designed by Marcel Breuer[/easyazon_link]
The Wassily chair was created in the year 1925, by Breuer, an apprentice at the Staatliches Bauhaus. He was indeed the first furniture designer to use tubular steel to make the Wassily chair. Breuer found the inspiration for designing this chair from a bent form of a bicycle frame (handle). It was way ahead of its time to use steel for making a product.
However, it's due to the development of technology in the mid-century era that made this innovation possible. Mannesmann, a German steel manufacturer, had developed a process by which you could produce seamless steel tubing. And, this same tubing was featured in Breuer's bicycle, which inspired him to use this material in the Wassily chair.
This chair has arms and backrests, along with fabric seats. With the re-launch of Wassily chair in 1960, there were black, brown, and white leather options available.
The Ottoman and Eames Lounge chair was molded to be used by the U.S. Navy during World War II. The same product has been continuously manufactured since 1956. It sounds unbelievable? Well! The hype about its comfortable design is quite relevant when we consider the functionality of this piece. It comes with an aluminum base, and it's upholstered in leather.
This design did stand out when compared to other chairs that were created during this period. It has a modern design that still blends in perfectly with every style of home decor. The chair was initially made with two existing models of furniture; a used baseman's mitt, and a country club chair. The simple design and high comfort factor makes it a statement piece in every home.
The legendary Barcelona chair was built in 1929 and was initially used at the German Pavilion by the Spanish royalty in Barcelona, Spain. It's a well-designed piece of modern furniture made with some of the finest quality materials. This elegant and versatile product can be accommodated in any formal setting or even the living room.
The furniture made by Ludwig is known for its fine craftsmanship, with a clear separation between the supporting surface and its supporting structure. The Barcelona chair also has a combination of luxurious fabrics like chrome frames with leather.
[easyazon_link identifier="B008E99YWO" locale="US" tag="homesthetics0a-20" type="link" link_id="276945"]Tulip Armchair designed by Eero Saarinen[/easyazon_link]
The Tulip Armchair not only resembles a flower, but it's also shaped like a stemmed wine glass. Saarinen had created this design to avoid any clutter in a living space. He wanted to make a chair with a clear and simple design without using the undercarriage of four legs.
This piece is a part of the last furniture series by Saarinen, which features a single pedestal leg that creates a unified environment of stools, chairs, and tables. The tulip chair has an aluminum stem that is fused with a plastic finish which supports the sculptural fiberglass shell seat. But, the chair looks as though its made of just one material.
[easyazon_link identifier="B00YC4Z8UC" locale="US" tag="homesthetics0a-20" type="link" link_id="276946"]Noguchi Coffee Table Designed by Isamu Noguchi[/easyazon_link]
The sculptor Isamu Noguchi is a well known Japanese American furniture designer and landscape architect. He created this extremely delicate coffee table by joining a freeform glass top with curved, solid wood base. It was introduced to the public in 1948, and ever since then, it has gained a constant appreciation for its minimalist design.
This simple design, with clean edges, is a stunning creation, that will stand out in every space that you choose for keeping this furniture.
Ball Chair Designed by Sori Yanagi
This ball chair is a perfect piece of contemporary modern furniture which adds a futuristic and casual element to any environment. It is made of fiberglass, and it has been upholstered with quality fabrics. You can place this chair in any informal or formal setting which makes this chair perfect for all-day ergonomic support.
[easyazon_link identifier="B016YEOKI8" locale="US" tag="homesthetics0a-20" type="link" link_id="276947"]Florence Knoll Sofa Designed by Florence Knoll[/easyazon_link]
This Florence Knoll sofa dates back to 1954, and it has a perfect blend of minimalism, beauty, and elegance. It is still one of the most famous pieces of mid-century modern furniture. With an ideal combination of functionality and aesthetics, this piece has a reasonable price tag. It's perfect for any style of living room, and it provides a sophisticated design with superior levels of comfort.
[easyazon_link identifier="B012WQ4RXU" locale="US" tag="homesthetics0a-20" link_id="195701" type="link"]Egg Chair Designed by Arnie Jacobsen[/easyazon_link]
The sculptor Arnie Jacobsen had first molded the shape of an egg by using clay to get the perfect shape. After getting the form right, he made the egg chair with a durable foam inner shell that is placed under the upholstery. It is perfect for public space or even the living room; it covers the entire back of the person seated.This unique, stylish design was created in 1958, which is not going out of trend any time soon.
A Brief History of Mid-Century Modern Design
As the name suggests, this design was pioneered in the 1940s-1960s. The mid-century movement came about during the era of modernism. This style has gained immense popularity in the last few decades; however, it wasn't widely recognized in the past. The designs are rooted in the concept of functionality, simplicity, and elegance.
This form of modern style had initially grown in the suburban areas of America, and it's ideologies are based on the principles of the Le Corbusier and Bauhaus. It originated in Germany, but after the horrors of World War II, several Bauhaus architects and designers migrated to America. With the advent of technology along with economic changes, there was a rapid shift in lifestyle.
Many modern homes were built, along with it came the demand for modern furniture. However, the advances in the field of technology did allow the production of a wide range of materials. This modern style furniture played with new materials like vinyl, glass, metal, and plywood. It's quite rare for a design movement to stand the test of time that keeps evolving with a new generation.
But, the concept of engineering functional yet aspirational furniture gave rise to pieces of architectural beauty. The mid-century design comes with geometric silhouettes, clean, simple lines, and multi-purpose usage that can easily blend with the surroundings. No wonder, this old charismatic style of furniture has such high demand even after decades for its immaculate design.
Mid-Century Modern Style Characteristics
Here are a few key features which distinguish the mid-century modern style from all others:
In the mid-century designs, functionality is essential in every type of furniture.
Superb craftsmanship. The designers take pride in creating pieces that can withstand the test of time.
Minimalism. The uncluttered look with sleek lines come in both geometric and organic forms. It lacks any fussy ornamentation or design.
It uses man made as well as natural materials. You'll find a mix of traditional materials solid wood or stone, with synthetic fibers like plywood, rayon, or nylon.
It comes in modern prints. Even though the focus was on simplicity but it didn't come at the expense of an overall appeal. You'll get designs ranging from geometric prints to boomerang designs.
"Floating" furniture. The mid-century pieces come with short and extremely tapered legs, which gives it a" floating" appearance.
It uses bold colors. You'll find a broad spectrum of colors in use from neutral to bright, and for the graphic designs, there is also a splash of black and white.
Different Types of Mid-Century Modern Furniture
Every piece of furniture that is crafted by the mid-century modern designers is timeless and blends easily with the contemporary style of decor. You can design your kitchen, bedroom, living area to the patio with mid-century modern furniture.
Even though it has a sleek and minimalist style, but it should be placed carefully according to the design layout. This helps to avoid making the design appear dated as it can easily monopolize a room. These pieces can either make or break the entire space.
The whole house can be redone, as you find the furniture that matches your requirements. We've curated some fantastic ideas that can be incorporated while you redecorate your home with mid-century modern furniture.
Living Room Mid-Century Modern Furniture
The living room is one of the most commonly used spaces in the home. And there are a lot of different ideas which you can implement for crafting a well-designed living room. This is a primary spot that helps to set the tone for the rest of your home decor. It's one of the best places in the house where you can showcase your design aesthetics. Let's look into the best mid-century modern furniture for your living room.
You must have seen a few accent chairs in the living room of many homes. It is not just used for extra seating arrangements, but it's a brilliant way to add a new style reference, color, or silhouette to any room. This has become one of the most common pieces of furniture in the entire stack of mid-century modern designs. They look simple yet stylish in every living room.
The size is perfect for you to incorporate it in any living space, be it your bedroom, living room, or even the office. It adds a sense of personality to any space.
A coffee table is a living room essential. To replace a coffee table is quite challenging when you consider all the benefits of having this piece. This long, low table is designed in a way that you can place it next to your upholstered chairs or sofas. It helps to support magazines, books, beverages, and other small decorative items.
Placing the mid-century coffee table in the living room helps to make it the center of attention. And its multipurpose form helps to add visual interest. You will love the entire effect of this classy design in your home.
Many of us must have seen the design of an egg chair, but the name might not have been clear. For those of you who haven't seen an egg chair, we're here to help you understand the complete form of this modern furniture design. It is a very stylish and cute chair that acts like a showstopper among the other decor items.
This design can have a significant impact on the overall outlook of the living room.. It has a super stylish and sophisticated design that complements both contemporary and traditional style of the living room.
The egg chair helps to carve out your personal space with its structural integrity. This statement piece comes in different colors, and a wide range of textures so you can find the one which will suit the other furniture in the room.
Having a sofa set in the living room is one of the first pieces that we tend to focus on while redecorating our home. You should not compromise on your level of comfort and design when it comes to selecting a sofa. The mid-century sofa sets are an ideal option for the people who appreciate bold to neutral hues in the living room. These sofas are the epitome of elegance, comfort, and style.
It has a significant amount of sitting space, and it provides you with unmatched comfort. This simple design adds the perfect spark of beauty that your living room needs. The slanted, low-set design of these sofa sets have a sleek, retro look which adds an undeniable charm to the room. Each piece comes with raw, exposed material finishes with an inherently stylish low-angled design.
It can get a little challenging to transform the entire home into a complete mid-century modern design. But, we can insert a few pieces of such furniture into our already existing modern homes. These TV consoles exhibit great minimalism. The stands deliver a classic look, which is indeed a distinguishing feature of mid-century modern design.
It exhibits expert craftsmanship (appearance), and it will be a safe place to keep the flat-screen TV with sufficient storage space (functionality).
The natural wood designs can easily blend perfectly with any style of decor. The color gives a sense of serenity, and it influences the surrounding atmosphere. As we focus on the functionality, most TV console features four storage spaces in the middle which you can fill with decoration, DVD's or with some books.
It generally has two open shelves that have been designed without doors, which makes it easier for you to access. The superior design, color, and quality of this mid-century modern furniture make it suitable for the living area.
Mid-Century Modern Bedroom Furniture
The bedroom is one of the most privy and intimate spaces of our homes. With a mid-century modern design, you can integrate plenty of personal touches by integrating some classic bedroom features. These design ideas are every bit as elegant as they are visually appealing. Let's take a look at some of the most famous mid-century bedroom furniture designs!
How do you complete your bed without a nightstand? It's with these stands that our beds and our rooms start to look complete. We use nightstands for many different purposes like- placing the books that we read every night, to keep our spectacle, regular supplements, eye masks, our cell phone, watch, etc.
It might appear like a small piece of furniture, but it's a simple, elegant, and super functional product. With this mid-century modern nightstand, you can avoid the clutter by storing different tiny items. It usually comes with spacious drawers, which makes it handy to store your essential things. The simple drawer and the hairpin-style legs come together in this design to create a visually-appealing nightstand.
Bed
A bed is like a safe haven which allows you to unwind after a long day. With a bold bedroom set, our space can start to look congested and small, but with the mid-century modern design, the bedroom will not look overdone. Geometric patterns and tapered legs are some of the essential features that are highlighted in this classic design.
Lightweight material, lively colors, and streamlined shapes give these mid-century modern beds a sense of timeless appeal.
The sleek lines of this mid-century modern bed help to create a unique sense of flair and add to its elegance. These beds come with a low headboard that you can use for keeping different decorative items or even your night lamp. Having this stylish bedroom set will be a great way to update the existing decor.
This belongs to the list of comfortable furniture where you can sprawl and read, listen to some music, or even take a nap. If you have a spacious bedroom, you should try to accommodate this mid-century modern chaise lounge. Having a chaise lounge in the bedroom or even your living room makes it the perfect relaxation zone.
It's an elongated chair that resembles a couch except for a few features such as- it comes with and without armrests while the backrest of the lounge allows you to sit in a reclined position. This piece of furniture has been growing in popularity, and in the new designs, there is enough space for two people to be seated. It complements the decor of the home, and it's known for its durability, beauty, and versatility.
When a bedroom doesn't have a dresser, you're missing out on an essential piece of furniture in your bedroom. It comes with excellent storage space where you can accommodate your linens, undergarments, clothes, towel sets, and many other items. You can use the dresser top to keep family portraits, beauty products, or plant decorations that can enhance the look of the entire room.
What makes the mid-century modern dresser stand out from the other styles, is it's simple, uncluttered design. It comes with clean lines, smooth finish, straight edges, and raised legs, which can make the bedroom look welcoming, warm, and extremely tidy. These pieces are usually made of natural wood, or plywood, you can also find other models that are made of other non-traditional materials.
Having the right light in your bedroom can transform the entire atmosphere. The mid-century modern lamps are a design-savvy lighting trend. You'll appreciate the chic look of these lamps which come in artful silhouettes, metal details, fine linens mixed with earthy textures. You might also find models that don't require wiring to be done; therefore, it requires no effort to set up the lamps.
This trend is not going out of style, so get these beautiful, sleek designs to set the right mood at home. It will not just brighten up the surroundings with an ambient glow, but it will be one of the statement pieces in your bedroom. You can find a ton of mid-century modern lamps with unique, innovative designs and a touch of minimalism which adds the perfect finishing touch.
Mid-Century Modern Kitchen Furniture
When you incorporate mid-century modern furniture in the kitchen, it gives an elegant and quirky spin with its retro accessories. This design and theme elude a sense style, organization, and personality in your kitchen. You should focus on creating a high-quality kitchen without having to sacrifice on the space.
Try removing all the visual clutter such as- bookshelves, excessive furniture, and other forms of visual obstructions. We've found some of the best mid-century modern furniture ideas for the kitchen that will create a massive impact to help you enjoy your cooking time.
Getting mid-century modern kitchen furniture is like investing while enduring style. If you don't prefer having a separate dining space, you can quickly get a table for the kitchen. Just like the other pieces of mid-century modern furniture, even this table has wooden legs, clean lines, and simplistic design. The right table set can transform the entire outlook of the kitchen.
These beautifully crafted tables will elevate your casual dining nook set to an elegant space filled with warmth and personality. Get this mid-century modern table to create a fun cooking vibe in your kitchen.
Most of the modern kitchens come with an open counter that makes it easier to place the cooking items, which acts more like a bar. You can sit around the open counter to have a meal when you don't want to move over to the table. The best furniture to get for this area is mid-century modern kitchen chairs.
The clean, sleek lines and simple design can never make your kitchen design look overwhelming, congested or overdone. You'll find a variety of sizes which are perfect for small to large kitchen space. With these kitchen chairs, you'll be adding a sense of personality that creates the perfect balance while giving you a welcoming, stylish, and classy environment.
Kitchen Cabinets
It is one of the essential components in our kitchen. It helps to keep the kitchen space organized and clean. The design of the mid-century modern kitchen cabinets is built by focusing on the functionality of this piece. You'll find a ton of colors, material, and a variety of sizes that will give you the perfect dream cabinet.
It will complement your kitchen space by making it appear more lively with its bold hues. Finally, you'll also find mid-century modern designs with front flat cabinetry, [easyazon_link keywords="retro knobs" locale="US" tag="homesthetics0a-20" link_id="195726" type="link" ref="misen"]retro knobs[/easyazon_link], and a sturdy counter-top with an aluminum edge to prevent scratching and chipping. These kitchen cabinets are superior-functional pieces with stunning design and craftsmanship.
Mid-Century Modern Furniture for the Dining Room
The dining room is just as important as your living room when you consider the ample amount of family time spent while eating together. It's the place where you can catch up with your family and share food at the end of the day. If you love to host social gatherings, you'll enjoy these design ideas to help you decorate this place with love and affection.
It's often said that the dining rooms decor can affect your appetite. So, select the pieces which will suit your style and vibe. When you get to enjoy a great meal, it does have a specific relation with the environment. Keep in mind, to select pleasant yet elegant pieces of mid-century modern dining room furniture.
Every dining room requires a set of dining chairs. We're sometimes so caught up in finding the perfect dining table that we forget how the dining chair style has an impact on the overall design. You'll find a wide variety of mid-century modern dining chairs which are, of course, attractive, well-made, and comfortable. This style of dining chairs will not make even the small spaces, to appear overdone or congested.
These mid-century marvels will impress your guests with the modern, yet sober look of dining chairs. You can get different materials of dining chairs as per your preference; the textures can range from sleek leather to traditional wood.
With a dining table, you can transform any space in your home into a dining room. Even if the room has no furniture, placing a dining table there will make that room functional. When choosing a mid-century modern dining table, you should go for a design that will make the dining room more welcoming, spacious, and warm.
But, if you pick a large table for a small space, your room will start to appear overcrowded and unwelcoming. These statement pieces have a simple and elegant style. The clean and sophisticated design of mid-century modern furniture is the reason behind its increasing demand.
Most of the homes, at present times, come in contemporary or modern design which blends in perfectly with these modern furniture styles. The mid-century modern dining table will perfectly complement your same style of dining chairs.
These dining tables don't have any carvings or ornamentation, which gives it a casual and minimalist look. Its classy appearance helps to enhance the overall aesthetics of the dining room.
In every dining room, there is some space allocated for keeping the dinnerware, table linen, for placing decorative accents, and food that you're going to serve. Having a buffet sideboard is one of the best pieces that you can put in your dining room, which has an aesthetic and functional purpose. When you plan to have a mid-century modern dining room, it's quite impossible to overlook the buffet sideboard.
With the entire set of mid-century modern- dining table, dining chairs, and buffet sideboard, there will be everything that you possibly need in a dining room. You'll be flooded with compliments when your friends start to appreciate the sleek, retro look of this piece. The streamlined, minimalist design of this buffet sideboard comes in strong looking shapes which avoids any types of curves.
But, when you select your buffet sideboard to ensure that its height should be a bit higher than your mid-century modern dining table. It also features solid doors, so you can place the items as you feel like and shut the doors. Overall, you should consider the size of the dining room and the dining table as you pick the perfect buffet sideboard for your home.
The dining room serves many purposes that are way beyond just serving a meal. You may often use the mid-century modern dining room to host informal gatherings, as a recreation room, or even a temporary home office. It highlights the importance of having the perfect mid-century modern chandeliers which are flexible, and designed to suit your needs.
Dramatic, attention-getting, a mid-century modern chandelier adds a visual flair that sets the overall mood and ambiance of the dining room. These chandeliers come in a host of designs, but each piece is created to be the focal point when you install it above your dining table. The sleek and refined chandeliers have been crafted to perfection and its made for dining room, both small and large.
Your guests will marvel at the beauty of this dazzling masterpiece that adds much-needed flair to the entire dining space. And, having good lighting is one of the best ways to create an engaging atmosphere. Having a mid-century modern chandelier will benefit your dining room both aesthetically and practically.
Mid-Century Modern Furniture for the Patio
The first thing that you see before entering a home is its well-designed patio. The patio speaks a great deal about your sense of style. It is imperative to design the patio in a way that helps you enjoy outdoor living. It's the best place to relax while reading a book, to spend quality time with family or even for hosting your summer BBQ party!
With a patio, you can lure your family outside to enjoy the beautiful weather that summer and spring have to offer. But, when you choose furniture for the patio, be careful about its durability and resistance of the material to outdoor weather conditions. To make it simple, we've compiled a few mid-century modern furniture for your patio!
Having a coffee table in the courtyard may seem obvious when you're shopping for new furniture. It can get challenging to keep your books, or a mug of coffee when you don't have a small table in the patio. You can use it to place your refreshments, floral arrangements, and other knick-knacks. During the winters you can use the coffee table to keep the tabletop fireplaces.
It has a multi-purpose usage and functions equally as a decorative accent. You can find mid-century modern coffee tables which are made of glass, wood, or even marble. The simple design with sleek lines makes it perfect for blending with the natural surroundings effortlessly.
Patio Chairs
The range of mid-century modern patio chairs is ideally suited to transform your outdoor space in modern style. Each set has been created to optimize your area and to adapt to the other design elements. The chairs with cushions are made of the best outdoor fabrics, and it comes in different weaves and colors. It is made of the most durable material which ensures pleasurable outdoor living.
With these chairs, you'll not be compromising on your comfort level while you're relaxing on the patio. These mid-century modern patio chairs will not just look stylish and comfortable, but it will enhance the overall look of your patio. You can get the dynamic duo of patio chairs along with the mid-century modern tables, to create a fun and relaxing environment.
Renowned Designers of Mid-Century Modern Furniture
Let's go back a few years! The mid-century modern style did run out of trend during the '70s and '80s; the design was considered to be camp. But, in the late 90's the interest in this design started to rise steeply.
Talking about homes, a desire for more living space, simplicity and comfort led to homes being designed with post and beam structures, lots of windows, and open plan living to connect the house with the natural environment. Then came the minimalist and elegant design of furniture which became accessible to all. And it became a popular trend among the younger generation who embraced this new lifestyle, with abstract textile, functional design, bold colors, lack of ornamentation, and simple living.
As the mid-century modern design keeps getting popular, you'll find a rise in the number of designers in this field. The first piece of mid-century modern furniture was a park bench made in 1946, by George Nelson. Later, Charles and Ray James created the Eames Lounge Chair; it's one of the most memorable designs in the mid-century modern genre.
Few other notable designers from this era include Eero Saarinen, Herman Miller, Marcel Breuer, and Florence Knoll Bassett. The simple Californian aesthetic followed by these designers, and their motto to create simple yet powerful pieces at an affordable price made these designs forever modern.
What Makes the Mid-Century Modern Furniture a Popular Choice in Modern Homes?
The mid-century was the last era of general improvement in the manufacturing world in terms of technology, design, and leadership. These designs were in demand during the mid-century, but things went downhill from the 60s to early 70s. However, within a short period of time, things got better, and ever since then the mid-century modern furniture has been on an upward spiral.
First, with smaller homes after World War II and with shrinking families, the mid-century modern furniture was the perfect combination. The open and simple designs make the house appear spacious instead of dull or congested. Secondly, the designers had an aim to create pieces that will serve people from all levels of society. The affordable price range for every furniture made it easily accessible without having to break the bank.
It's quite rare that a design trend holds a firm ground for so many decades. And the growing focus on furniture with traits of functionality and simplicity over luxury is the prime reason for its sustained popularity.
What Makes Mid-Century Modern Furniture Different from the Other Contemporary Furniture?
The contemporary design comes with a lot of variations, that are often inspired by the European-style designs. The nature of such furniture depends on what is being currently used by people. Therefore, contemporary design is a subject of change, which makes it challenging to describe it in terms of a particular set of aesthetics.
It's true that contemporary design also has features of modernism, minimalism, and other common design styles, but it's prone to change. Whereas, mid-century modern design refers to a style that was an offspring of the mid 20th century. Most of the furniture from this era are open and spacious, with tapered legs, which gives it an airy vibe.
Some of the materials that are used in mid-century modern decor include molded plywood, polished metal, glossy plastics, linens, and woods. In a mid-century modern home, it's common to find neutral-colored area rug on bare floors and carefully arranged furniture. Few designs come with fun geometrical prints with small hints of color.
These modern furniture lacks any form of ornamentation and has a reflection of a classy personality that is simple yet stylish. It's made with strict design rules by sticking to its key characteristics that include- clean lines, tapered legs, bold colors, and simplicity. This style trend has been existing for years on end, with massive influence in the way we live now.
Both contemporary and mid-century modern designs tend to favor minimalist, open, and uncluttered spaces with plenty of natural lighting. But, we need to understand that the differences are quite trivial. The demand for the mid-century design is to help our homes appear larger, welcoming, and stylish within an affordable price range!
Conclusion
As you plan to re-decorate your home, select some of these best mid-century modern design furniture that you have just read about. It's one of those styles which is always reconceptualized to create some unique and minimalist pieces of furniture.
The timeless appeal of these legendary models will never lose its relevance. So, investing in these uncluttered and sophisticated designs of mid-century modern furniture will give you the perfect home interior you have always dreamt of.
Replacing an old mattress with a new one might seem simple, but there are so many factors to consider in this decision. For instance, the type of mattress you buy will depend on how long you plan on using it or how many people will sleep on it.
Plus, we can't ignore the fact that individuals have different needs — some need a firmer option for back support, while others prefer softer surfaces. If you get the wrong type of mattress, it might interrupt your sleepand even cause back issues. This is why a lot of thought needs to go into the mattress-buying process.
If you are just starting out on a research journey for a new mattress, we suggest beginning with understanding the types of mattresses. So, here's a detailed list of all the types of mattresses that you can choose from–
Types Of Mattresses
Honestly, there are many things to consider before buying a new mattress because there's a selection of options waiting to be discovered. Over the years, companies have created new mattress styles with unique materials that you might not have heard of before.
Thus, we recommend taking a look at all the possibilities before locking down a final selection. In this section, we'll list the mattress types and the pros and cons of each selection. Let's check it out-
1. Memory Foam Mattress
Memory foam mattresses are made of a special type of polyurethane foam and are one of the more popular options for bedsthese days. Memory foam is the upgraded version of polyfoam, which is soft yet lacks the slow-moving feeling that memory foam mattresses provide.
In fact, the material is designed to contour to the shape of the sleeper, which generates a feeling of sleeping in a cozy nook. Memory foam beds are usually formed of all layers of foam, with the same few layers finding their way into other hybrid beds too.
Different types of mattresses can provide comfort and a good amount of pressure relief, but memory foam mattresses sink in, almost cradling the sleeper. Try it out for yourself the next time you're in the store — press your hand on the mattress and watch it move slowly back in place.
Essentially, this holding of body weight makes it the perfect mattress for those who like the extra cushiony feeling while settling into a deep slumber.
Who Should Use Memory Foam Mattresses?
Sleepers who are already struggling with pressure issues, aches, and pains while resting can find a good use for a memory foam mattress. Whether you sleep on your back or on the side, the memory foam material hugs all the curves of the body.
Also, even if weight is applied to the foam mattress for a long time, it goes back into place; thus, there is no need to flip it over. It's a great option if you need a low-maintenance mattress that also offers maximum isolation in movement.
Thus, this makes for an ideal choice for couples that want mattress motion restricted so that there is minimum disturbance to either party.
Pros
Motion isolation
Relieves pressure
Hypoallergenic material
Low maintenance
Cons
May overheat
2. Innerspring Mattresses
Back in the day, innerspring mattresses were all the rage. Nowadays, not so much because the trend has evolved into accommodating other options like foam, air, and organic mattresses. If we compare the popular option of today to the innerspring mattresses, the main difference is the use of coils or springs within the mattress.
Unlike memory foam mattresses that are constructed entirely out of foam materials, innerspring mattresses provide support via different types of steel coils. The coils within the innerspring mattress support the body weight and bounce back into place when the weight is shifted.
As a rule, we consider that a higher quality innerspring mattress has a higher number of coils. The reason for its popularity in yesteryears and even these days is for its reasonable price. Yet, these types of mattresses may not be ideal in the long run because the coils get damaged fast and may need replacement after a while.
Basically, there are three common coil types used in innerspring mattresses-
a) Bonnell Coils
Bonnell coils are the ones that look like hourglasses and coil around like a helix when put together. Innerspring mattresses made from these coils are moderately priced since they are not the most comfortable of the lot.
b) Continuous Coils
This system involves using a long but single wire that is spread out to form the entirety of the innerspring mattress. Since the full length of the mattresses is made up of a wriggling S-shaped coil instead of individual coils at intervals, it tends to last longer than regular innerspring mattresses.
c) Encased Coils
Unlike other spring mattress types, the encased models have coils that are individually wrapped or pocketed. These types of coils are not connected to each other, which is why they provide much better motion isolation. You will find these coils shaped like thin barrels in hybrid mattresses.
Who Should Use Innerspring Mattresses?
This depends on personal preference but remember - these beds will be more bouncier than memory foam mattresses. So, if you are a light sleeper or combination sleeper that likes to change sleeping positions often, it might be better to use an innerspring mattress.
Again, a memory foam mattress will give you the feeling of sinking, while an innerspring option will feel like you're sleeping "on" the bed. Some people who already have mobility issues might prefer the feeling of traditional innerspring beds.
Additionally, sleepers that want better ventilation along with firm body support will appreciate this mattress type.
Pros
Better ventilation
Available in many types
Suitable for sleepers with mobility problems
Affordable
Cons
Motion transfer
3. Hybrid Mattress
Ask anyone out there, and most sleepers might tell you they have switched an older bed for a new hybrid mattress. What's special about this option is that it combines the positive aspects of innerspring mattresses and memory foam mattresses to form a comfy bed.
If you look closely at the mattress materials, they are likely to be formed with a layer of coiled springs and a few layers of foam. Usually, there's one layer of coil bedding and two or three layers of different foams, which include memory foams or latex.
Pretty much all hybrid mattresses are customizable, so you can select the amount of bounce or sinking-in feeling you need. Add a few more layers of foam for a softer bed, and remove a few to get a firmer variety.
Here's an example — if you want better support for pressure points in the spine yet don't want to sleep hot, go for a hybrid option. One thing we particularly like is the option to select special hybrid mattresses that provide zoned support. This means that the layers are adjusted to suit specific parts of the body, like the spine.
Who Should Use Hybrid Mattresses?
Typically, people prefer this option for a few reasons, with the most prominent being its ability to provide comfort in different sleeping positions. So, we can safely say that this option is quite versatile, and almost anyone can use it for a good night's sleep.
In a few cases, we have seen back sleepers and stomach sleepers prefer hybrid mattress types because they support the body well in these positions. Also, if you want a temperature-controlling mattress but don't want the bouncy effects of innerspring beds, go for something in between like a hybrid.
Anyway, there are plenty of brands and options to choose from, which give you a wide range of collections at your disposal.
Pros
Better body support
Variety of options
Suits most sleeping types
Does not trap body heat
Cons
Costly
4. Gel Beds
As we've mentioned earlier, people who sleep on memory foam beds love the cushiony softness but aren't big fans of waking up in pools of sweat. Unless you are living in a cooler region, an equal alternative to a memory foam mattress might be required. This is where gel-infused foam mattresses come into the picture.
Gel-infused memory foam provides the same body support and pressure relief as memory foam without an increase in mattress temperature. Foam mattresses need to be dense, but they also have limited airflow that leaves no place for the body heat to escape. With gel memory foam, this problem is eliminated because the gel keeps the mattress cool throughout the night.
Essentially, manufacturers infuse the gel into the foam mattress because it takes a long time to trap body heat. This type of mattress is perfect if you don't want to let go of foam mattresses yet still want the temperature of the foam beds regulated.
Who Should Use Gel Mattresses?
We recommend this type of bed for those people who tend to sweat often yet wish to take advantage of cozy foam beds.
The good thing about gel-infused beds is that they are almost entirely made of foam, so sleeping on them doesn't feel as different. The same pressure relief benefits with motion isolation are found in gel beds too. Although it might not be the most affordable mattress on the market, a gel-infused foam mattress offers plenty of benefits for its cost.
Pros
Keeps body cool
Adapts to sleeping position
Soft and comforting
Practical and low maintenance
Cons
Made of synthetic materials
5. Latex Mattresses
If you are not convinced about foam mattresses and are looking for alternative mattress types, the next best option is a latex mattress. Natural latex is obtained from the byproducts of sap from rubber trees which makes it an environmentally-friendly mattress option.
Latex mattresses have pretty much the same qualities as memory foam mattresses, with the only difference being in their material origin. It allows for body contouring and supports pressure relief for some essential spots, just like foam mattresses. In our experience and according to those who have used both, latex beds are slightly more bouncy.
Ultimately, it comes down to preference, and maybe you should try both out because the sleeping experiences are similar. Do keep in mind while selecting that latex options are much more airy and have a slight bounce to them.
Also, a latex bed can be constructed using natural or synthetic latex, which means that not all options are eco-friendly. Try to check beforehand if the mattress is verified by the Global Organic Latex Standard, which certifies the safety standards for latex mattresses. Also, latex mattresses are manufactured in two ways — Talalay style and Dunlop.
a) Talalay
The Talalay process involves filling the mold with latex and then allowing a vacuum to suck out the air within. The resulting latex mattress is still unstable after this procedure which is why it is frozen afterward. Once that is done, the final mattress has an even texture throughout, unlike the Dunlop latex mattress.
b) Dunlop
In the Dunlop process of making a latex mattress, the latex is poured into the mold all at once. With this technique, the final product is denser towards the bottom and softer at the top.
Who Should Use Latex Mattresses?
As far as who can use this mattress, it is quite suitable for people with allergies. You see, natural latex is resistant to dust mites and hypoallergenic due to its superior ventilation mechanism.
Another benefit of increased airflow through the mattress is that it hardly ever gets hot while sleeping on it. Hot sleepers or people who get uncomfortable by hotbeds can switch to latex options for better breathability and cooling.
Also, this mattress type is ideal for combination or side sleepers because this bed will support constant movement easily. Its slightly bouncy nature will allow switching sides with ease.
Pros
Buoyant material
Better breathability
Uses natural materials
Suitable for hot sleepers
Cons
Heavy
6. Organic Mattresses
Living a lifestyle that limits the damage to the environment can have many forms, and one way involves switching the mattresses we use. Nowadays, you can purchase organic mattresses made of natural materials, limiting your exposure to chemicals.
Usually, organic mattresses are made of materials like natural latex, organic cotton, recycled coils, and organic wool. The companies that manufacture these mattresses try to keep the process free of toxins and harmful chemicals.
In addition, the products are always marketed as eco-responsible with certifications so that it's easier for customers to spot them among other mattresses. Check for Global Organic Textile Standard certified mattresses to get good quality material in your organic mattress.
Also, some mattresses come with a GREENGUARD GOLD certification which indicates that the materials used are natural and non-toxic. Similar to these, there are many other environmental certifications that you can check if you are eco-conscious. The sleep quality in these mattresses is pretty high; however, they tend to cost more.
Who Should Use Organic Mattresses?
An organic option is a perfect mattress for those who wish to reduce their carbon footprint and those who wish to use natural materials. Apart from providing all the comforts a good mattress should provide, a well-made organic mattress can also relieve pressure in the body.
Also, this option will work well for those people who live in climates that change often. This is because natural materials like cotton and wool are great at retaining heat in winter and dissipating heat in summer. Thus, you can truly use these mattresses comfortably in all seasons, especially in summer when some beds tend to get hot.
Pros
Regulates temperature
Eco-friendly mattress
Free of toxins and chemicals
Relieves pressure
Cons
Higher price range
Few brand options
7. Water Beds
Water beds might seem like a modern invention that is marketed for their relaxation benefits. But the truth is that water beds have been around for quite some time and were used to assist patients with bedsores.
Essentially, the mattress is filled with water which gives a sensation of floatinggently in water while sleeping. This might not be the first mattress option people go for, but it is popular as an alternative way to relaxfor a few hours.
With the option to customize the water level in the bed, you can get the desired fullness depending on your body weight. If you fill the waterbed with very little water, then there would be too much movement, and filling it too much will be uncomfortable too.
Typically, water beds have different chambers, and each of them can have different levels of water. There is also the option to have free-flowing water in these chambers or have a restricted water flow. These adjustable settings are ideal if there are two people sleeping on the bed since each side can have a different water setting.
Who Should Use Water Mattresses?
Although it may not be mainstream, a few sleepers may enjoy the sensation of sleeping on a waterbed. This type of bed adapts well to the shape of the body and prevents pressure from building up on the hips, shoulders, and knees.
Also, people prone to allergies to regular mattresses will benefit from sleeping on waterbeds. Besides, it's easy to maintain these mattresses because the outer vinyl cover is resistant to dust and stains.
Pros
Comfortable to sleep on
Heating options
Firmness is adjustable
Suitable for people allergic to natural and chemical materials
Cons
Susceptible to leaks
8. Adjustable Beds
If you've always wished for a bed that could be used for multiple purposes in the house, an adjustable bed is your best bet. They look like any other bed, but they can recline and adjust in two or more directions when watching TV or when you wish to stretch your legs.
This bed is ideal for those who wish to read or work in a sitting position but do not wish to invest in a new chair for the same. Typically, the price of these beds is higher because they come with moving electrical parts like motors.
Some of these adjustable beds also have pain-relieving abilities because changing the bed angle allows for targeting different pressure points.
Who Should Use Adjustable Mattresses?
Adjustable beds are good for people with chronic pain and conditions which may require frequent adjusting of bed positions.
Pros
Improved sleep quality
Pain relief
Comfort
Versatile
Cons
Slightly pricey
9. Pillow Top Mattresses
Now, the pillow top mattresses have an extra layer of padding on the top which can be several inches thick. There are various reasons for adding this type of mattress to the bed, with the most common one being extra comfort. In some cases, the topper provides better durability, cooling, and bounce.
Generally, a pillow top layer can be made out of natural materials like wool, cotton, latex, and sometimes even foam. Since the whole point of these mattresses is to add an extra layer of comfort, they are softer to touch than other mattresses.
However, it is true that these mattresses come at a higher price, but it might be worth it for the extra comfort. Still, there are a few budget-friendly options available from select brands.
The cushioning of pillow top mattresses is ideal for people who require pressure relief in some parts of the body.
In addition, it also isolates motion so that there is minimal movement of the bed while sleeping. Note that it may require some maintenance because it needs frequent rotation due to sagging. Also, the options made of foam will retain heat and might feel hot to sleep in during the summer.
Who Should Use Pillow Top Mattresses?
If you are one of those people who require extra cushioned support while sleeping, the pillow top mattress is for you. In fact, many types of sleepers can use this type of bed with ease.
Pros
Added comfort
Motion isolation
Soft to touch
Ideal for pressure relief
Cons
Retains heat
High maintenance
10. Air Mattresses
Don't look down upon air beds or air mattresses just because they sound like something a vacationer would use. Yes, we know how air mattresses are associated with college students who roll them out on the floor in replacement for "real" beds!
But, times are different now, and air mattresses available today are made of high-quality materials that are quite durable. One reason to replace the bed with an air mattress instead of foam or hybrid mattresses is for its light weight.
That's right; many sleepers are tired of moving around bulky mattresses and flipping them to different sides for better adjustability. With air mattresses, the problem of lifting and storing them is solved because they can also deflate and shrink into a box.
Besides, these are the most affordable mattresses you'll find, and some of them even come with thin foam layers for extra comfort. Sleeping on these beds long-term might not be the best choice for everyone, but they are perfect if you need a mattress for a short time.
Who Should Use Air Mattresses?
First of all, the firmness of these beds is easy to adjust on your own because it all depends on the amount of air you pump. Thus, if the bed seems too firm, allow some air out.
Those of you who move around often might find air mattresses pretty useful because they are super portable and light. Of course, they won't be as comfortable to sleep on as foam mattresses, and neither will help with back issues or relieve pressure.
However, an air mattress is ideal for talking along with you on a camping trip as a temporary bed or for guests visiting over. In any case, it makes for an affordable replacement mattress if you only need a bed to sleep on for a few days.
Pros
Firm-feeling mattress
Portable option
Low in cost
Easily adjustable firmness
Cons
Tendency to tear
Not suitable for long-term sleeping
Types Of Mattresses Frequently Asked Questions ?
Are mattresses harder when new?
In the beginning, mattresses will be much firmer than they turn out to be later. If the mattress feels a bit firm when you first use it, remember that it will become softer with time. It is recommended to use a mattress for at least a month to judge if it fits your needs.
Just as a new pair of shoes need to be worn a few times to feel comfortable, mattresses need to be used for a while. If you wish to hasten the process of loosening the mattress, try stepping on it a few times to soften it up.
Can I wash mattresses?
It's not possible to wash a mattress with water, but there are ways to keep it clean and fresh. Keeping the mattress covered will anyway keep it protected from unwanted spills and stains.
Additionally, you could clean some spots using a mixture of baking soda, hydrogen peroxide, and dish soap. Apart from that, steam cleaning the mattress periodically will also help in keeping the mattress fresh and deodorized.
How long do mattresses last?
Typically, a good mattress will last for 7-10 years if maintained in good condition. If extra care is taken, it could last for much longer. However, remember that the longevity also depends on the materials used to construct it.
Types Of Mattresses Final Words
As we've already discussed, selecting a mattress is a personal decision, and everyone will have their preferences. We suggest buying from a mattress store that offers at least a month of trial policy. During this time frame, you'll be able to decide whether the mattress is the right choice for you.
In any case, we hope you find the perfect mattress soon enough. See you next time!
Your recliner can indeed serve you for many years. But that is only possible when you take proper care of it.
To prevent your recliner or leather chairs from everyday wear and tear, it is an absolute must that you find the right slipcover. However, you need to keep in mind that durability is not the only thing you can think about.
If your recliner is in the living room, you must find a slipcover that also looks elegant and goes with the existing décor. When done right, your furniture will get a reupholstered look. The problem, however, arises when you visit the market to buy one as there are thousands of options that will leave you confused.
To help you, we have designed this guide with the top 7 products you can try. So, let’s take a look!
One of the first recommendations that we have for you is the Easy-Going Recliner Stretch Sofa Slipcover. To protect your recliner from daily wear and tear, it is best that you give this option a try. The designers have paid special attention to ensure that it fits your oversized recliner well.
High Quality Material: 80% polyester+20% spandex,high...
Dimensions:Recliner Slipcover:Fit Total sitting area is...
Why Did We Like It?
The slipcover comes in 4 parts, and it will fit your sofa like it has been made specifically for the purpose. This is one of the best recliner slipcovers as it comes in separate parts to make sure that it fits every part of your recliner well.
It has elastic straps that secure the cover nicely to the recliner. Apart from that, the material of the slipcover requires a special mention as it is made up of high-quality polyester-spandex blend, enhancing the durability and flexibility of the product manifold. Extra points to the manufacturers for choosing the right material, which makes the slipcover extremely huggable and stretchable.
Moreover, maintaining this item won’t be bothersome. Once it gets a little dirty with use, put it directly into the washing machine and set it for a mild machine wash. But keep in mind that in order to maintain the high-quality fabric, it is best that you use mild detergent for cleaning.
What Could've Been Better?
The only issue with this item is that it is not waterproof and can get damaged in case there is a sudden spillage of liquids. In case the liquid seeps deep under the layers, it would be difficult to take the stains out. So, if you have kids in the house, you might have to reconsider.
Up next, we have the H.VERSAILTEX Stretch Recliner Slipcover on the list, which is popular among users for the extra soft and plush feel that it delivers. What makes this recliner stand out among its contemporaries is that it comes with a footrest that wraps nicely beneath it and delivers an excellent fit.
GREAT FIT: This innovated 1 Piece recliner chair couch cover...
FULL PROTECT: These fantastic velvet slipcovers are unique...
Why Did We Like It?
If you are looking to add a luxurious touch to your living space, this is one of the best recliner covers to try. It is made of plush velvet fabric, and therefore, looks fantastic while being soft to touch. You would be surprised by the versatility that it puts on the table and is suitable for manual and electric recliners alike.
Moreover, we scored this product high on the ease of use that it offers to the users. There is a right-side handle, side pockets, and a continuous footrest, making it super easy for the user to put on the slipcover. There are also two elastic loops present at the back corner, which ensures that the fit is top-notch.
Other than that, it is super convenient to install this item. There are proper instructions printed on the manual that you will find in the package. Not to mention, the elasticized bottom makes it easy to put on the slipcover and make sure that it stays in place.
What Could've Been Better?
Despite being made of excellent quality material, it is essential to note that it is not suitable for an oversized recliner. If you use it on one, it will be pretty difficult for you to get the fabric tucked in and will only give the recliner partial coverage. In the worst case scenario, the elastic edges won’t really sit well.
The Great Bay Home Modern Velvet Plush Recliner Slipcover is so plush and velvety that you won’t be able to resist cuddling on it. This high-quality polyester slipcover will have you at hello! It is super comfortable and adds a dash of style to your room.
Protects furniture from spills, stains, wear and tear with...
Fits most armchairs up to 40 inches wide
Why Did We Like It?
This recliner cover is made of 95% polyester and 5% spandex and hardly experiences any wear and tear with use. It can easily last for a few years with little to no maintenance. The spandex-coated outdoor fabric is also super soft and will help you take long naps on your recliner.
Furthermore, it is one of those recliner covers that provide the ultimate protection to your furniture. Once you put it on, your recliner will be protected against dust and stains. Even if you have children in the house, this cover will make sure that no harm is caused to your recliner.
Moreover, you can rest assured that when you put it on correctly, it will stay in place and not move much as it is slip-resistant. You will find a helpful installation guide on the package, and that, along with the elasticized bottom, will make installation extremely simple.
What Could've Been Better?
Unfortunately, on receiving the product, we noticed that the side pockets on this recliner slipcover were two shades darker than the rest of the cover. It looked a little odd, honestly, when viewed from particular angles. If this problem had been rectified, we would have scored this product even higher.
Next up, we have the Easy-Going Recliner Sofa Slipcover. This has managed to garner much popularity in the last few years because of the exceptional workmanship that goes into its making. The faux suede fabric is of excellent quality and is relatively easy to maintain.
HIGH QUALITY: Elegant quilted texture, thick microfiber,...
DIMENSIONS: Sofa Cover: Fit seat width 18-19 in, please...
Why Did We Like It?
The first thing to take note of about this product is its exceptional build quality. It comes in an elegant quilted texture that adds a great deal of definition to the piece.
The microfiber is pretty thick and will last for a long time with minimal maintenance. Plus, because it is water-resistant, its lifespan is considerably extended.
Coming to maintenance, as we have mentioned already, it is super convenient. You can put it directly in your washing machine for a quick wash. A word of advice: Refrain from using bleach or harsh detergents as that might damage the color of the furniture covers.
Lastly, what adds to the ease of use is the fact that it comes with elastic straps that prevent the slipcover from sliding. So, even if you are sitting on it for a long time, it will remain in place and not move an inch.
What Could've Been Better?
While we have no complaints about the quality of the product, we need to mention that it does not come with a proper instruction guide. So, unless you have prior experience of using recliner covers, you might find it challenging to put this slipcover on the recliner.
We are almost reaching the end of our list, and next up, we have the Prince Deco Stretch Recliner Slipcover. Thanks to the high-quality blend, it is super comfortable to use, and no doubt looks stellar.
UNIQUE FEATURES AND FABRIC: This soft textured stretch...
PERFECT FITTED DIMENSIONS: These cozy and fantastic recliner...
Why Did We Like It?
This recliner chair slipcover comes in a range of colors, and there is one for everyone. It is made of polyester and spandex blend and delivers a soft texture that will make you want to sit on the recliner for long. The thick knit material gives the recliner cover an exquisite look and will surely catch everyone’s attention.
And this recliner cover not only offers versatility in terms of colors but also in the types of recliners that it is suitable for. So, you can go for this option irrespective of whether your recliner chair is manual or electric.
Not to mention, we loved the shrink-resistant feature that ensures that the fits stay well even after multiple washes. It is super easy to clean too; you can wash it by hand or put it in the washing machine.
What Could've Been Better?
A word of warning: This item is not waterproof. So, if any liquid falls on this thick material, there is a chance that it will seep in and leave permanent stains. If you accidentally drop something on it, we suggest that you wash it immediately.
To enjoy a cozy experience on your recliner, try the Rose Home Fashion RHF 4 Separate Piece Velvet Recliner Slipcovers. The soft velvety material is soft to touch and makes sitting on it super comfortable.
What makes this recliner cover stand out is the premium quality fabric that goes into its making. Owing to the quality, the material is pretty stretchable and can even fit an oversized recliner. Putting on and taking off this cover for maintenance work is simple.
Other than that, we couldn’t help but marvel at the excellent build quality of the slipcover. The knitting is super neat and will ensure that the slipcover stays in place even after hours of use. So, your sofa will always have a clean look and will not be ruffled.
And when it comes to convenience, this product gets some extra scores. You will find side pockets on it that can be used to keep phones or books while you take a nap. The side pockets work as a great storage place.
What Could've Been Better?
The only complaint that we have is with its packaging quality. On receiving the product, we noticed that the box in which it was delivered was tapered around the corners, and we were worried if the product was safe. Luckily, it was!
There was no way we were going to wrap up our list without having mentioned the MarCielo FBA Recliner Slipcover Burgundy. This furniture cover is suitable for most sofas, recliners, love seats, and even chairs, making it very versatile and popular among users.
360 DEGREE COMPREHENSIVE PROTECTION: The recliner stretch...
FITS MOST RECLINER: This recliner cover is one size fits...
Why Did We Like It?
When you are looking for a full-coverage slipcover for your recliner, this can be the best bet. It is made in a way that it can enwrap your recliner completely, thereby protecting it from unwanted damage, stains, and, most importantly, everyday wear and tear.
Moreover, the versatility that it puts on the table is nothing short of incredible. It is a one-size-fits-most slipcover and is suitable to be used on most types of chairs and recliners. The fit is perfect, and the slipcover stays in place without shifting or moving.
Most importantly, maintaining this item is pretty convenient. Once it gets dirty, you can simply send it for a machine wash and let it dry naturally. It is wrinkle-resistant and does not develop creases at all. Other than that, you will also find side pockets on it where you can store essential items.
What Could've Been Better?
Unfortunately, we were not really happy with their customer support team. We had a few queries, and we got a response very late on reaching out to them. To be honest, we expected a more prompt reply from a brand as good as this one.
Pros
Provides full-coverage
Build to last
Easy to maintain
Simple installation process
Cons
Customer service needs improvement
Recliner Slipcovers Buying Guide
Now that we have given you a detailed round-up of the top products, were you able to make a choice?
We understand if you are facing some trouble in making your decision. Actually, there are a few other factors that you need to take note of to understand what would be the best pick for you.
Let’s take a look at some of those factors!
1. Coverage Provided By The Recliner Slipcover
When choosing recliner slipcovers, you can opt for two types of coverage: full or partial. To be honest, there are advantages and disadvantages to both and you should select one that works best for you.
If you choose to go for a full coverage recliner cover, it will no doubt deliver a reupholstered look to the recliner. However, you need to keep in mind that full coverage slipcovers are a task to put on and take off.
Partial coverage recliner covers, on the other hand, are quite easy to put on. But they mostly look like a shield and would not cover your recliner in entirety. So, the chances are that some portions of our worn out recliner might still be visible after you put on the slipcover.
2. Maintenance
Keeping your slipcover in the right condition, especially when it is a full-coverage variant, can be pretty challenging. You might need to send it for a wash often if you have kids or pets in the house. In case you have problems washing it frequently, it is best that you go for one that is waterproof.
If the slipcover is not waterproof, at least check if the fabric is good and that the color will hold even after multiple washes.
Verdict
That’s all we have for you today!
We hope that learning about the best recliner chair covers has been fun so far and that you won’t face trouble in selecting one anymore. Making the right choice is essential because your recliner needs special care, especially when you have children in the house.
If you are still having second thoughts, let us help by letting you in on our favorites. The Easy-Going Recliner Sofa Slipcover takes the award for being an all-round model. Apart from that, if you are looking for an item that is easy to install and maintain, we would suggest that you give the H.VERSAILTEX Stretch Recliner Slipcover a try.
For any suggestions that you would like to share with us, feel free to write to us in the comments box below. And for more exciting reads, do not forget to keep a watch on this space.
The Papasan chair is a symbol of the 1970s. From catalogs to films to television reality shows, it has been featured just about everywhere. It has had a variety of colors to flaunt and has had variations in its design from time to time. And while it once used to be everyone’s favorite furniture to have in their home, office or lounge, it has shown a decline in its popularity of late. For reasons unknown, it has been seen in sales and discarded with little consideration, something entirely unwarranted for a darling of an iconic decade.
But, it hasn’t gone out of style. In fact, the demand has been on the rise as postmodernism and homages to retro designs grow popular by the day.
What is the Papasan Chair?
So what is a Papasan chair? Bearing other names like moon chair, bucket chair, bowl chair, big round chair, bowl chair, elevated bowl, and many others, it is a circular piece of Filipino furniture that consists of a rattan or wicker frame, which does not break easily, a reliable base, and a stylish and extremely comfortable cushion on the top which can be customized in any conceivable way so that you have that furniture to appeal to anyone who visits.
The cushion and the design of the chair offer great lumbar support. A Papasan chair is the bean bag of the 70s, with a fully formed structure, because that’s how comfortable it actually is. This is why it is popular with young adults to hang out with friends and in gaming lounges or just plain home entertainment. I personally would just love to curl up with it and read books and get some sweet, comfy sleep.
The Papasan chair has been coming back in style for more than one reason. Firstly, a lot of old decor is gaining popularity due to a revivalist movement in the decor and fashion world, so it is not just the Papasan chair that is seeing good days. A lot of minimalistic and modern decor designs had become too much of commonplace and do not hold any distinction anymore, so people are tracing back to what worked best in the past, especially when they were younger and bolder in their choices.
Nostalgia plays a really strong factor in marketing and in selling. Most movies these days are banking on this very fact and reviving old franchises and giving them new yet nostalgic spins and drawing in newer audiences while also getting the old fans in the seats. So, old clothing styles and old decor are coming back for good, and it is an exciting time to shop! Secondly, a lot of vintage decor is more accentuated than the more minimalistic style, so from an artistic point of view, Papasan is a winner.
There are a lot of Papasan chairs available both online and in physical stores for you to choose from. The catalogs are delightfully enticing. The best thing about Papasan and mamasan chairs is that not only do they look great, but they have the most comfortable cushions that make you sink in them, and they aren’t even warm like leather or rexine cushions, the soft cloth feels velvet like and smooth and adds to the comfort level. These chairs are made for relaxation, and it is hard not to fall asleep in them.
Papasan Chair Design Ideas
The Pretty Pink Papasan
The bold and striking colors of this Papasan chair are sure to catch your eye. They are exciting, full of pop vibrance, and enticing. And if you’re the romantic lot, this Papasan chair makes for a very apt couple seater. Plus, the undeniable comfort of the bean bag cushion can never run out of deserved appreciation. I’d like this chair in my house, wouldn’t you?
The Ash White Papasan
This papasan chair has a serene ash white cushion seat, contrasted with a striated black, grey and patterned blanket and a multi-colored cushion. It looks delightfully comfy and goes really well with its surrounding. Imagine sitting in it and reading a good book.
The Striking White Papasan
Sometimes you don’t really need to go with a lot. Sometimes less is indeed more. Vivid colors, though having their own charm and attraction, can be a mismatch in a particular surrounding and sometimes they can also be a little too striking on the eye. Which is why this particular Papasan chair is one of the simplest yet really alluring of the lot. It has no extra cushions, nor does it have a shawl or a blanket and there are no colors except for the chocolate brown of the rattan frame and the milky white of the bean bag cushion. It resembles a chocolate vanilla ice cream and is cool to the eyes.
The Rustic Papasan
I love the shade of green that this Papasan cushion has. It feels rustic and beautiful and is a stylish contrast to the chocolate brown wooden polish. The knitted cushions and the warm blue blanket complete this gorgeous arrangement. As can be seen, it seems to be a perfect place to just sink cozily in and work away comfortably. And, I repeat again, I absolutely love the colors.
The Turquoise Papasan
Ah. Turquoise blue. So delightfully cool to the eyes and to the senses. Even looking at this in a picture calms the mind. Imagine how you’d feel relaxing in the ultra-soft cloth bean bag with a few cushions to make you feel even cozier, while you read or write something, or even watch television. How could a piece of furniture like this ever go out of style? We’re glad it is back in business and with such demand, because it deserves every bit of attention it gets.
The Peppy Papasan
This papasan cushion is so unabashedly seventies, I am overawed by the color scheme of it and the combination of the peppy blanket. An unmistakable standout in your living room or any room for that matter, this is one refreshing piece of decor that you would love to have in your home.
The Minimalist Papasan
This is a very different kind of Papasan chair. It is more modern and minimalist in design and does not have the iconic and classic bean bag cushion. Instead, it is netted on all sides and has a slim white and square seat to sit on and a patterned black cushion for back rest. Not something you would go for if you’re looking for maximum comfort, but something that is definitely chic and peppy to include in your living room and quite nice to relax in.
The Roofed Papasan
This is another really unique set of papasan chairs. One is your standard Papasan chair with a rattan frame, and a large white cushion and the other one is a little more special than most. It has a big rattan or wicker bowl which is tightly knit. It has a delightfully blue large cushion and multiple pillows and cushions for rest. But, apart from these amenities, it also has a stylish retractable roof to shield you from the sun and let you have an undisturbed and cozy sleep. It’s really luxurious, in both its appearance and the comfort it provides. I would love to spend my noontime resting on it.
The Small Papasan
This is a smaller Papasan chair than most. It also has a fluffy bean bag cushion that resembles a sunken marshmallow. It has a lower height and is perfect for you just to sit back and enjoy your leisure time, resting your head on the lovely blue pillow. And if you have a pet, like the people who own that chair do, this chair will serve as a large cozy bed for your pet too.
The Poolside Papasan
This is a two-chair set of papasan chairs to be usually used in the outdoors, preferably by the poolside. Even though the chairs themselves, with their bean bag cushions, are perfect companions for a pool and for people to relax in, the small cushions that come with them are specifically designed for such an environment. No, I don’t talk about their cool blue color which is obviously really relaxing, I speak of the material and the extra comfiness that cannot be deterred even if there is a big splash of water striking at them. Because, yes, these cushions are waterproof! Now that’s definitely cool.
This pair of Papasan chairs are the perfect pieces of furniture you need by your private pool. They remarkably contrast the cool blue of the pool with their soothing white cushions and yellow-brown rattan frame. Replacing the usual recliner beds, these are comfier and cozier alternatives to have on your poolside. Curling up comfortably in them and sleeping on a warm and sunny day seems like a really relaxing exercise.
The Papasan Set
This is not just a single Papasan chair, but a full set with a stool and a side table, all woven in a delightful rattan mesh which is then painted with an ash gray that has a very iron-like finish to it and one that looks quite ravishing. To contrast this grey, the cushions are charmingly scarlet in color with a matt finish that tones down the sharpness and enhances the beauty of the color even more. I’m in love with this set and would want it on my front porch!
The Wide Papasan
This large papasan chair has a wide diameter of its rattan frame which is lower in height than its peers. It has a colorful bean bag cushion which has different shades of blue and a multitude of flowery designs. That is complemented by a white and a zigzag patterned blue cushion. The carpet under the chair adds to the appeal of the decor. The pattern itself is very Caribbean in nature and also calls back to the seventies quite boldly.
The Victorian Swingasan
This is not your usual Papasan chair, neither in its design which is obviously not earthbound nor in the pattern it has for its cushion. This is a hanging Papasan chair with no stool to rest the frame upon and instead ropes to hoist it in the air, to give it a buoyancy which only adds to the comfort as it gently rocks in the wind and gives you a sweet sleep with lovely dreams. The bean bag cushion has a polka dot pattern with a white base and a companion cushion with a very Victorian floral pattern. O how I would love to have this on my lawn.
The Traditional Swingasan
This papasan chair is also from the line of swingasan chairs, but it features the more traditional circular Papasan chair design. It also has a wheel pattern on the decorative side which is really unique and cool! It also has an extremely comfortable bean bag chair that you can sink in. You can hang your legs out if you will and just rest and sleep or read something. You can always add more cushions to the mix to increase your comfort levels. But, even the default cushioning should be enough for you. Plus, you can move it around as it is portable though hanging.
The Beachside Papasan
Here’s a pair of papasan chairs which are lightweight and have black frames. The cushions have a color scheme of dark blue and white, with elaborate leafy embroidery covering almost the entirety of the cushions in a psychedelic and repetitive manner. Perfect, hence, for the beach and the front porch, these Papasan chairs can be carried around due to their lack of weight. So, ready yourself to have a deep sleep by the sea, because that’s exactly what I would do.
The Oblong Swingasan
This is a swingasan Papasan chair. It looks more like a hanging chair than a traditional Papasan chair and doesn’t feature the conventional round shape most Papasan chairs have. Instead, it has a comfy white cushion for seating and no cushion in the back. The frame is made out of rattan and has extremely intricate patterns that have explicit south Asian influences in their symmetry and geometry. Hoisted by a chain, this hammock cum Papasan chair is amply comfortable for your summer getaway. And if you want to add to the comfort and find the rattan backrest a little uncomfortable, you can always add additional cushions on the sides and in the back and insulate yourself with maximum comfort.
The Mamasan Sofa Set
I love this papasan chair/sofa set. It has not one, not two, but three Papasan chairs, with two single seater chairs on either side of a large papasan triple seater sofa which is called mamasan. This set also includes a small stool. And adding to this set’s appeal is the color scheme. The bean bag cushions are strikingly blue, cool to the eyes and relaxing over all. The center set is complemented by four cushions, of which two are striated with lime green, blue and white and are square, and the other two are single toned blue and white. The blue cushion is actually a small pillow, so if you want to sleep away on this, you can use this Papasan sofa as your bed.
The other two papasan chairs have floral and geometric cushion designs that go well with the overall decor. All in all, a unique sofa set you wouldn’t want to miss having in your backyard.
The Hippie Swingasan
This hanging Papasan chair is as traditional as they come and I mean it when I say that. This is unconventionally seventies in its make with the splash of netted colored linen and bold yellow polka dot cushions giving it such a nostalgic vibe. You could say this ravishingly peppy or hippie in its design. Not something everyone would go for, but something many did once upon a time. So, if you’re one to desire a revival of the old days, this particular Papasan chair is made for you. And even otherwise, it is really cool to have on your front or back porch.
The Postmodern Swingasan
This black Papasan hanging chair mixes the modern and the traditional in a delightful blend with the result being something quite striking. The chair looks like an easter egg sliced in half, and the dark chocolate color goes really well with the surroundings. The netted patterns that surround the chair filter any sunlight while also providing you warmth and air. The milky white cushion looks extra comfy and perfect for you to sleep on or read something.
The Lush Green Papasan
This is a very retro colored mamasan chair. I love the lush green color of the cushion contrasting the dark brown of the rattan frame. Seems like a cozy companion for your furniture and can snuggle up in a corner to give you enough comfort and warmth. Add a few cushions and a blanket, and you can have a sweet sleep waiting for you.
The Ammolite Mamasan
A mamasan chair with a cool white cushion, it looks great placed beside the window. It has silver-gray leaf patterns on it, and its companion cushion has a beautiful ammolite design that is quite charming. I love the overall look of it. Sometimes, having too much color can be a deterrent, so I prefer this lovely white setting with a dash of silver and some embroidery.
The Oval Mamasan
This oval mamasan chair is a lovely replacement for your old and worn out sofa. A double seater, it has a light brown rattan frame and a large white cushion with two charming small cushions, one with a drawing of a forest and a girl and another a plain orange color. Moreover, there are two blankets, one of fur and one plain, the options helping you choose if you want a fluffier comfort or not.
The Dual Mamasan Papasan Set
Here’s a set of two papasan chairs, one mamasan, and one Papasan chair. The mamasan chair has a navy blue cushion, and the papasan chair has a sandy colored cushion. Both complement each other pretty well, and if you want to stretch out more and sleep, then you can sleep in the mamasan chair and if you want to curl up then the Papasan chair will be a more fitting option. Either way, this set makes sure more than one person can enjoy the comforts of the Papasan chair at the same time.
The Grey Swingasan
This hanging Papasan chair, also known as a swingasan chair, is for the minimalist in you, with a sandy grey color and set of stripes and an ash grey cushion. The stand for this hanging Papasan is black and pretty robust. It also has a driftwood finish and will cost you less than four hundred dollars. Quite a catch, isn’t it?
The Ribbed Mamasan
This mamasan chair is built for comfort. The ribbed and boxed cushion is designed to give you great lumbar support while you rest, regardless of your usage of it. I just want a pillow on it and retire to sweet sleep and you can too, because it will cost you only three hundred dollars or so. Not bad at all for something so rewarding.
The Standard Papasan
This white Papasan chair costs just about two hundred dollars. You would think a beautiful furniture like this would cost more. But, most Papasan chairs are incredibly affordable.
So, what do you think of the Papasan? Is it something you find fitting for your home decor? Where would you like to keep it? In your living room? Study? Porch? Backyard? Office? The options are plenty, and this crafty chair will be a favorite of anyone anywhere it is kept. By choosing a Papasan chair, not only are you bringing a splash of color and style with retro and nostalgic decor themes, but you’re also giving yourself and others a chance to have the most comfortable seating, for reading, writing, leisure, and sleep.
There are no conceivable downsides to owning a Papasan chair. It is fantastic for your lumbar support; it doesn’t really cost all that much either. So, what are you waiting for? Order a Papasan or a mamasan or an entire set for yourself and welcome a whole new level of comfort that you won’t have enough of! The designs are plenty, and the number of cushions you can add is entirely up to you, so all that remains is how comfortable you want to be in a Papasan.
Trust us; this problem is more common than you think. Leather couches, be it real or faux leather, are very prone to damage. Any sharp object or minor movements can easily lead to cuts and scratches on the couch. And handling is not as tough as you might think.
If you see cuts and holes developing on a leather couch, there are a number of things that you can do. Using a patch or tape is the most common solution. However, we suggest that you give leather tapes a try as well. Check out our article on top grade leather glues that are the finest leather patching tools found on the internet.
Before we get into more of these solutions, we will take you through the different types of damage that your leather couch might encounter. And in the second half of the guide, we will tell you about all the best possible solutions that you can implement to repair leather couches.
After discussing in our previous article if acrylic paint can be used on metal, today we are going to change course towards the comfiest place in the house: the couch. The place where we Netflix and chill might need refurbishment every now and then and hence let's discuss how to repair a leather couch that might need a quick revamp.
So, without further ado, let’s dive right into how to repair leather couches!
Common Types Of Leather Couch Tears
Leather couches and other leather furniture often experience different types of tears and damage, and all have a distinct repair process. A damaged leather couch will require solutions depending on what the problem is.
In this section, we will take you through the most common types of tears that might appear on your leather sofa or couch.
1. Minor Scratches/ Tears On Leather Couches
With everyday use, it is common for a leather sofa to develop minor scratches and tears. The small tears may appear in various shapes and sizes. These are primarily surface-level damages that will not require too much work to fix.
2. Cuts In Leather Furniture
Cuts on leather upholstery occur very commonly and might happen because of a range of reasons. Mostly, these cuts appear as clean incisions and have a depth of an inch or so. They might happen because of sharp objects or might even appear when you try to move a leather couch.
3. Rough Patches
When you use a leather couch for a long time, you will most likely notice worn-out edges or rough patches on it. However, when you find these worn-out edges, don’t think that you need to immediately replace the couch. There are methods that you can implement to fix the issue.
4. Holes And Punctures
For people who have pets in the house, this is a very common problem. Cats and dogs have a particular affinity for jumping on the couches, and their nails often create punctures on the surface of the couch.
Over the years, the tiny punctures tend to turn into big holes. These are mostly circular in shape and should be attended to on time. Otherwise, they will just keep increasing in size.
How To Repair Leather Couch
Now that you know about some of the most common types of tears that your leather couch might encounter, let's quickly take a look at how to fix them. There are quite a few methods that one can implement. However, today, we will take you through the most efficient and time-saving solutions that you can put to use.
1. Using Tape To Fix Leather Sofa
Would you like to find a quick solution to the tear that has appeared on your faux leather sofa? A leather tape works wonders on cuts, tears, punctures, and scratches. Be it real leather or a faux valiant, leather tapes are a fantastic way to fix a tear in no time.
But before you get started with the process, get your hands on the right tools. You won’t need too many things - a measuring tape, a clean cloth, and rubbing alcohol is all that’s required. Start by measuring the area that needs to be repaired with the tape and keep a note of the measurement.
Once you are done doing that, proceed to clean the area with rubbing alcohol using a piece of soft microfiber cloth. We strongly recommend that you use this fabric to ensure that no debris or lint is left behind after you are done cleaning the area.
Before you apply the leather tape, remain cautious and check if there is any lint or fiber left on the surface. If there’s any, the chances are that the tape won’t stick well.
After you are done cleaning, leave it to dry for a while, while you cut out the tape with the right measurements. Pro tip: Round the corners of the tape to prevent it from coming off or poking you after application.
Once the area is dry, go ahead and apply the leather tape to the damaged area. Smoothen it out till the tape adhesive sticks well to the surface of the leather couch.
2. Using Leather Glue
Leather glue mostly comes as a part of the leather repair kit that you can use to fix tears and scratches on leather couches. Adhesives are super strong and are a great tool that you can put to use when fixing tears on a leather couch.
For the leather adhesive to function, you will first need to find a patch of the same color as that of the couch. Once you find a suitable patch, you will need to put it under the cut and then apply pressure.
While you are at it, take care to not get any adhesive on yourself, as removing it will become pretty challenging. To prevent such problems, we recommend you wear plastic hand gloves or use wax paper.
Once you are done applying the glue to one side of the cut, proceed to apply it on the other side as well. And while you are at it, push the fabric as close to the other end of the cut. To get the best results, we recommend that you make sure there are no creases or wrinkles left on the patch or on your leather couch.
3. Make The Most Of Leather Fillers
Before you can proceed with using leather fillers, it is important that you first clean the surface of the couch properly. For that, combine warm water and white vinegar together into a concoction and clean the leather with it.
You can consider using a leather filler after using leather adhesive on a cut or a scratch that has developed on your couch. Once you have applied the adhesive very close to the cut and given it the proper time to dry up, apply the leather filler in thin layers.
There’s no need to be adept with the technical know-how; just follow some steps. Get a suitable applicator and put the leather filler meticulously on the scratch or cut. And make sure that your leather paint kit matches the exact color of your couch. Otherwise, the filler would stick out like a sore thumb. Once the adhesive and filler dry up, it is time for you to apply the paint.
In order to achieve the perfect look, we suggest that you not use a brush; instead, use a sponge to paint the area. Implementing this method will surely help you in repairing your couch.
How To Repair Leather Couch Final Words
With that, we have now reached the end of this guide!
We hope you had a great time reading, and now you are better equipped to repair a leather couch. You may now ask your friends to visit and spend a great evening watching TV on your recently repaired couch.
It is always a great idea to try to restore an existing couch before deciding to purchase a new one. Even if the task seems daunting in the beginning, with the right tools and a grasp of the technical know-how of repairing leather surfaces, you will be able to get the work done in no time.
Be it cracks, cuts, or scrapes, we have told you how to protect your leather couch in all situations. That said, if you liked reading this guide, do not forget to keep a watch on this space.
Until next time, fare thee well!
Hidden gun storage furniture is anything that can covertly store firearms within it.
It can be in the form of a couch, entryway bench, or even a gun concealment clock! You can store other valuables in it too, but its primary purpose is to hide a firearm.
Unlike gun safes, gun concealment furniture is easier to access, which is why they’re so popular.
But if you’re confused about which one to get, let’s get started with this guide on the best hidden gun concealment furniture. We’ve even included a brief buyer’s guide to help you purchase the ideal hidden gun storage furniture, according to your needs and preferences.
Listed below are the Best Hidden Gun Concealment Furniture:
PS Products: A versatile clock with a concealed compartment for hiding valuables, the PS Products Concealment Clock is elegantly designed to blend with any decor. A notable downside is its packaging which unfortunately hints at the clock's concealed feature.
Sauder: The Sauder Lift-Top Coffee Table is distinguished by its hidden compartment large enough to hold a sizable firearm. Its rustic finish suits any decor, but it requires a relatively complex assembly that could be inconvenient.
American Furniture: This piece from American Furniture Classics 504 Entryway Bench provides extraordinary storage capacity for up to 5 long guns. Despite its impressive storage and seating functionalities, packaging and product condition on delivery have been points of concern.
Tactical Traps 35S: Tactical Traps' 35S Compact Concealment Cabinet stands out with its strong security feature, using a state-of-the-art RFID system. Its assembly is straightforward and quick, though the quality of the included foam could be improved.
Bellewood Cabinet: The Bellewood Customizable Nameplate Gun Storage Cabinet impresses with its customizable design and secure storage feature. Its flexibility and customization are its key strengths, but the complex installation process, particularly the confusing video guide, is a notable weakness.
Here's the list of the 9 Best Hidden Gun Concealment Furniture, perfect for discreetly storing firearms and other valuables in stylish and accessible ways.
1. PS Products Concealment Clock
First up on our list is the concealment clock from PS Products, which is a nifty way to hide your gun. It's elegant outlook and practical shape make it fit in with pretty much any kind of décor. This won’t just tell the time but will also keep dangerous and valuable items away from prying eyes.
One of the things we liked about this product was its smooth finish. It is made of engineered wood with a mahogany stain and is easy on the eyes. You can place it on a desk, bookshelf, or mantelpiece, and its sturdy base will ensure that it won’t tip over and fall.
Further, the clock face panel can be opened to reveal a felt-lined compartment that stores money, jewels, and important documents. There is also a keyhole at the back of the unit, which helps keep the clock panel securely closed by using magnets.
We also like how even though the unit has been designed primarily as a hiding spot for a small weapon, it is efficient at telling the time and uses an AA battery. Like any traditional clock, it uses roman numerals and keeps time with a precise quartz movement.
We liked how the product was big enough to accommodate a small gun easily. However, when we received the package, it came in a brown box with “Concealment Clock” emblazoned on it. We felt that such lettering gave the game away, and the packaging should’ve been more discreet.
What We Like
Fits in with any kind of decor
Protects belongings from scratches
Doubles up as a clock
Smooth finish
What We Don't Like
Non-discreet packaging
Material: Wood | Dimensions: 13.25 x 9.5 x 6.25 inches | Weight: 5.29 pounds | Style: Classic | Shape: Rectangle
2. Sauder
The following entry is a lift-top coffee table by Sauder, which is also one of the pricier items on our list. It measures 21.13” x 52.81” x 5.06”, weighs 70.5 pounds, and is ideal for keeping a large-sized firearm within its hidden compartment.
First off, we liked the rustic finish of this coffee table. It has been meticulously carved and polished from all sides to give it an elegant look, which makes it ideal for your bedroom or a lounge. It has also been crafted with the latest styles and color trends and has a beautiful char pine finish.
In addition to that, the top part of this coffee table can be lifted to reveal a hidden storage that can be used to keep a firearm if you have one. You can also use it to store television remotes, board games, blankets, and other household items.
What’s more, the table also has open lower shelves which can be used to keep magazines, showpieces, and other essential items on display. The top of the table is sturdy, and if you sit on the ground, you can easily use it as a writing surface or keep a laptop.
Though this product was a great addition to our den, we did notice one thing that could be worked upon. Since this is an expensive product, we expected minimal effort to put it together. However, the assembly was a little complicated and time-consuming, to our dismay.
What We Like
Rustic and polished look
Sturdy
Can store larger-sized firearms
Fits in with any kind of decor
What We Don't Like
Assembly was tedious and time-consuming
Material: Wood | Dimensions: 43.15 x 19.45 x 19.02 inches | Weight: 65 pounds | Style: Transitional | Shape: Rectangle
3. American Furniture Classics 504
This stately piece from American Furniture Classics is next up on our list, and we must say, it is awe-inspiring. This measures 54 x 17 x 30.5 inches, weighs 95 pounds, and has been manufactured in Vietnam! It’s also a little on the pricier side.
This product is a multipurpose entryway bench that is both attractive and functional. The seat measures 48.5 x 15.75 inches and is easily large enough for three people to sit on! You can keep it near the entrance of your house, and it can be used to store things, as well as sit.
One of the key highlights of this product is the cleverly-designed, lockable storage. This storage area has a removable accessory tray and can store up to 5 long guns. This is more than any product on this list, so if you hunt, for instance, and have a lot of firearms, then this product is for you.
We also liked the finish of this solid wooden bench, which additionally has wood veneers and a remarkable slat design. Moreover, the storage area is lined with felt, ensuring that whatever you keep inside remains scratch and dent-free.
We paid a lot for this product, so our expectations were high. However, to our chagrin, we saw that the box was severely damaged on arrival, and due to wear and tear, the product itself was visible. Additionally, the seat of the bench had a hole! We ended up having to get it replaced, which was quite tedious.
What We Like
Multipurpose
Removable accessory tray
Can store up to 5 long guns
Storage area is lined with felt
Attractive finish
What We Don't Like
Package damaged on arrival
Seat had a hole
Material: Wood | Dimensions: 54 x 17 x 30.5 inches | Weight: 95 pounds | Style: Classic | Shape: Rectangle
4. Tactical Traps 35S Compact
Tactical Traps is a reputed American company known for making high-quality concealment cabinets. The 35S Compact is no different and measures 22.5” x 10.2” x 4”. It also has a smart storage space inside that can safely store your firearms away from prying eyes.
We were mighty impressed that the hidden compartment could only be accessed with a state-of-the-art RFID system. So this means that the secret trap door located within the cabinet could only be accessed with a key card. How cool is that! This product wowed us with its superior functionality and top-notch security.
Interestingly, the unit also has a backup mechanism in place. This means that if you were ever to lose the card, the emergency lock-out protection could help get you back in! This is a great way to keep dangerous firearms away from the reach of children.
Another thing we liked was that despite its purpose, the unit could blend into the décor of any room. It is made of handcrafted wood and has a smooth, layered finish. Additionally, it can also be assembled within just 10 minutes without needing any extra support or sheetrock cutting.
The product’s exterior was just as expected, and the key card also worked well. However, we did notice that the foam that came with could’ve been of better quality and was a tad flimsy. As a result, we needed to upgrade it.
What We Like
Attractive LED display
Comes with trimmable foam to fit weapons, magazines, etc.
Emergency lock-out protection
Blends with every kind of decor
Takes only 10 minutes to assemble
What We Don't Like
Foam could’ve been of better quality
Material: Wood | Dimensions: 10.25 x 22.5 x 4 inches | Weight: 10.03 pounds | Style: Modern | Shape: Rectangle
5. Bellewood Designs Hidden Gun Storage
Bellewood is a brand that makes locally-manufactured quality products. This product is a hidden gun storage cabinet that masquerades as a customizable nameplate and is made of real wood. It measures 3.5” x 9.5” x 18.5 inches and is available in multiple colors.
We liked the elegant, wooden design of this product. In addition to that, it also featured a pine and stained finish, which was quite aesthetically pleasing. The makers of this cabinet have crafted it to fit right in with any kind of décor!
Yet another thing we liked about this was the customizable foam insert that could be additionally procured if told to the manufacturer. Interestingly, the foam consisted of numerous perforated squares that could be easily parted to hold any item.
What’s more, the unit also came with soft-close, slow-motion hinges that ensure that the cabinet door doesn’t slam and draw attention. There’s also a handy integrated magnetic lock that makes sure that only people with the locking key can open the cabinet. This keeps dangerous firearms out of the reach of children!
The cabinet can be mounted on a wall and comes with an installation and usage video to help the users to mount it. However, we did feel that the video could’ve been a little easier to understand, which would’ve made the mounting process less complicated.
What We Like
Wall-mountable
Blends in with any kind of decor
Secure and comes with a locking key
Protection from scratches and dents
What We Don't Like
Complicated installation video
Material: Wood | Dimensions: 18.5 x 10.5 x 4 inches | Weight: N/A | Style: Modern | Shape: Rectangle
6. PS Products Mantel Concealment Gun Clock
Now we have yet another concealment clock from PS Products, which has a unique design. It appears to be a classic mantel clock but features a hidden storage compartment. This can be used to store firearms, valuables, and important documents. The dimensions of this clock are 16” x 5.5” x 9”.
Primarily, we liked how this clock doesn’t give the game away and looks indeed like a real clock unless you know better! It is decorative and fits right into most kinds of décor. The unit is made of engineered wood and has a mahogany stain finish, which gives it an elegant and appealing vibe.
The hidden storage is located behind the face of the clock and is ideal for keeping handguns away from prying eyes. It can be unlocked using a hinge and magnetic clasp. What’s more, the storage space is lined with felt to protect your belongings from scratches and other kinds of damage.
Though marketed as hidden storage, the clock is functional as a clock too and features a quartz movement. It runs on two AA batteries that are helpfully included with the product itself!
Since the clock is marketed as a hidden storage unit, we expected that the fact that it has a small space inside wouldn’t be apparent. However, we were disappointed to see that the lock that secures the space was visible to the naked eye if one looked a little hard. Repositioning the clock is a makeshift remedy for this issue.
What We Like
Attractive
Blends in with every decor
Made of engineered wood with a mahogany finish
Batteries included with the product
What We Don't Like
The lock of the hidden storage is a little too evident
Material: Wood | Dimensions: 7.5 x 14.5 x 4 inches | Weight: 2.2 pounds | Style: Classic | Shape: N/A
7. Casual Home 615-65
Casual Home is a brand that is four decades old and is reputed for making furniture that lasts the test of time. This particular product is part of their Kennedy Collection, which is focused on creating long-lasting concealment furniture with a timeless appeal. This unit measures 15” x 46” x 30” and is made of solid wood.
One of the things we appreciated greatly about this table was that it is sustainably sourced. The Casual Home 615-65 strikes the perfect balance between environment-friendly and consumer-friendly and has a durable design that is attractive and functional.
In addition to that, the table does a great job of blending into the décor. It gives off a very unassuming and innocuous appearance, and the drop-down compartment stays squarely tucked away unless it's explicitly unlocked.
The unit also ensures that all the belongings you choose to store in the hidden storage remain insulated from dents and scratches. It features a felt-lined drawer that provides a soft resting space for your firearms. The hidden storage is also easy to access but not too easy either- which ensures that your firearms don’t go into the wrong hands!
The table blends in perfectly with the décor, and its dimensions are that of any standard coffee table. However, we felt that the hidden storage space was far too less compared to the large size of the table. So, it wasn’t a viable storage space for a mid to large-sized firearm.
What We Like
Sustainably sourced
Durable
Blends into the decor
Protection from dents and scratches
What We Don't Like
The size of the hidden storage compartment was too less
Yet another quality product from Casual Home is the 615-77, a nightstand with hidden storage. It measures 25” x 20” x 27” and is made of wood. It can efficiently hide your firearms so that they are right beside you in the bedroom should anything untoward occur.
To begin with, we liked how the hidden compartment is easy to access yet not obvious due to its smooth, gliding surface and magnetic trigger design. Moreover, the compartment inside is lined with felt that protects any belongings you keep inside from scratches.
In addition to that, the nightstand has two drawers and a large open shelf. These can accommodate your other bedside essentials like books, keys, and wallets. This ensures that you can keep potentially hazardous and private items away from prying eyes without raising suspicion.
Another thing we liked about this product was its rich mocha finish and sophisticated design, allowing it to blend seamlessly with any kind of décor. It blends classic with the modern while providing long-lasting durability and security.
The product was pretty easy to assemble and looked great when finished. However, the screws provided to assemble it were a bit short and ended up stripping out the hole. We were lucky enough to have longer ones, but we hope the manufacturers take this into consideration.
What We Like
Lots of space to keep bedside essentials
Rich mocha finish and sophisticated design
Durable
Protects valuables from scratches and dents
What We Don't Like
Short screws that strip away the hole
Material: Wood | Dimensions: 25 x 20 x 27 inches | Weight: 47.5 pounds | Style: Modern | Shape: Square
9. Tactical Traps 52R Original
This gun shelf from Tactical Traps is useful for keeping any firearms you store away from the reach of children and other strangers. The exterior of the shelf measures 46” x 13” x 5”, and the product as a whole weighs 9 pounds. Additionally, it is made of wood and can be mounted on a wall.
Tactical Trap is a reputed brand that makes top-notch products, and this shelf is a prime example of that. It has a hidden storage space that is easily accessible with a modern RFID locking system. So, a key card is used to access the secret compartment, making it perfect for storing a firearm.
We also liked the dark walnut finish of this wooden shelf, and it looks attractive. Its versatile aesthetic makes it ideal for use in any space, and it blends right into every kind of décor. Furthermore, it looks and feels high-end and can be installed in just 10 minutes.
It also has a mechanism to help you access the secret space if you lose the key card. Additionally, an LED light provides ample visibility if you’re trying to operate the hidden gun safe in the dark.
The shelf comes with foam that lines the hidden space to soften any inside items. However, we felt that the foam could be a little more perforated, which would make it cleaner and tighter than the current one they have.
What We Like
Secure
Protection from getting locked out
Attractive finish
LED for use in low light
What We Don't Like
The foam wasn’t as soft
Material: Wood | Dimensions: 46 x 13.5 x 5 inches | Weight: 23.3 pounds | Style: American | Shape: Rectangle
What Is the Best Hidden Gun Concealment Furniture?
In the realm of furniture designed for concealed firearm storage, subtle differences in factors such as materials used, dimensions, weight, style, and shape can affect the suitability of each option to an individual's needs. The following table is a comprehensive comparison of some notably exceptional hidden gun concealment furniture. Each item is evaluated based on the material it's made of, its dimensions (measured in inches), weight (specified in pounds), along with its style and shape characteristics.
Buying Guide For The Best Hidden Gun Concealment Furniture
1. Usability
All the products on our list are diverse and can be used in different home areas. They aren’t exchangeable, and some are additionally wall-mountable. We personally prefer storing our firearms on the wall, so we’d recommend the Casual Home 615-77, which expertly hides the firearm and holds other essentials too.
2. Size of the firearm
Maybe you have a small handgun. Or, maybe you own a long-sized weapon. We feel that storage space for a long firearm could accommodate a small one too, which is why we recommend the American Furniture Classics.
We’ve finally reached the end of our list, and we’re sure you must be spoilt for choice! But as we mentioned above, keep in mind the size of your firearm and the space available in your house while deciding what to go for.
According to us, the PS Products Concealment Clock provides maximum value for money and offers handy storage space. But, if you own a longer firearm, then the Sauder is a great fit.
We hope our guide helped you make up your mind. We’ll see you again soon with another one of these!
Centuries ago, chairs were a symbol of class and pride! In fact, the earliest chairs found in Egypt were only used by the highly reputed and wealthy members of society.
Cut to today and chairs are an essential part of our household. Based on comfort and style, there are a plethora of variants to be found. And one of our favorites is the bean bag chair.
These comfy seats can easily become a part of any setup, be it at home or the office. So, having one shouldn’t be only a thought anymore. But what if, instead of rushing to the store, you make one at home?
Yes, you can very well do that! Making a bean bag chair is easier than it sounds. Even if you aren’t a DIY lover per se, try your hands on this one. So, we’ve curated this ultimate guide about making a bean bag chair.
Without further delay, let’s dive in!
Guide To Making A Bean Bag Chair
The history of bean bag chairs dates back to 1969 with their invention by a group of Italian designers. Then called ‘sacco’, these chairs were designed to have a pear shape and were stuffed with thermocol balls. As its popularity grew, designers came up with news shapes and sizes to provide maximum comfort for varied body types.
Manufacturers today rely on washable fabric and eco-friendly filling to ensure a longer life span. Not only can this type of material be cleaned easily, but it’s also more resistant to regular wear and tear. However, in doing so, they don’t overlook the style factor!
Similarly, you can also make a bean bag chair for optimum comfort, that too, without compromising on style. All you need is patience, basic sewing knowledge and some handy materials, mostly lying around the house.
In the following sections, we walk you through the basic steps of making a bean bag chair. But before that, here are the materials that you will need:
Outer fabric
Filling
Scissors (preferably the tailoring ones)
Pencil for marking
Measuring tape
Needles/sewing machine and threads
Zipper (if you want the zipped type)
Material & Filling Preference
When selecting the fabric, make sure that it's durable and feels comfortable on the skin. For this reason, users generally prefer to opt for denim or fleece. Additionally, they also add to the aesthetic appeal of the bean bag chair.
Likewise, the filling should be equal parts comfortable. While you can always opt for polystyrene or polypropylene beans, shredded muslin fabric or old clothes can also be a good alternative. Apart from that, you can also invest in shredded memory foam. Whatever be the filling, it should provide the right amount of support according to your preference.
One way of doing so is adjusting the quantity of filing being stuffed, but don’t choose materials that will form lumps under your body weight.
Steps For Making A Bean Bag Chair
Now that you have an idea about how to select the material, let’s take a look at the steps involved:
Step 1
For the first step, cut two rectangles and two circles of your preferred fabric. The size of these cutouts will depend on the overall size of the bean bag chair. In our case, each of the circles had a circumference of 170 inches, and the rectangles had dimensions of 87 inches x 32 inches.
If you’re not confident about your measurement skills, you can also opt for a sewing pattern with the required dimensions.
Step 2
Place the two rectangles in a way that the corresponding sides face each other. Line the edges as perfectly as possible and secure them with pins. Once done, begin sewing with one of the shorter ends. The resultant fabric should be a rectangle with three open sides.
The important thing to keep in mind here is that while lining the sides, make sure that the right or ‘pretty’ sides of the fabric are facing each other.
Step 3
Next, take a circle and pin its edge to one of the longer sides of the sewed rectangle. Here again, ensure that the right sides of the two fabrics are facing each other, and start sewing. For best results, try to keep the seam allowance between a quarter and half an inch. However, in case of heavier fabrics, the seam allowance should be larger than that.
After sewing the entire circle along the rectangle’s long side, sew the shorter ends of the rectangle together.
Step 4
Similar to step 3, take the second circle and line it with the other long end of the rectangle. This will form the base of your bean bag chair. But this time, don’t sew it all through the edge. Leave sufficient room for the filling to go inside the chair.
While you may also sew this opening after filling the bean bag, we’d recommend installing a zipper here. This will make it easier to replace the filling as and when required.
Step 5
In case you’re adding a zipper, secure the zipper with pins on the open edges of the chair’s bottom and zip it shut. Then unzip it to about a finger’s length. Don’t open all the way through. Take one side at a time, and begin sewing. As you move forward, continue unzipping the zipper a little bit at a time until all of it is sewn in place.
Since all the fabric has been stitched with the pretty sides facing inside, put your hand through the zipper, hold the fabric and bring it out. This will put the right side on display. Then add the filling of your choice and shut the zipper.
Your bean bag is ready!
Some Important Tips
Before we leave you to make the necessary preparations, here are some words of advise that will make the entire process even more convenient:
Try to get hold of a sewing machine for faster and more accurate sewing.
To make perfect circles without a sewing pattern, take a pen and tie a string to its nip. The length should be the radius of the desired circle. On the open end of the string, secure a chalk or marker. Place the pen in the center of the fabric, and hold the string taut. Move the chalk around to complete a full circle.
By following the above steps, you can also stitch an insert bag. In that case, make sure that it's smaller than the bean bag.
Final Words
That wasn't too difficult, was it?
With basic sewing skills, making a bean bag chair won’t be the most challenging job. So, start practicing! After all, there’s a certain charm about handmade furniture.
On that note, it’s time for us to say goodbye. Hope you had as much fun reading this guide as we had putting it together. We’d love to hear from you in the comments down below.
Don't you hate it when your once fluffy bean bag chair has shriveled down, denying you of much-needed comfort?
There's no need to worry as you can find several ways to stuff your old bean bag chair. And these are cost-effective techniques, meaning you won't have to spend a lot of time or energy and you can once again enjoy a relaxing time on the bean bag.
To help you, we have narrowed down the best alternatives compared to traditional fillers, which will surely be easier to get. By going through our guide, you'll have a much better idea of what you can use and how effective it's going to be.
So, let's survey the things surrounding you and remember to keep your eyes open. Sometimes, the least likely of things could act as the perfect alternative bean bag chair filler.
Without further ado, let's begin.
We have carefully handpicked the following seven alternatives for you to consider. Each of these provides an innovative solution to your problems, and the steps involved are straightforward. So, read on to find out.
Stuffing
Firstly, you may go to the nearest craft store and get yourself a quilt or pillow stuffing to fill your bean bag chair. And considering that these materials come cheap, you can buy large amounts at once. Moreover, these make for a spongy cotton fabric as they are mostly used in pillows and stuffed animals.
You can now use them with your bean bag and get the same level of comfort as before. It provides an excellent feel, and if you see the chair starting to flatten, you can fluff it up like a pillow, thereby saving you any added trouble.
There's another thing you can do, but only if your kids are bored with their toys or you have old stuffed toys that are just taking up space and gathering dust. If you don't want to spend money on stuffing, you can pick out these stuffed toys and use them instead.
Then rip out the stuffing and use it to fill the bean bag. Depending on how much filling you have gathered, you may or may not have to go to the store for more.
Shopping Bags
First and foremost, how many times have you come home from the mall with a plastic grocery bag? We're guessing more times than you can count! Or do you mainly use recyclable bags because they are easier to use and are environment-friendly? Whatever the case, you can use plastic bags to fluff up the bean bag.
It makes for a great DIY bean bag filler due to its soft, light nature allowing it to fluff up quickly. But the thing to remember is that you're going to need lots of bags, and it's necessary to start saving up before you can use them. Furthermore, you can ask friends or family to save some for you as well.
Now, when you do have enough plastic bags, collect them into a neat ball and twist the handle, ensuring they retain the shape as much as possible. Once inside the bean bag, you don't need to worry about the form anymore, but it's easier to get plastic into it, which is why we recommend using it.
A great side-effect of using plastic bags is that you've cleaned out space and put the plastic to good use instead of throwing it away. Which, in essence, is recycling. Besides, your comfortable bean bag is restored, and the environment remains unharmed.
Organic Material
You can also choose to use organic materials like pine needles and leaves though there are people who want to keep the natural world out of their bean bags. While there's a chance that the substances inside may break down, causing it to smell, it doesn't cost money and is kind of like nature's cushioning.
Again, you'll have to dedicate time to collecting enough good stuffing, and you should ask your friends, neighbors, and family to lend you a hand or store some for you.
Beans
What better way to fill a bean bag chair than with beans? We know it may sound cliche, but you can trust us; it serves its purpose, and you won't have to compromise with comfort. You need to go to the store and bring back quite a few sizable containers of beans.
Moreover, you can use any type, but it should be clean and dry, and you can even mix two or more kinds. Another hack for you - if you don't have adequate beans, simply use grocery bags. It'll lend weight to the bean bag chair so that the wind doesn't blow it away.
Meanwhile, the beans occupy the bottom of the bag because of more mass, thereby giving you enough room to seat yourself.
Rice
What if you could fill your bean bag with something unconventional, like rice? Don't worry, it's not only a staple food, but it's also readily available, and all you have to do is make the journey to your local grocery store. Get the biggest bag of rice and stuff it into the chair.
It'll be a lot like little rice heat pillows people often make. Furthermore, you can combine it with another food item – yes, you guessed right – the beans to prepare a delicious filling and provide the bean bag with the correct shape.
Packing Peanuts
If none of the above options appeal to you, opt for packing peanuts, a more conventional form of stuffing. These aren't natural peanuts, and you can find them in your nearest departmental store. However, if you have kids at home, remember to keep it out of their reach; otherwise, you'll be left with a mighty mess.
Try buying a lot at once, or you'll have to save up over time before getting to using them. You can try storing them in any convenient place or the big rubbish bins if you have one at home before you have saved a substantial amount.
In case you're finding yourself short of filling the bean bag, you can use it with plastic bags to get a terrific result.
Old Clothes
More often than not, if you look around, you'll find the necessary stuff to use in your beanbag chair. Similarly, what do we regularly use but have to buy new ones ever so often? Okay, a lot of things, but we're primarily talking about clothes.
We grow out of old clothes quickly, so instead of throwing them away, you can use them to bring your bean bag chair back to life. Plus, there's the added benefit of cleaning out your closet. Just ball up each item and throw it into the bag, but it may appear a little lumpy.
So, fluff the bag frequently, and you should be good. Using clothes is perfect for people who tend to flop down on the chairs, meaning they're sure to get optimum comfort. Another thing to consider is the weight as they are heavier than average and therefore remember to be careful.
Conclusion
We hope you have a much better idea regarding alternatives to traditional bean bag fillers.
Anything from old clothes to leaves from your garden can help to revive your bean bag chair. It's an incredibly affordable method while being efficient at the same time, and you can enjoy it for a long time.
Keep a close lookout for anything unused lying around, which could help to fluff up the chair. That's all for now. Until next time, Ciao!
How often have you heard people saying, "Man, I had a super long day at work today. I can't wait to sit back on my hard-wood chair and relax?”
Probably never, right? Well, of course. That doesn't sound comfortable at all!
If you are genuinely curious to know how the bean bag chair came into being, read on. We will tell you everything about it - from its conception, to how it became famous, as we now know it to be.
Bean bag chairs are found scattered around homes, offices, lounges, and even some airports. You can get them in different sizes, materials and various fillings. It’s not surprising to know that this cozy chair has become one of the most popular additions to most homes.
Well, if you’re curious to know more about it, read on!
History Of The Bean Bag Chair
A fascinating line of thought led to the revolution of the 'chair,' as we all knew it. Art critic Pierre Restany came out with a thought-provoking statement - "People didn't come back from assemblies or protest meetings to sit rigidly on a Louis XIV armchair."
As Restany pointed this out in his 1986 essay for the book Zanotta: Design For Passion, the world of designers seemed to have had a simultaneous epiphany. Soon enough, the rigid, uncomfortable chair was being replaced by something far more ergonomic, if not aesthetic - the bean bag.
How Did It Begin?
The revolution, which we now call Italian Radical Design, birthed three young thinkers who came up with a radical concept. Piero Gatti, Cesare Paolini, and Franco Teodoro mashed their creative heads and busted out the concept for a chair that could adapt to any situation.
They wanted to develop a chair that could change its physical structure and be as fluid as snow or water. Something that could respond to the stimulus of our varying body shapes and postures.
The Next Inventions
Other Italians had walked down the same line of thinking earlier. However, most ended up with a vague concept. The water mattress was invented during the time, but it was too hard and not portable, so it wouldn't do.
Soon after, a string of inflatables that the French called "pneus" (the word for "tires" in French) was created. Again, the air inside created a sort of rigidity which was uncomfortable and the opposite of what they had in mind - fluidity and softness.
Polyurethane foam was the next contender. This was popularized by Gufram, but strangely, even this material left something to be desired. Although polyurethane foam almost hit the nail on the head, something was not quite right. You just couldn't put a finger on it, but you knew right away that something wasn't entirely satisfactory.
"In the end, we thought about the old mattresses stuffed with chestnut leaves, widely used by peasants: You take a sack, you fill it with leaves or similar materials, and this molds itself to fit the body," Gatti said.
The Conception Of The Bean Bag
After tremendous brainstorming sessions, they were closer to developing a concept in their heads about what might work rather than what might not. They envisioned something small, spherical, and multiple little clones of these objects. When placed inside a sack-like structure, these marbles, or balls, might behave semi-fluid. Yes, they were getting closer!
At first, they thought of buckshot but scrapped the idea immediately as the lead would be too heavy. "What about tiny ping-pong balls?" they thought. Again, they reasoned against it, citing that it would be too expensive.
Finally, the line of thinking led them to a building material - foam polystyrene, typically used for sound and heat proofing. They experimented by cutting open an envelope and pouring these little balls into a vinyl bag. Admittedly, they liked where it was taking them.
The First Order
Before they could move on to perfect this concept, curiously, they received a call from the American department store, Macy's. They wanted to place an order for 10,000 of these little, clear, vinyl bags. Quite thrilling!
Gatti recalls how this order caught them off guard. They reasoned that the real challenge lay not in the concept of the chair but finding the right manufacturer who would produce it. Instinctively, they named Zanotta. Fortunately, their gut took them in the right direction.
"Within 30 minutes of hearing their presentation, Aurelio Zanotta already had ten prototypes made," states Marta Zanotta. Marta happens to be the brand's marketing and communication manager and also Aurelio's niece.
And well, the rest is history. They shipped out their order to Macy's, and within the following year in 1969, their design made its grand debut. Featured in the Paris Furniture Fair (January 1969), the "Sacco," or the bean bag, was conceived for the world to see.
The Bean Bag As We Know It
Before long, the bean bag became an icon of design and ergonomics. In today's world, we can see the humble bean bag featuring in college dorm rooms, game rooms, even our own bedrooms, and living rooms! Many offices have decided to put these 'chairs of guilty pleasure' in their lounges too.
The iconic Italian Vogue editor Franca Sozzani, in her Paris apartment, had one specially made for her. Of course, this one was sheathed in mink. It's been 5 decades since this humble chair came into the world, and on its 50th birthday, Raf Simons paid reverence to it by enveloping a suite of bean bags in his fabrics for Kvadrat.
In a recent event in Miami, Zanotta launched its first U.S flagship in the Design District, where hundreds flocked to the Art Basel Miami Beach to see its launch. Of course, with a price tag of $530, this comfortable fashion icon is affordable only to a few.
Conclusion
To many, Restany's words seem truer than ever: "It met the general need to loosen up the way people lived."
Nowadays, we see bean bags in various situations and places. There’s no doubt that people have adapted to the way they sit back and relax. And honestly, if you’ve ever plopped down on a bean bag, you know exactly why it’s so hard to leave it once you’re comfortable!
With that, we’ll take our leave. Hopefully, you enjoyed learning about the radical history of one of our favorite chairs to be invented!
Wooden pallets are the topic of today's chosen article, here to make a stand for their raw beauty and incredible versatility around the household. Their usefulness cannot be contested and their raw texture and shape serves as the perfect base for a multitude of delicate, bold and powerful projects alike. Coffee tables, kitchen revamps or simple and fun wall art projects, all can be achieved and empowered by the humble wooden pallet. We invite you to emerge yourself in this creative universe and choose your favorite craft from the 101 DIY pallet projects presented below.
Pallets – the one wonder of furnishing that still remains underutilized. But I’m not surprised; do a quick Google search and it’s likely that you’ll come across very few websites that actually go into the depths to explain their use. Sure, you can re-purpose pallets to practically build anything you want, but wouldn’t you need a guide for that?
Of course you would! That’s why I’m going to attempt to give you a series of DIY pallet project ideas to execute right now. It’s time you put all the hesitations behind and geared up to make some epic pallet furniture.
But before we begin
There are two things I’d like to tell you. First – where you might get pallets without spending a dime; second – the kind of pallets that are safe for use.
Free pallets. Since pallets are primarily treated as disposable extras, you can get your hands on them without spending any money. Just get in touch with small businesses that are looking to dispose of these items and offer to help. They would gladly give you what you need. Some other places you can look for free pallets are:
Construction sites
Small businesses such as furniture stores, pet stores, and hardware stores
A place where a new company is about to open
Craigslist
Other online marketplaces
How to find out if your pallets are safe for use? There is no point in gathering free pallets if they aren’t safe for DIY use in the first place. You don’t want the DIY pallets to be made of wood that has been treated with harmful chemicals. You can figure this part out quite safely by looking at the following aspects.
[HT] =Heat Treatment - Means safe to use
[DB] =Debarked - Safe to use
[MB] =Methyl Bromide - Not safe to use
[KD]=Kiln Dried - Safe to use
The codes are pretty self-explanatory, aren’t they? But what do you do if your pallets do not have these markings [IPPC markings]? Well, this is a bit of a tough one.
Some say pallets that do not contain IPPC markings are intended to be used for domestic purposes only, and domestic pallets are not treated with harmful chemicals. But there’s no way to be 100% certain they are safe to use or not.
Also, avoid using pallets that look damaged or rotten, it makes little sense, you need healthy wood!
DIY Pallet Projects
#1. Wonderful Garden Tunnel Suitable For Vines and Games Alike
We will start our most beautiful 101 DIY Pallet Projects with one idea implemented in the garden, perfectly applicable this spring season.Four wooden pallets have been cut to size and adjusted to create a wonderful tunnel in your garden which can later on be populated with flowery climbing vines and used as a hiding spot for your little one's games. Remember to treat the wood properly for your creation to last longer.
#2. Old Wooden Pallet Boards Assembled as Dinning Room Table Box Centerpiece
A dinning room table box centerpiece is a very versatile piece of decoration. It can be transformed with each passing season, reflecting the home's atmosphere and embellishing the actual dinner table in an unique manner. Fill it with fruit, fresh flowers, pumpkins and spice for the autumn season or pine-cones and cinnamon for the frosty one.Place it in the center of the table and not overcrowd it with additional decorations. The actual wood of the box will speak of beauty and naturalness itself.
#3. Drawer and Shelves Pallet Furniture Piece With an Industrial Appeal
A modern apartment nowadays tends to focus on mixing and matching different furniture pieces in order to obtain the perfect ambiance. A raw wooden piece made out of recycled wooden pallets can constitute such an example, speaking of its shade, texture and exuding a raw beauty, an industrial vibe very popular and sought by many. Place it in an all white Scandinavian decor and observe how it can, at the same time, blend in and stand out from the crowd.
The issue of storing a bike has been solved a long time ago with so many systems and gadgets being invented to support and host our metal companions. But in our opinion the classical wooden pallet bike rack can not be overthrown by nay metallic creation, its beauty laying in the actual simplicity of this project.
#5. Pallet Scraps Merged Into a Raw Yet Beautiful Wall Art Piece
What we have learned over the year from creating various DIY projects is that any piece of material be it wood or metal can be re-purposed and transformed into a work of art.The following piece can be included in this topic where different bits and pieces of old wooden pallets have been cut and assembled into a heart shaped wall art with a delicate hidden message.
Wood and paper decoupage go hand in hand into creating incredible vintage pieces usable in custom flooring or wall decoration. The tricky part of this projects lies in the choosing of the right decorative paper and the realization of the process itself, mastering the exact amount of left paper and exposed wood to obtain the perfect worn out effect.
Rope and wood go a long way in DIY projects and almost every combination of the two natural materials results in wonderful creations. Here the simplicity of this wooden tray is overpowered by the beauty of the materials used and their raw texture. make sure you secure the rope handles properly to avoid unwanted accidents.
#8. Wooden Headboard With a Specially Designed Rope Message
The classical headboard should and can be replaced by a specially designed hand made diy wooden pallet headboard. Add in this picture some glue and rope and we can guarantee a winner.Here the worn out wooden pieces assembled together and being delicately contrasted by the warmth of the raw rope assembled to form a loving message.
Spring is taking over our gardens and there is no better time than the present to start preparing your garden for this blooming fresh season. Use old wooden pallets to create a risen planter with drilled holes in its sides. Fill the created box with soil and fill the holes with flowers that will in time grow and cover the entire planter in a canopy of beauty and colors.
#10. Wooden pallets Assembled Into a MUlti-functional Tool Organizer
Organization and planning represents the key to success in most cases.Keeping an organized garage can turn out to be a challenge but by creating a tool wall out of a few wooden pallets you will save a lot of time in searching for lost tolls in the future undertaken projects. Simply attach the pallets to an empty wall and create all sort of supports rising from it from which you can hang your tools and materials.
#11. Vintage Vibes in a Simple Bathroom Cart
Vintage wood, candle light, fresh soap, wicker and lavender all come together and merge into creating a truly relaxation bathroom cart with a French vibe, suitable for any interior decor.Surge inspiration from the decoration of it and let it take you to that relaxing moment we all search at the end of the day from a hot scented bath.
#12. DIY Woodland Sign Perfect for the Holiday Season
Decorating your home and adorning your walls has become a tradition in the wintry season. This year we are proposing you a different set of decorations made out of simple pallet wood and basic rope. Send a cheerful message throughout the home and express your joy and excitement in an elegant manner.
#13. Scandinavian Coffee Table Risen From an Old Wooden Pallet
The Scandinavian style is probably the most adored out there for its coziness warmth and simple beauty exuded by each and everyone of the elements composing its atmosphere.White dominates the color scheme and wooden elements come to complete the desired image in a subtle manner. Today is a pallet coffee table adorned with wheels for increased maneuvering and a fresh coat of white paint to increase the chances of blending this furniture piece in.
Wall art offers a versatile wide pallet of options for the adorning of blank walls. Wooden pallets come to fill such an empty spot in contrast with colorful yarn shaped in a creative manner.Choose a simple yet beuatiful piece of wood for this project as it serves as the background for it, contrasting and yarn itself and giving it power and boldness in making a statement.
#15. Outdoor pallet Furniture Set For The Hole Family
Warm nights are to come and spending more and more times outdoors is highly recommended for our mental and physical health as well. Thus we encourage you to invest your time and effort into creating a wonderful versatile pallet furniture set for the outdoors with the exact purpose of encouraging you and your loves ones to spend quality time together in the freshness of your garden.
#16. Wooden pallet Turned Into a Gorgeous Chandelier
The texture and naturalness of a piece of wood can be but to value and exploited even further by the addition of warm light sources meant to diffuse their cozy shimmer and empower the actual wood piece even further. Here a selection of wooden pallet boards have been assembled to serve as a base for a set of hanging light bulbs. The effect is wonderful and exudes such a cozy warm vibe.
Invite the natural element in by creating a basic simple vertical garden from a simple yet gorgeous wooden pallet and a set of mason jars filled with plants and herbs. Add a few extra mason jars to serve as candle holders and infuse a warm light that pushes this project to the statement of wall art.
#18. Creating a Shelving Unit Out of a Wooden Ladder and Pallet Wood
The entire success of an idea behind a DIY project lies in the creative re-purposing of mundane materials an objects and their actual merge. Here a wooden ladder has bee used as the body for a pallet furniture shelf piece. Adorned properly this versatile creation can become a focal point in your living room. Add a string of Christmas lights to the frame of the ladder for special occasions.
Finding the right couch that fills your living area properly and merges perfectly with your desired decor and ambiance is a very difficult task many fail to accomplish. The solution to this problem lies once again in the humble wooden pallet that saves the day once more with its versatility. Paint a set of wooden pallets in a white or black hue and add comfortable cozy pillows and fluffy blankets for the perfect Scandinavian inspired couch.
#20. Succulent Filled Coffee Table
Succulents must be the most adorable cute beautiful little plants out there.Their simplicity and vibrant green tones come in perfect completion of the natural raw texture of pallet wood which can be assembled into creating a wonderful coffee table that serves as a succulent planter at the same time.Remember to treat the wood once a year to prevent additional damage from the water added to your tiny plants.
If you are an intense gardener who takes his job very seriously than you will definitely need to create a potting and planting command center where you can organize and store all your gardening tools and seeds.And because we are talking about the garden, wooden pallets constitute the perfect raw material for such a creative projects. Choose a fresh tone such as the mint green below for an extra touch.
You can take a simple wooden pallet and transform it into a useful beuatiful vertical herb garden in a blink of an eye. Simply add bottoms to your actual planting area and a set of legs for the planter to be free-standing. Place it near your kitchen window for easy access or use it to divide different ares on your wooden porch.Remember to treat the wood and protect it from water and insects.
The resilience of these wonderful plants is what recommends them as the perfect candidates for a pallet vertical garden. Simply fill an entire pallet with different variations of the succulent plant and create a delicate composition that will slowly and surely take over the pallet wood, claiming it their own.
When placed indoors, such a wooden pallet succulent garden can become the focus point of an entire wall. Let the beauty of the creation speak for itself and observe the growth of the beautiful plants that transform this wall art each year. Place the pallet in a spot with enough natural light and spray on water occasionally.
As much as some of us might despise insects, their vital role in our garden can not be contested. If being in control of this aspect is something you are searching for, creating an insect hotel seems like a fun interesting project that should take up a place in your garden. Invite butterflies bees and other such creatures into your green heaven and encourage the natural order of things.
#26. Wooden pallet Garden Shed
Transform a corner of your garden into an useful garden shed for tools and storage by using a series of wooden pallets assembled together. Encourage plants and vines to take it over and observe as it becomes more and more part of the actual garden with each passing year.
#27. Raised Garden Beds from Wooden Pallets
A spring herb garden can be created by using wooden pallets as raised garden beds, protecting yourself from occasional animal attacks on your greenery. Another incredible benefit of using raised beds is comfort. You can thus avoid all those long hours spent bent over your plant beds ending up with excruciating back problems.
#28. Classic Wooden Planter from pallets
I think you can agree with us that the merge of wood and greenery is beuatiful beyond compare.There is a subtle delicate elegance in this association that has deep roots into our subconscious. So it is only natural that pallet wood be used in the creation of planters for both indoor and outdoor purpose.Due to its delicacy the planters below have not been used in the true purpose of a flower pot but serve as a support for other ceramic planters that hold the herbs and plants, but with proper care and treatment you can use a wooden planter in the same manner as a ceramic one.
Childhood memories are often filled with the image of a wooden swing placed in the garden or backyard hung from a big old tree. Here a simple wooden pallet has been dressed in white coat and transformed into a beuatiful swing hung in the front porch. Adorn it with vines and flowers for special occasions and a romantic setting.
There is nothing more enjoyable than serving and delighting yourself in a delicious meal outdoors in the fresh comfort of your garden. Upgrade the classical picnic with a blanket and a wicker basket and stack a set of wooden pallets to achieve a perfect informal dinning table outdoors.Use fluffy pillows for sitting and adorn the entire picture with fresh cut flowers for a wonderful scented experience.
The memories revolving around that wooden swing hung in the backyard from the biggest thickest tree in view will stay with you forever. Invest time in recreating those wonderful moments by using a rather long wooden pallet and some thick rope to add a new swing to your patio. Make it a little more comfortable by adding on a few throw pillows in different tones that will spice things up.
#32. Mason Jars and Wooden pallet Wood Lighting Fixture
The wooden pallet has a new addition, as versatile as it is: the mason jar. Fill them up with elegant white candles and adorn your living room ceiling with this perfect vintage creation.Hung it down with a set of ropes to finish and complete the rustic picture.
Merge two wooden pallets and use an old wooden door a a headboard for the perfect little couch. Add a set of cozy fluffy pillows on top and play with textures and colors for a vibrant dynamic of the room.
The industrial style has been very in for a long time now and it is amazing how simple it is to achieve. Take an old pallet, add a set of large wheels and you are done.Place it in a modern contemporary interior design and notice how beautifully the entire scene comes together.
Create an adorning love shelving unit for your walls with a few simple cuts from a new wooden pallet. Use the letter O to center an important meaningful family photo.
Spending hours and hours in front of the computer at your desk will most definitely result in back and neck pains.Thus taking a break from time to time and changing your sitting area is highly recommended.If you are fond of using your comfortable couch as your working station, create this small functional laptop table out of pallet wood and metal pipes.
#37. Wooden pallet Display Units
If you are the owner of a little boutique, why invest tons of money in expensive furniture when you can create your own with your personal touches. Stack up a set of new wooden pallets and adorn them with underneath lighting fixtures for a special effect. Keep things modern and hip and your clients will adore the atmosphere exuded.
#38. Delicate Pallet Mirror Frame
Use the wonderful wood of o wooden pallet to create a delicate mirror frame. Leave the wood unfinished and let the cracks and texture speak for itself and its life.Add it to a small space like a hallway to maximize the idea of space or place it facing a large window to reflect the outdoors in.
Create this useful set without spending a dime and infuse a dose of rustic ambiance into your bathroom.Treat the wood with oil to bring out its wonderful texture.
Merge a set of wooden pallets, add wheels and a bright pop tone, finishing it all up with glass/mirror surfaces and complete your living room with a fun vibrant coffee table.
#41. Re-purposed Pallet Wood
Take bits and pieces of old pallets and arrange them in a wonderful composition to form the frame of a mirror.The entire appeal exudes a shabby chic style we find adorable.Do not try to remove the layers of paint as it is a touch that adds glamour to the piece.
Using wood as a backsplash in the kitchen might seem a little bit odd, considering steam and humidity but a washed out wood stenciled with a fun message will add a classic French vibe to your working area. Remember to treat the wood regularly to prevent deterioration.
Invite your family to a special dinner everyday by presenting the menu ahead in a vintage fun way. Create a wooden board and use contrasting tons to write the days of the week and chalk to change the daily dishes.
#44. An Array of Wooden Pieces
Use bits and pieces of different wooden pallets and assemble them together to form a wonderful coffee table. Mix and match the different tones and textures for an incredible effect and merge the raw texture with a set of hairpin legs.
Enjoy the wonderful spring heather outside in your backyard in a hand made pallet sun bed. Use a white paint finish for a Scandinavian fresh vibe that will contrast beautifully with the rich vibrant greenery surrounding you.
If you are looking for the vintage rustic style for your abode, a wooden designed kitchen will definitely fit right in. Use withered wood from an old pallet for a French vibe and let it stand out from the rest of your white painted cabinets.
Take the side of ecologists this year and opt for a wooden pallet light Christmas tree that will spare a new fresh tree from being cut. Use a single type of lights, preferably white for a delicate atmosphere.
Select a few pieces of rustic old wood and create a wonderful star decoration you can place in your Christmas tree or adorn your mantel with. Leave the wood unfinished and use different parts of the pallet with different textures and tones for a varied effect.
Keep things simple this year and opt for a Scandinavian pallet wood tree that can be left untouched for a rough effect or glamoured up with a set of Christmas lights and some basic rope ornaments you could create yourself. Another beautiful option would be to paint the wood and express your creativity for this wonderful DIY project.
Cut a pallet in long pieces, merge the pieces together and paint it white. You can now use this board as a photo display by attaching a few twigs to it and connecting your photos and the twigs with some basic rope. Drill a few holes in the pallet and place a lighting source beneath for a starry effect.
Storing all the different items we tend to gather up around the home can turn out to be a very difficult task we all dread to solve. Use the leftover pallets you have lying around the garden and transform them into a creative wonderful wooden box for placing books, magazines or throw pillows and place it next to your couch in the living room. Add a set of rope handles for effective maneuvering.
Every child needs a working station where he can learn, draw or read. It is an essential structural element in one's life and you can create such one from a set of wooden pallets. Treat the wood, finish it with a glossy white paint and cut out bits and parts to create certain storage spaces.
Decorate your child's bedroom with a custom made white pallet wood swing decorated with artificial flowers and transform his universe. You can create a larger version for your porch and spend cozy summer nights outdoors.
Diversify your crafting portfolio with a Christmas tree/ card& photo holder project as a perfect addition to your blank walls.Decorate it with pine branches to add that cozy holiday scent to your home.
Candle light transform any room and atmosphere. Add vintage wood to the equation and you've got yourself a definite winner. Choose to cut the sides with a specific motif that will exude light in a delicate manner. Attach a piece of thick rope as a handle and place your hand made luminaries somewhere you can admire and will use everyday.
Bookends are those simple volumetric letters everybody uses to hold their literature in place on the shelves but which do not necessarily beautify the place. To this problem we present you today a craft that through simple texture adds delicacy and beauty to any corner you intend it to be placed.
Improve the rustic vintage image of your kitchen with a pallet wood vent hood that will draw attention in an instant and empower the entire design. A darker wood tone will contrast beautifully with a pure white kitchen furniture.
Spring is the most wonderful season so let its primary elements which are the flowers bloom and grow in a wonderful controlled environment. Create a pallet wood planter box and place it outdoors on your patio in full spring sun.Add a layer of white paint and let it dry for a little before taking an old rag and removing the paint. The end effect will reflect a French vintage vibe we adore.
Shelving is one of the most easy and common pallet crafts you will find out there.It can add beauty, functionality and style to any blank wall in an instant. Embellish it will fresh cut flowers and family memories and photos to claim the craft your own.
Wooden doors come in all shapes and sizes but the actual beauty lies in the age of the wood, its intricate texture and natural tone.Here a few pallets have been transformed into an incredible sliding door that can be easily placed in a modern contemporary design.
The passage of time mark everyone and everything and wood is no exception. Wood aging is something being pursuit and searched thus it is only logical to use old pallet wood in the creation of a basic wooden clock.
Source
#64. Colorful Wood Box
Increase your storage space with a colorful addition. Create a wonderful wooden box with a touch of color and rope hinges.
As spring emerges from the dark corners it had been hiding, nature revives and birds, bugs and all sorts of creatures come to life and animate our garden. Take a step in this direction and invite the thrills of birds in your backyard with this fun bird feeders craft.
Blank walls should be decorated with your personal creations so feel free to express your imagination on a canvas created out of pallet wood. Use bleach to paint your dreams white.
A fresh fun twist on wall art should be added to a rather conventional area like the kitchen or dinning zone. Use pallet wood to create such a shape and add a coat of a bright hue to the end product to make it stand out and contrast the blank wall.
Use old pallets to create a sturdy structure for your bed. Customize it by adding a comfortable mattress and colorful pillows for the personal touch and taste.
Exploit the love you carry for a certain city and reflect in in your own wall art creation. Capture the city' skyline in an unique project you will simply adore in the end. Find different details you might have missed at the beginning and get attached even more to the image created itself.
Invest time in creating a comfortable patio chair or couch without spending lots of money or investing a lot of time and effort. Keep things simple and study and customize it with colorful pillows and cozy blankets that will come in handy on chilly nights spent outside.
Enjoy hot summer days relaxing in the sun in your garden on a hand made pallet adjustable sun bed.
#76. Kitchen Fruit Basket
Add a colorful touch to your white cabinet classically designed kitchen with this vibrant fresh pallet wood fruit basket. You can create similar ones for storing jars or spices and even for holding on to herb pots that will freshen up the kitchen and become useful at the same time.
#77. Simple Candle Holders
En-light your nights with these simple yet elegant vertical candle holders.Be careful by the combination of wood and fire and protect the actual candle with glass.
#78. A Special Family Message Display
Display you love and affection in plain sight and leave your mark on wood for the future to come.
Wish a merry and bright Christmas this year with a fun wall art creation on pallet wood.Use white and red paint to truly embody the Christmas spirit and attach a pine branch to complete the scene.
Although Valentine's day has become mainly a consumerist affair, try to attack the issue in a different manner by creating your gift instead of purchasing it. This wall art piece expresses affection in a very colorful and beautiful manner, maintaining that degree of uniqueness we all search in items today.
You you fill like committing and investing more time into a Valentine's project, create a stencil, dram your shape on a pallet wood board and cut it accordingly to the design. Apply a fresh coat of pastel paint and adorn with flowers or photographs.
If you have in the near future plan an idea of changing your kitchen cabinets, why not orient yourself towards wooden pallets? Choose old pieces of wood with character and combine them with a white kitchen main body.
#85. Outdoor's Coffee Table With Built in Fire-pit
Summer is approaching fast and with it, wonderful nights spent outside in the garden with friends and family. Create a functional pallet coffee table and insert a central fire pit areas for those cozy summer nights.
#86. Garden Pallet Playhouse
Spending tons of money on store bought toys does not sound like a good investment.So orient yourself towards creating a garden playground for your little ones from pallet wood. Invest time in the project and try and implicate them in the process for a memory they will cherish forever.
If you are a fan of wooden floors and let's be honest, who isn't, pallet wood is a wonderful creative method that will save you a lot of money but will cost in the time department.
#88. The Perfect Tree House
Create a tree house for adults by merging wooden pallets into a platform where you can add a few furniture pieces and enjoy nature from within.
Start a spring herb garden by filling up a wooden pallet with soil and compost and planting your seedings. Make tags for your herbs to remember exactly what you have planted.
#90. Rustic Flower Pots
Lemon trees and olive trees exude that Mediterranean vibe we adore so much thus it seems only logical to try and complement the olive green with some gorgeous wooden pallet planters.
If you are lucky enough to live in the seaside or to have such a vacation home, create outdoor furniture for entertaining from wooden pallets. Keep them basic and simple and add a set of comfortable cushions to the ensemble.
A wonderful patio or deck deserves a large swing for the entire family, especially if the view is worth it. Add string lights to the ensemble for magical nights.
#95. Vertical Indoor Garden
Use a wooden pallet to create a vertical herb garden. Apply a layer of chalkboard paint and use chalk to write the exact herbs and spices you have planted.
A wooden pallet background seen through a canopy of string lights is the perfect vision for a wedding decor. Add flowers to the mixture and the image is complete.
What is your take on the versatility and utility of wooden pallets? Choose your favorite from the 101 pallet projects presented above and share your ideas with us in the comment section below.
Wooden pallets can happily be used by anyone to tailor their design solutions creatively, regardless of the level of skill in diy projects wood can work with anyone willing to start on this path. Thanks to its nature it can also be processed through professional and amateur tools alike, being accessible to a wide range of process whilst delivering satisfactory and legendary results alike. 27 ingeniously beautiful diy pallet bed designs to materialize right now have been featured underneath, all of them creative and fairly easy to realize.
Cast a glance at the selection below and wonder on how good can an inexpensive diy project can be. With the proper accessories and in the right design line the wooden beds materialized can make a huge statement, sculpting Scandinavian design lines in an exemplary manner.
Beautiful DIY Pallet Bed Designs
#1 Make a Beautiful Wooden Pallet Crib For Your Little Loved One
What do you think about these diy pallet bed designs? We would love to hear your opinion in the comment section below. Would you choose a wooden pallet setup only as a temporary solution or would you be brave enough to infuse it in a high end Scandinavian interior design accessorized properly?
Quite epic wooden pallet projects are in the world of DIY as everyday these ingenious crafts are emerging to the online surface. Thanks to the their accessibility and their own high quality material, wooden pallets are used worldwide today to craft beds, swings, fences, terraces, decks and thousands of complementary household items. All successfully realized, all beautiful and cozy.
No less than 26 Highly Ingenious Cost Efficient Pallet DIY Projects for Kids have been showcased underneath. These items have been curated as a statement in educative practical experiments at home, by realizing a Do It Yourself with your family you can present in the future to your own child.
Cost Efficient Pallet DIY Projects For Kids
#1 use old wooden pallet boards to make a beautiful fairy tale fence
Homemade Pallet Furniture Designs have taken the world by storm, there is not one thing in your backyard that wooden pallets can`t cover along with a creative mind. Whether we talk about storage units, raised planting beds, coffee tables or lounge tables; wooden pallets are the way to go if you are looking for a memorable crafting experience. Gather your friends and family and invite them to join your diy wooden pallet furniture project, you can even challenge them to a contest, it can work even better.
The newly created furnishings can work in any decor thanks to the coziness and warmth brought into the picture by wood textures. Insert them raw in a stark white design line and you have the perfect Scandinavian Design premise to evolve from. Get creative and feed your imagination with these handmade pallet furniture designs below; if these are not enough you can find more wooden pallets recycling ideas here.
What do you think about the selection of homemade pallet furniture designs showcased above? We would love to hear how you up-cycle wooden pallets in the comment section below.
Natural wood is an extraordinary material, full of substance, personality, identity and warmth at the same time. From time to time we stumble into pieces of wood in different shapes that we overlook, quite often on pieces of used wood, wooden pallets or wooden crates. From these pieces beautiful furniture can be realized, especially from upcycled pallets in which the wood is already processed a little. Upcycled pallets are extremely useful because they have standard sizes as well, giving us the opportunity to use them as modules and repetitive items in ensemble with ease. Further on wooden pallets, new or salvaged from shipyards, buildings, barns or factories have been recycled into beautiful furniture worth consider.
Creative Ideas on Beautiful Furniture Made Out of Recycled Pallets
Extremely Graphic Lunar Shaped Baby Bed
Vertical Backyard Organizer
Bring Greenery Inside With a Winter Potted Garden
Shabby Chic Wooden Pallets Patio Furniture
Recycled Wooden Pallets Sheltering Greenery
Vertical Garden on Top of an Outdoor Bar Made From Recycled Pallets
Outdoor Wooden Box With Protective Role Made From Recycled Pallets
Colored Outdoor Pallet Garden Furniture
Wooden Pallets Organizers on Wheels
Small Fortress Made From Wooden Pallets
Superb Playground in Wood
Raw Irregular Wooden Stools
Simple Wooden Box
Nautical Themed Porch Swing
Square Side Table and Coffee Table From Wooden Pallets
If you want to keep woodenware in top shape, you have made the right decision by choosing to read this exhaustive review on wood waxes.
We have handpicked the 10 best wood waxes available this year here in a review, that is detailed, and informative and helps you decide what to buy for your home interiors.
Find more support in a buyer’s guide that highlights the categories of wood and other material that might be needing your attention. Make it worth your while before you go shopping for the perfect wax to polish those wooden surfaces clean and new!
So, let’s get started, shall we?
Whether you're working on a new woodworking project or restoring an old piece, using the right wood wax can make all the difference. To help you make an informed decision, here's the list of the 9 best wood waxes available in the market.
This wood wax is made of coconut oil, beeswax, mineral oil, and Vitamin E. All these natural ingredients blend to give a powerful cleansing and polishing agent. It is a tough cleanser, and the polishing elements of this wood wax can bring a glow to the dullest wooden surface.
This wood wax is a one-stop solution to all the dirt, grime, grease, and dullness accumulated in your house. All that needs to be done is adding the wax to the surface, and buffing it well for any object to start glowing again.
That’s not all; the coconut oil mixed in the wood wax acts as a cleansing agent, while Vitamin E helps keep the product fresh so that it lasts long. Vitamin E is also good for the skin, so this wood wax is safe and healthy to use.
Moving on. putting a small blob of wood wax on any wooden surface is more than enough to clean and polish it fully, reducing wastage to a minimum. It can be used with other products, or as a tough stand-alone cleaning and polishing agent.
What Could've Been Better?
This wood wax is useful for state-of-the-art cutting boards that may require repeated applications after a short time. The effects of buffing on cutting boards tend to wear off in some time, and may not be useful for those looking for more long-lasting solutions.
This finishing wax can be applied with a piece of cloth. It can be used on wooden cabinets, doors, antiques, woodwork, furniture, panelling, and wooden accessories that do not need a hard coat of polyurethane. Polyurethane is essentially used to protect different kinds of wooden surfaces.
EASY TO USE – It’s quick and easy to use this wood...
Why Did We Like It?
The finishing wax leaves a nice polished look on any wooden surface. It is especially used with chalk paint to maintain and seal wooden surfaces. The buffing can be done 10-15 minutes after the wax has been coated onto a surface and has dried up.
We like that raw wood needs only 2 coats of this wax, whereas a coated surface can make do with just 1 coat of the finishing wax. This wax particularly adds beauty and durability to your wooden products.
So, if you want to use it on bare metal, you would have to coat the metal more than once in a while to keep the rust off. It works very well with black colour and adds a creamy tone to antiques and other embellishments at home.
What Could've Been Better?
The finishing wax can be used for several tasks to keep your wooden objects in good shape. It can be used on practically all kinds of painted surfaces except white ones. The wax tends to add an amber tint to white-painted wood. This is especially true of bright white-coloured wood.
Pros
Stains wood
Cleans and repairs wood
Protects finished wooden surfaces
Adds lustre to any wooden surface
Cons
Adds colour to white-painted wood
Finish Type: Natural | Size: 16 oz | Food-grade: No | Application Method: Cloth
This wax and conditioner is a blend of natural beeswax, Brazilian Carnauba wax, and also USP-grade mineral oil. It seals cutting boards safely with one application and revitalizes their health with its natural ingredients.
2-in-1 Formula for Total Wood Care: CLARK’S Cutting Board...
Deep Conditioning & Superior Sealing: Infused with mineral...
Why Did We Like It?
The wax is safe to handle, easy to use, and can be applied with a simple cloth. It can be used to restore all kinds of wood. It can be used for teak, walnut, acacia, and oak wood. Hickory, Sapele and cherry can also be polished with this fine wax.
Also, several kinds of wood such as bamboo, pine, mahogany, olive etc. can benefit from the rich waxing and conditioning mechanisms of this product. This wax can be tested over a small area of the wood, as the coating darkens after application.
This would give you a good idea of the effects, finishing and appearance. It is also known to put a great finish on cutting boards and wooden spoons alike. Moreover, the boards do not stain and are far easier to clean after an application. Finally, it brings the grain of the wood out and lends the board a sheen.
What’s great about this product is that it can also help prevent staining, and cover up knife scarring. The wax makes cleaning a lot easier on the hands as well.
What Could've Been Better?
The buying price of this finishing wax and conditioner could have been more reasonable. It offers a range of maintenance and revival solutions. But the overall performance of the product is not commensurate with its market rate.
This could be a huge dent in its popularity, which is bound to escalate given its strong features.
This wax is made of mineral oil, Carnauba wax, and beeswax. The mineral oil comes with a food-grade assurance. The product locks in the oil and waxes of the brand’s other food-grade items used on surfaces or objects. This wax is safe to use on many materials - wood, paint, plastics, stone, cement, metal, etc.
SAFE FOR FOOD-CONTACT SURFACES: This cutting board wax is a...
ENHANCES AND PROTECTS: Our beeswax furniture polish for wood...
Why Did We Like It?
This food-grade wax gives any surface a smooth feel and a soft sheen after an application or so. It also saves bronze, brass, copper, and even wrought iron objects from oxidation and tarnishing. This is what prevents the early decay of your metal objects and helps them last longer.
Also quite easy to use, you just have to rub the wax onto any surface and leave it for some time. Buffing the excess makes the object shine brighter, and your job is done! Your surfaces and objects are protected to look better, and their beauty is enhanced to give your home the ideal look.
Moreover, woodworkers may find this food-grade wax extremely useful for a hard Carnauba wax finish to their wood projects.
What Could've Been Better?
The wax can be spread easily but is difficult to handle beyond that. When the surface or object is moderately well-sealed, this wax tends to misbehave. The mineral oil does not soak in, which leaves an oily layer on the surface even after leaving the application to dry for 24 hours.
This paste wax includes one of the best long-term finishing agents in its blend of special ingredients. The Brazilian Carnauba natural wax is known for giving great durability to the finishing of a surface. That is the world’s hardest natural wax and forms the prime component in Trewax Paste Wax.
This paste wax can protect outdoor surfaces and objects in your home environment from wind, rain, heat and snow. It can also protect your handy toolbox with chisels, blades and hammers from wear and tear.
Secondly, it can be used to varnish the wood with a light coat without waiting too much for the wax to dry out. Woodworkers with outdoor workshops might find this wax to be particularly useful in reducing friction for hand-plane blades.
Overall, the paste wax serves a range of minute tasks at home and in your workshops. It makes a great product for an enthusiast willing to experiment with the paste wax and its applications by learning through the articles, tutorials and videos available online.
Finally, this is a colourless paste wax that can be used to seal stone products quite well.
What Could've Been Better?
This wax gives a great finish to all your floors, surfaces and furniture and can be used once annually to refresh the coating. However, ensuring that the application gives a perfect finish can be a bit cumbersome. The wax has to be left to dry for several hours before anyone can walk on a floor or touch an object covered by it.
Careful management at home may be required to get your waxing correct in one go.
Pros
Works great on hard surfaces
Restores original sheen to many surfaces
Dries quickly
Non-slip wax product
Cons
Wax has to dry for hours before it sets completely
Finish Type: Natural | Size: 12.35 oz | Food-grade: No | Application Method: Cloth
This product is made of pure unrefined beeswax, Carnauba wax, and the finest natural ingredients that nourish, protect and revive wood. The beeswax is odourless and has no artificial fragrances added to its blend. It is perfect for your family and keeps your home safe and healthy.
✅ FOOD-SAFE & NON-TOXIC FORMULA – This unscented,...
Why Did We Like It?
All you have to do is use a soft cloth to rub a small amount of wax onto any surface. This task has to be done in a circular motion. Then buff with a clean and dry cotton cloth. The surface will have a healthy glow at once, shining bright as new.
And yes, it is safe to do as many applications as are required on your wooden surfaces and products from this beeswax. Daddy Van’s is a USDA Certified Biobased blend of wood-nourishing and food-safe ingredients.
This means that it is free from harmful chemicals and assures that your family and home are safe and protected always. It also nourishes your furniture and wood leaving them healthy and glowing with every application.
What Could've Been Better?
This beeswax can polish your wood efficiently but it will not go as far as filling any scratches on surfaces and other objects. It can, at best, make scratches less visible but cannot completely obliterate them.
To fill scratches, you might have to use paint and then coat it with an application of this beeswax to keep the colour safe.
Odie’s Oil is easy to wipe on a surface to bring sheen and polish to it instantly. Just wait a while after a coating and then buff the surface to get your results! Unlike the conventional wood finish, there is no need for sanding or stripping in between coats, even for retouching.
WHAT IT DOES- Odie’s Universal Oil protects, stabilizes,...
WHAT YOU CAN USE IT ON- Odie’s Universal Oil can be...
Why Did We Like It?
It can be used as a regular wood polish for your home and projects. It has a range of applications for both domestic and exotic wood. Polishing, cleaning, protecting and special utilisation as friction polish - all are part of this product’s repertoire.
An added advantage is that this oil has no driers or toxic chemicals and agents. The food-safe assurance increases the product’s normal safety range. Great for any household, and especially for woodworkers, who would appreciate the 30 years of R&D that have gone into this product!
Moreover, the oil has no solvents. What you put on the wood stays there and there is negligible evaporation. The best part, it comes in a 9 oz reusable glass jar, is environment-friendly and can cover up to 20 times the area of conventional wood finishes.
What Could've Been Better?
The oil has its benefits on daily use wood, and even new wood projects can be nourished with this product. But the most detailed planned and organised woodworking project might not be able to gain from this oil when it comes to finishing touches.
This is because thorough Odie Oil guidelines have to be followed to bring the best results to professional woodwork, and other such projects.
This wax is a blend of natural beeswax and mineral oil and is perfectly safe to use on surfaces, objects and projects at home and in your workshop. The beeswax brings life back into old wood surfaces. It doubles up as a great metal polish and increases the shelf life of different surfaces and products at home.
Hand Mixed in Small Batches to ensure the highest quality...
Why Did We Like It?
It is known as 'body lotion for wood' and can revive all those really old wood finishes that you want to put back for display in your house. It can also be applied easily to various kinds of wood and metal objects. The special formula penetrates wood and metal well and also dries up quickly.
So, when you buff the object it lends a soft, velvety sheen to it, which feels like a warm glow. Secondly, it can serve as the perfect finish for cutting boards, bowls, wooden spoons, or woodworking projects. Finally, it comes in a 6.25 oz container that will last you a long time, depending on your need and the number of applications.
The best part about this beeswax is that you can use it in your kitchen! For example, waxing the countertops with this wax can provide great protection, even as your daily chopping, kneading, cooking, etc. remain unaffected. And it comes with a food-safe assurance that will keep your kitchen healthy.
What Could've Been Better?
There could be a lack of lustre experience for oakwood surfaces, furniture, and projects made from such material. Even if you follow the instructions minutely, you might get results that disappoint, although they may vary from case to case.
Also, if you are trying to cover marks on your oakwood, that might not come to fruition in some applications.
Pros
All-natural wax
Non-toxic ingredients
Revives old wood finishes
Also serves as a metal polish
Cons
May need a careful application on oakwood
Finish Type: Natural | Size: 6.25 oz | Food-grade: No | Application Method: Cloth
This beeswax is safe when it comes to touch with food. The Carnauba wax in the mixture dries to a glossy finish and is extremely durable. The tung oil seals an object against water. It also remains unaffected by alcohol or acetone. Thus, this beeswax gives your household protection, renovation and durability against moisture and other elements.
This all-natural beeswax improves your old wood and other furniture by restoring its look and sheen. You can use it not only on your big wooden sofa set, but other items like a precious jewellery box to revive its old lustre.
All its ingredients are organic and non-toxic in this beeswax. Made of tung oil, beeswax and Carnauba wax, this mixture is great for the safety and health of your family and home. Best of all, it is handmade by a person who claims to have started producing it in his wife’s kitchen!
Reliable and made with care, it is easy to apply to your products. This beeswax will also serve all your cleaning and polishing purposes well. It can seal and protect the surfaces of your furniture and other goods, especially from sunlight and moisture.
What Could've Been Better?
The beeswax ensures the safety and revival of wooden furniture and products at home. However, even a double application of this beeswax may not be able to remove marks or blemishes on all objects. It can add a shine though, that can reduce the visibility of any damage to your objects.
While you were going through our succinct reviews of the 9 best wood waxes of 2024, you might have pondered some questions. What was the primary concern of the house or the workshop that prompted you to search for a waxing product?
It could be anything - from increasing the lifespan of your wooden bowl or removing dirt from an old table. You might even want to make some of your objects water-resistant at home.
It can be worrying that a kitchen cabinet has moisture trapped in its panels. Or that a cutting board has rough edges you want to smoothen out. Can all these utility products in the kitchen be waxed? After all, they are used to preserve and make your food.
These are some questions that might arise and more. We have sought answers for you, and in our informative buyer’s guide below to help you make a good decision.
Wooden furniture, kitchen maintenance, antiques and decorative embellishments, wooden, metal and other projects and special surfaces are some essential categories that could be needing your ‘waxing’ attention.
Wooden Furniture
Almost all the qualities of wooden furniture - durability, sheen, colour, texture and appearance- can be transformed entirely when you get the right wax for the wooden mainstay and the accessories in your house.
A wax jar is an all-purpose solution for your wooden furniture at home.
Kitchen Maintenance
A whole host of kitchenware, cutlery and storage equipment is almost always wooden. There are several food-safe waxes reviewed here that can protect and restore your kitchen. You can choose from special beeswax, or buy wax that is a daily use affair.
Antiques, Decorative Embellishments
Old items and carefully curated objects in the house require special attention. Despite being the most precious embellishments at home, they can ironically be neglected for longer than their lustrous lifespan.
Hard waxes, natural beeswax, and particular oils are all combined these days in wax jars to give you desired results. Buy wax for your precious objects at home and watch them glow again.
Wooden, Metal and Other Projects
Garage workshops, makeshift wood workshops, carpentry projects running from home and professional wood projects are usually an extension of the home. Wax manufacturers have combined many organic ingredients to give multi-purpose solutions to both home and workshop requirements.
Higher-grade professional projects may need more sophisticated waxing agents, some have even been produced from a home kitchen to give quality-grade waxing at home, and outdoors.
You have plenty to choose from in our detailed review of wood waxes.
Special Surfaces, Objects and Equipment
Wood may largely be the main preoccupation of health and maintenance for the average household, but waxing can also help revive metals and other materials. Brass, copper, iron, and various species of wood, are all commonly found at home. They can also be protected and cleaned at home itself.
Wood Waxes FAQ's
What is wood wax?
Wood wax is a type of finish made from a combination of natural waxes, oils, and sometimes resins. It is used to protect and enhance the appearance of wood surfaces.
What are the benefits of using wood wax?
Wood wax provides several benefits, including enhancing the natural beauty of wood, adding a protective layer against moisture and wear, creating a smooth and lustrous finish, and offering a natural and non-toxic option for wood finishing.
How do I apply wood wax?
To apply wood wax, start by preparing the wood surface by sanding it smooth and removing any dust. Then, using a clean cloth or brush, apply the wax in thin, even coats, following the wood grain. Allow the wax to penetrate and dry, and then buff the surface to achieve the desired shine.
Can wood wax be used on all types of wood?
Yes, wood wax can generally be used on all types of wood, including hardwoods and softwoods. However, it’s always recommended to check the product instructions and test the wax on a small, inconspicuous area before applying it to the entire surface.
How often should I reapply wood wax?
The frequency of reapplication depends on factors such as the type of wood, the level of wear and tear, and the specific wax product used. As a general guideline, it’s advisable to reapply wood wax every 6 to 12 months or as needed to maintain the desired level of protection and appearance.
Can wood wax be used on painted or stained wood surfaces?
Wood wax is primarily designed for use on bare or unfinished wood surfaces. It may not adhere well to painted or stained wood and may not provide the same level of protection. It’s recommended to consult the product instructions or consult with a professional if you intend to use wax on painted or stained wood.
How does wood wax differ from other wood finishes like varnish or polyurethane?
Wood wax differs from other finishes like varnish or polyurethane in terms of appearance, application method, and level of protection. Wax creates a softer, more natural-looking finish and requires periodic reapplication. Varnish or polyurethane, on the other hand, provide a harder, more durable finish but may alter the wood’s natural appearance.
Can wood wax be used outdoors?
Wood wax is primarily designed for indoor use and may not provide sufficient protection against outdoor elements. If you need to protect wood surfaces outdoors, it’s recommended to use a specifically formulated outdoor wood sealer or finish.
Can wood wax be used on furniture with existing finishes?
Wood wax can be applied to furniture with existing finishes, but it may not adhere well to certain finishes or create a consistent appearance. It’s advisable to test the wax on a small, inconspicuous area first to ensure compatibility and desired results.
Conclusion
The 9 best wood waxes of 2024 reviewed here can turn your home around into a brand new place! Choose from our selection of natural and organic waxes to bring out the texture and colours of your home.
With just a touch of the Walrus Oil Woodwax, your wooden surfaces and objects will regain their old lustre.The Minwax 785004444 Finishing Waxwill add beauty and longevity to your wood and metal objects.
Keep your home healthy and glowing with Daddy Van’s 100 Beeswax. It is a USDA Certified Biobased blend of wood-nourishing and food-safe ingredients.
Apart from these, the Interstate Woodworks Beeswax has a quick-drying agent and can give a soft, velvety sheen to all your furniture, kitchen products, and wood projects.
Wooden furniture can start to look dull after a few years, but you can always change its appearance with some good wood lacquer.
Not only will it add a shine to the wooden surfaces, but it will also provide them with a protective layer. If you choose wisely, then you may find options that dry fast. And those will allow you to complete your work easily.
Now, there are a lot of brands selling wood lacquer today, and it becomes really difficult to make a choice. However, we did a lot of research and came up with the top 8 products, which we have reviewed below.
Each review covers all the features of that specific product as well as the pros and cons so that you can make a fully-informed choice. So, do not wait any longer and dive in!
Whether you're a professional woodworker or a DIY enthusiast, these wood lacquers offer excellent quality, durability, and stunning finishes. So, if you're ready to elevate your woodworking projects to the next level, here's the list of the 8 best wood lacquers for you to explore.
One of our topmost recommendations is the Rust-Oleum 1906830, which is known for its beautiful ultra-gloss finish. You will be satisfied with the 11-ounce bottle, which can be used for almost any small project. Read on to know more about its bells and whistles.
Ideal for use on interior/exterior surfaces including...
Acrylic formula offers an ultra-hard, high luster finish...
Why Did We Like It?
The Rust-Oleum 1906830 is an acrylic formula that cures very fast so that you can get all your work done in a day. It dries to touch within 20 minutes, and you can apply another coat in an hour.
Moreover, each coating adds optimum durability, and you can even sand the surface after it dries up. This wood lacquer is already known to provide a very glossy and smooth surface. But once the surface is sanded, you can add another layer to get a more glossy finish.
Besides, you can apply it on different types of surfaces, including wood, metal, masonry, plaster, and unglazed ceramic. Hence, a single purchase can be used for multiple purposes. No matter the surface, the dried layer will be very hard, rendering a professional factory-like finish. We are sure that your guests would be wondering where you got the furniture from after application!
What Could've Been Better?
While we did not face any issues with opening the can, some customers have complained that they did it with great difficulty. The lid was stuck, and it took a lot of time to open it. So, please check the bottle carefully after purchasing and ensure that you contact customer care if you face difficulties.
Pros
Perfect for exterior and interior surfaces
Can be sanded post application
Can cover 7 square feet
Known for professional results
Cons
Difficulty in opening the can
Finish: High Gloss | Volume: 11 oz | Drying Time: 20 mins | Recoat Time: 2 hours | Coverage Area: 7 sq ft/can | Application Method: Spray
Up next is the Minwax 152000000, which has earned rave reviews for its brilliant glossy finish and clear texture. You can use it for all the wooden surfaces in the house to protect them from daily wear and tear. We were very happy to see its performance, and you can learn more about it in the section below.
EASY TO USE – This wood finishing spray requires no...
Why Did We Like It?
To begin with, the lacquer has a quick-drying formula, which dries to the touch within 30 minutes. Hence, you can begin coating all your furniture, and a majority of them can well be covered within a day.
Plus, you will be able to apply it on stained as well as bare wood. If you have bare wood, applying a layer of lacquer will provide it with a glossy finish, and the raw wooden look will be preserved as well.
Beyond that, it adds a protective layer to metal and wooden surfaces, which should prevent them from turning yellow over time. It will also prevent scratches from everyday activities and will keep the furniture looking new.
Moreover, no sanding is required in between coats, and one coat should be enough to get a glossy finish. In case you want to apply a second coat, you can easily do it soon after the previous layer dries.
What Could've Been Better?
The only issue is that this product cannot be used for exterior surfaces. This is because the formula will not be able to protect furniture from direct rays of the sun and may turn yellow if exposed to direct sunlight. So, keep this in mind before making the purchase decision.
If you are looking for a product to paint your wooden doors and cabinets, then the Watco 63041 will be an excellent choice. It ranks high in performance, and you will love the crystal-clear glossy layer that forms on top. This product is recommended for interior use and works well with wooden panels too.
Ideal for use on furniture, doors, cabinets and paneling;...
Formulated for a higher clarity finish than polyurethane
Why Did We Like It?
First of all, let us tell you that this is a very useful lacquer that will add a glossy layer as well as act as a wood filler. Now wood with holes or gaps is more prone to having insects staying in them. It is also prone to get damaged easily, and the holes can become more prominent over time.
The lacquer will prevent scratches on the body and will ensure that all gaps and holes in the wooden surface are properly filled. You will not need to add anything extra to the holes or cracks.
Next, one bottle of this product can cover an area of 290 square feet. You can apply 2 coats to the wooden surface, and there is no need to sand the surface in between. Just allow the base layer to dry, and then you can easily apply another layer on top of it.
What Could've Been Better?
In case you are purchasing this item, remember that you will need some time to dry the surface. It takes more time to dry when compared with its peers, and you will need to keep it for at least 2 hours. However, now that you are prepared for it, this should not be a drawback.
Are you looking for something to cover up stains on wooden surfaces? The Deft 37125015138 will be a perfect choice as a single layer can easily cover stains and marks. We have used it on our old furniture pieces, and they looked new and freshly painted after applying this option.
Use for the first coat on any lacquer finishing project
1 thin coat will block most stains from Weeping through the...
Why Did We Like It?
This product is perfect as a first coat, and you can apply it for all lacquer-based projects. It will cover all stains in the first go, and then another layer can be applied to it. This is a 100% nitrocellulose sealer, and you can use it on both metal and wooden surfaces. That includes MDI boards, particleboards, softwood, and hardwood to name a few.
Plus, it dries up within half an hour, and you can sand it after an hour. The second coat will provide more gloss to the surface, and you will be happy to see the results.
Also, once the product dries up, it does not remain toxic, and you can allow kids and pets near the painted surfaces.
Moreover, it is a non-yellowing formula, and it will not dry up inside the can. This is a major problem that people face with such products, but you can rest assured that it would not cause any problems.
What Could've Been Better?
While this lacquer covers up stains, it forms a very thin layer because of its consistency. So, you will have to apply 2 layers to get the proper consistency. That means putting in a little more effort than usual, but we will not be holding this as a drawback as it provides an ample amount of shine.
Now that we are halfway through the list, it is time to introduce the Watco 63181. We used it for our furniture, and they got a beautiful semi-gloss finish. The product comes in a 13.6 ounces bottle and is very easy to apply. Read on to know about the other features.
We used this product on our cabinets, and it dried to the touch within 30 minutes. One can apply another coat over the initial layer after an hour has passed. Plus, it will dry to form a very hard layer that would not be prone to scratches.
Next, one bottle of this product will cover 40 square feet, and hence, you can use it for a number of cabinets. Measure the area that needs to be painted with the lacquer and then purchase accordingly.
Moving on, this is a great wood-filling agent, and you can use the lacquer to fill up spaces or holes in wooden pieces. It would give you a plain and semi-glossy finish that does not require sanding. Hence, you can apply the second coat directly without sanding in between.
What Could've Been Better?
While the product works very well, we would have preferred to get a better nozzle that can be controlled. The nozzle offered here cannot be turned horizontally or vertically. However, you can always buy a separate nozzle from any local store and attach it to the spray bottle.
Up next, we have a superior-grade lacquer that can cover aluminum surfaces as well as wood. The S.M. Arnold 66-108 comes in a 12 fl. Oz. bottle, and it is used in a lot of garages for professional work. We were very happy to see the color and the brilliant texture that is provided.
✅ REBUILD ALUMINUM PARTS: One step convenient easy to use...
✅ NON-LEAFING PIGMENT: What separates this from the rest...
Why Did We Like It?
This is a very high-quality coating formula that has excellent adhesion capacities, and that is because it contains acrylic resin. It will stick to metal and wood, and you can use it for water pumps, alternators, and transmission boxes too.
The best part about the lacquer is that it is highly resistant to heat and can tolerate very high temperatures. We have tested it, and it can tolerate temperatures up to 250 degrees Fahrenheit.
Next, this item will dry very fast, and it will not peel off at all. Hence, you can use it for indoor and outdoor furniture if you wish to give them a metallic effect.
Also, this product is not transparent and has a silver aluminum color. The color can be achieved in 1 coat, and you will not need to add a second layer of lacquer. Moreover, it is VOC-compliant and can be safely used in 50 states.
What Could've Been Better?
While it would work for those who want a dull shade, it will not work well for those who prefer shinier surfaces. This product does not offer shine or gloss, and it is best that you know that before purchasing. Other than this, we faced no issues with this option.
We are finally nearing the end of the list, and it is time to talk about a product that is very easy to sand. The Minwax 154000000 is a marvelous option, and we have used it on old wooden furniture pieces, which had been developing gaps. The results were very pleasing, and the furniture looks new.
This is one of those products, which will dry to form a hard layer, and it will seal wood quickly. Not only that, you will just have to apply a thin layer, and that would work to block all cracks. You can use it for your old cabinets, woodwork, doors, and other pieces of furniture.
Other than that, it can be sanded easily, and you will get an even surface after sanding. Then the topcoat can be applied and that would provide a slightly glossy and smooth layer. We were happy to see that it dries up very fast and you can complete your work within the same day.
Moreover, it will provide the furniture with a clear layer that will not turn yellow over time. This is a very big advantage as the color of the wood will be protected.
What Could've Been Better?
When the product arrived initially, there was a huge dent in the can because it was not packaged well. It would be great if the brand provided thicker cans or packing materials. However, the brand replaced the product for us, and hence, we will not be holding it against them.
If you are looking for a non-yellowing formula, then the Deft Inc. 37125010041 is going to be an incredible option. It is easy to apply, and you will be able to get positive results very soon. We were very happy with the overall crystal clear glossy finish that was achieved after application.
This clear wood finish brushing lacquer is 100-Percent...
Why Did We Like It?
This is an easy-to-apply option that is available on the market, and you will be able to cover a large area with it. To be specific, 400 square feet can be covered with 1 gallon. And the best part is that it is made with 100 percent nitrocellulose. That makes it perfect for wooden and metal surfaces.
Moreover, it spreads well on the surface with the right brush. You can use a brush to spread it on wood, and then you will have to wait for 30 minutes. During this time, the entire top surface will dry up, and you can then apply a second layer if necessary.
Also, the lacquer would not become yellow over time, and the furniture would look freshly painted for a long time. The color will not darken at all, and the real shade of wood will be preserved.
What Could've Been Better?
While we achieved great coverage, the smell did bother us a lot. It has a very strong smell, and you might have to cover your nose during the process. However, you will be happy with the results once you have painted the entire surface.
Now that you know all about our top products, it is time that we tell you about some of the important factors to consider. Know that the most expensive product may not always be a perfect choice. There are many other things to consider, and we will be talking about them. So, read on and make a note of the following points.
Place Of Application
First of all, you will have to consider the items or the furniture that needs wood lacquer. The lacquer for furniture that is kept on the patio or the deck will be different from the one, which can be applied to indoor furniture.
Now all of the products listed here work well for indoor furniture, but only some will work for outdoor ones. If you still apply a product meant for indoor furniture outside the house, then the clear layer might turn into a yellow one with direct exposure to the sun.
Also, the lacquer might start to peel off in some time if you have applied it to chairs kept outside. Hence, be very careful about using it, and always check the back of the pack to know where the lacquer can be applied.
Finish
There are different kinds of finish that you might strive for, and there are separate lacquers for that. While some will offer an ultra-glossy finish, others might offer a glossy or semi-glossy finish. The choice is yours to make, and once you decide on the finish, then only purchase one that matches the purpose. You might want different levels of shine or gloss, and hence, making this decision before purchasing is necessary.
Surface
All wood lacquer varieties cannot be applied to all kinds of surfaces. Some are made specifically for wooden layers, while others may be applied to metal, masonry, ceramic, and plaster, to name a few. Also, there are products that can only be applied to stained wood, and there will be other options for bare wood.
We will recommend that you make a note of the surfaces to be painted before moving forward.
Area To Cover
If you need to cover a small area, then there is no point in purchasing a large bottle of lacquer. So, we will suggest that you measure the area that needs to be covered before buying it. But if you’re still skeptical, just buy a little extra to make room for unforeseen wastage. This will prevent you from having to stop in between work to order more.
Wood Lacquer FAQ's
How does wood lacquer differ from other wood finishes?
Wood lacquer is a type of finish that typically contains a mixture of solvents, resins, and additives. It differs from other finishes like varnish or polyurethane in terms of the type of film it forms, the level of glossiness, and the application method.
Can wood lacquer be used on all types of wood?
Wood lacquer can be used on most types of wood, including hardwoods and softwoods. However, some porous woods may require additional preparation or the use of a wood sealer before applying the lacquer to ensure proper adhesion and a smooth finish.
How is wood lacquer applied?
Wood lacquer can be applied using various methods such as spraying, brushing, or wiping. The specific application technique may vary depending on the type of lacquer and the desired finish. It is important to follow the manufacturer’s instructions for the best results.
Conclusion
We have finally reached the end of this guide, and it is time to wrap up. Before purchasing, ensure that you check the size and the description well, and you should be able to make the right choice.
But if you are still confused, then let us take you through our favorites quickly. The Rust-Oleum 1906830 is one of the top options that work for both interior and exterior surfaces. On the other hand, the Minwax 152000000 will prevent scratches.
And if you are looking to cover up stains, then the Deft 37125015138 will work brilliantly well. Let us know if you have any further questions in the comment section below.
The best wood hardeners are specialized resin-based solutions designed to penetrate deep into soft, rotting, or damaged wood—stabilizing the material, preventing further decay, and restoring structural integrity for long-term use. Whether you're preserving antique furniture, repairing window sills, treating termite-infested wood, or prepping a weather-worn deck, wood hardeners offer a fast and effective solution. Formulated with epoxy or acrylic polymers, these products reinforce weakened fibers and form a solid base for filling, sanding, or painting. Many are suitable for indoor and outdoor applications, and dry to a clear, durable finish that bonds with surfaces like pine, cedar, oak, or plywood. Brands such as Minwax, Bondo, PC Products, and J-B Weld are known for offering high-strength formulations with fast drying times and easy brush-on or injectable application. In this guide, we review the 5 best wood hardeners available today—comparing drying speed, penetration depth, compatibility, and overall performance—so you can select the right product for your wood restoration or reinforcement project with confidence.
Listed below are the Best Wood hardeners:
Minwax: Known for its quick restoration of decaying wooden structures, Minwax Wood Hardener is ideally suited for DIY tasks. Its primary strength is its moisture-retention capacity, providing additional weather resistance. Minwax has a strong odor, necessitating use in well-ventilated spaces.
PC Products: PC Products Wood Hardener offers an eco-friendly solution for decaying wood. Ease of application is a notable feature, allowing spraying, injecting, or brushing on various surfaces. A potential limitation is its poor interaction with borate products.
Bondo: In terms of versatility, Bondo Rotted Wood Restorer leads the pack. It dries rapidly, and its built-in brush applicator enhances the application process. It yields an elegant finish but is hindered by its strong scent and occasionally leaky packaging.
J-B Weld: J-B Weld Wood Restore Liquid Hardener is a budget-friendly choice that efficiently revives decaying wood. It dries quickly and is easy to apply. Its primary shortcoming is its powerful odor.
Abatron: Abatron LiquidWood is a premium option notable for its superior durability and the lasting protective shield it provides for wood. Maintaining a natural aesthetic, it is slightly pricier and has a longer drying time relative to other hardeners.
From high-performance formulas to easy application, this list encompasses the top-rated wood hardeners that will restore your woodwork to its former glory. So, without further ado, here's the list of the 5 best Wood Hardeners to give your wood a new lease on life.
1. Minwax Wood Hardener - Best for Fast Restoration
Are the rotten and chipped wood of your windows turning your living room into an eyesore? The Minwax 41700000 Wood Hardener is perfect for restoring all your decaying wooden structures. Thanks to its moisture retention capacity, it protects your surfaces against the elements. Plus, its quick-drying time makes it a perfect option for all your DIY tasks.
Catering to woodworkers’ needs for over 110 years, Minwax high-performance wood hardener performs exceptionally well in restoring rotten wood. The hardener seeps into the wood smoothly and restores the rotting or decaying wooden surfaces, thanks to its unique resin bind.
Furthermore, it features a thin water-like consistency, which makes it perfect for restoring the most challenging fractures. Whether you have to fill the gaps in window sills or fences that rain has destroyed, this hardener is perfect for all your indoor and outdoor needs.
Moreover, this thin-formula hardener is resistant to moisture and is waterproof. You can use it on all the exterior surfaces without worrying about elements damaging your surface. Also, it leaves a beautiful finish after drying.
What’s more pleasing is its drying time, which has made it a go-to product for all professional woodworkers, enthusiasts, and DIYers. It dries pretty quickly, allowing you to complete all your DIY wooden projects in almost no time.
No doubt, this is one of the best wood hardeners that we’ve come across. However, we’d recommend you work outdoors because of its strong odor. If you intend to work indoors, make sure the room is properly ventilated.
Also, wear gloves and a respirator mask to ensure you don’t inhale the fumes.
2. PC Products Wood Hardener - Best for Eco-Friendly Restoration
Whether you have to repair the decaying wood of the window sills and frames or fix soffit and decorative trims, this wood hardener will restore your wood to a beautiful finish. It is relatively easy to use. Also, it is usable on both interior and exterior surfaces.
What we absolutely loved about this wood hardener is its liquid formula, which makes it a perfect pick for all DIYers. It is a relatively easy-to-use product. As such, you can spray, inject, and even brush it on the damaged wooden surfaces.
Unlike other wood hardeners, which feature a two-part epoxy paste, this is a single-component adhesive formulated to perfectly wick into the decayed wood. Moreover, this water-based hardener is compatible with a variety of surfaces.
From filling up the stairs to reduce splinters to using it for preparing worn-out wooden surfaces for staining, this product works to revitalize anything and everything. With a curing time of 24 hours, your surface is ready for priming and staining in just a day.
Additionally, this low-viscosity hardener doesn’t drip much, making it ideal for overhead and vertical surfaces, such as beams and columns. Lastly, this environmentally friendly product has a mild odor, allowing you to work for long hours without any hassle.
This wood hardener by PC Products is no doubt an excellent option for restoring all your rotten and decayed wood surfaces. However, while testing, we found out that it doesn’t respond well to borate products.
We recommend novices work carefully with this hardener because of its thin consistency. You can browse videos and tutorials on YouTube to get a hang of this.
3. Bondo Rotted Wood Restorer - Best for Versatility
Next up, we have another quality wood restorer from Bondo. The Bondo Rotted Wood Restorer penetrates deep into rotted wood to create a strong hard surface. This stabilized liquid is sandable, paintable, and dries pretty quickly. Moreover, it offers a smooth and elegant finish to your surface.
If you ask us, the best part of this wood hardener is its quick-drying time of just 2 hours, unlike other wood hardeners, which take 24 to 48 hours to cure completely. Bondo has done a commendable job formulating a wood hardener that dries in just 2 hours. On top of that, it dries clear and tack-free.
Moreover, when it comes to versatility, this wood hardener will not disappoint you. Whether you want to fix a termite-damaged beam or the bottom rails of your windows, this hardener is perfect to reinvigorate life into damaged wooden structures. Plus, it is water-resistant, so you can easily use it on the exterior without worrying about nature tampering with the seal.
Another appealing aspect of this product is its built-in brush applicator, which makes application quick, easy, and hassle-free. Additionally, it is paintable, stainable, and even sandable.
While the product works excellently to seal and restore the rotted wood, we didn’t really like the strong, pungent smell of the hardener. That’s why we recommend using a mask and an eye protector while working with this.
Moreover, customers have complained about receiving a leaking can which created quite a mess.
What We Like
Quick-drying time
Versatile application
Built-in brush applicator makes it easy to use
Water-resistant
Offers a smooth, elegant, and professional-like finish
Our next pick is perfect for those on the quest for a wood restorer without being heavy on your pocket. The J-B Weld Wood Restore Liquid Hardener seals, restores, and reinvigorates decaying and rotting wood in almost no time. Its easy-to-use liquid formula has made it popular among professional woodworkers, DIY enthusiasts.
Well, the thing that first caught our attention was the price tag of this 16-ounce bottle. To be honest, this is one of the most affordable options on the list. Irrespective of the size of your project, this is an excellent product for restoring rotten wood.
This unique liquid formula isn’t like any other wood hardener available on the market. With its quick-drying time and strong and solid base, you know you’re working with nothing but the best.
Moreover, this wood hardener is highly versatile. Whether you have to restore the wooden furniture or fix up the garage and fences, this product is your one-stop solution for all restoration needs.
What’s more, this is a no-fuss, no muss kind of product, which makes it perfect for novices. Its brush-on and no-mix formula make it an easy-to-use product. Additionally, it’s resistant to moisture; rest assured, it would withstand even the harshest elements.
This wood hardener is highly popular among professionals, mechanics, builders, and DIYers, mainly because of its versatility and functionality, users have complained of its strong, obnoxious smell. So, if you don’t want to give yourself a head rush, put up a mask and work outdoors.
In our quest to bring you reputable and reliable products, we took a detailed look at Abatron LiquidWood. Often coined as a 'premium' product, Abatron LiquidWood has gained recognition for its high-performing wood preservation qualities. Despite being a blend of two separate substances in an epoxy form, it steps forward as an earnest contender in the market, partly due to it being offered as a cost-effective kit.
One of the key strengths of the Abatron LiquidWood that sets it apart from its competitors is the extreme durability it endows on the treated wooden surface. Its rating for sufficient structural repairs speaks volumes about its strength. Whether you wish to restore your rickety old pine table to its former glory or fortify softer wood-made products for enhanced longevity, LiquidWood offers a solution that's harder than Oak.
Adding more to its bag of virtues, not only does Abatron LiquidWood transform your wood into a robust structure, but it also finishes it off with a waterproof and weatherproof shield. Perfect for those outdoor projects where weather damage is a cause for worry. For those concerned about aesthetics, the finish it provides is nearly invisible after drying, maintaining the natural visual appeal of your deck or any wooden item.
Abatron LiquidWood ticks quite a few boxes in our checklist, but it's not without a few drawbacks. Notably, it exhibits an extended drying time compared to competitors. For the clumsy few among us, this might serve as a blessing, providing a fair window of about 30 minutes to rectify any errors, and approximately 24 hours to fully harden. However, environmental parameters such as temperature and humidity might extend this time, which could be an inconvenience when you need a quick solution.
While extended drying time offers room for mistake correction, it does present a conundrum when applied to vertical surfaces. The delay gives ample time for LiquidWood to trickle down, leading to drips — an aspect to consider when working on walls or vertical interfaces.
What We Like
Strength matchable for structural repairs
Suitable for both indoor and outdoor use
Adheres well to a wide range of wood fillers
Becomes virtually invisible upon drying
Generous working time
What We Don't Like
Requires blending two elements to form a usable epoxy
Pricier than some alternatives
Sub-optimal for usage on vertical surfaces due to extended drying time
Several wood hardeners are available on the market, each differing in its properties and characteristics. An understanding of these differences, including volume, application method, dry and cure times, sandability, paintability, waterproof capabilities, and whether they are solvent-free, can guide one's decision on the best wood hardener to use.
Choosing the best wood hardener for restoring dry and rotted wood is certainly a challenge. Simply knowing the best 5 options available on the market with their good and bad aspects isn’t enough. That’s because there are various other factors that you must pay close attention to before making a decision.
In actuality, it depends on the user’s needs and preferences. But worry not, we have discussed all the important factors below. Take a look before you make a decision.
Surface
Not all wood hardeners are compatible with every surface. Some may perform well on interior surfaces, while some are best for exterior surfaces. So, before you decide which one to go for, consider the surface you want to restore.
You can go for any wood hardener from a reputed brand for reinvigorating life into the wood for interior application. However, while choosing the exterior surface, you must only go for those that can withstand elements and are waterproof.
Drying Time
By now, you know not all wood hardeners and stabilizers have the same drying time. The ones that dry quickly are always better than those that take longer to dry. So, if you’re a professional woodworker, you must opt for the one featuring a quick-drying formula.
But, for newbies and DIYers, we’d recommend the one that takes slightly longer to dry. As such, long drying time wood hardeners are pretty forgiving of errors.
Color
Wood hardeners are available in various colors. We’d recommend you choose the one closest to the color of your surface. Alternatively, you can also go for the ones that are paintable and stainable to stain them with the color of your choice. So, make sure to choose the color before you invest in one.
Durability
We are sure you don’t want to redo your surface now and then. That’s why you need to invest in a wood hardener that is highly durable. Before picking one, make sure that it can withstand all the wear and tear for the next few years.
When should I use a wood hardener?
You should use a wood hardener when wood shows signs of softening, rot, or decay—typically caused by moisture infiltration, fungal growth, or insect damage—on surfaces like window sills, door frames, decks, beams, or furniture. Wood hardeners are resin- or epoxy-based liquids that penetrate compromised wood fibers, solidifying them to restore structural integrity and prevent further deterioration. They’re most effective when applied early, at the first signs of flaking, discoloration, or sponginess, and are often used in combination with a compatible wood filler to rebuild and smooth the treated surface. For the best results, consider pairing your hardener with one of the best wood fillers designed for exterior and interior repairs.
Can wood hardeners be used on all types of wood?
Yes, most wood hardeners are formulated to work on a wide range of wood types, including both softwoods (like pine or cedar) and hardwoods (like oak or maple). However, performance may vary depending on wood density, grain structure, and moisture content. Some products are specifically optimized for exterior applications, while others are better suited for indoor use. Always refer to the manufacturer’s instructions and compatibility guidelines to ensure optimal results with your specific wood species and environment.
Are wood hardeners waterproof?
While many wood hardeners offer enhanced moisture resistance, not all are fully waterproof. Most hardeners provide a solid, sealed surface that can slow water penetration, but prolonged exposure to moisture or outdoor conditions may still require a topcoat of waterproof sealant or paint. To achieve long-term weather protection, especially for exterior repairs, check the product’s specifications and consider pairing it with a durable, UV- and water-resistant finish once cured.
Can wood hardeners be sanded or painted?
Yes, once fully cured, wood hardeners can generally be sanded, painted, or stained like standard wood surfaces. After curing, the treated area often becomes rigid and smooth, making it an ideal base for further finishing. To ensure proper adhesion, you may need to lightly sand the surface and remove any dust before applying paint, stain, or a protective topcoat. Always follow the manufacturer’s recommended curing time and surface prep instructions before finishing.
Are wood hardeners toxic?
Wood hardeners often contain solvents or resins that can emit fumes or cause skin and eye irritation if handled improperly. While many formulations are safe when used as directed, it's important to apply them in well-ventilated areas and use protective gear such as gloves, safety goggles, and a respirator mask if recommended. Always read the Safety Data Sheet (SDS) and product label to understand potential health risks and ensure safe application, especially in enclosed spaces.
With that, we come to the end of our review-based buyer’s guide. Hopefully, you were able to pick the best wood hardener and wood stabilizer for your wood restoration tasks.
Before we sign off, we’d like to tell you our favorites from the list. All in all, the Minwax Wood Hardener is perfect because of its functionality. Meanwhile, theJ-B Weld Wood Restore Liquid Hardener will help you restore all wooden surfaces without being heavy on your pocket.
See you next time. Adios!
Who does not want beautiful wooden furniture to adorn their room? But let’s be honest- getting new pieces can cost a fortune!
That’s when you can get your hands on a varnish that will make your old furniture look as fresh as new. The efficiency of a wooden finish depends on factors like your preferences, the type of wood that is being coated, and the weather conditions. A wise selection would not only make your furniture look beautiful but also prevent them from damage.
However, we know that it is easier said than done. With multitudes of options on the market, choosing the perfect one is anything but simple. To help you, we have devised this guide where we talk about the top 9 varnishes for wood. There’s a buyer’s guide, in the end, that covers various aspects you must consider before picking the perfect varnish.
Listed below are the best varnishes for wood:
Rust-Oleum 207008 Marine Spar Varnish: The Rust-Oleum 2007008 is a varnish capable of retaining the wood's natural look even under harsh weather, thanks to its oil-based formula. Its drying time is longer compared to faster-drying options.
Minwax 63005444 Fast Drying Polyurethane: The Minwax 63005444 is a polyurethane varnish that provides a clear finish. It offers a much quicker drying time, unlike the Rust-Oleum 207008. The packaging leaves room for improvement.
Varathane 262006 Premium Fast Dry Wood Stain: Varathane wood stain is noted for its exceptional pigmentation, achieved through nano pigment particles. It enhances and preserves the natural wood grain texture more effectively than Minwax 63005444. The lack of detailed instructions can be problematic.
TotalBoat Gleam Marine Spar Varnish: A spar varnish capable of shielding wood from the sea's damaging effects, providing a higher level of defense than Varathane 262006. The necessity of multiple coatings to achieve an even finish makes it a slightly pricey choice.
Epifanes CV.500 Clear Varnish: The Epifanes varnish is globally revered for its high-gloss finish, notable UV protection, and minimal maintenance. Weakness: substandard packaging.
1. Rust-Oleum 207008 Marine Spar Varnish - Best for Weather Resistance
If your major lookout is to get your hands on an all-weather varnish, the Rust-Oleum 207008 Marine Spar Varnish is an ideal option to consider. You can apply it at any time of the year without any fuss. It preserves the natural beauty of the wood even in the harshest of weather conditions.
Let us tell you what we liked the best about this item! It is an oil-based varnish, which means it penetrates deep into the wooden surface and treats it from within. This also ensures that the final finish looks incredible and lasts long.
And as we already mentioned before, you can use it all year round under any weather conditions. Because it is an oil-based formula, it contracts and expands easily and does not develop any cracks in the paint in case of unexpected weather conditions.
Moreover, we were pretty impressed by the durability that this item provides. Even after months of applying it on wooden furniture, it looked good as new. Even if you stay by the seashore, you'll notice that the salty air doesn't have any detrimental effect on this varnish. Its transparent gloss is quite efficient in preserving the natural look of the wood.
We did not really come across any significant drawback of this product. However, we must warn you that patience is the key when you work with this. It takes a little time to dry up, and thus your painting time might feel prolonged. If you are in a hurry to wrap up a project, you should keep this factor in mind.
2. Minwax 63005444 Fast Drying Polyurethane Clear Finish - Best for Quick Drying
If you are looking for a fast dry varnish, you are at the right place. The Minwax 63005444 Fast Drying Polyurethane Clear Finish is quite suitable for cutting difficult areas that require fast dying, such as your wooden floors. Besides the convenience of its short drying time, it also adds an excellent luster and sheen to the wooden accessories.
What we liked the most about this product is the kind of versatility that it brings to the table. No one likes using a whole variety of varnishes to coat different things. This item is an all-rounder and can be used on a variety of wood surfaces. Be it finished or unfinished wood, this item is excellent for all.
Moreover, the final finish that this product delivers is incredible. It is a semi-gloss coat that is perfect for interior wooden furniture, doors, tables, and cabinets too. If you like a glossy texture but not the top sheen, this varnish is your best bet.
Also, its fast-drying formula is excellent if you are in a hurry to finish a project. You do not have to wait for hours for it to become dry to the touch. It dries up pretty fast, and if you are planning to apply a recoat, you can do it without much hassle.
Despite having no complaint about the performance of the varnish, we have to say that we were not too satisfied with the packaging. We expected the packaging to be better and sturdier. With poor packaging, it is difficult to guarantee the condition of the product by the time it reaches you.
3. Varathane 262006 Premium Fast Dry Wood Stain - Best for Pigmentation
Next up on the list, we have the Varathane 262006 Premium Fast Dry Wood Stain, which is best known for its high-quality stain. It is well-loved by consumers because of its efficient performance and long-lasting results.
The most notable trait of this product is that it provides you with a finish that lasts for a considerable amount of time. It is infused with nano pigment particles that enhance the stain's quality and highlight the natural wood grain texture of your furniture.
This exceptionally pigmented product requires one coat to give your furniture an added sheen and protection. You do not have to spend extra time, effort, or money to apply a recoat to get a proper finish.
Also, to use this item, you do not need to prepare your wood. There is no requirement for additional expenses on pre-stain or any wood conditioner. You can directly apply this varnish to the wood without any prior preparation.
If your wood furniture has developed tiny pores or cracks because of regular wear and tear, this varnish can help you restore it. It is excellent as a sealant, and the coat hardens in less than an hour.
The only issue that we faced with the product is that it does not come with a clear set of instructions. The user manual is not very detailed, and unless you have used wood varnishes before, you might find the process a little challenging.
What We Like
Highly pigmented color
Helps in preserving the natural wood texture
No prior wood preparation is required
Helps seal pores
What We Don’t Like
User instructions need to be more detailed
Type: Polyurethane | Finish: Clear | Volume: 32 fl oz | Drying Time: 1 hour | UV Protection: No | Application: Brush or Spray
4. TotalBoat Gleam Marine Spar Varnish
The TotalBoat Gleam Marine Spar Varnish is ideal for handling salty water and harmful chemicals from the sea that damage wooden goods. It is an excellent option for both interior and exterior use. We highly recommend this varnish for those living in regions with unstable weather conditions.
To be honest, what brought this product to our attention is the fact that it dries so fast that one can paint multiple coats in quick succession. Besides drying quickly, the varnish deposits an even layer of coat that lasts for a considerably long time. When it comes to durability, we are not questioning the manufacturer’s claim at all!
Moving on, the formula is highly potent and comes with a phenomic resin base with an added UV inhibitor. Whether it is rain, harsh rays of the sun, or snow, this item is built to provide 100% protection against weather-based damages.
Additionally, this item is quite versatile, and depending on your requirement; you can opt for either the gloss or the satin finish. If you want the gloss finish, all you need to do is apply 4 to 6 layers of the gleam gloss. And for the satin finish, apply a layer of gleam satin coat for the final touch.
After using it a few times, we noticed that it delivers the best result only when applying a few coats to it. With a single coat, it might appear a little blotchy. Since a single coat will never suffice, you will end up using more products. This makes the product relatively expensive for a modest budget.
The popularity that the Epifanes CV.500 Clear Varnish enjoys crosses geographical boundaries. People worldwide have come to like this varnish for the ultimate high gloss finish that it delivers. And it's not just the stellar looks but also the kind of protection it provides to the wood that makes it remarkable.
We were very impressed by the incredible amount of protection that it offers to the wooden furniture. If your deck chairs are losing their charm due to constant sun exposure, this item is the one for you. It deposits a UV-resistant coat and effectively prevents wood from becoming dull and damaged because of the harsh sun rays.
Moving on, this item requires very minimal maintenance. Because the layer is pretty solid, you do not have to think of reapplying it often. This saves you from putting extra effort into doing the same work and also saves unnecessary expenses. If you are looking for a varnish that can take the look of your furniture up a notch, this is the best bet. Lastly, we noticed that it is an excellent choice for both old and new wood.
Despite the brilliant performance that this item delivers, there's one complaint that we have. After the varnish was delivered, we noticed that the packaging was not really up to the mark. The outer box gets tapered easily, so the chances of the product getting damaged are high.
Next up, we have the Minwax 40900000 Wipe-On Poly, a perfect amalgamation of hand-rubbed beauty and excellent protection. The manufacturer is an established company that has spent decades perfecting the quality of the varnishes and architectural coatings that they produce.
The thing that caught our attention first is the ease of use that this product offers. Whether you are a professional or a beginner trying wood varnishing for the first time, this item will make the process a lot easier for you. There's no need for special tools such as brushes or drips; a simple piece of cloth is enough for the coating.
Coming to the texture and finish, we noticed that it is pretty thin and does not become patchy or thick. Because of its excellent consistency, it glides easily over the wooden surface and does not lead to hand fatigue.
This clear durable coat is an excellent choice if you dislike giving a new varnish coat to your exterior furniture every season. Once coated, the paint stays for long and prevents the wood from an array of weather damage. To put it simply, the wood gets a new lease of life with this layer of protection.
After a few weeks of putting the product on the outdoor wooden furniture, we noticed that it is not very resistant to water. The color got a little cloudy after a heavy downpour. In such a scenario, we suggest that you use a rain cover to protect it.
What We Like
Easy to use
Smooth formula glides easily
Suitable for beginners
Long-lasting results
What We Don’t Like
Cannot handle water damage
Type: Polyurethane | Finish: Clear | Volume: 16 fl oz | Drying Time: 2-3 hours | UV Protection: No | Application: Cloth or Brush
7. TotalBoat Halcyon Marine Varnish
For the ones who love the beauty of antiques, the TotalBoat Halcyon Marine Varnish is an excellent consideration. Once the coat dries, it leaves an incredible amber finish on the wood that accentuates its beauty. The tint is a light one and comes with great clarity.
The best thing about this item is that it allows the wood to expand and contract naturally in tune with the changes in the weather. Because of the excellent adhesion and flexibility that it offers, you'll notice no chipping, peeling, or yellowing once the coat is done.
To add to that, the formula is designed in a way that it provides the maximum amount of protection from weather-based damage. Whether it is the harmful UV rays or the unwanted moisture, this varnish protects the wood from all possible harm. It also prevents scratches from forming on the surfaces.
Moving on, the ease of using this item calls for a special mention. It is self-leveling, and you can use any tool to apply the varnish, be it a painting spray, foam brush, or roller.
One major drawback to this item is that the packaging is not up to the mark. It comes in a plastic bag container, and once you use it, the container tends to fold and becomes unsuitable for storage. We suggest that you transfer the entire product into a can before beginning with your work.
What We Like
Helps the wood remain highly flexible
Provides maximum protection from weather damage
Simple application process
Durable formula
What We Don’t Like
Poor packaging may cause product damage during transit
8. System Three 1850S16 Clear Marine Spar Urethane Varnish Coating
We have almost reached the end of our list, and following up, we have the System Three 1850S16 Clear Marine Spar Urethane Varnish Coating. It is best suited for outdoor wooden surfaces such as decks, railings, doors, and so on. Rest assured that with this varnish coating, you can easily achieve a precise and durable finish.
As the name suggests, this high-quality urethane coating is actually very well-suited for marine epoxy. So, if you are planning to give your boats a protective varnish coat or add some fresh color to the deck, this is a great option.
The formula is designed with a high content rate of UV absorbers. Once coated, your exterior wooden furniture will face no damage from the harsh rays of the sun. Even if the furniture is constantly exposed to sunlight, the layer won't crack or become dull if coated with this high-quality product.
Additionally, it is very easy to use this product. The coatings dry quite fast, and if you are planning to apply recoats, you do not have to wait for long to do that. Also, there is no requirement for sanding in between the coats.
The only thing that you need to be careful about when it comes to this product is that it dries up quite fast in storage. So, we suggest that you either buy an airtight container or buy only as much product as you need. Storing the leftover may end up in unnecessary waste.
If you are a professional and need to finish a project quickly, the Deft Defthane 037125020040 Interior Exterior Clear Polyurethane Gloss is an excellent choice. It is best suited for quick jobs as it dries up quite fast. To know more about it, keep reading.
The first thing to catch our attention was how easy it was to use this item. Although painting and varnishing are best done by professionals, you can use this product with equal ease even if you are a beginner. You can do the painting process all by yourself without having to hire a professional. That saves you from incurring extra expenses.
And as we have mentioned above, it is designed in a way that dries very quickly. Within 30 minutes, it is completely dry to the touch, and within an hour's time, you can even apply a recoat if you desire. This saves time and effort too.
Also, they offer excellent customer service. Their executives are available 24x7, and you can reach out to them any time you need. They are great at guiding you in case you have difficulty understanding how to use the item.
We hardly have any complaints about the product, apart from the fact that the product consistency is a little too thin. This requires you to put in multiple coats in order to get an even layered finish that looks presentable.
If you're seeking the best varnish for wood, listed below is a table that compares type, finish, volume measured in fluid ounces, drying time in hours, UV protection, and application method.
By now, you must have acquired a better grip on what to look for when selecting the best varnish for wood. But we suggest not jumping to any decisions yet, as you are just halfway to your destinations.
Simply knowing about the best products is not enough to make a good choice. To end up with the right option, you have to consider a few other factors. In order to evaluate the products thoroughly, we suggest that you go through this well-researched buyer’s guide.
Get ready to jump into the nitty-gritty of wood varnish!
Easy Application
The ease of using a varnish should be one of the most important considerations before you decide on a product. If you are new to woodworking, a lot of products might seem a little difficult to use.
Depending on your level of expertise, we suggest that you go for an option that can be applied easily. Some varnishes are quite light and glide very smoothly on the surface, unlike others that are thick and require a skilled application.
We suggest that you read the package carefully before buying. The manufacturers mostly put all the necessary details about the application process on it. Whether you need a brush, a painting spray, or just a piece of cloth, everything is mentioned. If you have any problem understanding, always take some recommendations from the seller before selecting an option.
Drying Time
This is a crucial consideration for the ones who work professionally with wood varnishes. If you have taken up a project with a short deadline, it is better to go for a product that dries and cures quickly.
A shorter drying time allows you to put more recoats easily if you are required to do so. It saves you a lot of time as you can paint in quick succession without having to wait. So, before heading out to buy a product, it is better you note down your painting schedule and the deadlines. This will help you make a better decision on which option would work best for you.
Durability
One of the major determinants of what can be considered a good product is the durability that it offers. If the finish does not last for long and starts chipping or developing cracks, it is no good.
No one likes recoating every season, making repairs, and fixing cracked paint every now and then. So, we recommend that you do your research and go for items that do not get damaged easily. If you were to paint twice a year, that would require you to buy more paint and spend double time doing the same work. Durable products save you from unwanted expenses and wasted effort.
How does varnish differ from other wood finishes like stain or paint?
Varnish differs from other wood finishes like stain or paint in its purpose and appearance. Unlike stain, which penetrates the wood to change its color, and paint, which coats and colors the surface, varnish provides a clear finish designed to protect the wood while enhancing its natural beauty. Varnish also offers a durable finish that can resist heat, chemicals, and weather, which isn't always the case with stains or paint.
What are the different types of varnishes available?
Some of the different types of varnishes available are traditional varnish, polyurethane varnish, and spar or marine varnish. Traditional varnish is composed of resin, oil, and solvents. Polyurethane varnish, which can be water or oil-based, provides a hard, durable finish and is often used on floors. Spar or marine varnish is formulated to withstand weather and water, making it suitable for outdoor furniture and boats.
How should I prepare the wood before applying varnish?
Preparing the wood before applying varnish includes several steps. Firstly, the wood should be smoothly sanded to remove any rough areas and imperfections. Once sanded, the surface must be cleaned of sawdust, usually with a tack cloth or a vacuum. In cases where the wood has blemishes or stains, it might be necessary to use a wood conditioner or pre-stain product to ensure an even finish. The surface should be clean, dust-free, and dry before applying the varnish.
How many coats of varnish should I apply?
The number of varnish coats you should apply can vary, but generally, two to three coats provide a satisfactory finish. These coats offer a balance between adequate protection and aesthetic appeal. Refer to the manufacturer's instructions for specifics, as the necessary number of coats can differ based on the type of varnish.
How long does varnish take to dry?
How long a varnish takes to dry can vary significantly based on several factors, including the type of varnish, the thickness of the applied layer, and environmental conditions such as temperature and humidity. While a thin coat of varnish may become touch-dry in a few hours, full curing—when the varnish achieves maximum hardness—may require a few days or even weeks. Refer to the manufacturer's instructions for specific drying and curing times.
Can varnish be used on outdoor wood surfaces?
Yes, varnish can be used on outdoor wood surfaces. Choose a varnish specifically designed for outdoor use, often termed as spar, marine, or exterior varnish. These varieties are formulated to withstand weather elements, ultraviolet light, and moisture, providing protection to the wood surface from cracking, peeling, and discoloration caused by exposure to the elements.
Can varnish be applied over an existing varnish?
Yes, varnish can be applied over an existing layer of varnish, as long as the surface is correctly prepared. This process generally involves lightly sanding the previous layer to ensure good adhesion, followed by cleaning the surface thoroughly to remove any dust. Adhering to specific instructions provided by the varnish manufacturer is important to achieve the best results.
And with that, we have reached the end of this comprehensive guide about the top 9 varnishes out there. We hope you have had fun going through this as much as we enjoyed compiling all this information for you.
And with that, it’s a wrap. Keep a watch on this space for such interesting reads. We promise to be back soon with more!
The metal furniture and décor in your home are integral to enhancing its appeal and ensuring great longevity.
However, such metal objects need appropriate protection to keep them in the right shape for years. And that’s why you need good-quality spray paint for all metal objects at home. It will provide resistance against rust, weather, moisture, and heat and will make your furniture look as good as new.
But choosing a suitable product is difficult, given the availability of so many options out there. Hence, we’ve tried to make the task easier for you by putting forward this carefully-curated list of the 13 best options to consider. Each option has its pros and cons mentioned, which will help you to make a wise decision.
So, without further ado, let’s dive in.
Best Spray Paints For Metal
From rust-resistant formulations to a wide range of vibrant colors, these paints are sure to breathe new life into your metal creations. So, without further ado, here's the list of the 12 best spray paints for metal that will make your projects shine.
Enhance the appeal of your metal furniture with this superior-quality spray paint from Rust-Oleum. It uses advanced technology to provide the ultimate protective coat over all your furniture pieces to make them last for years to come. Note that this paint comes in a spray bottle weighing 12 oz.
Ideal for use on interior/exterior surfaces including wood,...
Oil-based formula resists chips and provides long-lasting...
Why Did We Like It?
To begin with, we found the dual-cover technology used in this painting to be its most significant feature. This technology enhances both the speed and quality of any painting project and adds color to the home décor and furniture. It can even be used for art and craft projects on metal objects.
Additionally, this spray paint comes with a glossy finish that lends metal surfaces a new and fresh look. It also has a durable formulation that keeps it intact for a long time, while providing excellent hiding power to it. What’s more, each can have a coverage of 12 sq. ft. and gets dried in just 20 minutes.
Furthermore, the paint is oil-based and produces a mild odor that would never seem disturbing to you. Lastly, you can spray paint at any angle using this product, so painting the corners or other hard-to-reach parts becomes very easy.
What Could’ve Been Better?
The only issue we faced while using this product was that the nozzle of the can was clogged when we tried to spray too much paint at once. So, you should paint the surface bit-by-bit and not use excess paint at once. Also, spraying a greater amount of paint on one spot may create a pool of paint, which can make the bottom layer bubble.
Next, we’ve selected this COLORmaxx spray paint from Krylon, which gives a stunning look to your décor and furniture. Designed with premium quality components, this product is an ideal companion for people who are into DIY interior decoration projects. Note that it comes in a can of 12 oz. and has dimensions of 2.61 x 2.61 x 7.96 inches.
SPRAY PAINT AND PRIMER – Krylon COLORmaxx Spray Paint and...
INDOOR/OUTDOOR RUST PROTECTION – Whether your spray paint...
Why Did We Like It?
We found that this paint dried up in 10 minutes or less and was also perfectly rust-resistant. Thus, even one coat on your metal furniture will keep them protected for several years. As a result, you can also use it for your outdoor projects, and be rest assured that the finish and color will stay intact.
Further, the push button system of the spray makes it very easy to operate and hence lets you spray conveniently in all directions. As such, you get the job done faster and get greater coverage with this product.
Moreover, each can of 12 oz can cover an area of as much as 25 sq ft. and offers a sleek and modern finish to all your projects. Lastly, coming in white color, this product can be used for a variety of metal structures.
What Could’ve Been Better?
This product works quite well on most occasions. However, when you are painting smaller objects, it may be difficult to coat them evenly with this paint. That's because the sprayer has a bigger nozzle that may spray more paint on the other portions.
Pros
Dries up in 10 minutes or less
Perfectly rust-resistant
Can be sprayed in all directions
1 can has a coverage of 25 sq ft
Cons
Smaller objects are difficult to paint
Coverage: 15 square feet per can | Durability: Good | Rust Resistance: Good | Finish: Satin | Dry Time: 20 minutes | Adhesion: Strong
Rust-Oleum is a trusted name in the world of paints and primers, thanks to its range of high-quality products. And this spray paint from the brand is no different since it provides the quality and long-lasting protection you desire. Note that this product comes in a can of 12 oz and is available in a variety of colors.
Weather and corrosion resistant coating protects...
Oil-based formula provides a durable protective coating with...
Why Did We Like It?
First of all, this product is one of the most durable options that you’ll ever find out there. Thanks to its oil-based formulation, a durable, rust-proof, and protective coating is provided on the surface. Plus, you can use it for both outdoor and indoor objects.
What’s more, the product prevents abrasion, chipping, or fading of your furniture or home décor. Rather, it comes with a semi-gloss finish that lends a slight shine to the surface.
Additionally, you can spray-paint at any angle with this product including upside-down. Finally, it features a wide finger pad on the handle to reduce fatigue while spraying. Thus, you would never have any discomfort even after a long spray session.
What Could’ve Been Better?
The only drawback of this product is that it takes as long as 2 hours to dry up completely. And in the case of bigger surfaces, the time may increase to 4 hours. So, you will have to be more patient to be able to use the newly painted object.
Enjoy a top-notch painting experience each time with this Rust-Oleum paint which comes with a cutting-edge formulation. It gives a luxurious look to any furniture piece, home décor, or hardware. So, this product won’t fail to satisfy you even a bit. Note that it is available in a can of 11 oz and has dimensions of 2.6 x 2.6 x 9 inches.
Works on virtually any surface including wood, plastic,...
Oil-based formula with excellent adhesion prevents rust,...
Why Did We Like It?
The advanced oil-based formula of this product makes it highly durable and also gives it adequate rust and chipping protection. In addition to this, the paint is UV and fade-resistant, which enhances its longevity further.
What’s more, its formula dries up in just 30 minutes to make the furniture or décor suitable for use. And each can of spray paint can cover an area of as much as 15 sq ft. Plus, the surfaces are provided with a shimmering and rich metallic look that sets them apart from other objects.
Also, the product consists of a trigger that makes the job quite comfortable, eliminating any finger fatigue. Lastly, the 360° spraying power makes it easy to paint the hard-to-reach parts of any surface.
What Could’ve Been Better?
Sometimes the nozzle of the can may clog in the middle of a continuous painting session, which makes it difficult to spray the paint evenly. To deal with this problem, you have to shake the can at times to remove the clog. Thus, you need to ensure that too much pressure is never applied while using this product.
This is yet another amazing spray paint from Krylon that gives new life to old metal objects that have lost their shine. It is also suitable for all kinds of DIY projects and is one of the most high-performing products of the brand. Note that this paint comes in a can of 12 ounces and has dimensions of 261 x 2.61 x 7.96 inches.
STRONG ADHESIVE – This all-purpose spray paint bonds with...
Why Did We Like It?
The most significant feature of this product is the superior-grade protective property. Being both a primer and a paint, it offers the best protection from priming, sanding, and rust. Also, it easily bonds to any difficult metal surface such as that of old objects and wrought iron furniture.
Further, there are different shades of black and many metallic colors available for this product. The black shades include satin, matte, hammered, textured, and flat. Each of these colors provides a soft, classic look to your DIY projects, tools, or crafts. Plus, each can of 12 oz provides a coverage of 25 sq ft which is much greater compared to other average products.
Additionally, this painted surface becomes dry to the touch within 20 minutes, and the object can be handled in 1 hour. Furthermore, you can use this paint for a variety of indoor and outdoor projects.
What Could’ve Been Better?
Although this product works quite efficiently to deliver the desired results, sometimes the wrong color may be delivered to you. For one of our orders, we received a rose gold color instead of the metallic gold color that we wanted. So, do check the product carefully to ascertain whether you’ve got the desired color or not.
This best-seller product from Dupli-Color dresses up your metal and chrome surfaces in the best way possible. It comes with a range of amazing features that work to provide a high-quality coating to your furniture and home décor. Note that it can be used for both exterior and interior accessories and comes in a can of 15 oz.
HIGH HEAT RESISTANT– This high gloss, purple vehicle paint...
Why Did We Like It?
Firstly, this spray paint is designed to work on bare metal surfaces to provide a shining metallic finish that you will love. Plus, the paint is very glossy, which adds to the elegance of the objects.
Further, it is much more long-lasting than average products and prevents any damage due to heat, oil, or gas. Notably, it is resistant to temperatures as high as 500°F, which makes it suitable for painting heated metal parts too.
What’s more, this product consists of a spray nozzle with an EZ touch fan which allows you to spray-paint conveniently and ensures maximum comfort. Lastly, the object becomes dry to the touch within 30 minutes and can be handled in 1 hour after it’s painted.
What Could’ve Been Better?
The capacity of one can of this spray paint is not enough when you need to apply more than two coats on an object. For instance, if you have to apply 2 light coats and 1 medium coat, you might run out of paint. Purchasing 2 cans at once would be the best to deal with this problem.
Pros
Provides a shiny metallic finish
Gloss adds to the elegance
Prevents damage due to heat, oil, or gas
Nozzle makes spraying convenient
Cons
Each can has a smaller capacity
Coverage: 10 square feet per can | Durability: Good | Rust Resistance: Good | Finish: Gloss | Dry Time: 30 minutes | Adhesion: Strong
The next spray paint we have for you is this superb Rust-Oleum product that makes your furniture look extra sleek. It also keeps all metal surfaces perfectly protected for years to come. Note that this product comes in a 12-ounce can and is available in a flat black color.
Ideal for use on automotive parts and surfaces subject to...
Tough enamel features Stops Rust formula to prevent...
Why Did We Like It?
We really liked the rust-preventive formula of this product which ensured that our furniture remained intact for a long time. It also prevents other environmental elements like humidity and salinity from affecting the object. Plus, it provides resistance to grease, oil, and gas.
Another great benefit of this spray paint is its extraordinary heat resistance. You can also apply it to automotive metal parts that are exposed to temperatures of up to 2000°F, such as manifold headers.
In addition to this, it comes with 360° spray technology that lets you spray paint in any direction, including upside-down. Also, the product has a high-quality spray tip that makes the job very easy and comfortable. And you can get the task completed in as little as 30 minutes in the case of medium-sized objects.
What Could’ve Been Better?
The only disappointing aspect of this product is that it provides less coverage than other products. One can of the product covers 10 sq ft of area, which implies you may require another can of paint for larger surfaces.
This aerosol spray from Seymour is another great choice if you’re searching for good-quality spray paints. It uses an industrial-grade formulation and is perfectly lead-free, which makes it completely safe for use. Note that this product comes in a can of 1.3 lbs and has dimensions of 2.5 x 2.5 x 9 inches.
3-4 times the coverage of standard aerosol spray paint
Does not run or sag
Why Did We Like It?
First of all, this product provided coverage that was 3-4 times that of standard spray paints. Thus, you no longer need to worry whether the capacity of one will be enough for larger surfaces.
Plus, its MRO High Solid material provides ultimate protection from rust, abrasion, and high humidity. As for heat resistance, it can be applied on automotive metal parts with temperatures of up to 300°F. And the paint also contains water-borne resins instead of traditional polymers, making it safer for use and more durable.
Furthermore, this product is authorized by the USDA as fit for use on a variety of surfaces, including metals. Finally, it offers great hiding power just with a single coat, which means you never require too much paint for a single project.
What Could’ve Been Better?
We found it difficult to control the amount of spray coming out of its nozzle. Also, the paint sometimes clogged in the nozzle, which further disrupted the flow. This is a disappointment, considering the good quality of the paint and the price of the product.
Pros
Provides 3-4 times greater coverage
Resists rust, abrasion, and high-humidity
Resistant to temperatures of up to 300°F
Provides great hiding power with one coat
Cons
Nozzle may be defective
Coverage: 15 square feet per can | Durability: Good | Rust Resistance: Good | Finish: Gloss | Dry Time: 30 minutes | Adhesion: Strong
This all-weather paint from VHT is formulated to provide flawless performance and great durability. Coming in a can of 15.5 oz, this product is suitable for both interior and exterior furniture and décor. So, move on and have a look at all its wonderful features.
ANODIZED SPRAY PAINT – VHT Anodized Paint is a unique...
HIGH TEMP PAINT – This anodized spray paint can is...
Why Did We Like It?
We liked the porcelain-like finish on this product, which made it resistant to chemicals, salt, and rust. As a result, you get just the long-lasting performance that you desire. Plus, it is resistant to high temperatures of up to 250°F, which makes it suitable for coating automotive parts.
Further, you don’t need to apply a primer if you choose to go for this product, which makes the coating hassle-free. What’s more, it becomes dry to the touch in just 30 mins and can be handled after being kept overnight. And you also don’t need any curing, which eases the process further.
Lastly, this spray paint comes with detailed instructions printed on the can. Thus, you will have no difficulty understanding each step and complete the process quite smoothly.
What Could’ve Been Better?
The only problem we faced with this product was lesser coverage. When it comes to coating large metal surfaces, it takes at least 7 coats of paint, which implies that the whole product is used up at once. So, buying two cans of this product will be more profitable.
Pros
Resistant to chemicals, rust, and salt
Doesn’t need a primer
Gets dried up for touch in 30 mins
Easy to use
Cons
Lesser coverage
Coverage: 10 square feet per can | Durability: Good | Rust Resistance: Good | Finish: Satin | Dry Time: 30 minutes | Adhesion: Strong
If you are looking to apply golden color on your metal home décor or furniture, this spray paint from Design Master will be an ideal choice. It keeps your metal objects protected and gives them an attractive look that you’ll love. Note that this paint comes in a can weighing 12 oz and measuring 2.75 x 2.75 x 7.88 inches.
Colortool is a fast drying, satin finish, semi-transparent...
Quick drying - fresh flower safe
Why Did We Like It?
To begin with, this product is a pigmented and semi-transparent spray paint that is never too glazy and thick. Yet, it gives a beautiful golden color to your furniture and décor and comes with a satin finish.
Also, this paint dries within just 5 minutes and becomes suitable for handling in a few hours. As for its coverage, you can apply a single coat on an area of about 15 sq ft. with a can full of paint.
You can even use this product to coat fruit or flower baskets since it is safe for fresh fruits and flowers. Besides, it can be used on a variety of surfaces including pottery, glass, ceramics, and chipboards.
Furthermore, objects that have lost their shine over time can be rejuvenated with this spray paint.
What Could’ve Been Better?
This spray paint produces a strong perfume-like smell which may seem disturbing sometimes, more so when a double or a triple coat is applied. That said, this smell generally fades away within a few months and the paint stays intact for years.
Pros
Never too glazy and thick
Gives a beautiful golden color
Comes with an elegant satin finish
Dry-to-the-touch in 5 minutes
Cons
Produces a strong perfume-like smell
Coverage: 10 square feet per can | Durability: Good | Rust Resistance: Good | Finish: Gloss, Satin | Dry Time: 20 minutes | Adhesion: Moderate
Next up, we have chosen this Martha Stewart to spray paint which can be used to add brilliant and permanent color to all metal objects. This product consists of both a primer and a paint and is extremely useful for DIY and craft projects. So, read on to find out more about this amazing product.
PAINT & PRIMER IN ONE: Skip the extra step and get right to...
INDOOR & OUTDOOR USE: The durable formula in Martha Stewart...
Why Did We Like It?
We found the unique formula of this spray paint to be quite long-lasting as well since even a single coat rendered a flawless service for years. This formula is suitable for applying permanent coats on both outdoor and indoor metal surfaces.
What’s more, this product comes in as many as 64 colors, so you get a wide range of options to choose from. And each color gives your furniture and décor an elegant look that enhances the appeal of any room.
Additionally, these spray paints come in 8 finishes that include matte, neon, primer, satin, gloss, pearl, glitter, and metallic. Finally, the products have donuts around the nozzles which match the finish and color.
This way, it becomes easier to select the color that you want and even when the cap is open, you can know the color you are working with.
What Could’ve Been Better?
We noticed that the paint took much longer to dry up than other products. And for larger furniture, it might take several hours to dry up completely, so you need to be a bit more patient in order to handle it. That said, we had no complaints regarding the efficiency and durability of this product.
Pros
Long-lasting
Suitable for all metal surfaces
Comes in a range of colors
Gives an elegant look
Cons
Takes longer to dry up completely
Coverage: 12 square feet per can | Durability: Good | Rust Resistance: Good | Finish: Gloss, Satin, Matte | Dry Time: 30 minutes | Adhesion: Strong
We’ve also selected this Aqua Spray Paint from Pintyplus which can be a perfect gift for enthusiasts of art and craft. It consists of many high-quality components that work to offer an efficient and eco-friendly coat over any metal surface. Note that this product comes in a set of 8 cans of different colors, each weighing 4.25 oz.
ARTS AND CRAFTS SPRAY PAINT! Looking for an ultra matte...
PERFECT GIFT FOR ARTISTS! Our Aqua Mini Spray Paint Set is...
Why Did We Like It?
We loved the fact that these spray paints didn’t produce any strong odor, as in other products coming in a set of different colors. Plus, the combination of colors in the set would appeal to any DIY enthusiasts as it lets them create a unique palette as per their preferences!
Further, the colors are sprayed through the nozzle at a low pressure to add just the amount of color that is needed. Thus it prevents any overspray or dripping of the paint on any particular potion and gives you a uniformly painted surface.
Moreover, the paints dry up quickly, so you can handle furniture or décor within 30 minutes. Additionally, these paints are suitable for a variety of metals and can be used for craft projects of different kinds.
What Could’ve Been Better?
The capacity of each of these cans is much smaller than that of most spray paints. As such, covering larger metal surfaces with 1 can not be possible if you want to use one color. This is a disadvantage, considering the price of the set, which is higher than many single spray paint products.
Pros
Doesn’t produce any strong odor
Colors let you create a unique palette
Low pressure prevents dripping
Dries up to be suitable for handling in 30 mins
Cons
Cans have a smaller capacity
Coverage: 10 square meters per can | Durability: Good | Rust Resistance: Good | Finish: Matte | Dry Time: 15 minutes | Adhesion: Strong
Buying the right spray paint won’t be difficult if you keep things organized. First of all, considering some key features characteristic to spray paints is essential. Also, you must keep in mind your needs and preferences while choosing a product.
Only then will you be able to zero in on the product that would give you the best results. So, let’s look at some important points that should be taken into account when it comes to choosing spray paints.
Drying Time
This is one of the most essential factors to consider while selecting spray paints. Note that the time taken for the spray paint to dry is different for different products.
Some good-quality products might take longer to dry up, while some become dry to the touch within as little as 20 minutes. In the latter case, it is easier to move the item being painted, but it may not always imply that the object is completely dry.
Also, the humidity and temperature of the surroundings might affect the drying time to some extent. Generally, the ideal practice is to leave the spray-painted item for at least one day before using it.
Capacity
The capacity of the spray paint is also a very crucial factor and should never be taken lightly. For determining the capacity needed, you should consider the size of the surface(s) that you will have to paint.
Accordingly, you have to choose a smaller or a larger spray paint can. Remember that a smaller can last for a long if you need to paint larger surfaces frequently. For such purposes, a capacity of 15 or 17 oz will be ideal.
Outdoor and Indoor Use
Not all spray paints are suitable for both outdoor and indoor metal objects, so considering your needs is important in this case as well. Generally, indoor paints are less durable than those suitable for outdoor purposes, since they are less resistant to sunlight and water.
This implies that metal could rust and may also be affected by changing weather conditions. Note leaving metal objects outdoors for a long time may cause weaker spray paints to fade due to the action of UV radiation. As such, you will need to repaint such objects frequently, which will increase the expenditure on paints.
In comparison, spray paints that are suitable for outdoor purposes also are designed to tolerate different weather conditions. So, the vibrant and bright colors of your metal furniture will stay intact even if they are left outdoors on hot summer days.
While going through the details of each product you consider, make sure to check whether it is rust-resistant. This feature generally provides protection from both UV radiation and moisture and thus keeps your metal items in the right condition.
Spray Paints for Metal FAQ's
How do I prepare metal surfaces for spray painting?
To achieve the best results with spray painting metal, proper surface preparation is essential. Start by cleaning the metal surface thoroughly to remove any dirt, grease, or rust. Use a wire brush or sandpaper to smooth out any rough areas and create a clean, even surface. Next, apply a metal primer to enhance adhesion and prevent rust. Finally, ensure the surface is dry and free of dust before applying the spray paint.
Can I use regular spray paint on metal?
While regular spray paint can be used on metal, it’s generally recommended to choose a spray paint specifically formulated for metal surfaces. Metal spray paints often contain rust inhibitors and adhesion promoters that help the paint adhere better and provide superior protection against rust and corrosion. Using a spray paint designed for metal will ensure better adhesion, durability, and a professional finish.
How many coats of spray paint should I apply to metal?
The number of coats of spray paint needed for metal surfaces can vary depending on the desired finish and the specific product you’re using. In general, applying two to three thin coats of spray paint is recommended. Start with a light coat, allow it to dry, and then apply subsequent coats for better coverage and a smoother finish. Be sure to follow the instructions provided by the spray paint manufacturer for optimal results.
Can I use spray paint on outdoor metal surfaces?
Yes, spray paint can be used on outdoor metal surfaces. However, it’s crucial to choose a spray paint specifically formulated for outdoor use and metal surfaces. Outdoor spray paints often contain additional UV inhibitors and weather-resistant properties to withstand the elements and prevent fading, peeling, or rusting. Additionally, proper surface preparation and application techniques are important for long-lasting results on outdoor metal surfaces.
How can I prevent spray paint from chipping on metal?
To prevent spray paint from chipping on metal, it’s important to ensure proper surface preparation, including cleaning and priming the metal surface. Additionally, follow the manufacturer’s instructions for applying thin, even coats of paint, allowing sufficient drying time between coats. Applying a clear protective topcoat specifically designed for spray paint can also help enhance durability and reduce the chances of chipping or peeling. Finally, avoid excessive handling or placing objects on freshly painted metal surfaces until the paint has fully cured.
Conclusion
So, here was our guide on the best spray paints for metal. We hope you’ll find it easier to make an ideal choice now.
But before proceeding further, we have a pro tip for you to use spray paints efficiently. Do remember to shake the can for 45 to 60 seconds before you begin work. This will help you get smoother coverage without any clumping or spitting.
Now, we would like to highlight our favorites from the list. In case you are looking to paint smaller metal surfaces, the Rust-Oleum 249131 Universal Spray Paintwill be an ideal product to go for.
A well-maintained fence helps enhance the look of your home landscape. After all, it’s the first thing that visitors tend to notice!
Thus, maintaining a fence properly is essential, which is why you need an effective pump sprayer for staining the fence. It will prevent any splitting, limit the damage due to exposure to UV rays, and most importantly, will increase its lifespan.
But choosing a pump-sprayer is difficult when you have hundreds of options with different features. Hence, we have tried to ease the process for you by compiling this comprehensive list of the 9 best options to consider.
So, without further ado, let’s dive in!
Listed below are the 5 best pump sprayers for staining fences from our list:
Deck & Home 190399: This versatile sprayer offers lockable, continuous spraying, is powered by a high-performing pump requiring 25% less pumping action and includes four different nozzles, but may sometimes come with missing parts.
VIVOSUN 2.0 Pump Sprayer: This model stands out for its easy handling facilitated by a long watering wand and strong shoulder strap, plus its powerful pump enables fast fence staining, but it may arrive in weak packaging.
Chapin International 1949: This heavy-duty sprayer is optimal for large projects thanks to its large-capacity 3.5-gallon tank, sturdy construction, and fan-tip nozzle ensuring uniform coverage, but it is relatively expensive.
TABOR TOOLS N50: Ideal for harder-to-reach areas, this sprayer has an adjustable nozzle and a long reach, while the pump handle has a comfortable grip, but may come with warranty fulfillment issues.
Chapin International 30600: This sprayer offers three fan nozzles for adjustability in spray patterns, a reinforced 60-inch hose, and robust seals for durability, but the shut-off valve may occasionally not function properly.
Here’s the list of the 9 best pump sprayers for staining fence, ensuring efficient and effective application of stain to enhance the durability and appearance of your fence.
1. Deck & Home 190399 - Best for Versatility
Spray staining your fence is most comfortable with this product from Deck & Home. Besides, it has a variety of other applications, such as detailing your car, controlling insects, and killing weeds. This product comes with a number of highly beneficial features that make it one of the best products you’ll ever find there.
First of all, this sprayer consists of an efficient lockable shut-off feature that lets you spray the chemicals continuously yet comfortably. Plus, the convenient grip on the shut-off helps prevent the fatigue felt as a result of working with it for a long time
The sprayer is also powered by a high-performing pump that requires 25% less pumping action than leading products in the market. And it comes with 4 different nozzles that make it more versatile. Among these, one nozzle is poly adjustable, 2 are flat fan nozzles, and the fourth one is a foaming nozzle.
Furthermore, there are seals and gaskets from Viton fitted on many parts of the pump. These offer effective resistance against harsh chemicals, such as bleach. Lastly, the funnel top of the product will never cause any spills, thanks to its efficient design.
If you order this product online, make sure you check whether it has all the parts included. Sometimes one or more parts may be missing, which means the sprayer can’t be used. For instance, we found that the rubber ring on the pump was missing, so we had to report the issue immediately, requesting the missing part.
What We Like
Enables continuous spraying
Provides ultimate comfort
Seals provide resistance to chemicals
Highly versatile
What We Don't Like
One or more parts may be missing
Material: Viton | Dimensions: 9 x 9 x 18.75 inches | Weight: 3 pounds | Tank Capacity: 2 Gallons | Spray Wand Lenght: N/A | Adjustable Nozzle: Yes
2. VIVOSUN 2.0 Pump Sprayer - Best for Easy Handling
Next up, we’ve selected this pump sprayer from VIVOSUN, which makes spraying fun and easy. It delivers just the performance you desire, thanks to its set of amazing features. Note that this sprayer consists of a pump of 2 gallons and comes with a beneficial 1-year warranty.
What we liked the most about this product was its 56.5cm long watering wand. It provides a greater reach, so you can reach inaccessible places very easily. Plus, a strong and durable shoulder strap provides great convenience during staining sessions.
Additionally, the spray bottle is translucent and has a calibration scale on it, which lets you check the fluid level and be alerted about when to refill. Also, the largemouth and funnel make filling it quite easy and ensure that it’s never messy. All you need to do is unscrew the cap, fill it, and close it tightly.
Furthermore, the powerful pump of this sprayer lets you stain fences much faster than other average products. Operating it is also a breeze as you just need to pump up the pressure.
Packaging is the only issue that you might face with this product. Especially, the box in which the sprayer arrives is often weak and may be torn in several places during delivery. Also, the spray handle may leak sometimes, which can be managed by reducing the amount of water in the bottle.
What We Like
Provides greater reach
Lets you check the fluid level easily
Filling it up is easy and never messy
Operating the pump is a breeze
What We Don't Like
Faulty packaging
Material: Polyethylene (PE) | Dimensions: 22.2 x 7.3 x 7.3 inches | Weight: 3.99 pounds | Tank Capacity: 2 Gallons | Spray Wand Lenght: 56.5 inches | Adjustable Nozzle: No
3. Chapin International 1949 - Best for Large Projects
This Chapin International sprayer is among the toughest products available out there. It is suitable for both domestic and professional purposes and also delivers a top-notch performance. As such, you can be sure that the fence will be stained flawlessly. Note that this product comes with a spray bottle of 3.5 gallons and weighs 10.9 lbs.
If you are looking for a product with a spray bottle of large capacity, this will be a great choice for you. Its 3.5-gallon capacity ensures that you are able to paint large fences at once.
Plus, the bottle is made from strong steel lined with a protective tri-poxy coating to provide protection against denting, rust, or corrosion. And its fan-tip nozzle facilitates uniform coverage each time, ensuring that your fence is entirely protected.
Moreover, the hose of this sprayer is threaded with strong fittings and consists of Viton seals which enhance its durability further. What’s more, the tri-lock feature of the bottle cap locks firmly and hence rules out any chance of dripping.
And that’s not all. The gaskets and seals provided with the product are resistant to a variety of chemicals, which adds to the durability and efficiency of the product.
This sprayer is much more expensive than other products, so it may not be the ideal choice if you have a tight budget. That said, the price is justified to some extent since it comes with a really powerful pump that can get the job done for larger projects within minutes.
What We Like
Lets you paint large fences at once
Facilitates uniform coverage
Strong fittings enhance durability
Seals and gaskets are resistant to chemicals
What We Don't Like
More expensive than other products
Material: Metal | Dimensions: 8.75 x 8.75 x 27.37 inches | Weight: 10.5 pounds | Tank Capacity: 3.5 Gallons | Spray Wand Lenght: N/A | Adjustable Nozzle: Yes
4. TABOR TOOLS N50
This sturdy all-purpose sprayer from TABOR TOOLS is ideal for staining your fences evenly and gives you great control over the job. It can be used to spray water and pest control chemicals as required and comes with a 1.3-gallon spray bottle and a convenient 16.5-inch long spraying wand.
This product includes a 50-inch long hose with an adjustable nozzle that makes the work super easy and comfortable. When used along with the hose, the 16.5-inch long spraying wand provides a much greater reach than ordinary products. The nozzle helps you to adjust the spray as per your needs for optimal application.
Further, the trigger handle of the sprayer has a comfortable grip with a shut-off valve that lets you rest your hand while maintaining the flow. And the funnel top of the spray bottle allows for easy and mess-free filling.
Additionally, the polyethylene material of the bottle provides great durability, and its translucent nature makes it easy to view liquid levels. Lastly, the secured o-rings, spray filter, and seals on the bottle ensure that there is no clogging.
The warranty that comes along with this product is not very useful, as you can seldom elicit a response from the manufacturer. And if you are lucky enough to get a response and can request a replacement, they might not revert back anytime soon.
What We Like
Makes spraying easy and comfortable
Nozzle helps adjust the spray
Allows for mess-free and easy filling
Prevents any clogging
What We Don't Like
Inefficient customer service
Material: N/A | Dimensions: 22 x 7.3 x 7.3 inches | Weight: 2.65 pounds | Tank Capacity: 2 Gallons | Spray Wand Lenght: 16.5 inches | Adjustable Nozzle: Yes
5. Chapin International 30600
Sprayers from Chapin are designed to provide maximum satisfaction to the users. And this product from the brand perfectly lives up to that reputation, thanks to its high-quality build and convenient features. It can be used along with most deck cleaners, transparent stains, and sealers. Note that this product consists of a 2-gallon spray tank and weighs 6 lbs.
The most noteworthy feature of this pump sprayer is its three efficient fan nozzles. These nozzles let you adjust the spray pattern to coarse, fine, or medium as per your needs. Thus, you get the spray pattern suitable for each task and can complete it flawlessly.
Another great feature is the reinforced 60-inch long hose which renders a very long-lasting service and provides maximum reach. Plus, the strong seals from Viton enhance the durability of the product further. And the curved sprayer wand is designed to spray on hard-to-reach areas easily.
Moreover, the funnel top of the spray tank is 3 inches wide, which makes cleaning and filling hassle-free. Finally, the ergonomic handle lets you spray comfortably since it reduces hand fatigue arising due to continuous spray sessions.
We found that the shut-off valve with the wand didn’t work properly at times. As such, it didn’t lock in place during spraying, so we had to adjust it each time. That said, the manufacturers offer prompt customer service and would repair the fault free of cost if the issue is reported within the warranty period.
What We Like
Lets you adjust the spray pattern
Hose is durable and provides maximum reach
Viton seals enhance durability
Cleaning and filling is hassle-free
What We Don't Like
Shut-off valve may not work properly
Material: Alloy Steel | Dimensions: 8.4 x 8.4 x 18.9 inches | Weight: 6.4 pounds | Tank Capacity: 0.52 Gallons | Spray Wand Lenght: 60 inches | Adjustable Nozzle: Yes
6. D. B. Smith 190285
The next pump-sprayer that we have for you is this premium quality product from D.B. Smith. You can use it with the toughest of chemicals, thanks to its superior-grade durable features. Note that this product comes with a 36-inch long hose and a 15-inch long spraying wand. Now, let’s move on and find out about all that it offers.
To begin with, we found the poly nozzle of this sprayer to be very efficient for handling all spraying tasks. That’s because it is made of high-quality material that is perfectly non-corrosive. Also, it lets you adjust the intensity of the spray according to your needs.
What’s more, there is a 36-inch reinforced hose with a shut-off feature for making long spray sessions smoother. Plus, a comfortable grip is also provided on the hose, which reduces hand fatigue.
Moreover, the gaskets and seals from Viton fitted on many parts of the sprayer make it perfect for use with caustic chemicals such as bleach.
Lastly, it can be assembled in just one step and is very easy to use. You just need to fill, exert pressure, and then spray the solution on the fences.
If you order the product online, it may sometimes arrive without the drilled hole for receiving the sprayer. This hole is required for attaching the sprayer connector. It also might be that the hole is drilled on the wrong side. Either way, the sprayer is unfit for use, and you should immediately ask for a replacement that has the hold drilled correctly.
What We Like
Nozzle can handle all spraying tasks
Makes spray sessions smoother
Comfort grip reduces hand fatigue
Can be used with caustic chemicals
What We Don't Like
No drilled hole for attaching a connector
Material: Plastic | Dimensions: 16.8 x 7.4 x 7.4 inches | Weight: 1 pound | Tank Capacity: 1 Gallon | Spray Wand Lenght: 15 inches | Adjustable Nozzle: Yes
7. Scotts 190567
Powered by a lithium-ion battery, this Scott pump sprayer can be used with a variety of water-soluble chemicals. It uses advanced technology to deliver a perfect performance each time and comes with a range of beneficial features. Note that this product comes with a 21-inch poly wand and weighs 4.7 lbs.
We found the 3-in-1 nozzle of this product to be the most efficient among all its features. This nozzle is equipped with three different spray settings which include cone spray, fan spray, and stream spray.
Each of these settings can be used for spraying on a different surface, and for staining fences, it will be best to use the fan spray. Plus, you don’t need any additional tools for spraying when you have this product at home.
Furthermore, a safety valve is also found on the sprayer, which relieves the extra pressure before the pump is removed. This prevents any chemical from being sprayed accidentally. Lastly, the lithium-ion battery is rechargeable and can spray up to 12 tankfuls of solution with one charge.
In case you report any issue with the product or request a replacement for any part, the response might not be immediate. In fact, it can take several months for the manufacturer to get back to you with the solution. This is a disadvantage and may discourage customers from going for such a product.
What We Like
Lets you adjust spray patterns
Safety valve relieves extra pressure
Can spray 12 tankfuls of solution with one charge
No additional tools are needed for spraying
What We Don't Like
Customer service is not prompt
Material: Plastic | Dimensions: 16.8 x 7.4 x 7.4 inches | Weight: 4.7 pounds | Tank Capacity: 2 Gallons | Spray Wand Lenght: N/A | Adjustable Nozzle: Yes
8. ITISLL Pump Sprayer
Our next pick for you is this super-efficient pump sprayer from ITISLL that lets you complete large projects with minimum fatigue. It is designed keeping in mind the convenience of the user and also includes a useful 1-year warranty. Note that this product weighing 3.49 lbs. comes with a 19-inch spraying wand and a 50-inch hose.
Straight off the bat, we were impressed by the heavy-duty brass nozzle of this sprayer. It could be adjusted to spray any solution with different intensities, such as a fine mist or a direct injection.
Plus, the 50-inch hose along with the 19-inch extended spray wand helped spray over longer distances or in inaccessible places.
Moreover, the professional-grade PE material of this sprayer makes the tank transparent and highly durable. Hence, you can clearly view the level of liquid in it, and also be assured of getting a long-lasting service.
In addition to this, there are anti-clogging filters and wear-resistant seals that also keep the product functioning effectively.
Finally, an instruction manual included with the product, has all the steps for proper assembly explained in sufficient detail. It also has several tips and precautions for usage. This makes the assembly quicker and easier and also enables the convenient use of the product.
Filling up this sprayer takes longer than other products since its mouth is narrower. As such, cleaning it up thoroughly is also more difficult and time-consuming. This is a disadvantage compared to many other products which have wider funnel mouths.
What We Like
Can spray a solution with different intensities
Can spray over longer distances
Highly durable
Liquid level can be viewed easily
What We Don't Like
Takes longer to fill up and clean
Material: Brass | Dimensions: 15.9 x 7.08 x 7.08 inches | Weight: 3.94 pounds | Tank Capacity: 2 Gallons | Spray Wand Lenght: 19 inches | Adjustable Nozzle: Yes
9. SOLO 456
We have also selected this commercial-quality product from SOLO, which comes with an improved and more convenient design. It facilitates a highly efficient spraying action and can be used with a variety of chemicals. Note that this product comes with a 20-inch spray wand and a 4-feet spray hose.
The feature that caught our attention was the 4.25-inch wide opening of the sprayer tank. Very few products come with such a wide opening, and it makes filling up the tank almost effortless. Plus, you can clean up the entire tank very easily after each use.
In addition to this, the 28-inch long sturdy spray wand gives an extended reach with every use. A commercial-grade shut-off valve, having a lock-on and lock-off function reduces hand fatigue.
What’s more, it consists of interchangeable nozzles, which let you carry out multiple spraying tasks. High-quality seals that are chemical-resistant provide great durability to the product. Lastly, the ergonomic pump handle makes both pumping and carrying the product very easy.
The nylon strap fixed on the sprayer may snap or tear in some portions. That’s because it is built with weaker nylon material that is not very long-lasting. So, it will be better to use the pump handle instead of carrying the product using the strap.
What We Like
Makes filling up the tank effortless
Gives an extended reach
Lets you carry out multiple spraying tasks
Pump handle makes it easy to carry
What We Don't Like
Nylon strap is weak and less durable
Material: Plastic | Dimensions: 8.4 x 8.4 x 22 inches | Weight: 5.89 pounds | Tank Capacity: 2 Gallons | Spray Wand Lenght: 20 inches | Adjustable Nozzle: Yes
What is the Best Pump Sprayer For Staining Fence?
This section features a detailed analysis of the top-rated pump sprayers tailored for fence staining applications. The comparison table below systematically breaks down these sprayers' key attributes, encompassing material, dimensions, weight, tank capacity, spray wand length, and adjustable nozzle functionality.
Buying Guide for the Best Pump Sprayer for Staining Fence
Before proceeding to buy a pump sprayer, you need to consider a few key features that are characteristic of the product. Plus, you must also take into account your needs and preferences, as not all products shall have suitable features. So, let’s look at two important points that you need to keep in mind.
Tank Capacity
This is a very important factor to consider while you are buying pump sprayers. That’s because a smaller tank capacity would mean you will have to refill it more frequently while handling large projects.
This can seem irritating and consumes much of your valuable time. So, do consider whether the fence you need to stain is large, and choose a product accordingly.
Nozzle
Do remember to check the nozzle system of any particular product before making a choice. That’s because there are products with single as well as multiple nozzles, and your purpose will determine which type is suitable for you. Note that we’ve included products with different nozzle systems in our list, so you have a range of options to choose from.
How can the nozzle system affect my fence staining process?
The nozzle system plays a crucial role in the staining process. Different nozzle types, such as single or multiple nozzles, offer varying spray patterns and coverage. Choose a nozzle system that aligns with your specific staining needs to achieve optimal results.
Can I use a pump sprayer for other tasks apart from staining my fence?
Yes, pump sprayers are versatile tools and can be used for various tasks. They are commonly used for applying pesticides, herbicides, fertilizers, and other liquids to different surfaces. However, ensure you clean the sprayer thoroughly before switching between different substances.
How do I maintain my pump sprayer for long-term use?
Proper maintenance is important for the longevity and performance of your pump sprayer. After each use, clean the sprayer thoroughly, removing any residue or clogs. Store it in a cool and dry place to prevent damage. Regularly inspect and replace any worn-out parts to ensure smooth operation.
Can I use a pump sprayer to apply both oil-based and water-based stains?
Yes, many pump sprayers are designed to handle both oil-based and water-based stains. However, it’s essential to check the manufacturer’s instructions and recommendations for the specific sprayer you’re using to ensure compatibility with the stain type you intend to apply.
How do I achieve an even and consistent finish when staining my fence with a pump sprayer?
To achieve an even and consistent finish, maintain a consistent distance between the sprayer and the fence surface while applying the stain. Move the sprayer in a controlled manner, overlapping each pass slightly to avoid streaks or missed spots. Practice on a small area first to get a feel for the sprayer’s coverage and adjust your technique if necessary.
The best primers to cover dark paint are high-performance preparatory coatings designed to block out existing deep colors, improve paint adhesion, and ensure even coverage on surfaces such as drywall, wood, metal, and masonry. Unlike regular paints, primers contain specialized stain-blocking agents, high-opacity pigments, and bonding resins that neutralize strong underlying shades while creating a uniform base for lighter topcoats. According to ASTM International standards, primer efficiency is measured by hide (contrast ratio), adhesion tests, and dry-time performance, making it essential when transitioning from dark hues to light finishes in interior spaces such as kitchen cabinets, living room walls, or furniture. As Benjamin Moore’s technical expert Carl Minchew explains, “A primer’s role is not just coverage, but to ensure long-term durability and consistent color performance.” In this guide, we present the best primers to cover dark paint, including leading options from KILZ, Rust-Oleum, INSL-X, Prestige, and Modern Masters, tested for low-VOC content, adhesion strength, stain-blocking capability, and drying speed, so you can achieve professional-grade results with confidence.
Listed below are the 5 best primers to cover dark paint from our list:
KILZ 2 20902. The KILZ 2 20902, a product by a leading primer manufacturer, is a versatile and budget-friendly option that works well on an array of surfaces and dries within 30 minutes, facilitating quick recoating.
INSL-X SXA11009A-04. A product by INSL-X, part of the renowned Benjamin Moore and Co., the SXA11009A-04 primer offers superior adhesion to different surfaces, has a low VOC, and is easy to clean, enhancing its appeal for users.
Rust-Oleum 2004 Zinsser Bulls Eye. Manufactured by Rust-Oleum, a leading paint material producer, the 2004 Zinsser Bulls Eye primer offers industrial strength endurance and smoother, evenly applied coatings, making it ideal for DIY décor projects.
KILZ L211101. Another excellent product from KILZ, the L211101 high-bonding primer allows recoating within an hour thanks to its quick-drying ability, works well on various surfaces, and offers a durable and glossy finish, making it a worthy investment.
Prestige P500-1. The P500-1 unit from Prestige is a primer and an ultra-premium paint rolled into one, offering a smooth texture and a quick curing time of only 4 hours, offering users the convenience of a two-in-one solution suitable for different rooms.
So, if you're ready to tackle your painting project with confidence, here's the list of the 7 best primers to cover dark paint that will help you achieve the desired results with ease.
1. KILZ 2 20902 - Best for Budget-Friendly Option
Introduced in 1974, KILZ is one of the leading manufacturers of top-grade primers in the US. And the 2 20902 unit is certainly not any different. Made using latex, this versatile primer is perfect for hiding the old colors and allowing a firm adhesion for new paint.
There are quite a few things that we really liked about KILZ 2 20902. To begin with, it can be applied to a wide variety of interior and exterior surfaces, such as plaster, wood, drywall, painted metal, and even bricks. It does a pretty good job of providing strong adhesion for new paint.
Furthermore, you would be pleased to know that it takes only 30 minutes to dry up, enabling you to recoat within an hour. It really comes in handy for hiding previous colors and blocking medium stains. Plus, 1 quart of this water-based primer can easily cover an area of up to 100 square feet.
Finally, it is one of the most budget-friendly options on this list that delivers an excellent matte finish on surfaces. All of these features make it one of the most sought-after primers on the market.
KILZ 2 20902 does a decent job in all aspects, and honestly, we did not have much to complain about. However, we would have preferred if it came in better packaging. Other than this minor drawback, we were really impressed with the results it offered.
What We Like
Can be applied to a wide variety of surfaces
Dries up within 30 minutes
Useful in hiding previous color and spots
Extremely affordable
What We Don't Like
Poor packaging
Coverage: 400-450 sq. ft. per gallon | Adhesion: Excellent | Stain Blocking: Yes | Drying Time: 30 minutes (dry to touch)
2. INSL-X SXA11009A-04 - Best for Low VOC Formula
Next up, we bring you INSL-X SXA11009A-04. This brand is a part of Benjamin Moore and Co., established in 1883; it has been manufacturing some top-grade paints on the market. Having said that, this particular primer from the brand is capable of bonding with the most challenging surfaces.
As a primer from a company that has been in the business since 1883, INSL-X SXA11009A-04 exceeds expectations in all departments. For starters, it features an outstanding enamel holdout, which allows it to offer a firm base for a smooth topcoat finish. Made using acrylic urethane, it bonds to pretty much all hard-to-coat surfaces.
Furthermore, 1 quart of this primer can cover up to 100 square feet. This primer is suitable for both interior and exterior use; it can be applied on ceilings, drywall, glossy surfaces, masonry walls, concrete cement blocks, and plaster. Plus, the matte finish makes it a lot more visually appealing.
However, the best thing about this primer is that it features a very low VOC. Also, it can be cleaned with just soap and water. And lastly, if you are concerned with the drying time, you would be glad to know that it dries rather quickly.
The INSL-X SXA11009A-04 is undoubtedly a great choice when it comes to primers. However, while testing it, we found that it does not adhere to tiles. Also, it is a tad thinner for our liking. Apart from these two issues, it does a great job.
What We Like
Contains low VOC
Features acrylic-urethane
Can be applied on a wide range of surfaces
Easy to clean
What We Don't Like
Does not adhere to tiles
Coverage: 300-400 sq. ft. per gallon | Adhesion: Strong | Stain Blocking: Yes | Drying Time: 1 hour (recoat in 4 hours)
3. Rust-Oleum 2004 Zinsser Bulls Eye - Best for DIY Decor Projects
Founded in 1921, Rust-Oleum is one of the oldest and largest manufacturers of paint-related materials. That being said, we thought of including one of the most popular products of this brand on this list. Featuring industrial-strength endurance, the Rust-Oleum 2004 offers durability and strong adhesion to a wide variety of coatings.
To be fair, we were thoroughly impressed with all the exceptional features that Rust-Oleum 2004 had to bring to the table. What really drew our attention right from the start was its premium quality; it offers top-notch adhesion to a wide variety of hard-to-coat surfaces.
Plus, it does a spectacular job of getting rid of odor, water damage, and dark spots, allowing you to paint directly over the coating without the hassle of repairs. What's more? Well, it creates an extremely smooth coating that allows you to paint evenly and effortlessly.
Furthermore, one quart of this top-grade primer can cover an area as large as 100 square feet. It dries up relatively more quickly than many options on the market, and also, it is odorless. That being said, it is one of the most suitable options for DIY décor projects.
Even though the Rust-Oleum 2004 does a decent job in most aspects, there are a couple of things that could have been better. Firstly, we did not like the package at all, it was very poor, and the cans came dented. Plus, it is on the thinner side of things and, therefore, tends to drip.
What We Like
Applies on a wide range of surfaces
Odorless
Dries up very quickly
Suitable for DIY décor projects
What We Don't Like
Poor packaging
Coverage: 300-400 sq. ft. per gallon | Adhesion: Excellent | Stain Blocking: Yes | Drying Time: 30 minutes (dry to touch)
4. KILZ L211101
As you already know, KILZ is one of the leading names in the painting industry, so we thought it would be reasonable to add another marvelous product from this brand. With that being said, KILZ L211101 is a primer that offers everything you would expect from a top-notch primer, making it a must-have for all DIYers.
We were pretty impressed with its dry time, for starters, which is less than 30 minutes, allowing you to recoat within an hour of applying. Also, 1 gallon of this high-bonding primer can cover a whopping 400 square feet.
Besides being water-based, it can be applied on a wide range of interior and exterior surfaces, including tile, glass, glossy finishes, Kynar, etc. Also, it gives a gloss finish which is very durable; in fact, you would be delighted to know that we tried scratching it after 12 hours and nothing came up.
You do not even need to sand the surface before applying it; its smooth and glossy texture does the job. Overall, the KILZ L211101, given all the features, is certainly worth the investment.
We were quite happy with the performance of the KILZ L211101. However, while testing, we found two significant drawbacks: its poor packaging, and the one that we received was dented. The other issue is its odor; we strongly recommend you use it outdoors.
What We Like
Features a very durable finish
It does not require sanding
Dries up within 30 minutes
It can be applied on a wide variety of surfaces
What We Don't Like
Significantly strong odor
Coverage: 300-400 sq. ft. per gallon | Adhesion: Good | Stain Blocking: Yes | Drying Time: 1 hour (recoat in 4 hours)
5. Prestige P500-1
If you did not already know, Prestige Paints is one of the best-selling paint product brands. On that note, the P500-1 unit is both an ultra-premium paint and a primer, capable of delivering ideal results.
First off, we really liked its versatility; it can be used as paint as well as a primer, which is like killing two birds with a single stone. Having said that, it is most suitable for all kinds of rooms,such as bedrooms, family rooms, and living rooms.
In addition, it has got a very smooth texture, allowing you to paint evenly without sanding the surface. It has a curing time of only 4 hours, unlike most other primers whose curing time exceeds 12 hours. Impressive, right? Well, there is more.
Made using acrylic latex, this primer cum paint ensures that it is both durable and washable. Furthermore, it features a VOC of 5 g/l, which is considered to be on the lower side of things. If you are looking to go with a good quality primer and paint, this product may be a good option.
Despite being such a versatile and premium primer, there are a couple of areas that need improvement. Firstly, you will require multiple coats to cover. The other issue is that it generates an extremely strong odor. So, we would strongly advise you to use it in a properly ventilated room.
What We Like
Dual-functionality
Features low VOC
It has a curing time of only 4 hours
Works on a wide range of interiors
What We Don't Like
Requires multiple coatings
Coverage: 400-450 sq. ft. per gallon | Adhesion: Strong | Stain Blocking: Yes | Drying Time: 30 minutes (dry to touch)
6. Rust-Oleum 276087
Now that we are nearing the end of the list, here's another primer from Rust-Oleum that you simply cannot afford to miss out on. On that note, allow us to introduce you to the Rust-Oleum 276087, specifically designed for painting over existing fungi, mildew, and mold.
Rust-Oleum 276087 generates a very low odor; being a water-based primer, it cleans up rather easily. However, we consider the main USP its mold-killing feature, which sets it apart from most primers on this list, all thanks to the EPA-registered antimicrobial. You do not need to worry about any fungal growth on the coating.
Apart from that, it boasts a curing time of just an hour, which is significantly less than most primer options currently available on the market. Plus, this mold-killing primer is suitable for both interior and exterior purposes. What's more? Well, one quart of it can cover up to 160 square feet.
Furthermore, it binds with various materials, including metal, masonry, and chalky siding. It can also be used to cover fungal stains without the need for sanding. Overall, the Rust-Oleum 276087 is one of the top-rated primers available out there.
Despite being such a versatile primer, the Rust-Oleum 276087 has its fair share of drawbacks. When we received this product, it was rock solid, which made it quite difficult to use, and also the packaging was not that remarkable. The manufacturer should have kept a check on the shipping process.
What We Like
It comes with a mold-killing feature
Curing time is just an hour
Suitable on both interior and exterior use
Produces very low odor
What We Don't Like
Poor packaging
Coverage: 400-450 sq. ft. per gallon | Adhesion: Excellent | Stain Blocking: Yes | Drying Time: 1 hour (recoat in 4 hours)
7. Modern Masters AM203GAL
To be fair, our list of top 7 primers would have remained incomplete without the inclusion of Modern Masters AM20GAL. This leading brand, known for delivering top-notch specialty paints, has recently joined the family of Rust-Oleum to take its manufacturing process to the next level. That said, the AM203GAL stands up to the name of its makers in all aspects.
To begin with, we really liked the fact that it comes with low VOC. It also generates a very low odor; therefore, you can use it indoors without any problem. On that note, it can be used on a wide range of interior and exterior surfaces such as drywall, wood, metal, etc.
And since this primer is water-based, it is very easy to use and clean up. You would be delighted to know that a gallon of it can easily cover up an area of about 320 square feet. Furthermore, its unique formulation prevents rust from the paint coating by blocking all contaminates.
Apart from that, it dries up for 30 minutes, allowing you to recoat it without waiting much longer. And the good news is, it works like a charm with a sprayer. Overall, the Modern Masters AM20GAL is one of the most effective primers to cover dark paint.
Without a doubt, Modern Masters AM20GAL delivers outstanding results as a primer, but it may not be for those who are on a humble budget. On that note, it is certainly an investment worth making, given all the features it comes with.
What We Like
Produces very little odor
Dries up within 30 minutes
Prevents rusting
Super easy to use
What We Don't Like
Tad bit expensive
Coverage: 350-400 sq. ft. per gallon | Adhesion: Good | Stain Blocking: Yes | Drying Time: 30 minutes (dry to touch)
What is the Best Primer to Cover Dark Paint?
Outlined below is a comparison table, thoughtfully orchestrated to highlight the critical attributes of high-performing primers for covering dark paint. The table delves into factors like coverage capability, adhesion properties, stain-blocking effectiveness, and drying time.
Buying Guide for the Best Primers to Cover Dark Paint
With that, we have come to the end of our recommendations, so were you able to make a decision? Something tells us you still are not quite sure. Truth be told, there are a few other factors other than the price and the brand that need to be considered before buying the best primer.
In this section, we will briefly explain the importance of those factors; it will give you a clear idea as to why you cannot afford to ignore them. Also, it will help you make an informed choice. We strongly recommend reading this part very carefully.
Dry Time
Keep a check on the dry time; it should be specified on the package. Most primers dry within 30 minutes and get ready to be recoated with a layer of paint within an hour.
Moreover, primer made using latex takes a shorter time to dry up; on the other hand, oil-based primers need a few hours to become recoat-ready.
Environment Suitability
Environmental suitability is an important factor; there are three types of primers available on the market. The ones that are suitable for both interior and exterior use, for only interior use, and the ones only appropriate for outdoor use.
That being said, we suggest going with the ones that are suitable for both interior and exterior use. This is because they are a lot more flexible and save you from the hassle of buying separate exterior and interior primers.
Surface Suitability
Different primers adhere well to different surfaces. For instance, oil-based primers adhere well to wood and metal. On the other hand, latex primers adhere well to walls and stain-prone surfaces, as they help in making the surface look flat.
In general, however, latex primes are considered better and more widely used than oil-based ones. It mostly depends on your requirements, so choose wisely.
Can I use any primer to cover dark paint?
While some general primers may provide decent coverage, it’s best to use primers specifically designed to cover dark paint. These primers are formulated with higher opacity and better stain-blocking capabilities, ensuring optimal coverage and a smoother transition to the new paint color.
How many coats of primer should I apply to cover dark paint?
The number of primer coats needed to cover dark paint may vary depending on factors such as the intensity of the dark color and the opacity of the primer. In most cases, one to two coats of a high-quality, dedicated primer should be sufficient. However, it’s advisable to follow the manufacturer’s instructions for the specific primer you choose.
Can I skip using a primer and apply multiple coats of paint instead?
While it’s possible to apply multiple coats of paint to cover dark colors, using a primer is highly recommended. Primers provide a solid base, improve paint adhesion, and help prevent color bleed-through. Using a primer specifically formulated to cover dark paint will save you time and ensure better results.
Are there any additional tips for using primers to cover dark paint?
Clean the surface thoroughly before applying the primer to ensure proper adhesion.
Stir the primer well before use to ensure uniformity.
Apply the primer evenly using a brush or roller, following the manufacturer’s recommended drying time between coats.
Once the primer is dry, inspect the surface for any uneven spots or bleed-through. If necessary, apply an additional coat of primer before applying the topcoat.
It is nice to change the décor once in a while. Primers play a very important role in ensuring that the paint sits properly on the material's surface. So, if you want to cover dark paint without much hassle, a good-quality primer is a must-have.
With that, we have come to the end of this article. We hope this review-based article has provided some useful information about buying the best primer of 2024.
Before we bid farewell, we would like to mention our favorite primers on this list. KILZ 2 20902 is the best overall. INSL-X SXA11009A-04 contains low VOC, while Rust-Oleum 2004 dries up very quickly and is odorless.
Do you have an old worn-out red wall in the house that you have been dreading to paint over?
While red can be a bold, yet classic paint color for your wall, it has also proved itself to be quite a nightmare to paint over. This is because red paint usually contains extra pigments that provide it a rich and vibrant finish. These pigments make this color extra difficult to paint over, ultimately leading it to bleed through lighter paint shades applied on your wall.
Fortunately, there are lots of high-quality primers available in the market that can provide the coverage requirements to paint over your red wall with ease. The trick, however, lies in identifying the brand of primer that will give the quality and finish you seek.
And that’s where we come in! In this guide, we have reviewed the 7 best primers that will make painting over your red wall a breeze.
So, what are we waiting for? Let’s get right to it!
Listed below are the 5 best Primers for Covering Red Paint from our list:
KILZ 2 20941: Known for its robust formulation that allows it to cover a wide range of surface areas and resist mildew, offering efficient usage for indoor and outdoor projects.
Rust-Oleum 286258: Distinct for its efficient application on a variety of materials like glossy surfaces, metal, wood, and other challenging surfaces, making it ideal for more difficult assignments.
KILZ L200201: Celebrated for being a robust stain and odor blocker, this primer functions like the oil and shellac-based undercoatings, and seals strong odors before placing laminates or carpets on subfloors.
PRESTIGE SW7029-PCM: Prominent for its exceptional adhesive quality and ability for self-priming when applied on a properly washed and prepared surface, saving time in the painting process.
INSL-X SXA11009A-01: Renowned for its strong acrylic-urethane bonding capacity, enabling it to adhere to a multitude of challenging surfaces and forming a hard film ideal for various topcoats.
Here is the list of the 7 best primers for covering red paint that you can use to get your walls ready for a brand new look.
1. KILZ 2 20941 - Best for Indoor & Outdoor Use
First up in this guide, we have the KILZ-2 primer in model number 20941. KILZ, as you may already know, is a popular and well-established brand in the home improvement field. For 40 years now, this company has been manufacturing premium quality paints and primers at incredibly affordable prices, making it one of the top primer brands in the USA.
KILZ has developed a multi-purpose latex primer that can cover an impressive 300-400 square feet of area per gallon of this product. The powerful formulation of this primer enables it to hide mild to moderate stains while also making it mildew-resistant and an effective sealer of porous surfaces. What’s more, the latex in its composition makes this primer ideal for efficiently hiding previous colors with minimum paint wastage.
As mentioned in the specifications, this is a water-based primer and is hence very easy to clean with just soap and water. Once applied, this primer only takes half an hour to dry to the touch and can be used to recoat the surface as soon as 1 hour after application.
The shiny finish, high adhesive quality, and low-odor formulation of this primer have made it extremely popular among customers for both indoor as well as outdoor projects. It can also be effectively applied with a roller, brush, and spray, thereby giving its users the option to use the application method they are most comfortable with.
Most consumers agree that this is one of the best primers available in the market today. However, some have complained that their primer was busted and leaking when it arrived due to negligent and faulty shipping procedures. Hence, the packaging and shipping of this primer need to be improved.
What We Like
Budget-friendly
Easy to clean and convenient to apply
Mildew resistant
Versatile application methods
What We Don't Like
Poor shipping procedure
Color: White | Finish: N/A | Volume: 32fl oz | Coverage: 300 to 400sq ft | Dry Time: 30 Minutes (To Touch), 1 Hour (To Recoat)
2. Rust-Oleum 286258 - Best for Difficult-to-Paint Surfaces
Rust-Oleum has been one of the leading and most highly recommended manufacturers of paints and primers in the USA. Their superior formulation and high user ratings have continued to set them apart from the rest of their competitors time and time again. Hence, it’s no surprise a primer from their range is one of our top recommendations today.
This product is a water-based primer that works effectively on a multitude of materials and textures such as glossy, metal, wood, and other difficult-to-paint surfaces. The primer itself is gray in color and hence works wonders when applied under vibrant and dark-shaded topcoats.
Moreover, this primer has outstanding adhesive quality extending the overall durability of the paint while simultaneously decreasing the amount required in the process. One can of this primer easily covers 100 square feet of area and dries to touch in just 30 minutes thereby enabling it to be recoated in an hour.
But what’s more? The impressive formulation of this primer provides excellent stain-blocking resistance while preventing and covering up mildew, mold, and water damage. The best thing about this primer, however, is that it requires little to no surface prep prior to application. This means that you can simply skip the scrubbing and sanding process which is usually recommended as a preparatory step. This saves you both time and energy in the process.
Some users have said that this primer tends to scratch off easily if used as the final or topcoat for painting. However, it’s specifically designed to be an undercoat and therefore recommended to be followed up with paint for optimum finish.
What We Like
Provides a durable and long-lasting paint finish
Mildew-resistant and prevents mold, and water damage
Easy to clean
Little to no surface preparation is required
What We Don't Like
Scratches off easily
Color: White | Finish: Gloss | Volume: 31.5fl oz | Coverage: 100sq ft | Dry Time: 30 Minutes (To Touch), 1 Hour (To Recoat)
3. KILZ L200201 - Best for Odor & Stain Blocking
KILZ, as we discussed before, has established a remarkable reputation in the paint industry and has consequently been a household name in the USA for almost 40 years now. This primer in model L200201 is one of their most popular products known for its superior stain and odor removal qualities.
This primer is a powerful water-based primer, sealer, odor, and stain blocker developed to function specifically like oil and shellac-based undercoats. It’s an incredibly effective formula that can block stains from water damage, nicotine, rust, graffiti, permanent marker, felt pen, crayon, etc. It can also efficiently seal strong pet and smoke odors and is thereby perfect for blocking these same odors before placing laminates or carpets on subfloors.
One gallon of this product comfortably covers the usual 300-400 square feet of area. Equipped with strong adhesion, this primer can be applied to virtually all indoor surfaces like plaster, brick, ceramic tile, masonry, drywall, woodwork, etc. It always seals the texture of any surface it’s applied on to ensure a smooth and flawless paint application.
Furthermore, this primer much like most others in this guide dries up in 30 minutes and can be recoated within the hour. Lastly, it can be applied via brush, roller, and spray gun thereby providing users the option of application they are most comfortable with.
This product has a strong unpleasant smell which a few customers have found to be displeasing. The smell takes a long while to completely vanish and hence can pose an issue for someone who is planning to purchase it.
What We Like
Highly recommended to remove strong odors
Brilliant stain remover
Can be easily clean
Versatile application method
Hard and durable finish
What We Don't Like
Emits a strong unpleasant smell
Color: White | Finish: Matte | Volume: 128fl oz | Coverage: 300 to 400sq ft | Dry Time: 30 Minutes (To Touch), 1 Hour (To Recoat)
4. PRESTIGE SW7029-PCM
Next up we have the Prestige SW7029-PCM, an ultra-premium acrylic two-in-one paint, and primer that was created as a comparable match to the Sherwin Williams paint color. This paint is created by Prestige with industry-leading technology and is ideal for application on a variety of indoor surfaces.
This premium paint is the perfect product for anyone who wants to skip the priming step of painting your red wall entirely. The shade of this topcoat, as mentioned above, is comparable to the popular Sherwin-Williams paint color which you can reference for a better idea.
Equipped with a unique formulation, this paint can self-prime when applied on a properly washed and prepared surface. Its strong adhesive quality enables application on a variety of surfaces, including but not limited to uncoated drywall, plaster, or your previously painted red wall.
If that wasn’t enough, this paint has an average coverage of 250-400 square feet per gallon. The consistency of the primer enables you to apply it via roller, brush, or spray gun after it’s slightly diluted with water. Moreover, the paint also has a semi-gloss finish and has a lifetime warranty when applied as per the directions enclosed, which we absolutely adore!
This primer takes up to 4 hours to completely dry and thereby extends the timeline of the overall painting process. Moreover, the gloss finish of this product tends to highlight all the imperfections your wall might have, which makes properly prepping the wall before application a necessity.
What We Like
Eliminates the need for priming
Versatile application procedure
Very easy to clean
Perfect for high-humidity areas
Unique and bright semi-gloss finish
What We Don't Like
Long drying time
Gloss finish tends to highlight imperfections
Color: Agreeable Gray | Finish: Semi-Gloss | Volume: 128fl oz | Coverage: 250 to 400sq ft | Dry Time: 1 Hour, 4 Hours (To Recoat)
5. INSL-X SXA11009A-01
The INSL-X in SXA11009A-01 is a premium quality bonding primer that’s ideal for application on both interiors as well as exterior surfaces. It has a flat or matte finish that is ideal for providing excellent coverage on any surface it is applied.
The best part about this primer is that it can be used on a variety of challenging surfaces such as fiberglass, drywall, ceramic tiles, galvanized metal, concrete, stucco, shutters, etc. Equipped with unparalleled adhesive quality and an excellent acrylic-urethane bonding capacity, this primer can be applied to virtually all difficult-to-paint surfaces.
The unique formulation of this primer forms a hard film after application, making it the perfect base for various topcoats including alkyd, acrylic, lacquer, epoxy, and more. A gallon of this primer can comfortably cover 300-400 square feet of any given area. It’s also recommended that this primer be applied with either a high-quality nylon or polyester brush or an airless sprayer, for an even and flawless finish.
Furthermore, if you’re looking for a primer to paint over surfaces that are low ambient, then this is the product for you. The novel composition of the primer enables it to be applied and cured in exceedingly low temperatures that other conventional brands would not usually support.
This primer takes about one hour to dry to touch and can only be recoated after waiting for 3-4 hours. This may be a little inconvenient for people working on a deadline and who therefore need the paint to dry faster.
What We Like
Convenient to use and clean
Can be applied in exceptionally low temperatures
High durability and bonding capacity
Gives a matte finish with maximum adhesion
What We Don't Like
Long drying period
Color: White | Finish: Flat | Volume: 128fl oz | Coverage: 300 to 400sq ft | Dry Time: 3 to 4 Hours (To Recoat)
6. Rust-Oleum 271009
Rust-Oleum, as we have mentioned before, is one of the most highly-rated paint and primer brands in the USA. The B-I-N Advanced model of their primer is a water-based formulation that is specifically designed to act like synthetic shellac primer.
This is a one-of-a-kind water-based primer that is formulated to behave like a shellac-based primer instead. For this reason, while being easy to apply and clean, the primer also has the superior sealing, blocking, and durability properties of shellac.
Hence, this primer and sealer can not only effectively block water, graffiti, grease, crayon, and rust stains, but can further block odors from pets, smoke, and cigarettes efficiently. If that wasn’t enough, it also has a record fast drying time of 45 minutes, making it incredibly convenient to apply and recoat within a short interval of time.
Rust-Oleum has thereby managed to manufacture a primer that’s only high quality but also extremely affordable making it a top pick among most DIY enthusiasts. This product is very popular among industrial professionals for new construction, remodeling, and fire and water restoration projects.
The manufacturer has neglected to mention the average surface area one can of this primer will be able to cover. This may hamper interested users in figuring out the coverage and thereby the overall value-for-money of this primer.
What We Like
Superior stain-blocking feature
Very affordably priced
Fastest drying formula
Provides sealing and durability like shellac
What We Don't Like
Does not mention coverage of the primer
Color: White | Finish: Matte | Volume: 32fl oz | Coverage: 35sq ft | Dry Time: 45 Minutes
7. Rust-Oleum 260925
Last up on this guide, we have yet another Rust-Oleum primer. This primer has a triple-thick formulation making it one of the most vicious and hardy formulations on our guide today. This thick consistency of the primer guarantees 100% coverage on all kinds of worn-out and pre-painted surfaces with no leakage of any sort.
If you’re looking for an especially durable primer that can penetrate and bond with peeling or cracked surfaces, then this is the one for you. Its triple-thick formula evens out the roughest most worn-out surfaces while effectively gluing down edges and sealing out cracks to provide you with the finish of your dreams.
The flexibility of this primer is unmatched by most products not only in this guide but in the market in general. Its unique water-based formulation makes even the most ruined and debilitating surfaces regain their original finish and brilliance with ease. Hence, this primer is the perfect base coat for any alkyd or latex paint of your choice and will cover your red wall with zero leakage.
Apart from that, this primer also dries to touch in only half an hour allowing you to recoat within 2 hours of the first application. Furthermore, the longevity of this product makes it ideal for both indoor as well as outdoor surfaces of your choice.
Because of its exceptionally thick consistency, one quart of this product only covers approximately 12-50 square feet of area. This means, per gallon this primer has a coverage of 48-200 square feet which is comparatively much lower than most of its counterparts.
What We Like
Tough and durable finish
Smooths out all rough and cracked surfaces
Minimal prep required
Easy to clean
What We Don't Like
Low coverage
Color: White | Finish: Matte | Volume: 32fl oz | Coverage: 12 to 50sq ft | Dry Time: 30 Minutes (To Touch), 2 Hours (To Recoat)
What is the Best Primer For Covering Red Paint?
Presented below is an organized comparison chart clearly distinguishing key features of the top-rated primers apt for covering red paint. This includes variables such as the color of the primer, its finish, volume, coverage capacity, and estimated dry time.
Buying Guide For The Best Primer For Covering Red Paint
To make this decision a little easier, we have compiled a buyer’s guide for you. This functions by helping you single out factors that will help determine the perfect primer for your project. So, without wasting too much time on introductions, let’s get right into it!
Formulation Of Previous Red Paint
The type of formulation of the red paint that you are planning to cover is an important factor in determining the kind of primer you should invest in. This is because different formulations of paints are compatible with different formulations of primers.
However, water-based primer is always a safe bet to invest in when it comes to paint-covering projects. The reason is, that water-based primers are compatible with most types of paints and therefore can be applied under all kinds of topcoats including latex and oil paints.
Adherence And Consistency
It’s essential to invest in thick high-quality primers with excellent adherence properties for paint-covering projects such as the one you are planning to pursue. This is because not only will a thicker consistency effectively stick and cover the old paint better, but it will also adhere to the new paint more effectively providing you optimum coverage.
Coverage
The coverage of primer is a crucial factor when it comes to determining how value-for-money the product is. The average primer should usually be able to cover up to 300 square feet per gallon with comparative ease.
However, there are certain primers that have much thicker, more viscous consistencies that alternatively drastically reduce the coverage they provide. Hence depending on the size of the project and the budget, you need to decide which factors are most important to you.
Cure And Drying Time
The drying time of a primer is the amount of time it takes to dry to the point that it does not transfer when you touch the surface. On the other hand, the cure time is the total time a primer takes to completely dry and form its final hardened coating.
You usually need to wait for a primer to fully cure before going in with the recommended second or third coat, and hence is a crucial factor for your painting requirements.
Mode Of Application
There are 3 main modes of paint application, namely brush, roller, and paint spray. Most people already have their preferred modes of paint application, however, not all primers can be applied in all the above-stated ways. Hence, it’s vital that you check how the manufacturer has recommended a certain product be applied before you purchase it.
Should I use a water-based or a shellac-based primer to cover red paint?
While both can be effective, shellac-based primers are generally better at sealing and covering darker, more vibrant colors like red.
Does the primer color affect the final paint color?
Yes. The primer color can invariably influence the undertones of the final paint color. Therefore, select a primer that aligns well with your topcoat color.
What color primer best covers red paint?
Gray or white primers are generally recommended. Gray primer is most useful when transitioning from a dark color like red to a lighter shade, whereas a white primer is often used for very light or white topcoats.
What safety precautions should I take when applying primer over red paint?
Ensure your workspace is well-ventilated. Protective clothing, goggles, and gloves are recommended, particularly when using oil or shellac-based primers. Always read the safety instructions on the primer before use.
How many coats of primer do I need to cover red paint?
The number of primer coats required varies based on the color difference and the type of primer used. High-quality primers often cover red in one or two coats.
When concealing red paint, the need for a quality primer that can efficiently mask the vibrant color to pave the way for a fresh coat often arises. Primers are essential as they offer the canvas for your desired paint hue, ensuring a more vibrant and longer-lasting color payoff.
From the above 7 best primers for covering red paint, here are the top three expert recommendations:
The KILZ 2 20941 primer is an ideal option due to its ability to cover an impressive 300-400 square feet area per gallon. It hides mild to moderate stains, is resistant to mildew, and seals porous surfaces efficiently. Additionally, this primer is easy to clean and offers high adhesive quality, making it one of the most popular choices for both indoor and outdoor painting projects.
On the other hand, the Rust-Oleum 286258 primer is a good option, functioning brilliantly on various materials and textures. It stands out for its extraordinary adhesive quality tailored to decrease paint usage and extend durability. Not to forget, it also provides excellent stain-blocking resistance and requires little to no surface preparation, saving you time and effort.
Lastly, KILZ L200201 is the right choice for its superior stain and odor removal qualities. This primer covers the usual 300-400 square feet area per gallon, and its strong adhesion allows application on nearly all indoor surfaces, ensuring a smooth and flawless paint application.
Finding a primer that best suits your needs can make your painting project a smooth and fulfilling experience. The right primer will mask the red paint effectively, creating a perfect base for the new paint layer. When you follow the expert selections given here you ensure top-notch results. Happy painting!
Painting can be a tedious task if you don't know how to go about it.
It's not only a matter of choosing the right painting tools but also buying the ideal primer. The primer is the base on which painters apply the topcoat. It acts as a shield, keeping your walls free of impurities and maintaining the color quality for a long time.
There are several types of primers available out there, including both water-based and oil-based formulas. Moreover, they have different viscosity levels, drying times, and coverage areas, affecting how your walls will look after painting. Needless to say, you need to consider several factors while purchasing the right product.
But what's the best primer available out there? We've narrowed down nine premium-quality products suitable for bare wood and other surfaces. Additionally, there's a buyer's guide to help you make an informed decision.
Best Primer for Bare Wood
Whether you're working on furniture, cabinets, or other woodworking projects, these primers will provide a solid foundation for your paint or stain. So, without further ado, here's the list of the 8 best primers for bare wood that will help you achieve professional-quality results.
One of our top recommendations is the KILZ L211101 model, generating substantial buzz in the market. This water-based solution has all the essential attributes, making painting easier for professionals and first-timers alike. Understandably, users have liked what it offers, leading to its increasing popularity.
We'll begin by discussing the bonding abilities of this primer, allowing it to adhere to slick surfaces. Compared to oil-based primers, this unit has a viscosity value ranging from 93 to 100 KU, making it suitable for various materials. You can use it with Kynar, PVC, glass, and metal, keeping in mind that the topcoat should be of latex or oil-based paint.
People use it for both indoor and outdoor purposes to maintain the appearance of their homes. It also comes in handy for epoxies, lacquers, and Xylene solvents, preventing damage, while ensuring that the paint doesn't peel off.
Now, a single can of this product is suitable for covering 300 square feet, highlighting its coverage and affordability. Once applied, it dries within 30 minutes, meaning you can start recoating in less than an hour. Not surprisingly, it's extremely user-friendly and works well with a brush, roller, or spray.
What Could've Been Better?
If we had to nitpick, we would say that users should exercise caution while using this primer. It's highly adhesive, meaning you need to cover your furniture and keep it away from kids to prevent accidents. Another slightly concerning aspect is that it has a mild smell.
Pros
Versatile
Viscosity value of 93-100KU
Dries under 30 minutes
Long-lasting
Strong adhesive
Cons
Slight smell
Exercise caution
Coverage: Up to 100 sq. ft. | Volume: 1 Qt | Base Type: Water-based | Stain Blocking: Yes | Drying Time: 30 minutes | Adhesion: Excellent | VOC Content: Low
A well-known brand in the world of paints is Rust-Oleum, and its latest primer has everyone interested. By offering a spray-based solution, the manufacturers have deviated from the norm of providing large cans, making it stand out. No wonder it has received positive reviews from buyers.
Interior/exterior use on new or previously painted Drywall,...
Oil-based formula seals uniformly and will Stick to surface...
Why Did We Like It?
If you're looking for a spray primer, this model from Rust-Oleum will surely please you. It comes in a 13-oz bottle that can cover 12 square feet for the best results. While it may not have the capacity of the KILZ L211101, it promises reliability and is ideal for oil-based painting.
You can use it for both exterior and interior painting tasks, thanks to its smooth finish, delivering an attractive appearance. Users have loved how it adheres to wood and masonry, making this spray primer one of the top choices for buyers.
Other than that, it solves the usual sanding issues as it sticks uniformly to the surface. All you need to do is let the primer dry for 30 minutes, following which you can apply the paint without any hassle.
What Could've Been Better?
This primer drips irrespective of whether you use a sprayer, brush, or roller. You need to be vigilant lest there be streaks on the wall. Plus, despite its versatility, you won't get the best result while painting plastic surfaces, which isn't convenient.
Pros
Stain blocking resistance
Smooth finish
No need for sanding
Versatile
Blocks imperfections
Cons
Not suitable for plastic
Drips
Coverage: Up to 12 sq. ft. | Volume: 13 Oz | Base Type: Oil-based | Stain Blocking: Yes | Drying Time: 2 hours | Adhesion: Good | VOC Content: Medium
Another top choice for customers is the INSL-X SXA11009A-01, thanks to its excellent coverage and enamel holdout finish. You can use it for numerous purposes and on different materials, making it highly sought-after. So, read the following review to know more about it.
Bonding primer for drywall, plaster, ceiling, acoustical...
Why Did We Like It?
The striking aspect of this model is its fantastic coverage of 300-400 square feet per gallon, making it highly sought-after. It comes in a large container, with the primer delivering a matte texture on most surfaces. This is because it has an acrylic-urethane bonding that tightly adheres to doors and walls.
Significantly, you can apply a topcoat of any material, thanks to its enamel holdout finish. It forms the ideal base for applying an even coating of paint, and you'll enjoy the smooth texture on both interior and exterior walls.
But that's not all, and we loved that it's low maintenance, made possible by its exceptional VOC rating. All you need to do is use soap and a cleaning agent, making it easy to clean. Finally, it dries up quickly, even in temperatures as low as 35 degrees Fahrenheit.
What Could've Been Better?
After applying the primer, you'll need to sand the walls for a smooth finish, adding one more step while painting. Other than that, we noticed spots forming on the surface, owing to its matte texture, which you need to smoothen out quickly.
Pros
One gallon can
Matte texture
Low-maintenance
Low VOC rating
Easy to clean
Cons
Needs sanding
May lead to spots
Coverage: Up to 400 sq. ft. | Volume: 1 Gallon | Base Type: Water-based | Stain Blocking: Yes | Drying Time: 1 hour | Adhesion: Excellent | VOC Content: Low
We're at the halfway point in our guide, but the premium-quality products keep coming. Our next recommendation is another unit from KILZ, but how is it different from the earlier models? For starters, this oil-based solution is extremely versatile and tightly sticks to most surfaces, delivering durability. Unsurprisingly, it's quite popular among painters.
A good primer makes paint stick better to surfaces, makes...
KILZ Original oil-based primer blocks most stains including...
Why Did We Like It?
KILZ's oil-based primer is a strong adhesive for most surfaces, be it wood, drywall, or metal, highlighting its versatility. Since it sticks better, you won't have to use much paint while getting a more vibrant color to enhance the beauty of your home.
The primer comes in a single-gallon can, covering 300-400 square feet quickly for the best results. Plus, it dries in under 30 minutes, meaning you can apply the topcoat after one hour. Once applied, it blocks existing stains and prevents future stains from forming on the walls, making it long-lasting.
Users can use it with a roller, spray, or brush, creating a smooth texture and an even coating. This forms the base for the topcoat, filling in porous holes and keeping the paint from peeling off the walls. Therefore, you can use it for damage control to maintain the quality of indoor and outdoor furniture.
What Could've Been Better?
It's incredibly sticky, which is both advantageous and disadvantageous. While it delivers a firm coating, you need to cover the furniture and wear protective gear to keep yourself safe. On top of that, it produces a foul odor, affecting people with breathing issues and allergies.
Pros
Dries under 30 minutes
Smooth texture
Blocks stains
Versatile
Long-lasting
Cons
Foul odor
Sticky
Coverage: Up to 400 sq. ft. | Volume: 1 Gallon | Base Type: Oil-based | Stain Blocking: Yes | Drying Time: 30 minutes | Adhesion: Good | VOC Content: Medium
Rust-Oleum has ticked all the right boxes with its latest water-based primer, having a coverage area of 100 square feet. But that's not the only good thing about it, as its rust-resistant coat keeps your furniture fresh, maintaining the quality of your home. This product is on everyone's wish list.
If you need a primer for painting new metal surfaces, you'll love this product from Rust-Oleum. It's suitable for both interior and exterior painting tasks while its rust-resistant coating delivers longevity. So be it furniture or other components, you can maintain their quality without any hassle.
Now, it's extremely easy to use since it's a water-based solution, ensuring that you get an even coating. After applying the primer, there's no need for sanding as it sticks to most surfaces, making painting easy. Furthermore, it's easy to clean, and all you need is soap and water to keep your walls stain-free.
Another exciting attribute is that it prevents mold and mildew growth, maintaining the texture and color of the walls with the changing seasons. You don't need to worry about blistering or peeling, highlighting its efficiency when used on pH surfaces like concrete.
What Could've Been Better?
One gripe that we've is that you need to apply multiple coats as it isn't very thick. This increases the overall cost of painting, which is a downside for potential buyers. Moreover, it leaves lines, and you need to meticulously smoothen the surface before applying the topcoat.
Pros
Suitable for indoor and outdoor painting
Works well on pH surfaces
Easy to clean
Prevents staining
Protects against mildew
Cons
You may need to apply multiple coats
Leaves lines
Coverage: Up to 112 sq. ft. | Volume: 1 Qt | Base Type: Water-based | Stain Blocking: Yes | Drying Time: 35 minutes | Adhesion: Good | VOC Content: Low
Instead of manufacturing two different products, Zinsser incorporates the properties of a sealant and primer in a single oil-based solution. Users have expressed their admiration for the high-hiding formula, helping in damage control and provide a smooth base for different painting tasks. Rest assured, it will be worth the investment.
Cover stain, QT, Oil based stain killer primer/sealer
Adds extra shine to your product
Why Did We Like It?
Zinsser's innovative product is a 2-in-1 model, a primer, and a sealer, delivering desired output on different surfaces. You'll find that this oil-based solution covers stains and adds extra shine during painting. But it's easy to clean, making it low maintenance and guaranteeing a fantastic return on investment.
We loved its sealing properties, which block imperfections in the wall or furniture. Meaning, you don't need to worry about water seepage or smoking stains while retaining the original vibrancy and color of your home. Once you apply this primer, it sticks tightly to the surface, with a little sanding providing a smooth texture.
Professional painters prefer to use this product for remodeling, repainting, or construction work. This is because it dries quickly, reducing work time, while the enamel undercoating guarantees a smooth experience. Irrespective of the coarseness of the material, it penetrates most surfaces to plug the gaps.
What Could've Been Better?
The primer starts melting inside the can, losing its viscosity and turning into a watery solution. But there's no need to worry as shaking the can solves this issue. Also, you can't use a paintbrush, meaning you'll have to buy a sprayer or roller.
Pros
Versatile
Dries quickly
Suitable for indoor and outdoor use
Shiny finish
Stain-resistant
Cons
May melt
Unsuitable for paintbrushes
Coverage: Up to 400 sq. ft. | Volume: 1 Qt | Base Type: Oil-based | Stain Blocking: Yes | Drying Time: 45 minutes | Adhesion: Excellent | VOC Content: Medium
If you're looking for a glossy finish, you'll appreciate the properties of this primer. It makes the walls more attractive, ensuring that the vibrant colors enhance your home décor. Furthermore, it delivers sufficient coverage and a quick drying time, making it a suitable option for most people.
Use for a variety of indoor and outdoor project surfaces...
Water-based acrylic formula is low odor, resist chips and...
Why Did We Like It?
This latest Rust-Oleum primer has several benefits, foremost among which is its easy application and durability. We loved its water-based acrylic formula, having the right viscosity for painting different surfaces. Moreover, compared to other units, it has no foul smell for a fantastic user experience.
It's suitable for working on several projects, both indoors and outdoors, since the primer adheres to wood, metal, and ceramic. What's more, it dries in less than 30 minutes, meaning you can start painting quickly, highlighting its efficiency. Overall, a single can cover 120 square feet of area, making it ideal for numerous projects.
That said, it’s important to sand the surface; use a degreaser for washing, and leave the surface to dry before you start painting. This helps remove impurities, ensuring that the walls retain their original color for a long time.
What Could've Been Better?
While determining your painting budget, you need to factor in the cost of applying multiple coats of this primer. It takes time to get the desired texture, but thankfully it dries quickly. Apart from that, this water-based solution isn't suitable for brush painting; you'll have to use a sprayer or roller to complete the job.
Pros
Dries in 30 minutes
Long-lasting performance
No foul odor
Resists chips
Prevents peeling
Cons
Issues with brushing
Requires multiple coats
Coverage: Up to 120 sq. ft. | Volume: 1 Qt | Base Type: Water-based | Stain Blocking: Yes | Drying Time: 30 minutes | Adhesion: Good | VOC Content: Low
This Zinsser model features a 2-in-1 primer/sealer solution and has the unique ability to block water. It's often used for professional purposes, such as remodeling and construction, delivering outstanding reliability for long-lasting results. There's a lot to like about it, and you can read the following section to learn more.
Another terrific model is the Zinsser 00904, a combination of a primer and a sealer. It's a 2-in-1 B-I-N Shellac Base formula that proves useful for indoor and outdoor spot priming. This is because it has excellent adhesive properties, capable of blocking water, so it's used by professionals for remodeling and construction work.
You can apply it on different surfaces like wood, drywall, and metal without the added hassle of sanding or deglossing. It's incredibly easy to use and prevents sap streaks, delivering a smooth texture. In that regard, the enamel undercoat proves useful and helps provide an even coat of paint for the desired output.
Other than that, it has one of the fastest drying times among primers, 15 minutes, ensuring that users can start repainting in 45 minutes. Therefore, it covers an area of 120 square feet quickly while blocking porous holes and removing impurities.
What Could've Been Better?
Compared to other products, a single can of this primer costs more, which won't please potential buyers. But it's worth the investment, and it would be best not to compromise on quality. Other than that, it gets watery when left in the can, so you need to shake and stir the solution before commencing work.
Pros
Dries in 15 minutes
Enamel undercoat
Highly adhesive
Blocks water
Prevents sap streaks
Cons
Slightly costly
May appear watery
Coverage: Up to 125 sq. ft. | Volume: 1 Qt | Base Type: Water-based | Stain Blocking: Yes | Drying Time: 45 minutes | Adhesion: Excellent | VOC Content: Low
It's time to check out the buyer's guide, where we'll highlight all there is to know about a primer for bare wood. You can note the points mentioned below, which will help you choose between two top-notch products. So, let's get started.
Durability
The durability of a primer depends on its viscosity. To protect the walls from damage and prevent the paint from peeling, the primer should ideally cover porous holes to block water.
With the right product, your walls will retain their color for a long time.
Low-Maintenance
Secondly, once the painting is over, it must be easy to clean the walls. The primer plays a crucial part in ensuring that you can wipe the walls with a wet cloth without removing the paint.
On top of that, premium-quality primers prevent mildew and staining.
Price
Finally, you need to consider the cost of your painting job. The designers need to design an affordable primer formula without compromising on quality for long-lasting performance.
Having said that, you must be flexible with the budget as top products usually cost more.
Primers for Bare Wood FAQ's
Why is it important to use a primer on bare wood?
Using a primer on bare wood is essential for several reasons. Primers help seal the wood surface, preventing moisture penetration and potential wood damage. They also create a uniform base for paint or stain application, improving adhesion and durability. Additionally, primers can block wood stains, knots, and tannins, ensuring a smooth and consistent finish.
What type of primer is best for bare wood?
The best type of primer for bare wood is typically an oil-based or shellac-based primer. These types of primers have excellent sealing properties, provide good adhesion, and effectively block stains and tannins. However, water-based primers have also improved over the years and can be a suitable choice for certain applications.
How do I prepare the wood surface before applying the primer?
Before applying the primer, it is important to prepare the wood surface properly. Start by cleaning the wood to remove any dirt, dust, or grease. Sand the wood to smooth out rough areas and ensure proper adhesion. Fill any cracks, holes, or imperfections with wood filler, and then sand again to achieve a smooth surface. Finally, remove any sanding dust and ensure the surface is dry before applying the primer.
Can I use a regular paint as a primer on bare wood?
While regular paint may provide some coverage on bare wood, it is generally not recommended to use it as a primer. Primers are specifically formulated to seal and prepare the wood surface, providing optimal adhesion and coverage for the topcoat. Using a dedicated primer will yield better results, ensuring long-lasting and professional-looking finishes.
How many coats of primer should I apply on bare wood?
In most cases, applying one coat of primer is sufficient for bare wood. However, if the wood has significant stains, knots, or tannins, additional coats or spot priming may be necessary. Follow the manufacturer’s instructions for the specific primer being used, as some products may recommend multiple coats for certain conditions.
How long should I let the primer dry before applying the paint or stain?
The drying time for primer can vary depending on the product and environmental conditions. Typically, primer needs to dry for several hours before applying the paint or stain. Follow the manufacturer’s instructions for the recommended drying time, and ensure the primer is completely dry and cured before proceeding with the next coat or finishing product.
Can I use a primer for bare wood on other surfaces?
While primers for bare wood are specifically designed for wood surfaces, they can often be used on other materials such as MDF, plywood, or particleboard. However, it’s important to check the manufacturer’s instructions and product labeling to ensure the primer is suitable for the specific surface you are working with.
Is it necessary to sand the primer before applying the topcoat?
In most cases, sanding the primer is not necessary unless there are imperfections or rough areas that need to be smoothed out. However, if a smooth or glossy finish is desired, lightly sanding the primer with fine-grit sandpaper can help achieve the desired result. Always ensure the primer is fully cured and follow the manufacturer’s recommendations before sanding or applying the topcoat.
Conclusion
That's all there is to know about the best primer for bare wood, and it's time now to take your leave.
Before signing off, we've decided to help you a bit more by narrowing down our favorite models into different categories. We believe that the KILZ L211101 ranks among the top products, given its high viscosity and strong adhesive properties.
The Rust-Oleum 272479 has also done well, being one of the few spray-based solutions with stain-blocking properties, highlighting its user-friendliness. So, that's all, but we'll be back with more exciting product reviews.
We hope you can now decide on the primer most suitable for your needs. Whenever in doubt, feel free to consult the buyer's guide; with the right product, your old walls will look new. And rest assured, you can enjoy the vibrant glow of new paint for many years to come.
If it’s wood, it has to be polyurethane protected!
Perhaps no other formula works as effectively as these affordable coatings to keep all your wooden surfaces free from damage. Not only that, but it will simultaneously work to enhance their natural beauty.
But even before you can avail of these services, you’ll have to buy the right kind of topcoat, which unfortunately isn't easy. Especially with the plethora of options out there, the job becomes rather tiring.
So, to save you from exhaustion, we present the top 10 polyurethane coatings up for grabs. One look at the details, and you’ll know everything that’s required to make the right choice for all your needs.
Without further delay, let’s dive in!
Best Polyurethane Protective Coatings
Whether you need to protect industrial equipment, automotive parts, or even your home furniture, we have compiled a comprehensive list of the 10 best polyurethane protective coatings available. With their superior performance, ease of application, and long-lasting results, these coatings will provide the ultimate protection for your valuable assets. So, without further ado, here's the list of the 10 best polyurethane protective coatings that will keep your surfaces looking pristine and shielded for years to come.
The first pick for the day is the Bona Mega Wood Floor Finish. This easy-to-use, water-based polyurethane protection dries quickly while enhancing the natural finish of your wooden surface. Also available in semi-gloss or gloss finish, this protective coating is one of the most popular and affordable products on the market.
An oxygen-crosslinking polyurethane (OCP) waterborne formula
One-component; No limited pot life and no wasted finish
Why Did We Like It?
No surprises here as its OCP formula comes across as its biggest advantage. By using atmospheric oxygen as its crosslinker, this formula produces superior results to protect the wooden surface, without masking its natural color.
We also loved how easy it was to apply this poly. All we had to do was apply three coats, with a layer of sanding in between. The first layer looked a bit rough, but by the time we completed the last coat, the floor had become smooth and shiny. For best results, it's advisable to use the product on a warm and humid day.
Lastly, the formula has almost zero odor emission, thus making it safe for pets and people with breathing problems.
What Could’ve Been Better?
If you’re running low on time, then you might be a bit disappointed as it requires multiple coats for producing perfect results. Other than that, we didn’t find any other downside to this exceptional product.
The Minwax 33050000 is a poly varnish that produces a high-quality finish for all wood types. Its long-lasting protection works to negate the impact of a range of damages, without burning a hole in your pocket. Whether you’re a DIY enthusiast or a pro, this product is worth considering.
For starters, we were thoroughly impressed with its convenient packaging. If you’re a fan of aerosol varnishes, then the rotating spray fan on this one is made for you. This feature makes it super easy to get through all those horizontal and vertical applications in a jiffy!
Talking about its performance, the first thing that we should mention is that this product is especially suitable for interior surfaces. Similar to the Bona Mega Wood Floor Finish, a three-coat application is all you need to get that luxurious and polished surface.
Last but not least, you can use it to protect both finished and unfinished wooden surfaces, without losing their natural charm.
What Could’ve Been Better?
Like all other oil-based polyurethane coatings, this one too leaves a slight yellowish hue, visible almost immediately after application. Keeping that in mind, we feel it’s better to use this product on darker surfaces.
Pros
Also available in gloss and semi-gloss finish
Ideal for doors, cabinets, and furniture
Heat resistant
Enhances the natural richness of wood
Cons
May cause breathing problems when used in inadequate ventilation
For the third spot on this list, we have a water-based topcoat from the house of General Finishes. Durable and tough, this quick-drying protective coat is ideal for wooden floorings and stained wood pieces. This easy-to-use product gives a superior finish, making you feel like a pro!
Do not apply clear topcoats over bright white paint, as...
The hardest, most durable consumer polyurethane top coat on...
Why Did We Like It?
Firstly, the high customer ratings made us want to try the product. Because of its UV-stabilizing properties, this topcoat is resistant to sunlight and won’t break down to expose the surface underneath. This is a good additional protective feature to have, especially for preventing stains from fading.
The best thing about this poly is that it can be used with almost any brush type for a high-quality finish. We used a roller and applied three light coats while allowing each layer to dry for about 1.5 hours. You may also sand the surface with soft hands between two coats.
Like the Bona Mega Wood Floor Finish, this product too doesn’t emit any strong odor, thus making it convenient for use at all times.
What Could’ve Been Better?
Despite being water-based, it has a noticeable yellow tinge, which makes it highly unsuitable for use on white paints. Other than this, we did not notice any cause of concern about this top-notch product.
Are you looking for a topcoat that stands the test of versatility? Then the Rust-Oleum 200241H Water-Based Polyurethane might just be what you need. Its crystal-clear protection and durability make it the right choice for a variety of projects, including doors, cabinets, indoor furnishings, and a lot more.
Protects indoor wood surfaces such as furniture, windows,...
Water based formula dries fast and cleans up with soap and...
Why Did We Like It?
Having experienced some yellowing of surfaces with the previous varnishes, we were delighted to see that this product doesn’t leave any such residue of color. Its satin finish works just fine to enrich the natural color of the wood.
To deliver on its promise of durability, this poly comes with an anti-scratch formula to protect your precious surfaces. We arranged for a small play session with our pets on the finished floor and didn’t find a single scuff.
However, what appealed to use the most is the ease of application. All you have to do is apply a quick and smooth stroke, without worrying about any ridges that show up. The formula is such that it will take care of any irregularity while drying down.
What Could’ve Been Better?
To ensure that the surface is free from any bubble formation, it’s better to leave on each coat for around three hours before applying the next layer. If you’re looking for a quick touch-up, then this might not suit your needs.
Our fifth pick of the day is the oil-based Zar Polyurethane Wood Finish. Its tough protection, coupled with a clear and smooth finish, can go on almost every wooden surface around the house to keep them as good as new for years to come.
The first and foremost thing that won our praise is its anti-abrasion feature. Similar to the Rust-Oleum 200241H’s scratch resistance, this feature adds an extra level of protection on the surfaces against daily wear and tear. Plus, its self-leveling formula cuts out most of your tasks, as you don’t need to worry about bubble formations.
We also liked the level of sheen that this poly is capable of providing. Owing to its slightly thick flow, the final look comes across as the right compromise between a dead flat and satin finish. In simple words, it renders an antique look and feels to even the most worn-out surfaces.
Since the product is meant exclusively for interior use, it doesn’t have a powerful odor to cause any breathing trouble or watery eyes upon application.
What Could’ve Been Better?
Our only area of concern is the short workable period for eliminating the trapped air. Post that, it becomes challenging to cover the appearance of bubbles since the brush strokes appear prominently. So, we had to work rather quickly to ensure a smooth application.
Next up on the list is yet another product from Minwax. As you may have guessed from its name, this protective coat can be applied using the good old wipe-on method for precision. Its durability can protect a wide range of wooden surfaces, from furniture to railings and even trims.
First things first, its hassle-free application makes this product a user favorite. Even in the absence of a brush or roller, we could coat all the required surfaces with absolute control and precision, with the help of a lint-free cloth.
Besides, its durable satin finish enhances the natural beauty of the wood while adding a touch of elegance minus any color residue. Allow the final coat to dry for 24 hours before returning to normal use, and you’re good to go. So brownie points for that!
What we especially liked about this poly is that it's ideal for quick touch-ups. If you don’t have a big area to cover and don’t want to spend on a bigger package, then this wipe-on polyurethane is worth consideration.
What Could’ve Been Better?
The consistency of this product is quite thin and sticky and tends to run away. This can result in uneven layering and may require some extra effort to achieve that perfect finish.
Minwax 255554444 is an easy-to-apply protective topcoat that works equally well on acrylic paints and interior wooden furnishes. Its crystal clear finish adds value and durability to a range of projects and keeps them brand new for the years to come.
CRYSTAL CLEAR FINISH THAT LASTS – The crystal clear...
Why Did We Like It?
Its crystal clear finish stood out for us. We used the gloss finish that has the perfect sheen for our liking. Furthermore, the product is also available in matte, semi-gloss, satin, and ultra-flat clear finishes to cater to diverse preferences.
Its superior quality protection makes it the ideal topcoat to protect the beauty of decorative pieces, as it stays clear and doesn’t yellow over time. We used it for one of our art projects and were satisfied with the results of a single-coat application. However, you may also utilize multiple coats for added durability, all of which will dry down quickly.
Apart from that, its thin consistency prevents the formation of clumps when stored for a longer time.
What Could’ve Been Better?
The product tends to break down and smear the oil-based paints, so it’s better to use one before applying the poly. We also needed to make sure that we put on a uniform coat since any excess build-up in the nooks can leave a tinge of yellow.
Pros
Easy to use
Gloss finish is ideal for decorative pieces
Low odor
Suitable to use over light wood like maple
Cons
Inferior-quality brushes can leave marks on the surface
A true all-rounder, the Rust-Oleum 207008 is equally effective for interior and exterior surfaces. This highly durable oil-based topcoat renders a high-quality finish to enhance the natural beauty of all your wooden furnishings. With an easy application and removal process, there’s no way for this product to escape our list!
Ideal for use on exterior wood surfaces above the water...
Oil-based formula expands and contracts with changing...
Why Did We Like It?
The kind of protection this product offers for its affordable price tag made our jaws drop. In addition to being UV resistant like the General Finishes water-based topcoat, it also protects the surfaces against salt and mildew. This is what makes this poly suitable for outdoor use.
Furthermore, its oil-based texture contracts and expands according to weather conditions to produce a glossy and durable finish with optimum protection.
What’s more, its enhanced durability gives it an edge over similar products for all your marine projects. Overall, this quick-dry poly is one of the most versatile topcoats in the price range.
What Could’ve Been Better?
Its ultra-thin consistency made us apply more coats than normal since we wanted to make sure that the product holds up nicely. Sure, the extra effort took us longer to complete the project, but it was nothing very bothering.
The penultimate product of the day is the Rust-Oleum Floor Finish. This specialized polyurethane coating is meant to beautify and protect a range of hardwood floors. The glossy finish adds a splash of elegance to your home, while your floors remain protected from damage.
Firstly, its resistance to household chemicals and scuffs raises the bar of the durability of this product. When you’re talking about protecting the floors, it only makes sense to use a topcoat that emphasizes longevity, and this product works just fine for the purpose.
However, it doesn’t only work for hardcore protection. Its clear and glossy finish highlights the natural charm of the surface underneath so that no detail is masked in the process.
We also tried this product to coat a small countertop, and it didn't disappoint. There was no bubbling or clouding, nor did the texture get tacky upon water spillage. So its versatility is a bonus for the price.
What Could’ve Been Better?
Our only complaint about the otherwise high-performing floor finish is its odor. Despite having a water-based formula, the odor was strong and did not diffuse well even after the poly dried down completely.
Our last pick of the day is the Deft 259-01 multi-use topcoat protection. It's a quick-dry and easy-to-use application that takes care of user convenience. At the same time, its durability provides optimum protection-all this without concealing the natural color of your favorite wooden surface.
Similar to the General Finishes Water-Based Topcoat, this formula is extremely smooth and can be easily applied with almost any brush type. Its durability is at par with some of the best oil-based protective coatings, making it the right fit for a range of indoor and outdoor surfaces.
Not only does this topcoat have a fast dry time, but its not toxic finish makes it safe for kids, older people, and pets.
Being water-based, its easy cleanup feature is yet another advantage that makes it a popular choice. All and all, it performs quite well to protect any surface from the adversities of time.
What Could’ve Been Better?
Much like the Rust-Oleum Floor Finish, this poly protective coating is also not free from odor, which becomes especially intense in less ventilated spaces.
Buying Guide For The Best Polyurethane Protective Coating
Wood is an expensive material that needs proper care, and this is where polyurethane plays its part. But just because they are inexpensive, randomly picking up any such topcoat will be of no help.
So that your valuable belongings get the right kind of protection, we’ve listed certain important factors that should drive your purchase decision.
Read on to know more…
Types of Polyurethane Protective Coatings
Polyurethane coatings can be either water-based or oil-based. Water-based top coats are mainly clear in appearance so that the natural color of wood comes through. Also, this formula helps in keeping the wood hydrated for an extended period of time. If you’re looking to shield some of your more delicate wooden pieces, we’d suggest buying a water-based coating.
Oil-based polyurethanes, on the other hand, have a reputation of being more durable. In addition, they can also expand and contract according to the temperature. It would be a good choice for coating exterior surfaces, as they keep the wood from cracking.
Alternatively, you can choose any such poly which works for both indoor and outdoor surfaces.
Finishing and Looks
The type of finishing that the product offers will determine the final look of the surface. In that sense, the main types of finishing available are gloss, matte/clear, and satin. While a gloss finish is suitable for decorative pieces, matte or clear coatings are more appropriate for floorings and furniture.
Moreover, some protective coatings may also render a warm, yellow hue to enrich the color of the wood. If you are looking to add value to the natural tone, then we’d highly recommend such a product.
Another important thing to consider is that the topcoat should have the least possible amount of yellow tinge upon application.
Drying Time
In case you choose a fast dry topcoat, it’s crucial to ensure that there is no compromise on performance. Alternatively, you may also opt for a thicker polyurethane, which does the job in one or two coats. In this way, you won’t lose a lot of time while maintaining optimum quality.
Durability
You will hardly find a brand or product that doesn’t claim durability. After all, the primary function of such topcoats is to provide maximum durability to the surface underneath. However, if you are still skeptical about its claims, you may choose a product that has additional features like weather resistance, scratch resistance, or UV protection.
On a side note, it's good to know that such products may be comparatively more expensive than the normal ones.
Ease of Use
Some coatings may work well with a particular brush type, whereas others can easily glide on using almost any brush, roller, or even a piece of cloth. If you don’t want the hassle of purchasing compatible applicators, we’d suggest going for a formula that can be applied with any type of brush.
While at it, you should also consider how easy the cleanup process is. In general, most topcoats can be easily cleaned with water and soap.
Polyurethane Protective Coatings FAQ's
What surfaces can polyurethane protective coatings be applied to?
Polyurethane protective coatings can be applied to various surfaces, including metal, wood, concrete, plastic, and fiberglass. They are commonly used on vehicles, industrial equipment, machinery, floors, countertops, furniture, and more.
What are the benefits of using polyurethane protective coatings?
Some of the key benefits of using polyurethane protective coatings include:
Enhanced durability and longevity of the coated surface.
Resistance to abrasion, impact, chemicals, and UV rays.
Protection against corrosion and weathering.
Easy to clean and maintain.
Improved aesthetics with options for glossy or matte finishes.
Flexibility and adaptability to different substrates and environments.
How do I apply polyurethane protective coatings?
The application process may vary depending on the specific product and surface. However, general steps for applying polyurethane protective coatings are as follows:
Prepare the surface by cleaning, sanding, and ensuring it is free from dust or debris.
Apply a primer if recommended by the coating manufacturer.
Mix the polyurethane coating according to the instructions.
Use a brush, roller, or spray equipment to apply the coating evenly.
Allow the coating to dry and cure as per the manufacturer’s guidelines.
Apply additional coats if necessary, following the recommended drying times between each layer.
How long does a polyurethane protective coating last?
The longevity of a polyurethane protective coating can vary depending on several factors, including the quality of the coating, application method, environmental conditions, and the level of wear and tear. In general, a properly applied and maintained polyurethane coating can last several years before requiring reapplication.
Can polyurethane protective coatings be removed or repaired?
Yes, polyurethane protective coatings can be removed or repaired. If a coating needs to be removed, specialized stripping agents or mechanical methods, such as sanding or blasting, can be used. For repairs, damaged areas can be sanded and recoated with a fresh layer of polyurethane coating.
Conclusion
After much research and analysis, it has become clear that the top polyurethane protective coatings on the market each have their own set of benefits and potential drawbacks based on the specific situation in which they are used. Ultimately, what sets each of these products apart is the unique combination of features that they offer, such as UV resistance, scratch resistance, and ease of application, in addition to their overall performance and durability.
From the above 10 best polyurethane protective coatings, here are the top three expert recommendations:
The Bona Mega Wood Floor Finish is an ideal option for those who need a water-based, easy-to-apply protective coating that will enhance the natural finish of their indoor wooden surfaces. Its OCP formula ensures superior results without masking the wood's true color, while its low odor emission ensures safety for pets and individuals with breathing problems.
On the other hand, the Minwax 33050000 Protective Coating is a good option for aerosol application enthusiasts and professionals alike thanks to its rotating spray fan, which allows for quick horizontal and vertical applications. Its suitability for protecting both finished and unfinished wood surfaces adds great flexibility, though the slight yellowish hue it leaves should be taken into account when used on lighter surfaces.
Lastly, the General Finishes High-Performance Water-Based Topcoat is the right choice for those in need of a protective coating with excellent UV resistance. Its compatibility with a variety of brush types makes it user-friendly, and its UV-stabilizing properties prevent stains from fading and provide additional protection against sun damage. However, the yellow tinge it leaves on white paint should be considered before using it on such surfaces.
When selecting the best polyurethane protective coating for your specific needs, remember that these expert recommendations should serve as a starting point for your research. Take the time to explore the distinct features and benefits each product has to offer, and think about how they align with your priorities and requirements for your specific project. Once you've made an informed decision, you'll be well on your way to achieving a beautifully protected wood finish that lasts.
Is it really that difficult to scrape off the old paint? Well, not if you buy a top-quality paint scraper for your DIY project.
Most DIYers would agree that scraping off old paint is the least enjoyable part of any significant project. But that doesn't have to be the same for you; a top-grade paint scraper that is multifunctional and comfortable to hold can actually make your job easier.
Having said that, choosing a suitable scraper with all the required features is easier said than done. The problem is, there are a lot of cheap variants out there on the market, so you can't expect to settle on the best paint scraper based on luck alone.
So, to help you out, we have compiled a list of the top 11 paint scraper options currently available on the market, we tested 15 scrapers but 4 did not make it to the list as their overall quality was lacking. Furthermore, we have included a buyer's guide towards the end to make things more interesting.
Now, without further ado, let's get right in.
Best Paint Scrapers
Here’s the list of the 11 best paint scrapers to rock in 2024, carefully curated to help you find the perfect tool for your paint removal needs.
Founded in 1872 in America, Red Devil is one of the world's largest manufacturers of various types of DIY tools. On that note, allow us to introduce you to one of the brand's top-grade products. Featuring a solvent-resistant handle, the 4251 paint scraper from the brand is an option that you can depend on for a very long time.
6 TOOLS IN 1: Gouger, scraper, putty remover, spreader,...
SOLVENT RESISTANT HANDLE: Black nylon handle will provide...
Why Did We Like It?
As a product from a brand that has been on the market for 140 years, the 4251 paint scraper from Red Devil exceeds our expectations for most parts. It comes with the power of 6 tools; in other words, you can use it as a nail setter, roller cleaner, gouger, spreader, putty remover, and scraper.
Apart from this, it features a nylon-made solvent-resistant handle that ensures long-lasting usage. The blade is made of lacquered precision-ground steel to prevent rusting and offers top-notch durability. What's more? Well, you can use it to set drywall nails, thanks to the brass-plated nail setting head, we have found from using this on old drywall that it works like a charm.
Weighing just over 3 ounces, it is one of the most lightweight options on the market. Plus, it comes with a price tag that won't hurt your wallet. All these exceptional features make the Red Devil 4251 one of the top-rated paint scraper options available out there.
What Could've Been Better?
The Red Devil 4251 is an excellent option, our test show, especially because of its versatility and budget-friendly price tag. However, this product is not meant for those looking to use it for professional projects. But, other than that, it handles light-duty DIY projects quite efficiently and is certainly an option that all DIY enthusiasts should consider.
Pros
Offers great value for money
Extremely versatile
Very lightweight
Features highly durable build quality
Cons
Not meant for heavy-duty professional projects
Material: Precision-ground steel | Dimensions: 0.7 x 2.5 x 7.38 inches | Weight: 3.2 oz | Blade: Extra Sturdy High-Carbon Steel | Durable: Yes
Next up on this list is another efficient product from Titan, a renowned American brand that needs no introduction. Having said that, the 17002 scraper set from the brand is an option you simply cannot afford to miss out on, mainly because of its multi-functionality.
Set Contents: 9-1/4" Multi-Purpose Scraper, 4" Mini Scraper,...
Mini scraper is perfect for everyday use and hard-to-reach...
Why Did We Like It?
After getting a feel for the product we were thoroughly impressed with all the variable features this tool brings to the table. For starters, its long-reach design helps in using it for heavy-duty projects such as automotive scraping. You can further use it to scrape things off a wide variety of surfaces, including ceramic and glass.
Apart from this, the scraper's handle is made of heavy-duty polypropylene, which enhances the durability of the tool. It also features a TPR comfort sleeve, thereby enhancing the grip and minimizing hand fatigue to a bare minimum. Impressive, right? Well, there's more.
The set includes a 4" mini scraper, a 9-1/4" multi-purpose scraper, 5 replacement razor blades, and a protective safety cap, allowing you to meet various project requirements. Furthermore, it is very compactly designed and weighs under 4 ounces, which means you can use it in hard-to-reach areas without any difficulty.
What Could've Been Better?
Without a doubt, the Titan 17002 is a great option for those who want to scrape paint off a wide range of materials. That being said, we noticed that it comes with only one safety cap. We wish the manufacturer had provided two safety caps for both the mini and multi-purpose scraper.
Pros
Highly versatile
Comfortable to hold
Lightweight and compactly designed
Suitable for heavy-duty projects
Cons
Comes with only one safety cap
Material: Polypropylene | Dimensions: 1.7 x 6.9 x 12.7 inches | Weight: 3.68 oz | Blade: Ceramic | Durable: Yes
Bates Choice is a US-based brand that delivers quality DIY products at a budget-friendly price. And the 55054 knife scraper from the brand is no different. Backed by a lifetime warranty, this tool is a must-have for those who want to get the job done with a clean finish.
PROFESSIONAL QUALITY: Paint Scrapers that get the job done...
ONE TOOL WITH MULTIPLE USES: Tools can be used as a paint...
Why Did We Like It?
It is a multi-purpose tool for starters, which means you can use it as a paint scraper, a paint can opener, a screwdriver, a hammer, etc. It is made with professional quality materials, which makes refinishing and repairing jobs a mere walk in the park.
Apart from this, the blades are made of rust-resistant carbon steel for optimal durability. Plus, they are straight-ground in nature which makes them super flexible. It features a soft grip design that lets you work for longer hours at a stretch without causing discomfort to your hands.
It doesn't just end there! The Bates Choice 55054 is backed by a lifetime guarantee. So, don't worry if something happens; you can easily get the set replaced with a brand-new one. Overall, this tool is one of the most sought-after options by DIYers on the list.
What Could've Been Better?
After giving it a go we didn't come across any major downsides to the Bates Choice 55054 knife scraper. However, we were a little disappointed to find out that these blades don't come with safety caps. Of course, this does not compromise the scraping ability and the overall experience with this set of knife scrappers.
Pros
Backed by Bates Choice’s lifetime warranty
Highly flexible
Very comfortable to hold
Features durable blades
Cons
Doesn’t come with safety caps
Material: Carbon steel | Dimensions: 8.03 x 5.94 x 0.63 inches | Weight: 7.8 oz | Blade: Stainless Steel | Durable: Yes
Our following tool is from Warner, a reliable brand that has been consistently delivering top-quality yet affordable DIY tools since 1927. And the 90119 board knife is the perfect testament to the brand's superior quality and affordability. Need to know more about this outstanding tool? Well, then keep reading.
Tapered handle design makes it easier to clean after use
Why Did We Like It?
What caught our attention right from the start was the knife's chiseled edges; it makes scraping paint a hassle-free job. You can use it with chemical solvents without thinking twice. Furthermore, the ergonomic handle enables you to use it for longer periods of time with minimum pain.
Worried about durability? Well, the blade is made using carbon steel, hence making it quite sturdy. Plus, it weighs less than an ounce and measures just 4", thereby offering perfect balance. You can use it to scrape things off a broad spectrum of surfaces, including wood and tiles.
Apart from this, it comes with a very affordable price tag, making it an ideal choice for DIYers and first-timers seeking optimal results. Overall, the Warner 90119 does a fairly decent job and is an option worth considering.
What Could've Been Better?
Once again, we didn't find any significant drawbacks to the Warner 90119. In fact, it is a great option considering the brand value and the affordable price. That being said, it is not rust-resistant. So, we strongly advise you to keep it dry; otherwise, it will get rusty.
Pros
Comes with a modest price tag
The ergonomic handle makes it comfortable to hold
Highly durable
Can be used on a wide variety of surfaces
Cons
Prone to rusting
Material: Carbon steel | Dimensions: 4 x 0.75 x 8.5 inches | Weight: 0.32 oz | Blade: Stainless Steel | Durable: Yes
For over 130 years, Bacho has committed itself to manufacturing cutting tools that are highly ergonomic, performance-oriented, and innovative. And on that note, we decided to add yet another ergonomic product from the brand to this list. Backed by a limited lifetime warranty, the 665XXX carbide scraper does not disappoint us with its clean results.
BUILT FOR TOUGH REMOVAL JOBS: Tackle paint, glue, varnish,...
HEAVY-DUTY SCRAPER HEAD: Equipped with a wide, durable...
Why Did We Like It?
For us, the main USP of this tool is its ergonomic design. It allows us to scrape with utmost comfort and minimum effort. The 2 component handle provides a firm grip which further assists in scraping effortlessly. Plus, it features a large plastic knob which comes in handy for 2-handed operations, mainly useful for heavy-duty purposes.
Apart from this, the cemented carbide blade helps remove glue, paint, rust, and varnish from a wide variety of surfaces. The blade is decently built and can handle the toughest of tasks very efficiently. Also, you will be pleased to know that the blade remains razor-sharp even after repeated uses, a lot longer than traditional steel blades.
Furthermore, the manufacturer has provided a holster with this product, ideal for belt storage. And finally, the Bahco 665XXX paint scraper is backed by a limited lifetime warranty. So, do not worry about defects; Bahco has you covered!
What Could've Been Better?
There is not much to complain about such a durable, versatile, and ergonomically designed scraper. And for that reason, the Bahco 665XXX comes with a pretty expensive price tag. However, considering the outstanding features of this tool, it's worth the money you invest.
Pros
Backed by a limited lifetime warranty
Ergonomically designed
Suitable for heavy-duty uses
Comes with a holster
Cons
Tad bit expensive
Material: Cemented carbide | Dimensions: 10 x 2 x 3.54 inches | Weight: 7.4 oz | Blade: Carbide | Durable: Yes
Ergonomic, lightweight, and packed with many features, the MulWark 13 multi-purpose scraper set is a budget-friendly option appropriate for accomplishing DIY projects. Featuring an ergonomic design and popular for removing a wide range of materials, this unit ensures that you can slice through your project effortlessly and with maximum efficiency.
【Ergonomic Design】:Our scraper tool is heavy duty...
Why Did We Like It?
This tool offers you almost everything that you would expect from a top-quality scraper set. For starters, it features a polypropylene-made ergonomic handle to ensure comfort, longevity, and superior control. The mini razor scraper helps in working in tight areas, while the long one comes in handy for working in places that are hard to reach.
Furthermore, it comes with double secure caps, thereby ensuring optimal protection from accidental cuts. Plus, this scraper set is multifunctional; you can use it on surfaces like floors, cooktops, glass, and tiles for removing stickers, vinyl, paint, adhesives, and a lot more.
Apart from this, we also liked the fact that it is backed by a limited lifetime warranty from the manufacturer. You can easily get it replaced if you receive a faulty set. And finally, these exceptional features are coupled with a budget-friendly price tag, making the MulWark 13 one of the best-selling scraper sets on the market.
What Could've Been Better?
We bet you must be wondering what could possibly be wrong about the MulWark 13 despite having such spectacular features. Well, to be honest, we did not like the safety guards of the blades; they are quite difficult to snap on and off the product based on our first-hand experience.
Pros
Backed by a limited lifetime warranty
Comes with a budget-friendly price tag
Can be used for a wide range of applications
Comfortable to use
Cons
Poorly designed safety guards
Material: Polypropylene | Dimensions: 7.83 x 3.5 x 1.85 inches | Weight: 10.2 oz | Blade: Razor | Durable: No
For those who don't know, WEUPE is a US-based brand known to deliver top-grade hand tools that will serve you for a very long time. On that note, we bring you the Razor Blade Scraper Tool from the brand is a durable option that will help you scrape paint with minimum effort.
Made in USA Razor Blade Scraper effectively removes...
Great Scraper for Glass & Ceramic Cooktops and Stovetops
Why Did We Like It?
There are a good number of things that we loved about this product. The first is its compact and lightweight design; it takes up very little space and is very easy to carry; both are important features for homeowners. The build quality doesn't disappoint either, it is durable, and it features a stainless steel body which gives the product a very sleek and professional look.
Furthermore, we were really impressed with the versatility of his scraper; you can use it to remove a great variety of substances, including paints, adhesives, glues, labels, etc. Plus, it comes with 5 top-notch replacement blades. So, you don't have to go through the hassle of finding replacement blades on the market.
Apart from this, the large control knob ensures stability and optimal safety. And lastly, The WEUPE Razor Blade Scraper Tool comes with a very affordable price tag, making it the ultimate choice for first-timers and hobbyists.
What Could've Been Better?
Even though the WEUPE Razor Blade Scraper Tool does a decent job in most aspects, it fails in one. While testing this product, we noticed that the locking mechanism is not up to the mark. It often failed, which made the blade retract. This was indeed very disappointing, considering the other handy features this product comes with.
Pros
Comes with an affordable price tag
Very lightweight and compact
Sports a sleek design
Removes a great variety of materials with ease
Cons
Poorly designed locking mechanism
Material: Stainless steel | Dimensions: 8.15 x 3.19 x 0.67 inches | Weight: 2.89 oz | Blade: Razor | Durable: Yes
As you already know, Bates Choice is a very popular US-based brand that delivers top-notch DIY products at a budget-friendly price. So, it would be fair to add another exceptional product from this brand. That being said, the 10 in 1 Paint Scraper from the brand is a highly functional option that you must check out.
Bates paint scraper tool 10 in 1 easy to use and convenient.
A must have tool in your home, Rust-resistant steel blade...
Why Did We Like It?
According to us, the biggest highlight of this tool is its versatility. From removing loose putty to scraping paint to removing vinyl, you can use it on various surfaces for different purposes. Hence, it is a must-have tool for all homeowners.
Apart from this, the scraper features a durable build quality. It comes with a razor-sharp rust-resistant stainless steel blade which makes scraping seem like an effortless and fun job. Plus, the wooden grip further makes it very comfortable to hold, so you can use it to work for long hours at a stretch without hurting your hands.
Furthermore, it weighs just over 4 ounces, which makes it very lightweight and easy to carry. And lastly, the Bates Choice 10 in 1 Paint Scrapercomes at a very modest price, which is a very big plus in our books.
What Could've Been Better?
The Bates Choice 10 in 1 Paint Scraper is an entry-level paint scraper and a great value for money. Having said that, it is not meant for large-scale heavy-duty professional uses. However, you can use it to nail medium to light-duty DIY projects quite conveniently our tester says.
Pros
Highly versatile
Features a durable build quality
Very comfortable to hold
Extremely lightweight
Cons
Not meant for heavy-duty scraping
Material: Carbon steel | Dimensions: 8.66 x 3.86 x 0.67 inches | Weight: 4.2 oz | Blade: Razor | Durable: Yes
REXBETI, a brand that specializes in manufacturing products that help us to live convenient lifestyles, brings another exquisite product. The REX055 scraper set from the brand features 2 sharp razors and 20 blades which makes it a piece of reliable scraping equipment for all types of DIY projects.
REXBETI razor scrapers are built with high quality and...
3 position for easy to retract and push out blades.Blade...
Why Did We Like It?
To begin with, it comes with 2 razors, both serving different purposes. The 8.7" one can be used for working on hard-to-reach areas, while the 4.3" is perfect to be used on tight corners. Plus, the ergonomic handle provides the ultimate grip; you can easily use it for hours with minimum discomfort.
Apart from this, this scraper set is capable of removing various substances such as paint, adhesives, stickers, and even glue. It features blade storage at the bottom of the handle, which is useful for replacing old blades with new ones in no time.
Furthermore, it weighs just under 8 ounces, so carrying this set around shouldn't be a problem. Also, the build quality is pretty decent and is expected to last for several years. Overall, the REXBETI REX055 razor scraper set is great value for money!
What Could've Been Better?
Despite being such a great value-for-money option, the REXBETI REX055 has its fair share of drawbacks. Firstly, it does not come with any sort of instructions, which may be a problem for first-timers and old people. Also, using the long-handle razor is a little tricky as it does not hold the blades so well, not holding the blade well was not ideal when we trialed the product.
Pros
Very comfortable to hold
Can be used to scrape various substances
Great value for money
Features durable build quality
Cons
The long razor doesn’t hold blades so well
Material: Stainless steel | Dimensions: 9.02 x 3.62 x 1.26 inches | Weight: 9.6 oz | Blade: Razor | Durable: Yes
Since we are approaching the end of our list, here's another product from Purdy that you should consider. This brand has been producing some of the world's most durable and easy-to-use painting tools since 1925. Having said that, the 144900230 carbide scraper from the brand has the capability to deliver first-class results that bring success to the overall project.
The main reason why we liked this product so much is that it is one of the best in every aspect. It is suited for professional use and promises to make paint-scraping jobs easy and effortless. Plus, this scraper's exceptional build quality and top-notch durability make it the preferred tool of handymen and DIYers everywhere.
Apart from this, we also were also impressed with the ergonomic grip; it is rubberized, which makes it comfortable to hold for long hours and prevents slipping. The blade of this unit is made of carbide and therefore is much stronger and sharper than the conventional steel blades that you see on other scrapers. Oh! Did we forget to mention that it is also rust-resistant?
Furthermore, you can use it to scrape paint off various types of surfaces. Measuring just about 2.5", it is one of the compactly designed paint scrapers on the market. Overall, the durability, ergonomic design, sharp blades, and lightweight make the Purdy 144900230 worth your investment.
What Could've Been Better?
Purdy products generally tend to be slightly expensive, and the 144900230 paint scraper is no different. But once you make the investment, we bet you will not regret it. Apart from the expensive price tag, we did not notice any other drawback to this paint scraper, after testing it in various situations, we can say the Purdy deserves the price tag.
Pros
Suitable for heavy-duty use
Comes with a highly durable build quality
Comfortable to hold
Features sharper blades
Cons
Slightly expensive
Material: Blend | Dimensions: 11 x 2.5 x 3 inches | Weight: 6.4 oz | Blade: Carbide | Durable: Yes
Honestly, there would be something lacking on this list if we didn't include this marvelous product from Travol. Backed by a lifetime guarantee, this paint and wall scraper from Travol has the potential of giving tough competition to most options on this list. Now, of course, that's not all, keep reading to know more.
4" CARBON STRENGTH STEEL BLADE - In a Beautiful Mirrored...
STRONG & FLEXIBLE - Blade is Designed with the Perfect...
Why Did We Like It?
We were floored by the spectacular features this product had to offer. Firstly, it features a beautiful 4" inch mirror-polished carbon steel blade, which makes scraping paint very easy. Not only that, but it also takes the scraper's look to a whole new level.
Secondly, the handle deserves mention; it features a soft rubberized ergonomic design that lets you work for hours at a stretch without causing hand fatigue. From paint scraping to spreading, it serves pretty much all DIY uses.
Weighing just under 2 ounces, it is one of the lightweight options on this list. Furthermore, we were thrilled to find out that the Tarvol Paint & Wall Scraper is backed by a lifetime guarantee. This means that the manufacturer is very confident about the durability and performance of the product.
What Could've Been Better?
Tarvol Paint & Wall Scraper is an exceptional option for those who are looking to use a single product to fulfill various DIY tasks. However, this unit is prone to rust. But, given the modest price point and the handy features of this paint scraper, it would be absurd to complain much about it.
Pros
Backed by a lifetime guarantee
Comfortable to hold
Very lightweight
Can be used for various DIY purposes
Cons
Prone to rust
Material: Carbon steel | Dimensions: 9.33 x 4.17 x 0.94 inches | Weight: 1.76 oz | Blade: Carbon steel | Durable: Yes
Now that you have gone through the list of the top 11 paint scrapers, were you able to make a choice? Something tells us you are still confused. Well, to be honest, knowing just the brand names and a few pros and cons are not enough information, especially when you are buying the best paint scraper.
There are a lot of other factors that come into play that you need to keep in mind. So, to make things easier, we have explained all these factors in this section to help you buy the best product based on your requirements. We strongly advise reading it carefully till the end; otherwise, you might miss a thing or two!
Let's begin!
Materials of Paint Scrapers
You should always check the material used in the production of a paint scraper as it determines the overall durability of the product. Always go with a model that is either made of wood or metal as they offer enhanced durability and more longevity.
Furthermore, select a model that comes with a rubberized handle as they are comfortable to hold and provides a firm grip. Also, keep in mind the surface you will be working on scraping paint off a car is different from scraping paint off a wall so pick your tool and the supplies recording based on the surface you have to tackle.
Size of Scrapers
Again, it depends on the type of surface you will be working on. If you have to scrape paint off a wall, go with a model that has a larger blade size. However, if your project is smaller, a narrower one might get the job done very easily. So, always keep the size of your project in mind and choose accordingly.
Tool Versatility
Versatility may not be one of the prime factors when choosing a quality paint scraper, but it is important nonetheless. On that note, a few models offer built-in edges so that you can use them for other purposes like smoothing compounds, opening paint cans, and performing various other DIY jobs.
For instance, models that come with razor blades come in handy when removing labels and stickers off containers, but we determined through trial and error that having a one-piece tool is easier to manage in the log run, as often with multiple tools, accessories, they can be misplaced, never to be found again.
Straight Or Curved?
Both straight-edged blades and curved-edged blades offer great performance. However, paint scrapers with curved blades are useful in working on corners and tight spaces. Having said that, in most cases, a straight-edged scraper will work just fine when removing paint. Again, consider your project and choose accordingly.
Paint Scrapers FAQs
How do I choose the right size of paint scraper?
The size of the paint scraper depends on the surface you will be working on. For scraping paint off a wall, a model with a larger blade size is recommended. If you have a smaller project, a narrower blade might be sufficient. Consider the size of your project and choose accordingly.
Are there any versatile paint scraper options available?
While versatility may not be the primary factor when choosing a paint scraper, some models offer additional features. Some paint scrapers have built-in edges that can be used for smoothing compounds, opening paint cans, and other DIY tasks. However, it is important to note that having a one-piece tool can be more manageable in the long run to avoid misplacing accessories.
Should I choose a paint scraper with a straight or curved blade?
Both straight-edged and curved-edged paint scrapers have their uses. Curved blades are particularly helpful for working on corners and tight spaces. However, in most cases, a straight-edged scraper will work well for removing paint. Consider the specifics of your project and choose accordingly.
Are there any advantages to a rubberized handle on a paint scraper?
Yes, a paint scraper with a rubberized handle provides a comfortable grip and better control during use. It enhances user comfort and reduces hand fatigue.
Can a paint scraper have additional uses besides scraping paint?
Yes, some paint scrapers offer built-in edges or features that make them versatile for other tasks. They can be used for smoothing compounds, opening paint cans, and various DIY jobs. Look for models with these additional features if versatility is important to you.
Conclusion
Preparing the surface is very important before applying new paint. If you don't have an even surface underneath the new paint coat, it will look terrible. So, ensure that the old paint is properly scraped off the surface before applying a new one, whether you use this using a heat gun or a paint scraper depends on the job ahead.
On that note, we have reached the end of our review-based guide. We hope that it helps you purchase the right paint scraper based on your needs. However, before wrapping up, we will let you in on our favorites from the list.
Red Devil 4251 is the best product overall because of its versatility and lightweight design. Titan 17002 is comfortable to hold and is suitable for heavy-duty projects, while the Bates Choice 55054 is known for being highly flexible and is backed by a lifetime warranty.
With that, it's time for us to leave. Until next time!
It’s 7 in the morning, and you wake up to the sight of dark spots on your wall and ceiling. Not a pretty sight, is it?
Your home is supposed to bring in positive vibes, and imperfections on the wall can be a major mood spoiler. But hey, do not worry as there is a way to bring about a change. It is time to purchase a good roller and then let it transform your walls with your favorite colors and textures.
And guess what, there is no need to get professional help and spend loads of money on it. You can do it yourself at home with the right equipment.
To make your job easier, we are here with a list of the top 9 paint rollers to hide imperfections. The top features, along with the pros and cons, have been listed in detail for your benefit.
So, dive in to know more!
Best Paint Roller To Hide Imperfections
Here’s the list of the 9 Best Paint Rollers To Hide Imperfections Tested – transform your walls with ease and say goodbye to unsightly marks and blemishes.
One of our top recommendations is the Bates Paint Roller, which comes with a set of 11 different pieces, providing everything that you may need. You can expect professional quality results as it provides a smooth finish that looks gorgeous on all kinds of surfaces.
COMPREHENSIVE SET: Package includes 11 piece: Tray, Roller...
PROFESSIONAL QUALITY: This paint tray set is high quality...
Why Did We Like It?
First of all, let us tell you about the units in the kit. It includes a tray, 4 roller covers, one roller frame of 9 inches and another of 4 inches, an angel paintbrush, and a high-density brush made of foam.
The two roller covers measure 9 x 1//2 inches, while the other two measure 4 x ½ inches. This should take care of both small and big surfaces, and you can achieve a smooth layer every time.
It has synthetic filaments, which are specially designed to hold more paint than standard options. This made painting easier and saved us a lot of time, which would otherwise have been spent bending down, dipping it in the can, and picking up paint.
Plus, the naps are ½-inch in diameter and will help you to paint all kinds of places that would have been otherwise difficult to reach. You can use this roller to paint over imperfections on both walls and furniture.
What Could've Been Better?
We would recommend that you check the tray carefully before pouring paint into it. There was a gaping hole in the tray we received, and some of the paint leaked out. On contacting the customer support team, we were offered a replacement immediately, but we did lose time in the process.
Pros
Known to be affordable
Holds more paint
Can paint both big and narrow surfaces
Works for professionals and beginners
Cons
Hole in the tray
Material: Synthetic filaments | Dimensions: 16 x 12 x 3.5 inches | Weight: 3.52 oz | Size: 9"
If you are only looking for a frame, then the Wooster Brush R017-9 Roller Frame will be an excellent choice. This is a very sturdy unit made of durable materials and will fit well with naps, measuring 9 inches. Read on to understand the bells and whistles in a better way.
Quick release spring prevents roller slippage yet allows...
Why Did We Like It?
First of all, this roller comes with a quick-release spring, which will help you change naps easily. It will not slip out of your hand, spilling paint in the process. The naps are tightly held and will not come off while painting. Paired with this is a chrome-plated shank, which measures 5/16 inches.
What’s more, it is made of green fiberglass and comes equipped with a nylon cage. There are end caps placed to prevent any dislocation while working.
Now, if you are wondering about the grip, the unit has a polypropylene full-sized grip. This comes along with reinforced threads that will prevent you from straining your hand. We felt that it would be able to roll smoothly, and it does fit well into the palm.
What Could've Been Better?
The only issue with this product is that it makes a squeaky sound every time we use it. This sound can be disturbing, especially when you are using it for long hours. So, we would recommend putting on earphones and turning on your favorite music before beginning the process.
Pros
Quick-release spring
Durable fiberglass is used
Polypropylene grip
Does not spill paint
Cons
Makes a squeaky sound
Material: Green fiberglass | Dimensions: 9 x 3 x 7 inches | Weight: 12.6 oz | Size: 9"
Now that we have told you about a roller frame, it is time to discuss naps. One of our top recommendations is the Pro Grade - Paint Roller Cover, which will fit into any roller frames with a length of 9 inches. We were very happy to see the smooth and perfect finish that this helped us achieve.
Our no-shed microfiber roller covers ensure a perfect paint...
The 1/2" nap provides full, even coverage on smooth and...
Why Did We Like It?
This is a set of 5 naps that will fit in with most 9-inch frames. Each of them is made with microfiber and is not prone to shedding at all. We loved the smooth and even finish that this provided us.
Plus, each of the naps is ½ inches thick and can hold a lot of paint. They work on both smooth and semi-smooth surfaces, and you can use them on drywall. We worked on both ceilings and walls with this, and it did not drip much.
And if you are worried about durability, this option is known to be very durable, and you can use them multiple times. The naps can be easily washed and reused for other colors, and you will not notice any kind of shedding.
What Could've Been Better?
There were some pieces of blue bits that were stuck on the naps. Initially, we were not concerned, but after we started to use them, there were blue spots being left on the wall. We immediately cleaned it well and then continued the process, and we have to say that this was time-consuming.
Pros
No-shed microfiber used
Perfect for painting walls and ceilings
Known to be durable
Works on smooth and semi-smooth surfaces
Cons
Blue bits stuck in the naps
Material: Microfiber | Dimensions: 11.42 x 9.06 x 2.6 inches | Weight: 13.1 oz | Size: 9"
Up next, we have a brilliant product that works very well with glossy paint and enamels. The FOAM PRO 184 is a mini roller, which is a great choice for smaller and narrow places. It will provide a spray finish that keeps the glaze intact.
Perfect for glossy paints (enamels), urethanes, varnishes,...
Applies a lint-free, spray-like finish
Why Did We Like It?
This is a perfect device to apply a number of solutions on surfaces, and that includes glossy paint, primers, stains, varnishes, and urethanes. It is small in size, measuring just 4 inches, and hence we were able to use it to reach difficult corners.
Additionally, this item worked very well on cabinet furniture, doors, and moldings. The paint does not spread or get onto other surfaces on the sides. Plus, it can easily be put into 1-gallon cans, and you do not have to pour the paint first into a bigger container.
Moving on, one of its standout features is that there are no naps attached, and hence you will just be getting a smooth and lint-free surface after painting. Many recommend using this for painting the topcoat to ensure a leveled finish.
What Could've Been Better?
Since there are no naps attached, you will not be getting any kind of texture on the walls or furniture. Remember this before making a purchase so that you do not end up buying something that does not fit your needs. Having said that, we will not be holding this as a drawback.
Pros
Provides a smooth finish
Works well on narrow surfaces
Does not drip
Fits into 1-gallon cans
Cons
Does not allow a textured finish
Material: Foam | Dimensions: 4.5 x 1.5 x 11 inches | Weight: 4 oz | Size: 4"
Are you looking to use a roller with latex-based paint? The Purdy 144630183 Colossus Roller Cover will serve you excellently well as it is specially designed for this type of paint. It works smoothly on most surfaces and is a cost-effective option.
FOR LATEX & OIL-BASED PAINTS – For best results, use with...
Why Did We Like It?
This product is made of woven polyamide and is known to be very durable. The woven fabric sticks to each other and does not shed much during the process. In the case of the small amount of lint that mixes with paint, you can easily pick them off.
Next, you can use this product on semi-rough and semi-smooth surfaces. The texture of the roller cover will help in achieving a smooth finish if you are using oil-based stains or latex.
What’s more, this is big in size, measuring 18 inches, and will work on heavy-duty painting projects. Many professionals choose this as it can hold a lot of paint at one time. Plus it is big in size and can cover a larger area in a short while. Overall, it makes painting less time-consuming, and that is appreciated.
What Could've Been Better?
Although it is known to work very well, you might have trouble fitting it with every frame. We will recommend calling customer care representatives and discuss the brands and models that this roller cover will work with. This would save time and money in the process, and you can make an informed choice.
Up next, we have another product from the house of Bates. The BP-RS03N- Paint Roller is a set of 1 frame and 2 roller covers, and it works very well for different kinds of painting jobs. You will love the features that it is packed with, and you can read on to know all about them.
Package Includes 3 Pieces: 1 Paint Roller Frame (9-Inch), 2...
Why Did We Like It?
This is a lightweight product that is easy to handle and is widely used by professionals. We especially loved the high-impact handle that it comes with, which is made of rubber. This would provide you with a sturdy grip, and there are no chances of it slipping from your hand.
Moreover, we loved the smooth finish that was achieved, and we were able to do the job like professionals. The sleeves were able to hold a lot of paint at one time, and you can cover surfaces in a short time.
Adding on to that, these naps are very easy to clean and do not spill too much paint. They are made of microfiber and are resistant to shedding. We were able to get all kinds of painting projects done with this.
What Could've Been Better?
While this will work on smooth walls, we will recommend not using it on textured surfaces. We tried it on textured walls, and the layer turned out to be very uneven. We then had to apply multiple coats, and that involved a lot of effort. Take this into account, and there should not be any further problems.
Pros
Comes with a rubber handle
Easy to clean
Resistant to shedding
Fits most extension poles
Cons
Not for textured surfaces
Material: Microfiber | Dimensions: 11.73 x 10.04 x 2.83 inches | Weight: 12 oz | Size: 9"
The Wooster Brush RR662-9 is the next item on our list, and it is popular for providing clean coverage on all types of surfaces. This works very well for small-scale projects where you only need one nap to get the job done.
High-capacity yellow fabric for fast, no skip coverage
Good density to resist matting for smooth results
Why Did We Like It?
This is made of yellow fabric, which has a high capacity and is known to provide complete coverage. We have to mention the high density that it comes with, and that ensures that a lot of paint is absorbed and held at one time. You can easily resist matting and get a glossy finish, thanks to this.
Plus, it comes with a polypropylene core, which resists cracking, increasing its durability. It is resistant to water and solvents, making sure that the nap stays in place for longer.
Moreover, we found that this unit weighs 1.6 ounces, and is one of the most lightweight options on this list. This will not cause any strain on your hand, and you can continue working for long hours.
What Could've Been Better?
The downside to this product is that it splatters some amount of paint while working. So, we will suggest that you cover the entire area around you before beginning to paint. Also, wear proper gear so that the paint does not get into your eyes or nose. Once you are prepared, this should not bother you anymore.
Pros
High-density fabric
Provides complete coverage
Known for its durability
Does not shed
Cons
Splatters paint easily
Material: Yellow fabric | Dimensions: 10 x 3 x 3 inches | Weight: 1.6 oz | Size: 9"
Next, we have the ALAZCO Paint Roller, which is one of the smallest options available on the market today. It measures only 3 inches and works for corners, trims, and hard-to-reach places. This is also made of strong material and can be used multiple times.
ALAZCO Value Set of 1 Paint Roller Frame & 6 Roller Covers
3" Mini Size Covers with 1/2" works for most surfaces,...
Why Did We Like It?
This product consists of 6 covers, which are made of a unique blend of polyethylene fibers that are woven together. You will find an interlocking pattern that is specially made to absorb as much paint as possible.
We loved the unique dense nature that the roller and that ensured it could hold a lot of paint at one time. This brilliant absorption capacity makes it stand apart from its peers. Plus, it is resistant to shedding, and you should not find a lot of lint while working.
Next, this product is known for its smooth free-spin action, which will enable you to work freely and quickly. We were able to work with less elbow grease, thanks to this.
Last but not least, this unit comes with a comfortable grip that would not slip out of hand.
What Could've Been Better?
This option works well for smaller projects, but it will not work for larger ones. This is because of the small size, which would take a lot of time to cover large surfaces. You can instead use a larger product measuring 9 inches or more for bigger walls.
Pros
Known for smooth free-spin action
Comfortable, sturdy grip
Interlocking polyethylene fibers
Perfect for narrow areas
Cons
Not for big projects
Material: Polyethylene fibers | Dimensions: 14.41 x 9.02 x 3.98 inches | Weight: 12 oz | Size: 3"
Now that we are nearing the end of this list, it is time to introduce the Purdy 140765014. This is a mini roller system that is meant for versatile use. You can use it to achieve all kinds of sheen types.
To begin with, this product works well with primers, stains, cleaners, and oil-based paints. You can also use it with latex, and you will get a glossy surface. We have used it on semi-smooth and semi-rough surfaces, which include drywall, floors, and ceilings.
Moving on to the material used to make these rollers, we were pretty impressed with the woven dralon fabric, which worked great in absorbing and retaining paint. It offered a lint-free finish, and we did not have to waste time picking off the lint.
Next, this can be used for heavy-duty work, and it will provide complete coverage from one edge to the other. The surface will have a flawless finish, and you can create softening and blending effects easily on the walls.
What Could've Been Better?
This product works well, but the packaging was not done well. The handle was slightly bent due to this, and it could have been easily prevented if better packaging material was used. We wish that the brand would take this into consideration.
Now that you know about the top paint rollers to hide imperfections, let us help you further in choosing one. In this section, we have listed down the top factors, which will help in deciding upon an option that is perfect for you. Read on to know all about them.
Size Of The Roller
The size of the roller is a very important consideration while purchasing one, and you should know that this determines a lot. If you are planning to work on corners and edges or you want to paint by the side of windows, a large option would create a mess.
You will need a small roller between 3 to 9 inches for this job. The size will vary with the amount of precision that is required while painting.
On the other hand, if you need to paint large surfaces like walls or furniture, it is best to opt for bigger rollers as they will help in covering large areas quickly. Plus, it will be able to hold more paint, making your job simpler.
Handle
The handle is an important part of the product, and you should check it before purchasing. It is best to opt for a comfortable grip that will not cause your hand to strain. Also, a full-sized grip will make it easier to work with. Some handles are made of rubber and are softer to hold.
Absorption Capacity
The absorption level of a product will determine the time taken for you to complete your job. Naps that can absorb a lot of paint make the entire process easier, and this works best for large surfaces.
However, if you are working with narrow trims or edges, a larger absorption capacity is not needed. Hence, make a note of your requirements before purchasing any one of the options.
Paint Roller FAQs
How does the handle of a paint roller affect my painting experience?
The handle of a paint roller is important for a comfortable grip and ease of use. Look for a handle with a full-sized grip that fits well in your hand and doesn’t cause strain. Some handles are made of rubber, providing a softer and more comfortable grip.
How do I clean and maintain a paint roller?
After using a paint roller, clean it thoroughly by rinsing it with water or the appropriate cleaning solution based on the type of paint used. Remove excess paint by rolling it on a scrap surface or using a roller cleaner tool. Once clean, allow it to air dry or use a roller spinner to remove excess water. Store the roller in a clean and dry place to maintain its condition for future use.
Can I use a paint roller for different types of paint?
Yes, paint rollers can be used with various types of paint, such as latex, acrylic, or oil-based paints. However, it’s important to clean the roller thoroughly between different paint applications to prevent color mixing and achieve better results. Follow the manufacturer’s guidelines for compatibility with specific types of paint.
Are there any special techniques for using a paint roller?
To achieve a smooth and even finish with a paint roller, start by applying even pressure while rolling and avoid excessive force. Roll in a “W” or “M” pattern to evenly distribute the paint and avoid streaks. Be mindful of overlapping sections to maintain consistency. It may also be helpful to use an extension pole for reaching high or difficult-to-access areas.
Conclusion
Now before you begin painting, it is essential that you know everything about the process. We will recommend talking to an expert or a friend who has done it before.
If not, you can watch YouTube tutorials to know better. Once you have a clear understanding and all the tools needed, it would be time to begin.
Having said this, we will do a quick run-through of our favorites before taking your leave. If you intend on getting a complete kit, then our favorite option is the Bates Paint Roller Kit. But if you are only looking for a frame, the Wooster Brush R017-9 Roller Frame will serve you well.
On the other hand, the Pro Grade - Paint Roller Covers will be a brilliant choice if you just need naps. Let us know about your favorite option in the comment section below.
Best paint primers are essential preparatory coatings that ensure strong adhesion, block stains, and create a smooth, uniform surface for topcoats on walls, cabinets, furniture, metal, and masonry. Unlike standard paints, primers are formulated with sealing resins, stain-blocking pigments, and bonding agents to improve coverage, prevent bleed-through, and extend the durability of the finish. Their performance is commonly measured by adhesion strength, hiding power (contrast ratio), stain resistance, and compatibility with interior or exterior environments. Whether you need a latex bonding primer for drywall, an oil-based stain blocker for wood, or a corrosion-resistant primer for metal, the right choice can significantly reduce the number of topcoats required and improve long-term results. As coatings expert Carl Minchew explains, “Primers aren’t optional—they’re the foundation that determines how well your paint system performs.” In this guide, we’ve reviewed the best paint primers, tested for coverage, versatility, odor resistance, and application method, so you can select the most reliable option for your next project.
Best Paint Primers
Whether you're painting walls, cabinets, or furniture, these primers have been carefully selected based on their performance, coverage, adhesion, and versatility. So, if you're ready to take your painting game to the next level, here's the list of the 10 best paint primers that will help you achieve professional-looking results.
The first pick on our list is the KILZ Adhesion interior latex unit, one of the best-selling and high-bonding primers in the market. We’re fans of its multi-purpose functionality, which is quite impressive for a prime at this bargain-basement price. Let’s take a more in-depth look at its core features.
Right off the bat, the KILZ Adhesion primer ensures that the topcoat maintains proper adherence to certain surfaces that aren’t usually easy to paint. This feature extends the possibilities of painting on a wide range of surfaces, which spells convenience. Whether it’s brick, plaster, or other hard-to-coat surfaces, this product works its magic with precision. It develops an ultra-strong bond with the surface and ensures that the paint is glued for a long time.
However, it doesn’t end there - it also works perfectly on surfaces such as PVC, tiles, glass, vinyl, Kynar, and other slick bases. It contains 93-100 KU viscosity, which gives it a higher advantage over oil/water-based primers. It allows you to comfortably use it under lacquers, latex paints, or products that comprise xylene. Also, it takes as little as half an hour to dry since it’s applied and allows you to recoat within an hour.
Quantity-wise, it stands out to be a complete value-for-money product. It only takes a 1-gallon container of KILZ adhesion primer to cover around 300 square feet. You can also use it with sprayers to ensure proper utilization of the paint while ensuring excellent coverage.
What Could’ve Been Better?
This product isn’t approved by the Food and Drug Administration to be used on food surfaces, restricting its versatility a little. It can also get a bit frustrating at times when it’s only available in 1-gallon cans, as it may seem less for various large-scale projects.
Pros
An excellent and robust bond
Can be used with any latex paint
300 square feet of coverage
Value for money item
Cons
Quantity may seem less at times
Type: Interior | Volume: 128fl oz | Stain Blocking: Yes | Odor: Low | Base Type: Water-Based
This one’s for the hardcore Rust-Oleum fans; the all-new Zinsser Bulls-Eye outperforms almost any other product in terms of versatility. Despite being a water-based paint that provides the utmost ease of use, it maintains professional-grade efficiency. That being said, let’s have an inside scoop of its key features.
Rust-Oleum has left no stone unturned to formulate the Bulls Eye unit, and it stands out to be an excellent primer under a fair budget.
For those who are searching for a best-value unit to paint both the internal and external surfaces of their house, it is an absolute steal of a deal. Whether you’re planning to block the visible stains on the ceilings or renovate the walls, you can rely on it with your eyes closed.
It gets even better - the primer contains a rust inhibitor formula that makes it ideal for use on metal surfaces. Moreover, the adhesion that it provides to the mixed paint is firm and secure, making it 100% reliable for high-end jobs. Noteworthy to mention, you can avail the primer in aerosol cans, making it a lot more efficient for painting on surfaces that are usually impossible to reach.
It’s commonly available in the market in grey and white variants, and we’d also recommend it for those who are using dark top coating shades. This primer can be used on tiles, ceramic, glass, and wood, which speaks volumes about its versatility.
What Could’ve Been Better?
The only downside of this product is that it’s only accessible in a 1-quart size, which may not seem sufficient for completing larger painting jobs. Other than that, it offers pretty good value for money.
Pros
Rust-protection feature for high efficiency
Complaint with acrylic and latex paints
Used for both internal and external jobs
Available in aerosol cans
Cons
Available only in a 1-quart size
Type: Interior/Exterior | Volume: 32fl oz | Stain Blocking: Yes | Odor: Low | Base Type: Water-Based
KILZ has returned to our list with another top-notch product that guarantees 100% proper adhesion between the coated paint and the surface. This multipurpose primer comes off as an appropriate option to consider for covering stubborn stains on almost any surface. Under an affordable budget, it delivers satisfactory performance and quality.
A good primer makes paint stick better to surfaces, makes...
KILZ Original oil-based primer blocks most stains including...
Why Did We Like It?
The best thing about the KILZ original multi-purpose primer is its genuine quality, offering you optimal adhesion to the paint without using a lot of it. Once coated, it’s guaranteed to last for years to come without damaging or cracking. However, as the name implies, it can also be used as an excellent stain blocker. If an ugly stain ruins your ceiling or walls, it can hide stubborn marks efficiently.
To be precise, this product stands out as a solid choice for blocking water and smoke stains, making it very reliable for home renovation jobs. Also, unlike other typical alternatives in the market, it doesn’t require you to apply multiple coatings to block any stain permanently. Instead, it comes with a thickening formula to maintain optimal quality, allowing it to get the job done without using vast amounts of paint.
You can use this primer to hide stains caused by water, tannins, grease, smoke, and ink. It can be efficiently used on walls, ceilings, bricks, wood, and various other surfaces. Last but not least, 1 gallon of this product can easily offer a decent coverage of 300-400 square feet.
What Could’ve Been Better?
Quantity appears to be a significant issue with this unit, as it can only be available in either 1-quart or 5-gallon containers. Also, it might not be the best option to consider if you’re looking forward to priming floors.
Pros
Long-lasting primer
Blocks stains easily
Can trap pet odors and smoke
Affordable price range
Cons
It can’t be used on floors
Type: Interior/Exterior | Volume: 32fl oz | Stain Blocking: Yes | Odor: Medium | Base Type: Oil-Based
For the DIY home improvement folks who continuously ask for premium alkyd-based primers, the INSL-X Prime Lock is a deal you can’t afford to ignore. This product carries one of the most efficient stain-blockage properties that we’ve tested by far, raising the bar higher for quality. Let’s have a quick peek at what more it has to offer.
Fast-drying, multi-purpose Alkyd-based coating that primes...
High hiding Alkyd primer that seals stains from water, smoke...
Why Did We Like It?
The INSL-X primer makes a suitable companion for DIY enthusiasts, as this alkyd-based product can be availed at a very pocket-friendly price. It has powerful stain-blockage properties, making it quite useful for internal home renovation jobs. Furthermore, we’re fans of its spot-coating capability, which makes it more suitable for outdoor use. Also, without having to go through the hassle of sanding, you can use it on walls and varnished surfaces.
Moving on, this product can also be mixed with both oil-based and latex paints, which enhances its versatility a little. Once dissolved with the paint, it makes sure not to raise the grain of the wood. Applying it is easy as ABC, and it doesn’t take multiple coatings to get the job done. If you’re experiencing bleed-through from wood tannins or stressed out by hard-to-remove stains, applying this primer can be significantly helpful.
It further raises the bar for convenience, provided it consumes as little as 30 minutes to dry out since being applied. There’s no extra stress; all you have to do is roll the primer on the surface after you’re done filling out the cracks and leave it to work its magic.
What Could’ve Been Better?
First and foremost, it’s a tad disappointing how this product can only be used for indoor purposes. And although this primer blocks the stains within the first coating, it may take a few strokes when it comes to little severe ones.
Pros
Reliable under an affordable range
Ample quantity
Best for use on drywalls
Can be used with latex and oil-based paints
Cons
Doesn’t support outdoor use
Type: Interior/Exterior | Volume: 128fl oz | Stain Blocking: Yes | Odor: Low | Base Type: Oil-Based
Some of us are always in dire need of top-quality primers to protect metal surfaces that don’t cost top dollar. Fortunately, the Rust-Oleum Enamel paint unit comprises every feature you’d want from a reliable anti-rust primer. And apart from being a bargain hunter’s delight, it also offers optimal quality and durability. Let’s find out more!
Use to prime exterior or interior heavily rusted metal...
Oil-based formula provides a durable protective coating with...
Why Did We Like It?
As you’ve guessed, this is the ultimate go-to option for those who work on metal surfaces, as it carries strong corrosion-resistant properties. Only a coating can maintain the overall life of your metal products for years, which is quite incredible. This primer ensures the creation of a solid bond with the rust, which further establishes a stable surface for the topcoats to remain significantly glued.
The best thing about it is that, apart from providing superior adhesion, it can quickly dry within a few seconds of application. This product works best when used with premium Rust-Oleum paints, the most common of which is Hammer Rite. Its rust-elimination properties make it 2 times as resistant to corrosion as a typical rust-proof primer. For best results, use it with a sprayer can make sure that you hit every detail.
What Could’ve Been Better?
The most common issue received from the users is that they can arrive either broken, opened, or damaged, indicating major packaging issues. Moreover, we found the model to be quite expensive, which may be out of the picture for many.
Pros
Arrives in sufficient quantity
Corrosion-resistant primer
Works best on metal surfaces
Long-lasting and strong adherence
Cons
A little too expensive
Type: Interior/Exterior | Volume: 32fl oz | Stain Blocking: Yes | Odor: Low | Base Type: Oil-Based
For those who weren’t satisfied with the Zinsser Bulls Eye due to its quantity issues, the B-I-N Ultimate Stain Blocker is guaranteed to come off as an appropriate alternative. This product has left us in awe with its supreme stain-blocking capabilities. For those who don’t want an overly expensive unit, this one should be your ultimate go-to option.
First, this primer can be available in both 1-gallon and 5-gallon sizes, which gives it the upper hand over the Bullseye variant. Also, despite being priced very low, the adhesion quality that you get with this unit is incredibly superior. We were also surprised to know that it’s indeed one of the very best-selling shellac primers in the market. That said, it makes a very appropriate option for heavy-duty jobs.
What we’ve liked the most here is that its stain-blocking abilities are simply beyond the roof. As a matter of fact, it can easily take on the most stubborn stains with ease and can also be used for sealing intolerably gross odors in a few coatings. That said, we’d recommend this product for both indoor as well as outdoor usage. You can comfortably use it to coat any surface without requiring sanding.
What Could’ve Been Better?
Although this product performs very well as a heavy-duty primer, the presence of shellac in its formula has a significant drawback. The thing is that shellac-based primers themselves contain a specific odor due to the presence of volatile organic compounds. So, in case you’re using it inside, make sure that the room is utterly ventilated.
Pros
Reliable under an affordable range
Ample quantity
Best for use on drywalls
Can be used to seal odors
Cons
A high presence of volatile organic compounds
Type: Interior/Exterior | Volume: 128fl oz | Stain Blocking: Yes | Odor: Low | Base Type: Oil-Based
If you don’t mind spending a little extra for superb quality, then the KILZ Restoration is the best you can get. This product is one of the best interior primer-cum-sealers that we’ve tested in a while, and the user experience it offers is nothing short of top-class. Let’s find out more!
PRIMER | SEALER | STAINBLOCKER: KILZ RESTORATION Primer...
ADVANCED FORMULA: The innovative modified acrylic epoxy...
Why Did We Like It?
The first and foremost feature that we’re fans of is that you don’t need to use a lot of it at once to get the job done. Within a very small quantity, it manages to provide world-class adhesion for an incredible coating. Plus, it also stands out to be an excellent sealer, and you can trust it blindly if you’re dealing with odor and stain issues in your house.
This primer seals any unwanted odor or stains with utmost precision, which makes it very useful for houses that have both pets and babies. Many users have also reported that it can also be used for sub-coating underneath the flooring, which speaks volumes about the versatility that it offers.
And although it’s a water-based primer, we’re surprised by how it can easily outperform any oil-based alternatives in terms of toughness. However, cleanup is a piece of cake as the water base already makes it a lot easier to deal with. Overall, we found it to be worth every penny.
What Could’ve Been Better?
Despite being so strong, this primer fails to provide a beautiful shelf life, which is disappointing. Furthermore, we’re not happy with how it can take multiple coatings to lock the severe stains.
Pros
Can easily lock odor and stain
Very strong adhesion
Tougher than oil-based primers
Can be used on any interior surface
Cons
May require numerous coatings
Type: Interior | Volume: 128fl oz | Stain Blocking: Yes | Odor: Low | Base Type: Water-Based
Rust-Oleum has finally returned to our list with the Painter’s Touch unit, a pocket-friendly primer that can be used with latex paint. Although it isn’t the best in the game, the vast array of features it provides makes it a practical choice for DIY enthusiasts. Let’s check it out!
Use for a variety of indoor and outdoor project surfaces...
Water-based acrylic formula is low odor, resist chips and...
Why Did We Like It?
This unit is usually available in two variants, i.e., grey and white. Due to this, you won’t always need external paint all the time; using it as a standalone color will also do. Moving on, the manufacturers assure nothing but optimal quality with this package, making it a value-for-money option to consider.
When it comes to performance, this product shows the best results when it’s used with wooden furniture. Moreover, it has a higher advantage over the Zinsser B-I-N unit for having fewer volatile organic compounds, resulting in very little odor. Furthermore, it also doesn’t threaten to expose you to life-threatening fumes, making it quite a reliable option under a bargain-basement range.
Not to forget, the product turns off to be very thick and requires only a single coating, which gives it a higher advantage over our previous pick. Last but not least, it’s incredible how this product dries out within the first 30 minutes of application, making it very appropriate for DIY home improvement folks. If you have very little time in hand, this should be your go-to primer.
What Could’ve Been Better?
While testing, we’ve found that it doesn’t work very well on glossy surfaces. And although we’re not very happy with the coverage that it offers in 1 quart, it’s fair enough for small-term renovation jobs.
Pros
Reliable under an affordable range
Ample quantity
Best for use on drywalls
Can be used to seal odors
Cons
Doesn’t work well on glossy areas
Type: Interior/Exterior | Volume: 32fl oz | Stain Blocking: No | Odor: Low | Base Type: Water-Based
The penultimate item on our list is the product that every professional talks about- yes, the INSL-X Stix is what you grab for the most challenging situations. Not your average primer, this product has left us mindblown with the world-class adhesion and toughness that it offers. For those who are usually busy with heavy-duty jobs, this is your perfect companion.
Bonding primer for drywall, plaster, ceiling, acoustical...
Why Did We Like It?
Straight out the gate, the adhesion quality that you get from this product is parallel to none. This unit gets an instant advantage over our previous pick, as it can remain super-glued to glossy surfaces without any issues. Furthermore, a single coating of this primer develops an outstandingly tough film with an enamel holdout that is guaranteed to last for years and is ready for top coating in an instant.
Furthermore, we’re in love with how it makes leveling smoother than ever and provides uber resistance from blistering and cracking. If you’re looking for budget-friendly options to lock the imperfections in your drywalls, we couldn’t have a more durable option. It can quickly provide you with a coating coverage of 300-400 square feet, which is more than enough for heavy-duty renovation jobs.
Despite being a heavy-duty primer, it comes with almost zero volatile organic compounds that guarantee very low odor and fumes. Its water-based formula also makes it very easy to clean. Last but not least, it works fine in weather as low as 35 degrees, which makes it pretty appropriate for use in colder temperatures.
What Could’ve Been Better?
It’s a little inconvenient how this primer takes around 3 to 4 hours to dry out completely. Also, we’re not happy with how it can’t be used underwater, provided that it’s famous for being used in extreme situations.
Pros
Can be used in cold temperatures
Impressive coating coverage
Long-lasting and durable film
No odor issues
Cons
Not suitable for underwater use
Type: Interior/Exterior | Volume: 32fl oz | Stain Blocking: No | Odor: Low | Base Type: Water-Based
The final pick of the day is a very user-friendly addition to the popular KILZ primer range, the Odorless interior oil-based variant. Despite being a reliable primer, this product comes with zero odor issues and offers impressive coverage. That said, let’s check out its core features!
This ultra low odor primer, sealer and stainblocker has no...
Any slight odor detected during the application will...
Why Did We Like It?
As the name implies, the product takes the cake for being probably the most user-convenient variant in our list, and the credits solely go to its zero-odor feature. Being an oil-based alternative, this product ranks very high in terms of firmness as well. Also, we’ve found it okay to use in both interior and exterior surfaces, raising the bar higher for versatility.
When it comes to performance, this product has all the features in just the right amounts to be an appropriate DIY primer. What makes it even better is its affordable price tag, making it accessible to almost anybody. You can use it on bricks, metals, or even glossy surfaces without care.
While testing, we’ve found it to create a firm base for the paint to be top-coated, which clarifies any doubts about its reliability. Last but not least, its 1-gallon container offers coverage of 300 sq. ft.
What Could’ve Been Better?
The first drawback here is that it doesn’t work well on floors, which isn’t surprising because it’s a prevalent issue among KILZ primers. Also, we wouldn’t recommend it for use if you’re working on bathrooms or kitchens. Other than that, this one is an excellent option to consider if you’re searching for highly convenient alternatives.
Pros
Reliable under an affordable range
Ample quantity
Zero odor issues
Value for money
Cons
Doesn’t work on floors
Type: Interior | Volume: 128fl oz | Stain Blocking: Yes | Odor: Odorless | Base Type: Oil-Based
While shopping for products like paint primers, we’re often clueless about distinguishing a reliable alternative from an average one. However, our buyer’s guide enlists all the core features that you must check to ensure that you’re investing in a unit that serves your needs correctly.
Interior/Exterior Use
Some variants are only for interior use, while others support both indoor and outdoor applications. If you’re a simple DIY home improvement guy, an interior primer might just work fine.
Shelf Life
Quantity is a significant issue when it comes to primers, as most of the variants come with a disappointingly low shelf life. So, unless you’re preparing for larger projects, make sure not to buy a considerable can.
Stain and Odor Resistance
Apart from being used for priming, these products are also sealers. That said, these units must carry incredible stain-blockage and odor-locking capabilities. Make sure the one you choose guarantees to eliminate the “bleed-through” scenarios.
Paint Primers FAQ's
Why is it important to use a paint primer?
Using a paint primer has several benefits. It helps to seal porous surfaces, prevents stains from bleeding through, improves paint adhesion, evens out surface texture, and enhances the overall durability and longevity of the paint.
When should I use a paint primer?
A paint primer is typically used in the following scenarios:
On new, unpainted surfaces to provide a good base for the paint.
On previously painted surfaces that are heavily stained or discolored.
On surfaces with different porosities, such as patched areas or joint compounds.
When transitioning between different types of surfaces, such as from wood to drywall.
Can I use a paint primer as a topcoat?
No, a paint primer is not designed to be used as a topcoat. Primers are formulated to provide a suitable surface for paint adhesion and are usually not as durable or aesthetically pleasing as paint topcoats. It is recommended to apply a layer of paint over the primer for the desired finish and protection.
How do I choose the right paint primer for my project?
When choosing a paint primer, consider the surface type (e.g., wood, drywall, metal), the condition of the surface, the type of paint you plan to use, and any specific requirements (e.g., stain-blocking, odor-sealing). It’s best to consult the manufacturer’s recommendations or seek advice from a paint professional to ensure you select the appropriate primer for your specific needs.
Can I skip using a primer?
While it is possible to skip using a primer in certain situations, it is generally recommended to use a primer for optimal results. Primers provide numerous benefits, including improved paint adhesion, stain blocking, and surface sealing. Using a primer can help you achieve a smoother, more even paint finish and increase the longevity of your paint job.
Conclusion
Choosing the perfect paint primer for your DIY project can be a daunting task, but it is essential to ensure the longevity of your paint job and the overall appearance of the finished surface. The right primer will ensure proper adhesion of the paint, block stains, and other surface imperfections, and even protect metal surfaces from corrosion. With a plethora of products available in the market, selecting the best one that fits your requirements can be challenging.
Considering factors such as multi-purpose functionality, versatility, stain blocking, and corrosion resistance, we have narrowed down the cream of the crop from the above ten best paint primers. Here are the top three expert recommendations:
For multi-purpose functionality, the KILZ Adhesion High-Bonding Interior Latex Primer and Sealer is an ideal option. Its compatibility with various surfaces, impressive bonding strength, and coverage capacity make it a value-for-money product for DIY enthusiasts and professionals alike.
When it comes to versatility, the Zinsser Bulls Eye 1-2-3 Water-Based Interior and Exterior Primer is a good option. Its suitability for both interior and exterior surfaces, compatibility with different paints, and rust protection make it a solid choice for various projects.
Lastly, for effective stain blocking, the KILZ Original Multi-Purpose Stain Blocking Primer is the right choice. Its efficient stain coverage on numerous surfaces and easy application make it a consumer favorite.
Remember, taking the time to carefully select the best primer for your project will not only enhance the end result but also save you time and effort in the long run. So, explore the options, weigh your needs, and go ahead to bring your creative vision to life. Happy painting!
Are you looking for the most suitable paint primer to coat heavily rusted metal surfaces?
Well, you’ve come to the right place! This article provides you with a comprehensive review of the 6 best paint primers for rusted metal available on the market.
We are well aware of how difficult prepping and priming a heavily rusted metal surface is. The preparation process of clearing rust is not only exhausting but also long and tedious - which we can all do without. And that’s exactly where paint primers come in handy!
They have varied chemical formulations that stick on the rusted metal surface, not only effectively killing the prevailing rust but also preventing it from further corroding. As such, they eliminate the need to physically scrub rust entirely and require minimal to no prep before application.
Now, that we’ve got you hooked, let’s jump right into our recommendations!
Best Paint Primers For Rusted Metal
Whether you're restoring a vintage piece or working on a DIY project, these primers are known for their effectiveness in preparing and protecting rusted surfaces. So, without further ado, here's the list of the 6 best primers for rusted metal.
First up in our guide, we have the elite Corroseal corrosion inhibitor that comes packaged in a sealed plastic bottle or bucket. It is available in three volumes, namely 1 gallon, 1 quart, and 5 gallons, respectively, and can be used to considerably restore metal surfaces and extend the life of the equipment.
Paint, prime and convert rust in one step - water based rust...
Restore metal surfaces, extend life of metal equipment by...
Why Did We Like It?
This primer by Corroseal has the ability to remove rust, prime, and paint any rusted metal surface in one quick and simple step. Initially, this product comes off as white during the application, but it starts turning back as the rust begins converting into a stable substance called magnetite. This innovative chemical conversion process removes the prevalent rust and prevents further rust from developing.
Since this product is a water-based rust converter while being a latex-based primer, it is significantly easier to apply and clean than its counterparts. The formulation of this primer is non-toxic and non-hazardous; hence, it does not require you to take too many precautions during application.
Furthermore, this is a very effective primer and can be used for automotive, marine, as well as general household, and industrial purposes. One gallon of this product can efficiently cover up to 200-250 sq. ft. It can additionally be applied via brush, roller, or spray - whichever is more convenient for you.
What Could've Been Better?
It is essential to make sure that you do not apply this primer on freshly blasted steel or other newly galvanized surfaces. Standard surface prep is required before applying this product to the rusted metal surface. If this is not executed correctly and enough coatings of this primer are not applied, the rust may reappear on the metal surface.
Pros
Non-hazardous formulation
Convenient to apply
Easy to clean up with soap and water
Provides one-step corrosion control
Affordable and time-saving
Cons
Rust reappears if not applied properly
Volume: 128 fl oz | Corrosion Resistance: High | Adhesion: Excellent | Coverage: 200-250 sq. ft. | Drying Time: 30 minutes | Application Method: Brush, roller, sprayer
The FDC Rust Converter Ultra effectively halts pre-existing rust while simultaneously preventing future corrosion by forming a durable and protective layer on the metal surface. This primer comes packaged in a 1-gallon recyclable plastic jar with a built-in handle to pour the liquid out with ease.
CONVERT RUST: Convert rust to an inert coating that seals...
SAFE TIME & MONEY: Eliminates the need for sandblasting,...
Why Did We Like It?
This rust converter efficiently converts the existing rust on a surface into an inert coating that alternatively seals out moisture and oxygen to prevent further corrosion. Therefore, investing in this product eliminates the need for you to engage in the tedious process of removing rust via sandblasting, scraping, and grinding the surface. So, overall this primer saves you both time and money.
What’s more, it is incredibly weather-proof. As such, it can protect your metal surfaces from all kinds of variable weather conditions. Other than that, one gallon of this high-quality primer can easily cover up to 500 square feet of smooth, nonporous surfaces.
To top it off, the brand FDC is so confident of this product’s performance that it provides all its customers a 30-day no-questions-asked money-back guarantee!
What Could've Been Better?
Some users noticed frothy brown lumps forming in the liquid of this product. This usually occurs due to exposure to too much oxygen and moisture; hence, it is essential to store this product in a sealed and dry place. This primer also takes 48 hours to cure completely, which may be an issue for certain users who wish to paint the surface afterward.
As you probably recognize, Rust-Oleum is a popular and esteemed name in the paint and primer manufacturing industry. Their cutting-edge innovation, inspired by their founder, sea captain Robert Fergusson, had led them to create durable and long-lasting rust prevention solutions. This reputation of theirs, therefore, consequently transfers to this primer for rusted surfaces in model 7769830.
Use to prime exterior or interior heavily rusted metal...
Oil-based formula provides a durable protective coating with...
Why Did We Like It?
This primer is an ideal product to prepare heavily rusted interior and exterior surfaces for further painting. Its oil-based formula forms a protective and durable coating on any metal surface it is applied to. This coating not only covers the already present rust to form a smooth base but also inhibits the formation of more rust.
So this primer effectively covers all kinds of heavily rusted surfaces to form an even and long-lasting topcoat that easily adheres to all kinds of oil paints. The unmatched adhesion of this primer is especially handy because of its ability to withstand considerably heavy-use and demanding environments.
If that wasn’t enough, this primer takes only about 15-30 minutes to dry to touch and can therefore be reapplied for more coats just a few minutes apart. Equipped with a comfort tip and a wide finger pad, this spray can also considerably reduce finger fatigue due to continuous spraying.
What Could've Been Better?
One can of this primer spray only covers up to 10-12 square feet of area, which is considerably lesser than its counterparts. This increases the overall expense of the application and is therefore not ideal for priming large projects.
Pros
Easy to apply
Excellent prevention against rust
Durable and long-lasting
Prevents finger fatigue
High bonding and adherence
Cons
Limited coverage
Volume: 12 fl oz | Corrosion Resistance: High | Adhesion: Excellent | Coverage: 120-160 sq. ft. | Drying Time: 2 hours | Application Method: Brush, roller, sprayer
Krylon is one of the most trusted and highly rated paint and primer brands in the US. Consequently, this company has created a range of rust-preventing primers that double up as paint while providing high-performing rust protection and are available in 34 different shades. This particular model (K06903300) we are reviewing, however, has a unique clear satin finish.
Before discussing anything else, we have to mention this spray-on paint primer’s enhanced and fast-drying capability. It dries in a record time of 8 minutes and fully cures in just 2 hours, approximately 15 times faster than other leading rust-removing competitors.
This particular clear-colored primer once applied hardens to a tough yet smooth satin finish that effectively covers all rust on the metal surface it has been sprayed on. Apart from that, the potent formulation of this primer also efficiently prevents any further rust or corrosion from forming on the metal surface. In fact, it has performed considerably better than its counterparts in a variety of sanctioned corrosion tests.
Hence, this rust-removing primer by Krylon not only significantly reduces the time spent priming degraded metal surfaces, but is additionally easy to apply. If that wasn’t enough, the wide range of colors and finishes available in this paint and primer are sure to win your heart!
What Could've Been Better?
The spray nozzle built into the spray can of this primer is relatively low quality. For this reason, when the can is shaken before use as per instruction by the brand, the nozzle tends to leak and dribble paint. Consequently, this can tend to overspray and leak when sprayed, making it a rather messy process.
The TotalBoat rust primer by Jamestown Distributions is one of the most effective rust-removing solutions on the market and is popular for professional repairs. The formulation of this solution is water-thin, making it extremely high-coverage and convenient to apply.
STOP RUST IN ITS TRACKS: TotalBoat Rust Primer is a metal...
WIDE RANGE OF USES: Phosphoric acid-based rust converter is...
Why Did We Like It?
First and foremost, we would like to highlight that this is a more concentrated and thereby potent rust-removing solution that you can use on both rusted and new metal surfaces. This primer functions by converting the existing rust into an inert substance and thereby inhibiting its growth. Furthermore, it also ensures eliminating all chances of new patches of rust forming on the same metal surface.
This primer is easily one of the most versatile rust-removing solutions in the market and can be applied to an array of stainless, steel, and cast iron surfaces such as automobiles, machinery, metal railings, etc. One gallon of this primer can cover an impressive 500 square feet area which is unmatched by its competitors.
You’re only required to do basic cleaning of the metal surface with a wire brush before applying this product. Once applied, you need to leave this concentrate overnight, and the following day you will notice the rusty metal will turn black. This color change indicates that the rust has been transformed, and your metal surface is ready to be painted!
What Could've Been Better?
Certain customers found that this chemical primer leaves a powdery white residue after application. While this residue is easily brushed off in most cases, some people found it extra hard to remove. This powdery substance is even more challenging to remove when it gets wet, and hence you should ideally keep your metal project indoors and away from water.
Pros
Has unmatched coverage
Superior rust-removing performance
Easy to apply
Minimal preparation required
Wide range of uses
Cons
It leaves a white powdery coating
Volume: 128 fl oz | Corrosion Resistance: High | Adhesion: Excellent | Coverage: 350-400 sq. ft. | Drying Time: 4-6 hours | Application Method: Brush, roller, sprayer
As we mentioned above, Krylon is one of the most popular paint and primer brands on the market. Its new and innovative range of Rust Protector primers provides superior corrosion prevention and is available in 34 stellar shades. This particular primer we are reviewing, however, provides a white semi-gloss finish that is durable and paint-ready in a matter of minutes.
Price For: Each Dry Time Tack Free: Anytime Coverage: 15-20...
Country of Origin (subject to change): United States
Why Did We Like It?
Straight off the bat, we’d like to emphasize this primer’s superior fast-drying formula. Much like the previous Krylon primer we reviewed, this too dries to the touch in just 8 minutes and can be recoated within 2 hours of application.
This primer is formulated to provide extra protection against rust and corrosion on both bare and painted surfaces. Hence, it is the perfect preventive measure for metal surfaces that require high-performing protection against rust.
The final hardened film this white primer forms on metal surfaces is exceptionally durable by nature and has the ability to last a lifetime. In addition to that, this primer, much like the last Krylon primer we reviewed, also passed various corrosion tests with flying colors. Hence, this too performs its functions better than most of its competitors.
What Could've Been Better?
Since this paint primer has a more preventive function, it does not work on already rusted and actively spreading metal surfaces. Therefore, this is only ideal for priming new metal objects and project surfaces or reinforcing rust protection on an already painted surface.
Now that we’ve come to the end of our top 6 paint primer reviews, we wanted to highlight a few pointers to help you make your decision. We have, therefore, attached this buyer’s guide to briefly mention some of the essential factors you must consider while choosing a primer for rusted metal. So without any more fuss, let’s get right to it!
Types Of Primers For Rust
There are mainly 3 types of primers that deal with rust, namely rust converter, rust remover, and rust stopping primers. Each of these primers, thereby, has varied and unique formulations that function in different ways.
The rust converter for starters does away with the rust by converting it into an alternate inert substance upon application. This inert compound usually stops the process of oxidation from occurring and further protects the surface from future rust.
Rust removers, on the other hand, are usually formulated with concentrated acids which effectively strip away the rust from the metal surface.
Finally, we have the rust-stopping primer that simply coats a metal surface and cuts off the oxygen supply in order to prevent rust or corrosion from developing on it. Hence, you will need to decide on which kind of primer to buy depending on what you intend to achieve with it.
Quantity/Coverage
The quantity of primer depends completely on the size of the metal surface you plan to coat. The coverage, alternatively, decides on the quantity of primer you need to purchase. This is because certain primers have high coverage and hence require low quantities to cover large areas.
On the other hand, there are other low-coverage primers that will require more quantity to cover the same area. Hence, you must always take a close look at the quantity and coverage provided by a primer to check if it suits your project needs.
Effectivity
Different types and brands of primers have varied rates of effectiveness. While some only require a single coat to remove or prevent rust from developing effectively, others might need multiple coats for a similar result. A primer that requires multiple coats will, therefore, be required in a much larger quantity to effectively cover the same surface area.
You can determine the effectiveness of a prime by taking a thorough look at the user reviews. Hence, depending on these reviews and your budget, you can choose a primer that most suits the project’s needs.
Preparation Required
A vital factor to consider while purchasing primers is the amount of prep a surface requires before. While some primers on the market will need you to have a perfectly prepped and smooth texture, others can be applied on entirely unprepared surfaces.
Since, we know how long, tedious, and exhausting sanding metal for prep can be, no-prep primers are usually the go-to product. However, it’s worth noting that most primers on the market recommend a minimal amount of prep that includes scratching out the most chunky bits of rust for optimal performance.
Primers For Rusted Metal FAQ's
Why do I need to use a primer on rusted metal?
Using a primer on rusted metal is essential for several reasons. First, it helps to stop the progression of rust and prevent further corrosion. Second, it provides a smooth and stable surface for paint application. Lastly, it enhances the adhesion of the paint, ensuring a long-lasting and durable finish.
Can I use any primer on rusted metal surfaces?
While some general-purpose primers may work on lightly rusted surfaces, it is recommended to use a primer specifically formulated for rusted metal. These primers are designed with rust-inhibiting properties and better adhesion to ensure effective protection and a smooth paint finish.
How do I prepare the rusted metal surface before applying a primer?
Before applying a primer, it is important to prepare the rusted metal surface properly. Start by removing loose rust, dirt, and debris using a wire brush or sandpaper. For heavier rust, you may need to employ a rust converter or rust remover. Once the surface is clean, ensure it is dry and free from any contaminants before applying the primer.
How many coats of primer should I apply on rusted metal?
The number of primer coats needed for rusted metal can vary depending on the severity of the rust and the specific product instructions. In most cases, applying one or two coats of primer should be sufficient. However, make sure to follow the manufacturer’s recommendations for optimal results.
Can I paint directly over a primer for rusted metal?
In most cases, you should apply a topcoat of paint over the primer for rusted metal. The primer acts as a base layer, providing corrosion protection and improving paint adhesion. Choose a paint that is compatible with the primer and follow the manufacturer’s instructions for application.
Conclusion
It is fundamental to understand the vital role that primer plays in maintaining and extending the life of metal structures. They not only provide an essential layer of protection from rust and corrosion but also act as a perfect base for the application of paint, thereby enhancing the final finish. However, choosing the right primer for rusted metal surfaces can be a daunting task, especially given the plethora of options available in the market.
From the above 6 best primers for rusted metal, here are the top three expert recommendations:
For a one-step application, the Corroseal 82331 is an ideal option. Its water-based formulation allows for easy application and clean-up, while its effective rust conversion process extends the life of your metal equipment.
For larger projects, the FDC 13 is a good option. Its high coverage, combined with a weatherproof formulation, provides durable protection against future corrosion. Its ability to convert existing rust into an inert layer further saves you time and money.
Finally, for rust conversion, the Rust-Oleum 7769830 is the right choice. Renowned for its effective rust prevention solutions, this primer prepares heavily rusted surfaces for painting, creating an even, long-lasting topcoat.
In conclusion, these primers stand out in terms of ease of use, effectiveness, and other unique features, offering you the best value for your money. By picking any of these top three options, you get a top-performing, reliable product that suits your specific needs. Remember, the right primer can make a significant difference in the lifespan and appearance of your metal surfaces. Take the time to choose wisely and reap the rewards of durability and stunning visual appeal.
Did you know that paint primers can solve common problems like moisture damage, stains, odors, color changes, and more?
For years, professionals have sworn on this excellent problem-solving tool to execute the most uniform and flawless jobs. However, many homeowners are not familiar with its benefits. This has led to DIY enthusiasts skipping on this all-important priming step, often leading to disastrous outcomes.
But we’re here to tell you that priming doesn’t have to be the unnecessarily daunting and complicated step that you think it is. The only thing you need for a professional finish paint job is the right tub of paint primer.
And we have curated this comprehensive guide of our 9 favorite paint primers for drywall.
So, what are we waiting for? Let’s jump right into it!
Best Paint Primer for Drywall
Here's the list of the 9 best paint primers for drywall tested, ensuring a flawless and professional finish for your painting projects.
INSL-X is a remarkable bonding primer formulated for various challenging surfaces like glazed blocks, fiberglass, galvanized metals, glossy tile, pre-coated siding, vinyl, or PVC. It provides an excellent base for a shiny polished finish and is best applied with a polyester or nylon brush.
Bonding primer for drywall, plaster, ceiling, acoustical...
Why Did We Like It?
The product is durable and has unparalleled adhesion that enables it to form a tough layer on almost all kinds of challenging surfaces. Hence, it works effectively on drywall and interior and exterior surfaces such as masonry walls, plaster, wood trims, acoustic tiles, cement block, shutters, stucco, etc.
One quart of this product can easily cover 75 to 100 square feet of surface area, enhancing its value for money. Also, it is water-based and has a low VOC, which means it can easily be cleaned with soap and water, which we love.
One of the best features of this product is that it fully cures at average to very low temperatures (up to 35 degrees Fahrenheit) to give the desired finish. And that is generally not possible with most of the other brands. It's exceptional adhesive quality and marvelous enamel holdout provides an excellent base for an even and flawless topcoat finish.
What Could’ve Been Better?
This primer takes over 3 hours to cure completely, which means you have to wait for a long time before applying the second or third coat. This extends the overall painting experience and may be inconvenient to some users who are on a tight deadline.
Pros
It can be used on almost all kinds of surfaces
Water-based and therefore easy to clean
It gives an excellent smooth finish
Value for money
Cons
Has a 3-4 hour dry time in between coats
Paint Type: Acrylic | Coverage per Gallon: 300-400 sq. ft. | Dimensions: 6 x 6 x 5.88 inches | Weight: 2.76 pounds | Size: 32 Fl Oz
The Rust-Oleum Zinsser range is a premium, best-selling, and industrial-level series of primers known for high endurance properties. Hence, model number 286258 from this range is the perfect product for anyone looking for a primer for interior and exterior surfaces.
Interior/Exterior use on new or previously painted drywall,...
Water-based formula seals uniformly and will stick to...
Why Did We Like It?
This is a water-based primer that gives a high-performance finish and can stick uniformly on virtually any surface it is applied. As we mentioned already, this primer is grey, making it ideal for use under darker, vivid, and more vibrant colors than the traditional white primer. This saves both time and money by improving the hide and coverage of this primer under darker topcoats.
Moreover, the final uniform layer that this primer forms on surfaces are resistant to mildew and has excellent stain-blocking properties. It drastically reduces time and effort because it eliminates sanding and has a cure time of only one hour. This enables you to apply multiple coats of this primer in a comparatively short period. One can of this primer also has impressive coverage of up to 100 square feet of surface area.
That’s not all; the versatility of this primer allows it to be applied via both aerosol spray guns and the traditional roller and brush technique. This will enable users to pick the mode of application that is more convenient for them.
What Could’ve Been Better?
Some customers have complained that this primer scratches off easily and is not as durable as the manufacturer claims. But it should not be an issue for anyone using this primer as an undercoat instead of a topcoat.
Pros
High coverage
Has a short drying and cure time
Mold and mildew resistant
Rust inhibitive
Cons
Scratches off easily
Paint Type: Acrylic | Coverage per Gallon: 350-450 sq. ft. | Dimensions: 4.25 x 4.25 x 4.88 inches | Weight: 2.8 pounds | Size: 31 Fl Oz
KILZ is a renowned name in the field of manufacturing premium quality paints and primers. The brand has been around for over 40 years. The KILZ 2 10942 is one of their highest-selling primers and has comfortably made it to our top 9 primers list. It has also been awarded “Paint Brand of the Year” in 2015 by the Harris Poll EquiTrend Rankings.
A good primer makes paint stick better to surfaces, makes...
KILZ 2 Latex blocks mild to medium staining from water,...
Why Did We Like It?
This primer by KILZ is a high-quality 3-in-one primer, sealer, and stain blocker. The strong adhesion properties of this primer enable it to efficiently seal porous surfaces and lock in any new paint that is applied over it. It also can block and conceal the formation of mild to medium stains from grease, water, pencil, or ink.
Moving on, one gallon of this primer can comfortably cover from 300 to 400 square feet of area. It is mildew resistant and can be applied on a wide variety of surfaces, from drywall, stucco, plaster, and wood to popcorn ceilings, and so on.
The primer dries to the touch in only 30 minutes and has an overall cure time of one hour, making it convenient to re-apply in a shorter period. Furthermore, the viscosity of this primer allows it to be applied via a brush, roller, or spray according to the user’s convenience.
What Could’ve Been Better?
It’s imperative to prep the surface you are planning to apply this primer. The manufacturer states that this primer must not only be mixed well before use but must also be applied on surfaces that are free of dust, mold, rust, or peeling.
Pros
Can be used on multiple surfaces
Short cure time
Water-based and non-toxic
Value for money
Cons
Complicated prep procedure
Paint Type: Water Based, Oil | Coverage per Gallon: 300-400 sq. ft. | Dimensions: 9 x 13.1 x 5.3 inches | Weight: 2.9 pounds | Size: 32 Fl Oz
If you’re a professional or a painting enthusiast, you will recognize Prestige Paints as one of the leading manufacturers of paints in the USA. Their company provides its customers with over 1300 color shades of paint in four different kinds of finishes to choose from. Even their range of primers is available in the largest variety of shades compared to any other primer brand in the market.
Ideal for living rooms, family rooms, media rooms, bedrooms,...
Why Did We Like It?
One of the most remarkable qualities of this primer is that it comes furnished with a lifetime warranty for structural defects. So, as long as the instructions are correctly followed, this primer has the guarantee to last you a lifetime! The high-quality customer service provided by Prestige allows unsatisfied customers with original purchase receipts to apply for either a replacement or a refund for their product.
If that alone wasn’t enough to pique your interest, this primer is also mold and mildew resistant, making it ideal for a variety of indoor surfaces, starting with wood, metal, and other previously painted surfaces. This primer is generally recommended for application on interior surfaces and is ideal for bedrooms, hallways, dining rooms, living rooms, and even under-ventilated areas like the basement.
One gallon of this primer can comfortably cover from 325 to 400 square feet of wall area. The smooth satin finish this primer provides is not only long-lasting but also has a low VOC of less than 5 g/l before tinting.
What Could’ve Been Better?
This primer is oil-based and hence might be a little more challenging to clean than its water-based counterparts. It also has a comparatively longer cure time of 4 hours, automatically lengthening the overall painting time.
Pros
Easily washable
It comes with a lifetime warranty
Easy to apply
Can be applied to a variety of interior surfaces
Cons
Long cure time
Not very easy to wash or clean
Paint Type: Acrylic | Coverage per Gallon: 300-400 sq. ft. | Dimensions: 10.69 x 10.69 x 9.13 inches | Weight: 12.1 pounds | Size: 120 Fl Oz
As you all may already know, Rust-Oleum is one of the leading paint manufacturing companies in the USA. Hence, it must come as no surprise that their clear primer in model number 2104 has made it into our top 9 paint primers list.
Prepares all painted or glossy surfaces for wallpaper or...
Adheres to vinyl, paneling and other hard-to-stick-to...
Why Did We Like It?
While all the primer companies added to this list are deemed user-friendly and dependable, this one is off the charts. Rust-Oleum is, in fact, so confident of the top quality of this primer that they have a “Satisfaction Guaranteed” warranty attached to it.
The primer is clear in color, making it the perfect undercoat shade for any painting job. If you were looking to invest in a darker-tinted primer, for example, then this is the one for you. Its versatility allows you to mix the exact shade of paint you were applying to this primer and creates the perfect undercoat shade for your paint to bloom.
Moreover, the paint primer is also acrylic-based which means automatically also means that it’s water-soluble. This makes the application and cleaning process of this primer extremely easy and perfect for any indoor drywall.
What Could’ve Been Better?
The only criticism that this primer has received is in its shipping. In some instances, this paint’s indelicate handling and insufficient packaging have caused it to arrive with dents and leakages. However, this issue is more regarding the shipping company than the product itself.
Pros
Has a strong power of adhesion
Can be tinted to dark colors
Makes positioning easier
Easy to apply and clean
Cons
Poor shipping
Paint Type: Acrylic | Coverage per Gallon: 300-400 sq. ft. | Dimensions: 6.63 x 7.38 x 7.56 inches | Weight: 0.1981 pounds | Size: 128 Fl Oz
ROMAN is known for consistently delivering some of the highest quality paint equipment for over 75 years. Hence, the same can be said about their PRO-999 Rx-35 problem-solving primer which is clear in color and comes packaged in a 1-gallon can.
IDEAL DRYWALL PRIMER - ROMAN Clear Primer is excellent for...
SEALS AND PRIMES - PRO-999 Wallpaper Sealer and Primer dries...
Why Did We Like It?
This paint primer is ideal for priming and sealing problematic porous surfaces such as torn drywall, joint compounds, and wallpaper waste. This primer’s one-gallon volume can easily cover up to 450 square feet of surface area, depending on your usage and surface texture. This is a considerably high coverage compared to most of the other primers on our list and hence is one of this product’s redeeming qualities.
The chemical formulation of this primer enhances its adhesion and dries with a residual tack which makes it ideal to be applied under wallpapers. The wallpaper paste can lock itself on this adhesive texture of the primer very securely and can even prevent bubbling and rewetting.
However, the versatility of this primer also makes it a suitable choice for application under the paint. The clear color of the primer allows it to be mixed with paint to form the perfect shade of undercoat. It also comes with a tin tray with up to 4 ounces of volume for ease of mixing and application.
What Could’ve Been Better?
While this is one of our favorite primers and one of our top recommendations, it tends to be unavailable online most of the time. This makes it difficult for consumers to purchase it even when they’re interested in buying it.
Pros
Good coverage
Strong sealant features
Enhanced adhesion for wallpapering
No-run formula
Easy to apply and clean
Cons
Availability issues
Paint Type: Spray | Coverage per Gallon: 250-350 sq. ft. | Dimensions: 6.63 x 7.13 x 7.5 inches | Weight: 8.48 pounds | Size: 128 Fl Oz
XIM 11022 in color 400W White is an ultra-premium oil-based primer developed keeping in mind the Federal and State VOC requirements. The thoughtful formulation of this primer has hence successfully solved several paint bonding problems seen in other primers.
Xim has developed a 3-in-one solvent or oil-based primer, bonder, and sealer ideal for coating various indoor and outdoor surfaces. Its excellent adhesion properties enable it to efficiently seal all surfaces and successfully bond with paint, making it perfect for most hard-to-coat surfaces.
Unlike most other primers, this has a seemingly straightforward preparation routine before application. Surfaces that are clean and dull may not need to be sanded at all before application. However, hard and glossy surfaces will still require sanding to create some texture and promote maximum adhesion.
The oil-based formulation of this primer makes it impressively long-lasting and durable as compared to its other rivals. Furthermore, this allows this primer to be applied under various popular paints that are all alkyd, oil, or even latex topcoats.
What Could’ve Been Better?
It’s a solvent-based primer and hence is a little challenging to clean up during use. This primer is also not recommended to be applied beneath strong solvent topcoats such as lacquers or even two-component epoxies and urethane.
Pros
Dries very quickly
Powerful bonding capacity
Ideal for both interior and exterior use
Perfect for tough-to-paint surfaces
Durable finish
Cons
It cannot be cleaned using water and soap
Not recommended to be applied under strong solvent topcoats
Paint Type: Acrylic | Coverage per Gallon: 400-500 sq. ft. | Dimensions: 4.25 x 4.25 x 4.88 inches | Weight: 2.8 pounds | Size: 32 Fl Oz
As you may already know, INSL-X is a well-established brand in the paint manufacturing business in the USA. Their Aqua Lock Plus range is most well known for being a dynamic series of high-quality everyday-use primers. The superior finish and affordable price point have made this primer one of our top recommendations.
Multipurpose, 100% acrylic primer sealer that provides...
Superior sealing and coverage qualities, product versatility...
Why Did We Like It?
This 100% acrylic primer sealer provides excellent adhesion and superior sealings properties, making it ideal for application on multiple surfaces. Hence, the product is multipurpose and can be applied under a variety of interior and exterior surfaces, and is an effective base coat for both latex and oil-based paints.
The water-based formulation of this product makes it incredibly easy to clean up and apply on all surfaces. But that’s not all because the final hardened coat also provides exceptional mold resistance and stain-blocking properties unmatched by most other primers.
Moreover, a gallon of this primer can comfortably cover up to 400 square feet, depending on how porous the surface is. Last but not least, this primer not only has a considerably low VOC, but it also dries to touch in 30 minutes and cures completely in 1 hour.
What Could’ve Been Better?
While this paint is stellar in most aspects, it also comes with a relatively comprehensive prep and application procedure that can sometimes be difficult to follow. However, if you’re someone who regularly paints or is familiar with the process of painting and is not looking to skip any steps, this product is ideal for you.
Pros
Easy to clean
Mold and stain resistant
Multipurpose
Good coverage
Dries quickly
Cons
Has a hefty preparation and application procedure
Paint Type: Acrylic | Coverage per Gallon: 300-400 sq. ft. | Dimensions: 8.75 x 8.75 x 9.13 inches | Weight: 11.14 pounds | Size: 128 Fl Oz
This Modern Masters Primer from their Metal Effects range is a one-of-a-kind primer. It comes with a wide range of features to make your priming tasks effortless. Read on to know all the deets about it.
The unique formulation of this primer blocks acid salts, alkali salts, tannins, and other contaminants, while also preventing rust/oxidation from forming under the paint film. It is thereby most suitable for external and internal surfaces such as wood, metal, and drywall.
However, it can also be used on paintable wall coverings and canvas and is one of the most amateur-friendly primers on our list. This prime can dry to the touch in only 30 minutes and can be recoated immediately after; however, the full cure time of this product is 12 hours.
It’s important to note that this primer was originally designed to be applied with the Modern Masters Metal Effects Reactive Metallic Paint. Hence, this primer is specifically formulated to block aging solutions and rust activators of this paint from reaching and ruining the wood, metal, or reactive substrate surface to it has been applied on.
Other primers cannot be applied under this paint because they allow solutions and activators to penetrate the undercoat and damage the final color or finish of the surface.
What Could’ve Been Better?
This primer is only available in a 1-gallon tin that covers up to 320 square feet of area and runs out quickly when used for larger projects. It’s also relatively expensive for a primer that is only provided in such low quantities and thus may not be ideal for specific consumers.
Pros
Easy to clean
Prevents surface from rusting or oxidizing
Little to no odor
Dries very quickly
Beginner or amateur-friendly product
Cons
Expensive
Low coverage
Paint Type: Acrylic | Coverage per Gallon: 320-400 sq. ft. | Dimensions: 6.75 x 6.75 x 8 inches | Weight: 9 pounds | Size: 128 Fl Oz
Buying Guide For The Best Paint Primer For Drywall
Choosing the right kind of drywall paint primer to invest in can be a complicated process. For this reason, we decided to compile a detailed buyer’s guide for you to help ease your decision-making. This thorough guide lists all the factors you must consider when determining the perfect primer to invest in.
So, without much ado, let’s get right to it!
Adherence And Sealant Qualities
Drywalls tend to have different but high levels of porosity throughout their surface because of the mud used on the seams of their area. This makes it difficult to evenly paint the surface, which most commonly has dull and blotchy spots all over the place.
For this reason, you must look for a primer that has a high level of adherence and effective sealant properties. The sealant seals the porous holes on the drywall and prevents the surface from soaking up the paint applied to it. Alternatively, the adherence or stickiness of the primer gives the top coat of the paint some texture to effectively stick to, giving a flawless and long-lasting finish.
Coverage
Primer labels almost always mention how much surface area 1-gallon or quart of product can effectively cover. Hence, if you’re working on a larger project, this might be a factor you want to consider looking up. Purchasing a primer with ample coverage will eliminate the need to repeatedly repurchase the same product to complete your project.
Cure and Drying Time
The cure time, as we mentioned earlier, is the total time the primer requires to harden. Hence this is the time you will have to wait before going in with the top coat of paint. Drying time is the time the primer takes to dry to the touch. It is usually advised to wait until primers are dried to touch before going in with multiple primer coats.
State of the Surface You are Priming
You will want to purchase a primer depending on the state of the drywall you are priming. For example, if your drywall has stains, you will want to invest in a primer that has stain-blocking properties.
Alternatively, suppose you’re planning to undercoat interior surfaces. In that case, you might want to use a water-soluble primer instead of oil-soluble primers that release fumes but are more durable and hence ideal for outdoor surfaces.
Mode Of Application
The viscosity of the primer determines the mode in which you can apply it. There are mainly three ways to apply primers, spray gun, roller, and flat brush. The label of your primer will always mention which mode of application is ideal for the product at hand.
Paint Primer for Drywall FAQ's
Why do I need to use a primer on drywall before painting?
Using a primer on drywall before painting is essential for several reasons. Primers create a uniform surface by sealing the porous drywall material, preventing excessive paint absorption, and promoting better adhesion. They also help to hide imperfections, such as joint compound seams or repairs, and can block stains or bleed-through from the underlying surface, ensuring a more professional and long-lasting paint job.
Can I skip using a primer on drywall?
While it’s possible to skip using a primer on drywall, it is generally not recommended. Primers provide numerous benefits, including improved paint adhesion, enhanced durability, and better color coverage. They also help to prevent issues such as uneven sheen, color variations, or paint peeling. Using a primer ensures optimal results, especially when painting over new drywall or surfaces with different textures or repairs.
What types of paint primers are suitable for drywall?
There are various types of paint primers suitable for drywall, including water-based primers, oil-based primers, and shellac-based primers. Water-based primers are commonly used due to their low odor, quick drying time, and easy cleanup. Oil-based primers offer excellent stain-blocking properties and adhesion, making them ideal for heavily stained or problematic surfaces. Shellac-based primers are often used for extreme stain-blocking needs or when dealing with surfaces prone to bleeding, such as water or smoke-damaged drywall.
How do I apply a paint primer on drywall?
To apply a paint primer on drywall, start by ensuring the surface is clean, dry, and free from dust or debris. Use a brush or roller to apply the primer in even strokes, following the manufacturer’s instructions for application and drying time. It’s recommended to apply at least one or two coats of primer, allowing sufficient drying time between coats. Pay attention to any specific recommendations provided by the primer manufacturer, such as dilution ratios or surface preparation requirements.
Can I use a paint primer for drywall on other surfaces?
While paint primers for drywall are specifically formulated for drywall surfaces, some primers may be suitable for other surfaces as well, such as wood, plaster, or masonry. However, it’s important to check the product label or manufacturer’s instructions to ensure compatibility with the specific surface you intend to prime. Certain primers may offer versatile use across multiple surfaces, while others are designed exclusively for drywall.
Conclusion
Many people seem to have the common misconception that painting drywall is the same as painting any existing wall. However, the truth is, your primer for drywall will have slightly different requirements than a regular primer to ensure a uniform and smooth finish.
That’s why professionals always recommend buying primers meant specifically for drywall when planning to paint one. Nevertheless, we understand how confusing it can be to buy a painting primer when you’re not well-versed with such products.
So, before signing off, we want to mention some of our top recommendations for you. The INSL-X AQ040009A-01 is high-quality and multipurpose, perfect for professionals or DIY enthusiasts familiar with priming procedures.
ROMAN Products, on the other hand, is the best primer to be applied under wallpapers. Lastly, we have the Rust-Oleum 02101, whose versatility makes it ideal for most users.
As you continue your journey in home renovation or soundproofing, consider the potential advantages of using soundproof drywall. While normal drywall can transmit noise easily, soundproof drywall can reduce the amount of sound that travels through walls, providing a quieter and more peaceful environment. Understanding and integrating such elements can have significant impacts on the comfort and tranquility of your home.
Hence, with that, we come to an end with our detailed guide for the nine best paint primers for drywall. Till next time!
Best paints for garage walls are formulated to handle conditions harsher than typical interior rooms, combining durability, washability, and resistance to stains, mildew, and humidity while enhancing the look of drywall, concrete, or masonry surfaces. Unlike standard interior coatings, garage wall paint must tolerate temperature fluctuations, vehicle exhaust, and impact from tools or storage systems, which is why professional contractors recommend low-VOC latex paints, acrylic primers, epoxy coatings, and masonry-specific finishes depending on the substrate. The right choice not only seals cracks and pores but also improves indoor air quality, surface longevity, and overall usability of the garage—whether it functions as a workshop, storage zone, or extended living space. As Sherwin-Williams’ senior coatings expert Joe Kujawski notes, “A well-selected garage paint performs as both a shield and a design element, ensuring protection while elevating the space.” This guide ranks the best paints for garage walls by performance, environmental safety, and finish quality so you can select coatings that balance function with design.
Listed below are the 5 best Paints for Garage Walls from our list:
Backdrop Premium Interior Paint: Moonstone: Stands out for its Green Wise-certified, low-VOC, and low-odor paints, with designer-approved color combinations that bring out stylish aesthetics in your garage.
Montage Signature Paint: Snow White: Distinguished for its eco-friendly upcycled latex paint production, along with a built Green and LEED certification compatibility, it also offers a 10-year warranty.
PRESTIGE Interior Paint and Primer in One: Acclaimed for being suitable for humid areas, and known for its low VOC content and acrylic base, offering two different finishes and 237 color variants.
KILZ Tribute Matte Paint and Primer: Esteemed because of its high demand due to the combination of paint and primer in one, low VOC, and mildew resistance, offers 100 different colors in 4 finishes.
Glidden Duo Paint and Primer: Celebrated for its century-old legacy of providing quality paints, a combination of paint and primer, 300 color options, and three different finishes, it's stain-resistant and provides a mildew-resistant coating.
Are you looking to paint your garage walls? Painting can add color and style to the space while also protecting the walls from wear and tear. To help you find the best paint for your garage walls, we’ve rounded up a list of 5 products. Here is the list of the 5 best paints for garage walls.
1. Backdrop Premium Interior Paint: Moonstone - Best for Designer Color Combinations
Backdrop, a socially conscious premium paint manufacturer headquartered in New York, has only recently come into the industry. It offers an entire line of Green Wise-certified, low-VOC, and low-odor paints; its selection of off-whites, such as whites, browns, and greys, is impressive and well-received by designers. However, the company really shines with its unique paint combinations that bring out a harmonious look, even while in contrast.
To find the perfect accent color for your garage transformation, check out Backdrop's paint collections and consider the color of your cars, bicycles, and garage gear while planning out your combos, especially if you have one or more brightly-colored vehicles. I recommend Moonstone, an off-white with a cool white with a greyish tint, and Surf Camp, a dark blue with green undertones. Play around with colors, but remember that using light colors with isolated accents of color is always a good rule of thumb.
What We Like
Green Wise-certified, low-VOC, and low-odor paints
2. Montage Signature Paint: Snow White - Best for Eco-friendly Durability
If you're looking for an eco-friendly paint option that is both durable and aesthetically pleasing, Montage paints might be the right choice for you. Their paints are created through upcycling raw and post-consumer latex paints, making them eligible for points toward Built Green and LEED certifications, which is an extraordinary feat.
They offer a 10-year warranty. You can't go without their line, but I'd recommend Snow White in a low-sheen finish for a splendid, understated look - it's a warm white that will brighten up your garage and bring forward your car and gear, allowing them to be the centerpieces. Dove Gray is also a second excellent off-white option that you might enjoy. A lighter color is also far easier to retouch when needed.
This is mildew-resistant paint, so we don’t need to worry about the paint chipping off during the winter season. However, you’ll need to get a separate jar of primer, along with your painting kit, for this paint job.
3. PRESTIGE Interior Paint and Primer in One - Best for Humid Areas
It’s known to be the best paint for both the interior and exterior garage walls. This paint is most suitable for humid areas when compared to other brands.
Prestige offers a paint and primer combo that doesn’t require more than three coats. It has an acrylic base, with two different finishes, and 237 color variants. The low-level VOC (volatile organic compounds) content ensures that it’s not harmful to the human body.
In the market filled with non-eco-friendly paints, we wanted to opt for a brand that has a minimal amount of toxic compounds. This Prestige paint has a long-lasting product quality, and it dries faster than regular paints.
It might be an expensive product, but I wanted to consider eco-friendly paint for the safety of my family. It doesn’t produce any strong odor, and the smell of fresh paint disappears within 3 to 4 days.
Our garage is about 600 sq feet, so I had to order two gallons, which was perfect for applying three coats. And it’s a primer and paint combo, so we never had to purchase them separately. This allowed us to stay within the budget. We live in the southern region of the US, which is known for its humid summers. So, we had to be a little careful with the quality of the paint.
It took us about two days to paint the full interior of our garage because we wanted the paint to dry properly to avoid any smudges on the curing paint. The wide variety of color options helped us find the right shade that we had been looking for.
What We Like
Comes with a paint and primer combo
Eco-friendly paint
Has around 237 different color options
Each gallon can cover about 400 sq ft.
Good for humid areas
What We Don't Like
One of the most expensive garage wall paints
Finish: Semi-gloss | Sheen: Medium | Coverage: 400-450 sq ft | VOC: <50 g/L
4. KILZ Tribute Matte Paint and Primer
KILZ is known for making this excellent paint and primer formula. The functionality and the overall aesthetics that KILZ delivers is the prime reason for the high demand for their products.
It offers quality coverage, and it has an easy application process. You’ll not need to apply more than 2 to 3 coats to get an even finish. However, it comes with a high PVC content, and it’s also a mildew-resistant paint.
We are quite satisfied with the superior coverage and exceptional durability of this paint. While we were painting our garage, we didn’t get a strong odor like other fresh paints. It has a low content of VOC, making it the right quality product without harmful effects on the human body.
We were done painting the walls of the garage after applying about three coats, which gave the interiors a perfect finish.
You’ll get around 100 different colors to choose from, which come in 4 different finishes. With KILZ paint, you can be sure of the quality; they have been ruling the market for about four decades.
It comes in three different sizes; however, each gallon is suitable for painting an area of about 400 sq. ft. We had to prepare our wall correctly to ensure that it’s free of grease, mold, chalk, dust, and other peeling paint.
This matte paint gives a subtle, flat finish, and it’s also washable, which enhances the overall value and durability of the painted walls. It has very low emissions of VOC, making it safe for your indoor. On the flip side, if you’re using this paint in very humid conditions, it might run during the application process.
Glidden is an almost century-old company that manufactures quality paints. It comes in approximately 300 different colors, with three different finishes. The high level of saturation with superior durability can give your space the best coverage. It’s stain-resistant paint, which also provides you with a mildew-resistant coating. You can get this product in three different sizes.
Glidden is like the granddaddy of paint; it has been used in our household for many decades. And when I was considering the paint for my garage, I couldn’t think of opting for another brand. This is a paint and primer combo that helps to reduce the effort of getting them done separately.
You get three hundred different color options, which made it pretty simple for us to find sunset orange on this list. I was quite particular about the shade that I wanted for the interiors of my garage, and thanks to Glidden for offering such a wide variety of shades.
It has a very slight odor, which is almost negligible, making it safe for a household with children. The low VOC quality is also an attractive component of this product. This is an excellent combo of stain-resistant paint and stain-blocking primer.
Apart from the superior coverage that it provides, we were happy with the fact that it's also washable. So, we have no more fears about any stain spoiling the overall look of the garage. Finally, the high saturation level gives a vibrant color with even a single coat of paint.
What We Like
Available in 300 different colors and three different finishes
Latex paint is a type of water-based paint that is made with synthetic polymers and pigments. It has excellent adhesion characteristics, making it a popular choice for both interior and exterior surfaces. Latex can be used on a variety of surfaces, including drywall, wood, metal, masonry, and plastic, and is known for its low odor and quick drying time. Its durability and resilience make it ideal for high-traffic areas, as it resists fading and chipping better than other paints.
Latex paint is, without a doubt, the best type of paint to use for painting garage walls because it's considered by homeowners to be the easiest to maintain. It is ideal for these surfaces as it's easy to work with and clean up, and can be applied in a single coat, which encourages DIY projects. Latex paints are considered the best for garage walls because they dry quickly, too, and that allows for quick touch-ups where needed.
Additionally, latex means that cleaning the walls is a breeze; you can just use water and, if need be, some soap instead of more aggressive chemicals to remove grime and debris. As far as selecting a color, latex paint can come in any color your mind can conjure, so you can easily choose whatever paint color you prefer or simply go with a neutral one that will blend and bring forward your gear and vehicles. It is worth noting that interior latex paints can be safely on the garage walls and ceilings without worrying that they're interior paint. Most homeowners use exterior paint as garage paint as it is known to be a bit more hardwearing but you can comfortably go with latex
Overall, I recommend latex paint as the best option for painting your garage walls because of its ease of application and cleanup.
Masonry Paint
Masonry paint is a type of paint specifically designed to protect and decorate masonry surfaces such as raw concrete, brick, stone, and other similar building materials. It can be purchased in a variety of colors and sheens, from flat matte to high gloss.
Masonry paints contain waterproofing agents, making them ideal for areas with high humidity or exposure to water or other elements. They also contain fungicides and mildew inhibitors, which protect the surface from mold and mildew growth. This kind of paint ability to resist fading, chalking, and UV rays, masonry paint is often used on exterior walls and other outdoor surfaces and it can beautifully embrace the garage interior thanks to its great resilience. Additionally, it provides a durable finish that stands up to extreme weather conditions. Masonry paint is an excellent choice for painting brick patios or walkways as well as stuccoed walls or eaves.
Masonry paint might be a bit overkill for an enclosed home garage but I recommend using masonry paint on garage walls when the construction material is raw and untreated. Using masonry paint on exposed concrete or a brick wall might be a good idea if that wall also has a humidity barrier on the exterior.
Epoxy Paint
Epoxy paint is a type of paint that is used for interior purposes. It comes in a neutral color, making it easy to match with any decor style. This simple paint can be applied to a variety of surfaces and dries quickly, making it ideal for indoor projects. Epoxy paint is also very durable and resistant to moisture and humidity, making it perfect for areas such as bathrooms or kitchens where water may be present. It also provides good coverage, so you don't need to worry about multiple coats when using epoxy paint; simply paint and make the garage pretty again.
Epoxy paint is a strong and resilient paint that will last for years, even in high-traffic areas, but it is mainly designed for indoor use. The application process is simple, and any enthusiastic homeowner can enjoy the DIY process. One can spruce up the garage walls, even if the walls are already painted, thus beautifying your garage space through simple means. Epoxy paint also resists fading from UV exposure, so don't worry if your garage has huge windows; the paint will not fade.
I recommend epoxy paints for increased flexibility, especially if you just want the garage wall paint color changed and you are trying to paint the garage door in the same color as well. Epoxy paints have great adhesion; just in case your materials are tricky to paint over, with the proper primer for your material, you can paint any interior surface.
Oil-Based Paints
Oil-based paints use an oil base as their primary binder. This type of paint has been around for centuries and is certainly the most popular paint used for painting surfaces such as walls and woodwork. Unlike water-based paints, it takes longer to dry and has an odor during application, which turns off plenty of homeowners today. Its main advantage is that it's more resistant to scratches, scuffs, and fading than other types of paint.
Do note that oil-based paints tend to have a glossy finish that gives them more durability than water-based paints generally. They are used for painting hard-to-reach areas due to their viscosity and slow drying time, but they can be difficult to clean up after use. They provide a superior level of coverage when compared with water-based paints.
I do not recommend oil-based paints for the general garage walls, but if you are going for a gallery look, if your garage is a private gallery for your collection of cars, then oil-based paints might be the choice for your garage walls.
Buying Guide for the Best Paint forthe Interior Garage Wall
Just like how painting your garage wall makes it look lively again, similarly, with a little effort, you can find the right jar of paint. Here are the different factors that you should consider before you purchase your new paint.
Consider choosing the color palette yourself
The color of the paint should be a reflection of your personality and mood. What is your favorite color? Those should be the best colors for you! If you’re having trouble picking one, you can take a look at your garage. It should help you determine which color will suit this space.
Quality
Don’t opt for a lower quality of paint, because good quality paint will come with better longevity. It will not leave brush marks, and it’s less prone to getting yellow as it continues to age. You’ll get a smooth wall for many years to come, and some of them are also dirt and stain-resistant, making it easier to clean.
Tip
Before starting to paint, clean off existing oily stains and wash the walls off all stains that look problematic, as these stains can bleed through paint and damage the new layer.
No-VOC or Low-VOC paint
VOC (Volatile Organic Compounds) are harmful chemicals that are often released from regular paints once they dry off. You should always read the label to check if you’re picking a paint with No-VOC or Low-VOC and decide purposefully on the way to paint your garage concerning VOC levels.
Water vs. Oil
When you’re opting to get paint for your interior finish, it’s often advised to get water-based paints as they have less odor. However, the oil-based one comes with better durability, and it will be easier to clean the stains.
Latex vs. Acrylic
Latex paint gives proper protection from the build-up of mold or moisture. It’s also easier to clean the surface. But acrylic paints are less expensive than your other paints. Even though latex and oil-based paints are generally preferred over acrylic paints, the latter can be blended well to serve a lot of aesthetic options.
Selecting a Paint Finish
The finish is also known as the “sheen,” which serves as the artistic and tactile quality of your paint. For a garage that is not used for any events, you’ll prefer to paint with a less glossy finish. But, if the garage is used for other purposes too, a higher gloss will make the space appear more appealing.
The garage wall paints, which have more resins than the regular paints, can also double as primers. These resins can impact the overall finish of the paint. You can find different options for a paint finish, which include flat, matte, satin, eggshell, semi-gloss, and high-gloss. Each of these finishes comes with a varied range of effort, time, budget, and durability.
Size of the garage
Selecting a lighter color paint for a small garage can give the illusion of it being more spacious. Dark colors tend to absorb the light, making it appear smaller. The size of the garage and the atmosphere you are trying to create will dictate the color of the garage.
How do I paint the walls of my garage?
To paint the walls of your garage, start by cleaning the walls and removing any dirt, dust, and grime. Then, apply a primer to the walls and let dry overnight. Once the primer is dry, you can apply either latex or oil paint to the walls in a series of thin coats, allowing each coat to dry before applying the next.
What is the difference between latex and oil paint for garage walls?
The main difference between latex and oil paint is the drying time. Latex paint typically dries in 1–2 hours, while oil paint can take up to 24 hours to dry. Latex paint is also easier to clean up, while oil paint is more durable and resistant to fading.
Do I need to apply primer before painting the walls of my garage?
Yes, it is recommended to apply a primer before painting the walls of your garage. Primer will help the paint adhere to the wall better, and it will also help fill in any cracks or gaps in the surface of the wall.
What kind of paint should I use for the unfinished walls in my garage?
For the unfinished walls in your garage, you should use oil–based paint. Oil–based paint is more durable and will provide a longer–lasting finish.
What is the best paint finish for garage walls?
The best paint finish for garage walls is a semi–gloss or gloss finish. These finishes are more resistant to dirt, dust, and other wear and tear. They also create a nice shine that can help brighten up the space.
Thanks so much for taking the time to read through our comprehensive guide on the best paints for an interior garage wall! We hope that this information has been helpful, enlightening, and even exciting for you as you embark upon your own garage transformation journey. Remember, choosing the right paint can make all the difference between a dull, lifeless space and a vibrant, welcoming workshop or storage area.
Out of these 5 best paints for interior garage walls, here are the top three expert recommendations:
Backdrop Premium Interior Paint: Moonstone is an ideal option for those who appreciate Green Wise-certified, low-VOC, and low-odor paints, and have a creative knack for choosing complementary color combos.
Montage Signature Paint: Snow White is a good choice if you value eco-friendly manufacturing, Built Green, and LEED certifications compatibility with a 10-year warranty for some peace of mind.
PRESTIGE Interior Paint and Primer in One is the right choice for those living in humid areas or who prefer a paint and primer combo with numerous color options, all while being eco-friendly.
Choosing the perfect paint is truly a blend of aesthetics, durability, and eco-friendliness. Regardless of which option you select, you're well on your way to transforming your garage into a beautiful and functional space. So go ahead, grab your paint rollers, and unleash your creative potential! We're sure you'll be amazed by the results, and your garage will become a source of pride for years to come.
Decorating glass ornaments is an integral and exciting part of Christmas celebrations. What is the best paint for glass ornaments today?
From glass baubles to stars, crystal spheres to snowman figures, doves, and reindeer – glass ornaments are available in almost all shapes, sizes, and colors. The festive spirit of Christmas, the excitement of decorating the fir tree - grows if you make your glass ornaments or customize the basic ones you have purchased.
Painting the ornaments using enamel paint is the simplest and most effective way of adding your personal touch to the Christmas tree. With a variety of enamel paints available today, how do you select the best option that will help you decorate your glass ornaments?
We have compiled a list of the five best paints for glass ornaments that are available in the market today. Read on to find out what paint suits your requirements!
Listed below are the 5 best paints for glass ornaments from our list:
Testors 9146XT Promotional Enamel Paint Set. The Testors 9146XT set provides a comprehensive selection of more than 45 colors, allowing for a wide array of creativity on various surfaces, including glass; thinning brushes are included.
FolkArt ENAM8SET Enamel Paint Set. FolkArt ENAM8SET stands out for its ability to deliver beautiful, fade-resistant colors on surfaces from wood to glass; it dries quickly, is easy to clean, and offers excellent value for money.
Martha Stewart Crafts Gloss Opaque Glass Paint in Assorted Colors. Martha Stewart Crafts Gloss Opaque Glass Paint provides a clear gloss effect on glass, plastic, mirror, or ceramic surfaces; it's weather-resistant, so it's suitable for outdoor applications.
DecoArt 6 Piece 1mm Brights Glass Paint Marker Set. Ideal for personalizing glass ornaments, DecoArt's 1mm Glass Paint Markers can be baked for a durable, dishwasher-safe finish; the set includes six vibrant colors.
Sharpie Oil-Based Paint Markers, Medium Point, Assorted Classic Colors. Sharpie Oil-Based Paint Markers come in a variety of bright colors and four versatile tip styles enabling creativity on most surfaces including glass; they're resistant to abrasion, fading, and water damage.
Painting glass is a great way to express your creativity and create unique decorations for your home. Whether you're looking to create a special gift or spruce up your own decorations, painting glass ornaments is a rewarding DIY project. Here is the list of the 5 best paint for glass ornaments you can use to create beautiful art pieces:
Testors 9146XT Promotional Enamel Paint Set - Best For Comprehensive Starter Kits
Enamel Paint sets from Testors come in more than 45 colors in conventional glass bottles. The ¼oz enamel paints are available in a variety of combinations ranging from 6-bottle sets to 12-bottle kits with accessories. The Testors paint sets serve as an excellent way to let out your creativity.
The 9146XT Promotional set weighs 13.8 ounces and measures 9.9 x 1 x 4.6 inches. The essential selling point of this set is that it includes more than just paint bottles. The thinner paintbrushes that are included in this set take away the additional work of buying them separately. The paint can be easily applied on various surfaces like wood, paper, plastic, and glass.
It is advisable that you invest in a larger thinner bottle and a brush cleaner to increase the usefulness of the setas in our tests the tinner provided was used way before we were half done with the paint the kit is offering. Before applying paint to the glass ornaments, you should clean the surface with alcohol to remove the natural oils and allow the enamel to adhere firmly.
Andrew has tested this set on miniature models and dioramas, on plexiglass and glass alike, and was extremely satisfied with the quality, with his only comment being that at times more coats were required than usual. In our tests also seemed a little off, requiring even more coasts of paint than usual, but considering we are painting on translucent surfaces, that is too expected with any paint.
FolkArt ENAM8SET Enamel Paint Set - Best Value-For-Money
FolkArt is a part of the Plaid family of brands. Plaid has been one of the global leaders in the art and craft industry since 1976. The Plaid FolkArt Enamel Beginner Paint set includes eight 2oz bottles in the following colors: Wicker White, Licorice, School Bus Yellow, Pure Orange, Engine Red, Perfect Purple, Cobalt, and Hauser Green Medium.
All FolkArt enamel paint sets are made in the USA. The ENAM8SET weighs 1.65 pounds and measures 2 x 6.1 x 11 inches. The USP of the FolkArt Enamel Paint set is that it can be used on a wide array of surfaces like wood, Styrofoam, plaster, terra cotta, tin, ceramics, and glass. The paint may need a couple of coats on glass surfaces to get the desired look.
The colors apply smoothly to the surface, dry rapidly, look beautiful, and do not fade away soon. The paint can be conveniently cleaned with soap and water and are safe for the top shelf of the dishwasher. The FolkArt paint set is one of the most reasonable sets that allows you to paint on ceramics and glass and hence offers excellent value for money.
To test this out I painted glasses for my friend's party and I'm happy to report the nice assortments of paints did the job well but somehow I received a pack in which the red paint was just normal acrylic paint, not enamel paint like the rest. Now for these glasses, I didn't need that much red so it didn't ruin the experience for me, acrylic still works on glass, but this is something to keep in mind, and maybe inquire with the seller before purchasing if your project requires red enamel.
Type: Enamel Paint | Colors: 8 | Volume: 2 fl oz per bottle | Suitable Surfaces: Glass, Ceramic, Metal, Terra Cotta, Stone, Porcelain, and Resin
Martha Stewart Crafts Gloss Opaque Glass Paint in Assorted Colors - Best For Fine Detailing
Martha Stewart Crafts is a part of the Plaid family of brands. Plaid has been one of the global leaders in the art and craft industry since 1976. The Martha Stewart Crafts Glass Paint set is made in the USA and has diverse uses ranging from painting, silk-screening, and outlining on glass surfaces.
The opaque glass paint from Martha Stewart Crafts allows you to create evident gloss effects on any glass, plastic, mirror, or ceramic surface. The fine tip allows quick and easy paint application. These paints from Martha Stewart Crafts are safe for the top shelf of the dishwasher. The color is water-based, non-toxic, and weather-resistant.
Allow the paint to air dry or bake, as per the surface and your requirements. It can be easily cleaned before it dries out with a damp cloth, allowing you to rectify mistakes and redo a coat if needed. Given its weather-resistant feature, this paint can be used in outdoor applications as well which gives it an edge over similar paints in this price range.
The Martha Stewart Crafts opaque paint set includes 2-ounce bottles in a variety of colors. The paint does not leave any significant scent or fume, making it easy to use.
I've painted two mason jars, with the glitter blue variant and lupsa color and the good part is that it stuck to the jars, while the bad part is the blue is not really a solid blue but clear. This means that light will pass through the glass and creates somehow an unfinished look that is not fit for all projects, however, with a base coat, primer coat, or a lot of layers, you can achieve a solid look too.
A base coat will show on the inside of the glass while a lot of layers might be odd as the nice sparkles do have a texture and thus, the layers will be rather thick.
Overall, I would recommend going for a different set if you need the solid look, if you need a translucent glittery finish, this is your pick.
Type: Glass Paint | Colors: 12 | Volume: 2 oz per bottle | Suitable Surfaces: Glass, Ceramic, Porcelain, Metal, Terra Cotta, Stone, and Resin
DecoArt 6 Piece 1mm Brights Glass Paint Marker Set
DecoArt 6 pieces 1mm Glass Paint Markers is ideal for glass, glazed ceramic, porcelain, and metal surfaces. These paint markers can be used to personalize, draw, or outline on glass ornaments. You can even bake it in the oven for a dishwasher-safe and durable finish. It is recommended that the paint does not come in direct contact with any food items.
Each of the DecoArt Glass Paint Markers is water-based, non-toxic, and comes in a glossy, translucent finish. The paint markers have excellent adhesion and a sturdy fiber nib. The marker set includes six colors – Fuchsia, Citron, Yellow, Turquoise, Orange, and Violet. Other colors like white, red, green, blue, brown, black, silver, and gold can also be purchased individually.
To use the glass paint markers optimally, it is recommended that you shake the markers well before use and clean the surface with a glass cleaner. You need to press down gently on the tip to activate the marker and make the color appear on the surface. Ideally, you should allow the paint to air-cure for approximately eight hours. To get a dishwasher-safe finish, place the painted ornament in a cold oven and bake for 30 minutes at 325 degrees Fahrenheit.
I used these briefly in the office to create funny mugs and glasses with the nicknames of my colleagues, some of them were not amused and thus we erased them all at the end of the day. We didn't bake the mugs to get the dishwasher-safe finish but while drawing on mugs, the markers were exemplary, with really bright colors, great fine tips that allow you to create good details, and a solid marker set to paint on glasses and mugs.
Type: Paint Marker | Colors: 6 | Volume: 1mm tip | Suitable Surfaces: Glass, Porcelain, and Ceramic
Sharpie Oil-Based Paint Markers, Medium Point, Assorted Classic Colors
Since 1964, Sharpie has been a well-known brand in the arts and crafts industry. Being the world’s first pen-style permanent marker, Sharpie is a pioneer of paint markers. Sharpie’s Oil-Based Paint Markers are available in various bright colors. The markers are non-toxic, and the oil-based ink resists abrasion, fading, and water damage.
The valve-action design of the Sharpie markers guarantees smooth application on most surfaces, including metal and glass. The pens come in four versatile tip styles – bold, medium, fine, and extra fine. The 34971PP set weighs 4 ounces and measures 7.5 x 5.2 x 0.8 inches. The set includes oil-based markers in black, white, blue, yellow, and red colors.
It is recommended that before putting the markers to use the first time, place the tip to face upright and push against your finger. Recap the pen and shake it, and then press the tip on the surface several times for the paint to appear. The markers are xylene-free and non-toxic, which makes them safe for use by children too.
Sharpes require no introduction, they do the trick and they do it well, the different tip styles allowed me to experiment with the design and mix up different lines, ranging from extra fine to bold. Sharpie’s Oil-Based Paint Markers are ideal for creating designs on glass ornaments that you want to use in the long run but they're a bit more expensive than the Deco Art markers and needless to say not all projects are permanent. For crafts with kids and I'd always go for the DecoArt markers while for a more permanent mug, glass, or wine bottle centerpiece that I'd like to keep for years, I would order the Sharpies.
Type: Paint Marker | Colors: 5 | Volume: 0.5 oz per marker | Suitable Surfaces: Glass, Plastic, Metal, Ceramic, and Wood
What is the Best Paint For Glass Ornament?
Presented below is a comparison table proficiently designed to illuminate pivotal traits of the foremost paints suited for glass ornaments. The table weighs up factors such as type, colors, volume, and suitable surfaces.
Painting glass ornaments can be a fun and rewarding way to personalize your holiday decorations. With a few simple tips, you can get professional-looking results from your painted glass ornaments.
Choose the right brush
When it comes to painting glass ornaments, the right brush choice is essential. Use a brush with a fine tip that will allow you to paint intricate details without leaving any brush strokes. A brush with natural bristles is ideal, as synthetic bristles may leave streaks and brush hairs behind.
Allow ample drying time
To ensure that your painted glass ornaments last, it is important to allow them to dry completely before you move on to the next layer of paint. Depending on the type of paint you use, drying time can range from a few hours to several days, oils dry out harder while acrylics dry faster, do read the label of the paint and note that on glass, in general, all paints dry out slower, due to the perfect glass finish and lack of porosity. To ensure that your ornaments are completely dry, allow at least 24 hours before proceeding to the next step.
Use a clear sealant
To protect your painted glass ornaments, use a clear sealant such as a clear acrylic spray. This will help to protect the paint from fading and peeling and will give your ornaments a glossy finish or matte finish.
Guide to Store Glass Ornaments
Once the festival is over, the ornaments are taken off and stored safely for the next year. Here is a summary of the best ways to store your favorite glass ornaments:
Dedicated Containers
You would have thrown the original packaging of the glass ornaments most likely and could use special ornament boxes to store them. A variety of ornament boxes are available in the market, made from different materials and featuring unique designs.
DIY Containers
For those of you who are highly creative, creating a storage bin or container with readily available materials like cardboard, plastic cups, bubble wrap, and glue is the best option.
Egg Carton
To store small glass ornaments safely, an egg carton can serve as an original and effective storage space. You need to place the fragile ornaments inside the egg carton, and you may add a layer of bubble wrap or tissue for additional safety.
How do you get paint to stick to glass ornaments?
Pour 1 tsp of rubbing alcohol into the glass ball ornament. Shake the ornament, covering the opening with your finger. This will help to clean the interior surface of the ball, ensuring the paint sticks to the desired area, rinse and repeat if necessary.
How Do I Seal Paint on Glass?
You can choose to seal your glass artwork in two ways: by applying a chemical glass paint sealer or by baking it in an oven. Both options will make your artwork more durable thanks to the hard-wearing, long-lasting finish that will keep your art as new for years to come.
Can you use acrylic paint on the glass?
Acrylic paint can be used to paint on glass objects such as mirrors, vases, wine glasses, and mason jars. This is a great way to personalize these pieces; however, acrylic paint may not always adhere to glass easily, so using a primer or a base layer might come in handy.
Can I paint both the inside and outside of a glass ornament?
You can paint the outside of glass Christmas ornaments with any design you choose that showcases your artistic abilities. For a marbled effect, swirl various colors of craft paint inside the ornament.
Different color combinations and swirling methods result in unique results every time so do experiment with all options with paints that can be easily erased before sealer, or baking to find your ideal design.
How to Seal Acrylic Paint on Glass
To seal acrylic paint on glass, purchase an acrylic sealant that is suitable for glass surfaces. Opt for a glass paint sealer with a glossy finish for best results as they’re a bit more hard-wearing and long-lasting. This sealant is available in spray-on or brush-on formulas.
Thank you so much for taking the time to read our article on the best paint for glass ornaments! We hope that it has been both informative and exciting, walking you through some of the most exceptional products available in the market.
Out of these 5 exceptional paint products for glass ornaments, here are the top three expert recommendations:
Best for comprehensive starter kits: Testors 9146XT Promotional Enamel Paint Set is an ideal option that offers a variety of colors and accessories for crafting beautiful glass ornaments.
Best for value-for-money: FolkArt ENAM8SET Enamel Paint Set is a good option if you're on a budget, with its reasonable price, vibrant colors, and beautiful gloss finish.
Best for fine detailing: DecoArt 6 Piece 1mm Brights Glass Paint Marker Set is the right choice for those looking to create detailed, intricate designs on various surfaces like glass, glazed ceramic, porcelain, and metal.
As you embark on your journey to create dazzling glass ornaments, we hope our top picks help you achieve beautiful results. Remember that a little creativity, patience, and the right tools make all the difference in crafting the perfect piece. We encourage you to let your imagination run wild and have fun creating glass ornaments that reflect your personality and style. Happy painting!
To take good care of your home, we recommend that you repaint the property every 5-10 years.
While this seems easy enough, most homes lose their valuation because people remain ignorant about painting the basement, garage, or poolside. Since they are not the eye-catching areas of your house, it's natural to be negligent.
However painting the basement significantly improves the life of the walls, keeping the house in fine shape. Understandably, the next question is what kind of paint to use.
To help you, we've decided to review the 11 best paints for the concrete walls in the basement. These paints are usually water or oil-based solutions and possess incredible durability, making it worth the investment.
So, let's put on our painting gear and dive into our first product review.
Listed below are the 5 best paints for concrete walls in the basement from our list:
KILZ L377611: A product that sets itself on top with its incredible durability, fantastic coverage, and satin finish, displaying an impressive resistance to cracking, blistering, and staining induced by heat, chemical, or oil spills.
INSL-X SU092209A-01: Sets itself apart by solving a common issue seen in many paints - peeling under car tires, offering high durability with an added focus on skid resistance, ensuring safety and longevity even under heavy use.
KILZ L378601: Noteworthy for its hairline crack coverage, providing a unique speckled coating on surfaces and a skid-resistant property, ensuring safety on surfaces like pools and walkways.
Liquid Rubber 20602: Stands out as an eco-friendly choice that provides a sealant membrane for smooth spread over surfaces, along with the ability to fill in cracks and blisters effectively.
FIXALL F06570-1: An acrylic paint that provides a high-grip, skid-resistant finish on surfaces, making it a versatile paint option for high-traffic areas, and available in multiple color options.
Whether you want to create a cozy ambiance or add a pop of color, this list will guide you toward finding the perfect paint to revitalize your basement. So, without further ado, here's the list of the 11 Best Paints For Concrete Walls In the Basement.
KILZ L377611 - Best for Wall Durability
KILZ is a well-known brand in the painting world, producing premium-quality products at affordable prices. Its latest paint is incredibly durable, offers fantastic coverage, and has a satin finish, giving it the edge over other brands. There's a lot to like about it, solving most of your painting needs.
To choose the best concrete wall paint, you'll need to consider durability. That's why this product is one of the top choices of customers, thanks to its water-based solution. You can apply it in hard-to-reach areas, and given its resistance to cracking and blistering, rest assured that it will last a long time.
But that's not the only thing that it's resistant to. We found that it retains its color even under extreme heat and doesn't stain due to chemical or oil spills. What's more, its durability means that it's also exceptionally versatile, allowing you to use it on masonry, brick, and stone.
After applying it, users can enjoy its satin finish, meaning it's easy to get a smooth coating on different surfaces. It dries in under two hours, allowing consumers to recoat the walls in four hours our findings show.
The paint takes longer to dry, and you'll need to wait approximately four hours to apply the second coat. That said, you'll have to find a separate spot to keep your car for a couple of days because it often starts peeling under hot tires.
What We Like
Water-based solution
Versatile
Incredible durability
Doesn't crack or blister
Easy to clean
What We Don't Like
Takes time to dry
Peels under tires
Coverage: Up to 400 sq ft/gal | Finish: Satin | Volume: 1 Gallon | Drying Time: 1 hour to touch, 4 hours dry | Waterproof: Yes | Mold and Mildew Resistant: Yes | UV Resistant: Yes
INSL-X SU092209A-01 - Best Anti-Slip Solution
This product is extremely reliable and safe for long-lasting use. Although it doesn't have sufficient coverage, you get an even coating on most surfaces to restore the quality of your basement or garage. Hence, if you have money to spend, this might be the most suitable option.
We mentioned that the KILZ L377611 peels under car tires, and this is a problem that the INSL-X SU092209A-01 solves. Unsurprisingly, the paint is highly durable, with the manufacturer focusing on skid resistance for safety and longevity.
We found that the color doesn't fade even after years of heavy use, thanks to its abrasion and water-resistant properties. Apart from the basement, you can apply it to the stairs, walkways, and patios of the property, guaranteeing safety for your family.
What's more, users can use it to seal cracks and blisters, thanks to its fast-drying nature, reducing the waiting time to apply the second coat. Also, one gallon of paint can cover 80-120 square feet, ensuring that you get an even coating.
Since it doesn't have a wide coverage area, you'll need to apply multiple coats of paint, which increases the overall cost. Also, the solution is rather thick, and it takes time to reduce it to the required viscosity. Naturally, a single can of this paint isn't sufficient for painting large areas.
What We Like
Durable
Retains its color
Abrasion-resistant
Fast drying
Seals blisters
What We Don't Like
Pricey
Thick solution
Coverage: Up to 120 sq ft/gal | Finish: Matte | Volume: 1 Gallon | Drying Time: 1 hour to touch, 4 hours dry | Waterproof: Yes | Mold and Mildew Resistant: Yes | UV Resistant: Yes
KILZ L378601 - Best for Cracks Coverage
Our second product from KILZ has made certain improvements, generating mostly positive reviews from prospective buyers. We loved its quick drying time and matte finish, ensuring that your home stands out. And, thanks to its speckled coating, you get a unique appearance on most surfaces.
For starters, it's suitable for indoor and outdoor projects, allowing you to apply a beautiful coat of color to patios, decks, and porches. It livens up the walls and helps you repair cracks without any hassle.
Speaking of repairs, you won't be able to fill in large gaps. Instead, the paint covers hairline cracks, measuring 3mm, preventing damage from debris, grease, and hot tires. Now, once you apply the coat, its skid-resistant properties kick in, making the pool and walkways safer.
However, you'll need to purchase some additional components, like a ¼-inch roller cover, which has strong adhesive properties. It will hold the paint together, preventing fading while covering 50 square feet in one gallon.
Overall, your concrete surfaces will get a nice facelift, improving the valuation of the property.
Like the earlier model, this product too suffers due to its reduced coverage, but you do get a matte finish which is a silver lining. So, whether or not this is the right product depends on your preference. But a more serious issue is that it fails to mask the previous wall color.
What We Like
Fills hairline cracks
Prevents fading
Delivers safety
Versatile
Speckled coating
What We Don't Like
Low coverage
Doesn't cover the previous color
Coverage: Up to 60 sq ft/gal | Finish: Matte | Volume: 1 Gallon | Drying Time: 1 hour to touch, 4 hours dry | Waterproof: Yes | Mold and Mildew Resistant: Yes | UV Resistant: Yes
Liquid Rubber 20602 - Best Eco-Friendly Option
The Liquid Rubber 20602 features a sealant membrane, allowing the paint to spread over most surfaces smoothly. While the coverage is nothing substantial, it's not bad either, and we assure you that this water-based solution meets most of your painting needs. Particularly pleasing is that it's eco-friendly, meaning it doesn't have any harmful effects.
If you're looking to add an extra layer of protection, this is the ideal product for you. It's durable and has a protective finish, making it suitable for painting shower liners, wood, metal, and basements. Like the KILZ L378601, we found that it also has a coverage area of 50 square feet.
Interestingly, it has a sealant membrane which helps the solution spread evenly across all surfaces. The sealant offers 900% elongation to cover all cracks and blisters, allowing the paint to adhere strongly to the surface.
Moreover, it's easy to use and doesn't require mixing. All you need to do is use a brush, roller, or paint sprayer and apply the necessary coating to different surfaces. Also, if there's paint left behind, simply close the lid tightly and store it for future use.
Finally, it's eco-friendly, and its water-based solution is free of solvents and harmful odors.
One downside is that it has a higher viscosity, meaning thicker coats. Naturally, this impacts the coverage area, and you'll have to reduce the mixture or apply multiple strokes with the roller to get the desired thickness. Understandably, painting becomes messy, and cleaning the splashes of color is another hassle.
When it comes to acrylic paints, FIXALL has developed an innovative solvent that adheres to most surfaces. It's also incredibly safe, perfect for painting the garage or poolside. And users will especially like that it's available in numerous colors, ensuring your home gets a vibrant appearance.
So far, we've looked at several water-based solutions, so it's time to change things up a bit. Our next recommendation is a textured acrylic paint that evenly spreads over most surfaces for a durable finish. Why do we say so? Because it has anti-skid properties, creating a high-grip finish so that your walls remain in top shape for a long time.
It's the perfect option for painting high-traffic areas, delivering safety to keep your family safe. So, your car won't skid in the garage, nor will you lose your footing around the poolside. In fact, users have also used it for painting basketball courts.
You'll find that it's suitable for domestic and commercial purposes, and available in multiple colors. Also, it's easy to use but always clean the surface before playing the first coat. Then, spread it over the desired area with a brush or roller before leaving it to dry.
Although it's available in several colors, the actual colors may vary slightly from the description. For instance, users reported that the green color often has a bluish tinge which is unwelcome. However, once you choose the right color, it would be best to carry out regular maintenance to prevent scuffing.
It offers nothing fancy, but this model is highly reliable and perfect for indoor/outdoor painting projects. We loved its wide coverage and durable mixture, which reduces the need for prepping the walls. Understandably, it's convenient for professionals and first-timers alike, leading to growing interest among buyers.
To paraphrase Hamlet - variety, thy name is Rust Bullet. Very few concrete painting solutions offer so many colors for you to try out, ensuring that the basement receives a much-needed facelift. Moreover, it's perfect for use in garages, patios, sidewalks, and pools, making it the go-to option for many people.
But why so? This is because it's resistant to scratching, rust, and chemical solutions, meaning there's no need to worry about peeling. You can reverse your car into the garage without worrying that the hot tires will impact the color. Also, it adds to safety and reduces the chances of skidding.
It's the perfect solution for indoor and outdoor use, having a 300 square feet per gallon coverage area. Usually, it takes two coats to get an even coating, depending on the solution's texture, porosity, and concentration.
Lastly, you can apply it with a brush, roller, or sprayer.
We noticed that the paint creates a ripple effect in certain spots, which might be due to the texture of your choice of painting equipment. Hence, it would be best to smoothen the areas with a brush. Besides, it has a strong odor upon opening the lid, but it dissipates soon enough.
As the name suggests, you don't need to worry about toxic chemicals or foul odors affecting the health of those around you. Eco Advance has developed a liquid concentrate formula that is extremely durable, protecting against the weather along with mold, mildew, and stains. If you're interested to know more, read the following section.
Users living in moist conditions, and experiencing frequent rainfall, will love the performance of this liquid concentrate solution. It's waterproof, and a one-gallon container covers most surfaces smoothly to deliver a commercial-grade waterproof coating. Overall, it has a coverage area of 240 square feet suitable for painting basements and garages.
Apart from concrete, you can use it on brick, stucco, stone, and pavers without any hassle. You'll also find that it's incredibly durable, protecting against mold, mildew, oil, and stains, thereby retaining its color for a long time. Plus, it's easy to clean, and all you need is some cleaning agent and a wet cloth based on our firsthand experience with the product.
Unlike the Rust Bullet 850154005631, Eco Advance has developed a non-toxic, non-flammable formula. So, it's not harmful to your pets, plants, or kids, keeping your family safe.
Finally, the breathable solution sticks to the surface, resisting peeling or scratches.
You'll need to apply more than one coat to get the desired result. The good part is that you can use any equipment of your choice without any hassle. However, do add sand to the mixture because it remains slippery even after the paint dries.
If you're looking to purchase paint with a glossy finish, this can of paint from Armor fits your requirements perfectly. It's an acrylic-based solution, adhering to most surfaces to deliver unmatched performance. So, your home will look good, and it will be a long time before the need for repainting arises.
Another acrylic-based option that's captured the imagination of users is the Armor AR5005GAL. Acrylic paints have a fantastic texture, and their breathable solvent increases their adhesive properties. So, it can penetrate high solids, holding onto the surface strongly for long-lasting performance.
Speaking of durability, it can withstand sudden variations in temperature without cracking, keeping the walls in top shape. Moreover, it's UV-resistant, prevents abrasion, and doesn't peel even if you drive a hot tire over the surface. Long story short, it retains its high-gloss finish, infusing life into dull surfaces.
We believe that you'll need to apply at least two coats, guaranteeing a lifespan of 4-5 years. You can also apply it on surfaces already having an acrylic coating or on unsealed surfaces. But for the best results, it would be best to use it poured and stamped on concrete or pavers.
What's more, it's suitable for indoor and outdoor painting projects.
Our only issue with this paint is that it's sticky and takes longer to dry. Moreover, you need to clean the wall of impurities and ensure that dust and dirt don't gather on the surface while the paint is drying. Also, refrain from using the garage if you paint the floor.
What We Like
Abrasion-resistant
Suitable for indoor/outdoor projects
Durable
Doesn’t crack
Volume of five gallons
What We Don't Like
Sticky
Coverage: Up to 175 sq ft/gal | Finish: Clear | Volume: 5 Gallons | Drying Time: 1 hour to touch, 24 hours dry | Waterproof: Yes | Mold and Mildew Resistant: Yes | UV Resistant: Yes
Rust-Oleum 225380
Solely, in terms of coverage, this product tops the charts compared to other models, but there are other factors to consider. Thankfully, we weren't disappointed and found that it has advanced acrylic technology, complete with a satin finish. So, you can brighten up your home with vibrant shades that won't fade quickly.
In terms of coverage, few products can match the performance of the Rust-Oleum 225380. One gallon of this solution can cover 844-847 square feet, making it affordable and delivering a smooth coating. Hence, you can use it on interior and exterior surfaces by applying the solution with a brush, sprayer, or roller.
The paint has an eye-catching satin finish, thanks to its advanced acrylic technology. You'll find that it's resistant to UV rays, weather, or chemical stains, ensuring that the color remains intact. Moreover, it can handle changing weather conditions, and you can rest assured that the color won't fade during the monsoon.
Since it's suitable for painting the garage, the engineers have ensured that hot car tires don't peel the color from the surface. But there is a chance that it could gather impurities. So, all you need to do is clean the surface with soap and warm water.
We found that it isn't available in various colors and you can only choose from a few options. However, even if you find the color suitable, there could be slight variations compared to the description. So, keep this in mind before making a purchase.
Up next, the AQUA-X P1101G is a versatile model suitable for numerous tasks. Be it painting the garage, driveway, or patio; you will get an even coverage to restore the quality of your home. Moreover, it has high resistance against the weather, ensuring that the walls won't deteriorate after a couple of years.
This concrete sealer from AQUA-X is perfect for professional painters, delivering a clean yet natural feel. You can use it on concrete driveways, unglazed cement tiles, patio pavers, and cast concrete, enhancing the durability of any surface. Added to that, it looks good so that your property stands out.
What's more, it's a water-based solution, protecting against stains, spalling, freeze-thaw, and pitting. Hence, even if the walls gather impurities, cleaning it won't be a hassle. You won't need to spend much time on maintenance, and a wet cloth works wonders, helping retain its natural color.
Compared to other products, this unit doesn't have any harmful chemicals or a foul odor, keeping you and your family safe. It's perfect for painting your home while also maintaining the health of your plants and pets.
Users said that they needed to apply multiple coats to get a smooth texture. But that's the least of your troubles because different areas of the property take different times to dry. Meaning, that there might be one wet surface while another part of the garage may be dry and ready for the second coating.
What We Like
Durable
No foul odor
Easy to clean
Low-maintenance
Doesn't contain harmful chemicals
What We Don't Like
Drying time may vary
Needs multiple coats
Coverage: Up to 400 sq ft/gal | Finish: Clear | Volume: 1 Gallon | Drying Time: 1 hour to touch, 24 hours dry | Waterproof: Yes | Mold and Mildew Resistant: Yes | UV Resistant: Yes
United Gilsonite 23813
Engineers at United Gilsonite have developed this modern paint with advanced epoxy technology, which won't crack or blister under stress. We loved its semi-gloss appearance, proving waterproof and delivering safety in high-traffic areas. Additionally, the paint doesn't go to waste, and you can store it for later use.
This paint has advanced epoxy technology for long-lasting benefits, offering greater protection and durability. You can rest assured that seasonal changes won't lead to cracking or blistering, allowing you to seal wall imperfections without any hassle.
We found that it's highly resistant to water and impurities, meaning even chemical spills won't harm your walls. Not surprisingly, it retains its color and won't fade easily, but we still recommend that you repaint the surface after 3-5 years. Until then, if there's paint left over, you can store the container for future use.
Moreover, this paint is suitable for indoor and outdoor use, delivering a semi-gloss appearance to spruce up your property. What's more, maintenance is easy, and you can scrub the surface with water without worrying about peeling or scratching.
Overall it ticks all the right boxes, and you're sure to get value for money.
It's essential that you prep the walls before applying the first coat, ensuring that it's clean and free of impurities. Additionally, while storing the leftover paint, close the can tightly to prevent leakage, and it would be best to secure the opening with clips.
Outlined below is a comparative chart, specifically designed to highlight the distinct attributes of the top-ranked paints for concrete walls. The table's evaluative dimensions include the coverage area, finish type, volume of paint, drying time, and whether the product is waterproof, mold and mildew-resistant, and UV resistant.
Buying Guide for the Best Paint for Concrete Walls in Basement
It's time now to discuss some of the essential characteristics of concrete paints, ensuring that you can choose between two similar products. So, make a note of the following points to purchase the paint most suitable to your needs.
Durability
When choosing paint for your concrete walls, durability is key. Concrete surfaces are generally exposed to more wear and tear than other materials, so the paint must be able to withstand these conditions for an extended period of time. High-quality paints can offer a variety of protection against external conditions like temperature fluctuations, moisture, and UV damage. Some paints also have specific additives that can resist hot car tire marks, which is particularly useful in a garage setting. Opt for water or oil-based solutions that are specifically formulated for concrete surfaces to ensure long-lasting performance and minimal maintenance.
Low-Maintenance
Maintenance is another crucial factor to consider. The best paints for concrete walls are those that require minimal upkeep, leaving you more time to focus on other projects. This means the paint should be easy to clean and resist stains and dirt. Most high-quality paints for concrete surfaces will only require occasional cleaning with a wet cloth and a mild cleaning agent to remove surface dirt or impurities. Paints with a semi-gloss or high-gloss finish can also be beneficial for maintenance, as they allow for easier surface cleaning compared to matte finishes.
Cost
Cost can be a significant factor in your decision, but it's important to consider the overall value rather than just the upfront price per gallon. A less expensive paint might require multiple coats or frequent repainting, which could end up costing more in the long run. Conversely, a higher-priced paint might offer superior coverage, requiring fewer coats and providing longer-lasting results, offering better value over time. Additionally, consider the viscosity of the paint, as this can affect how much product is needed to cover your surface area adequately. Thicker paints tend to provide better coverage, potentially saving you money by reducing the number of coats needed.
Acoustic Considerations
When choosing the best paint for your concrete walls, one factor that's often overlooked is its potential contribution to the acoustics of the space. Particularly in a basement, where sound can easily bounce off hard surfaces and create an echo, the type of paint you use can subtly affect the level of sound transmission and reverberation.
Some specialty paints contain small, sound-absorbing fillers that can partially absorb and diffuse sound waves, reducing the echo and noise levels in a room. While these paints can slightly improve a room's acoustics, they should be viewed as part of a broader soundproofing strategy rather than a standalone solution. It's important to remember that the effect of such paints on soundproofing is often relatively minor compared to other soundproofing measures.
Therefore, while considering paint for your concrete walls, it's a good idea to complement it with other soundproofing methods. You can incorporate sound-absorbing materials in your furniture, use thick rugs and carpets, or apply a layer of drywall with sound-absorbing compounds.
For more detailed steps on how to create a sound barrier and truly soundproof your walls, consider consulting comprehensive resources that delve deeper into the topic. Incorporating these methods will help you not just create a visually appealing space, but also control sound transmission, enhancing the overall ambiance of your room.
How do I prepare the concrete walls before painting?
Before painting concrete walls in the basement, it’s crucial to prepare the surface properly. Start by cleaning the walls thoroughly to remove any dirt, dust, or grease. Fill in any cracks or holes with an appropriate filler and allow it to dry. Consider using a concrete primer to enhance adhesion and promote a smoother finish.
Can I use regular interior paint for concrete walls in the basement?
It is generally not recommended to use regular interior paint for concrete walls in the basement. Regular interior paint may not adhere well to the concrete surface and may not provide the necessary durability and moisture resistance required for basement environments. It is best to use paints specifically designed for concrete or masonry surfaces.
How many coats of paint should I apply to concrete walls in the basement?
The number of coats of paint needed for concrete walls in the basement can vary depending on factors such as the color you’re painting over and the desired coverage. However, it is generally recommended to apply at least two coats of paint to ensure even coverage and a long-lasting finish.
Can I paint over the existing paint on the concrete walls in the basement?
Yes, you can paint over existing paint on concrete walls in the basement. However, it’s essential to ensure that the existing paint is in good condition, properly adhered to the surface, and free from peeling or flaking. If there are any issues with the existing paint, it’s recommended to remove it before applying a new coat of paint.
We hope you now have all the information when it comes to painting basement concrete walls.
Do you feel confident about making a purchase? If you're still in doubt, let us assist you by highlighting our favorite options in different categories. If you're looking for durable paint, we recommend opting for the KILZ L377611.
Apart from that, the INSL-X SU092209A-01 is incredibly reliable and delivers maximum safety around your property. That's all there is to know about painting concrete walls; it's time now to bid you goodbye.
Before signing off, we'll leave you with this tip: it would help if you clean the walls every month to remove dirt and debris. This will keep the color intact and maintain a vibrant appearance.
Until next time when we'll be back with more exciting product reviews, take care, and see you soon!
Best paint brushes for trim are designed to deliver precision and clean lines on baseboards, crown molding, window frames, and door casings where accuracy is critical. Unlike standard wall brushes, trim brushes feature angled sash bristles, tapered synthetic filaments, and lightweight ergonomic handles that give painters superior control in tight spaces and corners. Their performance is evaluated by paint load capacity, release consistency, bristle retention, and cutting-in ability, making them indispensable for achieving a professional finish with latex, acrylic, or oil-based paints. As Purdy’s senior product expert Steve Revnew notes, “The right trim brush controls the paint, allowing you to achieve sharp, consistent edges without tape.” In this guide, we review the best paint brushes for trim, tested for durability, comfort, and smooth application, so you can complete detailed interior painting projects with professional results.
Best Paint Brushes For Trim
Here’s the list of the 9 best paint brushes for trim of 2024, carefully curated and reviewed by our experts to help you find the perfect brush for precise, versatile, and durable painting.
Wooster is one of the leading American brands that specializes in manufacturing paint brushes, and the Q3211-2 lives up to the brand's name. Featuring a flexible handle, this paintbrush ensures that it is easy to operate in tight spaces, thereby making its way to the top of this list.
Flexible purple Shergrip handle that measurers only 2 Inches...
White nylon and gold polyester blend for all paints
Why Did We Like It?
We were quite happy with what the Wooster Brush Q3211-2 had to bring to the table. For starters, its short handle helps in providing precision while painting edges and tight spaces. The bristles do an excellent job of working with almost all kinds of paints.
Furthermore, the brass-plated steel cap adds to its durability and visual appeal. It weighs just about 1.6 ounces and comes in a wide variety of sizes. Having said that, the main USP of this product is its top-notch portability; in fact, the tiny build quality makes it appropriate for painting baseboards.
Apart from being highly durable, it is super easy to control as it helps you paint different parts of the room without even tapping off. This product is a must-have for those who are not professional painters.
What Could've Been Better?
While testing the Wooster Brush Q3211-2, we did not find any major drawbacks. However, this paintbrush may not be ideal for you if you are into heavy-duty professional painting. Other than this, this product does a fantastic job in delivering smooth and even finishes.
Pros
Highly durable
Optimal value for money
Easy to maneuver
Affordable
Cons
Not suitable for professional painting
Material: Acrylic | Dimensions: 1 x 8 x 3 inches | Weight: 1.6 oz | Bristle Type: Synthetic | Size: 2"
Next up, we have paint brushes by Pro Grade. They happen to be one of the best-selling paint brushes on the market simply because of the various features they come with. They usually come in a pack of 5, with each brush serving various needs to help achieve your painting goals.
COMPLETE 5-PIECE BRUSH SET FOR EVERY PAINTING TASK —...
ZERO BRISTLE LOSS — GUARANTEED BY PRECISION ADHESIVE...
Why Did We Like It?
There were quite a few reasons why we liked the Pro Grade paint brushes. Firstly, we were pretty happy to see that they come in a set of 5. The premium quality of these brushes delivers desired results, be it on doors, walls, decks, trims, or fences.
Apart from this, the brushes feature SRT filaments that help in holding more paint so that you can save time, avoid streaks, and deliver top-notch finishes. They come with high-quality stainless steel ferrules that make them extremely durable and long-lasting.
That said, the grips feature smooth hardwood that enhances the comfort of using these brushes, hence allowing you to paint for longer hours at a stretch. They have fine tips that provide enough precision and control while painting through tight spaces.
What Could've Been Better?
The Pro-Grade paint brushes may not be the appropriate choice for those who intend to use them professionally. These brushes are made for light-duty DIY painting jobs and may not be the right fit for professionals. But it certainly does not disappoint with light-duty painting projects.
Pros
Great value for money
Comfortable to use
Provides enough control
It is long-lasting
Cons
Not suitable for heavy-duty painting projects
Material: Stainless Steel | Dimensions: 8 x 10 x 0.55 inches | Weight: 10.7 oz | Bristle Type: Synthetic | Size: 3"
Allow us to introduce you to Richard 13418. Richard is one of the most reliable brands on the market when it comes to painting brushes, and this product is no different. Having said that, the 13418 variant can be used to paint anywhere that demands accuracy and precision.
Ideal for accurate trim and cutting-in around doors, windows...
High performance brush for precise trimming and an...
Why Did We Like It?
We liked almost everything that Richard 13418 had to offer. To begin with, the tapered polyester bristles ensure it leaves clean edges while painting. The soft-grip handle makes it very comfortable to hold. And it also comes with a spectacular paint pick-up and release feature that helps provide a smoother finish.
Furthermore, this particular paintbrush is extremely durable and does best when used with latex paint. Weighing just about 1.58 pounds, the 13418 paint brush by Richard is also one of the lightest options on the market.
What's more? Well, it is one of the highest-rated paint brushes on this list, and the brown and yellow color combination gives it a very sleek and trendy look.
What Could've Been Better?
Without a doubt, the Richard 13418 is one of the best and most reliable paint brushes out there. However, we found out that the bristles tend to hold on to paint. Other than this minor drawback, it does a very smooth job.
Pros
Comfortable to hold
Effortless painting
Reasonable price
Light-weight
Cons
Bristles hold onto paint
Material: Polyester | Dimensions: 1.5 x 2.38 x 9.88 inches | Weight: 1.58 oz | Bristle Type: Synthetic | Size: 3/4"
Wooster's second product on this list clearly signifies how good this brand is at manufacturing paint brushes. The Wooster Brush Q3108 takes it to a new level by yielding smooth finishes with all oil-based paints, thanks to its super-soft bristles.
Soft brush tips provide a smooth and even finish with all...
White nylon and gold polyester with chisel trim
Why Did We Like It?
Made using white nylon and gold polyester bristles, the high-quality paint brush from Wooster is a practical option to consider buying. However, the brass-plated steel cap is what caught our attention from the beginning, giving it a very sturdy yet ergonomic look.
The yellow-colored plastic handle is very comfortable to hold, allowing it to be used for long hours. You would be pleased to know that the tip, apart from being soft, is also rigid, making it perfect for painting edges and for cleaning dust off PC motherboards.
Furthermore, this paintbrush weighs under 2 ounces, making it extremely lightweight; it can fit into pockets very easily. It works perfectly with acrylic paint and is one of our list's most affordable paintbrush options.
What Could've Been Better?
The Wooster Brush Q3108 checks pretty much all the boxes. However, you may want to avoid it if you are looking for a paintbrush for professional painting projects. This paintbrush is meant for light-duty painting jobs only. To be fair, it would be silly to look for heavy-duty paintbrushes at this price point.
Pros
It is very affordable
It comes in handy in cleaning PC parts
Extremely light-weight
Long-lasting
Cons
Not appropriate for heavy-duty paint jobs
Material: Polyester | Dimensions: 1.15 x 0.6 x 8.61 inches | Weight: 1.25 oz | Bristle Type: Synthetic | Size: 1"
Purdy specializes in delivering handmade paintbrushes. It has been in business for over 85 years, and the Purdy 144080225 is an excellent example of its craftsmanship. That being said, this unique paintbrush by Purdy is an option you may not want to miss out on, mainly because of the smooth finish it delivers.
PURDY NYLOX PAINT BRUSHES - Purdy Nylox brushes are designed...
DESIGNED FOR LATEX PAINTS - Featuring alderwood handles and...
Why Did We Like It?
For us, the Prudy 144080225 is not just any other paintbrush. This is particularly because it is handcrafted in the USA. Also, it is a pretty good option for using latex paints. Its edges are squared, and the stainless steel ferrule boasts a very sleek and sturdy look.
Apart from that, the premium quality bristles last longer than most options on the market. We also liked the keeper that comes along with the paintbrush, covered in wax; it keeps the brush safe from any contact with water.
Overall, this paintbrush is one of the best options for professional painting projects. It does not bend even after being soaked in water for a considerable amount of time. Without a doubt, the Prudy 144080225 is a reliable paintbrush and definitely worth the investment.
What Could've Been Better?
The Prudy 144080225 is one of the noteworthy paintbrushes on this list. Having said that, we found out that the bristles start to shed after a couple of uses. We really wish the manufacturer had made genuine efforts to deliver good-quality bristles. Other than this shredding issue, everything else works perfectly.
Pros
Suitable for professional use
Reasonable price
Works great with latex paints
Handcrafted in the USA
Cons
Bristles start to shed after repeated uses
Material: Acrylic | Dimensions: 0.75 x 2.62 x 13.25 inches | Weight: 4.3 oz | Bristle Type: Flagged | Size: 2 - 1/2"
As you already know, Wooster is one of the leading manufacturers of paint brushes, so we think it made sense to add yet another marvelous paint brush from the brand. The Wooster Brush 5221-2 1/2 does an extremely precise job, thanks to its width and angled bristles.
Silver tip, 2-1/2", angle Sash, paint Brush, white & Silver...
Adds extra shine to your product
Why Did We Like It?
There are quite a few reasons for the inclusion of this product on this list. Firstly, the silver tip does an excellent job of providing a smooth application of paint. The bristles are made of chemically tipped polyester, making them very flexible and thin.
Furthermore, the wooden handle adds to its elegance by giving it a sleek and sturdy outlook. Weighing just about 4 ounces, this paintbrush is appropriate to be used for long hours without feeling uncomfortable.
Apart from that, it is super easy to clean. The durable build quality makes it long-lasting, and it is also suitable for professional painters as the angled bristles do a fine job of painting the cleanest of edges. Overall, the Wooster Brush 5221-2 1/2 is one of the most sought-after paint brushes by professional painters on this list.
What Could've Been Better?
Despite being one of the most expensive paintbrush options on this list, we found out that the bristles keep coming off after repeated uses. It is pretty disappointing, given its price and other features. However, it remains a go-to paintbrush option for many professional painters.
Pros
Sleek and sturdy design
Long-lasting
The appropriate choice for professional painters
It comes in handy in painting edges
Cons
Bristles quality is not that great
Material: Polyester | Dimensions: 1 x 3 x 13 inches | Weight: 4.8 oz | Bristle Type: Flagged | Size: 2 - 1/2"
Now that we are nearing the end of our list, it's time to introduce you to Zibra PB125LZT. Zibra is a North American brand that takes immense pride in delivering application-based paintbrushes, and this product is no exception. In fact, the hourglass design of this paintbrush ensures that it is easy to use on all surfaces.
Triangle Brush: Enjoy extremely smooth and easy painting;...
Uses: The perfect brush for painting wall corners, raised...
Why Did We Like It?
We must say we were pretty impressed with the features that Zibra PB125LZT had to offer. For starters, its smooth bristle technology creates an optimum balance between bristle softness and stiffness, ensuring smooth paint release and high durability. This paintbrush's bristles are quite smaller compared to most options on this list, ensuring even paint on rougher surfaces.
However, what caught our attention the most was its build quality. It is made of hardwood and aluminum, giving it a professional and sleek look. Also, the ergonomic hourglass design provides optimum comfort so that it can be used for long hours without the problem of hand cramping.
Furthermore, it weighs just about 2.39 ounces, which makes it extremely lightweight. This paintbrush is so much more than just its design and build quality; in fact, the tapered brush tips allow it to deliver smooth, crisp, and even coverage.
What Could've Been Better?
The Zibra PB125LZT is undoubtedly one of the best and most visually appealing paintbrushes on the list. However, it is not very easy to wash because of the triangular metal protector. Other than this minor issue, it is one of the best paintbrush options for trim.
Pros
One of the best-looking paint brushes
Very professional-looking and sturdy
Perfect for trim work
Very light-weight
Cons
It cannot be washed easily
Material: Rubber | Dimensions: 11.6 x 2 x 1.5 inches | Weight: 3.52 oz | Bristle Type: Flagged | Size: 2 - 2/5”
Next up, we have another spectacular paint brush from the Purdy family called Purdy 144080310. As you already know, it is a well-established paintbrush brand that specializes in manufacturing paintbrushes that work well on trim. It is also known for its compatibility with almost all kinds of paint.
PURDY XL PAINT BRUSHES - Purdy XL Series brushes are great...
VERSATILE - Our most popular brush line, these medium-stiff...
Why Did We Like It?
To be honest, we were quite impressed with the features that Purdy 144080310 brought to the table. Firstly, we really liked the fact that it is extremely lightweight, weighing just over 1 pound; it becomes the perfect option for outdoor painting projects. The brushes are rigid, making them suitable for humidity and different temperatures.
Furthermore, this paintbrush's angled bristles make it perfect to be used on trim, ceilings, and walls. The handle is made of good quality hardwood, providing durability and ensuring it lasts long even after repeated uses.
What's more? Well, this paintbrush can hold good amounts of paint, so you need not worry about taping the room while painting. It has a firm grip, which makes it very comfortable to hold. Overall, the Purdy 144080310 is one of the best in class when it comes to painting brushes for trim.
What Could've Been Better?
We did not really find any significant drawbacks with this particular product. However, we did notice that this new version of the Purdy brush has 25% fewer bristles than the old version. This makes it a little difficult to use in tight spaces and on edges. Other than this minor drawback, everything else on this brush works fine.
Pros
Extremely light-weight
Comfortable to hold
It can hold good amounts of paint
Suitable for heavy-duty and outdoor painting projects
Cons
Bristles are a little thinner than older models
Material: Blend | Dimensions: 1 x 1 x 1 inches | Weight: 0.01 oz | Bristle Type: Synthetic | Size: 1"
Frankly speaking, our list of the top 9 paint brushes would not have been complete without the inclusion of this trim brush by Bates Choice. Bates Choice is one of the leading North American brands that delivers top-notch paintbrushes. This particular model is relatively newer in its line-up and allows for an outstanding paint job.
Professional quality: 100% satisfaction guaranteed, trim...
Fit for comfort: Quality plastic handle brushes are...
Why Did We Like It?
As a trim brush from a brand with only 6 years of experience, Bates Trim Brush exceeds our expectations in all aspects. The handle is made of high-quality control plastic, making it very lightweight and comfortable to hold, which makes long, tedious painting jobs a lot bearable.
Furthermore, the thick bristles can hold large quantities of paint, saving time and delivering smooth finishes. That’s not all; they are quite rigid and long-lasting. Also, this trim brush is suitable for both professionals and novices; since it is an angle sash, it suits all users.
Apart from all that, it is one of the most affordable options for paintbrushes on this list. They serve to be great value-for-money paintbrush options. The Bates Trim Brush is one of the highest-rated products on the market and an option that should be considered.
What Could've Been Better?
The Bates Trim Brush is undoubtedly one of the most affordable yet efficient paintbrush options out there. However, while testing it out, we noticed considerable bristle shedding after several uses. Given the price point, you really cannot complain, but we wish the manufacturer had taken note of it.
Pros
Very affordable
One of the light-weight paintbrush options
Quality control plastic handle
Suitable for professional and occasional use
Cons
Bristles start to shed after several uses
Material: Plastic | Dimensions: 9.65 x 1.5 x 0.83 inches | Weight: 1.76 oz | Bristle Type: Flagged | Size: 0.75"
So, that was our review of the top 9 paint brushes for trim. Things do not end here, though. In order to choose the best option, there are several factors that you need to keep in mind while buying. Since you would be busy choosing the paint color, we have brought this buyer's guide to assist you.
We strongly recommend reading this part, as we are going to take a brief look at all these important factors that will help you choose the best paintbrush.
Quality
Quality plays a huge role in choosing the best paintbrush. A top-quality paint brush should be able to offer smooth finishes.
Furthermore, the bristles should be longer in the center and shorter on the outside. Quality bristles should be able to hold paint, providing control and coverage.
Size
Paint brushes for trim usually come in between 1 and 6 inches. As a rule of thumb, the tighter the painting space is, the smaller the brush should be. For trim, we strongly recommend going with brushes that are between 1 inch and 3 inches.
Material
Never ignore the material when buying a good-quality paintbrush. There are mainly two categories of brush bristles: synthetic and natural. Synthetic brush bristles are mainly made out of polyester or nylon. They are best suited to be used with water-based paints.
On the other hand, natural brush bristles are made of animal hair, mainly of a badger or a hog. They are best suited to be used with oil paints.
Trim Brusher FAQs
What are the benefits of using a top-quality paintbrush for trim?
A top-quality paintbrush for trim offers several benefits, including:
Precision: It allows for more precise painting in narrow and detailed areas.
Versatility: It provides the ability to deliver even and textured finishes.
Durability: It is designed to be long-lasting and withstand frequent use.
What are the different types of brush bristles available for paintbrushes used for trim?
There are two main types of brush bristles for paintbrushes used for trim:
Synthetic bristles: Made of polyester or nylon, these bristles are best suited for water-based paints.
Natural bristles: Made of animal hair, such as badger or hog hair, these bristles are best suited for oil-based paints.
How can I ensure smooth finishes and control while using a paintbrush for trim?
To ensure smooth finishes and control while using a paintbrush for trim, choose a brush with high-quality bristles that can hold paint well. The bristles should be longer in the center and shorter on the outside, allowing for better control and coverage.
Can I use a paintbrush for trim with both oil-based and water-based paints?
It depends on the type of bristles used in the paintbrush. Synthetic bristles are generally suitable for water-based paints, while natural bristles are better suited for oil-based paints. Check the manufacturer’s guidelines to ensure compatibility with the paint type you intend to use.
How do I clean and maintain a paintbrush for trim?
To clean a paintbrush for trim, follow these steps:
Remove excess paint by scraping the brush against the edge of the paint can.
Rinse the brush under running water for water-based paints or use an appropriate solvent for oil-based paints.
Gently comb or reshape the bristles to their original shape.
Hang the brush to dry or store it horizontally to prevent bristle deformation.
Conclusion
Choosing the right paint brush for the trim can not only help in giving painting projects a smoother finish but also lessen the discomfort of tedious jobs. So, if you want to work for longer hours without ruining the finish, a paintbrush for trim is a must-have.
With that, we have come to the end of our review-based guide. We hope you have gained some important information about buying the best paint brush for trim in 2024. But, before we sign off, we would like to mention our top picks.
How challenging might it be to choose the right paint brush for polyurethane coating? Well, it is quite challenging.
Achieving outstanding, professional results while applying polyurethane is much more than just skills and expertise. You need a top-notch paintbrush for achieving that flawless finish.
The paintbrush used to coat the surface plays a crucial role in determining the final look of the surface. The finer your brush is, the smoother the coat will be. And naturally, there are hundreds of options available in the market. At times, even professionals get confused while selecting the correct brush for their projects.
After a ton of research and testing, we have curated a list of the 9 best paint brushes for polyurethane you can consider today. Besides, we have also added a buyer's guide to help you make the correct choice.
So, let’s not wait further and dive straight in, shall we?
Best Paint Brush for Polyurethane
Whether you're working on furniture, floors, or any other polyurethane project, these brushes are known for their quality, durability, and excellent performance. So, if you want to achieve professional-level results with your polyurethane coating, here's the list of the 9 best paint brushes for polyurethane.
The 3103-1 by Wooster Brush Store is an excellent product for various reasons, one of which is the smooth, even finish it offers. The highlight of this paintbrush is the handle which has an in-built stiffener blade ensuring tidy, precise results. Thanks to Wooster for this high-quality brush which is perfect for decoupaging, crafts, and antiquing.
Get ready to paint the smoothest surface with this excellent brush by Wooster. This foam brush coats your walls perfectly without leaving any visible brush strokes or lumps behind. Plus, the foam is quite flexible, allowing even distribution of the paint.
Furthermore, it has incredibly fine pores, which prevent bubbles from forming in the finish. Simply dip the brush into the finish, and let it soak up. Then apply it gently to the surface. If you’re a DIY-er or build customized furniture as a hobby, then you can never go wrong with this.
Moreover, we found that the make of the product is very durable and much better than cheaper brushes. Since the product is so affordable we didn’t expect it to be of such high quality. You may rinse, dry, and reuse these brushes, and they remain in perfect condition.
What Could’ve Been Better?
While testing this product, we did not come across too many flaws. However, we found that getting even a speck of lint on the brush was difficult. Since it was easier to clean with a paper towel, we recommend buying paper towels along with the brush.
Up next, we have Chip paint brushes by Pro Grade. Whether you have to help your child with their craft project or are planning to paint a piece of furniture, this brush can be the ideal choice. Because of their versatility, these brushes can be used to apply anything from staining to varnishing; rest assured, you’ll not be disappointed.
2 Inch Chip Brushes for Stain, Chalk Paint & Epoxy –...
Natural bristle filaments provide smooth application for...
Why Did We Like It?
We were immediately struck by the impressive customer reviews for this paintbrush, so we decided to give it a shot. And guess what, we weren’t disappointed in the least. As such, it is excellent for applying and staining polyurethane finishing. Plus, these brushes are great for acrylics, gesso, and glues, as well.
What’s more, the sturdy hardwood handle provides better grip and durability to its users. You don’t need to worry about the handles breaking anymore. As a result, these brushes are super affordable and the perfect option for DIYers and hobbyists.
Not only that, but its square, trim shape goes super smooth on flat surfaces. Also, these brushes are meant to be disposed of after use. So, this 36-Brush set provides excellent value and convenience to the users.
Apart from DIY works, these brushes are a perfect option for homes, businesses, and even industrial projects. Their durability and versatility are sure to provide you with a hassle-free experience.
What Could’ve Been Better?
No doubt, this product is one of the excellent options available in the market, mainly due to its affordability and durability. But we found that it wasn’t an ideal option for achieving a smooth look. However, it’s good to go with projects which require a chalk-like texture. Apart from this minor issue, this product works surprisingly well.
Since 1851, Wooster Brush Company has been known for producing innovative paint brushes of premium quality. And on this note, let us introduce you to the Q3108-2 Wooster brush. Thanks to soft bristles, this brush ensures a uniform and smooth finish without any extra effort. It’s suitable for both thick and thin coatings and is a perfect choice for DIY-ers and hobbyists.
Soft brush tips provide a smooth and even finish with all...
White nylon and gold polyester with chisel trim
Why Did We Like It?
To be honest, we found that this brush remains in flawless condition even after using it countless times.
Furthermore, it has Kaiser handles, and the balanced weight of this brush allows you to paint comfortably for hours without any strain. This makes it an ideal choice for all DIYers and professionals.
Apart from this, the tip of the brush features ultra-thin filaments to provide an unblemished finish without any marks. The brush offers an even and smooth effect while coating polyurethane.
On top of that, the mixture of white nylon and gold polyester filaments maximizes paint absorption while minimizing stray drips. And, the nylon/polyester combination of the brush is resistant to wear and tear, providing greater durability.
What Could’ve Been Better?
Overall, we were pleased with the performance of this product. However, since the handle is a bit slippery, it becomes tough to maintain a grip. So, we recommend you wear latex gloves to gain a grip and also to avoid staining your hands. Otherwise, this paintbrush is worth investing in.
Founded in 1904, the Minwax Company is among the world’s chief manufacturers of wood finishing and maintenance products. So, we have decided to present one of the best products of this brand. The Minwax 427350008 polyurethane brush is distinctively designed for coating wood products.
Designed with natural bristle for a smooth, glass like...
Natural bristle for increased absorption and hold of clear...
Why Did We Like It?
Get ready to beautify your wooden surfaces with the natural bristles of this paintbrush. Available in three different sizes, this provides a smooth and glass-like finish to your surfaces. The natural bristles promise improved absorption of the coating and ensure even distribution of paints.
Moreover, it is designed explicitly for polyurethane usage and is perfect for applying water-based stains and finishes. Unlike disposable foam brushes, it performs exceptionally well in laying down a smooth coat of finish.
Its stainless steel ferrule prevents the paints from staining. And you need not worry about the sheen, thanks to its bristles which ensure a glass-like finish. But that’s not all; DIY-ers who frequently work with oil-based stains, are sure to love this paintbrush because of its durability.
What Could’ve Been Better?
In our opinion, the Minwax Polyurethane brush is an excellent option, especially because of the smooth finish its bristles offer. However, we found that the bristles of the brush were a bit stiff. This might not be of much importance to DIY-ers, but it might be a drawback for professionals.
Up next is the P001WS, from the house of Magimate, which is yet another top-notch paint brush that will not disappoint you. It can be used for a variety of coating and stains, thanks to its time-tested versatility. The pack consists of 5 brushes that are enough to meet all your needs.
Ideal with varnish, oil-based or mixed paints coating for...
Why Did We Like It?
The P001WS Magimate Paint brushes are premium quality brushes loaded with features, but they are unique because you can use them for any kind of stain. Be it acrylic, latex, watercolor, oil-based coating, or even epoxy.
Now, the soft synthetic polyester bristles hold the paint really well and don't let it drip. This brush relieves you from the hassles of scrubbing the floors due to the dripping.
This angled sash brush ensures you can paint clean lines without much effort. Paneled doors, furniture, cabinets, or window trims, you’re good to go with this one. Also, the wood handles are ergonomic, allowing you to work comfortably with a good grip.
What Could’ve Been Better?
This paintbrush is without a doubt one of the best options available in the market, especially because of its versatility and smooth handles. That being said, while testing, we found out that the brush delivered an uneven finish. So, we recommend you sand the surface before using it.
We are halfway through our suggestions, and here’s another top-notch paintbrush from a very trustworthy brand that you should check out. Available in different widths, these brushes are ideal for a wide variety of projects; rest assured you won’t be disappointed.
SYNTHETIC PAINT BRUSHES: These professional paint brushes...
PAINTBRUSH BRISTLES: Each set has polyester bristles with...
Why Did We Like It?
We loved a lot of things about this paintbrush; however, the thing that drew us in from the start was its versatility. Because of this, the brushes perform excellently on doors, cabinets, windows, trims, corners, and decks.
Moreover, because the polyester bristles are thick, they can retain more paint. This means you can now finish your painting project faster, thus saving time. Not only that, but the feathered ends maximize the paint distribution capacity of these brushes.
Whether you decide to spend the weekends painting a new project or decide to renovate and paint a multitude of surfaces, these are ideal paint brushes. Plus, the wooden handles offer you a comfortable grip. Also, they do not shed bristles like a cat shedding its fur.
What is more, all these handy features are coupled with a decent price tag, ensuring you get great value for money.
What Could’ve Been Better?
We were quite pleased with the performance of these brushes, but the only gripe we have is that they are not suitable for long-term projects. That being said, these brushes are ideal for DIY-ers for touch-up work, although they might not be suitable for professionals. Apart from this, we did not notice any significant flaws in this otherwise great product.
Purdy has been manufacturing paint brushes for over 84 years and has introduced several innovations in the process. The Purdy 144152330 XL is no exception. Featuring a distinctive copper ferrule, this brush is designed to cater to all your painting needs and is well-known for its impeccable performance.
PURDY XL PAINT BRUSHES - Purdy XL Series brushes are great...
VERSATILE - Our most popular brush line, these medium-stiff...
Why Did We Like It?
One of the best things about Purdy is that it does not compromise on its quality, so it is the go-to brush of professionals. This brush’s beauty is that it is versatile, made to work for all kinds of stains and paints, and is enough to meet all your painting needs.
Moreover, the brush is highly durable since the bristles are made up of Tynex Nylon and Orel polyester. We found that after every use, the brush returns to its original shape; kudos to Purdy for getting that right!
You will also love that it delivers a smooth, glass-like finish even with latex. At the same time, the extremely soft bristles of this brush allow the paint to flow smoothly, making your task a breeze.
What’s more, the cover is designed to keep the bristles safe and in their original form, thanks to the wax coating. Plus, the stiffness retention feature of this brush delivers impeccable performance even outdoors.
What Could’ve Been Better?
Our only gripe is that the brush sheds bristles, and this is not something we expected from a brand as renowned as Purdy. Apart from this, we noticed no major flaws in this otherwise excellent product.
When it comes to brushes, Wooster needs no introduction. Another quality product from the brand, the 5232-3 Gold Edge Varnish is a commendable paintbrush. Equipped with chemically tipped polyester, its fine and soft bristles ensure almost “no brush marks” on the coating.
White and gold CT polyester filaments for excellent control...
Firm formulation, soft touch
Why Did We Like It?
Wooster is well-known for its top-notch products, and this paintbrush is no exception. Right off the bat, we were impressed by the semi-professional finish. This is an ideal brush for ensuring a smooth finish to your surfaces.
We particularly liked the CT polyester bristles which do an exceptional job of soaking up the paint and providing you with a smooth finish without shedding. Furthermore, it is outstanding for all enamels and paints. Overall, the brand’s innovation and high-quality materials deliver terrific results, making it highly popular.
Added to that, its overall impeccable quality makes it one of the best-selling products in the market. If you’re a DIY person, then this is a perfect option for you with its durability and easy-to-clean features.
What Could’ve Been Better?
Frankly, it was difficult for us to find flaws with this brush. However, if we have to nitpick, we would say that the bristles take a bit too long to dry. But we are sure that the users will overlook this slight inconvenience given the affordable price.
This appealing product by Mintcraft is ideal for stains, finishes, and oil-based paints. It works to give your surfaces a smooth finish, and you can also rely upon this brush for applying adhesives or cleaning parts.
Sanded wood handle and tin plated with white natural...
Why Did We Like It?
In our opinion, this 1.5-inch brush works best for trims, window areas, and corners. Since it features a sanded wood handle, it provides a comfortable grip and is preferred by professionals.
The tin-plated ferrule adds to the protection of the brush, making it corrosion-resistant. If you want to achieve that smooth, semi-professional finish for your surfaces, then this could be your go-to brush. Its easy-to-clean features make it highly popular among DIYers and hobbyists.
You can apply oil-based stains, paints, and finishes with this brush effortlessly. Its white natural bristles are ideal for applying polyurethane coating. They ensure a smooth and fine finish to your surfaces. Add to that an affordable price tag, and you’ve got a product that’s suitable for all levels of users.
What Could’ve Been Better?
It is undoubtedly one of the most reasonably priced and excellent performing paint brushes. However, despite cleaning, these brushes are to be discarded after every use. But, given its affordable price, this won’t be an issue for the customers.
Buying Guide For The Best Paint Brush For Polyurethane
Knowing just the 9 best recommendations and a few pros and cons is simply not enough information, especially when you’re in quest of a good paint brush for polyurethane. You need to be aware of a lot of other factors that come into play.
So, to help you choose the right paintbrush, we have explained all the other important factors here. After reading this, we are confident that you will be able to choose the right paintbrush based on your needs.
Types of Paint Brush Bristles
The very first thing to keep in mind is the kind of bristles you need to achieve a smooth and flawless surface. In this regard, you will find that there are two types of bristles, each catering to different purposes.
If you want to coat oil-based polyurethane, we recommend you go for natural bristles to ensure a smooth surface. But, if you want a professional finish, then synthetic bristles are a perfect option.
Shape And Width
The next thing to keep in mind when buying a paintbrush is size and width. A brush of 2 inches will prove ideal for small projects. At the same time, brushes of 4 inches will help you with larger projects.
So, when selecting a paintbrush, it’s best to go for the one based on the projects you are handling. You must choose a wider brush for projects that involve larger surfaces, whereas narrow widths will suffice for smaller ones.
Handle
Along with the shape and width, we also recommend you consider the brush's handle before making a purchase. If you’re working on small projects, it’s best to go for short and thick handles. But, if you have large projects at hand, a big handle will provide you with a comfortable grip.
Quality
Not to forget, the quality of the brush is of utmost importance for polyurethane coatings. Therefore, do not compromise on quality just to save some money. So, we recommend you invest in a top-notch quality brush from a premium brand for perfect application.
Ferrule
Before you invest money in a brush for polyurethane, make sure the ferrule keeps the bristles together. You can go for a stainless steel ferrule to prevent rust. We recommend you slightly tug the bristles to ensure the ferrule is secure.
Paint Brush for Polyurethane FAQ's
What type of paint brush is best for polyurethane?
Synthetic bristle brushes, specifically those made with polyester or nylon bristles, are typically recommended for polyurethane application. They provide smooth and even coverage, and their bristles are resistant to the harsh chemicals found in polyurethane.
What size paint brush should I use for polyurethane?
The size of the brush depends on the size of the project and personal preference. For larger surfaces, such as floors or large furniture pieces, a wider brush (2 to 3 inches) can help speed up the application process. For smaller areas or detailed work, a narrower brush (1 to 2 inches) provides more control.
Can I reuse a paint brush for polyurethane?
Yes, you can reuse a paint brush for polyurethane as long as you clean it properly after each use. Regular maintenance and cleaning will help preserve the brush’s performance and ensure a smooth application in the future.
How can I achieve a smooth finish when applying polyurethane with a brush?
To achieve a smooth finish, it’s important to apply polyurethane in thin, even coats. Avoid overloading the brush with too much product, as this can result in drips or uneven application. Work in long, smooth strokes, following the grain of the wood or the desired direction. Take your time and allow each coat to dry thoroughly before applying additional coats.
Conclusion
Polyurethane is the best varnish for ensuring that your surfaces stay protected and attractive. There’s nothing more pleasing than polishing your creations and watching them shine with long-term protection.
With that, we have come to the end of our review; and we hope our top picks help you choose the right paintbrush. Before we wrap up, we’d like to highlight our favorite paintbrushes from the list.
The Wooster brush 3103-1is the best overall, mainly because of its versatility and the great coverage it offers. Followed by it is the Pro Grade Chip paintbrush because of its durability and comfortable grip. Other than that, if you’re looking for a really affordable product, we recommend the Mintcraft 150015 which doesn’t shed bristles.
The best one-coat paint and primers are advanced coating solutions that combine the sealing power of a primer with the coverage and finish of a topcoat, allowing homeowners to achieve a uniform surface in a single application. These products are formulated with high solids, stain-blocking resins, and dense pigmentation, enabling them to hide existing colors, seal porous drywall, and resist common household stains while cutting down both labor and drying time. Unlike traditional multi-step painting systems, one coat paint and primers are engineered for efficiency, cost-effectiveness, and durability, making them especially useful for quick renovations, high-traffic rooms, or situations where time is limited. Performance is typically evaluated by coverage per gallon, opacity (contrast ratio), adhesion, and washability. As Behr’s senior product manager Erica Woelfel emphasizes, “Consumers want solutions that save time without sacrificing durability, and one-coat paints are designed to meet that demand.” In this guide, we review the best one coat paint and primers, highlighting their coverage capacity, finishes, and ideal use cases to help you refresh your space with confidence.
Best One-Coat Paint and Primers
Here is the list of the 5 best one coat paint and primers that you can use to refresh any room in your home without the need to apply a second coat.
One of the first entries on our list is the Glidden Interior Paint + Primer, which is best for an easy and stress-free application. Rest assured that you will get an even layer of paint and excellent coverage with just one application.
What we liked best about this item is that it makes your work pretty easy. Once you apply it to the walls, they become entirely washable. So, in case they get dirty, you can scrub and wash them till they get clean and the color would not become faint at all.
Moreover, while using this paint, you will not have to face the trouble of breathing in a pungent odor. It is low in VOC, and therefore it hardly smells. And because it is both a paint and primer combined in one, you do not have to waste time priming the wall before putting the color.
And lastly, we were pretty impressed by the range of colors that Glidden offers. The versatility is much welcome as you can select different colors to go with the decorations in various rooms of your house.
What Could've Been Better?
The only problem we faced when opting for this product is that it gets a bit challenging to select the color. The names are such that it is tricky to decipher the real nature of the color from them. We recommend that you ask the seller for a sample before deciding on it to avoid any confusion.
Pros
Does not catch dirt easily
Safe for the environment
Available in multiple colors
Easy to wash
Cons
Selecting a color can be tricky
Color: Black Magic | Other Color/s Available: Yes | Finish: Flat | Paint Type: Acrylic | Volume: 127.82fl oz | Coverage: 400sq ft | Cure Time: N/A
Prestige 30ABC-30Y-PARENT Interior Paint and Primer in One is the perfect choice for putting a coat on uncoated drywalls and glossy surfaces. It is a renowned brand in the market, and there's no way you would go wrong with its product.
Ideal for living rooms, family rooms, media rooms, bedrooms,...
Why Did We Like It?
If you have an affinity for acrylic paints, you will totally love this item. Thanks to its thick viscosity, one coat is sufficient for light stains. However, if the stain is a little dark, it is best to apply a few coats to hide it completely.
Additionally, it is both a primer and a paint combined in one. Unlike traditional paints, where you had to prep the wall with a primer before applying the color, you can directly apply this item to the wall. It is not only cost-effective but also saves you from the time and effort that you would have otherwise spent doing these two tasks separately.
Furthermore, the latex acrylic finish is ideal for easy washing and scrubbing. If you end up staining your wall, there's no need to worry. Get some soap and scrub it off the wall, and the color will not budge!
What Could've Been Better?
We have no complaint about the performance of the product. However, we were not impressed with the quality of the cap of the paint bottle. It comes off easily, and there's a chance of leakage. To prevent that, it is best to seal it well and ensure that there is no wastage.
Pros
Does not require priming
Cost-effective
Saves time
Can be washed easily
Cons
Low-quality cap
Color: Dove Gray | Other Color/s Available: Yes | Finish: Semi-Gloss | Paint Type: Acrylic | Volume: 126fl oz | Coverage: 325sq ft | Cure Time: 4 Hours
We have almost reached the end of our list, and next up, we have the KILZ TRIBUTE TRI INT GL MATU TB-71 TENDER SHOOTS for you. It has made it to our list because of the excellent coverage it provides and the durability it offers. Apart from that, it puts more things on the table. Keep reading to know about them.
It is available in multiple finishes and is 100% acrylic in nature. So, even if you are new to painting, you'll have no problem applying it as it is pretty smooth. This formula is great at providing a high-quality finish and coverage. And once you paint it, rest assured that it will last for a long time.
On top of that, you do not have to restrict yourself to using it just on walls. Get as creative as you want to, and use it on wooden surfaces, drywall, plaster, and even masonry. It will deliver equally magnificent results for all of them. Once you spend money buying a can of this paint, you can put this to a different use.
Additionally, you get this paint in more than 100 classic colors and colors that are in trend. So, whatever your likings are, everyone will get to choose one that they want for their room. And you can apply this both on interior and exterior walls.
What Could've Been Better?
There's hardly any complaint that we have with how well this item performs. However, we were not impressed by their customer support team. We had some queries, and we wrote to them. But, unfortunately, it was weeks before they got back to us.
Pros
Available in different shades
Does not smell
Can be used on various surfaces
Smooth application
Cons
Customer service needs to be more prompt
Color: Tender Shoots | Other Color/s Available: Yes | Finish: Matte | Paint Type: Acrylic | Volume: 128fl oz | Coverage: 300sq ft | Cure Time: 2 Hours
The next item on our list is the One Paint and Primer, which is well-loved by customers all across the globe. And with a water-based formula that ensures that application is as simple for hobbyists as for professionals, we are not surprised. You can use this paint to give your house a complete makeover.
ALL-IN-1 PAINT & PRIMER: A hardy multi-purpose and...
DURABLE & VERSATILE: A highly pigmented, thick formula...
Why Did We Like It?
For us, the highlight of the product is its efficiency. There is absolutely no requirement for any undercoats or primer as it is entirely self-sufficient. As you do not have to put on multiple coats, you can save both time and money. The solution you get is incredibly thick and opaque, and only one coat is sufficient to get good coverage.
On top of that, the item is very low on VOC. So, it hardly smells and is suitable to be used indoors. It is sustainable and safe for the environment too. So, whether you are a designer or a DIY hobbyist, you will like it equally well.
Moreover, you do not have to worry about the paint getting stained anytime soon. It is well-pigmented and does a great job of resisting grime and dirt. This helps you wash the walls whenever you want without causing any damage to the color.
What Could've Been Better?
The only issue that we faced when using this product is a lack of proper user instruction. There was no detailed manual included in the package. We recommend that in such cases, you take the help of online tutorial videos.
Pros
Thick and smooth paint
One coat provides excellent coverage
Easy to clean
Lasts for a long time
Cons
Absence of detailed user instruction
Color: White | Other Color/s Available: Yes | Finish: Satin | Paint Type: Water-Based | Volume: 8.45fl oz | Coverage: N/A | Cure Time: 2 Hours
For our final entry, we have the Microblend 73240-1-White Interior Paint and Primer, which is well-known for its premium semi-gloss finish. This interior paint is suitable for all kinds of surfaces, be it walls, wooden furniture, or clay pots. The versatility it offers is nothing short of incredible.
All the finish that this item provides is on the glossy end. You will find flat, eggshell, and satin variations for this paint. It is also available in cans of different sizes. So, you can buy only as much as you need. However, if you are a hobbyist and want to give the fences a makeover with this, you can just buy a gallon of this paint.
Also, the unique thing about Microblend is that none of the paints are premade. Only after you request one, does their automated paint machine generate a fresh bucket of paint just for you. Thus, you would never have to worry about the stock running out as everyone can is customized according to the customer's needs.
Moreover, its satin block and rust-resistant technology are nothing short of incredible. Once you put a layer of this paint on the walls, they will stay clean and trimmed for a long time without requiring much maintenance.
What Could've Been Better?
All that said, we were not impressed with their customer care service and delivery. It took a long time before the company delivered our product. And when we reached out to them to complain, we got a response from them very late.
Pros
Incredible finish
Can be used on different surfaces
Customizable
Cleaning is easy
Cons
Delivery is slow
Color: White | Other Color/s Available: Yes | Finish: Eggshell | Paint Type: Acrylic | Volume: 128fl oz | Coverage: Approx. 300 to 400sq ft | Cure Time: N/A
Buying Guide For The Best One Coat Paint and Primer
Now that we have discussed the top 5 one-coat paint and primer in great depth, were you able to decide which one to buy? Well, we understand that it is not an easy task. Just knowing about the products is not enough to make a wise decision. To do that, you need to consider a few other factors.
And in this section, we will discuss some of those factors to help you. Let’s take a quick look!
Paint Coverage
If you have painted before, you would know that each variety has the capacity to cover a particular area. The amount of space a product can cover is usually mentioned in the package. Make sure that you read it well and identify if it will suit your purpose before deciding to buy it.
The coverage mostly depends on the thickness of the paint. So you must pay special attention to understand if it can cover the space you plan on painting. Also, keep in mind that you might have to use more than one coat for some paints, which might lead to a decrease in coverage.
In that case, you will have to purchase more cans before starting the project. In order to avoid any hiccups, it is best to read the labels carefully as you will find all the information there. If you face any difficulty understanding, just ask the seller.
Color
Paint and primers are available in various colors, starting from earthy tones to vibrant shades. You might be tempted to buy the most refreshing color that you spot in the catalog. And you can go ahead with it if you are painting a new wall. However, if you are covering a stained or damaged wall, you won’t have so much freedom in choosing the color.
When covering a stain, you must remember that the coating color must be darker to hide the stain effectively. And for this purpose, you might even need to put on a coat or two.
Type Of Finish
In the market, you will get mainly four different types of finish: semi-gloss, satin, eggshell, and matte. This is clearly a matter of preference about which one you want to opt for. But keep in mind, it is not just about the difference in appearance, these paints have different properties too.
If you go for matte, it provides a shine-free and flat finish. This type is best when you need the most amount of coverage. Out of the four options that we have mentioned, this provides the highest coverage. So, when you have to fix a nail hole or an uneven surface, we suggest that you go for this variety.
Semi-gloss variants are best when you are putting them in areas that need protection from moisture and stain. This is helpful in preventing damage by moisture or mildew. Eggshell paints, on the other hand, are somewhere between gloss and matte finishes. They are highly durable and will last for a long time.
And if you like to have a velvety satin texture on your walls, a satin finish is the best bet. It is smooth and pretty easy to clean. It does not hold stains easily, and a simple wipe with a damp cloth can remove all dirt from it. We recommend that you use it on interior surfaces.
Depending on where you are using the paint, it is best to make the selection accordingly.
One Coat Paint & Primers FAQs
How does one coat paint and primer work?
One coat paint and primer works by combining the adhesive properties of a primer with the color and protection of a top coat. This allows the paint to adhere properly to the surface and provides a robust, colored finish in just one application.
Are one coat paint and primers suitable for all surfaces?
While one coat paint and primers are versatile, they may not be suitable for all surfaces. Always check the product’s label or consult with the manufacturer to ensure its compatibility with the surface you intend to paint.
Can I use one coat paint and primer on already painted surfaces?
Yes, one coat paint and primers can be applied on already painted surfaces. However, for optimal adhesion and coverage, it’s recommended to clean and prep the surface before application, especially if the existing paint is glossy or shiny.
Can I use one coat paint and primer in a sprayer?
Yes, it’s possible to use one coat paint and primer in a sprayer. However, make sure to adjust the sprayer for the viscosity of the paint and always conduct a test spray first.
Conclusion
That’s all we have for you today, folks.
We surely did enjoy a lot while compiling all this information for you. We also hope you had a great time going through this comprehensive guide, and now you can make a wiser decision.
But before we say goodbye, we would like to let you in on our favorites. Glidden Interior Paint + Primer takes the award for being our favorite overall. And if you are on the lookout for an option that is cost-effective and also easy to wash, then the Prestige Interior Paint and Primer is an excellent bet.
With that, it’s a wrap. Don’t forget to let us know about your favorites in the comments section below. Keep a watch on this space for more exciting reads.
Are you a DIY enthusiast on the hunt for some gold paint? Because if that’s the case, you’ve come to the right place!
What we’ve done for you is compiled the seven best gold paints for wood-based projects that are available on the market in 2024. Don’t worry if your project isn’t solely wood-based, though, because most of the paints on this list can be used on a wide range of surfaces.
Now, some of you might be wondering why we have an entire article devoted to just choosing the right kind of gold paint. That’s because most standard gold paints are not suitable for wooden surfaces. Why? Wood tends to absorb the paint applied, leaving a dull and awful finish instead. But this guide will ensure you avoid any such unfortunate mess!
So, without wasting any more time, let’s get right into it, shall we?
Best Gold Paint For Wood
With these exceptional gold paints, you can bring a radiant and luxurious shine to your woodwork. So, if you're ready to add a touch of glamour to your projects, here's the list of the 7 best gold paints for wood.
Rainbow Chalk Markers Ltd. is a rather popular UK-based family-owned business. They are known to specialize in chalk paint and are commonly known as liquid chalk specialists. Their Shabby Chic series of chalk paints are specifically targeted at furniture painting and refurbishment purposes, which is ideal for professionals and DIY enthusiasts.
Antique Gold Furniture Paint is a great way to create the...
Shabby Chic furniture paint is a water-based paint which...
Why Did We Like It?
The Shabby Chic Chalk Paint (antique gold shade) is one of our absolute favorite picks for gold paint! It has a slightly distressed yet ornate finish that gives a glow to any old furniture you decide to use. Also, it is an ideal metallic gold paint for refurbishing old furniture and is highly recommended in the DIY community.
We love how even though this paint is targeted for wooden furniture, it can also be used to paint various other surfaces. This includes metal, stone, and plastic, as well as plaster and brick surfaces, making this paint rather versatile. It’s also straightforward to use because it doesn’t require any undercoat or primer for a smooth and flawless finish.
If that wasn’t enough, this paint is non-toxic and water-based, making it very safe to use around children and inside the house. The rich and advanced formula makes it one of the best for DIY users because it does not need to be applied impeccably for a smooth and thick finish.
What Could’ve Been Better?
This paint takes over 3 hours to dry, which may pose an issue to some users with little children or pets around. Also, you may need to apply 2-3 coats to achieve the desired finish. But these are far from deal-breakers if you ask us.
This gold paint is manufactured by Rust-Oleum as a part of their Metallic Accents series of paints and is in the shade of Soft Gold. It is an elegant metallic paint meant to upgrade or re-touch wooden furniture, doors, windows, etc.
Elegant metallic paint adds a decorative touch on...
Low odor, water based formula contains mica beads for...
Why Did We Like It?
This paint creates a rich, elegant, and shimmery finish on wood, which interacts with light to give it a more accented and iridescent color. The paint features a very simple one-step application; it is versatile and suitable to apply on most surfaces. Just two coats of it are enough to provide a thick and flawless finish on any surface.
One bottle of this paint can cover up to 105 square feet of surface area and is, therefore, as quick and easy to apply as it is to clean up. However, one of the very best qualities of this paint is that it only takes 30 minutes to dry completely. Its non-toxic nature and little to no odor make it ideal for application within closed spaces and around kids.
What Could’ve Been Better?
This paint is a little expensive and might not seem affordable to purchase for smaller DIY projects. Also, it goes on rather thin and, therefore, can be easily scratched and ruined, which is kind of a letdown.
Modern Masters is one of the oldest paint brands and has been manufacturing water-based metallic paints since the early 1970s. Their continued focus on decorative paints with metallic finishes has set them apart from their competition and made them one of the best in the business. The paint we have on our guide from this company is in the shade of Rich Gold.
This Modern Masters paint in Rich Gold gives a vibrant, semi-opaque, satin metallic finish that provides a luxurious appearance. It’s a rather versatile paint that can be applied to all interior surfaces ranging from walls and ceilings to furniture and other trimmings.
Just like the last paint on our last, this one also dries up completely in just 30 minutes while covering a respectable area of 18 square feet per bottle. The water-based formulation is as per Leed Specifications and has little to no odor and volatile compounds. This makes it very safe and easy to use in home environments, making it a good option for all DIY enthusiasts to invest in.
Last but not least, this paint is composed of pearlescent pigments and real metallic particles, which strengthen its durability and make it more long-lasting. Because of its high-end decorative finish, this paint is ideal for large and small architectural pieces.
What Could’ve Been Better?
The quantity of paint provided in this product is very low. Furthermore, the consistency of this paint is rather dense and hence provides exceedingly low coverage. This makes it a hassle for people who are attempting bigger projects to invest in this paint.
Rust-Oleum, as we know, is one of the leading manufacturers of metallic finish paints. This one is a part of their Universal Spray Paint series and is therefore oil-based and comes packaged in a spray can. Moreover, this gold paint is very highly rated amongst consumers for its superior quality shimmering metallic finish on all surfaces.
Works on virtually any surface including wood, plastic,...
Oil-based formula with excellent adhesion prevents rust,...
Why Did We Like It?
This Rust-Oleum sprays paint works virtually on all surfaces, from wood, fiberglass, plastic, and metal to even vinyl, concrete, and Vicker. This paint also does not require any primer or undercoating, making it one of the most versatile paints in this entire guide.
This paint’s oil-based formula provides excellent adhesion, which alternately resists fading and chipping and prevents rusting while giving a long-lasting finish. The superior fade and UV resistance that this paint provides makes it ideal for painting both indoor and outdoor surfaces alike! If that wasn’t enough, this paint dries in just 30 minutes and covers an area of up to 15 square feet per can.
Hence it is fair to say that this gold paint is one of our very top contenders, especially when it comes to spray paints specifically. The spray can has an ergonomic trigger design and a 360-degree spray angle that facilitates a smooth and luxurious finish.
What Could’ve Been Better?
The spray feature of this product can make it slightly messy to work with. You will have to keep shaking the can to make sure that the paint is coming out. The spray application may also cause a considerable amount of wastage of the paint.
Krylon was the first brand in America to create spray coating and is one of the most trusted companies since its inception in 1947. Krylon’s COLORmaxx series offers the widest range of colors in the highest quality compared to any given company. Hence, the metallic gold variant of this paint has understandably made it to our top 7 gold paints list.
This spray paint works as a primer and paints 2-in-1, eliminating any need for undercoating and considerably reducing your painting time. Much like the last Rust-Oleum spray paint, this one can be used on an even wider variety of surfaces from wood, metal, and plastic to glass, ceramic, paper, and even fabric. This makes it ideal for a DIY enthusiast who likes to experiment with a lot of materials and surfaces.
The glamorous metallic sheen of this paint is not only beautiful to look at, but it also protects objects against rust and other weather conditions. The 12-oz volume of paint can cover up to 25 square feet of surface area with relative convenience. This makes it an ideal paint for outdoor projects.
Furthermore, the spray can this paint comes in is extremely user-friendly with a big button spray tip that can even spray when held upside down. And in case you make any mistakes or spill the paint in the wrong area, you can always clean it up with a lacquer thinner.
What Could’ve Been Better?
This paint, similar to the last one, comes packaged in a spray can, and hence the application is automatically always slightly messy. Other than that, this aerosol spray also releases a lot of strong odors and fumes that might make it a little bit difficult to use.
Next up on our recommendation list, we have the Design Master paint in the color Antique Gold that comes packaged in a tin spray bottle. This paint stands out from the rest by providing a smooth but semi-transparent bronze-gold finish on all the surfaces it is applied. The versatility in the usage of this product has quickly made it a fan favorite amongst most DIY users.
Colortool is a fast drying, satin finish, semi-transparent...
Quick drying - fresh flower safe
Why Did We Like It?
The uniqueness of this spray paint lies in the muted semi-transparent satin finish that this paint provides. It is characterized by its ability to paint wood, plastic metal, and styrofoam, fresh flowers, fruits, and vegetables for decorative purposes. The pigment has a quick-drying formula and forms only a thin coat, enabling the paint to be used on such a versatile set of surfaces.
Furthermore, this gold spray paint has one of the highest customer reviews compared to all its other counterparts on this list. It seems to have been specifically formulated for the demanding use of creative individuals, such as professionals and DIY enthusiasts. While the spray may not be very long-lasting, it comes in very handy for creating wedding decorations and painting over scratched or rusted surfaces that need a touch-up.
What Could’ve Been Better?
Since this spray paint only provides a thin coat of pigment on surfaces, it very easily fades away or scratches with too much wear and tear. Hence, this gold paint is ideal for temporary decorative pieces and light touch-ups rather than full-coverage paint jobs.
Pros
Quick-drying
Can be used on fresh flowers, fruits, and vegetables
Last but not least, we come to the Chase 24-karat gold spray paint manufactured by Darice. Many of you may have heard of Darice being one of the US’s most affordable art and Craft suppliers. They have been providing the best selection of craft supplies for the everyday crafter for more than 60 years. And it is hence no surprise that their gold spray has made it to our top 7 list.
Darice has developed a gold spray paint called 24-karat gold that gives a brilliant and flawless finish. This paint is an enamel that is made from an alkyd resin that was dissolved in a solvent. The paint forms a hard coating on the surface, making it one of the most long-lasting gold paints on our guide.
The exquisite shine and luster make it the ideal gold paint to use on furniture, ornamental pieces, frames, craft projects, and more. At the same time, the durable nature of this paint makes it the perfect option for touching up old and fading centerpieces in your house. This gold spray is also rather affordable compared to most other gold paints available in the market today.
What Could’ve Been Better?
This product is highly flammable and has several precautionary measures that need to be followed while in use. Hence, it’s highly recommended this paint spray is kept out of reach from children and used only in open and well-ventilated spaces.
For starters, you will want to invest in gold paint depending on the kind of project you are working on. So if you’re planning to paint an object that has high wear and tear, then you’ll want to go with conventional water-based paint. Applying water-based paint with a rush and applying a polyurethane coat at the end will ensure a strong and long-lasting finish.
Alternatively, if you’re looking to re-paint an old dresser, furniture, or other ornamental objects, any paint with a glossy or chalky finish should do the trick. Spray paint could work very well for such projects.
Need For Primer
DIY enthusiasts have always highly recommended using a primer as an undercoating before painting any surface for a more even and beautiful finish. However, the priming process increases the painting time and effort required for projects considerably.
Hence, for this reason, you might be looking for ways to skip this priming step altogether. For such people, we have paints that are primer and paint 2-in-1. The cost of these paints is usually a little on the higher side for their dual capabilities. But they’re well worth the investment if you’re looking to save some time and money while painting your project.
Drying Time
Paints have a variety of different drying times. Some dry as quickly as 30 minutes, while others may take hours or even an entire day to dry completely. Depending on the circumstances you are painting in, you will want to pick a paint with a drying time that suits your needs.
For example, if you have handsy children around you or are in a rush to finish a project, you will want to buy fast-drying paint.
Finish
Different gold paints provide a very different set of finishes on the wood that you are painting. Some of the common finishes for wood are matte, satin, and gloss. So, if you’re going for a more modern finish, you may want to invest in gold paint with a matte finish. If you want a more reflective finish, then gloss and metallic finish gold paints would be the one for you.
Gold Paints For Wood FAQ's
Can gold paint be used on all types of wood?
Yes, gold paint can generally be used on various types of wood, including hardwoods, softwoods, and engineered woods. However, it’s always recommended to check the compatibility and suitability of the paint with the specific wood species you’re working with.
How do I prepare the wood surface before applying gold paint?
To ensure a smooth and even application of gold paint, it’s important to properly prepare the wood surface. This typically involves cleaning the wood to remove any dirt or debris, sanding it to create a smooth texture, and applying a primer or base coat to enhance paint adhesion and color vibrancy.
How many coats of gold paint should I apply?
The number of coats of gold paint required can vary depending on factors such as the desired intensity of color, the type and quality of the paint, and the condition of the wood. In most cases, applying two to three coats of gold paint will provide an opaque and vibrant finish. However, always refer to the manufacturer’s instructions for the specific paint you’re using.
Can I use gold paint for outdoor wood projects?
While some gold paints are suitable for outdoor use, it’s important to choose a paint specifically designed for exterior applications. These paints are formulated to withstand exposure to the elements and provide long-lasting durability. Always check the product label or consult with the manufacturer to ensure the paint is suitable for outdoor wood projects.
How long does it take for gold paint to dry on wood?
Drying times can vary depending on the brand and type of gold paint, as well as environmental conditions such as temperature and humidity. In general, gold paint for wood may take anywhere from a few hours to overnight to dry to the touch. However, it’s recommended to allow sufficient curing time as specified by the manufacturer before subjecting the painted surface to heavy use or exposure.
Can I apply a clear protective coat over gold paint on wood?
Yes, applying a clear protective coat over gold paint can help enhance its longevity and protect the finish from scratches, moisture, and fading. Clear polyurethane or varnish are commonly used as topcoats for added durability and a glossy or satin sheen. Ensure the gold paint is fully dried and follow the manufacturer’s instructions for the specific protective coat.
Conclusion
So, with that, we come to an end with our guide for the top 7 gold paints for wooden surfaces. As we mentioned earlier, each of these paints has been tried and tested by our experts. Hence, you can rest assured that the quality of each of these paints is top-notch!
That being said, we would like to mention some of our favorite picks before we go. The Rust-Oleum 253537 and Shabby Chic gold paint are perfect for painting outdoor furniture and decoration pieces. The former has a more glossy metallic finish while the latter has a matte finish and so you can choose the one according to your likes.
The Krylon gold spray paint, on the other hand, is our top recommendation for DIY enthusiasts planning to paint indoor objects.
And with that, we’ll leave you to it. See you next time!
Best garage floor paints are formulated to provide durability, chemical resistance, and a smooth finish that protects concrete surfaces under heavy vehicles and daily wear. Unlike standard interior paints, garage floor coatings often incorporate epoxy, acrylic, or latex resins engineered to resist oil stains, tire marks, road salt, and moisture penetration. Their performance is typically evaluated by adhesion strength, abrasion resistance, drying time, and long-term gloss retention. As Sherwin-Williams’ technical expert Rick Watson explains, “The right garage floor coating extends the life of the concrete while improving its appearance and cleanability.” Whether you use your garage primarily for parking, as a workshop, or for storage, applying a high-quality paint or coating ensures both aesthetic appeal and structural protection. In this guide, we’ve reviewed the 7 best garage floor paints, highlighting their strengths, ideal applications, and value, followed by a detailed buyer’s guide to help you make the right choice.
Best Garage Floor Paints
Here is the list of the 7 best garage floor paints that you can use to spruce up the look of your garage.
The numero uno spot in our recommendations goes to the Liquid Rubber Foundation Sealant. It is the only product of its kind in this list, as it is completely water-based and does not contain any solvents. Unlike standard paint for the garage floor, it is environment-friendly and straightforward to apply.
Experience
The Liquid Rubber Sealant comes in two variants – one gallon and five gallons. While we use it to paint and seal our old garage floor, you may use it for several other purposes. Unlike paint, you do not have to mix it, making it relatively easy to apply.
It is capable of filling in random cracks you make have in the garage floor, so it eliminates the need for separately purchasing a concrete patch. We applied multiple coats of it to get a thick layer of sealant. We especially liked the fact that it does not have any harmful VOCs, solvents, or odor.
You will have to be extremely careful when you apply this product to your garage floor. It has to be used in specific conditions to work correctly and effectively seal the floor. It has to be applied in temperatures more than 40 degrees Fahrenheit but not in intense heat. It should not be used in wet conditions or if rain or dew is forecasted within 24 hours.
Pros
Comes with a 90-day, 100% money-back guarantee
100% environment-friendly
Effortless to apply
You can use regular soap and water to clean it from your skin if needed
Comes with easy-to-follow instructions
Cons
Has to be applied in particular conditions to work, which might not always be possible
Paint: Water-Based | Finish: High-Gloss | Coverage Area: 50 sq ft (Flat/Ponding Surfaces) | Cure Time: 1 to 2 Days
Durable, 2-part epoxy formula works on interior concrete...
Professional glossy finish is easy to clean and provides a...
The second product in our list of recommendations comes from the reputed brand of Rust-Oleum. The Garage Floor Coating Kit contains two gallons of two-part epoxy formula, which will transform your old and dull garage floor into a showroom-like glossy floor. It comes in an elegant gray finish which will look good in nearly all garages.
Experience
The kit consists of two large metal containers with the epoxy mix, two small containers with an activator compound, a concrete etch, decorative color chips, a stir stick, an instruction sheet, and a DVD.
First of all, we emptied the garage and cleaned its floor with the etcher and degreaser. After rinsing and drying the floor, we filled in random cracks on it. Then we taped the perimeter at the wall-floor lip junction.
After mixing both the epoxy bases and adding the activator, we were ready to pour it on the floor. We sprinkled the decorative chips on the newly painted areas. It took two of us nearly three hours to cover a 550-square-foot garage.
The paint leaves a smooth finish and looks top-notch. The chips did not suffice for our entire garage, and we had to buy some more. We recommend that you follow the instructions very carefully to ensure that you get the best results from using this garage floor paint.
You need to apply the paint within one to two hours of mixing. Ideally, you should apply this paint to the garage floor when the temperature ranges between 60 and 85 degrees.
Pros
Provides long-lasting protection from chemicals, stains, hot tire pick-up, cracking, and peeling
Emits negligible odor and Volatile Organic Compounds
Has a professional, semi-gloss finish that lends a subtle shine to your garage floor
Easy to clean
Comes with detailed instructions and a tutorial video
Cons
Decorative chips included in the kit are not enough to cover a standard two-car garage
Paint: Water-Based | Finish: High-Gloss | Coverage Area: 450 to 500 sq ft | Cure Time: 1 to 3 Days
High solids solvents based epoxy coating ideal for garage...
Provides superior resistance to chemicals, wear and even...
Rust-Oleum is a top-notch brand that offers excellent products for painting garage and basement floors. Two out of the first four recommendations on our list bear its brand name. The Floor Coating Kit contains two containers, one gallon each. It is available in four color options - dunes sand, tile red, dark gray, and silver/gray.
Experience
The Floor Coating Kit from Rust-Oleum consists of one gallon Part A: Activator, one gallon Part B: Base, and a bag of decorative chips. It leaves a semi-gloss finish in one of the four available base colors. You may choose to add the decorative chips that are included in the kit.
Each gallon of this high-quality epoxy can cover approximately 200 square feet of floor area. Make sure you buy enough for your garage, we purchased two for our 400 square feet floor area. It dries up quickly enough for heavy foot traffic in 24 hours and vehicle traffic in four days.
We especially liked how durable this product is. It provides unparalleled resistance to several chemicals and standing water. We parked our car in the garage after 72 hours of applying it, and we did not face any issues with peeling or cracking.
Pros
Versatile product that can be used for garage, basement, and workshop floors
Provides top-notch resistance against chemicals, peeling, cracking, and standing water
Features ultimate durability and adhesion
Lends an elegant, semi-gloss finish to your garage floor
Cons
It is not one of the most user-friendly products on this list as it emits a strong odor
Paint: Solvent-Based | Finish: Semi-Gloss | Coverage Area: 300 to 400 sq ft | Cure Time: 1 to 4 Days
Durable Epoxy Acrylic Formula: Resists hot tire pickup,...
Interior & Exterior Use: Designed for use on both indoor and...
Professionals, as well as DIY enthusiasts, have relied on KILZ products for over four decades. The 1-Part Epoxy Floor Paint is available in two fashionable colors – Slate Gray and Silver Gray. It comes in a one-gallon can, which is sufficient to cover almost 500 square feet of smooth surface or nearly 400 square feet of rough surface.
Experience
The 1-Part Epoxy Concrete & Garage Floor Paint from KILZ is a unique addition to this list of recommendations. It gives you the best of both worlds – it is a water-based paint combined with epoxy. So you get the benefits of easy paint-like application coupled with an epoxy-like finish and durability.
We especially liked the Satin finish delivered by this paint. It was quite convenient to apply it to our 500 square feet garage floor. As recommended, we used two thin coats with an interval of four hours. It is resistant to hot tire pick-up and household chemicals like gasoline and oil.
You will appreciate the versatility offered by this excellent floor paint from KILZ. You can use it to paint not only garage floors but also basement floors, decks, and driveways. Moreover, you can apply it to the surface using brushes, rollers, or sprayers. It is recommended that you let it dry for a minimum of 24 to 48 hours before parking your car.
Pros
Resistant to scuffing, peeling, fading, blistering, cracking, hot tire pick-up, and chemicals
Reasonably straightforward to apply and clean
Features a single component, so there is no need for mixing
Comes at an affordable price
Cons
Not as durable as two-part epoxy and works best for garage floors that experience light traffic
Paint: Water-Based | Finish: Satin | Coverage Area: 400 to 500 sq ft (Smooth Surfaces), 300 to 400sq ft (Rough Surfaces) | Cure Time: 1 to 2 Days
DRYLOK Latex Concrete Floor Paint is an all-in-one paint and...
It's scientifically formulated to protect and decorate...
We are halfway through with our recommendations, and it is time to usher in latex-based paint for concrete floors. The Drylok Concrete Floor Paint comes from the reputed brand of United Gilsonite Lab. UGL has been a common household name for various types of coatings, paints, and sealants.
Experience
We wanted to include a product on this list that would be optimal for any homeowner whose garage experiences low or moderate traffic. If you are looking for a product that does not cost a lot, and your concrete floor is not heavily abused, the UGL Drylok Concrete Floor paint perfectly fits the bill.
It is a consumer-grade product that is meant for homeowners who only use their garages for parking their vehicles. It is not designed to withstand the kind of rough use that a mechanic or woodworker would subject it to. We especially liked how easy it was to apply this paint to the garage floor.
As the name suggests, it features quick drying. You have to wait for only 24 hours after applying it to drive your car back in, which makes it a unique addition to this list. It can be used indoors as well as outdoors.
Pros
Straightforward to apply
Has one of the quickest dry times
Can be used on previously painted surfaces
Can be used indoors and outdoors alike
Cons
Offers limited durability and is optimal for light-traffic garage floors only
Low odor, low VOC formula is ideal for use on interior...
Two part, 100% solids epoxy coating provides excellent...
The third product from Rust-Oleum to make this list is the Basement Floor Kit. Do not be fooled by its name - it works just as efficiently for garage floors as it does for basement floors. It is a two-part water-based epoxy that leaves a glossy satin finish on your garage and basement floors.
Experience
The Rust-Oleum Basement Floor Kit is available in three color options - tan, gray, and tint base. Each kit consists of two cans - Part A is a one-quart activator, and Part B is a one-gallon base. It also includes a stir stick, decorative chips, and an instruction sheet. Each kit can cover approximately 250 square feet of floor area.
Our experience using this product to paint a two-car garage floor was nothing short of excellent. We used two of these kits to cover 550 square feet. An important lesson we learned while throwing the decorative chips is that they need to rest completely flat or else they will chip and bring up some epoxy.
The epoxy dries pretty fast so you will have to be quick, especially with the decorative chips. Go slow and try to avoid peeling off the epoxy when you remove the masking tape from the edges. We recommend that you do not apply thick coats of it on the floor and follow the instructions for optimal results.
Pros
Provides a durable epoxy coating that can resist stains, abrasions, and regular wear
Effortless to clean with soap and water
Emits negligible odor, ensuring easy application
It lends an elegant satin finish to the garage floor
Cons
The decorative chips have to be used very carefully to avoid chipping in the future
Paint: Water-Based | Finish: High-Gloss | Coverage Area: 250s q ft (Bare Concrete), 500 sq ft (Painted Surfaces) | Cure Time: 3 Days
The last product in our list of recommendations is the Light Beige Epoxy Resin Coating from Colored Epoxies. It is a three-gallon kit with a surface coverage of about 300 to 400 square feet per gallon. It leaves a 100% solid color and provides an excellent finish to garage, basement, concrete, and plywood floors.
Experience
The kit contains three tins - two resin tins and one hardener tin. You will have to mix all three tins before spreading it on the floor. Unlike most of the other products on this list, it is not water-based. In fact, it qualifies as a premium product and is one of the most expensive recommendations of ours.
We wish that it was more of a “kit” and included decorative chips. Keeping that aside, it has a unique formula that allows it to provide an extremely durable finish. It is quite easy to apply, and we did not face any significant hurdles to dampen our experience using it. But it tends to dry up rather fast, so be sure to act quickly.
Although the manufacturer recommends using a squeegee to spread it on the floor, we found a roller to do the job more efficiently. You would have to ensure that the roller does not leave bubbles in the epoxy if you decide to use one as we did.
Pros
Unlike most of the standard floor paints, it provides a 100% solid color, so there is no possibility of patches and cracks on the floor being visible through it
Colored Epoxies has excellent customer service
It provides a durable coat that will last for years
It is reasonably straightforward to apply
Cons
One of the most expensive products on this list and might not be affordable for some homeowners
Does not come with decorative chips so you will have to buy those separately
Paint: N/A | Finish: High-Gloss | Coverage Area: 300 to 400 sq ft Per Gallon | Cure Time: 1 Day
We have shortlisted the ten best garage floor paints for you. When it comes to picking one out of these ten top-notch paints, it is exceptionally subjective as there is no correct generic choice for every customer.
In this Buyers’ Guide, you will find all the information about garage floor paints that can help you select the best option that meets your requirements.
These factors determine the success of your garage floor painting endeavor, so make sure you check all the boxes here.
Durability
Painting your garage floor is not a fun activity that you would like to do often. Perhaps the most crucial prerequisite of optimal garage floor paint is its durability. You want to invest in a product that will last years.
The durability aspect of floor paint or epoxy can be evaluated based on some common factors. If your garage floor experiences heavy traffic, you should go for a premium, highly durable option like a two-part epoxy. If you live in an area that experiences intense heat, you should go for something that has hot tire pick-up resistance.
People usually do considerable work on their vehicles in the garage. As such, the floor is often subjected to various chemicals like cleaning agents, motor oil, gasoline, and windshield fluid. These chemicals are capable of damaging the floor so the product you choose should be resistant to them.
Surface Area
The area of your garage floor greatly influences your choice of paint. You want to buy paint or epoxy that can cover the entire surface area. If you do not know what the exact floor dimensions are, measure it first and then select a product accordingly.
Each of the ten products we have reviewed specifies its coverage area, which is for a single coat. So if you want to apply two layers, the coverage area you get is half of what is specified.
The majority of paint and epoxy products you can find have very little pliable time. You would have to apply it within one or two hours. Hence, being aware of the area you have to paint helps significantly in planning the entire task and if needed, dividing it into several subtasks.
Application
The initial preparation for painting garage floors is a mammoth task in itself (we have covered it in detail in this guide). As a rule of thumb, always go for paint or epoxy which is very easy to apply.
It can cost you a lot to hire a professional to do it for you, but you would not want to spend a lot of time and energy to save that money.
All the products we have reviewed are easy to apply.
Appearance
One of the primary reasons for painting the garage floor is to enhance its appearance. Different paints and epoxies tend to have a different final finish. You can choose from semi-glossy or ultra-glossy, colorful or colorless, and clear or flakey.
Most epoxy products give a semi-glossy look to your garage floor, while polyurethane coating lends sheer brilliance and ultra-glossiness. The majority of products dry into a colored (usually gray) finish. You can always go for decorative chips to add some variety and a dash of color!
Soundproofing
Considering the noise generated in a garage, especially when working with tools or machinery, soundproofing is an important factor to take into account when choosing garage floor paint. Certain garage door paints and coatings, when paired with appropriate soundproofing materials for walls and ceilings, can contribute to improved garage acoustics. Explore options that not only enhance the visual appeal of your garage floor but also help manage noise levels effectively.
Types of Garage Floor Paint
One of the essential questions you need to answer is – what kind of floor paint is most suitable for my garage? There are several types of garage floor paint you can choose from, each with its features and applications.
Latex or Acrylic Paint
Standard paint that you may use in and around the house is often latex or acrylic paint. It is the most reasonable type of paint available in the market but offers low durability. Although it provides a wide range of color options to choose from and is easy to apply, it is not strong enough to be used for painting garage floors.
1-Part Epoxy Paint
Epoxy blends or 1-part epoxies are combinations of epoxy and latex or acrylic paint. It serves as the middle ground between cheap, useless standard paint and expensive, premium 2-part epoxy. It offers better durability than standard latex or acrylic paint and can be used for painting garage floors that experience low-to-moderate traffic.
2-Part Epoxy Paint
2-part epoxy is a mixture of a polyamine hardener and an epoxy resin. It is one of the most durable garage floors paints out there and provides an excellent finish. Given its better quality, it commands a higher price. There are limited color options when it comes to 2-part epoxy paint, but you can always resort to decorative chips.
Urethane
Urethane is like a superior version of epoxy - anything the latter can accomplish, so can the former. Urethane is more flexible than epoxy, which enables it to absorb various impacts in a better way and makes it more resistant to chemicals. It is even more expensive than 2-part epoxy and hence, used by a niche customer base.
Initial Preparation and the Painting Process
Now that we have addressed the essential factors that you must consider for selecting the best garage floor paint, it is time to dive into some useful information about the painting process.
The biggest hurdle you have to overcome after you have selected the best paint for your garage floor is the initial setup. To derive the best results, it is imperative that you prepare the floor first and then apply paint.
Materials Needed
There are a lot of elements that you need to prepare your garage floor before painting it. Most of the products we have reviewed are kits instead of just paint and have some (if not all) of these materials. Depending on the product you choose to buy and your garage floor, you might have to get some of the following materials:
Some pieces of cardboard
Anti-skid additive
One paint roller cover
Rolls of plastic drop cloth
Concrete patch to seal cracks
Heavy-duty degreaser
Paper masking tapes
A pair of squeegees
Special fine sand to mix with the paint
Tools Needed
What are the tools you will need to prepare your garage floor for a makeover? You can find some of these tools in your home already, or you may have to buy them.
One large bucket
Some paint sticks
One plastic garden watering can
A couple of plastic putty knives
One non-stick metal paint tray
Paint roller frames
Extension pole for rollers
Paint can opener
Polyester soft grip brushes
One retractable utility knife
Steps to be taken
The steps we have outlined encompass both the initial preparation and application of paint.
Remove everything from the garage.
Wash and clean the garage floor. Wait for at least 24 hours for the floor to dry completely.
Use the concrete patch to fill cracks in the floor. Wait for at least 8 hours.
Apply the degreaser and cleaner. Rinse the floor thoroughly and ensure that all the degreaser has been washed off.
Wet garage floor and spread concrete etch.
Put tape on the edges of the floor. Wait for at least 24 hours for the floor to dry before painting.
Apply the first coat of paint. Wait for at least 72 hours before applying the second coat. You may walk on the painted floor after 12 hours.
Add the anti-skid additive to the paint and apply the second coat. Throw decorative chips while painting. Wait for at least 72 hours before moving your cars back in.
If you will be applying only one coat of paint, add the anti-skid additive before the first coat and throw decorative chips while painting.
Maintenance Tips for Garage Floors
Painting a garage floor is not something you want to do too often – the process is tiring, to say the least! We recommend following these maintenance tips to ensure that your garage floor paint survives as long as possible. Most of these tips are very simple and inexpensive to implement.
Avoid using cleaners that contain any kind of acid.
Scrub and vacuum the floor regularly.
Use a welcome mat to prevent dust from coming in with shoes.
If you need to scrub out any stains, do it immediately with light pressure.
Do not weld without a welding mat because welders emit hot iron particles that can damage your floor.
Keep a mat or rug under metal gears.
Avoid putting heavyweights of any kind on dust or dirt, as it can lead to a permanent stain.
Best Garage Floor Paint FAQ
How long does it take to paint a two-car garage floor?How long does it take to paint a two-car garage floor?
Most of the floor paints and epoxies have to be used within a couple of hours after they are opened and mixed. It usually takes up an entire afternoon to paint a standard two-car garage floor, but the initial prep can take much longer.
How long does garage floor paint last?
Garage floor paint usually lasts five to ten years with the potential to last significantly longer, depending on the degree of wear and tear it is subjected to.
Do various chemicals affect garage floor paint?
Salt, motor oil and other chemicals can stain and erode the paint on your garage floor if left unattended. If you apply paint that is not chemical-resistant, you need to clean the floor proactively. Even the most robust floor paint will crack and flake with prolonged chemical exposure.
How long should you wait before using a newly painted garage floor?
This depends on the paint or epoxy you use – you will have to wait longer for a higher epoxy count to dry. Pay attention to the instructions to know how long you should ideally wait before using your newly painted garage floor. Generally, you can walk on it after 24 hours and move your car in after 72 hours.
Can you paint damaged or marred concrete garage floors?
Most of the floor paints and epoxies are not equipped to fill cracks in concrete floors or even hide them. While you can paint a damaged or cracked floor, the cracks will be visible. You should invest in a concrete patch and fill up the cracks before painting your garage floor.
What type of paint is best for concrete floors?
You can choose from standard paint or epoxy for concrete floors, depending on the wear and tear. If your garage floor is likely to go through heavy abuse, epoxy will fare better than latex. If you estimate standard wear and tear, latex paint should work equally well as epoxy.
Conclusion
As we've explored a range of garage floor paints, it's clear that the key to selecting the best product lies in understanding the specific needs and conditions of your garage. From environment-friendliness to durability, the top garage floor paints come with different features that make them stand out.
From the above 7 best garage floor paints, here are the top three expert recommendations:
For environmentally-conscious individuals, the Liquid Rubber Foundation Sealant is an ideal option as it's completely water-based and does not contain any harmful solvents.
If you're aiming for a professional, showroom-like finish, the Rust-Oleum EpoxyShield Garage Floor Coating is a good option with its elegant gray finish that will enhance any garage's appearance.
To guarantee a high level of chemical resistance and durability, the Rust-Oleum Floor Coating Kit is the right choice that will keep your garage floor safe from peeling, cracking, and standing water.
Investing in the right garage floor paint will not only protect your garage but also add aesthetic value to your space. Remember to assess your specific requirements, such as eco-friendliness or resistance to chemicals, before making the final decision, and your garage floor will look as good as new for years to come.
On the hunt for the perfect primer for application on exterior surfaces? You’ve come to the right place!
Whether you’re planning to redo the exterior of your home or paint an outdoor patio table, primers are crucial for a high-quality paint job. However, it’s easy to be confused or feel overwhelmed when you’re trying to figure out the right primer to use for your project.
This is especially true if you’re new to doing these projects by yourself. But don’t worry, as that’s exactly what we’re here for!
To make this process a little bit easier for you, we have tried and tested a bunch of top-rated primers available on the market. And finally, we come to you with a guide detailing the 7 best options of 2024.
So, now that we’ve got you hooked, let’s dive straight into it, shall we?
Best Exterior Primer Paints
Here is the list of the 7 best exterior primer paints that you can use to prepare your walls for a perfect topcoat finish.
Interior/Exterior use on new or previously painted drywall,...
Water-based formula seals uniformly and will stick to...
Rust-Oleum’s reputation is notably well-deserved and has led them to develop a broad range of paints and primers to meet your requirements. That said, its Zinsser Bulls-Eye 1-2-3 primer in gray is a high-performing formulation meant to provide you with smooth coverage on a variety of exterior surfaces.
Why Did We Like It?
This primer by Rust-Oleum is light gray in color and is made for application under comparatively deep and vibrant paint shades. Moreover, it is tintable and can be applied both as an undercoat and as a topcoat after tinting with paint.
Straight off the bat, we would like to mention that this primer is rather versatile and; thereby, compatible with a variety of interior and exterior surfaces. Starting from previously painted, drywall, masonry, wood, concrete, and metal, it can be applied on varied glossy and difficult-to-paint surfaces.
What’s more, it forms an incredibly durable mold, mildew-resistant, anti-rust, stain, and odor-blocking film that provides surface protection from weather damage.
That’s not all; the water-based formulation of this primer makes it very easy to apply and sticks on all surfaces without prior sanding. It dries to touch in just 30 minutes and can be re-applied within the hour facilitating a fast-application process.
What Could've Been Better?
The shipping procedures followed by the company are subpar at best. Quite a few customers have voiced grievances regarding having received leaking and banged up or dented paint cans. This can be really messy and difficult to handle for people on the receiving end.
Pros
Mold and mildew-resistant formulation
Rust-inhibitive, stain-blocking
Tintable primer perfect under deep colors
Versatile and quick-drying
Can be used with any topcoat
Cons
Dented paint cans
Color: Gray | Finish: Gloss | Paint Type: Acrylic | Volume: 31.5fl oz | Coverage: 100sq ft | Drying Time: Dries to Touch in 30 Minutes, Ready to Recoat in 1 Hour
KILZ is one of the leading premium painting manufacturing companies, especially among home-based DIY enthusiasts. In the 40 years since its inception, this brand has gained large-scale popularity and was even declared the “Paint Brand of the Year” by Harris Poll EquiTrend Rankings in 2015.
Why Did We Like It?
If you’re looking for a product that combines the features of both oil and water-based paint, then this paint is the one for you. Its unparalleled adhesion makes it one of the most unique yet durable paints available on the market. This is also a great option if you’re looking to add a pop of vibrant color to your exterior surfaces!
Furthermore, this paint is easy to clean and apply because of its water-based properties. Simultaneously, it provides a remarkably enduring and mildew-resistant finish that resists fading, cracking, and peeling in the long run. Apart from that, this paint is applicable on a variety of properly-prepared exterior surfaces including, plywood, fences, laminates, masonry, stucco, and more.
Moving on, this paint provides excellent coverage ranging from 200-500 square feet per gallon, depending on the porosity of the surface it’s applied on. Last but not least, it has a versatile application method and can be applied using a roller, brush, as well as a spray gun. This enables users to choose the process they are most comfortable with.
What Could've Been Better?
This paint takes about 2-3 hours to dry to touch, and at least 6-8 hours to dry completely before it can be repainted. And since most painting projects require you to recoat at least 2-3 times, this paint considerably extends the project duration. It’s also essential to properly prep all the surfaces you apply this paint to.
Pros
Offers good protection against weather elements
Provides great coverage
Supports versatile application methods
Resists peeling, cracking, and blistering
Mildew-resistant and long-lasting
Cons
Long drying time
Color: White | Finish: N/A | Paint Type: Oil & Water-Based | Volume: 512fl oz | Coverage: 200 to 500sq ft | Drying Time: Dries to Touch in 2 to 3 Hours, Ready to Repaint in 6 to 8 Hours
High hiding formula for excellent coverage with smooth...
Prestige has developed a high-end paint and primer that effectively coats a variety of exterior surfaces to provide a smooth and glossy finish. This includes cement boards, masonry walls, properly prepared wood, aluminum, factory-primed siding, and other unconventional surfaces.
Why Did We Like It?
This ultra-premium paint and primer two-in-one offers users the benefits of a topcoat while eliminating the need of applying an undercoat. It’s 100% acrylic-based latex paint and therefore easy to apply, and even simpler to clean and maintain in the long run.
Furthermore, this paint provides excellent opaque coverage with a smooth dewy finish that hides all kinds of old paints and stains effectively. One gallon of this paint can comfortably cover from 200-400 square feet of area depending on the porosity of the surface it’s applied to. Besides that, it supports multiple application methods, such as roller, brush, and spray gun once the paint is sparingly thinned.
That’s not all though, because the mildew-resistant coating of this paint and primer makes it perfect for application in high-humidity areas. Additionally, formulated with a remarkably low VOC count of 50 gms/L, this is very safe to apply yourself and can even be used around children and pets.
What Could've Been Better?
While glossy paints provide a lot of aesthetic benefits, they also tend to highlight the imperfections of the surface it’s applied on. Hence, it’s necessary to properly prep a surface you plan to apply this on. Apart from that, the manufacturer recommends keeping the paint overnight before recoating. Sometimes this drying time extends even further depending on the weather.
Pros
Provides impressive coverage
Lifetime warranty
Supports versatile application methods
Mildew-resistant coating ideal for high-humidity areas
Extremely easy to clean and maintain
Cons
The gloss highlights imperfections
May take a long while to dry
Color: White | Finish: Semi-Gloss | Paint Type: Acrylic | Volume: 128fl oz | Coverage: 200 to 400sq ft | Drying Time: Dries in 1 to 2 Hours
Mold & Mildew-Proof paint film - guaranteed for 5 years
Rust-Oleum, as we mentioned before, is an extremely well-established brand in the paint and home improvement industry. The Zinser 3134 from its range is specifically formulated for households exposed to high humidity and therefore prone to mold and mildew concerns.
Why Did We Like It?
If you’re searching for a paint that is specifically formulated to tackle frequent mold and mildew issues, this exterior paint by Rust-Oleum is hand-down the perfect product for you. It comes equipped with a 5-year mold and mildew-resistant paint film guarantee. Hence, you can rest assured of a highly effective and premium performance when using this product in high-humidity areas.
Besides that, the brand also provides a whopping 15-year blister, fade, peel, and crack resistance guarantee. This further endorses the enhanced durability and long-lasting performance of this product. Additionally, this white coating is tintable, allowing you to mix other shades of paint to alter its final color according to your preferences.
What’s more, this paint is self-priming and requires no prior application of an undercoat to provide a smooth and durable surface. It also considerably reduces the preparation process because it requires no sanding and hence ensures minimal prep before painting.
What Could've Been Better?
A few customers found this paint to have a clumpy texture. To get rid of these clumps, you will need to vigorously stir the paint and maybe even thin it with some water. Other than that, users also noted that it offered very low coverage. Hence, they were forced to apply multiple coats to achieve the finish they desired.
Pros
Guaranteed mold and mildew-resistant paint
Crack, fade and peel resistant
Tintable
Self-priming, therefore, requires minimal prep
Simple and easy to clean and apply
Cons
Low coverage
Color: White | Finish: Flat | Paint Type: Acrylic | Volume: 31.5fl oz | Coverage: 100sq ft | Drying Time: N/A
Use for a variety of indoor and outdoor project surfaces...
Water-based acrylic formula is low odor, resist chips and...
Next up in our guide, we have yet another Rust-Oleum variant. This premium latex primer belongs to their Painters Touch range and offers a durable flat finish on a variety of surfaces. This includes surfaces such as bare or painted metal, wood, wicker, unglazed ceramic, plaster, and so on.
Why Did We Like It?
Are you looking for a paint primer with exceptional coverage? If that is the case, then look no further, because this primer is what you’re looking for. Equipped with a double cover technology, this primer provides exceptional coverage effectively hiding all kinds of paints and stains on varied surfaces.
In addition to the above, this primer offers a remarkable bonding capacity enabling it to adhere to any surface with vigor and forming an excellent base coat. This facilitates the topcoat to adhere to the surface optimally and therefore provides a smooth and uniform look. The flat finish of this primer further minimizes the appearance of imperfections on the surface it’s applied to.
If that wasn’t enough, this primer dries to touch in just 30 minutes enabling fast and efficient project completion. Moreover, one quart of this primer can in fact, efficiently cover up to 120 square feet of area with relative ease. Lastly, this enhanced coating offers long-lasting indoor as well as outdoor durability that resists fading and chipping to provide a flawless finish.
What Could've Been Better?
The manufacturer highly recommends that you sand the surface you are planning to paint with 180/200 grit sandpaper and then wash it with a degreaser. This ensures that the primer goes on to provide a smooth finish. If these instructions aren’t followed then the paint surface tends to crack apart a while after application.
Pros
Provides enhances coverage
Has a strong bonding and adhesive capacity
Long-lasting and resists paint chipping
Easy to clean and apply
Has a fast drying time
Cons
Paint prone to cracking after application
Color: Gray | Finish: Flat | Paint Type: Acrylic | Volume: 32fl oz | Coverage: 120sq ft | Drying Time: Dries to Touch in 30 Minutes
PRIMER | CLEAR SEALER | BONDING PRIMER: A high-performance...
ADVANCED FORMULA: This incredibly versatile styrene acrylic...
KILZ, as we mentioned earlier, is a popular brand that has been in the premium paint and primer manufacturing game for over 40 years. It has consequently developed a high-performing clear primer that is specifically formulated to bond chalky and porous interior and exterior surfaces.
Why Did We Like It?
The KILZ L220105 is an exceptionally powerful primer, bonder, and sealer that is created to seal porous and difficult-to-paint interior and exterior surfaces. Its superior stain-blocking capacity and enhanced topcoat adhesion have made it a hot favorite among many DIY home development enthusiasts.
It can effectively coat a variety of surfaces to create a tough, breathable, yet flexible film that can readily accept the paint you wish to apply.
Furthermore, this primer, although water-based, is compatible with a versatile selection of topcoats including alkyd, and oil-based paints. This is the ideal primer to consider if you’re planning to repaint an exterior surface with the same color because the transparent color makes an ideal base coat.
If that wasn’t enough, one gallon of this primer can effectively cover an area of 300-400 square feet. What's more, it dries to touch within half an hour and can be recoated in one hour with the help of either a brush roller or spray, Hence, it also supports versatile application methods to allow customers to choose the method they are most comfortable with.
What Could've Been Better?
This primer has an extremely thin consistency that makes it difficult to apply on most surfaces. Customers mentioned that they found this product difficult to apply, especially on unprepared surfaces. They were additionally forced to apply multiple layers of this primer to achieve the desired coverage on their walls.
Pros
Fast drying time
Alkali-resistant primer
Works with all kinds of topcoats
Versatile application methods
Tough, breathable, and flexible stain-blocking properties
Cons
Has a very thin consistency
Color: Transparent | Finish: Matte | Paint Type: Water-Based | Volume: 128fl oz | Coverage: 300 to 400sq ft | Drying Time: Dries to Touch in 30 Minutes, Dries to Recoat in 1 Hour
Multipurpose, 100% acrylic primer sealer that provides...
Superior sealing and coverage qualities, product versatility...
INSL-X is acompany committed to producing superior quality multi-purpose paints and primers for everyday use. And this acrylic primer for interior and exterior surfaces is no exception. For this particular guide, we have tested and are reviewing the white variant only.
Why Did We Like It?
This multi-purpose primer and sealer by INSL-X from their Aqua Lock Plus series can be applied on a multitude of interior and exterior surfaces. It provides excellent sealing properties that actively block out all the imperfections and stains on the surface you are priming. Additionally, the final film of its form is mold-resistant, thereby ideal for application in high-humidity areas.
Furthermore, this primer is very versatile and compatible with a variety of topcoats that have latex as well as oil-based finishes. Its superior quality adhesiveness offers unmatched adherence that helps all kinds of paint stick to an array of difficult-to-paint surfaces.
Apart from that, it takes only 30 minutes to dry, offering an unparalleled coverage that rarely requires you to apply a second coating. The topcoat can then be applied over this paint in an hour, making it one of the quickest priming solutions on the market.
One gallon of this product provides complete coverage of about 300-400 square feet of area, which is something we absolutely love!
What Could've Been Better?
Some customers have expressed that the primer they bought from INSL-X was more light gray than white as mentioned in the description. A few of them also received defective items where the product was completely cured, and chunky; hence, practically impossible to stir or apply.
Pros
Excellent stain-blocking properties
Enhanced adhesion and sealing capacity
Easy to clean and apply
High coverage and quick drying
Cons
Primer does not match the description provided
Color: White | Finish: N/A | Paint Type: Acrylic | Volume: 128fl oz | Coverage: 300 to 400sq ft | Drying Time: Dries in 30 Minutes, Ready for Topcoat in 1 Hour
With that, we’ve come to the end of our top 7 reviews. But are you still confused about which of these products is the best option for you? To help you answer this question, we have compiled a comprehensive buyer’s guide for you. In this guide, we have listed some of the key factors to consider while purchasing primer paint for your exterior projects.
So, what are we waiting for? Let’s jump right into it!
Environment
The environment you will be working in or the climate that you live in is a very crucial factor to consider while buying primer. The environment determines the temperature of your location and some primers out there have a very specific range of temperatures in which they can be applied.
Furthermore, the environment contributes to issues such as mold and mildew formation. So, if you’re living in a high-humidity area that is prone to these issues, you might want to buy a paint primer that is mold and mildew resistant.
Drying Time
The drying time is the amount of time a primer requires to dry to the touch. Alternatively, cure time is the duration it takes for primers to dry completely after which you can either recoat or apply the topcoat of your project. These are significant when it comes to determining the overall project duration time.
Coverage Provided
This factor includes two very important aspects of primers you need to consider. First of all, how much area one tin of this product can cover and secondly, how many coats you require to cover it. Both of these together determine how much paint you will require to cover a certain surface area. Hence, they also simultaneously help you understand how affordable a primer really is.
Finish Of The Primer
Different products offer an assortment of different finishes to your project, ranging from flat, glossy, satin, and so on. Each finish has its own advantages and disadvantages. So, for example, a glossy finish is really easy to maintain but they tend to highlight the imperfections of the surface.
Alternatively, a flat finish primer offers more coverage and sealing properties but is difficult to maintain in the long run. Hence you need to decide on the finish depending on your surface type and preparation.
Versatility
This includes both versatility in paint application surfaces as well as paint application methods. Although this article is specifically for exterior primer paints, there are a lot of products in our guide that caters to a wider variety of surfaces. Similarly, most of our primers support varied application methods and allow you to choose what you’re most comfortable with.
Exterior Primer Paints FAQs
Can I use interior primer for the exterior surfaces of my house?
It’s not recommended because exterior primers are formulated to withstand weather conditions like rain, hail, snow, and sunlight, unlike interior primers.
Is it important to clean the surface before applying exterior primer paint?
Yes, for the primer to adhere properly, the surface should be clean, dry, and free of loose or peeling paint, mildew stains, dirt, and rust.
What's the best way to apply exterior primer paint?
Exterior primer paint can be applied by rolling, brushing, or spraying. Each method has its pros and cons, so choose the one which suits your project and skill level best.
How many coats of primer do I need to apply?
Most of the time, one coat of primer should be sufficient. However, if the surface is highly porous, stained, or if there will be a dramatic color change, additional coats may be necessary.
Conclusion
Understanding the perk of a good-quality exterior primer paint is important if you're looking to wholly revamp the look of your house or even a particular exterior structure. An ideal exterior primer not only serves as a protective layer for your exteriors but also enhances the aesthetic value by providing a smoothened base for the final topcoat. Primers, in general, prevent stains, rust, and peeling, and they also enhance the durability of the topcoat paint.
From the above seven best exterior primer paints, here are the top three expert recommendations:
The Rust-Oleum Zinsser 286258 Bulls Eye primer is an ideal option for those looking for a deceptively simple and versatile primer. This high-performing primer is noted for its smooth coverage, compatibility with a broad range of surfaces, and its water-based formulation that makes it easy to apply and reapply within a short duration. It's ideal for surfaces that have been previously painted, including masonry, wood, metal, and drywall. In spite of some complaints about poor shipping procedures, the overall performance of this primer is commendable.
The KILZ 10111, an oil and water-based primer, is a good option for those who desire a blend of premium performance and durability. This primer offers excellent coverage and a highly resistant finish, and it supports various application methods including using a roller, brush, or spray gun. If prepped properly, it adheres and covers brilliantly on surfaces like plywood, fences, and laminates. Despite its long drying time, its enduring finish is worth the wait.
Lastly, for someone who is looking to get the double benefits of a primer and a topcoat, the Prestige E500-9 is the right choice. This two-in-one paint and primer has an easy-to-apply formula with excellent coverage and a high-end finish. It's mildew-resistant, which makes it perfect for high-humidity areas. But for best results, you need to give the surface a good preparation, given its semi-gloss finish tends to highlight imperfections.
While shopping for the right primer, some might compromise on certain factors, but as long as you're aware of what you require in your primer, you'll make the right decision. Each primer mentioned above excels in its quality, versatility, and protection, while also offering aesthetic benefits to your exterior surfaces. Explore each of these options and choose what suits you best.
Remember, a good painting job starts with a good primer. So invest wisely!


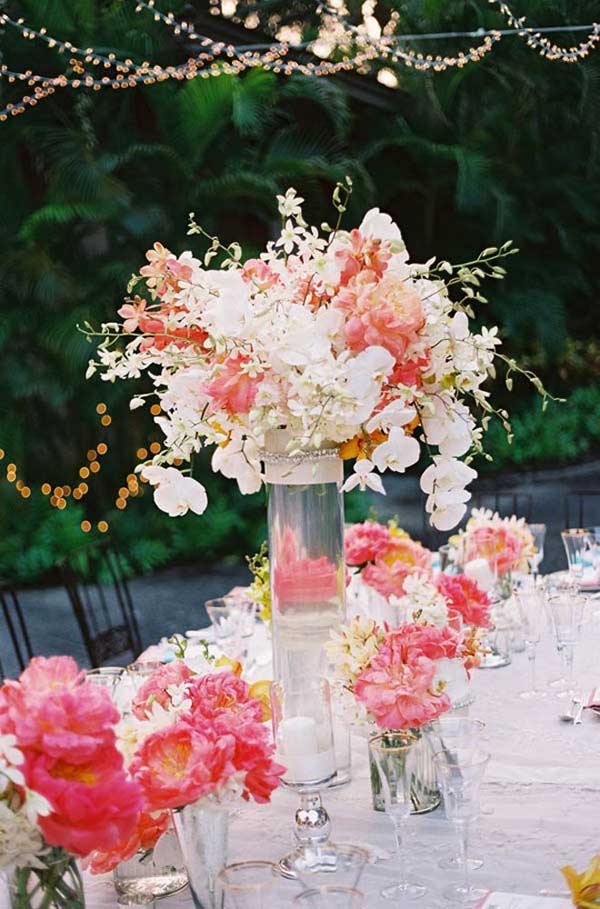
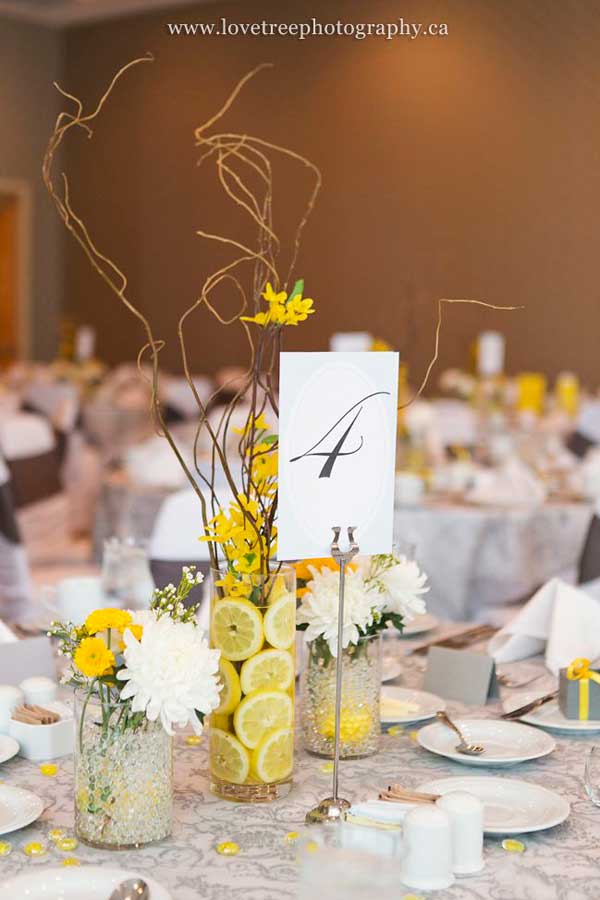
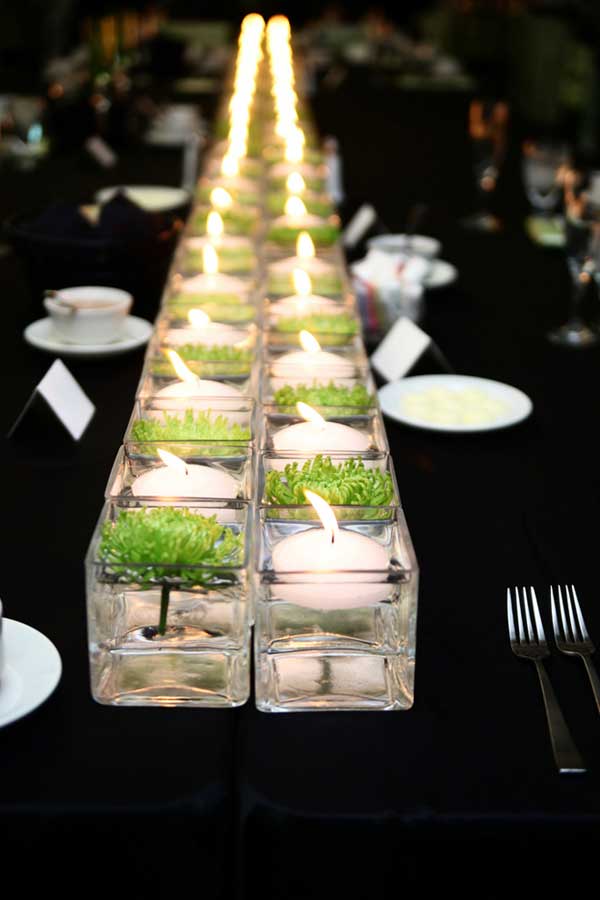
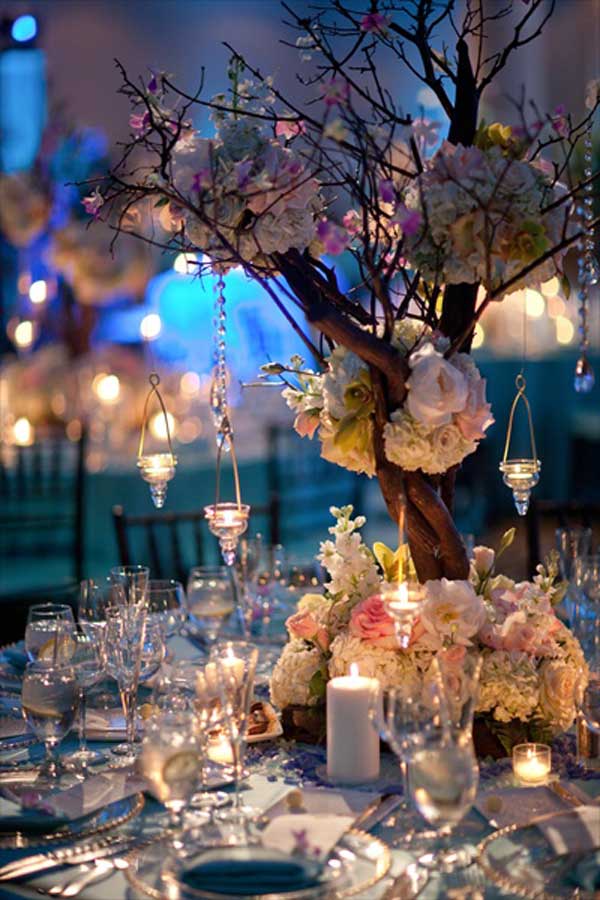

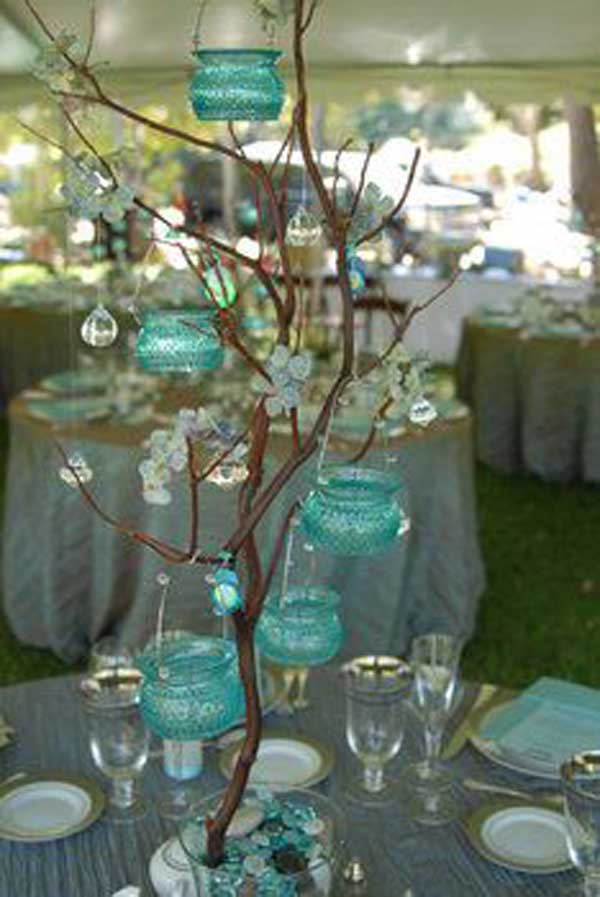
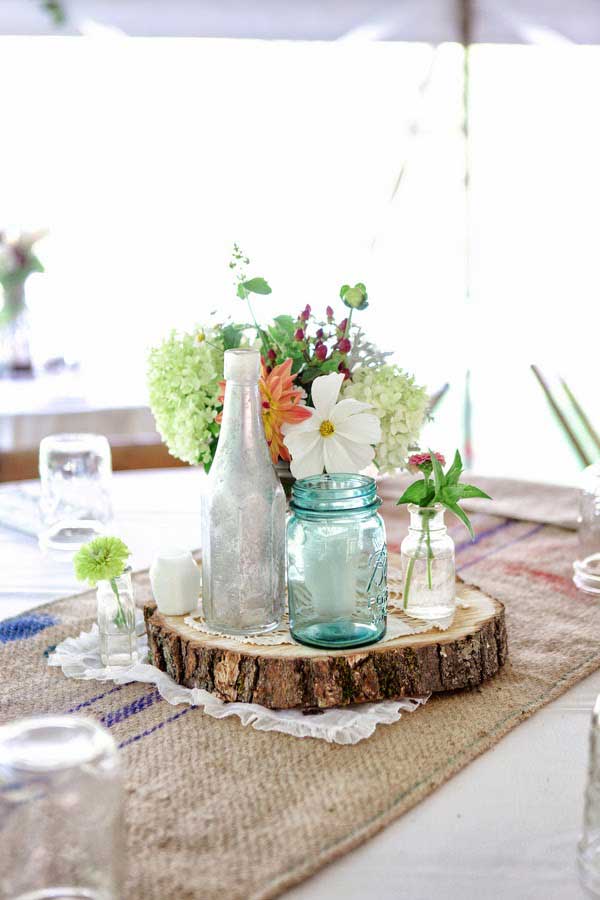
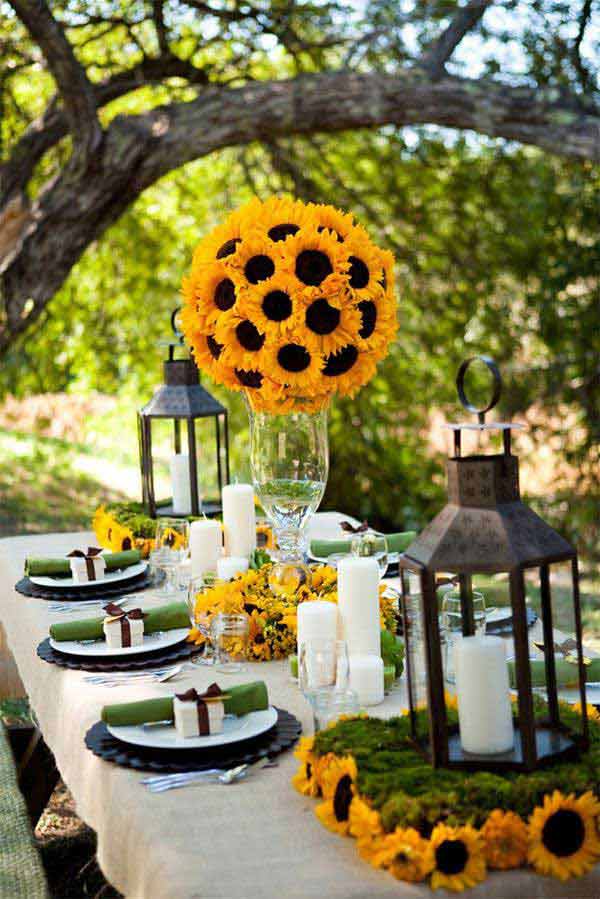
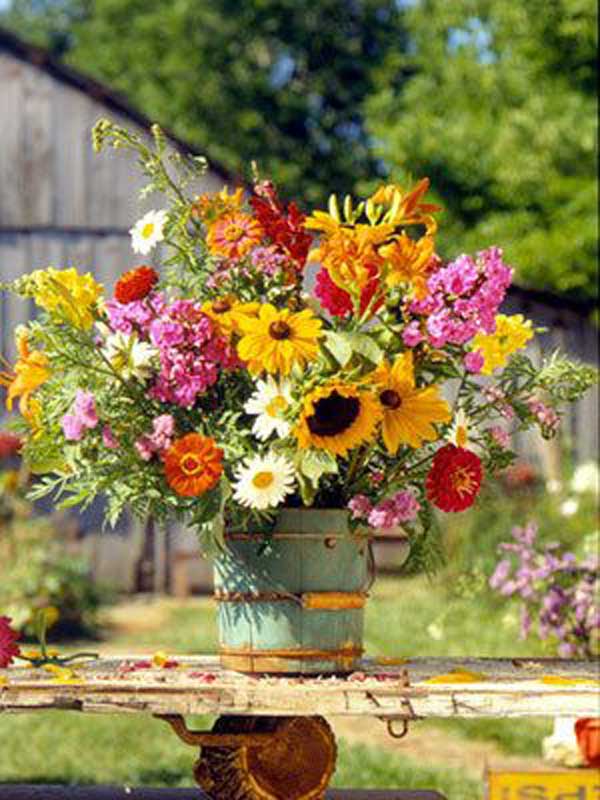
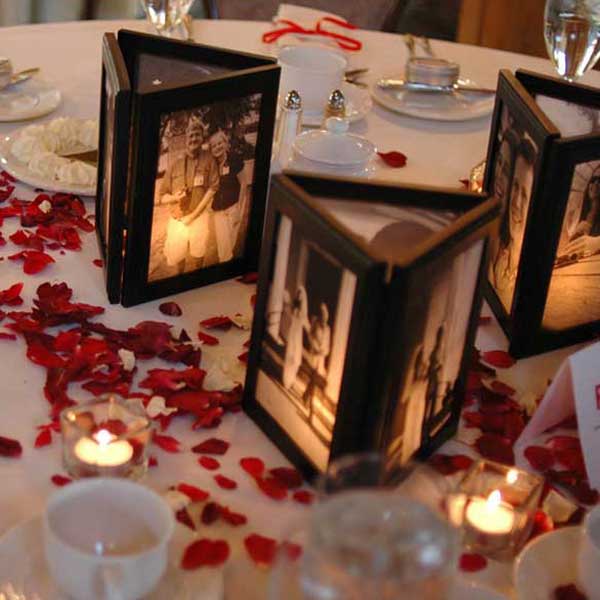
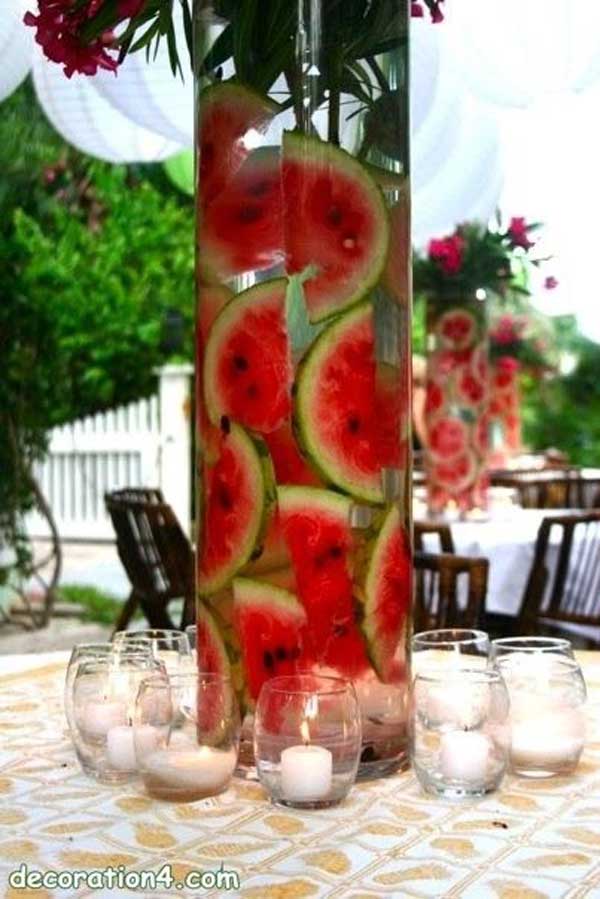
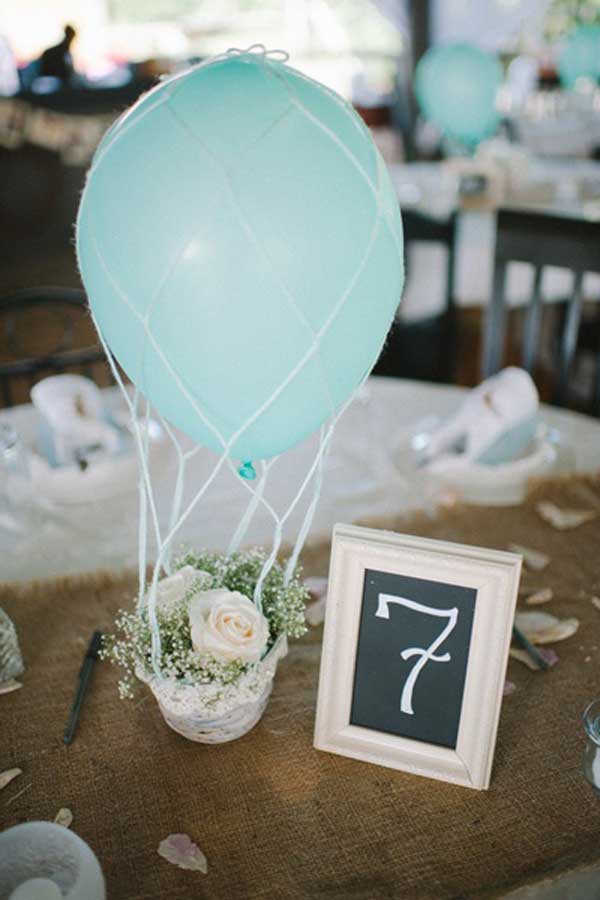
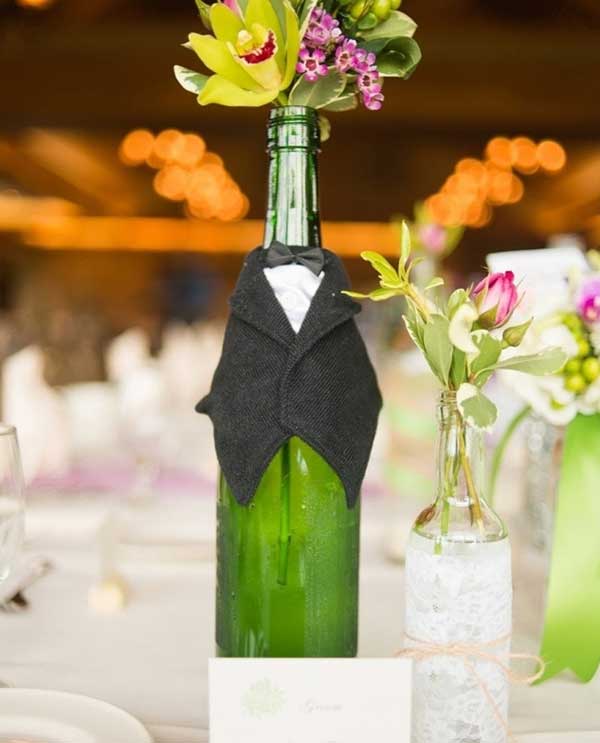
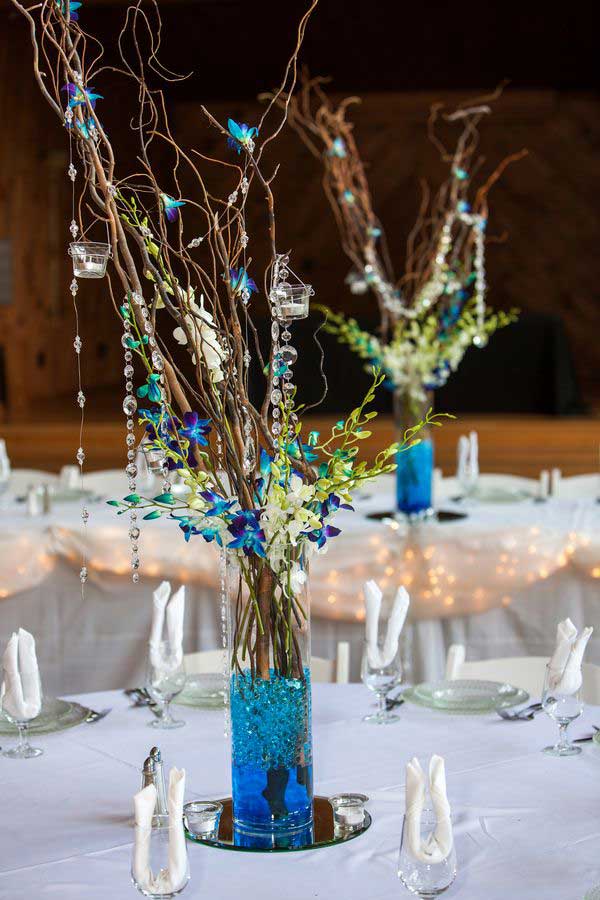
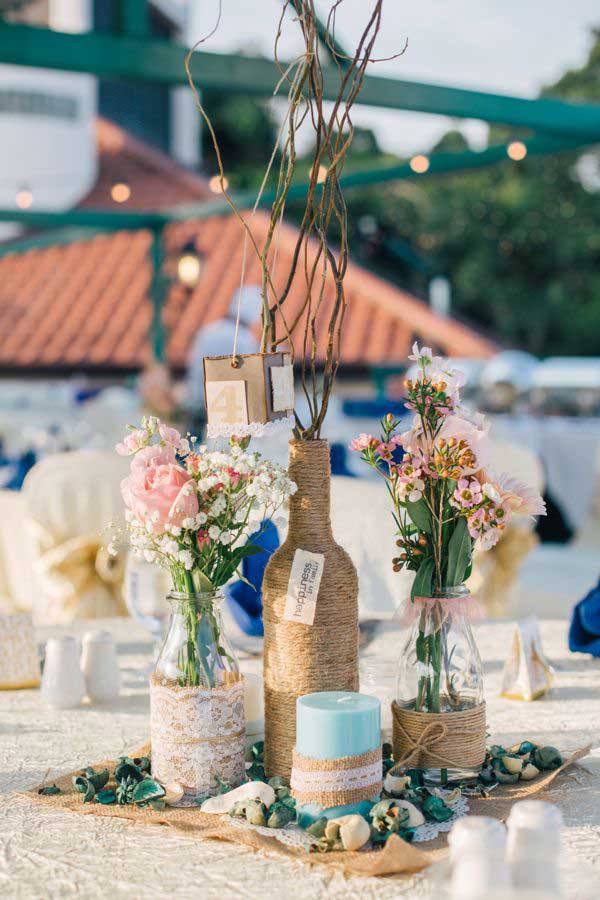
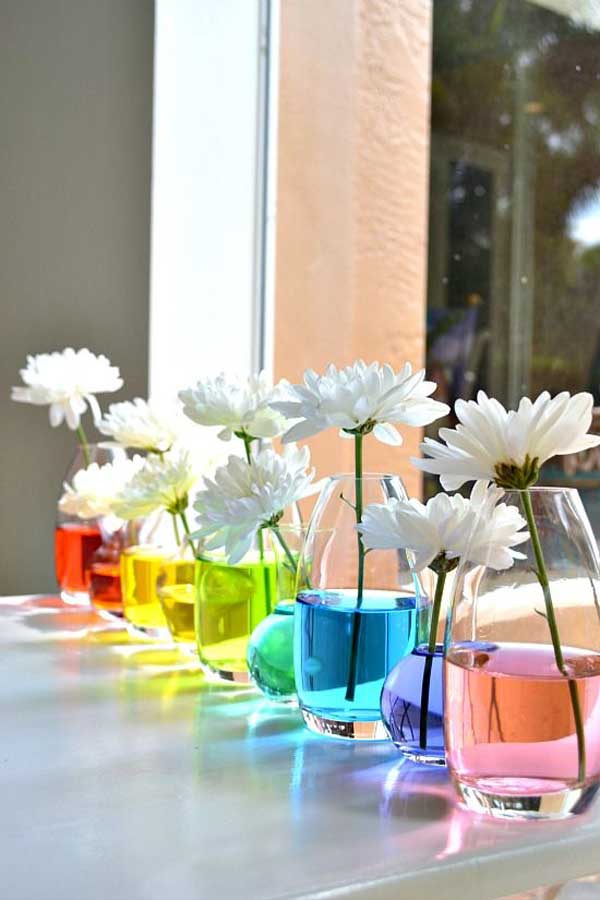
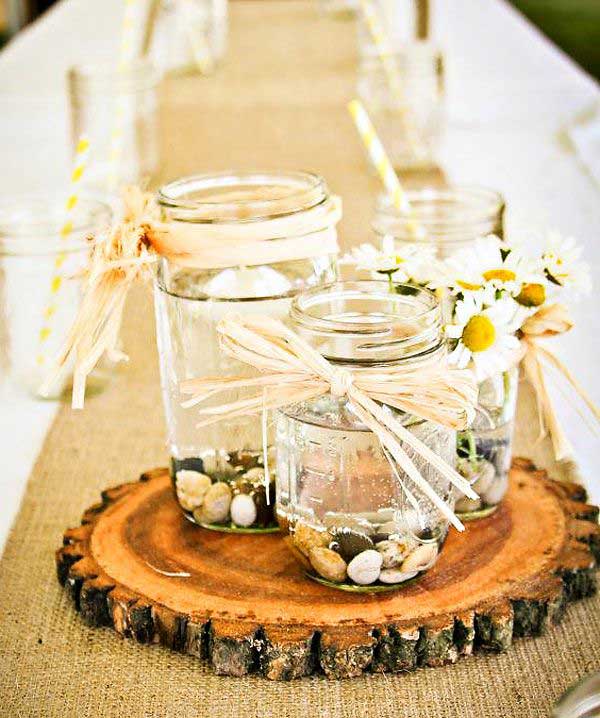
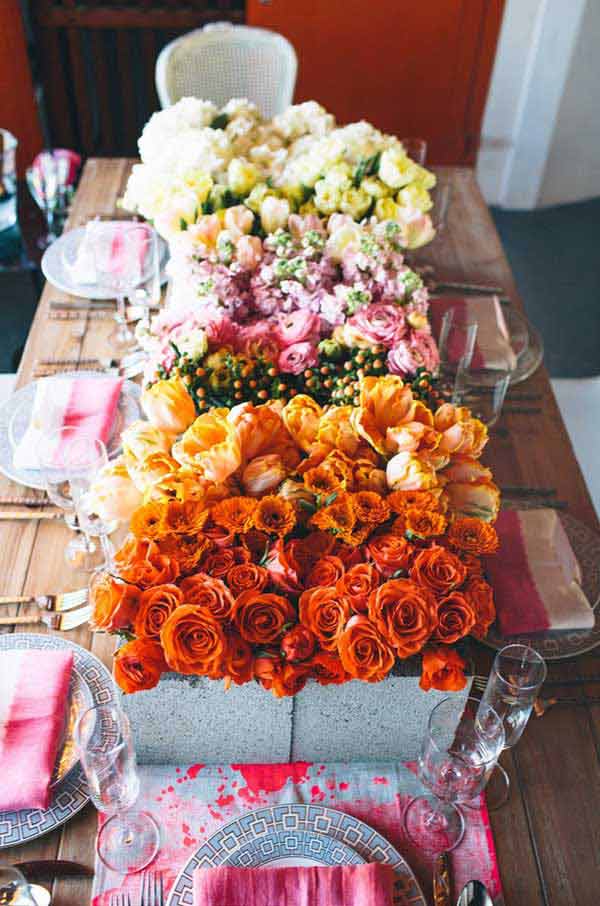
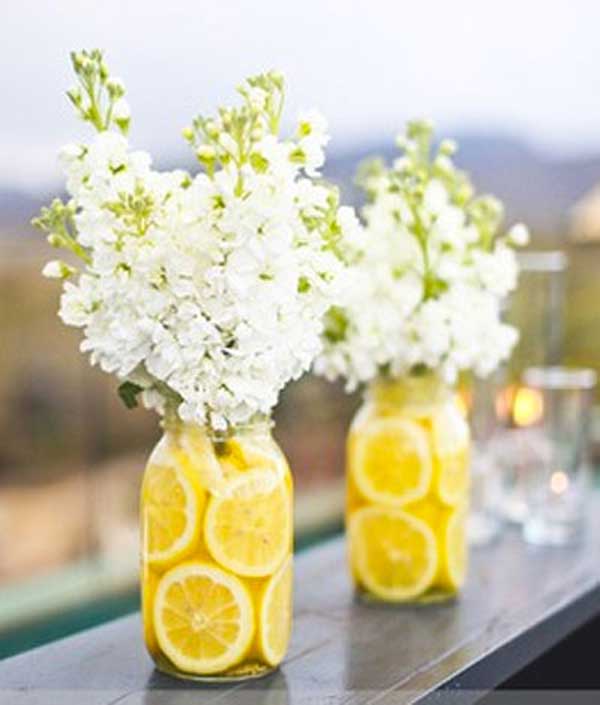

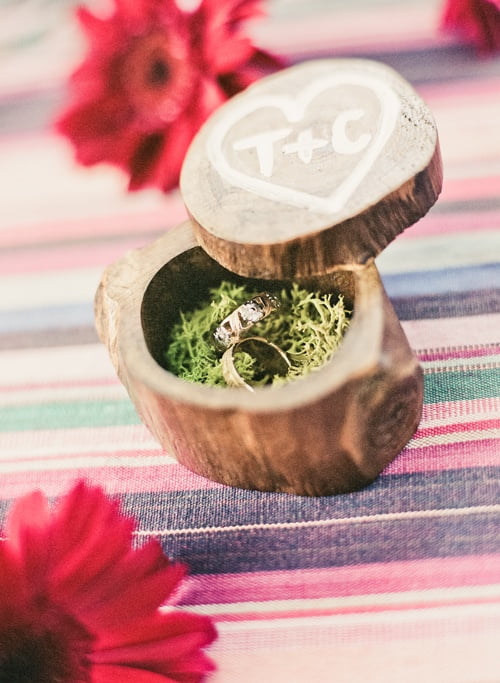
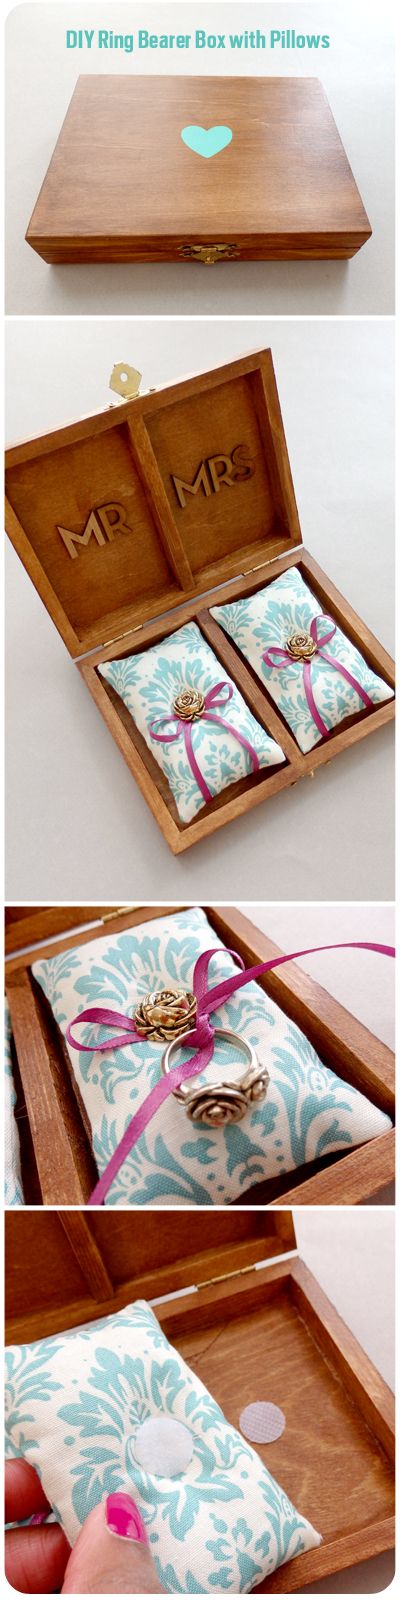
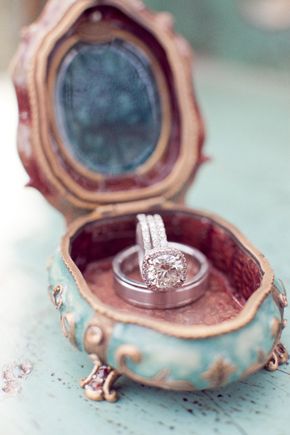
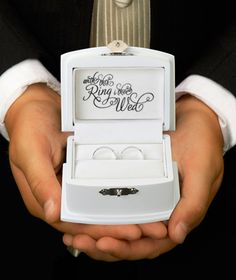
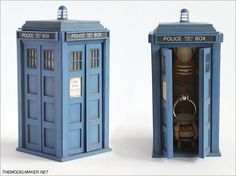

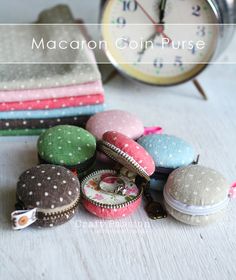
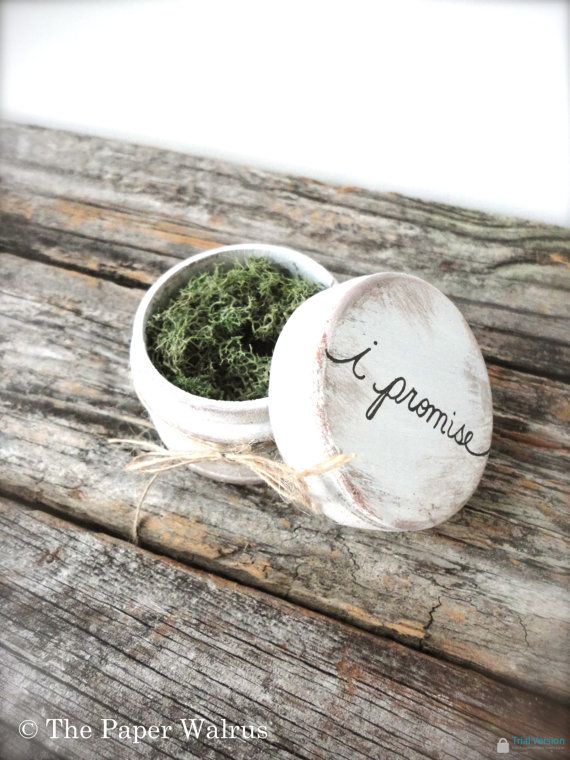
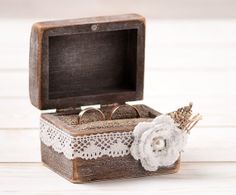
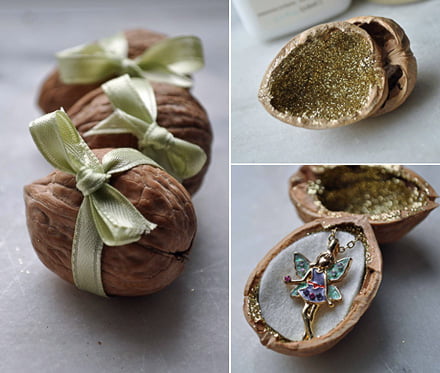
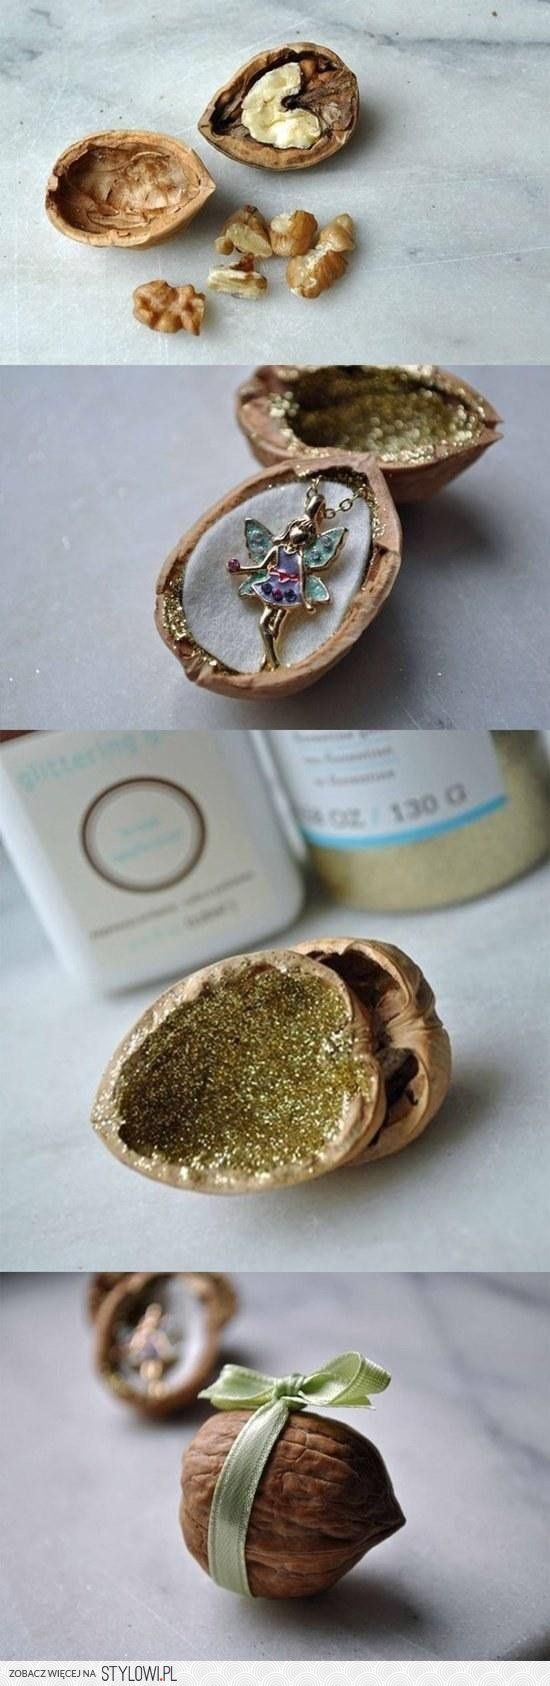

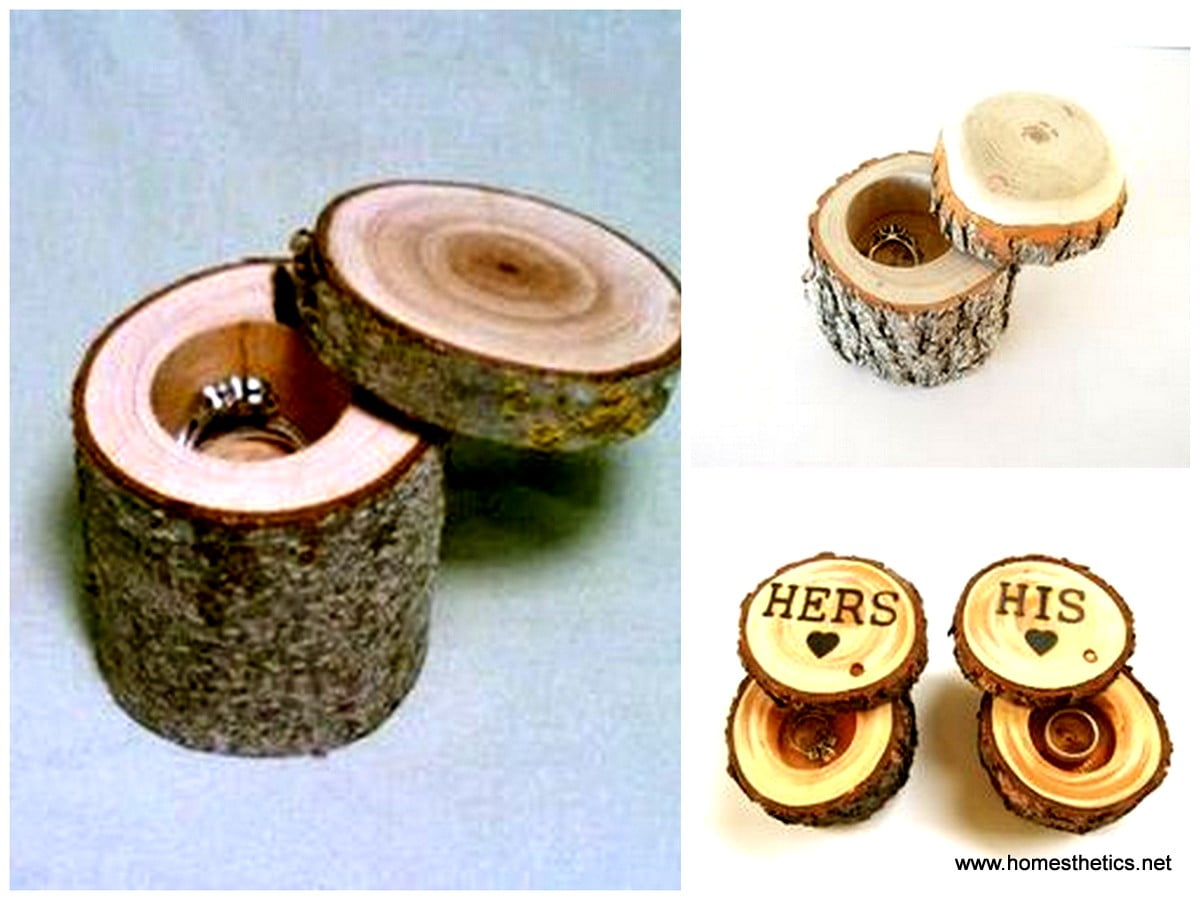
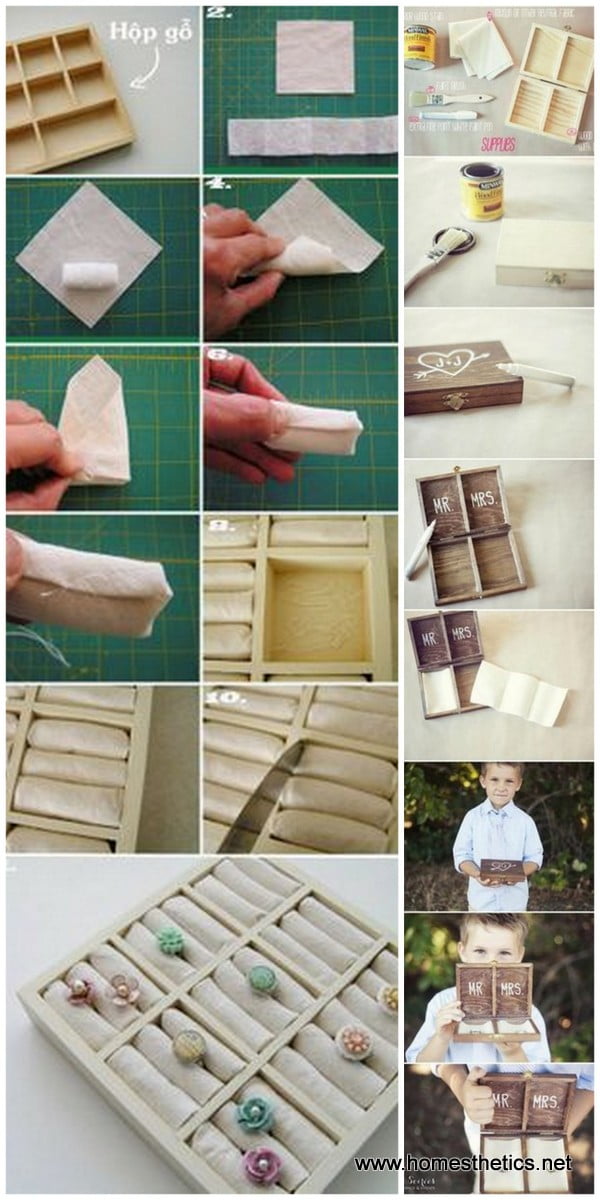
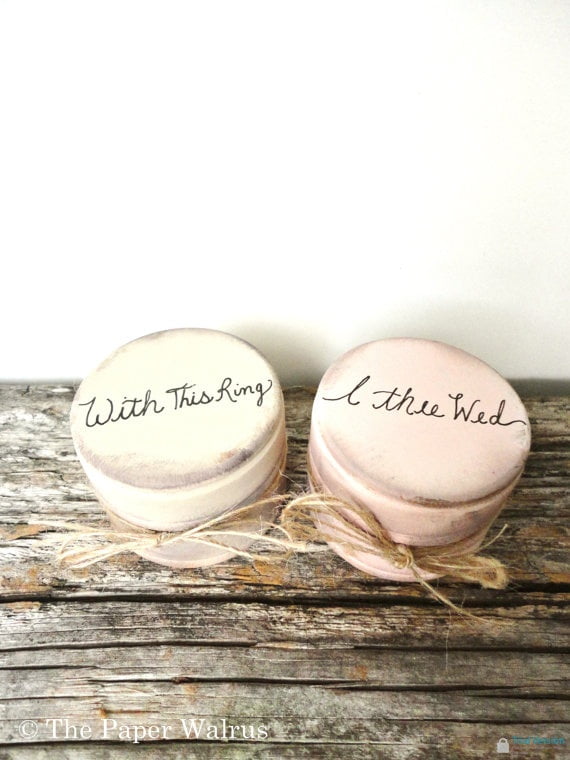
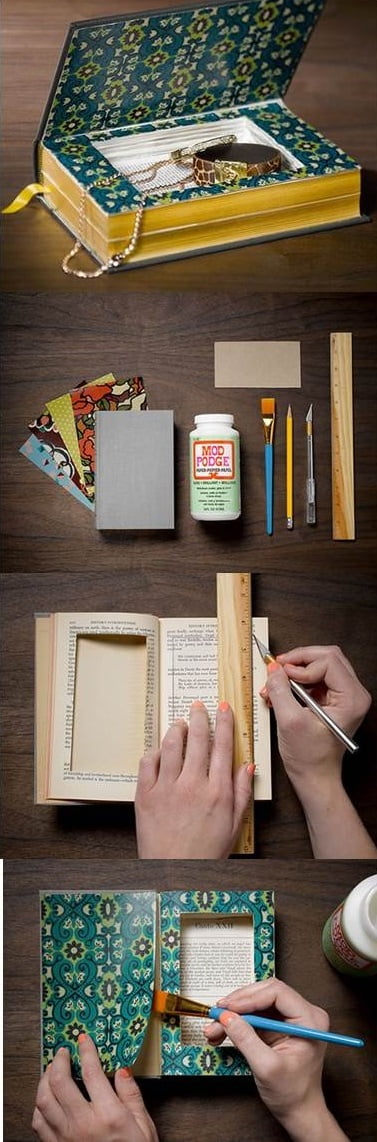


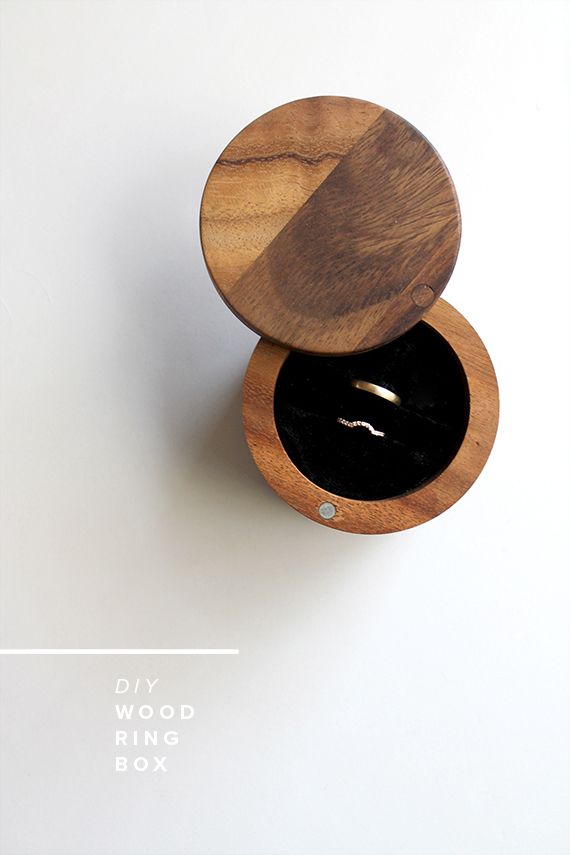

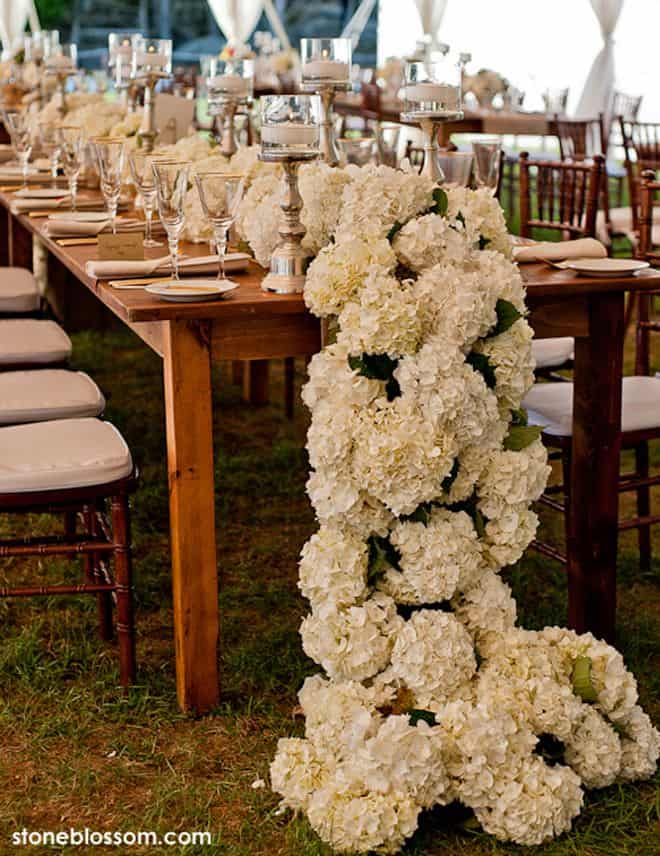
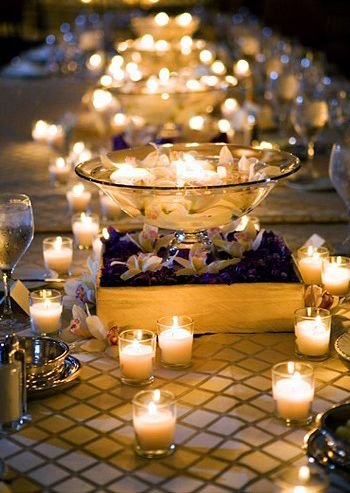
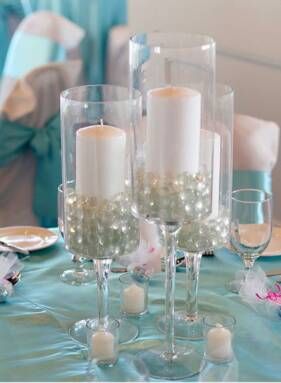
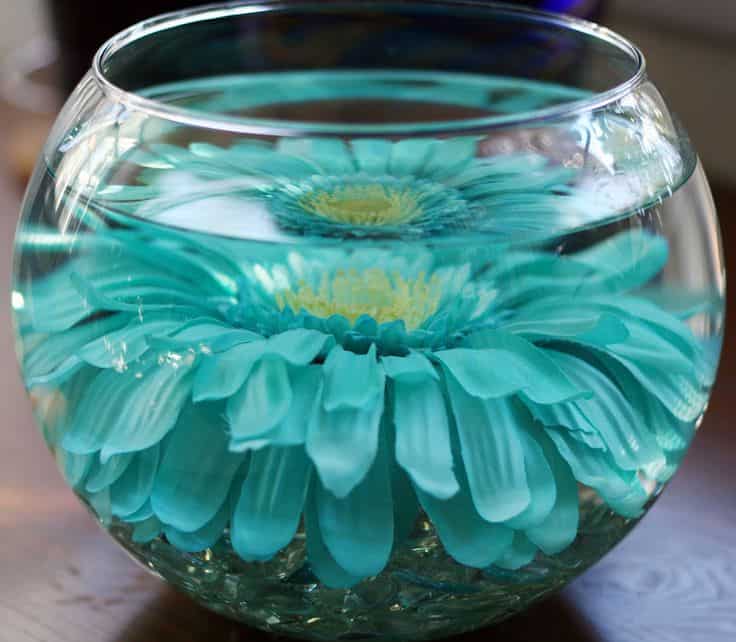
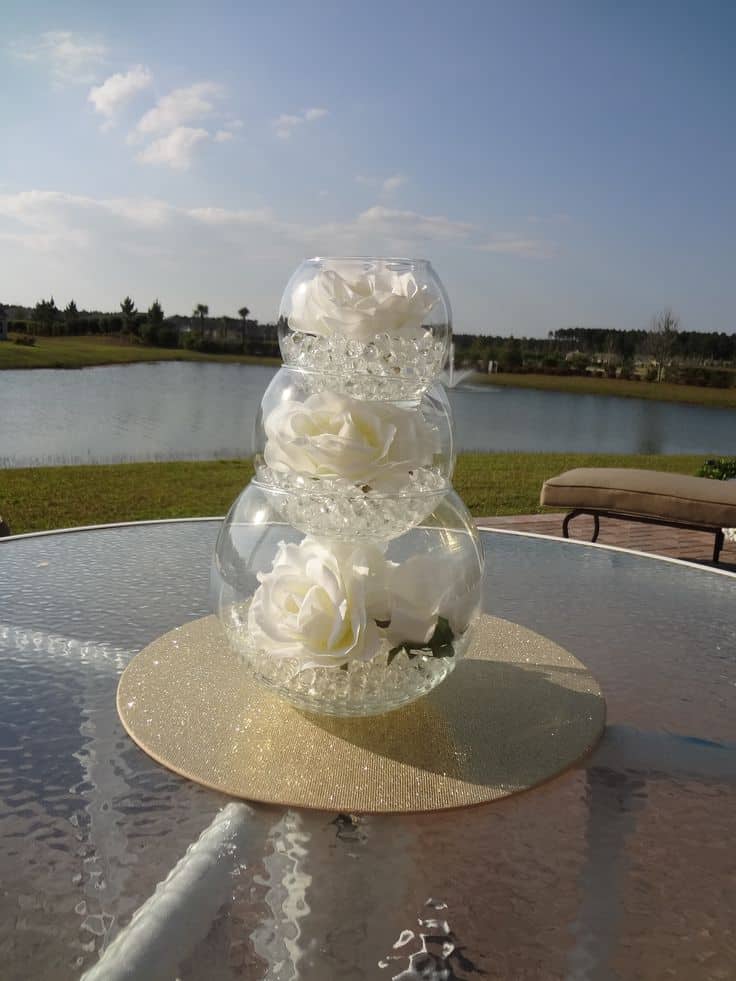
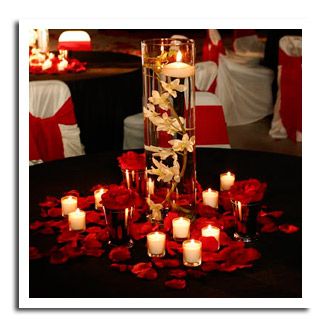
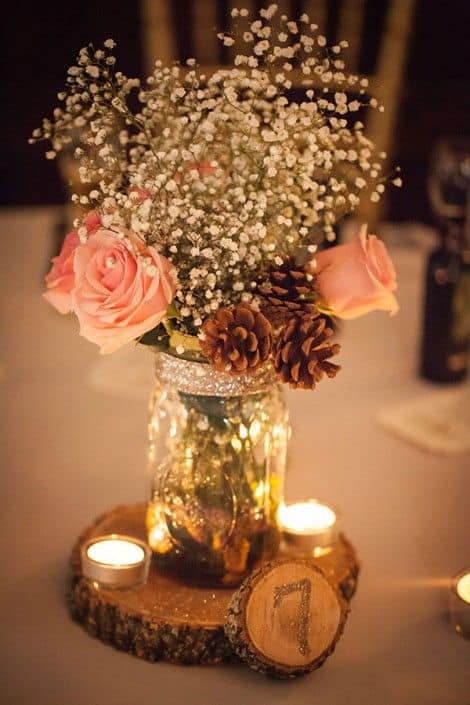
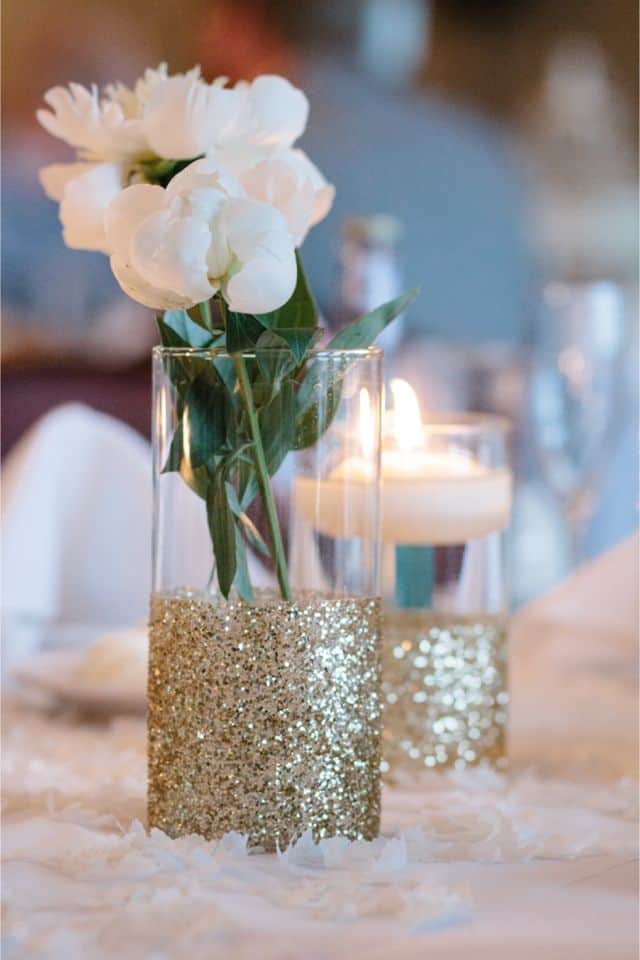
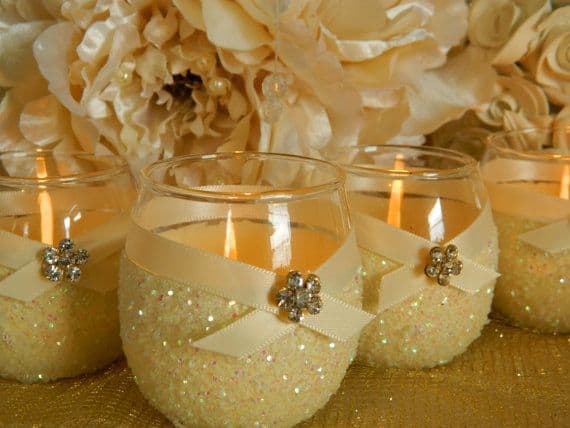
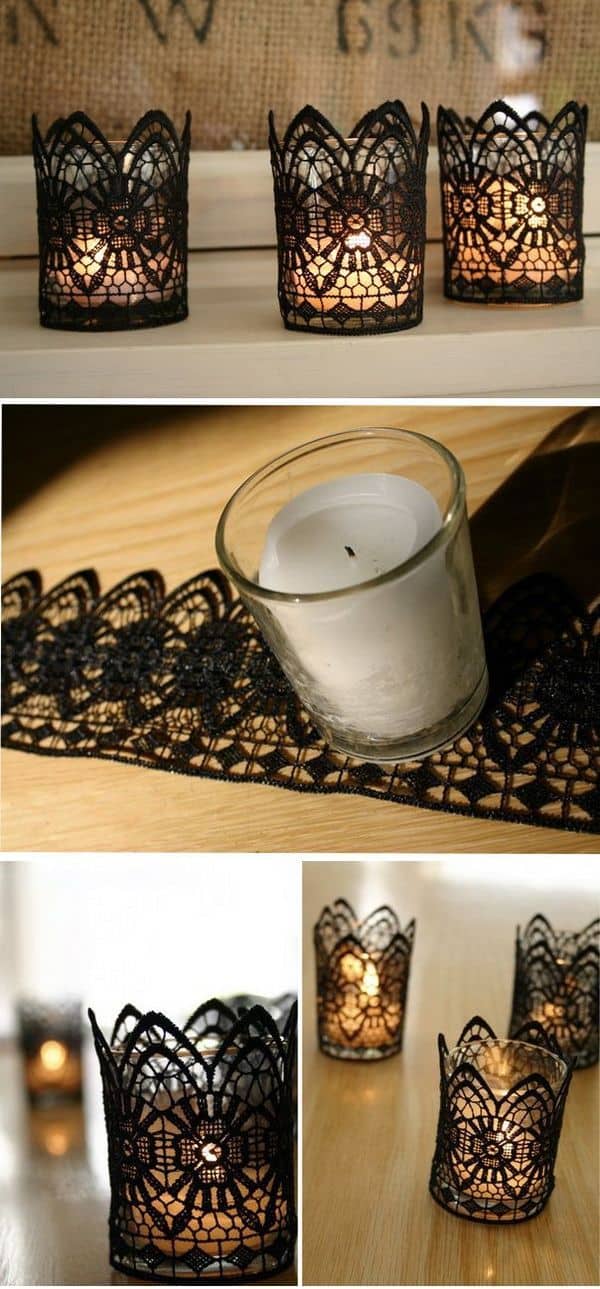
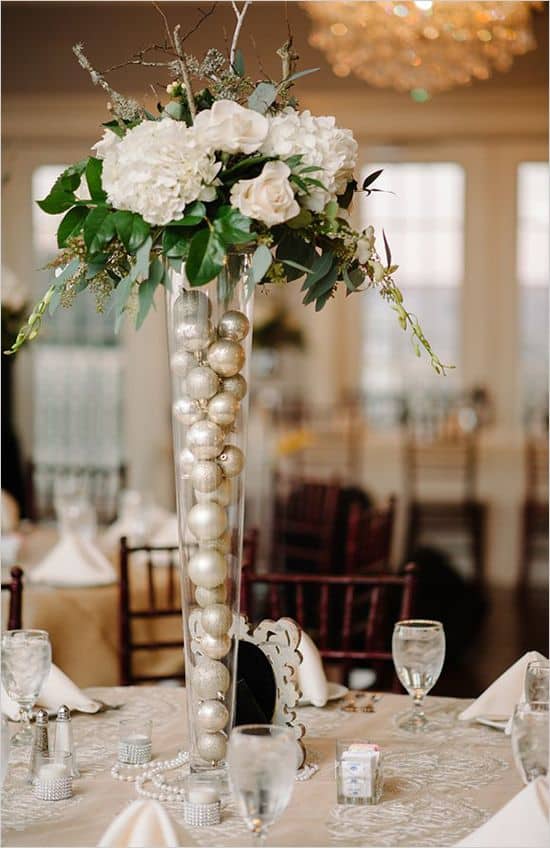
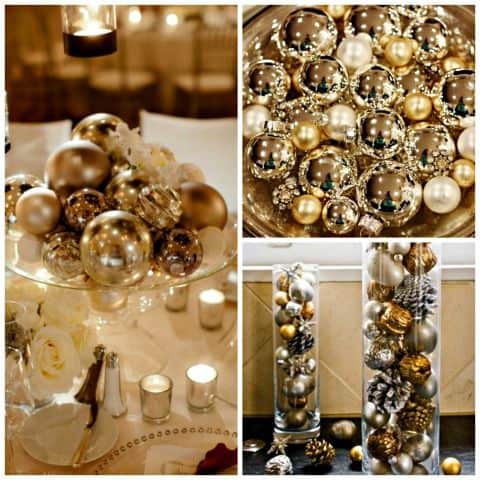
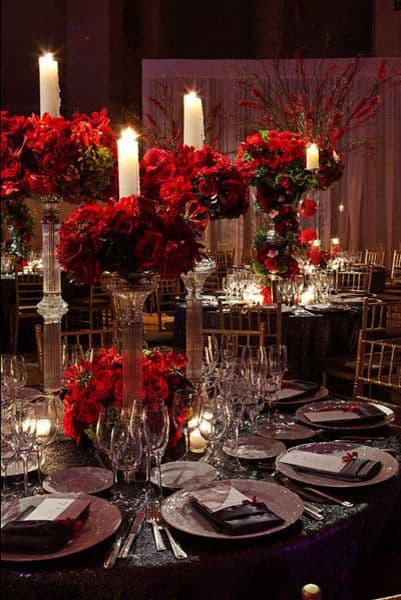


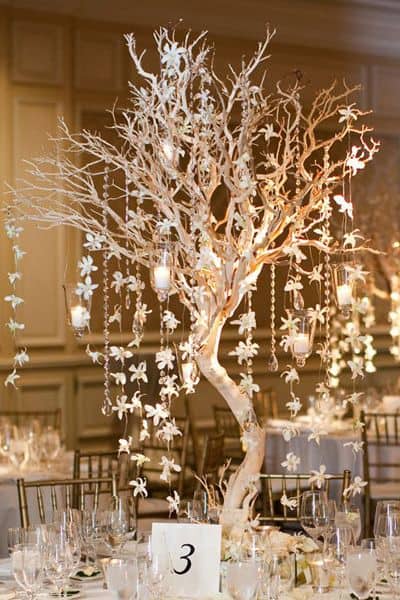
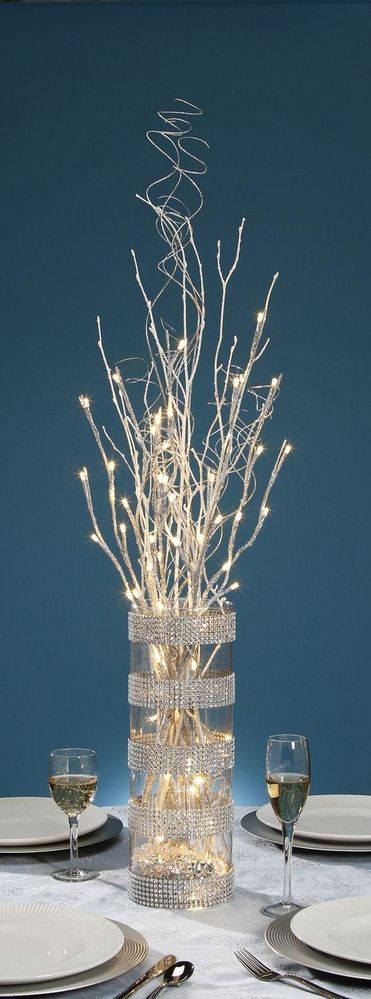

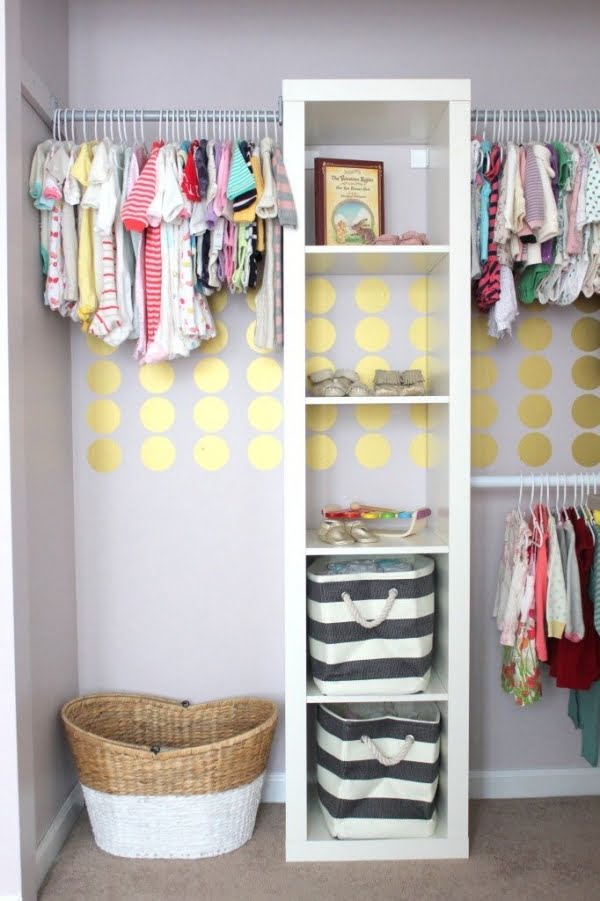
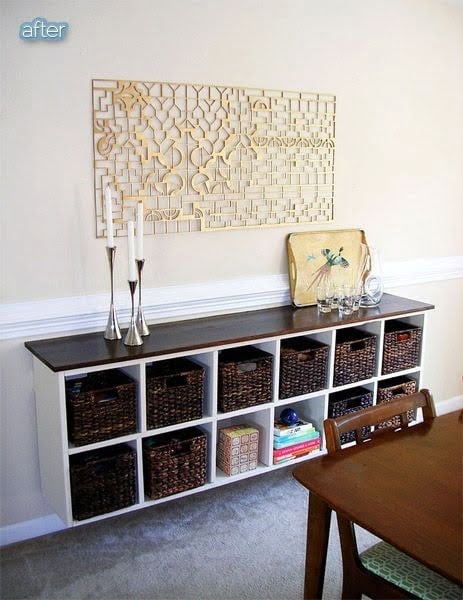
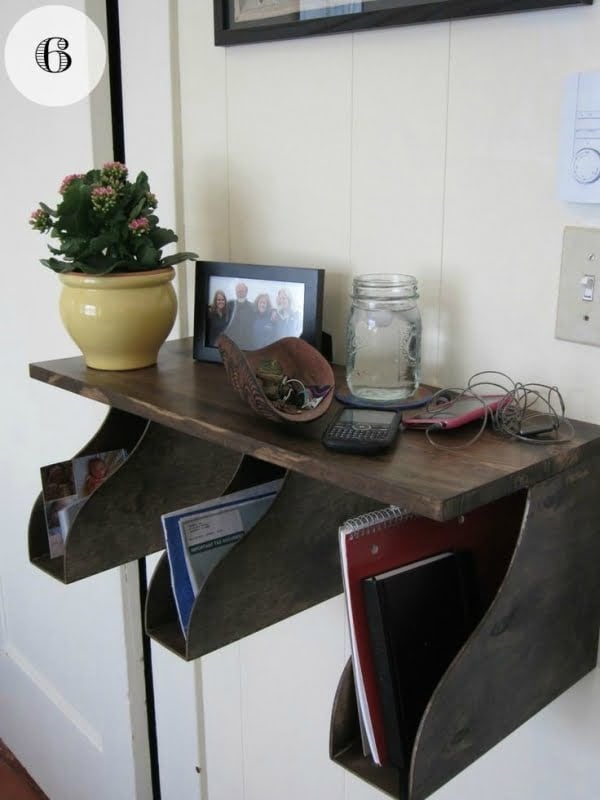
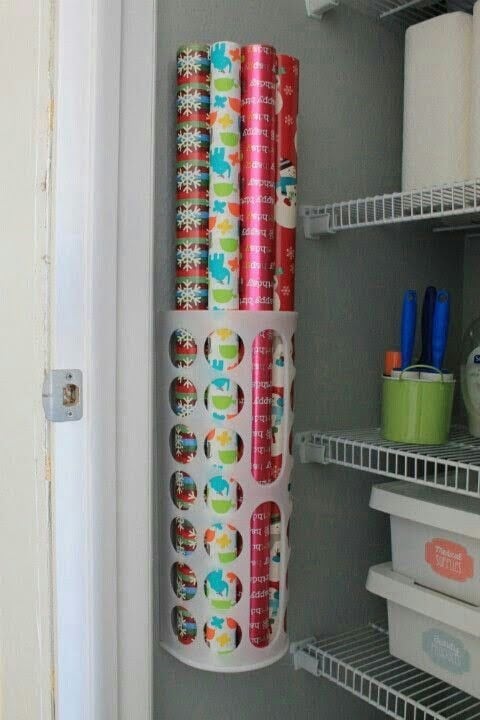

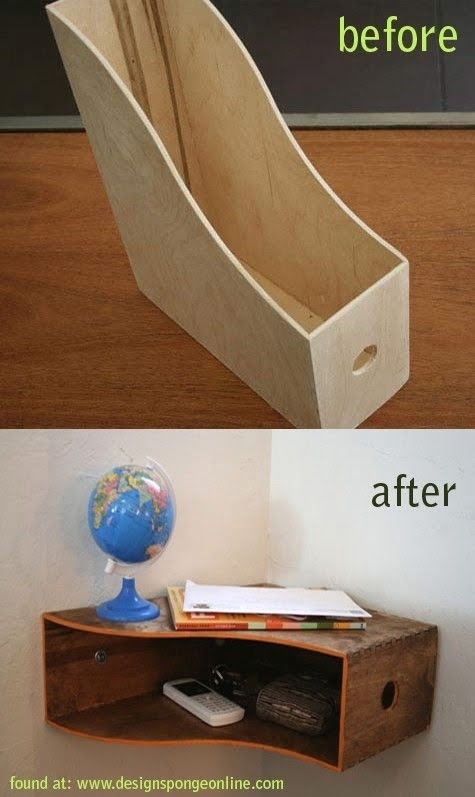
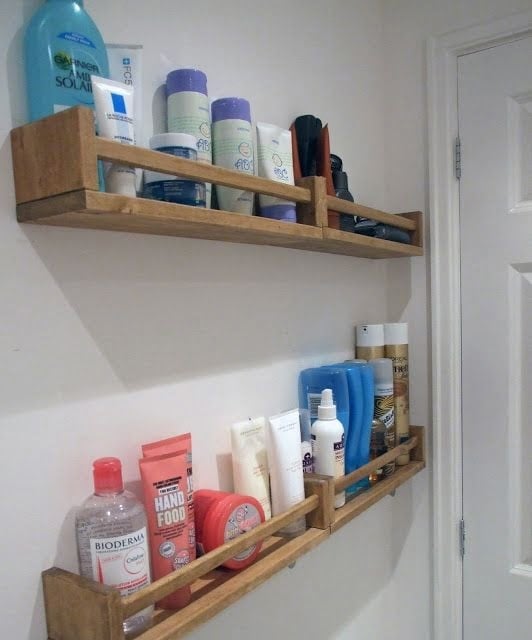
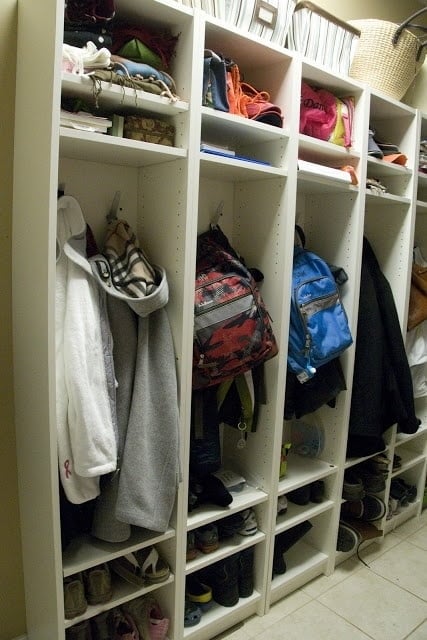
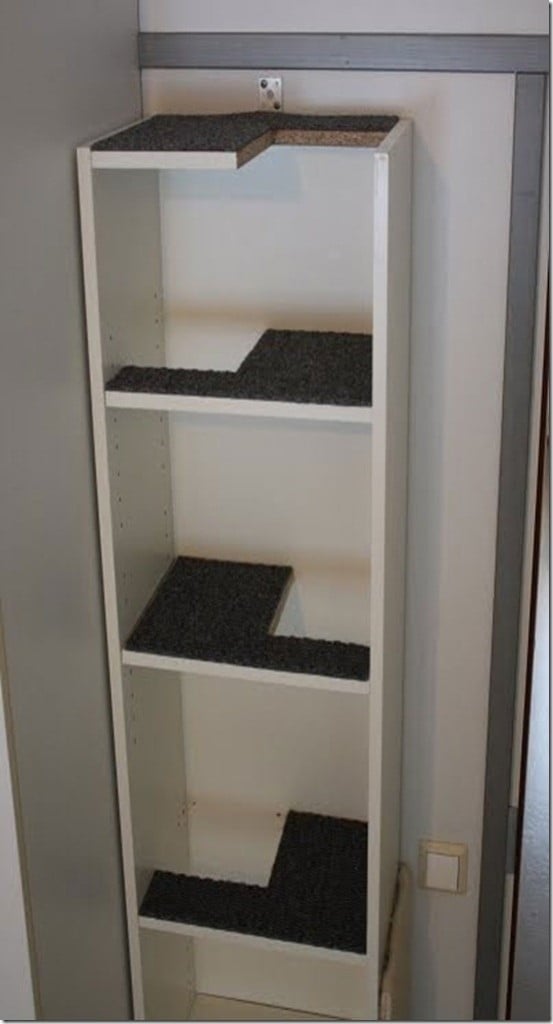
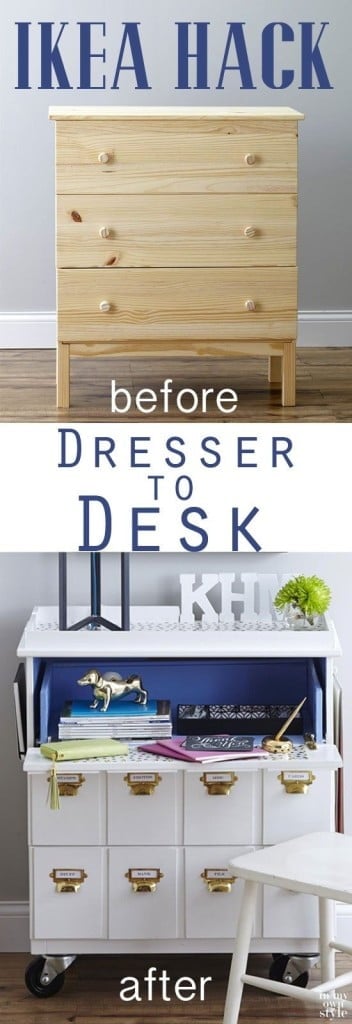
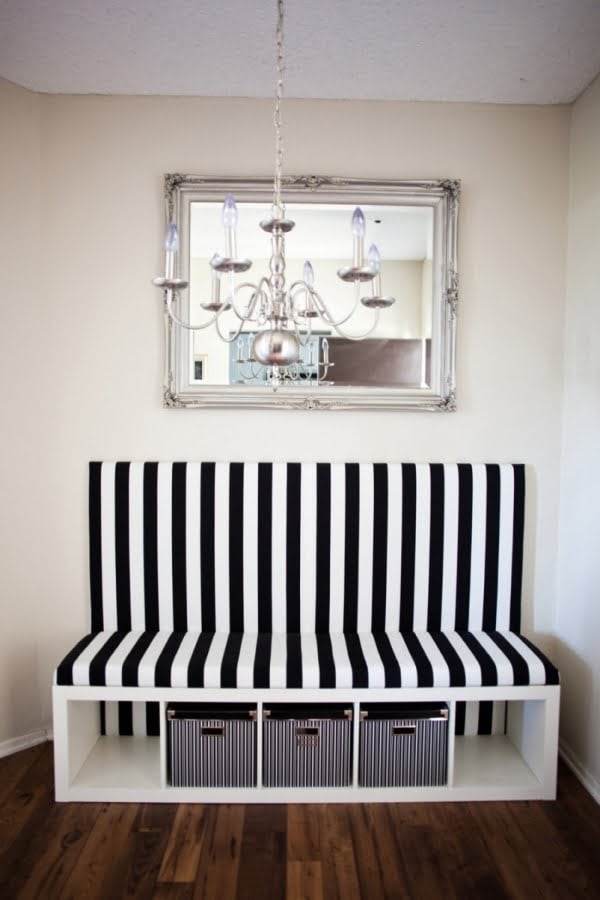

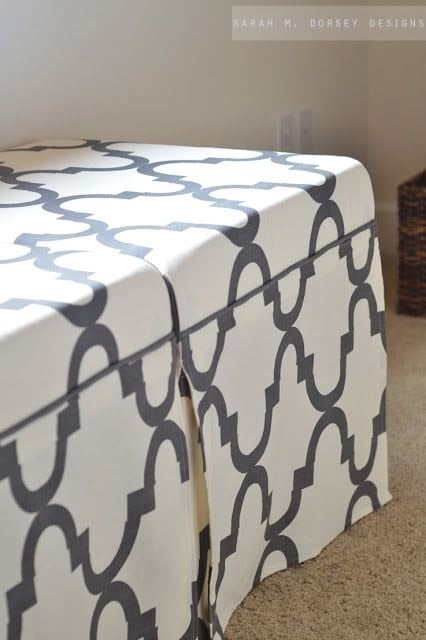
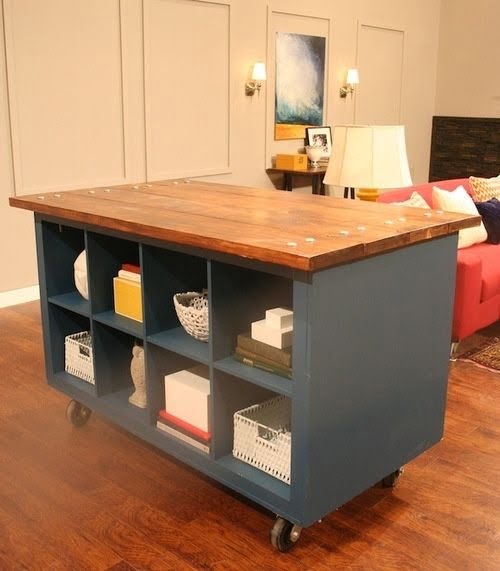
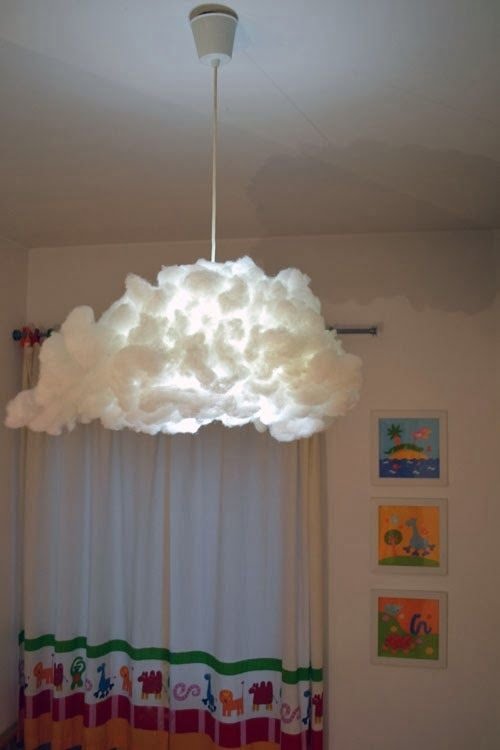
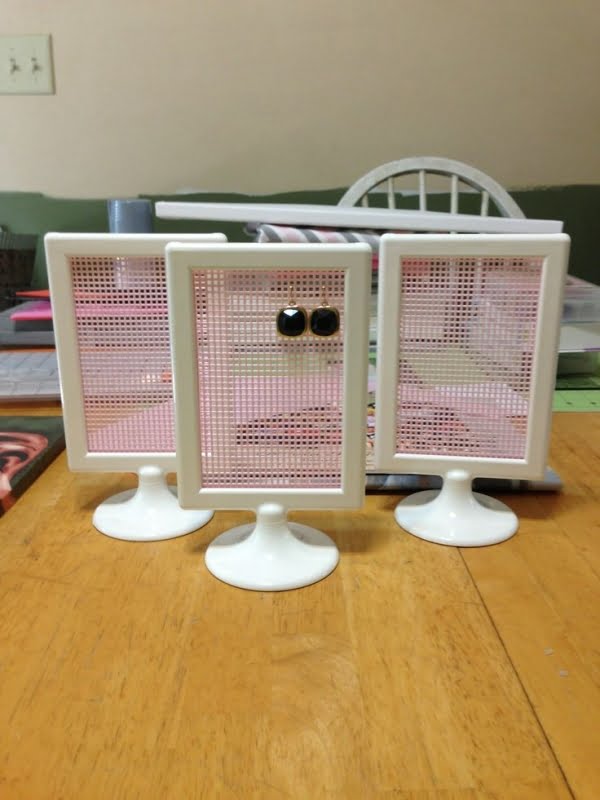
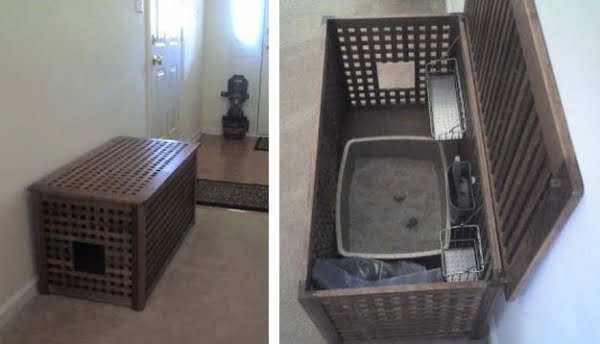
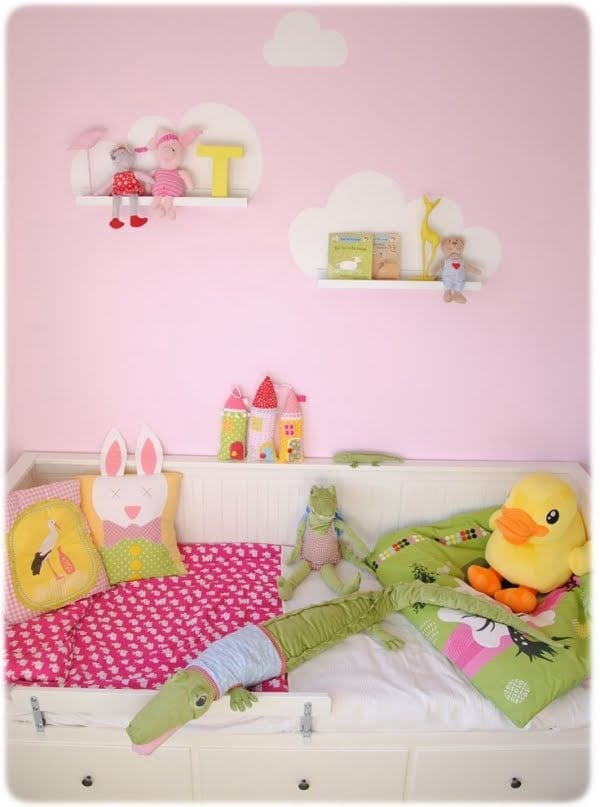

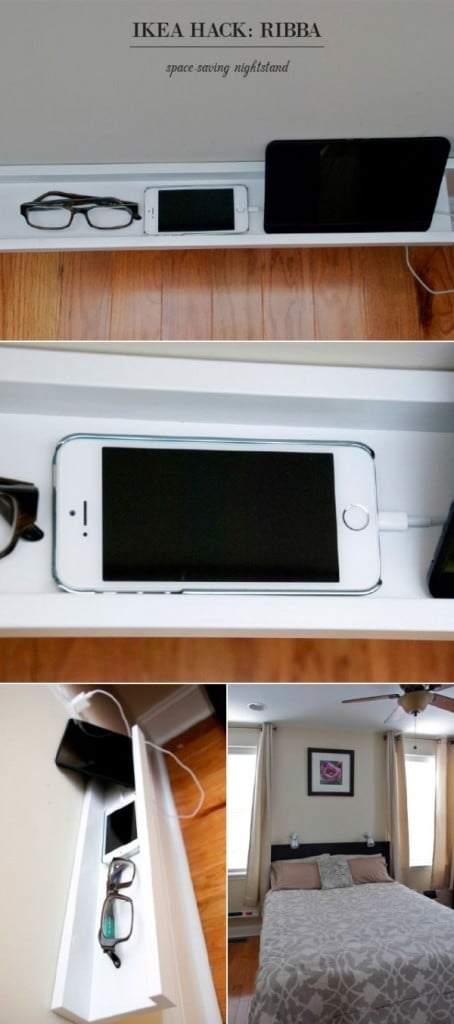
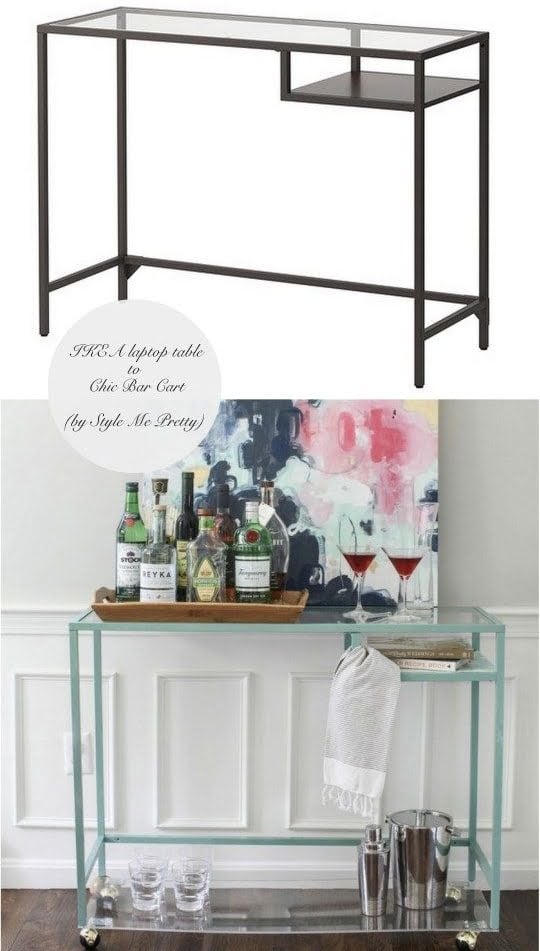

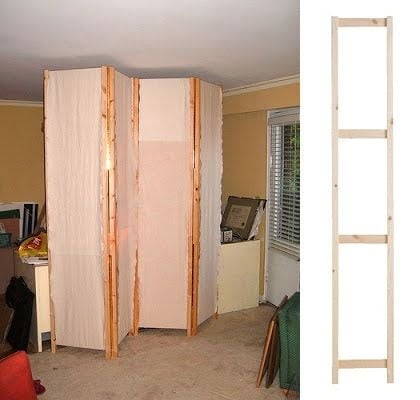
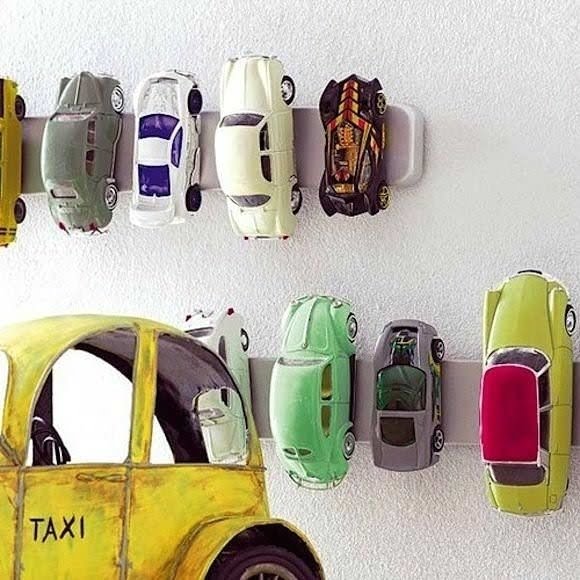
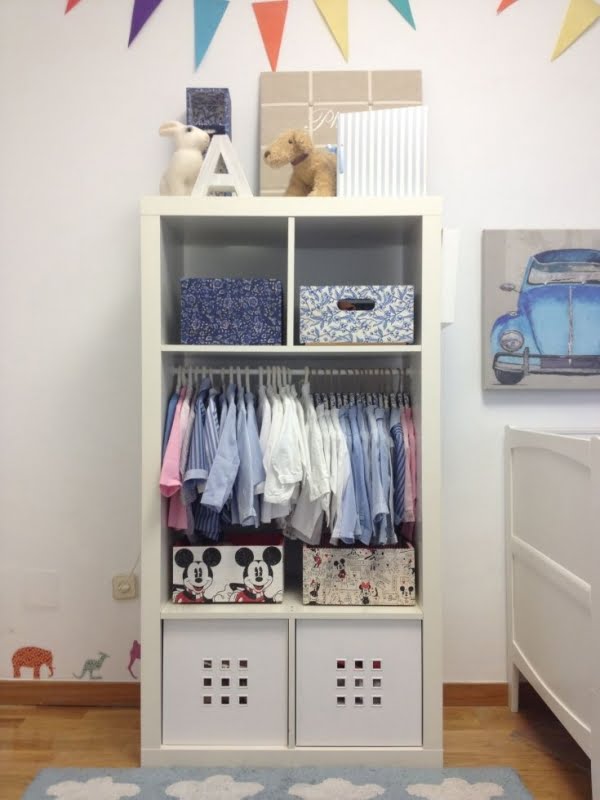
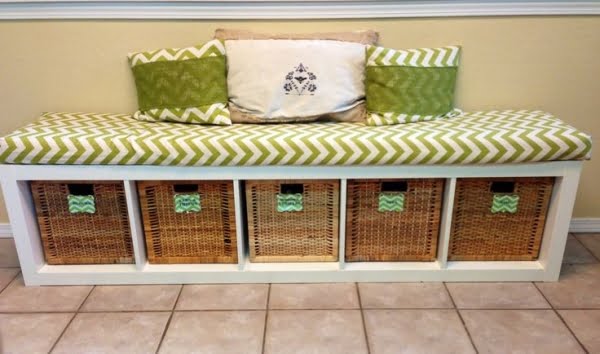

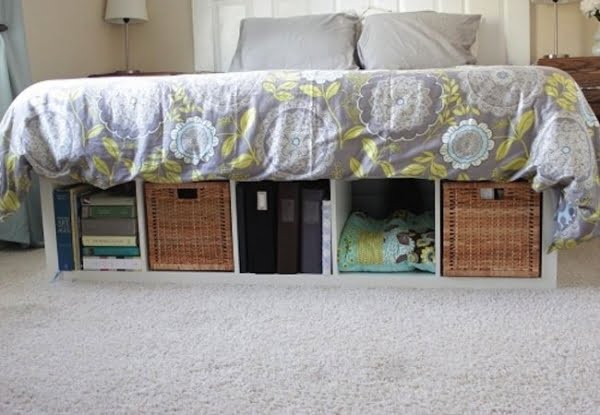

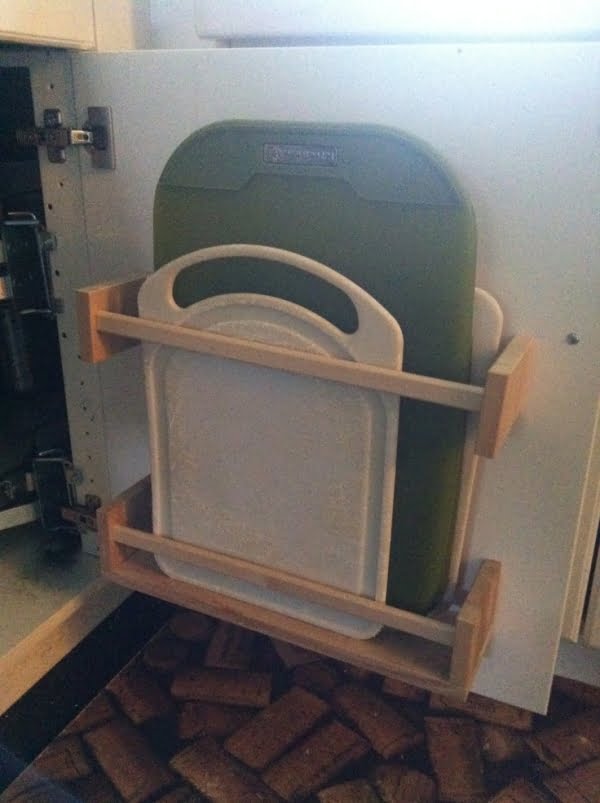
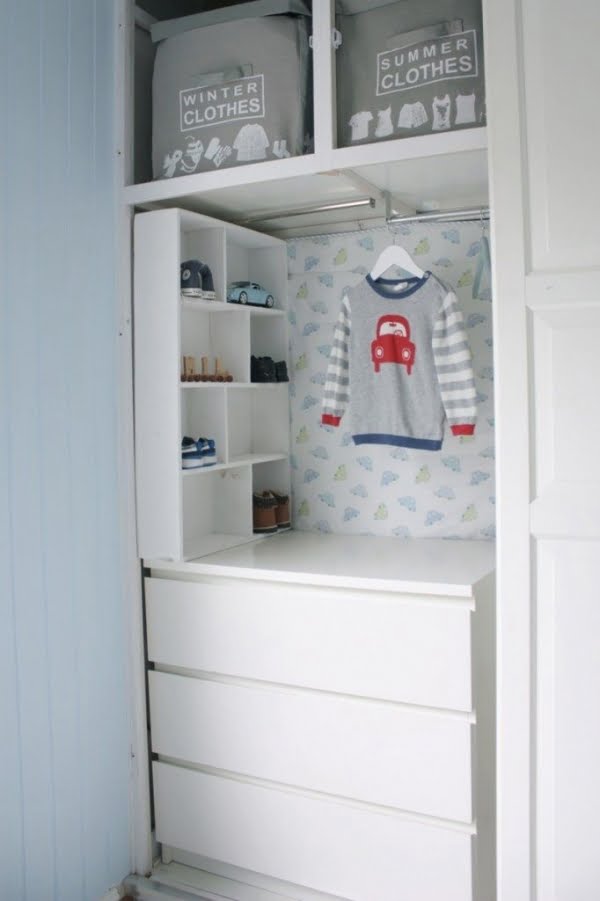
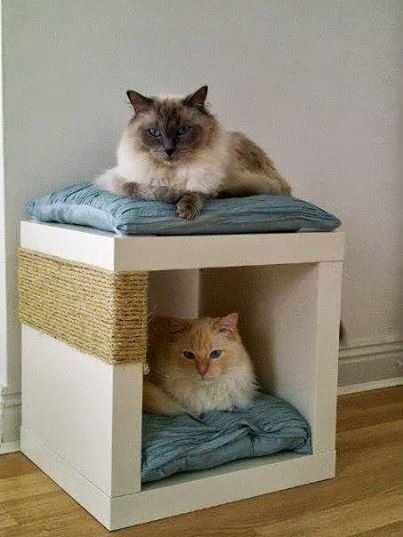
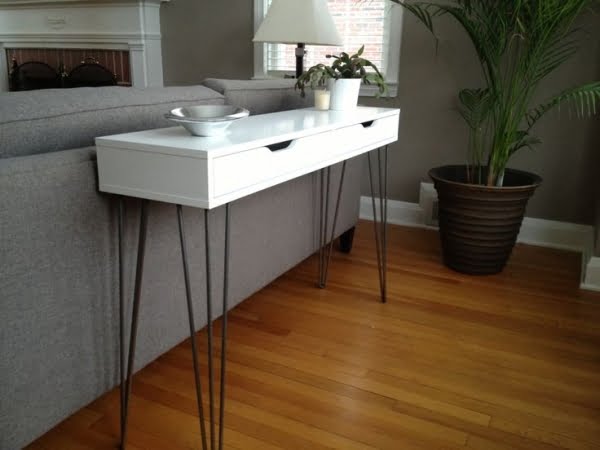

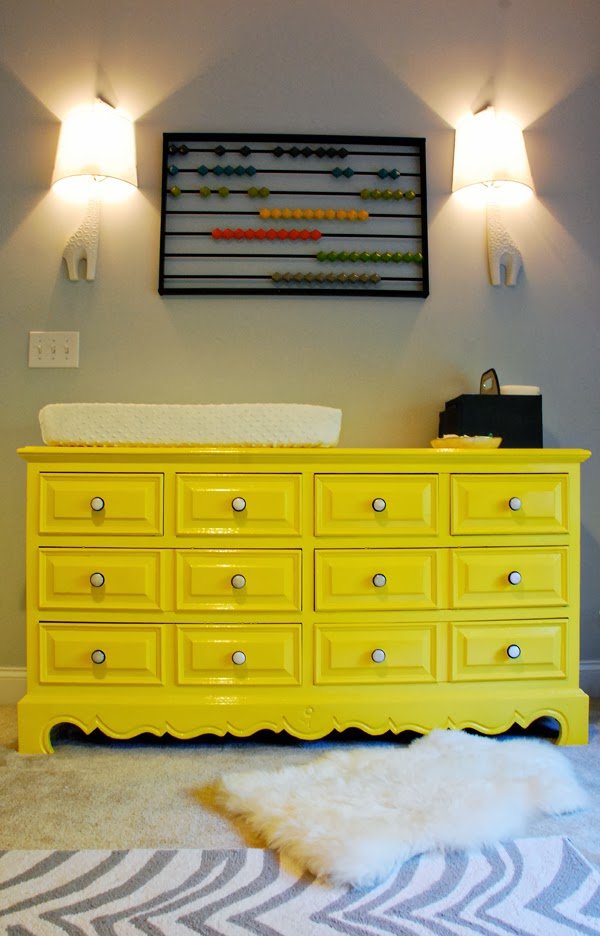
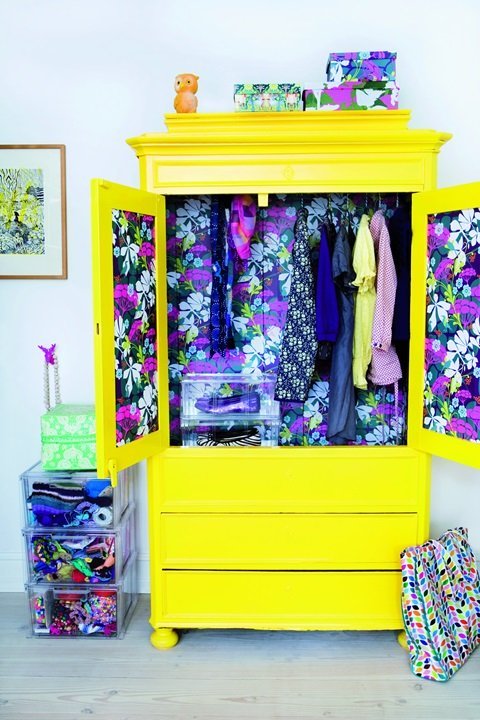
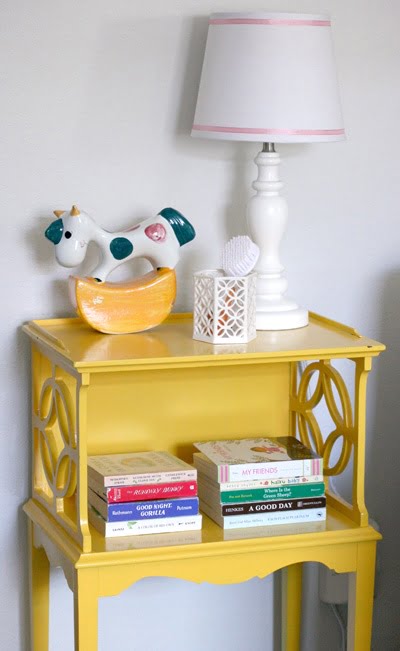
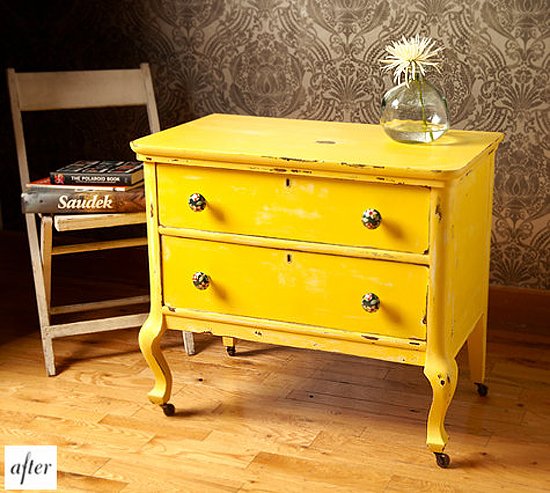
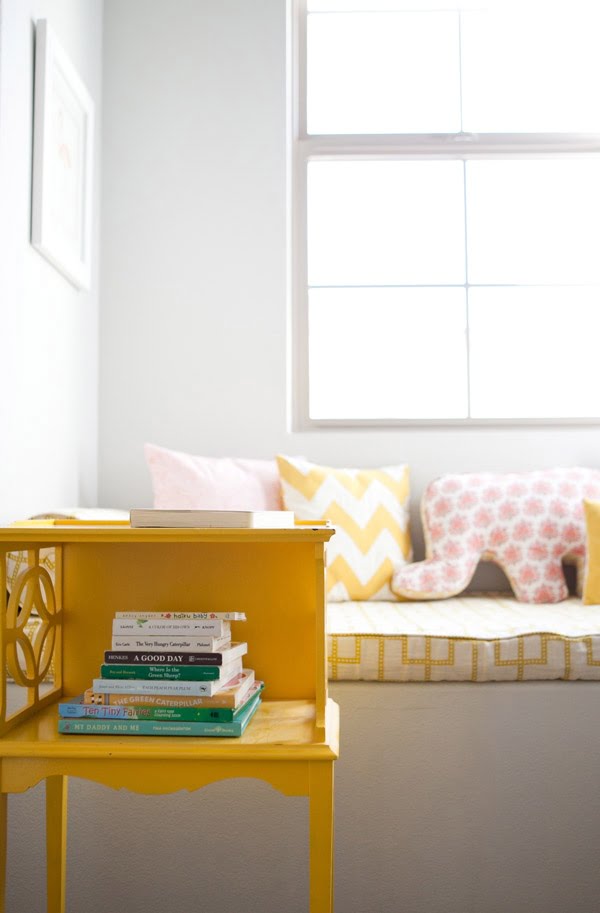
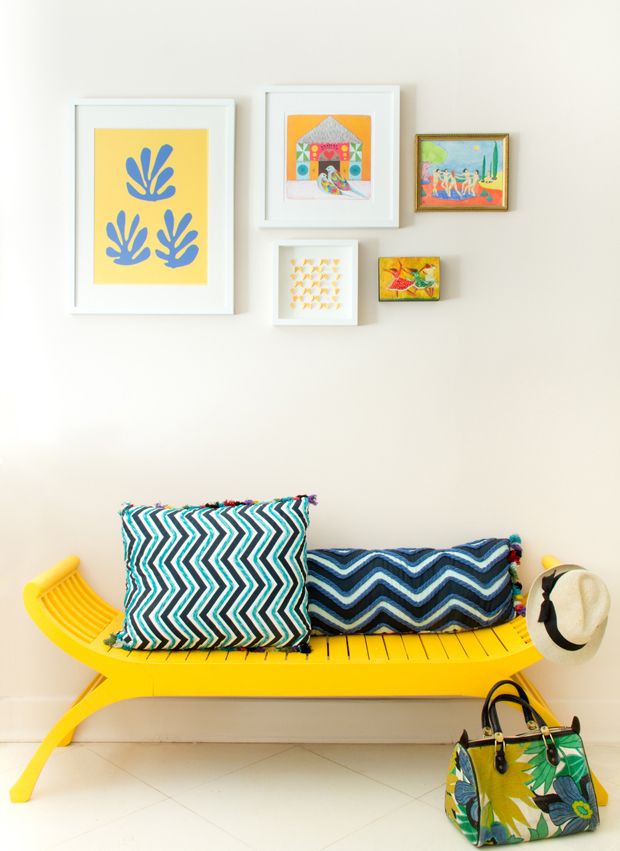
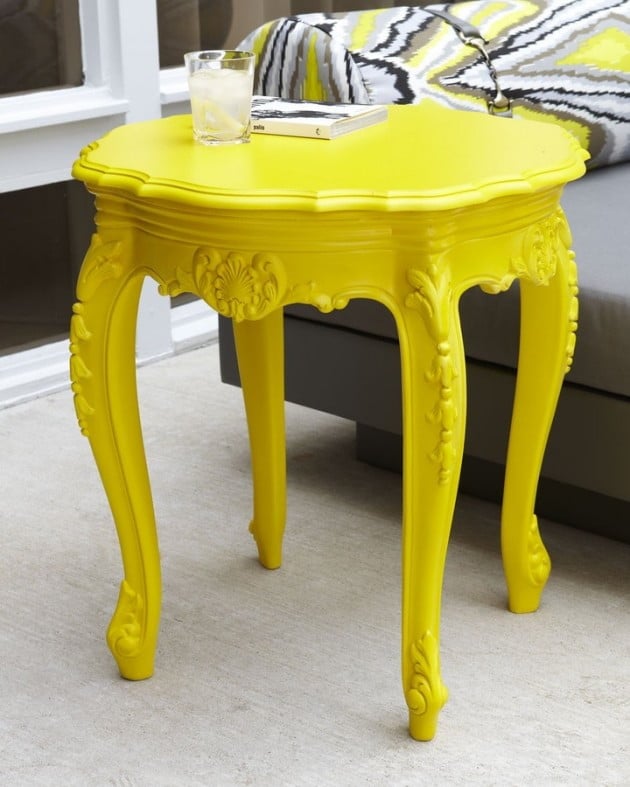
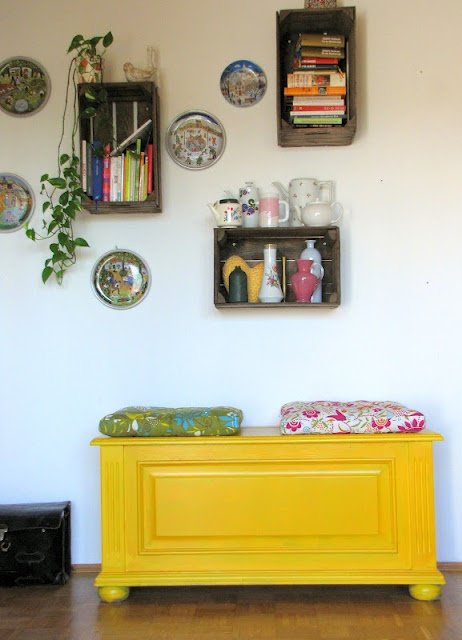
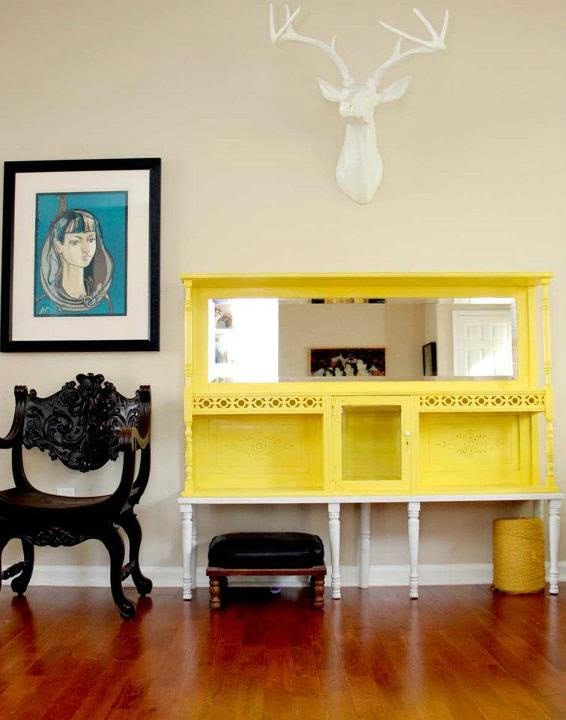
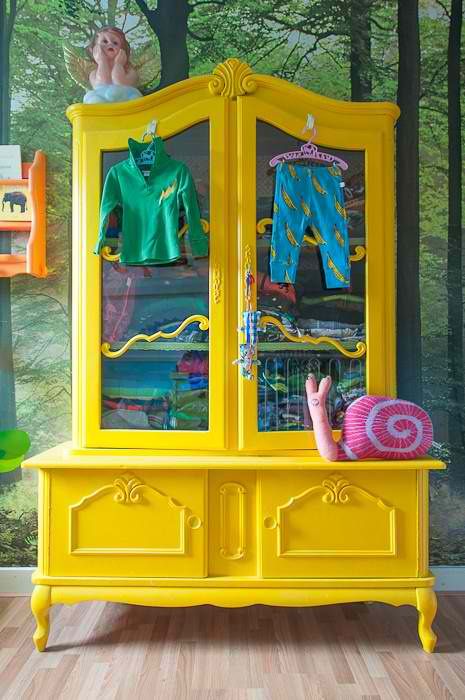
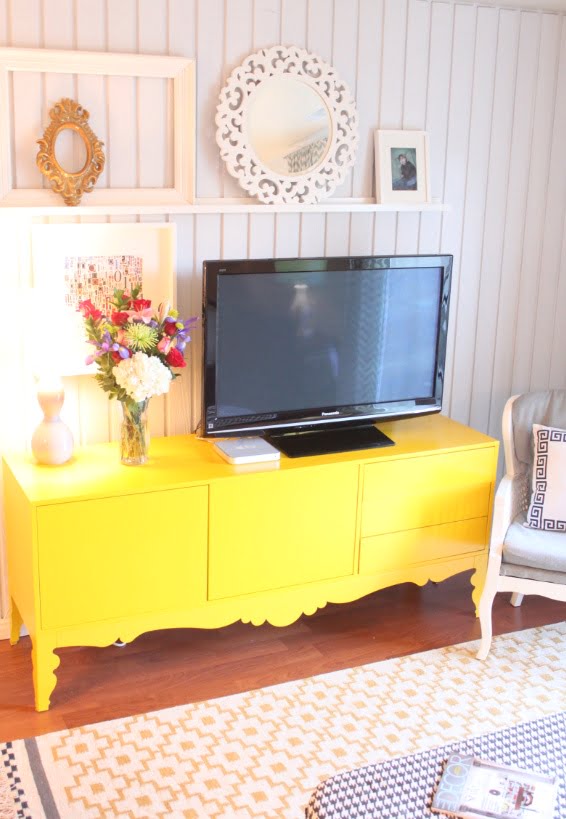

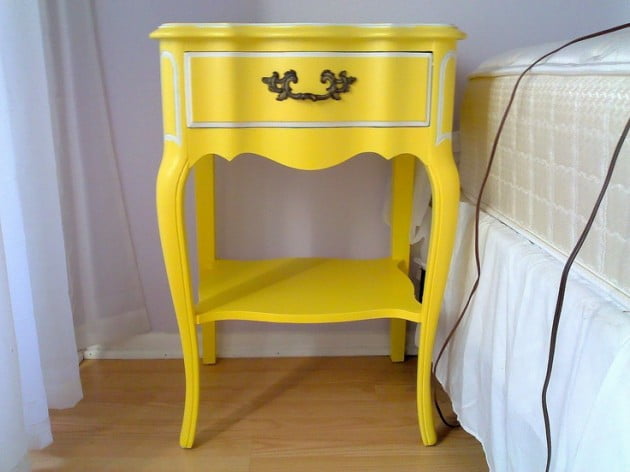
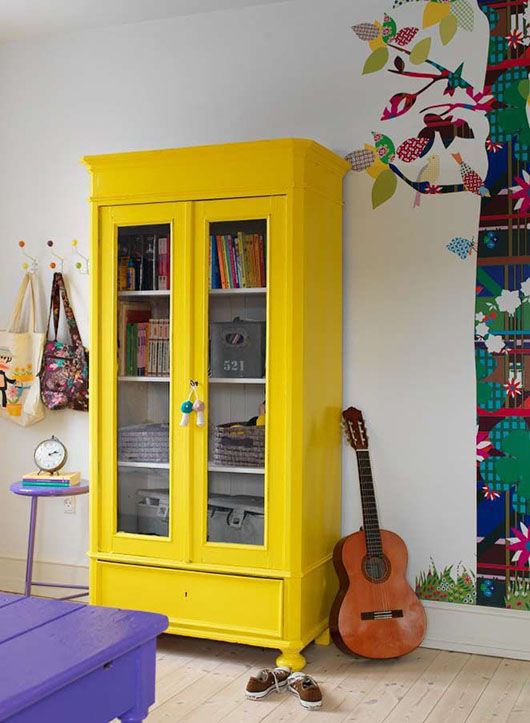
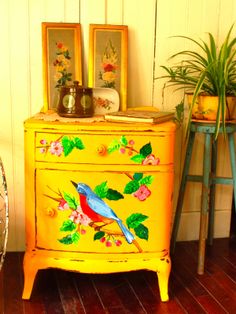
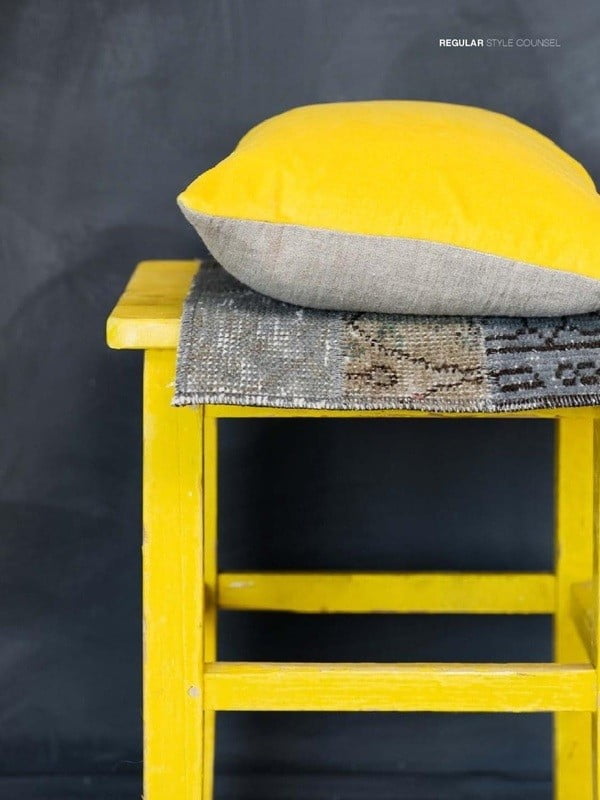
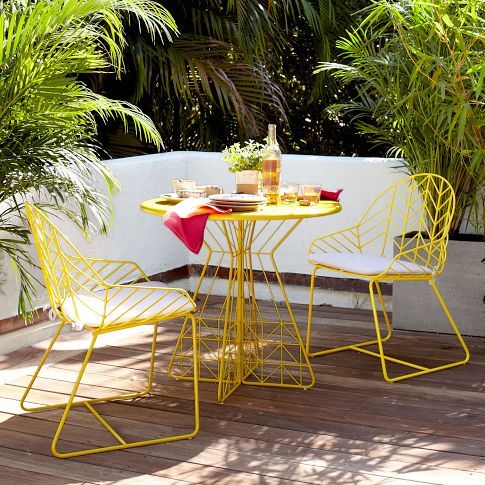
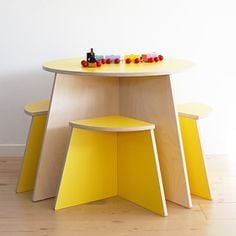
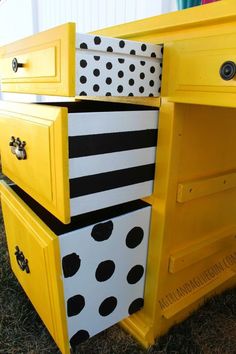
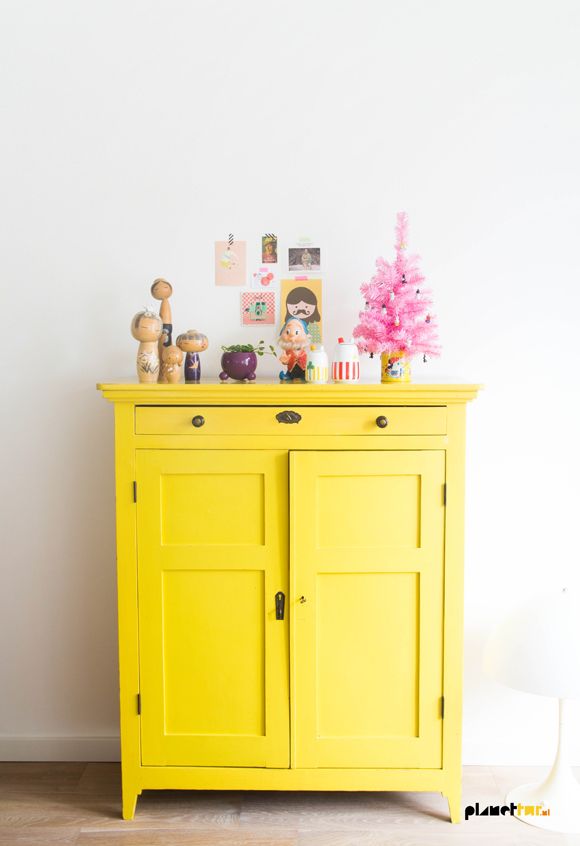
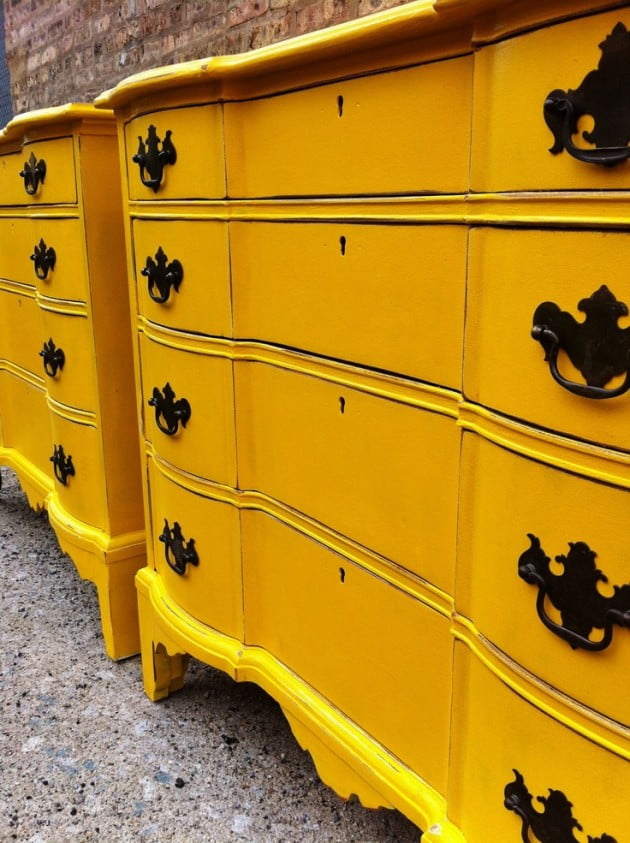
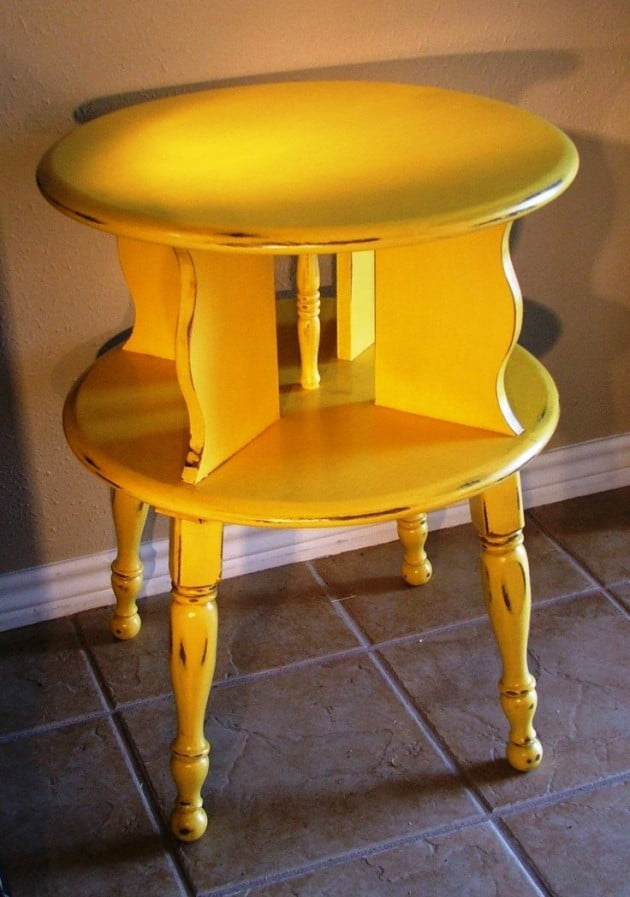
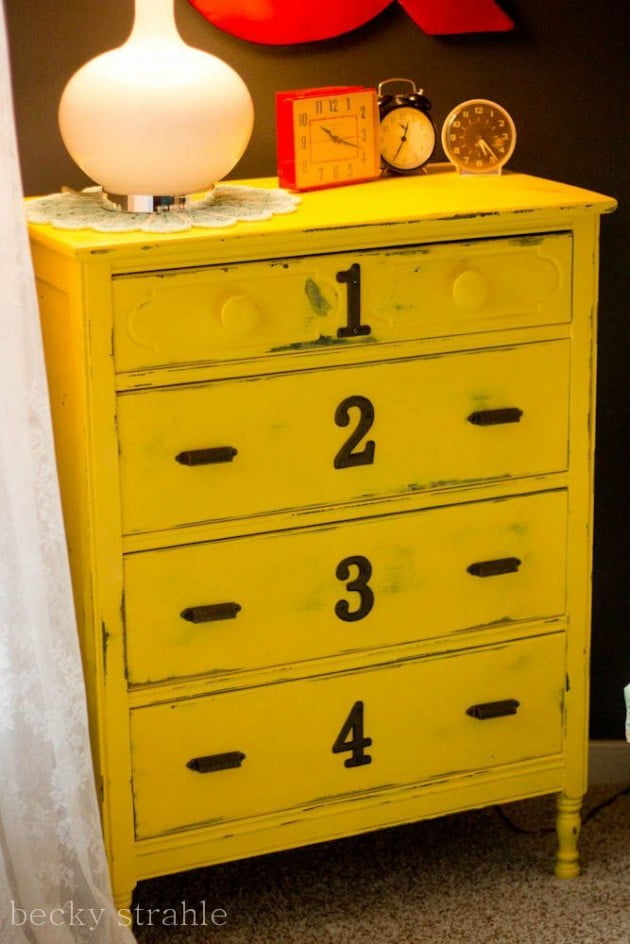
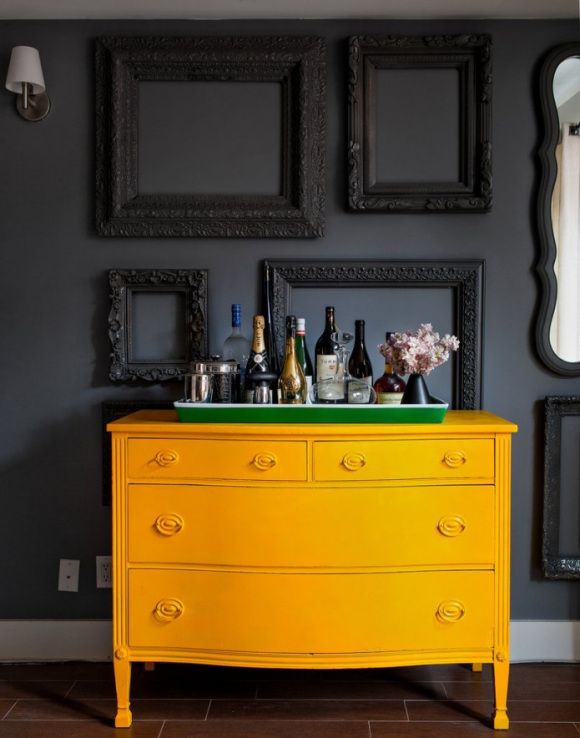
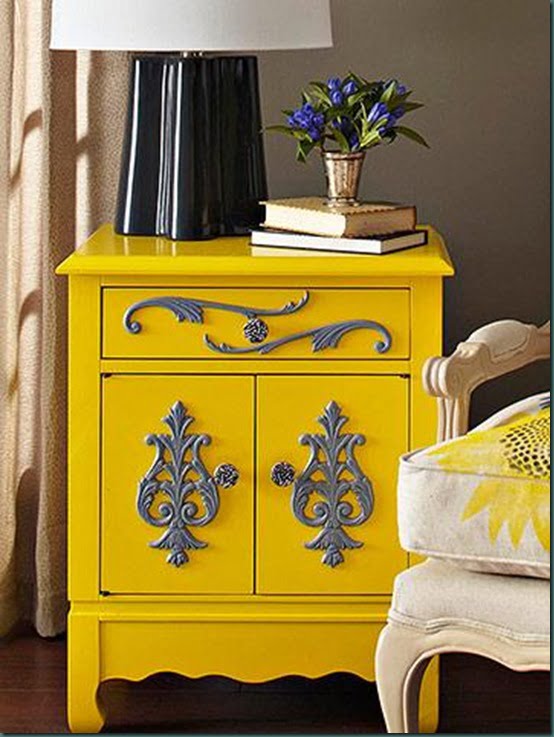
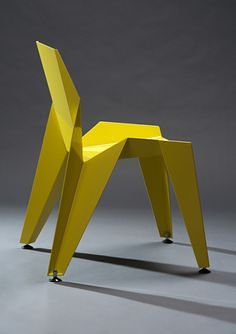
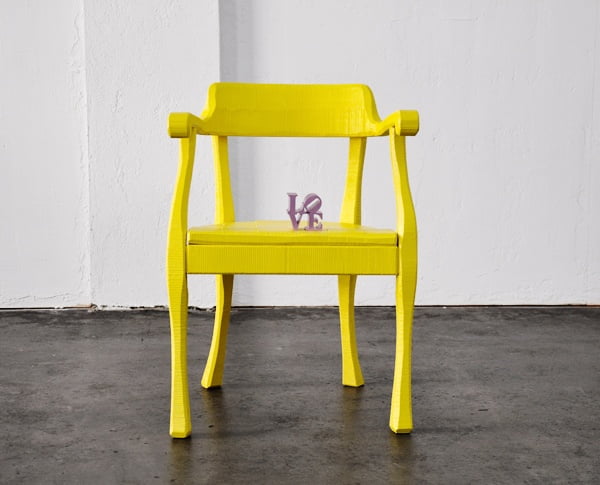

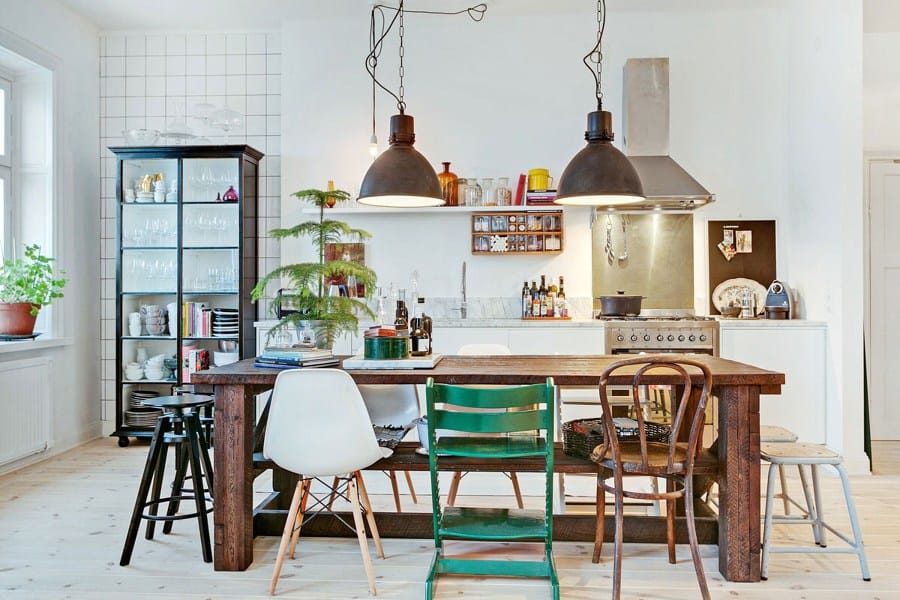
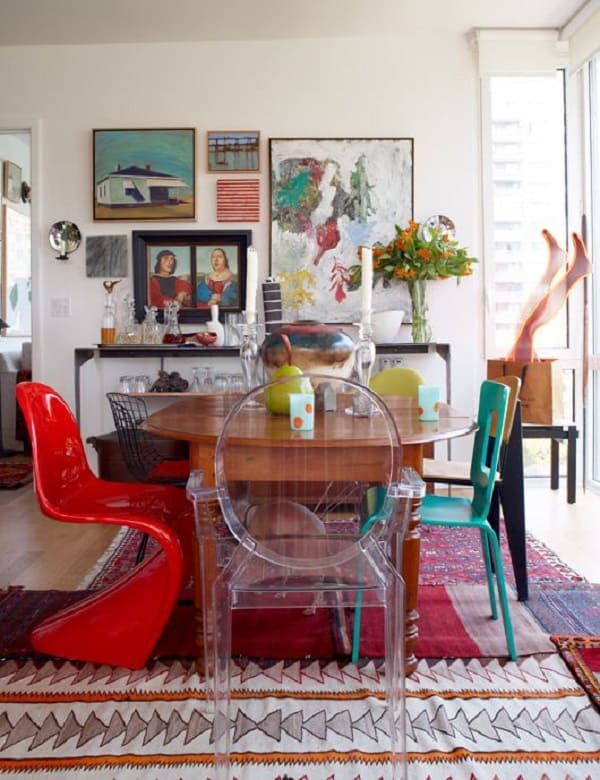
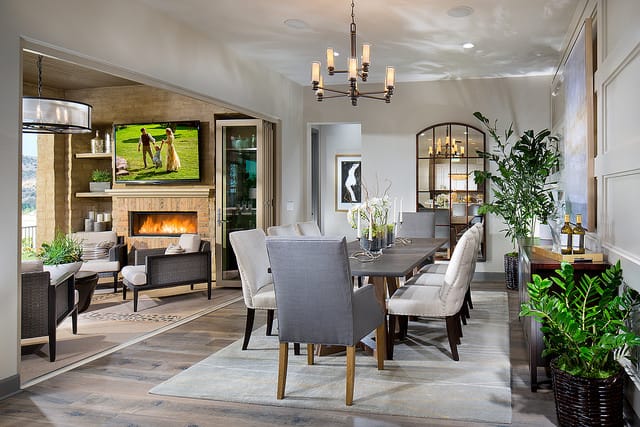
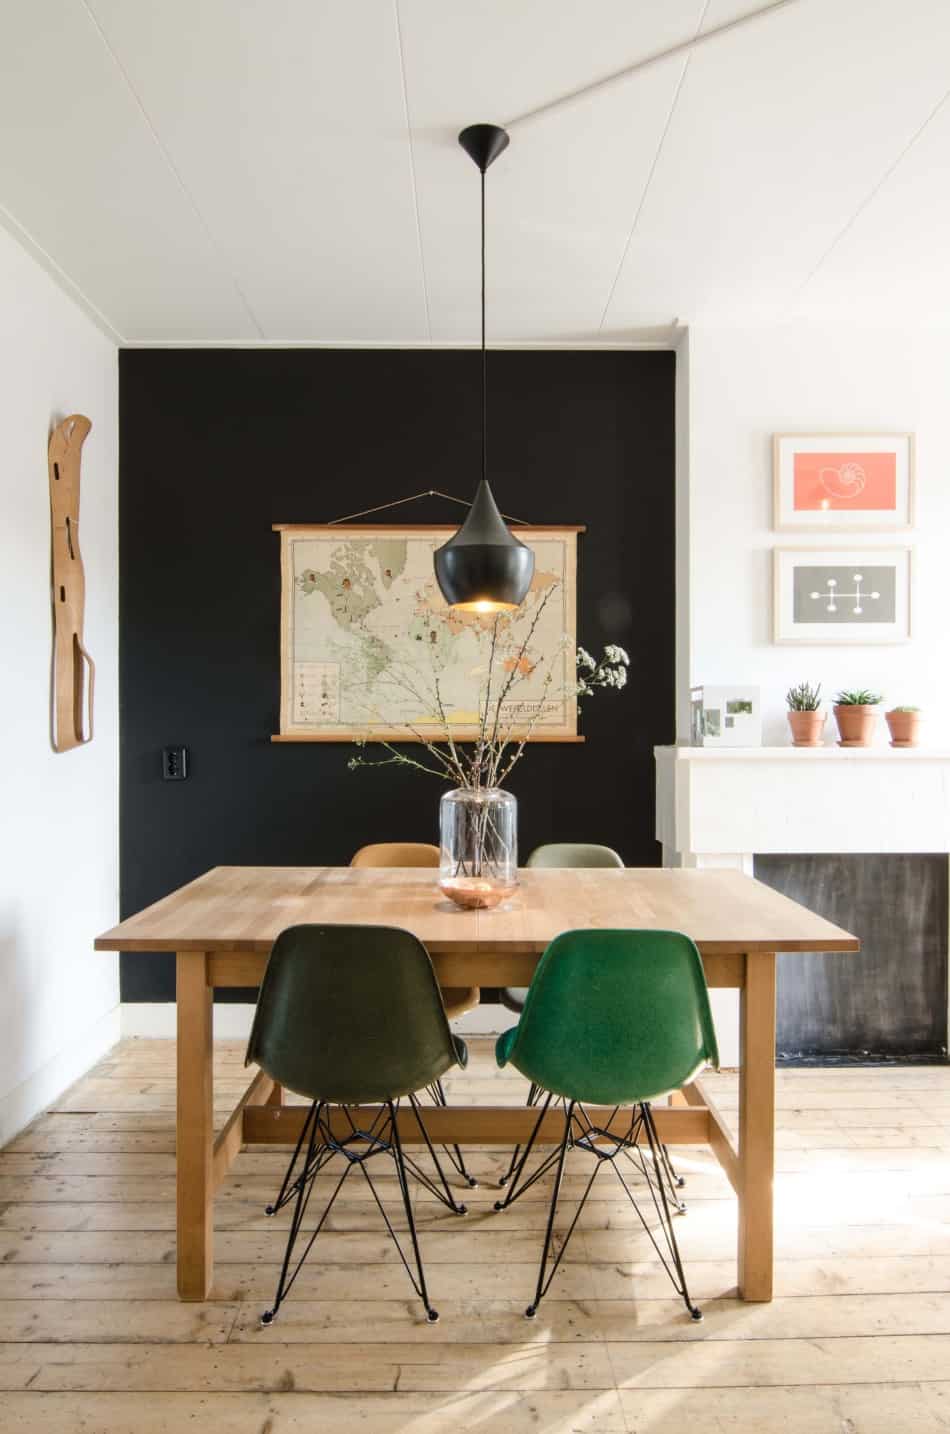
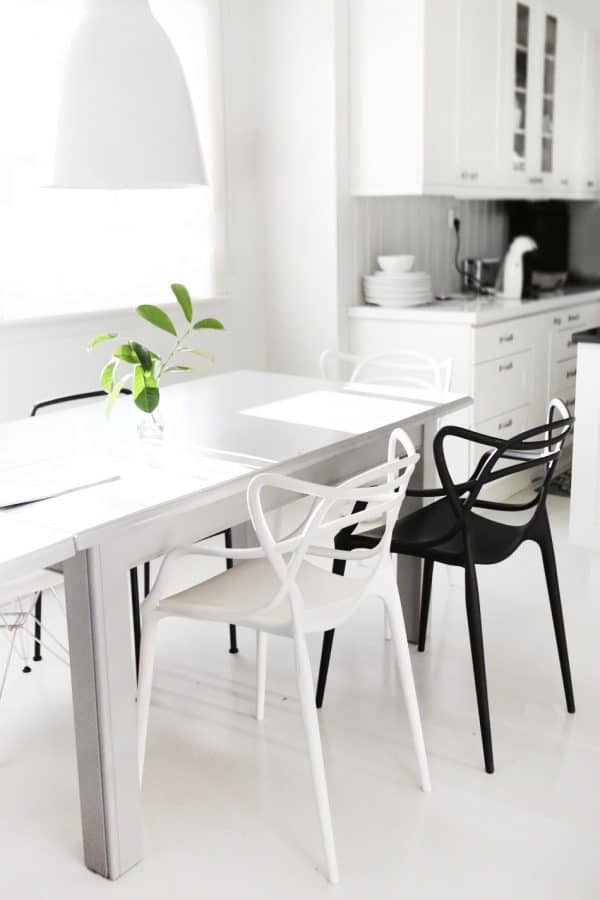
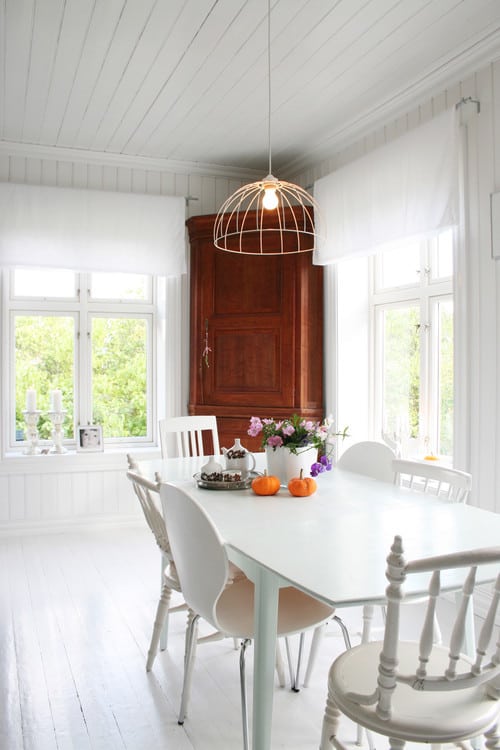
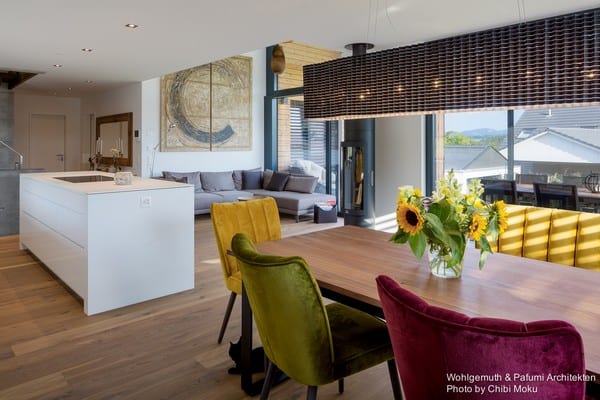
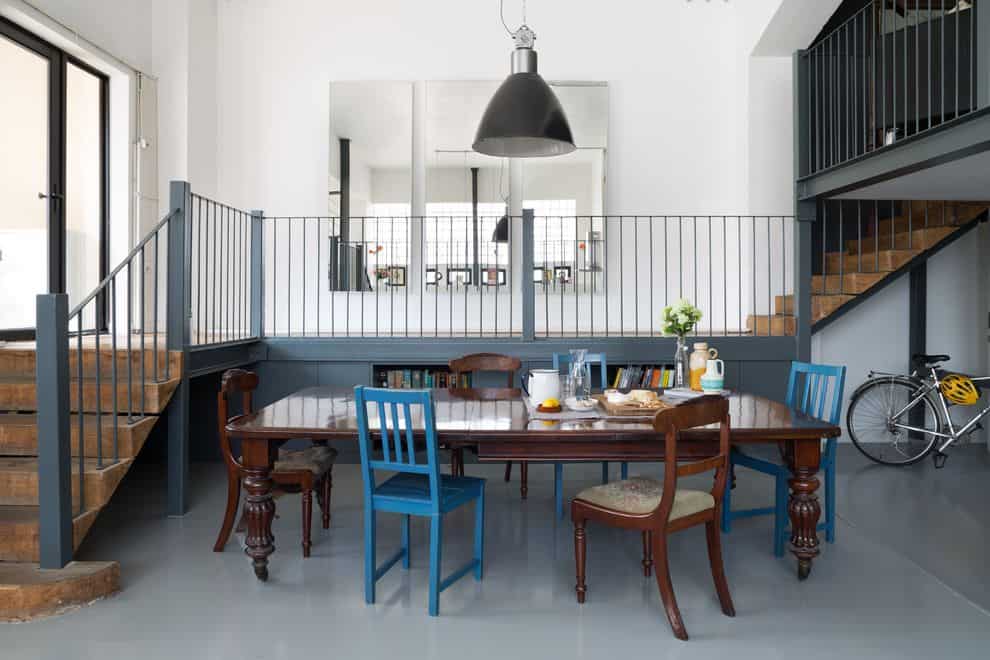

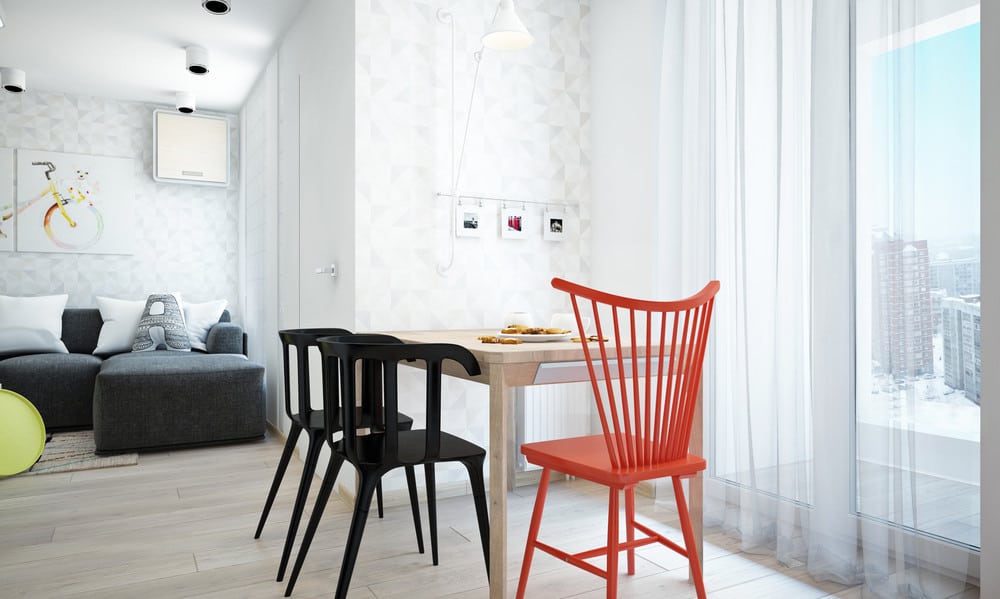
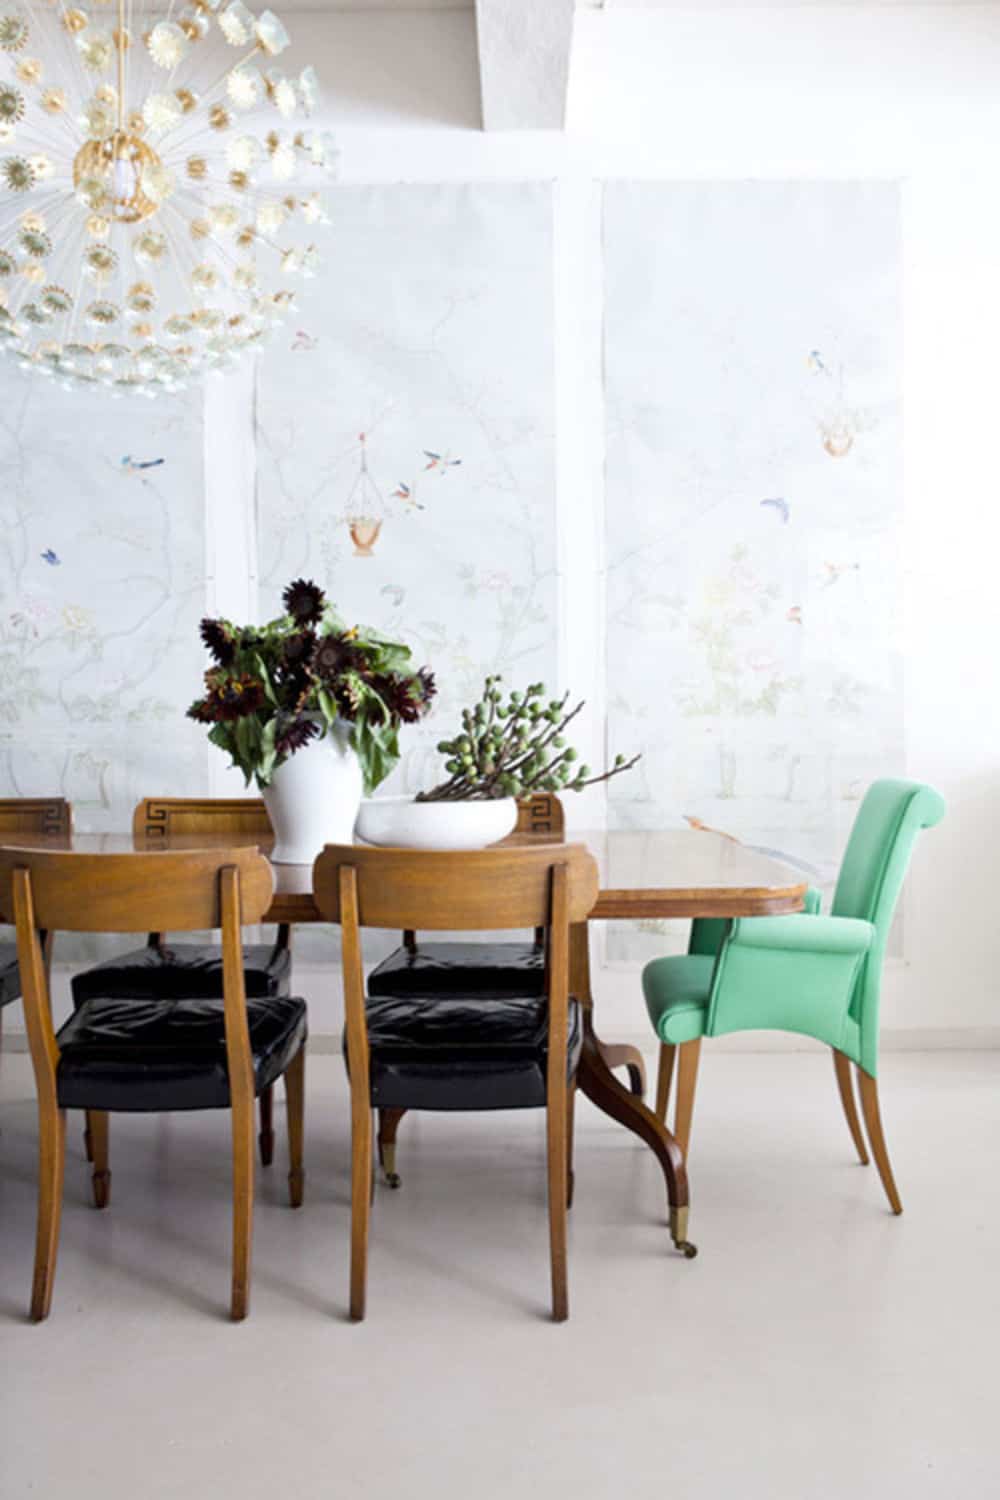
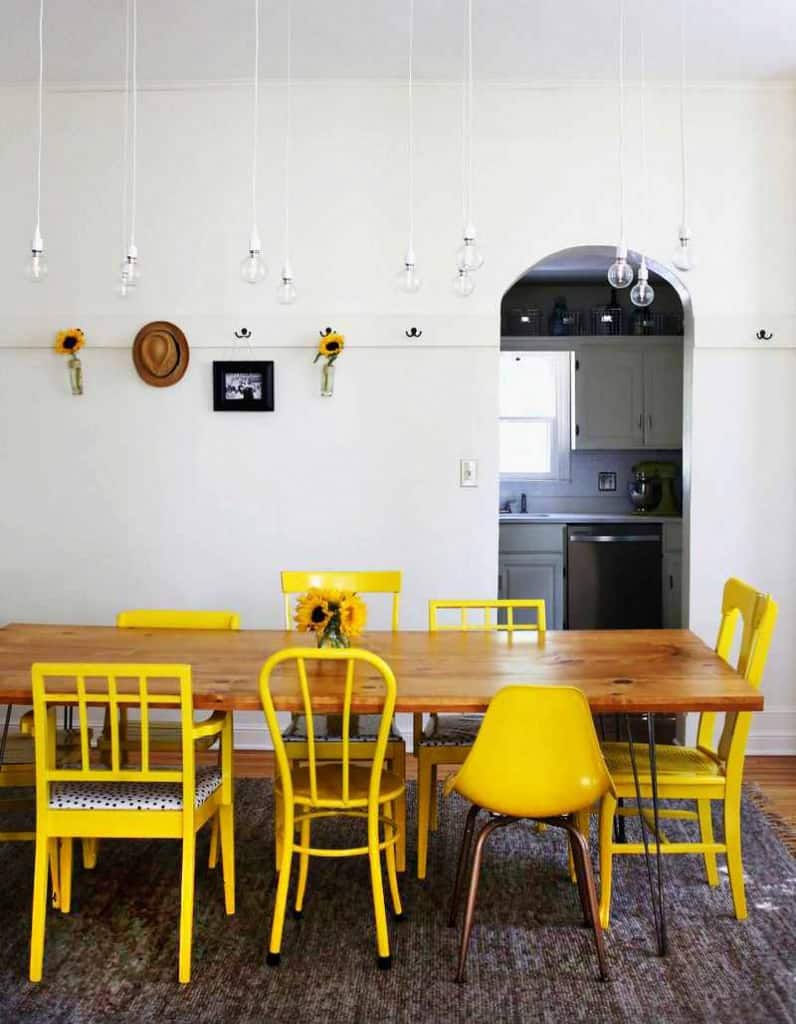
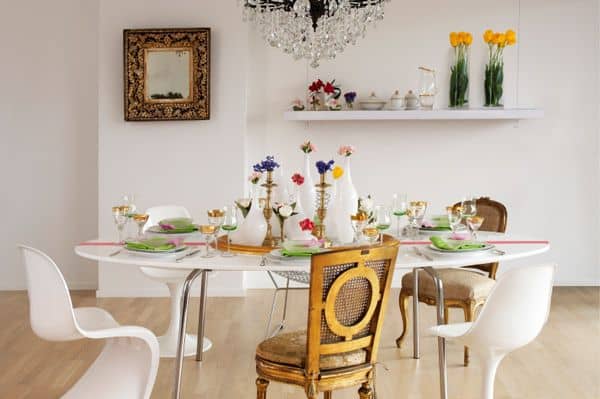
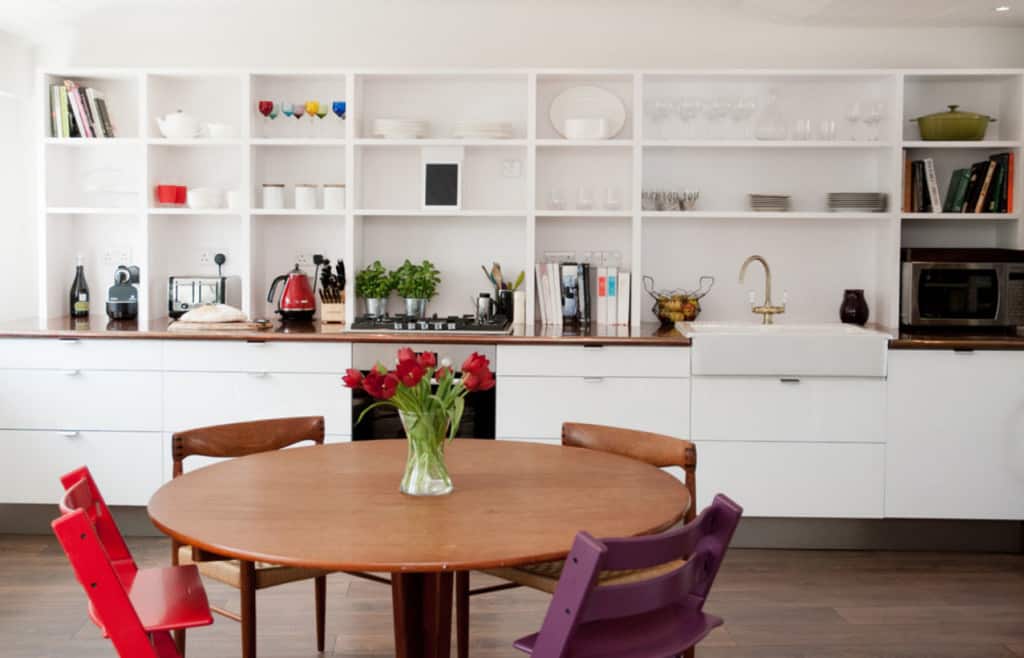
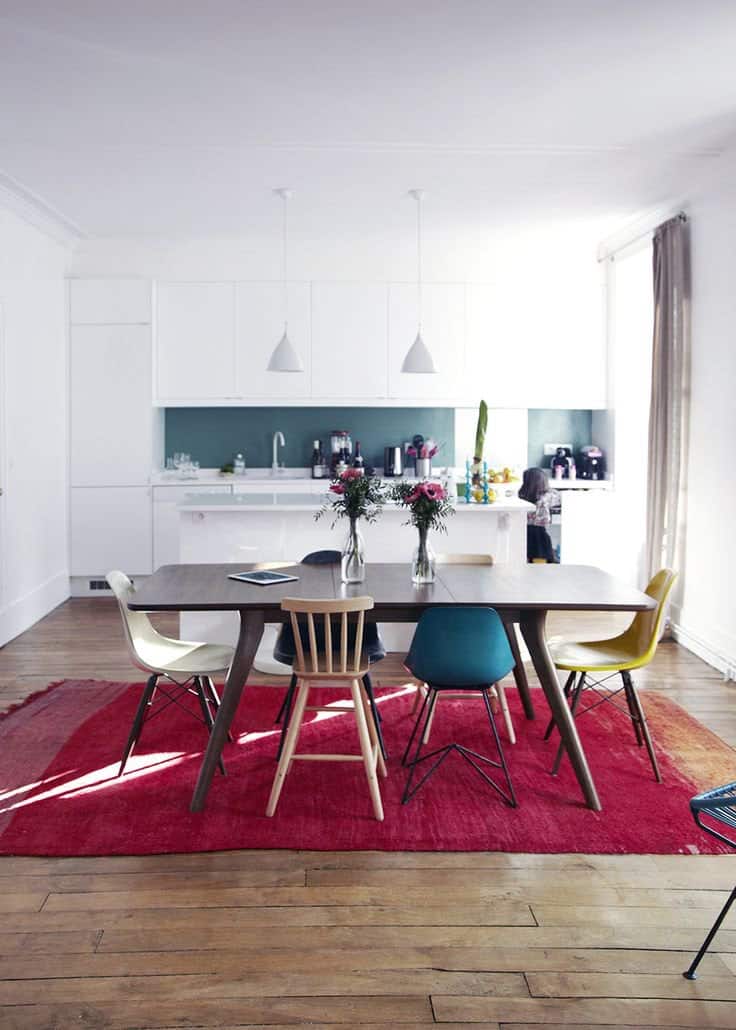
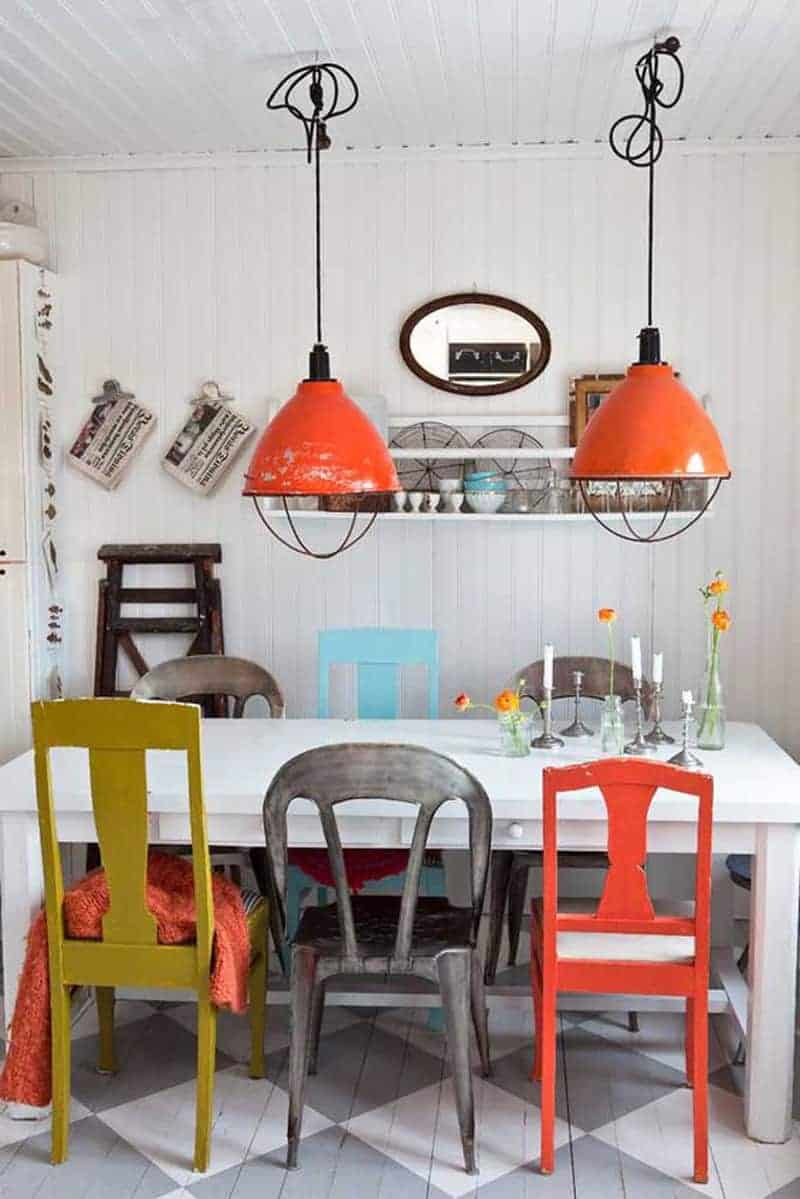
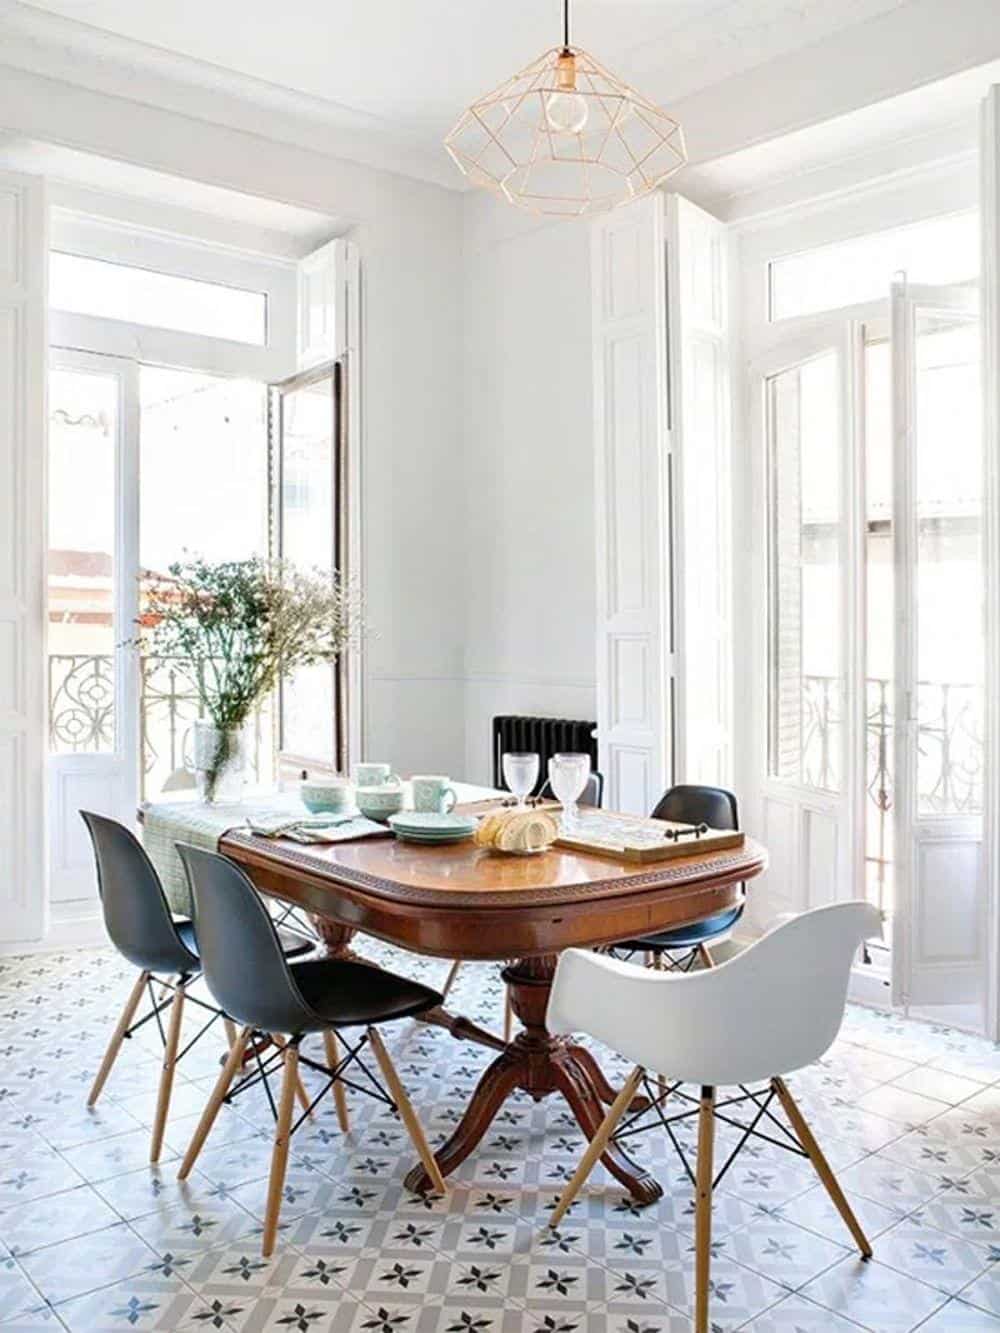
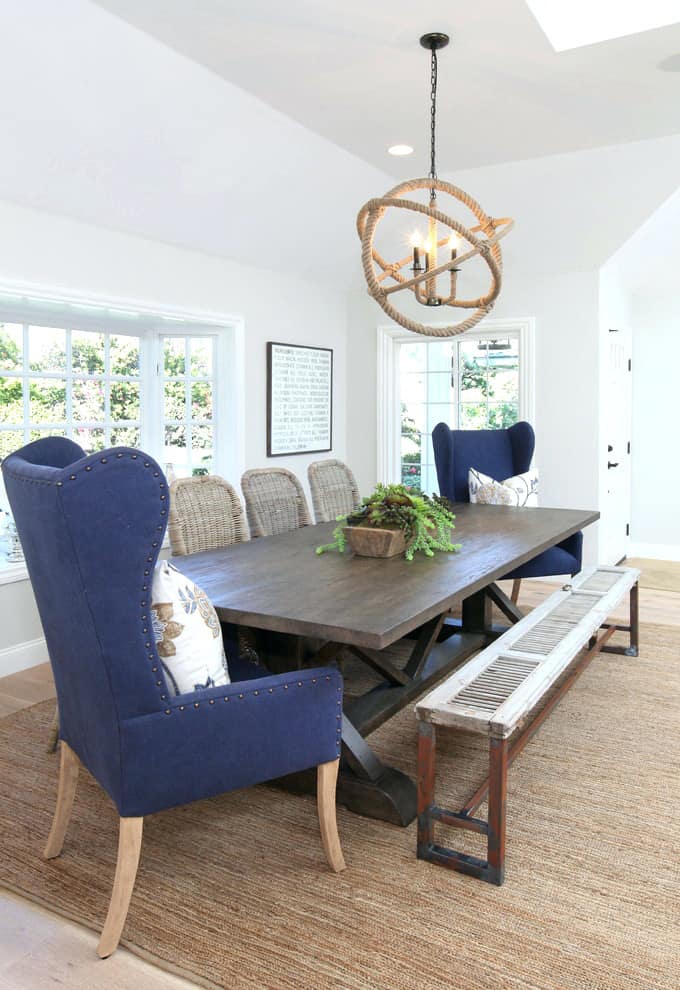
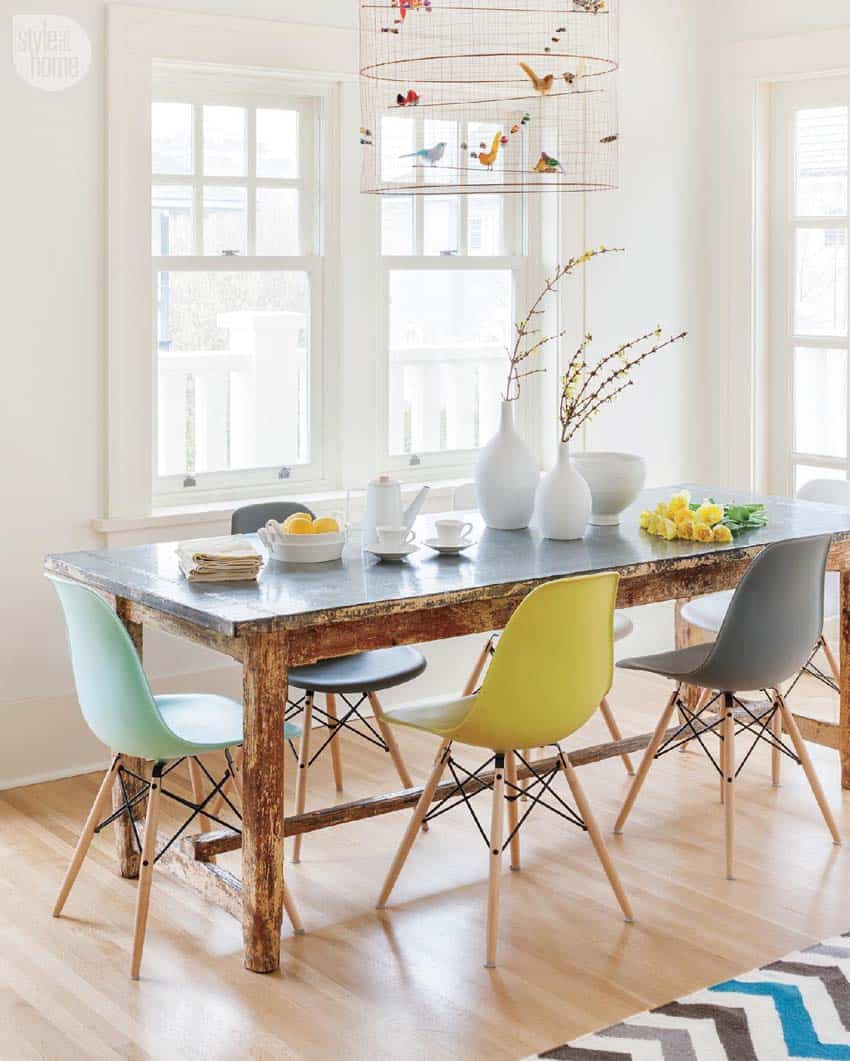

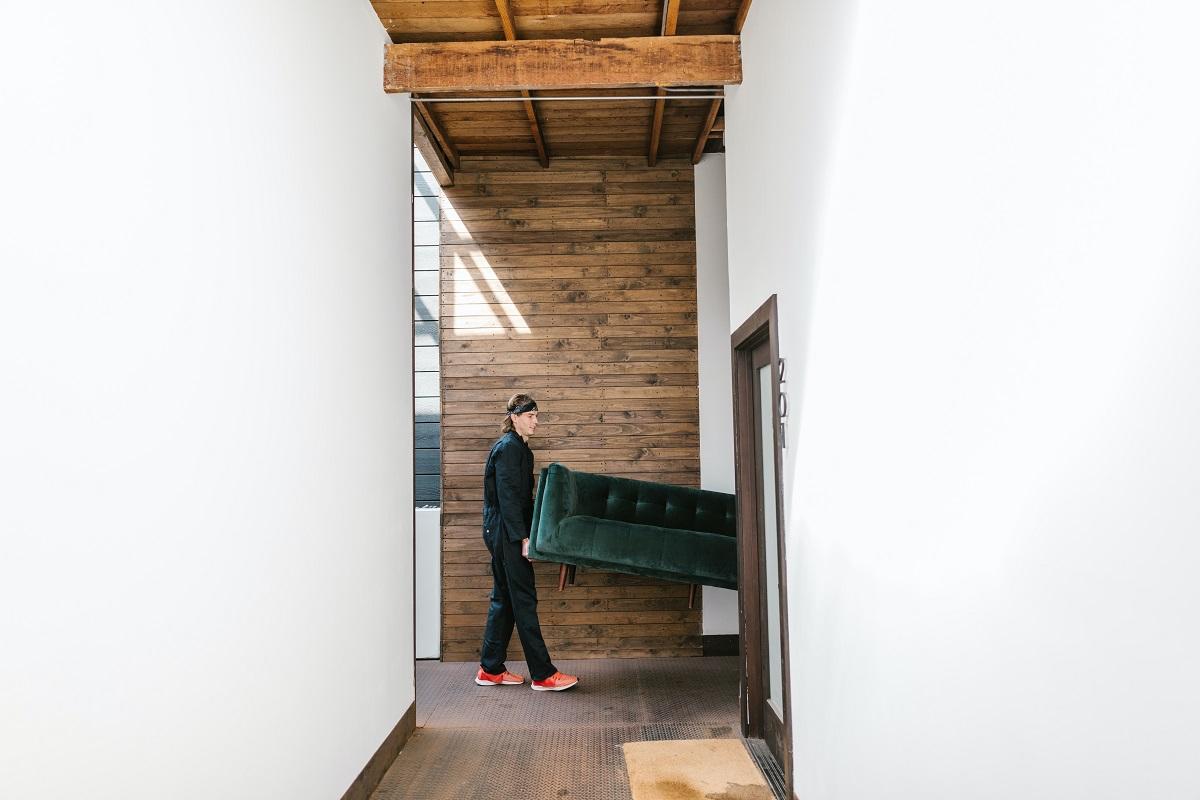


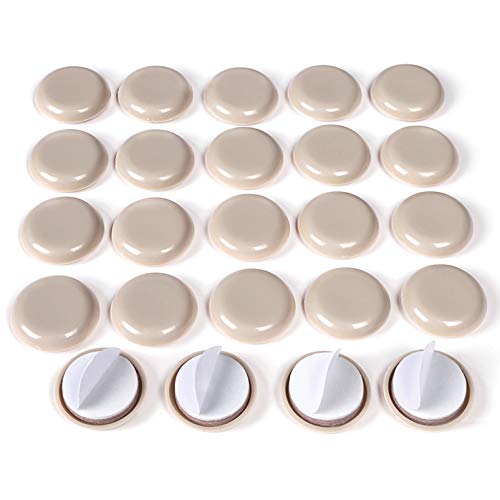
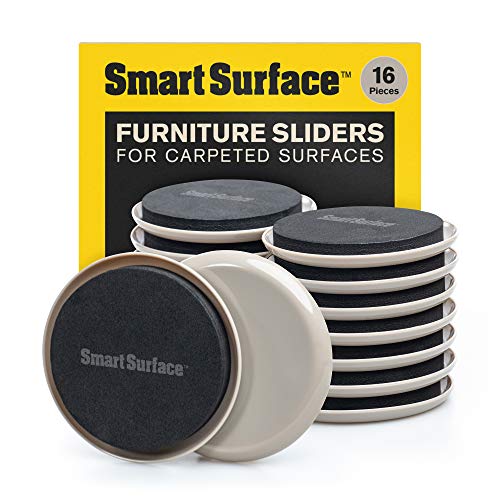

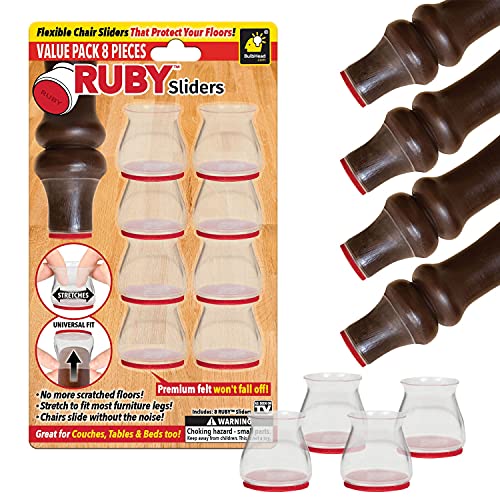


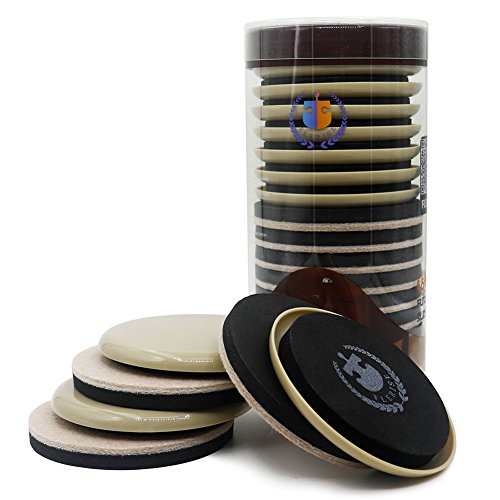
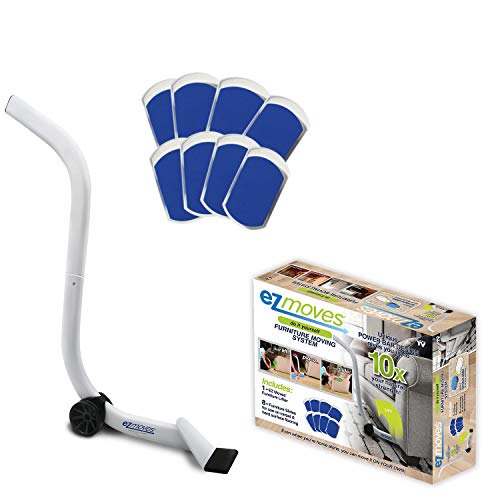


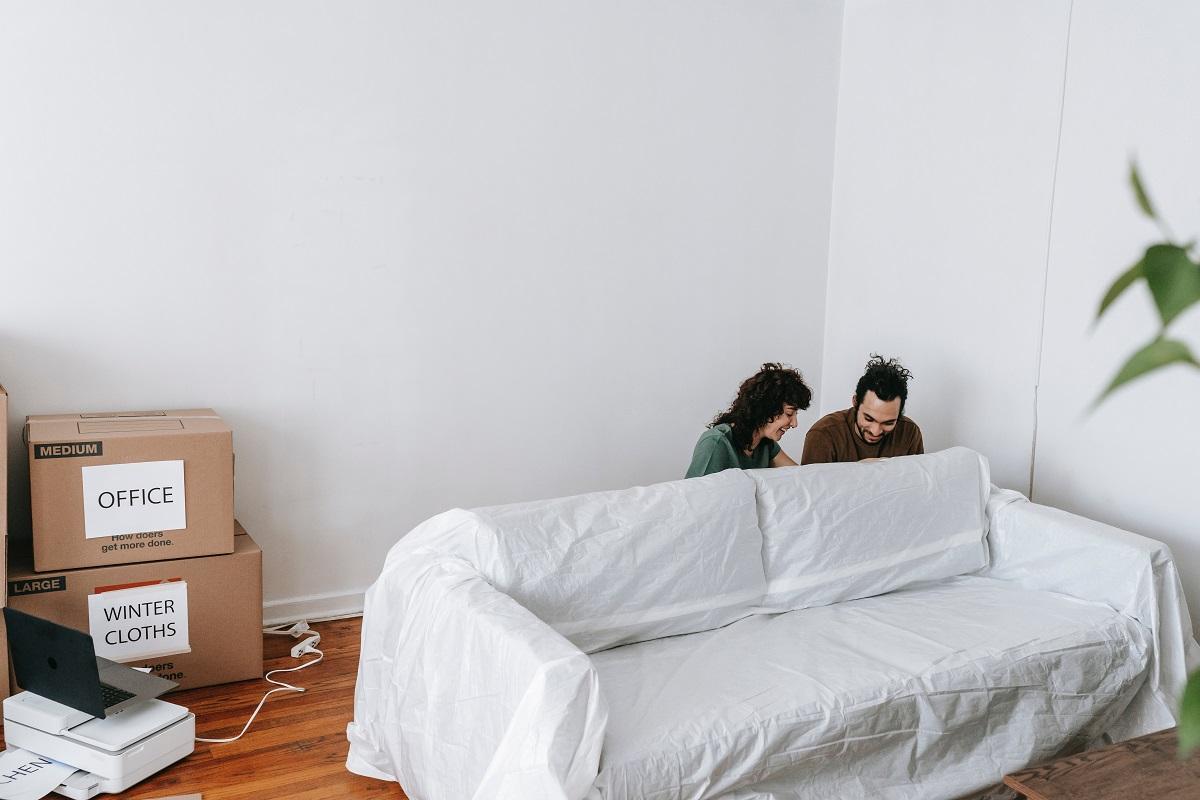

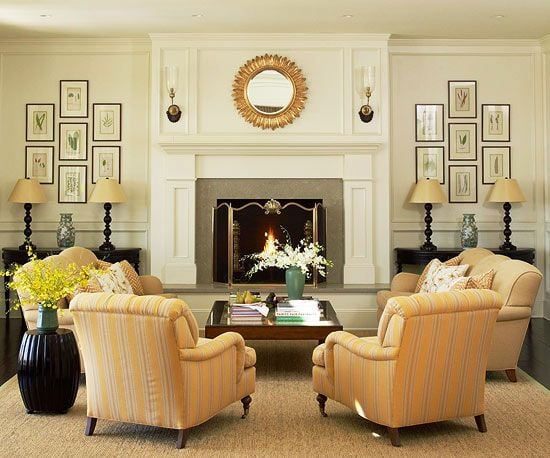

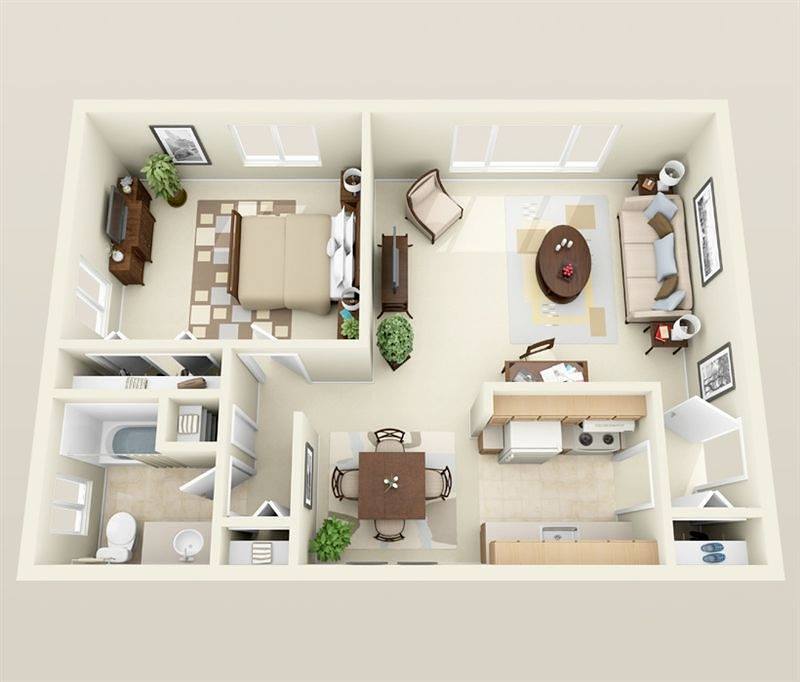
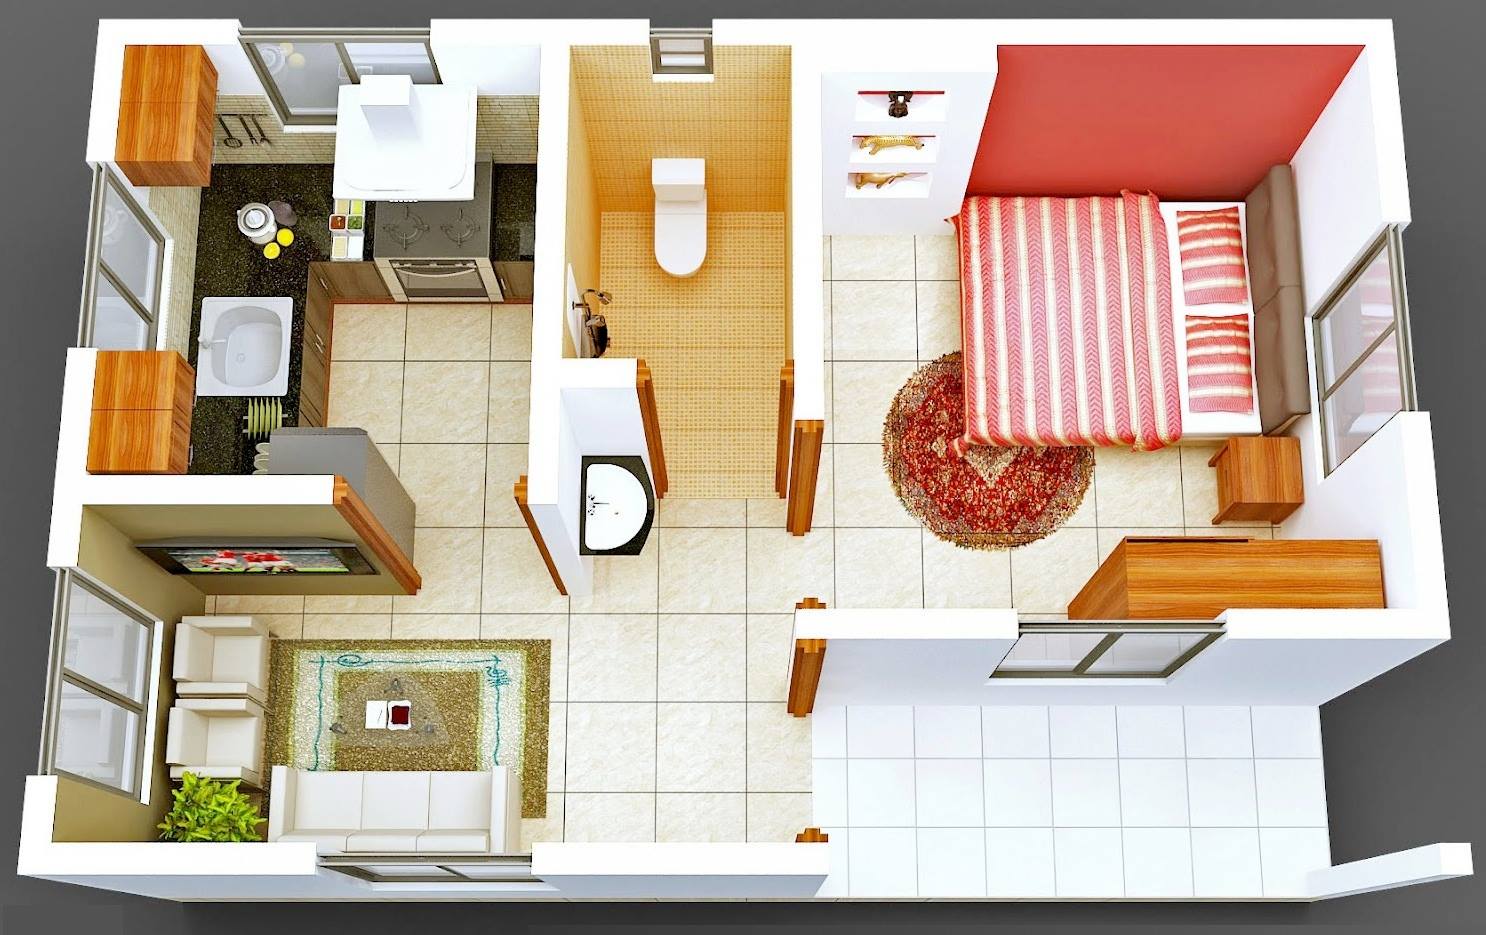
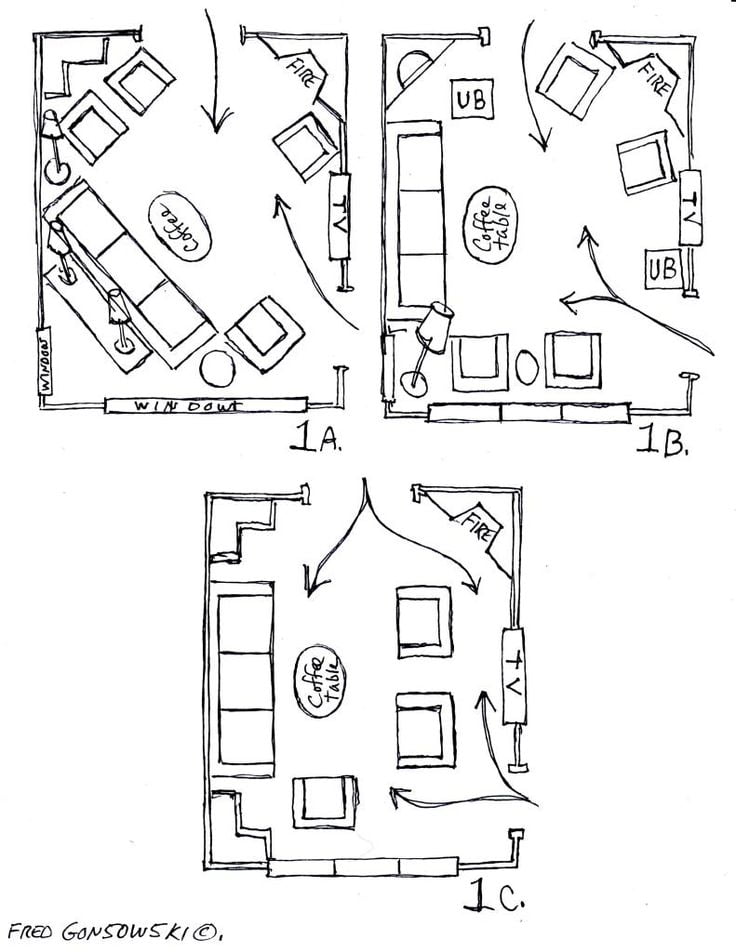
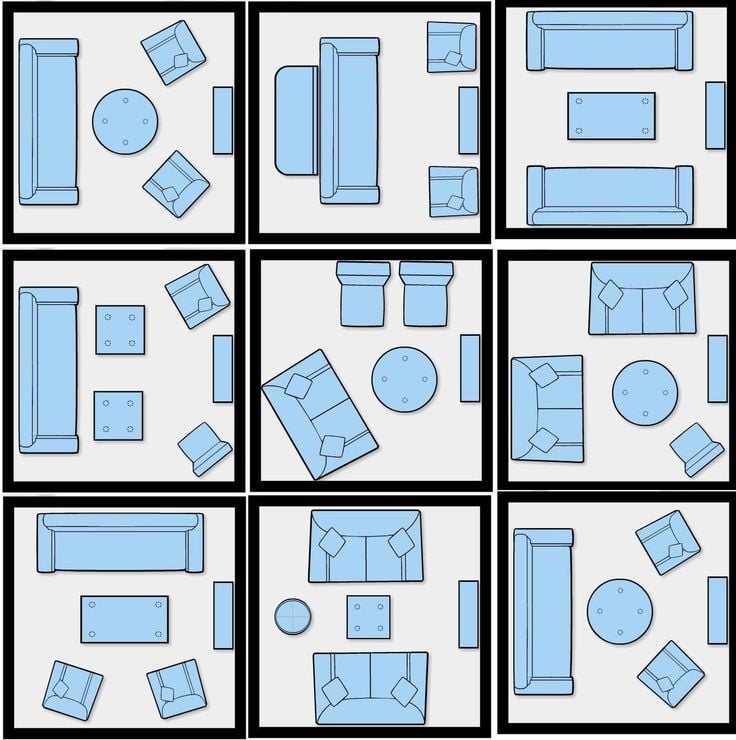
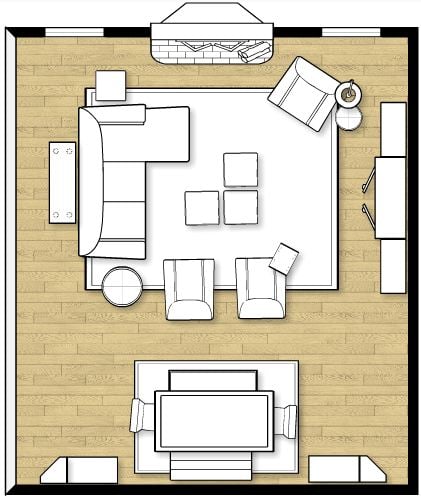
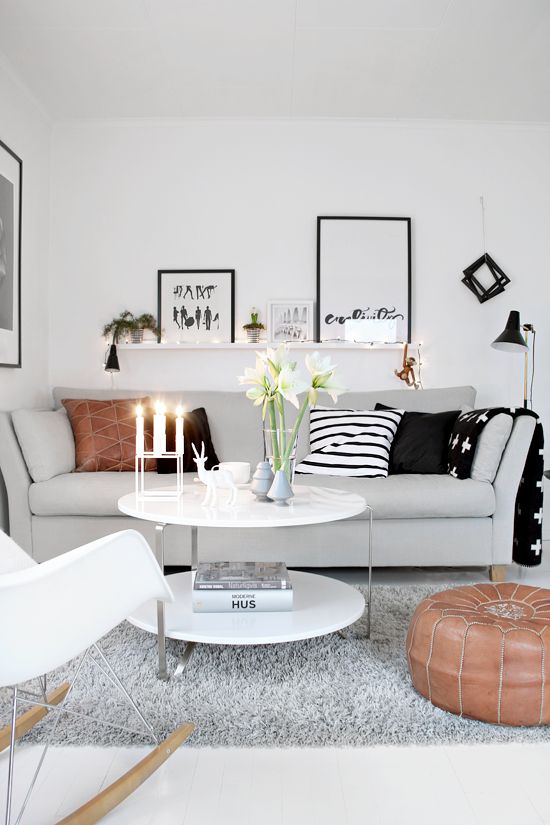
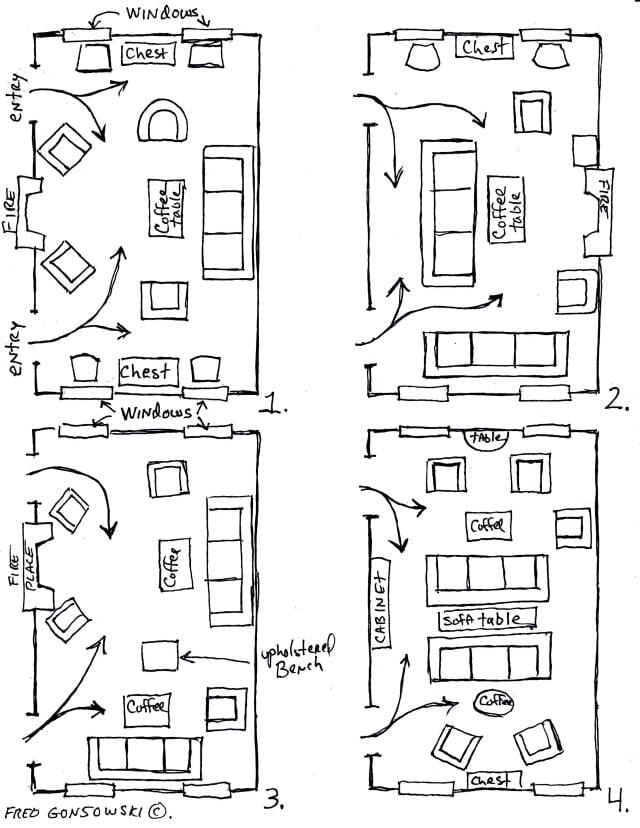
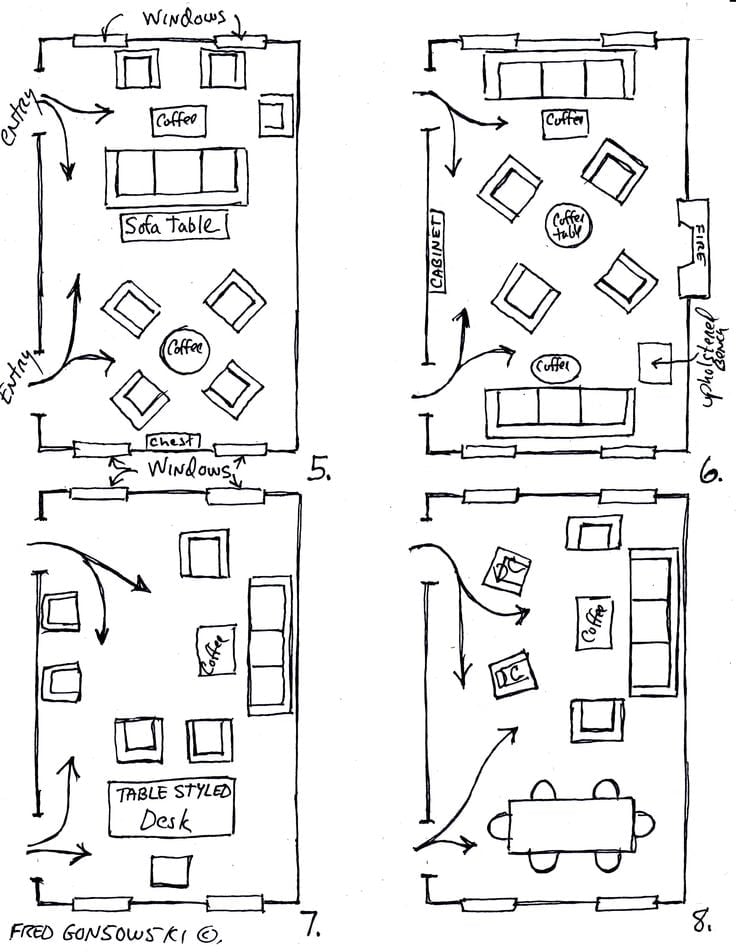
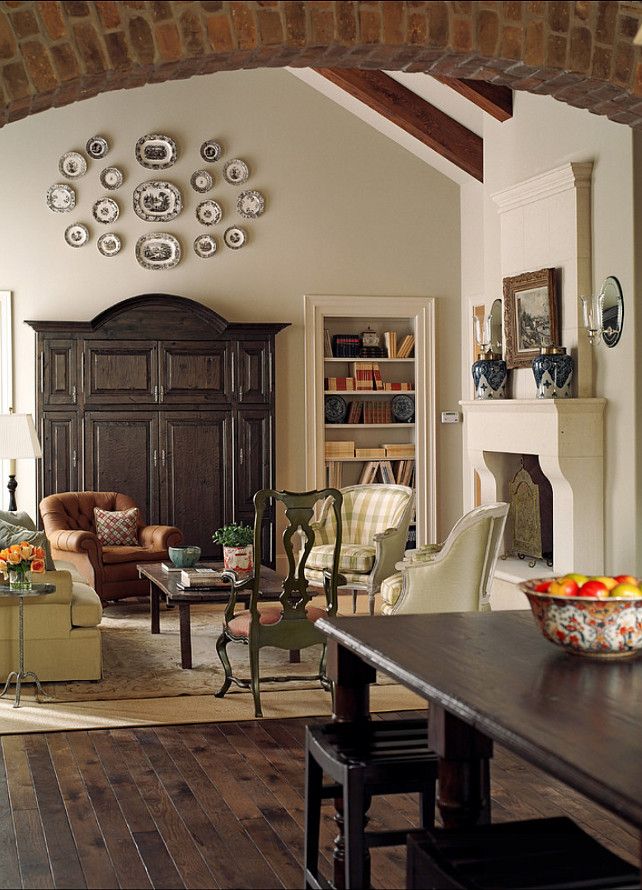
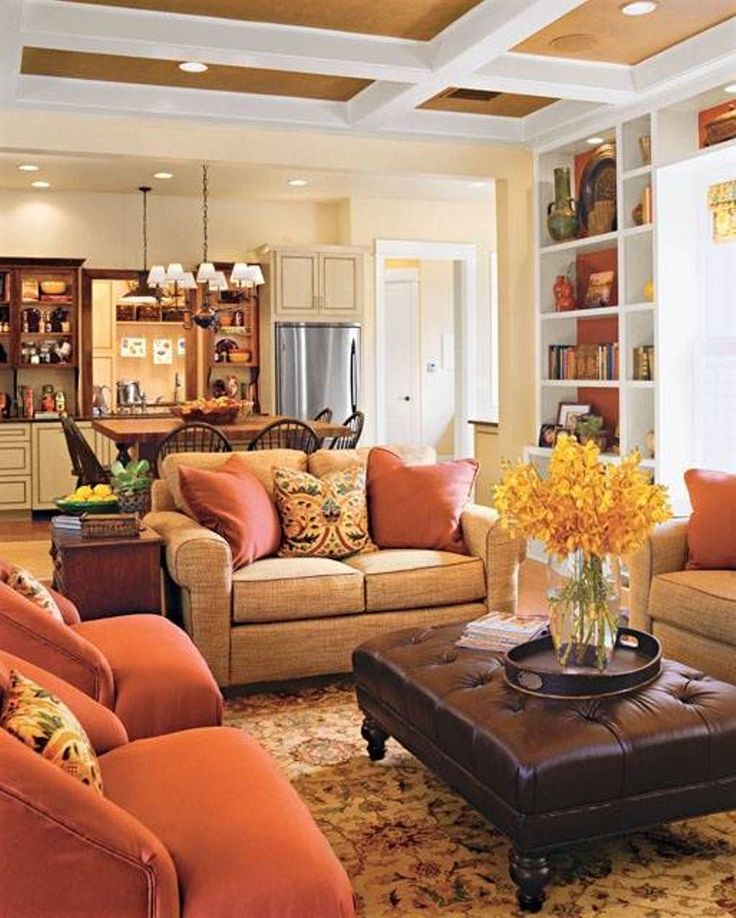
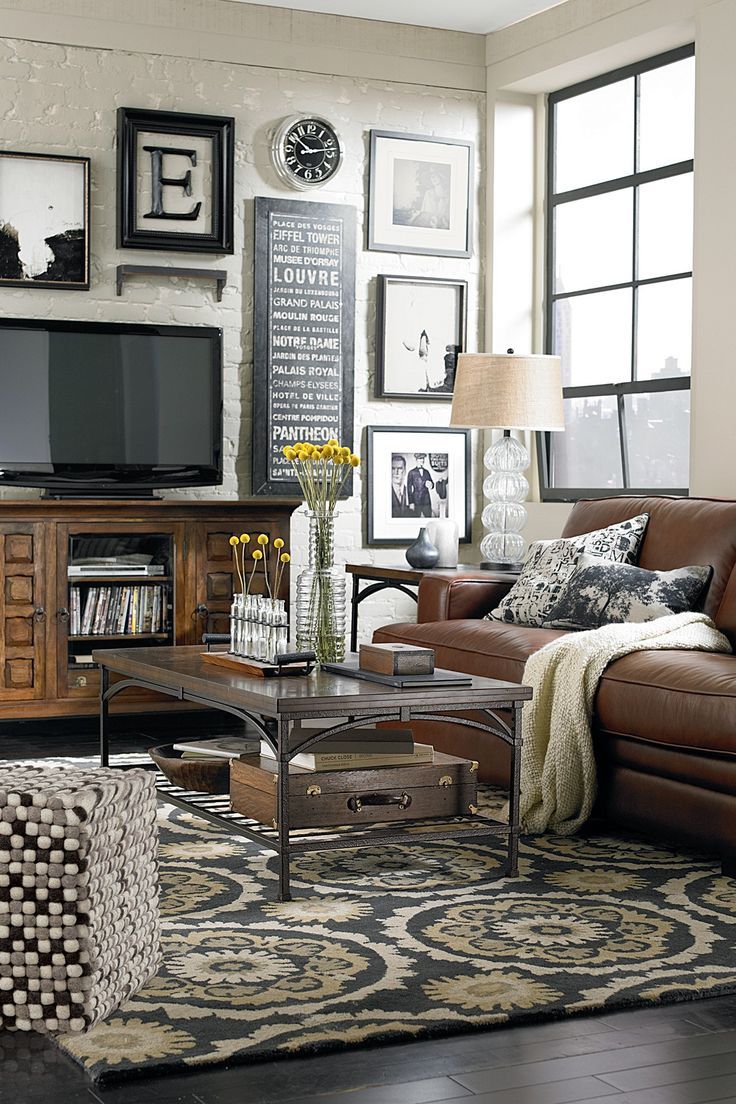
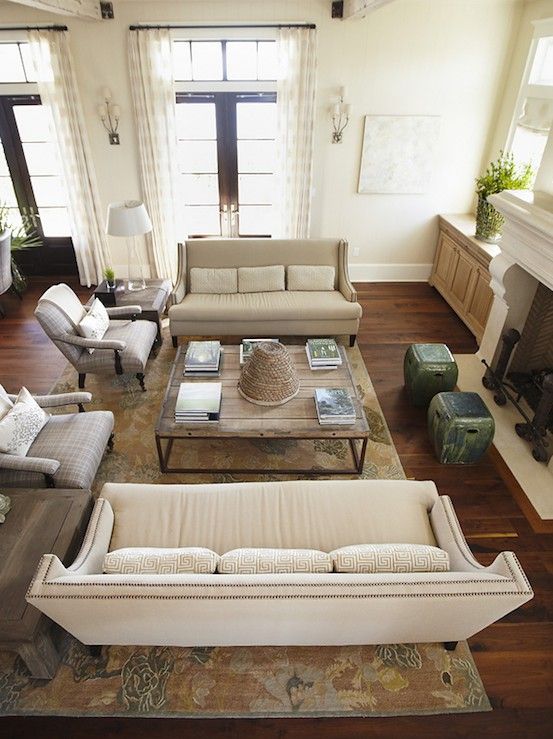

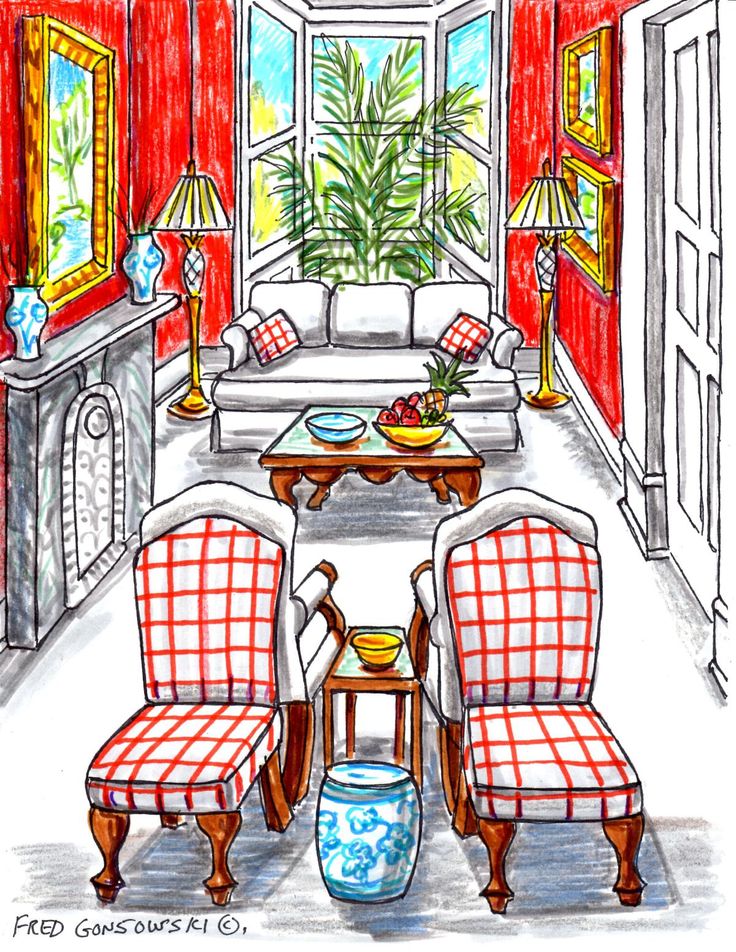

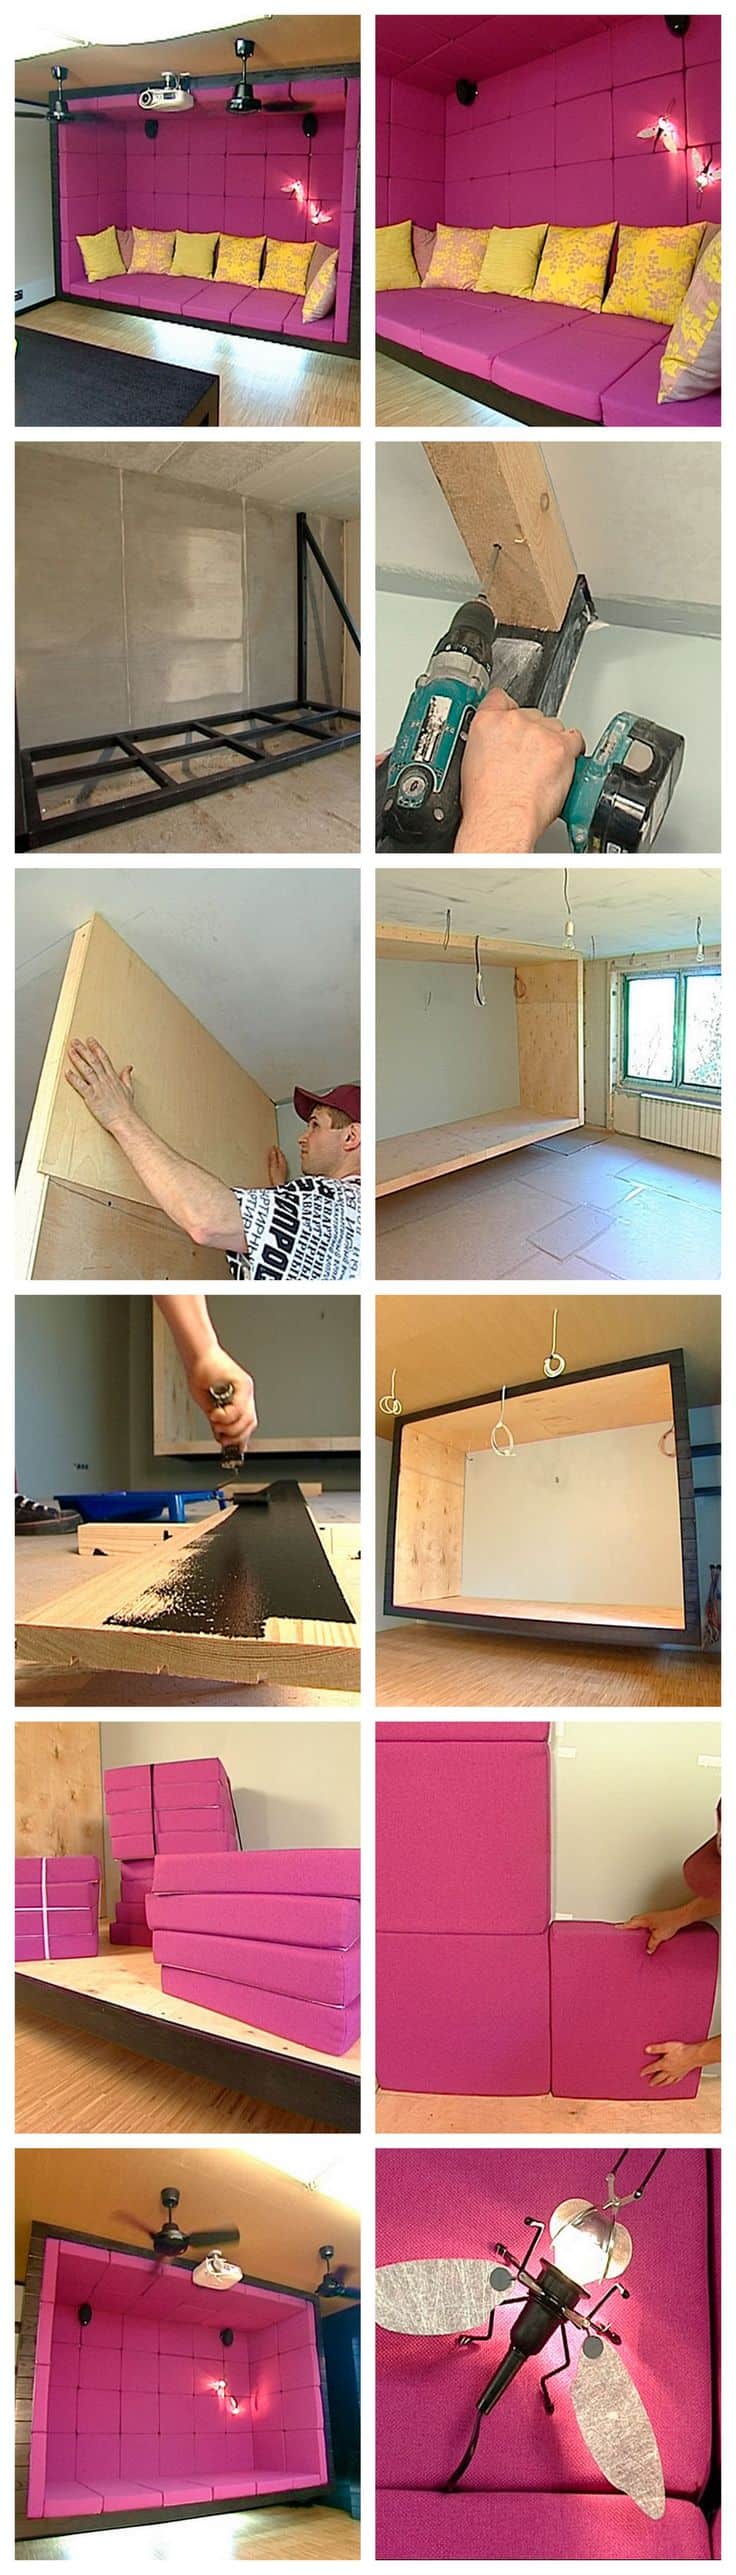

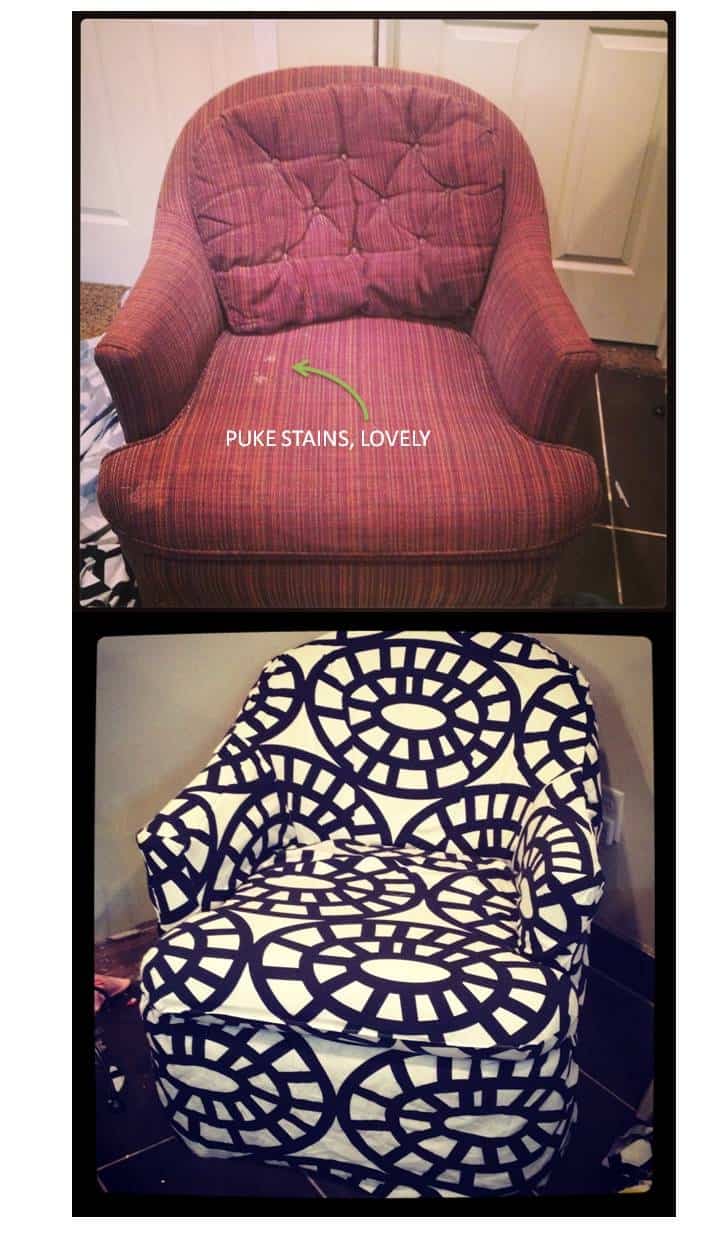
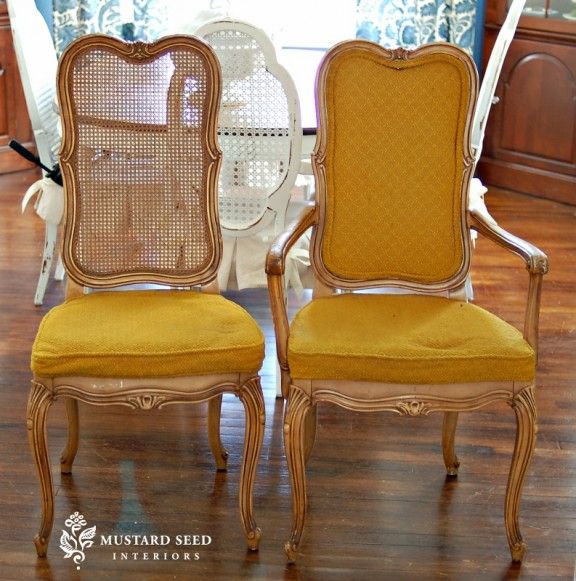
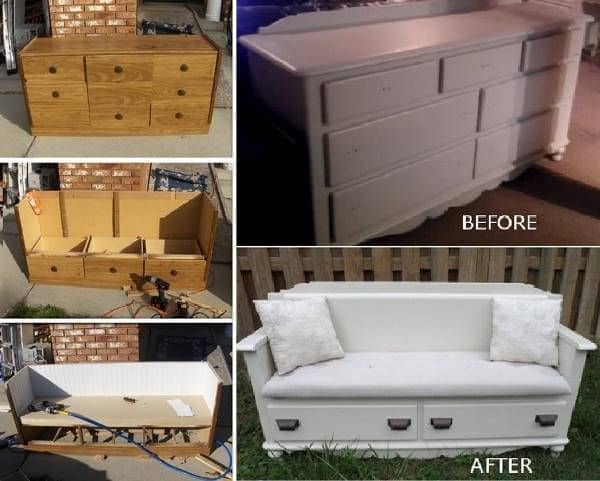
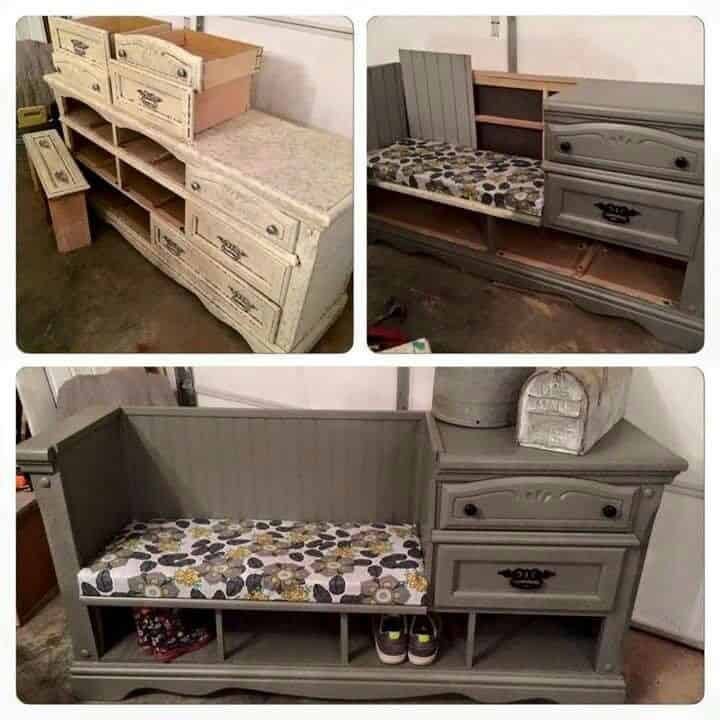
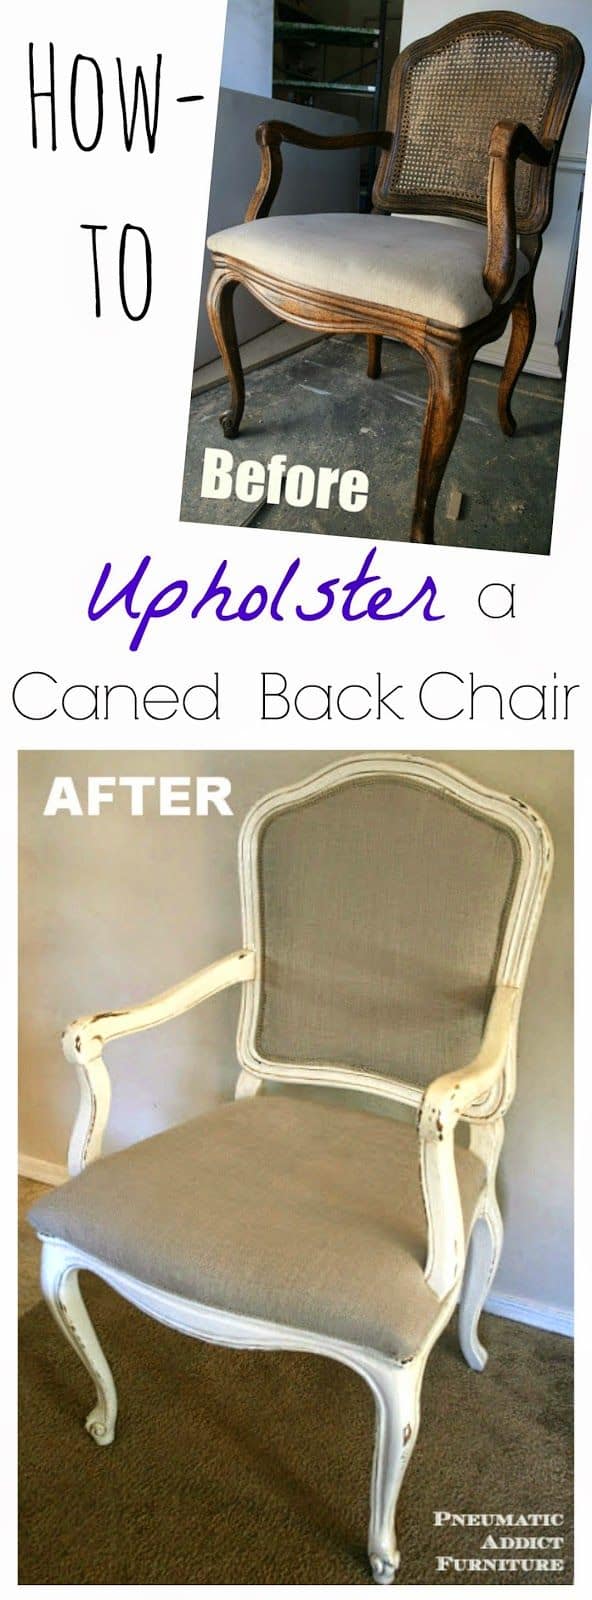
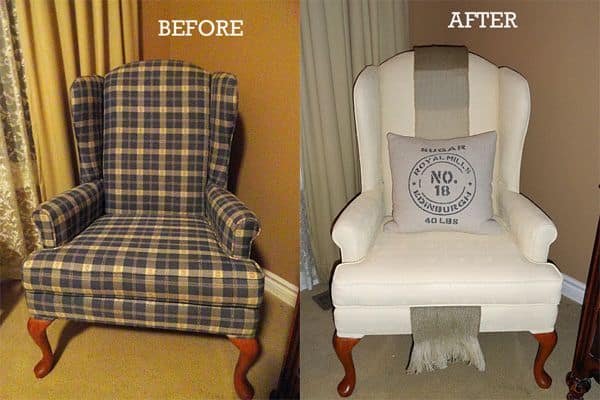
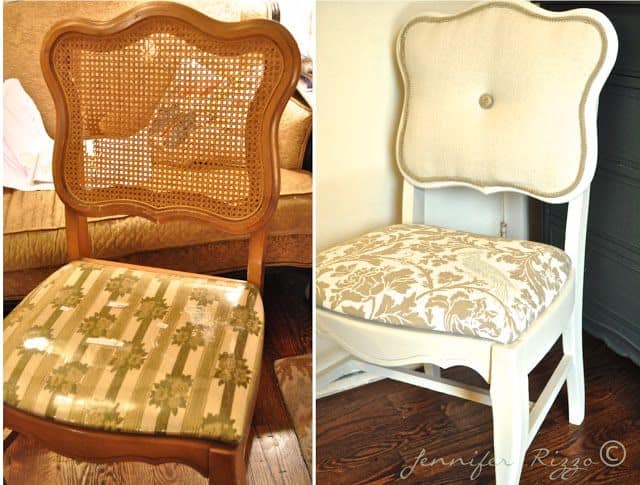
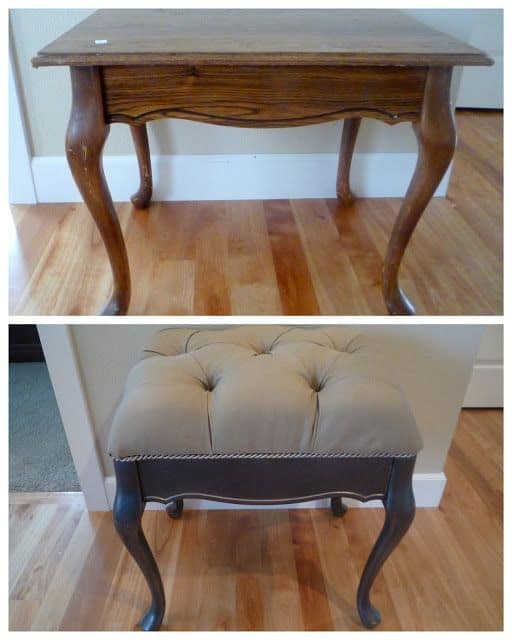
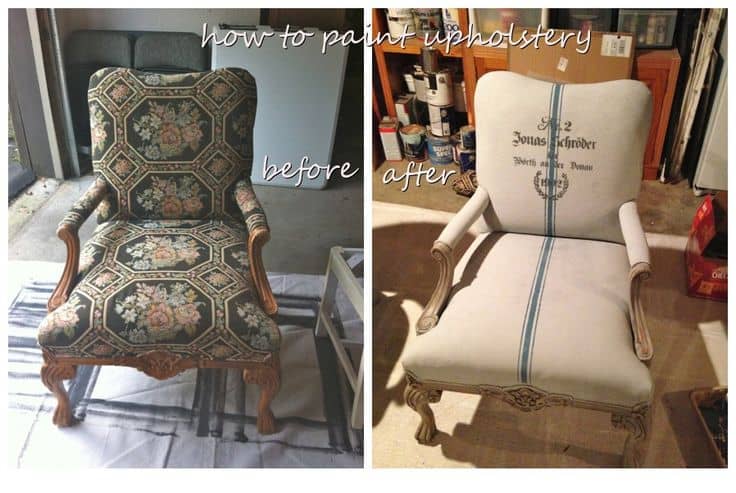
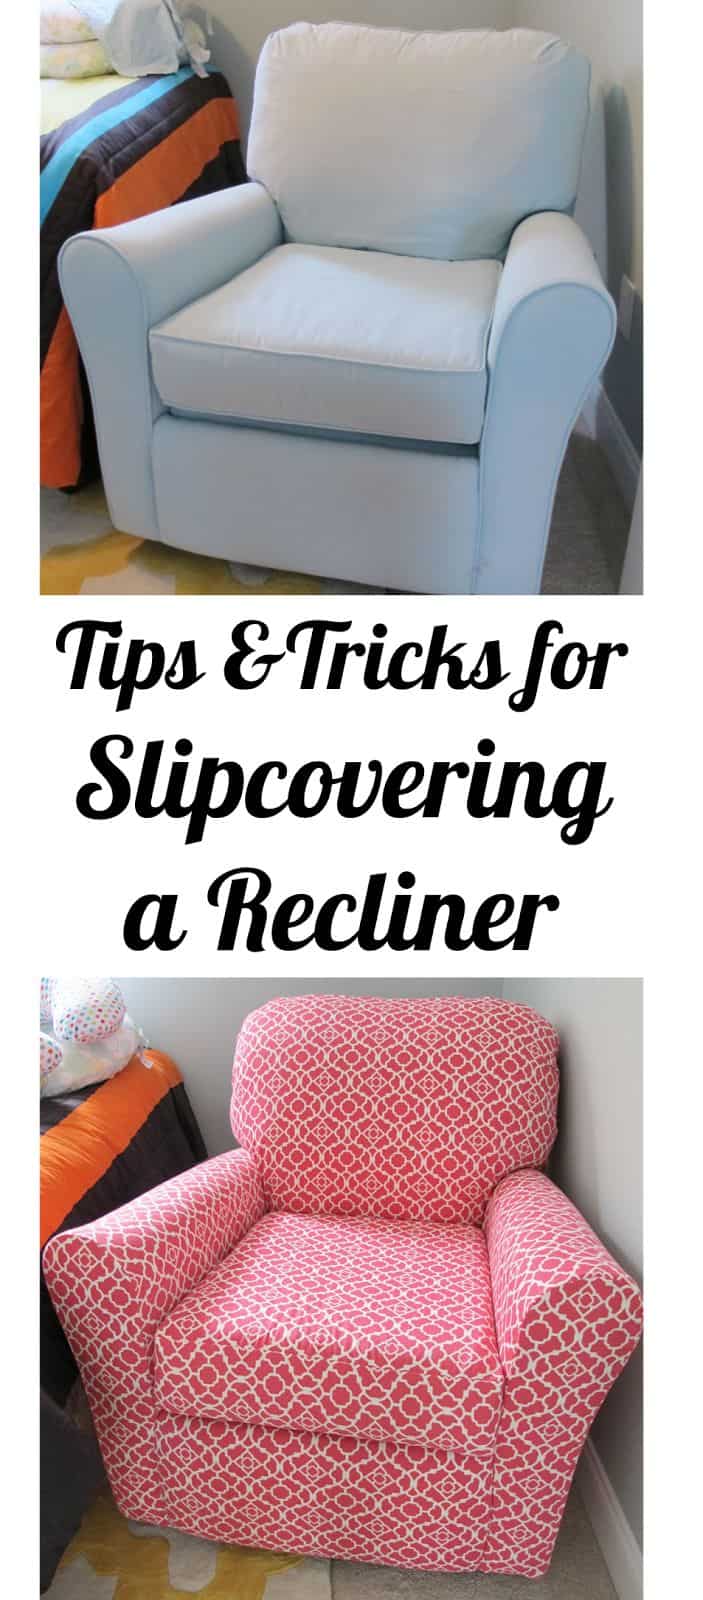
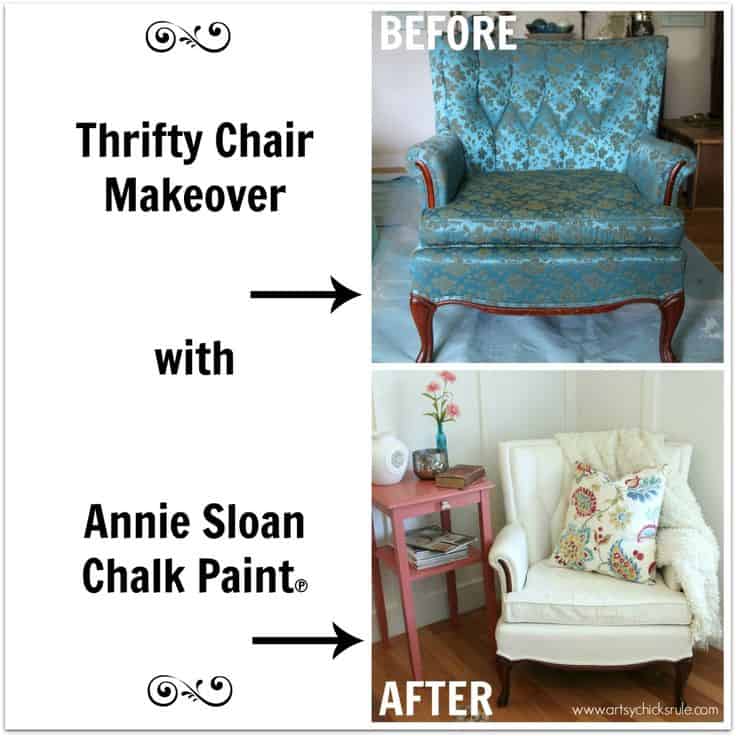
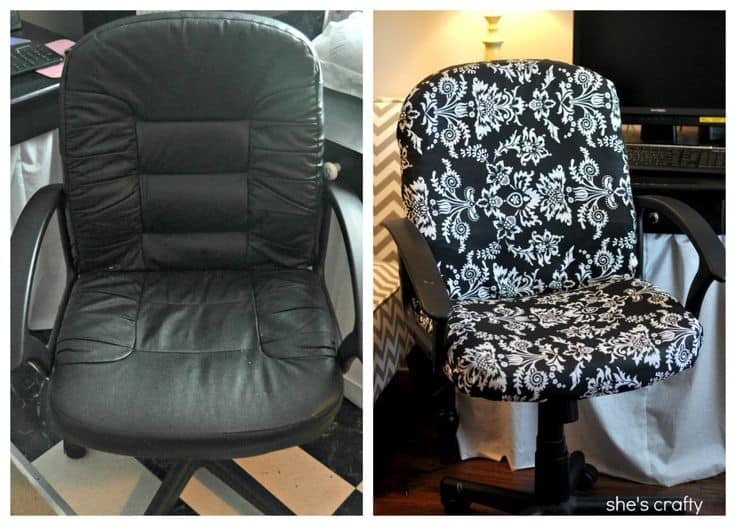
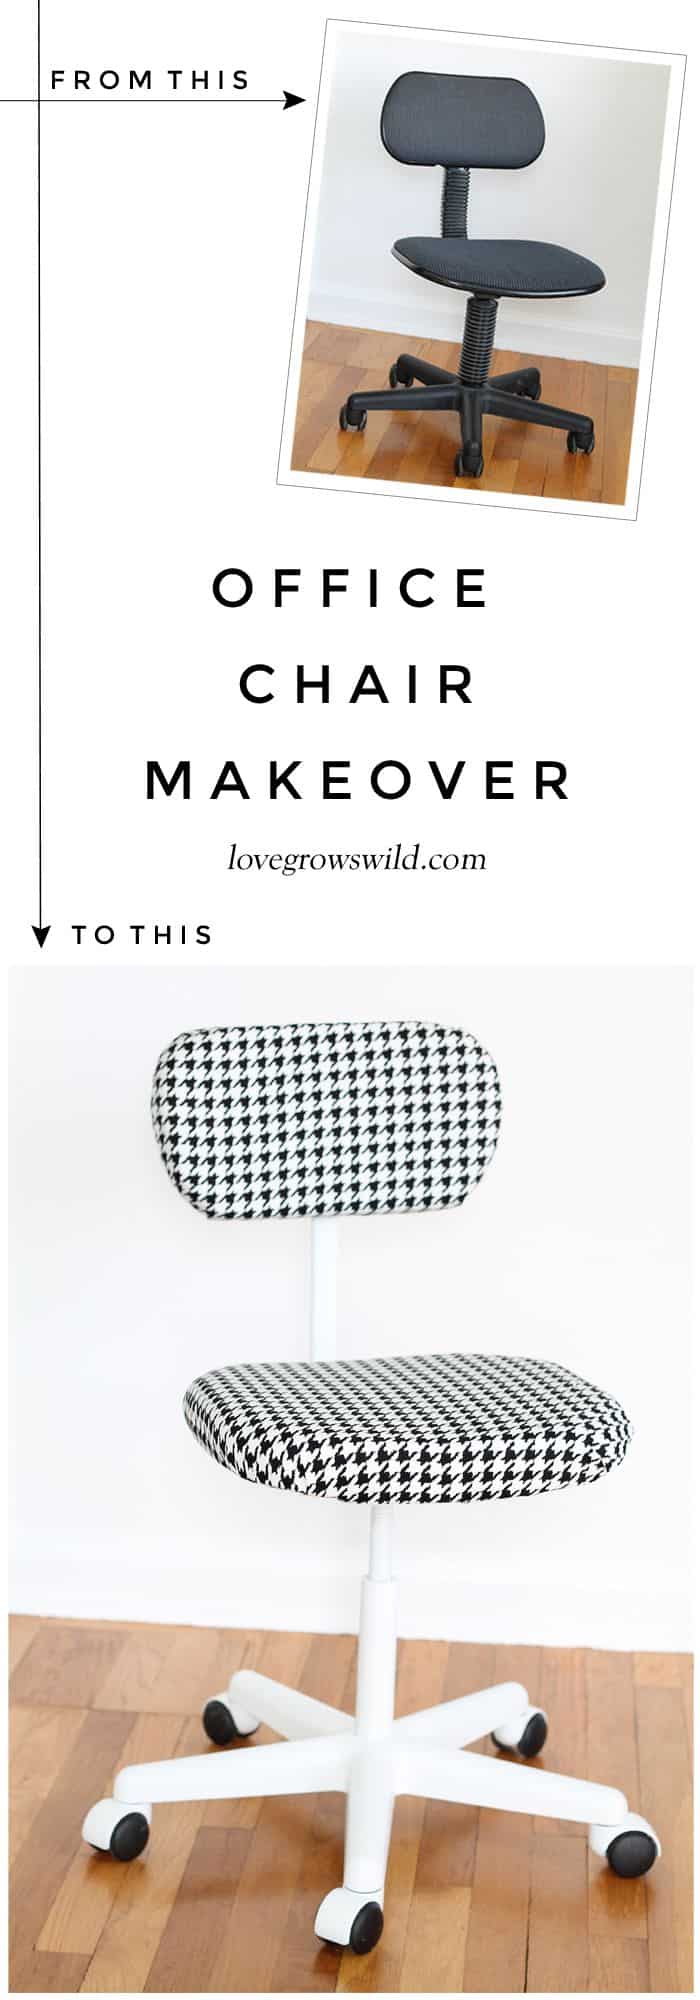

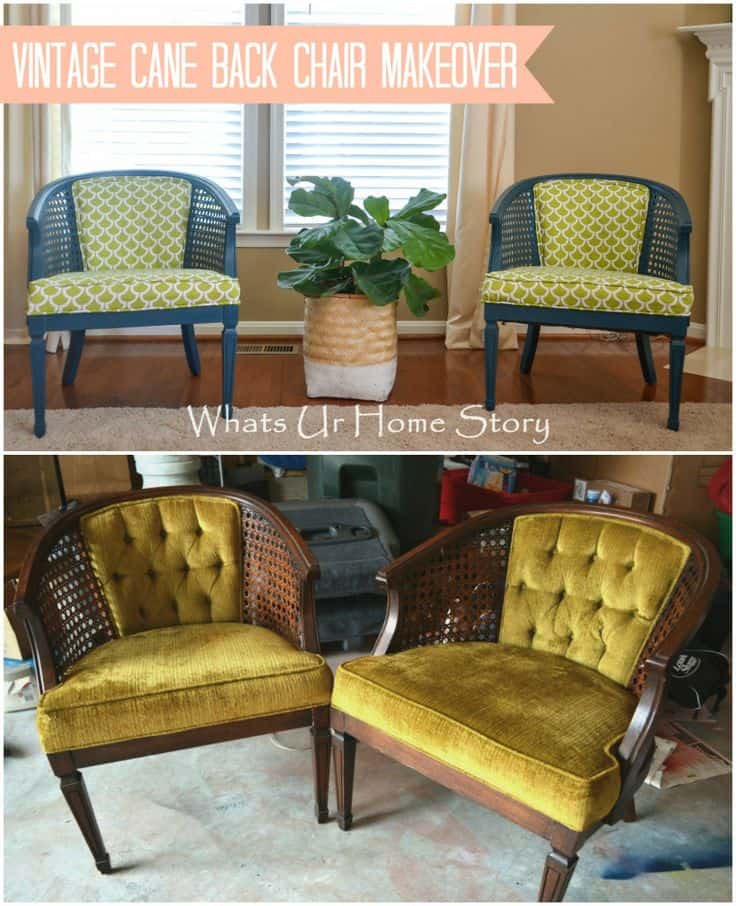

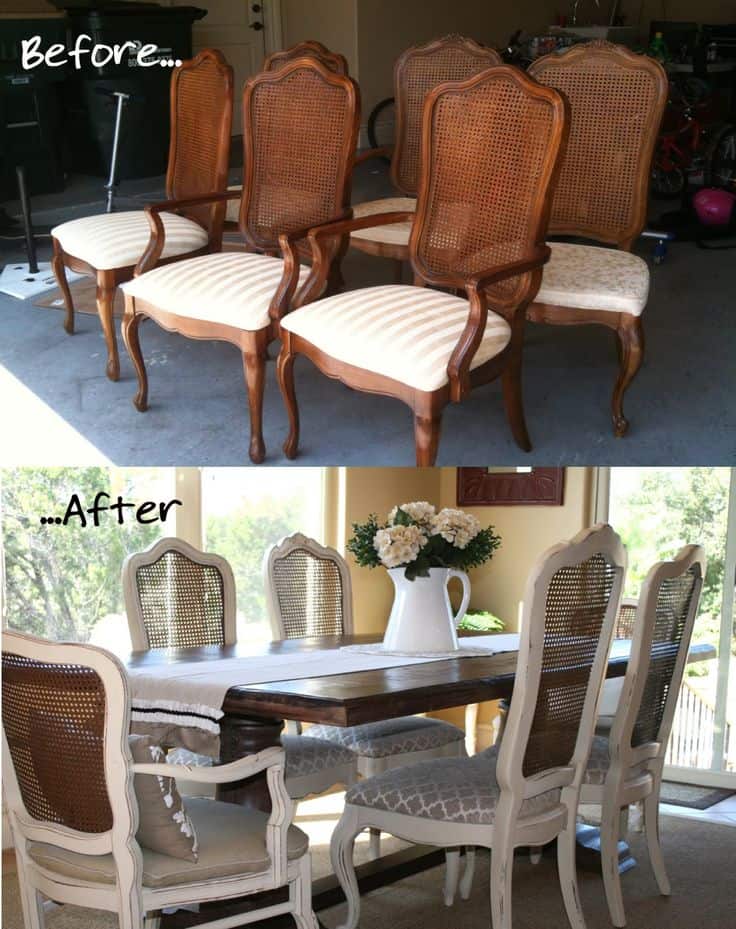
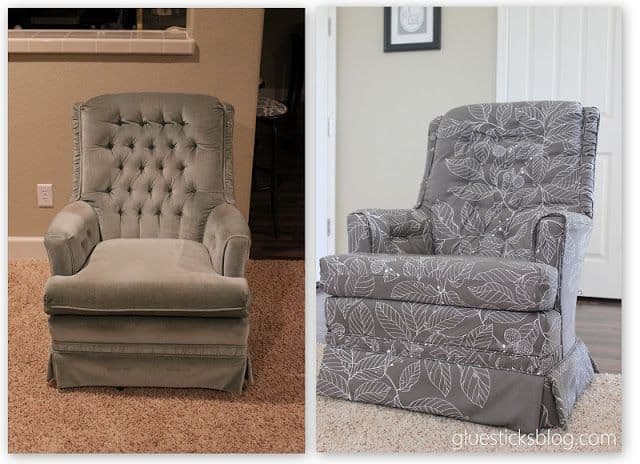
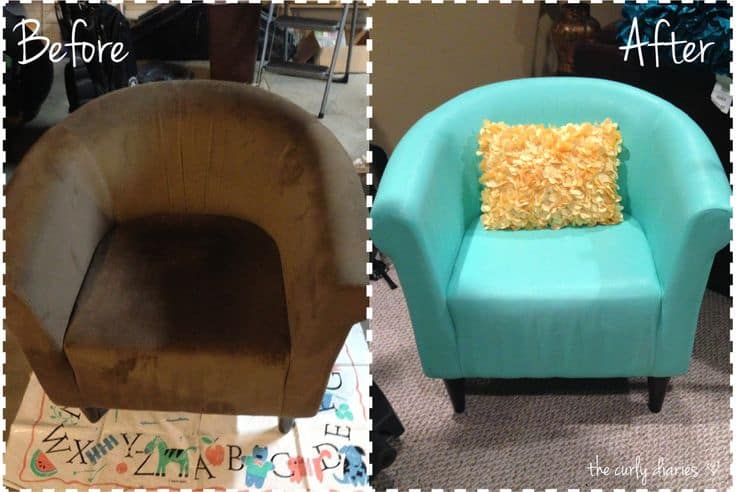
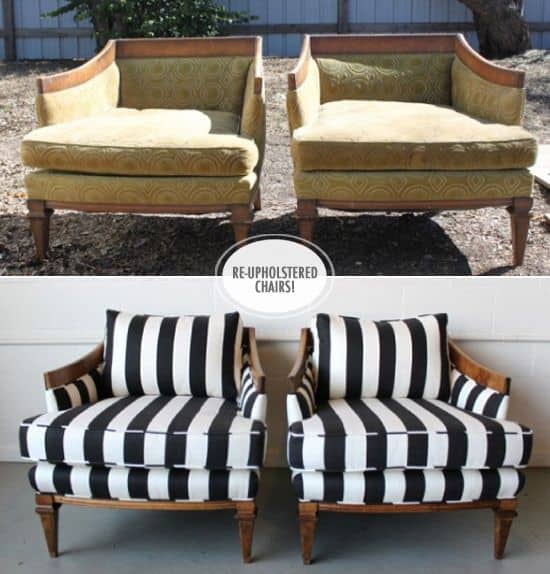
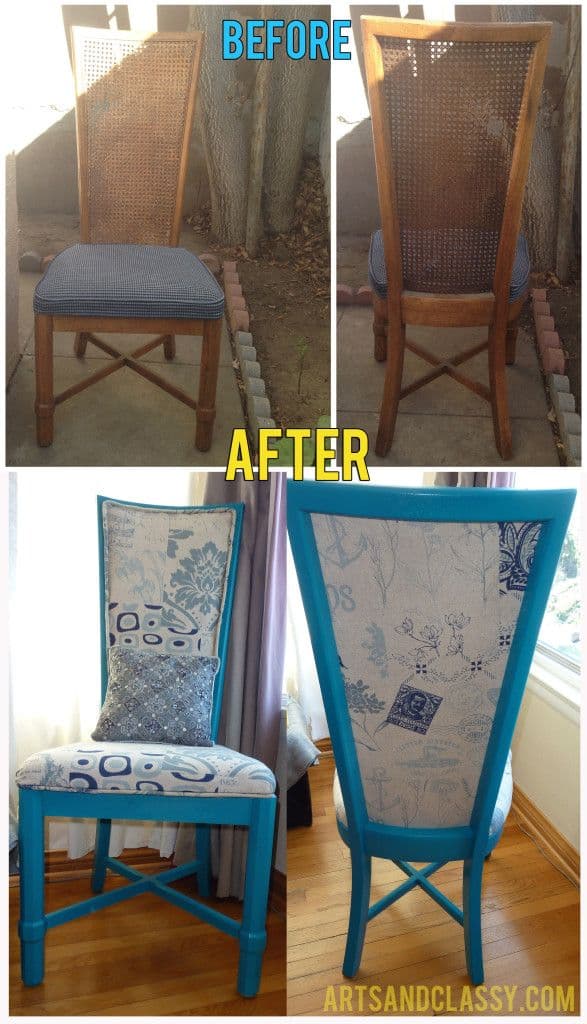
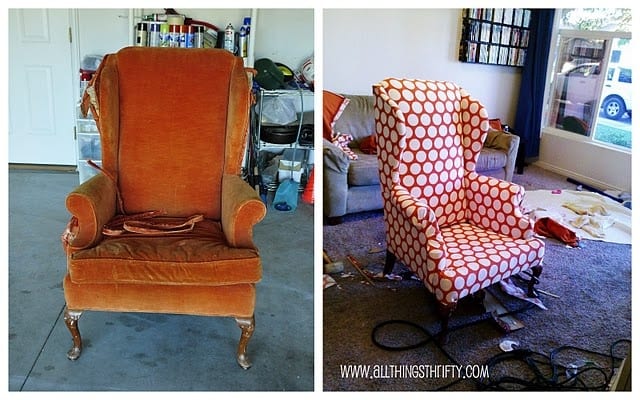
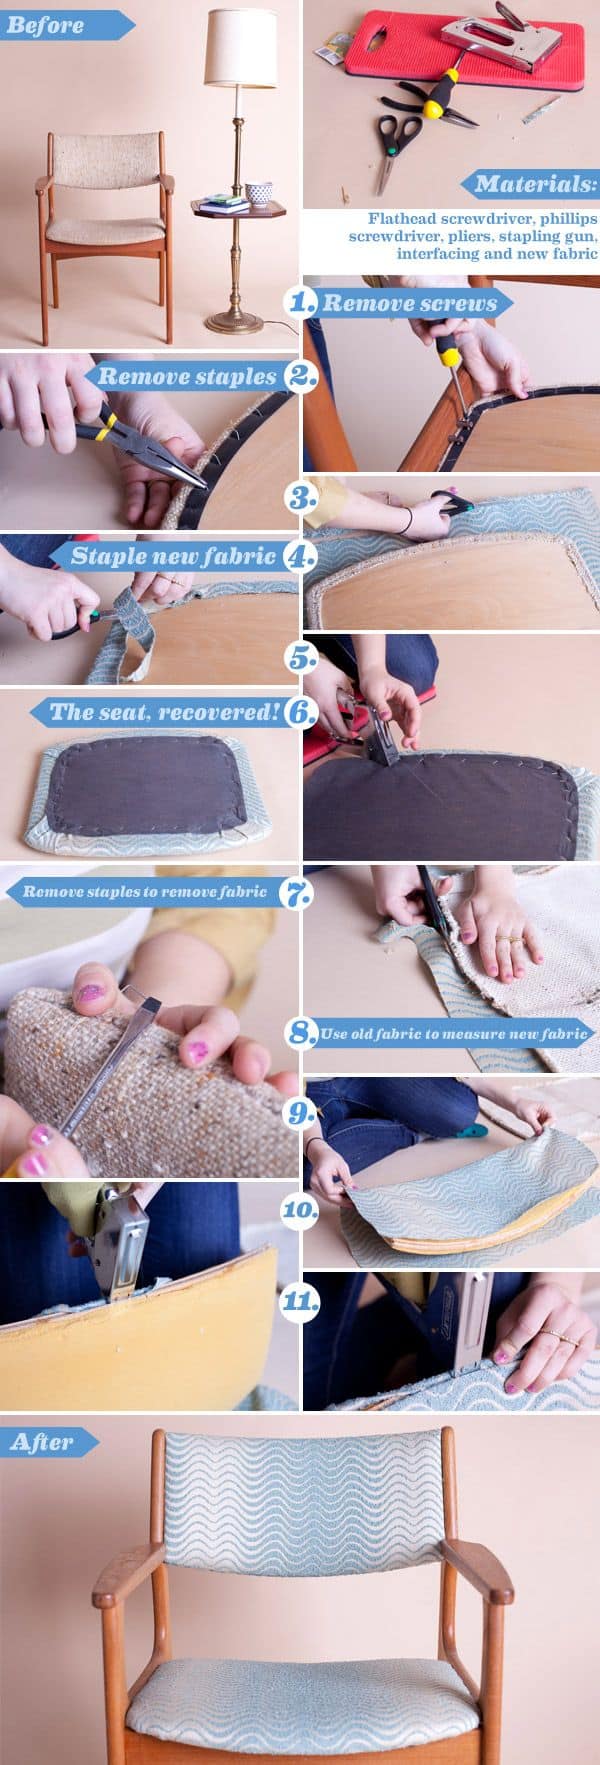
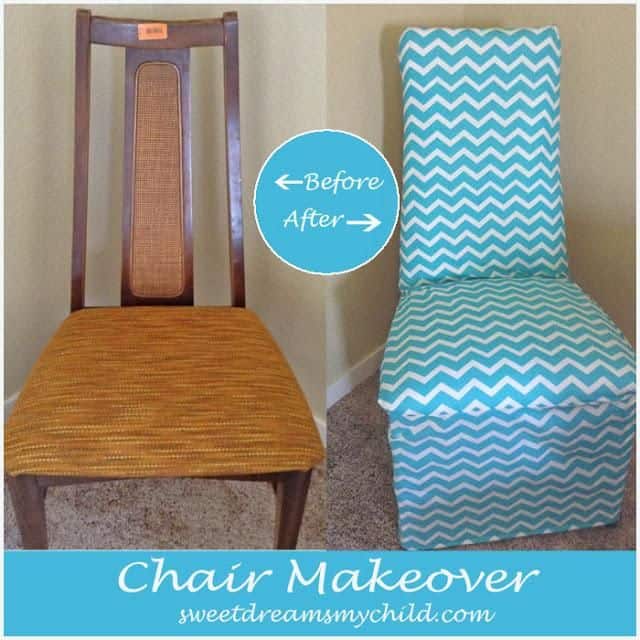
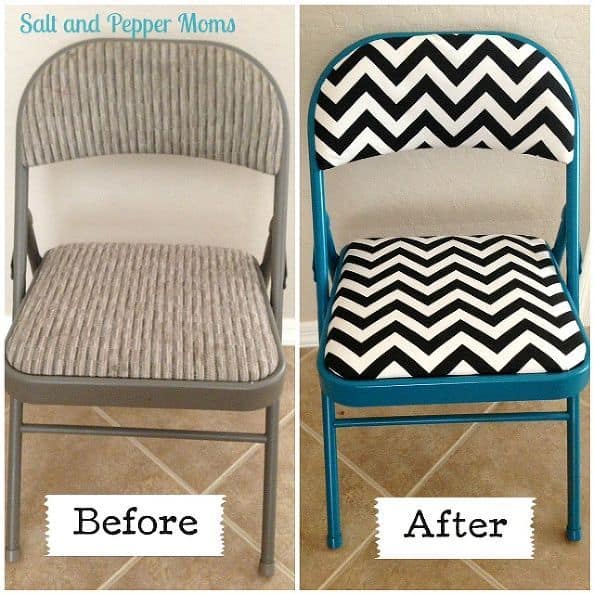
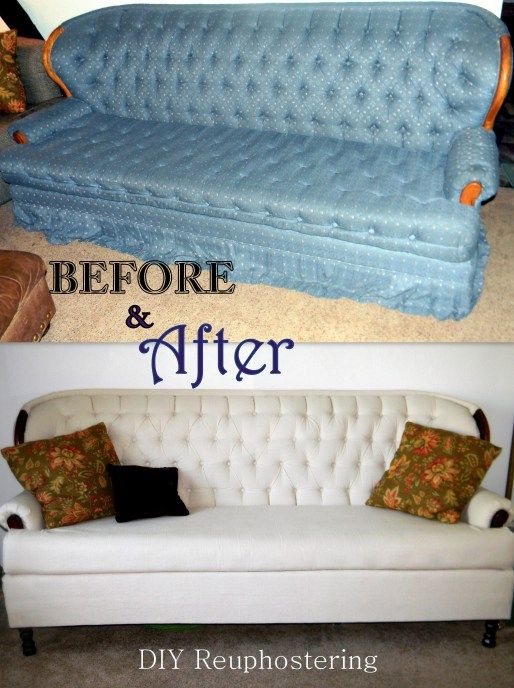
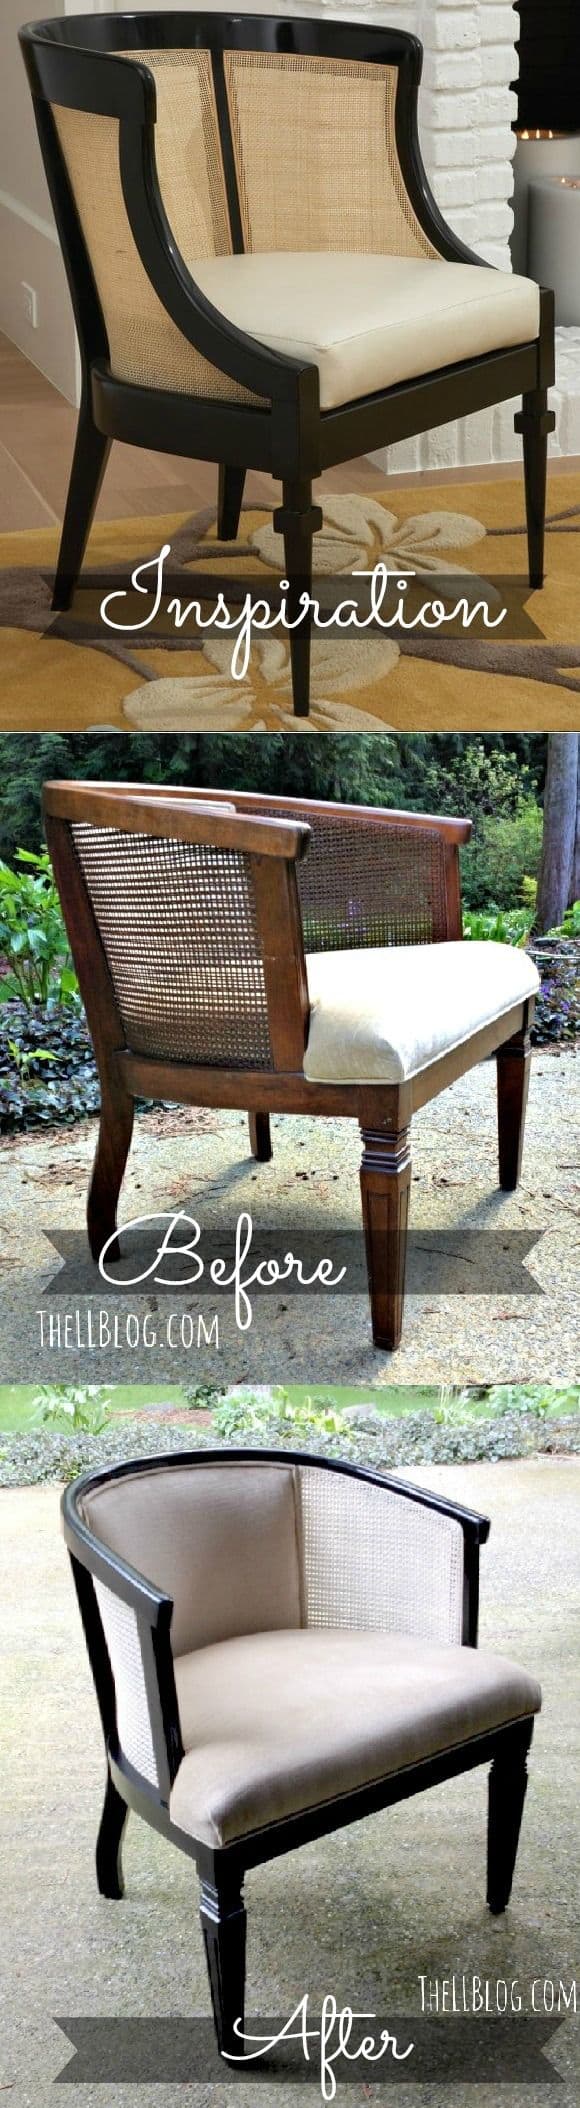

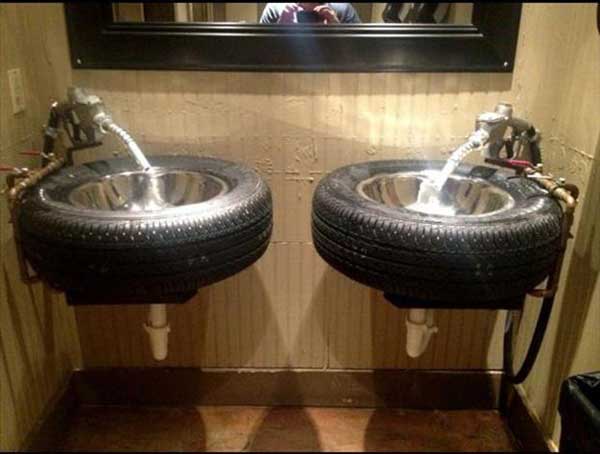
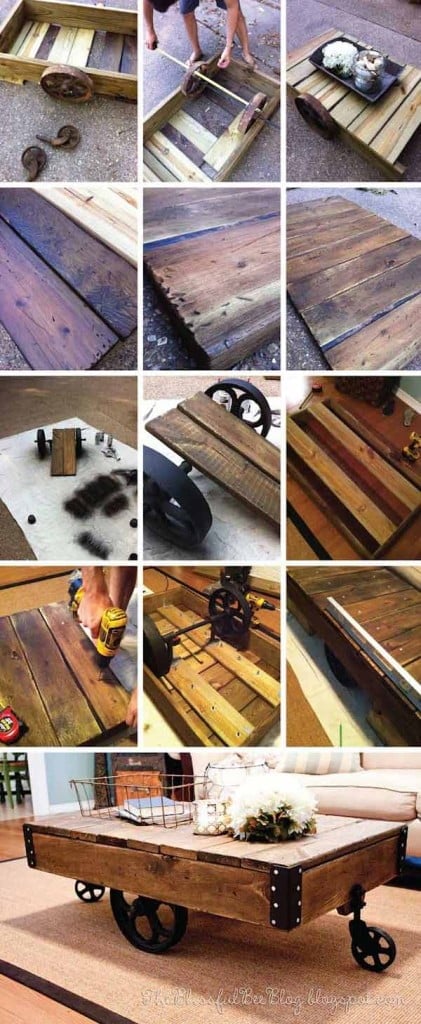
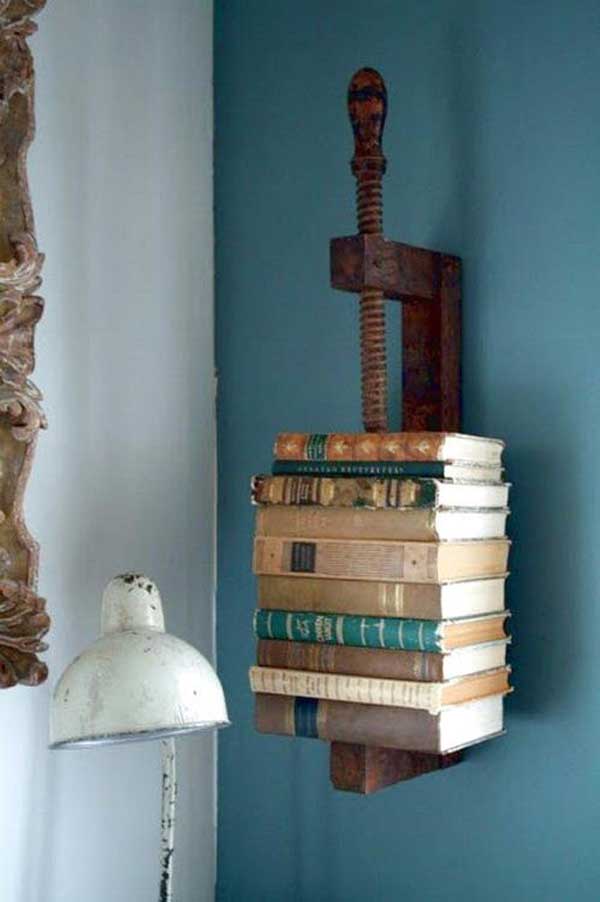
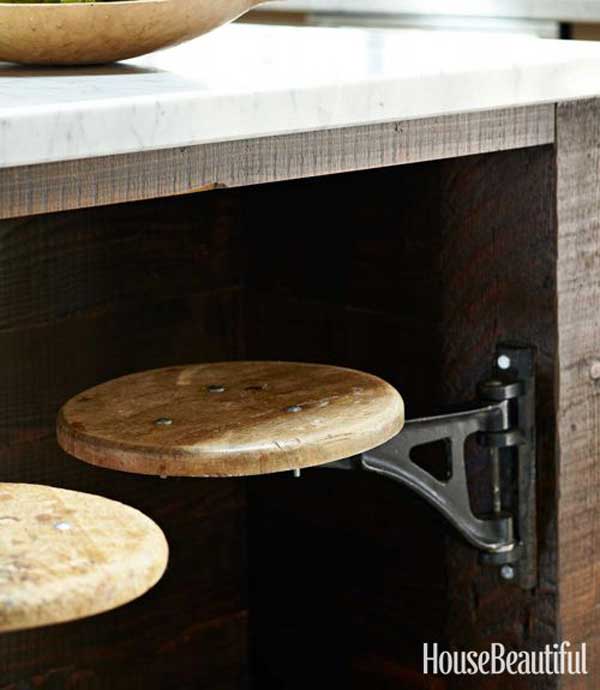
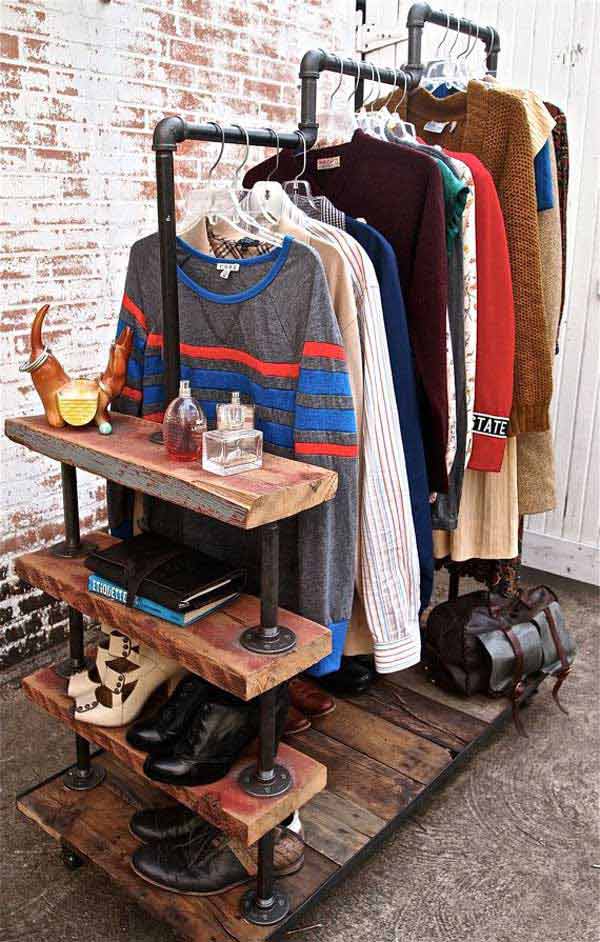

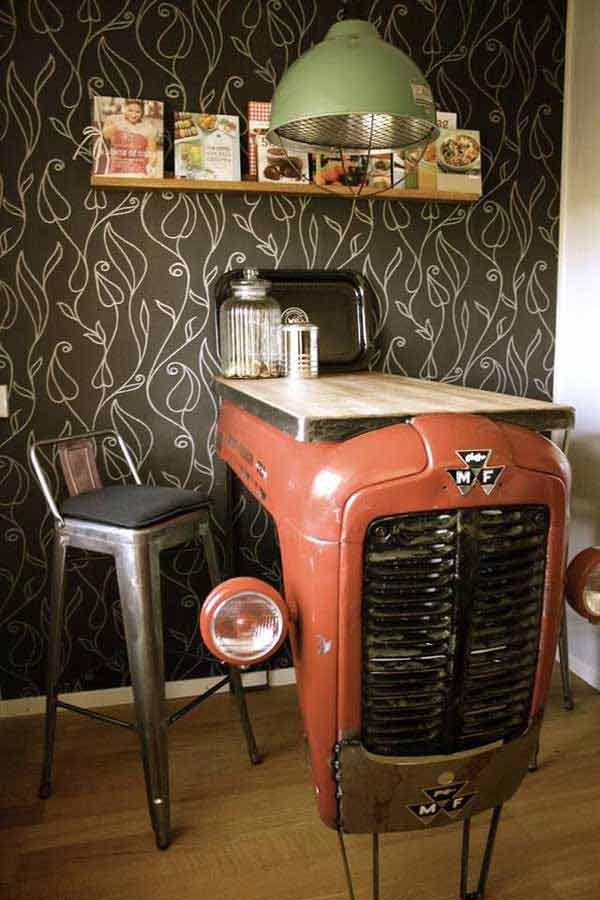
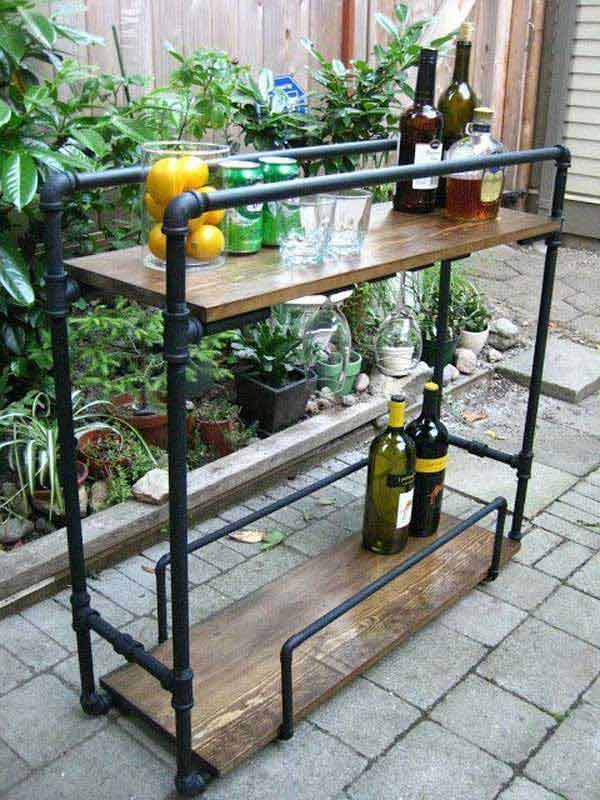
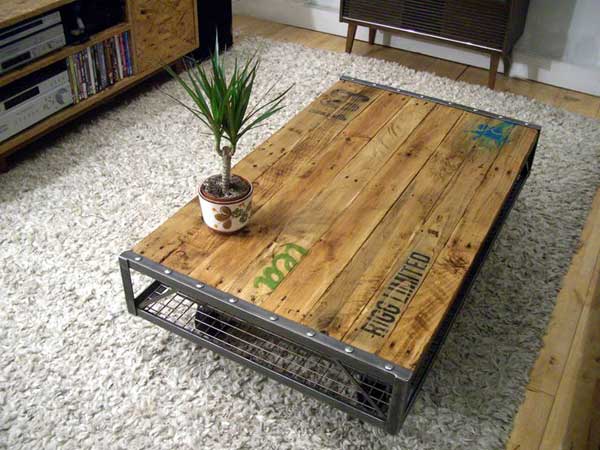
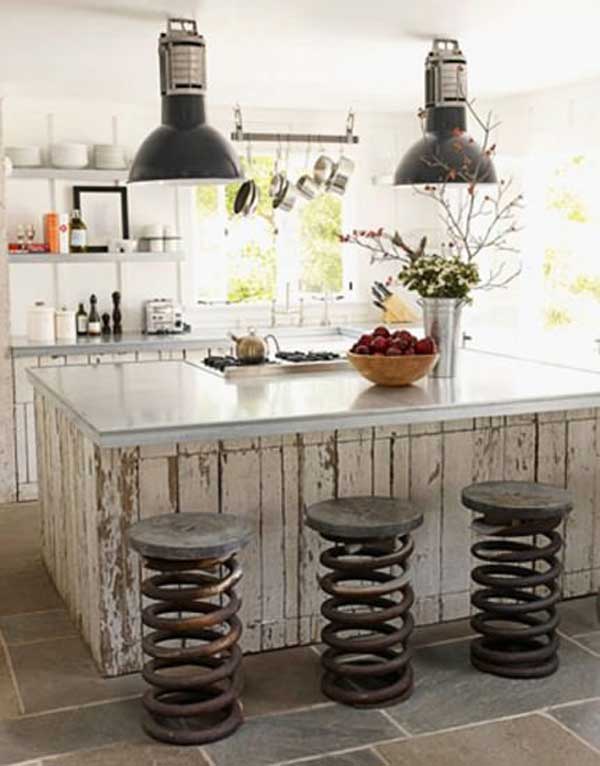
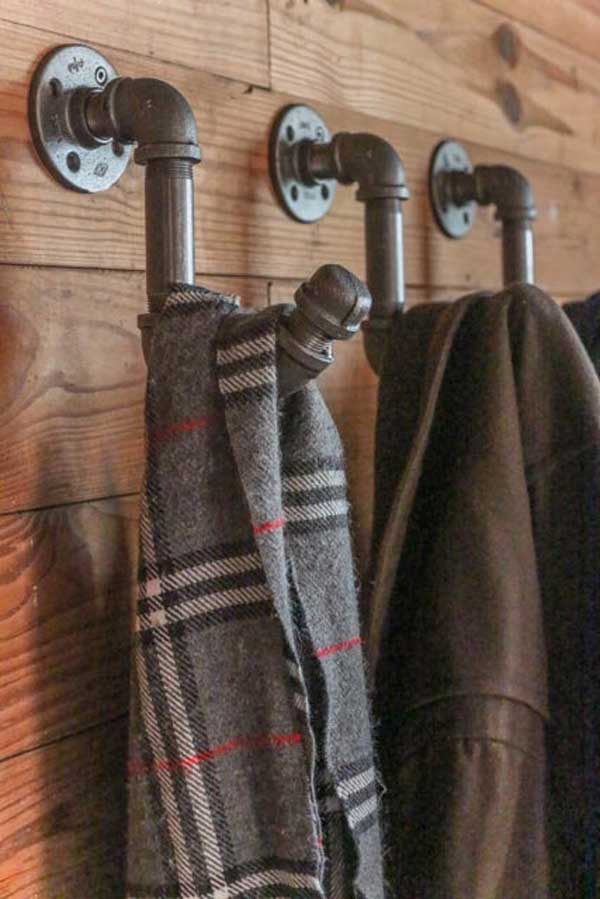
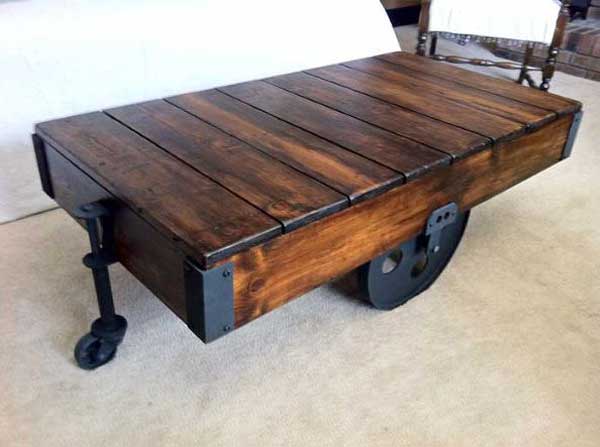
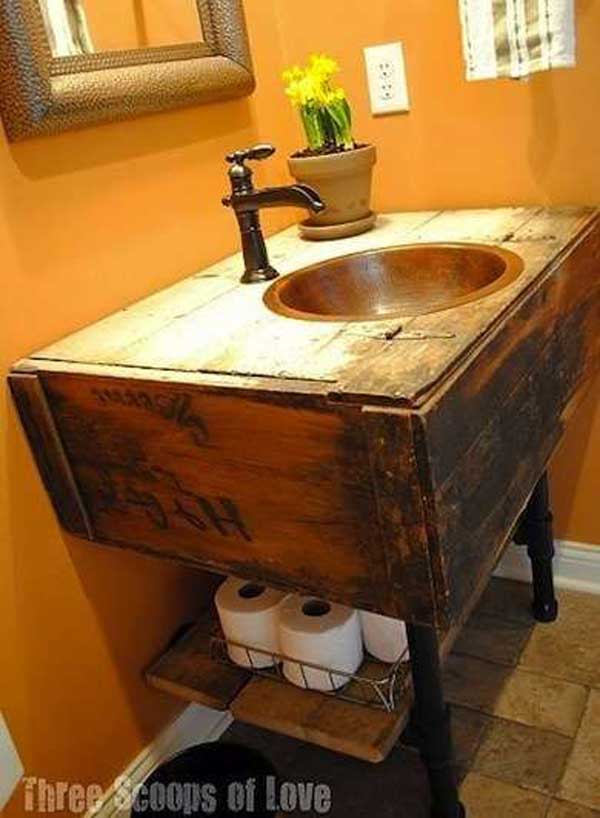
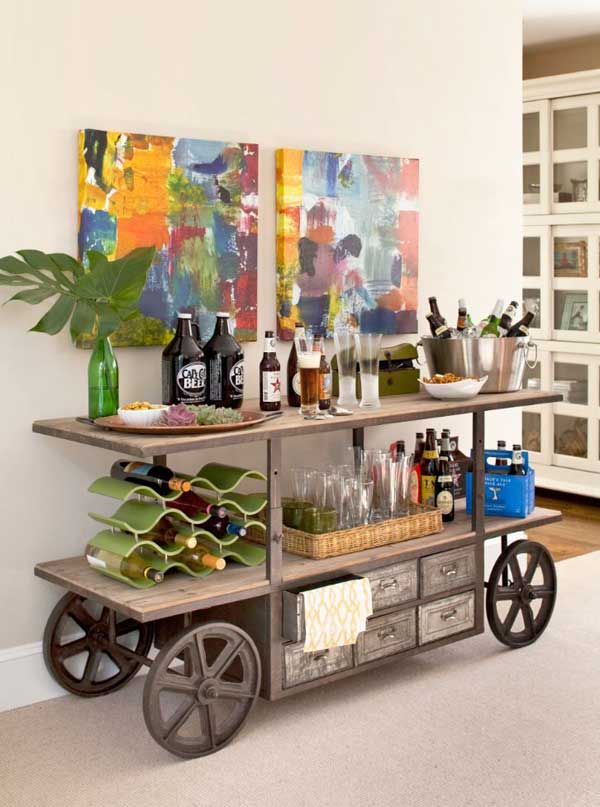
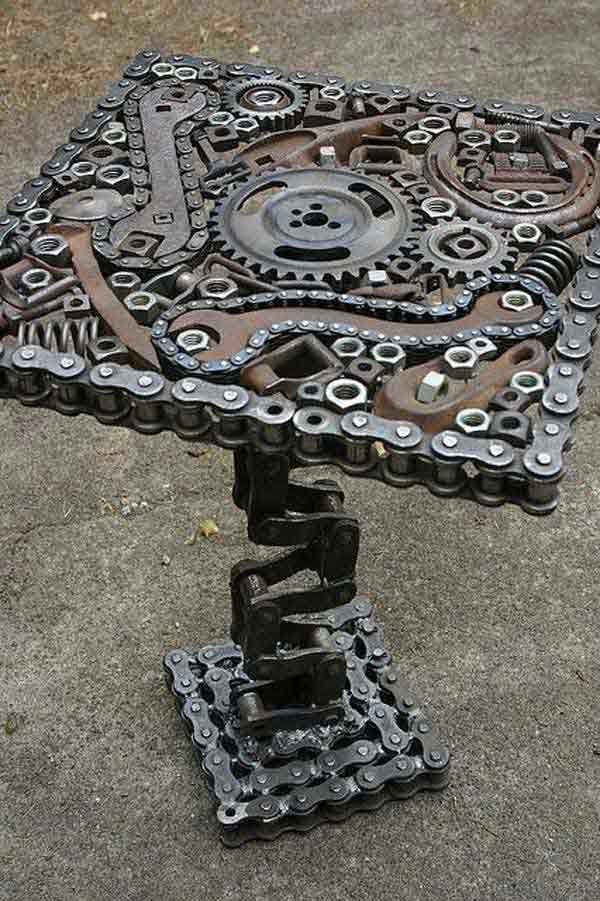
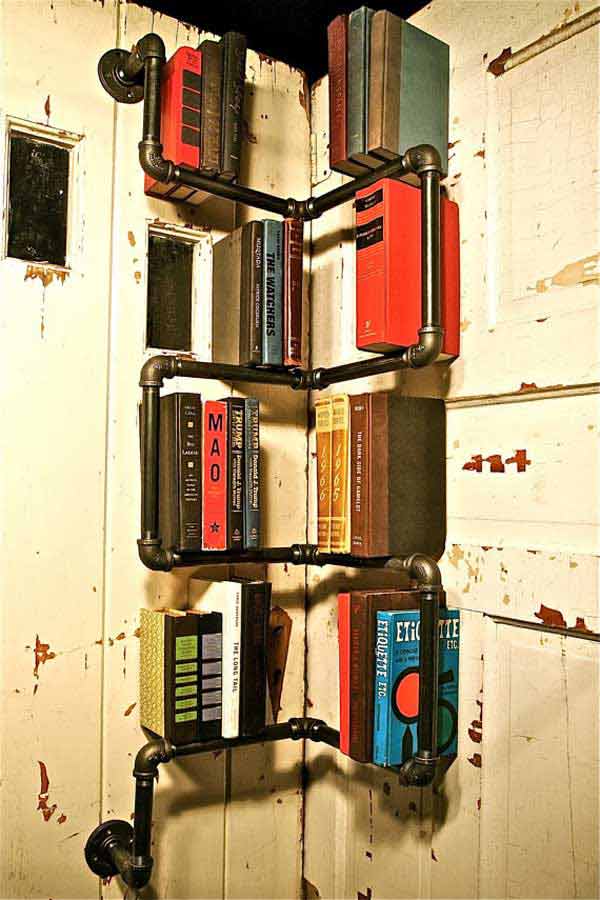
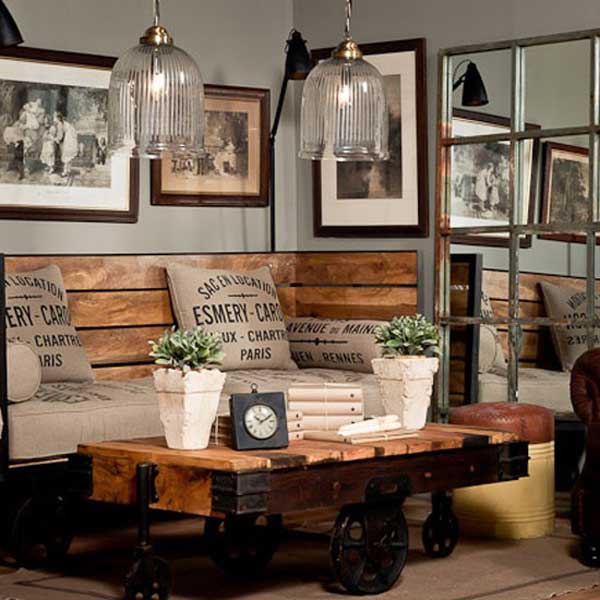
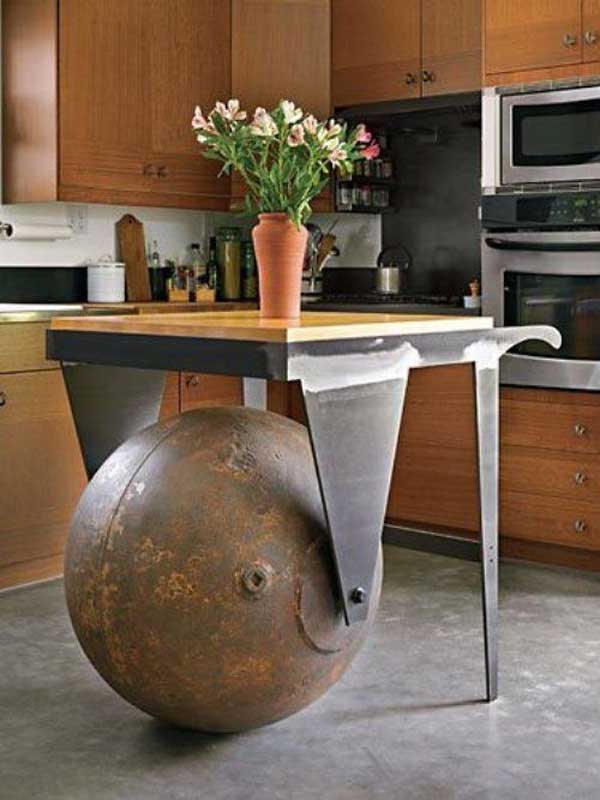
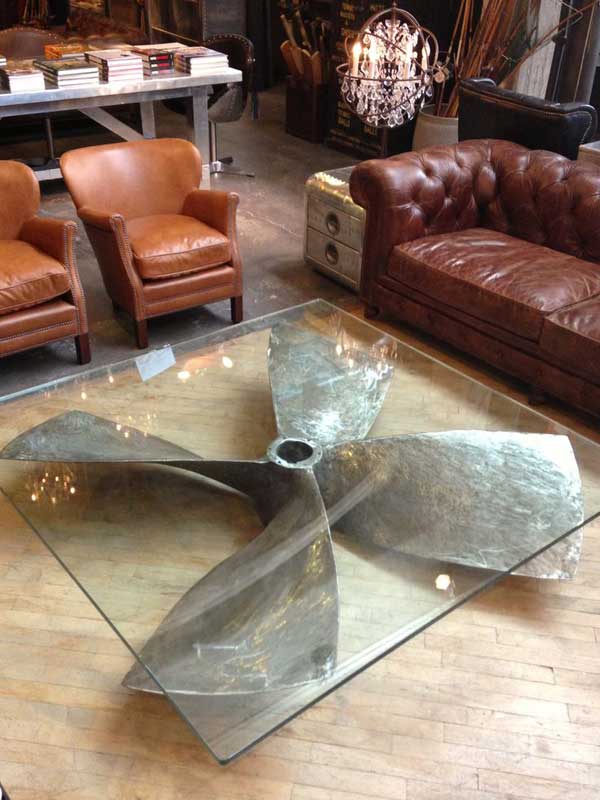
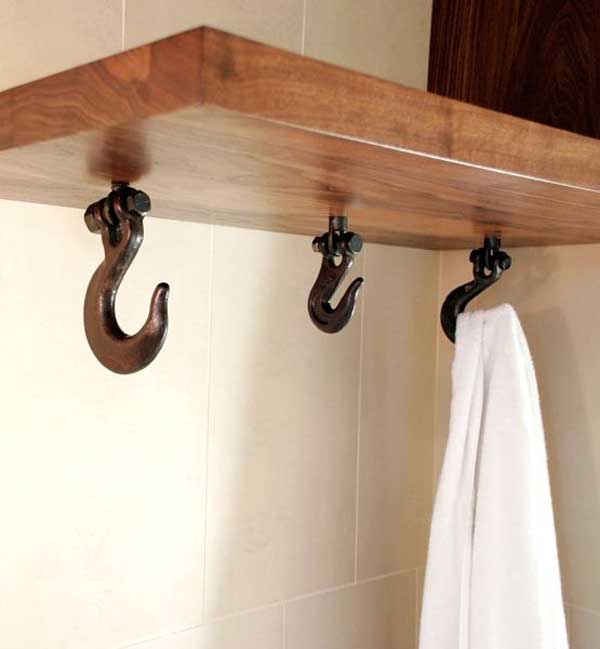
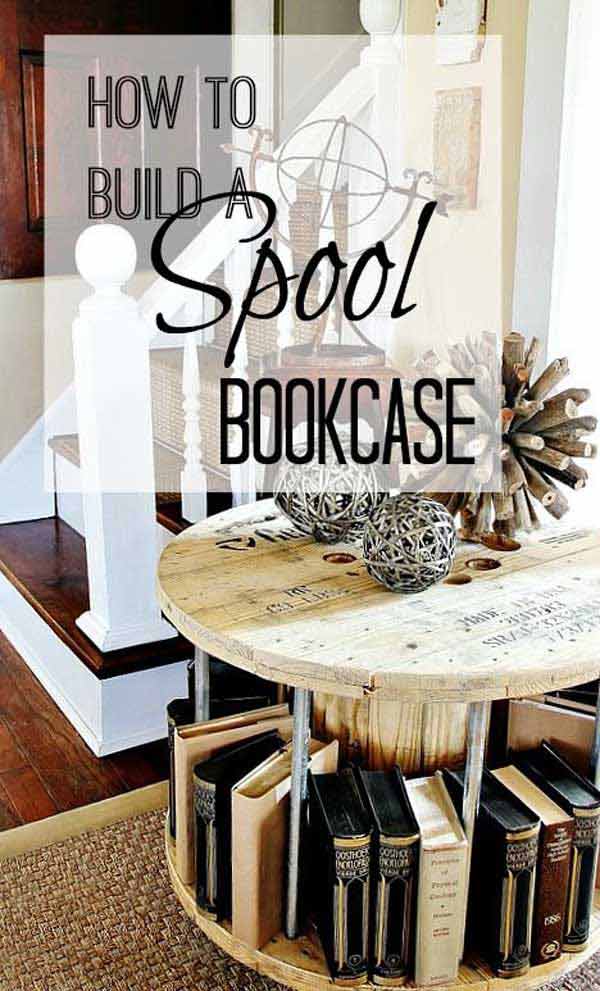
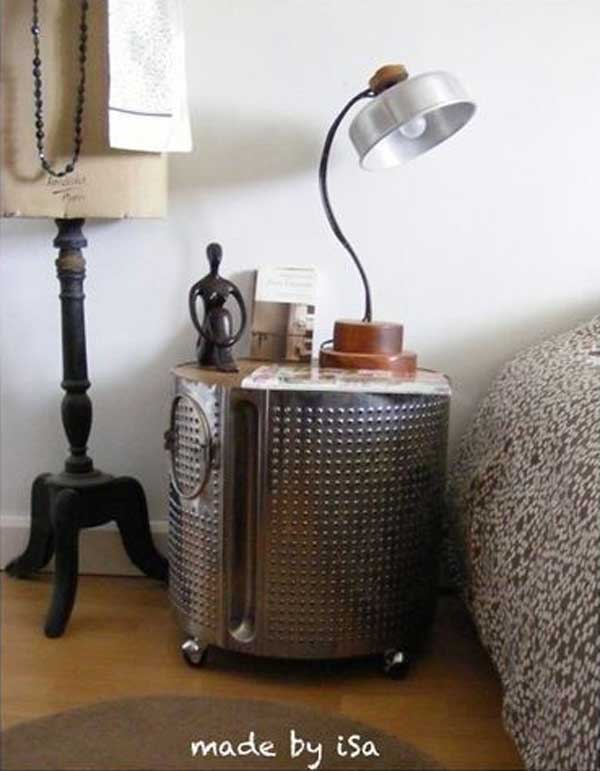
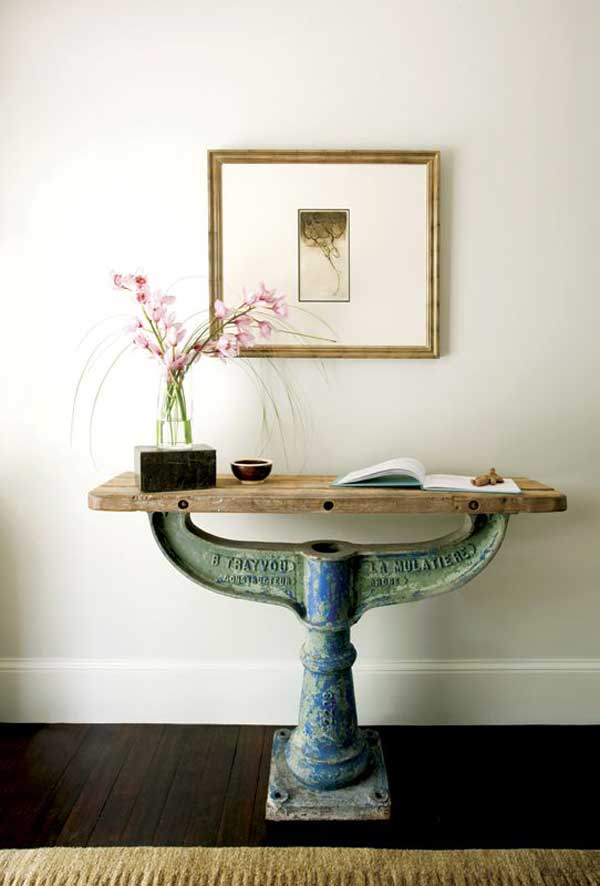

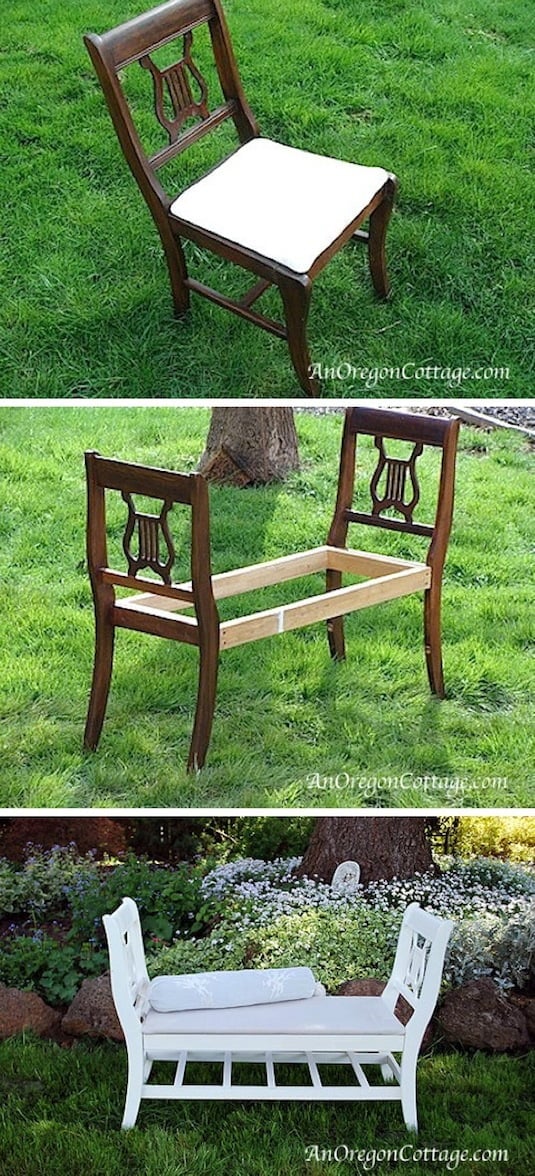
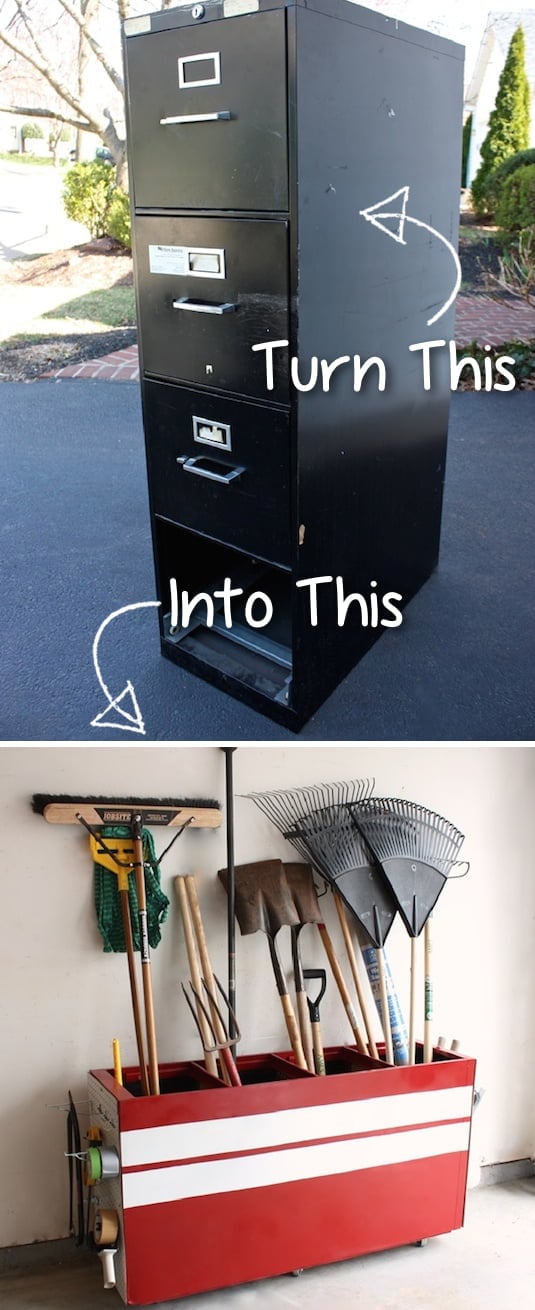
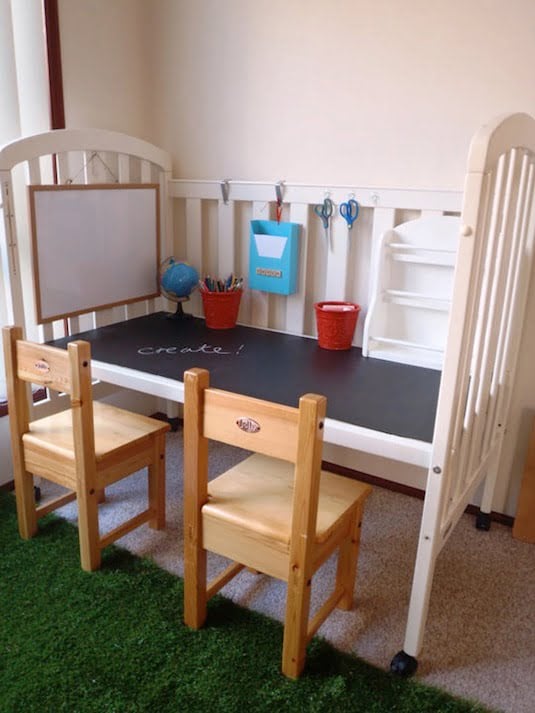
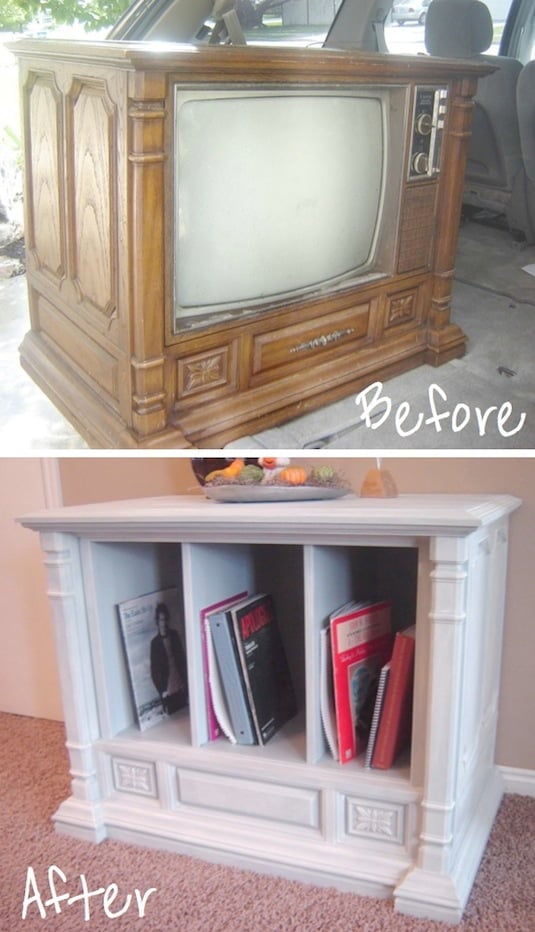
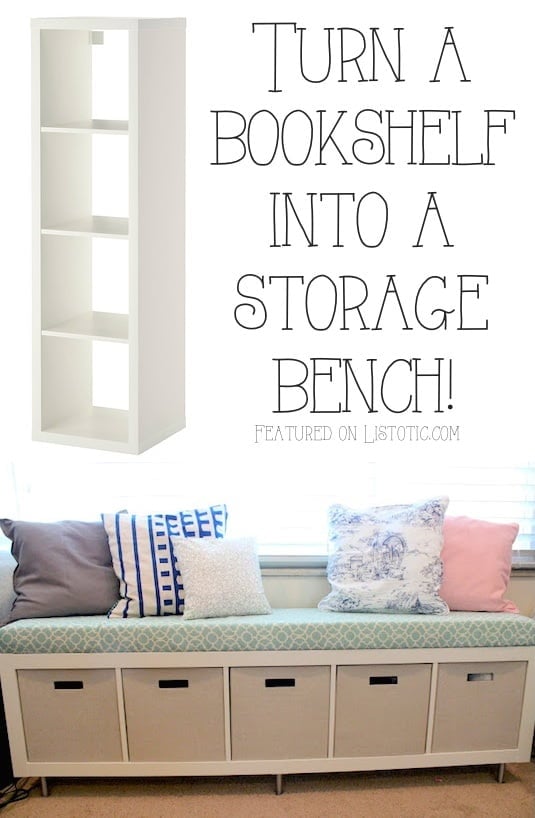
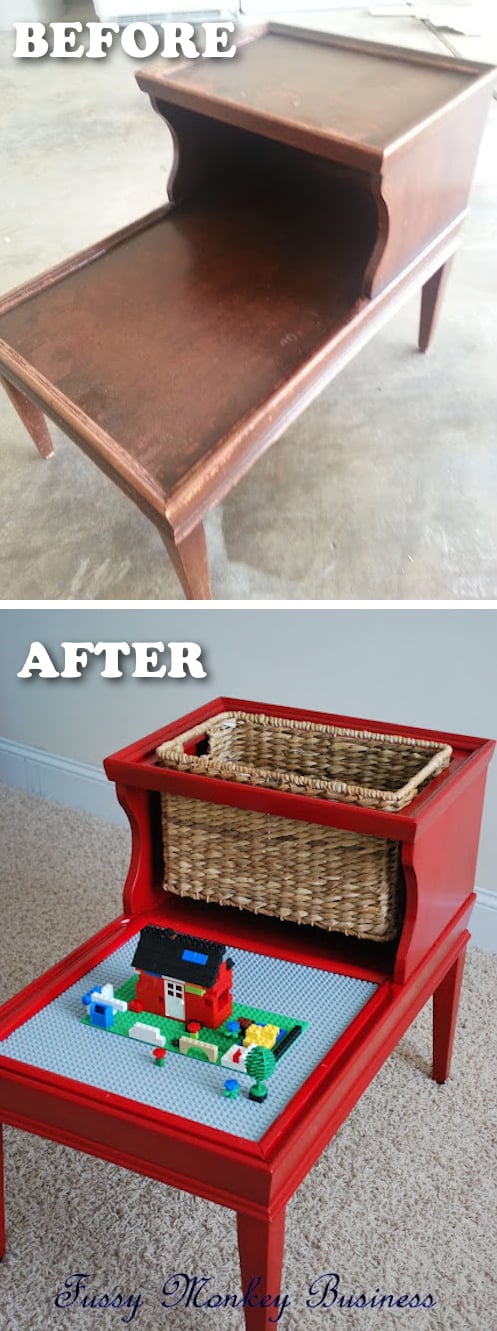
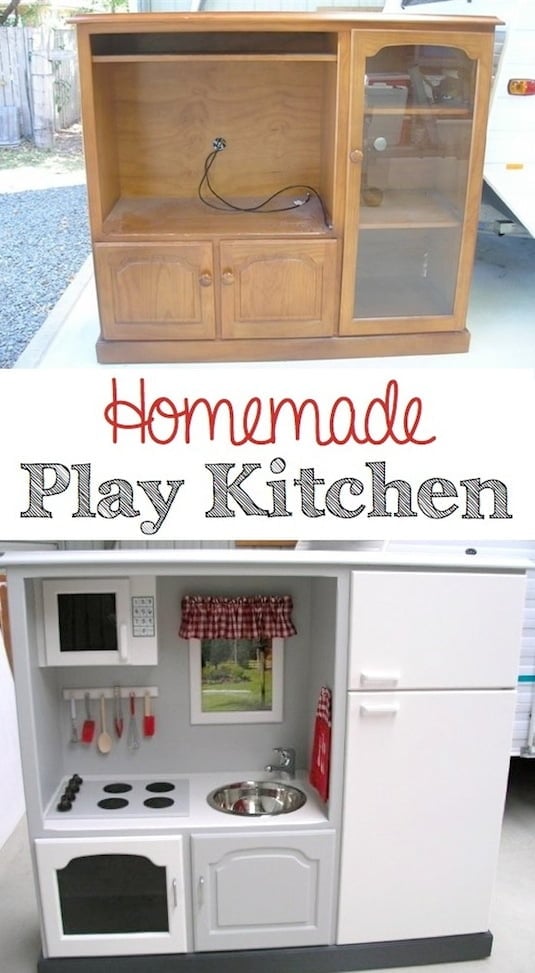
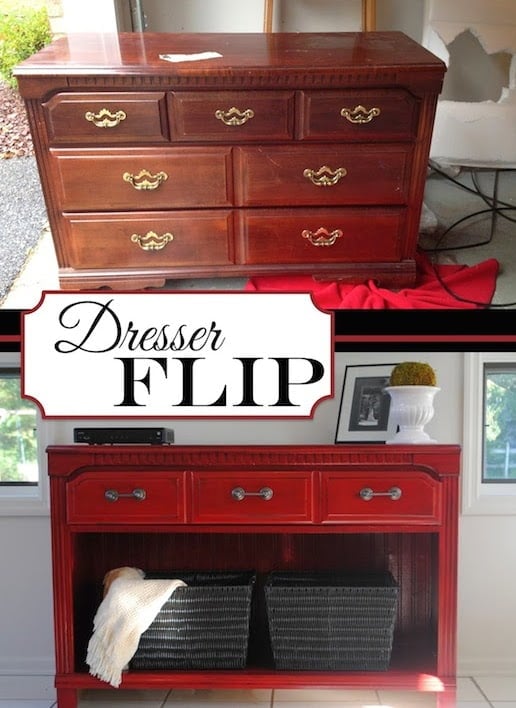
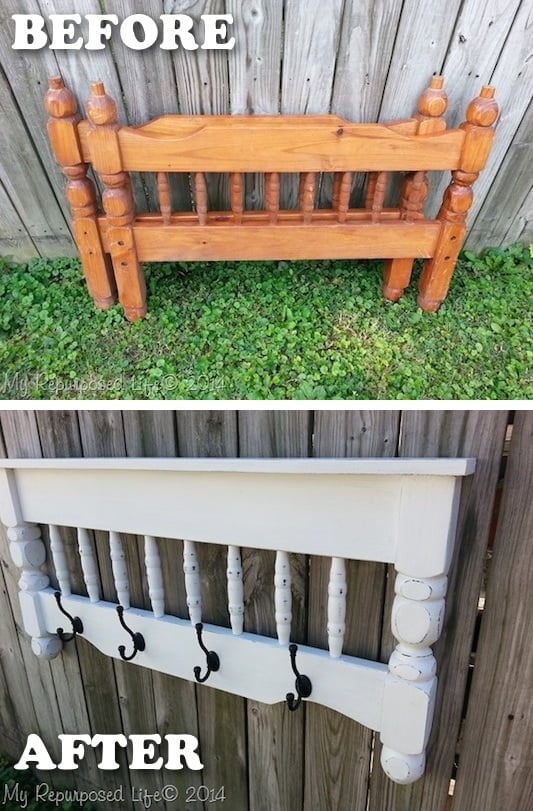
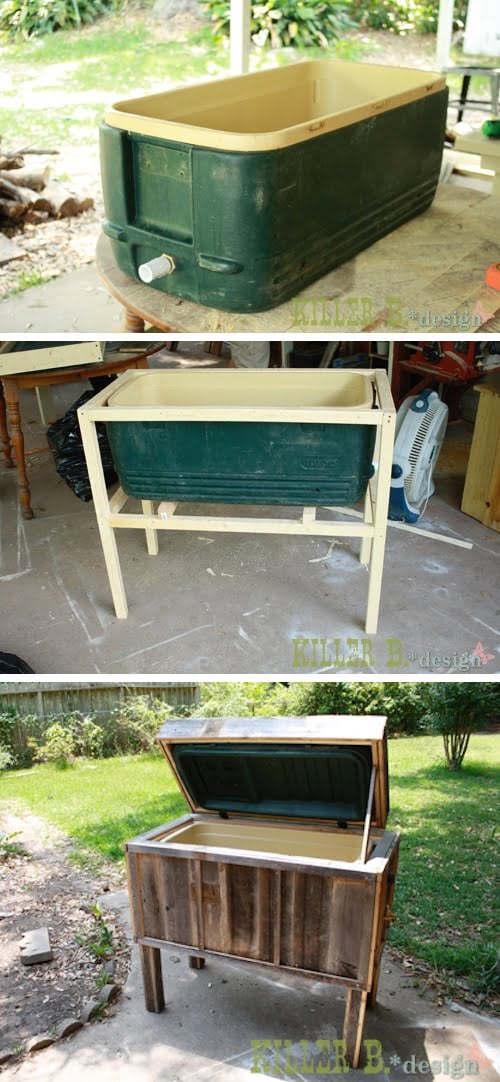
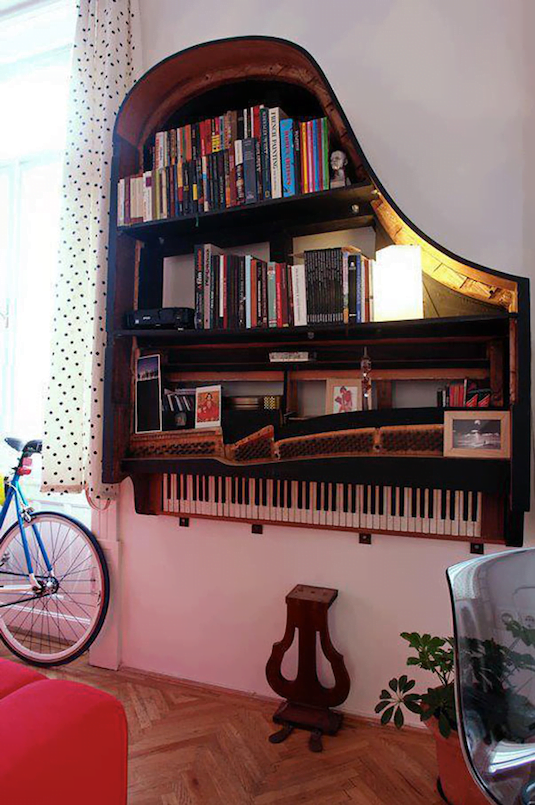
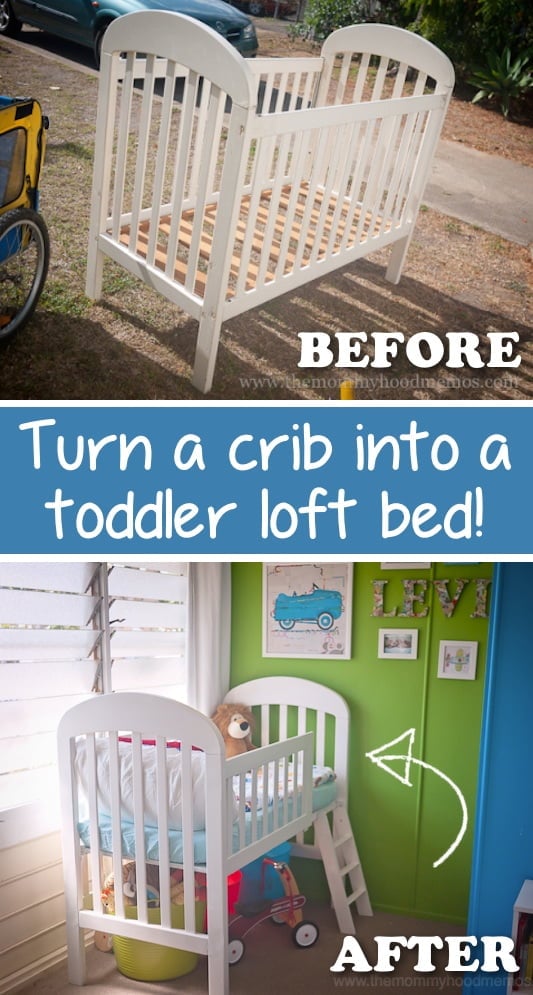
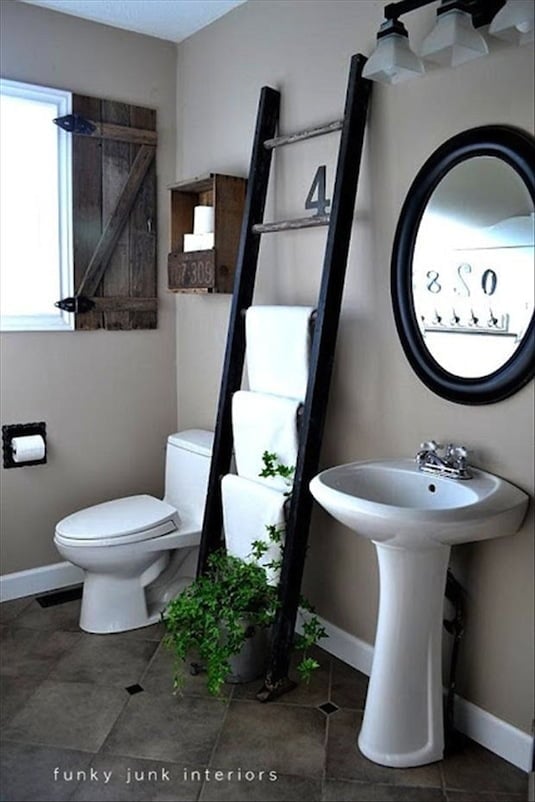
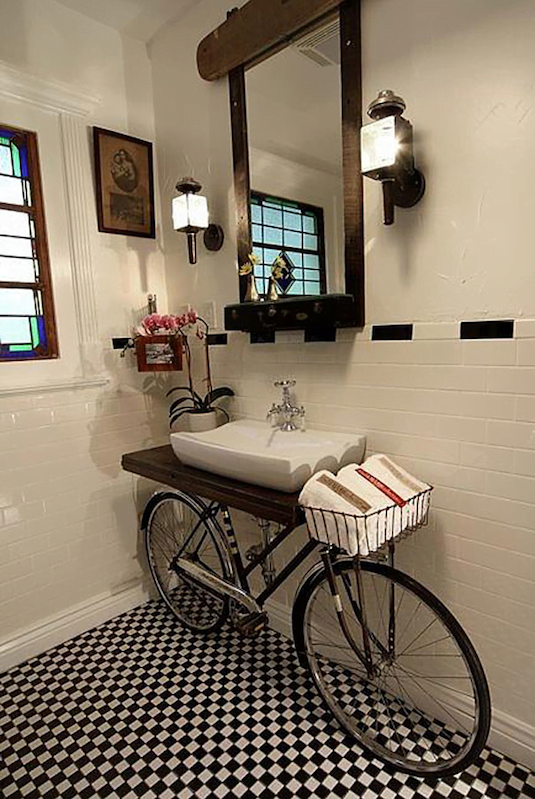
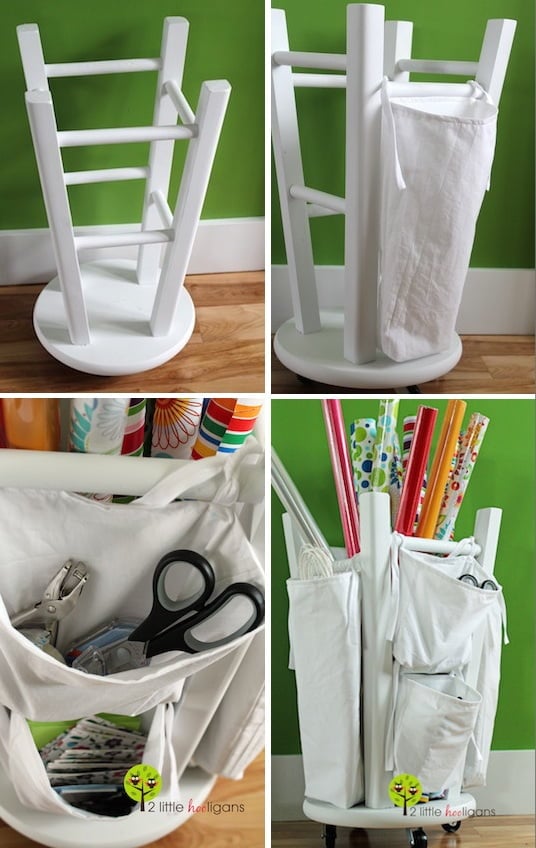
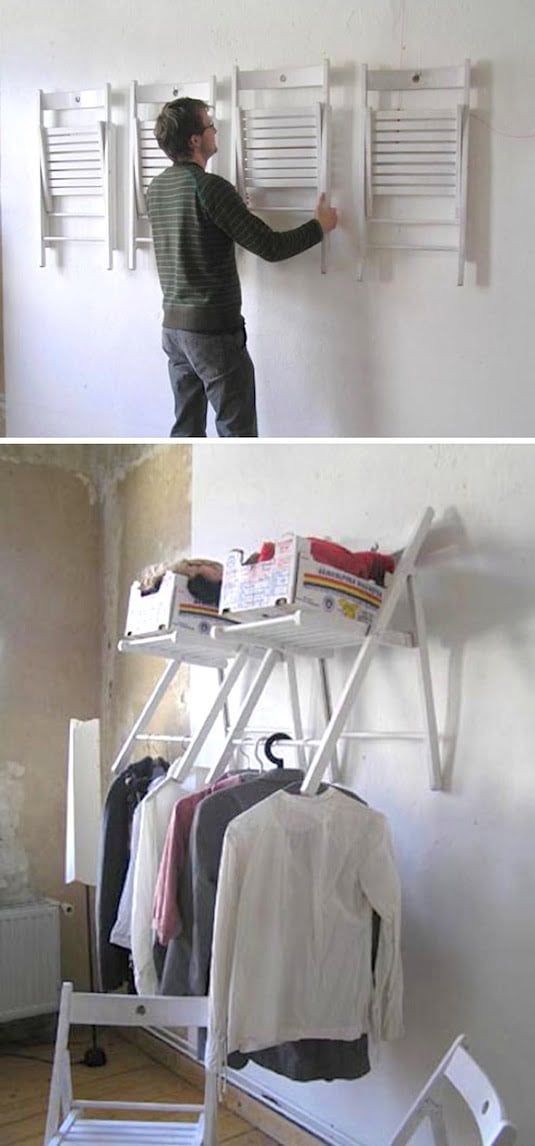
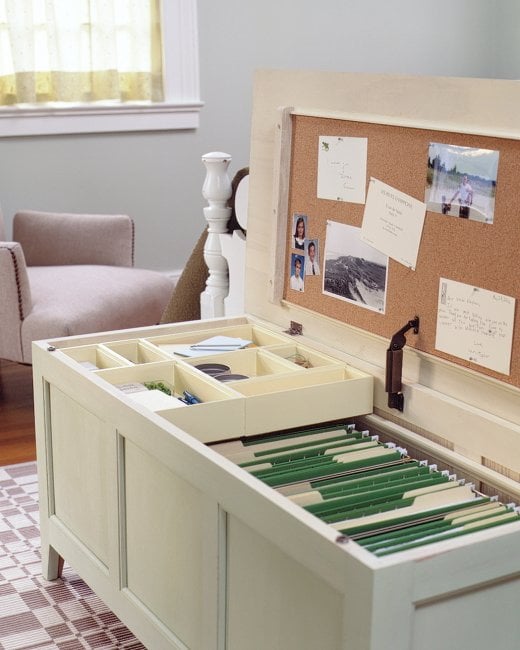
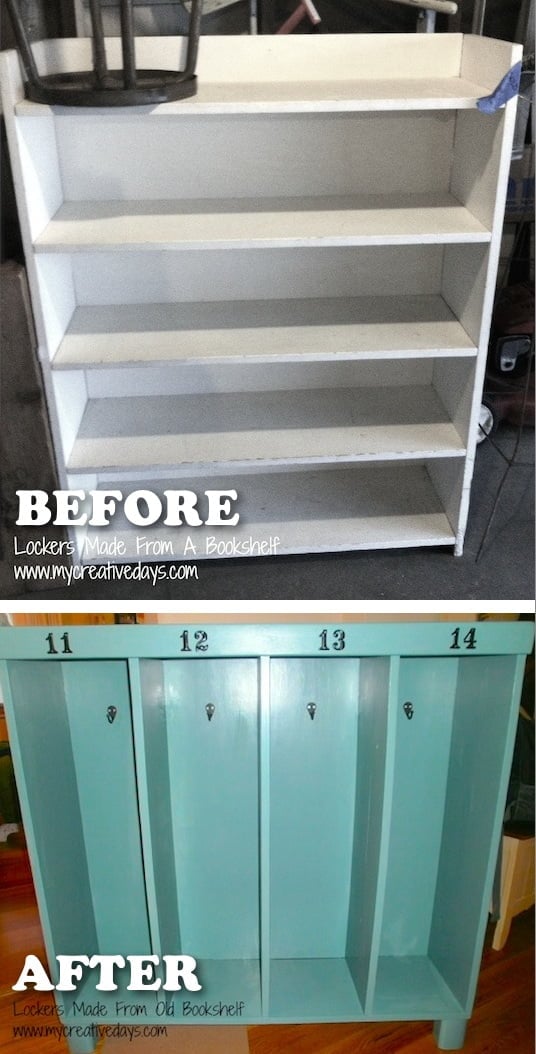

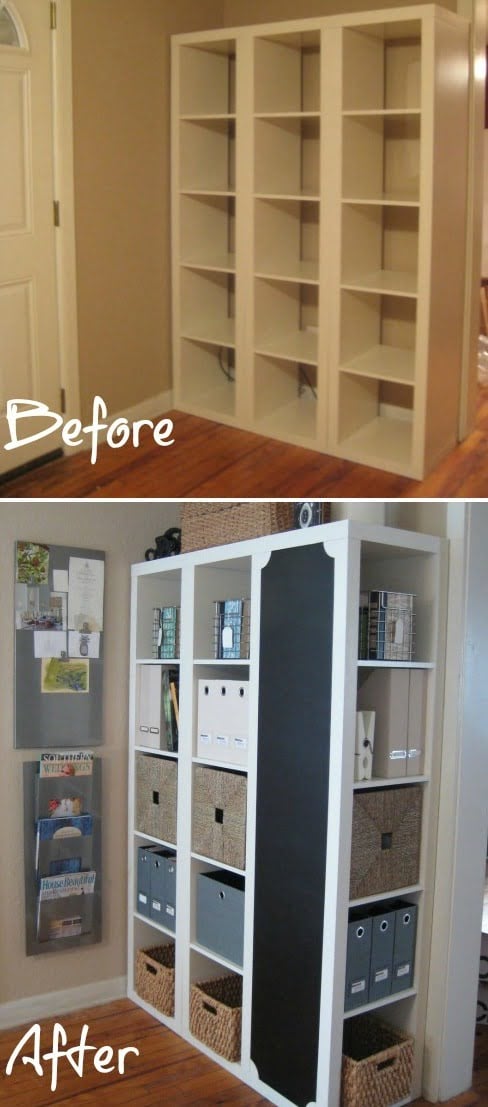

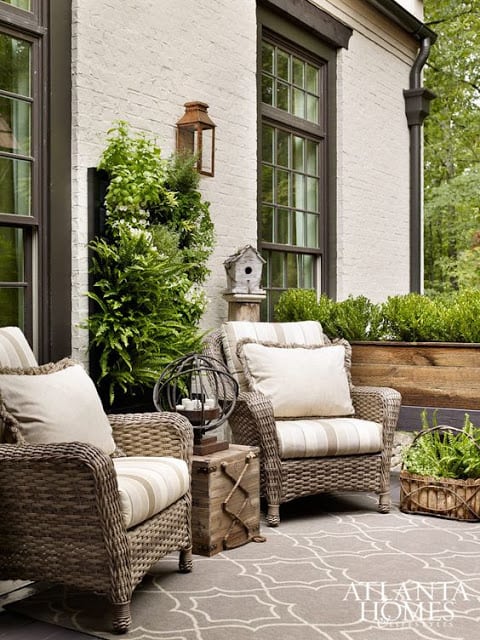
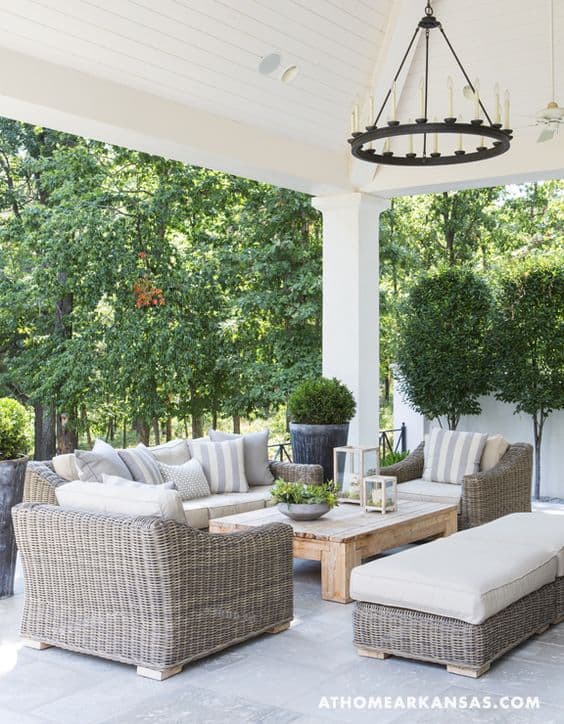
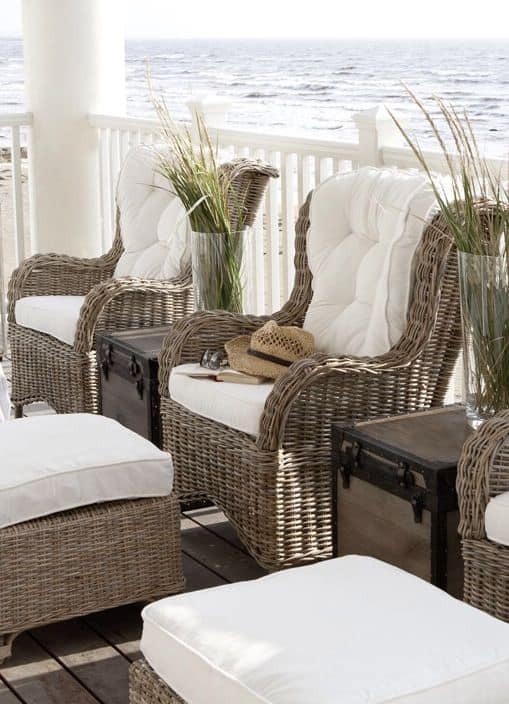
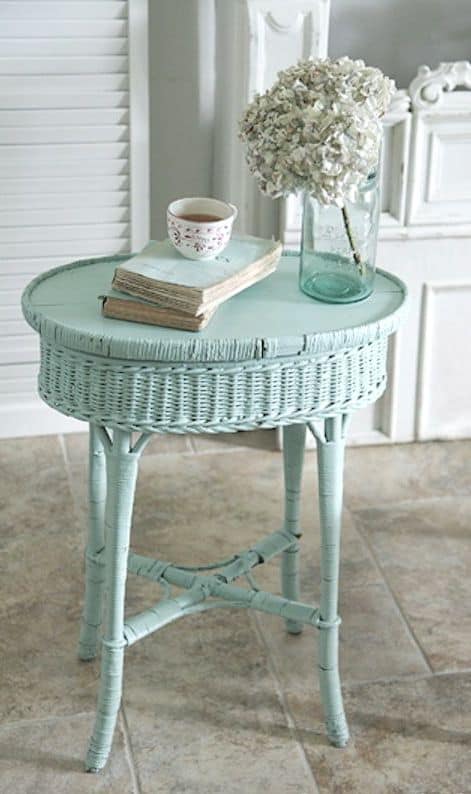
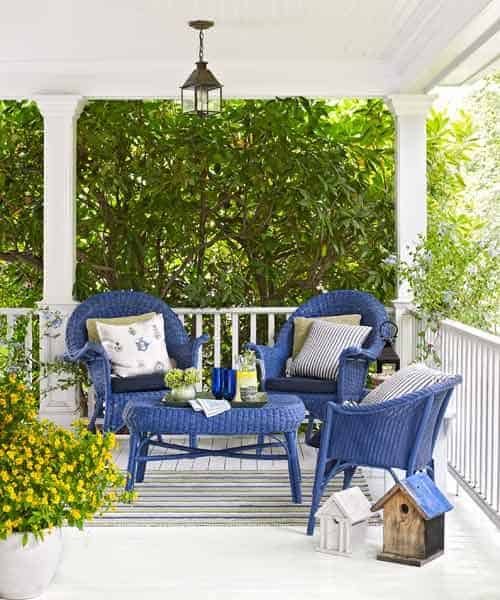
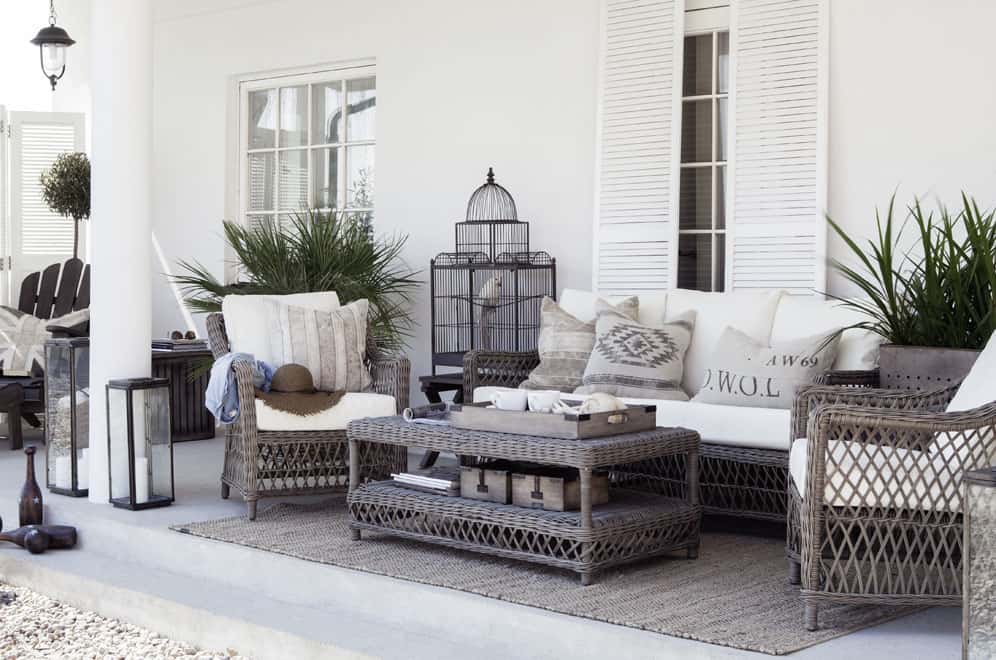
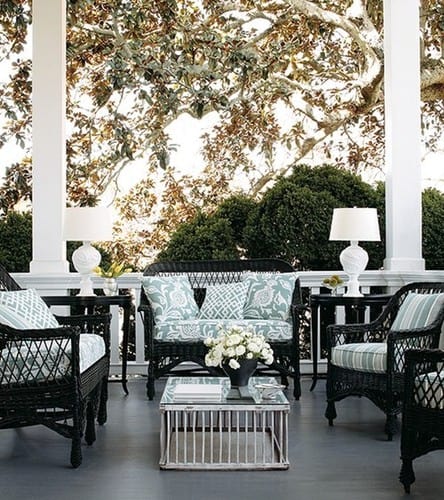
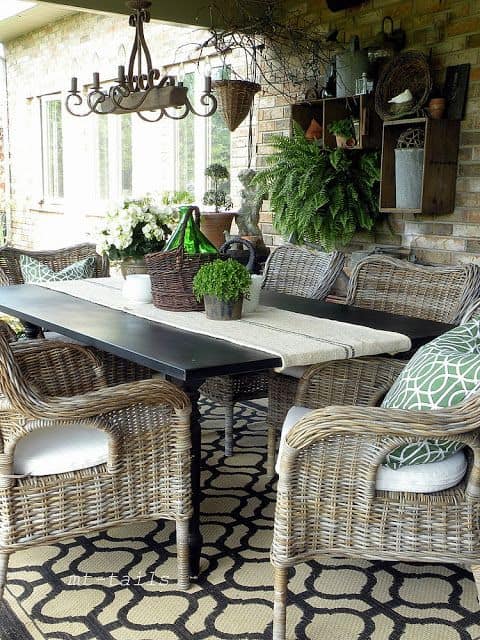
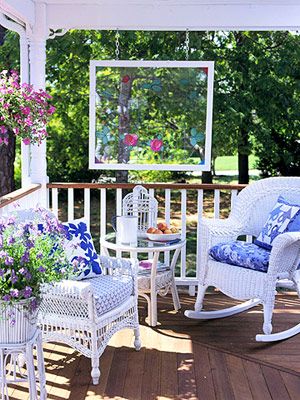

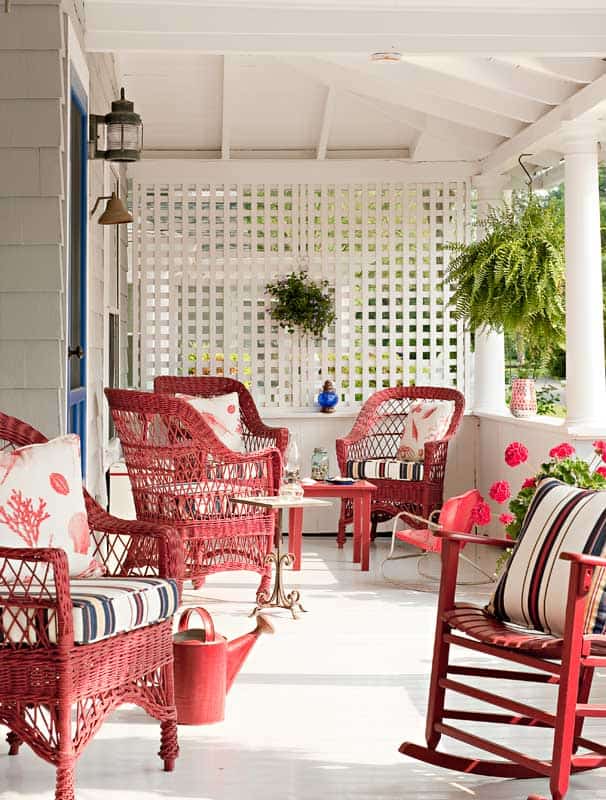
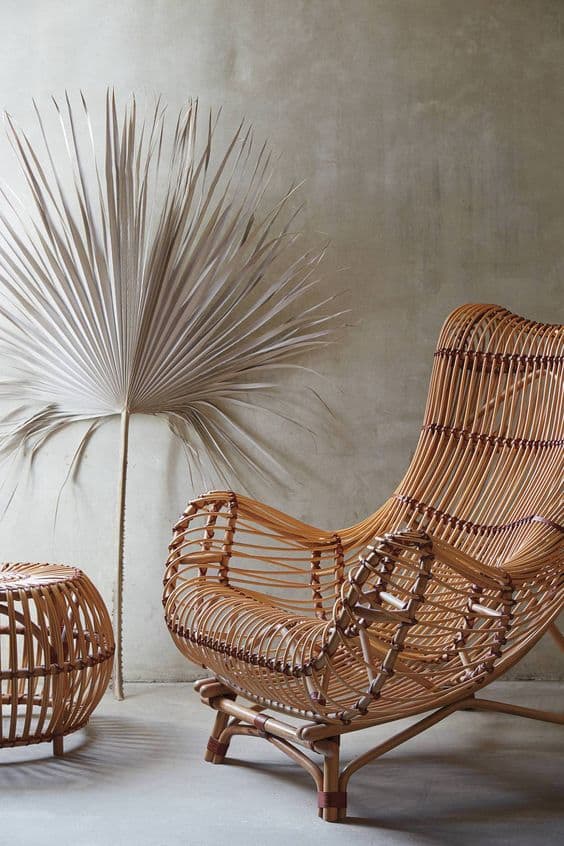

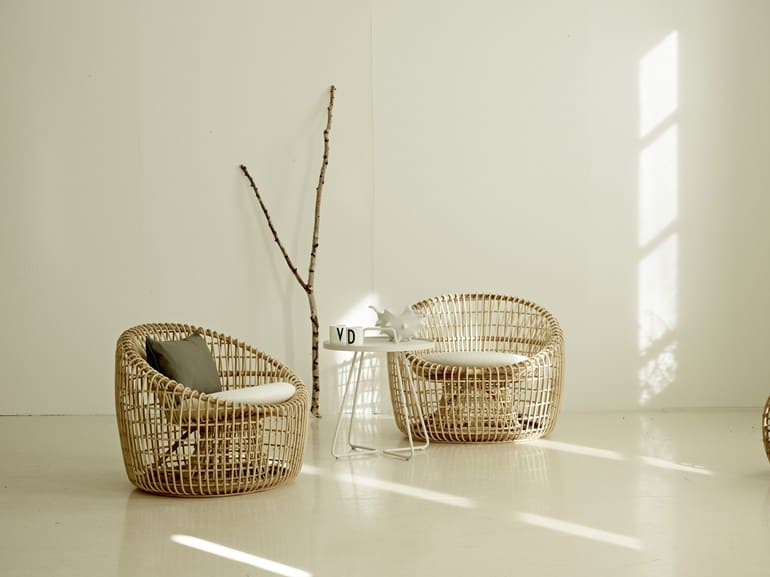
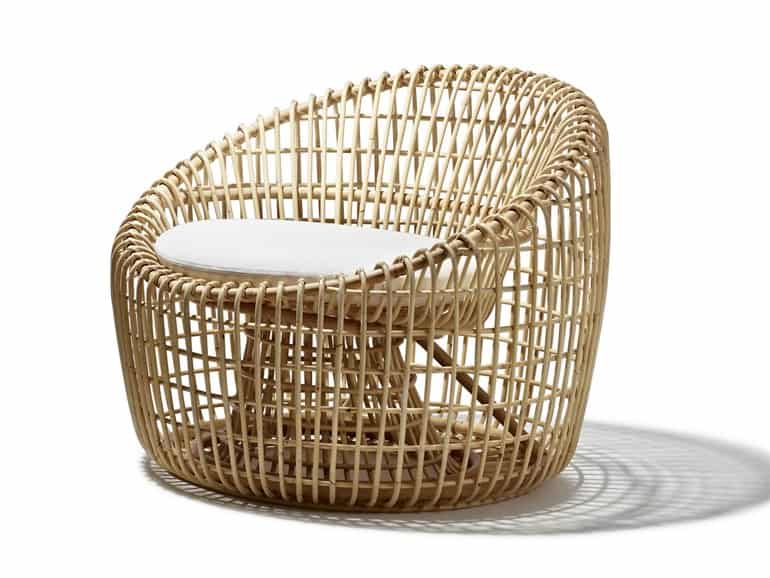
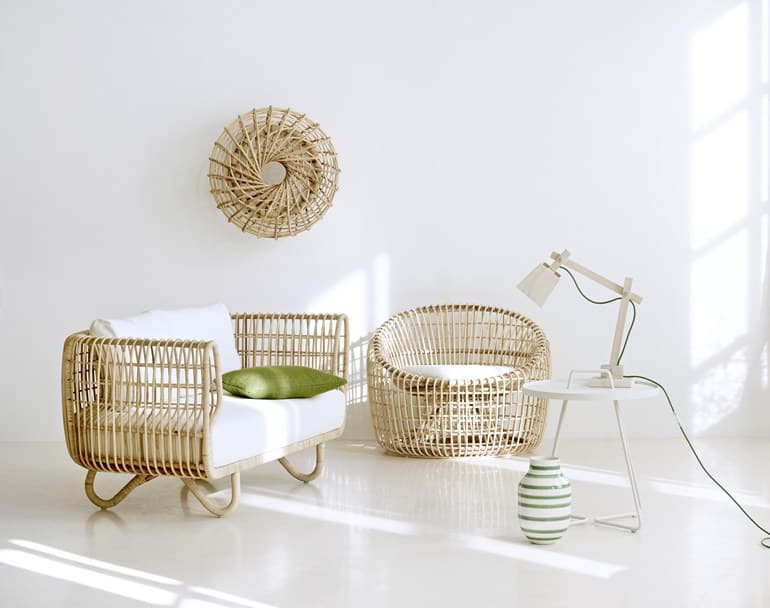
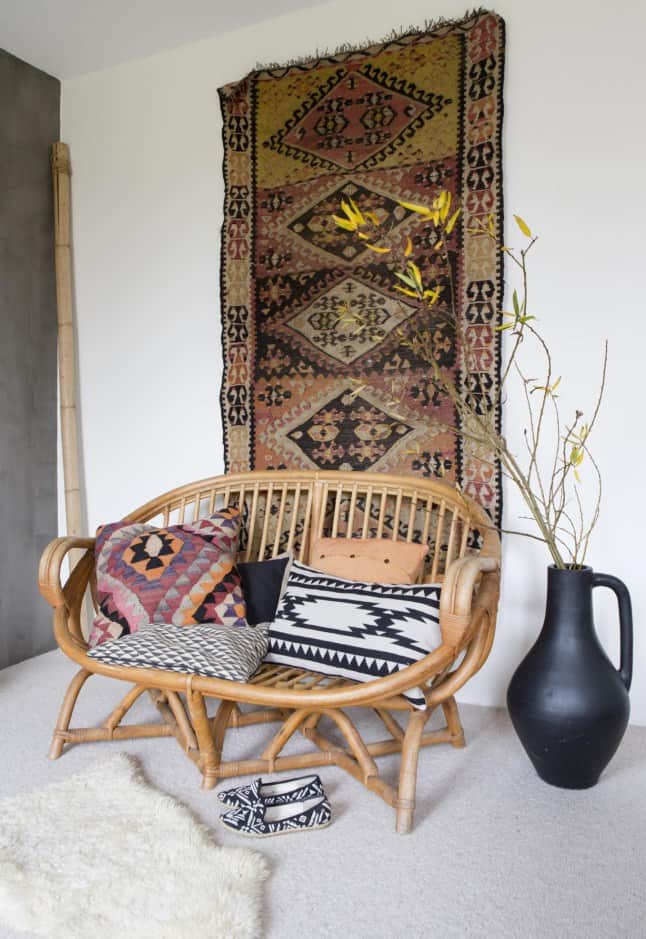
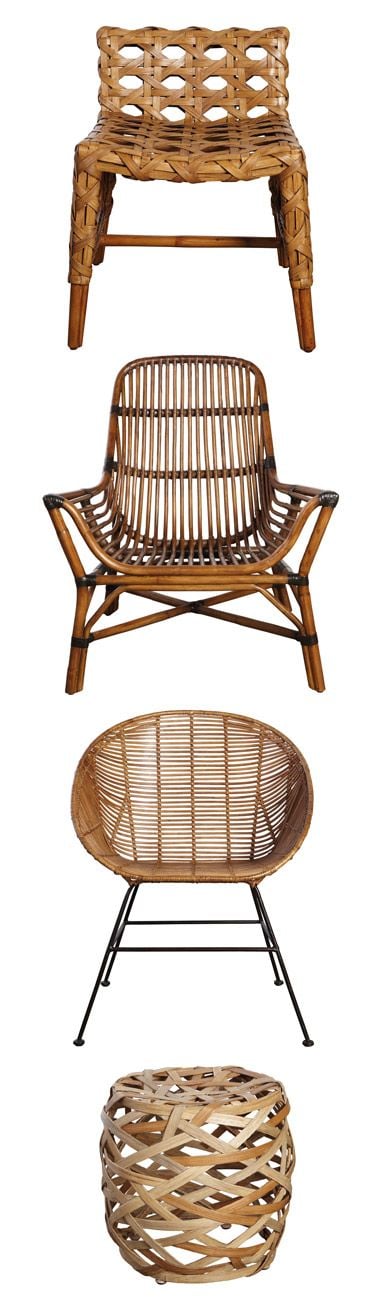
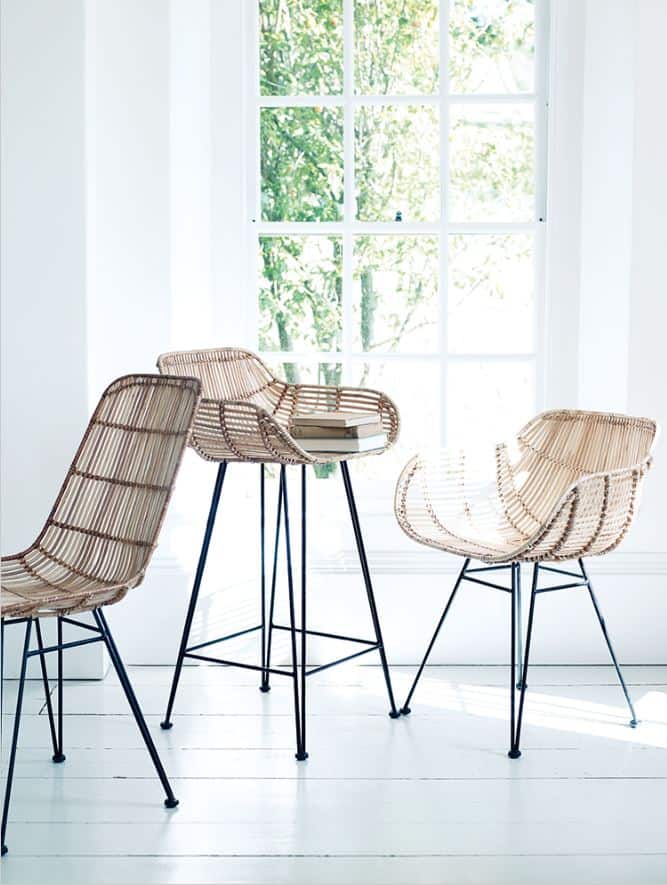
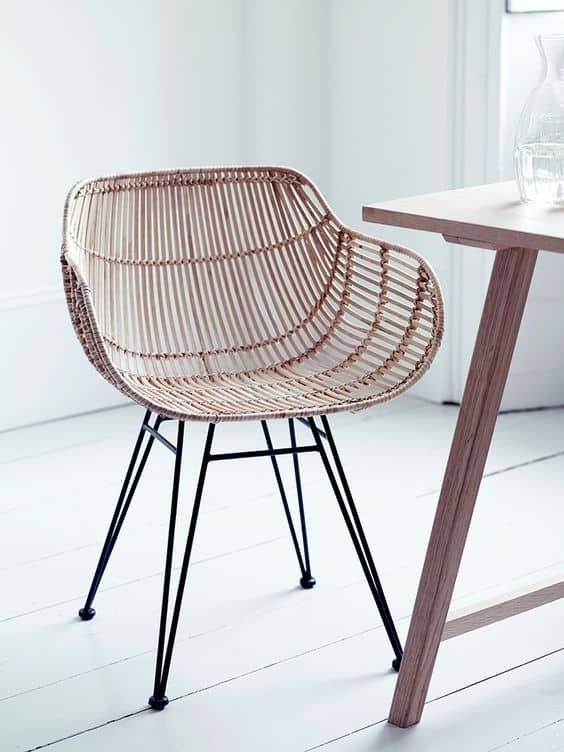
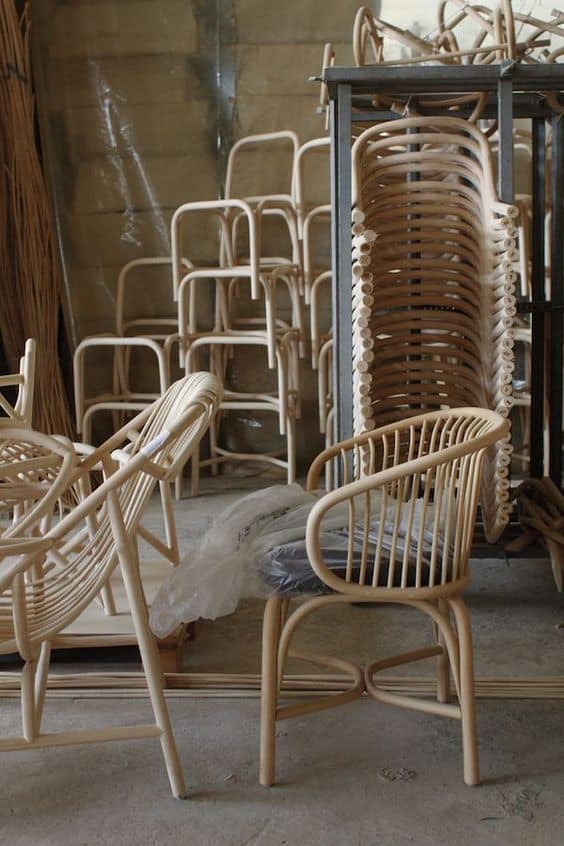
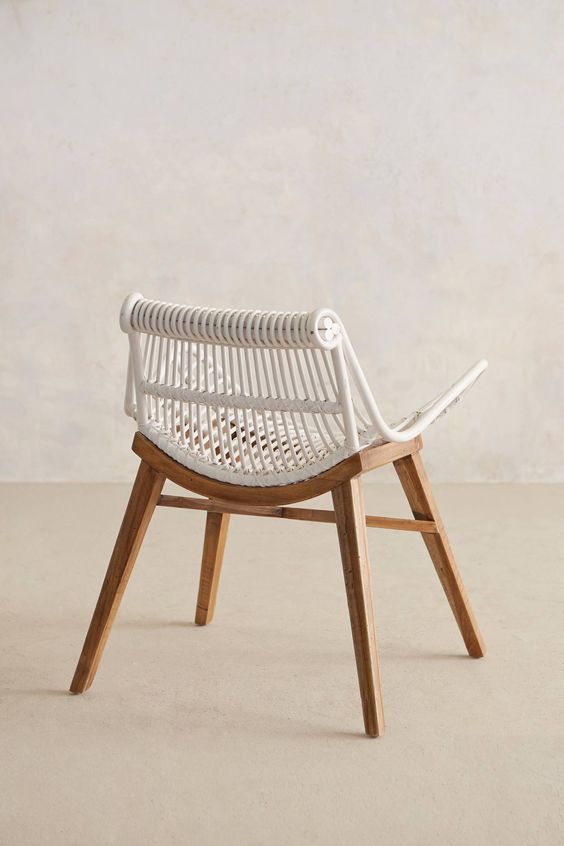
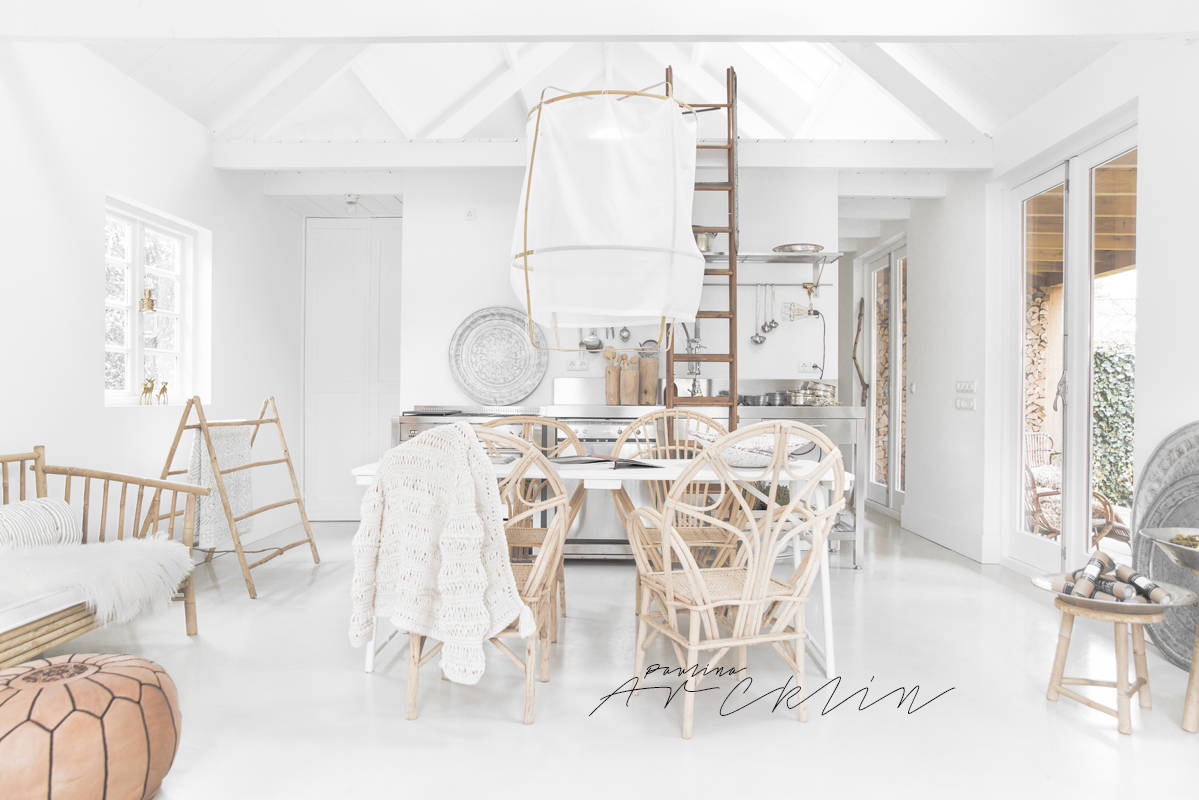
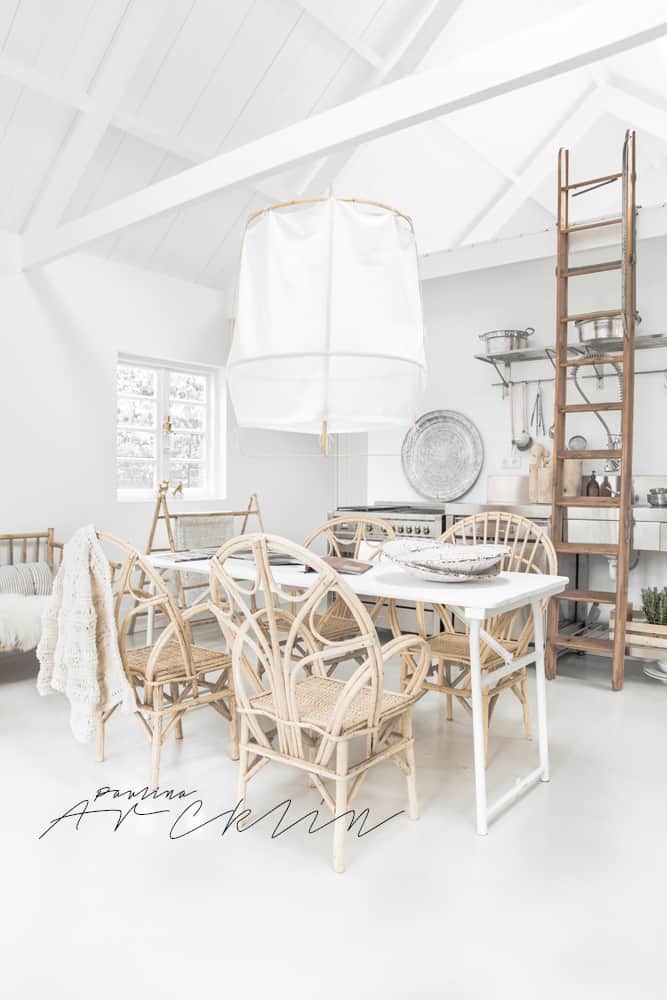
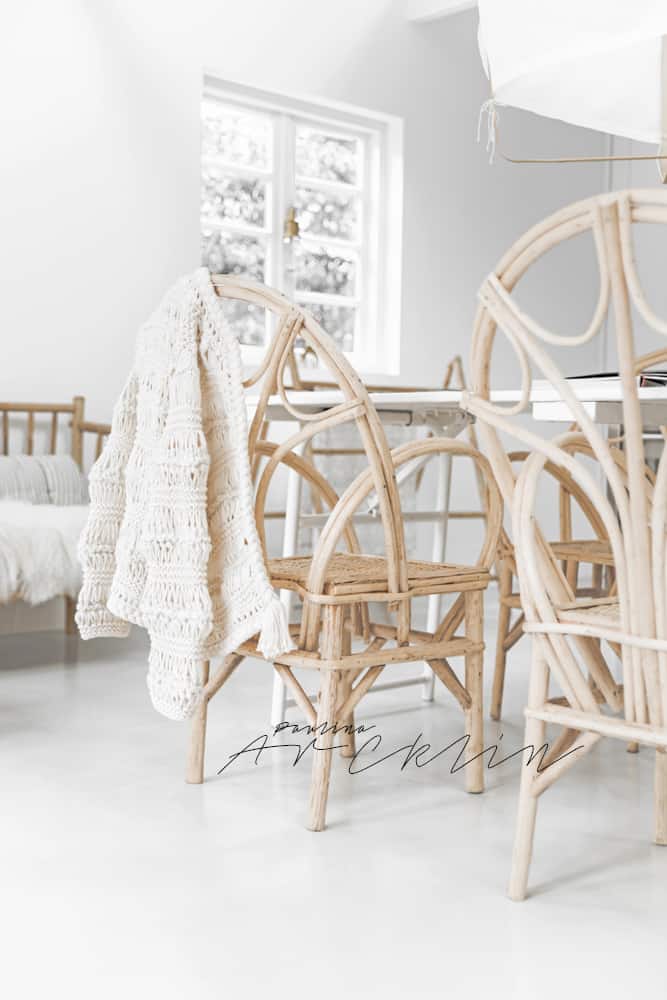
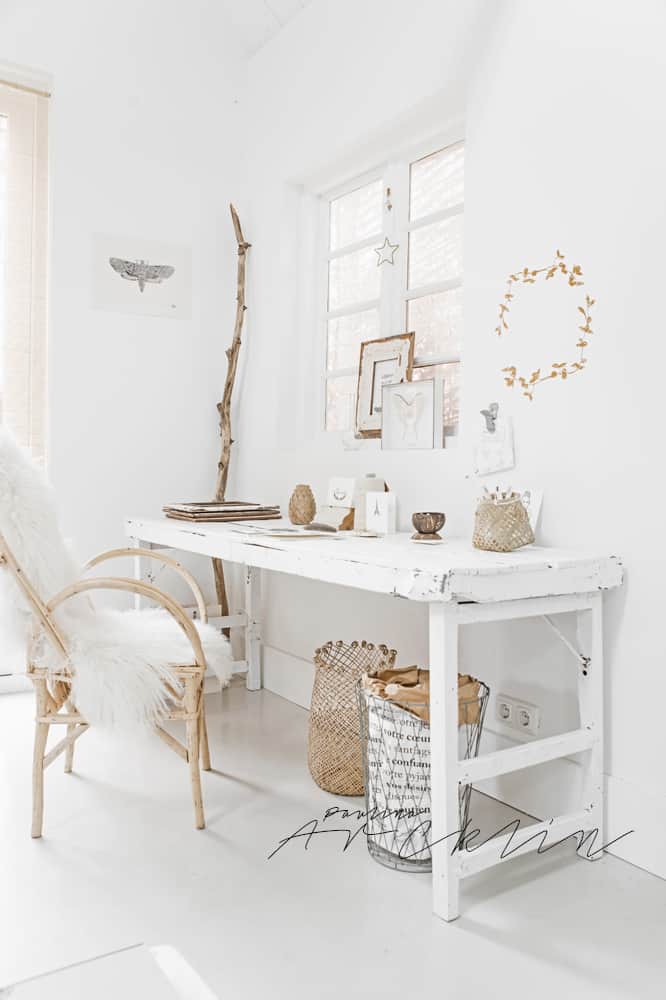
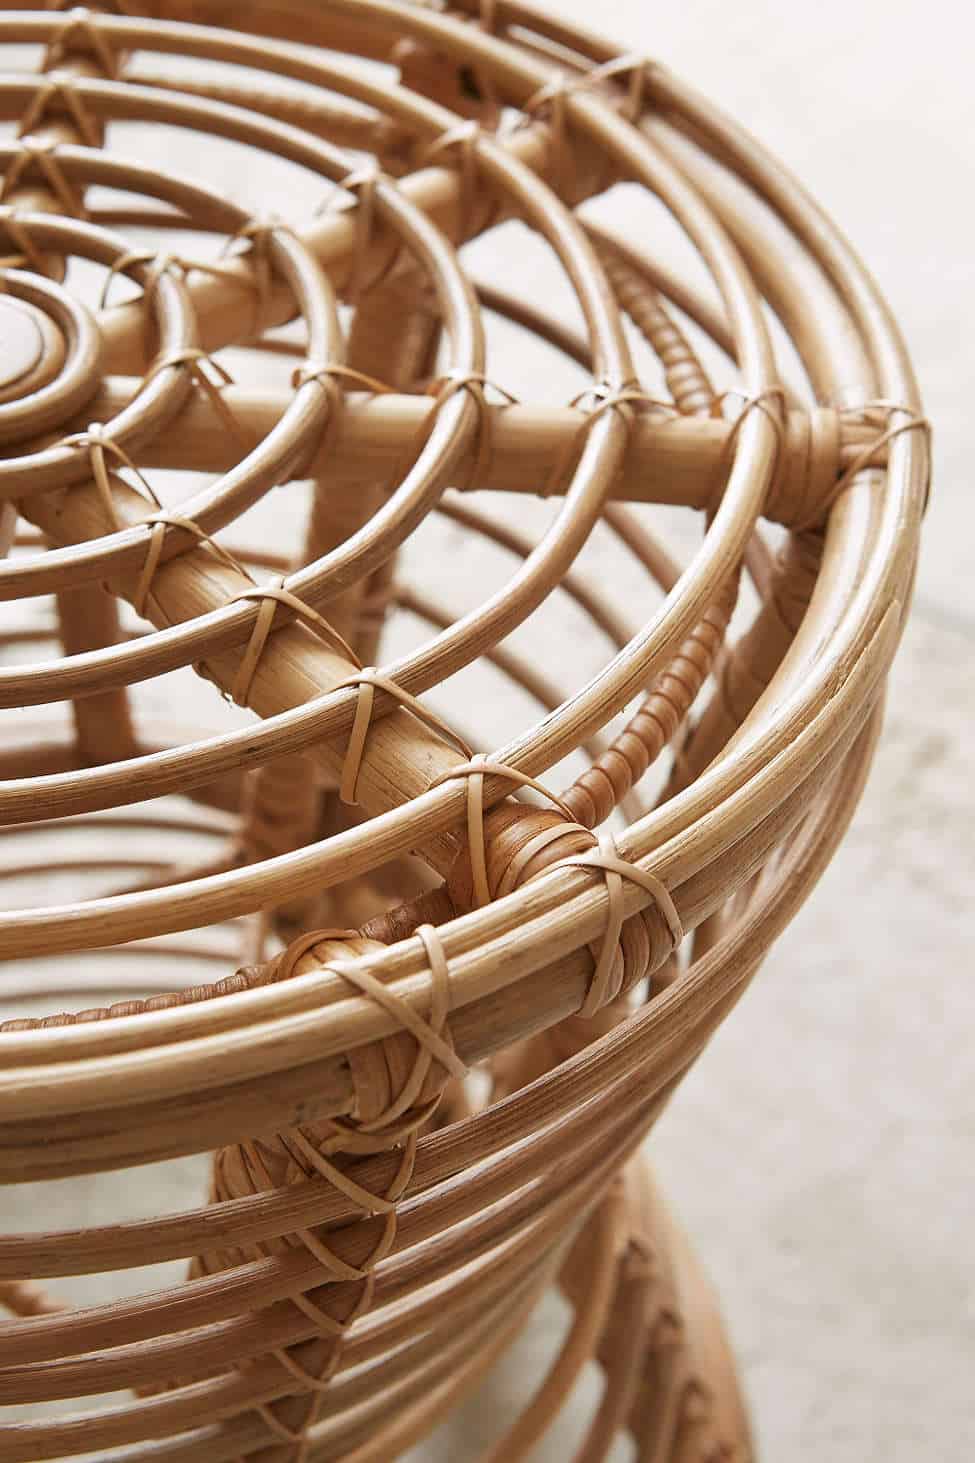

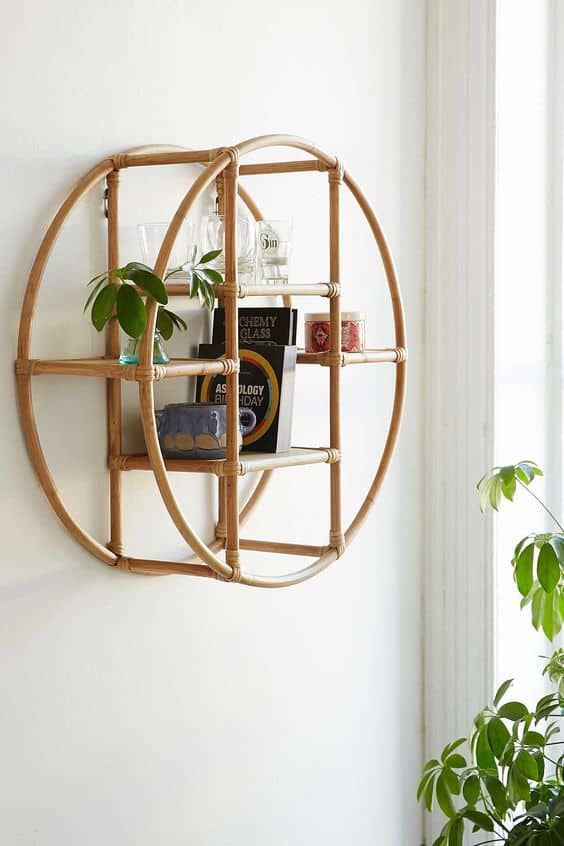
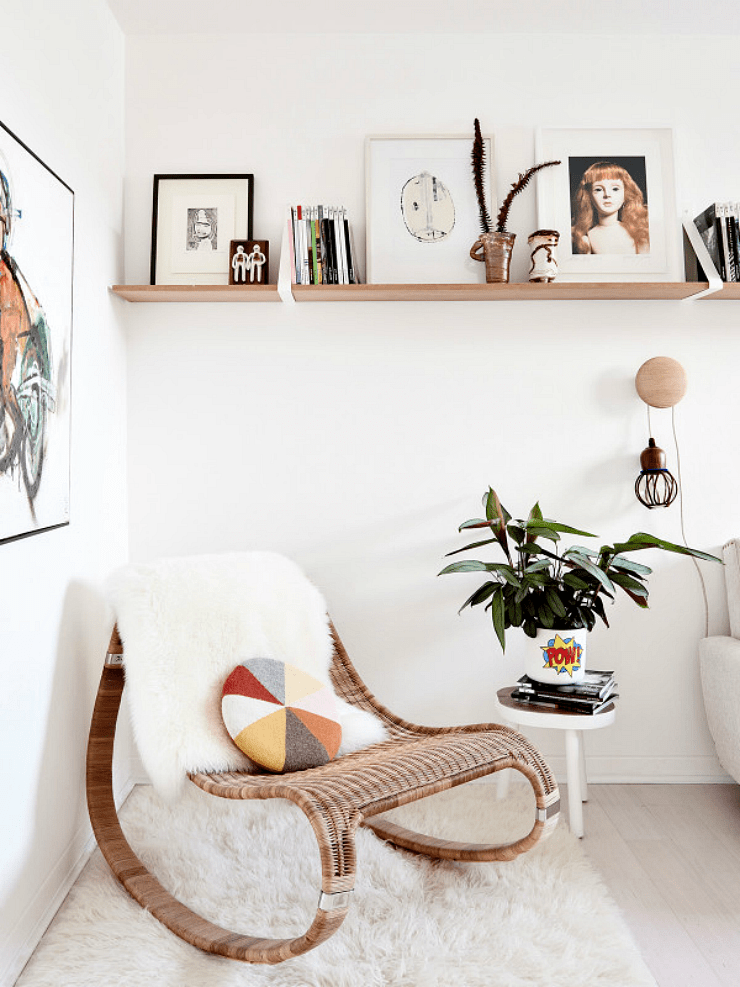
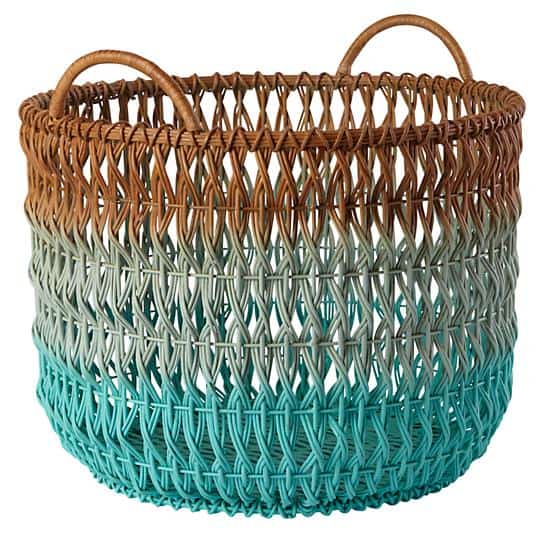

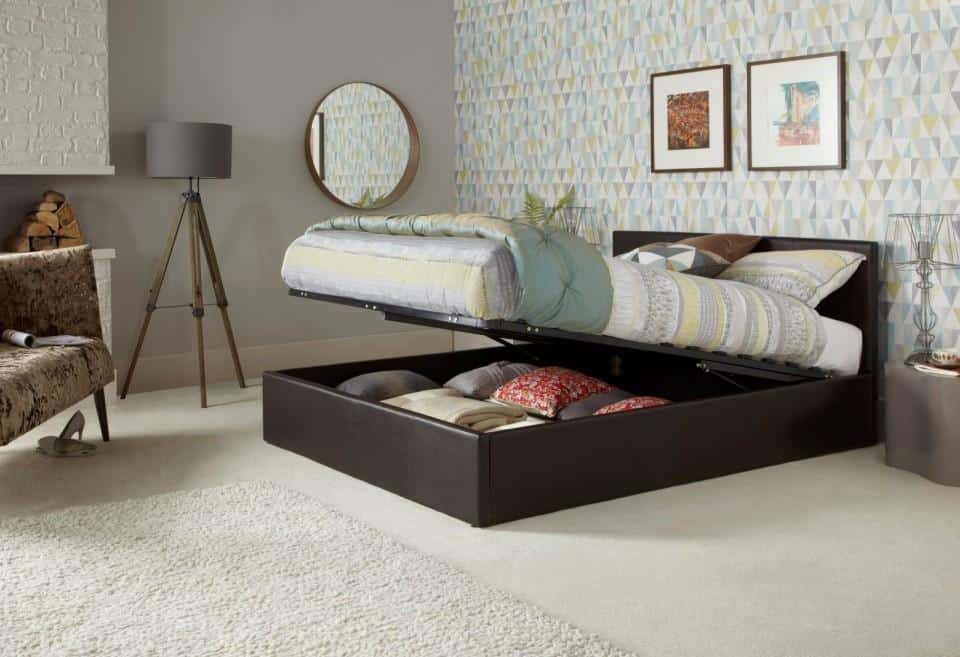
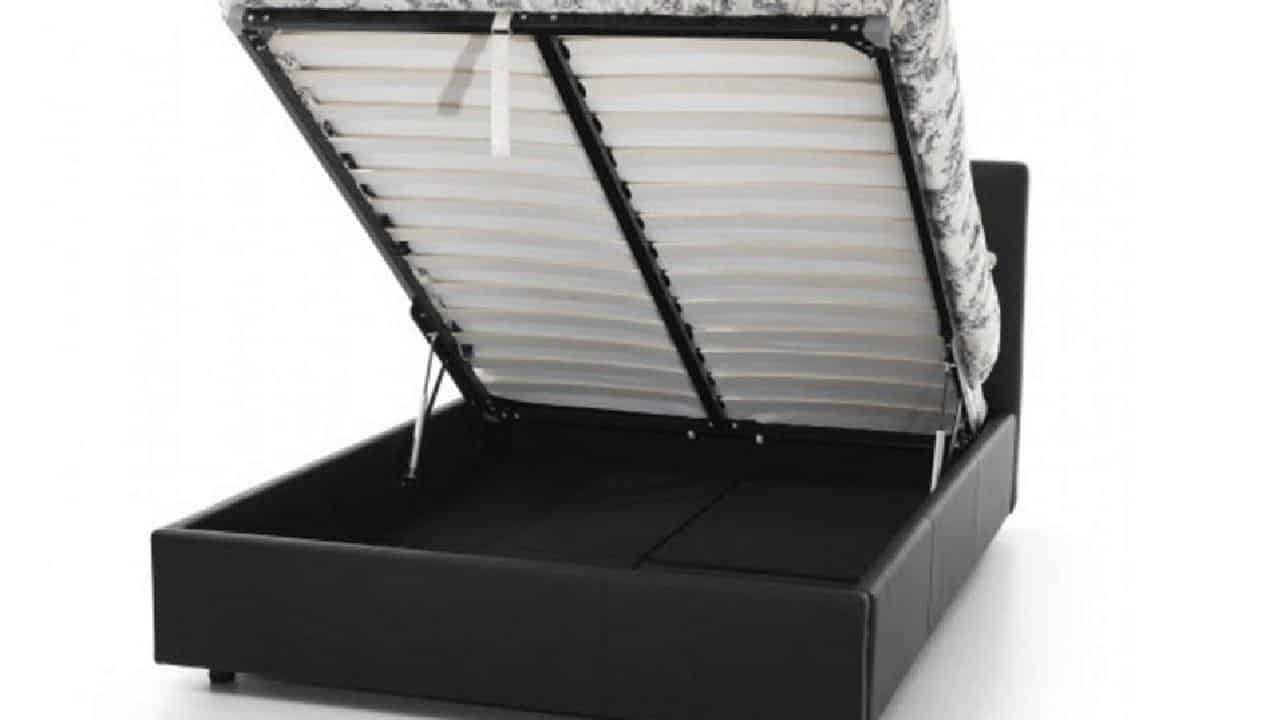
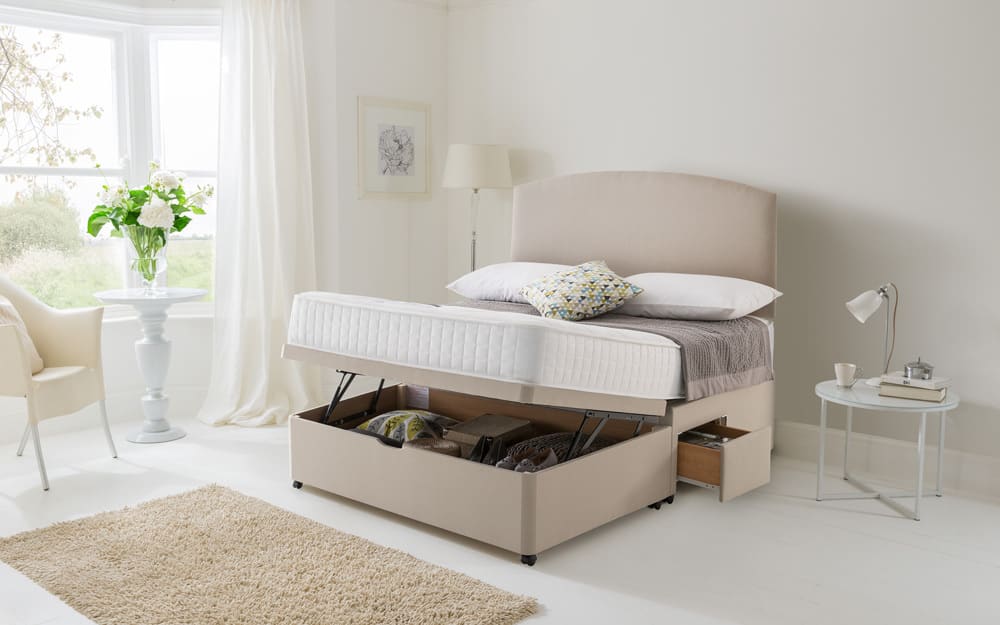
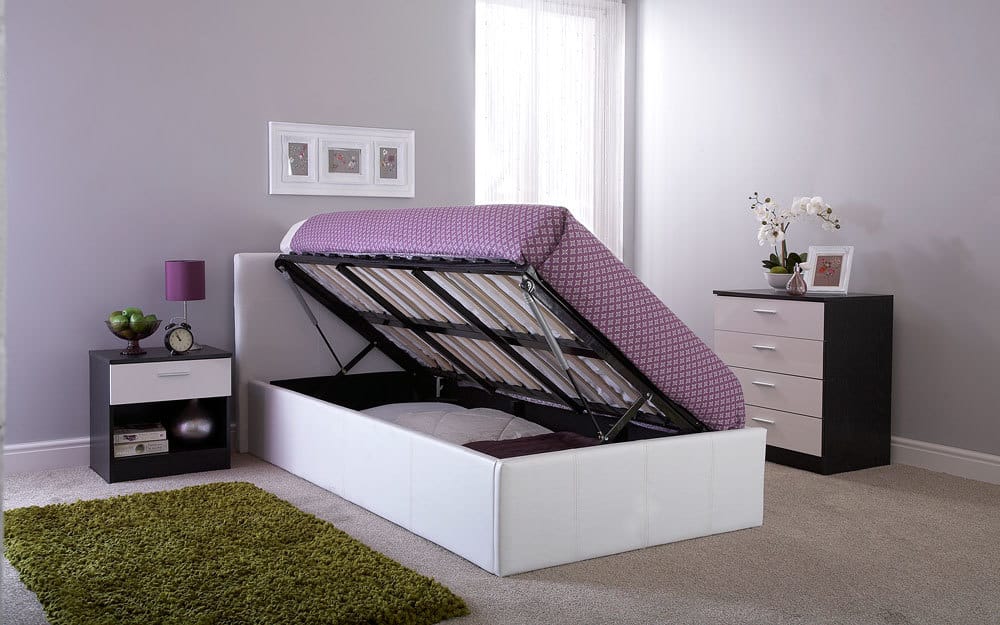
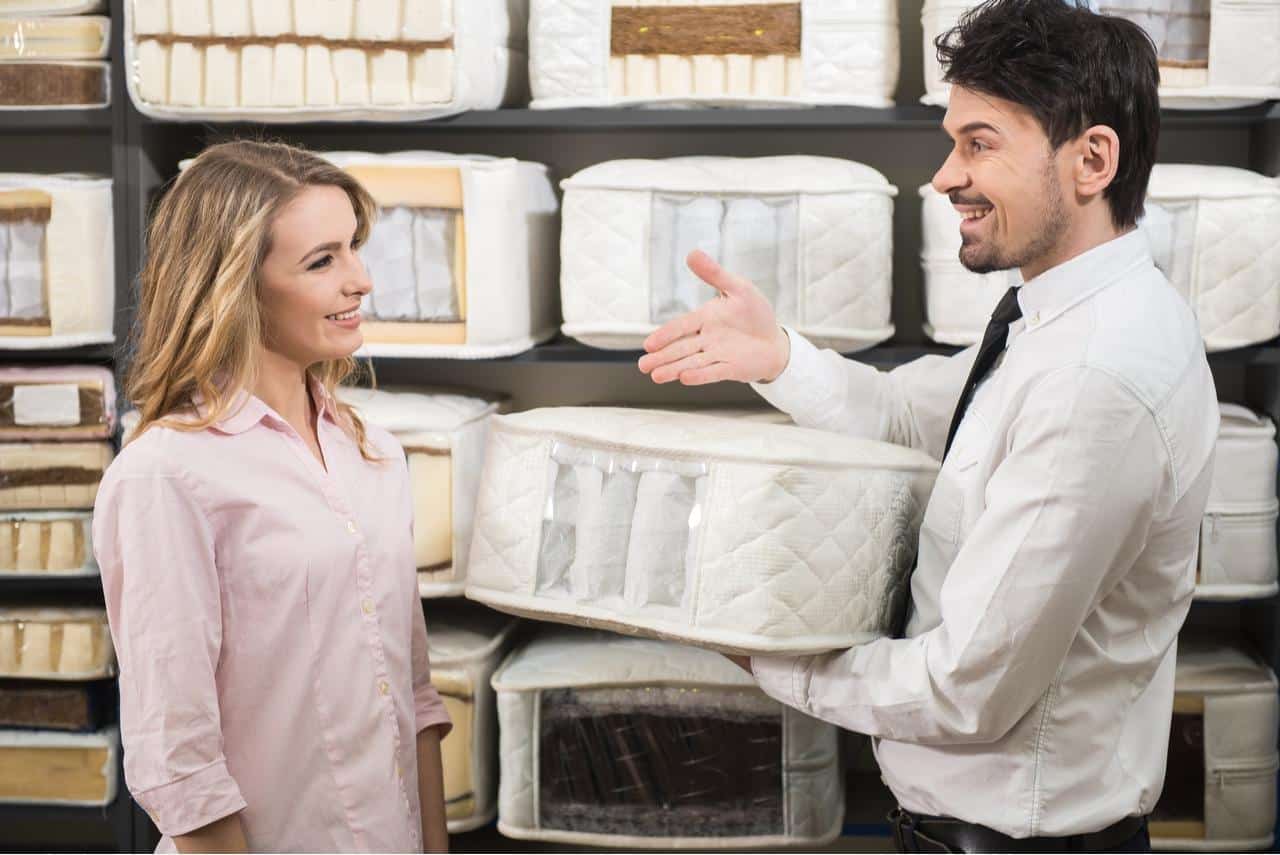


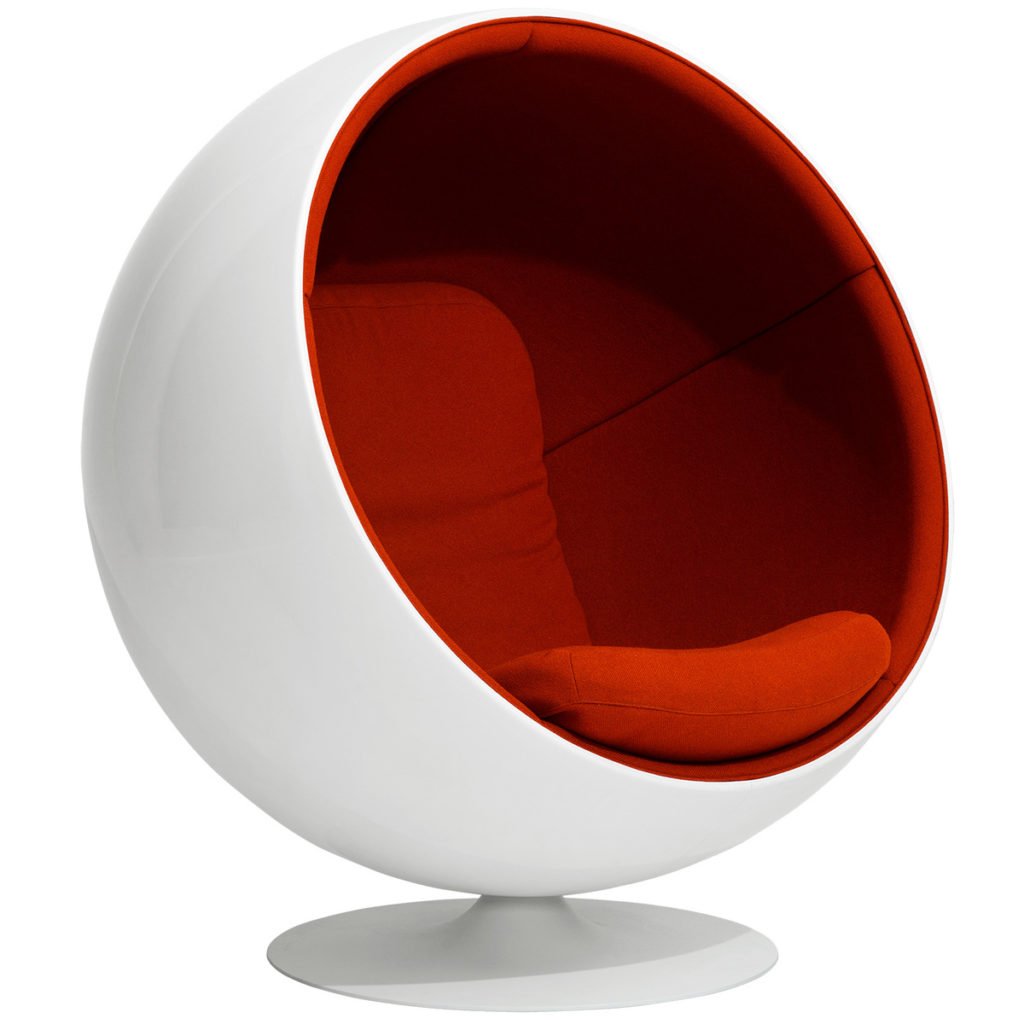

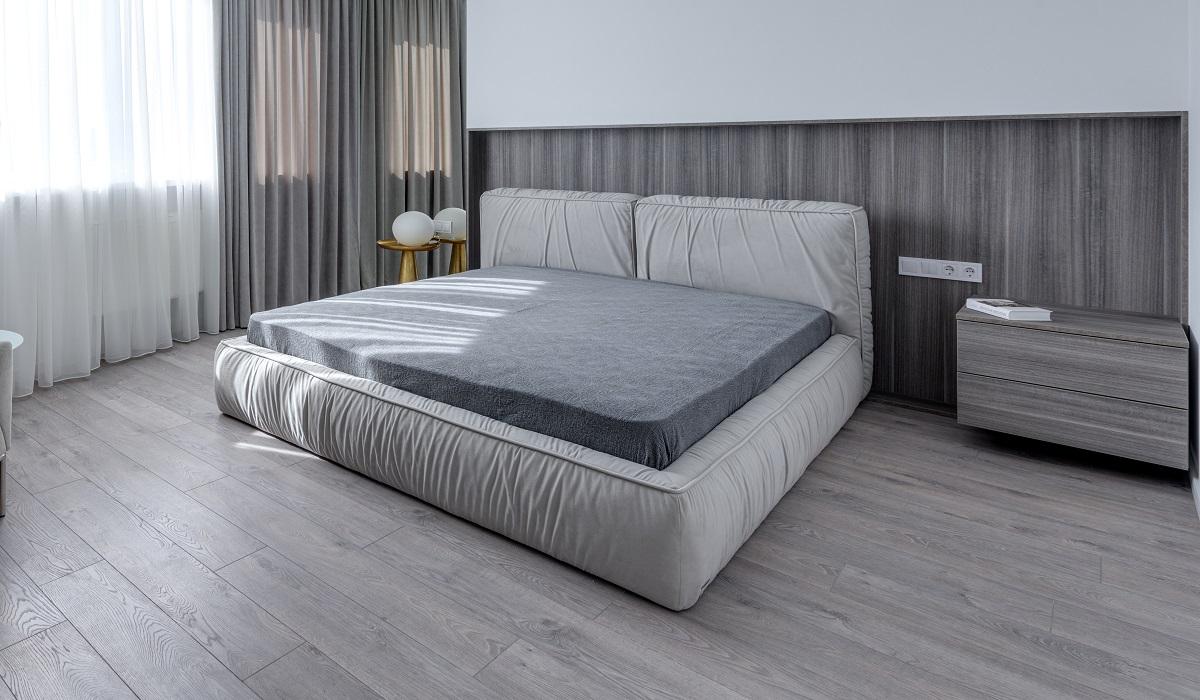
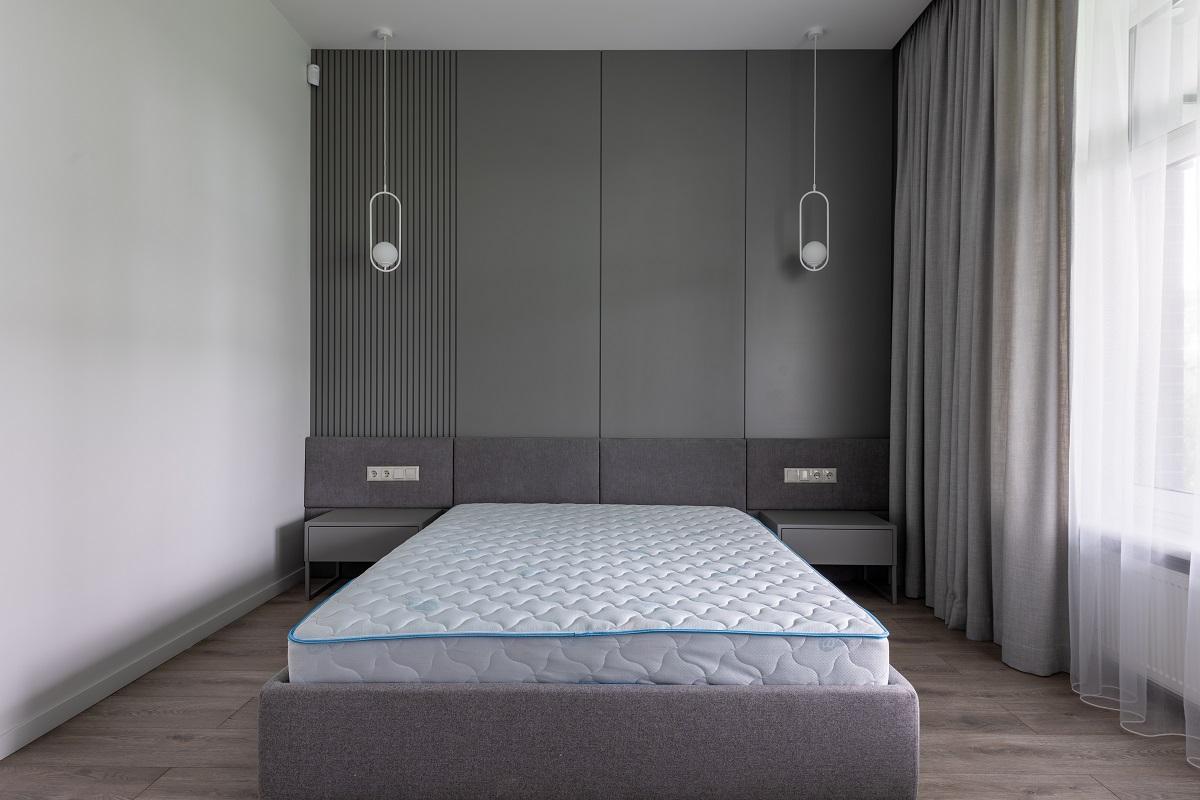
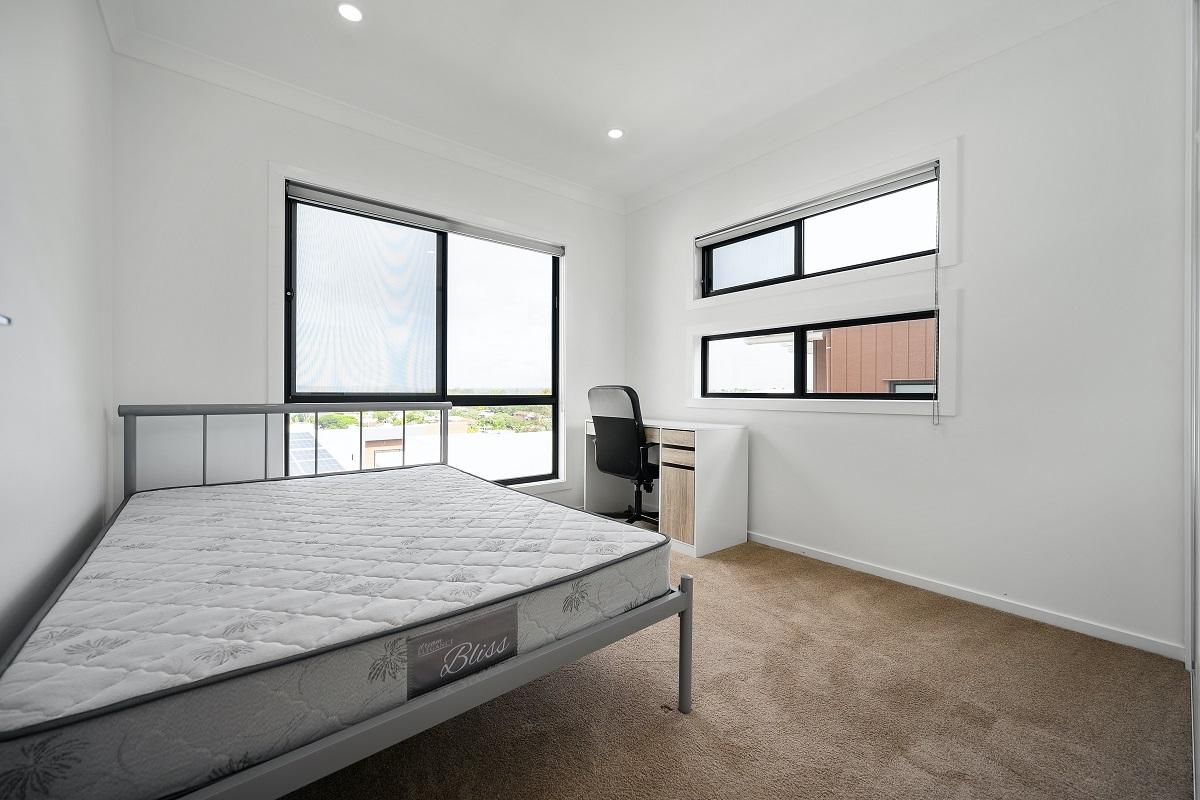
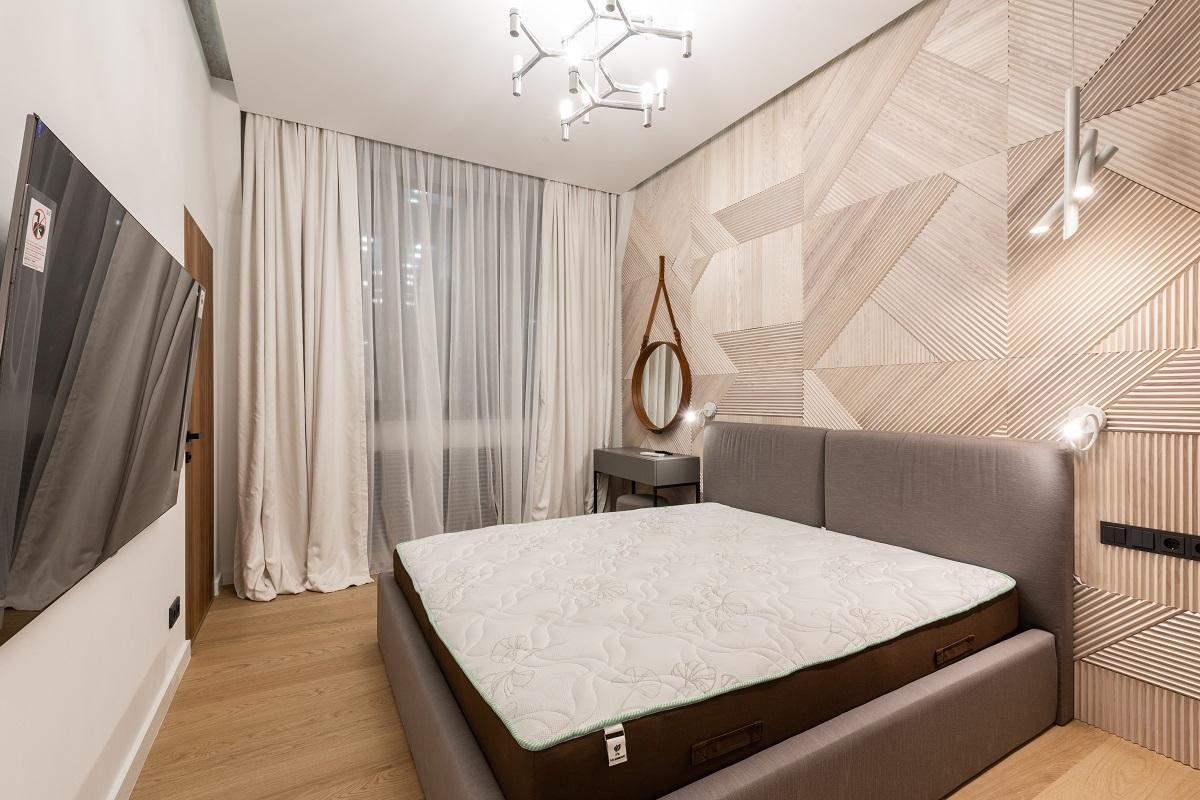
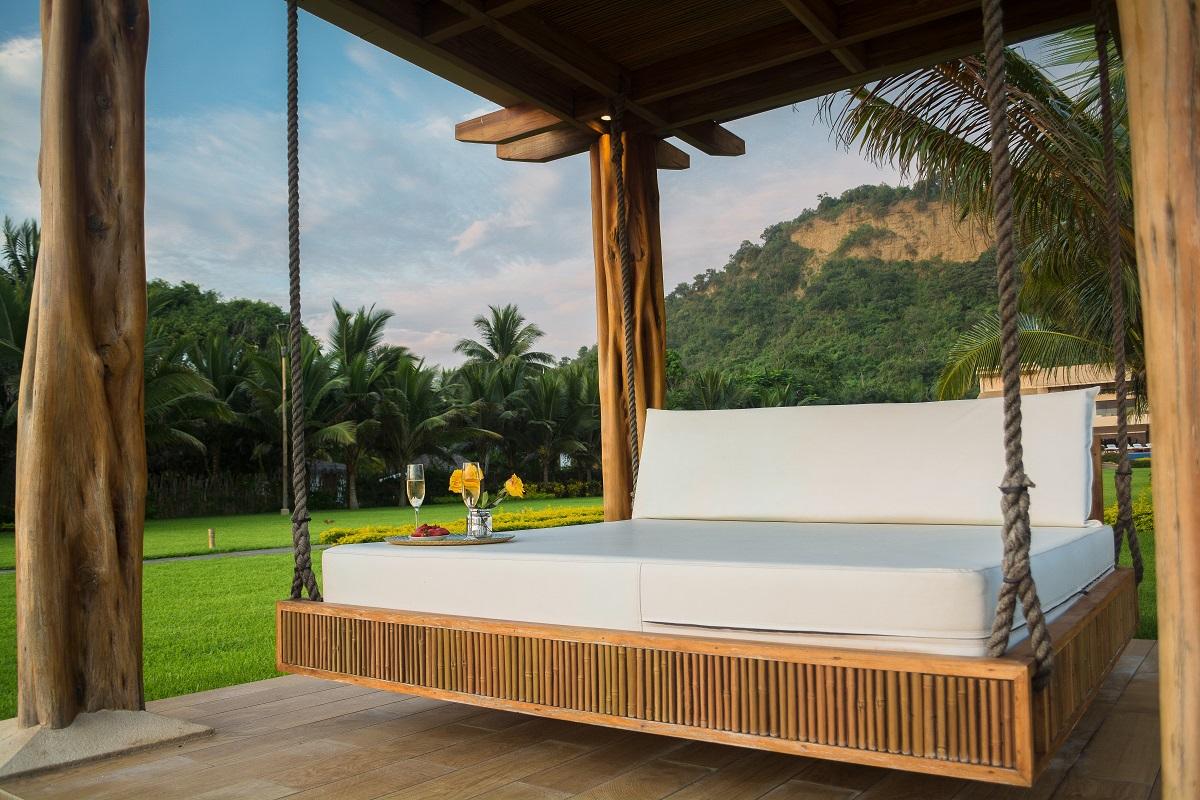
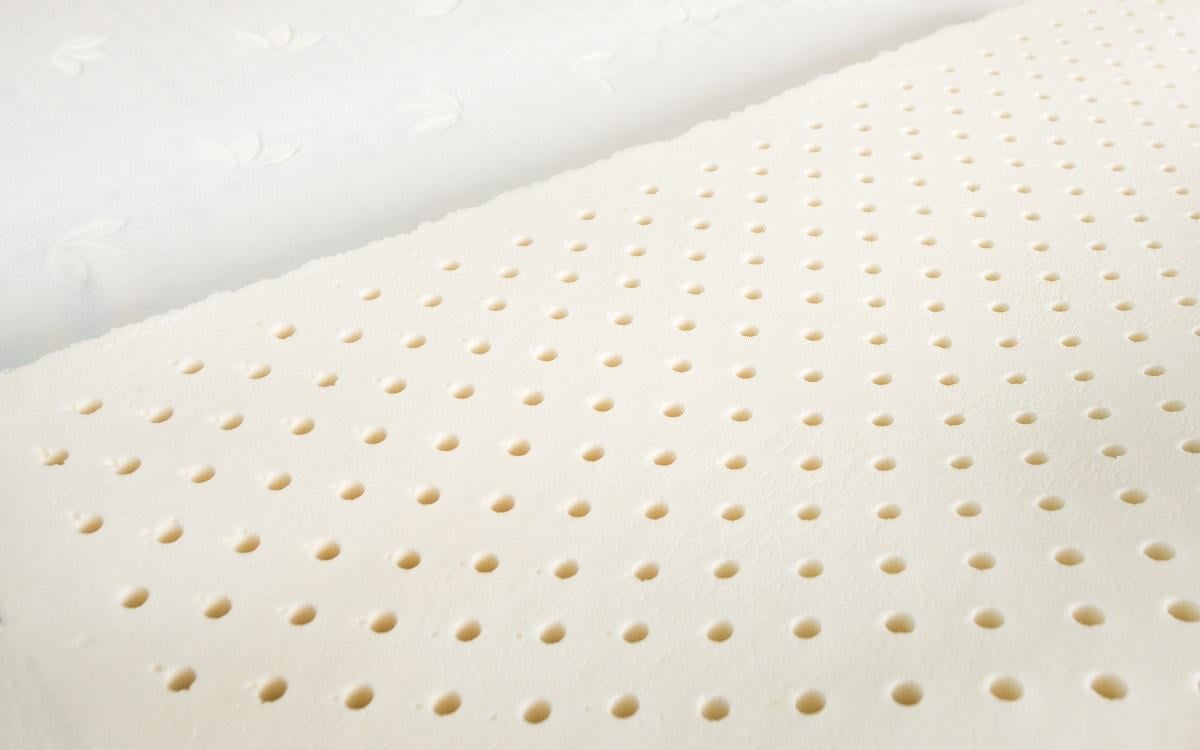
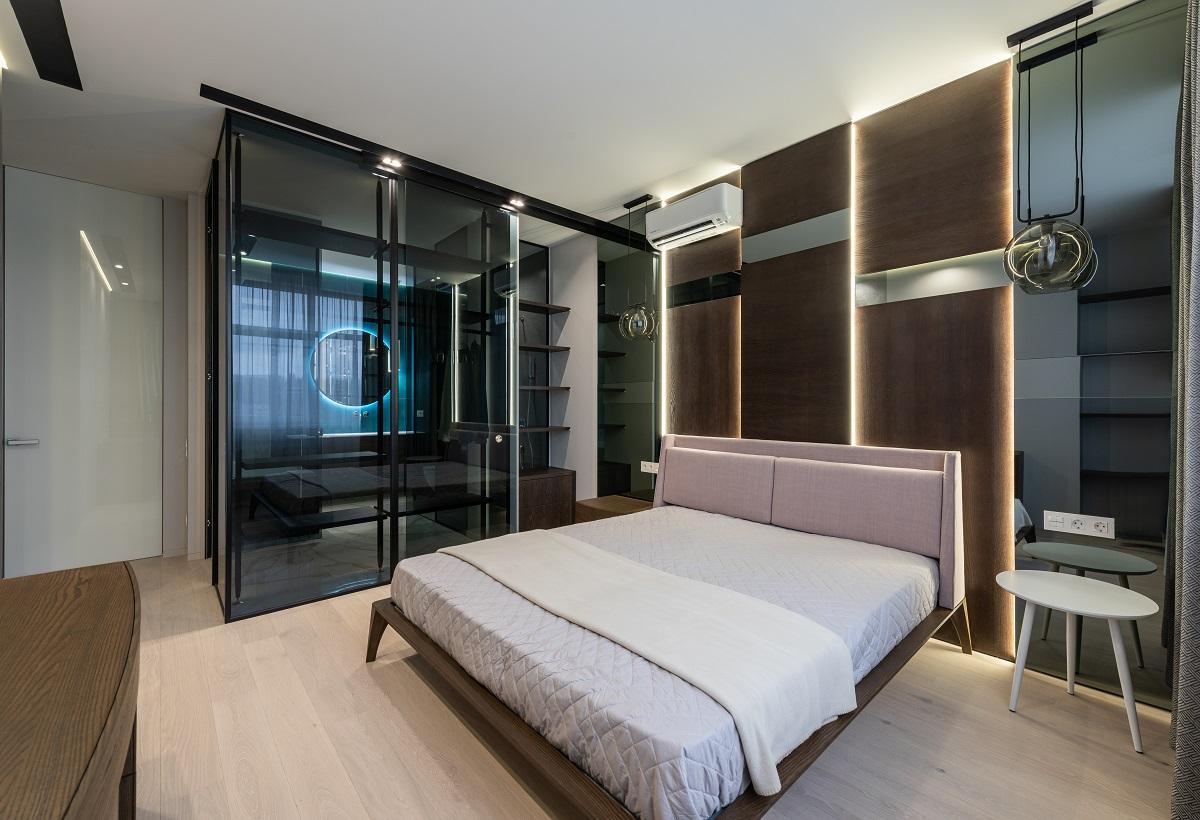
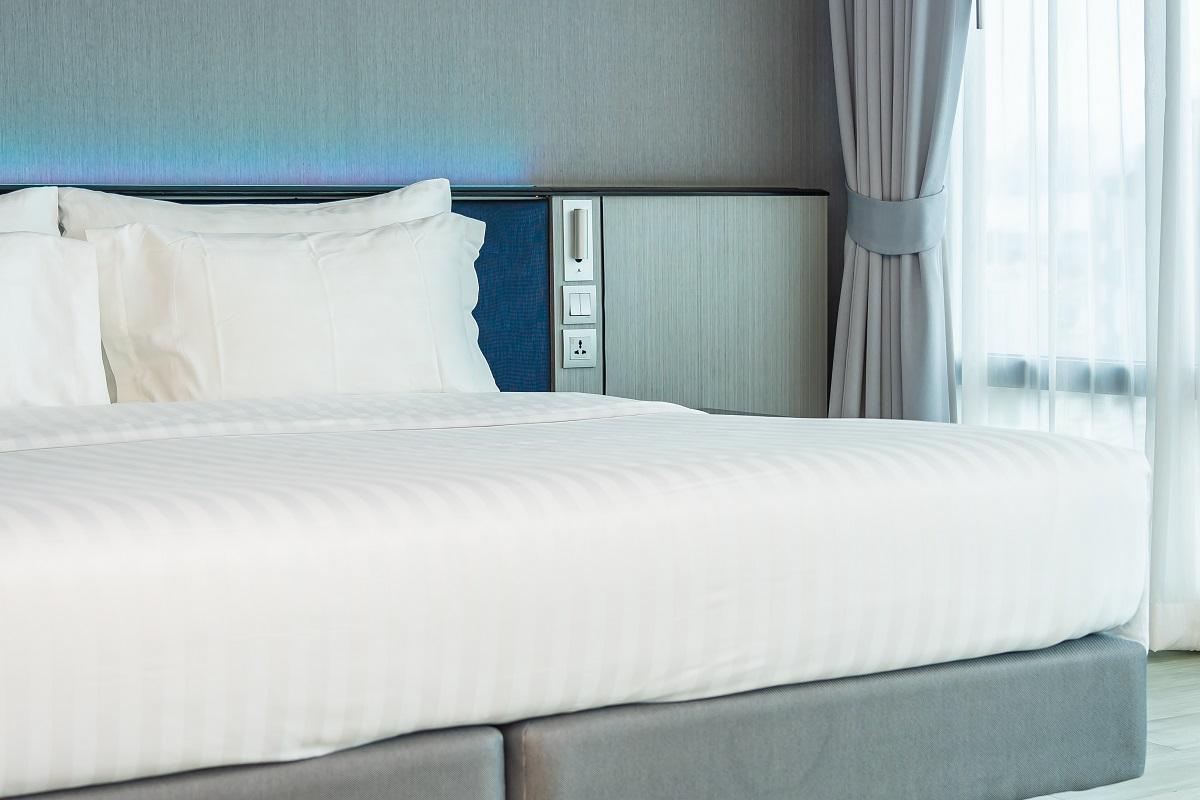

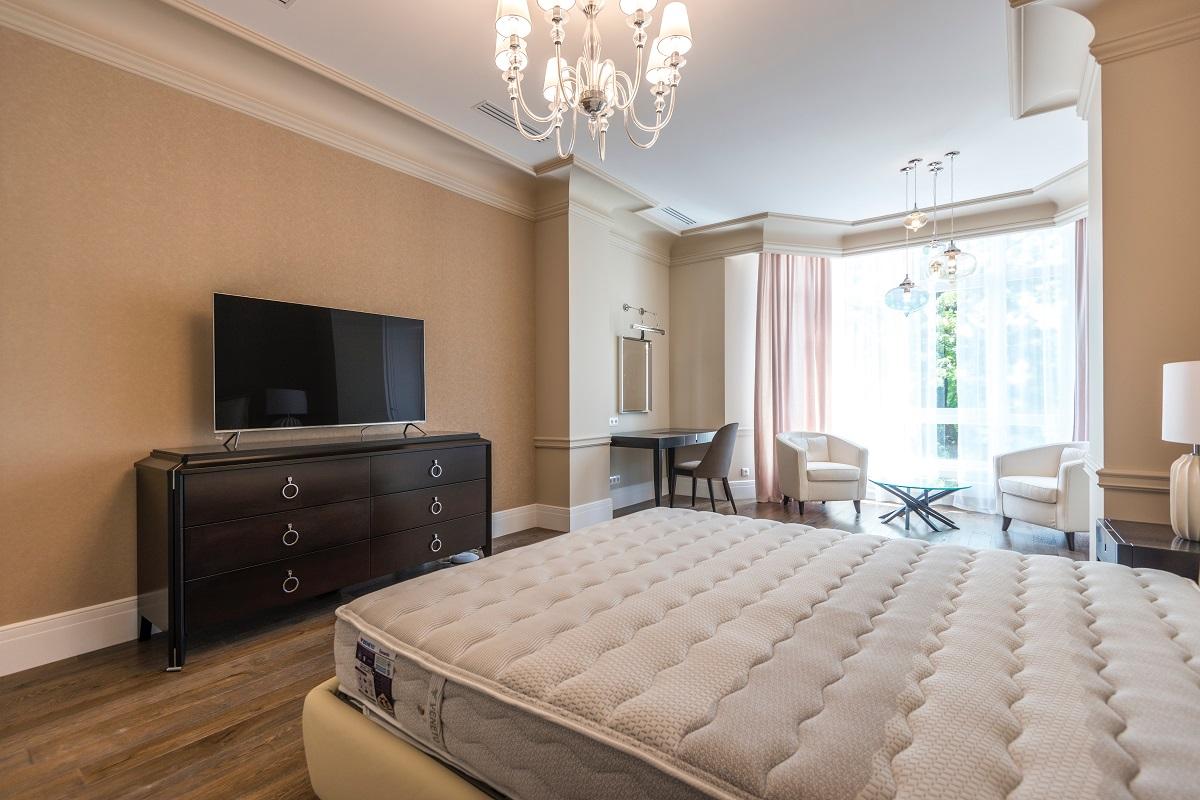
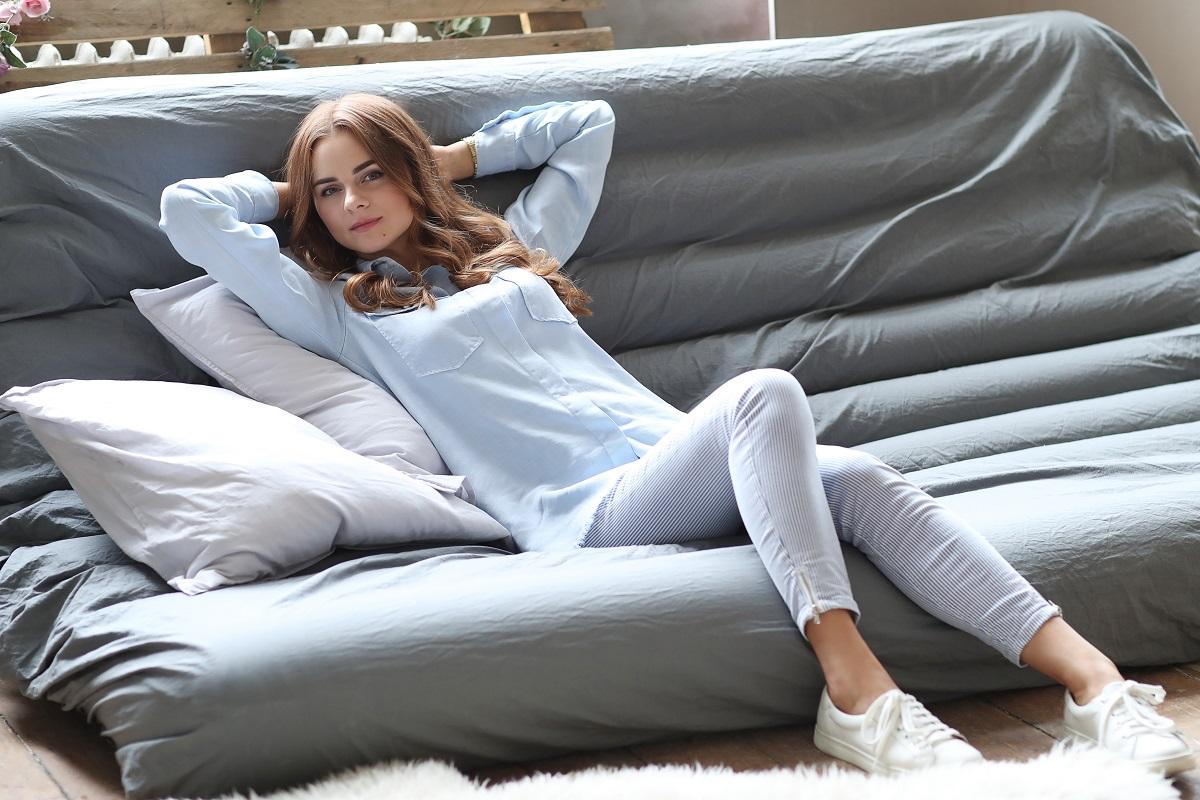
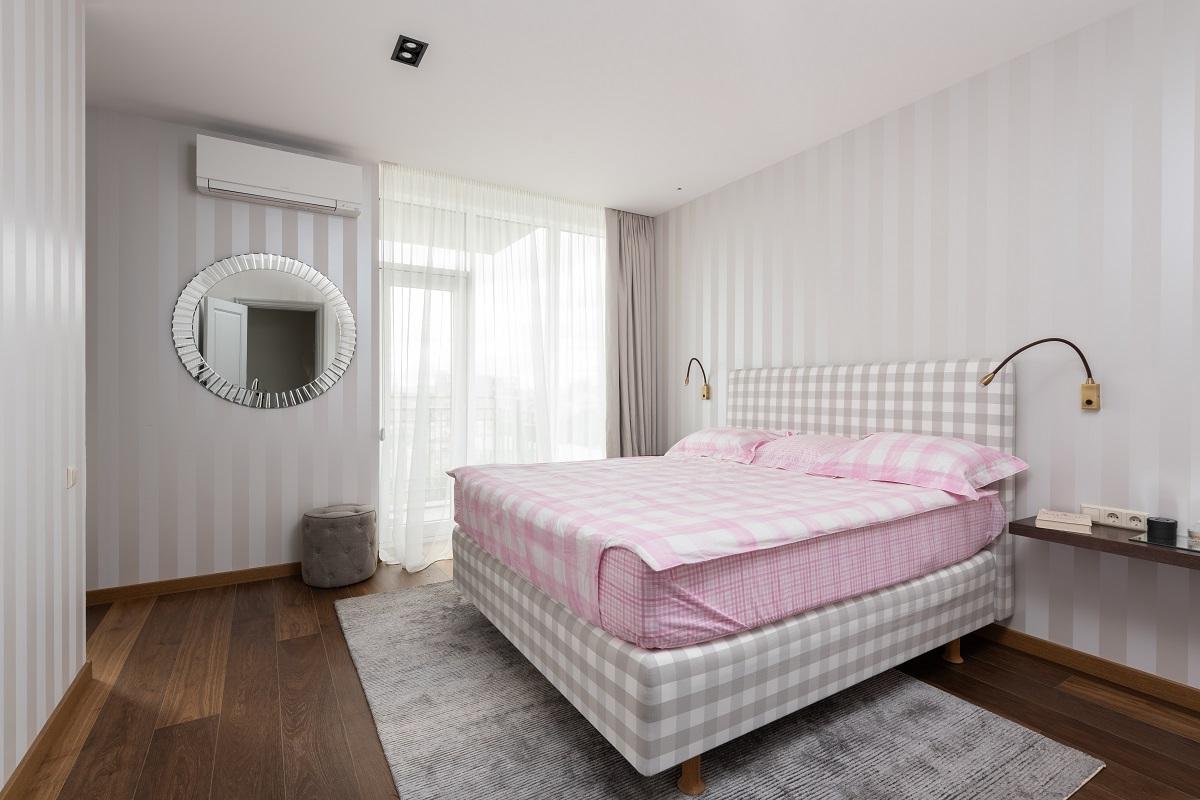

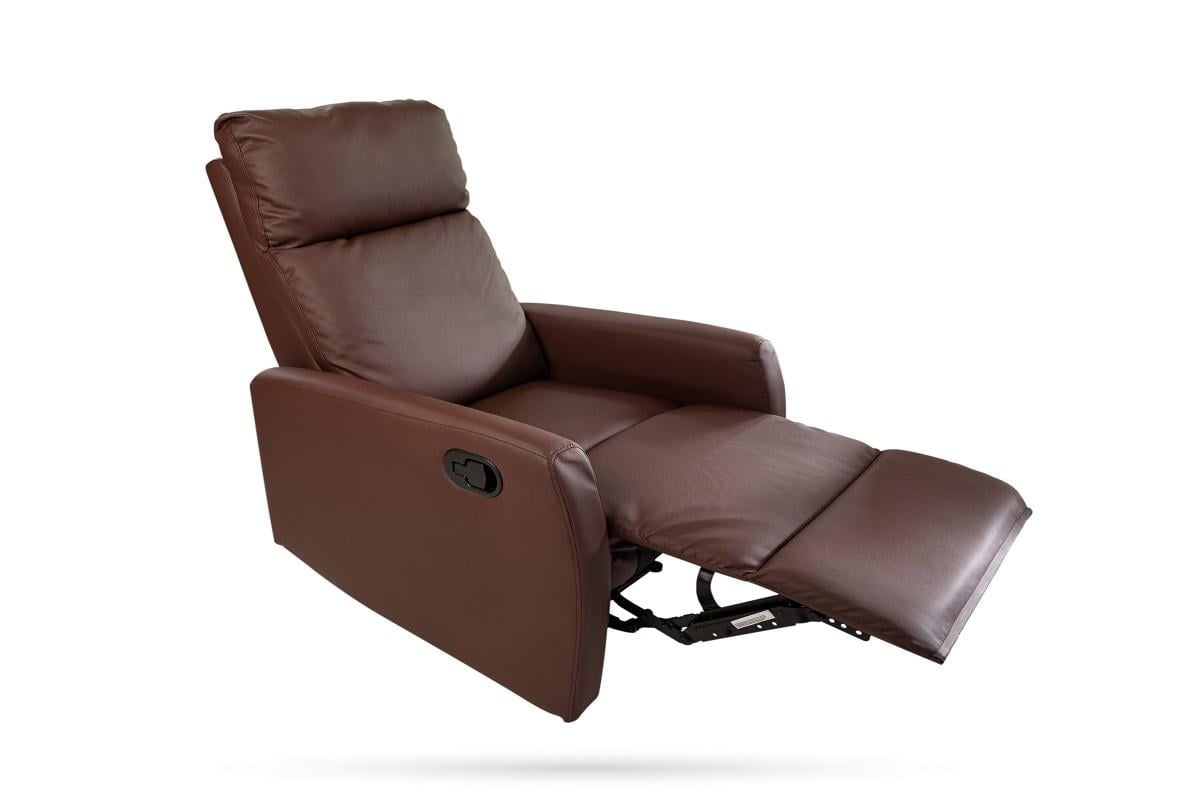


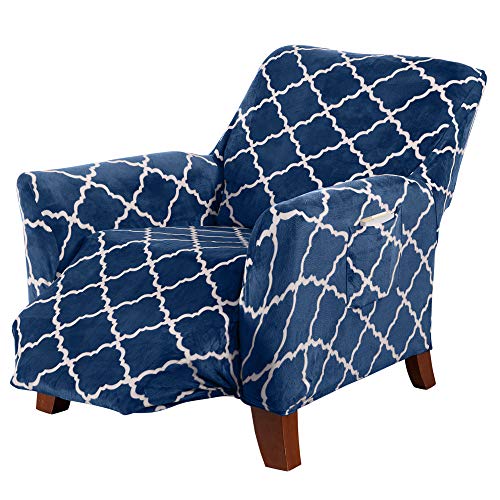
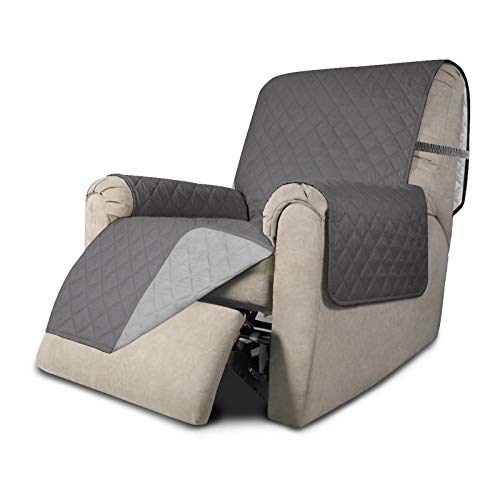


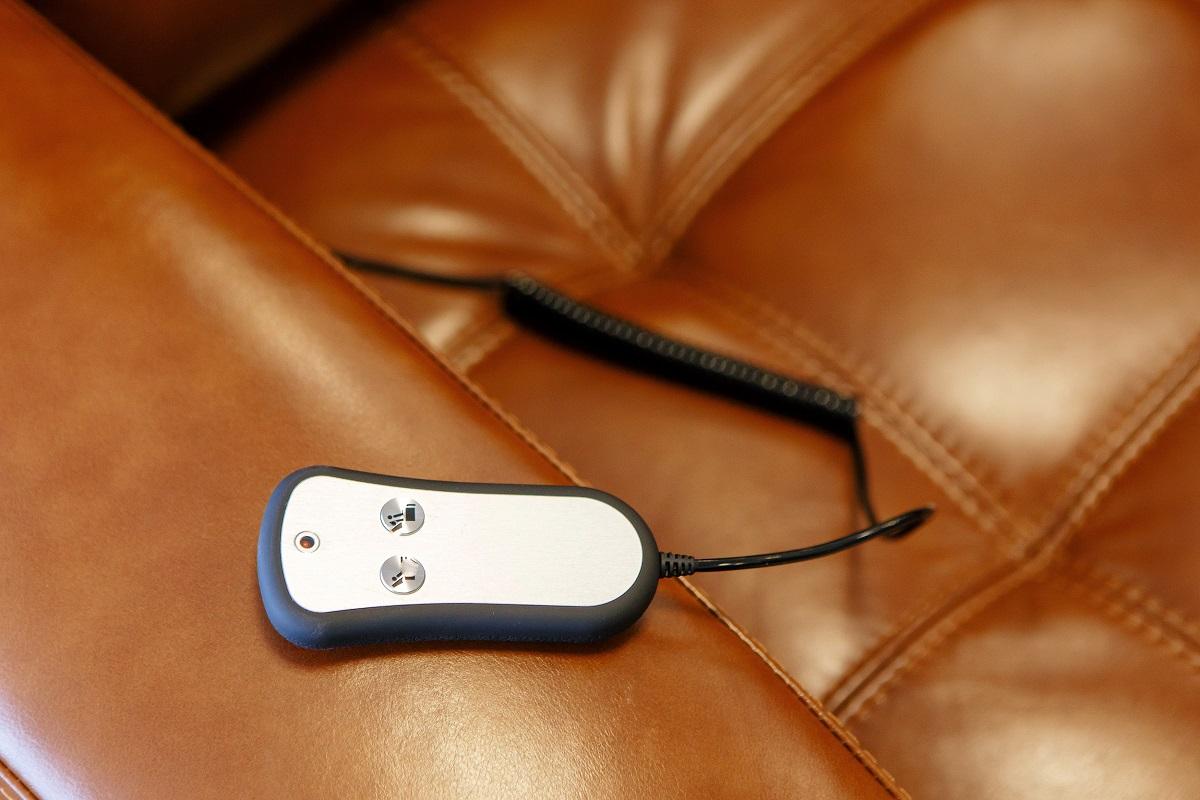

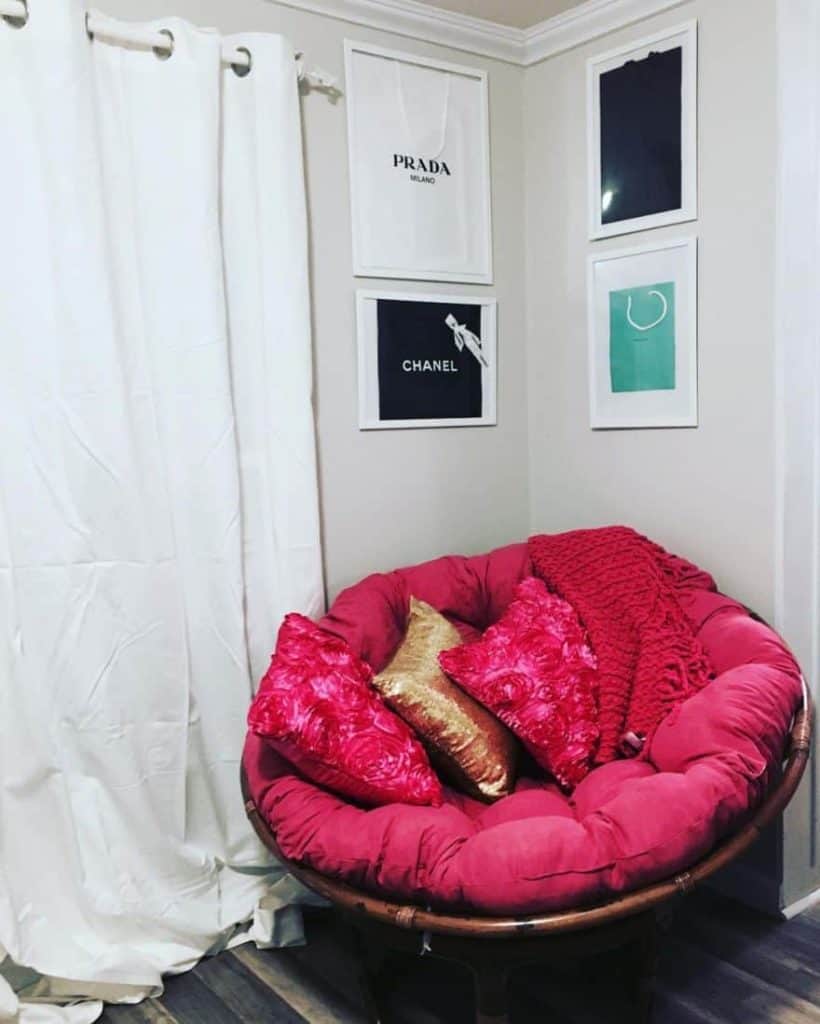
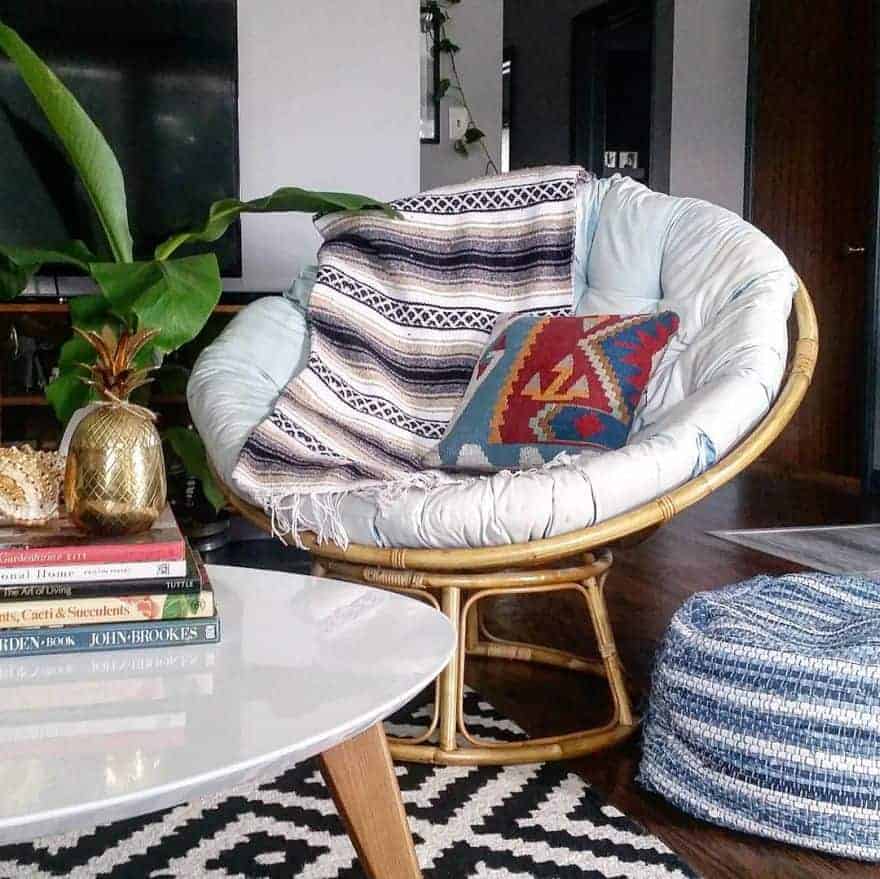
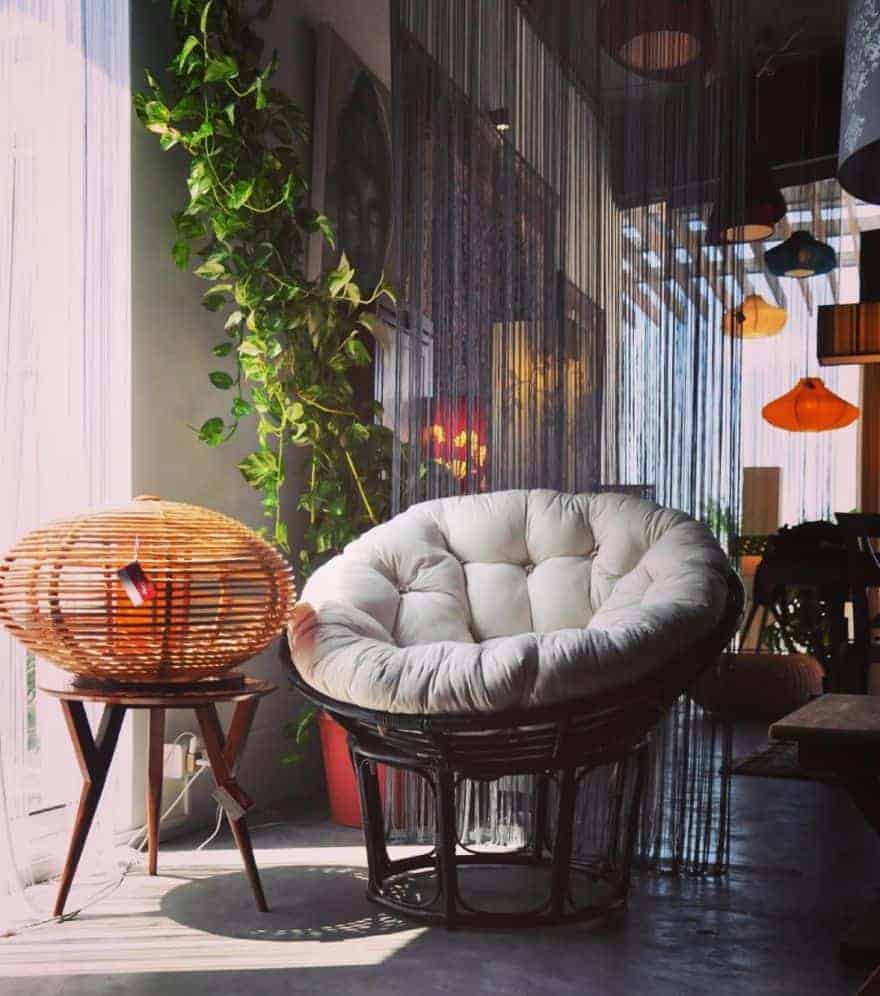
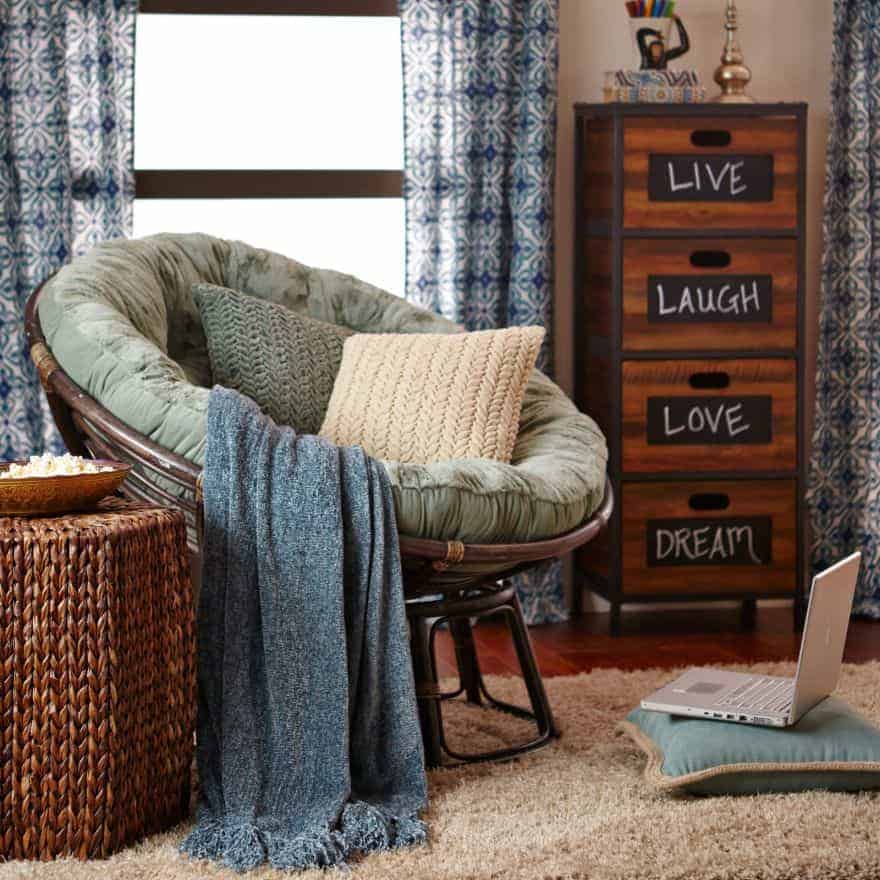
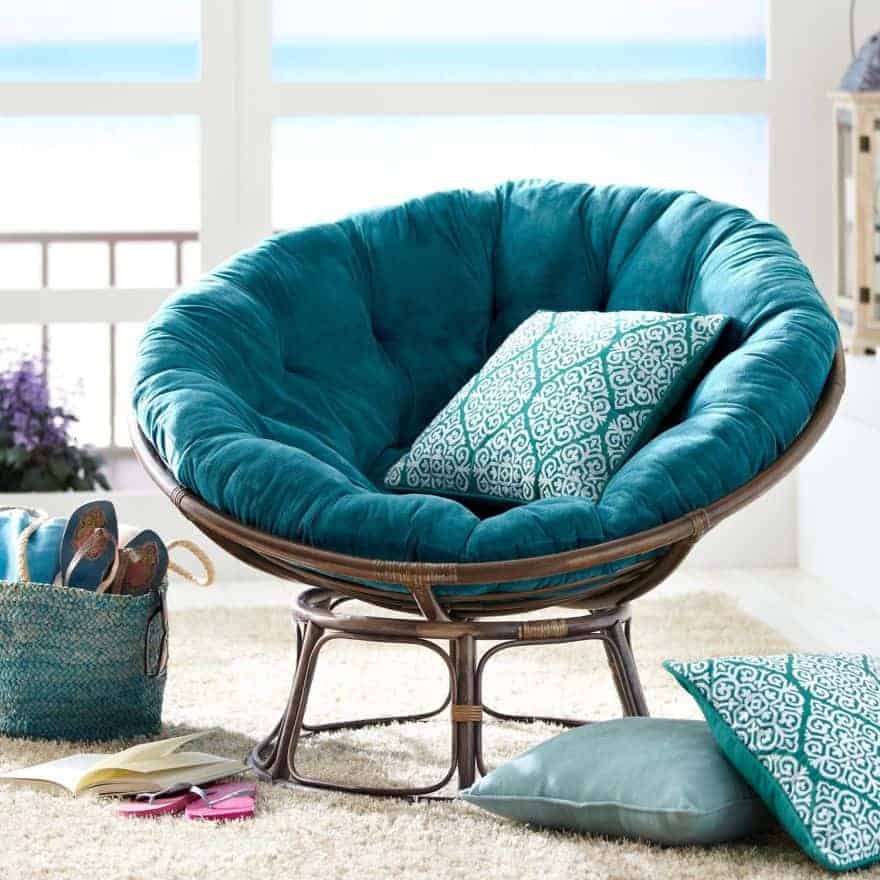

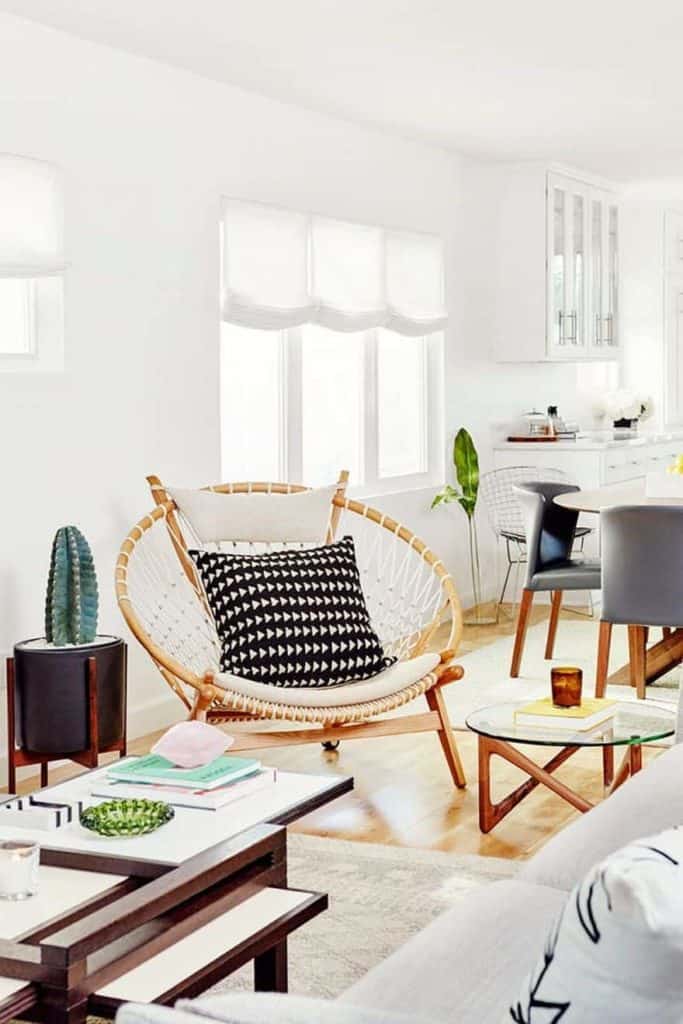
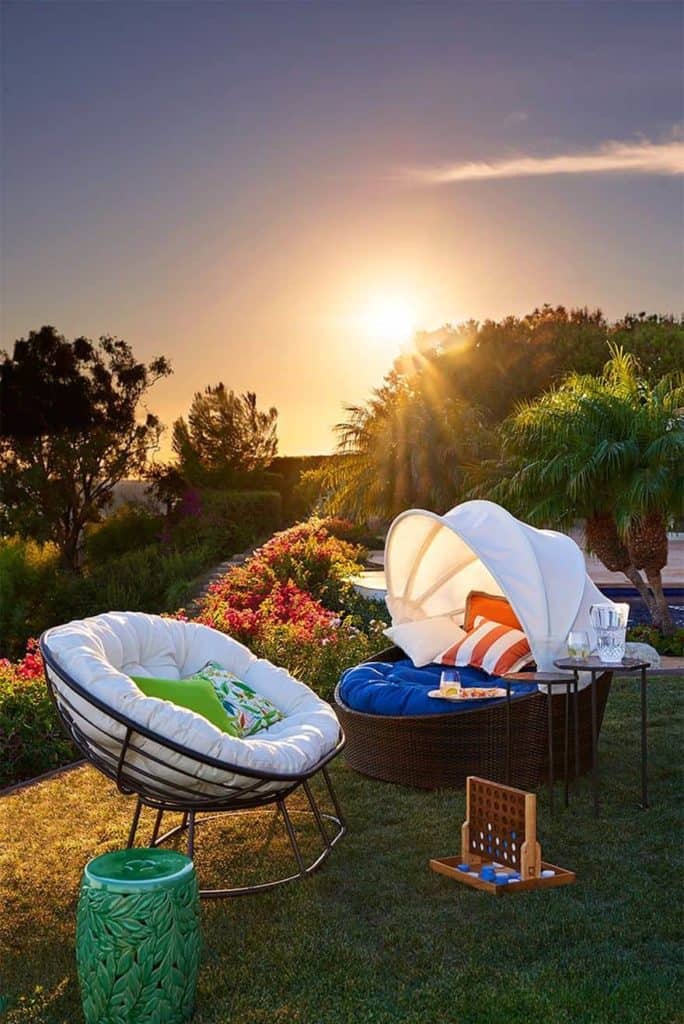
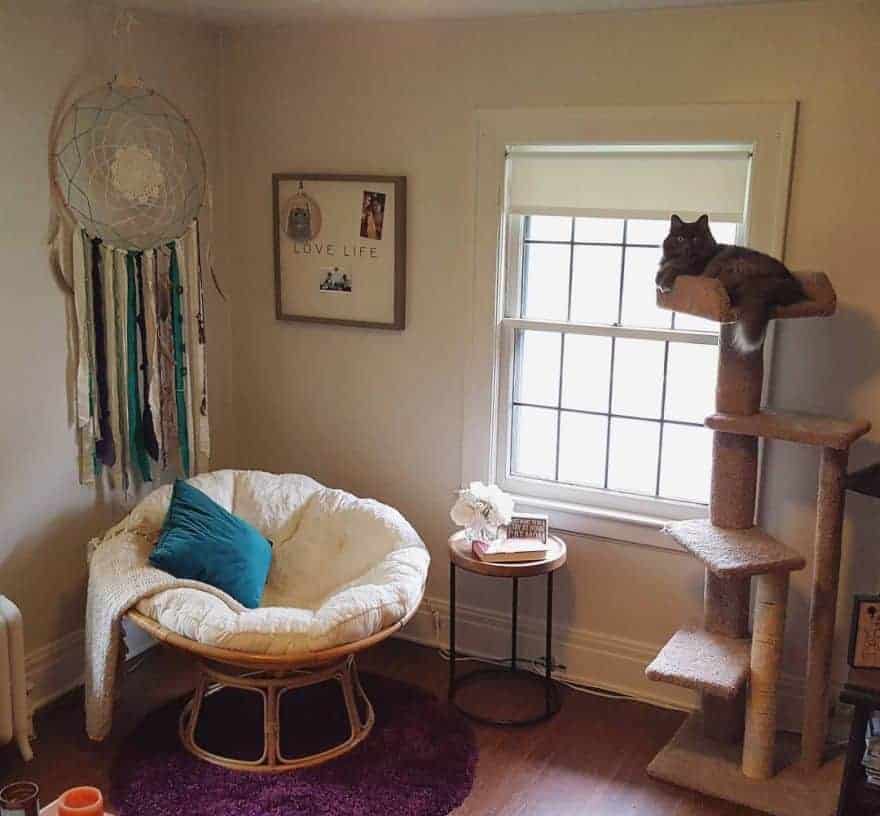

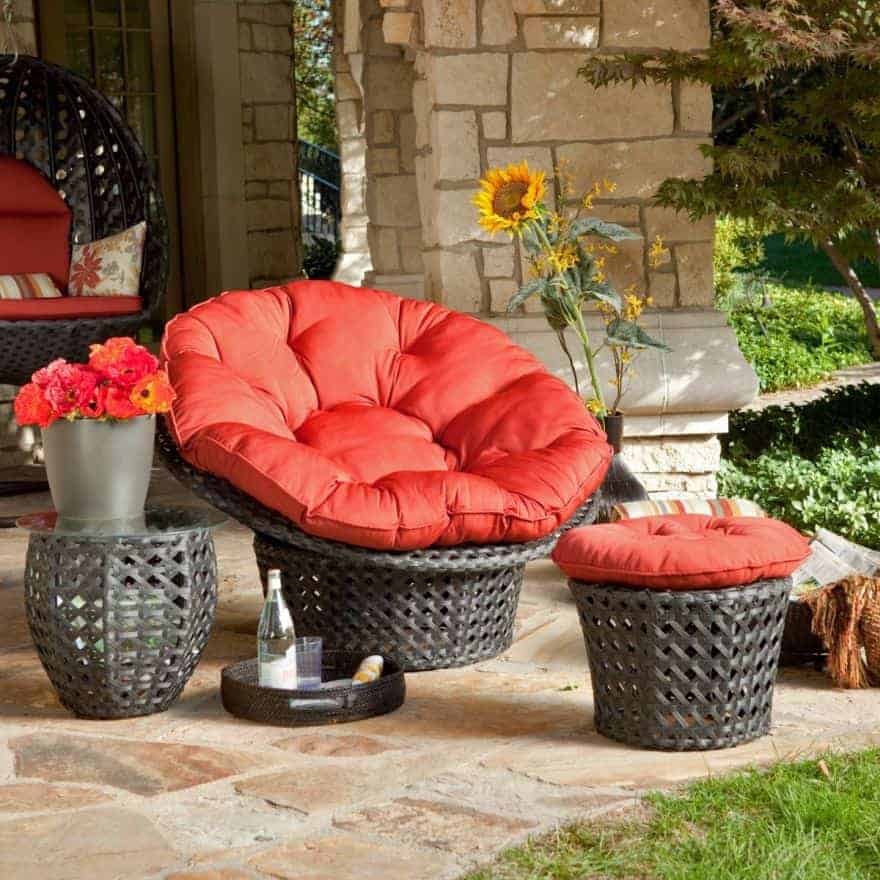
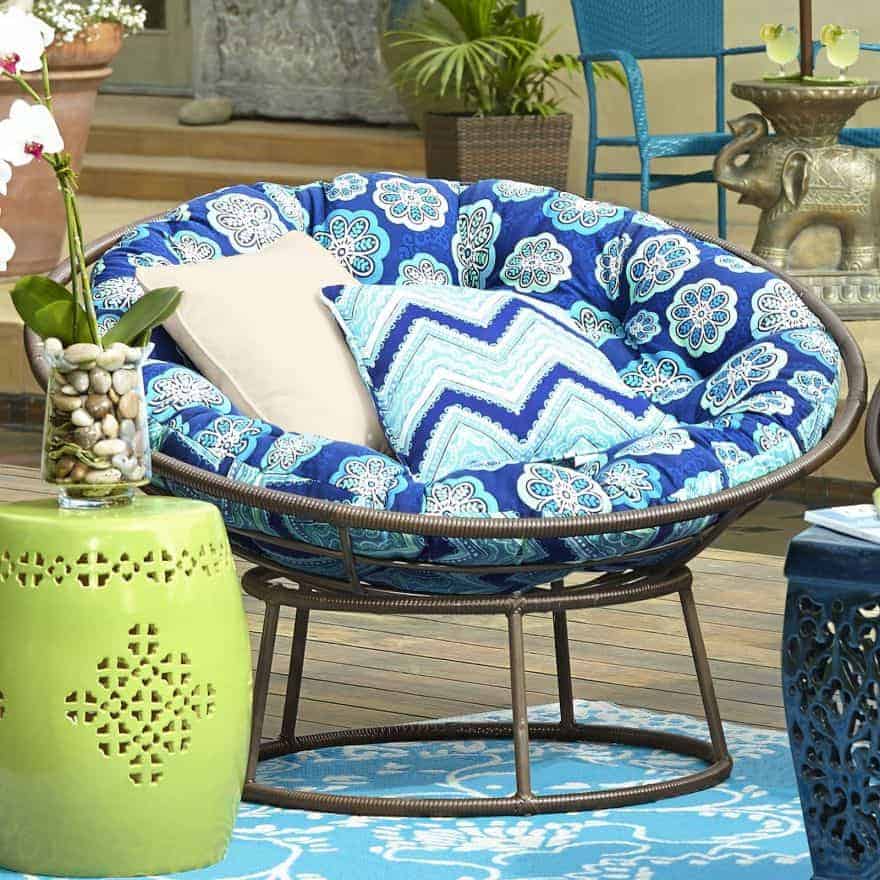
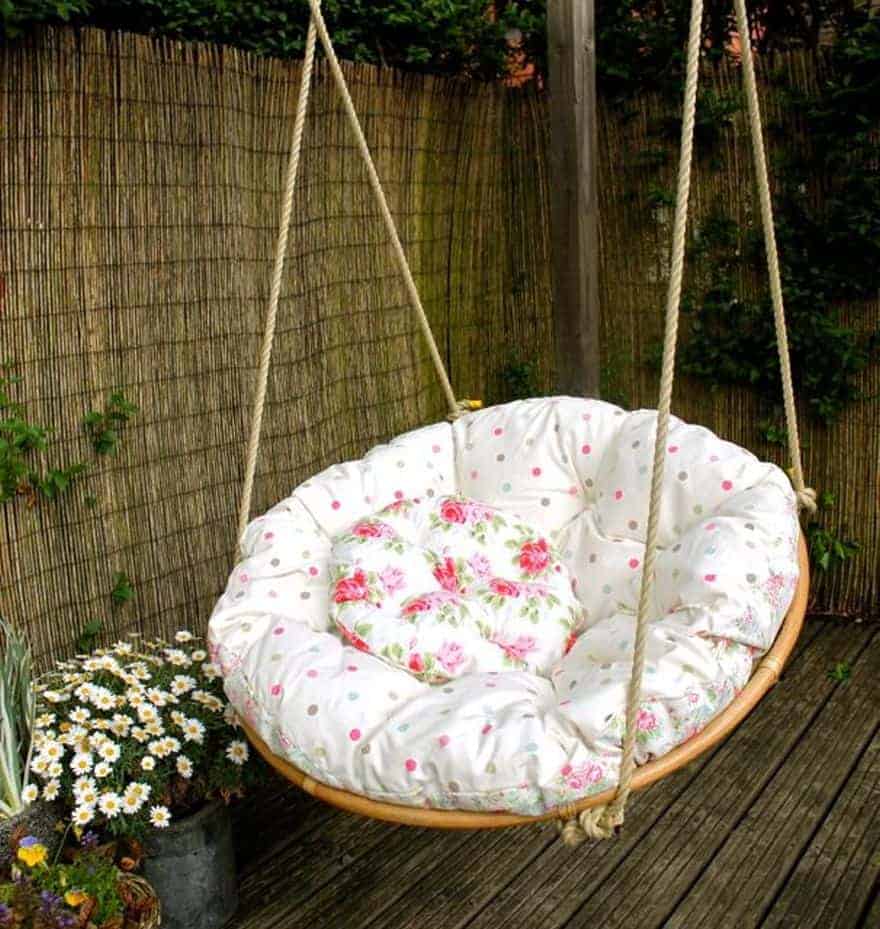


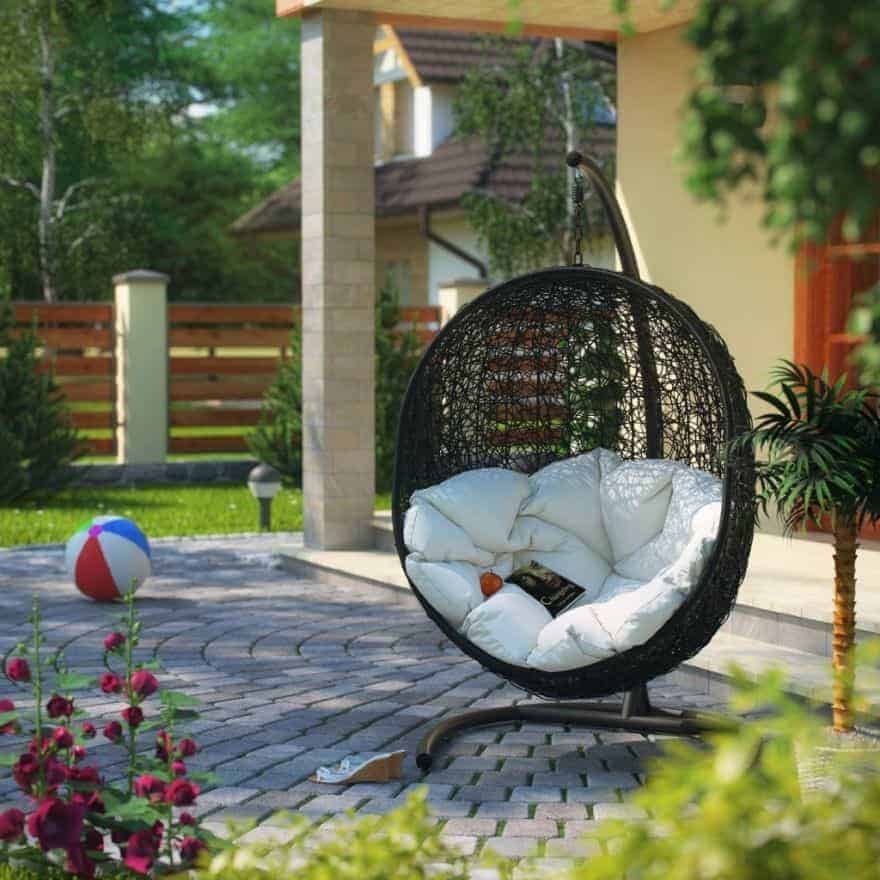
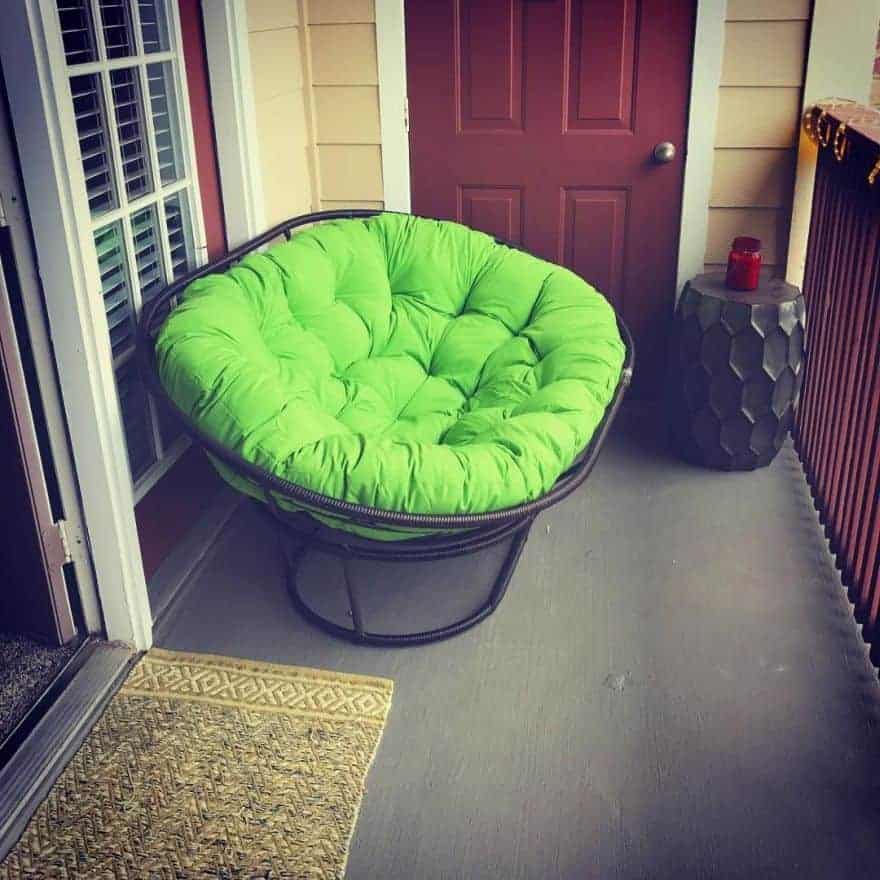
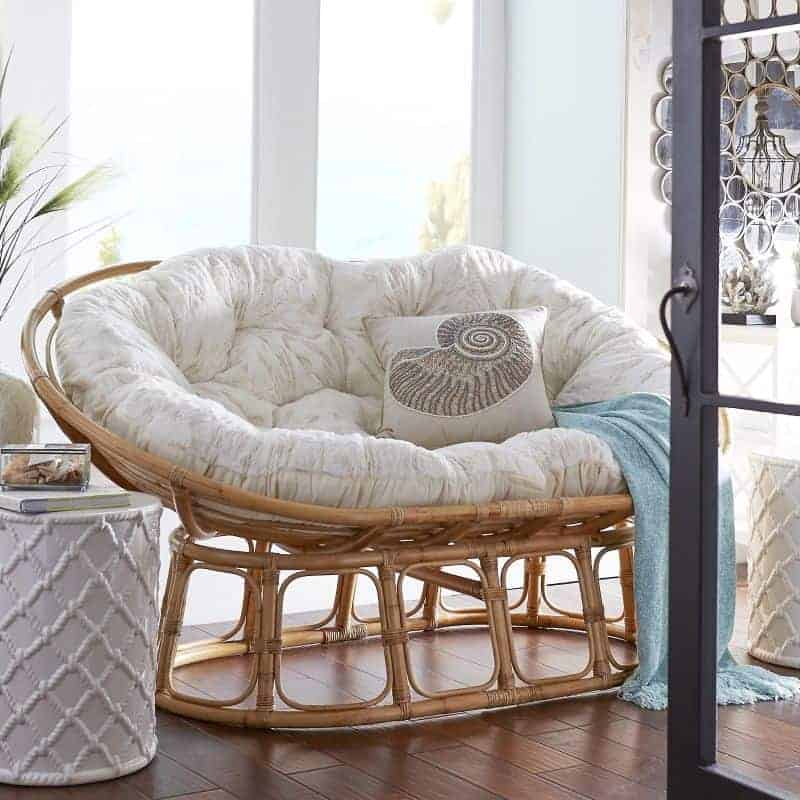

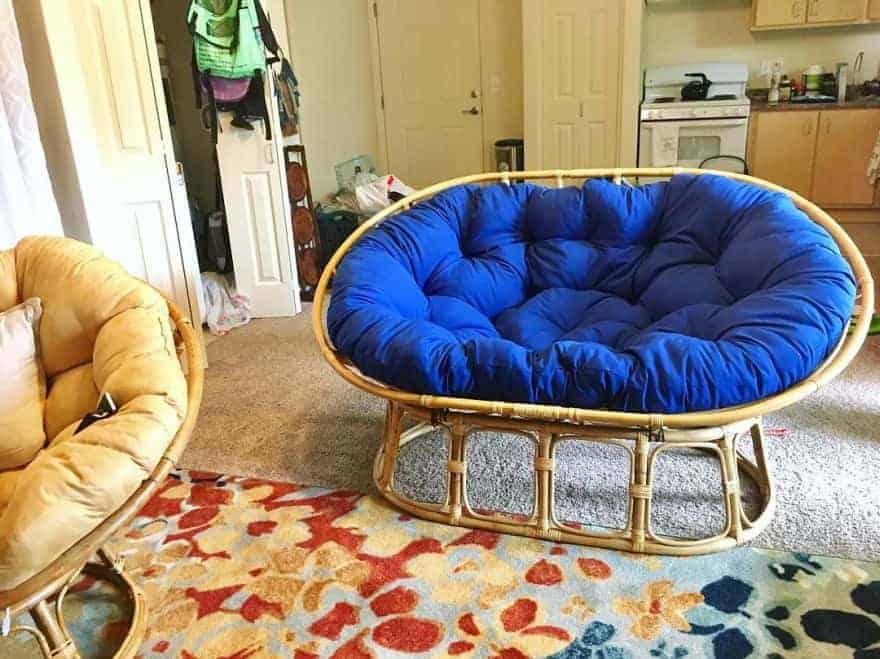
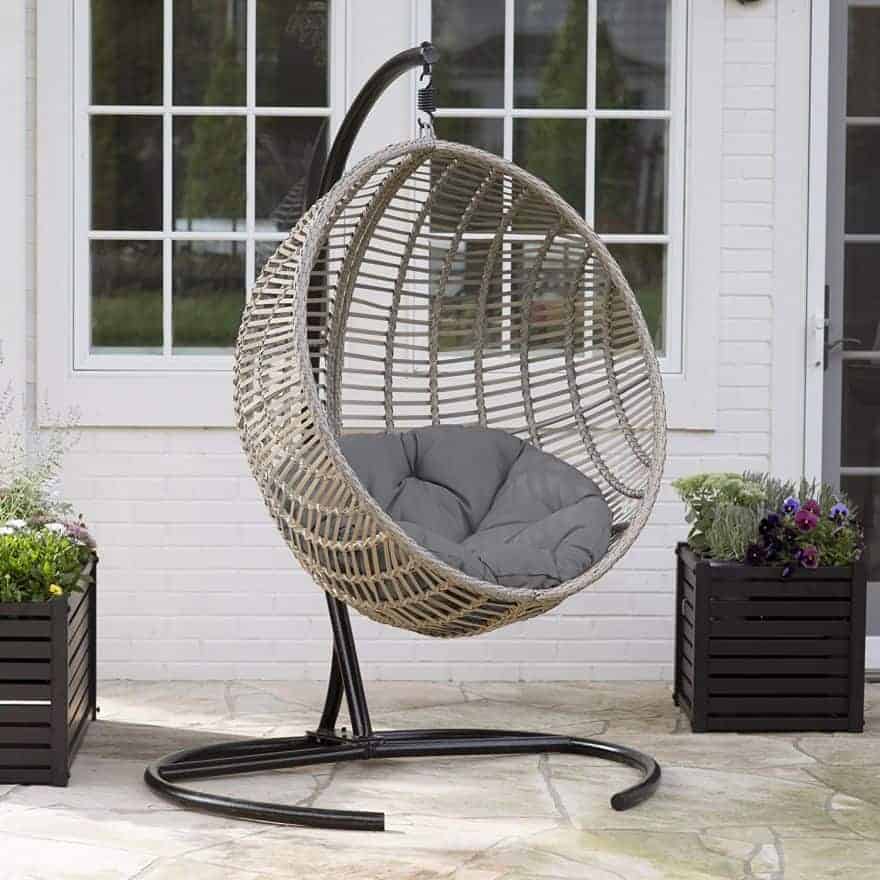
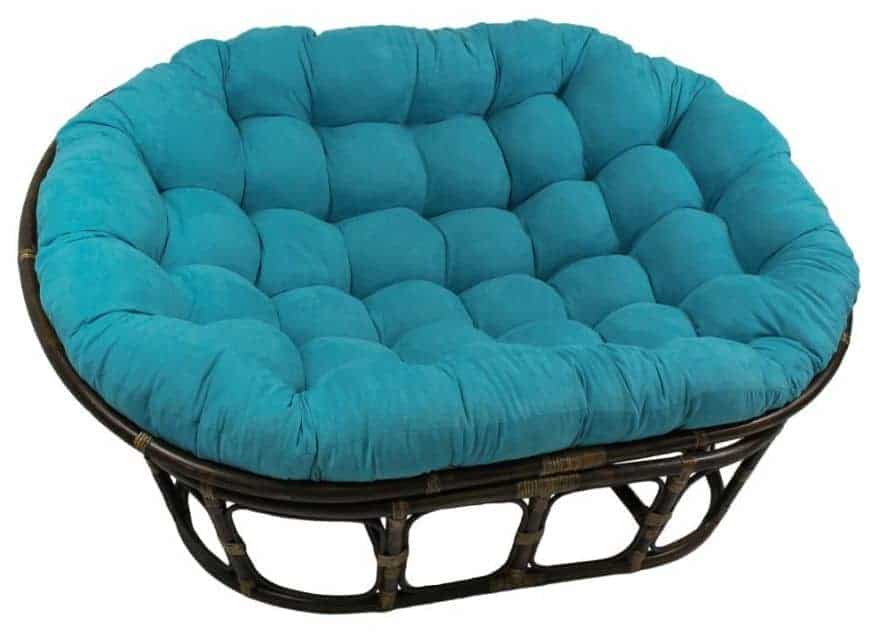


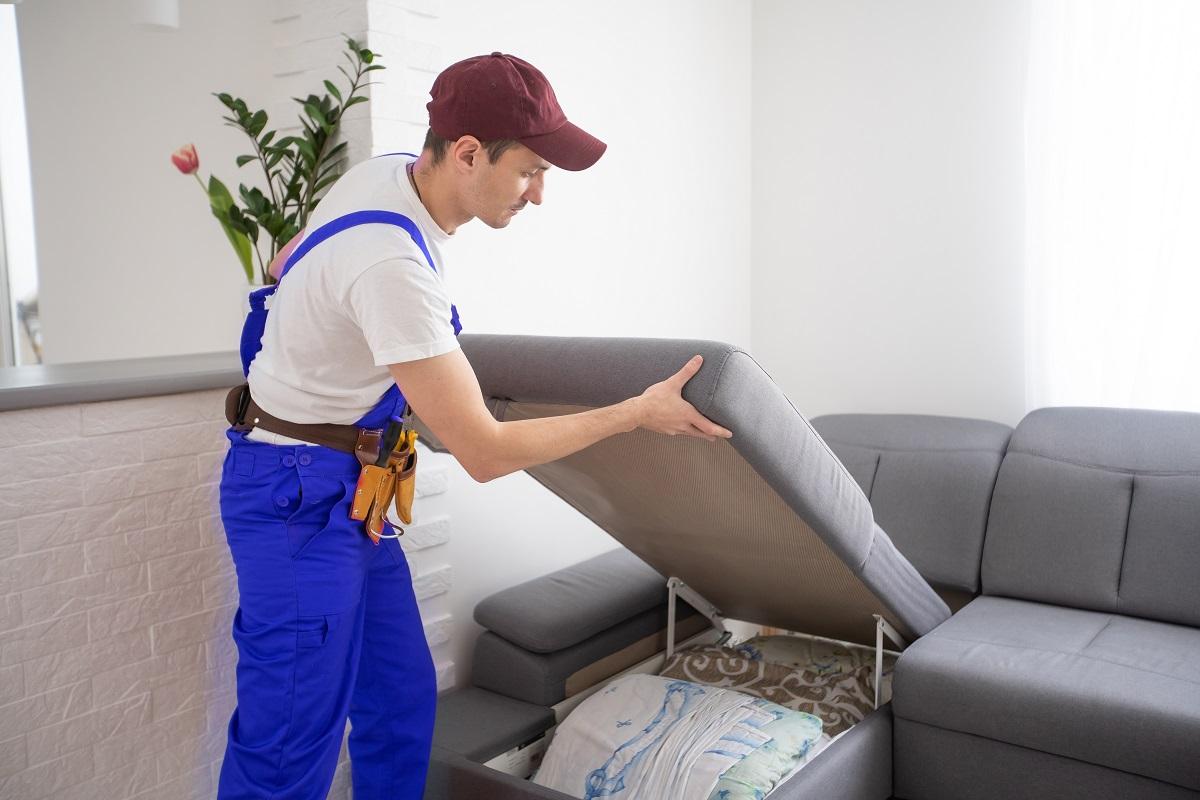
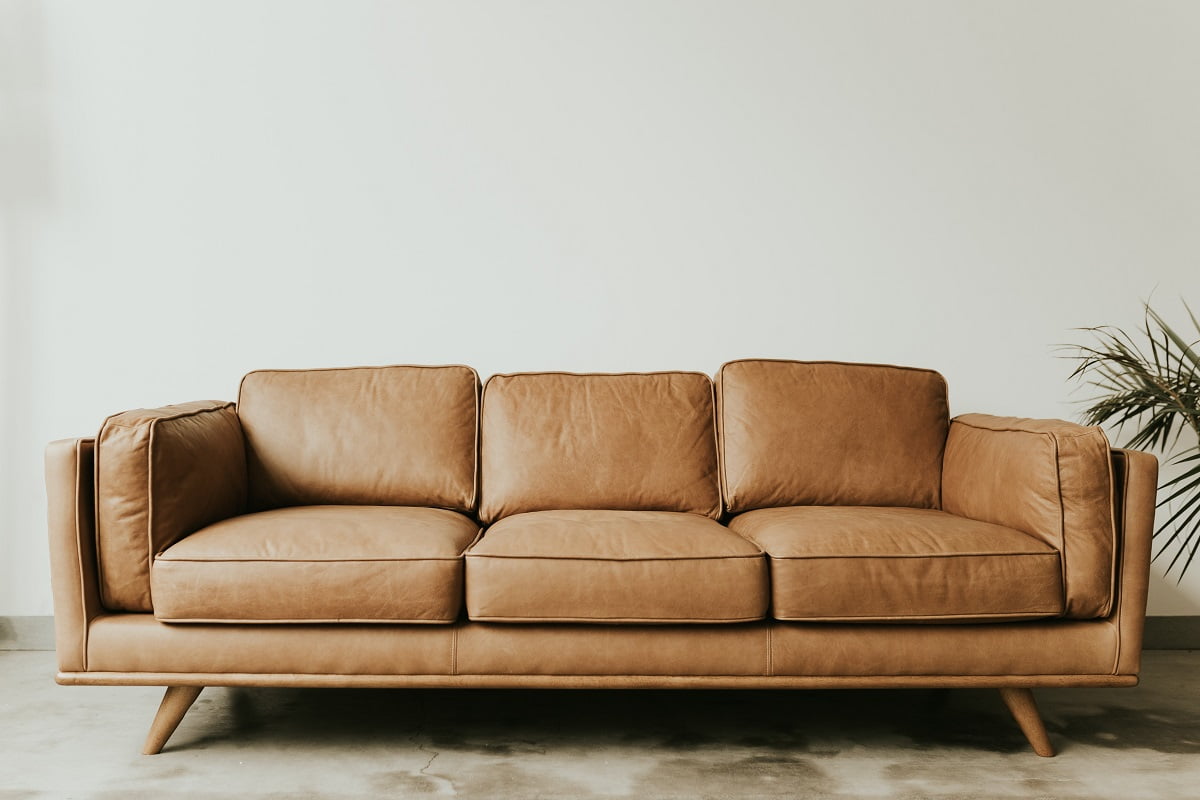

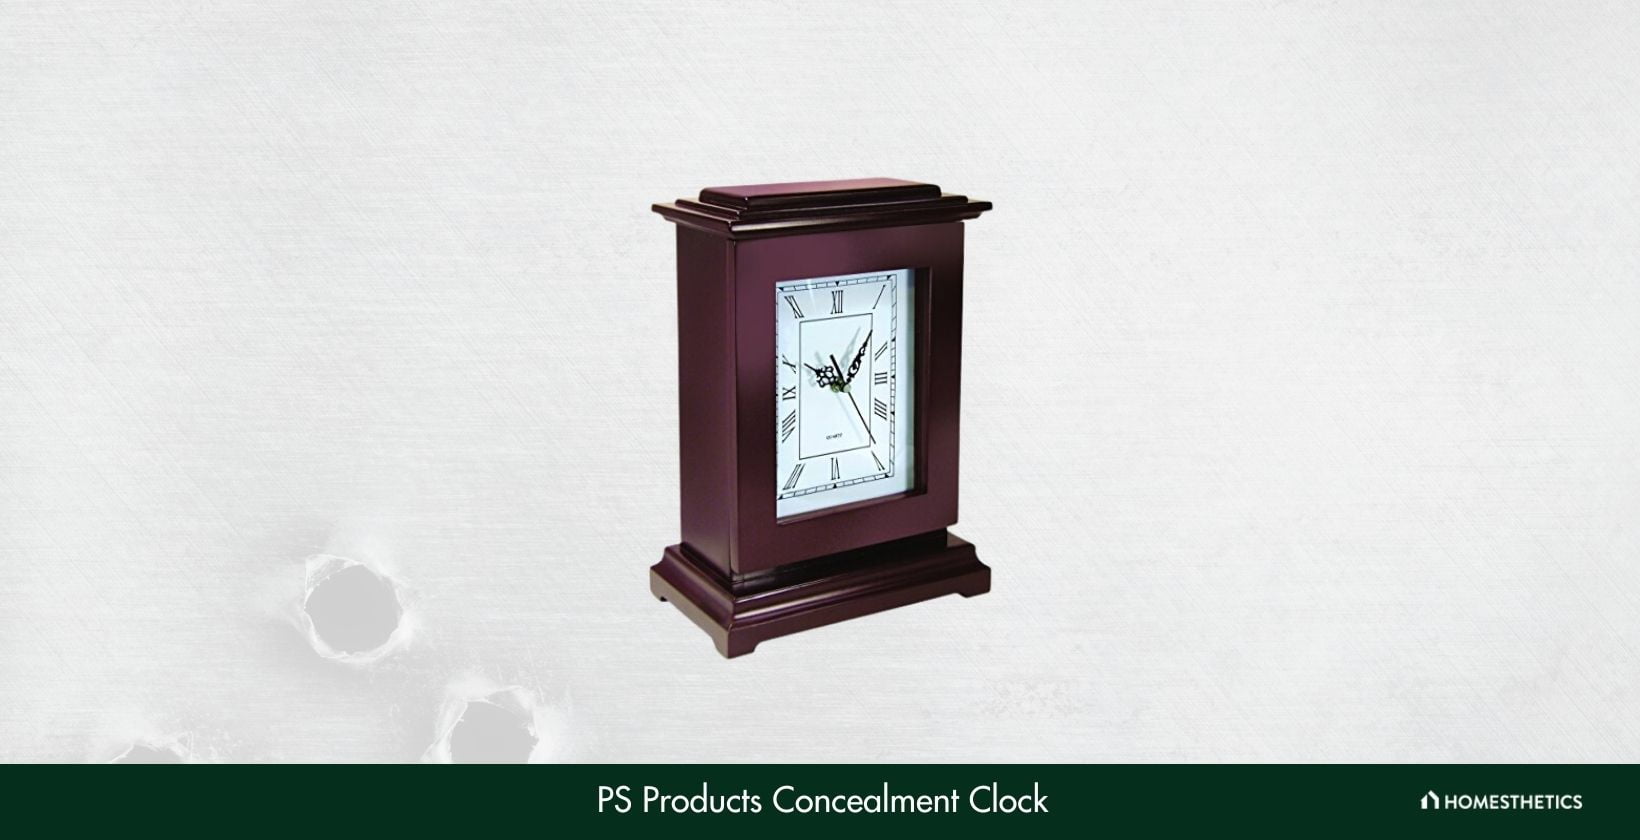
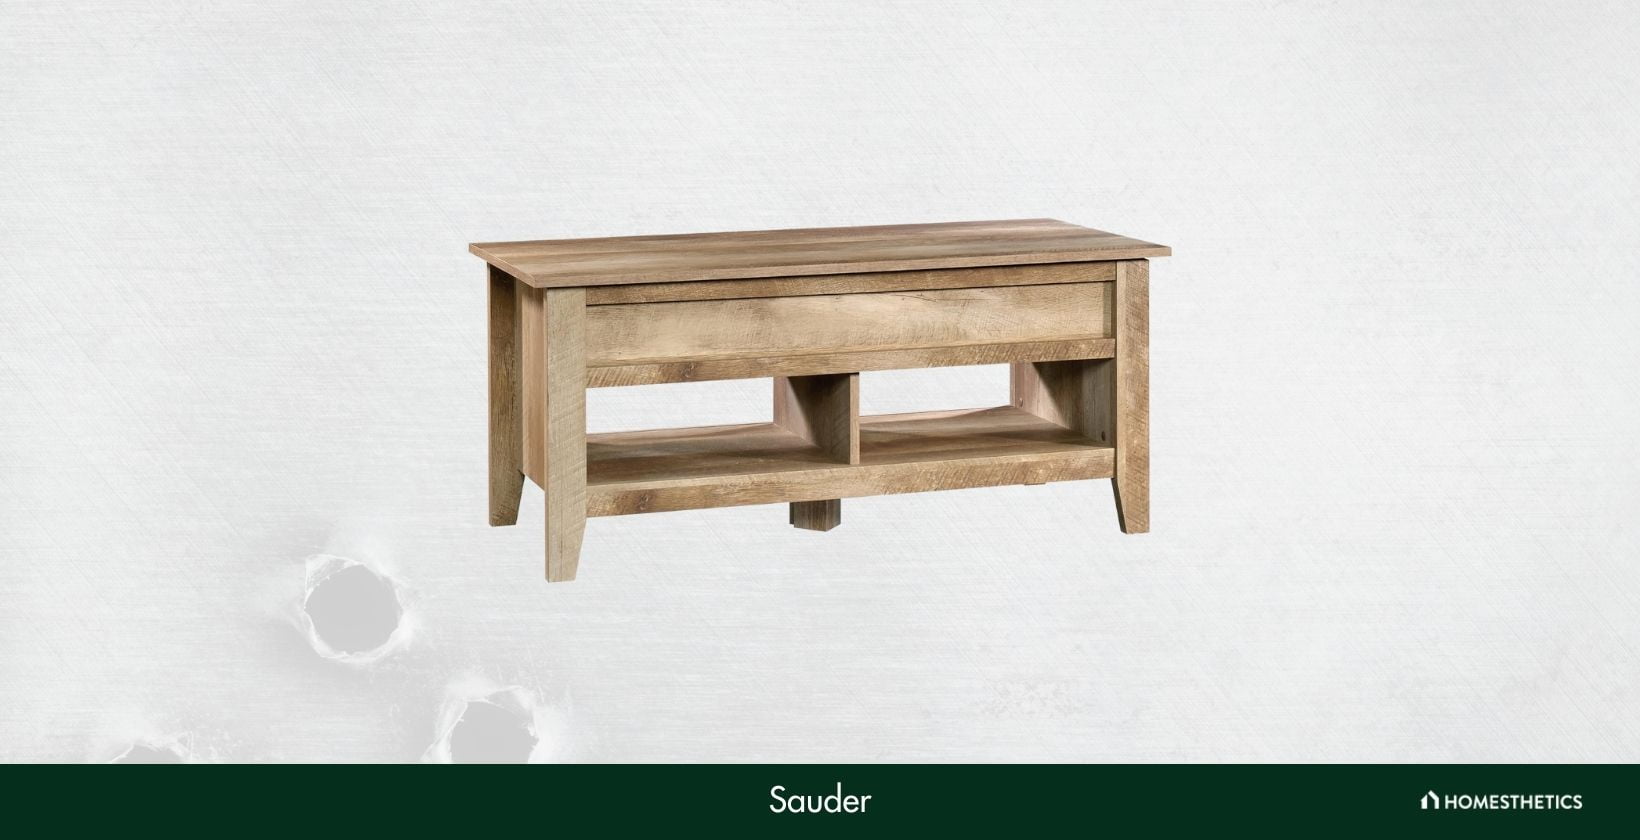
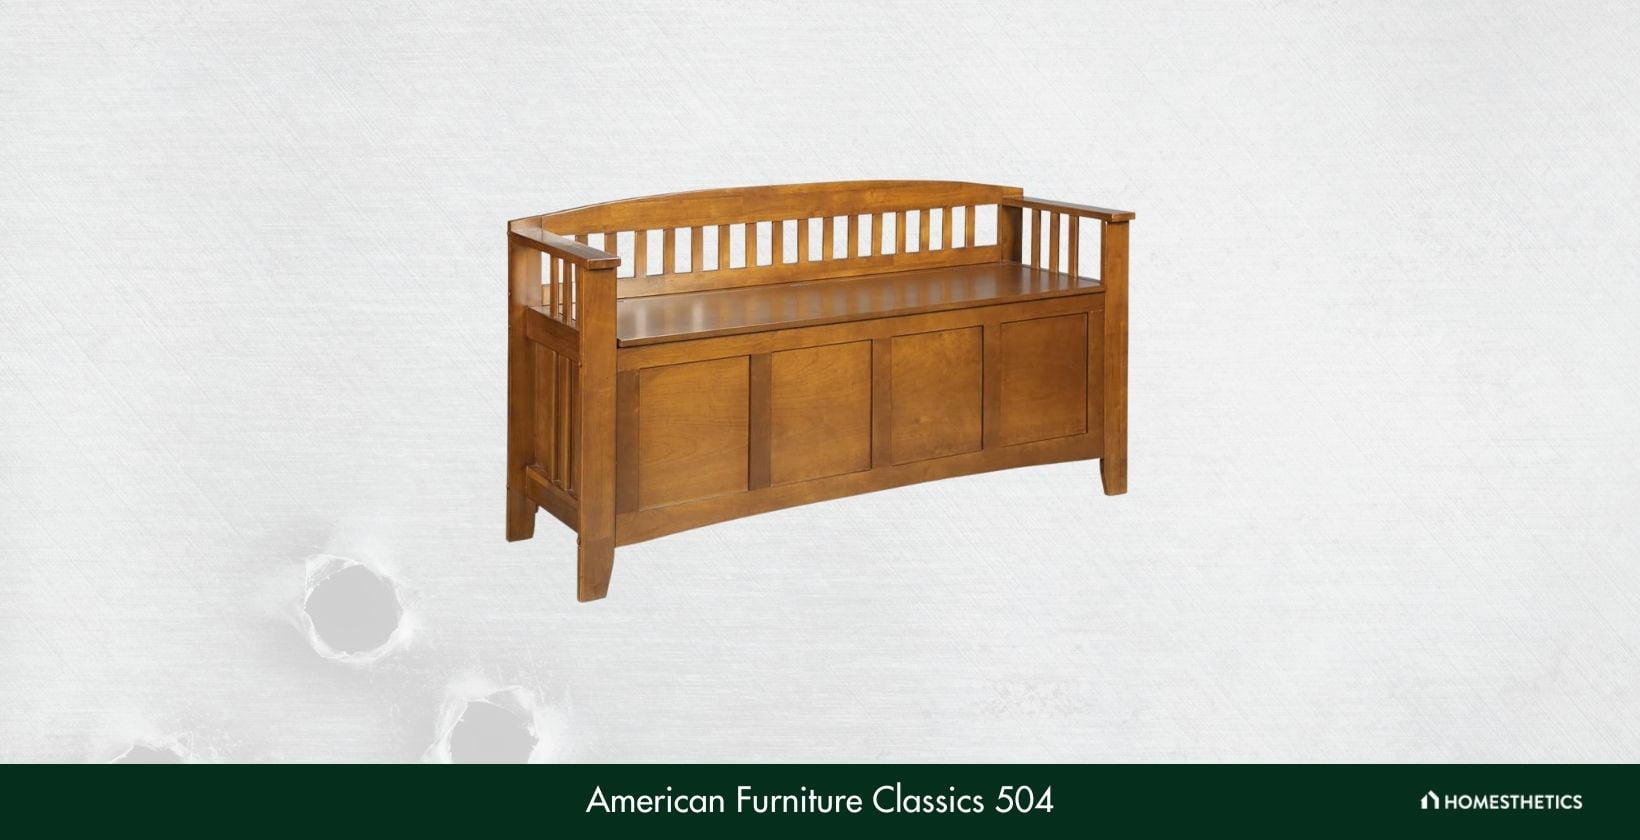

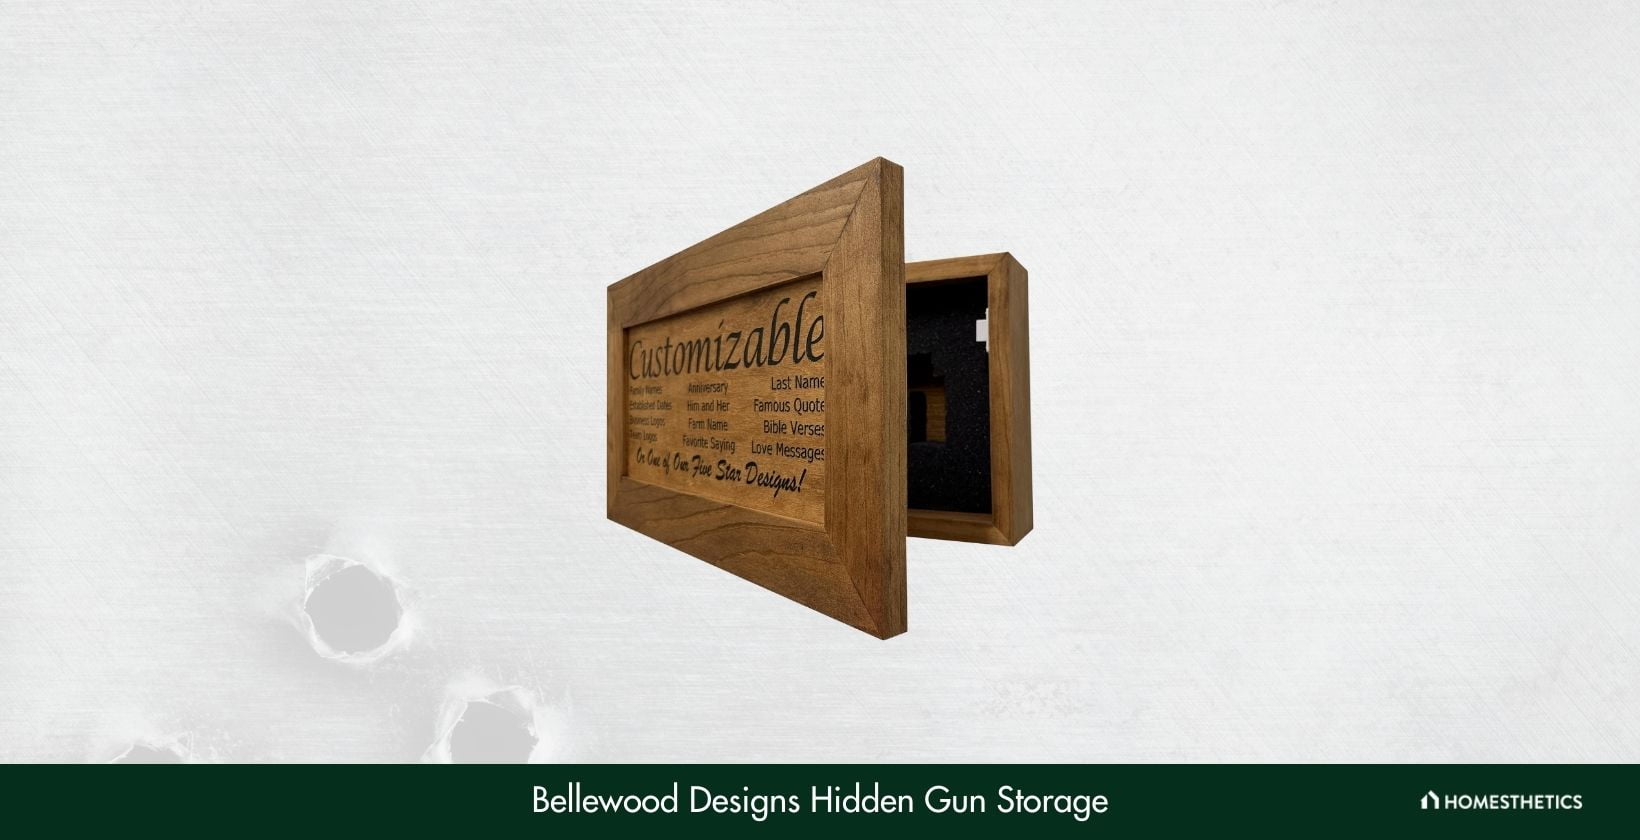
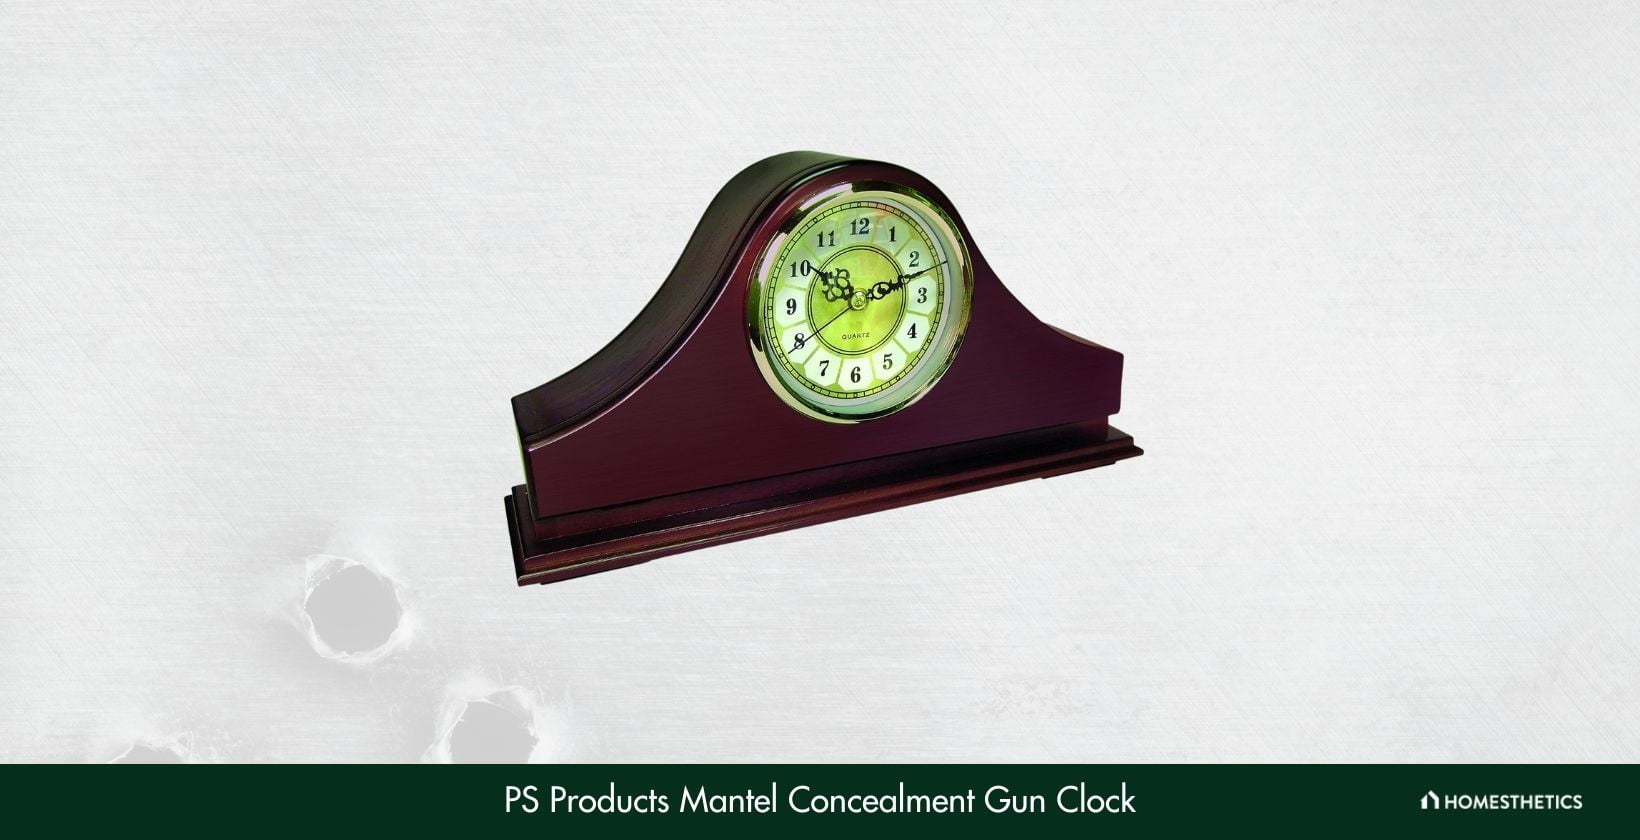
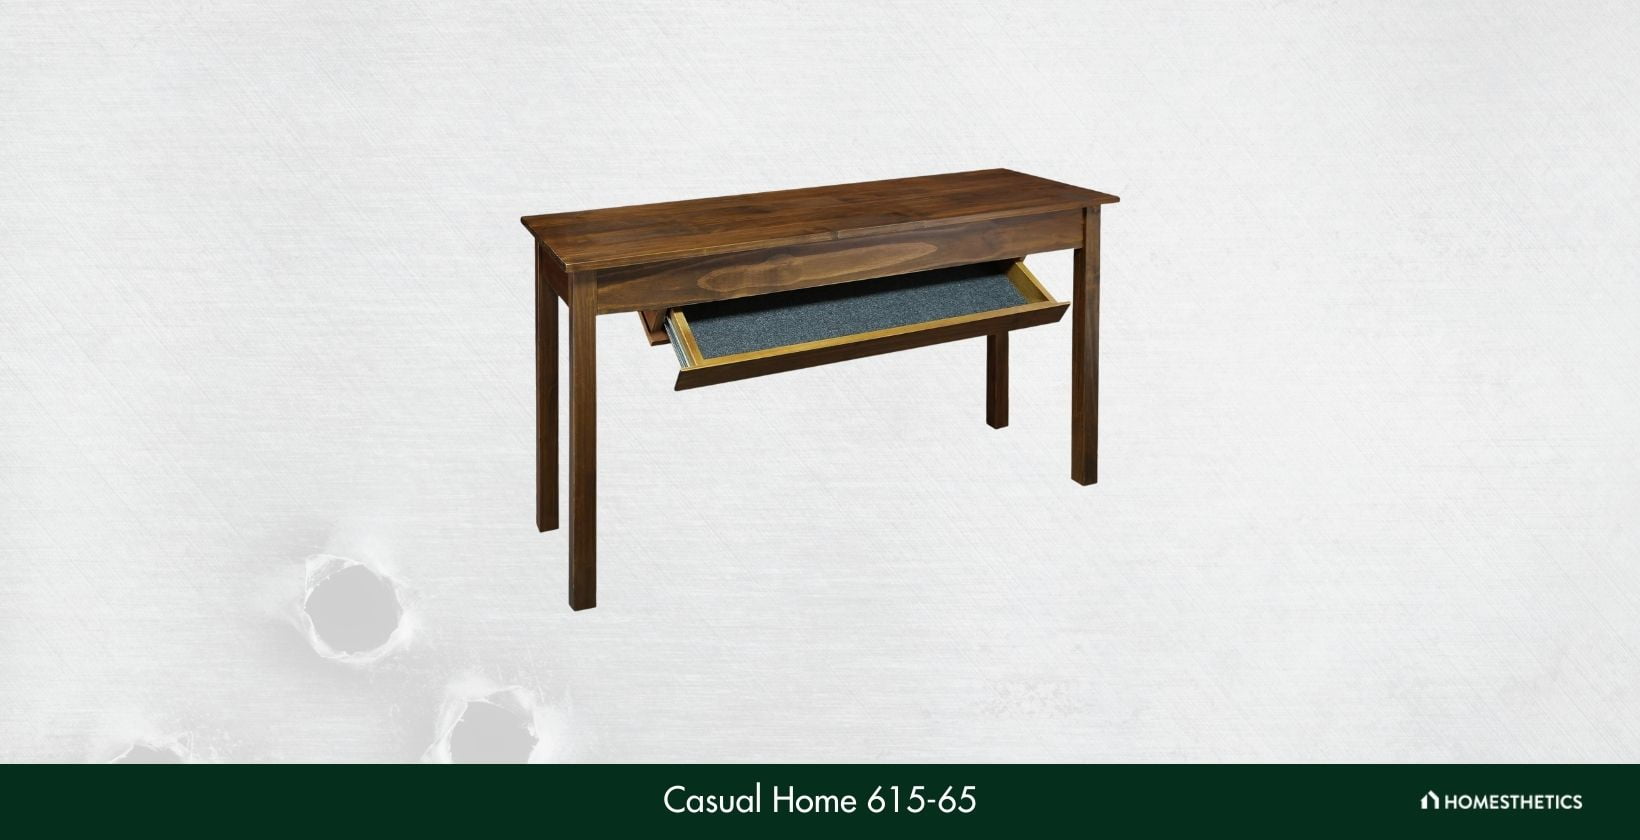
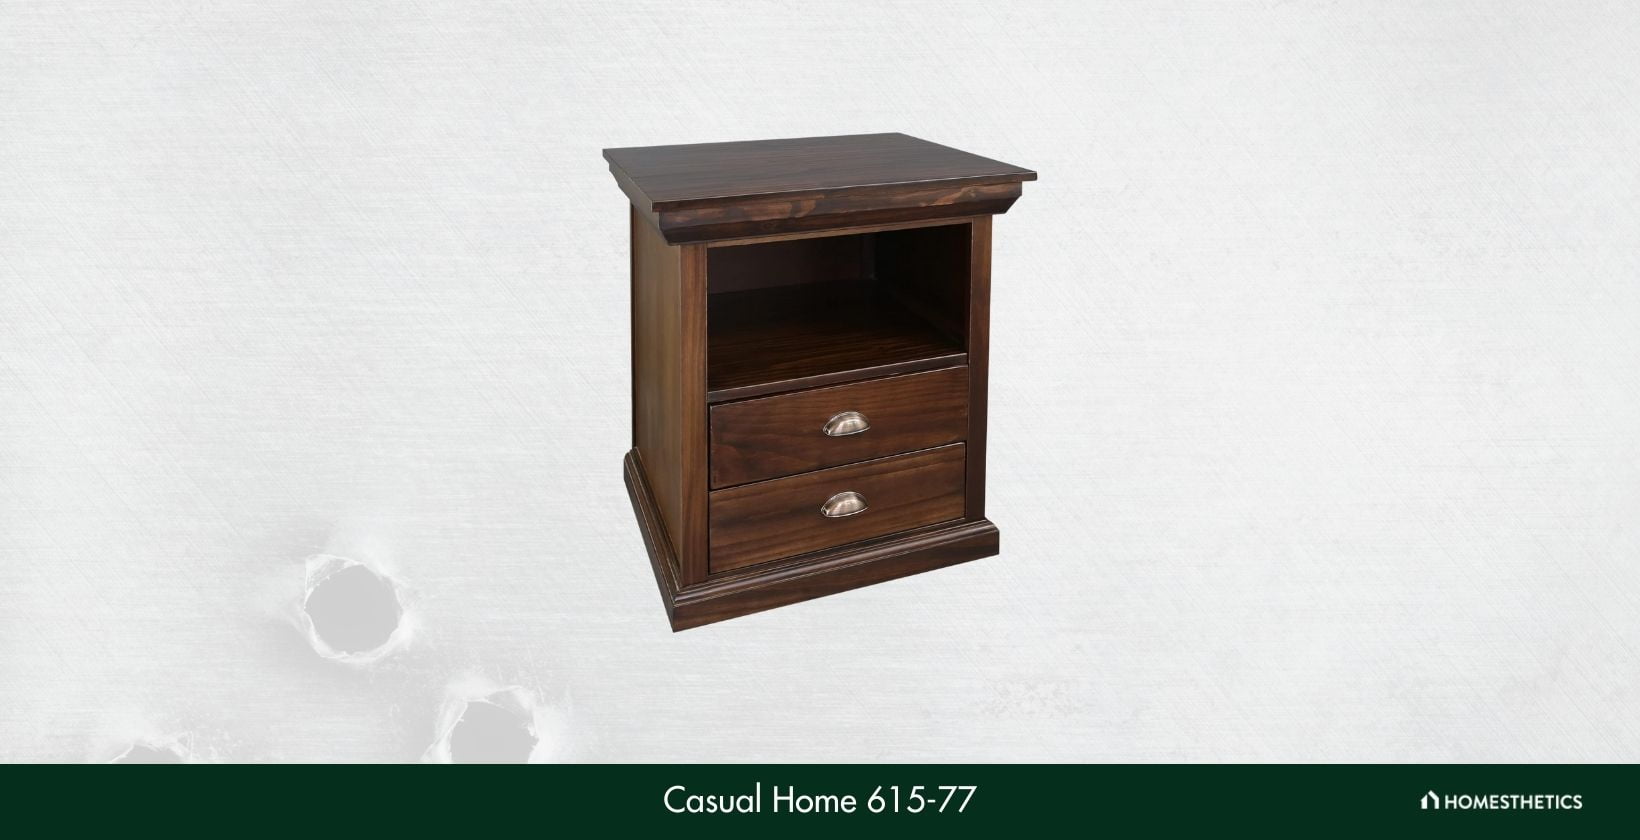


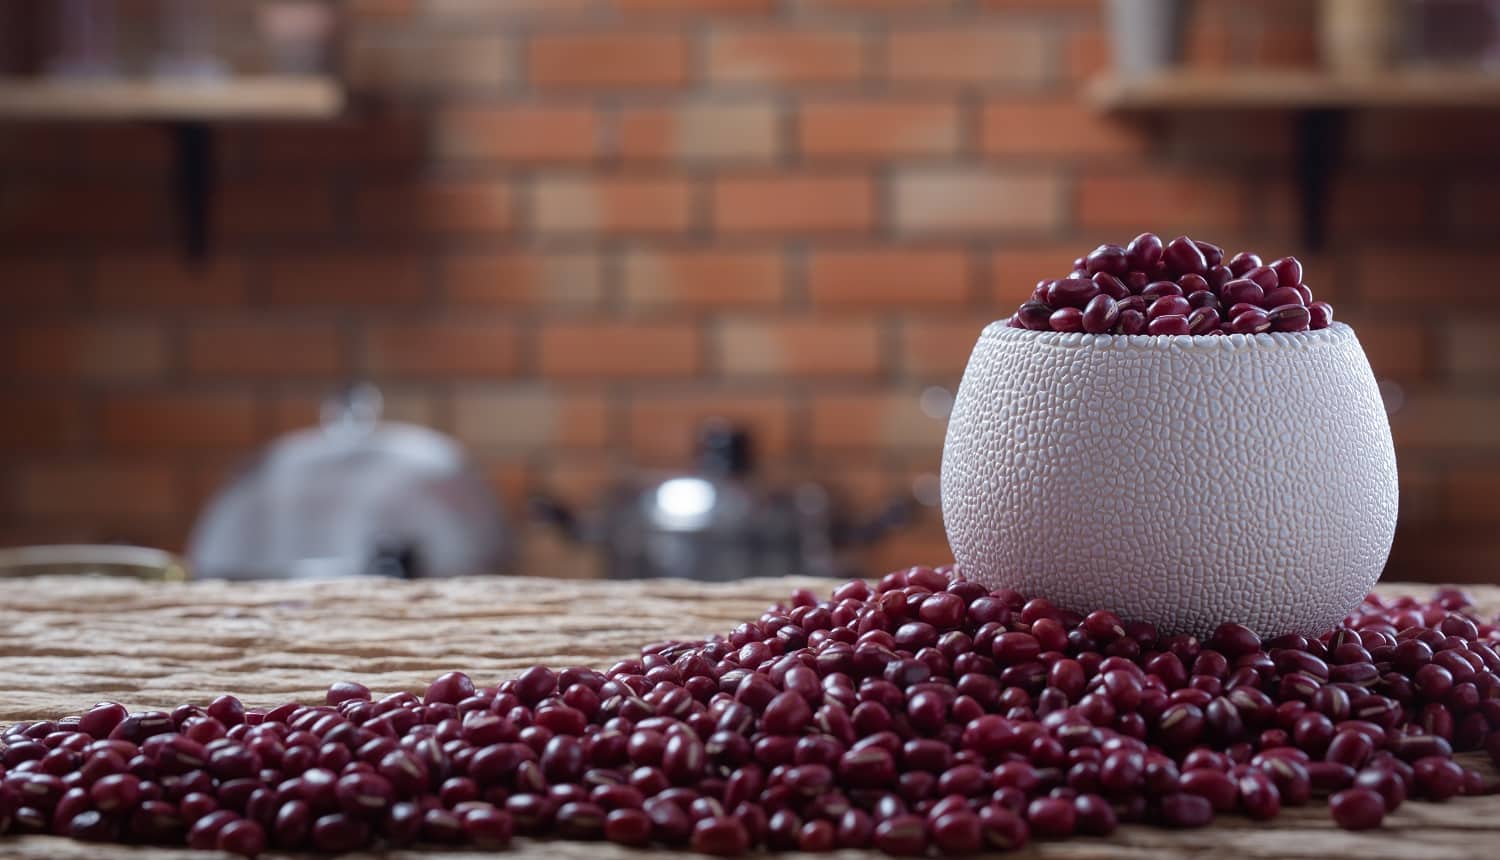


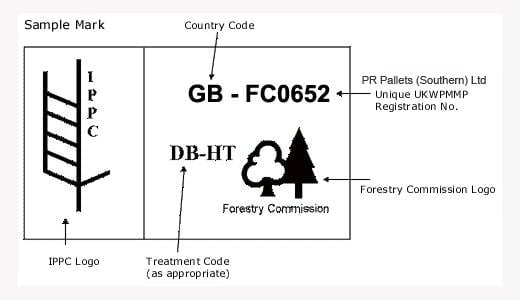
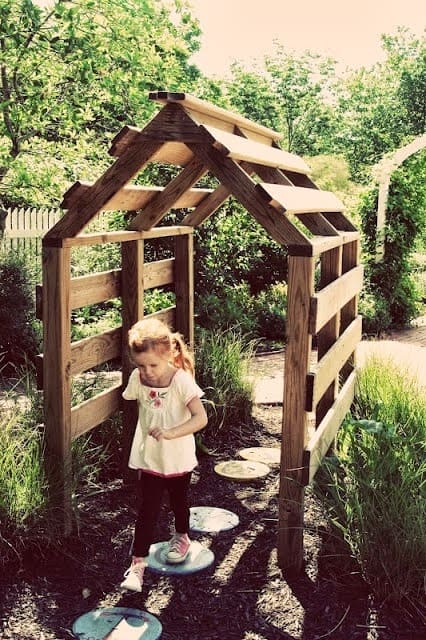
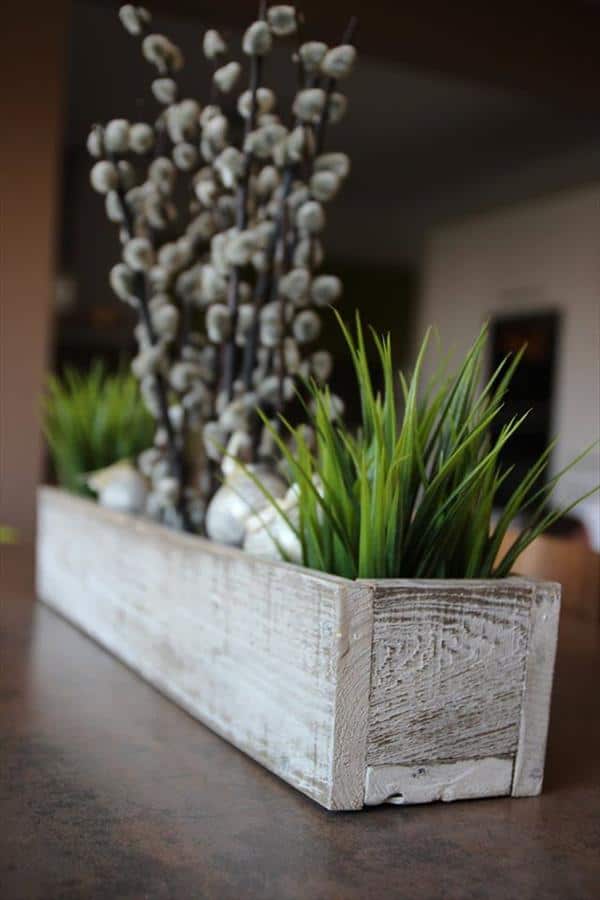
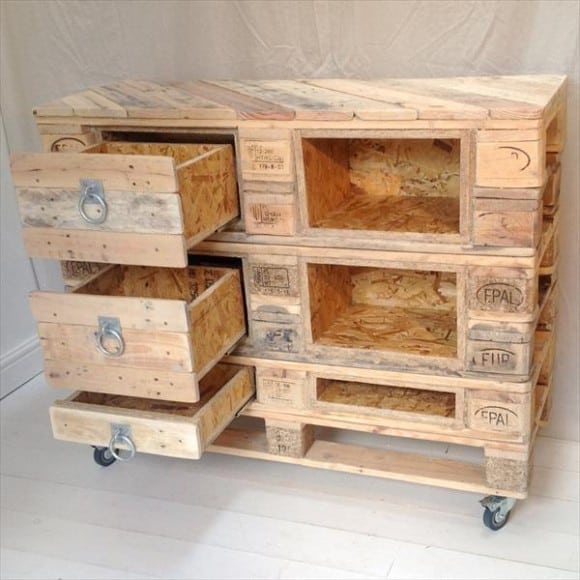
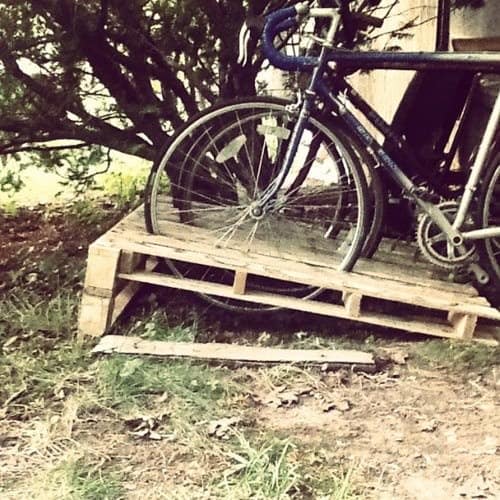
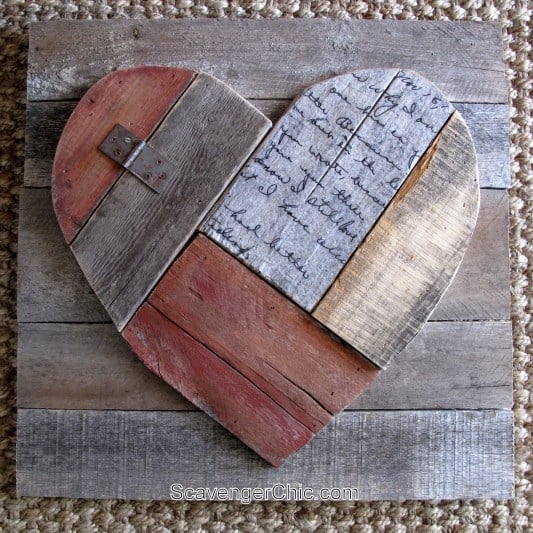
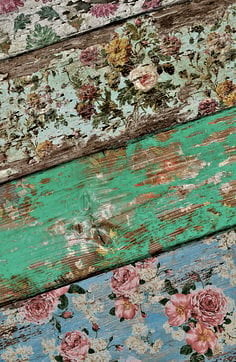
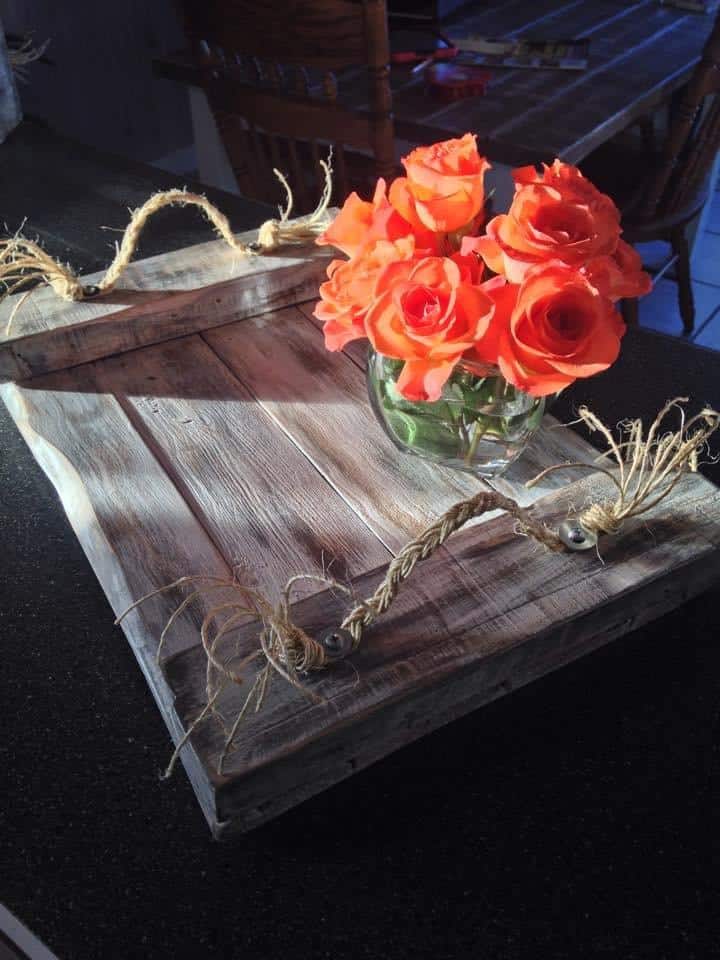
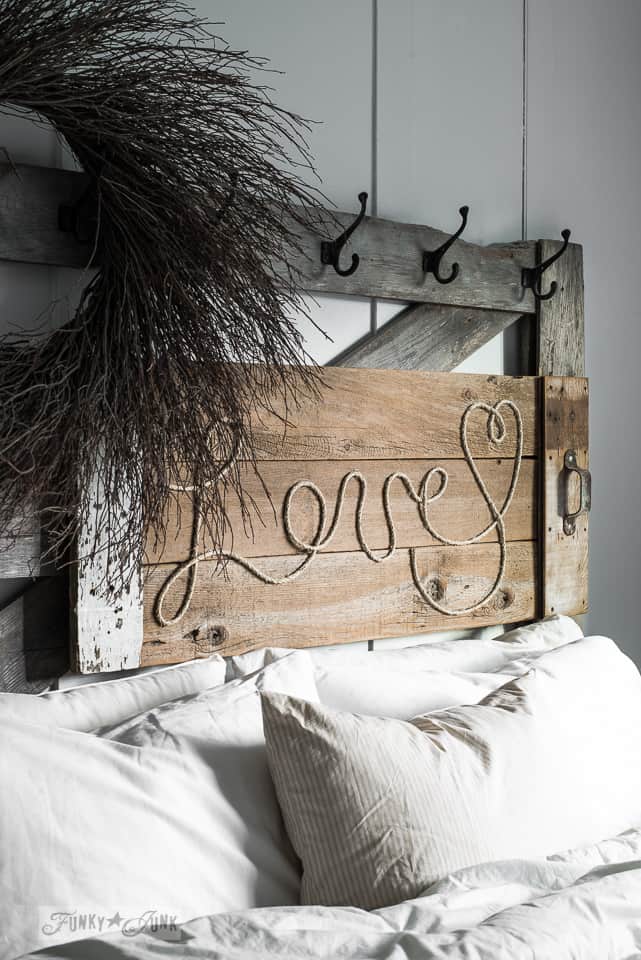
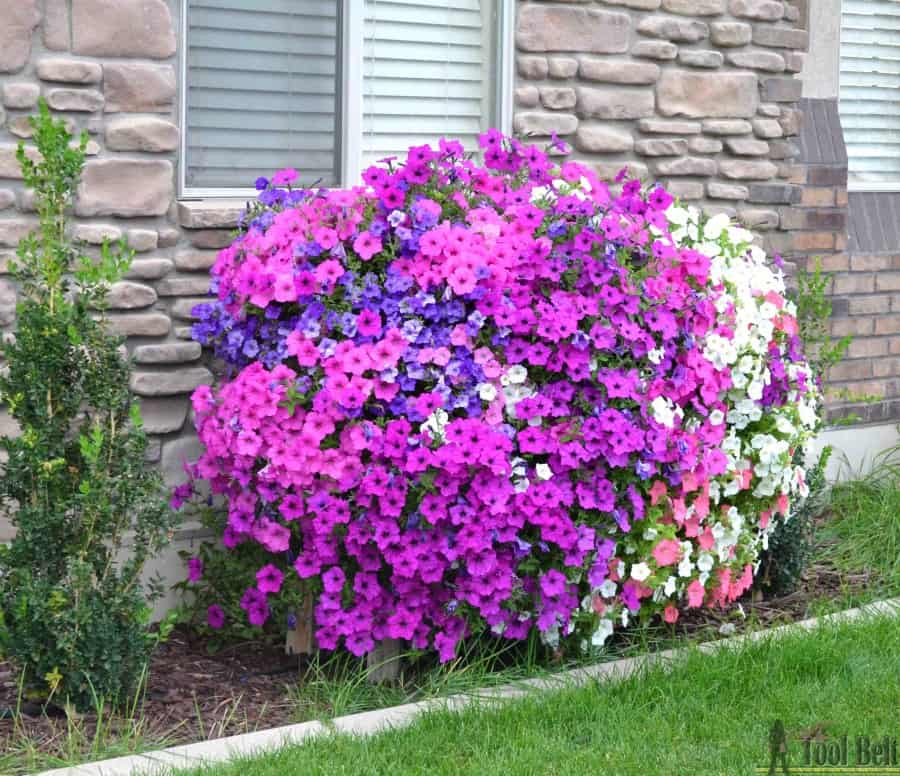
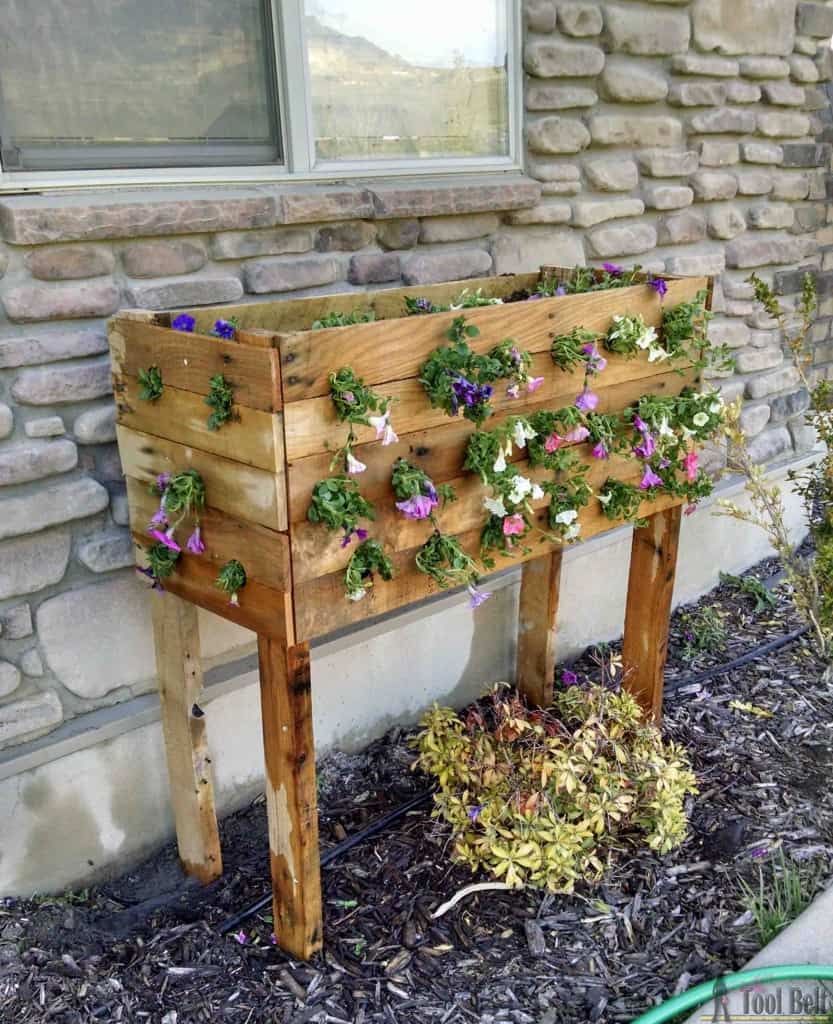
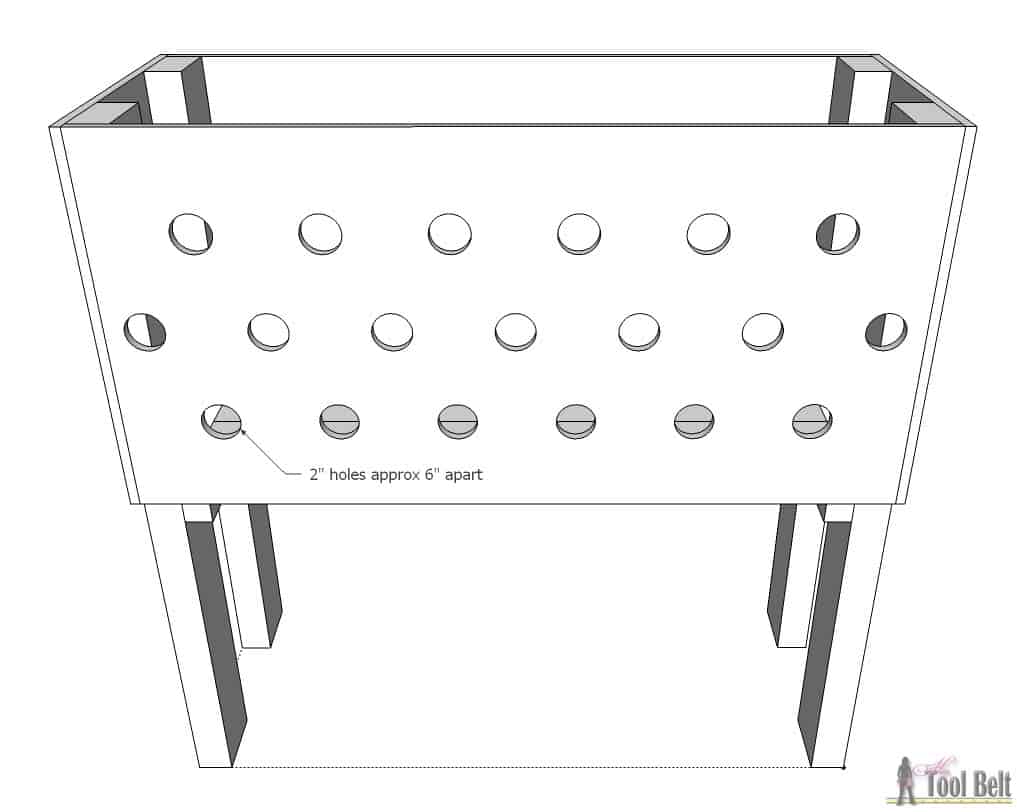
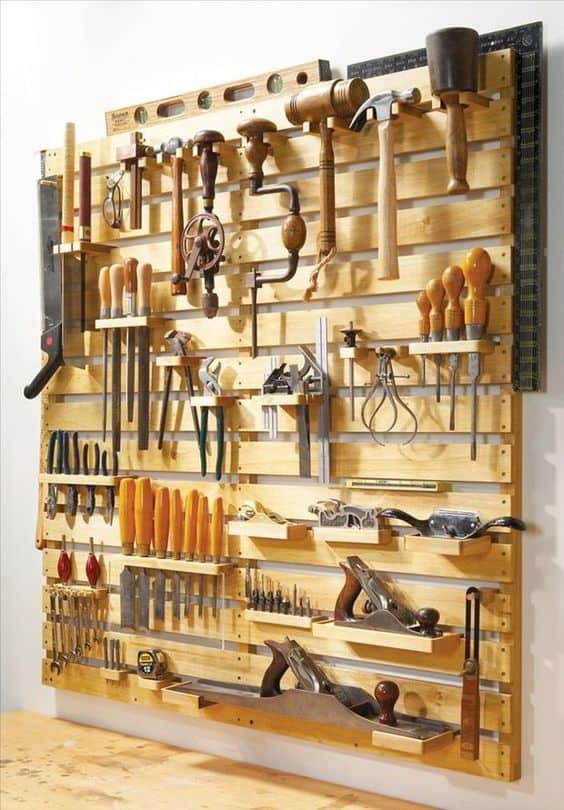
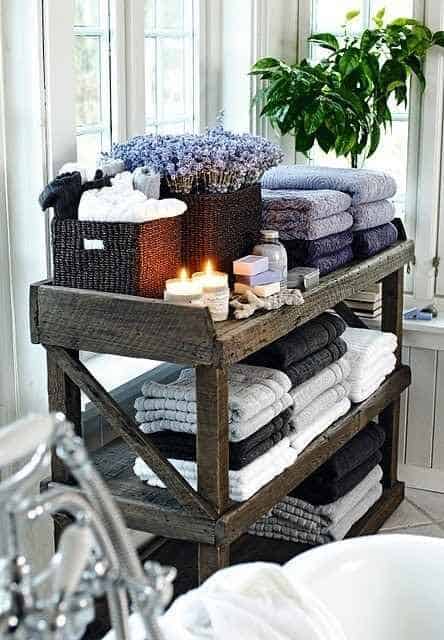
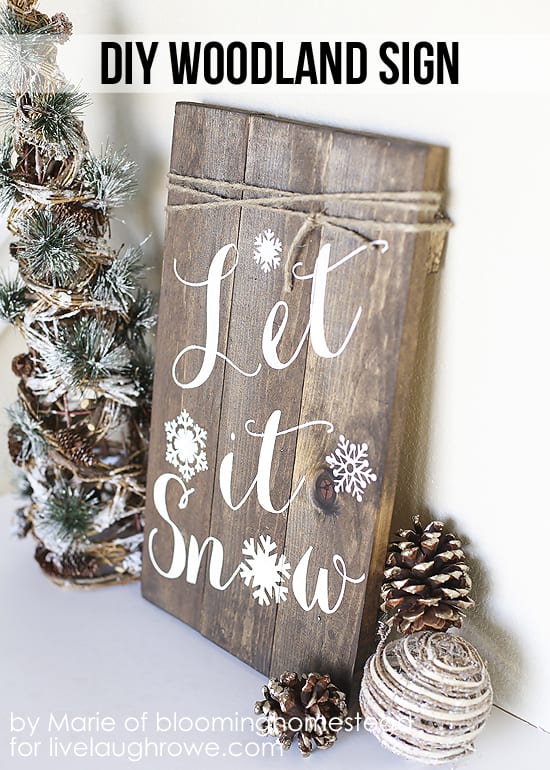
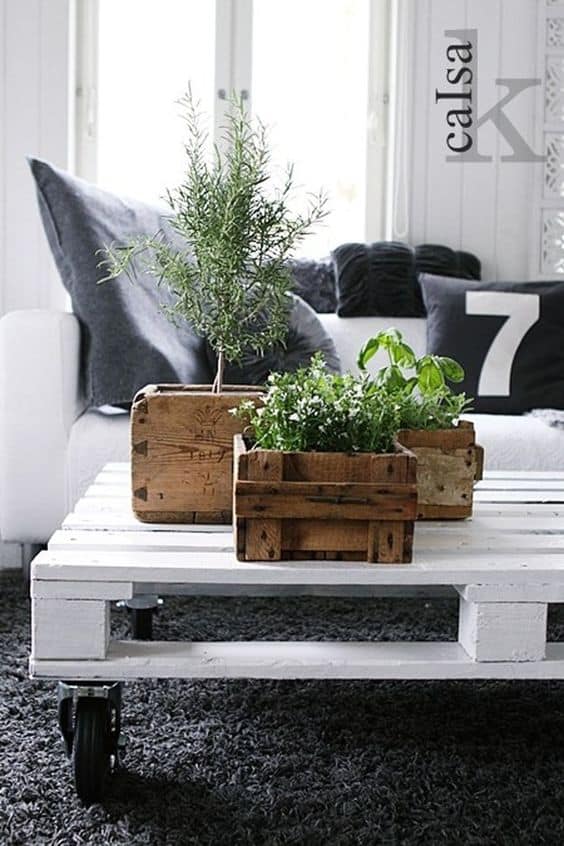
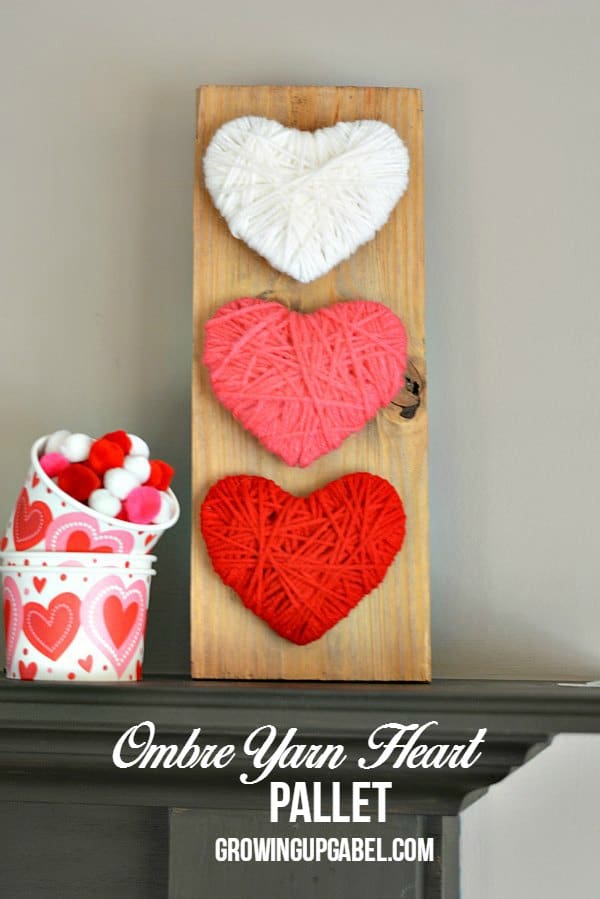
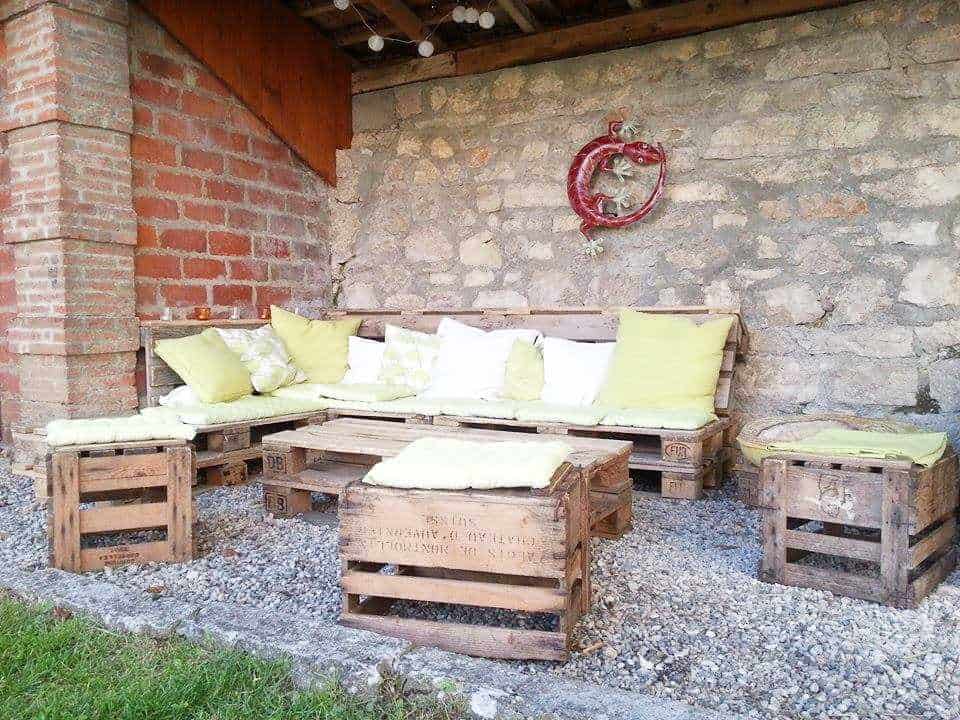

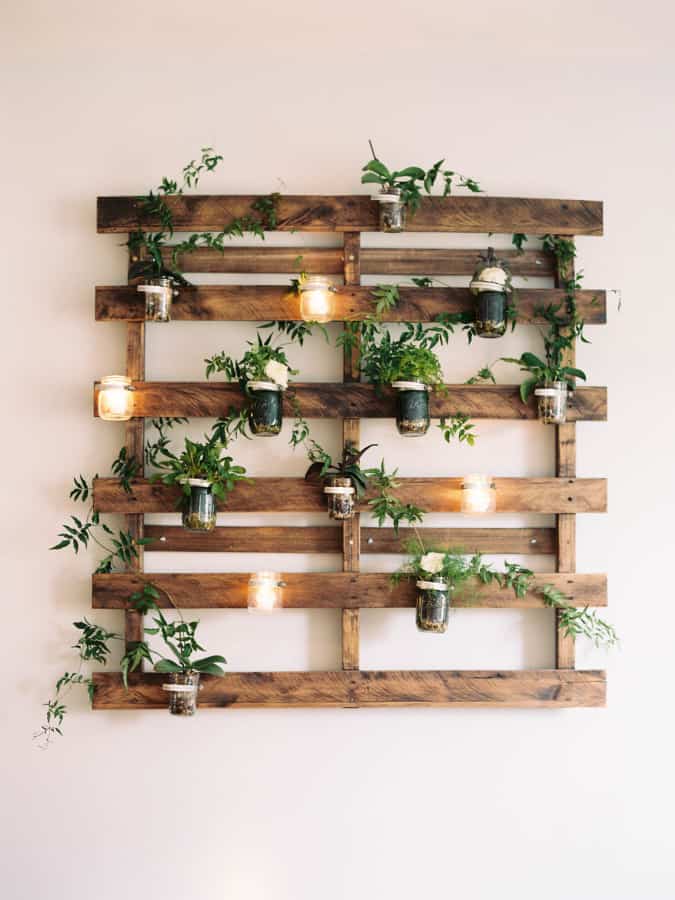
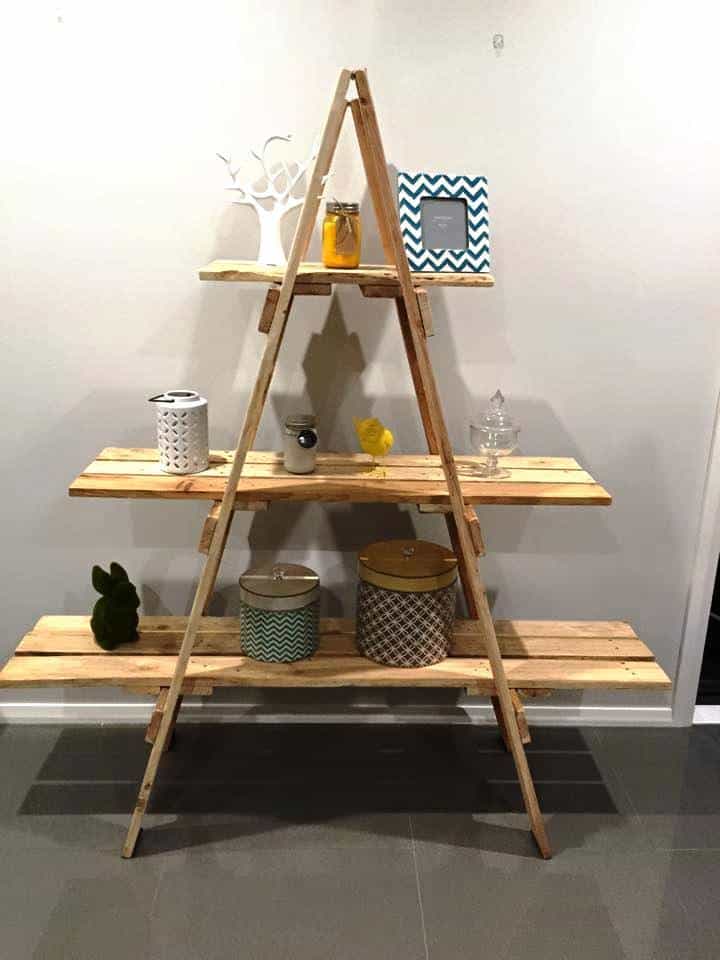
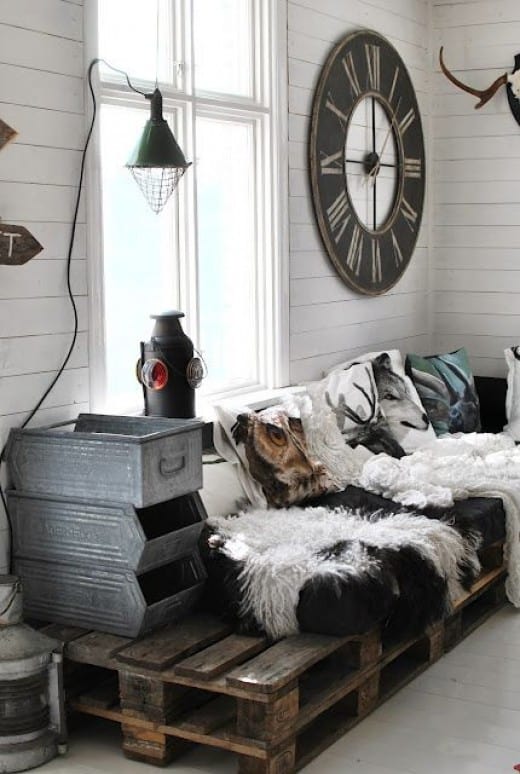
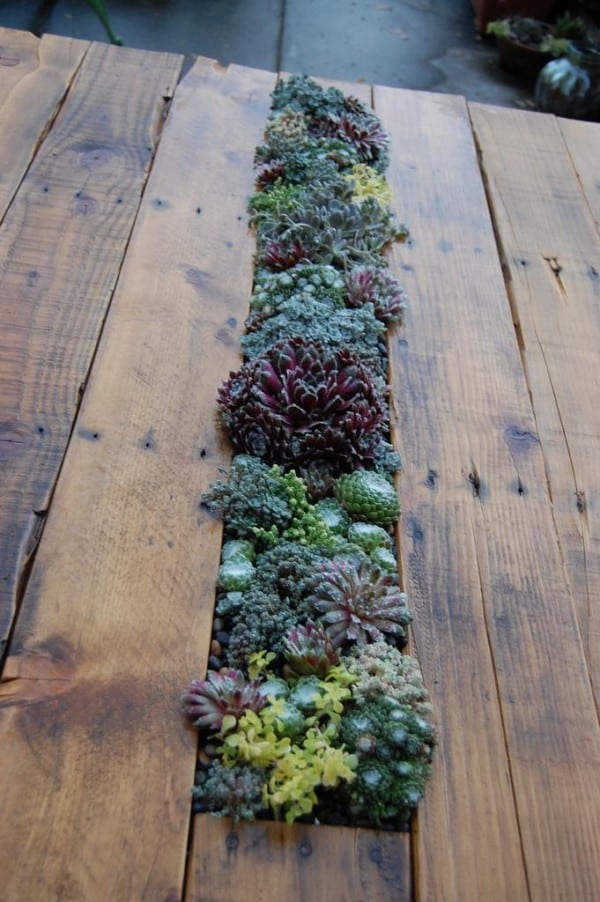
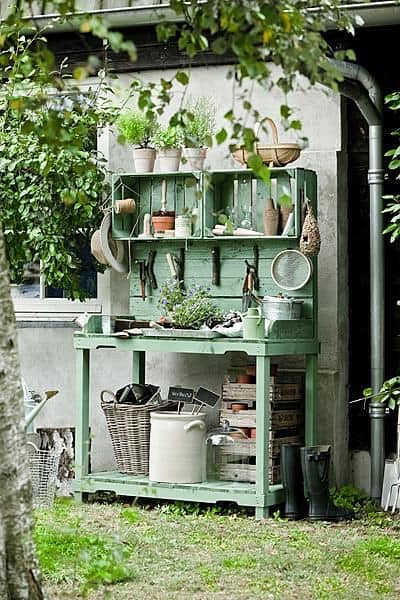

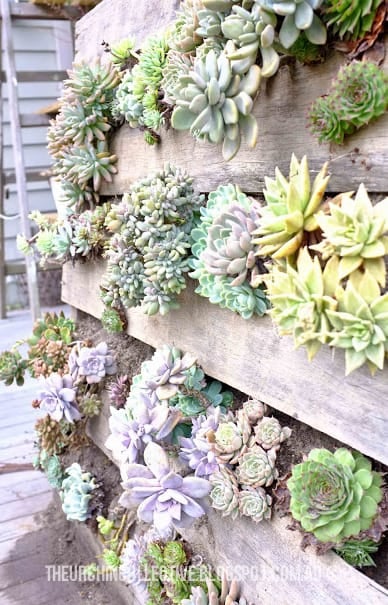
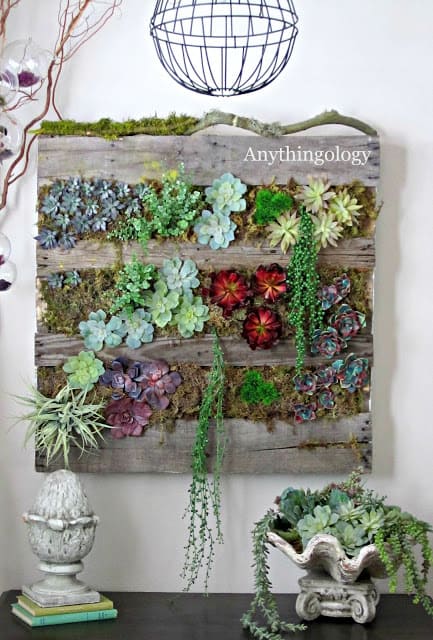
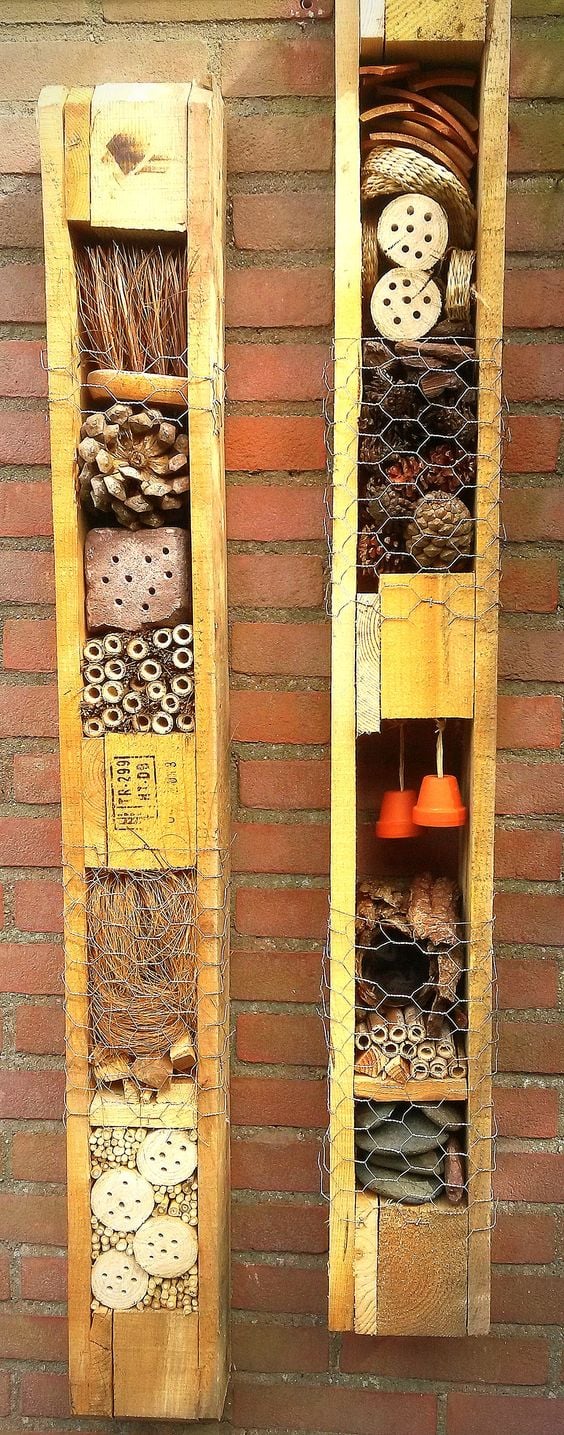
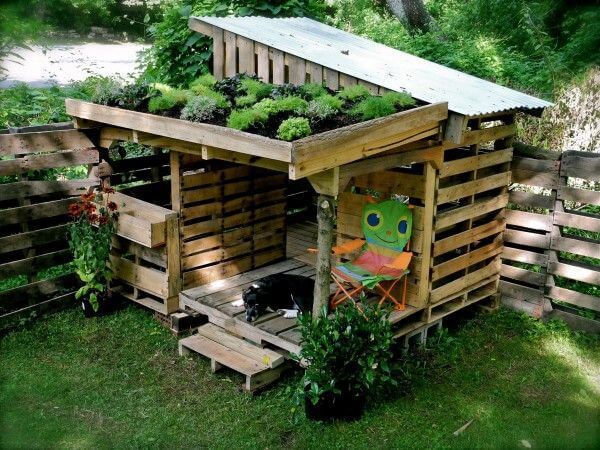


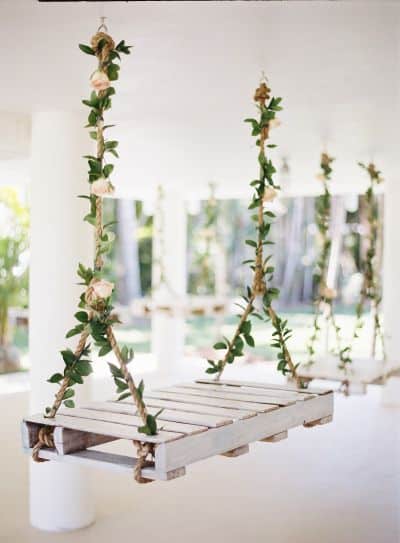
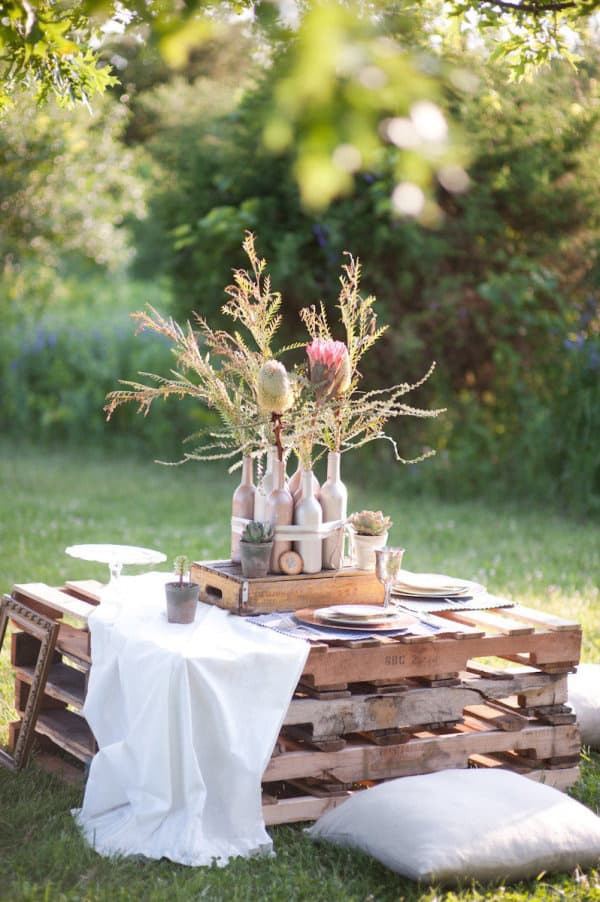
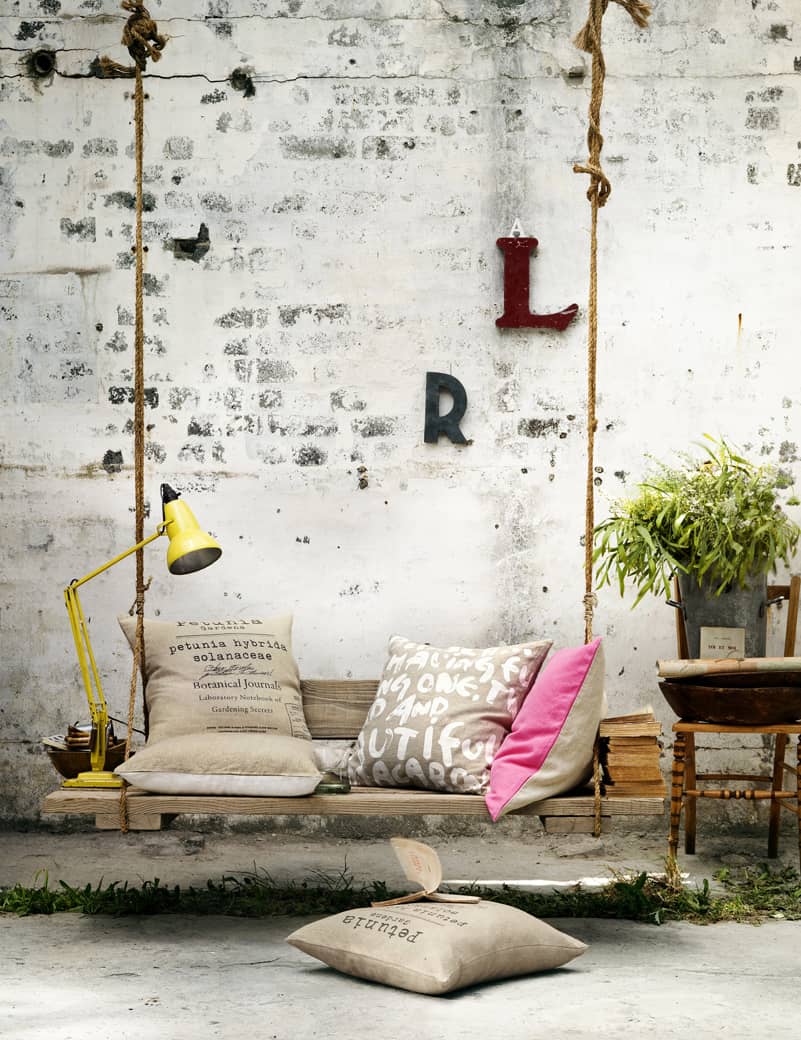

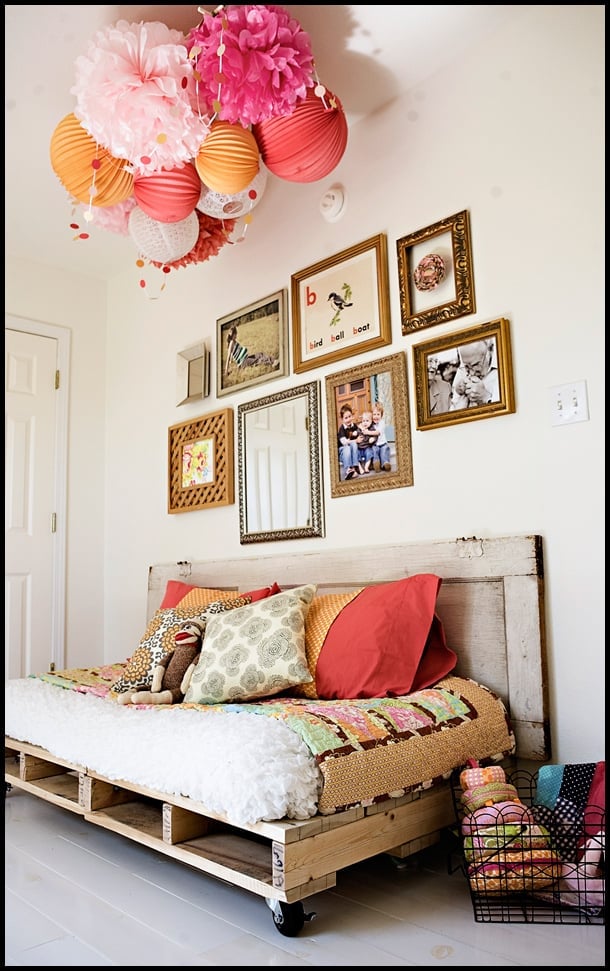
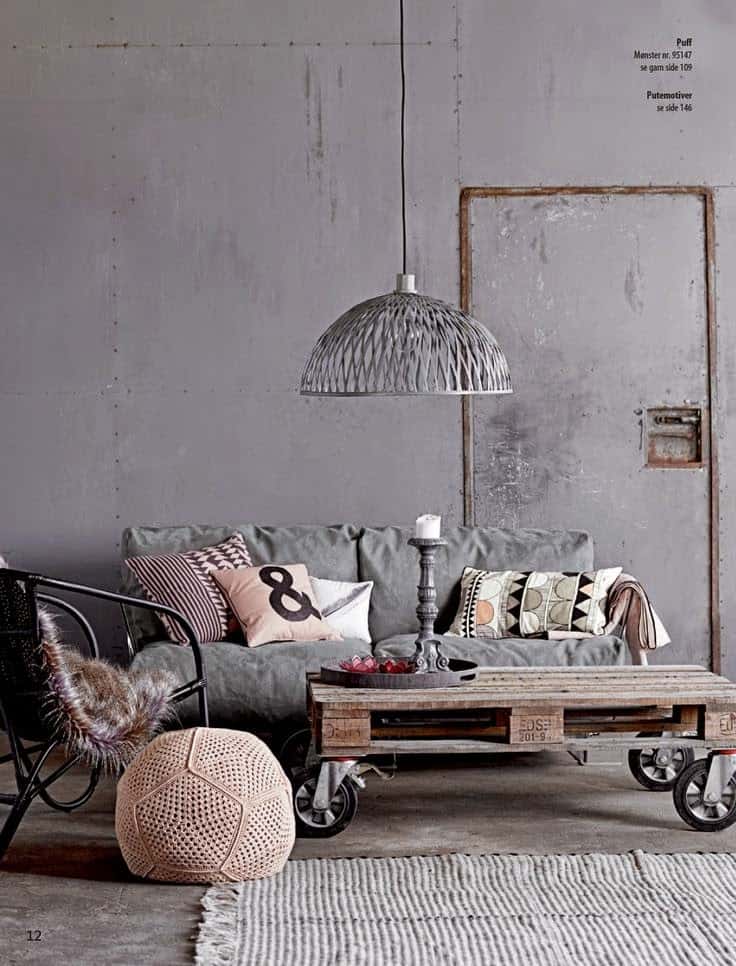
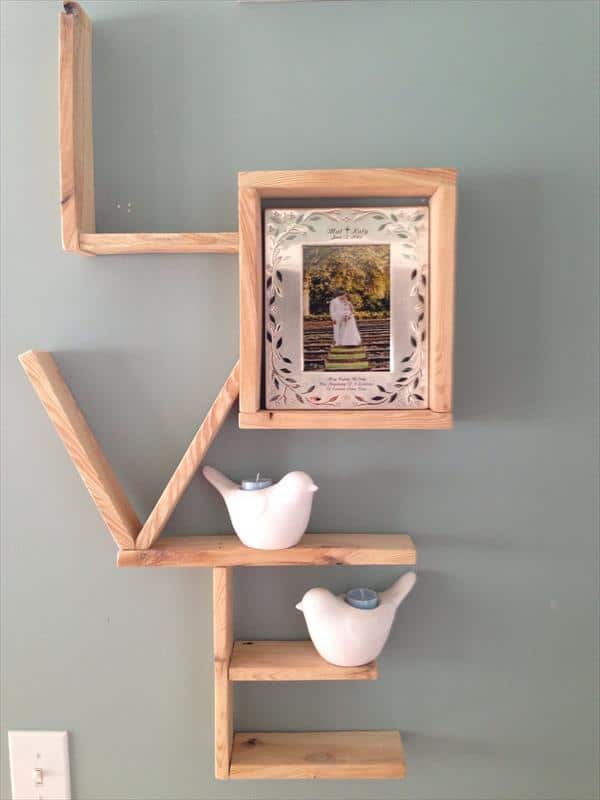
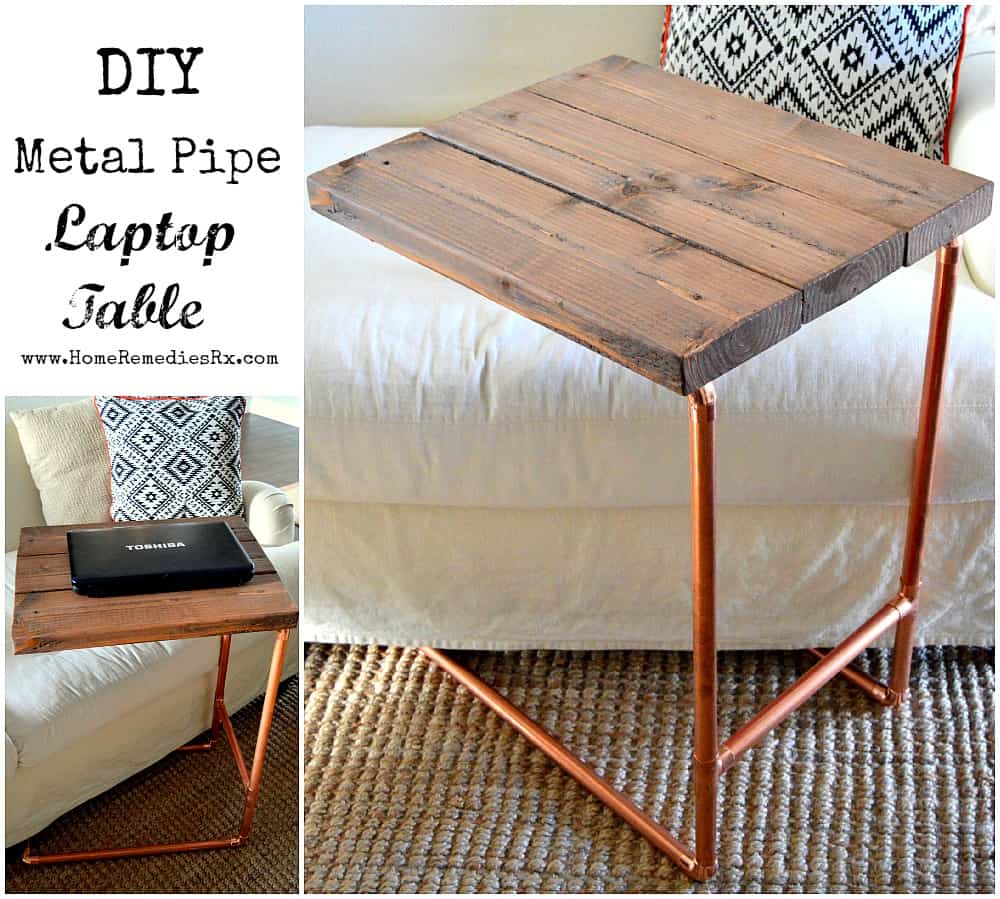
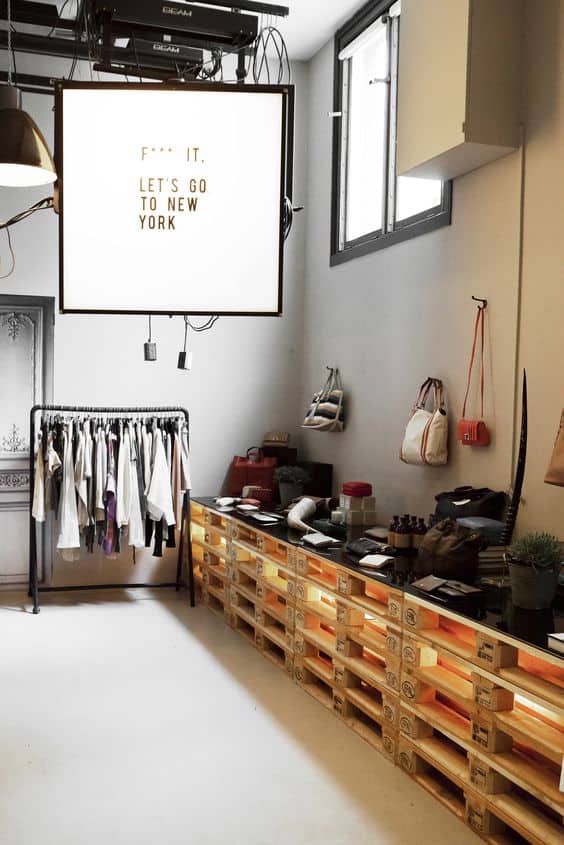
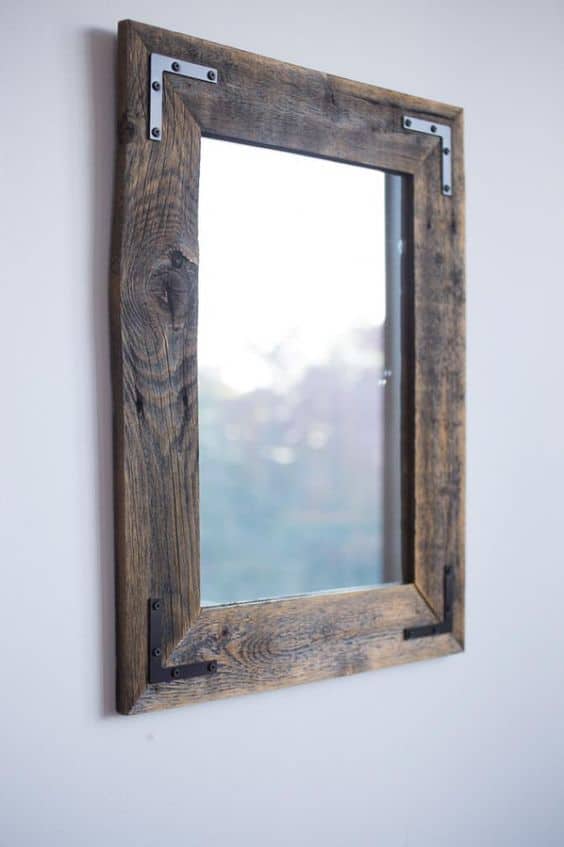
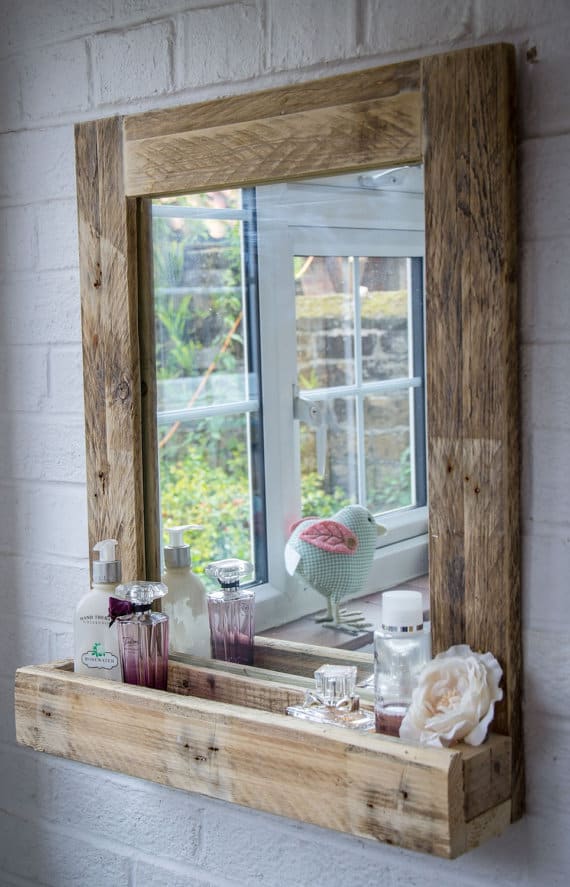
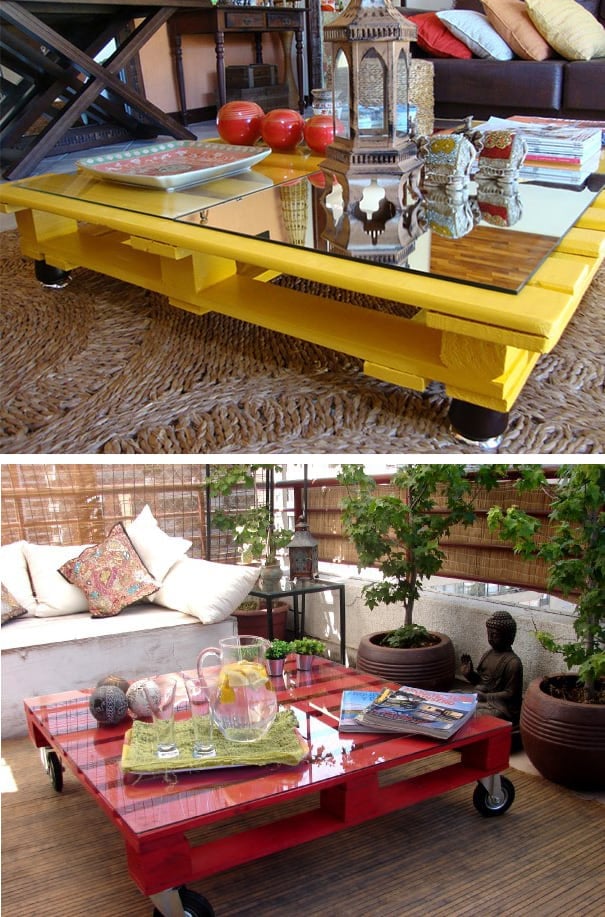


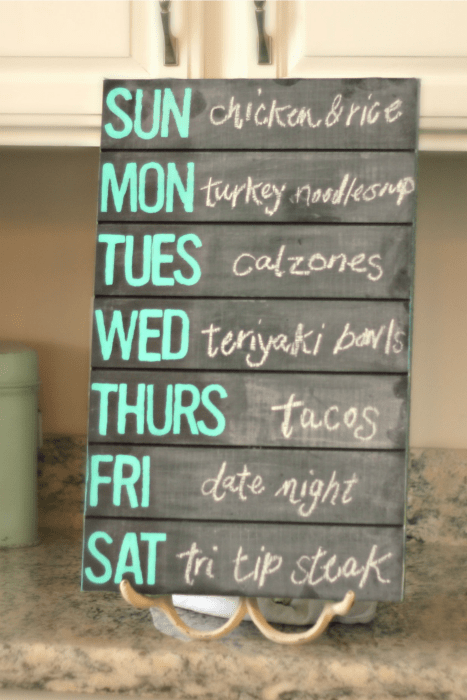
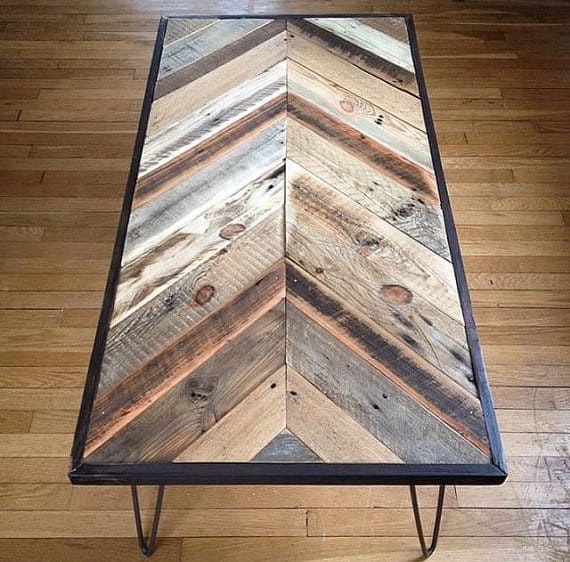
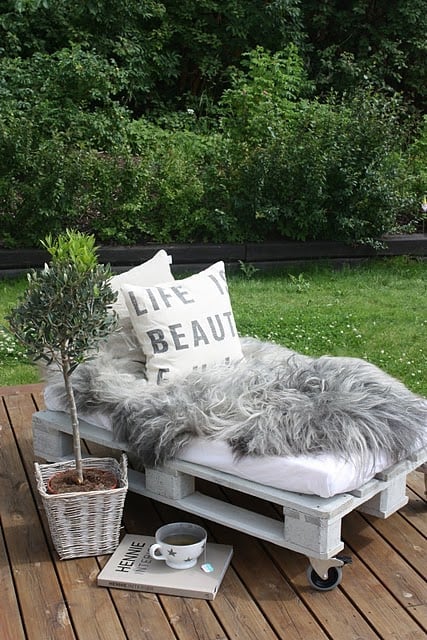
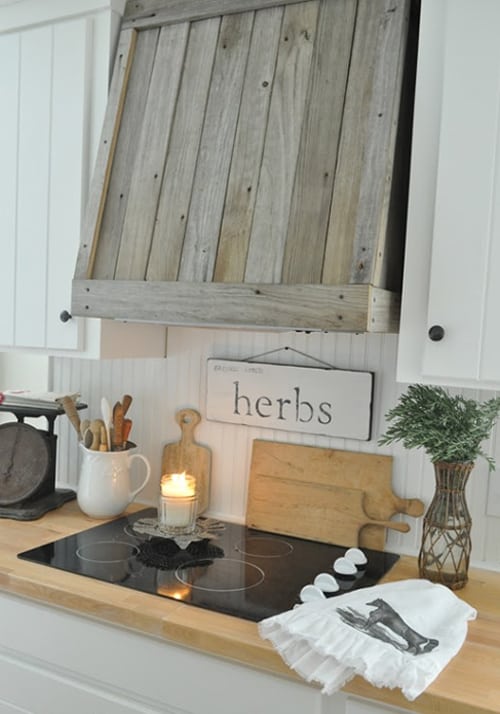
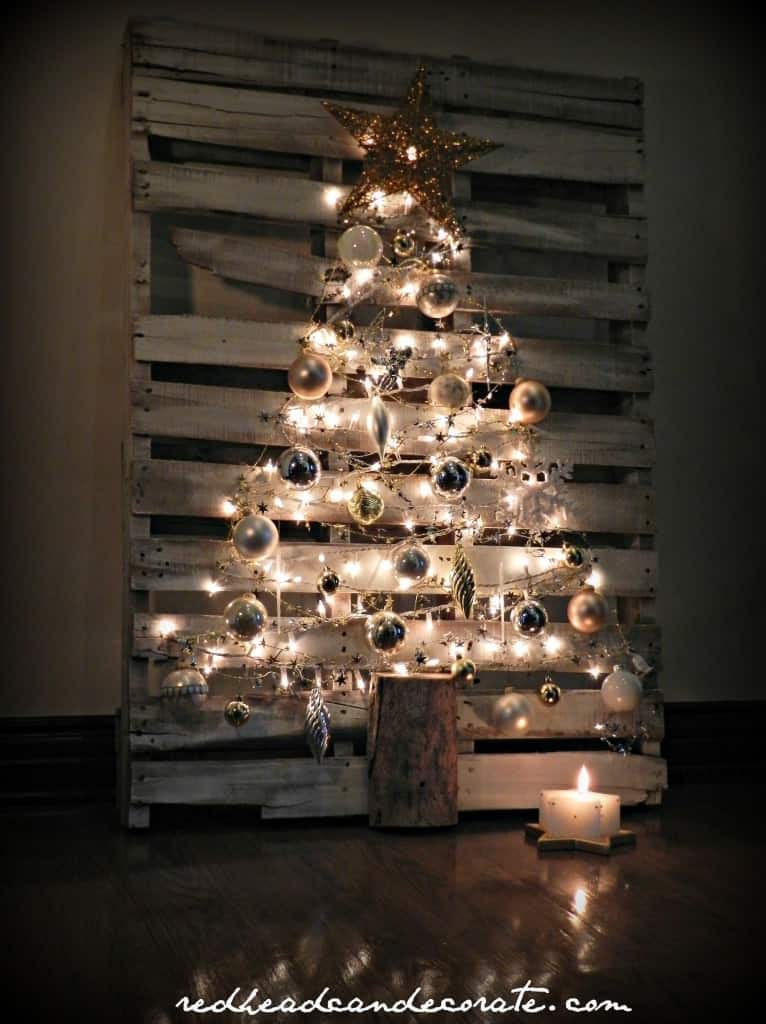
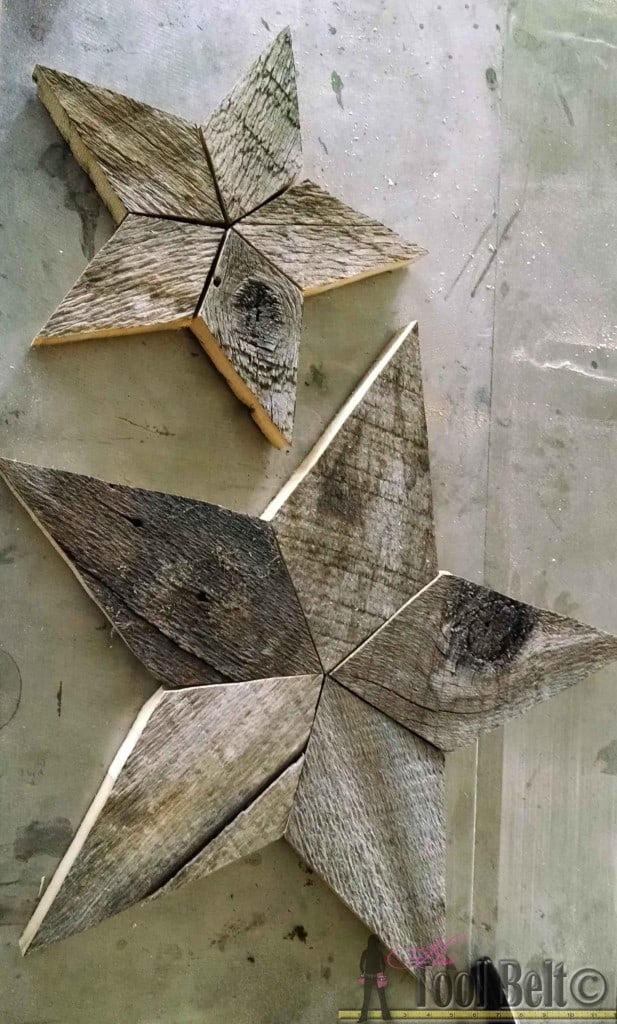
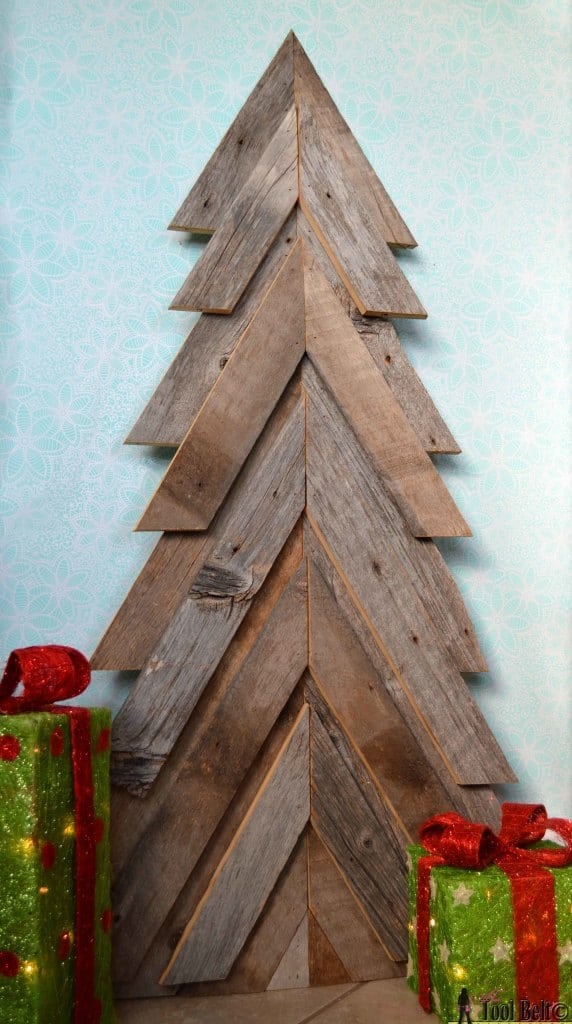
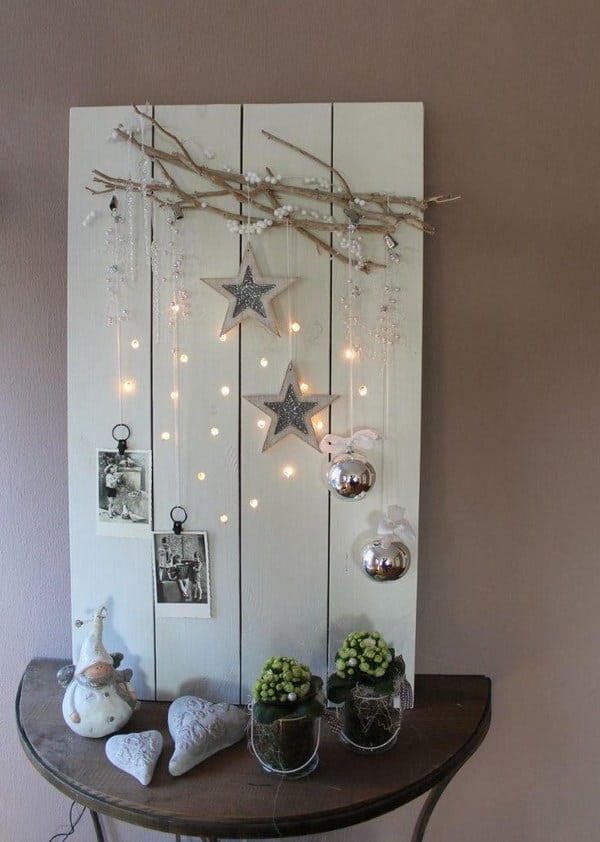
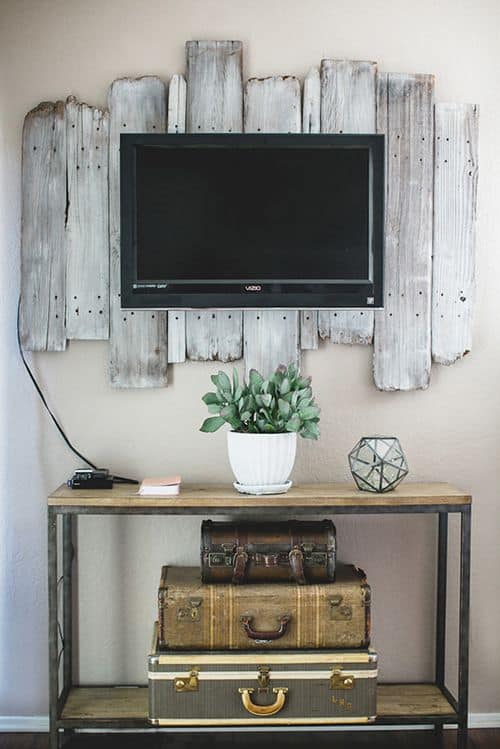
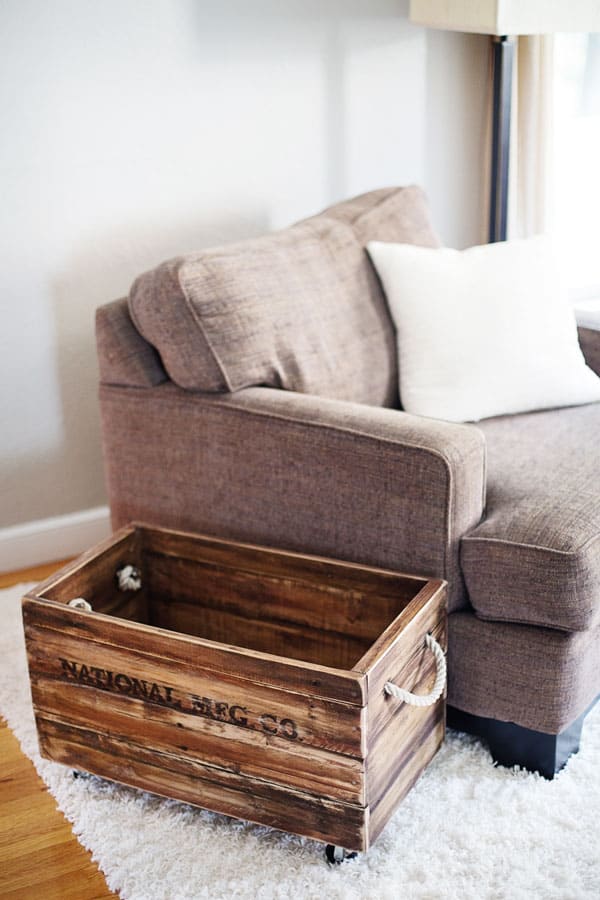
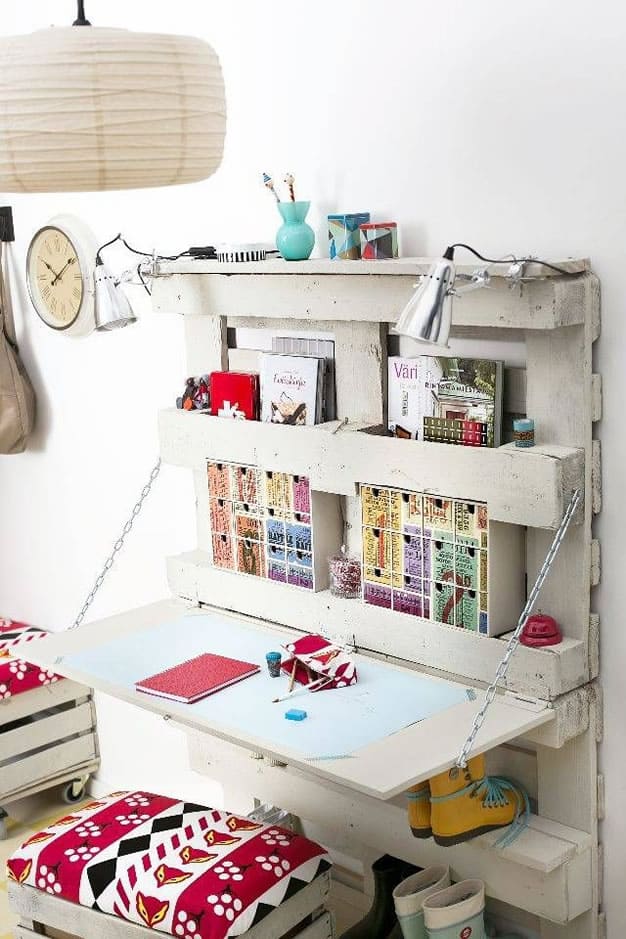
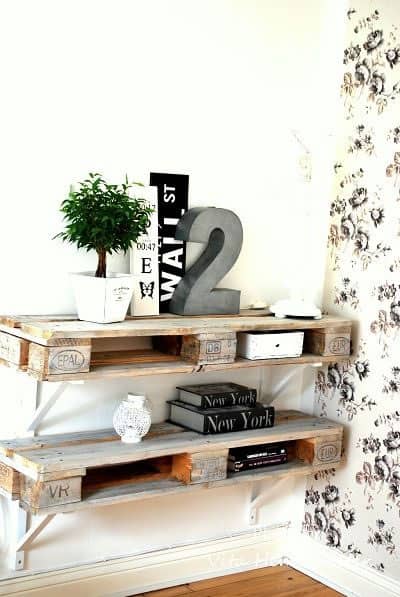

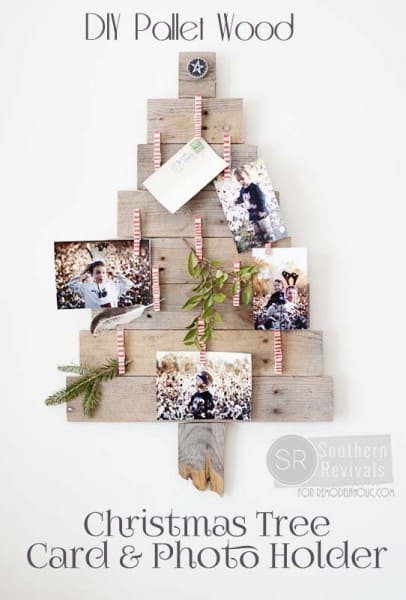
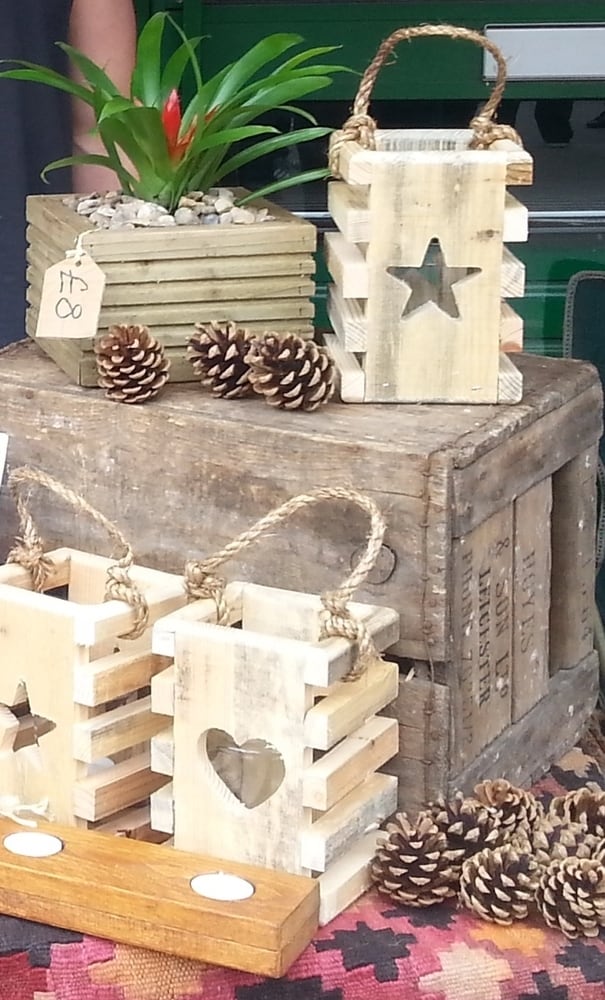
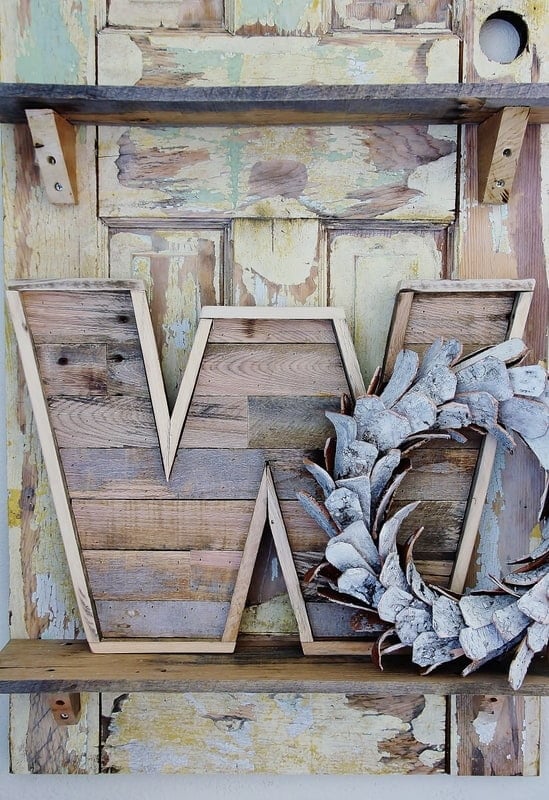
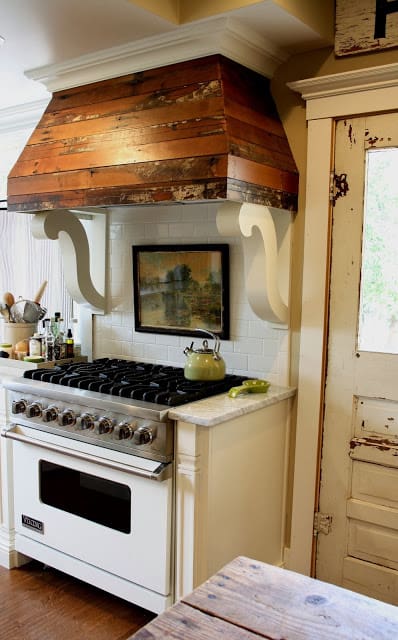
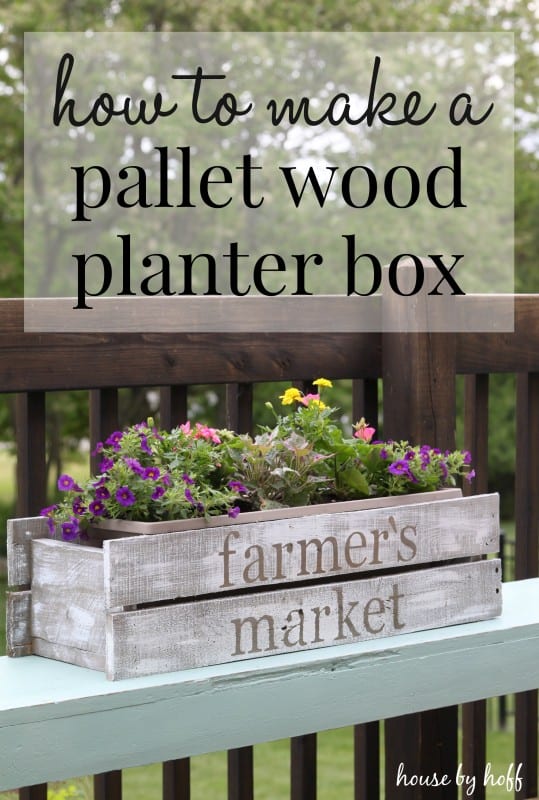
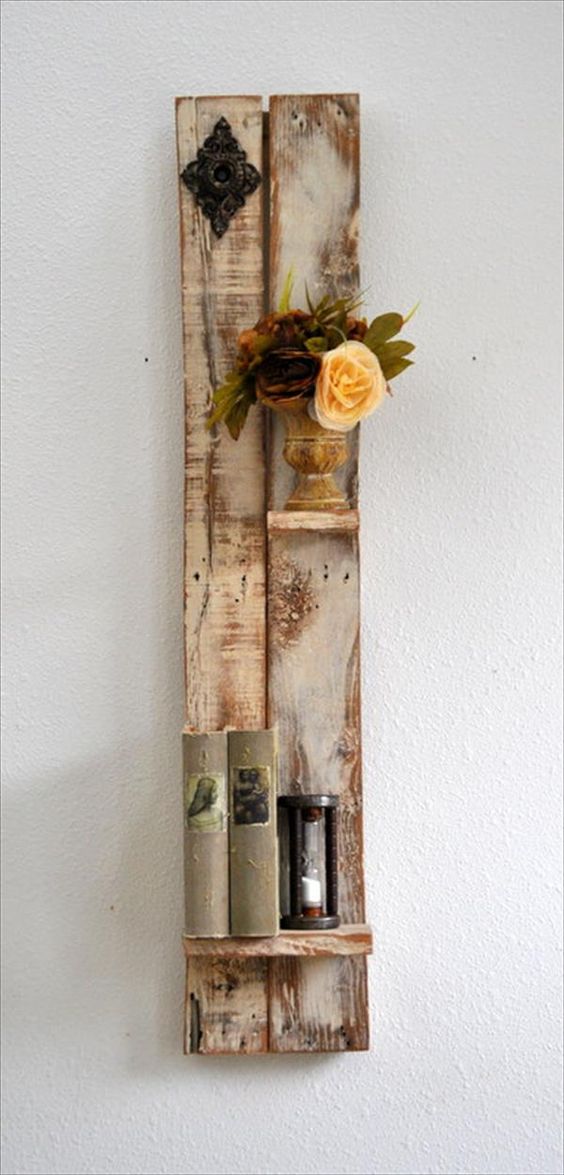
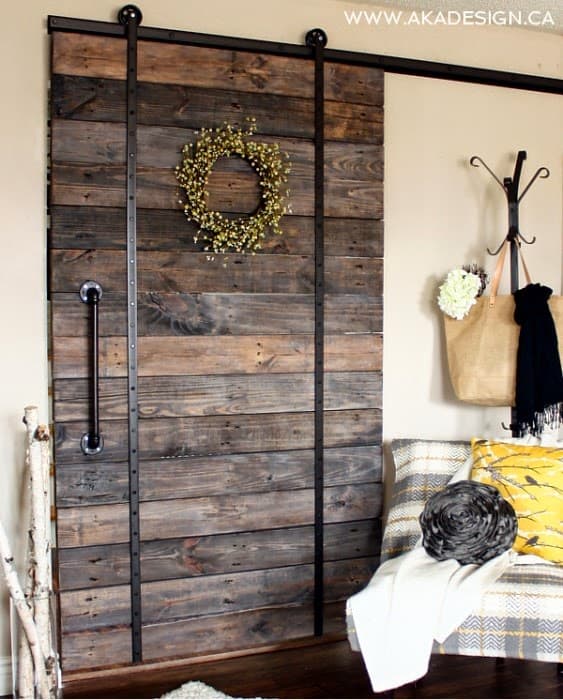
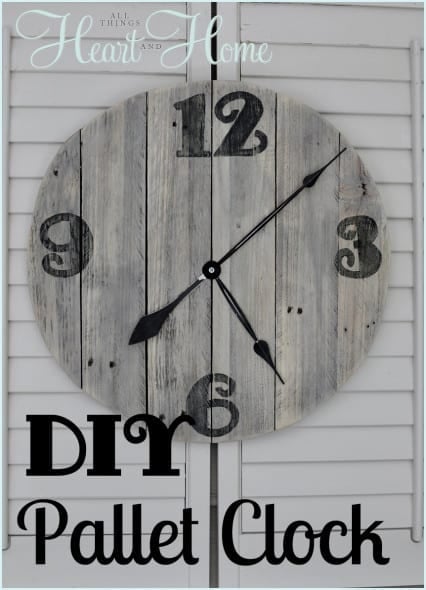
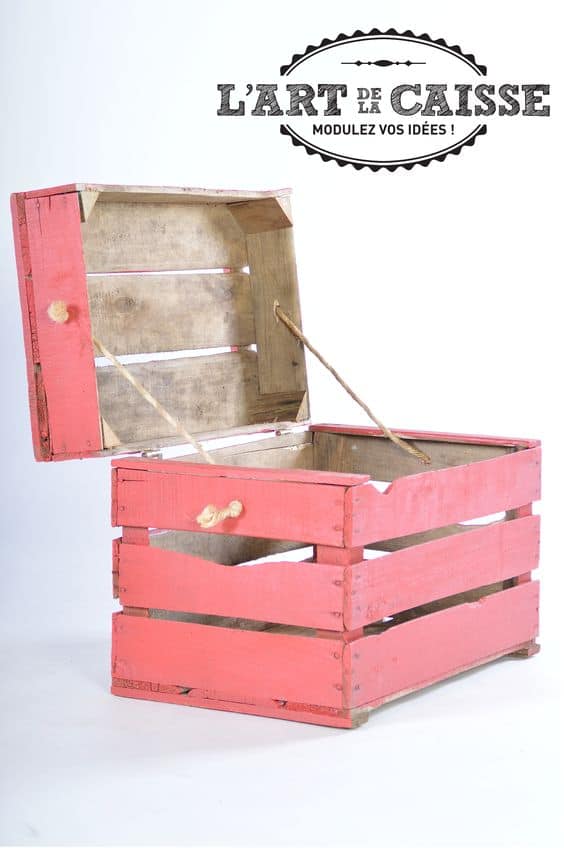
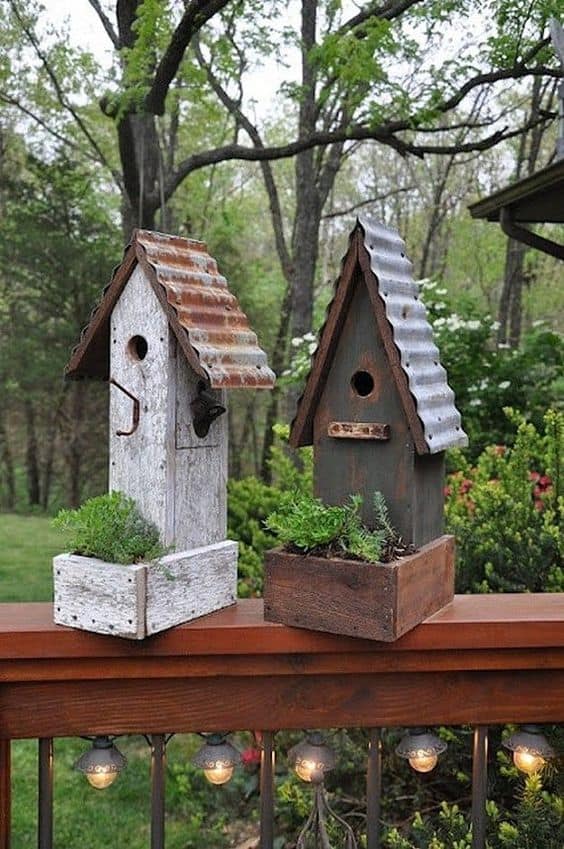
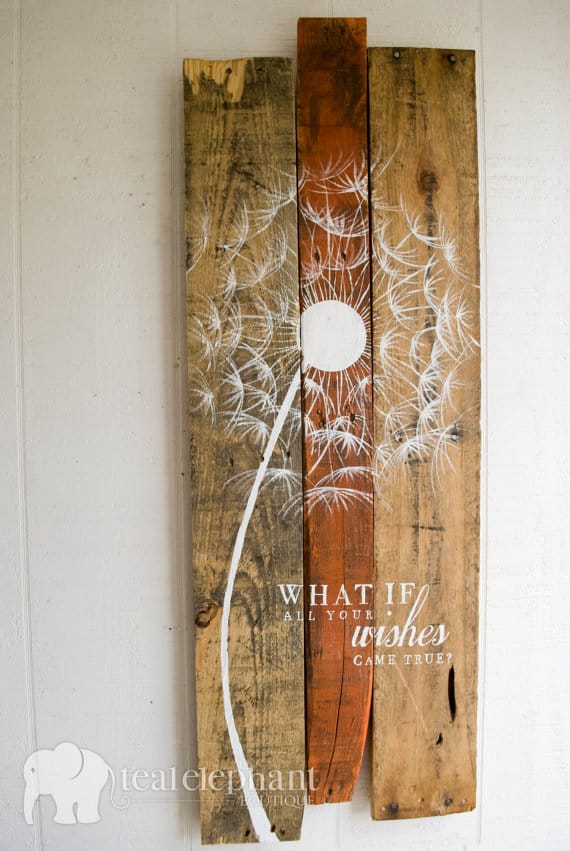
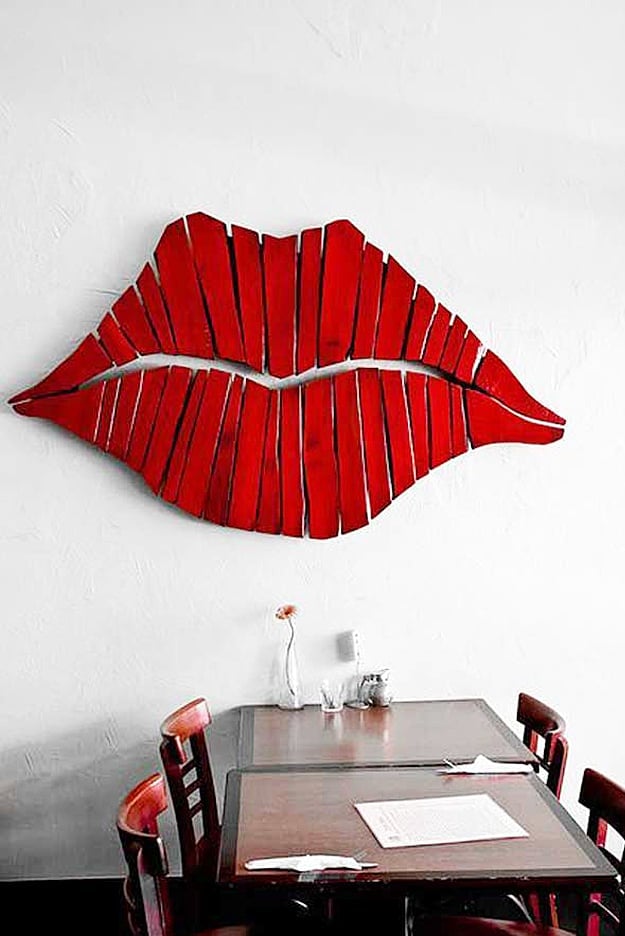
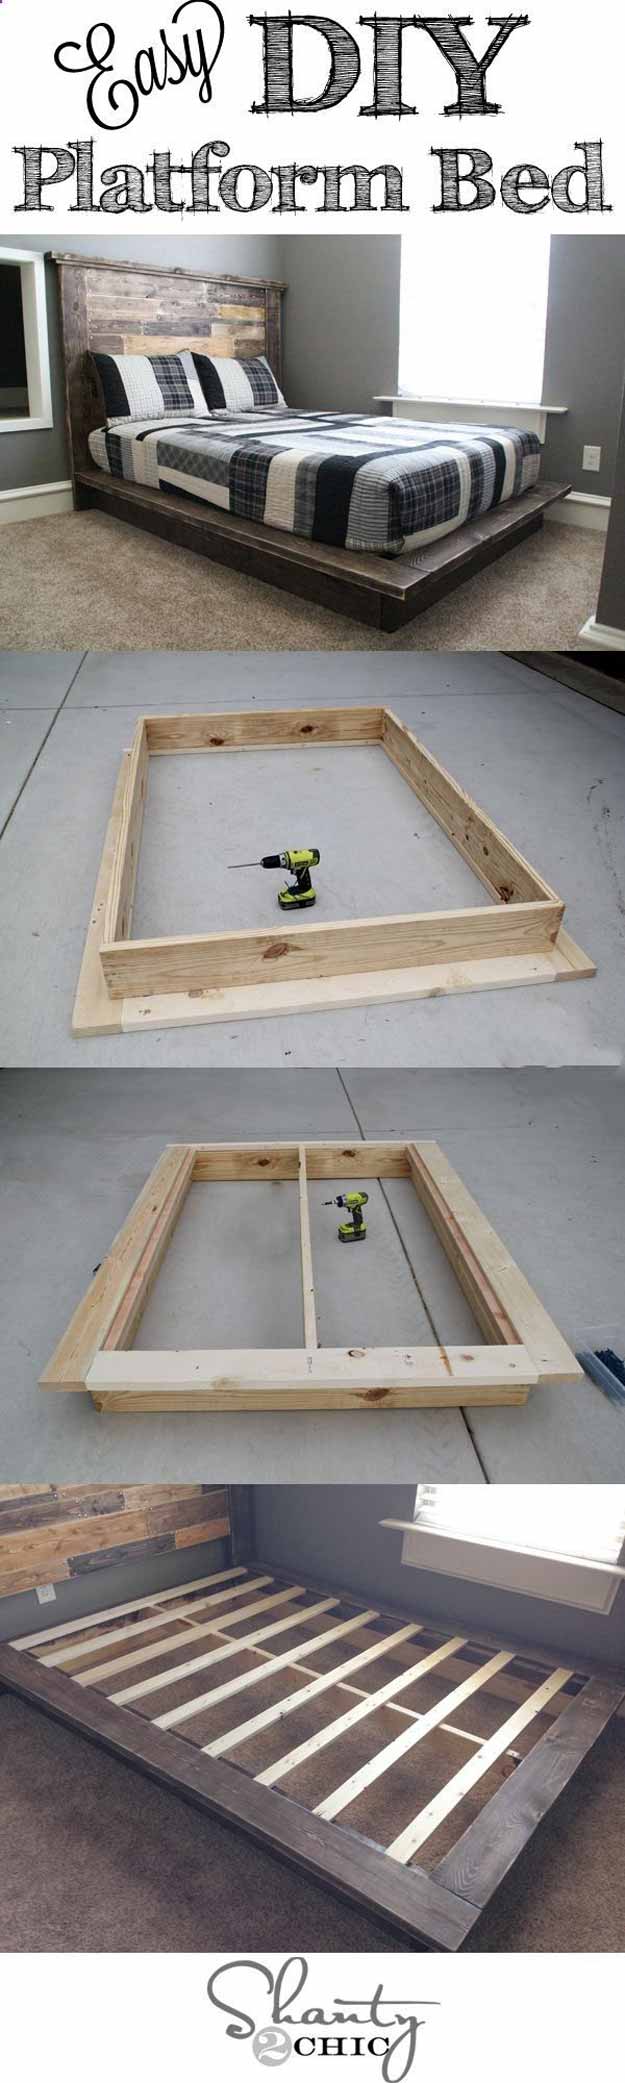

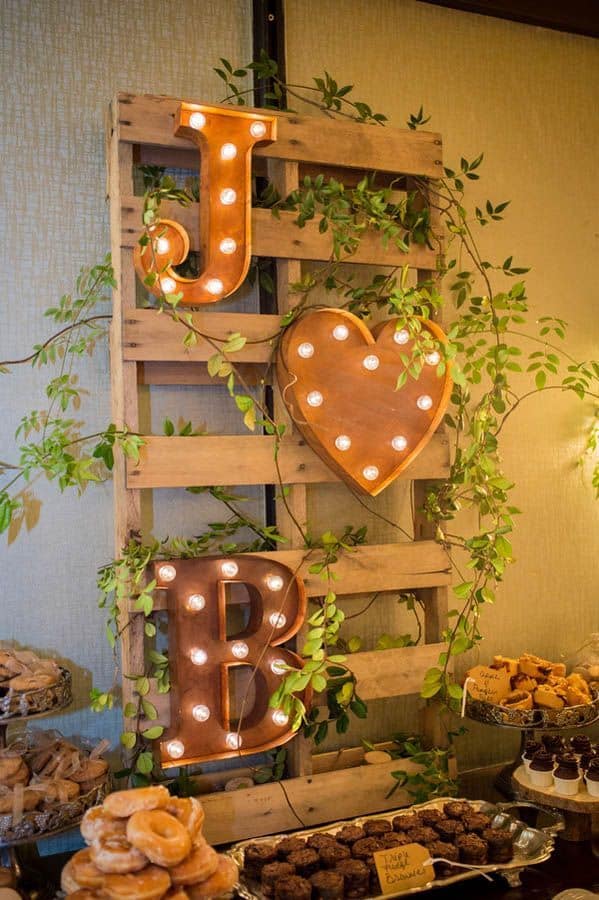
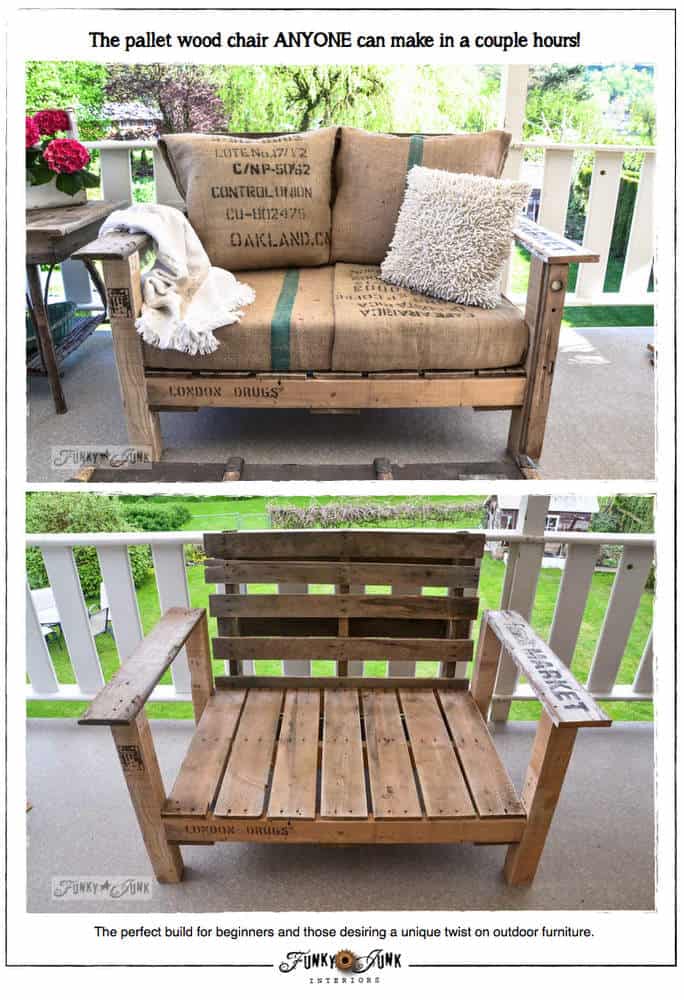
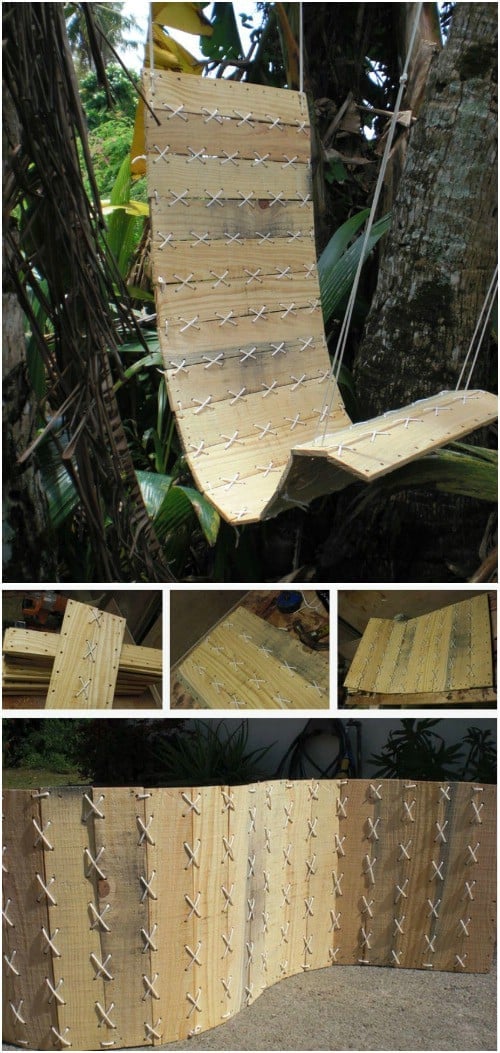
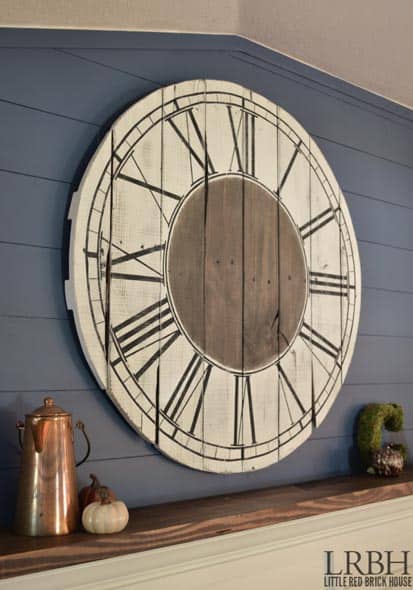
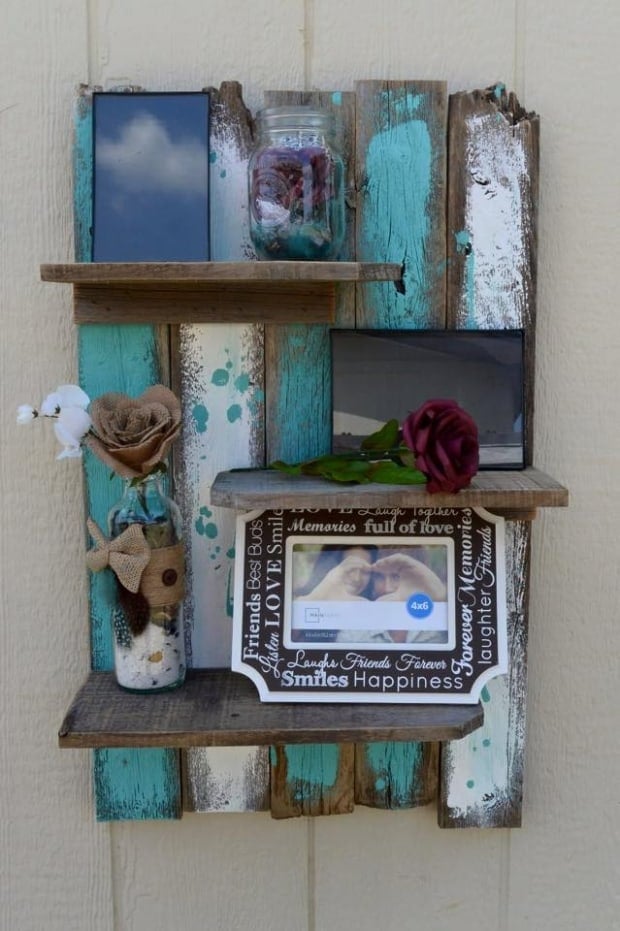
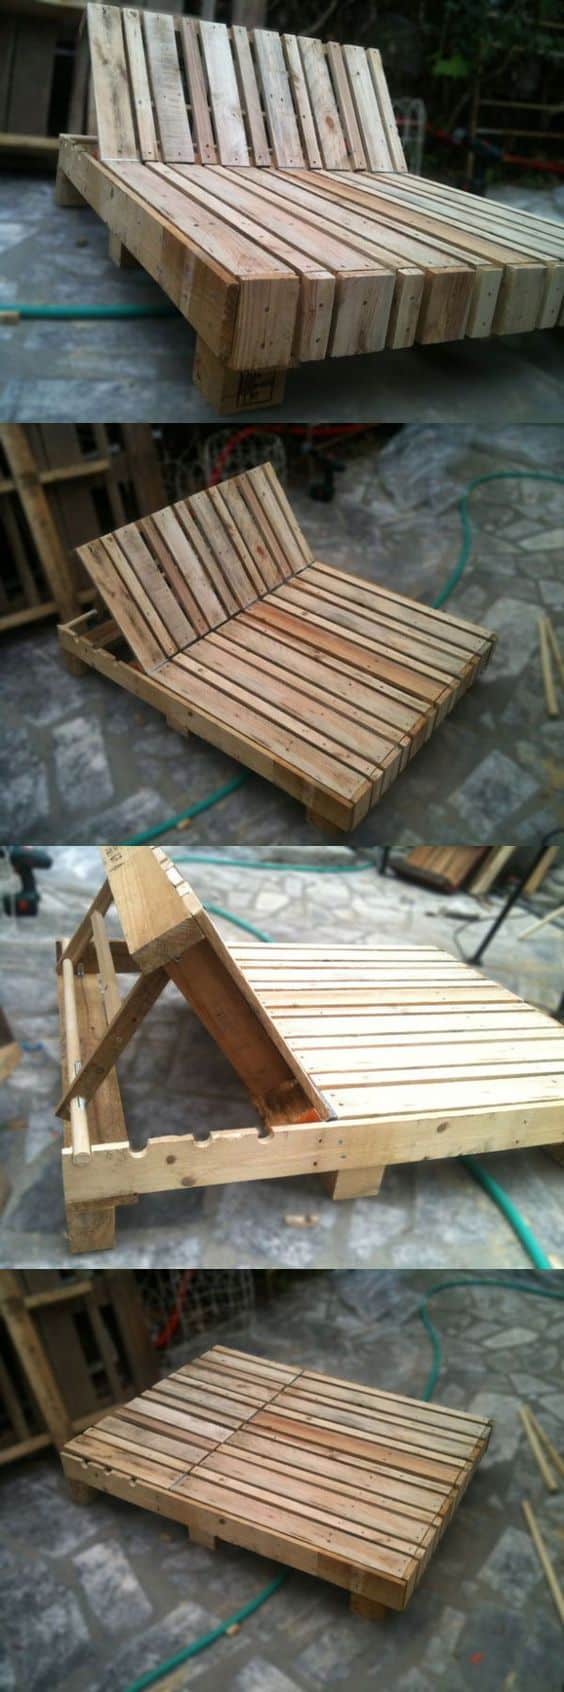
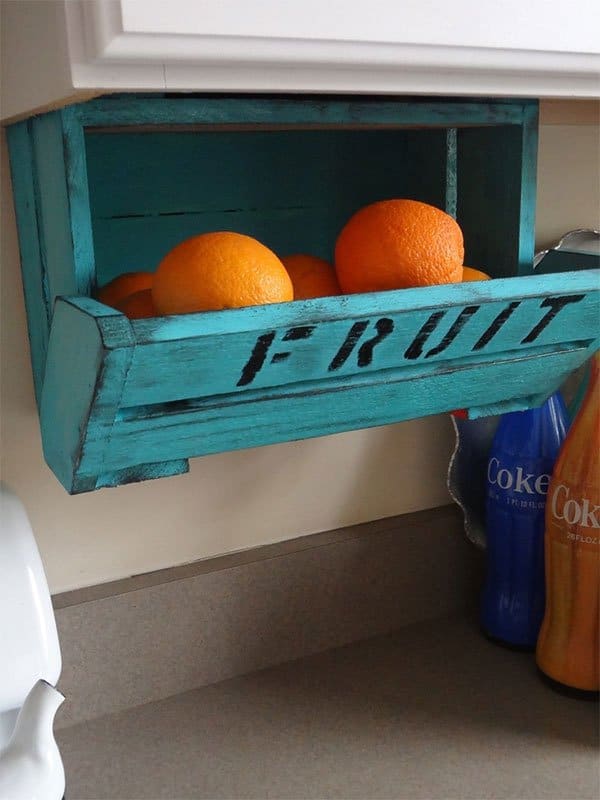
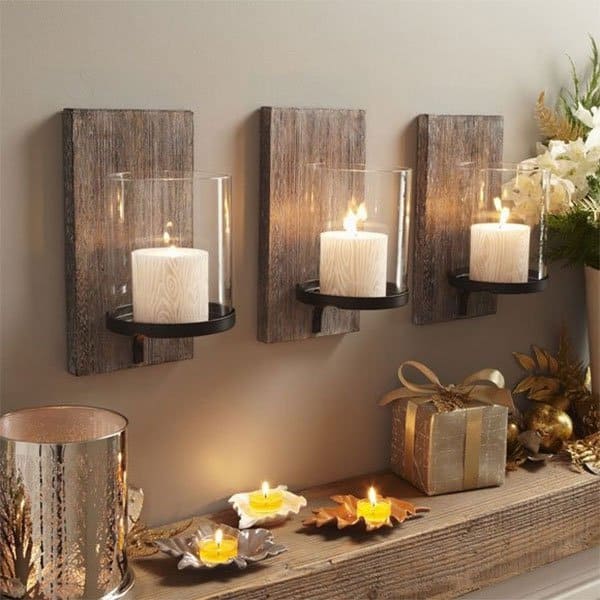

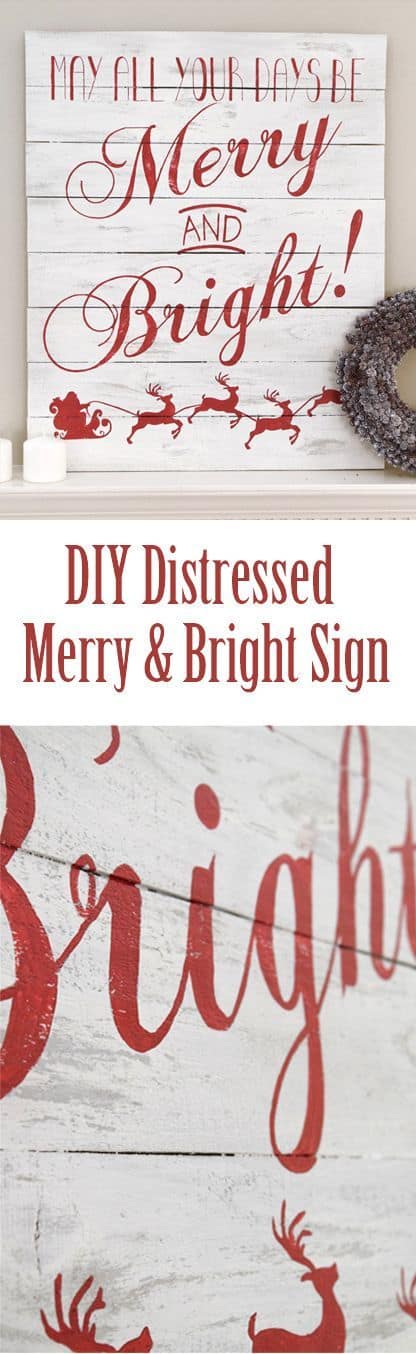
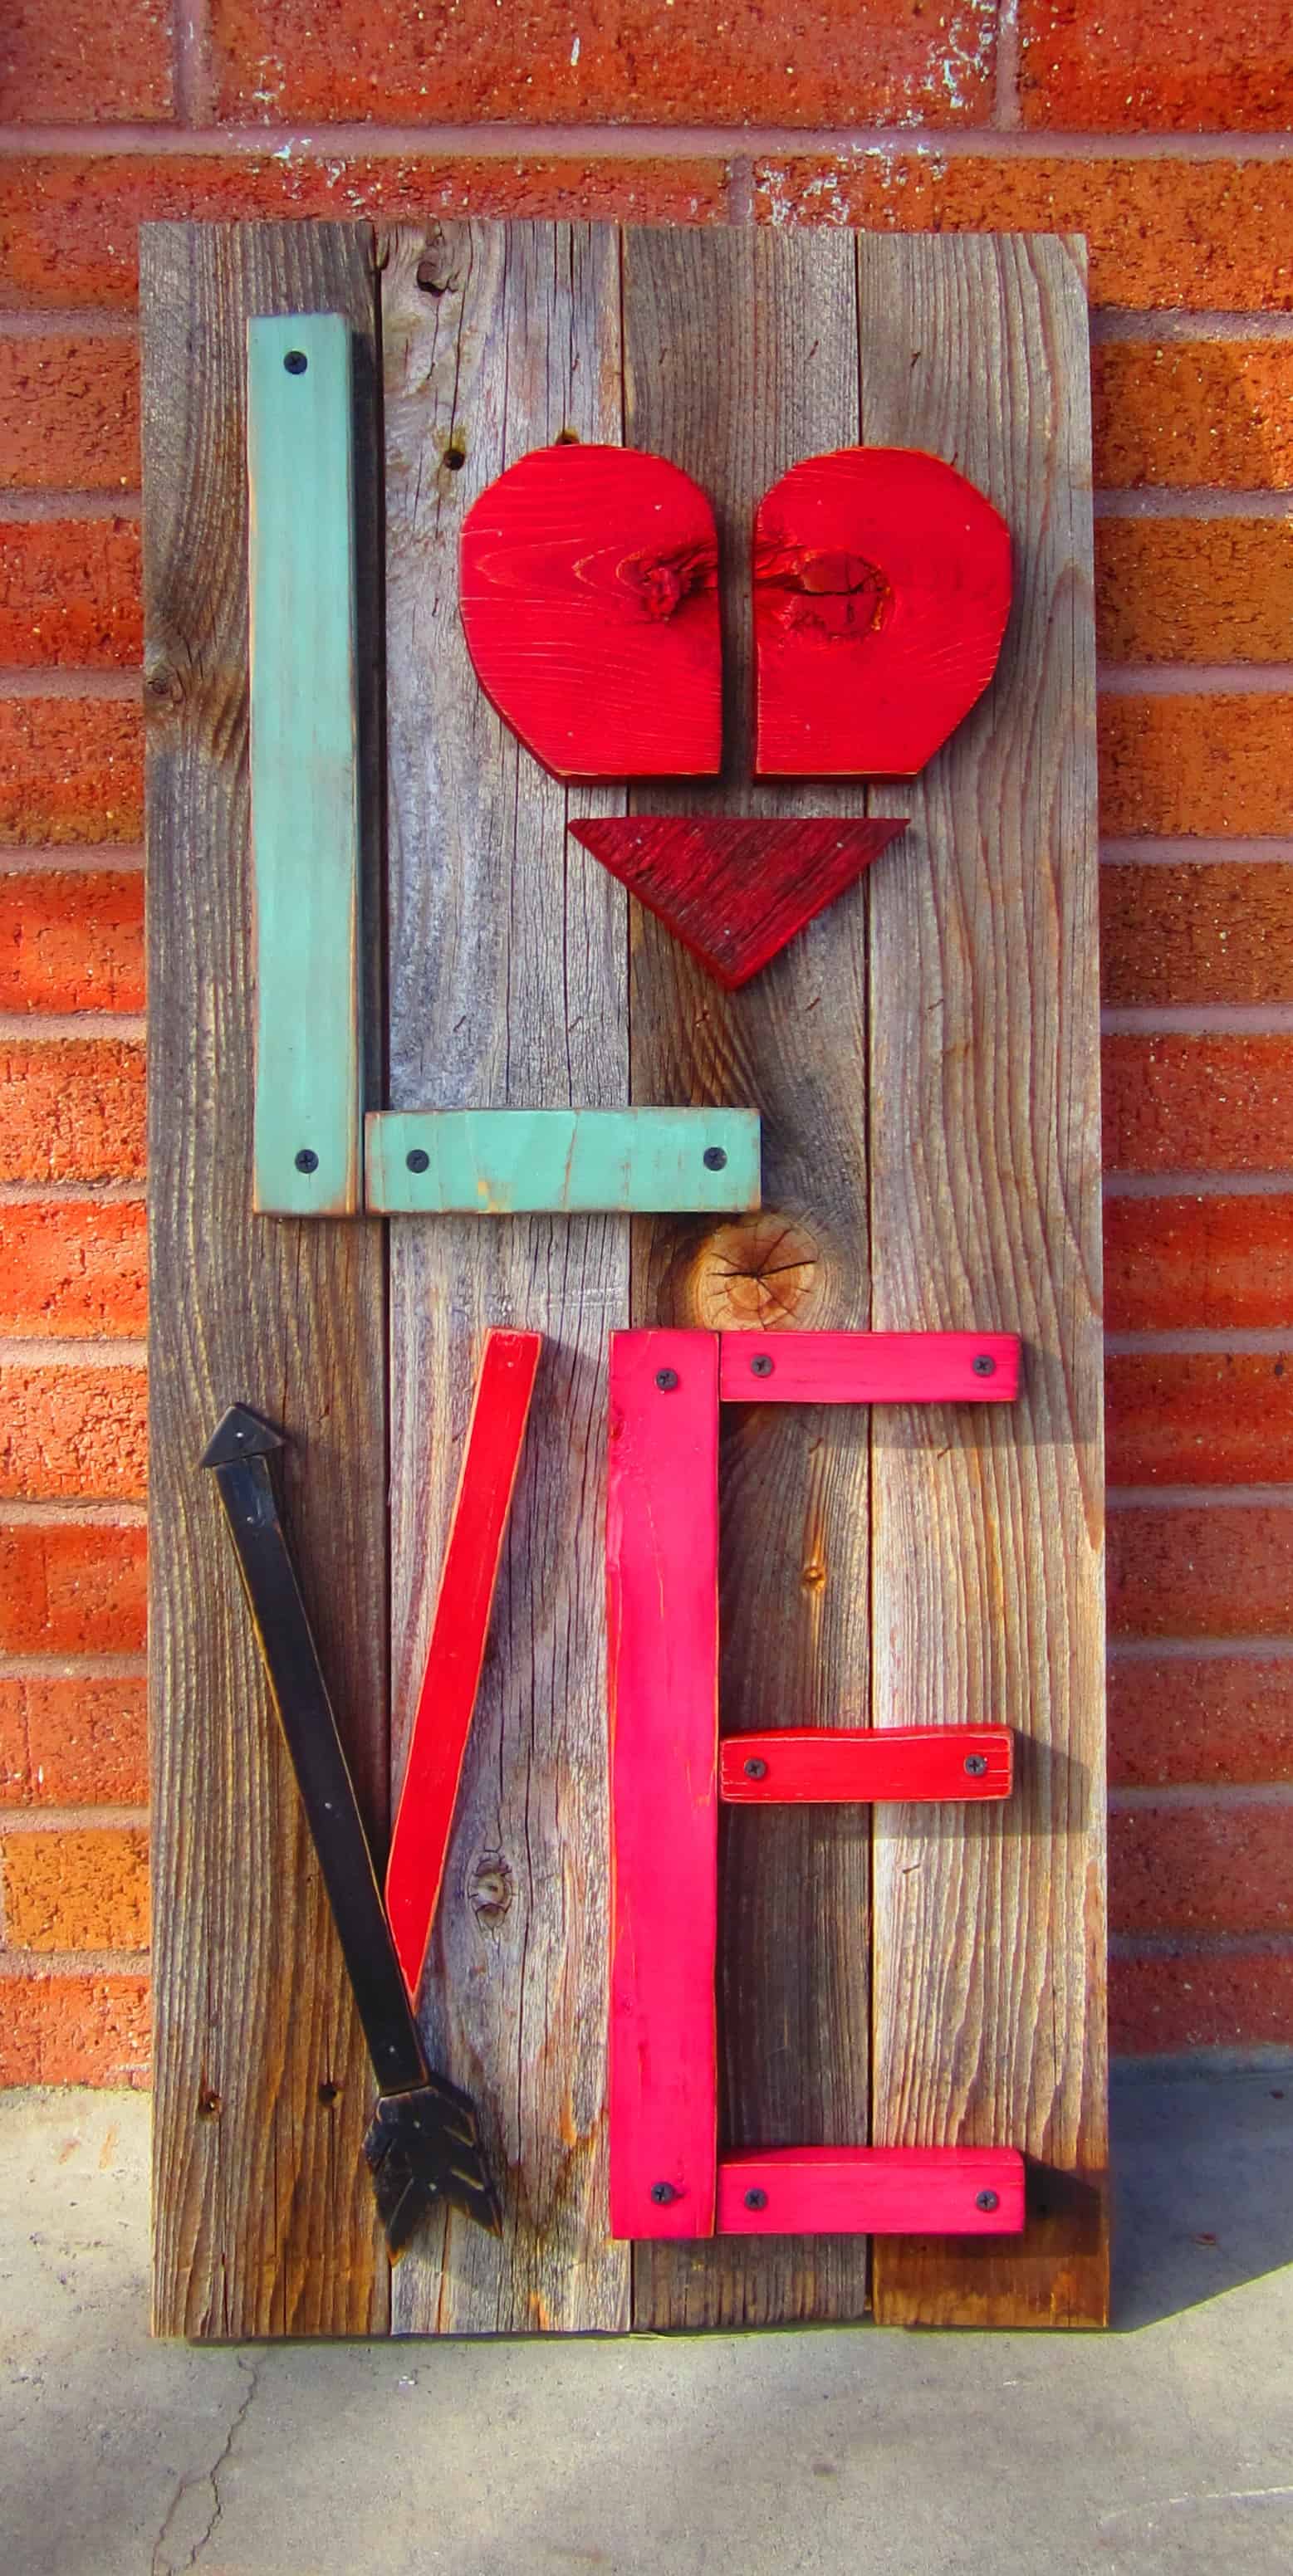
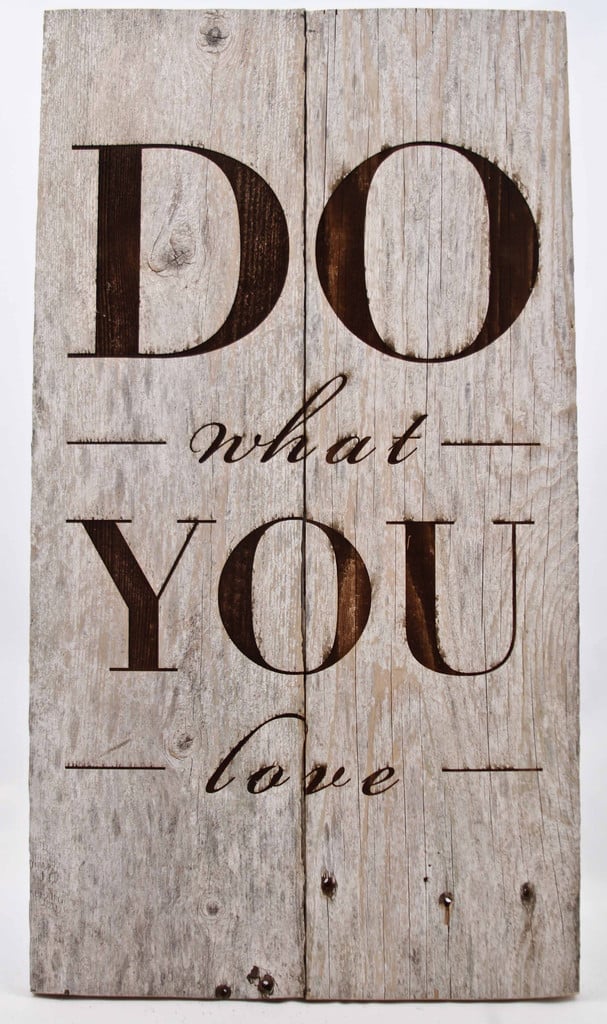

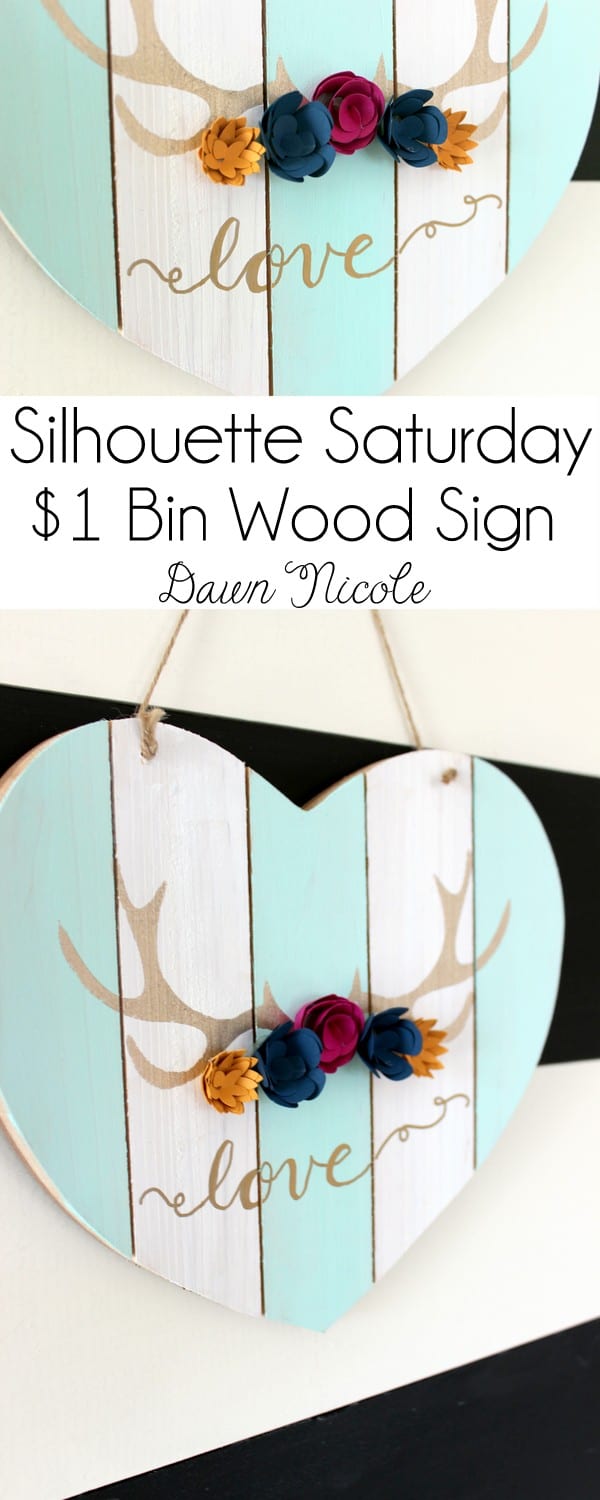
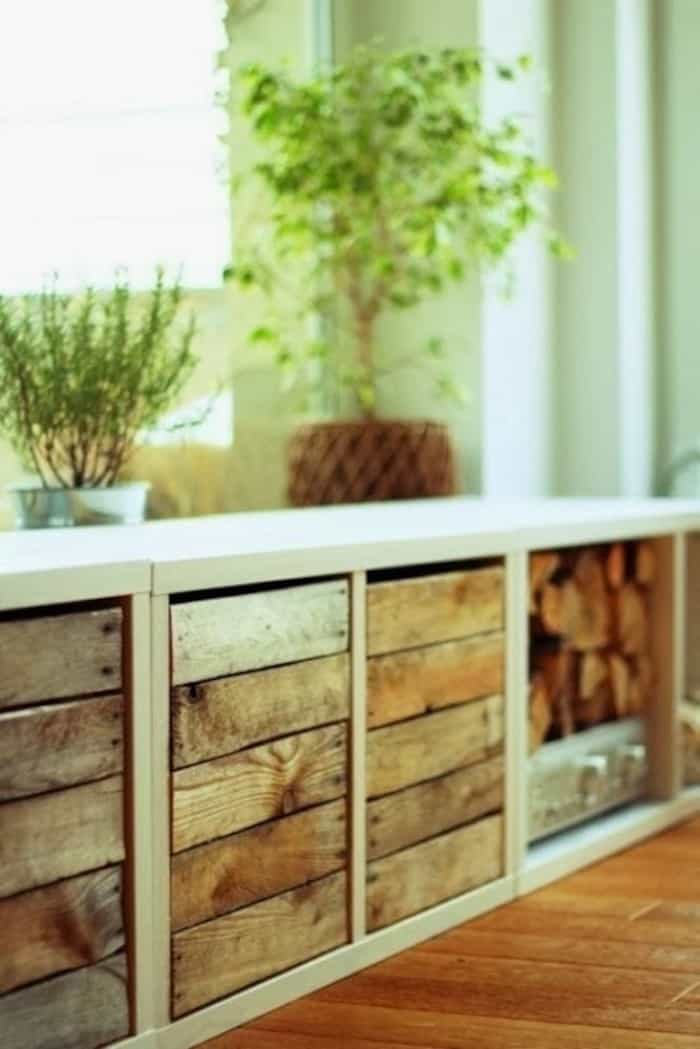
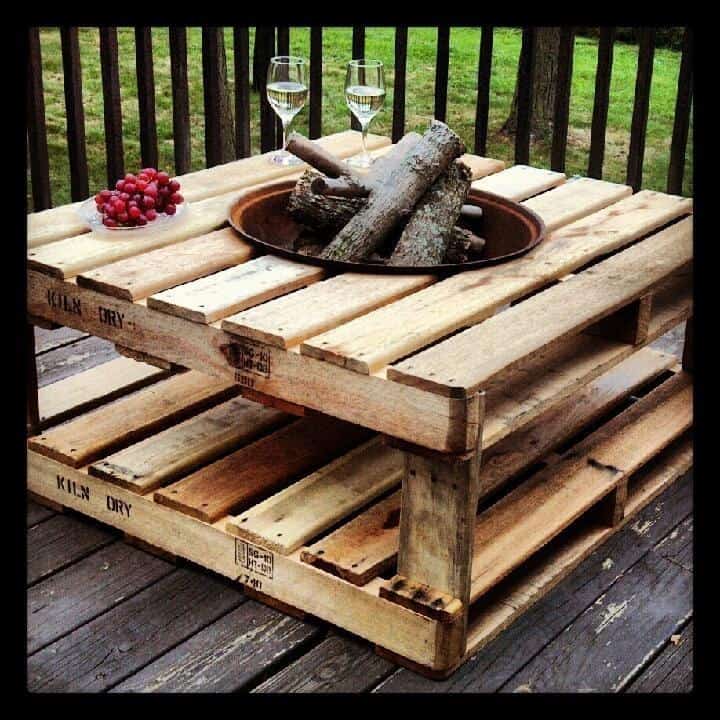
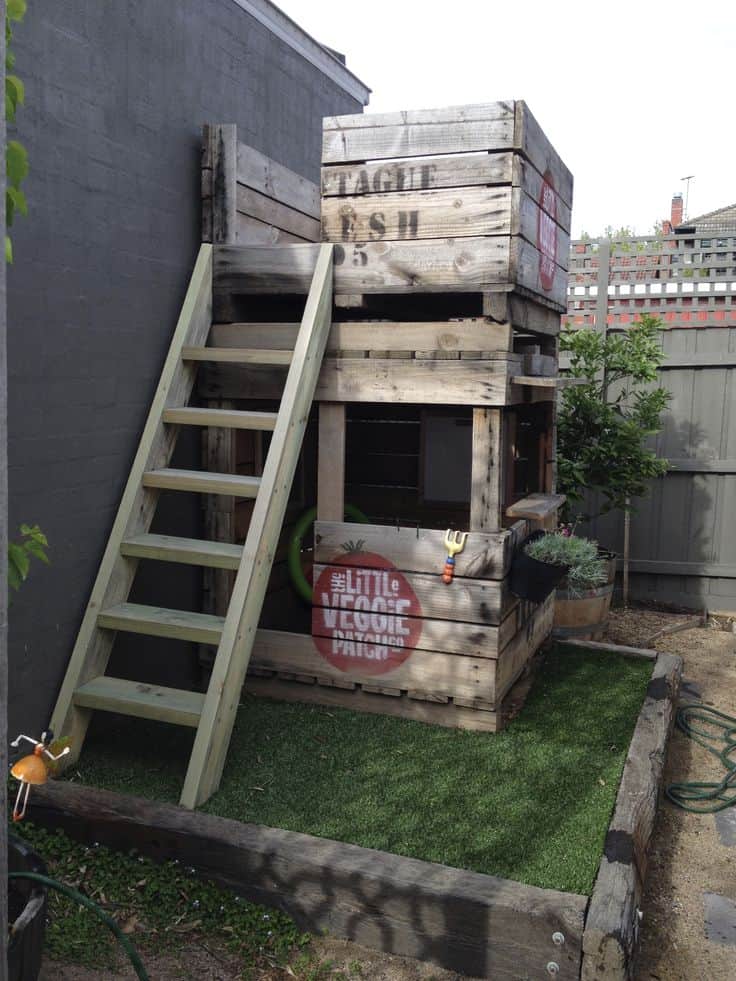
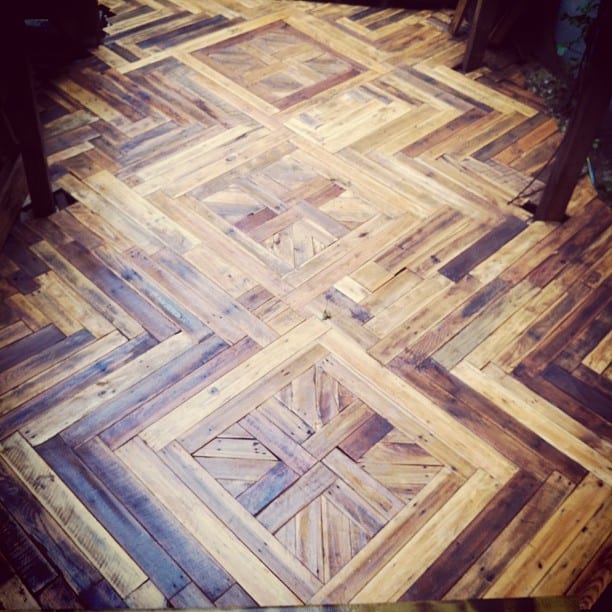

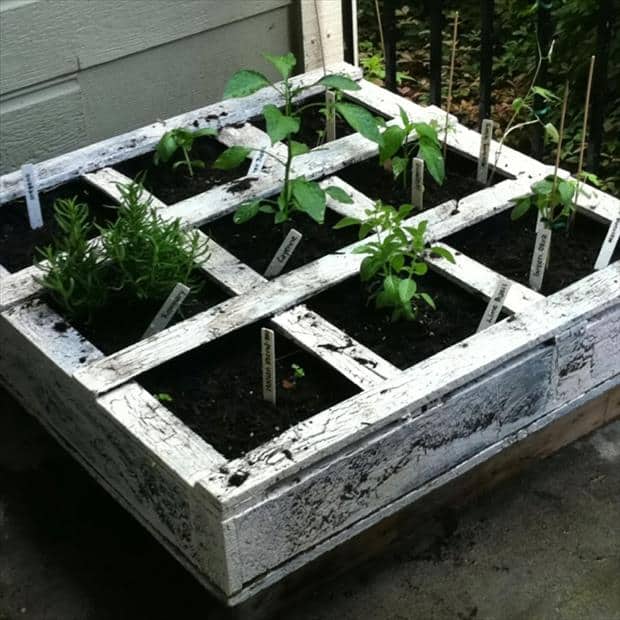
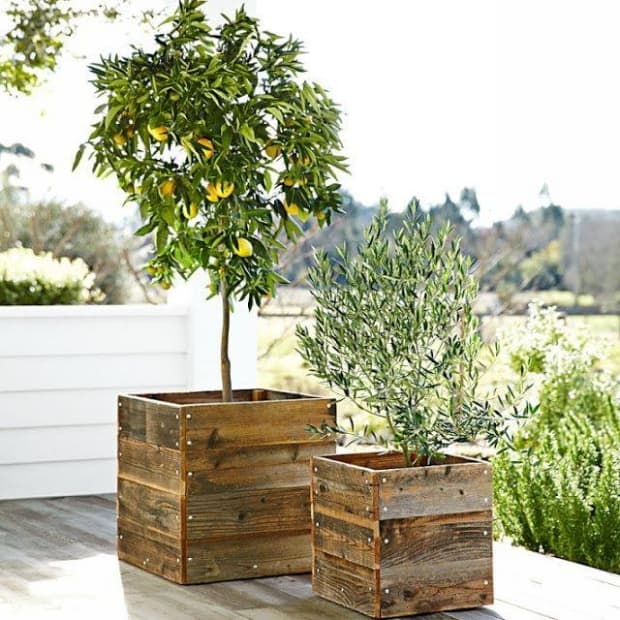
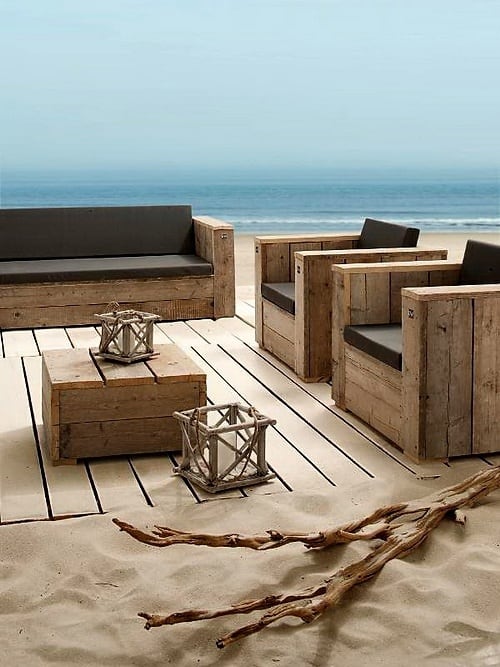
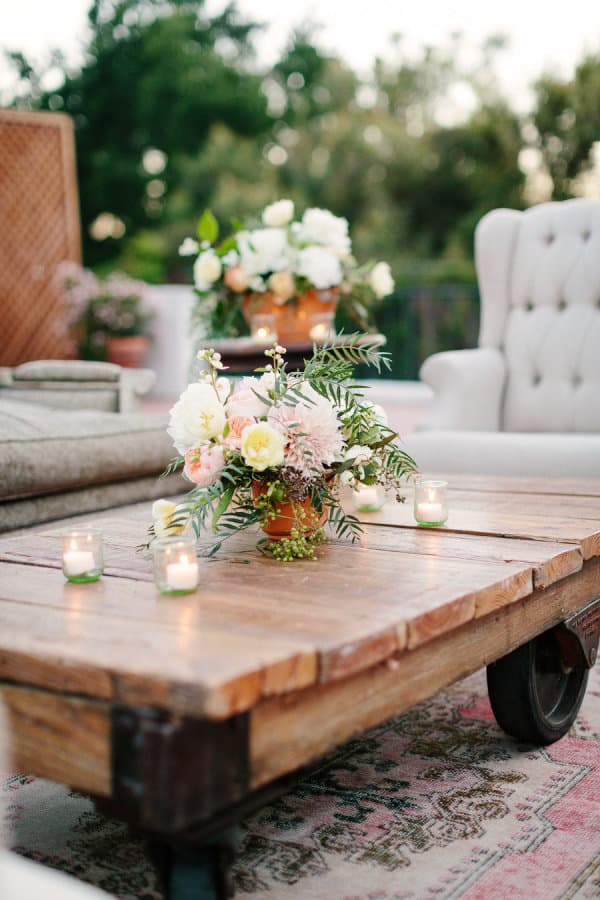
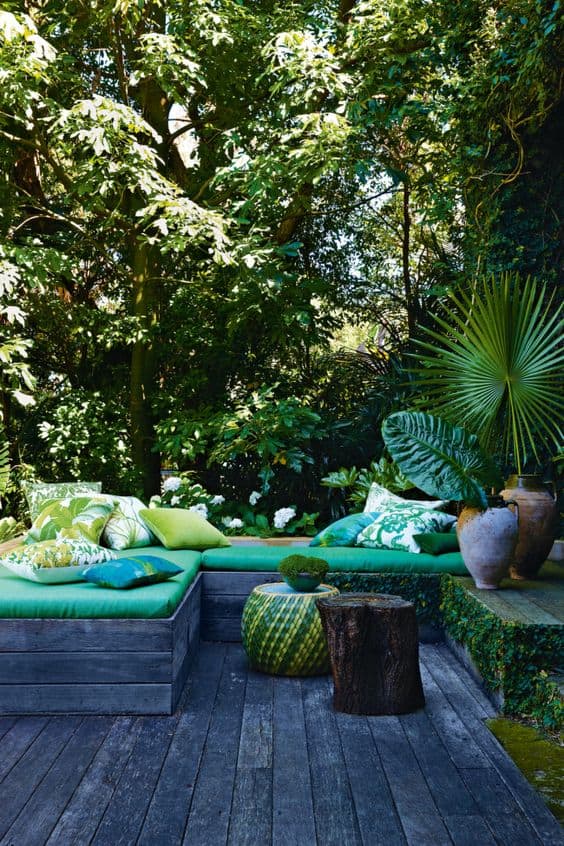
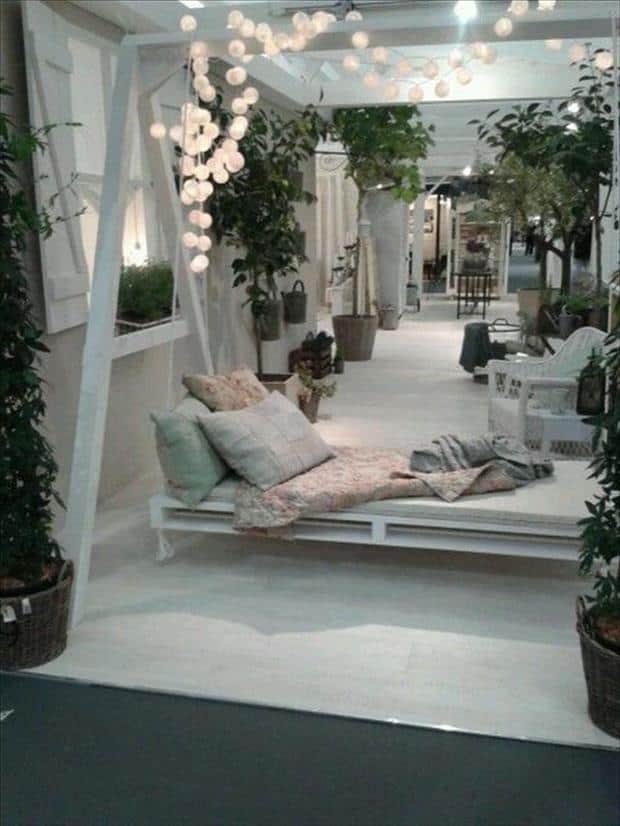
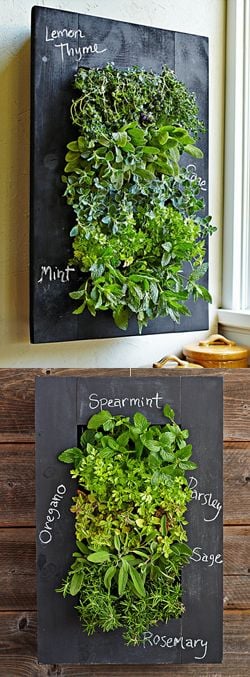
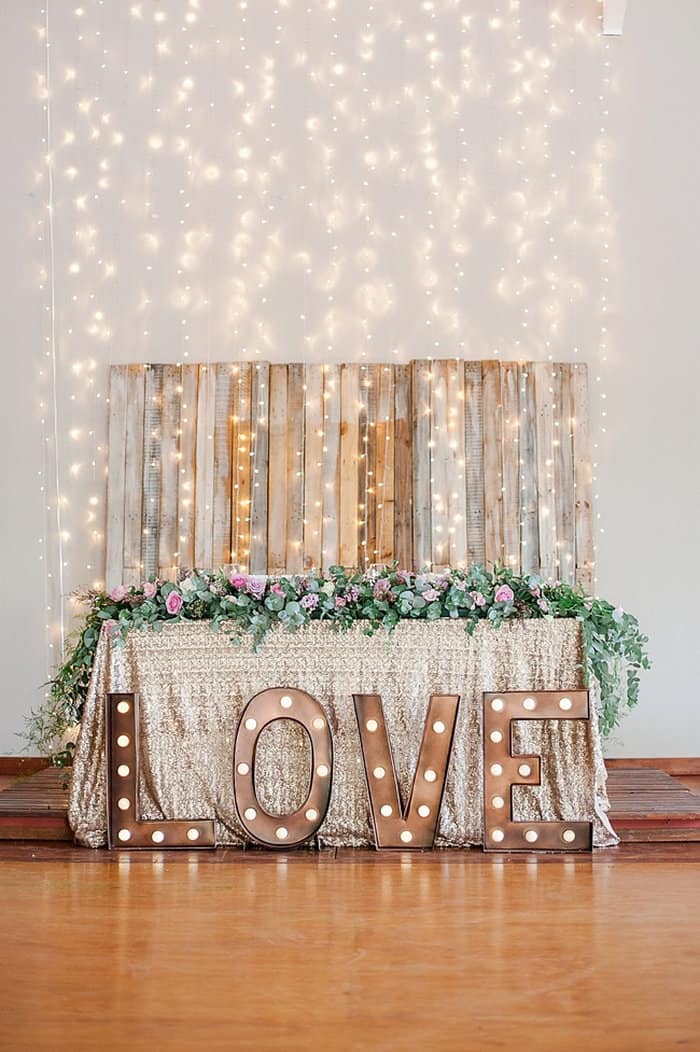
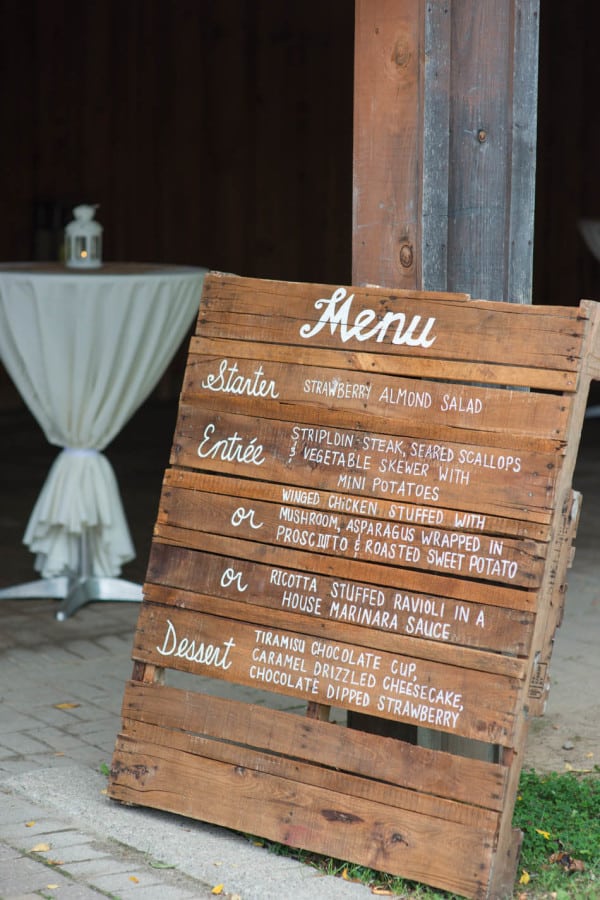
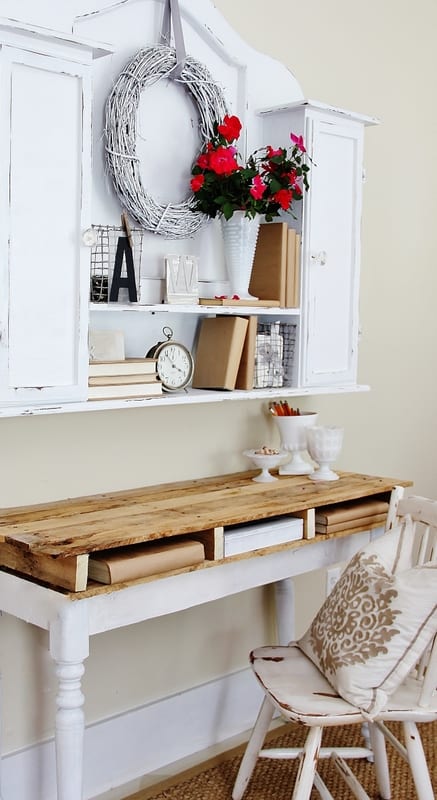
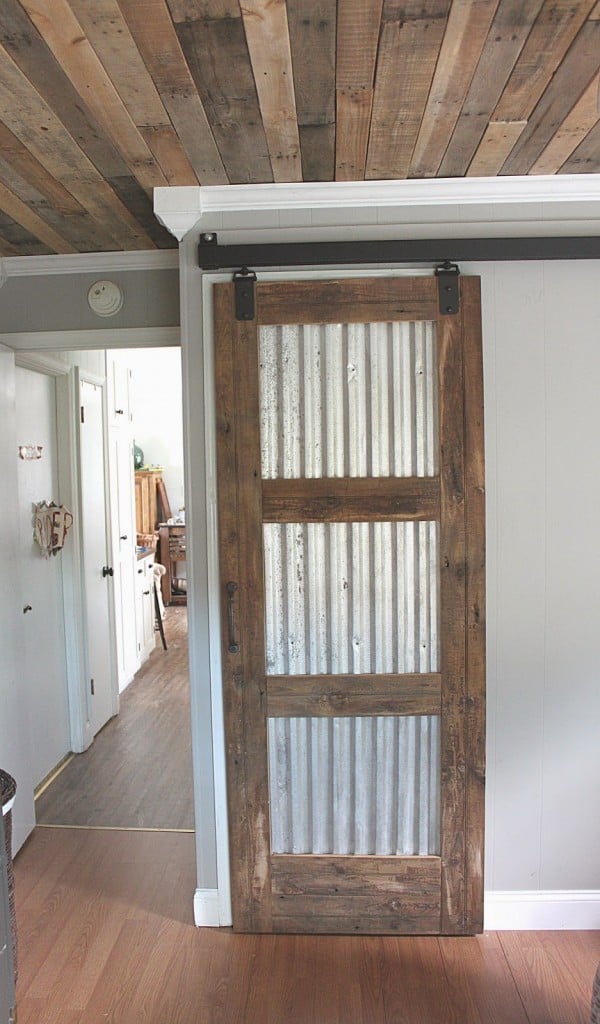
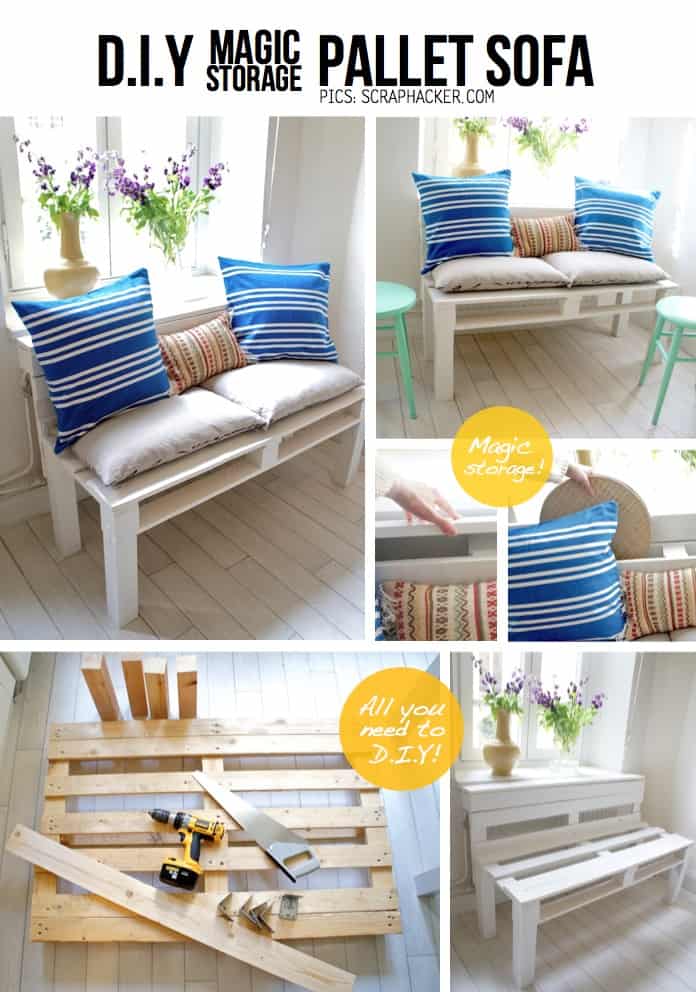
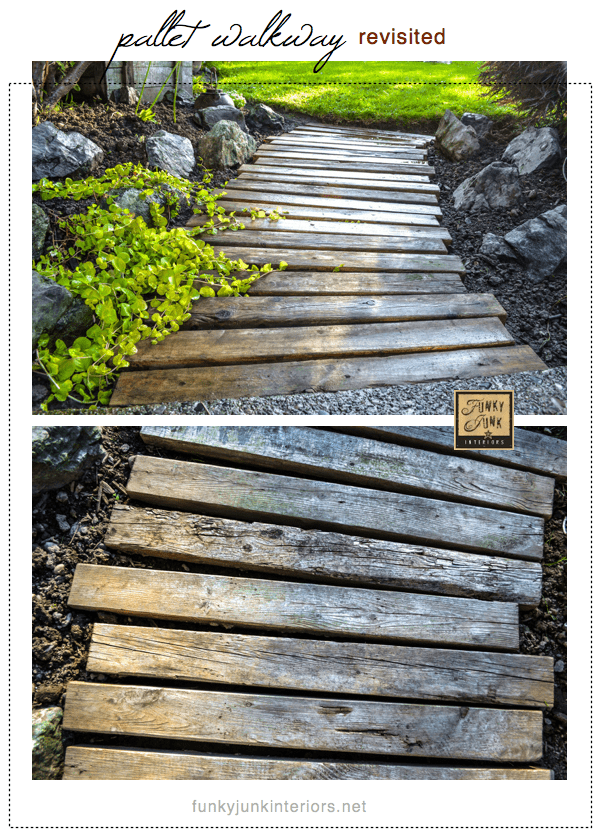

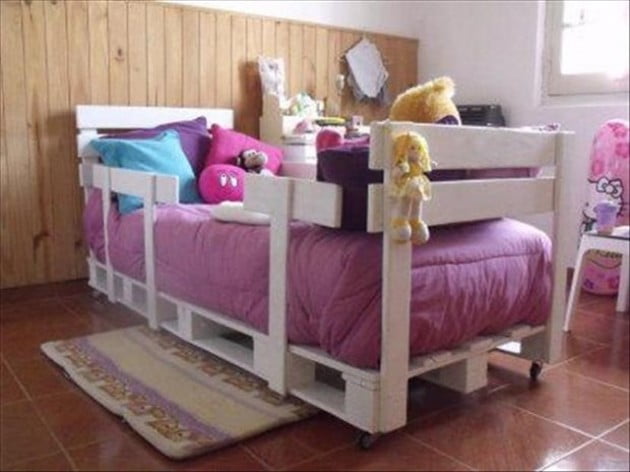
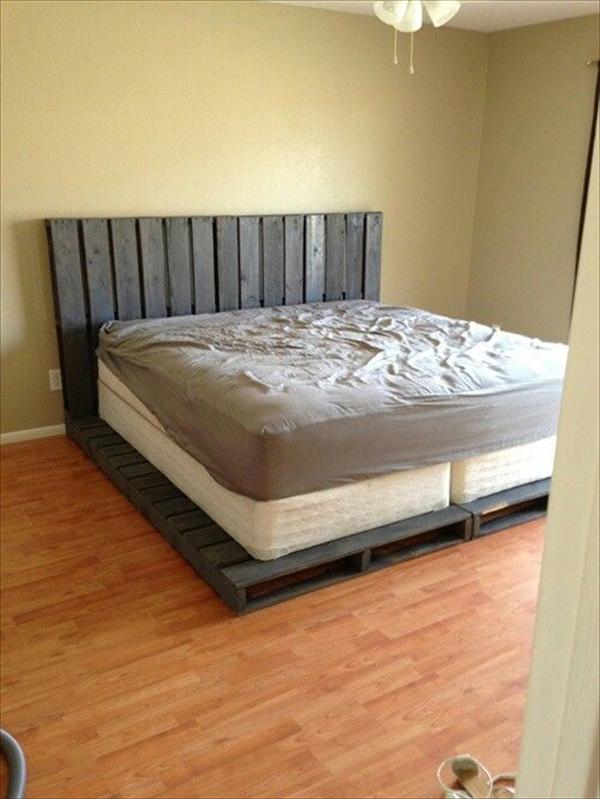
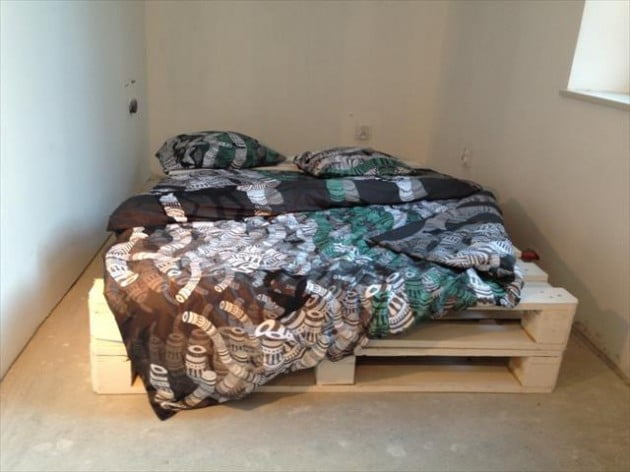
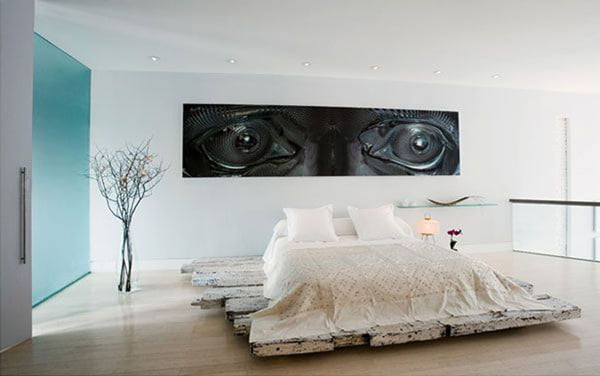
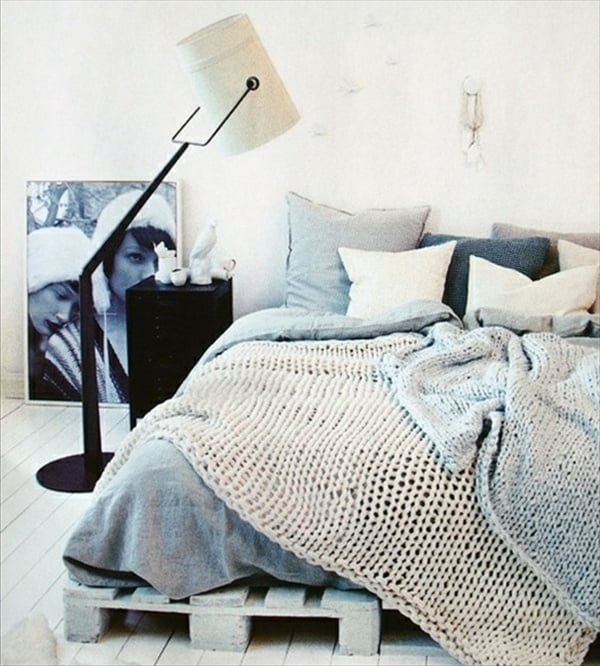
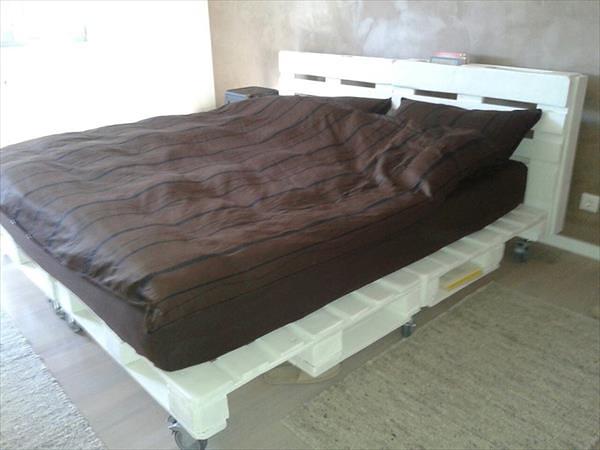

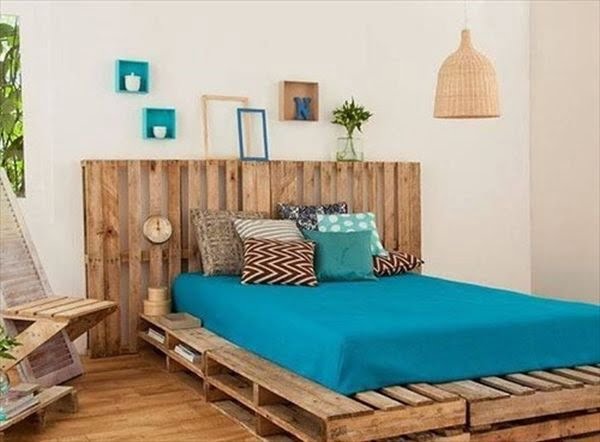

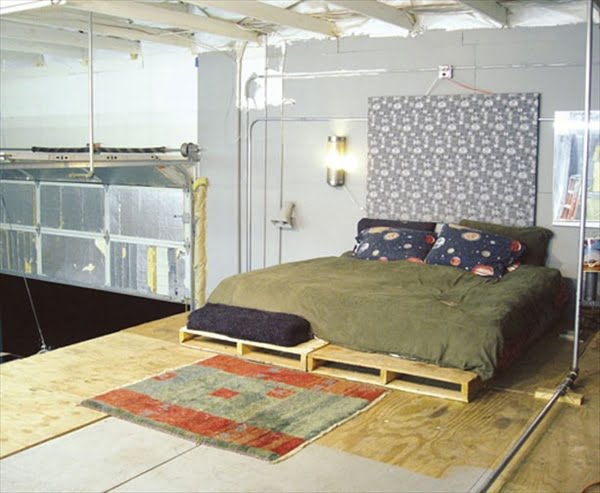
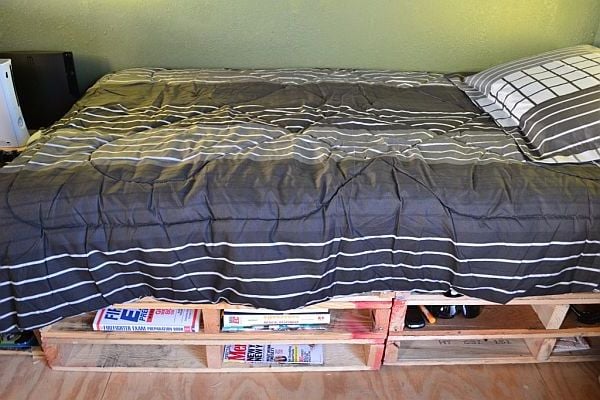
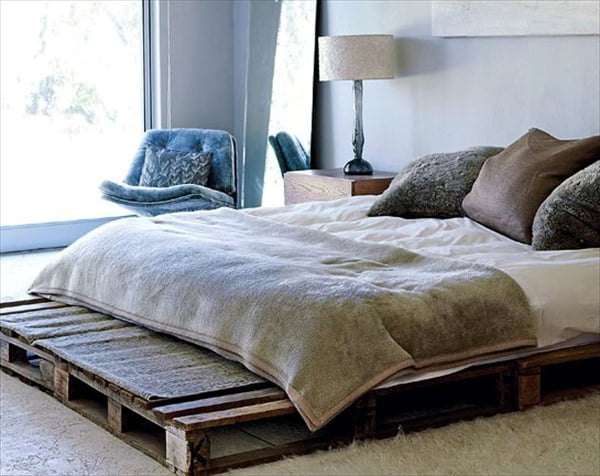
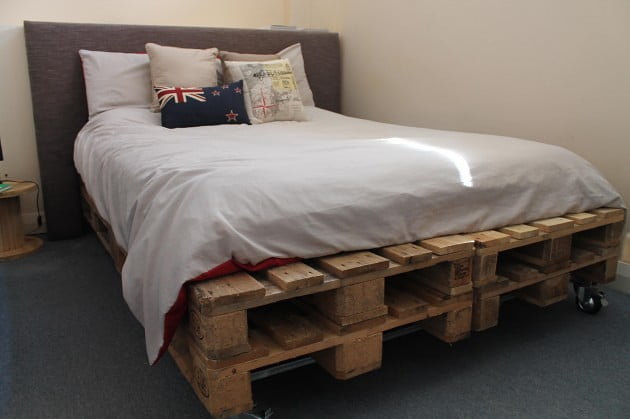
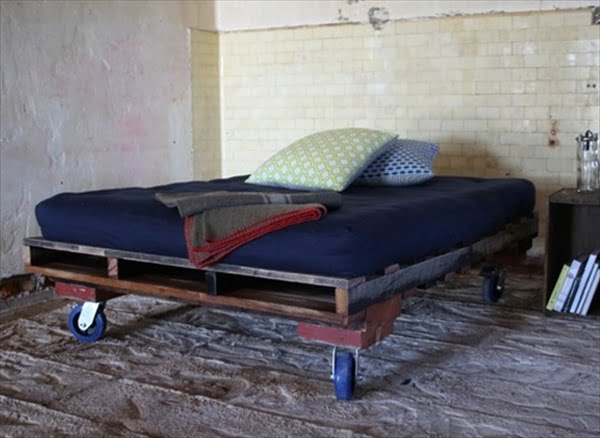
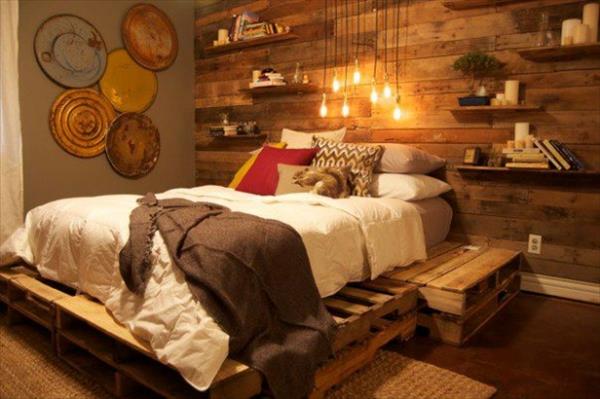
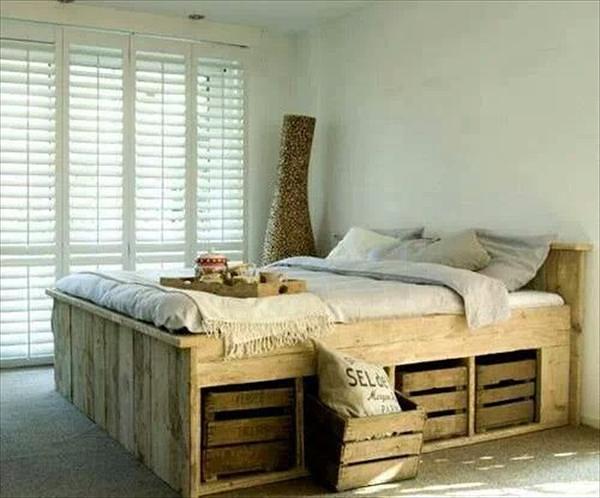
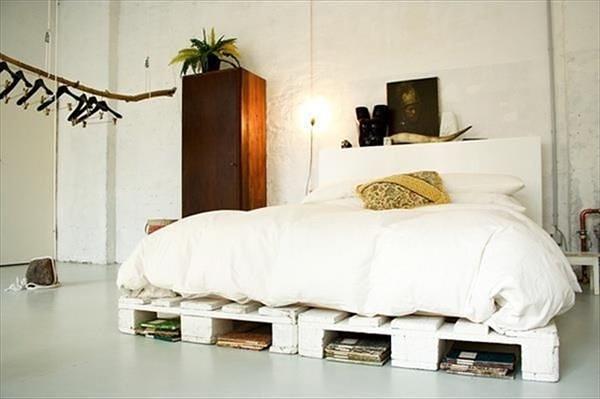
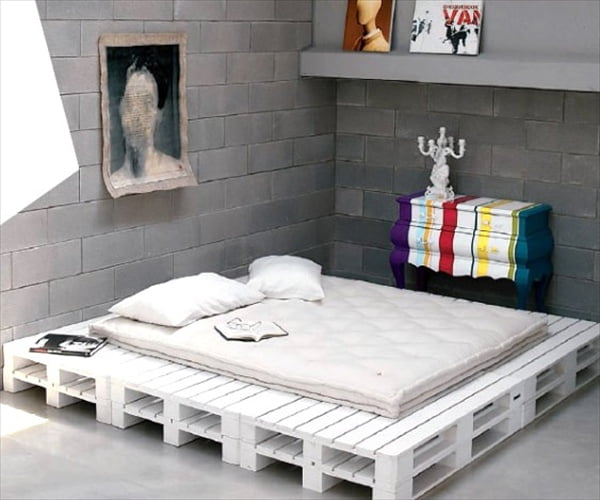
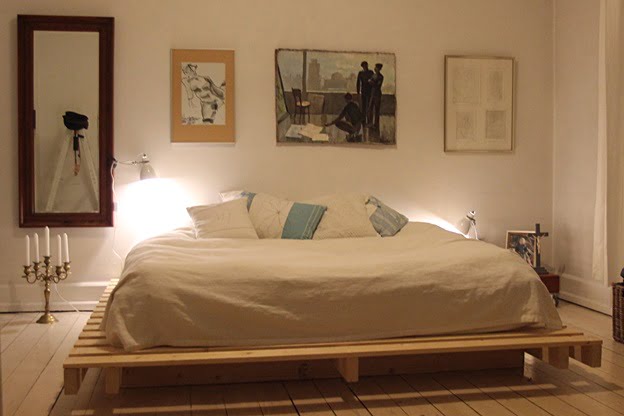
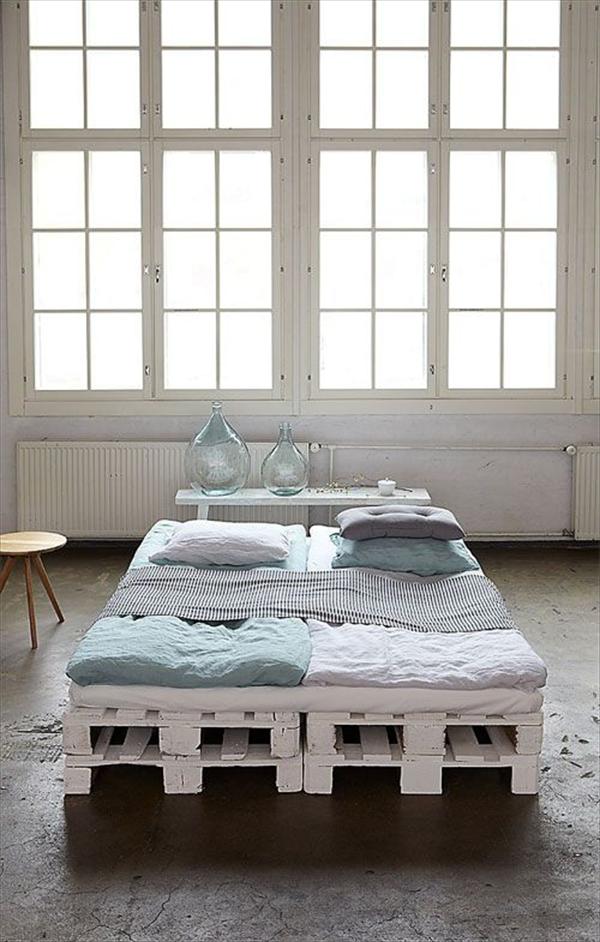
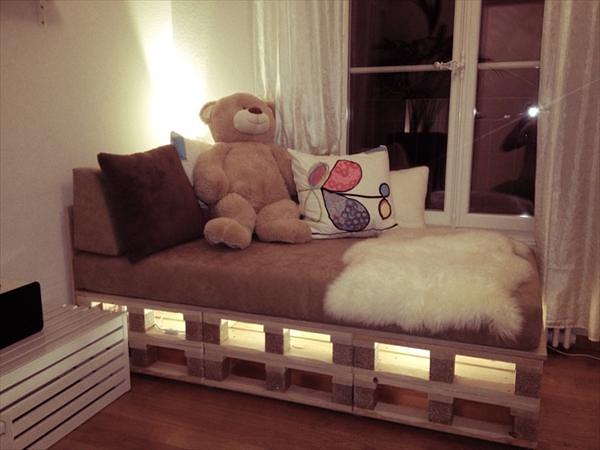
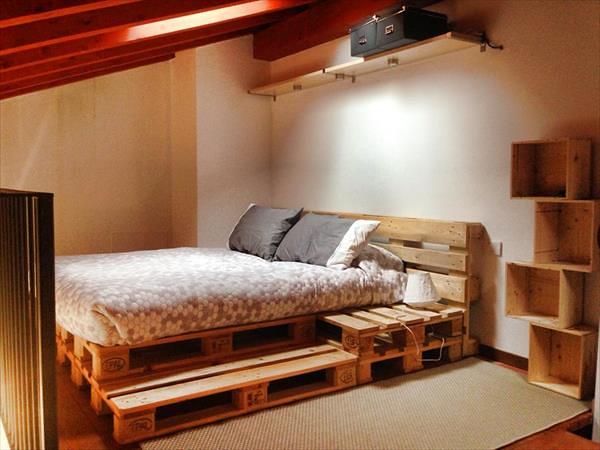
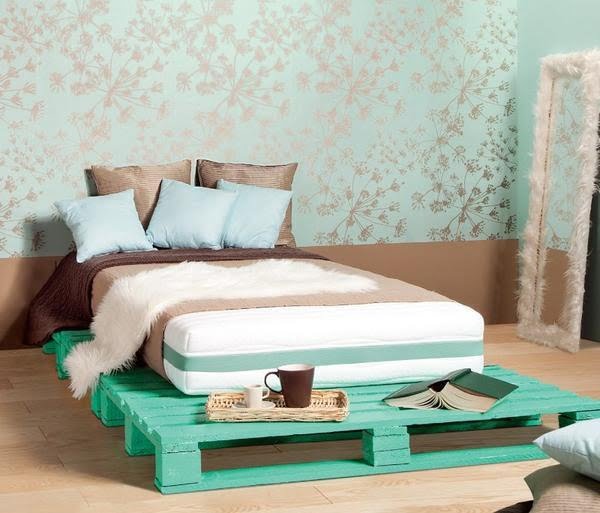
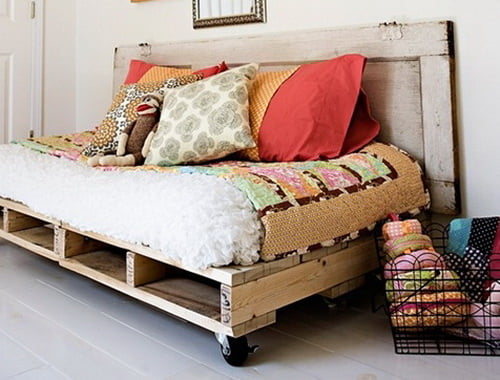
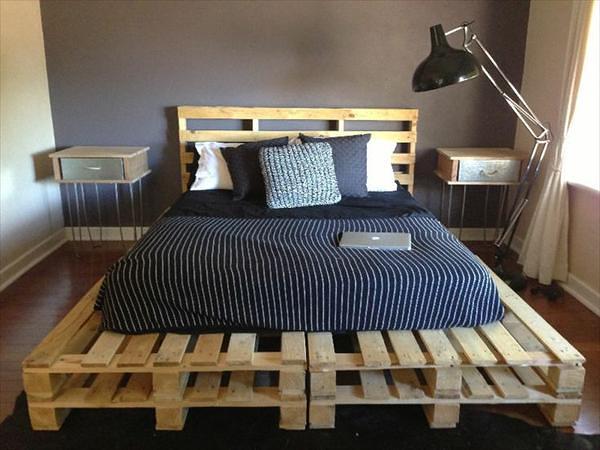
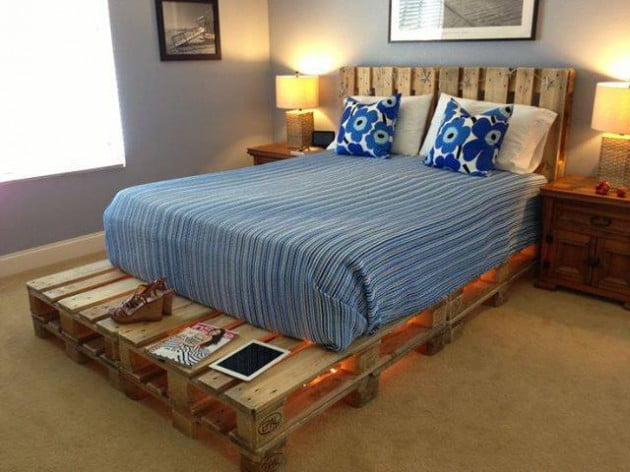
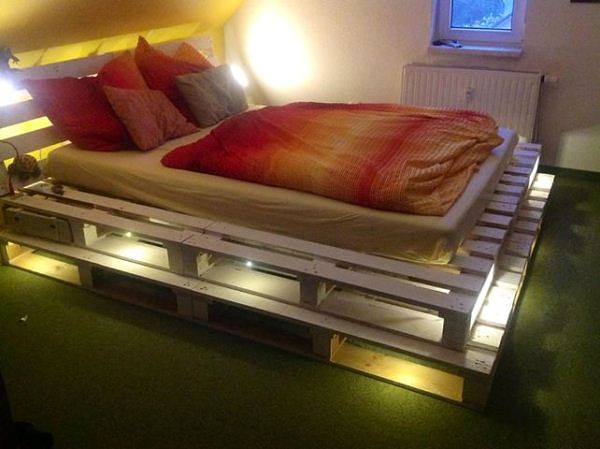

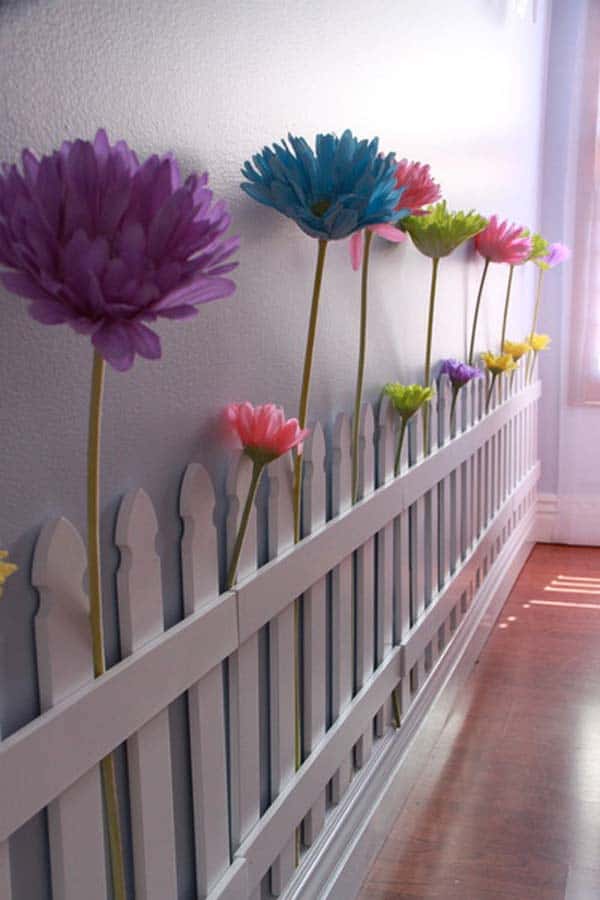
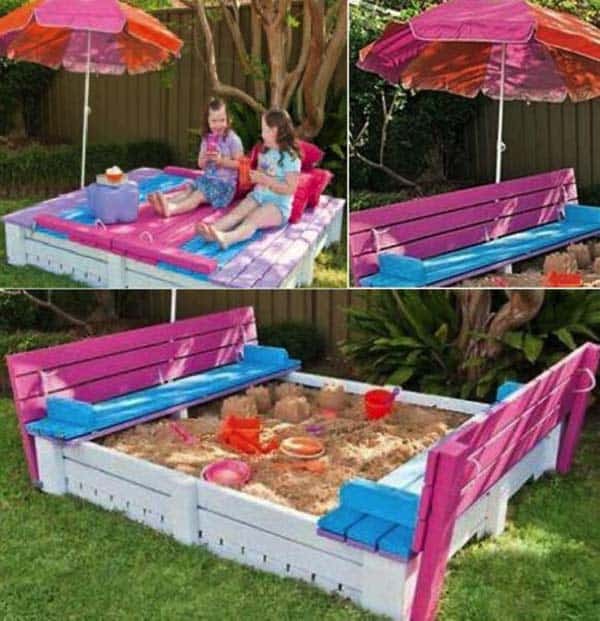

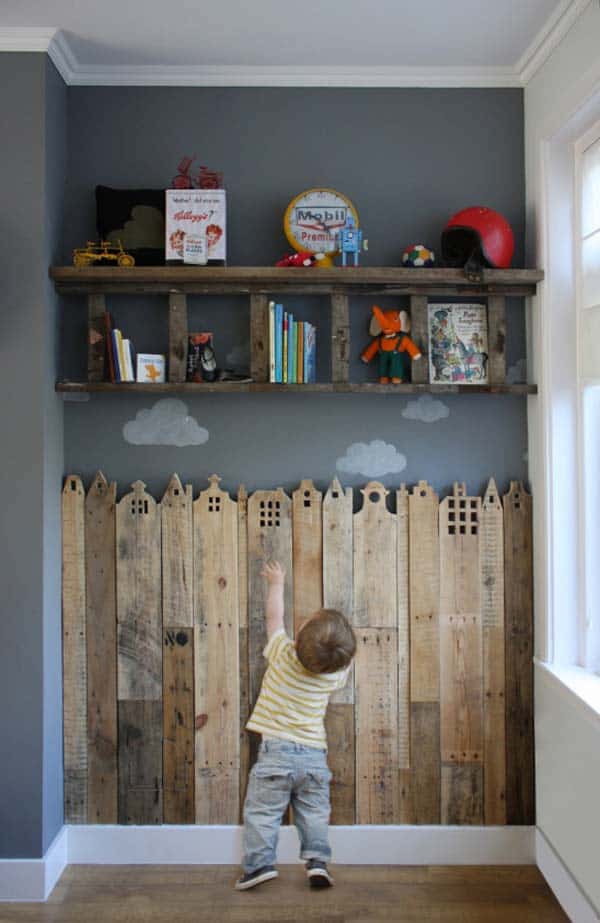
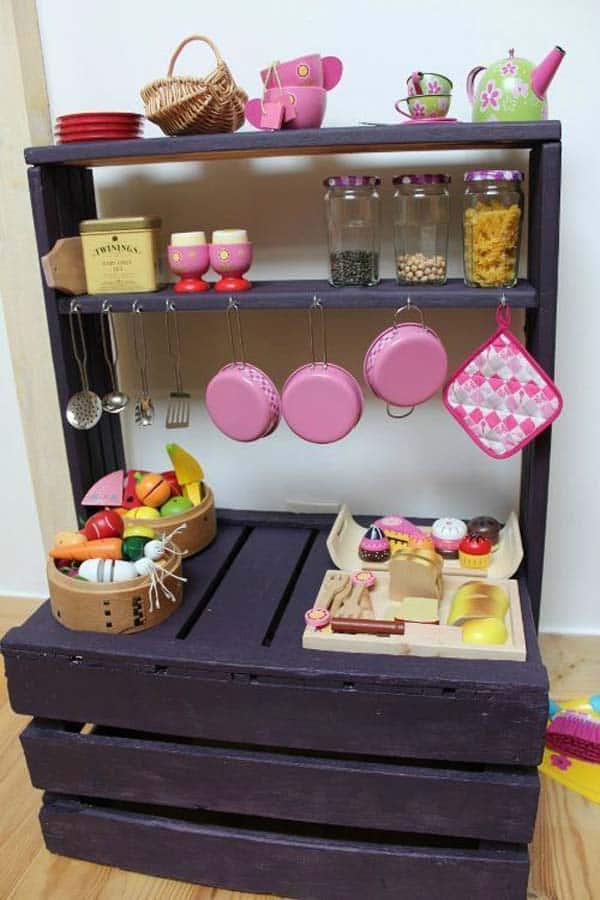
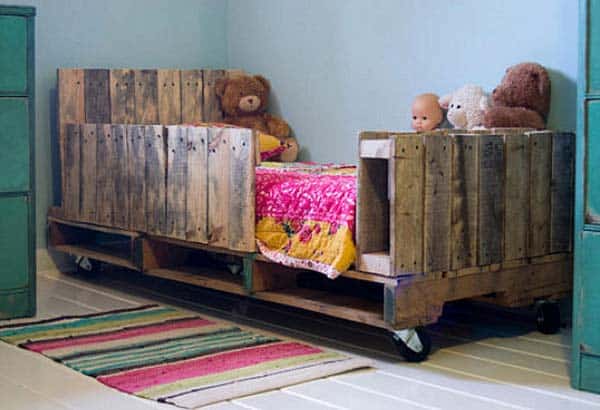
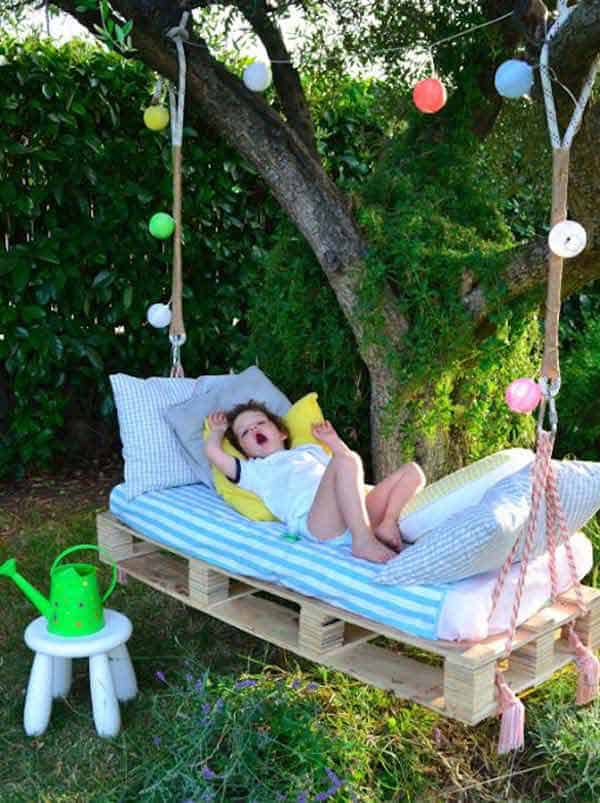
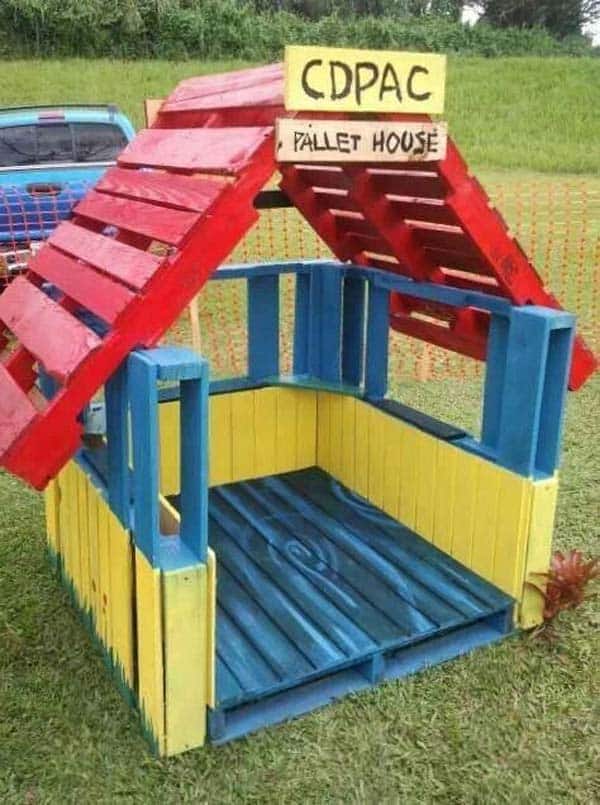
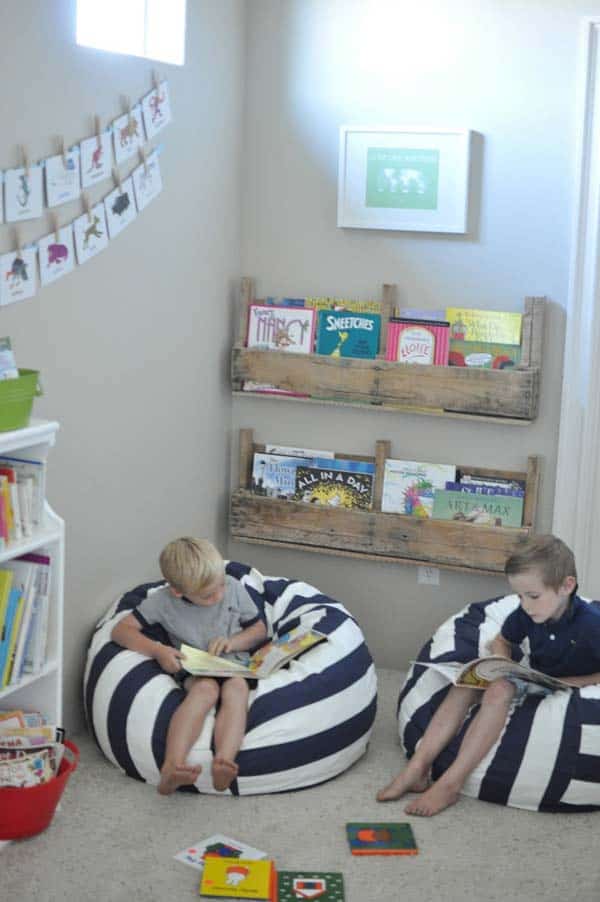
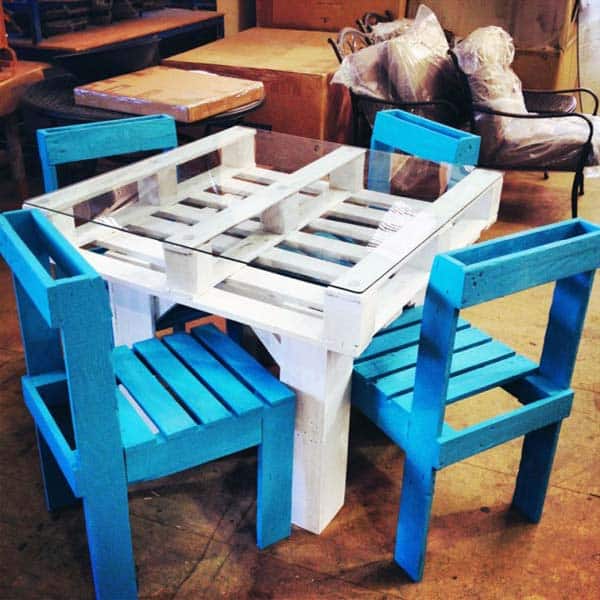

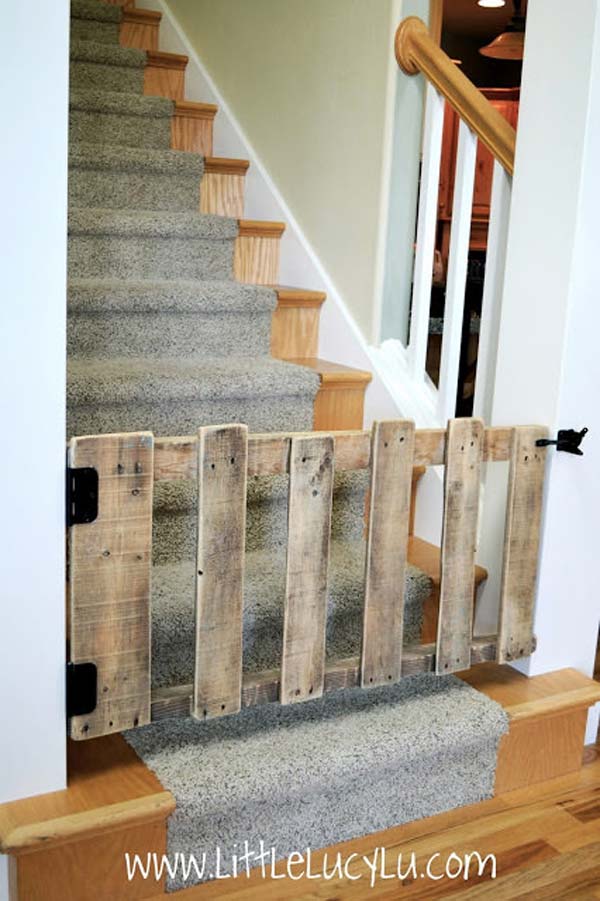
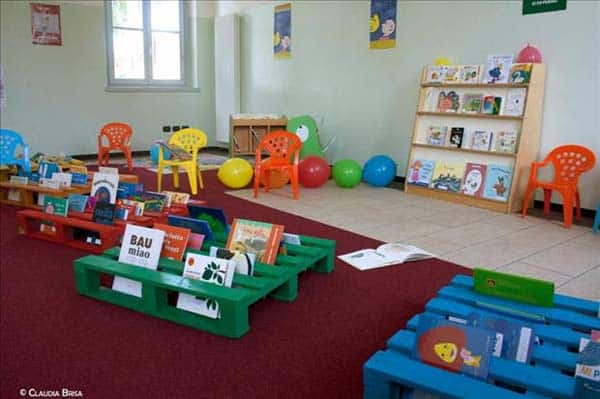
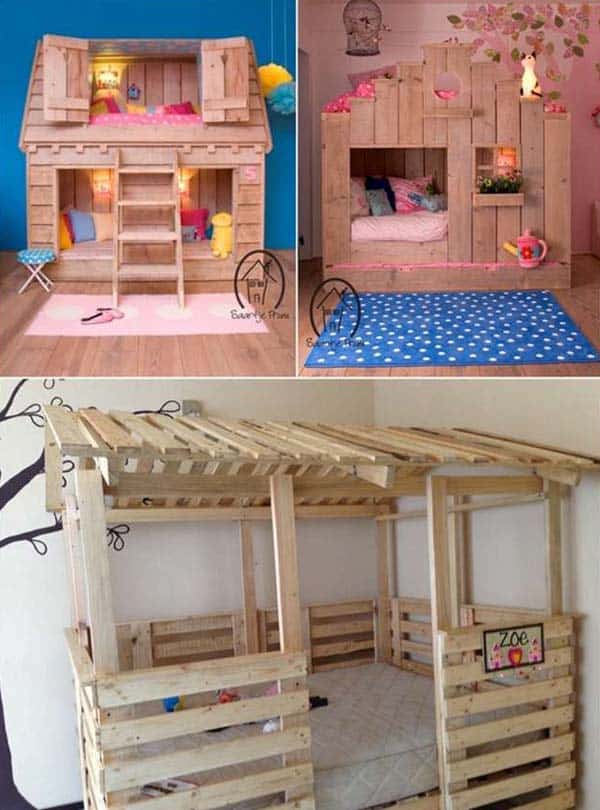
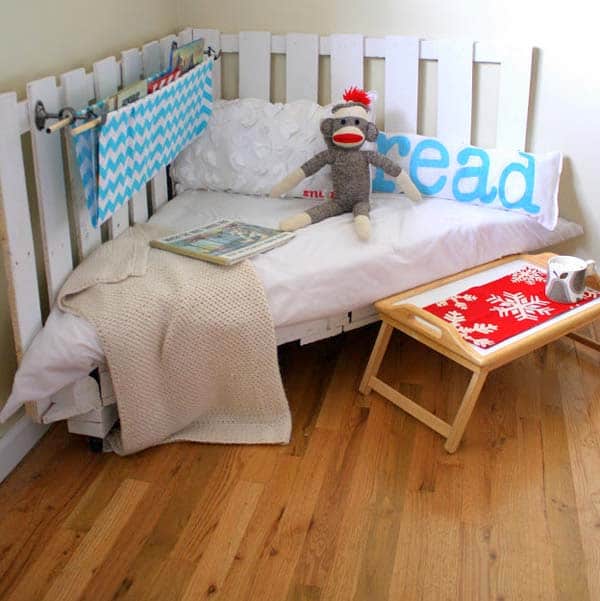

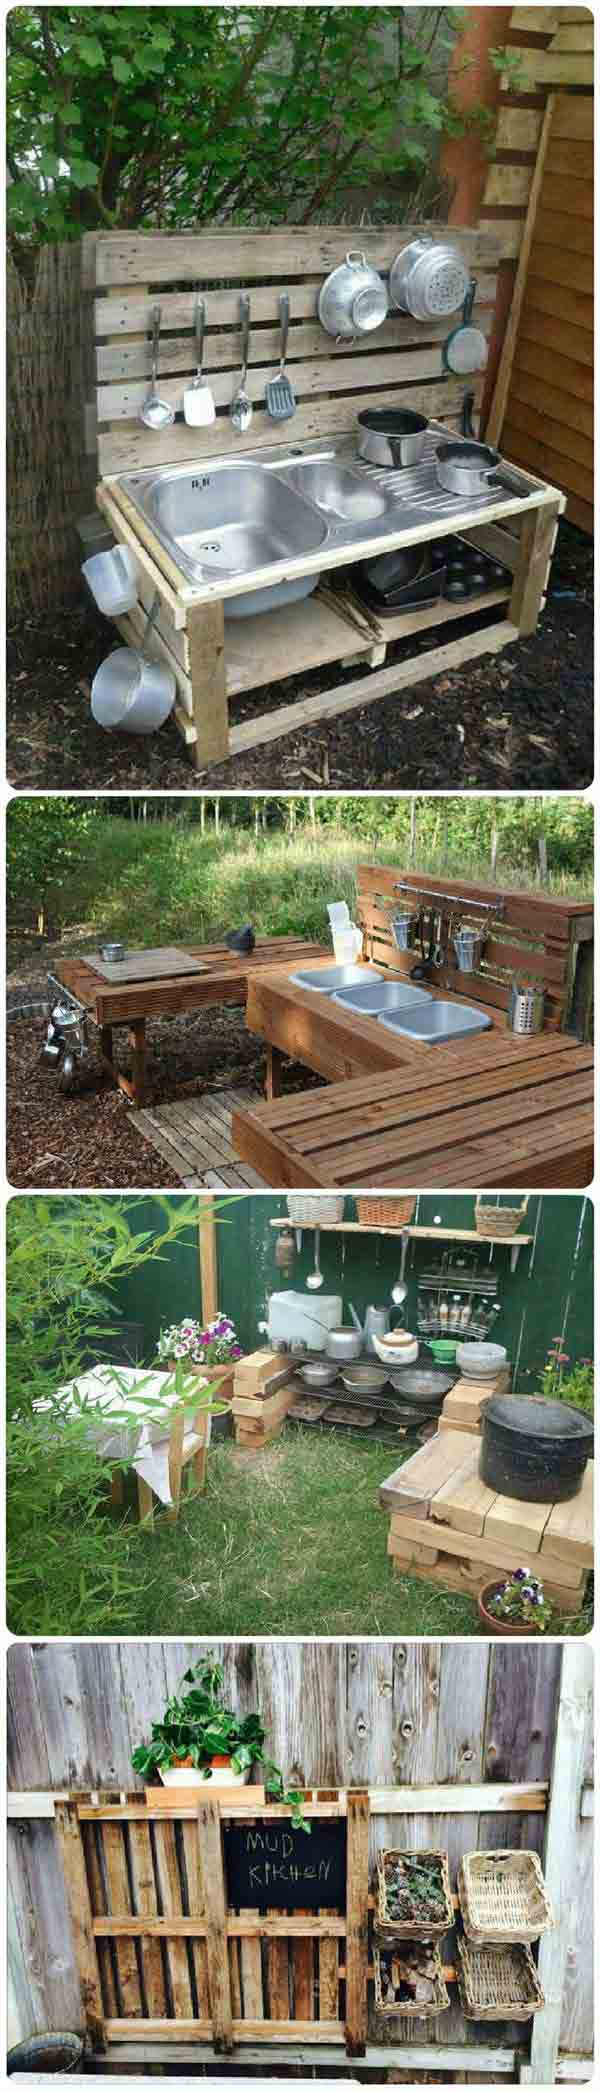
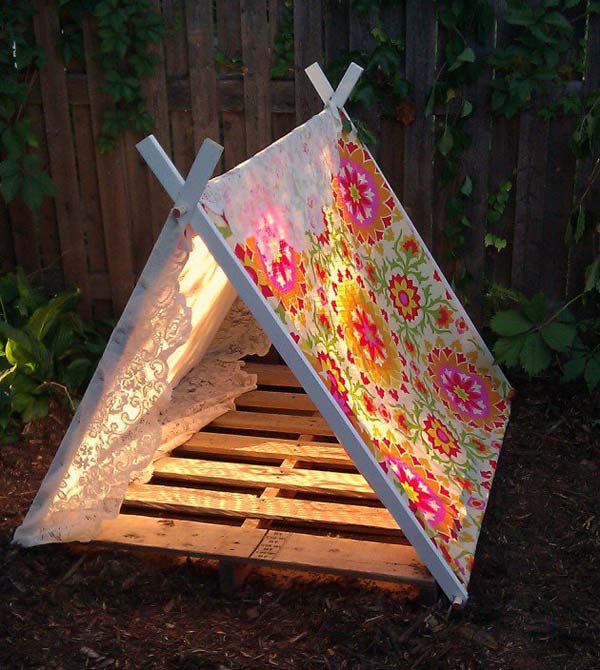
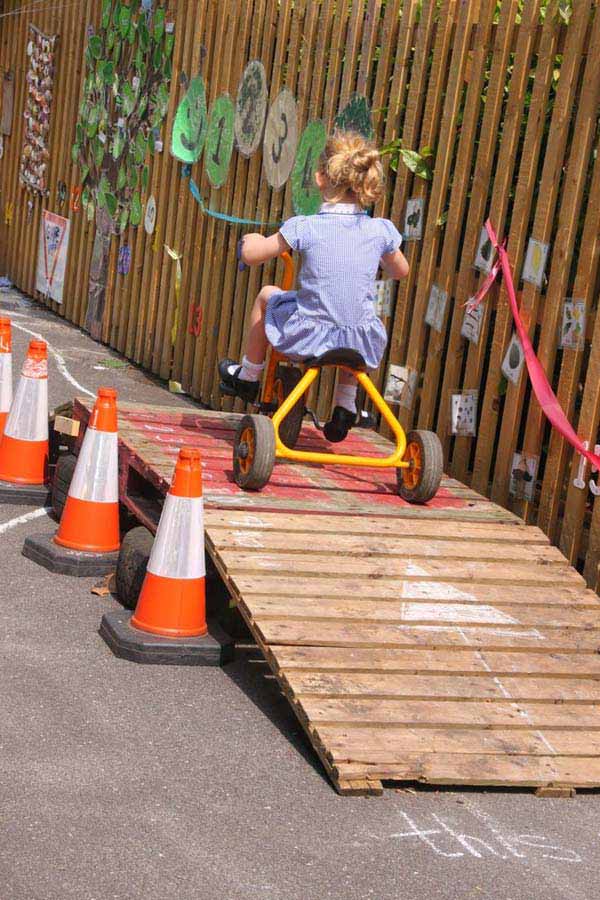
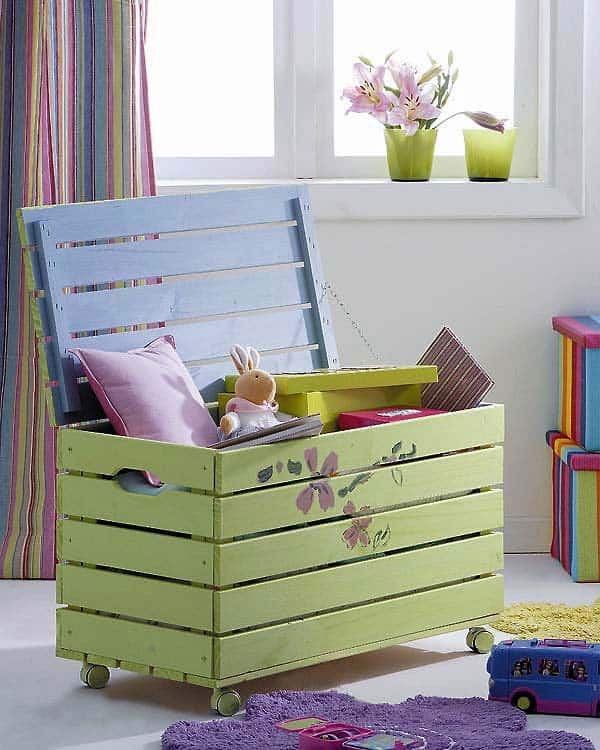
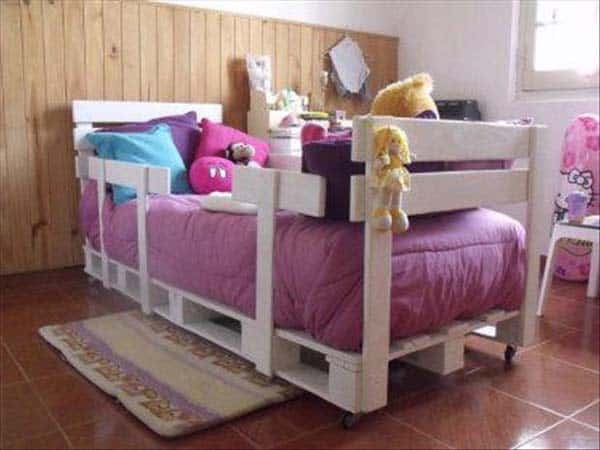
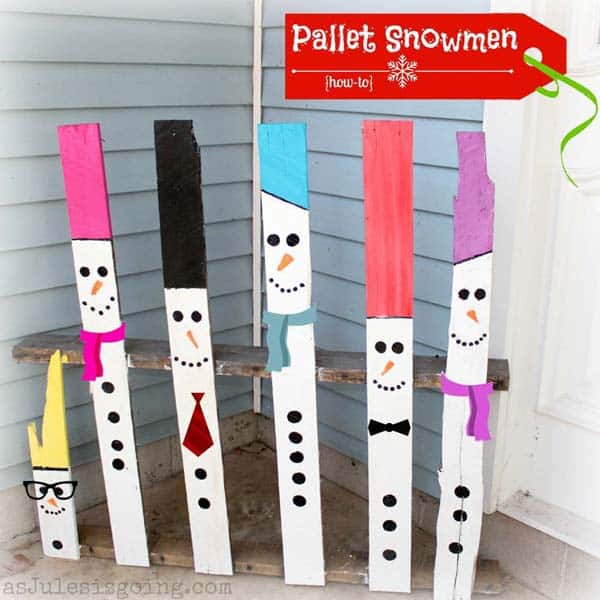
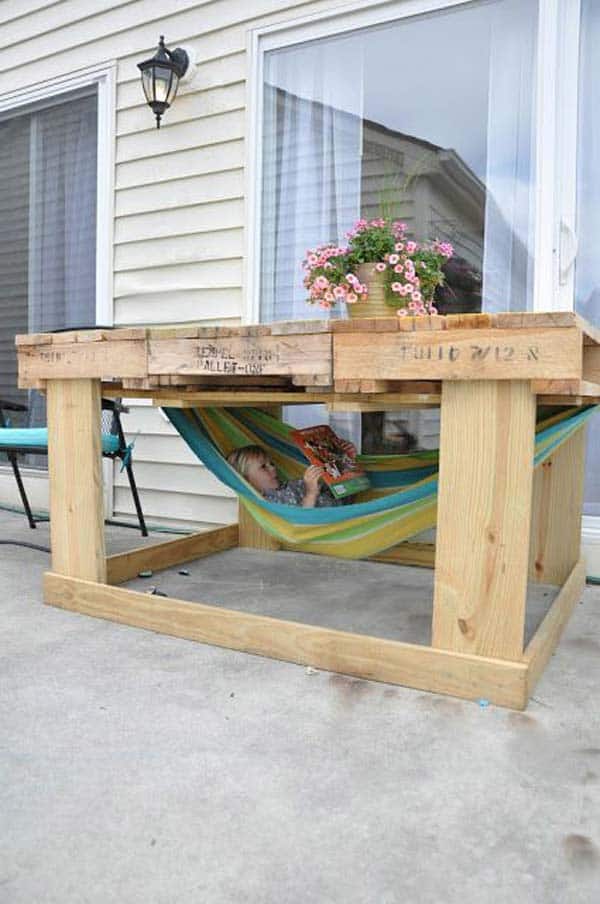
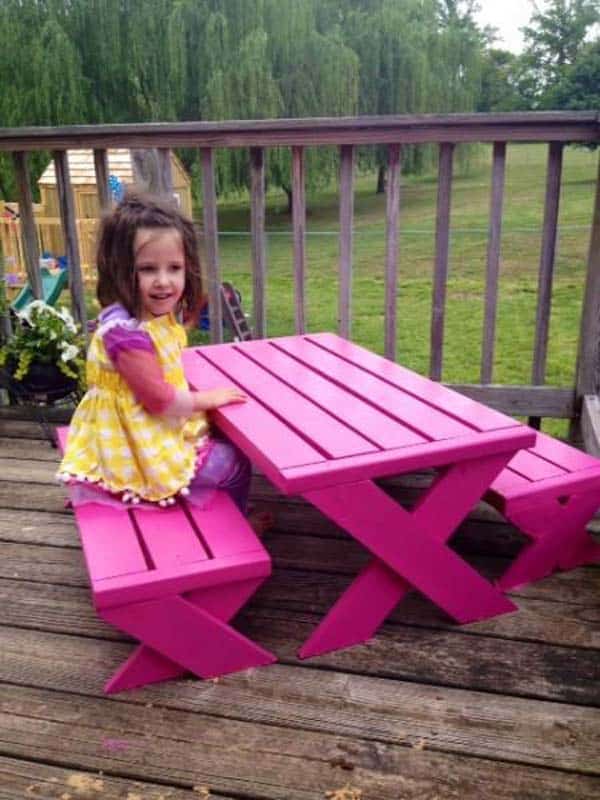
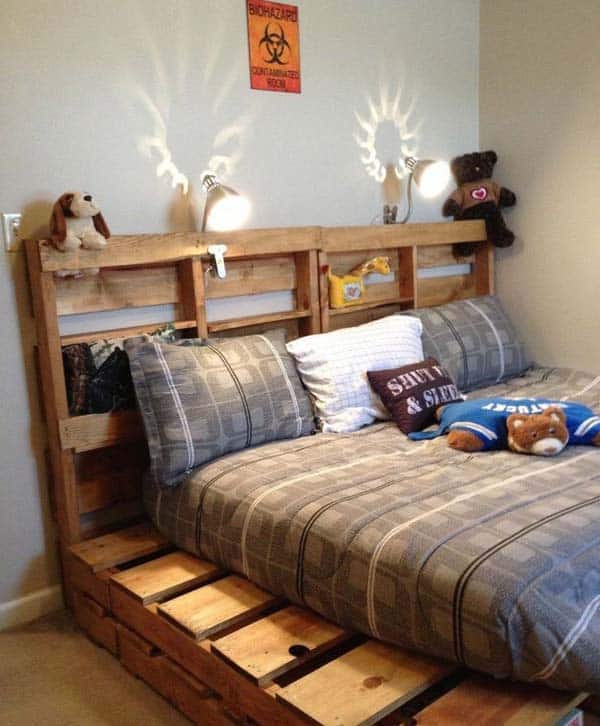
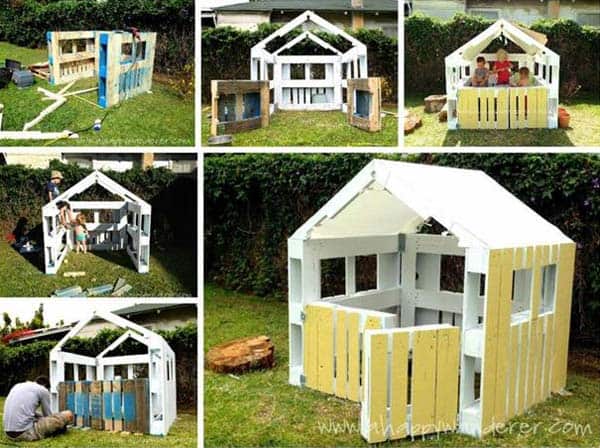

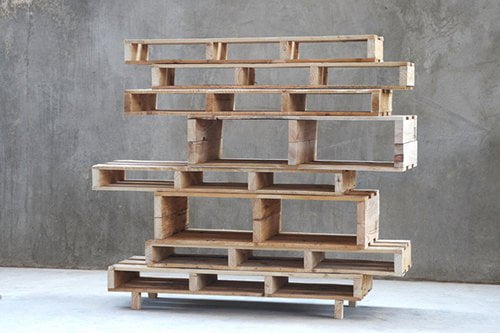
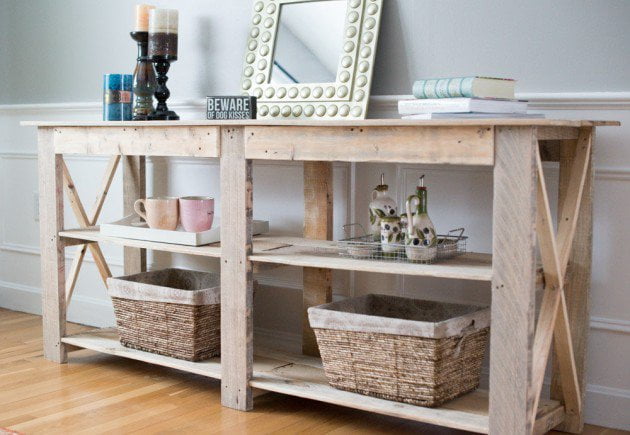
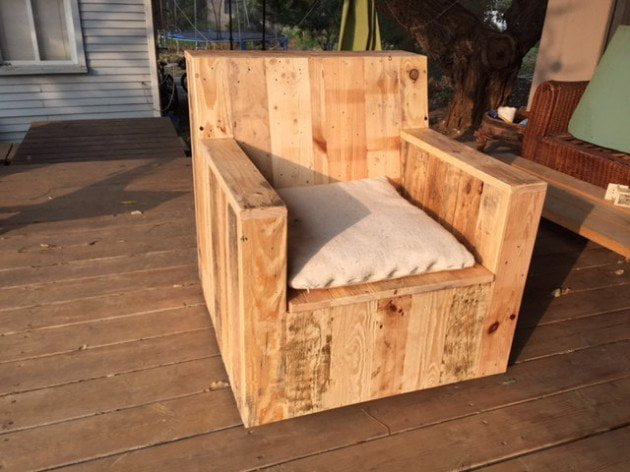
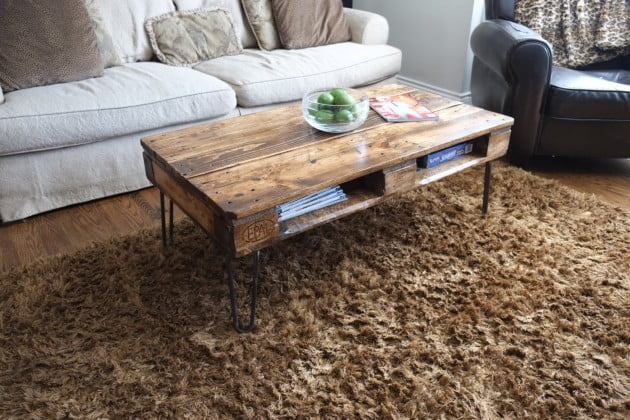
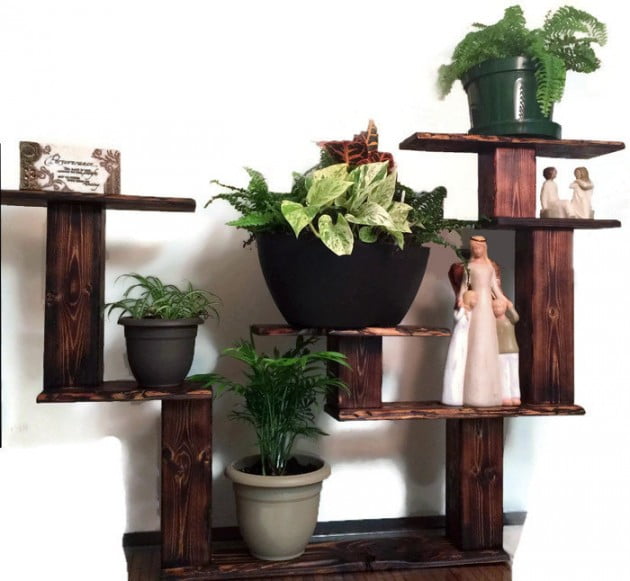

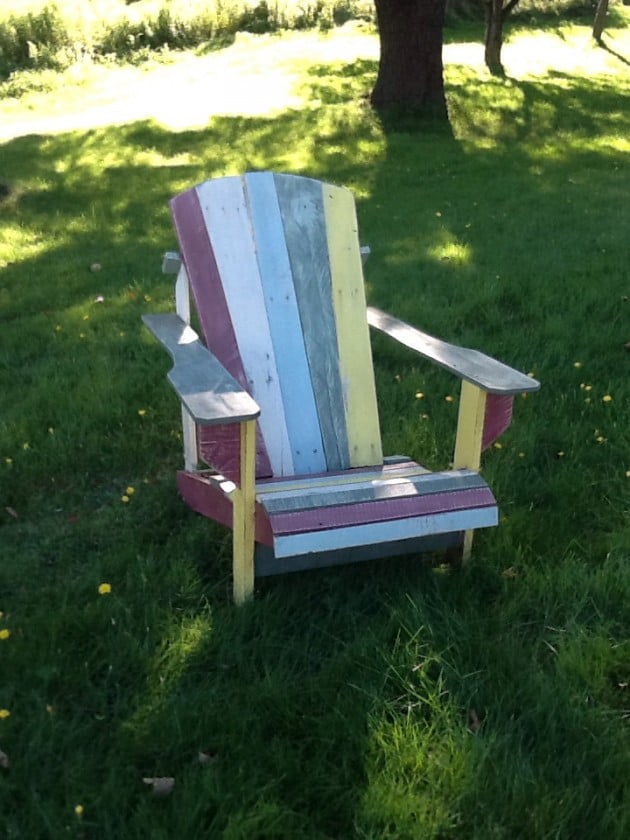
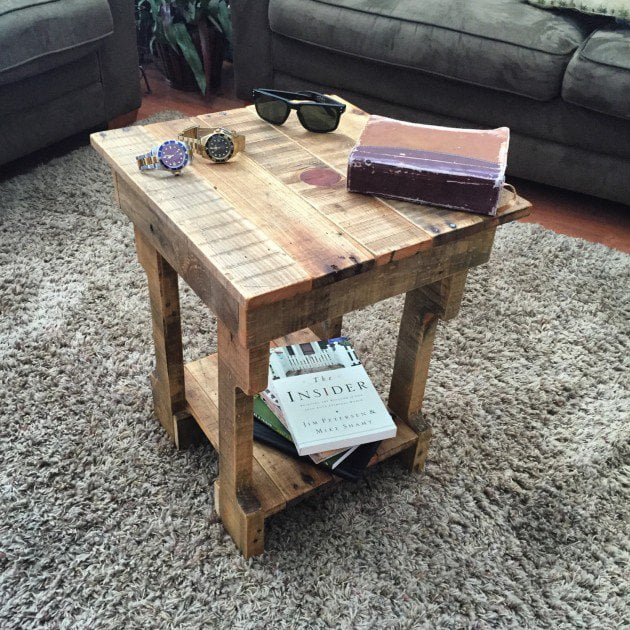
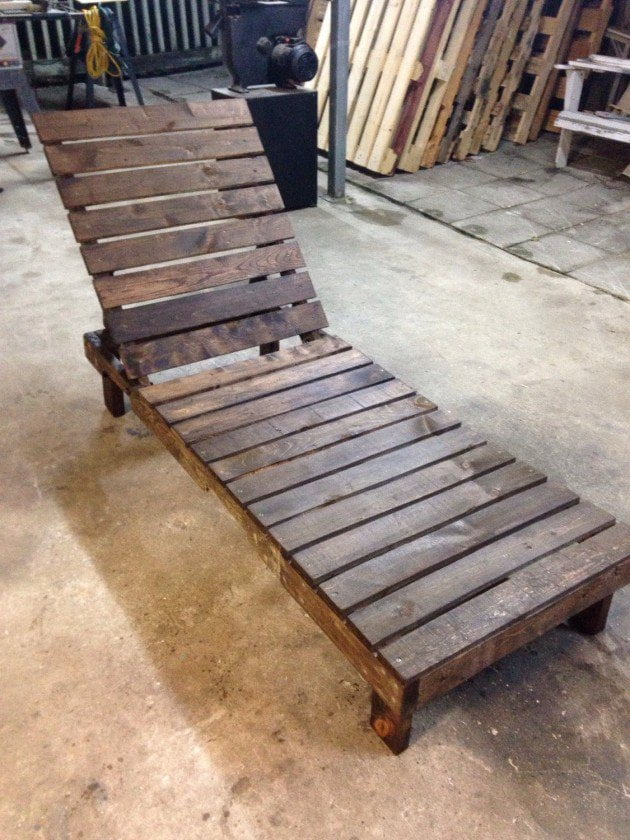
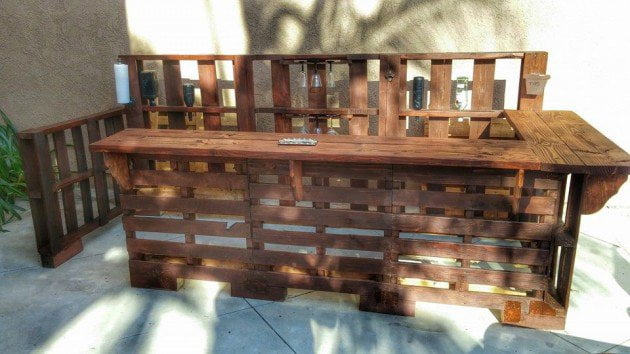
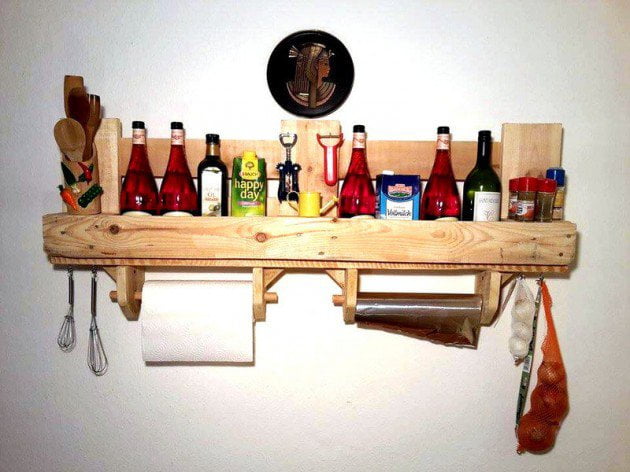
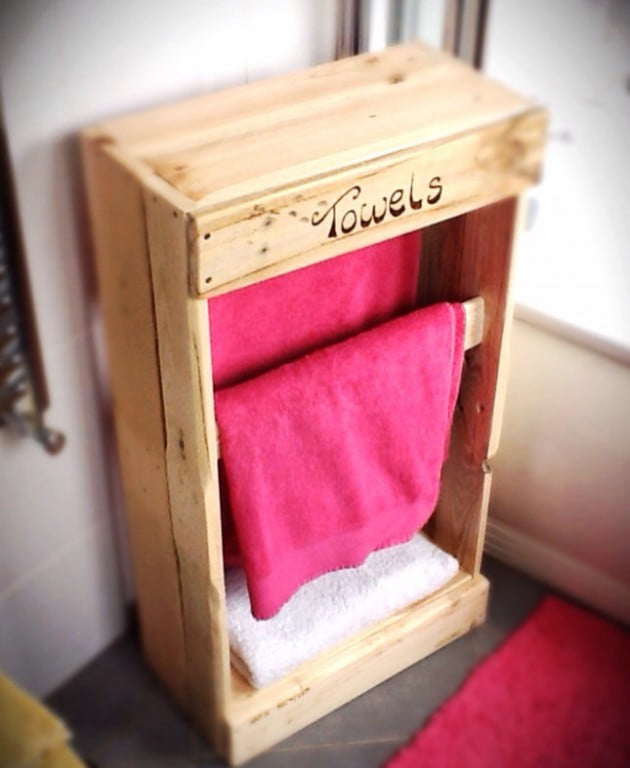
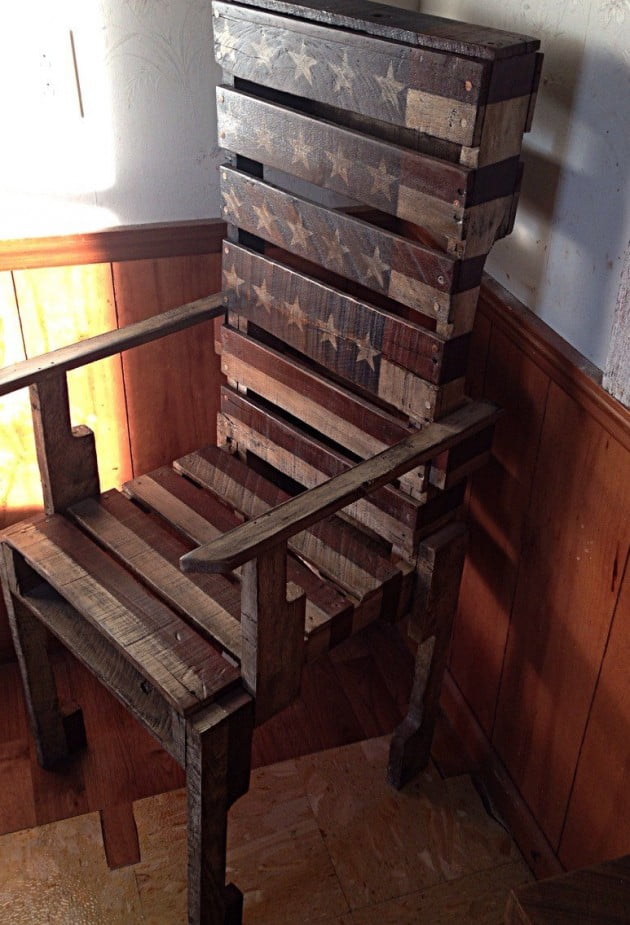
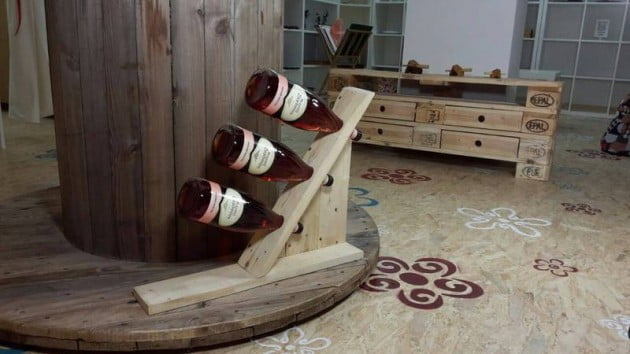
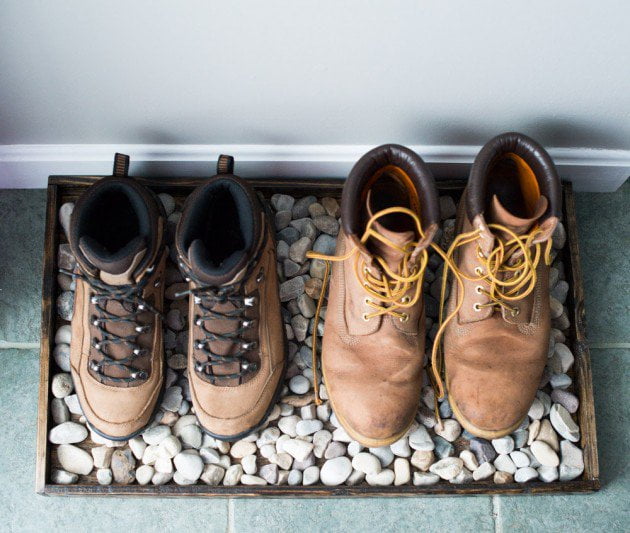
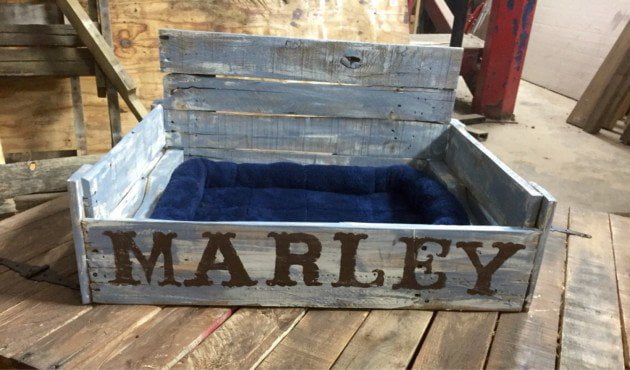
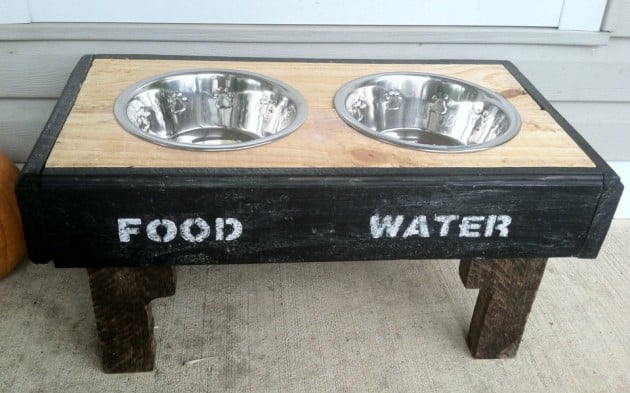
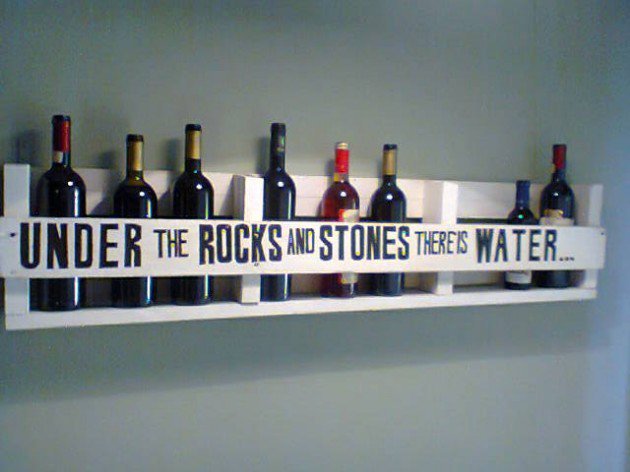
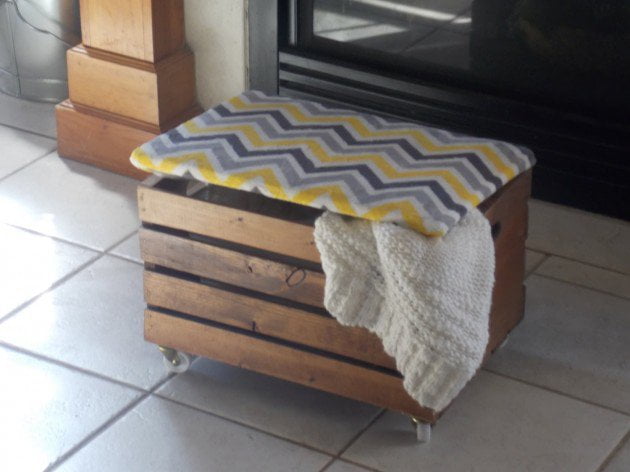
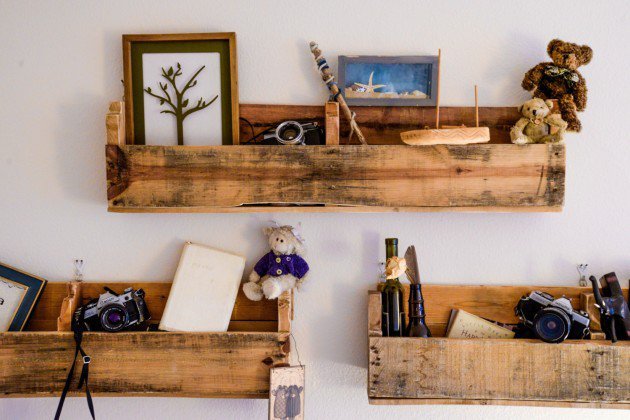
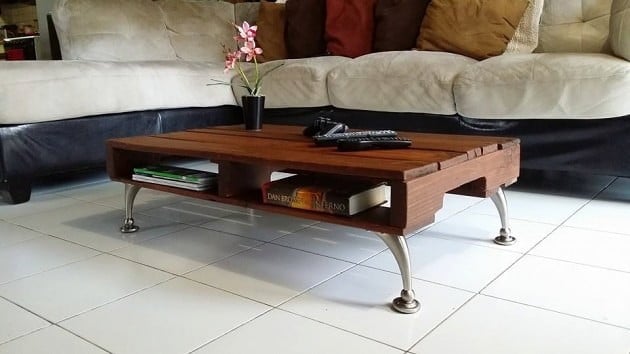
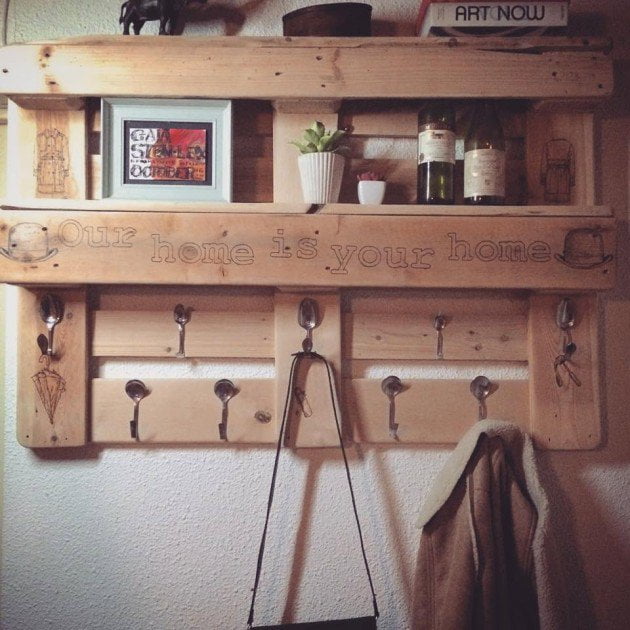

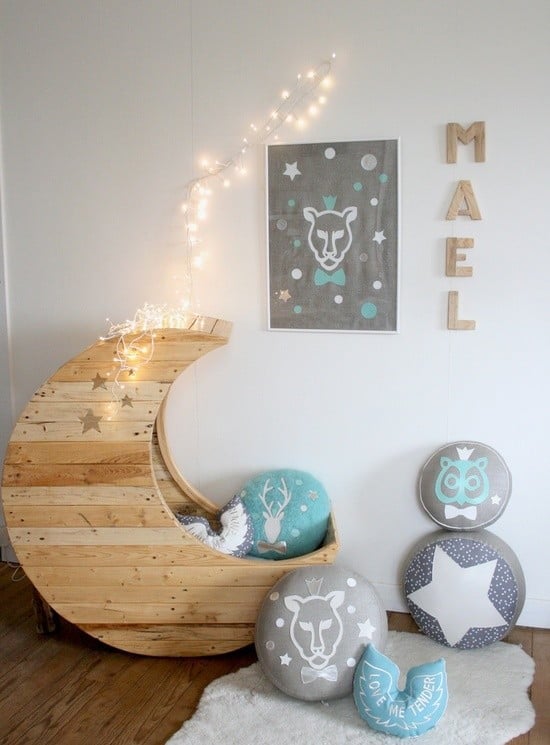

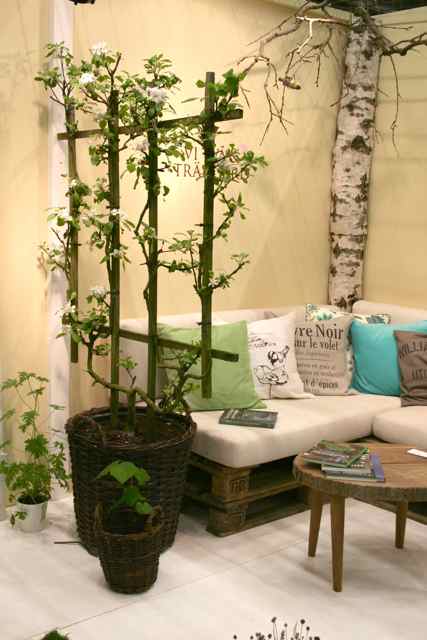

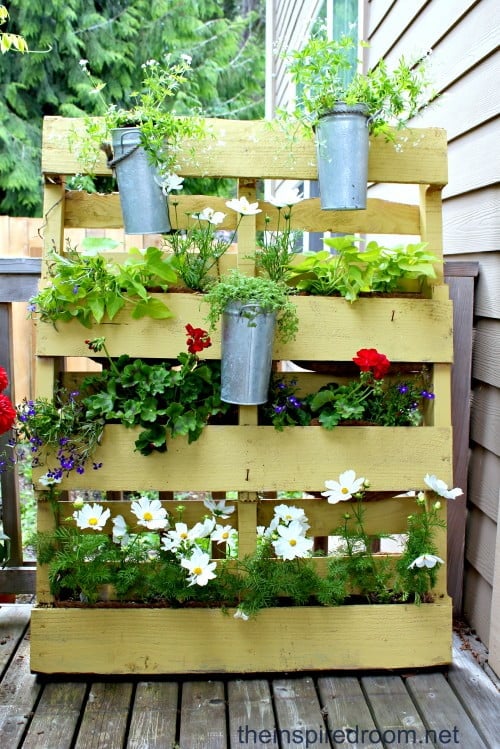
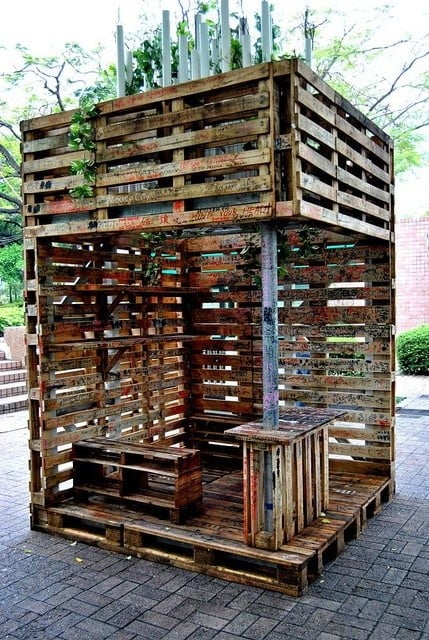

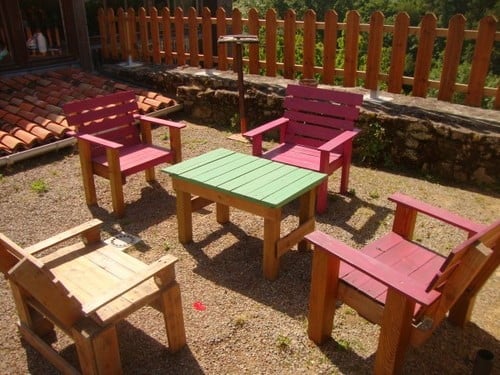
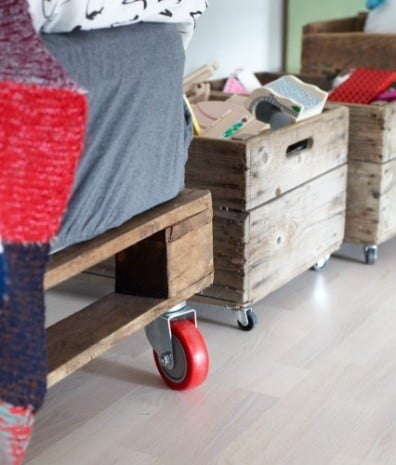
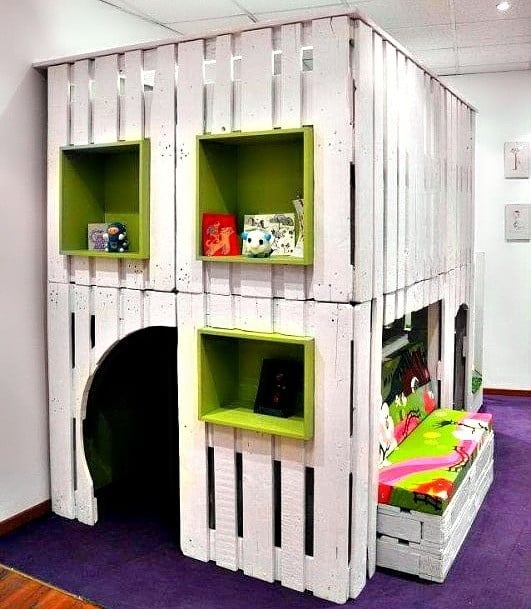
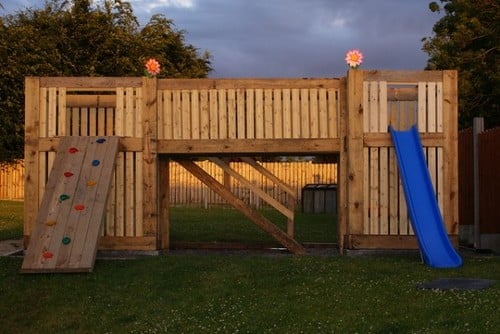
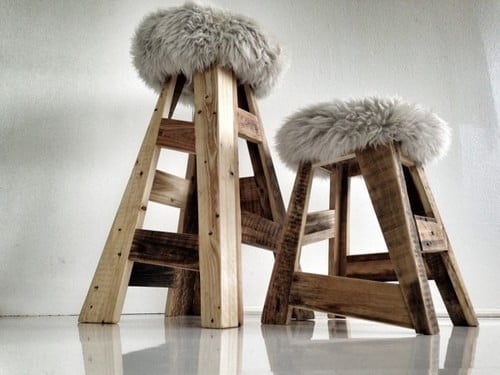
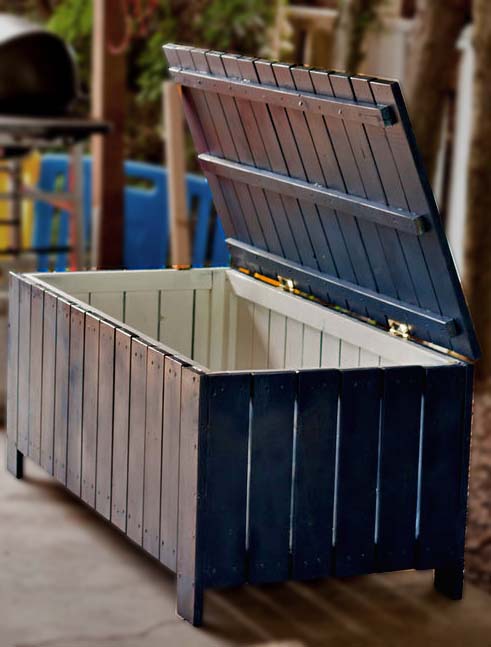
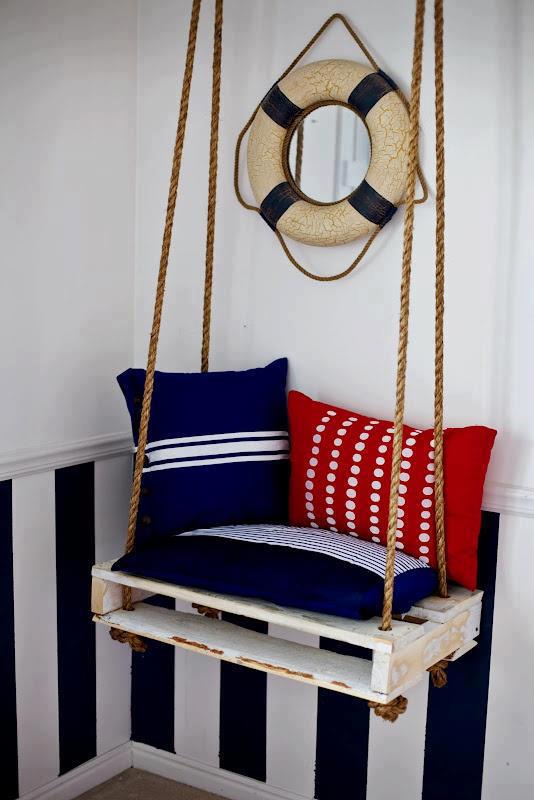
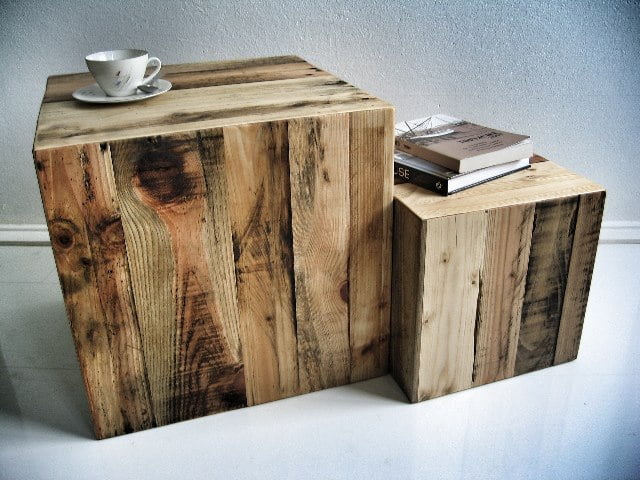
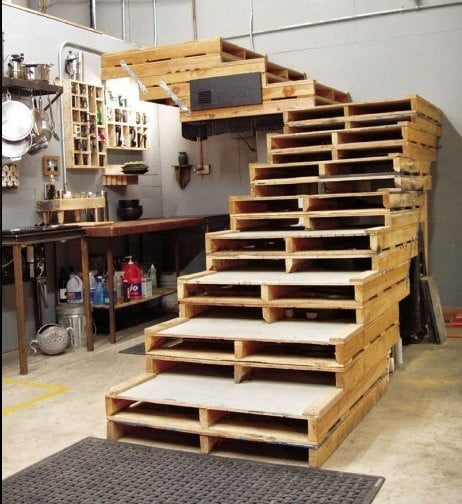
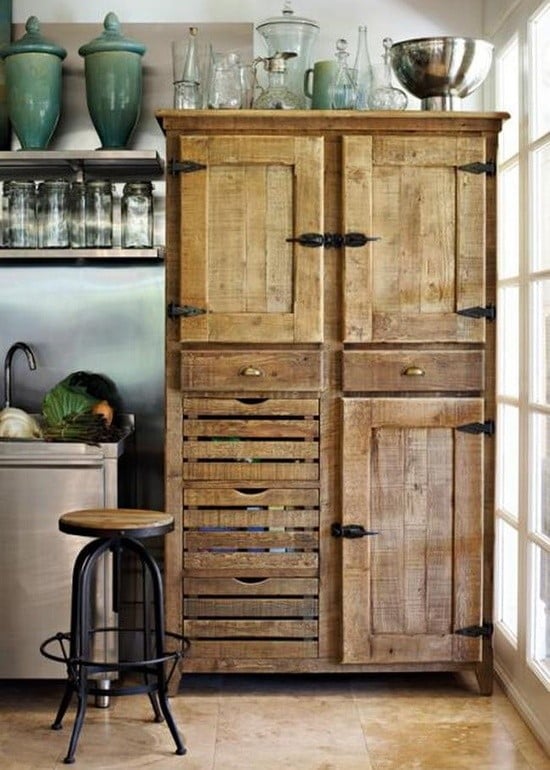
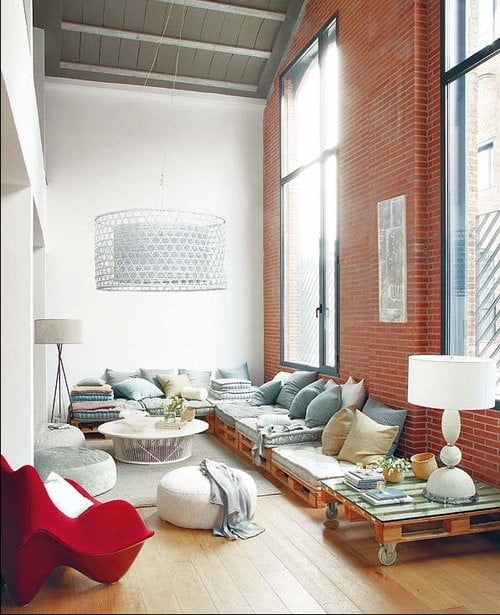
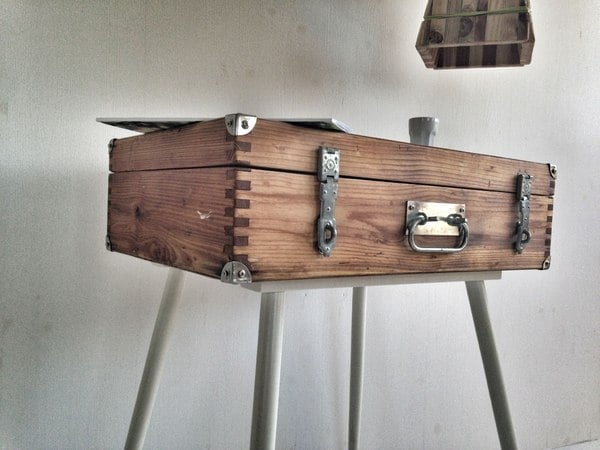
![9 Best Wood Wax of 2026 [Reviewed & Buyer’s Guide]](https://homesthetics.net/wp-content/uploads/2021/06/Best-Wood-Wax-of-2021-04.jpg "9 Best Wood Wax of 2026 [Reviewed & Buyer's Guide]")


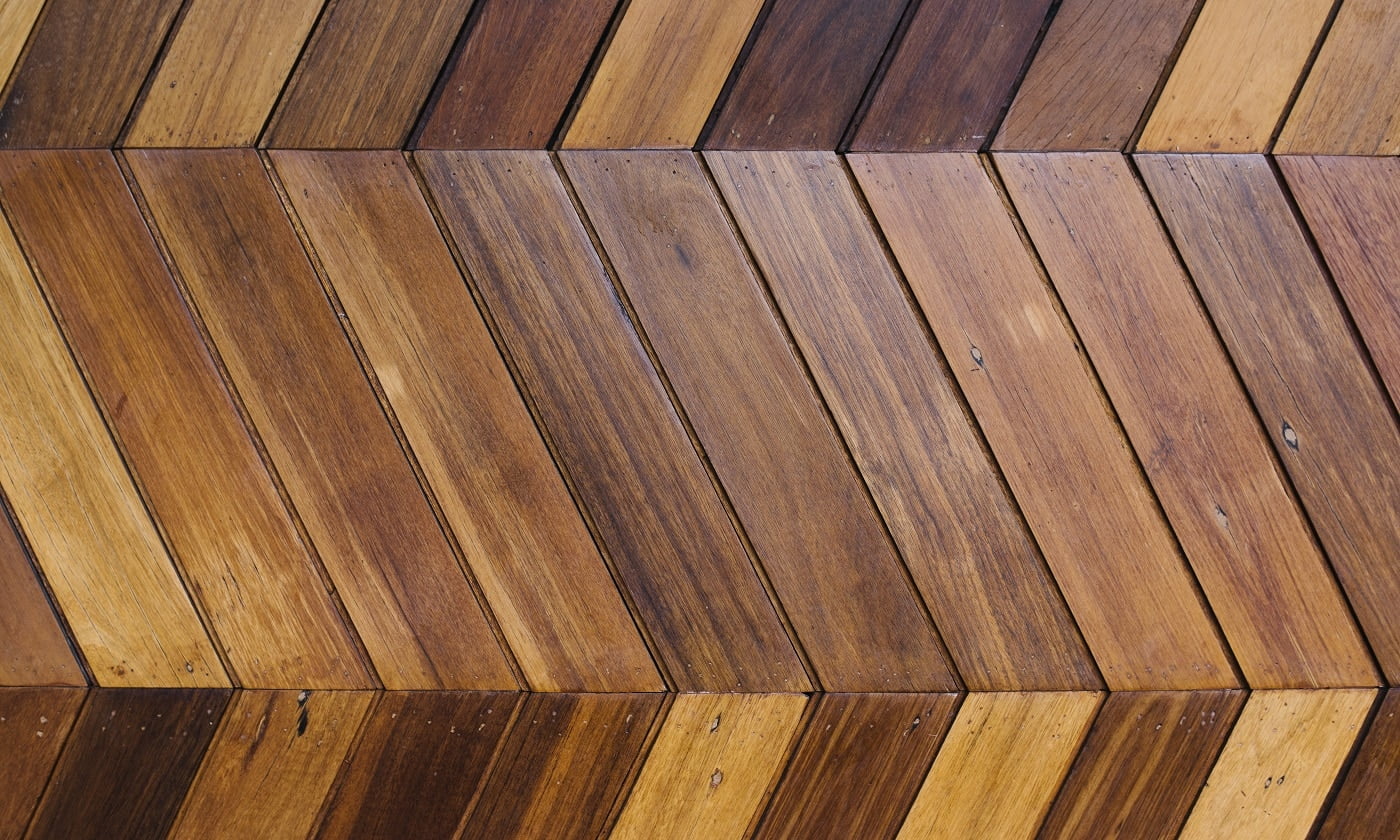
![8 Best Wood Lacquer of 2026 [Reviews & Buyer’s Guide]](https://homesthetics.net/wp-content/uploads/2021/12/Best-Wood-Lacquer-1.jpg "8 Best Wood Lacquer of 2026 [Reviews & Buyer's Guide]")


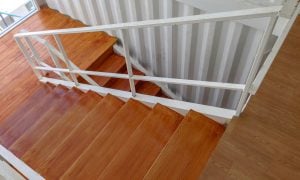


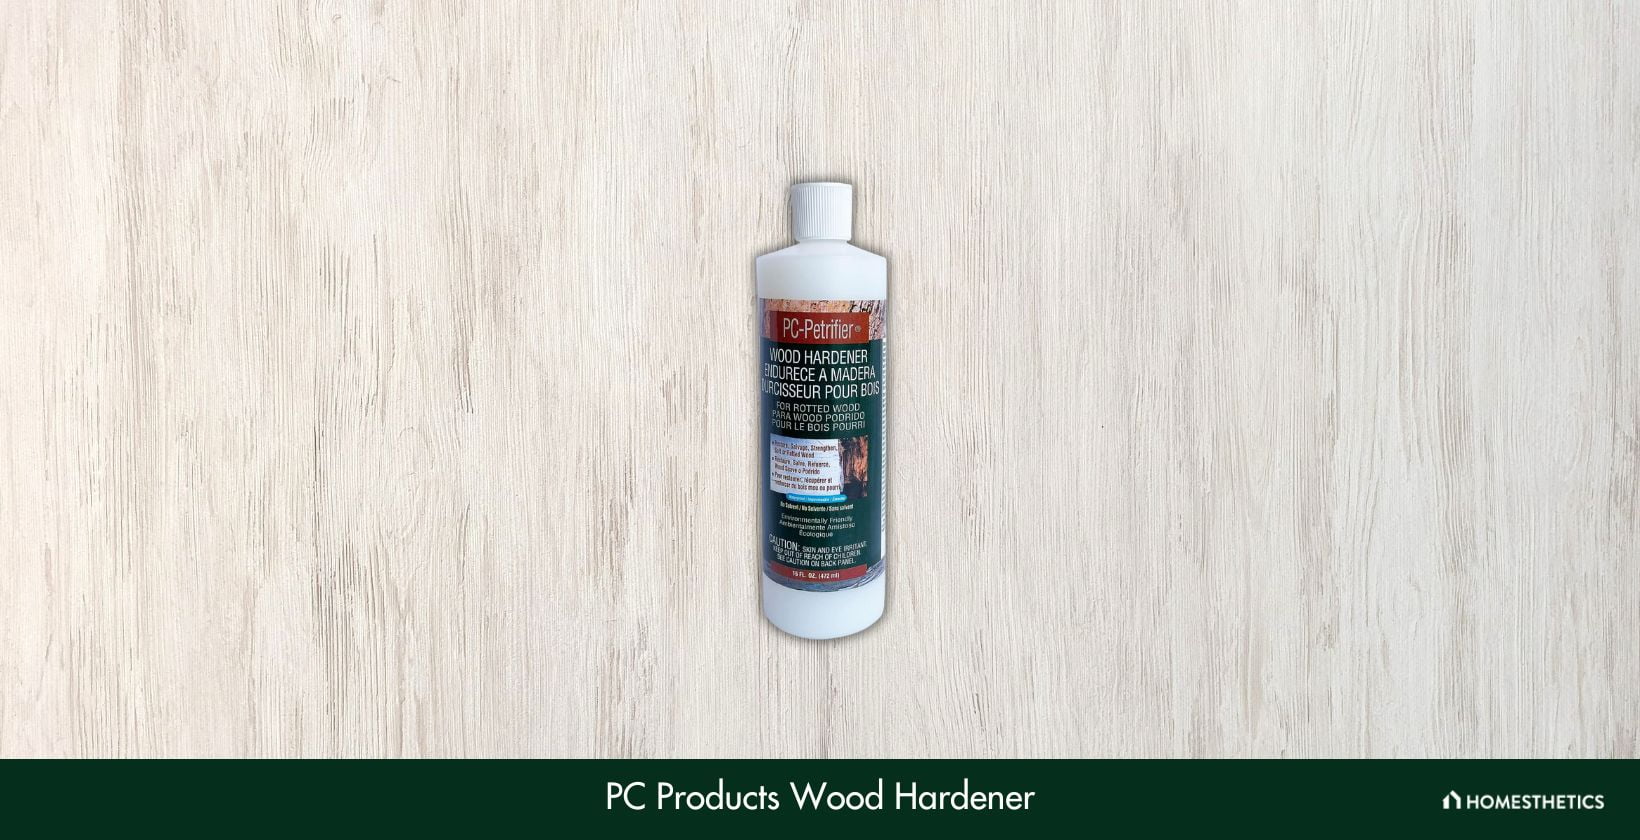
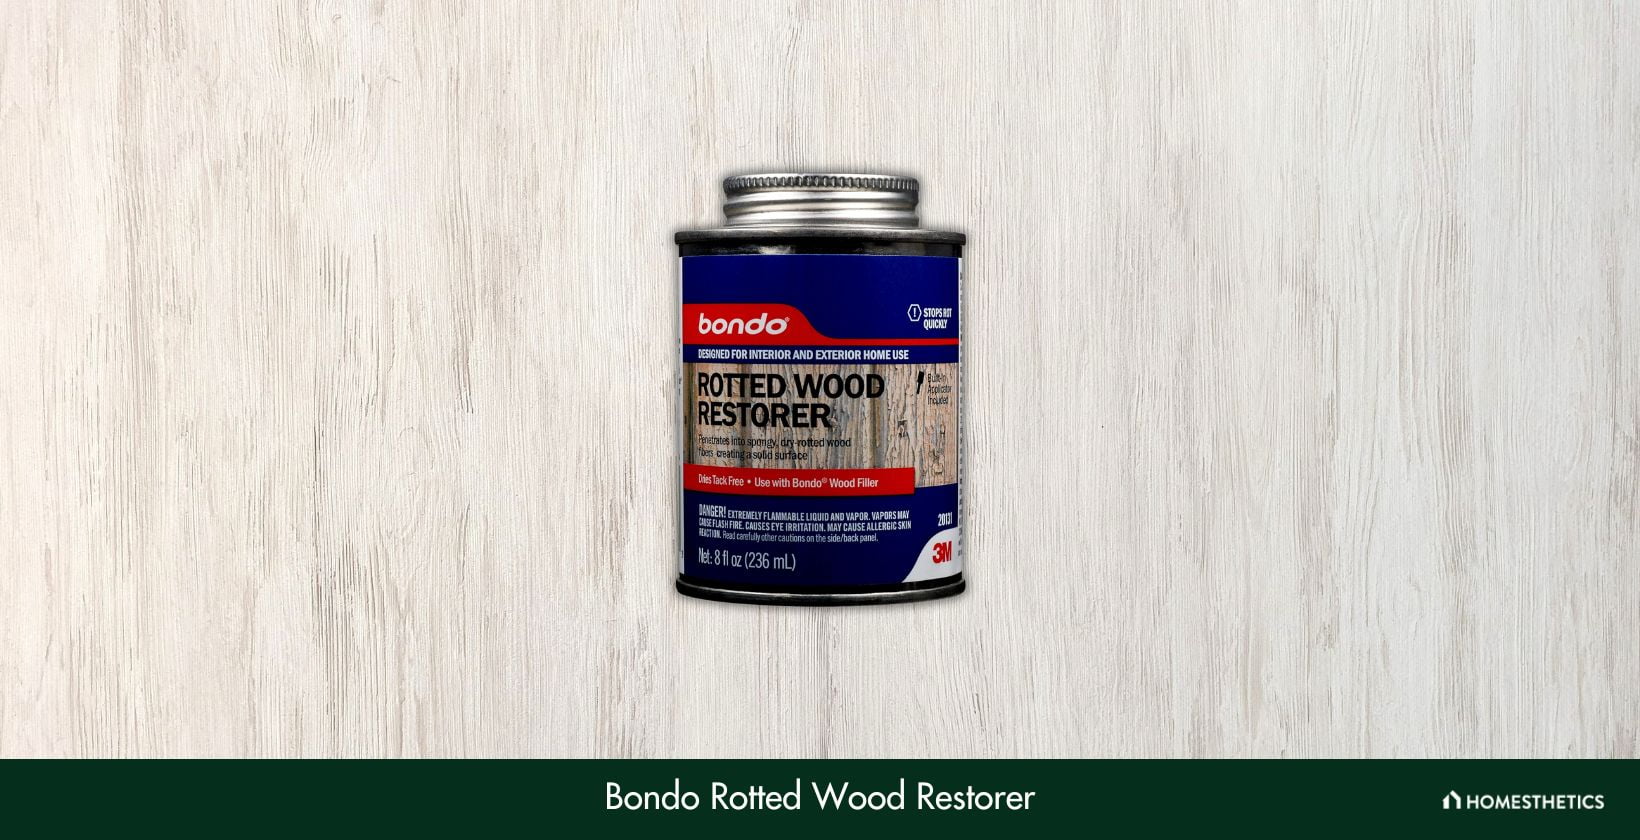
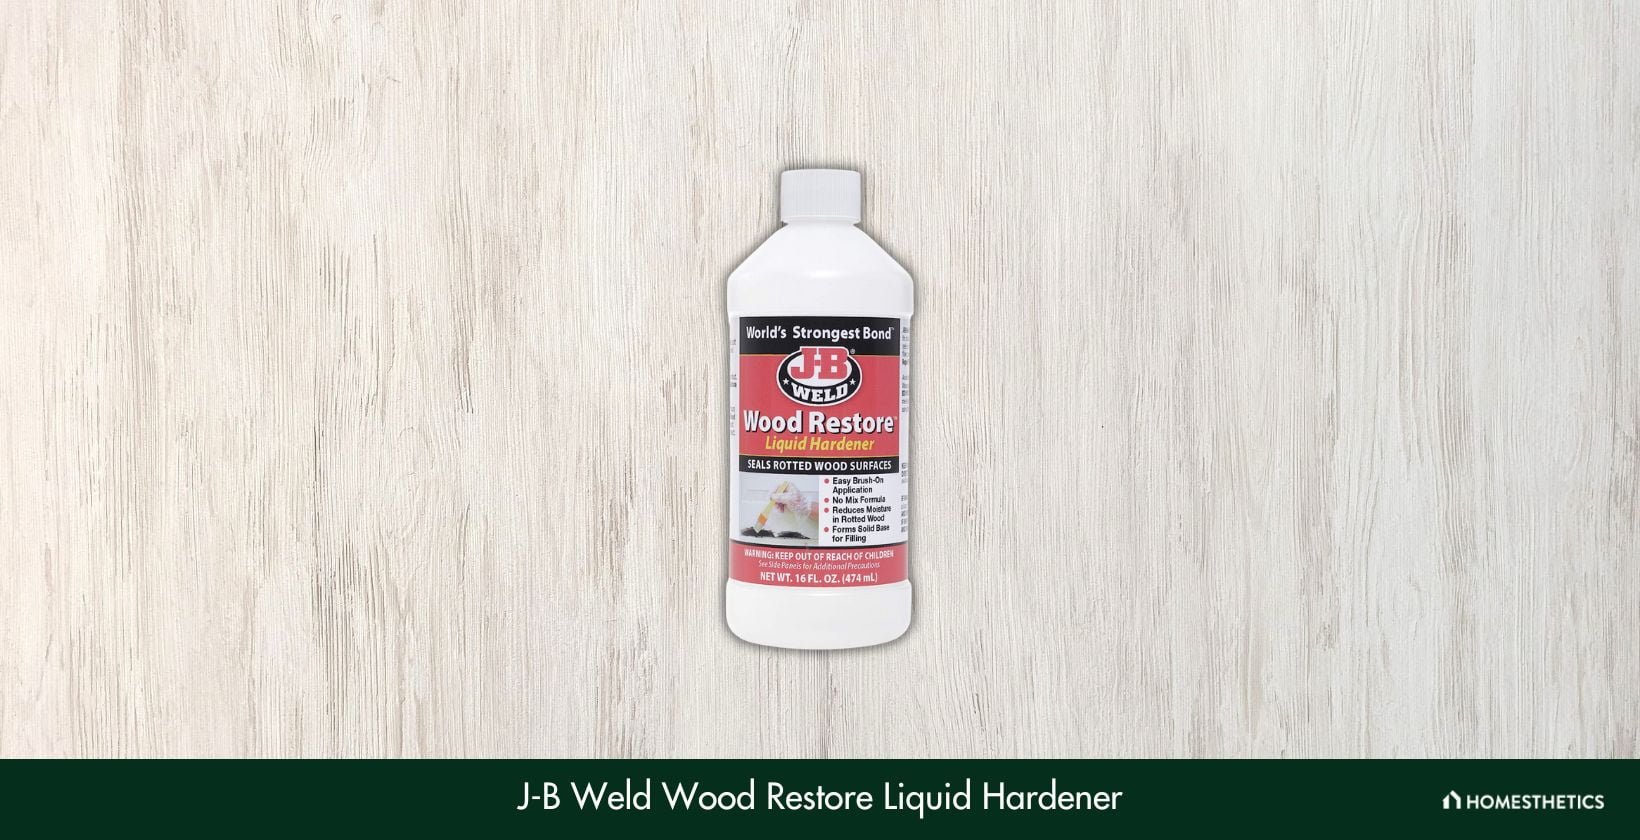
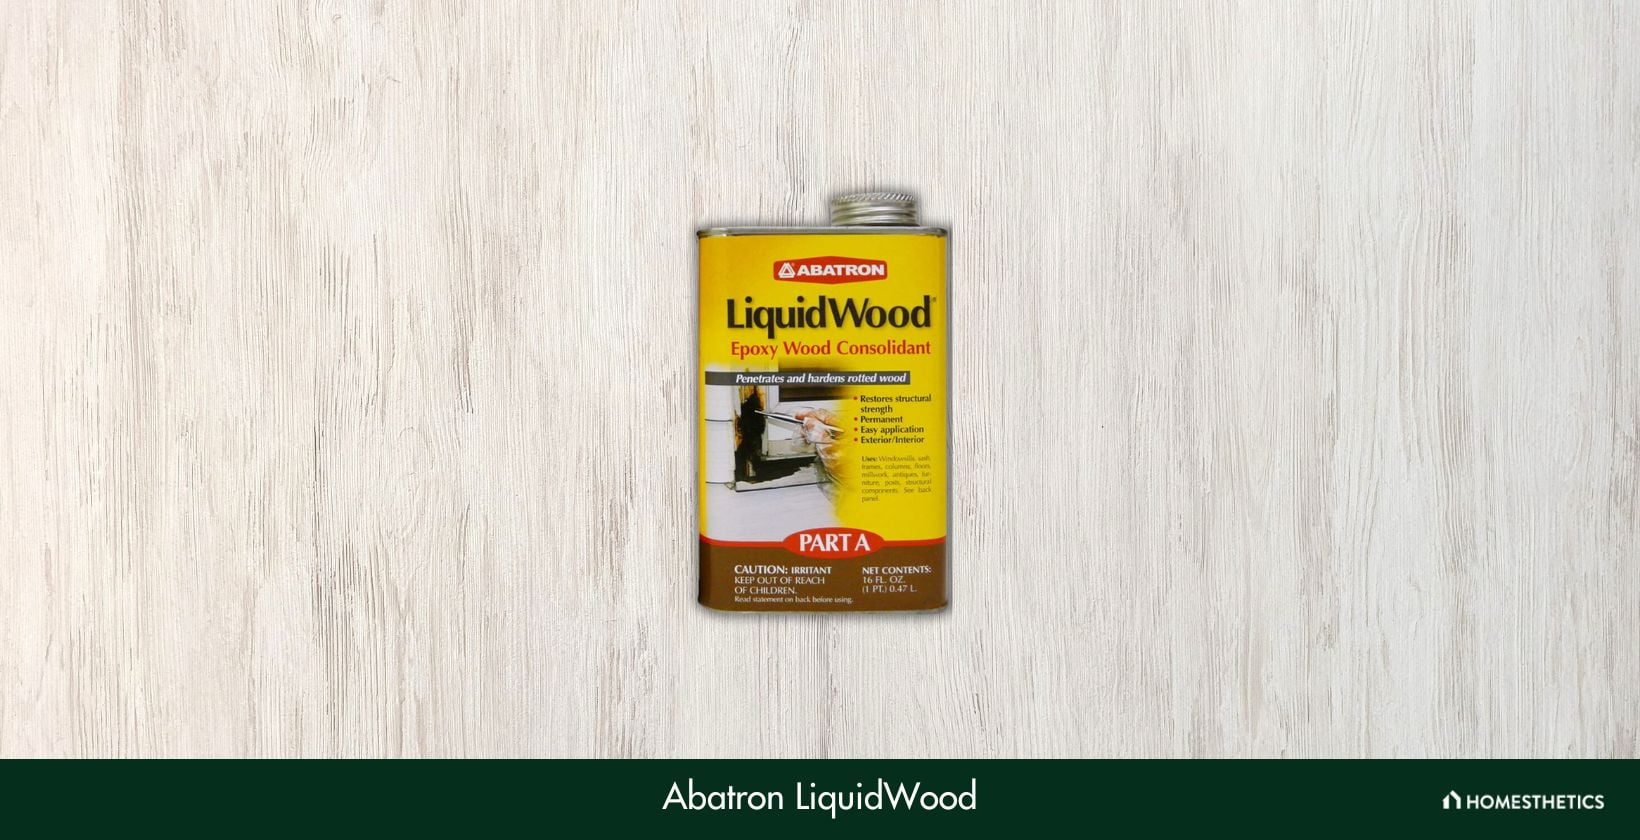
![9 Best Varnishes for Wood [Reviewed & Buyer’s Guide]](https://homesthetics.net/wp-content/uploads/2023/11/Best-Varnishes-for-Wood.jpeg "9 Best Varnishes for Wood [Reviewed & Buyer's Guide]")
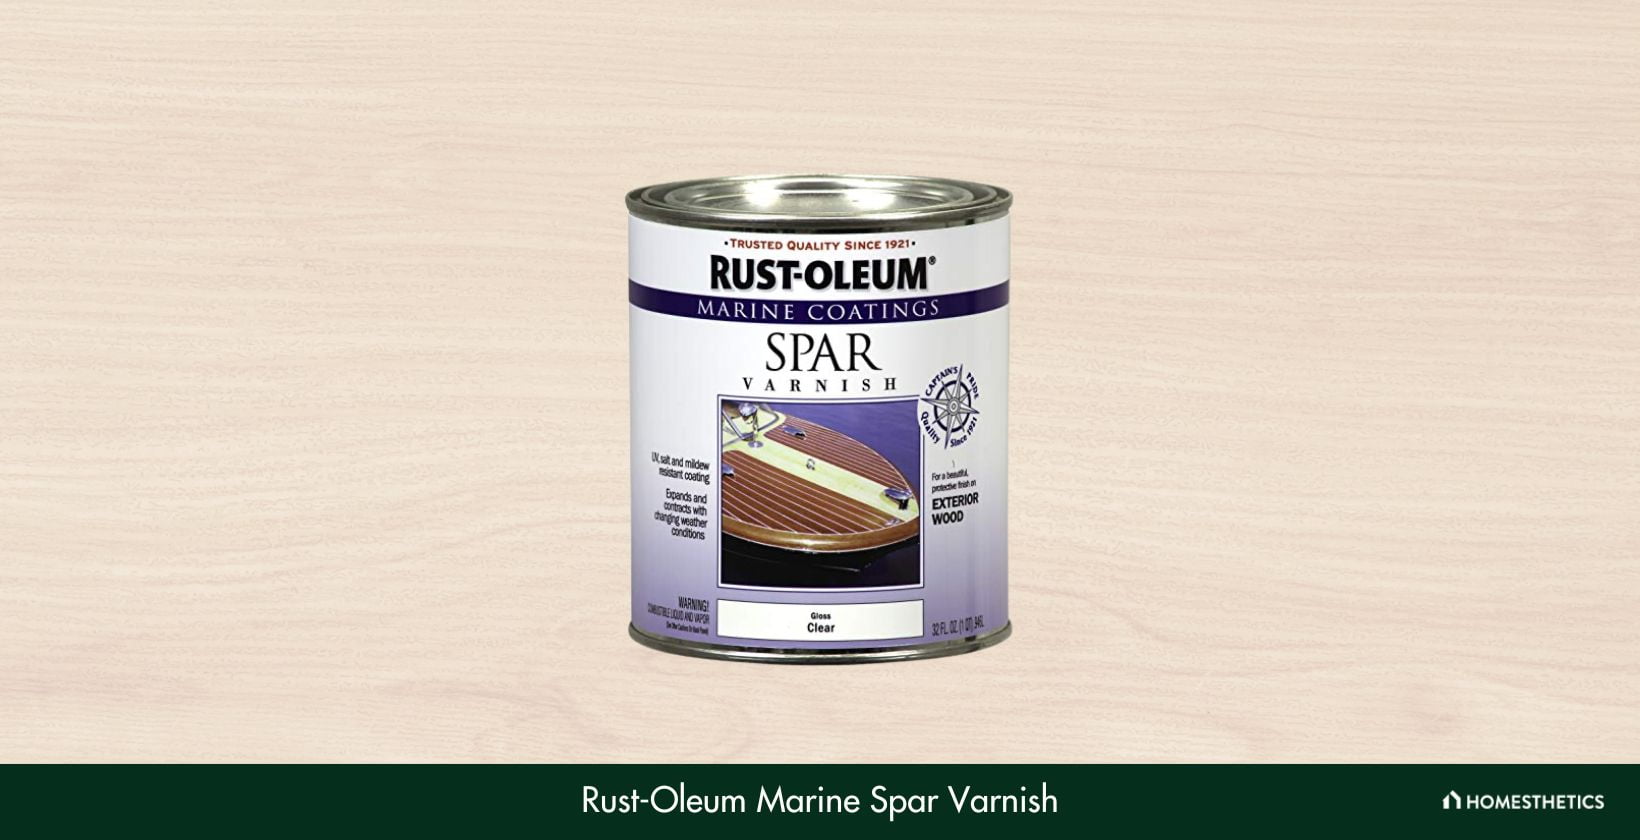
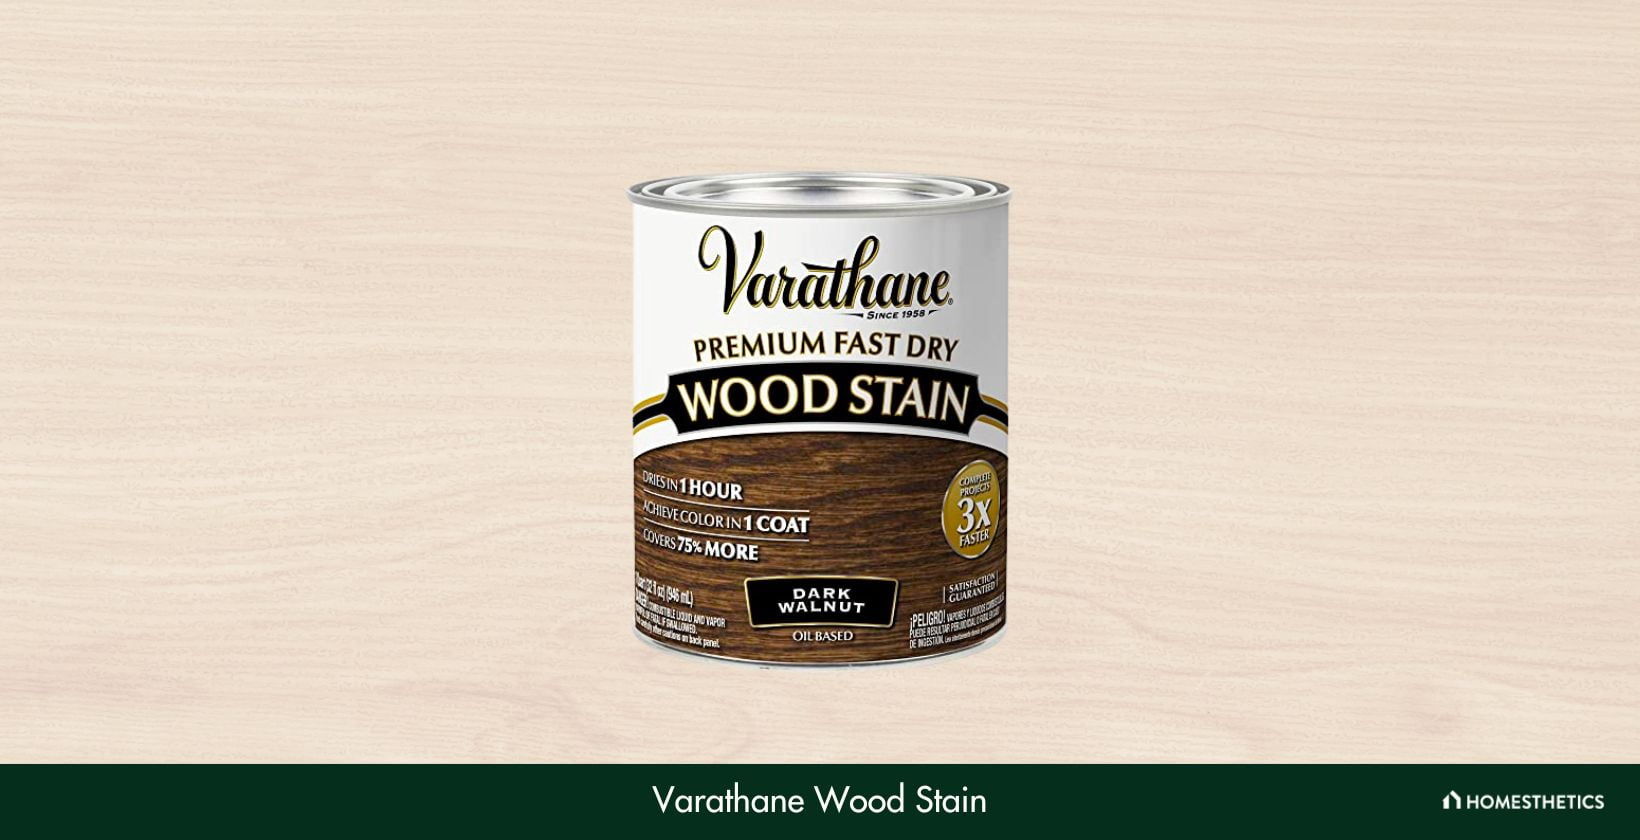
![12 Best Spray Paints For Metal Of 2026 [Buyer’s Guide]](https://homesthetics.net/wp-content/uploads/2021/04/Best-Spray-Paints-for-Metal-of-2021-01.jpg "12 Best Spray Paints For Metal Of 2026 [Buyer's Guide]")


![9 Best Pump Sprayers For Staining Fence [Reviewed & Buyer’s Guide]](https://homesthetics.net/wp-content/uploads/2023/07/Best-Pump-Sprayers-For-Staining-Fence.jpg "9 Best Pump Sprayers For Staining Fence [Reviewed & Buyer's Guide]")
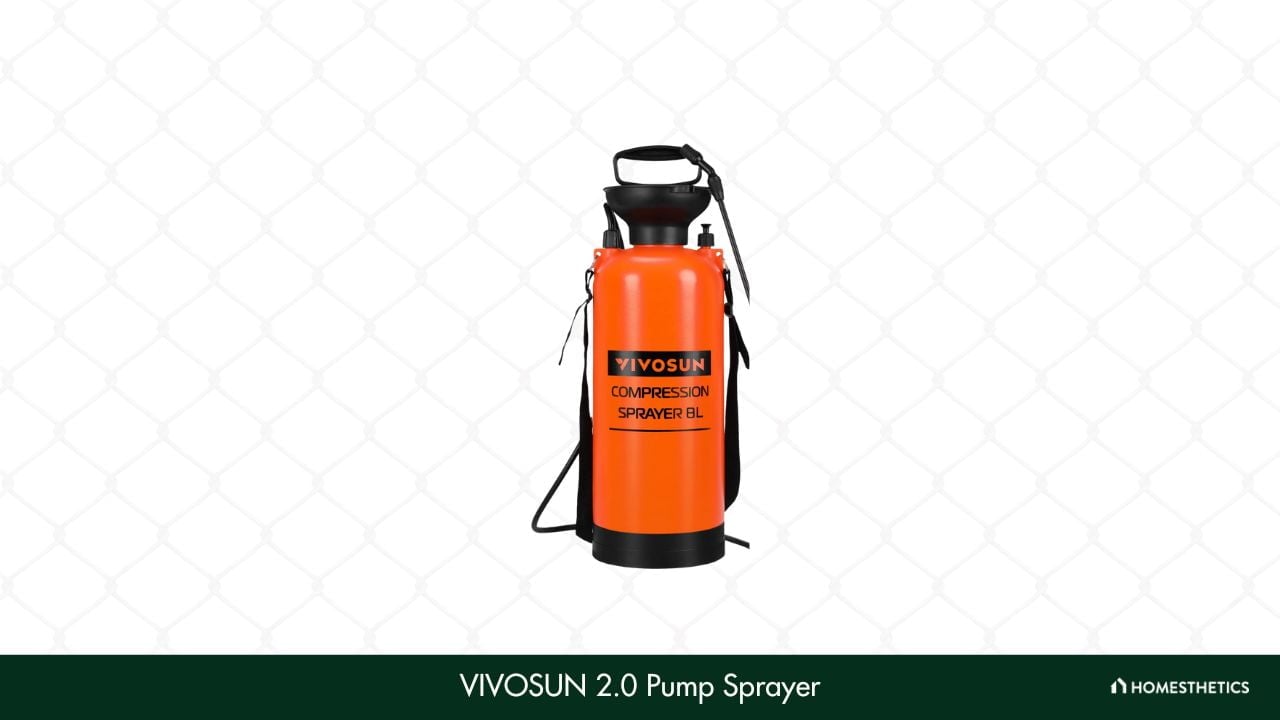
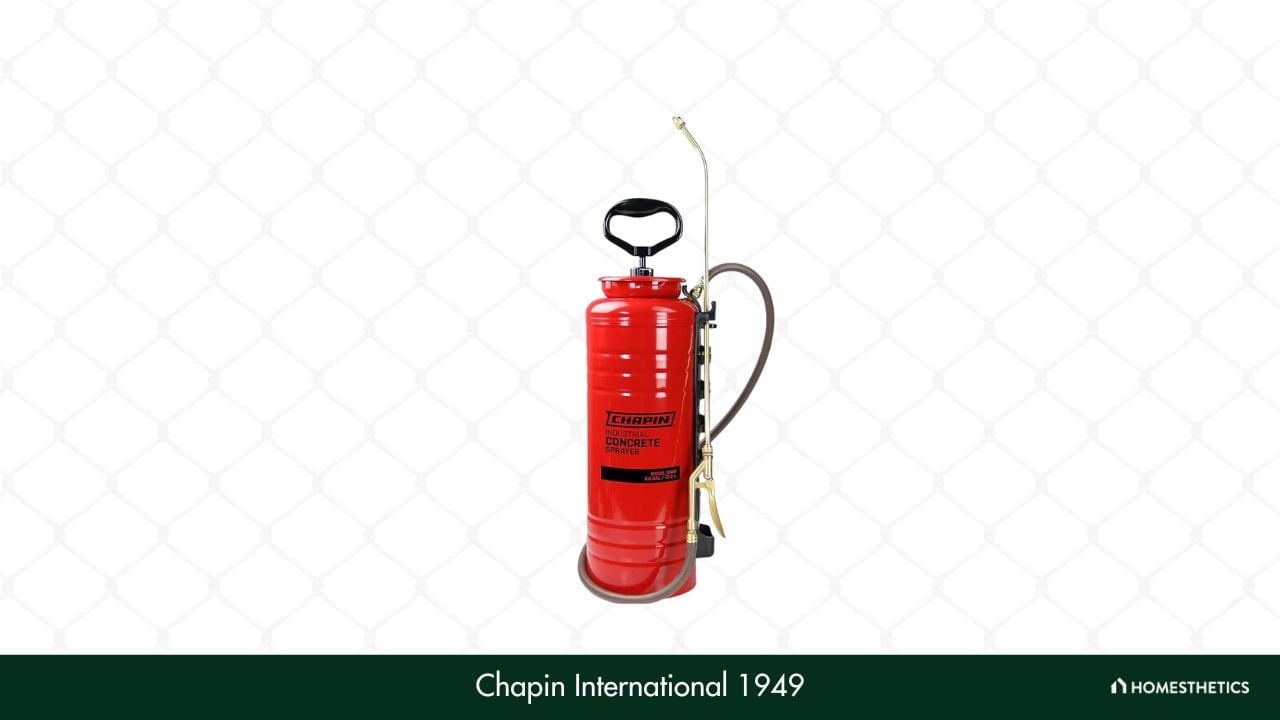
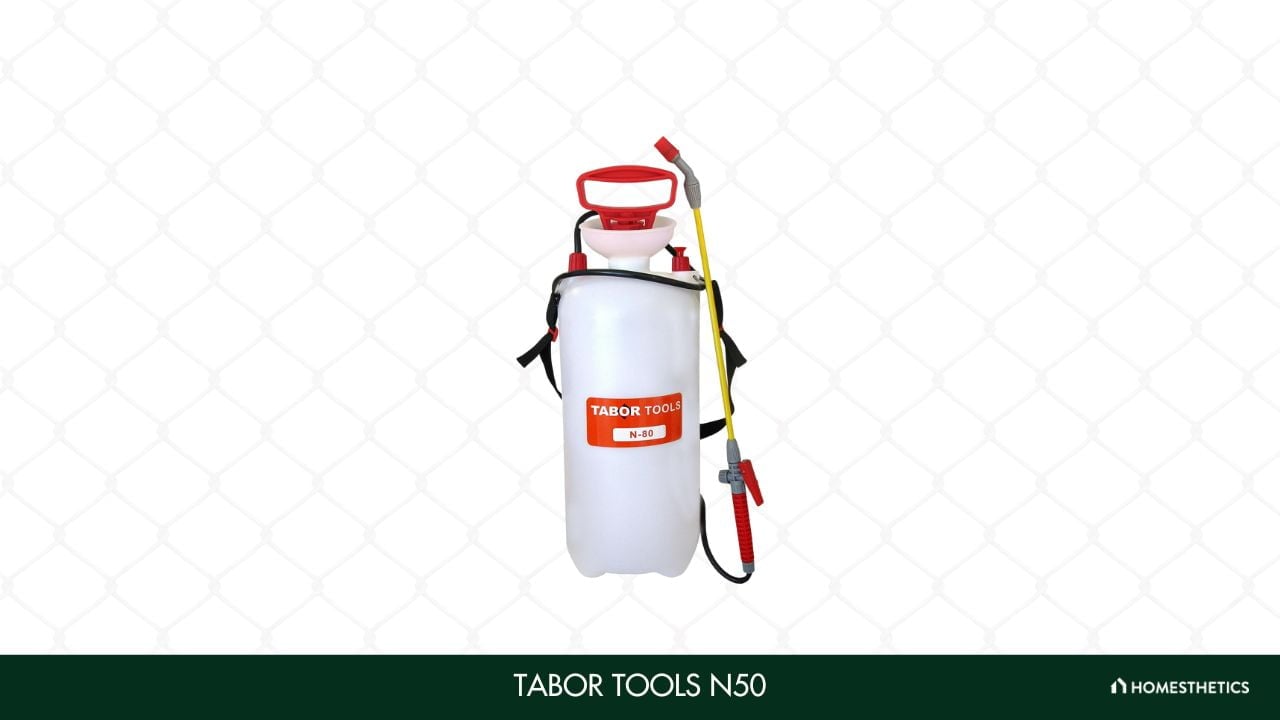

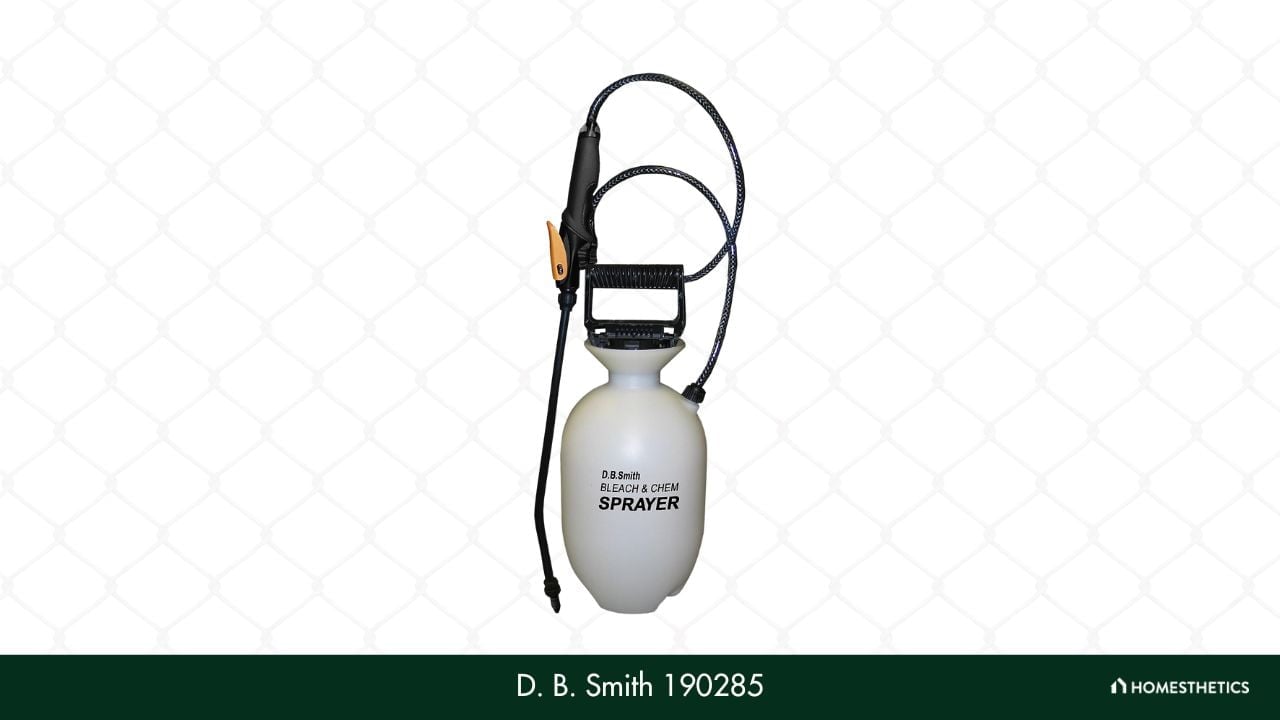
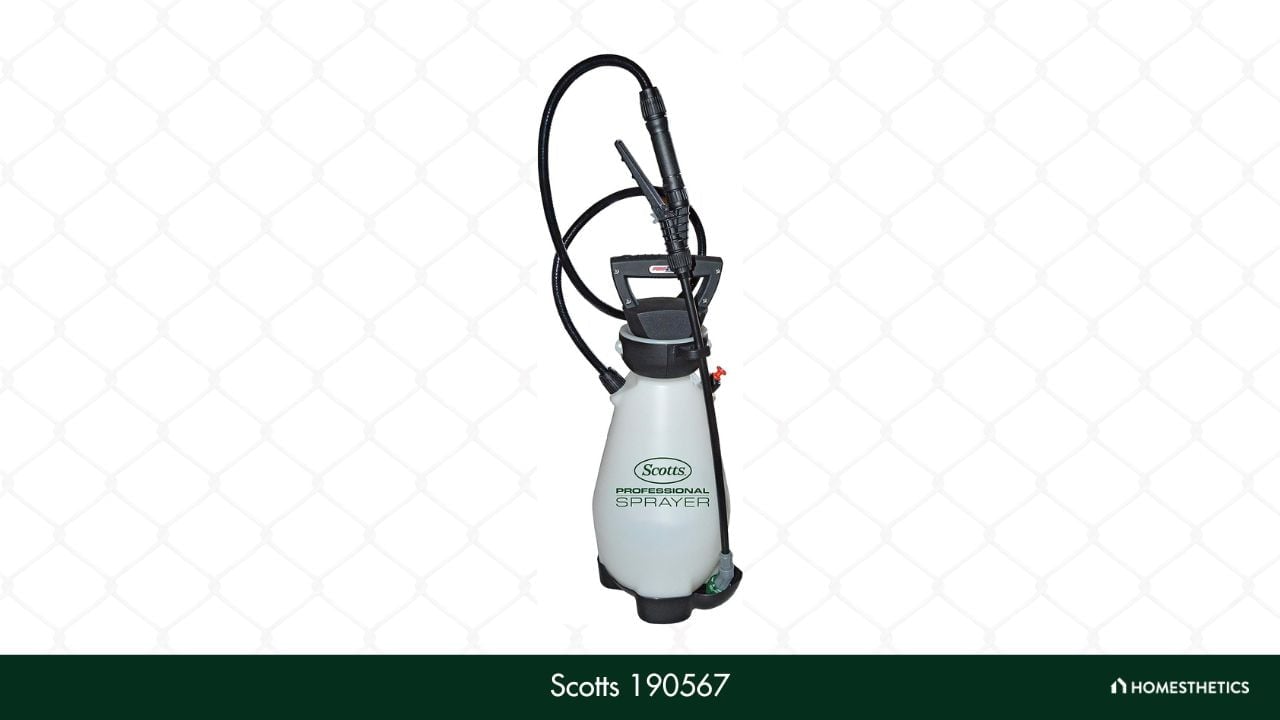
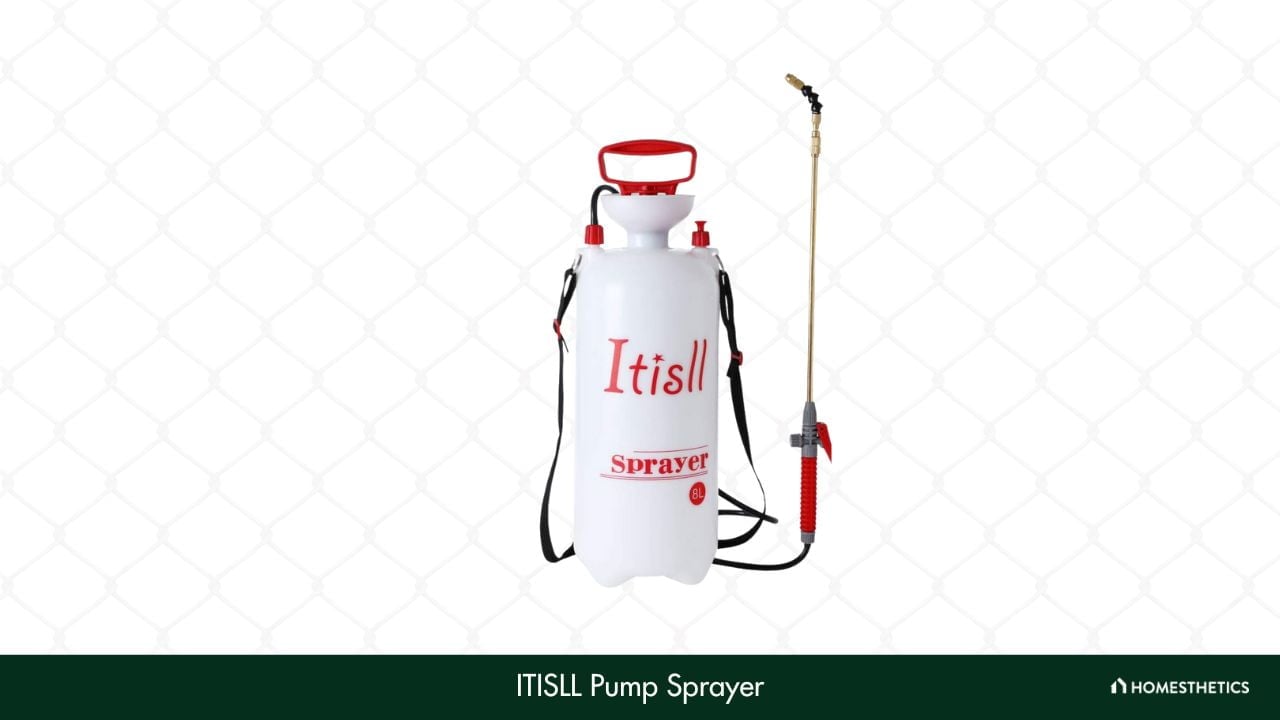
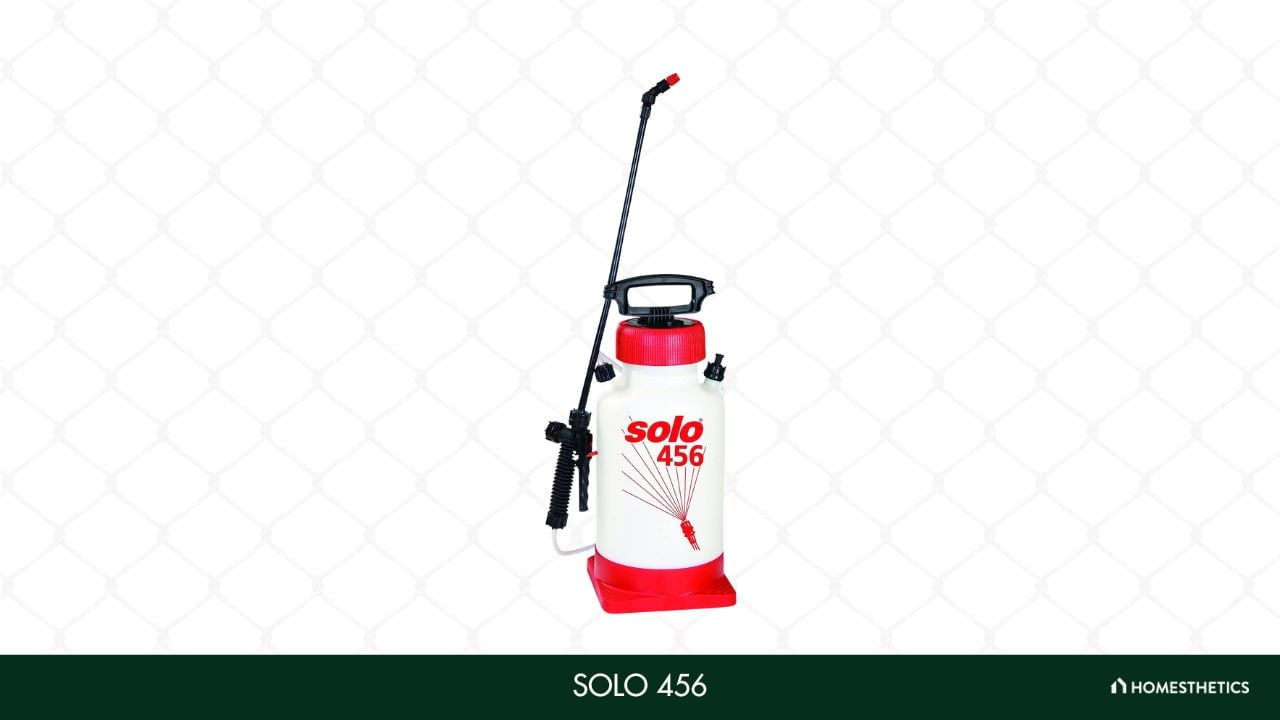

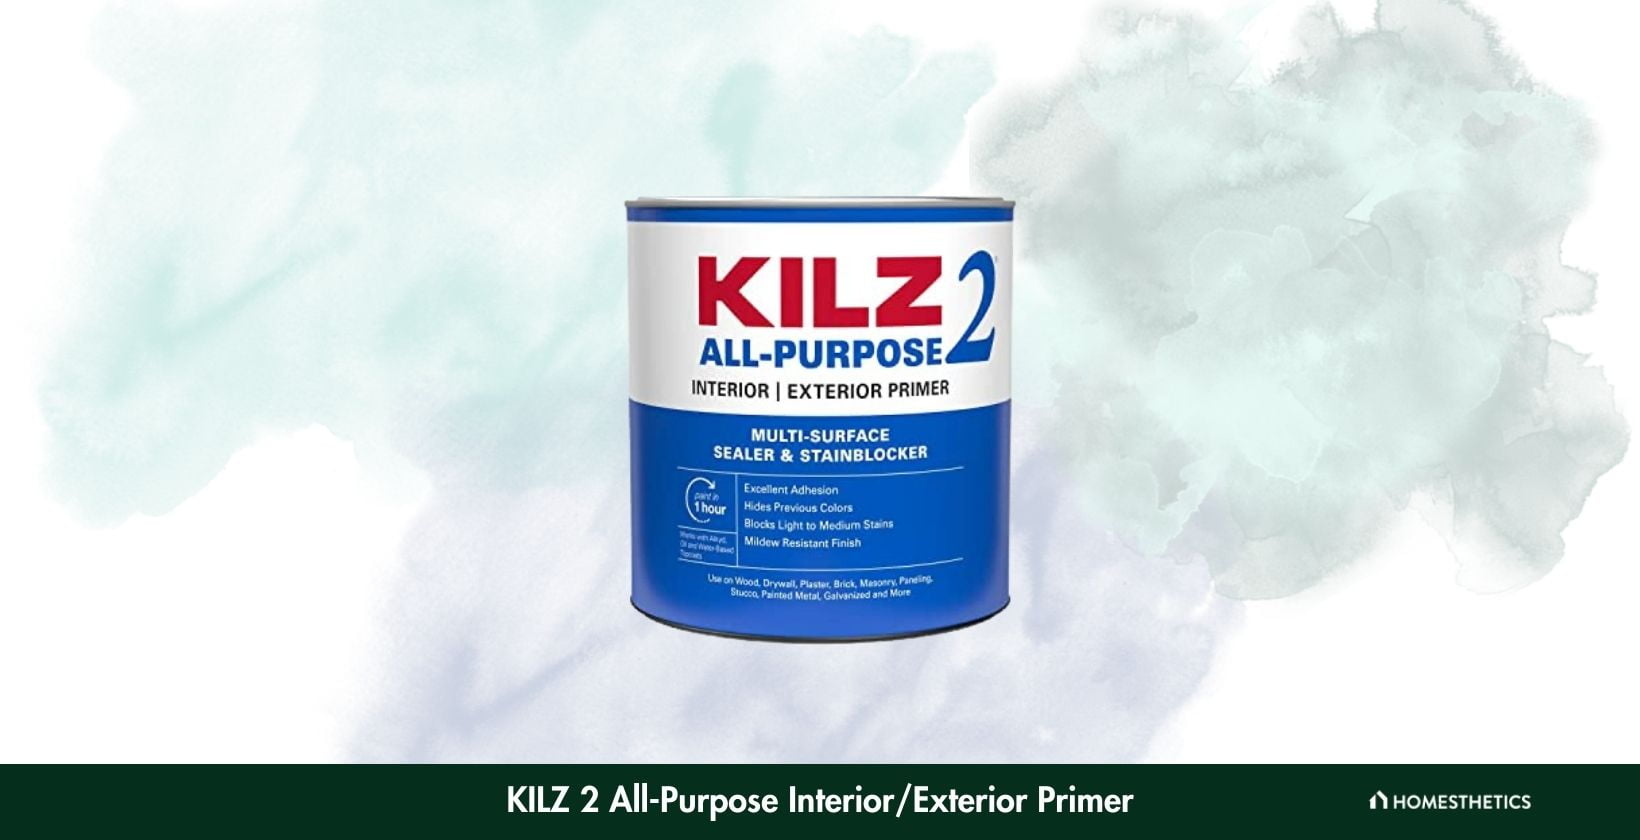
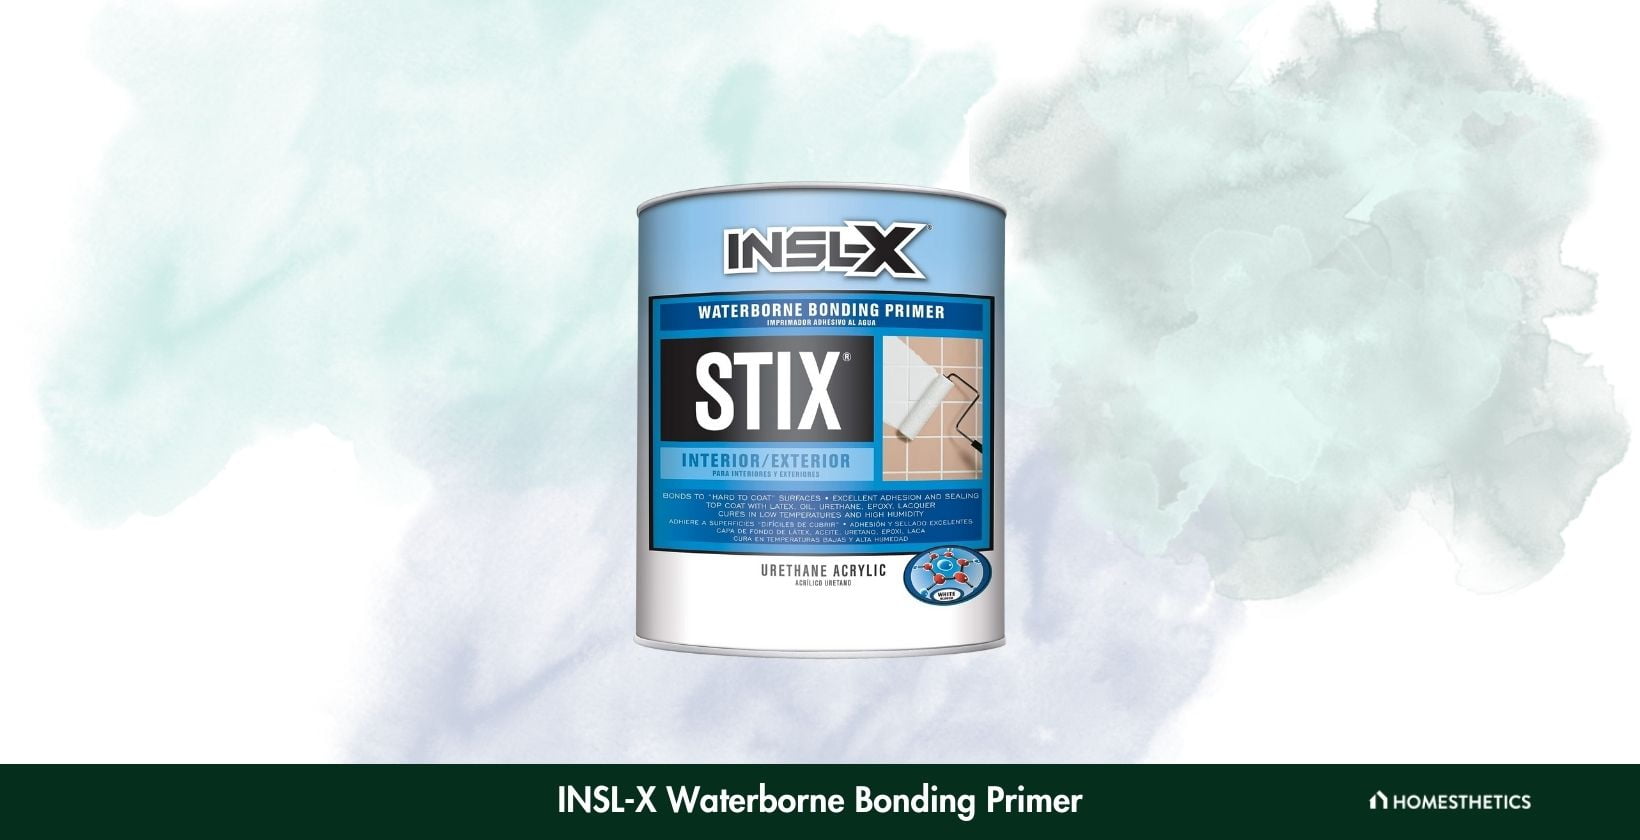
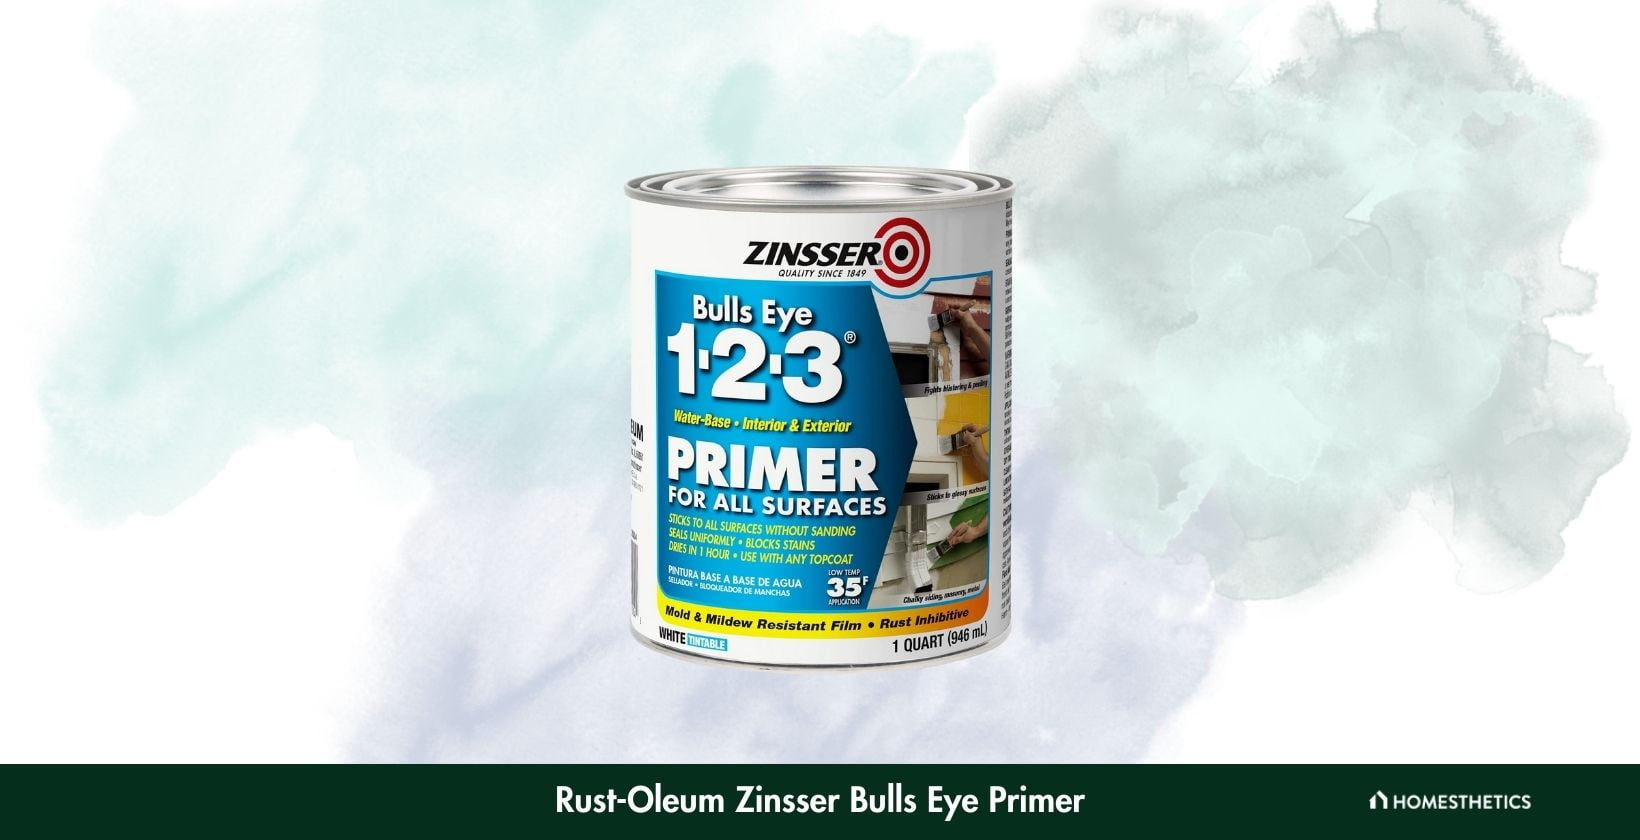
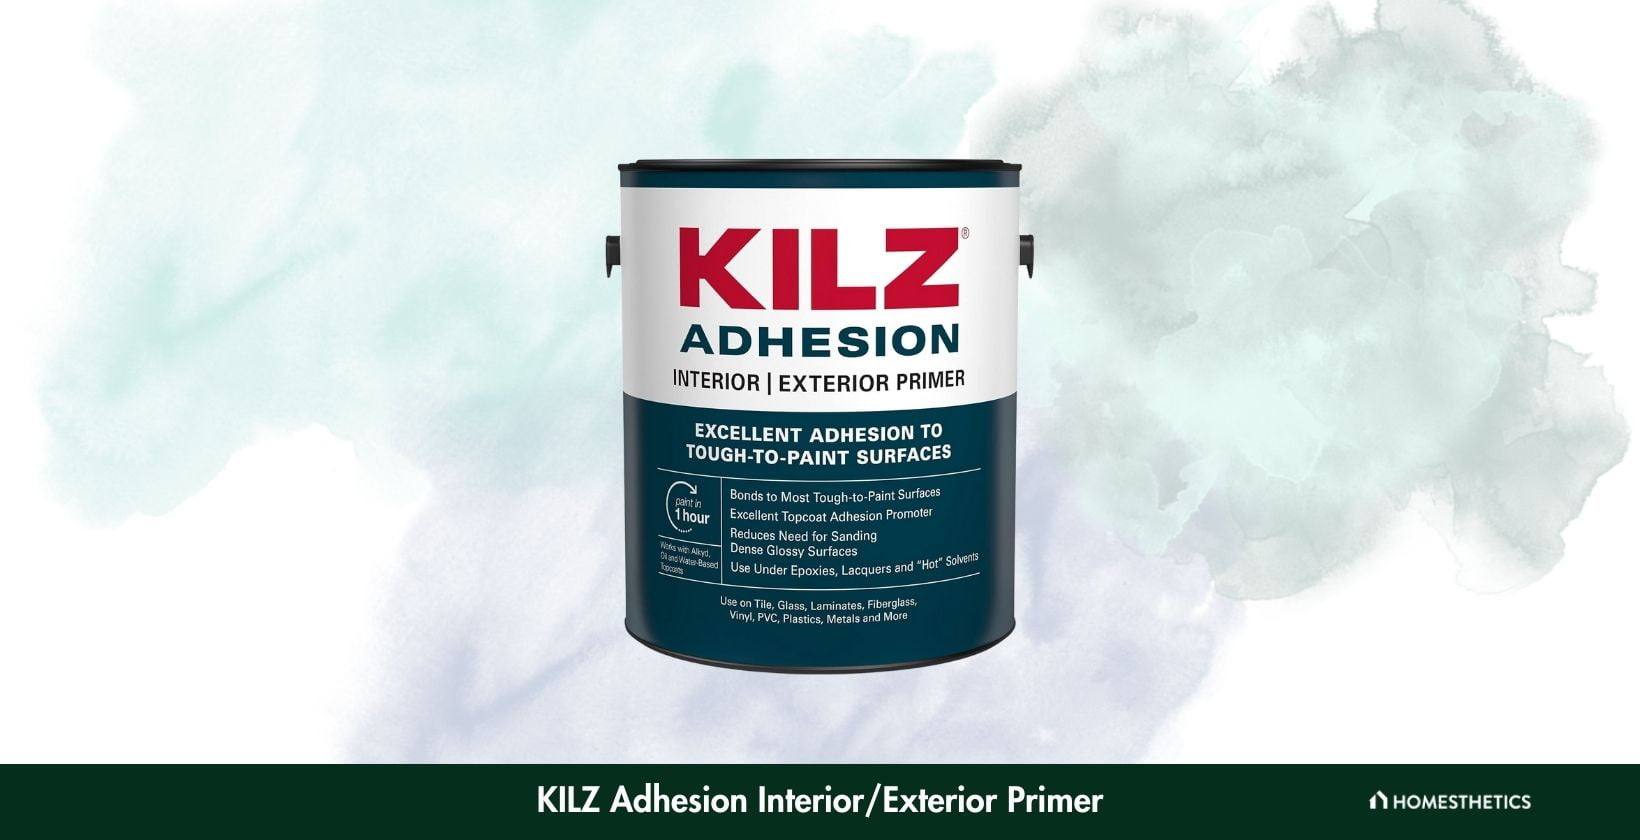

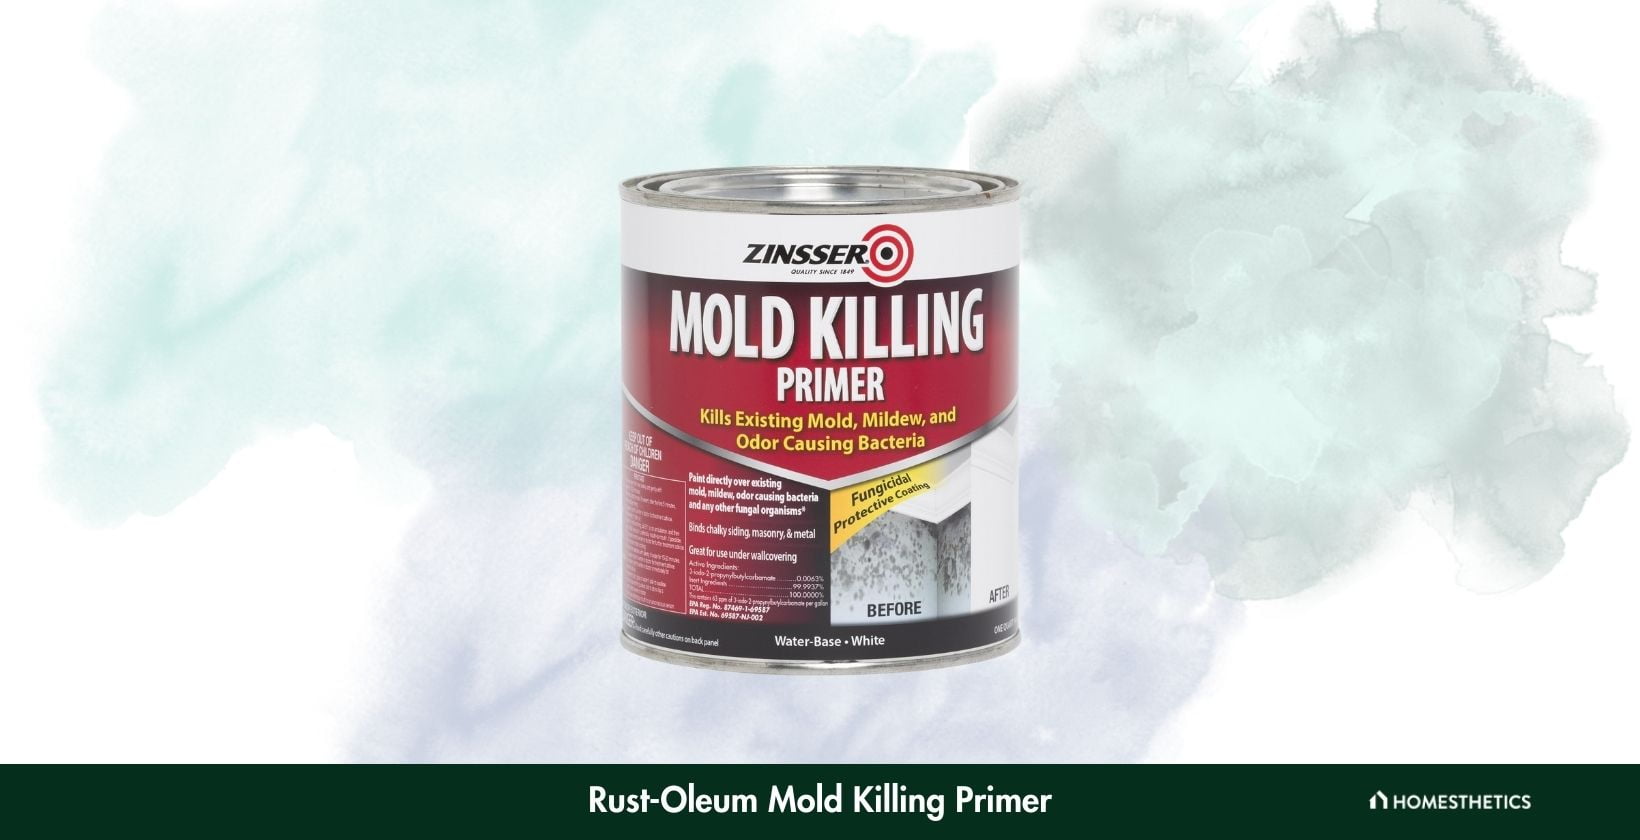
![7 Best Primers For Covering Red Paint [Tested]](https://homesthetics.net/wp-content/uploads/2023/07/Best-Primers-For-Covering-Red-Paint.jpg "7 Best Primers For Covering Red Paint [Tested]")
![8 Best Primer for Bare Wood [Reviews & Buyer’s Guide]](https://homesthetics.net/wp-content/uploads/2021/05/Best-Primer-for-Bare-Wood-01.jpg "8 Best Primer for Bare Wood [Reviews & Buyer's Guide]")
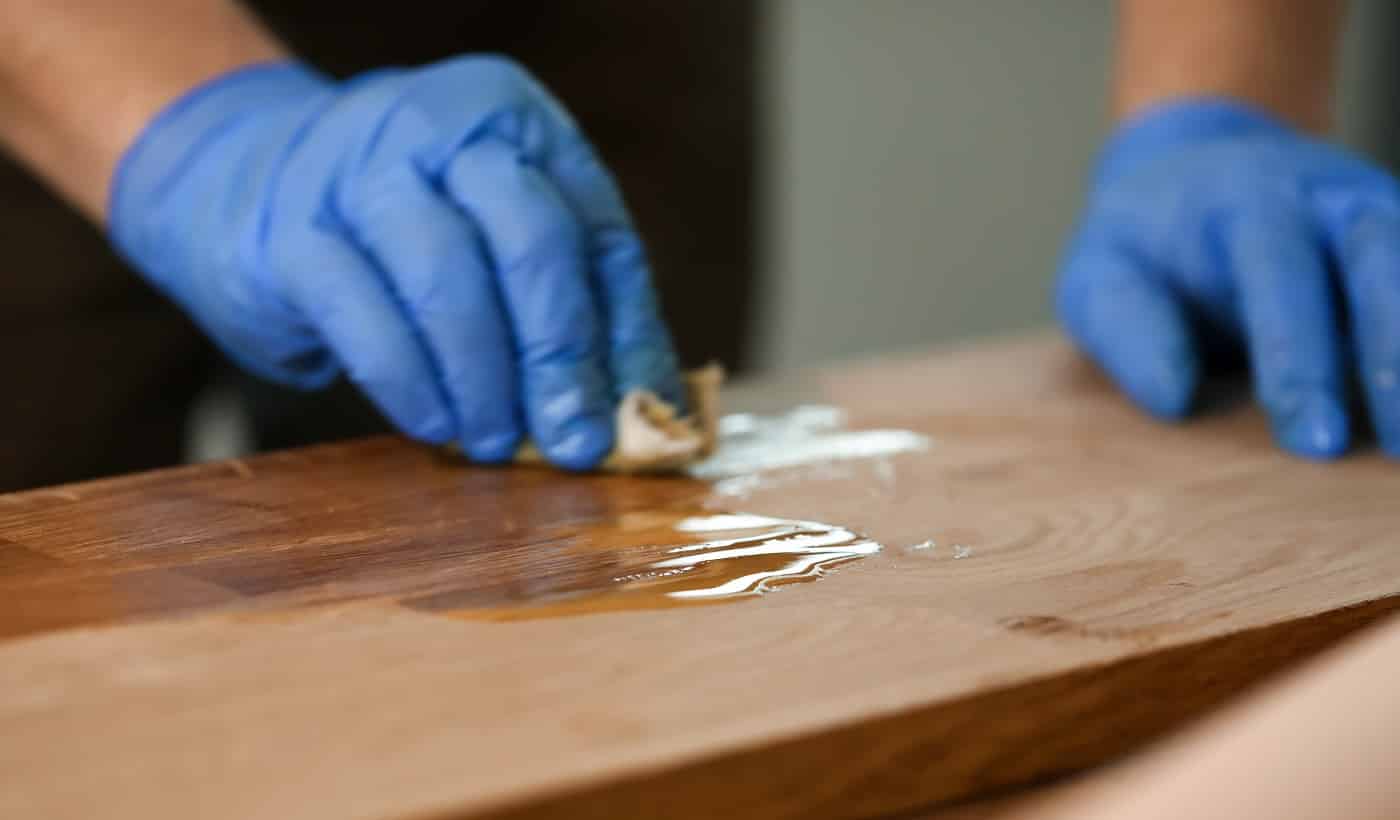


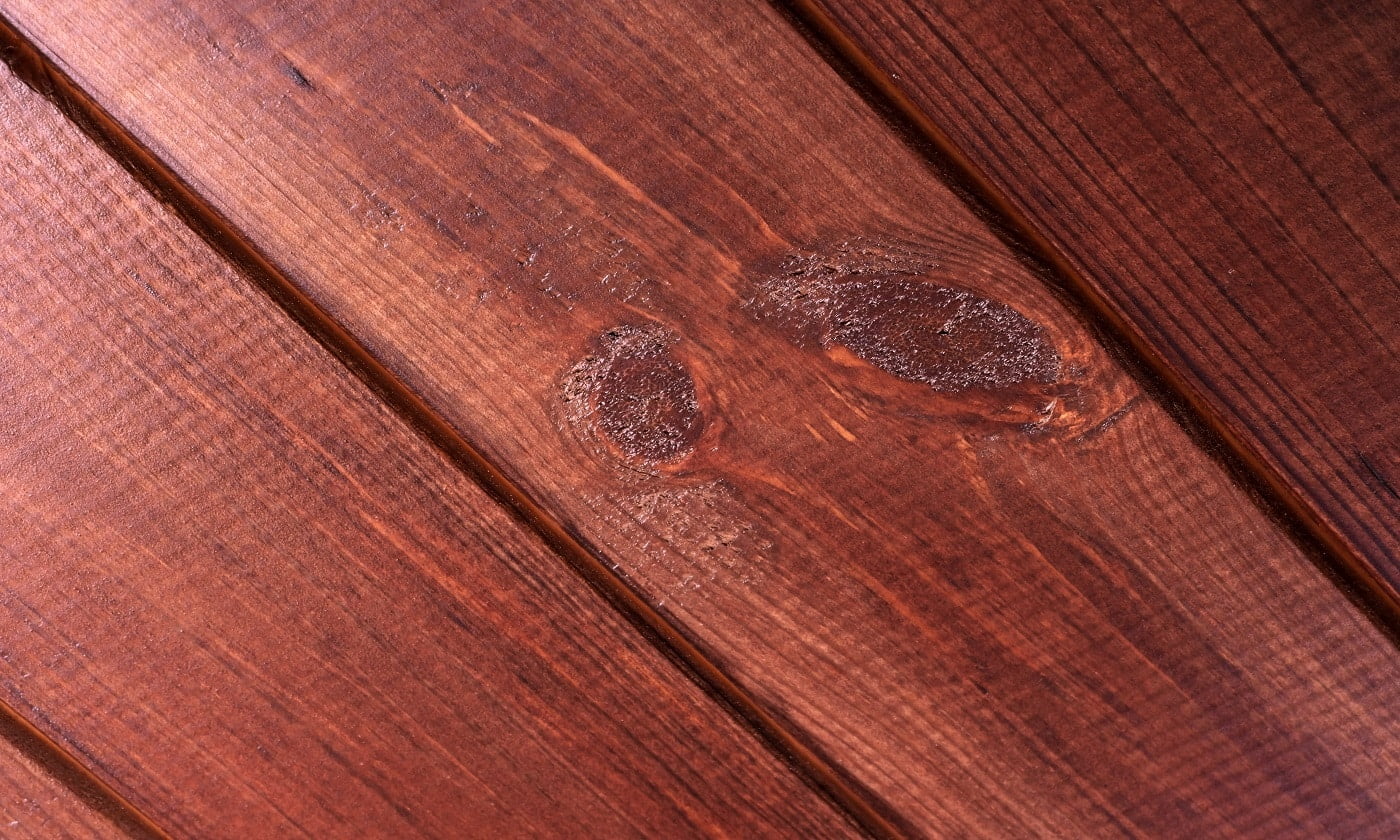

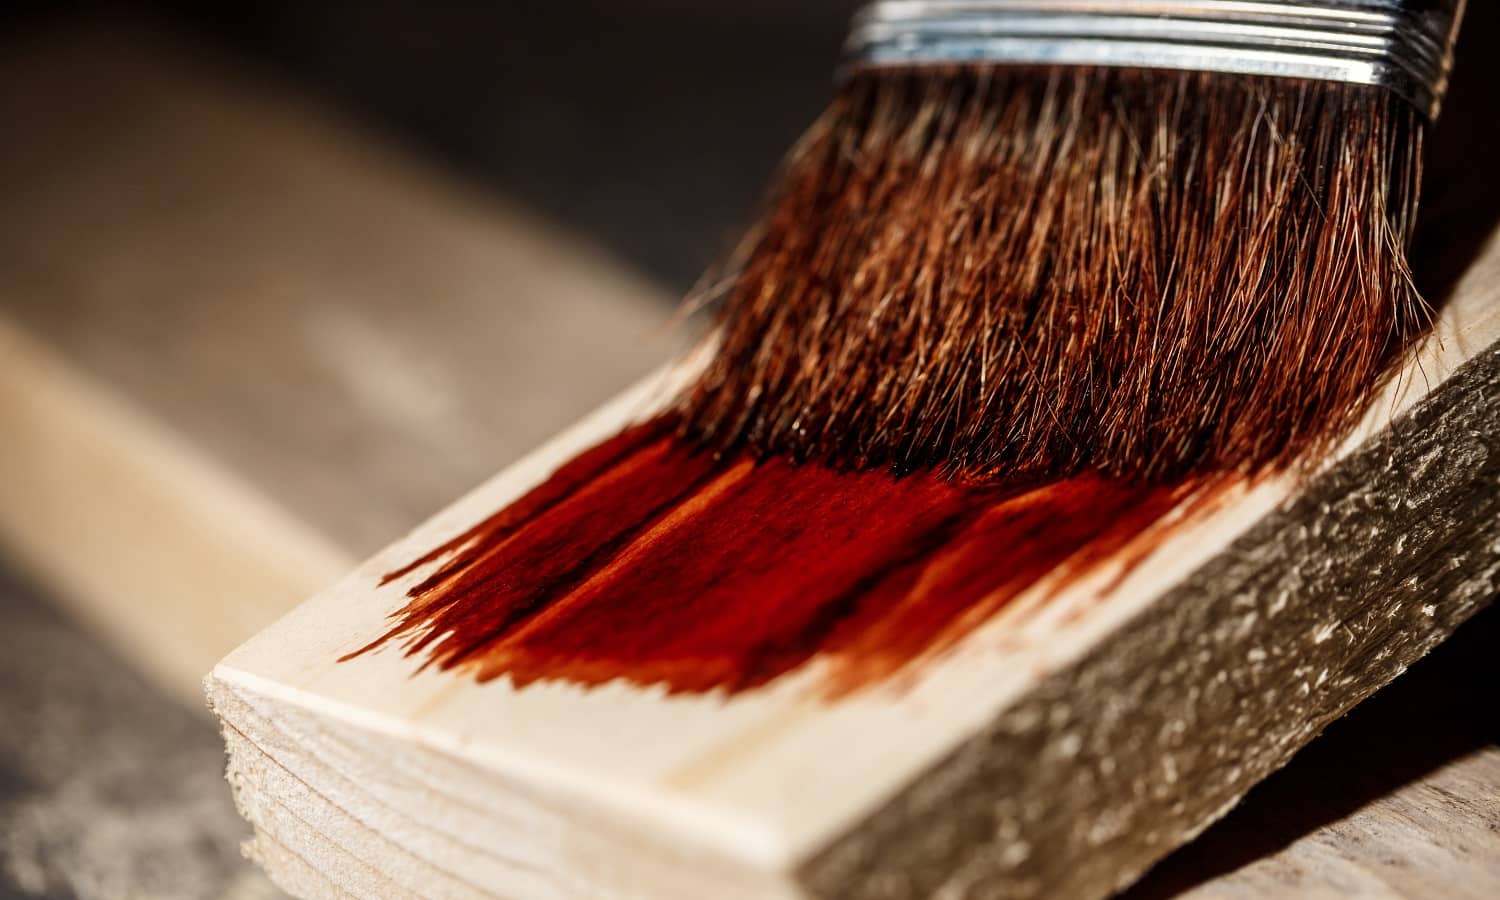
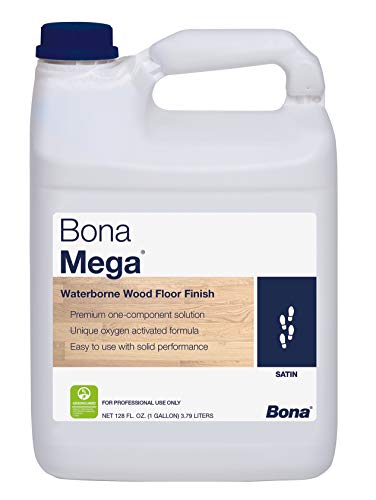
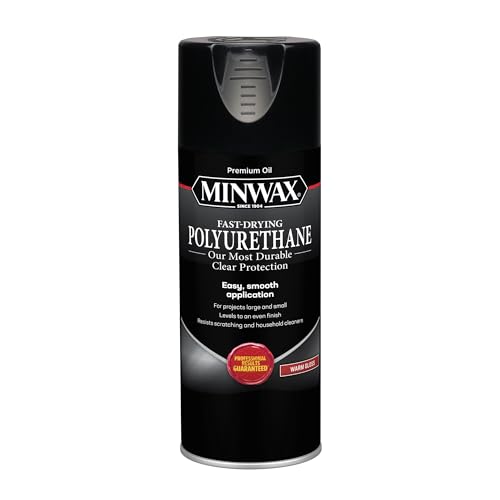


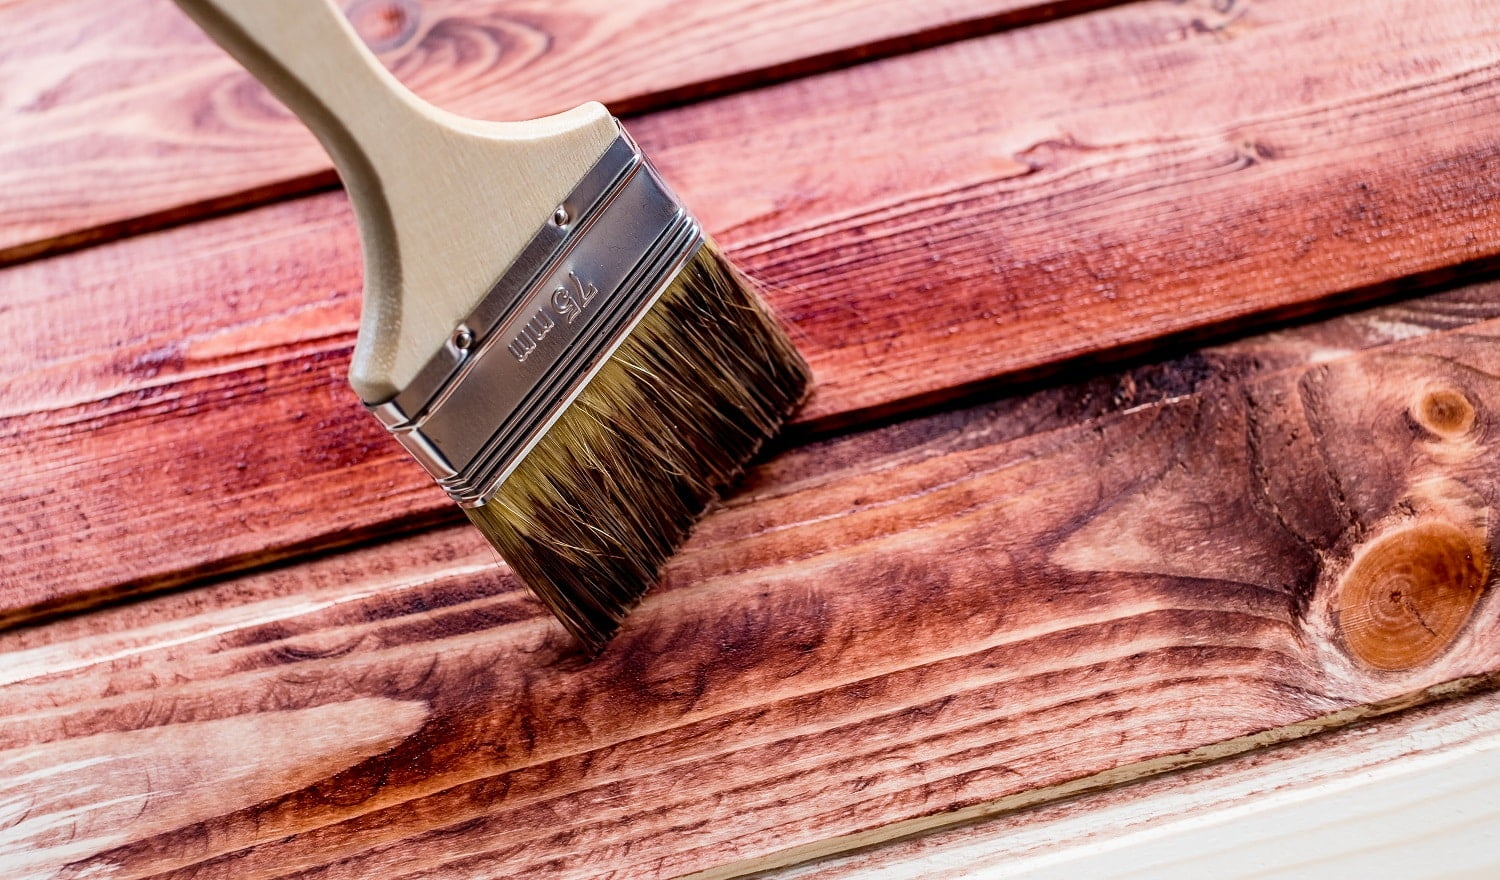
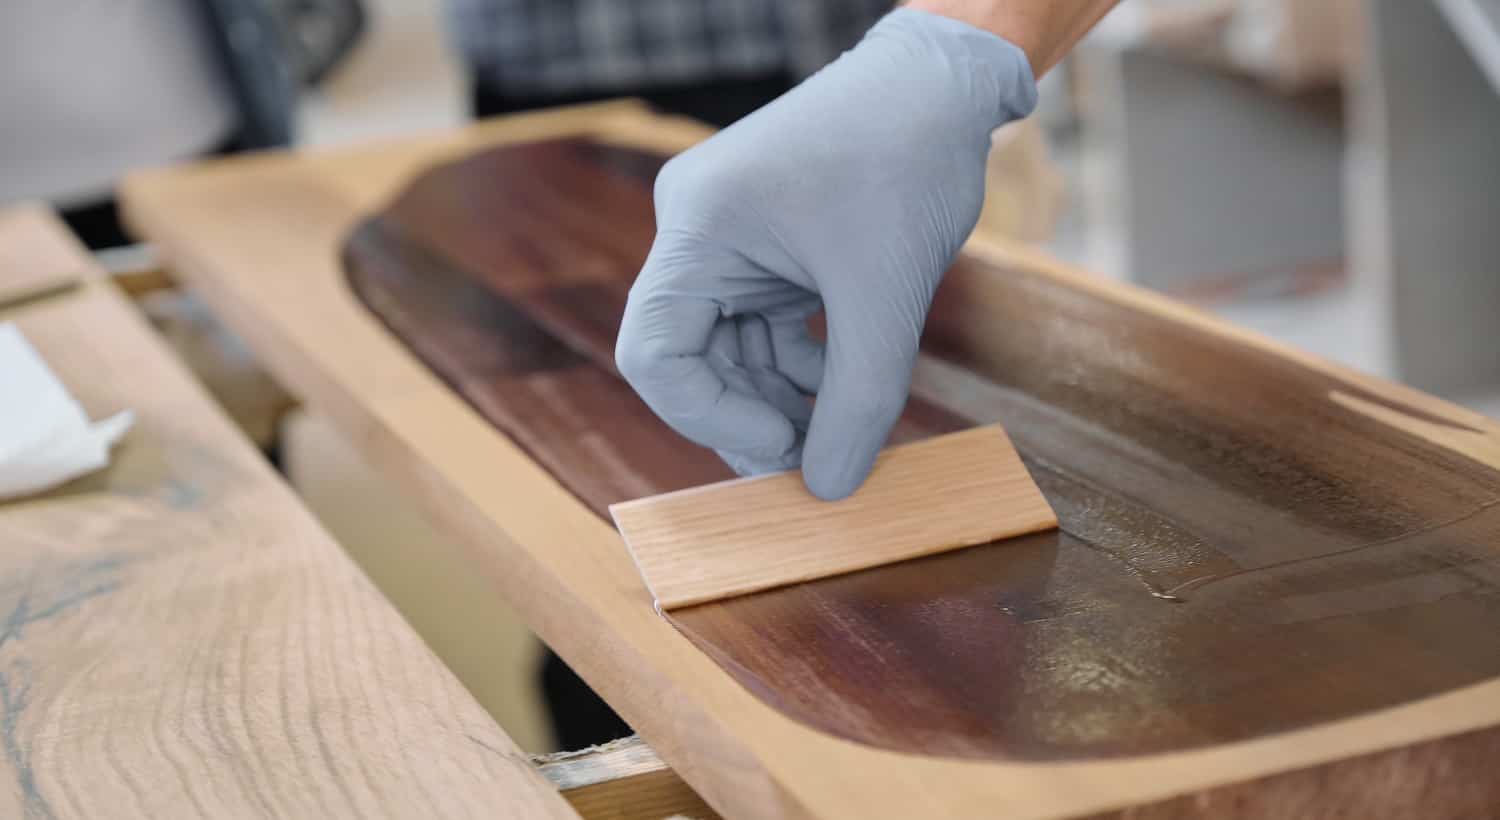
![11 Best Paint Scrapers to Rock in 2024 [Reviewed]](https://homesthetics.net/wp-content/uploads/2021/07/Best-Paint-Scrapers-to-Rock-01.jpg "11 Best Paint Scrapers to Rock in 2024 [Reviewed]")
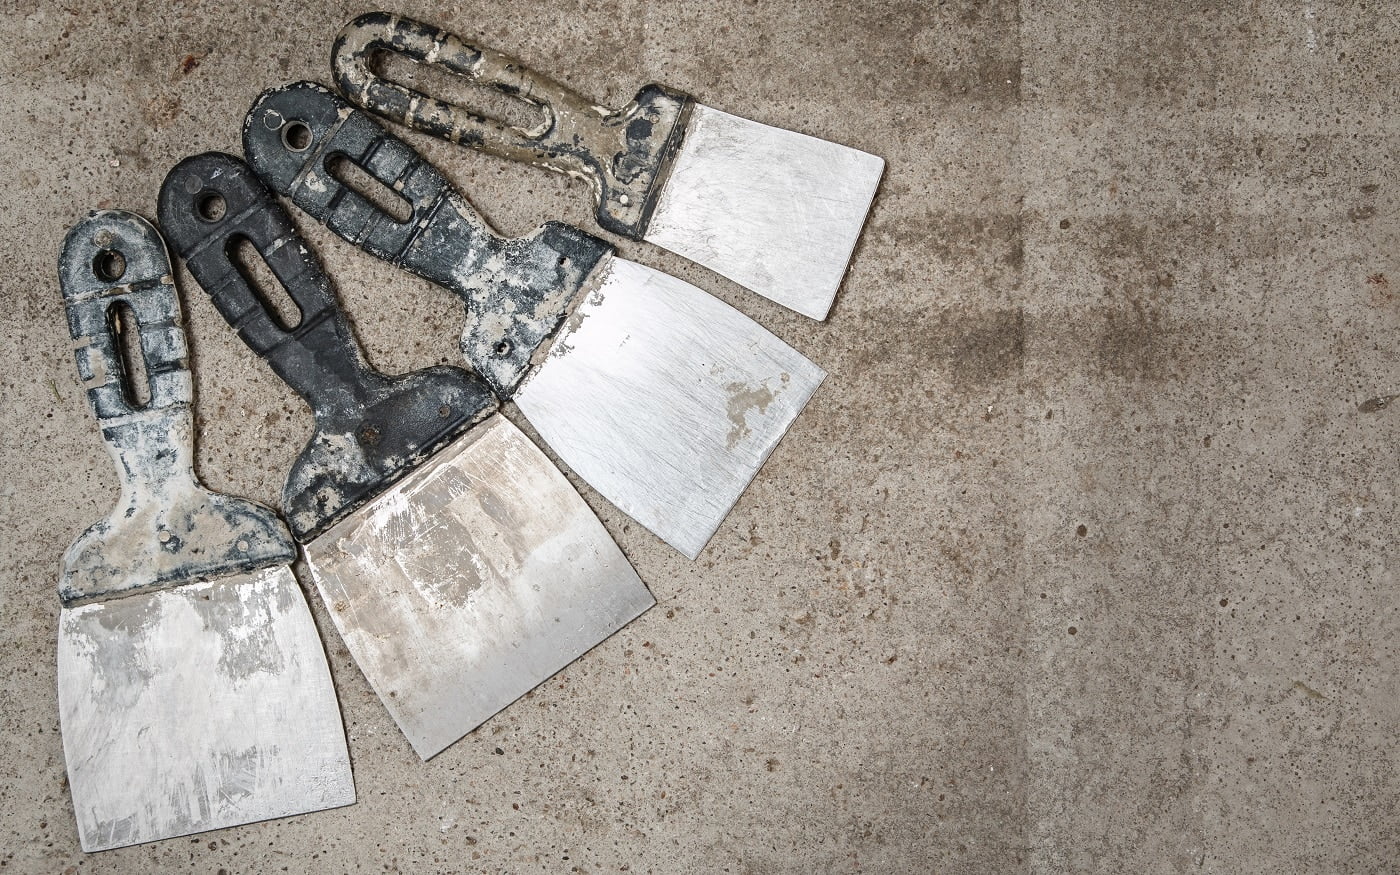
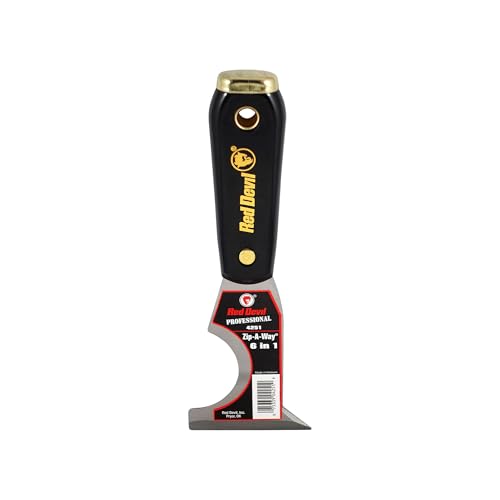
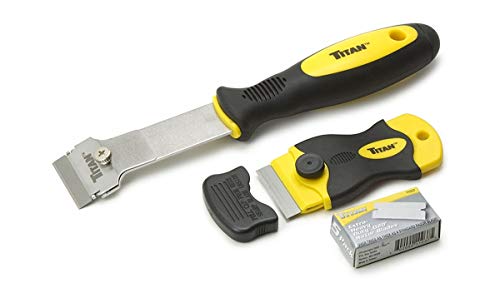
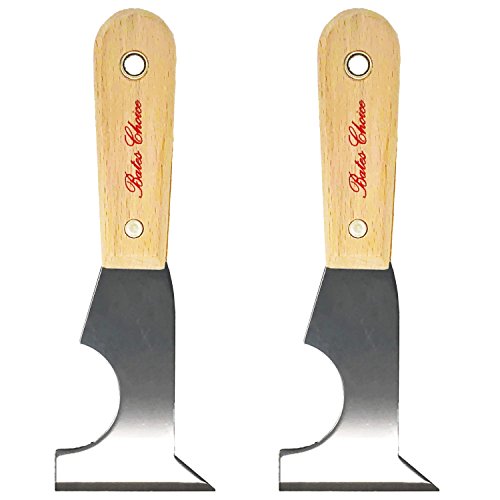


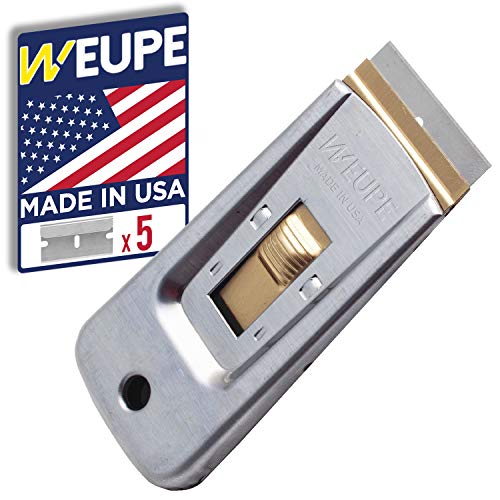
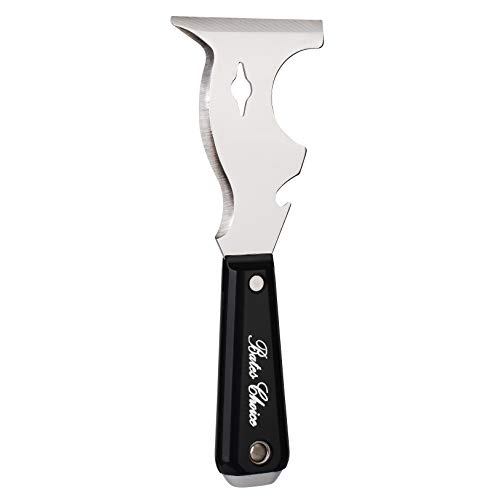


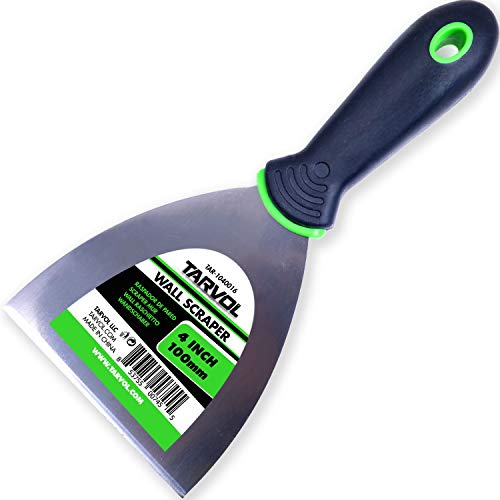
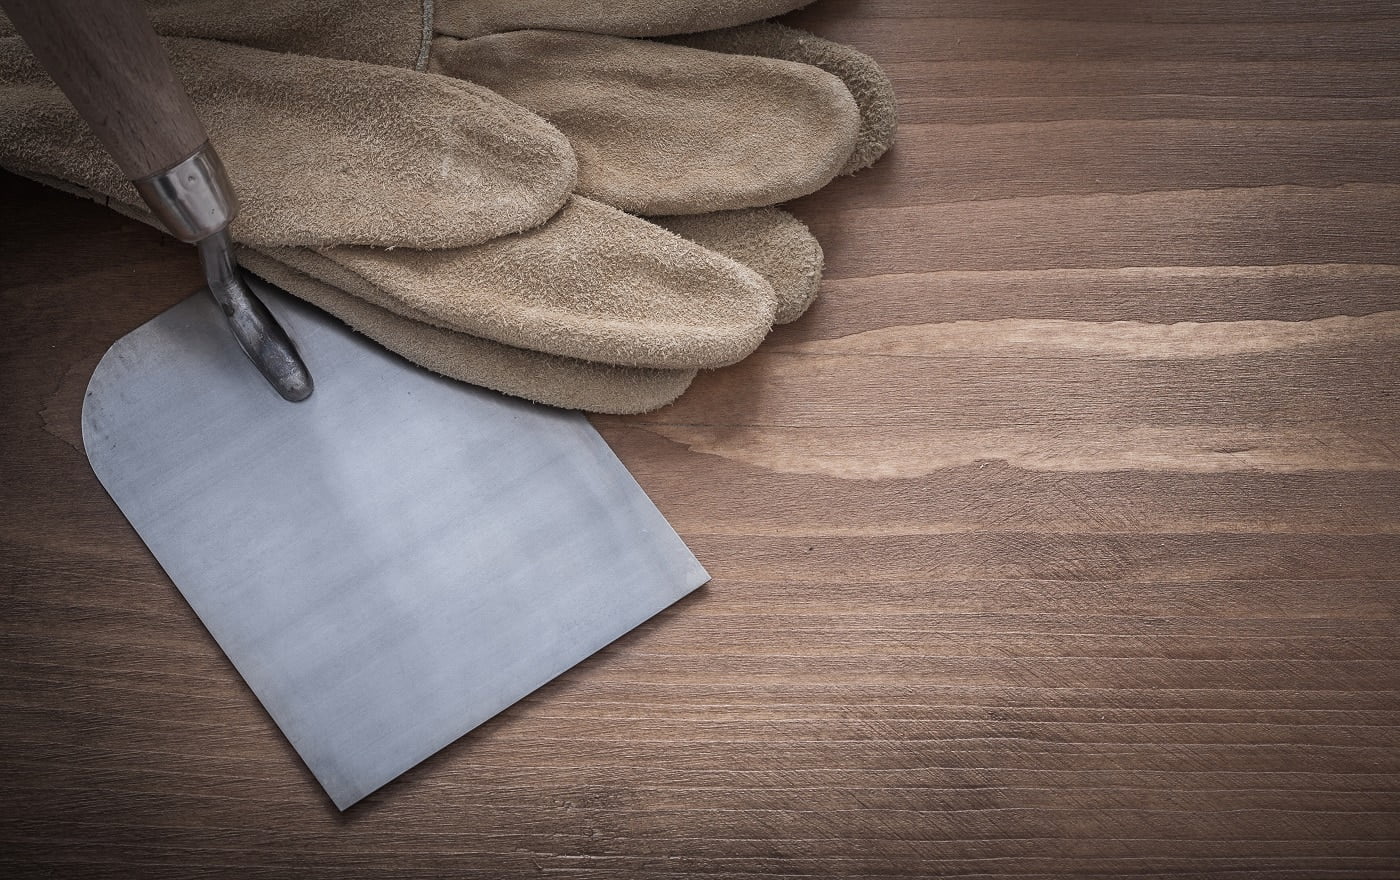
![9 Best Paint Roller To Hide Imperfections Tested [Buyer’s Guide]](https://homesthetics.net/wp-content/uploads/2021/06/Best-Paint-Roller-To-Hide-Imperfections-01.jpg "9 Best Paint Roller To Hide Imperfections Tested [Buyer's Guide]")


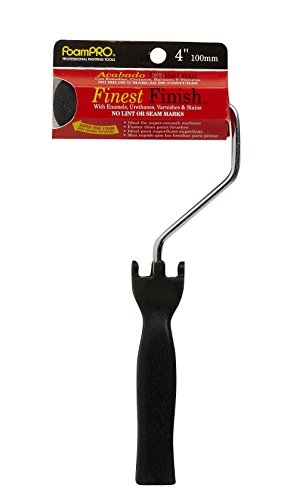

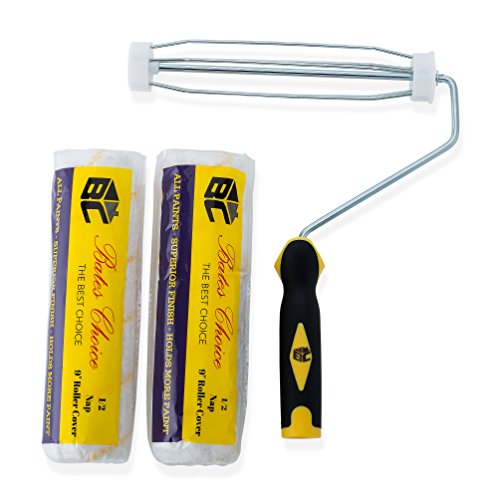

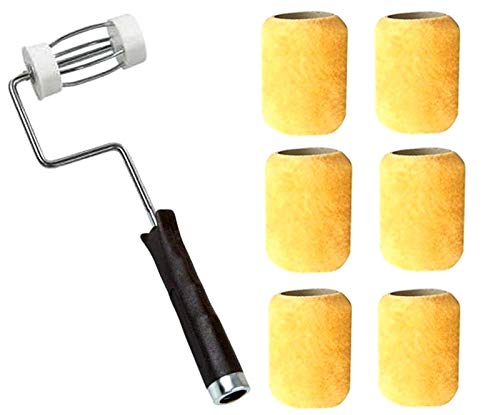
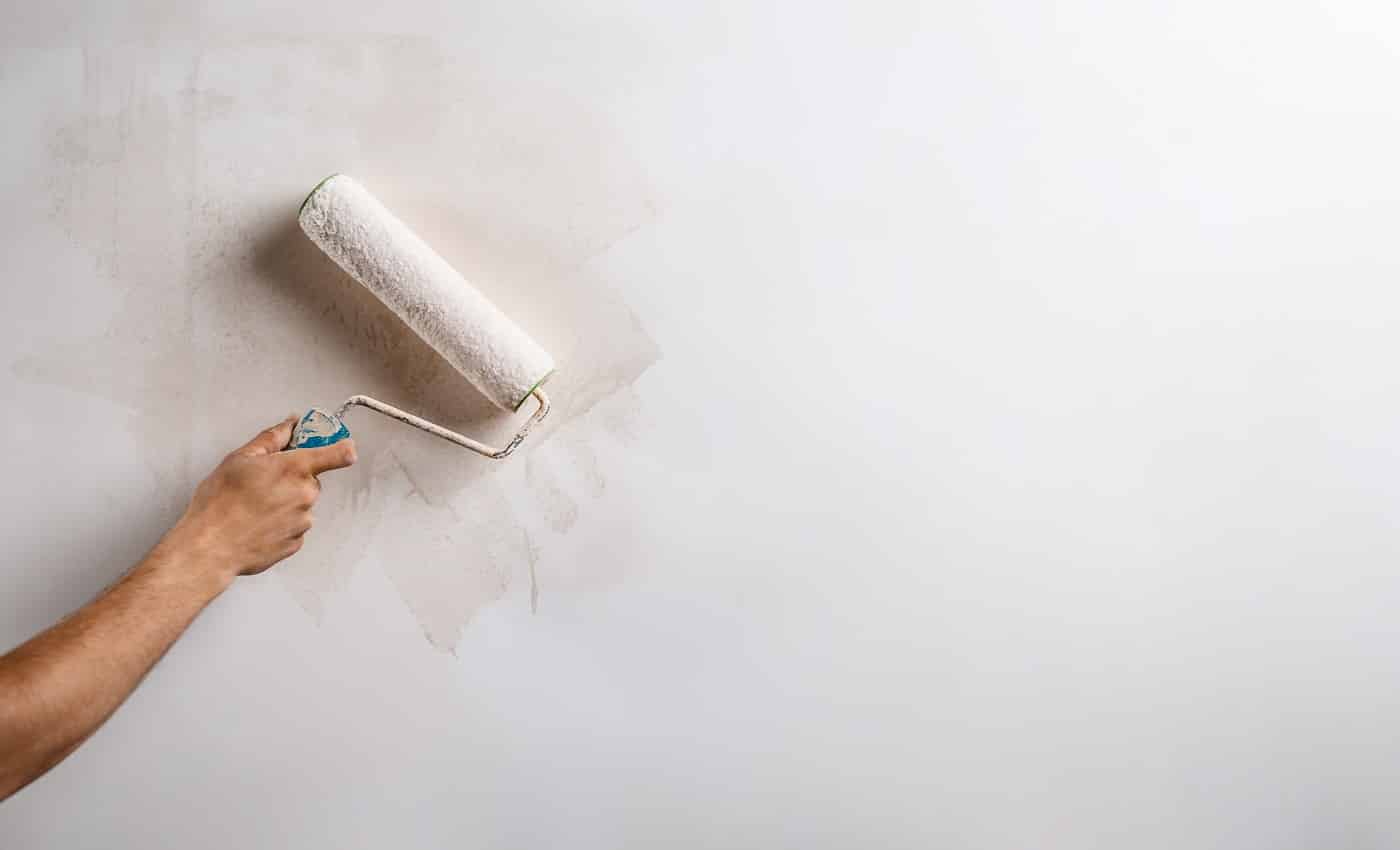


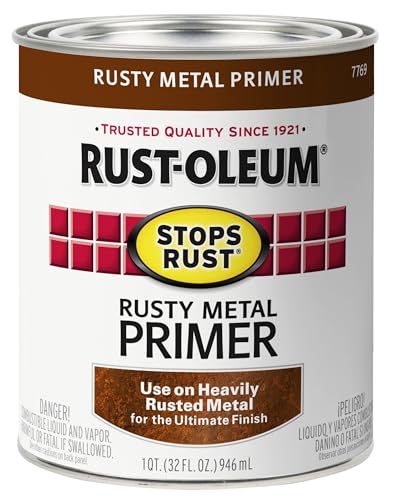

![6 Best Paint Primers For Rusted Metal [2026] [Buyer’s Guide]](https://homesthetics.net/wp-content/uploads/2021/07/Best-Paint-Primer-For-Rusted-Metal-001.jpg "6 Best Paint Primers For Rusted Metal [2026] [Buyer's Guide]")

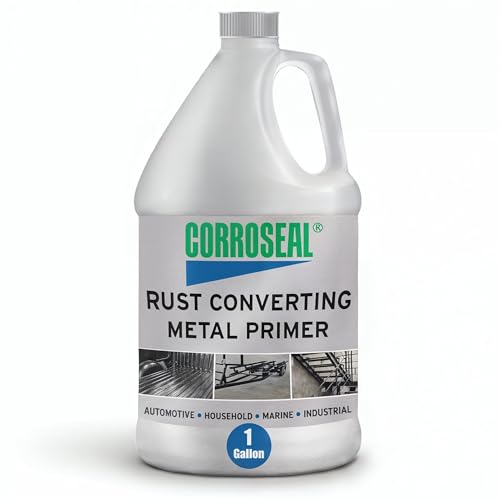
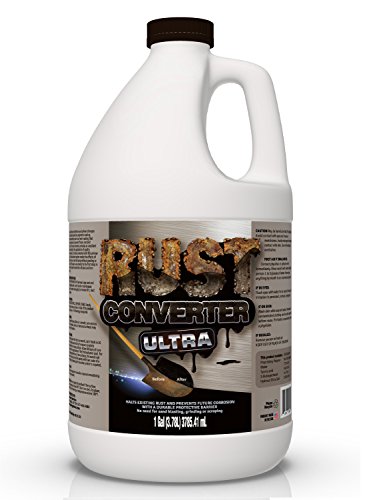
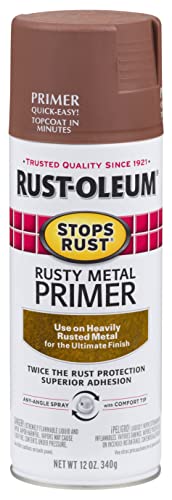


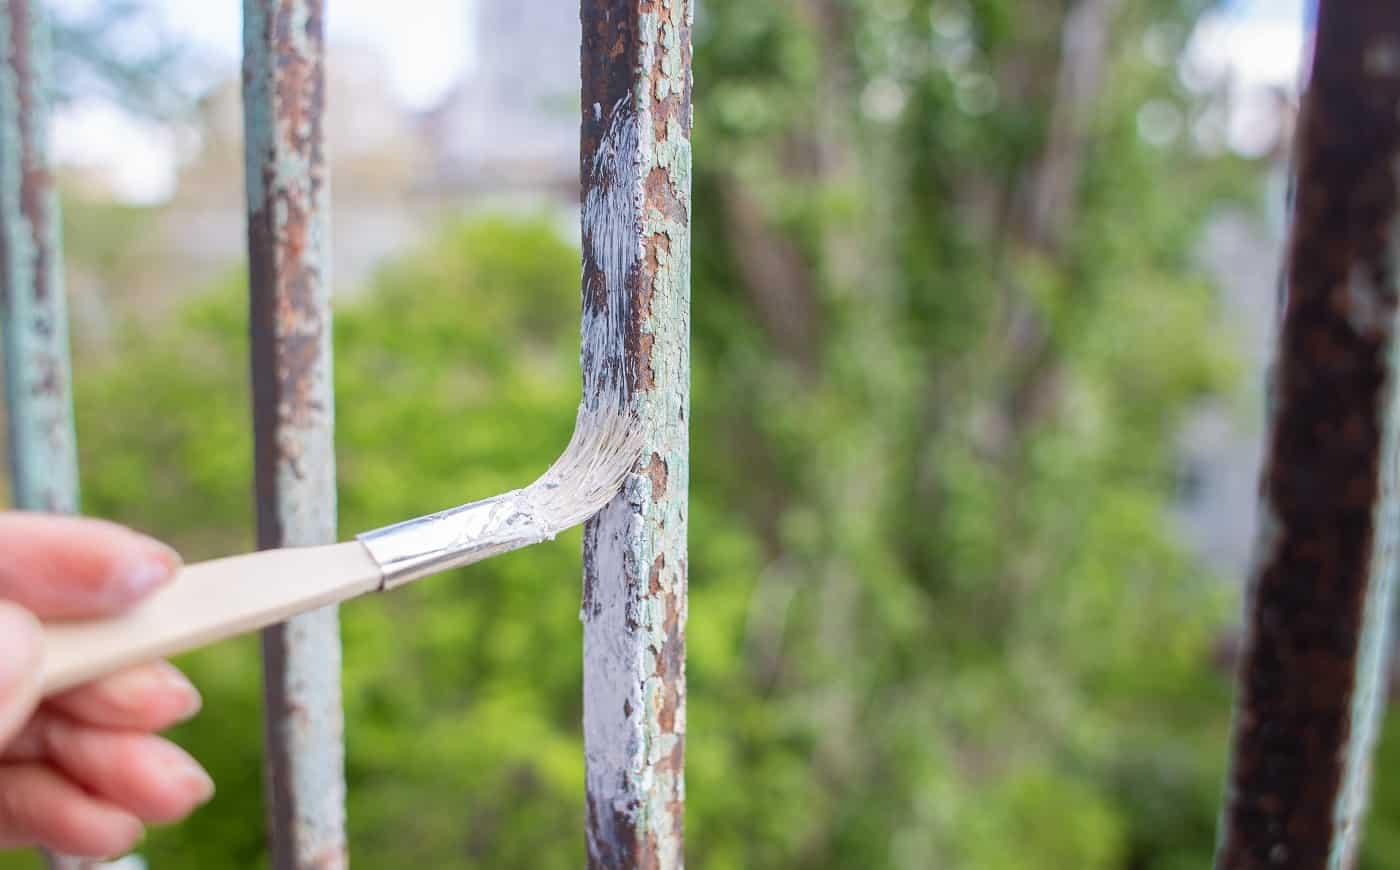

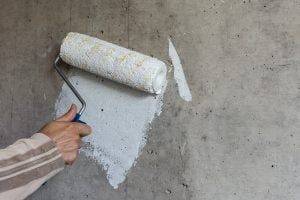


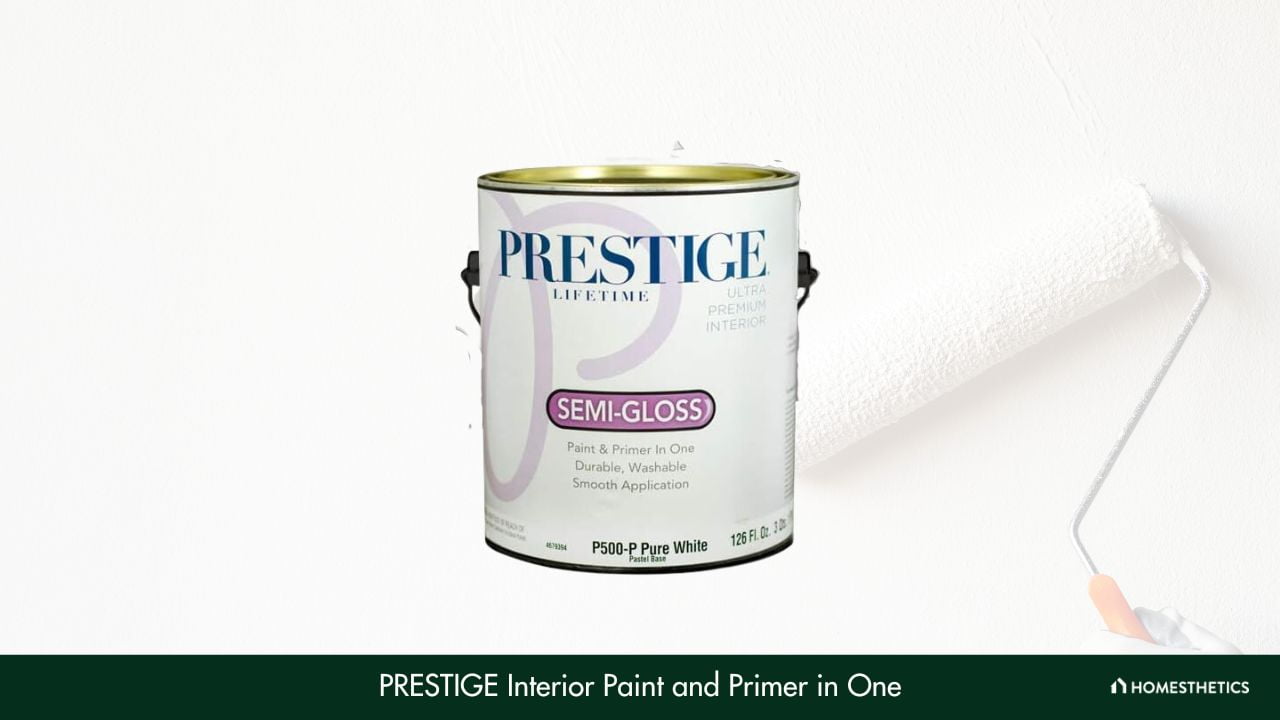
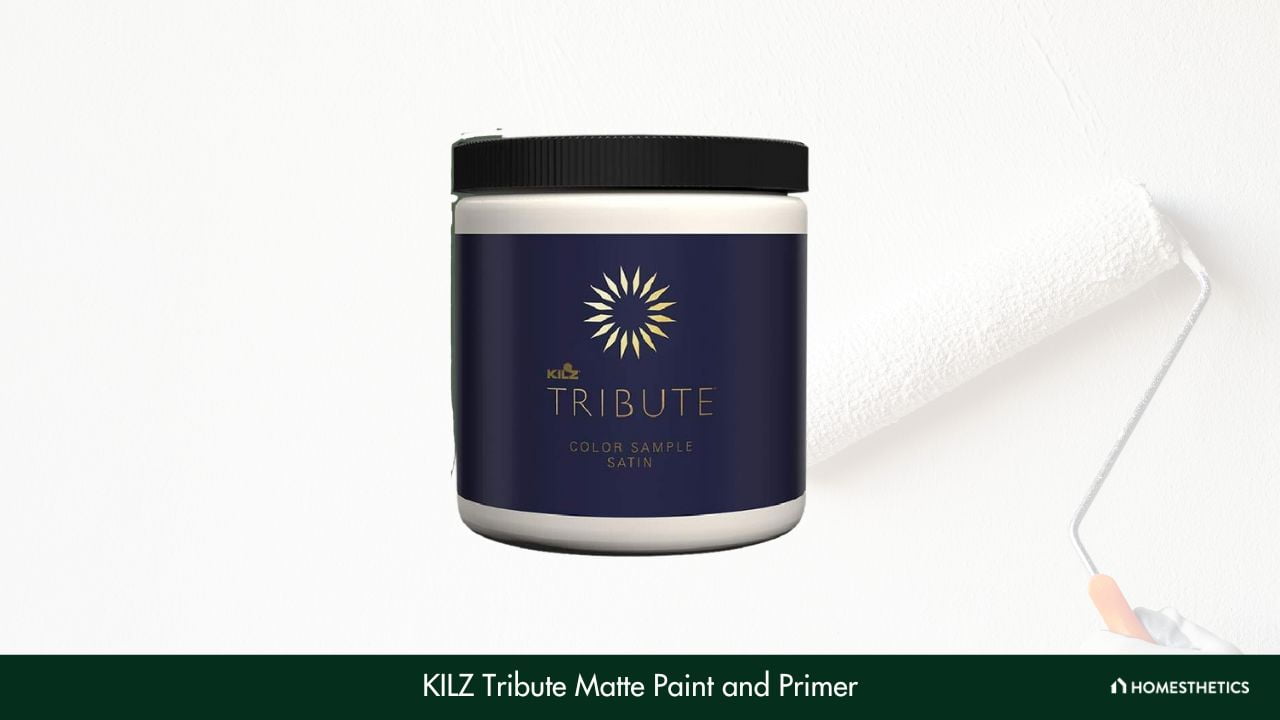
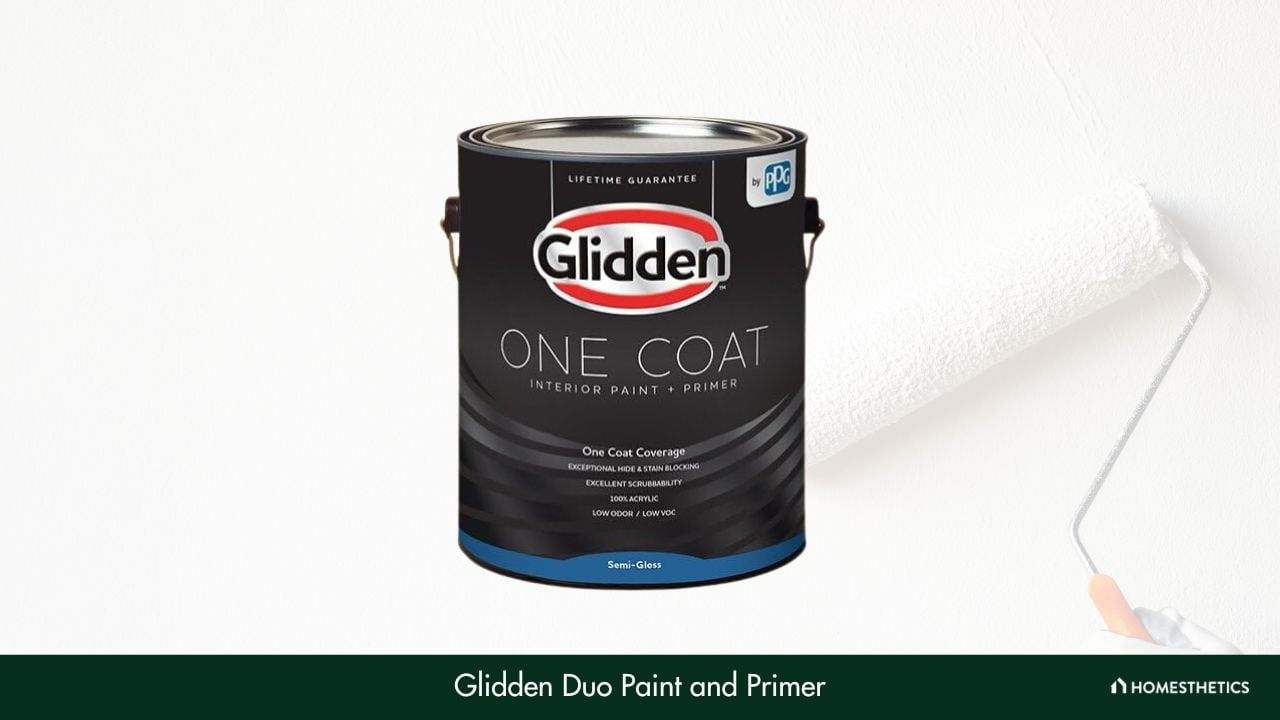

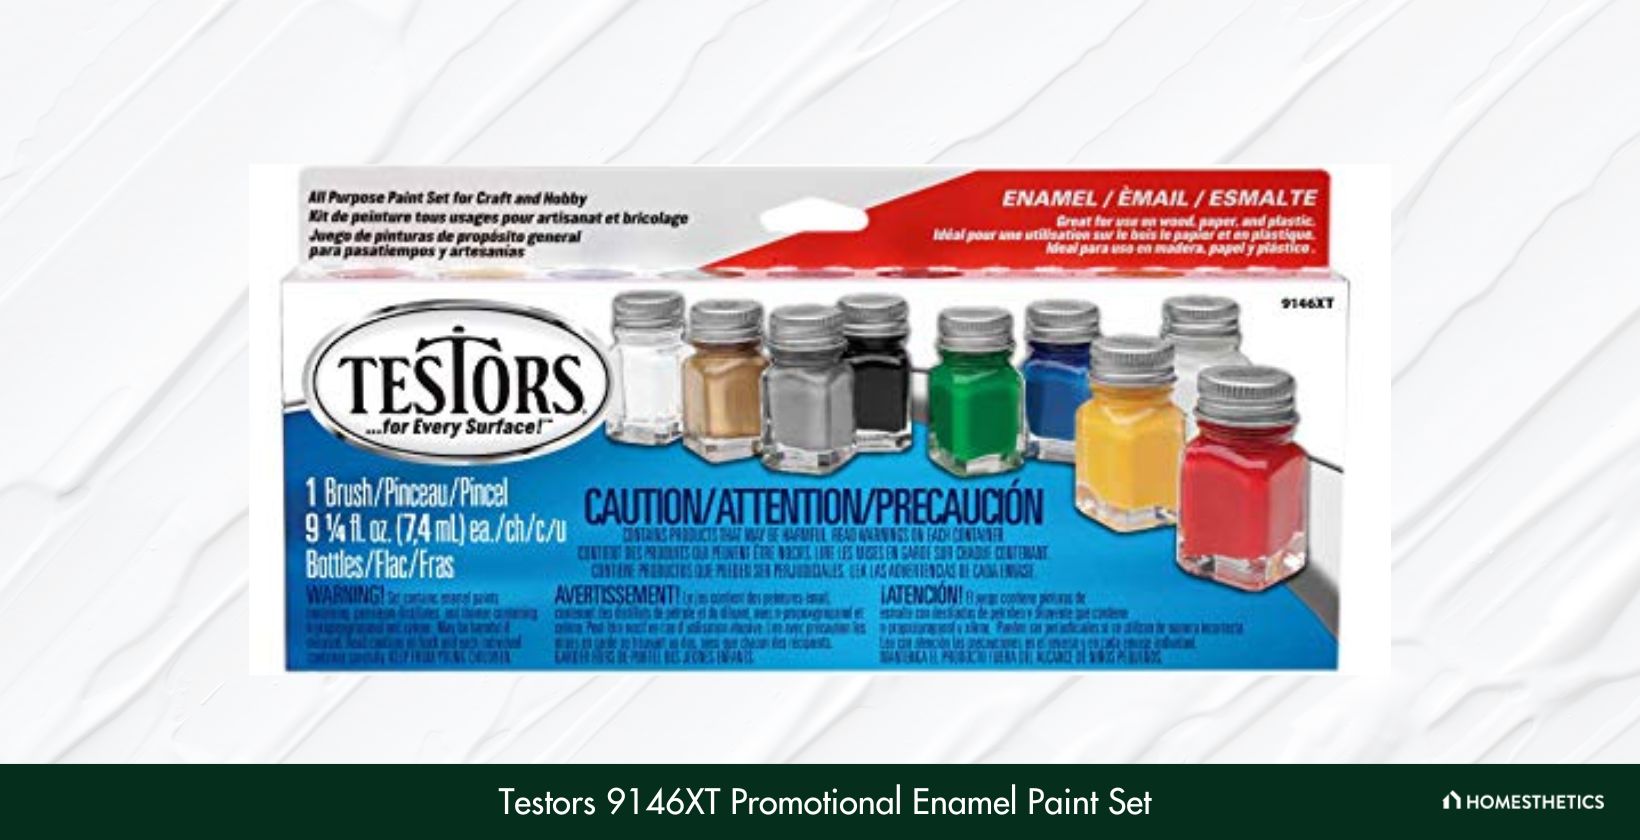
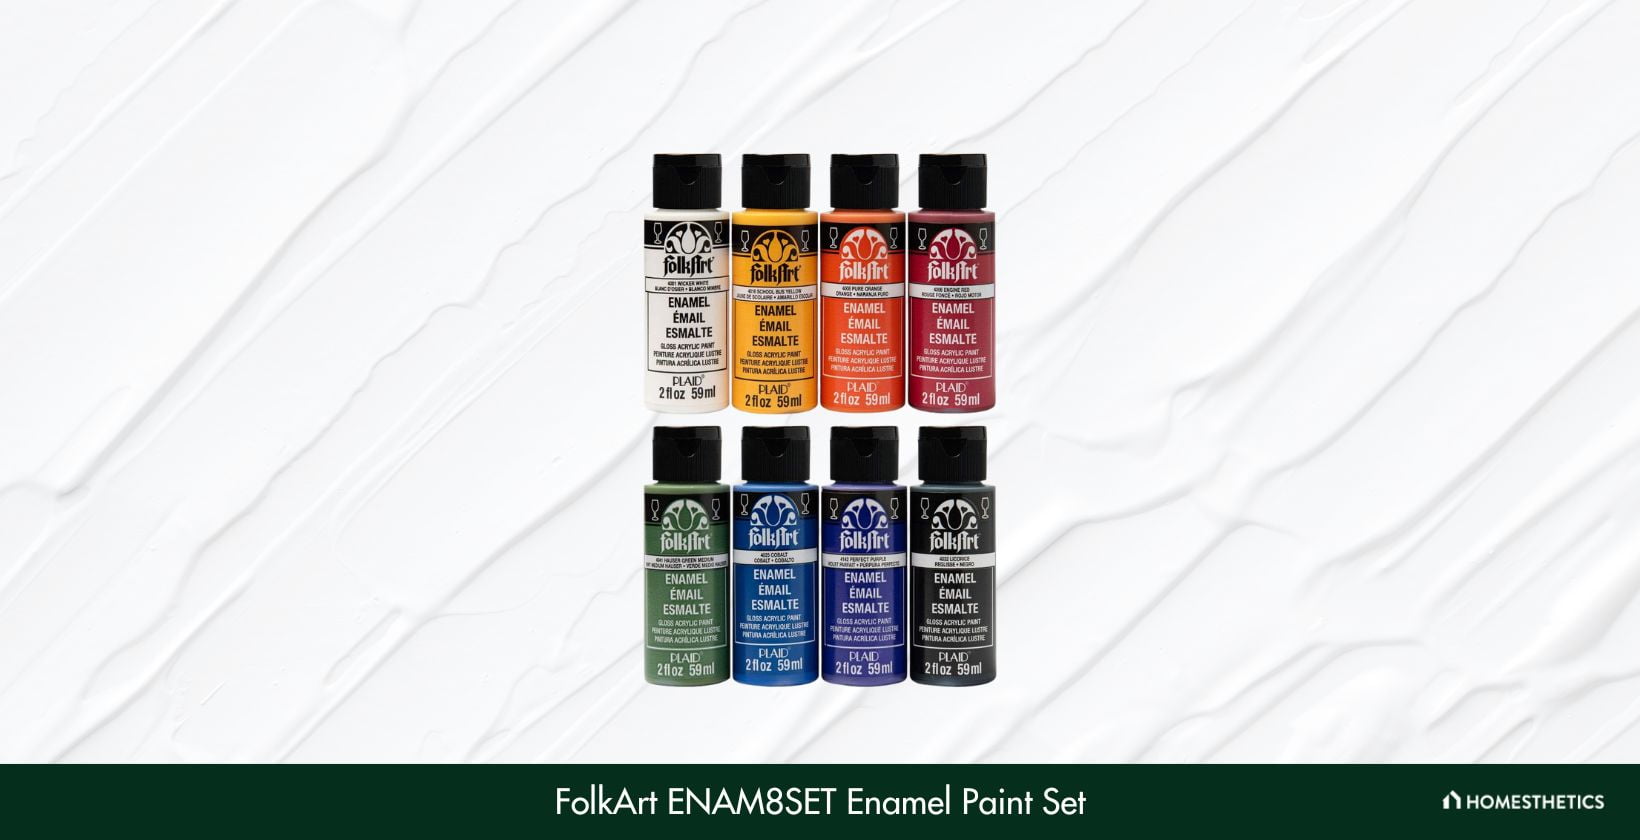

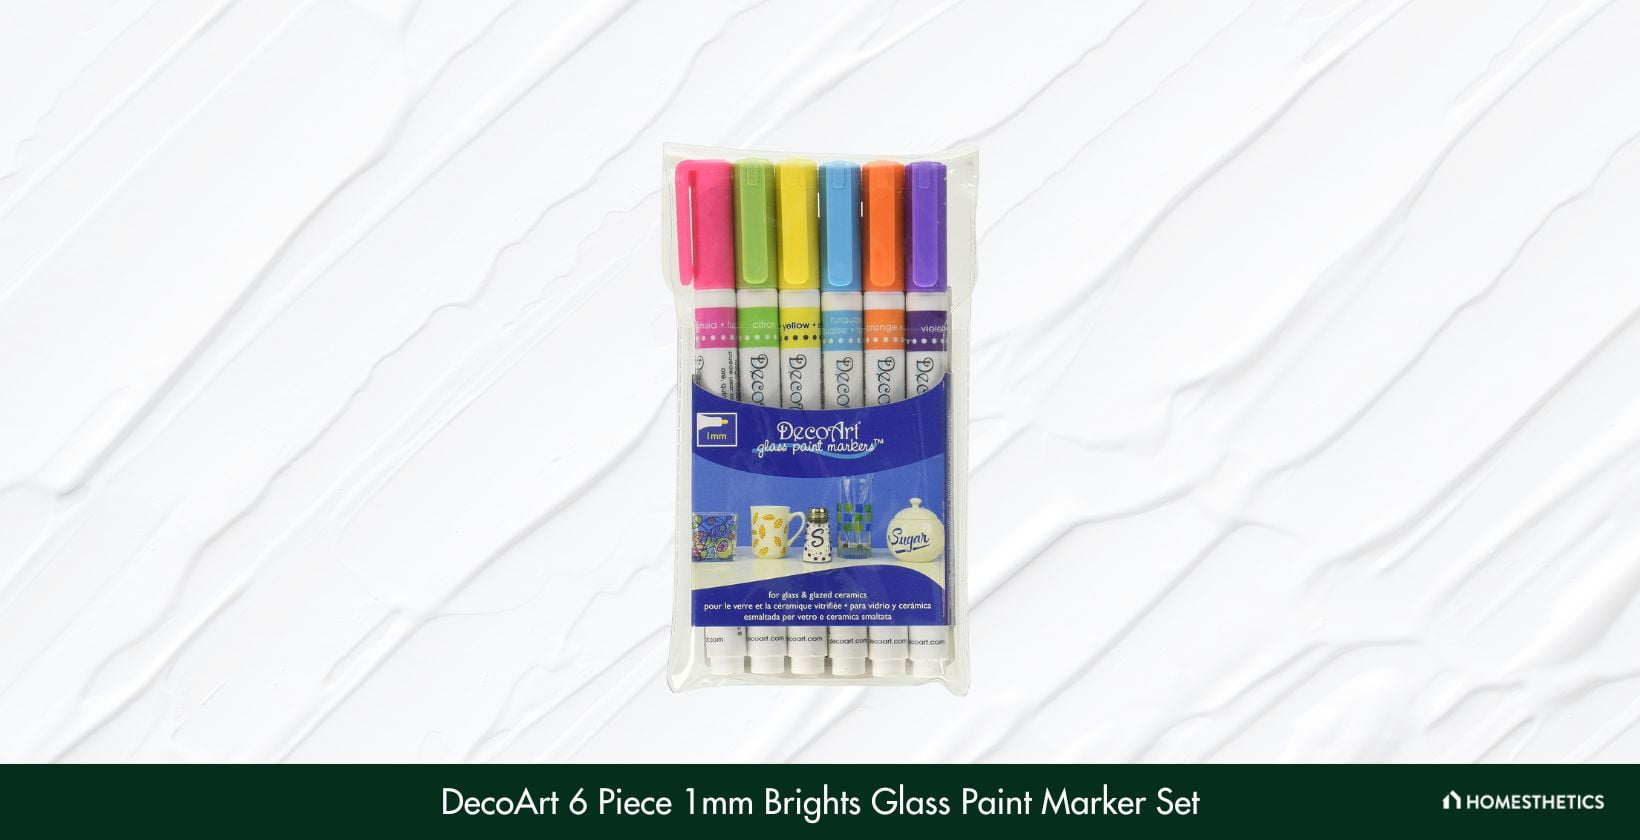
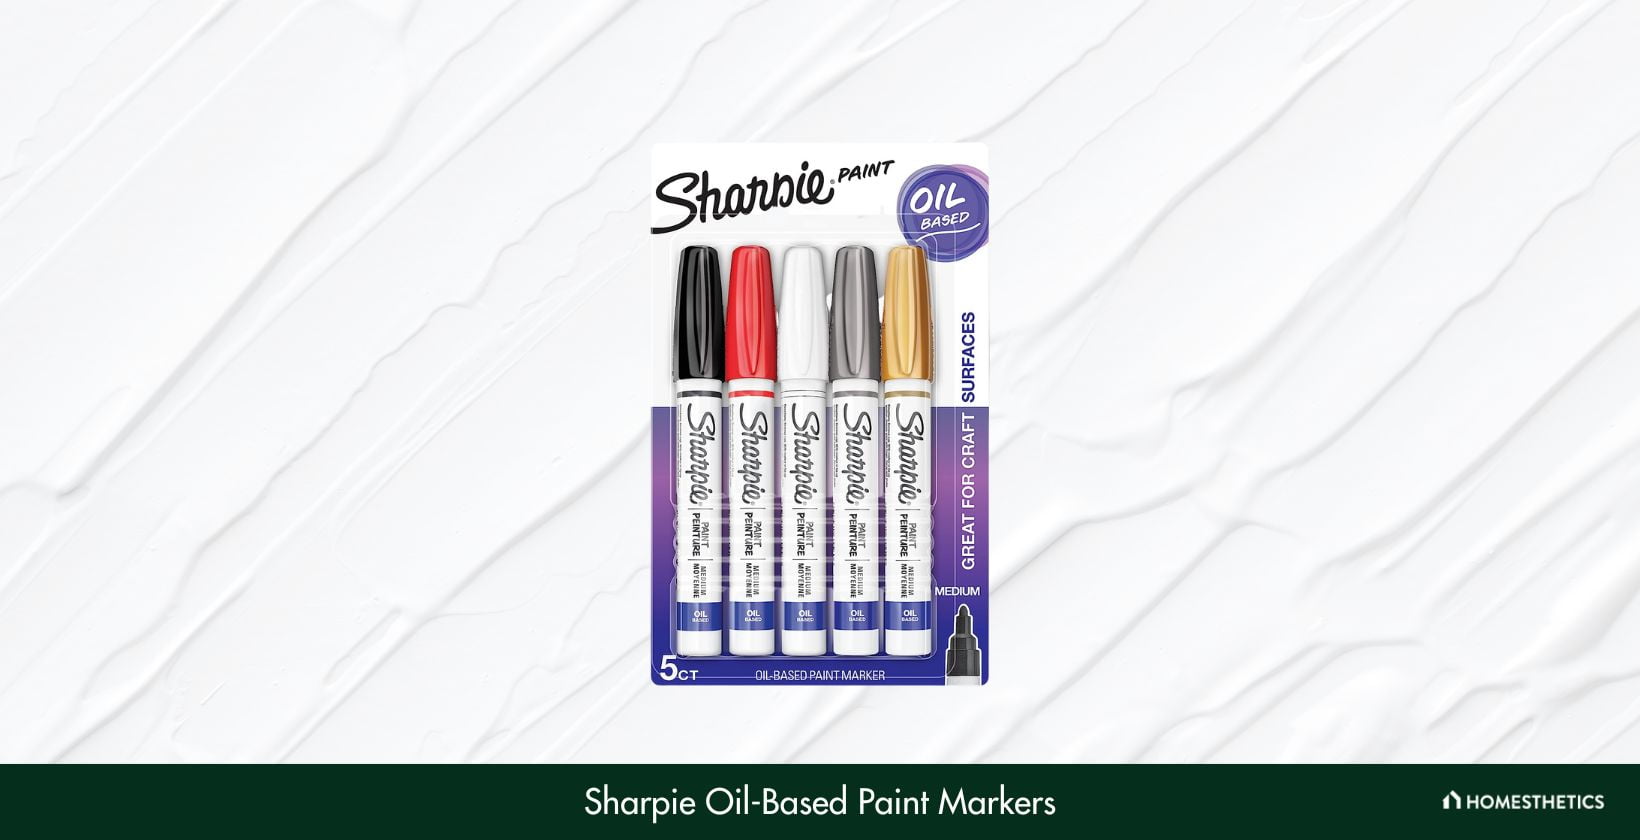

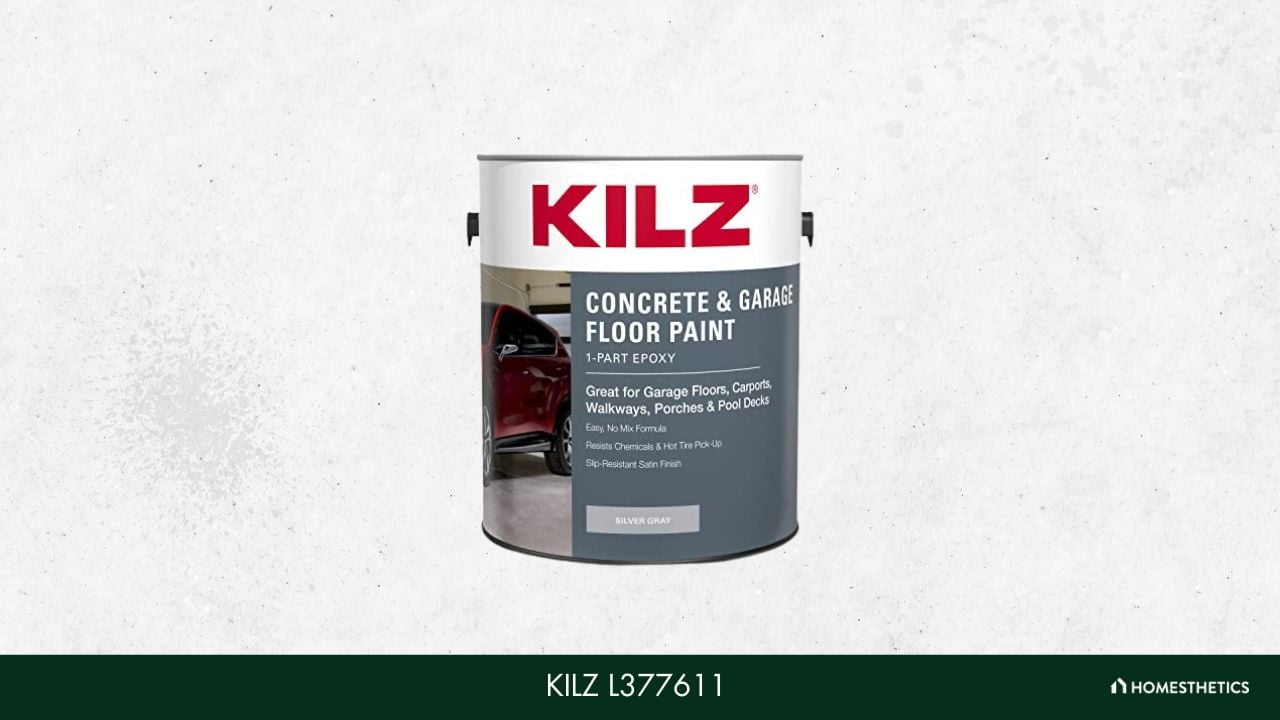
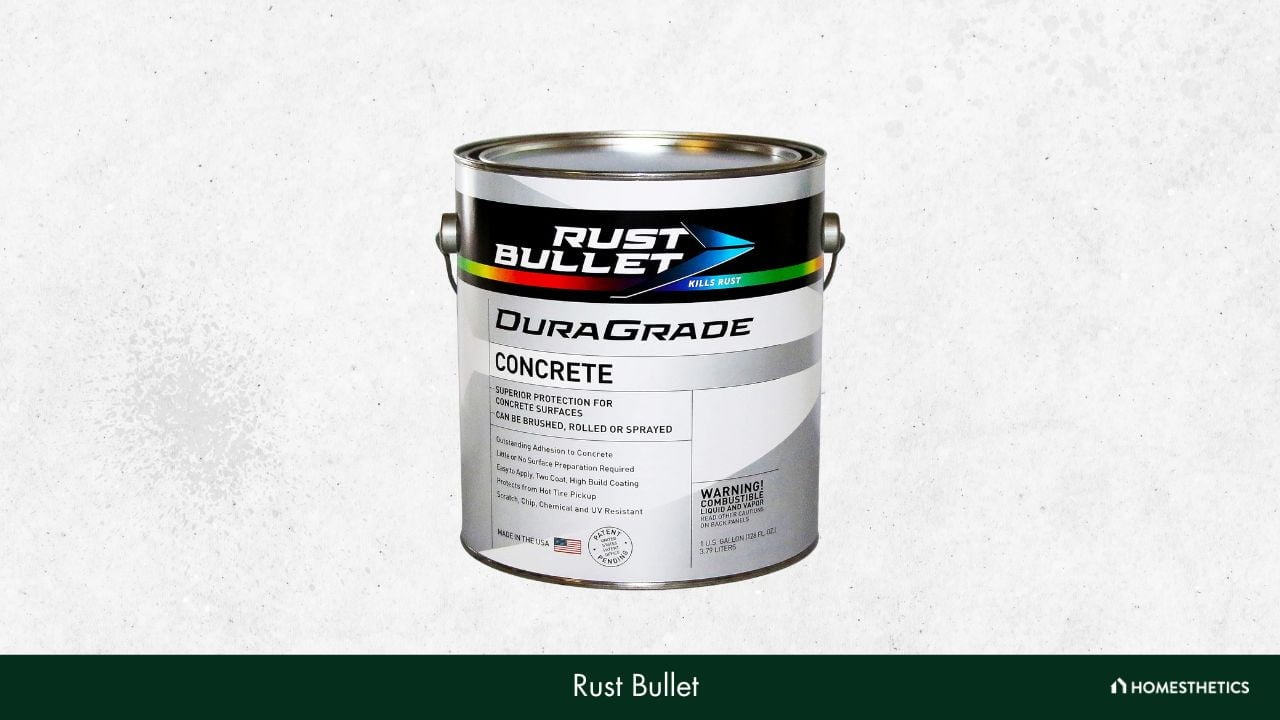

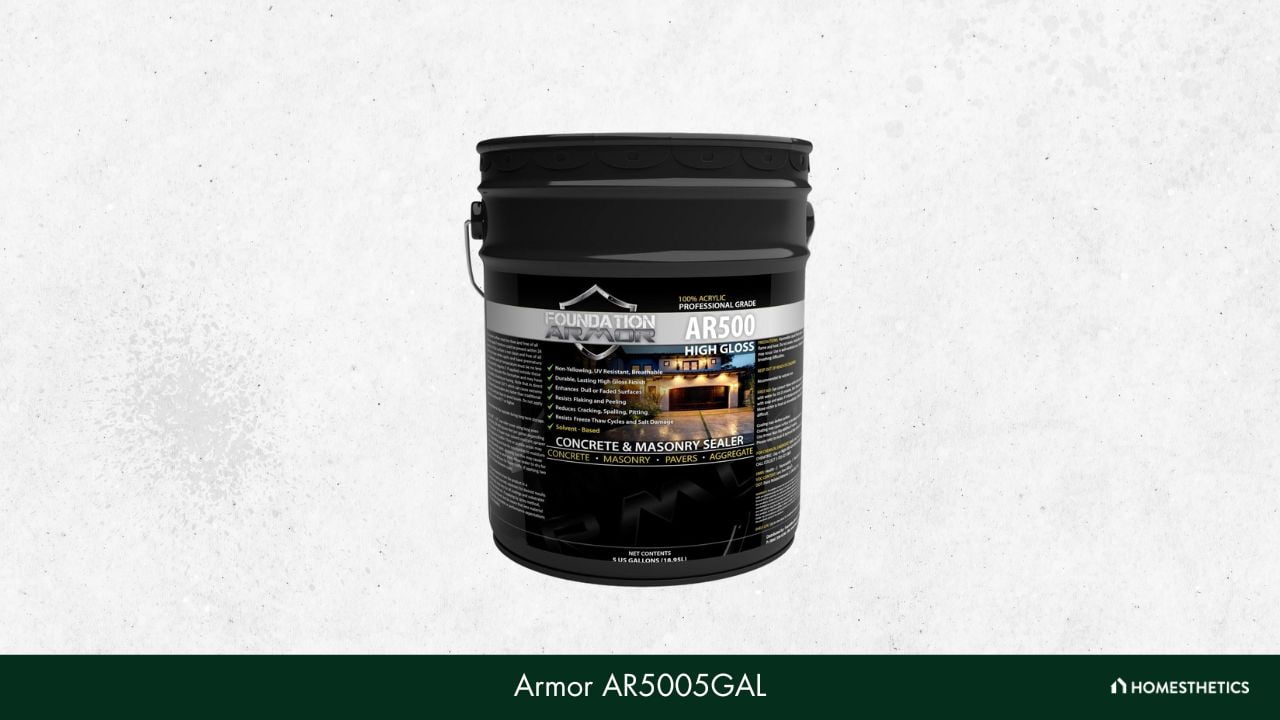
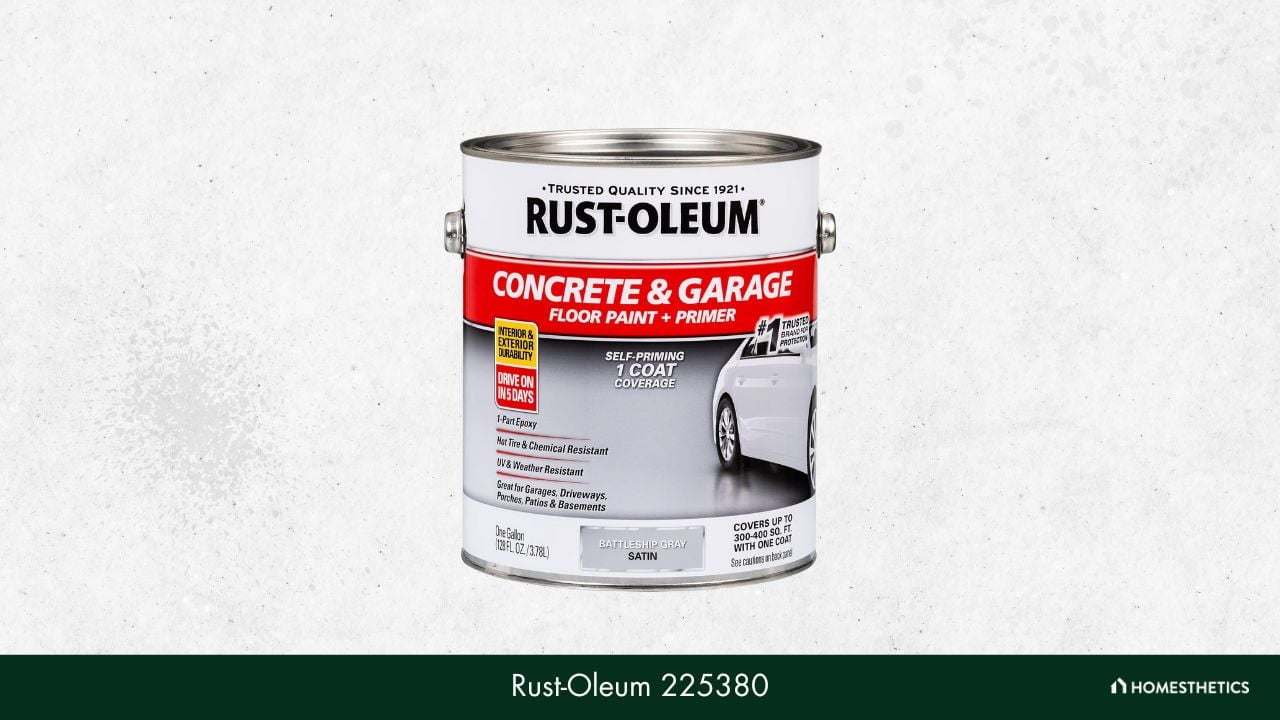
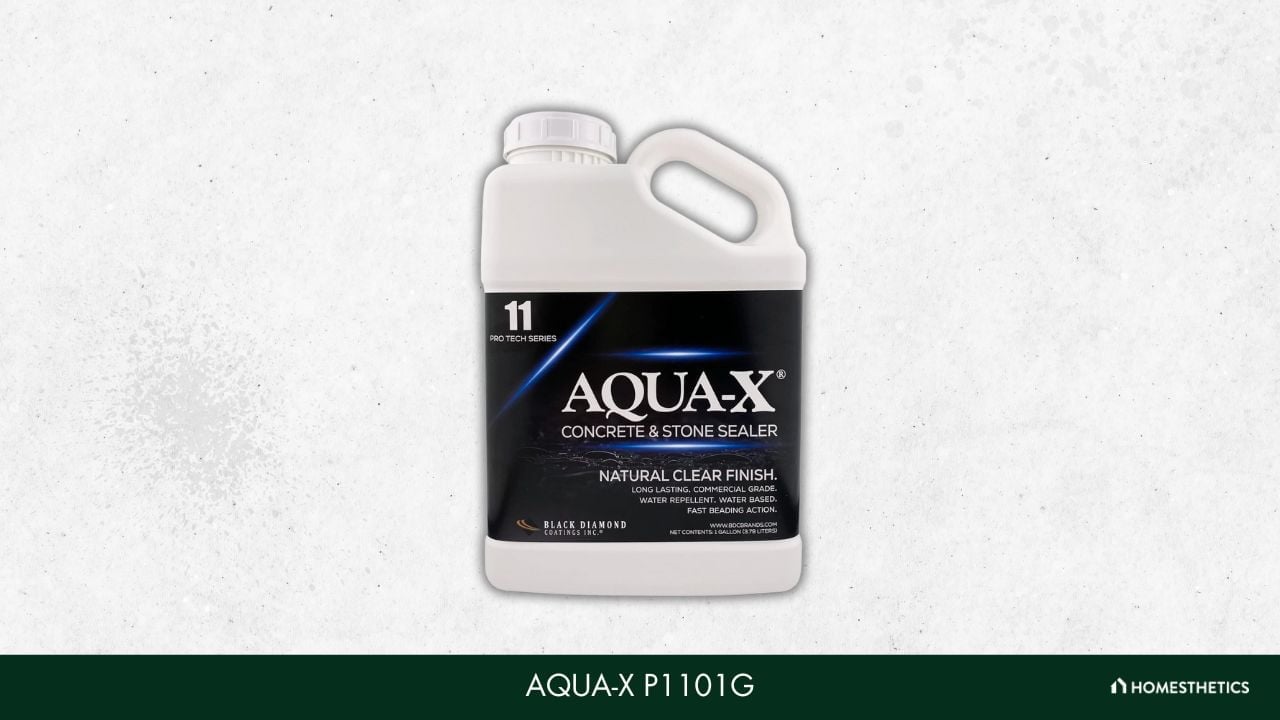


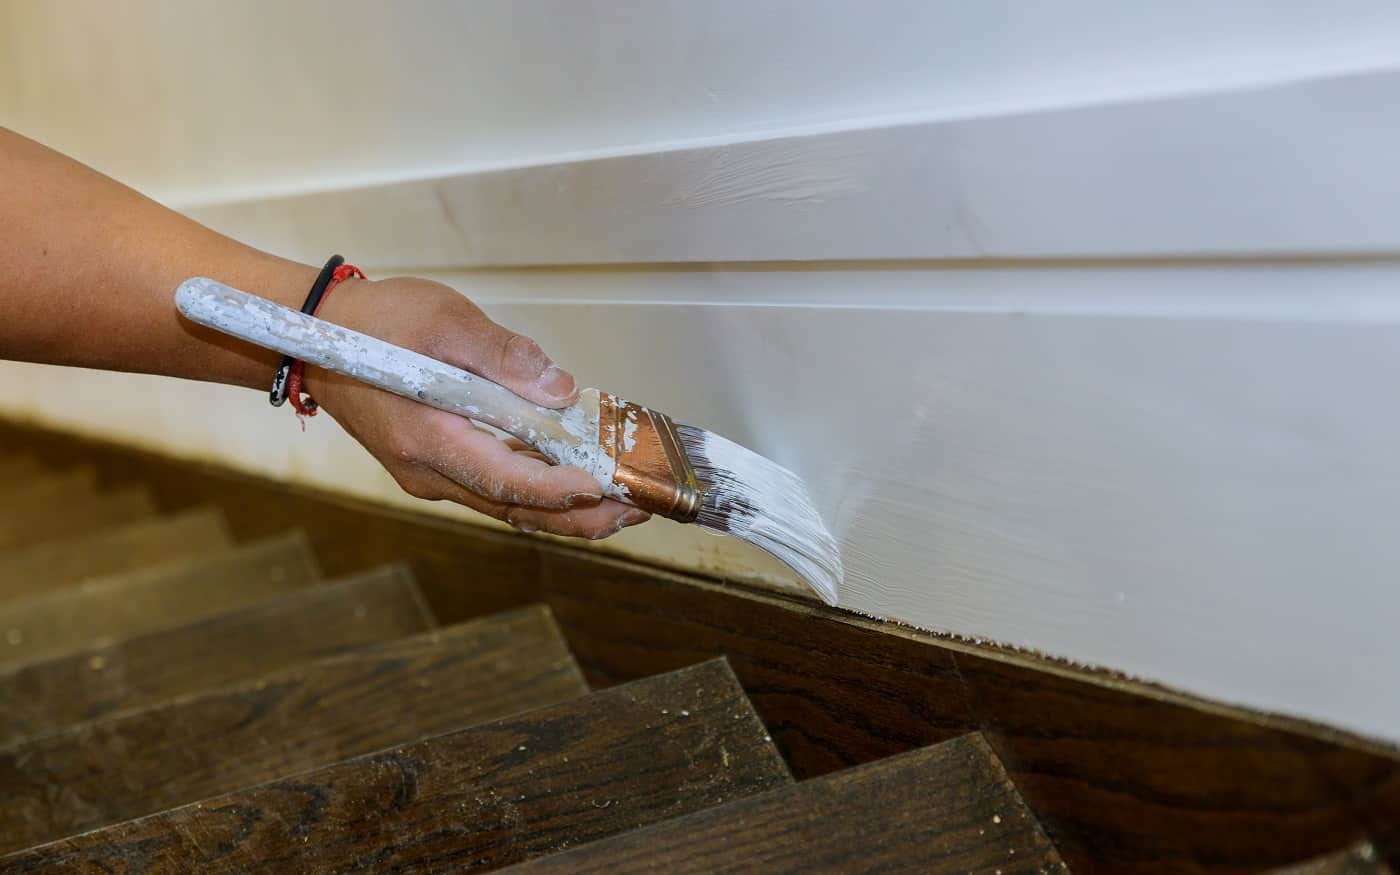

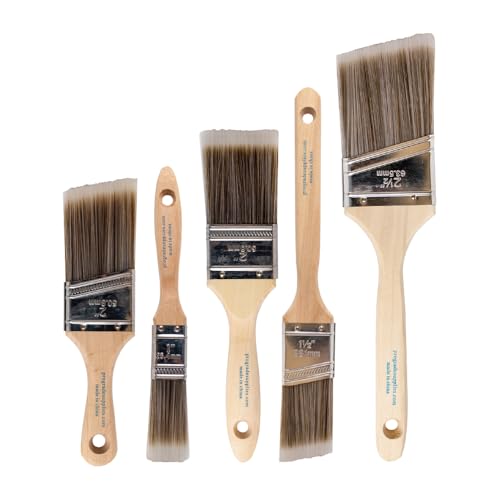
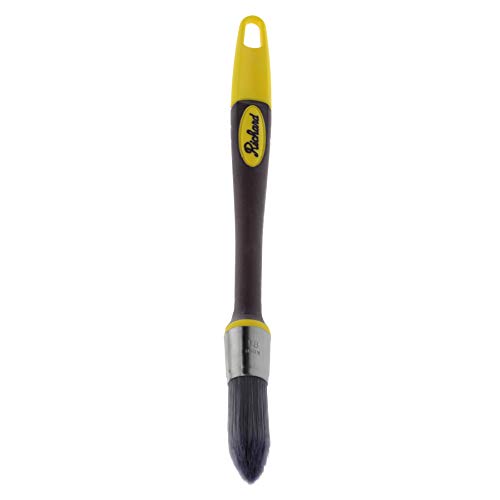


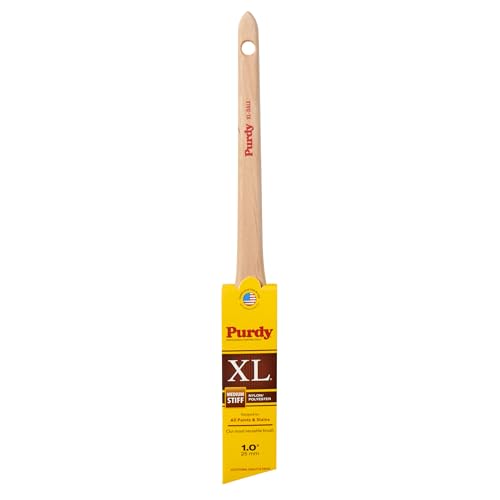
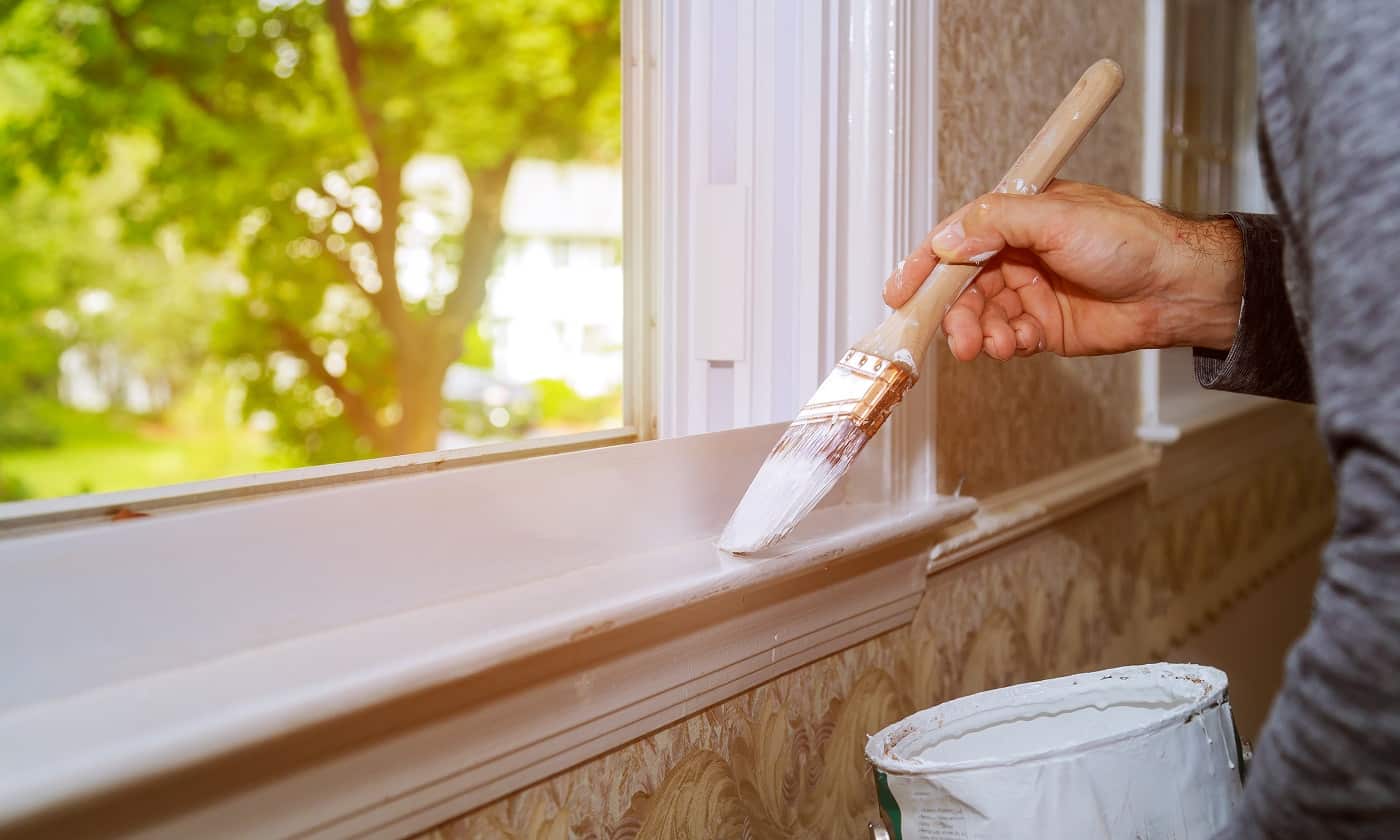

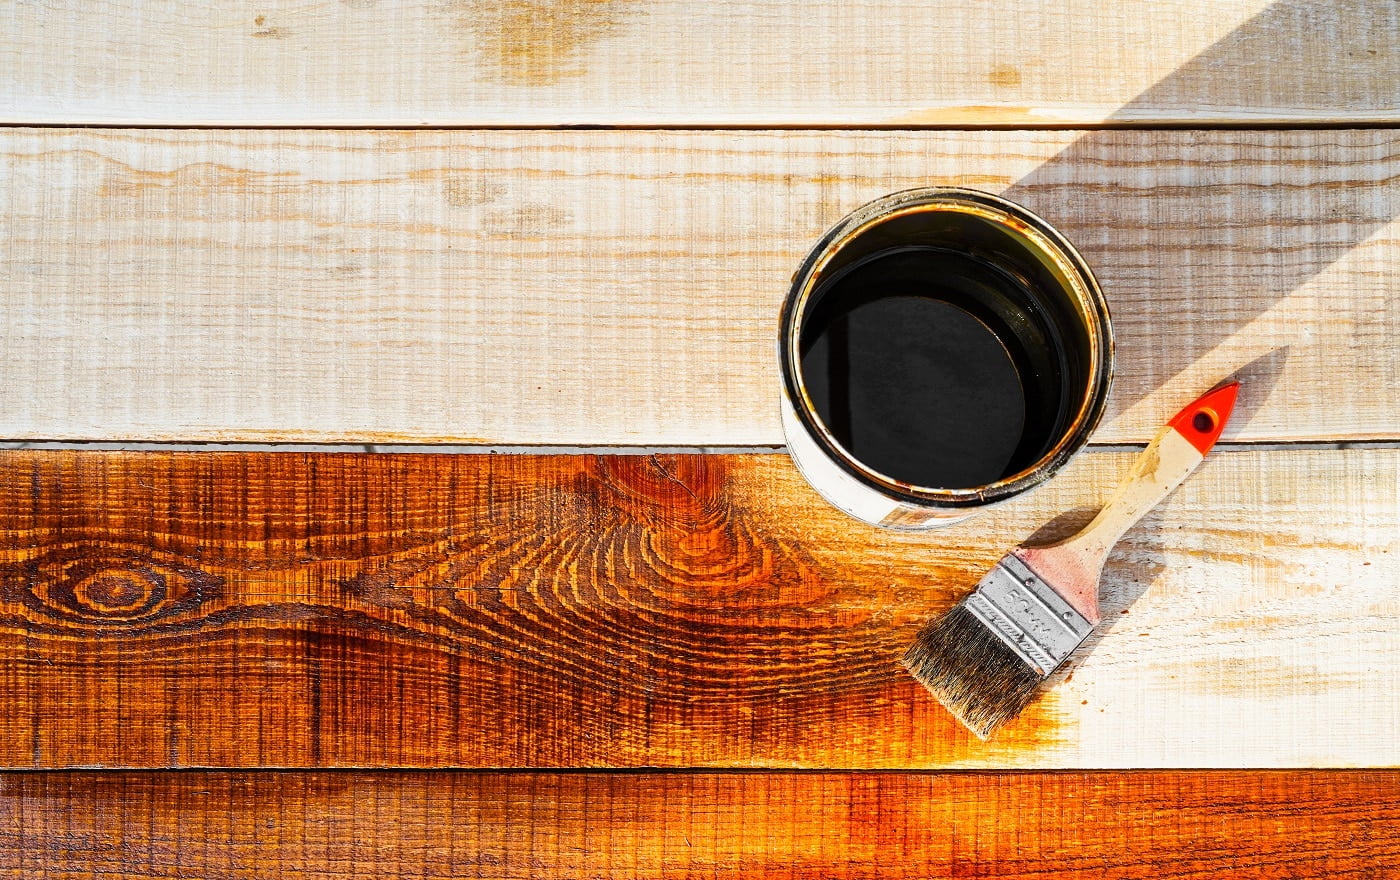
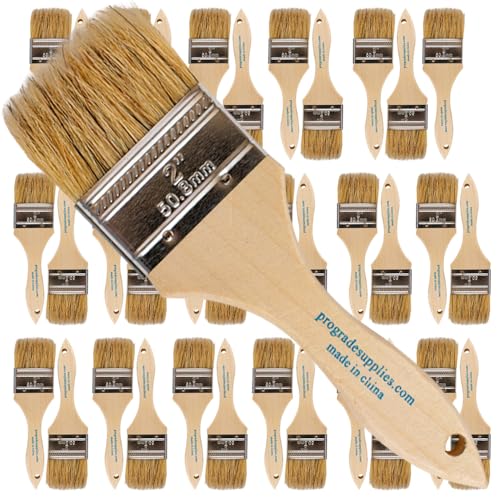
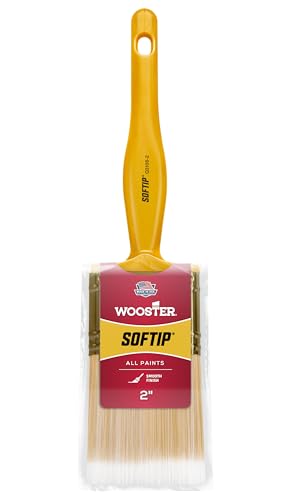
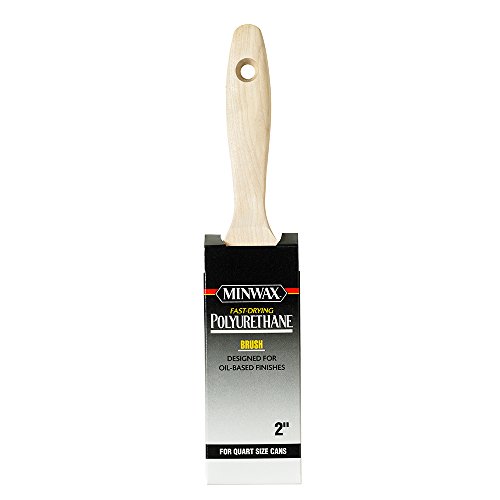
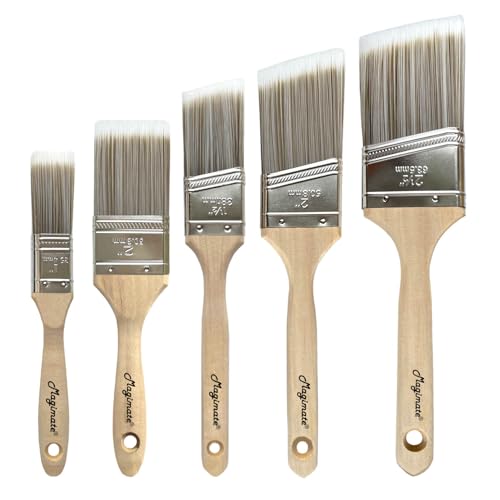
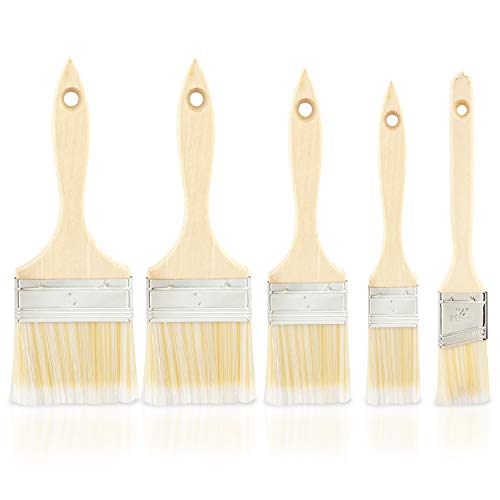
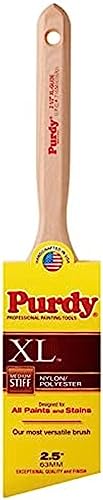
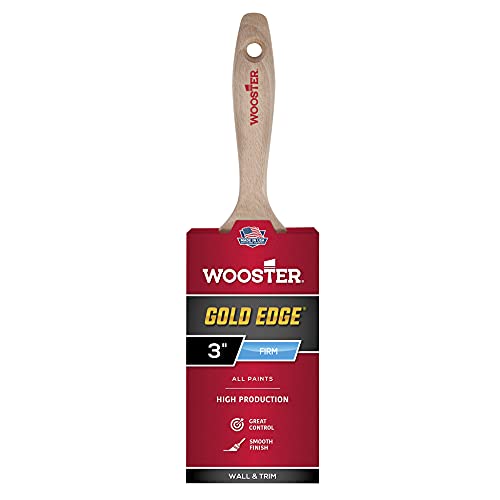

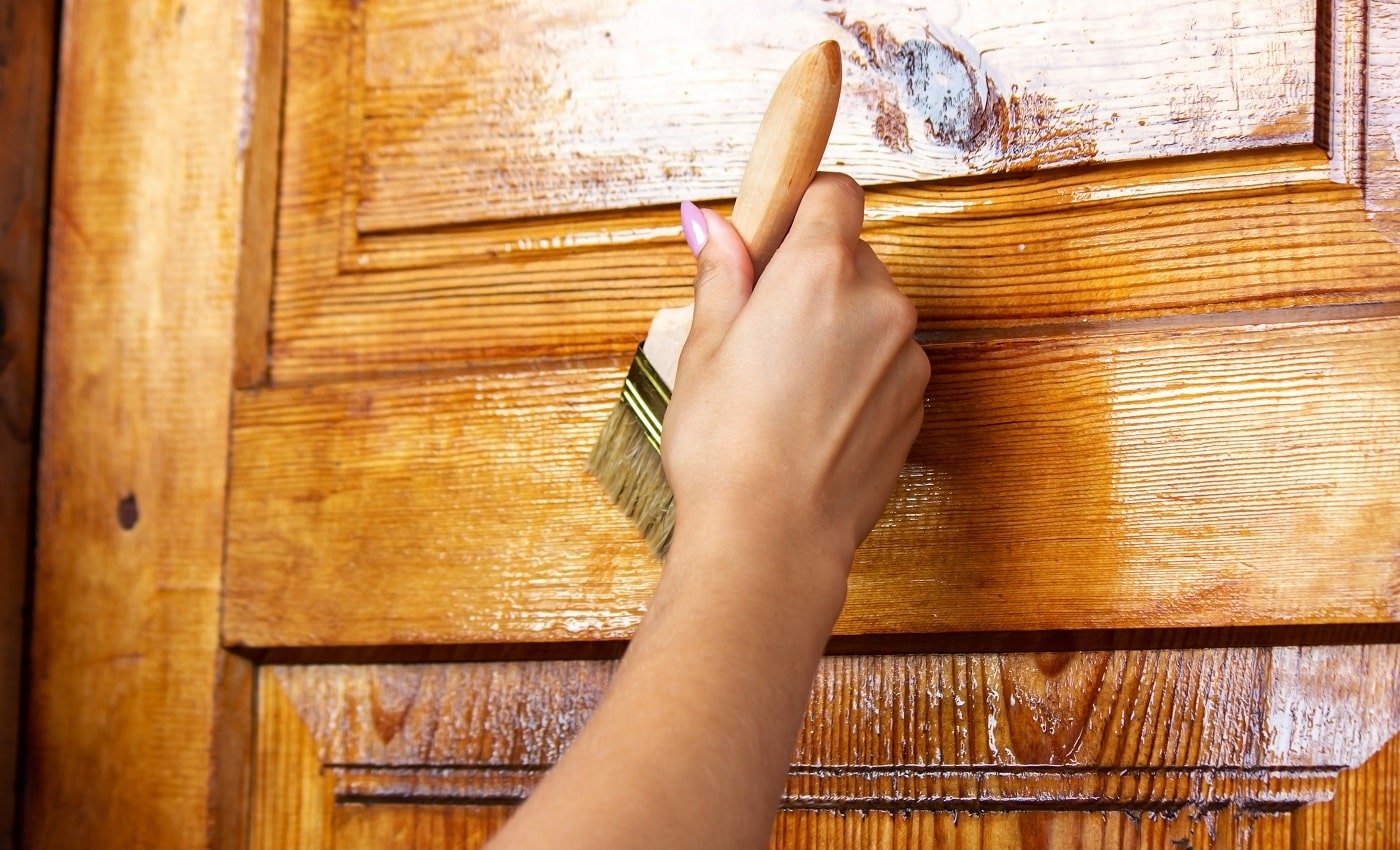


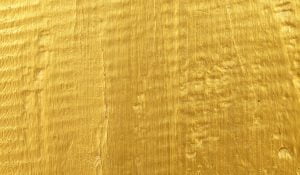
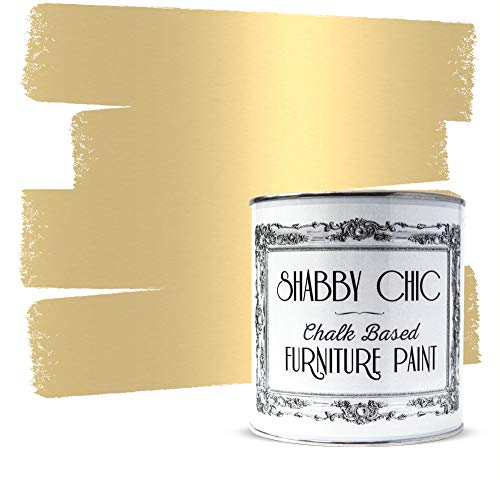

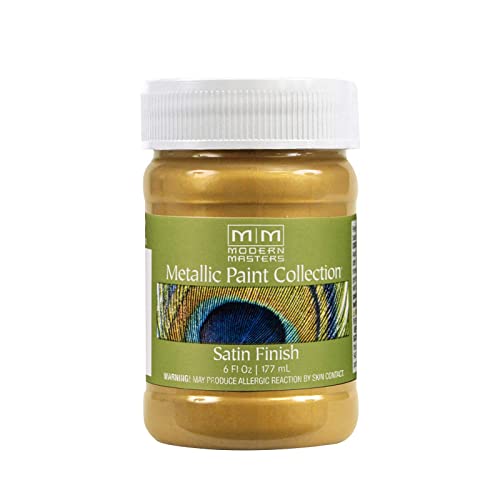
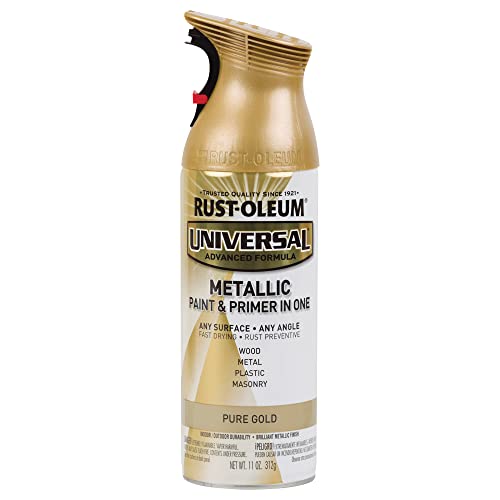


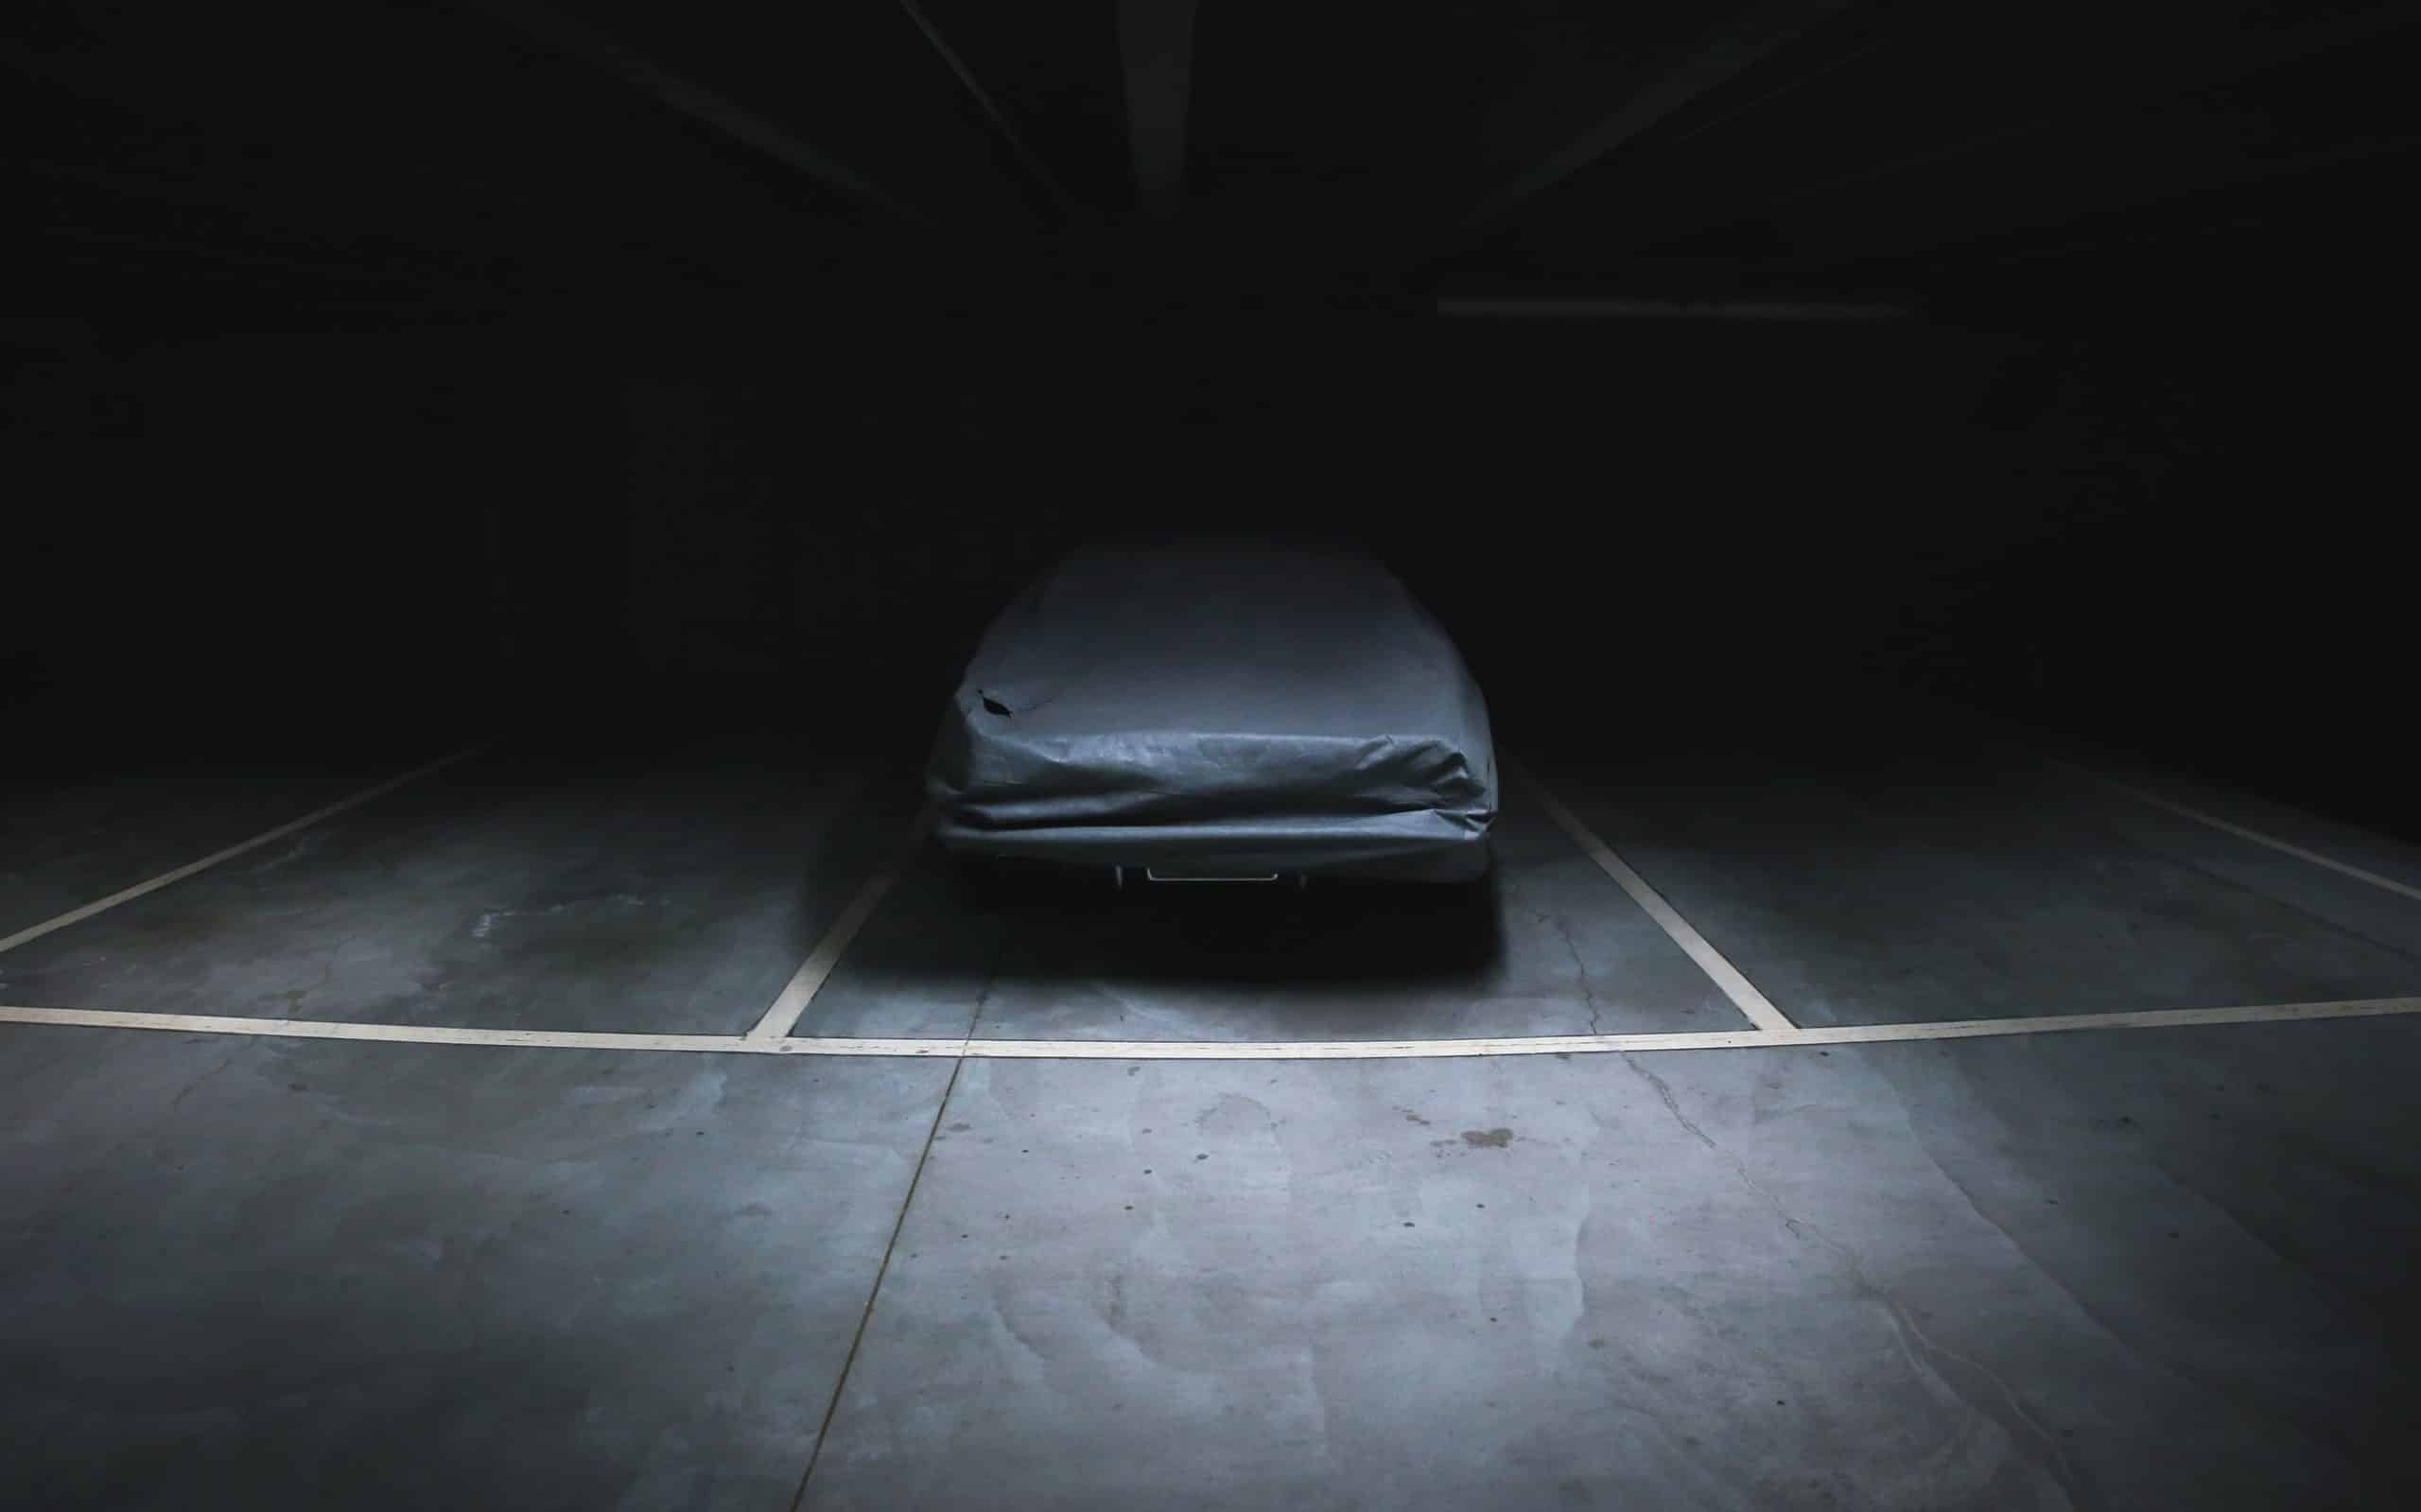


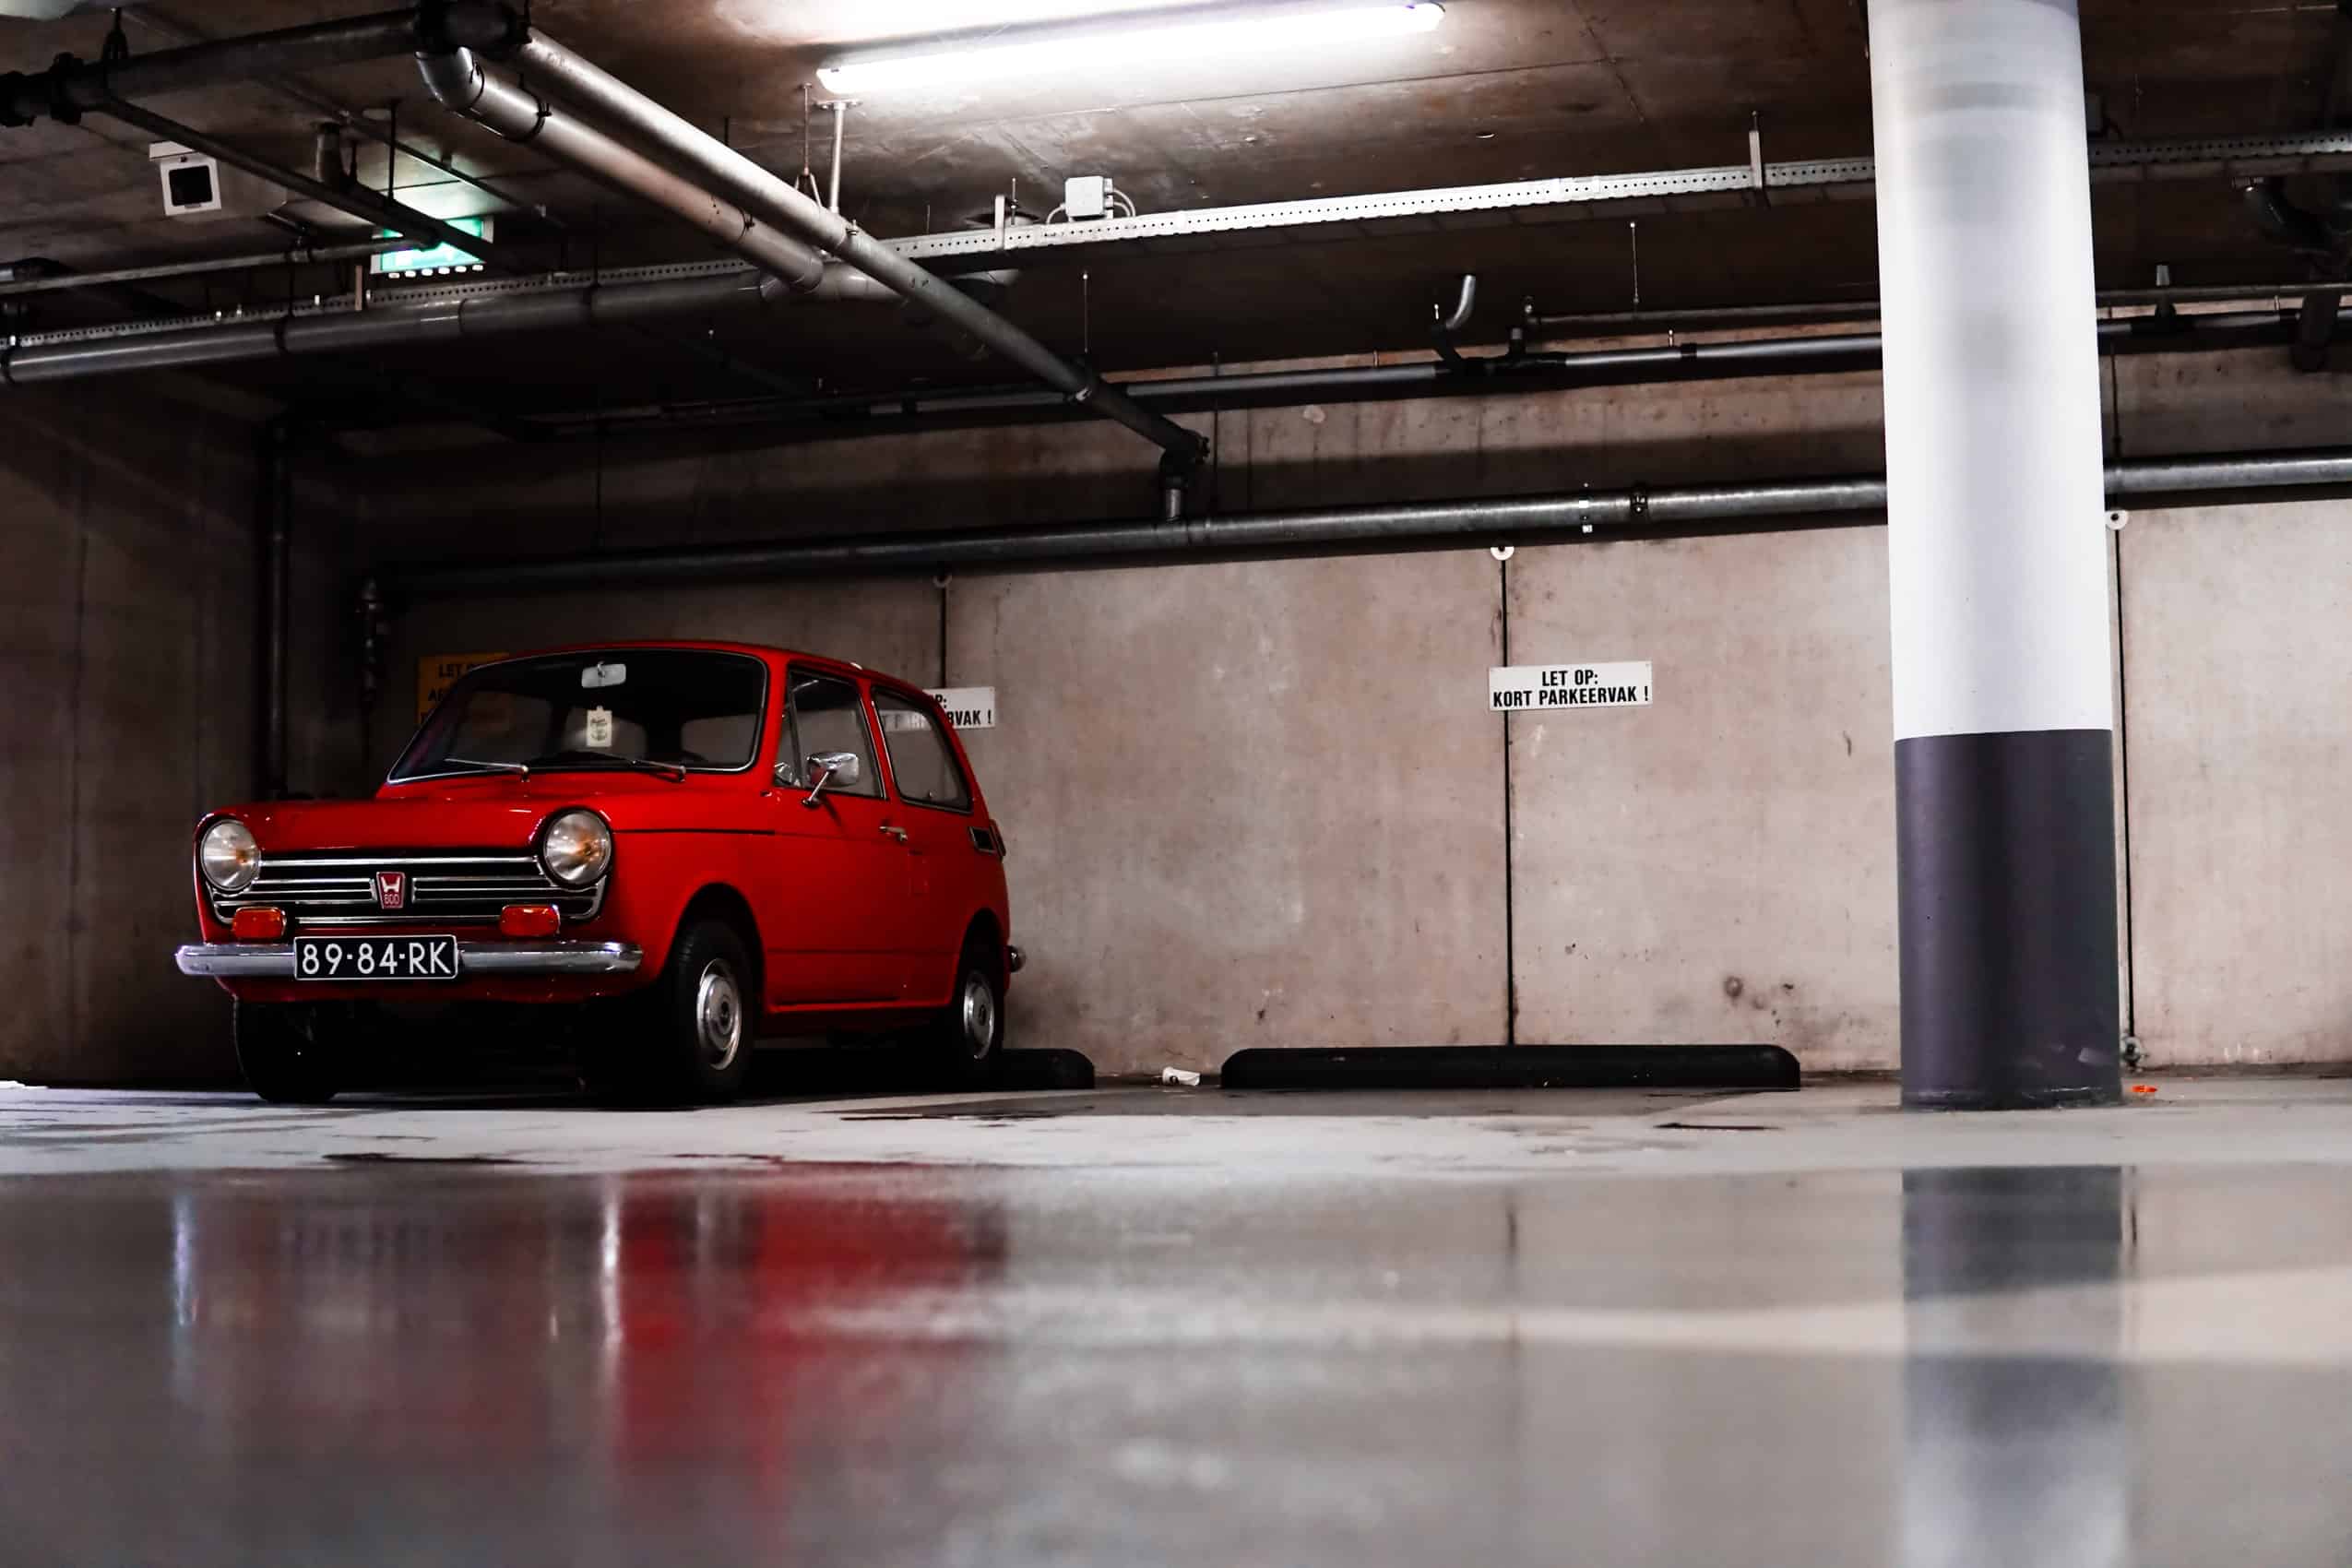


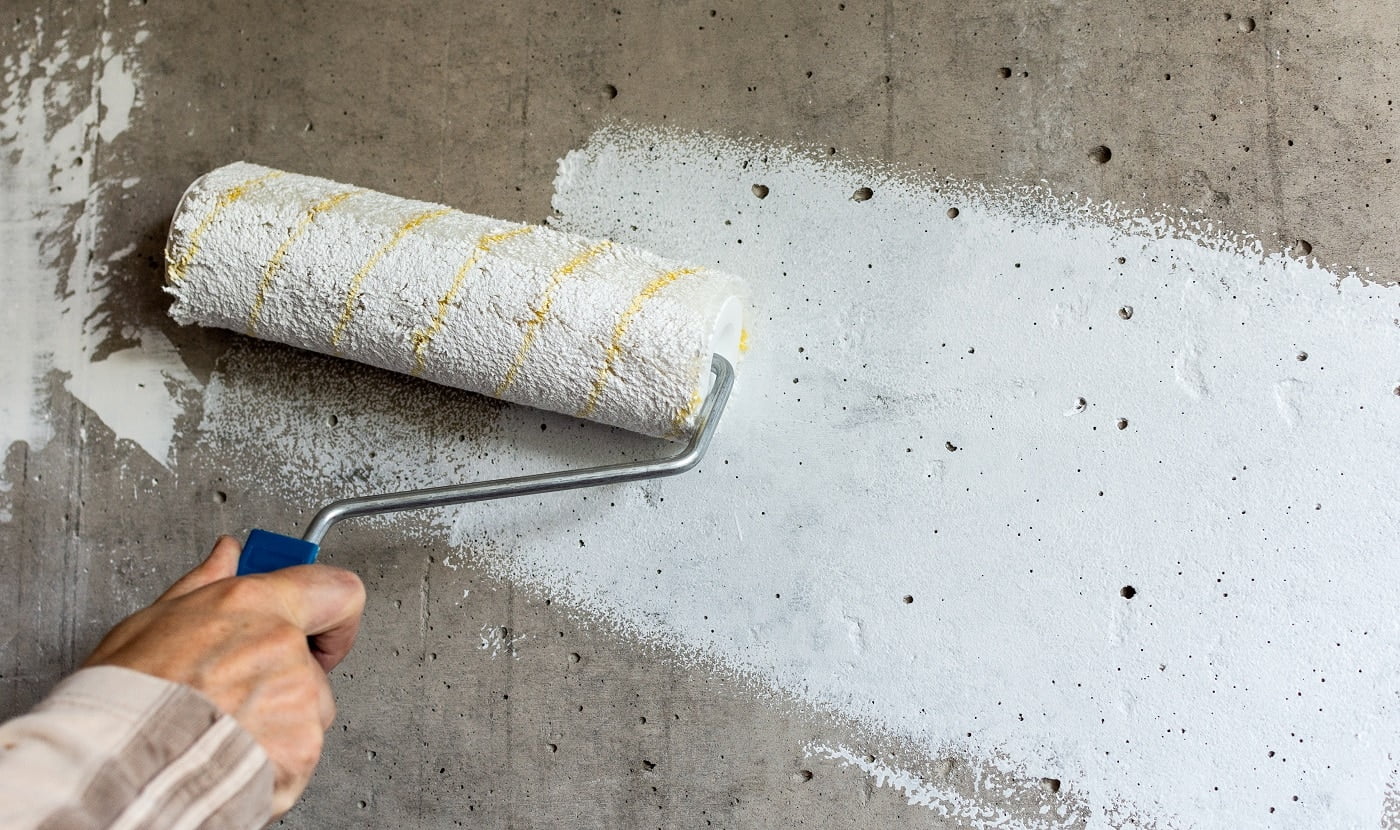
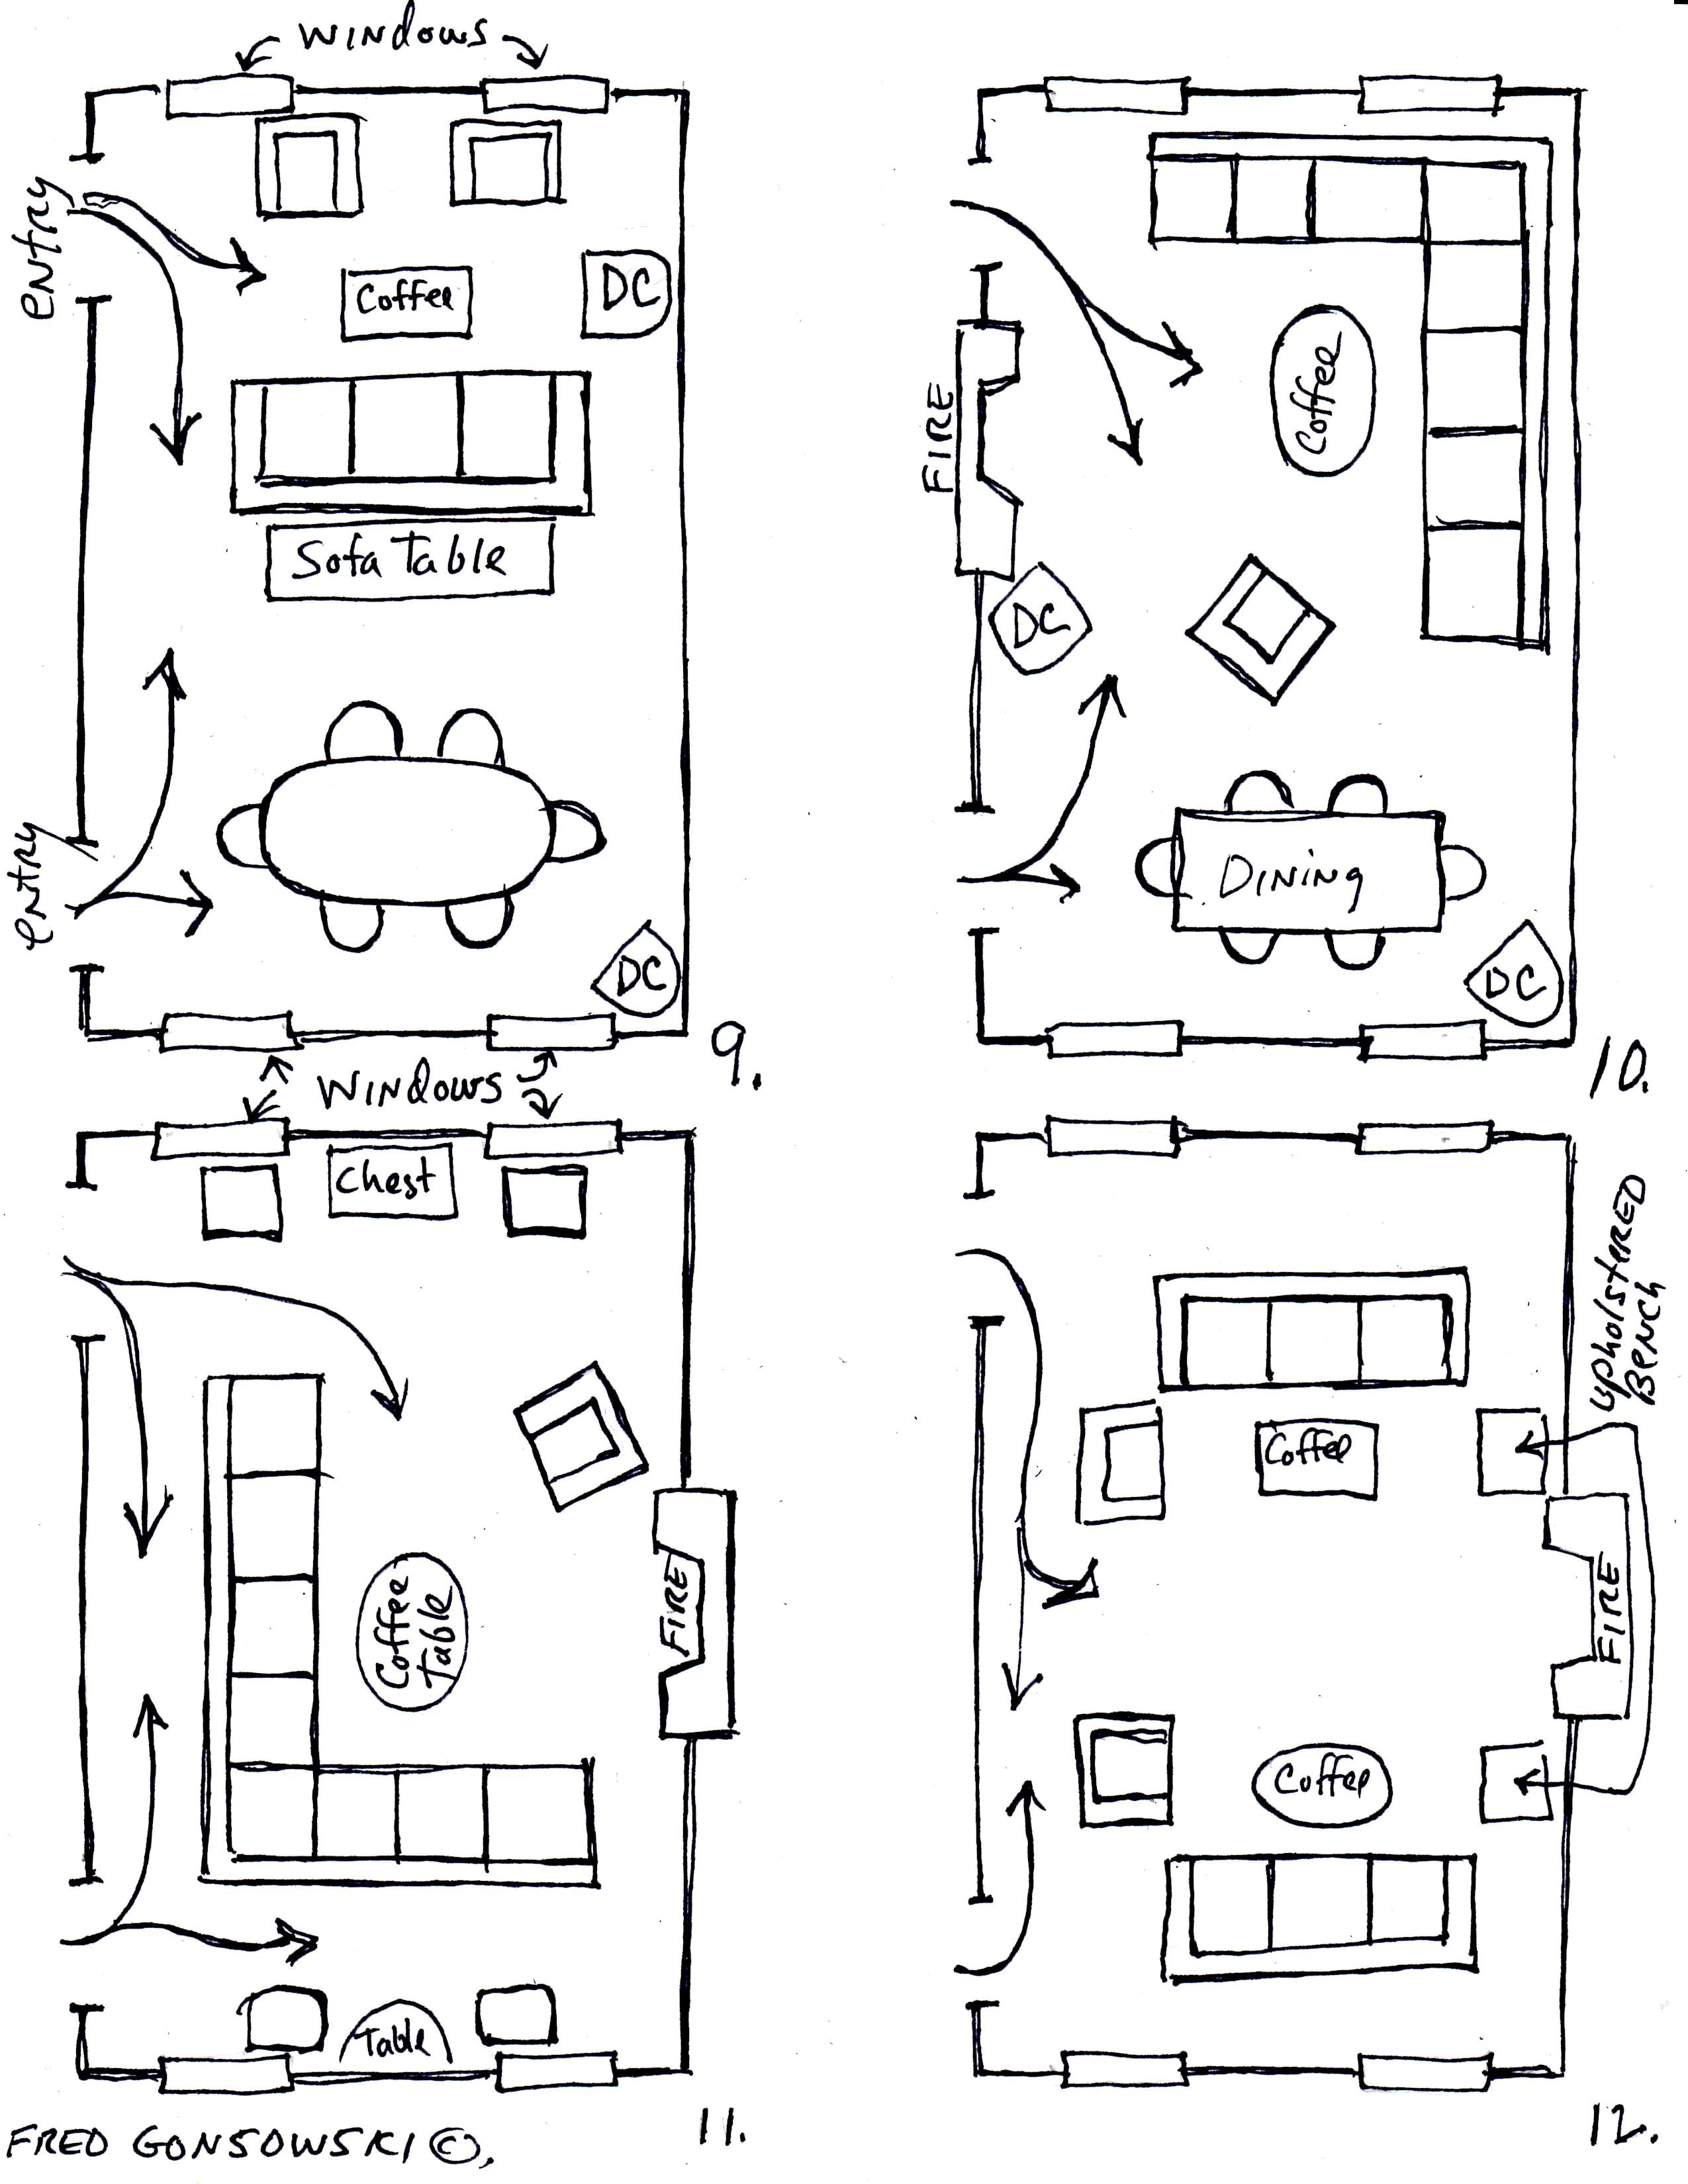
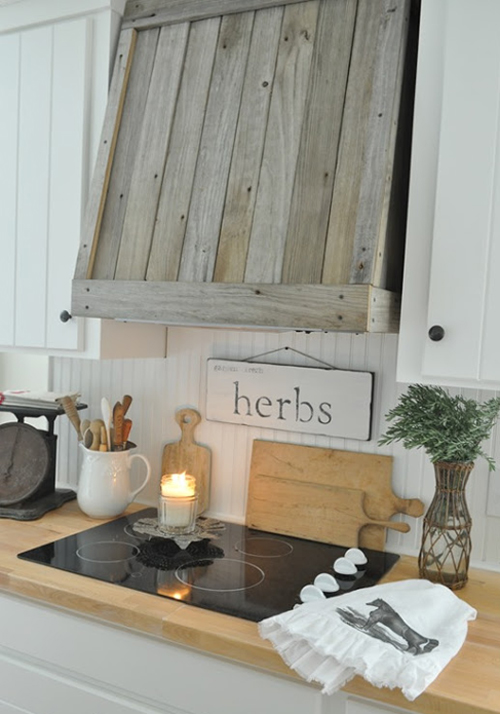