Accommodating a Jacuzzi as the ultimate means of relaxation in your backyard is something people usually seek. Many might prefer gardens or pergolas to fill their small space or backyard, but for people who find comfort and relaxation in water, it's the classical Jacuzzi that comes to mind. Pools on the other hand require a large area for placement and therefore are not always a viable option for some homes. Jacuzzi have been used since 1915 and have, in time, become a symbol of luxury and comfort, the perfect alternative for the long desired swimming pool. 20 Outdoor Jacuzzi Ideas for a Relaxing Weekend have been featured below, cast a glance.
the perfect jacuzzi design for small space
With small spaces, a Jacuzzi is a much welcomed idea. This layout works well in a small backyard, allowing enough room for plants and the classical picnic table. The pallet wall inserted creates the privacy a person needs during a time for rest in the Jacuzzi.
the comfort of being surrounded by nAture
Hot springs often come with the perk of enjoying nature at its finest. This outdoor Jacuzzi design captures such delicate beauty and relaxation brought by nature. The green background is soothing for the eyes and the natural breeze coming from the area will surely make the dip in this outdoor Jacuzzi even more enjoyable.
Pallet wood is an industrial miracle for people who want to save more and still get their desired design for any home craft. While distressed pallet wood is a good choice, a cleaner look suits this elevated outdoor Jacuzzi. The light brown color of the pallet becomes a perfect backdrop for greenery.
lovely pergola for jacuzzi shade
The sight of a pergola encourages relaxation and though the shade is very minimal, it can still feel very comfortable under one. The white outdoor Jacuzzi and the pergola creates the perfect mix of comfort, while plants and the bamboo wall create a lovely background that allows the white Jacuzzi to stand out.
for the romantic movie marathon night
A date night can change with the perfect setting- and this one might just be the best. Wine on hand, relaxing hot water, the soft glow from the candle light and a favorite movie can complete the romantic atmosphere this outdoor Jacuzzi brings.
Kids can be envious of how their elders relax during the night in a "mini pool" and might want to have their own. This outdoor Jacuzzi serves the purpose of being a water pen for kids in the day time and a relaxing hot tub for the grownups during night time. The metallic Jacuzzi is emphasized by the crates and the natural background of trees, allowing anyone, young or old, to get enticed to dip into the water and make a splash.
This outdoor Jacuzzi design screams Greek inspiration in every corner. The white bedding and pillows match the faux white-gray wall and the brown faux tiles. The plants in classic white pots still keep the natural green within the picture even at a small space, exuding a look that is so serene, one that can surely help a person relax.
People find the sound of flowing water relaxing and inviting, encouraging the soul to take a break. Hot tubs create the same effect for the human body by releasing the tension accumulated from daily stress. The natural flowing water on the boulders create the best backdrop, along with the natural hues of green of the plants. The wood planks make the whole outdoor Jacuzzi look stunning.
Outdoor Jacuzzi are fun but not all appreciate being so fully exposed. This design helps keep as much privacy as possible without compromising the outdoor view. Soft, light-colored drapes and sliding doors are used to increase privacy.
romantic jacuzzi for a sunset dip
This outdoor Jacuzzi is perfect for rooftops and enjoying the sunset while the wood finish on the platform creates a beautiful contrast on the marble finish and the Japanese bamboo.
Outdoor Jacuzzi need not have elaborate designs to be stunning and this design is proof. The off white tub and white background become stunning with just large lush plants as its main decor. Sensual, simple and surely enticing.
when red wood and lovely green collide
Red in wood is beautiful when lighter contrasting colors are mixed with it, such as the natural green hues of plants. This elevated outdoor Jacuzzi made from red planks of wood and surrounded by greenery is stunning. Adding the natural light of candles creates a dreamy atmosphere.
Outdoor hot tubs are very popular in Japan, usually made from wooden planks and on natural springs.
flowing wAter to ease stress
Imagine having a personal hot spring bath that can be used any time of the day. This very design encompases the natural stress relieving benefit of hot springs and its natural beauty.
A pergola can be used to protect an outdoor Jacuzzi, sheltering it from bad weather and offering a little bit of privacy.
dreamy and romantic night of relaxation
An alternative way of spending time with a loved one can become even more special with this outdoor Jacuzzi idea. The soft drapes create privacy even when outdoors, while the soft candle light sets the right soothing atmosphere.
clAssic hot tub with a waterfall backdrop
Going back to the powerful sounds of nature, this waterfall backdrop can create the sublime noise that can drown stress easily. With the hot water from this classic outdoor Jacuzzi, all cares in the world can be swept off by this marvelous design.
This design is a perfect setting for that ladies' tea party you are waiting for.The flowers create a softer design against the lush greenness and the softer hue of the wood used for the outdoor Jacuzzi promotes a more feminine touch.
a closer design to what nature offers
Hot tubs and jacuzzis are the immitation of natural hot springs, and creating a design close to the natural will transform the appeal. The boulders and mix of plants and ferns in this design draw the attention of any anyone on first sight.
This is a simple design but one that can still captivate a modern and chic person easily. The black Jacuzzi stands out from the lovely polished wood. The pillows also stand out from the hue of the wood and add a bit color to the entire ensemble.
Have you ever considered incorporating a Jacuzzi into your backyard design or do you already own one? Feel free to share your thoughts on the matter in the comment section below.
What is the first thing that comes to your mind when you think of swimming pool? Do you suddenly start imagining luxury resorts, hotels or maybe water parks and public swimming pools? That is because we see photos of huge swimming pools everyday on our social media profiles but not enough of actual private swimming pools that a lot of people have in their backyards or even courtyards.
A lot of people think of private pools as huge basins of water with all kinds of various features and artistic landscaping as we see in photos of the homes of celebrities. But the truth is that everyone with a larger backyard can have their own swimming pool without having to star in a box office hit movie. But really, you are going to need space. If you don't think your backyard can house a swimming pool and still have some space left over for the patio, then you will be better off with a hot tub.
In our collection, we are going to show you 20 private swimming pools that are going to illustrate the beauty of having your very own swimming pool in your backyard. You will have the chance to see various designs in different styles that are made to fit spaces that differ in size. Some of the following private swimming pools are more luxurious than others but the point of this collection is to show you that the private pool doesn't have to be bigger than a golf course. Enjoy!
1. Sullivan's Beach House - A Beach Style Pool in Charleston
20. Backyard swimming pool with a see-through feature in Melbourne
How do you see these epic swimming pools? We would love to hear your opinion in the comment section below.
A swimming pool is a great way to bring life to a dull backyard because it encourages regular recreation and family fun time. An outdoor splash can be enclosed by a wooden surface or a concrete one and take on a geometric, kidney or circular shape. Having a relatively miniature basin in the back of you house would make the long hot summer days much shorter and more appreciative. Beautify the area around your tub with flowers and shrubbery or paint the inside in a bright color to stand out even when the sun goes down. A swimming area on your property can be the perfect place to set out a table, chairs and even a BBQ pit for any pool party events. Consider having your own customized pool with a water fountain and an own unique shape and design, while still leaving enough room for a beautiful landscape or walkway. Besides getting you outdoor bubble bath insured, make sure that your pool is always covered unless you intend to pay someone to clean it regularly.
Be mindful that whether you decide to construct an in-ground or fiber-glass plunge bath, a budget must be set to determine the cost of what you desire and how much you're willing to spend. Decide whether you will have a heating system in order to enjoy your new water basin to its fullest or just savor it for the summertime.
If you are at a lost in terms of where to begin, then check out some of the finest companies online that specialize in pool installations. For some creative ideas, consider these 19 swimming pools for a miniature backyard.
Swimming Pool Ideas For Small Backyards
#1 Envision a small square shaped swimming pool in a backyard enclosed by a wooden platform
As long as the rules that involve your building codes work in your favor, there is no reason you cannot relish in having a natatorium in a petite backyard.
Spending time outdoors is an essential crucial part of a healthy lifestyle, one that eases the mind and delights the senses. And when it comes to your own backyard, the entire idea of a floating deck comes as a solution to how you can organize a small corner outside that will complete your backyard design whilst serving as an entertaining, relaxing space, the ideal vision for a summer night spent with friends and family. The simple structure of a floating deck confers an airy fresh vibe to your yard and offers all the necessary space you desire to organize an outdoors dinning area or a pallet lounge zone with little trouble. You can even take the idea further and build the deck around a majestic tree without it being connected to your actual house or terrace or, why not, around a round pool or Jacuzzi with the sole purpose of ultimate relaxation.
As you will see in the gallery presented below, wood, especially pallet wood is the main material utilized due to its beautiful texture, adaptability to any type of structure and exuded warmth. Recycle old wooden pallets to create the most beautiful deck without spending a fortune on building materials and taking the environment into consideration. In time, the natural tone of the pallets will gradually fade, transforming itself into an incredible grey-greenish tone that will accentuate even more the greenery surrounding it. Invest time into creating your special corner an feed your imagination with the following 15 Stunning Low-budget Floating Deck Ideas For Your Home.
#15 backyard emphasized through a deck and potted greenery
What do you think about the chosen topic? Feel free to share your ideas in the comment section below.
It is time to enjoy the great summer outdoors, on our yards, patio, balconies or terraces. In all its splendor summer gives us the opportunity to see things completely different by spending more time outdoors, in cozier and warmer weather. A hammock or an outdoor bed are great ways to relax outdoors and happily both can be achieved through DIY projects.
Cast a glance at the 19 relaxing suspended outdoor beds showcased underneath and choose the one that suits you. You can construct your own hanging bed from two wooden pallets, an old sturdy door, trampolines, boats and thousands of other resources. Get creative and materialize an item that will relax you.
Relaxing Suspended Outdoor Beds
#1 suspended bed on the deck made from barn wood
via anthropologie.com
#2 re-purpose an old boat into a cool hammock on the porch
Patios are the perfect method to combine that cozy feeling of the inside home with the lush green scenery of the natural landscape. An extension of the house outside seems like a normal element and addition, a space designed and outlined by the perfect nature-artificial synergy. We have gathered a small collection of 15 Of The Most Elegant Patio Designs You Have Ever Seen which exceed our wild dreams and define a surreal elegant luxurious world where ordinary everyday problems seem to have no place. Various rich textures, natural materials, bold black cast iron in combination with white pure surfaces and the powerful insertions of greenery create the perfect relaxation areas.
Cast a glace at the selection below and allow yourself to dream a little. Enjoy!
Elegant Patio Designs
1. With such an exit the patio could not be below the expectations
2. Rustic feel in an elegant combination where nature has been allowed to take over
3. The patio fireplace has become a must for chilly evenings spent outside
4. Simplicity overpowers in most cases
5. Small inner patio with incredible openings
6. A natural element such as aged wood adds coziness to the exterior
7. A mixture of several textures and materials conceived in an harmonious way
8. Finding the secret spot in a fairy-tale garden
9. Elegance in an oriental twist
10. Sublime delicate setup overpowered by lush greenery
11. Dark hues of wood in a simple composition
12. Black cast iron contrasting with the purity of white
13. Elegant and comfortable in a green surrounding
14. French style patio corner in a mineral setup
15. An open terrace is the ideal solution for both summer and winter seasons
Which of the above designs appeals to you the most? Their extravagance exudes a wonderful surreal setup we would all love to include in our homes. Feel free to share your thoughts in the comment section below.
Pallets are often deemed as wasted timber. Once households or individuals get their packages, they really don't care about the pallet box anymore, which goes straight to the fireplace or rots away in a storage area. However, pallets are rather versatile,they can turn into anything; from tables, racks, storage areas and even gardens. There are a variety of new items that can be created from these pallet boxes and all a person really needs to do is to be creative and think outside the box.
Pallet gardens are the usual DIY projects that come to mind after receiving pallet boxes. For a home with a smaller lawn or even no lawn at all, these pallet gardens allow the possibility to improvise beautiful and green gardens. Some even take this advantage and create their own herbal gardens from where they can get spices and even fresh vegetables and fruits.
If you are interested in creating your own pallet garden, here are some useful pallet garden ideas that should get you going.
Vertical pallet gardens are one of the most encountered types. There is little to change in the appearance of the pallet box, only that the sides are covered so that the dirt can stay in and will not end up scattered around. Then plants are planted on the spaces between the pallet wood. This pallet project is the optimal solution for homes that have little to no space as the pallet can be supported on the wall.
This idea is rather a different vertical garden approach. The pallets are no longer closer to each other and there is more space for the herbs to grow. Again, instead of ornamental and decorative plants, herbs are among the most common pallet garden plants. Since these are rather helpful for various reasons, deciding to go with this plan will offer numerous benefits.
Vertical pallet gardens can become a great piece of art, simply by adding some hues through paint and then planting beautiful flowers as a pop of color. In a garden with mostly greens these represent a wonderful addition.
4. unique idea for a pallet garden
If you want a rather bigger space for your plants to grow in, you can choose to create a vertical pallet that has a bigger box at the bottom for the bigger plants you're planning to grow. Of course, this will take some work on the pallet boxes. You will have to recreate the look to achieve this.
5. perfect pallet garden for smaller areas
Almost all suburban and city homes have small lawns, but pallet boxes are here to make a difference. Through a small space, various plants can grow and almost every part of this pallet box planter can be used for growing these green lives.
Here are some examples of vertical pallet gardens that are created for your walls. The plants you can grow in them can differ, you can either leave it in a corner with other potted plants you have or hang it on your wall as sort of a decoration. You can even put these vertical pallet gardens inside the patio and create a wonderful new green universe.
If you want a rather traditional look to your pallet garden, you can create a planter box wherein your plants are free to grow as high as they like. Of course, you will need to create the box from the pallet wood you have. The good thing is you can make use of every pallet you have, whether they are new or old and sustain thus the recycling movement.
In case you want to start a pallet garden, you may want to choose some vegetables and fruits that you can easily grow using these pieces of wood. This can be considered the optimal solution for saving money and cultivating fresh organic food in your backyard.
Instead of directly growing your plants on the pallet garden you have made, you can try to put your potted plants on it. Somehow, it becomes a "shelf" for your plants, making it easier to transfer the plants if you need to.
Create a plan and then use old pallet woods and then add lights and beautiful indoor plants to organize a wonderful patio piece. Such a project will require little skill but the visual effects will be appreciated.
If you have limited skills when it comes to handling hammers and nails, you may want to consider this simple pallet garden. You can nail some aluminum or anything durable that can handle the pot onto the pallet box and then place some of your potted plants. It's almost like a hanging garden of sorts.
12. pallet vegetable box garden
You could choose the traditional way of using pallet boxes wherein you don't have to customize its look to plant your veggies. But of course, you can also create a bed from those pallet woods you have. It can be bigger and wider and you can plant more with this idea.
If your place doesn't have a lawn but more of a balcony style, you can still have your little garden. Create a pallet box planter and simply add legs to it to raise it from the ground and save up space. The raised beds can make it easier to care for your plants.
14. little pallet gardens
These tinier pallet boxes can only accommodate one row of plants. You can place the boxes alongside each other or in various places around the house, especially when you don't have the freedom of using too much space.
Another common pallet garden idea is a stair pallet planter. It resembles a flight of stairs, as mentioned in the name. Each step can also accommodate 2 to 4 types of plants. The stair idea is great when you're looking for a garden that can be decorative and easier to accommodate your plants.
You can build your vertical pallet garden with higher rows and thus have more space for your plants to grow in. You can either grow your plants directly onto the spaces or you can place a potted plant. Anyway, this design is suitable for modern homes because of its cleaner, edgier look.
17. unique garden pallet boxes
This unique design is great for individuals who are looking forward to making their garden look much better but have no budget for landscaping. Just create four square planters of different sizes, then fill them with soil and stack them according to this design.
Vertical pallet gardens are one of the best choices for decorative garden pieces and simply for saving space. This beautiful project alternates planters on a vertical pallet and becomes a great and stunning addition to any home. Since it's attached to a fence, you won't have the problem of finding sufficient space for your new babies.
Pallet fences are also a common project for unused shipping boxes. These can be used to create a fence to your mini garden where you can plant more of your shrubs and mini trees. To decorate your pallet fences, use the top space to plant little flowers.
This little vertical pallet garden can be stored anywhere outside your home so it can get sufficient sunlight. But instead of planting flowers or succulents, you can plant herbs that you can use for medication and cooking. Each planter can grow two different kinds of herbs.
Strawberries can be expensive when you buy them at the supermarket, especially off-season. If you are crafty you can save money by creating your strawberry garden. No worries, these can grow on pallet boxes so it's possible to create one and start planting your strawberries as soon as the weather allows you to.
Succulents are not just wonderfully beautiful plants, they are also rather easy to care for, and very low-maintenance as compared to other plants. If you don't have enough space for tiny pots, you can build an indoor pallet garden filled with succulents.
Want to fill out some empty spaces and corners? Creating a pallet planter for this very purpose is doable. Instead of creating boxes, create a triangular planter from your pallet wood. Do not forget to take the measurements of the corner for a perfect match.
Basil, rosemary, mint, parsley, and coriander are great choices of herbal plants you may want to start growing in your vertical pallet planter: Usually used for cooking and also for medical purposes, it's always a good idea to have easy access to these herbal plants.
Instead of planting into your pallet boxes, you can simply create a garden by adding mini pots of flowers and plants. You can use it as a party decor prop in your home.
Adding greens and flowers around the home can actually create a more refreshing environment so as much as possible, people try to invite greenery in.
28. pallet garden nursery
Growing your food will take time and effort. This little garden nursery made from pallet wood could help you in that endeavor as this is a perfect place to start growing those cabbages and carrots.
Recycling pallet wood can reduce waste all around. But these can also become the perfect decoration and even a budget-friendly solution for the green initiative around the city.
Vertical pallet gardens aren't just for design. Sometimes, they also have their purpose. For example, these can be used to divide parts of the house or actual properties cheaply as you are using repurposed pallet wood that you may already have. All it takes is a bit of hard work and dedication to the clause.
All it takes are garden clothes to keep the dirt in the pallet planter. It is easier to start growing your vegetables, each row can be allocated to a different vegetable or fruit which makes it easier to have a varied vegetable garden. Soon enough, you can save money by eating what's in your backyard, fresh and organic.
If you are serious about making a little vegetable garden and you have more pallet wood to spare, creating a bigger space is possible. A bigger planter can accommodate more plants and a vertical pallet planter can help save space. You don't have to worry even if you're not living in the countryside as this idea will be enough.
If you are having doubts about the solution of vertical pallet gardens, you can just choose to create a pallet stair planter. This alternative is more stable than vertical ones that don't have any type of support.
34. know what you have planted in your pallet garden
The great thing about pallet planters is that they can be designed to your liking. But the most common and yet the one that is best for almost any plant is the raised bed. Since it's bigger and deeper, it can be filled with more garden soil, making it a great choice for planting.
Take good care of your growing plants even more by adding a stand/leg for your raised pallet box planter. This is a great idea for elderly people who can't bend or stay bowed down to tend to their plants. Raised beds can also be great for homes without a garden.
Squash plants aren't simply grown by placing a seed in the ground and waiting for it to grow out. To properly grow it out, you would need a plant trellis, which can also be made from pallet wood. Trellises are used so plants like squash can have something to "climb" on and develop properly.
Gardens with inserted lighting are always surreal and beautiful, especially at night. You can add candlelight or string lights to your pallet gardens to make them look more cozy and chic.
If you're a first-timer in the pallet gardening area, you should start with rather simpler projects. This one is a simple pallet garden bed with a vertical side.
Who said gardening indoors is prohibited? You can most definitely bring a pallet garden to your home. You merely have to secure the sides with a garden cloth so that the dirt will not easily fall and you won't have a hard time cleaning after it. Apart from that, you may want to choose plants that don't need much maintenance, especially with sunlight. But for precaution, choose to place it near a place with sufficient sun.
44. tower pallet garden
Want more plants but lack much space? This tower pallet garden is the solution you require. Since a lot of homes now have little space, planting tends to take up the space intended for other things. But if you want to have your garden, create a tower, it's like creating four vertical pallet gardens side to side.
45. Pallet planter design
This cute little raised garden nursery has side planters to offer more space for growing your plants. This kind of design also makes it easier to maintain your growing plants. You don't need to go around the place trying to water everything. At least having a wider place in one spot will make it faster to do your gardening chores.
Pallets are a perfect base for raised garden beds. These pallets already have raised platforms, at least an inch or two above the ground. You don't even have to modify your pallet boxes or perhaps it would only take small changes such as making the spaces a little wider in between the panels.
These hanging pots would be a great idea if you can't find a garden cloth to seal in dirt and you want to bring your pallet garden inside the house. You don't even have to nail some handles, you can simply find hooks that you can attach to the buckets and make sure that they can securely get hooked on the pallet.
48. colorful pallet garden idea
A pallet garden mostly relies on the type of plant you are going to plant to make it look appealing. Of course, flowering plants will do. Nonetheless, it is best to see whether the plants can survive in a space like a pallet. Take note that these won't be growing straight upwards as the distance between the panels is not wide.
When it comes to planting pumpkins, trellises are common. These are used to support the growth of the pumpkins, as these are vines that will crawl and invade other spaces when not properly taken care of. But instead of finding good pieces of wood to make a trellis, pallet wood will make it easier for you as they are already constructed to look like a garden trellis.
50. pallet gardening table
This project doesn't directly use the pallet as the planter. However, it can be extremely useful for gardening. For example, if you don't have a gardening table and there isn't much space to place one, a pallet can be turned into a foldable garden table like this one. It is then easier to work on your favorite plants.
This one is quite an ambitious project, but if you can do it, it would be an extremely great idea. The project features stairs as garden beds with different plants plus real stairs to sit on or climb to the top. There's also a mini slide for the children!
Some love gardening, but don't want to step on plants as you do in a regular garden or find different plants lying around. When the surface doesn't support gardening a pallet garden box is the best choice.
53. colorful flowers in a vertical pallet garden
How to transform a great pallet into a garden? It's really about how you take care of the plants. If your plants, especially flowering ones, bloom and grow healthy, you have great bundles of greens and even pinks, reds, oranges, and violets on your pallet garden, thus becoming an amazing garden piece.
Cover up some old walls that you can't repaint or renovate in the meantime with some vertical pallet gardens. Choose great plants to look at and can cover up the walls you need covered.
Whether your wooden pallets are old or broken, they still have space for pallet gardens. In case you're the person who wants to get rid of any stuff and pallets are piling up, why not create a vertical pallet garden like this? It's easy and you don't need to find any sophisticated spot to place it.
56. a green wall with vertical pallet gardens
Here's what it would look like if you had chosen plants that can easily grow and bloom well even in a tiny space. It's almost like a green wall made of plants.
Wooden planters aren't just for creating planters. If you have enough of them, you can create a space like the one above. Most people tend to turn to gardening if they are usually stressed. Gardening can take away stress and clear the mind. Your wooden pallet garden could aid you in a more stress-free life.
Turns out wooden pallets can also be chic. Instead of old pots, you can grow your plants on these designed pots and then hang them on your vertical pallet garden. Then, you can hang your garden on the wall as a wall decoration.
Most vertical pallet gardens are wide, with the same size as a pallet wood. However, you can play with it and instead, create a narrower vertical garden that can fit a single plant. This is great if you only want a nice accent to your home and garden and if the walls aren't wide enough for the normal width of vertical pallet gardens.
60. flowery pallet garden
If you want your vertical garden to have a blooming, colorful life, you can choose flowering plants as your choice to put in your pallet planters. However, you may want to widen the gap between the tiers/panels so the plant will have the chance to grow upright and more healthy.
Not everybody has a green thumb, that is why not everybody makes gardening a hobby. However, if you want to try out a pallet garden project, you can start with smaller ones and with plants that can easily live. These are also great as decorations so if you're main goal is to find something that fits your home, go smaller.
62. alternate vertical pallet garden
This wonderful vertical garden idea is a nice touch to a lawn that's filled with fences and pretty much grass only.
This wonderful pallet sign and mini garden is a great project for both parents and children alike. It would be fun doing such a DIY project with the little ones in the hopes of making them grow up aware of their surroundings and how beautiful nature can be.
Colors don't have to come from flowers alone. If your garden is a little too monotone or perhaps your home is, this fun pallet garden project can bring out color to the garden. It's also another fun project that can be done with the kids.
65. colored vertical pallet planter with dollar cups
This is another different way to design your pallet garden. It's a side-to-side (or maybe back-to-back) slanting garden bed with planters on the top; it is also raised which helps you avoid back problems from bowing down a long time.
Succulents can be easy to grow and maintain and they are definitely beautiful. Use wooden pallets to create a mini succulent garden for your home in no time.
As said, you can now grow your strawberry at home. In contrast with the first one that was shown, a raised bed, this one is a vertical pallet planter. Take note that the planter is wider and there is more space in between each tier. taking up less space as compared to a raised bed though.
Simply take out some of the panels and then plant each spot with a different plant. Since it's a raised bed, you can choose to go with rather tall plants.
This is a great tutorial for first-timers or those who have no idea how to create this type of pallet garden.
71. cool pallet fence idea
Pallet fences are common, but since we're talking about pallet garden ideas, we offer a creative one that combines both. There are little spaces on the fences where smaller pants can be planted and a bed attached to the lower part of the fence for other plants as well.
The bottom image might make you think that it was just a bush that has grown healthily. However, there is a trick to this and this one needs the help of a pallet box. Instead of the usual box, this one had small holes where the stems of the plant would go through. Once it fully blooms, it would entirely hide the box, making it look like one thick and healthy bush.
73. corner pallet planter with seating included
Apart from being great pieces for promoting gardening, this project has the addition of a tiny seat, perfect for balconies and rooftops.
This amazing structure is made from pallets and for gardening. These are going to be raised beds, with each side structure having two spaces and a big square planter in the middle. Adding another side structure will make it a cool centerpiece in your garden.
Again, this does not directly make use of the pallet as the planter. But the pallet can also help organize tools as several tools are required to make sure your garden will look amazing. You can hang this outside in your backyard for easier and quicker access.
You can choose whichever plant you are going to grow, but choosing the ones you know will fit in with each other and create a lively masterpiece is something you should always keep in mind. Also, be wary of what soil you will use and how the other plants may react with each other. Planting in a tight space like a pallet garden should be taken seriously.
This amazing idea will remind anyone that anything can be convenient. Instead of a simple pallet garden or a simple bike rack, you can combine the two. A couple of vertical pallet gardens plus a top that can be used for shade makes it a perfect place to leave your bike to rest when you're not using it.
This small little pallet fence with a mini garden makes for a cute front yard design. It makes you feel welcome in a home and also adds life to your humble abode.
85. vertical pallet garden with fence
Now if you want the real deal, you can also add pallet gardens on your fences and then add some blooming green life on the soil. Having more plants will make your home more refreshing and with cleaner air since plants are known to filter the air naturally.
Even though you didn't make use of the pallet as the planter, you can still hang more pots of plants if you make it bigger and taller. It can simply become a garden of its own. Plus without the soil threatening to spill out, this can become an interior decor.
Want to start pallet gardening but you don't have much pallet wood to work with? This little project is the perfect solution. It's a small pallet box and can be placed anywhere such as the patio, right beside the door. It's a simple wonderful decoration.
This idea can be used for cafes and offices. This is a whole wall of pallet gardens that is ethereal and Instagram-worthy. This can add charm to your place while making sure the air is filtered and refreshing.
89. pallet planter trellis with plants
These pallet planters can be used as trellis. But when it's not the season to plant pumpkins, you can make use of the spaces to plant other things. It's easier to transfer them when they have grown and when it's time for the pumpkins again.
These are mini pallet box planters that can be used anywhere, whether outdoors or indoors. If you have a few pallets of wood to spare, you can build a number of these as these are rather small. Once you have done that, you can sell the others you won't be using for profit.
Another Instagram-worthy wall of live art masterpiece. You can create this vertical pallet garden in your yard and just set a garden table and seat and it would be instantly amazing. The place will be what you are looking for if you want a relaxing place, and it's just right in your own home.
Your business could also benefit from these vertical pallet gardens especially, of course, when the space is not as wide as you want it to be. You can grow out plants or help divide your used spaces.
Apart from making a fence for your poultry area, you can also mix it up with a little garden life. The top part can be placed with a garden cloth and you can start planting little plants to give it more life.
94. vegetable garden right in your home with pallet planters
Tomatoes and other fruits and veggies could also grow out of a vertical pallet garden. Once you have these, you can monitor how they are taken care of and you can assure that what you eat is safe. It's also very easy to do the pallet garden and it can be placed anywhere most convenient for you.
This beautiful pallet garden piece will be an amazing addition to your patio or your balcony. But with a design like this, it would be better to call the help of professional builders since you want this to be a safe piece for your home.
96. lovely pallet fence garden for mini potted flowers
Here's how you can create a simple pallet garden with the right kind of soil and with garden cloth stapled into a pallet. With this garden, it is possible to transfer grown plants into it just as long as you know they can survive the transfer.
Take note: label your herbs if you don't want to mess things up. Since you would likely be using your herbs, you want to make sure that you're getting parsley instead of mint. Of course, you may know the difference even without the labels, but this is for the consideration of others.
99. pallet garden with decorative candle holders
It's even lovelier if you choose to add some cool decorations to your pallet garden. Candle holders are perfect, especially if you're planning on adding some lights to it soon for romantic decor.
100. raised vegetable garden with pallet boxes
Your yard's soil may not be the perfect soil for growing some types of vegetables. But with a raised pallet bed, you can easily fill it with the right one and then grow it right on your own spot.
If you want a more organized look to your vertical pallets, you can try and use pots and boxes to place your succulents in and then hang them. This is easier for the eyes and it makes the garden look cleaner and more perfect for indoor use.
102. small strawberry pallet planter
A small pallet box can hold at least three shrubs of strawberries. That would be enough if you're just planning on eating the strawberries. But for easier transport, you can add wheels to the box and you can just push and pull it around wherever you feel it would fit well.
Instead of spending hundreds or thousands covering something up with a wall, a vertical pallet will do the job even better. It's natural and can be easily placed and removed without costing too much.
Since you're already recycling old pallet wood, why not partner it with using cans for pots? It's a different look but it will help manage the waste in your home.
107. palette wood and buckets
A great choice for when you're looking for fabulous decor without spending a dime.
Brighten up your home with this little pallet planter. Add some beautiful flowers that aren't too vibrant, but just enough to please the eyes and give a more natural look to the home.
You can add some other features to your pallet box. If you have the money, you can buy these amazing posts that complement your repurposed pallet boxes. The hanging pot
Cedar pallets are exactly like other pallet boxes. If you can't find a cedar one among the ones you have at home, don't worry as you can still use anything you can find. The important point is recycling to eliminate waste and add more beauty to your surroundings.
111. pallet box planter and fairy garden
Of course, a garden won't be complete without a little fairy landscaping. Allow your imagination to run wild and feel like a child once more.
What do you think about the idea of a pallet garden? Feel free to share your pallet garden ideas and projects in the comment section below.
Wobblers are better suited for moderately sized grounds or enclosed spaces thanks to their efficiency and uniformity. On the other hand, impact sprinklers can be used for larger areas due to their significant range and low cost.
Those who have a garden know how difficult it is to keep it watered. Luckily, with a wobbler or impact sprinkler for low pressure, your watering woes can be resolved.
That’s why I have compared these two sprinkler heads today. They are much better at watering your plants than traditional drip emitters. As such, you can preserve the beauty of your garden for a long time.
So, if you want to know which one is the best for you, then read on!
What Is A Wobbler?
To start things off, I will be looking into the Wobbler sprinkler head. It was originally introduced as Xcel Wobbler, manufactured by the brand Senninger, which is a well-known name in the field of irrigation systems. As such, the Senninger wobbler sprinklers are the most popular.
This particular type of sprinkler head produces rain-like droplets that resist wind and evaporation. And it is built with off-center rotary action technology that allows it to operate at lower pressures.
Advantages Of The Wobbler Sprinkler Head
1. Provides Uniform Distribution
The wobbler sprinkler head provides a much more uniform coverage compared to traditional drip irrigation systems. Thanks to the off-center rotary action, it can distribute consistently sized droplets over a large area without any issues.
Also, the wobbler technology enables it to maintain a uniform pattern, meaning that you don’t have to worry about parts of your garden getting no water.
2. Efficient Water Usage
The droplets distributed by wobbler sprinklers actively resist wind drift. This means that the droplets won’t spread out beyond the operational area, which reduces water wastage. Besides, they have been designed to operate at low pressure, which means that you can cover your entire lawn with relatively less water.
3. Highly Versatile Application
When compared to existing drip systems, the wobbler sprinkler heads are much more versatile. So, they are used extensively across yards, lawns, gardens, nurseries, and turfs.
Not only can a wobbler be used for watering purposes, but it can also be used to control insect growth and provide frost protection. Furthermore, it has minimal impact on the soil structure despite the large droplets, which makes the area ideal for germination.
4. Durable Build Quality
To ensure a prolonged lifespan, the wobbler sprinklers are made from high-impact, engineering-grade thermoplastic materials instead of metals. As such, they are incredibly strong and damage-resistant, which means that you can use them for a long time without any issues.
Disadvantages Of The Wobbler Sprinkler Head
1. Expensive
Because of the high-quality materials used and the versatile features, it comes with a relatively high price tag. That can act as a deterrent for many homeowners, especially those who have a limited budget.
2. Difficult To Set Up And Maintain
Compared to a traditional irrigation system, the wobbler sprinkler features a much more intricate setup. This makes the installation process a lot more complicated and time-consuming. Likewise, the sprinkler head is difficult to maintain and repair due to the same reason. So, if you encounter any issues with it during usage, you might have a lot of trouble fixing it. Even performing periodic maintenance can be a headache.
What Is An Impact Sprinkler?
Now that you know about the wobbler, I will be discussing impact sprinklers in this section. An impact sprinkler is one of the most commonly used sprinklers, featuring a rotating head that disperses water. On that note, you can choose between the Orbit vs. Rainbird impact sprinkler, which are two of the best brands available today.
The head is pivoted on a bearing, which makes it free to rotate. This bearing is located on top of the threaded nut that is used to attach the head to the pipeline. An impact hammer present on the head strikes the water stream, and the force of the impact helps to rotate the sprinkler around.
Advantages Of An Impact Sprinkler
1. Highly Adjustable Design
Typically, an impact sprinkler head comes with a set of nozzles that allows you to adjust the water flow rate as per your requirements. In addition, the head features an adjustable stop, which allows you to choose between a part-circle or full-circle operation.
2. Cost-Effective
Compared to the wobbler or any other sprinkler head, the impact sprinkler is a lot more affordable. This is because it does not have a complicated design like the wobbler, nor does it require skilled personnel for its installation.
On top of that, it does not require electricity to operate, unlike many other sprinkler heads. Therefore, you can save on energy costs, which further enhances its cost-effectiveness.
3. Easy To Use And Maintain
Due to its simplistic design, an impact sprinkler is much easier to use than wobbler sprinkler heads. It is quick and easy to assemble, and there are no complex moving parts that you need to be careful about.
As such, it is a breeze to maintain the sprinkler head periodically. And if there are any issues with it, you can troubleshoot them on your own. Just disassemble the parts, identify and fix the problem, and put them back together - simple!
4. High Coverage Area
Impact sprinklers are designed to spray water over a fairly large area, which makes them a perfect choice for large, open spaces. In fact, they might have the greatest range among all types of sprinkler heads, which makes them extremely useful for irrigation purposes.
Disadvantages Of An Impact Sprinkler
1. Not Always Suitable For Low Water Pressure
If you plan to use an impact sprinkler for your lawn, then you need to make sure that the pressure of the water supply is high enough. These sprinkler heads do not work that well when the water pressure is low when compared to wobblers.
2. Relatively Noisy
The impact sprinkler is noisier than other sprinkler heads. This is due to the water stream striking the impact hammer. Unfortunately, there is no way to get around this problem, so you have to deal with the noise. However, the noise is not very loud, so it should not bother you unless you are in close proximity to it.
Wobbler Vs Impact Sprinkler Conclusion
Both sprinkler heads have their own strengths and weaknesses, which makes them suited for different use cases.
If you have a moderate-sized lawn or have an enclosed space such as a greenhouse, I would suggest going with the Wobbler sprinkler head. Also, it is suitable if you live in an area with low water pressure. It has a decent range and provides uniform coverage.
On the other hand, if you own a large yard or an irrigated field, you can go with impact sprinklers. Its exceptional range and low cost mean you can cover the entire land area without issues.
There are several reasons for polymeric sand not hardening properly, with the most common being excess water. Resolving issues with polymeric sand hardening is fairly simple, requiring a few precautions during the application process.
The application ofpolymeric sandis an involved process that can go wrong the moment a step of the process is missed. And a failed polymeric sand project is both costly and time-consuming.
So, to help you fix these issues and avoid them in the future, I’ve created a complete guide on polymeric sand. With this, you can make sure that your polymeric sand installation will go as smoothly as possible.
How Polymeric Sand Works
Made from a blend of sand and polymer additives, polymeric sand is used to seal the joints between pavers of all kinds. For instance, it can be used with brick and concrete pavers for optimal results.
Once you add water to the sand, the special polymers in the polymeric sand activate and begin to harden when the water dries up. The result is a strong binding agent that doubles as a good joint-stabilizing sealer.
Polymeric sand eliminates the need for frequent repairs because of how strongly it binds pavers together, making your patio look good for a long while. And once the compound hardens, it becomes water-resistant, which makes it a worthwhile solution for your patio pavers.
There is no room left over once the sand hardens and so, your patio becomes resistant to weeds and pests as well. But you can consider mixing in pesticides or weed killers to future-proof your patio from potential critter or weed infestation.
Possible Reasons For Polymeric Sand Not Hardening Properly
1. Pavers Contain Moisture At The Time Of Installation
Moisture present in the base or the bedding sand can lead to problems with polymeric sand. It can lead to the sand either hardening improperly or not hardening at all. Additionally, a lack of soil compaction can lead to the bedding sand holding more water than necessary, which can further exacerbate this issue.
Tip
Another thing to be wary of when you install polymeric sand is the weather.
If it has rained recently, your bedding sand may have too much water for a successful installation. I would suggest keeping the base of your pavers completely dry for proper installation.
2. Over-Watering And Under-Watering
One of the most important steps of polymeric sand installation is the watering stage. This step involves using a garden hose on the shower setting to spray the patio with water to activate the polymers.
If you’re not careful, this stage can easily lead to over-watered sand, which ends up separating the polymers from the sand during activation. The bonding strength suffers as a result, and the sand ends up not hardening properly.
On the flip side, if you don’t water the sand enough, it will form a slightly hardened top layer without properly bonded joints. As time goes on, the sand will erode and create gaps, exposing the sand that hasn’t bonded down to the base of the joint.
3. Improper Drainage
Poor drainage can easily destroy all the progress you made on the paver project. If water has no space to leave the bedding sand, the polymeric sand won’t set properly. And once the rainy season comes around, the polymeric sand will be left vulnerable to be washed out.
The lack of a slope can also lead to water pooling underneath your paving stones, further exacerbating the issue. And if the pavers don’t have a boundary of an either artificial or natural kind, the edges remain susceptible to the same issue.
4. Improper Joint Spacing
Both the lack of space in a paver joint and an abundance of it can lead to issues with polymeric sand. Too narrow or tight joints can cause spill-overs during the activation process, and the lack of space gives water no room to flow while showering.
In a similar vein, larger joints with too much space between them can lead to washout as well since they allow too much water between them. The same is applicable to joint depth as well.
Not only is this problematic for the polymer activation process, but the sand that washes out can also form a hazy, hardened layer on your pavers. This is an unsightly mess that can be quite difficult to resolve without professional help.
5. Poorly Removed Excess Sand
While using polymeric sand, you will need to brush off excess sand before and after the compacting step. But if the excess sand isn’t removed properly, the polymers in it will activate first and dry up before the sand in all the joints. And if you’ve already applied a sealer on top of it, the problem can become much worse.
The dried crust ends up trapping water underneath, causing issues in the long run. Moreover, the resulting hardened polymeric sand is far from a pleasant sight, leaving behind dried-up polymers that are a blemish on your pavers. The appearance is akin to a permanent layer of stone dust on your pavement, which is not a good look, to say the least.
6. Using The Wrong Type Of Polymeric Sand
Unfortunately, there are plenty of polymeric sands on the market that are simply not up to the mark. A cheaper price tag may seem enticing at first, but the product is likely to cause trouble in the long haul.
Poor quality polymeric sand uses cheap ingredients that lower its price and can set up quickly, but the results can be far from desirable. One such ingredient is portland cement, a material known to leave behind a hazy residue on the pavers.
Likewise, the combination of poor-quality materials may also result in the sand not hardening well enough to be satisfactory.
Other Common Polymeric Sand Problems
1. Polymeric Sand Crust
A crust forms on the surface of the sand as a result of it being filled too high or not being watered enough. This causes the sand to remain fairly loose underneath the hardened surface that erodes over time, necessitating frequent repairs. The only permanent solution to this problem is to remove and replace the existing sand with new polymeric sand.
2. Hazy Polymeric Sand
A white haze forms over the pavers as a result of improperly swept excess sand or overfilled joints. This hardened haze can be quite difficult to remove, requiring saturated chemicals to clean the pavers thoroughly. The process is quite involved and has several steps to it, which is why most people strive to avoid such hazy results.
What You Can Do To Ensure Proper Polymeric Sand Application
If this is your first time applying polymeric sand, you are probably going to encounter at least one of the issues I listed above. I certainly did the first time I got to use the paver filling material, and it was an educating experience, to say the least.
You can try to mitigate these issues- or outright prevent them- by following the set of tips below. These tips cover all the essentials of polymeric sand application, and I ensured to leave no stone unturned when it came to being thorough.
1. Buy High-Quality Polymeric Sand
One of the first steps you can take to make sure that your polymeric sand doesn’t fail you is to use high-quality products only. You won’t have to spend extra money on repairs for a long while, and the time you spend on it will be well worth the while.
Low-quality polymeric sand will require repairs far sooner than one would expect, and it’s generally better to use high-quality variants when such a time arrives. The price difference between high-quality and low-quality sand ends up saving you money as time goes on.
It may sound contradictory, but rest assured, you’ll be getting your money’s worth for years to come. Just be sure to use enough polymeric sandwhen starting the project.
2. Follow The Manufacturer’s Instructions
Several polymeric sands come with instructions specific to the particular product. So, if there is an additional sand application step that you have missed, you may want to start over with the project.
It’s always best to look up the paver manufacturer’s instructions manual before starting a DIY project, after all.
3. Take Your Time With The Application
A rush job can be the root of many issues, and polymeric sand installation is no different. While the application process will take you about an hour, the sand will require multiple days to set in well. Rushing through the steps will give the sand no time to harden, leading to a host of issues that are expensive and time-consuming to fix.
So, take your time with the application process and prepare well in advance to keep the patio off-limits. After all, you wouldn’t want to keep fixing the pavers over and over again for any accidental damage, would you?
4. Take Care While Watering The Sand
Over-watering and under-watering can both occur while showering on the patio, and you can avoid them by using your garden hose carefully. Some polymeric sandbags may make mention of the optimal amount of water required for the sand to set in properly.
You should wait for up to three minutes between watering sessions to let the water seep into the pavers. And once you see foam, stop watering at once. Doing so should give you a proper idea of how much water you need to spray in future showering sessions.
Tip
If you’re unsure about the amount of water needed, consider setting up a few square feet of test area away from your main pavement work.
It’s for the best to avoid spillover while lightly watering if you can.
5. Remove Excess Sand Carefully
Moderation is key when sweeping your patio to remove excess sand. Sweep too vigorously, and you may not leave enough in the joints to form a good seal. And if you do so too lightly, the excess leftover paver sand will form a hazy residue on top of your pavers.
Thus, you should be careful while sweeping to leave as little sand on top of your paver surface as possible, particularly with textured pavers.
If you are left with a hazy coat of sand on your pavers, you may be able to remove it using a hot water pressure washer. Water from a hot pressure washer can help reactivate the polymers in the sand and make it easy to remove again. Once again, moderation is key to successful removal.
6. Allow Proper Drainage
There are a few solutions to poor drainage problems that are easy to implement during installation. These include: installing pavers on a surface that lets water through, establishing boundaries, and creating a slope. Issues with standing water are eliminated completely with these practices.
Installing pavers on a surface made of crushed concrete sand or natural stone with bedding sand in between creates a medium for the fluid to pass through undeterred. Thinner pavers benefit from these particularly, getting the extra support while the polymeric sand hardens.
Depending on where you live, you may also want to look into installation guidelines on the impact of such substances on the garden soil. If you have a garden near your patio, this is a helpful practice in keeping the plants safe.
Next, create an artificial or natural boundary around your pavers to allow water to flow off the edges. Even if the surface doesn’t allow drainage, a boundary can help remove water from the pavers.
Lastly, you can consider giving your new patio a slight slope that naturally redirects water away from the pavers. Note that the slope should be tilted away from your home, so it doesn’t pool around the base of the structure. Additionally, electric gates and other electrical installations should be placed away from the end of a slope.
7. Be Mindful Of The Weather
Before you begin installing polymeric sand, you should check the weather forecast for chances of rain. Rain can easily wash away all of your hard work with no fault of your own, after all. And the same goes for any weather condition that can lead to the pavers becoming damp, such as snow storms.
Try to ensure that the weather conditions are completely dry before starting your patio project. And, for good measure, consider using a leaf blower on the surface before you begin working.
8. Avoid Topping
Topping is the act of using regular paver sand to fill in the paver joints before covering them with a layer of polymeric sand. Though this may sound effective both in terms of cost and results, this is anything but effective.
The primary issue with topping is that the base isn’t packed densely enough with regular sand, which can wash out quite easily during the rain. A thin layer of polymeric sand won’t last long enough to withstand the rainy season and soon, you will have a mess on your hands. It’s entirely possible that topping can end up costing you more money than simply using polymeric sand for the job.
Suffice it to say topping is not a wise approach when it comes to creating solid paver joints.
9. Compact The Sand Well
It may be tempting to skip out on the compacting stage of the polymeric sand installation, but it remains a vital step of the process.
Using a roller compactor or plate compactor for this causes sand particles to remain close while the binder materials in polymeric sand do their job. This ends up creating a solid and durable bond that will last for a long time. The pressure applied during this step removes pockets of air and any spaces left between the joints, reducing the likelihood of cracked and broken joints.
Polymeric Sand Not Hardening Conclusion
Though the application of polymeric sand is straightforward, the process requires a lot of care to be executed properly. After all, there is a lot that can go wrong with the compounds involved in the workings of polymeric sand.
If your polymeric sand doesn’t harden, the culprit is often excess water. Regardless of the reason, issues with polymeric sand hardening can be resolved without much trouble. All you need to do is remain vigilant during the application process and ensure you’re following the manufacturer’s instructions.
Should you face any issues with polymeric sand, I would suggest contacting professionals and letting them handle all the heavy lifting. The end goal here is a gorgeous-looking patio, and professionals can guarantee it for you at a small fee.
Polymeric sand is a specialized construction material typically used for landscaping projects like sealing pavers and driveways. It can also be a long-term solution for repairing cracks on these surfaces.
Damaged pavements and driveways are more than just an eyesore- they can compromise the safety of your landscape like nothing else. That’s why most homeowners take special care when sealing these surfaces or repairing them in case of damage. And if you ask me, polymeric sand is one such material that can help you achieve both purposes effectively.
But, what is it and how do you use it? Read on to find out!
What Is Polymeric Sand After All?
Simply put, polymeric sand is a special material used for construction purposes, which is made by combining fine sand particles with additives (like silica). Polymeric sand is used by professionals and DIYers alike to fill the gaps between surfaces like tiles and pavers. Once exposed to water, the material hardens over time, creating a strong, durable bond.
Now, regular building sand, the material used for the formation of paver beds, can be used for filling gaps and joints between the above-mentioned surfaces. But there are quite a few advantages that makepolymer sand stand out when compared with regular sand, such as:
1. High Durability
The additives in a polymeric sand bind with the material when exposed to water, creating a fundamentally durable bond. So, when you apply the material to fill gaps or joints, you can rest assured about its longevity to keep the surface secure. However, this is not the case with regular building sand, as you may have to reapply it every few weeks, especially with heavy use and inclement weather conditions.
But polymeric sand is said to be resistant to rain, the elements, and even corrosion. In hindsight, it reduces the need for frequent repair and reconstruction of your driveway, pavement, or other tiled surfaces.
2. Ease Of Use
No matter which brand of polymeric sand you opt for, it will come with detailed instructions on the package for hassle-free application. Although the process may be time-consuming, especially for first-timers, it’s relatively easier to get the hang of.
Tip
Make sure you follow the application instructions to the tee, especially if you want to apply polymeric sand to make the surface resistant to water. Moreover, you should clean the remaining polymeric sand thoroughly to ensure that everything “sits” in the gaps or joints and there’s no leftover on the surface.
3. No Weed Infestation
Since polymeric sand settles in the joints and gaps of pavers and tiles without leaving any gaps, you don’t have to worry about weed infestation in these places. This also means that you won’t have to use any weed killer or use manual weed-pulling methods, thereby preventing any unnecessary damage to the surface.
4. Multiple Colors
Polymeric sand is manufactured in different colors, with red, brown, and gray being the most popular options that blend with most pavers and tiles seamlessly. As a result, homeowners don’t have to worry about spoiling the aesthetics of their outdoor projects.
Are There Any Disadvantages Of Using Polymeric Sand?
Like any other construction material, using polymeric sand requires users to be careful about certain aspects. For instance, this material can harden very quickly, meaning you won’t have much time to work with it, especially once it’s exposed to moisture. Hence, you have to work quickly during the application; otherwise, there will be chunks of sand all over the surface and joints.
Another thing to be aware of is if there’s leftover sand on the surface when it rains or if the surface the sand is being applied to is moist, the material will harden immediately. And this will result in ugly-looking patches.
Furthermore, you should always use the right amount of sand and sprinkle the right amount of water to fill the gaps and joints. If you use too much water, the polymers in the sand will wash away before getting the time to set. Likewise, using less water will result in weaker bonds, which will be fragile and highly likely to break away.
How To Use Polymeric Sand?
The most common use of polymeric sand is in landscape paving projects, such as stone, brick, and concrete pavers. Aside from that, you can use this material to fill cracks on tiles and similar surfaces. But how do you use polymeric sand to get the best results? Find out below!
Start by cleaning the surface to ensure that there’s no dirt or debris which can interfere with the bonding process. And once you’ve ensured that the surface is completely dry, spread small amounts of the sand on the required areas. Do not use too much, as the leftover sand will become hard to clean- you can always add more if required.
Now, use a push broom to sweep the sand and “force” it into the cracks and joints. Do this a couple of times in one direction, then sweep in the opposite direction to ensure that all the gaps have been properly filled. Continue this step until all the gaps have been visibility filled with the sand.
To reinforce this step, I’d suggest using the handle of the broom or using a vibratory compactor to tap the sand and help it settle. You will likely see that the level of the sand in the gaps will drop, which is when you should apply more sand and repeat the application process. Continue this until the cracks are filled to the brim after the tapping.
In case of excess polymeric sand on the surface, use a leaf blower or a brush to clean it, but make sure you’re not removing the sand from the cracks or joints. Finally, use a mister to spray water on the applied sand and activate the binders. However, remember that too much water or a strong water stream will wash away the applied sand.
How Long Does Polymeric Sand Take To Dry?
Once exposed to water, the applied polymeric sand should dry within a couple of days. You can check the bond by inserting a stick or pen into the joints- if it fails to penetrate the crack, the sand is completely set. If not, you can use more water or apply more sand as required and repeat the application process.
But “should you seal the pavers before using polymeric sand?” Well, this isn’t really required, as the material itself will work as a sealer to lock the paver joints in place. However, read the manufacturer’s instructions carefully, as some manufacturers may recommend otherwise.
What Is Polymeric Sand & What Is It Used For FAQs
Can you use polymeric sand in cement?
Although there’s no rule to stop you from doing so, using polymeric sand to fill concrete slabs may not be the best idea. This is because the material will eventually harden over time, preventing flexibility in the slabs and promoting cracks in the long run.
As such, I’d suggest using backer rods, which are specifically made for sealing cement pavers. You can even take the help of a professional if you’re unsure about the process.
Can you use polymeric sand with gravel?
Filling gaps and joints with polymeric sand that already has gravel in them can be extremely cumbersome, as it will take a lot of effort to force the sand between the gaps. And leaving the sand on the surface for too long will increase the risk of discoloration.
Ideally, you should try removing all the gravel from the joints, cleaning and drying the joints, and applying polymeric cement. Once applied, finish it with a layer of polymeric sand before spraying water to activate the polymer.
Does polymeric sand work with flagstone?
No, polymeric sand should never be used to fill joints and cracks in flagstone pavers, as they are typically built on a foundation of gravel stones. As a result, the sand will not reach the lower level of the paver and simply settle on top, eventually cracking and creating a mess.
Not only that, but the void left at the bottom of the flagstone pavers can facilitate the growth of weeds and promote the entry of ants or other small pests.
Does polymeric sand work with porcelain pavers?
Yes, polymeric sand can perform very well when sealing porcelain tiles and pavers. As the material sets in place and bonds with the tiles, it facilitates a durable connection that’s equally flexible to reduce the chances of cracks and other foundational damages.
Can you use polymeric sand with brick pavers?
Yes, many professionals prefer joining clay brick pavers and fixing cracks on brick driveways with polymeric sand. As the material hardens inside the gap forming one continuous unit, it strengthens the bricks to prevent cracks. Moreover, it takes up all the space inside joints and cracks to deter weeds and pests.
Additives like resin and plastic in the polymeric sand can also protect the surface integrity of your pavers and driveway by facilitating even weight distribution.
Can bluestone driveways and pavers be set with polymeric sand?
Bluestone concrete pavers are generally designed in a wet-laid application, which isn’t really suitable for polymeric sand. If you use polymeric sand to fill gaps and cracks in wet bluestone pavers, the material will invariably harden to form ugly chunks, eventually cracking. Besides, the joints may not hold in freezing and thawing conditions.
Due to these reasons, many professional contractors prefer using mortar instead of polymeric sand when setting or repairing bluestone pavers.
Can you apply polymeric sand to set pea gravel driveways?
The answer to this will depend on the size of the pea gravels you have used. For instance, if you have placed the pavers 2 inches apart and used small to medium-sized pea gravels for the base, there should be enough space for the sand to enter and do its job.
However, using polymeric sand may not be useful if you’re using large-sized pea gravels at the base or using them on the surface.
Should you use polymeric sand for installing or fixing travertine pavers?
Polymeric sand works very well when setting or fixing gaps and cracks in travertine (natural stone) pavers. All you have to do is pour the sand in small heaps on the required areas and sweep it in the gaps a couple of times to ensure they are completely filled.
Then, clean the leftover sand on the paver and lightly mist the filled gaps to activate the additives, setting the sand in place.
What Is Polymeric Sand & What Is It Used For Final Words
That’s all I had for today!
But before I leave you to the job, here’s one last tip. If your pavers have been discolored due to leftover polymeric sand, spray some white vinegar on the required area, leave it for a couple of hours, and scrub it lightly. Then, wash it with soap and water and let the area dry completely.
See you another day!.
Pulsating sprinklers or impulse sprinklers are lawn maintenance devices known to create a natural rainfall effect to cover larger areas. Broadly, there are five types of sprinklers with specific features, so it’s essential to choose one carefully for your gardening needs.
Every gardening enthusiast can agree that watering large areas is a challenge, especially if you’re working with animpact sprinkler for low pressure.
As a result, you may have considered getting a pulsating sprinkler (a.k.a. impulse sprinkler) for your lawn. However, nowadays, there are different types of pulsating sprinklers available on the market, catering to various needs.
On that note, I have curated this brief yet informative guide on pulsating sprinklers and how they work. Read on…
What Are Pulsating Sprinklers?
A pulsating sprinkler or impulse sprinkler is a lawn maintenance device used to spray water over a large area. The five common types of sprinklers are - impulse, oscillating, traveling, rotary, and stationary.
Pulsating or impulse sprinklers offer gentle and slow watering as the water is not directly sprayed on the grass but upwards into the air. As such, they disperse water uniformly on the ground, making the sprinkler ideal for watering private lawns, golf courses, landscaping, etc.
Who Invented The First Pulsating/Impact Sprinkler?
In 1933, Orton Englehart, a Glendora, California citrus grower, invented a horizontal action impact drive sprinkler and patented it two years later. Thereafter, he sold the design to Clem and Mary La Fetra, who distributed it under the brand Rain Bird.
How Do Pulsating Sprinklers Work?
Pulsating sprinklers feature a single jet, and most models can be adjusted for watering in partial and full circle patterns. You can further adjust the distance of the throw, allowing you to cover a larger area while watering. I especially like how a freestanding impulse sprinkler can be connected to any type of hose.
Moreover, you can find two main types of these sprinklers on the market.
First is the sprinkler with a spike base, ideal for areas experiencing high water pressure. This type of sprinkler features a sturdy base, offering greater stability while handling strong water force. As such, the sprinkler is less likely to flip over while throwing the water at longer distances.
Another category is the pulsating sprinkler with a sled base or H-base. These are more suitable for watering smaller areas experiencing low water pressure.
Lastly, pulsating sprinkler heads are another “pop-up” option for in-ground systems. You can detach them before mowing the lawn.
Tip
No matter the type of impulse sprinkler you use, I always recommend low water pressure to prevent any damage to smaller plants and grass.
What Are Pulsating Sprinklers Made Of?
Most pulsating sprinklers are made of metals like stainless steel, zinc, brass, aluminum, and bronze to prevent corrosion. Some components may be made of plastic as well.
Additional features allow the user to adjust the impact sprinklerand the stream of water it releases. You can choose to spray water in a fine mist form or a full jet. I use this feature a lot to customize the watering strength according to the type of plants or grass I’m handling.
You may also find baffle plates in some sprinklers that help adjust the height of the water. As such, you can conveniently water smaller plants and bushes below low-hanging trees.
Benefits Of Pulsating Sprinklers
I prefer pulsating/impulse sprinklers over other types because they are the most effective in covering larger areas. Plus, they can operate well in low water pressure while dispersing more water per hour.
Moreover, these sprinklers are low-lying with single jets dispersing water. The spring-loaded arm releases water with high force. This mechanism offers adequate wind resistance, meaning the weather conditions will have to be extremely windy to cause any harm to the sprinklers.
How Much Do Pulsating Sprinklers Cost?
Depending on the manufacturer, materials used, additional features, coverage area, and more, the price of pulsating sprinklers varies widely. However, if your lawn is on the smaller side and you do not require many features, I recommend going for budget-friendly options.
Pulsating Sprinklers Conclusion
Pulsating/impact sprinklers imitate the natural effect of rainfall, and hence, they are a must-have for gardens, lawns, or any large area of grass and plants. Plus, they are a non-intrusive alternative to furrow irrigation which requires you to dig trenches.
Overall, I highly recommend investing in a high-quality pulsating sprinkler system to water your lawn quickly and effectively. For further information on impact sprinklers and how to fix and maintain them, I suggest checking out my article, “impact sprinkler trip pin not working.”
Envisioned byRobert M. Gurney the Nevis Pool and Garden Pavilion are breathtaking examples of backyard landscaping ideas and of the attention that we should pay to our green spaces, these extensions being located in Washington DC. Being located in a neighborhood at the border of Washington DC, this suburban site offers the owner the advantage of being adjacent to woodlands. Surrounded by nature, trees and small mesmerizing manicured gardens, new swimming pools and stone walls, new paths and trees,structured planting, all these being elements that are anchoring a new design and a breathtaking landscape into the site.
The small pavilion contains a stainless steal kitchen with seating components along with an adjacent living space bound to a modern fireplace that becomes the center of the ensemble. The new pavilion is meant to provide shelter from all natural elements whilst making a statement for the breathtaking backyard landscaping, a natural organic view for the native natural surroundings.
Gardens can do wonders to our well-being and it's scientifically proven that people who have them live better lives. If you are one of those lucky people, and have the privilege to live in a house with a wonderful garden then you should definitely spend some quality time on its decoration and do create some fabulous landscapes that you will enjoy even more. In this article you are going to see 19 Stunning Garden Pathways That You Can Make On Your Own with ease and without having to ask a professional for help.
The garden pathways create spaces in your garden where you can move freely, so you don't destroy the grass and the rest of the landscape. They define the areas that are for walking around, and they will make the walks more enjoyable than ever. If you have been thinking about creating a pathway in your own garden the photos below are going to get your imagination going. There are lots of materials that you can use to make them, so see which design works the best for your existing garden décor.
There are some really carefully-planned designs that will require more time and lots of patience, so if you are a perfectionist you will definitely enjoy playing with pebbles and stones while creating this eye-catching pathway.
Did someone say glass bottles? Yes, you can repurpose the glass bottle in an awesome way and create a unique path for your garden. It's a super eco-friendly idea that you should copy if you have tons of bottles and you don't have a clue what to do with them.
If you are using cement for creating an interesting pathway we suggest you to have fun and decorate it with a big leaf while the cement is still fresh for a unique and natural look.
If you are living near a forest and you have to make a long pathway super easily and quickly, we have the perfect idea for you. Use pallets and get the job done in no time.
The combination of pebbles and wood is totally adorable, and all of the pathway designs that feature these two look more than amazing. There are plenty of ways to put them in combination and create versatile designs.
Backyard landscaping designs and ideas are sadly highly underrated in architecture and design magazines these days. Landscape design is actually highly underrated today. We should be encouraged to spend as much time outdoors as possible enjoying nature, fresh air and if we have the opportunity to spend this time in our own small backyard why shouldn't we do so? The following example has been materialized in Barnsbury, London, England and it is entitled Barnsbury Townhouse Garden, featuring dense greenery complemented by a rock texture that beautifies everything in an extraordinary manner.
The project has been envisioned and completed under the instructions of Daniel Shea. The backyard design line showcased by the artist is the extent of the owner`s taste, embracing colors and patterns that he used in his interior design and nestling iconic furniture pieces.
Daniel Shea further relates on the Barnsbury Townhouse
“The brief was to create a sophisticated contemporary space that would allow for relaxing, entertaining and to provide a vista from the house and it its many levels. Screening of the neighbours was also a priority to ensure that the garden was not overlooked.
The clients, a professional couple with a dog, would mostly use the garden on the weekends and in the evenings. Lighting would be crucial to extend the use of the garden well into the dark London nights.
The garden was inspired by the client’s interior decors of fine artwork, contemporary furniture, picking up on the tones of dark greys and greens, the garden reflects these tastes in the choice of wall paint and green planting. The main social area contains a large gas fire, gas BBQ and work surfaces along with a chrome framed modular sofa. White sawn limestone paving adds a real luxury to the space.
The central area of the garden has a water trough, clad in white limestone that spills onto and through a dry stone path. Towards the rear of the garden are the two sun loungers and the glorious dry stone wall, up lit by 3 spotlights, highlighting the textures of the hand crafted wall.
The planting with its contrasting textures of green and white flowering perennials provides the soft relaxing tones to the garden. Three Silver birches provide a reassuring sense of seclusion amidst the surrounding matrix of townhouses.”
I spent a good amount of time recently working in my backyard and with this opportunity I have payed some attention to new areas in it. As a result I started xeriscaping my side yard and while I have to be sincere and tell you that it wasn`t easy it I also have to mention that it was definitely worth the hassle.
I kept on looking for inspiration online and I thought it might be worth sharing here, it`s not easy to find extensive garden ideas so I`ll try and do just that: present you a selection of modern xeriscaping ideas that we`ve found helpful. Xeriscaping is far simpler than it sounds, it`s a sustainabile form of landscaping that has the goal of saving water. In Xeriscaping are used drought-tolerant plants frequently along with much an gravel.
If you think you are not ready to remove the beautiful green grass and lush vegetation in the favor of a more sustainable form of landscaping it`s ok. I personally wasn`t ready either, I started with the side yard and kept the lush vegetation in backyard exactly the same. In this manner you will add a lot of depth to you outdoor space by creating different areas and layers. For example I have used rock garden of different sorts in small quantities. This very different special part of the yard accentuated the greenery in the backyard even more, gave it a whole another aspect.
Beautiful Xeriscaping Pathways and Steps
In modern xeriscaping techniques pathway and stair-steps are very often used as little landmarks. These really important because they`re transitional areas on which a great array of plants can be displayed to draw attention and create a beautiful design, gravel and stepping stones are used along the plants of course. [from Huettl Design]
A couple of native grasses in a xeriscaped landscape
You can use gravel and stepping stones to create a modern looking path which is afterwards surrounded with native grasses and other graphic pebbles as displayed in the beautiful xeriscaped outdoor space below . [from Huettl Design]
Stepping stones surrounded by xeriscaped areas
Despite Zaha Hadid`s opinion you can really get creative by forming an angular path rather then an organic irregular path, you can use small gravel, limestone can work, and edging to obtain a controlled design, clean and highly aesthetic.[from All Seasons Gardening and Landscaping]
Modern xeriscaping following an angular pathway
Materialize a special area at the top or bottom of the steps; this accent can be a wonderful surprise in a modern yard, it can accentuate a detail that you love on the stairs or simply change the tone upon entering the home. In the example bellow the grid formed by stepping stones and ground covers are creating a rhythm on two directions before dematerializing into just one direction with the steps, accentuating the monumental stones before entering the home in a special manner.[from All Seasons Gardening and Landscaping]
Intriguing modern xeriscaping near the steps of a modern yard
If you have the space required on the steps you can use the actual the stairs to create an xeriscaped area. You can fill them with gravel native plants and offer your modern yard a discrete beautiful touch; consider involving the edging of the stairs in the design as well.[from Phillips Garden]
Another xeriscaping "step"
Why would you not use a variety of xeriscaping materials? In the photo bellow there are displayed many interesting features such as stepping stones, stairs, gravel, mulch, metal trim, various different plants and a large sculptural rock; all in an excelent outdoor paradise. Who draws the line if not you?! [from Big Red Sun]
Example of xeriscaping with mulch and gravel
Xeriscaping The Yard
Now we already have a couple of transitional areas in the yard itself . Wehteher you are going to xeriscape the whole backyard, front yard or side yard you definately need to begin with a plan. It`s indeed fascinating and sweet to see things taking shape as you work but in this manner you might want to measure your outdoor space if you want to obtain a highly nuanced design, you might realize half way, or worse in the end that you do not have space for everything you desired if you`re not using a thoughtful strategy. [fromJeffrey Gordon Smith Landscape Architecture]
Composition of mulch and rocks in a xeriscaped yard
You have your yard in one single horizontal plane? And if so, do you want to remain that way? You can use stepping stones to create a beautiful terraced effect on which you can use a wide variety of plants . [from Big Red Sun]
Different layers of xersicaping in a modern yard
In how many different areas you will divide your site? You can make a simple lawn or an elaborate play area. You can group and mix plants or arrange them in groups by type, you can use a plant in particular to create visual borders as displayed bellow or just mix and match. [from Jeffrey Gordon Smith Landscape Architecture]
Xeriscaping meant to match Mid-century homes
A harder and more rough materials like concrete stepping stones can help you define your outdoor space. These graphic borders can guard large plants or trees or just small arrangements. We advise you to start small and enlarge the project when you feel satisfied with the result of the little spot in the first place. If you have a bigger outdoor space we strongly advise you to consult a professional or an experienced friend. [from Big Red Sun]
Xeriscaping in a lush green backyard
You can use cement and gravel to achieve a custom geometric look in your yard, your own design can be materialized easy with concrete and patience, strategically planning your pathways and design lines can help you obtain the desired result. [from Jeffrey Gordon Smith Landscape Architecture]
Xeriscaping in a contemporary yard
You can accentuate a beautiful geometric effect by shaping the lawn in an unusual manner and actually sculpting an effect. Gravel can help you in this problem with ease even with trapezoids and harder shapes. [from Phillips Garden]
Simple and efficient angular xeriscaping
A critical aspect in your xeriscaping endeavors is obviously making sure that you choose greenery that will thrive in your area. Most of us have learned this the hard and expensive way, selecting plants for a sunny yard that would not survive the summer or winter would not be that great, time and resources elapsed into nothing. After you have the selection of plants that will thrive ready opt for some colorful choices that would really enhance your backyard and offer depth. [from Phillips Garden]
Xersicaping a colorful manner
In some cases the most interesting pops of color can be created with only one bold hue in a ocean of greenery. Changing the texture and creating rhythm with it can be marvelous, a selection of cascading silver that falls dichondra, wispy Mexican feather grass or along with long full red foliage as displayed can work extremely well too. [from Big Red Sun]
Terraced xeriscaping in a contemporary yard
You can create massive amounts of colors just by juxtaposing shades of green, it`s simple extraordinary. Bellow a succulent range from minty to blue and limes surprised in a very beautiful manner. If you want to place an intruder object in hot pink or any other candy colored accent you can fool someone into actually eating them . It just look extraordinary. [from All Seasons Gardening and Landscaping]
Superb use of color in xeriscaped yard
If you have the luck of owning an expansive yard consider grouping up a variety of different sectors into hues, in this manner you will generate an extraordinary dept, you will have a variety of extremely beautiful colors from yellows, purples and pinks that are extremely eye-catching up to more neutral blue and green tones. Consider completing these extraordinary painting with small gravel that would further define and highlight the design line. [photo by Hunter Ten Broech for Waterwise Landscapes]
Dense and extensive xeriscaping on an albuquerque property
The last but not least image is living proof that no space is to small for a proper xeriscape. You can always use colorful plants to give an extraordinary vibe to a compact yard. These become a focal point in your design, popping into the eyes of the viewers, surprising everyone. [from Shelley Gardea Photography via Houzz]
I started xeriscaping a little small area in my side yard to see what I can do and it will definitely pass the time test but I`m starving for more, I think larger pieces of rocks that will slowly move towards the backyard into the lush vegetation as transition along with some stepping stones and gravel to merge would work extraordinary but time will tells. How you are treating your outdoor spaces? We would love to hear your opinion bellow regarding xeriscaping, we find it a magnificent alternative and a great complement to regular backyard landscaping ideas.
A garden is a place in which we find refugee at the end of a long day, we soothe our nerves, and we find peace nestled between greenery; as the snow slowly starts to melt and the gardening activities start to occupy our minds we too start searching diy projects that can change our garden for the better. A selection of crafts that beautifully recycles items into cheap diy garden art flower yard projects has been curated to creatively showcase the immense possibilities brought forward by recycling and up-cycling.
Any item that we discard can be recycled and the vast majority can be up-cycled as well, you can repurpose them creatively thus saving a great amount of energy from hitting the landfill. Cast a glance below and surge inspiration.
Low Budget DIY Garden Art Flower Yard Projects To Do
One could use old plates in a painting session with friends and family only to proudly prepare them for an artistic installation. The plates ought to become flowers in a beautiful recycled field of color on your fence, shed or garage. The craft can become a really educative group lesson for children on recycling and up-cycling.
The individual able to work with metal could use old kitchen utensils to shape graphic flowers; the possibilities are limitless as any piece can change the dynamic of the composition greatly.
Tin cans can be opened up and creatively painted to create beautiful flower compositions; they can become great planters too in no less than 30 seconds.
The garden hoses are now inactive and it will be time till your first crop will need heavy watering but for the time being, one could get creative and arrange the hoses into flower installations that foretell the coming of spring.
Use simple bottle caps to create simple garden art with the little ones. A glue gun, paint, and bamboo skewers are all you might need to get these crafts ready for a colorful spring.
Recycling glass items into complex flower installation requires the enthusiast in you but the results can be quite impressive; always take all the safety precautions when working with glass.
Every now and then wheel protection falls off and every now and then three others happen to hit the landfill as a result. Bring your contribution and attempt to recycle or up-cycle them.
Chicken wire carefully tailored to assemble a bulb that receives color can stun the pedestrian and upon scaling the installation simply becomes extraordinary.
The low-budget DIY garden art flower projects below might be considered unusual but they`re definitely graphic. What do you think? We would love to hear from you in the comment section below!
Sealing pavements with sand can help preserve them from aging and stains. It is critical to use polymeric sand and coat the pavements as soon as possible after installation. Sealing the pavers makes them look brand new and protects them from possible harm.
There are two major scenarios in which homeowners learn about using polymeric sand to seal their pavements. The first is when they've just finished installing pavements for the very first time.
The second is when they employ paver repairs because the pavers start looking worn out. Paver sealant is an essential maintenance product for keeping paver patios and driveways free from damage.
In this article, I have provided advice on whether you should seal pavers to achieve the desired finish.
Why Should You Seal The Pavers?
Sealing your pavers is the most effective approach to maintaining your pathways, patios, walkways, pool decks, retaining walls, and other hardscapes. The highly efficient sealers provide a durable finish that restores the original color depth, repels stains, and prevents surface damage.
Just as you would clean and polish your automobile regularly, your pavers and retaining fence blocks require the same attention to keep them functional and as good as new.
Benefits Of Sealing Pavers
It is always recommended to seal pavers immediately following a fresh installation. However, the tried-and-true procedure of repairing, cleaning, and sealing can restore the original brilliance of even worn, unclean, and fading pavers.
The following are the benefits of sealing the pavers:
Dissuades ants and some other insects by inhibiting weeds and grass growth in joints
Prevents sand loss in joints
Resists oil, grease, filth, and stains
Simpler cleaning
Color, texture, and brightness are all improved
It is resistant to the impacts of extreme weather conditions
Protects against salt damage
Surface degradation and wear are reduced
Ensures long-term beauty and value
Is It Really Necessary To Seal The Pavers?
Most manufacturers and builders advocate sealing pavers for one reason. The materials used to make pavers are permeable - cement and stone are both porous. This implies that your pavements will absorb fluids, which is what causes stains.
When the pavement gets wet, it darkens for a moment, but all that moisture will dissipate with time. The underlying problem is that your paver stones are exposed to grease, hard water, corrosive water, and other contaminants. When these liquids penetrate pavements, they leave a discoloration that’s difficult, if not impossible, to remove.
The sealer is designed to infiltrate the holes of your paving stones and make them impenetrable, forming a layer that protects the surface and makes it easier to clean. A completely sealed pavement will not discolor and will readily erase any markings.
Is There A Disadvantage To Sealing Pavers?
This very important question may loom in your mind: "Is there any disadvantage to sealing pavers?" The answer to this question would be: "If the item required for sealing is not adequately chosen and the application was badly executed, there might be a problem in the sealing process."
If you don't like the color improvement option, you should use a natural-looking sealer. Since you may be unable to create a paver patio with a shiny surface, the chosen product must give greater friction. These are legitimate issues that you must address before purchasing a sealer.
Poor application may also result in haze and white films. Worse, it has the potential to trap dirt behind the sealing layer. However, these are not necessarily disadvantages of paver sealing. As mentioned before, they are disadvantages of poor product selection and implementation.
Can You Seal The Pavers On Your Own?
While it is true that you can, you should not. You will benefit greatly from hiring a professional unless you are skilled and have the necessary tools for sealing pavers. Many things could go wrong if you don't have the requisite experience. A professional will take all of these factors into account.
And I'm guessing you won't be able to save any money by going the DIY route. You'll have to pay retail for your sealer and will most likely have to rent gear for power washing before sealing and spraying the sealer evenly. Furthermore, you will waste a whole weekend on a task that might turn out differently than you’d want it to.
How Often Should One Seal Pavers?
A decent rule of thumb is 3-5 years. However, you only need to correctly examine your pavers to understand when the true moment is approaching. You will notice that the film begins to wear off, particularly when it rains.
When your pavers are exposed to water, they will darken. While conducting routine washing, use the garden hose to see if the water is being absorbed instantly by the pavement.
4 Things To Check Before Sealing Your Pavement
1. Find Out What The Supplier Has To Say About It
Before getting to your neighborhood hardscape supply store, examine the paver manufacturer's sealing standards. This will provide you with crucial information on the type of sealing materials that are appropriate to apply to your pavers and the recommended waiting time before adding sealer to new pavers.
2. Examine The Weather
Before beginning your job, ensure no rain is on the horizon for the next 24 hours. In most circumstances, you should only apply a sealant on totally dried pavers. You should also avoid sealing jobs in severe temperatures. Generally, temperatures between 60 and 80 degrees Fahrenheit are optimum.
3. Clean The Paver
I cannot emphasize how important this step is! Not only should you clean dirt from your pavements before sealing them, but you should also start taking care of any efflorescence. This cleaning phase prepares the pavers for optimum sealer bonding.
4. Clean Out Any Dirty Sand From The Connectors
If you're going to handle the sealing procedure, don't cut any corners. Make sure to replace any contaminated sand in the joints with polymeric sand.
Tip
If you're replacing sand, do the efflorescence cleaning after you refill the polymeric sand and then before you seal.
What Are The Different Types Of Sealant Available On The Market?
Following are the different types of sealants available on the market:
1. Sealant For The Surface
A surface sealer is a transparent coating applied to the paver's surface. It protects the pavement from discoloration and makes cleaning easier.
2. Sealant That Penetrates
A penetrating sealer enters the paver's pores, forming a shield against moisture, oils, and debris.
3. Water-Based Sealer
A liquid sealer is a penetrating sealer composed of acrylic polymers. It forms a transparent, protective layer after bonding to the paver.
4. Sealer Made Of Oil
An oil-based sealant is a penetrating sealer created from petroleum-based materials. It forms a transparent, protective layer after bonding to the paver.
What Is Polymeric Sand And How It’s Used To Seal Pavers?
What Is Polymeric Sand?
So, what is polymeric sand and how is it used? Well, it is a sand that includes polymers, often known as plastics. This sand binds pavers together and fills up any fractures or gaps. Polymeric sand comes in various hues, allowing you to match it to the shade of your pavements.
Is Polymeric Sand Superior To Regular Sand?
Yes, polymeric sand is superior to normal paver sand for several reasons. For starters, it strengthens the bond between the pavers. Second, it aids in the filling of any fractures or gaps between pavers. Finally, it is resistant to pests and bug infestation.
What Are The Negative Effects Of Polymeric Sand?
There are a couple of drawbacks to polymeric sand. To begin with, it is more costly than normal sand. Second, if you ever have to repair the pavers, it might be tough to remove the sand.
How To Apply Polymeric Sand?
The quantity of paver sand required will be based on the size of the paver. You'll need around 2 pounds of sand for a modest patio. For a bigger patio, you'll need around six to eight pounds of sand.
Once you've established how much sand you need, spread it onto the pavers. The best tools for the job are a push broom and a hose with a nozzle connection. To begin, moisten the pavements with water. Next, use the hose or broom to distribute the sand over the pavers uniformly.
What Are The Other Types Of Sand That Can Be Used?
The purpose determines the ideal sand to use. Concrete sand, for example, is commonly used for pavement projects, but brick sand is best suited for masonry construction. Polymeric sand is the finest option for sealing pavers since it holds them together and fills any fractures or gaps.
Following are the types of sand that can be used for sealing the pavements:
Playground
Concrete
Masonry
Brick
Polymeric
6 Mistakes To Avoid While Sealing The Pavement
1. Joints That Are Too Narrow Or Too Wide
I recommend a joint width of 1/8th of an inch to 4 inches and a joint depth of at least 1 inch between your pavers. This helps you to get the most out of your polymeric sand's bonding performance.
Furthermore, too-thin or excessively narrow joints might create spillover during the setup process. Tight channels do not enable water to circulate and sink downwards to the bottom of the connections while washing the pavement.
Sand is put through the joints. As a result, I do not advocate utilizing polymeric sand in excessively thin connections. Similarly, overly-wide joints can induce washout by allowing too much water to enter during the activation phase.
2. Pavers Or Joints That Are Wet
Before putting in polymeric sand, make sure the pavements and gaps are dry. If there's any dampness present, the polymers will prematurely activate, resulting in a haze on the surface, or the sand will not firm up correctly. Wait until the morning dew has burned off before putting the polymeric sand in a humid area.
3. Filling Your Joints Too Much
This is a reasonable and frequent error. You stuff your joint to the top, hoping to get the finest joint stability possible. But don't do it. It is critical to leave around 1/8 inch from the surface of your pavers. This is essential to avoiding spillover once you begin wetting the joints to activate the sand.
Whenever the sand is 1/8 inch thick, it provides for the optimum bonding and adhesion of the paver joint below the surface. Furthermore, overfilled joints will deteriorate over time with activity on the surface. This is going to appear poorly on your project.
4. Overwatering Or Underwatering The Pavement
You should try to obtain the finest adhesive effectiveness from the peak of the junction to the bottom. Ensure that you wet your joints for the appropriate amount of time, and use the "spray" mode on your pump attachment.
A. Underwatering The Pavement
Underwatering the pavement leads the polymeric sand to create a "crust" on top. As such, the joints won’t connect properly, and the crust will eventually break away, damaging the joint. Since the sand has only partially bonded the whole depth of the joint, it also generates fissures and gaps.
B. Over-Watering The Pavement
Over-watering may cause polymers to separate from the sand during reactivation, lowering bonding strength.
5. Drainage Issues
Poor drainage might jeopardize your project. To seal your pavement properly, you should adhere to the following guidelines:
A. Pavers Should Be Put On A Drainage-Friendly Foundation
Pavement or paver stone should be placed over cement, limestone, or other similar materials, with bedding soil in between. Thin pavers can be put on concrete in some circumstances, often with bedding soil in between to create a padding effect and drainage.
Installation recommendations differ across the region for different soil constraints, temperature conditions, and usage demands. Water must be able to escape for the polymers to harden. If polymeric sand is utilized in locations with poor drainage, the liquid will subject the sand to extended wetness and moisture, rendering it susceptible to washout.
B. Ensure Your Pavements Have A Border, Whether Natural Or Artificial
If your pavers are parallel to the ground, you will have a natural barrier and drainage. Otherwise, you should install a cement boundary or edging to avoid runoff at the borders.
C. The Project Area Should Have A Modest Incline
If the area has places that retain water for extended periods, avoid using polymeric sand.
6. Excess Sand Isn't Thoroughly Removed
Since it adheres so well, polymeric sand is ideal for paver stabilization. This becomes an issue when activated and afterward left to dry on the pavers rather than between them.
The problem can be made more difficult to resolve if the sealer is applied on the surface of the sand-crusted paving stones, accentuating the coarse texture and haze. Of course, when used correctly, the sealer may provide an exquisite touch to your project.
There are two critical periods during installation when you must remove the polymeric sand from the surface of your pavements:
After sweeping the sand into the joint
During the process of activation
Should You Seal Pavers Before Polymeric Sand Final Words
All patios settle, wear, and disintegrate over time. Instead of merely filling up the gaps between the pavers with conventional sand, use polymeric sand to provide long-lasting functionality and appeal to the surface.
If you don't, a lot of the sand you pour in will flush away after a few hard storms, and weeds may sprout before you complete the sealing process.
Sand sealing is an important step that may help preserve pavers from weathering and stains. You can properly seal your pavements with polymeric sand and rest assured they will last for years to come by following the professional recommendations in this guide.
With this as an icebreaker, we are starting a series, that will guide and advice you in backyard landscaping design. After reading the last article , hopefully you will be able to use this in order to design your dream backyard using the information. An important item in backyard landscaping ideas and probably a must have is the fireplace…In this article we are going to see the different types, sizes, shapes and solutions for every situation and.
The awesomeness of fireplaces has made them a hugely desirable item. The great part about this is that the options are virtually endless. You can have basically anything you can imagine from a traditional design to a 100% custom one.
Exterior Fireplaces Meant to Enhance Your Living Quality
Traditional design
Recognizable arched shape and brick or stone finishing , this model will fit right in your rustic backyard.
Southwestern design
Most often than not finished in stucco, an outdoor southwestern style fireplace can be decorated with colored ceramic tiles. Also , for authenticity , the chimney structure would be a stair step one instead of a straight or slope one.
Modern design
Featuring clean-cut lines and industrial materials, this design looks great in the modern backyard garden setting. The best materials for it include stainless steel and/or concrete. The shapes fall into the rectangular, monolithic design category.
Mediterranean Design
Using a simple structure and colored ceramic tiles decorating the firebox are the defining features of the popular Mediterranean design originated in Morocco.
These are just a few examples of fireplaces that can transform your backyard into the little corner of heaven you always dreamt it could be. But you are in no way limited to popular tendencies. Adding a nice cozy fire , improves any moment, whether it`s scary story time, a special moment with your significant other, a relaxing read, or a drink with your friends. So having established that , let`s look into some other options of `firing things up `.
Portable Fire Pit
A portable fire pit gives you versatility. Because of the circular shape and portability, it`s ideal for when your friends come over and it`s a guaranteed cozy , homey atmosphere which everyone will enjoy. Here too you can choose from an entire array of stiles, shapes and whatnot. If you don`t like the hassle of making your own wood fire, some high end portable fire pit models come with a natural gas source, but nothing compares with a wood fire when enjoying some outdoor moments watching the sun slowly set in the summer evening. Mobility means that you can change the design of your backyard if you want to experiment, without having the constraint of the fixed fireplace, also if you decided to sell your house it can make it more appealing to a buyer that may not want a fire pit.
Built-In Fireplace
The epitome of outdoor home features, a built-in fireplace, preserves and matches the overall look of your outdoor home design and adding to your real estate value. A great enhancement to your patio , the built-in fireplace also provides additional comfort by being protected from wind which can turn your relaxing evening into a chaos of flying ash, smoke and ember. The choice in furniture for the fireplace-patio ensemble should be oriented towards low , deep comfy chairs, with soft cushions that maintain the homey relaxed atmosphere around the fireplace , placed around a coffee table. Bare metal should be avoided as it can get hot to an uncomfortable level due to high heat conductivity. Another great option for the seating arrangements is the usage of built-in seating. It can be designed as an extension of the fireplace and finished in accordance. Also the sky is the limit when it comes to layouts, style, shapes. The ideal dimension should be the same as above with low height and comfortable cushion, especially as the seats themselves would be made out of concrete , brick or stone, depending on the fireplace design. The height should be around 20 inches. Commonly known as seat walls, this seating arrangement is not a thing you should disregard when you decide what suits your case best.
We are continuing our Backyard Landscaping Ideas series with detailed and necessary information that will help you make the best and most suitable choice of the outdoor fireplace you always wanted. In this article of the Backyard Landscaping Ideas series we will go through placing, dimension, materials, finishing and more crucial points you need to go over when you decide to take your backyard to the next level.
Outdoor Fireplace Kit
Due to the fact that building a fireplace from scratch can be challenging, time consuming, and requires a certain level of masonry skill, a lot of manufacturers offer the option to buy a kit which contains all the tricky structural parts of the fireplace already prefabricated. This allows you to put together your fireplace on site easily.
The main components in the kit are the firebox and the chimney and it is crucial that they are manufactured with quality materials. Opposed to the classic brick and mortar which will degrade structurally in time due to cycles of contraction/expansion, composites like pumice and refractory cement radiate heat instead of absorbing it, which drastically improves durability.
A premium quality outdoor fireplace kit should incorporate a few important characteristics like : Interlocking joints which are important for structural durability, lightweight composite materials which improve durability and will be easy to put together also,a chimney manufactured out of refractory material with a proper throat design that guarantees it draws good, a good angle on the back wall to improve heat radiation.
Another advantage of the outdoor fireplace kit option is that all the kits in the market are properly tested and approved to standards similar to indoor units in order to ensure proper functionality.
Also , the variety of designs, sizes, shapes that you can find is practically limitless, and you can choose the one that suits your taste the best. One thing you have to do yourself though is have a foundation in place made to match the manufacturers specifications. This is of utmost importance especially if the model you chose has a larger height which makes it vulnerable high speed wind.
The finishing should be chosen in order to perfectly match the environment you picked.
Another option is to buy the fireplace fully finished and all you need to do is set in in place, anchor it and if desired connect it to a gas line. This option has a few disadvantages like the need of a crane or other type of heavy equipment do to increased weight, not finding a finishing that perfectly matches the surroundings, which is a must if you want your backyard landscaping ideas to come to life like you dreamed.
Outdoor fireplace design
When brainstorming with the family for backyard landscaping ideas , one thing should definitely not be underestimated. That is the location of your outdoor fireplace. The position you choose will have a great impact on the whole atmosphere that the scenery you create will induce to the observer. It will also establish how often will you use that outdoor fireplace. Keeping in mind that and outdoor fireplace becomes an important focal point in your backyard landscape should help you find an ideal position which will also not distract any attention from other focal points or zones that you consider of interest.
Ideal dimensions for an Outdoor fireplace patio
Due to the obvious fact that the functionality of a fireplace is concentrated at the front side, it can be located against any kind of wall, fence or corner whilst making sure it has the right amount of space in front of it to be enjoyed as it was meant to.
What does this mean in actual dimensions? Well, for a small fireplace you will be wanting about 12 by 12 foot (that is about 3.65 by 3.65 meters) while for a larger one you will need at least 18 by 18 foot (which amounts to 5.4 by 5.4 meters).
Local Construction Codes
This an aspect of utmost importance and it should not be overlooked, as it might cause a rebuild of your chimney due to wrong positioning or wrong dimensioning. Zoning regulation can and probably will include things such as minimum distance to an existing structure, property line etc. , height of the chimney and so on. The first thing you should do when and outdoor chimney appears on your backyard landscaping ideas list, should be contacting your local city planning office.
Privacy
Another thing you shouldn`t take lightly is privacy. Ideal for setting an intimate atmosphere, and outdoor fireplace should be placed away from prying eyes. Do your best to ensure that the front of your fireplace is out of sight while also taking into account that you shouldn`t block a potential view you might enjoy from your back windows like a beautiful lake scenery, a skyline or what have you.
Wind Direction
This can turn your calm relaxing atmosphere next to your outdoor fireplace into the hell on earth of backyard landscaping ideas. Predominant wind direction is a very important factor when deciding placing and orientation of your outdoor fireplace.
Make sure it will act like a wind breaker, which will create a sea of silence(well maybe a small lake) in front of it, allowing you to relax and have a good time.
Backyard landscaping ideas come in all shapes and sizes, with special focus on a certain design line and a spot on a certain area desired to be emphasized. The natural can be tamed and molded to your liking, creating intricate complex areas meant to delight the senses and ease the mind and soul. In such a creation a variety of elements are involved, starting with the basics: earth, water and greenery. The exact method of how these three are combined leads to numerous options and solutions, modern, classy, contemporary, chic, according to your taste and desire.
Today we are focusing on the role rocks have to play in the garden.Specific for Japanese creations, rock gardens have started to appear in other cultures as well as a mixture of the static and the dynamic.They are used in certain zones of the garden to form a fire-pit, an elegant arch, to mold a water fountain or as simple stepping stones merged in vegetation. Mixing and matching is the key here if the goal is to obtain a complex balanced garden design, not one that falls into the arid garden type. So let's dive into the beuatiful world of rock garden ideas.
As you well know, each garden is suppose to have a fire-pit /fire-place area. This essential element plays the role of attractor, generating a specific design around it meant to emphasize its position and shape.Positioning a fire-pit in a specific zone involves taking into consideration the presence of a sitting, resting area where one can relax on summer nights or cozy autumn evenings with loved ones.
Lighting is another important element when considering designing a rock garden. Try inserting tiny solar chargeable lanterns that will cast a delicate glow on the rocky paths you have created. Remember to put to light specific areas that are worth accentuating. Notice how the actual path flows organically around the trees, with larger rocks limiting the track and merging naturally with the natural environment.
Also inspired form the Japanese culture is the wooden bridge usually inserted into the garden to connect two points over a small pond. In this case the water element is missing but the overall imagery is so elegant and beautiful you can let the details slide. Rocks of similar dimensions have been used to form the organic path intersected by larger stepping stones and the actual bridge.
Succulent plants are easily associated with a rock garden as they represent the natural environment of the arid areas. Large rocks can be used and transformed to nestle these delicate incredible resilient plants, placed strategically around the garden.In time greenery will take over naturally and fill every crack and nook as life goes on each day.
A cement path can be defined by a rocky limit where all sorts of flowery plants nestle and evolve in the sun. The irregularity of the limit is what enhances the design and delights the eye.
Although when you think of stones and rocks you instantly associate them with weight and gravity, a certain amount of patience and creativity will defy the rule. The incredible arch below can find a proper place in a rock garden where greenery can climb on, vines and roses will embellish it and claim it their own.
Stepping stones are usually used on the important alleys leading to your house. Here, drought resilient plants have been planted on the sides and in between the actual stones, the bold green balancing the grey hues perfectly.
For important zones where you are trying to direct the attention use medium size rocks and ceramic flower pots to create a flowing arrangement. Nestle succulents in this newly formed environment and allow them to grow in the sun.
If you are dealing with slopes, work the terrain to your advantage and use large rocks and various plants and flowers to accentuate a certain direction.
Large stones have been used to create an exotic waterfall and build it cave for this luxurious swimming pool. Lush vegetation comes in from the sides to embrace the fountain and complete the imagery.
Layers with different textures have been used to limit the natural from the anthropic. Smooth swimming pool margin, river rock limit, various larger rocks and lush vegetation complete the imagery of this swimming pool area.
For the diy enthusiast, a rocky path can prove to be a real challenge, especially if the design is even remotely similar to the creation below. A flowing design has been created using different sized stones that have been placed to emphasize a certain direction, moving along a larger stone placed in the center of the composition.
Have you ever considered building a rock garden? What are your thoughts on this topic? How do you see the garden ideas above? Feel free to express your ideas in the comment section below.
The Rain Bird 32ETI Automatic Sprinkler System is a hose-connected, in-ground irrigation kit designed for mid-sized lawns, offering programmable watering via an electronic timer, retractable sprinkler heads, and automatic drain valves for freeze protection. With a coverage area of up to 3,000 square feet and compatibility with standard ¾-inch outdoor faucets, it provides homeowners with a reliable, season-ready solution that simplifies lawn hydration without professional installation. We tested the 32ETI across installation ease, performance consistency, component quality, and weather resilience to determine whether it justifies its position as one of the most accessible DIY irrigation systems on the market.
Lawn maintenance entails watering, and a sprinkler system, such as a great low-pressure impact sprinkler, makes light work of it. We tested one of the most trending products in the market, the Rain Bird 32ETI Automatic Sprinkler System, across a variety of parameters and seasons, to find out if it’s worth the investment.
Eliminates constant hassle of moving garden hoses and making...
Rain Bird Sprinkler System Review
Installation is streamlined and DIY-friendly
The Rain Bird 32ETI sprinkler system is built for quick, user-friendly installation with a five-step setup that favors DIY homeowners. Starting with a simple lawn layout sketch and staking process, the tubing is then run along the marked perimeter and connected to the sprinkler heads. Testing the coverage involves turning on the faucet and observing spray range and pressure, ideally between 45 and 75 psi for peak performance. Once verified, shallow trenches are dug to bury the half-inch tubing, keeping the lawn mower path clear and the surface clean. The final step is programming the timer, which supports scheduled irrigation, manual override, and rain delay functions. Most users can complete the installation in under five hours with minimal tools and no prior experience.
Every day usability is efficient and intuitive
In daily use, the system proves efficient and reliable. It includes six rotary sprinkler heads equipped with Rain Curtain nozzles that deliver precise water distribution while minimizing runoff. Each head allows simple adjustment of spray distance and arc using a flat-blade screwdriver, ranging from 19 to 24 feet and 40 to 360 degree,s respectively. The digital timer is sunlight-readable and offers dual daily watering options along with a 96-hour rain delay and convenient override settings. Once watering is complete, the sprinkler heads retract automatically to ground level, preserving the lawn's appearance and allowing for unimpeded mowing.
Build quality is solid with minor reservations
Component quality is generally solid, especially in the sprinkler heads, retractable mechanisms, main piping, and the timer unit. These elements show durability under high-pressure conditions and regular handling. However, some fittings and connectors feel slightly flexible, which may be necessary for tolerance but could also be perceived as less robust. While this did not result in any performance issues during testing, a few users have reported minor leaks, often dependent on the hose used or initial connection tightness. The system’s freeze-resistant self-draining mechanism works as intended, automatically clearing water to prevent winter damage without user intervention.
Feature set is practical but not exhaustive
Despite its overall reliability, the system does lack a few modern features found in competing products. It does not include a rain sensor, meaning scheduled watering continues during rainfall unless manually paused. Additionally, the absence of a pressure gauge limits the user's ability to monitor water pressure, a key factor in achieving consistent spray coverage.
Eliminates constant hassle of moving garden hoses and making...
Price-to-performance ratio is competitive
Pricing reflects the system’s position as a full in-ground kit, which includes all essential components for immediate setup without the need for separate purchases or professional installation. Compared to higher-end systems with similar coverage and functionality, the 32ETI is competitively priced and provides strong value for light to medium residential use. For users seeking efficient irrigation without the cost of a professionally installed system, it remains a dependable and economical option.
The Rain Bird 32ETI holds its ground in a competitive space
While there are strong competitors in the category, such as models offering app connectivity or expanded feature sets, the Rain Bird 32ETI holds its ground with superior reliability, a user-centric design, and long-term operational stability. Its performance under regular and seasonal conditions affirms its reputation as one of the most practical and complete residential sprinkler kits currently available.
What We Like
Thoughtfully designed, easy to install, and operate
The hose timer works well and is easily legible even under direct sunlight
Presence of some professional-spec irrigation parts
Sprinkler retracting mechanism works well
Durable system works flawlessly across seasons
What We Don’t Like
The quality of some parts can feel tacky
Missing features, such as a rain sensor, are missed
Specifications
Product Name: 32ETI Automatic Sprinkler System
Product Brand: Rain Bird
SKU: 6901900
Product Dimensions: 4.16 x 2.1 x 4.3 inches
Floor Area: 3000 square feet
Maximum Flow Rate: 12 Gallons Per Minute
Product Weight: 1.71 ounces
Final Verdict
After extended testing across varied conditions, the Rain Bird 32ETI Automatic Sprinkler System proves to be a reliable, well-engineered solution for small to mid-sized residential lawns. Its core strengths—quick installation, intuitive controls, durable components, and consistent water distribution—demonstrate a clear focus on functionality over unnecessary complexity. While it lacks advanced features like app integration or rain sensors, it excels in delivering dependable, day-to-day performance. For homeowners seeking an all-in-one in-ground irrigation kit without the cost or complexity of a professionally installed system, the 32ETI offers outstanding value and long-term reliability.
Eliminates constant hassle of moving garden hoses and making...
Polymeric sand proves particularly useful during path or patio installation, and you must apply it after laying all the layers. Also, remember to apply water and activate the bonding agents in the sand so that the pavement doesn't shift.
Before knowing about the polymeric sands and how did they works properly. I always wondered how to get polymeric sand off paverswhen engaging in landscaping or home construction projects. As the sand settled, tiny particles came loose and stuck to the surface, creating a haze and affecting the beauty of the reconstructed surface.
But in my efforts to find a solution, I learned regular sand is useful for many hardscaping tasks. Today I will highlight how regular and polymeric sand is different and when to use them.
Polymeric sand isn't a natural compound; instead, it's a man-made product specifically manufactured for use in landscaping and construction work. The basis for creating polymeric sand is combining silica or other relevant additives with fine particles of sand.
Using proper additives helps create a strong bond between the sand particles for greater durability. Moreover, non-activated polymeric sand possesses the same texture as regular sand particles after production. All you need is to add water to activate the bonding agent within the sand and create a hard, gel-like compound.
Advantages Of Polymeric Sand
Suitable for path and patio installations
Adheres strongly to pavers
Creates a durable and reliable bond
Simple and convenient application
Available in multiple shades to match the walkway and patio design
Better drainage
Eye-catching aesthetics
Can withstand heavy rainfall
Protects against insects and weed growth
Longer lifespan
What Is Regular Sand?
Even the best polymeric sand is not suitable for all hardscaping projects, which is where regular sand proves useful. For such projects, you must use all-purpose sand, known as leveling or joint sand, to create a tight seal between the paver joints.
I have seen that regular paver sand does not have bonding agents in many instances, but as the sand particles are coarse, they interlock to form a strong gap filler. People mostly use regular sand due to its convenience and easy application.
Advantages of Regular Sand
Creates a level base
Suitable for paver installation
Guarantees even distribution over the walkway or patio
Affordable option
Versatile and better for making adjustments
Doesn't form a permanent bond and is easy to remove
Polymeric Sand Vs Regular Sand - Which One Should You Choose?
I have provided a basic idea of how polymeric and regular sand differs, and in this section, I will highlight how they match up in various categories.
Durability
For any hardscaping project to bear fruit, it must last a long time. While the lifespan of any surface or paver joint can vary based on the climate and product type, polymeric sand usually lasts for 10 years.
Regular sand can also last long but will require adjustments every 2 years so that the pavement doesn't shift.
Pest Control
Regular sand doesn't offer a permanent solution against pest infestation and can only slow down weed growth or insects burrowing for a short time after installation. On the other hand, polymeric sand is more beneficial for preventing weeds and insects from pushing through the joints.
Appearance
After you have let the material set, it's challenging to tell the difference between polymeric and regular sand. Both options are available in various colors and shades, although polymeric sand delivers a cleaner look, suitable for daily use.
This is due to the strong binding agent holding on to the sand particles, preventing them from blowing away or loosening from the joints in high-traffic areas.
Ease Of Use
The major difference between regular and polymeric sand lies in the application method. I have noticed that applying polymeric sand is easier as there is more room for error, but remember to apply water to activate the bonding agents.
Also, use a broom to blow away dust from the surface of both materials and maintain a vibrant appearance. Once the loose sand settles on the surface and forms a haze, it becomes challenging to clean the paver.
Common Problems
To tackle the haze problem, you can use cement-free polymeric sand while removing dust from the surface while adding water. Meanwhile, regular sand erodes more quickly, especially when exposed to natural elements, like rain or strong winds. To prevent this, add more sand or a strong sealant over the surface of the pavers.
Price
Polymeric sand is pricier than all-purpose sand; however, spending a little extra is worth it, given the durability of a polymeric paver.
Tip
Choosing the correct sand, depending on the area, is vital because if the pathway or pavement is in the shade, it will be too moist and cool for the sand to set. Also, check the weather and postpone all construction work if it's going to rain.
Polymeric Sand Vs Regular Sand FAQs
Can you mix polymeric sand with regular sand or cement?
Even though it is possible to mix polymeric sand with regular sand or cement, I recommend that you don’t do it. This is because when the cement settles and forms a compact mass, it prevents the sand from adjusting to temperature changes, increasing the chances of cracking.
Moreover, applying cement between the cracks is challenging, and if you don’t wipe it off before it hardens, it can hamper how the paver looks.
Is it important to use a paver sealant?
A sealant is applied to the surface of the pavers and the joints in between to protect the surface from stains and keep the color intact. Most importantly, it strengthens the joints more than just polymeric sand to guarantee longevity.
Polymeric Sand Vs Regular Sand Conclusion
Both sand types have pros and cons, and which material you opt for depends on the type of project and personal preference. Ask yourself what you wish to achieve and the purpose for choosing the most suitable option.
Overall, I feel the benefits of polymeric sand outweigh the advantages of regular sand, providing more value for money on multiple projects. But regular sand is ideal for people on a budget and lasts several years with proper maintenance.
Serene, peaceful, balanced, simple words that describe the Zen garden, the traditional Japanese language expressed through mineral means, through rocks and sand sculpting equilibrium, deaf, peaceful art around one`s home.
"What is a Zen Garden?"
Is a recurring question today, in the following rows we`ll briefly describe and showcase Zen Garden Designs ideas that you might find interesting. In short, the zen garden is a representation of the natural world, one in which ponds or streams are often replaced with rock formations, white sand, moss and pruned trees, the wilderness tamed, restructured. A setting that contains light sand and stones is quite common too, no water or plants. Rocks are shaping the mountains where various others stones represent islands, water is presented in the form of sand or gravel and to further advance the sculptural component of the garden it can be raked or unraked.
"Why is sand raked in Zen Gardens?"
It is a highly difficult practice, raking the sand into waves or ripple patterns is a practice originally used by Zen Buddhists in the attempt to focus one`s mind and aid him in concentration. It goes without saying that the free form nature of sand cannot be simply controlled, it is a challenge to form the waves and ripples in the pursuit of perfection. Stones are sculpting the ripples and therefore they will weave and break the pattern allowing one to create a dramatic variation.
A Zen Garden ought to be perceived from a certain angle, they`re not designed to be simply gazed at, every stone and sand pattern is shaped to obey certain perspective points thus creating balance. A stone that simply leans on one side ought to have a rock nearby to aid it, support it. Flat horizontal rocks are also more common than vertical rocks as they further emphasize balance.
Zen Garden Design Ideas
1. Ocean of sand nestled in vegetation
Zen Gardens have no certain scale, they`re present in huge expansive spaces just as they are in miniature desktop gardens, small portions of backyard are commonly transformed in peaceful, quiet spaces.
Water can define a place, being interpreted as mineral or actually being water are two different things in materiality yet how you perceive and understand it is truly important.
Water, wood, stone, gravel and vegetation tailored to channel calm and peace.
via bridesblog.net
6. Serene zen garden in equilibrium
The water mirror anticipates balance in the form of raked gravel, rocks and punctual vegetation. The splendid setting here is animated by light as well.
A Zen Garden can take many forms, the mineral presence often simplifies the principle of balance but a whole park can be designed with the same set of principles.
Zen Gardens ought to help one find peace, concentration, it is traditionally a focus point used in Buddhist thought and meditation, quiet, peaceful contemplation. Writers and artists have often talked about how the methodical raking helps them find creativity.
Any space can shelter the striking form of art, meditation is something that you choose to do not something you ought to expect from the design itself. The contrast between the elements, the presence of the mineral can help one concentrate and focus indirectly, the ambiance seeks to balance itself with all its components, you included.
In a highly fast-paced world the Zen Garden represents a beautiful point in which one chooses to simply stand still, to concentrate and focus, to find peace.
Source Unknown
33. Create depth through layers
Zen gardens setup and scenes can be layered by color, materials, textures, shapes, use these in the pursuit of balance.
A Zen Garden can start small, a desktop kit is a click away if you`re unsure whether to start transforming your garden into a classic zed garden or seek balance and calm in little things like creating an area with sand and stones.
What do you think about the Zen Garden approach and how do you see the Zen Garden design ideas above?
We would love to hear from you in the comment section below.
A garden or yard of the house is always incomplete without a fence; anyone would agree with that fact. But building a commercial fence is extremely expensive and could probably affect your budget, especially if you are looking to build it in a particular way, theme or even as a complement to the design of the house.
If you have been wanting to build a fence, yet cut down on the costs, there is a cheaper alternative – to build it yourself using pallets. Pallets are an amazing alternative to commercial fencing as they are durable and cheap, even free at times.
Moreover, since you’ll be the one doing the job, you can procure the right kind of pallets, add some style of your own and make it aesthetically pleasing, according to your own taste, that too, without burning a hole in your pocket. All you need are wooden pallets and some imagination and you’re good to go.
But if you need some help with the ideas, we are here with 35 ingenious ways you could build a pallet fence in your backyard, while saving some big bucks on fence panels thanks to the inexpensive nature of pallet wood. If you worry about the aesthetics you will notice rapidly that more pallet fence ideas in this list look posh and, with sufficient patience, your DIY fence will look far better than anything you could purchase honestly.
If you’re just looking for a simple DIY fence to the yard that’s just typical, then this plain wooden picket fence with a small gate could be the one for you. All you have to do is to decide where you need the fence, acquire some wooden pallets, nail them up around the yard, and give it a simple whitewash.
To make it look more pleasing, you could decorate the space around with some plants, and maybe even a small table with a couple of chairs to spend some time in the evenings.
More details at thewillowfarmhouse.com
Wooden Fence for Outdoor Dining Area
This one is ideal for people who do not want to just secure their yard area, but also have a dining set up for a relaxed lunch on a lazy afternoon, or a small barbeque party in the garden or the yard of your house.
Build a tall wooden fence with the pallets and varnish it with wooden-colored paint. For the dining area, you could consider various ideas for making the space cozy, probably go for a simple table with chairs and cushions. A few potted plants here and there would make it just perfect, and would also raise the eyebrows of the people who happen to have a look at it. Isn’t it interesting?
More details at palletwoodprojects.com
Gated Garden Fence with Trellises
For those who are in love with plants and gardening, this simple garden fence with trellises is definitely a great idea for the house. You can start off by building a simple fence and attach a few trellises to it where you can plant creepers or other small plants.
This way, you don’t just get to flaunt your creativity and frugality, but also show your love for plants whilst building something that gives your house more secure.
More details at fairywingsanddinosaurs.com
Pallet Fence for the Garden
It is always better to do a lot of research before fixating on the design for your pallet fence. Finding the pallets might be easy, but molding them as per your liking can be a little difficult job.
Some of you would be fine with a simple short fence of around 3-4 feet to keep the animals away, while some of you might actually crave fencing that gives you enough privacy as well as add beauty to your garden. If that’s the case, you could try something like this where the pallets are nailed close to one another, around the garden, at a greater height, somewhere around 5-6 feet, and add plants around on either side of the fencing.
More details at ccacademy.net
DIY Pallet Fence for your Poultry
If you’re living in the countryside or have a lot of chickens that need to be kept outside where they can move freely, but within a confined space, then you can opt for this simple pallet fence which is perfect for your poultry.
This DIY fence could be built in a small space around the hen-house, so that your chickens are not just confined to the house, but can get some air. You could fill in the place with soil or a bed of grass, and even keep a small bird feeder at one corner.
Source Unknown
Pallet Fence for a small Indoor Farm
For a family that’s all about sustainable living and organic farming, this could be the perfect fence for your small at-home farm. If you have a habit of growing your own fruits and vegetables at home and are worried about rabbits or other small animals entering in and nibbling away at your plants, you could build this simple square fence around your veggies.
It can be small, maybe around 3ft or a little more, along with a gate so you could access it easily. And since it’s just for a farm, you need not actually paint or decorate the pallets and leave them as they are.
On the contrary, this kind of pallet fence is also great for keeping your chickens in, of course, not with the plants in.
We often don’t realize that we spend a lot of money on herbs and other small vegetables. What if you could cut some budget by growing them on your own, along with the comfort of building a secure fence around the house?
This planter-topped fence is a perfect idea for those who want to do so. Unlike the one with the trellises mentioned above, this one has a simple fencing frame with pallet box planters on top. You could fill these planters with soil and some herb seeds which could give you a nice little harvest that helps you in the seasoning of the meals. Two birds at one shot, right?
More details at naturallyloriel.com
Pallet Picket Fence
This is one of the simple fencing ideas out there for those with huge backyard spaces in their homes, probably if you’re living in the countryside. Also, it could be done in a matter of a few hours.
Collect as many pallets as you can, and just fix them to the ground. You don’t even need to attach these pallets by nailing them together. Instead, just keep them close, at a diagonal angle. You could paint it in rosewood color to give it a classic look or use any other color as per your liking.
This is a perfect fence that keeps pets and other animals away from entering your yard.
More details at founterior.com
Designer Pallet Fence for Small Homes
If your house is small and needs fencing only for the front yard, then you could use this modern design with the look of dark timber wood. Precut the pallets into two different sizes, probably a thinner and a thicker size, and make two huge fencing frames with the latter for either side of the gate.
For the gate, you can use the thinner pallets and make a smaller frame, that can fit right between the fencing you’ve attached. And like any other simple house fencing, you could have some soil on the outer side of the fencing, outlined with stones, where you could plant some small shrubs or flowering plants.
More details at syonpress.com
Dress up your existing Chain Link Fence
This kind of fence is for those who have a chain link fence but crave a little more privacy. It could also work if you want a whole new fence, but can invest a little bit more than pallets, and like to mix things up a little – a wooden panel with chain links around.
Choose the part of the chain link fence, where you think adding a panel would give more privacy to your home, and nail the wooden pallets to the vertical frames. Make sure it is the size of the chain link fence to give it aesthetic value.
This is a completely unique and creative pallet fence idea, which not only makes your house secure but also gives it a peculiar garden-type look.
Instead of making pallet frames and linking them together, you can make boxes of planters and stack them one after the other, until the required height of the fence is achieved. You can put some soil in these planters and grow herbs, or veggies that don’t need much space to cultivate.
Another great thing about this fence is that you can unstack them whenever you want and change the design according to your tastes.
More details at indrahughes.com
Gated Pallet Fence
This pallet fence will almost cost you nothing and can be finished within 4 hours. All you have to do is drill a few pallet boards onto the walls for support and nail the other planks onto these support boards by stacking them one after the other horizontally. You can also make a gate to the fence the very same way, and attach it with a hinge.
When the sole reason you’re opting for the fencing of your backyard is only to keep small animals away, then you could go for this very simple and tiny fencing system for your front yard.
It has pallets nailed together into frames of different heights, which are lined alternatively. This easily serves the purpose and can help you keep a track of onlookers and passers-by.
More details at crowfootcattle.com
Pallet Design for the Gates
You can spice up your fence design and double it up as a yard device, in addition to using it for privacy or security.
This kind of fencing needs prior research about the design, as there has been a lot of emphasis on the design and the details. You might have to fix the pallets together without any space, with small pallets as designer frames and gates. It will probably take a lot of your time, but it’s definitely worth it.
More details at ccacademy.net
DIY Patio Pallet Fence
Another great way of decorating your fence is by creating a simple fence with wood from old pallets, and painting flowers, or any other art of your choice on it. This gives the fence a personalized look and feels that you can easily fall in love with.
Feeling colorful? Have extended space at the back of your yard with a small pond, or huge trees that you want to separate from a small garden? Then you could make this simple fence by dismantling the pallet wood into planks, fixing them up into the ground, and painting them in different colors. This definitely gives the fencing a vibrant and gorgeous.
More details at rprtphoto.com
Square Pallet Fence Idea
Not all fences are square in shape. But it is a great idea, especially if you are trying to put in your cattle, or grow some veggies or have a garden. It’s easy to make and doesn’t take you a lot of time to build. If you need, you can line the outer part of the fence by placing potted plants to give it a much nicer look.
More details at simplyjanelledesigns.com
Rustic Pallet Fence
If you’re into rustic things and want the same around for your fencing, then you could simply stack the dismantled wooden pellets, preferably old ones, one after the other, and fix them in the ground. Also, you could add wood from old doors or wooden furniture to give it varied textures.
Another way of creating a movable fence or gate is to make a simple fencing frame with wooden pallets, and attach them with hinges. As the final touch, attach some heavy-duty wheels and casters to the bottom of the fence, so that they could easily be moved around. Now you can place your fences wherever you want.
In case your kids keep stomping the yard, creating trails all along, then make this simple fencing by dismantling the pellets, squaring off one end, and fixing them up in the ground by digging holes. You can also add a few plants in the soil at the bottom to give it a nice end look.
If the front or backyard of your home is already covered with a wall, perhaps of a smaller height, and you need something out in the open that gives you privacy while you’re chilling out in the sun, this kind of pallet fence would be the right choice for you.
It’s built with lots of wooden pallets and looks like something along the lines of a gazebo. You could fix the fence on three sides, leaving the last side open, and put in some benches made of pallets. Also, to jazz it up a little bit, you can place some potter plants around. It would definitely be a great place to sit and read a book or have a coffee.
More details at iconhomedesign.com
Pallet Fence Idea for a Small Garden
If you only have a small area in the yard of your house where you want to grow some shrubs or flowering plants, then you can try building a small garden fence with wooden pallets around this little space. In addition to the bushes inside, you can allow creepers to grow on the fence itself, or attach some trellises to the fence.
More details at wolffsapplehouse.com
Fencing for Balcony Garden
Sometimes, it's better to think out of the box and go for an idea that’s completely different from the rest. Usually, balcony gardens don’t need fencing, as they have their very own railing and space to keep the pots.
But, if you are blessed with a huge balcony, why not try and build a fencing gate to it? This way, you can separate your balcony into the seating area and the garden area and have a mini-farm type of setting. How interesting could that be?
More details at themicrogardener.com
A pallet Fence Decked up in Herbs and Flowers
Now, you can not only create a rustic look to a simple pallet fence painted in dark-wooden color, but also deck them up in different herbs and flowers by fixing in boxes for small pots, or by directly nailing planters to the fence.
This is another style where you get to have complete freedom of customizing and decorating the fence the way you want.
For this, you need to just build a simple fence, like the one mentioned in the beginning, or fencing of any style. Then the actual fun begins, you can carve shapes out of the leftover wood, and nail it to the fence, or draw some art, or even graffiti onto it, in order to suit your style.
More details at 1001pallets.com
Tiny Garden Fence
If you have a small garden attached to one of the walls of your house, this might definitely be a cool way of making a DIY fence around the garden, at absolutely no expense. All you have to do is nail wooden planks to the support boards and fix them into the ground by digging up holes. You can then embellish the fence by painting it in your desired color, adding a planter box for creepers, and maybe even adding a couple of lamps.
A good and simple fence can really turn your eyes around. This is one simple fence idea if you don’t have much time in your hands. Just nail large pieces of horizontal pallets onto the vertical planks, and attach them to one another.
To give it a nicer look, you can paint it in dark maroon, brown, purple, or any other color that complements the paint of your house, and grow flowering plants and creepers on the inner side of the fence.
More details at ccadacemy.net
Wooden Fence with a Small Planting Area
Another wonderful way to ensure privacy through your fencing work while adding a little bit of gardening to it is shown in this design.
Here, you have to stack all the pallet planks together tightly without any space and fix it to the ground. You can always choose the desired height for the fence. Now, for the planters, you can attach small wooden boxes towards the inner side of the fence, where you can grow herbs. Also, you can throw in some soil by the bottom of the fence, outline it with stones and use it as a mini garden.
More details at 101palletideas.com
Pallet Fence with a Bench
In addition to creating a usual fence with pallets decked up one after the other to create privacy, you could attach a few dismantled planks together to the fence in order to create benches to sit on. This not only gives you privacy, but also a place to sit and relax.
This is a stylish and modern way to decorate the outdoors of your home. It’s perfect for the courtyard, or to separate a wall from the rest of the yard. Get the planks from the pellet and stack it to the desired height and nail them to the vertical frames. You could spray paint it in wooden brown, and use long flat planks as shelves where you can actually place potted plants. Further, you could plant bamboo, crawling roses or other trees of medium height, which could give the fence a trendy look.
More details at ccacademy.net
Movable Pallet Fence for Swine and Goats
Who said pallet fencing could only be for gardens or yards? It could also be used to protect your pigs or goats from the animals outside, and wooden pallets are the best materials to build one, as commercial fencing would be too much to just keep your swine or cattle in check.
You can just build the framing by nailing the pallets together and fixing them up, along with a small gate. What would be even more interesting is that, you could make it movable and reusable, by just making them into frames that can be easily removed, if necessary.
If you’ve dug up anything at your home recently, or if you’ve planted a favorite tree that you need to keep people out of reach, or if there’s any electric device or anything hazardous that needs to be secured, then this small square pallet fencing is the perfect idea.
It is short, sober, and fits right around the object you need to keep others away from.
More details at representingdads.com
Pallet Fence Design
If there are a lot of houses in the neighborhood and your garden is attached to that of your neighbor’s, you can simply try this pallet fence design to separate the gardens. Just make the fencing frames from the pallets and fix them through from the wall of your house all the way to the sidewalk.
More details at 1001pallets.com
Another Private Pallet Fence
It is uncomfortable when you can look right through to your neighbor’s house from your living room window, or the kitchen sink. That’s when you have this immense urge of privacy.
Here’s another incredible idea to build a complete private fence with pallets. Make frames with long planks and fix the wood dismantled from the pellets horizontally, without any space. You can then place them one after the other through the length of front yard. You can also grow a few decorative plants around to give it a great finishing look.
A garden full of climbing rose bushes or other flowering plants is definitely bewitching. Something as lovely as that needs a fence which is only adds to its beauty.
So why don’t you try opting for a simple wooden pallet fence and gate, paint it in blue or maybe even mauve, and let the roses crawl all over the fence? It could surely make the whole garden view much more gorgeous.
If you have a swimming pool and want to relax by the water in private, try building a small open fence around it. This is a rather novel idea, but something definitely worth working on.
Collect as many pallets as you can, separate them into wooden planks, and build a usual three-side fence. If you have more time on your hands, do use the planks as the floor by spreading them. Paint the whole thing white to give it a complementary look, and add some benches or a couple of wooden chairs to relax, and you’re done.
More details at 101palletideas.com
Herb Garden Fence
This design can be used both as a free-standing garden to plant herbs, as well as a fully functional fence. All you have to do is convert wooden pallets into planting boxes and attach them to supporting wooden frames (planks) using nails. These planters can be used to grow herbs, and you can either use just one or make multiple pallet herb gardens and stack them one after the other to make it a fence.
These are just a few DIY Pallet Fence ideas on how to make your own fences with wooden pallets, at a minimal cost. You too can create a beautiful one for your home, just add a little bit of creativity and imagination to the existing ideas, and customize them at your will.
What do you think about these pallet fences, what do you think about pallet projects in general? We would love to hear from you in the comment section below!
Orbit offers a wide variety of impact sprinklers to choose from, including models with adjustable arcs and flows. Rain Bird's impact sprinklers tend to be more expensive than Orbit's, but they offer superior performance and durability.
Both Orbit and Rain Bird offer high-quality products, but there are some key differences between the two brands, and this is where I am going to discuss them. Price is usually one of the first things people think about, but it's important to remember that cheaper doesn't always mean better.
Orbit
Orbit Irrigation Products is a Utah-based supplier and manufacturer of irrigation products for residential and commercial applications. With over 2,000 products in their catalog, they offer a comprehensive selection of options for every need.
Their product line includes sprinklers, timers, valves, and even low-volume and micro-irrigation products focused on water conservation. Overall, Orbit is a trusted name in the industry, known for its high-quality products and commitment to customer satisfaction.
Orbit Sprinkler Review
When talking of watering lawns and gardens, nothing beats the orbit impact sprinkler which is known to be the best impact sprinkler on tripod. This sprinkler, which can be set on a movable tripod, covers an area of up to 85 feet in diameter. Their coverage can be varied from a small arc to a complete circle depending upon the time.
It features a deflector shield that can be adjusted to change the distance and an anti-backsplash arm that can help with spray patterns and area coverage. Water droplets can be adjusted in size by turning the screw on the diffuser.
Orbit Impact Sprinkler Features
1. Area Coverage
With a spray radius of up to 85 feet, the orbit sprinkler will cover a large area quickly and efficiently. The Orbit sprinkler can be set to a full circle to cover an area of up to 5,670 sq. ft. This makes it perfect for large lawn areas or even plantation farms where one is growing flowers.
2. Durable Built And Design
Orbit sprinkler heads are designed to conserve water and improve the effectiveness of watering your yard. This can drastically reduce your water bill and contribute to environmental protection at the same time.
Moreover, you should know that this one sports a solid zinc construction. Plus, the body is lightweight, making it easy to maneuver around the yard without having to worry about damaging delicate plants.
3. Adjustable Coverage And Anti Backsplash
The spray and water coverage may be easily adjusted from a partial area to a full 360° watering radius, and the distance can be adjusted up to 80 feet. It is equipped with an arm that prevents splashback. You may adjust the stream by utilizing the deflector shield and the diffuser screw, and the spray distance radius can be changed to anywhere from 20 to 42 feet.
Further, the tripod base can be adjusted between 16-37.5 inches in height, and you can use it as needed. The 1/2" male threaded impact head is ideal for use with the deflector shield and diffuser screw.
Hence, the product is perfect when you need to give your plants a little extra watering but don't want to overwater and create a muddy mess.
4. Affordable
Orbit sprinklers are a great option for those looking for an affordable way to water their lawns. When compared to other brands like Rain Bird, Orbit sprinklers are significantly less expensive.
However, just because they are less expensive does not mean that they are of lower quality. Orbit sprinklers are made from high-quality materials and are designed to provide years of trouble-free operation.
Pros
Easy to install and use
Comes with an adjustable arc head
Lightweight
Helps in watering long shrubs and reaching all layers of gardens
Has a zinc impact body which makes it more durable than other brands
Features a patented swivel connection which allows for 360-degree rotation
More affordable than Rain Bird
Best for small or medium-sized lawns
Cons
Only one year of warranty offered
Rain Bird
If you're looking for a sprinkler for the irrigation system, you have probably heard of Rain Bird. Professionals and homeowners have come to rely on its high-quality sprinkler devices.
Rain Bird Corporation, with headquarters in Azusa, California, was founded in 1933 and has since then manufactured and supplied the largest selection of irrigation devices. As such, the brand’s products are used on golf courses, farms, sports arenas, commercial properties, and homes in over 130 countries around the world.
Rain Bird Impact Sprinkler
The Rain Bird Impact Sprinkler is a high-quality sprinkler that is perfect for a variety of watering needs. The heavy-duty construction can withstand even the most demanding watering needs, and the brass fittings add an extra level of durability. Overall, the Rain Bird Impact Sprinkler is an excellent choice for anyone who wants a reliable and easy-to-use lawn sprinkler.
Rain Bird Sprinkler Features
Rain Bird is inspired by the original Rain Bird impulse sprinkler, patented in 1933, but updated with the precision and longevity of today's innovation.
1. Built And Design
This sprinkler is made of brass, bronze, and stainless steel and will outlast any similar product made from zinc. It is designed with a water flow that goes straight through it for enhanced dirty water efficiency (irrigation canals, ponds, high-mineral content, etc.).
2. Wider Coverage
It provides great coverage and can be set to a full circle (360 degrees) or a partial circle (anything from 20 degrees to 340 degrees). The pattern can be adjusted indefinitely after installation. Stream length can be adjusted anywhere from 20' to 41' with the adjustable deflector flap.
That is not all; it covers a wide range of areas that can extend up to 5200 sq. ft. This durable Rain Bird sprinkler offers broad coverage to provide consistent growing outcomes year after year, making it the perfect choice for use in lawns, gardens, and planting beds. And it is hugely used in farms as well to keep the crops healthy.
3. Warranty
Rain Bird sprinklers are some of the most durable on the market, and they come with a warranty to protect against defects. Two to five years of warranty is a good investment because it ensures that you'll be able to use your sprinkler for a long time.
The warranty also covers parts and labor, so you would not have to worry about paying for repairs if something goes wrong. Plus, the company has a good reputation for customer service, so you can be confident that all your problems will be taken care of.
4. Classic Impact Sound
Rain Bird sprinklers have been a traditional favorite for generations. Their impact sound assures you that your yard is getting the water it needs for healthy growth.
They come with a variety of nozzles to custom fit your watering needs, and the Rain Bird warranty guarantees your satisfaction. With proper installation and care, Rain Bird sprinklers will provide years of trouble-free operation and be an integral part of your irrigation system.
5. Instruction Guide
The Rain Bird Sprinkler comes with an instruction guide that will help you to properly install and operate your new sprinkler. This guide covers everything from unboxing and assembling your sprinkler to choosing the right settings for your lawn. It also includes a troubleshooting section in case you experience any problems with your sprinkler.
6. Sprinklers Valves
The valves manufactured by Rain Bird are of exceptionally high quality, and they are capable of providing flow control, internal openings, and straightforward control of irrigation systems. Sprinkler valves made by Rain Bird are meant to maintain the product's integrity and are hence made of brass or glass-filled nylon, depending on the model.
As a result, they have become a favorite among professionals working in irrigation and golf course maintenance all over the world. But one potential thing to be aware of with regard to a Rain Bird sprinkler system is that it only rotates in one direction. This can be problematic if your garden is long and narrow, as the water may not reach all areas evenly.
Pros
Top-of-the-line irrigation device
Made of high-quality materials such as brass and bronze and sports a stainless steel construction
Highly durable
Comes with a warranty to protect against defects
Easily adjustable
Installation is simple
Has an adjustable sprinkler head spray pattern
Sprinkler head made up of brass
Cons
Requires more water pressure to function properly
Orbit Vs Rainbird Impact Sprinkler FAQs
Do sprinkler valves from a professional irrigation business differ from those sold at Home Depot?
The models of valves and controllers sold at hardware stores like Home Depot and those sold at a professional irrigation business will be very different.
The sprinklers and controllers sold at Home Depot are of inferior quality to those sold by reputable organizations that source their inventory from irrigation suppliers. But they are easier to use for homeowners. Therefore, it is suggested that sprinkler controllers be purchased through vendors rather than big box stores.
Are impact sprinklers better than those with rotors?
Because they are made of bronze or brass, impact rotors can be more expensive than the newer plastic sprinkler heads. However, they are more long-lasting and can typically be used for many years without needing to be replaced. They also have a lower maintenance requirement compared to plastic rotors.
Which one is better: wobbler vs impact sprinkler?
When it comes to watering your garden, you must be wondering about wobbler vs. impact sprinkler and which one to choose. Both have their pros and cons, so it’s important to choose the right one for your needs.
Wobblers are less expensive and easier to set up, but they’re not as efficient as impact sprinklers. They also do not deliver as much water pressure, so they are not ideal for large areas. Impact sprinklers, on the other hand, are more expensive and require a more advanced setup, but they are much more efficient. They also deliver higher water pressure, making them ideal for larger lawns.
Moreover, sprinkler impact heads are dependable because of their unobstructed water flow and resistance to clogging, even when used with muddy water or recycled water from ponds and canals. There are many sprinkler heads to choose from to throw water perfectly well and have a healthy lawn.
What happens with sprinkler heads at extreme temperatures?
Sprinkler heads sit in the ground and usually come with quartzoid bulbs that are susceptible to bursting in extreme temperatures. You will then have to replace it or get it repaired.
To get a bit more into the deets, freezing temperatures (anything below 32 degrees Fahrenheit) can cause pressure build up in the sprinkler head, making it prone to cracks. Similar leaks and cracks can occur when the water is too hot as well. So, never let the temperature go beyond 135 degrees Fahrenheit.
Orbit vs Rainbird Impact Sprinkler - Which One Is Better For You?
Performance is important when it comes to lawn irrigation, and Rain Bird definitely has the edge over Orbit in this department. Its products are simply more reliable and efficient, meaning your lawn will stay healthy and green even during the hottest summer months.
That being said, Orbit is considerably cheaper than Rain Bird, so if you're on a tight budget, then it may be the better option.
Ultimately, it depends on your needs and what you are looking for in a sprinkler system. I have looked at both Orbit and Rain Bird impact sprinklers and outlined the pros and cons of each type so that you can make an informed choice.
Hopefully, this article has helped to simplify the process of choosing a new sprinkler system for your home or lawn. At the end of the day, both Orbit and Rain Bird offer quality products that will get the job done; it just comes down to personal preference.
Are you looking for possible ways of adding a dose of vintage style in your garden for the upcoming season? If yes, you are just at the right place. Here I have collected for you some breathtaking designs that will turn your garden into a magical oasis meant to stand out from the rest of the crowd.
You will see lots of old and rust decorative pieces which look totally stunning outdoors, scroll down and you will find the Mesmerizing Vintage Gardens That Will Make You Fall In Love With Antique Designs. All of the gardens are very attractive, and those reclaimed and salvaged goods work really great in nature. When paired with the green grass and colorful flowers they will make your space appear more than magical! I believe that the photos below will inspire you and that you will get some tips to decorate your own vintage garden in style!
The old wheelbarrows which can't be used anymore can serve you an aesthetic purpose in your garden if you think creatively. You can turn them into your new super unique planters that will catch the attention of anyone who comes to visit you.
Don't leave bikes out of the picture when you are thinking about decorating your garden in the vintage theme. A bike filled with flowers is an outstanding decoration for your outdoor area, so think about finding an old one and incorporating it in the decor.
Did someone say old carts? Hell yes! This is the perfect way to give your yard an old feeling and introduce the vintage style with ease! Ask some people who own goats if they have an old cart that you can borrow or buy. It's totally worth the investment!
Have been wondering how you can get rid of the old bed that has been taking up space in your home? Well, you don't have to go long distance. Put it in your garden and use it as a decoration and a flower planter. Is there someone who wouldn't love this flower bed in their vintage gardens?
There's something special about old vintage plates. If you are not the type of person who is into DIY project, this is the ideal decor for you that you can easily pull out. Just get the plates and use them to add some character to the old and dull fence. How do you like the idea?
What do you think about these mesmerizing vintage gardens ? We would love to hear from you in the comment section below !
Polymeric sand is a semi-permeable sand that contains additives and binding agents to lock paver joints into place. And although it is not completely waterproof, it can hold its structure by firming up when completely dry.
The best polymeric sandis made of binding materials such as quartz, silica and other chemical binders that offer a strong bond. Due to its water-resistant properties, polymeric sand can also sustain heavy rains and bad weather conditions.
As such, carefully applying polymeric sand can improve waterproofing and increase life expectancy of the pavers. And to help you achieve the best joint stabilization, I have curated some detailed information about polymer sand and its application. Read on…
Is Polymeric Sand Waterproof?
Most types of polymer sand are activated only once during the joint stabilization process, after which the sand becomes completely waterproof. However, applying excess sand on the paver surface before adding water can interfere with its waterproof abilities and create an unsightly look.
However, some polymeric sands available on the market can be softened with water to correct minor imperfections on the surface.
Tip
Do not apply polymeric sand on paver joints if there is a rain forecast. The sand acts immediately when in contact with a moist surface and can become useless.
Benefits Of Polymeric Sand
1. Durability
A polymeric sand project can last up to ten years. And with good maintenance, it can protect concrete pavers for 15 years! Unlike regular sand, polymeric sand gets its durability from polymers and binding materials. It will bind the wide joints so tightly that even heavy rainfall won’t be able to budge the fine sand. For this reason, I always recommend using polymeric sand instead of regular sand for jointing.
2. Prevents Weed Growth and Ant Infestation
Since the polymeric jointing sand seals the tiny cracks and crevices on the concrete pavers, no space exists for weeds to grow. However, one or two pesky weeds might grow even after applying jointing sand.
My trick to prevent this is to ensure airtight uniformity during the activation process. Moreover, their anti-weed chemical construction this achieved keeps your space tidier for a long time.
This will also prevent washouts and tiny pests like ants entering and nesting in the cracks to create unwanted vegetation further.
3. Anti-Erosion And Easy Installation
Preventing erosion by tightly binding the paver joints is the main function of polymeric sand. When the activation agents bind the sand particles, even the heaviest rains cannot wash away any more sand.
Using polymeric sand is also relatively easier and less time-consuming than traditional sand.
4. Better Variety
Like regular jointing sand, polymeric sand comes in many different colors to choose from. You can use the color that best suits your patio or house, or the one that’s most appealing.
Drawbacks Of Polymer Sand
1. Accumulates Polymer Dust
Over time, polymeric sand may accumulate dust from the ground and form white specks. However, this is not a serious issue since regular cleaning makes the dust specks easily removable.
2. Expensive
Installing polymeric sand can often be expensive since a one-pound bag costs more than that of regular sand. However, if you choose polymeric sand, I suggest not to compromise on its quality. Instead, measure the joint size to determine much sand you will need for the project so that there’s no wastage.
3. Tricky To Apply
If not applied properly, polymer sand can trickle out of the pavers and harden on the surface. And fixing this mess can be very challenging, as polymeric sand hardens very quickly and tightly adheres to the surface.
Installing Polymeric Sand
Not installing polymer sand properly can ruin your patio or hardscape. That’s why I have a guide on how to apply polymeric sand to help you ensure that the jointing sand adheres to the concrete pavers.
Things You Will Need
Polymeric jointing Sand
Plate Compactor
Brooms and water hose
Leaf blower
Pressure Washer
Steps Involved
1. Prepare Your Paver
If the concrete pavers on your patio are in good condition, you can begin your application. But first, you must thoroughly clean them since using polymeric sand on the entire depth will be helpful in the long run. Using a pressure washer and a leaf blower to dislodge the stubborn sand particles might help.
Tip
I highly recommend wearing protective goggles and gloves as a safety measure. You can also use a raincoat since the pressure wash may get you wet.
To ensure uniformity, you should also remove all existing sand from the joints and the bottom of the paver. Then, remove any weed growth between the paver joints. Make sure that all the weed roots are removed to prevent future infestations. You can apply a non-selective herbicide on the joints the day before. This will loosen the roots and make pulling up the weeds easier.
2. Avoid Staining
Polymeric sand is very easy to stain if applied on damp pavers. To prevent polymeric sand from staining, thoroughly dry the pavers to the bottom and remove any moisture. If it rains, wait for at least three to four days before the polymeric sand installation. Also, do not apply sand on the same day you pressure wash the pavers since they remain wet.
Another way you can prevent the sand from staining is by removing any stone dust created while dumping the polymer sand. When wet, this dust can cause stains that are difficult to fix. Use a leaf blower to remove any excess dust. Also, I do not recommend using polymer sand on red clay bricks.
3. Apply Polymeric Sand
Pour the polymer sand on the pavers and sweep it between the joints using a broom. Repeat this process until the sand reaches ⅛-inch of the top of the paver. Don’t go overboard with the application since adding water to it will increase the volume. In other words, don’t add polymer sand up to the surface of the paver; this will cause the polymer sand to trickle out of the joints.
Then, carefully brush away the excess sand using a brush or leaf blower. Proceed to compact the sand with the plate compactor.
4. Add Water
Using a water hose, slowly fill the paver joints with water. Remember to use enough water to provide adequate moisture to the stand, but ensure it does not overflow. If you add too much water, the polymers in the new sand will start floating. Moreover, excess water can lead to uneven application and severe stains.
Adjust the nozzle of the water hose to spray mode and spray for a few seconds at a time to observe its drainage. Repeat this process to ensure the sand is watered thoroughly.
5. Protecting Your Pavers
There are certain measures you’ll have to take to protect your pavers to help harden the sand properly. Cover the pavement or treated area with a plastic cover and hold it down with tarps. This simple covering can prevent the polymeric sand from washing away in the rain.
However, if the rain pours at a right angle directly onto the pavement, then it might be a problem. Consider putting up awnings or other covering to redirect the rain.
Moreover, you must ensure there is no pedestrian traffic for 24 hours. Close off the area for 72 hours if there are chances of vehicular traffic.
6. Apply Sealer
Applying a joint stabilizing sealer is the best way to consolidate the surface and it ensures your hard work remains fruitful for a long time. I recommend using a water-based sealer to boost the waterproofing ability of the polymers.
However, you should wait till the sand hardens before applying the sealer. After the sealant is completely dry, give a final sweep to the paver.
Mistakes To Avoid While Applying Polymeric Sand
1. Damp Pavers
Ensuring the pavers or joints are dry before installing polymeric sand is essential. Moisture will prematurely activate polymers, leading to uneven surfaces and stains. To avoid humidity, do not use this sand during morning and evening since the dew can prevent the pavers from being completely dry.
2. Over-Watering Or Under-Watering
Over-watering can cause the sand to separate while activating, leading to foam build-up. It prevents the walkway from hardening and causes poor bonding strength.
However, under-watering causes the sand to form a crusty layer on top. This crust signifies that your pavers do not have a strong bond. Over time, the crust will break away while eroding the paver simultaneously. Underwatering can also cause gaps and cracks throughout the depth of the paver.
3. Not Removing Excess Sand
Although polymeric sand can effectively stabilize your pavers, letting extra sand dry on top of them can create problems. Therefore, before applying the sealant, remove extra sand twice during the application. First, sweep it away before adding water, and then do it again before applying the sealer.
Consider using materials like crushed cement, aggregate or stone for the pavers along with the bedding sand. You can also add thin layers of pavers over concrete with bedding sand in between for better drainage.
Also, ensure the pavers have natural borders and are even with the ground level. Additionally, do not apply polymeric sand in areas without slopes that tend to retain water.
Is Polymeric Sand Waterproof Final Thoughts
Even though polymeric sand has inherent waterproofing traits, only correct application can guarantee it. Mistakes like overwatering or underwatering can disrupt its structure and cause it to lose its bond. Therefore, you must not take its water-resistant abilities for granted.
I highly recommend checking the compaction of the pavers and the patio slope before using this sand. Also, consider waiting three months before applying the sealer for a stronger hold and smoother application. However, if it doesn’t harden after following the necessary step, do not hesitate to call a professional to fix the issue.
I hope my detailed guide on the properties of polymeric sand and how to apply it helps you. Until next time!
A proud garden owner knows how important is every piece of it; he knows how personal and extraordinary his garden is and how much time he invested in it. He knows that every piece of greenery contains life and every piece deserves attention. Following the same chain of thought he knows that absolutely every piece of wood wears significance and throwing away an old window or door that once protected the individual in its home would be an unforgettable act and as a result we are showcasing underneath beautiful diy upcycled gates that have previously been used in the owners home.
DIY Upcycled Garden Gates
It goes without saying that results are simply extraordinary, doors and windows to small heavens in all their green glory. Cast a glance at the ideas showcased below and think twice before throwing an old door or window from now on. We would love to hear your opinion on the matter in the comment section below.
#1 Two Toned Green Doubled Door Protecting a Heaven With a Shabby Chic Design
#2 Old Wagon Wheel Adding Personality
#3 Up-cycled Bike Opening The Door to Heaven
#4 Small Old Window Protecting Greenery and Splendour
#5 Simple Old Window Opening "Le Jardin"
#6 Old Church Window Welcoming Curious Eyes
#7 Superb Garden Corner Welcoming Greenery
#8 Transparent Headboard Decor
#9 Colorful Old Doors Used as a Double Gate
#10 Old Tools Up-cycled Creatively Into a New Garden Door
#11 Creativity Unraveled in Sculptural Garden Door
#12 Pink Door Sheltering a Beautiful Flower Pot
#13 Small Red Door From Old Headboard
#14 Old Doors and Windows in New Setup
#15 White Window Presenting Inviting Scandinavian Decor
#16 Simple Metal and Wood Composition
#17 Old Metallic Headboard Transformed Into a New Fence
#18 Wood Sheltering Metal in Perfect Equilibrium
#19 Wood and Metal Gates Can Work Extraordinary Well
#20 Fairy Tale Land Protected Beautifully
#21 You Shall Not Pass Into The Green Land
#22 Simple Small Old White Window Guarded by Small Twigs
What do you think? Metal and wood are working beautifully together, the perishable coziness and warmth of wood being boldly backed up by the rustic rust of metal in a mature and complete composition. Old windows, doors and headboards alike are excellent new garden gates and fences, welcome them properly in your greenery and keep the door open for new memories.
When you set up an above-ground lawn irrigation system, choosing a sprinkler head that fits your needs and keeps your lawn well irrigated is very important. While an impact sprinkler can water large areas, a rotor sprinkler covers a smaller area. Both have advantages and disadvantages that you should be considered before purchase.
The main motive behind installing the best impact sprinkler for low pressure is ensuring that your lawn is irrigated properly with minimal water wastage.
But before that, you must decide which kind of sprinkler head would suit your needs. You can visit any irrigation manufacturer’s website and look for various kinds of sprinklers.
However, today I will be talking about the two most common sprinkler heads that are mostly used in households: impact sprinklers and rotary sprinklers. I will discuss how they work and highlight their advantages and disadvantages, so keep reading!
What Is An Impact Sprinkler Head?
Impact sprinklers have a simple functionality. The force and momentum of the sprinkler is generated by the flow of the water comes out of the spray head. That’s why it’s important to know how many gallons per minutes the impact sprinkler uses before installation.
The water flow will move an arm of the sprinkler, eventually altering the water pattern. And the force of the arm make the sprinkler head rotate to ensure distribution of water.
However, the arc rotation might be narrow or wide according to the variations in the model. The smallest arc size available is 22.5 degrees. As such, you can easily buy a model that suits your desired radius of coverage.
Most of the spray sprinklers have a radius extending from twenty to over hundred feet. And this range depends on two factors: the pressure of the water and water restriction.
Pop-up sprinkler heads use more water to ensure complete coverage and they reach greater distances compared to other types of sprinklers. This can be advantageous or disadvantageous depending on the geography of the lawn. Some ground types demand a lot of water on a regular basis, whereas slopes or places with a lot of mud will struggle with such a strong stream.
A basic fundamental behind the working of this sprinkler head is that you can install this anywhere in the field, and it will irrigate the desired area without any hassle.
Moreover, the pattern of water coming out of the sprinkler head is precise and steady. But sometimes due to the high water speed, the sprinkler may appear wobbly and unstable. Lastly, impact sprinklers can be loud at times and require frequent maintenance.
Impact rotors are built in such a manner that they can cover huge areas quickly and conveniently. The in-built hammer will act like a spring because of the force exerted by the stream of water, causing desired volume of water to shoot through the nozzle.
It is returned to the flow casing by the spring mechanism, generating an impact that gently rotates the head of the sprinkler. The water jet then causes the hammer to move once again, resuming the cycle.
Since the water pressure is not restricted in any way, an impact sprinkler can easily cover large distances. Impact rotors are quite popular due to their wide area coverage. So, if you have a large lawn, you can easily water the entire lawn without much hassle.
This will allow you to water a larger area within a very short time. The configurations of these pop-up spray heads can be easily adjusted to manage the direction and distance for convenience.
Advantages Of Impact Sprinkler
1. Works With Well Water/Hard Water
Due to the low number of components and the basic head design, an impact sprinkler head will ensure consistent flow of water even with hard water. You need not worry about its longevity in terms of performance.
2. Area Coverage
It has a high water flow and can cover huge areas that extend up to 45 meters in spray radius. This will allow you to effectively saturate your property during summer months.
3. Affordability
You can choose from a wide range of models. But owing to its simple design, even low-cost variants can suffice for most applications.
4. Usability
These sprinklers are designed to be user-friendly, making it suitable for first-time users. Plus, they can be readily adjusted adapt to your irrigating requirements.
5. Care
Since these sprinklers flaunt a basic design, they require less maintenance and endure a long time.
Disadvantages Of Impact Sprinkler
1. Noise
Due to their functioning mechanism, impact rotors can be noisy. The impact sprinklers make a very peculiar sound. Due to the working mechanism where the hammer hits the region at the back of the plate , the sound of the impact sprinkler might sometimes annoy you.
2. Water Pressure
Impact sprinkler might not work properly under lower water pressure. These sprinklers require a optimum water pressure to perform properly and generate an arc-like spray pattern, water homogeneity, and cover a wider area.
3. Arm Rotation
Impact sprinklers may use more water than a rotary sprinkler head to ensure a consistent operating pressure for a continuous stream of water. This is because their arms require a strong water flow to rotate properly.
What Is A Rotor Sprinkler?
Since rotor sprinkler spray heads operate using internal gears, they are also called gear drive sprinklers. These kinds of sprinklers have an enclosed-body design and are more expensive than impact sprinklers.
All the gears are built-in and are hidden from our sight, so it becomes very difficult to tell how it exactly works. Gear drive sprinklers propel the sprinkler across its arc pattern using an internal system (a gear) rather than an arm.
Due to this design, the sprinklers work smoothly without shaking or wobbling. Additionally, gear drive sprinklers are sturdy and reliable due to their intelligent design.
It isn’t easy to find gear drive sprinklers or any variant you want. After all, the gear driven rotors are pretty new compared to the impact rotors that have been in the market for quite a long time. If the variety and demand for rotor sprinklers increase in the coming times, then their availability will also increase accordingly.
How Does It Work?
Although rotor irrigation devices are simple to set up, it's crucial to understand how they function. They're a straightforward system to comprehend, which makes troubleshooting a breeze. Water enters the sprinkler from the main water source in a rotor irrigation system. The water is filtered and then sent via a turbine.
The stream of water enables the rotor to spin and the gears of the sprinkler to revolve. As such, water flows through the sprinkler and into your garden.
Another important component of rotating sprinklers is the radius reduction screw. The screw is what holds the nozzle in place.
Many individuals may turn this screw in the mistaken belief that it will assist each sprinkler share the same spray patterns. The screw instead may be used to either extend the area the sprinkler can cover or lower the diameter the nozzle can spray. This screw should only be used to adjust the sprinkler radius.
Advantages Of Rotor Sprinkler
1. Less Noise
Since it is powered by an inner mechanism, this sprinkler produces no "impact" noise. You can expect most rotors to have a quiet operation.
2. Larger Area Coverage
These sprinklers can cover large areas ranging from 20 to 84 meters in radius, which is even larger than the coverage area of impact sprinklers.
3. Less Water
They throw water precisely wherever you need it in the volume you specify, wasting the least amount of water.
4. Highly Effective
Usually gear drive sprinklers are more efficient than other kinds of sprinklers. However, based on your demands and intended use, choosing the proper sprinkler type is critical.
5. Uniformity
Since the spray heads rotate at a constant pace, it may offer precisely level water distribution throughout a particular area. Even at high pressure, it will provide a more uniform output.
6. Low Water Pressure
Rotor sprinklers work best with low water pressure. To water your lawn, multiple nozzles protrude from the ground and the sprinkler heads revolve at low water pressures ranging from 30 to 50 PSI.
7. Rotation Speed
Same speed of rotation is maintained in both the backward and forward orientations.
Disadvantages Of Rotor Sprinkler
1. Effectiveness
Due to the smaller water droplets, the water might drift in case of high winds.
2. Might Tilt
If the gear driven rotors are set in pop-up style, then they will eventually sink or tilt. Moreover, they will spray excess water on the turf areas nearer to the sprinkler. Water might not reach to the distant sections, creating dry patches.
Which One Should I Choose?
Though impact sprinklers can evenly cover the lawn, nowadays, rotor sprinklers have become quite trendy due to their sturdiness and consistency. Companies producing irrigation devices are coming up with more and more varieties of rotor sprinklers that will suit you and your lawn.
Due to its larger radius and capacity to a larger area, the same-size gear-driven rotor may outperform an impact sprinkler. Gear driven rotors are a better option if you want to add an extensive irrigation system for your lawn.
They provide much better control over the flow of the water, and the expensive ones can easily surpass the performance of any classic impact sprinkler. A rotor sprinkler design is incredibly effective and saves water while maintaining a rich green lawn all summer.
If homeowners don’t want an immaculate lawn or a full irrigation system solely for good grass, they can use a decent hosepipe and impact sprinkler all year.
Using a sprinkler that is constructed on a raised platform makes it easy to transfer it to the different parts of the garden, allowing you to divide it into zones and ensure there are no dead areas. Impact sprinklers will spray water quickly in a full or half circle pattern, allowing you to water your entire yard rather rapidly.
Even if you have to physically transfer the hose pipe and sprinkler to the other zones once or twice, the water stream consistency will still be the same.
Impact Sprinkler Vs Rotor Final Words
Both sprinkler systems will do the work. However, you must choose between automatic irrigation and manual irrigation systems. Nowadays, the cost of the gear driven rotors and different nozzles has decreased dramatically, and various components for a sprinkler system are widely available online.
Therefore, changing your watering strategy to add a true watering system with a regulator and rotor nozzles might be the best long-term strategy for your home.
An impact sprinkler trip pin may stop working due to misalignment, obstructions, incorrect pressure, or other damaged parts. But you can resolve the problem if you re-adjust the pin, use the correct water pressure, clean the part, or repair/replace any damaged components.
If you ask me, I’d say that impact sprinklers are a worthy upgrade over conventional watering systems. With a good impact sprinkler for low pressure, you can water your lawn at any time.
Of course, there are a lot more advantages to using impact sprinkler heads, such as increased versatility and watering range. However, it is a machine, and like any other machine, it can encounter issues at times. And one of the most annoying issues you can encounter is a malfunctioning trip pin.
That’s why I have expanded on this issue here, so read on if you want solutions!
What Is The Impact Sprinkler Trip Pin?
If you are not very well-versed in impact sprinkler heads, you might not know what the trip pin is. That is why I have briefly discussed it in this section for your convenience.
A typical impact sprinkler head consists of several parts, such as the impact arm, bearing washer, arm spring, solenoid valve, trip collar, trip pin, and others. If you have ever wondered why sprinklers pulsate, then the answer is the impact arm. Likewise, the trip collar helps in fine-tuning the watering range and so on. Checkout what pulsating sprinklers are in this exclusive article to know more.
In that context, the trip pin is of particular interest because it allows the sprinkler head to oscillate when in use. So, if it stops working or becomes damaged, your impact sprinkler will get fixed in one direction, thereby reducing its usefulness.
The trip pin is usually located at the base of the sprinkler head, just below the trip collar. Under normal circumstances, it is aligned downwards, which helps to rotate the sprinkler. On that note, it works in conjunction with the other moving parts so that your sprinkler can distribute water evenly throughout the garden.
Why Has Your Impact Sprinkler Trip Pin Stopped Working?
In order to fix the problem, you’ll need to identify the cause behind it first. There are several reasons that can cause the trip pin to stop working, as I have discussed below.
1. Misaligned Pin
A misaligned trip pin is the most common and obvious cause of this issue. As I have mentioned before, a trip pin is normally aligned in a downward position. But due to frequent usage or external impacts, the pin might become displaced from its original alignment. This jams the oscillation mechanism, which ultimately causes the sprinkler head to become fixed in a single direction.
2. Incorrect Water Pressure
An impact sprinkler requires a moderately pressurized water flow for normal operations. So, if the water pressure becomes abnormally high or low, then the sprinkler head will not be able to rotate properly.
If the water pressure is considerably higher than the acceptable range, it will strain the trip pin and the trip collar. That will subsequently damage the pin, which will cause the sprinkler head to stop oscillating.
On the other hand, if the water pressure is too low, the stream will not be able to apply enough force on the impact head to rotate it. As a result, the trip pins will not be triggered, which will prevent the sprinkler head from rotating.
3. Obstructions
If any object or debris becomes lodged inside the trip pin (or any other part, for that matter), it will jam the component and prevent it from functioning as expected. In other cases, the foreign object will cause unnecessary friction between the sprinkler parts, which will eventually wear them out. And once that happens, your sprinkler head will stop working.
4. Damaged Parts
I have already stated that the trip pins work in conjunction with other parts of the sprinkler head. So, if any of these components were to become damaged, it would consequently affect the normal functioning of the pin.
How To Restore The Normal Functions Of A Trip Pin?
Based on the underlying reason, there are several ways to fix malfunctioning trip pins. I have discussed each of these solutions in detail below, so keep reading.
1. Adjust The Trip Pins
In case the pin has become misaligned, you can restore its normal functions by simply re-adjusting it back to its original position. The pin can be easily adjusted with the help of a flathead screwdriver. All you need to do is tighten the pin with this screwdriver, and once it is back in proper alignment, the sprinkler head will start to rotate again.
Warning
Be careful not to tighten the pin too hard, or else it might break. You will then have to replace the broken pin entirely, which can be a lot more problematic.
2. Ensure The Correct Water Pressure
If the problem is due to unusual water pressures, then you will need to adjust it with the help of a pressure gauge.
Generally, impact sprinklers operate at a pressure of 50 to 60 PSI. However, not all impact sprinklers operate within the same pressure range, so make sure to check the documentation that comes with the product.
When the pressure is above or below the recommended range, you can first try to adjust the pressure of the faucet or tap. If that doesn’t make any difference, you will need to install a pressure regulator at the water source to make the necessary pressure adjustment.
3. Clean The Sprinkler Parts
In case the pin or any other part of the sprinkler has become obstructed with dirt and debris, you should clean them to restore normal functions. If you gently rub the sprinkler parts with sandpaper, you can remove any loose dirt. But if the debris is stuck inside the components, you can flush them out with a spray of water or a cleaning solution.
4. Repair Or Replace The Other Parts Of The Sprinkler
When the problem is due to damages in the impact head, sprinkler valve box, washer, or any other component, then you’ll need to troubleshoot them individually. For instance, if the arm spring has come loose, you can adjust it with needle nose pliers. Or if the impact arm has become bent or damaged, you will need to replace it with a new one.
Impact Sprinkler Trip Pin Final Words
The problem of a malfunctioning impact sprinkler trip pin can be resolved fairly easily on your own. However, if you are feeling a bit unsure about going the DIY route, you can always seek help from a professional.
In this regard, periodic maintenance can prevent this problem from appearing again.
Many users have asked me about how many gallons per minute an impact sprinkler uses. And the answer is - quite a lot! That’s why it is important that you have an adequate water supply to handle the load, or else these problems will become frequent.
A soaker hose makes an indispensable part of the gardening arsenal for most homeowners.
Who wouldn’t love having such an efficient watering system handy? You’ll love the virtually hands-free and consistent water supply, while your plants will love the targeted moisture. Win-win, we say!
But if you aren’t looking to spend a lot, you’ve come to the right place. We’ve curated a quick DIY guide that’ll help you make one from the comfort of your backyard. After all, hand-made care for your greens is the best expression of love.
So, without further ado, let’s begin!
What Do I Need To Make A Soaker Hose?
Making a soaker hose may sound like a lot of work, but it’s a fairly simple job. Moreover, you’ll find most materials in your garage. And even if you don’t, buying them won’t make you break the bank! On that note, here’s a list of the things you’ll need:
Charged drill
3/64 or similar drill bit
Electrical tape or hose cap
Garden hose
Garden hose splitter (optional)
A few things to note: while we opted for a charged drill to save time, you can also use a hammer and 20d nail. Look for any discarded hose (like the leaky one you forgot to throw out) before buying one.
Depending on the area to be covered, you might need a couple of those. Whatever be the case, you don’t need to buy a high-quality hose. Going for a cheaper option will also do the job just fine!
Now, let’s look at the steps involved.
Step 1
Lay the hose flat and make evenly spaced holes on one side using the drill or hammer. For best results, make the first hole about 18 inches away from the female end and maintain a distance of 2.5 to 3 inches.
If you want a sprinkler effect, drill the holes on multiple faces but make sure they don’t go all the way through to the opposite side. As the water flows through the hose, it’ll seep out of the holes and directly reach the roots with minimum evaporation.
Step 2
Once you’re done drilling the last hole, grab the end, fold and crimp it off by wrapping with electrical tape. Alternatively, you can screw in a hose cap to create a tight seal. If the leftover portion is too long, trim it before crimping. However, ensure that the length doesn’t become too short. Sealing one end of the hose forces the water to flow out gently from the holes.
Step 3
Leaving enough of the female end loose to connect it to the water source, place the hose in the desired area. If the area is too big, you might need to make another soaker and join the two using electrical tape. Don’t try to stretch a single hose to cover a large area as too much tautness can damage it.
Furthermore, you can also decide if the soaker system should be kept permanent or movable. For the former, we suggest burying the hose around 2 inches deep underground. This is especially beneficial for more water-hungry plants or areas that experience severe drought. Other than that, setting the hose in the soil will also come in handy if you plan to double it for covering multiple rows of plants.
In case you want to keep the soaker hose moveable, it'd be a good idea to secure its position. Use some heavy objects like stones or sticks at every turn to provide adequate support. Make sure that the stone or stick is placed in a way that doesn't damage the hose.
Step 4
With everything done, it’s now time to switch on the water supply. But before that, there’s one small thing that should be taken care of. If the hose isn't compatible with a spigot, it may be challenging to fit it to a tap. In that case, we’d recommend buying a good garden splitter to have an unhindered water flow.
Some General Tips
So that your soaker hose covers all the bases, here are some handy tips to follow:
If the air in your area is too dry, consider burying the hose under a few inches of mulch to minimize evaporation.
In an ideal scenario, it’s advisable to run the soaker hose for a maximum of 30 minutes, twice a week. That said, you may adjust the soaking according to the watering requirements. Apart from that, don’t engage the tap or spigot to its maximum capacity.
Since soaking is essentially a high-precision task, you’d want to keep the water flow nice and slow. We’d recommend opening the tap just enough to allow the water to seep through the holes.
You may get a water hose timer for optimum water conservation. Simply set it up to have a regular reminder about the watering schedule. Moreover, the ones with a built-in rain sensor automatically skip watering if the soil is too moist.
Buried soaker hose should be cleaned regularly. In case of hose cap seals, take out the cap and flush the pipe at least once in two weeks to prevent clogs. And for the ones with an electrical-tape sealing, replace the tape after every wash to keep the pipe usable for long.
Lastly, don’t throw out your old garden hose just because the color has worn off! If it doesn’t have any significant wear and tear, preserve it for future use. Besides, keep an eye on the curb on the trash day for old hoses being thrown out, especially during early spring.
Final Words
So, there you have it - an efficient DIY soaker hose!
Not only does a soaker hose make your job easy, but it also makes you less guilty about bothering your neighbors when you’re on vacation. Trust us; they will be delighted to know that all they have to do is turn on the spigot for a few minutes twice a day.
With that, it’s time for us to bid goodbye. But before we leave, let us share a pro tip: clean the pipe thoroughly before converting it into a soaker hose. This way, you’ll have unobstructed water flow.
An impact sprinkler is a great irrigation system that is ideal for watering large areas of land, like your yard or lawn. You can install it on your own by digging the land and using tools like power trenchers and pipe-pulling machines.
So, you are planning to get an impact sprinkler for low pressure for watering your garden or lawn? I understand that it’s only natural for you to assume that the installation would be a hectic affair. However, you will be surprised to know that you can do it easily with the help of some power tools.
So, today, I will tell you all about how to install an impact sprinkler- right from marking the area to testing it before use.
8 Steps For Installing An Impact Sprinkler
1. Marking The Area
Start by placing wooden stakes or small flag poles at every location where you plan to install a sprinkler head. A piece of string can be used to mark the area where the pipe will be placed. However, before you start digging, it is important to know about the location of all the gas pipelines and other power lines to avoid digging into these installations.
2. Digging The Trench
Once the area has been marked, start digging trenches where the heads will be placed. The typical depth for a trench is between 6 and 12 inches. In case the trench is to be dug at a walkway, a DIY high water pressure device can be used to efficiently dig a hole through it.
For this, get a PVC pipe that is lengthy enough to fit underneath the walkway, install a slip-female thread adapter at one end of this pipe and connect it to a hose. Connect a slip-male thread adapter on the opposite end of the pipe and proceed to connect a jet spray nozzle. You can easily find one at any home improvement or garden retail store.
Once you’ve located the area for the impact device, you can dig trenches to the walk on either side of the location. Then, you can turn the water on and start working your way through the trench.
Tip
It can get quite messy and muddy to work with water for long, so turn off the water every now and then to let the ground soak the moisture.
To make things easier, I purchased a power trencher and a pipe-pulling machine for the Poly Pipe, which helped me bury it without damaging my lawn. If you also plan to do so, make sure you leave enough space between the valves on the manifold so that you can detach or replace them when needed.
3. Providing Water Supply
Once all trenches are dug up, you can provide the water supply for the sprinklers. Manufacturers like Rain Bird can help you determine a suitable water connection according to the location of the sprinklers, but make sure you keep up with the local regulations.
4. Assembling The Pipes
Begin by assembling the valve manifold and connecting the back-flow preventer if needed. You will find PVC pipes in various diameters as well as wall thicknesses. Typically, using a bigger diameter PVC pipe can elongate the life span of the sprinkler and make it more durable.
For colder climates, you can install a Poly Pipe by digging up a trench, placing the Poly Pipe, and sliding Poly pipe clamps over the coupling to tighten the connections.
A Poly Pipe is more malleable and much less prone to damage or getting affected by freezing temperatures. However, dealers like Rain Bird suggest refraining from using Poly Pipes for mainline connections.
Another viable option is PVC cement, which is usually applied inside the sprinkler fitting and on the pipe’s exterior. Once the cement is applied, quickly insert the pipe completely, and turn it around to spread the cement. Make sure to hold it inside for a couple of seconds.
5. Testing The Pipes
Test the pipes by running water through them and flushing the system. Control the valves manually to clear the system by opening each valve individually, filling the pipe, and then closing the supply. Be sure to do this with each individual valve.
6. Mounting The Sprinklers
After the pipes are set, mount the sprinkler head using a core tool. If the pipe hole needs to be expanded, heating the ends will do the job. Cover the dug hole with soil once the sprinkler head is in position, and make sure to cover until the hole is level with the ground.
Note
The sprinkler’s protective cap must be in place during the mounting process and tightly secured.
7. Cleaning The Sprinkler
Once you install the impact sprinkler on the ground, use water to flush away any dirt on the sprinkler. Pour water on the soil that was used to fill up the distance. This will further strengthen the soil covering the body of the sprinkler.
8. Testing The Sprinklers
It is essential to test the sprinklers before starting to use them to reduce the chances of any issues arising in the future. Simply turn on the water supply and inspect each sprinkler closely to see if it’s functioning efficiently. Check the head of the sprinkler to see if there are any leaks or loose connections, and tighten them if there are any.
How To Install An Impact Sprinkler Conclusion
Though impact sprinklers are functional devices, the type of sprinkler you need depends on your home. For instance, a rotor might fit your needs much better than an impact sprinkler.
A rotor is a sprinkler device that shoots out single or multiple streams of water in circular motion and is usually opted for irrigating larger areas. You can do a comparison of impact sprinkler vs rotor to find which type best suits your needs.
If you have enjoyed reading this guide, you can check out my other article titled “how to cut particle board?” See you next time!
Polymeric sand is an ideal option for renovators performing driveway or walkway projects. Since this compound hardens when it is in contact with water, excess sand on the pavers needs to be removed using a brush, pressure washing, or boiling water.
Although slightly expensive, polymeric sand has been a favorite among many renovators, including myself.
Though it is a great material for bonding pavers, excess polymeric sand on the paver floor can lead to an unpolished look. So, to combat this issue, I have compiled a summarized guide that helps efficiently clean any excess polymeric sand from pavers flooring.
Let's dive in.
How To Get Polymeric Sand Off After Installation?
Ideally, I recommend removing polymeric sand from pavers as soon as you finish your patio work. The polymeric sand haze that develops on top of the flooring is mainly due to the leftover material. To remove polymeric sand haze, it is necessary to know what polymer sand consists of.
Polymeric sand typically contains 85-90% crystalline silica and quartz, allowing the sand to bind together. When this sand is wet, it begins to activate polymers, which in turn toughens the numerous components and locks the pavers.
I have mentioned below the required steps required for cleaning pavers effectively:
For starters, make sure to avoid moisture or water whatsoever before cleaning. Wet polymeric sand would be much harder to get off the surface, so ensure the floor is completely dry.
On the dry paver flooring, sweep the floor with a soft-bristled broom. Keep repeating this step as many times as necessary to get rid of excess polymeric sand. I opted for a soft-bristled broom to avoid accidentally scratching or damaging the pavers.
Sweep the surface to deposit the materials into the paver joints, thus utilizing every inch. After sweeping the paver's surface thoroughly, I employ a leaf blower to get rid of any remaining polymeric sand.
Warning
Be extremely careful while using a leaf blower to avoid blowing sand in excess. If not leveled properly, it can remove polymeric sand from paver joints.
Removing Polymeric Sand Post Hardening
Unlike normal sand, polymeric sand remaining on top of the paver surface will harden quickly when it comes in contact with water or moisture. This leaves the paver stones hazy, making the surface quite tough to clean. However, cleaning the paver floor surface after the polymeric sand hardens is still possible.
Sometimes the haze on the paver will be quite thin. In such cases, I use my garden hose to wash the pavers. I did have to do the process several times to ensure I got rid of all excess polymeric sand.
But if the sand hardens into thick polymeric sand and forms rough clumps, just hose water would not be enough to get it off the paver surface.
This is when pressure washing comes into play. But a pressure washer is not to be used on a regular basis. If the excess polymeric sand cannot be removed from the top layer even after washing the surface for days, then using a pressure washer can help.
A vital thing to keep in mind when performing a pressure wash is not to let it remove polymeric sand from pavers joints. The most suitable water pressure for cleaning the pavers, without disrupting the sand from the joints, is the medium range (from 1600 to 2000 PSI).
For more efficient performance, I use a hot water pressure washer at 180℉. The heat tends to activate the polymers in the sand once again and help in removing polymeric sand from pavers effortlessly. If the area of the paver floor surface is small, I use boiling water to remove excess polymeric sand.
Precautionary Steps After Removing Polymeric Sand
After removing polymeric sand from pavers, some preventive measures will help give the paver flooring a much more polished look.
Once I remove any polymeric sand from pavers, I check for spots in the joints that may have had the sand removed. While adding material again to these joints, it is necessary to avoid adding it to a wet surface. I also keep track of the weather so I can avoid adding extra materials if there is a possible chance of rain in the coming days.
After I fill the pavers joints with polymeric sand, while keeping the precautions for cleaning in mind, I wet the sand with a garden hose to trigger it. After activation, the polymeric sand will form the alloy that effectively keeps the pavers in the right place.
Another precaution to be taken once the entire process is complete is to apply a sealer over the entire flooring. The sealer will help to attach the polymeric sand to the joints of the pavers, preventing it from being washed away by any water hose or rain, for instance.
Polymeric sand is a semi-permeable substance which means it will only allow a small amount of water or moisture to seep through. The sand gets softer when wet but remains intact and firms up as soon as it dries up again. It does not get washed away easily when it rains, but it is not immune to constant heavy rainwater run-offs.
Advantages Of Polymeric Sand
Stops weed growth in paver joints
Prevents erosion
Improves the aesthetic of the floor
It makes the floor durable
How To Get Polymeric Sand Off Pavers Conclusion
With this, we come to the end of this article. I have mentioned above all the steps needed to remove any excess polymeric sand from the pavers efficiently. However, be sure to do it with utmost care so as not to wash or blow off any required sand from the joints.
Applying polymeric sand involves pouring it into paver joints, watering it, and allowing it to set for a few days. The process is quite DIY-friendly, making it a convenient solution for issues associated with patios.
Patios crack and wither away over time, be it due to human activity, the weather, or simple aging. That’s where polymeric sandcomes into play, proving to be one of the best materials for paving projects.
Here’s everything you need to know about polymeric sand, its properties, and how you can use it to renovate your patio project.
Polymeric Sand: All You Need To Know
Polymeric sand is a blend of sand and polymer additives, the primary function of which is to seal the joints between brick pavers and concrete pavers. As a result of blending special polymers with sand, polymeric sand acts as a strong binding agent, which is what makes it a good sealant.
Let’s look at what makes installing polymeric sand preferable for paver jointing over regular sand:
1. Higher Durability
Once applied to pavers, polymeric sand locks the blocks together, improving the durability of your patio for a long while. You won’t have to repair your patio as often, and the porch will continue to look just as good over the long haul.
The joints made as a result of polymeric sand don’t decompose or crumble, making it a truly permanent solution for your paver joint woes. And polymeric sand is water resistant to boot once it sets in properly, making it a worthwhile solution for your patio pavers.
2. Weed And Pest Resistant
Polymeric sand leaves no room for weeds or pests to make room as it holds paver blocks more homogeneously than regular sand. You can also infuse the sand with pesticides or weed killers to truly make it free of infestations.
And since these joints don’t deteriorate quickly, polymeric sand will make it so you won’t have to face frequent pest or weed infestations.
3. Large Color Variety
Polymeric sand can be used for more than just function, as it is available in several colors to appeal to your aesthetic sense. They have become a critical part of landscaping projects and, as a result, can have a positive effect on the value of a property.
Most polymeric sand manufacturers make sure to provide a wide range of colors that can be matched with any paver block.
4. Simple Installation Method
Polymeric sand is easy enough to apply on your own, meaning you won’t have to rely on professional services for repairing your patio. The application process is a simple matter of allocating an hour of your free time to finish fully.
I have applied polymeric sand on my patio porch a number of times, and it only gets easier the more I do it.
Applying Polymeric Sand: What You’ll Need
To apply polymeric sand effectively, you’ll need the following tools and materials:
Leaf blower
Plate compactor
Two push brooms with hard and soft bristles
Garden hose
Tip
Before you begin applying polymeric sand to your patio, you should check the weather forecast. Rain can deter the sand from binding your pavers together, so you should wait until the weather conditions are completely dry before proceeding.
6 Steps To Apply Polymeric Sand
1. Pour The Sand
Spread your bag of polymeric sand over the walkway in several small heaps while taking care to not apply excessively. It’s important to be careful while spreading the sand since it can be difficult to remove if overapplied.
Take care to fill the gaps between the pavers and any visible blemishes before proceeding to the next step.
2. Perform The First Sweep
Use a hard bristle broom to direct the sand around the pavers and into the grout lines. Do so as evenly as you can before finishing up the first sweep, brushing in opposite directions to leave no crack unfilled. Add more sand as necessary and see if there are any patches left to be filled.
If you see no area left untouched, you can begin compacting the sand next.
3. Compact The Sand
It’s time to use your plate compactor and press the sand further into the grout lines of the pavers. You can go over the area as you did during the first sweep, using the compactor as many times as necessary. In the end, you’ll have fully compacted the sand into the joints to a satisfying degree.
4. Perform Second Sweep And Blowing
This is where you begin the cleaning-up stages, starting with another sweep of your paver patio. Using a fine bristle broom, you can get rid of any excess polymeric sand left on the pavers.
Tip
It can be somewhat difficult to remove the sand from small areas where it resists the push broom. In such cases, you can put your leaf blower to work, using its lowest setting to get rid of difficult-to-remove patches of sand.
5. Water The Sand
Water activates the polymers in the sand and once the moisture leaves it, the polymeric sand hardens. Using a garden hose on the shower setting, spray your paver patio with water and allow the polymers to do their job.
Try to ensure that there are no puddles forming on the pavers and if you do see them form, stop watering at once.
6. Drying And Cleaning
You can use the leaf blower to dry-clean your patio and get rid of any leftover polymeric sand or water. Once the surface has dried up, your patio is ready to be used again.
Additional Tips For Polymeric Sand Application
1. Purchase High-Quality Polymeric Sand Only
Low-quality polymers seriously affect the lifespan of your paver joints, and though they may cost less, the end result is similarly unsatisfying. Despite being made of the same material base, there is a stark difference in quality. It won’t be long before you have to repair your patio with high-quality polymeric sands again. And this means more time and money wasted than what you would have with a bag of high-quality polymeric sand.
The extra money that you invest into high-quality polymeric sand ends up saving you money in the long run. It may sound paradoxical at first, but the price is well worth the return, as I’ve learned over the years.
2. Manufacturer’s Instructions
Every bag of polymeric sand comes with manufacturer-specific instructions that you must follow before applying it. This includes any additional sand application steps that you may need to perform to extend the lifespan of your patio further.
It’s always wise to check up on the instructions manual before you begin a DIY project, after all.
3. Don’t Rush The Job
While the application process takes up a little under an hour of your time, the sand takes time to set in properly. If you’re planning to use the patio the very next day, you may want to reconsider, as the sand won’t have set in by then. It’s better to reschedule any plans you may have on the patio, so you don’t have to put in extra work mending the damage.
4. Be Careful During The Watering Process
The sand needs a particular amount of water to set in properly, something that should be specified in the instructions.
Too much water can cause polymers in the sand to wash out completely, nullifying all the work you put in. Moreover, this can result in polymers binding to the paver surface, which is notoriously difficult to remove and results in an eyesore.
On the other hand, not using enough water will cause the sand to sit in poorly, resulting in a reduced patio lifespan. Since the sand won’t have settled in well, it won’t resist the weather or pests properly either.
5. Be Thorough While Removing The Sand
Something to keep in mind while using polymeric sand is that it can bond on top of the surface of the pavers. While it’s a desirable trait when using sand to fill in the false joints, it can become a problem if your new pavers are covered with excess sand. And if you use a sealer without taking care of the sand-encrusted pavers first, the problem can grow even worse.
You should be careful during the sweeping stages not to leave any excess sand on top of your pavers. This is particularly the case with textured pavers, as these can make it difficult to remove once enough time has passed.
6. Allow Proper Drainage
Similarly to how overwatering can harm your polymeric sand application, poor drainage conditions can also lead to problems that should be taken care of quickly.
Firstly, you should consider installing pavers on a surface that allows water to pass through. Surfaces like crushed concrete and limestone with bedding sand in between act as appropriate draining materials. And if you’re considering installing pavers thinner than usual, you may set them up on concrete with bedding sand in between. Depending on where you’re located, you can look into the installation guidelines to gauge how the soil is impacted.
If you use polymeric sand on a surface without proper drainage, the sand may wash out when exposed to the moisture present in it for long. The sand won’t have enough time to settle in, causing a weakened bonding process.
Secondly, you should establish a boundary around your pavers, be it the natural or artificial kind. This will allow water to flow off the edges, even if the surface doesn’t particularly allow for drainage.
And lastly, your patio should have a slight slope to it to allow water to flow freely. This eliminates issues with standing water completely, allowing polymeric sand to set in properly.
Tip
The slope must be tilted away from your home or other structures so that water doesn’t pool near it. Elements such as electric gates that open outwardsshould not be at the lower end of a slope.
7. Be Mindful Of The Joint Width
To get the best bonding results out of your bag of polymeric sand, try to make the paver joints be between ⅛ and 4 inches wide. As for the joint depth, it should be at least one inch deep to allow the sand to bond well between the pavers.
If the joints end up being too narrow, overwatering becomes a real problem, causing the sand to flow all over your patio. In a similar vein, false joints that are too wide can cause the sand to wash out through the channels formed. The sand is carried into the water flow before the activation process can begin properly.
Regular Sand: How It Fares Against Polymeric Sand
Regular sand is also a perfectly fine bonding material with a few caveats that set it behind polymeric sand. The coarse sand particles are effective and long-lasting as a paver joint sealant, creating a leveled base for paver installations.
Distributing sand evenly across the paver foundation is quite easy, as there is nothing bonding the particles to one another. If you are on a budget, you can consider using regular sand as the paver foundation for your patio or walkway. Regular sand is quite budget-friendly, after all.
I find regular sand to be a perfectly good alternative for polymer sand, especially if you’ll be making adjustments to the patio layout in the future. Regular sand is easy to remove, making it a great non-permanent solution for your patio troubles. Moreover, it requires no maintenance and in areas where rain and humidity isn’t an issue, you can use it over polymeric sand.
If you’re torn choosing between polymeric sand and regular sand, it all comes down to what you want your patio to be. The former is more of a reliable permanent solution, while the latter gives you room for readjustments. For those who like changing the aesthetic of their home frequently, regular sand may very well be the sealer of choice.
How To Apply Polymeric Sand Conclusion
Polymeric sand is one of the best options when it comes to paver joint sealers. It remains effective in both aesthetic and functional senses, and it’s easy to use. The DIY-friendliness of polymeric sand makes it quite a convenient solution, in my eyes.
Consider topping off your sanded pavers with a sealant to preserve their looks for a good while. Old pavers benefit from this especially, making them look as if they were new. You can apply a sealer once the patio has dried up and is ready to be used.
And lastly, if you find yourself in a bind over the paver installation process, it’s always good to reach out to professional help. Professional paver installation services are always available for you to take advantage of, and these professionals will ensure that you encounter no issues with your patio.
After all, a well-sanded paver is the end goal you want to reach, be it through a DIY method or through professional help.
To ensure complete 360-degree coverage, the head of an impact sprinkler pivots as water runs through it. However, you can adjust the spray pattern, water pressure, and arc of an impact sprinkler by changing the position of the hose faucet, deflector shield, diffuser, pin, etc.
This is because they provide a higher level of coverage than other types of sprinklers. However, one downside of impact sprinklers is that they can be more difficult to adjust. In this article, I will explore how to adjust different elements of impact sprinklersto get the ideal trajectory and strength.
How To Adjust Impact Sprinkler
A. Adjusting Sprinkler Coverage
Your sprinkler system is one of the most important tools in your lawn care routine, but it is only effective if it is properly calibrated. Let me tell you about a few things that I do to fine-tune my sprinkler.
1. Adjust From The Source
Changing the flow of water that comes from your sprinkler system can be accomplished by turning the hose faucet from the attachment either clockwise or counterclockwise.
If you turn down the flow of water coming out of the faucet, the sprinkler will only cover a smaller portion of the yard. Increasing the water pressure, on the other hand, will make the stream stronger and cover more ground.
Tip
When you wish to prevent fragile plants from being damaged by a violent blast of water, use a lower water flow than normal.
2. Turn The Diffuser Pin
A huge screw is used as the diffuser pin, and it is secured to the bottom of the sprinkler head. To reduce the area that is covered by your sprinkler, simply turn the pin until it is positioned above the nozzle.
This will accomplish the desired result. Turning the pin counterclockwise will result in a stream that is more concentrated and will travel further. Alternatively, you can remove the pin entirely.
When the diffuser pin is inserted, the stream is fragmented, and as a result, it is spread out in the form of a fine mist or spray. The amount of water sprayed will be less concentrated if the pin is allowed to protrude further beyond the hole.
3. Move The Deflector Shield Up Or Down
Changing the trajectory of the watering stream of the best impact sprinkler on tripod can be accomplished easily. You can try rotating the square piece of flat metal on the sprayer head ( next to the pin that diffuses the water).
You can move this either clockwise or counterclockwise. The stream will be diverted into a lower arc when it strikes the downturned deflector shield, which will make it ideal for watering grass and plants.
This is an excellent method for ensuring that your plants are receiving the proper amount of hydration that they require without wasting any of the water that you provide them.
Tip
Maintain an elevated position for the deflector shield if you are attempting to water your entire yard or garden. By doing so, the water will be able to move in a more upward trajectory and cover more distances.
4. Change The Spray Radius With The Friction Collars
Adjusting the motion of the sprinkler head is accomplished by rotating the metal clamps located at the bottom of the sprinkler head. The watering range is reduced in proportion to the proximity of the collars to one another.
The trip pin is a thin metal component that is located at the bottom of the sprinkler head. As the sprinkler revolves, the trip pin will oppose the collar clamps, making the sprinkler turn in the opposite way.
Warning
Ensure that the trip pin does not move outside of the range that you have chosen for the sprinkler. If not, a part of your porch, deck, or garage may get wet while watering the bushes outside your house.
5. Flip The Trip Pin-Up For A Complete 360-Degree Cover
If you have a lawn sprinkler system, you may want to consider flipping up the trip pin for 360-degree coverage. By doing this, you can ensure that the sprinkler system is watering your entire lawn evenly.
In addition, if you have any plants or shrubs in the center of your lawn, flipping up the trip pin will allow the sprinkler to reach them more easily. To flip up the trip pin, simply lift it until it reaches the sprinkler head.
Doing this will enable the sprinkler to water radially. As a result, you will save time and water by ensuring that your sprinkler system is operating efficiently.
6. Adjust The Dial For The Distance Control
One of the great things about impact sprinklers is that they can be easily customized to fit the specific needs of your lawn. If your model has a separate distance control dial, you can simply turn it to the right or left to get the desired spray distance.
The approximate distances should be labeled to ensure the right coverage. In case there is no distance control dial in your impact sprinkler, you can adjust the spray head by changing the water pressure, deflector shield, and diffuser pin.
By experimenting with these three variables, you should be able to get the perfect spray pattern for your lawn.
B. Choosing The Right Setup For Your Lawn
One of the important aspects of maintaining a healthy lawn is ensuring that it receives adequate irrigation. While rain can provide some moisture, it is often not enough to keep grass and other plants lush and green.
This is where sprinklers come in. By evenly watering the lawn, sprinklers help to ensure that plants receive the moisture they need to stay healthy. However, it is necessary to learn how to maintain your sprinkler.
1. Choose A Source With Ideal Pressure
It is imperative that you use a water supply that offers at least 15 pounds per square inch (psi) of pressure. When the water pressure isn't high enough, an impact sprinkler system won't have the necessary force to do its job.
If your sprinklers are not adequately watering your garden or do not appear to be releasing water at a rate that is extremely high, use a different irrigation type.
You can know the psi you are dealing with by calling the water provider or by utilizing a pressure gauge located over the end of a garden hose. Both of these options are available to you.
The water flow in the majority of residential areas is typically in the range of 40 to 60 psi on average. If, on the other hand, you acquire water from a well or pump, the cost may be less for you.
2. Select The Right Water Sprinkler Head
Plastic and metal are the two most common materials that are utilized in the production of impact sprinkler heads. Plastic heads are lighter than metal heads, which makes it easier to move around using a moderate water flow (about 20-40 psi). Metalheads are durable enough to withstand higher water pressures, but they do tend to be priced slightly costlier than their plastic counterparts.
Metal sprinkler heads are not only more resilient, but they also have a longer lifespan and fewer problems over their lifetime.
When searching for an impact sprinkler system, it is a good idea to seek the advice of a professional in the field of home renovation or gardening. This is especially needed if you are unsure which sort of head would be most effective for your property.
3. Clean The Sprinkler’s Head Regularly
If a brand-new sprinkler has ceased to function as expected, it may only require a thorough cleaning. Take the sprinkler head off of the base, and disassemble the nozzle and the swivel bearing within. Scrub each component using a bottle brush and hot water to eliminate any dirt or mineral buildup that might be preventing the sprinkler from functioning properly.
A weak stream with regular water pressure is one of the most common indications of a filthy sprinkler. Other symptoms include failing to rotate, turning to one side, and stopping.
The sediment and heavy mineral deposits collected on the inside of the sprinkler head can be removed with a solution that consists of vinegar and warm water.
General Tips
Adjusting your water sprinkler is not as daunting a task as you may think. There are several tips that can help make the process easier and ensure that you get the most out of your sprinkler system. Know more on what are pulsating sprinklers really are here.
Take a picture of or note the individual settings for the impact sprinkler head as soon as you have it configured. This will help you remember where those settings need to be in order to water each area.
Next, the movement of an impact sprinkler often results in coverage that is more even across broad regions. To lower the power bill or if you are attempting to keep plants alive in a hot and dry environment, this might be a better option.
To maintain the efficient operation of the sprinklers, you should promptly replace any broken or misplaced parts that you detect. And if you are wondering why sprinklers pulsate, it is generally because of the fluctuating water pressure.
How To Adjust Impact Sprinkler Bottom Line
Impact sprinklers are an important part of your irrigation system. They provide even water distribution and can help you save money on your water bill. It is important to adjust the impact sprinkler so that it provides the best coverage for your landscape.
Follow these simple steps to adjust your impact sprinkler and get the most out of your irrigation system. And if you want to know more about keepingutility pumps fish safe and other topics related to pumps, read through my blog.
Take care!
Polymeric sand, also known as paver sand or jointing sand, fuses your pavers to strengthen your patio. You need just the right amount of sand to fill all the paver joints 3/4th of the way without spilling out on your patio surface.
Polymeric sand is used to lock concrete pavers together. It is used in patios, paved sidewalks, and garage floors.
It is different from traditional sand and mixed with an adhesive material like silica. When you add water, the adhesive properties set in, sealing the bond.
Now, you may be worried about choosing the paver sand amount. After all, you don't want to buy too much and let the excess hang out in your garage corner for the next decade.
On the other hand, buying more paver sand after running out will be difficult.
Thus, finding the right amount you need for your patio is crucial. Below, I've given more details about polymeric sand and my thought process to help you choose.
Why Do I Need Polymeric Sand?
I use polymeric sand so that I don't need to worry about rain, weed growth, or insects destroying the patio anytime soon.
What's more, this adhesive only needs to be applied once a decade with minimal maintenance costs. And, regardless of the color of your patio paver blocks, you can find suitable polymeric sandthat blends into them.
How Much Polymeric Sand Do I Need?
Now, you need to know the amount of paver sand you should buy. To calculate this amount correctly, let's first consider the factors that will affect the amount of paver sand your patio takes up.
Factors Affecting The Polymeric Sand Amount
1. Patio Dimensions
Your patio dimensions include its area and shape. The larger the patio, the more tiles are needed to cover it. Thus, you need enough paver sand to fill all of these gaps.
However, the shape of your patio also affects this. If it's circular or curved, you'll need several smaller tile pieces to cover the paver joints without irregularities. As a result, you will use up more polymer sand.
2. Paver Dimensions
As a general rule, large pavers will cover the patio easily in fewer numbers. However, you require hundreds of small tiles to fill the same area.
Additionally, simpler shapes have fewer gaps. A triangle is the most uncomplicated shape, and each paver will have around 3 gaps between adjacent members. In the same way, a square has 4 gaps on each side; a pentagon has 5, and so on. If you want stylized or curved tiles, they will increase the gaps significantly.
3. Size Of Paver Gaps
Depending on your paver borders, the gap between them might vary.
A paver might have a honed edge and be firmly interlocked, leaving tiny cracks. On the other hand, manufacturers might create pavers with slightly rounded edges. These need more paver sand.
Calculation Of The Polymeric Sand Amount
Knowing The Patio Area
Ideally, you'd know the area of the patio. However, if you don't know the exact number or forgot it, there are simple ways to calculate the area.
If your patio has straight borders, the task will be easy. Just measure the length and breadth and multiply them to get the area.
On the other hand, if you have a more complicated or curved patio, the calculations will be more complex. If it's a recognizable shape like a pentagon or a hexagon, just look up "find the area of [shape]" and calculate it accordingly. If it's circular, treat the farthest point like the breadth and take a rough estimate.
Estimating The Joint Sizes
You can easily determine the joint size if the patio is paved. To do this, take a ruler and measure the gap between any two pavers. If the patio is even, this is the average gap size.
As a rule of thumb, a small gap is usually less than 0.3 inches in width. If the gaps measure 0.3 inches or more, they are wide.
Also, if you haven't paved the patio yet, you can still measure the gaps. Take out two pavers and place them side-by-side on a table. Then, press them firmly from both sides to ensure the gap is accurate, and measure it.
Finding The Product Coverage Area
The particular paver sand you purchase will have a specific product coverage ratio. You can usually find it on the back of the bag or in the product description online.
I'm using the most common coverage ratios I see to teach you the calculations. However, you should customize this according to your product.
Calculating The Amount Of Sand
Usually, a 50-pound bag of polymeric sand is enough to fill 75 to 100 square feet of a patio if it has small gaps. Thus, you need about 0.5 pounds per square foot for narrow paver gaps.
For wider gaps, you need 70 to 100 pounds of polymeric sand. Sometimes, there are irregular gaps in the patio. You should buy about 250 pounds to fill the wider gaps in this case.
If you find your exact product coverage, you can just divide the patio surface area by it. This quotient will tell you how many pounds of paver sand you need.
How Do I Add More Polymeric Sand To My Patio?
In rare cases, you might underestimate the amount of sand you'll need and have to go get more.
Thus, you're adding more polymeric sand to fill the gaps left by the existing sand. This is easy, but you should ensure that none of the sand has sealed. If you water half of the patio, this half will harden before you add the rest. Therefore, a gap will stay between them.
As a beginner, I sometimes messed up and let the partial sand harden. When this happened, I used a pressure washer to remove the hardened sand before redoing the patio.
What Should I Do With Too Much Polymeric Sand?
Sometimes, I do all the calculations and still end up with too much jointing sand. It happens to the best of us, and the amounts are only an estimate. If this is your situation, you'll be wondering what to do with all the extra sand now.
First and foremost, do not pour this extra sand onto your patio. If all the gaps are already filled, more jointing sand will collect on your paver surfaces and solidify in lumps, making your patio irregular. This is especially bad if pets or children walk onto the patio barefoot.
So, when you have leftover polymeric sand and don't want to throw it away, you can do a couple of things. First, look in other areas like the driveway, garage, and front door stairs. If you have weed growth issues in any of these places, the polymeric sand will stop it.
However, if you're still left with the bag, store it safely because you never know when you'll need it later. You might have to redo the same patio if you made some mistakes or if a particularly bad hurricane damages it. So, store the polymeric sand in an airtight bag and keep it handy.
Warning
You shouldn't pressure wash pavers after you use polymeric sand. It's resistant to water but not to a lot of force hitting it at high speeds.
Only use a pressure washer on your patio when removing the previous application.
How Much Polymeric Sand Do I Need Conclusion
Polymeric sand, when applied correctly, hardens and seals your pavers together and keeps your patio safe from pests or structural damage.
Estimating the amount of sand you need in advance will help you save time, money, and energy. I use a few factors to know how many bags to buy, and I've described my calculations to help you do the same.
Ultimately, you should trust your gut and note the particulars about your patio and pavers. For example, if your pavers are really high, you'd need more sand.
At all times, your best bet is to note the product specifications and factor them into your calculations accordingly. Using the right amount of sand will make your patio safe, durable, and more pleasing to the eye.
Water sprinklers help in good irrigation by ensuring a wider coverage for your lawn, but they can also increase expenses. Following my simple methods to monitor how many gallons per unit time your impact sprinklers use can solve these issues.
The only affordable method which ensures my lawn gets proper watering, even with low water pressure, is using an impact sprinkler. Hence, investing in an impact sprinkler for low pressureon the market has immensely increased my water coverage with its advanced nozzle and spray patterns.
However, when I initially used an inefficient impact sprinkler for my garden, my water bills rose and got really expensive. That is when I started monitoring my water usage.
What Are Impact Sprinklers?
Before using a water sprinkler to water your lawn or garden, it is essential to be aware of the know-how and their technology. Researching to determine how many gallons per minute my impact sprinkler used has drastically reduced my expenses.
Impact sprinklers are small irrigation devices that rotate and turn with the help of a rotating arm and spring pin. The sprinkler propels in full and part circle motions to provide a more comprehensive water cover for your house lawn.
Using a garden hose to water my garden has been challenging, but switching to an impact sprinkler has been the best decision. The sprinkler head can spray water across a large radius, and the sprinkler system is easy to access, whether above the ground or below.
Many impact sprinklers offer varying features depending on the water pressure, angles, and patterns of water projection. Some companies even manufacture sprinklers that are safe for kids and pets, making them a responsible choice for every household.
Tip
Read the instruction manual before using an impact sprinkler, and never use chemicals while watering, as they can disperse into the surrounding areas.
Different Types of Impact Sprinklers
When buying a brass impact sprinkler for myself, I was faced with different types of sprinklers that I needed to choose between. On average, there are three major kinds of sprinklers on the market. They are:
1. Oscillating Sprinkler
This type of sprinkler usually has a horizontal-bar shape that moves back and forth, covering a large lawn radius with each sprinkler head. Oscillating sprinklers are constructed to emulate a real shower of rain.
Moreover, they can also turn into a part circle and thus are usually used for small and medium-sized lawns. I found quite a few of these oscillating sprinklers in local gardening stores.
2. In-ground Sprinkler
This kind can be expensive since it needs to be staked in the ground to spray. But though it is pricey, it is quite advantageous, especially for people with a large family or many pets. I found out that this system is designed with features that retract each sprinkler head into the ground when not in use.
However, from the customers’ reviews I have skimmed through, I’ve seen that its mechanical design can cause problems like jams and clogs. So, before you install these, consider talking to an expert.
3. Gear-driven Rotors
This system has sprinkler heads that are more suitable for an expansive area. Not only do they cover a large radius, but they can also turn into a full and part circle. I found that gear-driven rotors are beneficial to increase even distribution of water across a vast site.
However, they are different from the traditional impact sprinkler since they do not include the arm which helps a sprinkler turn. Also, note thatdifferent sprinklers use varying gallons per unit of time, depending on the water coverage, sprinkler head, or water pressure.
How Many Gallons Of Water Does An Impact Sprinkler Use?
Going back to my main concern, having sprinklers can be very wasteful if you do not know how much water the sprinkler currently uses. Besides high water bills, water waste through improper lawn sprinkler usage is detrimental to the environment and violates both regional and state water restrictions.
However, there are many resources and techniques that will help you calculate how much water each sprinkler head uses every hour, minute, or second.
Keep on reading as I share some ways to determine the average water usage quickly and efficiently.
1. Gallons Per Unit Time
The average water usage of any irrigation tool is measured in terms of Gallons Per Minute (GPM). I discovered that once I calculated the GPM, it was easy to convert it into Gallons Per Hour (GPH) by multiplying the number by 60. Then, to calculate the overall water meter usage, add the GPM of each sprinkler.
Moreover, I also calculated the inches of water a brass impact sprinkler would spray over time using the collection method. I used this method by putting out containers to collect water for ten minutes while the sprinkler ran.
But how do you gauge the potential water bill with this seemingly elaborate process?
To estimate the water bill, the water volume has to be measured. And since gallons are a measure of volume, finding the coverage area of the location and the inches of water the sprinklers produce is sufficient.
2. Other Methods To Calculate
There are also other ways to calculate the Gallons Per Minute (GPM) or Gallons Per Hour (GPH) according to your water pressure. But the most popular one is as follows:
Place a deep, plastic container on the ground and turn on the sprinklers. Aim each sprinkler in such a way that it sprays sufficient water into the container. This is an important step since varying water pressure determines the reach height.
Before doing this, I examined the interior of the sprinkler to see if theimpact sprinkler trip pin is not working. If the trip pin of your sprinkler is faulty, you may need to separately buy another to replace it.
After letting the sprinklers run for ten minutes, I poured the water into a plastic container that measured one gallon. Thus, this is the quantity of water the sprinkler sprays every ten minutes. Further, this number can be multiplied by six to find out the gallons per hour.
Another method of calculating how much water the sprinkler uses is surveying the water meter before turning on the system. This water meter should be located near the place where the water supply line to your home begins.
Write down the number on the meter and turn on the sprinkler system. Make sure that no other water source is allowed to flow.
After ten minutes, check the meter reading and write it down again. The difference between these two readings indicates how many gallons per ten-minute usage. Then, multiplying by 6 gives you the hourly calculation.
How To Choose An Impact Sprinkler For A Lawn?
Every brass impact sprinkler has a different set of features that sets it apart from others. When it comes to me, I require a sprinkler that can suitably adjust to the low water pressure of my home. For this, I look for the PSI requirement of a sprinkler that tells me whether it is compatible with my water system.
Besides PSI, there are several factors one should consider when buying an impact sprinkler. These are:
1. Flow Rate
To continue my discussion with PSI (pound per square inch), the flow rate of a sprinkler is calculated based on the PSI itself. It is also directly related to the water pressure of the central home system and the sprinklers. If the sprinkler is required for a larger area, consider purchasing sprinkler systems with a higher flow rate.
Tip
It is crucial to keep track of the weather before using a sprinkler. High winds and extreme temperatures are detrimental to the flow rate.
2. Adjustable Pattern
Impact sprinklers spray water in a full and part circle. Some sprinklers have adjustable systems that allow users to adjust the circle, arc, trajectory, and water pattern. Thus, look for models with a diffuser pin to adjust water distance.
3. Timers And Automatic Shutting System
Timers and automatic shutting systems are features that are an ideal match for people looking for self-regulating devices. However, impact sprinklers with integrated features like these can be pretty costly.
But I really wanted a system that could run and stop independently. So, I purchased shutting valves and a timer to add to my impact sprinkler. Now, it saves me a lot of time.
4. Distance
Before buying a sprinkler, measuring the area that needs irrigation is essential. This helps in determining what sprinkler radius may be suitable for a particular location. I always check whether it has an adjustable distance in case I wish to water a larger area.
5. Warranty
Like every device and irrigation tool, warranty is a critical issue to consider when purchasing sprinklers. Different manufacturers provide varying warranties based on the material and durability of the product.
For example, some manufacturers offer a five-year warranty for their brass impact sprinklers and a two-year warranty for the plastic ones.
6. Price
Price is a significant factor when it comes to investing in irrigation tools. Although impact sprinklers shouldn’t be too expensive, it is good to invest in one with superior quality. I believe the best way to make this decision is by calculating the budget available.
However, remember that your lawn may require more than a sprinkler to cover the area effectively. The more sprinklers, the higher the budget for purchasing them should be.
How Many Gallons Per Minute Does An Impact Sprinkler Use Final Thoughts
The concept of an aluminum or brass impact sprinkler has revolutionized the irrigation industry with easier accessibility and time-saving features. However, to ensure better usage, maintaining impact sprinklers is crucial.
I regularly check inside the sprinkler to see if there are any deposits or mineral buildups. These buildups can cause potential clogs and blockages, so I clean them thoroughly whenever I find them. Moreover, I also make sure to check each head to see if they are loose or broken. If they are, I immediately replace them.
That is all on how much water an impact sprinkler uses. I hope my detailed guide and personal experience help you operate a sprinkler.
If you like similar informational guides and reviews, I suggest you read my article titled “Impact Sprinkler Vs Rotor”
That said, I’ll be signing off now. Until next time!
The trellis is loved by gardeners and those who maintain yards all over the world. One might say it is a mainstay in most situations.
This hardscape has been defined as the backbone on which the garden mostly grows. Usually, the trellis takes not only numerous forms but also serves multiple functions. Be it simple structures where vining vegetation is lifted, to the more complex alternatives with elaborate and sturdier designs, the trellis is always useful.
Even back patios and pathways benefit from these installations, as they spruce up any location. While these installations can improve the aesthetics of a place, trellises can be expensive to buy. That is why we have prepared some of the best trellises that you can make for yourself.
Not only are they functional, but the process is easy too. You can rest assured that these trellis ideas will match whatever style you have in mind.
Now, let us dive into the details without delay.
DIY Pergola
Often pergolas are known as arbors or trellises. Not only can they be used as a structure that vines use for support, but also to define the space outdoors. You’ll see how they are functional as shades for cooling once you start using them.
Before making a pergola for crawling vines, it is best to know where the underground lines are located in your garden. Normally, you’d have to sink the footing so that it is one quarter the height of the desired post.
Honeycomb Trellis
If you’re in the mood to make your garden look good, then this trellis is the right way to go. The structure looks lovely as it is, and the hexagonal shape is sure to make your property look sleek and stylish.
Using a miter saw, you can easily make these hexagonal cuts. Then, you’d have to mount the trellis on the fence, ensuring that you’ve screwed in adequately into every one of the horizontal supports.
T-Post Trellis
The T-Post trellis is a rustic and sweet addition, which you can easily make using two T-posts. In addition, you can make use of twigs from poplar saplings as well as twine. Then, it is best to resort to zip ties to get additional strength for the trellis.
Using bigger branches towards the bottom and smaller ones at the top add a degree of strength to the structure. Alternating the thick ends as per rows brings a degree of stability too.
Fancy Trellis
Eager to show off the entrance to your house? Bank on a fancy trellis to grab the attention of everyone. If you drape it with a flower-like clematis, you’ll find the structure especially nice. While using these flowering vines, make sure the trellis is made of pressure-treated lumber. Having a sealer and stain will ensure it stands the test of time too.
Clematis Trellis
You might love the privacy offered by tall fences around the house, but they don’t always look good. Alter this uninspiring appearance, and feel free to jazz up the backyards by adding a clematis trellis. It gives an adequate amount of support to flowering vines, so they can climb high.
In order to execute this project well, cut the cedar boards into one-and-a-half inch strips so you get the right material for the trellis.
Trellis with Planter Box
For two projects in one, this installation is the right way to go. Here, you’ll see that a trellis is placed inside a handy planter box. There are casters that are mounted on the bottom of the box as well. Thus, there is no trouble in moving the entire thing.
We recommend adding drainage holes at the base, along with casters, so that the plants remain healthy too.
Wire Wall Trellis
In the event that your garden or yard has a brick wall, it might look quite dull as compared to the greenery around. But, there’s a great way to spruce up the look by adding a few vines to the wall. These crawling plants add the right dash of green, and if there are flowers, the overall look is further improved.
With the masonry anchors, cable wire, and eye hooks, you can create a great foundation for the vines.
Copper Trellis
A trellis made of copper pipes manages to encapsulate a feeling of delicateness and strong aesthetics at the same time. Although the assembly might feel like a tough task involving welding, you’ll end up finding that it is quite simple to put together.
We recommend having some strong glue handy to put together the parts. Once the vines begin growing, the entire installation will take on a shade of patina.
Rustic Trellis
Many like their gardens to look deeply charming while retaining the whimsical aesthetic. You’ll find the trellis has been made with green saplings, while they are bent into a certain shape. After they’re turned into hoops, these trellises are wedged between the large rocks for around two weeks.
Once dry, the ends are kept in wooden inserts that are buried in the ground on both sides of the walkway. You can also make sure the saplings are lashed together, using additional twine, just so that the structure is more stable.
Criss-cross Wall Trellis
Sometimes the garden might serve as a formal setting. But that doesn’t mean it can’t look good at the same time. You can easily resort to the criss-cross trellis that champions a degree of elegance.
There’s plenty of space for foliage to climb over, using some kind of support. You’ll see pink bower vines growing particularly well here. Sometimes, artwork or installations like fountains can also be highlighted using this structure.
Simply place the object at the center of the ‘X’ formed by the trellis. Thus, the entire thing becomes a frame, drawing your attention to the central piece.
Trellis Ladder
A ladder doesn’t just have a degree of utility but serves as a great decorative piece as well. You don’t just have to use the item as a trellis, but you can also create a degree of support. In order to do this, you can go about using a bunch of posies, or other decorations, based on the season.
Overall, this choice becomes a great addition to your patio or porch. If you craft the ladder from black birch saplings or limbs of other unique trees, there is a greater amount of visual appeal to the entire thing.
Garden Obelisk
Using this simple yet cheery obelisk trellis is an excellent choice. Thanks to its multifunctionality, you can pretty much do anything, from growing roses to turning it into a cage to grow tomatoes. No matter your need, this installation will come in handy,
As far as construction is concerned, make use of pine, so the structure is sturdy and long-lasting. For the finishing touch, you might even add a weather vane at the top. In some cases, the trellis is coated with Tung oil instead of using traditional paint.
Cattle Panel Trellis
In the event that you don’t have much room for gardening, you’ll see that the cattle panel trellis saves a lot of space. The design is rather intelligent, allowing you to use metal cattle panels.
Using these, you can grow a lot of vegetables and plants like cucumbers, beans, and pole peas. The way to install it is to trim the panel and make it in half. Then, make use of cable ties or hog rings in order to join them.
If you need to take the trellis out and store it for winter, then this option saves a lot of space as well. All you have to do is to fold the panes, and you’re good to go.
Freestanding Trellis
Combining efficiency, ease, and incredibly affordable materials, the freestanding trellis is preferred by several gardeners as a DIY project. Taken together, the raw materials come within $5 sometimes.
The cost-effectiveness can hardly be understood as the product spruces up the exteriors. You can make this trellis using furring strip boards, brad nails, and glue. Overall, the size can be customized to suit the sizes of different gardens.
Pea Trellis
The first thing about this trellis is that the ease of construction makes it stand out. Even kids love lending a helping hand to set it up quickly. You can make the frame out of four bamboo poles and join them with twine.
All you have to do is to run this twine up and down so that the frame stays together. As it remains taut, try to coax the peas a little and watch them take to the trellis naturally.
Vining Plant and Pea Trellis
You can build this trellis to be higher or shorter, and it is perfect for any vining plant or peas. Based on your needs, you might also decide to make these trellises thicker and sturdier. In that case, we recommend using better boards so the structural integrity doesn’t get compromised over time.
Trellis Planter
The trellis planter is smart looking and practical. At the same time, these structures add a degree of weight to your porches and patios. To make the build easier and faster, you can make use of latticework, which is prefabricated.
In order to give this installation a complete look, you can even consider adding a frame with lumber that is pressure-treated. Just place it all around the trellis, and enjoy the effect created.
Trellis Wall
These trellises are pretty as a picture and make blank walls look visually interesting as well. If you happen to add a bougainvillea creeping on this structure, it will become all the more aesthetically pleasing.
But, you have to keep in mind to have a few inches of space when installing the trellis so that the vines have space to grow out. Soon, you’ll see the trellis covered in pretty greenery, sprucing up the wall.
Pallet Cucumber Trellis
While growing cucumbers, you might face the problem of insects or rodents since they are close to the ground. With the help of the pallet cucumber trellis, these vegetables can now be given a degree of heightened safety.
It is extremely simple and easy to make these trellises using wooden pallets. All you need are two posts and some twine. Put together, the structure is firm enough and can be used to grow crops like radishes and lettuce as well.
Garden Tools Trellis
If you’ve been gardening for a long time, you’re bound to end up with a few broken tools which have no practical use anymore. Instead of throwing them out, you should try and make use of the worn-out items, like hoes, rakes, and spades, by making trellises. Apart from the utility, the installation also doubles as garden art.
First, you need to chisel the handles of the tools, so they’re shaped like a stake and can be driven into the soil easily. Then, attach cross slats across the handles, made out of scrap wood. Hold them together with the help of nails or glue. As the structure becomes increasingly weathered, it will look more charming too.
Chevron Lattice Trellis
The chevron shape never goes out of style, and if you add it to your trellis, you can be sure the installation will make your garden look all the more modern. Add a dash of flair with this structure, especially if you paint the entire thing black.
Using zip ties, you can add clay pots with flowers and plants to this trellis so that your garden becomes the talk of the neighborhood.
Modern Trellis
This option embraces the tenets of modernity by being slim and sleek. Even the lines offered are unfussy and simple enough. There is a great contrast visible due to the heavier and more traditional planters, which are placed behind such trellises.
In order to keep the look clean and bright, you can apply two coats of semi-gloss paint on the exteriors. For more ease, you might resort to sprayers as well.
Tiny Rose Trellis
Sometimes the answer lies in simplicity, and nothing proves this better than the miniature rose trellises. Here. You don’t need any elaborate design to get the job finished. Try these quaint options that don’t take up a lot of space but manage to look sophisticated at the same time.
If you have a smaller garden area or want to create the look of a comfortable nook, then this trellis is the right way to go. With a delicate framework, they’ll make your gardens stand out.
Bike Rim Trellis
In case you’ve got a bike rim lying around, taking up space, you can now use it to make an attractive trellis. You might be the person who prefers utility over decor, in which event, this choice is perfect for you.
Use some gardening twine along with the old bike rim for a functioning trellis that can support plants. Apart from the effectiveness, the process doesn’t cost too much money either, making it an endearing prospect.
Background Trellis
When you use the background trellis, you’ll notice how the structure supports the bushes which are in the background. At the same time, the potted plants seem to benefit from the location of the trellis as well.
Ultimately, it is a great example of how a framework can be well incorporated into the design of the garden. The cherry on the cake is obviously how these trellises easily spruce up the place.
Swooping Trellis
For those who want there to be a canopy effect in their gardens, the swooping trellis is the perfect option. There is a covered effect on the walkway, and the arches attract attention automatically.
Not only is the framework easy to make, but you’ll find the canopy covered in flowers and vines after a while. It makes the garden look and smell wonderful.
PVC Pipe Trellis
Gardeners are always on the lookout for new ideas for trellises. The PVC pipe trellis is a fantastic addition in such cases. It is a relatively easy DIY project involving PVC pipes and some gardening twine.
Not only is it easy to build, but the entire project doesn’t cost much either. All you have to do is look around the house for some raw materials.
Rough Trellis
Farmhouses or country cottages snuggled in the woods can make good use of this trellis. It adds a rustic look and has a lot of character. As compared to an ordinary trellis, this design is definitely rougher. While the rough trellis is certainly not traditional, it is considered to be a wonderful addition to most gardens.
Squash Arch Trellis
This is a nice spin on the ordinary arch trellis. You’ll find that it can support most vines and plants. But, using it to grow squash or pumpkins is especially beneficial in enhancing the overall beauty of the garden.
Thanks to these trellises, you can be sure that the vines will get all the support and sunlight needed. Once the blossoms become eye-catchers, you can be sure to earn praise for this smart DIY project.
Contemporary Trellis
This is a new take on the traditional trellises that most people are used to. Be it a chic getaway or a modern home; the contemporary trellis fits right in. It has a sleek design and happens to be smoother than many other variants.
Since the wood is painted, the colors are eye-catching, and the smooth texture makes it all the more gorgeous. If you’re looking to make a smart addition to your backyard, then this DIY project is the right way to go.
Creative Trellis
With DIY projects, the best bit is that you can always improve your creativity. This is most evident in some trellises, which look more like art installations. In the creative trellis, you can easily compile several trellises into a standalone concept.
Be it a porch, or a garden, or even against a wall, these creative trellises only look sophisticated, but they’re actually easy to assemble and install.
Trellis Bench
If you’ve got a pretty garden, it is understandable that you might want to spend some time sitting and looking at it. Instead of adding chairs or seating arrangements, you can always save space and opt for trellises with benches.
These designs are found mostly in country houses or properties with more sprawling garden areas. If you have parties or gatherings, then this seating arrangement can be perfect for highlighting those who are at the center of the party.
Moreover, the quaint bench is protected by the shadow of the arch and looks incredibly welcoming when installed properly.
Trellis Fence
The concept of a trellis fence is extremely nice and easy to execute at the same time. It is simple to put together with materials lying around the house. In essence, it looks like a tiny part of a fence with plants growing on it.
Enthusiasts can customize the item even further by using materials and colors of their choice. Basically, all you’d need is some wires or twine and wood to build this DIY trellis.
Japanese Wood Lattice Trellis
Add a dash of culture to your garden with the help of these Japanese wood lattice trellises. They effortlessly combine beauty and elegance. All you need is a little bit of patience and time to put together this structure. But, you shouldn’t feel daunted because the assembly process is relatively simple.
Once the project is wrapped up, you can definitely take a step back and appreciate how it enhances the overall appearance of your garden.
Vertical Planter Trellis
A vertical planter is often the way to go if you’re looking to save some serious space. These structures can easily support a lot of plants, making it simpler to care for them too. With the help of the vertical trellis, you can add a dash of efficiency to your garden.
Stack up the plants in this structure, and the trellis will support them as long as you need to. The installation is sure to catch the eye of everyone for its unique design. Making vertical trellises is easy too, and all you need are some basic tools and extra wood.
Willow Garden Trellis with Bench
You can make your garden look magical with the help of this willow garden trellis. Using willow wood, you can construct the structure. We recommend adding a bench to the entire installation, so it doubles as a natural seating arrangement.
Due to the material used, it feels like a natural extension of your decorations, which is why the enchantment is much more. Assembly is relatively simple, and the DIY project lasts for a long time without needing much maintenance.
Traditional Trellis
The slanted trellis happens to be a more traditional design that gardeners tend to go with. Once again, it is very simple to put together. All you have to use is some spare wood and twine. For those who don’t prefer to slant it, can always go for a hovering setup.
Normally, these trellises are great for growing tomatoes, pumpkins, and a variety of other vegetables.
Giant Trellis
If you’re planning to go big, then this giant trellis is the perfect option. You can take some time to create this highly unique design. If you have a side garden or even a yard, it is best to utilize the space with the help of this trellis.
Notably, the bigger the size, the more plants can be put on it.
Trellis with Lighting
This trellis comes with an incredibly cute design that would be best suited for an interior space. The mood lighting is incredibly funky and adds a bohemian touch to how plants are kept. Not only are the lights bright yet simple, but the plants benefit from the supportive structure of the trellis as well.
Now that you’re acquainted with some of the best DIY trellis ideas, it is time to apply these to beautify your lawns or gardens. Be sure that the installations look stylish and are crafted with longer-lasting materials.
If you want, you can further increase utility by adding benches. While some of the trellises require a larger degree of handiwork, others can be simply assembled with materials that lie around every household.
Depending on your requirements and the kind of aesthetic you’re going for, you can decide which trellis suits you the best. And with that, we will take your leave now. If you run into any problems with the assembly or choice of a trellis, then do reach out to us.
Goodbye for now!
arch and trellis, entwined vine and lantern in a beautiful Park in the summer.
Have you just finished building a new concrete driveway in front of your home? Then it is time that you gave it a fresh new look using concrete paints.
The driveway is the main entryway to your home, so you need to give it a striking appearance by incorporating a few driveway paint ideas. That way, people coming to your house will have something to look at and admire. Moreover, if you make it durable enough, your driveway will stay attractive for a long time.
On that note, you can utilize different materials and finishes to enhance the overall aesthetic while simultaneously enhancing your driveway longevity. But if you are fresh out of ideas about jazzing up your driveway, then allow us to help.
In this article, we have discussed some of the trendiest concrete driveway ideas that you can try out. So, without stalling any further, let’s roll!
Concrete Driveway Paint
A painted driveway can make the exterior of your home look appealing to onlookers. However, you need to be careful when painting your concrete driveway since they have a reputation for developing cracks or other signs of damage too soon. And even if there are no damages, there is a high chance that the paint will get washed away after heavy rains or snowfall.
That is why you can’t just use any type of paint for your driveway. There are special types of paints that are suited for this purpose, which is what we have discussed in this section. So, if you want to know what they are, keep reading below.
1. Masonry Paint
Masonry paint is a specialized type of paint that is designed to be applied on masonry surfaces, such as bricks, stones, clay, or concrete. It is composed mostly of silicon, acrylic resins, and other polymeric compounds, due to which it possesses a higher degree of durability and elasticity than conventional paints. Because of these properties, it is also known as elastomeric paint.
Besides, masonry paint is available in a wide range of colors, so you can choose whichever color suits you best. For added brilliance, you can choose a color that is the same as the house color. Thus, the customizability alone makes it one of the best driveway paint products.
Applying a fresh coat of masonry paint to your driveway is relatively easy. Since it is made for rough or uneven surfaces, you don’t need to prep the surface extensively before you start painting. Consequently, the time required for painting your driveway is reduced as well, even if you need to apply more than two coats.
2. Epoxy Paint
Epoxy paint is another great paint option for your driveway. This concrete paint contains durable epoxy resins that can withstand the toughest environmental conditions with ease. Apart from that, epoxy resins are highly versatile and elastic. So, the paint can withstand heavy loads for a long time without showing any signs of damage.
That is why you can use it not only to paint your driveway but also to paint floors that have heavy foot or vehicle traffic. Plus, you can use it on the exterior walls to protect them from the elements, such as heavy rains or snowfall.
However, you do need to consider the thickness of the paint you want. A thicker coat will be more durable than a thin coat. But on the flip side, a thicker coating will cost you quite a lot.
You can get the paint in different colors and finishes, so the potential for personalization is great. If you wish, you can opt for transparent epoxy resin, which can be applied over other materials to improve their durability. For instance, you can apply it over your garage floor paint to make it more durable than it currently is.
One thing that you need to keep in mind, though, is that this paint dries rather slowly, especially if you apply multiple coats. Thus, if you are looking to use your driveway soon, this might not be the best option.
Concrete Driveway Finishes
Despite the popularity of driveway paints, many professionals recommend against them. They cite reasons such as high annual maintenance costs, and additional labor requirements, both of which are perfectly valid.
However, this doesn’t mean that all hope is lost since you can go with some great concrete finishes for your new or existing driveway. So, if you are curious to know what they are, read on!
1. Plain Concrete Driveway
If you are a fan of minimalistic designs and finishes, then this one is the perfect choice for you. With the plain concrete finish, you get a no-frills look for your driveway. You can also complement it with a grassy lawn around the driveway or even a shrub lining along the edges.
Achieving this finish is no hassle either since all you have to do is pour the concrete over your driveway area and allow it to dry. In this regard, we recommend putting an even spread of concrete throughout so that there are no irregularities on the surface. The presence of irregularities may make the driveway more vulnerable to damage and disrupt its uniformity.
2. Polished Concrete Driveway
This is one of the most attractive finishes that you can give to your driveway. It will give the driveway a lustrous and appealing sheen, which will considerably enhance its aesthetic. Not only that, but the polished concrete is also highly durable against flaking or chipping. It is resistant to sunlight and UV rays, which can make your driveway look dull over time.
To get the sophisticated, polished look, you will need to put in a lot of labor. Polishing the concrete is often a multi-step process, which requires scrubbing the concrete surface with sandpaper, wire brush, or bonded abrasives. But we believe that the end results make all the effort worth it.
3. Exposed Aggregate Concrete Driveway
This is the exact opposite of a polished driveway since you get a very rugged texture from it. Because of this, it is skid-resistant, which implies that there is no risk of slipping or falling, even when the surface is wet or greasy.
Moreover, it is pretty attractive to look at since the aggregate materials used in the concrete, such as stone chippings and pebbles, are exposed to the surface. The outer layer of the cement paste is removed, which exposes the aggregate materials below. Likewise, it is relatively low-maintenance as well.
4. Stamped Concrete Driveway
You can use stamped concrete for your home’s driveway, which has a finish that can be regarded to be a hybrid of the polished and exposed aggregate options. In that context, it combines the best qualities of both, which makes it a perfect choice for your driveway.
The stamped concrete finish involves adding a concrete color and texture separately, which helps it to mimic any material or pattern on concrete surfaces when applied. You can use a single color for simple textures or multiple colors for more complex textures. In fact, you can even go with gray or another neutral color to get a more simplistic texture.
Once the concrete is applied, it is pressed with a polyurethane concrete stamp to imprint the texture. After it is completely dry, you get a beautiful, durable, and low-maintenance finish that can withstand any weather exposure.
5. Broom Finish Concrete Driveway
This finish is somewhat similar to the plain concrete finish that we discussed before. In it, you apply the concrete layer over the driveway area without any additional preparation. However, there is one major point of difference that sets this apart from the plain concrete finish. And that involves running a stiff broom over the concrete surface before it dries up completely.
Ideally, you would want to run the broom in a single direction for a more uniform texture. But you can also run the broom in a circular motion or any other random motion to create unique variations in the driveway texture.
As you can guess, this makes the surface relatively rougher than plain concrete. The rough surfaces provide exceptional skid resistance to the driveways, which makes them safer for people and vehicles alike.
6. Rock Salt Finish Concrete Driveway
This is a traditional method of adding a very subtle finish to concrete driveways without using any complex tools or chemical reagents. All you need to do is pour some rock salt over the concrete after application. It leaves behind shallow indentations on the concrete surface, which gives it a pattern similar to weathered rocks.
You need to pour the rock salt over freshly applied concrete that has not yet dried. Pouring it over dried concrete will have no effect other than messing up your driveway. Likewise, once the cement dries up completely, power washing the concrete is mandatory to dilute the rock salt.
7. Slick Trowel Concrete Driveway Finish
The slick trowel finish involves applying and fixing the concrete substrate with the help of a manual steel trowel or trowel applicator machine. Here you should keep in mind that there is a very limited window for applying this finish after pouring the concrete.
The surface needs to be hard enough to withstand the person or trowel machine. But it should not be hardened too much, or else the trowel won’t be effective.
In the end, it gives a very rugged appearance to the concrete, which makes it durable enough to withstand bad weather conditions.
On that note, an interesting aspect of this finish is that the surface texture is pretty smooth, despite having a rough appearance. And because of this, the slick trowel finish makes your concrete driveway incredibly easy to maintain.
The smooth surface texture prevents the accumulation of dirt and grime. That's why you can simply wash it with a hose and squeegee it off with a bit of soap solution.
8. Engraved Concrete Driveway Finish
If you want to enhance the curb appeal of your driveway considerably, then we recommend getting an engraved concrete driveway design. After you have applied the concrete over the driveway area, you can etch patterns on it using a sharp tool.
You can etch any type of pattern over the concrete, which makes this finish extremely unique compared to any other type of driveway idea. However, the engraving process requires a lot of time to complete.
Regardless of the pattern you choose, the engraving needs to be completed before the concrete has fully dried up. A similar principle is used for creating joints in concrete. These joints protect the concrete from cracking when it expands or contracts under extreme temperatures. Therefore, you get practical utility out of an engraved finish as well.
Other Concrete Driveway Ideas
You can go with more innovative and appealing ideas in addition to the paint and finish ideas discussed above. For instance, you could try using different materials alongside concrete, such as stones, asphalt, marble, and so on. They can effectively complement the appearance of your concrete driveway.
Honestly speaking, the potential ideas that can be generated are limitless. But for the sake of convenience, we have discussed some of the most common and trendy ideas in this section that can significantly ramp up your property value.
So, we suggest that you keep reading below to know what these ideas are.
1. Stained Concrete Driveway
Stained concrete is a very innovative way of refreshing the look and feel of your driveway. Not only that, but concrete stains can also be fairly versatile and economical compared to conventional paints or finishes.
You can choose between two types of stains - acid-based and water-based. An acid stain reacts with the concrete to form a strong and long-lasting bond and is extremely resistant to fading or peeling. Conversely, a water-based stain dries faster, is comparatively safer, and is available in many colors. Regardless of your choice, a concrete stain will produce a very attractive and natural-looking finish for your driveway.
Alternatively, you could go with conventional stained brick pavers as well, which are typically used alongside the concrete. They produce a more uniform stain and give your driveway a very rustic appearance.
2. Irregular Concrete Driveway
Asymmetric patterns and engravings are quite popular these days, which is why this is a great idea that you can use for your concrete driveway. There are two ways of achieving an irregular appearance - by stamping or by using stones and rocks.
As we have discussed in a previous section, stamping can help to mimic different textures on concrete. Thus, if you use an irregularly-shaped stamp, you can give the concrete driveway an asymmetric finish.
Or, you could simply use irregularly shaped stone pavers along with the concrete in your driveway for a more realistic feel. In that case, you should use enough concrete to fill cracks and gaps between the pavers adequately, or else the stones may come loose over time.
3. Stenciled Concrete Driveway
This is yet another idea that can significantly enhance the attractiveness of your concrete driveway. And the best part is that this can be done on a new as well as existing driveway. Using a concrete overlay or adhesive-backed stencil, you can liven up our new concrete driveway or refurbish an old one.
Concrete stencils come in a variety of shapes and patterns, which makes them customizable. Besides, applying stencil patterns on your concrete driveway is fairly easy and doesn’t require considerable prep, which further adds to its convenience.
4. Concrete Blocks On Driveway
Instead of pouring concrete into your driveway, you can use pre-built concrete slabs. This idea is not only appealing but also serves a practical purpose. The joints between the concrete blocks protect your driveway from cracking under extremes of temperature.
Besides, if you use irregularly shaped slabs, you can create a striking asymmetrical pattern for your whole driveway. Apart from that, you can fill the gaps between the blocks with cobblestones, flagstones, or gravel for a contemporary look. You can even grow grass between the joints for a more unique appearance.
5. Slatted Concrete Paver Driveway
A slatted concrete paver contains several gaps and holes on the surface. In addition to giving your driveway a distinctive look, the slatted concrete helps drain the water on your driveway into the ground below. This effectively helps in stormwater management and prevents the buildup of moss on the concrete surface.
On top of that, if you use a neutral color tone on the slatted concrete and complement it with lush grass on either side of the driveway, you can give it a highly rustic vibe. Coupled with the water drainage aspect, this is one of the most eco-friendly driveway options to consider.
If you are looking to refurbish or repaint your already-painted concrete driveway, you will need to remove paint from concrete driveways first. For that, you will need to scrape away the peeled and chipped paint with sandpaper or brush. Then apply a paint stripper, which will remove the paint coating from the concrete.
You may need to re-apply the paint stripper multiple times in this regard. Just make sure to rinse away the paint stripper after each application. Also, ensure that the paint stripper you are using is compatible with the paint on the concrete surface.
How thick should your concrete driveway be?
Typically, a concrete driveway should be around 4 to 5 inches thick. However, the desired thickness of your driveway depends on its usage scenario.
If you have lighter vehicles, such as bikes or have light foot traffic on the driveway, a thickness of 3 to 4 inches is sufficient. For regular-sized passenger vehicles and heavier foot traffic, the driveway should at least be 4 to 5 inches thick. And for considerably heavy vehicles or storing multiple vehicles at once, the thickness of your driveway should be over 5 inches.
How to avoid water from puddling on your concrete driveway?
As a rule of thumb, concrete driveways should always have a sloped design to eliminate excess water from the surface. In this regard, you can keep the center of the driveway thicker than the sides, which will effectively prevent the puddling of water. Or, you could slope the driveway gently towards the street to drain the water outside your home.
Alternatively, you can opt for a slatted concrete design for your driveway, which will take care of the water management issues altogether.
What is the life expectancy of a concrete driveway?
Usually, the average lifespan of a well-built concrete driveway can be around 25 to 30 years. However, it depends on usage and maintenance as well. If you use your driveway very frequently or you run heavy vehicles on it, the driveway will degrade faster than normal. Likewise, the lack of periodic maintenance will degrade the concrete driveway more quickly.
The top finish or paint of concrete driveways has a slightly less lifespan of around 10 to 15 years. This is because the upper surface is exposed to harsh weather conditions, such as rain and sunlight. In addition to the regular usage, these factors take a toll on the top surface too.
Does a concrete driveway need rebars?
Rebar is a structural component that makes the concrete stronger and more resistant to damage. So ideally, it would be a good idea to use rebar for your concrete driveway. However, it is not absolutely necessary in all cases, especially if the ground below is firm.
The costs also need to be considered since using rebars on your concrete driveway can be considerably expensive. If your driveway won’t be having too much traffic, it will be more feasible to build your driveway without rebars.
Concrete Driveway Ideas Final Words
Like most other outdoor features, such as porches, patios, or pool decks, the driveway is an integral part of your home. And that is why we have discussed both the concrete floor paint ideasand the finishes you can use for your driveway.
Some of these ideas are simple enough, and you can do them on your own, provided you invest the necessary time behind the task. But if you find the DIY process too complicated, you can hire a professional mason or contractor who can get the job done in a jiffy.
With that said, we have arrived at the end of this informative guide about concrete driveway ideas. We hope you have been inspired enough after reading through it.
So, until next time, adios!
Spring is here, greenery is just around the corner, after the first, extraordinarily blossom, today we ought start to envision our decorating plan, we ought to envision how we are going to enjoy spring and summer outdoors, in fresh air, relaxing, soothing our nerves, loosing ourselves in the lush, green garden.
To emphasize spring`s colors, to highlight the immense possibilities and opportunities brought forward by color, texture and patterns in the following article we showcase 34 colorful bohemian garden designs, bohemian ideas defined by sensible, spectacular patterns wearing great color, exuding immense joy; cast a glance in the search of incredible and feel free to share with us your garden spring decorating ideas.
Bohemian Garden Designs
One colorful flowered canopy surrounded by flowers and greenery might be the ultimate photo boot or the supreme corner for outdoor relaxation, choose the right pillows and enjoy quality time outdoors.
Earth brings us closer to our roots, to enjoy its coolness and humidity in perfect harmony with the environment is something, an extraordinary experience. The right mattress, rugs, pillows and a good tea might be everything you need.
Boost color and boost greenery to create a vivid contrast between Mother Earth`s naturalness and our vivid sense of joy, extraordinary experience of living surrounded by nature and loved ones.
via thejungalow.com
Find balance in a simple setting, a few pillows, a canopy peace of mind can define happiness.
via gigsandgarnet.com
Build a wooden tee pee, this can be used as a meditation spot in your household or as the ultimate playground for your little ones. The green wall on the left, surrounding flowers and amazing sculpted wood mushroom stools greatly contribute to this setting too; little things add up to something extraordinary.
Color boosted on a wooden deck tailored with wooden pallets creating a lively joyful atmosphere.
via eyphoto.net
Textile color can be easily replaced with colorful flowers supported by greenery, here an old shabby chic bench supports beauty in the form of candles and flowers, it brings a great balance in color and ambiance that can speak of the bohemian style.
Source Unknown
Succulents, colorful diy tin cans and the extraordinary in an old window now re-purposed, how do you see this particular scenery?
The shade of an old tree can shape an unique space, here items with memory, items that speak of authenticity, experience and memories are animating a really graphic scenography.
via payload.cargocollective.com
An ambiance can be emphasized with ease by a fire pit, here the presence of color and the green background are enlighten by fire, exposed concrete is the only cold element in the composition that disrupts, wood ought to be present too to shape an extraordinary cozy and warm setting yet the overall design is peaceful, calm.
Ethereal is the right word. White shaping light to animate a simple sitting area embellished in greenery, at night emphasized by warm string lights, a beautiful place to seek calm, peace, refuge.
One might argue that painting a color over wooden textures would be a mistake in the realm of aesthetics yet it is what brings us joy that matters; it is what you cherish what you ought to pursue, shape your reality, live, love, learn, experience.
A romantic setting can incorporate color, comfort and a delicate, sensible ambiance, here surprised by colorful suspended lampshades and textiles that invite one to sit down and relax.
Wooden pallets will always have a place in bohemian and shabby chic settings, they`re natural, they have memory and they are imperfect which is basically the main attribute of coziness and warmth, imperfection ought to be something different, loved, cherished.
Have fun in your household with epic instructions towards landmarks in your garden, create a little bit of something in each space, carefully designated with the little ones, it will be an unforgettable childhood memory that they will surely love, surely remember.
It goes without saying that our curated bohemian garden designs are defined by color, greenery and naturalness, they describe an imperfect balance with which we often identify, it is therefore sufficient to embrace it to understand and absorb calm, peace and a deaf joy that we so desperately unknowingly pursue in our everyday life.
How do you see these ideas, how do you pursue calmness in your garden design? We would love to hear from you in the comment section below.
Tripod sprinklers are height-adjustable irrigation systems designed to deliver wide-area water coverage, making them ideal for lawns, gardens, orchards, and uneven terrain. These systems elevate the sprinkler head for enhanced reach and spray uniformity, minimizing manual effort and eliminating the need to move hose-fed units repeatedly. Built for stability and flexibility, tripod sprinklers are particularly effective for tall vegetation, open fields, and even pest deterrence. We tested 13 models for spray performance, material quality, ease of setup, and motion features—narrowing it down to the 7 best tripod sprinklers. This guide includes models with adjustable metal tripods, motion-activated technology, and multi-pattern nozzles to suit varied irrigation needs while delivering reliable, user-friendly operation across all lawn sizes.
Best Tripod Sprinklers
Whether you're tending to a vast lawn or maintaining a sprawling garden, a tripod sprinkler can help ensure that your plants receive the right amount of water. To assist you in finding the ideal tripod sprinkler for your needs, here's the list of the 5 best tripod sprinklers available in the market.
As we experienced first-hand, the Orbit 58308 Brass Impact Sprinkler is one of the top products in the market, and with valid reason. It's armed with quality functions, making it quite a hit amongst potential customers. It has received mostly positive reviews, and you're sure to get a fantastic performance under different conditions.
LARGE AREA WATERING MADE EASY - Our heavy-duty sprinkler on...
LONG-RANGE SPRINKLER PERFORMANCE - With its high-pressure...
Why Did We Like It?
First and foremost, it offers a maximum spray diameter of 90 feet, thereby quickly helping to cover most lawn areas. But more importantly, you can adjust the amount of coverage you need. You can set it to a full circle, which will deliver a coverage area of 6,360 square feet.
When we trialed this product, we managed to get a full 360-degree which was extremely satisfying, but you can also do partial spraying, depending on the task at hand. Moreover, you have the option of using customizable settings, thanks to the inclusion of the deflector shield and diffuser screw. These two components work together to alter the stream and the spray distance to deliver more versatility.
That’s not all; it has a metal tripod base that serves the dual purpose of being stable and durable. So, you can use it for a long time without encountering any performance issues. Besides, it has an anti-backlash arm, ensuring it can distribute water in a consistent pattern.
What Could've Been Better?
The plastic components aren't UV-protected, which could lead to problems in the long run. While it can endure most external elements, you may not want to expose it for long hours under the sun, which might cause the plastic to crack. Plus, the sprinkler head may get stuck, thereby affecting coverage.
Pros
90-feet spray diameter
360-degree coverage
Metal tripod base
Anti-backlash arm
Anti-clogging
Cons
Plastic isn’t UV-rated
May get stuck
Material: Brass | Sprinkler Type: Impact | Coverage Area: Up to 90 ft diameter | Spray Pattern: Full Circle, Partial Circle | Adjustable Angle: Yes | Flow Control: Yes
The Orbit 62120 Sprinkler has many similarities with some of the other options out there, but it has also made the necessary upgrades to top rival brands. It offers the perfect blend of durability and power, leading to a positive response from users, with most people having it on their wish list.
ULTIMATE YARD PROTECTION - Defend your yard with our...
SENSOR-ACTIVATED YARD SECURITY SPRINKLER - The heat and...
Why Did We Like It?
Firstly, it offers an adjustable coverage of 120 degrees, meaning you can set it to the maximum value or use it for partial coverage. Whatever your choice, you'll get excellent output, and you can utilize it in numerous ways, making it highly versatile. However, the significant addition is the inclusion of Intelligent Sensing technology.
It helps you to get much-needed reliability due to optimum water usage and battery conservation. So, it'll not only operate for a long time, delivering a seamless experience, but it can get the job done without wasting much water. In that regard, the 35-foot adjustable height comes in handy, allowing you to cater to different needs.
Furthermore, it can generate 7,500 activation cycles and is well supported by the 4 AA alkaline batteries. Therefore, you have the perfect combination of power and precision, which is rarely seen in other units. Lastly, it has a 30-minute water setting as well.
What Could've Been Better?
We determined through our tests that there are a couple of issues with the unit, one of which is that there's no remote. So, you'll have to keep an eye on the settings, and you don't have any other option than to change it manually. Besides, the sensors run for a maximum of 30 seconds before turning off, which might be an inconvenience.
Pros
Battery conservation
Optimum water usage
30-minute watering setting
7,500 activation cycles
4 AA alkaline batteries included
Cons
No remote
The sensor runs for 10-30 seconds at most
Material: Metal | Sprinkler Type: Motion Activated | Coverage Area: Up to 35 ft diameter | Spray Pattern: Full Circle, Partial Circle, Square | Adjustable Angle: Yes | Flow Control: No
The Melnor Pulsating Sprinkler has all the functions to deliver a power-packed performance. It has incredible versatility, which has shot it up the charts, while also turning quite a few heads in the market. With features like great coverage and an adjustable height, it has ticked most of the right boxes.
Study metal tripod extends to 48” high to water from above
Coverage up to 85' diameter to water a large sized area
Why Did We Like It?
Straight off the bat, it comes in metal construction, thereby adding to its durability. And if you're worried about rusting, you'll be pleased to know it's rust-resistant, meaning your unit can endure the demands of daily use. Moreover, the 48" adjustable height offers excellent coverage, and all parts of your backyard will receive consistent spraying.
It has 85" coverage at the maximum limit, and all you need is to adjust the height to manage the coverage diameter subsequently. So, it's incredibly useful and prevents excessive water loss. Plus, it features a quick-connect adapter, ensuring you don't have to spend much time getting the connections right.
It adds to the versatility, making it compatible with numerous components while enabling you to get better results. Furthermore, the pulsating head can adjust to any convenient spot you need to set it up.
What Could've Been Better?
As we experienced it first-hand, there's a chance the rotating head may get stuck, which won't please most buyers. It may lead to frequent interruptions while depriving you of the opportunity to get maximum coverage. Apart from that, the connections may not be the strongest and could come undone, thereby leading to leakage.
Pros
Durable
Pulsating head
Adjustable
Quick connect adapter
Easy operation
Cons
May get stuck
The issue with the connections
Material: Metal | Sprinkler Type: Pulsating | Coverage Area: Up to 85 ft diameter | Spray Pattern: Circular | Adjustable Angle: Yes | Flow Control: No
We are at the halfway point of our list, but there are several quality products we have yet to cover. Our next recommendation for you is the Eden Multi-Pattern Sprinkler, which has climbed its way up the ladder to be regarded as a highly trustworthy unit. So, no surprise then that it's a favorite among people.
Robust heavy duty metal tripod construction provides...
Why Did We Like It?
Right away, you'll notice the misting system, but there's no reason to worry as it doesn't take up much water. It's a part of the five spray patterns available with the unit to ensure you get maximum versatility. Depending upon the task at hand, you can change it up between flat, fan, mist, large, or multi-spray.
But whatever you choose, you're guaranteed to get the best results under the toughest of situations. Meanwhile, the toughness is derived from the sturdy construction, assuring you get great longevity and can enjoy functions like the turbo gear drive. Consequently, you can activate it to cover the maximum area quickly.
However, the significant aspect is the quiet operation despite having several heavy-duty features for handling various jobs. It's sure to please your neighbors while making the entire process more efficient. As with pretty much all products that we tested, you can adjust both the height and the distance depending on the area that needs watering.
What Could've Been Better?
The feet are made from plastic, and there's a chance you may not get the stability you desire. It makes it difficult to get a firm footing and leads to other problems, like an inability to control the pressure. As a result, it may tip over quite frequently, proving to be a deterrent for potential buyers.
Pros
Quiet
Turbo gear drive
5 spray patterns
Quick connect adapter
Versatile
Cons
Feet made from plastic
Pressure can’t be controlled
Material: Metal | Sprinkler Type: Multi Pattern | Coverage Area: Up to 30 ft diameter | Spray Pattern: Multiple Patterns | Adjustable Angle: Yes | Flow Control: Yes
We are nearing the end of our list, but we have to go through a couple of excellent products. Next up, we have picked the Aqua Joe Brass Impulse Sprinkler, which focuses primarily on user-friendliness. However, it has made the necessary upgrades to cement a place for itself in the market.
[360º IMPLUSLE SPRINKLER]: Water in partial or full circles...
Why Did We Like It?
Straight off the bat, it flaunts a sturdy metal construction, thereby ensuring it can outlast external elements to deliver consistent performances. All the components have an anti-rust coating, allowing you to get the desired result without encountering reliability issues. Plus, with the adjustable distance, you can cater to a specific area of coverage.
But in case you want a more comprehensive coverage span, you can opt for the 360-degree rotation, allowing all parts of the lawn to be watered. Likewise, with the multi-spray pattern, you can determine the amount of water you need to cater to any task. It makes it incredibly versatile, which is further supported by the multiple rotation feature.
In our time with the product, we didn't reach the maximum value due to physical limitations of our testing area, but you can cover 1390 square feet, which is one of the highest in terms of output. Meanwhile, the diffuser pin enables you to control the distance you get on various spray types.
What Could’ve Been Better?
Based on our observations, it has shorter spikes than the other models, which may impact the stability you’re likely to get. It’s more challenging for the shorter spikes to dig into the ground, and so your sprinkler may be a little wobbly on occasion. As a result, it vibrates a lot, leading you to think twice before purchasing it.
Pros
360-degree coverage
Diffuser pin
Multiple spray patterns
Varying rotation
1390 sq. ft coverage area
Cons
Unstable
Vibrates a lot
Material: Brass/Plastic | Sprinkler Type: Impulse | Coverage Area: Up to 1,390 sq ft | Spray Pattern: Full Circle, Partial Circle | Adjustable Angle: Yes | Flow Control: Yes
Selecting a tripod sprinkler involves more than just choosing the tallest or most powerful model on the shelf. A quality tripod sprinkler must balance coverage range, durability, spray control, and ease of use, all while integrating smoothly into your existing irrigation setup. Whether you're managing a large lawn, elevated beds, or uneven terrain, this guide will walk you through the key features to evaluate before making a purchase.
Durability and Build Quality
The best tripod sprinklers are constructed from rust-resistant materials like zinc, aluminum, or powder-coated steel, ensuring resilience against UV exposure, moisture, and frequent handling. Avoid units made with thin plastic components, as they tend to warp or crack under continuous water pressure and sun exposure. Look for reinforced hose connectors, metal threadings, and sturdy tripod legs with locking mechanisms that prevent tipping on soft or sloped surfaces. A durable sprinkler not only withstands environmental stress but also delivers long-term value without recurring replacements.
Height and Spray Adjustability
Tripod sprinklers are prized for their elevated reach, making height adjustment a key factor. Most models extend from 20 to 48 inches, which is ideal for watering shrubs, tall perennials, and sloped areas. Equally important is spray pattern customization. Choose a unit with adjustable arc control (typically 20° to 360°) and distance adjustment (20–90 feet) to fine-tune coverage based on your lawn’s shape and size. Impact heads with diffuser screws and collars provide superior control over spray radius and droplet size, helping to prevent overwatering in tight zones.
Water Pressure Compatibility and Power Output
Tripod sprinklers operate best within a 30–80 PSI pressure range. Models designed for low-pressure irrigation systems or well-fed setups often include pressure-boosting mechanisms or pressure regulators. A powerful sprinkler should be capable of delivering a high gallons-per-minute (GPM) rate without losing accuracy or misting at long distances. Keep in mind: raw power isn’t enough—precision flow control is essential for conserving water while maintaining uniform coverage.
Ease of Setup and Operation
User-friendliness is crucial. Look for models with tool-free assembly, quick-connect hose fittings, and clear setup instructions. The legs should extend smoothly and lock securely into place, and the head should rotate freely without jamming. Features like integrated hose filters, anti-leak connectors, and snap-lock hose fittings enhance usability and reduce maintenance. Some advanced models even include motion-activated shut-off, which doubles as a wildlife deterrent.
Hose Compatibility and Portability
Most tripod sprinklers are compatible with standard ⅝-inch or ¾-inch garden hoses, but always verify the connector thread type (typically GHT—Garden Hose Thread). If you’re using multiple sprinklers in a daisy-chain configuration, ensure your system supports the required flow rate and pressure. Additionally, consider the unit’s portability—models with foldable legs or telescoping shafts are easier to store and move around your yard as needed.
Tripod Sprinklers FAQ's
What are the benefits of using a tripod sprinkler?
Tripod sprinklers offer several benefits, including:
Wide coverage: Tripod sprinklers can cover larger areas compared to stationary sprinklers, making them ideal for watering lawns, gardens, or agricultural fields.
Adjustable height: The tripod stand allows you to adjust the height of the sprinkler, enabling you to target specific areas or adjust for different plant heights.
Stability: The tripod base provides stability and prevents the sprinkler from tipping over, even in windy conditions.
Versatility: Tripod sprinklers often come with adjustable spray patterns and flow settings, allowing you to customize the watering to meet your specific needs.
Can tripod sprinklers be used for different types of plants?
Yes, tripod sprinklers are versatile and can be used for various types of plants. You can adjust the height and spray pattern to accommodate different plant heights and watering requirements. Whether you have a lawn, flower beds, vegetable gardens, or even agricultural crops, a tripod sprinkler can be adapted to suit your specific watering needs.
Are tripod sprinklers easy to set up and use?
Yes, tripod sprinklers are generally easy to set up and use. Most models come with clear instructions for assembly and usage. Simply connect the sprinkler to a water source, adjust the height and spray pattern as needed, and turn on the water. Many tripod sprinklers also have features like automatic shut-off timers or rotation capabilities for added convenience.
Are tripod sprinklers durable and long-lasting?
The durability of tripod sprinklers can vary depending on the brand and model. It’s recommended to choose a sprinkler made from high-quality materials, such as sturdy metals or durable plastics, to ensure longevity. Reading customer reviews and selecting a reputable brand can help you find a reliable and long-lasting tripod sprinkler.
Conclusion
Tripod sprinklers offer a powerful combination of elevated coverage, portability, and zone flexibility—making them a smart addition to any home irrigation setup. Their adjustable height and wide spray radius allow them to handle large lawns, garden beds, orchards, or sloped terrain with ease. Built from durable materials like brass and metal alloy, the top models we've reviewed are designed to withstand repeated use and varied weather conditions, while providing consistent, targeted water delivery for healthy plant growth and water conservation.
To recap our top picks: the 58308 Brass Impact Sprinkler is the best all-around option, combining precision control with robust construction. For enhanced longevity and weather resistance, the Orbit 62120 Motion-Activated Sprinkler is a top-tier choice. And if maximum spray power is your priority, the Melnor Pulsating Sprinkler delivers high-pressure performance with minimal setup. With any of these selections, you're investing in both functionality and long-term reliability—so now all that’s left is to match the sprinkler to your landscape and let it handle the hard work for you.
Sprinkler valves are core components in any automated irrigation system, controlling the start, stop, and flow of water to specific zones with precision and efficiency. Sprinkler valves come in various configurations—inline, anti-siphon, globe, and manifold—each suited to specific system layouts, pressure conditions, and installation environments. Whether you’re upgrading an existing setup or building one from scratch, choosing the right valve affects everything from water conservation and timing accuracy to long-term durability. In this guide, we’ve tested and reviewed the 11 best sprinkler valves, assessing their construction, compatibility, pressure ratings, and installation ease to help you find the ideal fit for your lawn or garden system.
Listed below are the Best Sprinkler Valves:
Orbit Inline: The Orbit Inline Sprinkler Valve excels in universal compatibility, offering easy assembly even for novices. The major downside is the insufficient length when replacing certain brands.
HFS ® National Pipe Tapered: The HFS ® National Pipe Tapered is known for its automatic control of valves using an electromagnetic field. Its limitations include incomplete closing under low-pressure conditions.
Orbit 3-Valve Manifold: The Orbit 3-Valve Manifold ensures hassle-free installation due to its pre-assembled structure and high durability from UV-resistant material. The need for a timer for testing and expensive replacement parts constitutes its drawbacks.
Rain Bird CP100 In-Line: The Rain Bird CP100 In-Line Automatic Sprinkler Valve is optimal for heavy-duty residential and commercial use and integrates smoothly with standard timer systems. Its minor flaws include potential slight leaking at some joints and an unimpressive manual guide.
Irritrol 2400T: The Irritrol 2400T Globe NPT Threaded Connection stands out with its easy servicing using a threaded bonnet design. Its restriction to just two flow settings – off and on – is a limitation.
Without further ado, here's the list of the 11 best sprinkler valves that will enhance the effectiveness of your irrigation system and contribute to the health and beauty of your outdoor space.
1. Orbit Inline Sprinkler Valve - Best for Universal Compatibility
One of our first recommendations comes from a company specializing in sprinkler valves and their parts, Orbit. We were pleasantly surprised to come across a product that is compatible with most major brands. Moreover, the part can be used as a replacement for other automatic valve systems. Read on to find out more about it.
Those who are confused or even slightly overwhelmed by the seemingly complicated sprinkler valve system will appreciate this product. To begin with, the ¾" connection is extremely easy to assemble - it requires no glue or complex tools.
Secondly, the product takes out the guesswork for most first-time users, as it is compatible with all 24-volt systems from major brands. Generally, it is imperative to have specific knowledge about the irrigation system you have and the sprinkler valve best suited for it. Since this product is universally compatible, it removes most of the overwhelming influx of information.
Moreover, the included screws are compatible with multiple tools - another excellent feature that reduces guesswork and the need to buy more tools. These screws are compatible with hex, Philips, and standard screwdrivers.
One of its best features is the captured plunger, screws, and springs. This effectively prevents the loss of parts during regular cleaning and maintenance.
Overall, this sprinkler valve is an excellent product and is truly compatible with most major brands. That being said, we noticed that it could be slightly short when used to replace certain brands.
Since it is an extremely cost-effective and affordable solution, we recommend testing it on your irrigation system first. This way, you can gauge if you are comfortable with its length or not.
What We Like
Universally compatible system
Easy assembly and installation
High-quality plastic makes
Loss prevention captured tools feature
What We Don't Like
It can be slightly short when used as a replacement for certain brands
2. HFS ® National Pipe Tapered - Best for Electromagnetic Functionality
The next item on our list is a National Pipe Tapered inlet connection from HFS. This valve is composed entirely of an electromagnetic coil, a spring, an iron core, and a diaphragm with a valve body. Wondering how it works? Let us tell you all you need to know.
Initially, the workings of this inlet connection might seem confusing. Bear with us for a bit because we will try and simplify it for you.
First off, this sprinkler valve is electromagnetic. This means that all the materials used have a magnetic field of their own. This magnetic energy is used to open and shut the inlet and outlet valves.
When you operate the valve, the electromagnetic coil in the center generates a magnetic field. Thereon, the magnetic field effectively controls the iron core, which pulls the diaphragm against the resistance of the innerspring. This motion causes the valves to open and shut automatically.
On the inside, the enameled copper wires and thick, heavy-duty wall tubes are durable and long-lasting. Moreover, the solenoid valve body on the outside is made of brass, making it super durable and corrosion-resistant to oils, water, gas, and other elements.
Unfortunately, the valve does not close all the way and may sometimes get stuck in the open position. We spoke to the HFS customer service, who guided us through the process. It seems like the springs don't shut entirely under very low pressure, so you may have to do it manually if you need to shut it completely.
What We Like
Strong and durable outer brass body
Copper enameled, long-lasting wires
Reversible wires for ease of use
Easy assembly and installation
What We Don't Like
The valves do not shut entirely under very low-pressure conditions
3. Orbit 3-Valve Manifold - Best for Easy Installation
Next up, we want to introduce to you the Orbit 3-Valve Manifold. This is one of the best sprinkler valves in the market for several reasons, which we will talk about in just a bit. Although we will primarily talk about the 3-valve design here, there is an optimal 2-valve design as well.
Firstly, let us mention one of our favorite aspects of this 3-valve manifold - its ease of use. The product comes completely pre-assembled, removing the overwhelming process of reading overly descriptive instructions and buying tools for assembly. Moreover, it is easy to install within minutes, making it an ideal option for most.
Next, we want to talk about its functionality and multi-purpose design. This sprinkler valve is compatible with most PVS & pipe systems. Furthermore, it includes a 3/4-inch adapter and a 1-inch PVC pipe. The manufacturer provides everything you need in one package, so you don't need to purchase any additional tools or gear.
The sprinkler valve is made of high-quality, durable plastic material. It also comes in a striking light teal shade, which we think looks exceptionally aesthetic. Finally, one of the best features of the manifold is the easy ability to transform it into a 4 or 5-valve manifold - simply attach another 2-valve manifold, and you're done.
The ease of use and convenience made this one of our favorite products to test. However, we needed a timer to test the system, as manual operation wasn't possible.
Also, we checked out the prices of replacement parts and discovered that they are slightly expensive. As such, you should take good care of the system because replacement parts will cost you quite a bit.
4. Rain Bird CP100 In-Line Automatic Sprinkler Valve - Best for Heavy-Duty Use
Moving on to our next recommendation, we bring you the Rain Bird CP100 In-Line Automatic Sprinkler Valve. This versatile product can be used for both residential as well as commercial functions. Moreover, the sturdy, durable materials and design make it extremely robust for long-term use. Several other excellent features make this one of the most popular products on the market.
One of the first things we noticed as soon as we picked up this device was its robust built and rugged fittings. Clearly, it was designed to withstand extended, heavy use without wearing down. This also makes it ideal for commercial use as well as residential use.
Moving over to its functionality, this ¾" female threaded inlet and outlet is compatible with any inline irrigation valve. Moreover, the threaded design gives the inlet and outlets a stronger connection with irrigation pipes, making them extremely hard to break down - even with prolonged use.
We understand the anxiety caused by forgetting to sprinkle the yard at regular intervals, which is why we think you will appreciate the next feature. This device supports all standard timer systems.
We tested this by programming a standard timer bought from a local hardware store and connecting it to the device. Safe to say, it did the job seamlessly without intervention. Moreover, the heavy-duty solenoid efficiently controls water flow, eliminating most of our headaches.
All said and done; there are a few areas where Rain Bird could use some improvement. Firstly, we noticed that some of the joints leaked a slight amount of water. When we called their customer support, they directed us to the user's instruction manual, which was inadequate, to say the least.
What We Like
Exclusive fail-safe design to avoid flooding and save water
5. Irritrol 2400T Globe NPT Threaded Connection - Best for Threaded Bonnet Design
Now, for our next recommendation, we present the Irritrol 2400T Globe NPT Threaded Connection. As the name suggests, this device features a threaded bonnet design that enables easy servicing and repair - without removing the entire system. However, our favorite feature is the multiple configuration system that gives it added versatility.
Our next recommendation is an excellent 1" Electric Globe Valve from the Irritrol 2400 series. This device is extremely versatile, multi-functional, and has several applications, making it very popular amongst most users.
With a flow rate of .25 - 30 GPM and a 10 to 150 PSI pressure rating, this sprinkler valve is an ideal fit for most irrigation systems. We loved the threaded bonnet design that enables easy servicing without removing it from the system.
Moreover, the availability of multiple configurations makes it extremely convenient to use. Whether you need an NPT, male x male, slip, or male x barb, switching between them is seamless.
Moving on to its operation, the flush mode or the internal and external bleed enables manual operation for those who prefer it that way. Also, the stainless-steel metering system allowed us to operate the valve consistently without fail.
Last but not least, the double-beaded Santoprene diaphragm was super rugged and tough, ensuring a completely leak-free experience.
Although you can manually turn on or off the water to control flow, there is no option to adjust it. This means that you are stuck with only two options for flow control - on or off.
Granted, it isn't a deal-breaker for most users, but the addition of a flow adjustment might have made this device more usable.
What We Like
Leak-proof seal
Easy and consistent manual operation
Can be serviced without removing the entire system
Next up, we want to introduce the Hunter Sprinkler 1-inch Globe Valve. Although we have only reviewed the model with flow control, you can opt for ones without flow control if you wish. The barb inlet and outlet connections are made of rugged materials and are very durable and tough.
To begin with, we loved the option of both a flow-control and a non-flow-control version of the same model. While we opted for the former, we understand that several users might prefer the latter. The option to choose instantly increases our respect for the company, as they have considered all kinds of users' needs.
Next, we want to talk about its construction. Made of high-grade, durable, and robust materials, the sprinkler valve and diaphragm are solid and well-constructed. We noticed that they did not lose color, wear down, or corrode, even after heavy, prolonged use.
Moreover, the model comes in various sizes, giving added versatility and functionality to its users. Although it was designed for residential use, we think it might be well-suited for commercial use.
Finally, we recommend this device as a backup solution for faulty and damaged valves. It works efficiently to reduce flow in high-pressure zones. Furthermore, it can be used to cut off a zone completely in case a solenoid goes bad.
After extensive research, we found that this device comes only in a 1-1/2" and 2" globe model. It is not available in a 3-inch valve design, which is slightly disappointing. That being said, the available designs function excellently, and we have no complaints.
We are mid-way through our list of top recommendations, and it's time to introduce to you the Rain Bird Anti-Siphon Valve. One of the most significant attributes of this device is its encapsulated solenoid - this enables the device to work automatically without manual intervention. Moreover, the anti-siphon valve comes with excellent flow-control features.
To begin with, we love how versatile this device is. It comes with an energy-efficient encapsulated solenoid that enables the device to work automatically. However, users can opt out of this feature to make their own adjustments, if that is preferred. This can be done using a manual bleed screw.
The next thing we want to bring to your attention is its flawless installation. This device is designed to work best when installed at least 6 inches above the highest sprinkler head. This will effectively prevent backflow and eliminate the wastage of water.
Moreover, the Buna-N diaphragm offers superior durability and performance, even in harsh weather conditions. When it comes to pressure, the device is capable of high pressures of 150 PSI.
Also, it comes with a flow range rate of 0.2 to 22 GPM. Those looking for drip applications or a flow rate lower than 3 GPM will need to install a 200 mesh filter in front of the valve.
This device comes with several appreciable features. However, its relatively low flow rate can be a deal-breaker to some users.
We also went through several customer reviews extensively and found several users complaining about the thread quality used. That being said, we did not face any particular issues with this feature.
For some users, a heavy metal body is one of the top markers for the quality and durability of a product. In that case, the Orbit ¾-Inch Brass Anti-Siphon Control Valve will be an ideal option. Its heavy-duty construction is ideal for outdoor use, especially in harsh weather conditions.
First things first, we loved the sturdy, durable construction of its all-brass body. This device has been designed to withstand harsh climates and cold water, making it ideal for users living in colder climates. Moreover, its non-corrosive body makes it suitable for heavy-duty outdoor use.
One of the most significant aspects of its design is its ability to prevent contaminants from entering the water supply. This ensures that your plants, flowers, and grass enjoy safe water that is free of bacteria and contaminants, enabling them to thrive and be healthy.
However, keep in mind that its robust construction makes it weather-resistant and long-lasting, eliminating the need for regular repair and servicing.
Moving on, it handles high-pressure water up to 150 PSI. We also love that it comes with flow control adjustments, giving us more flexibility over its use.
Our only gripe with this device is the absence of a warranty. Although we did not face any significant issues with the parts that would call for servicing, it doesn't go to say that other users may not have any issues.
Also, this valve can be used only with cold water and not hot or room-temperature water.
What We Like
Easy flow control and adjustment
High-pressure capabilities up to 150 PSI
Heavy-duty brass construction
Prevents contaminants from entering the irrigation system
We are almost at the end of our list, but first, let us introduce you to the Toro ¾-Inch Anti-Siphon Jar-Top Valve. As the name suggests, this device has an anti-siphon feature along with a top jar valve and an excellent aspheric backflow preventer. Moreover, its flow control enables precise water control after installation.
Those looking for more control over their sprinkler valve will appreciate the excellent features of this device. Firstly, this anti-siphon jar-top valve from Toro can be used as a replacement for other valve parts or installed as a new addition to your garden. Moreover, it is designed to integrate seamlessly with most irrigation systems.
Secondly, we loved the advanced flow control mechanism that allows precise control over water flow. This feature is extremely helpful for those looking for added control over the quantity of water they want, rather than banking on just automatic shut-off and open features.
Furthermore, the manual bleed and encapsulated solenoid give you complete freedom and control over the device. In our opinion, this is one of the most important features of a sprinkler valve, because every user has different needs and requirements.
Finally, the aspheric backflow prevention feature is excellent - it not only reduces water wastage but also gives added control over the overflow.
Although the jar-top valve design is exceptionally convenient to adjust and replace, it comes with certain drawbacks. The replacement may be easy, but it's not a hassle-free job. Moreover, it can get slightly messy. Some users might prefer to spend a little extra for a design with screws rather than the jar-top design.
Our next recommendation is the Hunter 1-Inch Anti-Siphon Female NPT Valve, ideal for heavy residential use. This model features heavy-duty PVC construction with a glass-reinforced bonnet for added protection. Furthermore, its rugged diaphragm and PGV-ASV also give you added control and a leak-proof design. Read on to find out more about it.
One of the best features of this anti-siphon NPT valve is its versatility and availability of different user options. Although it is built for heavy residential use, it might work well for residential use as well.
Coming to its functionality, this NPT valve includes flow control options, giving additional flow control to users. However, you can also opt for the non-flow control feature if you prefer. This will give you a more simplistic shut-on-and-off mechanism, which many users may prefer.
Moving on, the rugged diaphragm and solid PVC construction guarantee a leak-proof experience. It also features a glass-reinforced bonnet for additional control and systematic use of the product.
Lastly, we loved how the product comes in a variety of sizes for every individual's needs. It is perfect for controlling flow in high-pressure zones. However, it also allows you to cut off any zone entirely in case a solenoid goes bad.
Unfortunately, the valve is not compatible with DC voltage, which some users might have. However, it is designed to work perfectly with low voltage 24 VAC, found in most household irrigation timers.
Moreover, we noticed that it does not come in a ¾" design.
What We Like
It comes in a variety of sizes
Features manual operation as well as automatic
It is compatible with most 1″ & 2″ irrigation systems
11. DIG Battery Powered Digital Controller & Anti-Siphon Valve
We are almost at the end of our comprehensive guide. But before we move on to the next part, we want to talk about the DIG Battery Powered Digital Controller & Anti-Siphon Valve. As you may have rightly guessed, this device is battery-controlled and requires two AA alkaline batteries.
The biggest takeaway from this device is its ease of use and convenience. Two AA alkaline batteries are required to power it, which is easy to find at any local hardware store. It also features a safe period of 60 seconds that allows you to replace the batteries without losing your programming.
Moving on, we loved the brilliant LCD that features an excellent AM/PM clock. Furthermore, icon-based programming makes it extremely convenient for users to program and use their devices as per their convenience. This is a beneficial feature for first-time users.
The device features seven buttons that are integrated with a high-resolution screen. Its user-friendly features also allow you to select between four different start timers and a grand selection of watering frequencies. Irrigation is made easy with this device as it eliminates most of the guesswork for new users.
If we had to nitpick, we would talk about the spacing between the risers being slightly more compact than standard valves. This can make the installation slightly challenging for some users who are not well acquainted with the process. Our recommendation would be to use several 45-degree PVC couplings for the best results.
What We Like
The option of weekly or cyclic programming
Easy, icon-based navigation system
External manual bleed
Smooth operation
What We Don't Like
The space between risers is slightly more compact than traditional valves
Sprinkler valves are essential for managing water flow in irrigation systems, and the top-rated options offer excellent operational mechanisms, durability, and efficiency. A comparison table outlines key attributes, such as product type, flow control (manual or automatic), valve size (in inches), solenoid type (standard or heavy-duty), and unique features, for the best sprinkler valves on the market.
Now that you have all the information on some of the best sprinkler valves in the market, it is time to pick the best one for your needs. Keep in mind that your needs may vary from those of another user, even if they have the same irrigation system and garden.
We recommend considering certain important factors before choosing the right one for your garden. Here are a few vital points to keep in mind.
The Type Of Sprinkler Valve
As you may have noticed from our reviews, several types of sprinkler valves are available in the market. Each type has a distinctive use, appeal, and application. Depending on your personal needs and preferences, you should research or talk to a professional who will help you pick the best one.
The options include anti-siphon valves, which we have heavily reviewed and recommended because of their ease of use. However, other types include inline valves, which are installed underground and won't prevent backflow, unlike anti-siphon ones.
You can also explore the automatic electric valves, which have easy controls and may follow on-and-off schedules. Gate valves are another option that enables high-pressure water to reach your sprinklers for various needs.
Connection
You also need to consider the type of connection best suited for your irrigation system. If you have a male-threaded connection, the most compatible option is a female-threaded one or vice versa.
Other options include Barb, union, and NPT connectors.
What types of sprinkler valves are available? The types of sprinkler valves available include globe valves, angle valves, and anti-siphon valves. Globe valves are installed underground and are ideal for residential or commercial systems requiring valve boxes. Anti-siphon valves combine valve and backflow prevention in one unit, making them mandatory in many above-ground installations. Angle valves, less common, redirect water flow at a 90-degree angle and are used in compact system layouts.
How do I choose the right sprinkler valve for my system? To choose the right sprinkler valve for your system, match the valve type to your system configuration—inline for underground, anti-siphon for above-ground—and ensure compatibility with your pipe diameter, flow rate (GPM), and water pressure (PSI). Also verify controller compatibility, especially for automated zones, and consider materials like brass for durability or PVC for affordability.
Can I install sprinkler valves myself? Yes, you can install sprinkler valves yourself if you have basic plumbing experience and access to the correct fittings. Most valves come with threaded or slip connections compatible with PVC or poly systems, and installation requires adherence to manufacturer specs and local irrigation codes. Use Teflon tape for threaded connections, ensure watertight seals, and test all zones post-installation.
How often should sprinkler valves be replaced? Sprinkler valves should be replaced every 8 to 12 years, depending on water quality, usage frequency, and environmental exposure. Signs that a valve needs replacement include inconsistent zone activation, solenoid failure, visible leaks, or failure to close properly. Preventative maintenance can extend valve life, but aging internal diaphragms and seals eventually degrade.
How can I troubleshoot common sprinkler valve problems? To troubleshoot common sprinkler valve problems, start by checking the diaphragm, solenoid, and electrical leads. Valve not opening may indicate a faulty solenoid or controller, while continuous leaking often results from a damaged diaphragm or debris in the valve body. Use a multimeter to test continuity and flush the system to remove clogs or mineral buildup.
Can I automate my sprinkler valves? Yes, you can automate sprinkler valves by connecting them to a zone-based irrigation controller or a smart controller with Wi-Fi or Bluetooth capabilities. These systems allow you to program watering schedules, set seasonal adjustments, and remotely control watering cycles via a mobile app, increasing precision and water efficiency.
Conclusion
Sprinkler valves are the command center of any irrigation system, responsible for regulating zone-specific water flow, optimizing pressure, and enabling scheduled automation. Selecting the correct valve type—whether inline, anti-siphon, globe, or manifold—ensures your system functions efficiently and safely. After thoroughly testing 11 top-rated models, we’ve identified the most reliable solutions for both residential and commercial needs, with options tailored to universal compatibility, heavy-duty capacity, electromagnetic actuation, and tool-free maintenance.
Whether you choose the Orbit Inline Sprinkler Valvefor ease of setup, Rain Bird CP100 for rugged performance, or Irritrol 2400T for threaded bonnet convenience, your system’s efficiency and longevity will improve dramatically with the right valve in place. Match your selection to your connection type, water source pressure, and control system—then enjoy more consistent coverage, reduced water waste, and long-term reliability.
While there are many gardening equipments, it's tough to find an affordable option that possesses the optimal features.
In that regard, soaker hoses are all the rage right now and offer the perfect solution to keep your garden in prime condition. You can use it for several tasks, and due to the adjustable length, it delivers incredible user-friendliness.
These simple tools are highly efficient and can reduce your water bills without compromising on an adequate supply. But the question is, how do you choose from the many options that are available for purchase? We've narrowed down our selection of the top 8 recommendations to help you, which we believe, can make a difference to your gardening needs.
Moreover, we've added a buyer's guide to provide you with an idea of the essential aspects, based on which we've formulated our list.
So, without further ado, let's begin with the reviews.
From durability and flexibility to water flow and length, these hoses have been carefully selected based on their performance and user satisfaction. So, if you're ready to take your garden irrigation to the next level, here's the list of the 8 best soaker hoses.
One of our top recommendations is the Melnor Soaker Hose, as it packs a wide array of nifty features to simplify your gardening chores. Most users have expressed their admiration for its flexibility, which is well supported by secure connections. But that's not all; read on to learn all the deets about it.
We start with the indispensable attribute of a soaker hose, which is its flexibility. It can generate a steady stream of water while allowing you to access tight spots with ease. Irrespective of the twisting and turning, you'll be pleased to note that it manages to generate the desired output.
It speaks positively about the versatility of the model and ensures that you can complete numerous tasks without any hassle. Furthermore, you can place it on the ground or on a layer of soil and mulch, where the porous nature of the hose comes into effect. Hence, it's ideal for raised flower beds and prevents water wastage.
Moreover, thanks to the easy connection, you've got the option of using more than one hose, which permits you to complete work quickly. The components also feature a rust-resistant construction, which delivers much-needed reliability along with a long lifespan.
What Could've Been Better?
Based on your preference, you may enjoy working with a short hose. While more length serves as an advantage and allows you to reach the farthest corners, it may be challenging to maneuver. You may be worried about damaging your plants, but it isn't a significant issue and you’ll certainly get better with practice.
If our previous recommendation appealed to you, wait till you check out the series of exciting features in this one. The Yardworks Hose Soaker has made all the right noise so far and with valid reason. It has several top-notch features, which is the reason for the positive response from users.
Straight off the bat, it's highly consistent, thanks to the comprehensive coverage. You'll notice that it effectively soaks the soil from above and below to provide your plants with the best conditions for growth. Moreover, it's an eco-friendly unit that has been made from 65% recycled rubber.
Furthermore, you're guaranteed to get the desired sturdiness while the rubber construction ensures that there's no let-up in flexibility. You can twist and stretch it to navigate through the garden and reach plants growing at the back. As a result, most users have expressed their admiration for what it offers.
Thanks to the suitable dimensions, you can comfortably move it around, which comes in handy to form secure connections. Similarly, the plastic couplings at either end enable you to link it with multiple soakers. So, it comes in handy when you need water for a large area, thereby saving valuable time.
What Could've Been Better?
One of the downsides to using it is that users have expressed concerns regarding the stretchable nature of the model. In some cases, it may not stretch properly, which is why the designers have added plastic couplings. But in case you don't have another soaker to link, it may be frustrating to get the necessary output.
Pros
Soaks above and below the ground
Expandable length
Suitable dimensions
Versatile
Maneuverable
Cons
The extent of stretch may vary
Length: 50 ft | Material: Plastic, Rubber | Hose Diameter: 5/8 inch | Pressure Rating: 10-25 PSI | UV Protection: No
If you're a DIY enthusiast, then you'll love all that the Gilmour Hose Soaker offers. The designers have made the necessary upgrades with features like the innovative fabric, thereby cementing a place for itself. You're bound to get your money's worth, and that's why it's on most wish lists.
Lightweight water hose is made of 100% recycled vinyl, clog...
Garden water hose can be installed above or below ground to...
Why Did We Like It?
First and foremost, it'll solve your watering problem due to the latest designs that allow the water to percolate deep underground. You can water your plants from above, but from down below as well, the soil is replenished. It ensures your plants can flourish in most situations, and your garden will thrive throughout the year.
The significant upgrade is that you can create your watering system based on the type of conditions you want to provide. All you need is to bury the hose beneath the mulch for a steady supply of water. Moreover, you can link to a timer that will shut off automatically to prevent wastage.
We especially liked the environment-friendly construction since it's made from 100% recycled vinyl. In that regard, the fabric is clog-resistant to provide swift movement and permits you to get an efficient soaking. Finally, it's incredibly maneuverable for maximum coverage.
What Could've Been Better?
Although there's no let-up in performance, you'll get the best results if you lay it out in a flat line. We've received reports stating that a zigzag pattern or having too many coils may lead to an irregular flow rate, which is an inconvenience. Likewise, it would be helpful if you tried avoiding kinks.
Pros
Environment-friendly
Deep watering
Consistent performance
Easy to use
Lightweight
Cons
Too many coils may impact the flow rate
Kinks are an issue
div class="measures-box">Length: 75 ft | Material: Vinyl | Hose Diameter: 1/2 inch | Pressure Rating: 10-60 PSI | UV Protection: No
The Water Right Garden Hose may seem like a simple unit but don't be fooled. It delivers a power-packed performance, which is turning quite a few heads among prospective buyers. We loved the attention to detail and when it comes to a reliable output, rest assured that it outperforms rival brands.
EFFORTLESS, EFFICIENT WATERING: The 700 Series 1/2" Inner...
CLEAN AND NON-MARRING: Unlike traditional rubber or...
Why Did We Like It?
If your primary concern is durability, you'll be immediately attracted to the polyurethane construction with lead-free fittings. As a result, you don't have to worry about impurities being passed on from the hose, which might damage your plants. It's utterly devoid of BPA and phthalates, making the water entirely safe for drinking.
Further adding to the robustness is the presence of solid-chrome plated components that have brass fittings. They won't get tarnished easily and can handle work demands, ensuring you get to use them for a long time. Moreover, we were pleased to see Water Right address the usual issues of kinks by including strain reliefs on the hose ends.
Once you start working, you'll realize the excellent flexibility, which makes it suitable for all weather conditions. You can even use it in freezing temperatures without experiencing performance issues, which speaks volumes about the careful selection of quality components.
What Could've Been Better?
You may encounter slight issues with coverage, but it's not something for which you would lose sleep. Nevertheless, we feel it's important to mention that the small holes make the water sprinkle out rather than escape the nozzle in a powerful burst. Therefore, you may face certain inconsistencies that could've been avoided.
Pros
Lead-free fittings
BPA free
Safe for drinking purposes
Flexible
Long lifespan
Cons
May not provide the best coverage
Water sprinkles out
Length: 50 ft | Material: Polyurethane | Hose Diameter: 1/2 inch | Pressure Rating: 10-25 PSI | UV Protection: Yes
If you're looking for a durable unit, there's none better than the One-Stop Gardens Soaker Hose. It has all the necessary functions to make your task more comfortable, and you can complete your work quickly. No surprise then, that it has generated substantial buzz to rank among the top products.
Lies flat on ground and "weeps" water for maximum...
Soaks roots directly, won't damage plants.
Why Did We Like It?
The first thing that strikes you about it is the stable output it generates, and all you need is to lay it on the ground. Allow the machine to supply water to all parts of the garden, and when you're satisfied, disconnect and store it in the yard. The main advantage of using it is it ensures the roots receive direct water.
You can create optimum flowering conditions all year round without damaging your plants, thanks to the excellent utilization of resources. In that regard, you've got the option of using miser discs to regulate the flow and restrict water up to 75%. It ensures you don't waste valuable resources, proves eco-friendly, and keeps the water bill low.
You can swiftly attach the connections, thanks to the ¾-inch thread hooks, which work with most standard equipment. Furthermore, we also loved how the designers have focused on durability by including woven nylon sleeves to manage daily use.
What Could've Been Better?
For all that's good, you need to be wary of certain things like its wide stitching. We received reports stating it tends to leak from time to time between the stitches, but that doesn't affect performance. We assure you it isn't a significant problem, but you can choose from the numerous available options if you're feeling uneasy.
We're at the halfway point of our list, but there are many quality models we're yet to review. Our next recommendation for you is the GREEN MOUNT Soaker Hose, which quickens up your work and produces an efficient output. Moreover, with user-friendly attributes like easy storage, it promises to be a valuable acquisition.
Patented & More Efficient Watering - The patented soaker...
Heavy-Duty Design & Durable - Made of Heavy-Duty PVC...
Why Did We Like It?
Upfront, we would like to mention the two most vital aspects of the unit – its swiftness and efficiency. It supplies water at the rate of two gallons every two minutes, which allows you to complete work quickly. Moreover, it's well supported by the standard pressure of 60 PSI, making it stand out in terms of results.
You'll be pleased to know that it's made of PVC material, which serves a dual purpose – it allows even water distribution while being sturdy. Meanwhile, it features a flat design, permitting you to store it easily since it occupies no more than 0.15 feet when folded.
Therefore, it's convenient to set up for all age groups, which speaks volumes about the incredible maneuverability. You can use it all year round, even in extreme conditions due to the high tensile strength. Also, it doesn't compromise flexibility, and you can place it above or below layers of leaves and soil.
What Could've Been Better?
It may appear stiff to certain people, which may prove to be an inconvenience. It would be best if you were careful to monitor the pressure so it doesn't blow out. Consequently, you can use an inline regulator or restrictor washer to manage the output and extend longevity.
Pros
PVC material
Releases water at two gallons per two minutes
Compact
High tensile strength
User-friendly
Cons
Needs additional components for safety
May appear stiff
Length: 50 ft | Material: Pvc,Rubber | Hose Diameter: 1/2 inch | Pressure Rating: 10-50 PSI | UV Protection: Yes
The Teknor Apex 1115920 Soaker Hose has similarities with other models since it has incorporated the best aspects. But the manufacturers have also made relevant improvements that have endeared it to users. The innovative design is sure to please you and ensures you get a consistent performance.
Firstly, it doesn't require much work, and you can lay it flat on the ground, thereby allowing the weeping pores to soak the earth. Not only will the plants receive adequate water supply from above, but it will create ideal conditions under the surface as well. The roots will thrive in such situations leading to optimum growth.
Moreover, you can save up to 30% on your water bill, making it an eco-friendly unit. You'll be pleased to note that it comes in a sturdy vinyl construction, which produces a consistent stream of water while guaranteeing much-needed longevity. Consequently, you can use it in various weather conditions without it breaking down.
It forms tight connections for a seamless experience made possible by the E-Z Tite brass couplings. Plus, it consists of ABS plastic and provides a maximum length of 400 feet, meaning you can cover all corners of the garden.
What Could've Been Better?
It's troubled by some of the usual problems that we've seen with other models. You need to be mindful of kinks that may impede water flow, and a quick scan is all you need to solve the issue. Besides, regular use has often led to it developing holes after a couple of years, which isn't ideal.
Pros
Can cover 400 feet
Vinyl construction
Super flexible
Easy to handle
Helps conserve water
Cons
Develops holes
Kinks may interrupt the water supply
Length: 25 ft | Material: Vinyl | Hose Diameter: 5/8 inch | Pressure Rating: 10-25 PSI | UV Protection: Yes
The Cuckoo Soaker Hose has most bases covered, which is why it has built quite a reputation for itself. Irrespective of whether you're a DIY professional or an amateur, you'll enjoy a seamless experience due to the numerous quality functions. It keeps the garden fresh while saving more water than other models.
No products found.
Why Did We Like It?
For starters, it's a heavy-duty model, thanks to the use of recycled rubber, which ensures it can last a long time. It also means that it's environment-friendly, and at the forefront is its excellent water-saving ability. It saves 70% more water as compared to other systems without affecting the supply in any way.
Furthermore, the fantastic user-friendliness is on full display when it comes to the adjustable length. The designers have included quick-attach reinforced fittings to help you form tight connections with most standard equipment, and you can link it to additional soakers. As a result, it delivers water to the tightest spots without any hassle.
You get to use it for numerous tasks, which speaks highly about versatility. Your flowers will also have the perfect conditions throughout the year while the nozzle filters out sand, debris, and dirt. So, it keeps the water clean and your garden fresh.
What Could've Been Better?
A common complaint among users is that it's not very flexible, making it difficult for you to manage it. It would help if you were careful about too many twists and turns to the body, leading to frequent interruptions in the water supply. Therefore, many users may not find it to their liking.
Pros
Saves 70% of water
ABS connectors
Releases two gallons of water every two minutes
Filters out debris
Polyethylene material
Cons
Not very flexible
Length: 25 ft | Material: Rubber | Hose Diameter: 5/8 inch | Pressure Rating: 10-25 PSI | UV Protection: Yes
Before you venture into the market, we would like to give you a couple of pointers to help you pick the right unit. Soaker hoses have many components that could make it difficult for you to distinguish between the top products and the merely good ones.
We are here to discuss the essential aspects of soaker hoses based on which we have formulated our list. A piece of knowledge about these functions will place you in good stead and help you make an informed choice.
Durability
Your tool must be durable to handle the wear and tear of daily use. As a soaker hose, it will have to deal with all types of tasks that mostly revolve around water. It shouldn't be any surprise that only quality materials must be used to ensure it doesn't break down.
Buying any tool is an investment, and so you can't afford to spend time or money ever so often on a new one. You must enjoy both the product and the components that come with it for a long time.
In that regard, the manufacturers cannot afford to make any compromises. So, just having a steel or metal construction isn't enough. It must be rust-resistant as well to deliver faultless output.
Ease of Use
Soaker hoses come in various sizes to handle an array of tasks, but that shouldn't mean that the designers have to compromise with user-friendliness. The primary objective of any unit is to reduce your workload, and therefore you must be able to control it effectively to get the best results.
All the components and functions must be understandable, almost at a glance. You should know what each part does rather than pondering over how to get it right. Plus, the installation process and the disassembly must be written clearly to ensure that it's uncomplicated.
There is no point in having a plethora of functions if the users find it challenging to use. Rather any good model must keep the basics right and then add the necessary features to deliver a better performance.
Power
Finally, you must have sufficient energy to make sure that you get through your work quickly. Managing your garden can get tedious at times, and you can't afford to go about it at a leisurely pace.
You have a lot of work to do, and your unit must be up to speed to ensure you get fantastic performance. More power doesn't always guarantee a better output, so you must have the ability to control the force you need on various tasks. As a result, your tool will be versatile, enabling you to handle small-scale and large-scale projects.
Soaker Hose FAQ's
How do I use a soaker hose?
To use a soaker hose, lay it along the desired area of your garden or flower bed. Secure it in place with stakes or garden staples to prevent movement. Connect one end of the hose to a water source and turn on the water at a low flow rate. Allow the hose to run for a sufficient amount of time to provide adequate watering to the plants.
Can I bury a soaker hose underground?
Yes, you can bury a soaker hose underground to hide it from view and provide even water distribution. However, it is important to ensure that the hose is buried at an appropriate depth and without any kinks or bends that could restrict water flow.
How much water pressure is needed for a soaker hose?
Soaker hoses are designed to work best with low water pressure, typically around 10-25 PSI (pounds per square inch). High water pressure can cause the hose to burst or result in uneven water distribution along its length.
Can I connect multiple soaker hoses together?
Yes, you can connect multiple soaker hoses together to cover a larger area. Use hose connectors or splitters to join the hoses while ensuring a secure and leak-free connection.
How long should I run my soaker hose?
The duration of watering with a soaker hose depends on various factors, including the water needs of your plants, soil type, and weather conditions. As a general guideline, running the soaker hose for 30 minutes to an hour is often sufficient, but it’s best to monitor the soil moisture and adjust accordingly.
We've reached the end of our guide, and hopefully, you've got a better idea regarding soaker hoses.
With the right unit, you can quickly complete your work without worrying about accessing even the most challenging spots. Your plants will receive the right amount of water, ensuring your garden will thrive all year round, irrespective of the weather.
Before signing off, we've decided to assist you a bit more by narrowing down the top products in various categories. For the best overall performance, you can opt for the Melnor Soaker Hose, while the Yardworks Hose Soakerhas unmatched versatility.
Apart from that, the Gilmour Hose Soakeroffers the perfect blend of user-friendliness and durability to solve most of your problems. That's all from us, and depending on the size of your garden, you can pick the ideal unit.
Take care and enjoy the smell of freshly watered plants. Bye!
Polymeric sand is an essential component for locking pavers in place, preventing weed growth, resisting insect invasion, and minimizing joint erosion in patios, walkways, and driveways. Engineered with fine sand and proprietary additives, it hardens when moistened—forming a durable, flexible bond between pavers. For anyone working with interlocking stones, from professional landscapers to DIY homeowners, choosing the right polymeric sand can significantly affect the longevity and aesthetic of the project. While the Dominator Polymeric Sand is highly praised for its durability and wide coverage, products like the Alliance Gator Maxx Intelligent Polymeric Sand excel in erosion control and insect resistance. In this guide, we’ve reviewed the 5 best polymeric sands available today, evaluating each based on joint stabilization, weather resistance, ease of application, and long-term performance.
Listed below are the best polymeric sands:
DOMINATOR Polymeric Sand: DOMINATOR polymeric sand is the top choice for professional use due to its ceramic flex technology and strength. Its 48-hour curing time is ideal for projects requiring a longer-setting time, unlike Rhino polymeric sand, which sets within an hour. Incorrect watering could harm its integrity.
Alliance Gator Maxx Intelligent Polymeric Sand: A high-quality polymeric sand that's prized for preventing erosion and insect damage, setting within 15 minutes post-application, quicker than DOMINATOR. Its robust ASTM C144 gradation suits tight joints. The high cost may be a deterrent.
BuddingCo Polymeric Sand: The BuddingCo polymeric sand is the best choice for stabilizing stone paver joints due to its special blend of sand and polymer binders. Additional purchases may be required for larger tasks as it can only cover up to 40 sq ft compared to the larger 85 sq ft of Alliance Gator Maxx.
Rhino Power Bond Plus Polymeric Sand: The Rhino polymeric sand is known for stone joint sealing and becomes rain-safe within an hour, more quickly than DOMINATOR's 48-hour cure time. It can't be applied where temperatures fall below 32°F.
ConSANDtrate Polymeric Sand Concentrate: ConSANDtrate polymeric sand stands out with its weather resistance and customizability. Unlike BuddingCo, which is only available in one size, ConSANDtrate can be mixed to suit various needs. Improper blending can lead to chunkiness.
1. DOMINATOR Polymeric Sand - Best for Professional Use
Sold in a 40-pound packet, the DOMINATOR Polymeric Sand sits atop my list because of its strength and flexibility. Powered with ceramic flex technology, a technology found only in the most advanced polymeric sands, it’s a blend of polymers of fine sand.
What I particularly like is that it is formulated without cement, allowing easy application. All you need to do is spread a generous amount of the jointing sand on the surface and sweep it to fill the joints properly.
Again, you will have to use a broom or a leaf blower to sweep off the excess sand from the surface and water the particles with a spray nozzle. Remember that both under-watering and over-watering can inhibit the integrity of the sand, so hiring professionals would be the best bet if you’re not confident in your DIY skills.
As the sand particles are small, this joint sand is versatile and works well for sealing both tight joints and wider joints. Besides easy application, the solid flex technology allows this paver sand to flex without affecting its durability. That means it will soften but stay in place firmly when exposed to water.
As for curing, this polymeric sand takes about 48 hours to cure fully, provided the temperature is above 50°F. Coming in an easy-pour bag, it has a long shelf life - you can store it in a tight container and use it later.
Also, it’s available in various colors and sizes, so make your pick carefully.
What We Like
Easy pour handle
Multiple colors and sizes
Cures within 48 hours
Ideal for pool decks, concrete pavers, & other outdoor surfaces
What We Don't Like
Using too much or too less water can ruin its integrity
Weight: 40 lbs | Color: Titanium Gray | Coverage: 85 sq ft | Working Temperature: 50°F or Above
2. Alliance Gator Maxx Intelligent Polymeric Sand - Best for Preventing Erosion & Damage Caused by Insect Infestation
Available in slate gray and beige colors, the Alliance Gator Maxx Intelligent Polymeric Sand is firm yet flexible, so you can rest assured that it’s highly durable. Like most other poly sands, it features a unique blend of calibrated sand and polymer binders, effective in sealing joints as wide as 4 inches.
When it comes to application, it is quite similar to regular sand, except that you’ll need water to set it between the joints. Irrespective of whether you’re a weekend warrior or a novice DIYer, you won’t face trouble using this polymeric sand.
What’s more, this polymeric sandmeets the ASTM C144 gradation, meaning it’s suitable for tight joints. This sand is also OSHA crystalline silica compliant, so it prevents the growth of weeds and the damage caused by insect infestation.
Additionally, it inhibits erosion caused by freeze or thaw cycles, rain, and wind, which is another feature I like about this polymeric sand.
This poly sand (haze-free) is also powered with rapid set technology, which is why it becomes rain set within 15 minutes of application. You can use this polymer sand all year round– be it summer, winter, or monsoon.
Another feature that appealed to me about this polymeric sand is that it is a dust-free and blower-free formula. That means you can skip your dust mask when applying it to seal the joints.
The Gator Maxx polymeric sand is suitable for a variety of uses, including false paver joints, overlay or non-overlay, and residential and commercial applications. That said, this polymeric sand is slightly pricey, so be prepared to shell out a few bucks more.
What We Like
Haze-free, dust-free, & blower-free formula
Sets within 15 minutes after applying water
Prevents erosion & damage due to burrowing insects
Ideal for natural stone joints, concrete pavers, & wet-cast products
What We Don't Like
Slightly pricey
Weight: 50 lbs | Color: Beige | Coverage: 85 sq ft | Working Temperature: 32°F or Above
3. BuddingCo Polymeric Sand - Best Joint Stabilizing Sand for Stone Pavers
Featuring a unique blend of calibrated sand and polymer binders, the BuddingCo Polymeric Sand is similar to regular paver joint sand in terms of application.
Spread it over a dry surface, sweep it, and spray water to set the sand firmly between the joint width and allow it to dry. Once this sand sets, it will create a durable jointing material while remaining flexible.
What makes the BuddingCo Polymeric Sand one of the best polymeric sands is its versatility, as it’s usable on a variety of surfaces. Besides paver projects, you can use it on the pavement (architecture), parking space, driveway, walkway, patio, and pool deck of your property.
Available in an 18 lbs. bucket, this polymeric sand covers up to 30 to 40 square feet, which makes it a viable option for a single paver project. That means you will have to order more buckets for larger or multiple projects.
That’s not all; you can use this sand on false joint pavers, unlike other polymeric sands. And aside from the outdoors, this sand even seals gaps or cracks indoors.
Moreover, this polymeric sand sets at 32°F or above freezing temperatures, so you can set your driveways even in winter. Interestingly, this long-lasting and highly durable sand prevents erosion due to freeze-thaw cycles, wind, and rain.
Over and above that, this sandy soil is powered with rapid set technology, so it becomes rain-safe after 15 minutes of application. And available in multiple colors, this polymeric sand is OSHA-compliant and ASTM C-144, meaning it is safe for use.
What We Like
Prevents erosion
Becomes rain-safe after 15 minutes of application
Easy to install
OSHA-compliant & ASTM C-144 tested
What We Don't Like
Available only in one size
Weight: 18 lbs | Color: Gray | Coverage: 30 - 40 sq ft | Working Temperature: 32°F or Above
4. Rhino Power Bond Plus Polymeric Sand – Best for Stone Joints
The Rhino Power Bond Plus Polymeric Sand is yet another product that you can consider for your DIY sealing projects.
Coming with professional-grade Loc-King technology, this polymeric sand keeps weeds out of the joints by staying firmly in place. In addition to that is the haze-free technology that makes it rainfast within an hour of application.
Its ability to fight every weather condition is what made me include this polymeric sand on this list. Be it excessive sunshine, snow, or rain, Rhino Power Bond Plus can withstand the rigors of nature. And that is what makes it a great choice for stone joints, paver joints, and other surfaces.
Walkways, driveways, or around a pool–this polymeric sand is usable in a variety of areas. Other than that, you can use it with wet cast-based pavers and concrete pavers.
Before installing polymeric sand, just make sure that the surface is completely dry, or it won’t adhere properly. After sweeping the sand in the cracks and gaps, blow off the excess and activate the polymers by misting the surface.
One bucket of this polymeric sand is about 20 pounds and can cover up to 20 to 40 square feet for up to 2 inches of wide joints. However, you can go for the 50-pound bucket if you need this polymeric sand for large projects.
What’s more, the brand supplies this sand in four colors– slate gray, beige, ivory, and black diamond. One thing I’d like to bring to your attention is that this sand shouldn’t be applied to places where the temperatures are below 32 degrees F.
What We Like
Can handle the rigors of the natural elements
Prevents insect infestation by securing the joints firmly
Rainsafe in an hour
Available in multiple options
What We Don't Like
Not recommended for places with temperatures under 32°F
Weight: 20 lbs | Color: Slate Gray | Coverage: 20 - 40 sq ft | Working Temperature: 32°F or Above
5. ConSANDtrate Polymeric Sand Concentrate – Best Weather-resistant Sand
My last recommendation is the ConSANDtrate Polymeric Sand Concentrate, which comes in a 20-pound package.
Featuring a specific blend of polymers, this poly sand can be mixed with regular sand at a ratio of 10:1. Meaning, you will have to mix 10 parts of regular sand with one part of ConSANDtrate sand for a more concentrated polymeric.
Not just colors, but you can also mix custom colors with this poly sand, which isn’t the case with other polymeric sands.
Applying polymeric sand in joints between paver stones and slabs is easy. First off, you will have to fill the joints with sand and level them with a stiff brush by sweeping them down. Next, use a paintbrush or a blower set to clean away residue from the joints.
Thereafter, spray water on the filled joint using a garden hose at least 3 times at 10-minute intervals.
Paver joints, flat rock, and hardscape– you can use polymeric sand from ConSANDtrate for a variety of projects. Not only that, but it can also be used as a crack filler for exposed or concrete aggregate slabs.
As for the color, this polymeric sand comes in gray, but since it is tintable, you can use it on any surface by mixing it with whichever you want.
All things aside, you’ll be pleased to know that this polymeric sand is weather-resistant, meaning it can withstand harsh rain and severe cold easily. Like the previous product, it prevents weeds from growing between the joints.
Note that it may become chunky if you don’t mix this polymeric sand with regular sand properly.
What We Like
Tintable
Prevents weed growth
Deters insects
Can withstand the natural weather
What We Don't Like
Becomes chunky if not mixed properly
Weight: 20 lbs | Color: Gray | Coverage: 170 - 200 sq ft | Working Temperature: 32°F or Above
What is the Best Polymeric Sand?
If you're seeking the finest and the best polymeric sand, listed below is a table that compares weight measured in pounds, color, coverage area measured in square feet, and working temperature in Fahrenheit.
Using the right polymeric sand in your paver project can impart a professional look to your pavers or whichever surface you use it on.
Through trial and error, I’ve learned the factors one must consider when choosing polymeric sand for their projects– and this section discusses just that. I’ve put together a list of all the important factors that you need to keep in mind when ordering poly sand for your paver or other outdoor projects.
Let’s discuss that in detail.
Size of the Joint
Before you order a pack of polymeric sand, you must take into account the size of the joint you need to fill with it. Most polymeric sand manufacturers sell sand for wide joints, while others manufacture them for filling tight joints.
For fieldstone patios or paver projects that have large joints, you will have to opt for ones that are made for sealing wide joints. That’s because they would create a strong barrier after settling in the gaps. Not only that, but they will also seal oil the elements better than others.
Color
By now, you know that polymeric sand comes in different colors– beige, gray, brown, ivory, and others.
So, you will have to order and similar in color to the surface where you intend to apply it. Some polymeric sands are tintable, meaning you can mix dry pigments of your preferred color and apply them to the surface to complement your pavers.
Curing Time
Another important aspect that you need to consider when using polymer sand is the curing time. Most polymeric sands come with a drying time of 24 hours, while others take 48 hours to cure fully.
If you go for those that take 24 hours to dry, your surface will be ready for use the next day of application. On the other hand, you will have to wait for 2 days to use the surface if you opt for poly sands that take 48 hours to cure fully.
However, keep in mind that the weather plays an important role in determining the drying time of the sand. That is to say, the sand is likely to dry more quickly if the weather is hot than if the weather is cold.
And if you’re in a hurry, opt for polymeric sand that is powered with rapid-set technology because it sets within 15 minutes of application. So, even if it rains after application, the sand won’t be washed away with water.
Further, you can also check out our article on how to apply polymeric sand to gain more on this particular topic.
Resistance
Since you’ll be using polymeric sands for sealing outdoor surfaces, it is important to choose a highly durable product.
For your paver project, go for polymeric sand that shows excellent resistance to weather, so the natural elements won’t tamper with its binder (material). It should also be water-resistant, so it doesn’t get washed away from the joints when exposed to water.
Additionally, I’ll suggest going for polymeric sands that are blower-free, dust-free, and haze-free.
Price
Polymeric sands are sold by various manufacturers at different prices. Some sell them at reasonable prices, while others sell their products at a slightly steep price.
One thing to keep in mind is that not every expensive product is of high quality, and vice versa. Therefore, you must always weigh the price of the polymer sand with the quantity to figure out if it’s worth the money or not.
Alternatively, you can look for customer reviews to find out if the product actually lives up to its claims or is simply a waste of money.
Polymeric sand doesn’t come with exorbitant price tags, but still, I suggest preparing a budget before scouring for them. This way, you won’t overspend on your paver project.
Can I use regular sand instead of polymeric sand?
While you can use regular sand instead of polymeric sand for paver joints, it does not offer the same benefits. Polymeric sand contains binders that, when wet, bond the sand particles together and create a solid joint, preventing weed growth and insect intrusion. Regular sand does not have these properties, and joints filled with it are more prone to washout and less resistant to the aforementioned issues.
Is polymeric sand eco-friendly?
Polymeric sand is generally considered eco-friendly. It's usually made from quartz sand and select polymers, which don't tend to have a significant environmental impact. That being said, individual products might vary, so always consult the product's material safety data sheet or reach out to the manufacturer for specific environmental impact information.
Can I use polymeric sand with any type of pavers?
Yes, polymeric sand can be used with virtually any type of pavers, including concrete, brick, and stone. It's designed to fill and solidify the joints between pavers, enhancing their stability and preventing weed growth or insect issues. Always check the manufacturer's instructions for any specific requirements or recommendations.
Can I use polymeric sand for both narrow and wide joints?
Yes, polymeric sand can be used for both narrow and wide joints in pavers. Keep in mind that each product will have a recommended joint width range specified by the manufacturer. While it performs effectively in narrow and regular joints, for very wide joints, other materials or a specific wide-joint polymeric sand may be required for optimal performance.
Can I remove and replace polymeric sand if I need to make changes?
Yes, polymeric sand can be removed and replaced if you need to make changes. This typically involves removing the old sand from the joints by using a power washer or a sharp tool, taking care not to damage the pavers. Once the joints are cleaned out, new polymeric sand can be applied and set according to the manufacturer's instructions.
How long does polymeric sand last?
Polymeric sand can last anywhere from 10 to 15 years when properly installed and maintained. Factors such as the quality of the sand, weather conditions, installation process, and usage can impact its longevity. For optimal durability, it's recommended to follow installation instructions carefully and consider periodic maintenance.
Polymeric sands provide an excellent solution for sealing and stabilizing paver joints, preventing weed growth, deterring insect infestation, and resisting erosion. They have become increasingly popular for different types of outdoor applications, ranging from pool decks and concrete pavers to driveways and walkways. With so many options available in the market, it is crucial to choose the right polymeric sand that suits your specific needs and requirements.
From the above 5 best polymeric sands, here are the top three expert recommendations:
Powered by ceramic flex technology, the DOMINATOR Polymeric Sand is an ideal option for its strength, flexibility, and easy application. It can handle tight joints and wider joints with ease, making it perfect for various outdoor surfaces.
Preventing erosion and damage from burrowing insects, the Alliance Gator Maxx Intelligent Polymeric Sand is a good option for those seeking durability and adaptability. Its haze-free, dust-free, and blower-free formula ensures a safe and easy application.
Offering joint stabilization and versatility, the BuddingCo Polymeric Sand is the right choice for projects ranging from pavements to driveways and patios. Its rapid set technology and OSHA compliance make it a reliable option for residential and commercial applications.
Thus, selecting the ideal polymeric sand for your project depends largely on your specific needs and the type of application. Evaluate your requirements carefully and choose a product that delivers the best results in terms of durability, flexibility, and ease of application. With the right polymeric sand, you can enhance the appearance and increase the longevity of your outdoor spaces.
The Foundation Armor paver sealer is a solvent-based self-priming acrylic sealer that is completely breathable. Similarly, the DOMINATOR paver sealer is a water-based weather-resistant option that can be differentiated from other sealers by its long-lasting protection and low odor.
Pavers used for exterior or interior flooring can get damaged due to various reasons, like the weather, seasonal changes, wear and tear, plant growth, and lack of proper maintenance. Applying paver sealers is generally the most effective way of preventing such damage to pavers and it can even be used to improve their appearance.
Several types of paver sealers are available for this purpose, and the best ones have been reviewed in this guide.
Explore the top choices for home improvement with our list of the finest Paver Sealers:
Foundation Armor: The Foundation Armor paver sealer is renowned for its non-yellowing durability, thanks to the inclusion of non-recycled resins. One drawback is its strong smell.
DOMINATOR: The DOMINATOR paver sealer provides a glossy finish and impressive coverage, yet it may not perform as well on clay or stone surfaces.
Foundation Armor Water-Based: The Foundation Armor water-based paver sealer, known for delivering a durable seal lasting up to 10 years and possessing DOT approval, stands out as a premium choice despite its higher cost.
MasonryDefender: The MasonryDefender paver sealer effectively preserves the appearance of pavers while providing waterproofing. However, it's worth noting that under adverse weather conditions, it can become slippery.
DOMINATOR Clear Acrylic: The DOMINATOR clear acrylic sealer stands out for its high-gloss finish, low VOCs, and rapid drying capabilities. However, it is important to be aware of the potential for lumps in the product.
1. Foundation Armor paver sealer - Best paver sealer with non-recycled resins
What We Like
Durable and long-lasting
Attractive finish
Non-yellowing
Easy to apply
What We Don't Like
Has a strong smell
The Foundation Armor paver sealer comes from one of the best manufacturers of industrial-grade coatings and sealers in the United States. It is a solvent-based acrylic sealer that can enhance the appearance of a patio, driveway, or pavement by providing a highly durable finish.
This sealer does not turn yellow over time, which is one of the key features that distinguish it from the competition. It means that no matter which type of paver project it is used for, pavers will retain their immaculate appearance for a long period.
Additionally, this concrete sealer is manufactured entirely in the US using non-recycled resins, which means its quality is unmatched. It is also quite versatile and can be used on a wide variety of surfaces. These can include surfaces sealed earlier using solvent-based sealers as well as unsealed paver and concrete surfaces.
Besides helping such surfaces look good, this paver sealer protects them from damage, so pitting, spalling, and cracking are significantly reduced. Moreover, it is resistant to salt damage, chemicals, and water. Because of this, it can easily last for up to 3 years when used on exterior surfaces and up to 7 years when used on indoor ones.
It requires little maintenance, can be easily applied using a sprayer or roller, and is self-priming. You can also find clear, detailed instructions regarding the application process online, which can be helpful in making the best use of this sealer. And it can be mixed with non-slip additives if required.
Compatible Material: Stone, concrete | Color Enhancing: Yes | Stain Resistant: No | Finish: Low gloss
2. DOMINATOR paver sealer - Best water-based paver Sealer
What We Like
Outstanding coverage rate
Quick drying
Safe to use
Long-lasting
What We Don't Like
Not suitable for clay or stone
When it comes to water-based sealers, this one from DOMINATOR is an effective option. An acrylic sealer, it provides a glossy, wet look to concrete pavers and protects them against spills, including oil stains, and makes them incredibly resistant to the weather.
This paver sealer can also be used on decorative concrete surfaces. It has a decent coverage rate, and 250 to 400 sq. ft. can easily be covered per gallon of the sealer while applying a single coat. Moreover, the sealer lasts for a long time and can provide adequate surface protection for up to 4 years, depending on the environment.
It means frequent coatings are not required after using this paver sealer, and the maintenance requirements are minimal, which can be very helpful in saving time and money. Plus, the water-based formula of the DOMINATOR paver sealer does not produce harmful fumes or strong odors. Thanks to this, applying the sealer to the pavers is quite easy and fast.
It does not contain any volatile organic compound or other harmful ingredients and, thus, is among the safest paver sealers on this list. Other than that, there is a quick start guide included with the paver sealer that provides access to instructional videos that can help in learning how to use it properly.
However, the standout feature of the DOMINATOR paver sealer is that it dries very quickly, so paver sealing or resealing projects can be completed in just one day.
3. Foundation Armor water-based paver sealer - Best silane and siloxane-based sealer
What We Like
Approved by DOT
Long-lasting
Easy application
No visible film
What We Don't Like
Slightly expensive
This water-based paver sealer is another remarkable product from Foundation Armor, manufactured using silane and siloxane molecules. These are extremely effective in entering concrete substrates and sealing pavers from within. This sealer can be used on interior and exterior concrete pavers, whether installed horizontally or vertically.
It has been manufactured entirely in the USA and contains no imported or recycled resins. Instead, it contains up to 5 times more active ingredients than most other paver sealers. Furthermore, this paver sealer can even be used to seal pavers made from materials like bricks, for which there are few other options.
But what makes it unique among paver sealers is that it has received approval from the Department of Transportation (DOT) as a water-repellent sealer. It creates a hydrophobic barrier that can reduce up to 95% of water absorption to prevent water damage. The Foundation Armor water-based paver sealer can last up to 10 years, so frequent applications are unnecessary.
And speaking of application, using this paver sealer is easy as it just needs to be sprayed onto a rolling pan or sprayer before applying it to the surface. This will ensure the pavers have adequate protection against mildew, mold, salt, ice, and snow. It can also protect paver surfaces from staining and provide them with an unsealed feel and texture.
This is possible since this is a non-film-forming paver sealer, so there is no visible film on the paver’s surface, and you get a clear finish.
Compatible Material: Masonry, brick, unsealed concrete | Color Enhancing: No | Stain Resistant: Yes | Finish: Clear
4. MasonryDefender paver-sealer - Best clear drying sealer
What We Like
Safe to use
Clear drying
Low odor
Easy to clean
What We Don't Like
Slippery when wet
One of the highest-rated paver sealers currently available is this one from MasonryDefender, a brand that specializes in sealing solutions for home and commercial use. The standout feature of this paver sealer is that it completely waterproofs pavers without altering their appearance.
This type of waterproofing is possible since it dries clear despite having a milky white appearance when freshly applied. Also, the water-based sealer does not turn yellow over time, a problem often seen with other sealers. So, it can help pavers retain their original appearance for a considerable period.
The only change it makes to their appearance is that it provides a low-gloss finish to the paver stones while helping stabilize the joint sand and preventing fading. Aside from that, the concrete sealer dries quickly.
Another noteworthy feature of the MasonryDefender paver sealer is that it is VOC compliant. This means it does not contain any volatile organic compounds, which can pose a health hazard, and is completely safe to use. Also, very little odor is emitted during the application of the stone sealer, and it dissipates quickly.
As for the application process, this requires minimal effort since there is no need to mix the paver sealer before applying. It is ready to use and just needs to be sprayed onto the surface of the pavers, a process that helps save a lot of time. And it is possible to clean the excess sealer easily using soap and water without requiring any harsh chemicals.
Compatible Material: Stone, concrete | Color Enhancing: No | Stain Resistant: Yes | Finish: Low gloss
5. DOMINATOR clear acrylic sealer - Best option for high-gloss finish
What We Like
Protects against stains
Dries quickly
Low VOCs
Comes with a quick start guide
What We Don't Like
May contain lumps
For those looking for a paver sealer that can provide a high-gloss finish to paver stones, this offering from DOMINATOR is worth checking out. It is a wet look sealer with a milky white appearance that dries clear and leaves pavers looking as good as new for up to four years.
Besides providing a high-gloss finish, this paver sealer provides protection against different types of spills and stains, including oil stains. It also protects the paver surfaces from the elements so they do not appear faded and are not susceptible to water damage. The sealer dries very quickly, in just about 45 minutes, so most projects can be completed quickly.
Coming to the coverage, a one-gallon bottle of this high gloss sealant from DOMINATOR can easily cover up to 400 sq ft when a single coat is applied. It also provides joint stabilization, making it an economical option that can help save money while reducing the need for maintenance.
This is another of those water-based sealers that do not have any strong odors and very low VOCs. So, safety should not be a concern when using it, and it can be applied easily without any health concerns. The application process is simple, and the sealer comes with How-To videos and a quick start guide that explain it in detail.
Apart from standard concrete pavers, this paver sealer can be used on decorative concrete surfaces since it does a good job of improving and enhancing faded colors.
Compatible Material: Concrete | Color Enhancing: Yes | Stain Resistant: Yes | Finish: High gloss
6. Foundation Armor solvent-based paver sealer - Best self-priming paver sealer
What We Like
Durable
Easy application
Suitable for various surfaces
Low maintenance
What We Don't Like
Not very quick drying
Designed to protect, enhance, and seal both interior and exterior concrete surfaces, this is one of the most effective solvent-based sealers from Foundation Armor. Like other Foundation Armor paver sealers, this one is a US-manufactured product without any recycled resins.
It creates a breathable acrylic coating on paver stones, providing protection against extreme temperatures, UV rays, and abrasion. This coating provides a high-gloss finish to the paver stones and lasts up to three years after application. It can also enhance the color of faded pavers, helping even old surfaces look good, and there is no yellowing with time.
This paver sealer can be used on aggregate, concrete pavers, stamped concrete, and poured concrete surfaces. In addition, it works quite well on surfaces previously sealed using solvent-based sealers and even unsealed ones, providing long-lasting protection. There is no peeling or cracking after application, and the sealer is also unaffected by freeze-thaw cycles.
Applying the sealer to paver stones and other surfaces only requires a sprayer or roller and is quite easy to do. Once applied, the sealer makes the surfaces resistant to salt damage, certain chemicals, stains, and water. Moreover, it darkens the surfaces so that they acquire a wet look, which can add some shine and add to the overall appearance of the area.
Additionally, this Foundation Armor solvent-based paver sealer is self-priming and requires very little maintenance. Recoating surfaces while using it is also easy and detailed instructions can be found on the container and online.
Compatible Material: Stone, concrete | Color Enhancing: Yes | Stain Resistant: Yes | Finish: High gloss
7. Miracle sealants paver sealer - Best option for porous surfaces
What We Like
Works on several types of surfaces
Easy application
Slip-resistant
Safe for food areas
What We Don't Like
Slightly costly
Moving on with this list, we'll now be reviewing the Miracle Sealants paver sealer, which is a transparent, weather-resistant sealer that can be used in food areas. Specially manufactured for use on porous surfaces, this sealer can easily be used on surfaces like slate, limestone, travertine, granite, and marble.
It provides such surfaces with superb protection against water and stains without affecting their breathability, as it does not trap water vapor within. Thus, it can be used on exterior and interior surfaces, including tiles, grout, pavers, and concrete. And since it is transparent, the appearance of the surface remains unaltered.
One of the main features that differentiates this sealer from others is its slip resistance. Applying this sealer to interior or exterior flooring can significantly reduce the chances of falls and accidents. Also, it is effective against efflorescence, which is the deposition of salts on various surfaces, generally porous ones.
The Miracle Sealants paver sealer is reasonably quick-drying, and surfaces sealed with it can dry in three to five hours. So, there is no need to wait long to apply the second coat, and depending on their scale, various sealing projects can be completed quickly.
Application is also easy and just requires preparing the surface by cleaning it by pressure washing before applying the sealer to the pavers using a lint-free cloth or an applicator. So, even those with no experience with such projects will not find using the sealer challenging.
Compatible Material: Granite, marble, limestone, tile | Color Enhancing: No | Stain Resistant: Yes | Finish: Clear
8. Rain Guard water sealers paver sealer - Best sealer with micro seal
What We Like
VOC compliant
Easy to use
Non-yellowing
It can be used indoors and outdoors
What We Don't Like
Tends to run off
The Rain Guard Water Sealers paver sealer is a professional-grade water-based sealer that contains a silane siloxane blend. Its unique feature is its Micro Seal, a breathable water-repelling chemical substance that protects surfaces from various types of damage. These include moisture, spalling, lime, and efflorescence.
This paver sealer can be used on indoor and outdoor surfaces since it does not change the appearance or texture of the surfaces. In addition, it does not yellow and provides a stain-resistant finish, extending the life of the pavers. Another highlight of this sealer, which has been manufactured in the USA, is that it is VOC-compliant and completely safe to use.
Aside from that, this paver sealer contains Micro-Lok, a proprietary ingredient that helps create a water-repelling barrier. It also ensures that the sealer is properly absorbed into the surface, providing protection against rain, ultraviolet rays, extreme temperatures, dirt, salt, and frost weathering. Additionally, it prevents the growth of mildew and mold, which can grow in damp areas.
This paver sealer can be used on porous surfaces, including unpainted and unpainted stucco, stone, wood, brick, tile, and concrete. The premixed formula can be used straight out of the bottle without any mixing required and can be applied on different-sized surfaces. One gallon of this sealer can easily cover areas as large as 300 sq. ft.
Both vertical and horizontal surfaces can be protected by applying this sealer, and application instructions are provided on the sealant container.
Compatible Material: Stone, wood, pavers, brick | Color Enhancing: No | Stain Resistant: Yes | Finish: Clear
9. MasonryDefender water-based paver sealer - Best water repellent option
What We Like
VOC-compliant
No mixing required
Provides UV protection
Low odor
What We Don't Like
Not suitable for heavy-traffic driveways
An extremely popular water-based paver sealer, the MasonryDefender concrete sealer is a color-enhancing option that provides surfaces with a wet look. Manufactured using high-quality resin, it is a clear sealer that protects pavers and similar surfaces against water damage. It also prevents cracking, flaking, pitting, and other types of free-thaw damage.
Surface protection aside, the MasonryDefender wet-look sealer also hardens any loose sand between pavers, ensuring they remain locked in place. And it prevents damage from UV rays so that pavers do not fade or suffer from color loss, which can cause them to look worn out.
The sealer can be used on various horizontal surfaces, including cement, clay brick, natural stone, and clay paver stones. It is also safe to use since it is VOC-compliant, which means no volatile organic compounds are released when it is used. Similarly, the sealer emits very little odor, so the chances of getting overwhelmed during application are extremely low.
Being one of those water-based sealers that do not require mixing before application, it just needs to be filled up in a sprayer and sprayed onto the surface. Additionally, a non-slip additive can be added to the sealer, preventing surfaces sealed with it from becoming slippery when wet.
Once applied, the sealer provides a glossy finish to the surface, which is what makes it ideal for areas like patios and porches. After application, any excess sealer can easily be removed by cleaning it with water and soap.
Compatible Material: Clay, stone, brick, cement | Color Enhancing: Yes | Stain Resistant: Yes | Finish: High gloss
10. Black Diamond Stoneworks paver sealer - Best sealer for indoor and outdoor surfaces
What We Like
Suitable for different types of surfaces
It can be used indoors and outdoors
Money back guarantee
Professionally tested
What We Don't Like
Glossy finish is not the best
The next item on this list comes from Black Diamond Stoneworks, a brand best known for its range of high-quality surface cleaners. This high-gloss sealer can be used to protect decorative, colored, stamped, and exposed aggregate surfaces both indoors and outdoors. Apart from pavers, it can be used on patios, garage floors, driveways, slate, and concrete surfaces.
It can even be used on limestone, travertine, and marble, and applying this sealer will prevent them from peeling and flaking. This sealer can help these surfaces retain their appearance rather than acquire a wet look, as it does not darken them but provides a high-gloss finish.
In addition, it dries completely clear, does not yellow over time, and is incredibly resistant to chemicals. Thus, it can prevent chemical damage to surfaces on which it is applied. Applying the sealer and cleaning up afterward is also easy, and being VOC compliant, it is a safe option that does not harm the environment.
As for durability, the Black Diamond Stoneworks paver sealer is one of the best water-based sealers and can last for a long time. Coverage is also much higher than competing products, and one gallon can cover up to 500 sq ft. The sealer is manufactured in the US and is thoroughly tested by tile and stone care professionals to ensure the highest quality standards.
Finally, the paver sealer comes with a 100% money-back guarantee, ensuring easy returns and refunds.
Compatible Material: Marble, concrete, travertine, limestone | Color Enhancing: No | Stain Resistant: Yes | Finish: High gloss
11. StoneTech paver sealer - Best sealer for stone pavers
What We Like
Safe to use
Easy application
Non-slip sealer
Non-flammable
What We Don't Like
Not very long-lasting
Providing pavers and concrete surfaces with unparalleled protection against stains, the StoneTech paver sealer is a versatile option that delivers impressive performance. It can be used on various surfaces besides pavers, like grout and porous natural stone; hence can be used indoors and outdoors.
The sealer works most effectively on stone surfaces, and a quart of this can cover up to 100 sq ft. Developed using water-based fluoropolymers, it can provide adequate protection against water and oil-based stains, ensuring completely clean pavers.
Also, applying this penetrating sealer does not affect breathability, so water vapor and gasses do not get trapped underneath it. This ensures that the appearance of the pavers or other surfaces remains unaffected. And being a water-based sealer, it is safe to use and does not harm the environment.
Weather resistance is another important feature of this sealer, and it enables it to protect surfaces from the elements. Pavers, grout, and stone surfaces become water-resistant after applying this sealer but will not become slippery. Additionally, it does not produce any foul odors and is non-flammable. It can also be used on indoor and outdoor surfaces.
The sealer can darken materials like granite but does not alter the appearance of materials like quartzite. So, depending on your surface type, it can provide a wet or dry look. But it does provide a shine to surfaces and is very easy to use. All instructions on how to apply the sealer are provided on the container.
Compatible Material: Concrete, stone, grout, marble | Color Enhancing: No | Stain Resistant: Yes | Finish: Low-gloss
What are the best paver sealers for home improvement?
The table below displays a detailed comparison of the foremost paver sealers in terms of their compatibility with varied materials like stone, concrete, brick, etc., their ability to enhance color, stain resistance capability, and the type of finish they provide (ranging from Low, High, to Clear).
Finding the right paver sealer can be pretty challenging, even after knowing about the best options. The reason is that there are several factors to consider, such as the types of paver sealers, finish, durability, and budget. This buying guide explains some of the most important factors to keep in mind when selecting a paver sealer.
1. Type
Paver sealers can be broadly classified into two types - film-forming and non-film-forming sealers. Film-forming paver sealers create a physical barrier and may provide semi-gloss, satin, or glossy finishes and need to be reapplied more frequently. On the other hand, a non-film-forming sealer provides a matte finish and lasts much longer.
Apart from these primary classifications, paver sealers may be classified as solvent-based, water-based, wet-look, acrylic, and breathable. A solvent-based sealer usually has a polymer or acrylic blend and can provide resistance against UV rays and stains.
While water-based sealers are also made from acrylic material, the polymers are contained inside water molecules. Unlike solvent-based sealers, water-based paver sealers do not contain VOCs and do not result in a glossy finish. They dry clear and are easier to apply and clean.
Wet-look sealers are generally polyurethane sealers that make pavers appear darker, as though they were recently exposed to water. They may result in a semi-gloss or high-gloss finish. Breathable sealers are those that do not trap water vapor below, which can affect the appearance of the pavers. They may or may not be acrylic sealers that provide protection against UV rays.
2. Finish
The finish refers to how the paver appears after the application of the sealer and can be differentiated into several types. Penetrating sealers provide a natural or matte-like finish, while high or low-gloss sealers generally result in a wet look. Some sealers even provide a satin finish to pavers.
A penetrating sealer is the most suitable when preserving the natural appearance of pavers is needed since they can go deep into the masonry or stonework. They are also non-film-forming paver sealers, which ensures that the appearance of the pavers is unaffected.
But solvent-based options might be better for those who want to provide some shine to their pavers, resulting in a high or semi-gloss finish.
3. Slip Resistance
Applying a sealer to paver stones can often make the surface slippery, especially when it gets wet. This can increase the chances of falls and accidents, so looking for a paver sealant that offers good slip resistance is a good idea. Generally, high-gloss wet-look sealers tend to have a more slippery texture and should be avoided near areas with heavy foot traffic.
Or, if they are to be used in such areas, they should be mixed with a non-slip additive. Such additives are compatible with film-forming paver sealers and can make the sealer less slippery. Alternatively, a penetrating sealer can be used that works by sealing the paver from within and does not create a slippery surface.
4. Durability
The durability of a paver sealer is one of the most important factors to consider when picking an option. A good paver sealer should last for a reasonable period, generally three to five years. But this depends on various factors, such as the weather, traffic, and maintenance.
Penetrating sealers are considered to be the best as far as durability is concerned, while high-gloss and wet-look sealers do not last as long. This is especially true if they are used in areas where there is heavy traffic. The coating of such sealers quickly wears away in such cases, and the pavers are left unprotected.
Another thing to remember is that film-forming sealers can help prevent pavers from looking worn out, which is impossible with non-film-forming ones. Whether the paver sealer is wearing out can be determined by checking the color of the pavers after exposure to elements like rain. Changes in the color may indicate that a fresh coat is required.
5. Drying Time
The time sealing pavers require for drying depends on the climate, temperature, and humidity. Generally, paver sealers take around 24 hours to dry, after which a second coat can be applied. However, some sealants can dry in as little as six hours or even less. The drying process takes place when the solvent present in the sealer evaporates and the pavers do not feel sticky.
After the sealer is dry, the curing process can begin, which happens after the evaporation of the solvents once they start combining with the oxygen present in the air. Once the paver sealers are completely cured, they become hard and cannot be damaged easily.
Unlike the drying process, curing can take much longer, from seven to 30 days.
6. Ultraviolet Resistance
Pavers used for exterior floorings, such as on a pool deck, are exposed to the ultraviolet rays of the sun, which can cause fading and other types of damage. Acrylic sealers are the most susceptible to such damage and can slowly turn yellow when exposed to UV rays. So, options that do not turn yellow or cause pavers to fade might be better for such areas.
7. Ease Of Use
How easy to use a paver sealer is another important consideration, as depending on how much experience you have, applying a sealant can take a lot of effort and time. When considering the ease of use, check whether the paver sealer comes with detailed instructions that are easy to follow.
Such instructions may be mentioned on the packaging, sealant container, or website. Some manufacturers even provide videos explaining the application process, creating a great user experience.
8. Cost
To determine how much a paver sealer will cost, the first thing to do is to calculate the square footage of the area that needs to be covered. Also, consider the ease of access, the location, and the type of paver to be sealed.
Different types of pavers require different types of sealants and may also affect the quantity and the number of coats needed. This is because some paver materials have higher porosity and absorb a greater amount of material than others. So, a greater amount of the sealer will be required, meaning the cost will be higher.
Can you use cement or stone paver sealers on brick pavers?
Whether you can use a stone or cement paver sealer on brick pavers depends on the sealant brand. Generally, sealants designed for cement or concrete patios and pavers can also be used on clay bricks, but this may not always be true. Also, it may not be possible to get the best results by using a concrete paver sealer on brick paving stones.
It is better to use a paver sealer that is specially designed for use on such surfaces. Generally, a good sealer for such purposes is one that contains silane and siloxane.
What is the best way of applying water-based acrylic sealers?
The easiest way of applying water-based acrylic sealers is through a pump-up sprayer. Most paver sealers come premixed and do not require any mixing. You just need to fill the sprayer with the water-based acrylic sealer and spray it onto the surface to seal the pavers. If the process is undertaken in warm weather, avoid flash drying.
Can you use solvent-based paver sealers to seal a retaining wall?
A retaining wall helps retain or hold soil in place and prevent erosion and can be made of various materials, such as concrete, stone, bricks, and wood. Both water-based and solvent-based sealers can be used to seal such walls, but which option will work best will depend on the material of the wall.
For how long should you keep vehicles off sealed surfaces?
It is best to avoid driving vehicles over surfaces where a paver sealer has been freshly applied for at least 48 hours. This will provide plenty of time for most sealers to dry and form a protective layer over the surface.
Can you pressure wash pavers after applying a paver sealer?
While it is possible to pressure wash pavers that have been sealed, it should be done with great care. A high setting on the washer can remove the sealant, leaving the pavers unprotected. That is why using very low pressure while cleaning pavers is crucial.
The 11 options mentioned in this review-based guide are some of the best paver sealers on the market. While all of these offer impressive features and deliver outstanding performance, some manage to stand out from the crowd due to their innovative features and outstanding performance.
The Foundation Armor Paver Sealer is a self-priming solvent-based acrylic option manufactured using non-recycled resins, can be used on various surfaces, and provides a highly durable finish. Similarly, the DOMINATOR Paver Sealeris a water-based option that can be used on pavers and decorative surfaces, emits very little odor, and lasts up to 4 years.
‘’Give light, and people will find the way’’ is what your patio would say if it could speak!
However, there can be multiple reasons why you have put that task on hold, with the biggest one being racking up electric bills. And that’s where low-voltage landscape lighting comes into the picture. So, now is the time to get one! But we’re not going to end only with that advice.
Since there are hundreds of options available out there, we take it upon ourselves to introduce you to the top names that are making the right noise. Hence, we’ve narrowed down the 9 best low-voltage landscape lightings out there on the market.
Now, without any further ado, let’s begin!
Best Low Voltage Landscape Lighting
Whether you desire a warm, inviting atmosphere or a modern, sophisticated look, this list will guide you toward the perfect lighting solution for your outdoor space. So, without further ado, here's the list of the 9 Best Low Voltage Landscape Lighting options to transform your landscape into a captivating oasis.
The GreenClick Landscape Lighting has earned a reputation for its high-quality design and efficient power consumption. With a simple construction and convenient setup, it definitely makes for one of our top recommendations of the day. Plus, the pocket-friendly price won’t burn a hole in your pocket.
Super Bright LED Landscape Lighting: 4pcs 3W 12V plug-in...
4 in 1 Landscape Spotlights: Each light daisy-chains into...
Why Did We Like It?
As pleased as we were with the first impression, the positive customer feedback made us want to try this product even more. For starters, the unit consists of four 12-volt plug-in lights, with each LED offering a 300 lumens bright output. These have a much more stable light stream compared to other solar garden lights.
Moreover, the 360-degree adjustable head means that you can choose from different light positions, be it for the wall, trees, bushes, or any other part of the garden. The warm yellowish hue is bound to enhance the charm of your landscape.
Coming to the wire distribution, the total length is about 15 meters, while the portion between the plug and the first light is about 6 meters long. After that, the length of the wire between the lights becomes 3 meters so that the entire setup can cover a larger area.
But if you need to cover even more space, you can add DC extension cords between each light. On top of that, the unit can be extended for transforming into a 6-in-1 or 8-in-1 landscape light variant.
The thick IP65 aluminum construction makes the lights waterproof, while the glass lens prevents the LED bulb from dirt and damage. Just position the lights and plug in the 12V adapter, and you’re done!
What Could’ve Been Better?
Nothing except the adapter. Since it’s not waterproof, make sure that you don’t expose it to the rain. In some cases, users may have to employ extension cords to keep it in a safe position. However, that in no way is a deal-breaker for us!
Pros
Long-lasting and bright lights
Efficient heat dissipation and corrosion-resistant
Hand-adjusted nuts for simple installation
45-degree beam angle
Cons
Adapter is not waterproof
Power: 3W | Lumens: 1800 | Voltage: 12V | Color: Warm White | Control Method: Remote Control | Waterproof Rating: IP65 | Installation: Ground Spike
Next up, we have the Zuckeo 6W RGB Remote Control LED Landscape Lighting. With multiple color variations and a powerful light stream, this set can be the perfect addition to your outdoor setup. Plus, the hassle-free installation will appeal to first-timers and experienced users alike.
【Color-changing LED Landscape Lights with remote control,...
【Memory Function, Multiple colors and flashing Modes】...
Why Did We Like It?
One of the first things that grabbed our attention was the color variation on offer. The set has 8 color-changing RGB LED lights, and you can choose from among 16 colors, thanks to the pair of remote controls. Not only that, they are also integrated with a memory function, meaning the lights go back to the same color as they were before the power shutdown.
Since the lights essentially feature a spotlight design, the removable heads can be rotated in almost any direction for illuminating the desired area. Be it the deck, fence, trail, wall, or trees; the 90-degree beam angle is ideal for all areas in the backyard.
And if you're planning to host a party, then the flash and strobe modes are bound to amp up the ambiance. On the other hand, the fade and smooth modes are more suitable for regular use or weekend dinner dates. So, count the brownie points!
Much like its predecessor, each light features a combination of a thick IP66 aluminum body and lens cover for optimum weather protection. Lastly, the set is covered under a 3-months replacement guarantee and a 1-year warranty.
What Could’ve Been Better?
Although you can easily connect the Zuckeo 6W RGB Remote Control LEDs to an existing lighting setup, the set doesn’t come with extra low-voltage wires or a transformer. That said, buying them separately won’t cost a lot.
Pros
Adjustable brightness
Service life is up to 30,000 hours
Can be used with a 12-watt or 24-watt transformer
Each light can be configured to have a different color
The Meikee 7W LED Landscape Lights are regarded as one of the best pathway lights, and as such, find a mention on our list. With a beautiful white warm hue, this set can be used for both security and décor purposes.
Brilliant Warm White Landscape Lighting: Featuring...
Safe and Reliable Low Voltage Operation: This landscape spot...
Why Did We Like It?
Firstly, we were quite impressed with the robust structure, which predominantly features a thick aluminum body. Other than that, the lamp cap, spike, and lens cover are made from an anti-corrosion polycarbonate lamp material, thereby ensuring maximum weather resistance and long service life.
Moreover, the eight 7-watt LEDs produce a combined output of 800 lumens that illuminate the space without being too harsh on the eyes. In this regard, we’d also appreciate the warm undertone of the white light. And the best part is that even with continuous use for a few hours, the lights didn’t feel hot to the touch. Therefore, they are safe for kids or pets to play around with.
Additionally, the 270-degree rotatable light heads can be adjusted for target illumination if needed. The quick installation mechanism will come in handy for first-timers, where all you need to do is attach the stake to the base and insert the spike stand into the surface.
Overall, the Meikee 7W LED Landscape Light comes across as a cost-effective option for those looking to get a mono-light setup.
What Could’ve Been Better?
Similar to the Zuckeo 6W RGB Remote Control LED Landscape Lighting, this product doesn’t come with extra wiring or transformers. You may also need crimp-ends for connecting the power cord to the mainline, so we’d suggest having some in the vicinity before installation.
Pros
45-degree beam angle
IP66 waterproof body
First-class LED COB chip
Anti-rust and anti-corrosion parts
Cons
No extra accessories
Power: 7W | Lumens: 800 | Voltage: 12V/24V | Color: Warm White | Control Method: No Remote Control | Waterproof Rating: IP66 | Installation: Ground Spike
The Doluck 4W LED Landscape Lighting is a premium product from the brand that takes care of your outdoor lighting requirements. Equipped with eco-efficient LED bulbs, this versatile setup won’t add to your electric bills.
SAFE LOW VOLTAGE OUTDOOR USE – AC/DC 12V working voltage...
ECO-EFFICIENCY – Our expert LED accent lighting system,...
Why Did We Like It?
Before we get into the deets, here’s some quick appreciation for the elegant appearance! Owing to the die-casting aluminum build, each fixture performs just the right amount of heat dissipation to prevent overheating. But if that’s still not enough, we bet the high-temperature silicone O-ring and tempered lens glass will do the job.
Finished off with a beautiful satin powder coating, they may well double up as the ideal decor for your patio!
But what we loved the most are the 4-watt MR16 LED bulbs that are designed to give off the perfect brightness (320 lumens) for a cozy environment. Additionally, the warm temperature of the white color makes for powerful security lights. Being mountable, you can easily take them off for replacement purposes.
Unlike metal spikes, the robust ABS ground spike negates rusting while maintaining a firm hold even with constant adjustment of the fixture heads. If premium pricing isn't a problem, then the Doluck 4W LED Landscape Lighting is worth considering.
What Could’ve Been Better?
Honestly, we are a bit bummed out that the pack misses an extra low-voltage transformer at this price. While buying one isn't a herculean task per se, we really aren’t looking forward to accessory charges.
Pros
Safe installation for DIY projects
Cost-saving, replaceable LED bulbs
270-degree adjustable light heads
Adequate heat dissipation and absorption
Cons
Expensive
No extra accessories
Power: 4W | Lumens: 320 | Voltage: 12V | Color: Warm White | Control Method: No Remote Control | Waterproof Rating: IP65 | Installation: Ground Spike
The Sunvie 12W LED Landscape Lights feature a simple yet efficient design that can produce a super bright output to light up all corners of the yard. Besides, you can use it as a pathway, tree, or flag light.
SAFE LOW VOLTAGE OUTDOOR USE:AC/DC 12V working voltage...
Why Did We Like It?
Without a doubt, the high-lumen output made us want to try the product at first glance. In tandem with a low working voltage of 12V, this setup can be powered with the usual household circuit. In addition, the COB bulbs ensure maximum energy efficiency for reduced operational costs.
The seamless installation process essentially features three simple steps. Firstly, securely attach the light fixture to the included spiked stands. Next, mark the areas and insert the stands to cover the desired area. With stable performance and a long life span, it’ll be long before you search for replacements.
The 270-degree adjustable head is fully complemented by a combination of a sturdy aluminum body and a glass lens cover. Apart from ensuring stability, it helps the structure withstand rainy and snowy weather for around the year utility.
What Could’ve Been Better?
We aren’t very sure about the waterproof design as few fixtures allow water to seep through during rain. To counter this, we suggest using some clear silicone sealant to firmly seal the glass to the frame. Also, the holding brackets appear to be rust-prone.
Pros
Straightforward design
Bright, warm light
90-degree beam angle for spotlighting
Constant, no flicker output
Cons
May not be waterproof
Power: 12W | Lumens: 900 | Voltage: 12V | Color: Warm White | Control Method: No Remote Control | Waterproof Rating: IP65 | Installation: Ground Spike
When it comes to low-voltage landscape lighting, Lumen Logic is a name that needs no introduction. And its 12V Brass Mini Spotlight is a good example to justify this reputation. Featuring a sleek design and warm white light, it comes across as the right choice for spotlighting.
SOLID BRASS - This solid brass path light features a convex...
LED BULB - The included 3W LED G4 bi-pin bulb produces 300...
Why Did We Like It?
This stand-alone fixture gave us a much-needed break from landscape lighting sets. So, brownie points were awarded! But that’s not the only reason why this product finds a spot on our list. Perhaps its biggest advantage is the high-quality cast brass construction that assures longevity like nothing else without compromising on looks.
Furthermore, the 3W GU4 bi-pin LED bulb produces about 300 lumens, which is enough to light up the patio or walkway. Beyond that, the adjustable glare guard facilitates adjusting the light beam for the desired outcome. For instance, a broader beam can replicate a floodlight-like effect, and a narrower beam will help accentuate the features.
Just like the Doluck 4W LED Landscape Lighting, the bulb can be replaced for more illumination. You can also decide the aiming direction with the smooth knuckle located just below the light head.
Lastly, its moderate height of 4.5 inches will come in handy if you plan to conceal the structure behind stairs or bushes. Considering its reasonable price, there are hardly any more features that we could’ve asked for.
What Could’ve Been Better?
Since the SPTT-1 lead wire is only about 4 feet long, you may have to use additional wiring to connect it to the power source. Also, it may be helpful to know that the 3W bulb is meant for subtle illumination, but you can always change it to get more light for security purposes.
Pros
40,000 hours of lamp life
Flat clear glass lens
Pre-stripped copper lead wire
Backed by a lifetime warranty
Cons
Lead wire is slightly short
Power: 3W | Lumens: 100 | Voltage: 12V | Color: Warm White | Control Method: No Remote Control | Waterproof Rating: IP65 | Installation: Surface Mount
As we near the end of the list, the Leonlite 12-Pack LED Landscape Pathway Light finds an honorable mention. The blend of a rugged aluminum casing and bright LED bulbs make for a high-performing landscape lighting set.
360° Wide Lighting Coverage: This bollard light delivers...
9-Chip 3000K Glow: Built with 9 integrated LED chips, this...
Why Did We Like It?
First things first, this ETL-listed lighting set has a low AC/DC 12V low output voltage, making it safe for children and pets. Moreover, the durable die-cast aluminum frame ensures proper heat dissipation, which correlates to prolonged service life.
Moving on, the 6 superior-quality LED chips have an output of 94 lumens with a warm color temperature of about 3,000K. Besides, the upgraded lens facilitates evenly balanced and glare-free lighting that is soothing to the eyes. And with a 90+ CRI rating, these lights don’t dominate the natural color of the surroundings.
Since the stake will always be in close contact with the ground, its IP65 waterproof build prevents the formation of moisture and rust.
Last but not least, the 4.9 feet long power cord and 24-wire connectors aid hassle-free installation.
What Could’ve Been Better?
Although we’ve nothing against the quality, a low-voltage transformer is the least that we can expect, given its upscale pricing. Also, you’ll need to purchase extra wiring in case you plan to lay out a parallel connection.
Pros
40,000 hours lifespan
Suitable for wet locations
360-degree coverage
5-year warranty
Cons
Low voltage transformer not included
Very expensive
Power: 3W | Lumens: 94 | Voltage: 12V | Color: Warm White | Control Method: No Remote Control | Waterproof Rating: IP65 | Installation: Ground Spike
The Hykolity 6 Pack Low Voltage LED Landscape Pathway Light is a robust, long-lasting, and easy-to-install set that’s suitable for almost any outdoor space. With incandescent LED bulbs, they provide adequate energy-efficient illumination.
All-Room Rapid Heating: hykolity space heater powered by...
Peaceful Safety: hykolity electric space heater provides...
Why Did We Like It?
Having tried a Hykolity unit, we were eager to see what this product brings to the table. And we are decently satisfied with the performance. For one, the integrated 2-watt incandescent LED bulbs have a brightness of 150 lumens with a warm color temperature of 3,000K. In addition, the 139-degree wide-angle beam casts a soft light on walkways, patios, trees, shrubs, and so on.
Its mushroom-like design boasts of an aluminum hat that doubles as a protective shield and heat dissipator. Even with 6 hours per day run time, you’ll barely feel the structure getting hot. Similarly, the cleated heavy-duty stake cut down on installation efforts- just mount the fixture, insert it, and forget it!
Lastly, the tough cast-aluminum construction can withstand extreme weather conditions, be it rain or snow. And with a 5-year guarantee, you can count on the brand to cover the majority of damages and shipping costs for replacements.
What Could’ve Been Better?
Much like a couple of our other recommendations, the expensive pricing can become a constraint for potential buyers. Plus, the integrated bulb design means you practically have to throw them away if the damage doesn’t come under the warranty.
Pros
Quick-install wire connector
15-year lifespan in ideal conditions
15-inch power cable
Long guarantee
Cons
Pricey
Bulbs cannot be replaced
Power: 3W | Lumens: 150 | Voltage: 12V | Color: Warm White | Control Method: No Remote Control | Waterproof Rating: IP65 | Installation: Ground Spike
Comprising 8 super-bright, energy-saving LED landscape lights, this set from Innerwill has been a popular alternative for 50-watt halogen lights. The space-saving design can fit in the crampest of spaces, giving off a soft, warm white light.
First and foremost, the Innerwill 5W LED Landscape Light set has a multi-fitting design, meaning you can install the lights either on the ground or mounted on the wall. While the package includes 8 solid aluminum spikes for the former, the light head is equipped with three mounting holes for wall fitting.
Apart from that, the bulbs are integrated with first-class LED COB chips for optimum lumen output. The 120-degree beam angle covers a considerable area, but you can always adjust the 210-degree rotatable head for customizing the illumination as required. Being extremely energy-efficient, these lights will save up to 80% on your electric bill so that you can use them continuously.
We also liked how the band worked on the durability factor. Aside from the thick die-cast aluminum body and sturdy glass lens, these fixtures have watertight seals and pressure rubber gaskets to prevent water or dirt from depositing on the bulbs.
Long story short, the set can be used for various applications like warehouse, garage, garden, patio, and billboard lighting. And if you’re bored with mono-colored lights, the RGB color variant will be at your disposal for a few extra bucks.
What Could’ve Been Better?
It may be a challenging task to mount the lights on certain surfaces. In that case, you’ll have to remove the brackets, mark and drill the holes on the wall, attach the bracket and then install the light. Other than that, we don’t really have a lot to crib about.
Pros
No dim mode for a longer lifespan
Can be used with a 12V or 24V transformer
Rubber seal around wire exit
Prevents corrosion, rust, and cracks
Cons
Mounting may be time-consuming
Power: 5W | Lumens: 500 | Voltage: 12V/24V | Color: Warm White | Control Method: No Remote Control | Waterproof Rating: IP66 | Installation: Ground Spike
Best Low Voltage Light Landscaping Comparison Table
Buying Guide For The Best Low Voltage Light Landscaping
If you think knowing about the best options on the market is about it, then we want you to reconsider. Why, you ask? Well, without understanding your requirements, it’s highly likely that you’ll end up making the wrong purchase. And so that you have the right product, we’ve curated this comprehensive buyers’ guide to highlight the factors that should be kept in mind.
Brightness
The numero uno specification to look into is the brightness. Sure, you’d want to light up the space to the best possible extent, but a bright light might not always suit your needs.
Especially if you’re considering illuminating the driveway, we recommend going for a subtle lighting set with a lumen output of about 300. This way, there’ll be less visual interference when you’re riding in or out of the garage. On the other hand, a brighter option (with 800 or more lumens) is appropriate for covering large areas.
Number Of Fixtures
You don’t always have to opt for a set with more lights if you’re planning to cover a big space. For example, you may even choose a set with 6 lights for big spaces, provided they have long power cords and the power source is in the vicinity. Fewer lights are also a good option for specific zone lighting.
However, if your backyard is a regular spot for parties and get-togethers, or if security is on the top of your priority list, we’d advise going for more lights.
Beam Angle
There’s no rocket science here- a wider beam has more coverage compared to a narrower beam. But the thing that you’d want to consider is that with broader beams, the light tends to get dispersed or faded. So, you may want to compensate for that with a higher lumen output or more bulb wattage. Generally, most homeowners choose the ones that have not less than a 45-degree beam angle.
Some models come with an adjustable shade, which will come in handy for adjusting the angle.
Adjustable Head
Simply put, the adjustable head is a feature that transforms your landscape light into a spotlight with a simple turn. We highly suggest choosing a full 360-degree rotatable head to make room for unforeseen requirements.
Color Temperature
Without sounding too technical, a higher color temperature denotes a warm tone, which is more soothing to the eyes. Likewise, lower color temperatures produce a ‘sharper’ tone that’s suitable for accentuating the nearby objects.
Transformer capacity
Low-voltage landscape lightings generally use a 12V or 24V transformer, and most lights allow both. But some models may ask for only a specific transformer, so keep an eye for it.
Construction
Landscape lightings come in metal and plastic construction, with a thick cast-aluminum housing being the south-after choice for the former. Whatever the material, make it a point to look for features like weatherproof design, anti-rust, corrosion-resistant, and waterproof coating. More durability features mean a longer lifespan.
Quick Installation
Fastlock wire connectors are one of the best ways to ensure that you don’t spend hours installing the lights.
Low Voltage Landscape Lighting FAQ's
What are the advantages of low voltage landscape lighting?
Some advantages of low voltage landscape lighting include:
Energy efficiency: Low voltage systems consume less energy, helping to reduce electricity costs.
Safety: The low voltage makes these systems safer to install and use, especially in wet or damp outdoor environments.
Versatility: Low voltage landscape lighting offers a wide range of fixture options, allowing for customizable lighting designs and effects.
Easy installation: The low voltage cabling and plug-and-play connectors make installation simpler compared to high voltage systems.
Can I install low voltage landscape lighting myself?
Yes, low voltage landscape lighting systems are designed to be user-friendly and can be installed by homeowners. However, it’s important to follow the manufacturer’s instructions and safety guidelines. If you’re unsure or uncomfortable with electrical work, it’s recommended to consult a professional electrician for assistance.
What types of fixtures are available for low voltage landscape lighting?
There are various types of fixtures available for low voltage landscape lighting, including:
Path lights: These fixtures are designed to illuminate pathways and walkways.
Spotlights: Spotlights are used to highlight specific features or focal points in your landscape, such as trees, statues, or architectural elements.
Deck lights: Deck lights are installed on outdoor decks or patios to provide subtle illumination and enhance safety.
Well lights: Well lights are buried in the ground and provide upward illumination for trees or large plants.
Step lights: Step lights are installed on staircases or steps to improve visibility and safety.
Can low voltage landscape lighting withstand outdoor weather conditions?
Yes, most low voltage landscape lighting fixtures are designed to withstand outdoor weather conditions. However, it’s important to choose fixtures that are specifically rated for outdoor use and are constructed with durable and weather-resistant materials. Regular maintenance, such as cleaning and replacing bulbs when needed, will also help prolong the lifespan of the fixtures.
How do I design an effective low voltage landscape lighting layout?
Designing an effective low voltage landscape lighting layout involves considering various factors such as the purpose of the lighting, desired lighting effects, and the features you want to highlight. It’s recommended to plan the layout by considering the focal points, pathways, and areas that require illumination. Experimenting with different fixture placements and angles can help achieve the desired lighting effects.
Are low voltage landscape lighting systems expandable?
Yes, most low voltage landscape lighting systems are expandable. The transformer used in the system has a specific capacity or wattage rating, which determines the number of fixtures that can be connected to it. If you plan to expand your lighting system in the future, ensure that the transformer has sufficient capacity to accommodate additional fixtures. Adding more fixtures typically involves extending the low voltage cables and connecting them to the existing system.
Conclusion
Landscape lights are no longer a luxury-they have become a necessity for keeping your house safe. And let’s just face it, who doesn’t like their backyards to light up in the dark?
Hopefully, our recommendations and reviews have helped you pick the best option for your needs. But if you’re still in two minds while processing all that information, allow us to assist you some more by naming our top 3 favorites.
Impact sprinklers on tripods are elevated irrigation tools designed for extended spray reach and flexible positioning, combining the efficiency of an impact sprinkler head with the portability of a collapsible tripod base. These systems are ideal for sloped landscapes, tall vegetation, elevated garden beds, and areas where in-ground systems aren't practical. By allowing customizable spray patterns, height adjustments, and easy relocation, tripod impact sprinklers offer broader, more consistent coverage with minimal effort. In our testing, switching from fixed in-ground sprinklers to tripod-mounted models significantly reduced hardware costs while improving coverage and water efficiency. This guide highlights the 7 best impact sprinklers on tripod stands, chosen based on build quality, spray radius, stability, and user-friendliness. Our top selections include the Orbit Brass Impact Sprinkler for its all-metal durability and precise controls, the Melnor AMZ Pulsating Sprinkler for high-volume watering with gentle flow, and the Twinkle Star model for filtration and long-range performance. For those dealing with limited water pressure, don’t miss our dedicated guide to the best impact sprinklers for low pressure to ensure maximum compatibility and efficiency.
Listed below are the 5 best tripod sprinklers from our list:
Orbit Brass Impact Sprinkler on Tripod Base: Known for its high durability and extensive coverage, this sprinkler features heavy-duty brass construction, customizable settings, and offers excellent value for its price despite a lack of an instruction manual.
Melnor AMZ Metal Pulsating Sprinkler: Standing out for high coverage with a gentle watering effect, this sprinkler includes a warranty for manufacturing defects, sturdy metal construction, and provides versatility despite occasional connection issues.
Twinkle Star Impact Sprinkler on Tripod Base: This heavy-duty sprinkler excels in filtration with its rubber filter O-ring. It has an adjustable water range and durable construction and is easy to connect while offering versatility, barring its lack of a connecting adapter.
Orbit Zinc Impact Sprinkler: Boasting a unique zinc construction, this highly durable and affordable sprinkler offers large area coverage and a fully collapsible design, although high water pressure may cause balance issues.
Hourleey Impact Sprinkler on Tripod Base: This sprinkler shines for its ease of use and high-quality built material. It offers adjustable coverage and features a swivel lock and a rubber filter O-ring, although it may cover a smaller radius compared to others.
To find tripod sprinklers that are efficient and convenient to use, I have tested and carefully reviewed a number of them. In the end, these seven tripod sprinklers stand out with their smart features, ease of use, and durability. Here’s the list:
1. Orbit Brass Impact Sprinkler on Tripod Base - Most Durable Brass Construction
What we like
High coverage
Affordable
Durable material
Customizable settings
What we don't like
No instruction manual
Orbit 58308Z Brass Impact Sprinkler on Tripod Base is a durable product that comes at an affordable price and has highly favorable customer reviews.
The body of the sprinkler head comes with a heavy-duty brass construction that can withstand high water pressure and bad weather without the risk of any damage. The metal tripod stand has a fully adjustable height ranging from 22 to 46 inches with uniform stability. Moreover, it is made of durable yet lightweight material that is anti-tipping and anti-rust.
This model of brass tripod sprinkler offers a spray distance of 20 to 40 feet radius that can be used for partial or 360-degree coverage. Even in terms of diameter, it can spray water up to 90 feet in a full circle. That is really impressive if you ask me!
I found that this sprinkler also provides quite a few customizable features. You can use the additional diffuser screw and deflector shield to adjust the radius and preferred coverage.
Furthermore, its anti-backsplash arm and flow-through designs ensure a consistent water flow and adjustable coverage without any risk of clogs and blockages. The goose-neck connection that comes with the sprinkler makes it easy to plug in the water hose before usage.
Material: Brass, metal | Coverage Area: 90 feet | Adjustable Height: 22 to 46 inches | Weight: 5 pounds
2. Melnor AMZ Metal Pulsating Sprinkler - Best for High Coverage
What we like
Sturdy metal construction
Gentle water spray
Versatile
Warranty for manufacturing defects
What we don't like
Connection issues
Melnor’s Metal Pulsating Sprinkler is a versatile tripod sprinkler with a durable metal body and adjustable height. This is the right sprinkler for you if you want high coverage with gentle watering.
Its heavy-duty metal body is rustproof and can endure bad weather without sustaining any damage. Moreover, its adjustable height offers coverage of up to 48 inches, ensuring widespread watering in a consistent pattern for your backyard and gardens.
This tripod sprinkler offers a maximum coverage of 85 feet in diameter. I could easily adjust the spray coverage limit by customizing the height according to my desired radius or diameter.
Also, when I tested it out on my lawn, it sprayed quite gently, even with inconsistent water pressure, to avoid water loss. This gentle spraying can benefit those suffering from high water bills. It also offers advanced features like a Connect Product Adapter that is included to connect and disconnect the sprinkler head quickly.
This tripod lawn sprinkler is also versatile since it is compatible with different irrigation and farming systems.
Furthermore, to ensure customer satisfaction, the company offers a limited lifetime warranty for product failures due to defects in mechanical parts and craftsmanship. I further checked the company website to read the clauses of the warranty. It states that they will either replace the product or initiate a refund to the customer in case of manufacturing issues.
Material: Metal | Coverage Area: 85 feet | Adjustable Height: 48 inches max | Weight: 5.19 pounds
3. Twinkle Star Impact Sprinkler on Tripod Base - Best for Filtration
What we like
Corrosion-resistant
Rubber filter O-ring
Easy connection
Versatile
What we don't like
No connecting adapter
Twinkle Star Impact Sprinkler is a durable tripod lawn sprinkler ideal for yard and grass irrigation.
The sprinkler head is made of heavy-duty brass and alloy metal that ensures long-lasting usage, along with water and corrosion resistance. I have noticed that, unlike the previous model, this newly designed model looks good and sturdier than other plastic sprinklers.
It offers a 360-degree rotation with an adjustable water range and arc for more controlled watering. Further, the tripod has an adjustable height ranging from 16 to 37 inches. The quick-release clip of the tripod securely locks the legs into place before storing them away.
I really appreciate the built-in rubber filter O-ring that filters sand and gravel, often present in the water, to reduce nozzle clogs. Further, the gooseneck hose attachment makes connecting your garden hose much easier!
Besides covering an area up to 40 to 70 feet in diameter, it is also an ideal tripod sprinkler for lower water pressure. Lastly, there’s no need for a connecting adaptor since it comes with the US standard ¾ thread fitting that is compatible with most garden hoses.
If you require a tripod sprinkler to use both as an irrigation tool and for recreational activities like swimming pool misting, this is an excellent choice.
Material: Brass, alloy metal | Coverage Area: 40 to 70 feet | Adjustable Height: 16 to 37 inches | Weight: 3.91 pounds
4. Orbit Zinc Impact Sprinkler - Best for Zinc Construction
What we like
Durable zinc material
Large area coverage
Fully collapsible
Affordable
What we don't like
Balance issues due to high water pressure
Orbit 56667Z Zinc Impact Sprinkler is one of the best tripod sprinklers that is affordable and offers high coverage of 85 feet in diameter or 5670 square feet of area.
This worked wonders for my entire lawn since it effectively covered most of the area with a gentle water spray. Its body is made entirely of high-quality zinc materials, making it extremely durable and corrosion-resistant.
The tripod legs can extend to a maximum height of 37.5 inches; since the tripod base is weighted, it can also act as an anchor. When collapsed, the sprinkler measures 16 inches, which is perfect for landscaping.
Its ½ inch male threaded impact head can be fully adjusted for partial or full circle coverage. Moreover, you can use the diffuser screw and deflector shield to alter the spray distance or stream pressure.
This model, similar to Orbit’s brass model, also comes with an anti-backsplash arm for more consistent and even water spraying. Connecting my standard garden hose to the tripod sprinkler was also easy due to the gooseneck attachment.
Overall, it is a durable tripod sprinkler with a unique zinc body and excellent coverage.
5. Hourleey Impact Sprinkler on Tripod Base - Best for Ease of Use
What we like
High-quality build material
Adjustable coverage
Swivel lock
Rubber filter O-ring
What we don't like
Can cover less radius
Hourleey Impact Sprinkler on Tripod Base is a heavy-duty sprinkler with an impact head that adjusts the coverage depending on the prevalent water pressure.
The impact head is made of high-quality brass with premium alloy material. Its tripod stand is a mix of alloy metal and plastic components that are rustproof, water-resistant, and corrosion-resistant, making it long-lasting and sturdy.
With a coverage of 20 to 35 inches in radius, Hourleey’s tripod sprinkler base can extend up to 16 to 27 inches for versatile usage.
I personally liked two features of this tripod sprinkler. First, it has a trusty swivel lock bolt on the gooseneck attachment for conveniently closing the water supply. Second, the rubber filter O-ring filters sand and gravel in water and provides comparatively clean water for the plants.
Suitable for all standard hoses, its ¾ inch US standard internal thread fittings make it an ideal sprinkler for lawns, gardens, and even advanced farms.
Moreover, its sprinkler head has four different adjustments for spray distance and angle for a part and full circle coverage. To achieve freer rotation in both parts and a full circle, I used an additional Rain Bird sprinkler. To learn more about Rainbird sprinklers, read my article on “Orbit Vs Rainbird Impact Sprinkler.”
6. Biswing Impact Sprinkler Head on Tripod Base - Best for Safe Locking System
What we like
Good distance adjustment to spray water
Alloy metal tripod
Safe locking system
It can be used as a tripod sprinkler for commercial agriculture
What we don't like
It doesn’t work well with low-pressure
Biswing Impact Sprinkler Head on Tripod Base is one of the best tripod sprinklers with rustproof materials and high coverage.
Built with a brass sprinkler head and a premium alloy metal tripod, this product delivers a polished look, durability, and convenient usage. I had a lot of fun watering my lawn because of the sprinkler system, which is a first! Moreover, this lawn sprinkler can rotate freely in part and full circles with adjustable spray patterns and water radius.
Equipped with quick-release leg clips, the tripod legs can extend up to 16 to 37 inches and safely retract. These tripod sprinklers by Biswing also come with a rubber filter O-ring to provide clean water for irrigation.
Since the spray distance depends on the pressure, a high water flow is recommended for this irrigation tool. It offers coverage ranging from 20 to 35 feet in radius. This sprinkler system can also work with low water pressure, but I suggest using at least 20 to 60 psi.
It has the US standard ¾ inch internal thread fittings that make it compatible with any standard garden hose. You can also use it as a commercial tripod sprinkler.
Material: Brass, alloy metal | Coverage Area: 20 to 35 feet radius | Adjustable Height: 16 to 37 inches | Weight: 8.31 pounds
7. STYDDI Heavy Duty Impact Sprinkler on Tripod Base - Best for Adjustable Height
What we like
Impressive height reach
Wide coverage
Anti-tipping
Less water consumption
What we don't like
Expensive
SYTDDI Heavy Duty Tripod Impact Sprinkler is ideal for a large yard and agricultural farm with various obstacles like fences, tree limbs, or vines.
The tripod sprinkler is constructed with heavy-duty brass zinc alloy, making it durable, sturdy, and rustproof, suitable for extreme weather conditions. It also has an anti-tipping feature that helps stabilize the tripod sprinkler in case of high winds.
Its tripod base adjusts to different heights, ranging from 21 inches when collapsed and 50 inches when fully extended. However, I used the average height of 36 inches, and it did a good job; the easily adjustable height makes it ideal for every irrigation need.
These tripod sprinklers can be adjusted so that the rotating head sprays in a partial circle or 360 degrees. It has a maximum coverage area of 5,600 feet when fully rotating. I really like how easy it is to hydrate the specific areas of my lawn that need more hydration.
This is also an excellent choice if you want to reduce your water bills. These tripod sprinklers cut down the watering duration to prevent increased water consumption. Furthermore, its impressive height reach offers a wide coverage area; hence, you do not need to buy other impact sprinklers.
Material: Zinc, metal | Coverage Area: 5,600 square feet | Adjustable Height: 21 to 50 inches | Weight: 5.69 pounds
What is the Best Tripod Sprinkler?
This section provides a straightforward comparison of top-rated tripod sprinklers. The table below outlines key product specifications, including material, coverage area, adjustable height, and weight.
Given the variety of brands, features, and prices available on the market, choosing the tripod sprinklers that work for you may be challenging. As such, there are several factors that you need to consider before purchasing. Here’s a list of what worked for me:
Material
Durability and weatherproofing highly depend on the make and material of the tripod sprinkler. Sprinklers can be prone to corrosion and rust since they are mostly outdoors and deal with water.
To avoid such damage, buy a tripod sprinkler that is made of heavy-duty brass, zinc alloy, alloy metal, or aluminum. These materials are mostly waterproof and corrosion-resistant, making them more durable in the long run. I also suggest buying a tripod sprinkler with rustproof and waterproof coatings alongside paint.
Coverage Area
The water coverage you need depends on the size of your lawn, yard, or garden. I recommend measuring your area properly before making the purchase. After doing so, select a tripod sprinkler with the optimal area coverage, both in radius and diameter.
Moreover, this will also help you select the maximum extendable height of your sprinkler. If the lawn or yard concerned is obstructed by shrubs, vines, or fences, you will need a sprinkler that reaches a higher height. Read the product descriptions and purchase them accordingly.
Customizable Features
Having additional features that help you adjust the spray pattern, water spread, or distance is always advantageous. Diffusion pins and diffuser screws help adjust the water flow, while metal tabs change the water pattern.
Some modern tripod sprinklers are gear-driven and make no noise while functioning for battery conservation. Others have intelligent sensing technology, like motion detection that stops the sprinkler if someone enters the area. Dials and automatic watering cycles also make watering much more comfortable without frequently adjusting the tripod settings.
Installation
The installation process often requires more effort than the actual operation. Consider avoiding tripod sprinklers that have a complicated installation process or too many mechanical parts to attach. There’s no point in buying an affordable sprinkler if money is eventually wasted on professional installation.
Buying a tripod sprinkler that is easy to install in a few steps is the best option. Some tripod sprinklers just require setting up, and they are ready to use. A proper installation manual is a plus.
Price
The price range for a typical tripod sprinkler is very wide, although the price often determines the quality. While I want to save money, purchasing ones at a very low price does not guarantee good features. This will only increase expenses in the long run.
I suggest noting down all the features you need and choosing the sprinkler that fits the criteria. After that, choose the tripod sprinkler that is most affordable among the ones on the list.
Warranty
The warranty of an irrigation product also depends on its price. Tripod sprinklers that are higher in price often offer a lifetime warranty, while ones at a lower price offer a limited warranty. You can choose a tripod sprinkler based on your warranty preference.
However, you should note that all warranty, whether limited or a lifetime, only stands for manufacturing defects and issues with design and craftsmanship. For other problems, you will need to fix them using your own money.
Stability
Lastly, since most areas are undulated and rocky, finding a tripod sprinkler that has good stability is essential. Weighted legs and ground spikes that can penetrate the soil and hold the sprinkler offer strong balance and stability. This is especially required for sloping or uneven terrain.
Maintaining a Tripod Sprinkler
If you want your tripod sprinkler to last for a long time, regular maintenance and proper aftercare are crucial.
I like to frequently check the sprinkler head for clogs due to dirt, soil, or lawn clippings. Similarly, sprinklers with nozzles without a rubber filter need to be unclogged in case of blockages. Often, I find that my tripod sprinkler is spraying water with lower pressure, and this happens due to leaks.
Leaks can be found in both the garden hose and neck connections where the hose is supposed to be attached. The solution for the former is a garden hose replacement, and the latter may require sealant putty or similar water-blocking tools.
Adjusting your sprinkler according to the local temperatures is also essential. For example, if you live in an area with very cold winters, consider winterizing the sprinkler system to avoid frosting or pipe bursts. This process includes emptying the water from the system and turning it off.
You can also collapse the tripod and stow it away in a dry, warmer place to protect it from freezing temperatures.
Finally, since the tripod sprinkler has a lot of mechanical parts, regular lubrication can further increase its longevity. Since they work with water, there is are high chance of rust and corrosion. To avoid this, use an effective lubricant oil or grease to fully cover the tripod base, sprinkler head, and other screws or pins.
Precautions for Using Tripod Sprinklers
While tripod sprinklers are mostly harmless, sometimes, not using them properly can lead to unforeseen accidents. Since the sprinklers work with a garden hose, one should prevent kids and older people from stepping near the hose. Tripping over hoses can lead to serious injuries in vulnerable people, so keep that in mind.
Moreover, tripod sprinklers are collapsible, and without secure locking systems like leg clips or safety clamps, they can be quite dangerous. Fingers can get stuck or injured if they’re not carefully handled. For this, I recommend purchasing tripod sprinklers with safety mechanisms.
What is the difference between an impact sprinkler and a pulsating sprinkler?
The main difference is how they distribute water. Impact sprinklers use a mechanical arm, while pulsating sprinklers utilize a hammer and spring mechanism. Both can offer full or partial coverage, but the choice depends on your specific watering requirements.
How durable is an impact sprinkler? The durability of an impact sprinkler is typically high, as most models are constructed with corrosion-resistant materials like brass, zinc, or stainless steel and mounted on heavy-duty aluminum or galvanized steel tripods. These components ensure long-term performance under continuous outdoor exposure, UV radiation, and varying pressure conditions. Well-maintained units can last for several years with minimal degradation.
Can an impact sprinkler be used all year round? An impact sprinkler can be used year-round in climates that remain above freezing, as its weather-resistant construction is designed for seasonal operation. However, in cold regions, it must be disconnected, drained, and stored indoors during winter to prevent ice expansion from damaging internal seals, nozzles, or connectors.
Can I use any type of hose with this type of sprinkler? Yes, an impact sprinkler can be connected to any standard garden hose, provided the hose diameter (typically ⅝ or ¾ inch) supplies adequate water flow and fits securely with the sprinkler's inlet thread, often GHT (Garden Hose Thread). Using a hose rated for high flow will ensure optimal pressure and prevent leaks or connection instability.
Can I use an impact sprinkler with a rainwater tank? Yes, an impact sprinkler can be used with a rainwater tank, as long as the tank is equipped with a functional outlet and a gravity-fed or pump-assisted system that delivers consistent flow. However, low-pressure gravity-fed tanks may result in reduced spray range, so a booster pump may be needed to achieve standard coverage performance.
Can an impact sprinkler be used on uneven surfaces? Yes, an impact sprinkler on a tripod can be effectively used on uneven surfaces, thanks to its height-adjustable and telescopic leg design. Most tripods feature wide, spiked, or rubberized feet that allow stable placement on sloped, rocky, or soft terrain while maintaining accurate spray distribution.
Conclusion
Tripod impact sprinklers offer one of the most versatile and cost-effective irrigation solutions for lawns, gardens, elevated beds, and uneven terrain. Their adjustable height, wide spray radius, and durable construction make them ideal for users who need flexible coverage without installing permanent in-ground systems. After evaluating build materials, spray control, portability, and connection compatibility, our top recommendations deliver excellent results across a range of use cases. Whether you prioritize brass durability, maximum height, or ease of assembly, there’s a tripod sprinkler in this guide to match your needs.
For users dealing with low water pressure, don’t forget to explore our comprehensive guide on the best impact sprinklers for low pressure to ensure optimal performance. With the right tripod sprinkler, you can improve water efficiency, reduce manual labor, and ensure uniform coverage—season after season.
Low-pressure impact sprinklers are mechanical irrigation tools designed to operate efficiently at water pressures below 40 PSI, delivering consistent coverage through an impact-driven rotating spray arm. These systems are essential for homeowners relying on well water, gravity-fed irrigation, or aging municipal supply lines that cannot support high-pressure output. However, not all impact sprinklers perform well under such conditions. Out of 11 models tested, only 6 met functional thresholds for spray distance, pressure efficiency, and construction quality—5 of which stood out as top performers. These include models from Rain Bird, Orbit, and Melnor, each with distinct strengths such as wide pattern adjustability, tripod mounting, water-saving spray arms, and durable metal bodies. This guide presents in-depth reviews of the 5 best low-pressure impact sprinklers, covering real-world performance, design pros and cons, and long-term reliability, along with a buyer’s guide grounded in hands-on testing and practical irrigation scenarios.
Listed below are the 5 best impact sprinklers for low pressure from our list:
Rain Bird LG3HE In-Ground Impact Sprinkler: This device offers full or part circle coverage with infinite pattern adjustments and wide coverage, perfect for medium to large lawns, but may require multiple units for uniform distribution in larger areas.
Orbit 58308Z Brass Impact Sprinkler: This offers an adjustable tripod base for flexible targeting and a significant coverage area, although it could suffer from water leakage issues due to insecure hose attachment.
Rain Bird P5R Low-Pressure Impact Sprinkler: The P5R offers water conservation benefits due to its spray-guiding arm that controls flow, minimizing consumption, but may be somewhat limited in terms of area coverage.
Orbit 56186N Brass Impact Sprinkler: This sprinkler ensures even distribution over large areas, and it's suitable for dirty or reclaimed water; however, its lightweight design could potentially compromise its stability.
Melnor 65607-AMZ Pulsating Sprinkler Impact Sprinkler: Known for its durability, this sprinkler includes a timer to prevent over- or underwatering, backed by a 7-year warranty, but may experience issues with its rotation function that could limit its 360-degree coverage.
Here is the list of the 6 best impact sprinklers for low pressure that you can use to effectively water your lawn and garden.
1. Rain Bird LG3HE In-Ground Impact Sprinkler - Best for Medium to Large Lawns
Rain Bird is a leading manufacturer of the most reliable irrigation products and services designed to minimize water consumption. And the LG3HE in-ground impact sprinkler is no exception! Ideal for watering medium to large areas, the impact sprinkler ensures full or part circle coverage with infinite spraying pattern adjustment.
Our team discovered through using this product that we have to appreciate the wide coverage of the Rain Bird LG3HE, which, in turn, makes it perfect for medium to large lawns. The wide coverage is not a given for all low-pressure sprinklers, we learned. You can adjust the coverage anywhere from 0 to 360 degrees (full circle or part circle coverage) to ensure a uniform distribution of water.
That’s not all; this impulse sprinkler boasts of a spraying distance ranging from 26 to 41 feet, allowing the water to reach a larger distance. At the same time, its 3-inch pop-up height makes it easy to water lawns with tall grass.
Moving on to its installation, we were impressed by how convenient it is to set up impact sprinklers. There’s no trenching required, simply dig a small hole, place the sprinkler backfilled with dirt, and watch it in action!
What’s the best part? The complete assembly remains in place for the entire season, removing the hassle of setup every time you have to water your lawn. All you need to do is connect your garden hose via the click-n-go connect, and you’re good to go.
Over time, you may see brown patches of turf on your lawn due to uneven watering, our research shows. This usually happens in large lawns, where the sprinkler fails to reach the middle areas, despite its extensive coverage. In such cases, we’d suggest adding more impact sprinklers that partially overlap to cover the entire property.
What We Like
Simple and permanent installation
Rugged side housing for quick connection
Full-range water pressure
Pops up and retracts smoothly
Adjustable coverage
What We Don't Like
More than one sprinkler is required for uniform coverage in a large area
Dimension: 0.62" x 0.62" x 1.07" | Weight: 2.1lbs | Style: Impact Sprinkler w/ Click-N-Go Connect | Area Coverage: 360° Full Circle & 20° - 340° Part Circle | Floor Area: 5200sq ft | Material: Stainless Steel, Brass
2. Orbit 58308Z Brass Impact Sprinkler - Best for Adjustable Tripod Base
Next up on the list, we have a popular heavy-duty brass sprinkler on a tripod base from Orbit, a leading brand when it comes to smart watering systems for lawns. Designed to fit the changing needs of your growing plants and grass, its impact head offers better reach for extensive coverage.
For us, the highlight of the 58308Z sprinkler from Orbit is its tripod base, which not only makes it easy to set up but also ensures quick adjustability. In other words, you can position the stand as per the required height without any hassle using its ergonomically designed clamps.
When we trialed this sprinkler, we learned that once set, the heavy-duty construction of the impact sprinkler base firmly plants it to the ground to resist the force created by the impact head, thereby preventing tipping. It allows you to keep the sprinkler watering for a long time by attaching your water hose to its gooseneck hose attachment.
Our analysis of this model revealed is perfect for large lawns, covering an area up to 6,360 sq.ft., thanks to its wide and adjustable coverage ranging from partial section to full circle watering. You can customize the spray distance radius and stream using the diffuser screw and deflector shield.
Last but not least, its anti-backsplash arm makes sure that the water is sprayed in the desired direction in a consistent pattern.
There’s no doubt that the Orbit 58308Z Sprinkler is an ideal option for the uniform watering of large lawns. However, we couldn’t help but notice a few of its minor design flaws. For instance, the gooseneck hose attachment wasn’t secure enough, which led to water leakage issues.
What We Like
Quick and easy setup
Flow-through design for anti-clogging
Stable and heavy-duty brass tripod base
Adjustable coverage and customizable settings
Easy and compact storage
What We Don't Like
Water leakage issues
Dimension: 15" x 9" x 8" | Weight: 5lbs | Style: Brass Impact Sprinkler | Area Coverage: 0 - 360° | Floor Area: 6360sq ft | Material: Brass, Metal
3. Rain Bird P5R Low-Pressure Impact Sprinkler - Best for Water Conservation
Rain Bird continues to rule the impact sprinkler industry with its wide range of innovative products designed to maintain the beauty of your lawn. So, it makes sense to introduce you to the P5R plastic impact sprinkler from the brand. Equipped with a spray-guiding arm, it controls the spray pressure and pattern to conserve water.
The Rain Bird P5R features a high-impact polymer and stainless steel construction, making it a durable option for you to consider, our research indicates that nothing beats it in terms of reliability and performance, especially in dirty water conditions, such as ponds, irrigation canals, etc. This is why it’s an excellent choice for reclaimed irrigation water systems.
Apart from a straight-through-flow design, the model comes with a spray guiding arm that controls its water flow and prevents side splash. Hence, the impact sprinkler surpasses expectations in minimizing water consumption, whichis undeniably a feature that makes it stand out from the rest.
As per our expertise, the Rain Bird P5R is significantly easier to install using its 1/2-inch threaded pipe outlet. Once set up, the double-weighted arm ensures slower rotation and increases spray distance. You can also use the diffuser screw to reduce the water pressure for the uniform watering of your lawn.
You’ll always have to keep the radius coverage low to ensure an even distribution of water when it comes to a large lawn. This is because if the sprinkler head is adjusted to a larger area, the water tends to reach the regions nearby and the outer perimeter. The middle area remains dry and unwatered.
What We Like
Water-saving design
Durable and reliable
Superior performance in dirty water conditions
Easy to install
What We Don't Like
Not for wide area coverage
Dimension: 1.67" x 0.6" x 5.27" | Weight: 0.35lbs | Style: Plastic - 1/2" Inlet | Area Coverage: 360° Full Circle & 20° - 340° Part Circle | Floor Area: N/A | Material: Plastic
4. Orbit 56186N Brass Impact Sprinkler
We now bring you yet another dependable impact sprinkler from Orbit, which is ideal for watering a large lawn when it’s set to a full circle. Attached to a wheeled base, the impact sprinkler can easily ensure even distribution of water, covering the entire area without getting tipped or stuck.
The Orbit 56186N is designed to ensure uninterrupted water flow for irrigating lawns and gardens covering an area of up to 6361 sq. ft. There’s no need to worry about clogging, even when used with dirty or reclaimed water from ponds and canals.
After conducting experiments with it, we learned it will spray water consistently season after season without getting stuck or tipping over, thanks to its brass/zinc and wheeled construction. The impact sprinkler can easily adjust to high water pressures and severe conditions without breaking or rusting. So, you can rest assured of its durability at all times.
What’s more? You can adjust the spray coverage of the model from a partial section to full 360-degree watering, depending on your lawn's requirements. To expand your watering coverage, its flow-through design allows you to connect multiple sprinklers as per the water pressure.
We found the Orbit 56186N a bit light compared to the other options on the list. This doesn’t affect its overall performance in any way, but it may compromise its stability. Also, we came across minor water leakage issues in the rotational section. So, we’d recommend checking the product before making a purchase.
What We Like
Dependable performance over the years
Covers large areas consistently
Resistant to clogs
Wheeled base for easy positioning
Customizable settings
What We Don't Like
Water leakage issues
Lightweight design
Dimension: 13.5" x 12.5" x 4.4" | Weight: 1.58lbs | Style: Brass Impact Sprinkler | Area Coverage: N/A | Floor Area: 6361sq ft | Material: Aluminum
Melnor has come a long way in the innovation of lawn and garden watering tools and equipment since its foundation in 1946. On that note, we decided to introduce you to the 65607-AMZ pulsating sprinkler from the brand. Backed by a 7-year limited warranty, this impact sprinkler serves as one of the most reliable options out there.
The Melnor 65607-AMZ is designed to help tackle all your watering chores, allowing you to maintain a healthy and pristine lawn at all times. It’s equipped with durable nozzles and wands, which, in turn, add to your convenience during operation.
While testing this product, we loved the inclusion of the timer since it helps prevent underwatering or overwatering, thereby minimizing water consumption. As a result, the sprinkler serves as an easy watering solution to keep your large lawn or garden lush and green.
You don't need to think twice about buying this impact sprinkler as Melnor guarantees quality, which is backed by a 7-year limited warranty. And with its rust-proof design, expect years of reliable service.
Furthermore,the impact sprinkler comes with a quick-connect system that makes connecting and disconnecting tools a snap. Simply attach the threaded end of the nozzle to your garden hose to begin spraying.
We weren’t entirely impressed by the construction and design of the sprinkler, despite its durability. This is because it compromises some of its functions, such as rotation. It tends to get stuck while rotating, failing to ensure a full 360-degree coverage - a design flaw that needs attention.
What We Like
Quick connect system
Includes a water timer
Minimizes water consumption
7-year limited warranty
What We Don't Like
Gets stuck during rotation
Dimension: 7.91" x 8.97" x 5.07" | Weight: 1.1lbs | Style: Metal Head, Metal Sled | Area Coverage: N/A | Floor Area: 5600sq ft | Material: Metal
What is the Best Low-Pressure Impact Sprinkler?
In this section, we present a comprehensive evaluation of the finest low-pressure impact sprinklers available, each designed to efficiently cover specific areas with precision. The comparison table below meticulously dissects their attributes, including dimensions, weight, style, area coverage, floor area, and the materials used in their construction.
By now, you’ve gone through our list of the top recommendations for low-pressure impact sprinklers. So, were you able to make a choice? Well, we’d be pleased if you have, but even if your answer isn’t affirmative, there’s no need to worry!
We understand that selecting the best impact sprinkler for low pressure from a hand-picked list of excellent options is easier said than done. This is why we’ve come forward with this comprehensive buyer’s guide, explaining a few crucial points that need attention when it comes to buying a sprinkler for your lawn. Our analysis of the impact of sprinklers for low pressure taught us it's simple but not easy, as the sprinkler needs to fit your exact use case.
Read on to learn more about choosing impact sprinklers!
Water Pressure Requirements
You know that your home is equipped with a low-pressure water system, so you’ve decided to opt for a low-pressure impact sprinkler. Great! But it doesn’t end there.
It’s essential to compare the sprinkler water pressure requirements with those of your home water system for optimum coverage. In other words, the sprinkler’s PSI (pounds per square inch) or flow rate should be compatible with the low-pressure system.
Spraying Distance & Great Coverage
To determine the overall coverage of impact sprinklers, it’s important to consider the spraying distance and radius of the sprinkler. Also, don’t forget to measure the total area of your lawn or garden.
That said, make sure the sprinkler is adjustable to ensure uniform water flow throughout the area that requires irrigation. In case your lawn covers an extensive area, you can consider going for more than one impact head.
For this, you need to ensure that the sprinkler comes with a quick-connect feature, allowing you to attach the heads in a chain.
Good Construction & Design
You’d want your sprinkler to ensure reliable service over the years, right? That’s why checking the materials used for its construction is imperative.
Always opt for a unit made using heavy-duty metal, such as zinc, brass, stainless steel, aluminum, and plastic. These materials make the sprinkler resistant to rust and corrosion. That’s not all; impact sprinkles made using durable metals can withstand moisture and severe weather conditions.
Furthermore, its base plays a vital role in determining its sturdiness. You can consider choosing a unit that comes with a wheeled base for its easy positioning. It ensures uniform water distribution without getting stuck or tipping over.
Tripods also stand out in terms of adjustability and wide coverage. They add height to the impact sprinkler, making them perfect for large lawns with tall grass.
Spraying Pattern
Ideally, sprinklers spray water uniformly in a circular motion caused by their arms’ impact hitting the ball bearing. That said, opt for a unit that comes with an easy-to-use diffuser screw to help you adjust its spraying pattern and water flow. It also allows you to control the spraying distance as per your lawn’s requirement our test group shows.
Apart from this, the sprinkler should come with a deflector shield. This will help you control the movement of the impact head to adjust the arc of water.
Are there any restrictions on where I should install impact sprinklers for low pressure? Yes, impact sprinklers for low pressure should be installed in open areas free from obstructions such as walls, fences, or dense shrubbery, as these can interfere with spray trajectory and coverage. Placement must account for the sprinkler’s spray radius and pattern to ensure full overlap without overspray onto walkways or structures. Installation near delicate beds or tight corners may require additional flow control or deflectors.
Can I connect multiple low-pressure impact sprinklers to my water source? Yes, you can connect multiple low-pressure impact sprinklers to a single water source, provided that the total flow rate and pressure requirements do not exceed your system’s capacity. It's critical to calculate cumulative gallons per minute (GPM) and match that against available water pressure, typically ensuring each unit receives a minimum of 25–30 PSI for reliable operation. Use a pressure regulator and hose splitter with individual valves for optimal distribution control.
Can I use an impact sprinkler for watering delicate plants? Yes, impact sprinklers can be used for delicate plants if they feature adjustable spray patterns and flow control nozzles. Select a model with fine mist settings or reduced spray pressure capability to avoid damaging leaves or stems. For sensitive plantings, position the sprinkler at a greater distance and use partial arc settings to control intensity.
How do I maintain my impact sprinklers for low pressure? To maintain impact sprinklers for low pressure, inspect them regularly for nozzle clogs, worn seals, or misaligned arms. Clean out mineral deposits and debris that can restrict flow or disrupt spray patterns. Lubricate moving parts occasionally if recommended by the manufacturer, and check connections for leaks. Proper seasonal storage and clearing out trapped water before winter can extend the lifespan of all components.
Conclusion
Selecting the right impact sprinkler for low-pressure conditions ensures consistent water distribution, prevents underperforming zones, and reduces water waste. The five models featured in this guide have been tested for spray accuracy, build quality, and pressure efficiency—each offering specific advantages depending on your lawn size, elevation, and system design. For those prioritizing height and adjustable reach, a tripod-mounted impact sprinkler can be a smart upgrade for covering tall vegetation or uneven terrain. If you’re building or upgrading a full irrigation setup, pairing your sprinkler with the right sprinkler valve is equally important for flow control and long-term reliability. Additionally, users managing multiple zones or large properties may want to explore other top-rated tripod sprinklers to optimize reach and mobility across different lawn areas.
Whether you're maintaining a residential garden or managing a larger yard with water constraints, this guide should help you confidently select a high-performing impact sprinkler that meets your specific pressure and coverage needs—all without the complexity of commercial-grade systems.
Swimming pools are the ultimate insertion in a backyard design. Even if they sound a bit luxurious and probably unaffordable, the amount of relaxation and recreation achieved by having such an extension to your home will always outweigh the costs.
The backyard landscaping ideas series continues with a very enjoyable feature: the patio, an addition fairly easy to build that creates a very intimate environment, ideal for socializing!
First of all, let us define the patio. The patio is "an area, usually paved, adjoining a house and used as an area for outdoor lounging, dining, etc.". There are hundreds of designs to choose from when designing your backyard but, no matter how it looks like, the patio is in fact an extension of your indoor living space. It can be used as an outdoor kitchen, a living room or perhaps even as a bedroom if you fancy sleeping under the stars. A patio represents a way to extend your home without making the house bigger, in a more fashionable and less expensive way. In the end, this addition will also increase your home's resale value because it's such an appealing environment. A patio, whether it's made of brick, stone or concrete, will greatly enhance our living quality and quite often become the heart of the party as most people prefer spending time outside, in fresh air rather than in between four walls. Planning a patio is essential before you start remodeling your backyard as there are so many options to chose from. You'll have to think about it's placement and size, materials and what amenities you wish it to host. We have previously featured a few ideas on our website: Backyard Landscaping Ideas-Swimming Pool Design,Backyard Landscaping Ideas-Attractive Fire Pit Designs, Pergola Designs Upfront-Transforming Your Backyard Into a Relaxing Environment
Backyard Patio Styles and Types
Think of your patio as a regular room that has a purpose and will host a certain activity. This implies a certain type of layout, furniture and finishes to match. If you haven't decided exactly what you'll be designing your patio for, here a few examples: dining, cooking, game or movie nights, sunbathing, enjoying a good book and more. You can see now how the furniture can differ from one type to another. Depending on the space available, your patio can serve one or more purposes.
Lounge and Bistro Patio
This is perhaps the smallest patio type there is but the most intimate. A rustic set of chairs and table encircled by blooming flowers will ensure the perfect spot for an outdoor breakfast or a glass of wine in the evening alongside friends or family.
Outdoor Dining Patio
This is probably the most popular type as every person prefers enjoying a meal in a natural environment. And you can be sure that this backyard landscaping design idea will be a powerful magnet for your friends and family. It does require a bigger area, at least 12 feet by 12 feet and preferably, it should be placed near the kitchen to make serving as easy as possible. But more important than that will be its surroundings. Make sure that the environment will feel as natural and rustic as possible.
Living Room Patio Design
Outdoor living rooms are incredibly popular. Adding an outdoor living area to your backyard will give you a space to relaxing with friends and family. This style of patio often features a fireplace or fire pit with deep-seating patio furniture and a shade structure. An outdoor living room should be at least 16 feet by 18 feet. Don't forget to include extra space for people to walk around the furniture.
Sundeck Patio Design
This type of design must benefit from a privileged area of the backyard where there is no shade, it's accessible and most likely near a swimming pool. Outdoor comfortable chaise lounges are the perfect type of furniture for this one. The pavement can be different from the rest to mark a specific area, which can be enclosed and decorated in a individual manner and become a focal point.
Backyard Patio Basic Design Rules
When designing your own patio it is important to begin with a few things in mind. In most cases, due to a lack of attention to details, people ended up with undersized patios with unusual and unusable shapes, not fitted for their activities. To avoid that, it's best to consider everything from the start. So what should you have in mind? Well, the most important thing is exactly what will you be doing in int? Will you simply enjoy your morning coffee and a nice book in the evening from time to time? Will you invite friends over to talk till midnight and perhaps watch a movie? Or perhaps the entire family will gather at your place on Sunday's to eat lunch and have a good time. Either way, you can see why these questions will determine the attributes of your dream backyard patio. After that you will have an idea of exactly how much space it will take, perhaps what shape and what type of furniture you will be using. Before going into details I suggest that you surf the internet for as many and various examples as possible in order to get a wider view of how you're going to apply the design you have in mind.
Backyard Patio Placement Ideas
In most cases, a patio is best placed on the back of a house. But don't rush into it. There are several things that you need to consider before making that decision. Here are the most important things that you need to have in mind: patio's purpose and future activities, its relation to your home, the amount of space available, the sun factor(some people prefer shade whilst others go for lots of sun, depending on their activities) and last but not least, the views available. After all, your patio will be a thing of beauty and taste, like the rest of your backyard design. Taking advantage of the serene environment you'll create is very important. But the purpose of the patio is the most important aspect. Think about it. For dining events, it should be placed somewhat close to the kitchen. If it will act as an extension of your living room, it should be as close to it as possible. Or perhaps you've set up a small pond (Upcycle An Old Tire Into a Jaw-Dropping DIY Pond !) somewhere in the back and you want to take advantage of it as it's the perfect place to enjoy a steamy morning coffee.
Backyard Patio Dimension Ideas
Take your time to determine your future patio's exact size. Most people end up with one that's either too big or too small. Better if it's bigger but still, you could've used that spaced for a different activity. Also, once it's built, it will be very inconvenient to alter its size or shape. So plan everything with care, taking precautions and thinking about what future events it will host. The first step will be to decide how you will use it. But we've already talked about that. Just keep in mind that everything takes space and when you sum up, it might have to be bigger than you've imagined. Dining might also mean cooking so make room for a barbecue; you could also have a firepit or fireplace(Backyard Landscaping Design Ideas-Fresh Modern and Rustic Fire Pit Design Ideas, Backyard Landscaping Ideas – Exterior Fireplaces Meant to Enhance Your Living Quality). The second step would be to foresee the amount of people that will be enjoying your patio. Not just for the furniture but circulation area as well. There are certain standards that you can use to determine that. The third step consists of applying your scheme to the dimensions of your backyard. Will it fit? Can it be bigger or do you need to reduce its area to make room for other amenities?
Always remember to use paver sealer on your patio, it is extraordinarily easy to apply a layer and the effects are mind-boggling!
With these ideas in mind, we invite you to share your patio projects with us and to leave your valuable feedback in the comment section below.
The most reward-full and luxurious addition to a backyard landscape is also the most popular one world wide : the swimming pool. All contemporary modern mansions and dream homes now include a custom swimming pool englobed in the design from the very beginning, the swimming pool now enhances the home and the living quality dramatically . As the functionality of an exterior swimming pool is limited during the winter architects and homeowners alike consider bringing the swimming pool indoors to extend its use. Despite this tendency to extend the use nothing compares to the timeless charms and extraordinary serenity of a natural pool that evolves along with the surroundings as the colored leaves are nestling on the sky mirrored in the a spectacular swimming pool. Nature enhances everything and can transform your backyard landscape in one of the most extraordinary panoramic getaway, always at hand.
Metal Roofing in the Backyard Enroots The Nautral Pool Setting Appeal to Earth
by Becker Studios
Certain individuals may enjoy a spacious backyard that can accommodate extensive and surreal landscapes along a natural pool yet most contemporary homes reside on small plots and therefore homeowners are pushed into complex, creative and beautiful cozy solutions in their designs. Further on we will present a few ideas and pictures meant to feed your imagination from a heavenly natural point of view on natural pools.
A Natural Pool Area That Enhances Both the Appeal of the Backyard Landscaping and Your Own Health
by Genus Loci Ecological Landscapes
Perfect Setup and Equilibrium Between the Home and the Site
by Locati Architects
Rustic Natural Pool with a Farm Backdrop and Faux Ruin Shelter
Natural Landscape Complementing and Idyllic Landscape Beautifully
by Armond Aquatech Pools / Halkin Photography
Beautiful Simple Natural Pool
Tropical Flavor Added To a Natural Pool Through Plants
by Freddy Landscape
Design Completely Natural As Nature Does
As soon as you spell the word "natural" everything changes. The true meaning of the word today lost a whole lot of substance and meaning yet it still means a whole lot more then aesthetic values. A natural swimming pool is obviously surrounded by living things whether they`re plants or microorganisms. A natural pool relies on the greenery in which is embedded to maintain the water clean on a daily basis and they are completely chemical-free. This in theory means that they will never negatively effect your skin your health or the environment in any manner. A natural pool though is tougher to build because it makes use of a larger landscape in which water circulation and purification will take place using a regeneration zone.
Escape the Rush of Urban Life with a Relaxing Pond
by Genus Loci Ecological Landscapes
Humongous Natural Swimming Pool for Big Backyards
Biotop Natural Swimming Pool Creating a Sustainable Landscape
by R. P. Marzilli & Company Landscape Contractor
The size of the regeneration zone is directly proportional to the size of the pool and the amount of water that it needs to filter daily. This basically means that even small backyards can shelter natural pools in small sizes with the additional regeneration area. Submerged plants, floating plants and rooted ones alike are improving the water quality whilst maintaining the right oxygen content. These does not meant that additional plants on the sides should not exist, these add a certain appeal and they help the sustainability of the complex ecosystem.
Natural Pool Coupled With Multiple Ponds and Intricate Pathways in an Extensive Natural Landscape
by Legacy Landscapes
Canopy That Surrounds the Pool Defining Its Natural Relaxing Appeal
by Robins Nest Aquatics
A Natural Refreshing Pool That Replicates a Pond in The Forest
Stunning Natural Pool San Francisco That Presents a Tropical Beach In Your Backyard
by Bradanini & Associates
Add Waterfalls in Your Landscape
Swimming pools and natural pools in particular are not just for the benefit that they offer. It`s worth knowing that there are a couple of homeowners with a swimming or natural pool that invested into them for their jaw-dropping effect or sense of proximity with nature. With this thought in mind, a spectacular asset to the aesthetic value of a pool is the waterfall. The waterfall is one of the hottest trends in outdoor pool designs mainly because they are mind blowing beautiful, they add an exotic vibe, they keep the water fresh and create one of the most relaxing sounds in the world.
Basalt Rocks Along Japanese Maple and Dreamy Waterfall Shaping the Stunning Pool Retreat
by Alderwood Landscaping
Natural Chemical Free Swimming Pool Design Enhancing a Magnificent Mesmerizing Backyard
by Kane Brothers Water Features
Through natural rocks you can manipulate and shape the landscape around a natural pool magnificently. Huge basalt rocks are a popular yet very expensive choice and they add authenticity to your pool. The shape of the pool and depth are also very important factors that will determinine its appeal, simple straight lines and constant depth might kill the mood. However a less natural addition can enhance it : LED lighting. LED lighting will shape and highlight your natural pool in an unique manner after sunset.
Brilliant LED Lighting Enhancing a Natural Pool Magnificently
by Placid Pools
Spectacular Natural Pool with Waterfall Fed by a Hillside Creek
Natural and Serene Look in a Pool with Waterfall
by Poole’s Stone and Garden
Impressive Setting Obtained Through a Simple Natural Design
by The Landmark Group
Draw Inspiration From Nature in Your Natural Pool
The major setback of a natural pool is the maintenance, natural pools are far more demanding in terms of care then regular chlorinated pools. If you are unable to maintain such an instrument yet you still desire that connection and feeling of proximity with nature in your backyard consider making a compromise. Combine your backyard pool with the inimitable look of a natural swimming pool, draw inspiration from nature and infuse it into yours. Through some natural rocks, greenery and maybe even a small waterfall you can create something charming, beautiful.
Natural Organic Style With a Tropical Motif
by One Specialty Landscape Design, Pools & Hardscape
Perfect Natural pool Setting for a Modest Small Backyard
by Pool Environments
While the maintenance costs of a natural pool are near to a chlorinated pool the systems are a little more complex and delicate therefore on a long term the natural pool is more demanding.
Wood and Stone Deck Around a Small Natural Pool
by Waterscapes – Jesse Dutra
Natural Rock Shaping The Pool
by Designworks
Landscape Around the Pool And Waterfall Providing a Natural Elegant Vibe
by Cipriano Landscape Design & Custom Swimming Pools
Surround Your Natural Swimming Pool with the Right Plants and Shrubs
by Creative Environments
Clear Pool Resembling a Natural Lagoon
by Water Wizard Custom Pools and Service
What do you think? Is it worth the hassle? We would love to hear your opinion in the comment section bellow.
The Japanese are considered to be artists in matters of backyard landscaping ideas and their gardens are truly peaceful sanctuaries designed out of natural elements like sand, stone, water and, of course, plants. The right combinations transform any small garden and their method take into account three principles: small reduced scale, symbolization and recreation of certain views. In the following we'll present you a few tricks and methods of creating your very own Japanese garden meant to inspire and relax.
Backyard Landscaping Ideas - Japanese Gardens
1. Koi Fish Ponds
One of the most important elements of a Japanese garden is a pond populated with colorful Koi fish. Their purpose is to bring a little piece of a lake or ocean into your own garden and empower your senses with color and life. The dimensions of koi pond can vary so you can fit this element in any garden.
2. Bridges
A bridge is usually used to connect pieces of land and here it is used with the same purpose. Red or just simple unadorned stone, the bridge is a main element in a Japanese backyard landscape design and can offer a romantic flair to the entire garden.
3. Rock gardens
As stated above, one main principle in Japanese design is the reconstitution of certain natural elements. Rocks are utilized to represent mountains, sand to represent water and rivers. Traditionally, stones are supposed to be placed in odd numbers but the specific placement is not a given; you can choose your own personal way of arranging the rocks in your garden, creating thus a mineral landscape.
4. Moss Gardens
Moss is associated to green everywhere, anytime and due to its capacity of endurance it is very widely utilized in Japanese design. Its versatility makes it easy to use in any combination ( like a chess table with square stones as presented below) and is a source of green and life in any season.
But some climate conditions like a certain amount of shade, humidity, moisture can really make your moss garden blossom.
5. Bamboo and water
Bamboo water pipes are generally used in order to scare away birds and other animals that may harm your created environment. A bamboo tube is used with a water source which drops into the lighter end causing the heavier end to lift off the ground, emptying the tube. When it comes back down on the rock, the crashing sound is the scare tactic.
6. Japanese Lanterns
You may be tempted to think of paper lanterns that you lid and let flow into the air, but here we are referring to stone lanterns. Their main purpose is to offer light to remote secluded places of your garden, to beautify your garden and transform it by night into a little piece of heaven.
There 6 elements are sure to transform your garden into a Japanese design. And the beauty of it is that you do not really need all the elements to transform your space. All you really need is patience and dedication to organize and create that Zen atmosphere.
If you are one of the few that invest his time into a mesmerizing backyard garden you will surely love this extraordinary selection of DIY Pebble Paths. 15 magical paths have been hand picked, each better than the one before, each more detailed and more spectacular than the other one. These designs have been born through a lot of work, a whole lot of time and attention to details.
Each of these pieces should serve you well, feeding your imagination and encouraging you to start your own DIY pebble path project into your own garden. The designs showcased below have been created by using river stones carefully categorized into colors and sizes. You can only imagine the amount of work invested into such a grand design. It is only natural though to increase the aesthetic values of the nature you shelter in your backyard as much as possible so it`s always worth the effort.
What do you think about these fascinating DIY Pebble Paths? Would you invest the time and effort into a DIY project that would have this at the end? We would love to hear your opinion in the comment section below.


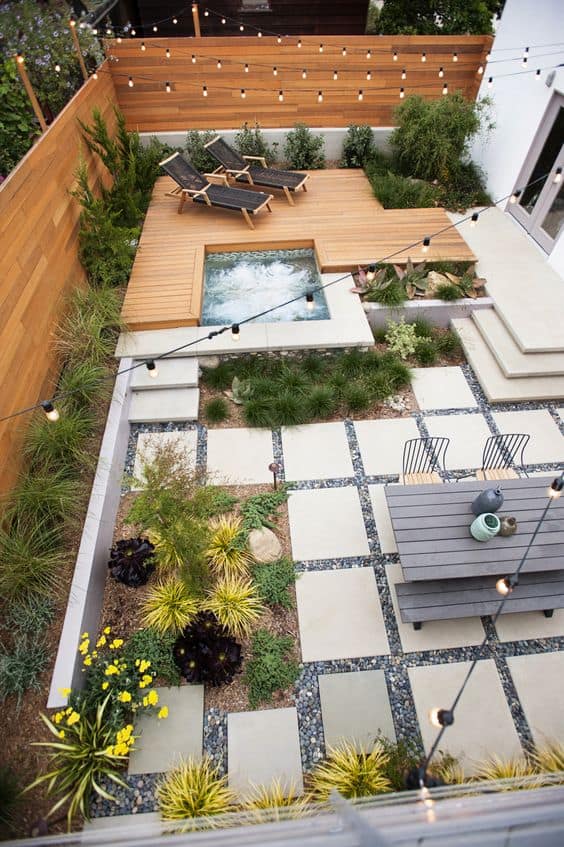
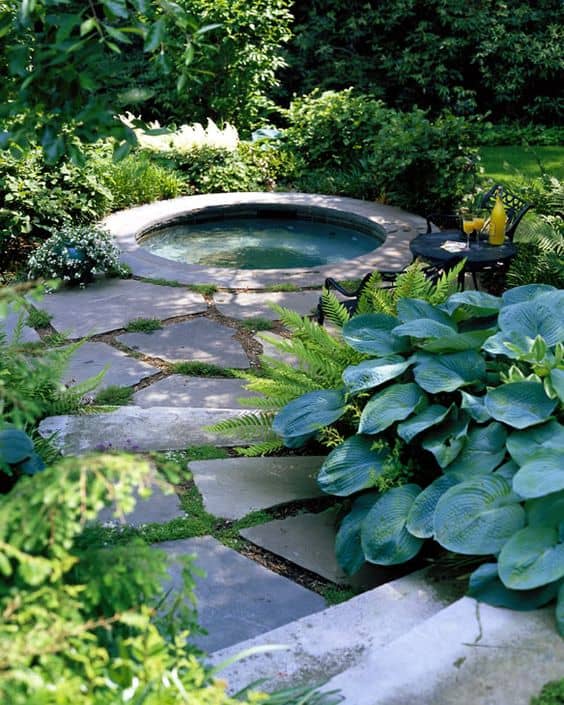
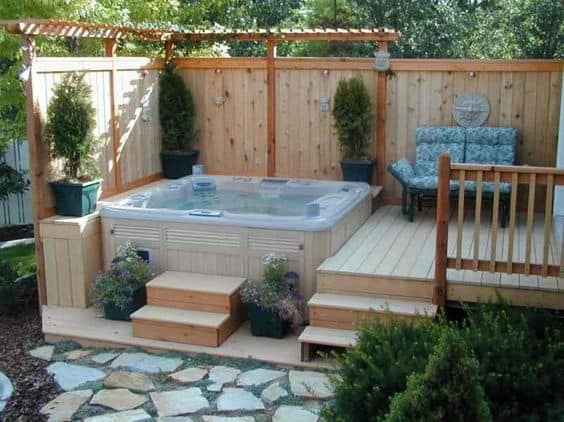
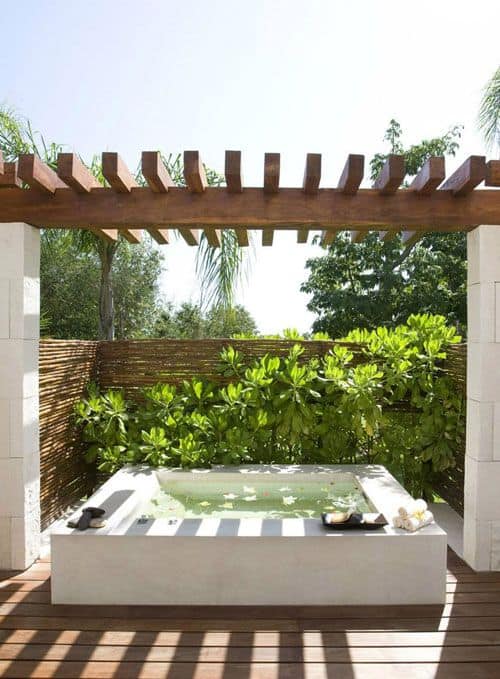
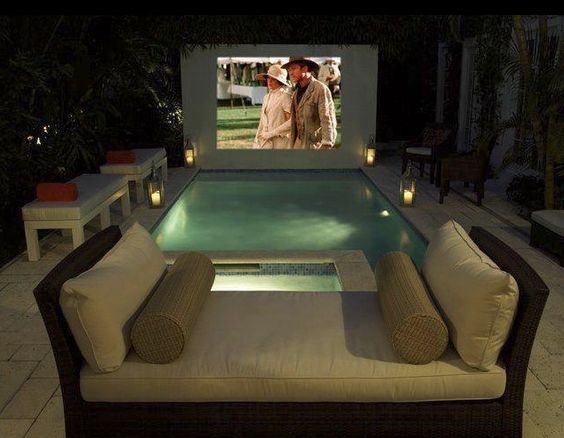
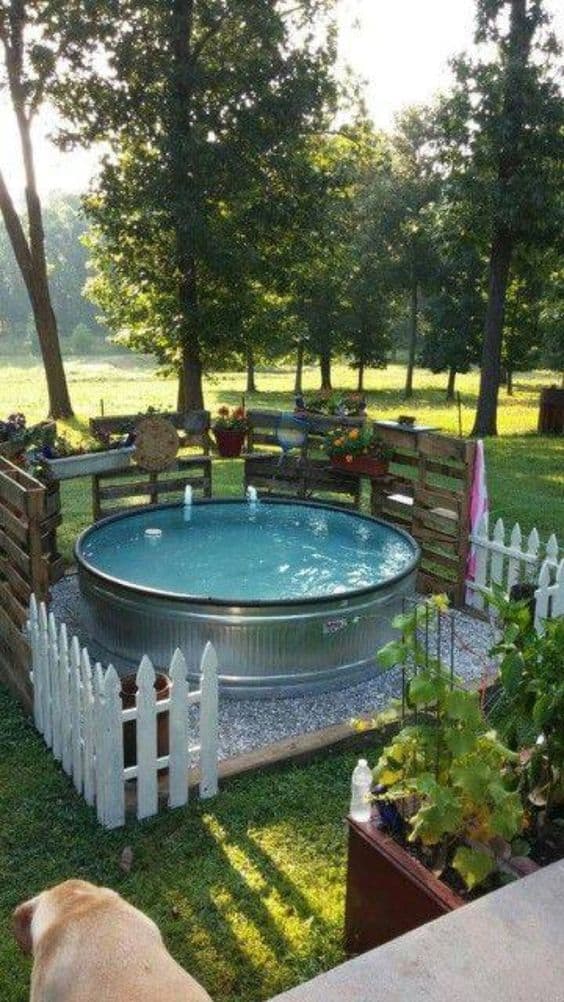
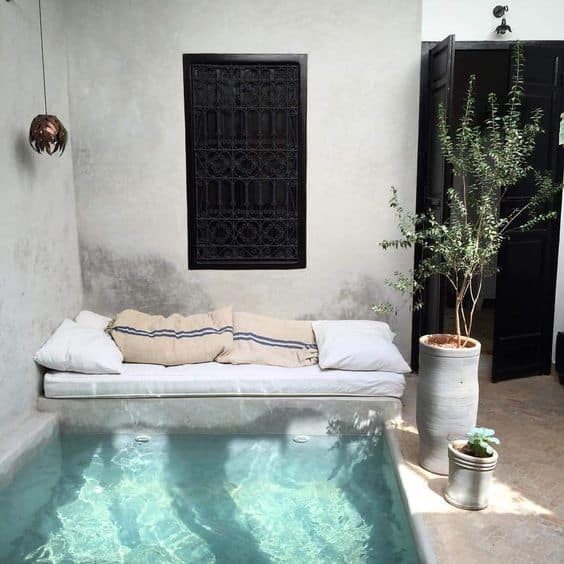
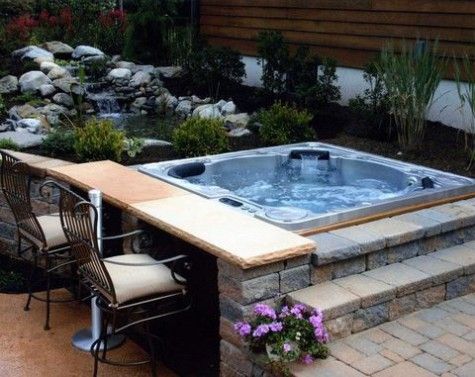
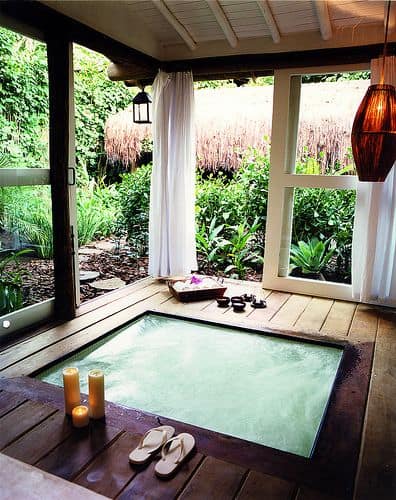
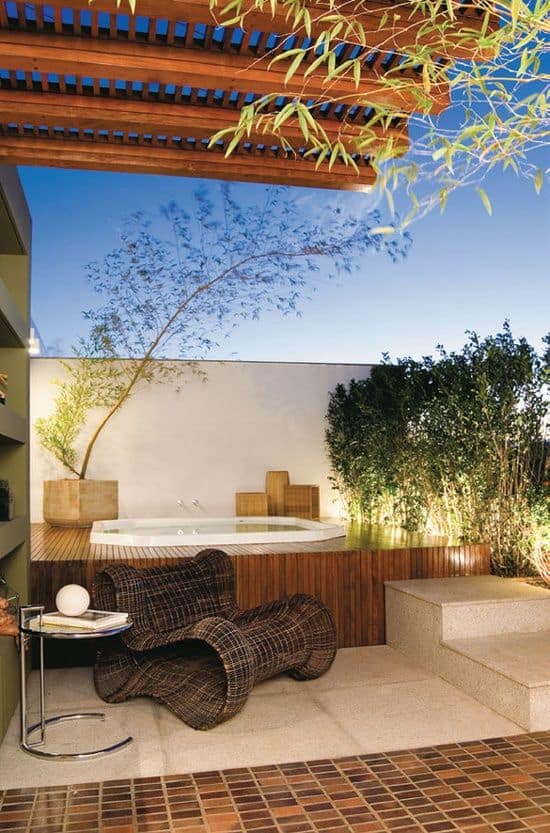

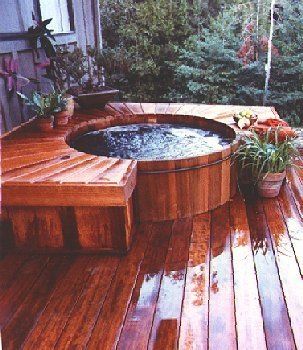
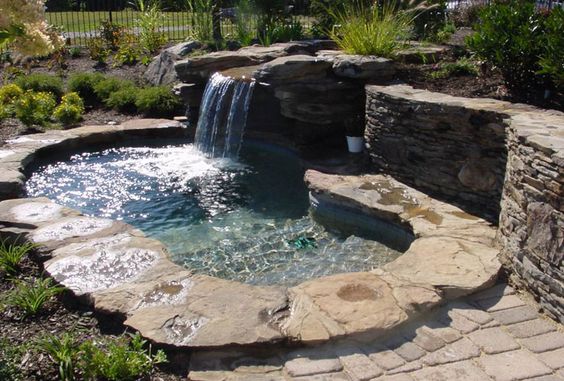
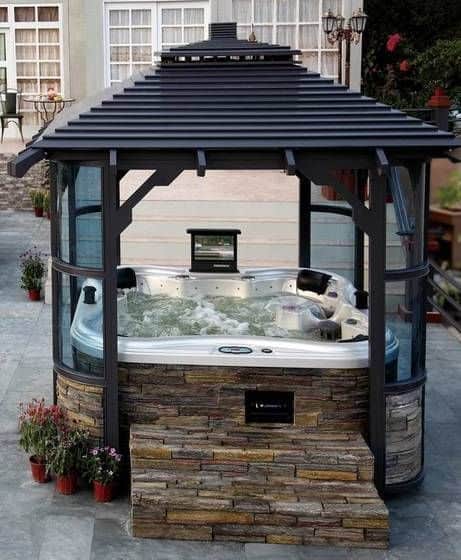
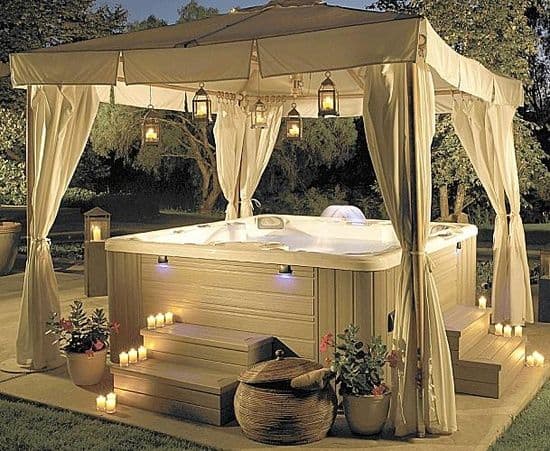
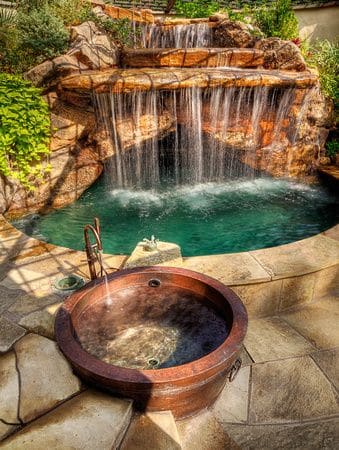
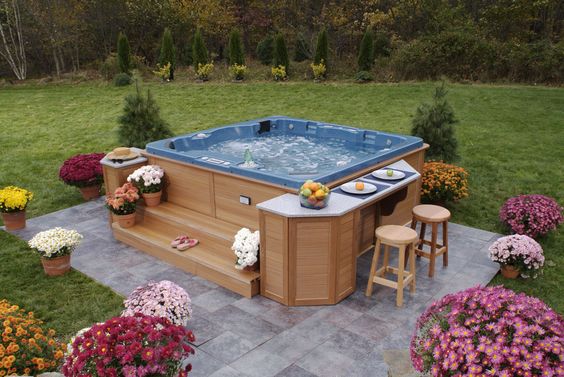
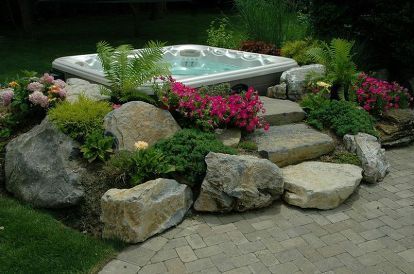
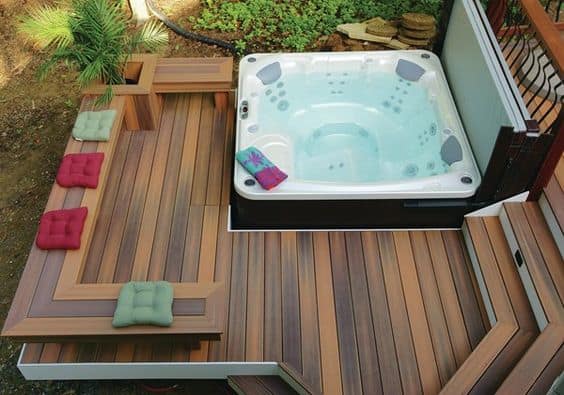

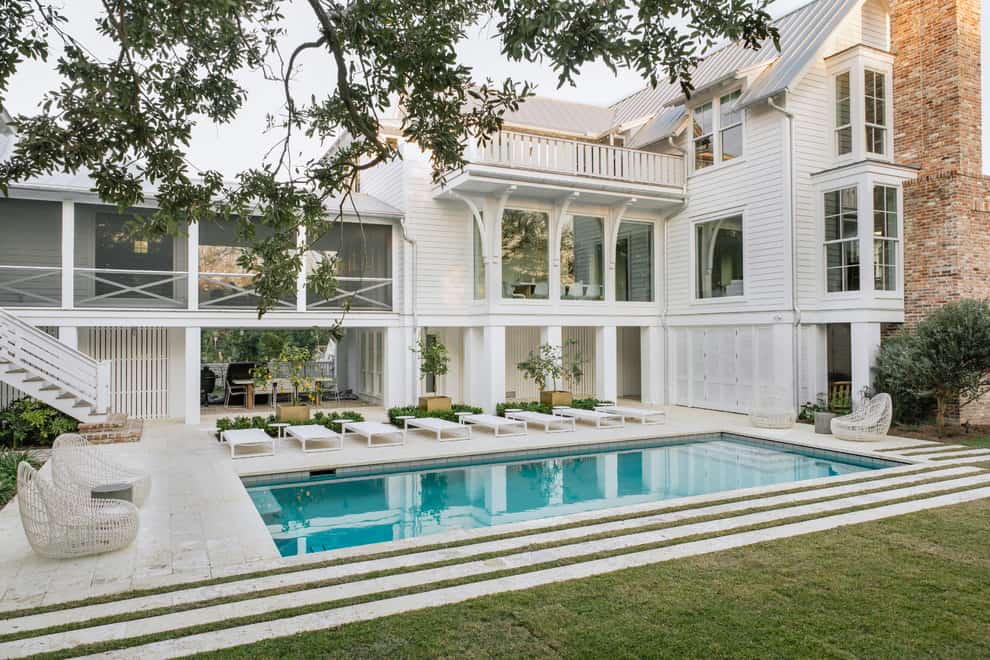

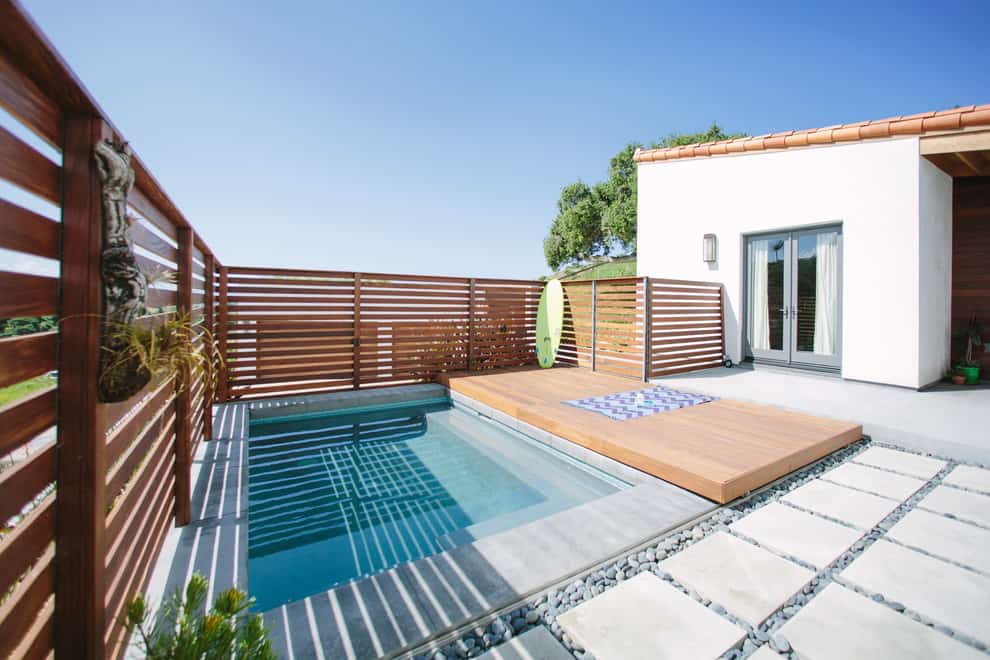
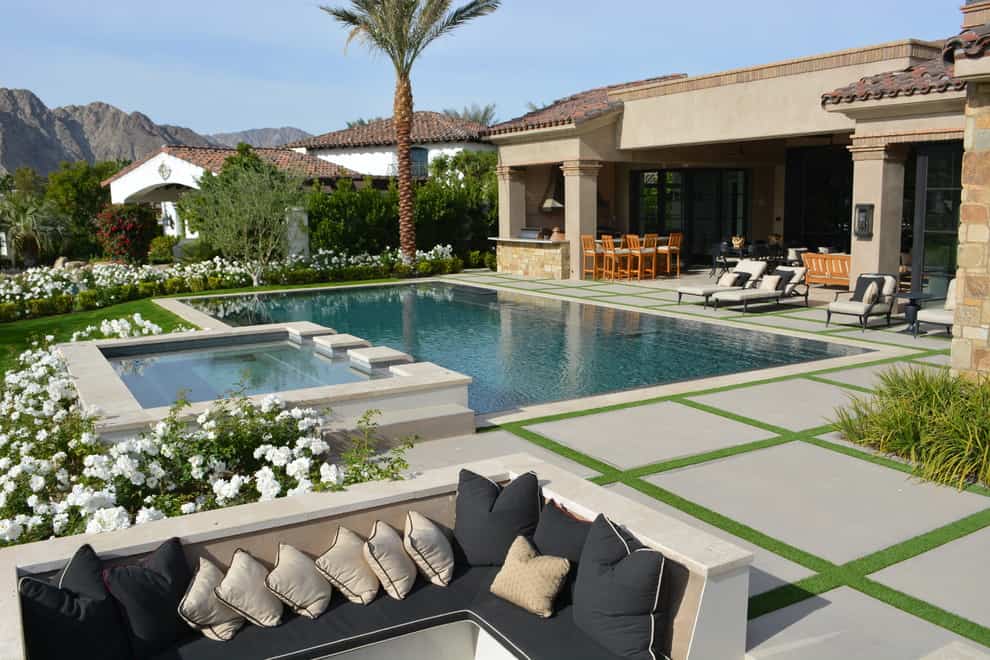
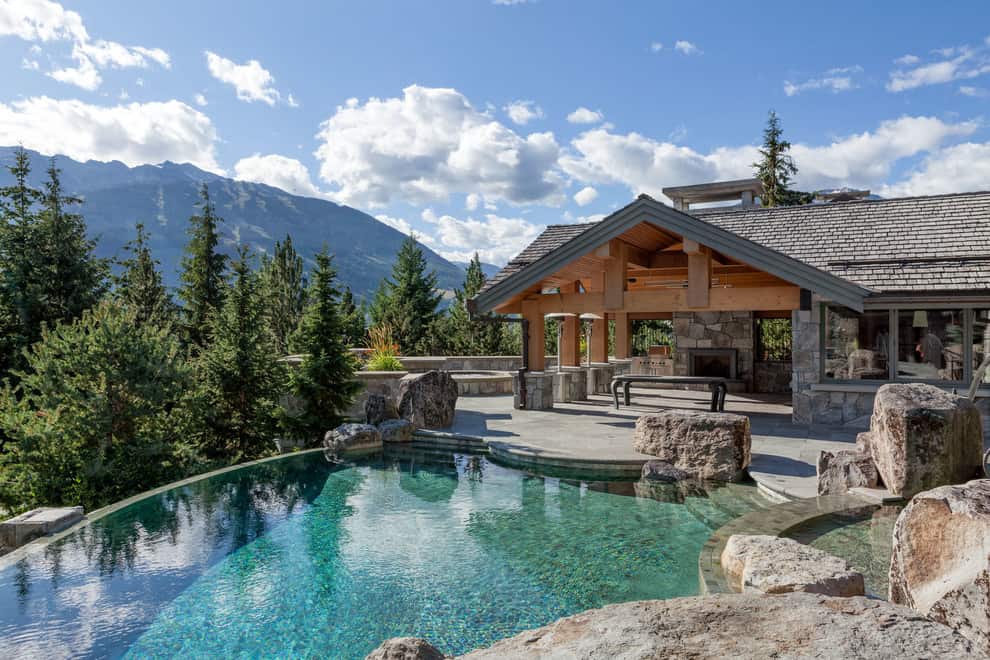
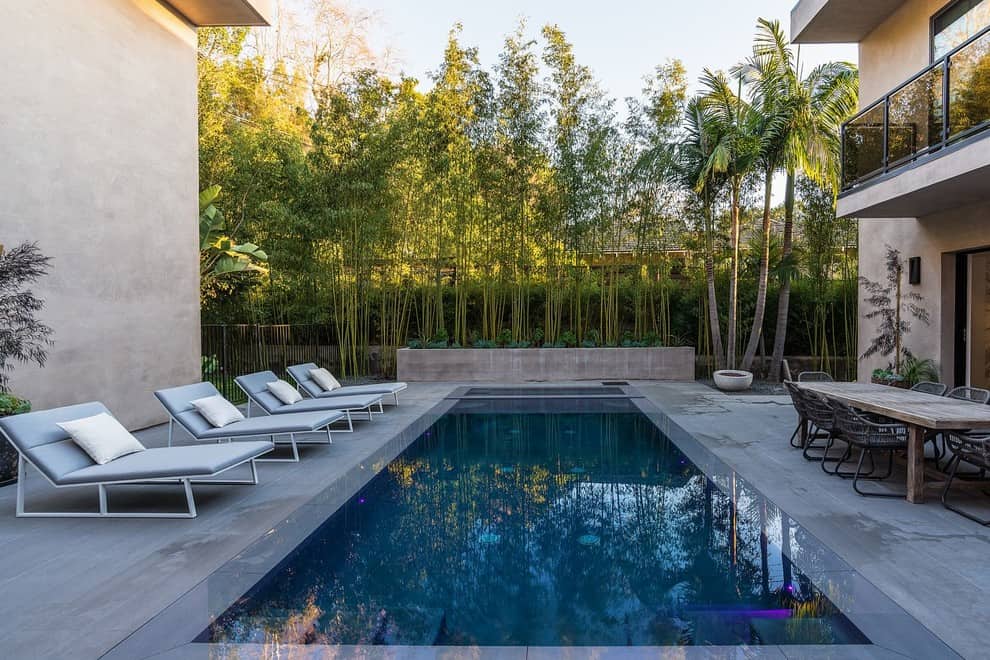
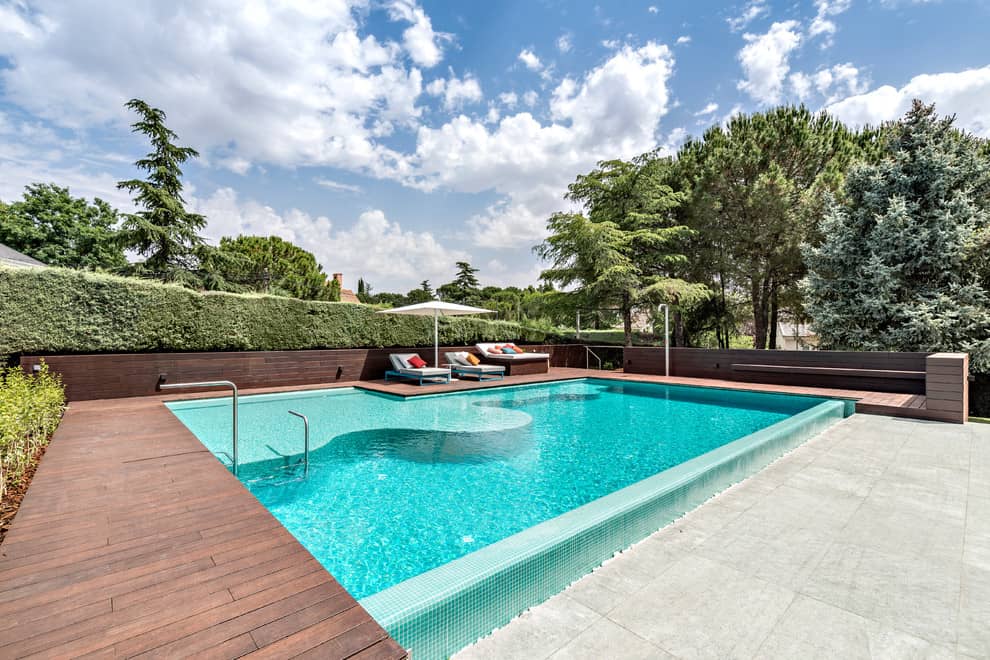
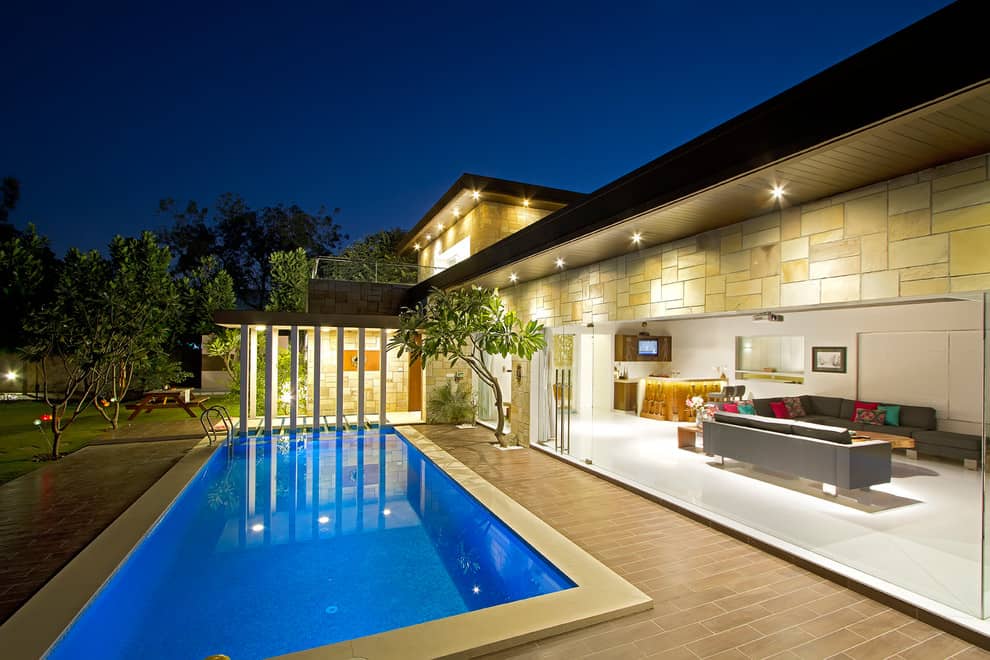
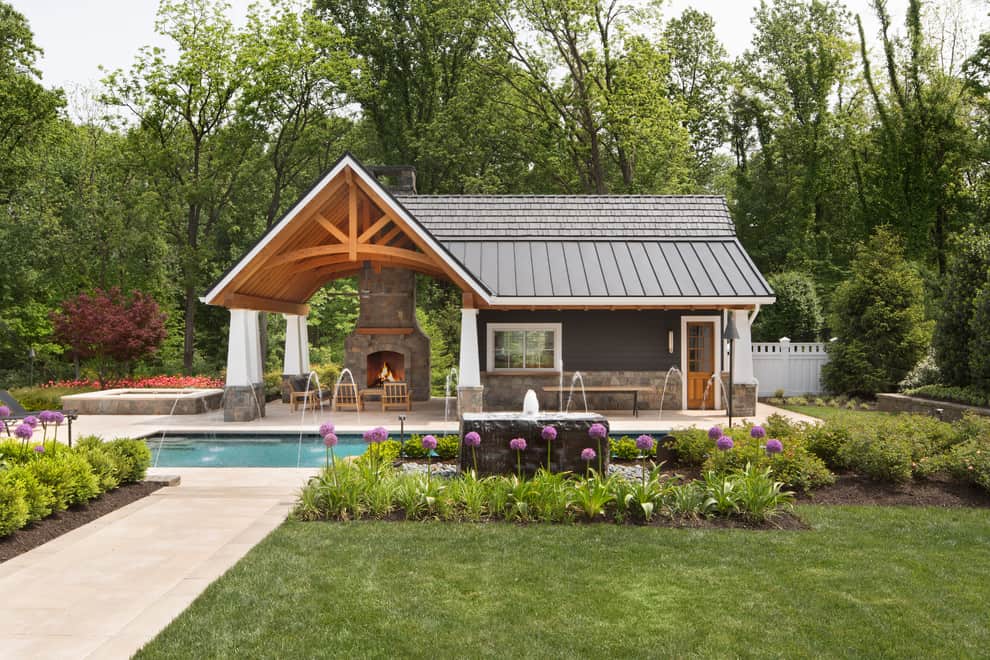
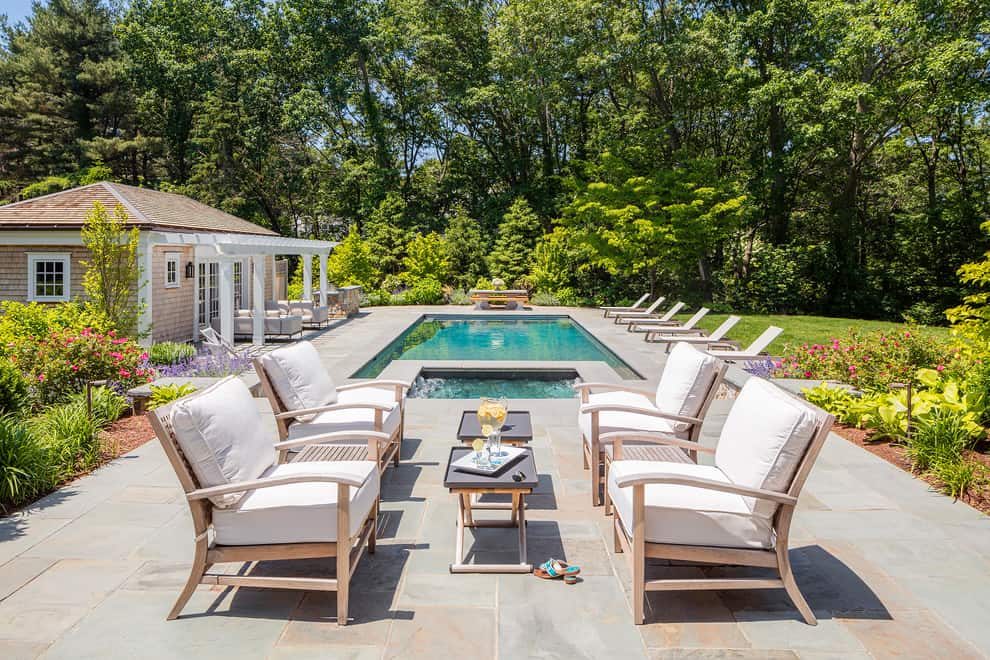
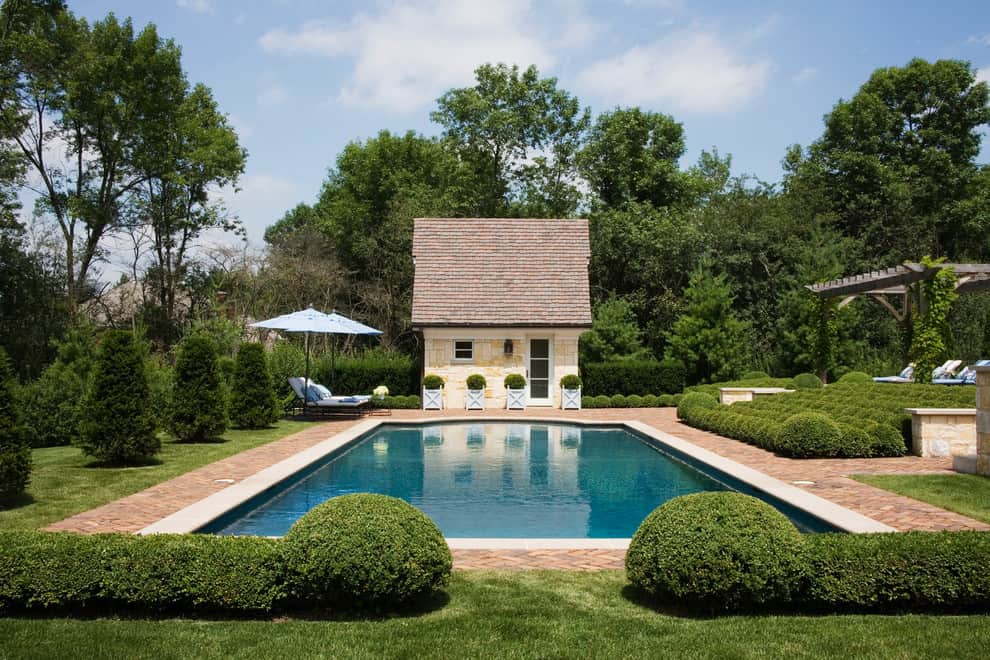
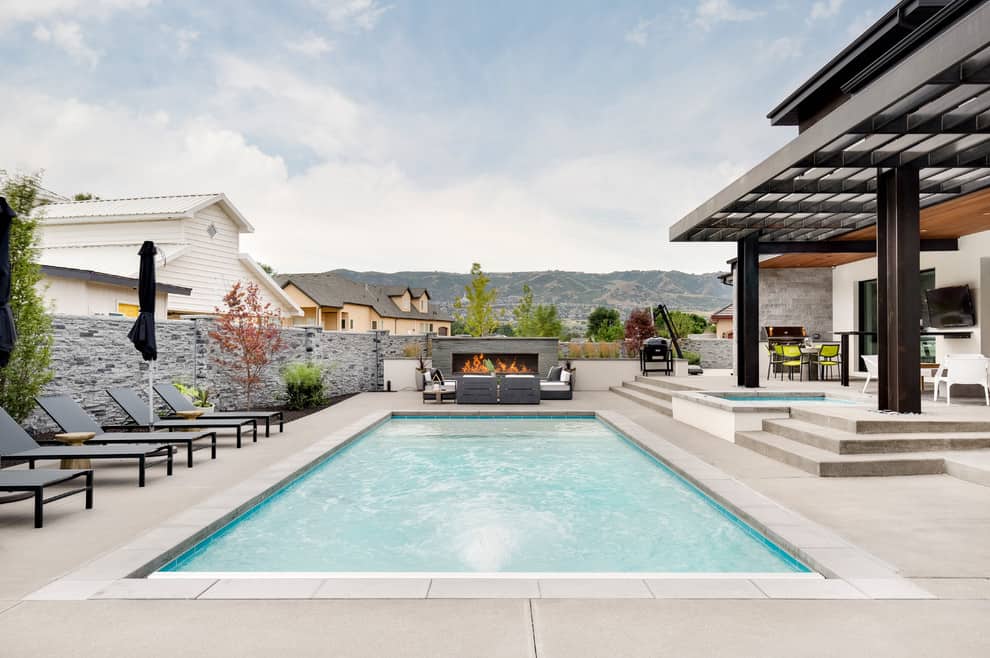
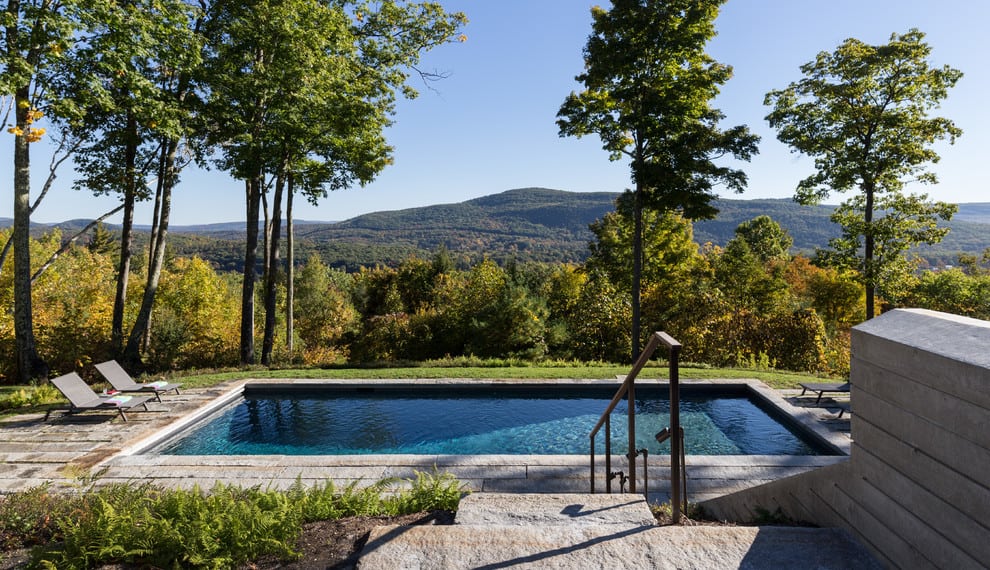
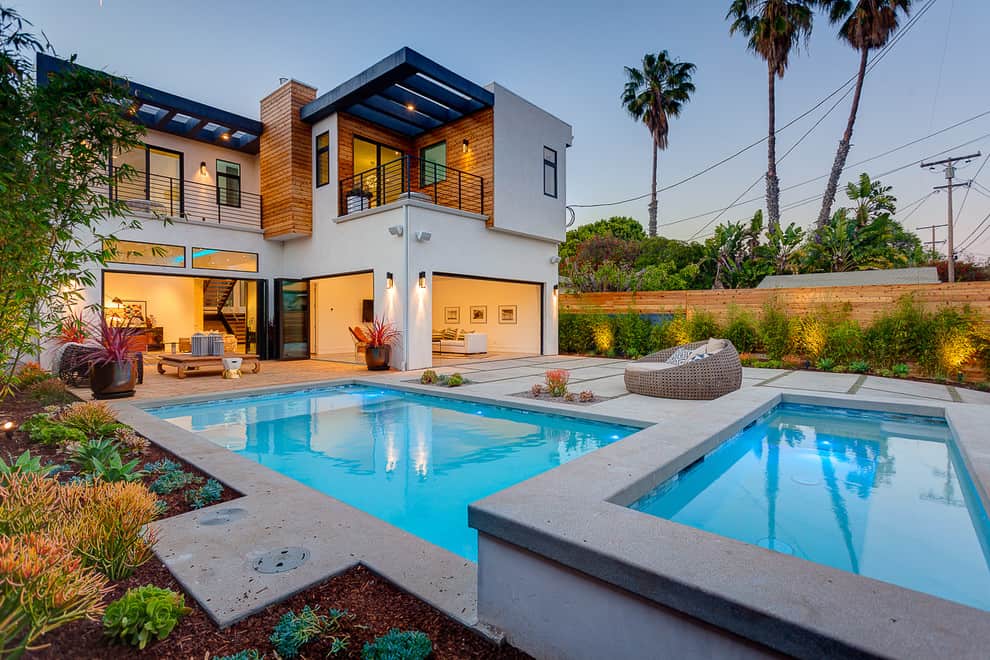

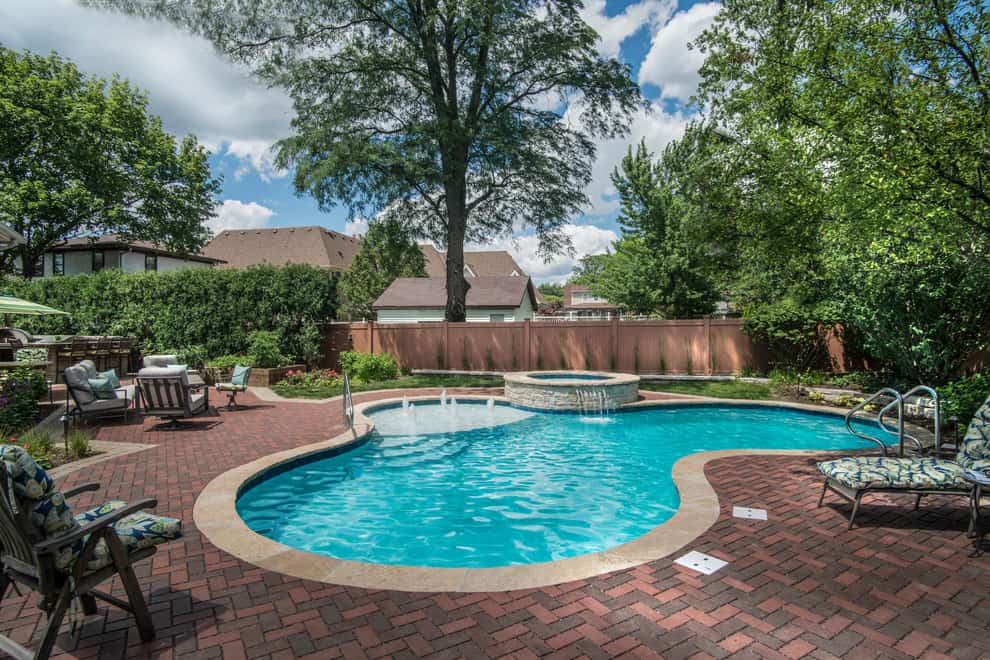

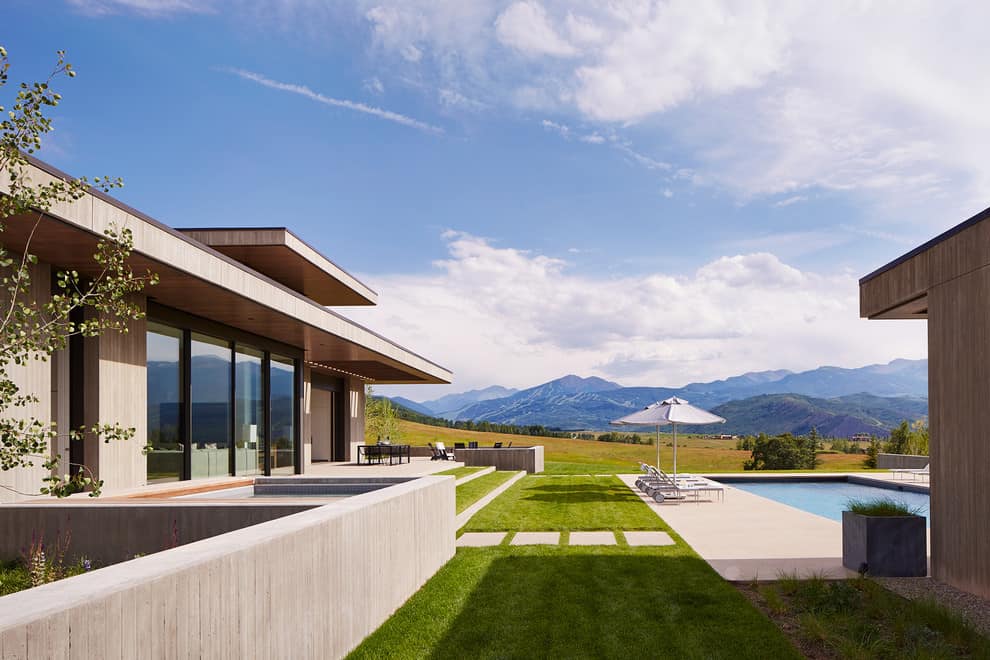


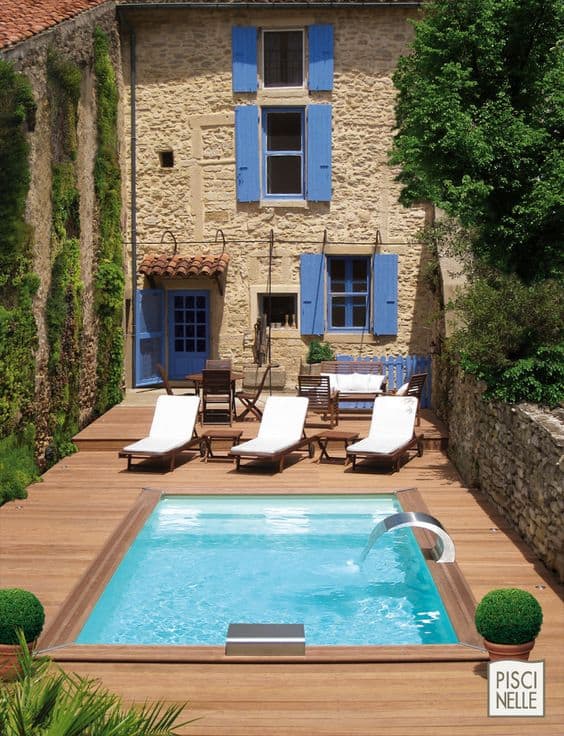

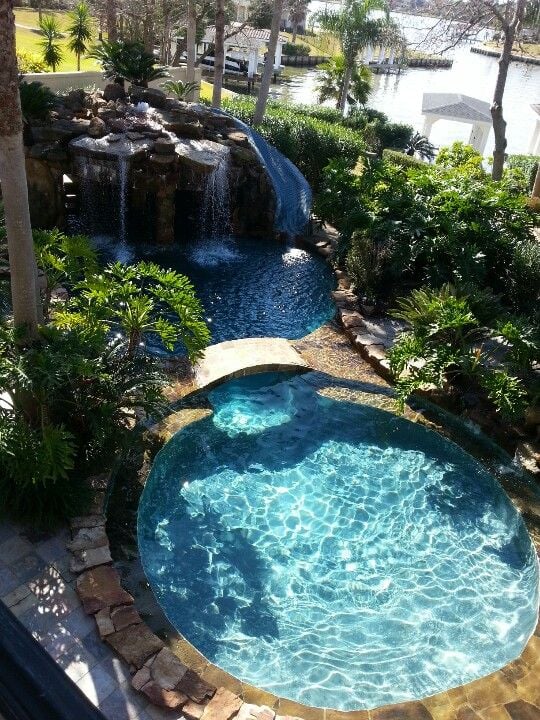
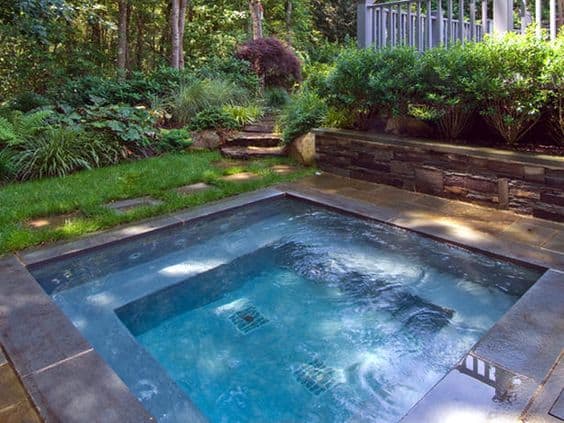
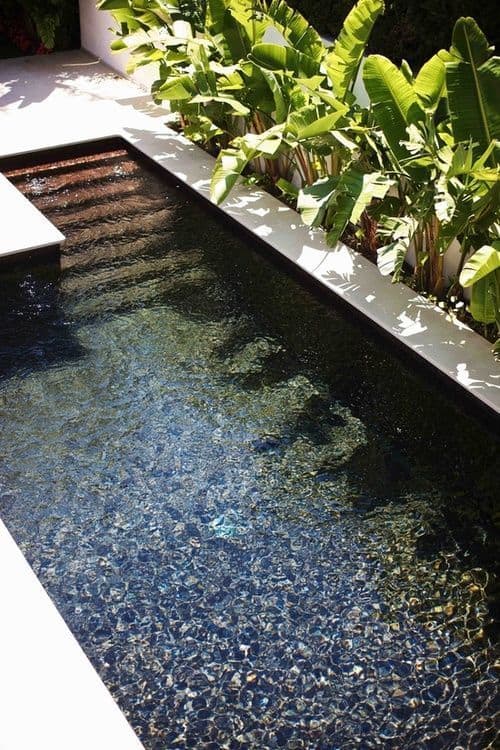
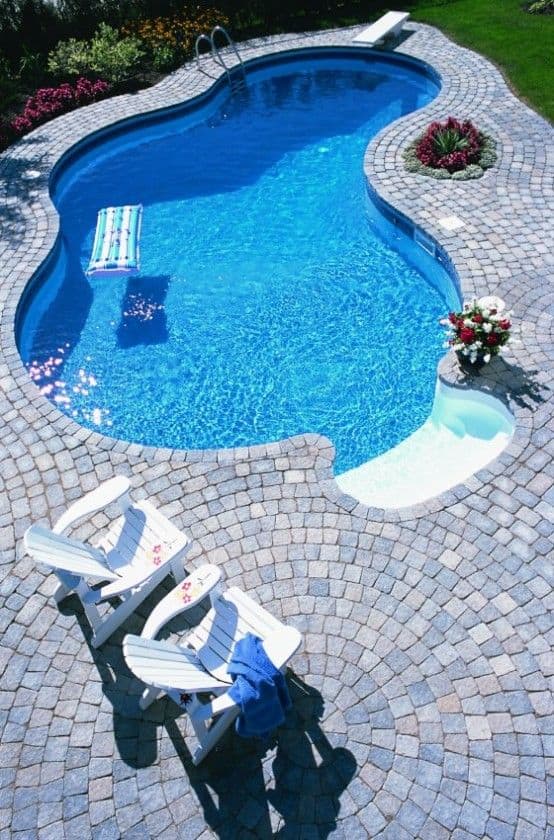
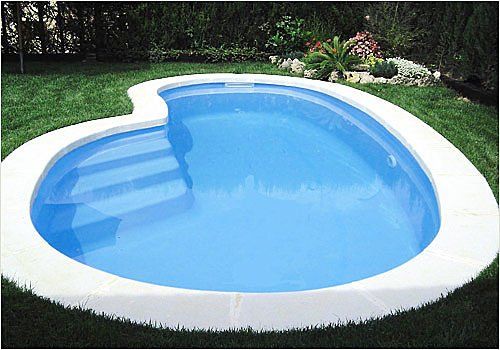
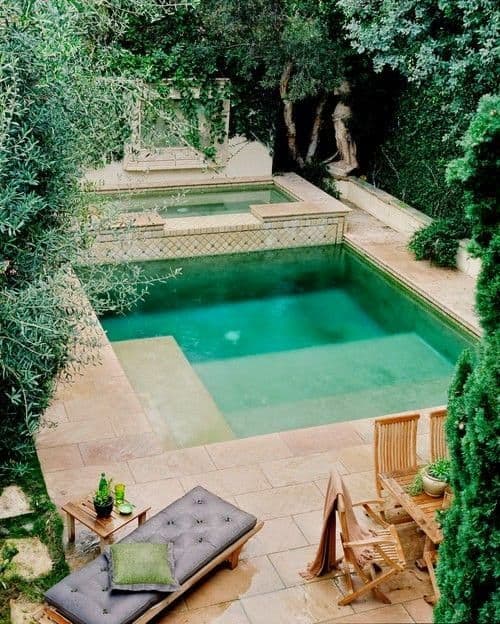
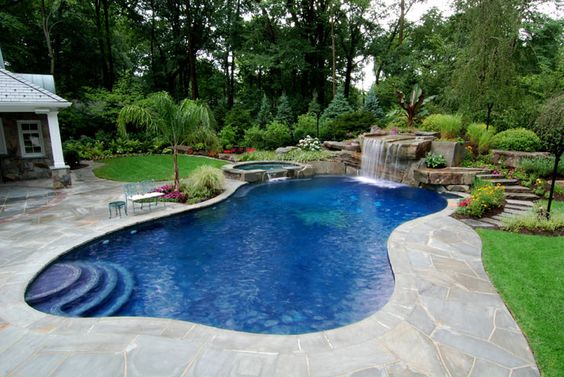
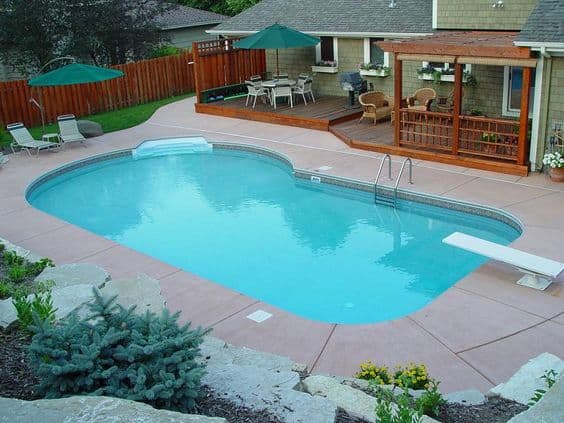
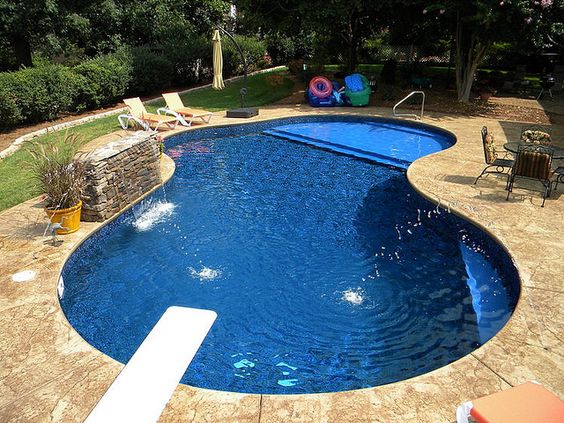

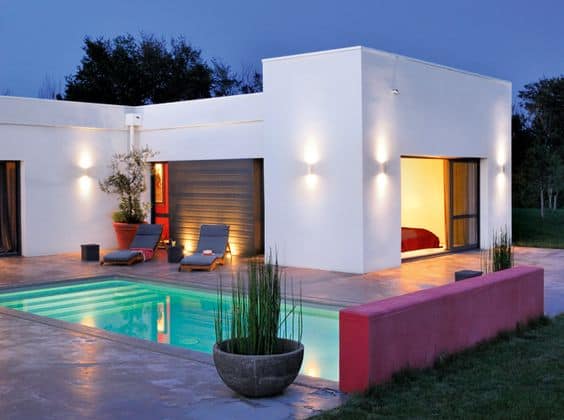
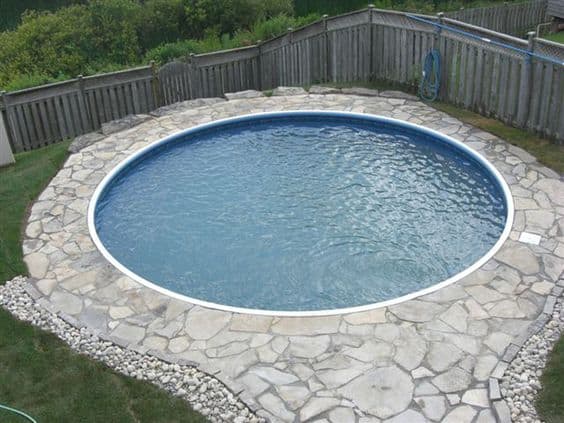
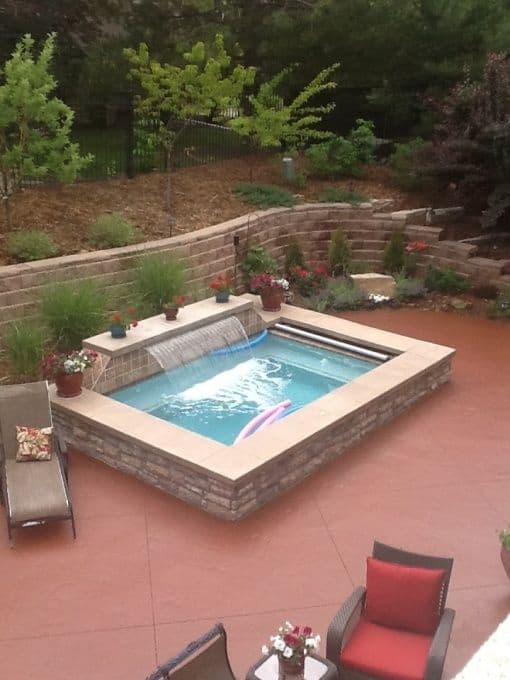
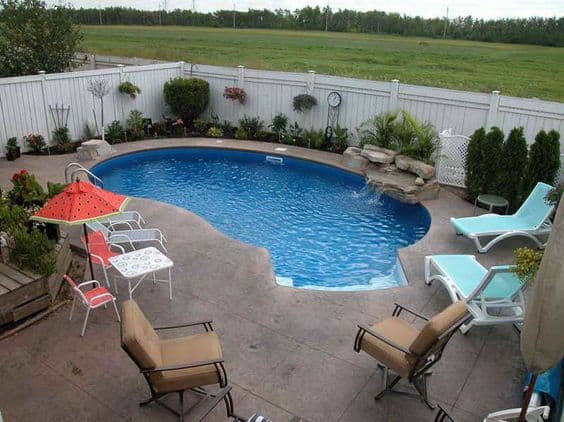
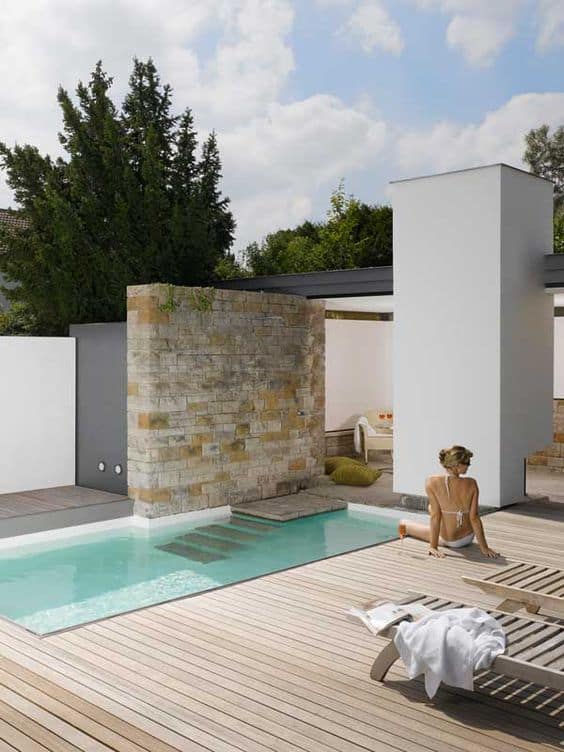
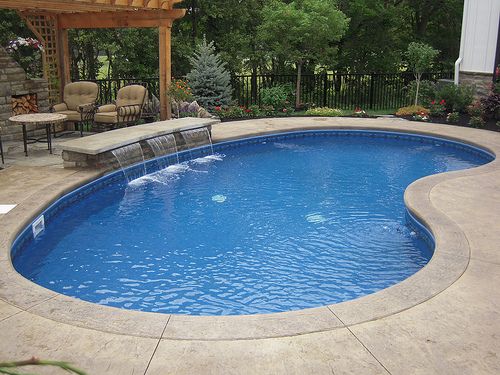


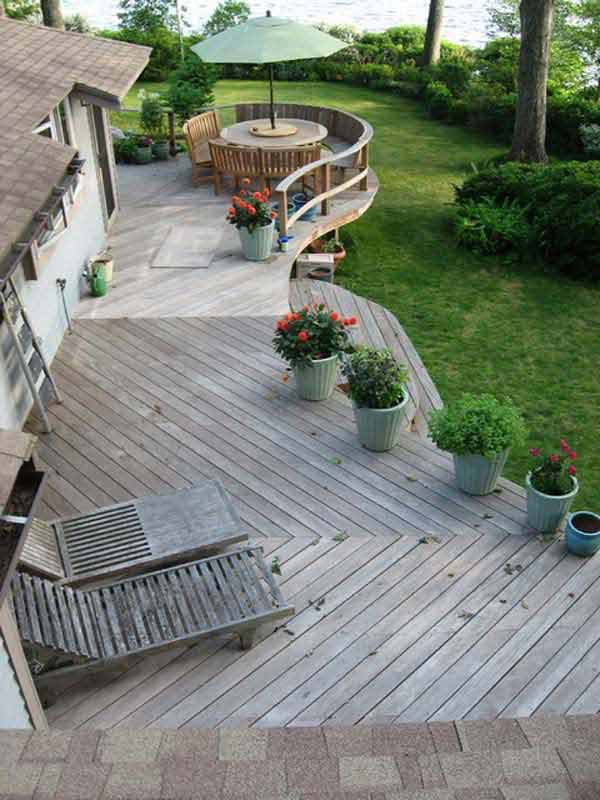
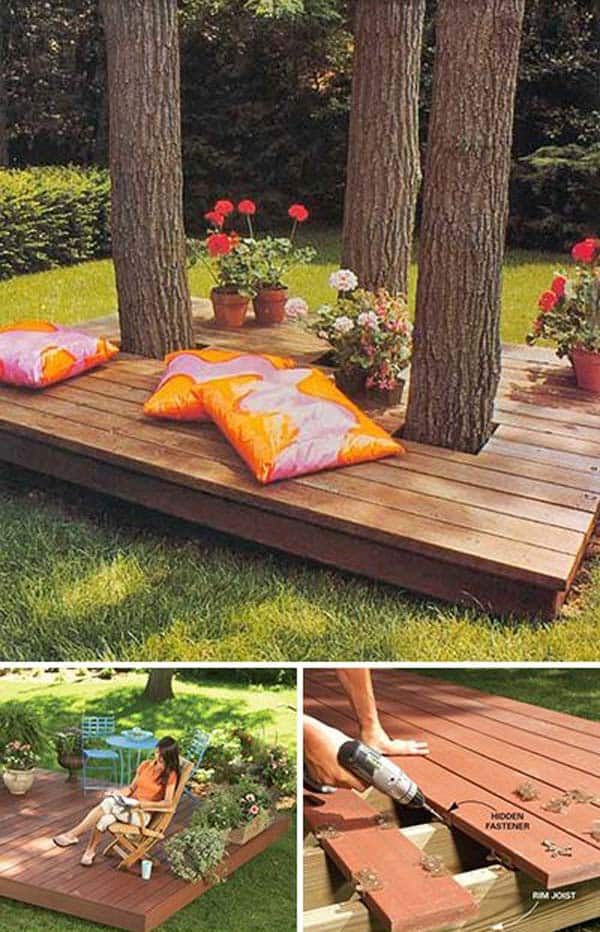
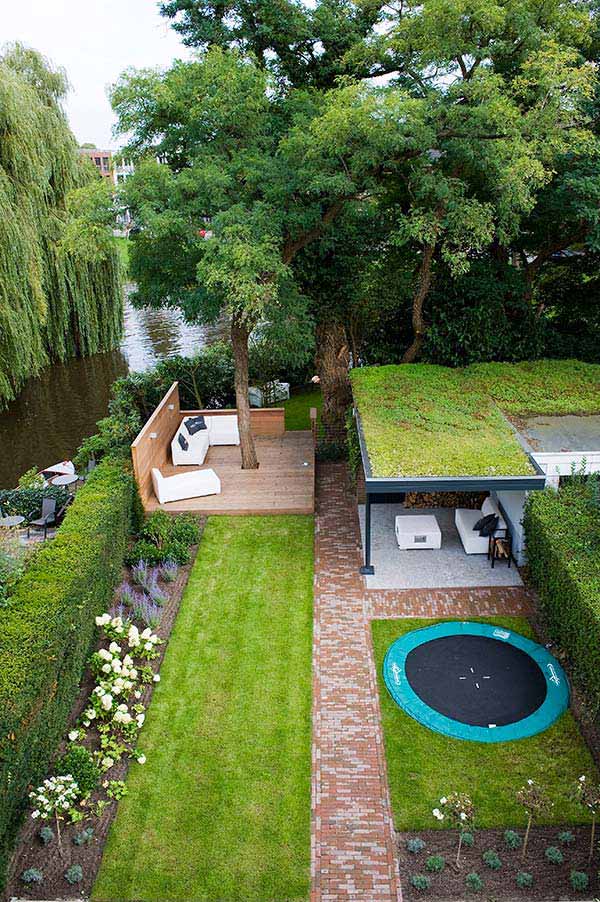

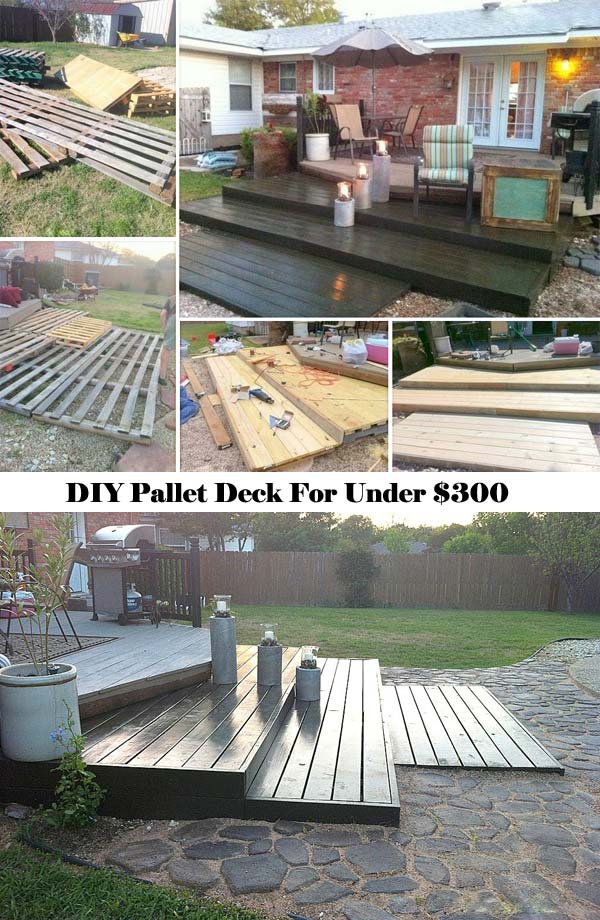

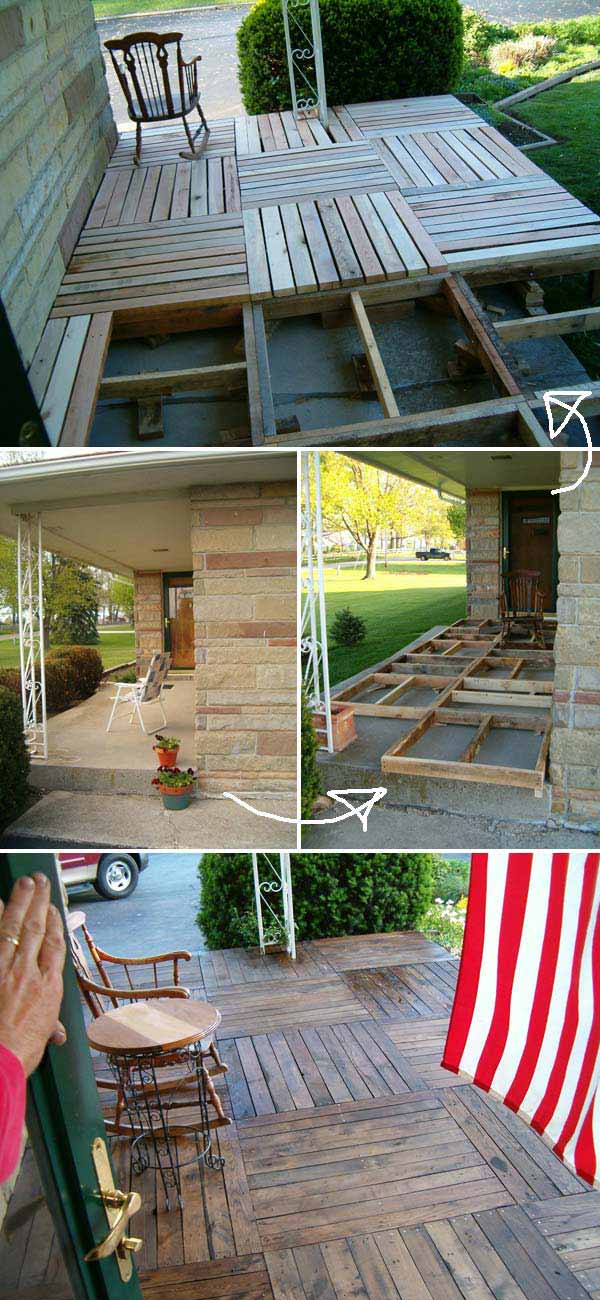
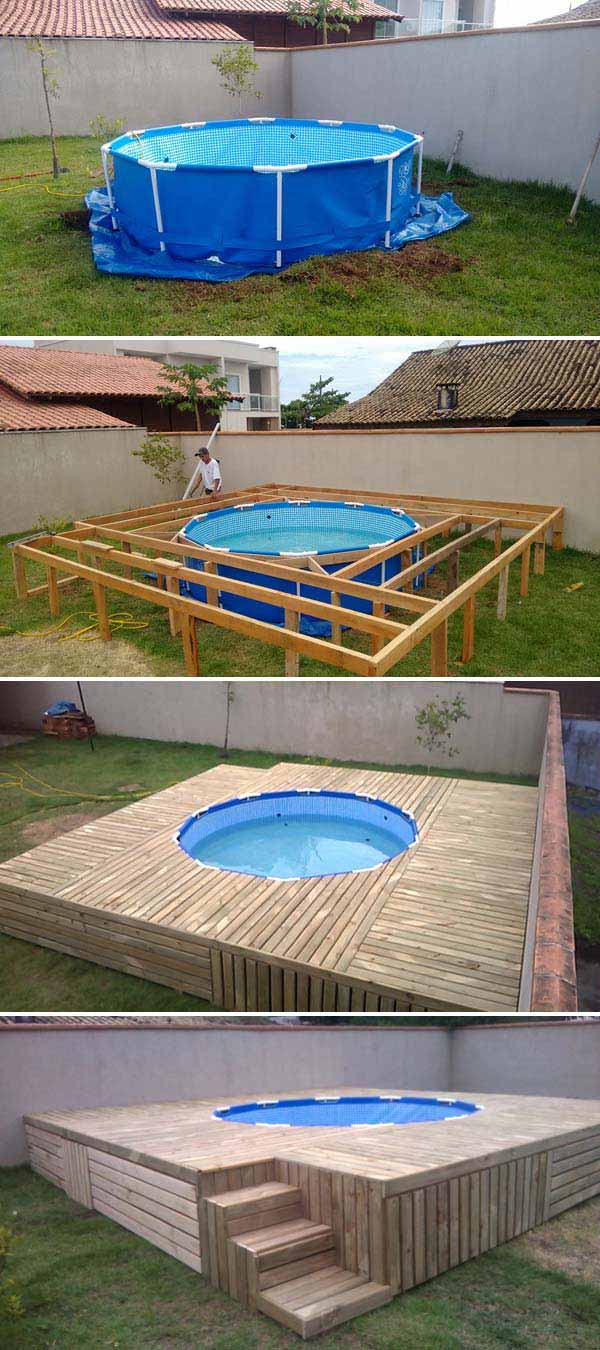
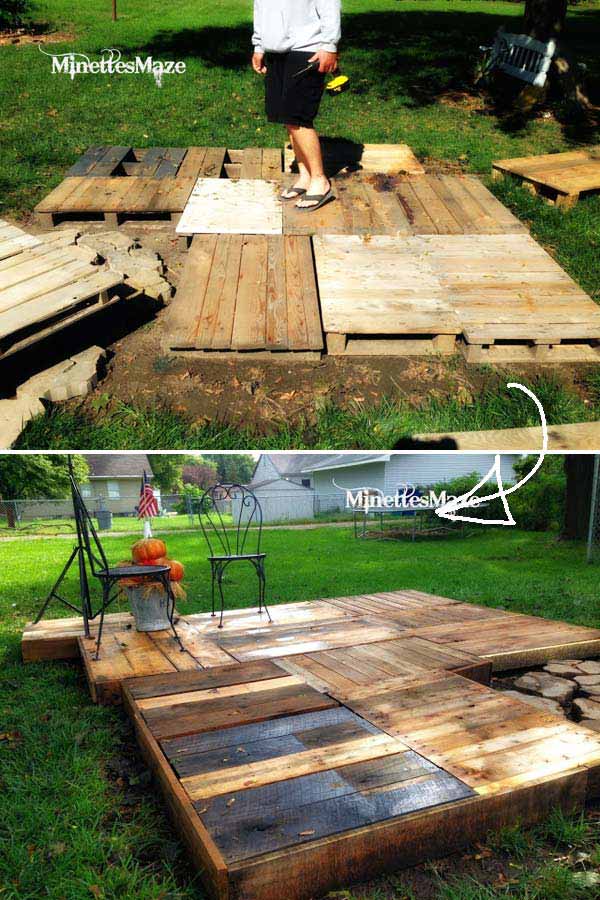
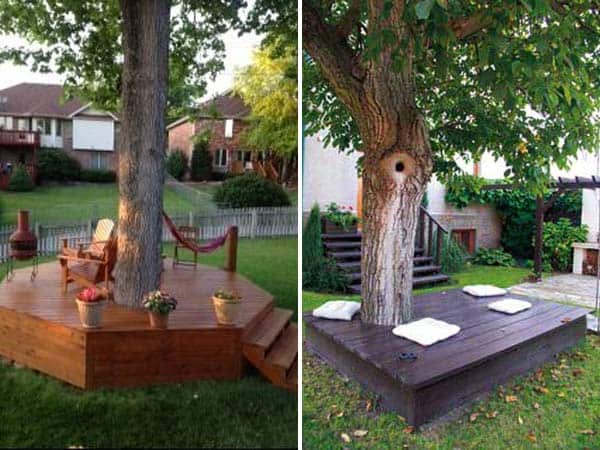
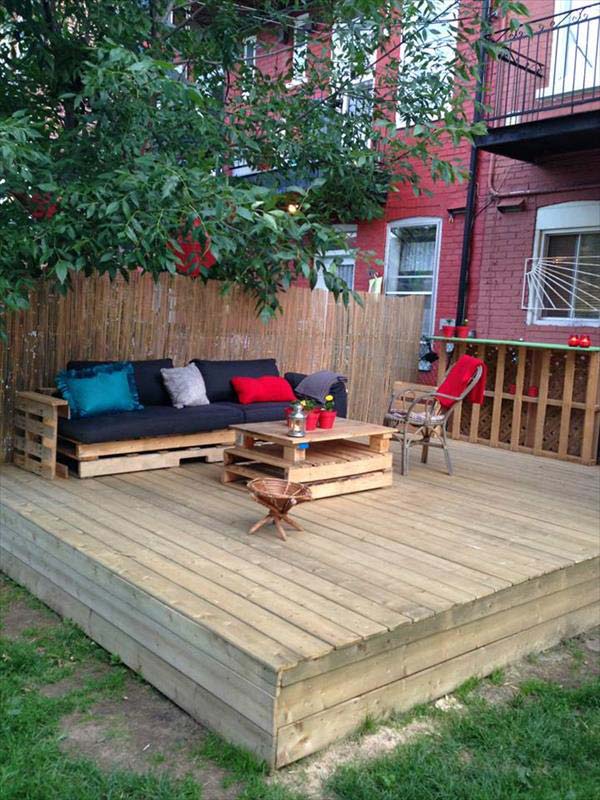
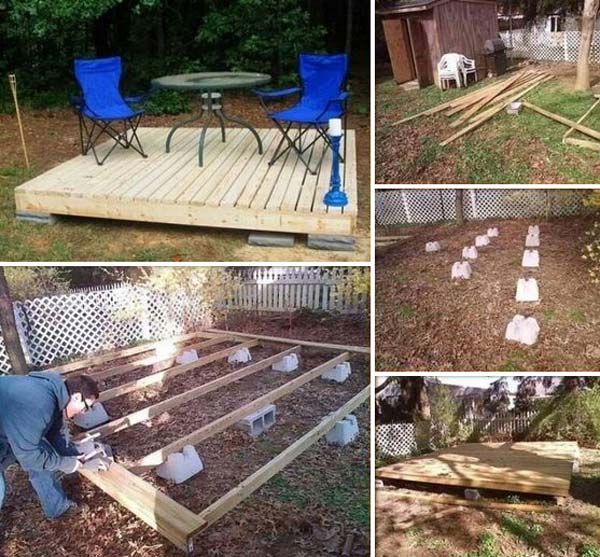
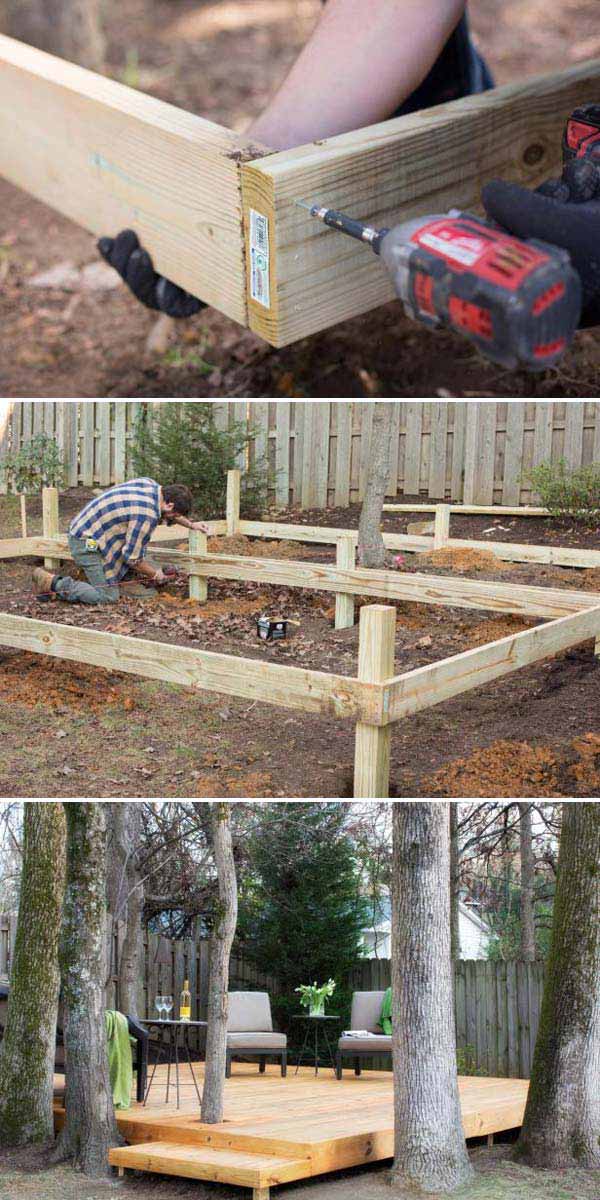
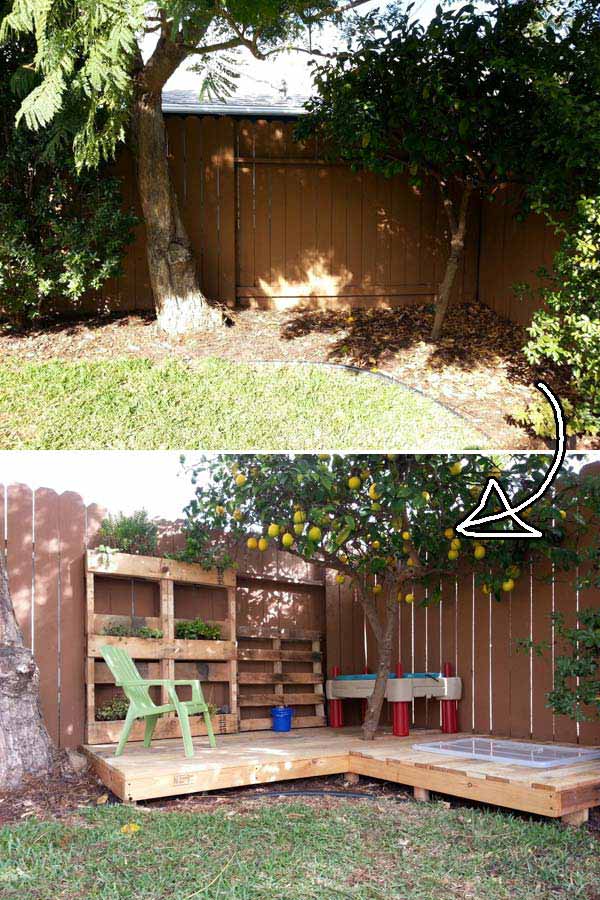
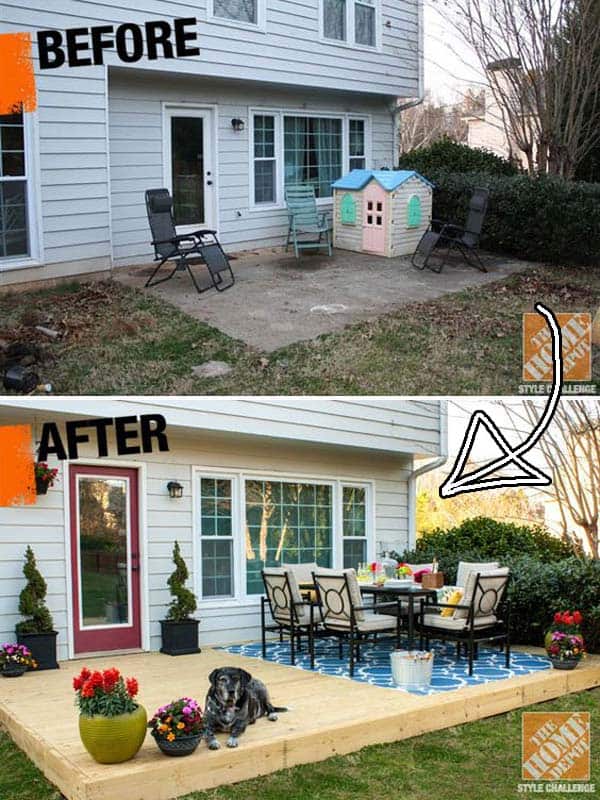

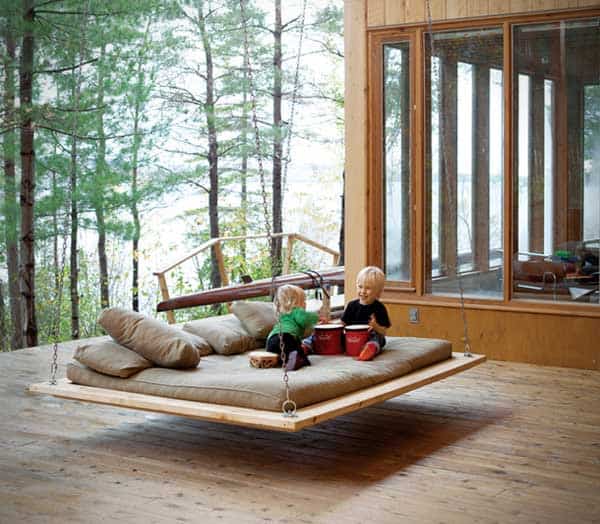
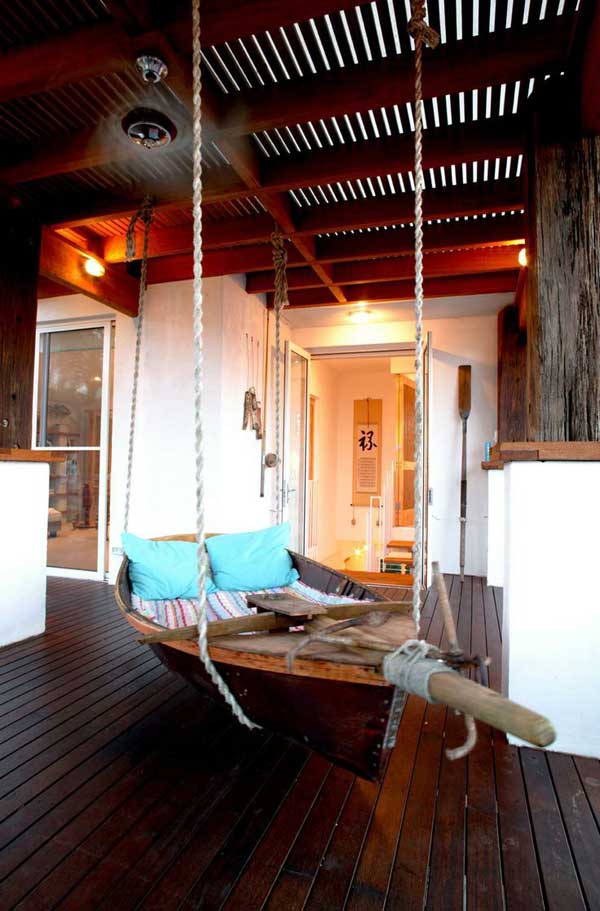
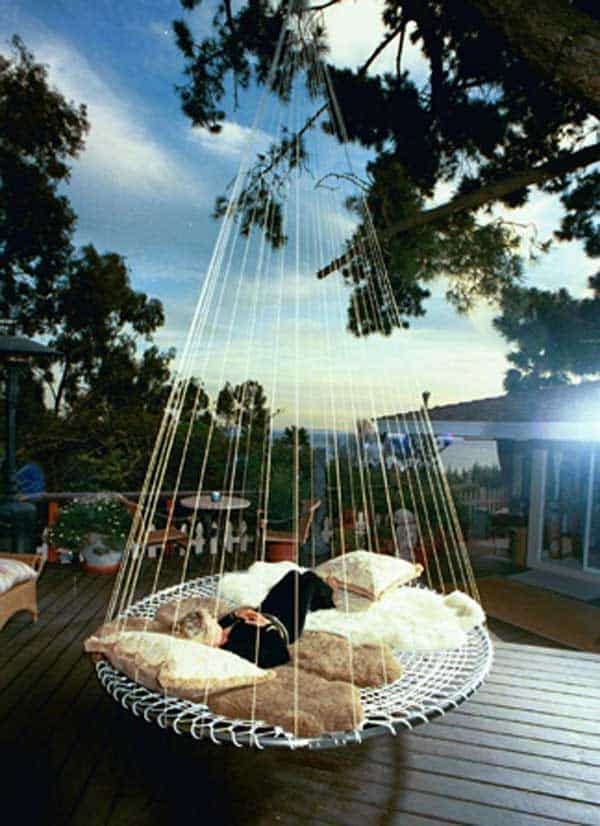

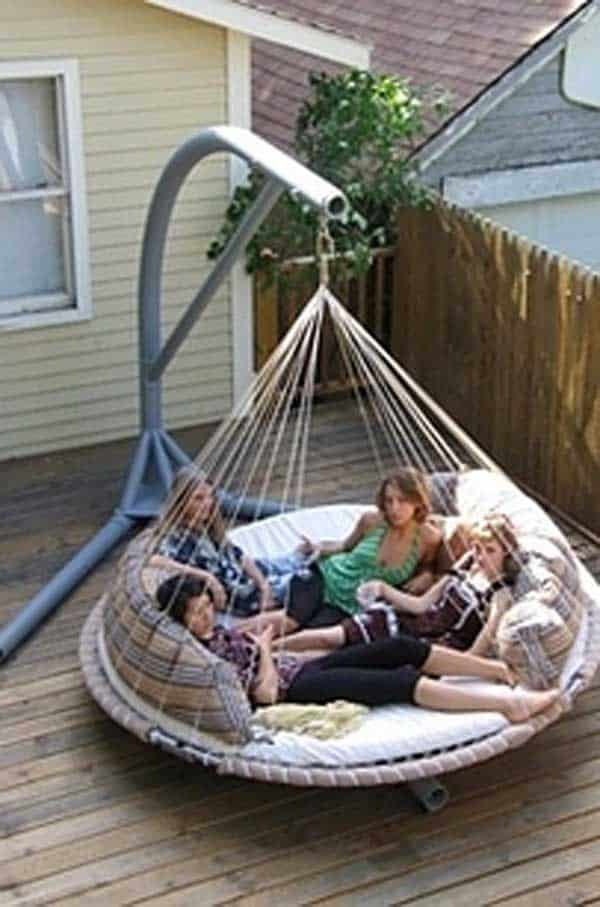
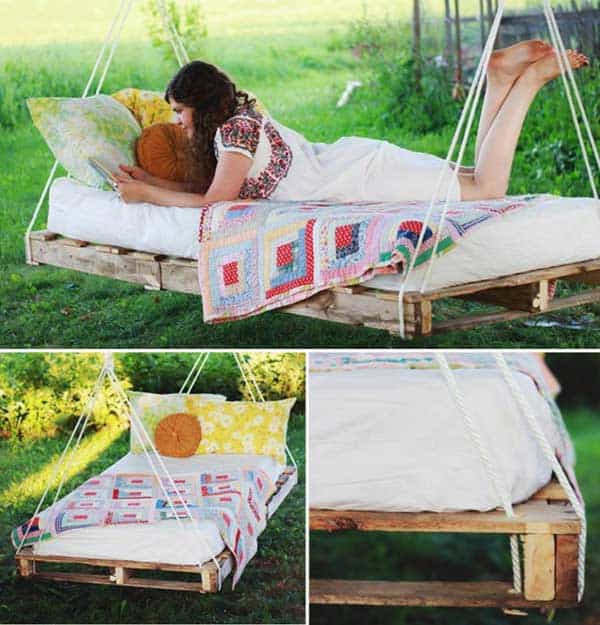
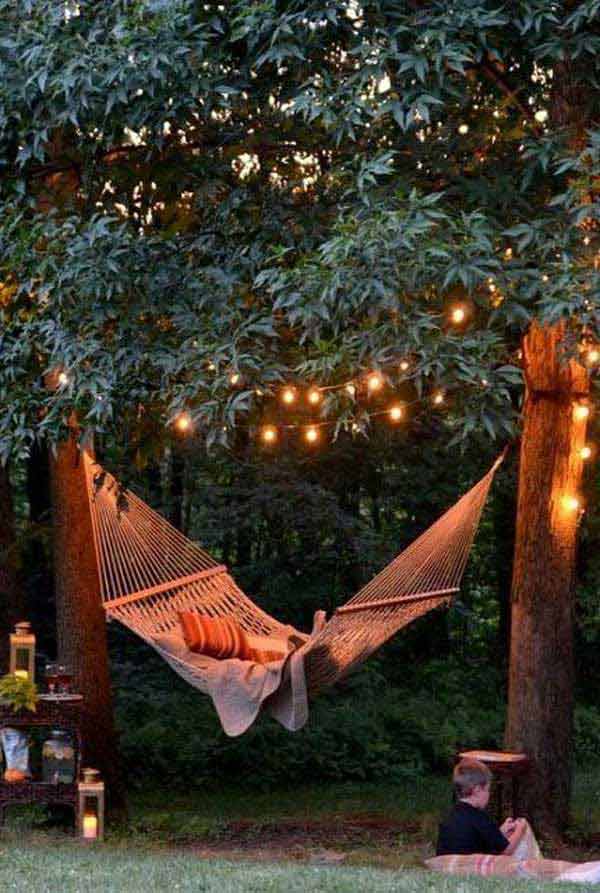
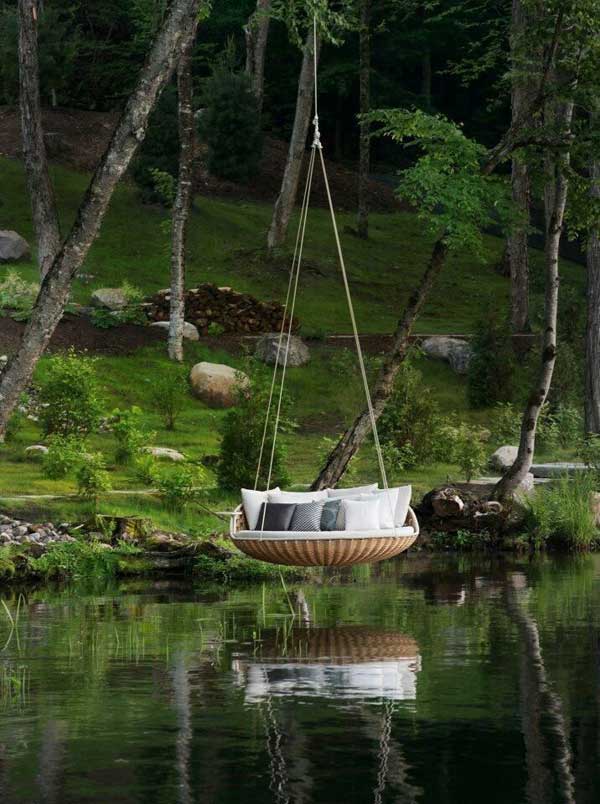
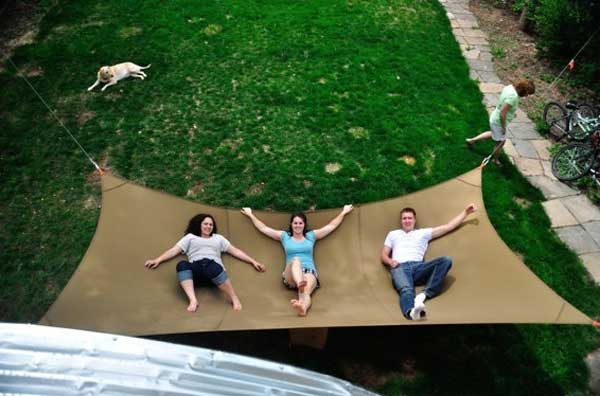
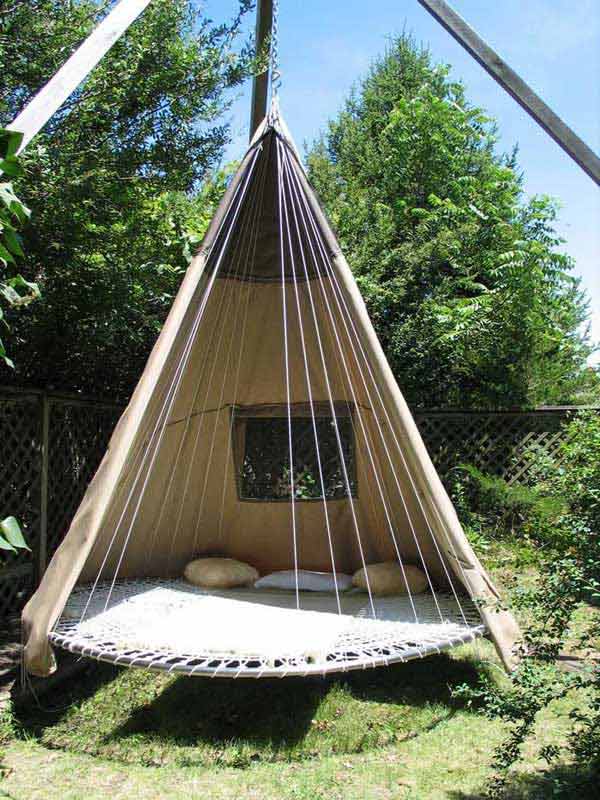
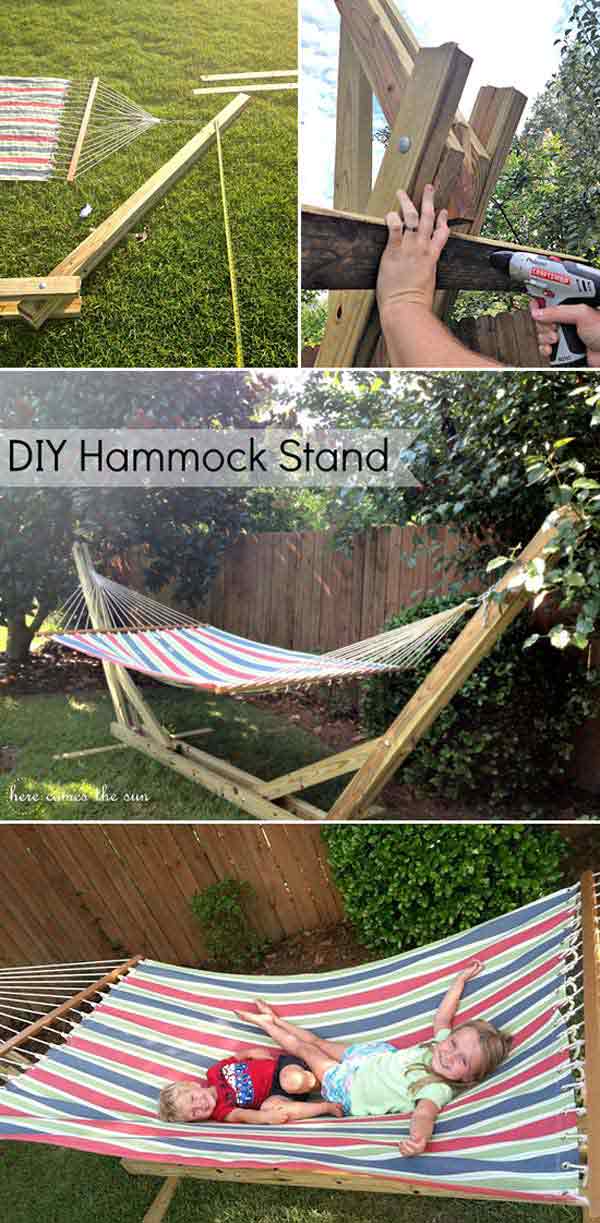
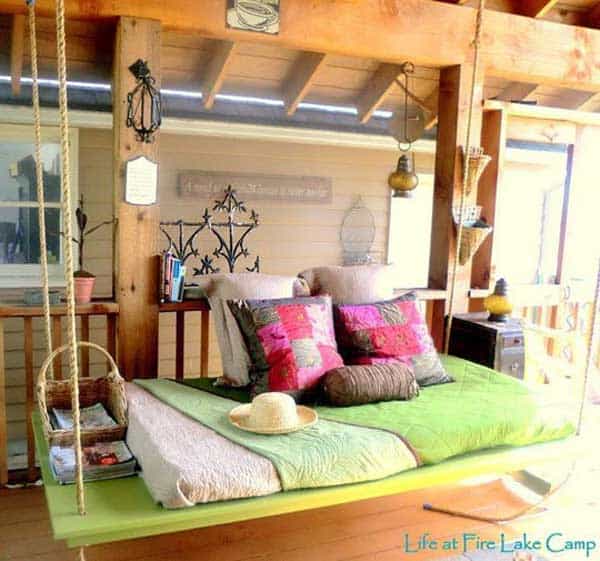

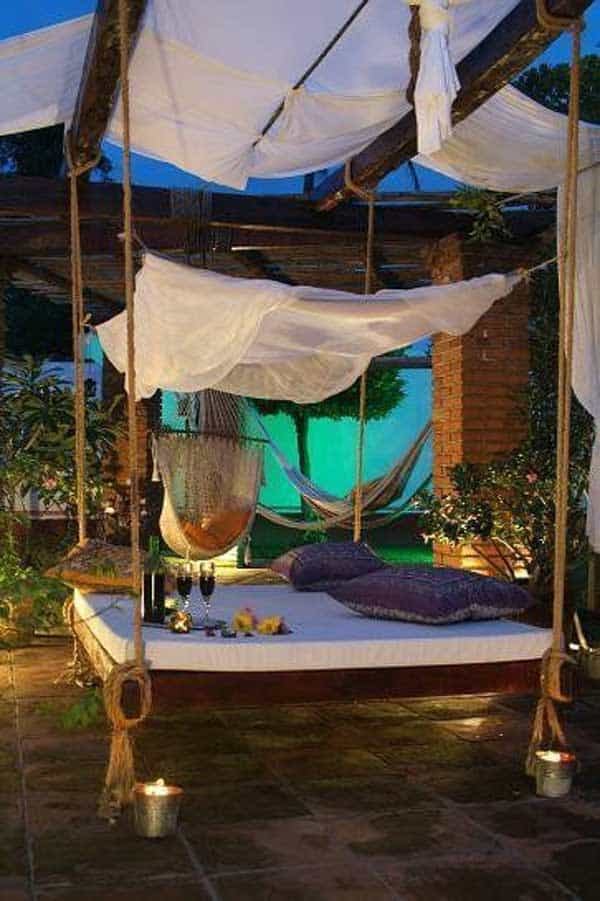
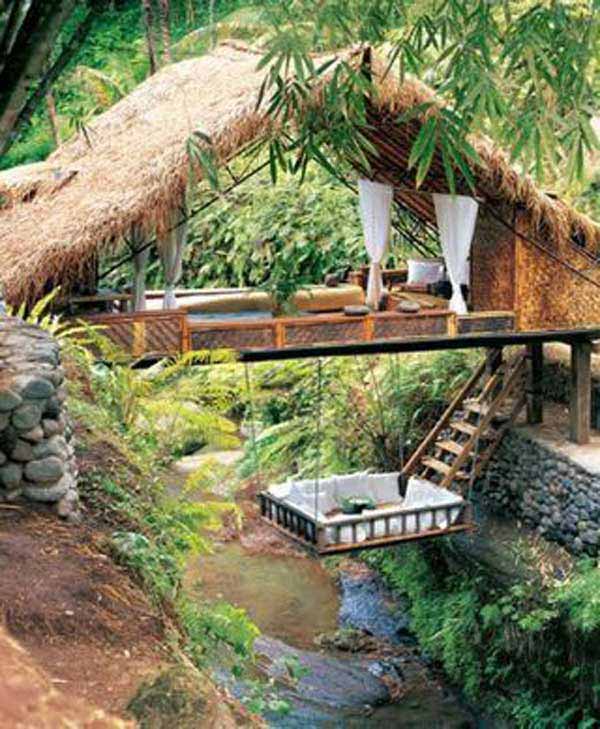
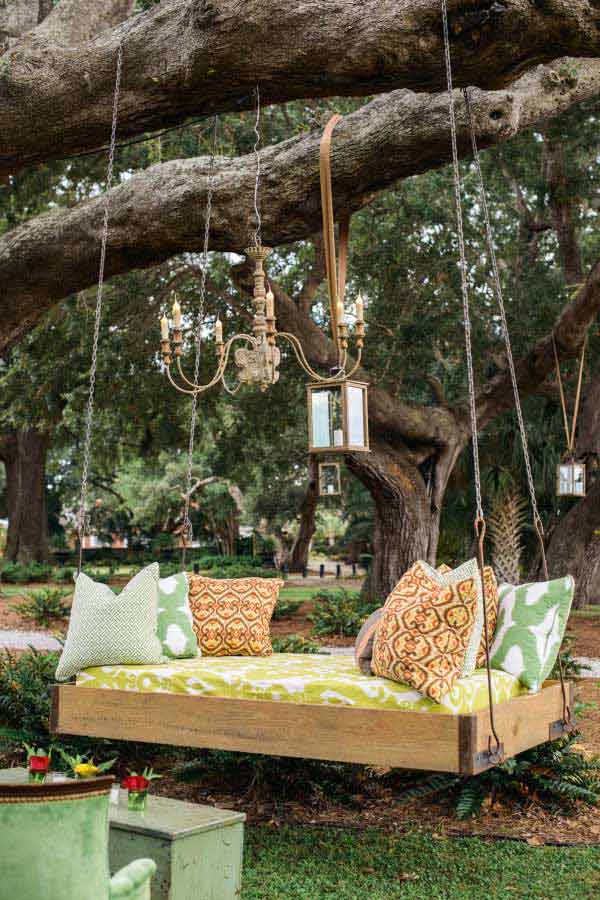
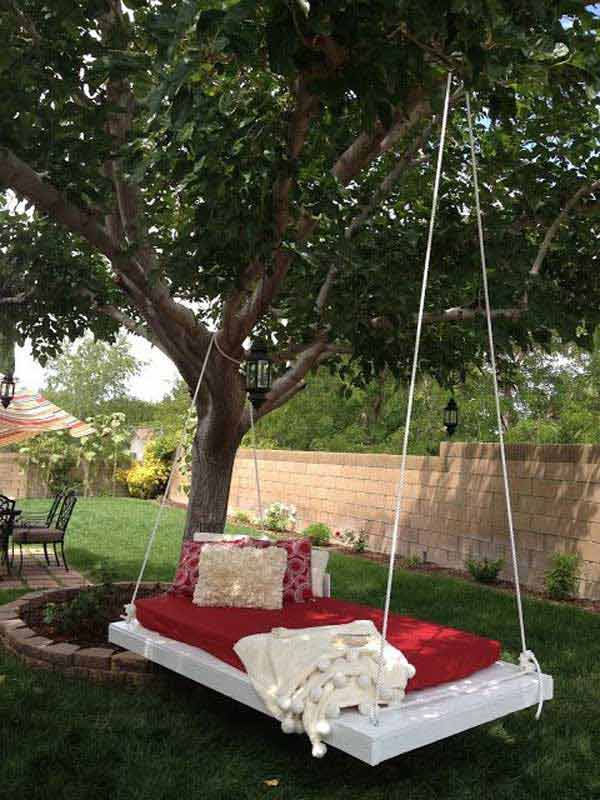
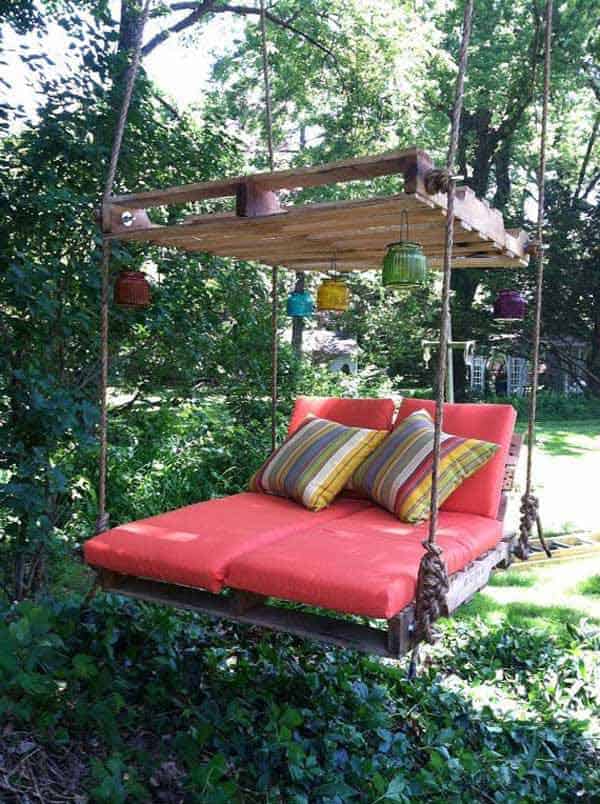

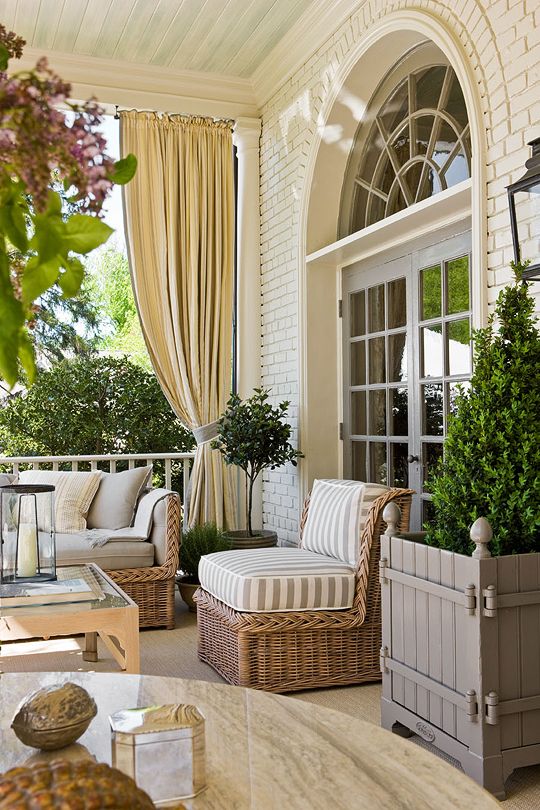
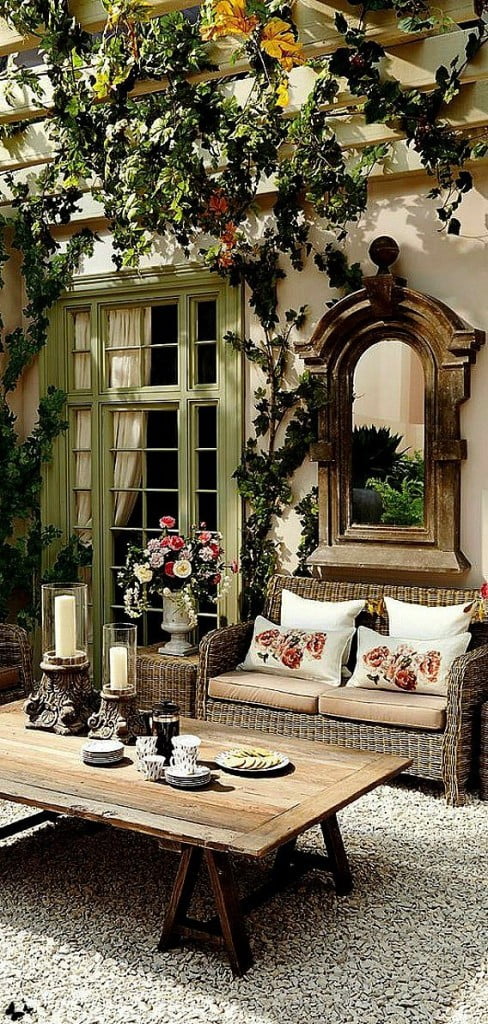
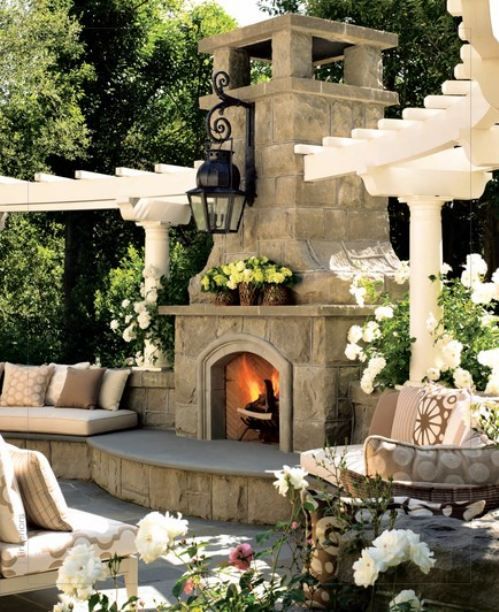
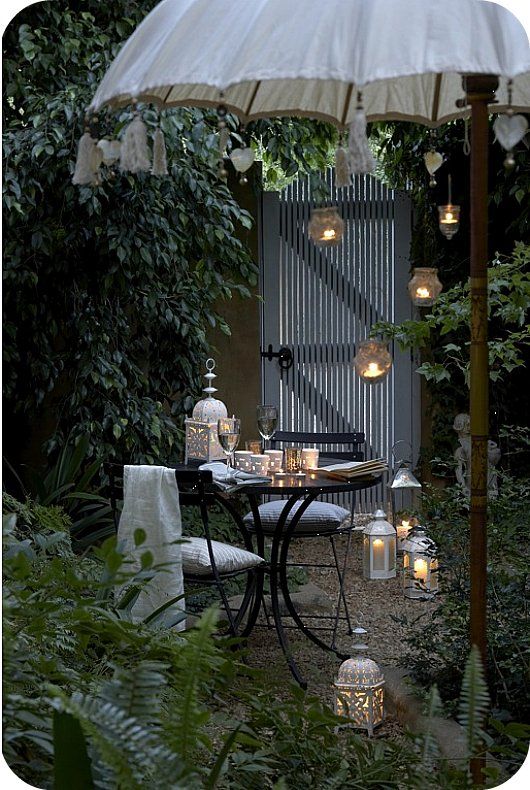

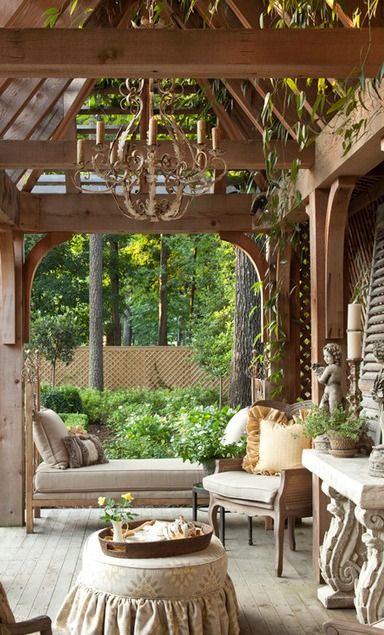
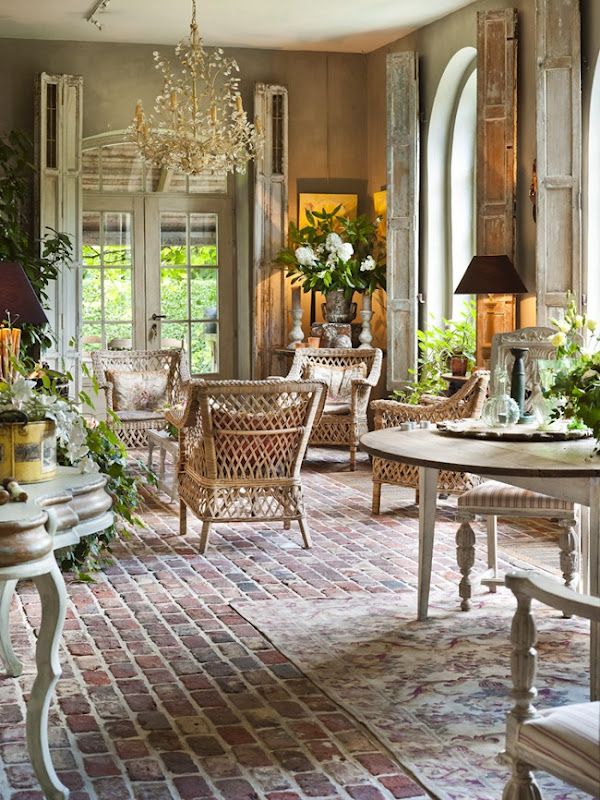
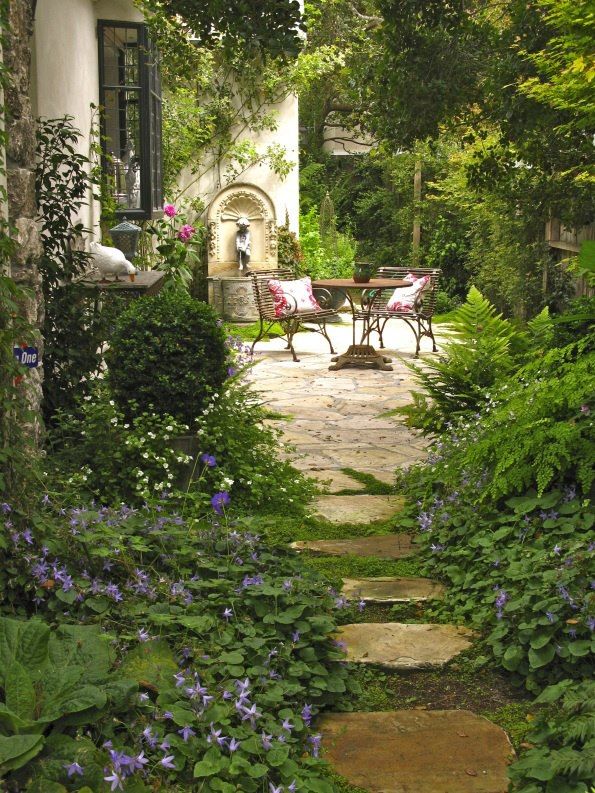
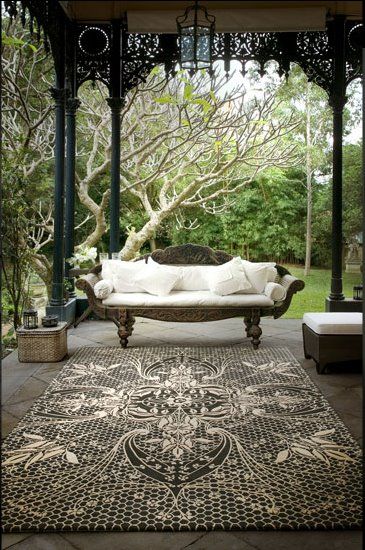
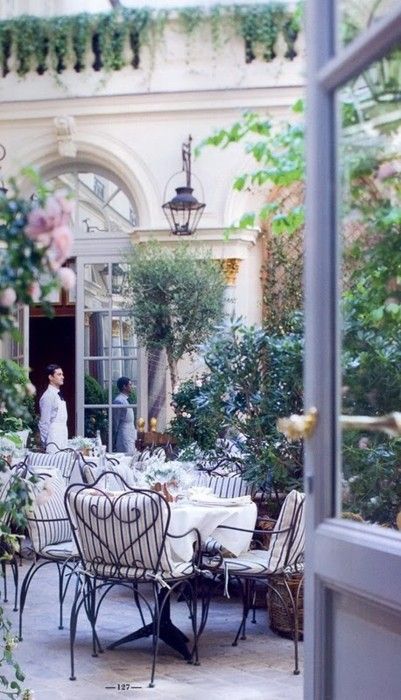
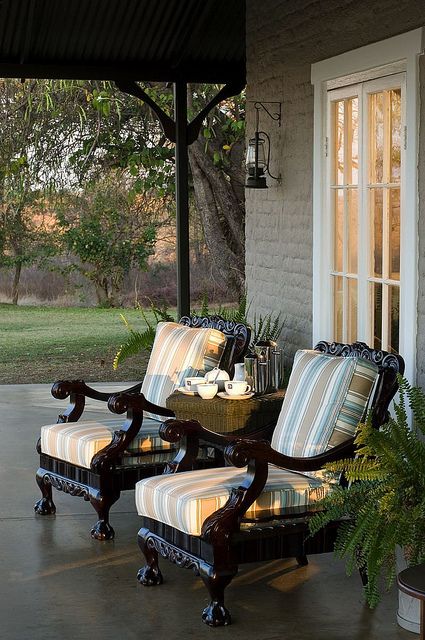
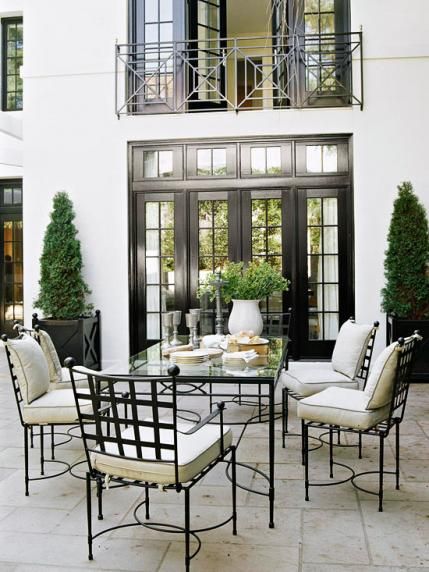
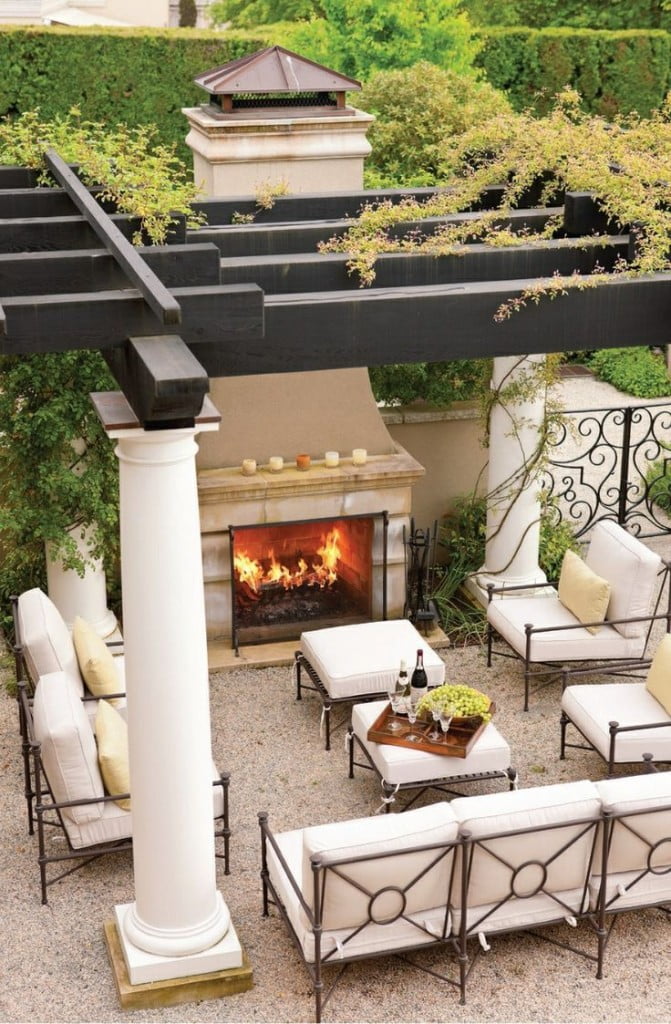
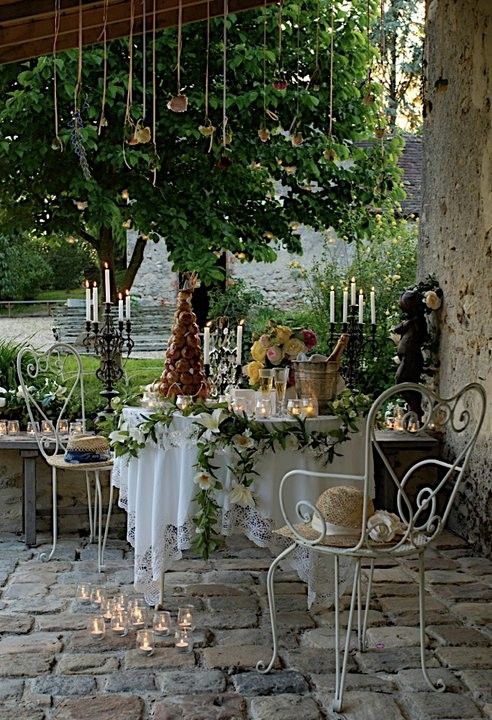
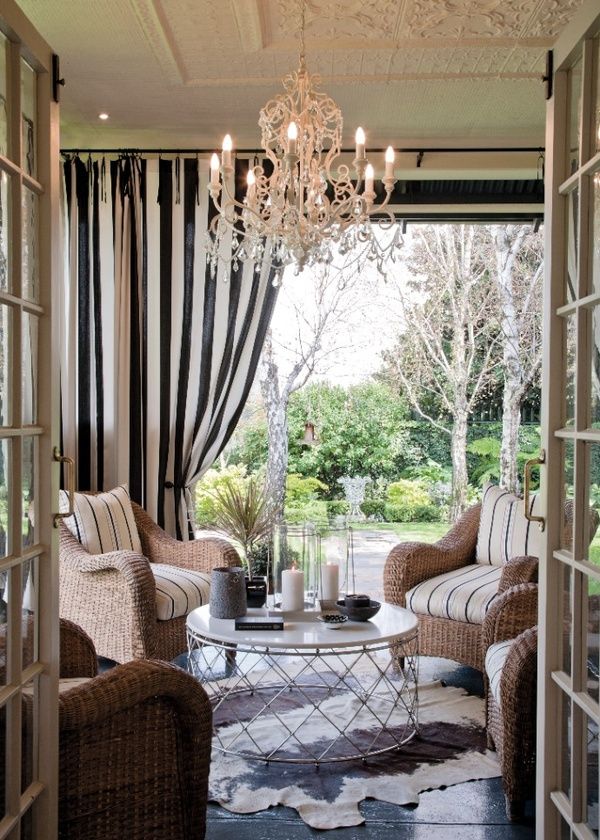

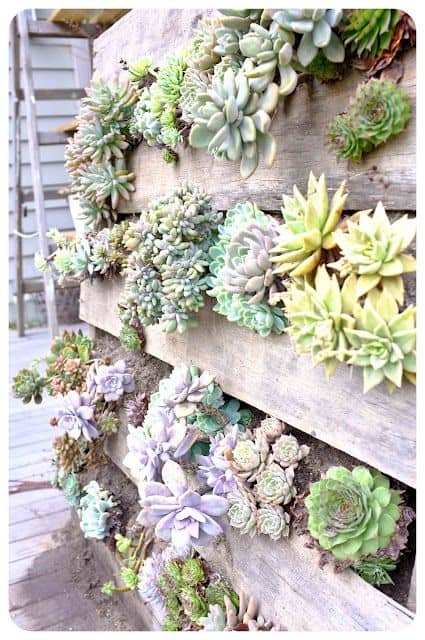
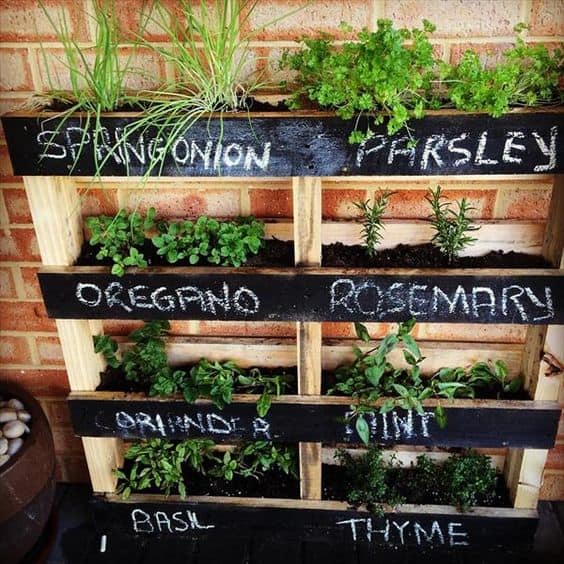
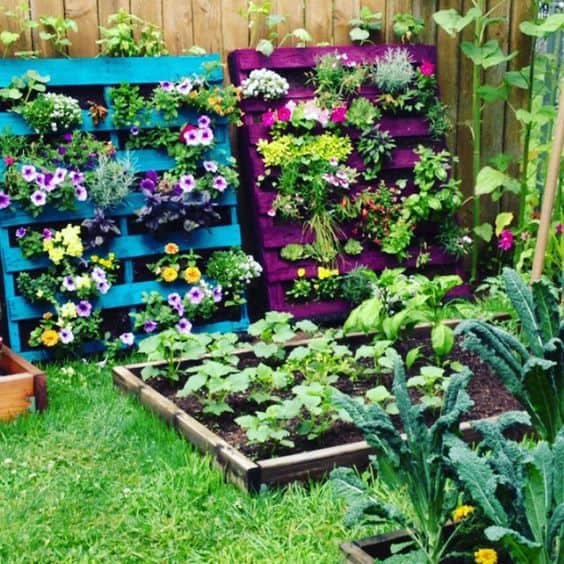

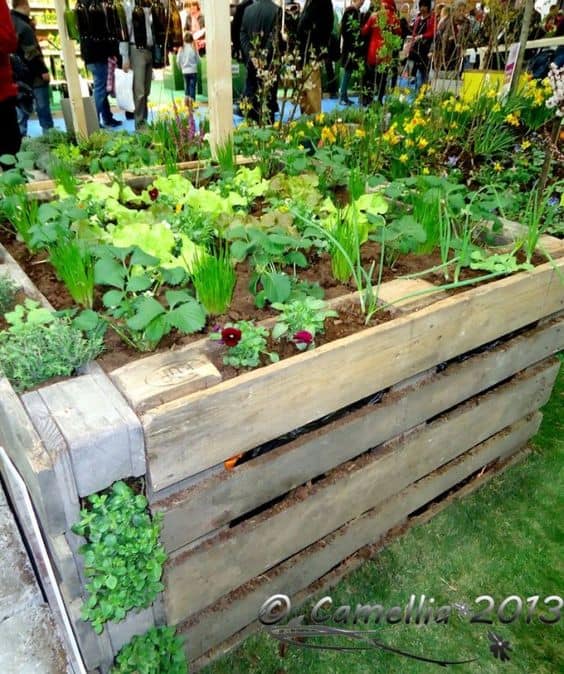
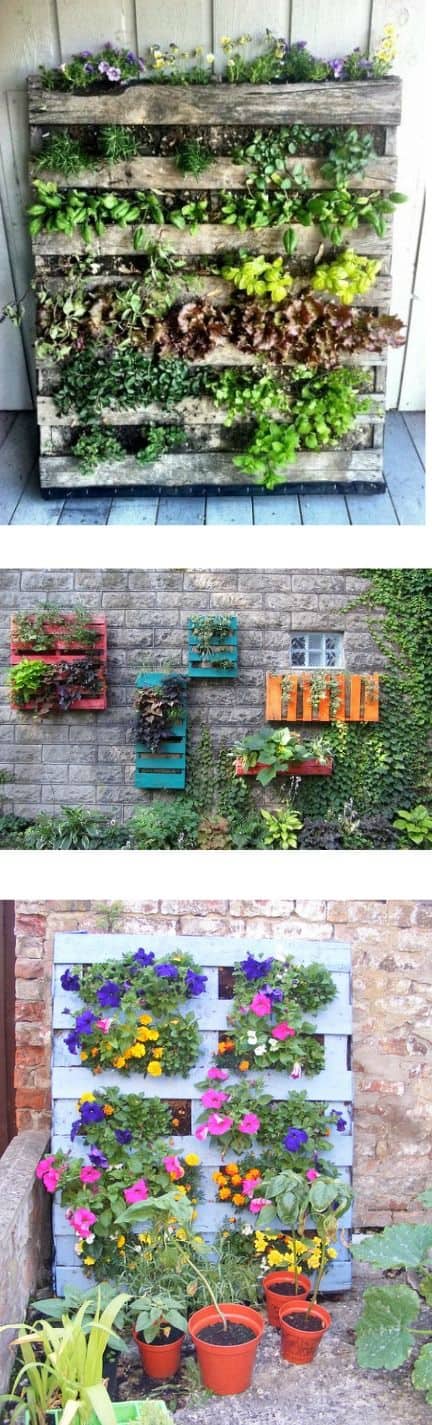
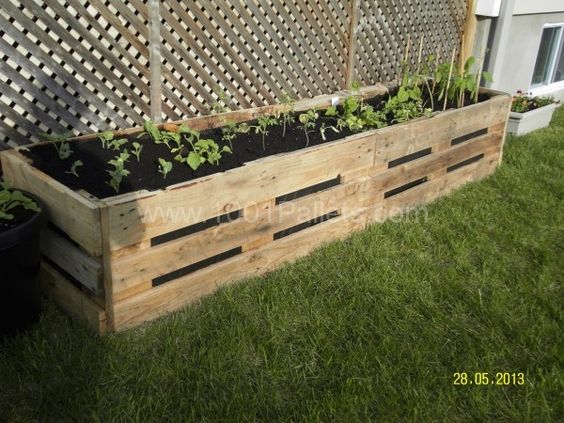
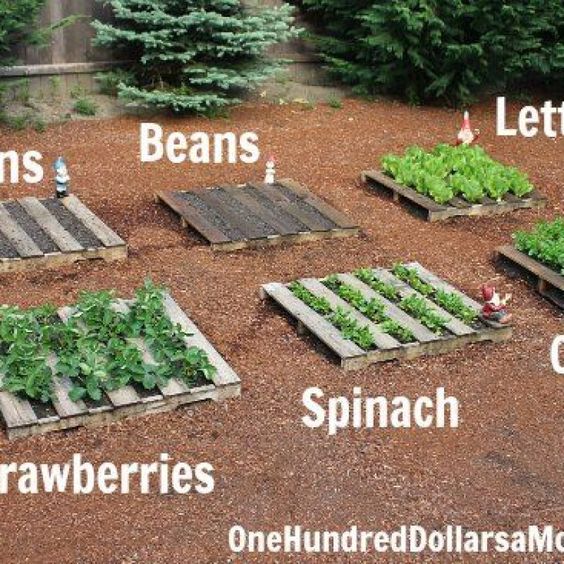
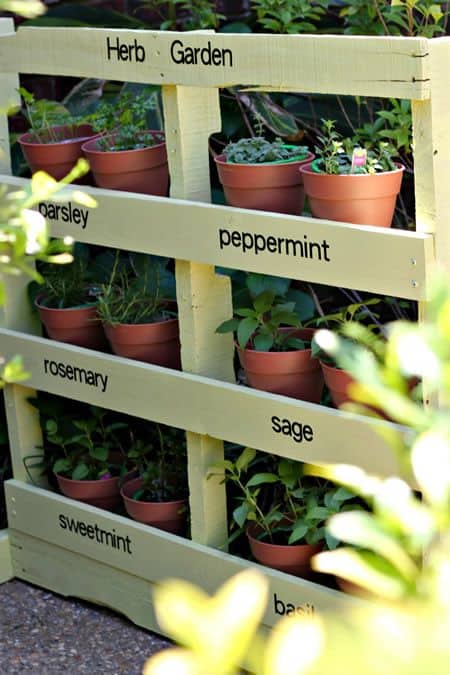
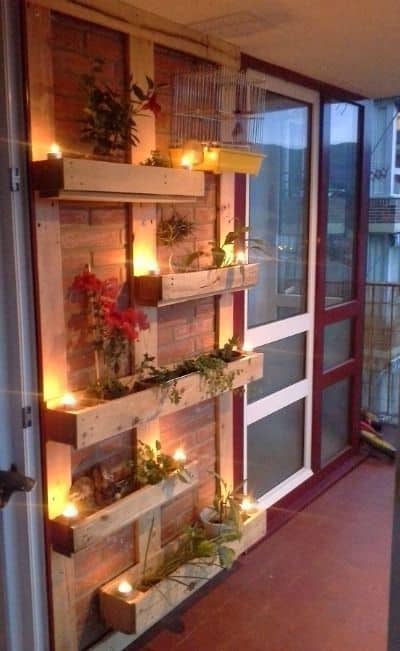
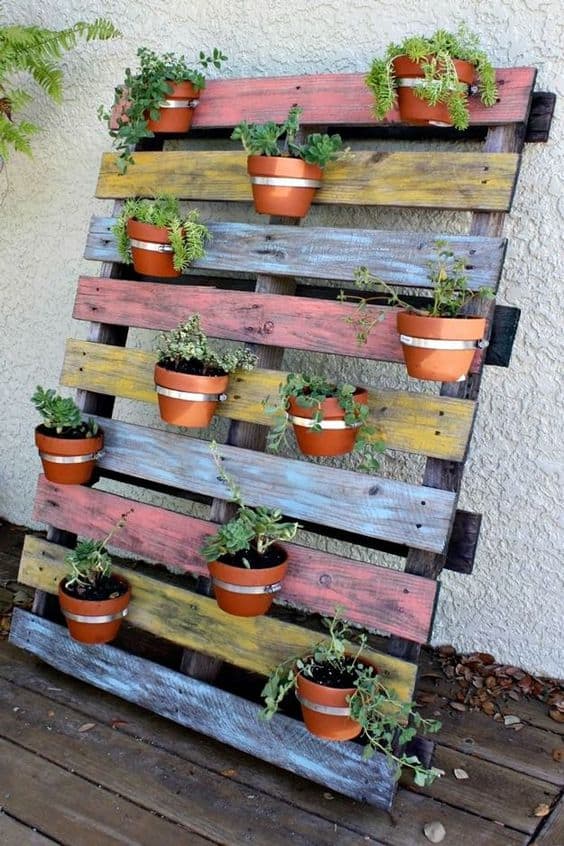
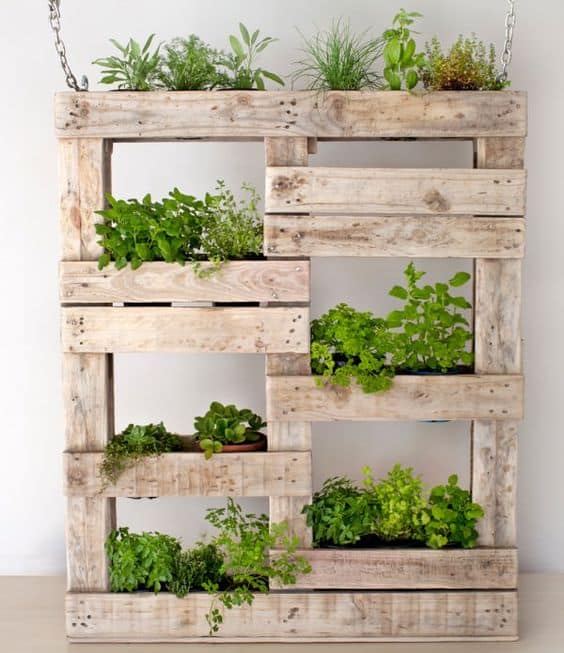
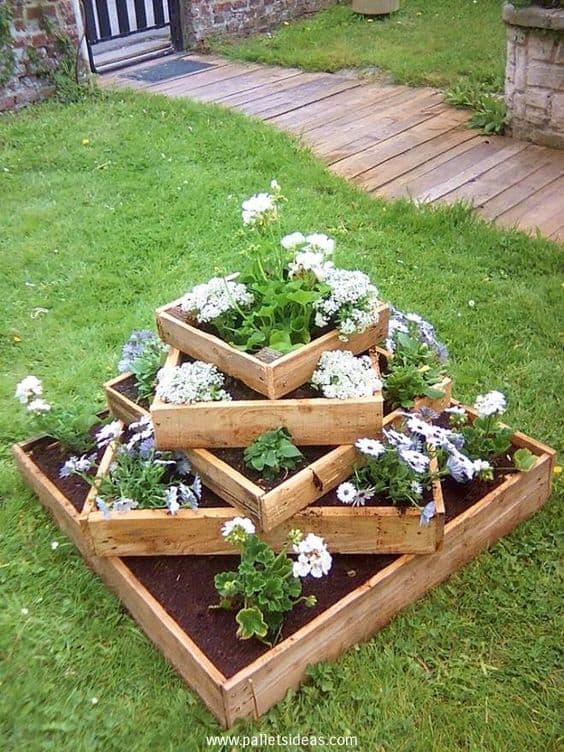
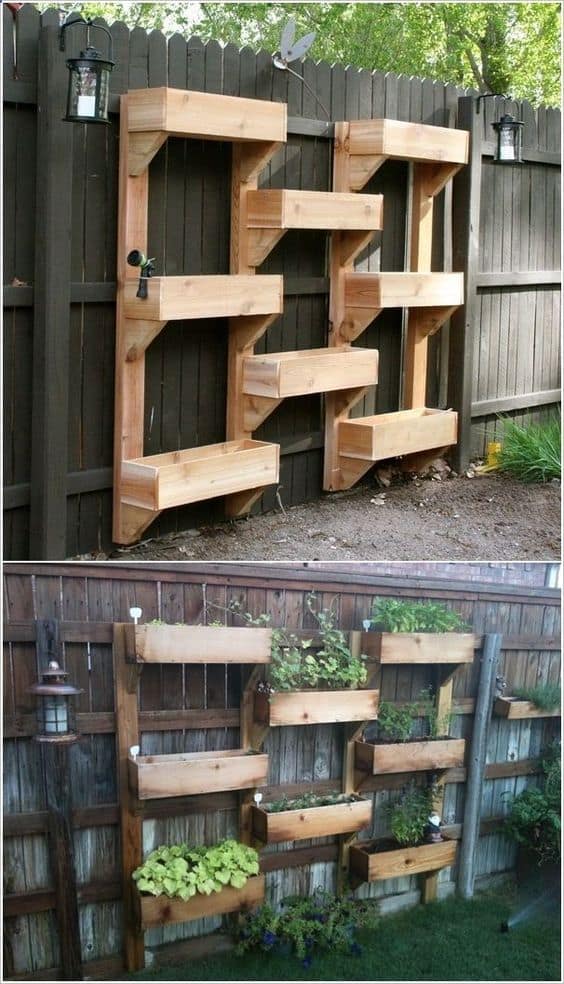
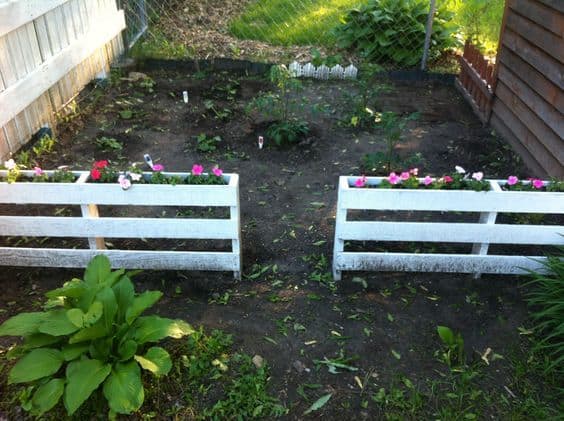
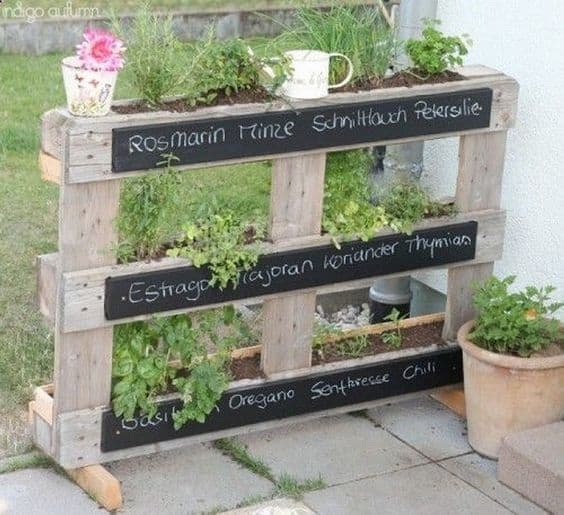
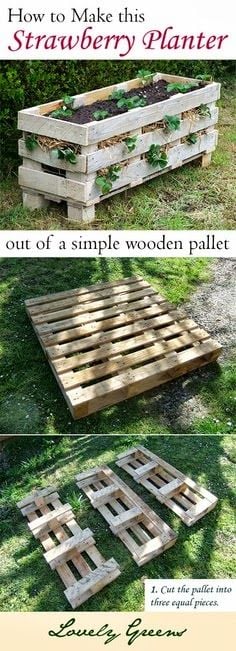
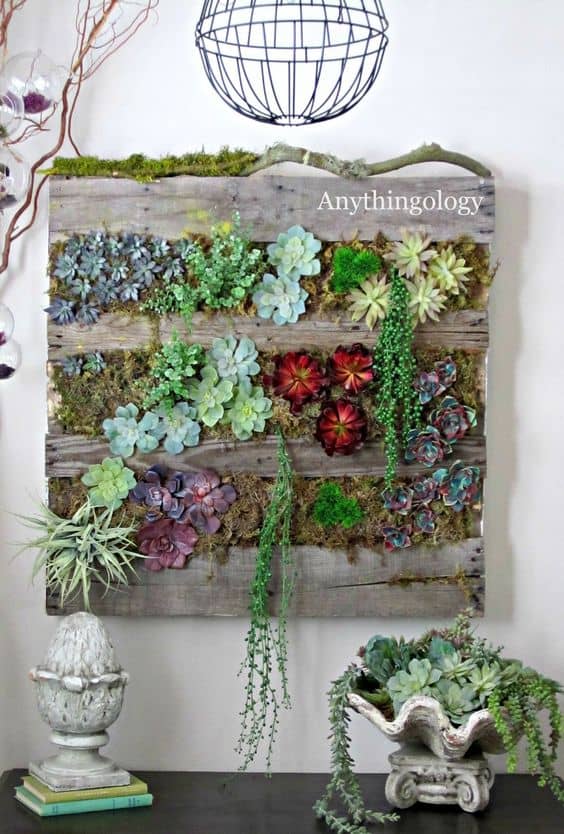
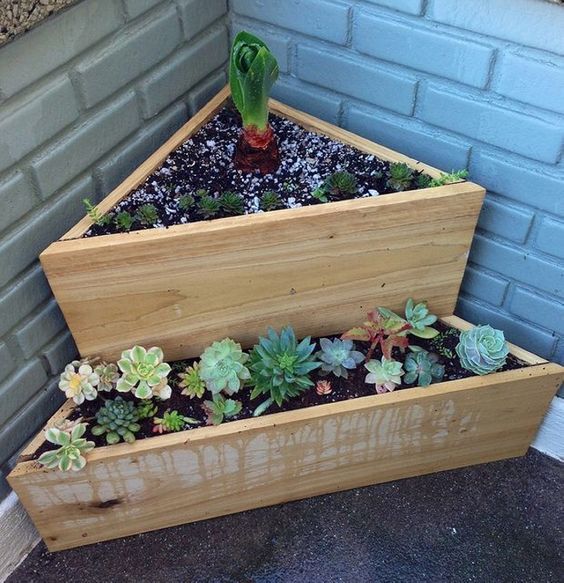
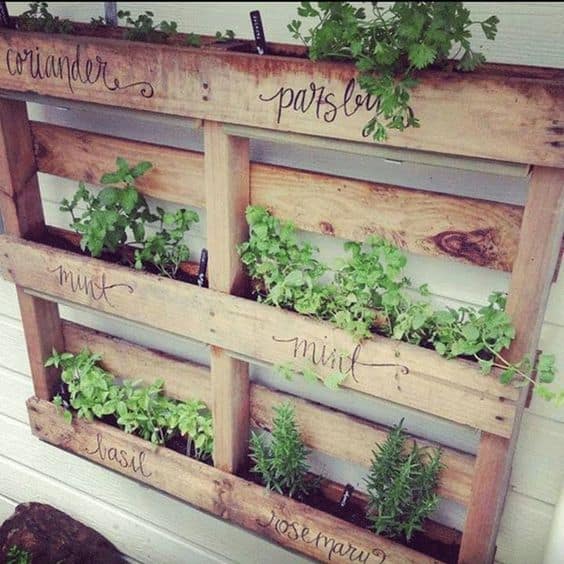
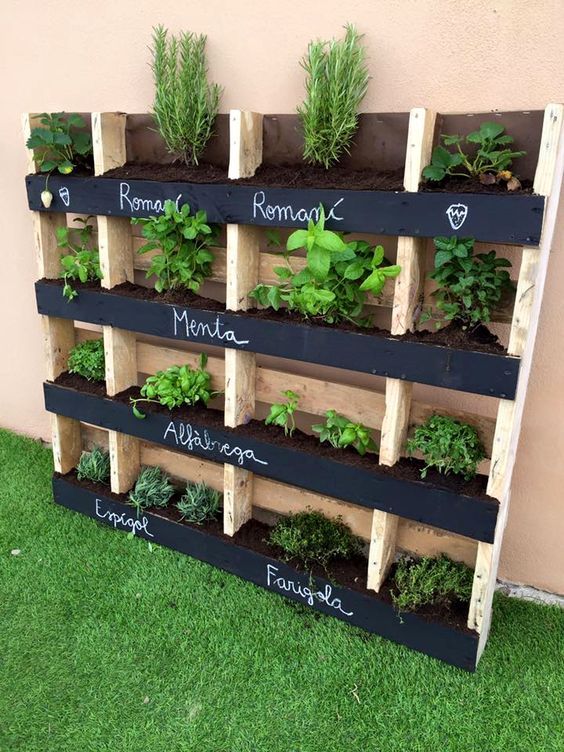
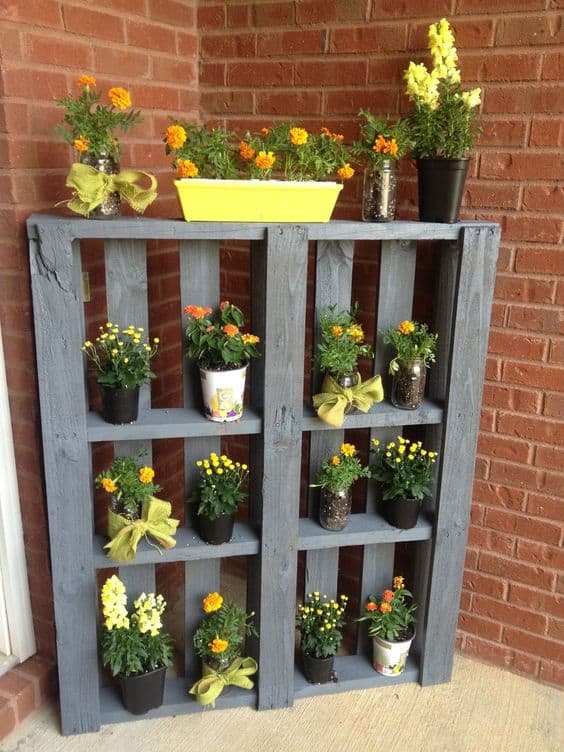
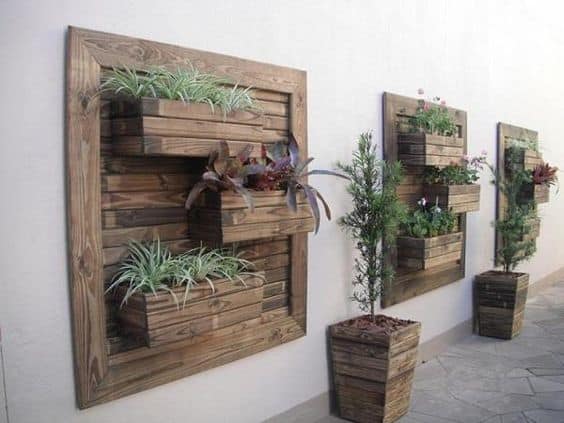
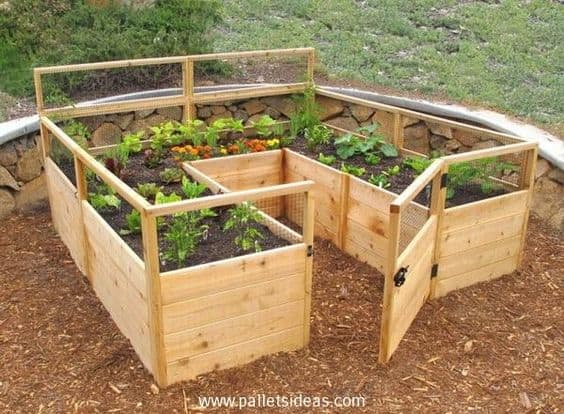
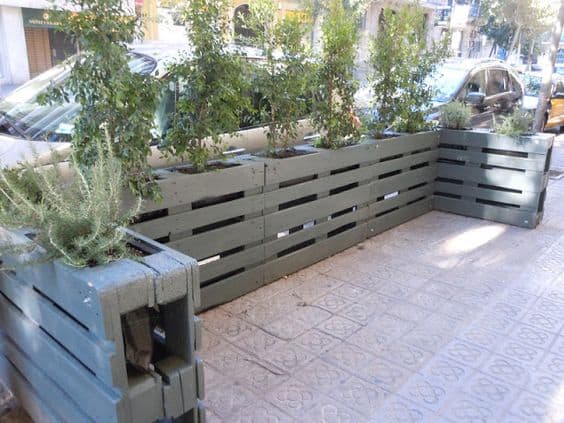
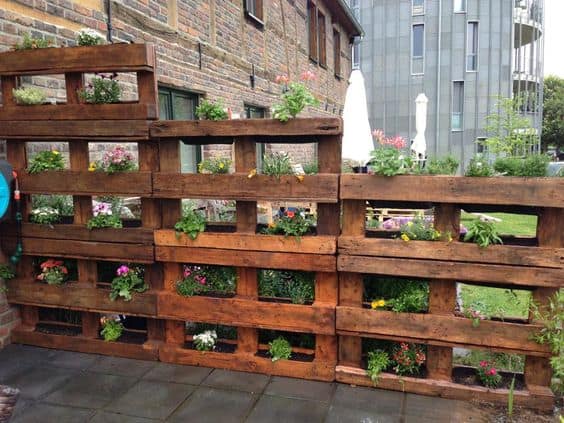
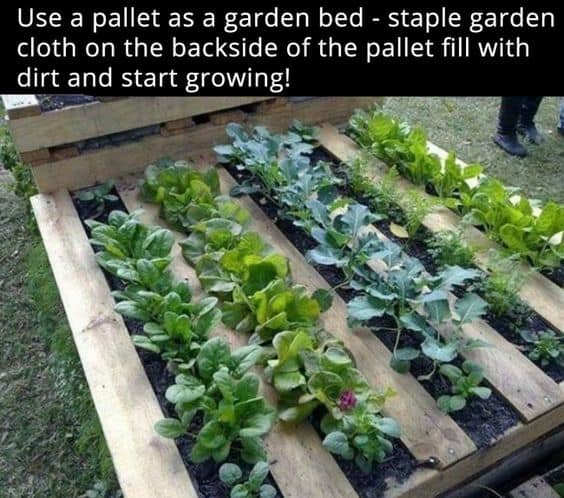
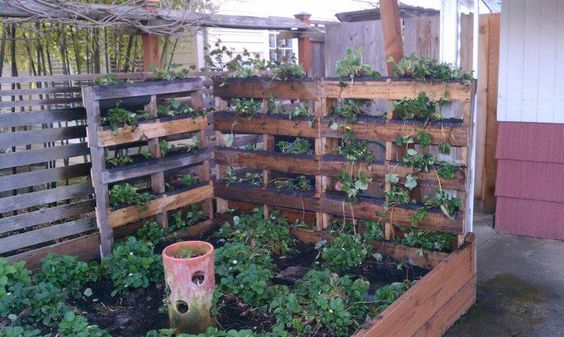
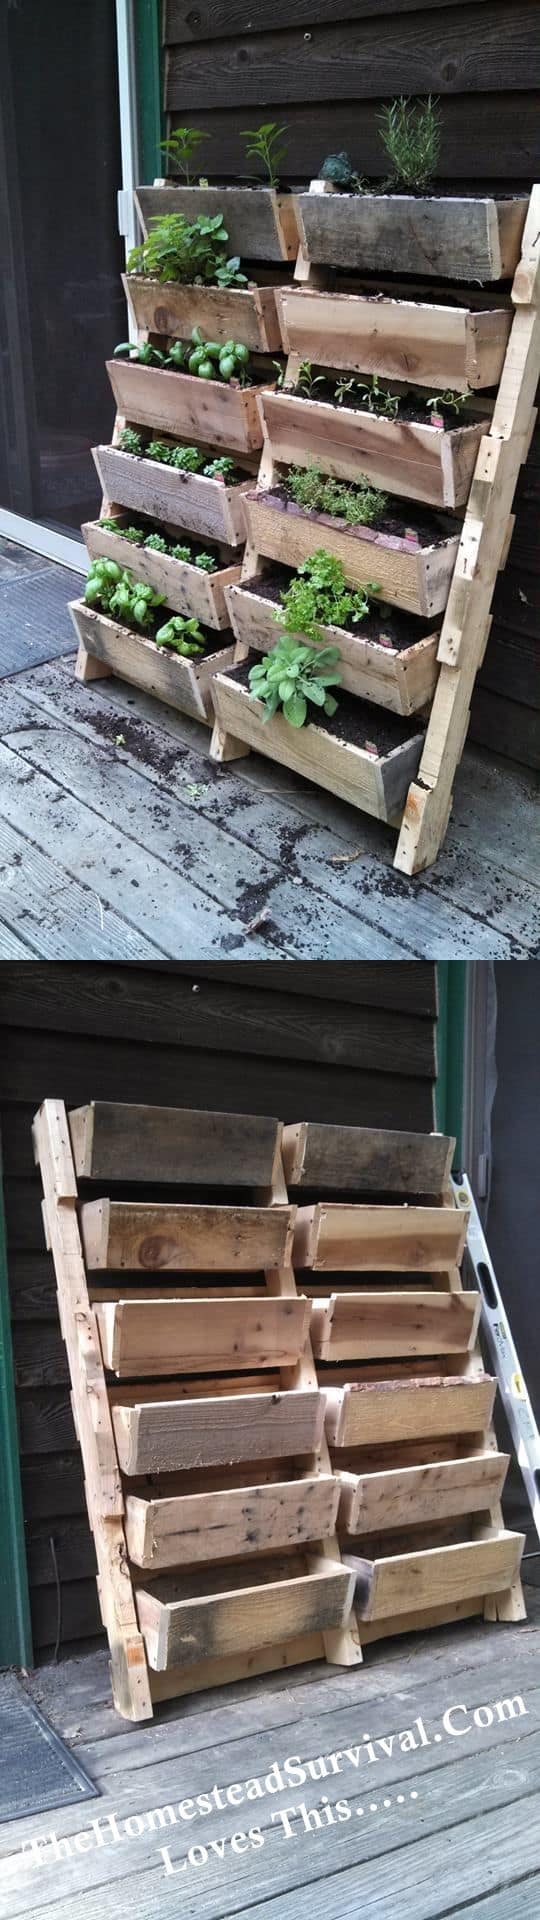
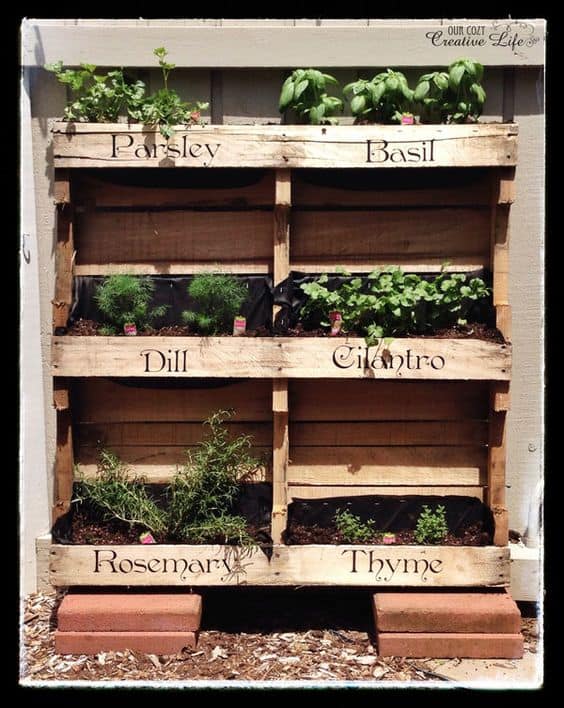
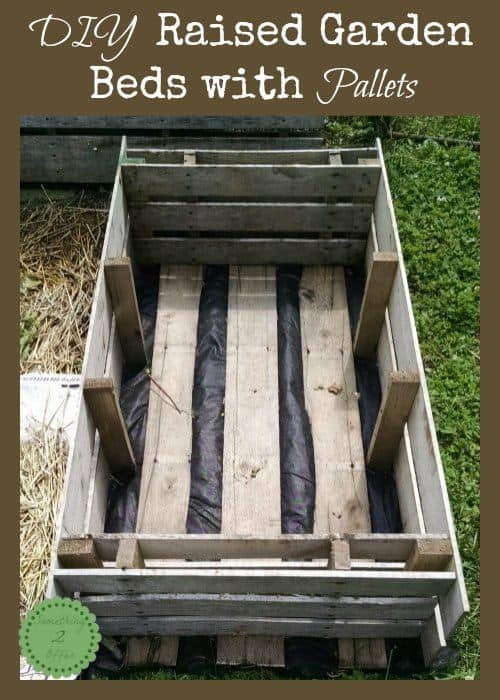
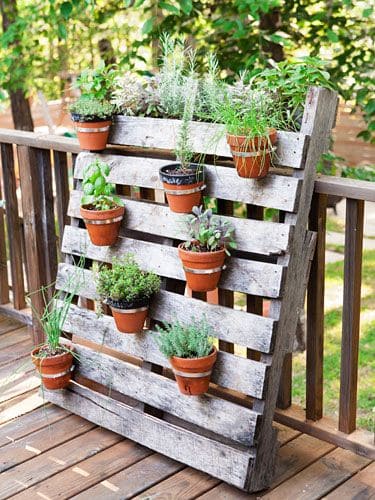
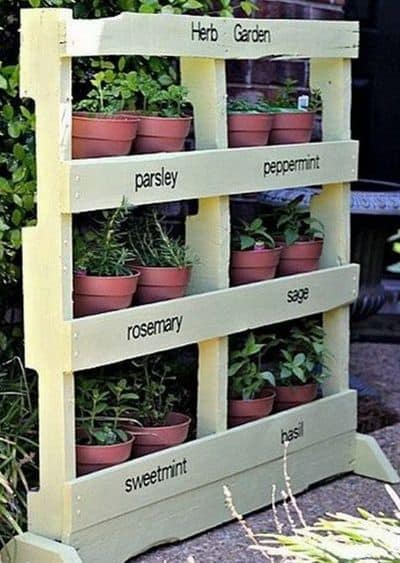
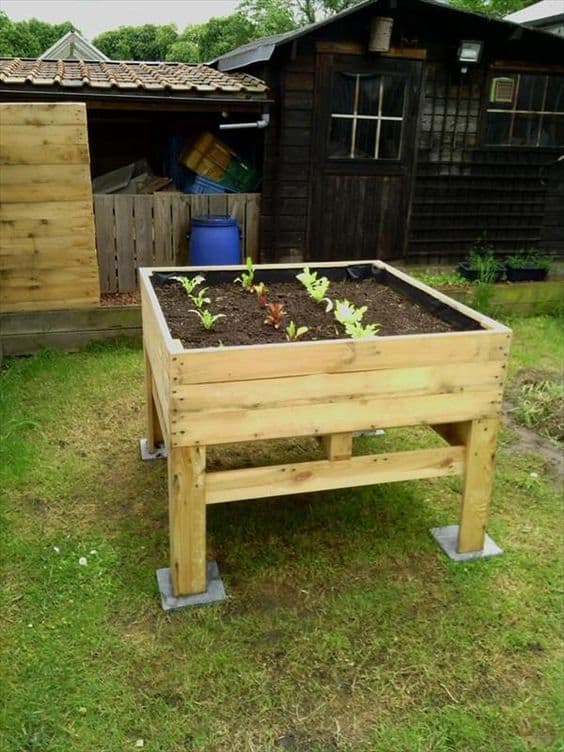
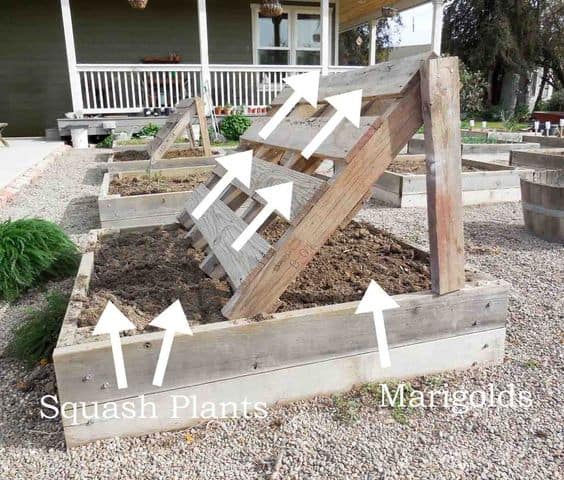
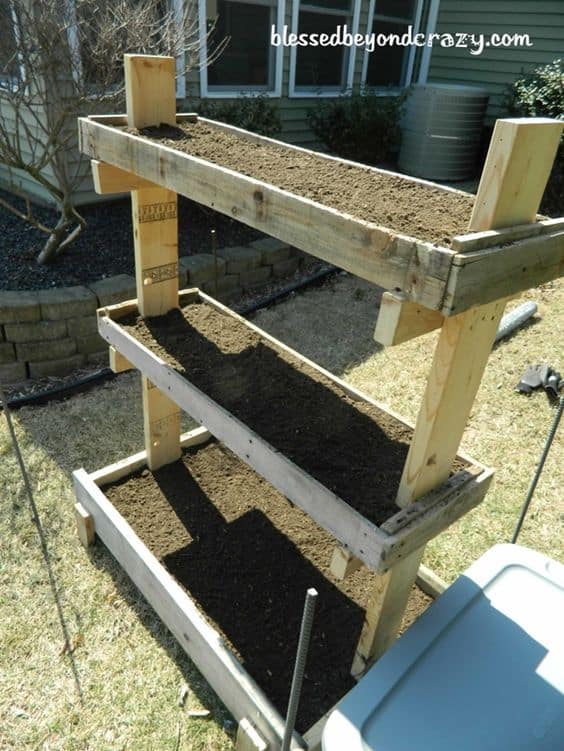
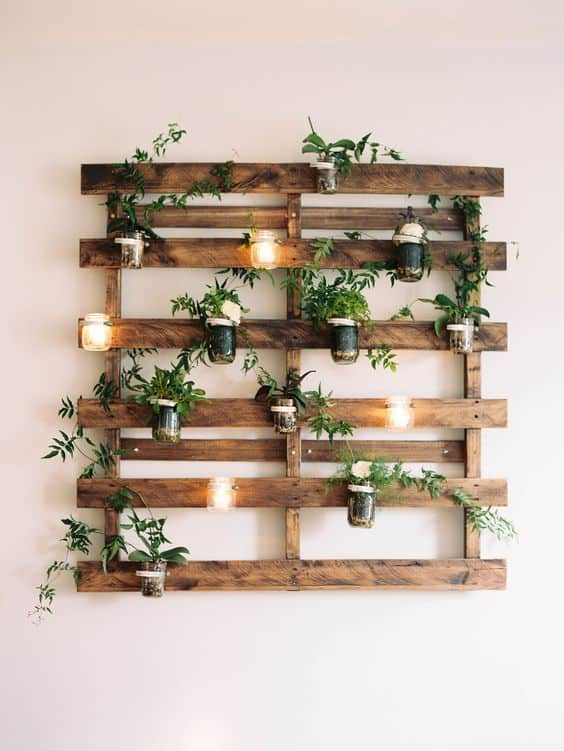
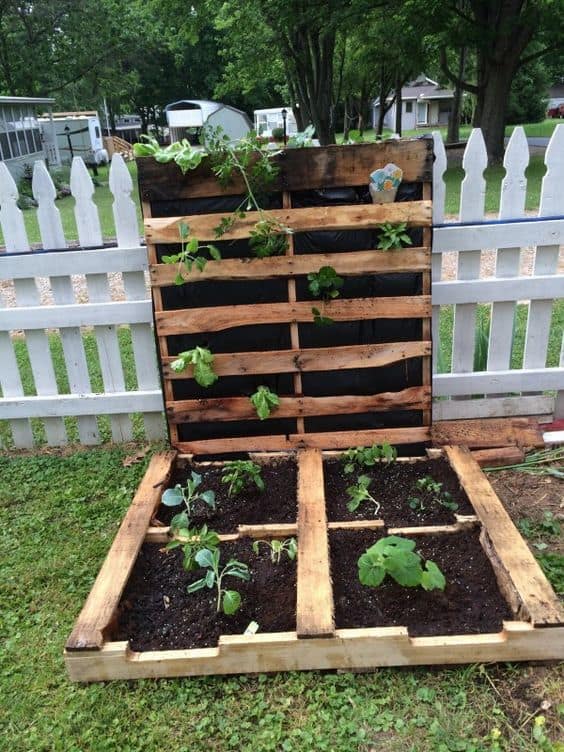
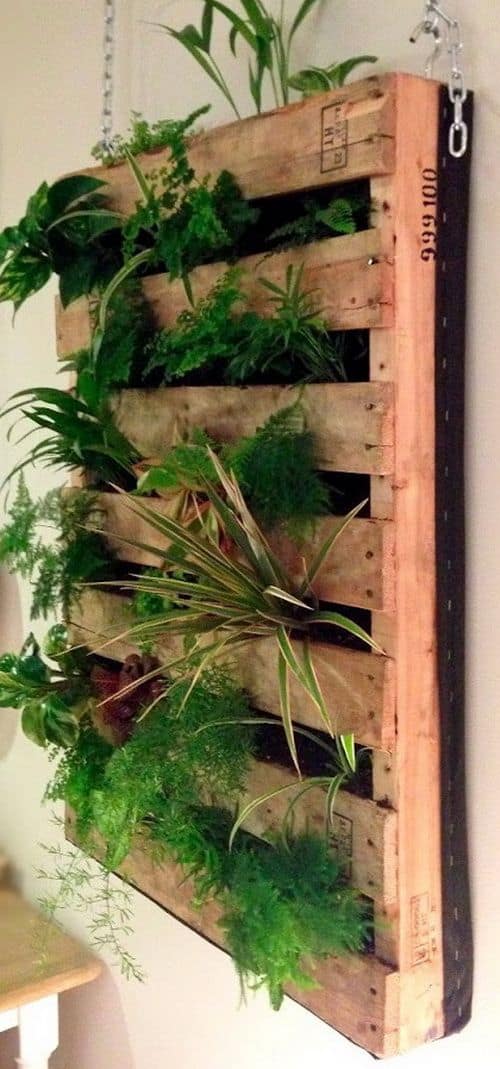
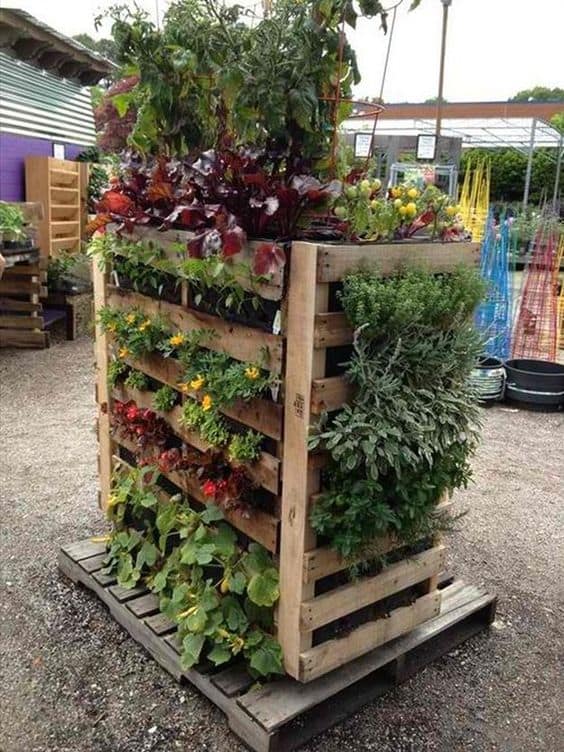
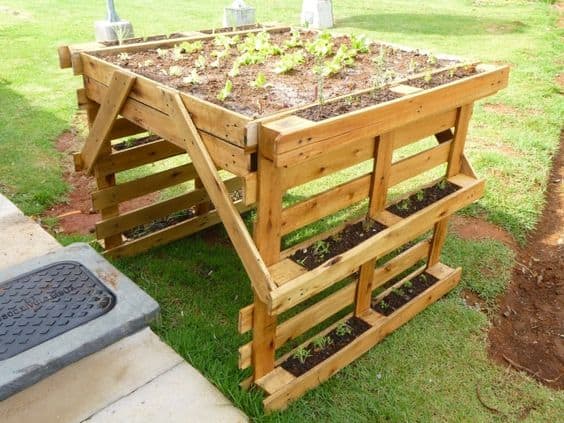
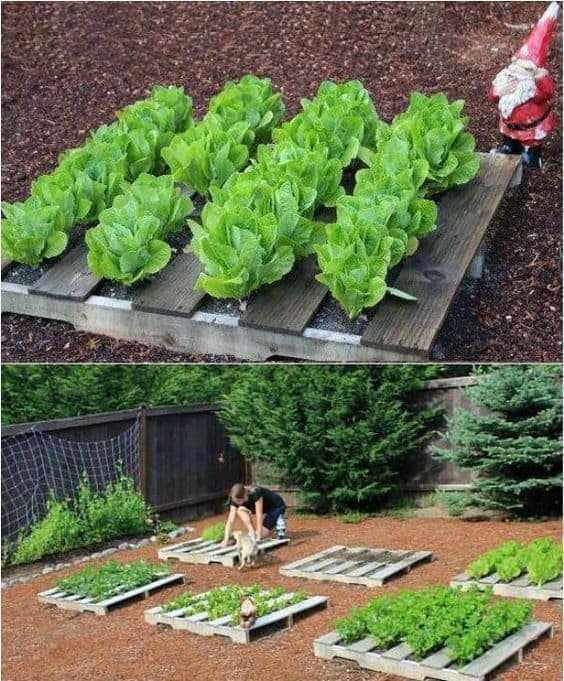
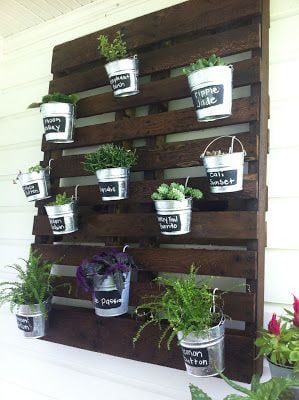
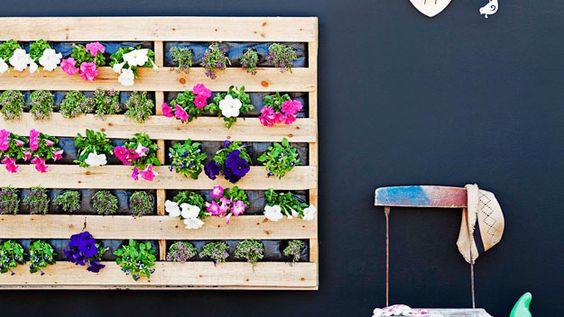
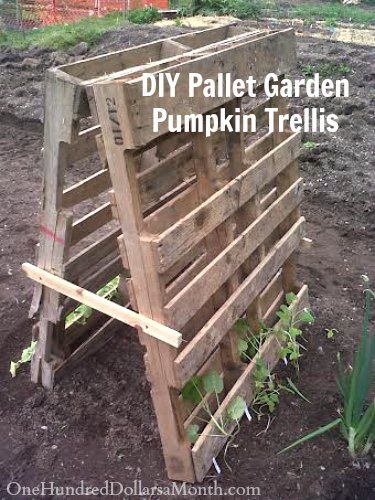
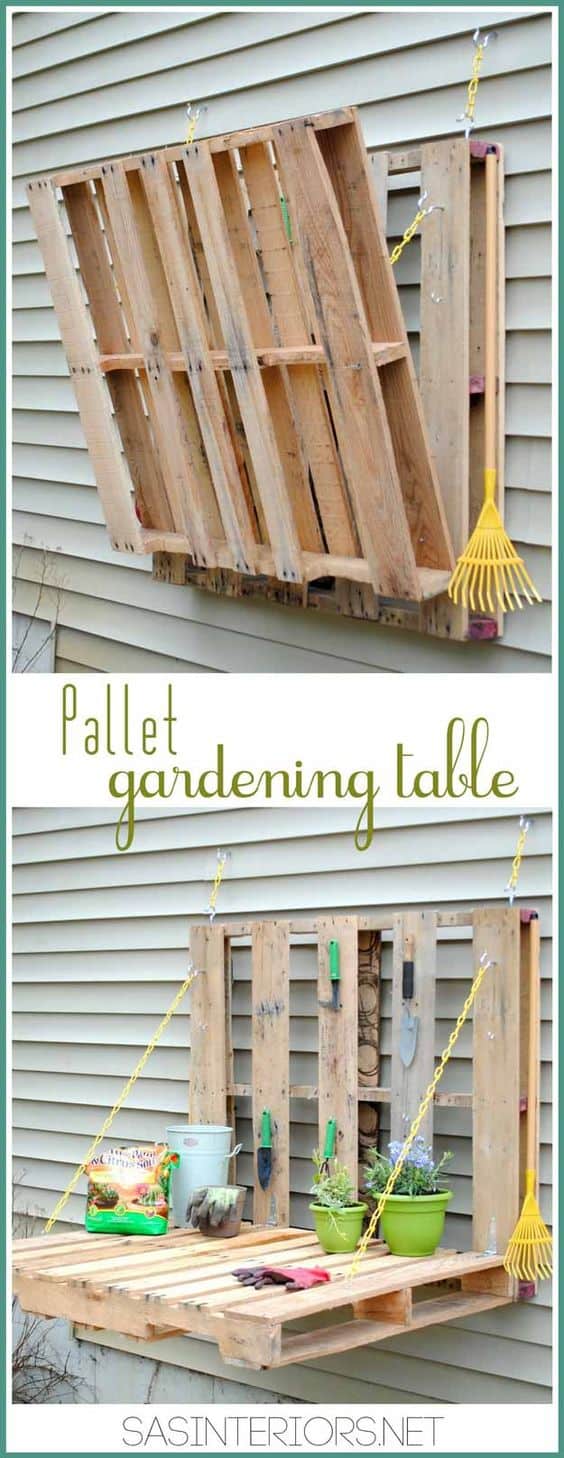
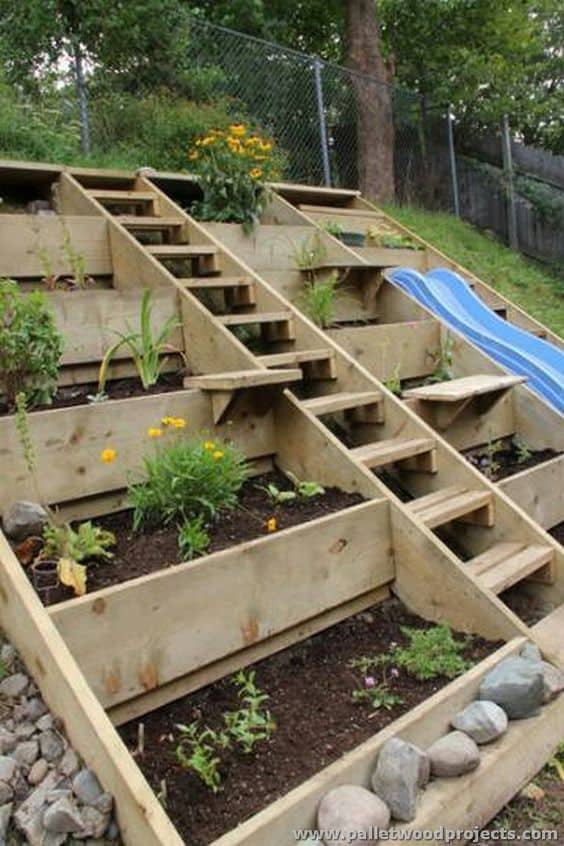
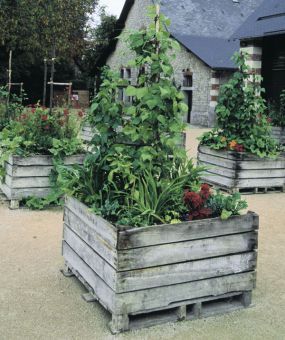


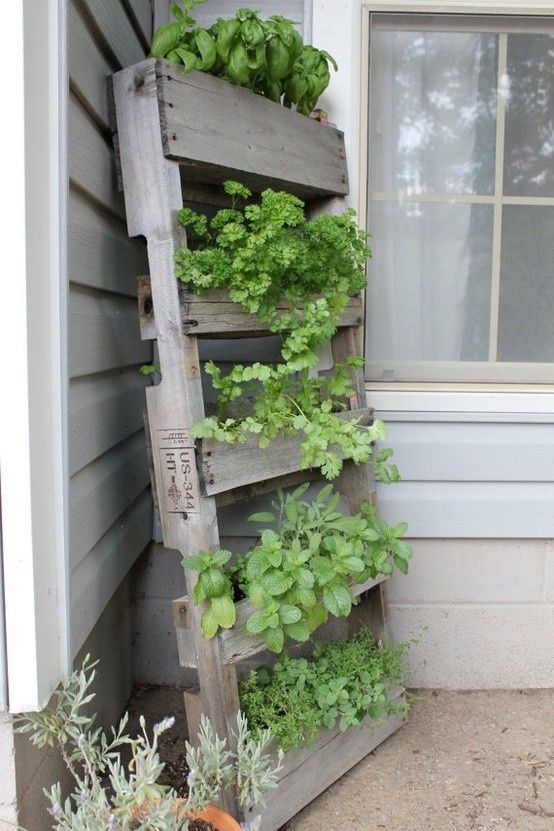
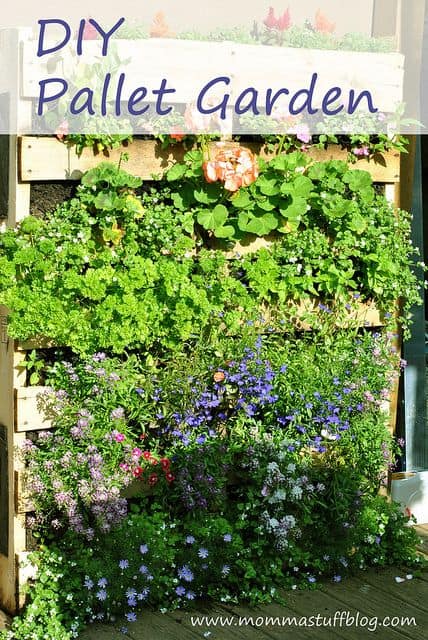

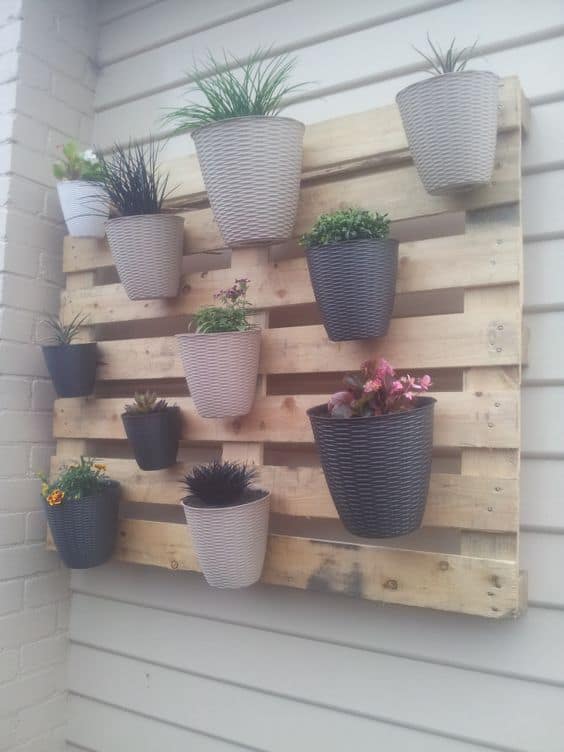
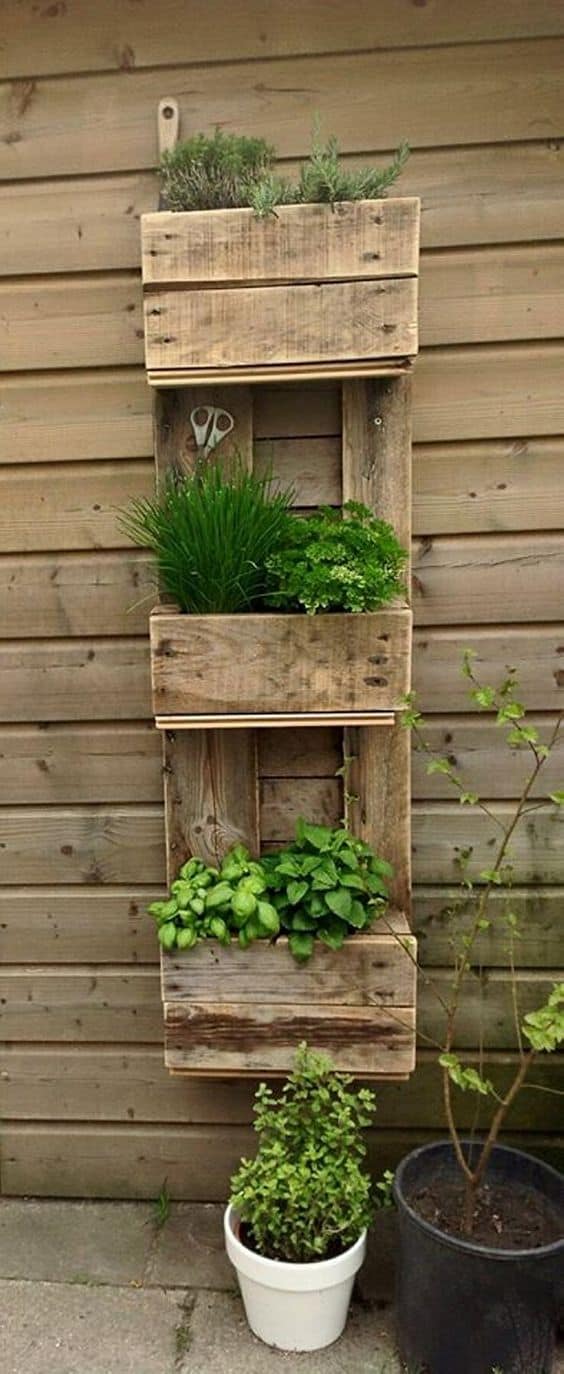
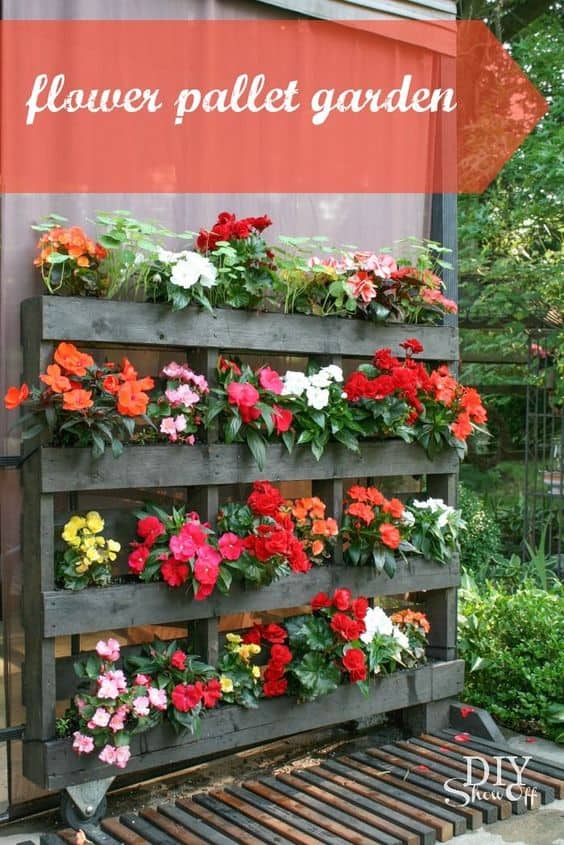
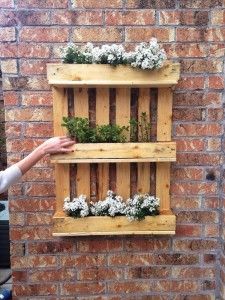

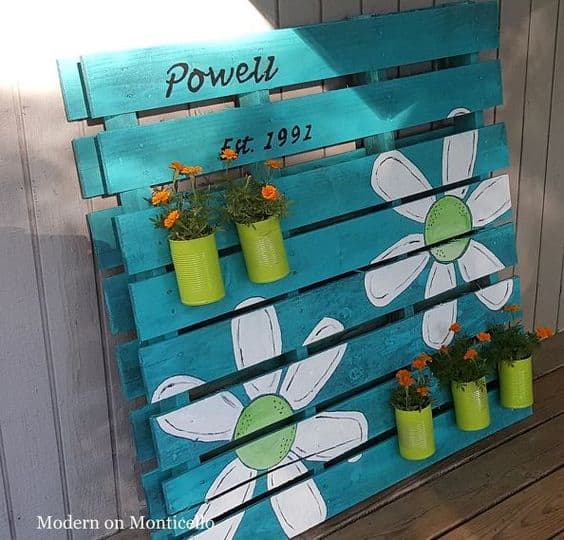
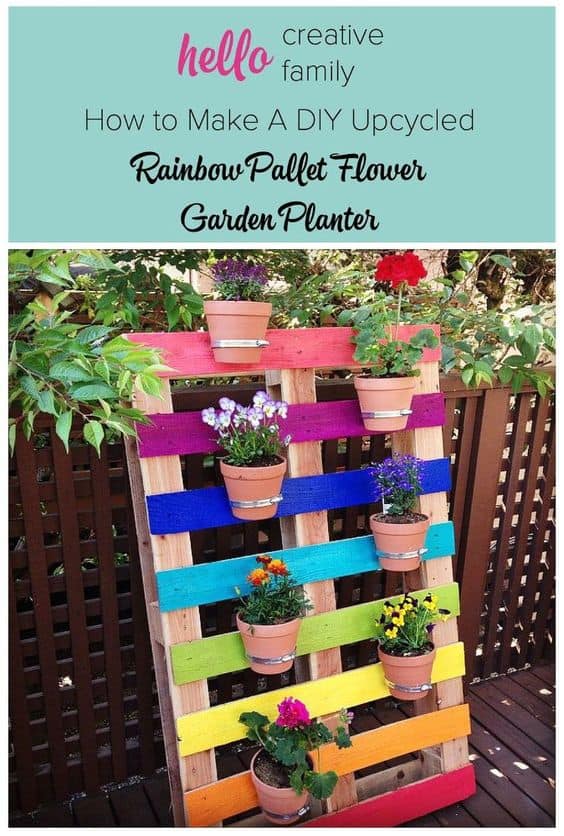
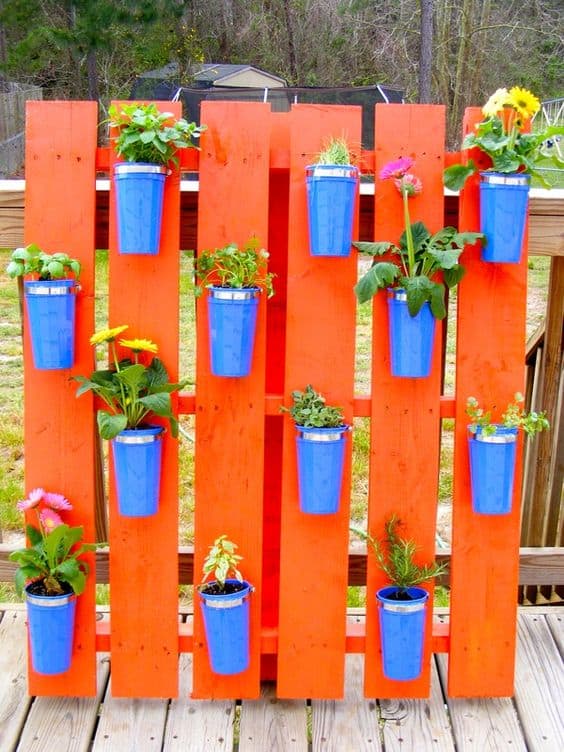
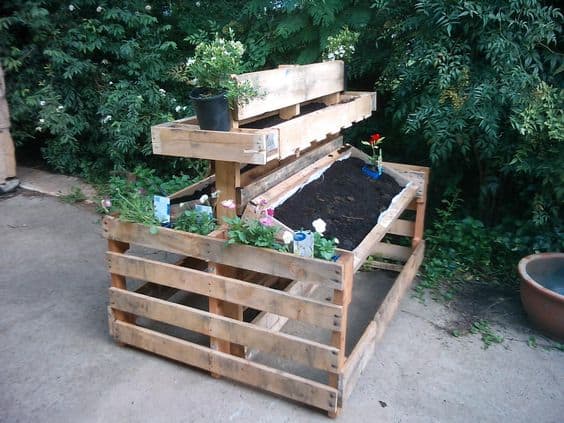
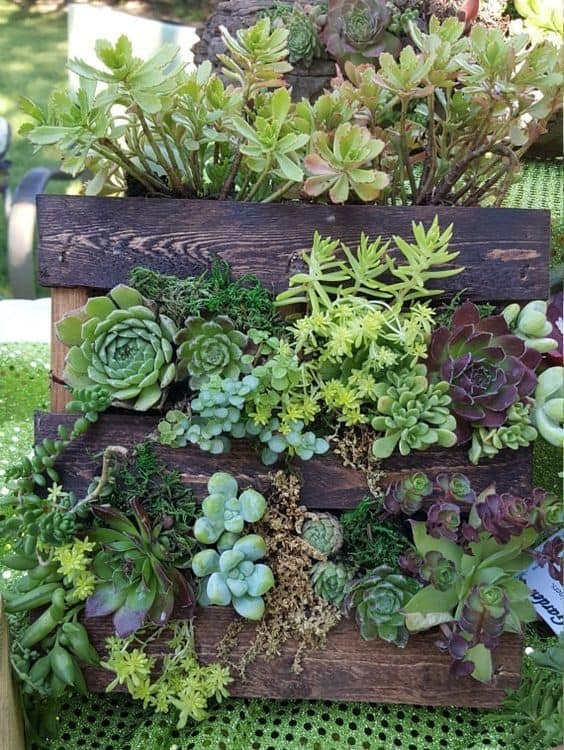
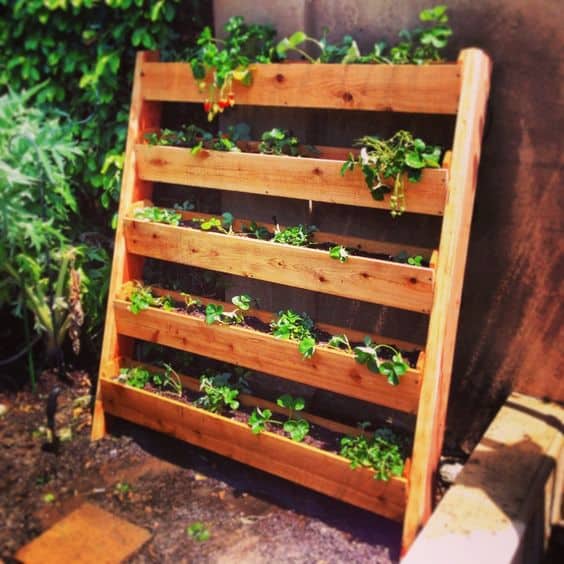
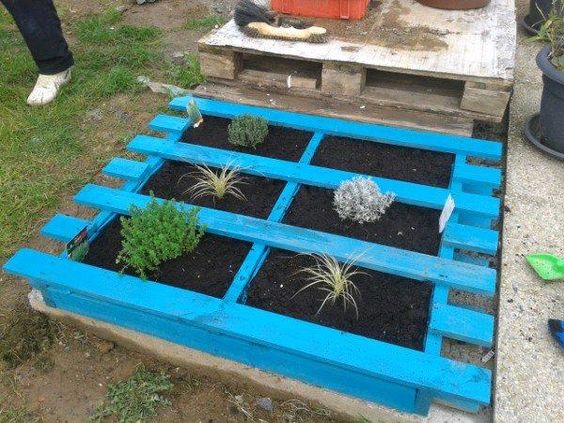
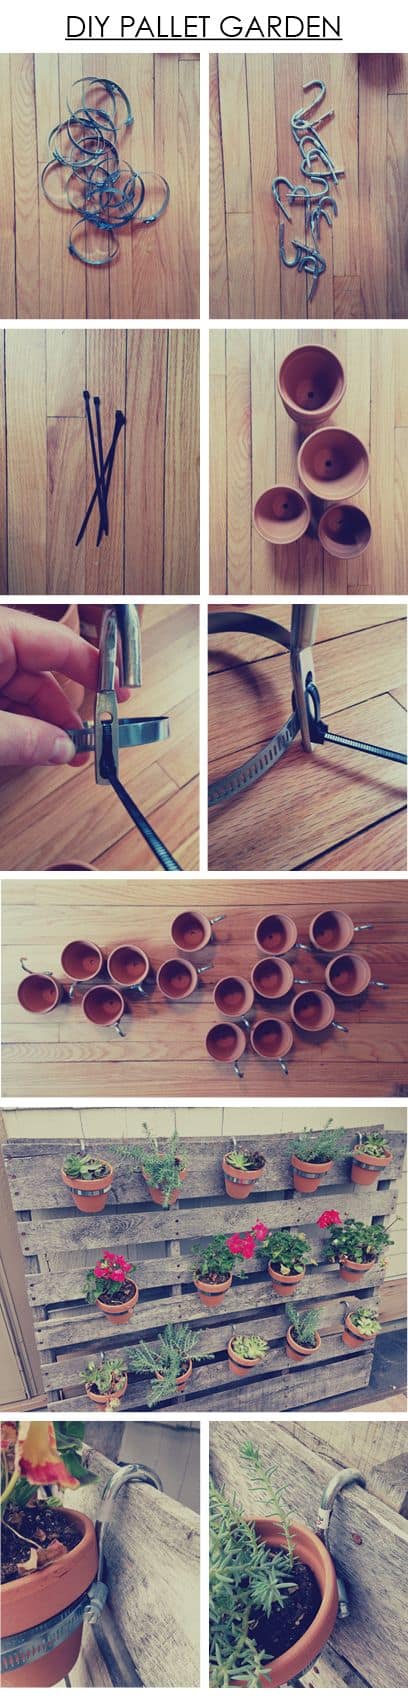

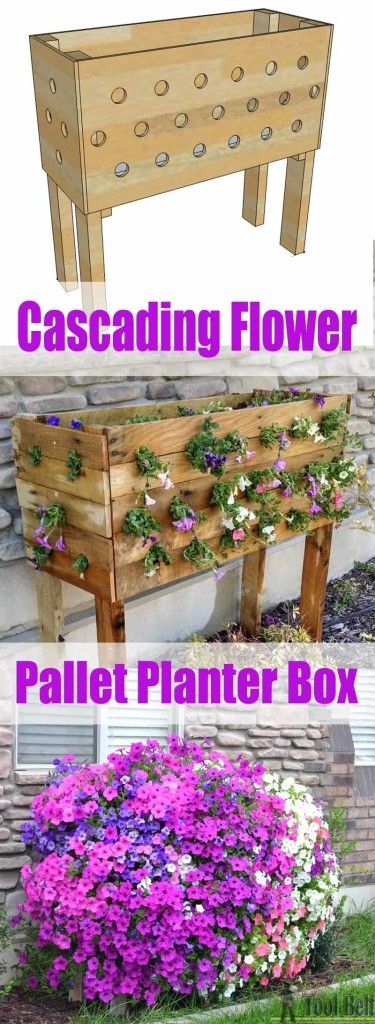
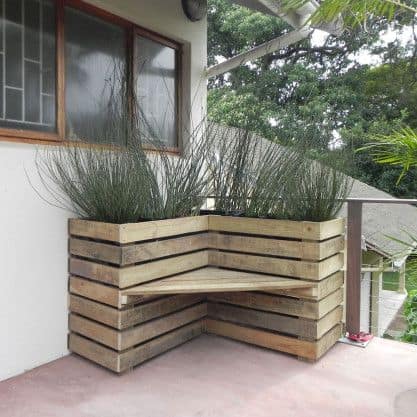
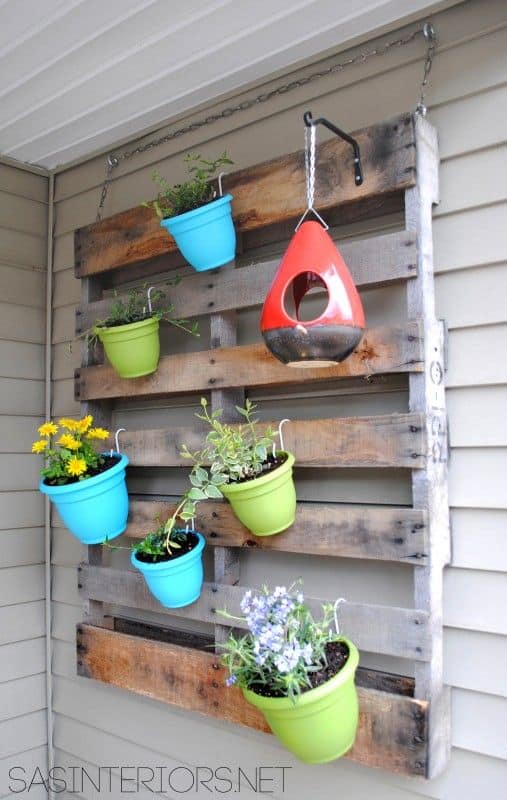
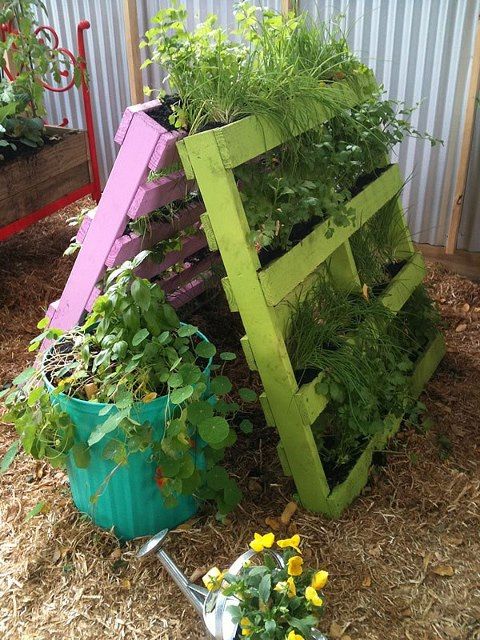

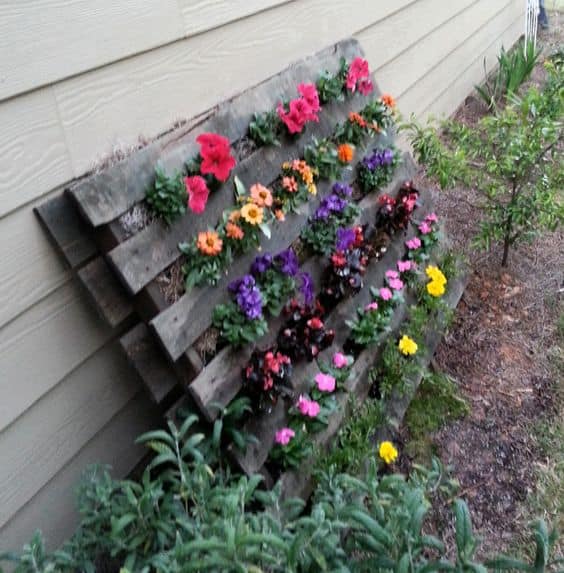
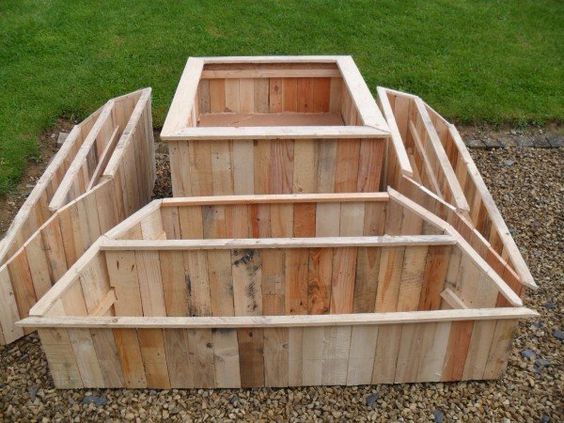
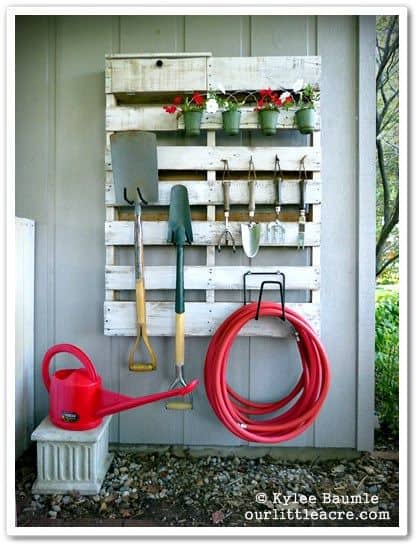
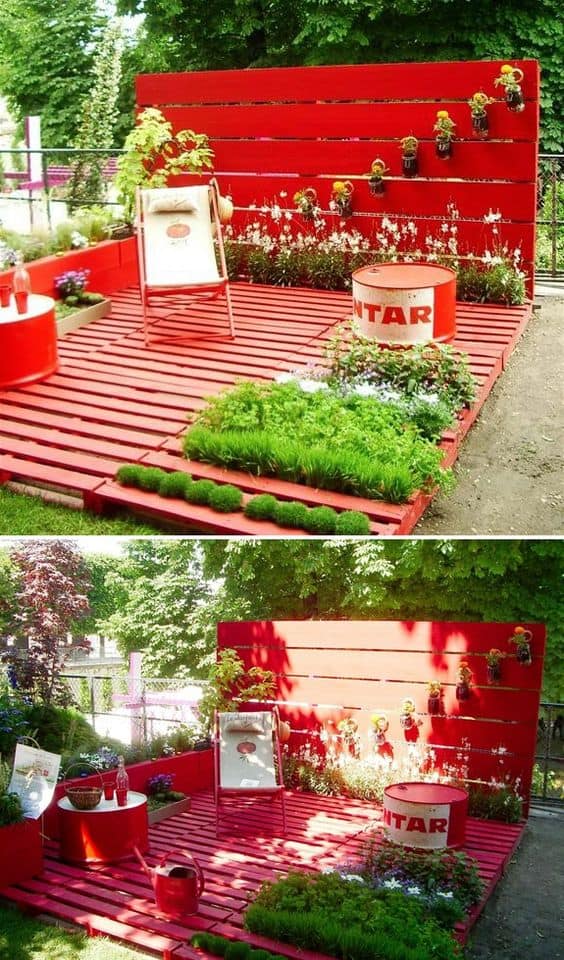
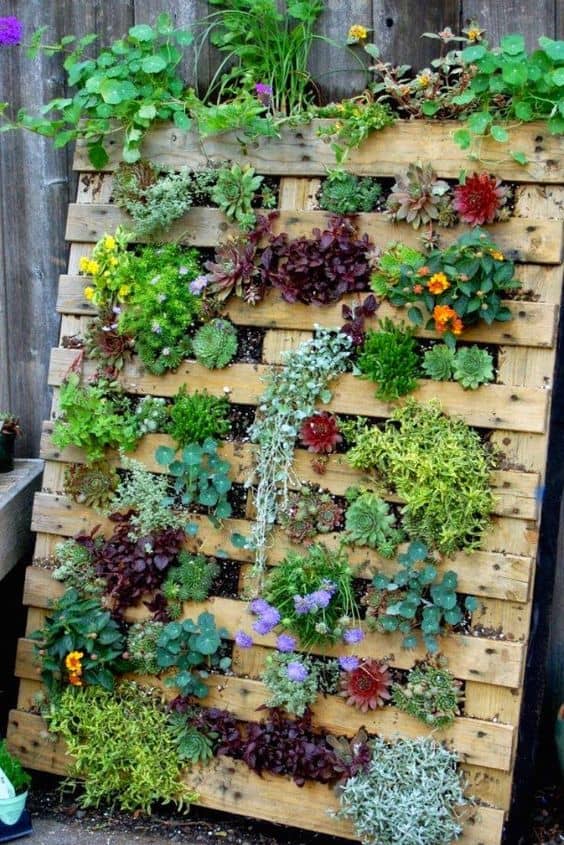
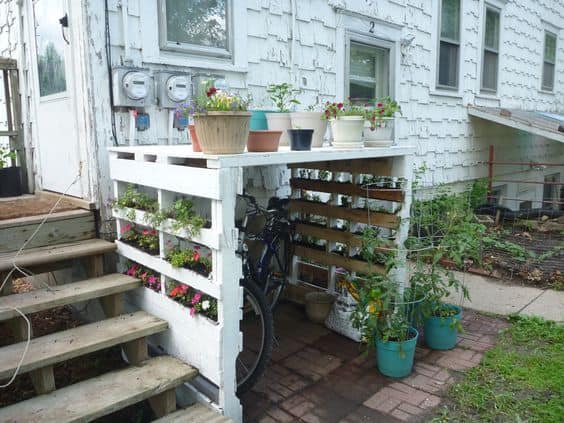
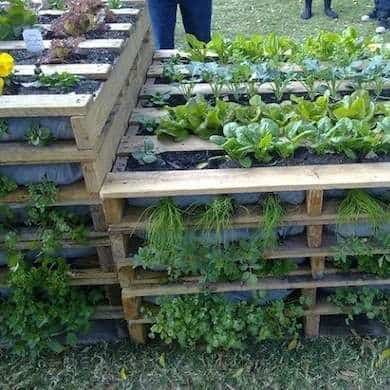
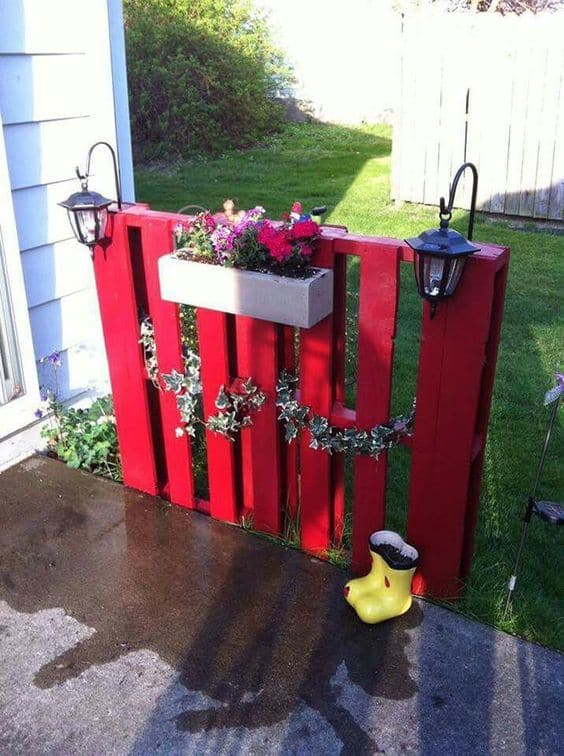
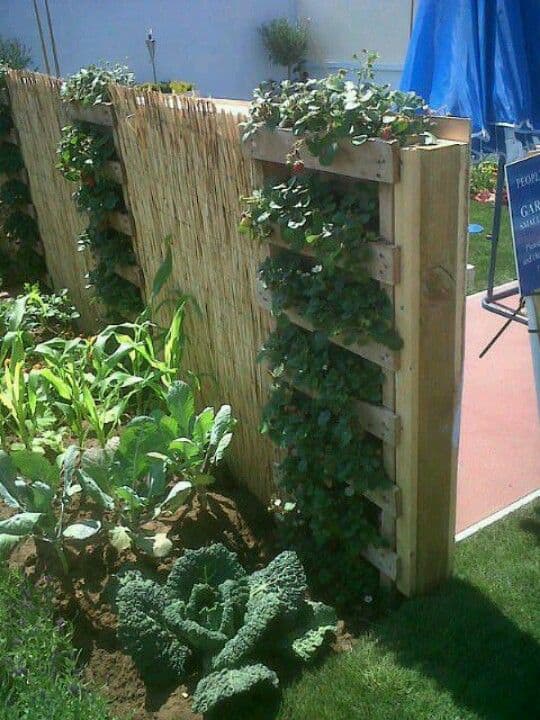
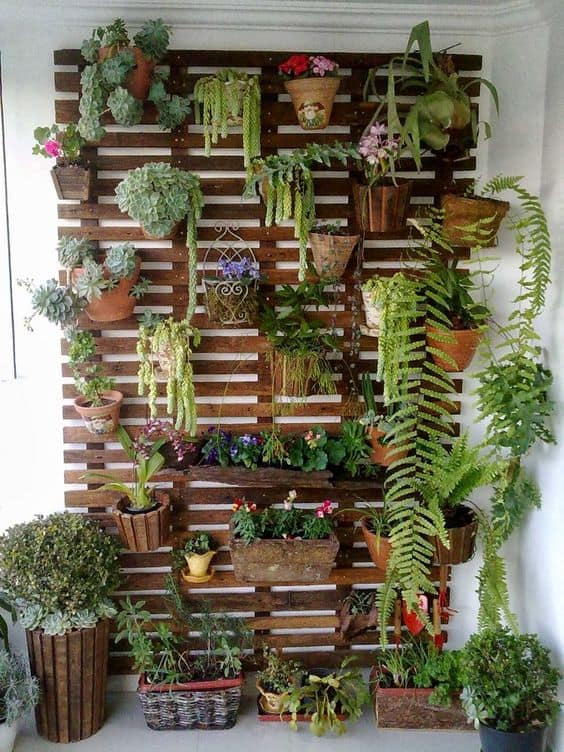
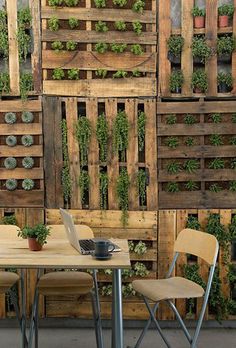
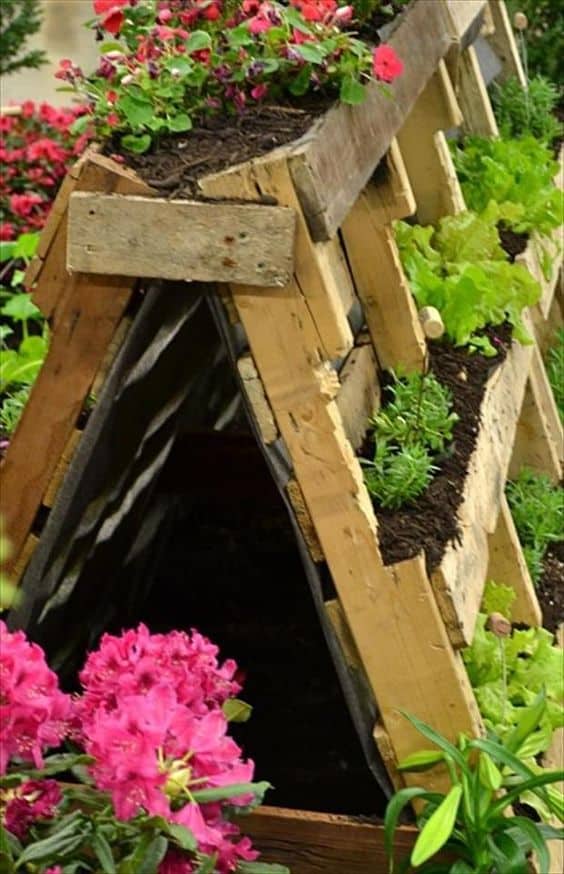
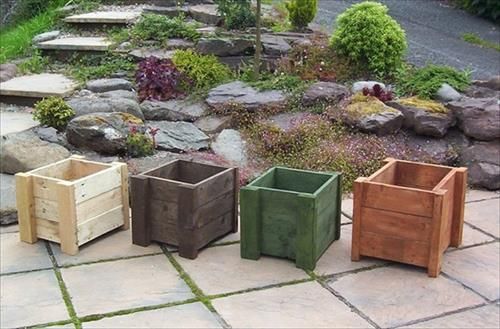
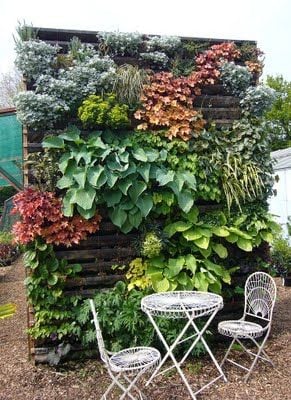
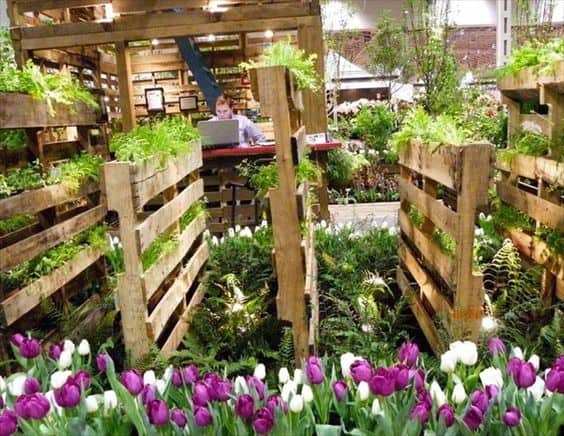
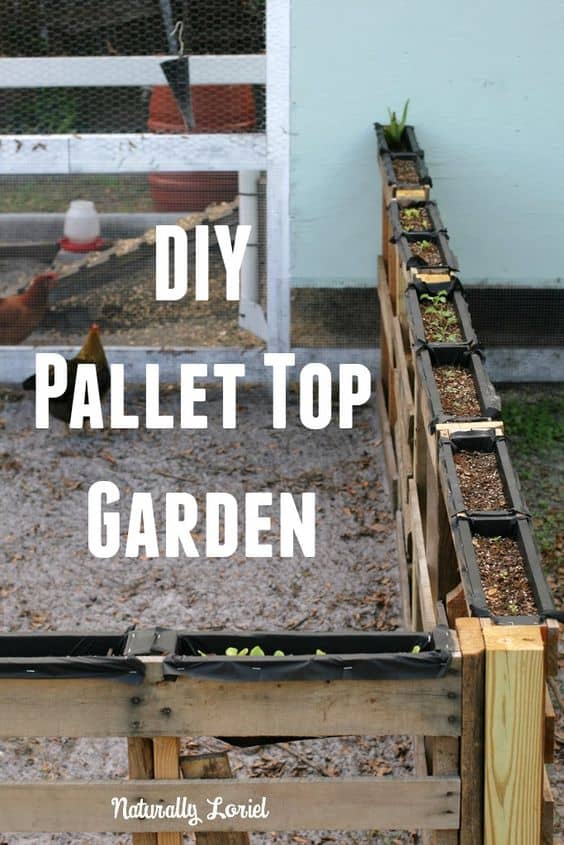
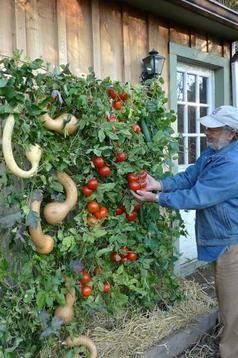
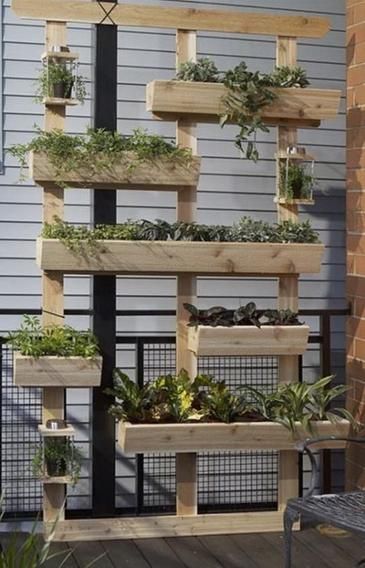
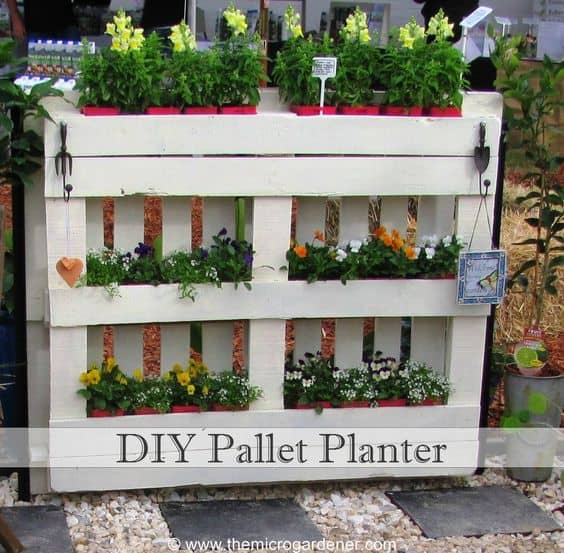

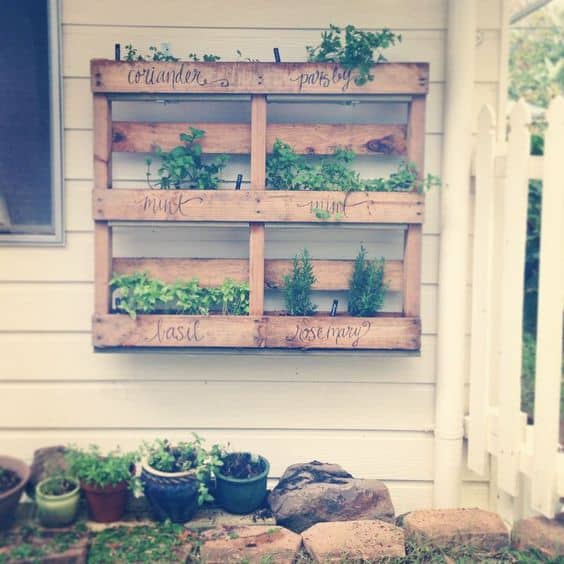
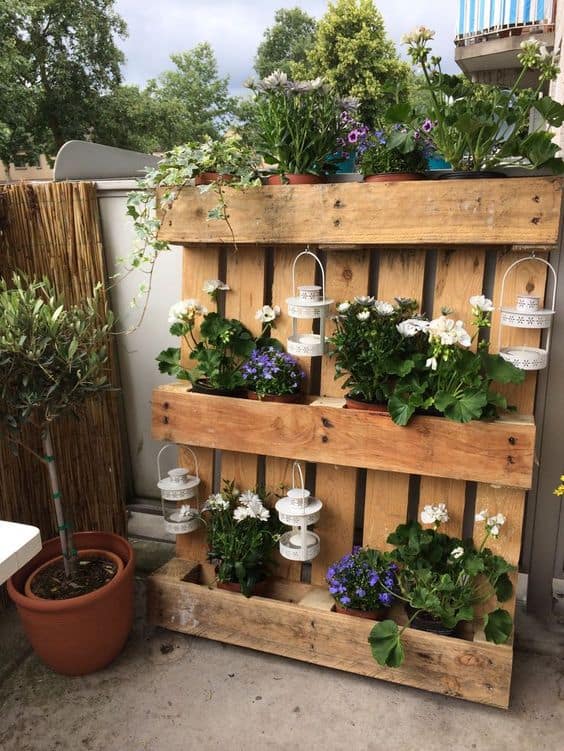
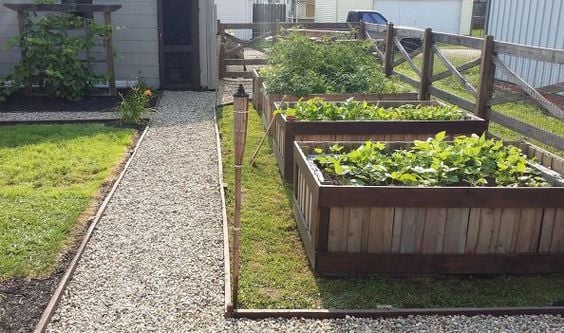
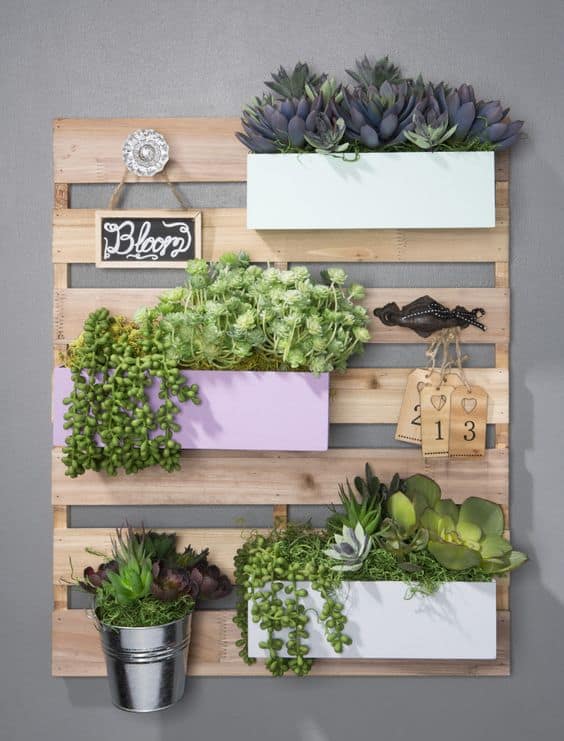
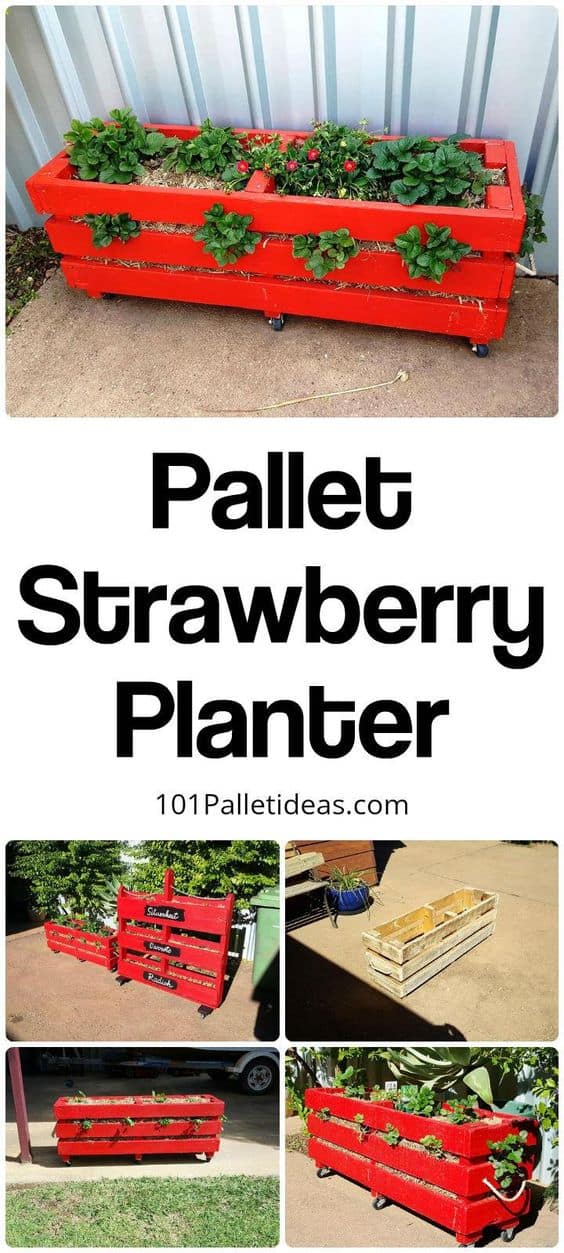
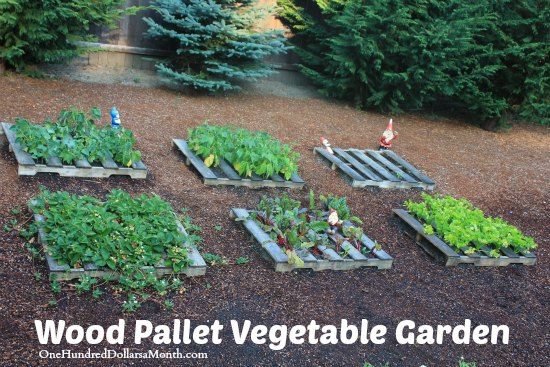
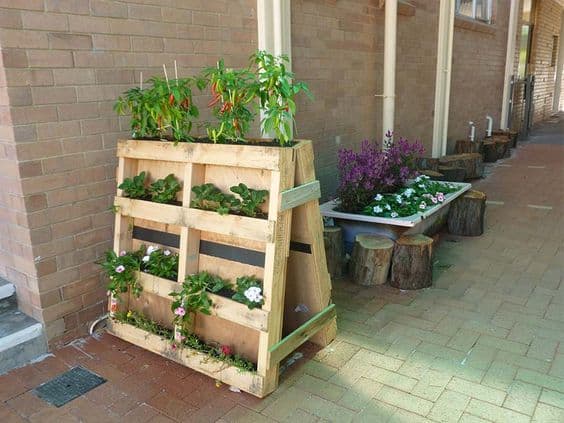
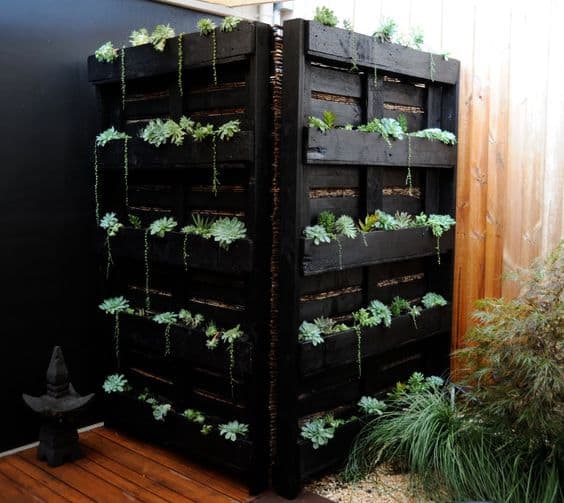
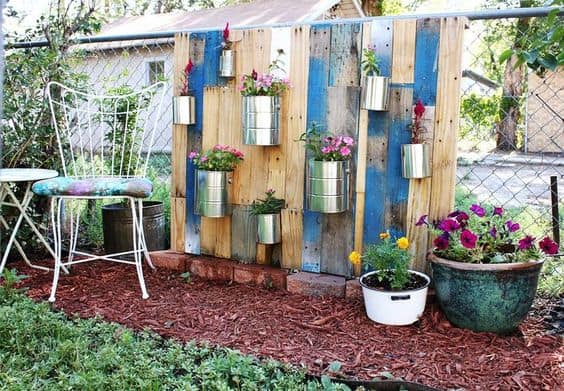
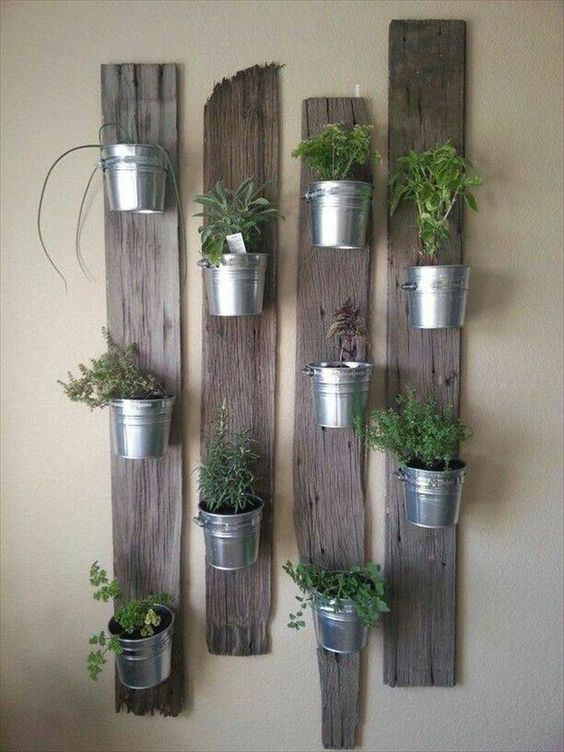
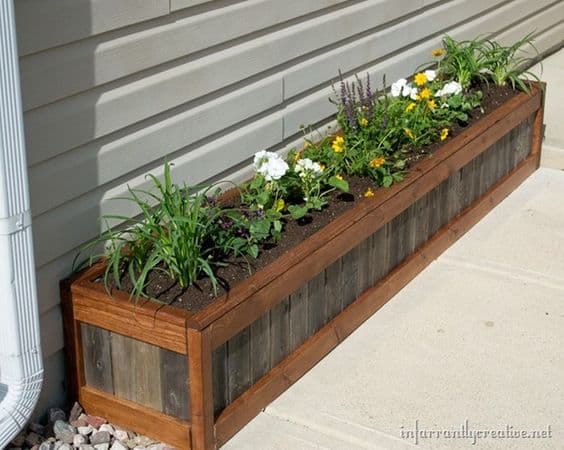
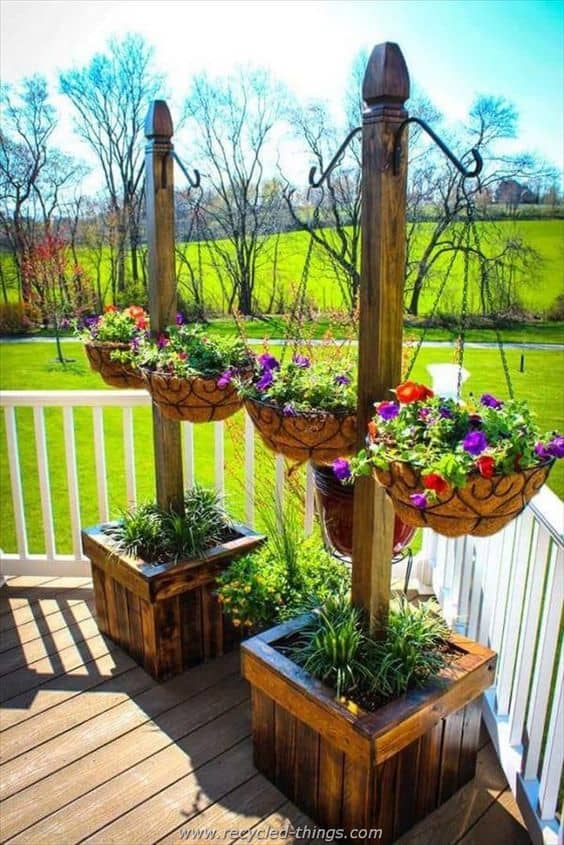
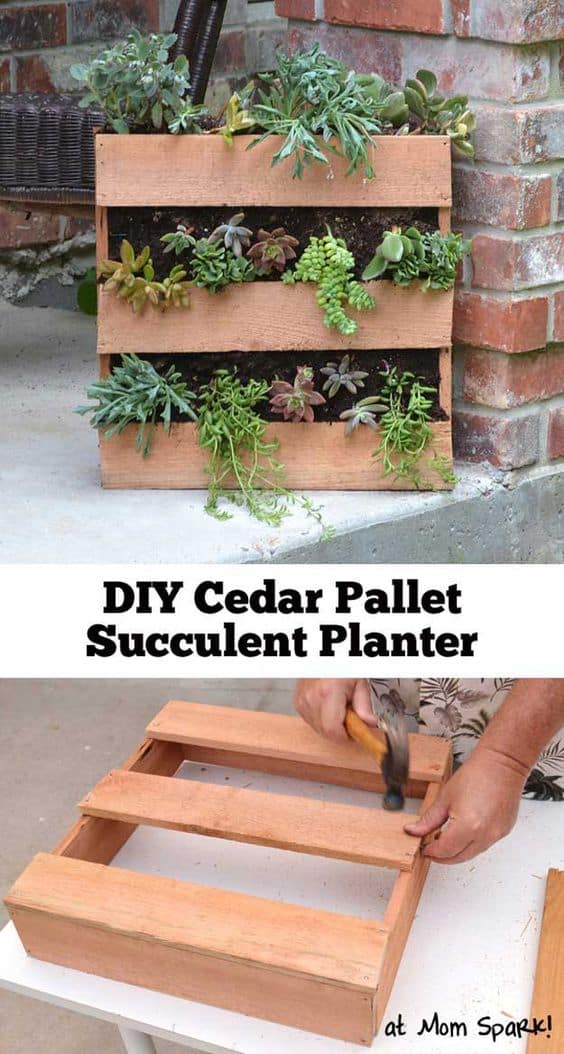
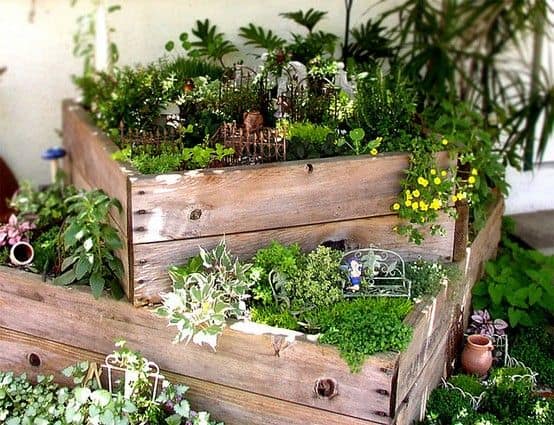

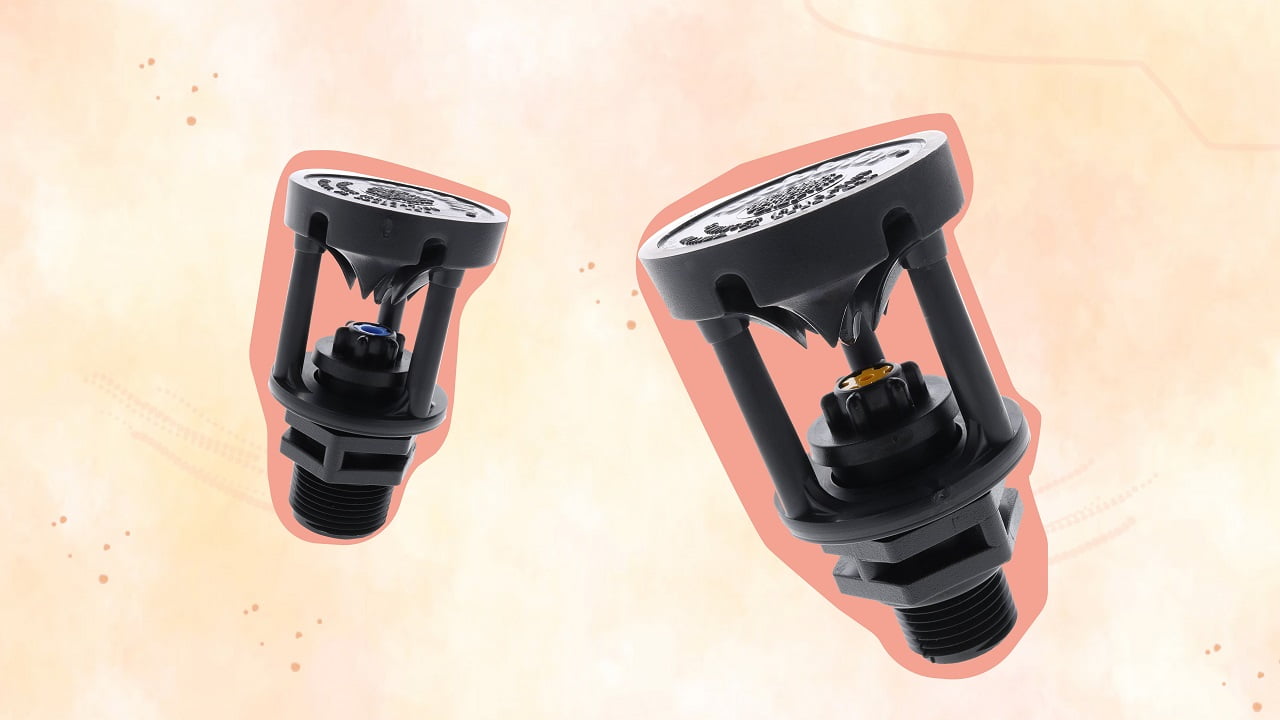


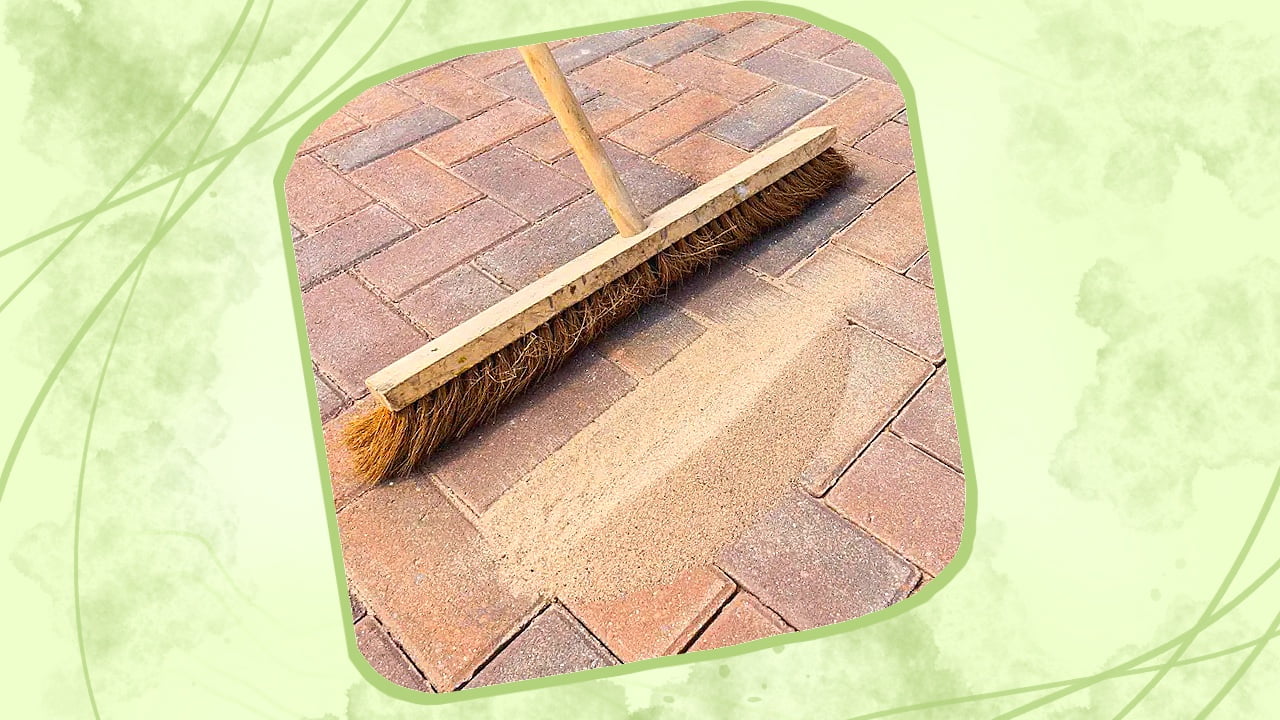
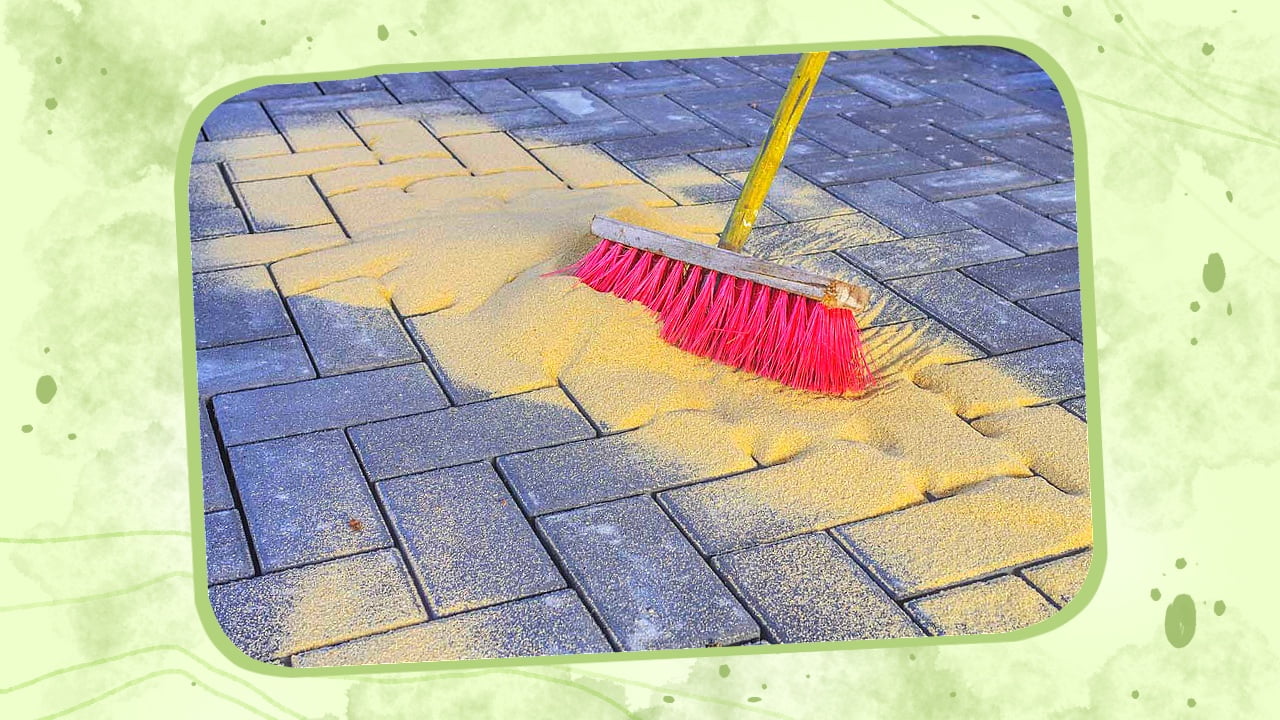
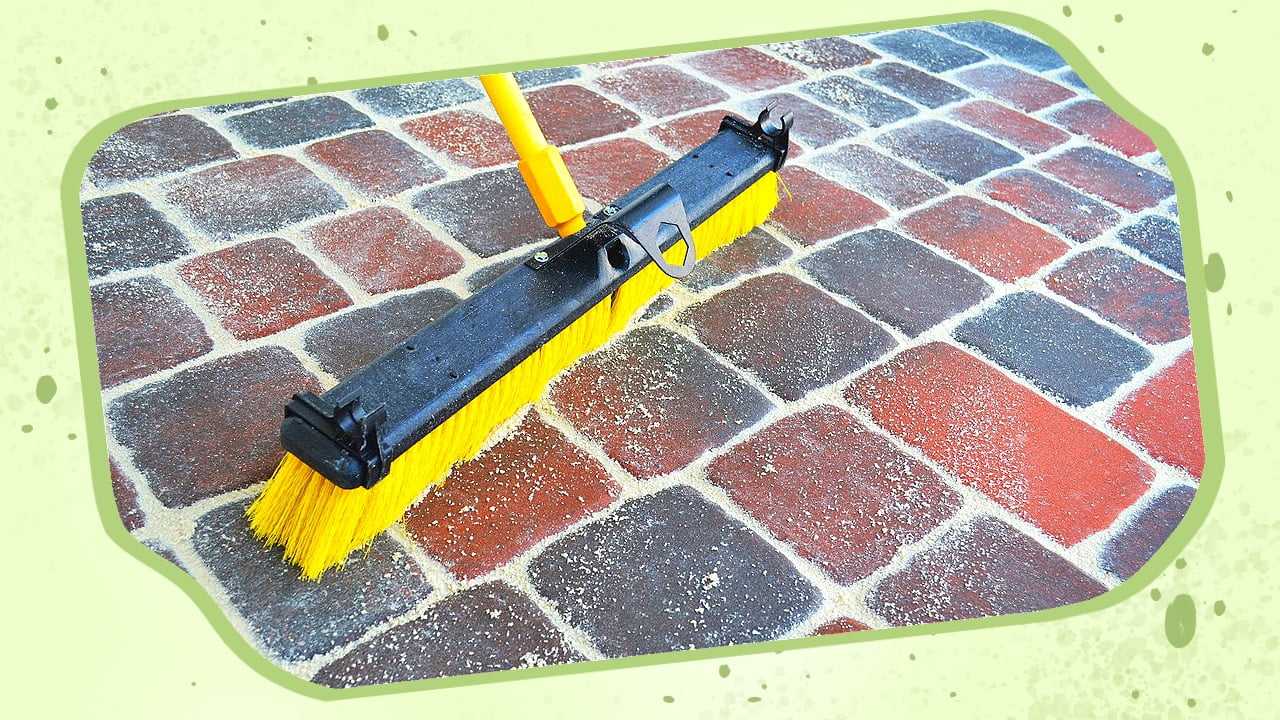


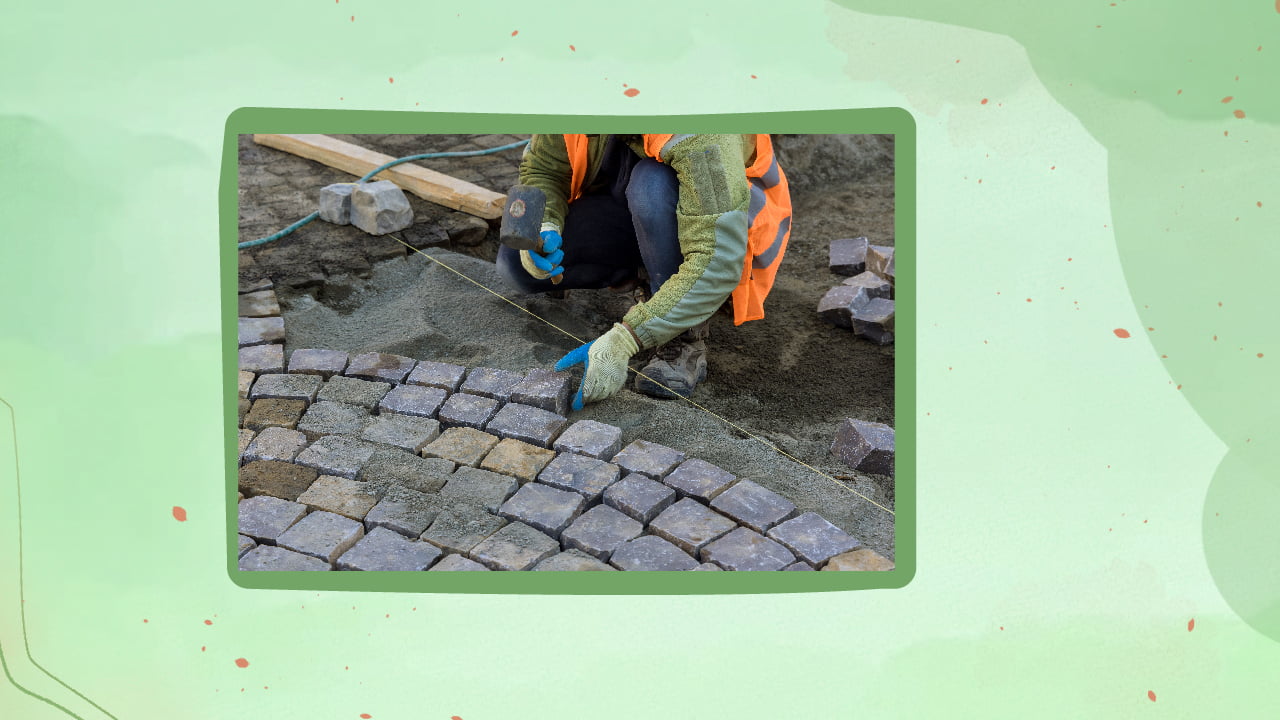


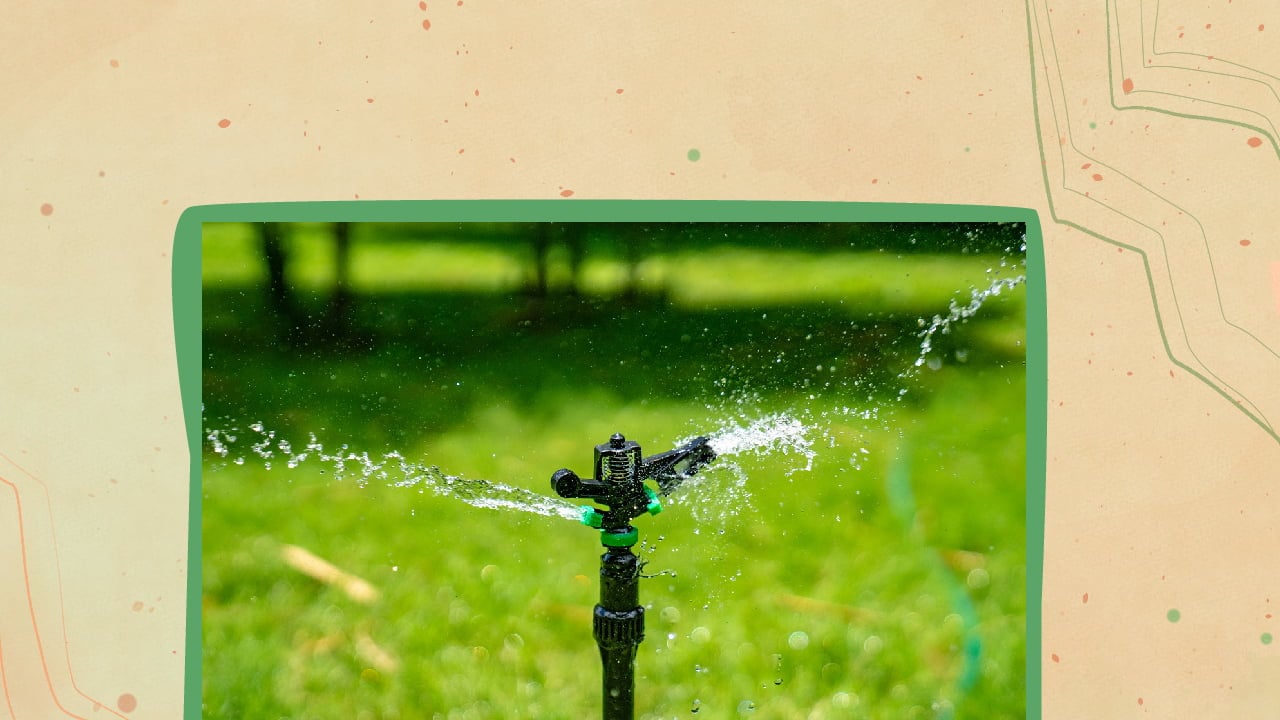


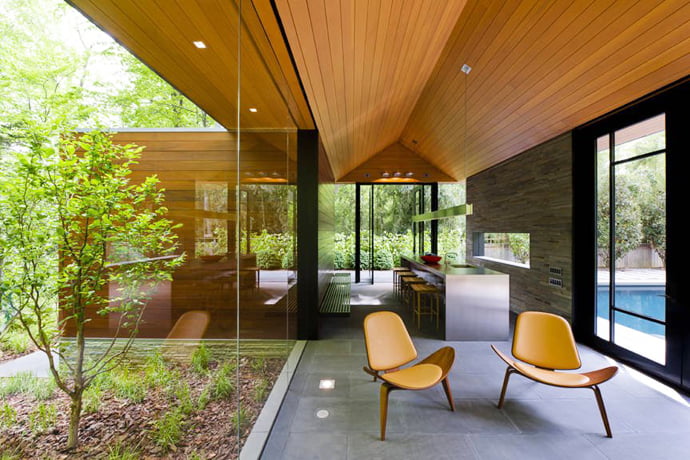
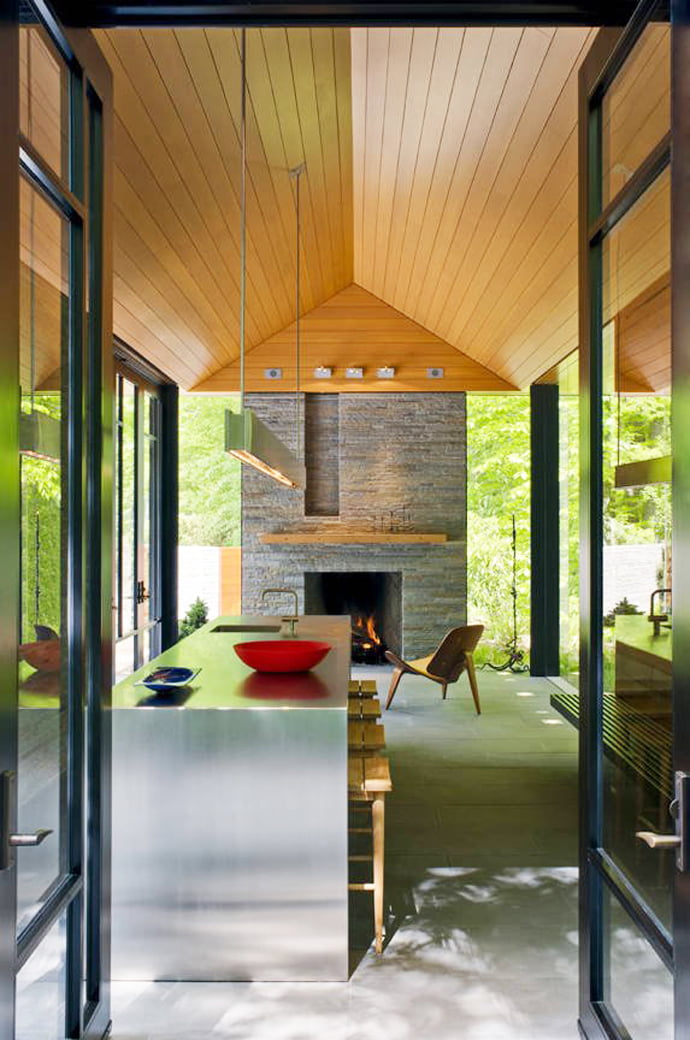
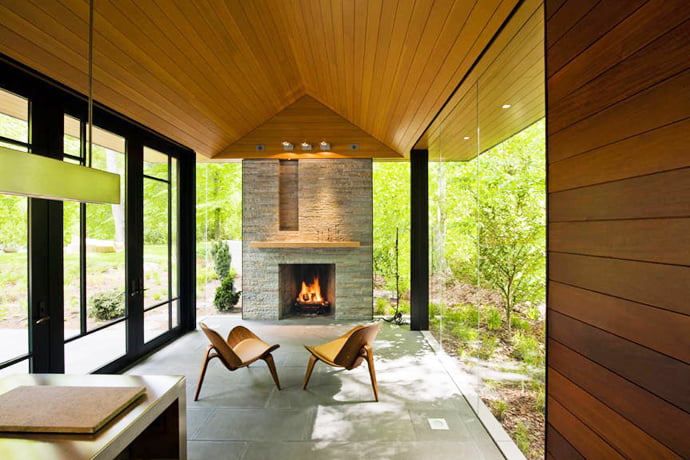

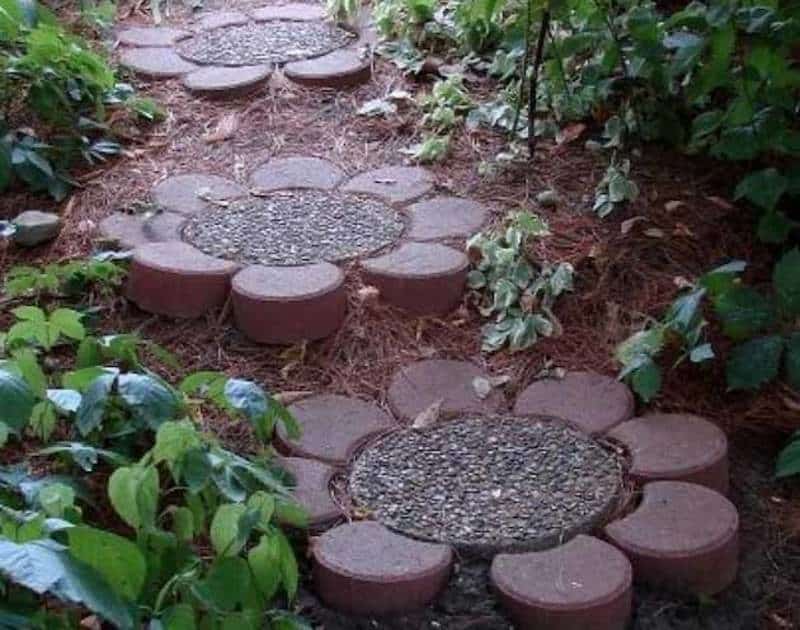
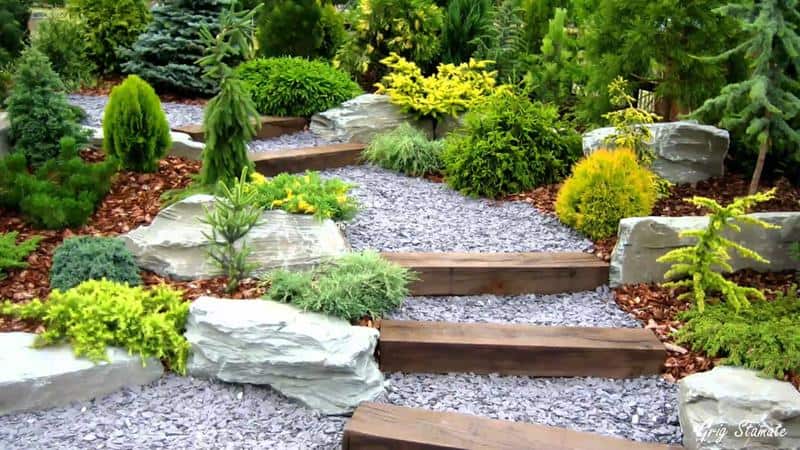

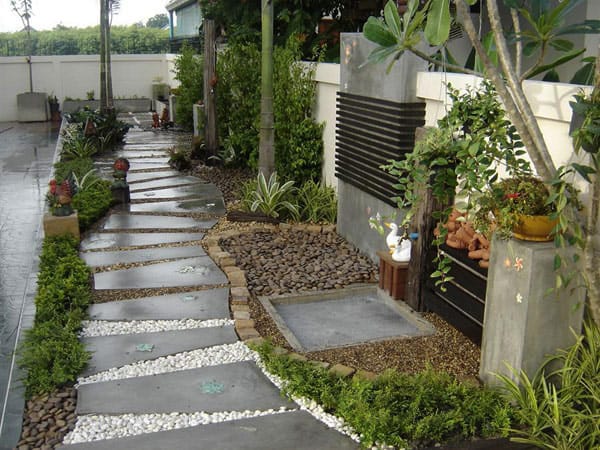
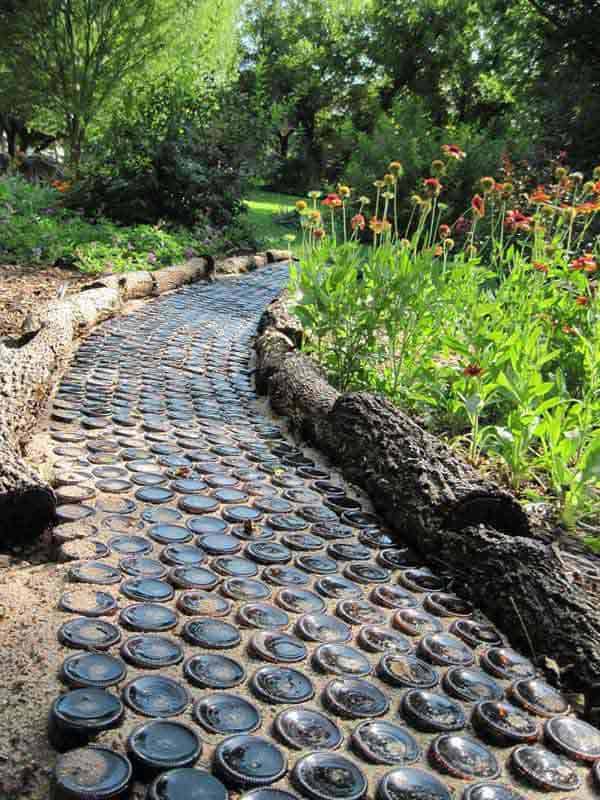
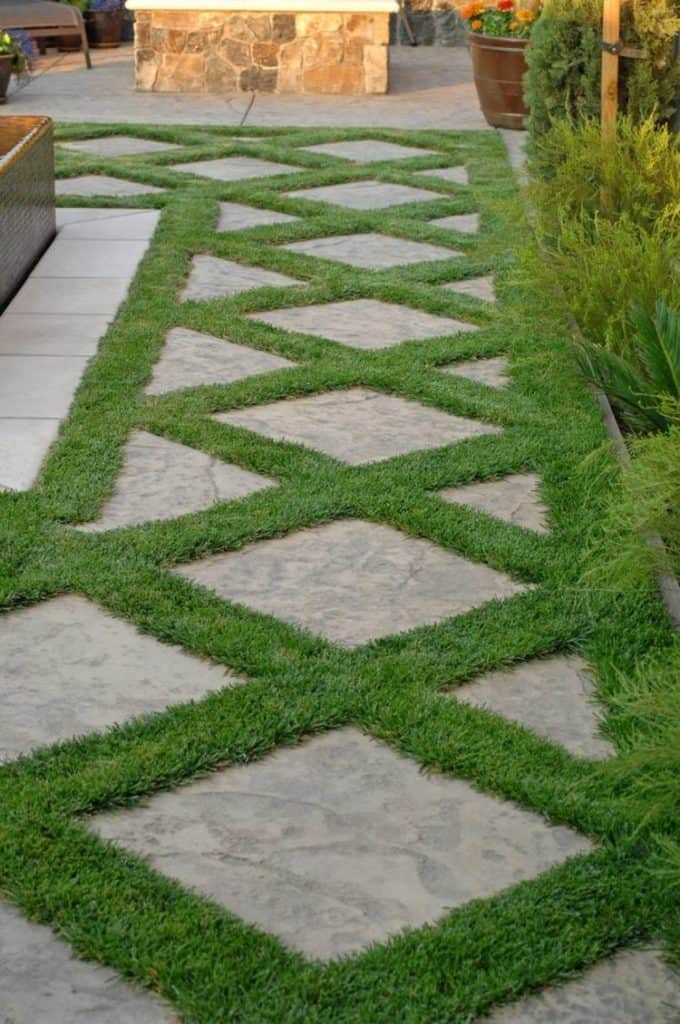
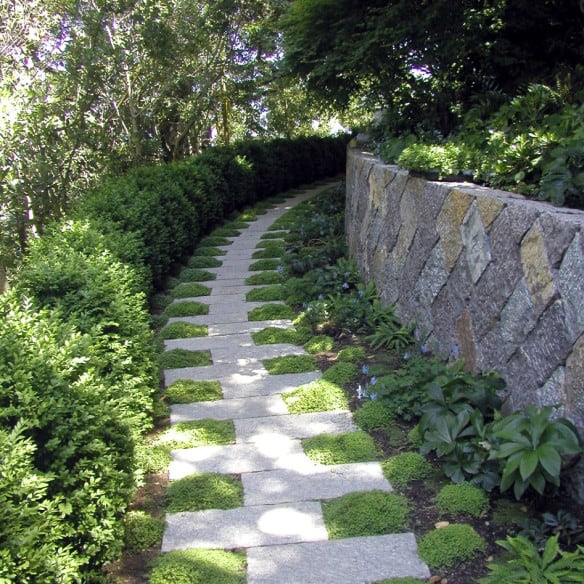
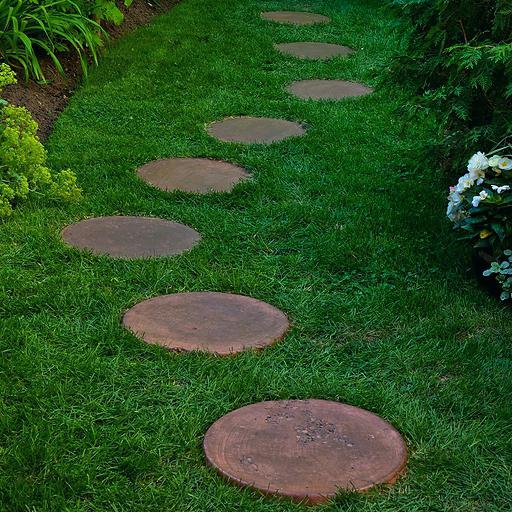
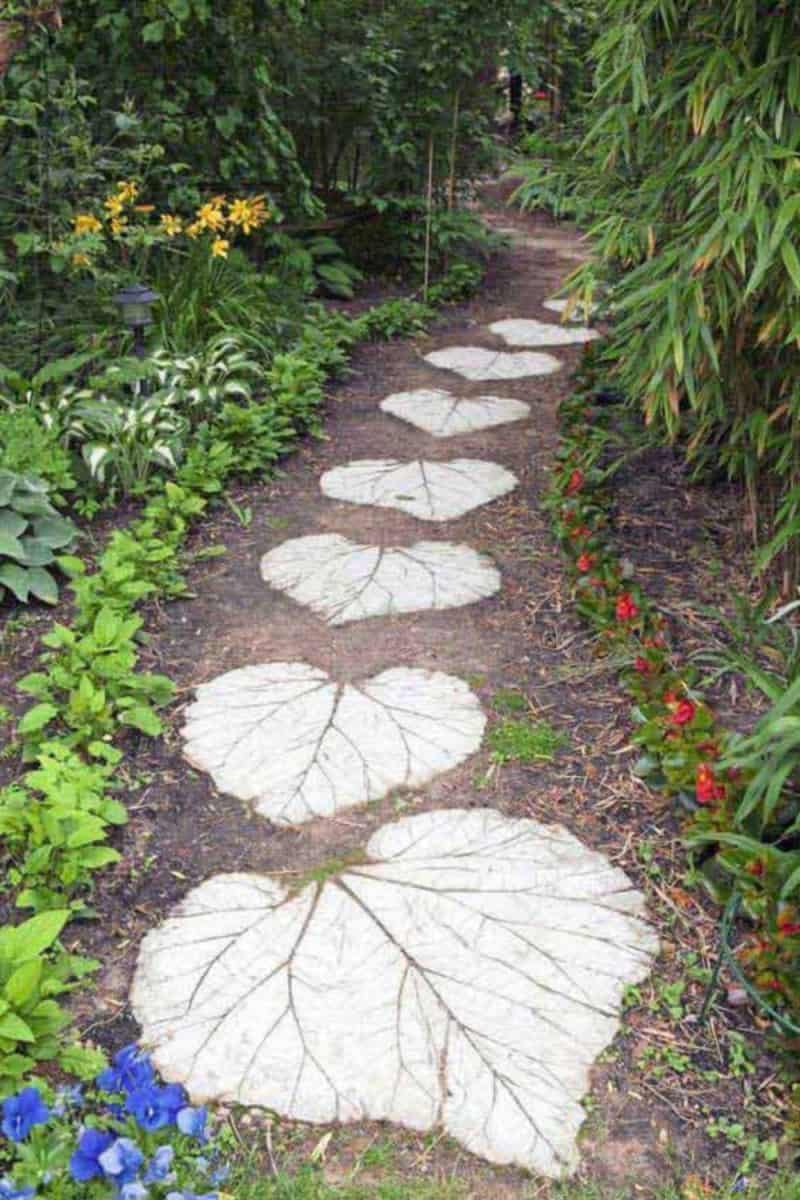
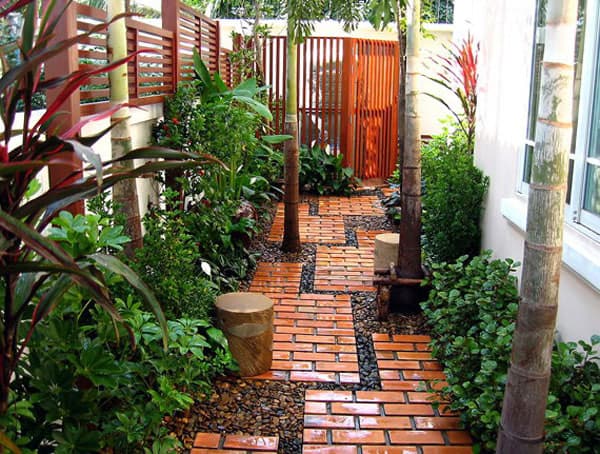
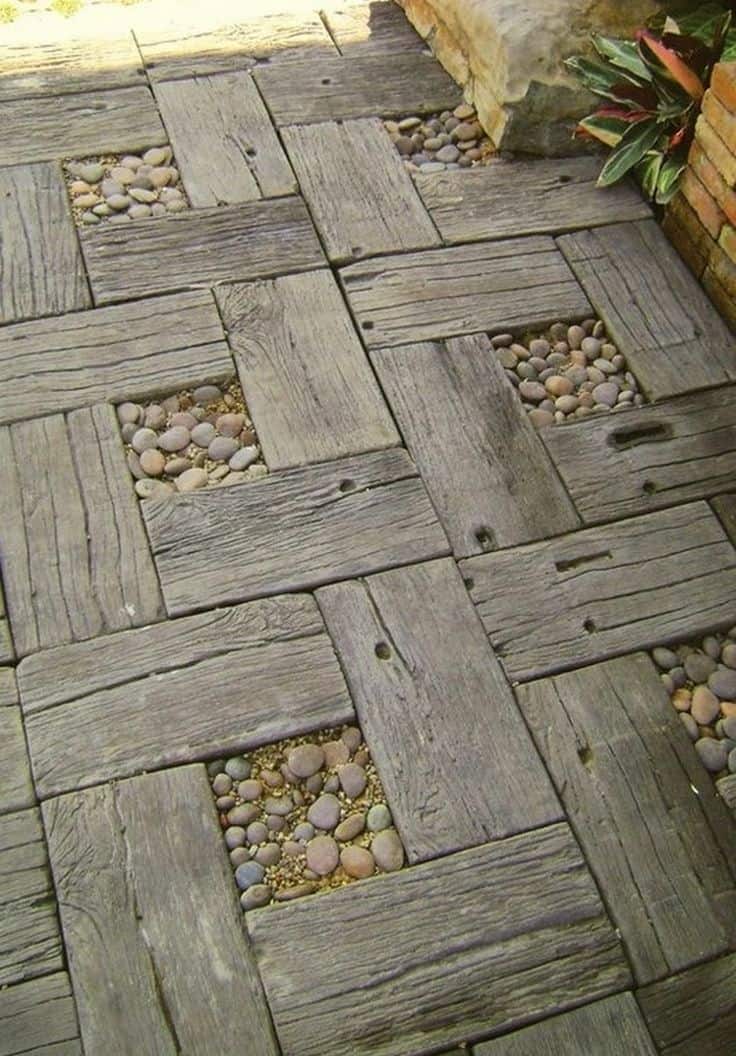
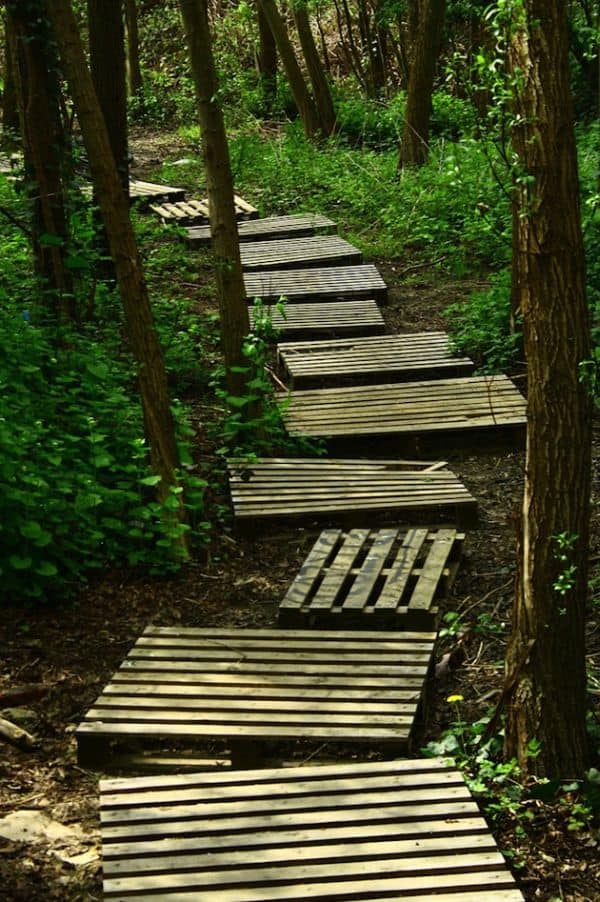
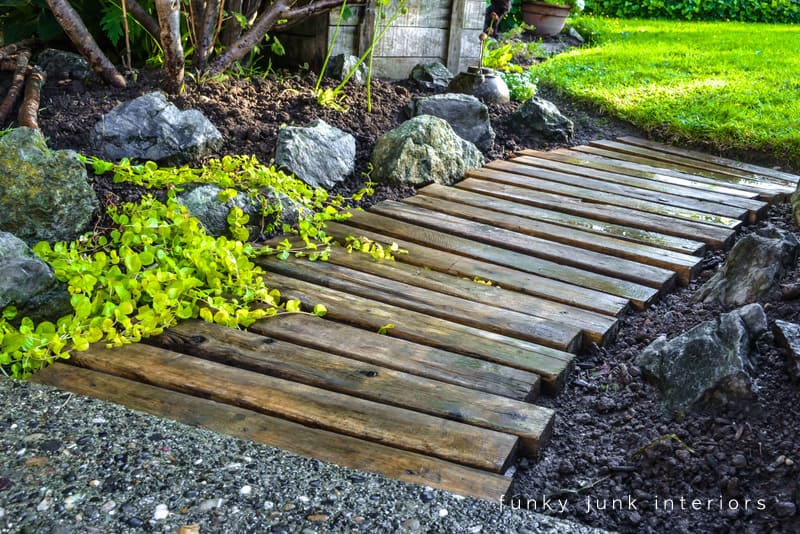
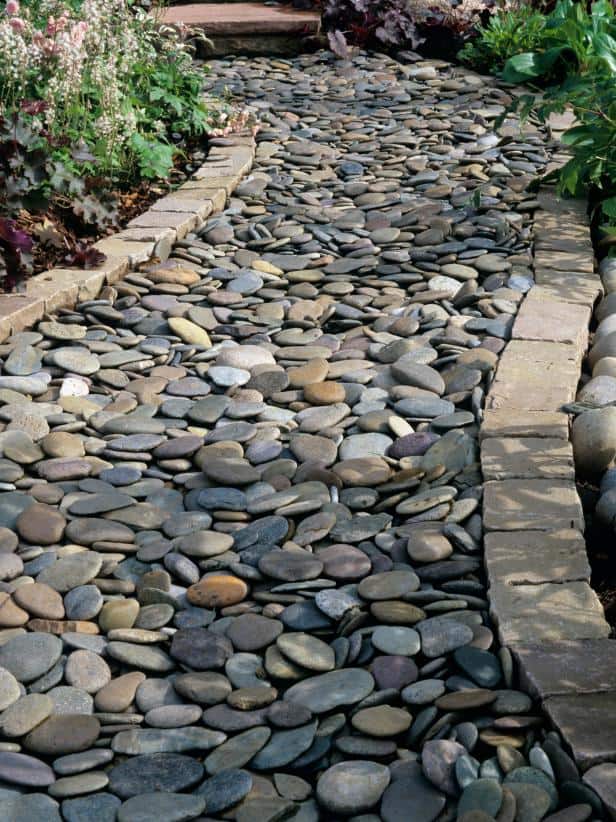
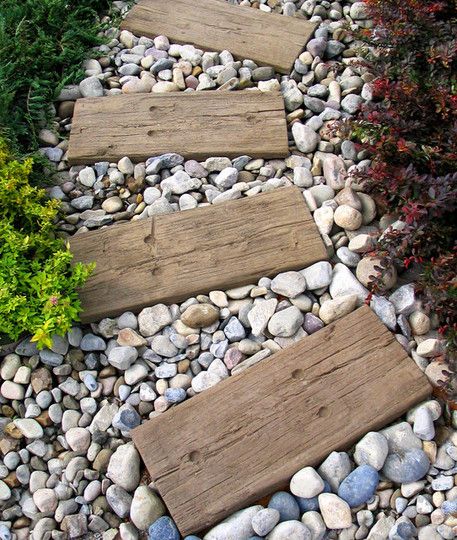
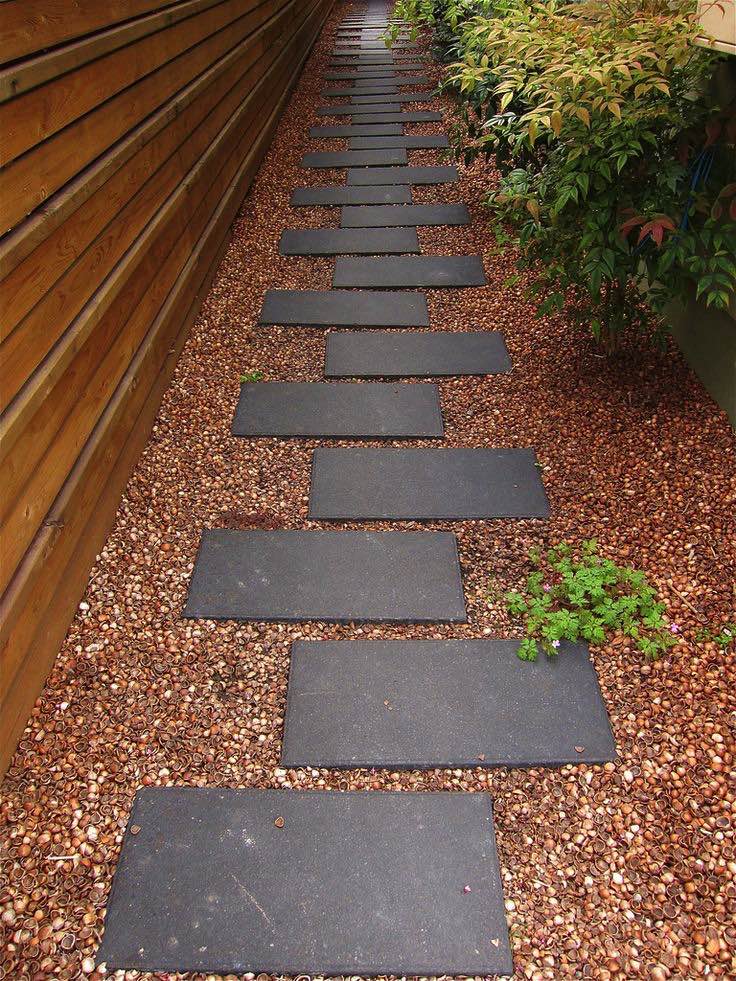
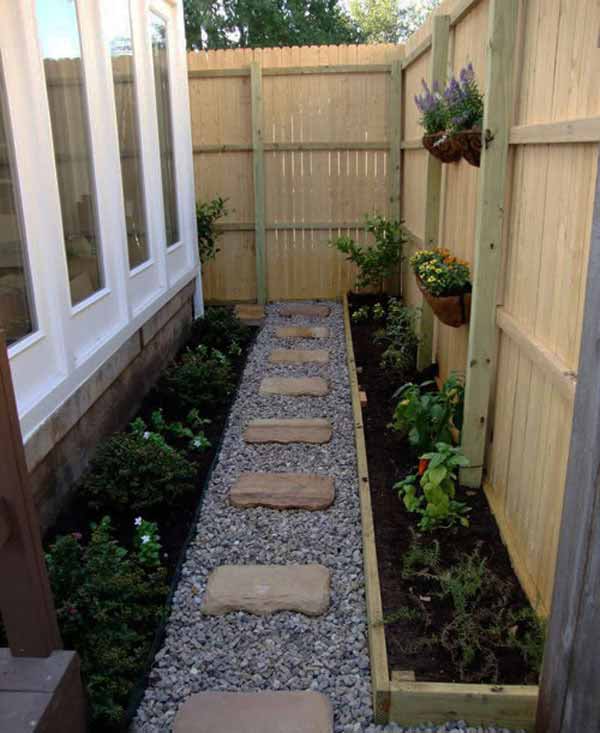
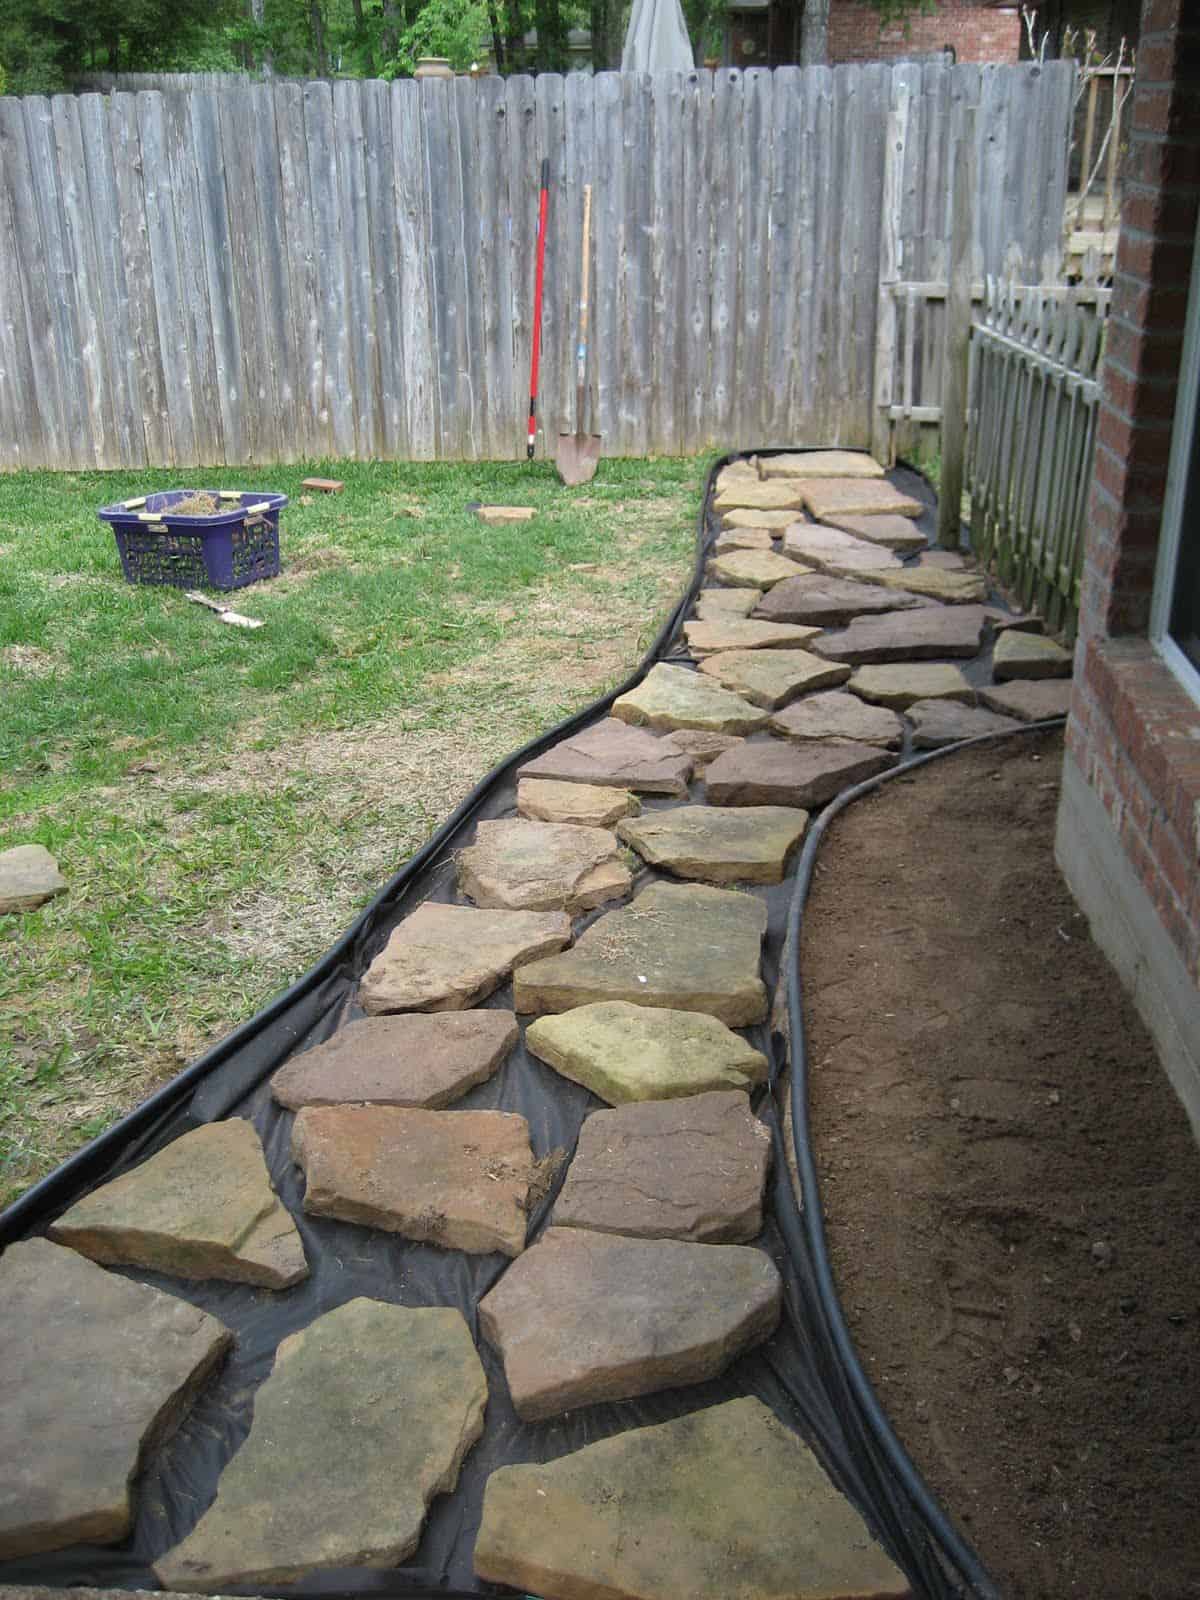
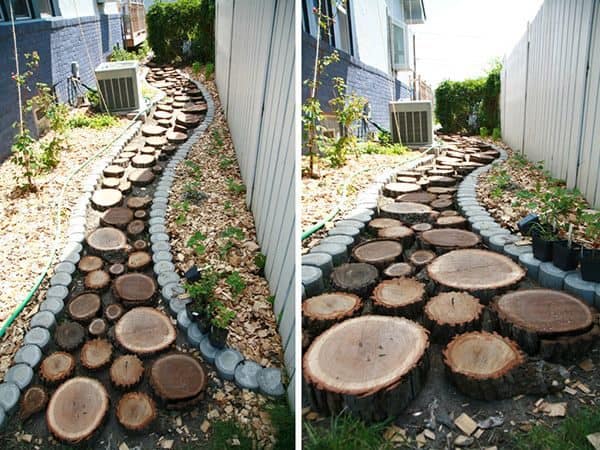

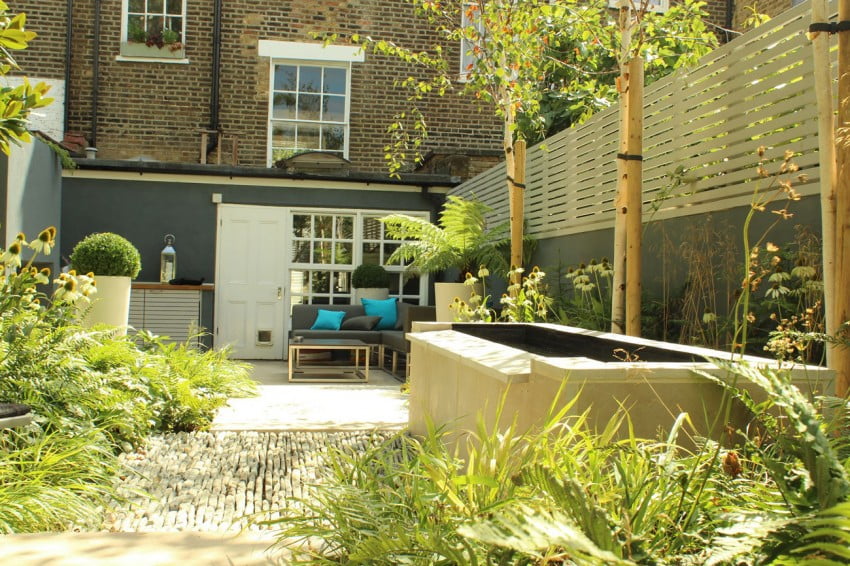


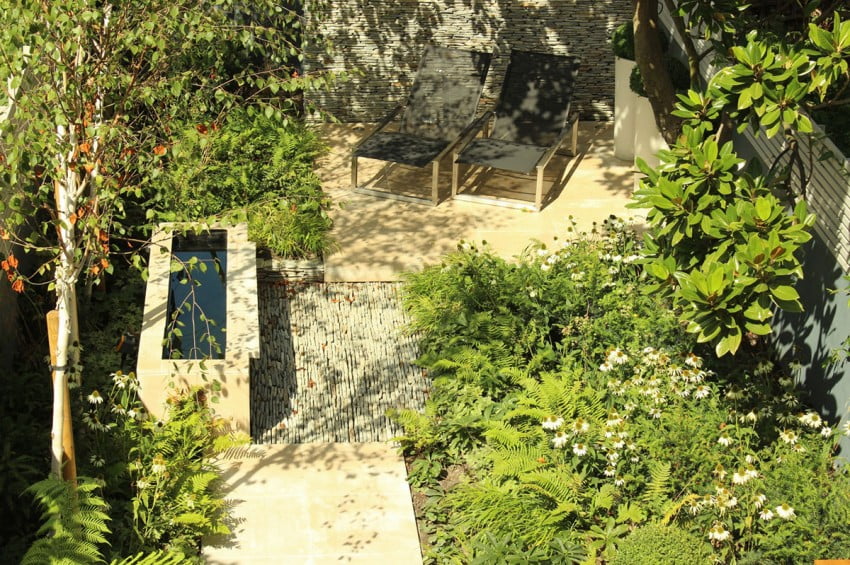
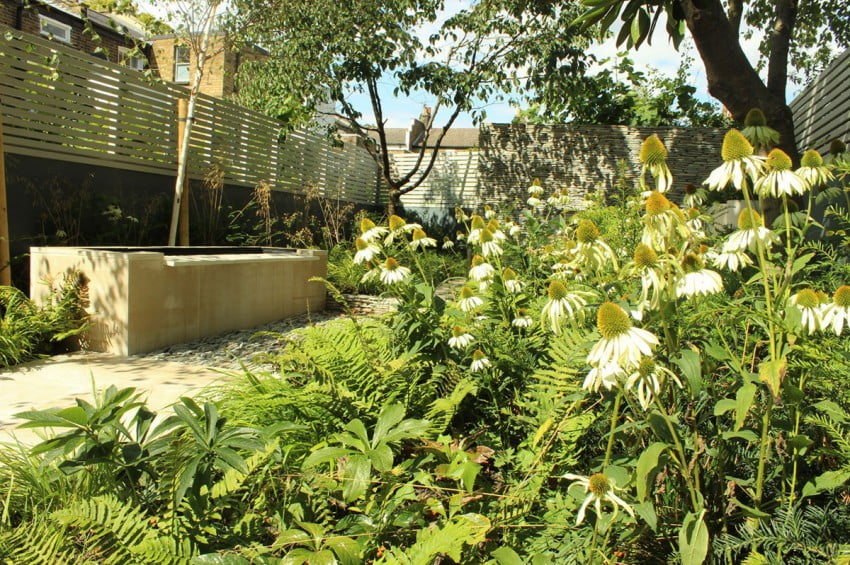
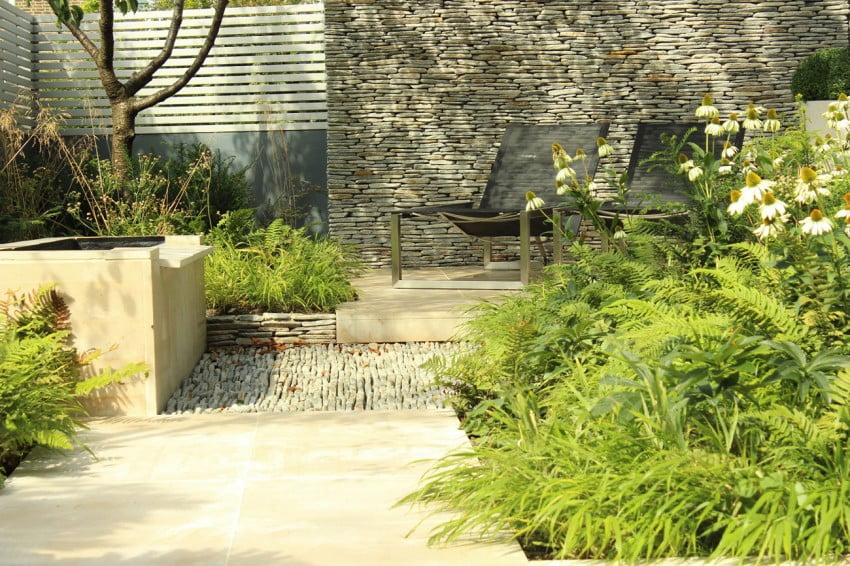

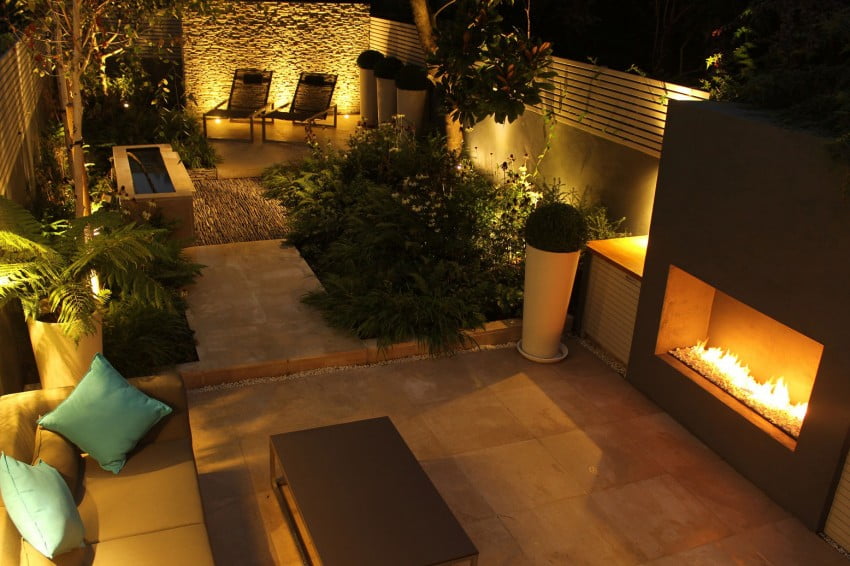
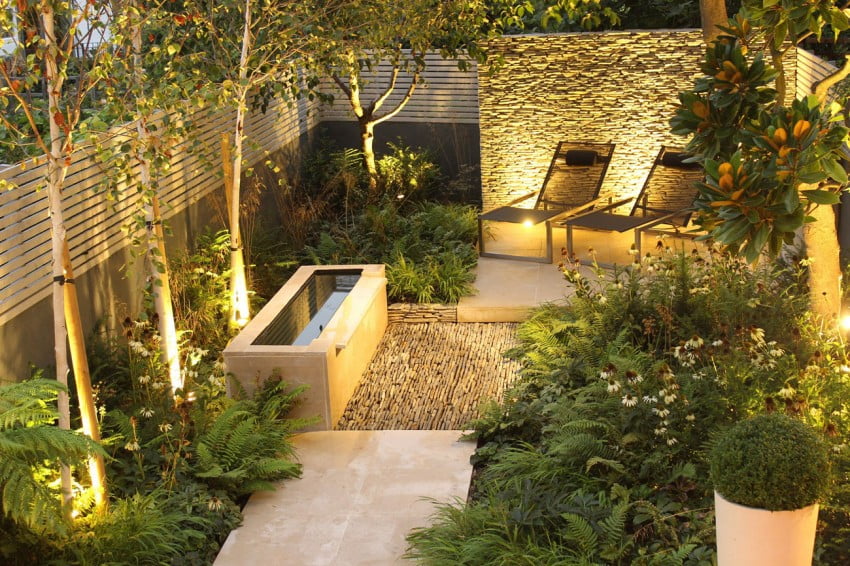
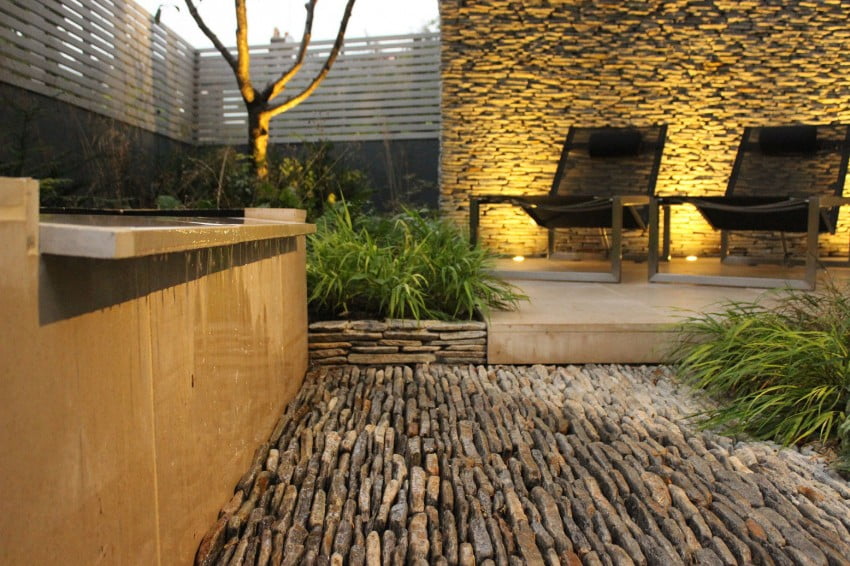
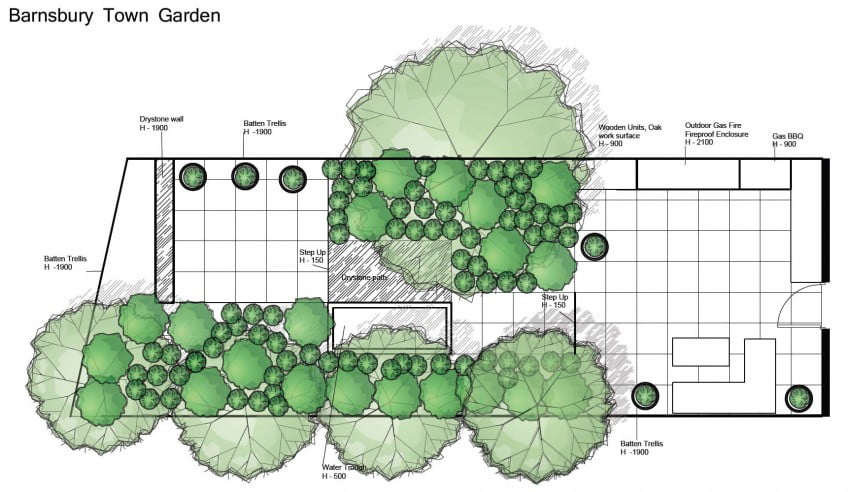

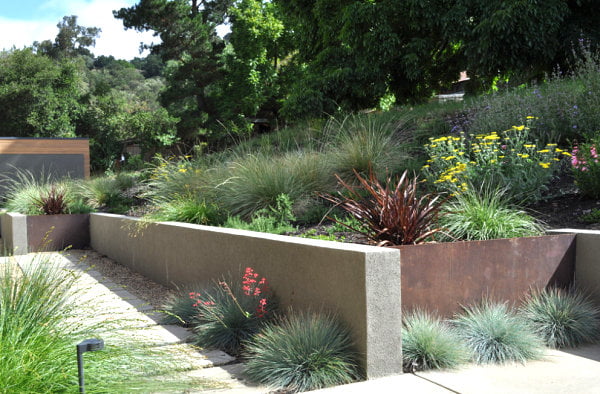
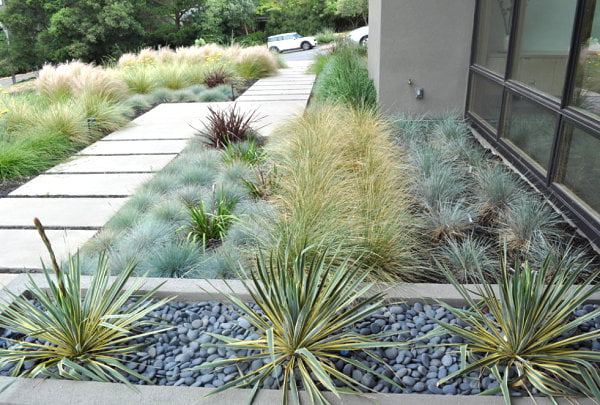
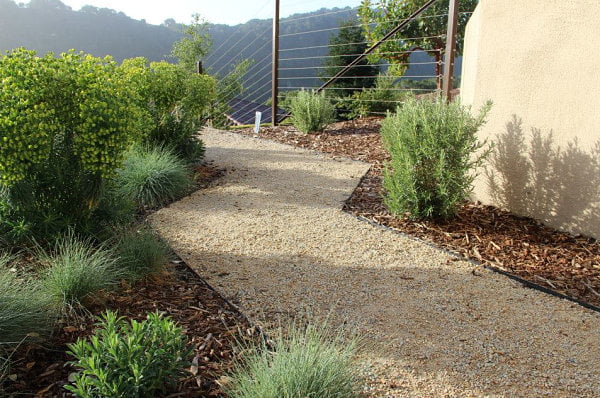
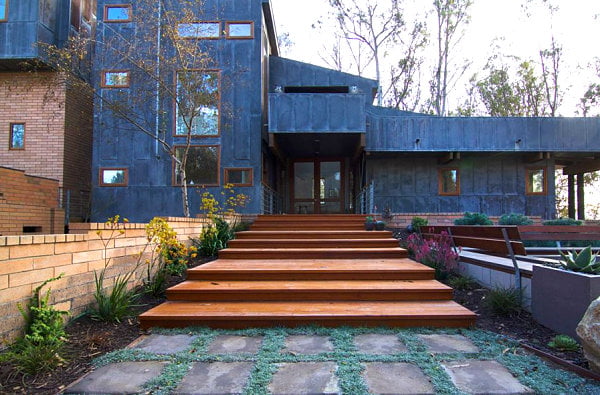
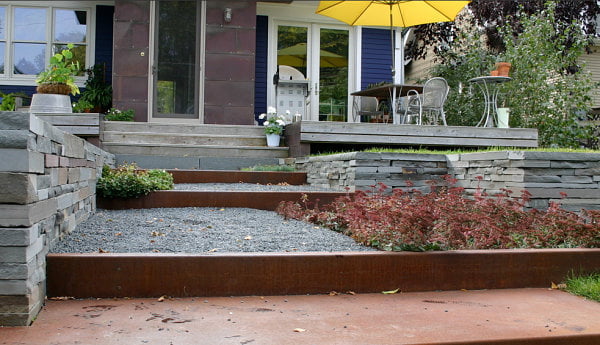
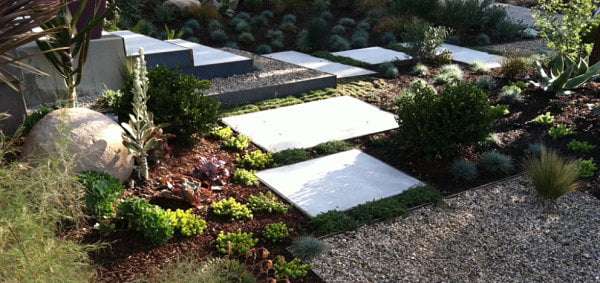
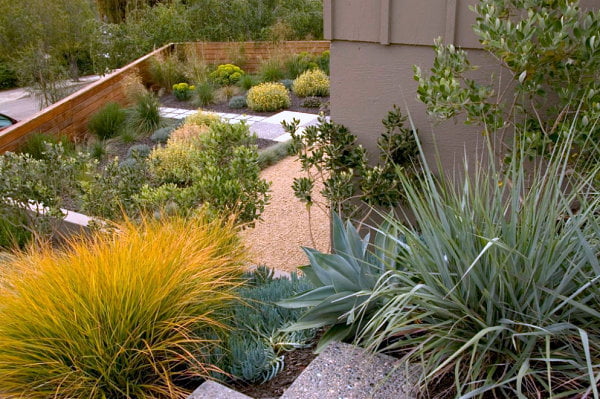
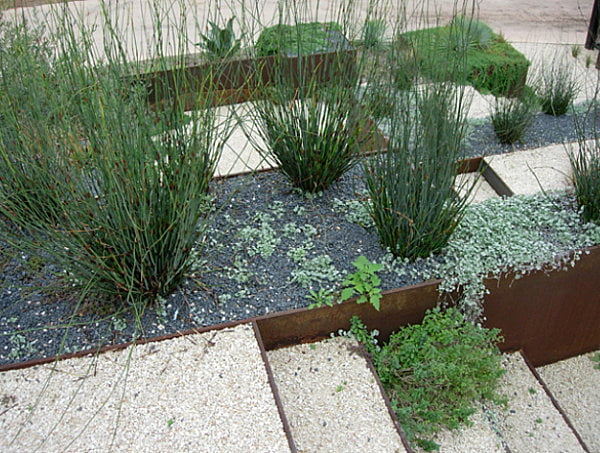
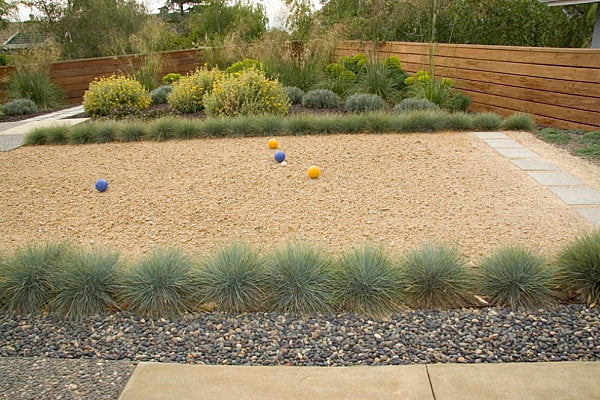
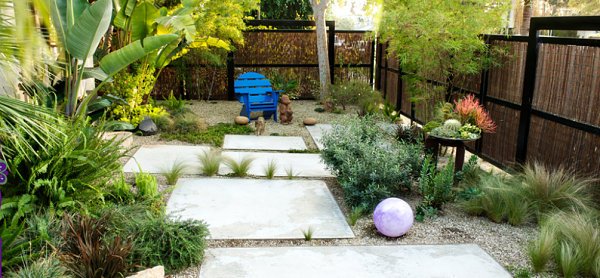

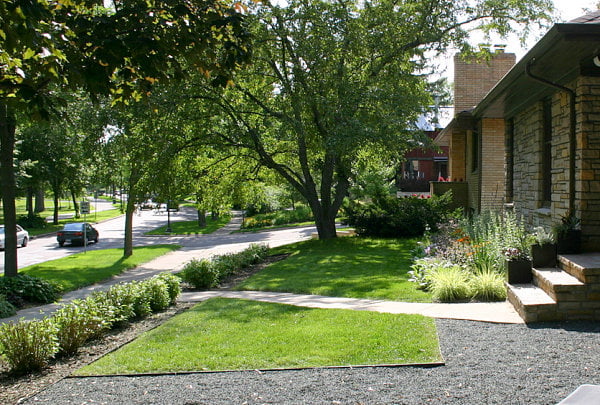
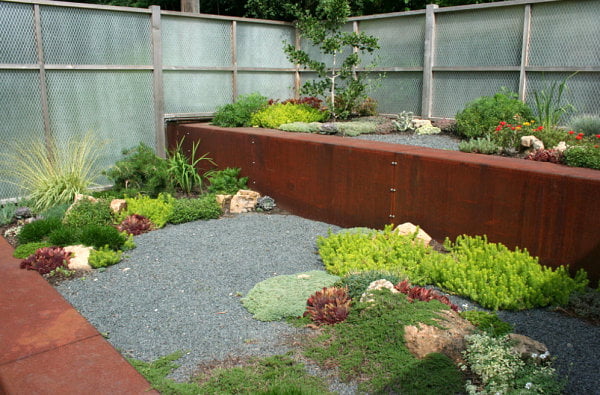
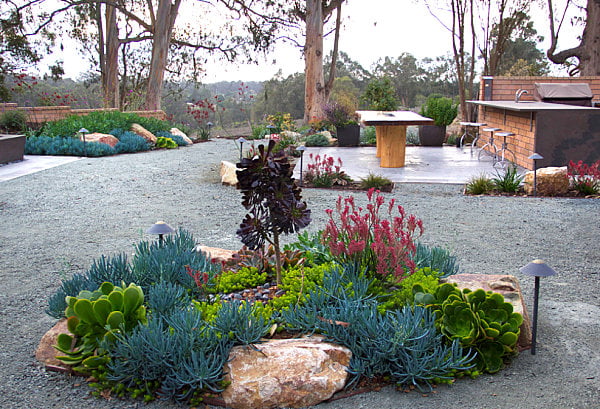


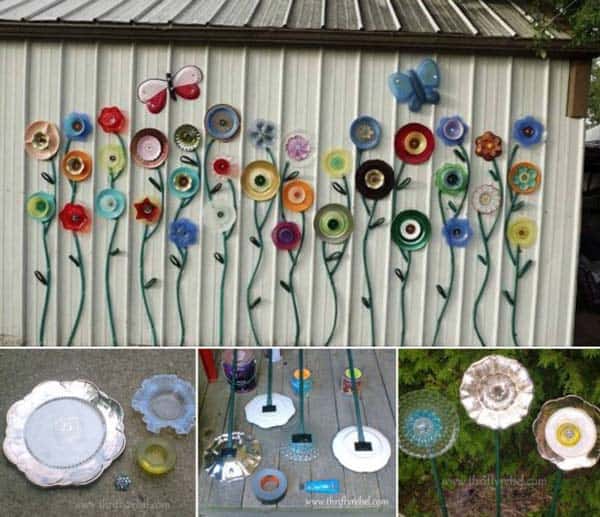
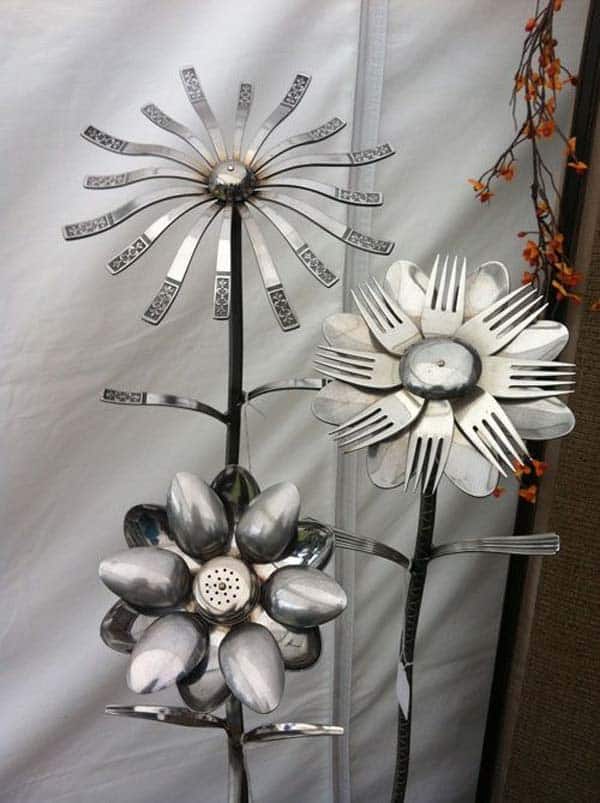


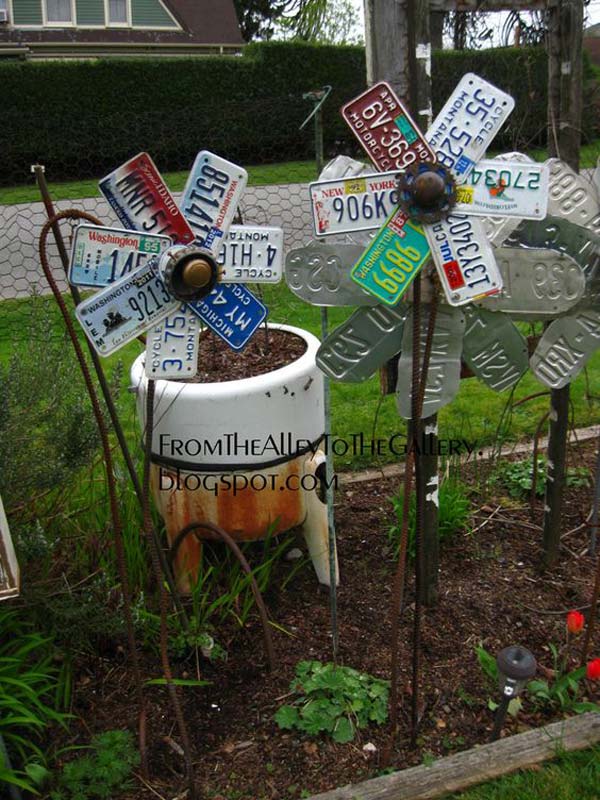
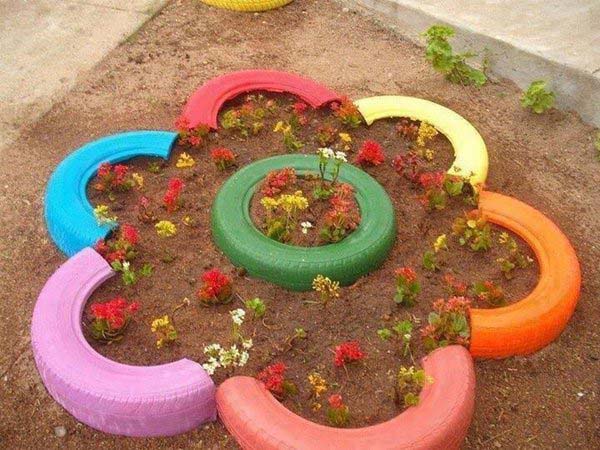

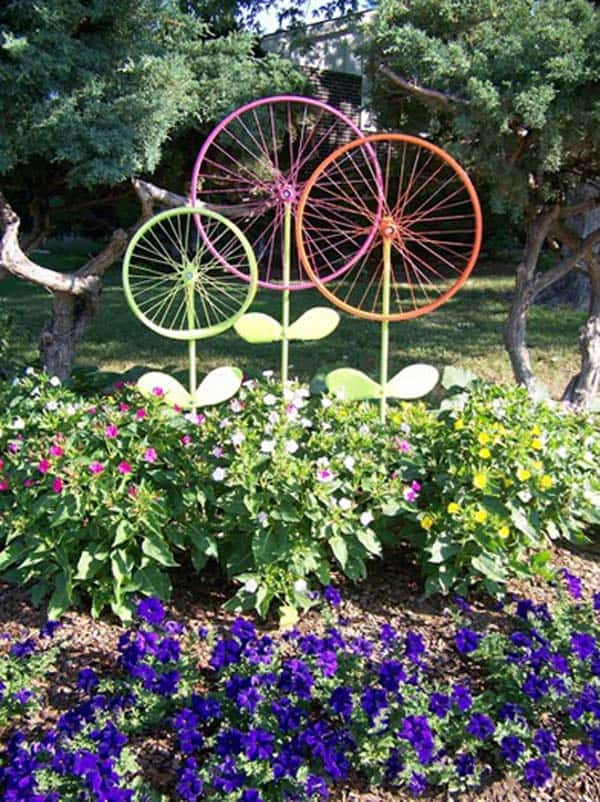


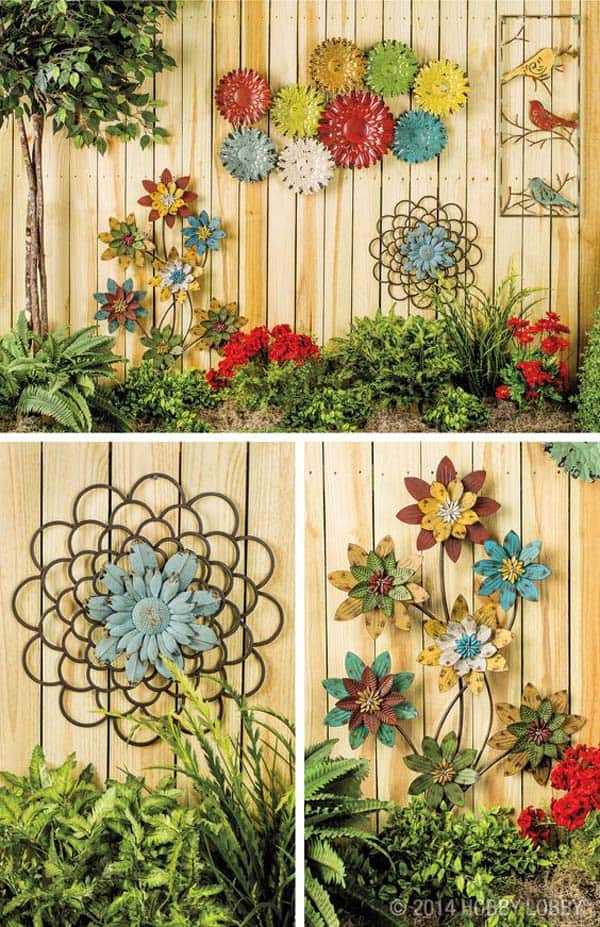
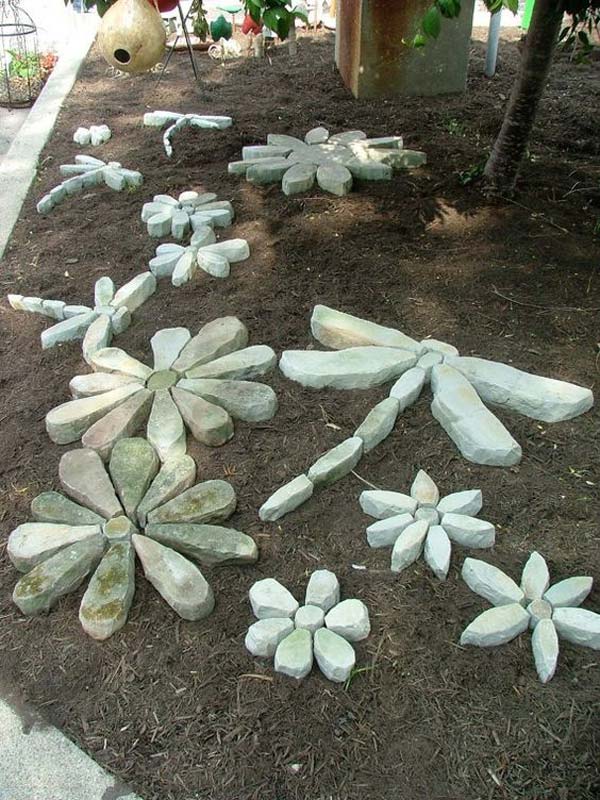
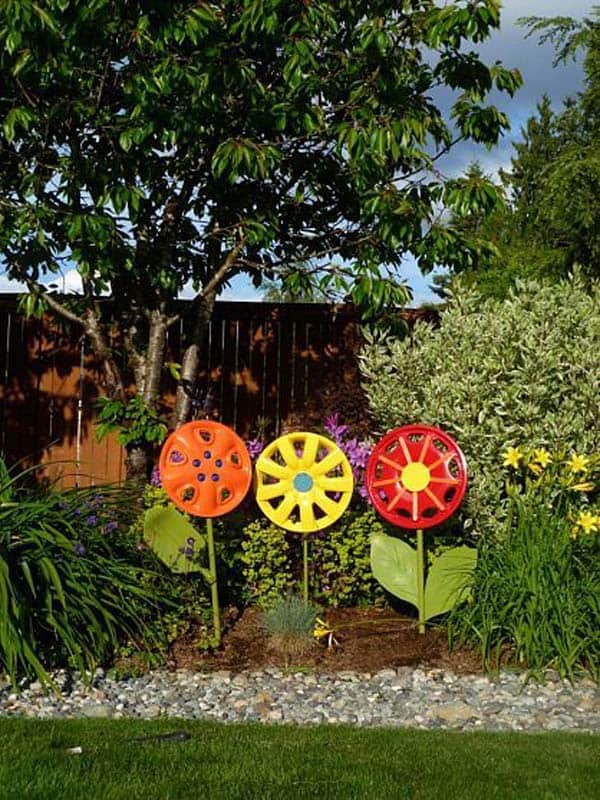
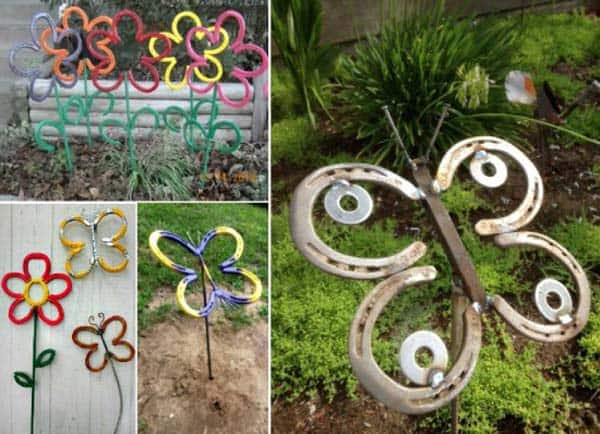

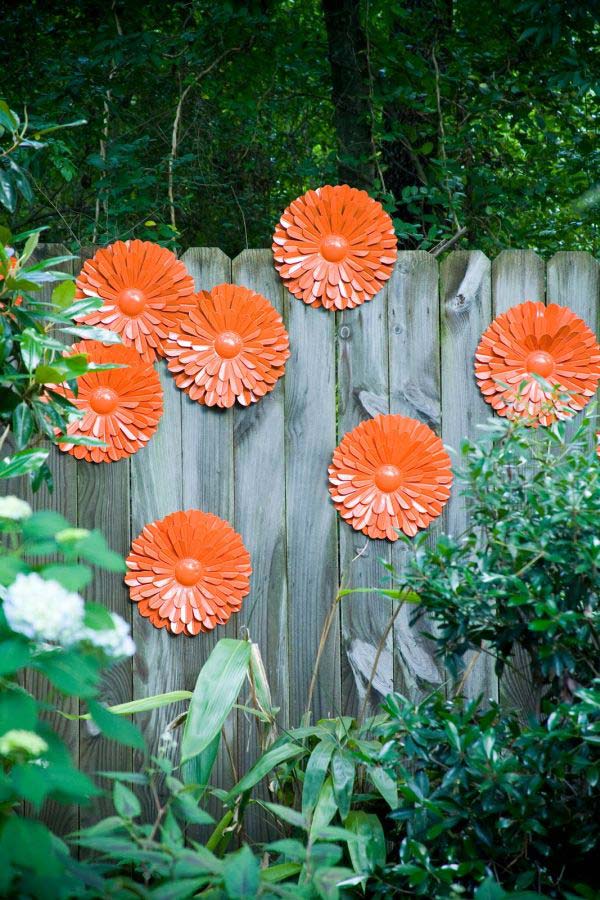


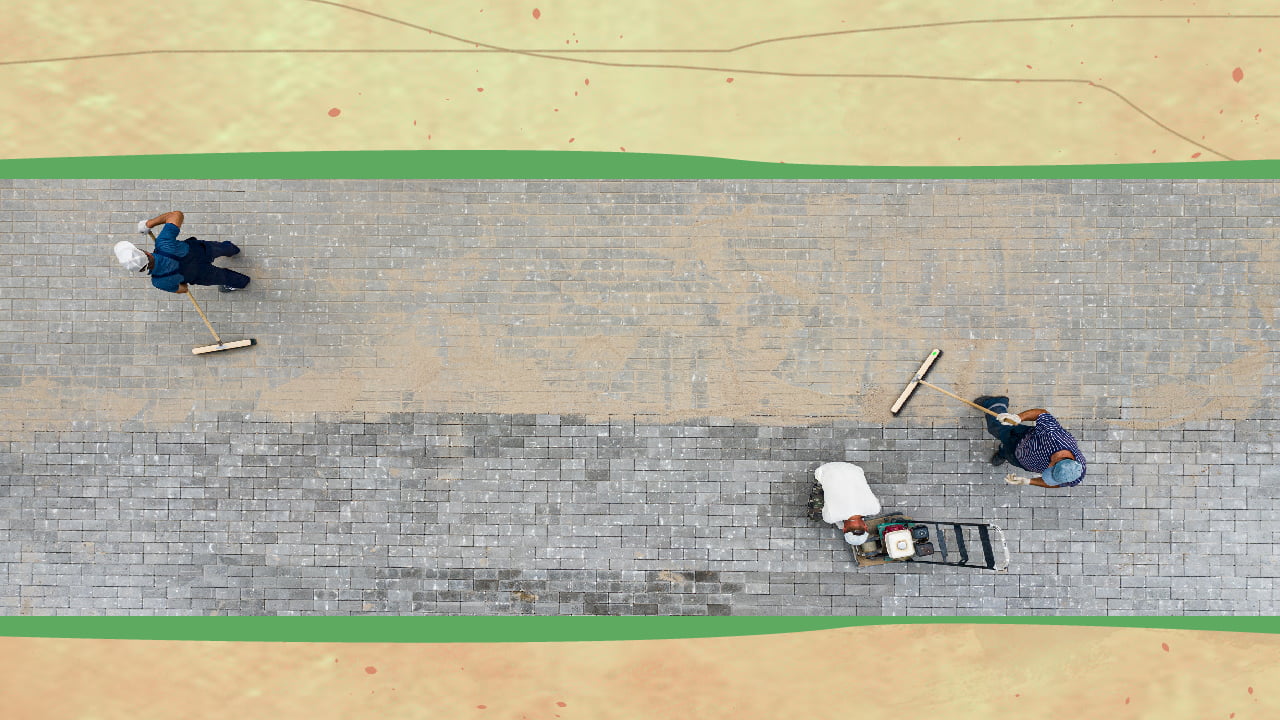
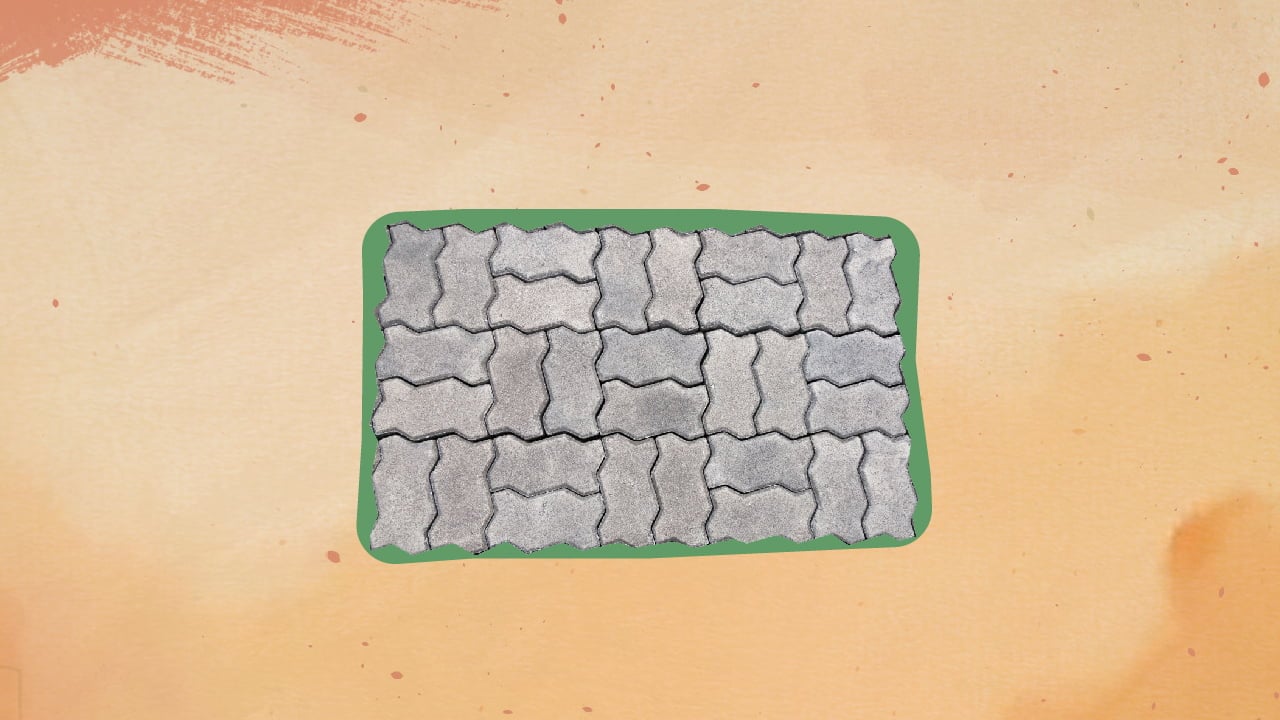


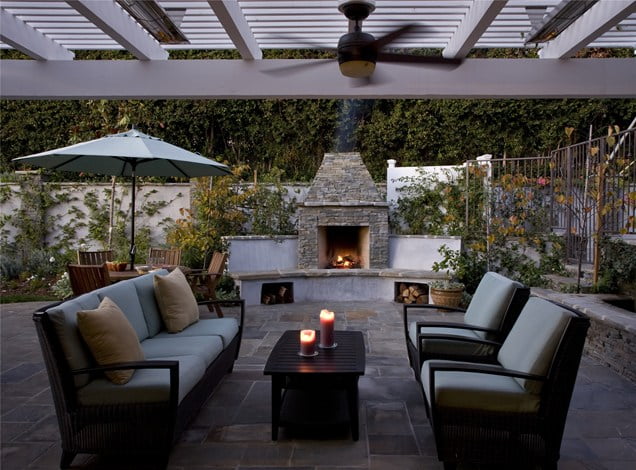
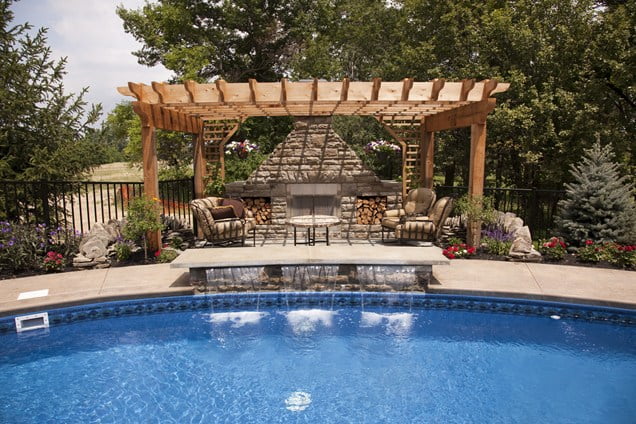
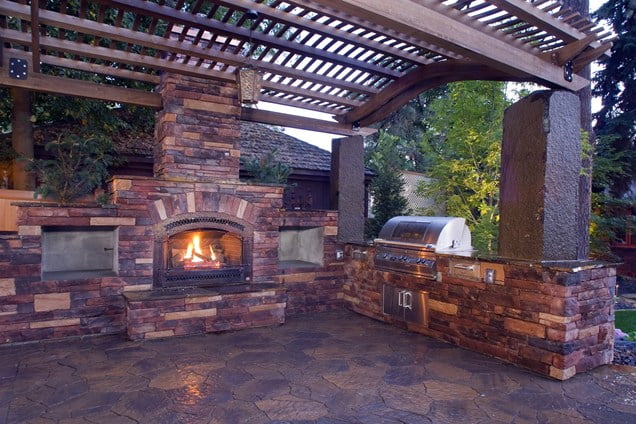
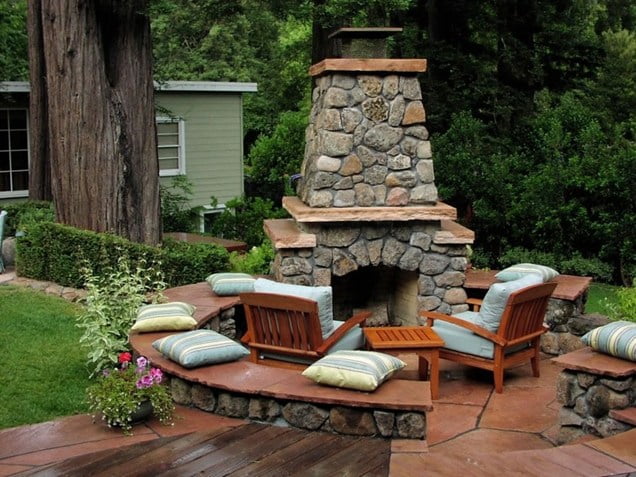
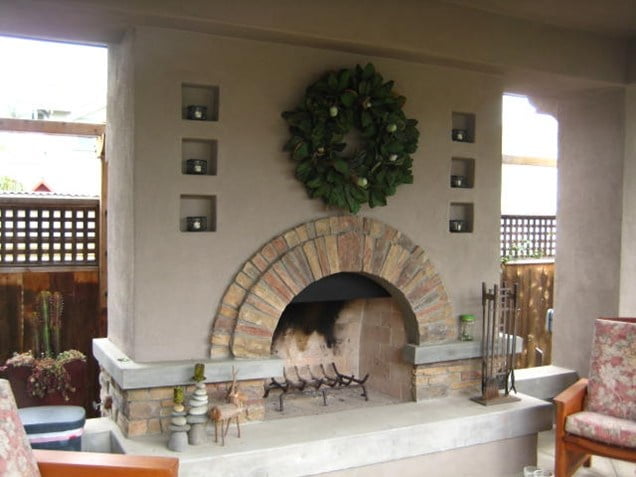
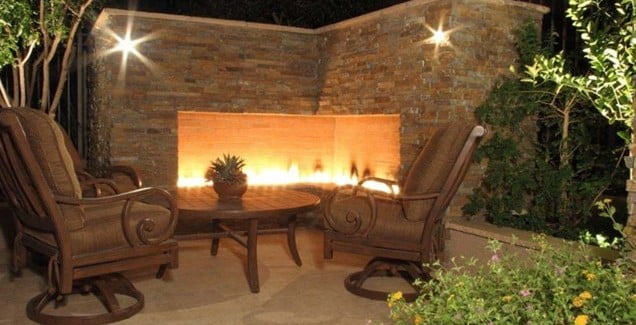
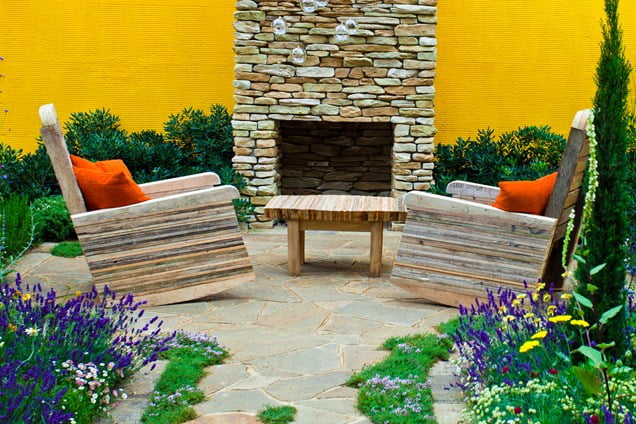
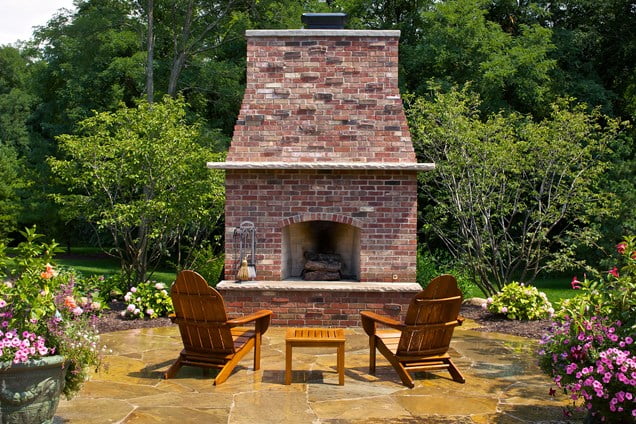

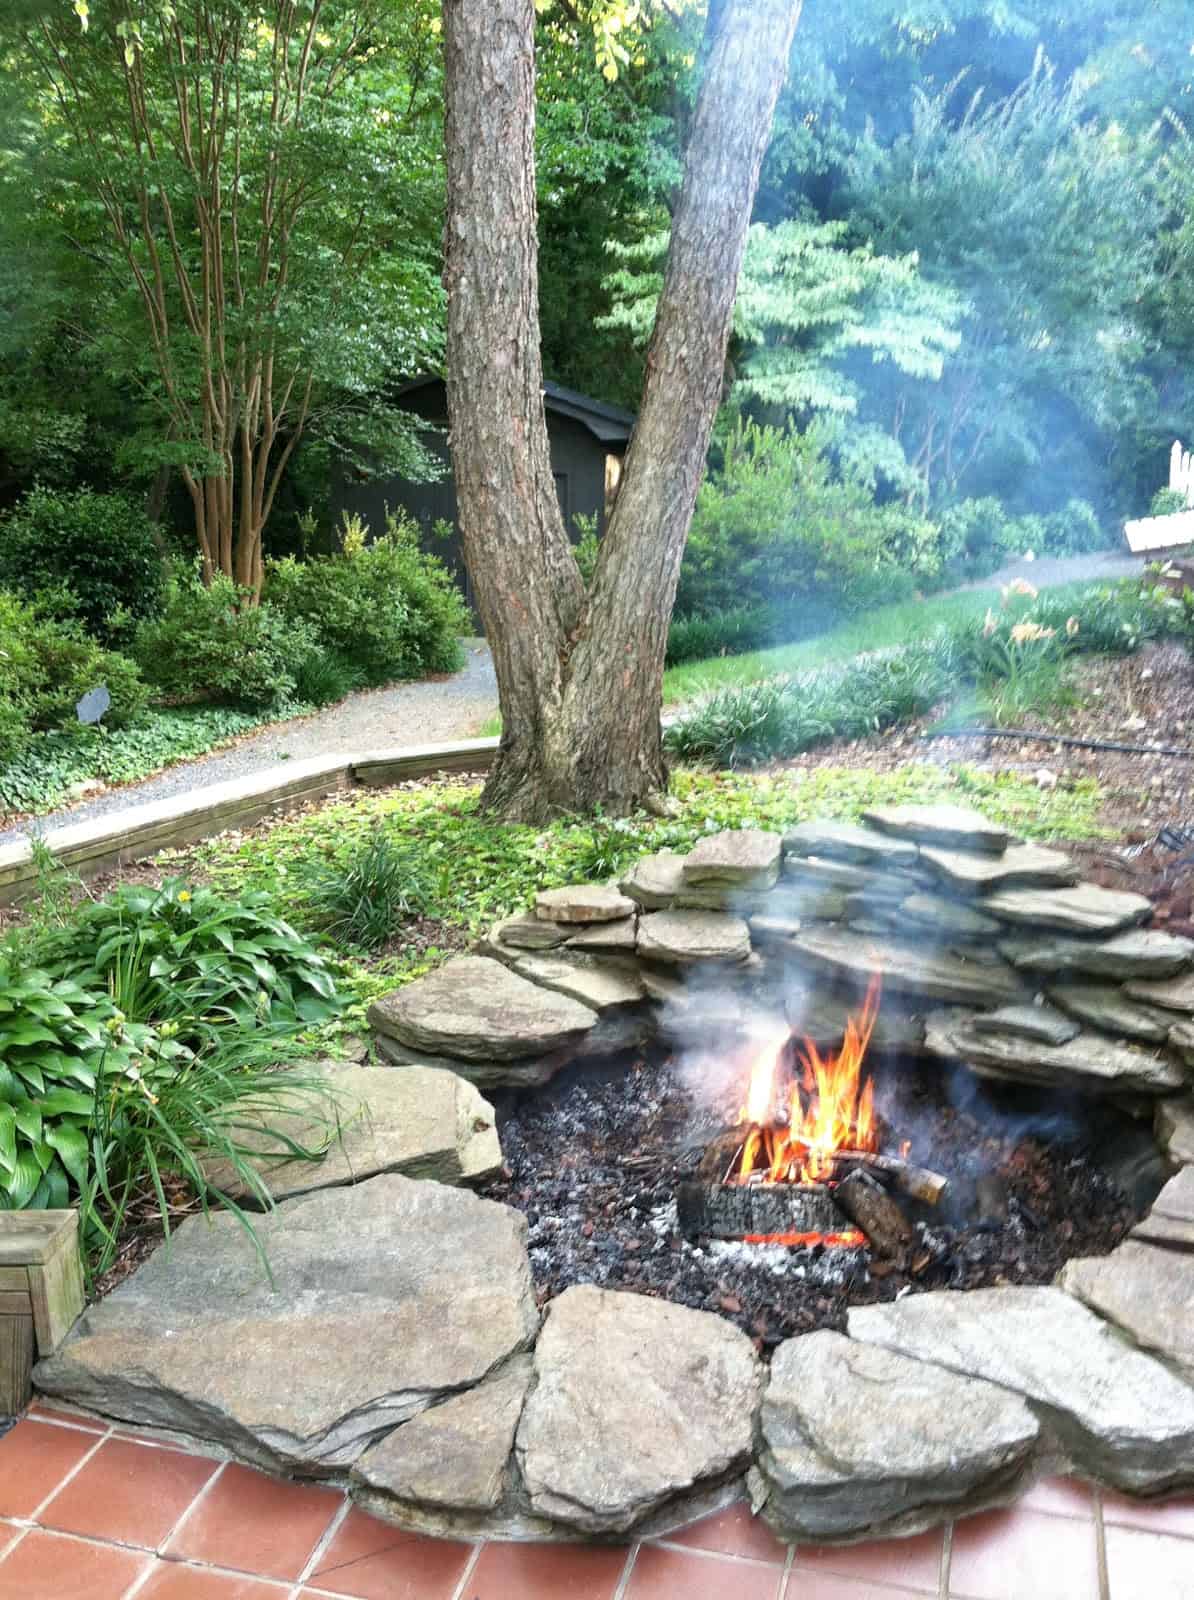
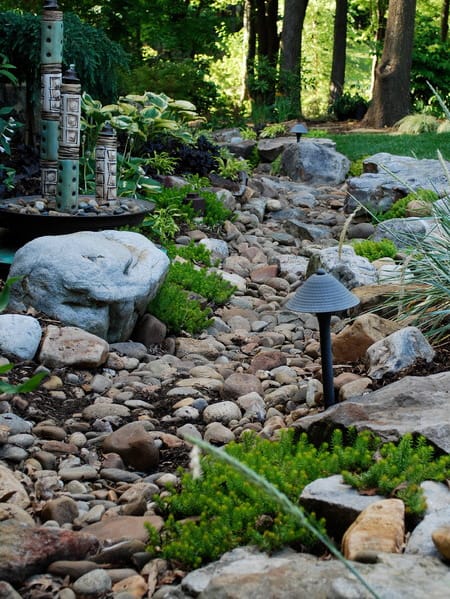
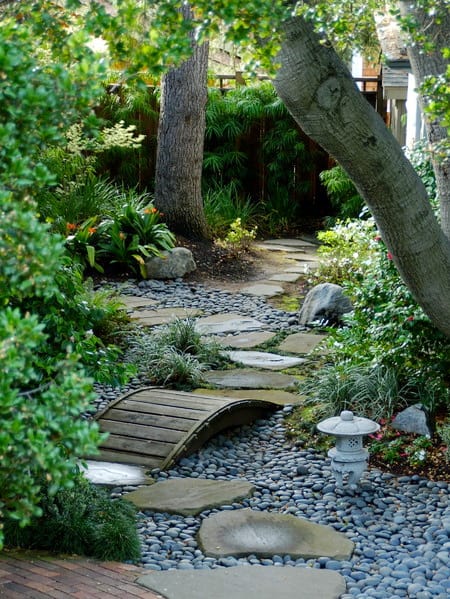

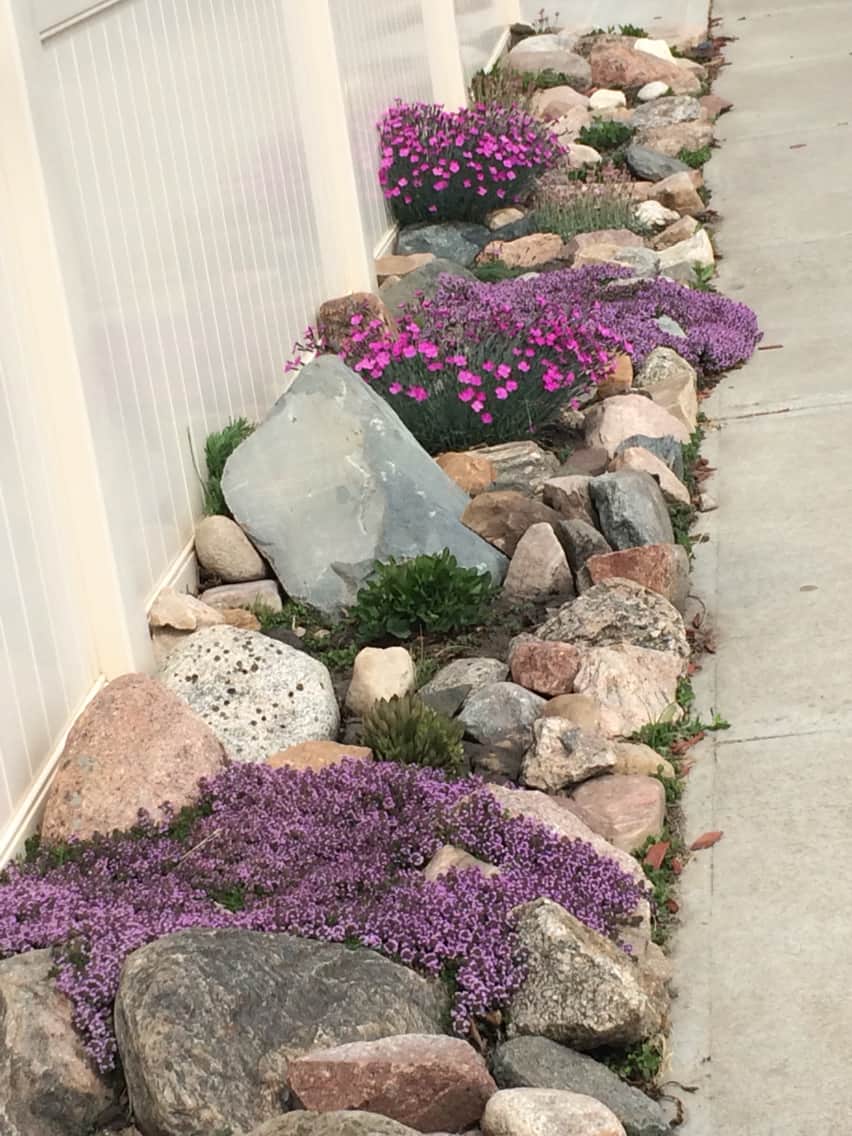
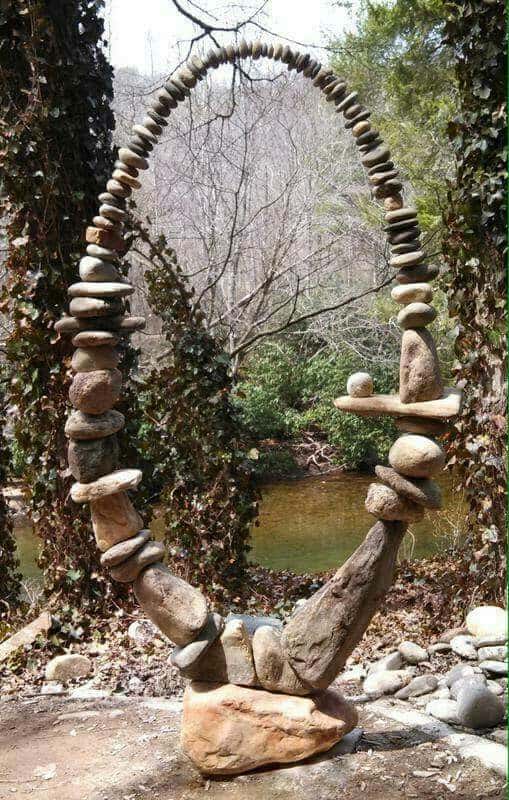
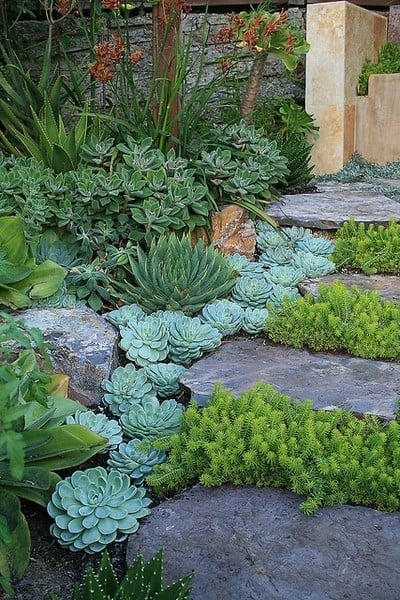
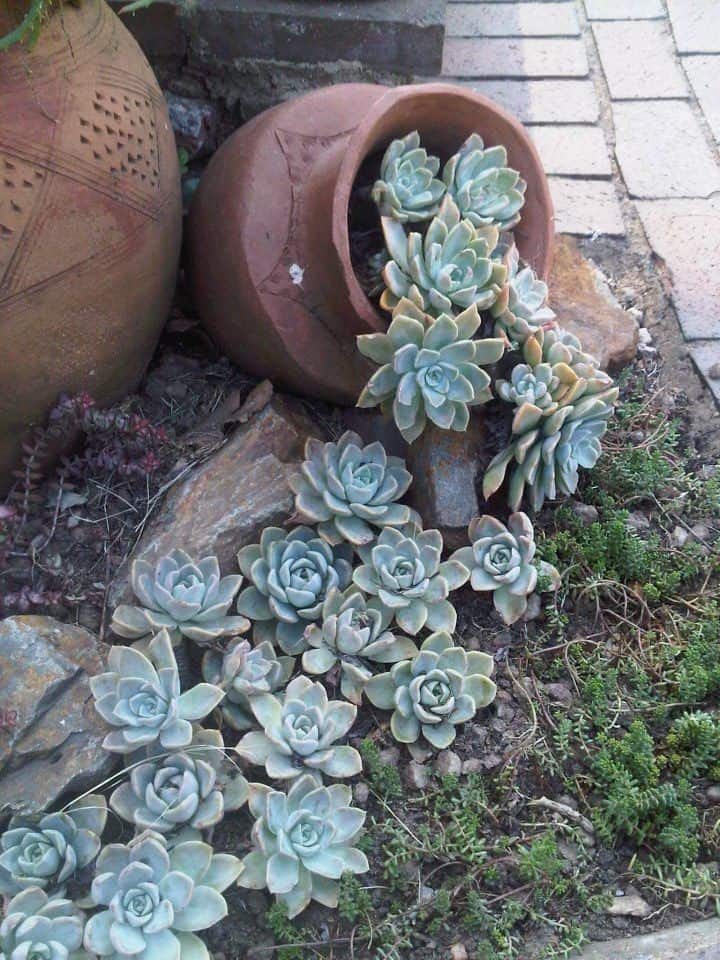

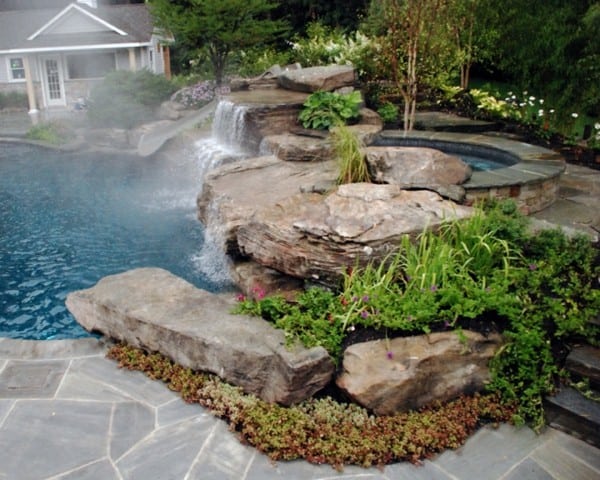
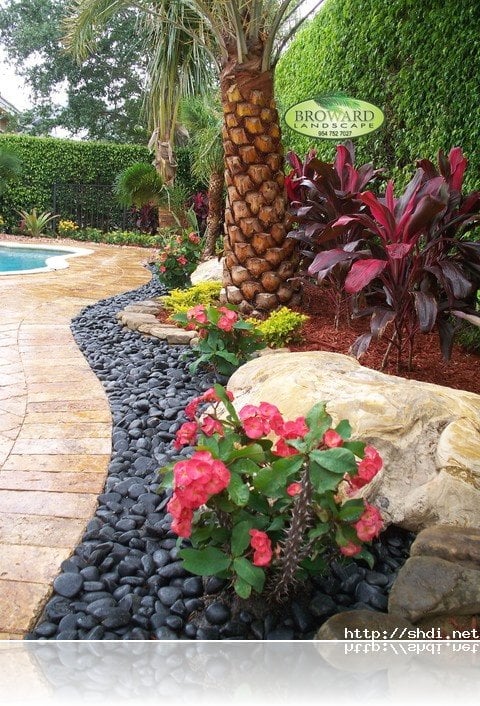


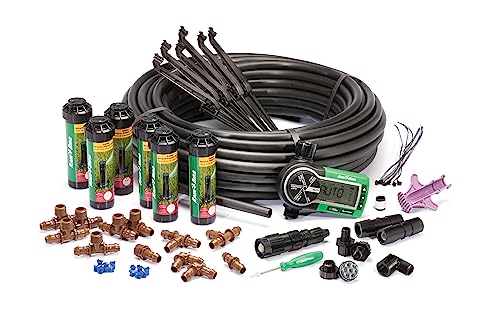
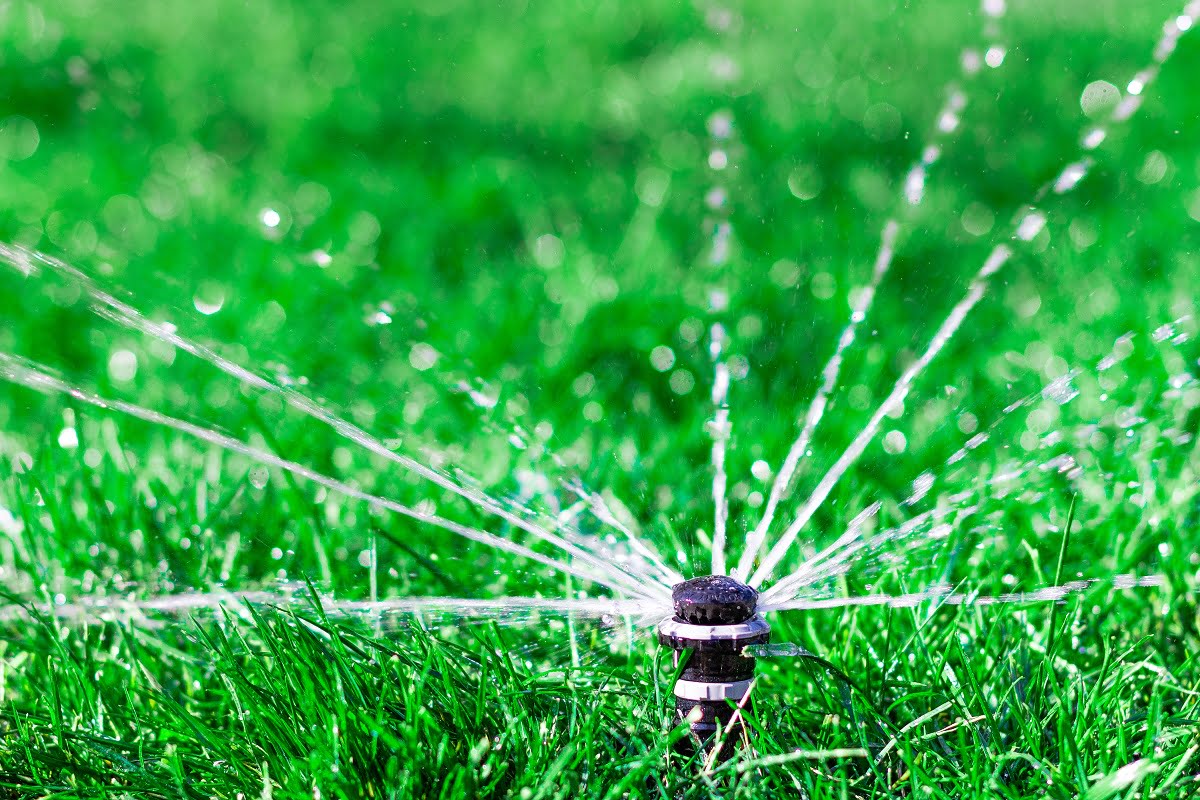
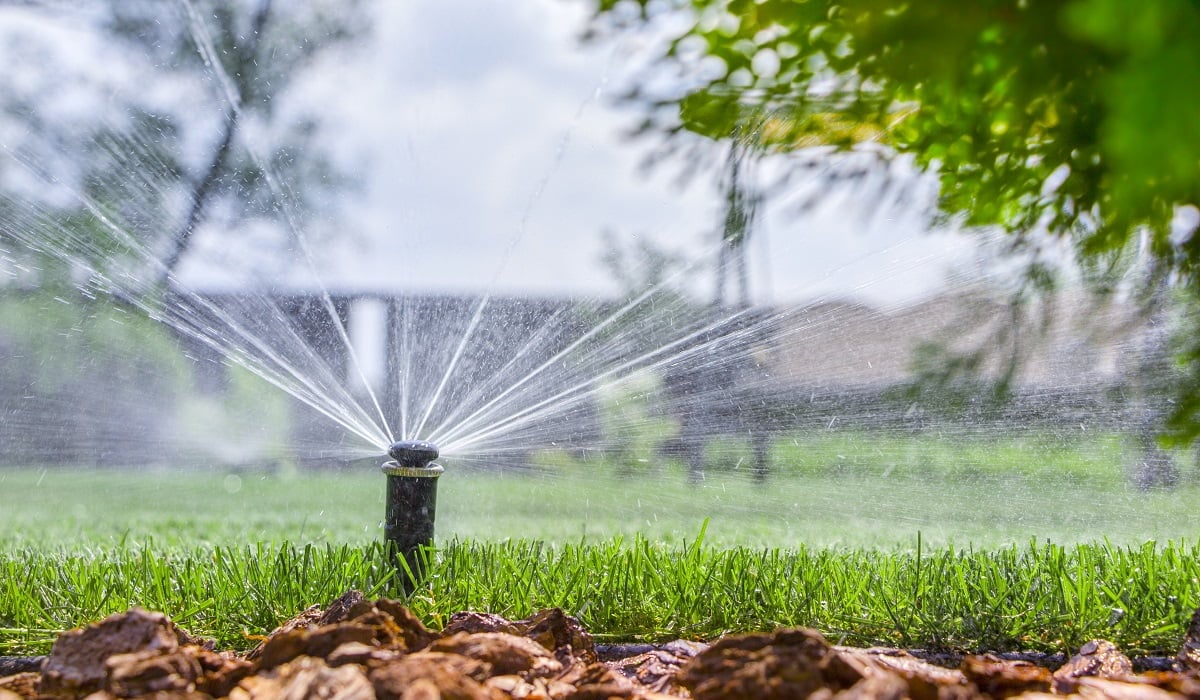


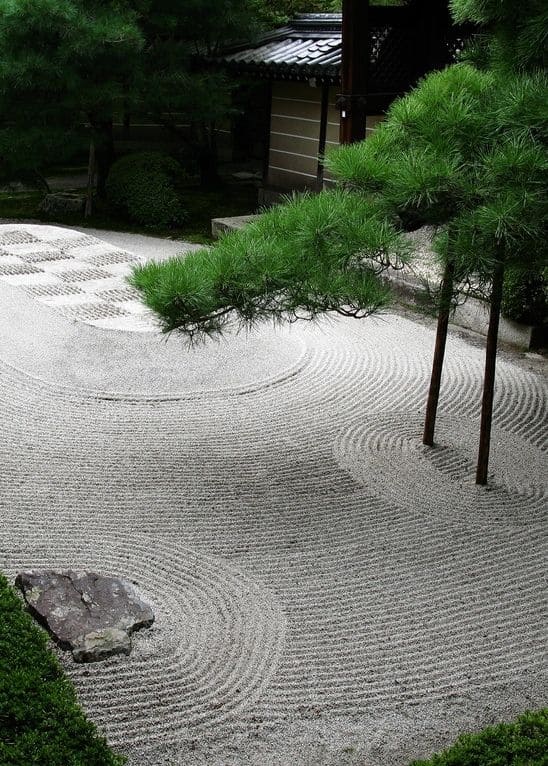


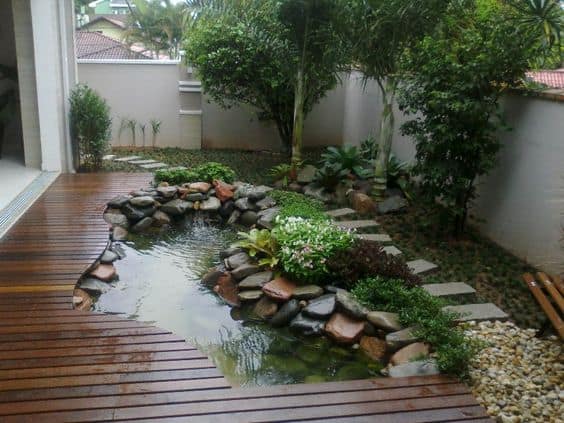
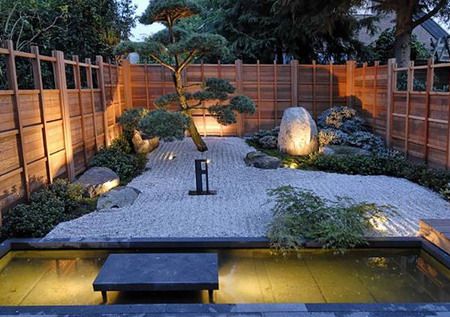

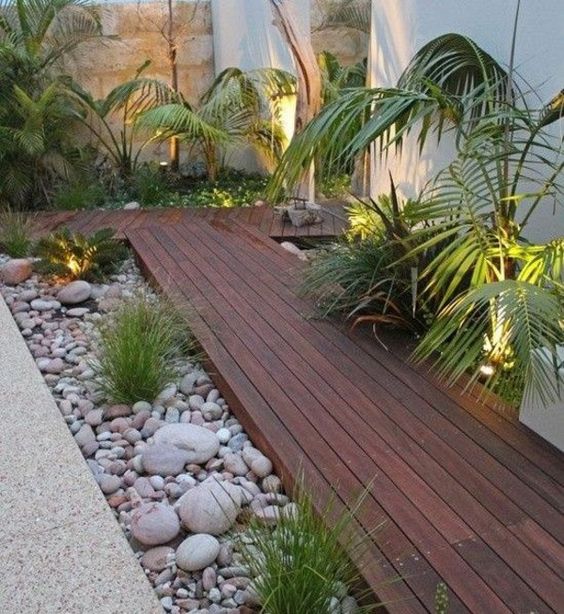
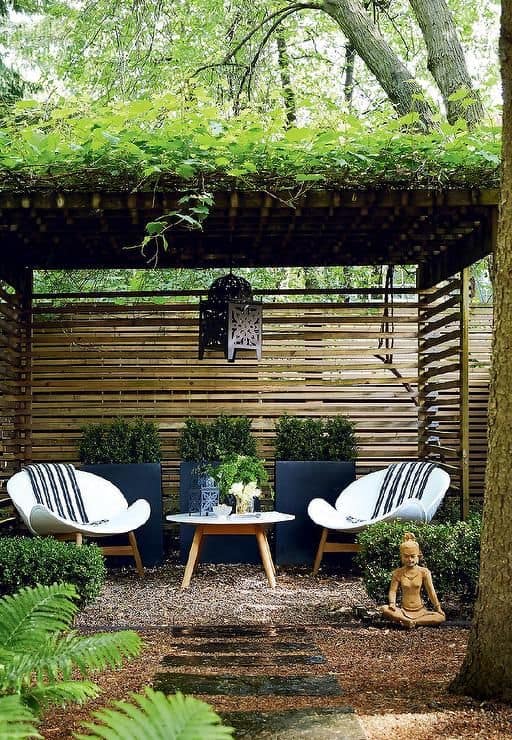
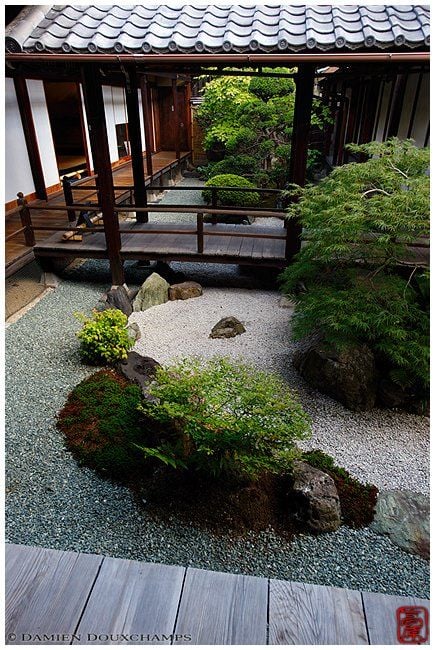

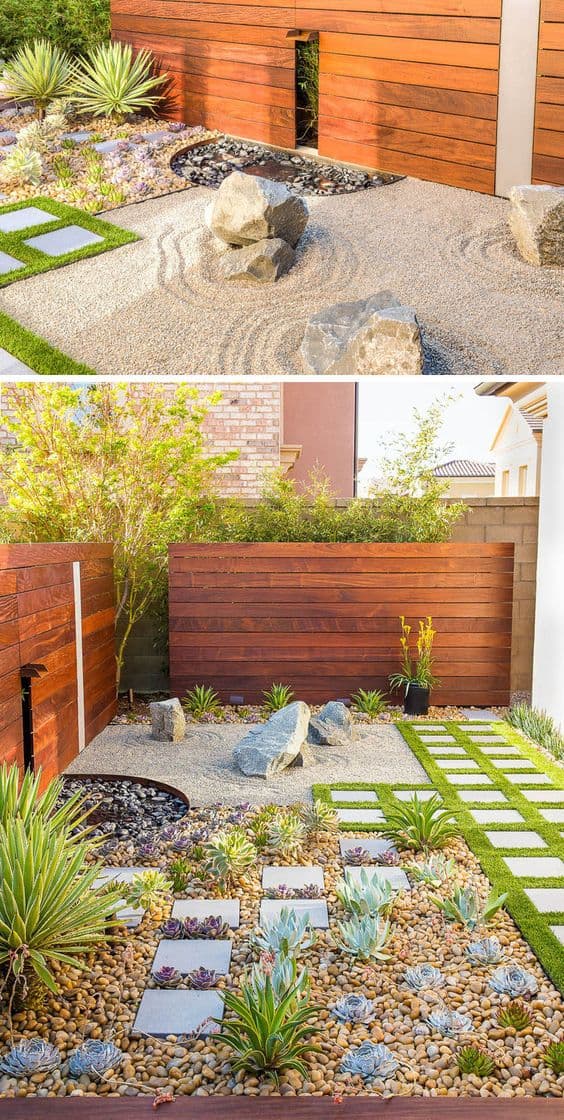

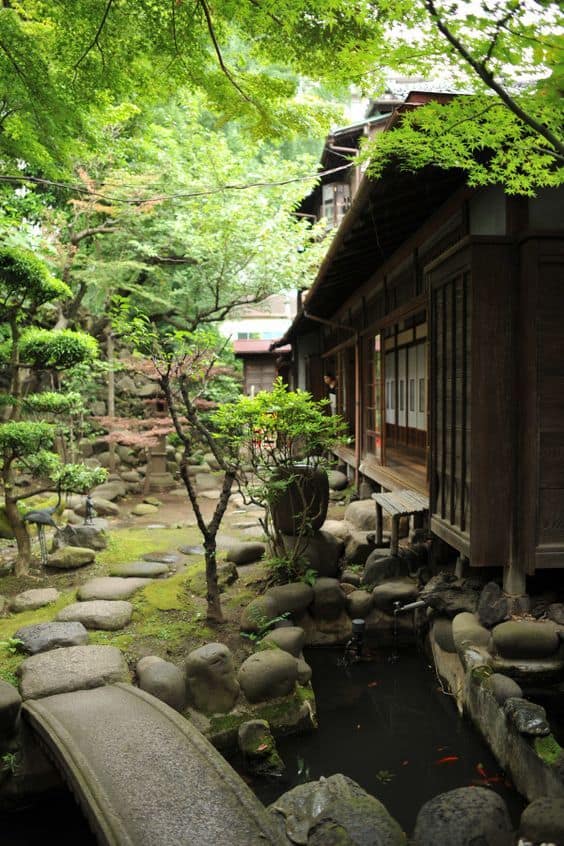
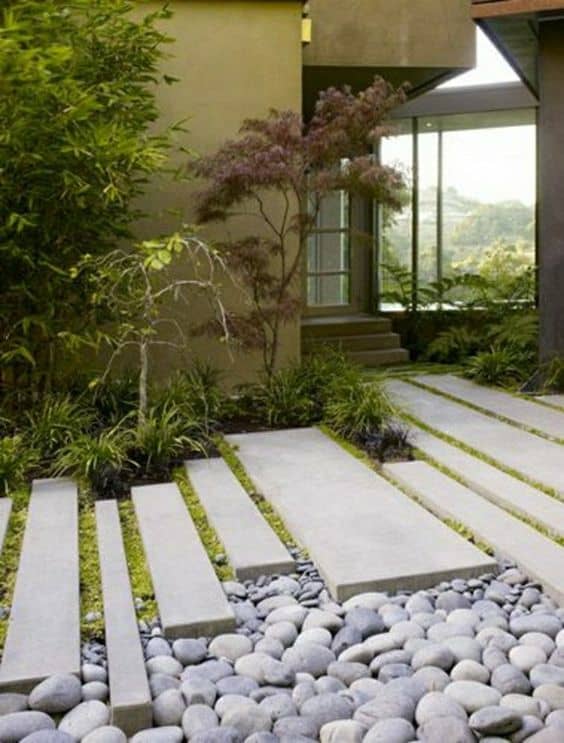
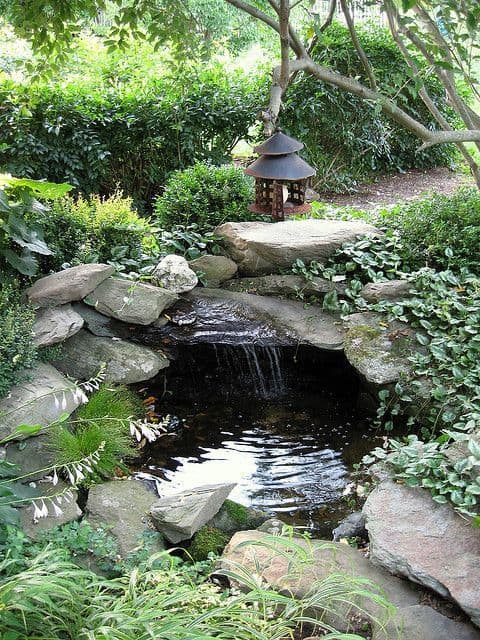

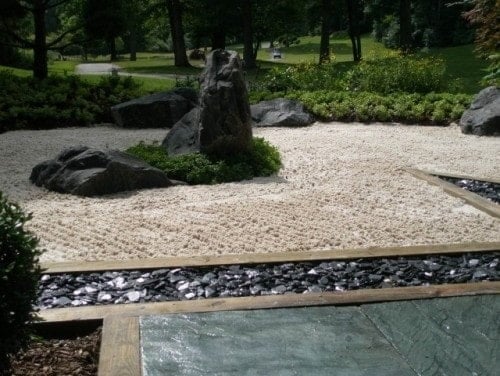
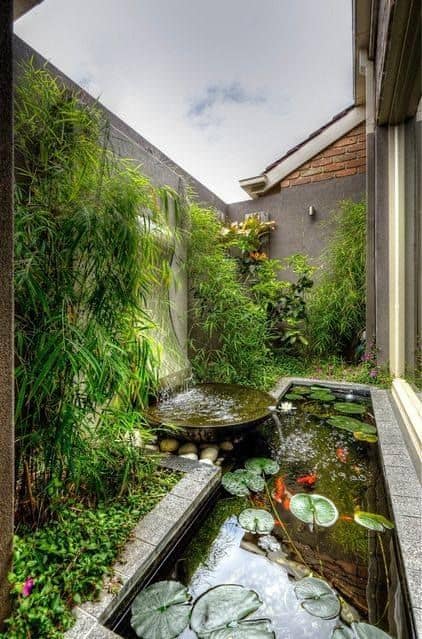
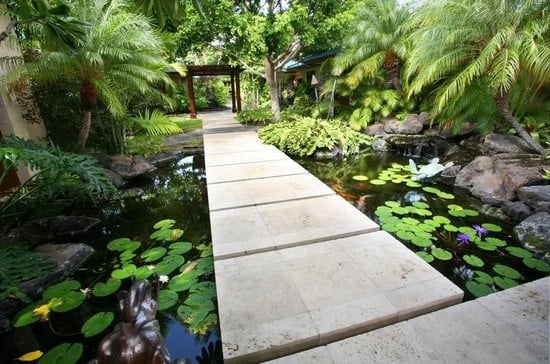
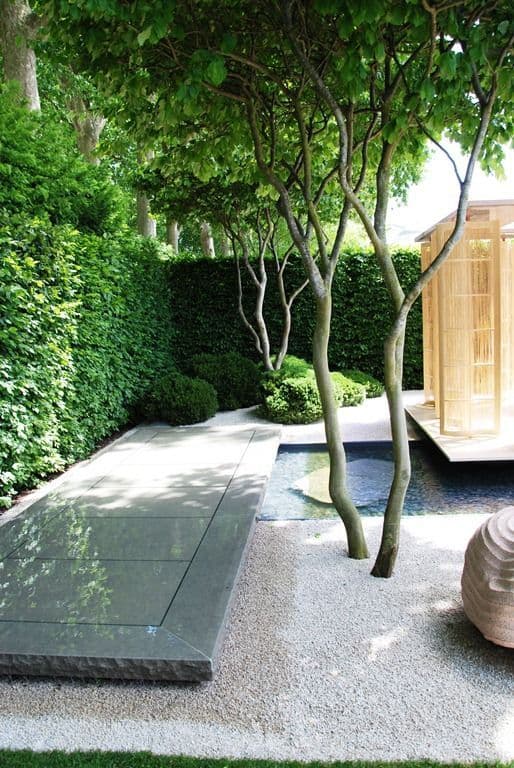
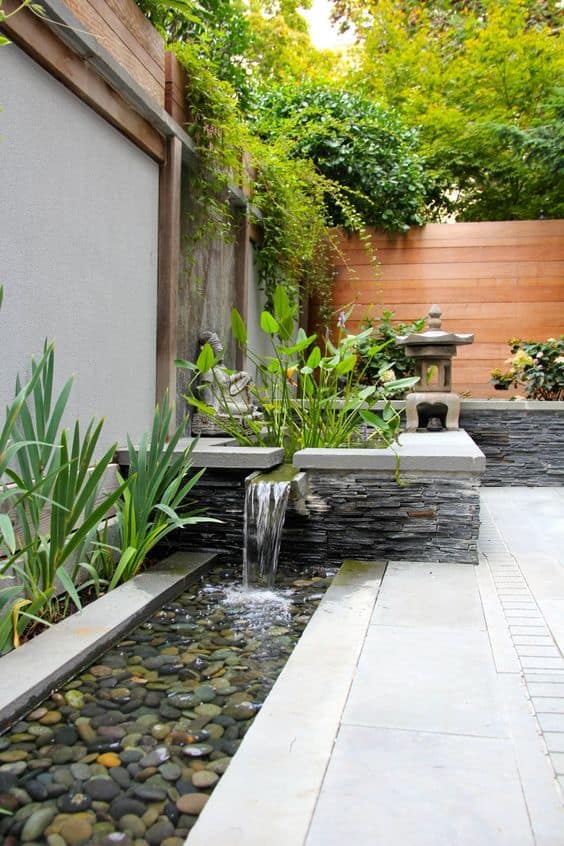
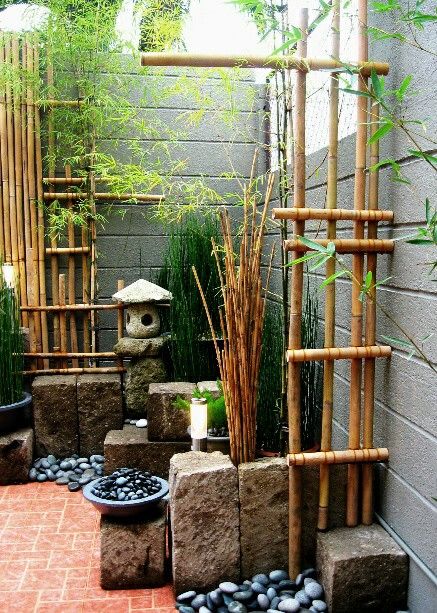
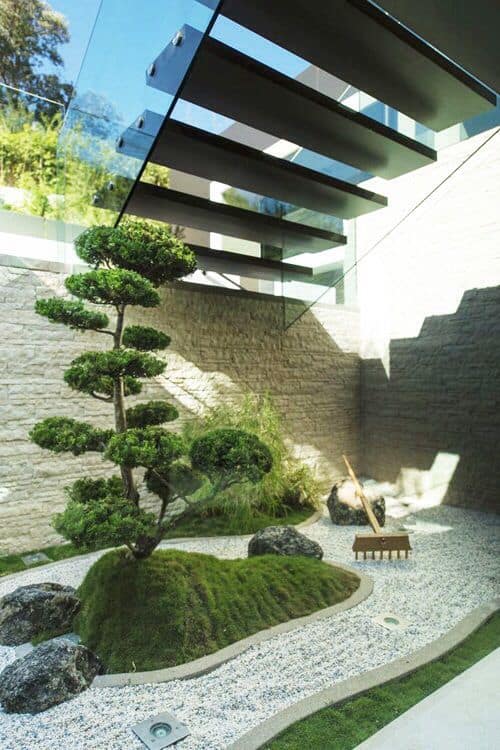
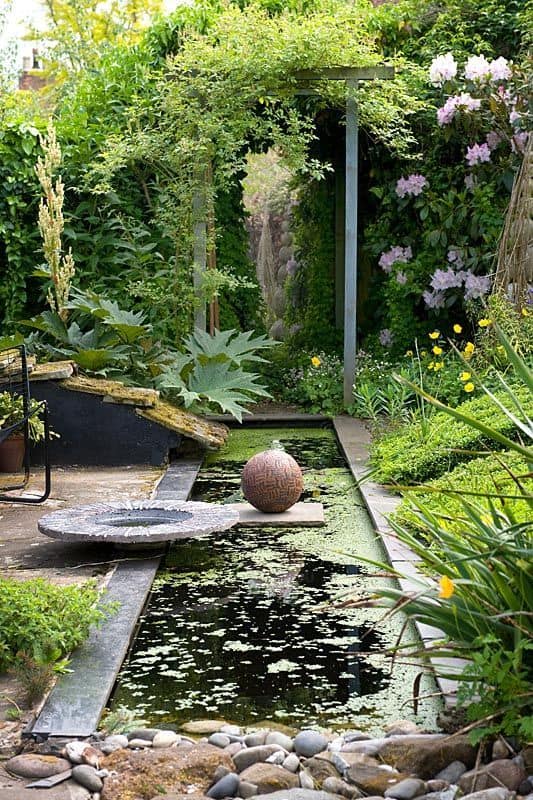
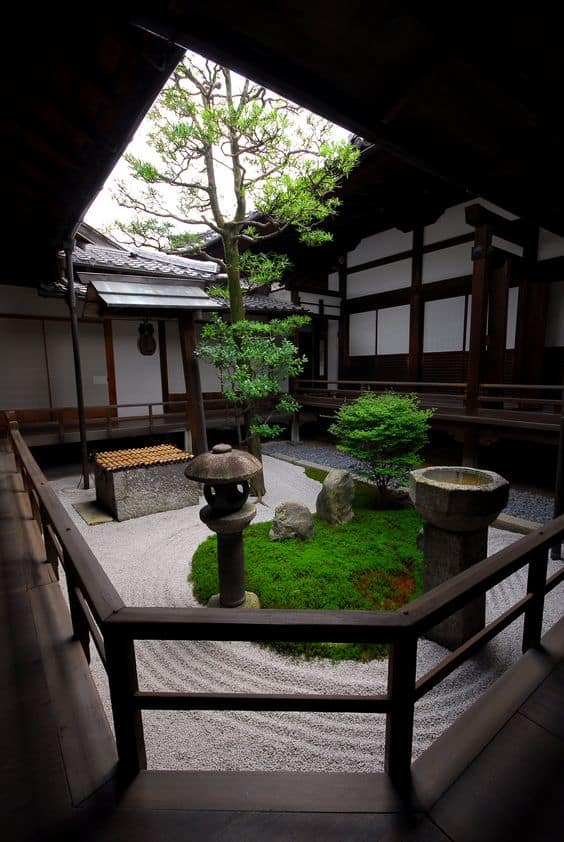
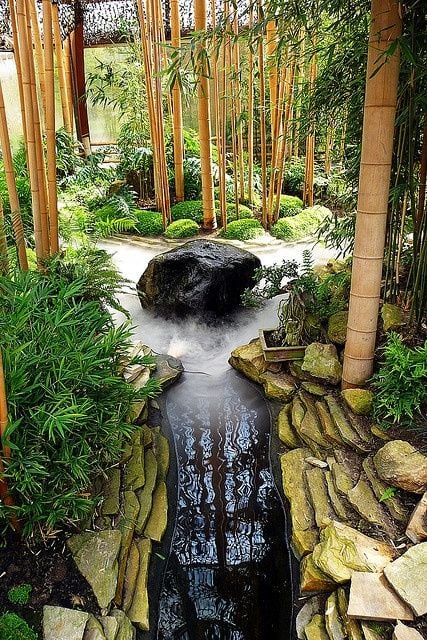
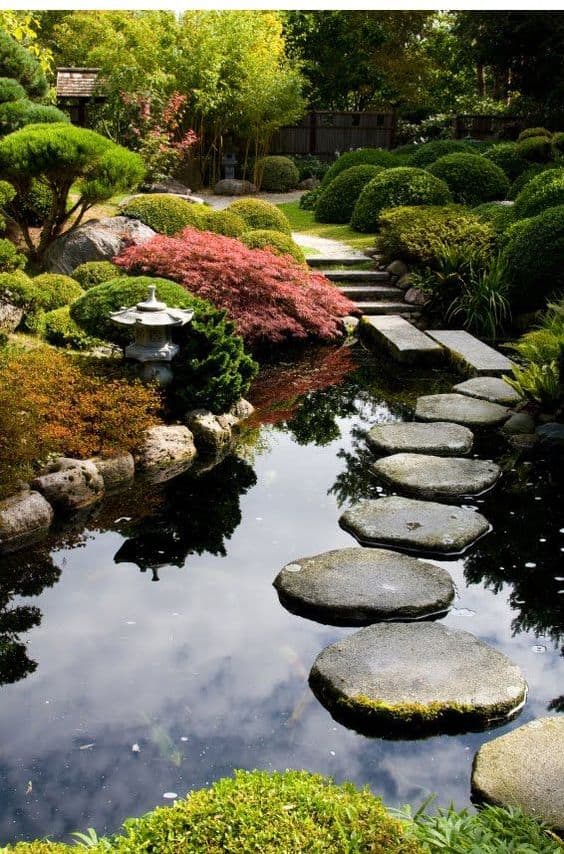

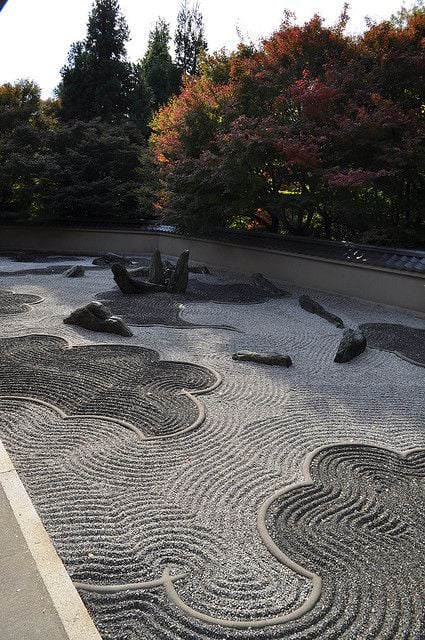
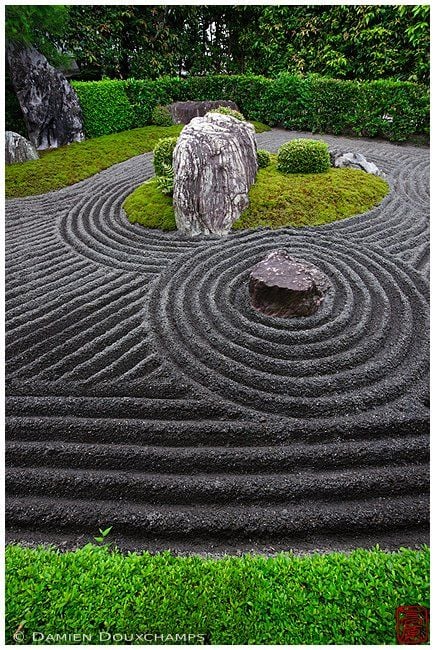

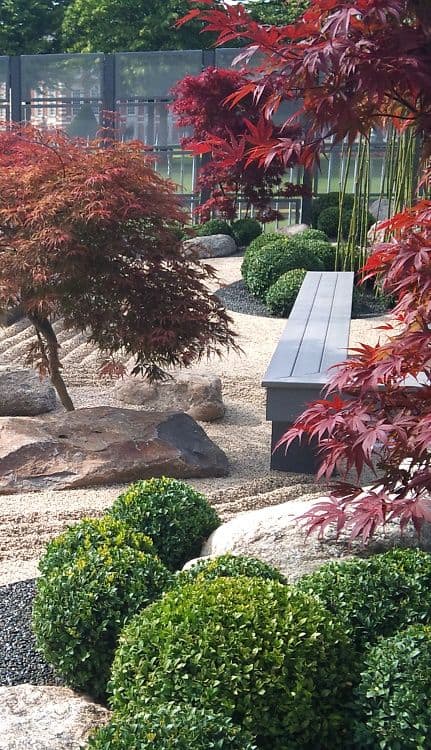

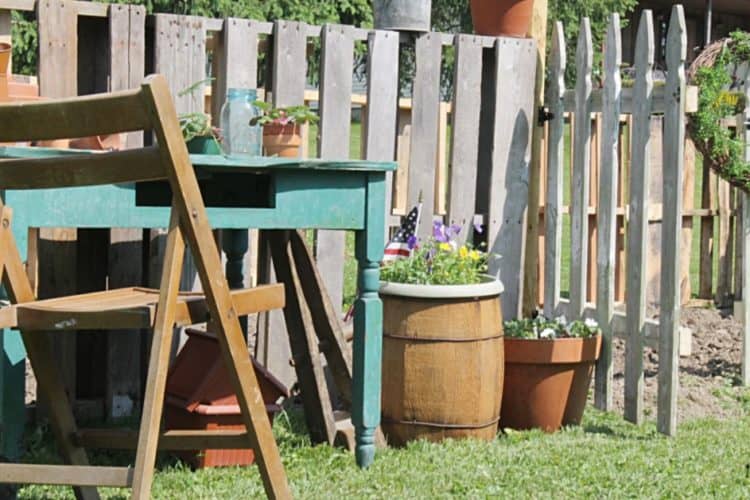
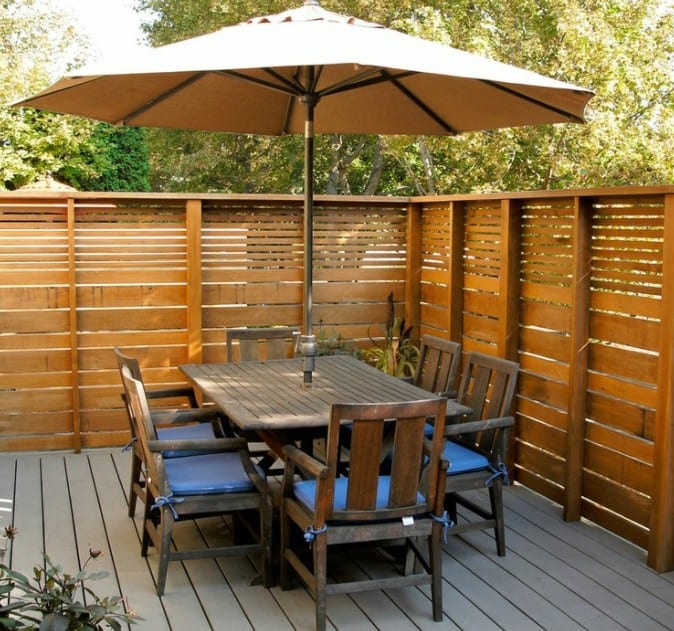
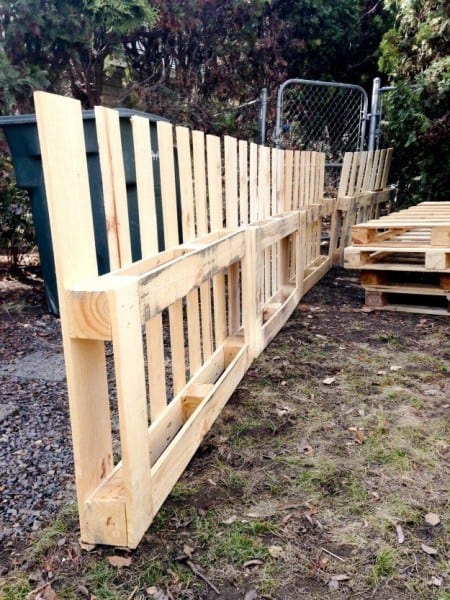
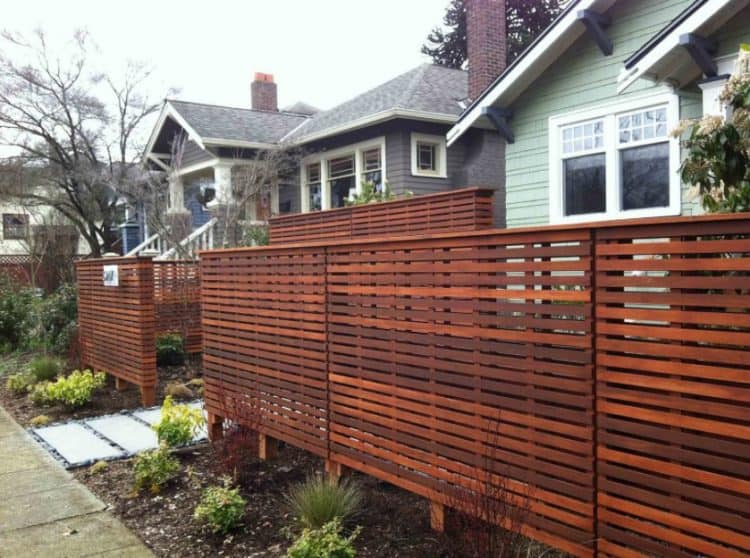
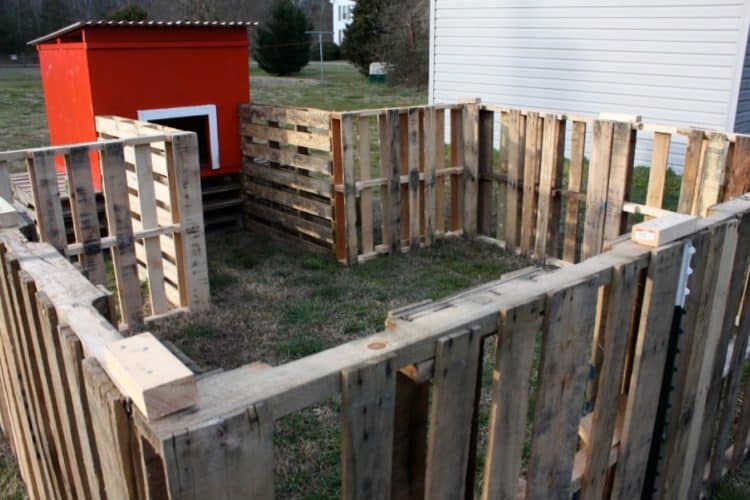
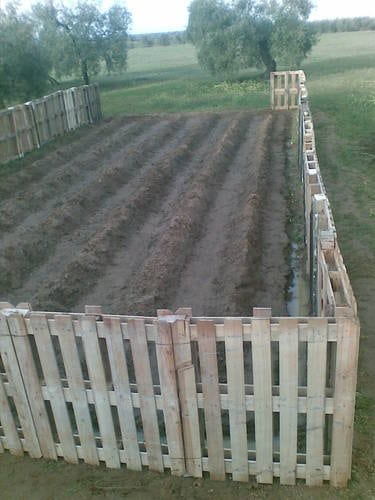
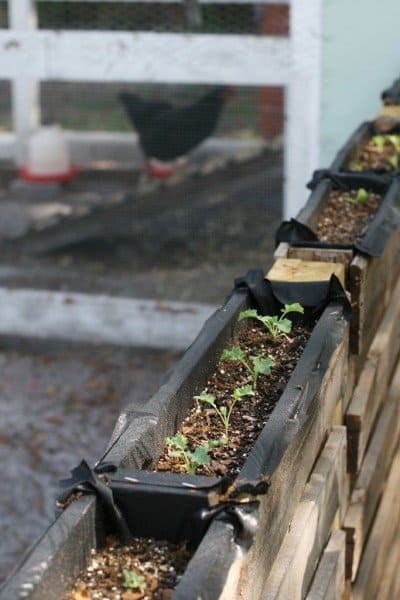
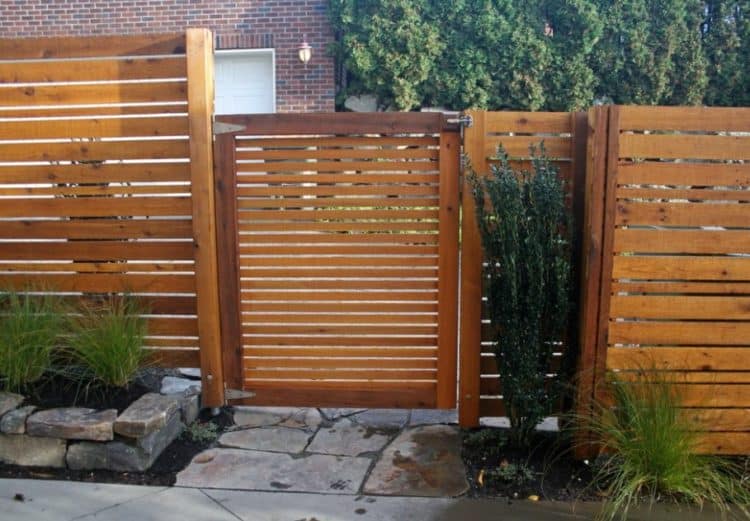
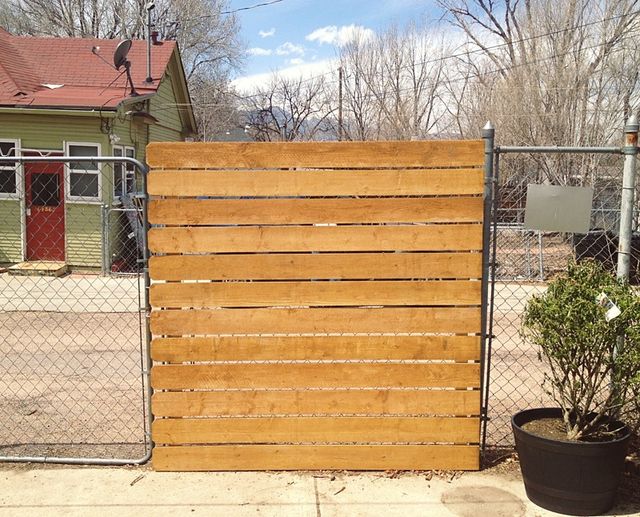
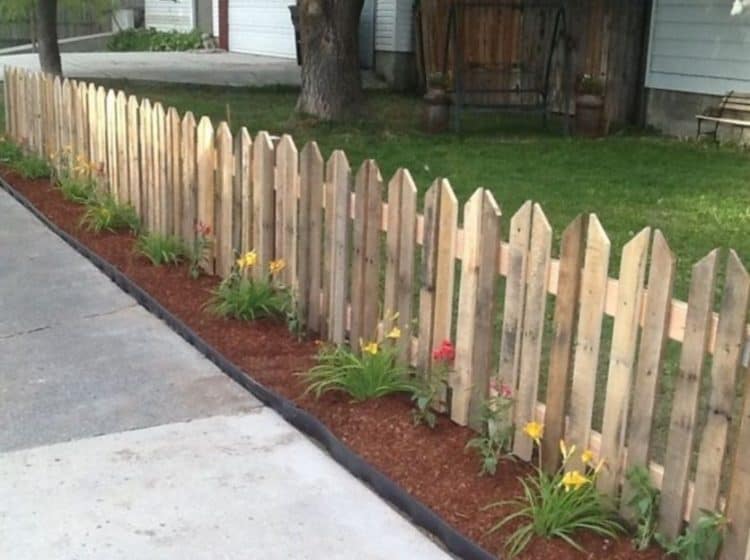
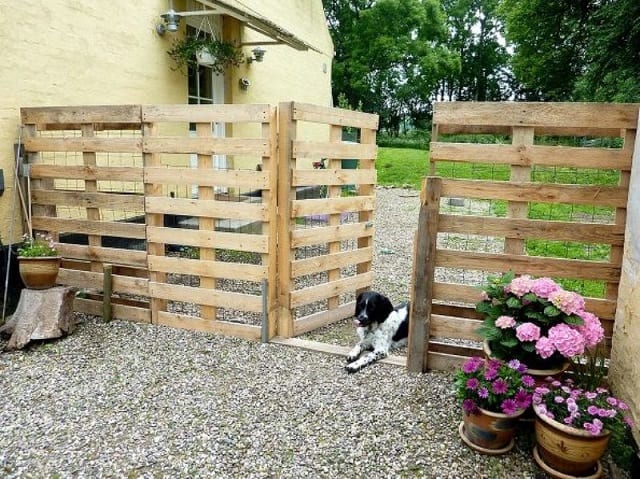
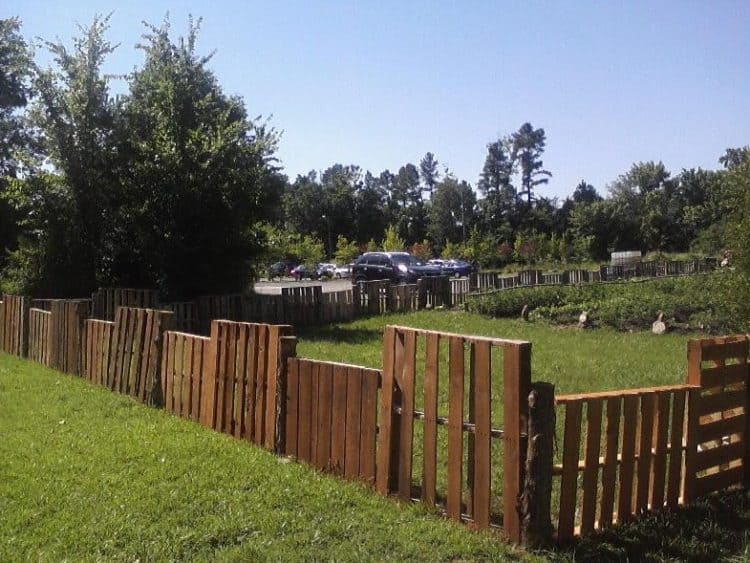
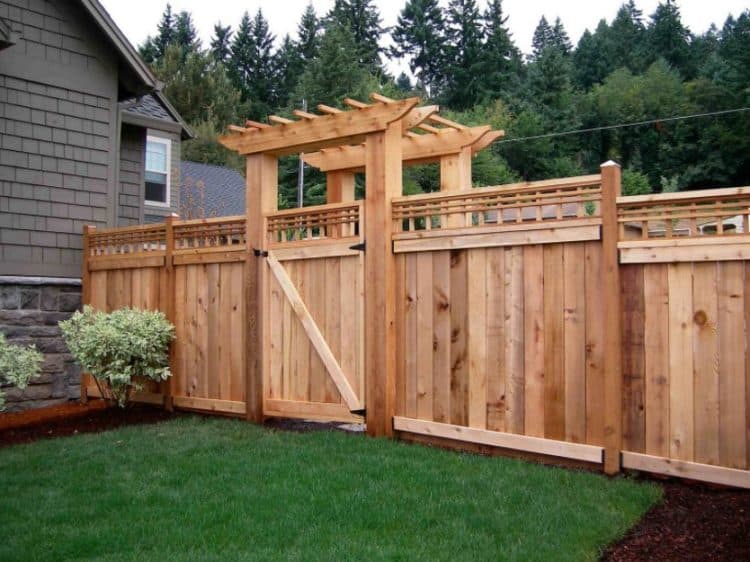
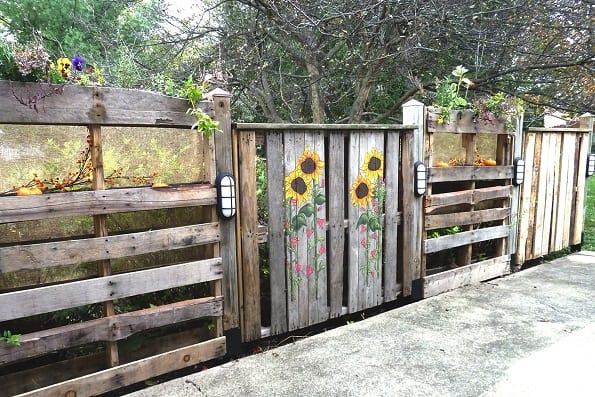

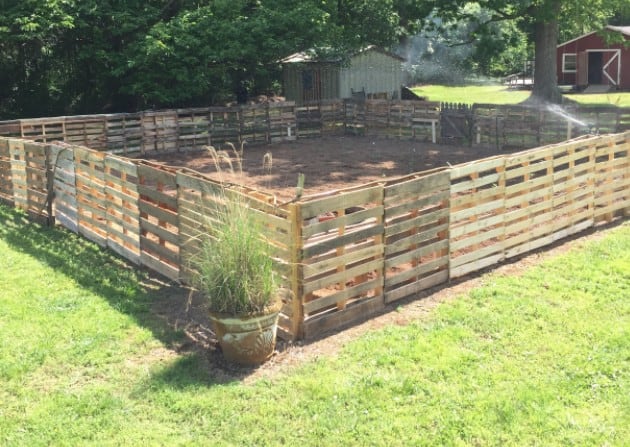
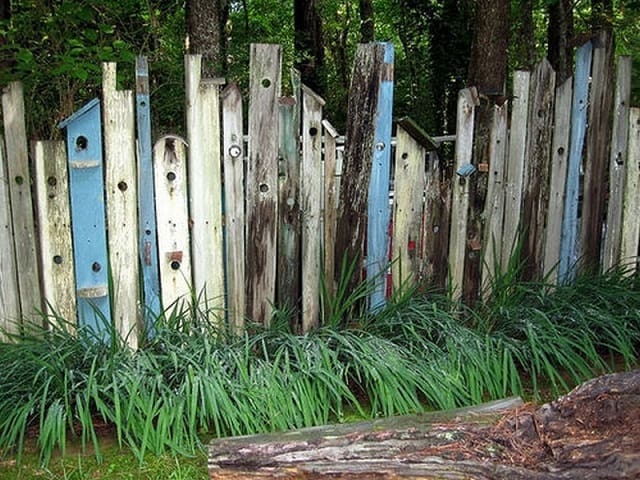
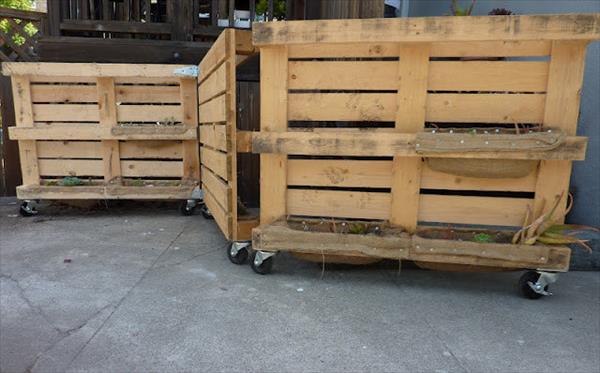
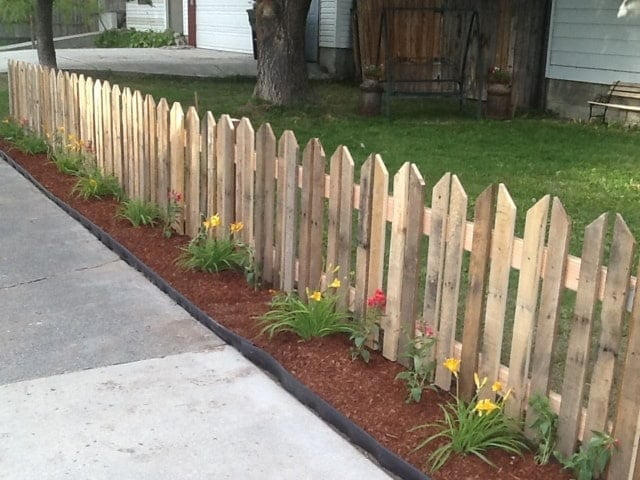
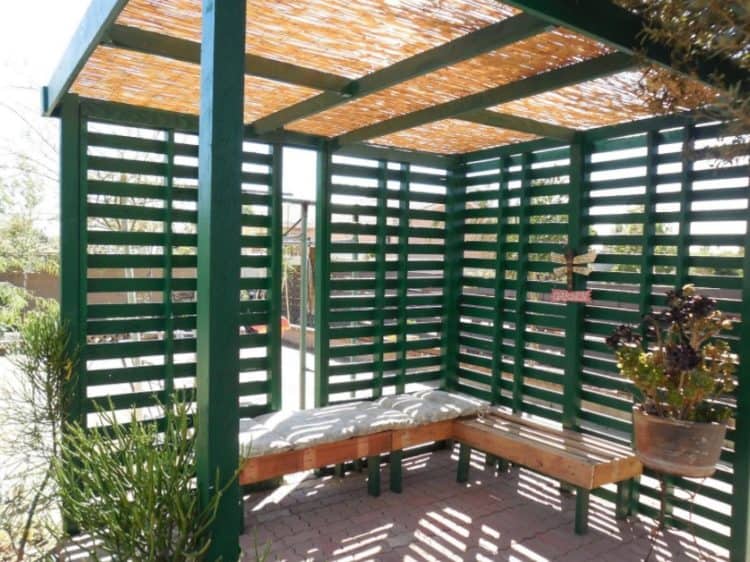
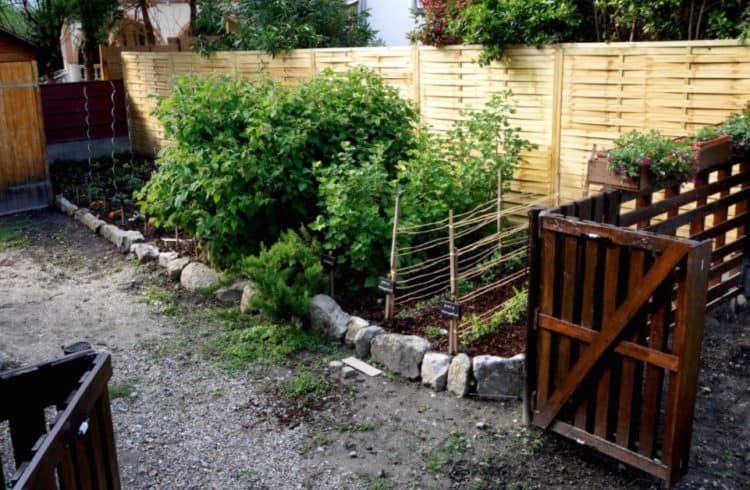

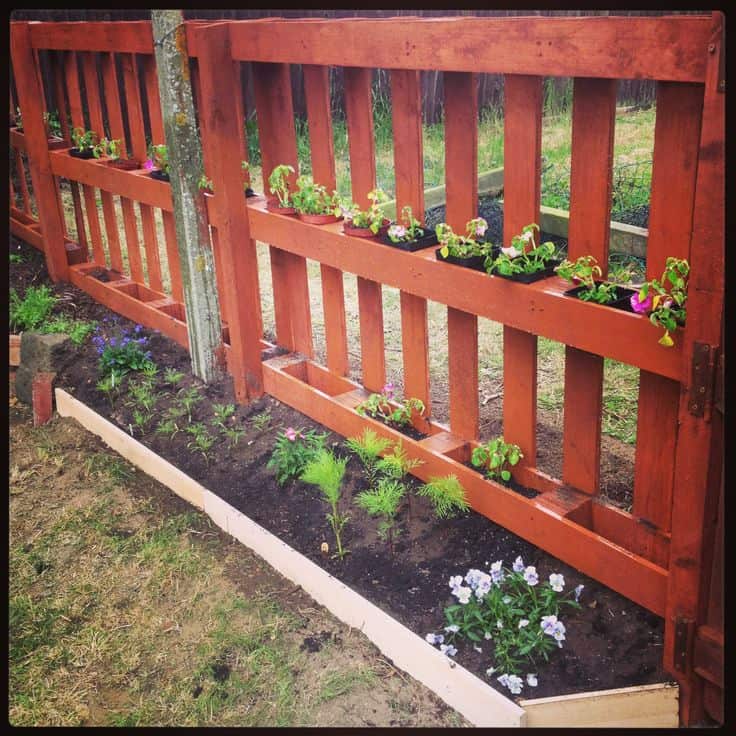
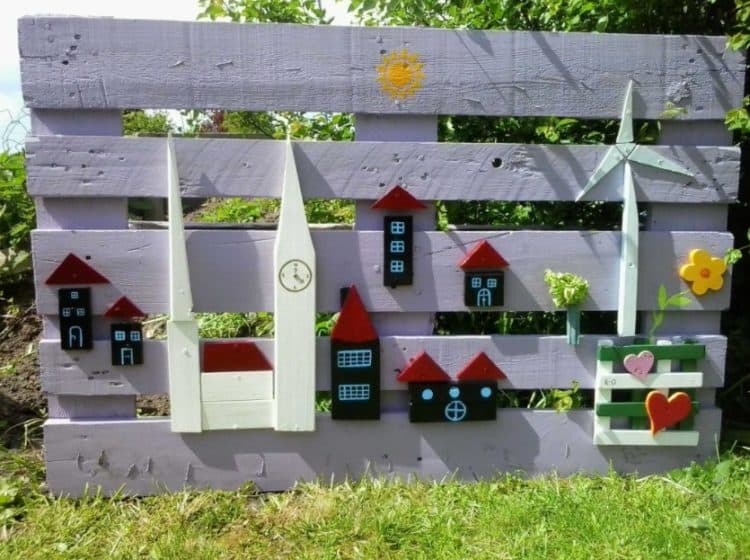
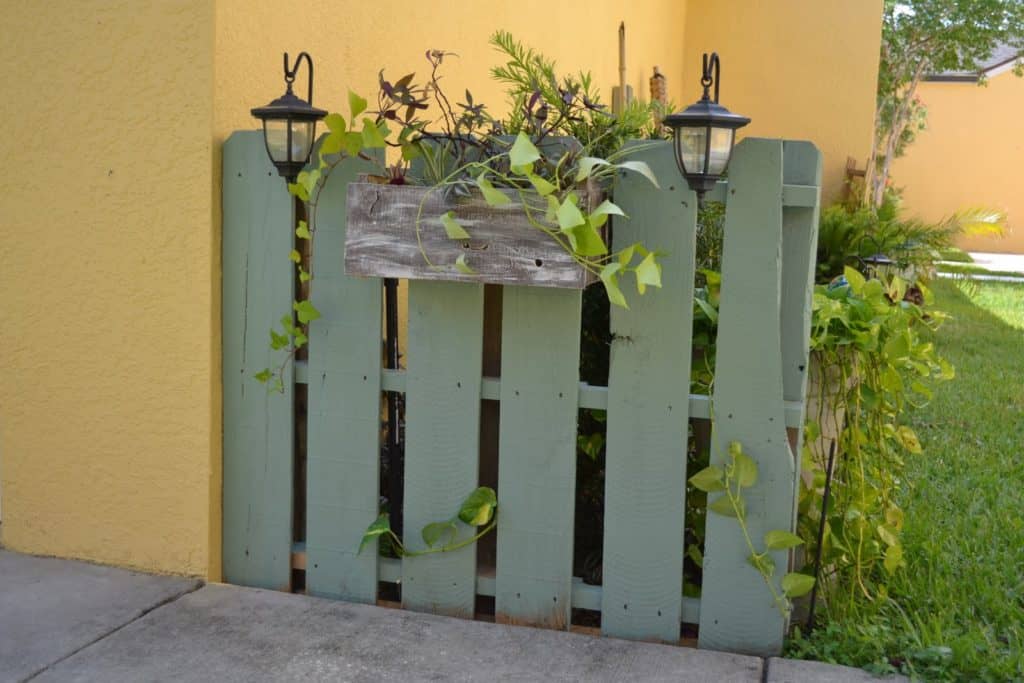
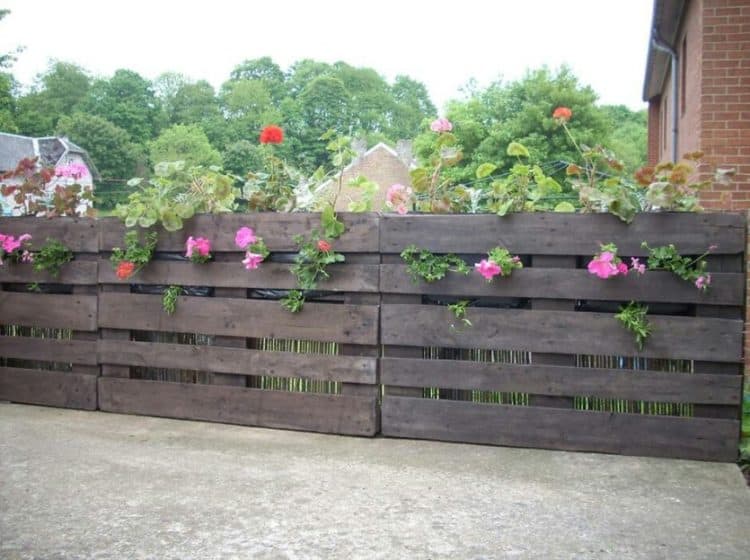

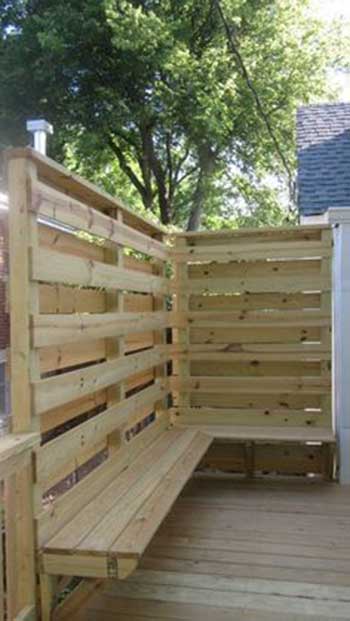
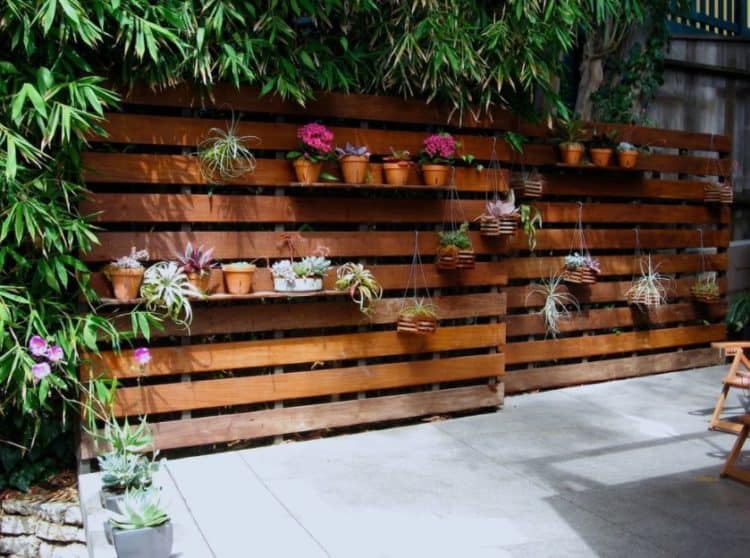
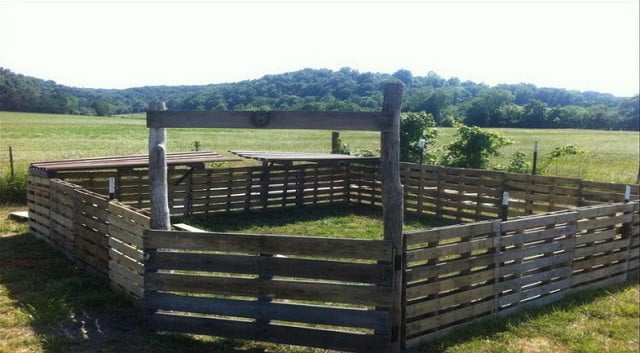
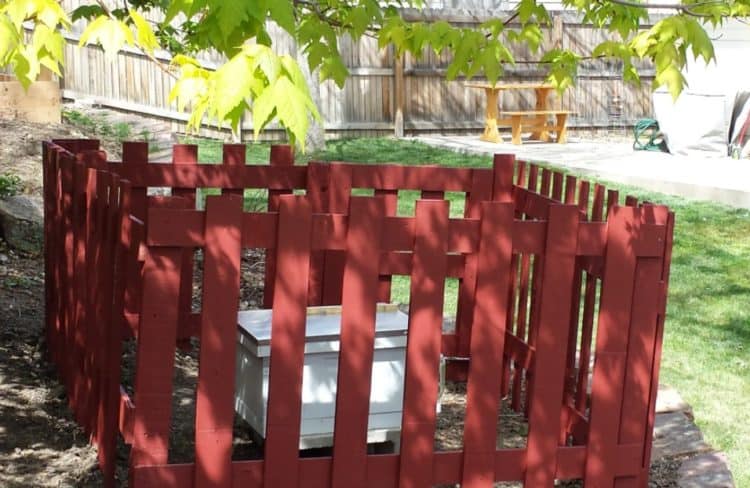
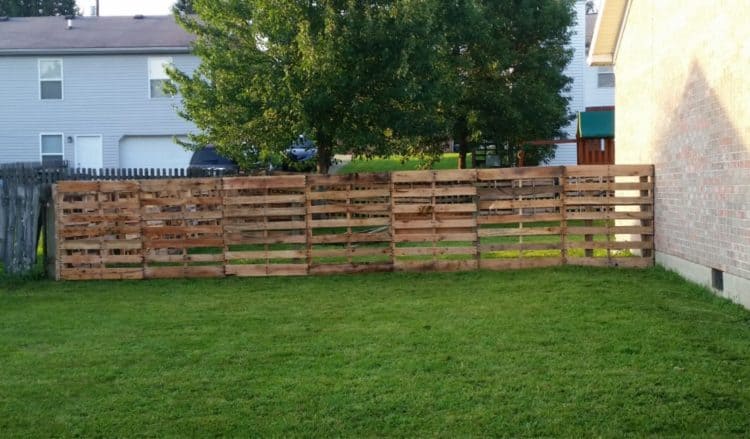
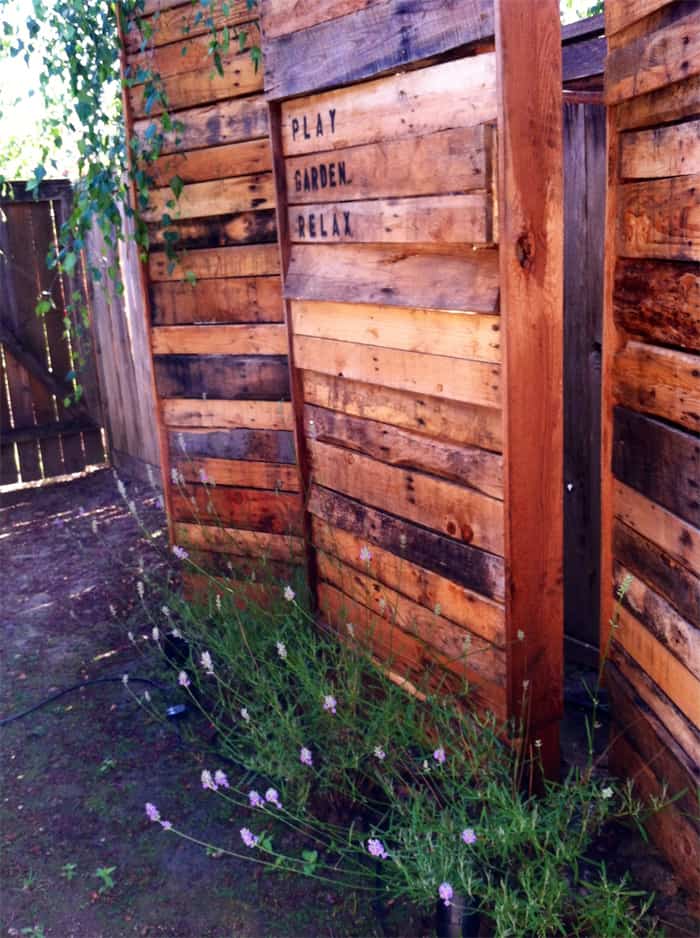
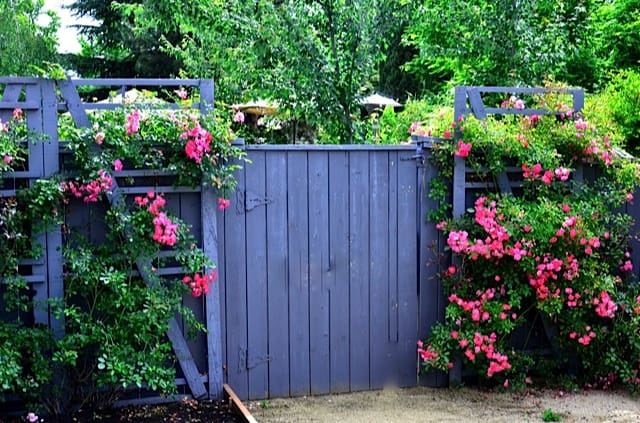
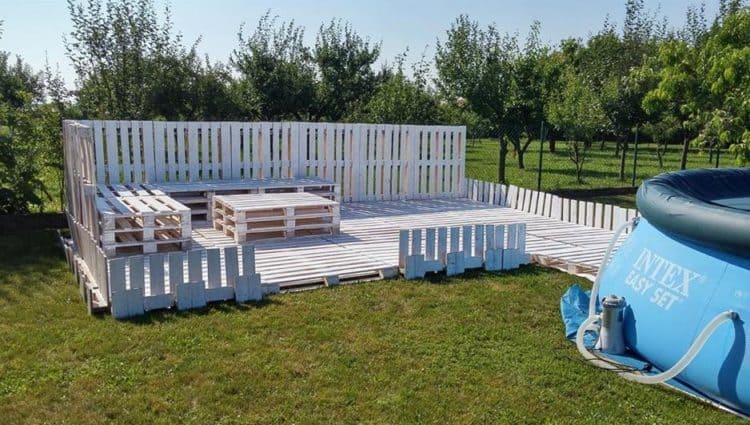
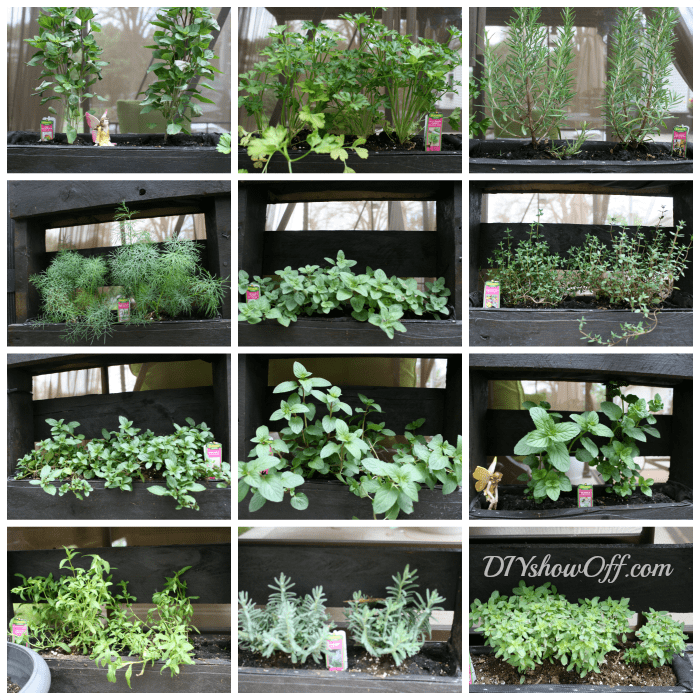

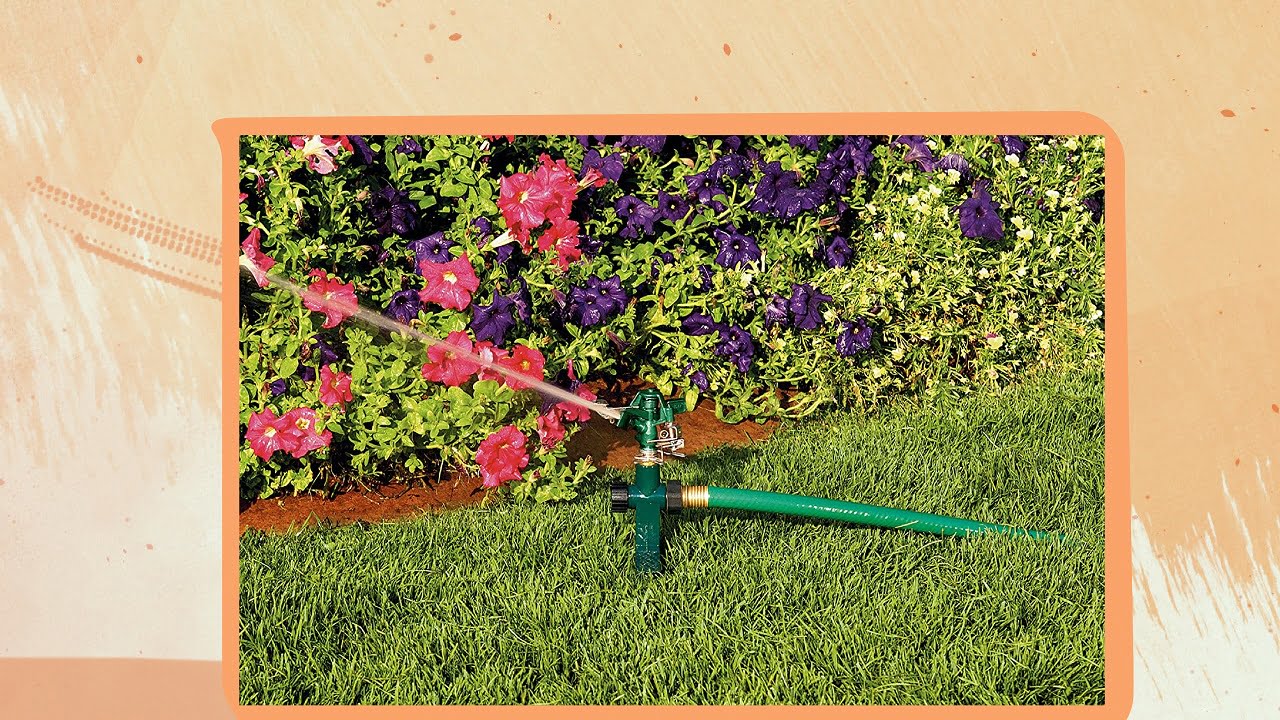
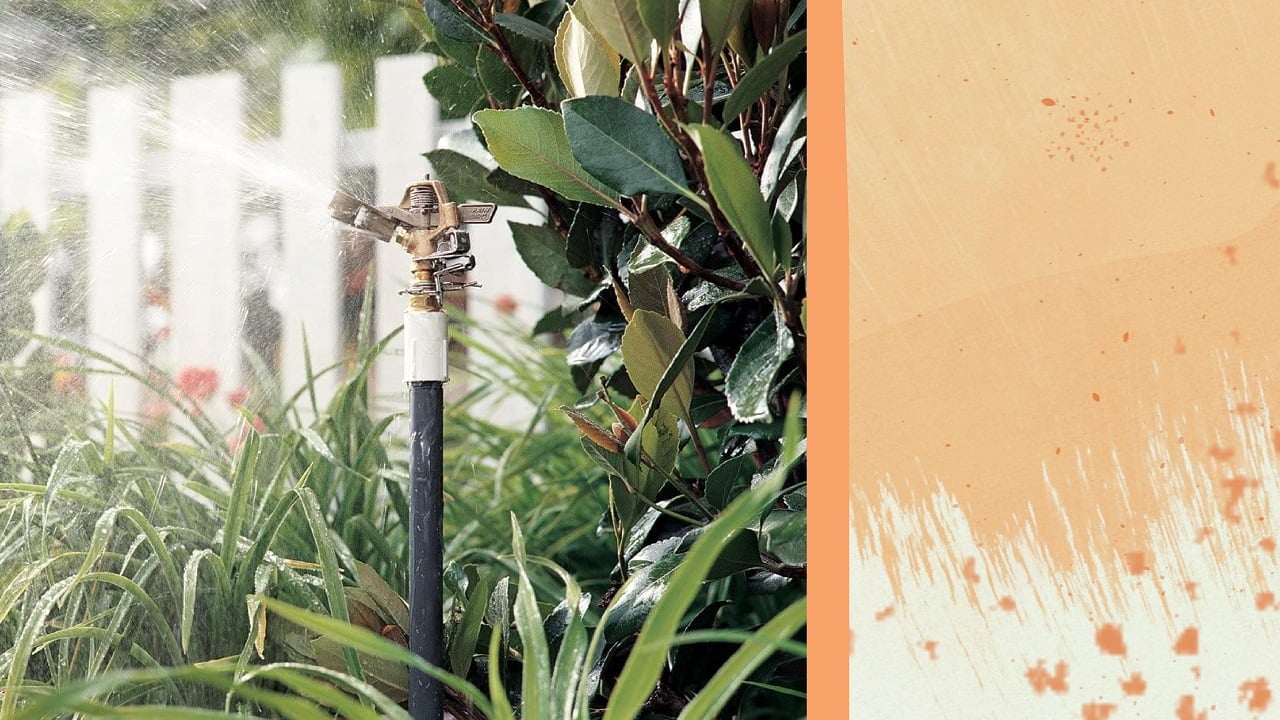


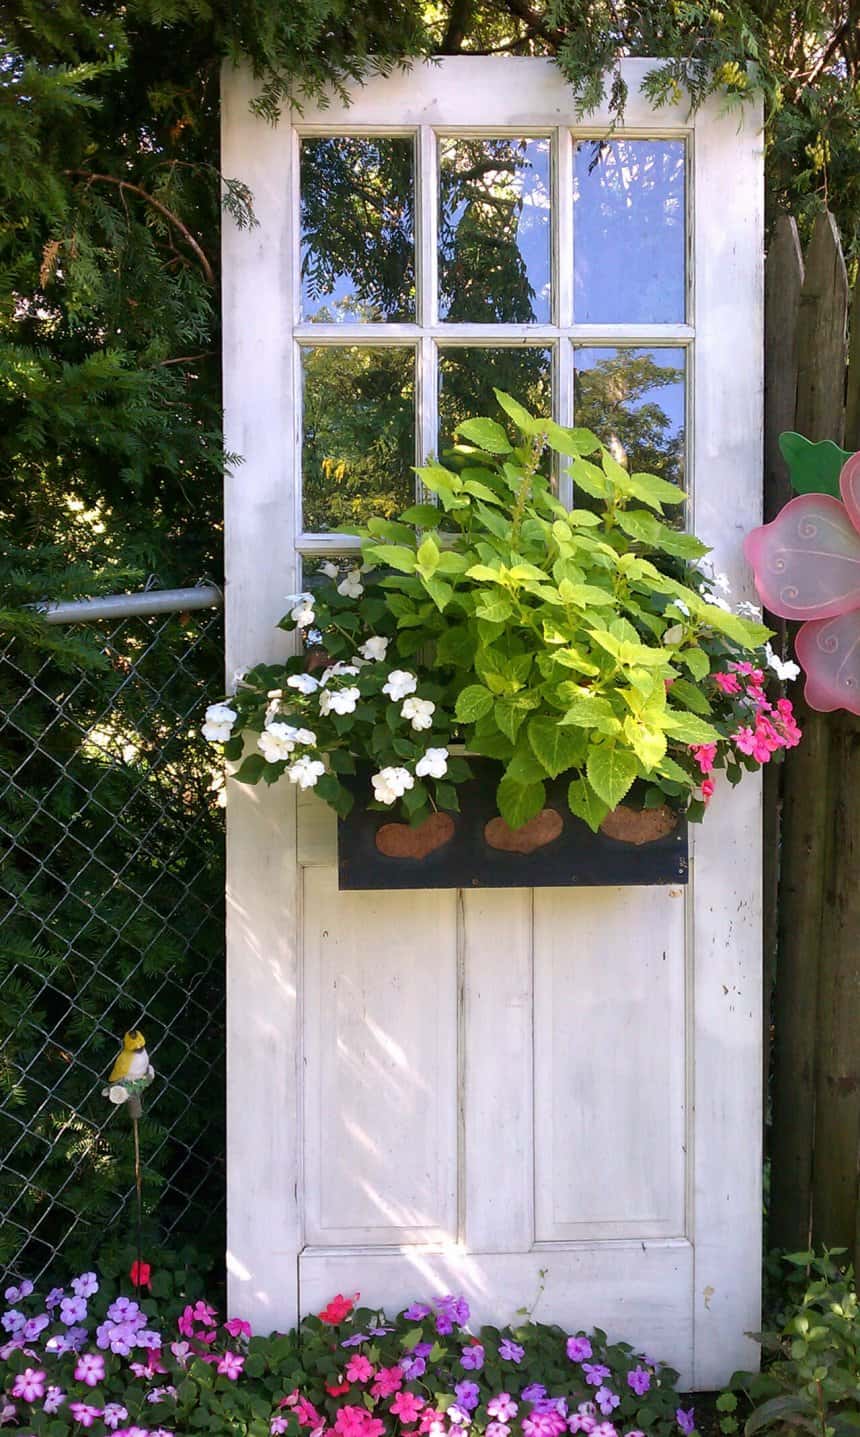
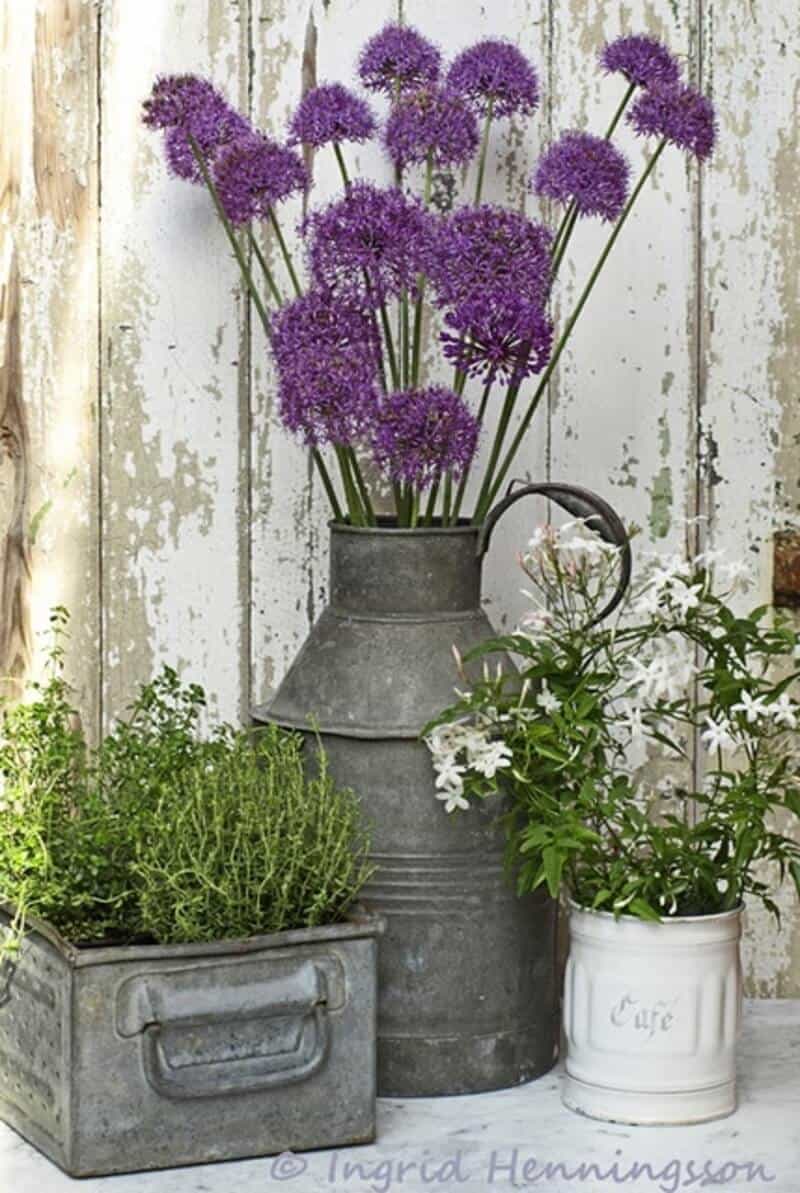
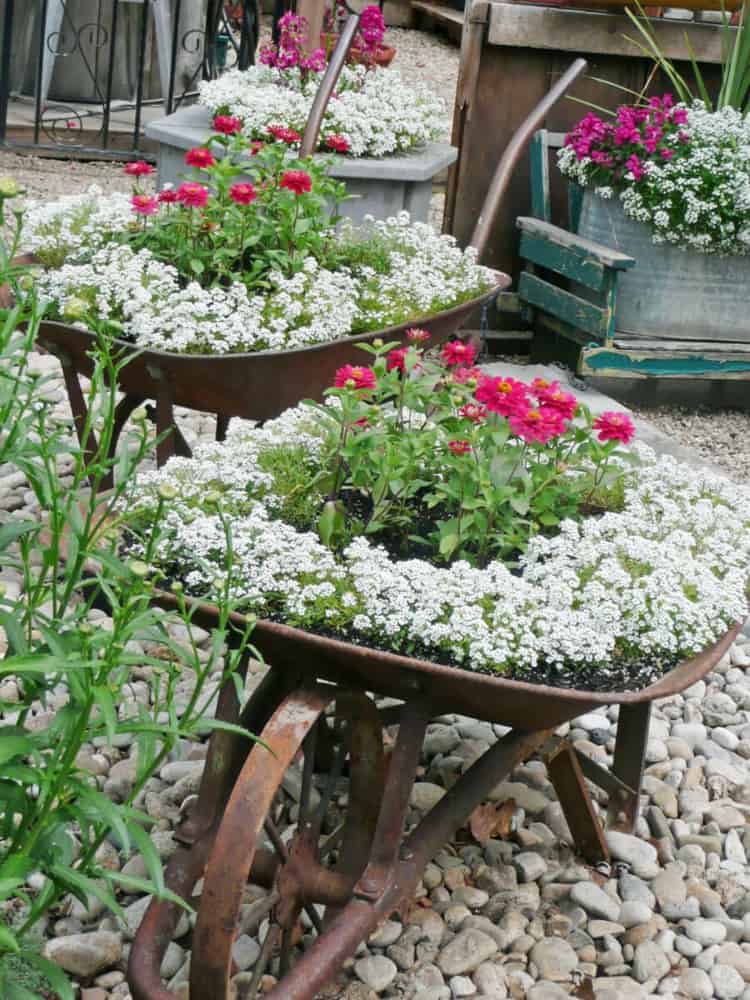
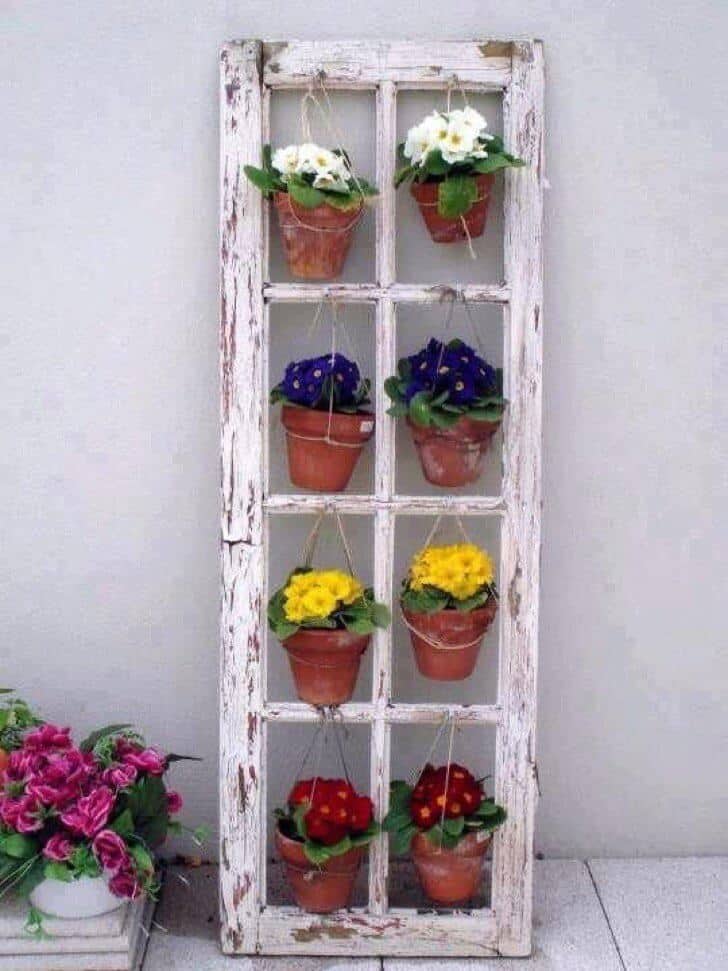
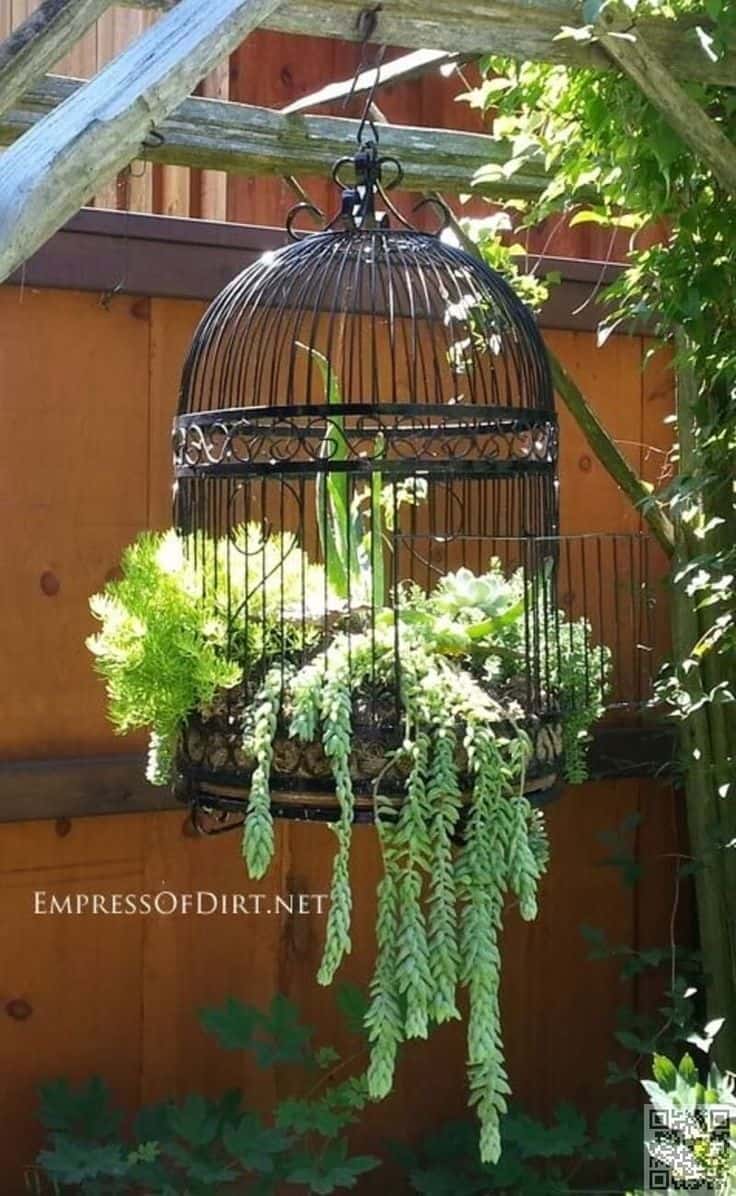
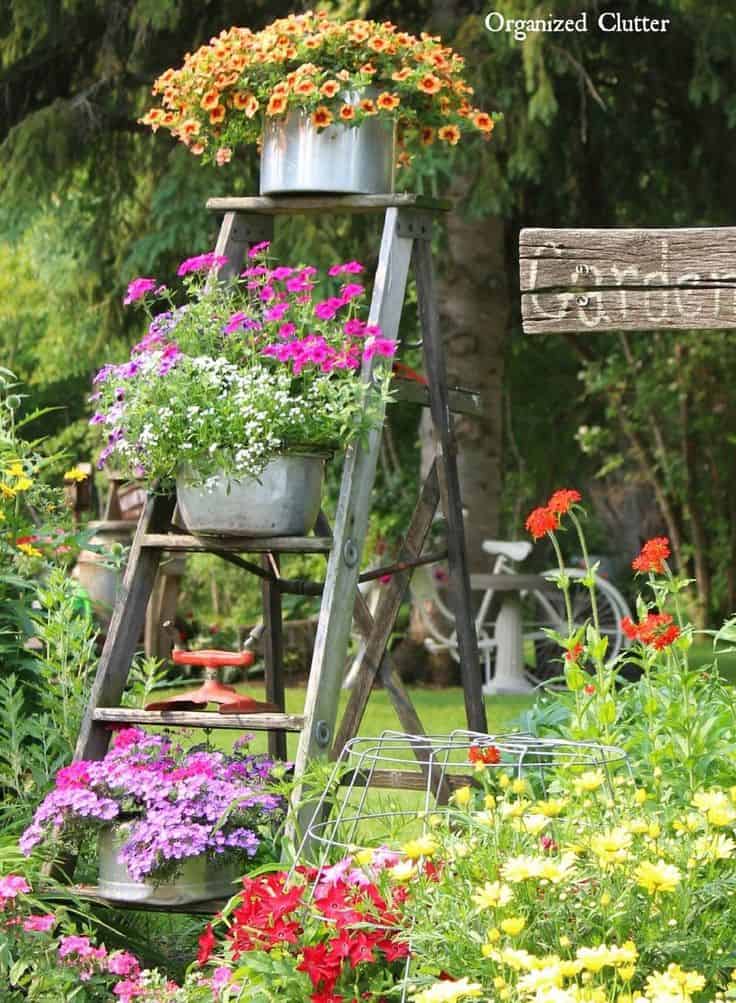
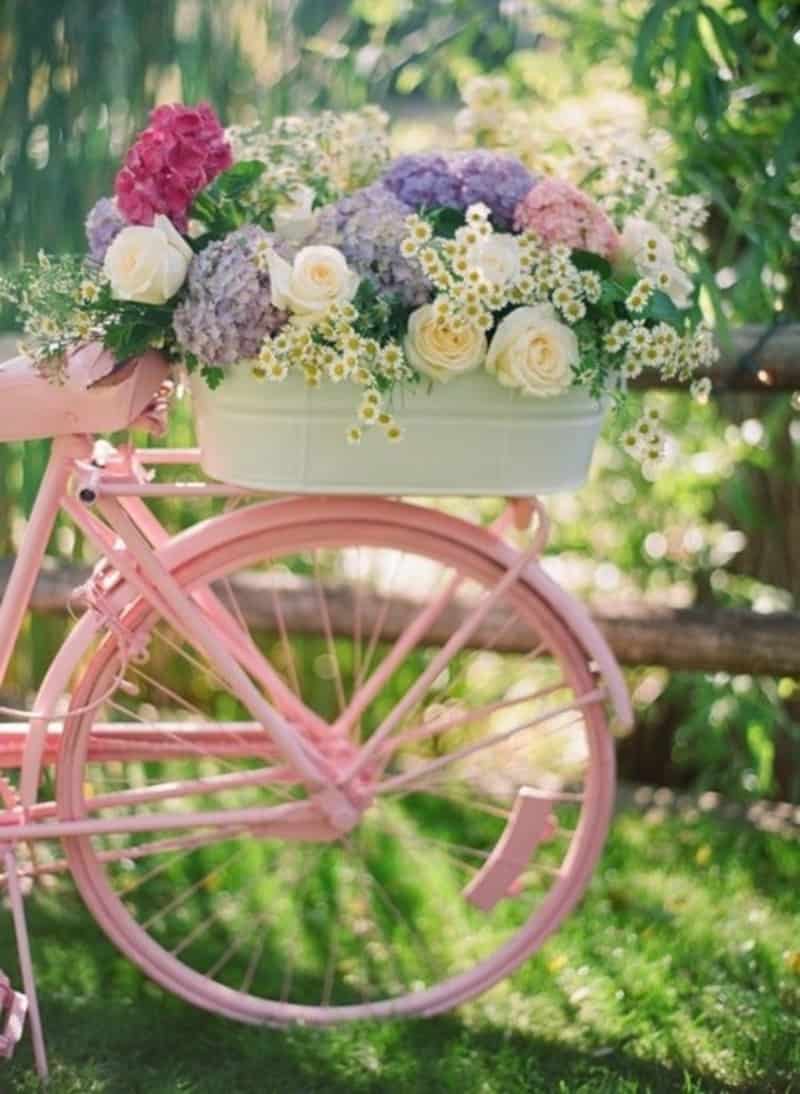
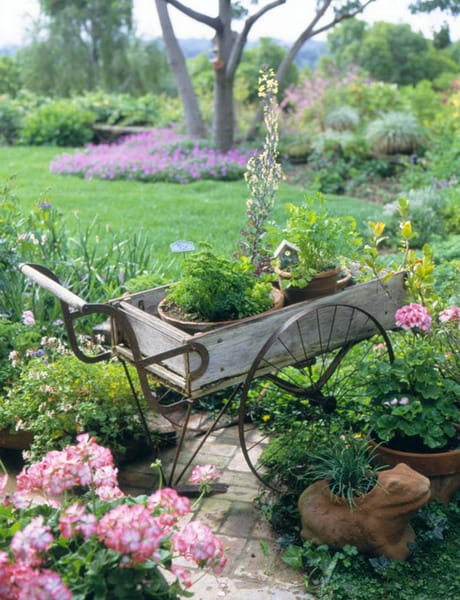
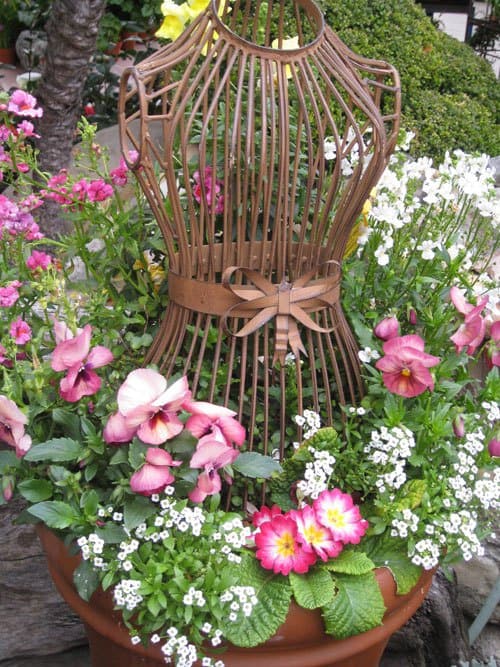
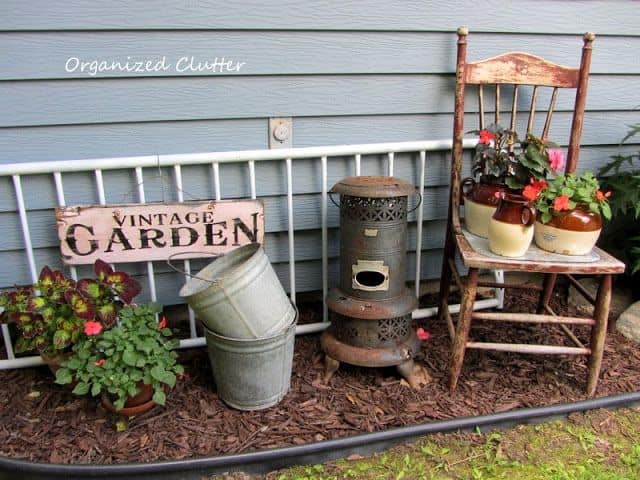
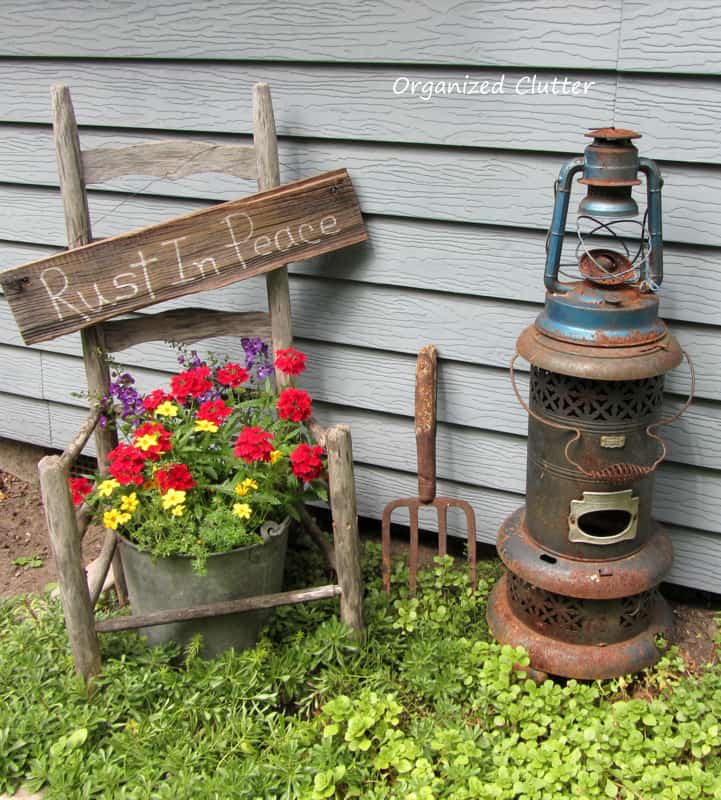
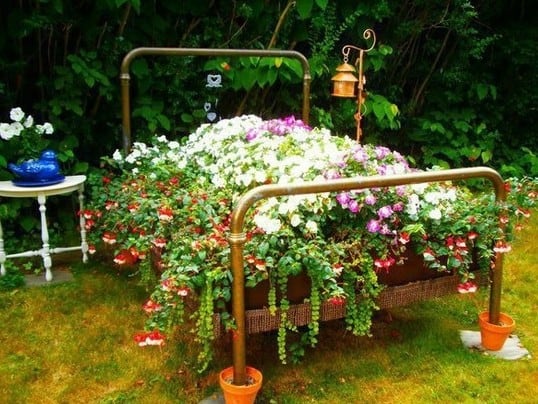
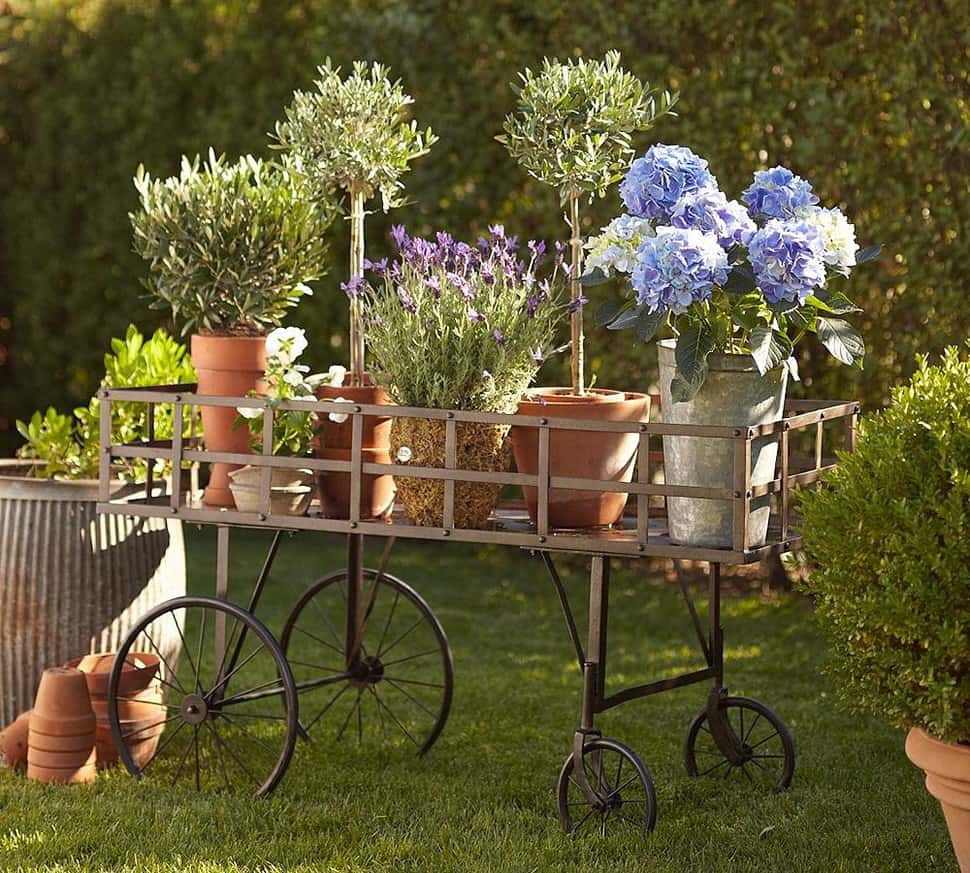
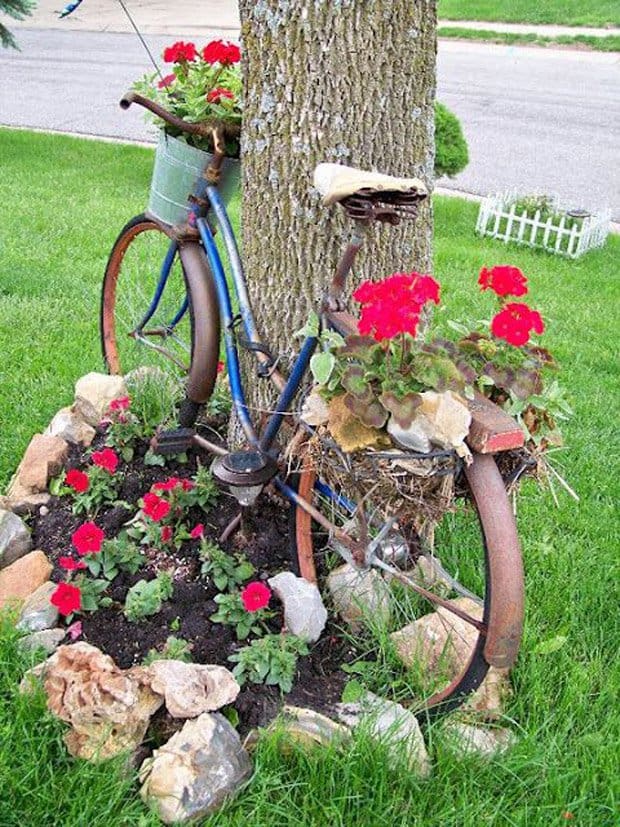
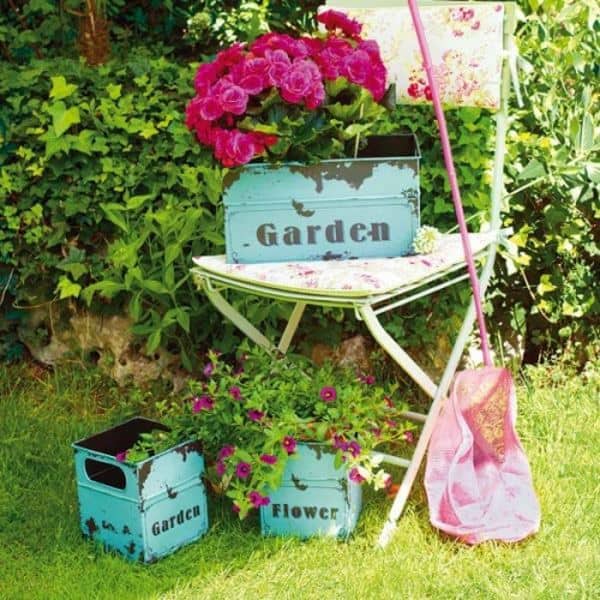
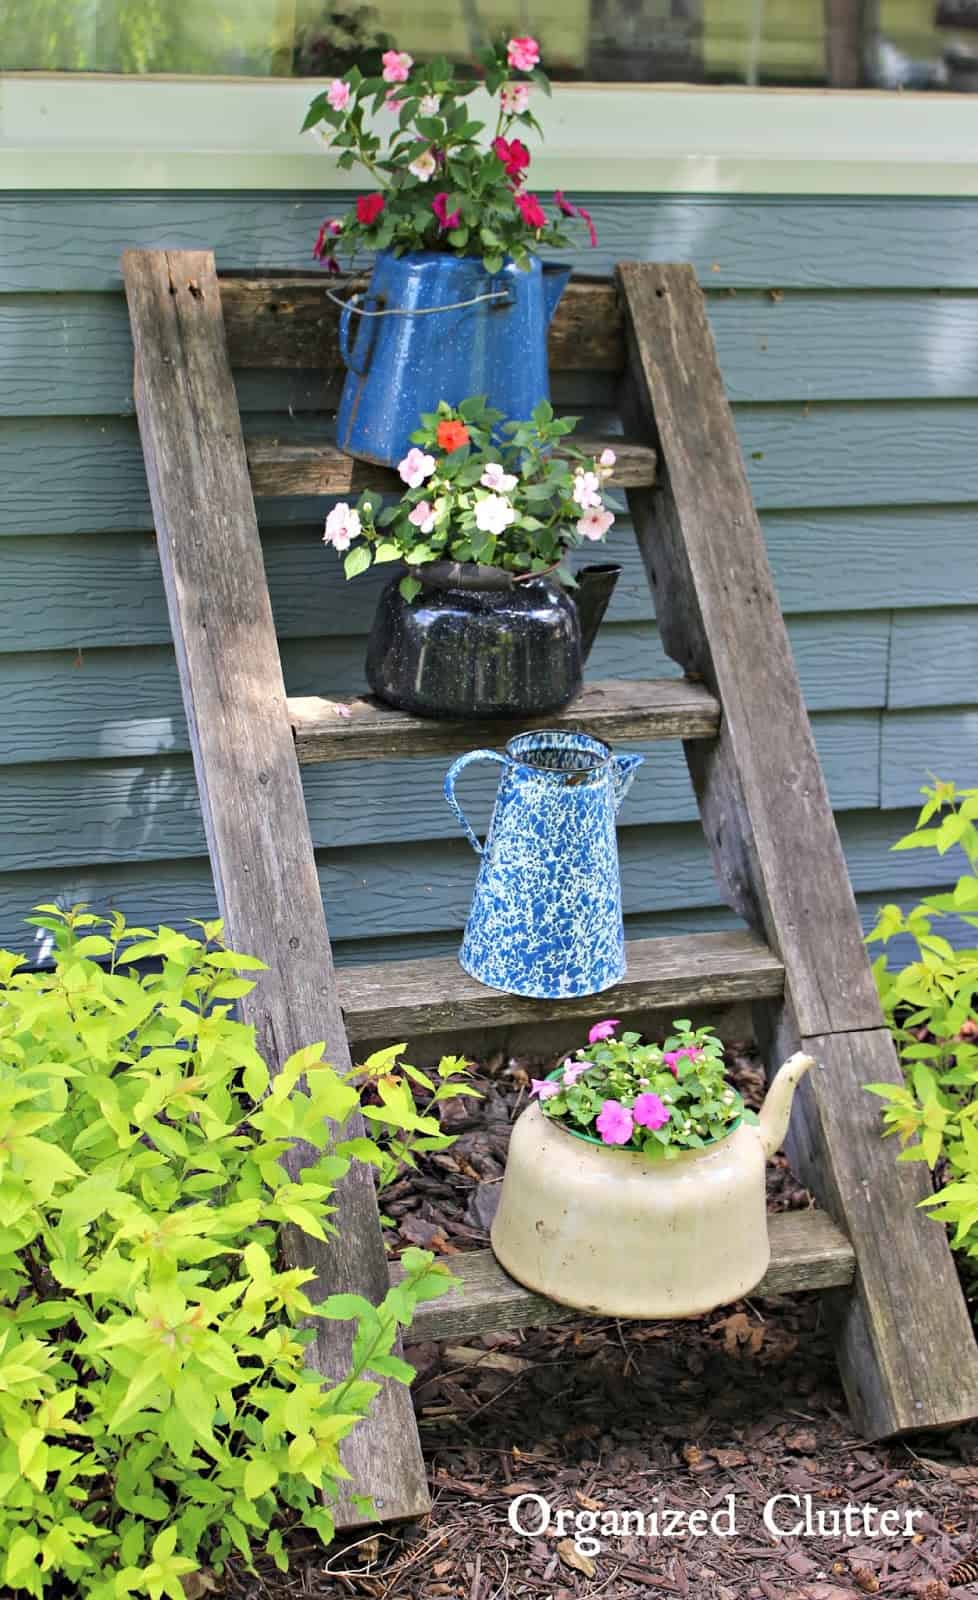
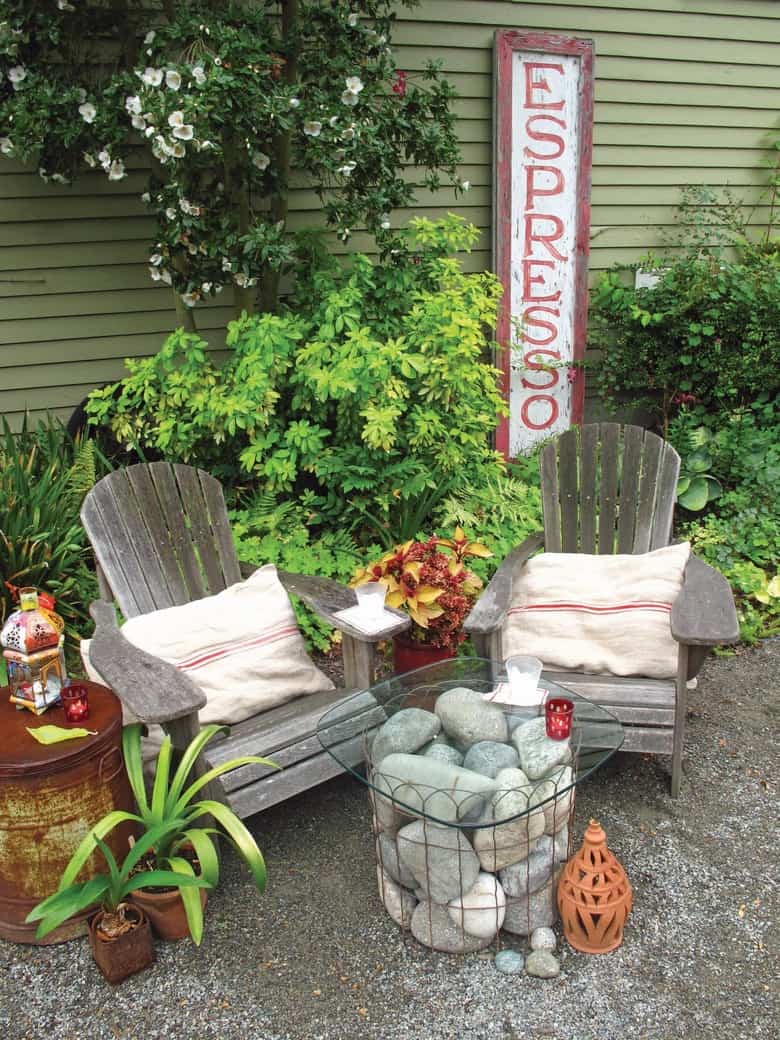
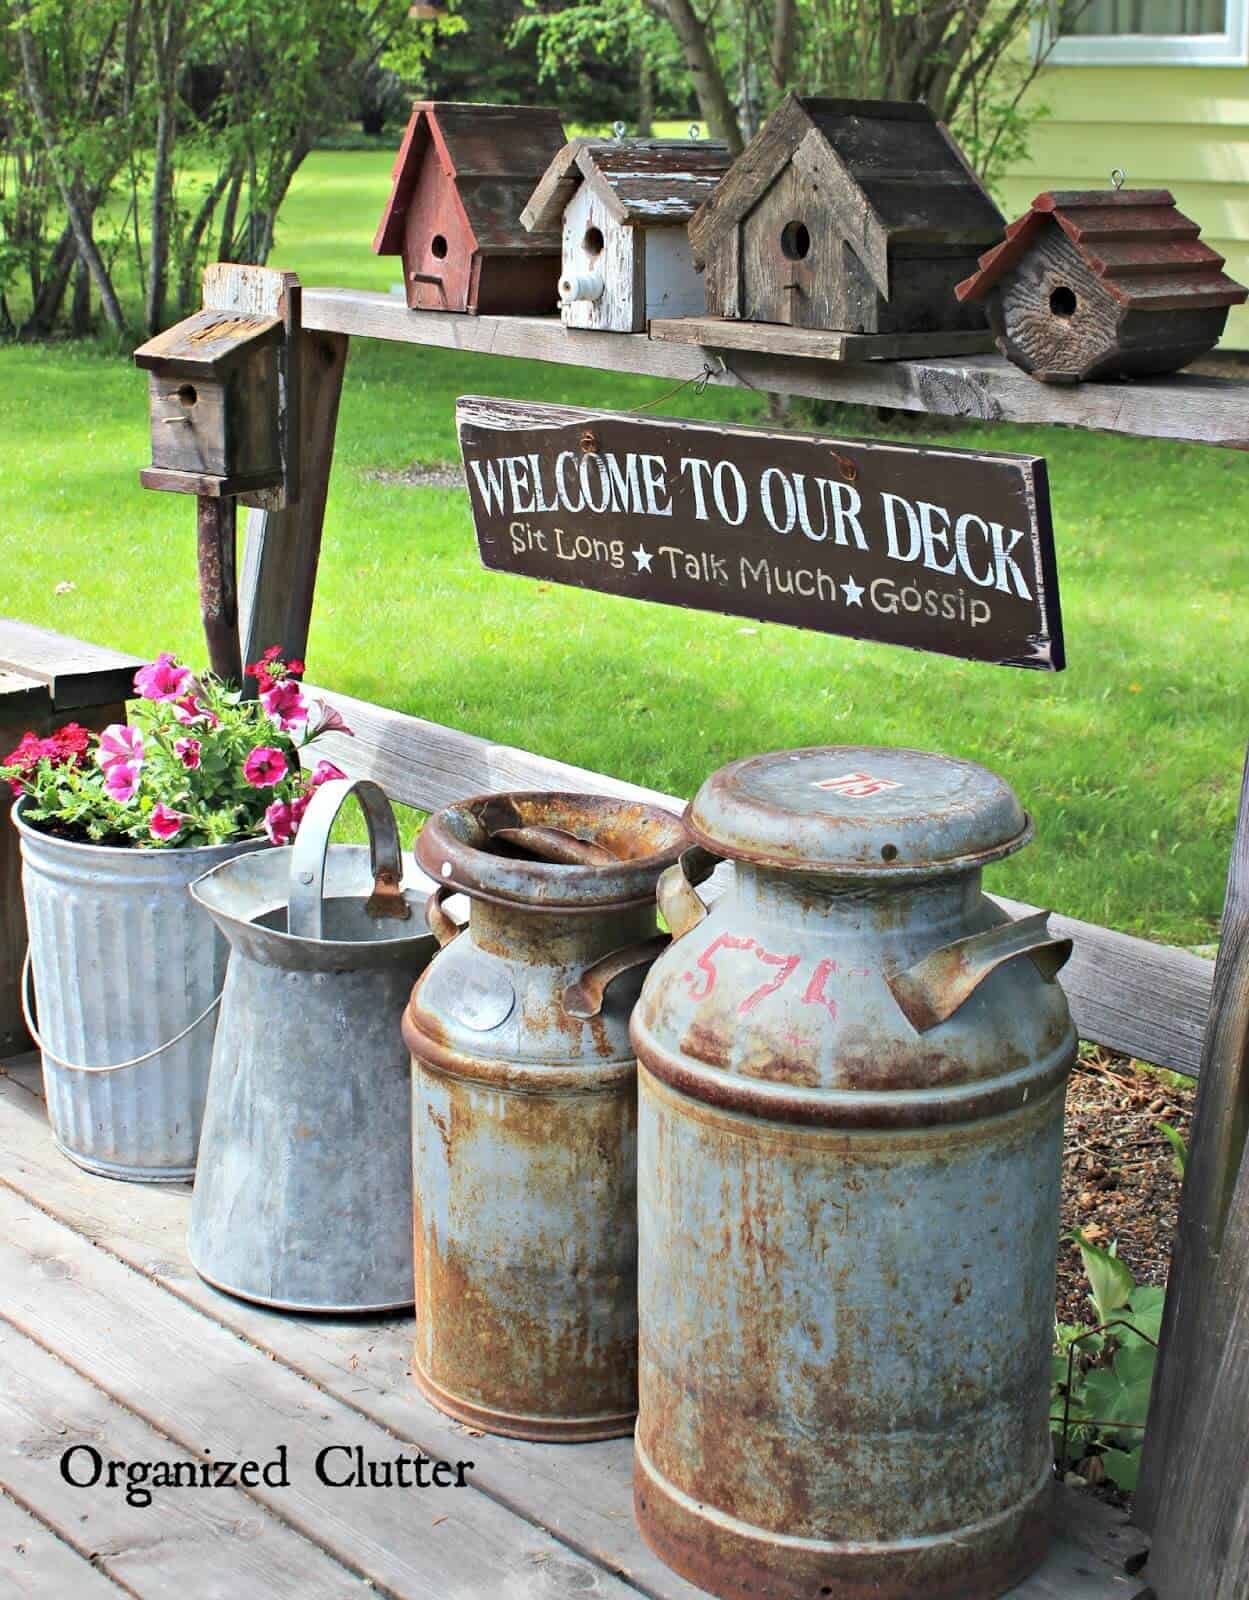
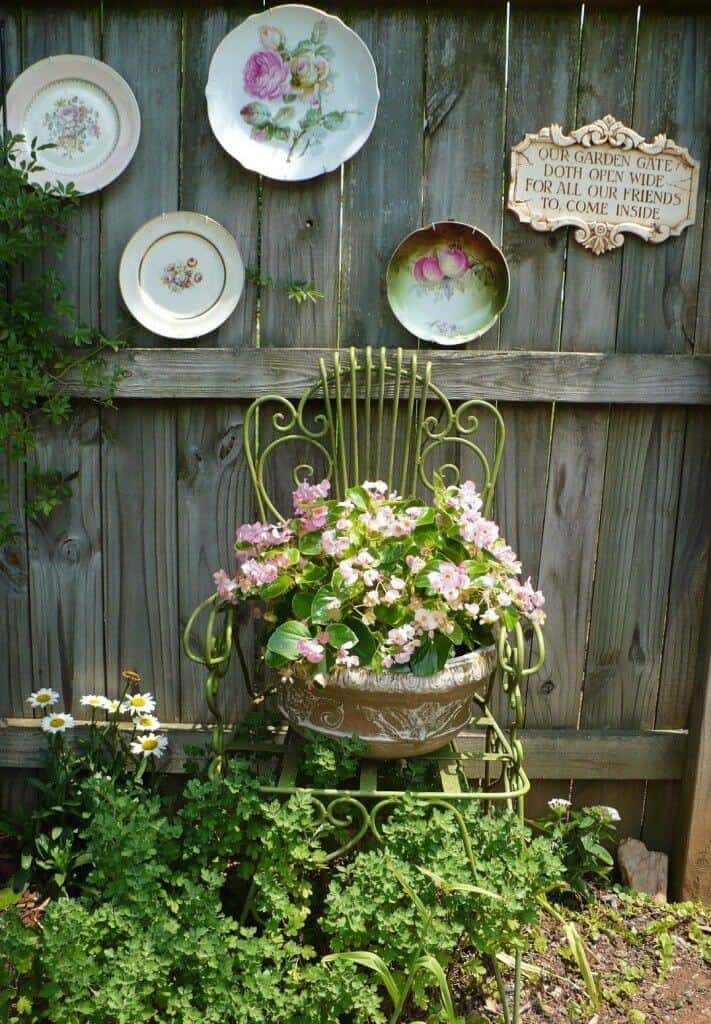

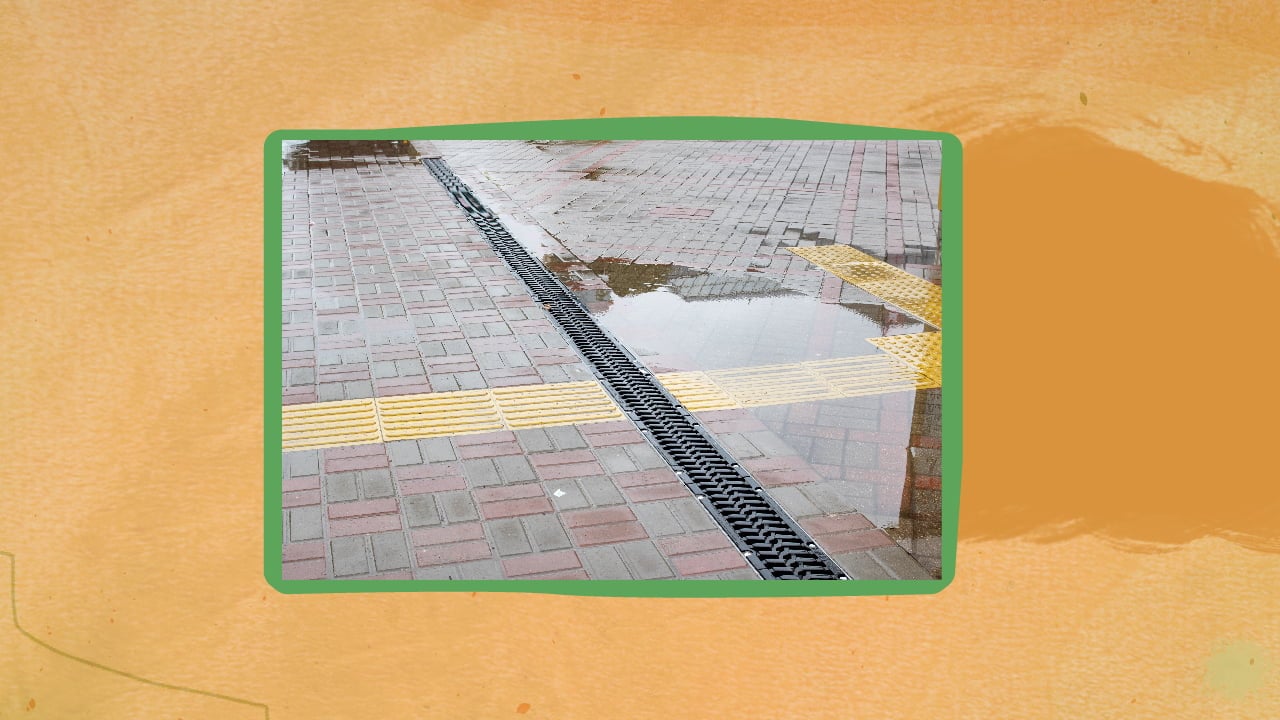

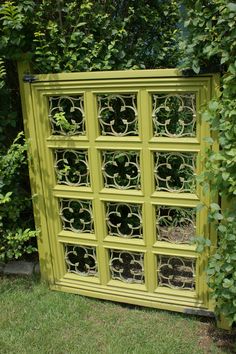
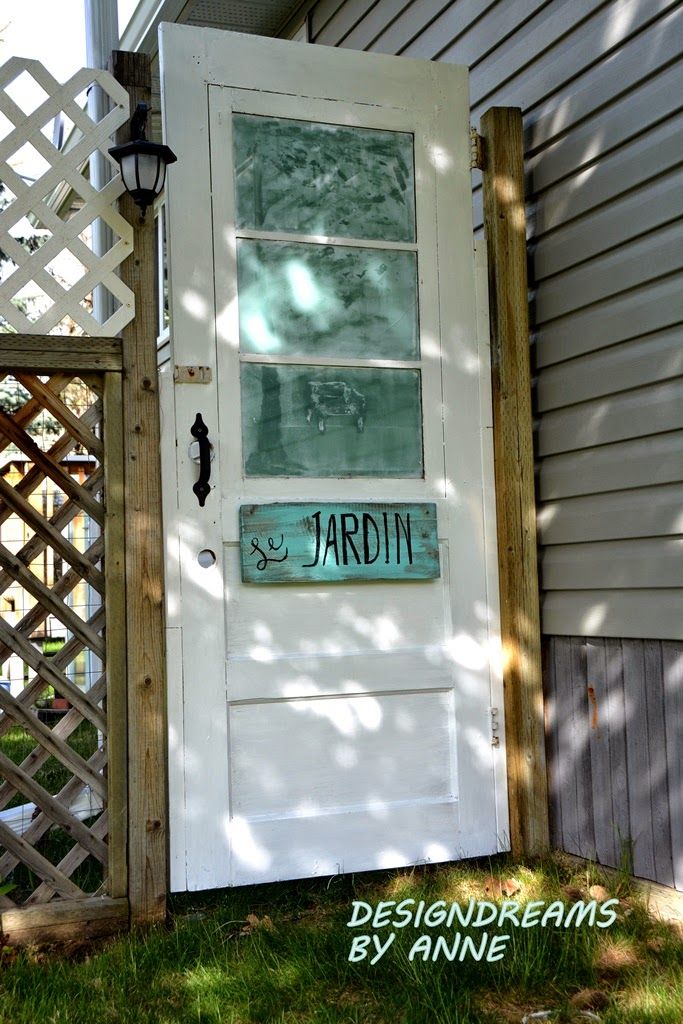
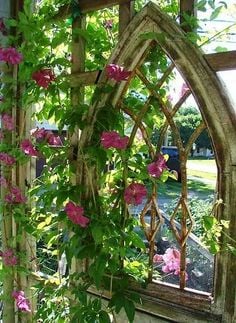
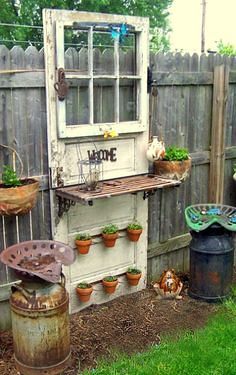
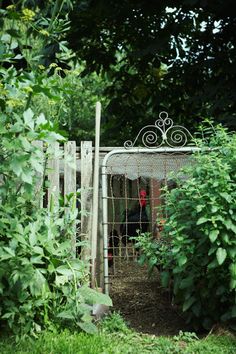
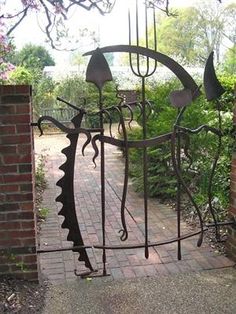
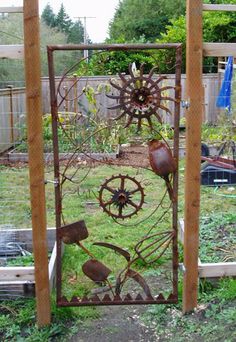
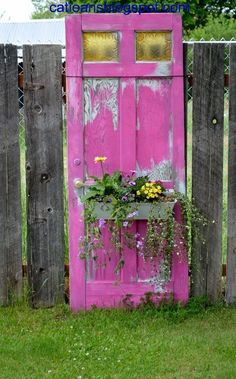
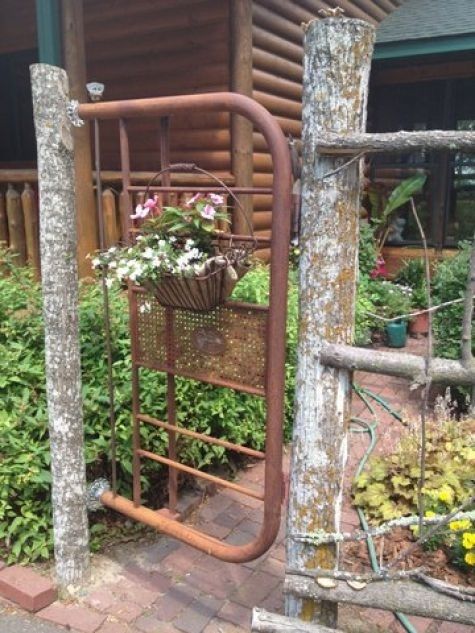
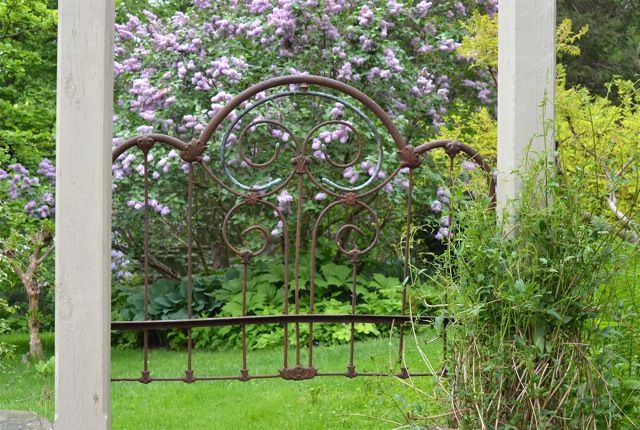
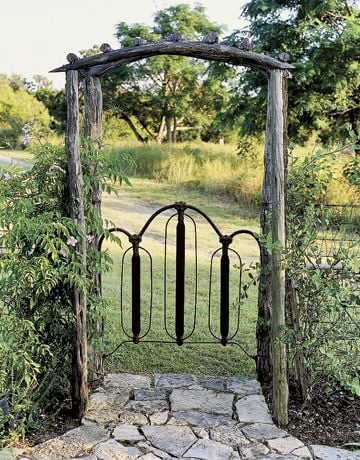
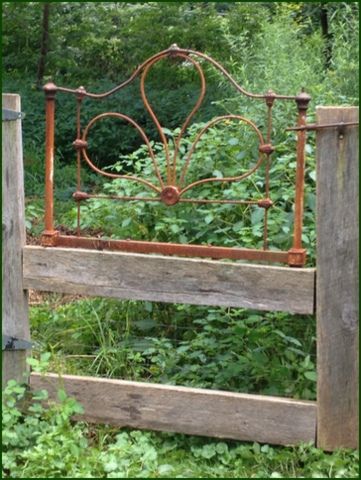
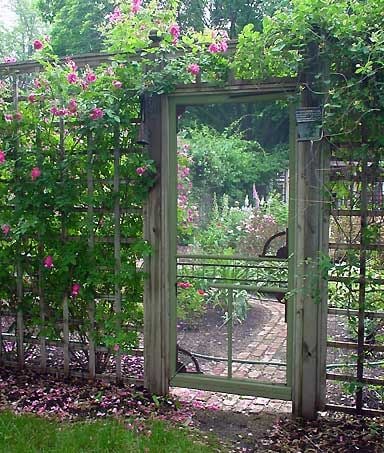

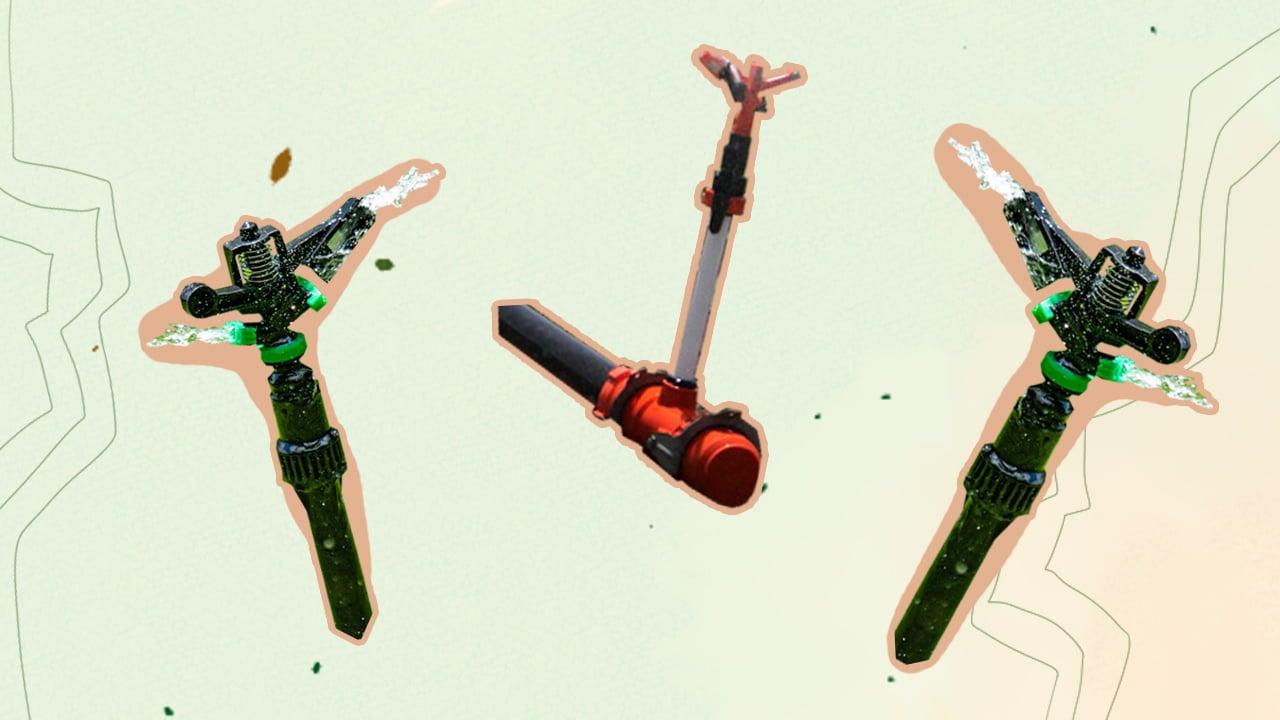
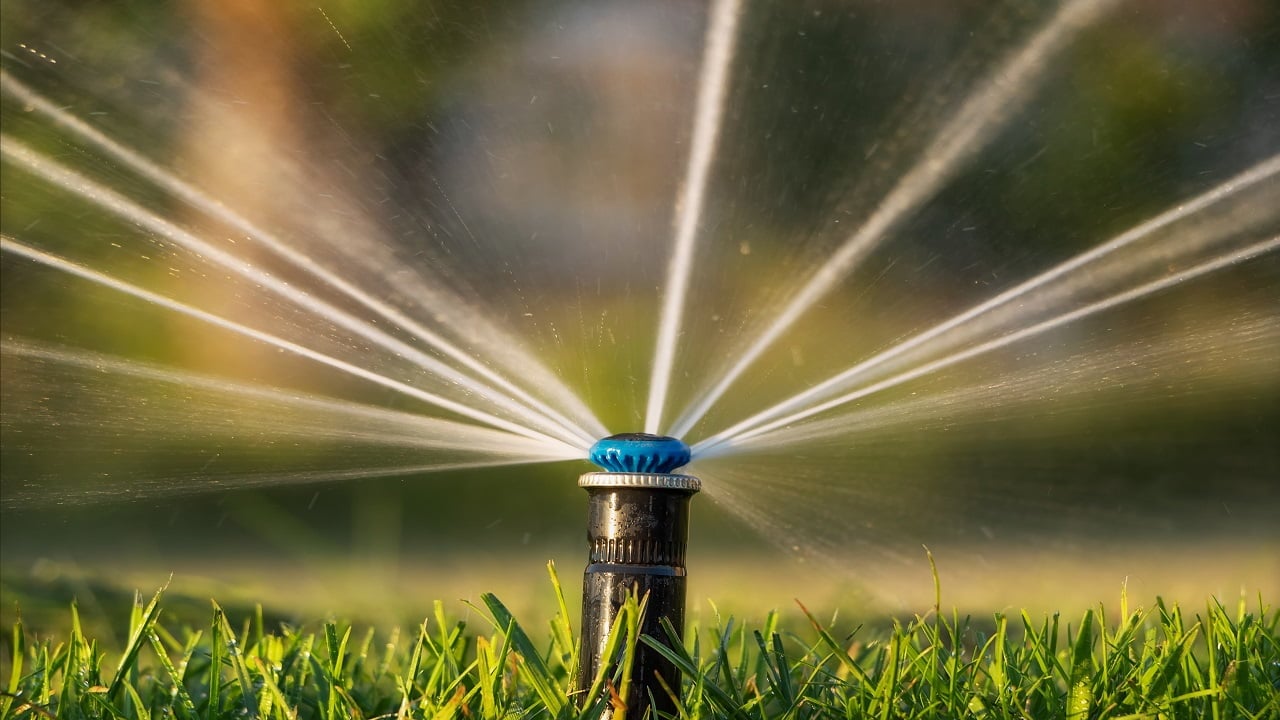
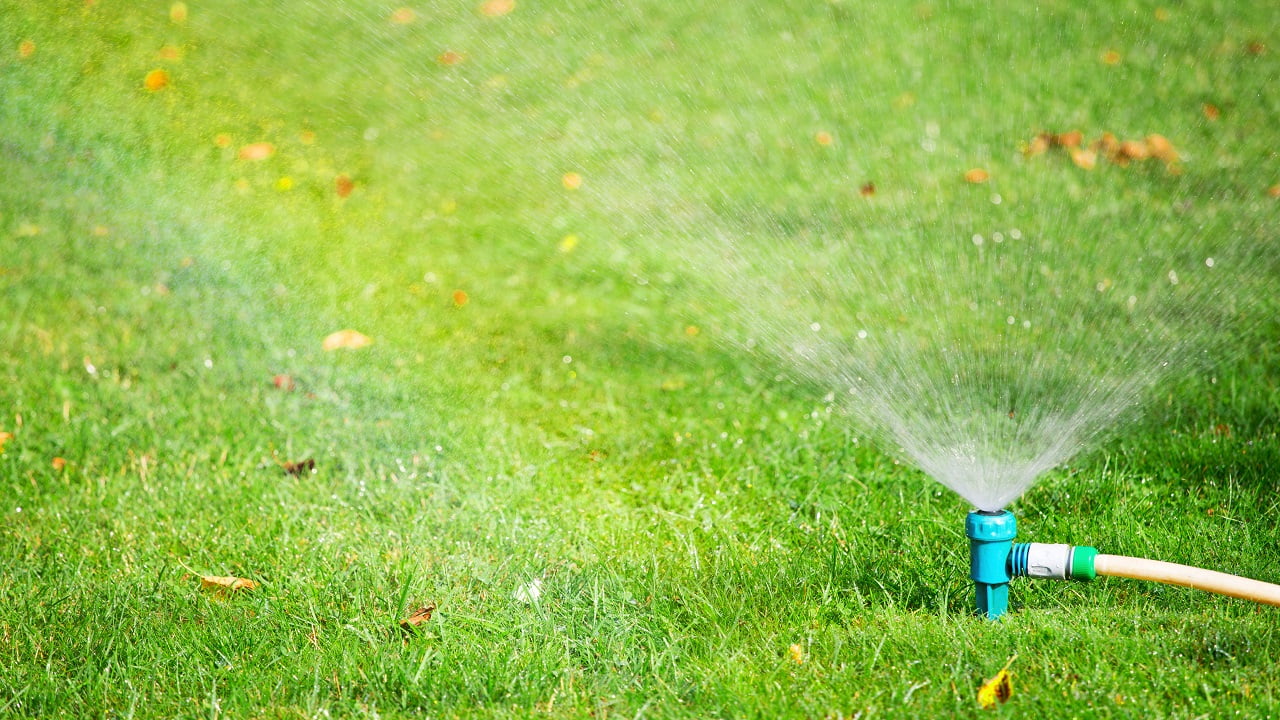

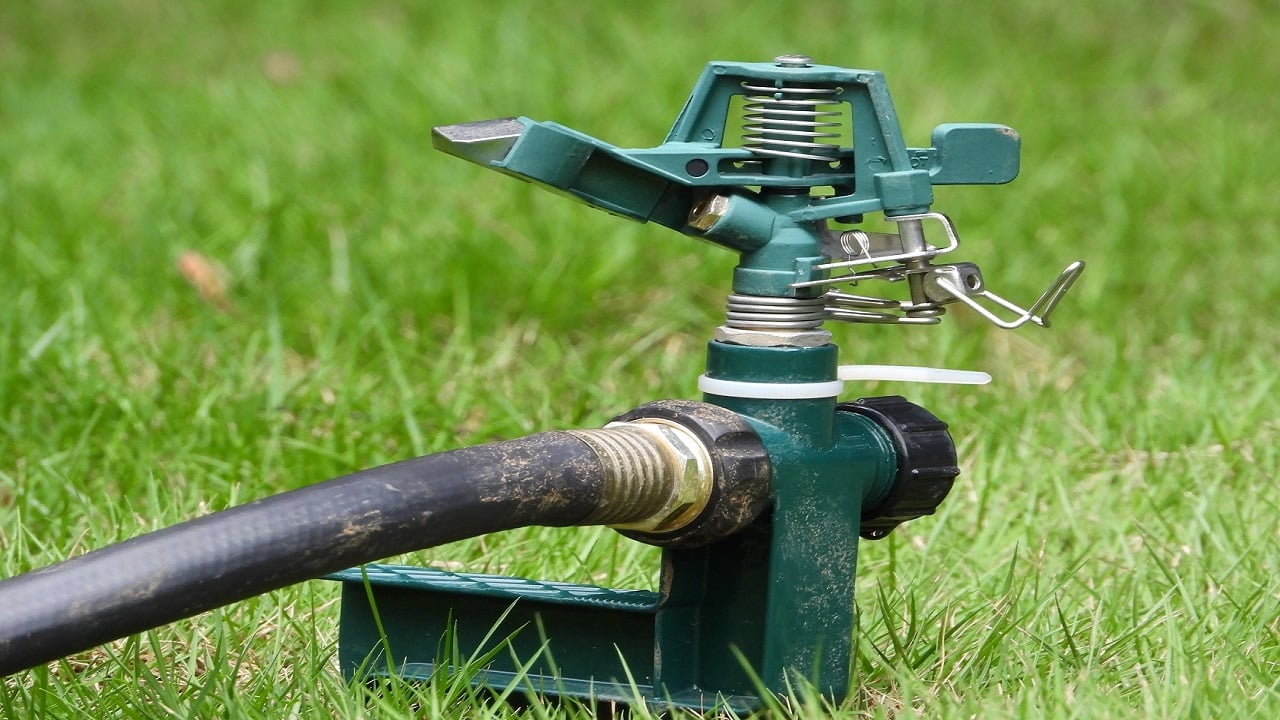


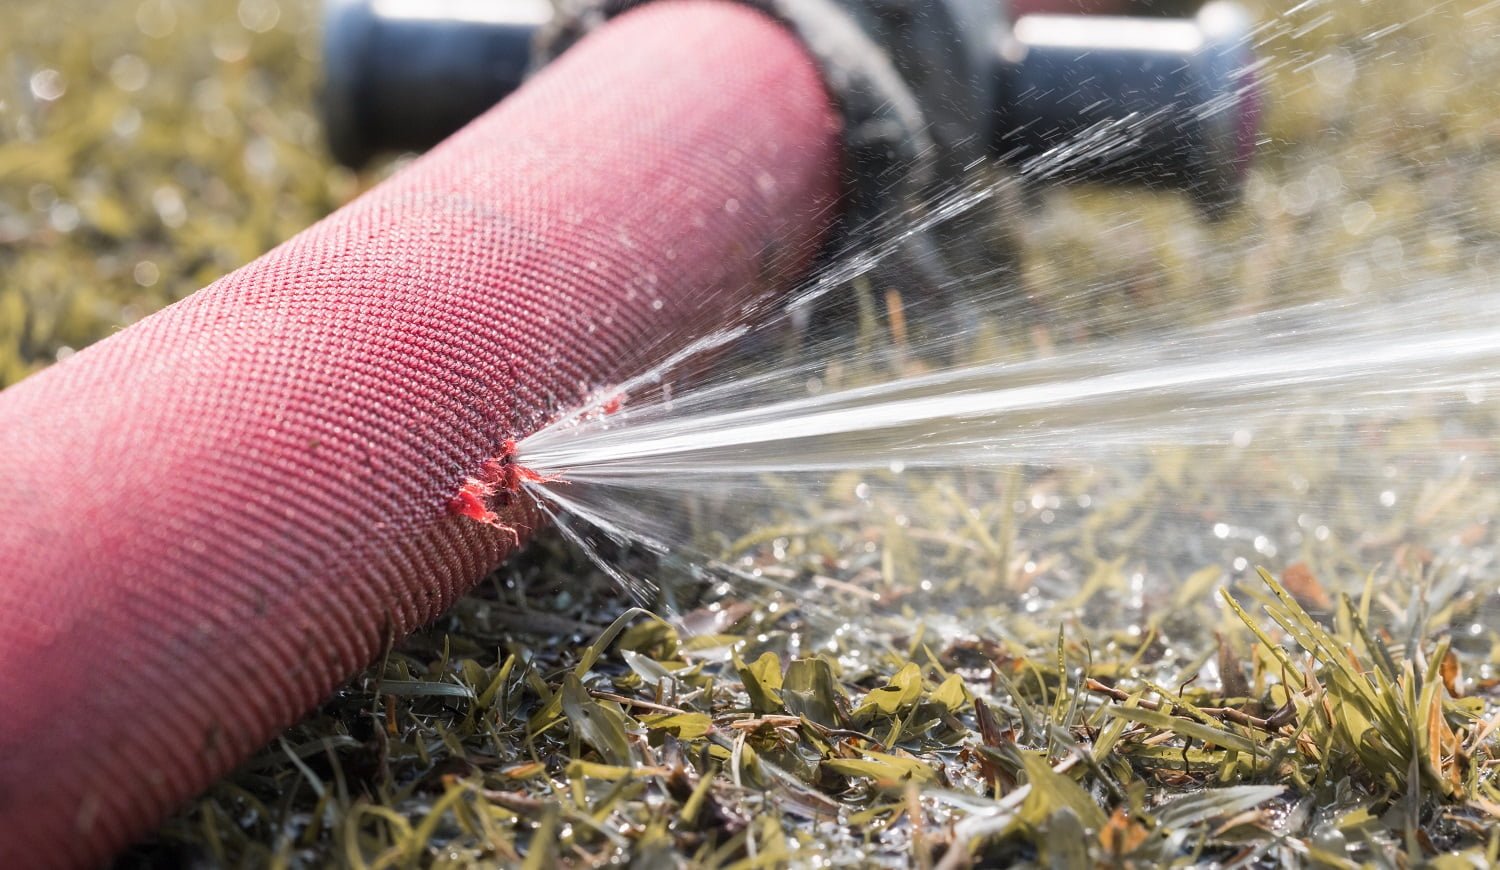

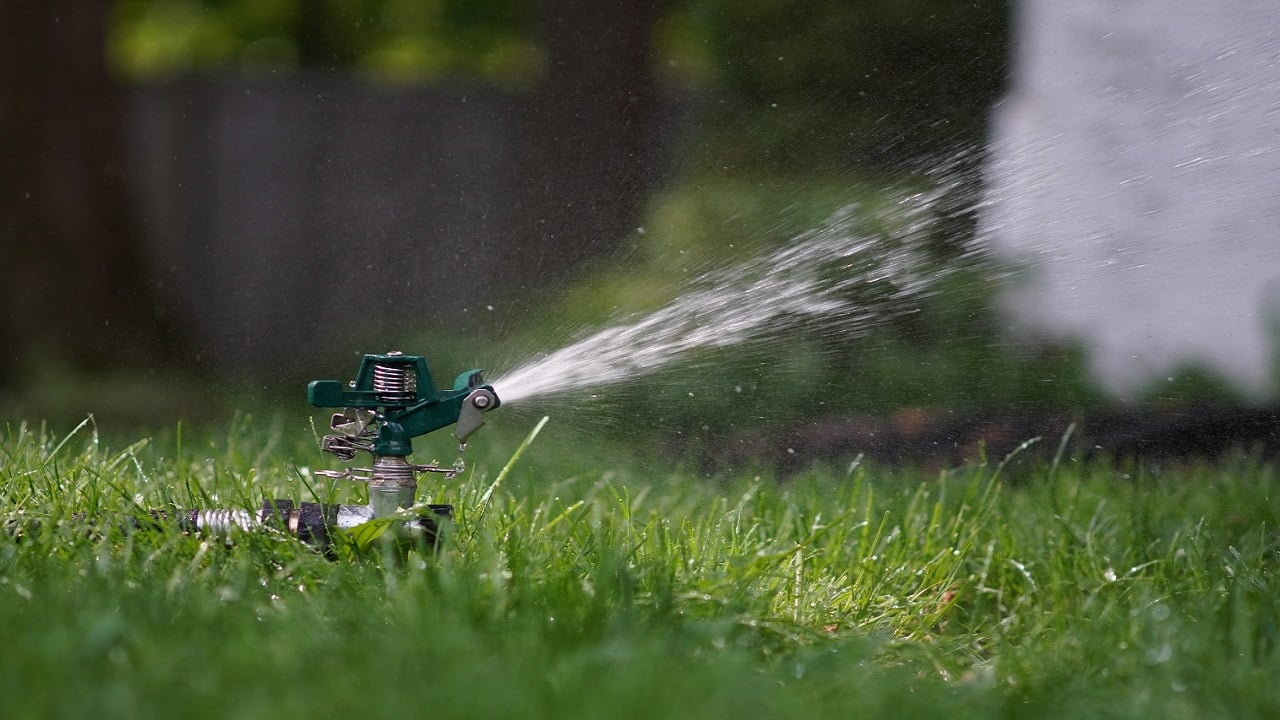
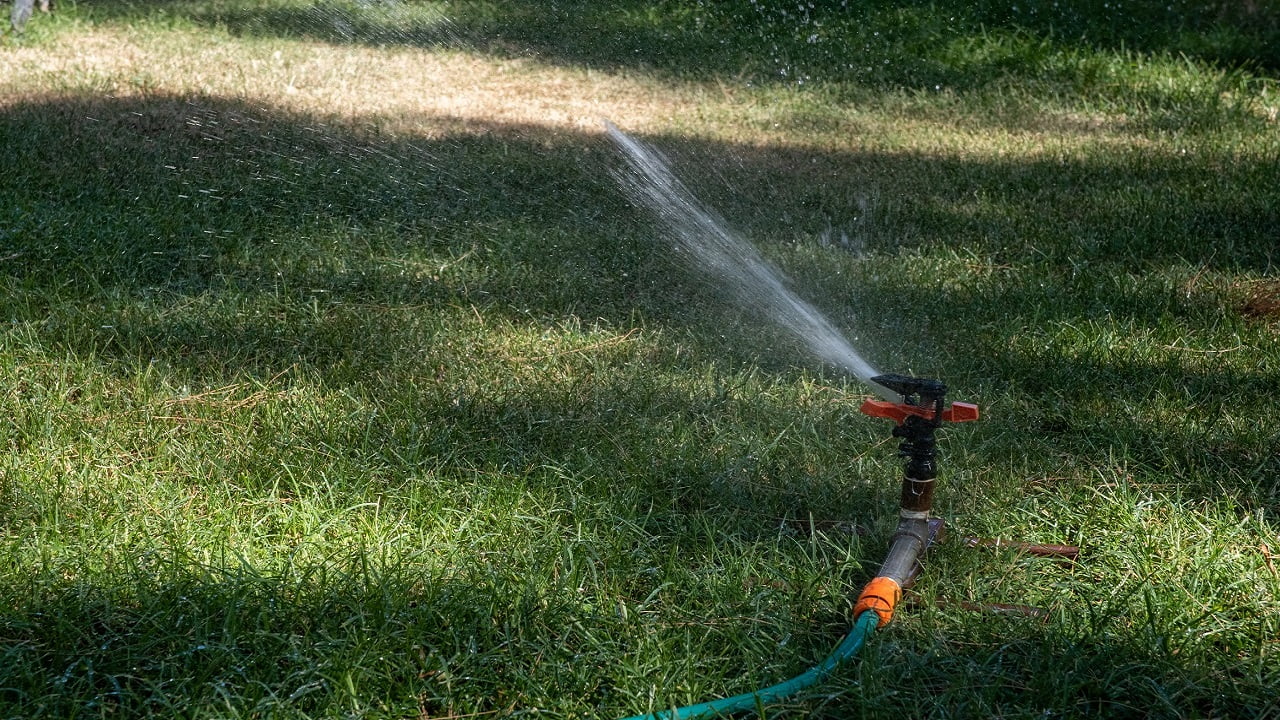


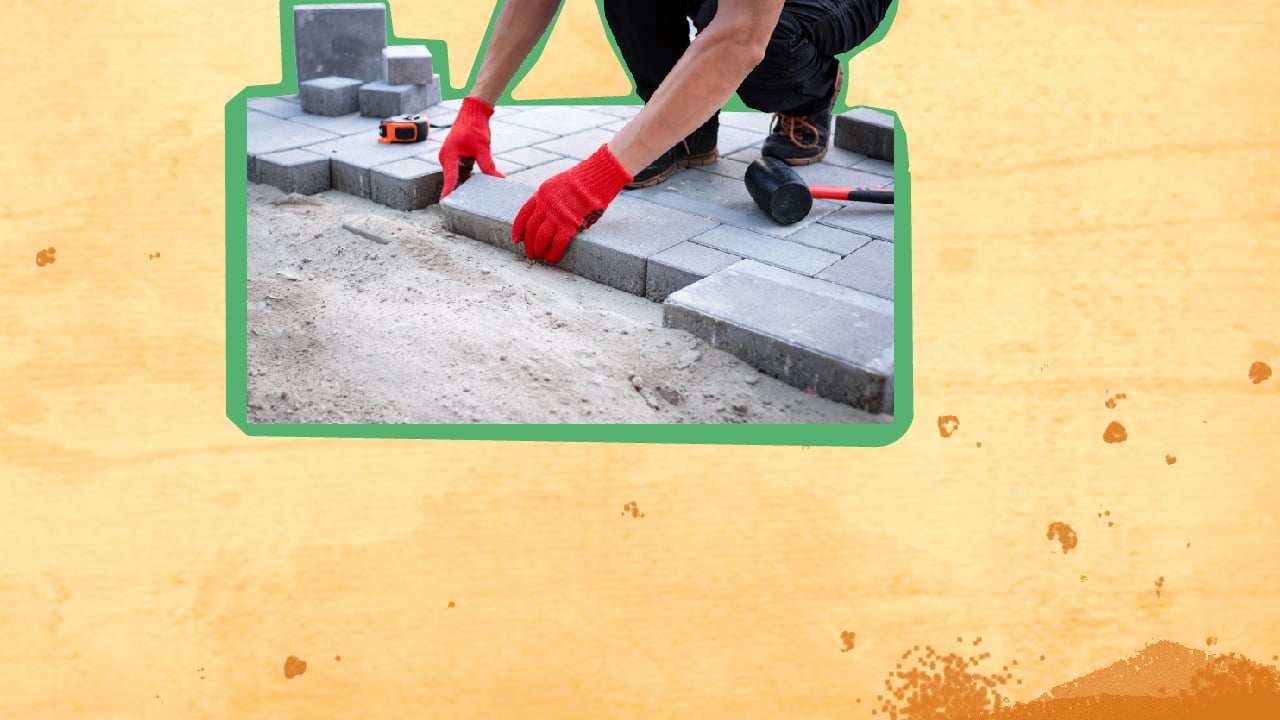
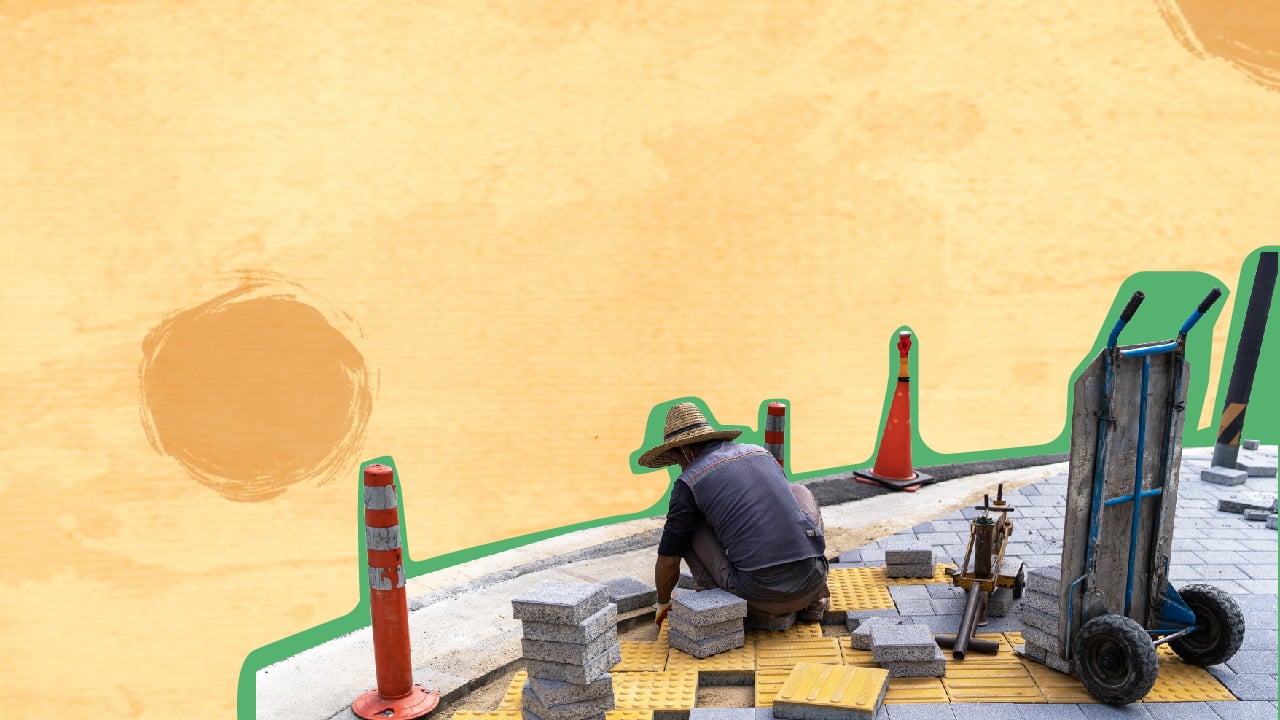


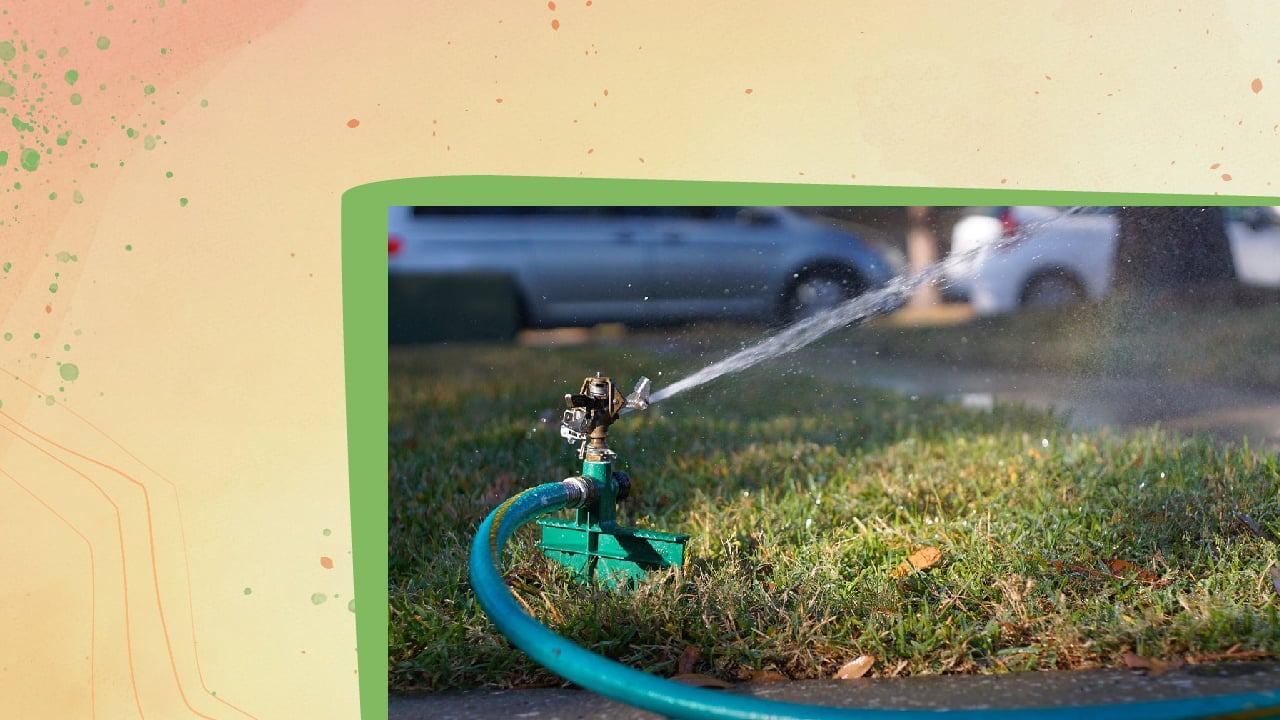


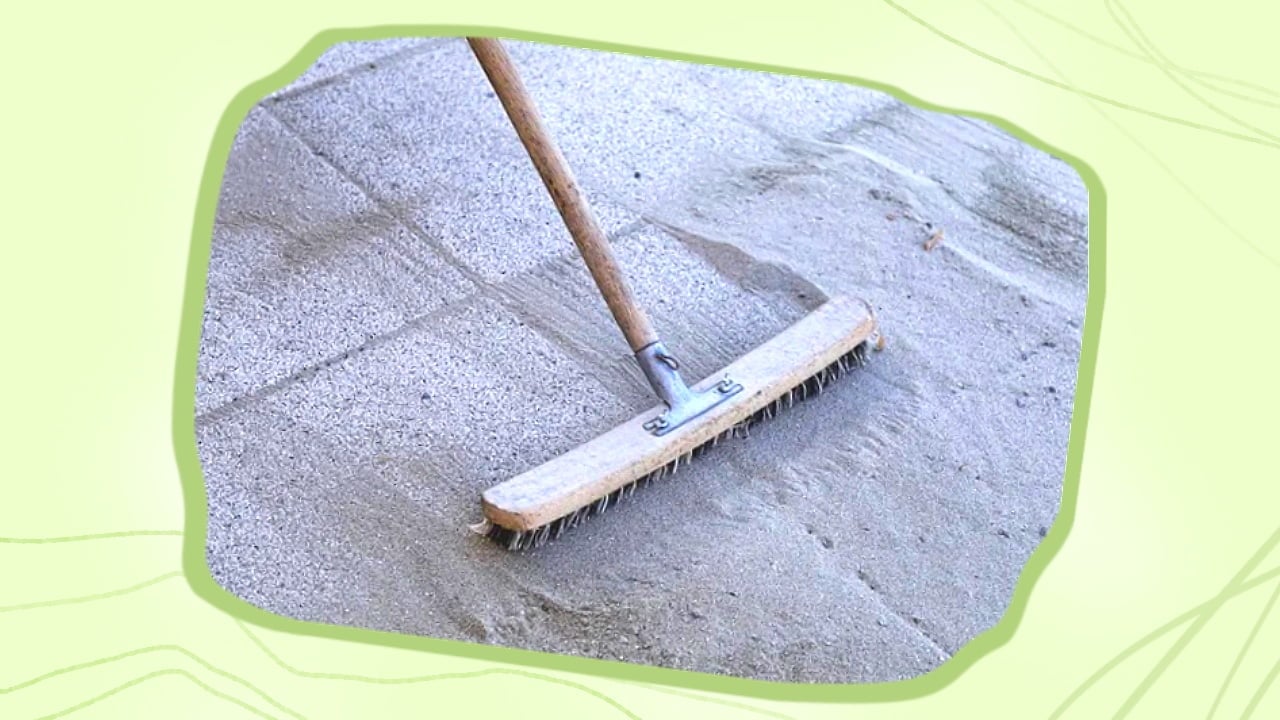
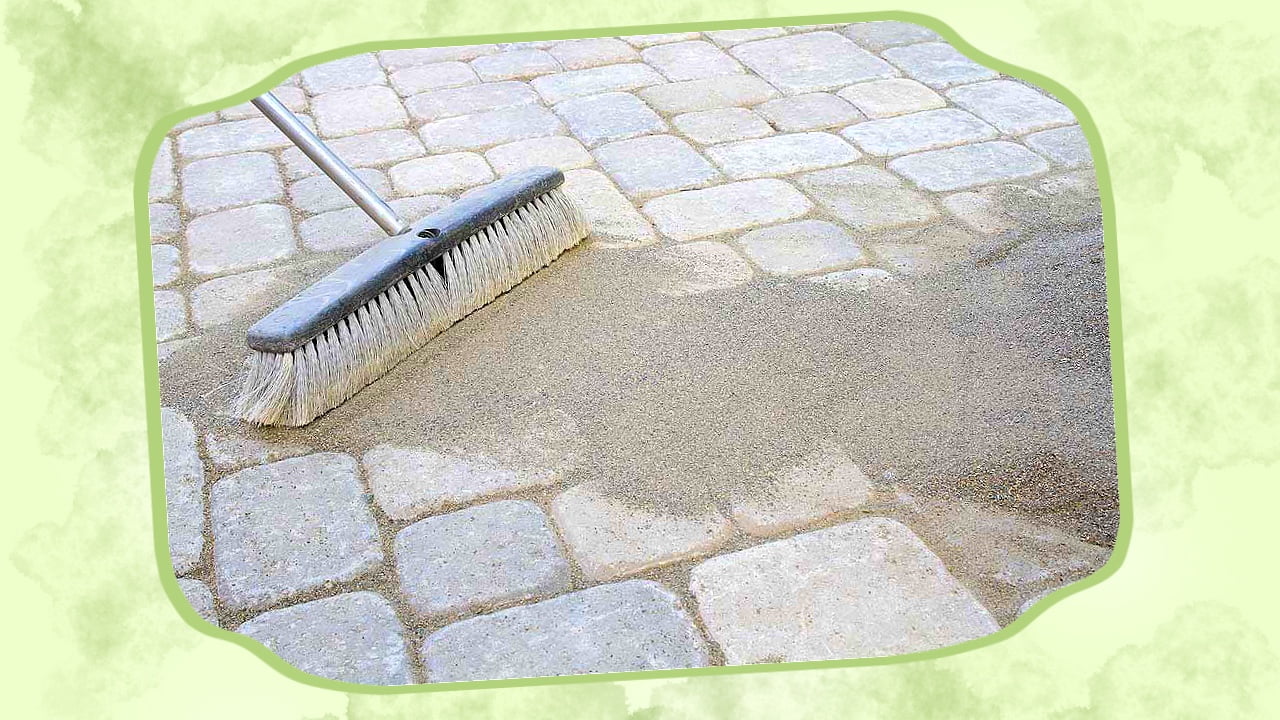


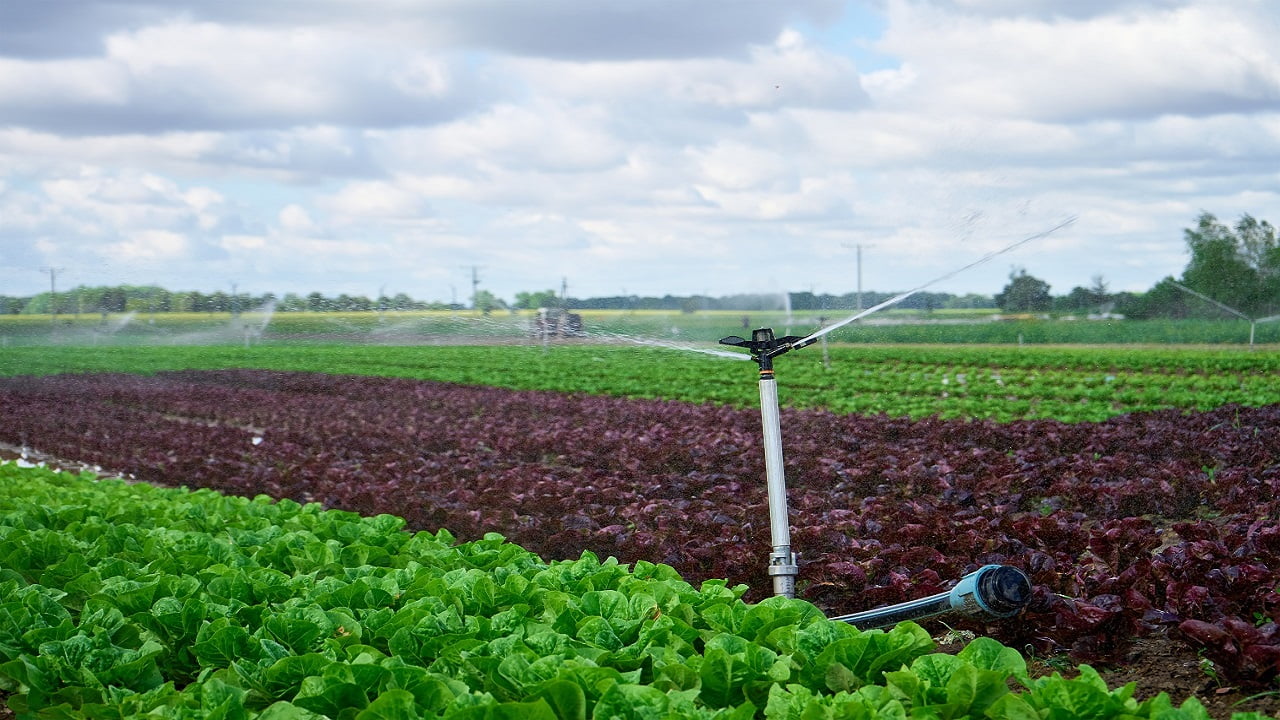


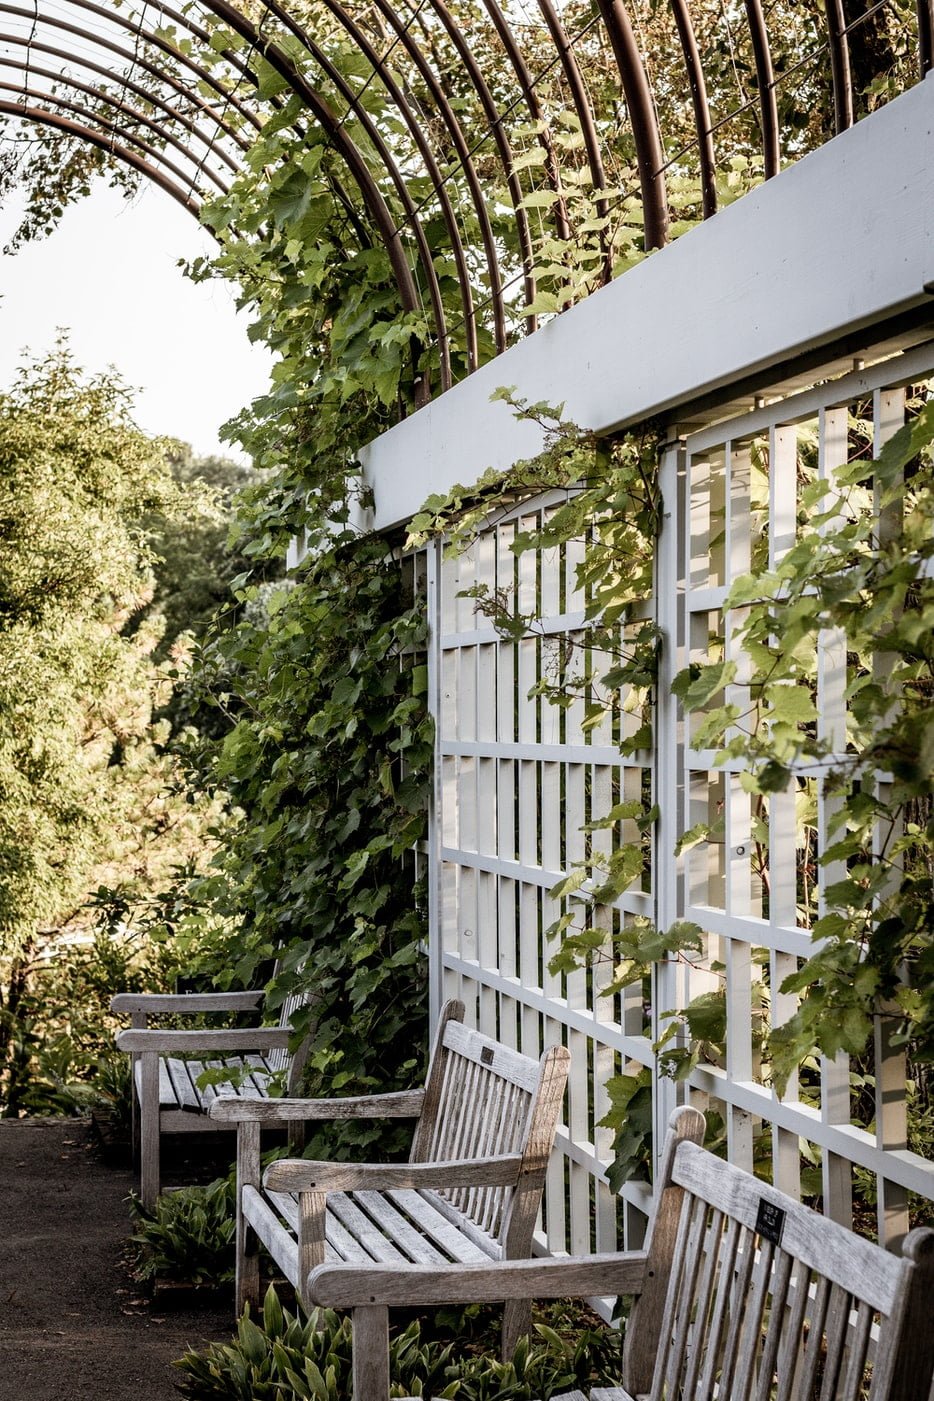
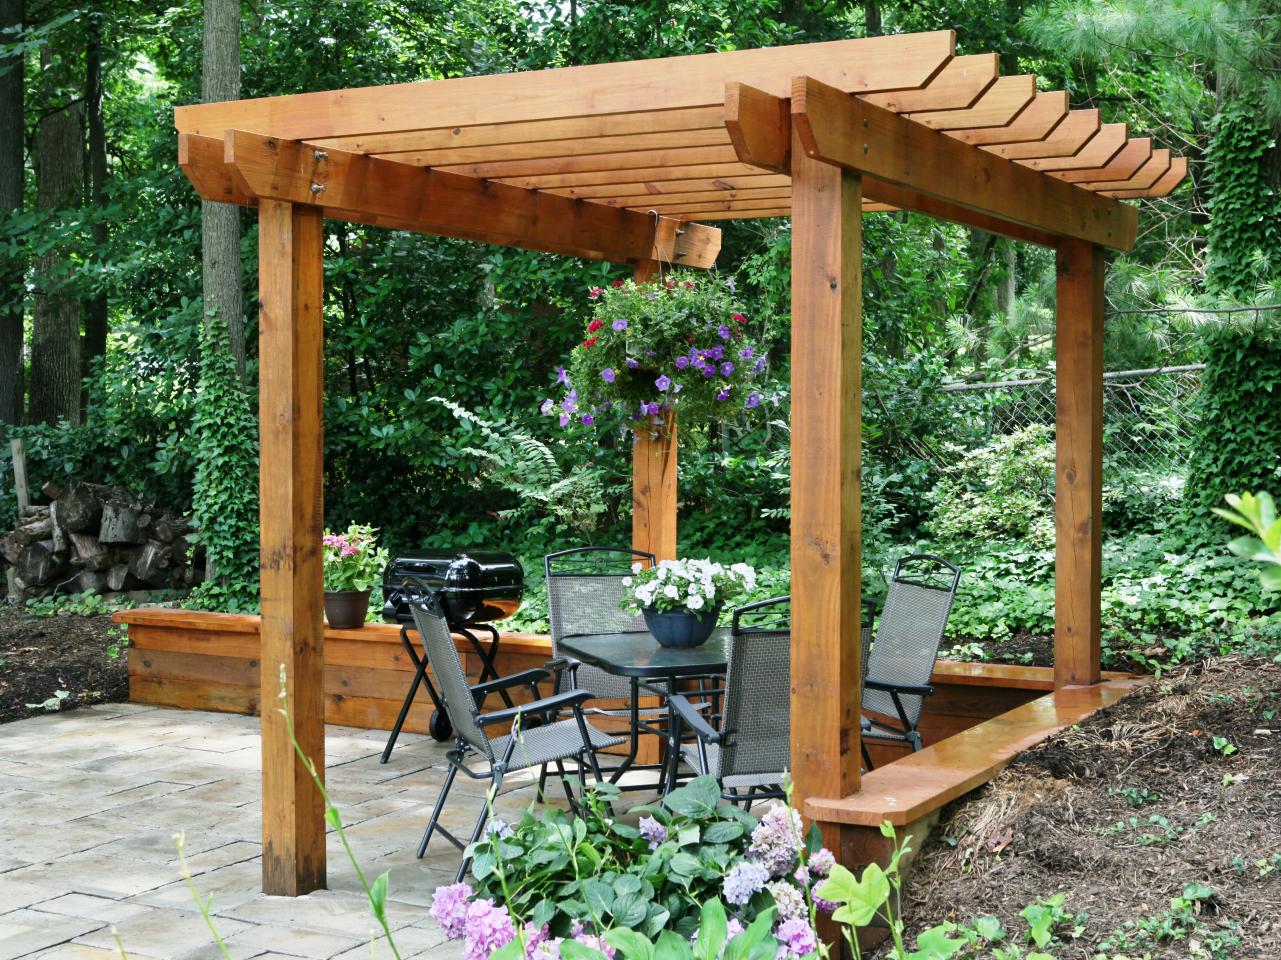
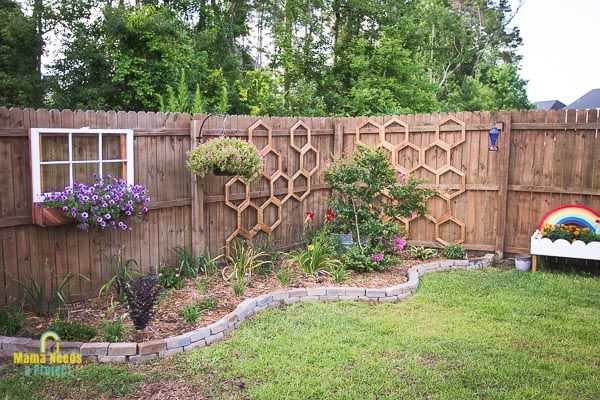


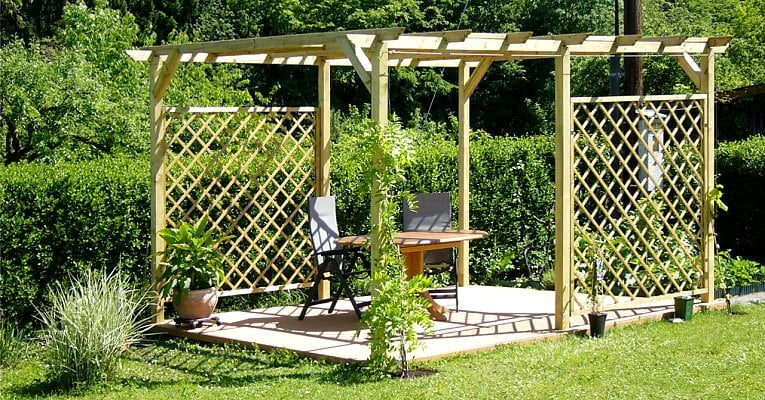
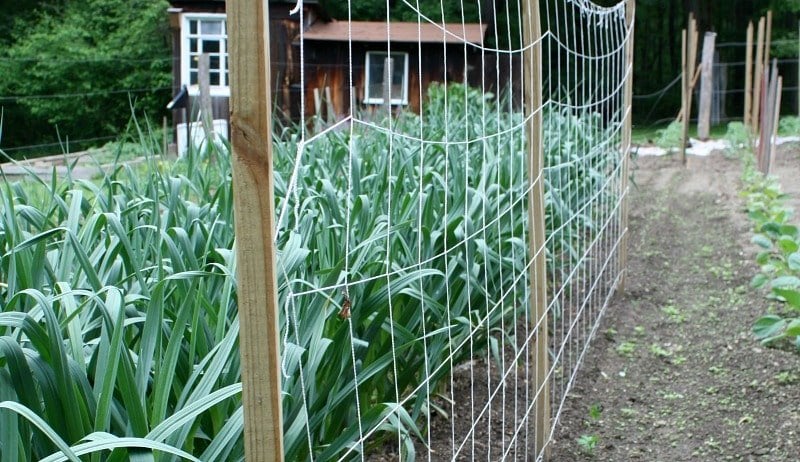

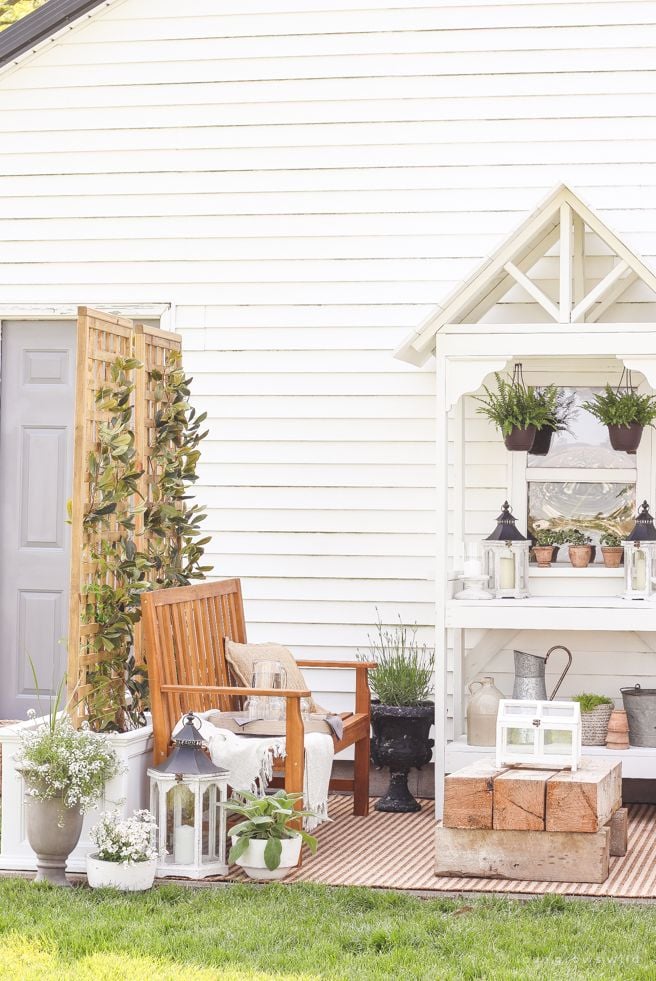
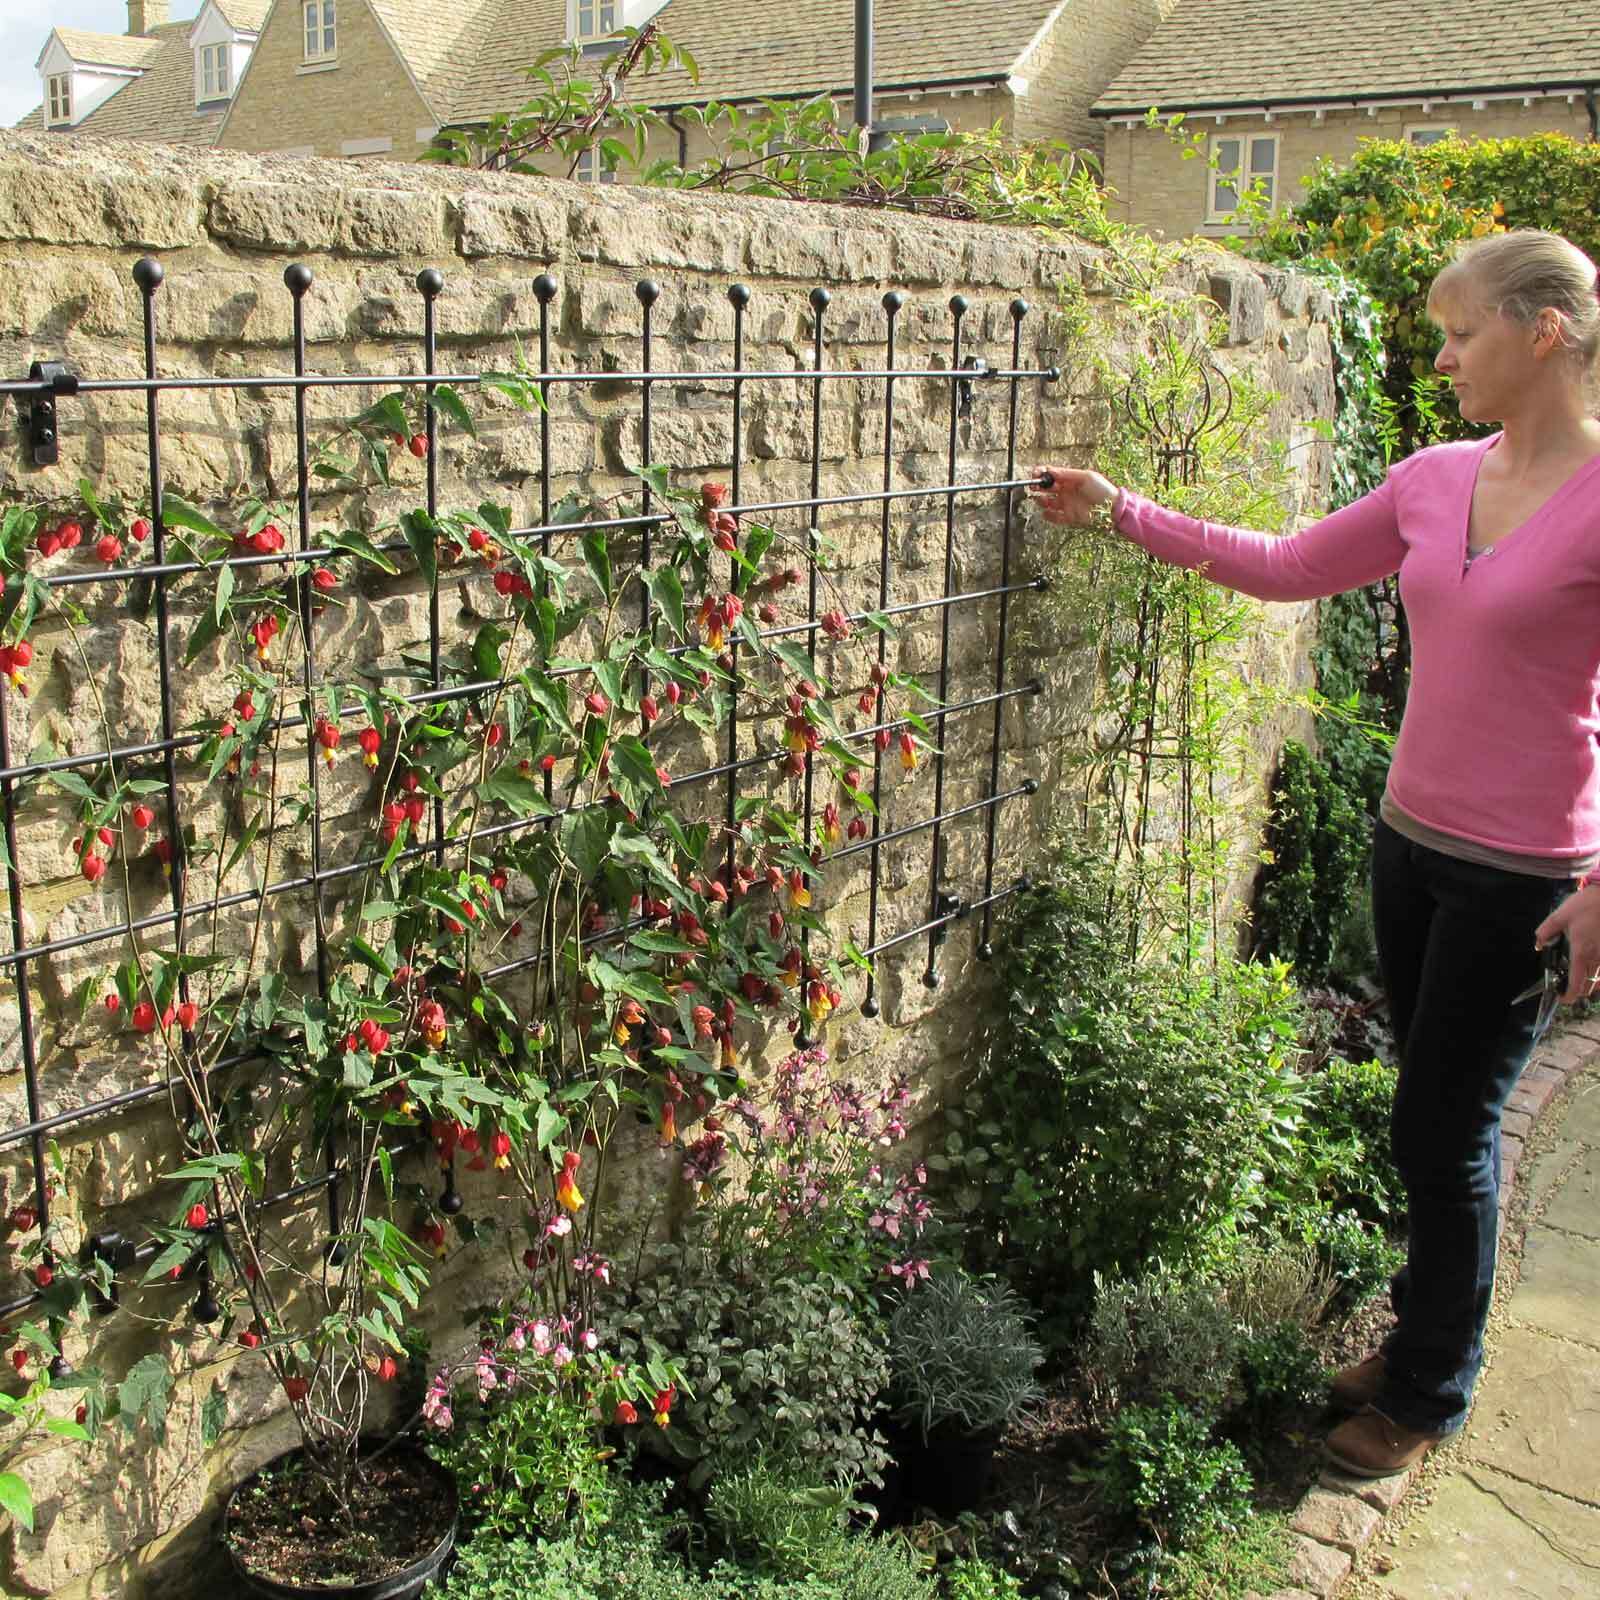

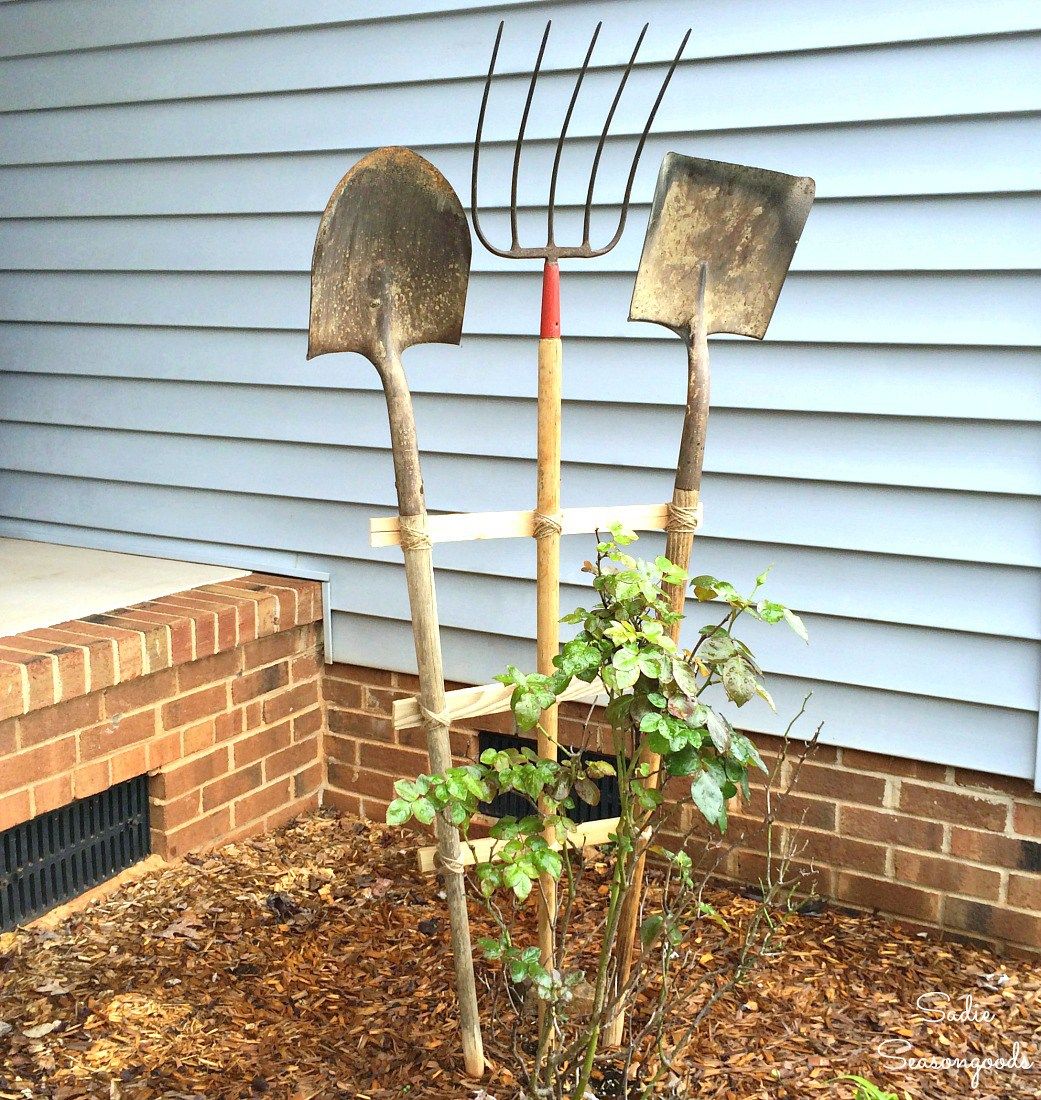

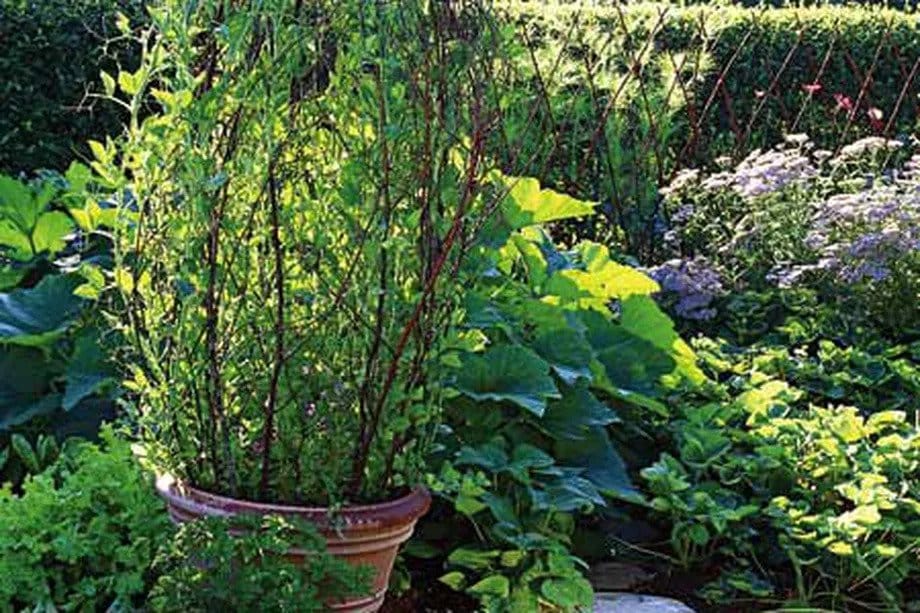
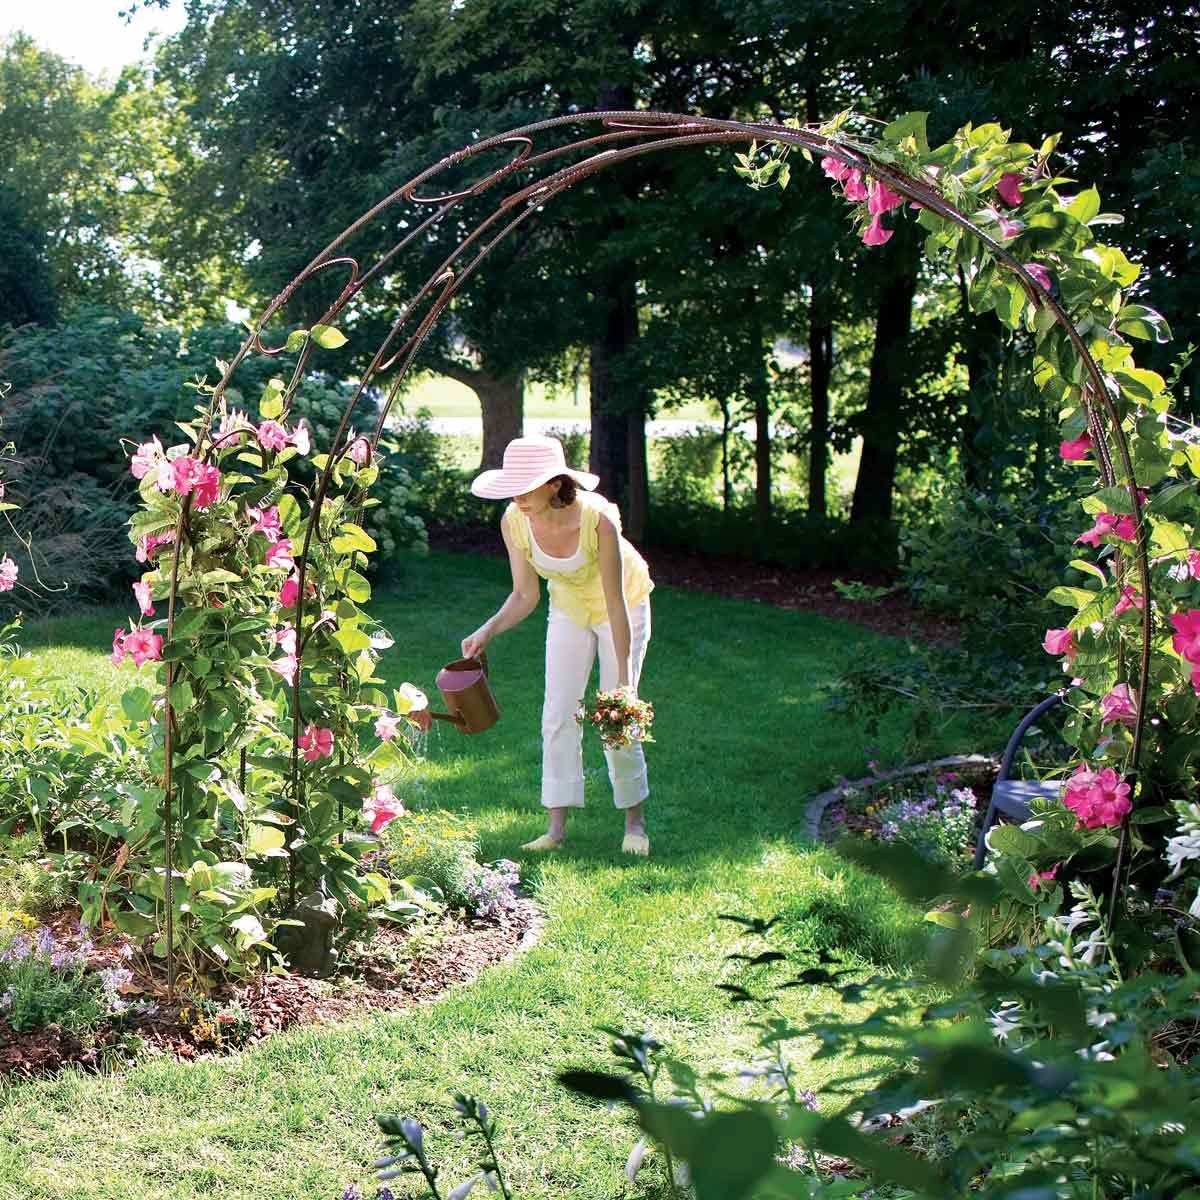
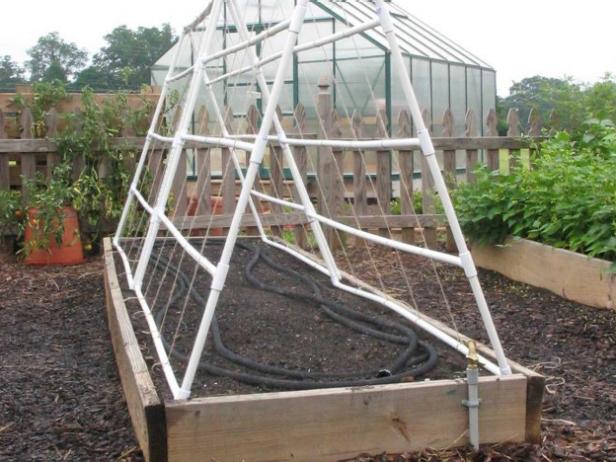
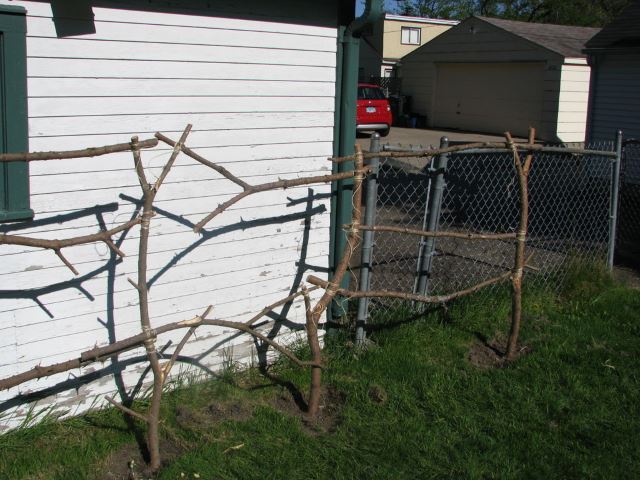
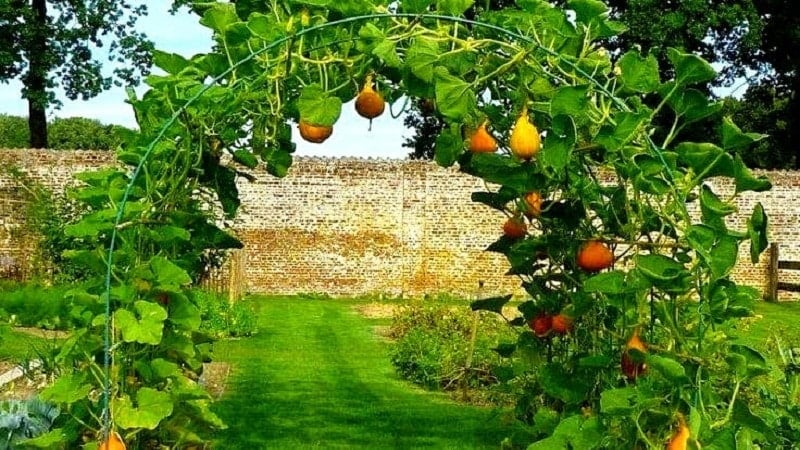
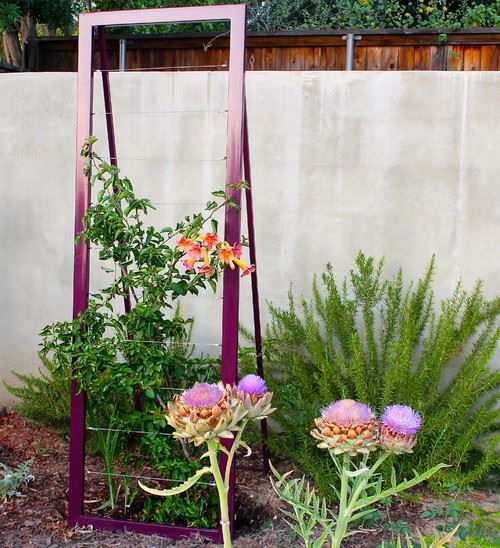
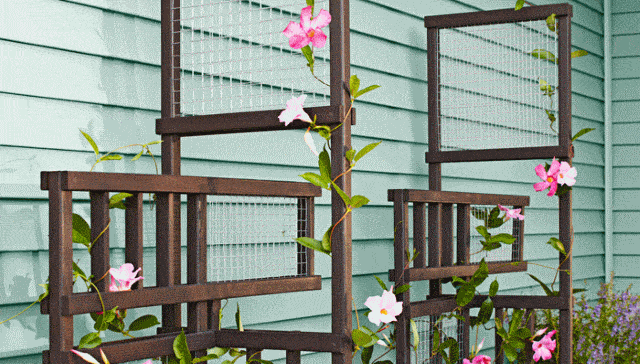
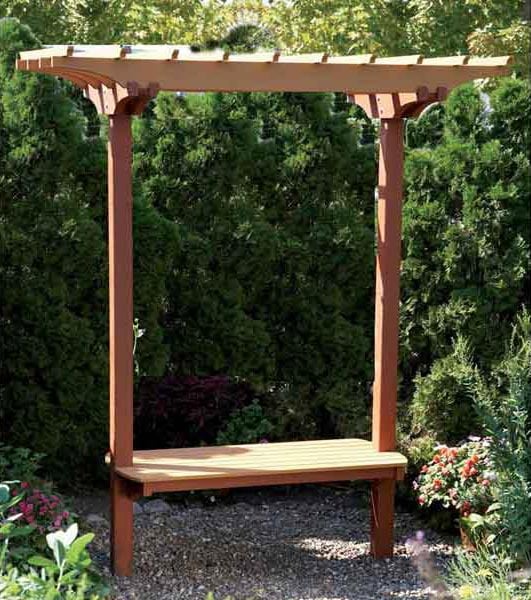
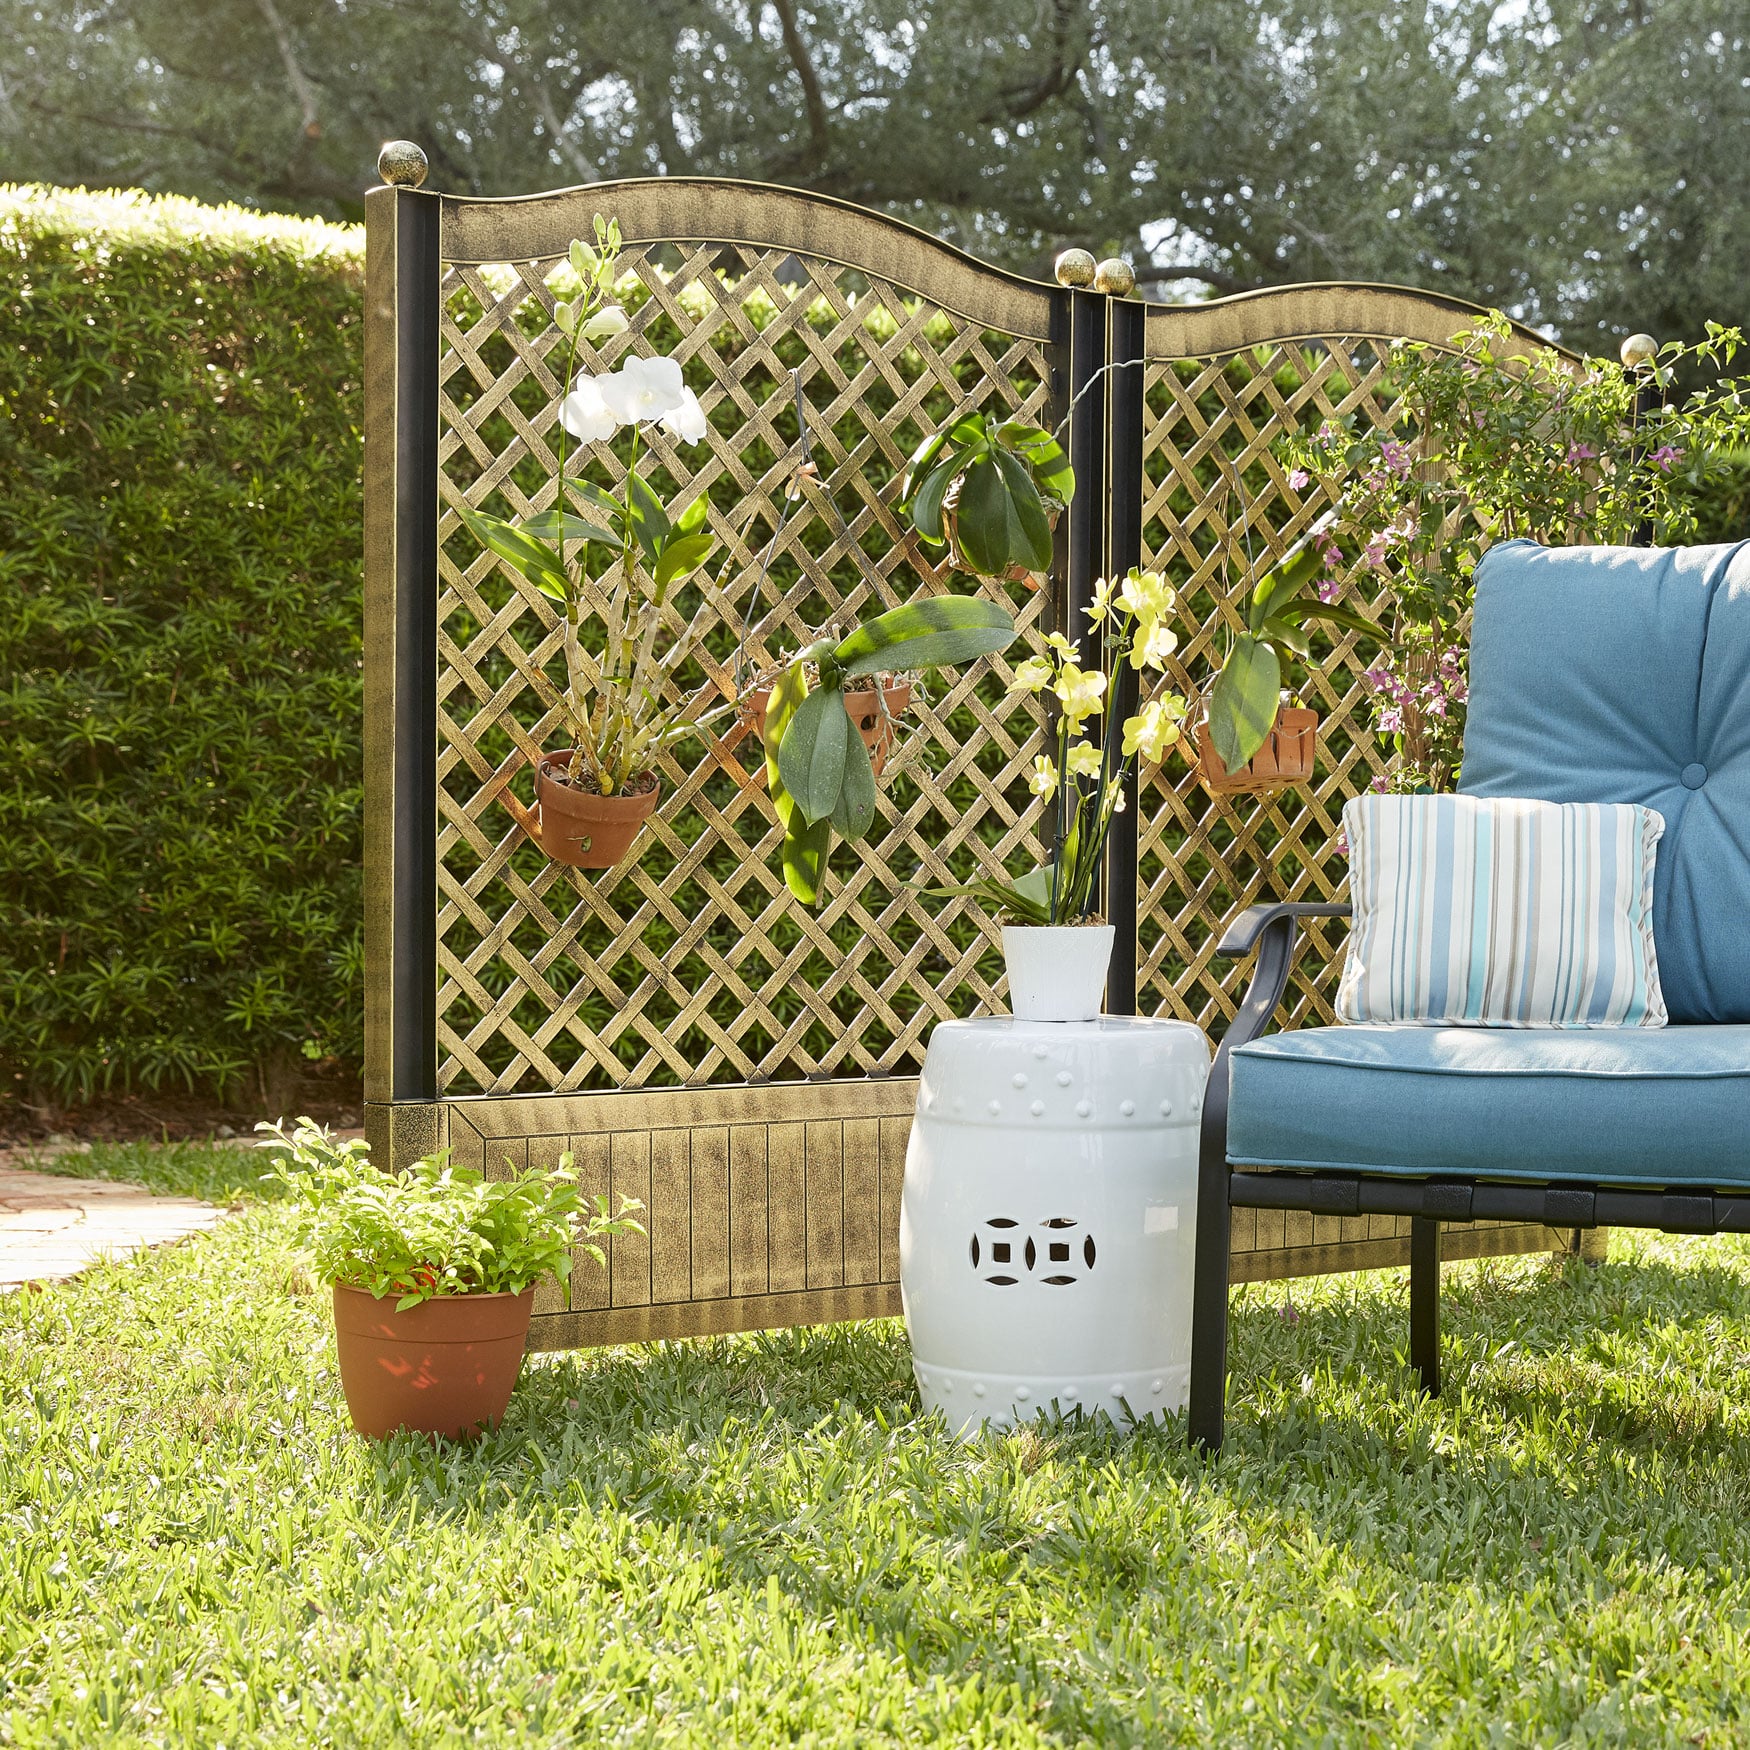

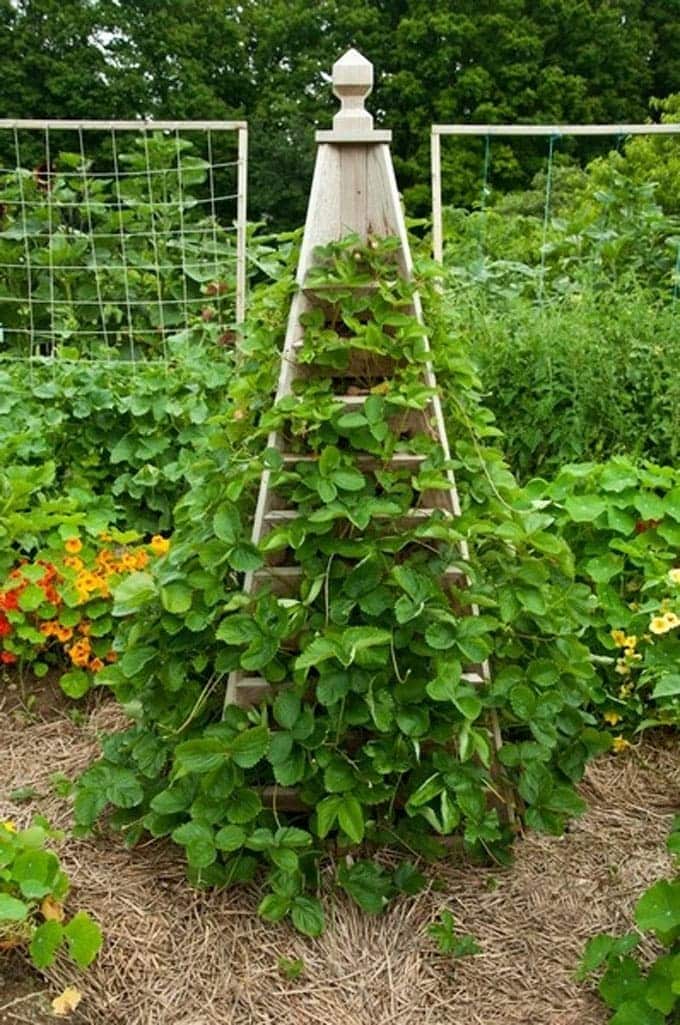
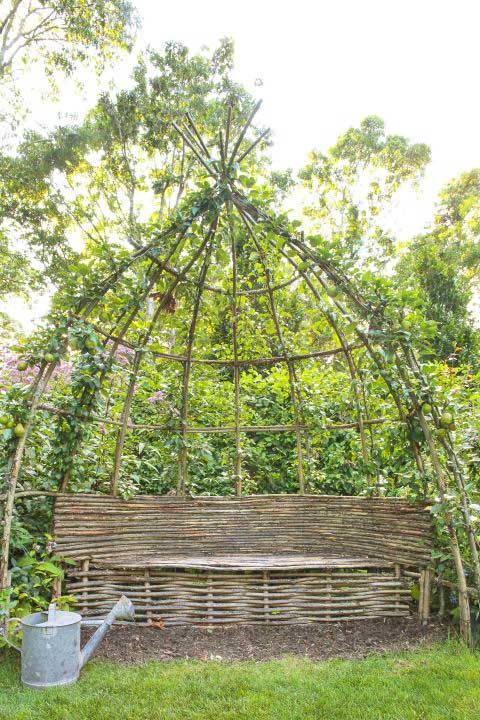
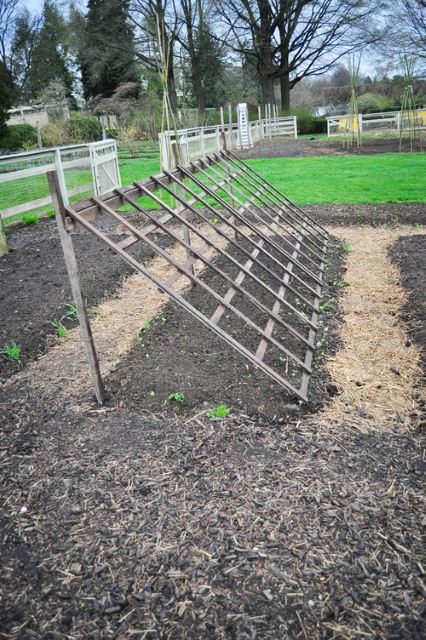
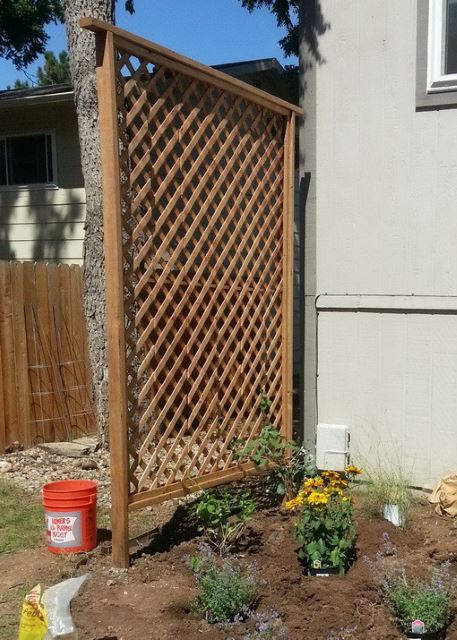

![Concrete Driveway Ideas [All You Need To Know]](https://homesthetics.net/wp-content/uploads/2022/08/Concrete-Driveway-Ideas-1.jpg "Concrete Driveway Ideas [All You Need To Know]")

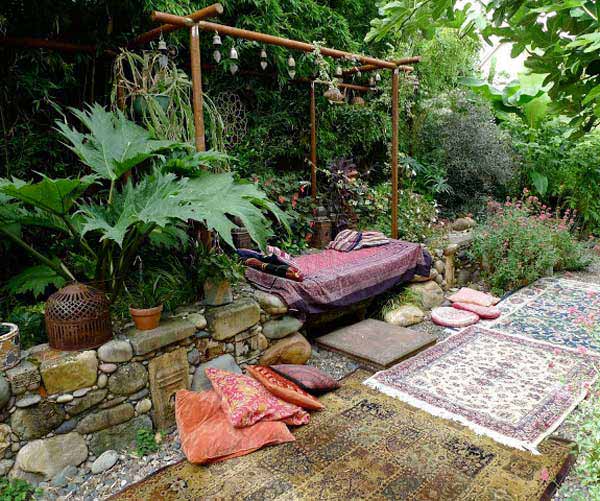
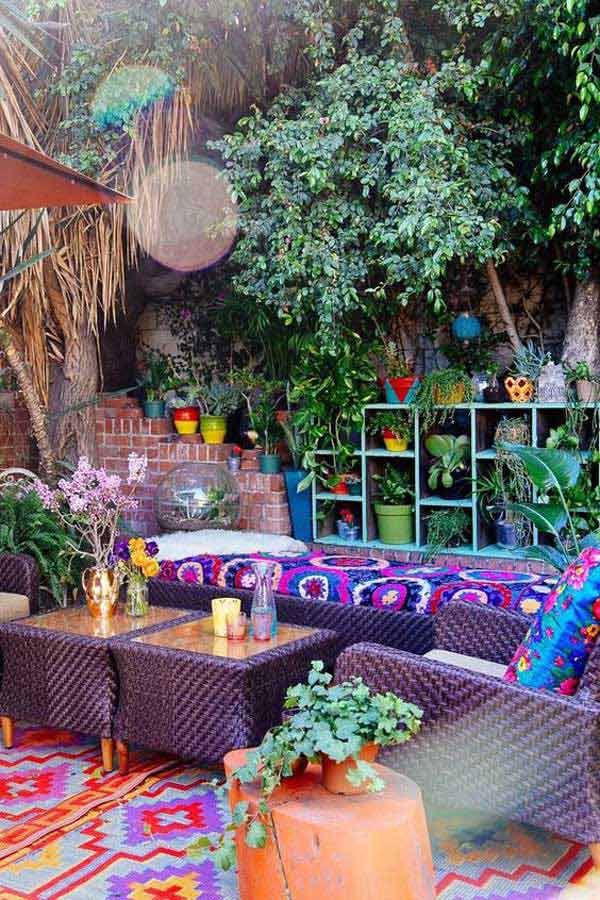

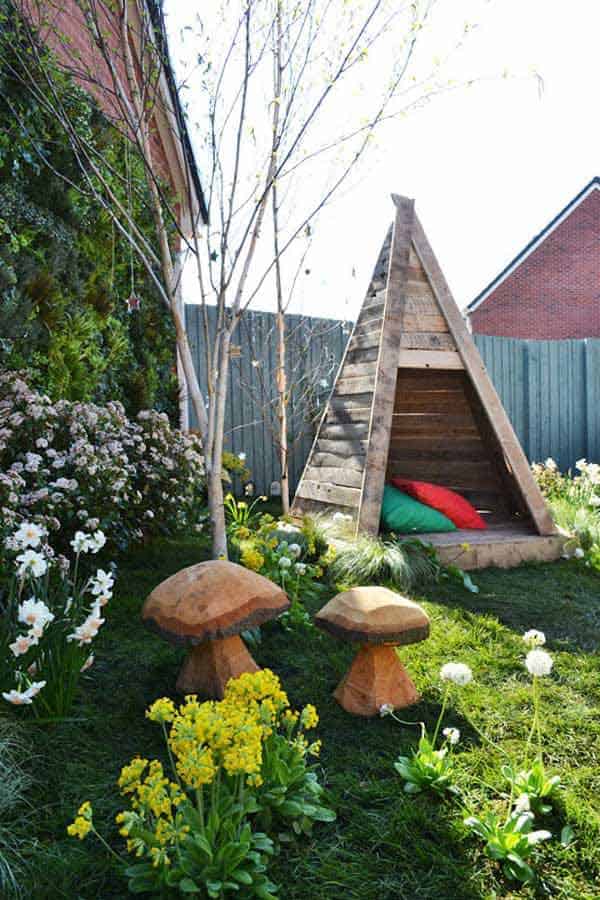
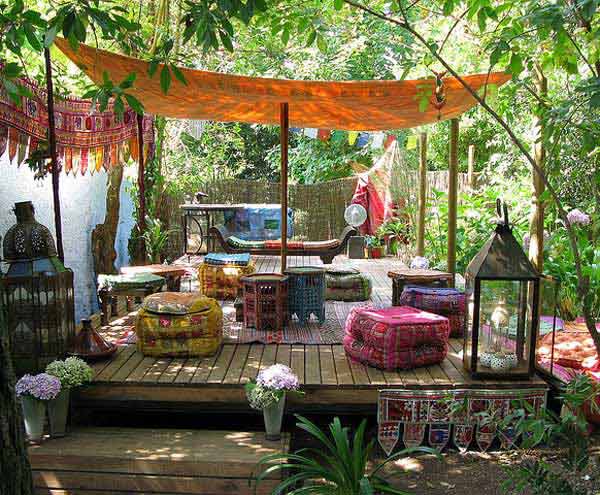
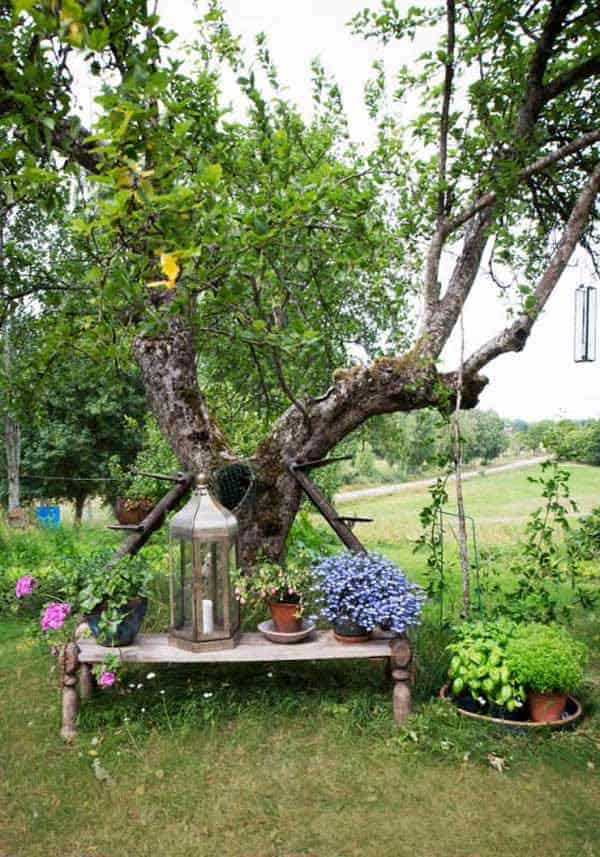
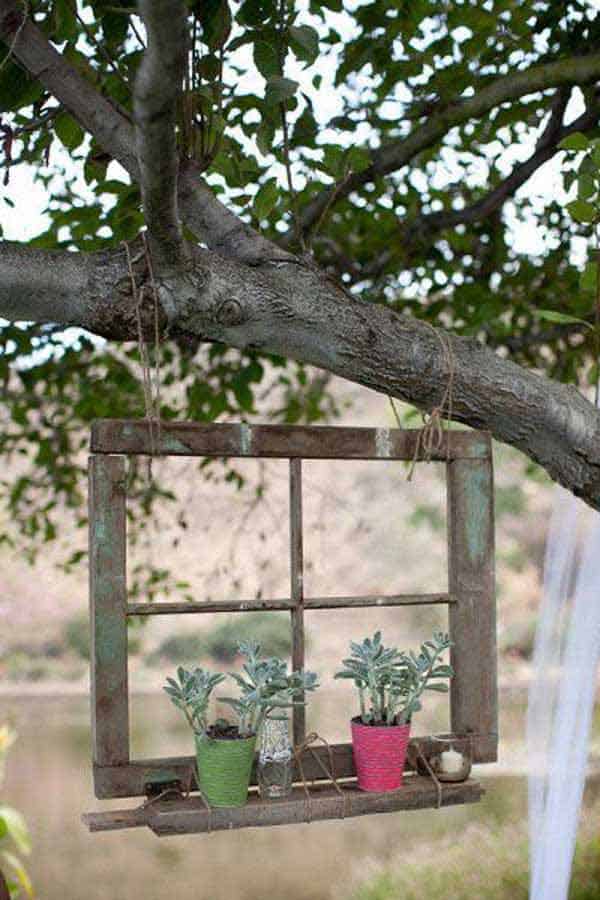
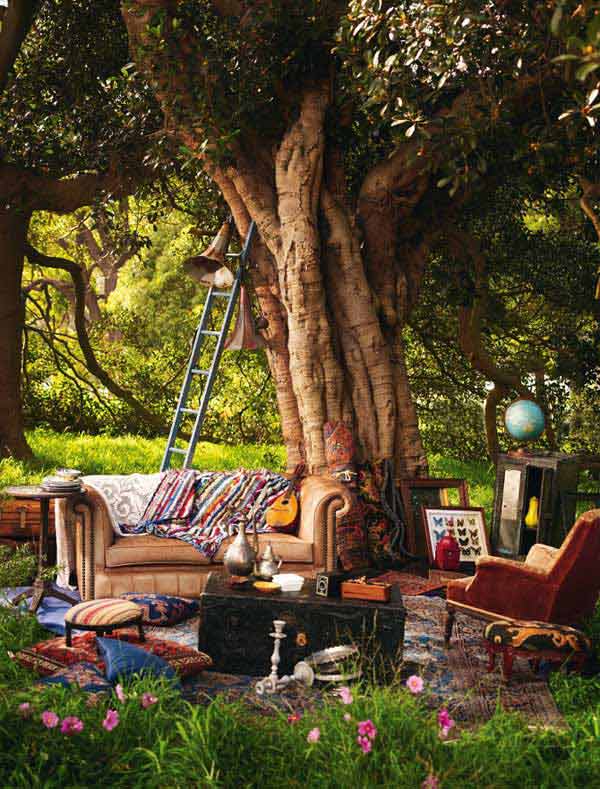


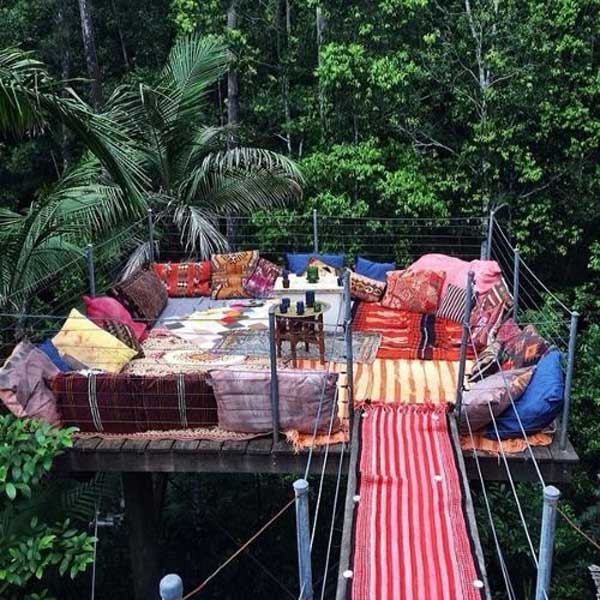
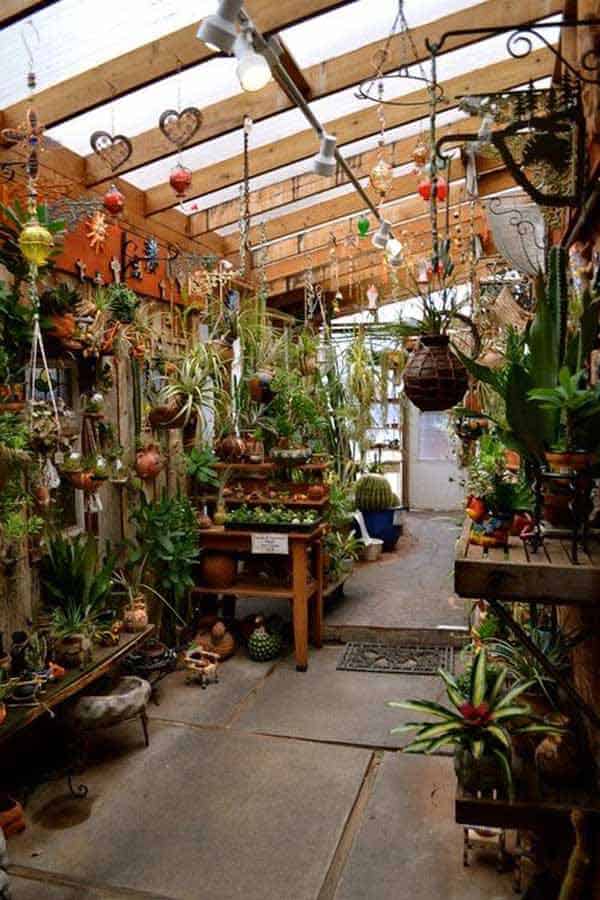

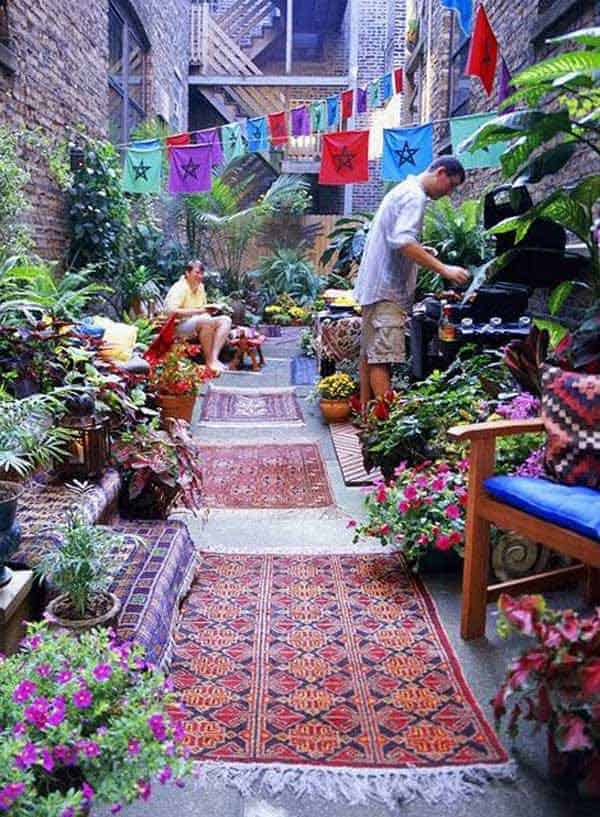
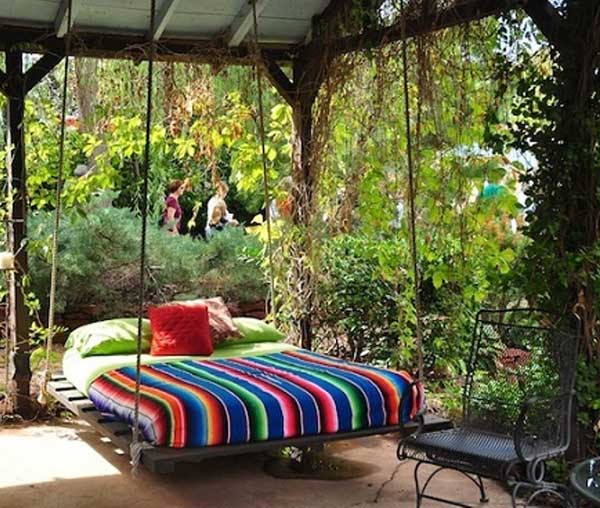
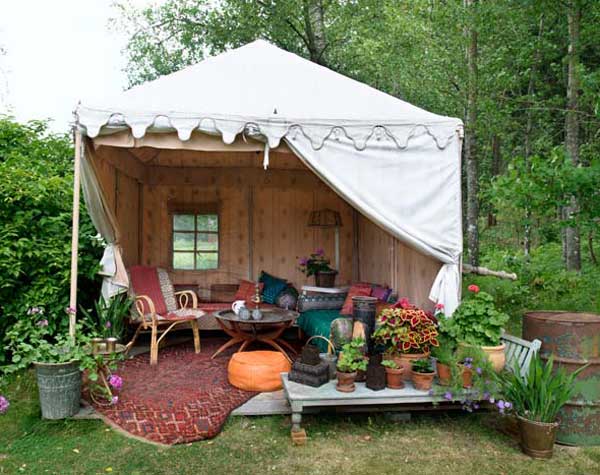
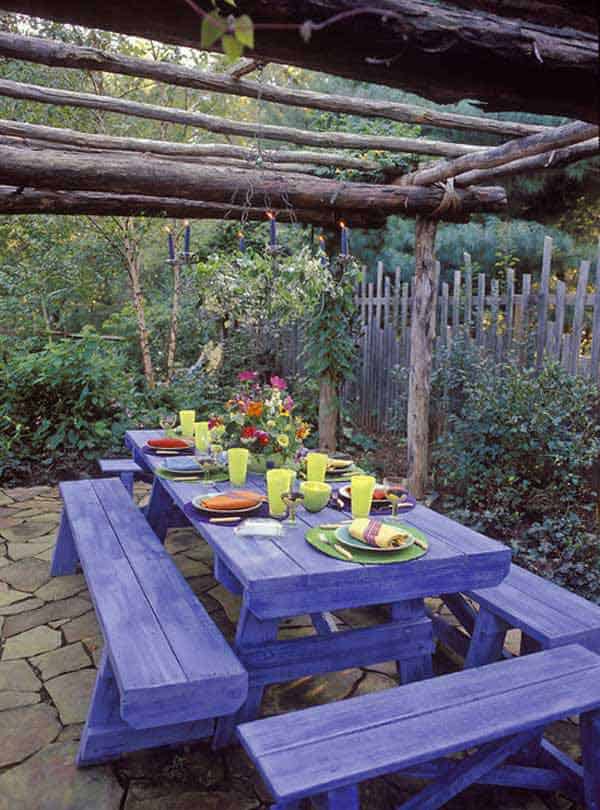

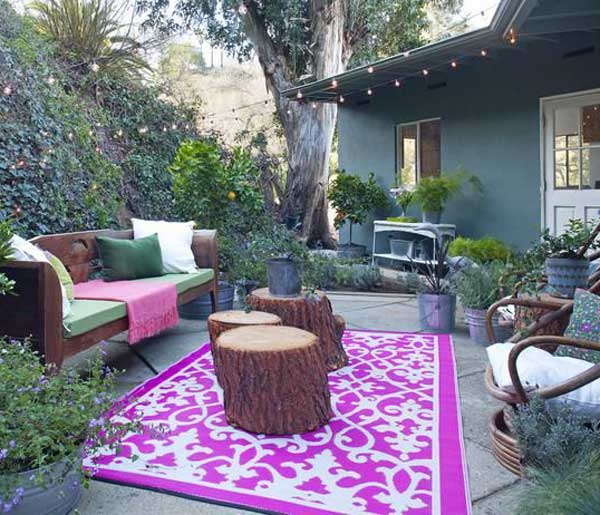


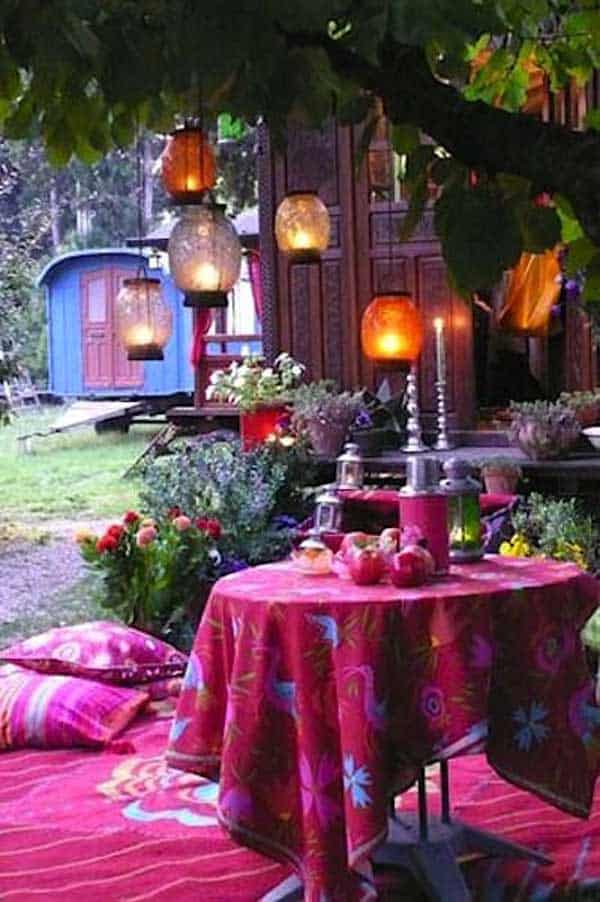
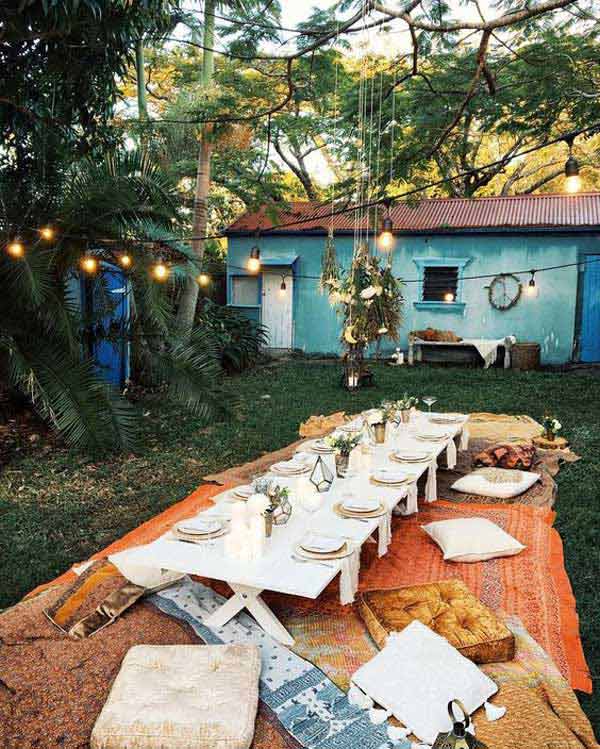

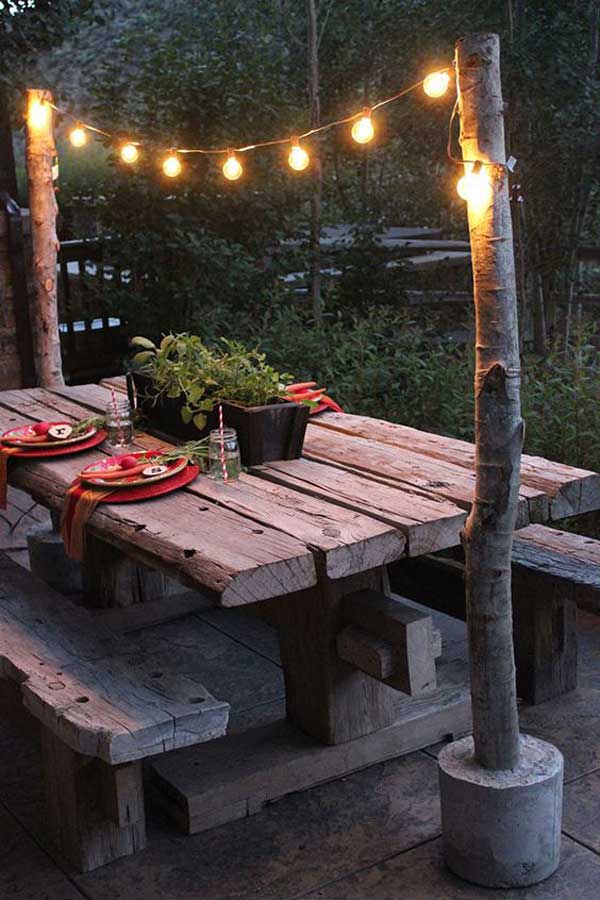
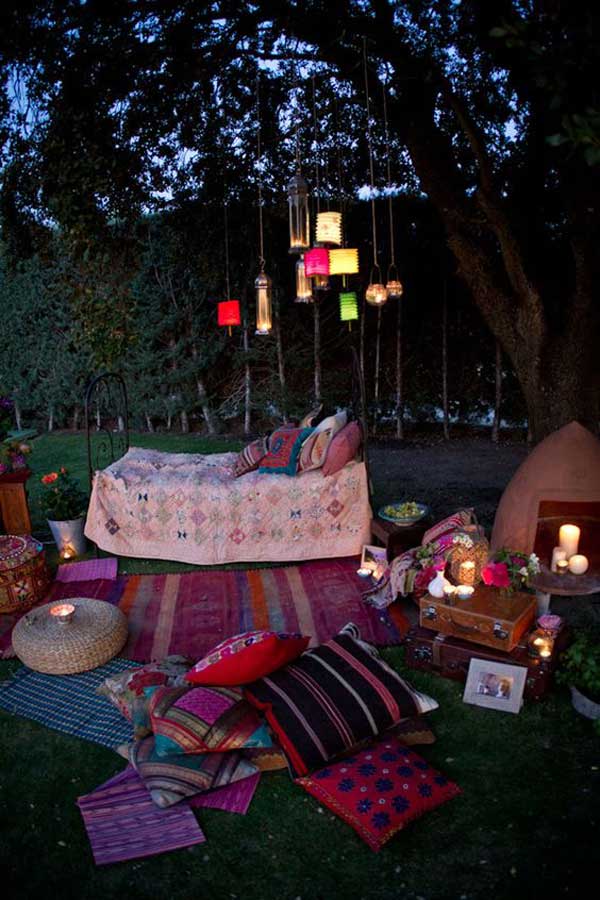
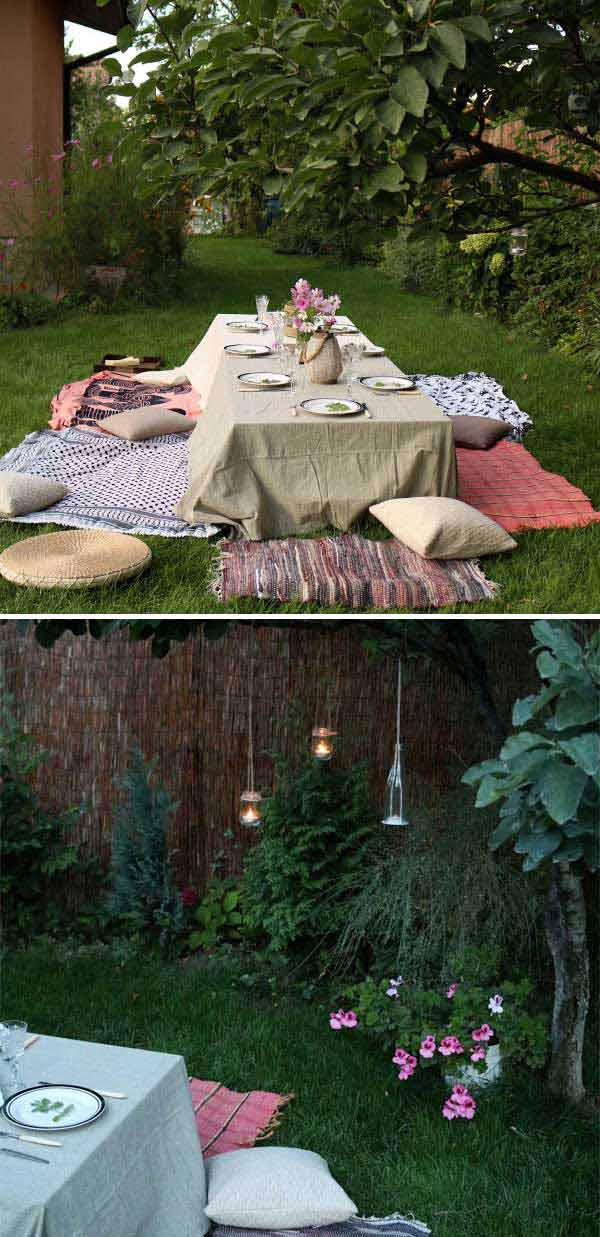
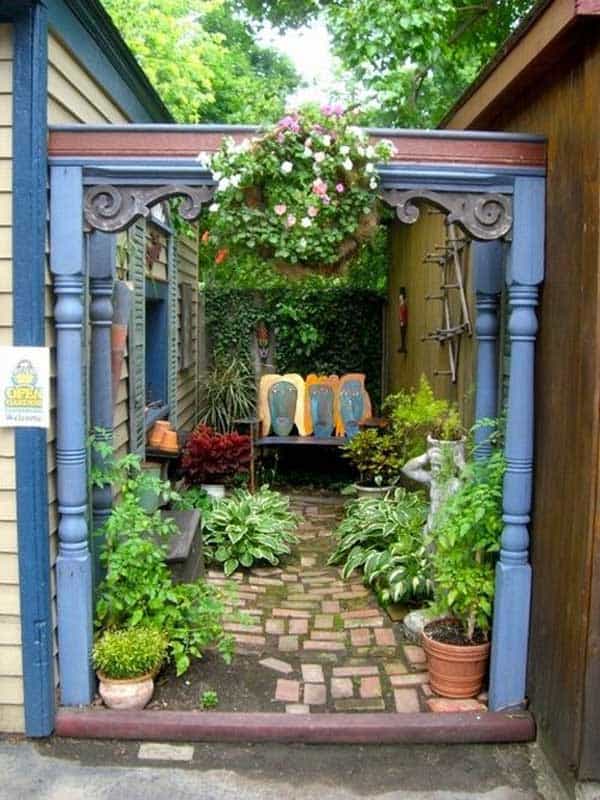
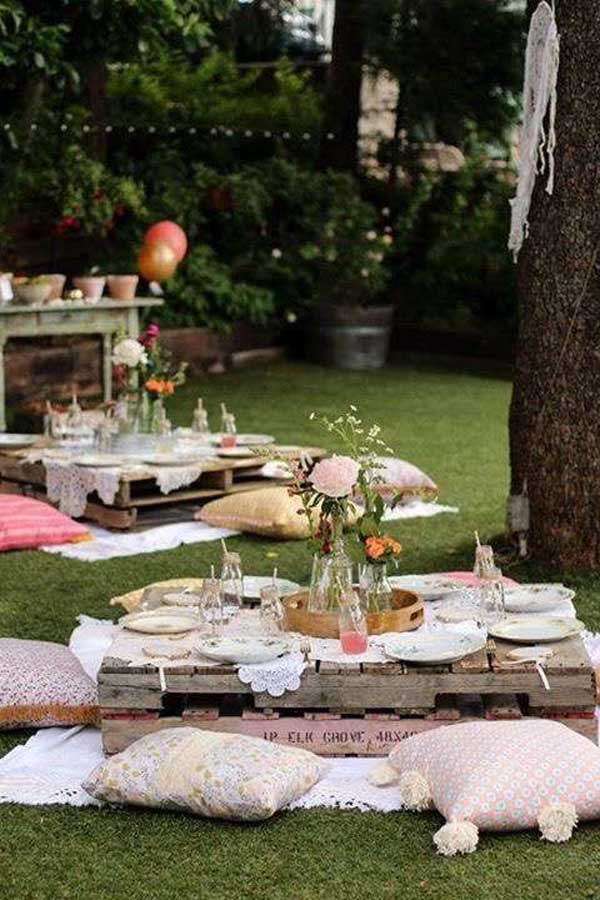


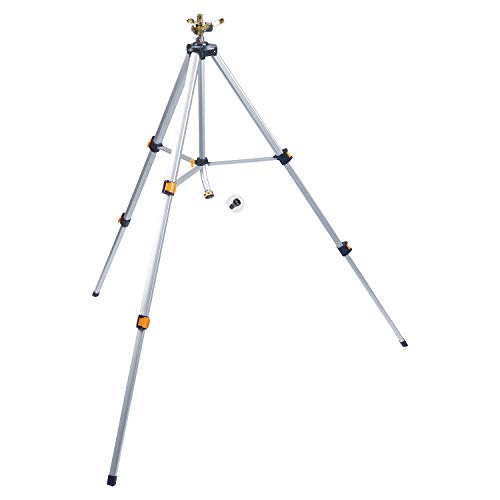
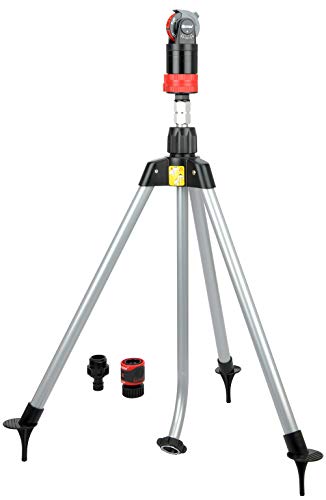
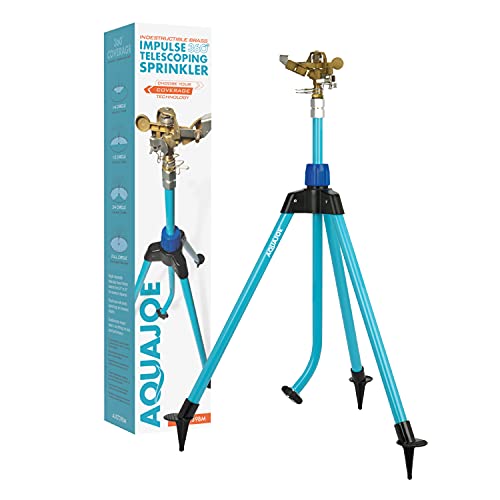
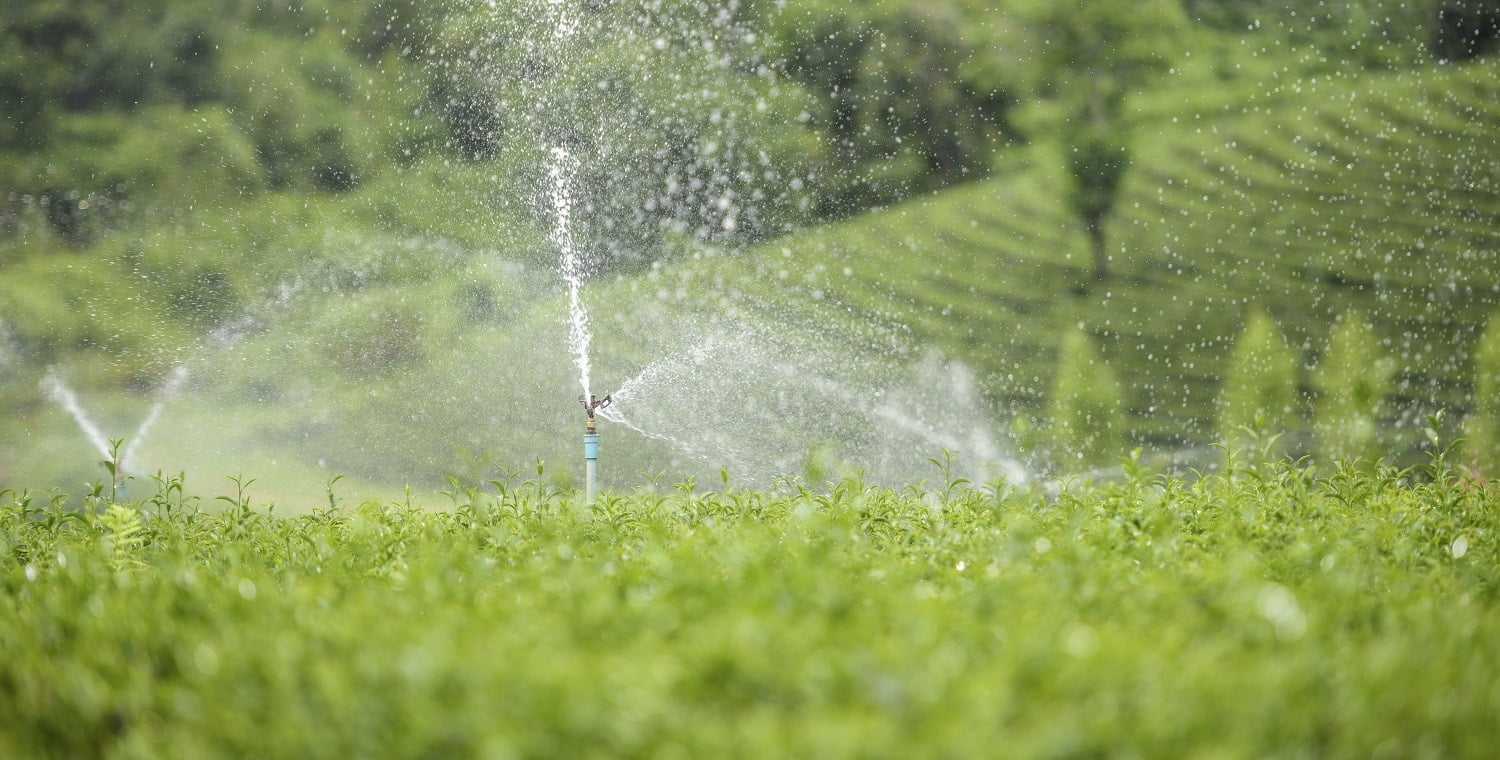

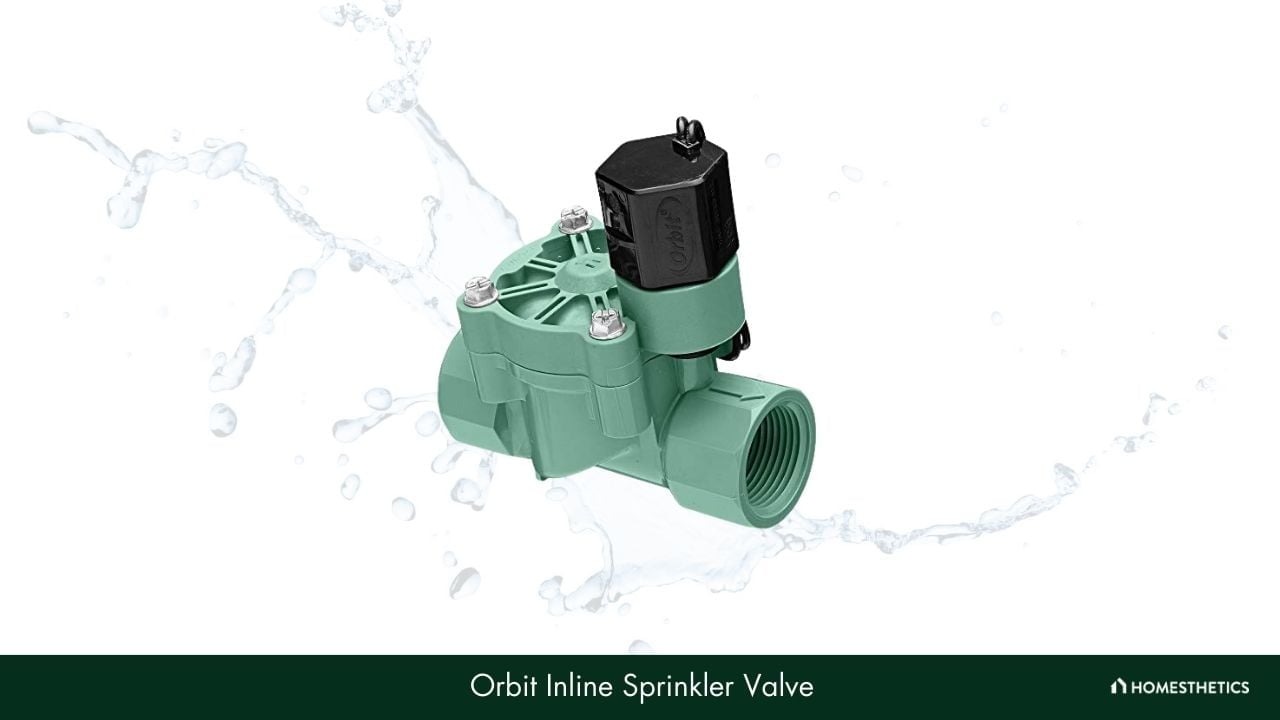
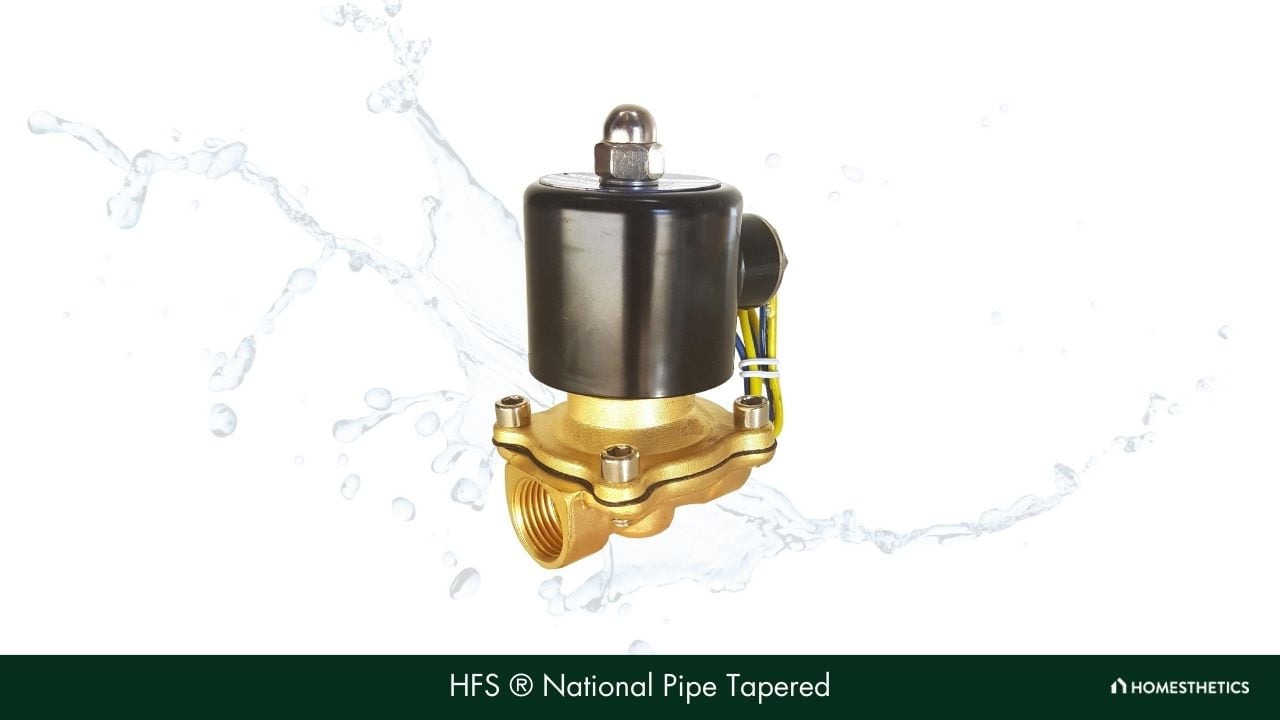
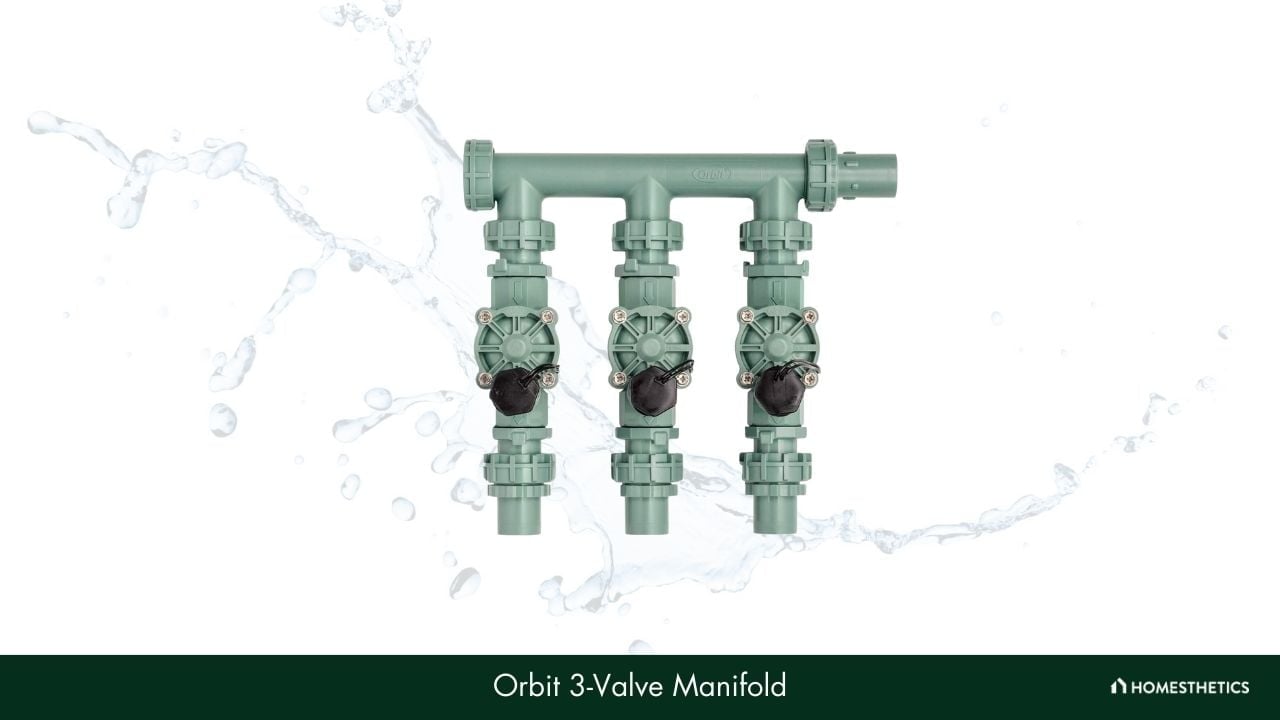
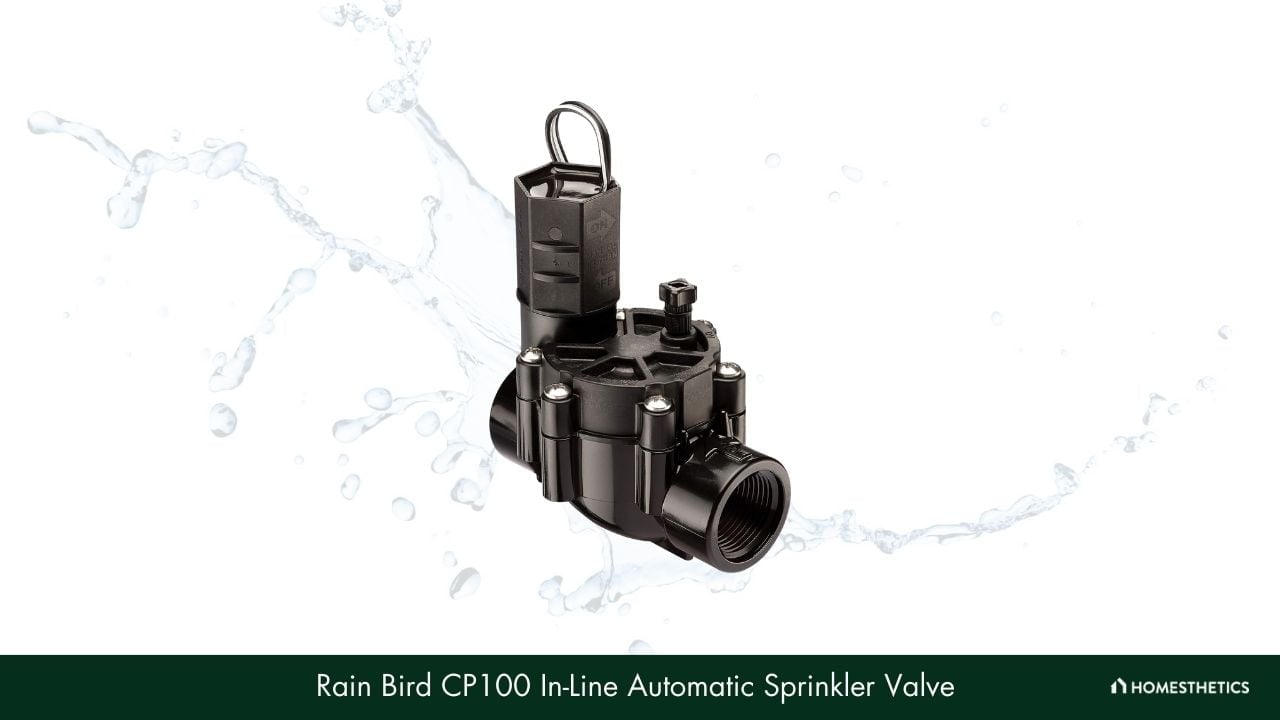
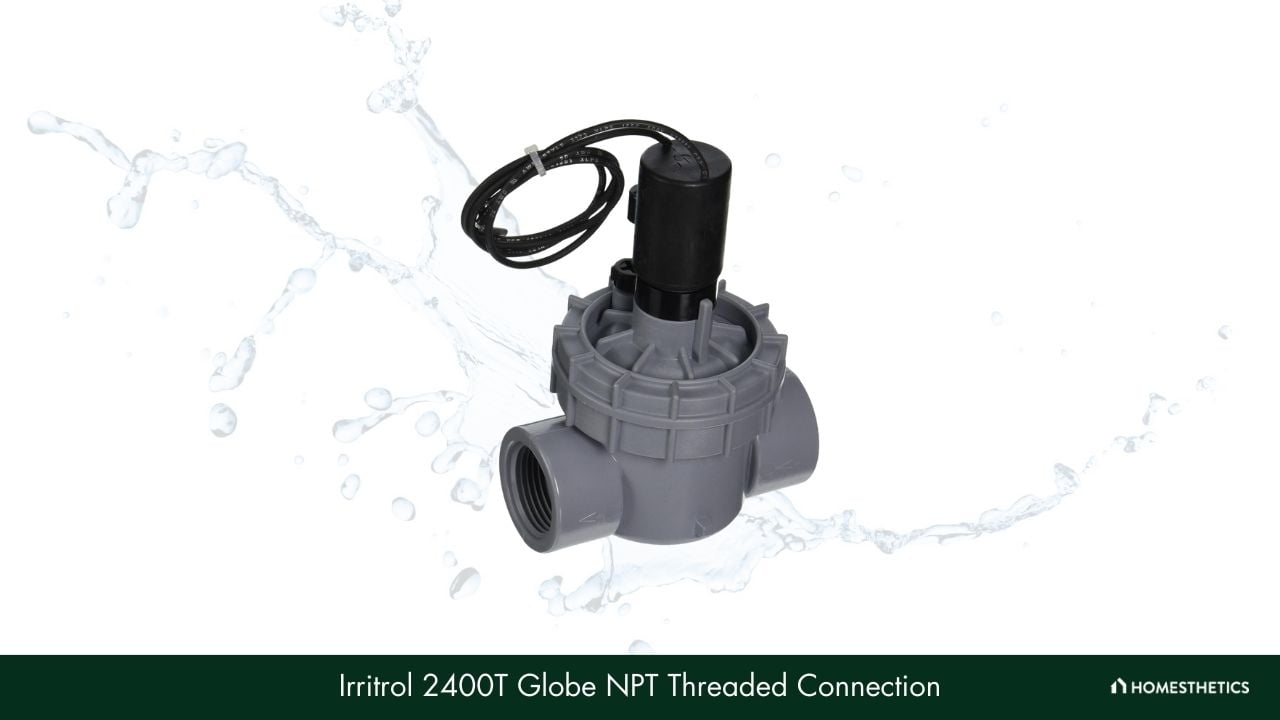
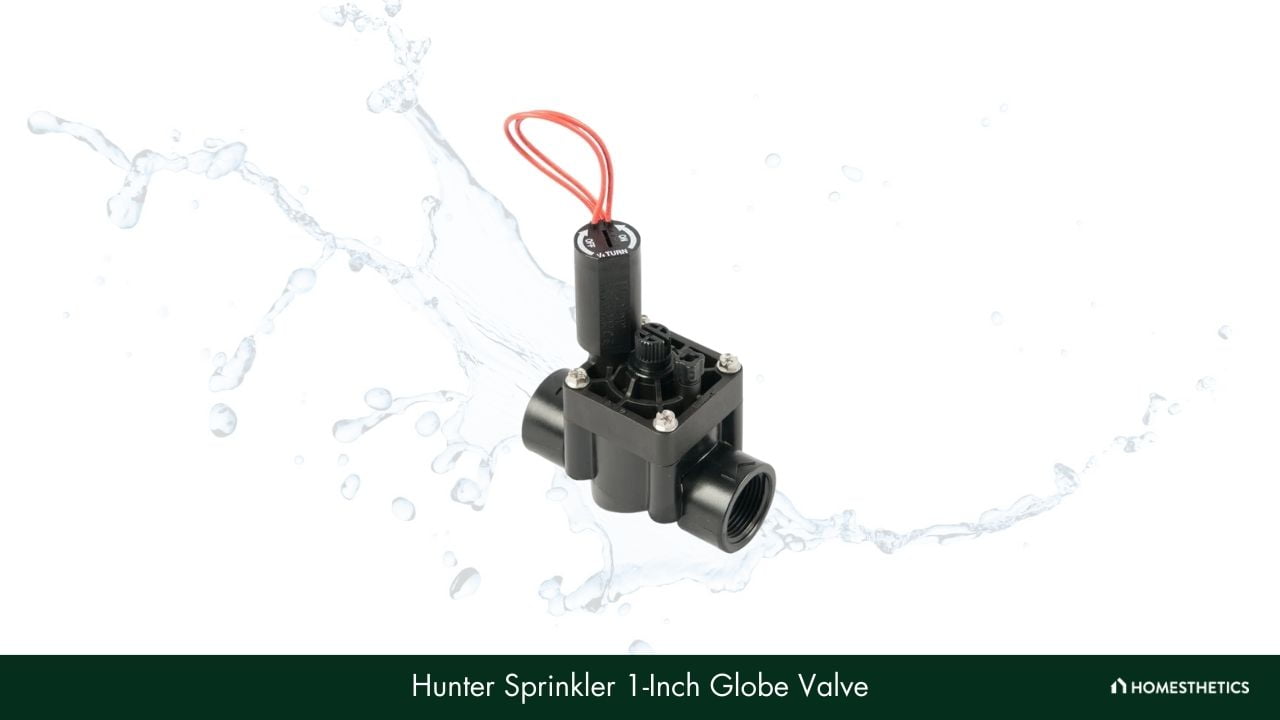
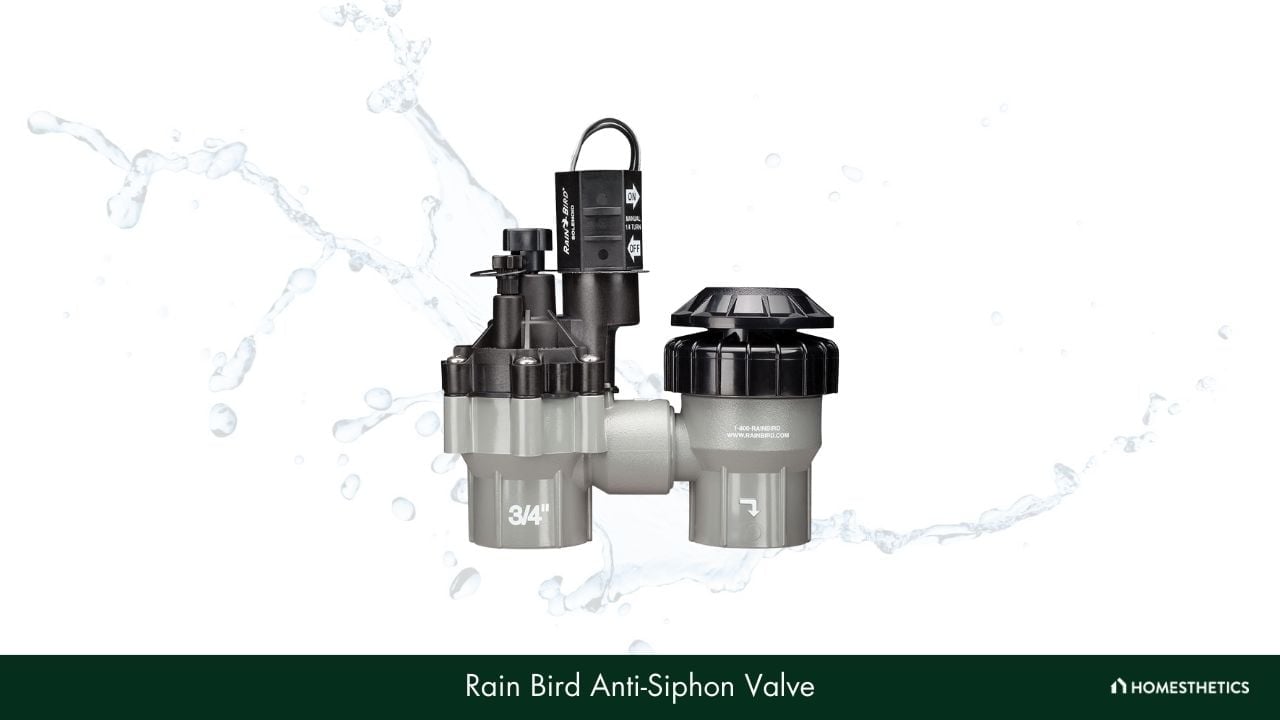
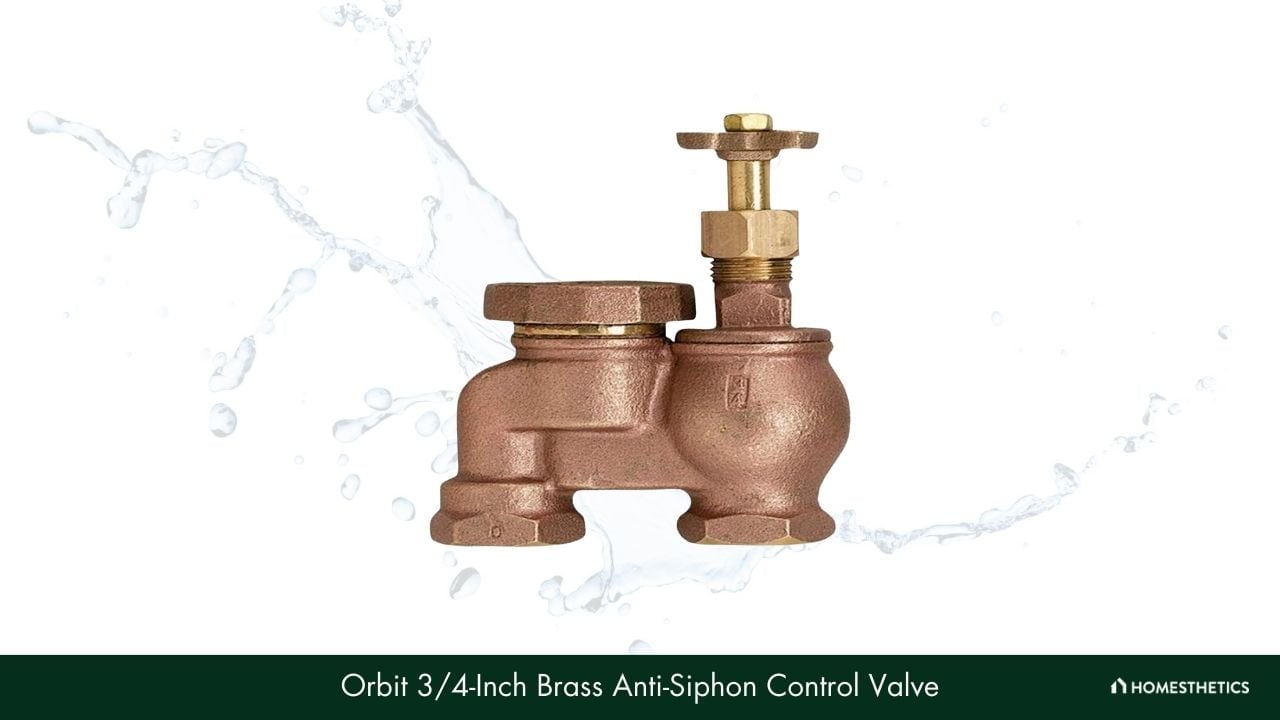

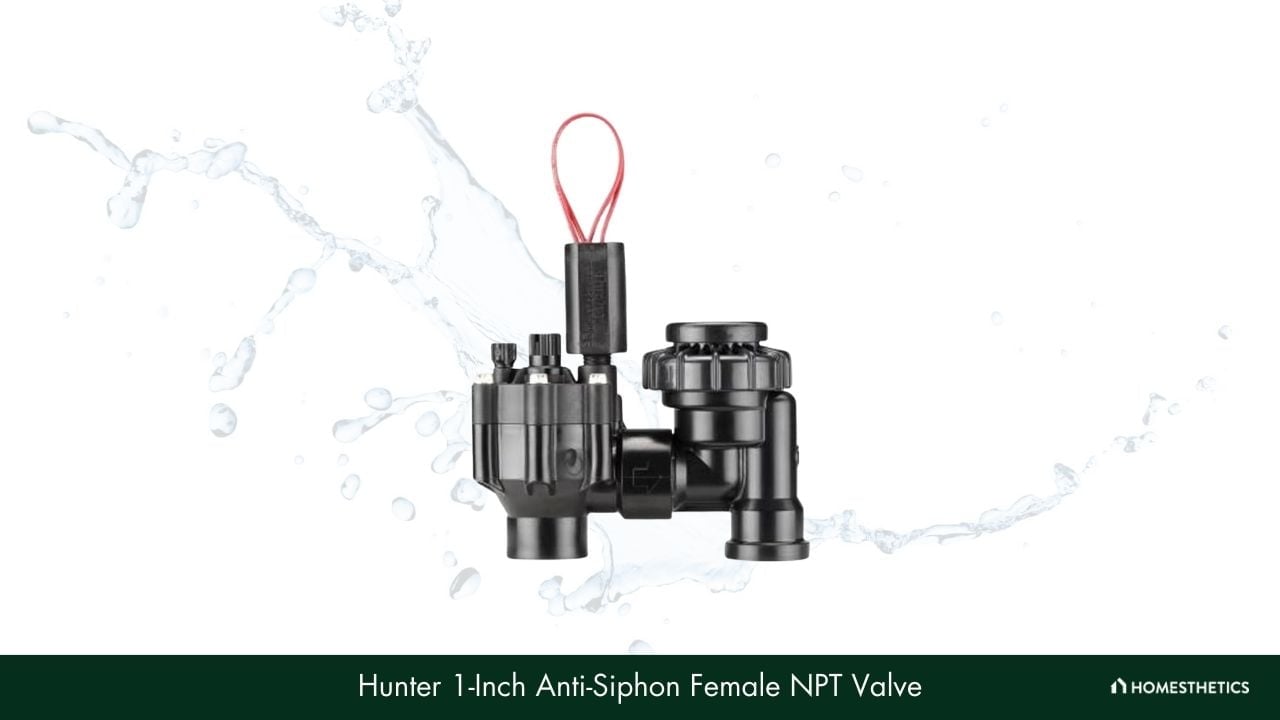
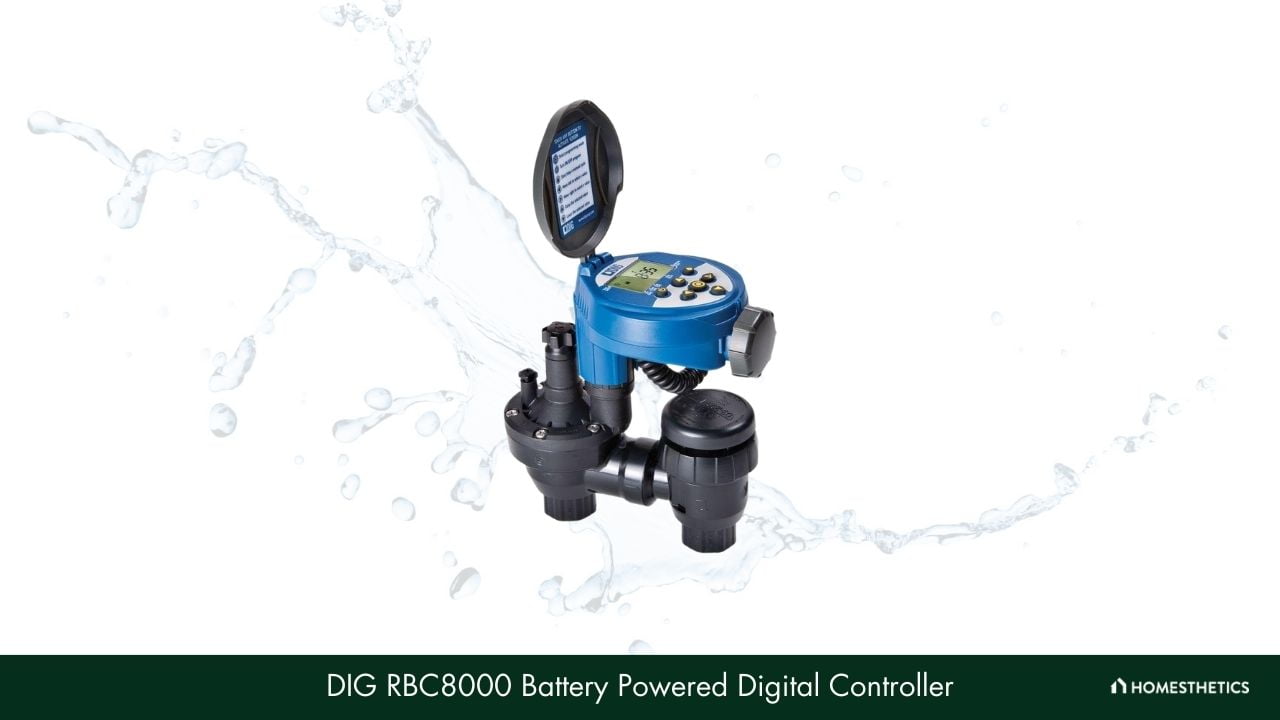

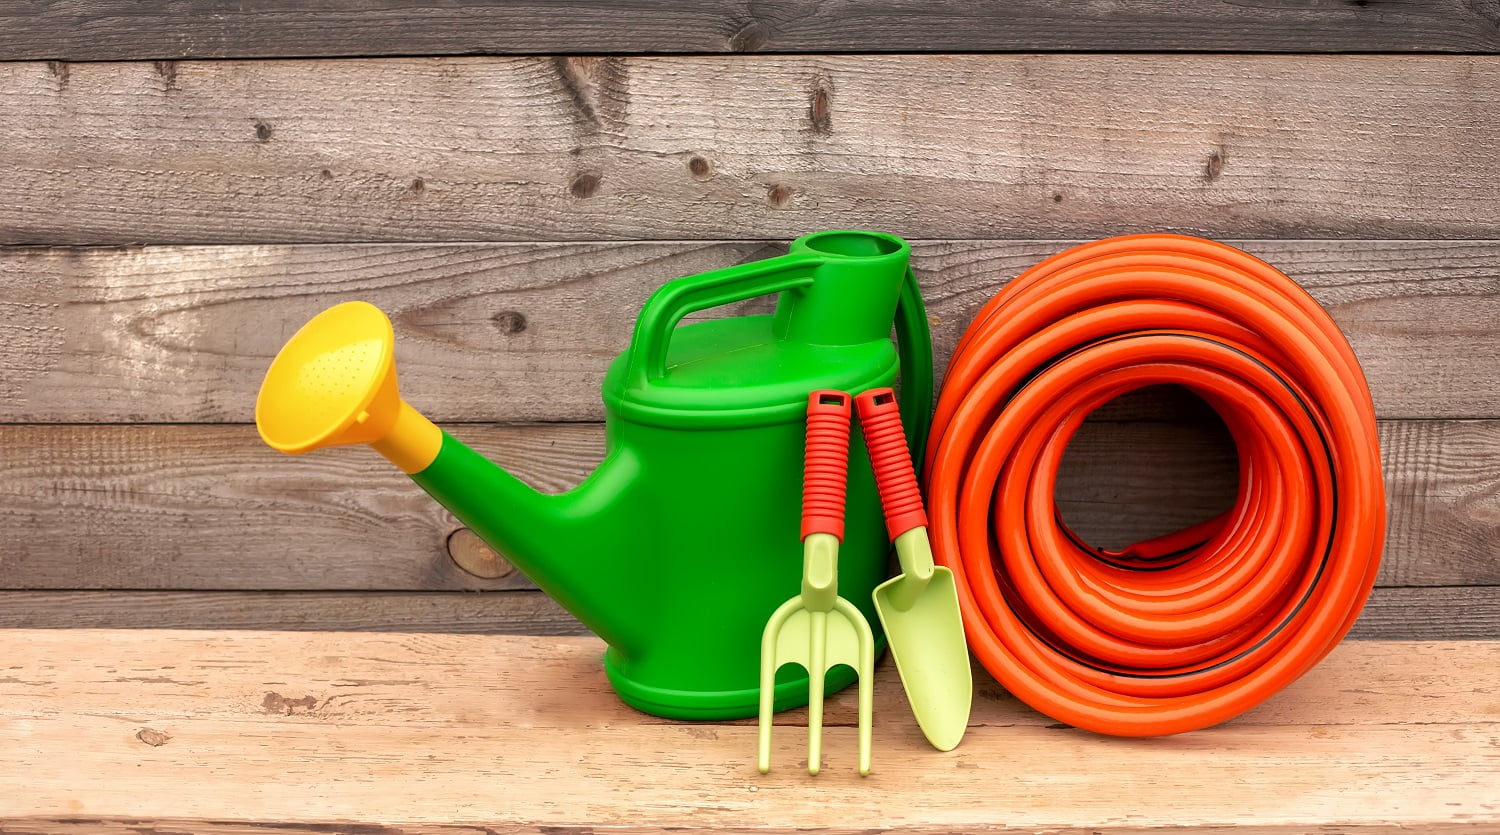

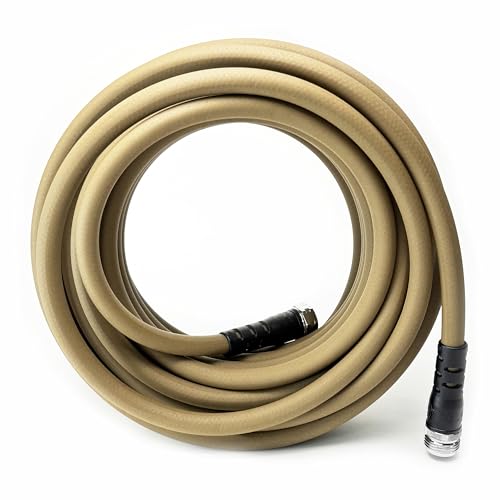


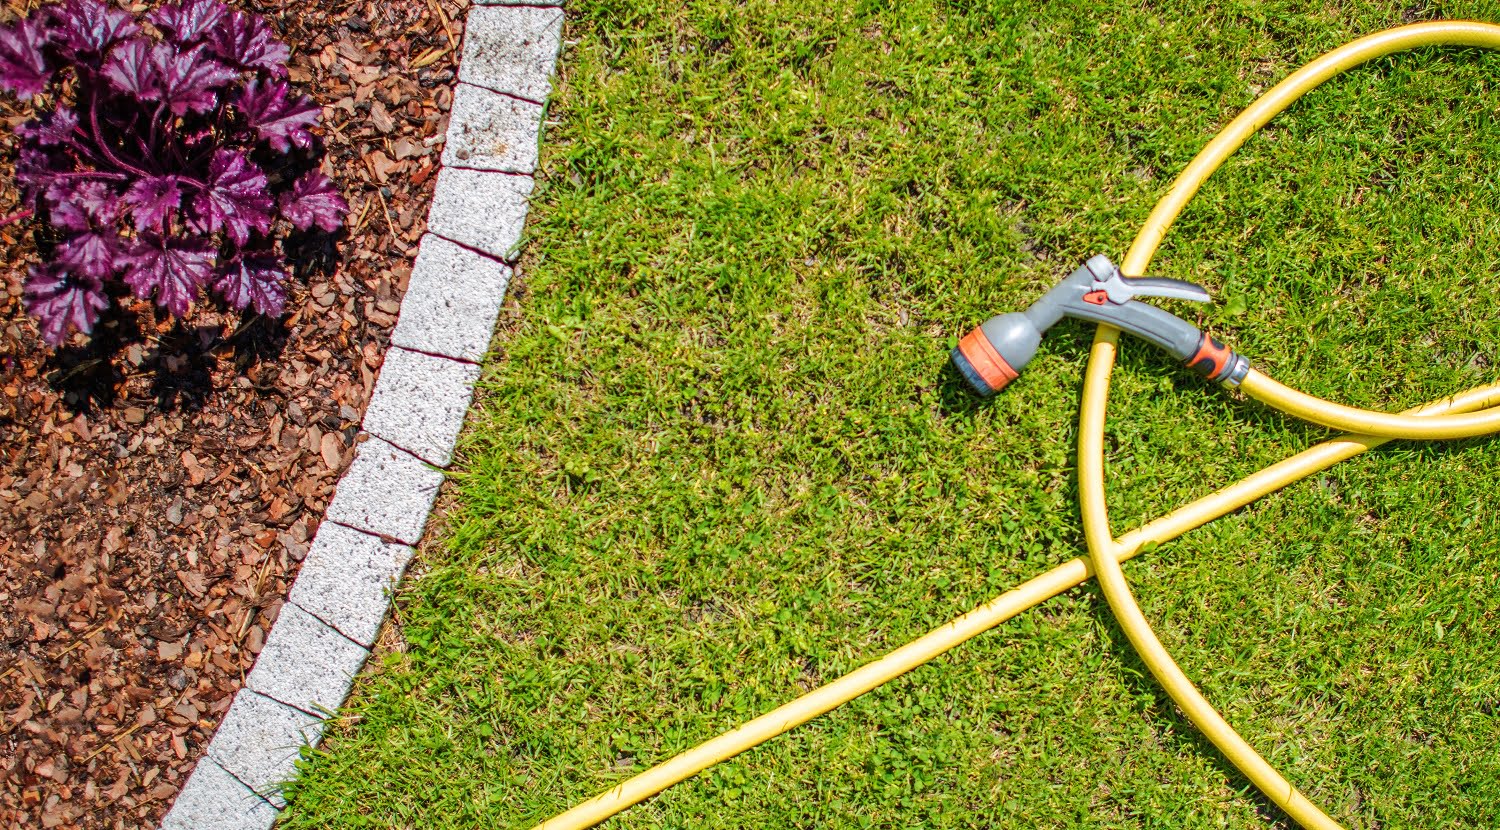

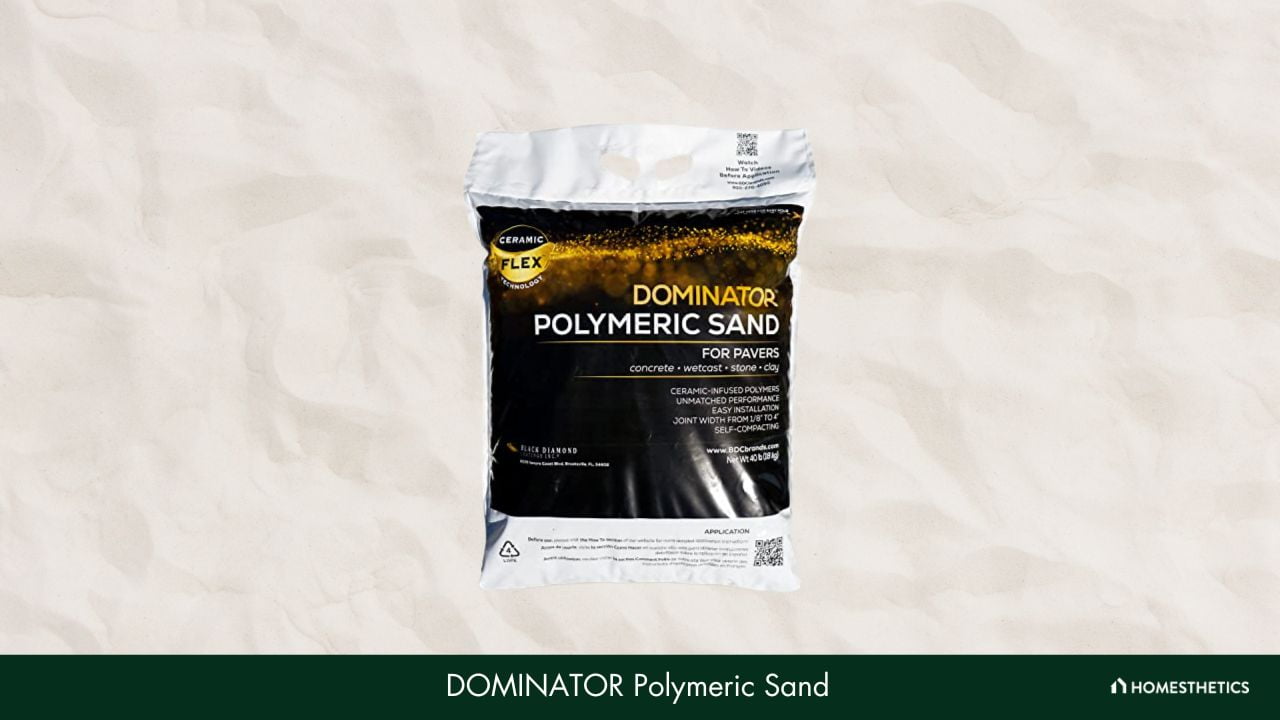
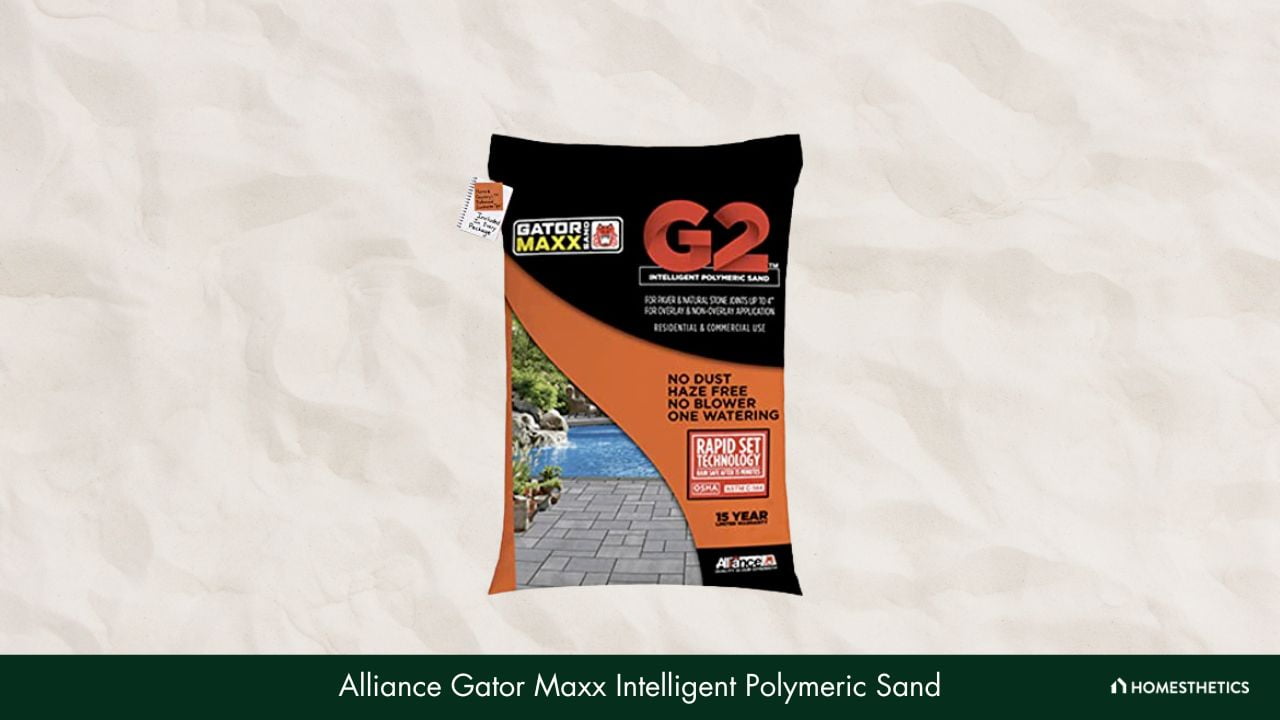

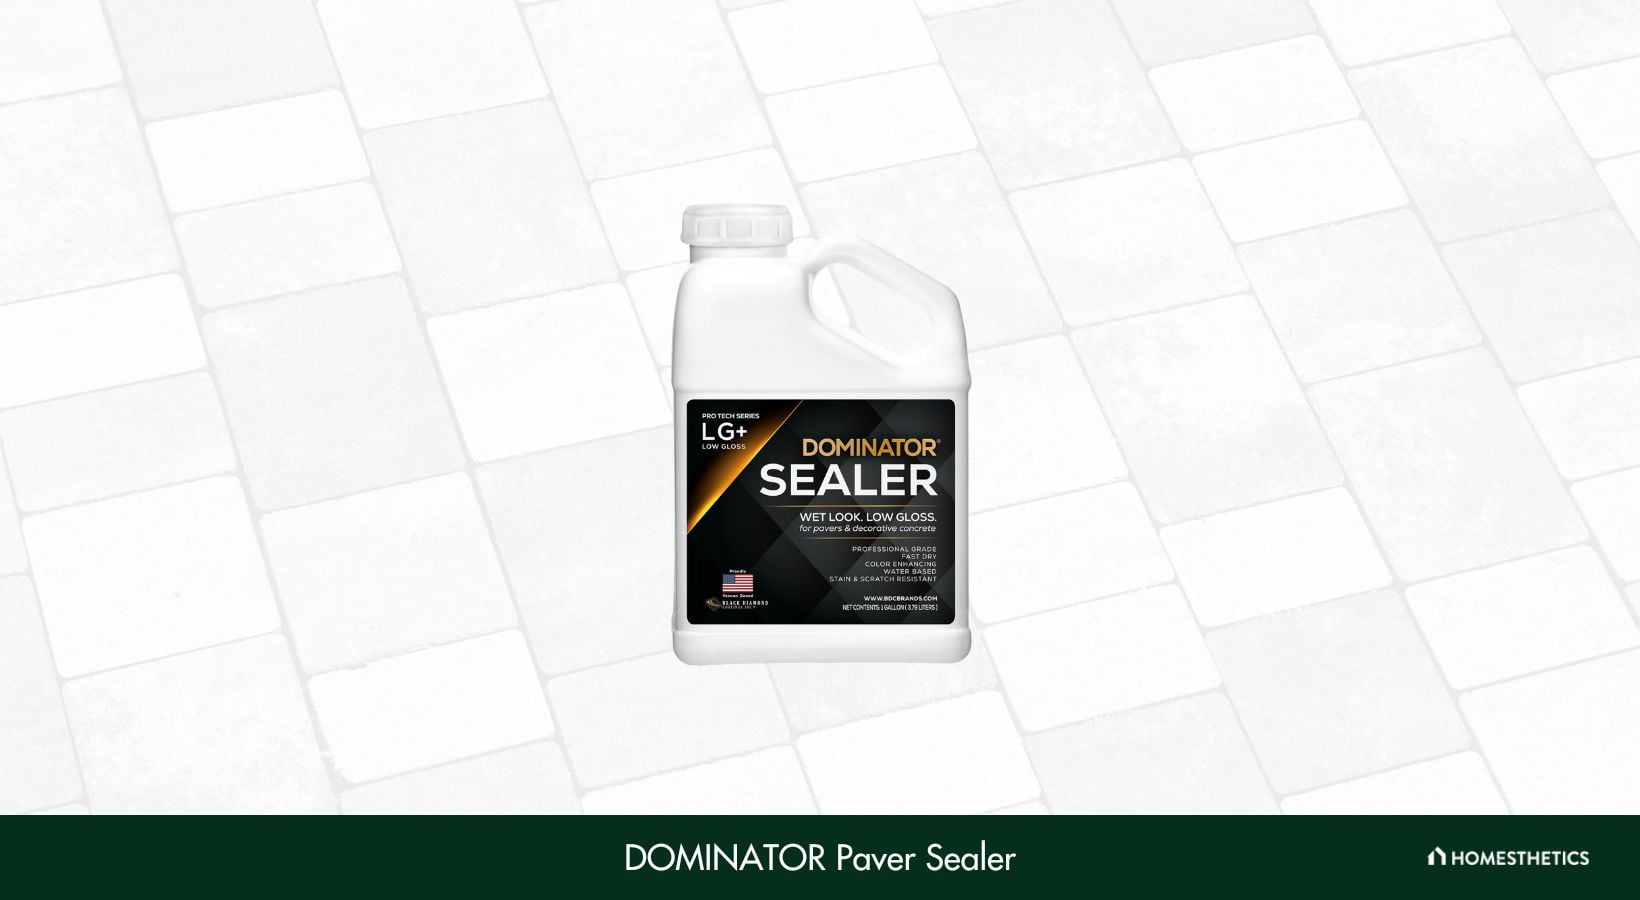
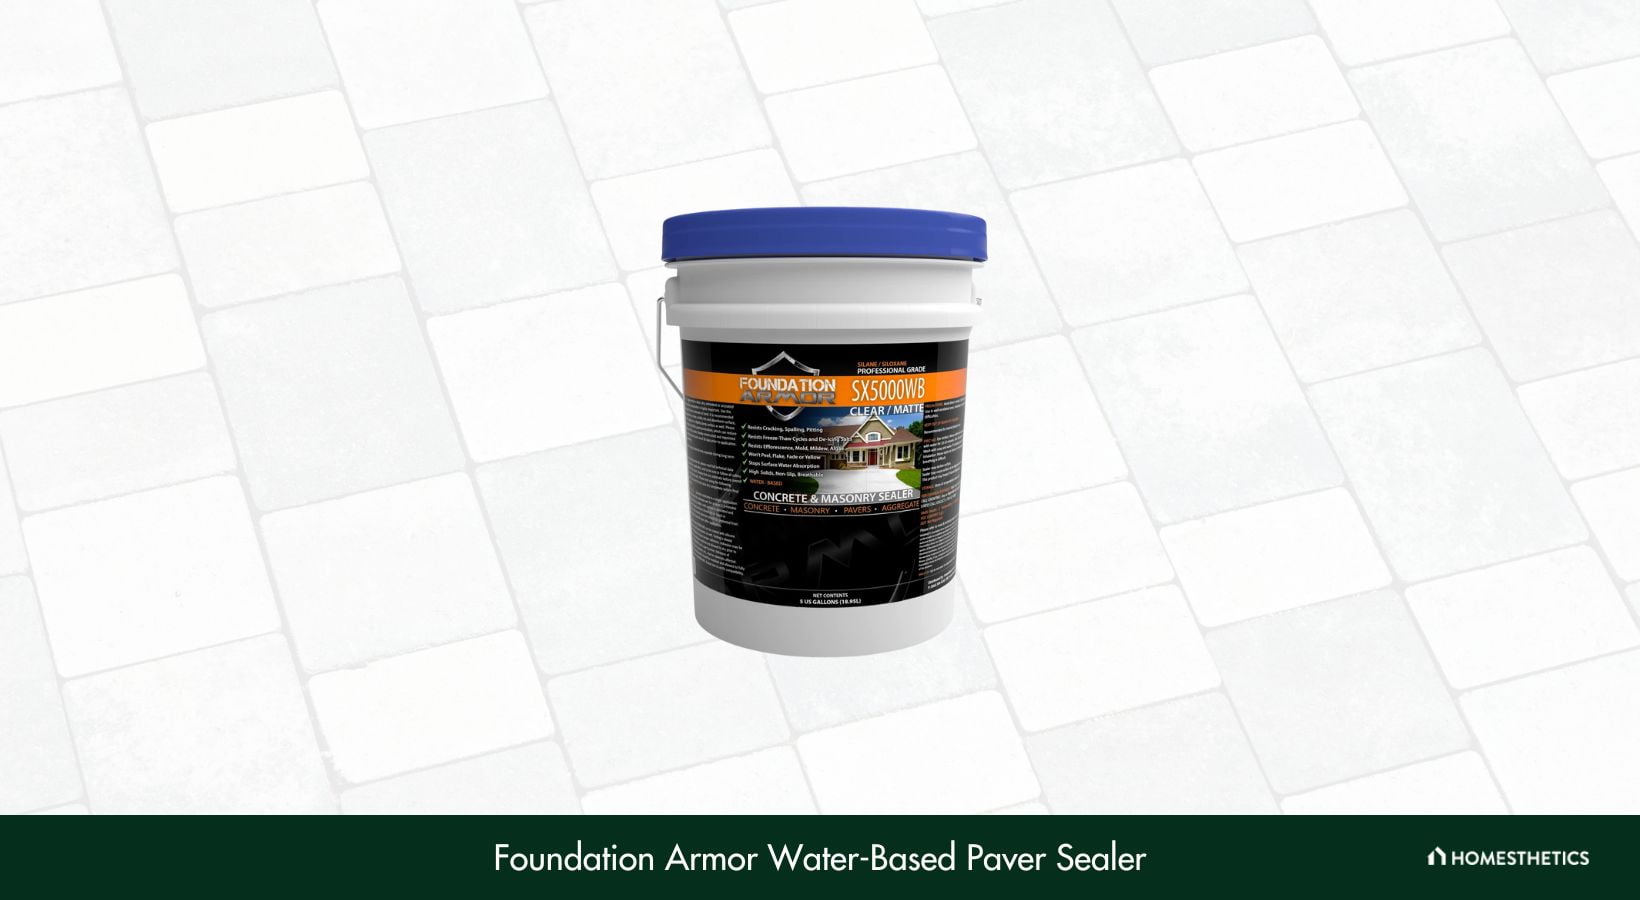
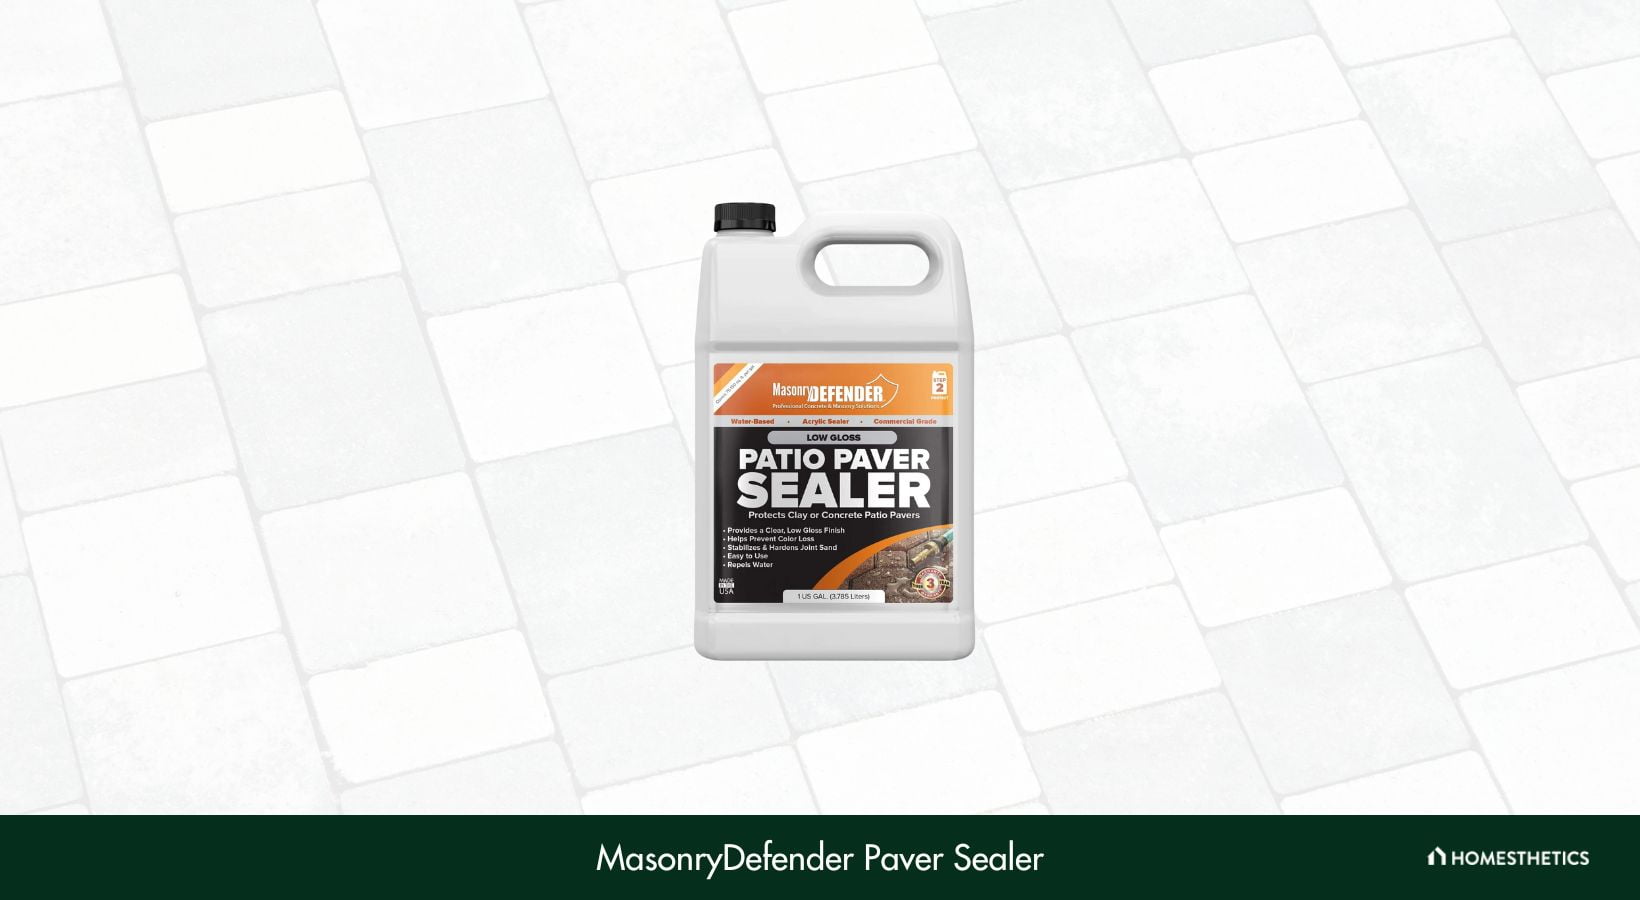
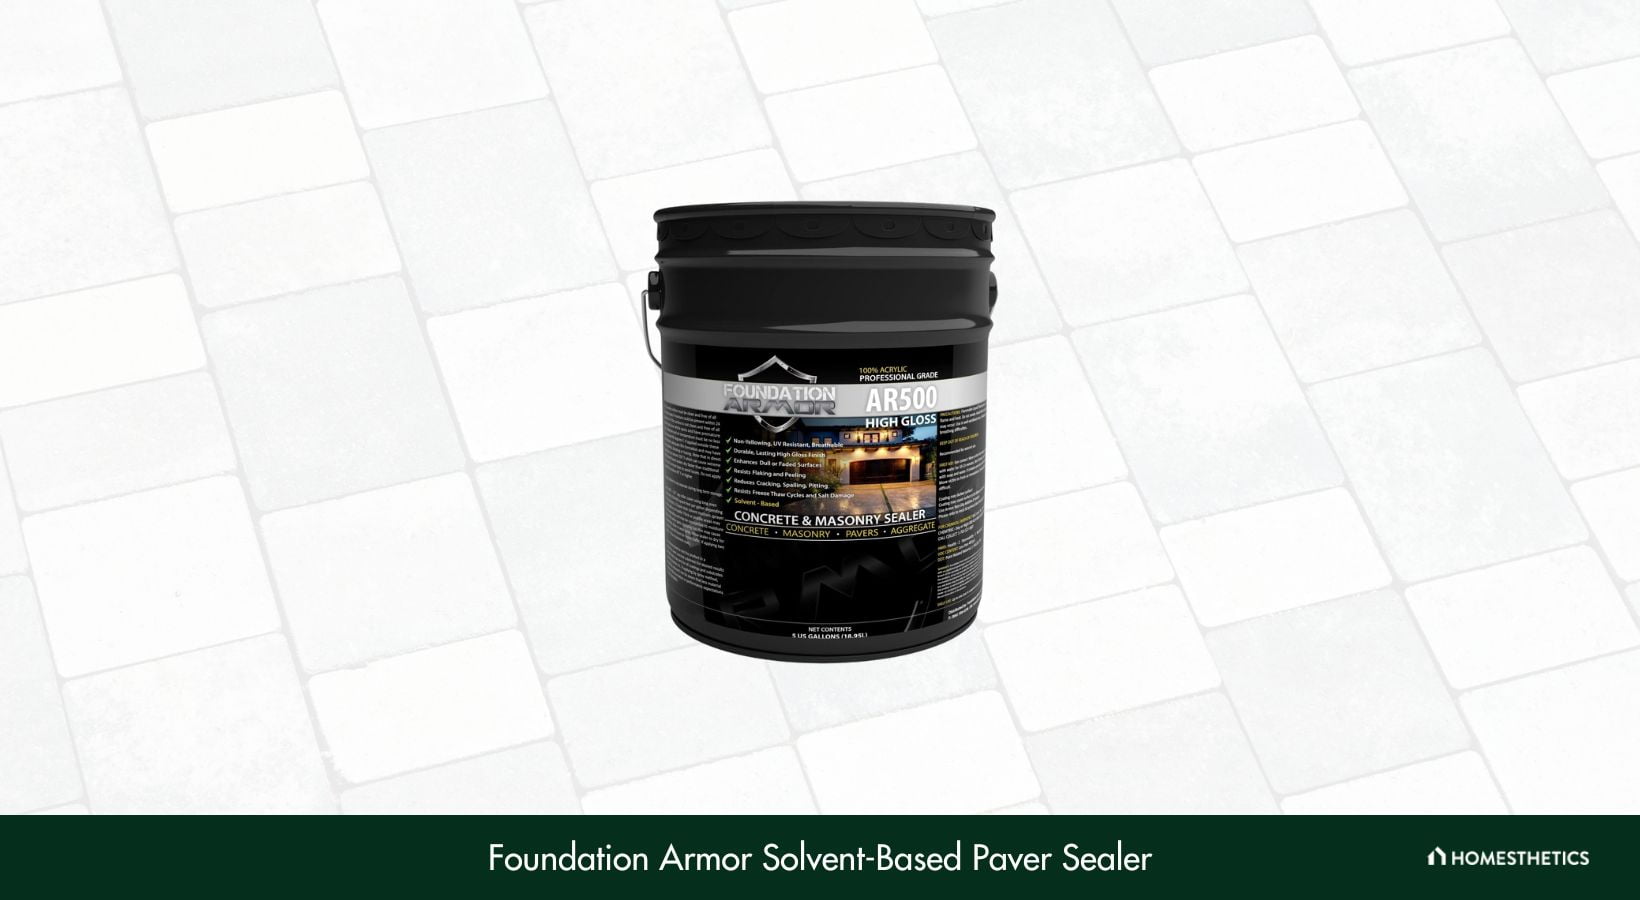
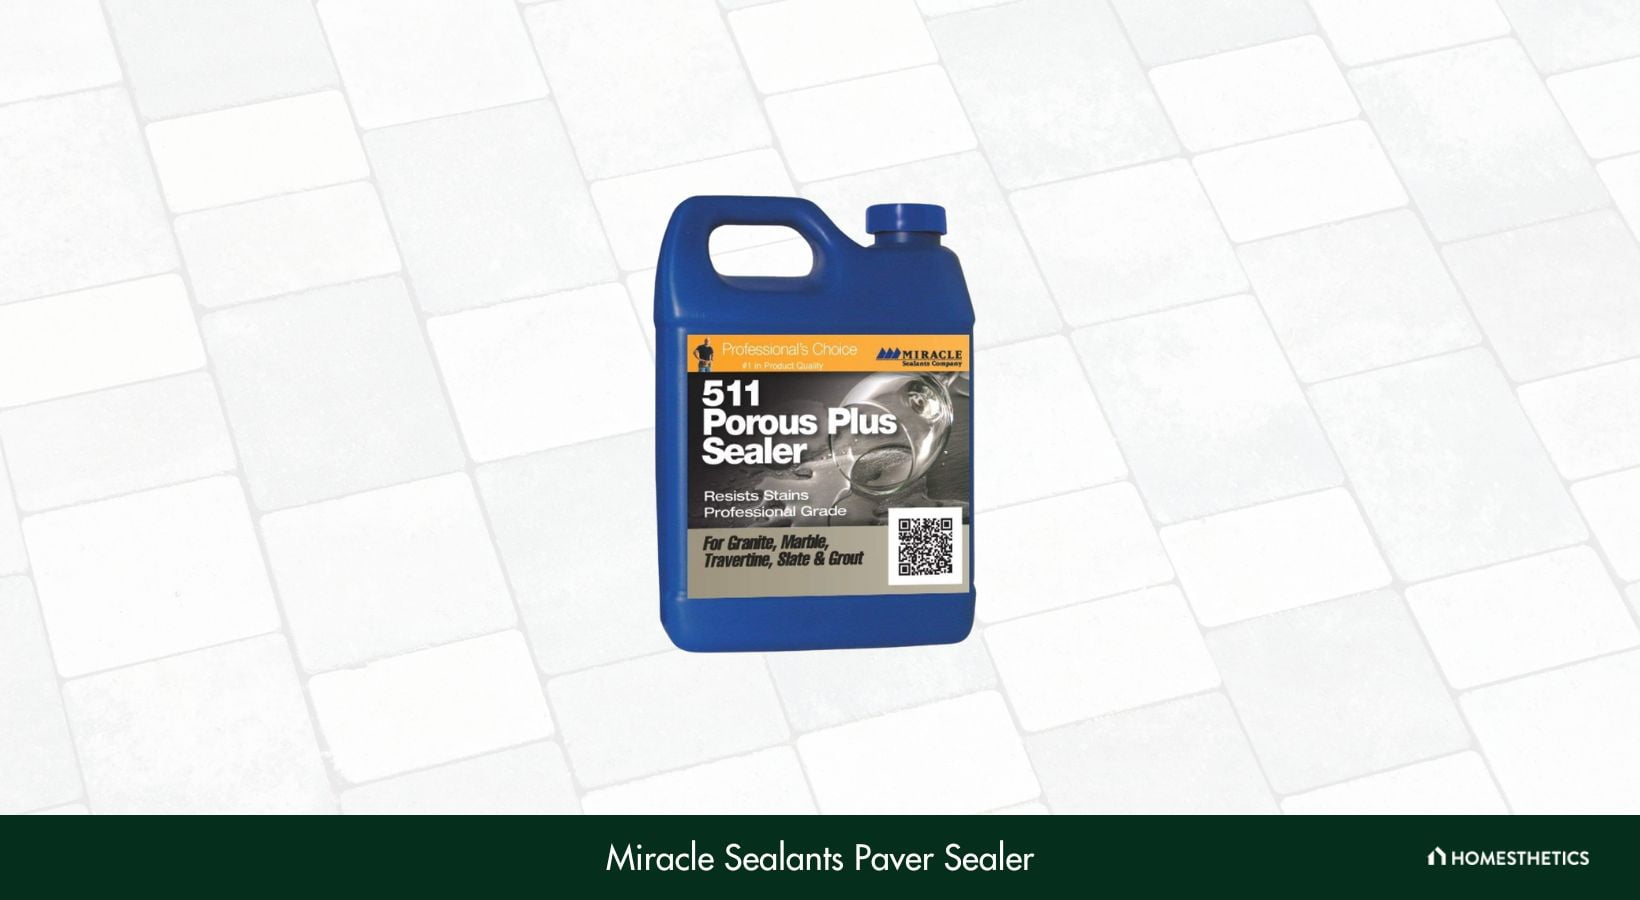
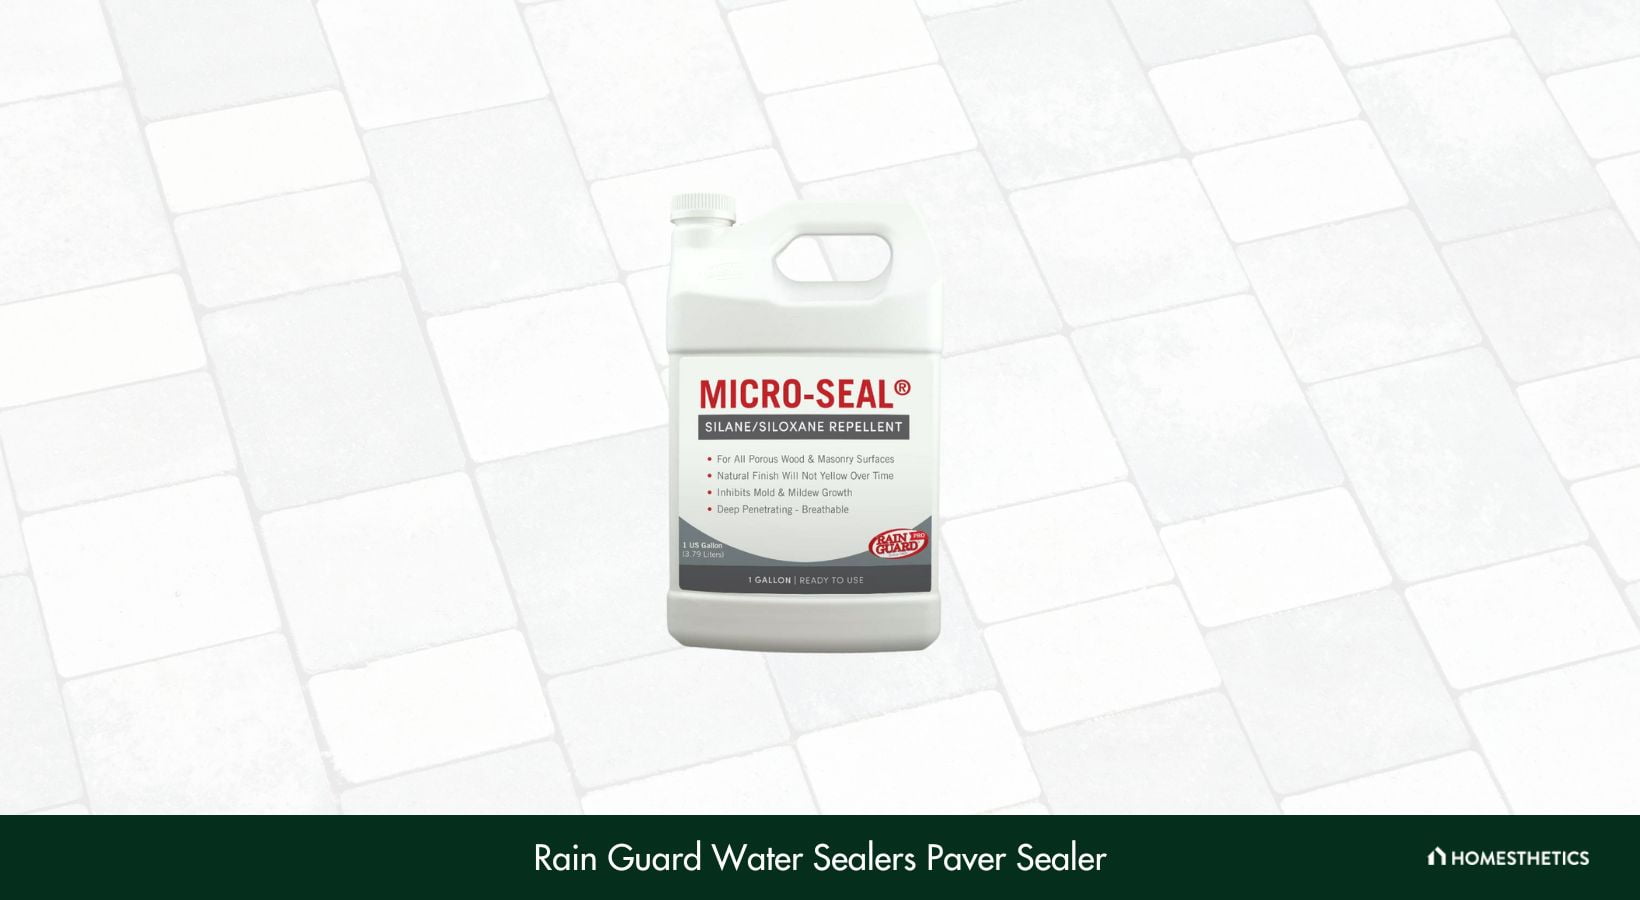
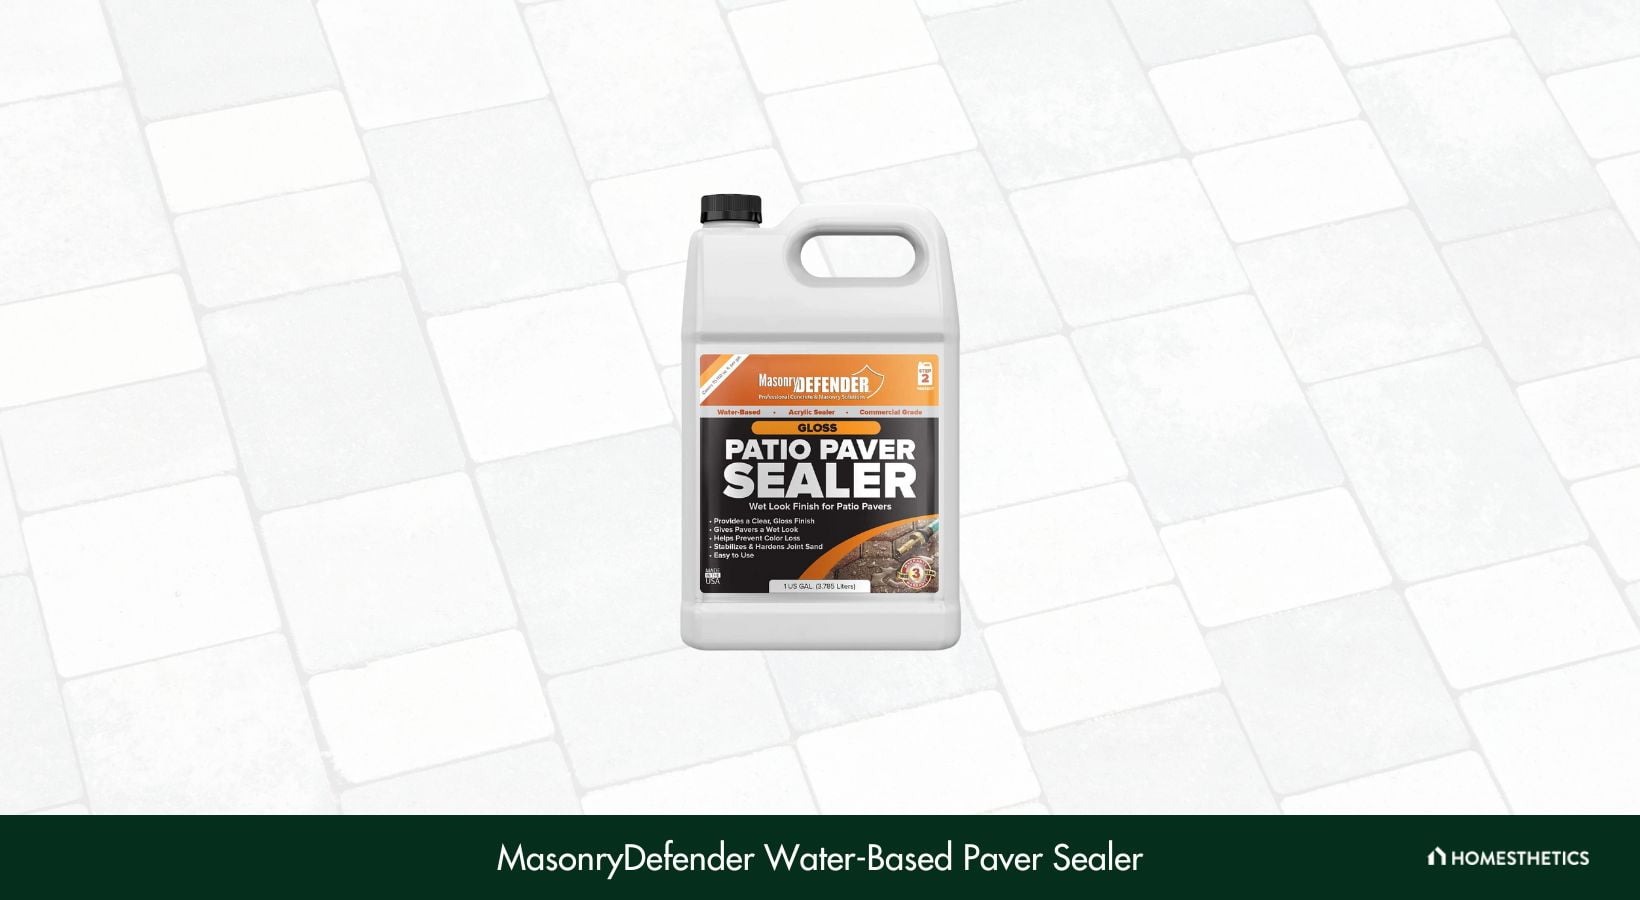
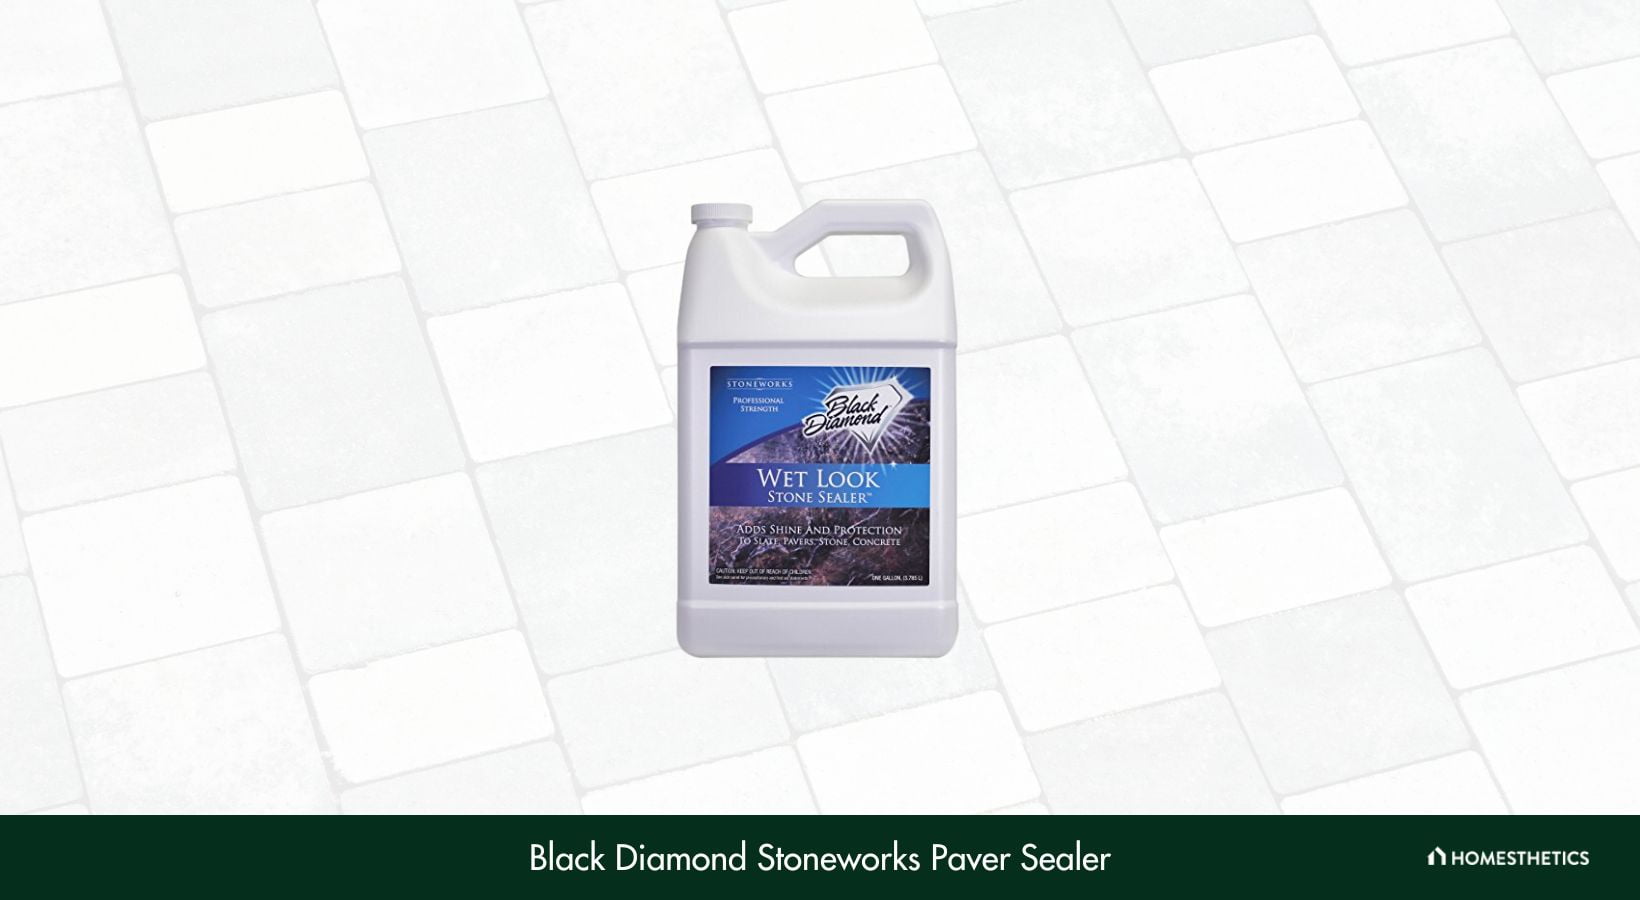
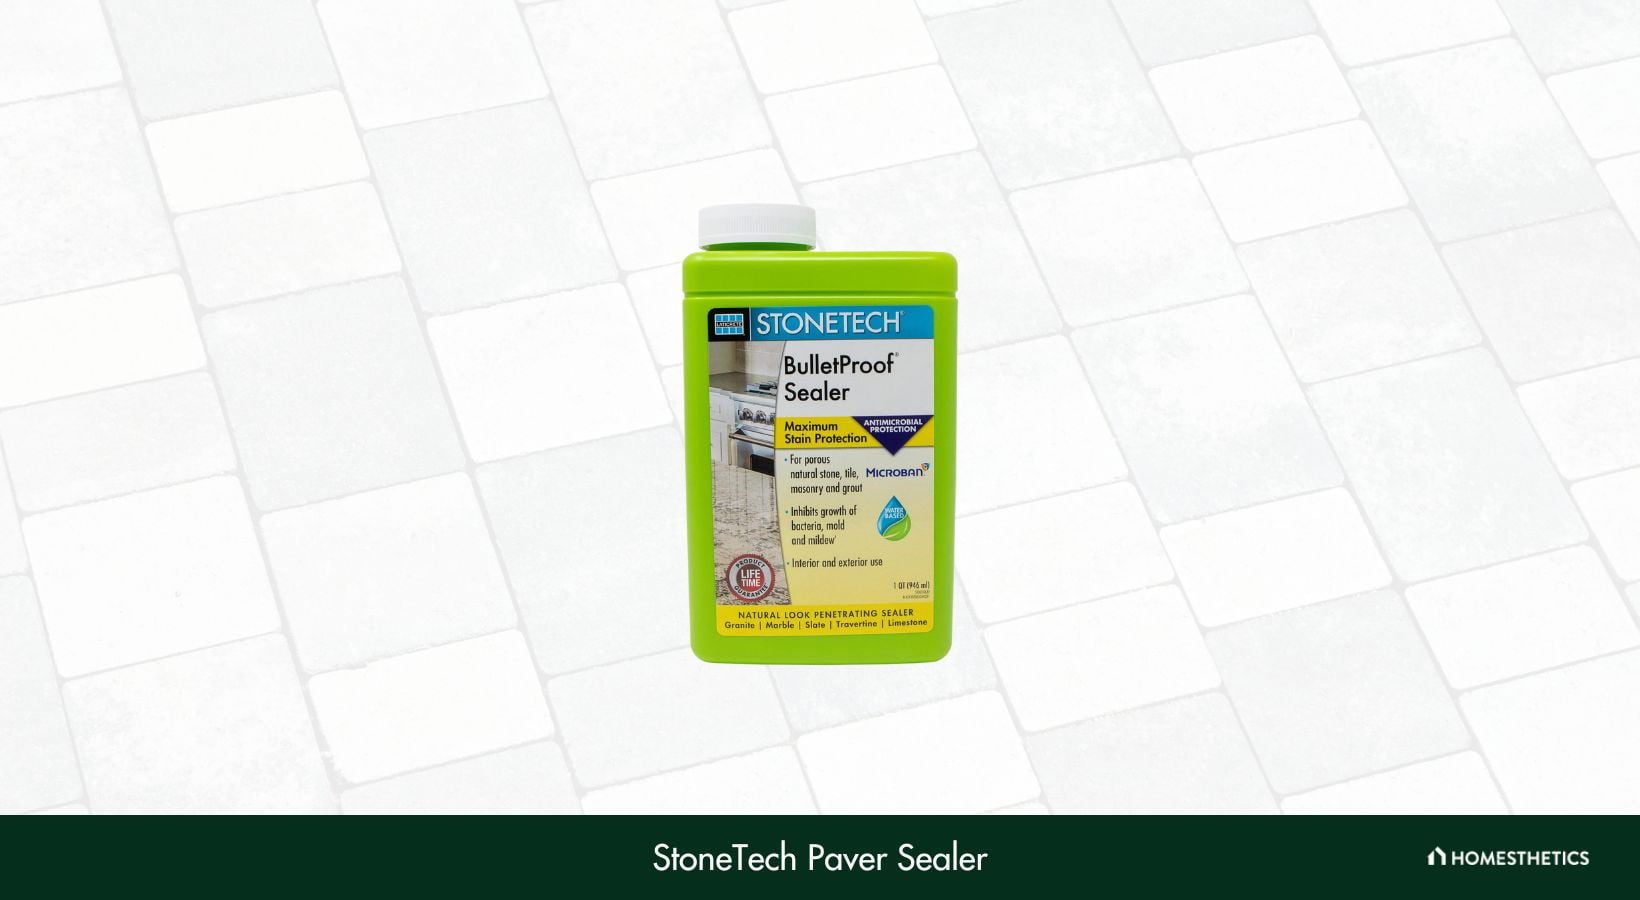


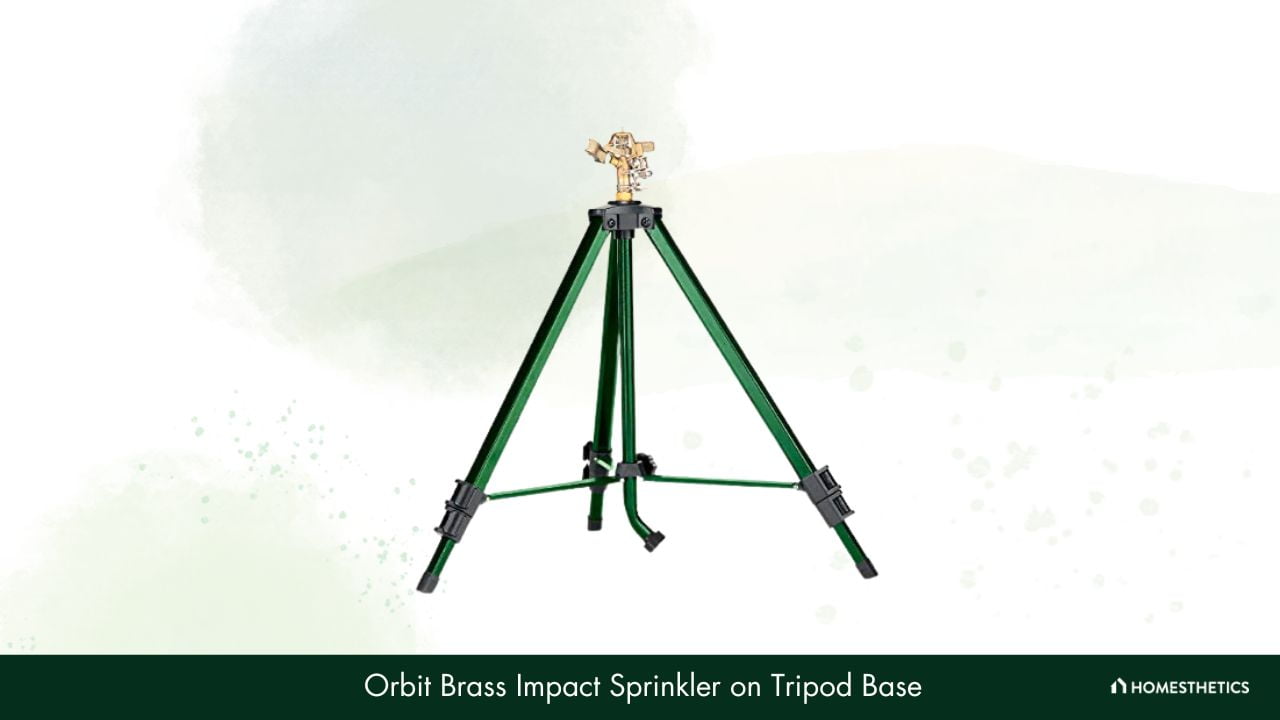
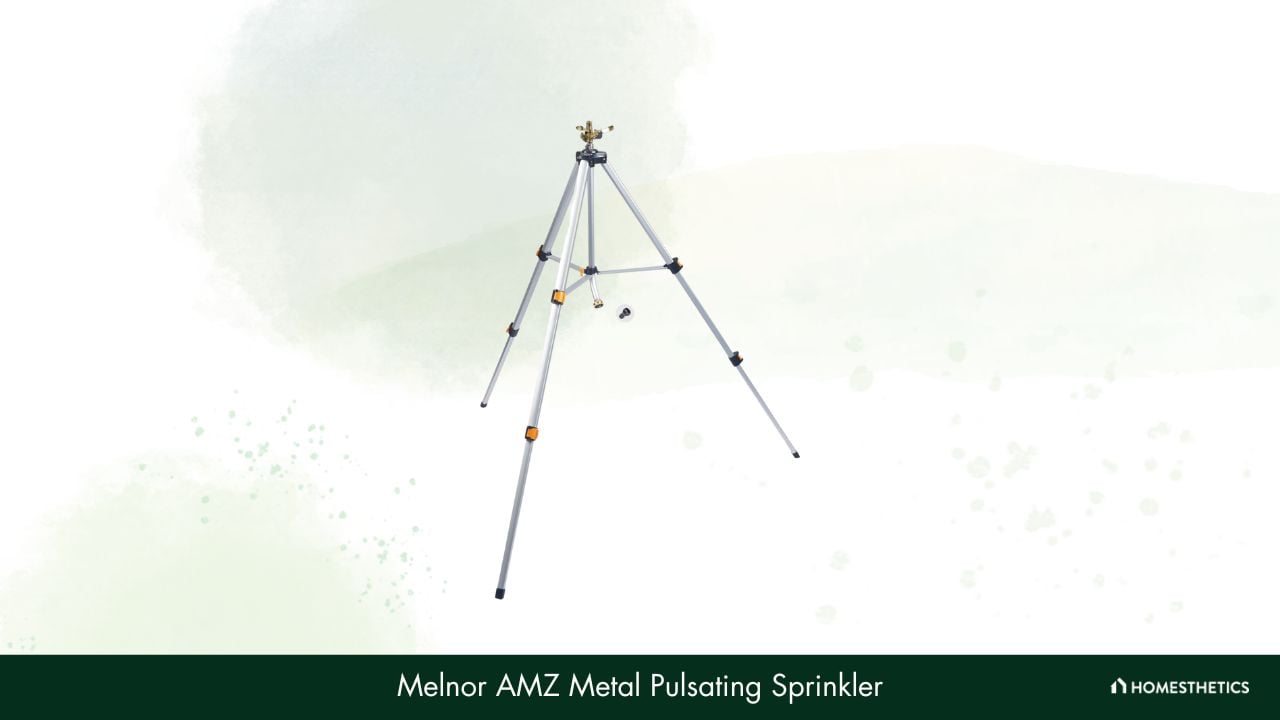
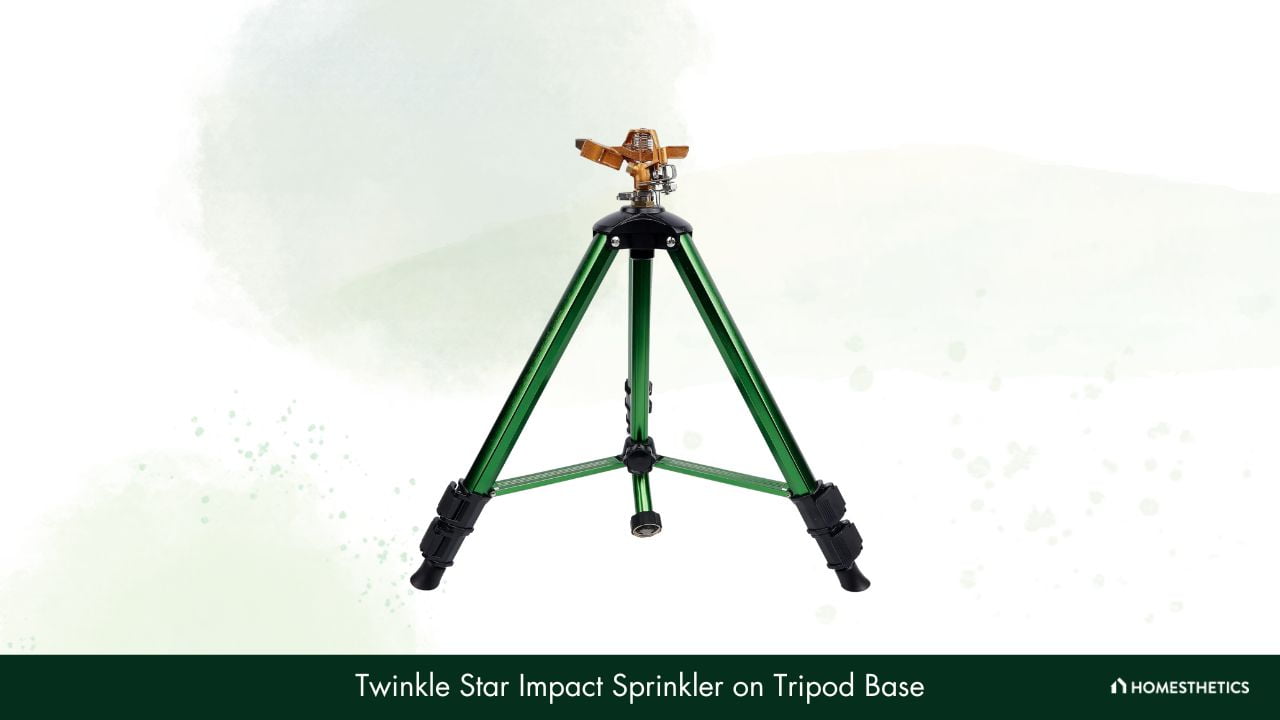
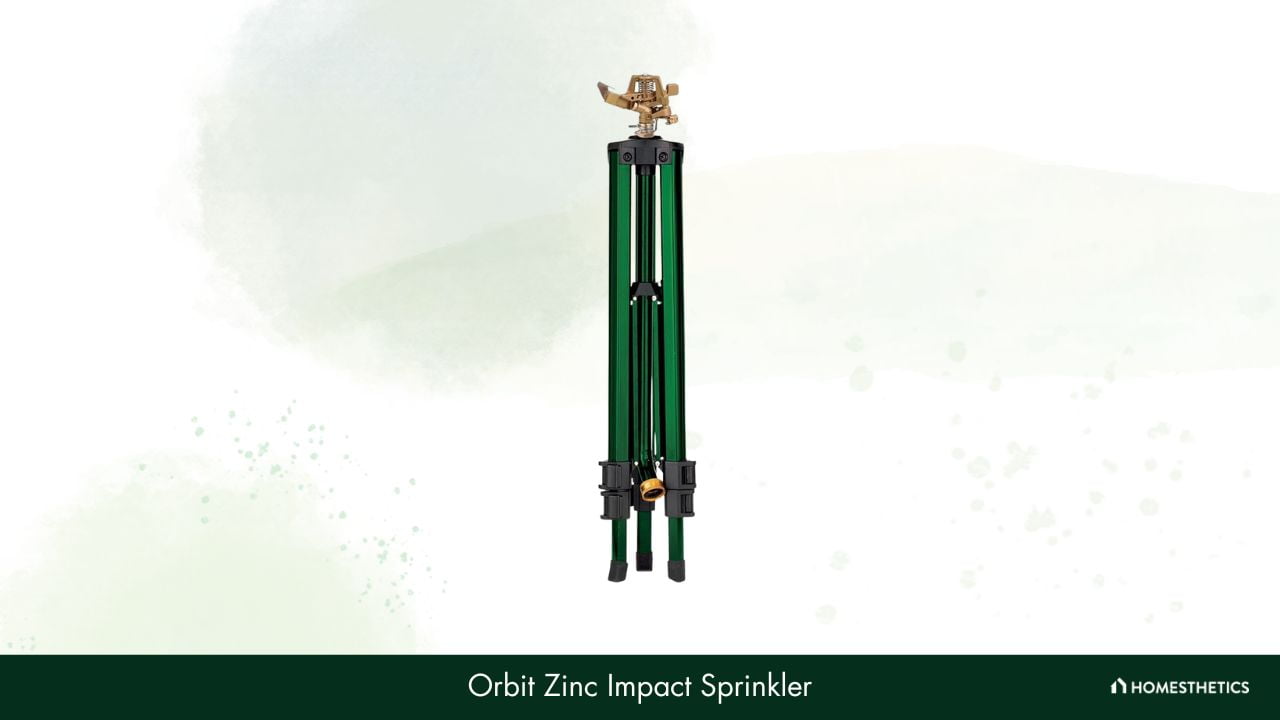
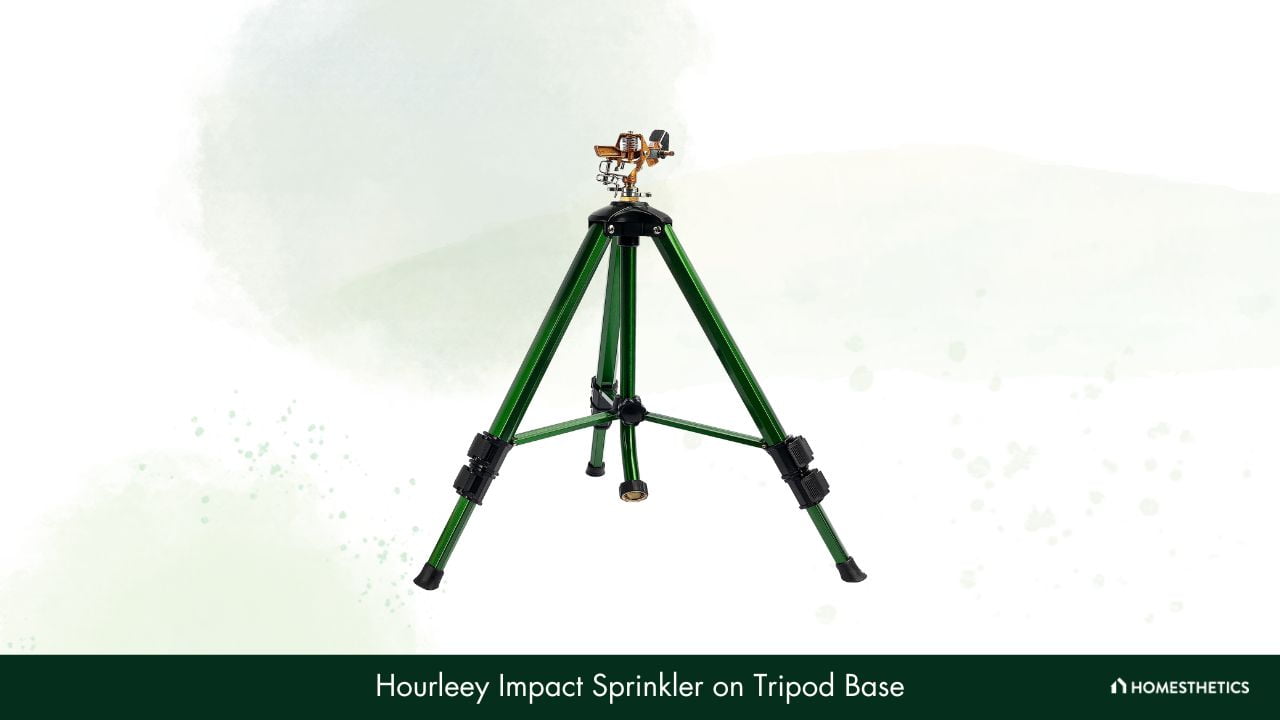
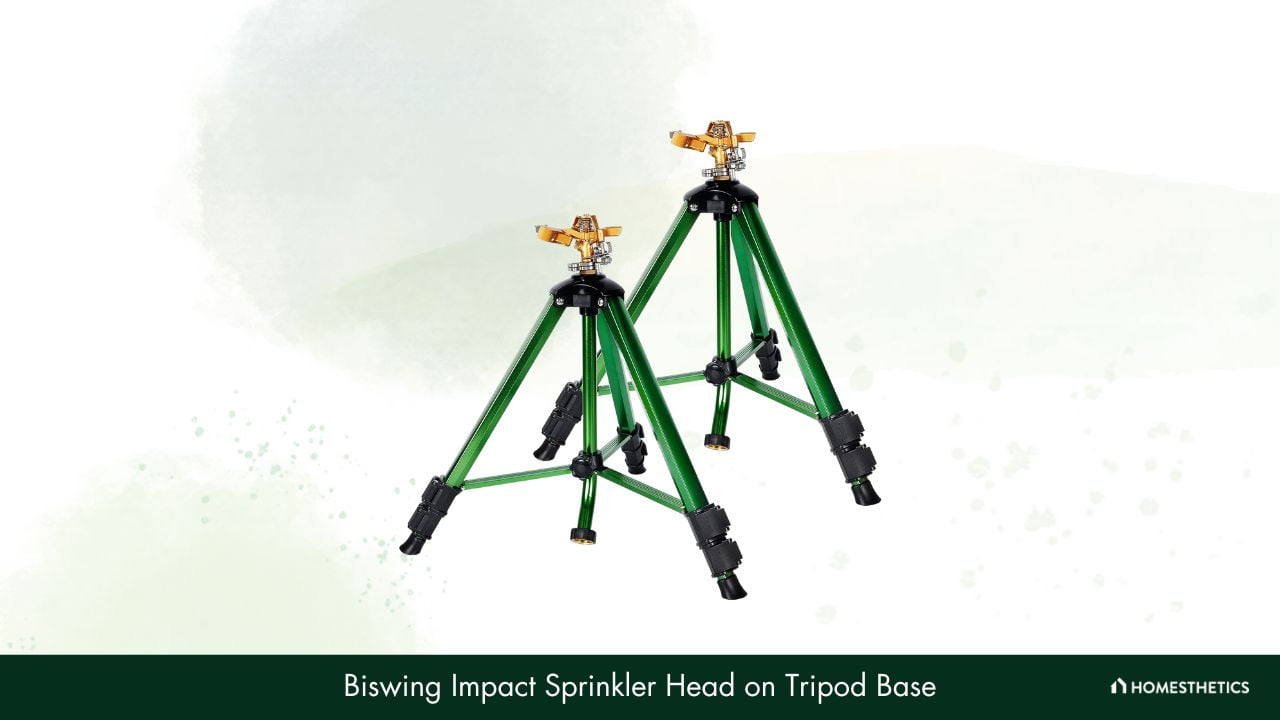

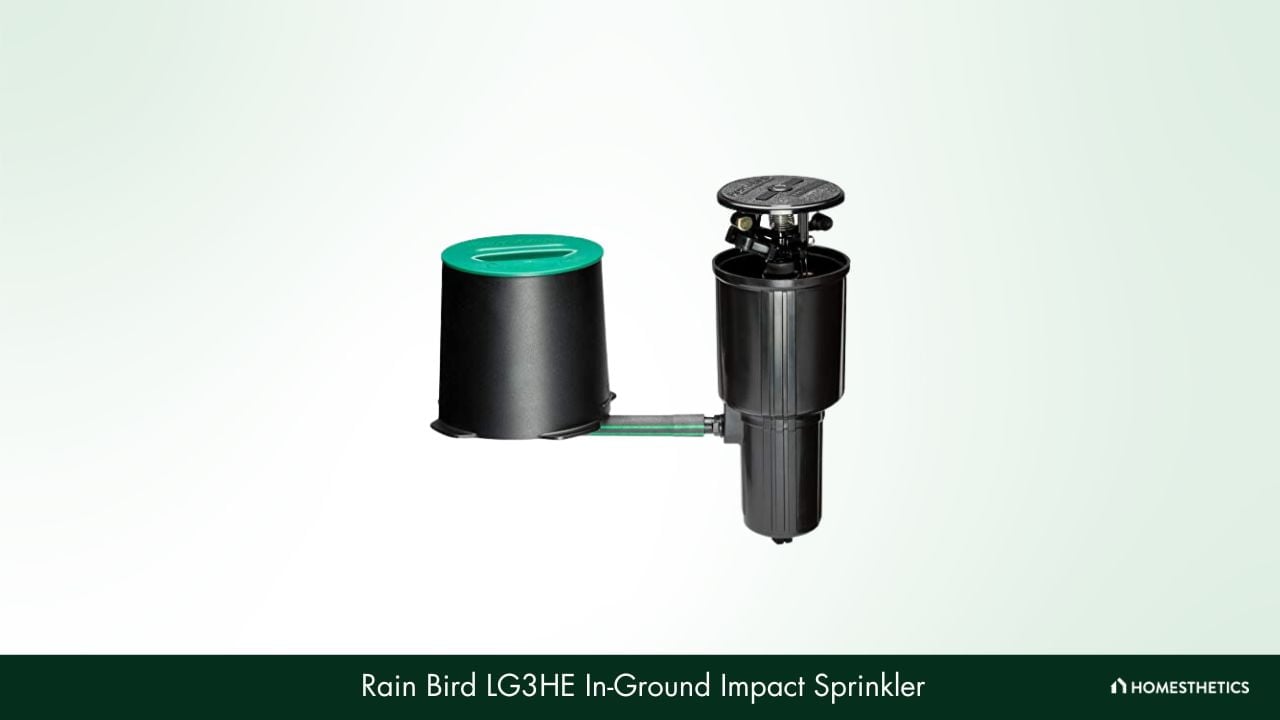
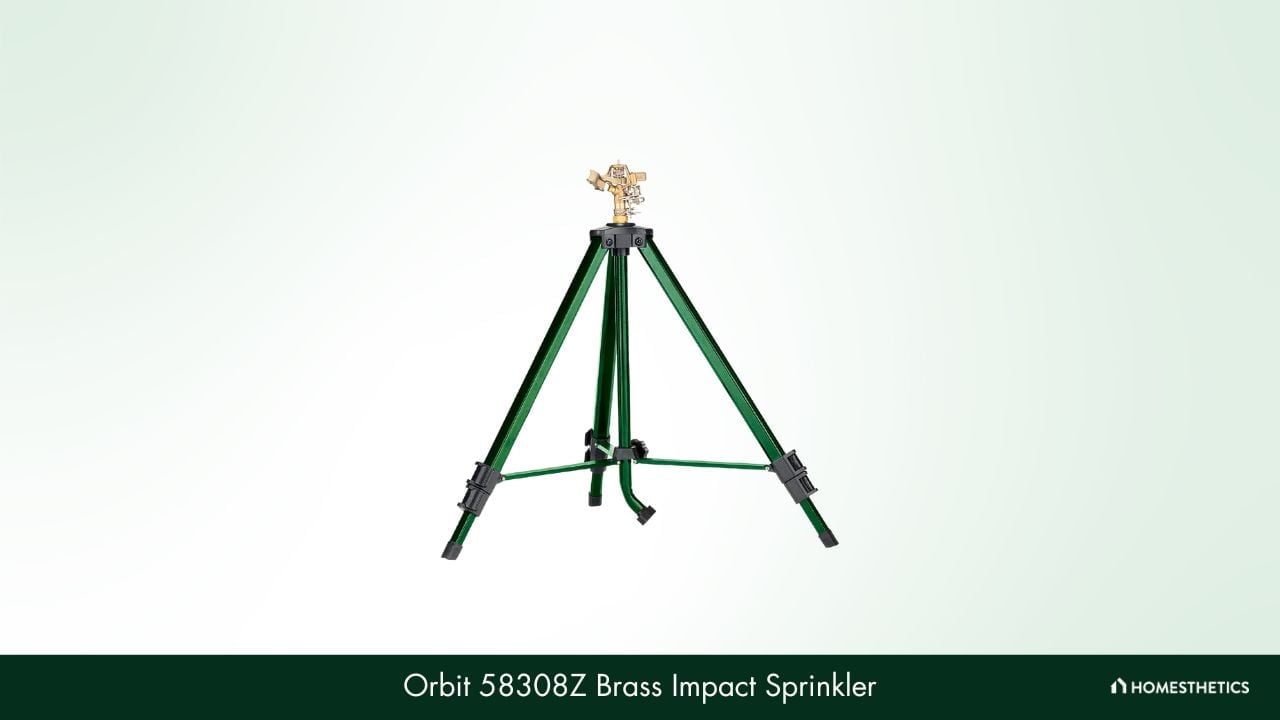
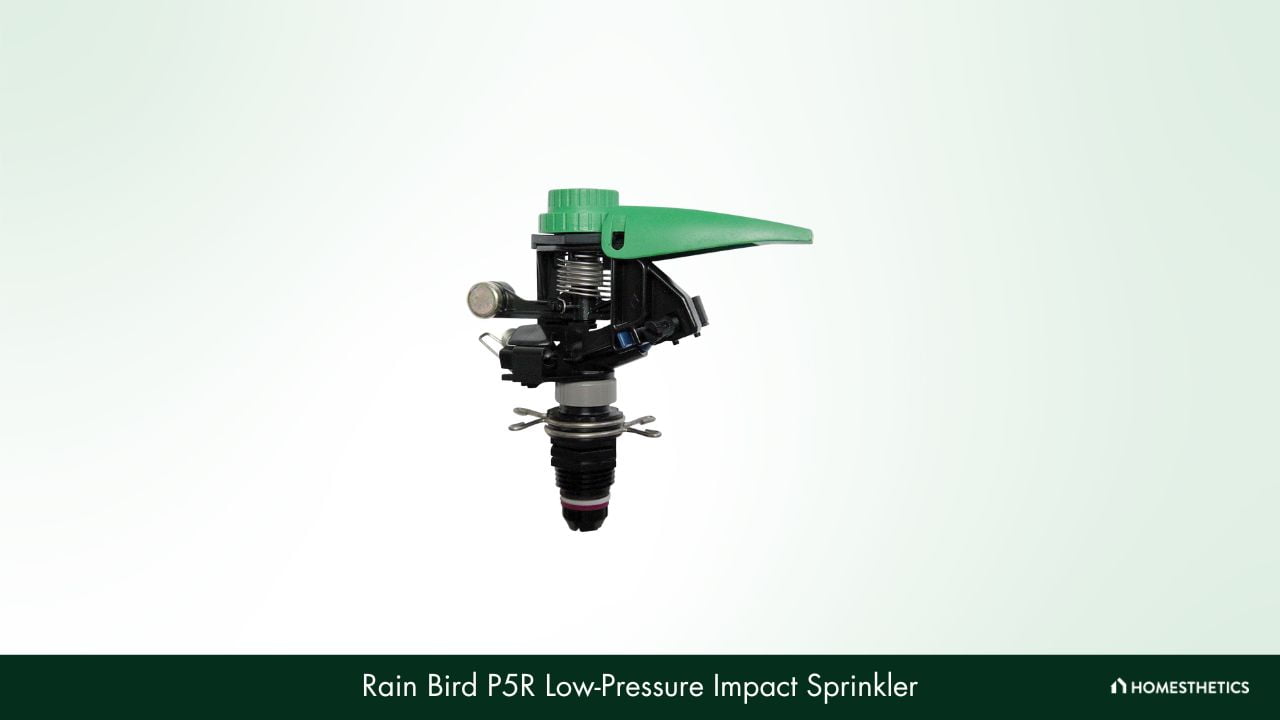
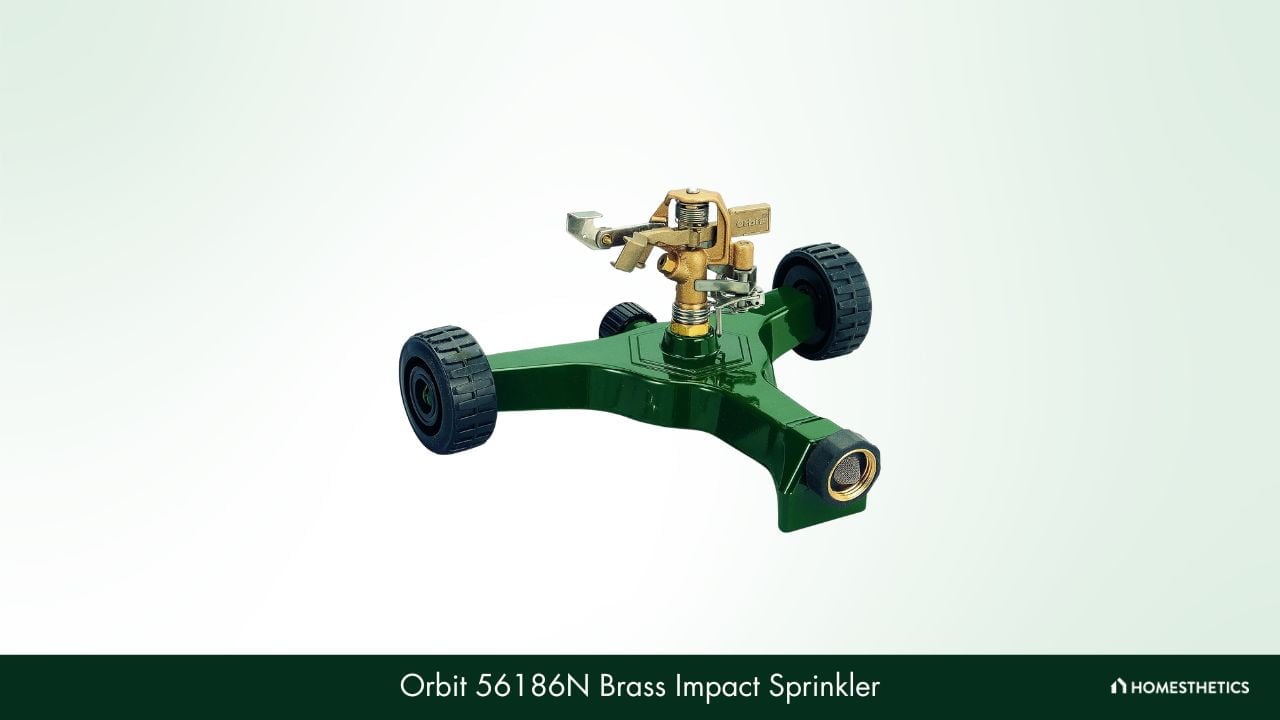
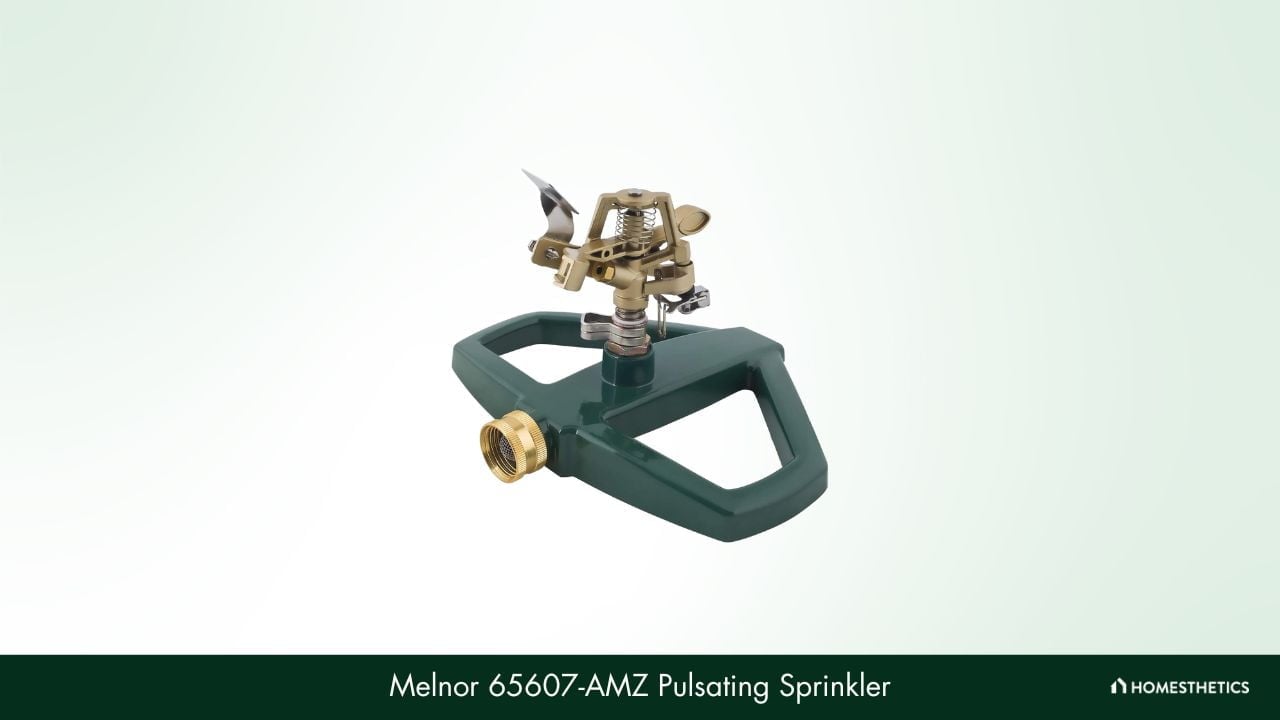


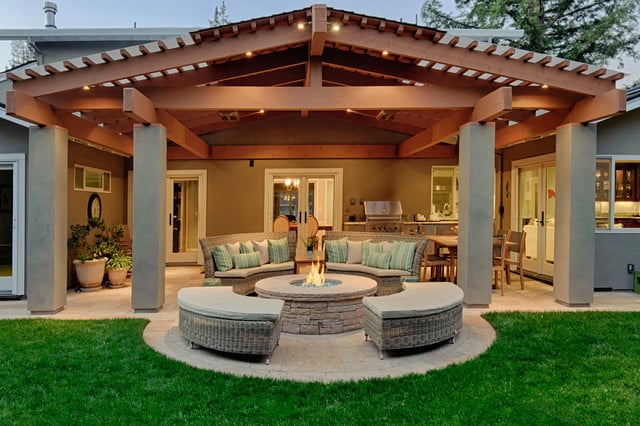
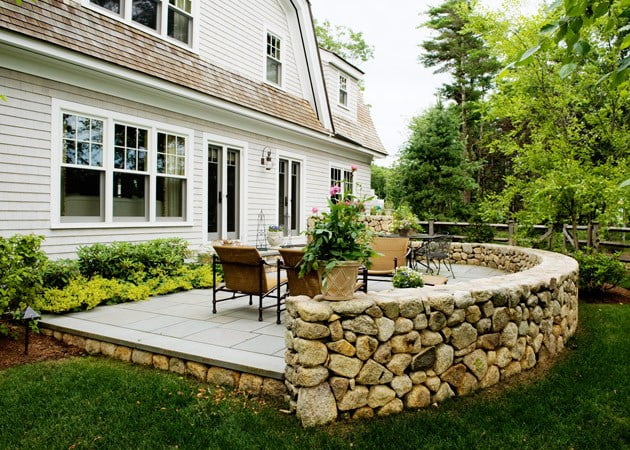
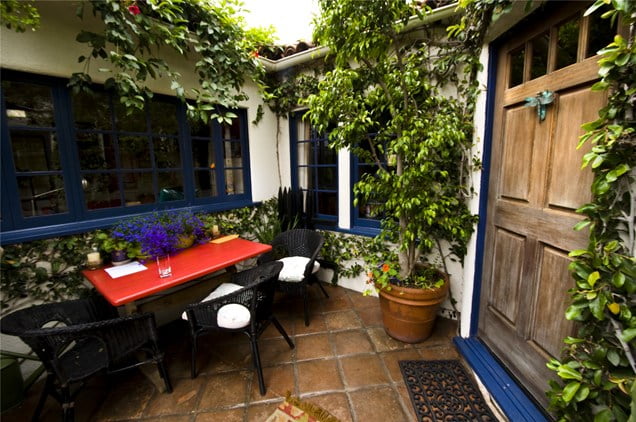
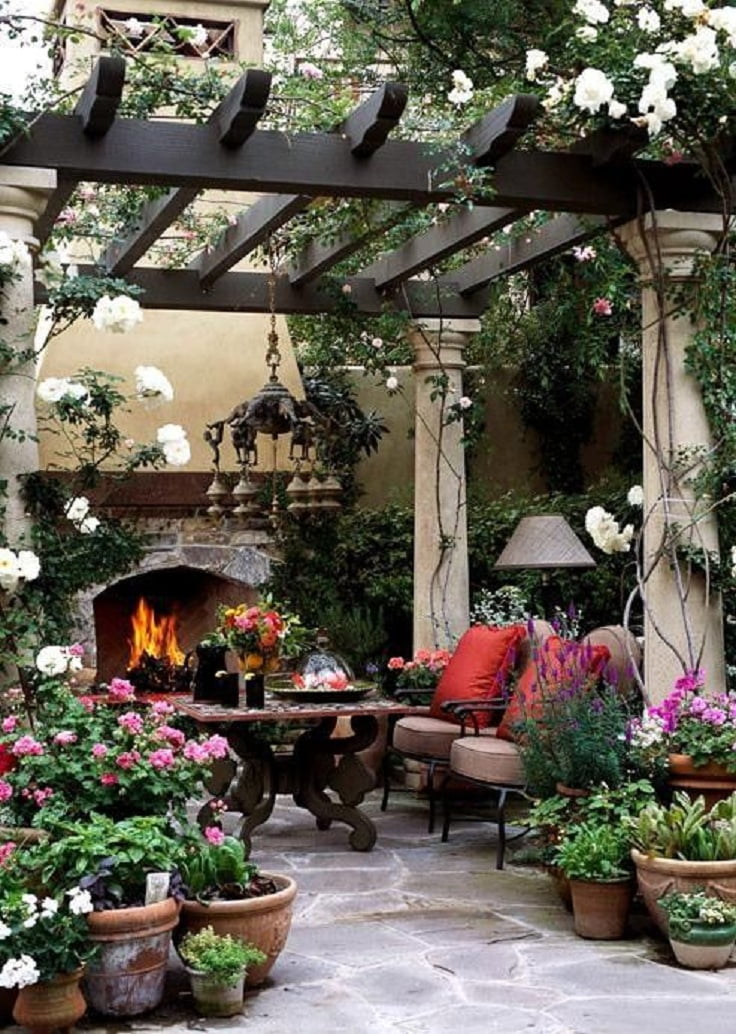
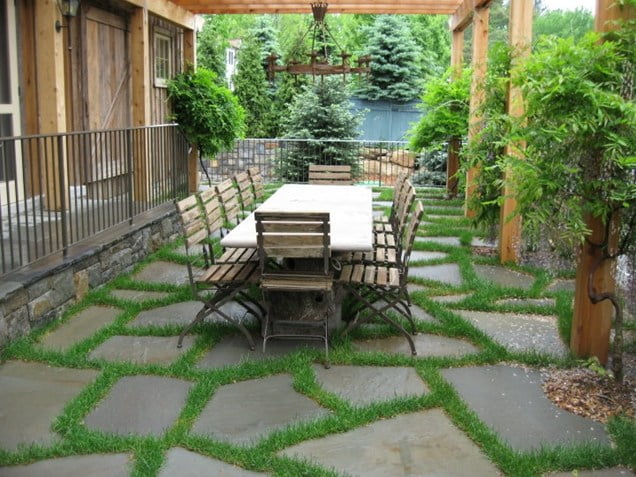
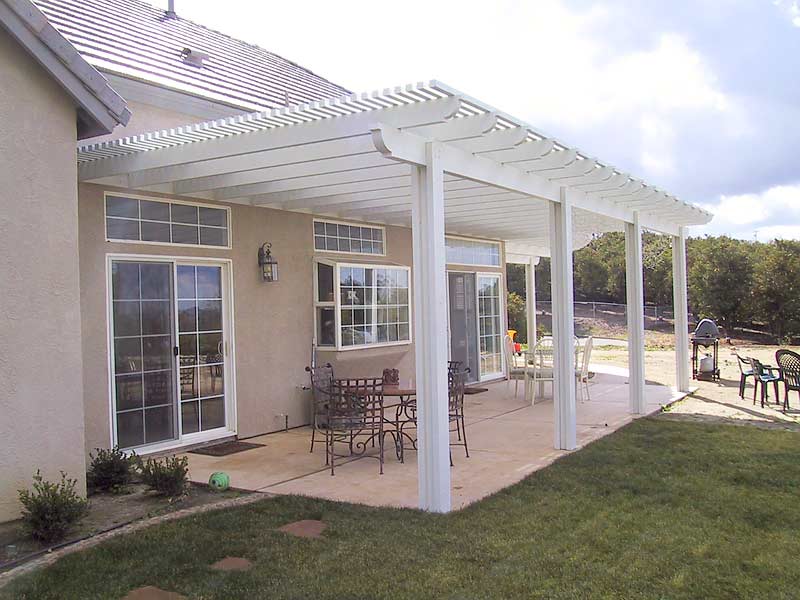
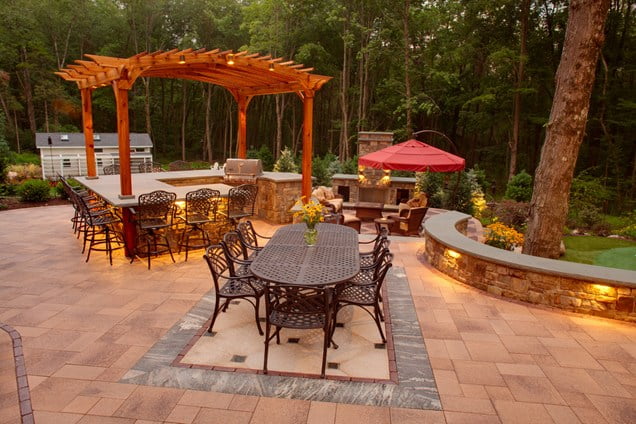
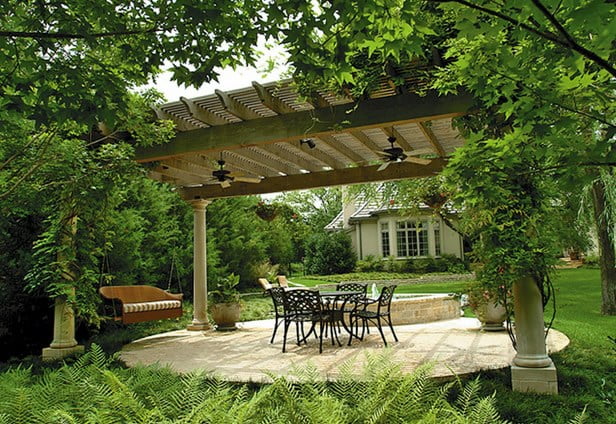

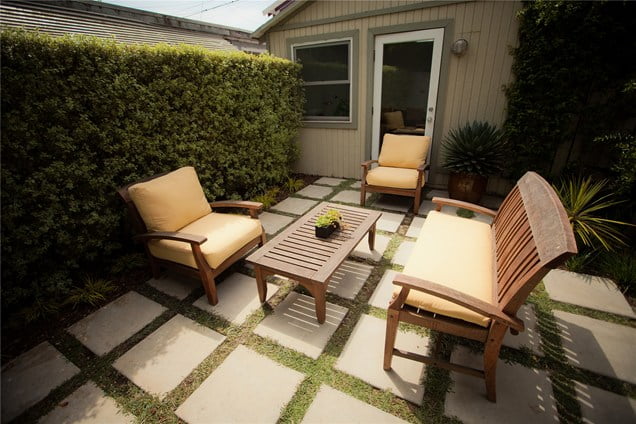
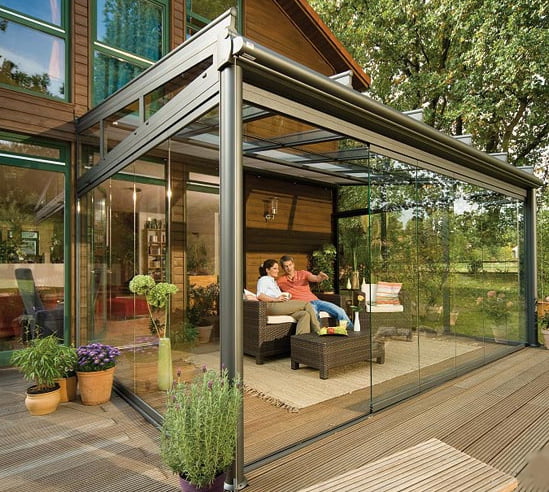
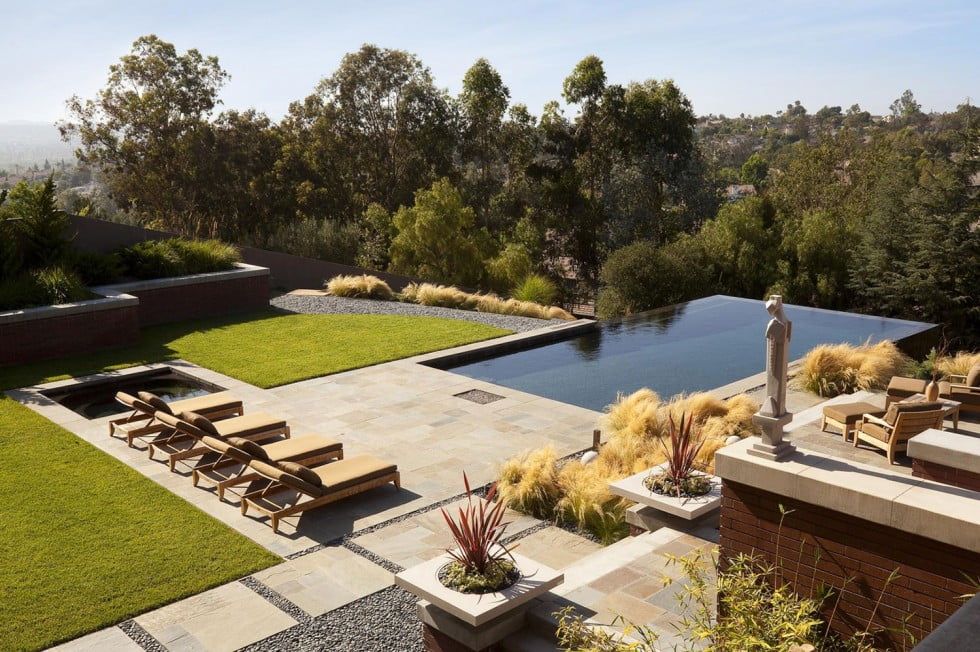
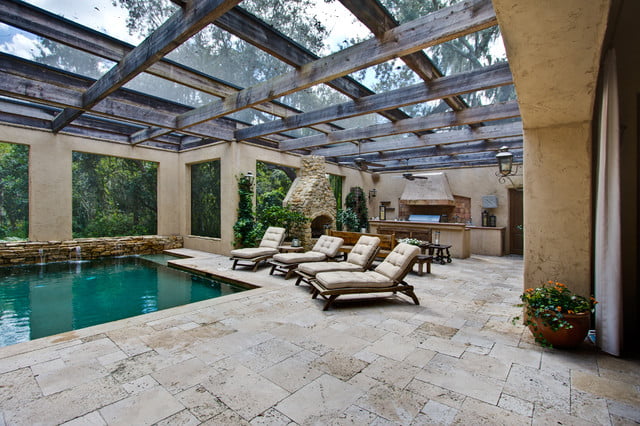
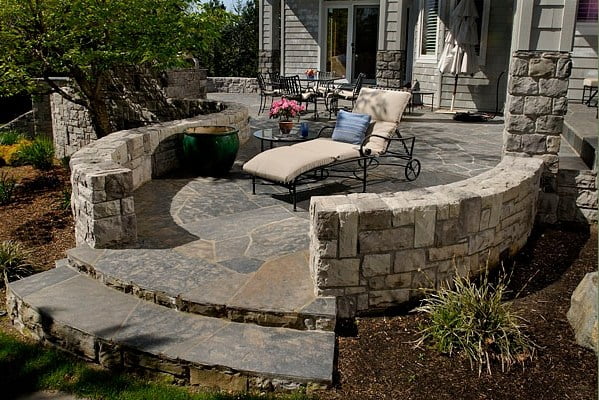

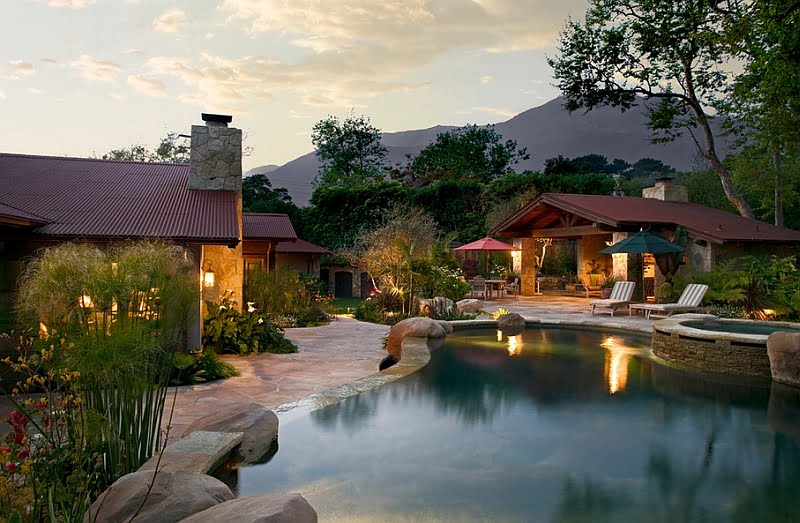
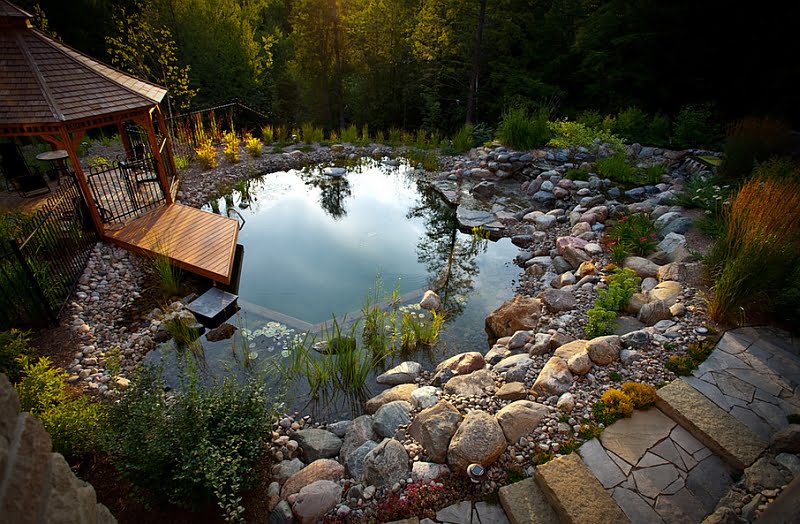
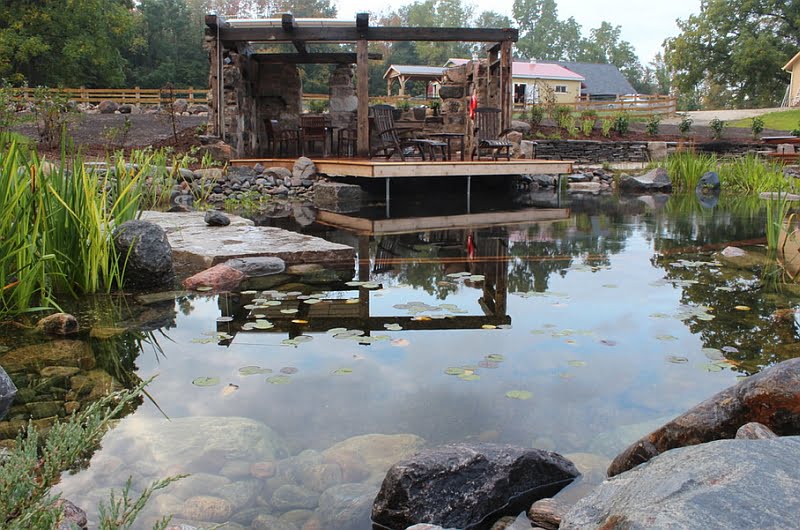
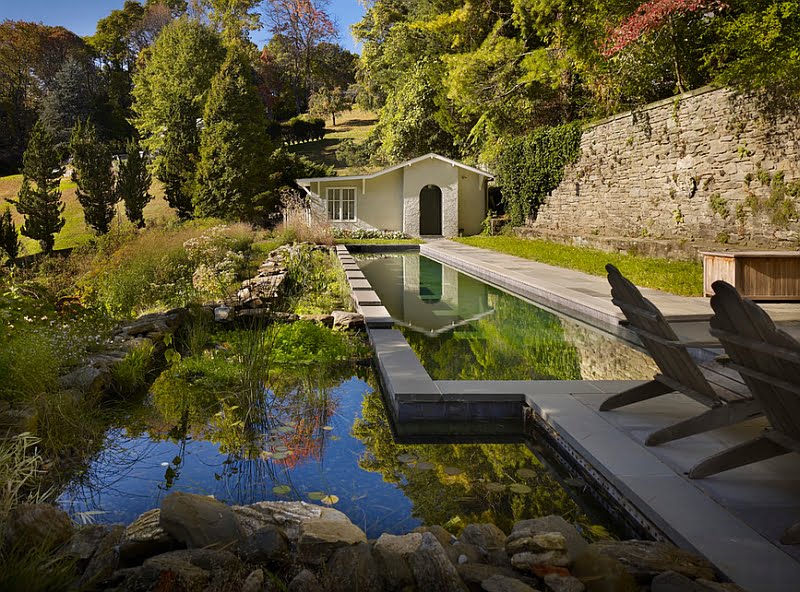

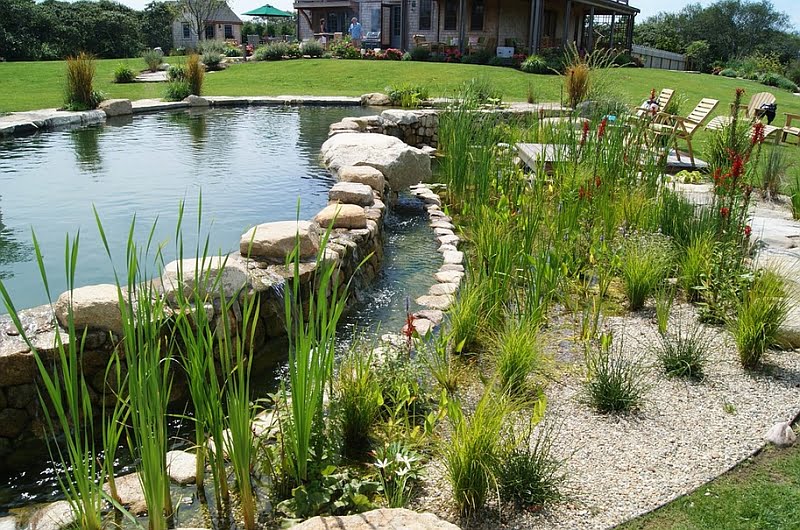
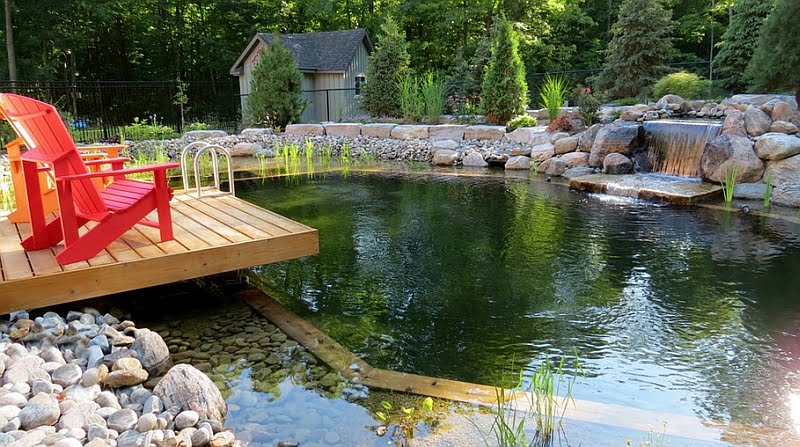

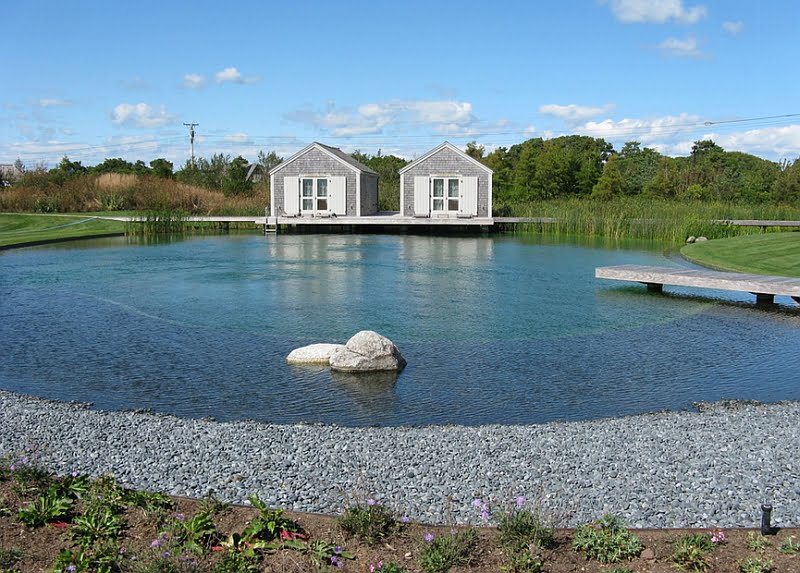
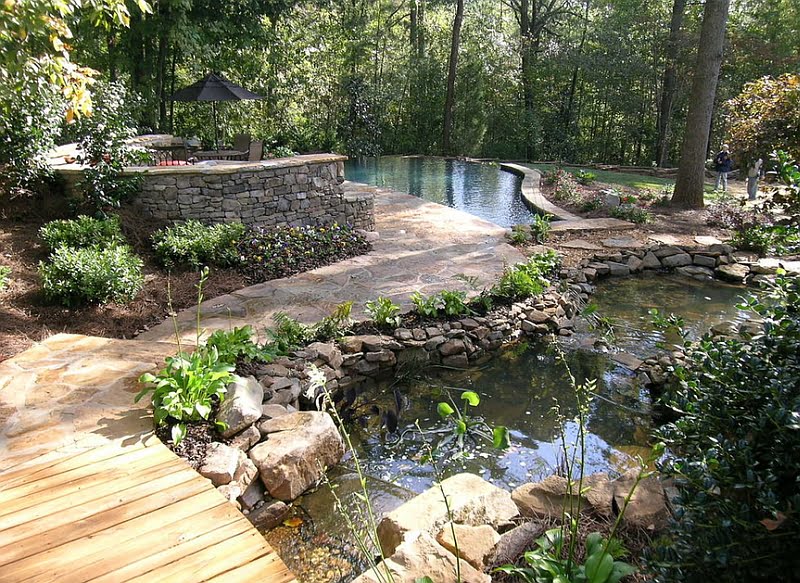
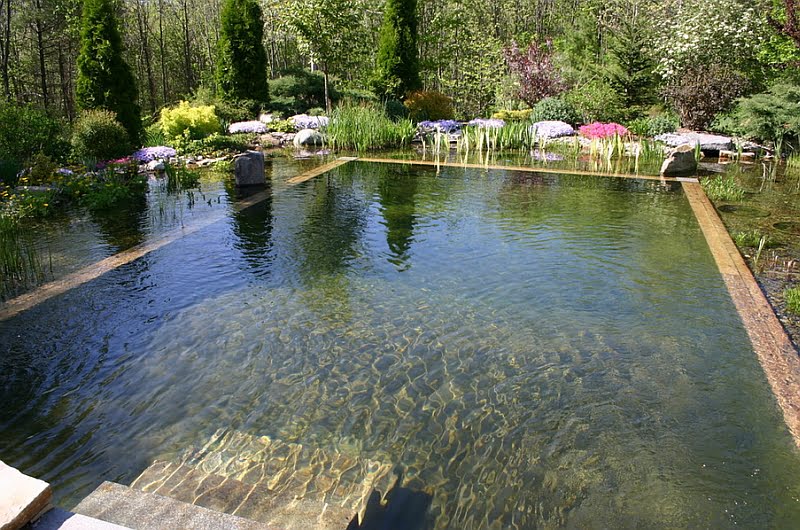

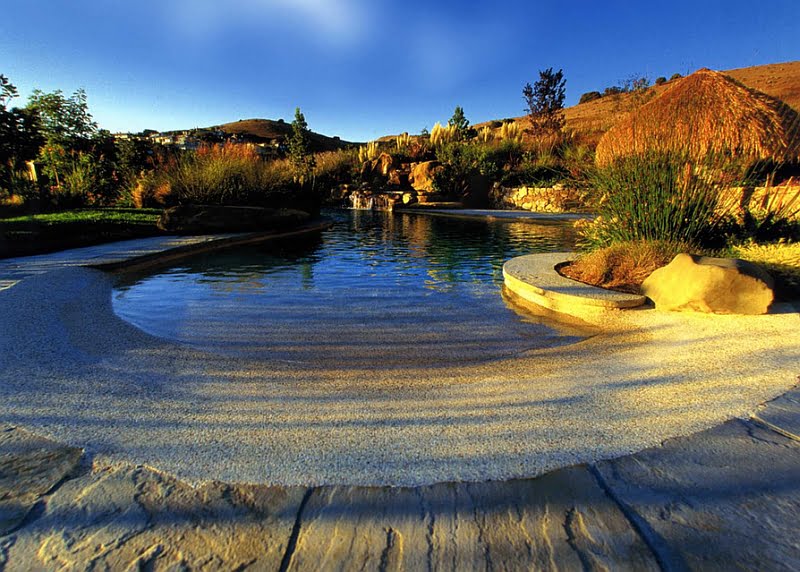
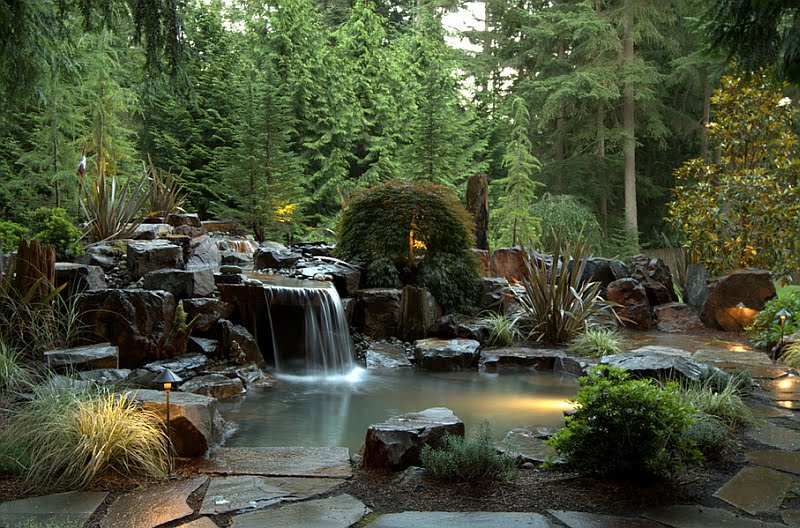
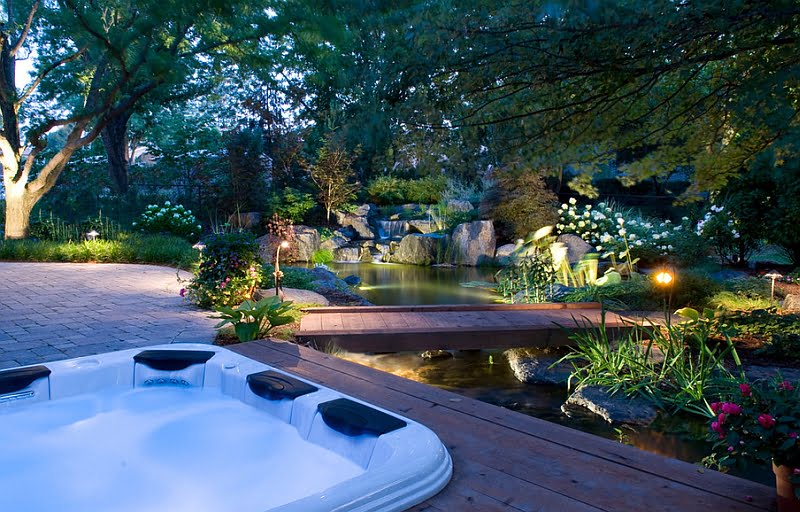
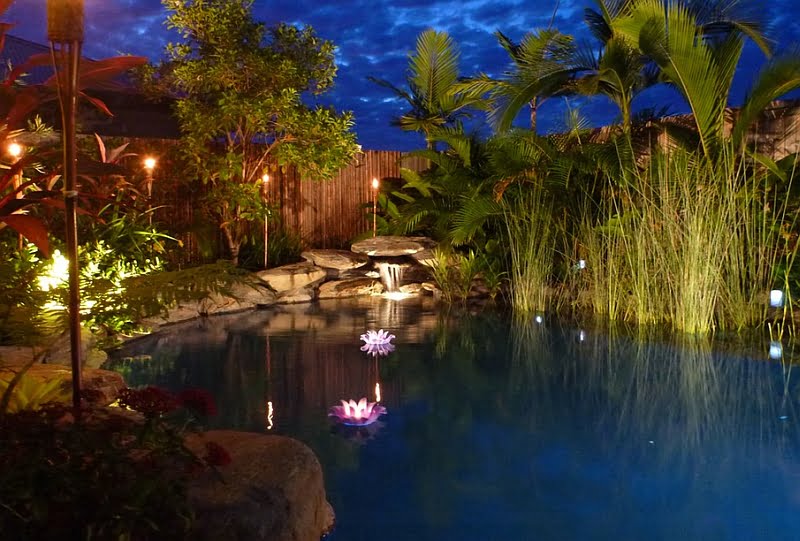
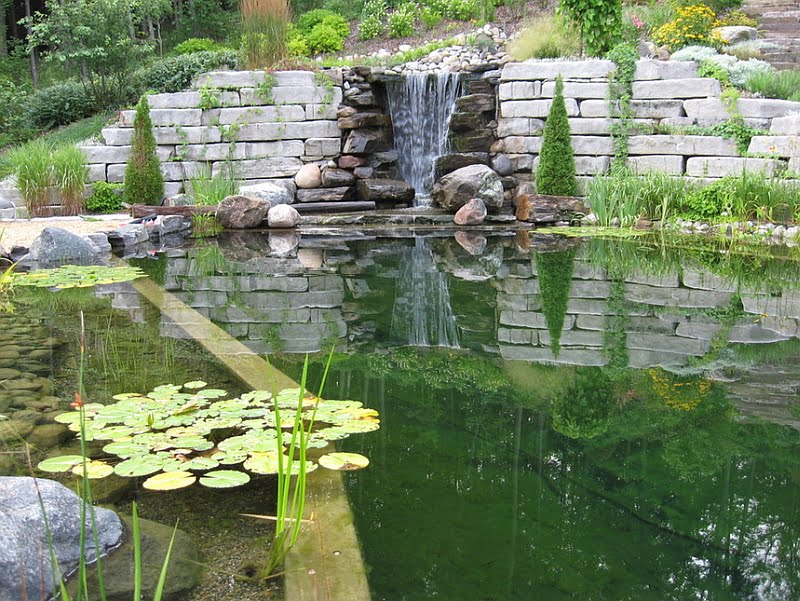
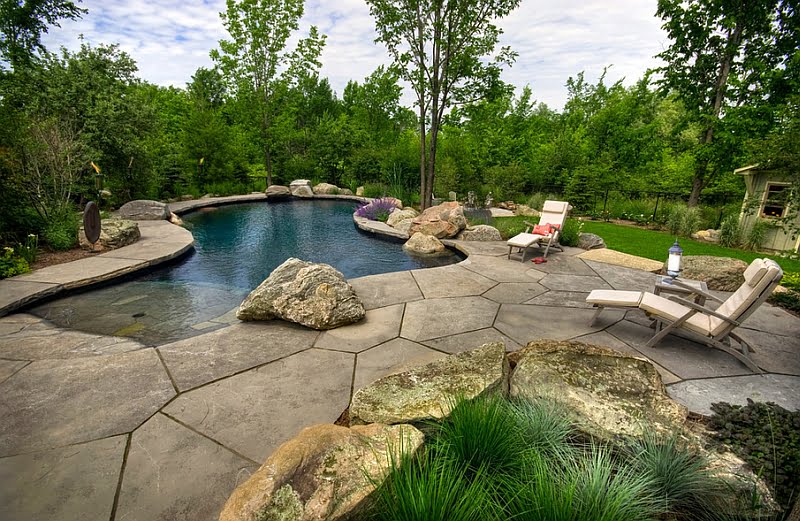
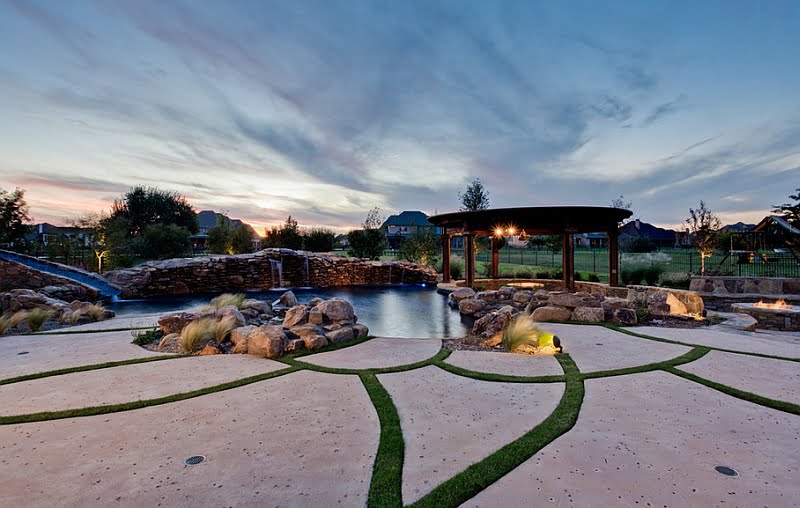
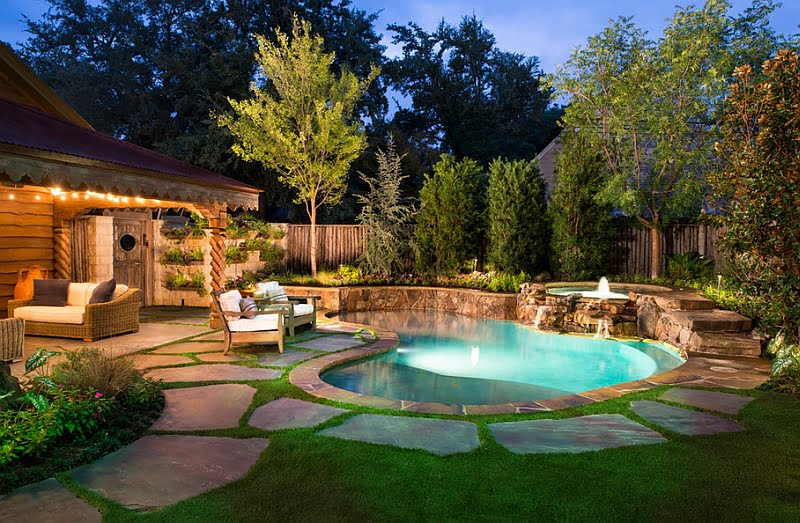
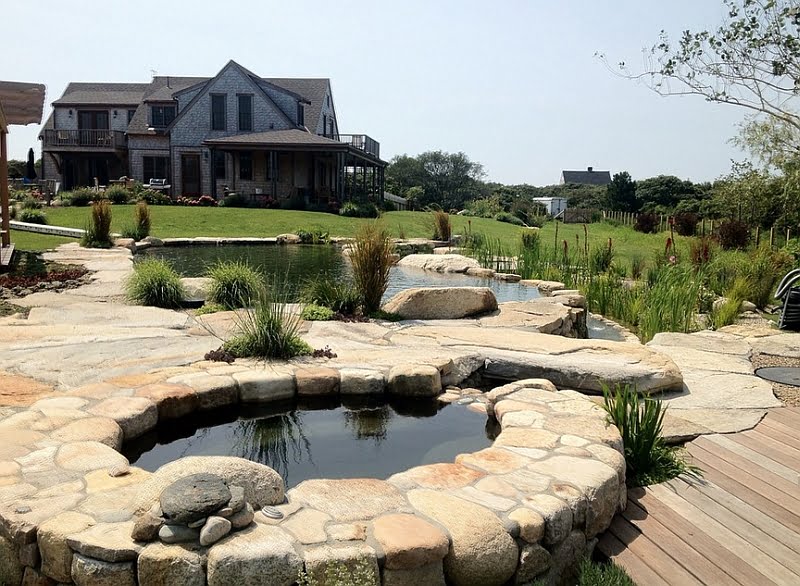
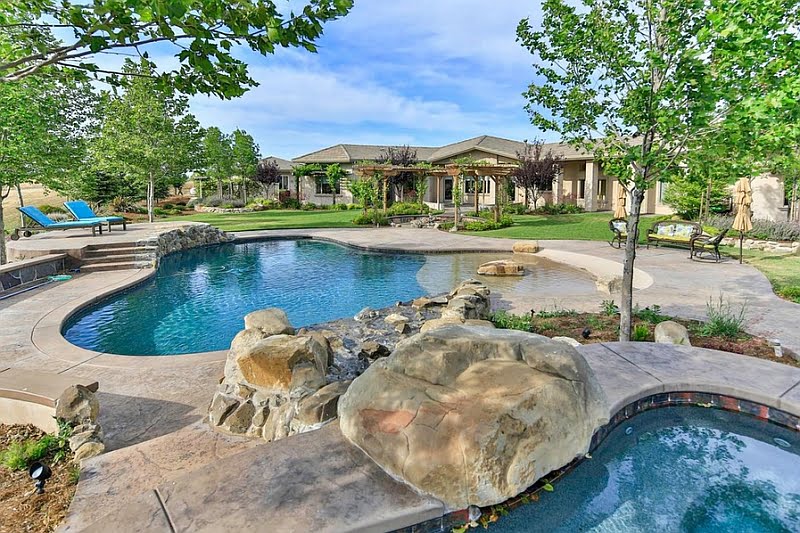
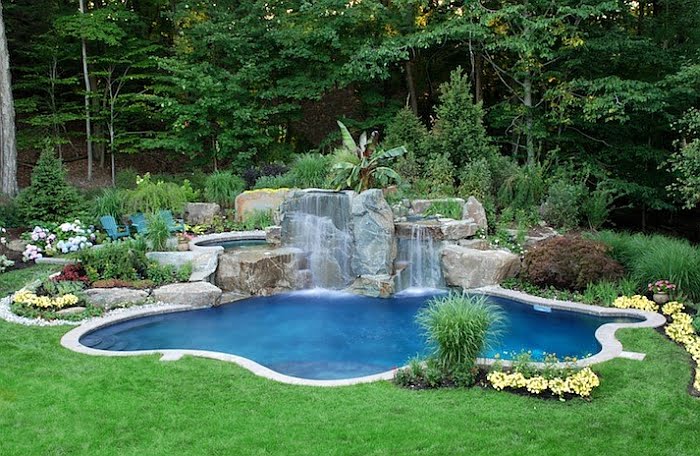
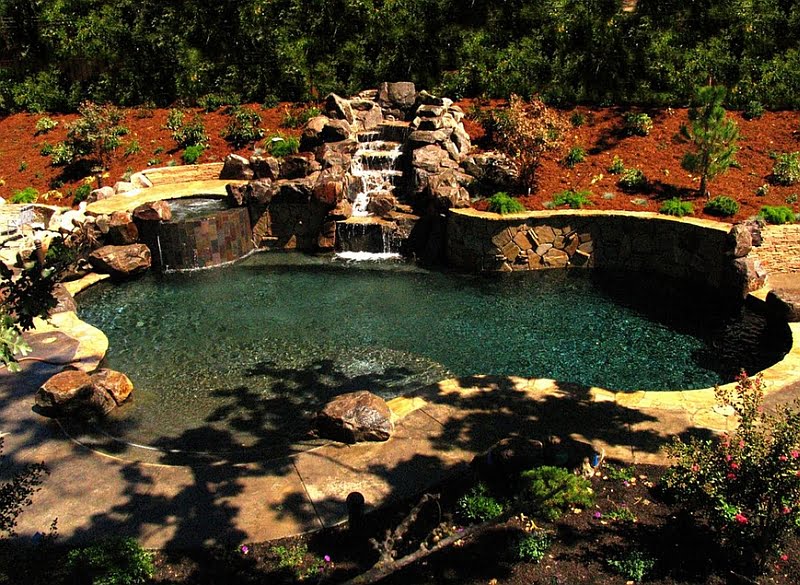
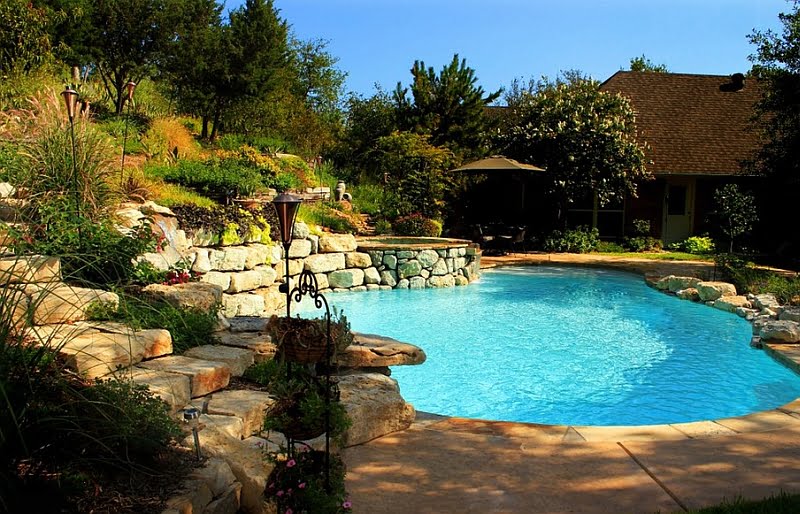

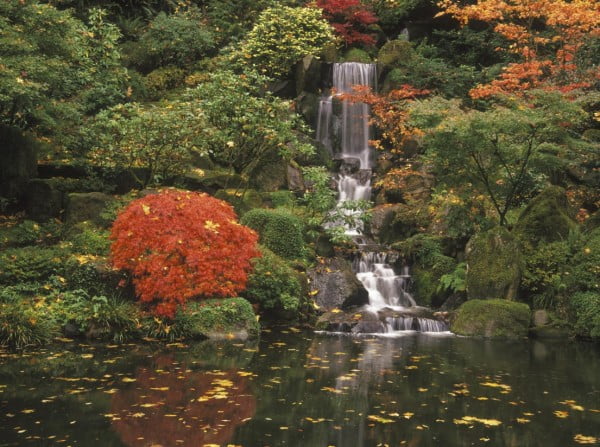
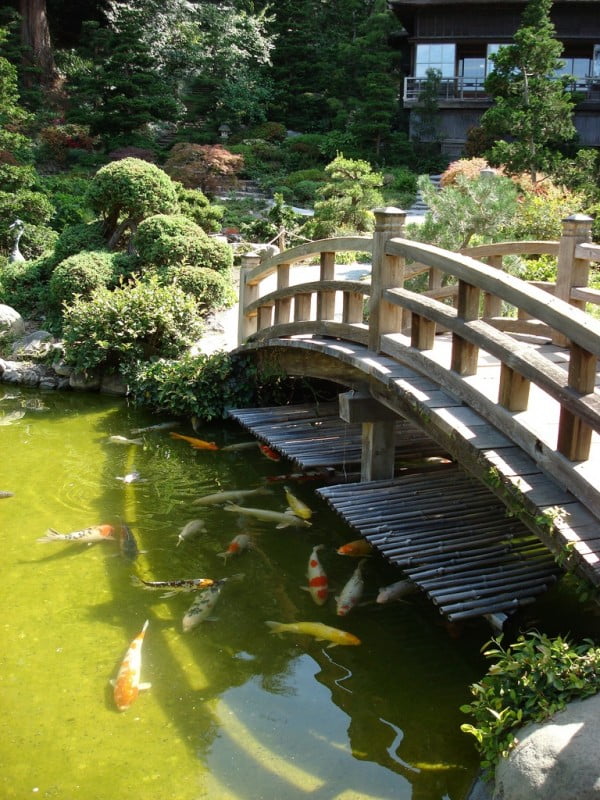
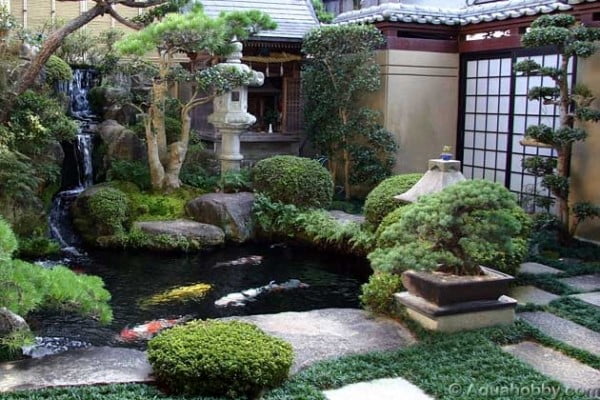
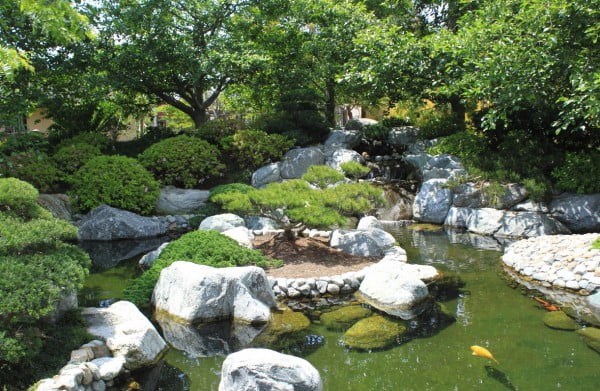
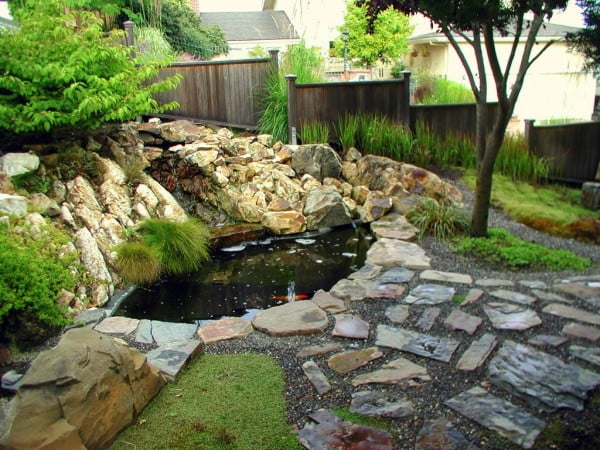
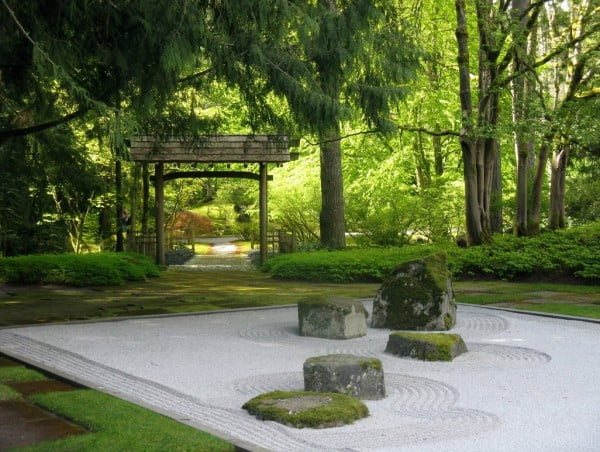

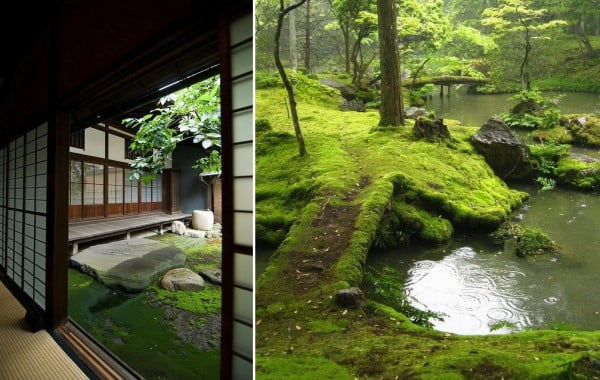
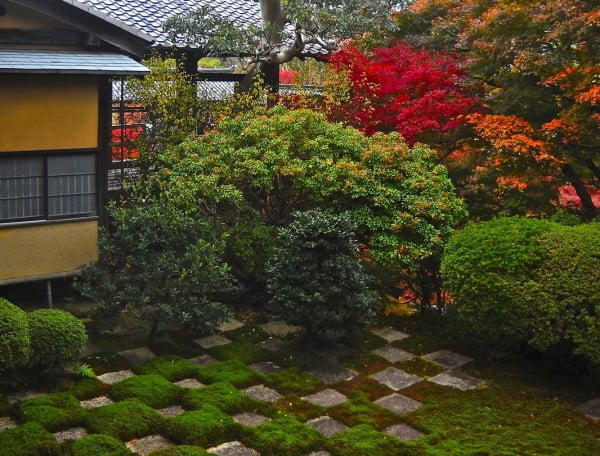
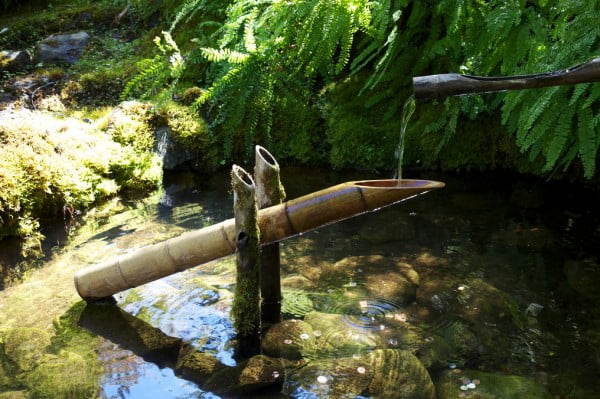
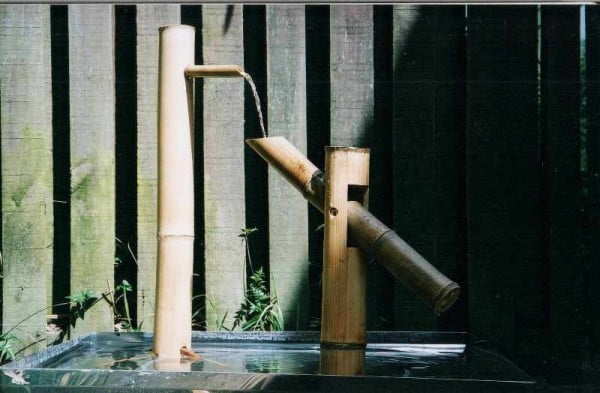
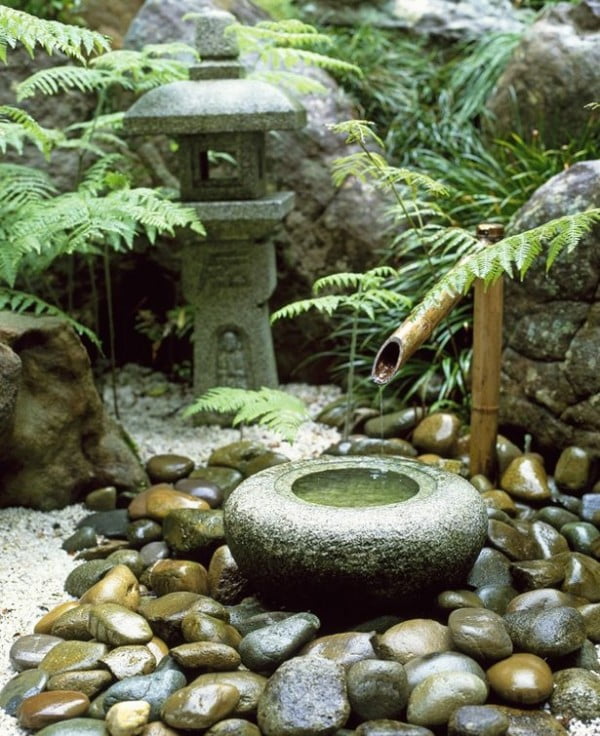

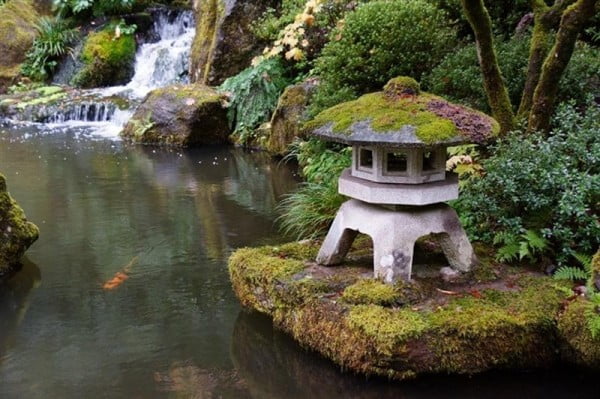
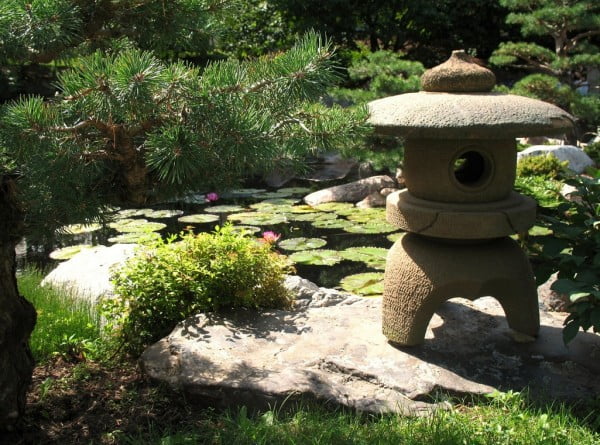

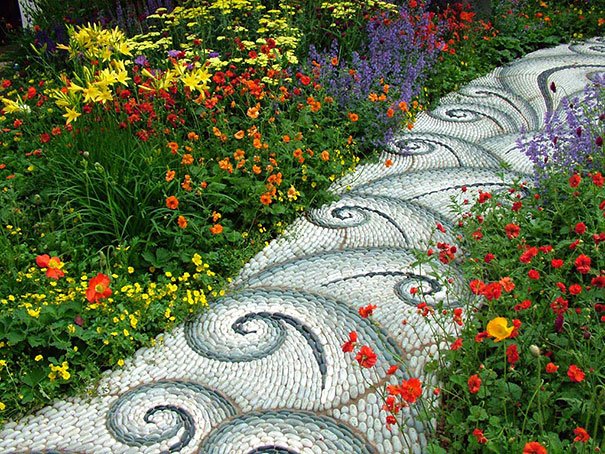
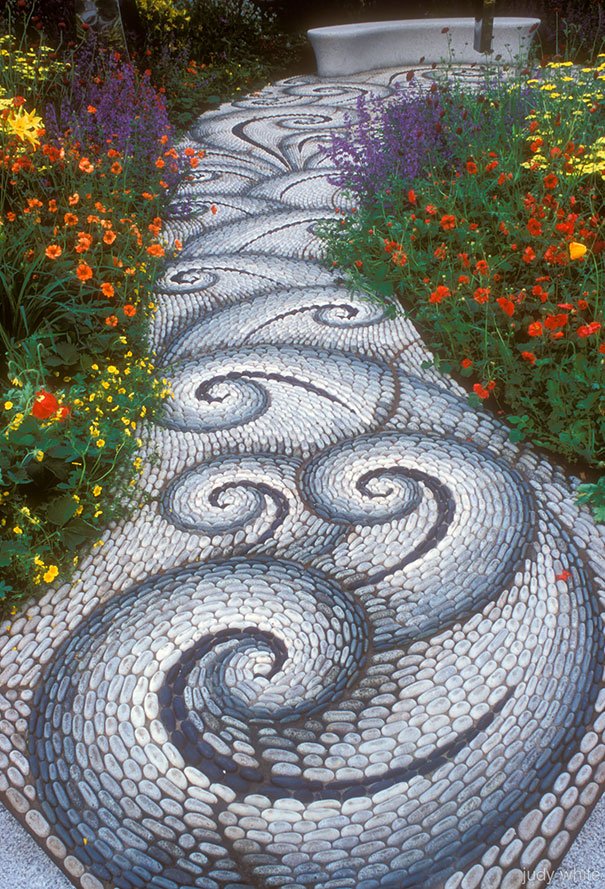
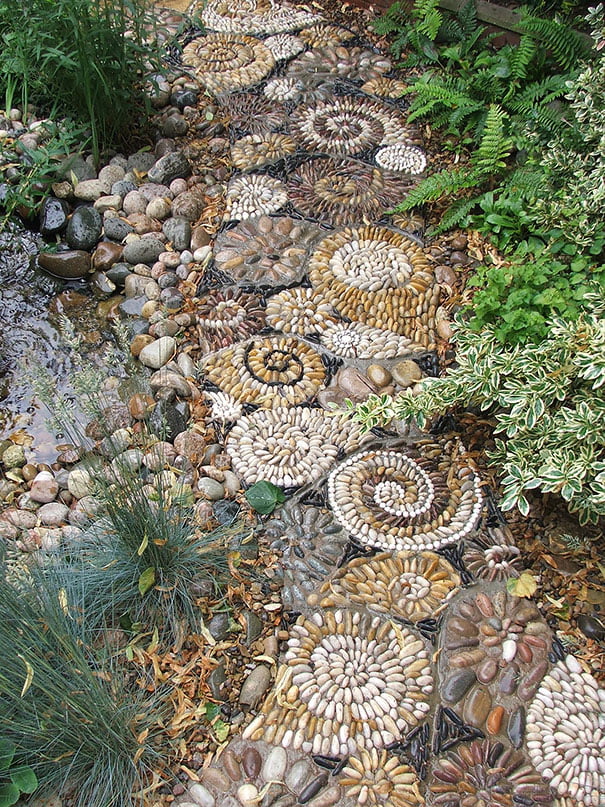

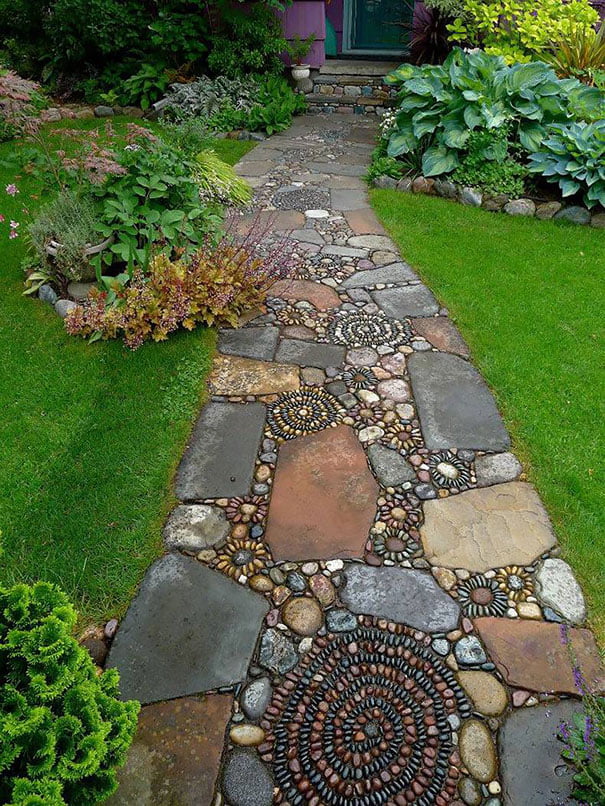

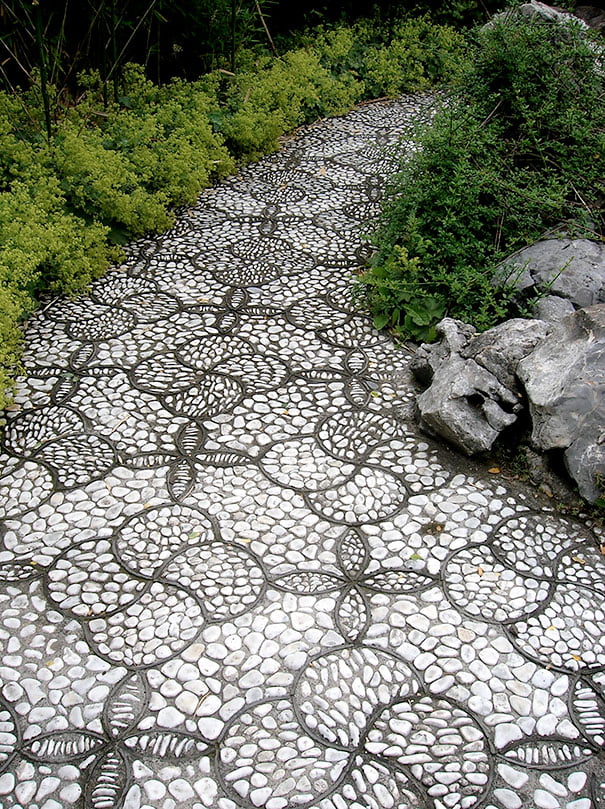
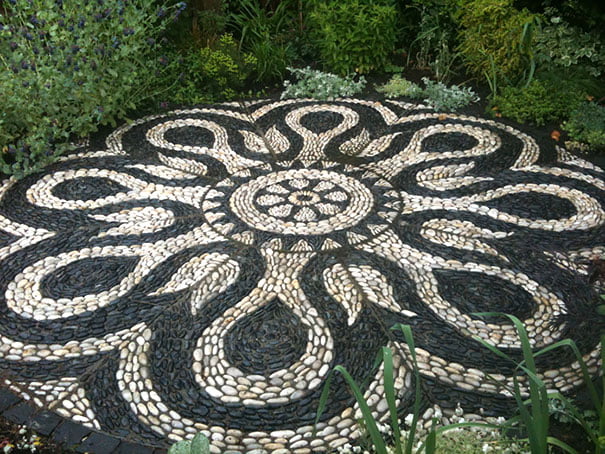
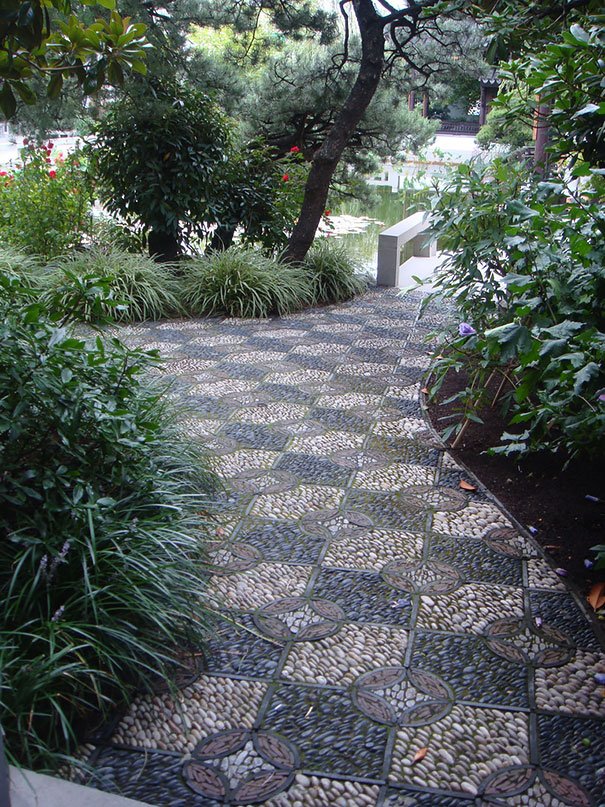

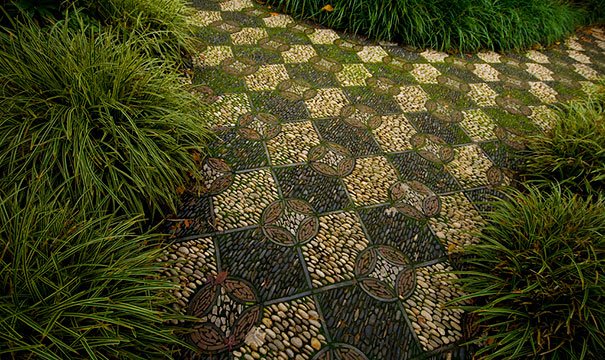
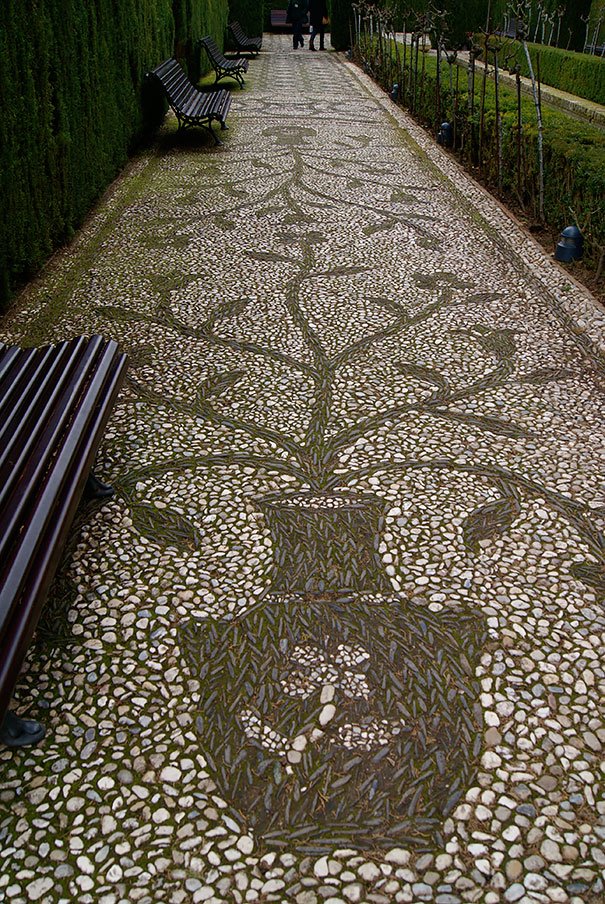
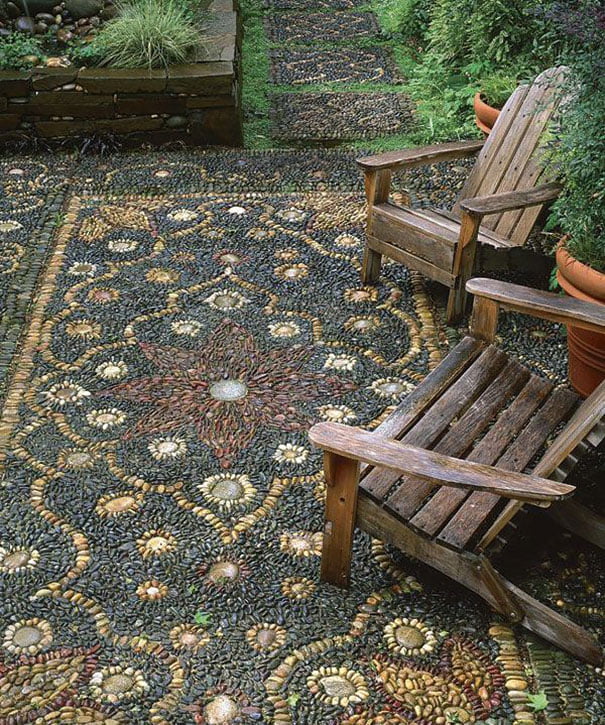

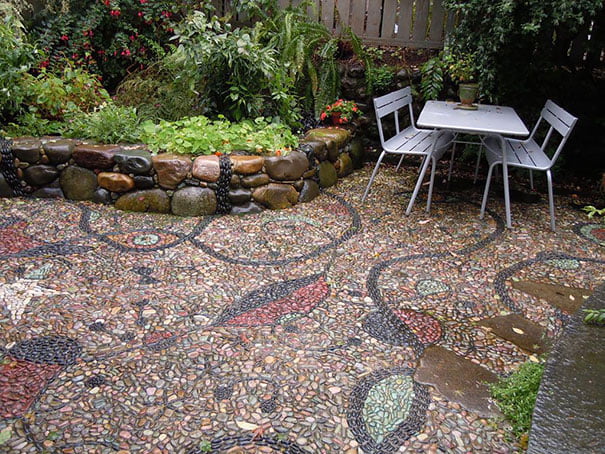
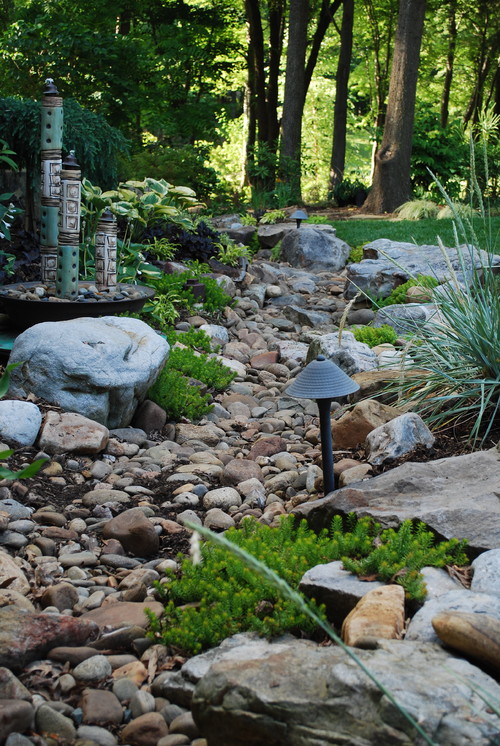
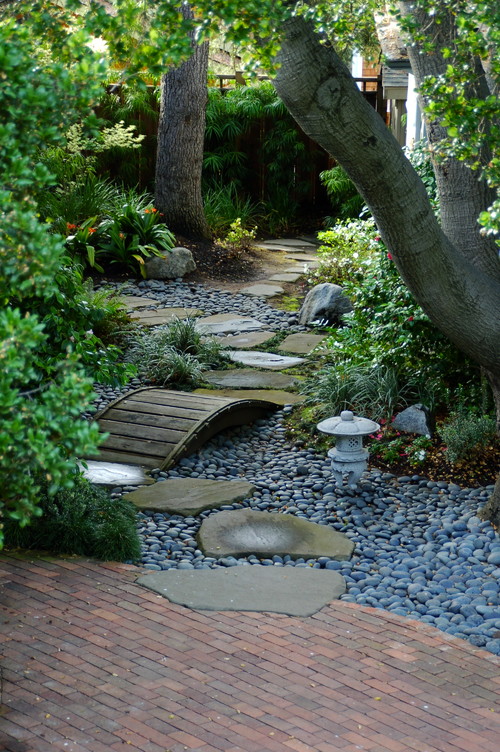