
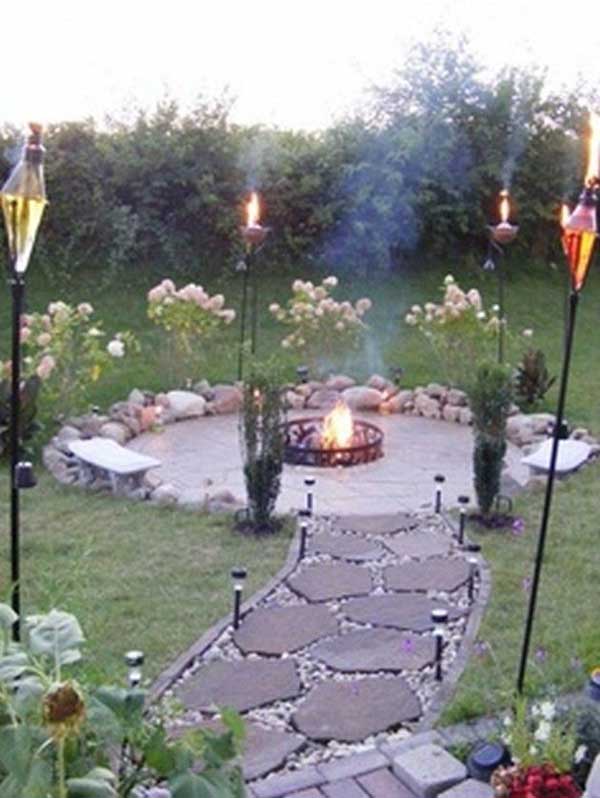
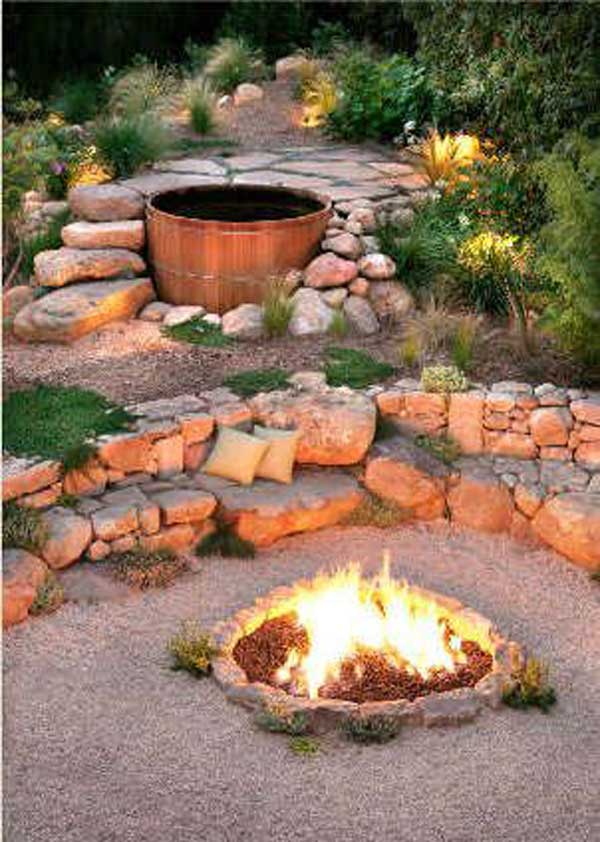
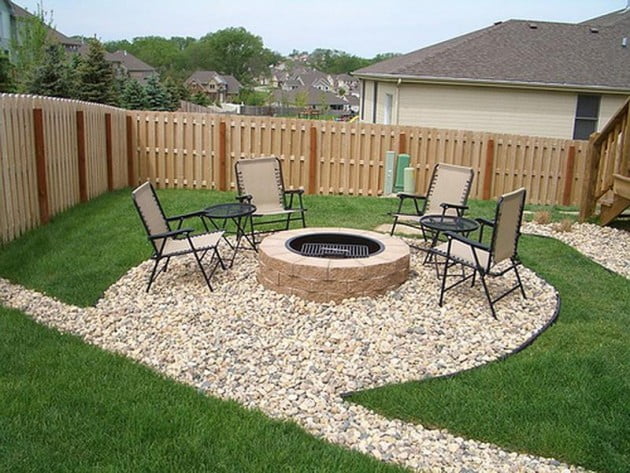
On the journey of finding the most attractive backyard landscaping ideas, we have come across these awesome fresh modern and rustic fire pits, that are the ultimate addition to your backyard landscaping design. We hope they bring warmth and comfort to your home. We have previously featured on our website an article that explains the details adding such an item to your backyard: Backyard Landscaping Ideas-Attractive Fire Pit Designs.

Of all the backyard landscaping features, charming cottages and small sheds are probably the best way of extending your home. Who wouldn't prefer working on a laptop, playing music or perhaps cooking in a small cozy space in the middle of the garden? It's the best way of taking advantage of the wonderful natural environment in your backyard, without having to leave your work or hobbies behind. They are perfect for spending a wonderful evening playing cards or talking to your best friends. So go ahead and look for the most charming cottage we present; perhaps you'll build it someday and change the feel of you backyard landscape.

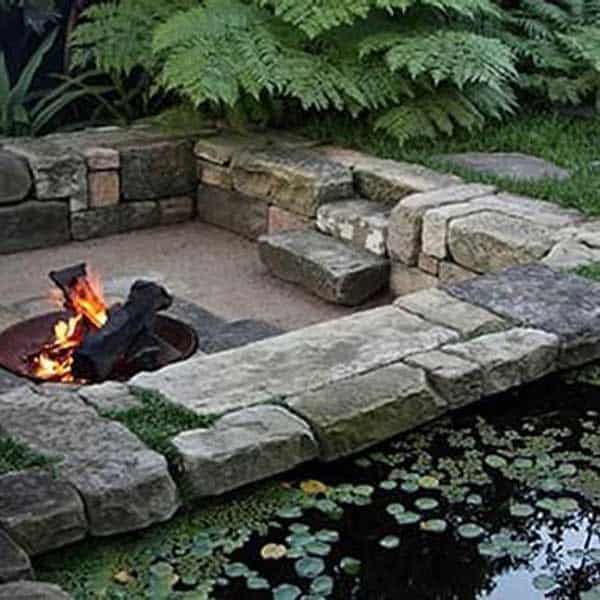
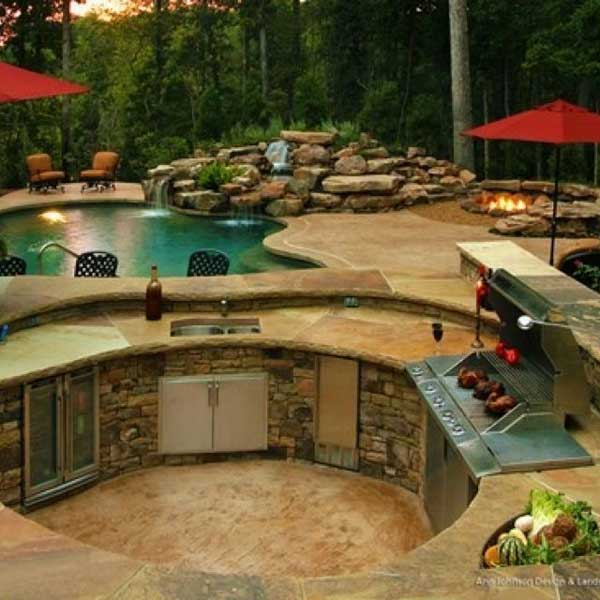
I think we can all agree that swimming pools and fireplaces are the ultimate additions to a wonderful backyard landscaping design. But what happens when you combine them in a brilliant way? Picture perfect. A piece of heaven in your own backyard.

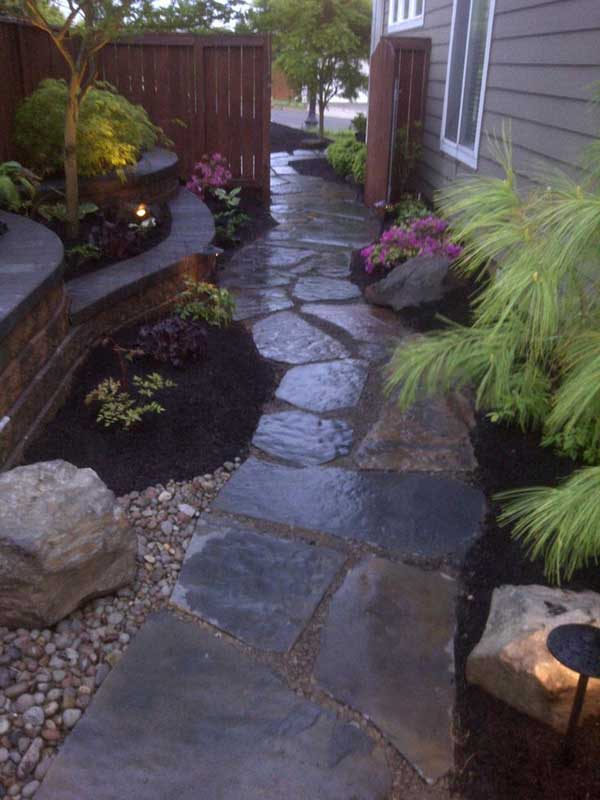
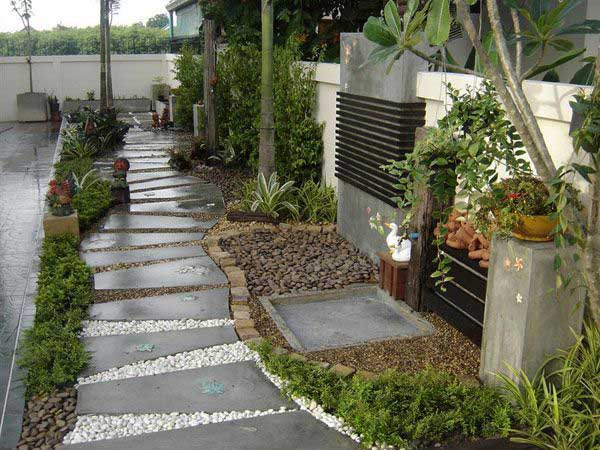
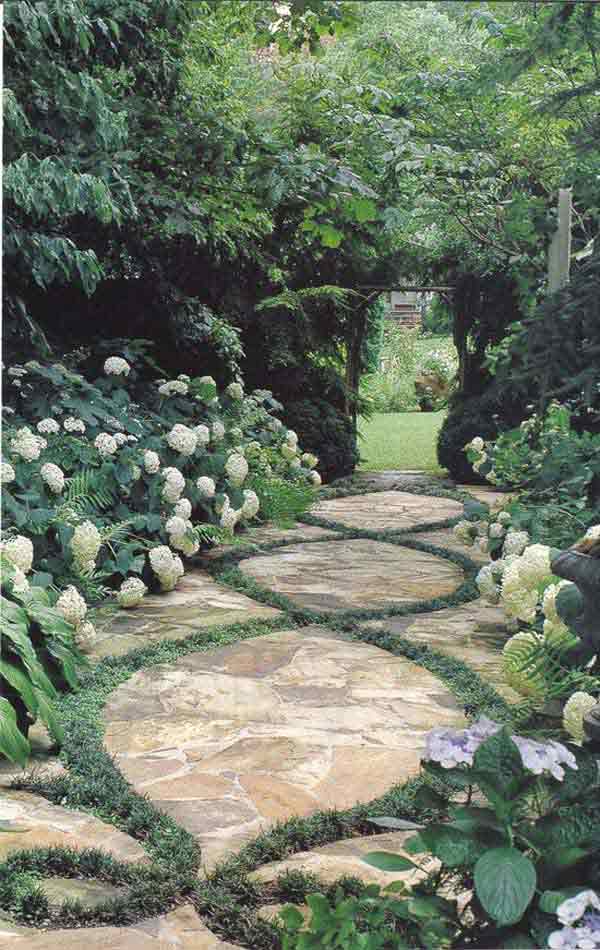
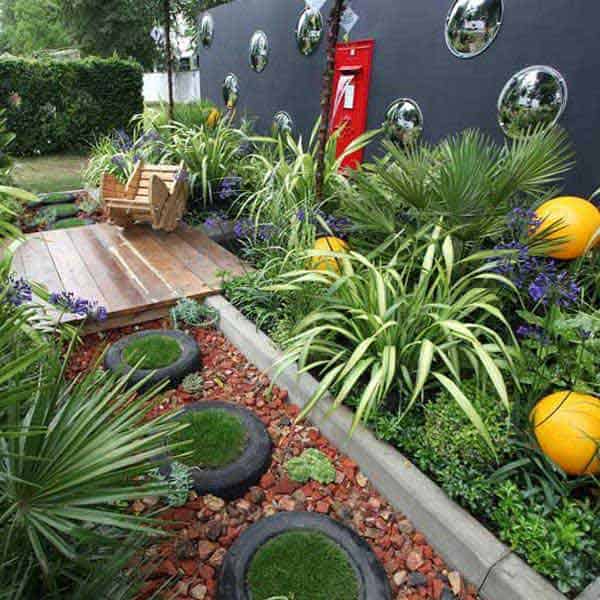
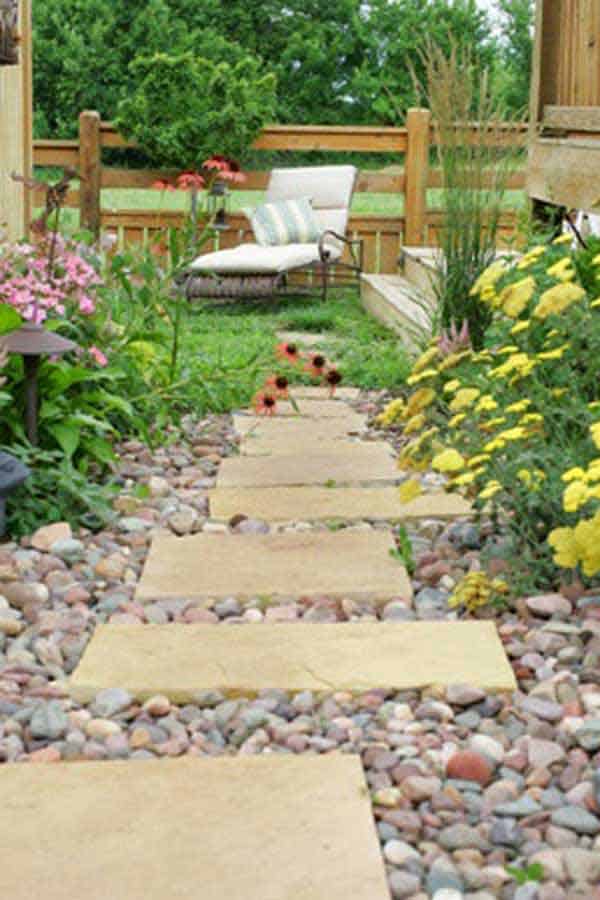
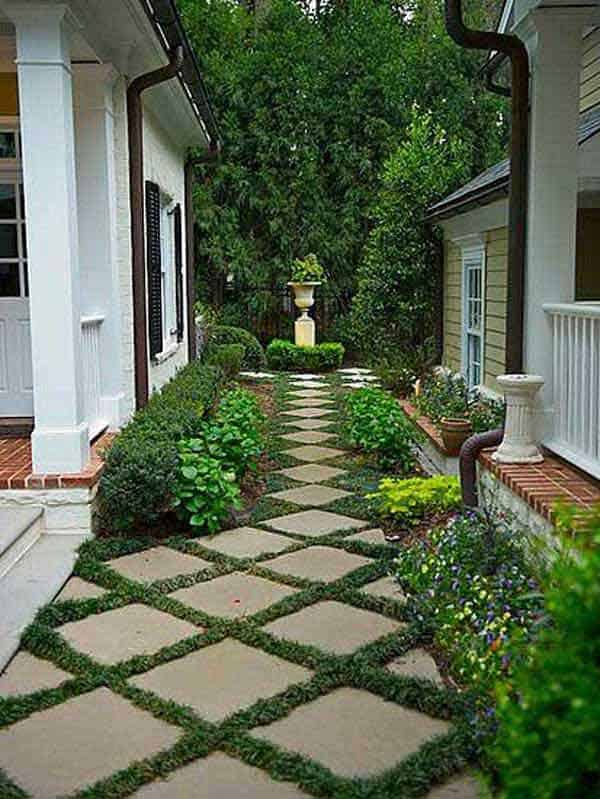
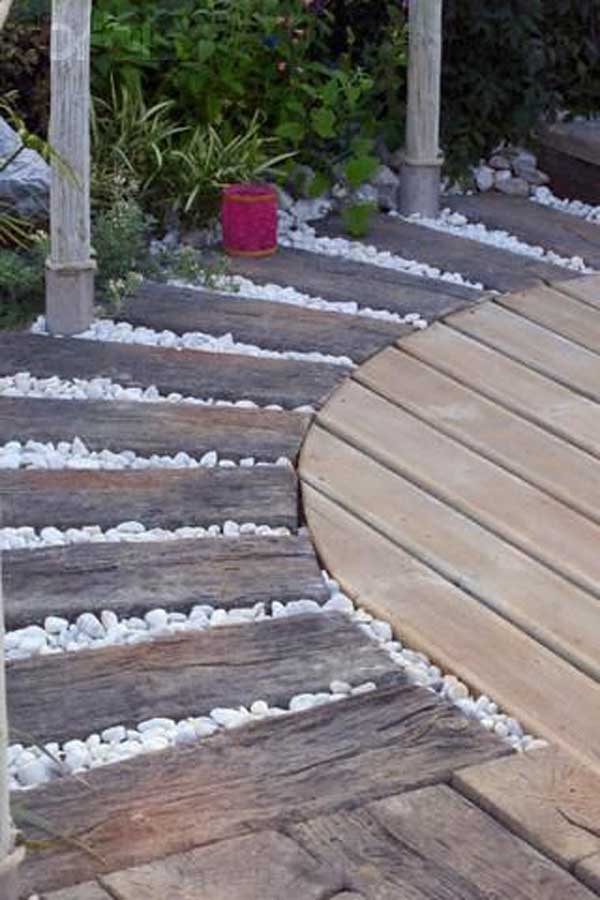
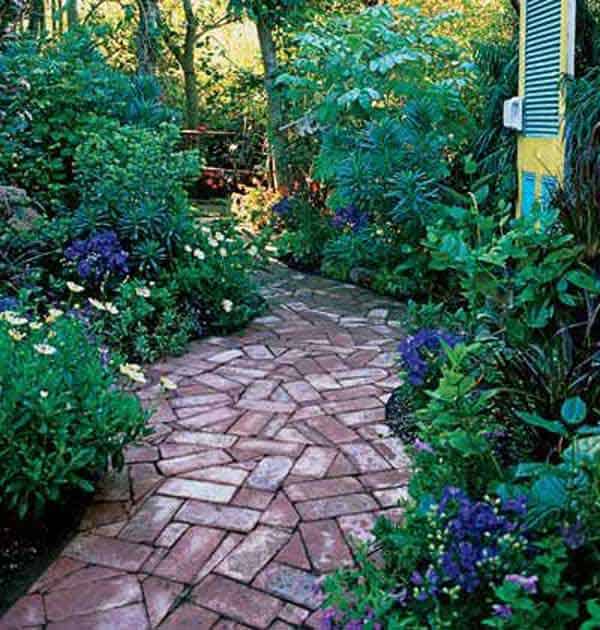
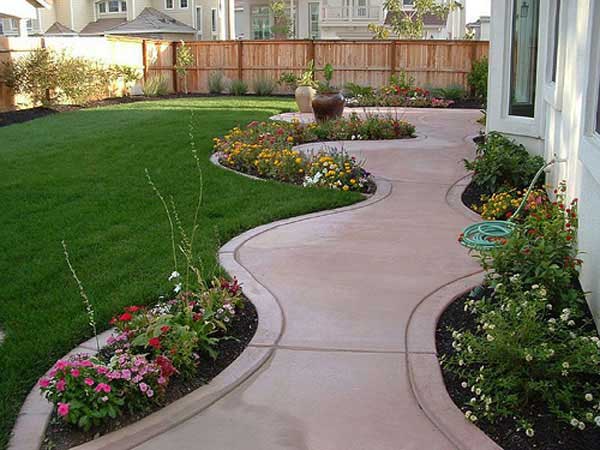
Ingenious and beautiful DIY Garden Paths have been unveiled in the gallery showcased below, all lesser things in huge beautiful ensembles, pieces that are beautified through vegetation and flowers. Mineral elements are slowly directed by green elements trough the garden being completely subdued to their magic. Cast a glance at the selection and notice how beautiful simple elements can give birth to drops of heaven.

Beautiful DIY Garden Path Ideas
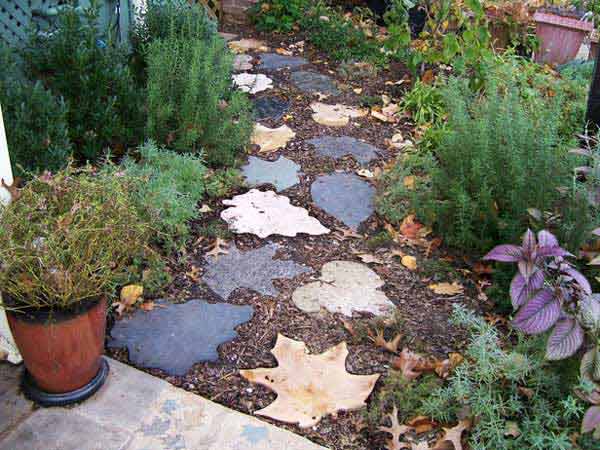
#1 Mineral Elements Enhancing a Stone Path
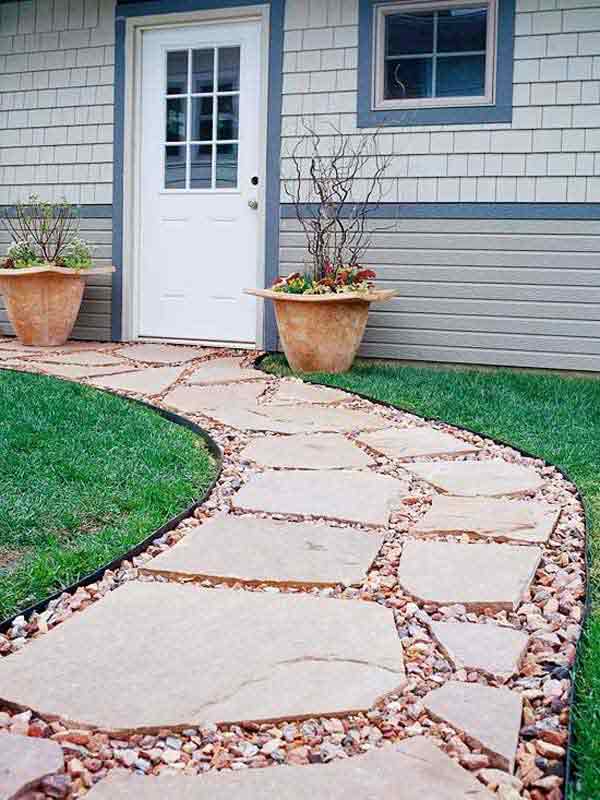
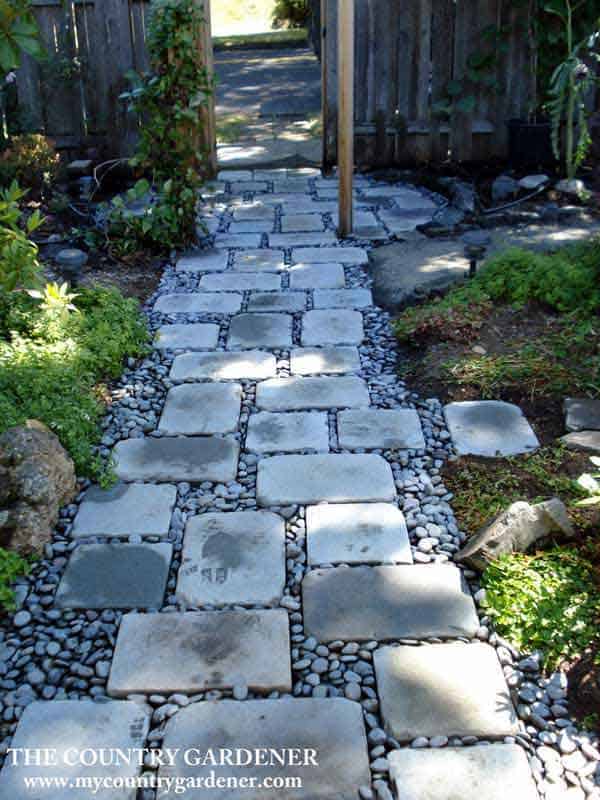
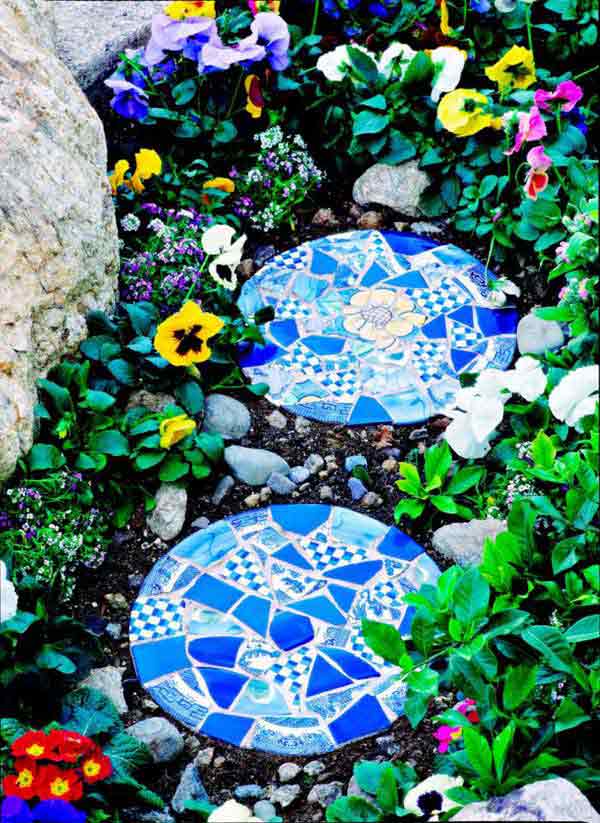
#2 DIY Cement Cobblestone Pieces Combined With River Rocks

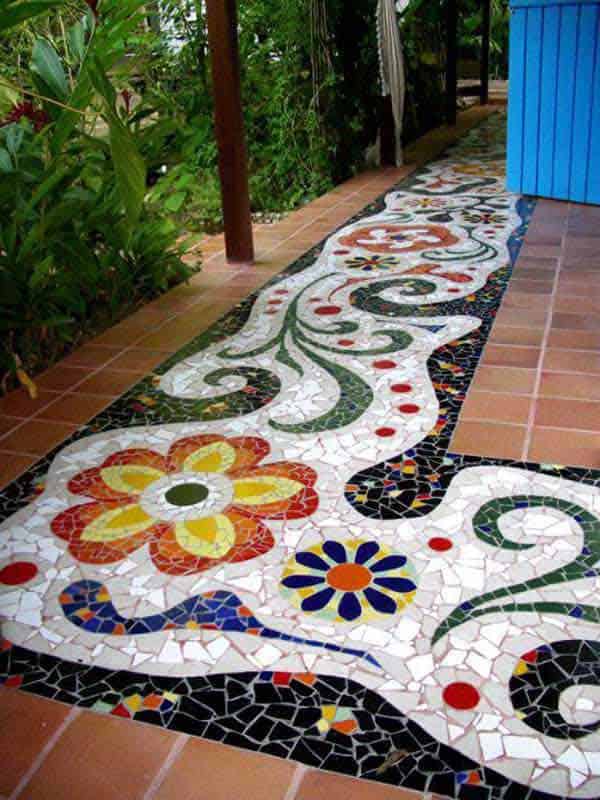
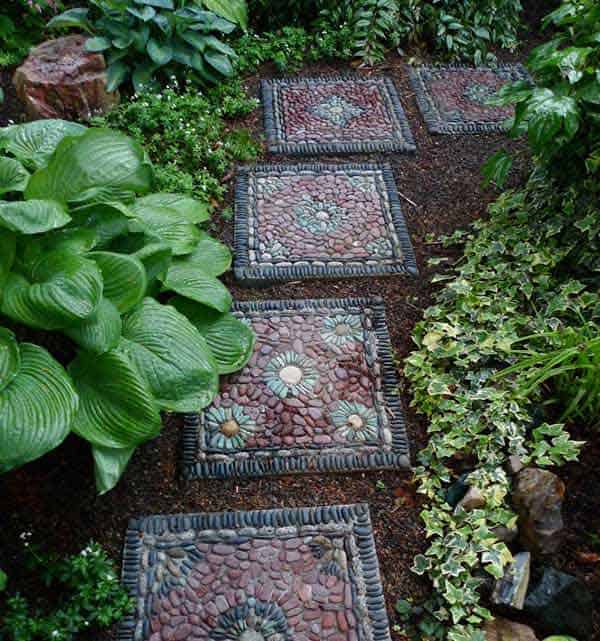
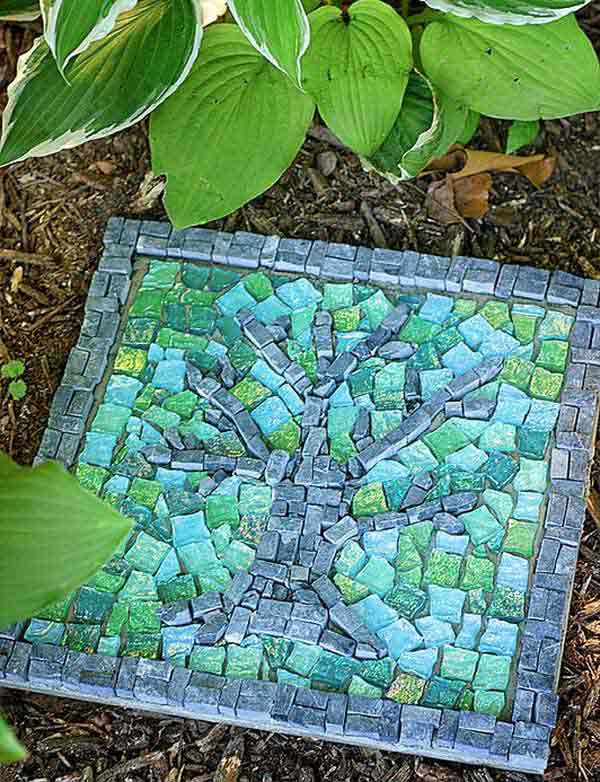
#3 DIY Mosaic Butterfly Stepping Stones and Flowers

#4 Geometric Concrete Trapeze Stepping Stone Sculpting Organic Path
#5 Super Greenery Invading Mineral Elements
#6 Old Tires Used to Nestle Grass in a Special Stepping Stone
#7 River Rocks and Yellow Stepping Stone Combined With Greenery Beautifully
#8 Garden Landscape Perfectly Organized With Brick Paths

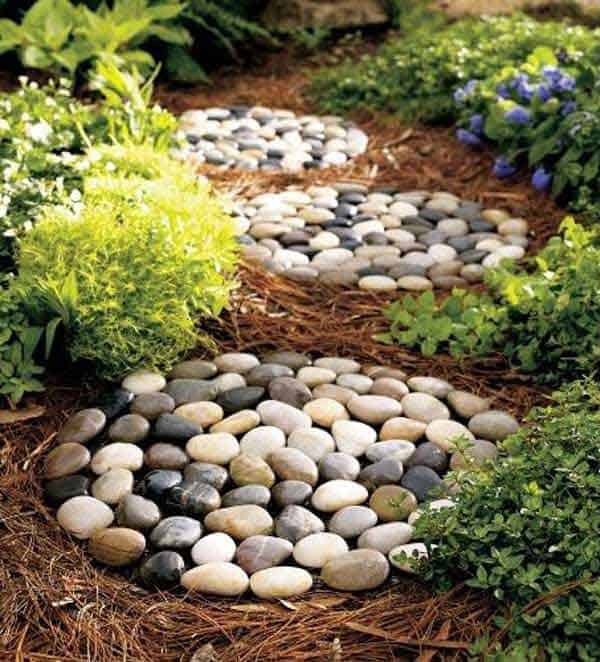
#9 Mosaic River Rocks Stepping Stones Beautifully Organizing Sculpting a Garden Surface

#10 Yellow Stepping Stone and River Rocks in Equilibrium
#11 Simple Path Organized With Huge Slices of Rocks and Greenery

#12 Orange Black and Gray River Rock Paths Combined With Red Stepping Stones

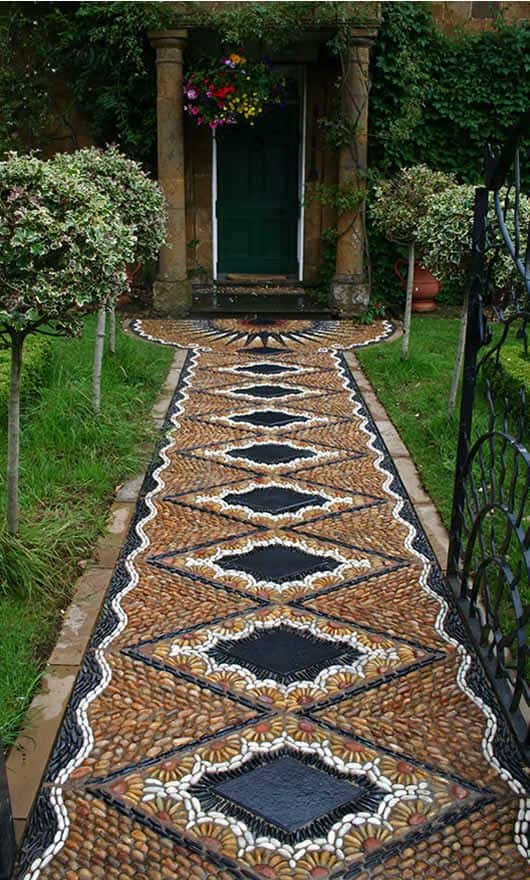
#13 Meticulously Realized Mosaic Terrace Path
#14 White River Rocks Contrasting With Black Stepping Stone
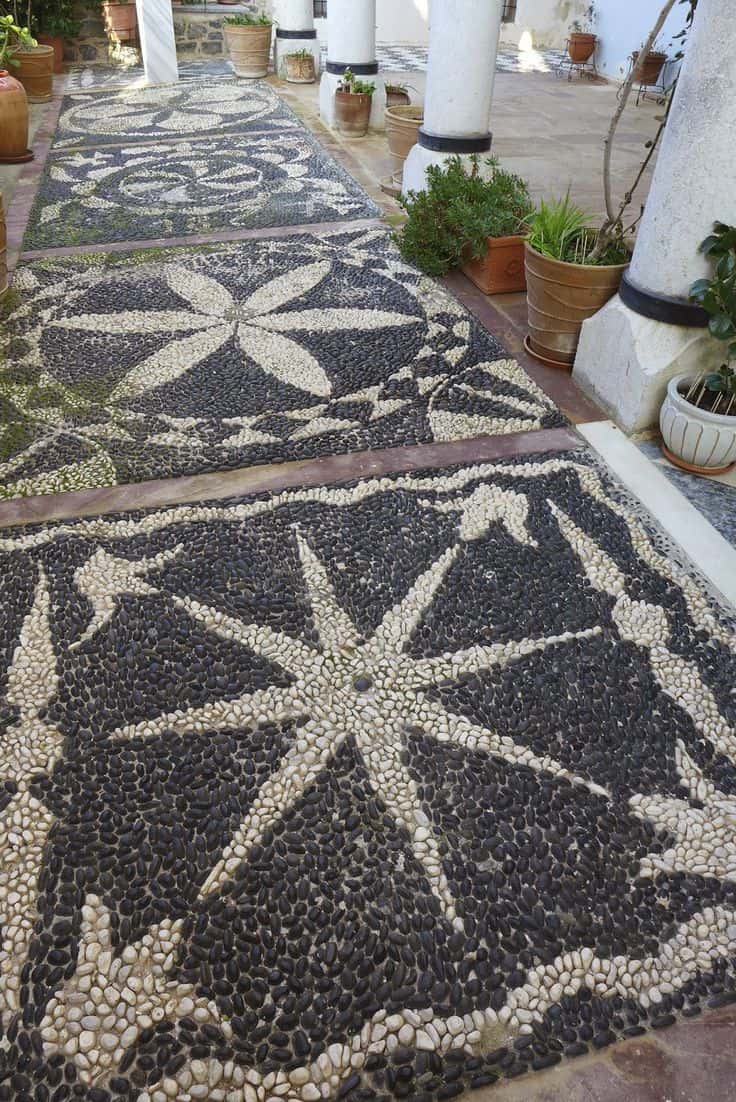
#15 Insane Rock Mosaic Intensifying a Geometric Path

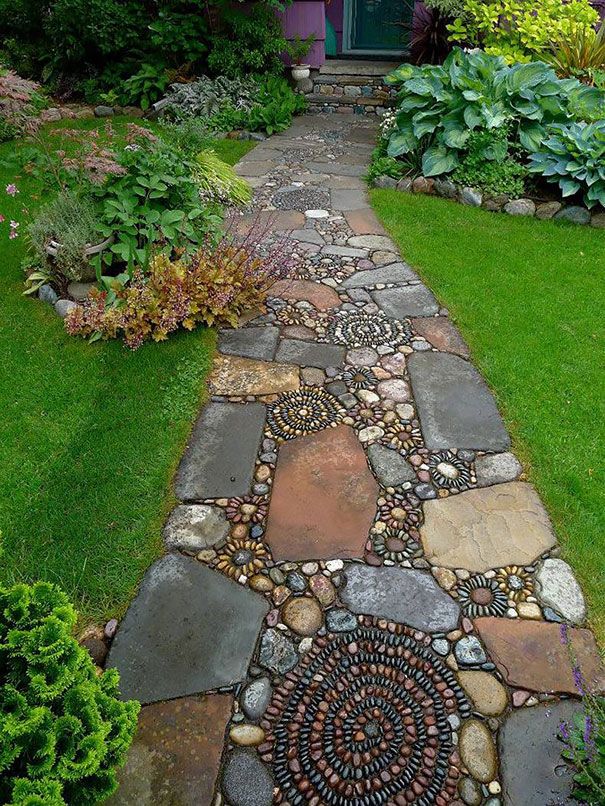
#16 Sculptural Organic Path Realized With River Rocks

#17 Chess Like Stepping Stone-Grass Game in a Beautiful Backyard

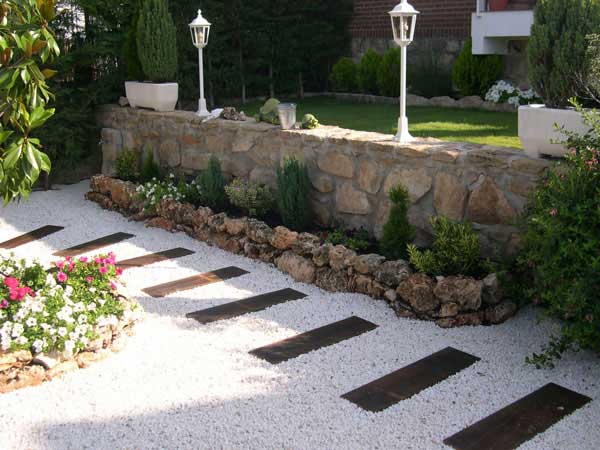
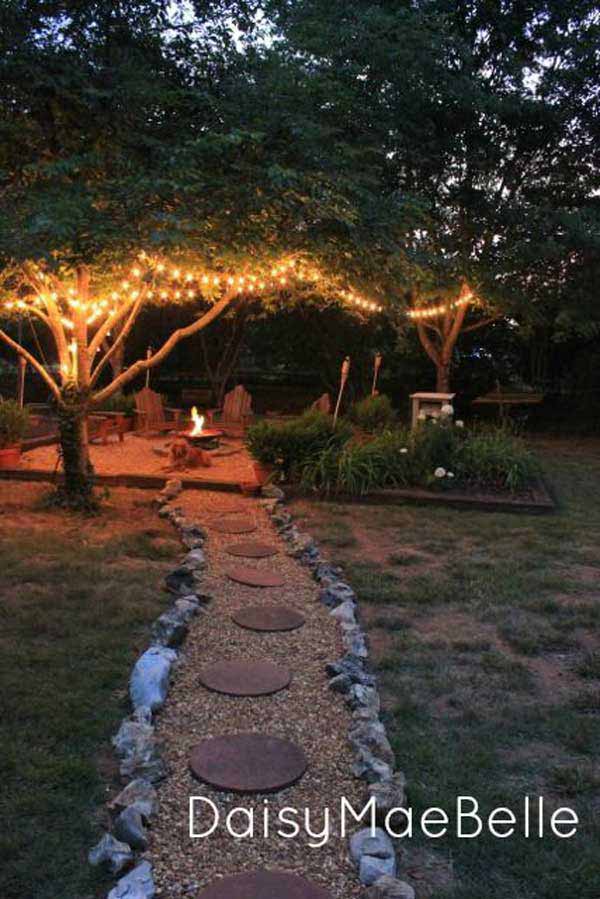
#18 Gravel and Straight Long Stepping Stones

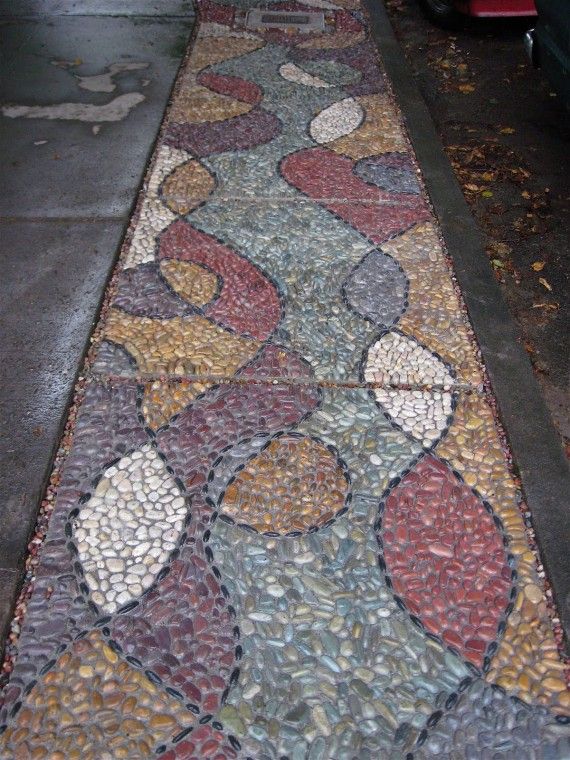
#19 Complex River Rock Mosaic Adding Texture
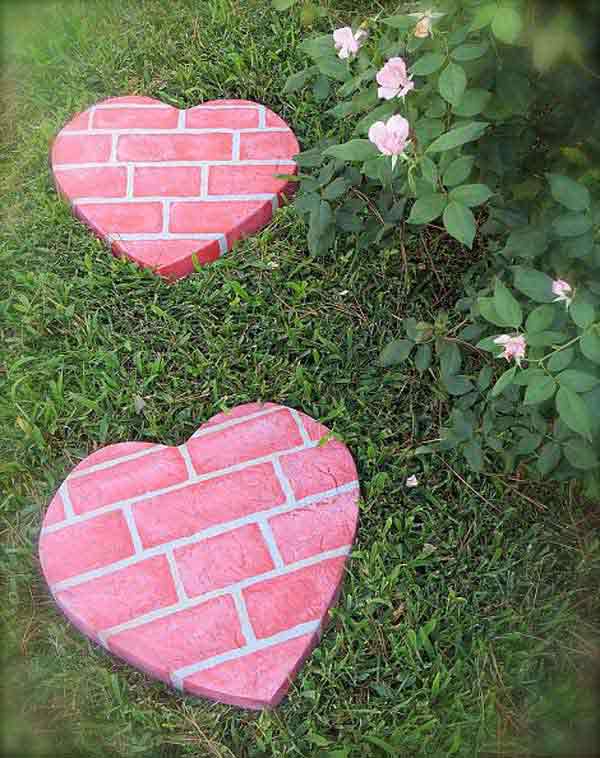
#20 Red Bricks Embracing Black Stepping Stones in a Village Torn From Fairy Tales

#21 Huge Rocks Exposed Concrete and Natural Wood Composition
#22 Simple Massive Rocks Combined With Greenery
#23 Black and Yellow River Rocks With Home Made Stepping Stones
#24 Brick Garden Path and Edging

#25 Wooden Terraced Path Structure Filled With Earth and Gravel

#26 Stepping Stones Tailored With Greenery
#27 Multiple Wood Essences Combined With White River Rocks
#28 Geometric Elements Defining a Well Maintained Garden Path
#29 Spherical Rocks Texturing Beautiful Organic

#30 Brick Garden Path Directed by Greenery
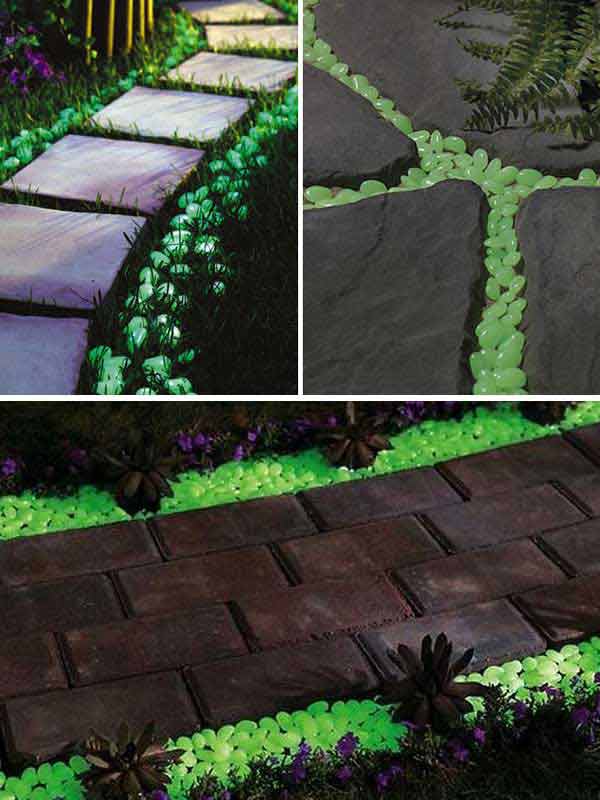
#31 Fluorescent Rocks Highlighting Grass and Stepping Stones
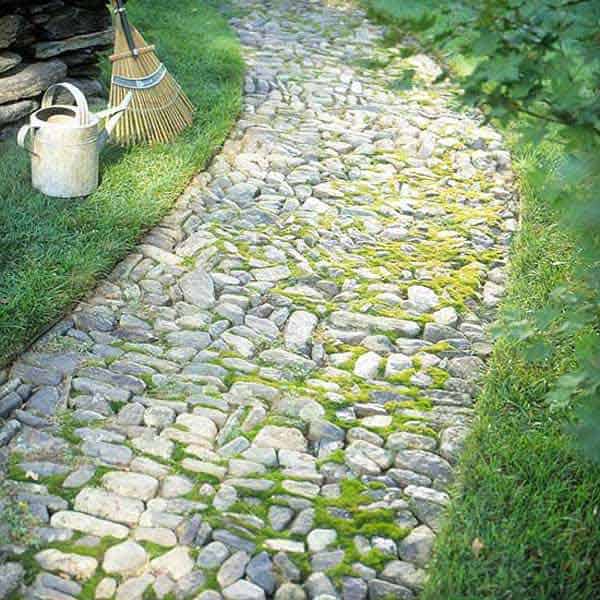
#32 Grass and Stones Beautified by Moss
#33 River Rocks Carrying Simple Rock Stepping Stone

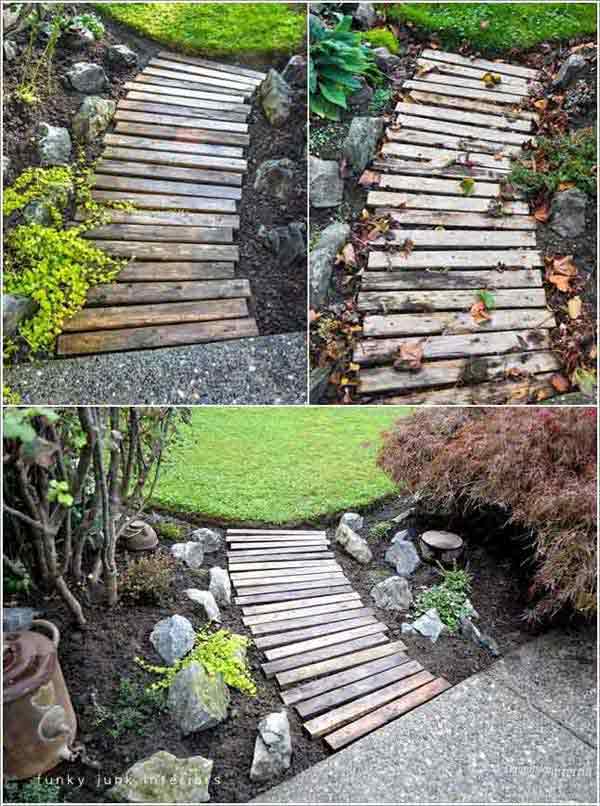
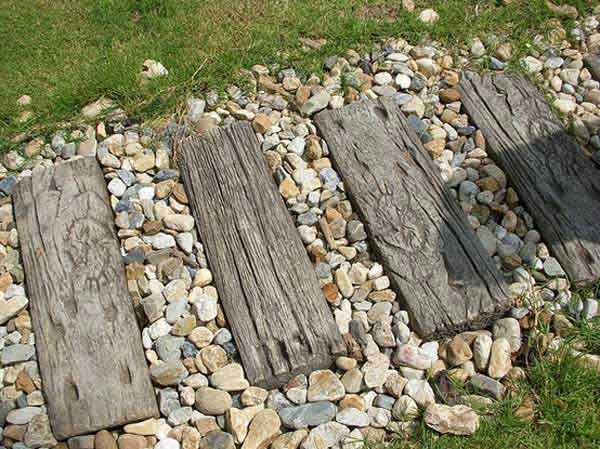
#34 Simple Wooden Planks Creating a Transition Between Gravel and Grass
#35 Organic Cement Sidewalk Defined by Flowers and Grass
#36 Rectangular Stepping Stones Combined With River Rocks
#37 Reuse Glass Bottles Creatively to Edge Your Paths in Your Garden

#38 All Rock Garden Path Swimming Through Greenery

#39 Green Rock and Brick Installation

#40 Sliced Tree Stumps Used as Stepping Stones

#41 Gravel Rocks and Round Stepping Stones in Neat Path Composition
What do you think? What mineral elements would you combine with the organic ones in your garden? Tailor your solutions around vegetation and do your best to leave things untouched, grow your plants as natural as possible and enjoy the wild view filled with freshness in all its splendor.
Spring in all its splendor is here, knocking at our door, inviting us to refresh our decor and start working on the backyard landscape design. Through small simple upgrades you can easily start a garden improvement project that will transform your backyard into a small heaven. Easy and cheap diy art projects for your landscape have been featured ahead, we have found each and every one of them highly original and easy to realize. Pin your favorites for later use and share the inspiration pack with your love ones.

#1 DIY Vintage Flower Pot Holding Petunias
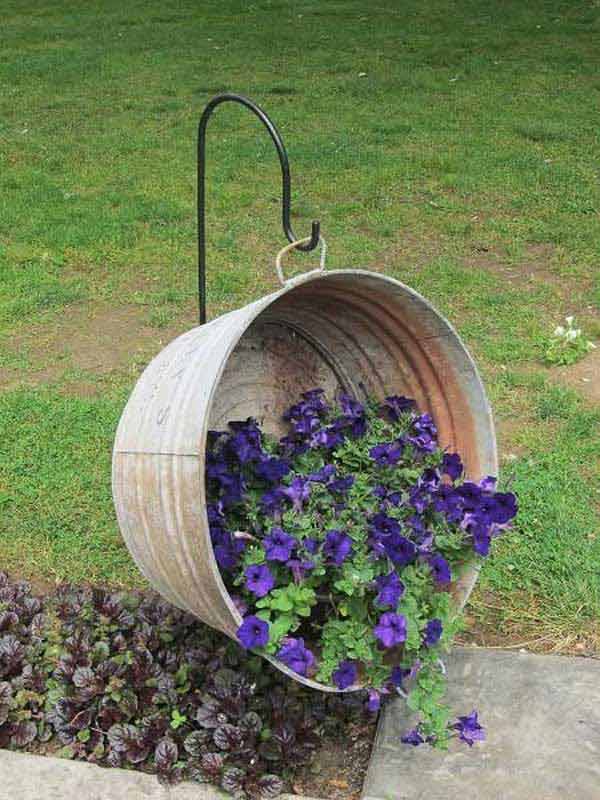
Source: pinterest.com
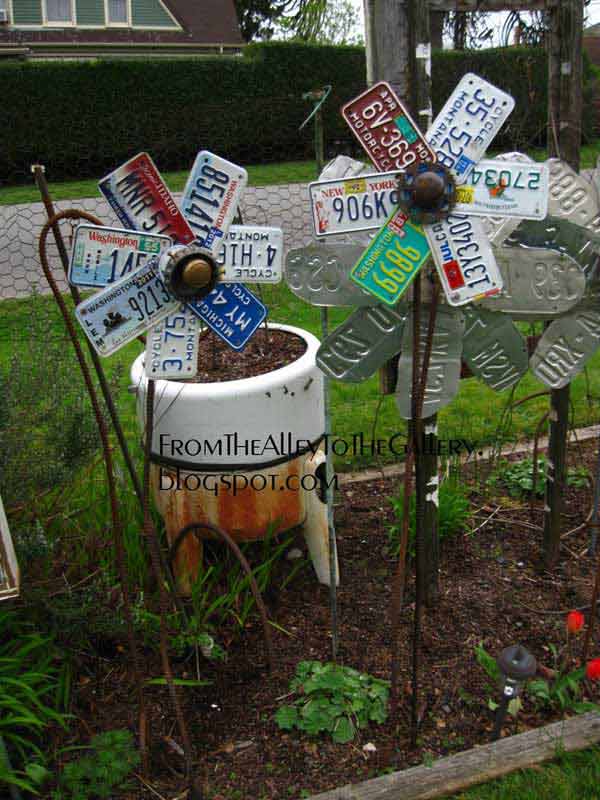
#2 Industrial Vintage Design Garden License Plate Flowers
#3 Garden Planter and Bird Bath Composition

Tutorial: homestoriesatoz.com
#4 Backyard DIY Stone Projects

Tutorial: instructables.com
#5 Drain Trays and Flower Pots in Garden Mushroom
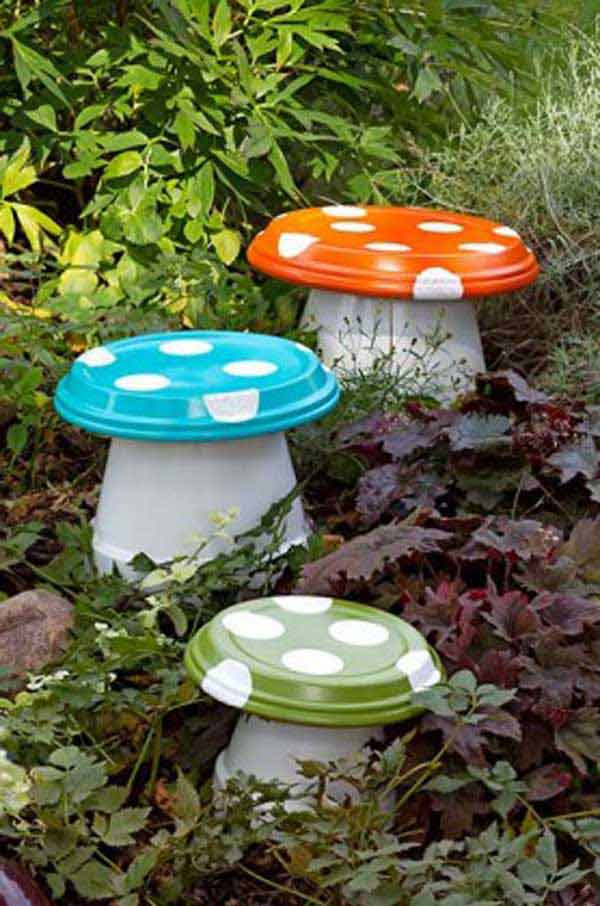
Tutorial: birdsandblooms.com
#6 Miniature Fairy Tale Folk Garden

#7 Light Animated Garden Treasure Jars

Tutorial: empressofdirt.net
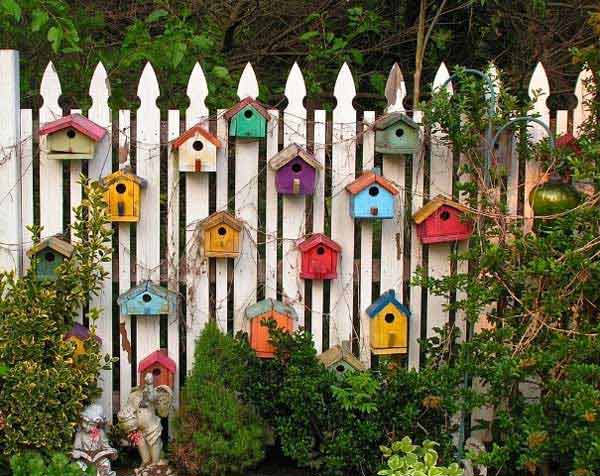
#8 Bird House Ensemble Enhancing Nature
#9 Creative Pebble Mosaic

Source: flickr.com
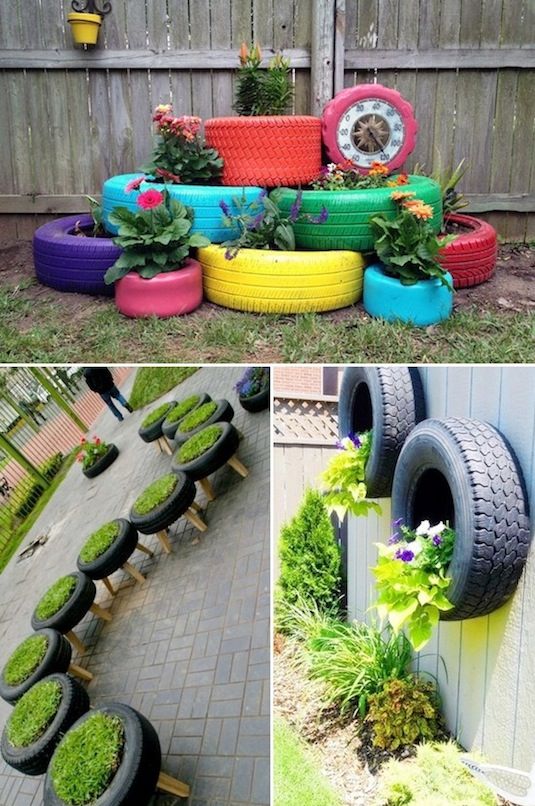
#10 Creative Recycled Tires Crafts

Tutorial: twowomenandahoe.com
#11 Gorgeous Recycled Watering Can Pouring Crystals

Tutorial: craftsbyamanda.com
#12 Colorful Creative DIY Tire Planters

#13 DIY Rock Spiral Herb Garden Design

Tutorial: ohmy-creative.com
#14 Creative Clay Pot Flower Pots People

Source: sodahead.com
#15 Fully Recyclable Earth Wise Owls

Tutorial: empressofdirt.net
#16 Simple Metallic Mushroom Ornaments

Source: bobbiesgirl-carole.blogspot.com
#17 Ladybugs Golf Balls

Tutorial: artdrops-tatjana.blogspot.com.es
#18 Creative Animals in the Garden Realized from Old Tires

Source: icreativeideas.com
#19 Sculptural Bird Cage With Succulents
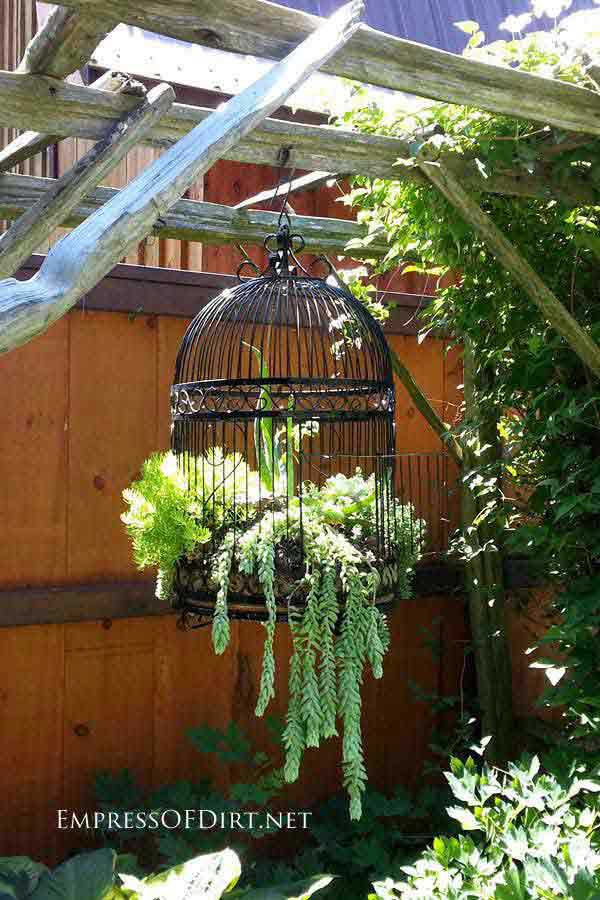
Source: empressofdirt.net
#20 Extraordinary Positive Oil Barrels Planters

Source: allmystery.de
#21 Creatively Up-cycled Elements into Wind Chime

Source: flickr.com
#22 Ingenious Backyard Flower Composition

Source: lovethispic.com
#23 Tree Sculptures Realized Out of Old Tires

Source: pinterest.com
#24 Wheel Barrow Planters Beautifying Your Backyard
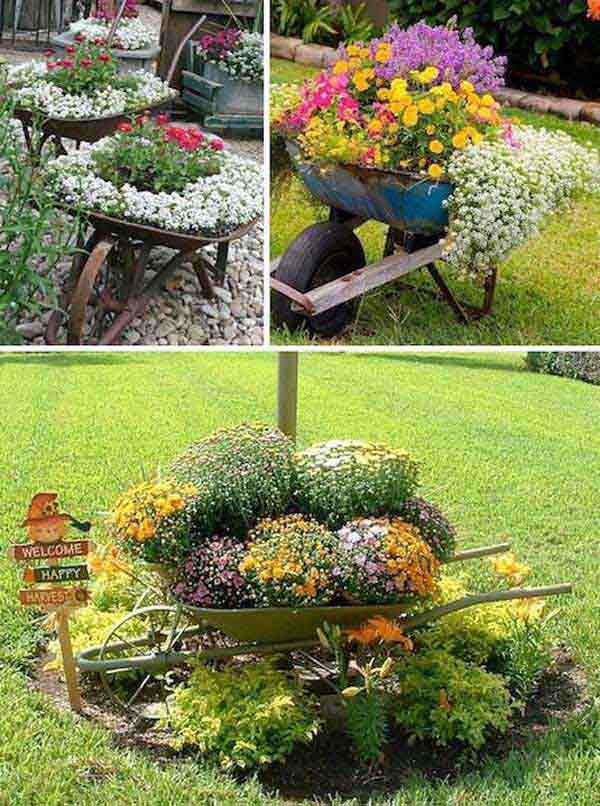
Source: woohome.com
#25 Colorful Hubcap Flowers
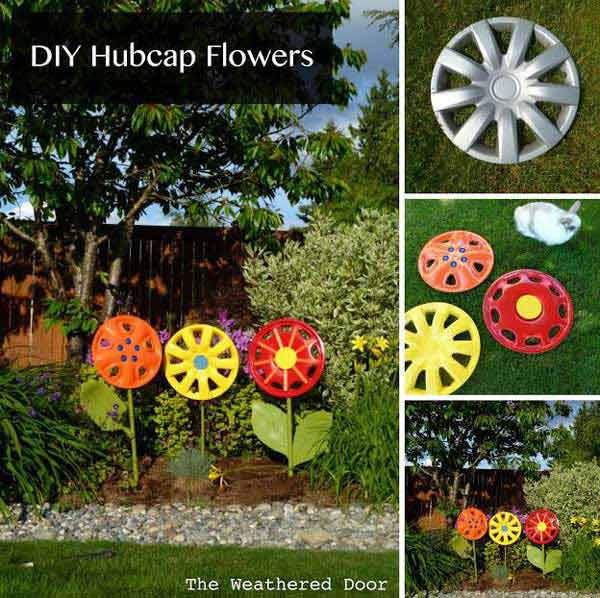
Tutorial: theweathereddoor.blogspot.com
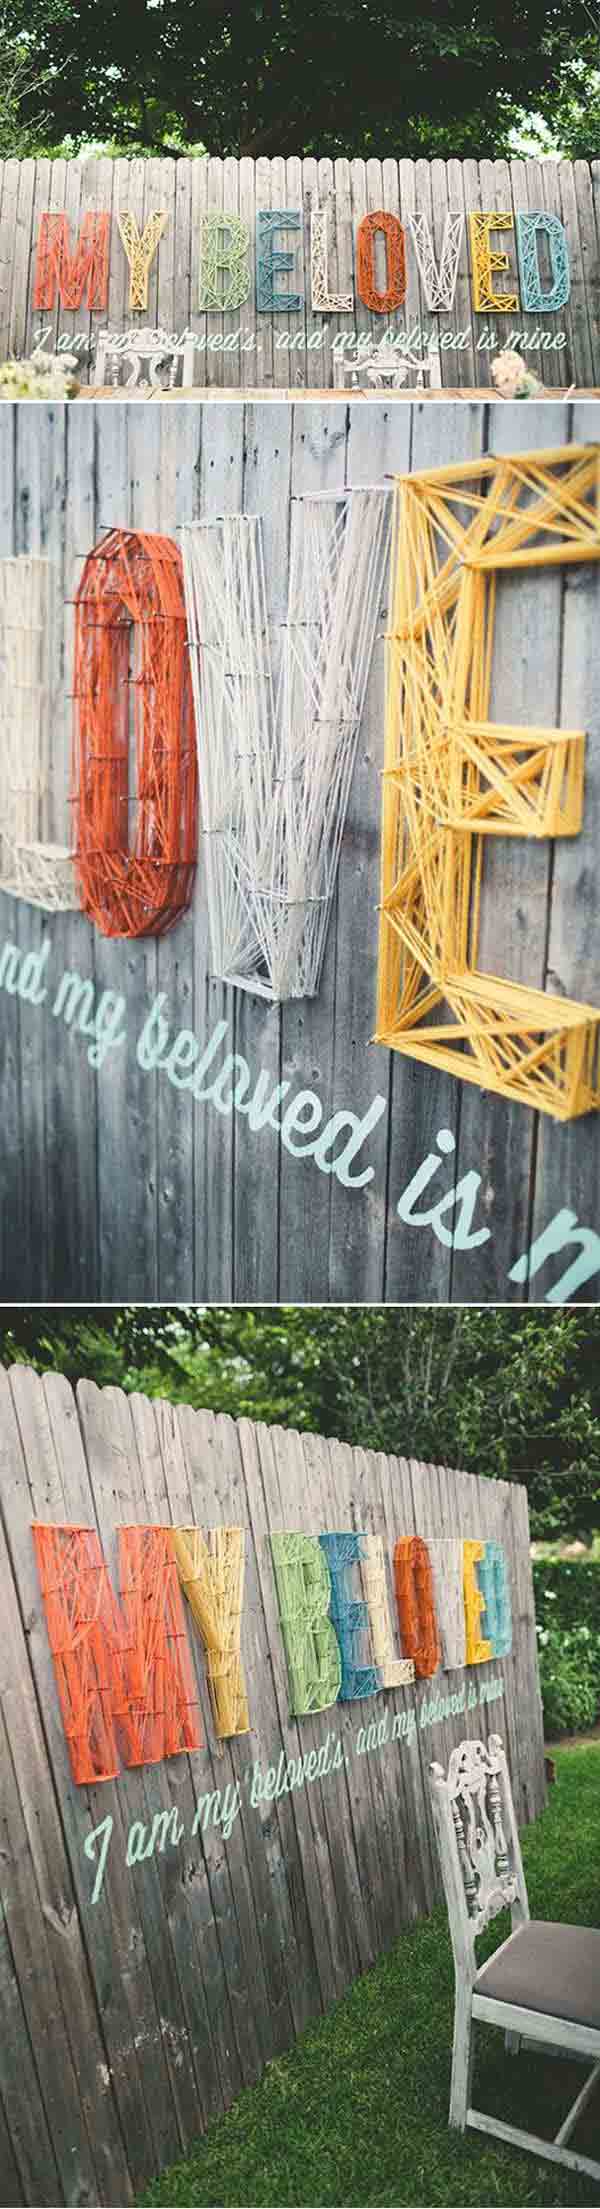
#26 Colorful Positive Messages in Your View
#27 Creative and Colorful Crayon Fence
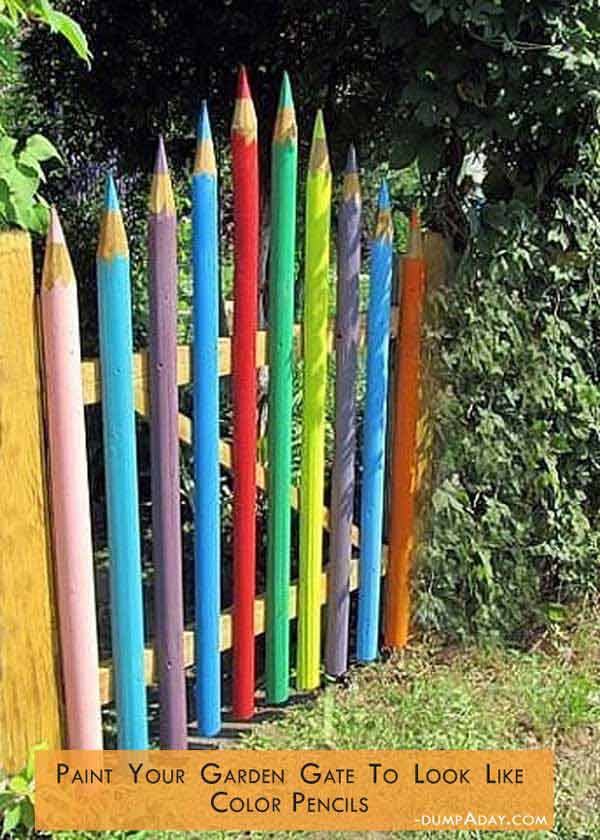
Source: woohome.com
#28 Moss Graffiti Enhancing Vertical Planes
Tutorial: wikihow.com
#29 Flower Up-cycled Plastic Bottles

Source: podelkin.com
#30 Colorful Vintage Bicycle Planters

#31 Mason Jars Garden Chandeliers

Source: decoracion2.com
#32 Cinder Block Herb Garden Composition Filled With Color

Source: toovia.com
#33 Sculptural Bottle Swan Shaped Planters

Source: amazinginteriordesign.com
#34 Concrete Leave Fountains

Source: pinterest.com
We would love to hear your valuable feedback on the backyard DIY Art Projects showcased in the comment section below. We have found each and every one extremely inspiring and we would love to hear your thoughts as well.
If you really want to make sure that your home is one of a kind you should definitely tailor your own solutions, to make sure that everything is fitting to your taste and lifestyle like a glove. In the backyard landscape in particular a dozen diy projects with low budgets can be materialized with ease, emphasizing your supreme relaxation spot for this summer. Following this chain of thought we have curated 29 super cool diy reclaimed wood projects meant to help you in this endeavor.

Choose your favorite DIY project from the ones showcased below and start hunting for wood. To complement your backyard you can also create a small diy tire water pond, an outdoord diy pizza oven, a luxurious diy fire pit and some unique garden walkways to sculpt your small green oasis.
1.Transform a Tree Stump Into a Natural Wooden Planter

via goodideasforyou.com
2.Crack Logs and Light them Up In a a Beautiful Dramatic Manner

3.Mark Plantations With Twigs and Branches

via sweetlifegarden.com
4.Beautiful Small Backyard Fouintain

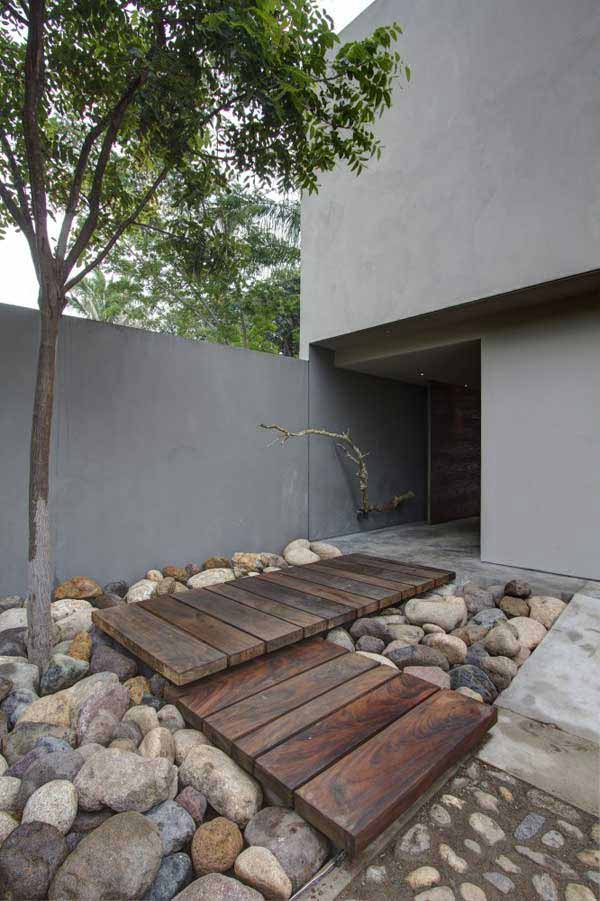
5.Materialize a Geometric Path From Salvaged Wood and River Rocks
6.Repaint Your Small Fences and Emphasize Them With Planters

via pinterest.com
7.Plant Succulents Into Wooden Trunks

via darbysmart.com
8.Create Tiny Tiny Small Corner Tables Suspended on Your Balcony

9.Colorful Garden Edge From Salvaged Wood

via bobvila.com
10.Raise Your Cooler Off The Ground
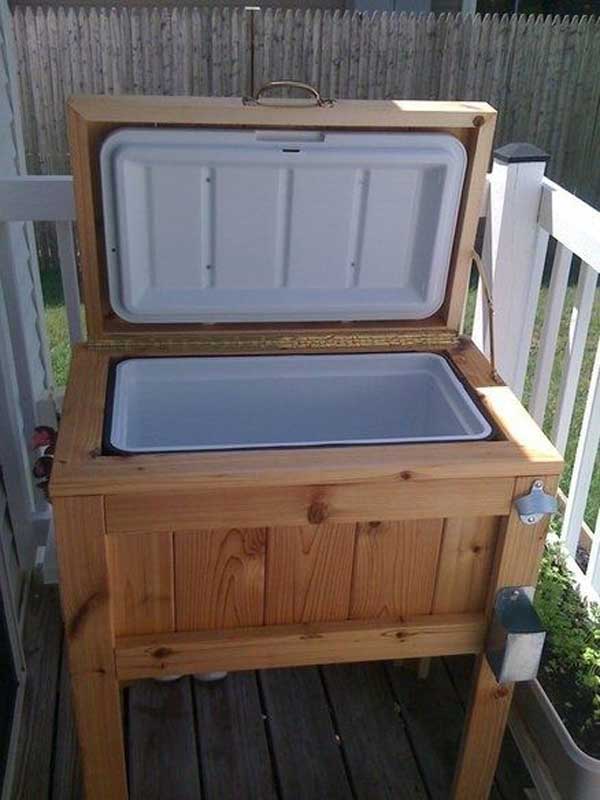
Tutorial lumberjocks.com
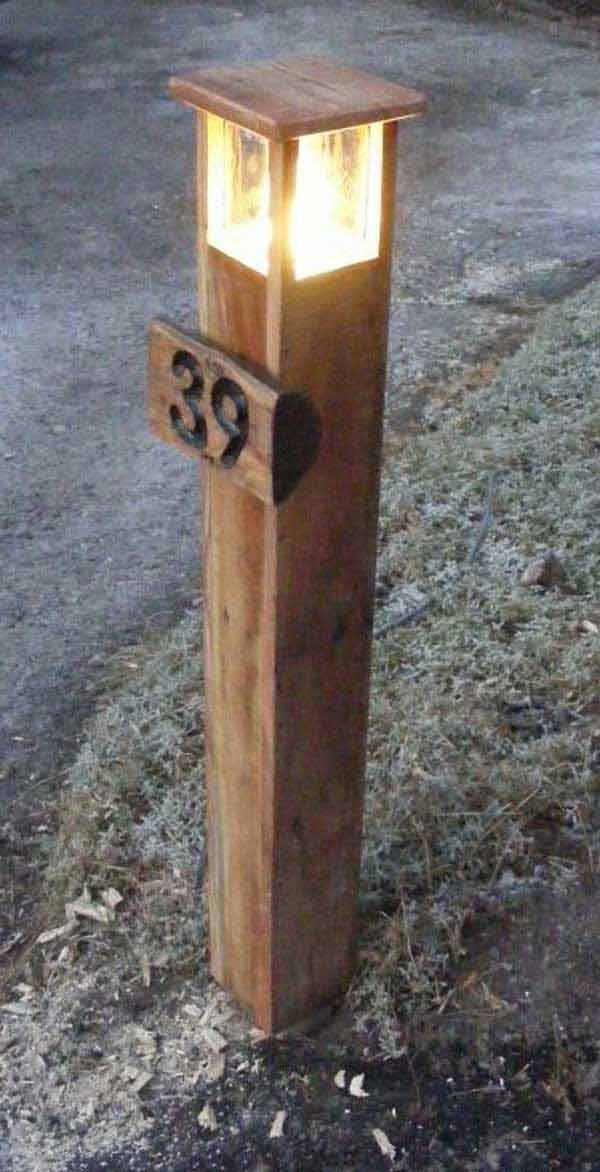
11.Create and Outdoor Light Stand
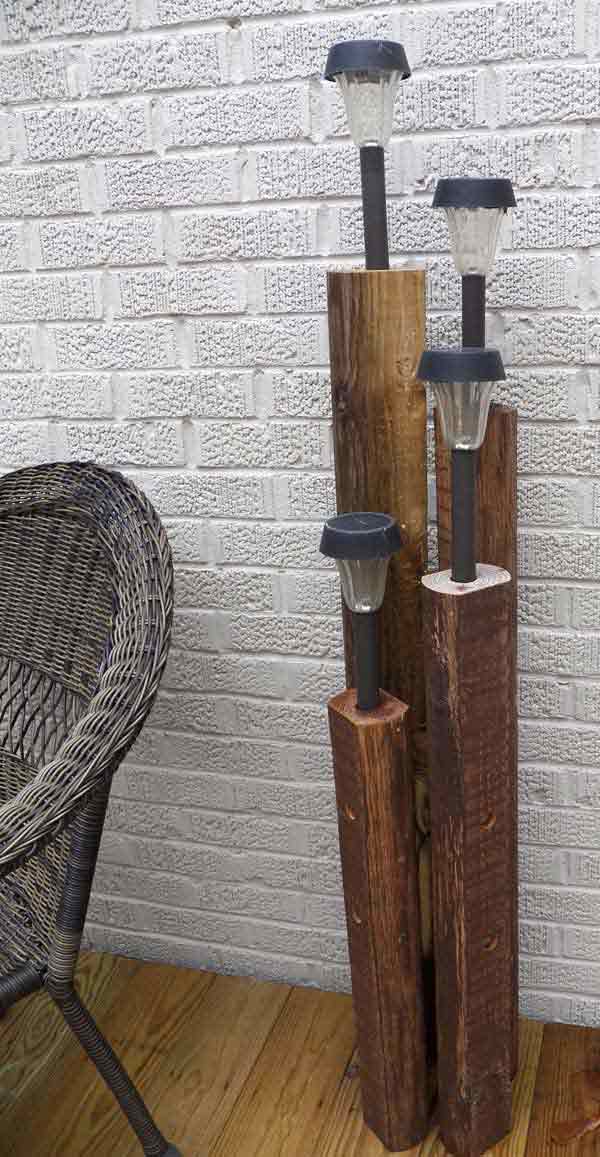
Tutorial the100block.blogspot.com
12.Branches and Twigs Used to Realize a Privacy Screen

13.Superb Tree Stump Side Table

14.Log Bench Emphasized by Up-cycled Wooden Chairs
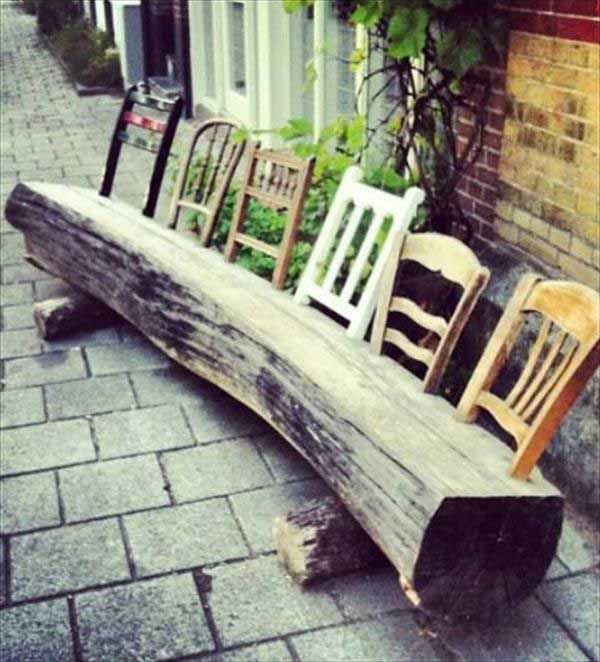
via dishfunctionaldesigns.blogspot.com
15.Outdoor Bar Realized From Scrap Timber and Wooden Pallets

via recyclart.org
16.Stylish Huge Planters Wearing Wood Textures

Tutorial instructables.com
17.Wood Garden Walkway Realized From Pallet Pieces

Tutorial funkyjunkinteriors.net
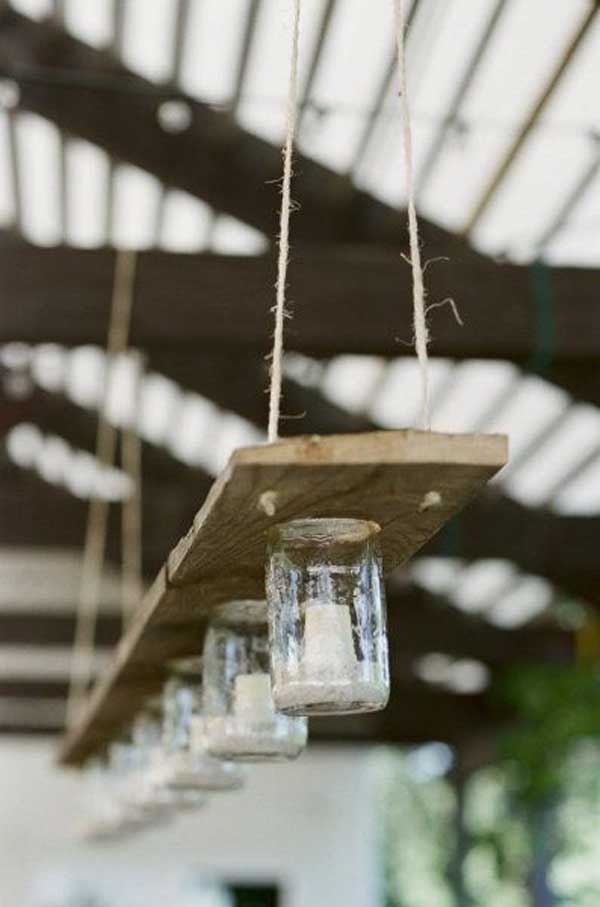
18.Reclaimed Wood and Mason Jar Light Fixture
19.Tree Stump Mosaic Stools

20.Small Log Vase Centerpiece Ready to Carry Flowers

21.Wood Slices Used in a Homemade Water Fountain

22.Salvaged Wood Used For a Vertical Pot Holder
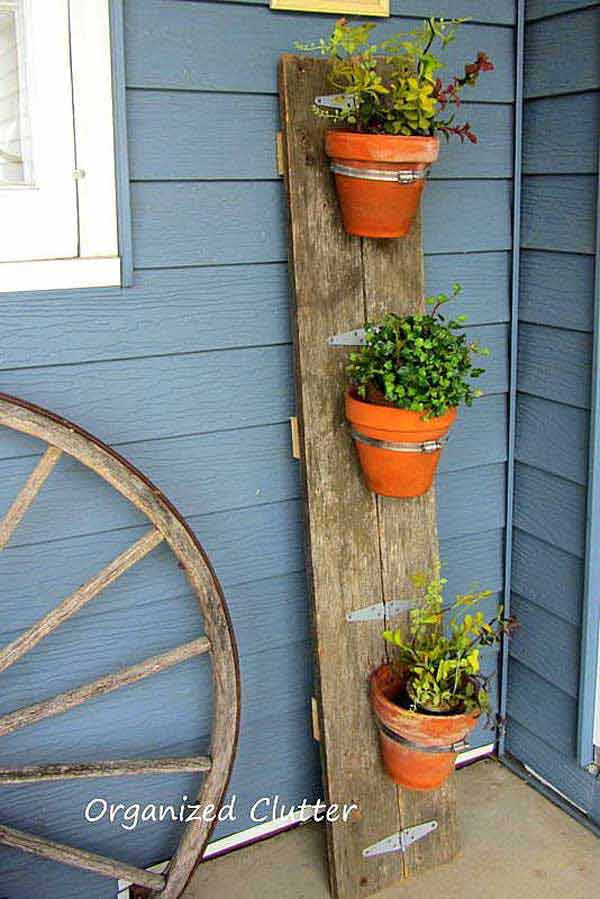
Tutorial organizedclutter.net
23.Pallet Wood and Mason Jar Garden Lamp
Tutorial handycrowd.com
24. Jaw-Dropping Mosaic Walkaway Realized From River Stones

25. Hanging Basket Planters Beautifying Spatiality

via etsy.com
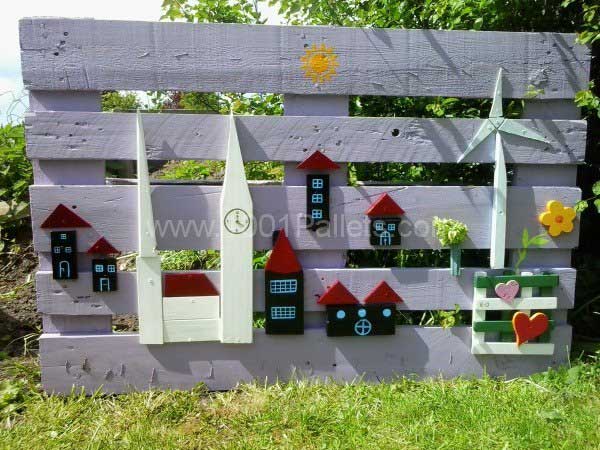
26. Small Pallet Tee For Children

via 1001pallets.com
27. Wooden Boxes Constituting a Vertical Garden
via ana-white.com
28. Colorful Wooden Crates Emphasizing a Simple Fence Through Flowers
via hgtvgardens.com
29. Simple Mundane Geometric Paths Sculpted By Greenery
We would love to hear you opinion on these super cool diy reclaimed wood projects. Each and everyone is able to change your backyard landscape in a breathtaking manner and we would love to hear which from the ones showcased above would be first on your list. Craft away!
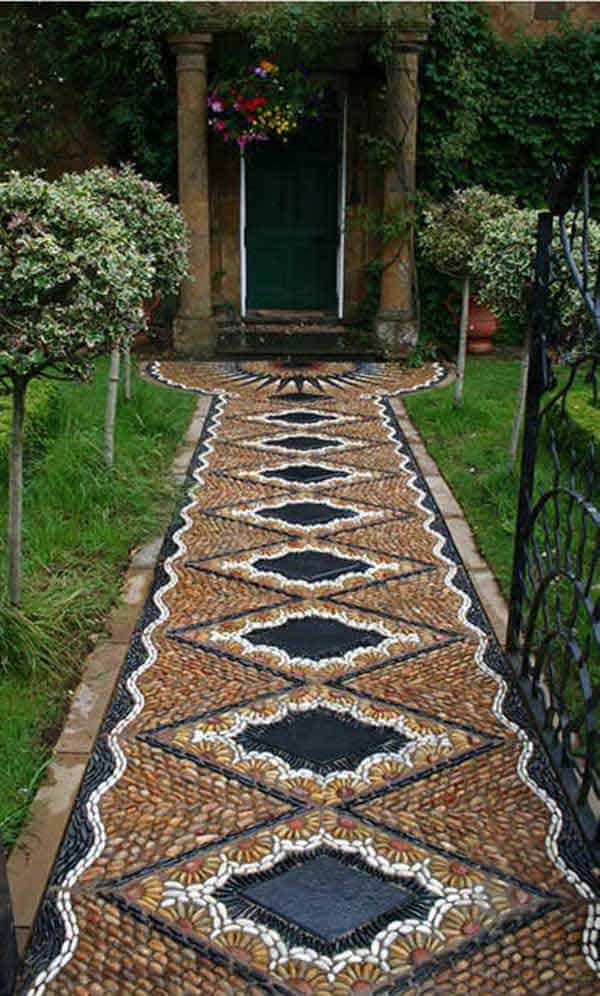
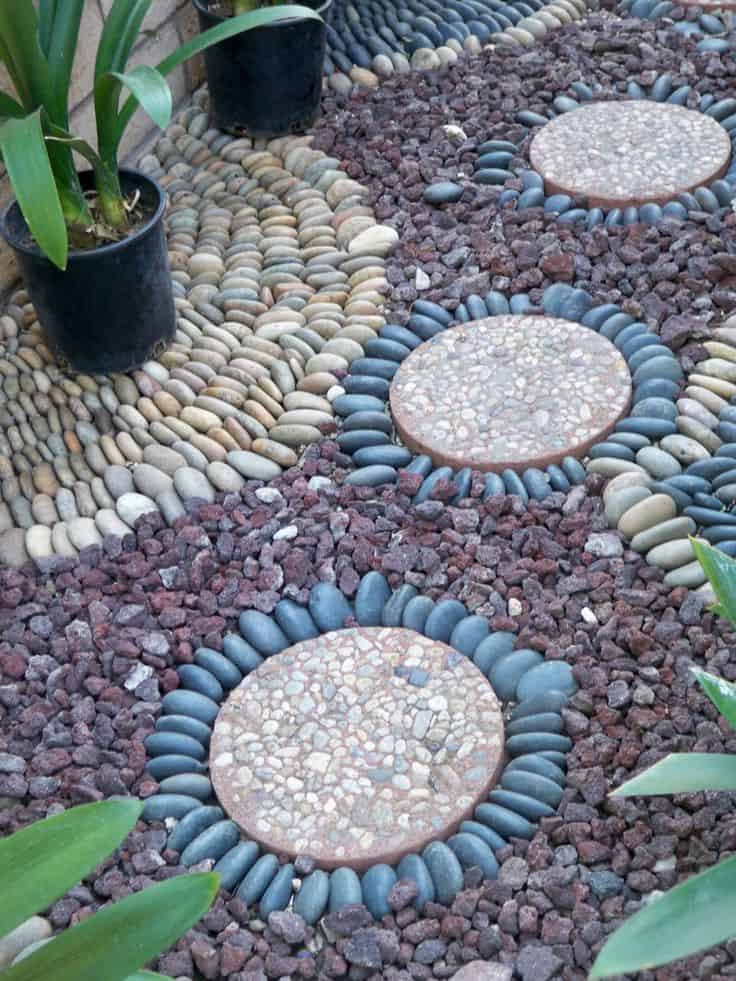
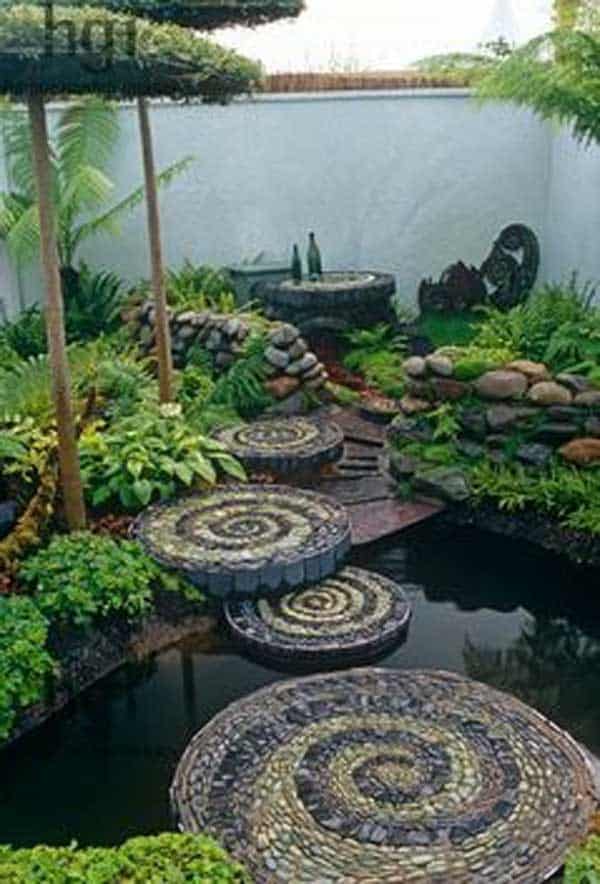
Mosaic art stems far back as 4000 years. However it was the Greeks who took the pebble art forming to a higher level, somewhere in the eighth century. Since then the art continues to be created and seen on and around famous buildings, business establishments and the home of many people. In this article we will look at a variety of garden pathway pebble mosaic designs that we hope will trigger some ideas in your head.

You can choose to buy your mosaic pebbles online, known stores, or simple go about collecting them as some adventurous lovers of the art do. Keep each pebble sorted in separate containers based on their unique shape and color. To do this successfully you may need to wet them a bit to really tell their color. You will need to have your mortar, measuring, equipment and wheelbarrow along with all the other appropriate tools readily at hand for this project. Draw out on paper your pebble mosaic idea then sketch it in the exact area you will be creating your art design. If you are uncertain about how to proceed try doing a smaller, simpler project to ensure you really grasp the concept. Set out to work on an overcast day and ensure when you're done you leave your work to set and dry properly.
The other option would be to hire a professional to create your pebble mosaic art in your garden pathway. People will stop to admire this delicately laid artwork so while expensive to pay to have it done, it will be a joy to look upon.
Take a look at these 29 garden pathway pebble mosaic ideas for your home surroundings.
#1 Detailed rug-like mosaic of pebbles and rocks

#2 Intricate spiraled mosaic of rocks and pebbles
Source: paradisexpress.blogspot.com

#3 Carefully laid pebble mosaic art
Source: coffeelovinmom.tumblr.com
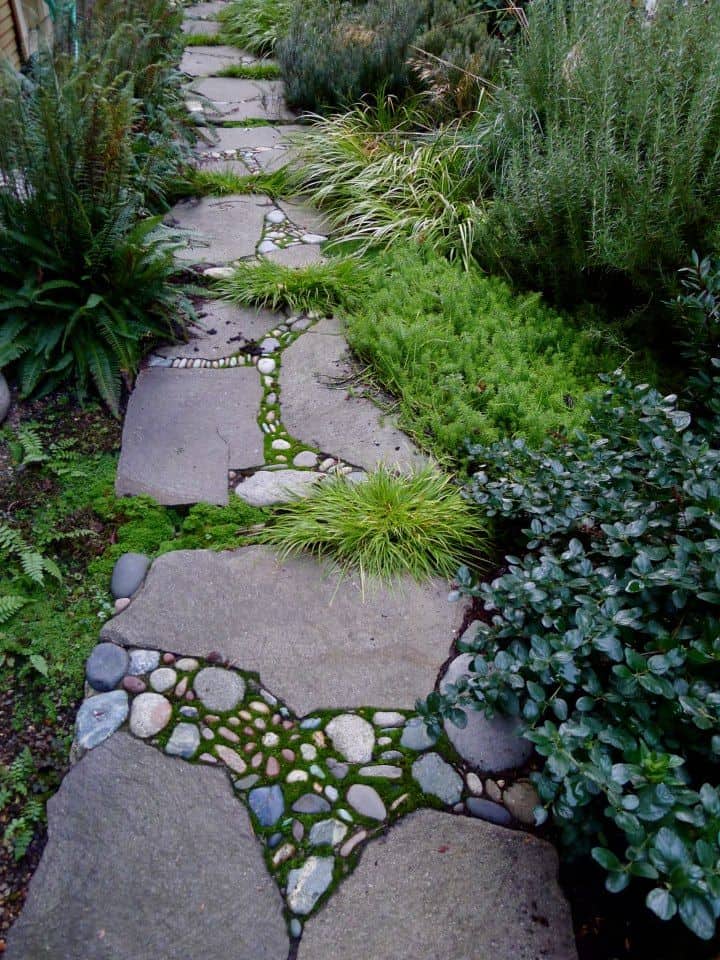
#4 Stone mosaic pathway
#5 An even greater pebble mosaic challenge for your garden pathway
Source: jeffreygardens.blogspot.ca
#6 The art of laying pebble mosaic

#7 Notice the style, pattern, and direction in which each pebble is laid

#8 Ocean creatures pebble mosaic design

#9 Simple yet detailed pebble design in this pathway
#10 Peacock stone mosaic design

#11 A heart-shaped pebble mosaic design in this garden

#12 A work of art in your garden vs numerous pot plants

#13 Make your pebble mosaic artwork a fun project
#14 Spiral stone mosaic pathway

#15 Feather stone mosaic

#16 Spiral stone mosaic tile pattern

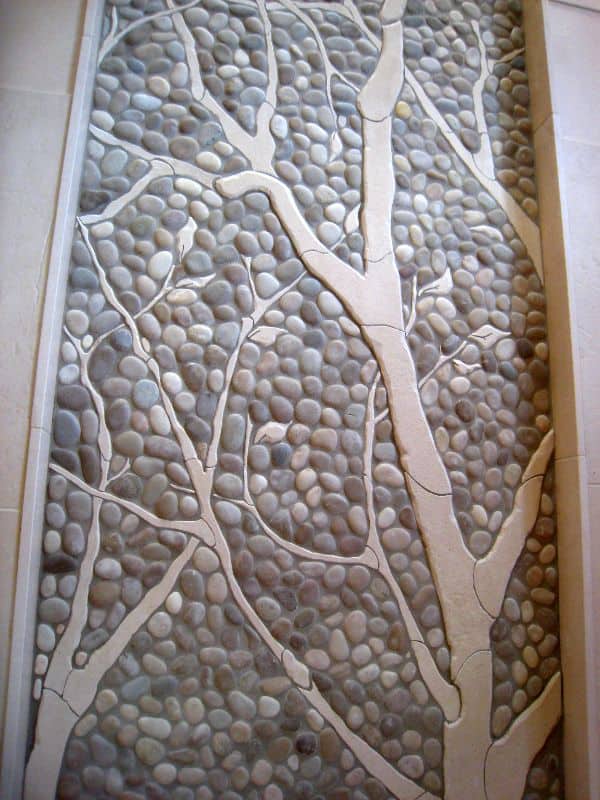
#17 Treemosaic realized with rocks and pebbles

#18 Professionally done pebble mosaic garden pathway work of art

#19 Pebble mosaic tiles

#20 Rock and pebbles mosaic garden access
Source: personalgardencoach.wordpress.com

#21 Marine-inspired theme rock mosaic scene

#22 Butterfly rocks and pebble mosaic

#23 Pebble and rock bathroom mosaic
#24 Colorful pebble design

#25 Rock and pebbles used to repair garden pathway
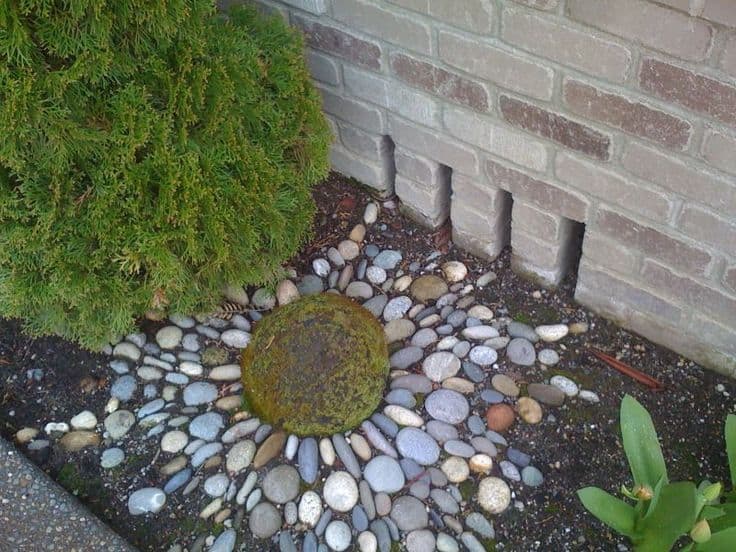
#26 Solar garden mosaic with rocks and pebbles
#27 Rock and pebbles interlaced with brick in a circular mosaic
Source: wowthatsabusygarden.blogspot.com

#28 Circular spiral made with pebble mosaic in this garden

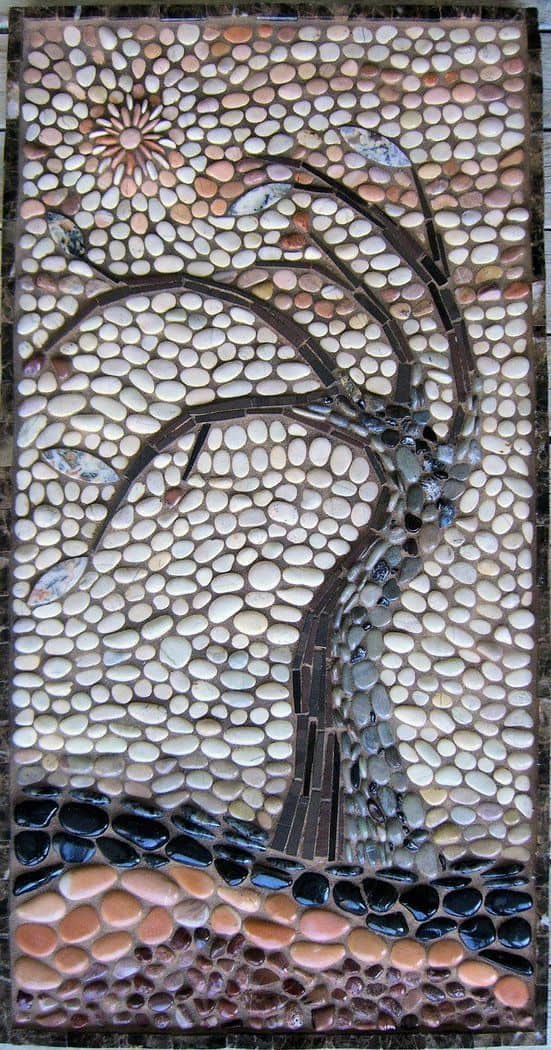
#29 Leafless tree amid mosaic pebbles
Pebble mosaic art as you have seen is a great garden project to enhance your home surroundings. You can take a tutorial as there are a few videos available on the internet showing step-by-step the knowledge of this art. Then again, as I mentioned in the article, you can pay to have it professionally done - taken you can afford to. Share your ideas in the comment section below.
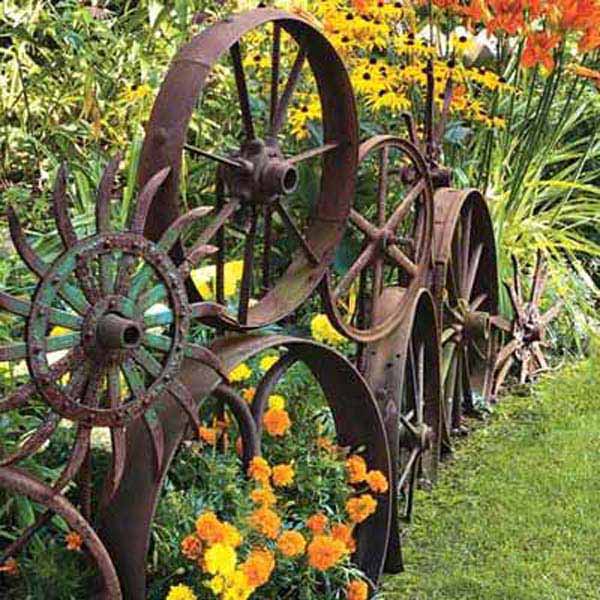
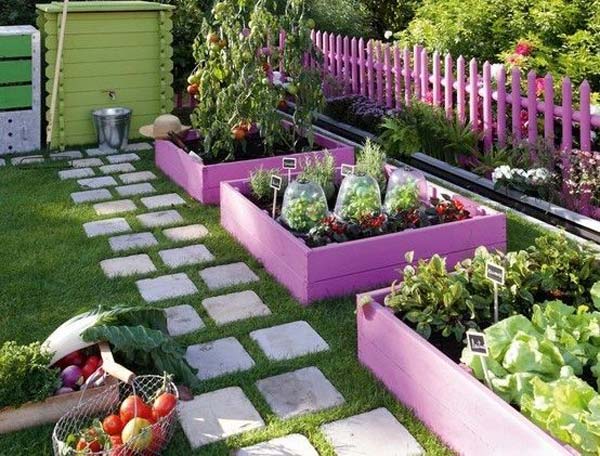
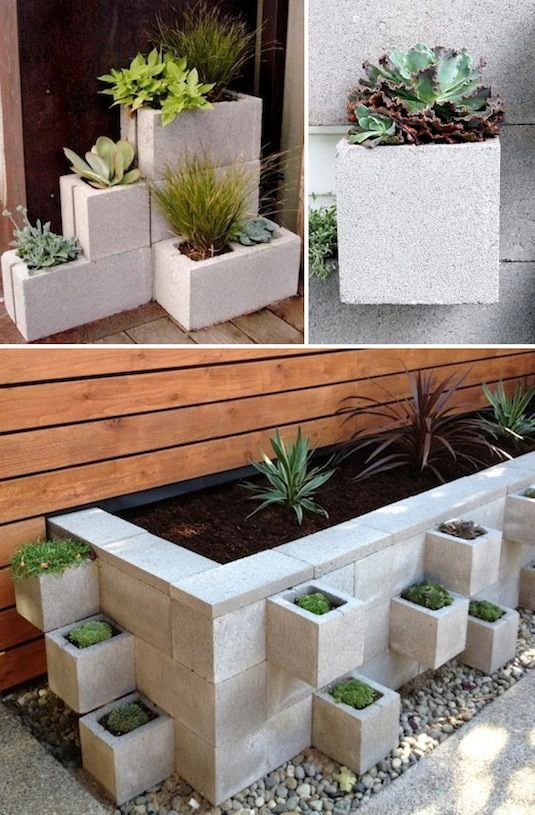
Once you have plants in your garden you will want them safe, you will want them beautifully organized and fresh. Gardening, happily, is a never ending journey where progress is slow and steady and regardless of the the nature of the lot, regardless of the plant grown or the way in which the gardener takes advantage of the lot, the sole effort of growing a living green creature in his own background is a victory. More then 27 DIY garden bed edging ideas have been showcased underneath, these are here to help you enhance and emphasize your garden in increments.

Complement your greenery with an edge whether is organic, mineral or ferrous and continue your garden on both sides. Be creative and enjoy your garden as much as possible wherever you are, wherever it is.
Garden Bed Edging Ideas
#1 Authenticity Captured in Old Metal Wheels Wired Together Into a Creative Edging for Plants
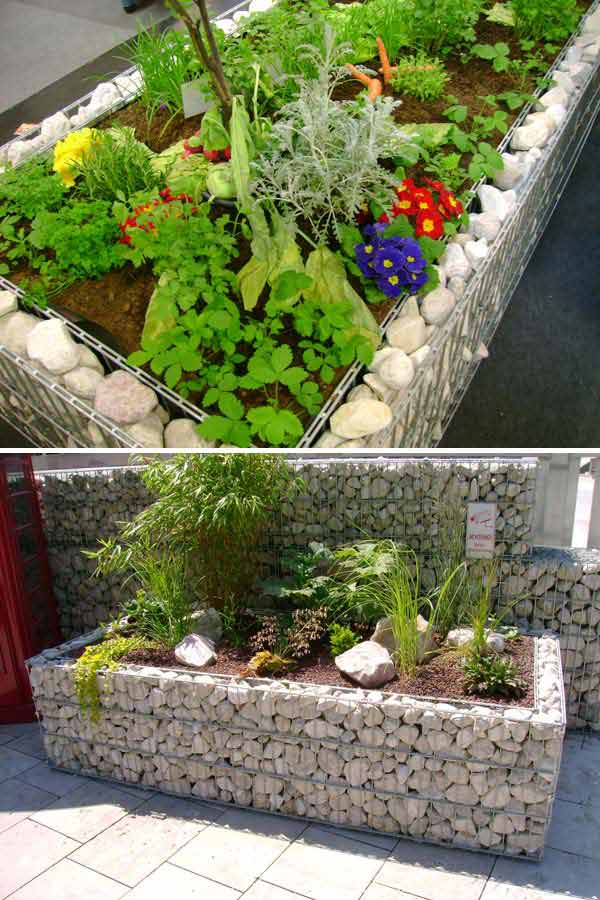
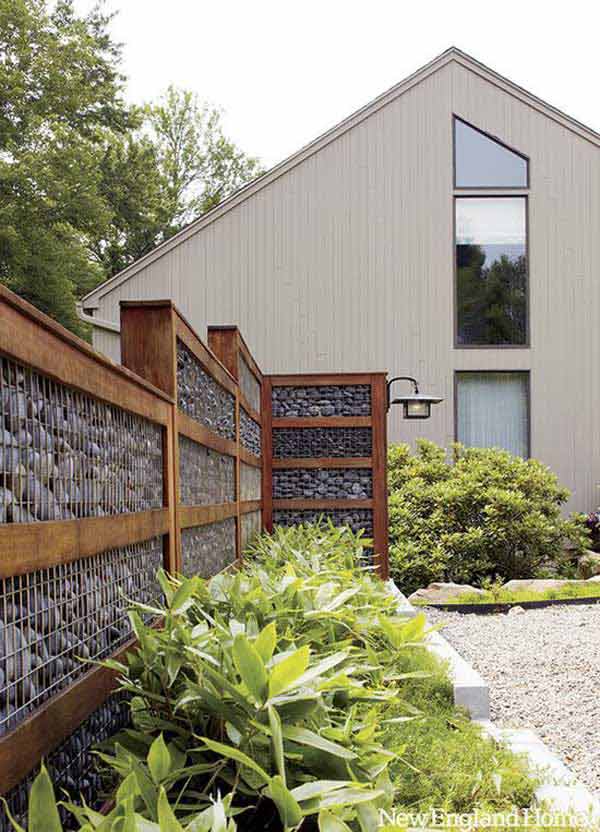
#2 Terraced Backyard Landscape Highlighted by a Sculptural Gabion Wall

#3 Airy Reclaimed Wood Cut at Various Lengths Bringing Color Into The Picture

via bobvila.com
#4 Plant Directly Into Troughs And Wooden Buckets For a Vintage Look

#5 Painted Wooden Pallets Can Double as a Beautiful Edging
via lookathome.ru
#6 Wooden Logs Can Bring Texture and Sturdiness Into The Simplest Raised Bed

#7 Garden Beds Edged With Old Terracotta Pipes

#8 Use Cinder Blocks to Create a Raised Bed

Tutorial @ youtube.com

#9 Metal Corroded Tubes Can Bring a Very Original New Texture Into The Picture

via floradoragardens.blogspot.com
#10 U-Shaped Raised Garden Bed Can Provide Maximum Accessibility in Smaller Yards


#11 Superb Natural Woven Raised Bed Garden

#12 Stone Bricks or Cement Bricks Can Create an Edge In Your Garden With Ease

#13 Collect and Up-cycle Glass Bottles Into Creative Colorful Garden Edging

via flickr.com
#14 Old Plates Used as Garden Edge For Smaller Raised Beds

via 33barefootlane.wordpress.com
#15 Knitted Tree Branches Used to Define Garden Raised Beds

#16 The Straw Bale Garden Bed Edging Can Enhance Your Planting

via howto-garden.com.au
#17 Wavy Steel Corroded Edging

via houzz.com
#18 A Wide Concrete Edging Can Be Used as an Occasional Garden Path
via pinterest.com
#19 Huge Clam Shells Protecting Flowers

#20 Simple Rock Edging in a Very Beautiful Garden

via bhg.com
#21 Raised Bed Garden With Knit Branches Nestling Lasagna

#22 Old Reused Bricks Into an Organic Border
#23 Log Border Flowerbed Using Birch Tree

via cheapseeds.com
#24 Small Fence Realized With Up-cycled Bike Wheels
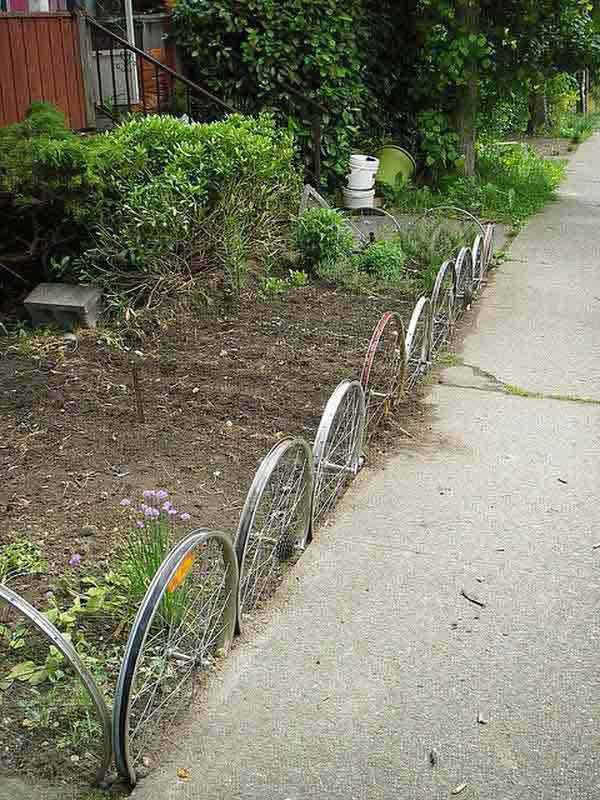
Source Unknown.
#25 White Gabion Raised Bed Border
#26 Railway Sleepers Positioned Vertically Constructing a Beautiful Edge For a Raised Bed

via kilgraney.com
#27 Garden Protected With The Nature`s Most Powerful Element, Greenery

#28 Simple Wood Edge Used For a Tiny Raised Bed

How do you organize your gardening lots? We would love to hear your opinion in the comment section below on the ideas showcased above. Enjoy your garden, emphasize, enhance, and breathe greenery!
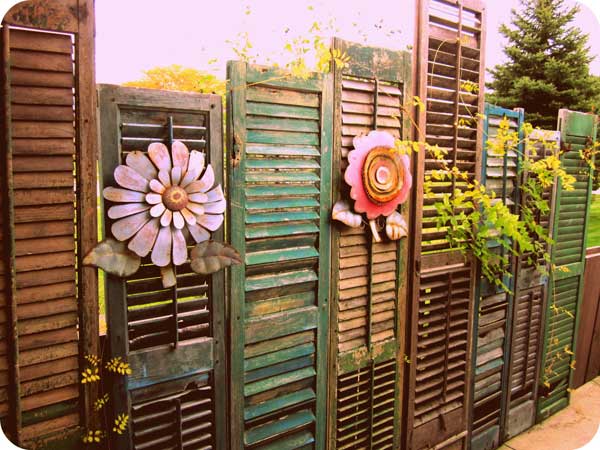
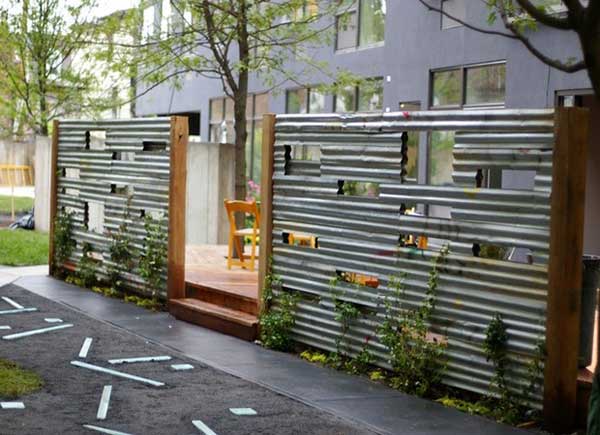
It goes without a saying that the fence in your garden is a very important part of it. You see it everyday and it serves as a background for all your greenery, for your little heaven. We have selected 26 insanely cool garden ideas to materialize this summer to enhance your fancy and interesting yard and or garden with something that really matches your personality in a unique, interesting manner. Recycling and up-cycling should always be top priorities in DIY projects and they can be included into the project early, from the planning phase. You can use branches, old wooden planks painted into various playful items, wine bottles and even window shutters. Creativity has no limits; cast a glance at the gallery below and feed your imagination!

Cool Garden Fences Ideas
1.Use Your Wire Fence as a Huge Canvas for Your Artwork
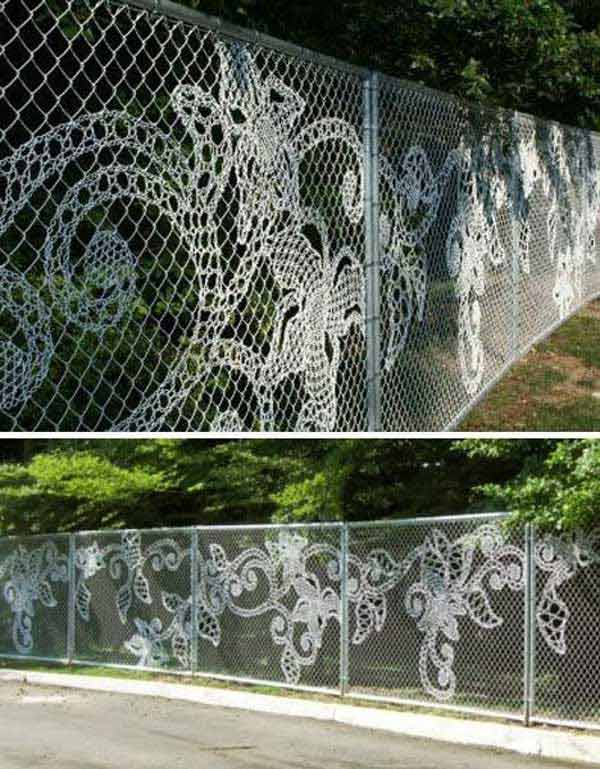
via curbly.com
2. Extravangant Yet Relaxing Aquarium Fence

3.Rustic Rusted Steel and Birch Branches in a Beautiful Fence Composition

via houzz.com
4.Patio Bottle Fence

5. Different Pieces of Metal Used in a Superb Patchwork Fence
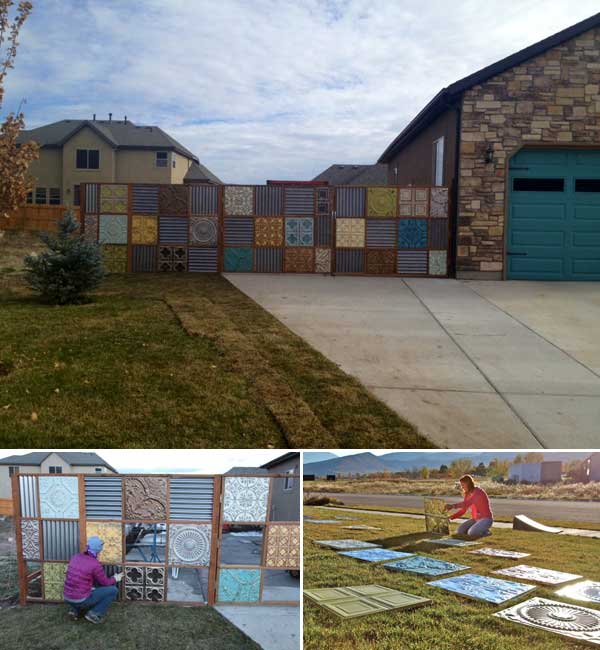
via noelleodesigns.com
6. Dense and Beautiful Glass Bottle Fence

via Flickr
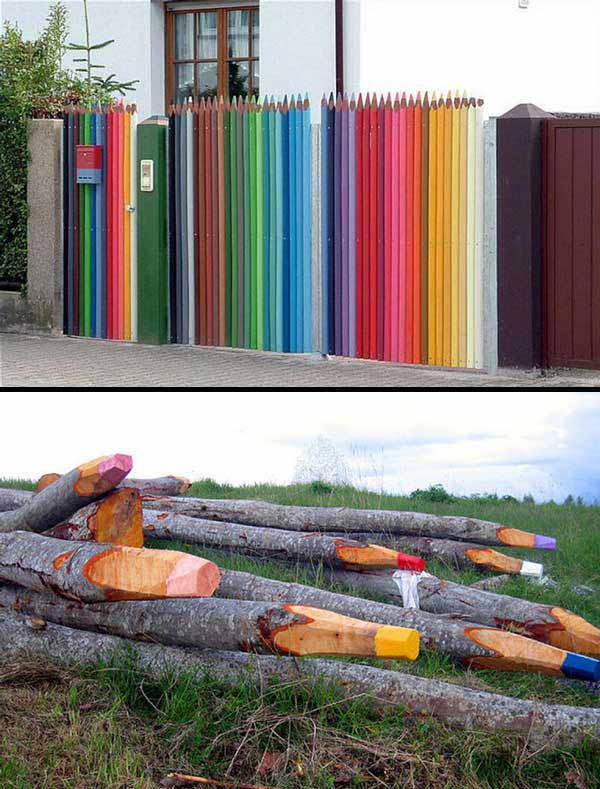
7. Creative Colorful Fence Resembling Coloring Pencils
8.Paint and Reuse Shutters as Privacy Screens and Fences

Tutorial cottageintheoaks.com
9.Stones and Rocks in an Insanely Beautiful Rustic Fence

via tapeciarnia.pl
10.Fence Realized Out of Old Bicycle Parts

via Flickr
11.Encourage Creativity With a Huge Chalkboard Fence

12.Wood and Marble Composing a Fairy-tale Like Fence

13. Paint a Picture and Spread Happiness

via adorepics.com
14.Highly Graphic and Dense Stone Wall
15.Old Doors Reused as a Fence
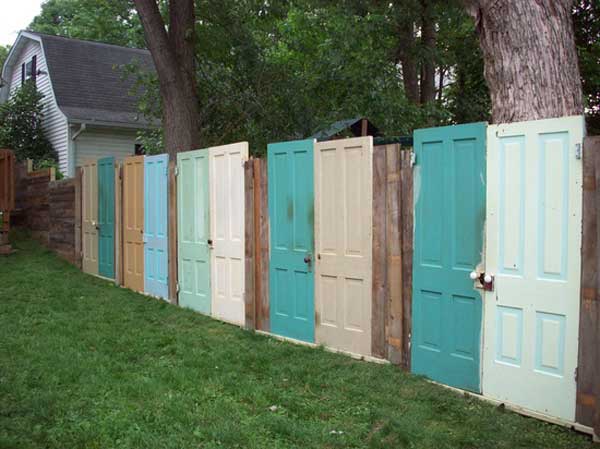
via thedoodlehouse.com
16.Lattice Planter Inserted Into a Brick Wall
via whimsicalhomeandgarden.com
17.Old Windows Used as a Garden Fence

18. By Placing The Wooden Boards Horizontally You Can Obtain a Dynamic Effect
via minimalisti.com
19.Ice Sky Fence Boosting Colors

via recyclart.org
20. Simple and Beautiful Bamboo Fence

21.Old Shutters Reused in a Vintage Fence
via alexandriasdesignstudio.blogspot.com
22.Highly Creative Piano Inspired Fence

23.Reclaimed Wooden Fence Animated by String Lights

via optimumgarden.com
24.Corrugated Metal Fence Carrying Greenery
via asofom.info
25.Wooden Pallet Beautifully Decorated Into a Sensible Playful Fence
via 1001pallets.com
26.Unique and Unusual Bowling Ball Fence

via designrulz.com
What do you think about these cool garden fence ideas? We would love to hear your opinion in the comment section below. We have found them different, inspiring, and insanely creative and we would love to hear your take on them.
Related Articles
Best Fence for Noise Reduction
8 Best Fences for Dogs to Consider
13 Best Gas Powered Post Drivers
7 Best Electric Fence Chargers
10 Best Electric Fences for Chickens
37 Awesome and Cheap DIY Pallet Fence Ideas to Realize Swiftly
With spring around the corner it is time to get creative in the garden. The backyard landscape will become our natural screensaver that we can refresh through a simple blink. Little by little, weekend by weekend DIY garden projects are starting to break the ice through simple efficient methods that will beautify our every day lives with ease through a simple flower. It is up to us to create the perfect retreat around us, to materialize a small green heaven. We can start today by sharing inspiration with our friends and by selecting our first DIY garden container project to start with this spring. Be creative and craft away!

#1. Graphic and Creative Shoe Planters

Ensure the proper drainage through a few holes drilled and nestle your plants, succulents in a new beginning.
1. Black Gold 2. Rosy 3. Gardening Forums
#2. Colorful Vintage Bicycle Planters

Whimsical, inspiring and truly creative. A boem decor to enjoy with your daily coup of tea.
Top: flickr
#3. Cork Planters For Succulents

Small is great, small is truly original and inspiring whilst being cozy and personal. Use cork to offer shelter to your succulents.
Source & Instructions: Upcycle That
#4. Colorful Recycled Tire Planters
Upcycle tires and join the sustainable movement. You can find more inspiration here.
1. LB&T 2. Architizer 3. Recaptured Charm
5. Green Water Fountain Planters

Fairy tale-like gardens can be nestled into upcycled water fountains. Make sure that the arrangement fits the scale of the fountain for an extraordinary result.
1. BHG 2. Rancho Reubidoux 3. bc living
#6. Old Sink Planters

This craft proves that pretty much anything can be used as a planter and even more ideas will follow to confirm it. Be creative and plant as much greenery as possible around you.
Top: My Home Ideas Bottom: Midwest Living
#7. Vintage Strainer Planters

The vintage colors are top notch but every color scheme can work perfectly as these recipients are already wearing the drainage holes.
1. Google+
#8. Tree Stump Planters

With a chisel and hammer, you can return a piece of nature back to its origins. New plants sheltered by a tree stump. Perfectly natural and insanely beautiful.
1. Pinterest 2. Interior Holic 3. Houzz
#9. Natural Rock Planters

Rocks are ideal for any plant but succulents are really emphasizing the austere beauty of this natural element.
1. Unknown 2. PFPlants 3. Cactus Pad
#10. Wheel Barrow Planters
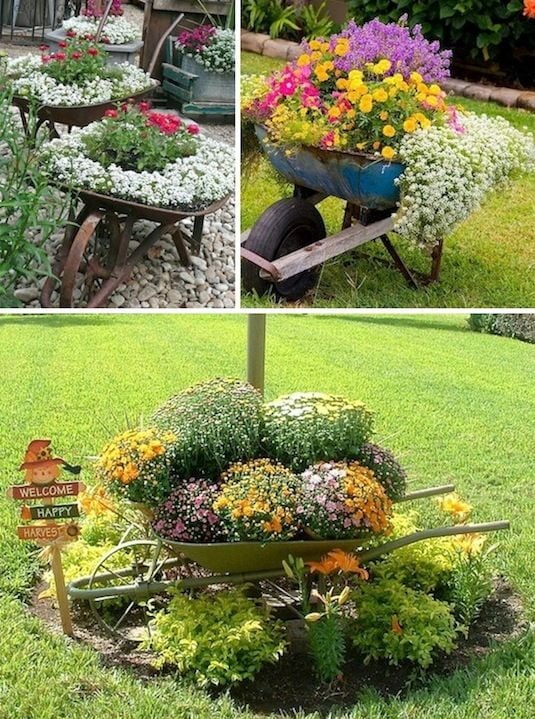
You can plant a sensible collection of flowers in a wheelbarrow, besides the obvious graphic aesthetic values you will get to protect your sensible plants with ease thanks to its mobility.
1. iVillage 2. Bob Vila 3. The Seasonal Home
#11. Vintage-Looking Toy Truck Planters

Bottom: Capers & Crayons
#12. Beautiful Birdcage Planters

Regardless of size and model birdcages will go insanely well in any decor. Accessorize it beautifully.
1. Cottage Market 2. Brides of Adelaide 3. Enchanted Cottage
#13. Old Paint Can Planters
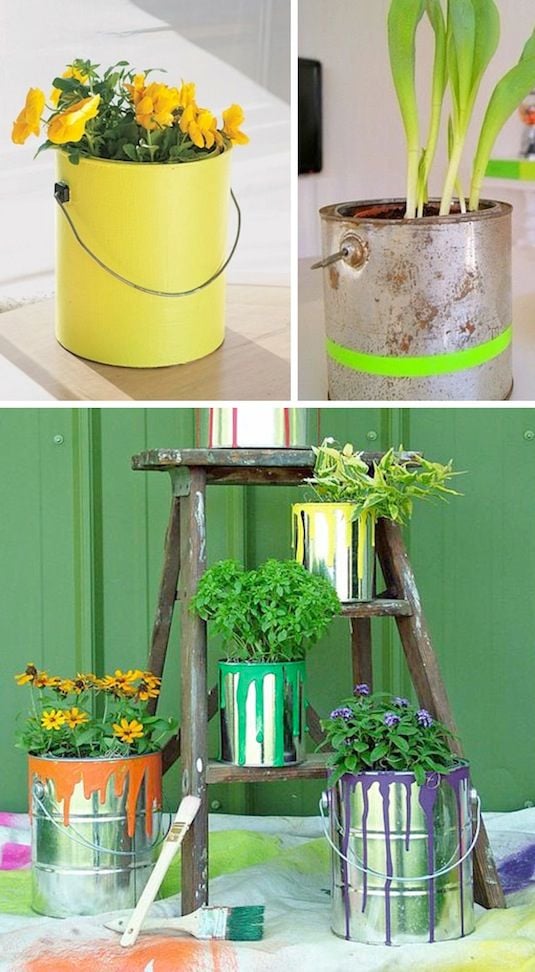
Most paint cans have ideal sizes and they can become quite graphic if you remove their label. Drill a few holes to ensure proper drainage and you are good to go.
1. RePlayGround 2. Thea’s Mania 3. HGTV
#14. Tin Can Planters

Tin cans are always in our trash can in big numbers. Start recycling them creatively in beautiful flower pots.
Source & Instructions: Dos Family
#15. Graphic Vintage Chandelier Planters
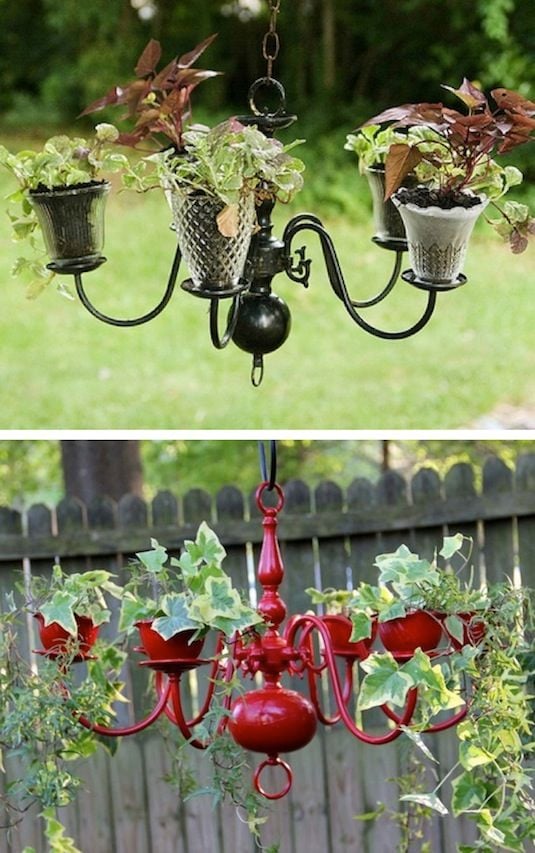
Superb idea for cascade flowers on your patio. Craft away!
Top: Miss Modish Bottom: Etsy
#16. Cinder Block Planters
Remaining cinder blocks stacked can become ideal flower planters thanks to their compartments, get creative and generate an interesting volume in your composition, a volume ready to wear green clothes.
#17. Vertical Greenery Through Repurposed Shoe Holder
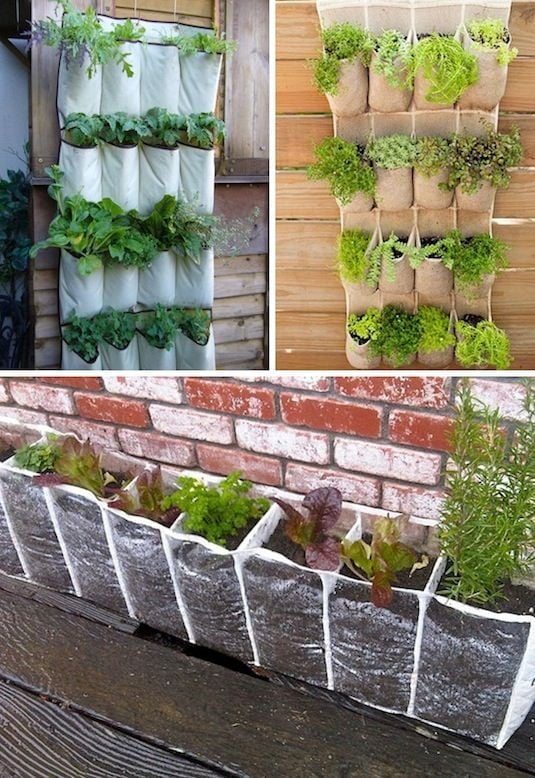
Old shoe holders can become your new vertical garden. What`s stopping you?
1. instructables 2. Good Housekeeping 3. B&H
#18. Shabby Chic Chair Planters
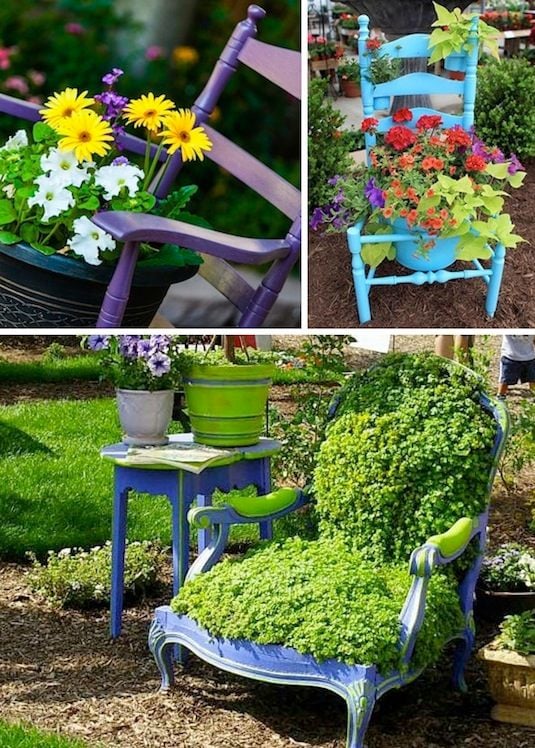
Remove the seat and you have a new planter. An extremely graphic and original new planter.
1. Unknown 2. Seattle Times 3. Debra Prinzing
#19. Books Sheltering Small Plants

An old bike filled with flowers by a side table accompanied by two armchairs with green vegetable cushions. A few book flower pots are on the table. Perfect scenario.
Source & Instructions: Apartment Therapy
#20. Milk Carton Planters
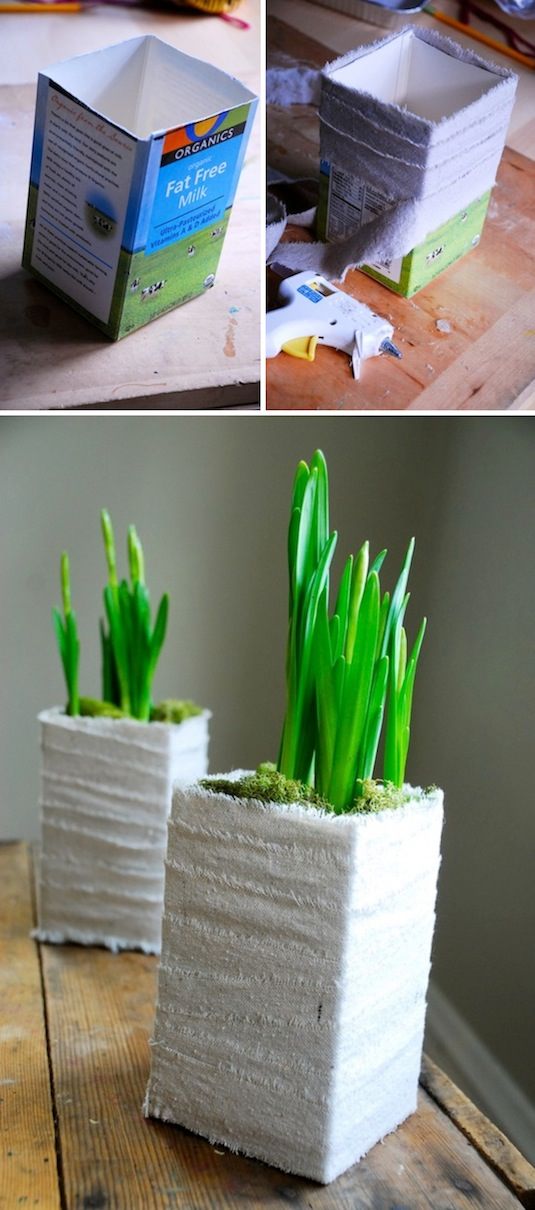
Milk carton recipients are quite strong and can become ideal centerpieces if you decorate them beautifully.
Source & Instructions: Camilla Fabbri
#21.Tool Box Planters

With layered levels, you can create a beautiful effect of greenery. Be creative and place the in key points in your backyard.
1. Making Art 2. Curbshopaholic 3. Unknown
#22. Small Shell Planters

Small yet creative. Small shells can become ideal centerpieces in any decor. Succulents will fit nicely.
1. Etsy 2. radmegan 3. Unknown
#23. Boat Planters

A boatload of flowers can really be something. If you have room to install a boat in your backyard and more importantly if you have an old boat to install in your backyard the ideas are definitely worth considering. Pictures do speak for themselves.
1. tumblr 2. flickr 3. SPL 4. HGTV
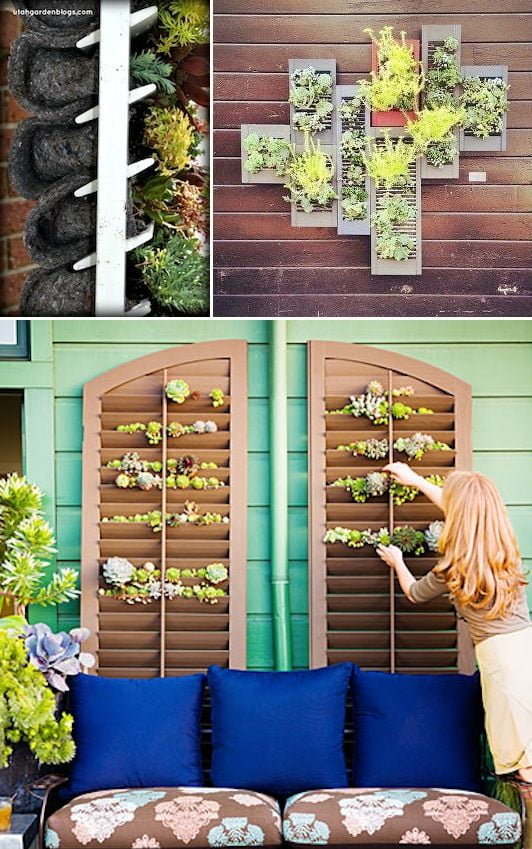
#24. Plantation Shutter Planters
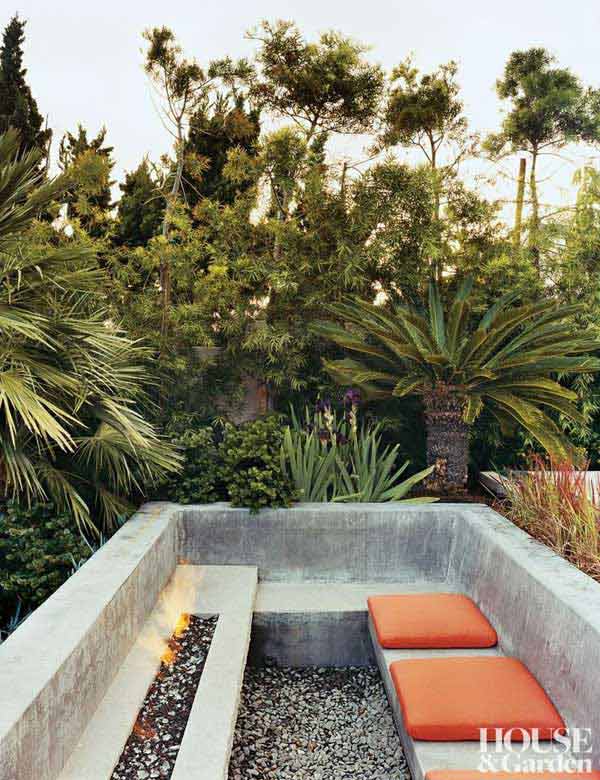
There is nothing better than a sunken sitting area designed in a green lush background. The elements flow from organic to mineral into incredible balanced compositions meant to feed the body soul and mind all at once.Taking advantage of your own landscape is a creative natural idea which preserves the natural habitat as much as possible while providing the necessary comfort you seek. The idea of sinking an area offers comfort and a feeling of protection in between your "walls" whilst providing various aesthetic values to your backyard design.We have gathered a selection of 23 Simply Impressive Sunken Sitting Areas For a Mesmerizing Backyard Landscape. Various ideas are displayed, offering solutions even for the plainest of the terrains.Cast a glance at the gallery below and feel free to share your valuable feedback at the end of this article.

#1 Use river rocks to maintain the natural aesthetics values
via partyfettiblog.com
#2 simple sunken sitting area with normal furniture

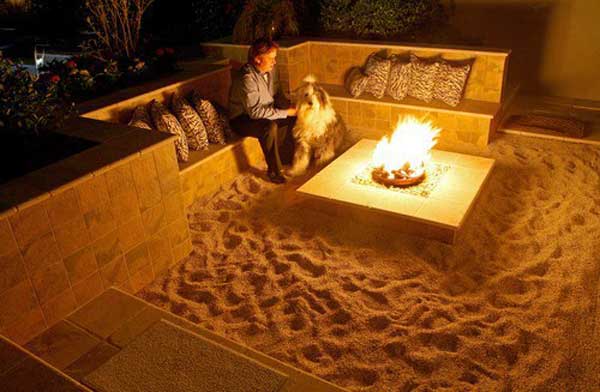
#3 sunken sitting area with a sand floor
Source unknown
#4 sunken terrace with wooden floor and walls

via railwaysleeper.com
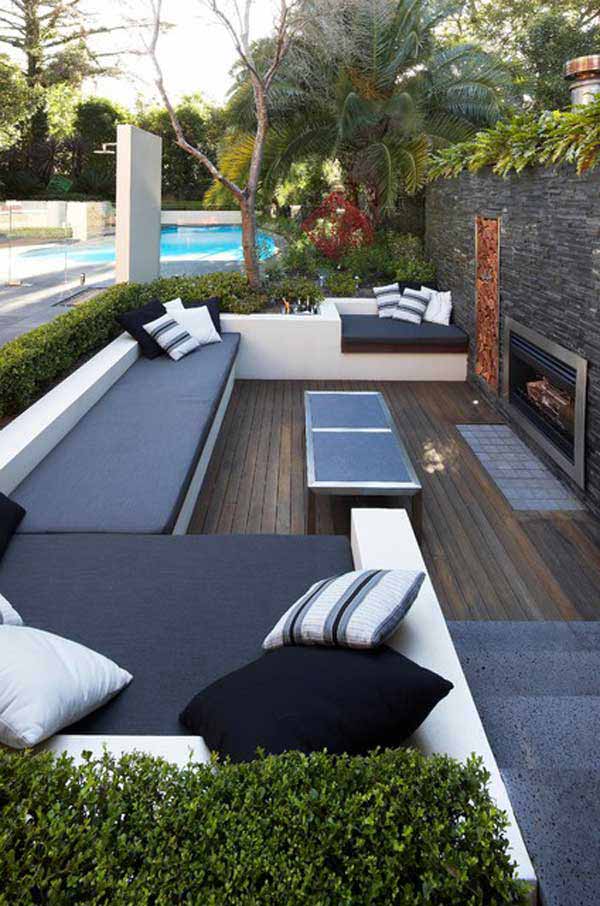
#5 neat modern sunken sitting area with outdoor fireplace
via rollingstonelandscapes.com
#6 wooden sunken area nestling coziness and WARMTH

via bohema.ca
#7 JAW-DROPPING sunken sitting area nestled in a lake

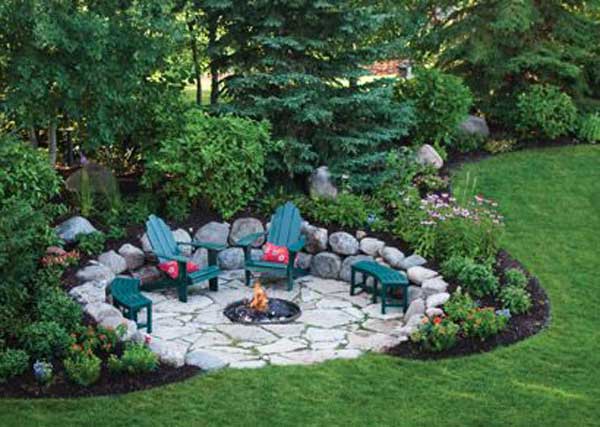
#8 simple rocks protecting a fire-pit sunken area
Source unknown.
#9 simple and inexpensive neat sunken sitting area

via throughthegardengate.co.uk
#10 beach sunken dinning room table for romantic evenings

via lidobeachresort.com
#11 sunken area at grass level offering mesmerizing views

via awarchitect.com
#12 concrete can solve problems with ease

via gardenista.com
#13 beautiful ancient looking rock surrounded by water and greenery
#14 Transform your backyard into a retreat with a stoney sunken sitting area

via livedan330.com
#15 surround yourself with LUSCIOUS greenery and use it as a background in your sunken sitting area
via everdellgardendesign.com
#16 a terraced garden deserves a secluded space

via photoshelter.com
#17 mineral and organic will always combine perfectly into surreal landscaping
via bhg.com
#18 what could be better than a swimming pool sunken sitting area?

via fancy-fixtures.com
#19 even the simplest of elements can transform a space
#20 when the landscape is not in your FAVOR improvise and build your own

via awarchitect.com
#21 urban compositions including sunken sitting area are very popular nowadays

via contemporist.com
#22 the ultimate sophistication is definitely a sunken kitchen in your backyard
via blog.styleestate.com
#23 concrete and fire in an elegant composition
What do you think about the topic of sunken sitting areas? Would you build one for your home? We invite you to leave your valuable feedback in the comment section below.

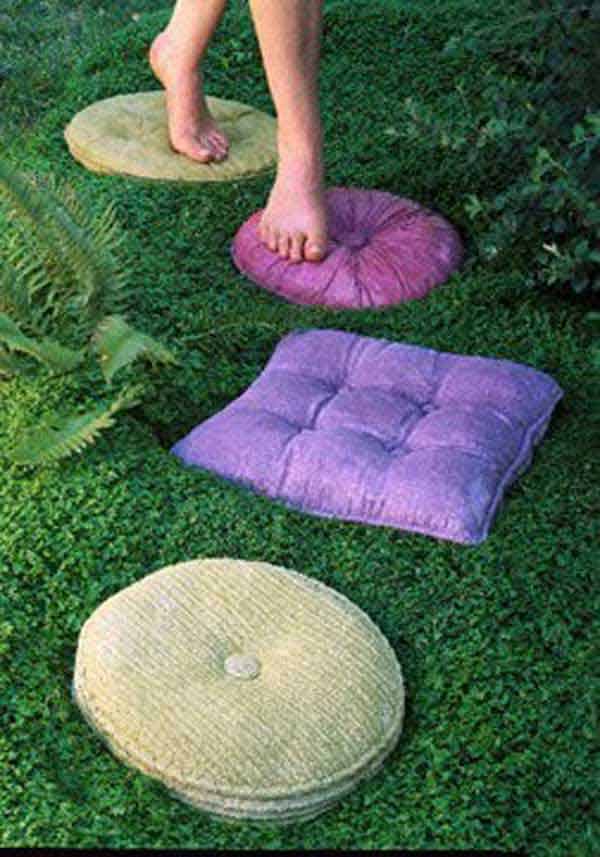
#1 Rectangular rIver Rocks DIY STEPPING STONES
Tutorial @ jeffreygardens.blogspot.com
#2 Easy To Realize Cake pan Stepping Stone From Broken plates

Tutorial @ intimateweddings.com
#3 Realize glow in the dark stepping stones

#4 Insert natural elements into the stepping stones

#5 Glass Marble stepping stones

#6 Rock Footprints Stepping Stones

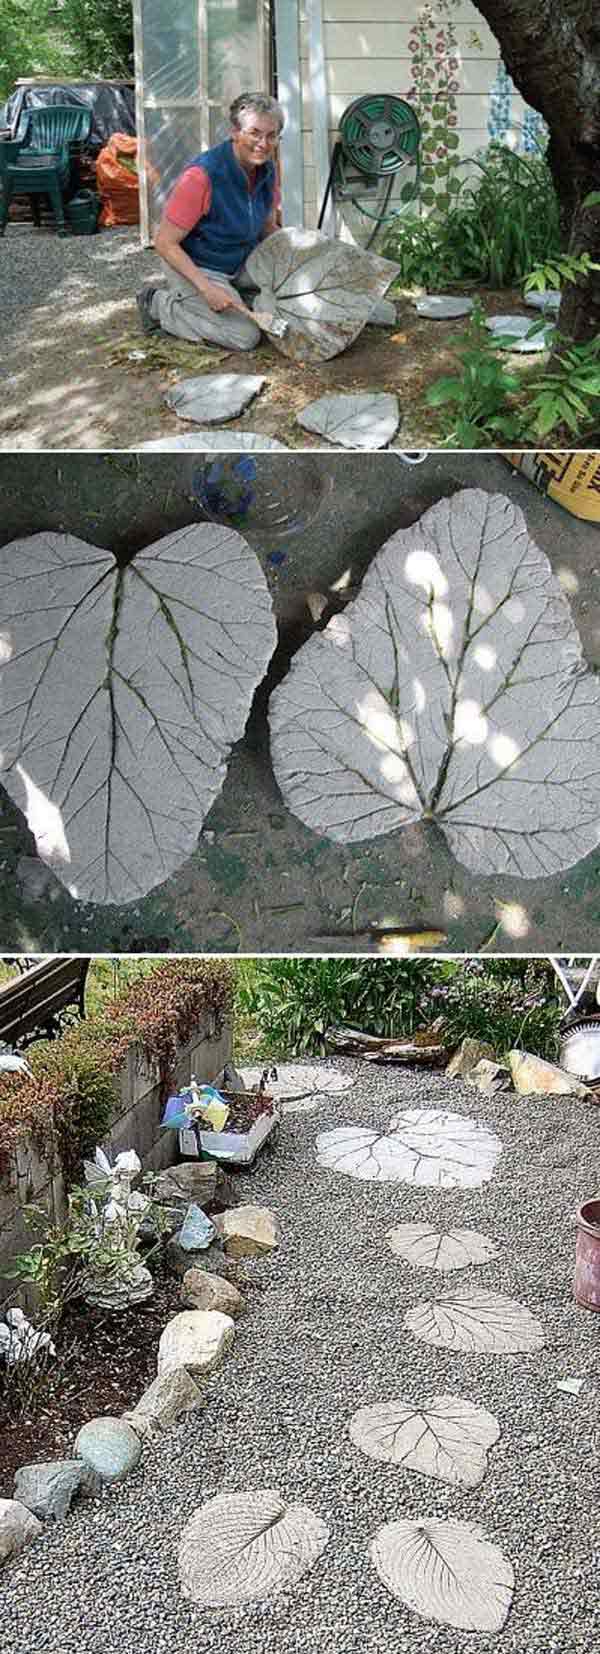
#7 Leaf Shaped Stepping Stones
#8 Colored rock tree STEPPING stone
#9 superb round mosaic stepping stones
#10 rhubarb leaf shaped stepping stone
Tutorial @ alternative-energy-gardning.blogspot.com
#11 circular snail rock mosaic stepping stone

#12 pillow shaped stepping stones wearing color
#13 river rocks and old wood doubling as stepping stones
#14 HEART-SHAPED stepping stones with brick decoration
#15 superb nests of river rocks used as stepping stones
#16 stepping stone realized with old toys approved by the little one

#17 Simple and natural leaf shaped stepping stones

Tutorial @ gardenmama.typepad.com
#18 Mosaic stepping stones with multiple source items

Tutorial @ www.intimateweddings.com
#19 impeccable river rock stepping stones in natural setting
#20 colorful Hopscotch Stepping Stones

Tutorial @ readbetweenthelimes.blogspot.com
#21 butterfly shaped river rock stepping stones

Source @ subtropical-gardening.blogspot.com
What do you think? We have found the examples simply breathtaking beautifully and equally authentic. We would love to hear your opinion in the comment section below.
19 of the world's best ways to repurpose old furniture in your garden have been featured below. They`re here to amaze and beautify, they`re here to change and save the world at the same time. Imagine how much time has been invested into creating your old couch, imagine how many hours it has been used by you and your loved ones; it would be a waste to just throw it away when you can create a beautiful flower bed out of it. Up-cycling old items is so much more then reducing costs, it speaks a lot about an individual that cares enough about its items, an individual that conserves the effort of others as much as possible whilst saving the planet a little bit of energy.

We invite you to cast a glance at the gallery showcased below and surge inspiration for your own garden, there are thousands of items that were unable to make it to our top, thousands that are able to beautify your garden with ease. Whether you`re going to create new unusual flower pot for your garden or a small water fountain we invite you to cast a glance at the unusual garden flower recipients and start your own DIY project as soon as possible; nothing beautifies the world more than greenery and its flowers.
Best Ways to Repurpose Old Furniture
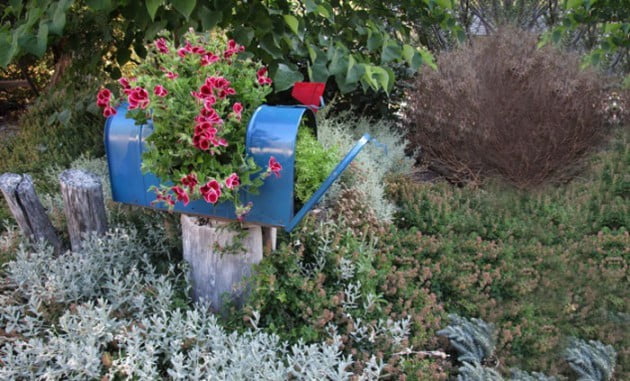
#1 Wooden Stump Carrying Old Mailbox Transformed Into Flower Planter
#2 Metallic Bed Devoured by Beautiful Flowers

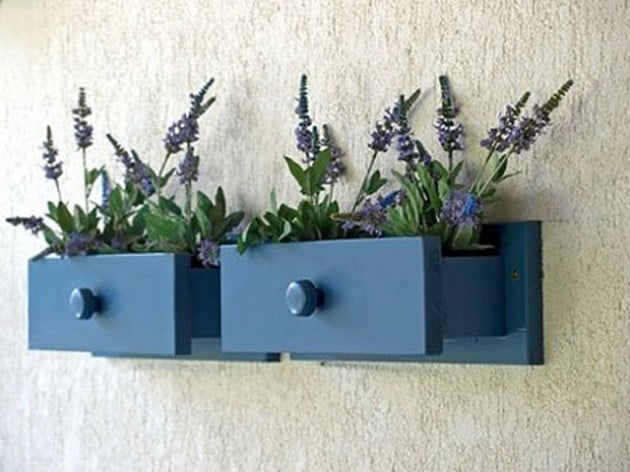
#3 Lavender In Drawers Planters
#4 Old Toilets Flower Planters

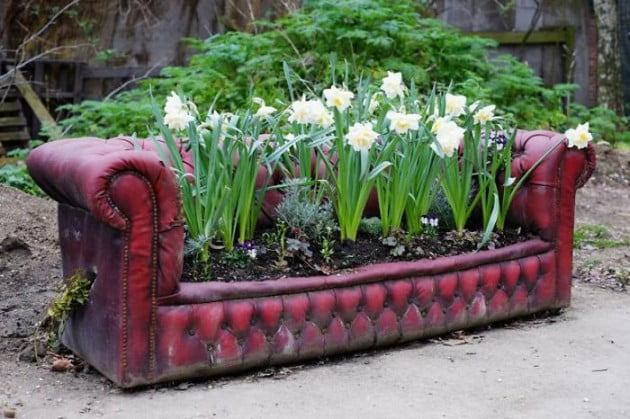
#5 Used Chesterfield Couch Containing Flowers
#6 Storage Unit With Drawers Nestling Succulents

#7 Small Planter In White

#8 Dinner Table Immersed in Greenery

#9 Complete Bedroom Set Outdoors Now Serving Vegetation

#10 One Night Stand and One Box With Flowers

#11 Shipping Cart Boosting Fresh Salad Material

#12 Typing Machine Printing Beautiful Flowers Outdoors

#13 Up-cycled Chair Now Used as Seed Store

#14 Huge Flower Planter Made From Old Bath Tub

#15 Cello Continuing to Beautify The World Now as a Planter

#16 Multiple Up-cycled Items on a Wooden Patio

#17 Store Greenery Outdoors in a Timeless Manner

#18 World's Best Outdoor Bed

#19 Old Piano Flower Pot and Water Fountain

Simple unique and extraordinary creative crafts beautifying the world in just one article. We really consider these 19 of the world's best ways to repurpose old furniture in a yard and we are aware that there are far more ideas out there to add to our guide. What do you think?
Related Articles
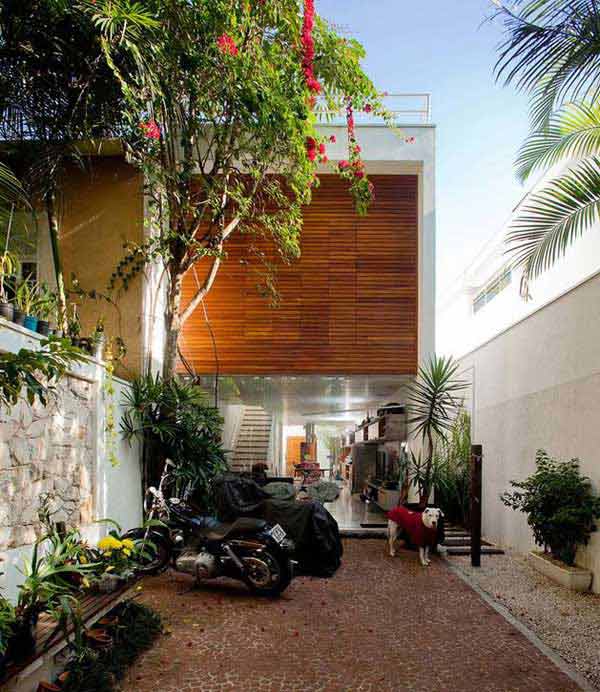
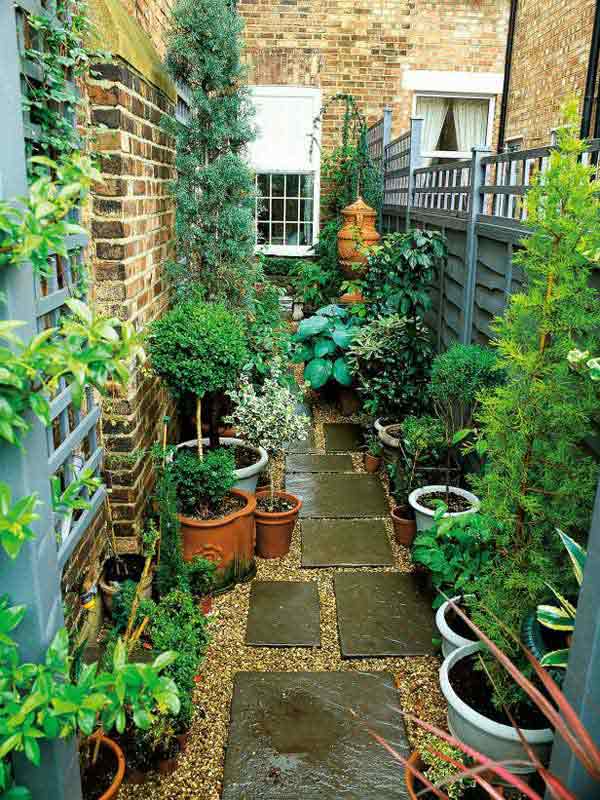
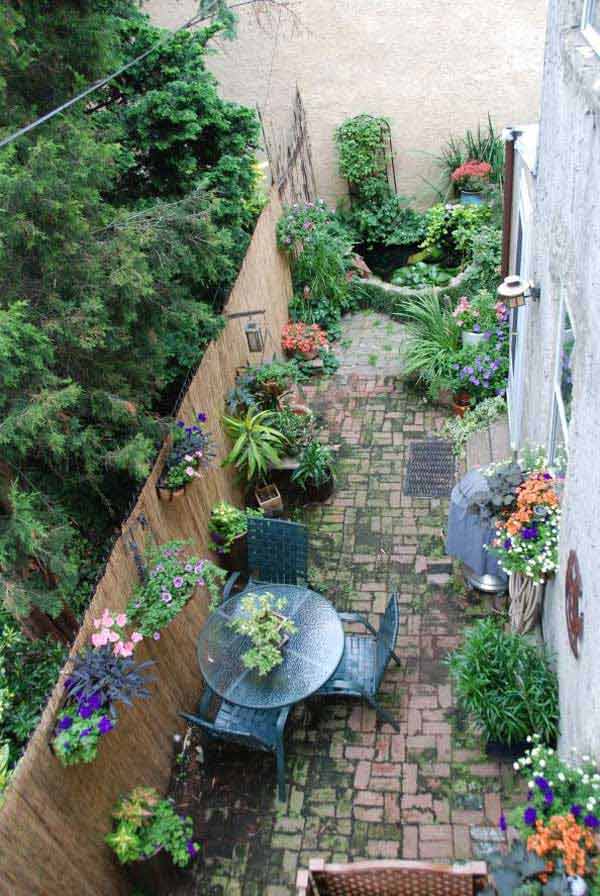
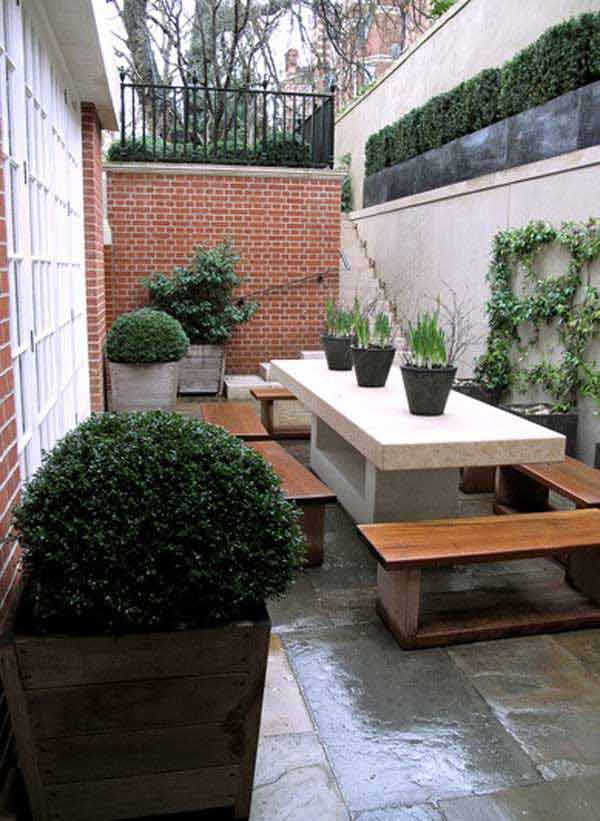
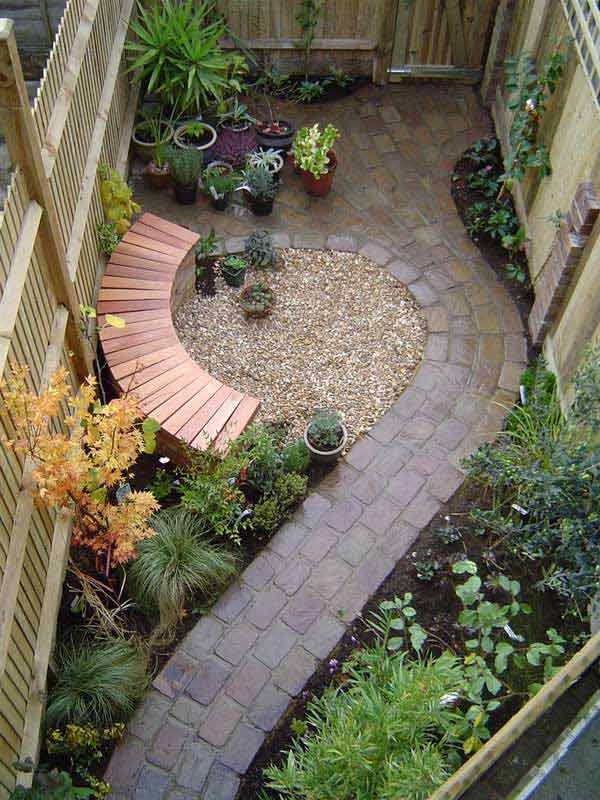
Small personal and cozy a narrow space can be. When it is your courtyard, backyard or balcony it is your responsibility to take advantage of it, regardless of shape and size. Through one-two potted plants and a bench to read outdoors everything can be changed. Breathe more oxygen, enjoy a better view in your own yard. Creative landscaping ideas for narrow outdoor places have been showcased and explained underneath. We invite you to cast a glance and identify the elements that manage to manipulate compositions, perspectives by emphasizing the feeling of space in a highly positive manner.

#1 Even The Most Narrow Lot Can Shelter Greenery

#2 Elements Scaled Right and Greenery Might Transform Your Space With Ease

via thejewelboxhome.blogspot.com
#3 Envision and Tailor Beautiful Spatial Compositions In Which Organic Elements Are Present
via trendir.com
#4 Light Can Sculpt Warm and Diffuse Space, Manipulate It Right

via thisisbrickandmortar.com
#5 Vertical Accents in Narrow Spaces Can Create Dinamicity Extending and Manipulating Perception Towards The Sky
#6 A Simple Pass Through Can Have Stationery Inviting Objects
#7 Create Rhythm Through Various Elements Without Intensifying The Space

Notice how the first stair is linear to sculpt a very important perspective along with the stone wall. The floor breaks this dynamic in small elements creating a rhythm subdued by the channeled perspective.
via lilou73.tumblr.com
#8 Organic Elements Can Blur The Straight Lines Beautifully
via hgtvgardens.com
#9 Certain Elements Can Bring Another Sound or Focal Point Into The Perspective

This will simply distract the individual from perceiving the narrow space along his path. Needless to say that the sound of water will change the ambiance entirely widening the psychological space of the lot for anyone, calming and relaxing the pedestrians.
via botanicalconceptschicago.com
#10 Multiple Elements of Natural Origin Can Enlarge a Space
#11 End The Perspective With Something Meaningful and Sculpt The Space For Him
via blogto.com
#12 Greenery Transforming a Straight Yard Into a Sinuous Walk In The Park
via philadelphiagreen.wordpress.com
#13 Airy Elements and Light Colours Will Emphasize The Feeling of Space
Notice how the gray round stepping stone seem to levitate over the white gravel. The wire-frame bench emphasizes the feeling of space through its color and transparency while the French glass door allows extensive views through it.
via thegardeningcook.com
#14 Mineral Elements Constructing a Bold Attitude Aided by Greenery
via hollanderdesign.com
#15 Simply Breathtaking Organic Walkway and Bench Area Sculpting Space With Naturalness
via skonahem.com
#16 Subdue Useful and Practical Elements to Greenery

via hgtv.com
#17 Clear Straight Lines Shaping Space

#18 Narrow Space Flooded by Greenery and Light

via dezeen.com
Organizing and living in a narrow space might be difficult for some of us but we stand by the firm![]() belief that smaller spaces are far more personal and cozier to the individual . We think everything can become beautiful and everything can be nourished, healed by a lovely soul. We would love to hear your opinion in the comment section below on these beautiful and unique designs.
belief that smaller spaces are far more personal and cozier to the individual . We think everything can become beautiful and everything can be nourished, healed by a lovely soul. We would love to hear your opinion in the comment section below on these beautiful and unique designs.
Related Articles
17 Small Front Yard Landscaping Ideas To Define Your Curb Appeal
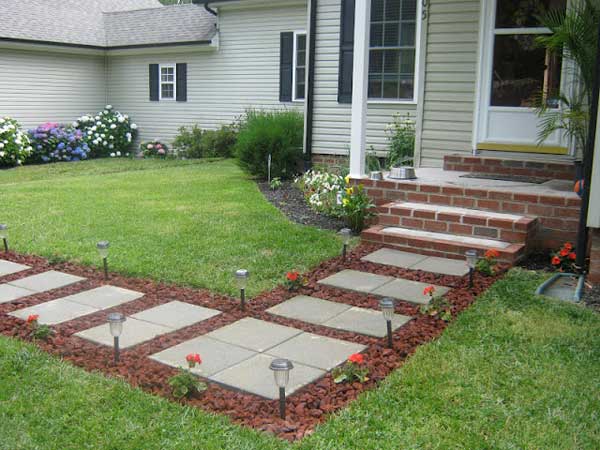
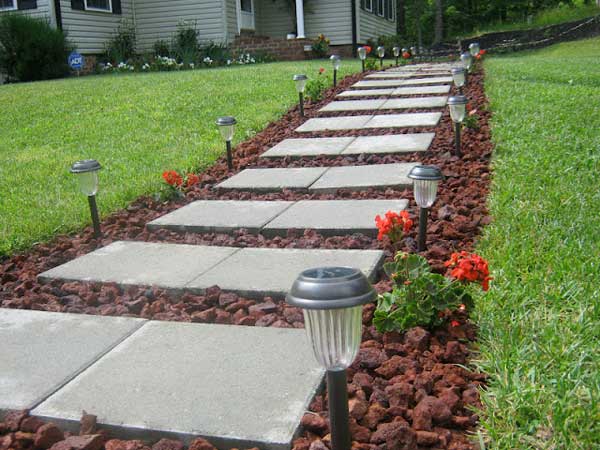
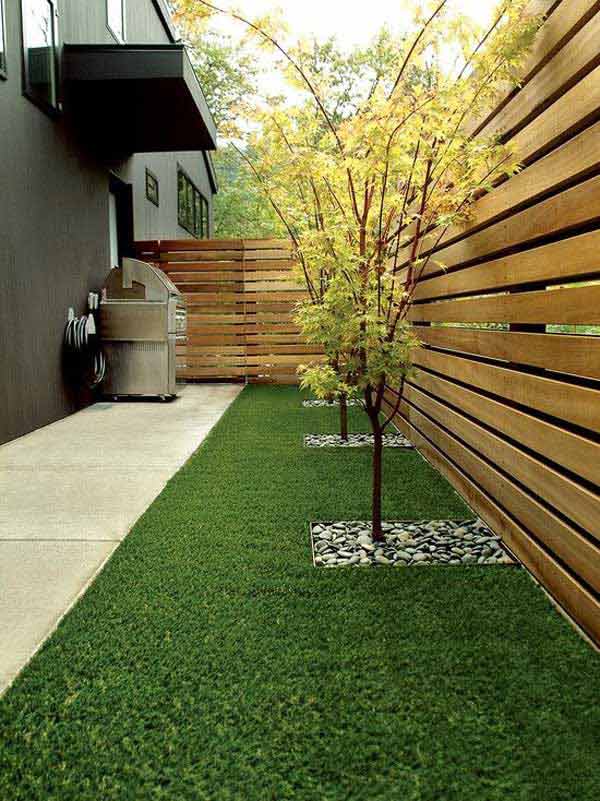
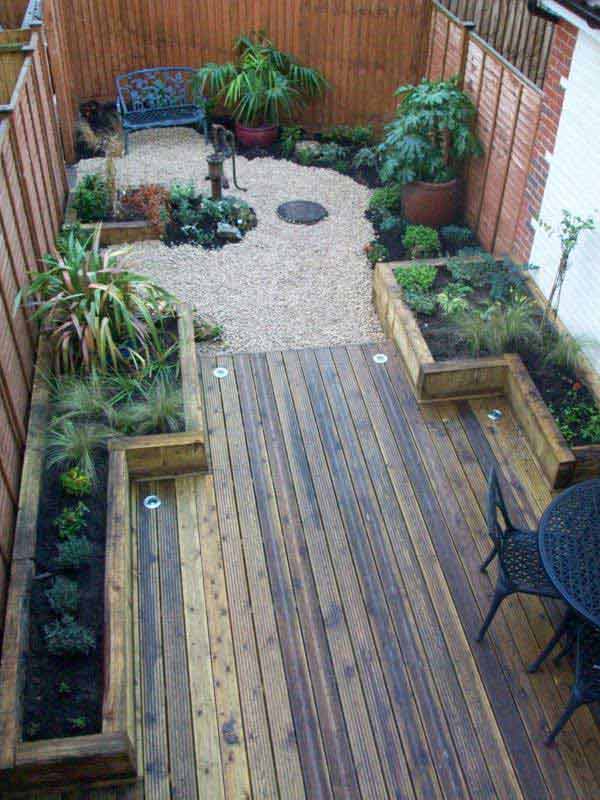
Nature and greenery is all you need to recharge, relax and calm down at the end of a stressful day. If you are lucky enough to enjoy a small yard of your own these are the elements that should be enjoyed to the fullest at the end of your work day. Greenery can sculpt a high quality background with low costs and happily maintenance is low, especially on xeriscaped backyards. In the gallery showcased below you will find no less than 16 backyard landscaping ideas that have beautified household through simplicity.

In your backyard as in your home decluttering your décor is insanely important, a smooth design line being obtained through clarity and naturalness. Enjoy your landscape with your friends and family and try to think of it as a refugee, a small drop of heaven nestled in greenery in your own yard.
Backyard Landscaping Ideas
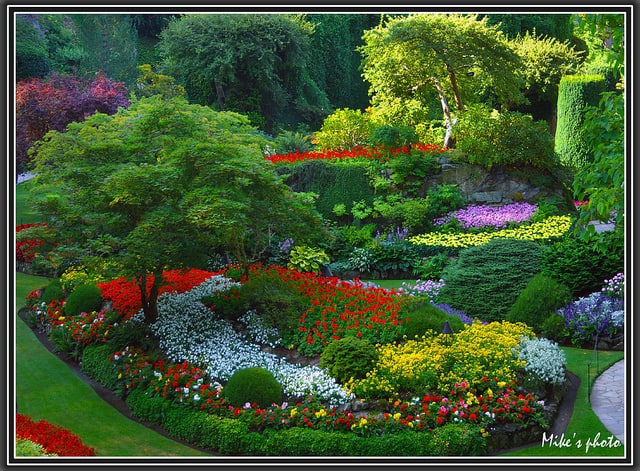
#1 Natural Scenery Beautified by Greenery

#2 Brick Edge in Beautiful Greenery With Tropical Plants

#3 Xeriscaping and Mineral Elements in Drought Backyard

#4 Stunning Realized With Colorful Flowers Embraced by Tall Greenery

#5 Greenery Emphasizing a Simple Backyard

#6 Wooden Fence Protecting Flowers With Organic Edging

#7 Big Rocks Used to Organize a Breathtaking Landscape

#8 Terraced Rocky Backyard Sheltering Flowers at Multiple Levels

#9 An Ocean of Greenery and Flowers on a Sloped Backyard

#10 Tropical Setting With Lush Vegetation and Rocky Flooring

#11 Exemplary Floral Display Decorating a Brick Wall
#12 Wooden Deck Nestled in Greenery Taking Advantage of Fresh Air

#13 Two Benches in Greenery Might Be All You Need

#14 Organic Landscape Sculpted by Mineral Elements Throughout The Greenery
#15 Wood and Rock Combined With Greenery in a Calm Peaceful Background

#16 Wooden Pallets Used as a Fence in Simple Rock and Grass Backyard
We would love to hear your opinion on these backyard landscaping ideas in the comment section below. What elements would you like to introduce in your backyard this summer?
Related Articles
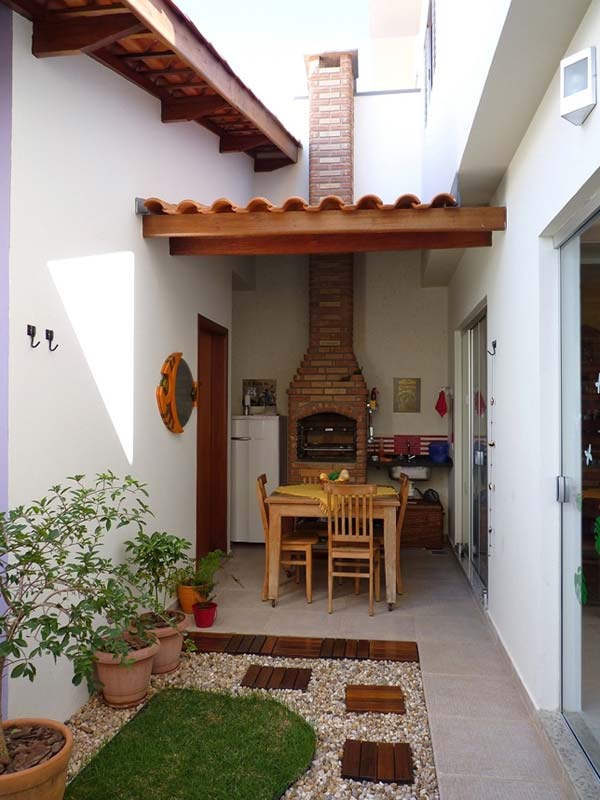
There is nothing better than spending a warm evening outside on your patio enjoying a glass of wine around a fire pit and surrounded by family and friends. The spring season opens the garden party festival and mesmerizes us with its greenery and sweet-scented flowers. It is time to start refreshing your garden and patio and set the right mood for special nights spent outside. The garden can be transformed into little pieces of heaven, your retreat from daily troubles and problems. As a consequence, no detail should be left to chance and every tiny element can make a big difference. A single strand of twinkling lights added to your favorite tree can set a romantic mood while a pallet sofa bed can turn out to be your favorite place in your home. Greenery is the key element to any patio design, placing it in the right area and carefully building every corner of your backyard exactly to your heart's desire. We have gathered a series of 15 DIY Backyard Design Ideas That Will Refresh Your Landscape This Spring. We invite you to browse the gallery below and start your garden remodeling now.

1. Grow tall plants and use them as a screen

2. Create a lounge area from cement bricks and a couple of pillows

3. Let the greenery take over old pieces of furniture

4. Create a retractable sun shield for your deck
5. Insert wood in your backyard design
6. Edging your garden with cement blocks or stones

7. Or wicker and pine cones

8. String lights add a touch of magic to every garden

9. Old bed used as a flower container

10. A hanging bed is the perfect relaxation spot

11. Create a defying gravity flower display

12. Handcrafted fences look best from natural elements like stones and wood

13. Using the old silverware in your garden

14. Wood and concrete used in a minimalist style

15. Old tires can be used as flower pots

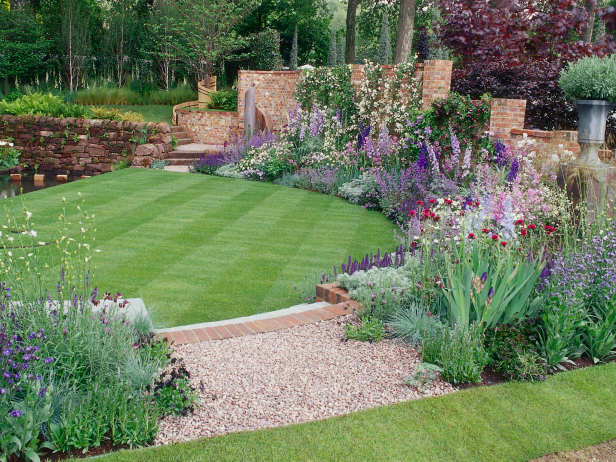
One of the most beautiful things in nature to look upon is flower gardens. Unfortunately people with allergies cannot enjoy their natural beauty,so the spring and summer time is pretty hard for them. Flowers are mother nature's furnishings over this earth. They grow and bloom in a variety of colors,they take on their own unique shape, style and form. If planted and grown properly, they can transform any corner into a garden of Eden. Some flowers permeate an unpleasant odor while others help you to understand where some perfumes originate from.

Flowers can be planted in your own flower garden, or just among your other plants to add beauty and versatility but sadly most flowers can only be appreciated during summer and fall seasons. Man made flower gardens are those that have been planted deliberately in a certain way to create a certain euphoria, style and beauty for special occasions. This is why we call them flower gardens. Certain colored lights are strategically placed to enhance, illuminate and exaggerate their color and beauty. While flowers of various colors can stand on their own in a garden, undeniable some green trees and lawn grass really take it a notch higher to add more decor. Red roses, white carnations, morning glory, lady of the night, yellow bell flowers, lilies and tulips, all have taken up their place into the vases and gardens of many flower lovers and gardeners. Here are thirteen reasons to love the most beautiful man made flower gardens in the world.
#1 A very edenic designed flower garden
Source: worldinsidepictures.com

#2 Multi-colored flower garden showing a variety of planted flowers

#3 man made flower garden perfect for a wedding ceremony
#4 designed flower garden with seating and walk way accommodations

#5 designed flower garden glowing from the reflection of yellow decorative lights before dark

#6 same flower garden shown here in day time - what a big difference lighting fixtures make

#7 designed flower garden enclosed by concrete barrier
#8 another man made flower garden neatly planted in pots for decorative purposes

#9 majestic pink flower garden

#10 water and flowers placed strategically merge beautifully
Source: ladyandhersweetescapes.com

#11 man made 'river' of royal blue colored flowers - one of the most spectacular flower gardens

#12 designed flower garden blooming a variety of multicolored flowers

#13 designed
floral arch covered in light and dark colored pink flowers

Are you a flower lover? Gardener? Do you only appreciate natural flowers, or man's interference as well? Share your thoughts and experiences with flower gardens. Do you do this as a favorite hobby? More so, are you a flower lover but struggle with seasonal allergies? What are your favorite flowers and why? Freely put your answer/answers in the comment box below. Thank you for your input in advance.
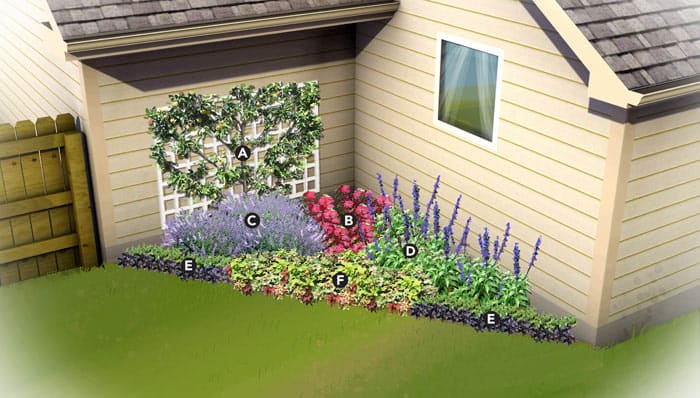
Stress can take a toll on the body as well as the mind and numerous studies have been conducted to confirm this fact. In a busy city life, caught midst the hustle and bustle of daily chores, you need a relaxation corner, close to your heart, where you can go to rest, unwind, and connect with yourself, your friends, and your loved ones. What could be a better place than your backyard for such a private element? Having a small garden in your backyard will give you the perfect retreat, but the real question is who has the time in the world to try out different alternatives and find the best small garden design idea to implement? This is where this article fits in. It provides a curated list of 10 small flower garden ideas to assist you in embellishing your own backyard.

Small Flower Garden Ideas
Colors to make you joyous

Source: Simply Flowers, Inc
Nothing stimulates our mood as colors do, so much so that there is a specialized branch of study, color psychology, to understand the effect of colors on our well-being. Talking of colors, the first thing you can do is to have a colorful backyard, enlivened with small flowers of different hues and tones. In one corner of your backyard, you can mull to have perfectly structured rows, or even circles, of bright color flowers, use the yellow ones for emotional strength, pink ones for tranquility, blue ones for serenity and intellectual sublimity, white ones for purity and clarity of thought. When creating a colorful small flower corner, you should keep in mind to balance colors against each other in terms of tone, spread, and petal correspondence and composition.
Rows of Petunias

Source: about.com
Another way to make your garden colorful is by adding various types of petunias in a multitude of forms. A good choice would be to use colorful petunias in your garden to create rows of flowers and use those to form a border in your garden. You can think of other ways to use it as well, like planting them in planter boxes. Take note that even the petunia plants in the above image have been planted in flower pots, which are placed side by side. You need to limit your choice to three colors, as shown in the image. If you choose to use petunias for your flower garden, you should consider the color balance, opting for two or more colors will increase the complexity of your garden and enrich the senses. In the long term, the goal is to build a cozy retreat in your backyard.
small corner flower garden
Source: Lowe's
Another way to have a nice cozy corner in your backyard is to design it with an array of small flowers. One way to do that has been shown in the above image, though the source mentioned that instead of flowers you should use plants like basil, coleus, and paprika, to complete the corner garden. You can have the same plants should you wish to double the use of available space, but that is not mandatory. Choose any kind of small flowers alongside a dwarf tree to accentuate the design. The key element in the making of a corner garden should be to measure the amount of sunlight available for their proper development.
Use rocks for border

Source: eHow
Rocks add to the natural beauty of a flower garden or flower bed, for that matter, by providing a natural coarse texture to your garden. They are also used to form borders around the plants. Some people prefer white rock borders, others choose it to be black, while most of you want to mix and match more than one colors of rock to mark the outside borders of your small garden. Rocks and pebbles can also be used to cover the soil around the stem of plants, if and when your small flowers blossom some inches above the ground.
Cover the ground with a carpet of flower

Source: Northern Shade Gardening
If you need to cover the ground with small flowers, Campanula portenschlagiana is a nice option. It is suitable for partial shade and also develops well in sun. The heart or kidney-shaped green leaves of the plant contrast well with the purple and blue flowers. It is suitable for covering grounds, and in the right condition it will soon make its way into crevices and cracks in the ground or wall, giving a uniform look to your small flower backyard retreat, transforming the space and claiming it its own.
Install planter boxes


Source: eBay
No one knows for sure how you are going to use the space in your backyard in the years to come, and you cannot always go into tearing down the backyard and recreating it to meet the ever-changing requirements. Therefore, you may wish to include some sort of removable planter boxes in your small garden plan. These boxes can come in any size and can be used as portable flower units to be placed wherever you need them. When designing your backyard garden retreat, you should keep in mind that a good design always includes the future requirements in the scheme of things. Wooden box planters can be one such inclusion.
Raised Flower bed

Source: This Next and Alternative Gardening
Taking a cue from the above idea, you can also create raised flower beds in your backyard to give character to your small flower garden. The idea of using planter boxes to embellish your small garden can be more useful if you have concrete flooring in the backyard and do not wish to remove it. You can also use the boxes as an unmovable focal point of your design. The shape, size, and height of one or more planter boxes or wooden units depend upon the space. You should take a careful measurement of the area where you want to install it and make the box at least 1 inch smaller, in case you are going for a removable raised platform.
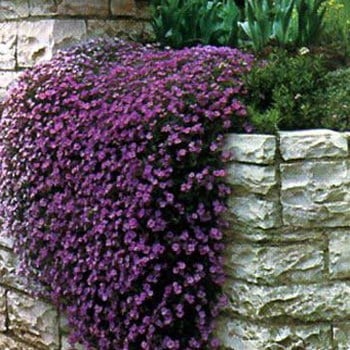
Purple wall of flowers
Source: Outside Pride
It seems this article on small flower garden ideas is obsessing over purple-colored flowers. Seeing the suggestions made, the accusation cannot be denied completely, but this does not mean there is no merit to the suggestions made here. When you want to create a hanging basket with cascading flowers or want to cover the entrance of your backyard garden with purple flowers, the rock cress cascading Aubrieta, which blooms during spring, is a nice option. It effortlessly flows like a torrent, adding fullness to your hanged flower pots
Red and white Moss Phlox to attract butterflies

Source: Bakker Spalding
If purple flowers have been too much for you, you can go for clump-forming Moss Phlox. It remains green in both summer and winter blooms in crimson and white flowers during spring and happily last till late summer The flower attracts lots of butterflies. Does it need to be mentioned that butterflies will add life to your backyard garden and help you relax? In the season, Moss Phlox gets smothered by small flowers. It grows well in the ground but can be planted in raised boxes, flower pots, or hanging baskets. You can use this flower along with rockcress cascading Aubrieta to add variety to your small flower backyard garden.
Add a point of interest or focal point

Source: Houzz
For many people, the design is not complete if there is not a point of interest or a focal point built in the garden, small or large. If you share this sentiment then you may want to consider installing a water fountain or a statue or two in your backyard garden. Some people like to have the statue of the meditating Lord Buddha in one corner. This helps them stay calm and focused.
A parting thought
Your backyard is like a blank sheet of canvas spread open for the artist in you to explore and express your inner meaning, and the flowers, stones, and statues are nothing but art supplies to help you transform your barren backyard into a work of art. The small flower garden ideas shared above are nothing but a gentle reminder to wake the artist in you, suggest some necessary tools, show some work of garden designs, and show you your grand canvas which is waiting for you to create your chef-d'oeuvre.
With the onset of winter, we welcome the misty mornings and chilly evenings, but it comes with its own set of woes. And, hot water is the bare necessity during this time of the year.

What is the breakthrough invention for home appliances? Without a blink, it’s none other than the most hardworking device in every home - a water heater. It was before the invention of this heating system that we used the open fire or the stove for making hot water. This was indeed a time-consuming affair back then, but water heaters are simple, safe, and convenient to use today.
At present, you'll find a wide variety of water heating systems in the market, with apparent distinctive features. This is how far, innovation has come to help make our daily lives simpler.
However, you’ll face quite a few challenges as you look for the right water-heating appliance for your home. We’ve compiled the best types of water heaters in the following guide to help you make a fully-informed decision!
Types of Water Heaters
-
Tankless Water Heater
The “tankless” water heater comes with a modern technology feature that gives your home an endless amount of hot water.
How does the tankless water heater function?
As the name suggests, the “Tankless” water heater comes without any tank. It has coils that get super-heated when filled with water. This helps to heat the water in an instant, no wonder it’s called the on-demand water heater. If you have a large family, then this product will be perfect for water heating purposes. It can heat a large amount of water quite efficiently.

Illustration by Doug Adams
The “Tankless” water heater is available in different sizes. So, you should be careful about selecting the appropriate size as per the needs of your family. For instance, if you choose a small water heater and the demand for it is huge, then you can expect to get cold or lukewarm water.
With the smaller water heater, you have the option to use natural gas to power the heater. But, if you’re opting for the larger size, you’ll need a gas line with a large quantity of gas to help the water heater function right.
However, for the larger models which run on electricity, you’ll need to increase the electrical capacity of your home. This can get expensive, mainly if the water heater is used frequently.
What type of maintenance is required?
Even your “Tankless” water heater will require some basic maintenance. You should get it cleaned at least once a year to avoid corrosion by removing the mineral scale deposits. You might find the parts of this heater to be pretty small which makes it more challenging to clean. If you can maintain this heater correctly, it will last you anywhere between 8 to 10 years.
What are the positive aspects of this water heater when compared to the other models?
If you’re looking to reduce your energy consumption, we advise you to get the “Tankless” water heater. The main reason people usually opt for this “tankless” model, is due to its on-demand feature, which gives you warm water in a flash when you need it.
And, if you get one of the large “Tankless” models for your home, you have the privilege of getting hot water throughout the day.
What are the negative aspects of the Tankless Water Heater?
The down payment for this model is much higher than the other conventional-style water heaters. Few of these models also require larger electricity capacity and gas lines that will be an additional cost for the entire renovation.
-
Traditional Storage Tank Water Heater
In most homes, you’ll find this conventional-style water heater, that makes you quite familiar with the model we’re about to describe. However, let’s look at the details of this product!
How does the conventional storage-tank water heater function?
In this style of water heater, you’ll get the storage tank feature, for storing water that needs to be heated. This indicates that the size of the water tank helps to determine the quantity of hot water available for you at once. The tanks come with proper insulation for keeping the water warm after you have turned on the heater.
The heater comes with a two-valve feature; one is for controlling the temperature while the other is for pressure control. The pressure control valve opens only when it needs to release heat and for moderating the temperature level after the water records 120 degrees Fahrenheit. And, the valve for pressure control opens for reducing the pressure after it reaches around 150 Psi.
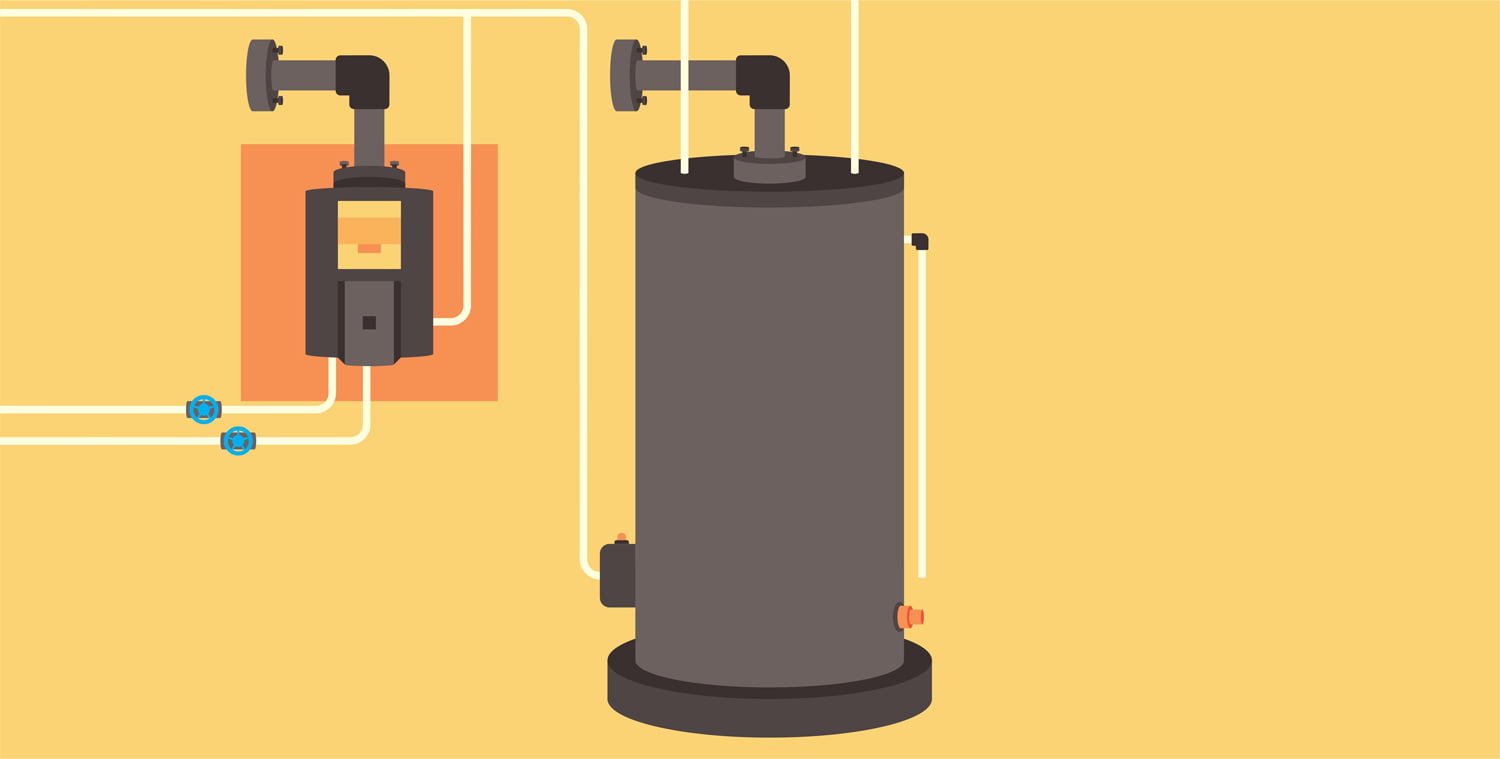
This is the most popular type of water heater that is available in almost every household. But, it does have limitations for the amount of water that it can hold. You might face some challenges if you’re purchasing a small tank for a household that generally requires a large quantity of water. For instance, you’ll have to wait for another new tank to be heated each time you run out of hot water.
What kind of maintenance is required for the traditional storage-tank water heater?
This water heater tends to work continuously for storing water, which makes it essential for you to clean the tank quite often. It will not just prevent corrosion but also enhance the lifespan of the water heater. You need to ensure that the tank is cleaned at least twice a year to remove the mineral scale deposits and other sediments.
If you don’t focus on the maintenance aspects, then the water heater will not last for an extended period. However, the Traditional Storage Water Tank Heater usually comes with a lifespan of around 10 to 12 years.
What are the advantages of this type of water heater?
This traditional Storage Tank Water Heater is one of the most affordable styles that you can find along with a simple installation process.
What are the drawbacks to purchasing a Traditional Storage Tank Water Heater?
This model of water heater, it has a fixed amount of water that it can store. For instance, a tank with a 50-gallon water capacity will offer you the same quantity of constant water flow until the tank is empty. After you run out of hot water, it may take around an hour or more to refill the tank and to heat another 40 gallons of water.
-
Condensing Water Heater
This water heater has a smart solution, which makes it energy efficient. It utilizes the extra gas fumes in your home by capturing it for heating the water.
How does the Condensing Water Heater function?
This is also known as the condensing boiler. If you're using natural gas as a primary source of energy at home, then the Condensing Water Heater is one of the best options available. This water heater is energy efficient as it can extract energy out of the flue gas and then stores this heat for pre-heating the water which enters the boiler.
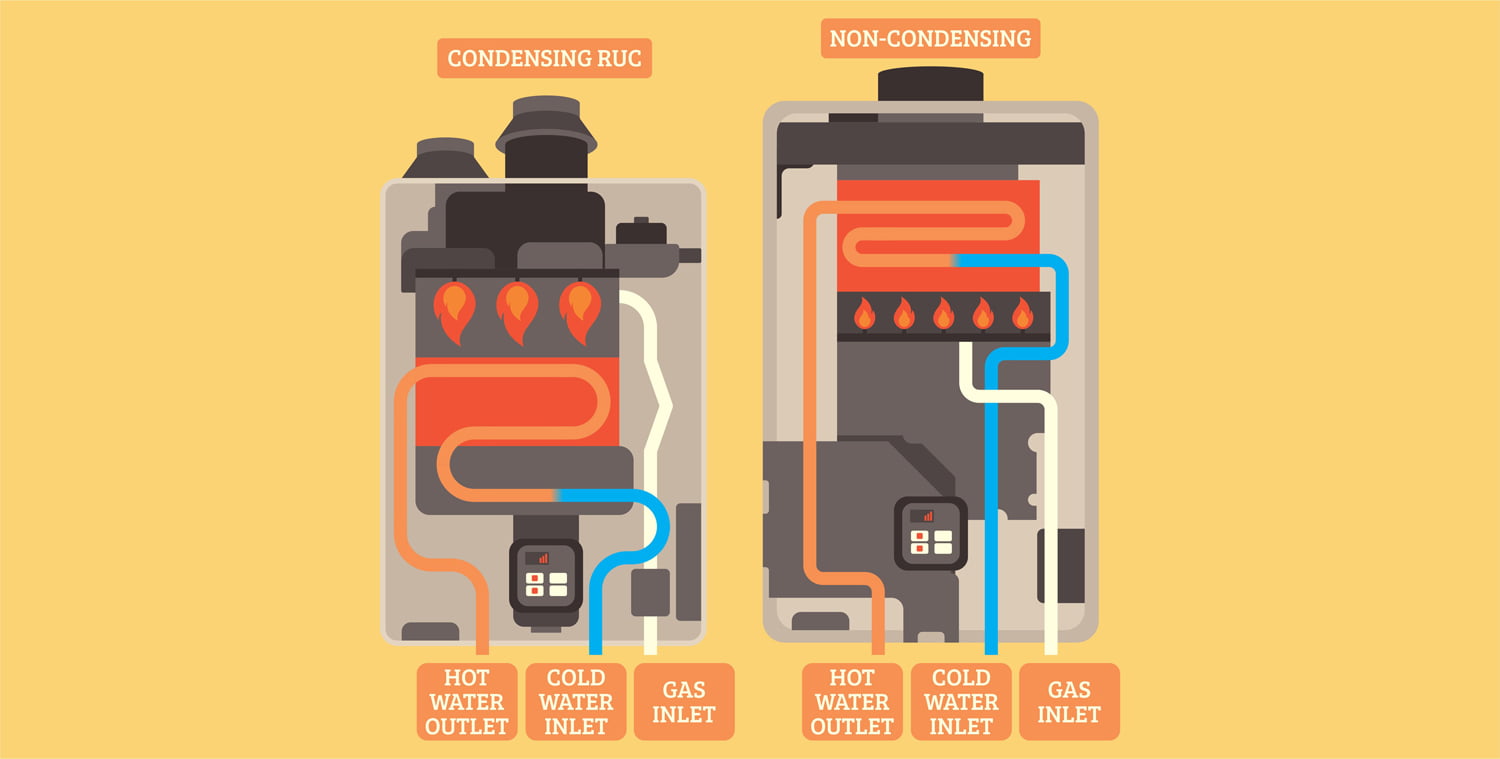
It has a tank just like other traditional storage-tank water heaters. But, it captures the hot exhaust gas that is generally expelled from the house through the flue. These gases are then blown from the coil which is placed at the base of the heater. It is located at the bottom, to heat the incoming cold water. This design of the water heater is suitable for a household that requires around 55 gallons of hot water or more.
This Condensing Water Heater requires quite a less amount of energy when compared to other styles of water heaters. But, you should purchase the appropriate size with a large capacity according to the needs of your family.
What are the types of maintenance required for this style of water heater?
This model also comes with a tank, just like the other water heaters. So, you should ensure that you get the tank cleaned at least once a year. And, the same goes for the gas import valves that should be maintained well.
What are the advantages of using this kind of water heater?
For households that use natural gas, this style of water heater is indeed the most energy-efficient option. You’ll get plenty of hot water as this model comes with a big tank, so there is no fear of the water running out anytime soon.
What are the disadvantages of this style of water heater?
You’ll not find a small-size tank for this model, but it works perfectly fine for families that require a quantity of 55 gallons of water or more. However, this style of water heater is not a great alternative when compared to the Conventional Style Storage Tank Water Heater. Especially for homes that don’t require natural gas for other purposes.
-
Heat Pump Water Heaters
Heat Pump Water Heaters are also known as Hybrid Electric Water Heaters. You’ll not be spending much money on your electricity bills since it doesn’t generate heat directly leading to lower consumption of power.
How does the Heat Pump Water Heater function?
This style of water heater comes with a unique mechanism. It captures heat from either the ground or air, and then gradually transfers the heat to the water. This shows that the electricity is in use only when the heat moves from the air or ground to the water tank. It's unlike the other models, where the machine depends entirely on electricity to operate.

It consumes around 60% less energy when compared to the conventional style of a water heater. However, the heat pump is placed on top of the water heater so you'll need around 8 feet of open space from the floor to your ceiling.
What kind of maintenance is involved in this water heater?
Just like the traditional storage tank water heaters, this model also comes with a tank, which means that it should be cleaned regularly. And, when you get the general inspection and cleaning done at least twice a year, it helps the water heater to function efficiently.
What are the positive aspects behind the usage of hybrid/pump water heaters?
This model of water heater is extremely energy efficient, which means you can expect a return on investment with lower utility bills.
What are the pitfalls of this type of water heater?
The Hybrid Electric Water Heater doesn’t function efficiently in places with extremely low temperatures. This is because it depends mainly on drawing heat from the air or ground that is around it. We don’t advise you to place this heater in your basement or in places where it’s freezing throughout the year. Finally, this model of water heater is one of the most expensive pieces available.
-
Solar Powered Water Heater
A water heater that is solar-powered draws its energy from the sun. If you’re considering adding solar panels, or you already have them installed at home then this style will be the absolute best option for you.
How does the Solar Powered Water Heater function?
If you’re looking for a highly energy-efficient model of water heater, the Solar Powered Water Heater will be suitable for you amongst all the other styles. It relies on solar panels for energy sources which are usually mounted on the roof.

The solar energy trapped in the cells of the solar panels is slowly transferred to the closed-loop system, which contains the heat-conductive material (antifreeze-like fluid). This antifreeze-like fluid then runs to heat the water in your tank.
The Solar Powered Water Heater works great for people who are living in warm, sunny climates, as it can save a ton of money on electricity bills. Overall, you’ll also require to have an alternative energy source, such as electricity or natural gas, to operate the water heater during the cold and rainy season.
What kind of maintenance is required?
This system also comes with a tank, that should be cleaned at least twice a year to remove the mineral deposits and for preventing corrosion. You also need to maintain the solar panels, which might require an annual professional inspection.
What are the benefits of using a Solar Powered Water Heater?
It is an environmentally friendly water heater as you’ll be reducing the hot water carbon footprint. This is an incredibly energy-efficient style of water heater that turns around 80% of the radiation into heat energy. And, by installing the solar-powered heater, you can save money on electricity bills every month. You can get an unlimited amount of hot water during the sunny days.
In some countries, the government also gives financial incentives if you start using solar-powered water heater which includes- federal and state tax credits, along with utility rebates.
What are the drawbacks to this style of water heater?
The entire set that comes along with this water heater can get pretty expensive in some regions. It might take around 20 to 30 years or more to yield a good return on your investment.
It is not suitable for all weather conditions as you need to depend on the sun to heat the water. However, when you have to get an alternative energy source, it just adds to the overall budget. Also, the annual maintenance of the various parts of the solar water heater can be a hassle.
-
Combined Space and Water Heating System
The Combined Space and Water Heating are appropriate for homes with lower heating requirements. This is due to lowered air leakage, more insulation, and efficient use of the space. With these systems, you need a single heating unit for your domestic water heating and space; this helps to save a significant amount of energy.
What is a Combined Space and Water Heating System?
It is also known as the “combi” system, which can easily replace the existing water heater and the forced-air furnace. This system consists of an optimized hydronic air handler and a high-efficiency boiler or water heater. The air handlers have been designed with large coils that help with heat transfer for an efficient method of space heating.
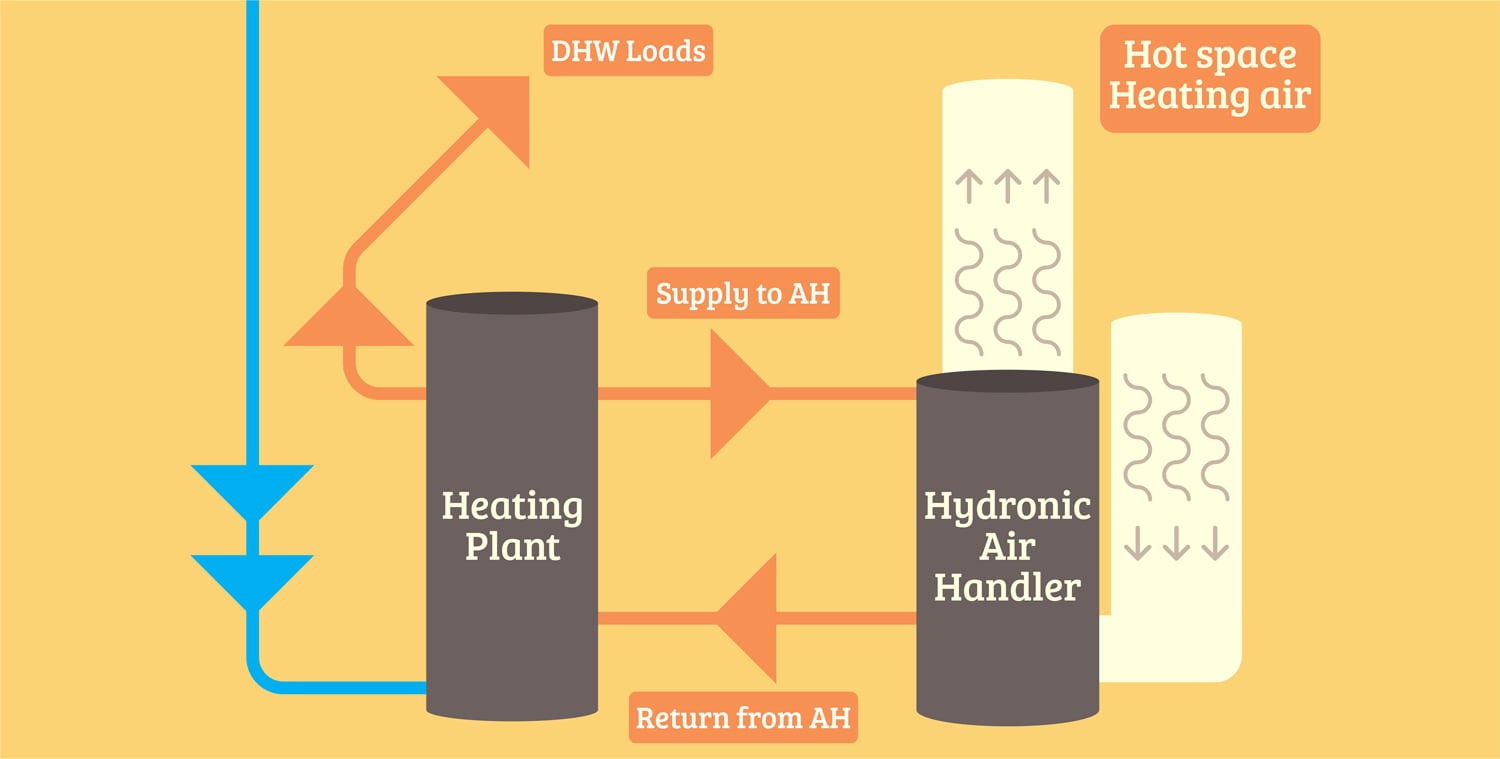
The fan coil is generally installed with ductwork, while the small pump helps to circulate water from your water heater along with the fan coil. If you want floor or radiant heating, you can distribute the hot water through the in-floor piping.
When you’re purchasing the water heater, you should be careful about the size to ensure that it can serve combined heating purposes. The functions of this system are different when it’s used for heating water in addition to space heating. Similarly, the performance rating of the space heater should not be used to measure its performance as a water heater.
How to maintain this heating system?
With preventive maintenance of the entire heating system, there are several benefits such as- longer equipment life, fewer repairs, lower energy bills, few chances of catastrophic breakdown, and safer equipment operation. You should hire a professional at least twice a year for general inspection and cleaning purposes.
What are the benefits of using a Combined Space and Water Heating System?
The “combi” system has the same gas consumption level when compared with separate high-efficiency water heaters and natural gas furnaces. It saves a good amount of energy and money by not having to purchase separate space and water heating devices. Moreover, this system eliminates spillage issues from the natural draft appliance with the use of a direct or powered combustion vent.
What are the negative aspects of this space-water heating system?
The initial investment for this product can get relatively expensive. And the installation process is quite challenging, as many installers are not familiar with this system. Therefore, we cannot compare this heating system with the standard installation methods for power vents or condensing furnace water heaters.
-
Combined Space and Water Heating System with a Hydronic Boiler
This combination space-water heating device has a hydronic boiler instead of a water heater. It’s a compact, energy-efficient option for a household that is aiming to save energy and reduce the number of necessary appliances. These systems come in different models for some, you can heat your space and water simultaneously, while for others heating space and water can be done one at a time.
What is a Combined Space-Water Heating System with a Hydronic Boiler?
This type of water heating device is also known as the segregated heating system or combi-boiler. It uses a hydronic boiler, from which the heat is generally transferred to the water through a heat exchanger. In some countries, there are rules which state the use of double-wall heat exchangers for such heating applications. It helps to avoid the contamination of potable water from your boiler heating loops.
You can find new combination boiler designs which have full-energy saving power along with a tankless feature. This helps to ensure that there isn’t any unnecessary water heating when you’re not around.
Moreover, it also comes with a flow control valve which ensures a constant temperature level irrespective of your incoming water temperature. You can, therefore, enjoy a good quantity of hot water flow with accurate water stability.
What maintenance is required for this heating system?
Again, you have to get annual cleaning and general inspection done for the boiler to work efficiently. The auxiliary pump connections and flow control valve should be maintained correctly to prevent it from mineral deposits and corrosion.
What are the benefits?
The life span for this heating system is around 10 to 15 years, depending on the maintenance and usage. It has a compact design with built-in parts for outdoor reset control, auxiliary pump connections, and recirculation capability. Therefore, it minimizes the number of products that you need to purchase separately for each function.
When you have this heating, the compact size also helps to free up the loft or roof space that is otherwise used for cold water storage in traditional heaters. This is because the combi-boilers get their water supply directly from the mains without the use of any tank. It’s a highly efficient heating system, and you’ll have around 90% savings from your monthly electricity bills.
Are there any negative aspects to this style?
It has a complicated installation procedure as it requires various electronic devices for its functions. You should ensure that a professional does the setup correctly because the repairing cost of a boiler is quite expensive.
This heating system might not be suitable for larger households with a high demand for hot water. As these boilers directly get their water supply from the mains, and it doesn’t have any backup of a water tank. Therefore, it requires more time to heat the water, and big families should instead opt for the traditional boiler that comes along with a water tank.
Features to Consider When Purchasing a Water Heater
-
Warranty
The general coverage for water heaters varies as per the cost and duration. But, the life span usually ranges from three to twelve years. You might have to pay a bit more if you want a longer-warranty period. However, we advise you to pay that extra amount to get a load off your shoulder without having to surprise yourself with more repair costs in the future.
You might also get a few models of water heaters that come with 13-15 years of warranty. And, they tend to have larger burners or other elements which can speed up the heating process. Also, it might have good insulation that prevents heat loss and saves up on energy.
-
Glass-Lined Tanks
Some water heaters are designed with a glass lining ( porcelain enamel ) inside them. Most of our water heaters are made up of steel, but with a coating of porcelain enamel, it helps to protect the interiors from corrosion. These days, ceramic enamel coating is also becoming widely popular. However, a glass lining is not a necessity in a water heater, but it helps to reduce the corrosion level that extends the life of the water heater in return.
-
Anti-Scale Devices
The buildup of mineral scale can damage the water heater to a great extent. Few brands have water heaters with anti-scale devices which swirl the water present at the bottom of the tank. This constant movement of water inside the tank helps to prevent mineral deposits. Even though this feature can enhance the lifespan of your water heater, you should focus on getting a model with a more extended warranty period.
-
Plastic vs. Brass Drain Valves
The drain valve is situated near the bottom of the water heater. It is used to drain the water before shifting the equipment or for other maintenance work.
These drain valves are usually made of plastic or brass. Unlike plastic material, brass is more durable and malleable, while it's also known for being less reactive to water temperature changes. It’s a small feature to consider but has a significant impact on the durability of the water heater.
-
Capacity
To determine the size of the water tank, you should first understand the amount of water that you’ll require for your household. For instance, a 40-50 gallon water tank for two to five people, while 55 gallons or more for six to seven members. And you’ll require two water heaters for a house with more than eight members.
-
Digital Displays
The water heaters that come with digital displays are more convenient for our personal needs as you can easily alter the settings. These modern digital displays can be used to adjust the water temperature and water output, and it also comes with a scheduling feature. You can input the duration/hours in which the house is occupied for added efficiency as it can turn off when you’re away.
Possible Reasons to Replace Your Water Heater
When you consider replacing the water heater, you should be sure about a few things, that have gone wrong with the older model. This will help you understand the features that you want to have in your new water heater. We’ve curated some of the common grounds that you should look into, while you opt for an upgrade!
-
Leakage problems with the water heater
If you notice any leakage in the water heater, you’ll need to call the plumber for helping you fix the problem. This can be a time-consuming chore as well as expensive, but a professional inspection will help you understand the gravity of the issue. And, whether a simple repair will be enough, or you need to replace the entire system.
-
The warranty period is over
If your warranty runs out by a few years, after the given 10-12 years life span, then this is the best time to get a new water heater. Especially if you’re spending a ton of money on constant repairs as the system keeps breaking down quite often. An older design also indicates that a higher amount of energy is being used to operate the water heater, as it loses its efficiency over time.
Getting a new heater can be expensive initially, but you can save energy and money from the electricity bills every month.
-
Your building codes have changed
The other reason to purchase a new water heater is when your older model doesn’t match the building codes of your community. It’s essential to keep updating yourself about the new building codes since your devices need to change accordingly. However, if you’re moving from one state to another, then you should get a new model that fits with the building codes of that area.
-
You keep running out of hot water
Have you been running out of water each time you start doing the dishes or are you taking lukewarm showers frequently? Well! This means that you need a storage tank with a larger water capacity, as your household has a higher demand for hot water.
Final words
As you have read through the variety of water heaters in the market, you should now carefully weigh out their pros and cons. This epic guide was created to help you find a suitable model as per your needs, so make the best use of it!
Related Articles
13 Best Utility Pumps to Consider – Reviews & Buyer’s Guide
What Size Tankless Water Heater Do I Need?
One morning, you wake up to find that the skies have cleared up after the recent rains, and the sun is shining brightly.

It’s the perfect day for outdoor activities, so you decide to play baseball with the kids in the backyard. Things get off to a bright start with everyone enjoying themselves and trying to smash a home run until one ball lands on the exterior wall adjoining the front porch.
While going to fetch it, you notice that the color is peeling off the walls, and they even appear damp and flaky. With more rain forecast over the weekend, you wonder what to do.
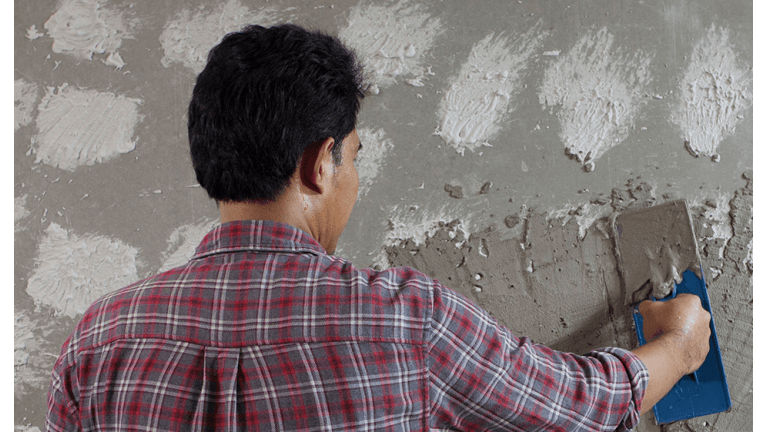
This is a classic case of the plaster having worn out after several years, and the best thing would be to make reinforcements. Today’s guide discusses the different types of plasters and how you can use them.
Before discussing the types of plaster walls, wall plaster materials, and finishes, allow us to highlight some of the most popular types of plaster.
Types Of Plaster
1. Browning Plaster
When you are looking to get creative with the decor of your internal walls, we recommend choosing browning plaster because it acts as a suitable base for painting. It’s a type of undercoating plaster mostly used for decorative coating and is quite similar to bonding plaster, provided you use it on absorbent surfaces.
You’ll find that this plaster proves useful on construction sites for building walls, but a thin layer of plaster is added to prepare the surface beforehand. Usually, an 8 mm coat is enough to create a suitable layer on ceilings, while a slightly thicker coat of 11 mm is ideal for walls. Compared to other options, it takes browning plaster a day to dry, depending on the weather conditions.
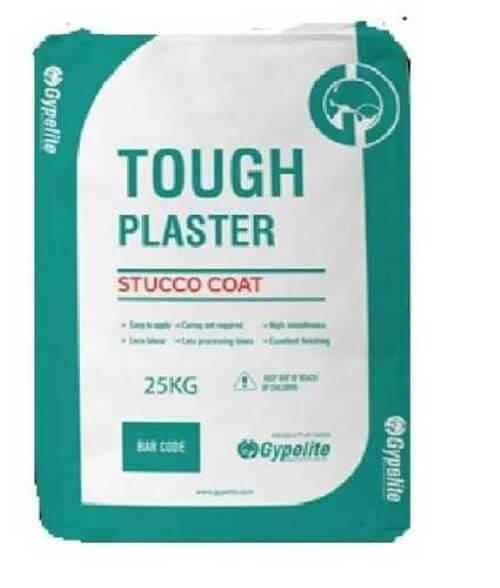
2. Tough Coat Plaster
This is another type of undercoat plaster that is highly durable and used as a protective or decorative coating. This plaster wall can withstand external conditions that other types won’t be able to bear, including fire or cold temperatures. But you should know that it won’t perform well in freezing conditions, although it provides decent protection.
What stands out is the durable base of the material as it offers strong impact resistance, especially when used as a background on a masonry wall.
3. Bonding Plaster
Like the first option, bonding plaster works great as an undercoat to which you can add reinforcements to keep the exterior walls in good condition. Most impressive is the enhanced sticking ability of this material, owing to which it finds application on construction sites.
You can use it on all walls, such as concrete, engineering blocks, or smooth surfaces since it isn’t dependent on the absorption properties of the surface. Hence, it’s extremely effective as a wall plaster for which an 11 mm thick coat should suffice, while ceilings will require an 8 mm coating.
For the best results, you should apply the first coat to a newly patched wall before leveling the surface and marking it with a nail to apply the topcoat.
4. One Coat Plaster
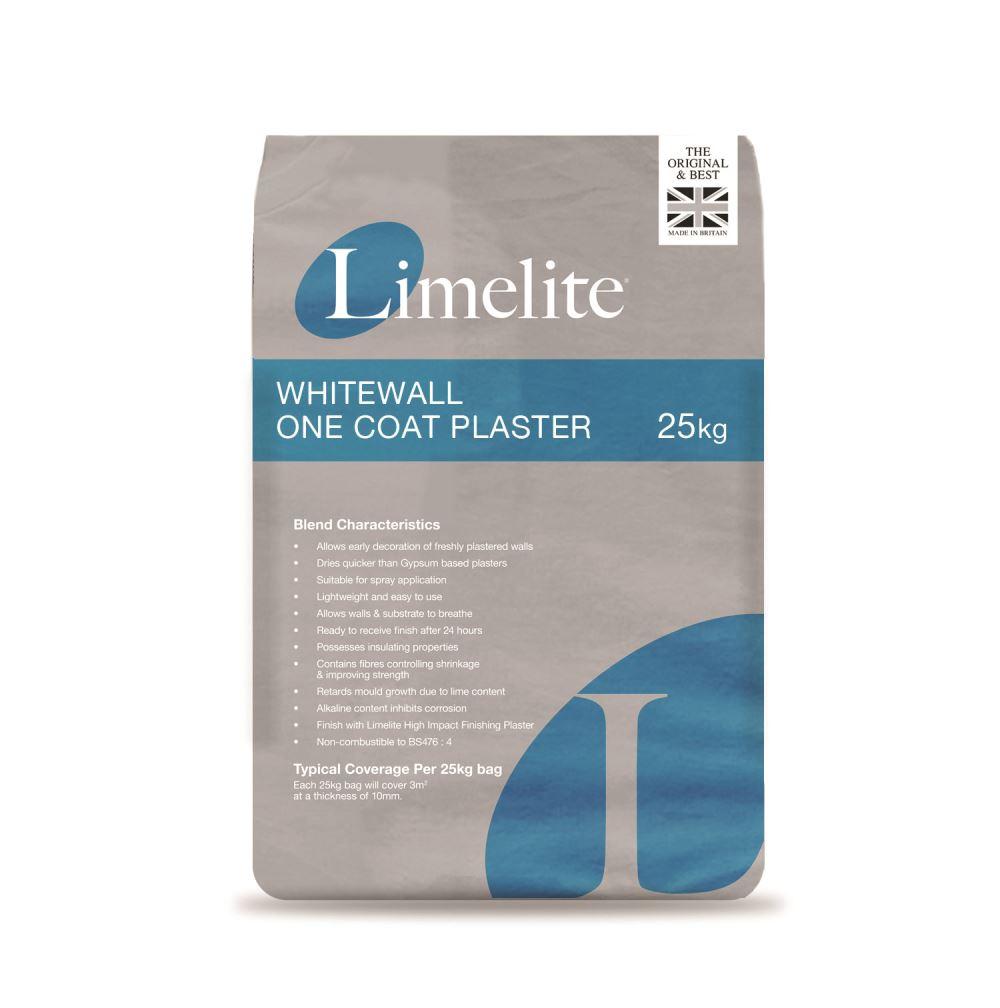
One coat plasters are interesting because they are neither undercoats nor finished plasters, but a bit of both. They are two sides of the same coin and help people protect their interior walls, thanks to their all-around durability and easy application.
We found that it’s thicker than other materials, as it contains traditional gypsum, and you can create stronger layers compared to other coatings. Most professionals apply it by hand, but they use mechanical tools to even out wall surfaces in some cases.
Particularly pleasing is that there’s no need for a scratch coat or additional steps to protect the walls because it provides you with a smooth surface even in tight spaces.
5. Thistle Plaster
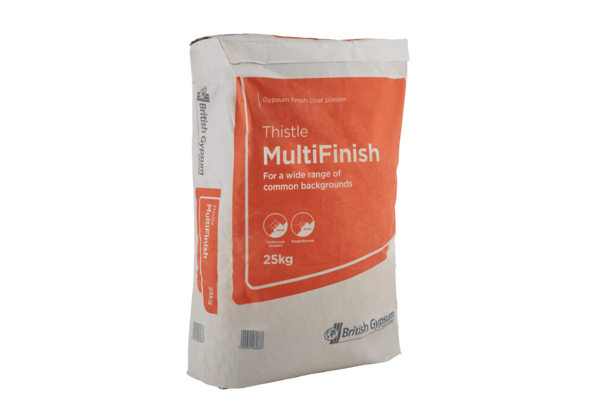
You’ll need this type of plaster at the end of the plastering process because it’s a finished coat, unlike bonding and browning. Consumers can use it for simple repair tasks or light-scale applications that require plaster finishes. We assure you that it’s easy to use, and this convenience makes it a versatile option.
More often than not, it’s best suited in a two-coat system and looks great on plasterboards, for which you can apply it by hand or use mechanical tools. But what makes it particularly popular is that you get a smooth surface to create various decorative finishes.
6. Dri-Coat Plaster
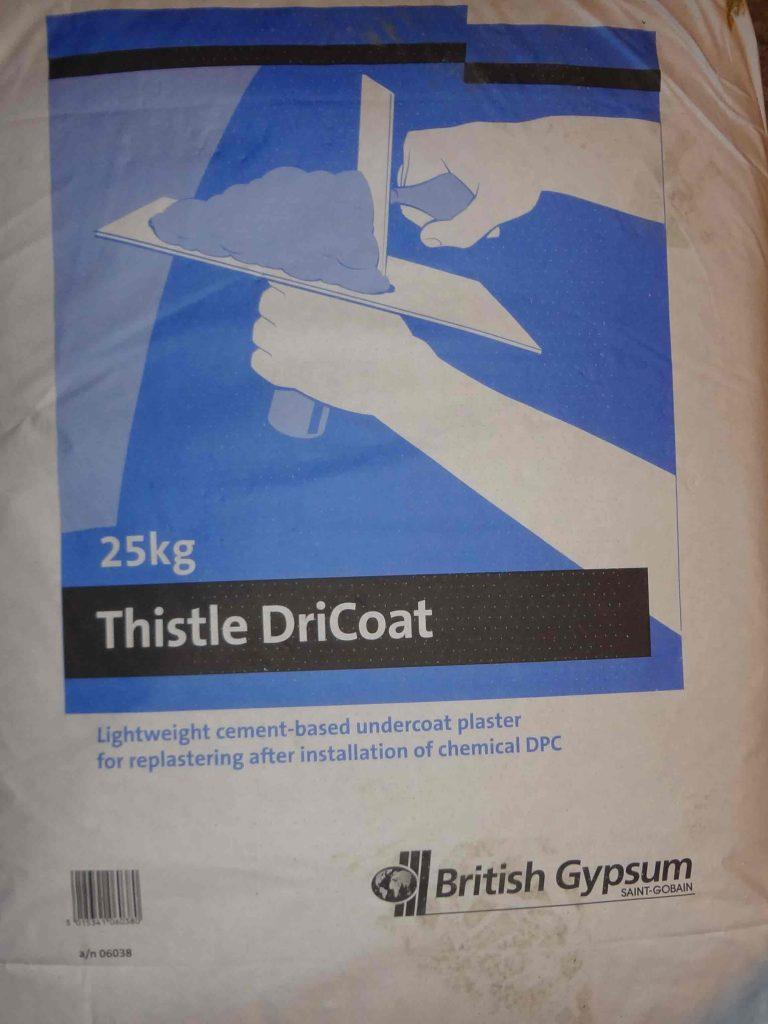
It’s a slightly different building material and is mostly used for replastering after installing a new damp-proof course. We found that it effectively prevents hygroscopic salts from affecting the surface texture and keeps them in the background. As a result, it acts as a suitable protective layer because hygroscopic salts absorb moisture which leads to damp walls.
Your walls will be in good condition throughout the changing seasons, provided they aren’t exposed to extreme conditions. Do keep in mind that Dri-coat falls flat in cold temperatures or even when there’s a fire.
7. Hardwall Plaster
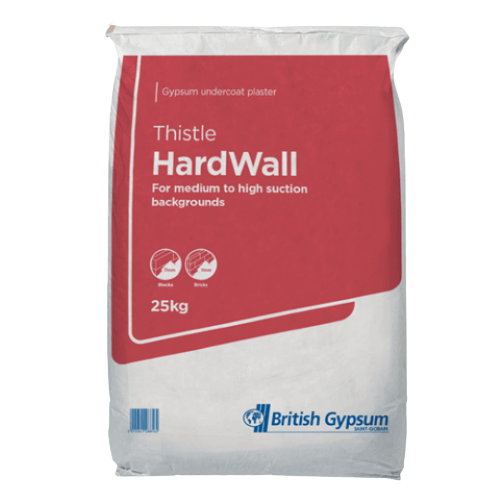
Hard wall plaster is the way to go if you’re looking to renovate masonry walls since it provides a smooth and leveled surface with standard and medium-density bricks. It creates a strong base while the shorter work time proves convenient, especially when the walls are in fairly good condition.
You can’t use hardwall plaster if the walls are crumbling, as the plaster might crack, so it’s essential to carry out basic renovation before applying this coating.
8. Carlite Plaster
After you paint the wall background, use carlite plaster for a smooth coat finish on a range of surfaces, thanks to its versatility. It’s also possible to innovate with various decorative techniques only if you allow the plaster enough time to set.
On that note, this material takes 3 hours to set, which is far longer than thistle plaster which sets in 1.5 hours. But the main advantage of using the former is that it’s more durable and scratch-resistant to withstand even strong impact.
9. Gypsum Plaster
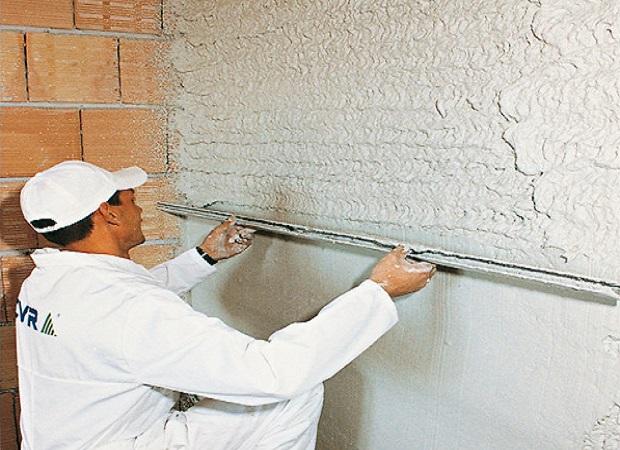
Manufacturers partially or completely dehydrate the gypsum mineral to create gypsum plaster, a white cement-like material. There are hardeners and retarders present in the formula, but the trick is to apply it in a plastic state with water so that the chemicals can harden.
To get a hardened finish, it’s necessary to dehydrate the gypsum at high temperatures while adding chemicals like borax, alum, and alkali sulfate. In most cases, you get a fine sand-like finish depending on the task.
10. Stucco Plastering
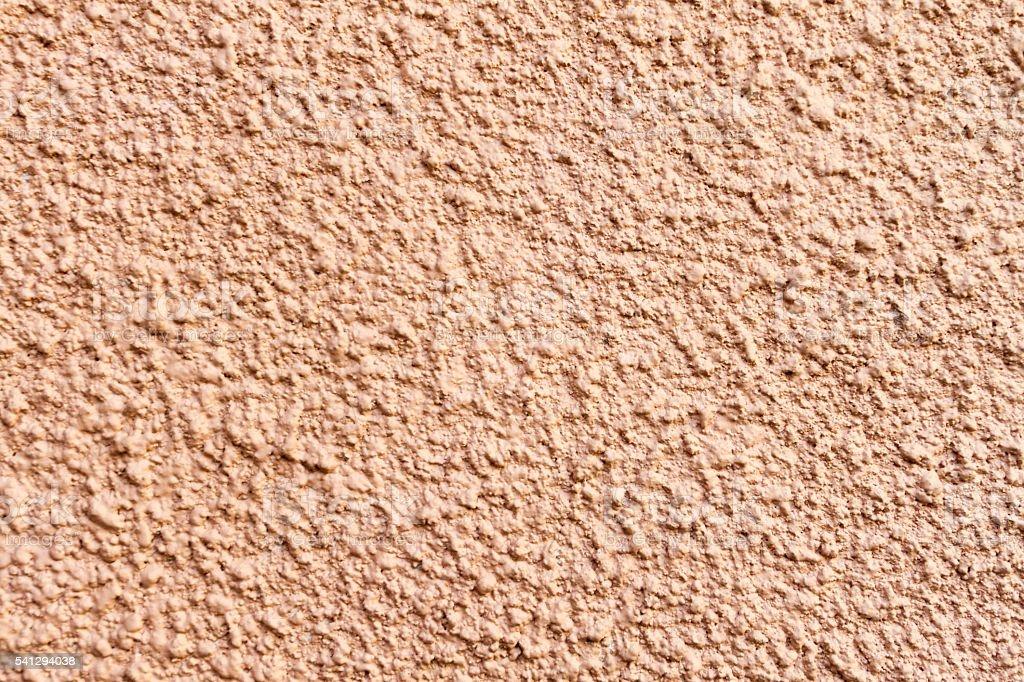
Plaster is made from gypsum-based materials and delivers a smooth texture, while stucco is rougher, so what is stucco plastering? It’s a type of exterior plaster made from Portland cement, sand, and a small amount of lime. It’s usually applied in a plastic state so that the resultant mixture forms a hard coating on exterior walls.
You’ll need to apply three coats for the best results - scratch, brown, and finish coat. The scratch and brown coat are applied by hand or sprayed with a machine, while you can use a trowel to create hand textures on the finished coat by sanding or spraying.
11. Lime Plaster
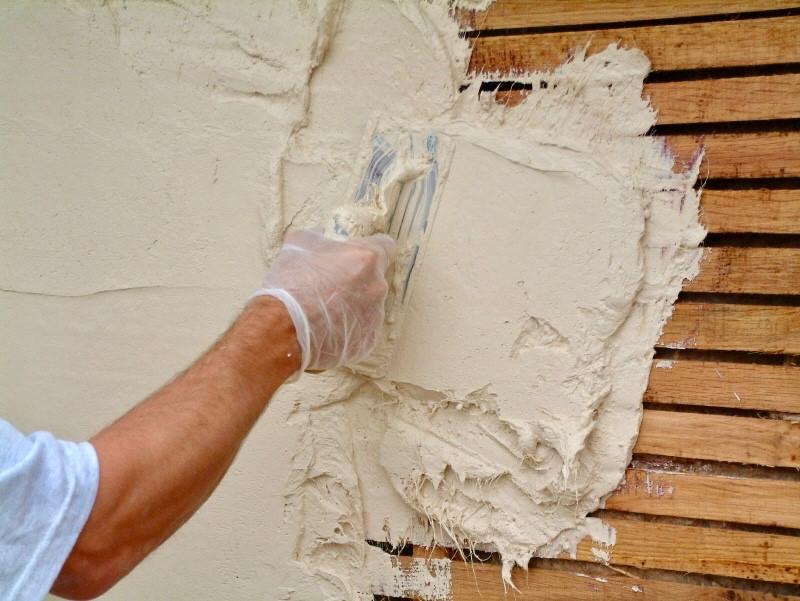
Lime plaster features a combination of lime, sand, and water by hydrating the lime through non-hydraulic techniques. The catch is that it often takes time to prepare the plaster with this method, as the carbonation is essential for it to set. That’s why manufacturers often add pozzolan additives to reinforce the mixture and reduce the curing time.
The advantage of using lime plaster is that it’s durable but still quite flexible and less hard than cement. It safeguards the softer materials underneath from shear stress. Using it instead of cement plaster leads to fewer chances of cracking or expansion because it’s less brittle.
12. Venetian Plaster

This plaster increases the value of your home by heightening the aesthetic appeal of the property. Unlike other plasters, it doesn’t contain aggregates and is used on surfaces where it’s challenging to install marble panels. Without using Venetian plaster, the cost of carving real marble columns, curved walls, and corbels would be quite high.
The only downside to this plaster is that it cracks if there’s subsidence or movement, especially in older homes where the plaster was applied a decade or so back. In some properties, continuous high winds have also resulted in the plaster wearing out after several years.
13. Cement Plaster

One of the best ways to keep the interior and exterior walls in good condition is by mixing cement with water and fine-grain materials, like sand. You’ll have to apply the resultant mixture to the prepared surface, after layering the first coat with a mason’s trowel or screeds. After that, you’ll need a wooden float to level the surface and form straight edges.
For the final step, it’s crucial to polish the walls with a trowel to get a smooth texture. But it’s not as easy as it sounds because curing is possible only 24 hours after plastering. Also, it would help if you kept the walls moist for a week so that each coat stays damp for at least 5 days.
14. Mud Plaster
Manufacturers use mud plaster while installing drywalls to stick paper joint tapes, use topping mesh, and paper joint tapes with metal and plastic corner beads and filling joints. You can also use it for repairing holes and cracks on the walls since it’s easy to make - simply mix sand and clay in a suitable amount.
Leave the mixture to season for 5-7 days; you may also add hemp and chopped straw to increase its strength. But make sure that the mixture becomes a homogenous mass before plastering.
15. Granite Silicone Plaster

The main advantage of granite silicone plaster is its high elasticity due to the granite and silicone formula. We found that it won’t crack even under weathering, and you can quickly set the plaster to keep the walls in good shape. Another point in favor is that you can apply multicolored and monolithic finishes by using acrylic resin dispersion.
What’s more impressive is that such plaster is durable, impact-resistant, and highly breathable, which helps retain the wall color for a long time.
16. Roughcast Plaster
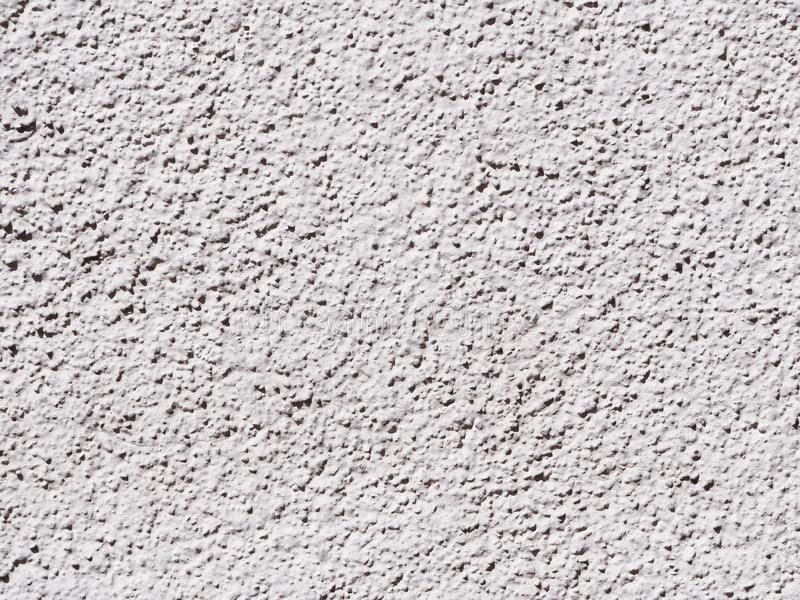
Roughcast plaster, also known as pebbledash, is a coarse surface material mostly used on outside surfaces due to its high durability. The mixture consists of lime, cement, small gravel, sand, and pebbles that lend it a unique appearance. You’ll find that the resultant mixture is quite slurry which the workers throw at the walls with a scoop or trowel.
Then, it’s time to level the surface and ensure there aren’t any empty spots, lumps, runny portions, or ridges. You can also opt for a roughcast finish, whereby a coarse coating containing gravel is pre-mixed and thrown at the walls.
17. Barium Plaster

Compared to the other plastering techniques, barium plaster finds application within x-ray rooms to protect the people inside. The primary component is barium salt mixed with sand, cement, lime, and other materials to create a suitable mixture. Depending on the radiation levels of the room, it is possible to recalculate the required percentage of each component in the mixture.
When you get the ratio of each component right, it allows the radiation energy to pass through the walls. For that, you should let the plaster dry for seven days.
18. Acoustic Plaster
Do you live in an area with high traffic and are frustrated by the constant honking and shouting? It will help if you apply acoustic plaster to the walls as it contains aggregates or fibers with high noise absorption properties. The base layer of the plaster is made of absorptive substrate panels, such as inorganic, non-combustible blow-glass granulate or mineral wood.
Some consumers prefer pre-made acoustic panels, but we feel that using plaster delivers a smooth and seamless appearance, owing to which the joints aren’t visible.
19. Veneer Plaster
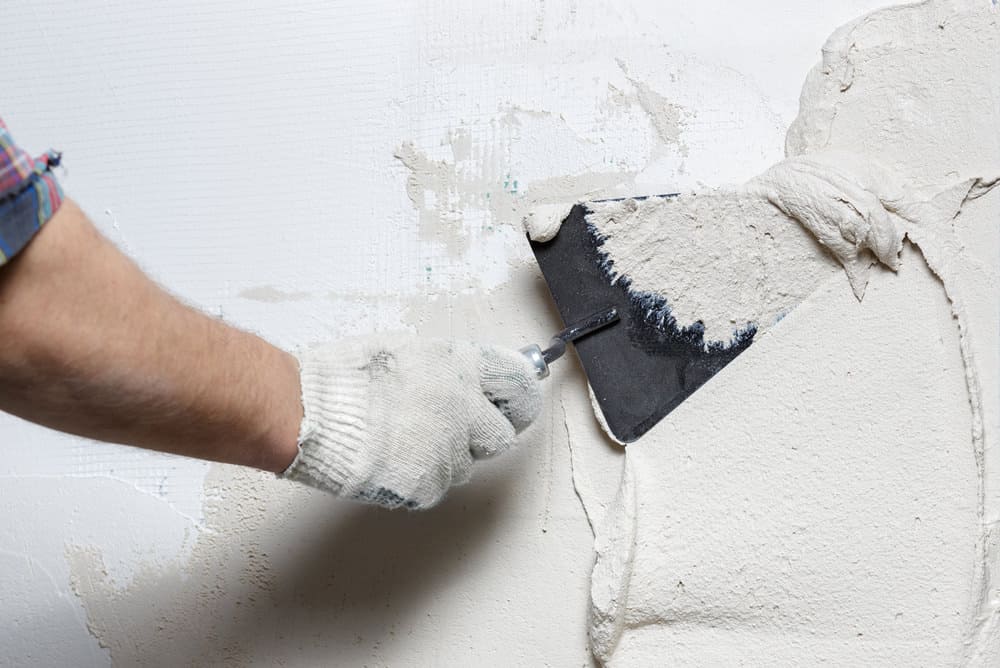
Veneer plaster is great for decorating the interior walls and is most popular in old-age homes where the walls already have a coating of lath-and-plaster. The best part is that it’s cheaper and easier to use as there’s no need to rip the existing surface and install drywall.
You may even use it as a finished surface because although it may not be attractive, it does lend a certain uniqueness to the interior decor. Moreover, the smoother and harder surface is resilient to dents and scratches when you use a dual-coating technique.
20. Ceiling Plaster
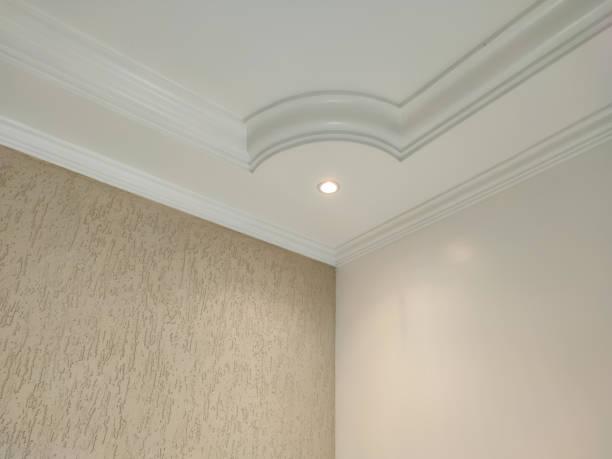
There are no special plasters for ceilings, so gypsum plaster proves the most convenient option. Consumers can use different types of aggregates depending on the finish they want. For a traditional finish with rustic overtones, sand should be the base aggregate, while modern designs contain pumice, vermiculite, or perlite.
The main reason for plastering the ceilings is to hide the tubes and wires that accompany appliances like lighting fixtures. You can even apply it for aesthetic purposes by hiring a professional company, but it also protects against termite attacks and improves sound absorption.
21. Asbestos Marble Plaster
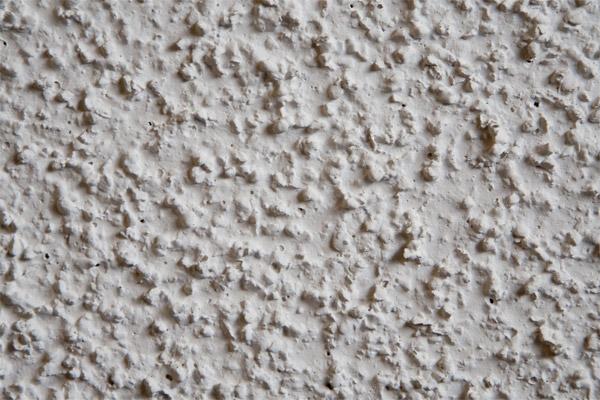
If you don’t have the budget to install marble carvings, we recommend using asbestos marble plaster, which looks similar to real marble. All you need do is to add cement, finely crushed marble, and asbestos before mixing them.
Most importantly, using asbestos helps insulate the room and improves the protective properties of the surface against disasters like a fire outbreak. We should also mention the strength and waterproofing abilities of the material, which is why it’s used in rooms that are prone to water damage.
22. Wet Plaster
This specific plastering technique involves applying layers of wear-resistant and strong materials to deliver a durable finish. Although it takes longer to apply since workers will need special tools to create a suitable coating, the finished wall is air-tight, sound-resistant, and has a beautiful texture.
We should also mention that wet plaster has a wider reach and covers the wall entirely for better insulation. This ensures that you don’t have to spend too much on heating appliances which makes it cost-effective.
Types Of Plaster Finish
Now that we have discussed the major types of plaster let’s look at the common types of plaster finishing to improve wall construction.
1. Scrapped Plaster Finish
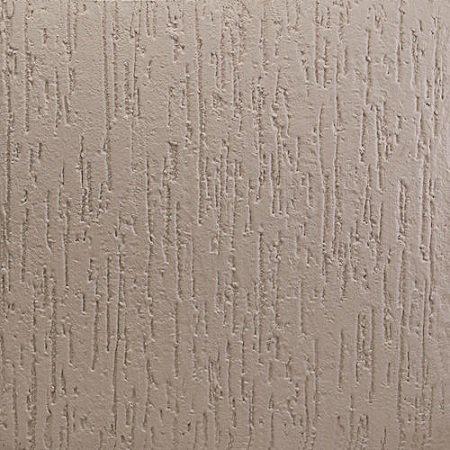
To get a scrapped plaster finish, it’s essential to have a blend of rough and smooth surfaces. After leveling the surface and allowing it to harden, you’ll have to scrape the final layer with a steel saw blade or other durable tools with a straight edge. It’s similar to removing the lumps and gaps from the wall surface to deliver the finishing coat.
In most instances, the penultimate plaster layer is between 6 and 12 mm thick, out of which scraping removes 3 mm from the surface. You should ensure that the final coat has set properly before scraping.
Some manufacturers use grading aggregates in the final coat, and scraping provides a suitable texture by exposing these aggregates. Moreover, this finish is stronger and less likely to crack than other types of plaster.
2. Stucco Plaster Finish

Thanks to the elegant finish it delivers, you can use stucco plaster for both interior and exterior walls. The entire process consists of three coats, and the plaster is 25 mm thick, with the topmost coat known as the scratch coat.
In the middle, you’ll find the finer coat, or brown coat, while the bottom-most layer is referred to as the white coat, also known as the finishing coat.
3. Textured Plaster Finish
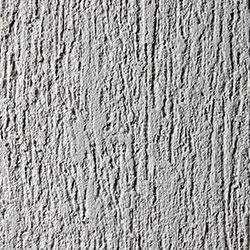
An effective way to enhance the interior decor of your home is with a textured plaster finish. It’s most noticeable on boundary walls, or you can use it to create a feature wall on the property through stucco plastering. You can apply a rough finish or smooth finish over coarse surfaces to make repetitive patterns.
To create a suitable mixture, it’s crucial to mix cement, water, lime, and sand with synthetic acrylics, fibers, and coloring pigments. Also, remember that you’ll need special tools to create ornamental patterns while the final coat is still fresh. It will have the same features of a rough finish and prevents plaster cracking.
4. Exposed Aggregate Finish

You can find this type of plaster finish on the walls of office buildings, whereby colored and white marble chips of 6-12 mm thickness are used in unison. This is done by crushing marble stones to make the final coat 20 mm thick. The important step is washing the pebbles of impurities and mixing them with marble chips and a bag of cement.
Once the mixture is ready, it’s thrown at the walls while it’s still wet, known as the plastic state, which acts as the undercoat. To get an even coating, you’ll need to employ a strong whipping motion and direct the plaster at 90-degree angles to the wall.
If there’s loose mortar on the surface, wash it away with a water jet or brush the surface clean.
5. Sand Finish Plaster
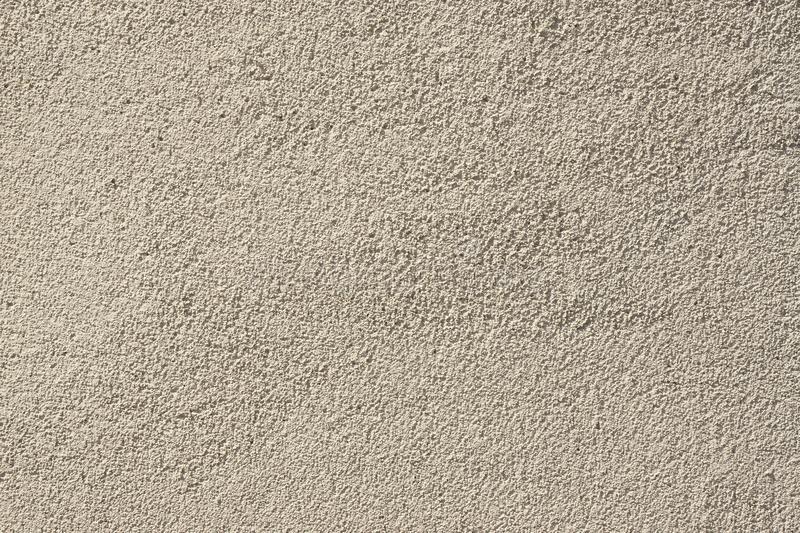
You’ll need two coats of mortar mix to get the desired sand finish on the walls. For the first layer, the ratio of cement to sand is 1:4 and not more than 12 mm thick. Also, after applying the first coat, you should let it rest for 7 days before applying an 8 mm thick second layer.
This layer will contain sand and cement in a 1:1 ratio, and you can use a sponge to create designs on the wet plaster.
6. Depeter Finish
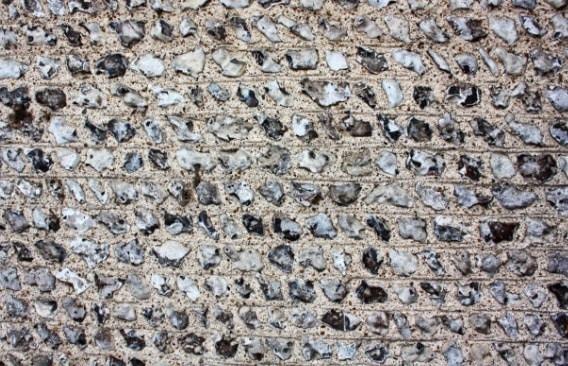
It’s the final coat of the plaster finishing process and has an overall thickness of 12-15 mm to produce a top-notch design. The first step is applying the mortar, after which you’ll have to compress the gravel plinth to the required degree manually. This proves most advantageous because gravel plinth is available in various shapes and colors to lend the walls a striking appearance.
7. Waterproof Finish
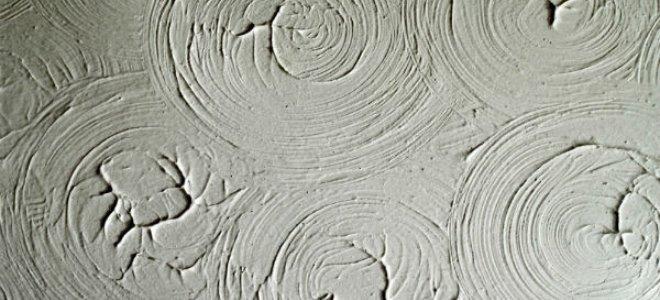
There is waterproof cement available on the market that delivers a waterproof plaster coating with a rating of IS:2645. It’s mostly used for construction work to protect the walls from damage due to the changing weather conditions. Depending on your requirements, you need to mix the compound with dry cement, usually 3% proportion by weight.
Pay close attention while mixing and ensure that the waterproof compound blends with the cement and water instead of separating.
8. Rough Finish
To prepare a plastered surface with a rough finish, you need to use a cement-sand aggregate mixture of 1:1:3. While applying the finishing layer, ensure that the coarse aggregate ratio is between 3 and 12 mm.
When the mixture reaches the desired consistency, splash the mortar mix on the wall and use a wooden float to get a rough texture. Once it hardens, the walls should be much more durable, waterproof, and crack-resistant.
9. Keene’s Cement Plaster
Keene’s cement plaster, known as Parian plaster or Martin’s cement, is a calcined form of regular plaster containing an alum admixture and calcium sulfate. It delivers a hard finish to the final coat, which you can then polish for aesthetic appeal. You’ll mostly find this type of plaster on hospital walls, railroads, and stores where the footfall is high and the longevity of the buildings is a priority.
Types of Plaster Final Words
That’s everything we had to tell you about the different types of plaster and how they are useful.
One of the best things about using plaster is that it’s eco-friendly since the formula consists of environment-friendly components. There are no harmful chemicals, and it’s VOC-free which makes it suitable for use in public spaces.
The durability of the material also ensures you get your money’s worth and won’t have to worry about renovating the walls at least for a few years.
It’s over to you now to choose a plaster suitable for your needs, so refer to our guide to clear all doubts and make an informed decision. You can create decorative patterns and use striking colors to make your property stand out with the right mixture.
On that note, it’s a wrap, and we’ll see you soon with another interesting guide!
Related Articles
9 Best Paint Primer For Drywall Tested
6 Best One Coat Paint and Primer
Mobile Home Skirting | Guide + Types of Skirting
11 Types of Retaining Wall Materials to Consider
35+ Different Types of Houses for Your Future Home
Modern architecture and design advancements have left no stone unturned in ensuring only the best of everything for your house.

From stunningly beautiful design ideas to highly functional protective measures for your home, the urban decor scenario has royally changed the game for conventional housekeeping!
And one such unbelievably smart and utilitarian weatherproofing idea that you could get for your sweet home right away is “Siding”!
Featured Image | Factory Roof Houses / Delmulle Delmulle Architecten
Siding is a protective cladding or wall that you can attach to the exterior walls of your house to protect it from the onslaught of weather that includes storms, rain, snow, the sun, and the like. It maintains a comfortable environment inside the house and keeps the exterior walls from weather damage. Furthermore, siding can enhance thermal performance and soundproofing, leading to increased energy efficiency and improved acoustic comfort within your home.
And if you’re looking to reap the benefits of an excellent home siding service, then do visit the link anchored here!
In this extensive read, we’re going to decode all types of siding materials that you could opt for and the benefits of each!
Types of House Siding
-
Wood
Wooden sidings are the most common type of material used for home exterior sidings. The most significant benefit of wooden siding is its versatility of design and availability in several styles.
It gives a beautiful traditional, organic look to the house as well as maintains a peaceful, natural environment inside and around the house.
The most commonly used type of woods that are used for sidings are pine, spruce, redwood, and cedar. You can either use a wood stain for your wooden sidings or leave it in its natural state.

Black House by Buero Wagner
You could also customize the overall style by opting for different profiles in which the wood is applied to your home exterior. Common wood profiles include batten and board, clapboards, drop siding, shingles, wooden sheet siding, vertical boards, and logs.
However, wood requires regular maintenance and is susceptible to rot, termites, woodpeckers, and fire. It is also not advisable for your house if you stay in an arid climate or where a forest fire is a common occurrence.
-
Vinyl
As you might have guessed by now, vinyl siding for home exteriors consists of synthetic protective material. This is an extremely popular siding option owing to its versatility, durability as well as affordability than most other types of siding materials.
Vinyl siding is easy to install and doesn’t require high or frequent maintenance, unlike wooden ones. It can endure weather damage for a considerable period of time.

One of the greatest benefits of vinyl siding is its energy efficiency and insulation which reduces your heating bills significantly in both hot and cold climates
It is available in a range of different colors and styles such as shingles, vertical panels, horizontal panels, fish scales, beaded designs, and lap.
However, on the downside of it, vinyl siding could not be painted over or customized all that much. Also, it is non-biodegradable, which does have an adverse effect on the environment.
Vinyl siding, if not installed properly, could lead to seepage of water on the inside which may damage the wood under it.
-
Metal
Metal is unquestionably one of the most long-lasting and enduring that one could have for siding options for home exteriors. It is completely resistant to water damage and hence, does not rot or mold.
Metal siding will always retain its color without fading out, and it can also be painted over. It is not susceptible to pest attack, rodents, or insects of any sort and is highly resistant to fire as well. It is also a low-maintenance option to go with.

Shanghai Office by Schmidt Hammer Lassen
However, metal sidings are pretty expensive with additional charges incurred on labor, as it is not easily installable. Also, metals will not retain heat and hence can increase the cost of your electricity bills in winter.
While softer metals such as aluminum may dent easily if hit by rocks, heavier steel will increase your labor charges during installation.
-
Brick
Bricks are one of the most durable materials you could ever choose when even when it comes to getting a house siding as, with proper care, they could last over a century!
There are essentially two sorts of subtypes that you avail in the category of brick sidings: traditional brick masonry which consists of solid brick constructions, and brick veneer, which uses thin layers of bricks.

Immensely low-maintenance, a brick exterior usually requires little to no maintenance. You will only need to give it a pressure wash occasionally to clean the surface.
Brick exteriors could keep a pleasantly cool environment inside your home at all times. But, this could be an issue in winter when you have to have proper heating.
One of the biggest cons of brick siding is that of cost, as it is immensely expensive. Installation would be a labor-intensive process and might require special skills, in which case you could consider brick veneer.
-
Stone
Similar to brick exteriors, stone sidings bestow a beautiful natural look on your house. It is incredibly durable and weather-resistant needing fairly low maintenance for substantial periods of time. Stone sidings are available in variants of limestone, granite, slate, and other natural stones.
Apart from natural stones, you could also get stone sidings in different other kinds such as manufactured stone, natural stone cladding, stone veneer panels, and foam panel “stone.”
Stone exteriors are completely resistant to moisture or fire damage as well as pest or fungus.
However, the cost of material for stone siding and installing it could be highly expensive, as it will require professional expertise.
A comparatively cost-effective alternative to natural stone exteriors is stone veneer siding. These cost roughly half of what natural stones come at and are also easier to install.
-
Fiber Cement
Fiber cement is manufactured using wood fibers, cement, and sand.
A fiber cement house siding is strategically created to mimic the nature of natural wood, providing the benefits of a wooden appeal with the weather-resistant nature of an artificial texture.

24 Housing Units / Zanon + Bourbon Architects
It is actually more affordable than wooden sidings, durable, and exceedingly easy to maintain. But, the most significant benefit of fiber cement is that it’s fireproof coming with a Class A1 fire rating. Additionally, it is also resistant to water and insect damage.
There are two variants of fiber cement: a pre-coated/painted siding and another one which could be stained or colored after it’s installed.
However, the cons to it could be that it is expensive to install, is double the price of vinyl ones, and may not be as long-lasting as stone or brick siding.
-
Stucco
Stucco is made using a combination of lime, cement, and sand, but it could also be manufactured using other elements and recipes. A stucco siding is similar to a plaster and created by layering the mixture all over the exterior of the house.

Karuna House by Hammer & Hand
There are many different ways to apply it on wooden, stone, or brick surfaces, and it could be given different shapes and textures.
The benefits of having stucco siding are that they are long-lasting and provide proper insulation, which helps to reduce electricity bills. It is resistant to fire and requires any additional fire retardants.
But, stuccos do not do well around water and are not a plausible alternative in places that receive frequent rainfalls or remain damp or humid. Also, the cost of installation is pretty steep as you’d require professional help.
-
Imitation Stone/Brick
Taken to be the precursor to modern vinyl, imitation stone or bricks are considered a decent alternative to the more expensive brick or stone exteriors for houses.
Although the popularity of other, more functional, and beautiful types of sidings have foreshadowed the fame of imitation stone/ brick that was highly in demand even a decade back, it hasn’t completely gone out of trend.
The primary benefit of using this type of home exterior is that they cost substantially less but look almost as good as the real thing!
However, these artificial sidings are not anywhere near stone or brick in durability and are susceptible to water damage. These could be used for outhouses and garages, for that matter
Also, it could be difficult to customize them according to the overall look of your house. And honestly, the options we mentioned earlier are far superior and more functional than these fake stone/brick walls.
-
Engineered Wood
Engineered wood is made using composite materials, yet looks exactly like real wooden finishes. Engineered wood house sidings are superior to fiber cement or wood-like vinyl owing to the fact that it actually contains real wood.
Numerous strands and fibers are combined together to create a finished product that looks like real wood in every way.

Woodview Mews by Geraghty Taylor Architects
The greatest benefit of getting engineered wood siding is that it comes at a comparatively lower price than other materials and could be customized to suit your preferences.
It is, in fact, a highly durable alternative that could last up to 20-30 years, not requiring very high maintenance for that matter. It is resistant to moisture, fire, and pests, being a decent weather-proof protective material.
However, it can’t be repainted or re-stained, and that could be one disadvantage you’d have to do with.
-
Insulated
Insulated siding is a way better alternative than vinyl ones, and you could call it an improved version of the latter. It has almost all of the features of the vinyl siding with the huge added benefit of a unique insulating layer, made from expanded polystyrene foam (EPS).
This layer of EPS is fused on the reverse side of the vinyl which provides a snug fit between the real wall exterior of your house and the vinyl material.

This insulative layer actually provides more than 20 percent more energy than the best vinyl or other insulative siding options out there on the market.
Insulated siding is also an incredibly durable option that could last up to 40 years or more.
While, on the other hand, the disadvantage of using this is that it is not customizable or re-paintable in any way. The exterior may not look all that attractive with the insulative cover unlike most siding, but it does provide significant value for the money you pay for it.
-
Concrete
Concrete is made with a mixture of gravel, sand, cement, and water. These ingredients are mixed well together in various proportions to form a thick paste which is then applied to the exterior walls of the house, much like a stucco, to create concrete siding. The paste dries to form a sturdy, durable wall siding around your home exterior.

T&G House by Nicolás Campodonico
The cost of installation could be high, and it will largely depend on the complexity and size of the structure of your house.
Concrete sidings are usually considerably long-lasting if formed and mixed correctly and can last as long as stone or brick walls. You can also form them into different shapes and sizes. These can endure natural calamities such as floods, hurricanes, or tornadoes and are also resistant to fire.
Additionally, these can also reduce the cost of cooling and heating owing to their insulative nature.
-
Glass Exterior
While one may question the efficiency of glass as an exterior or “siding,” it can look absolutely beautiful if you do have the budget for it. Glass exteriors will bring all the natural light into the room, always maintaining a cheerful environment inside your house.
However, do make sure that you go for high-grade fiberglass installments, so that is strong enough to withstand the onslaught of weather. Moreover, it should always be resistant to the harmful UVA and UVB rays of the sun.

Huete House by BmasC Arquitectos
So, all of these factors make the cost of glass sidings plus installation a highly expensive investment.
Premium quality glass sidings can even work wonderfully as insulative barriers trapping all the heat and preventing them from escaping during colder weather. This will lower your electricity bills substantially!
But, glass floor-to-ceiling exteriors involve high maintenance. You will require to clean it frequently and protect it from external shocks. Also, these will hardly provide any privacy in your space.
-
Steel Log Siding
Steel log sidings bring the best of both steel and wood for making a great exterior for your house. This combines the formidable nature of heavy-duty steel with the beautiful natural charm of wood to create magnificent exteriors for your homes.
It is resistant to almost all kinds of issues and determinants, including fire and water. And even with everything included, steel log sidings require really low maintenance, lasting for an incredibly long span of time.

The steel body of the exterior of these protective exteriors is treated with wood grains and made to have impressions that are made by wooden chinks or hewing, so that looks absolutely like natural wood.
The significant downside to getting steel log siding is the price of the material, which is immensely high. Installing a steel log siding is far from easy and entails a lot of money and labor.
-
Half-Timbering on Stucco
A beautiful mix of wood with Stucco is one of the ways to get a brilliantly functional siding arrangement for your house. Half-timbering on Stucco is actually a style dating back to the Tudor Revival, that made a huge impact, especially during the mid-19th century in England.
To this day, the style is popular for its durability and immense versatility of a functional design.

15th-century half-timbered Black Swan Public House, Peasholme Green, York, Yorkshire, England
The combination of wood and stucco brings the combined benefits of both these materials into the play of modern architectural ideas.
While the wood makes for a charming organic appeal to the overall structure, stucco ensures the durability of the protective cladding as well as its resistance against inclement climate or fire. It is an exceedingly customizable design that you could design according to your personal preferences.
However, the cost of the material and installation is considerably high, requiring professional skills and assistance.
-
Wood Shingle Siding
Shingles are made of uniform blocks of wood that may be cut and formed into different shapes. These shapes are cut with a machine that ensures the uniformity of shapes and sizes as well as a smooth texture for the pieces.
A shingle siding is then created by applying the shingles over the wall exterior in an overlapping arrangement.
But, the cost of installation of shingles is extremely high and depends on the size and location of your house. Also, these are prone to rot, moisture, and fire damage.
If you’re opting for shingles for a home that tends to get affected by moisture, then go for mildew repellents on the sidings as a protective measure.
Shingles sidings are delicate and need to be stained every 3 years and repainted after 6 years. These could warp or crack in extreme temperature conditions or loosen with time.
-
Board and Batten
The board and batten siding allows you to be creative in making a protective arrangement for the exterior of your walls using wooden boards of different lengths. You can install the boards both vertically or horizontally.
These are easy to install and are comparatively more affordable than most other siding options. They are also easy to maintain and are available in many different colors.
The most common types of woods used for this include cedar, pine, fir, and redwood.
Wood is usually what is used to make board and batten siding, but you could even get vinyl or engineered ones for your wall exteriors as well.
Although these hold up considerably well in harsh conditions, if you end up with the ones that are not well-treated or are of low grade, then they could develop rot and mold or become infested by pests and insects. Also, these could crack in extreme weather conditions.
-
Log Siding
These are made by piling on logs on top of each other in an interlocking design. The common kinds of woods used for making log sidings include cypress, redwood, cedar, and pine. Before forming the structures, the logs are dried and treated to increase their longevity and endurance. These can be easily stained or painted.

However, the natural state of the logs is usually preferred over painted ones, or they are given just a clear basic coat for the purpose of protection.
Log sidings provide a natural, cabin-like charm to your house. But, the initial cost of installation of the logs could be high and require professional expertise.
These are susceptible to moisture, fire, pests, and insects which makes the cost of maintenance pretty high for these. Also, if the logs are cracked or so, make sure to immediately seal them up to prevent decay.
-
Horizontal or Vertical Wood Boarding
In horizontal wood boarding, the protective layer for your wall exterior is made using thin strips of wood that are placed horizontally. In some instances, these might also be arranged using a tongue and groove. If the wooden strips are placed vertically, then that helps accentuate the overall height of the home.
The most common types of wood used in this case include pine, cypress, spruce, or Douglas fir.
This brings in a beautiful organic look that is natural yet elegant for any modern design and enhances the curb appeal of the building.
The cost of installation could be high and so can the maintenance charges. These sidings could be easily customized using stains or paints.
The exteriors will require regular maintenance so that the wood doesn’t crack, split or warp or develop rot and fungus. These should be re-stained and repainted every three to six years, which is part of the protective measure for wooden sidings.
However, wooden boarding does maintain a cool atmosphere within the house and is greatly admired for its versatile nature and posh appeal.
-
Lap Siding
Horizontal lap siding which is also known as bevel siding or clapboard is one of the most popular siding styles out of all that is mentioned here in this list.
It is an immensely versatile design and can be made using a vast range of different materials such as wood (most commonly), aluminum, vinyl, and fiber cement.
It is also available in a vast range of colors and could be customized using different finishes.

Since its introduction during the ’60s, lap sidings are used for almost all kinds of structures. These are affordable, and the cost of maintenance for these are low.
There are many different styles available for lap sidings such as vertical panels, shakes, shingles, fish scales, and beaded patterns or brick veneer patterns that look marvelous on all sorts of buildings.
However, you do have to get your lap siding frequently repainted and caulked to prevent weather damage.
Conclusion
And we that, we come to the very end of our extensive guide on all the types of house sidings you could get right now to protect and adorn your house with!
We hope you liked our effort and got exactly what you were looking for.
And we'll be back with more such stuff real soon!
Till next time!
Related Articles
Sump pumps can be a long-running, non-portable and permanent solution to removing water from places where water fills up frequently. In contrast, utility pumps are portable and versatile water-removing devices that can be used in a variety of situations.

No matter where you live, you will likely run into spillage at one point or another. And this is where you can put the best utility pumps or sump pumps to use.
The trouble is, it can be confusing to know which is the right pump for your specific use case. So, to help you gauge which type suits your needs, I’ve reviewed both a sump pump and a utility pump.
Sump Pump

Sump pumps are small pumps that are placed below ground level in order to remove water from places where the liquid can’t be drained. The pump uses a piston to redirect water into a drain pipe, reducing the water level and keeping the area dry. Usually powered by electricity, these pumps are primarily used as an anti-flooding measure and are directly connected to sewer systems.
You can also find sump pumps powered by solar energy if you wish to rely on a cleaner energy source.
Advantages Of Sump Pump
1. Dries A Particular Area
During my time testing the sump pump, it was apparent that the effluent pump is meant to be used in specific areas to prevent flooding. Basements are an obvious place where the pump can be used, but it needn’t be limited to below-surface areas. You may also use them as pond pumps, if need be.
Say a portion of your home is being rebuilt from the ground up, a place where water can damage the construction process. A submersible pump can be put to use to dry the area and keep the construction going smoothly.
2. Keeps The Soil Stable
Something I noticed about the drying capabilities of a submersible pump above the surface is that it can maintain the dryness of the soil. This can be particularly helpful in a construction site, where dry soil can add to the stability of the building. After all, if the soil isn’t dry enough, water damage can lead to serious structural issues for the building.
3. Switches On Automatically
Most submersible sump pumps have built-in float switches that rise with the water level. Once the switch has risen to a certain point, the pump will turn on automatically and begin pumping out the water automatically. So long as the switch hasn’t reset its position, the pump will stay on.
More advanced submersible pumps use an automatic sensor to keep the area dry without requiring a dedicated float switch.
4. High Power
Since sump pumps operate in below-ground locations that are typically the lowest point in a home, they have an appropriately high pumping power. Sump pumps can move water through a pipe several feet above to push it into the drainage system, in stark contrast to most other sewage pumps.
5. Adaptable Pipes
The output connection in sump pumps are purposefully designed to be able to connect to drainage pipes easily. So, you can connect it to a garden hose as well if you wish to redirect the water to a nearby pond or swimming pool.
A diameter that is no less than an inch can be found on most sump pumps, which enables this adaptability.
6. Alerts You About The Water Level
Sump pumps often come with water alarms and features that stop airlocks, making operations smoother and easier. And since they are powered directly by a home’s electrical system, these pumps don’t require any priming before they are ready to be used.
Disadvantages Of Sump Pump
1. Relies On Electrical Power
Something I noticed immediately while using a sump pump is that power outages become a major issue. If you live in an area with heavy rainfall, there’s a good chance that your electricity will go out for quite a while. And since sump pumps rely directly on your home electrical system, they can be rendered useless until power is restored.
During severe weather storms, it could be days before the power comes back on, leaving your basement filled with water until then.
2. Needs A Pit
Sump pumps are installed below the surface, necessitating an opening in the earth under your home, called ‘sump pits’. There are two main issues that stem from this: the effort required and the risk of Radon gas entering your home.
Having a sump pit in your basement to accommodate a sump pump can lighten your wallet significantly and be quite unsightly as well. Regular maintenance can help reduce the visual distraction, but I found it to be not quite as effective as I had hoped.
And lastly, there is a chance that the soil under your home has Radon gas trapped, which may release as the pump is being installed. The gas is a significant health risk and can seriously damage your lungs, so be sure to have the soil tested for radon before installation.
Utility Pump
A utility pump is a portable pump that is small and compact in design. Unlike sump pumps, utility pumps do not laser-focus on one specific objective and cater to various uses instead.
Most utility pumps work without needing to be submerged, and thus, they have a wider use case. Their typical applications extend to agriculture and horticulture, construction sites, food processing and service, power generation and more.
The output pressure of utility pumps is quite high on average to cater to each use case. And furthering their versatility is the presence of an inlet connection, as well as a garden hose discharge pipe.
Advantages Of Utility Pump
1. Can Be Used In Enclosed Spaces
Since they don’t need to be submerged, utility pumps can be used in a variety of areas, including enclosed spaces. A utility pump can remove standing water from places like ponds or pools. This is particularly useful when you need to empty clogged sinks that are filled with water.
I was able to use a utility pump to remove rainwater from stairwells and window wells to check what is a utility pump’s true performance test.
2. Boosts Water Pressure
A utility pump is generally quite high-powered, which helps to increase water pressure in a rain harvesting system or water cistern. This, in turn, allows water to be pushed further than what would otherwise be possible.
This application of automatic pumps can be paired with a garden hose to create extra pressure, creating a simple DIY contraption for pressure washing purposes.
3. May Not Need Electricity
So long as you have fuel available, the pump can operate independently of your home’s electrical system. Gasoline-powered utility pumps are particularly powerful, even among other utility pumps, being able to move more water than a typical electric pump.
You may find commercial establishments using large gasoline-powered pumps for this very reason.
4. Can Remove Large Amounts Of Water
Utility pumps can be used to clear out large amounts of water from areas that are prone to flooding. Owing to their higher power output, utility pumps can be used for both large and small-scale water removal.
And with certain models, small debris isn’t an issue as long as the inlet screen remains clear of debris. Some utility pumps can be used as sewage pumps as well.
5. Portable
Utility pumps are typically highly portable, allowing you to move them from one location to another freely without issues. These devices don’t need to have a space dedicated to them to work properly, and the extra mobility can be useful in certain situations.
6. Versatile
There are three chief types of pumps with a unique use case for each. These include gas-powered pumps, transfer pumps, and submersible pumps, the latter two of which can be powered by electrical or solar power.
Gas-powered pumps are typically used in commercial areas, while transfer and submersible pumps can be seen in residential applications. These can be used interchangeably for the most part, save for specific circumstances. For instance, a submersible utility pump is used to remove a large amount of water, an application where a transfer pump can’t be used.
Disadvantages Of Utility Pump
1. Cannot Be Used Continuously
If you need to keep your pump on continuously without stopping, utility pumps may not be able to perform as well. Sometimes, a pump may be needed to remove water from multiple places for hours on end, which a utility pump may struggle with.
2. Can Be Difficult To Repair
Certain kinds of utility pumps, such as submersible utility pumps, can be difficult to repair due to the presence of a seal. This is because the seal can corrode over time, making it difficult to repair the device to a satisfying degree.

Sump Pump Vs Utility Pump Conclusion
Sump pumps and utility pumps have specific use cases, and though they largely perform the same function, rarely can they be used interchangeably.
If the pump doesn’t need to be moved from where it’s needed, sump pumps can effectively remove water. These water pumps can be put to use in basements and crawl spaces where water fills up quickly after heavy rainfall, proving to be a more permanent solution.
As for utility pumps, they can be used in most scenarios that don’t demand continuous usage. They can be transported freely and may require no electrical tethers, giving them a wider set of applications than sump pumps.
At the end of the day, your specific requirements determine which pump suits you the best. And so, I’d advise you to gauge your situation and choose accordingly.
If the interior of your home is analogous to the brain, then that would make the roof comparable to a skull. In other words, it protects the delicate interior of your home from the outside elements. However, despite its importance, the roof accounts for only 3% of the total house construction cost and sadly the right roof types are not adapted to one`s architectural solution, roofs are are often simply overlooked. That is mainly due to the ignorance of people. While an inexpensive Gable roof might save you some cash, it might end up doing irreparable damage in case you live in an area prone to cyclones or tornadoes. On the flip-side, if your area is far from windy, a Gable roof will definitely be more fitting. In fact, it will be more useful compared to a hip roof.

Why you ask? Well, to find the answer to that question and more, you need to go through this article first.
What are you waiting for?
Read along to find out everything you need to know about various roof structures.
Most Popular Roof Types
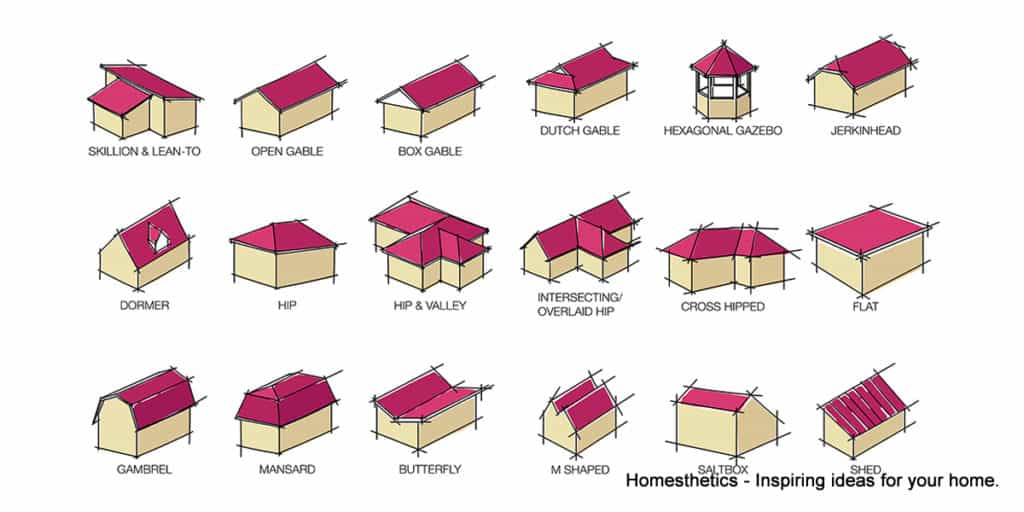
via homesthetics
1. Open Gable Roof
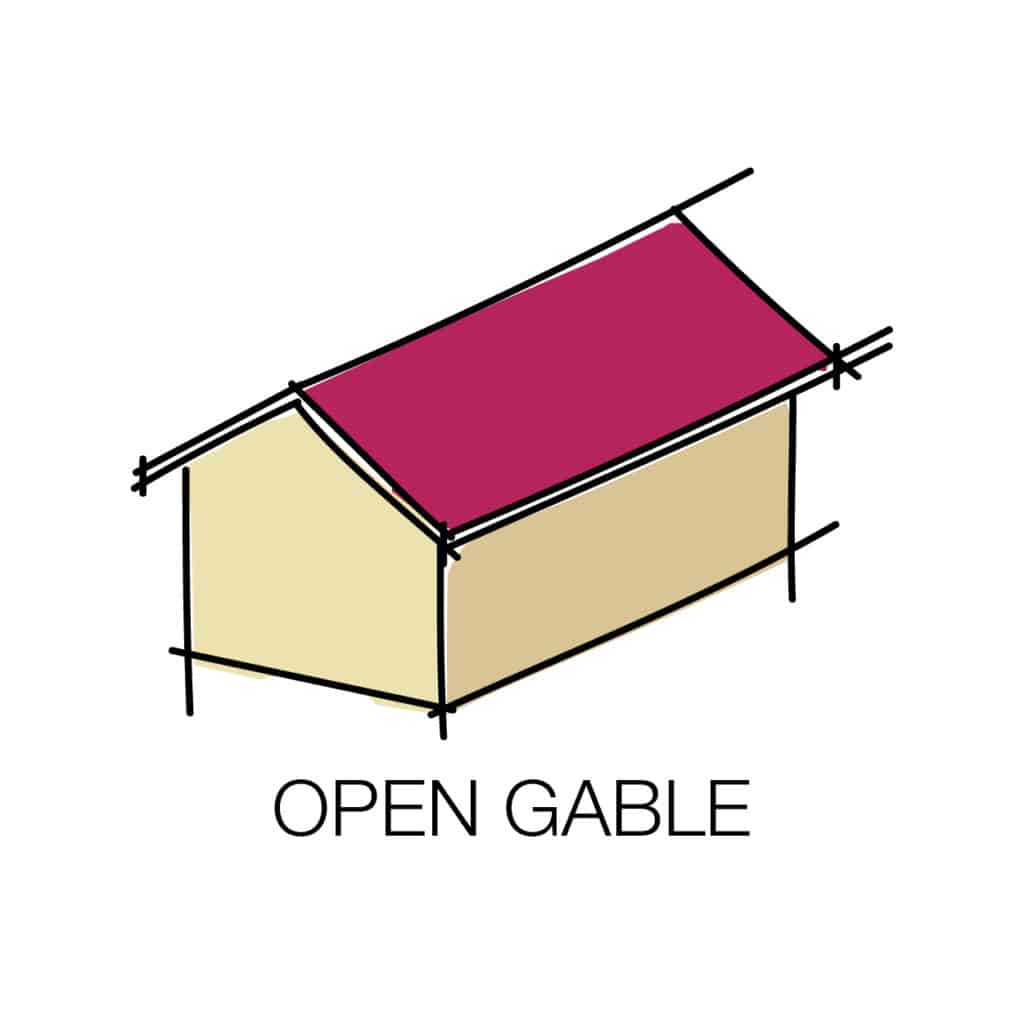
What better way to start our extensive roof guide than with the highly popular Open Gable Roof? But, before we get into the details, let us first explore Gable Roofs in general. Gable roofs have been used for time immemorial. In fact, they were used quite generously in ancient Roman and Greek architecture. What makes them so popular?
Well, for starters, they are comparatively inexpensive and also have a wide range of versatility when it comes to the design. Moreover, gabled roofs have a simple design principle which makes working on them quite easy when compared to the other complex roof structures in this article. However, that is not all; gabled roofs are also incredibly weather resistant and offer great protection from rain and snow.
Now that you have a clearer picture of what a gabled roof is, let us explore Open Gable Roof structures. Open gabled roofs are possibly the most common gabled roof structures used in the US. The main distinguishing feature of this structure is that the triangular extension at each end of the house is open.
The following are the two types of Open Gable Roofs based on the direction the Gable is facing:
- Front Gable Roof. In this structure, the front-gabled building faces the street with its gable. Buildings with this type of roof were extremely common in the medieval Gothic period. You can still find buildings with this type of roof structure in many German city streets. The image that follows shows a building with a front gabled roof.
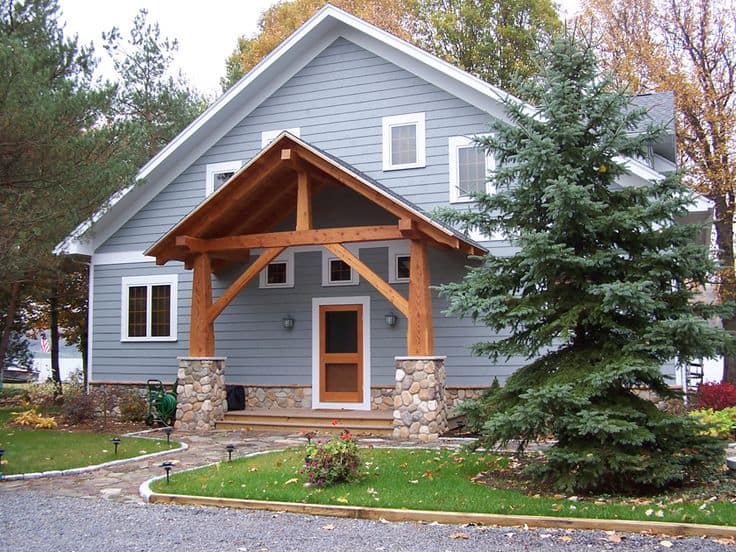 via Pinterest
- Side Gable Roof. In this case, the sloping side of the Gable faces the streets. Buildings that came up in the later Renaissance period were influenced by this structure. The next image illustrates a building with a side-gabled roof.
2. Box Gable Roof

Box gabled roofs are extremely similar to open Gable roofs, with one small exception. On box-gabled roofs, the triangular extension at each end of the house is closed off instead of being opened. That is the only difference between these two structures.
Whether you want the triangular extension at each end to be closed or open is more of a personal choice than a practical one. However, we can tell you that the use of extra materials in the case of box-gabled roofs will definitely make it a little more expensive than open-gabled roofs. If you are on a tight budget, we suggest you go for the open gabled roof structure for your house. Below an image illustrates a standard building with a box-gabled roof structure.

via Wikipedia
3. Skillion and Lean-to Roof
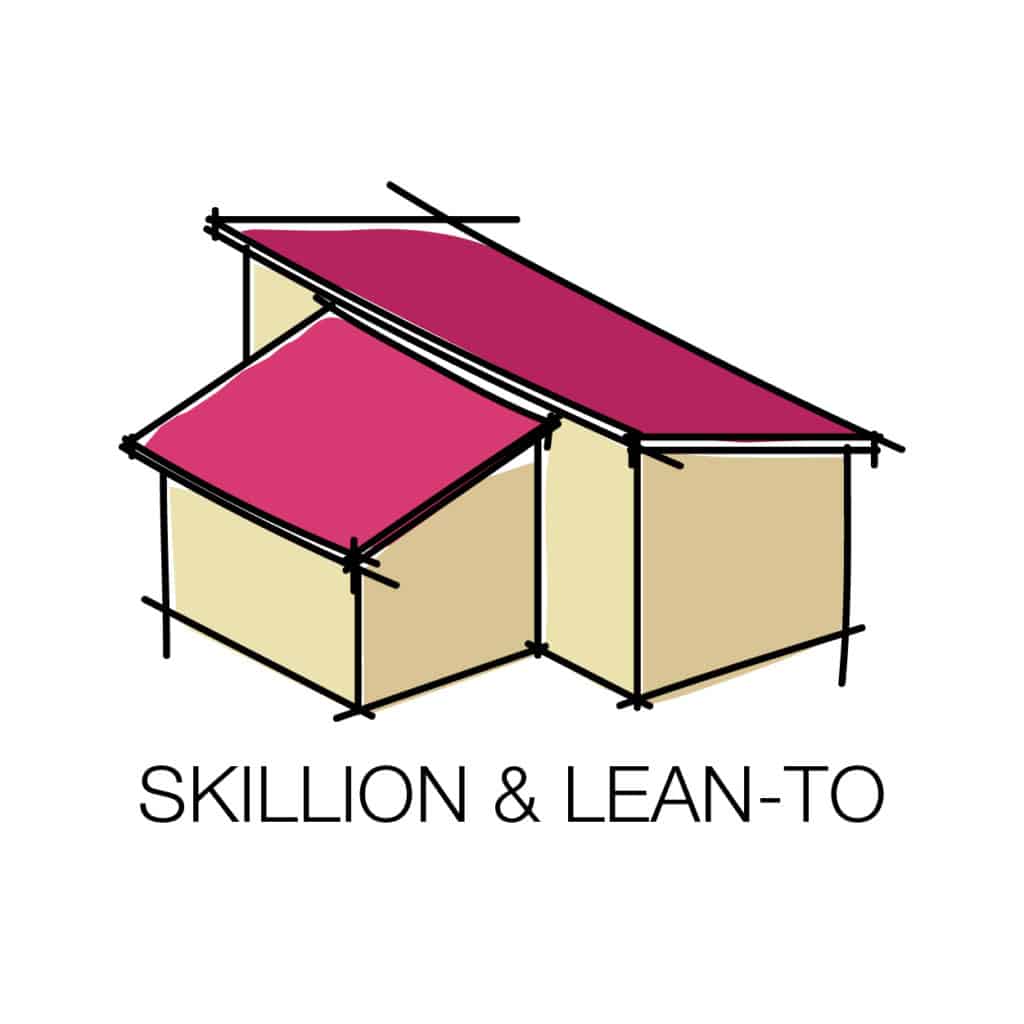
The Skillion and Lean-to-Roof structures are quite commonly used in modern homes. A standalone skillion roof has a single slope which resembles the roof of a shed. When the Skillion Roof is combined with a lean-to roof, it results in a sleek and modern look as seen in the illustration below.
Combining these different roof structures together has an aesthetic benefit. It allows you to build walls of varying heights, just like the house featured in the illustration below. Interestingly, this roof structure does not have a roof ridge like every other roof. That is primarily because of the varying elevation level of the sloping structures.
 via houzz
4. Dormer Roof
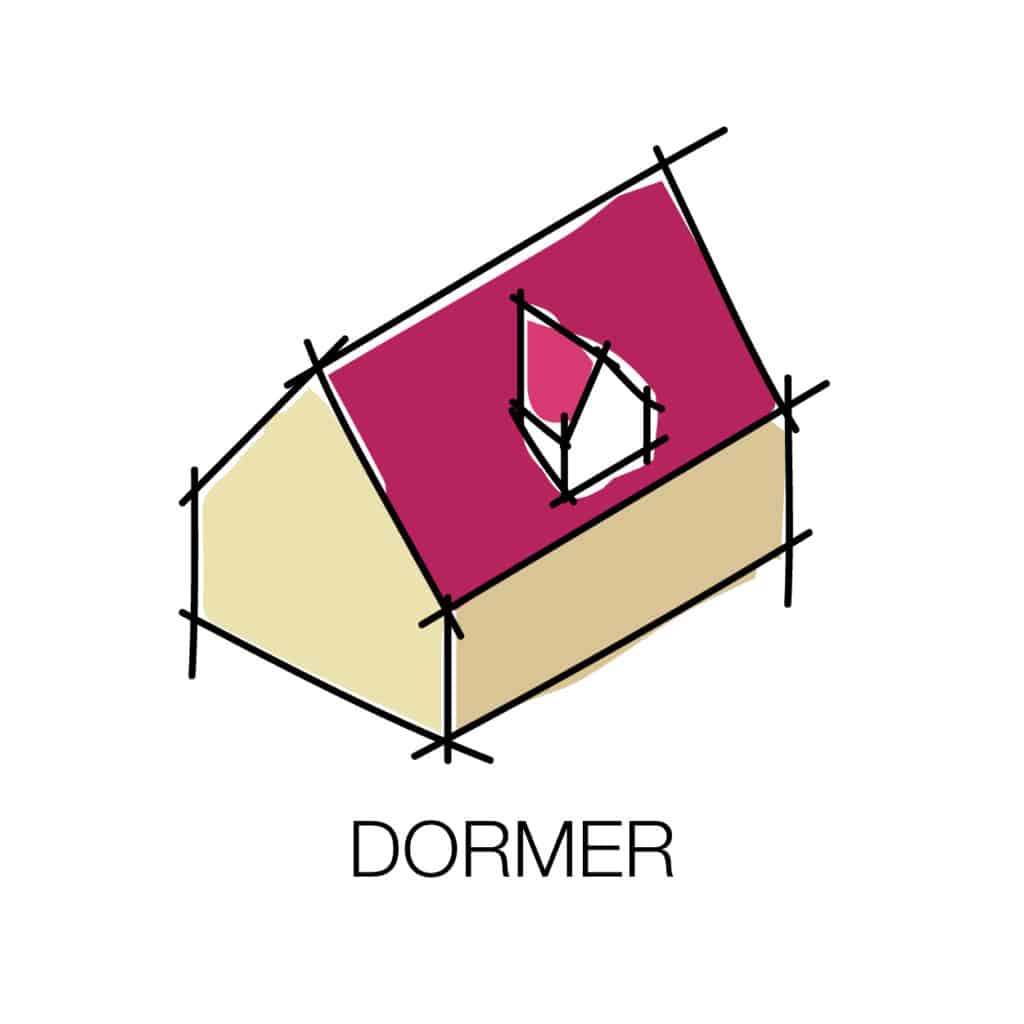
Next up on our list is the Dormer Roof. Now, the Dormer Roof isn't a completely different roof structure, rather it features an additional structure on top of an existing roof structure. This roofed structure usually contains a window and it projects vertically outwards beyond the plane of a pitched roof. The photo below shows a standard Gable Roof house with two Gable Dormer structures.
While dormers can drastically improve the aesthetics of the building, they are also extremely practical as they can be used to extend the interior space whilst inviting additional light inside.
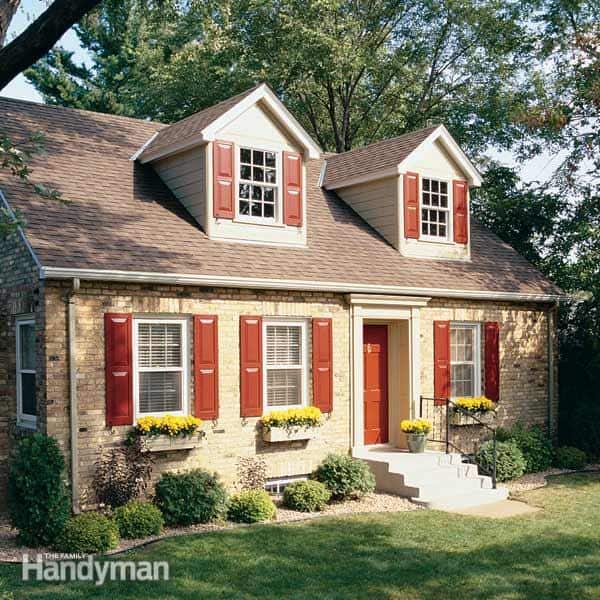
Various types of dormer structures that are commonly used in buildings follow.
- Gable Fronted Dormer. Gable Fronted Dormers have protruding windows with gabled roofs. This type of dormer is by far the most common as it is comparatively less expensive to build compared to the other dormers on this list.
- Hip Roof Dormer. Hip Roof Dormers are also quite commonly used in buildings. While a standard Gable Fronted Dormer has two sloping sides, this dormer structure has an additional sloping structure in the front.
Whether hip-roof dormers are more attractive than Gable fronted dormers is up for debate. However, this type of dormer structure is generally more expensive compared to a simple Gable Fronted Dormer. - Flat Roof Dormer. As its name suggests, the roofed structure of this dormer is flat and does not have any ridges. However, for practical purposes, sometimes the flat roof is slightly inclined to let rainwater slide off. In case you live in an area with heavy rainfall, we suggest you go for sloping roofed dormers instead of flat ones.
- Shed Dormer. Shed dormers are quite similar to flat-roof dormers and do not have any ridges. However, unlike flat roof dormers, shed dormers have a greater level of inclination for the roofed structure. This is certainly more practical in case you live in an area with high rainfall.
- Wall Dormer. Now, a Wall Dormer is not an entirely different dormer structure. Rather it is a dormer that is positioned in such a way that it rises vertically with the wall of the building. In other words, the face of this dormer is co-planar with the face of the wall below it. These Wall Dormers usually feature a gabled roof structure on top.
- Eyebrow or Eyelid Dormer. This type of Dormer places more importance on the design rather than the functionality. As its name suggests, this low and wide dormer has a curved roof that resembles an eyelid.
- Link Dormer. There can essentially be two types of link dormers; one which connects one part of the roof with another or another which houses the chimney. The latter is similar to a wall dormer, with the addition of a chimney.
- Bonneted Dormer. Also known as a segmental dormer, this type of arched roof dormer is commonly found in Victorian structures. They are mainly built for improved aesthetics and not for practicality.
- Nantucket Dormer. These are possibly the largest type of dormers. The entire structure can be broken down into three segments, out of which the outer two segments are simply gable dormers. The middle segment features a shed dormer and it connects both the gable dormers together.
- Lucarne. This type of dormer usually appears on the slope of a Gothic spire. These dormers are usually slender and gable-fronted.
- Blind or False Dormer. As its name suggests, these dormers aren't built with functionality in mind. These dormers are used purely to improve the aesthetics of a building and they are not accessible from the interior. In fact, these false dormers can be an afterthought.
5. Hip Roof
If there was a major flaw with the structural design of gable roofs, then that would be the fact that the triangular extensions at each end do not provide the side walls with sufficient protection from the rain. One way to solve the problem would be to make the roofs protrude further.
However, if you have limited horizontal space, then that would not be advisable. In that case, you will require a Hipped roof for your building. So, what exactly is a hipped roof? In comparison to simple gabled roofs which do not have sloping structures on 2 sides of the building, hipped roofs have slopes on all sides. Other than additional protection from the rain, hipped roofs are also better suited in windy environments.
But, there is a downside to installing hipped roofs, and that is the cost. They are more expensive compared to a simple Gable Roof. Moreover, the sloping sides mean that there will be less usable attic space, as illustrated by the image below.
6. Hip and Valley Roof

You can think of a hip and value roof as a modified or an extended version of a simple hipped roof. However, the difference in the roof structure is due to the shape of the building. If the building is not rectangular and is either T or L-shaped, then the hipped roof structure used for this building will be a Hip and Valley roof.
We understand that the explanation is a bit complicated, so we have also featured an illustration below to make things simpler. If you are interested in constructing a Hip and Valley roof for your building, then we suggest you take a look at this detailed guide.

via JW Roofing
7. Gambrel Roof
The Gambrel Roof is very similar to a standard gabled roof, however, instead of a single slope on each side, Gambrel roofs feature two slopes. This type of structure is commonly noticed in barn houses. The illustration presents a barn house-like structure with a standard gambrel roof.
In the case of gambrel roofs, the bottom slopes are more steeply raked compared to the top ones. This design philosophy results in increased attic space compared to a similarly sized building with a Gable roof.
However, there are some downsides to this design choice as well. The most obvious one is the price as gambrel roofs are usually more expensive to construct compared to a simple gabled roof. Moreover, gambrel roofs are less weather resistant compared to a Gable or hipped roof structure.
8. Mansard Roof
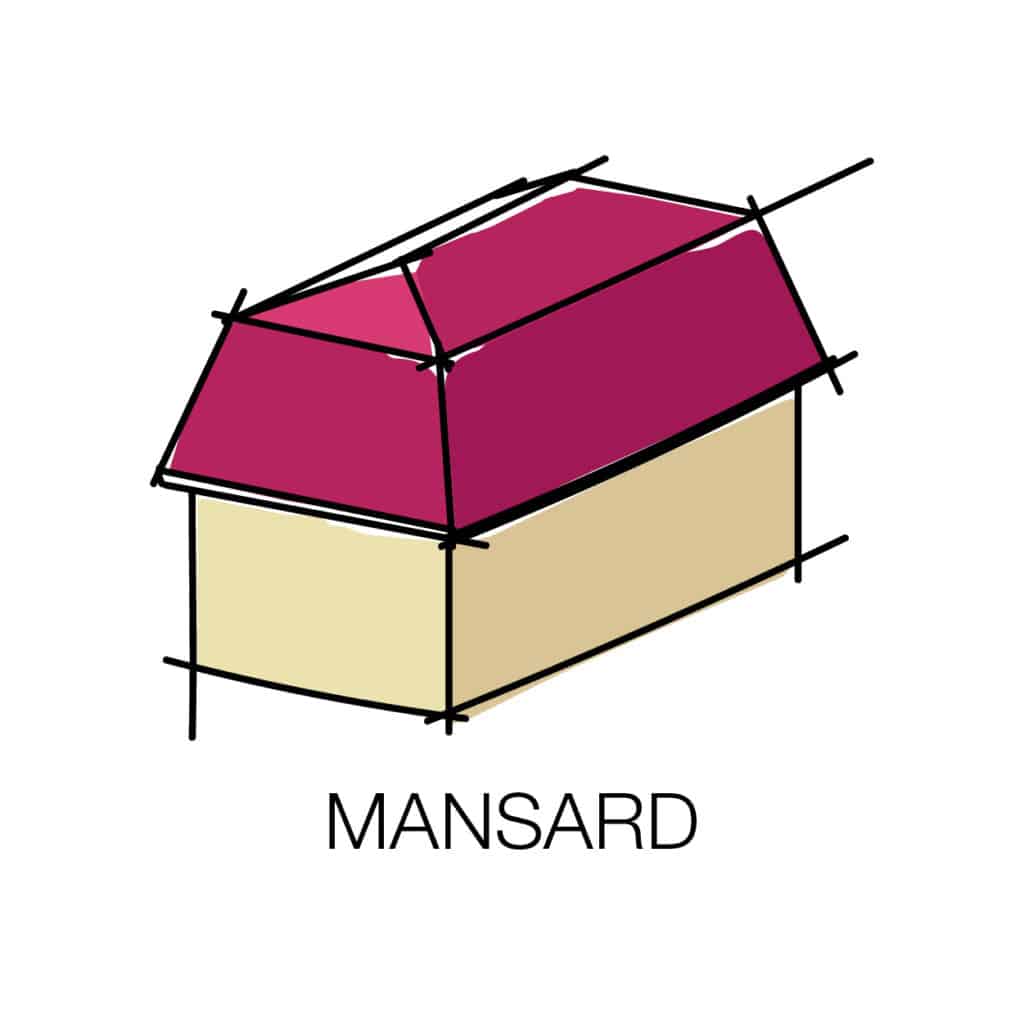
You can think of the Mansard roof as a mixture between a hipped roof and a gambrel roof. Why do you ask? Well, unlike a standard gambrel roof which has sloping edges on two sides of the building instead of all four, a Mansard roof has sloping edges on all sides. The sloping edges are exactly like that of a gambrel roof. In other words, each side of a Mansard roof has two slopes, out of which the bottom slope is steeper than the top one.
Mansard roofs also go by the name French roofs as this style was popularized in France by architect François Mansart. You can see buildings sporting the Mansard roof commonly in many European countries, including France.
Despite its usage in many aristocratic buildings, Mansard roofs are not that popularly used in normal homes. Not only are they much more expensive compared to the more popular roof structures, they are also quite complicated to construct. If you are looking to install a Mansard room in your building, then we suggest you consult with an experienced professional first.

Source Unknown
9. Butterfly Roof

Simply put, a Butterfly roof is nothing but an inverted Gable roof. This type of roof structure is quite new compared to other roof structures featured on this list and was popularized by William Krisel and Dan Palmer in the late 1950s. The first Butterfly roof was created by a Swiss-French architect named Le Corbusier, who used it for a vacation house in Chile in 1930.
While beauty lies in the eye of the beholder, the practicality of the Butterfly roof's design cannot be questioned. This roof structure allows more natural light to enter the house and results in greater interior space well, moreover, it is also effective in collecting rainwater.

via hunker
10. Dutch Gable Roof
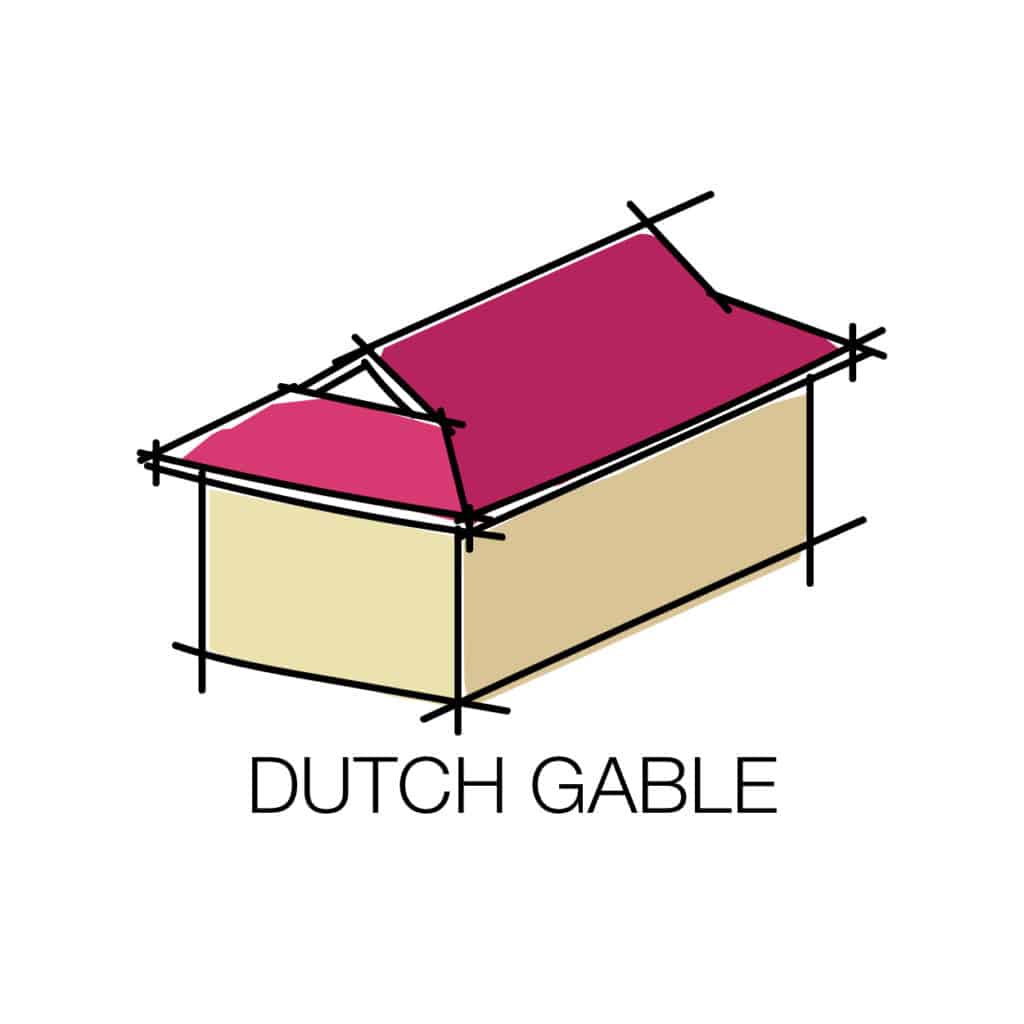
A Dutch Gable roof or a Gablet is a fusion between a hipped roof and a Gable roof. As you can see in the illustration below, the Gable portion sits on top of the Hip Roof. Now, there are quite a few advantages to this design philosophy.
Since a standard Hip Roof offers less attic space, the gable portion makes sure that the house has comparatively greater attic space. Moreover, the Hip structure on the bottom gives the entire roof more rigidity and that results in greater weather resistance. On top of that, the hipped part of this roof creates a covered porch area, as observed in the image below. In other words, a Dutch Gable roof combines the strength of both gable roofs and hip roofs and eliminates most of the drawbacks as well.

via houzz
11. Hexagonal Gazebo Roof
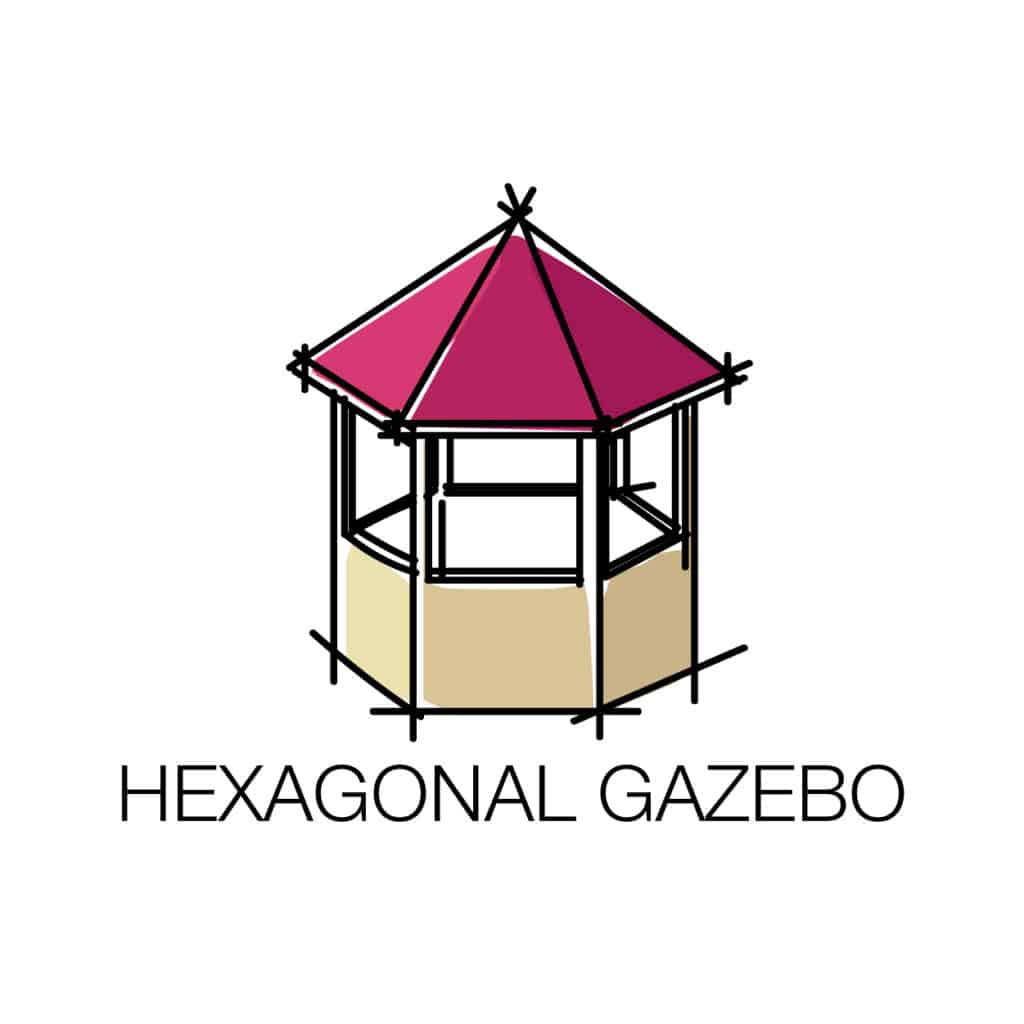
Hexagonal Roofs are not fit for every house. In fact, they are mainly designed for improved aesthetics rather than practicality. One of the most common places you will see a hexagonal roof is in a pavilion structure like a Gazebo. The illustration below shows us a beautiful Gazebo with a Hexagonal roof on top.
 via
via 12. Jerkinhead Roof
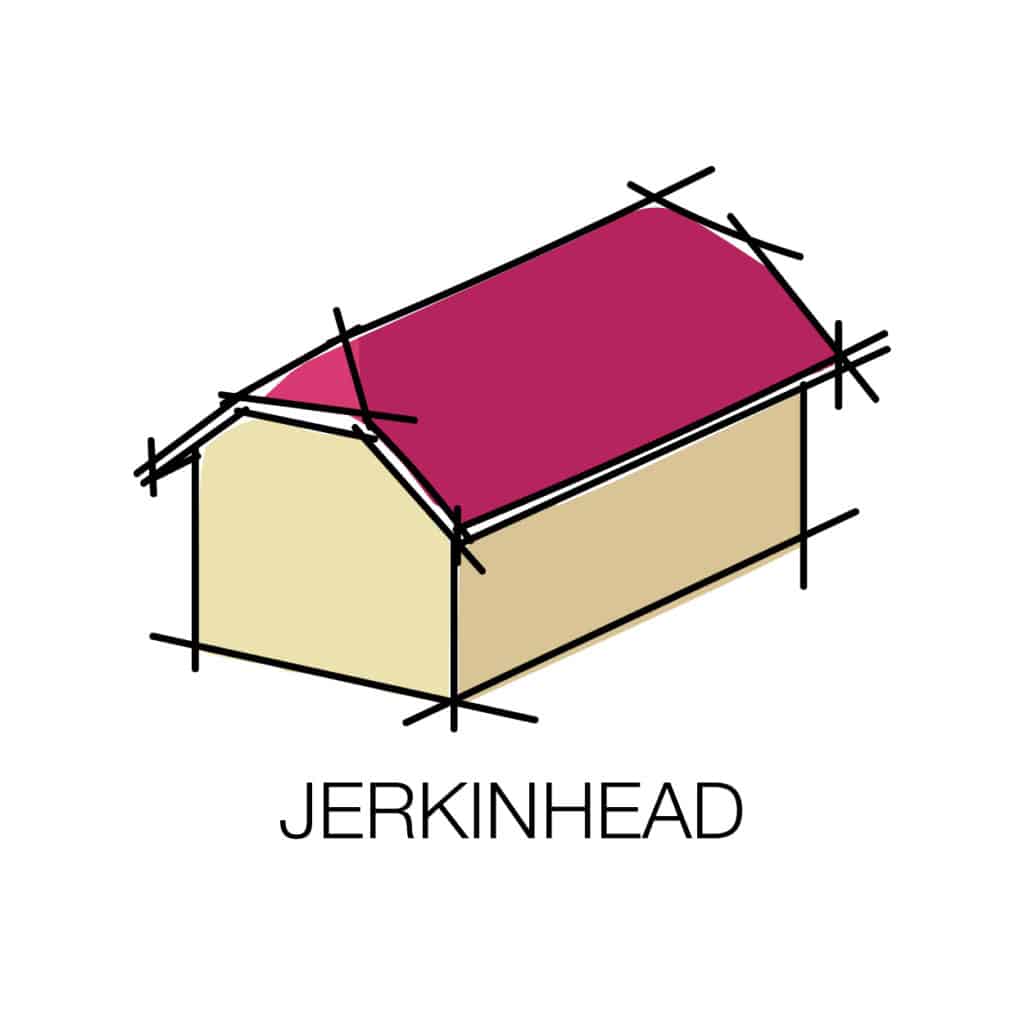
The Jerkinhead Roof is a mash-up between a Gable roof and a Hip Roof. However, unlike the Dutch Gable, which is also a fusion of the same, Jerkinhead roofs have a large gable with clipped edges. These clipped edges resemble a hipped roof structure.
Now, the benefits of this design are increased attic space compared to a standard Hip roof and greater wind stability due to the Hip roof structure. However, as you can see from the illustration, Jerkinhead roofs have a complicated design and that makes it much more expensive to construct compared to a standalone Gable roof or a Hip roof.

via Memphite
13. Clerestory Roof
The Clerestory roof is quite similar to the Skillion and Lean-to Roof we covered earlier. However, unlike a standard Skillion and Lean-to Roof, the Clerestory roof features a row of windows on the top as you can see in the illustration below. Since the windows of a Clerestory roof are placed very high up, they do not invade your privacy by any means.
So, what is the function of the windows? Well, they are there to fulfill a single purpose, and - you guessed it - it is to let a ton of natural light into the building. Moreover, as a result of the excess natural light, the room stays warm during winter months as well.
 via Pinterest
14. Saw-tooth Roof
Although Saw-tooth roofs were usually used in industrial buildings, this design philosophy has slowly trickled down into eco-friendly homes. By definition, a saw-tooth roof is comprised of a series of ridges with vertical glass windows that meets a pitched roof. So, what are the benefits of this roof design?
Well, just like Clerestory roofs, Saw-tooth roofs are also built with natural light in mind. However, unlike Clerestory roofs which have only one set of windows, Saw-tooth roofs feature vertical windows on each segment.
If you are deciding between a Clerestory roof and a Saw-tooth roof, we would suggest going for the latter only if your house is extremely wide. Otherwise, a Clerestory roof will be better suited. Plus, you will also save some cash.

via Pinterest
15. Flat Roof
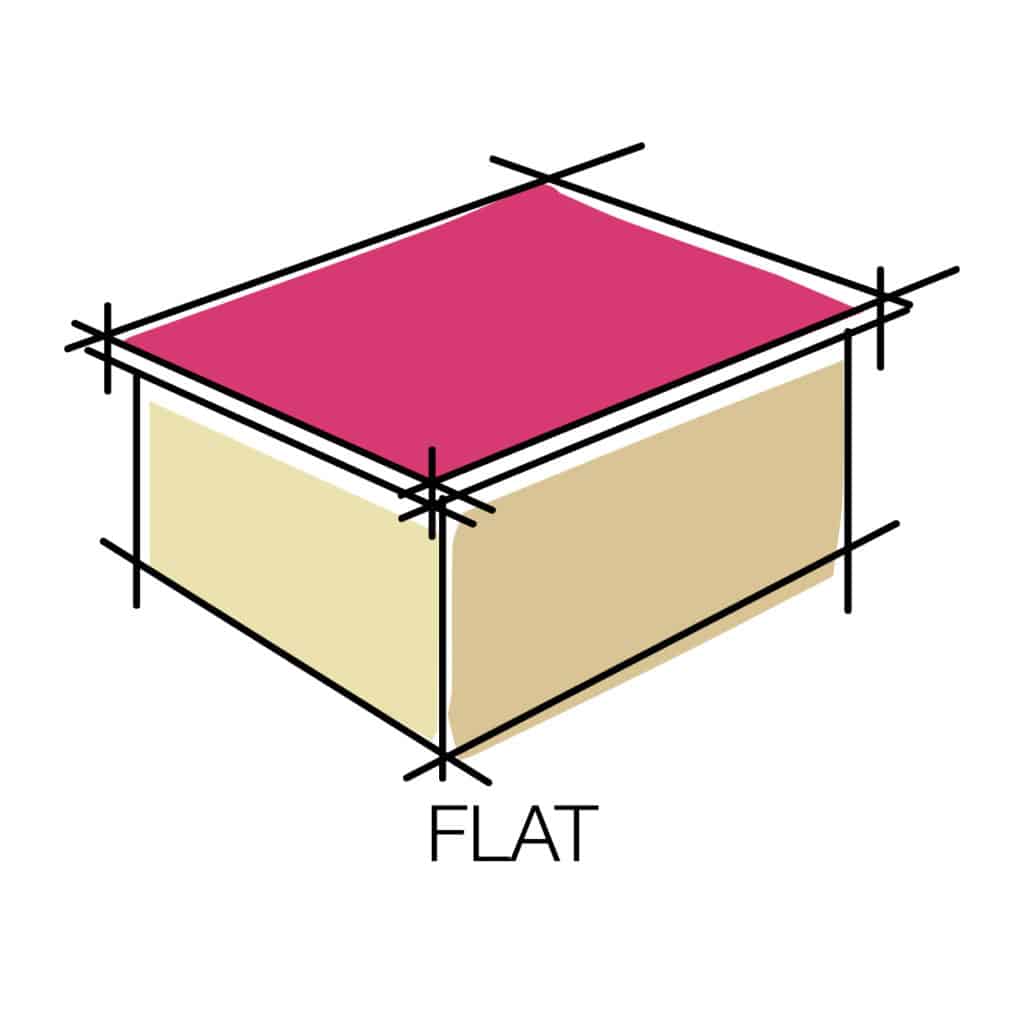
Although flat roofs are quite commonly used in commercial and other industrial buildings, they are also used in many residential houses. Surprisingly, they are installed in both high and low-rainfall areas. However, if you live in an area with heavy rainfall and snowfall, we would advise you against it. Instead, you should go for a Hip roof or any of the other weatherproof roofs featured on our list.
Another interesting fact about flat roofs is that they are not completely flat. In fact, they have a slight incline to not allow water to collect on it. In case you live in an area that is free from harsh weather conditions, then you can definitely install a flat roof. Moreover, you can use the flat space on top to make your house even more practical. For example, you can install PV Solar Panels on top of your flat roof to make your house energy efficient or even energy independent.

via Pinterest
16. M Shaped Roof

As its name suggests, M Shaped Roofs resemble the letter M. Well, not exactly a vertical M, but it is more akin to a flattened M. In other words, M-shaped roofs are nothing but two connected gable roofs. Now, the design of the M-shaped roofs leads to an obvious downfall which would be the meeting point of the two gables.
Needless to say, snow and rain will definitely build up in this area. Although, that can be countered to some extent with the use of a central gutter. In areas of high rainfall and snowfall, the pitch of M-shaped roofs is usually much steeper and this ensures that it catches less rain and snow.

via inhabitat
17. Saltbox Roof
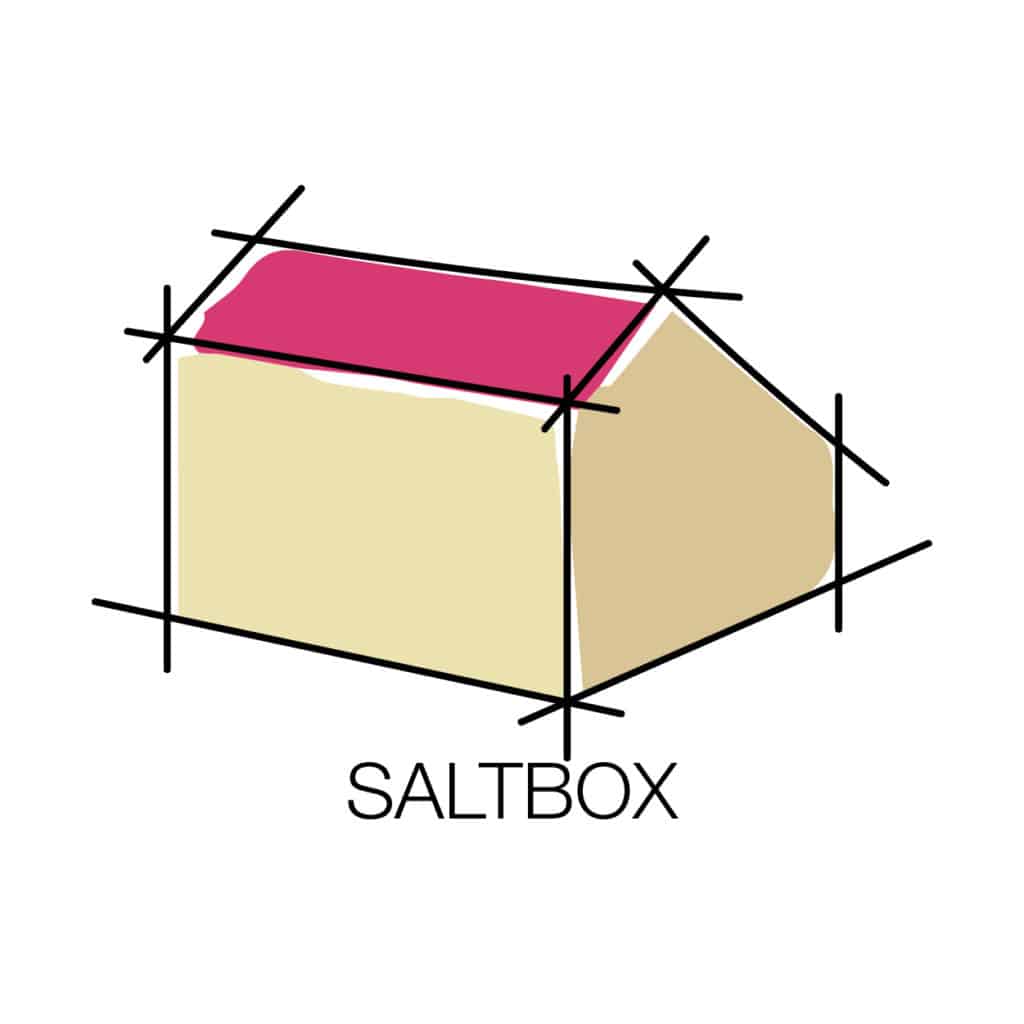
Saltbox roofs are quite common in New England. In fact, the first Saltbox house originated in New England and is an example of American colonial architecture. Saltbox roofs are quite similar to Gable roofs, however, unlike Gable roofs which have symmetrical slopes on either side, these roofs have asymmetrical slopes. Take a look at the illustration below, the right slope is much longer than the left one.
This design philosophy leads to a few problems. The interior space on the back side of the house is quite limited due to the roof almost extending to the ground. Moreover, the tricky design also leads to increased costs.
However, there are a few redeeming qualities that make this roof style desirable. Saltbox roofs are usually more durable than standard gable roofs owing to their asymmetrical design. On top of that, the large slope makes it easy for water to run off and you can collect a lot of rainwater if you live in an area with heavy rainfall.
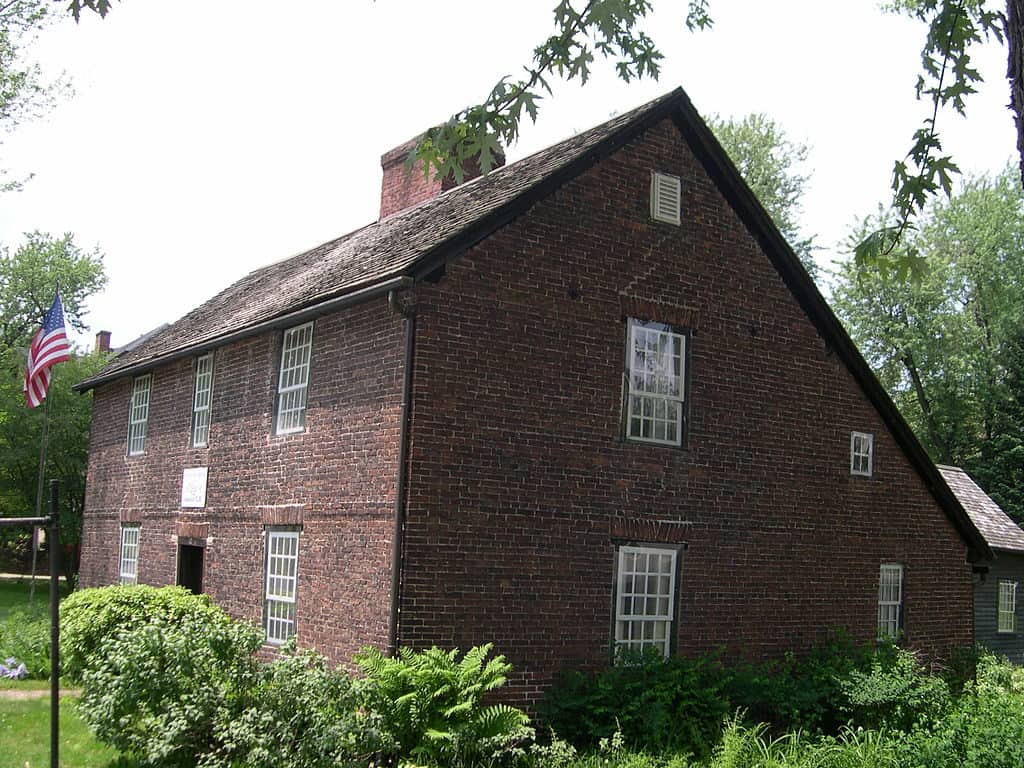
via Wikipedia
18. Shed Roof or Skillion Roofs
Shed roofs, also known as Skillion roofs, have a single slope, as you can see in the illustration below. Many modern homes prefer to have this kind of roof style as it not only offers more interior space as opposed to a gable roof or a hip roof, but it can look quite sophisticated as well. Moreover, shed roofs allow more natural light inside compared to pitched roofs.
Another benefit of installing Skillion roofs is simplicity. These roofs are easy to assemble and do not need as many building materials as some of the other roof styles. However, if you live in an area prone to tornadoes or hurricanes, we would suggest you go for a more windproof roofing style like a hip roof.

via BuildLLC
19. Combination Roofs
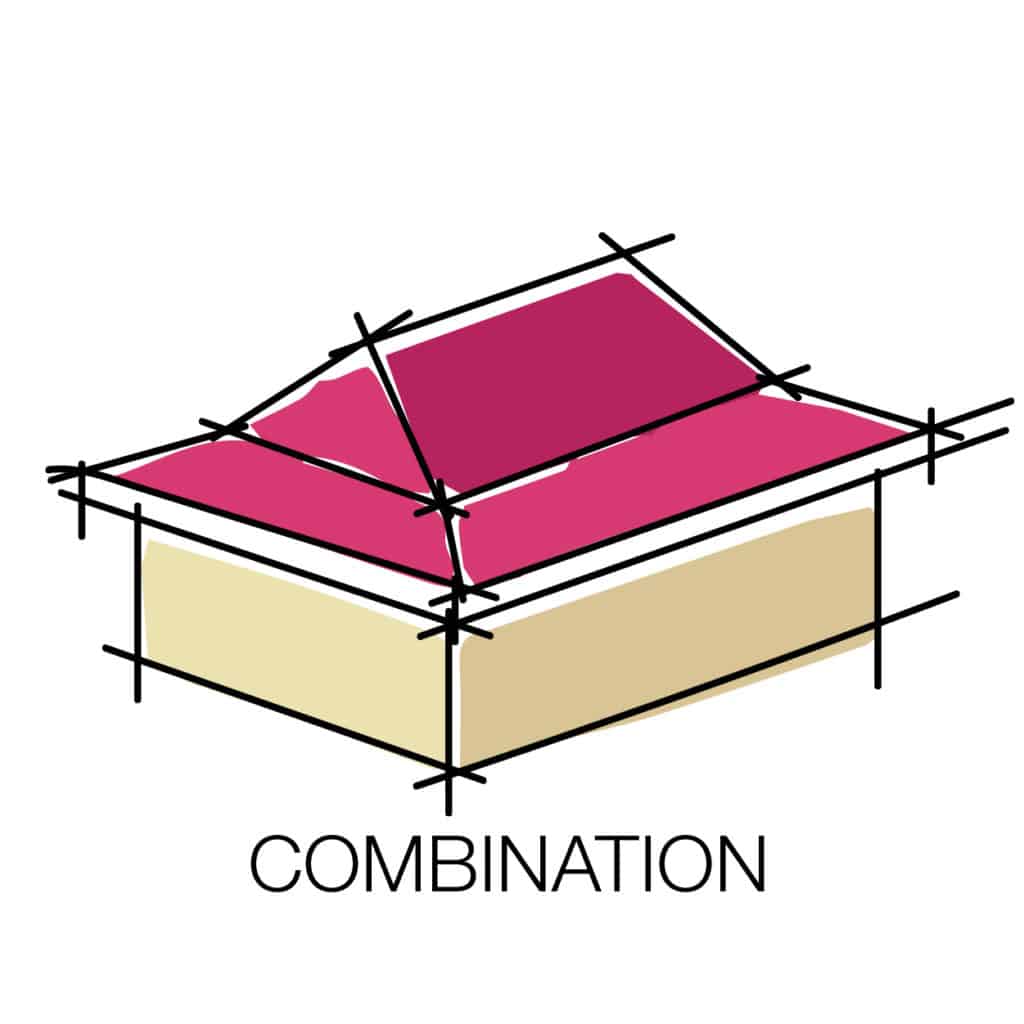
As its name suggests, combination roofs are an amalgamation of simpler roofing styles. Take a look at the illustration below, for example, it incorporates multiple gable roofs along with a hip roof for the front porch. Combination roofs are more suitable for complex architecture.
However, the complexity of the roof structure leads to an obvious downside: the cost. Moreover, building such roofs requires roofing experts and cannot be attempted by an amateur. On top of that, if there are multiple valleys in the roof, it can lead to water damage through those weak points.

20. Pyramid Hip Roof

Last but not least, is the Pyramid Hip Roof, and as its name suggests this roof closely resembles a pyramid structure. You can think of this roof as a special case of a standard hip roof. Normally, in the case of hip roof, the four sides of the roof converge in the center thus creating a ridge. However, in the case of a Pyramid Hip roof, the four sides converge to a single point, as you can see in the illustration below.
If you live in an area with harsh environmental conditions, then Pyramid roofs will have you covered. They are extremely resistant to strong winds. However, the downside of a Pyramid Hip roof is the complexity of the design which leads to increased costs over a standard Hip roof or a Gable roof.

via Lapp Structures
With that, our article has come to an end. Now that you have read through this article you ought to be better prepared to choose the correct roofing structure for your home. Before we bid adieu, remember that roofs are extremely important, they`re not there just to improve the aesthetics of a building. It is highly recommended to go the extra mile and splurge on the roof best suited to your needs.
What roof types you`ve noticed in your area and what roof types do you think you actually need?
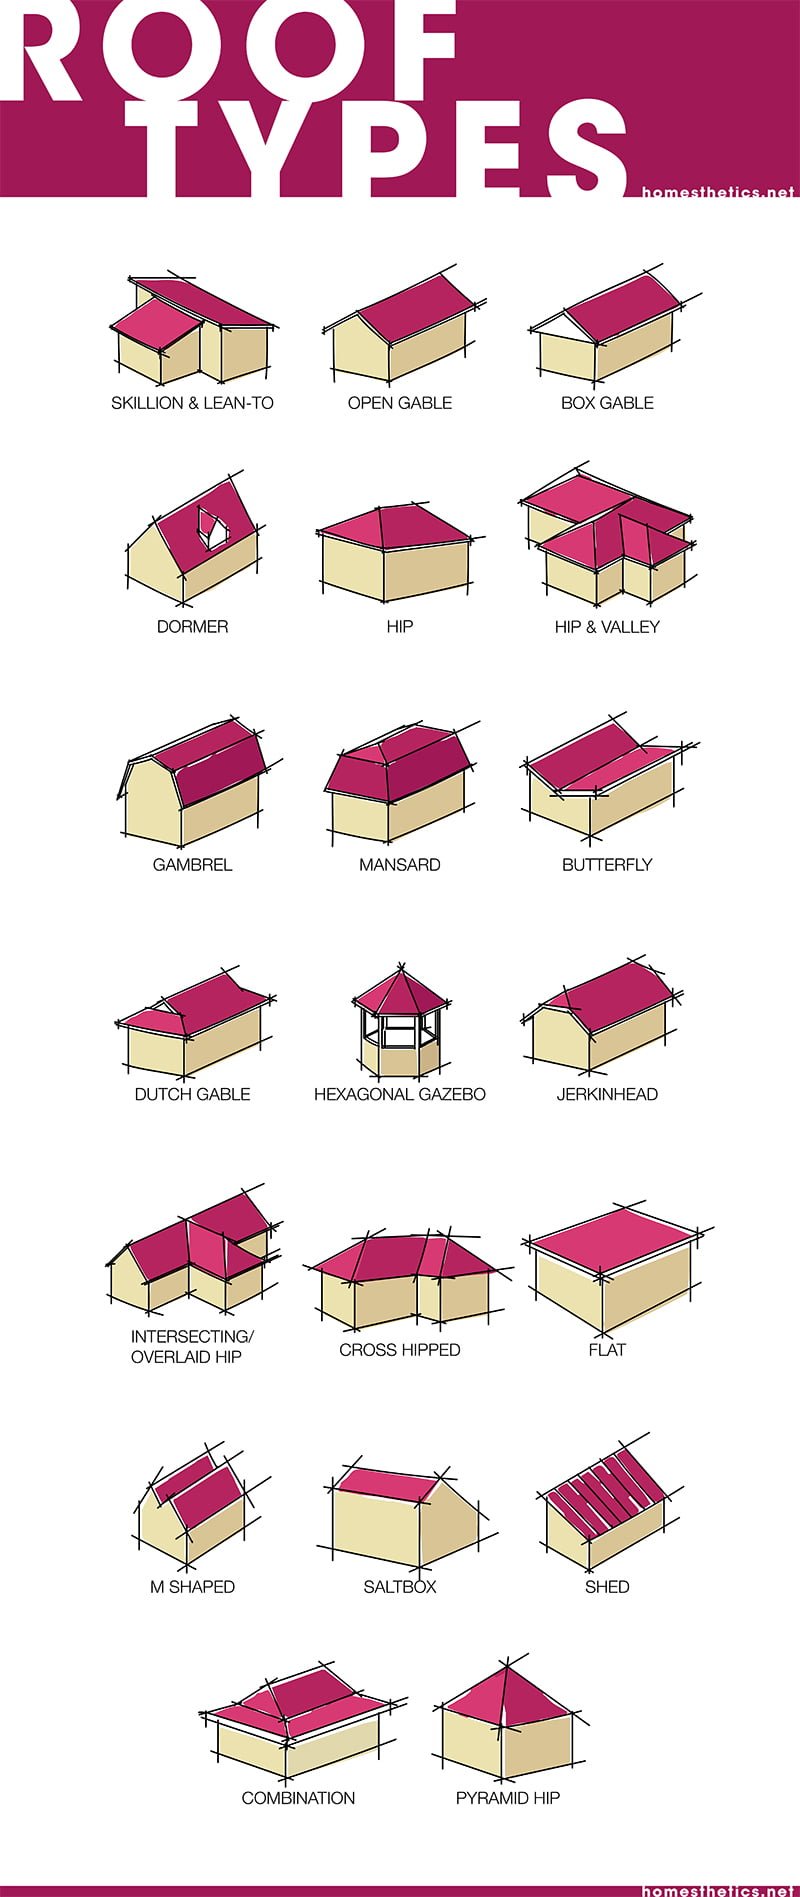
Related Articles
23 Hip Roof Types & Styles for Your Future Home
What is the Mansard Roof, Advantages and Disadvantages Sheltered
6 Eco-Friendly Roofing Materials and Why You Need Them
How To Clean Gutter Guards Efficiently
Shur Flo Gutter Review | All You Need to Know
EasyOn Gutter Guard Review 101 | All You Need to Know
5 Best Foam Gutter Guards [Reviewed & Buyer’s Guide]
23 Extraordinary Beautiful Ways to Repurpose Rain Gutters in Your Household
Putting up skirting on a mobile home is a great way to create a warm environment while adding functionality and protection to your home.

Decorating a mobile home does not have to stop at just putting up artwork inside. Adding skirting creates a high-quality finished look that also protects the home.
But deciding on a skirting finish can be a tough choice, with so many skirting options available. However, the right skirting layer can completely change the look of any mobile home for the better.
And our in-depth guide has everything you need to know when it comes to choosing the best skirting option for you. Everything from the benefits of skirting to the different materials available will be covered.
So, without further ado, let’s get started!
Mobile Home Skirting

Types Of Skirting Panels
Skirting panels are available in different materials, which offer various benefits to the mobile home itself as well as add aesthetics to the base.
Depending on the material type, the price for each skirting material can vary. On one end of the spectrum are sturdy, more expensive materials like masonry. And lying on the other end of the spectrum, we have cheaper materials that are not as sturdy.
1. Vinyl Skirting Panels
Vinyl skirting panels are one of the most used types by mobile home owners. The benefits that vinyl brings in both aesthetics and durability make it a popular choice.
Installing mobile home vinyl skirting is incredibly easy and affordable. That said, the price can increase if you choose to double layer it to create insulated skirting for the home.

Another benefit of using vinyl siding and skirting is its environmentally-friendly composition, as it is made of chlorine from common salt and natural gas ethylene. Compared to other skirting options, it doesn’t affect the environment as much as wood and brick.
However, it’s not the thickest of skirting options on the market. There is an insulated version that is thicker and can regulate the temperature better. However, these insulated models are usually more expensive than the standard ones.
Furthermore, low-quality variants of vinyl skirting do not age well. They tend to break down quickly and lose their sheen. Weed eaters may also damage the vinyl siding, slowly breaking down the material over time.
Vinyl skirting is easy to install and work with from a contractor’s perspective. Usually, these skirting panels come in 12 feet sizes, but they can be cut to fit various terrain. In fact, it is possible to cut them as small as one-foot.
Furthermore, the installation is relatively straightforward. Each ground track is secured to the foundation with long rods that are joined together. Meanwhile, the top back is placed along the bottom of the home and the top front secures the outside length of the panel.
2. Simulated “Rock” Skirting
For a natural look, using a “rock” design as skirting is a popular choice. These are not actual rocks but rather made up of plastic that resembles a rock pattern. As such, these panels can be easily installed and are available in a number of neutral colors.

Ekena Millwork 48 5/8"W x 24 3/4"H x 1 1/4"D Cascade Stacked...
- FAST DIY INSTALLATION: Our lightweight polyurethane panels...
- LOW MAINTENANCE & DURABLE: Made from high-quality urethane...
Sandstone and granite are the two commonly used rock types that are replicated in these faux rock skirting panels. But there are other rock types that can be purchased to create different aesthetics and add some curb appeal to your mobile home.
Moreover, installing these skirting panels is not very labor intensive either. They can be directly installed on the manufactured housing or in the same way that you would with the vinyl skirting. Whether you install them the DIY way or with the help of professionals, the labor costs can be kept minimal, thanks to the simple installation.

What’s more, the panels are not too expensive while still giving you a natural look. Overall, it makes for an affordable and popular skirting that is second only to vinyl in terms of popularity of the material.
3. Faux Stone Skirting
Similar to the simulated “rock” skirting, faux stone is designed to look like real stone. And much like the former, it’s made of polyurethane. By having a plastic construction, the resulting skirting becomes a durable vapor barrier.
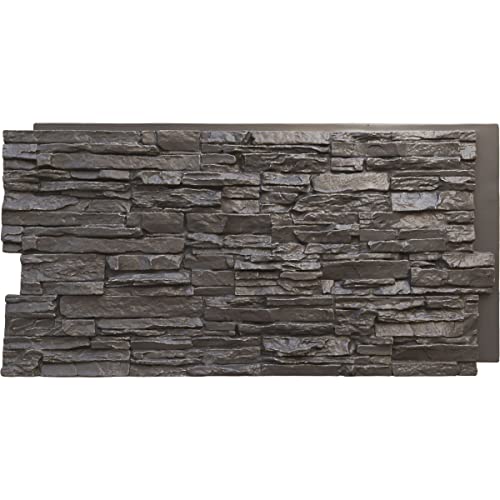
Ekena Millwork 45 3/4"W x 24 1/2"H x 1 1/4"D Canyon Ridge...
- FAST DIY INSTALLATION: Our lightweight polyurethane panels...
- LOW MAINTENANCE & DURABLE: Made from high-quality urethane...
However, choosing to install faux stone skirting can be pretty expensive. But the good news is that this type of skirting is actually seen as an investment that raises the value of your mobile house. This is opposed to simple vinyl skirting panels, which can lower the value of the home.

4. Faux Brick Skirting
Brick skirting is a high-quality option that can increase the durability of the foundation. But using real brick skirting is not always feasible, as it can become quite costly to install. That is why faux brick skirting is a popular alternative to actual brick.

Vopie Brick Wallpaper, Stone Textured, Removable and...
- Vintage Faux Brick Wallpaper.Flat print with slightly...
- Each Roll is 20.8 Inches Wide by 33 Feet Long, Covering 57...
Moreover, a faux brick panel allows for the “brick” to be more lightweight than actual brick, as it’s generally made from polyurethane. Another benefit of this material is the increased resistance it offers to shifts in temperature and various weather conditions.

Additionally, an actual brick skirting entails a much more complex installation than a faux one. But depending on what you are aiming to accomplish with the skirting, either option can be viable. Whether it is for durability or aesthetics, a faux or brick skirting will definitely benefit the curb appeal of your mobile home.
5. Concrete Skirting
Concrete skirting is one of the most durable skirting options if you’re looking for a permanent and solid connection to the ground. Once you install the concrete skirting, it won’t be going anywhere as it is made of cinder blocks. The permanence of concrete skirting extends so far as being similar to a poured foundation.
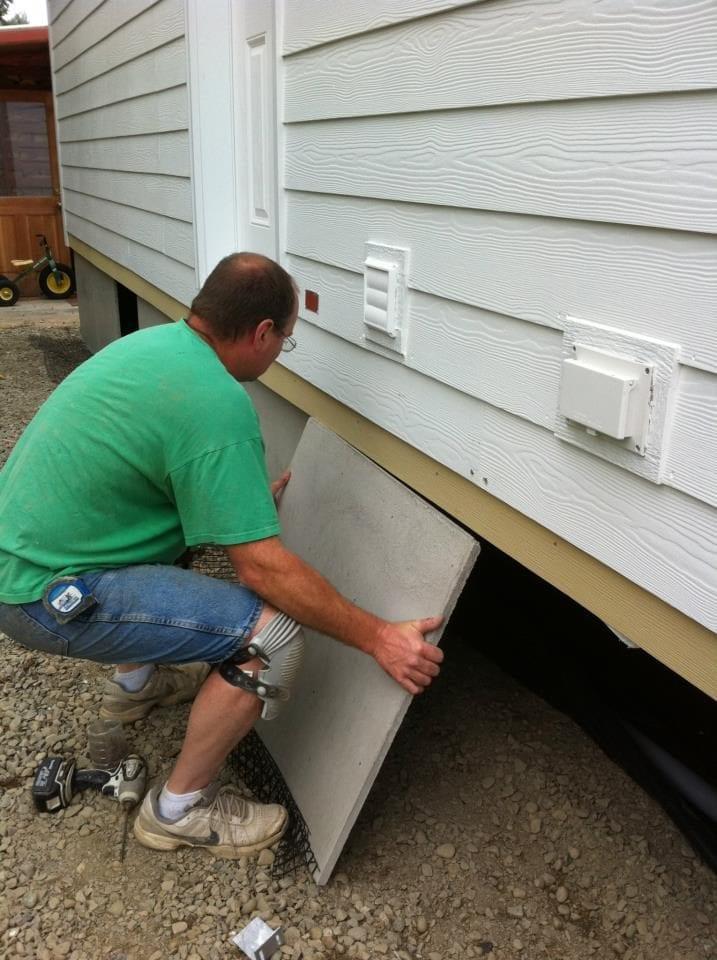
One caveat to using concrete is it utilizes cinder blocks to create the skirting. What this implies is that it involves a large amount of labor and time to install it. Furthermore, the blocks need professional work in order to secure them into the ground.
Since you’ll need the help of masons and contractors, it can raise the cost of installation considerably. Although the blocks themselves are solid, they can not be considered as a bonafide permanent foundation by industry standards.
Long story short, cinder block skirting has the benefit of providing a solid foundation to mobile homes. Their strength and durability are unparalleled when compared to other skirting products. However, the cost of materials and labor fees can run quite high.
6. Metal Skirting
Among the many skirting variants available, metal is a cheap and easy to install option that is used widely. This skirting needs a two by two or two by four frame to support it. And dirt can be filled in behind the frame to provide extra support.
Not only is the metal durable, but they are also available in a variety of designs and patterns. If you choose to go the custom route, you will be happy to know these metal skirtings are paintable. Furthermore, the metal panels won’t be damaged with weed eaters or other similar equipment.
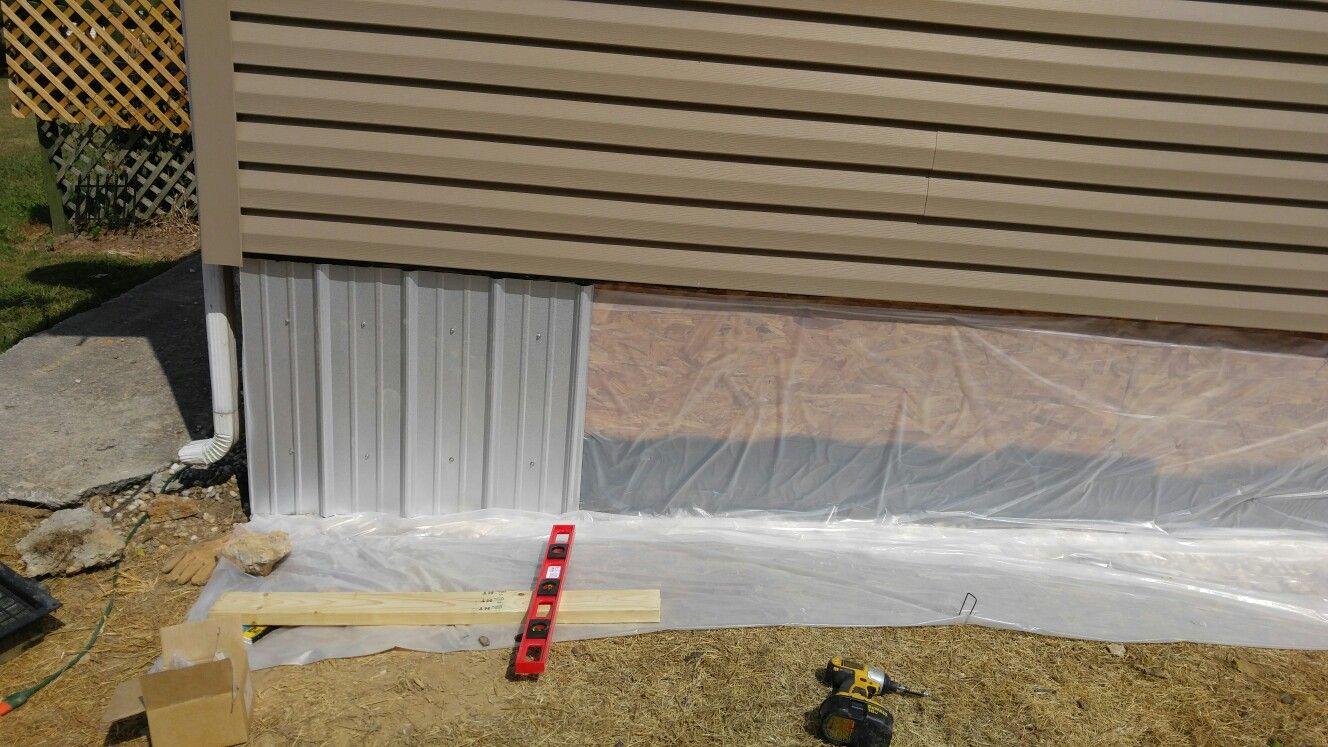
Patterns are also stamped onto the metal to create patterns, which in turn, enhances the curb appeal of the home. So, no longer are you limited to flat metal; it is the goal of the skirting company to give the customers almost any design they want.
A few popular types of metal skirting options are available in tin or steel. These materials make for a skirting that’s easy to install without compromising durability.
7. Foam Skirting
If you are looking for a skirting option that’s high on energy efficiency, then foam skirting is a solid option. It provides insulation and regulates the temperature underneath the mobile house.
Manufactured homes are usually at a loss when it comes to energy efficiency. Although a ground track can be effective to some extent in regulating temperature, it is not as good as insulation foam.
Keep in mind that while using foam as a trim piece can save money in heating and cooling, it is not the best-looking skirting option. Depending on what you want, it is possible to manipulate and shape the siding to resemble brick, cinder block, and pebbles.
Additionally, foam skirting is quite expensive, even though the panels are smaller as compared to others. Each of these panels is only two feet in length at a time, whereas others are four to five feet. These smaller sized panels are packed full of foam and are incredibly energy efficient.
However, installing foam skirting is pretty simple; it follows a process similar to brick and stone materials. As such, the labor costs can be kept to a minimum.
8. Wood Skirting
Where wood skirting shines is the versatility it offers in customization. Typically, these wood products are custom made, so they can be tailored to match exactly what you need. As there are many variants of wood and finishes, the price to install this type of skirting varies.
Furthermore, not only does the wood type vary, but the design of skirting can also be changed. Wooden skirting options are available in either the standard thick panels or as a lattice design.
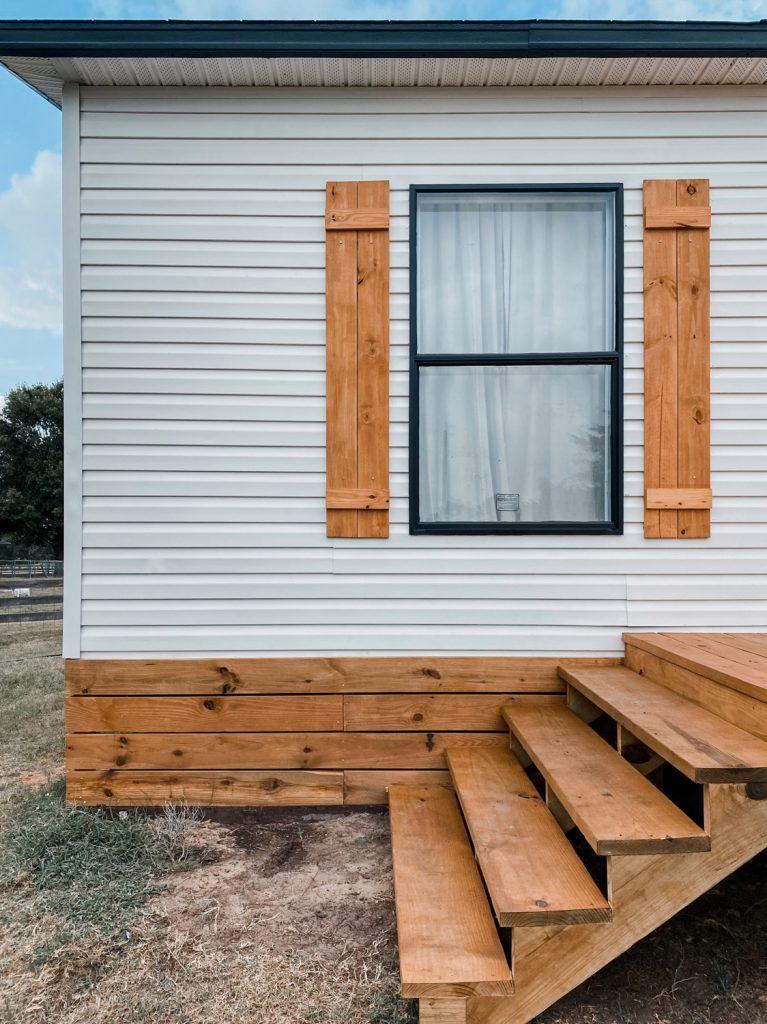
Using wood as a skirting material for mobile homes does not rank high in popularity among customers. There is no need to hire an outside company or contractor to prepare or install the wood. It is even possible to cut out the middle man entirely and complete the installation yourself.
However, there are drawbacks to using this material for skirting. The most common concern is with the durability of the wood as it is regularly exposed to the elements. Wood has a tendency to shrink and swell with changing temperature, which in turn compromises its structural integrity over time.
9. Other Skirting Materials
Besides these materials, there are a few other creative options available that are easy to install and also durable. For example, old barn tin and railroad ties are two materials that are cost-efficient and sturdy.
Utilizing different materials is a viable route to go if none of the traditional is to your liking. However, you should always consider the pros and cons of materials before deciding.

Calculating Costs
In order to have a clear idea of where money is being spent, drawing up a budget plan is a good idea. For mobile home skirting, this involves a number of calculations of the dimensions of the base and how high the panels should be.
First, a measure of the length and width of the house is added together. This measurement is then considered with the average height from the ground in mind to obtain the total square footage. The square foot measurement is simply how much paneling or material is needed to make up the skirting.
Whether the materials being used are sold on the basis of panels or in square feet, a better estimate is gathered. Beyond material costs, labor costs to install the skirting track must also be considered.
Regional differences in labor depend on the type of material being used and how much skirting is needed. Environmental factors such as slopes and ditches can also have an impact on how much material or expertise is required in order to complete the job.
If you are using a unique material that is not already suitable for installation, consider the various factors carefully. In particular, pay attention to material cost, energy efficiency, and curb appeal.

Improving Curb Appeal
Besides adding or replacing skirting to your mobile home, there are a few other methods to make your home look nicer. Although skirting is excellent in adding an extra dimension of protection, it is not always the best to look at, especially for a residential building.
As such, here are a few other options you can try to improve your mobile home’s look.
1. Doors And Windows
One of the simplest things you can do to spruce up the outside of your mobile home is to install new doors and windows. These are usually what the eye is drawn to first subconsciously—as such, having a nice set of windows and doors can really change the look and feel of the mobile home.
2. Installing Trim
Another quick and easy fix to touching up a mobile home is changing out the pre-installed trim with a higher-quality one. Usually, mobile homes have a basic trim kit around the edges that make them blend into the sea of various other mobile homes. Having a unique trim can set your home apart without spending a large budget.
Additionally, there are trim kits that can be bought and installed easily without the need for contractors. You can install the new trim yourself along with some crown molding if you so choose. These small additions add lots of character and personality to your mobile home, a great way to express yourself.
3. Upgrading The Roof
Admittedly, mobile homes are not always known for their quality roofing. Usually, they are thin and do not provide much in terms of insulation. Upgrading or installing a completely new roof can bring a new look as well as help in insulating the house better.
Of course, this renovation will require a large amount of expertise and effort, but the payoff is definitely worth the investment. A roof is the culmination of all the lower elements of the mobile home. As such, a great looking roof not only speaks to your personal taste but can save you a few bucks in heating and cooling the mobile home.

4. Adding A Basement
If a basement is within the realm of renovations you would like to have for your mobile home, it will require a bit of forethought. The mobile home must be placed on top of the basement foundation as it needs to remain solid despite having a recession underneath it.
Hiring professionals is always a good idea when working on large scale renovations such as this. After all, you don’t want to risk having the mobile home fall through the floor to the basement. Once the renovation is complete, your mobile home will begin feeling like a higher quality, solid house.
5. Installing Hardwood Flooring
Another renovation you can do to step up mobile home living quality is to install a hardwood floor. Contrary to popular belief, it is fully possible to have a hardwood floor even in a mobile home. So long as the foundation of the mobile home is solid enough to support the weight, you should have no problems.
Hardwood floors are great not just for their aesthetic value but also to help make the floors easier to clean and maintain. In a small living area like a mobile home, this becomes even more important as space is limited.
6. Install Additional Rooms
As a final suggestion, you can even install new additions to your mobile home that add more personality and functionality. These installations can be as simple as a porch in the front or a new bathroom to the side. Each room can then be given its own personality by decorating it.
However, if you want to go the extra mile, installing a large room with higher ceilings is sure to catch the eye. After all, how often does one see a mobile home with towering ceilings?

Conclusion
Hopefully, now you know a bit more about how to pick a suitable skirting for your mobile home. These simple yet effective additions can elevate the quality of your home and also allow for a sturdier base.
Mobile homes have become more complex over the years. Once the durability and safety of the skirting are taken care of, they can be adjusted to suit your personal tastes in color and texture.
Every renovation and addition to the mobile home is an investment that goes towards increasing the street’s value and the lifespan of your home. Mobile homes are not the most durable of residential places, but they can be made sturdier with this addition.
Making this investment is a great choice that has many benefits for mobile homes. What are you waiting for? Elevate your mobile home living today!
Related Links
37 Free DIY Tiny House Plans for a Happy & Peaceful Life In Nature
35+ Different Types of Houses for Your Future Home
Mansard roofs—also known as French or curb roofs—are a hallmark of classical European architecture, blending elegance with practicality. Characterized by their dual-slope design on all four sides, these roofs maximize upper-level space while adding distinct visual identity to both historical and modern structures. Originating in the 16th century and popularized in 17th-century France, the mansard roof remains a timeless choice for architects and designers looking to create dramatic rooflines, usable attic spaces, and vertically expressive facades. In this guide, we explore everything about mansard roofs—from structural features and historical roots to modern applications, design considerations, and roofing material options.

What is a Mansard Roof?
Definition of Mansard Roof
In technical terms, a Mansard roof can be described as a four-sided hip-style gambrel roof. A traditional gambrel roof consists of two sides, each with two slopes—the lower slope being significantly steeper than the upper. Meanwhile, a hip roof has gentle, uniform slopes on all four sides that extend downward to the walls, resembling a tent-like structure. When these two roofing principles are combined—featuring four sides with dual slopes, where the upper slope is shallow and the lower slope is steep—the result is the Mansard roof.
The upper slope of a Mansard roof is typically not visible from the ground due to its flat or shallow angle, while the steep lower slope maximizes usable space beneath the roofline. Dormer windows are often incorporated into the lower slope—similar to traditional gambrel roof architecture—creating habitable upper stories or attic areas, commonly referred to as garrets. Mansard roofs can vary in form, including straight, concave, or convex profiles, offering both structural flexibility and visual variety.
Although commonly associated with barn-style buildings, the Mansard roof design is not limited to rural architecture. In both Germany and France, the terms Mansard and gambrel are often used interchangeably, with the Mansard roof being widely recognized for its classical elegance and efficient space usage.
There are two primary design styles of Mansard roofs: the steep-sided style and the double-pitched style. The key distinction between the two lies in how they manage drainage. Steeper and longer slopes tend to offer more effective drainage of water and snow. The double-pitched version, while less aggressive in slope, still provides reliable drainage performance while maintaining a more subdued visual profile.
Traditionally, slate tiles and wooden shingles have been the materials of choice for Mansard roofs. These options appeal to those who prefer historic authenticity and textural richness. However, alternative materials such as zinc, copper shingles, and asphalt shingles are also used today to improve durability and reduce maintenance costs. For steep portions of the roof, metals like copper and zinc are especially effective. When using asphalt shingles, it's important to apply them in a consistent pattern to maintain water resistance and aesthetic cohesion.
Interestingly, the Mansard design isn’t limited to buildings alone. Its space-maximizing geometry has also been used in locomotive architecture, providing additional storage or headroom. Examples include the Australian Commonwealth Railways CL class and two Victorian Railways hopper wagons, both of which featured Mansard-style roof elements for practical utility.
For broader context and comparisons with other roof configurations, you can explore this complete guide to roof types, which highlights how Mansard roofs align with or differ from hip, gable, shed, and more.
History of the Mansard Roof
The Mansard roof was popularized by renowned French architect François Mansart (1598–1666), who employed this distinctive style extensively during the Baroque period (1600–1750). He applied it to numerous townhouses and châteaux, where its blend of structural practicality and ornamental grace quickly gained admiration. The term Mansard refers not only to the roof’s form—two slopes on all four sides with a steeper lower slope—but also to the inhabitable attic space beneath it.
However, François Mansart was not the first to conceive of this style. The original use is credited to Pierre Lescot (1510–1578), who implemented the design in 1550 during his work on the Louvre Museum in Paris—now the world’s largest art museum. The roof’s utility and elegance led to its resurgence during the Second Empire (1852–1870) under Napoleon III, when it became a dominant architectural element across Parisian boulevards during the city’s extensive reconstruction.
The style's popularity soon transcended France. It spread across England, Italy, and much of Europe, eventually reaching North America. In Canada and the United States, Mansard roofs were frequently used in Victorian-style mansions and urban townhomes, appreciated for their expandable attic spaces and ease of roof repair, especially in areas prone to hail damage.
Though less common in recent contemporary architecture, Mansard roofs are still found in select modern homes and commercial structures. Their enduring appeal lies in their ability to provide additional living space, thermal efficiency, and distinctive curb appeal—all within a relatively compact footprint. Moreover, the steep lower slope is advantageous in snow-prone climates, allowing snow to shed quickly and reducing structural load.
Mansard Roof Advantages
-
Extra Usable Space. The Mansard roof design offers exceptional flexibility when it comes to expanding upward. Its steep lower slopes and nearly flat upper slopes create room for full-height attics, additional stories, or spacious master suites, without extensive additional support or masonry. Compared to gable or hip roofs, a Mansard allows much more habitable space under the roofline.
-
Versatile in Rural and Urban Environments. Suitable for both countryside estates and tight urban lots, Mansard roofs are particularly advantageous in urban settings where expanding outward is not feasible. Their upward expansion capability makes them a smart architectural solution for space-constrained sites.
-
Increased Natural Light and Better Heat Distribution. Dormer windows, a signature feature of Mansard designs, span the length of the lower slope. These windows allow ample natural light to flood the interior while enhancing heat distribution throughout the upper floors, leading to improved comfort and energy efficiency.
-
Elegant Architectural Appeal. A Mansard roof adds a high-class, French-inspired aesthetic, rooted in Renaissance and Baroque architecture. Today’s builders incorporate modern insulation, lightweight materials, and durable finishes to retain this elegance while improving lifespan. Compared to older Mansard constructions, modern versions are more resistant to rust and structural degradation.
-
Long-Term Cost Savings. Though Mansard roofs have a higher upfront installation cost, they offer long-term savings by eliminating the need to build new structures for added space. Their superior heat distribution lowers energy bills, and the use of durable materials like metal shingles enhances lifespan. In essence, they provide greater value per square foot over time.
Mansard Roof Disadvantages
-
Potential Legal and Zoning Restrictions. In some regions, Mansard roofs are subject to special permitting, height restrictions, or square footage-based taxation, since they technically add to a building’s floor area. It’s essential to review local building codes before committing to this style. You can also compare this with other roof types to weigh your zoning limitations accordingly.
-
Higher Installation Costs and Time Investment. Due to the complex geometry and multiple slopes, Mansard roofs require skilled labor and extended construction timelines. This complexity leads to higher installation costs, especially if premium materials like metal shingles are used. While the investment pays off long term, it may be a barrier for budget-conscious homeowners.
-
Lower Resistance to Harsh Weather. The flatter upper slope makes Mansard roofs less ideal for heavy rainfall or snow-prone climates. Water and snow can accumulate, potentially causing leaks, dampness, or even structural damage if not maintained. Homeowners in such regions must remain vigilant during storms or heavy snowfall.
-
High Maintenance Requirements. Mansard roofs require frequent inspection and maintenance due to their layered structure and exposure. Debris often collects on the upper slope, increasing the risk of long-term water damage. The dormer windows, while visually appealing, are prone to leaks and structural issues if neglected, resulting in higher repair and energy costs over time.
The protruding design of the dormer windows causes more exposure to the environment, so they will often require maintenance. They are prone to develop structural problems or damage if neglected. This will add to increased maintenance costs and will become a burden on your energy costs as well if you have faulty dormer windows.

Mansard Roof vs Gambrel Roof

Many people confuse the mansard roof type with the gambrel roof type; however, these two roof types have distinctive features that you can recognize when you look closely. Gambrel roof architecture is a version of a gable roof, but the gambrel roof has two slopes on each side, rather than the one slope on a typical gable roof.
This style of roofing is not common on homes, but you can see it on barn houses and on Scandinavian design homes occasionally.
A mansard roof is a hipped roof, similar to the gambrel roof in that it has two angles on each side, but it has a roof on all four sides of the house, rather than just two, like a gambrel roof.
Types of Mansard Roofs

Four main types of mansard roof designs are commonly used:
- Straight mansard roof - This type of mansard roof has a nearly vertical lower slope and a smaller upper slope that may not be visible from ground level. Dormer windows are often added to provide natural light and ventilation to the upper floor.
- Convex mansard roof - With this style of mansard roof, the lower slope curves outward, resembling the shape and curvature of a bell. This design provides extra space in the attic rooms, which makes the interior space feel airier and cozier too.
- Concave mansard roof - This French Roof type features a flat upper slope and a steeper lower slope that curves inward, and thus it doesn't offer as much space as other mansard styles. Regardless, it has a rich architectural history and was commonly used in historic mansions and heritage buildings.
- S-shaped mansard roof: This roof style combines the convex and concave roof lines, starting with a curve inward and finishing with a curve outward.
Mansard Roofs Design Considerations
Types of shingles on the Mansard roof
Roofing materials are different from house to house, but mansard roofs require a specific type of roofing material due to their slope and exposure to harsh weather conditions. Waterproofing needs on this type of roof are extremely important, and a bit more difficult to create a tight seal between shingles on steep surfaces.
Traditionally, mansard roofs were covered with slate tiles, which could be precisely positioned by the roofer to facilitate water drainage and also provide an aesthetically pleasing look. Thanks to the advancement of manufacturing technology, in recent years, synthetic shingles or lightweight wooden options like cedar shakes have gained popularity thanks to their reduced weight and resistance to sliding down the roof over time.
Asphalt shingles or metal tiles are options as well, but although they may be cost-effective, some experts caution that asphalt shingles may be too heavy for a mansard roof's slope.
Climate
Mansard roofs are ideal for areas with cooler climates as they allow for extra insulation and boost extra protection against the elements, but are not ideal for extreme conditions with a lot of rainfall and snow, as the flat portion at the top can cause water infiltration issues.
The extra attic space and the slope of a mansard roof can help keep a building warm in the winter and cool in the summer.
Building Height
The height of the building is an important factor when considering a mansard roof. The roof’s steep pitch will require a taller building for it to look aesthetically pleasing, but it also maximizes the interior space of the building.
The extra height provides more usable space inside the building, as the slanted walls of the mansard roof provide additional storage and living space. This aspect is the driving factor behind the popularity of the mansard roof since its inception.
Cost
Mansard roofs are more expensive than traditional roofs due to the extra materials required for their construction, such as additional insulation. The labor costs associated with building a mansard roof can also be higher than those for a regular roof, but so is the interior space obtained. The extra height of the building necessary for a mansard roof will also add to the overall cost, but it maximizes the interior space without changing the building footprint.
Homes with Mansard Roofs
The mansard roof type stands out from all other roofing styles due to its regal beauty and unique aesthetics, and brings to the table the potential for more interior space.
We have gathered some stunning photos of mansard roofs, both outside and inside, to exemplify that mansard roofs have an elegant, familiar look worth considering, cast a glance.
Mansard Roof Exteriors
A mansard roof is easily identifiable due to its distinctive design and iconic look. The mansard-style roof has been around for centuries and is still popular today, appearing on both old and new buildings. Let's take a look at some examples.
Concave mansard roof

A large historic home built in red brick cladding stands tall. A front porch, bay windows, and a splendid blue metal roof add to the charismatic home above, showcasing its concave mansard roof. Several large windows bring natural light into the loft area of the concave French roof.
Straight mansard roof

Another red brick urban home, now with a straight mansard roof featuring grey shingles, the straight mansard roof featured on this modern townhouse has a small upper slope not visible from the street level. This mansard roof, one could argue, misses the historic charm but it's an extremely fitting roof style for a modern home, one that many architects are embracing today.
Convex mansard roof

A rounded mansard-style roof is an example of how architectural design changes the built environment, a simple curvature adds extra space in comparison with a straight roof, and is embellished greatly with roundness.
via civiconcepts
Modern mansard roofs

Copyright ©Rory Gardiner 2017
To say that mansard roofs are not used that much anymore is not an understatement, but the historic style still is extraordinarily present in heritage sites and is popular still in Europe, where square footage is more expensive and the cost of a single mansard might be lower than a regular roof.
In the example above, the straight mansard roof with gray metal slats allows the addition of rather large windows and creates linearity in the vertical plane, greatly emphasizing the windows below through the contrast of the metal sheets whilst complementing them with the window proportions.
Mansard Interiors
Mansard roofs have come into existence to boost interior spaces, and here they are today, doing just that. When you add a mansard roof, you encounter advantages and disadvantages,s but you certainly gain additional living space that can be anything, from storage to artist studios, you name it.
Mountain chalet with mansard roof

Copyright © Tomas Soucek
In this Chalet in Krkonoše designed by Znameni Ctyr Architekti, small bedrooms can be found on the higher levels, most of which are attics and mansard roofs. These bedrooms receive natural lighting through smaller windows in the gables and dormer windows, while technical windows in stone pedestal walls complete the overall look.
Office in an upper loft

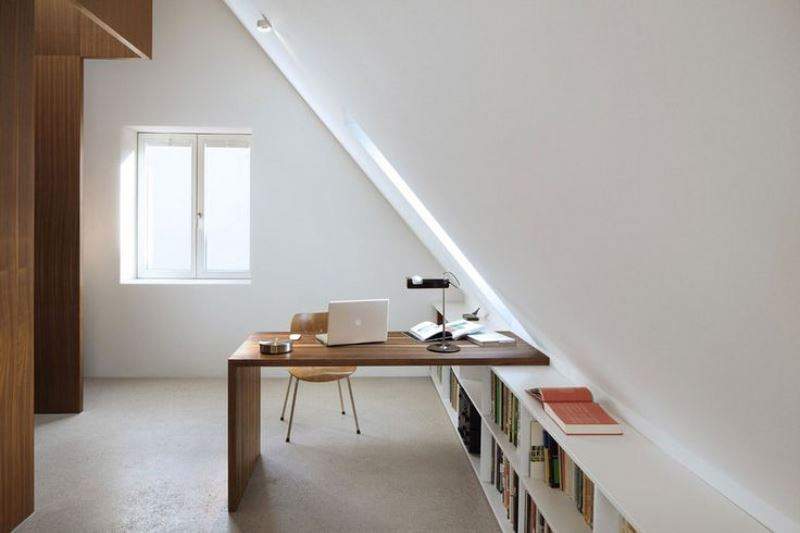
via InStyle
These days, a single mansard roof space can become an open space office, as people often take advantage of the extra square footage to create a sensible, secluded workspace. The flat roof can be fitted with large skylights, making this space incredibly bright and perfect for pretty much anything.
Benefits of Installing a Mansard Roof
The French roofs, or Curb roofs, are known for their energy efficiency, as they are designed to keep heat in during the winter and keep it out during the summer. This can help to reduce energy bills, as the roof will act as an additional insulator. Mansard roofs also have a longer lifespan than other roofing materials and are not as susceptible to damage from severe weather. A françois mansart is relatively easy to install as it does not require complicated framing or engineering and adds additional interior space with reduced costs.
Last but not least, thanks to its unique design, a mansard roof can add a sense of style and character, and charm to a home, and thus it is still a desirable choice for homeowners today, centuries later.
Mansard roofs were created and designed to maximize upper-story space while minimizing the amount of taxes paid due to the height of the building. Therefore, builders were able to add additional room without increasing the overall height of the building and thus, reduce the amount of taxes they had to pay. Mansard roofs provide extra loft space compared to hip or gable roof designs, making them an attractive option in terms of aesthetics. However, there are some drawbacks to consider before investing in a mansard roof, as with any other kind of roof the biggest of which is the added building complexity and the need for better waterproofing and overall superior, more expensive construction materials. Mansard roofs equipped to sustain snow and rain can last up to a century, whereas asphalt tends to last between 20 to 30 years. Copper is often used due to its resilience to damage caused by heavy snow and rainfall. The primary roofing material for most French roofs is sheet metal, either zinc or copper, when these materials are exposed to the elements they are weathered, zinc takes on a gray color and copper will become light green in hue. Yes, a mansard is a type of hipped roof, consisting of four sides with a gambrel–style design. No, a mansard roof is not flat but it does have a smaller slope of around 30 degrees, which cannot be seen from street level, thus appearing flat. The small portion at the top, the flatter portion at the top, which is not flat, is the reason why mansard roofs are not recommended in areas with a lot of snow. The mansard roof has two slopes to consider – the lower one with an angle of about 70 degrees, and the upper one with an angle ranging from 30 to 36 degrees. Gutters are the best way to control drainage from upper roofs, but not all mansard roofs were built with gutters at their base. Therefore, at times, we must find alternative methods to direct the water away from these roofs or spread it out over a larger area when working with a historic building equipped with a mansard-style roof.What is the Mansard Roof FAQ
What is the purpose of a mansard roof?Are mansard roofs good?What is the life expectancy of a mansard roof?Why are French mansard roofs gray?Is a mansard roof a hip roof?Is a mansard roof flat?What pitch is a mansard roof?Do mansard roofs need gutters?
Conclusion
As we come to a conclusion, it is pretty evident that the biggest advantage you get with Mansard Roofing is the flexibility of adding rooms in the future due to its distinctive design. Even after knowing all the disadvantages, many people in the modern world prefer Mansard roofs for their advantages and a traditional, classy look.
Undoubtedly, mansard roofs have stood the test of time and are now, centuries later, an architectural heritage.
Related Articles
23 Hip Roof Types & Styles for Your Future Home
Learn About the 20 Most Popular Roof Types for Your Future Home
6 Eco-Friendly Roofing Materials and Why You Need Them
How To Clean Gutter Guards Efficiently
Shur Flo Gutter Review | All You Need to Know
EasyOn Gutter Guard Review 101 | All You Need to Know
5 Best Foam Gutter Guards [Reviewed & Buyer’s Guide]
23 Extraordinary Beautiful Ways to Repurpose Rain Gutters in Your Household
The foundation supports an entire house, and it is essential that you use only the best concrete crack filler if you notice any cracks in it.

Cracks in foundation may appear for a number of reasons, and they will make your building look shabby. And, unless you treat the foundation problem on time, you might see bulging walls and in the worst-case scenario, the building might lose its structural integrity.
So, we suggest that you keep a regular check on the foundation wall and take note of any cracks, and use only the best crack filler to fix the issue. This will block any crawl space from water and won’t allow the concrete to contract or expand.
However, that’s not it! There are a range of other things that you can do to fix cracks in a foundation wall and we will tell you all about them.
So, let’s take a look!
Things To Do To Fix Crack In Foundation Wall

1. Inspecting Your Foundation Cracks
Can old concrete be resurfaced? We get this question a lot and before we give an answer, we will take you through the reasons behind it.
There are plenty of reasons behind a cracked foundation wall. And, to fix it, you need to find out why it is appearing in the first place.
When there are instances of too much water, it starts to infiltrate the foundation walls. This phenomenon makes the concrete walls contract and expand when there’s a change in temperature. Alternatively, you might be in a situation where you find that the soil beside the foundation has settled. Together, factors like these weaken the concrete, leading to crack formation.
And, once the cracks start appearing, there is no stopping. Over time they continue to grow, and if you leave them for too long, they might become a severe problem. The reason behind a foundation crack can be easily identified if you take a close look at it. If you see horizontal cracks, they are most likely caused by settling soil.
Also, you might be in a situation where you find too much moisture around the foundation. This leads to water infiltrating the concrete, seeping through it to the other side of the basement floors. And, in the worst-case scenario, the water may start to create pressure on the foundation walls, resulting in vertical foundation cracks.
But, rest assured, cracks caused by these factors are mostly hairline cracks and won’t cause problems if treated on time.
2. Preparations For Repair
Before you learn how to repair foundation cracks, it is crucial to get yourself acquainted with how to prepare for the process.
Get your hands on a flathead screwdriver or a stiff wire brush to clear off any loose material and broken bits of concrete around the crack. In order to ensure that the adhesive works properly, use a chisel and hammer to broaden the crack and cut under the cracked edges. This will provide more area for the patch to stick when the adhesive is applied.
Once you are done with these steps, get a garden hose and clean the crack with water.
3. Fixing Hairline Cracks
Unlike fixing structural cracks, hairline ones are pretty easy to mend. If you notice one, go to the local supermarket and get your hands on some patching compound and vinyl concrete. To ensure that the bond between the patching material and the old surface is top-notch, you can consider applying concrete bonding adhesive.
After that, you can use an old paintbrush and apply the liquid to the cracks and around the edges. Next, you can use a putty knife and apply the patching compound in layers. And, while you are at it, do not forget to push the first layer into the cracks. For a long-lasting hold, we recommend that you allow drying time between applying each layer.
If you are not looking to follow such a lengthy process, you can consider going for a quick fix. You can make a cement mixture for fixing foundation cracks. In case you notice that the crack you are trying to fix is wide, consider adding some sand to the cement mixture. For that, you will need to mix one part of cement with three parts of sand and add enough water to make a thick paste.
In another container, mix cement and water to make a runny cement paint that you will have to use like a primer. Once the primer has dried off, you will have to apply the mixture properly into the cracked foundation. For this, it is best to use a putty knife. Next, you will require a flat-headed tool to flatten the mixture.
Ensure that you leave the patch undisturbed for an hour before blending it correctly with the surrounding area with the help of a float. However, if you are on the lookout for quicker fixes, consider using an epoxy seal instead.
4. Repairing Larger Cracks
Not all cracks are of the hairline width, and some may even be wider. And, to fix a crack like that, you will need to be equipped with caulking materials like silicone, polyurethane, or latex concrete caulk. It is best to use a caulking gun to fill the cracks with it.
This method is very effective as it fills up the entire crack and does not allow the concrete to expand or contract due to changes in weather. After you are done applying, let it rest for a while and dry up. If you notice that the caulk has contracted and has not filled up the entire crack, you will need to reapply.
A structural engineer would attest to the fact that this method is extremely suitable for treating both horizontal and vertical cracks.
That said, while inspecting a crack, you might notice that it is wider than ½ inch. In such cases, you will need to use foam backer rods in addition to the concrete caulk. A foaming rod will act as a great support to the patch and will prevent it from sinking into the crack with time.
However, keep in mind that it should be placed ¼ inches below the surface. To fix the rod in place, you will have to use a putty knife to insert it into the crack. After you are sure that the foam rods are placed correctly, you can fill up the crack with caulk or apply a vinyl patching.
How To Fix Crack In Foundation Wall Frequently Asked Questions ?
How to use hydraulic cement to fix foundation cracks?
Using hydraulic cement is a great way to fix shrinkage cracks and stair step cracks. To use this repair method, you will first need to get your hands on a packet of hydraulic cement. Begin by mixing the cement with water in a container to make a gooey paste.
Once you are done preparing the mix, proceed to dampen the cracks using a spray bottle. After that, swiftly insert the mixture into the cracks using a putty knife. Now that the major work is completed, you will have to let the layer dry before applying a pure layer of cement over the crack.
If you use hydraulic cement to fix the crack, the structural integrity of the foundation wall will stay intact.
Is sealing foundation walls necessary?
Filling the cracks with cement mixture and using patches won’t be enough unless you apply a proper sealant. For this, you can use a waterproof masonry sealer which will last for a long time.
A sealant is very crucial to prevent water from infiltrating the concrete and putting additional pressure on it. To apply the sealant easily, you can use a paintbrush and apply the coating directly over the dried patch. Once the first coat has dried, you can use a larger brush or consider using a masonry roller to apply another layer.
A lot of times, people wonder why cement cracks even after applying fillers. And, in most cases, this happens when they do not apply the sealant correctly or when the sealant is too runny.
Experts suggest that applying sealant on the entire surface is a pretty good idea as well.

How To Fix Crack In Foundation Wall Final Words
It is important to keep in mind that to prevent structural damage, you should try to prevent water infiltration to the best of your capabilities. To avoid foundation problems, also keep a regular check on the downspouts and gutters to see if they are functioning optimally.
Be it a horizontal crack or a vertical one, you must attend to it as soon as you can to prevent it from becoming a major problem. Small cracks may seem harmless in the beginning, but when left unattended, they soon expand in size.
We hope that the suggestions we have talked about in this guide come to help if your foundation walls develop cracks. And, if you liked reading this guide, do not forget to keep a watch on this space for more such reads.
Fixing cracks in foundation wall is not an easy job; likewise, figuring new clay sculpting ideas is not easy as well. Checkout our next article on finding clay sculpting ideas to enhance your DIY knowledge pool.
Until next time, take care!

A walk-in closet can a unique flair to your home. If you’re tired of using small, inaccessible closets to store your clothing, it’s time to consider a walk-in closet instead. But what does something like this cost? Though you may not think so: A walk-in closet doesn’t have to break the bank, as there are many varieties and sizes to choose from that vary in the price range. Sure, they can get expensive- but so can any home improvement.
In this article, we’ll discuss a few of the elements you’ll need to consider when pricing-out your new walk-in closet.
How Much Does A Walk-In Closet Cost?

You’ll Need Someone To Build It
If you’re not a contractor yourself, it will likely mean you’re going to need to hire someone to build your walk-in closet for you. A private contractor may give you a better deal than a construction company, but it’s important to research both for more than just price.
With either option, you’ll want to be sure the company or individual has a reputation for good, quality service. A walk-in closet probably means getting rid of parts of the wall, a job which, if done incorrectly, can leave your wall looking uneven or even damaged. In the same light, you’ll want to make sure that your contractor or builder understands the blueprint of your home.
Depending on the closet size, you may have to even build completely new walls to accommodate for the new space you’re building into the closet. Don’t trust something of this magnitude to just anyone. After all, your walls are a large part of what keeps your house standing. Be sure your contractor is professional and has reviews or testimonials you can read. A general contractor will probably cost around just under $1,000 to complete the work.

Size Determines Cost
A normal reach-in closet is around eight foot high by three or four foot wide. A typical walk-in closet can be anywhere from six foot by six foot to even larger. Keep in mind that the size of your closet will help determine the cost. If you’re looking for a closet that’s 12 ft long, be prepared to pay the cost.
A larger closet will require more materials and labour, and therefore will be more costly. It’s important to consider the size you truly need before making a decision. Six by six foot is actually quite a lot of space, but if you have a large wardrobe or want to save space for future additions, you may need more than the typical size. Your construction company or contractor should be able to guide you to the best option for your home while keeping your desires and blueprint in mind.
A typical walk-in closet on average will cost you right around $1,500. We’re talking the standard six by six-foot space, with materials and labour included. If you want any extras, such as special shelving, styling, or any other customization, the price goes up from there. Remember that the more you customize something, the more it will cost. Some designs may even knock you $5,000.

Design
Before you actually build your walk-in closet, you’ll want to consider different designs. You can create these yourself, or consult with a walk in closet design company to generate some great ideas. There are thousands of variations on the traditional walk-in closet to choose from. More importantly, this company is known for closet design that wows.
When you’re designing the closet, be sure to consider how much space you’ll actually need for your clothes and extras and whether or not someone else will be using the closet as well. A good strategy is to take inventory of everything you want to put in the closet. If you’re sharing it with a spouse or partner, you’ll need more space since you’ll have double the clothing.
Designers will usually offer a free consultation on your closet, so you can get a good idea of what you’ll need and the ball-park cost for the entire project. Be sure to use a trusted design company when you’re designing your walk-in closet and get multiple quotes. Much like any big purchase, you want to shop around and get quotes to ensure you’re getting the best price for the work.

Materials Are Costly
Buying the materials for your walk-in closet can be a costly endeavour. You will almost always need to build a frame from wood and use drywall to cover the frame. The cost of both will vary from company to company, but you should generally find that wood has similar cost across the board, depending on the type of wood you use. Pine is generally inexpensive, whereas harder woods such as white or red oak are more costly.
In addition to the frame, you’ll want to account for any shelving or racks, the type of flooring you want inside the closet (carpet is usually the cheapest material to work with). Metal is usually cheaper than wood for things like racks and wall studs, so you should consider this material as a cost-effective alternative where you can (keeping in mind which parts of the closet will be visible to you).
Consider the storage you want in your closet and whether or not you want drawers, shelves, racks, or other storage options. What you choose here will depend on your storage needs and budget. An intricate shelving system will probably cost more than a simple rack and a single shelf for shoes.
Check Your City’s Codes
Depending on your city’s building codes, you may actually need to obtain a building permit to begin construction of a walk-closet in your home. It’s important to check this before you begin construction, as you don’t want to incur any extra fees for building illegally. These will make the original cost of that walk-in closet rise dramatically, and put a halt to building altogether. This information can be easily found in your state’s revised code- or with a simple call to the building and zoning department. Either way, a quick Google search should provide you with all the information you need.
The Take-Away
Walk-in closets can add value and a unique feature to your home. They’re spacious, typically inexpensive, and provide the one thing you can never have enough of in your home: storage space. To add to that, walk-in closets can do a lot for your home value. Not only are walk-in closet more appealing to buyers, but they’re also typically on the list home improvements classified as ‘luxury’ on the MLS listing.
Picking the right contractor, design company, and materials can mean the difference between an affordable and quality closet doors and one that breaks the bank. A little research can go a long way in these situations, so be sure to investigate the contractor’s reputation before hiring, and decide beforehand what you’ll need in the closet. Use metal over wood where you can, and consider carpet instead of extending a wood or tile floor into the walk-in closet.
Are you considering building a walk-in closet? What are your concerns? Likewise, if you’ve already built a walk-in closet in your home- Leave a comment. Your experience may help a new builder.
As a homeowner, maintaining and improving your property is a significant responsibility. Each area of your home serves a unique purpose and has specific requirements for maintenance and repair. Accordingly, attending to your home's maintenance needs is essential in preventing future issues and ensuring the longevity of your investment.

While it's common for homeowners to focus on upgrading and enhancing living spaces like the living room, bedroom, kitchen, and bathroom, the basement often gets overlooked. However, the basement is an equally important area that deserves attention. To transform your basement into a valuable and functional space, you should address various necessary tasks, such as waterproofing, ventilation, and soundproofing. By evaluating the cost of basement waterproofing, and other important improvements, you can make informed decisions to create a comfortable and usable basement environment.
Basements hold great potential, and with proper care and attention to these vital aspects, you can unlock their true value and utility within your home.
Basement Waterproofing Cost
How Important Is My Basement?
During home planning and construction, opting for a basement is advantageous due to its features and purposes. There are different ways to use your basement and here are some excellent ideas:
- Storage room for equipment rarely used objects, and other miscellaneous items
- Additional living room or bedroom
- Recreational spaces like a home theater, library, bar, children's playroom, gym, and arcade room
- Pantry and wine cellar
You can transform your basement into anything with proper planning and execution. Having a basement is beneficial for the household since it's not like any other part of your home. A basement is located below the ground level. Therefore, a basement can serve as private accommodation for your guests or a place where you can be alone. The basement can increase the value of your property since not all homes have a basement.
However, to protect your home's entire structure, your basement should have a strong foundation. While you're enjoying your basement amenities, you may not notice the structural, cosmetic, and systematic issues building up.
Your basement is the most vulnerable part of your home when it comes to flooding. When neglected, flooding can lead to worse problems that can cost you a fortune. Rather than spending on these repairs and remodeling, act immediately. Install basement waterproofing with the top-rated professionals in your locality.
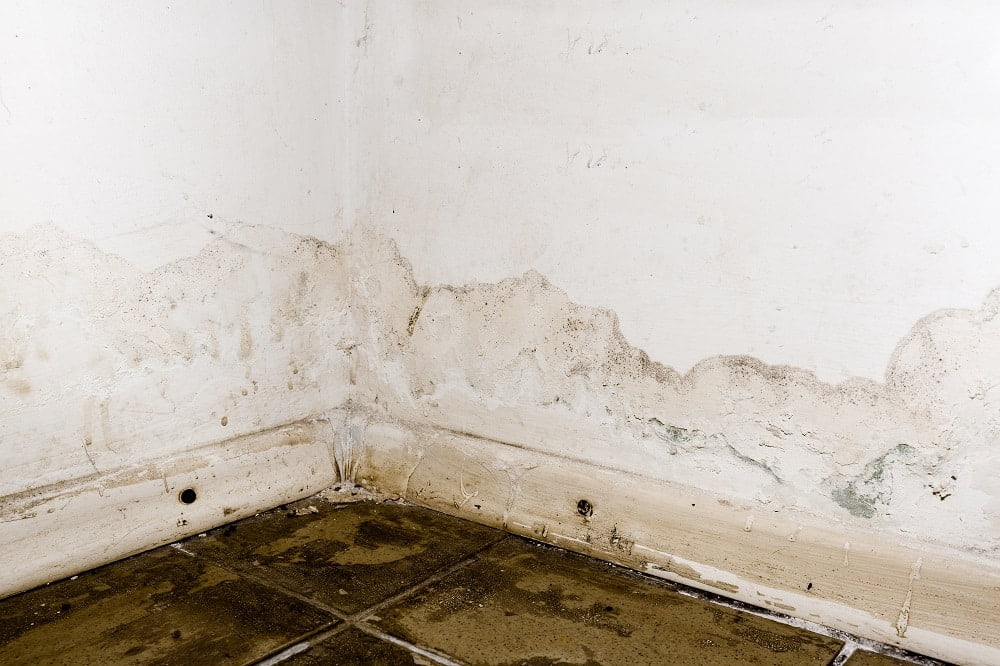
What Is Basement Waterproofing?
Underground spaces naturally have high humidity levels. When groundwater surrounding your basement evaporates, humidity increases and starts crawling into your basement. Moreover, humidity can also be triggered by water seeping into your foundation walls. But most importantly, humidity rises in your basement due to leaks on your basement floors and walls and because of puddles of water. These can happen even when it's not raining.
The healthy and optimal humidity range that makes you comfortable inside your basement is 40% to 60%. Also, 80% is considered extreme humidity. To control moisture in your basement, you can try using a dehumidifier or installing a ventilation system. However, these are only temporary fixes and can’t help during flooding and rainy seasons. This is where basement waterproofing comes into the picture.
Basement waterproofing encompasses a plethora of methods to protect your basement from the penetration of mold, humidity, and floodwater. Since basement waterproofing is a significant alteration in your property's structure, you must plan this carefully. You must prepare a budget for the project.
Options for Waterproofing Your Basement
Before spending your money on basement waterproofing, you need to understand the available options. Take note that there are various basement waterproofing solutions, so your expenses can vary significantly.
Choosing the right basement waterproofing solution isn't based on your preference. It primarily depends on the type and severity of damage to the basement's structure. Also, the water source is a huge factor in identifying which approach to utilize.
Not all basements may require a complete waterproofing solution. This is when you can opt for damp proofing instead. Look at the differences between the two:
- Dampproofing is ideal for homes located in high-humidity areas that have less rainfall and pooling of water. This method involves excavating the dirt surrounding the foundation to make way for a damp-proof coating. The cost ranges from USD$3 to USD$6 per square foot.
- If you experience flooding and water pooling frequently, you shouldn't hesitate to have waterproofing in your basement. Compared to damp proofing, waterproofing stops moisture and flooding. Also, waterproofing is recommended for areas with a higher water table. Different waterproofing solutions, which will be elaborated later, range from USD$5 to USD$9 for every square foot.
There are two basic waterproofing methods that professionals install on a property's basement: waterproofing from the outside or inside.
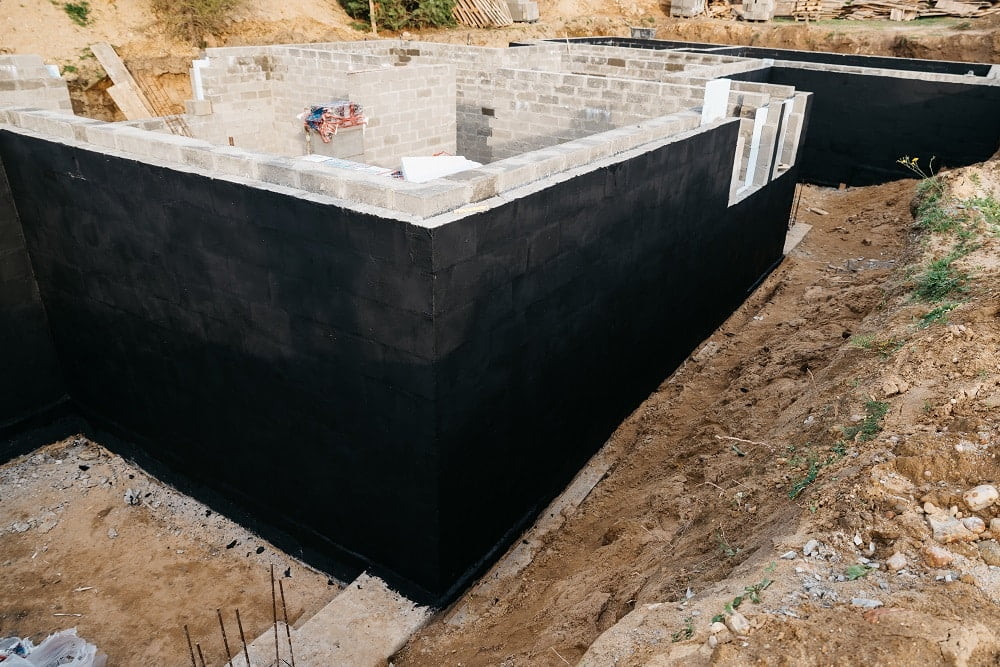
Exterior Basement Waterproofing
As the name implies, exterior basement waterproofing installs waterproofing methods externally. Usually, exterior waterproofing is installed while the basement is under construction. This waterproofing method is extensive and requires more workforce and materials. Therefore, it’s costly.
Waterproofing from the outside utilizes coating materials such as membranes and polymers to cover the basement’s exterior walls and joints. In this way, your basement is protected from structural damage that may occur over time. This method can’t be used if your basement is already built because the polymer will only disrupt and clog external drains.
However, you can execute exterior basement waterproofing even after the basement has been built. There are five lines of defense for this.
- An exterior moisture barrier and dimple board are installed on the basement wall for transporting water into the drainage system.
- A moisture membrane is installed. It protects the structure from crawling water.
- Instead of dirt, gravel is filled within the surrounding area to minimize hydrostatic pressure. This also helps in carrying water into the footer drain.
- To safely discharge water away from your basement foundation, the footer drain is established outside your home
- A sump pump installation may or may not be necessary.
The costs of exterior basement waterproofing differ extensively due to numerous factors. In the United States, the national average costs for an exterior basement waterproofing project ranges from USD$8,700 to USD$14,500. Depending on your location, accessibility, landscaping, digging requirements, and many other factors, it can reach up to USD$80,000.
Exterior Basement Sealing
Additionally, sealing your basement is advantageous for blocking seeping water and supporting your main waterproofing system. Since the basement walls and foundation sides have direct contact with the surrounding soil filled with water, you need to protect them from water and ensure that no structural damage occurs. While water can't seep through concrete, it can absorb moisture leading to a variety of problems like mold growth.
On average, sealing a basement with different materials (to be discussed further) varies from USD$1,500 to USD$4,250. If excavation is required, the costs can be higher.
Exterior basement sealing covers the following methods and materials. The methods can be used on masonry and concrete walls without any backfill or excavation:
Liquid membrane waterproofing
Think of this membrane as a paint that’ll be applied to the basement walls. It can either be an elastomeric or a crystalline membrane. Every coat costs USD$3 to USD$5 per square foot, and the optimal number of coats is two to three coats. You must set aside USD$9 to USD$15 for every square foot.
You can apply the liquid membranes yourself, but you won’t be able to apply uniform coats. Hire an application expert to ensure the best results.
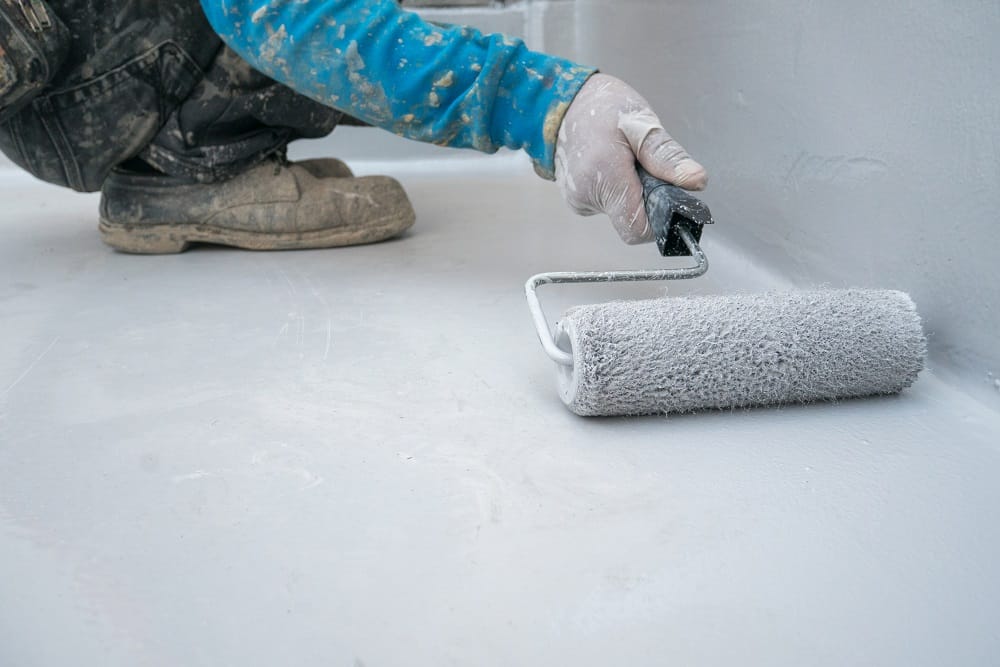
Sheet membrane waterproofing
Another membrane waterproofing method utilizes sheet membranes: tied around the footing, attached to the perimeter drain system, applied to basement walls, or wrapped around the concrete foundation footing. They cost USD$3 to USD$6.5 per square foot.
Aside from their waterproofing abilities, sheet membranes are reliable due to the following reasons:
-
- Withstands high water pressure, especially during flooding
- Deals with unequal static forces
- Endures groundwater with chemicals like chlorides and sulfates
- Resists dynamic forces during an earthquake
Cementitious waterproofing
For only USD$5 per square foot, you can have cementitious waterproofing inclusive of the cement material and labor cost. Instead of a membrane, this method uses a cement solution that can be painted on surfaces that require sealing. They're thick and durable, easy to apply, and provide a smooth finish.
But the cementitious solution isn't flexible enough during extreme force involving joint movements. It can only withstand water exposure. If your area is prone to earthquakes or has frequent underground activity, you shouldn’t go for this method.
On a good note, a gallon of the cement solution only costs around $36. This volume is good for 150 square feet. You can opt for purchasing an acrylic additive for increased durability.
Bentonite clay waterproofing
Lastly, bentonite clay is also a popular material for waterproofing because it blocks crawling water and absorbs moisture. As it soaks up moisture, it expands and fills cracks and spaces between walls. Material and labor costs total only USD$3.5 for every square foot.
Nonetheless, bentonite clay isn't ideal as a long-lasting solution because it can clog your outdoor drains, especially when it reaches its maximum expansion. From time to time, you need to check if the seal has formed correctly.

Interior Water Drainage Installation
Being the most effective waterproofing approach, an interior water drainage system deals with hydrostatic pressure building up around the basement walls and floors. This pressure causes groundwater to force its way inside your basement. Installing a drainage system is an excellent idea to trap and dispose of water properly, either internally or externally. However, an exterior drainage system is more inconvenient because the drain lines installed on the outside can accumulate soil, silt, and roots resulting in clogging.
Thus, interior water drainage is a safer option. By installing the drainage system on the inside, water is trapped on its usual entry point, the joint between the floors and walls. Moreover, waterproofing from the inside is more convenient than that from the outside.
A complete interior water drainage job in your basement can cost as low as USD$2,000. This is four to seven times cheaper than installing an exterior drainage system starting at USD$8,000. Depending on your basement requirements and the entire property layout, waterproofing may require a combination of interior and exterior methods.
Here are some other ways of waterproofing your basement from the inside:
Basement Waterproofing Painting
To strengthen your basement waterproofing, you can apply waterproof paint on the inside walls after exterior waterproofing. It's a cheap and effective method but will only work if you have strong protection from the outside. It can be a DIY (do it yourself) project or done by a professional. Surprisingly, it costs only USD$0.6 to USD$0.8 per square foot. The waterproof paint, however, can cost USD$195 for five gallons. The amount of paint you'll need will primarily depend on the surface dimensions and porosity of the walls.
Epoxy Crack Injection Repair
If you have existing cracks in your basement after exterior waterproofing, you can choose the epoxy crack injection method. Injecting an epoxy material in the wall crevices can restore the concrete's pre-cracking condition without magnifying its strength. For every crack as wide as 3/4 inches, the epoxy injection may cost USD$200 to USD$500.
If your area often experiences freezing and thawing, you'll need additional support by reinforcements on the exterior wall foundation. Epoxy injection is beneficial in drier climates since colder climates produce more cracking on walls leading to more epoxy injection repairs.
Crawl Space Encapsulation
Most homes with basements have a crawl space, the hollow area under the first floor. Air can flow into these narrow spaces. So, you should always keep them dry and clean to avoid the growth of mold and bacteria. Crawl space encapsulation is your best solution to prevent indoor air moisture. This method installs a strong polyethylene vapor barrier to cover the crawl space completely.
However, encapsulating the crawl space is the most expensive option discussed so far. The cost ranges from USD$3,000 to USD$8,000. The vapor barrier installation has additional costs of USD$0.50 per foot. Despite its expensive costs, the encapsulation can last for 20 years if it's installed professionally.
Key Takeaways
Maintaining a clean and healthy basement isn't easy. The basement is more humid than other parts of your home and the humidity can lead to numerous problems. When poorly maintained, there can be moisture buildup, mold and bacteria growth, water pooling, flooding, and the like.
Through a combination of the basement waterproofing methods discussed above, you can ensure that your basement remains dry and strong. If you're going to work on your basement, the two most important takeaways to jot down are: set aside a lot of money for material and labor costs and hire the best waterproofing professional. This article will give you a concrete idea of how much to spend on your basement waterproofing.

Related Articles
43 Insanely Cool Basement Bar Ideas for Your Home
8 Best Basement Cement Floor Paints
11 Best Paint For Concrete Walls In Basements
Hip roofs have been a popular choice from ancient times and continue to be a hit design today. But did you know there are multiple varieties of it?

Every house is not the same and has different requirements. With the different kinds of hip roofs available, you will find simple and complex options. These have been prevalent since the 18th century from the early-Georgian era. The French then took up this style, and you will find it in their colonial architecture.
This kind of roof is not only pleasing to the eye but helps keep the houses safe from storms and hurricanes. Their slanted surfaces prevent water from accumulating and make sure that most of it slides down. That is why these types of roof structures are very commonly used in hilly areas.
Moving on, we will begin with the 5 hip roof variants in the next section. It will be followed by 18 examples of the top styles that you can try out.
So, without further ado, let’s dive in!
Types of Hip Roofs And Styles
-
Simple Hip Roof
You will find simple hip roofs in most houses, and it is indeed the most common variant. There is a ridge in the center, and that creates 2 triangles on the 2 sides. The other 2 sides form polygons, which complete the structure. We found this to have a symmetrical design with the slant being the same on all sides. The triangular sides are also known as hip ends.
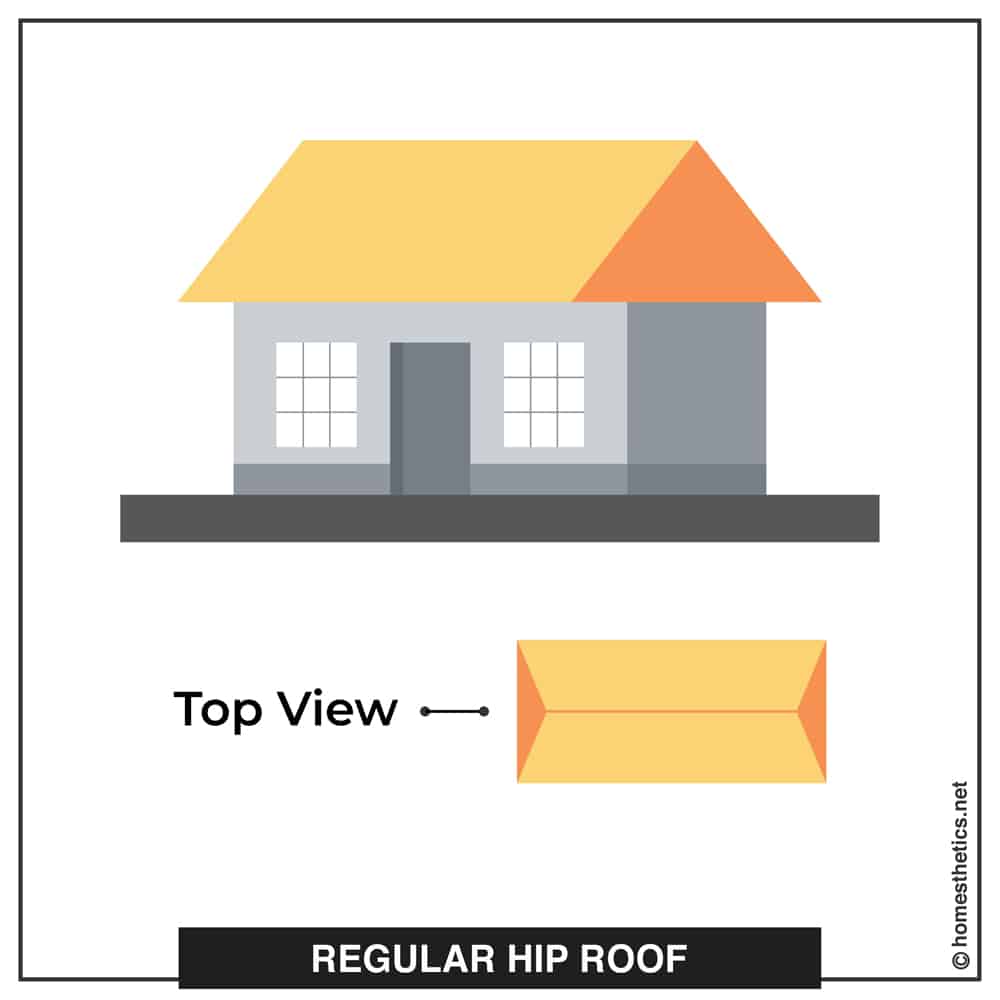
This type of roof is generally used if you do not want a lot of attic space. Since both the sides drop immediately from its center, there is minimal space in the attic, and you might not be able to store many things in it.
One disadvantage with these types of roofs is that they are prone to leakage. We would suggest that you cover up the ceiling of your attic with a protective water-resistant covering if the area is very prone to rainfall.
-
Pyramid Structure
A pyramid hip roof is one that has equal triangles on all sides. There are 4 triangles that are created, and they all meet at one point which is the center. The slant on all of its slides is the same, and its top juts upwards. In most cases, the pyramid structure is placed on a square walled house, and the peak rises just in its center.
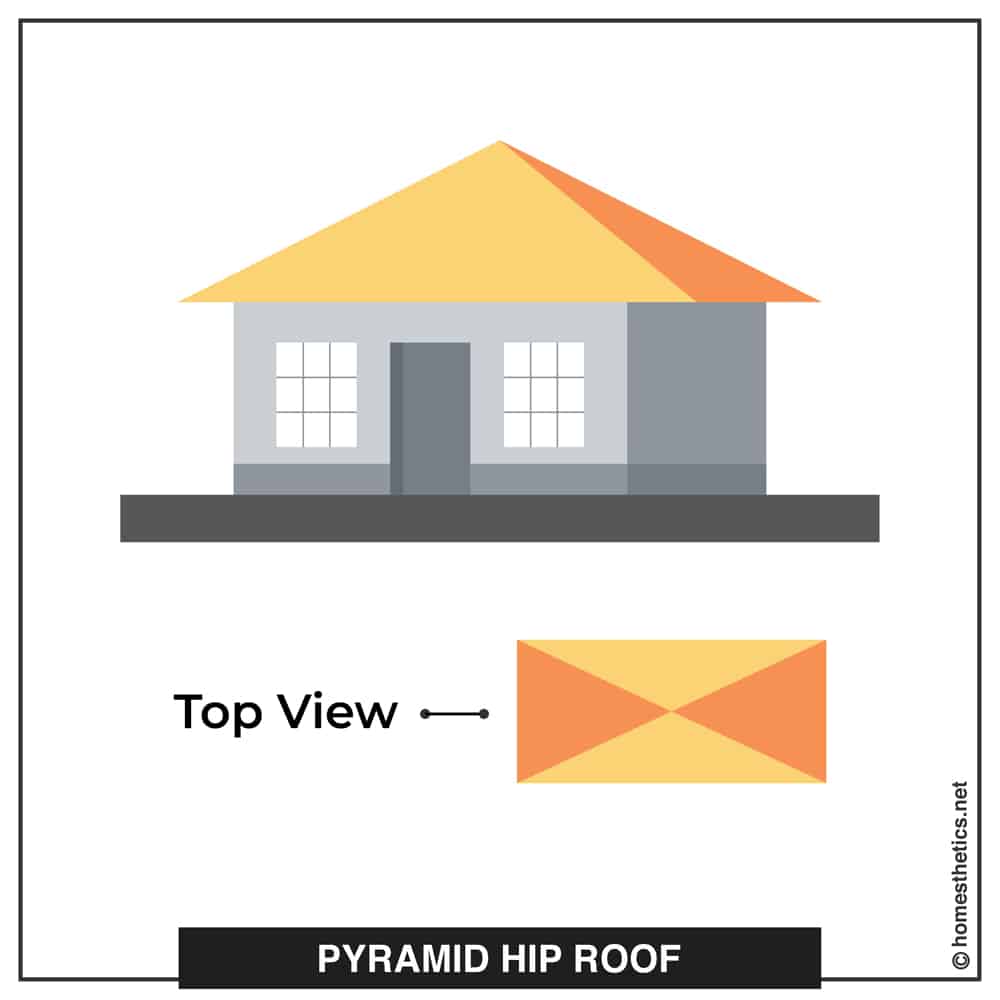
You will find these roofs generally over gazebos and pavilions, and they work well in preventing leakage and mold growth. This is because there is no place for the water or snow to accumulate on top of the structure. Anything that falls on the roof will slide off, thanks to the gradient slopes on all sides. This makes it perfect for houses in rain-prone areas and in the mountains.
-
Half Hip Roof
Half-hip roofs are one of the most stable forms when compared to their peers. These have the ability to deal with high wind and cyclone-like conditions while keeping the concrete or wooden structure below it safe.
Also known as a clipped gable roof, these consist of a gable with its upper part being replaced by a small hip. These work best with a gutter that you can attach on the sides. The gutter will go around the house and help remove excess water from its roof very quickly during heavy showers.
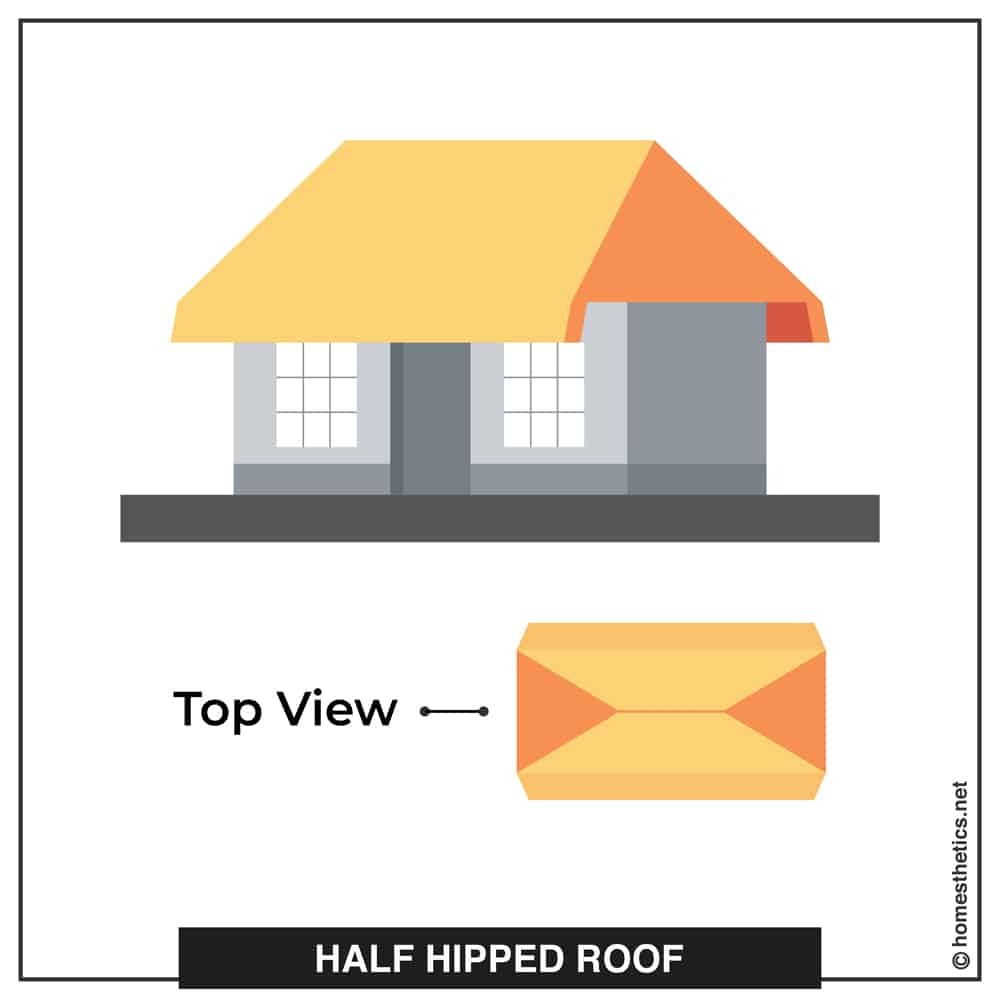
This kind of structure contains the benefits of both a gabled and a hip roof. They are popular in Europe and became a part of houses in Germany, Austria, Slovenia, and Denmark. A part of southeast England also sees this structure a lot.
-
Hip And Valley Roof
If you are aiming for the traditional look, hip, and valley structures may be precisely what you want. Many contractors recommend this kind of structure if you live in areas with heavy rainfall or in those that are prone to storms. They can stand against tornados, too, and will keep you protected.
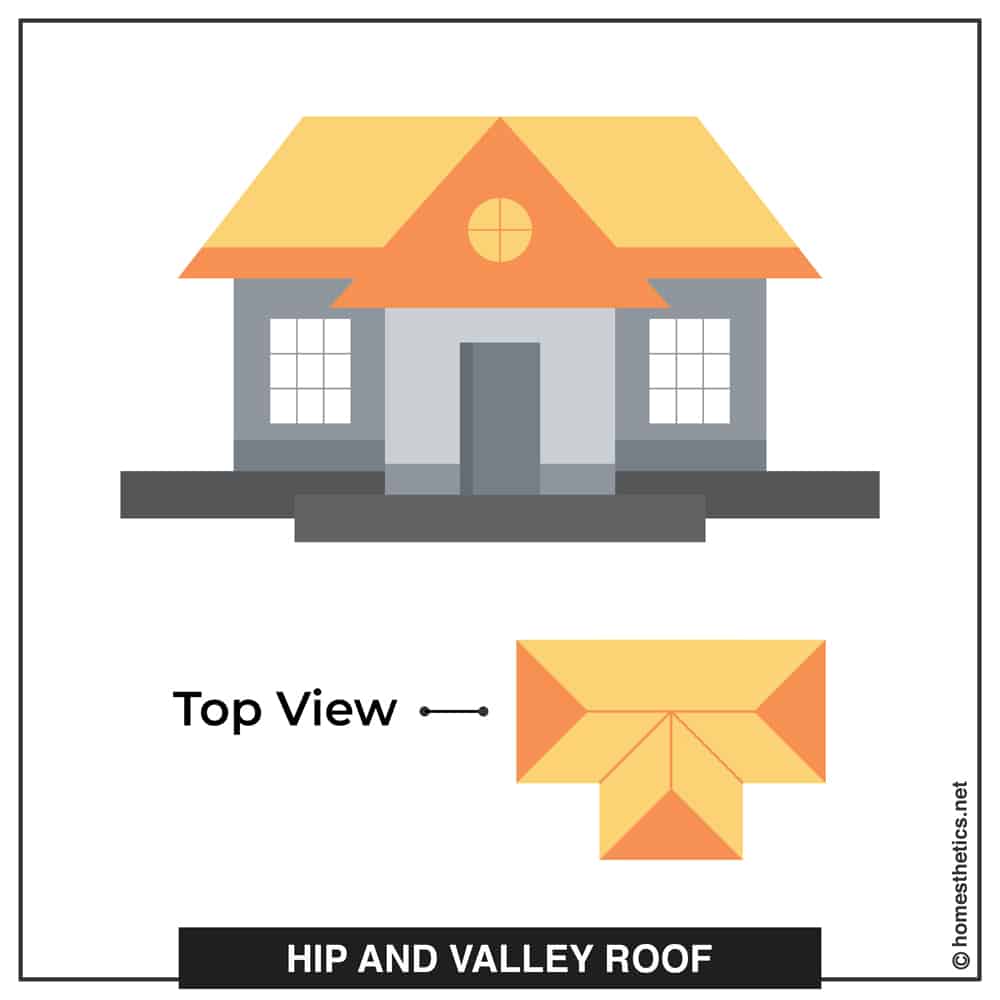
Another great benefit is that they allow for an attic big enough to fit in a lot of items. If you have great storage needs or want a skylight, this will be a great choice.
But yes, the problem that occurs is with leakage. Fully adhered underlayments are problematic as they can cause massive leakage. Make sure that you add leaks to the roof insurance plan to stay fully secured.
-
Cross-Hip Roof
Up next is another well-known type of structure called the cross-hip roof. This has gentle slopes on its sides, and the hip roofs form an ‘L’ structure. There are 2 hip roofs involved in this, which are placed perpendicularly to ensure that the building can stand against high winds. A gutter can be placed around the house, and the seam on top extends to form a valley.
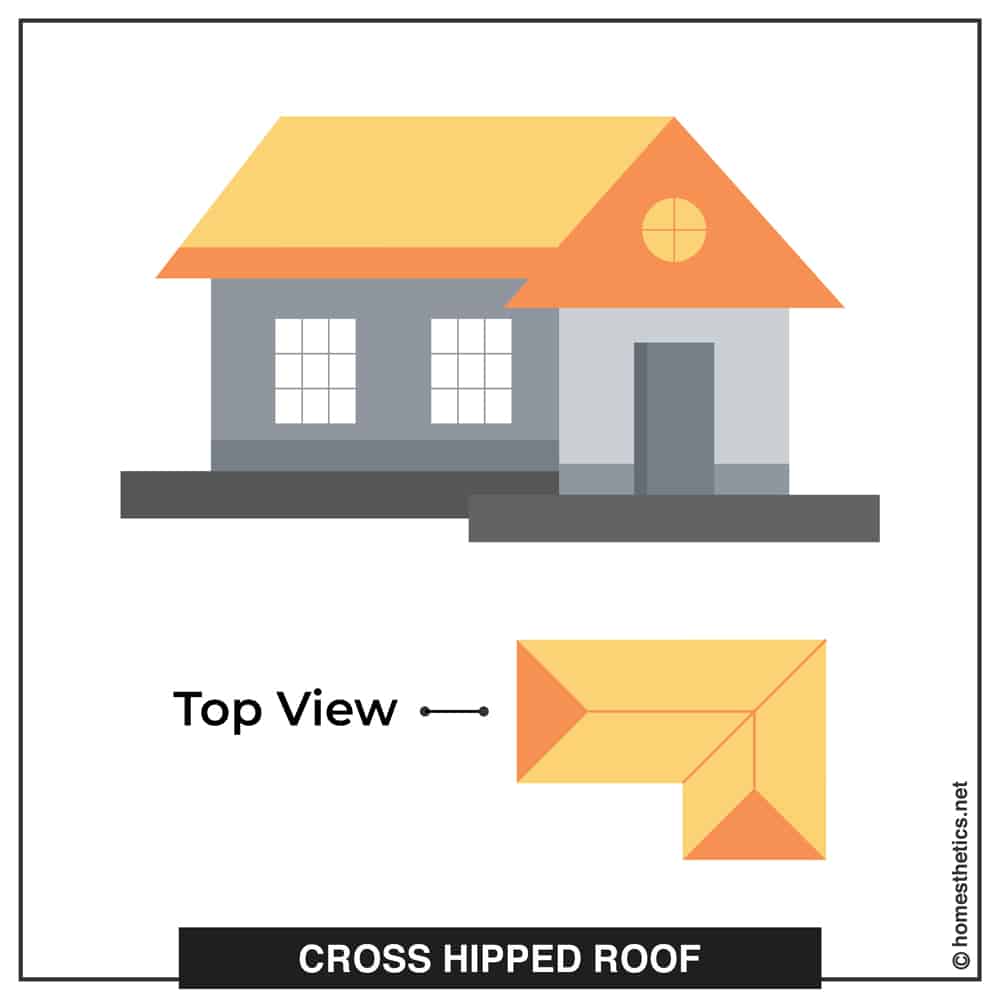
These were very popular, especially during the mid-1800s when ranch-style structures and homes were trending.
But the only issue here with this kind of roof is that the attic space is reduced. Since the slant of the slope is inwards, the attic remains very small, and you cannot fit much into it.
-
Red Fairytale Hip Roof House
Remember that red wooden house by the brook from your fairytale books? Yes, it has a hip roof, too, with enough space for a chimney on top. The chimney is placed in a fairy glade, and the house is within a forest. It is covered by trees on all sides, and there is a freshwater brook in front.
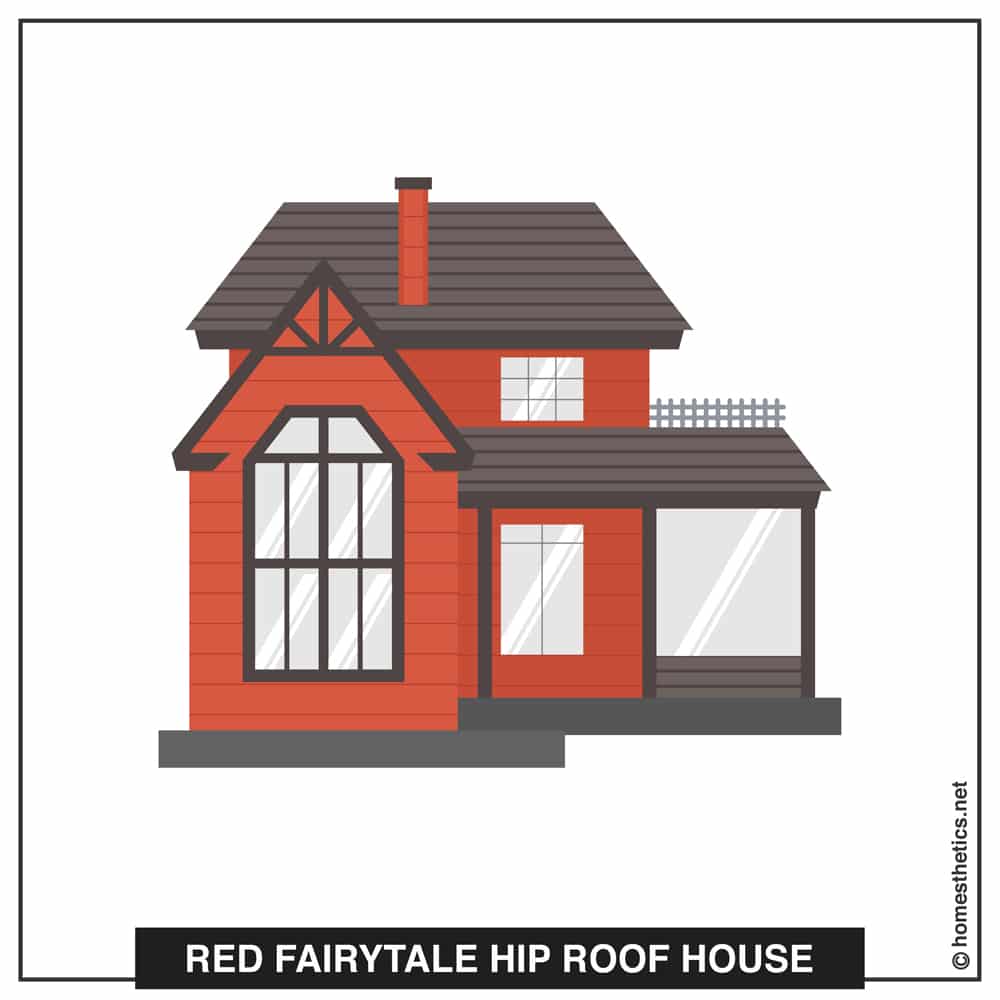
Although the house is mostly made of red bricks, the hipped roof is in a lighter shade of brown. It provides ample space for a big attic, and there is a gutter around the roof side. We found this to be the perfect place to relax and unwind. The structure makes for the ideal retreat and can be used by people who want to make a house to retire to during holidays.
-
Gray Stone Structure
Are you a fan of stone structures? This house gives off a beautiful and elegant vibe with its chic walls and roof. The walls are made of stones with a touch of wood, and the reflective windows add to its look.
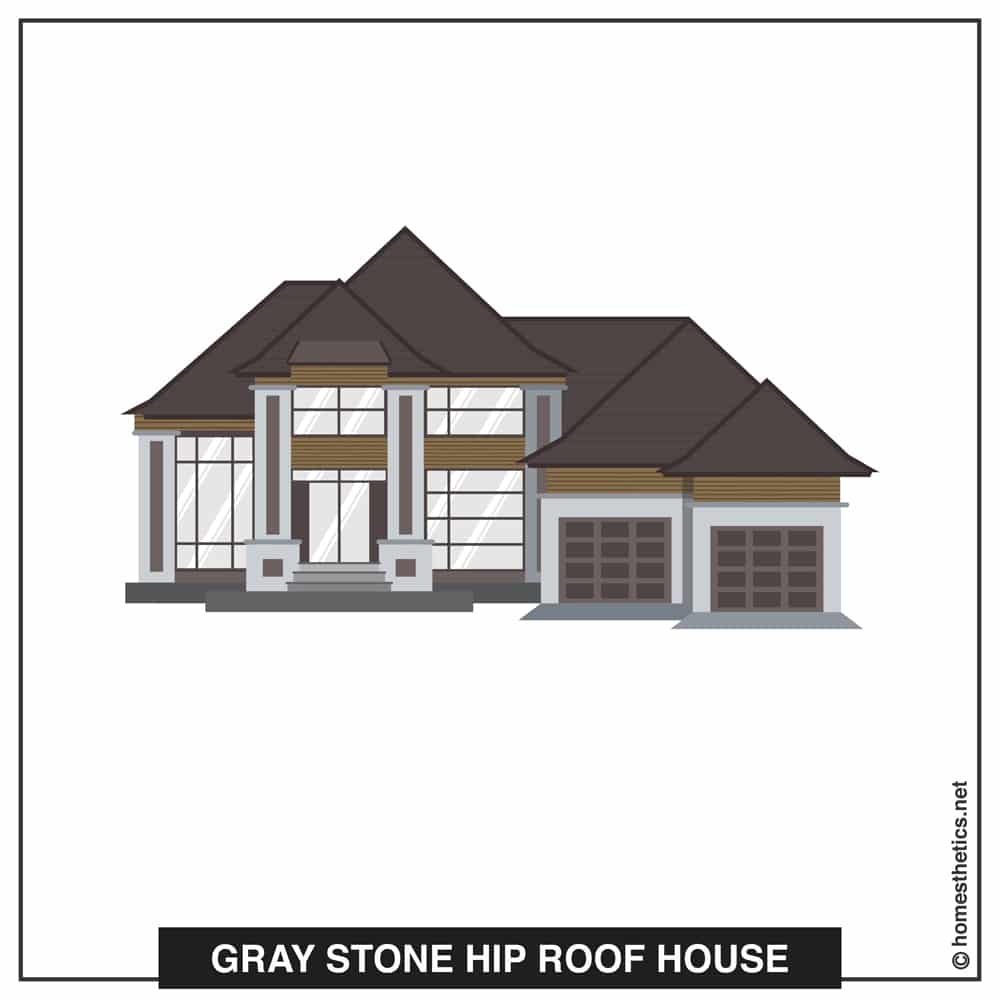
We loved the charcoal and smoky grey color of the hip roofs. It complements the white stone walls of the structure. The roofs can tackle heavy rain, and they will protect the house in case of storms or hurricanes.
-
Ultra Modern House
If you have the wealth, this is the kind of house you would want to splurge on! We agree that it looks gorgeous, and the several hip and valley roofs that you will see on its top add to the elegant structure.
The surface of the roof is made of a material that shines. It is a kind of metal that reflects light and looks beautiful at night. You must have also noticed the spotlights all around the house. This enhances the structure and highlights certain parts of the building.
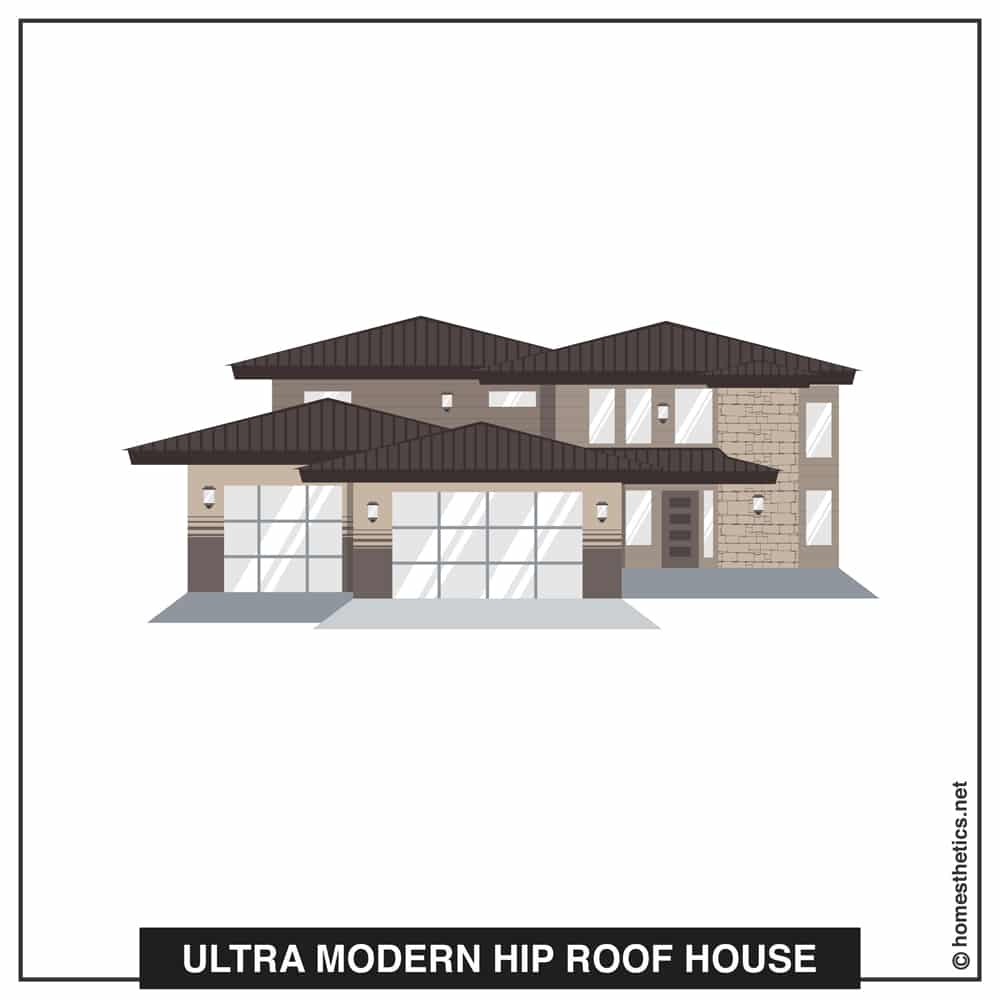
The big glass windows and panels complement the textured walls and roof. If you look closer, the roof has a certain pattern on it, which makes it stand out. It is balanced by the large expenses of plain glass to achieve the perfect combination.
-
Countryside Cottage Structure
Now that we have already discussed an ultra-modern house let’s talk about a simple house. Some people prefer simplicity, and we have the perfect design for you. With shining white walls, this is the perfect mid-century designed living space that you can boast of.
The roof has silver shingled hips that add to its design and make for a perfect room in the attic. You can provide our teenagers with ample privacy and give them the attic room space.
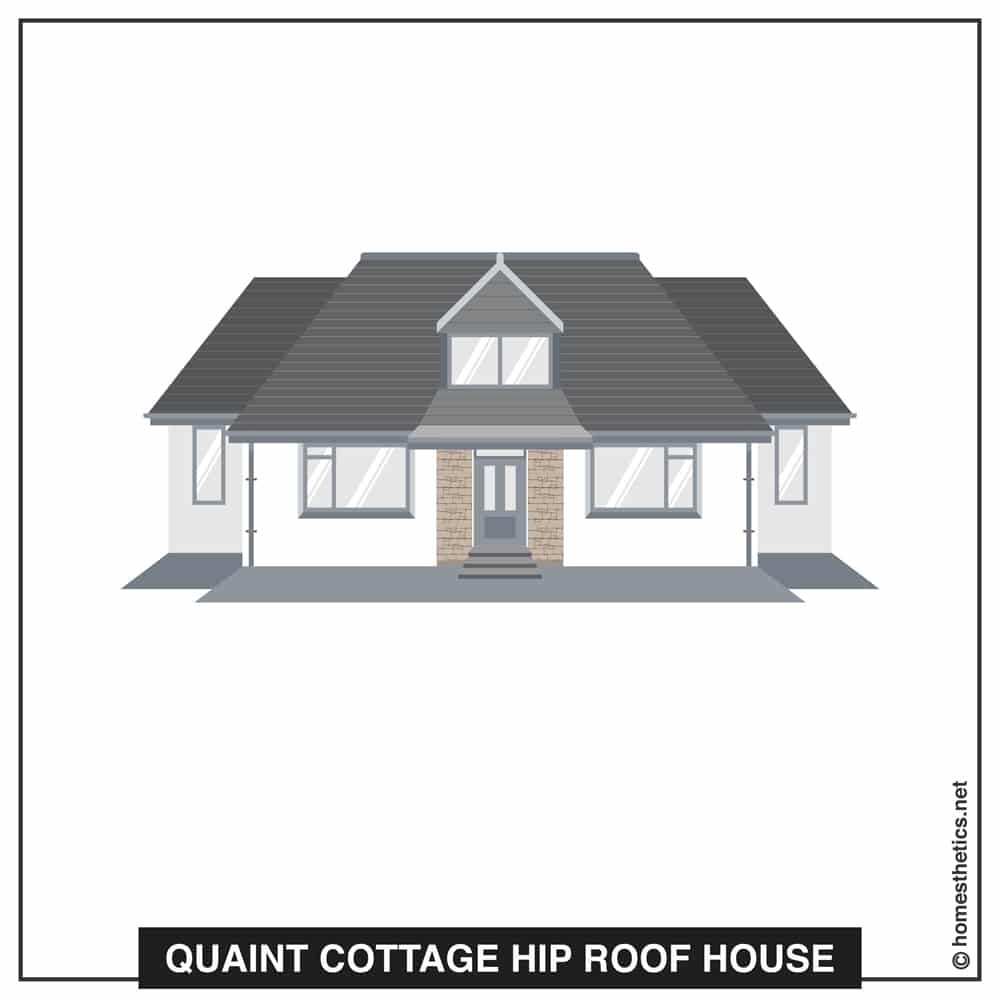
It can also be used for making art or a music room for that matter! You will also find additional storage space because of the multiple hips. The house in itself is very spacious, and the color provides a warm and inviting space.
You will be able to spot a proper L-shape and cross-hipped structure. This is a great example of both and fits well with the countryside vibe. It helps cover large structures which are spread over a considerable area.
-
Triangle Time Structure
Up next is a house that has a number of straight lines and triangles. When you see the house from the front, you will notice the number of triangles that are a part of its roof. The triangular hip ends make this house unique and add to the plain white walls.
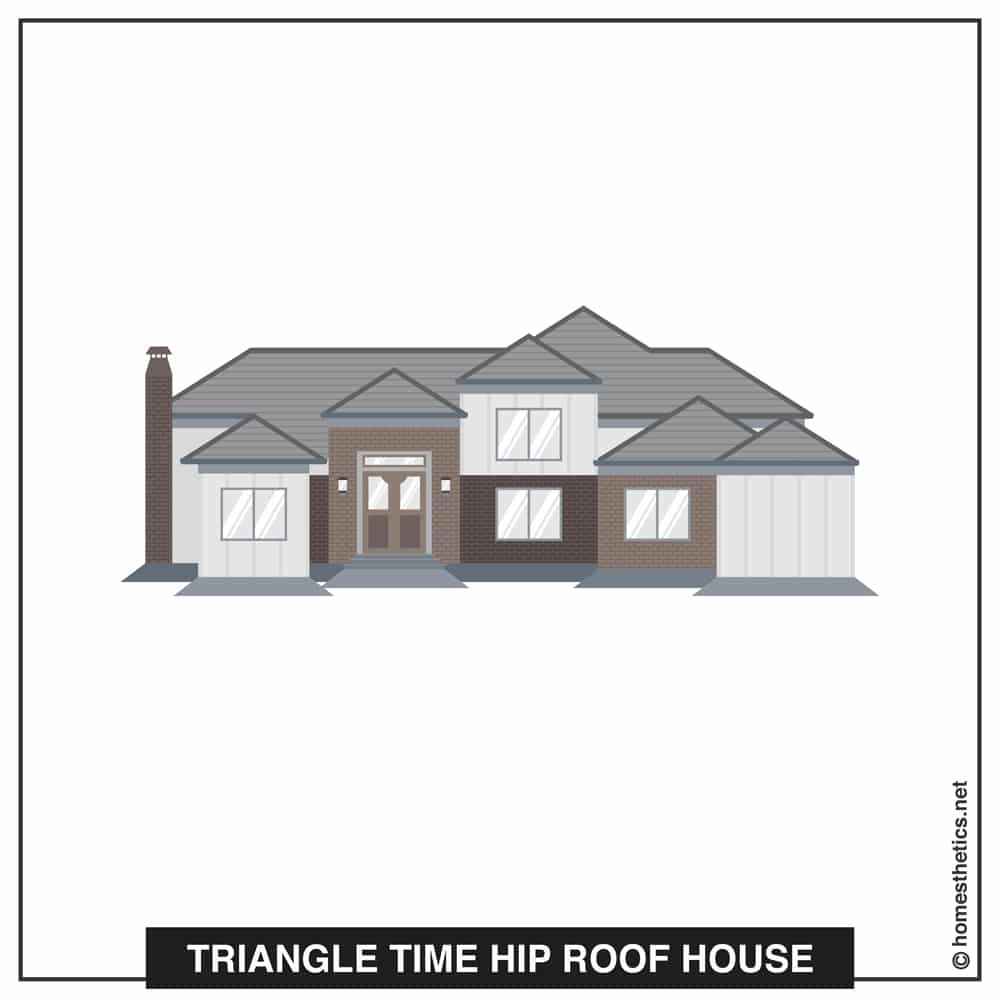
Look closely and tell us whether it will look as attractive without the hipped roof? Probably not! The warm color tones of its wall complement the silver-gray color that its roof has. It is painted with a very eye-catching color, and the horizontal lines add to the design.
If you add some spotlights just below the roof at multiple places below the gutter, it will light up and create an even better structure at night.
-
Colonial Hip Roof
If you want a countryside house that looks elegant as well as royal, this is a great example. You will find beautiful white walls along with a roof which is colored brown. The earthy tone goes very well with white and works for large structures. There is a sense of continuity, even if it takes a huge amount of space.
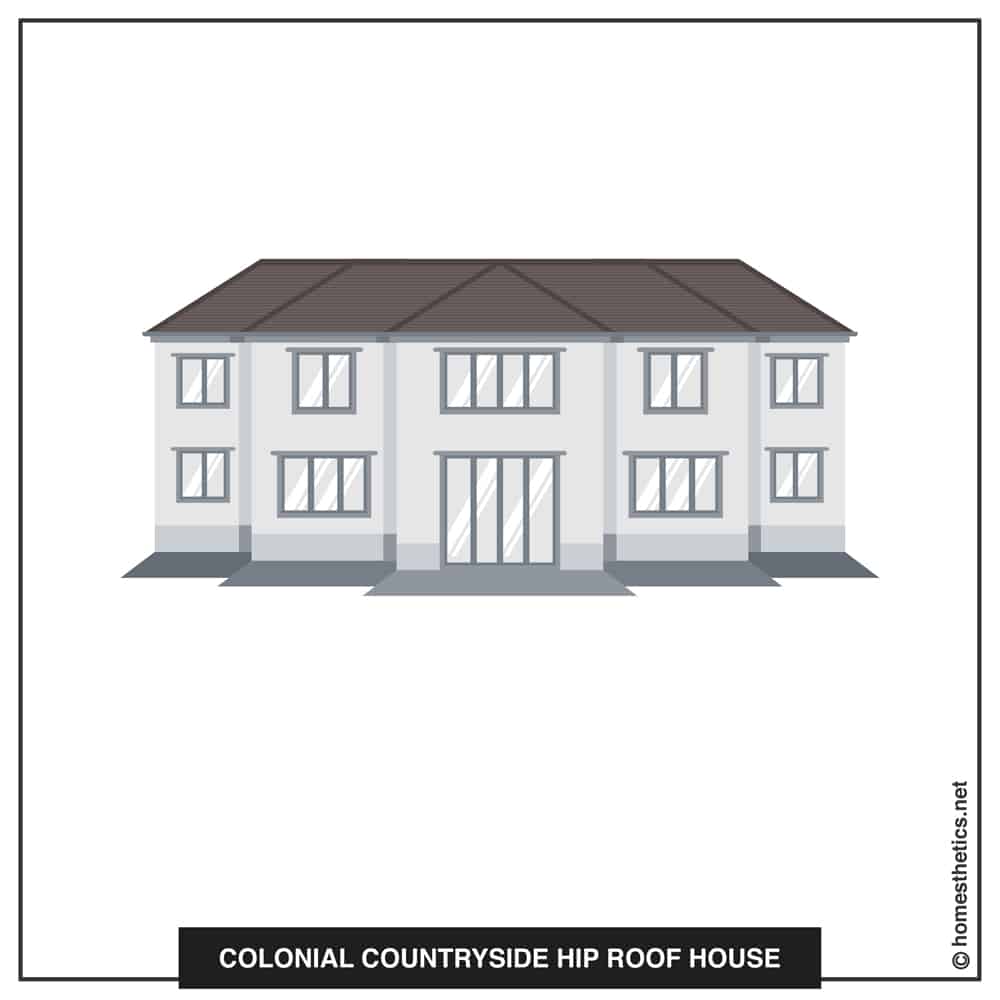
This has the vibe of old churches, but with reflective windows, it looks more homely. You can team it up with a beautiful front porch and a lovely back garden. The hip and valley roof, along with the white-walled structure, works well for wealthy farmers and countryside lovers. This would also work as a holiday home or your summer retreat.
-
Georgian Mansion
Do you find Georgian architecture attractive? If this is where your heart lies, you can make this perfect winter retreat right in the middle of a forest or near the countryside. This was a design that was very popular during the 18th century in England. There is a low-angled hip roof structure that is complemented by large windows.
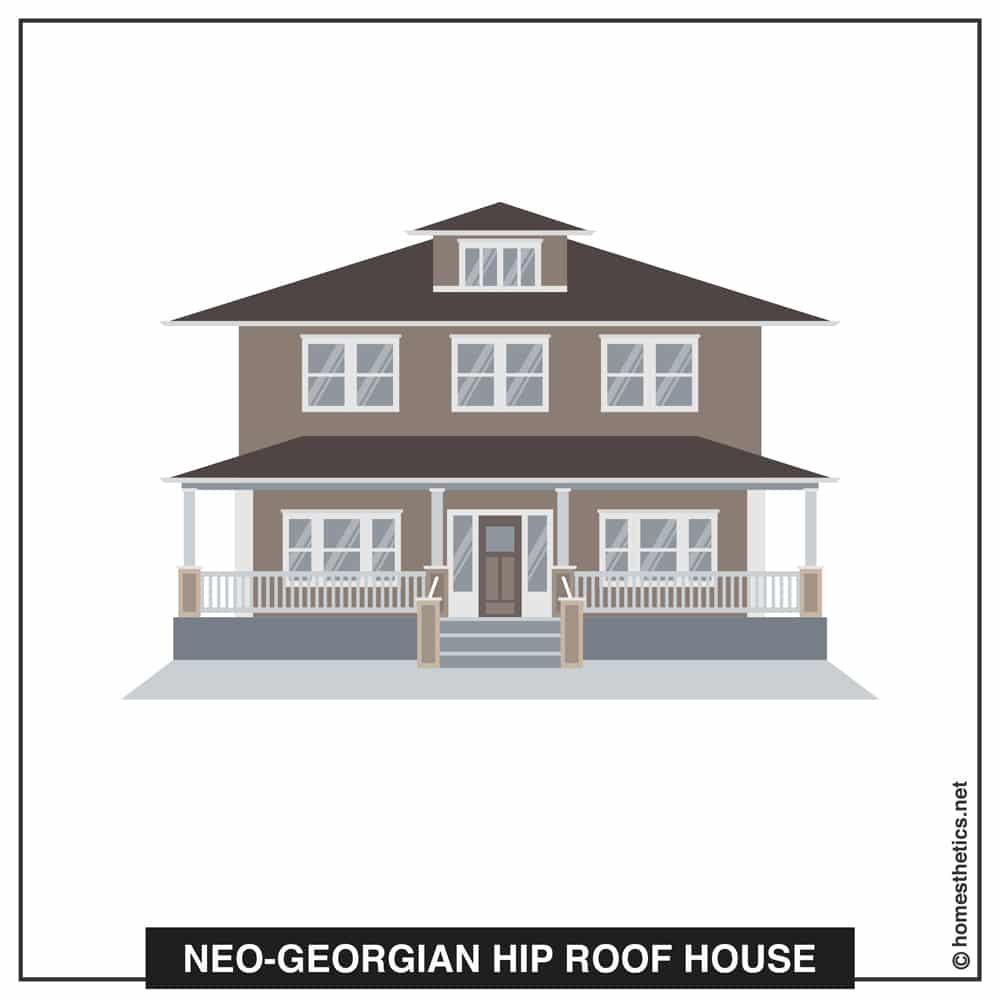
The white stenciled windows are an incredible example of old England designs, and the white chimney columns add to it. The house in itself is made of small bricks that complement the white and grey roofs.
-
Crimson And Grey House
Are you an art enthusiast or a DIY artist? This house may just provide you with all the inspiration that you need. It has a unique design with half the surface made of river stones, and the other half is painted a dark shade of crimson.
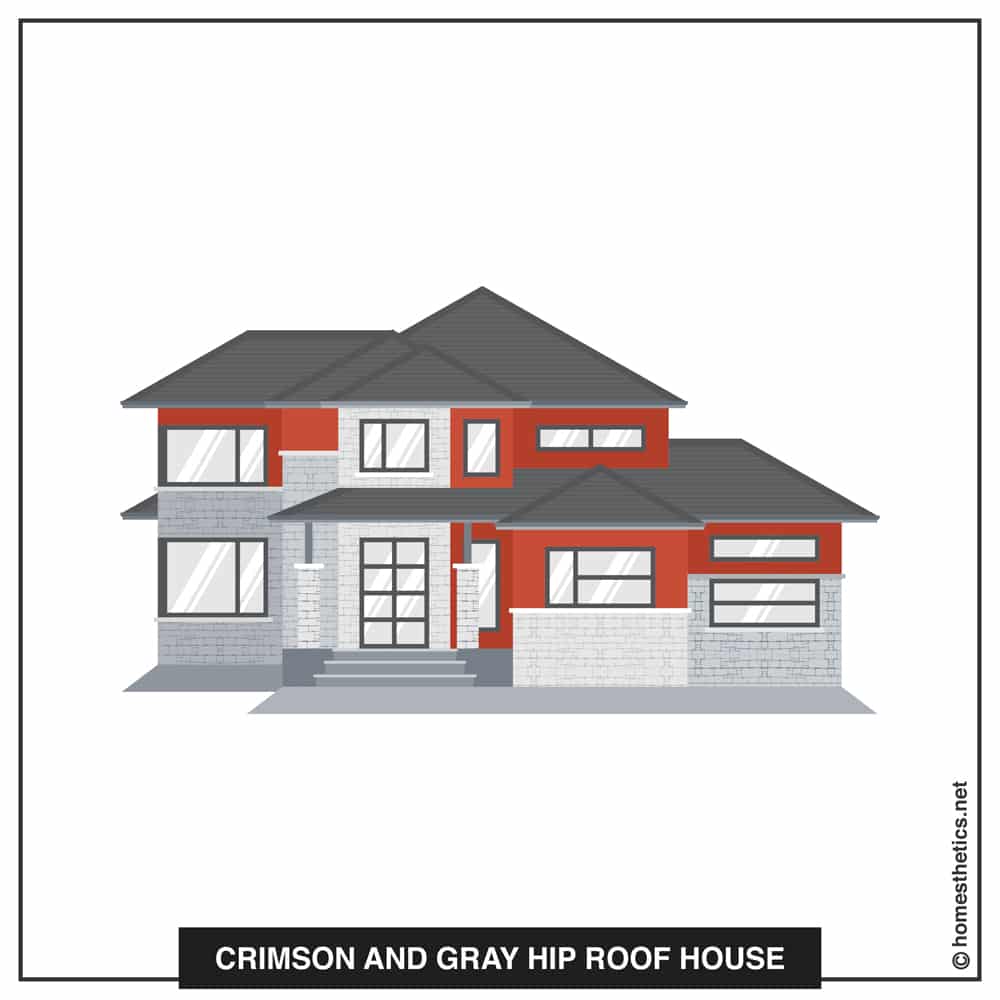
This is paired with a grey-hipped roof on top to finish the look. The windows are rectangular and extend towards the sides more. You will also notice a number of hips around the roof, which provides the structure with more shape and form. This will work for a city house as well as the countryside.
14 Charcoal Hip Roof Structure
The best part about this house is its sweeping roof, which takes up half the space. It looks brilliant and catches a lot of attention. The dark grey roof is paired with a cream-colored structure that has tall windows. The doors and windows have reflective surfaces and dark grey borders, which enhance the look further.
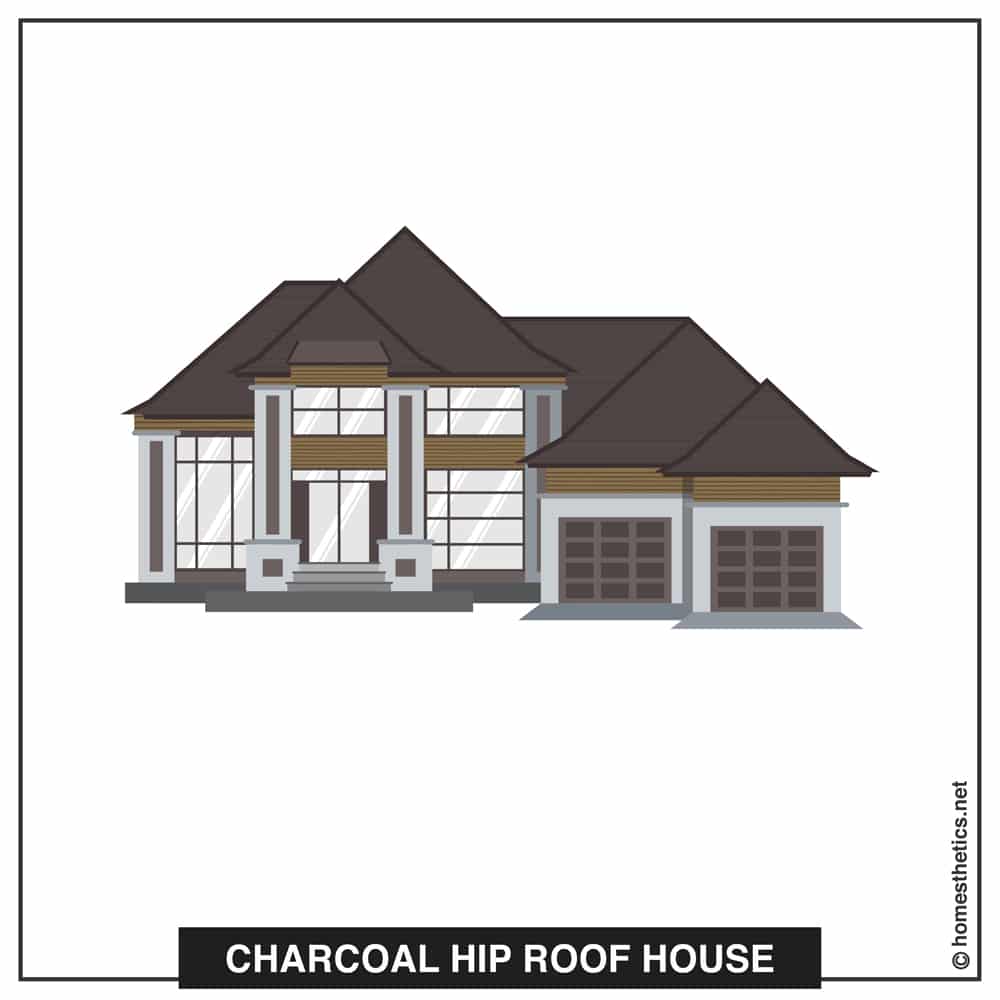
The color palette that is used here is brilliant, with its stormy grey complementing the cream very well. The sweeping dark roofs can have recessed outdoor lights towards their bottom, which will enhance the light and dark color play further.
-
Green Half Hip Roof Home
Do you want your house to look cozy and comfortable? We have the perfect option for you, and it is in a shade of green. Pastel shades of green are used to make the house, and it is painted on wooden walls.
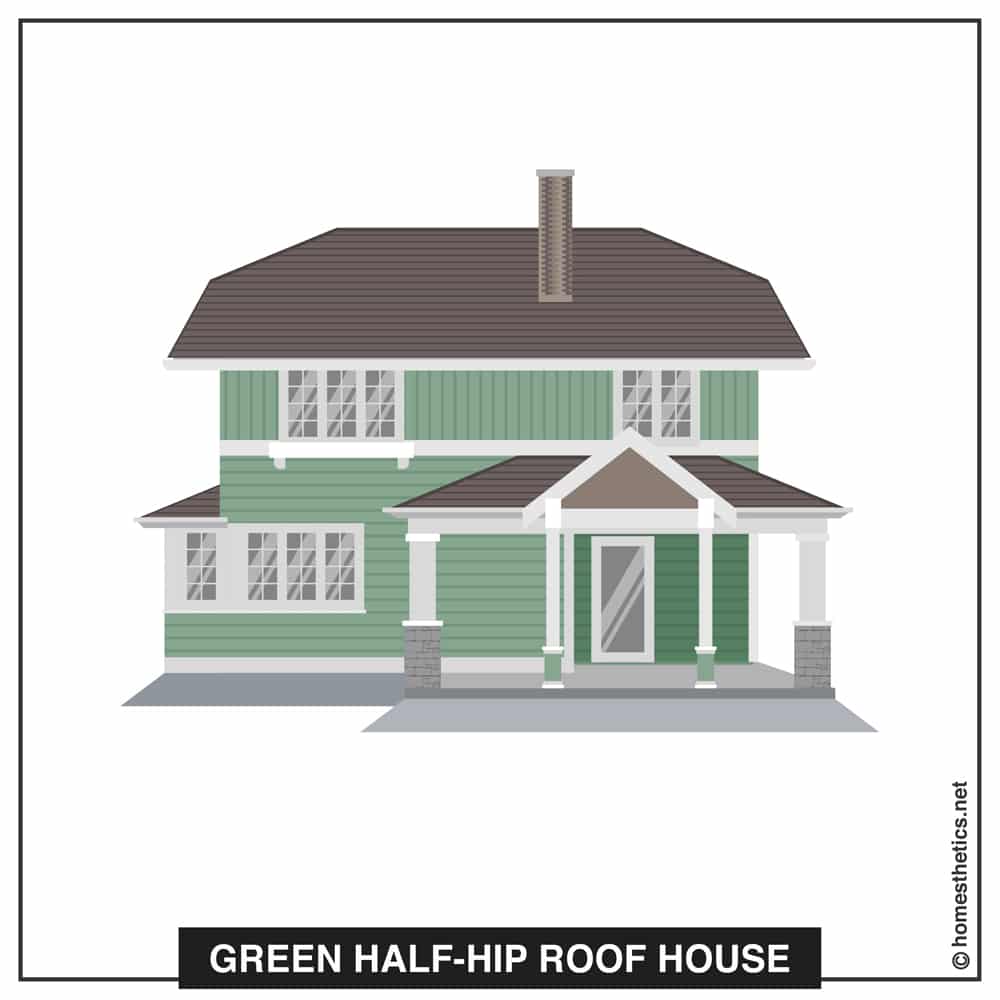
If you see the roof, you will notice the half-hipped roof design, which adds to its look and is made with bricks. It also has a chimney, which is again made of bricks and goes well with the countryside look. The white outlines and windows make the house look extremely elegant.
Another special characteristic of this house is the gabled entrance. It looks extremely good and makes the entrance stand out. This could be the perfect autumn or winter retreat.
-
Neo-Georgian House
Do you want to create a fusion of modern and classic designs? This is the structure that you can aim for. It is an excellent blend of contemporary design and Georgian architecture, which together create a masterpiece.
The walls are painted a light shade of beige, and it also has a roof that is rectangular shaped and expands on both slides. The windows are perfectly square-shaped, enhancing the symmetry of its structure. It is indeed very symmetrical as the entire house is rectangular in shape too.
Add some manicured lawns in the front, and you have the perfect space to flaunt.
-
Grey On Grey Home
Are you a fan of subtle colors? This pale grey house might just be what you are looking for. It has pale grey walls with a warm beige complimenting it. The roof is extensive and covers a lot of areas. Painted in silver grey, it will perfectly cover a large house and looks very attractive.
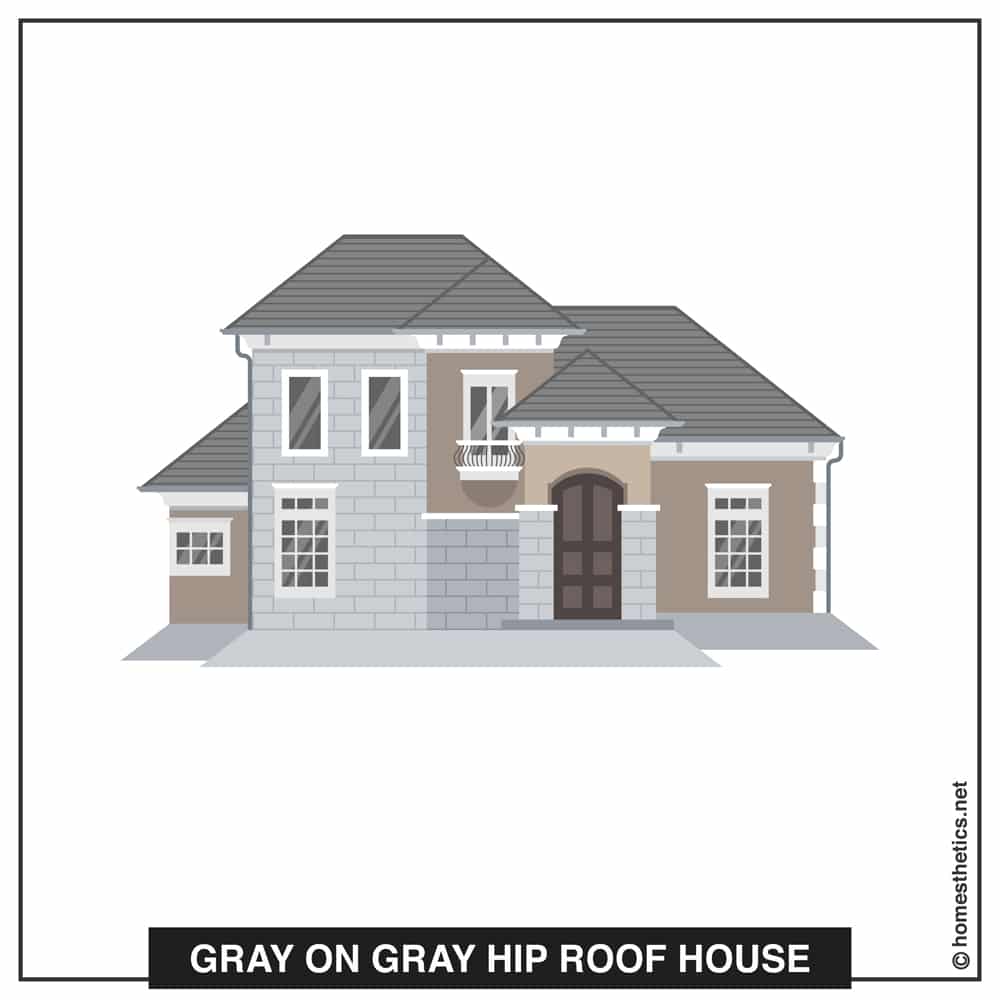
Also, you can pair it up with a manicured lawn or garden. Throw a party in the front while the house looms behind. It would be the perfect summer retreat in the countryside.
-
Colonial Hip Roof House
If you were looking for that perfect quaint house that uses rustic warm colors, this might be a great choice. It will provide you with a classic rustic look that will remind you of the good old days. No, this structure does not have anything contemporary about it and will help keep the old-world charm alive with white walls and beige windows.
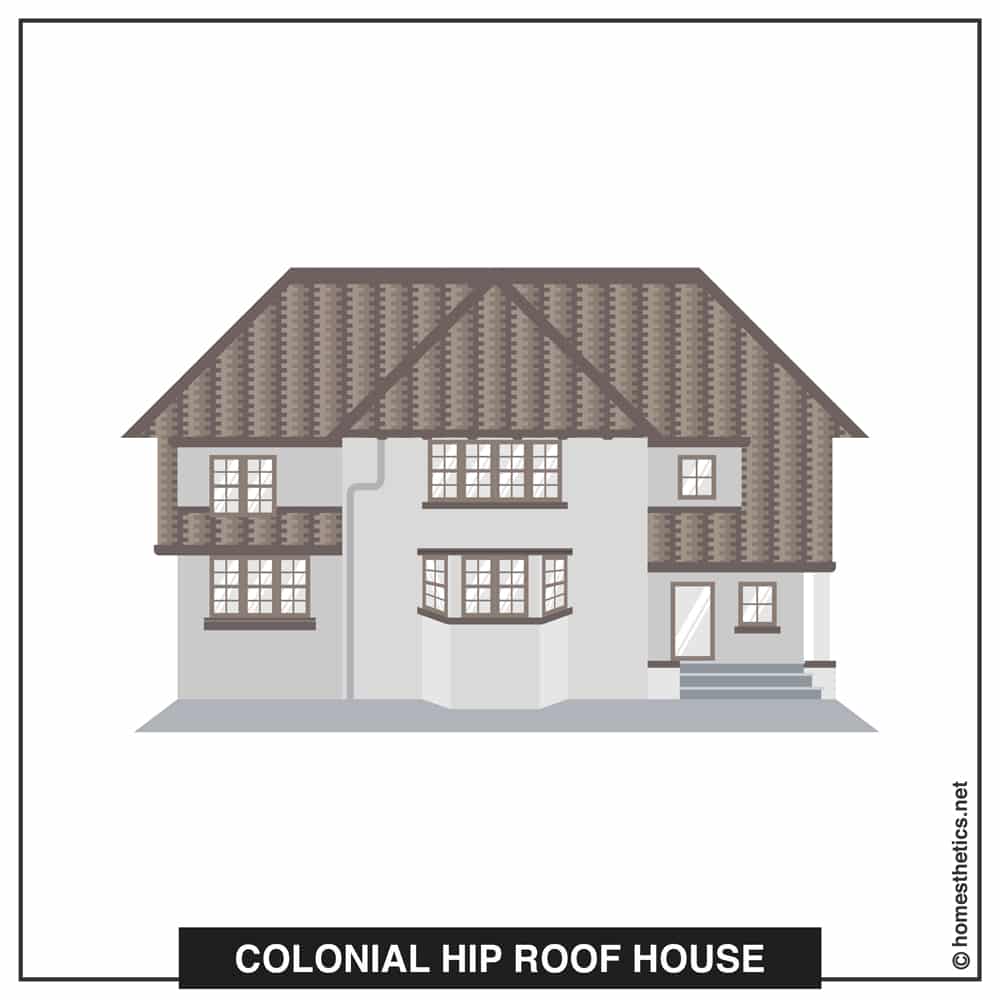
The roof is made of brown bricks, and there is a chimney on top, which adds to the beauty of its design. Remember those farmhouses from the 80s movies? This will give you the same experience with a colonial aura. The peaked roof adds to the symmetry and works very well with shrubs and trees around.
-
Little Gray House
If you want a quaint small home, this is a great design to aim for. We loved the stylish exteriors, and pale colors have been used to make it look bigger. You will have neutral tones being used for the walls of this house while the roof is made of gray shingles and consists of hips. This dark grey color looks great with lighter-colored walls.
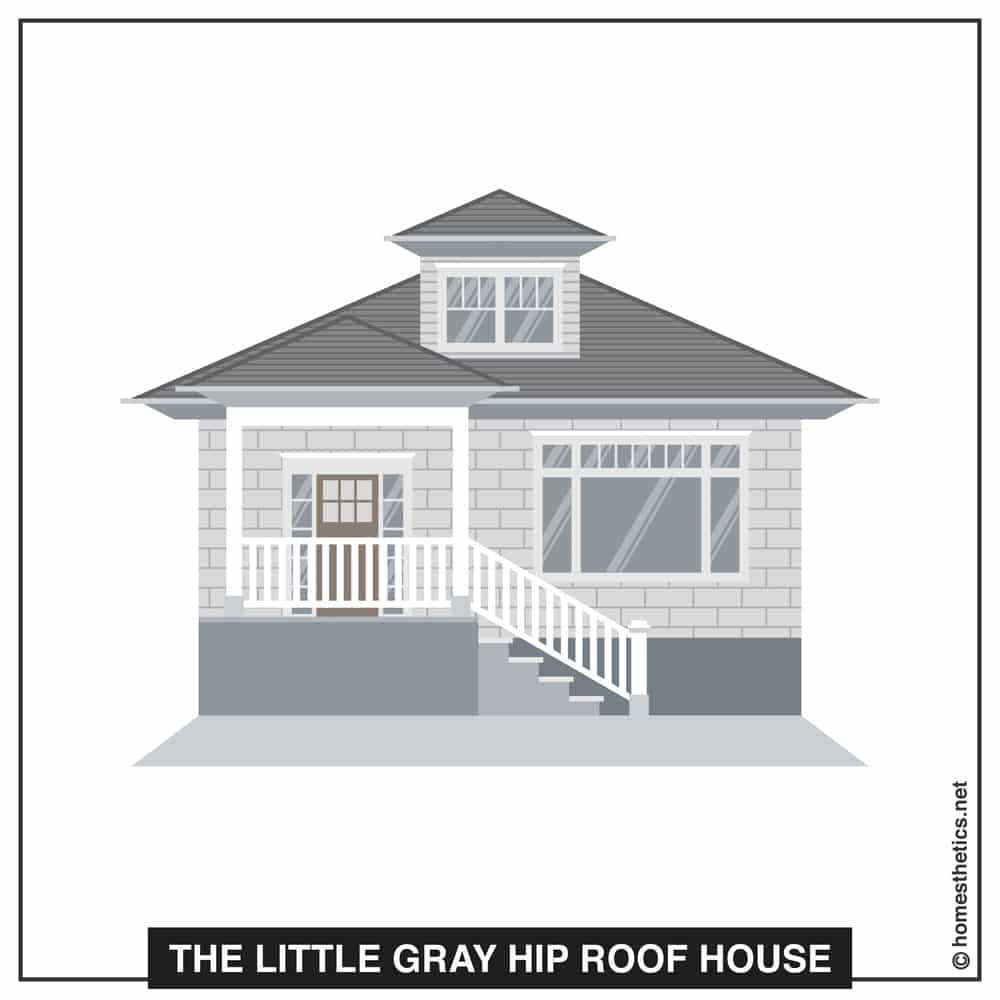
The deck is painted white and consists of vertical bars, which provide a much-needed pattern to the otherwise solid colors that this house is painted with. It will look best with manicured lawns, and you can host barbecue parties in it.
-
Red Brick Villa
How does a vibrant red house sound to you? If it appeals, then you will love this house made of red bricks. It has a very warm vibe, and the roof balances the vibrant red with a darker and cooler shade of it. It has a shingled red-hipped roof with a valley in between.
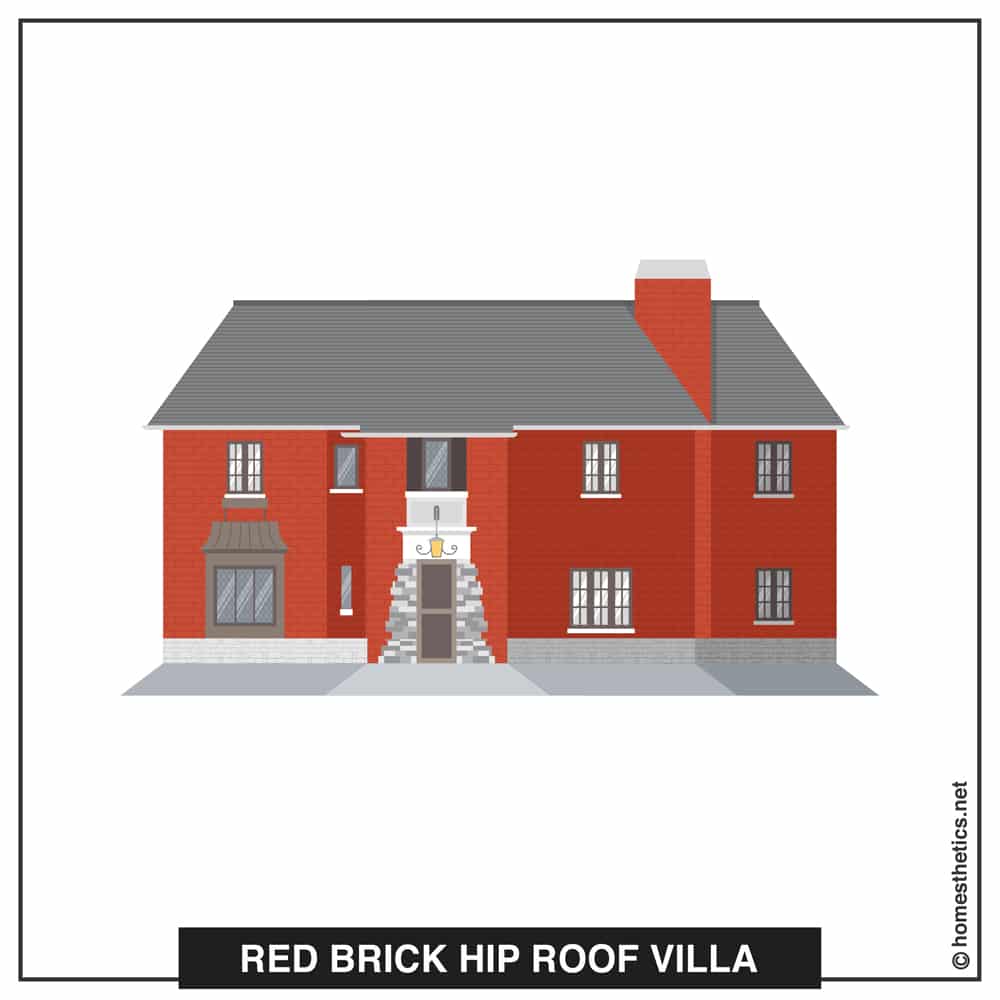
This will also give you a lot of attic space, and you can use it for storage or for music practice. One can also build a skylight and set up a bedroom because of the vast flat space on it.
-
Neo-Palladian Hip Roof Villa
Are you planning to build a villa for yourself? This Neo-Palladian design will impress you a lot. We were very delighted with the giant and majestic windows along with arched doorways. The red walls and the dark grey-hipped roof look brilliant together. You can see multiple hips, and it flaunts a hip and valley roof style.

We also loved the patterns around doorways and windows, which are painted white and stand in contrast with the light red wall. If you have seen English Aristocratic houses of the past, this one will look very similar to that design. It creates the ideal space for large families to live and works well with sprawling estates.
-
Coral Pink Hip Roof House
If you like colors, this hip and valley roof design will be an excellent choice. The house looks very attractive with a bright red-hipped roof with white walls to complement it. There are multiple skylights, and you will be able to see the sky while lying on the bed. And since the slopes are board, you will easily be able to make a room in the attic.
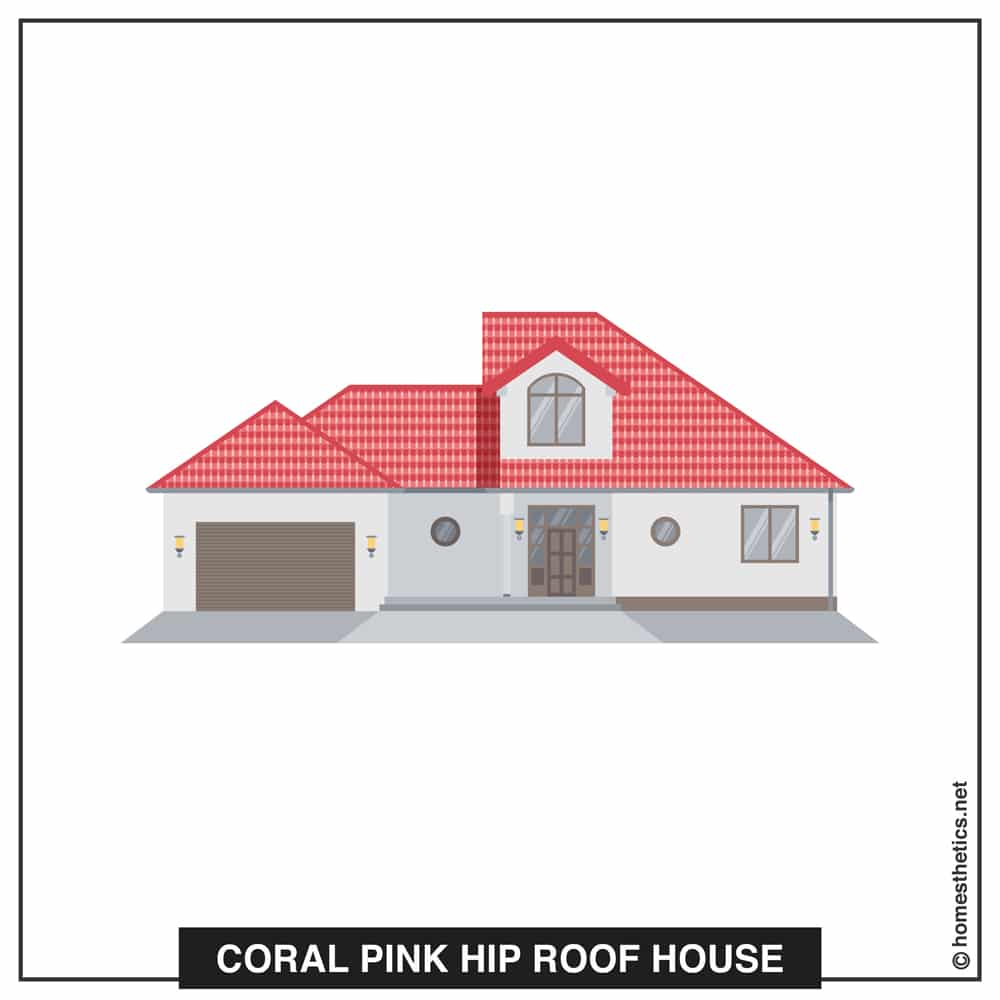
It is also bright enough to stand out among other houses. Look at the picture, and you will see how you first noticed this one before the grey-colored houses situated around it.
-
Cream And Grey Roof
Finally, we have a cream and grey color combination that works out very well for the countryside and small towns. The cool gray shade of the hipped roof is balanced by the pale cream color of its walls. Although both are neutral shades, they combine to form a very elegant structure. The doors are painted a dark red color, which provides the house with a splash of vibrancy.
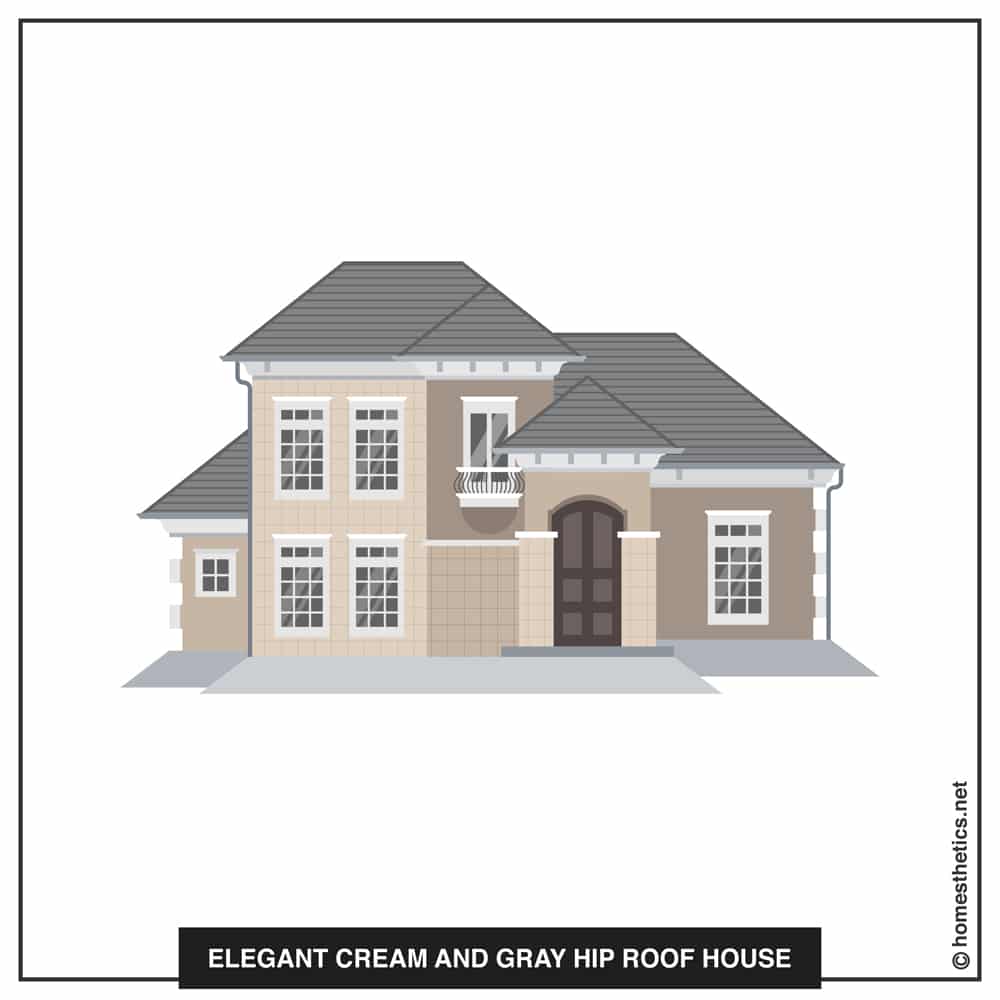
Also, if you look from afar, you will notice how the roof together forms a triangle-like structure, which provides proper symmetry to the house. The windows are made of dark-colored glass, which works well with the pale cream color.
Hip Roof Types & Styles Buyer’s Guide
Now that you know all about hip roofs and their styles let’s move on to some general points that you should keep in mind. You must have realized that there are pros and cons to every roof style and type, and each one differs in its slant, attic space, and more.
We have written about the common points to remember before making a purchase. This should guide you to make an informed decision.
-
Attic Space
This is a very important consideration while making the roof. A common complaint with this kind of roof is that they might not provide a lot of attic space. A hipped roof that drops down immediately will provide very little space, and you should think twice if you plan to store a lot of items in the attic.
Hip and valley roofs and half-hip roofs provide more space and may work out better if you want to make a bedroom in the attic or use it for storing items.
-
Process Of Installation
Although hip roofs are known to prevent water and snow from accumulating on top, they have to be installed properly to eliminate leakage. Since there are many joints, each one has to be covered and installed by professionals. Instead of trying to do it on your own, get professional help, and that should prevent leaks.
Also, if you see any leakage happening, consult a professional and get it fixed immediately before the damage deepens.
-
Ventilation
Hip roofs are known to provide ample ventilation, and hence our house will not heat up too much. If you have problems relating to claustrophobia, these kinds of roofs might be exactly what you need. The homeowner also can create a corner or a crow’s nest to add to the attic space.
-
Cost
Hip roofs are generally more expensive than gabled roofs because of the large amounts of material needed for construction. They are also more expensive because of the complex structures that often need to be created for larger houses.
You might have to create a complicated system of rafters and trusses, which is not going to come cheap. However, we would say that the money is well spent and you will be getting a beautiful house at the end of the day.
Final Words
Hip roofs are known to be versatile, and you can choose your own style from the multiple options that we discussed above. You can also combine and create a unique style that reflects your personality. The best part about these roofs is that they can help provide your contemporary-style structures with a traditional or a classic touch.
These provide more aerodynamics than flat-roofed structures and will keep the house safe. After all, there is a reason why they are still popular after 3 centuries since they were first used.
With this, we have come to the end of our guide. Let us know if you have any further queries in the comment section below.
Until next time!
Related Articles
Learn About the 20 Most Popular Roof Types for Your Future Home
What is the Mansard Roof, Advantages and Disadvantages Sheltered
6 Eco-Friendly Roofing Materials and Why You Need Them
How To Clean Gutter Guards Efficiently
Shur Flo Gutter Review | All You Need to Know
EasyOn Gutter Guard Review 101 | All You Need to Know
5 Best Foam Gutter Guards [Reviewed & Buyer’s Guide]
23 Extraordinary Beautiful Ways to Repurpose Rain Gutters in Your Household
Rain gutters are an integral part of most homes, especially in areas that receive heavy rainfall. We're here to help you choose the right gutter.

Gutters are not only a necessary means to keep rainwater away from your home. The primary benefit of a gutter is to keep your home safe from water damage; however, there are several other benefits of installing them.
If you have been thinking about installing gutters in your home but are unsure of the right kind, don't worry. We have curated a comprehensive guide to help you learn about the different types of gutters, and finally, pick the right one for your home.
So without further ado, let's get started!
Gutter Types
How Does A Gutter Work?
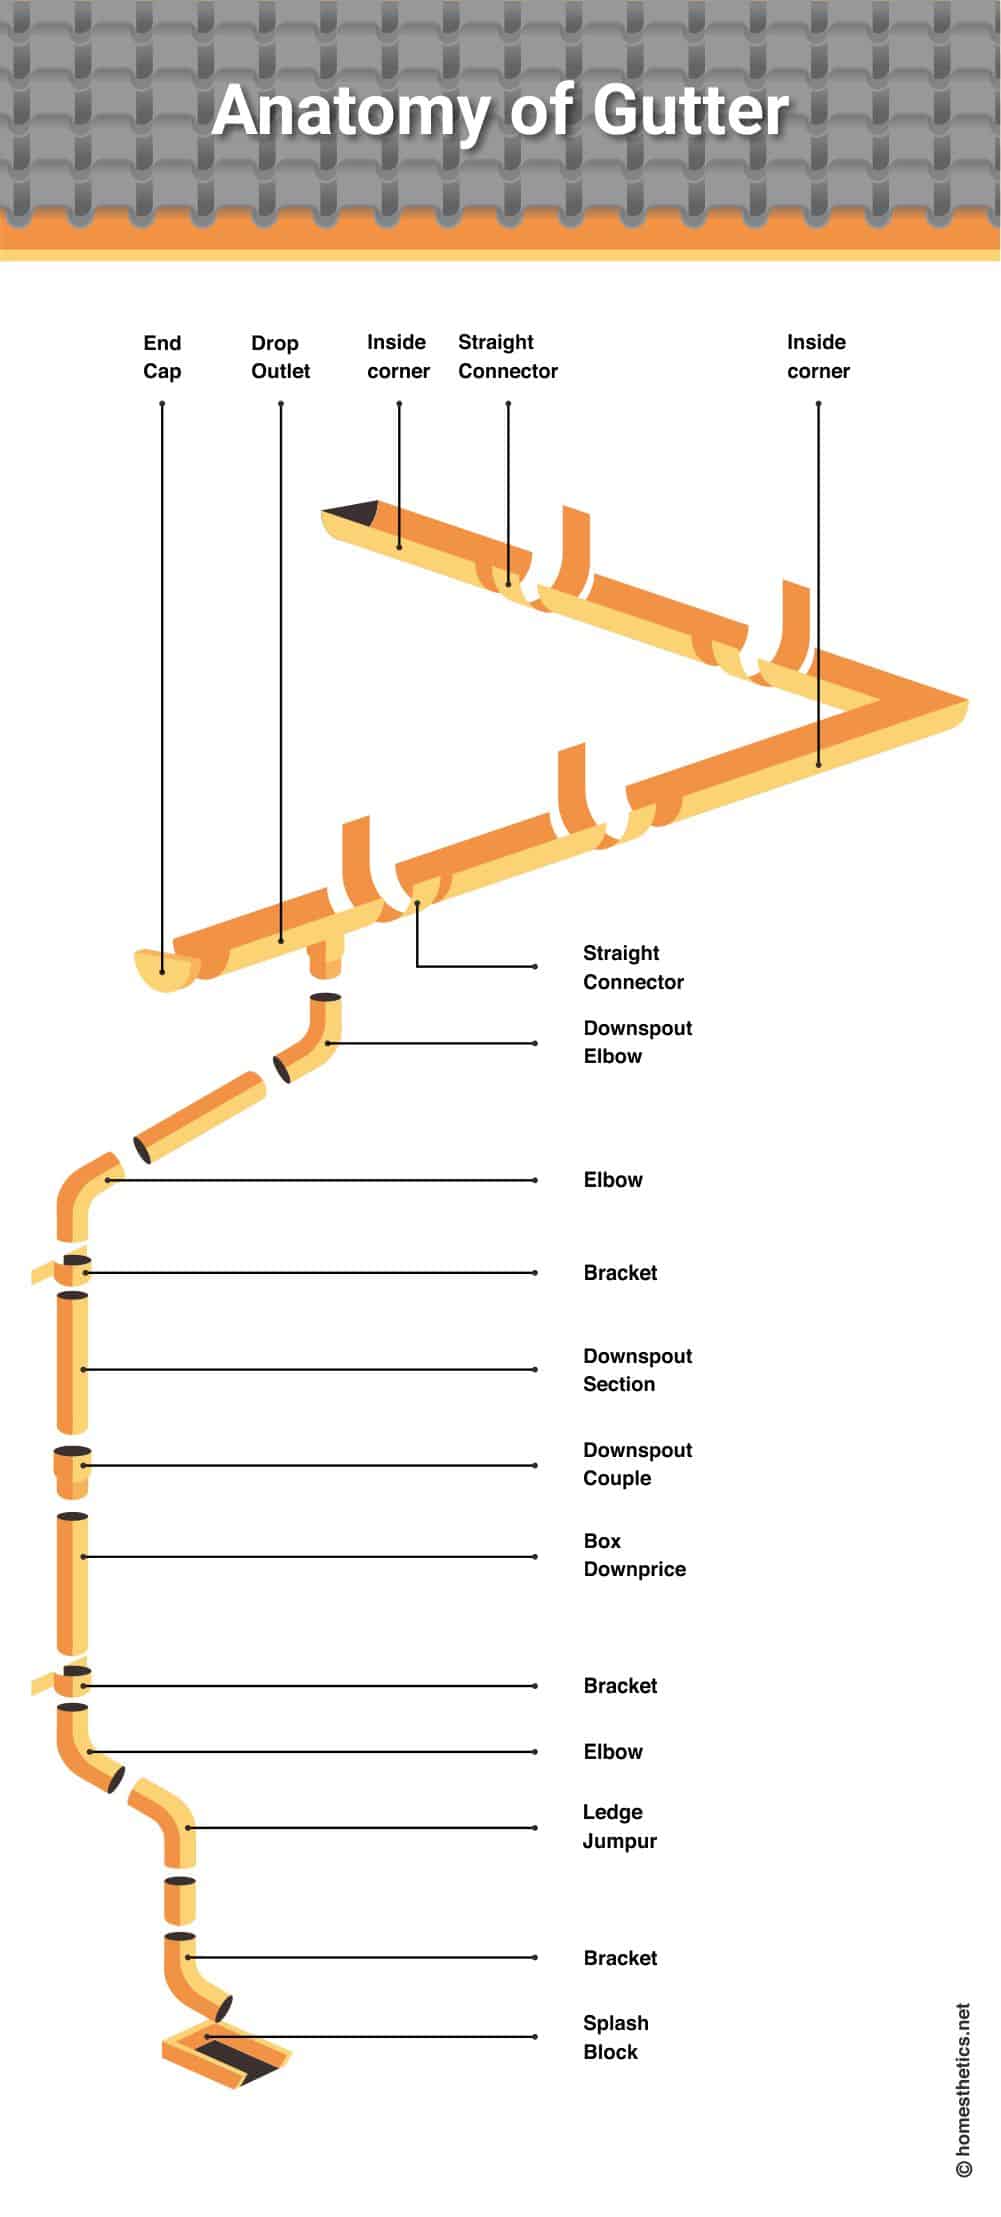
It doesn't take a genius to figure out how gutters work. Essentially, these handy devices collect rainwater which slides down slanted roofs and channels water into the ground. This is done with the help of the long downspout of the gutter.
Of course, most of the time, gutters help collect much more than rainwater. They also help trap dead leaves, twigs, dust, and other debris. Although they are one of the essential aspects of a home, they are largely ignored during maintenance and installation.
Most homeowners might argue that their homes do not need a gutter; however, its absence can be detrimental.
If you are thinking about buying a new home, consider installing the right gutter on your roof. Without this, your home may end up suffering several types of water damage, flooding, and other conditions.
Without the right gutter system, rainwater will likely collect on your roof, causing mold, rot, and extensive damage. Furthermore, the rainwater that manages to slide down from the roof will end up pooling at the foundation of your home. Again, this leads to several water-related damages and conditions.
Does Your Home Need A Gutter?
Before we dive into the section on the different types of gutters, let us determine whether or not your home could benefit from one. As such, experts recommend installing gutters, as they have plenty of benefits. However, we will let you decide for yourselves.
Here are a few questions to consider which will help you determine whether your future home requires a gutter installation or not:
-
Does Your Roof Have An Overhang?
Most home roofs are built with an overhang to protect the home from damage. Typically, an overhang should measure at least two feet or more. However, if your new home does not have an overhang or it extends only a few inches, you need to consider installing a gutter.
Without an adequately long overhang, any rainwater that trickles off your roof will likely collect at the foundation of your home. This not only damages the foundation but can also cause severe damage to your basement.
As the rainwater seeps below the surface, the structural integrity of your home is compromised. Over time, it can lead to significant issues for your home and the surrounding area.
Not to mention, the collected rainwater can also damage flowerbeds and other plant life near your home.
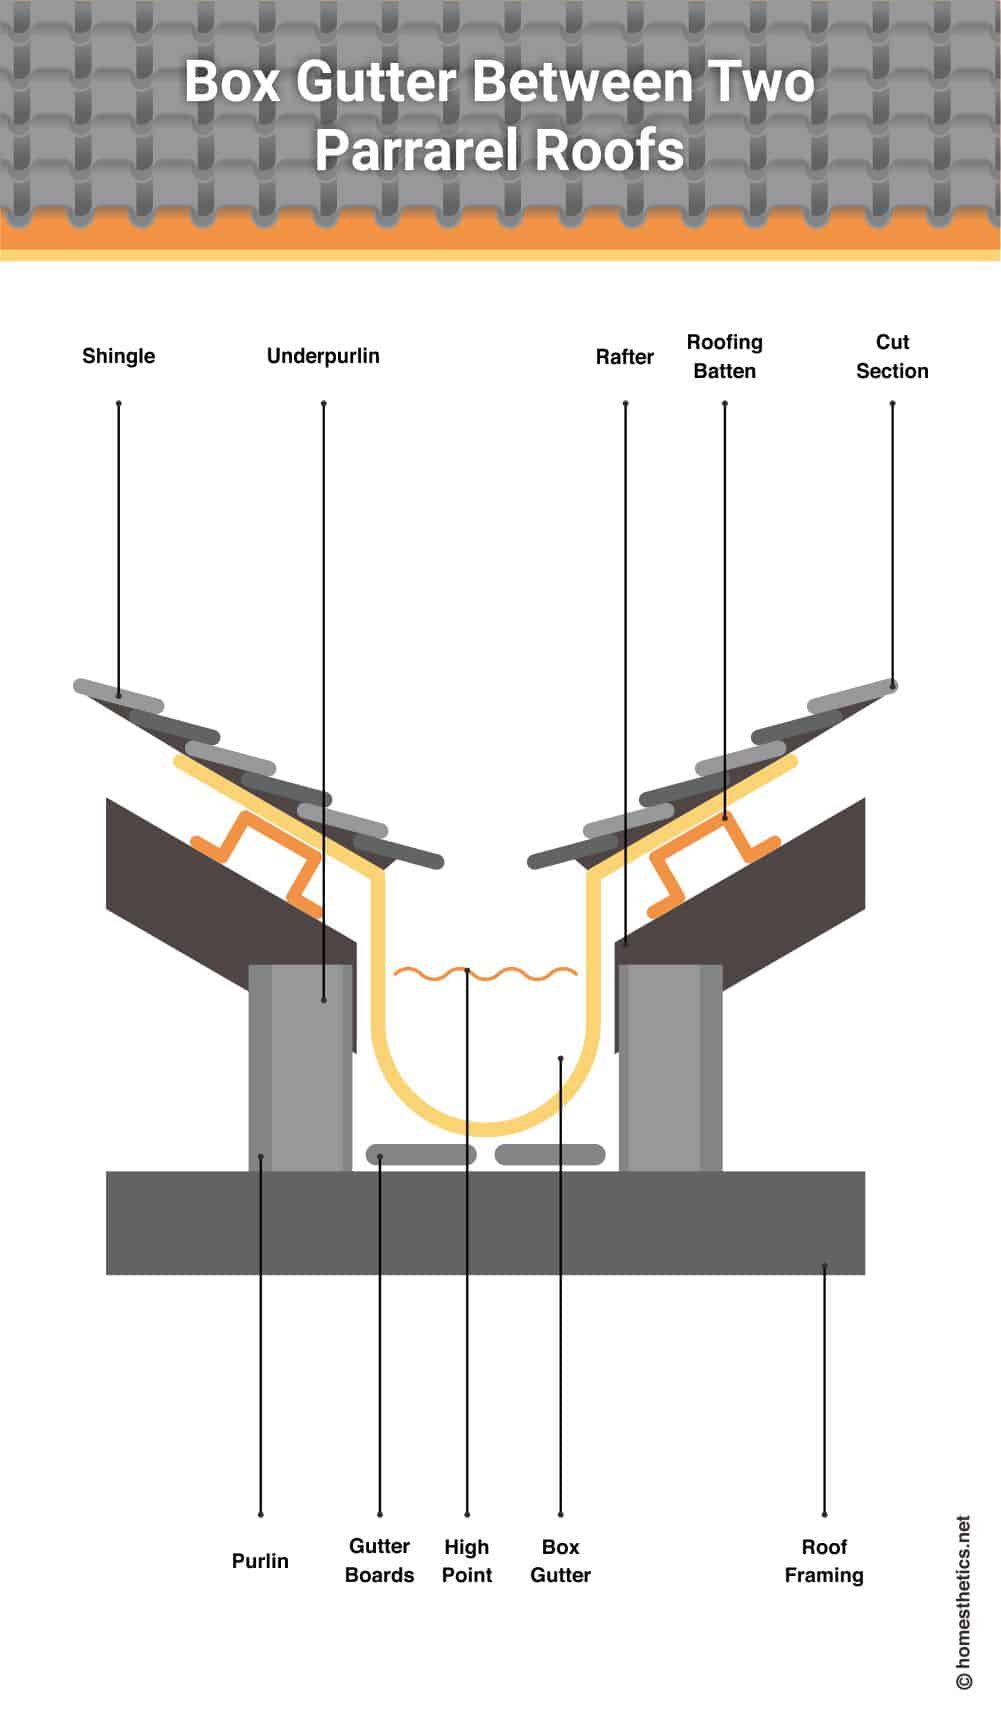
-
Do You Live In An Arid Climate?
You might be wondering why you need to install a gutter in arid climates. Well, consider the fact that most of the moisture and humidity in the area gets naturally evaporated. Moreover, there is very little rainfall, which can cause severe drought-like conditions.
In situations like these, it is beneficial to save as much water as possible. Installing a rain gutter in these climatic conditions can help you trap rainwater, which can be used at a later stage for various applications.
That said, those living in arid climates can consider skipping a gutter installation if they wish.

-
Does Your Area Receive A Lot Of Rainfall?
Conversely, if you live in a region that experiences heavy rainfall, installing a rain gutter is a must. Without this, you risk damaging your home. Not to mention drenching anyone who happens to walk by your house!
-
Does The Surrounding Landscape Slope Upwards?
All you need is a basic understanding of gravity to know why it is vital to install a gutter if the surrounding landscape slopes upwards. Suppose your future home is in the middle of or at the bottom of a region where most of the surrounding landscape slopes upwards; rainwater will likely pool near your home during specific periods.
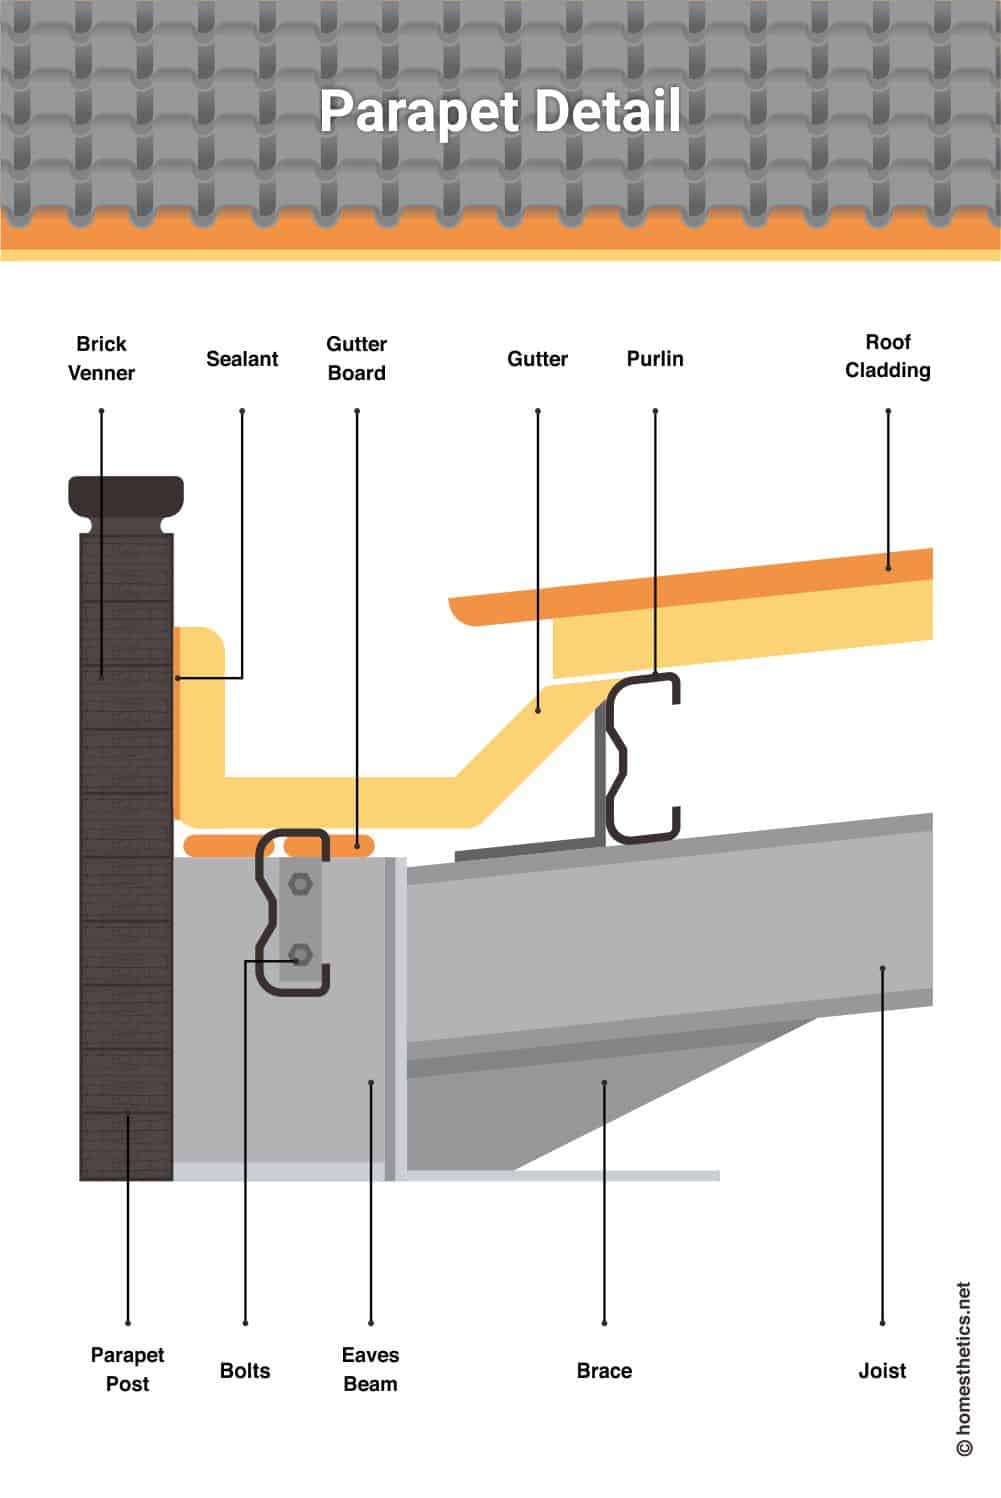
This can cause extensive water damage to your home as well as the surrounding areas. To prevent this, you need to install gutters that will strategically direct rainwater away from your home and deposit it at an adjacent downward-sloping site.
Types Of Gutters
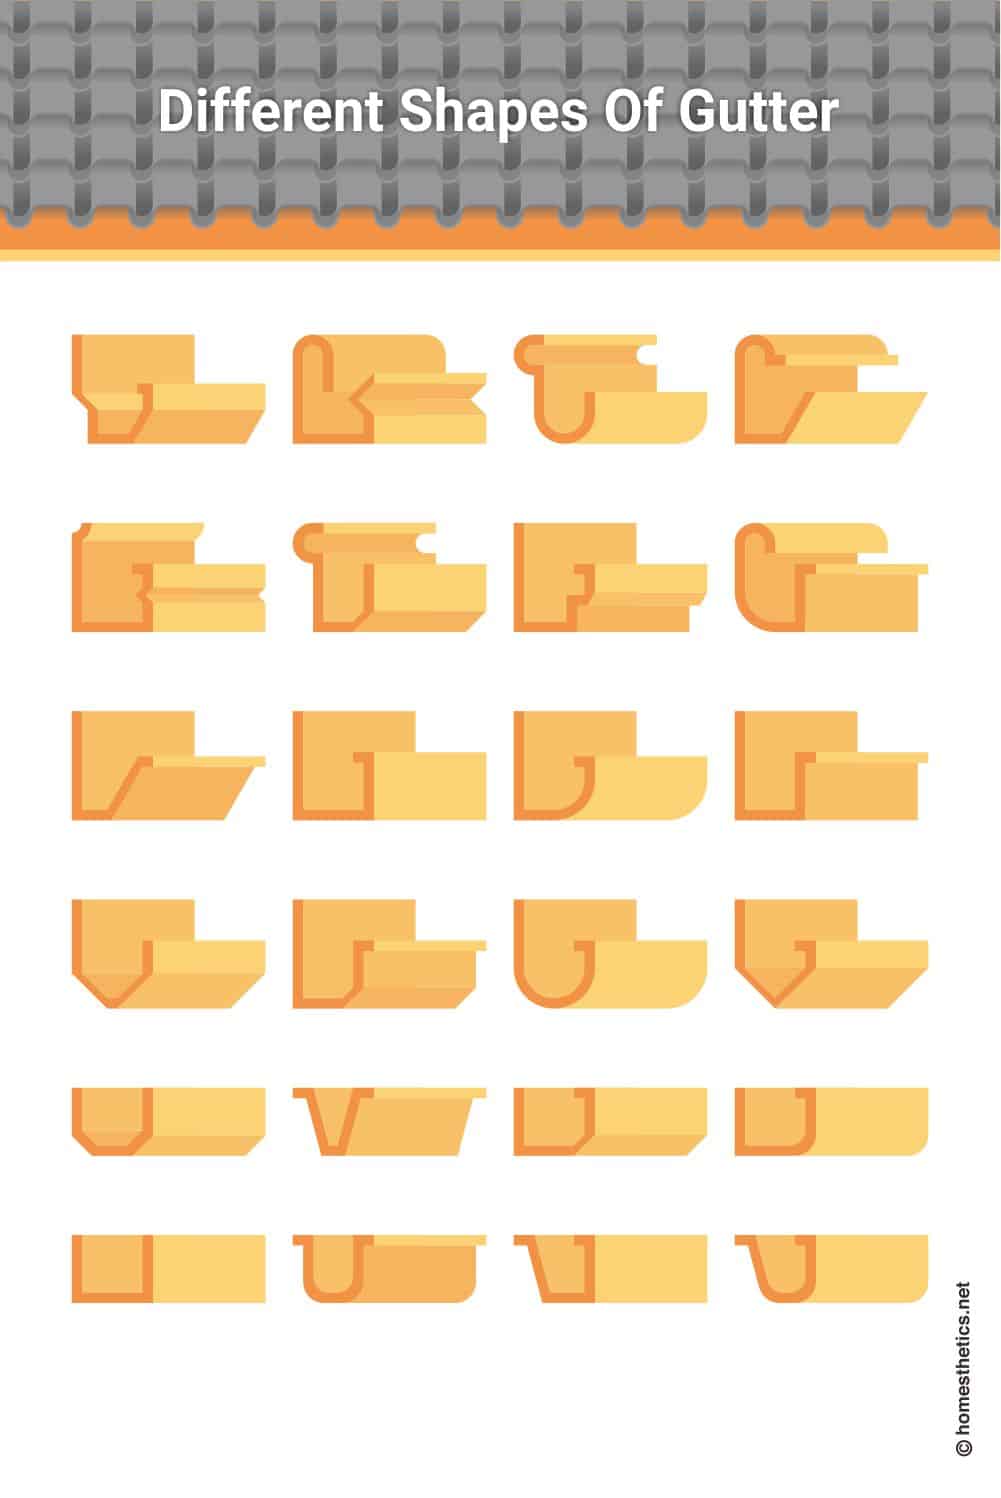
There are dozens of gutter types to choose from. However, the kind of gutter you decide to get for your home does not depend singularly on its aesthetics. Instead, you need to consider its functionality.
In this section, we will talk about the different gutter types. We have divided them into categories based on their shape, the material used to make them, their construction, color, and size.
Based On Shape
K-Style Gutters
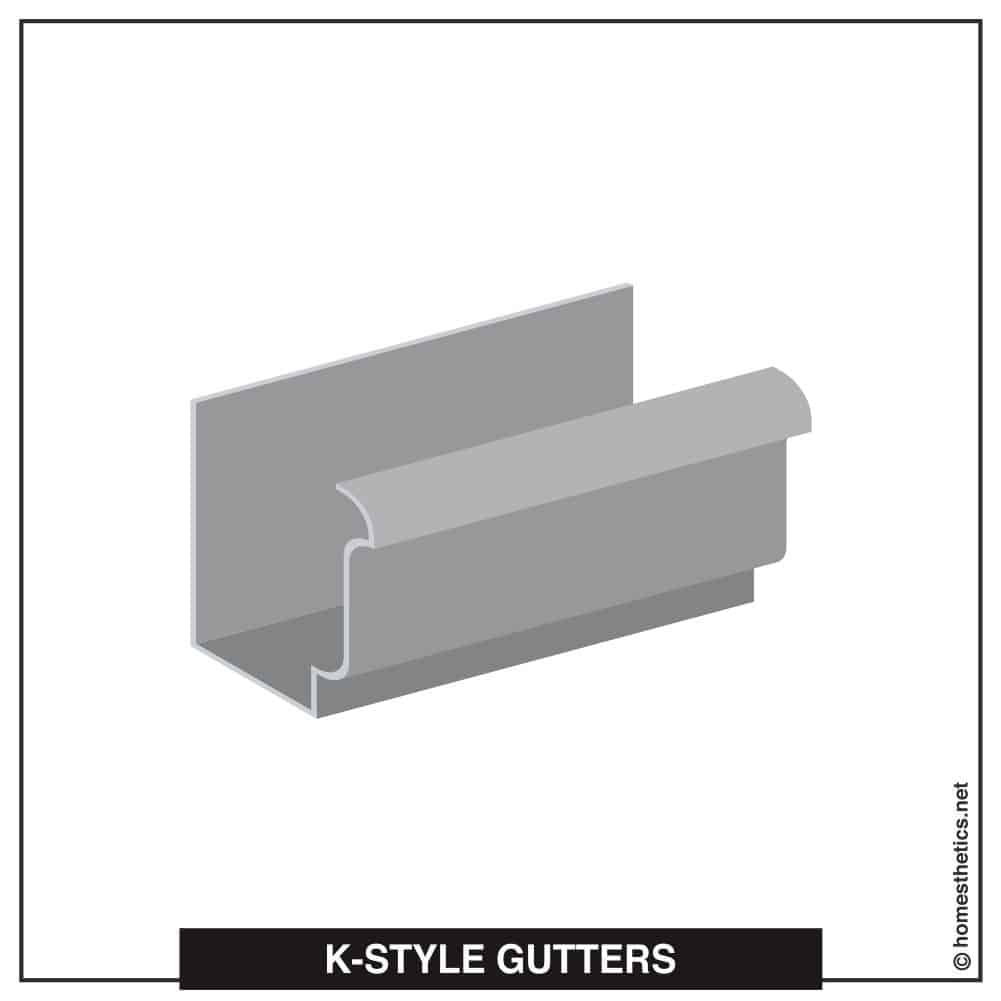
We begin the list by introducing you to the most popular type of gutters for homes - K-Style gutters. These gutters have been used in most homes for over 50 years because of their reliability, ease of installation, and functionality.
A fascinating tidbit about this gutter is that they do not get their name because of their resemblance to the letter "K." This is a common misconception which most people have.
In actuality, K-Style gutters get their name from the fact that they are listed as option "K" in the national association, which lists the common types of gutters available.
These gutters are immensely popular due to their aesthetics. It might sound strange to some people, as you don't generally expect gutters to be aesthetic. However, K-Style gutters typically have very decorative fronts and curved designs, making them a relatively aesthetic addition to your home roof.
These gutters are found in various shapes and sizes, giving homeowners plenty of options to choose from. Furthermore, they are said to look similar to crown moldings, which are optional decorative pieces that many homeowners add to their ceilings.
Pros
- Aesthetic design
- Easy installation
- Durable and long-lasting
- It can hold more water than other gutter styles
Cons
- Susceptible to corrosion
Half-Round Gutters
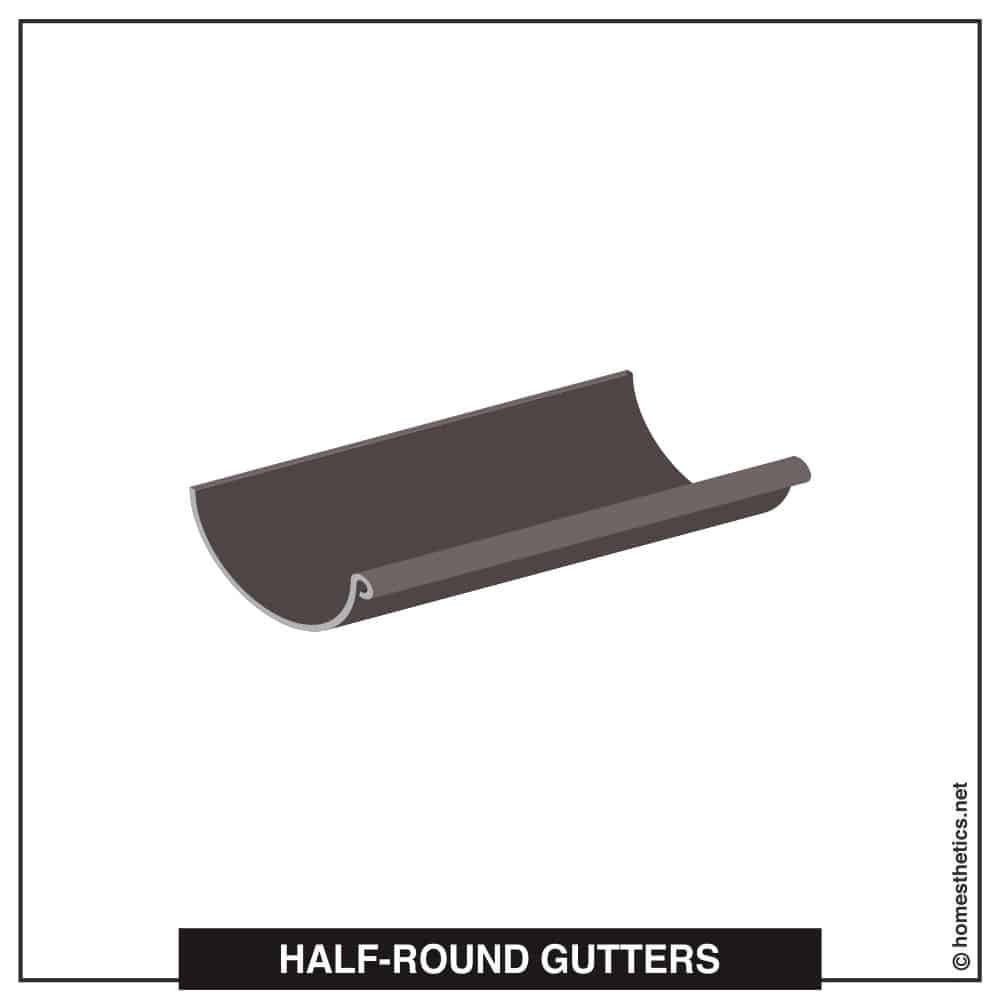
Moving on to our next style, we want to talk about the half-round gutters. As the name suggests, this gutter style looks like a tube cut in half.
These gutters are the next popular choice after K-style gutters. Although they are not as popular as the previous type, homeowners looking for a functional gutter that isn't overly flashy will appreciate this one.
These gutters are extremely useful in trapping rainwater effectively and channeling it towards the ground. That said, its open style also makes it prone to trapping dead leaves, twigs, and other unwanted debris.
If you opt for half-round gutters, keep in mind that you need to regularly clean and maintain it. We admit it; regular gutter cleaning can be overwhelming, not to mention messy and complicated. We recommend hiring professional gutter cleaners who can come over once in a while to do the job expertly.
Those who have a keen eye for detail may notice half-round gutters featuring in most historic or traditional-style homes. These gutters were immensely popular prior to 1960, after which K-style gutters became the rage.
Pros
- Traps rainwater effectively
- Adequate space to store large amounts of water
- Simplistic style
- Customizable options
- It can be installed with hidden hangers
Cons
- Prone to trapping unnecessary debris
- The curved design does not sit flush against boards
Fascia Gutters
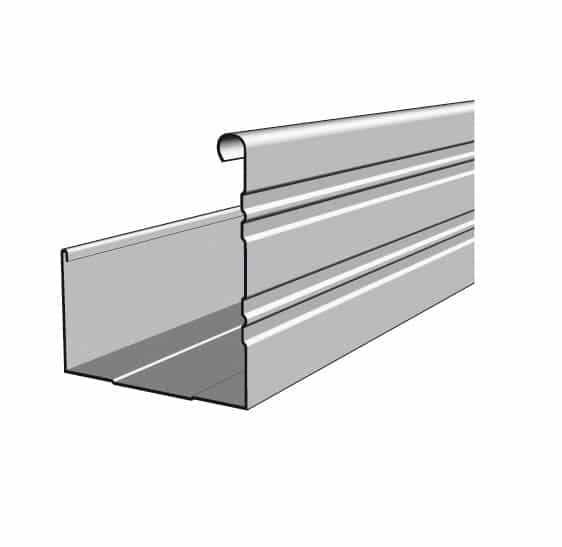
If your home does not have a pre-installed fascia board, fascia gutters may be an ideal option. This is because fascia gutters play the dual role of acting as a gutter as well as a fascia board. So, you don't need to worry about separately installing the board if you don't already have one.
Moving on, fascia gutters are immensely popular because of how easy they are to customize. Homeowners who care deeply about personalization tend to opt for fascia gutters. Furthermore, these gutters generally have a sleek and contemporary appearance, making them ideal for modern homes.
A common issue most homeowners face is with their rafter rails. Not only do they compromise the aesthetics of your home, but they also leave space for water or small animals to enter.
Installing a fascia gutter eliminates this issue. Once you install these gutters, the edges of your rafter rails will not be visible. Not just that, the gutter does not leave any space for water or animals to enter, making it safer for your home.
Lastly, fascia gutters are not sold in separate sections like most other gutters. Instead, they come as a long stretch of aluminum that is installed on your roof. Although this makes installation slightly more tricky, not to mention expensive, it produces a robust and seamless bond.
Pros
- Seamless design
- Easy to customize
- Prevents water seepage and damage
- Hides rafter rails
Cons
- Costly professional installation
European Gutters
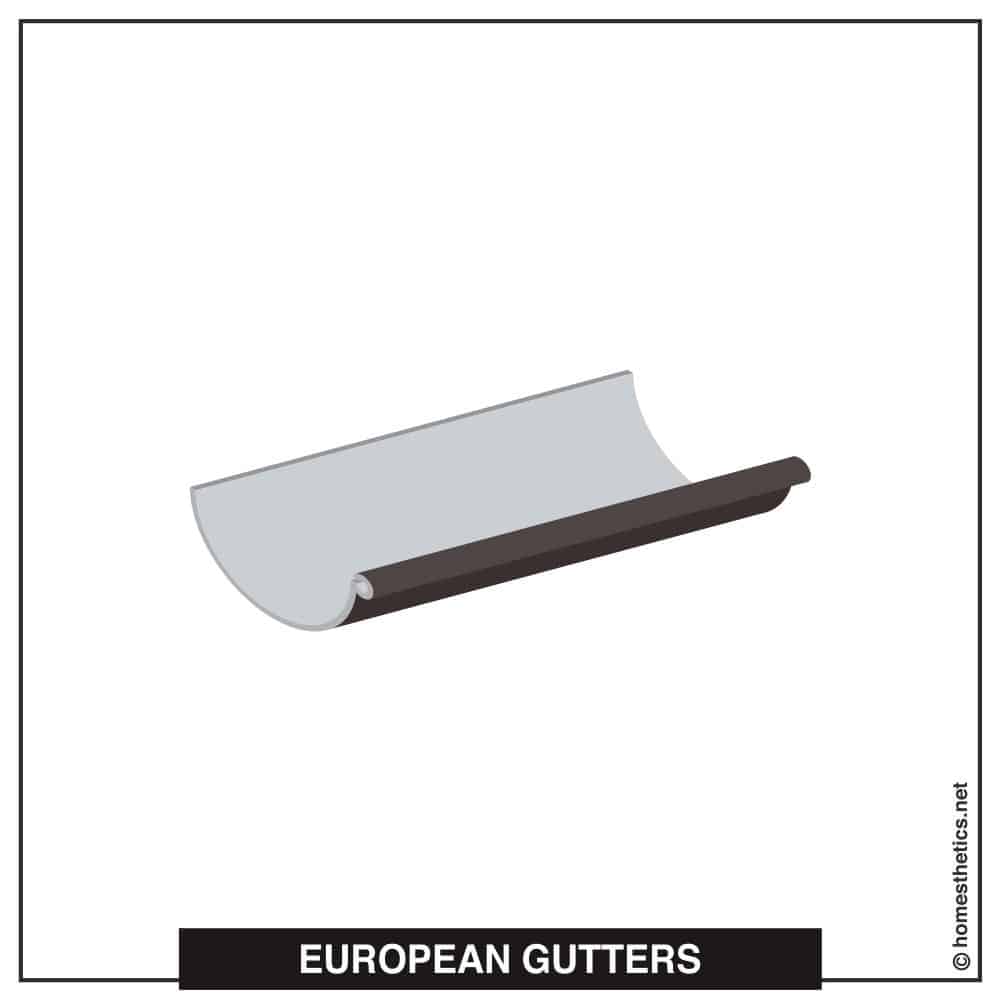
If you like the minimalist appeal of half-round gutters but are looking for something a little more decorative or durable, consider European Gutters. These gutters look very similar to half-round gutters but feature an additional lip. The lip protrudes and is distinctly visible, the look of which many homeowners seem to like.
Another distinct feature is its prominent half-round hanger. These features add an extra layer of class and appeal to your traditional gutters, which is why they are a popular choice amongst homeowners.
You can also opt for European gutters made of copper, which are known to age well. These gutters initially have a shiny, distinct appearance when they are first installed; however, as they age, they get a distinctive patina that is visually pleasing.
Another reason to opt for these gutters is their durability. Typically, European gutters have a solid construction and are built with high-endurance materials. This makes them ideal for regions that experience severe rainfall, storms, and wind.
The sturdy construction of European gutters enables them to withstand adverse climatic conditions. They are less likely to suffer damage or get cracked, ripped, or torn in adverse weather conditions.
Finally, if you are tired of little critters building their nests and homes in your gutters, don't fret. The unique design of European gutters makes it tricky for small animals to build their homes, as it does not have the same level of protection as other gutter types.
These gutters also allow more rainwater and debris to flow towards the downspouts. This means that they are less likely to get clogged and require periodic cleaning and maintenance.
Pros
- Wider curves allow more water to flow
- Less likely to clog
- Not ideal for animals to build their homes in
- Aesthetically pleasing
Cons
- Not conducive with gutter guard systems
Victorian Ogee
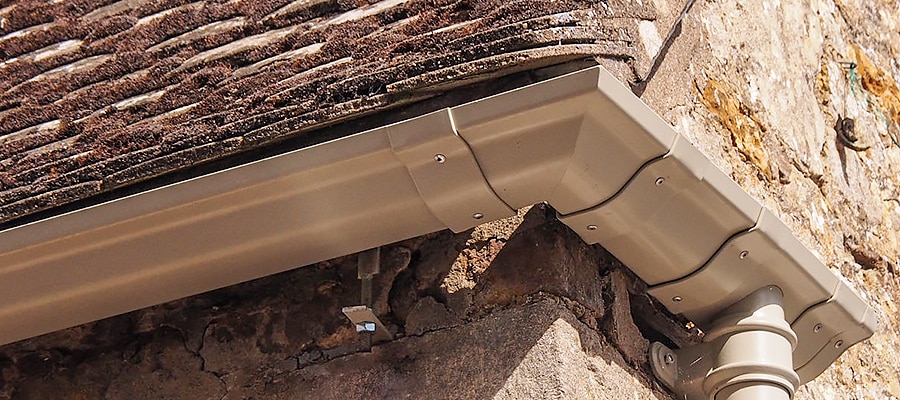
As the name suggests, the Victorian Ogee gutter system is inspired by 19th century Victorian gutters. Although the original style of gutters was made of cast iron, modern Victorian Ogee gutters have several other options.
That said, these gutters follow the same style and aesthetics of the original ones, making them ideal for installation in traditional homes.
One of the most significant advantages of these gutters is that they are very low maintenance. You also have several sizes and options to choose from, so you can customize them to fit your home perfectly.
This is especially beneficial for those who are looking to install new gutters into their homes or replace their old ones.
Victorian Ogee gutters are also known as "Old Gothic" gutters. It is evident that they get this name due to their distinctive, old-fashioned, Gothic appearance. If you are a fan of old, Victorian architecture, these gutters can be the ideal addition to your home.
A few essential factors to note about them are that they cannot be bought off the shelf. As such, you need to find the right professional to custom-build them for your home. Furthermore, these gutters are typically shallow, which means that they cannot handle massive downpours.
The gutter style is ideal for small homes or homes built in a region that doesn't experience heavy rainfall. So, those living in arid climates who are fond of old-style, traditional gutters can consider this a perfect addition to their homes.
Based On Material
Aluminum
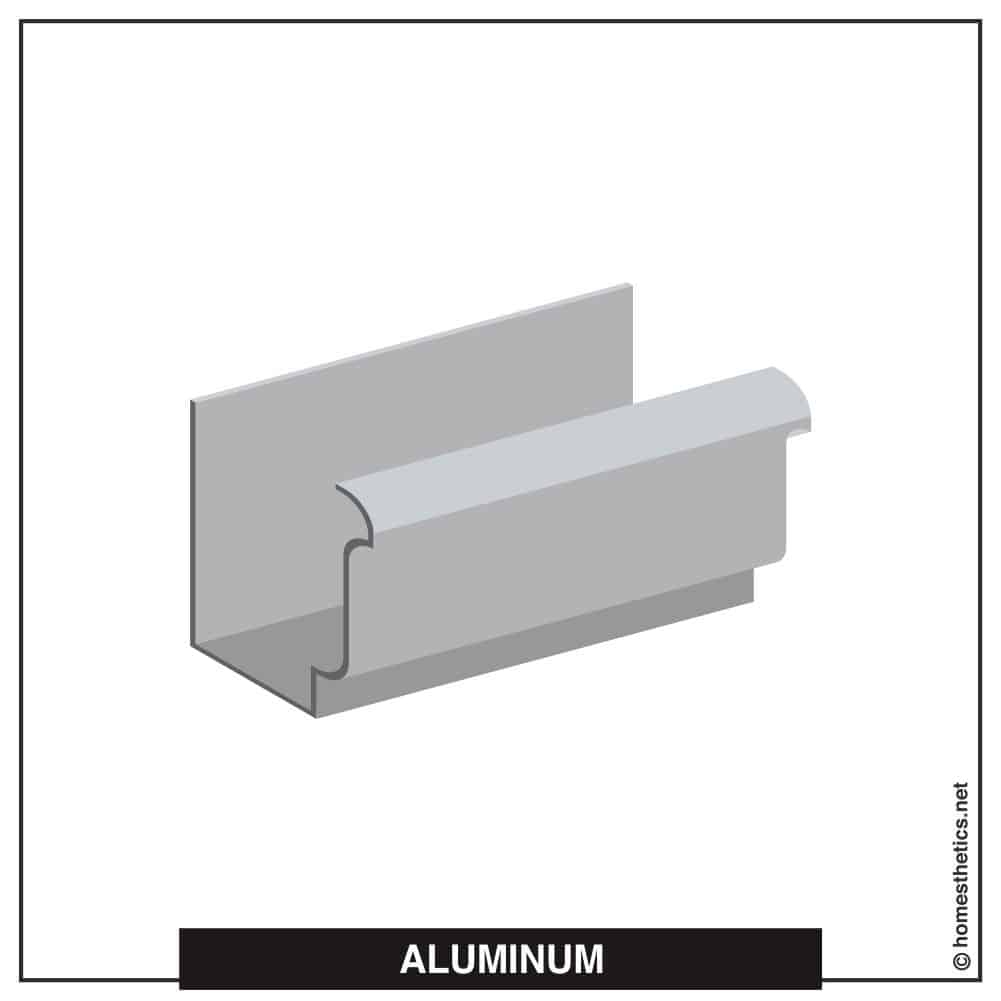
Aluminum gutters are by far the most common material used for making all types of gutters. The primary reason behind this is that they are lightweight and easy to install. They are also available in different thickness options, giving you the freedom to choose the right one for your home and environment.
Those who care about color coordination will also love the versatility of aluminum gutters. As such, you will find these in several color choices. You can customize them to any size, shape, and color you wish.
Let's not forget, aluminum is extremely affordable and can be easily found in most local hardware shops or online stores. Furthermore, this lightweight material is easy to install, making it ideal for DIYers.
Of course, you can always opt for professional installation services, but even that will not cost you too much.
Aluminum gutters are mostly weather-proof and can withstand all types of climatic and temperature conditions. Furthermore, they are not prone to rust and corrosion, eliminating the need for costly repairs and replacement.
Pros
- Availability of colors
- Easy to customize and install
- Affordable
- It does not rust or corrode
Cons
- May dent easily
Vinyl
If you thought aluminum gutters were affordable, check out vinyl ones. These gutters typically cost less than aluminum while holding similar properties. They are incredibly lightweight and easy to install, making them very popular for DIY gutter installation.
Another incredible thing about them is that they are available in an array of colors. However, if you don't find the right vinyl gutter for your home, don't worry. You can easily have them painted any color you wish, perfectly matching the aesthetics of your house.
A common issue with aluminum gutters is that they are likely to dent or bend. However, that concern is eliminated with vinyl.
Vinyl gutters are made of very durable plastic that can withstand heavy rainfall, storms, and winds. Moreover, they are not prone to corrosion and rust, which is certainly an advantage you’d like in gutters.
A major advantage of choosing colored vinyl gutters is that they are less prone to showing scratches and marks. In most cases, unpainted vinyl gutters are excellent for those worried about scratches being visible.
Please note that if you opt for painted vinyl gutters, scratches may likely show up on them.
All said and done; there are a couple of things to keep in mind when opting for vinyl gutters. For starters, they are prone to fading when exposed to constant, direct sunlight.
Moreover, ensure that you don't purchase cheaply constructed vinyl, as this will make the gutters prone to sagging with age. They can also get brittle if they are exposed to continual adverse climatic conditions. That said, this is not something you need to worry about if you opt for high quality vinyl.
Finally, vinyl gutters snap together very easily during installation. While you can install these gutters by yourself with ease, we recommend getting professional help.
Pros
- Easy to install
- Very affordable
- Color options available
- Anti-rust and corrosion
Cons
- May fade with sun exposure
Zinc
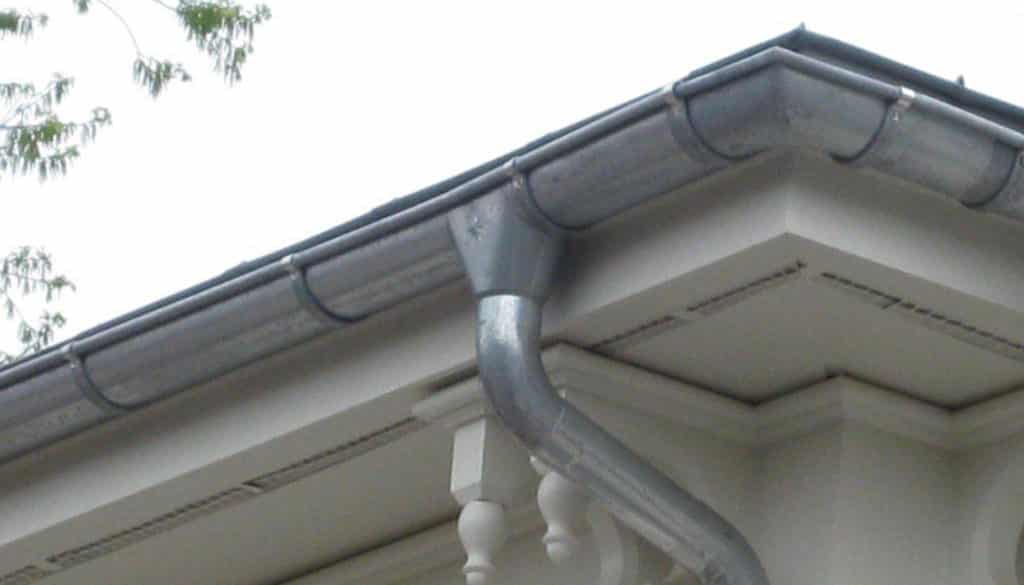
Moving on to the next material, you have zinc gutters. Although these gutters will cost you significantly more than aluminum or vinyl, they are incredibly durable, solid, and built to last for at least five decades.
Keep in mind that zinc gutters are likely to last for 50 years with proper care and maintenance; however, their longevity is slightly compromised if you live near the ocean. This is primarily because of salt in the air that affects the integrity of zinc over time. Although they are not ideal for these regions, you may still consider them as an option.
In most cases, zinc gutters also contain small amounts of titanium and copper. Moreover, these gutters are generally left unpainted and do not come in a variety of colors like other gutter materials.
However, this can actually work to your advantage. As zinc ages, it develops a distinct and appealing patina that enhances its aesthetics. Of course, it is essential to stick to regular cleaning and maintenance routines to ensure that it ages well.
You may find zinc gutters featured in high-end or traditional, historic homes. This is primarily because of how reliable and durable the material is and how well it ages. Furthermore, since these gutters can last for decades, they are considered a smart investment.
That said, we must mention that zinc gutters almost always require professional installation. This is because their joints have to be welded using professional tools, and it may be hazardous to attempt doing so on your own without professional help.
Pros
- Long-lasting and durable
- Aesthetic
- It does not rust or warp easily
- Ages well and develops a beautiful patina
Cons
- Requires professional installation
Copper
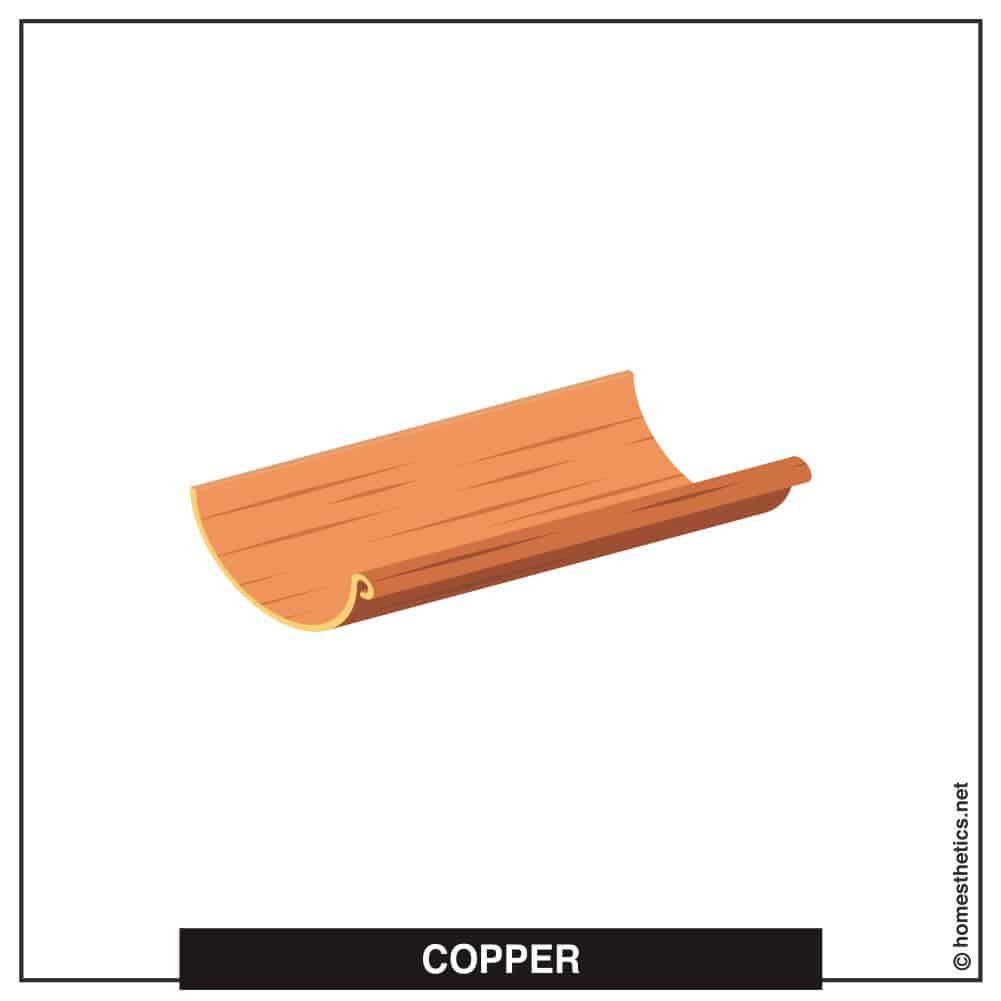
The next alternative you can explore for your home gutter is copper. Since these gutters are more expensive than aluminum or vinyl, most people avoid installing them. But look closely, and they do have several advantages of their own.
Installing copper gutters has a set of benefits that are worth the price. For starters, you don't need to worry about painting copper, as it is popular for its natural color and sheen. That said, keep in mind that it develops a slight greenish patina as it ages.
Many people prefer the natural, old-world appeal of aged copper, so this greenish tinge isn't necessarily a bad thing. Moving on, another benefit of installing copper gutters is that they are not prone to mold, mildew, fungus, and rot. Just ensure that they are installed correctly by a professional, and these common conditions will be the least of your worries.
Pros
- Ages well
- It does not require an additional coat of paint
- Sturdy and long-lasting
- Not prone to developing mold, mildew, or fungus
Cons
- Not the most inexpensive choice
Galvanized Steel
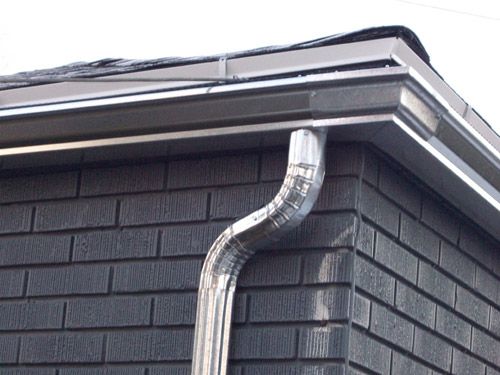
Galvanized steel gutters are made of steel and covered with a thin coating of zinc for extra protection and durability. These gutters have a very simplistic appeal; moreover, their shiny look can make them appear quite classy.
Typically, galvanized steel gutters are solid and can withstand adverse climatic conditions. That being said, we should also mention that this material is slightly more prone to rusting, so it is essential to maintain them well over time.
Furthermore, although these gutters are known for their high endurance and strength, they are prone to minor scratches. Unless you maintain them well, they may get easily damaged due to rust.
Homeowners who plan on installing galvanized steel gutters should be prepared to partake in a regular cleaning and maintenance routine. You can do this yourself or hire professional help. Otherwise, you’ll have to spend on frequent repairs and replacements.
Another vital factor to keep in mind is that it is best to get them professionally installed. Of course, there is no harm in doing it yourself, but incorrect installation can lead to rainwater getting pooled near your home due to improper channeling and drainage issues.
Pros
- Aesthetic and stylish
- High strength and endurance
- Long-lasting
- It can be painted over
Cons
- Prone to rusting if not maintained and cleaned frequently
Galvalume

If you liked the look and appeal of Galvanized Steel gutters but are looking for an alternative that isn't prone to rust, consider Galvalume gutters. The first thing you need to know about it is its composition.
As you may already know, steel is one of the best options for gutters. This is due to its inherent strength and durability. However, galvalume steel uses a patented coating made of zinc, aluminum, and silicone that enhances its strength and resilience.
Moreover, this patented coating is known for its anti-rust and anti-corrosion properties. The zinc particles also add to its resilience, ensuring that your gutters last for decades without much issue.
Unlike Galvanized Steel gutters, you don't need to worry about the reaction of the material when it is exposed to heavy rain or sunlight. Furthermore, it is relatively easy to customize this material and build the most appropriate gutters for your home.
Pros
- Strong and resilient
- High endurance to weather conditions
- Aesthetic appeal
- Easy to customize
Cons
- Requires expert installation
Based On Construction
Sectional
As the name tells you, sectional gutters consist of numerous sections that are joined together to build a gutter system for your home. Typically, several sections are taken and trimmed down to fit each other perfectly. The various sections are then joined using connectors.
One of the advantages of sectional gutters is that they can be easily manipulated to fit any home. No matter how long or wide your roof is, sectional gutters can be customized to fit each home perfectly.
Installation of these gutters is extraordinarily straightforward and convenient, and many DIYers do it on their own without professional help. That said, these gutters are prone to leaking if not installed correctly, which is why we recommend hiring an expert.
Pros
- Easy installation
- Can be cleaned and maintained without hassle
- Affordable
- Can be customized on the spot
Cons
- The connecting portions may cause leaks if not installed correctly
Seamless

The other alternative to sectional gutters is opting for seamless gutters. As you may guess, seamless gutters automatically eliminate the worry of leaks and seeps, thanks to the absence of seams or connectors.
These gutters are typically custom-made to fit each home. As such, they are costlier than sectional gutters but may provide more value over time. Seamless gutters are made of one large piece of material and only have connectors at the corners, joints, and downspouts.
Furthermore, these gutters are typically very strong and are built to last for decades. You can also choose between a plethora of colors. This gives you more flexibility over the final look you wish to achieve.
Pros
- Reliable and leak-free
- Color options available
- Custom-made to fit your home
- Sturdy materials used
Cons
- Expensive
Based On Size
5-Inch
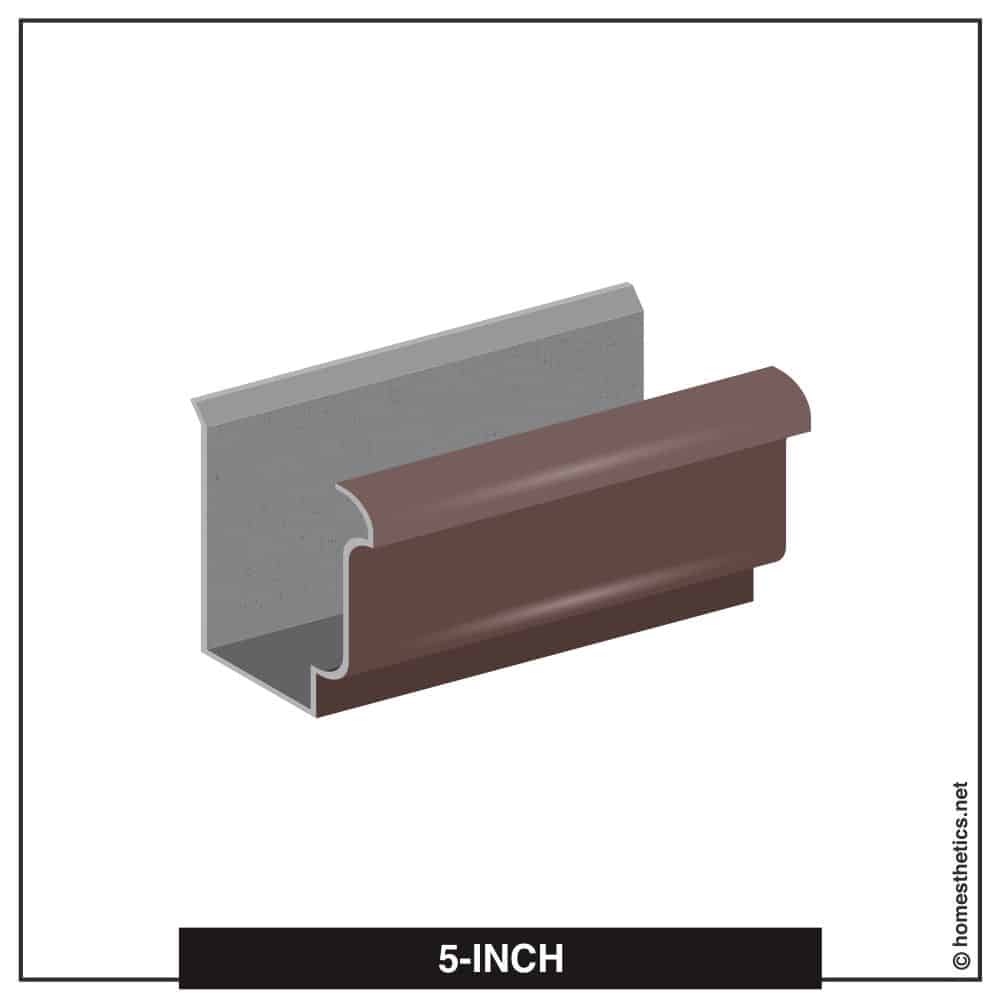
The most common gutter size you will find on the market is 5-inch gutters. This is most commonly found in K-Style gutters. Fortunately, this gutter size is adequate for most homes as it can easily handle rainfall, leaves, and other debris collected in the gutters.
However, if you live in a region that experiences heavy rainfall, you might need to opt for larger gutters.
That said, if you want to stick to 5-inch gutters for convenience or aesthetics, there is another solution. Opt for wider downspouts which can carry more water away from your home.
6-Inch
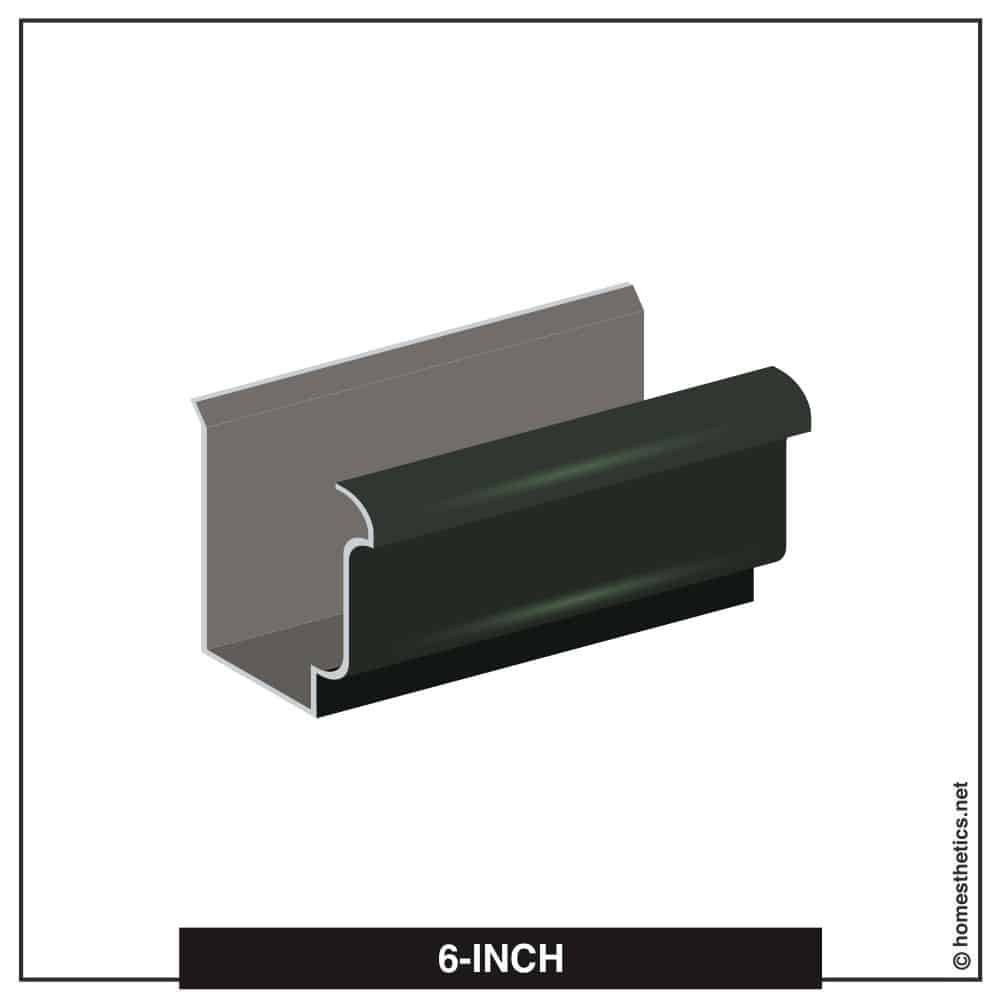
6-inch gutters are not the largest size gutters you can opt for. However, these large gutters are often adequate for most homes that cannot make do with 5-inch ones.
You may find 6-inch gutters for most half-round gutters as this size is the most convenient for the shape. If you think you might require more oversized gutters, we recommend speaking to a professional about it.
Several factors like the amount of rainfall you receive, its intensity, and the pitch of your home can determine the correct gutter size. Keep in mind that larger gutters do not always mean better drainage. In fact, opting for gutters that are too large may be detrimental and can affect the aesthetics of your home.
Based On Color
Bold
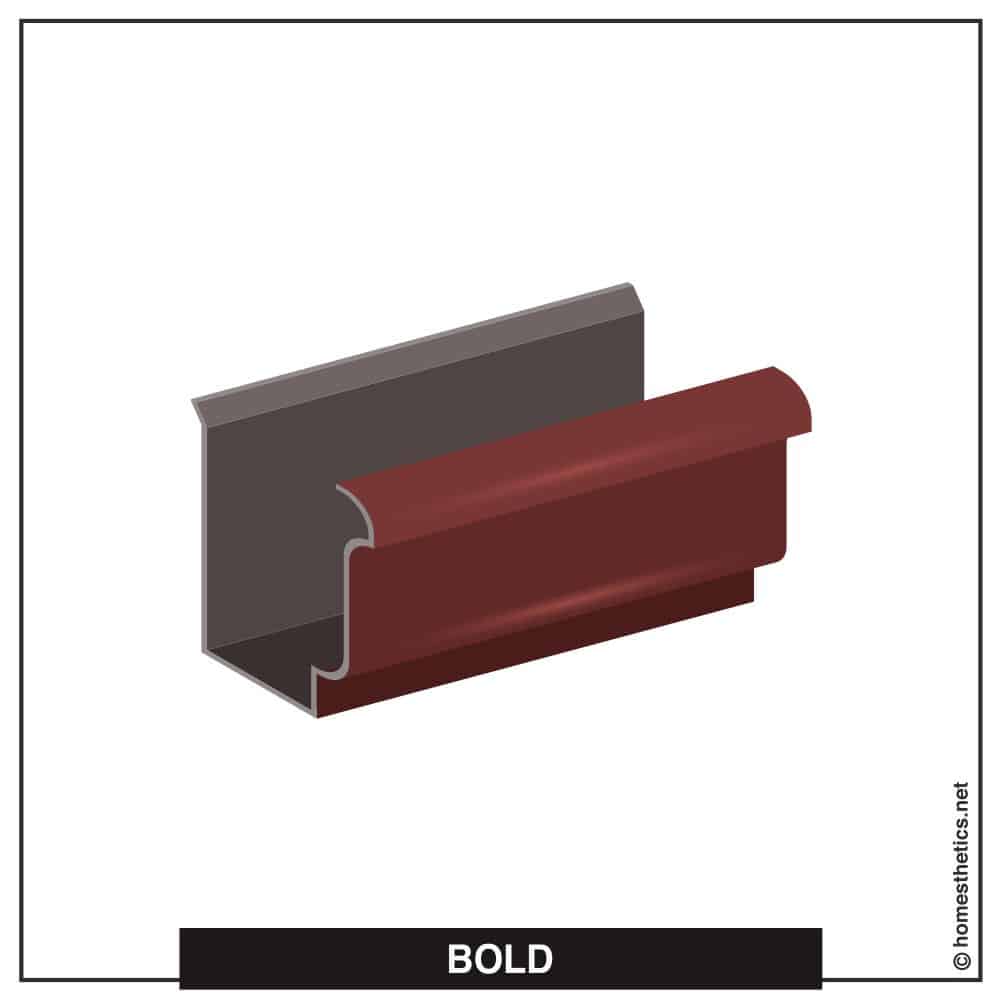
Unless you live in an HOA that restricts bold gutter colors, you can opt for any color gutter you desire. Keep in mind that certain gutter materials cannot be painted; however, most of them can.
Consider the general color scheme and aesthetics of your home before choosing a bold gutter shade. You can ask an expert about this as they might be in a better position to recommend the right gutter color for your home and personality.
A bold gutter shade can instantly add to the aesthetic appeal of your home, distinctly transforming its appearance.
Neutral
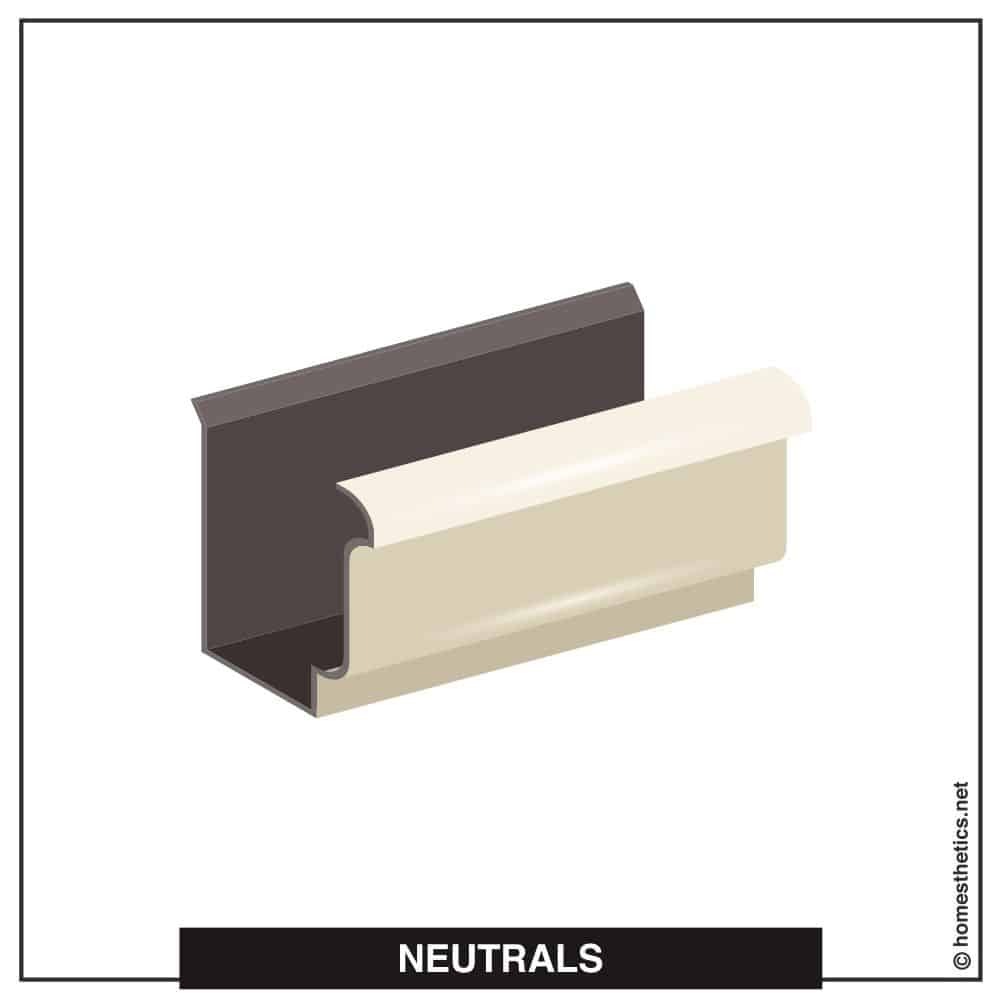
Opting for a neutral gutter shade instead of a bold one doesn't mean you aren't adventurous. In fact, several neutral colors can look better than bold, bright shades. The right neutral tones can instantly add class and appeal to your home, especially if you can complement it well with the rest of your domestic decor.
Gutter Type Buyer's Guide
Now that you know all about the different gutter types, you may be wondering which one to choose. With the availability of options, making the right decision can often be overwhelming.
Fortunately, we have curated a guide to help you choose the right gutter type for your home. Take a look!
-
Longevity
When choosing the right gutter type for your future home, consider how long you want it to last. If you don't mind replacing it once every few years, you can opt for aluminum or vinyl. These are relatively inexpensive to replace, and you can switch gutter styles if you need to.
However, if you want to make an investment that will last you for decades, consider more durable and reliable materials. Copper and zinc are ideal materials to opt for, while galvalume is also a good option.
In terms of the gutter type, it is best to take professional advice when choosing this. Although you may like the aesthetics of a certain gutter style, it may not be suitable for your home.
-
Need
You also need to consider whether or not a gutter installation is required for your new home. Those living in arid climates have a choice not to install them. However, if you live in a region that experiences rainfall, we recommend installing one.
We have added a short guide in the section above that will help you determine whether your home requires a gutter or not.
-
Ease Of Installation
Do you enjoy DIY installations, or do you prefer to leave it to the experts? Either way, it is a vital consideration when choosing the right gutter for your home. Certain gutters call for professional installation, so keep this in mind when selecting them.
-
Budget
Last but not least, you need to consider a budget when choosing the right gutter for your home. Some gutters are affordable and long-lasting, while others are more of an investment.
Conclusion
With that, we are finally ready to wrap up our guide.
Hopefully, this helped you understand the different gutter types in the market. When choosing the best gutter type for your home roofing, consider its durability, aesthetics, and whether it is suitable for your region and environment.
If you have any further questions, feel free to leave a comment below. Until then, take care!
Related Articles
23 Hip Roof Types & Styles for Your Future Home
Learn About the 20 Most Popular Roof Types for Your Future Home
What is the Mansard Roof, Advantages and Disadvantages Sheltered
6 Eco-Friendly Roofing Materials and Why You Need Them
How To Clean Gutter Guards Efficiently
Shur Flo Gutter Review | All You Need to Know
EasyOn Gutter Guard Review 101 | All You Need to Know
5 Best Foam Gutter Guards [Reviewed & Buyer’s Guide]
23 Extraordinary Beautiful Ways to Repurpose Rain Gutters in Your Household
Discover the advantages of safeguarding your home with an environmentally conscious roof that offers both practicality and sustainability. The leading eco-friendly roofing materials on the market today consist of materials such as metal, wood, clay tiles, and recycled shingles derived from wood, rubber, or plastic.

In this comprehensive guide, we will examine six of the finest eco-friendly roofing materials and discuss why incorporating these sustainable options into your home is essential.
So, what sets eco-friendly roofs apart from traditional roofing systems?
Eco-friendly roofing materials are gaining popularity due to their numerous benefits, including:
- Lower energy consumption
- Contribution to a healthier ecosystem
- Accessibility and affordability for a variety of homeowners
Moreover, these roofing materials come with added advantages like water resistance, fire resistance, and impressive durability. Notably, eco-friendly roofing materials can also enhance soundproofing against airborne noises, allowing for a more tranquil and comfortable living environment.
Browse through our carefully curated list of "Eco-Friendly Roofing Materials" and make an educated choice for your home that is sustainable for generations to come.
Eco-Friendly Roofing Materials
-
Solar Panels
Solar panels, also known as solar shingles, are the most trendy roofing systems currently.
This type of roofing is one of the top eco-friendly roofing options today due to its exceptional ability to cut down electricity bills.
However, solar panels alone do not form your whole roof. They need to have support to sit on. That is why, before getting started with solar panels, having a strong and proper roof is required.
But the benefits that you’ll get with solar panels are countless. Not only do they save electricity, but they also do not emit wastes and harmful substances to generate electricity, nor do they contribute to air pollution.

Moreover, unlike other power plants, they need little or no steam at all to generate electricity; only sunlight. That makes them highly beneficial for the environment as well as your household too.
Solar panels by themselves are quite affordable, hence, they have become so popular and accessible to everyone. And the installation cost varies from one roof to another.
Although the cost of getting solar panels installed differs from roof to roof, the whole process is still quite expensive compared to other roofing systems. And this is not advisable if you are planning to shift sooner rather than later. It would only be a waste of money if you are temporarily staying in your current home.
-
Recycled Shingles
Shingles used for roofing have been around for quite a long time.
Asphalt shingles used to be the most popular option - the type which is used on roads - because of their durability. They are also water-resistant, very cheap, and easy to install.
However, asphalt roof shingles pose a threat to the environment because they’re petroleum-based and emit dangerous fumes when recycled.
And that is where eco-friendly roof shingles come in. Some of the common eco-friendly shingles are clay tile, slate tile, concrete tiles, wood, rubber, and metal.
The price of recycled shingles varies according to the type. However, almost all shingles are affordable, except for wood shingles which are comparably more costly.
Slate Tiles
This type of roofing is nothing new as it has been around for many years.
There are two types of slate tiles: hard and soft. Hard slates are mostly colored while soft slates are mostly black.
Depending on the type, roofs made of slate tiles are known for being highly durable because they last for a very long time - even for a lifetime!
Besides the incredible beauty that they add to your home, they are easily interchangeable when one breaks and causes leakage.
But the overall installation is to be done by a professional because these are very heavy and thick tiles.
If you are planning to have a beautiful and long-lasting roof, this might just be the right option for you.
Clay Tiles
Similar to slate tiles are the clay tiles used for roofing. There are a few differences, however.
Clay tiles don’t last as long as slate tiles would. They probably will last only for some years, say, 50 years tops. But clay materials are very eco-friendly, whatsoever.
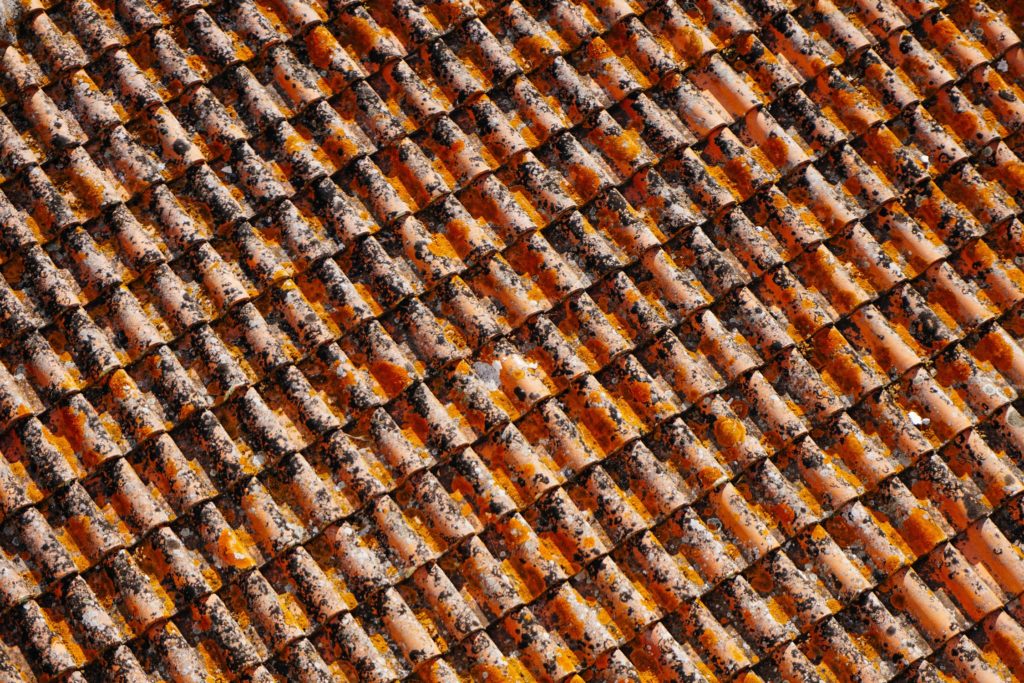
Moreover, with clay tiles, you don’t get a lot of color variations, except for earth tones like orange, yellow, brown, and white. But some people like the simplicity these colors portray.
Clay tiles are fire-resistant as well as robust against strong winds. Also, insects have no chance. They are also quite heavy and need experts for installing them.
Concrete Tiles
A concrete tile is a product of water, sand, and cement which makes it environmentally friendly.
Concrete tiles provide the home with a cool sense of comfort. This helps reduce the use of air conditioners during the summer. Plus, it is also a cheap option if you are on a budget for roofing.
No doubt that the manufacturing part of concrete tiles involves releasing harmful agents into our environment. And to be honest, it’s mostly the same with many manufacturing processes as well. However, what is worth it is the end result you get when finally using the tiles.
Note: Some people have experienced concrete tiles to be fragile to harsh weather while some find that they have a high level of endurance. The reason for such a difference may be due to the mixture or the type of cement/sand used.
For concrete tiles to last longer, the cement and sand used must be well refined and the structure of the tiles should be condensed enough that rainwater cannot penetrate easily.
Wood Shingles/Wood Shakes
Wood shingles are generally made from recycled cedar shakes. But there are those which are made from other wood varieties as well.
However, cedarwood shingles are the most preferable because they repel insects and resist water/moisture due to the natural oils present in them.
To put it out there, wood shingles are mostly used for high-end houses and they require frequent or regular maintenance. But, they do give houses an expensive look.

Moreover, they have high endurance against harsh weather or elements and they have natural insulation which can help cut down the electricity bill.
Wood shakes are very similar to shingles. The only difference is how they are crafted.
While shingles are sawed, shakes are made by hand-splitting them from the main piece of the log.
There is also a difference in the structure. With wood shakes, you will clearly see that one end is thicker than the other. This is the side that should be visible when laid down for roofing.
This option is perfect if you like the beauty and traditional look of wood for your place.
As we have mentioned about wood roofing, the problem with it lies in the price tag - It can be too expensive for some people. It is also inflammable and needs to be renewed/changed only after a few years.
Rubber Roofing
Rubber shingles are constructed from recycled tires which are mixed with sawdust and crushed slates. They are very affordable if compared to traditional shingles.
Roofs made from rubber shingles tend to last for quite a long time because they have high resistance against water and other harsh elements, except for fire. On top of that, they can be installed easily without requiring a lot of maintenance as regular asphalt shingles do.
There are more plus points to rubber shingles, though. Because these are properly formulated, it’s unlikely for them to bend - like normal rubber would, under the scorching sun. They are also crack-free which prevents leakage for years to come.
So if you are someone who is extra conscious about harsh weather conditions, a rubber roof is something that you might consider looking into.
Metal Shingles
Metal shingles are one of the best choices when it comes to roofing.
During rainy days, the noise from metal shingles may be too loud to bear. A solution for this is to layer your ceiling with insulation or install an underlayment mat.
Metal is long-lasting and is not susceptible to damage caused by insects/pests. On top of that, it provides great protection from harsh weather.
If you want to consider this option without having to worry about roof noises during rainy and windy seasons, we suggest hiring a team of experts to get it installed correctly.
-
White Roof
As the name suggests, a white roof can be of any material except that the paint must be white or other light colors. It is also commonly known as a “cool roof”.
The reason it falls within this category is because of the color.
As you probably must have heard, light colors reflect sun rays rather than absorbing them as darker shades do.
That is why it is eco-friendly as your house will comparably be much cooler on the inside with a white roof on it. Therefore, you do not have to spend all that money on paying electricity bills for using too much AC.
-
Living Roof or Green Roof
The living roof which is commonly known as the green roof is the type that accommodates some vegetation on it.
What this rooftop garden does is help reduce the energy consumption of a building by absorbing the heat to itself, therefore, leaving your home cool without having to use air conditioners.
The National Research Council of Canada conducted a study that shows that about 75% of energy consumption is reduced with the use of only a six-inch green roof.
Green roofs also absorb stormwater that is expected to overflow rooftops and cause potential floods. Almost 90% of the stormwater that hits the roof will be absorbed by a green roof. That will also help the place to remain cool during hot weather.

Using a green roof will literally solve half of energy consumption issues. It is a convenient and almost effortless option to make your home look more vibrant and beautiful.
Secondly, if you have no space for vegetation and gardening, this roof option will be perfect for you. It can also catch a lot of attention along the way.
Another benefit you’ll get from a green roof is that it reduces what is known as the urban heat island (UHI) effect that you experience in urban areas mostly. This happens when the area becomes too congested combined with pollution which means that heat is trapped in these certain places.
-
Roof Overhangs
Large enough roof overhangs will help to keep the exterior fresh and clean because they protect the house from all elements, especially from rain and sun.
Deep roof overhangs are the solution to maintaining the temperature in both summers and winters.
With roof hangs, it depends on the position and direction.
If the deep roof hangs facing the south, it will allow only a minimum of sunlight to enter the house and keep it cool during summer. And in winter, the roof allows winter sunlight to pass right into the areas where they normally don’t hit during summer.
According to the U.S. Department of Energy, these types of roofs are highly effective if you are located in the northern hemisphere, given that the building elements are faced south.
So these are perfect if you do not require any extra roofing materials except for the one which is an extension of your home.
-
Standing-seam Metal Roof
This type of roofing ensures protection, security, and durability. If you are someone who wants nothing but a good long-lasting roof, this will be the perfect choice for your home.
It holds most of the features that one would search for in a good roof. Unlike wood and other roof materials, metal roofs can last for about 40-50 years providing full protection against elements and requiring little or no maintenance at all.
We were talking earlier about white roofs and how any material would do. However, to get the best and most effective white roof, metal is the best option.
Metal roofs are not the cheapest in the market but they are one of the best roofing options to invest in.
Roof Installation
When it comes to applying shingles, there are many tools available for DIY roof installation.
However, we are not going to dwell on DIY roofing because first of all, you have to get the right tools, and getting all the necessary means is not as easy as it sounds.
Also, if you do it yourself, there is no guarantee that the roof will provide full protection unless you have years of roof installation experience. Plus, these are things you will probably only use for a few times in your life so spending a lot of money on them does not make sense.
So what we would recommend is to hire a team of experts and get the job done for you. Hiring professionals will save you a lot of time and energy.
Investing in professionals to get the job done will do your home good in the long run.
Conclusion
As a quick reminder, be sure to think of the advantages and disadvantages before you choose the right roof for your place. After all, you will have to live “under” that decision for a long period of time.
So we hope you find the best eco-friendly roofing option to go with your home and preferences.
And with that, we’ll wrap up today’s article. So, until next time!
Good luck!
Related Articles
23 Hip Roof Types & Styles for Your Future Home
Learn About the 20 Most Popular Roof Types for Your Future Home
What is the Mansard Roof, Advantages and Disadvantages Sheltered
How To Clean Gutter Guards Efficiently
Shur Flo Gutter Review | All You Need to Know
EasyOn Gutter Guard Review 101 | All You Need to Know
5 Best Foam Gutter Guards [Reviewed & Buyer’s Guide]
23 Extraordinary Beautiful Ways to Repurpose Rain Gutters in Your Household
Building your future home is like putting together one giant puzzle.

There are numerous factors to consider, and even if sometimes you feel one piece fits into space, it may not be the right one. Similarly, if you’re looking to avoid drywall, you’re probably thinking about some of the other options to consider.
To help you, we’ve narrowed down the 17 best products for you to try out. However, you still get a variety of options to choose from, and you can pick one based on the setting you’re looking to create.
Different factors, like durability and aesthetic beauty, have been considered. And all of these materials have certain features that make them stand out. We’ll discuss the essential aspects while you let your imagination run wild thinking about the various colors and shades to get the desired look.
So, without further ado, let’s begin, shall we?
Drywall Alternatives
-
Wood Planks
One of the top products to consider if you don’t want to use drywall is wood planks. It allows you to decorate your home like a farmhouse, or you can opt for a rustic look. Therefore, it brings a degree of sophistication to your interiors while being relatively easy to use.
No products found.

It’s important to note that you must get the wood to match the rooms; otherwise, it might look out of place. The best thing to do is to choose a modern design for which shiplap is the ideal model. We found it’s ideally suited to most homes given its ability to expand and contract.
Furthermore, it provides incredible versatility, and you can leave it in its natural form or paint it by mixing and matching different colors. It’s easy to install, and all you need is a power saw to fix it in place. Moreover, stick and peel wood planks present an affordable option.
-
Plywood
First and foremost, plywood brings together the best of two worlds and presents an exciting option for homeowners. It offers aesthetic beauty and, at the same time, delivers a sturdy construction. You’ll love that it provides an affordable opportunity to replace drywall and is easy to install as well.
All you need is to screw the studs with or without the drywall to fix it in the appropriate place. However, you’ll need to call for help as it weighs substantially more, but that’s understandable given the exceptional strength it generates.

The significant reason for using plywood is that it ensures you can experiment with various designs. You can leave it in its natural condition to get a Nordic look for your home while modern models are environment friendly and promote a healthy living space.
Meanwhile, we found that you can create a faux shiplap at half the cost by cutting it into planks.
-
Textured Wall Panels
Rather than having one solid color for your walls, you can add a textured look to provide a different effect. It amps up the aesthetic appeal of your room, and that’s why three-dimensional wall panels are all the rage right now. You get to choose from an array of materials, all of which produce stunning results.

For instance, some of the panels are made from coffee grounds and pottery shards to portray a unique pattern. And they are composed of authentic materials, so there’s no reason to worry about harmful chemicals or other side effects. Similarly, you’ll be pleased to note that it’s relatively easy to install.
They are available as tiles, or you can purchase the peel-and-stick version. Moreover, you can also paint it to match the interiors, making it perfect for producing an accent feature. The only thing you need to keep in mind is that regular cleaning is a necessity.
-
Exposed Bricks
Do you remember the saying – old is gold? Our next recommendation gives your interior an antique look but with a modern twist. The benefits of using exposed bricks are plenty, and you can decorate a small portion like an accent wall or even a larger area with ease.

It provides a perception of warmth while no other product can match up to the textured appeal. Meanwhile, it doesn’t require much effort to get it ready. All you need is to expose the wall and clean it before moving on to the finer aspects. You’ll also have to ensure all gaps and holes are plugged to prevent the bricks from absorbing moisture.
Furthermore, it delivers exceptional sturdiness, and with the right maintenance, it’ll last a long time. We should tell you it’s a little challenging to clean bricks given their rough and uneven nature. You’ll need to carry out regular dusting, but painting it will considerably reduce the need for maintenance.
-
Unfinished Concrete
Straight off the bat, unfinished concrete presents the ideal option if you’re looking to get a modern look. While it may seem bland, concrete can create a striking appearance, provided you make the correct choices. The best way to use it is by following the formula – less is more.

You don’t need to do too much, and having an accent wall made of concrete is a great style statement. Likewise, you’ll love that it won’t take much effort to maintain concrete, but you do need to ensure that it’s properly sealed. Also, depending on the coarseness you desire, you can opt for polishing.
Besides, you can play with various textures and choose from numerous styles to get the desired look. By combining it with specific natural elements, a concrete wall can exude a feel which is usually unmatched by other items. Lastly, it’s incredibly safe, thanks to its fire-resistant nature.
-
Veneer Plaster
Right away, you need to smear one or two coats of a thin plaster, which can be done with or without tint. The coating goes over a unique type of gypsum board called the Blueboard and provides an attractive interior design option. No surprise that veneer plaster is easy to install and offers more strength than drywall.

Furthermore, after the plaster sets, you have the choice of leaving it in its natural state. You can also paint it with various hues depending on the type of décor you’re going for, and therefore it delivers fantastic versatility. Plus, it’s water-resistant, and you won’t have to worry about problems like seepage.
It saves valuable time and doesn’t require much effort to install it. But the downside to using it is that you’ll need professional help, and you have to complete the work in one go for the best results.
-
Lath & Plaster
Firstly, using lath and plaster together presents an alternative to using drywall and veneer plaster. For those who don't know, lath forms the narrow strips of wood, placed horizontally between studs and ceiling joints. Once that's done, you can move on to coating it in plaster, which is ideal for delivering a medieval look to your interiors.

Moreover, it has the added advantage of being used with various textures to provide more vigor on the walls. It's readily available, which makes for an affordable option, and you can choose from the array of available prospects such as wood, timber, rock, or metal lath.
Meanwhile, for extra toughness and durability, we found that using horsehair improves the lifespan while making the texture stand out. People prefer it as an alternative because they can use it for curved surfaces or corners, thanks to its flexible nature.
-
Sheet Wood
Another terrific recommendation is sheet wood, which shares many similarities with plywood. Like the latter, it doesn't cost much while delivering a certain degree of flair to your interior designs. You get to choose from multiple wall decorations, which adds to the variety on offer.

It's perfect for getting the country feel, but what's striking is the exceptional sturdiness it delivers. While plywood may come off on occasion, you won't face any such problems with sheet wood, thereby making it highly desirable. Moreover, it's easy to install, and all you need is a power drill or screwdriver.
Remember to guarantee there are no cracks and take your time when it comes to shaping it. It's crucial to ensure the measurements are precise, and once the installation is over, it's easy to paint and match it to your interiors. As a result, it's highly beneficial and doesn't take much effort.
-
Cement Board
First and foremost, cement boards can be used across all the walls of your room to produce something called brutalism architecture. There's no need to be afraid; it means your room will comprise many right angles and flat surfaces along with concrete. It, therefore, provides a classy look to your interiors as well as excellent durability.

We suggest using it for one of the walls before deciding if the design needs to be replicated on the other surfaces. The main reason is the price, and since it's slightly costly, it's better not to go all-in on your first try. It would be best if you took your time rather than having to compromise.
Meanwhile, it works wonders in areas with high moisture content and is therefore susceptible to mold. It'll please you to note that if you have a staircase, then the cement board forms the most suitable background to make it stand out.
-
Pegboard
If you're looking to redecorate your garage, then we suggest you give the pegboard a try. It has several advantages, one of which is to provide an eye-catching background. Whichever room you choose to install it, ensures it gets plenty of light. It's because the pegboard helps to brighten up the room by reflecting the light.
As a result, you won't need to invest in any additional light features, which reduces the cost. We were impressed by how effectively you can space out the hook holes to get the desired storage space, making it highly convenient. And, thanks to its extraordinary strength, it allows you to hang the heaviest of objects without any hassle.
You can decorate your room in a multitude of ways, which speaks of the variety on offer. Plus, it's easy to install, and all you need is to screw it into the appropriate spot, followed by coloring the screws to render them invisible.
-
Cork Board
For starters, corkboards have several similarities to pegboards, making it another exciting option for future homeowners. It provides an easy installation enabling you to implement any random spark of inspiration that may crop up. Consequently, it's ideal for various types of designs to offer a striking appearance.
You can easily hang up photos or use thumbtacks for your favorite objects but keep in mind that it can't bear too much weight. It's one aspect where it misses out; however, it isn't a significant concern, and all you need is to ensure the object isn't weighty.

Furthermore, it naturally offers a range of choices for you to consider. Corkboard has multiple colors, thicknesses, and numerous sizes of cork chips adding to the versatility. It mostly comes in handy to light up a room, which brings about a feeling of warmth. As a result, it acts like a natural insulator that you're guaranteed to love.
-
Wahoo Walls
It has a funny name, and working with Wahoo Walls is equally exciting as well. If your original wall is made of concrete or cinder, you can provide a coat on top of the existing wall without any difficulty. We should also let you know it's a by-product of the basement wall finishing system, which opens up many opportunities.

Furthermore, it bears the closest resemblance to drywall while proving to be an affordable alternative. You need to plug any possible gaps or leaks and then redecorate the wall to match the surroundings. The significant advantage is its moisture-resistant nature, meaning you won't have to worry about any recurrent leaks.
Additionally, the installation procedure doesn't require you to use screws, thanks to the panels that click together and form a tight fit. But if you want, you can use glue for more reliability. Finally, you've got the option of coloring them in various hues, which delivers fantastic output.
-
Reinforced Fiberglass & Gypsum Panels
Right away, reinforced fiberglass and gypsum panels mimic the appearance of drywall, but you get much more versatility in your choices. The durability is on full display, and it's built to last a long time, thanks to its scratch-resistant nature. It, therefore, bolsters the sturdiness and ensures the material won't be damaged easily.
In that regard, we suggest you don't need to use plywood at all due to its incredible strength. As a result, it's cost-effective and falls well within your budget. You can effectively cover the wall from corner to corner without having to compromise on any aspect.
Meanwhile, it offers protection against mold, a common complaint with drywall, thereby proving extremely reliable. For enhanced soundproofing, you may consider using soundproof drywall which is specifically designed for optimal noise reduction. We also found it's the ideal surface to implement a second 3D layer to amplify the room's ambiance. And you can paint it with different hues to get a stunning appearance.
-
Corrugated Metal
Have you ever looked at wavy metal sheets on rooftops? Now, let us tell you it provides the ideal design for you to decorate your rooms. Those sheets are corrugated metal, and you can use them to get a wavy texture on your walls. The only thing we advise is don't use it on all four walls or even on large surfaces.
A-Street Prints 2701-22334 Rust Corrugated Metal Wallpaper,...
- Unpasted non woven material
- Washable and strippable
In that regard, applying it on an accent wall will give you the ability to gently take it off if you wish to redecorate in the future. Meanwhile, the installation is easy and doesn't take much time. You need to screw it into the studs and make sure it isn't wobbly.

However, you'll need help when it comes to cutting it down to size. It requires precision, and for that, you'll have to use metal shears, table saws, or circular saws that include a blade specifically designed for the purpose.
-
Vinyl Sliding
Firstly, it's a highly underrated option, and we assure you you'll get fantastic results if you decide to opt for vinyl sliding panels. It has received mostly positive reviews, thanks to the easy installation that makes it suitable for all age groups. Moreover, we suggest you use it with tongue and groove panels to make work more manageable.
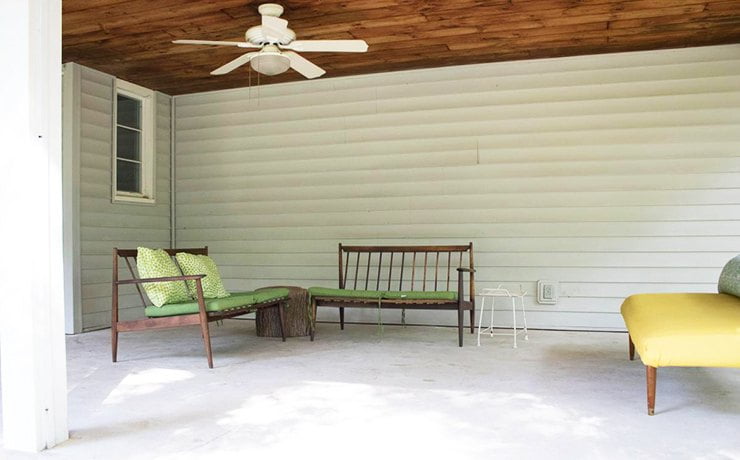
The siding panels include a locking mechanism to ensure you can reliably lock it in place. All you need from thereon is to carry out regular maintenance and check if the screws are coming loose. Plus, you can also opt for plastic panels that cost less but offer exceptional performance.
You can attach it to plywood, which provides an easy-to-clean surface. Similarly, it's weather-resistant and can withstand gusts of wind and rain. In that regard, it delivers the best results if you use it for open-air patios and other outdoor structures.
-
Plastic Panels
Straight off the bat, plastic panels provide several advantages, foremost among which is ease of use. It requires you to lock it in place, and it'll effectively cover up the damaged area of your drywall. It won't take much time for you to hang it up while offering excellent variety.

Among the different types of panels, if you're looking for a cost-effective option, you can opt for the groove and tongue paneling, which also works with other materials. You can clip it on or screw it to the appropriate spot, depending on what's convenient. Moreover, placing them over the studs delivers a suitable solution.
It'll please you to note that the panels are easy to clean, which reduces the need for maintenance. It's also resistant to mold, which speaks highly of the sturdiness and its ability to last a long time. You can, therefore, use it in rooms that experience a lot of moisture.
-
Basement Wall Finishing Systems
First and foremost, the basement wall finishing system uses non-organic materials that can dry quickly in case of flooding. It resists basement moisture and protects the texture of your walls for long-lasting results. As a result, it's the perfect alternative for drywall and offers numerous other benefits.

You get excellent insulation, which is essential since basements are situated underground. It gets difficult to control the temperature and so the wall panels are incorporated with built-in insulation. However, there are a couple of downsides to using it, such as the price, which is relatively high compared to other materials.
You need to be careful and make sure it fits because they are pre-cut and occasionally pre-designed. We also found that the system only compromises the wall paneling, after which you'll have to install the suspended ceiling along with the flooring.

Final Words
We've reached the end of our guide, and hopefully, you've got a better idea regarding drywall alternatives.
It would be best if you didn't have to compromise while making your future home, and in that regard, you can choose from the various materials on offer to get cracking results. While specific rooms like the basement require a different approach, you can design your interiors with a modern or antique look.
So, before signing off, we've narrowed down the top products in different categories to ensure you can make an informed decision. It's ideal for the best overall performance to opt for Wood Planks, which provide great variety. Apart from that, you can use plywood for an affordable option while Textured Wall Panels lend a modern touch.
It's over to you now, and we suggest you play with your imagination to make your home stand out. That's all the time we have. Take care and ciao!
Related Articles
Are you looking for some new DIY projects for your home soon? If yes, you should choose reclaimed wood to make them because it has a rich history, a nice charm, it has memory and experience, it adds character and beauty in its surrounding. Reclaimed wood is known to be extremely durable and strong, so this is another good reason why you should make it a part from your home. If you don't have a clue what to do with this type of wood, I'm going to give you some stunning ideas that you can't get out of your mind once you see them.

Scroll through the photos below and see the Charming DIY Reclaimed Wood Projects That Will Add Warmth To Your Home and make your picks. Wood will connect you to the outside world with ease and will beautify the space instantly with its interesting unique textures that coziness and warmth.
Let's take a look at some fun designs that you can recreate at home!
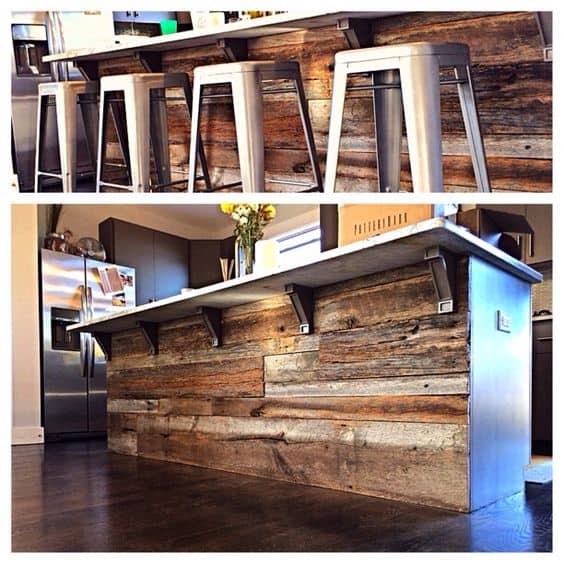

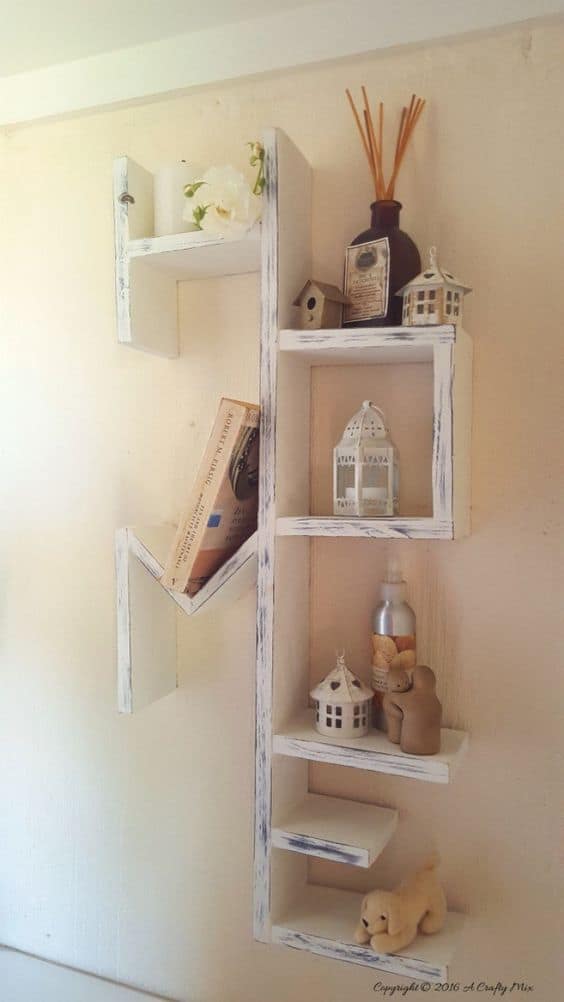
The reclaimed wood seems to fit in almost any style with ease and lots of modern home owners decide to add it in their living spaces whether it is just as an accent or in a big way.
Would you love to see larger doses of wood in your home or just small details that will enliven the ambiance?
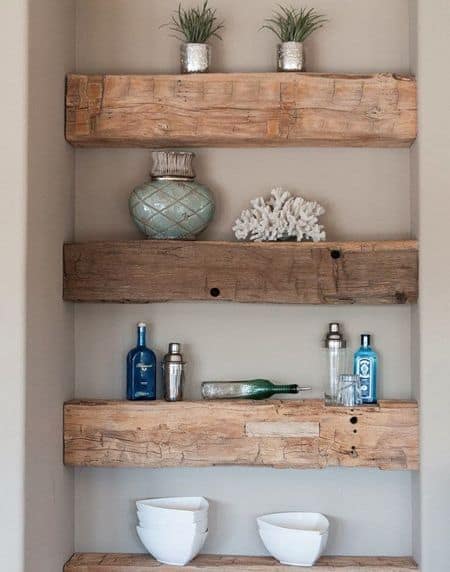
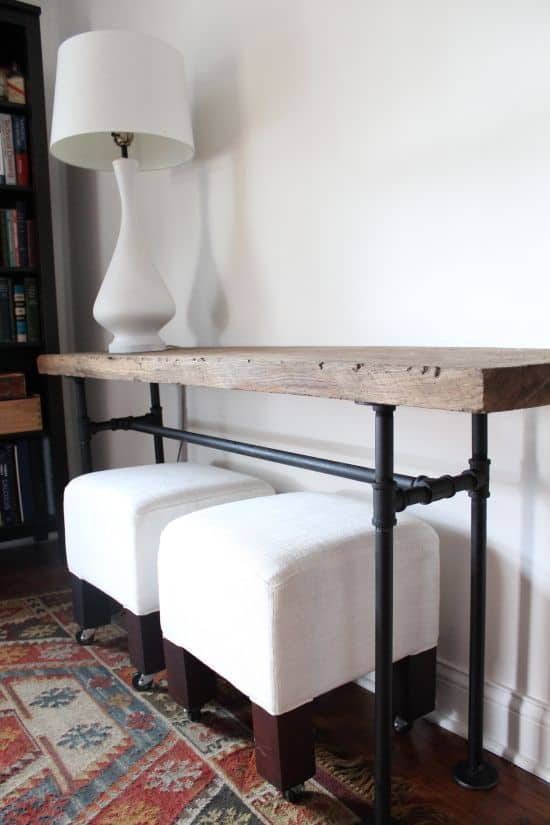
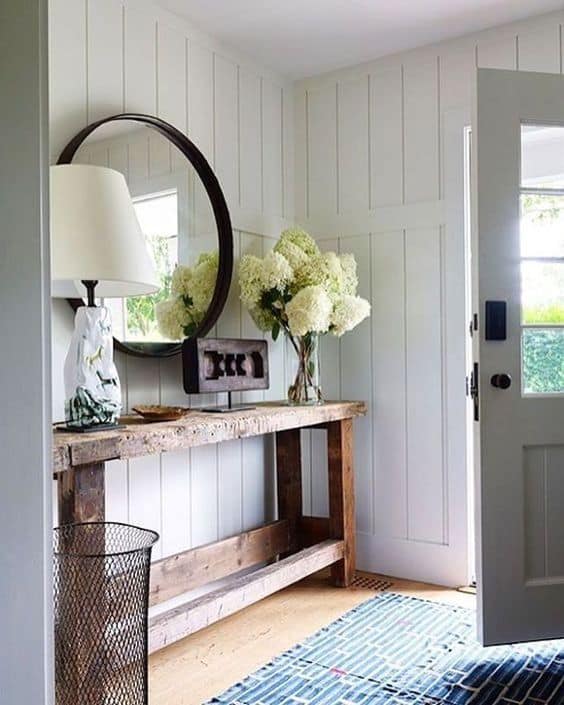
Reclaimed wood is not expensive, so all of these projects won't cost you much money. You can make some useful furniture out of it or other decorative pieces that will give character to the area. It's a hot trend nowadays and it seems that everyone is looking forward to embracing the warmth of wood.
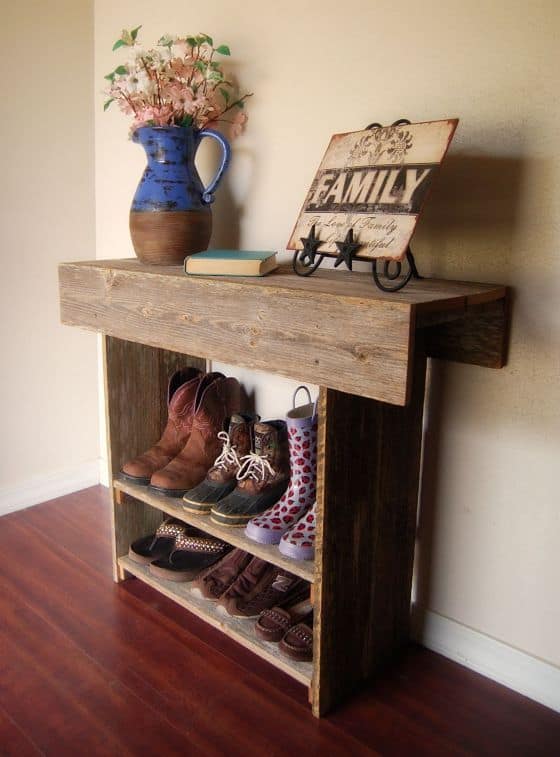


Do you think it's impossible to add reclaimed wood in your home? Have you though about a barn door? This is an interesting project for your home and change your surroundings with a small effort.
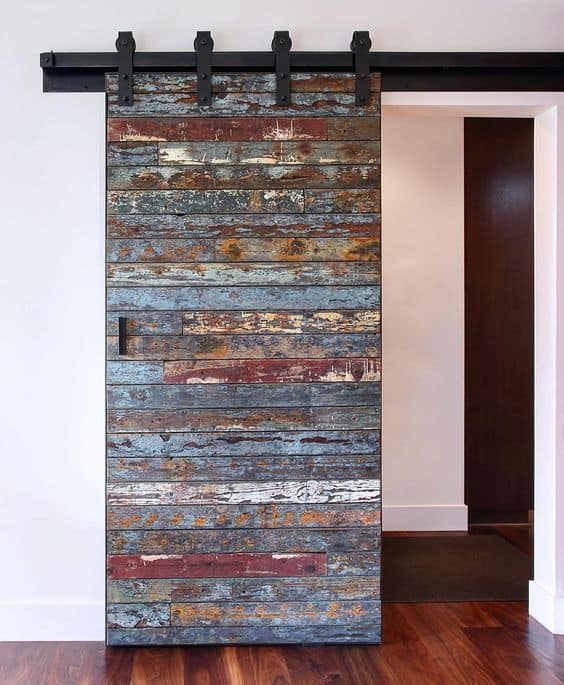
You will fall in love with these decoration made of reclaimed wood for sure!
Forget about going shopping for decorations but rather get down to work and put that awesome reclaimed wood to a wonderful use.

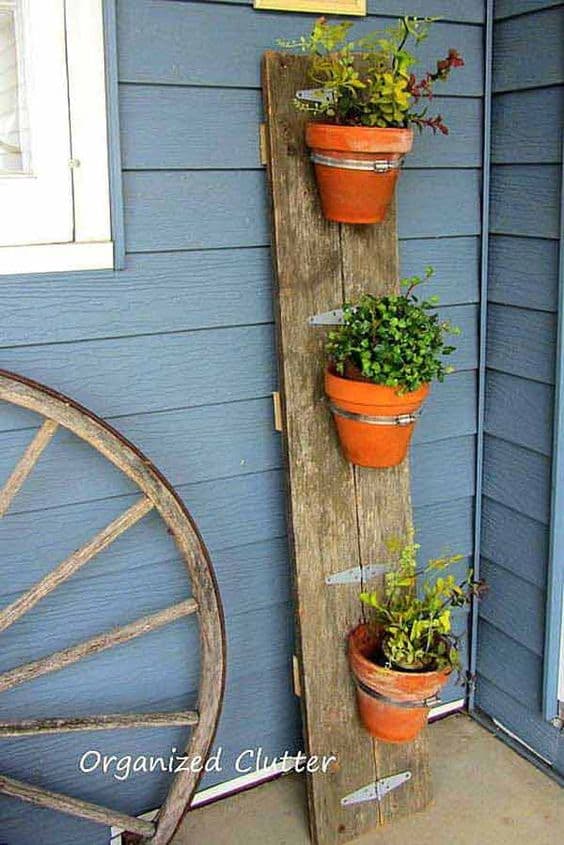

Do you miss a headboard in your bedroom?
Your sleeping area is another place where you can incorporate wood and make the atmosphere more warm, comfy and inviting, so what do you say about using reclaimed wood to make your own headboard quickly and easily?

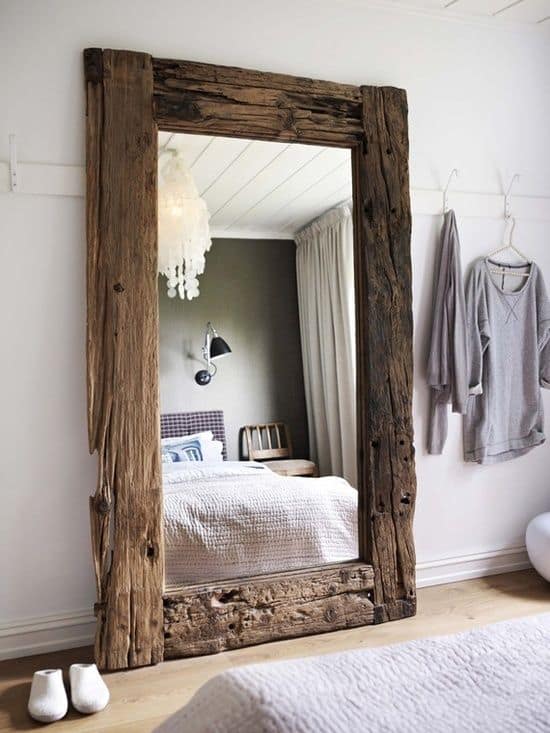
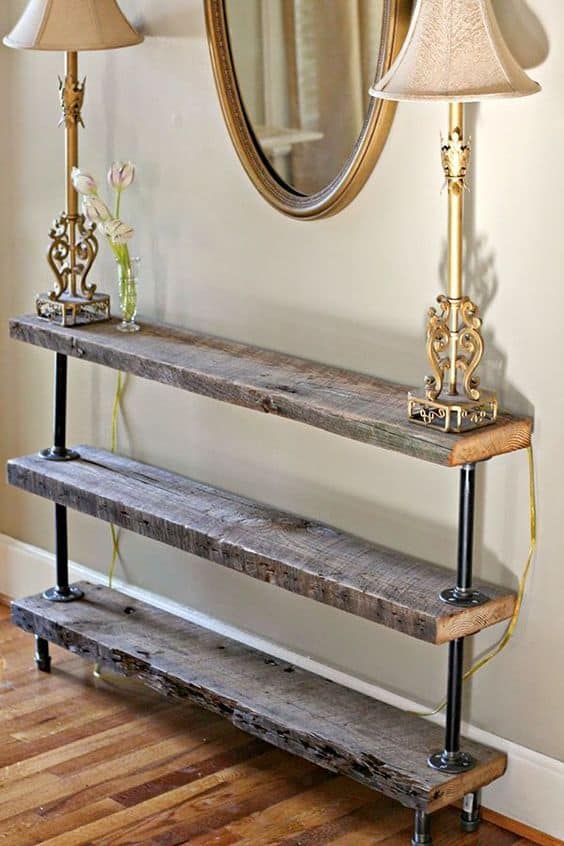
Are you looking forward to adding reclaimed wood in your interiors too?
How?
We would love to hear from you in the comment section below!
Related Articles
53 100% FREE DIY Farmhouse Table Plans for Your Rustic Dinning Room
Are you tired of racking up excessively high energy bills during winter? Well, we’ve got just the thing for you.
![8 Best Window Insulation Kits [Reviewed & Buyer’s Guide]](https://homesthetics.net/wp-content/uploads/2021/07/Best-Window-Insulation-Kit-001.jpg "8 Best Window Insulation Kits [Reviewed & Buyer's Guide]")
In most circumstances, the windows in our house are not entirely insulated which leads to air leaks and cold drafts escaping into the house. This, alternatively, increases the consumption of heating devices and ultimately leads to very high heating costs, especially during the winter months.
Purchasing and installing a window insulation kit, in this context, is an effective and budget-friendly way to keep your home warm and toasty but also a great solution to soundproof your windows and reduce noise from the outside. This kit is not only DIY-friendly and compatible with most windows but it also seals in heat emitted by the sun and conserves energy in the process.
But how do you figure out the right window insulation kit to invest in? To answer your question, we have compiled a meticulous guide discussing 8 of the best window insulation kits available.
So, without further ado, let’s jump right into it, shall we?
Best Window Insulation Kits

Here is the list of the 8 best window insulation kits that you can use to save money on your energy bill and improve the comfort of your home.
1. Duck Brand 286217 - Best for Energy Efficiency
The Duck Brand is a reputable company known to manufacture weatherization products for American homes. It has consequently developed a versatile window insulation kit that is compatible with and thereby can be installed on a variety of different doors and windows.
Duck Brand Indoor 5-Window Shrink Film Insulator Kit,...
- Reduce your energy costs by insulating your windows
- Crystal clear film heat shrinks to seal out drafts and cold
Why Did We Like It?
With the onset of winter, it can be really difficult to keep your homes warm without amping up the energy bill. But this window insulation kit comes packaged with a comprehensive instruction guide, making it easy to install and efficiently insulate your house in no time.
The crystal clear film included in this kit readily lets the sunlight and heat enter your home, all the while insulating it from further escaping outside. Moreover, this film can effectively cover up to 5 windows having the dimensions of 3' x 5' and block cold air drafts from leaking into your home.
Furthermore, the double-sided tape provided in this kit can be easily applied on a wide variety of surfaces, including painted or finished wood, vinyl, and aluminum. It’s also simultaneously very easily removable and does not strip out any paint or ruin finishes in the process. This tape therefore effectively seals the room and does not allow the warm indoor air to escape or the cold outdoor air to enter.
What Could've Been Better?
The adhesiveness of the double-sided tape provided in this kit is a little weak. This, therefore, leads the film to slip off the tape or the tape to come off the wall in just a few short weeks after installation. Hence, chances are, this insulation setup might not last you the entirety of winter like it’s supposed to.
Pros
- Increases energy efficiency and reduces costs
- Made of earth-friendly material
- Seals out cold drafts and air leaks
- Easy to apply and remove
Cons
- Low-quality adhesiveness
Size: 62" x 210" | Coverage: 5 Windows | Material: Plastic | Transparent: Yes
2. 3M 2141W-6 - Best for Fast Installation
3M has developed a window insulating kit that utilizes one of the most high-performing insulating technologies in the market. It comes equipped with a clear film, along with a heavy-duty roll of double-sided scotch tape to help you install it.

3M Indoor Window Insulation, Insulator Kit for 5 Windows 3ft...
- Saves energy and reduces heating costs
- Reduces condensation and prevents frost buildup
Why Did We Like It?
First of all, we would like to mention that the window film included in this kit is one of the clearest and most effective insulating films on our guide today. Once applied to the tape, it needs to be patiently heated with a hairdryer and readjusted accordingly to achieve a smooth and stretched-out look. Moreover, this film considerably lowers condensation and prevents the build-up of frost on the windows.
The double-sided scotch tape, on the other hand, has unparalleled adhesiveness that makes it incredibly easy to install and facilitates creating an airtight teal seal around the film. This leads to the formation of a secure seal that neither allows warm air to escape the room nor cold air/drafts to enter.
Hence, the heavy-duty insulation provided by this kit allows you to readjust your thermostat to a low energy-consuming setting. Consequently, this action considerably reduces your energy consumption and thereby lowers the value of your utility bills in the long run.
What Could've Been Better?
The clear film in this kit, much like in the Duck Brand above, needs to be smoothed out with a hairdryer after application. However, some customers have lamented saying that it remains wrinkly no matter how much you blow dry it, which gives your windows an overall shabby look.
Pros
- Fast and simple installation process
- Reduces condensation and thereby prevents frost build-up
- Helps you save on heating costs
- Keeps cold air out and warm air in
- Durable and lasts throughout the season
Cons
- Clear film is difficult to smoothen out
Size: 62" x 210" | Coverage: 5 Windows | Material: Plastic | Transparent: Yes
3. Duck MAX Strength 284351 - Best for Homes with Children & Pets
As we mentioned earlier, Duck Brand is one of the most reliable companies when it comes to the production of weather solutions commodities. This window insulation kit manufactured by them in the variant MAX Strength creates a heavy-duty barrier to obstruct the entrance of cold air inside the house.
Duck MAX Strength Heavy Duty Insulating Film Window Kit,...
- Insulates up to three 3 feet by 5 feet windows to block...
- Kit includes: heavy-duty film and window kit tape
Why Did We Like It?
This window insulation kit, as compared to the previously reviewed Duck Brand kit, has a more durable structure. The shrinking film that is a part of this kit is thick and puncture-resistant and therefore more long-lasting and ideal for homes with young children and pets.
Furthermore, the double-sided tape provided as a part of this kit has a unique adhesive quality that makes it especially easy to remove after usage. It leaves no marks and does not ruin any finishes and hence can be safely applied to a variety of different surfaces.
What’s more? This kit is very easy to install and comes equipped with a comprehensive set of instructions. Additionally, the transparent film is very easily shrinkable with a hairdryer and provides a smooth and professional look to all your insulated windows.
What Could've Been Better?
This insulation kit, much like the other Duck Brand insulation kit we reviewed above, has a tape with low-quality adhesiveness. This considerably reduces the longevity of the product as it tends to allow the film to fall off after only a couple of weeks of usage.
Pros
- Removes cleanly and easily at the end of the season
- Effectively seals your home
- Simple and straightforward to install
- Thicker and puncture-resistant film
- Easy to shrink up
Cons
- Weak adhesiveness of the tape
Size: 62" x 126" | Coverage: 3 Windows | Material: Plastic | Transparent: Yes
4. Frost King V73/9H
Frost King offers you an affordable yet effective solution to shield your home from the extreme cold of winter. This insulation kit developed by them consists of 9 clear sheets and a roll of double-sided tape to facilitate a simple installation process.
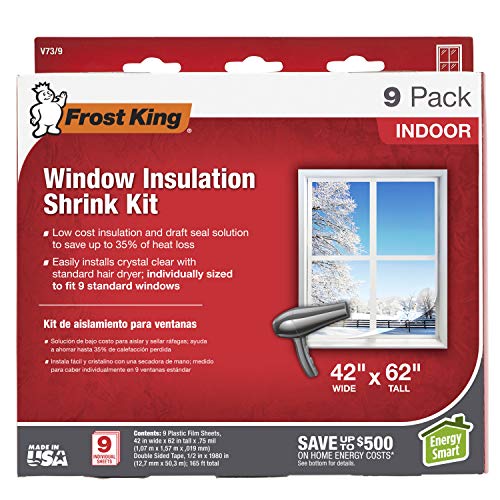
Frost King V73/9H Indoor Shrink Window Kit 42 62-Inch,...
- This product adds a great value
- Product is highly durable and very easy to use
Why Did We Like It?
The sheets provided in this kit are of standard size and can cover a variety of different window sizes effectively. They offer great versatility and can be installed on basement windows, standard windows, or even on patio doors.
Since the sheets are crystal clear they give you an unclouded vision of the outside without compromising on the warmth of the room temperature. Apart from that, the translucency of the sheet also allows sunlight to enter the room which is always an absolute requirement during winter.
Moving onto the double-sided tape, it has excellent sealing properties that firmly hold the sheet on all four sides of the window. The adhesiveness on this tape is tempered and therefore it can be put on painted or varnished wood, vinyl frames, or even on metals. The only point to be kept in mind is the surface should be grease-free and clean to provide better adhesion.
Last but not least, this kit comes equipped with a limited lifetime warranty, making it one of the most dependable insulation kits on our guide today.
What Could've Been Better?
Most grievances shared by customers are regarding the subpar adhesiveness of the tape. This has ultimately forced users to separately buy tape again from the local stationery stores. In a couple of instances, users noticed the adhesive leaving marks on the metal or wood after the plastic was taken off.
Pros
- Quick and easy to install
- A budget-friendly product
- Transparency of film allows sunlight to enter and for us to see the outside
- Keeps rooms 35% warmer than usual
Cons
- The adhesiveness of the tape needs improvement
Size: 42" x 62" | Coverage: 9 Windows | Material: Plastic | Transparent: Yes
5. XFasten TWST230
XFasten initially started off in 2015 as a small company providing adhesive solutions to the average American citizen. Since then, however, they have grown considerably as a brand that now offers a wide selection of products ranging from safety tapes to carpet tapes.

XFasten Transparent Window Weather Sealing Tape, 2-Inch x 30...
- STRONG BUT SURFACE-SAFE ADHESIVE. Transparent weather...
- AIRTIGHT WEATHER STRIPPING TAPE. The XFasten...
Why Did We Like It?
XFasten’s motto is to provide its customers with simple solutions to everyday problems and hence has developed a unique weather-sealing tape for everyday insulation. This product is quite the steal and is perfect for sealing any kind of leakage from windows. The tape is in fact, weather-resistant and therefore works great under a variety of stress conditions.
Furthermore, this adhesive is incredibly easy to use, and hence easy to install and even easier to remove. You can simply seal all the windows of your house that are prone to leaks and gaps before the onset of the winter. Additionally, this tape also works by sealing out exceptionally cold temperatures starting from -17 degrees centigrade.
But wait, that’s not all! Because this tape is not only effective in keeping out the cold, but is also great at blocking smog, dust, or even warm air from entering an air-conditioned room. Apart from that, the adhesive side of the tape does not ruin surfaces and leaves no residue post-removal, which we love.
What Could've Been Better?
This sealing tape is not recommended for exterior use as water tends to seep in and get clogged very easily whenever it’s applied. Furthermore, since it’s made of plastic one must not use it as an insulation coating for electrical wires.
Pros
- Residue-free adhesion
- Extreme heavy-duty bonding on any given surface
- Long-lasting and durable
- Tear-resistant and weatherproof
- Provides air-tight sealing
Cons
- Only for interior use
Size: 2” x 1080" | Coverage: N/A | Material: Plastic | Transparent: Yes
6. Duck Brand 281075
Duck Brand has released a single roll of double-sided replacement tape to help you efficiently seal your homes when paired with their previously discussed insulation kits. This modest indoor tape has the ability to provide you with effective insulation for a full season.

Duck Brand 281075 Double-Sided Indoor Replacement Tape for...
- Duck Brand window kit indoor replacement tape is...
- Adheres well to painted/varnished wood
Why Did We Like It?
This double-sided tape is essentially meant to act as a replacement for the tape provided in their previously mentioned insulation kits. The clear and transparent look of this tape does not stand out and efficiently blends into the décor of the room you apply it in.
Furthermore, this product is remarkably convenient to apply and helps in completely sealing windows of all sizes. It is built to be specifically applied on wooden surfaces including clean ones. painted, or varnished wood. Additionally, the double-sided adhesiveness holds the plastic sheets more securely against the window to provide optimum insulation.
But what’s more? The enhanced insulation properties of this tape can keep rooms warm and comfortable while saving you money and energy in the process. Apart from that, the tape can also be used to keep the heat during summers at temperatures above 50 degrees Fahrenheit.
What Could've Been Better?
The tape is meant for interior use only and can be applied on a very limited number of surfaces. The brand clearly advises against applying this tape on plaster, drywall, and unsealed wood. Hence, application on these surfaces may lead to damage and an adhesive residue being left behind.
Pros
- Easy to use
- Good adhesive quality
- Value for money
- Versatile usage
Cons
- Cannot be applied on all surfaces
Size: 0.5" x 288" | Coverage: N/A | Material: Polyethylene | Transparent: Yes
7. LBG Products Window Foam Insulation Panels
This innovative insulation kit by LBG consists of 2 large black foam panels that are meant to be installed against the windows. It is built to keep unwanted air from entering the house in order to keep it comfortable inside.
LBG Products Window Air Conditioner Foam Insulation...
- [✔Universal Design]:Air Conditioner Side Insulating...
- [✔Keep House Comfortable]:Work like a window seal,seal out...
Why Did We Like It?
These foam insulation panels are one of the simplest insulation kits to install and use. Equipped with highly adhesive side channels, all you have to do is peel off the tape sticker and apply it to the window unit of your choice. Most consumers appreciate the sturdy and well-designed paneling of this insulation that comes in use for multiple purposes.
Furthermore, the foam panels in this kit are pretty thick and therefore give good insulation against both cold winters and hot summers. The large and opaque build of this panel keeps the sunlight out entirely and leaves the temperature of the room entirely on the thermostat. This alternatively helps many households save money on electricity.
What’s more? The foam panels in this kit are also anti-vibration and can effectively control vibrations and absorb noise made by household appliances like air conditioners. Hence, in a way, it also works as a noise-canceling or soundproofing panel.
What Could've Been Better?
It’s important to remember that the foam in this kit is not waterproof and hence cannot be installed outdoors. If set up outside, it will get ruined at the first of the rain. A few consumers also felt that this product is like any regular and hence too high-priced for its quality.
Pros
- Anti-vibration and noise absorbing
- Can be cut easily as per requirement
- Strong adhesive and no residue
- Self-stick side channels
- Windproof and dustproof
Cons
- Not waterproof
Size: 17" x 9" x 3.1" | Coverage: 2 Panel Frames | Material: Foam | Transparent: No
8. Fowong Grey Foam Tape
This gray tape by Fowong is made of neoprene rubber foam and is therefore completely weatherproof by nature. It comes packaged in 2-roll sets and is perfect for insulating gaps between the air conditioner and the window as well as for door gaskets.

fowong Gray Foam Strip- 2 Rolls, 1" W X 1/8" T X 32' L,...
- 2 ROLLS VALUE PACK - foam weather seal, includes 2 Roll of...
- STRONG ADHESIVE FOAM TAPE - Waterproof, non-degumming,...
Why Did We Like It?
This insulation tape by Fowong is very soft and thereby can be customized and applied as per your needs and requirements. You can easily cut it with a pair of scissors or blades making it extremely easy to install and use. Additionally, the tape has an extremely strong adhesive side and is waterproof making it ideal for a versatile set of purposes.
But that’s not all! This product is also oil-resistant, flame-retardant, dustproof, corrosion-resistant, shock-absorbent, anti-skidding, and sound dampening. You can use this to seal or insulate sliding doors, garage doors, or windows to keep your room cozy and comfortable. It also insulates effectively enough to reduce energy consumption and thereby save you on your electricity bills.
If that wasn’t enough, this foam tape can work well within a temperature range of -50 degrees Centigrade to 150 degrees Centigrade making it exceptionally versatile. Fowong additionally provides a dedicated service and warranty, assuring us of extended and durable performance.
What Could've Been Better?
Some consumers have expressed that the thickness of this tape is not enough to seal the doors and windows. At times the tape gets compressed where the door touches and it peels off in a short while. Additionally, it may also peel off easily when not applied to cleaned and dried surfaces.
Pros
- Extremely flexible
- High durability and great insulation
- 30% more resilience than its counterparts
- Can be applied easily
- Value for money
Cons
- Gets compressed easily
Size: 0.50" x 0.25" x 156" | Coverage: N/A | Material: CR Foam & Neoprene | Transparent: No
Best Window Insulation Kit Comparison Table
| Product | Size | Coverage | Material | Transparent |
|---|---|---|---|---|
| Duck Brand 286217 | 62" x 210" | 5 Windows | Plastic | Yes |
| 3M 2141W-6 | 62" x 210" | 5 Windows | Plastic | Yes |
| Duck MAX Strength 284351 | 62" x 126" | 3 Windows | Plastic | Yes |
| Frost King V73/9H | 42" x 62" | 9 Windows | Plastic | Yes |
| XFasten TWST230 | 2” x 1080" | N/A | Plastic | Yes |
| Duck Brand 281075 | 0.5" x 288" | N/A | Polyethylene | Yes |
| LBG Products Insulation Panels | 17" x 9" x 3.1" | 2 Panel Frames | Foam | No |
| Fowong Grey Foam Tape | 0.50" x 0.25" x 156" | N/A | CR Foam & Neoprene | No |
Buying Guide For The Best Window Insulation Kit
Purchasing the right window insulation kit can be quite a confusing task, especially considering the diverse kinds of kits available in the market. For this reason, we have compiled a comprehensive buyer’s guide listing out all the important factors to contemplate. These pointers will help narrow down the options so that you can buy the right product for yourself. So, what are we waiting for? Let’s jump right into it!
-
Transparency
The transparency of the film determines how much sunlight can enter the room. The more transparent or crystal clear the film is, the higher the rate of sunlight and heat dispersed within the room. Alternatively, the more opaque it is, the cooler your room stays because of its ability to actively block out sunlight.
Hence it is essential to check customer reviews and the manufacturer’s description to ascertain the transparency level of the sheet. This will enable you to buy a kit according to your personal requirements and insulation criteria.
-
Reusability
Window insulation kits are mainly used only during the colder winter months and hence most of the kits available are meant for one-time use only. However, if buying a kit every consequent year doesn’t sound appealing, you can always invest in one that can be reused for multiple seasons.
While these kits tend to cost more than their counterparts, they considerably reduce your overall expenses. Additionally, they also lower the amount of waste produced and hence are better for the environment.
-
Effectiveness of Sealing
The sealing properties of your window insulation kit are very important factors to consider while purchasing one. This feature determines how effectively your product can keep out cold air from inside your home while keeping the temperature consistently warm. Look for details regarding the airlock properties in order to get a better idea of how good the sealant is.
-
Installation and Removal Process
It is essential to look for a window insulation kit that facilitates easy installation and removal especially if you are planning to do it by yourself. This process will mainly depend on how good the materials provided in your kit are since flimsy materials are usually more troublesome to install. Alternatively, you must also look for products that cause the minimum amount of damage to your windows and walls upon removal.
-
Longevity
The longevity of a product can only be ascertained by comparing the reviews posted by consumers. It is crucial to invest in an insulation kit that is of high quality and lasts for at least a couple of months at a stretch. This will enable you to avoid constantly repurchasing and reapplying to the same product in a short duration over and over again.
No, a window insulation kit should not impact your indoor air quality. However, ensure the room is adequately ventilated during installation to avoid inhalation of any adhesive fumes. While primarily designed for thermal insulation, they can also provide a degree of sound insulation, reducing noise from outside. Absolutely! Window insulation kits are generally designed for easy DIY installation. They should come with clear instructions, and only requires basic household tools. As the film is typically applied to the interior of the window, it will prevent the window from being opened. It’s best installed on windows that do not need to be opened frequently. Window insulation kits are typically designed to last through one heating season. However, its longevity might depend on the quality of the kit and how well it was installed.Window Insulation Kits FAQs
Does a window insulation kit impact indoor air quality?Can window insulation kits work for other types of insulation besides heat?Can I install my window insulation kit myself?Can the window be used normally after installing the insulation kit?How long does a window insulation kit last?
Conclusion
Insulating your home, especially during the colder months, is a critical step in improving energy efficiency, reducing costs, and enhancing the comfort levels of your home. Throughout this review, we have taken you through an in-depth look at eight brilliant window insulation kits that excel in their own way.
From the above 8 best window insulation kits, here are the top three expert recommendations:
The Duck Brand 286217 is an ideal option for you if you're seeking versatility. Being compatible with various doors and windows makes this a versatile option. Despite its low adhesiveness, it has other noteworthy benefits including increased energy efficiency, cost reduction, and easy-to-apply and remove insulating film which lets sunlight in while effectively blocking cold drafts.
On the other hand, the 3M 2141W-6 is a good option for those who prioritize high performance and durability. Its clear film is known to be one of the most effective insulating films in the market today, reducing condensation and preventing frost build-up. Despite the challenge of smoothing out the film, its easy installation process and unmatched adhesiveness provided by the included scotch tape still make it a top contender.
If durability is your main concern, the Duck MAX Strength 284351 is the right choice. With its puncture-resistant and long-lasting shrinking film, it's ideal for homes with young children and pets. Its easiness of installation and clean removal is extraordinary. Despite the weak adhesive tape, its straightforward installation and durability set it apart from the rest.
Remember, the ultimate choice of a window insulation kit is significantly influenced by your unique circumstances, including the type of windows you have, the severity of winters in your region, your budget, and personal preferences. These recommendations provide a solid starting point when shopping for the right window insulation kit to meet your needs. Explore each option and choose a kit that will offer optimum performance and longevity. Happy shopping!
Related Articles
Have you noticed a significant rise in the water level of the sump pit? It could be because your sump pump system has gotten older.

In that case, you will need to change the sump pump system, and while doing that, you will also need to invest in a good quality check valve.
However, choosing a good quality check valve that is affordable and easy to install can get rather confusing. Since the market is already flooded with many options, the entire process of choosing the best of the lot can be pretty tiresome.
So, we thought of helping out by compiling this list of the top 8 sump pump check valves that you should consider.
Our experts have handpicked them, and after weeks of rigorous research and testing, they have shared the results with us. We have made this review-based guide based on the shared results.
So, without any further ado, let's get started!
Best Sump Pump Check Valves
Here is the list of the 8 best sump pump check valves that you can use to ensure proper operation of your sump pump system.
1. Superior Pump 99555 - Best for Multipurpose Applications
Superior Pump is one of the leading names in the plumbing industry. It has been in this business since the 70s and is known for delivering very high-quality plumbing products. That said, the 99555 check valve from the brand features a universal design and allows liquid to flow in one direction only.
There are quite a lot of things that we really liked about Superior Pump 99555. To begin with, it is made using ABS plastic, which makes it highly durable and sturdy. It features a universal fit, allowing it to work with multiple applications such as ABS fittings, PVC fittings, and barbed hoses, making it simple and easy to install.
Furthermore, you would be pleased to know that the interior of this check valve is made with Nitril-Bruna N seal, which prevents water from flooding back into the sump basin. Also, it can handle water pressure up to 11 PSI, which always helps in providing better drainage.
Apart from this, it weighs just a little over 7 ounces, making it very easy to carry. Overall, it is one of the most affordable sump check valves that you may not want to miss out on.
We faced a very hard time finding any significant drawbacks of this check valve. However, we noticed that it does not fit with a garden hose, given the fact that the package says that it fits all. Other than this fitting issue, it does a great job.
What We Like
- Highly durable
- Prevents water from flowing back
- Extremely lightweight
- Budget-friendly option
What We Don’t Like
- It does not fit with a garden hose
Material: ABS Plastic | Size: Fits Any 1 1/4" or 1 1/2" NPT Male/Female Thread | Connection Type: National Pipe Tapered (Inlet), MNPT (Outlet) | Water Pressure Limit: 11 PSI
2. Campbell B00JFF205Y - Best for Quiet Environments
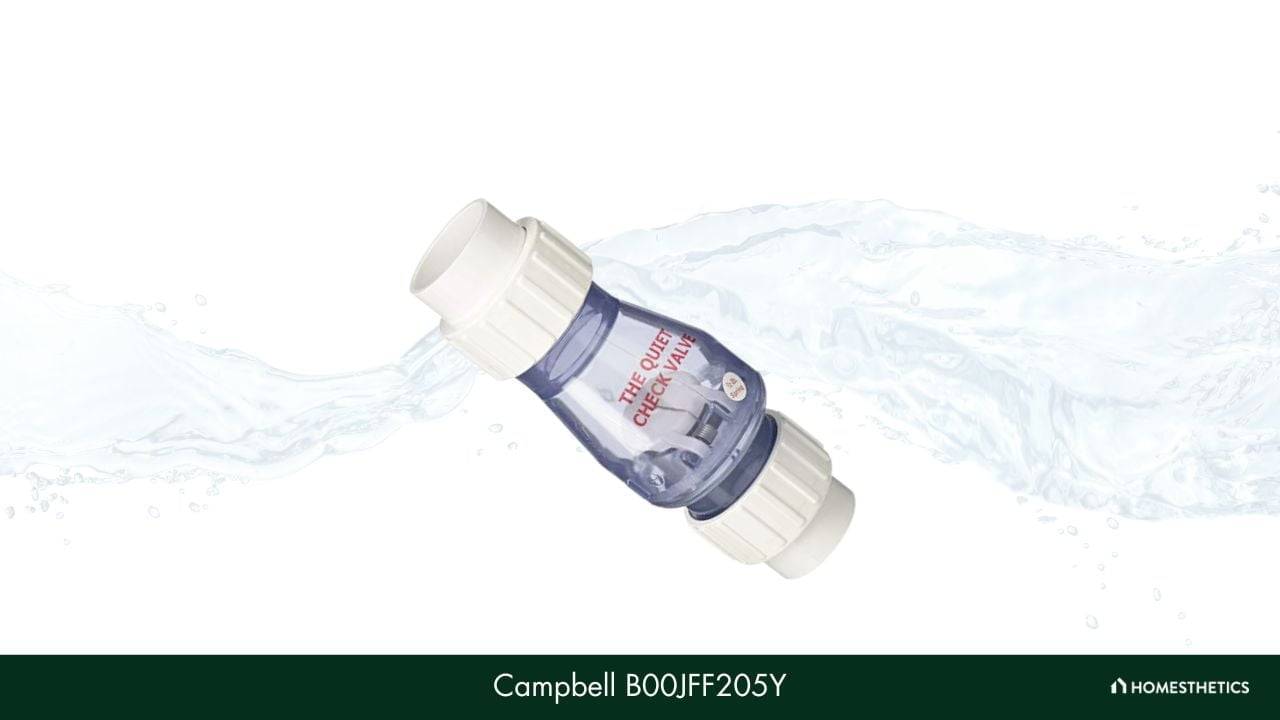
Next up, we have Campbell B00JFF205Y. Campbell is one of the most popular brands when it comes to delivering high-grade plumbing equipment. The B00JFF205Y check valve is a metal-made option from this brand, which is suitable for people looking to purchase a very quiet check valve.
We were thoroughly impressed with its noise production, for starters, which is much quieter than most options available on the market. It does not produce the much dreaded 'thud' sound. Plus, it takes only 15 minutes to install, which is pretty quick.
Made using polyvinyl chloride, Campbell B00JFF205Y works quite well with almost all types of sump pumps. It supports 150 PSI and can deal with water at a maximum temperature of 120 degrees. Sounds good, doesn't it? Well, that’s not all!
It is also one of the affordable options on this list, and since it is almost silent, it won't be a problem if it's set up near your bedroom. Apart from that, it can be installed horizontally as well as vertically, making it a flexible check valve option.
Even though Campbell B00JFF205Y does a decent job in most aspects, it comes with a drawback. We noticed that it puts extra strain on the sump pump's motor, which decreases its speed. We really wish the manufacturers had done something about it.
What We Like
- It is much quieter
- Can be installed horizontally and vertically
- The transparent body makes its working visible
- Works with all sump pumps
What We Don’t Like
- Slows down the pump motor
Material: PVC | Size: 1 1/2" | Connection Type: Slip x Slip | Water Pressure Limit: 150 PSI
3. Zoeller 30-0181 - Best for High-Temperature Applications
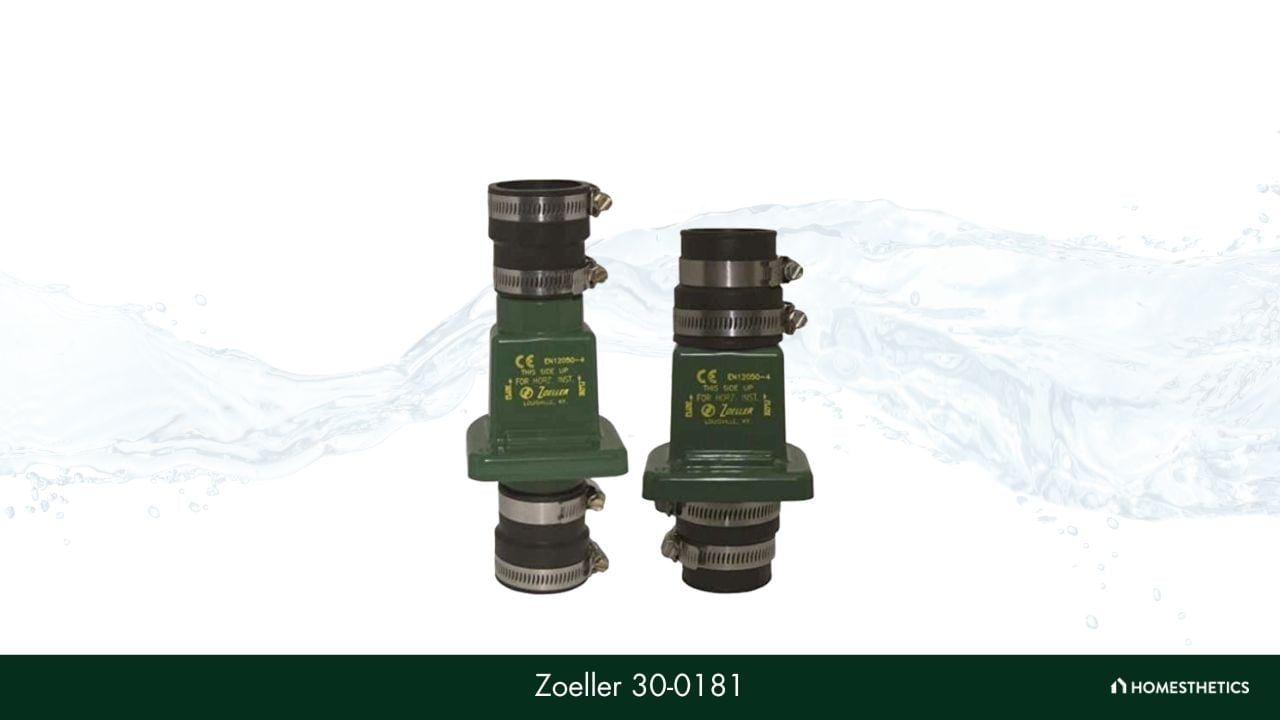
Founded in 1939 in Kentucky, Zoeller is one of the oldest manufacturers of water pumps in North America. This brand holds a reputation for producing exceptionally high-grade products for its customers. And the Zoeller 30-0181 is one of the finest check valves from the brand that can easily complement your sump pump.
As a sump pump check valve from a brand that has been in the business since 1939, Zoeller 30-0181 exceeds our expectations. Featuring 1-1/2 slip x slip unions and a flapper that bends over the edges, it ensures high performance for your sump pumps.
Coming to its build quality, it is made using plastic and metal, enabling it to resist 4.3 PSI, pushing water up to 10-feet. Plus, it can withstand temperatures up to 130 degrees Fahrenheit.
Furthermore, it can easily fit with copper pipes, steel pipes, and ABS, allowing flexibility across a wide range of applications. Overall, this unit is one of the best-selling check valves on the market that makes the task of making water flow in one direction very simple.
The Zoeller 30-0181 is undoubtedly one of the best options for check valves on the market. However, it may not be for those who are looking for quiet check valves as it is extremely noisy. Other than its loud noise, we do not have anything to complain about.
What We Like
- Extremely affordable
- Easy to install
- Can withstand high temperatures
- Works as advertised
What We Don’t Like
- Produces very loud noise
Material: Plastic, Metal | Size: 1 1/2" | Connection Type: Slip x Slip | Water Pressure Limit: 4.3 PSI
4. Wayne Pumps 66005-WYN
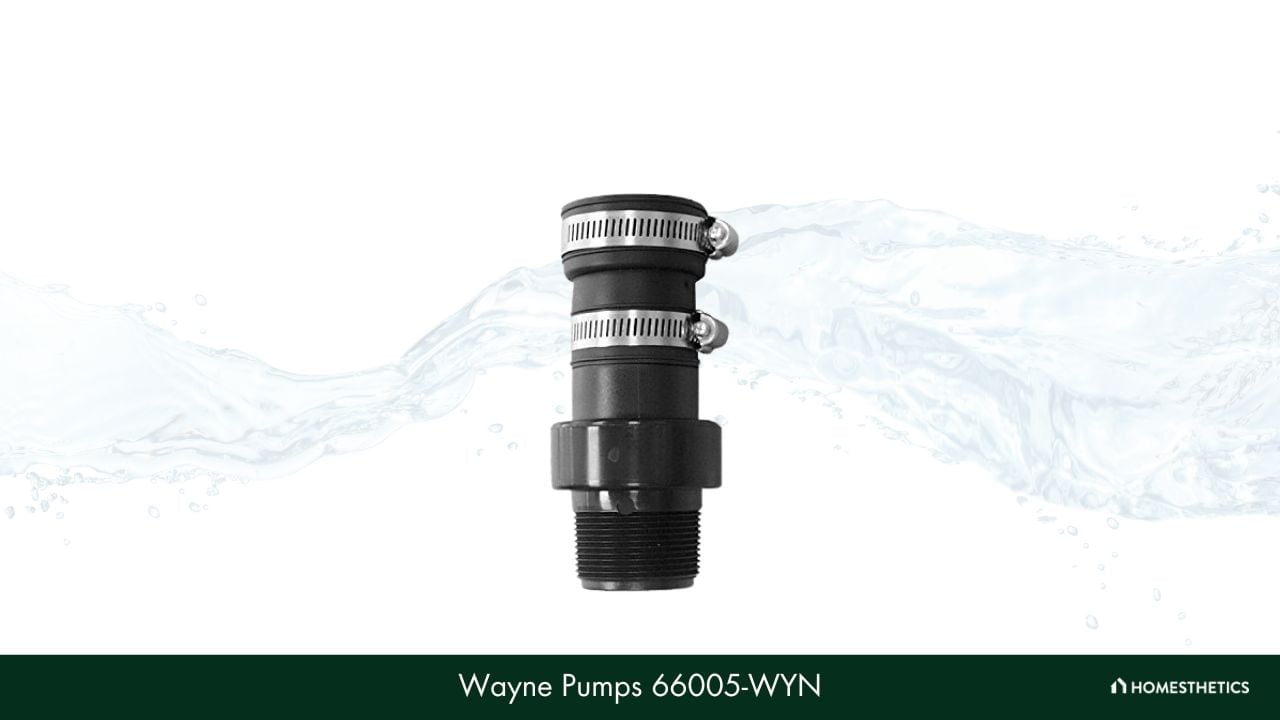
Wayne Pumps is a 90-year-old American brand that specializes in producing top-notch residential water-handling solutions that homeowners can rely on. And the 66005-WYN check valve from the brand is a flawless example of a unit that will work well on all types of sump pumps with ease.
Wayne Pumps 66005-WYN does an exceptional job of preventing water from flowing back into the sump basin. Ergonomically designed, it comes in black color, giving it a very professional and sleek look. However, the best part about this product is that it makes very little noise.
Furthermore, it comes with threaded male end adapters measuring 1 1/2-inches, shoulder adapters measuring 1 1/2-inches, and outflow shoulder end adapters measuring 1 1/4-inches. This ensures that this unit is able to fit on most sump pumps and drain lines.
Apart from this, it is also one of the most budget-friendly options available out there. And, you will be mighty pleased to know that it comes with a 90-day warranty. Plus, this check valve installs in just 20 minutes, making it further productive.
Even though Wayne Pumps 66005-WYN checks most of the boxes yet it misses out on an important one. It does not come with proper instructions; we found out that only 1 rubber coupling was provided, whereas the instruction states that there should have been 2.
What We Like
- It comes with a 90-day warranty
- Makes very little noise
- Easy to install
- It fits on almost all sump pumps
What We Don’t Like
- It comes with misleading instructions
Material: PVC | Size: 1 1/2" Threaded Male End, 1 1/4" Outflow Shoulder End, 1 1/2" Shoulder End Adapter | Connection Type: Threaded (Inlet) | Water Pressure Limit: N/A
5. Jackel DJ-545
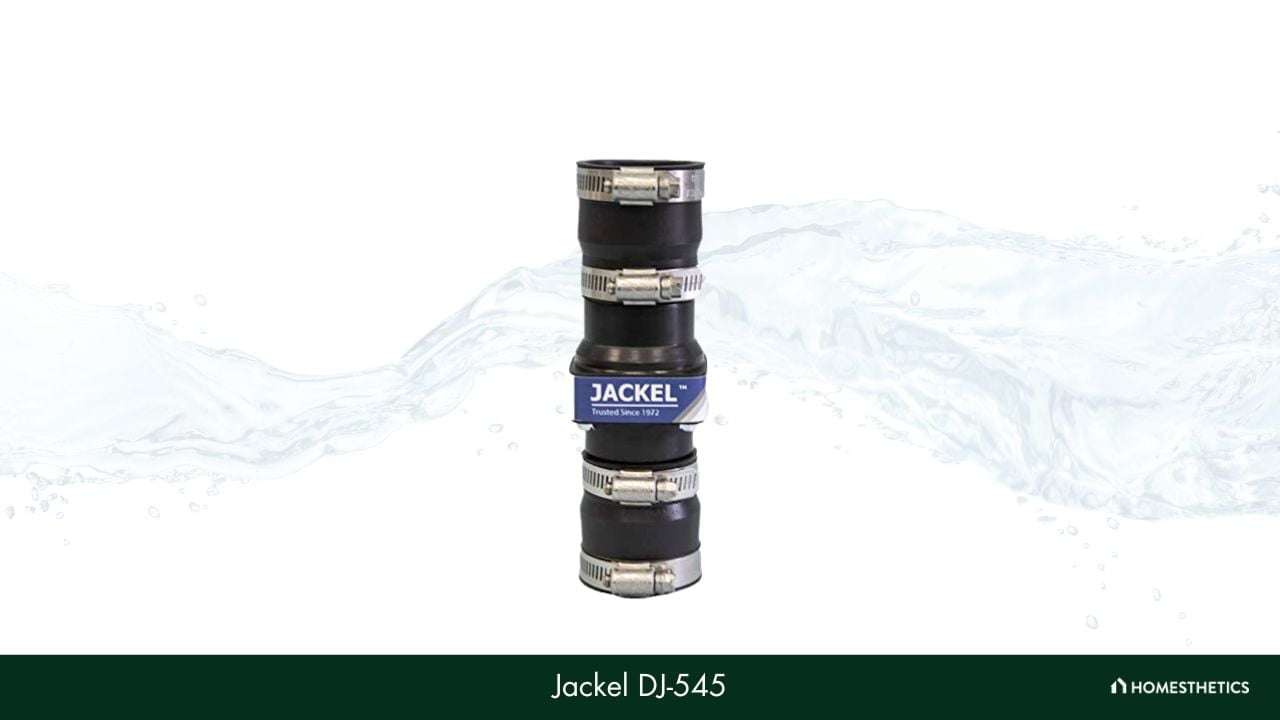
If you did not already know, Jackel is an American brand that has been in the business of manufacturing quality control plumbing products since 1972. Therefore, it should come as no surprise that the Jackel DJ-545 check valve is on this list, given the exceptional features it comes with.
What drew our attention right from the very beginning was its build quality, featuring an ABS body; it makes it highly durable and sturdy. Even though it is mostly made using plastic, the fasteners and clamps are made of stainless steel.
It comes with combination adapters measuring 1-1/4" or 1-1/2". Furthermore, the interior of this check valve is made of high-grade rubber, increasing its longevity by a lot. Impressive right? It does not end here.
If you are on a tight budget, the Jackel DJ-545 is your go-to product as it is one of the most affordable check valve options on the list. Plus, this exceptional check valve is going to make your sump pump a lot less noisy.
The Jackel DJ-545 offers a lot, given its price point. However, installing it may not be the easiest of jobs. Wondering why? The fittings are on the smaller side; the pipe adapters included in the package were too tiny to work with a 1.5-inch pipe.
What We Like
- High-quality flapper
- Very lightweight
- It comes with a 1-year warranty
- Extremely affordable
What We Don’t Like
- Not easy to install
Material: ABS Plastic, Stainless Steel | Size: Fits 1 1/4" or 1 1/2" Black, Galvanized or DWV Schedule 40 Pipes | Connection Type: N/A | Water Pressure Limit: N/A
6. Zoeller 30-0041
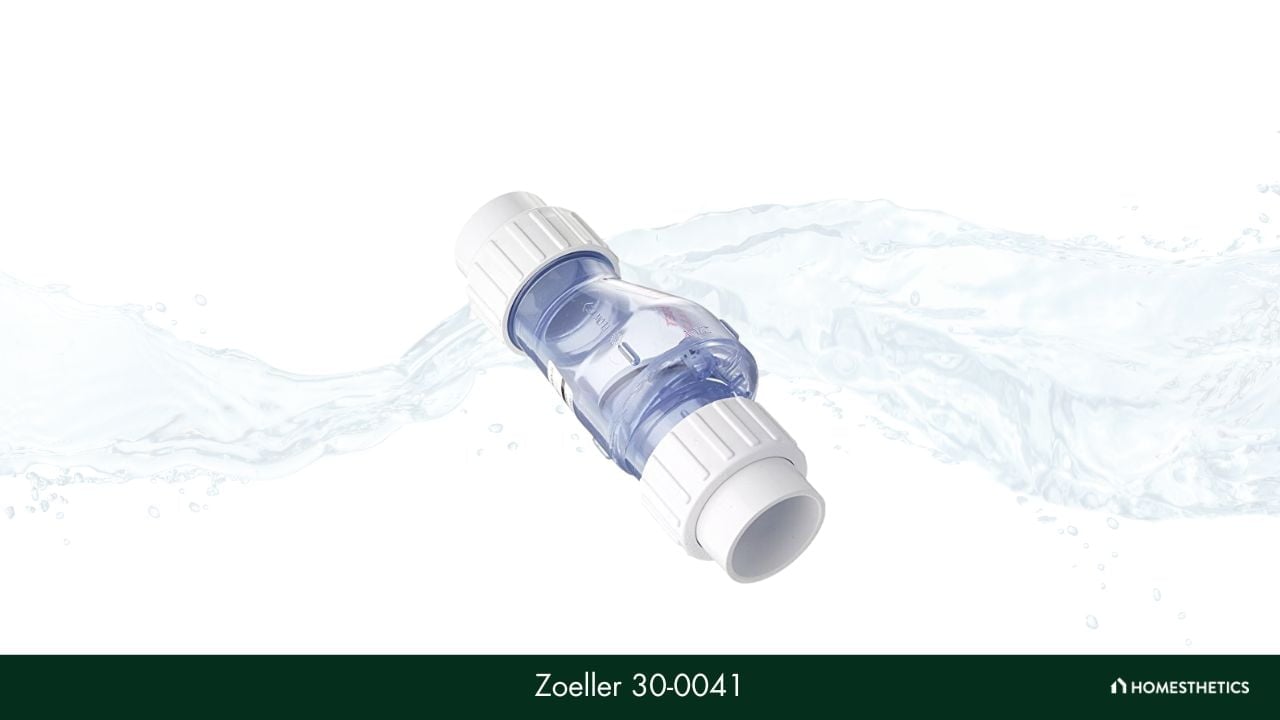
As you already know, Zoeller is one of the oldest manufacturers of plumbing equipment in North America. So, we thought it would be only fair to include yet another exceptional product from this brand in this list. Zoeller 30-0041 is a top-quality check valve that helps keep the water flow in a single direction.
We were impressed with most of the features that Zoeller 30-0041 provides. Firstly, installing this is like taking a walk in the park, and the best part about it is that it is quieter than most check valves on this list. You can sleep peacefully at night without having to hear that thumping sound.
Even though it is made out of plastic, it can bear water pressure up to 50 PSI, making it extremely productive, and moreover, it can withstand temperatures up to 130 degrees Fahrenheit. What makes this check valve so special is that it comes with a transparent body, hence allowing you to keep a watch on its working process.
Apart from this, it weighs just a little over a pound, making it lightweight and portable. We were happy to find out that the manufacturer did not skimp on the warranty. Overall, this product is one of the most sought-after products on the market, given all its exceptional features.
Without question, the Zoeller 30-0041 does a fantastic job in most aspects. However, after extensive testing, we found out that initially, it stays quiet, but after a month, it starts making noise. We really wish the manufacturer had done something about it.
What We Like
- Easy installation
- Handles high pressure quite well
- Makes no noise
- It comes with a year of warranty
What We Don’t Like
- It starts to make noise as time passes
Material: PVC | Size: 1-1/2" | Connection Type: N/A | Water Pressure Limit: 50 PSI
7. Smith-Cooper International 0209CV30IL

Now that we are nearing the end of the list, here's another product that you should consider. Let us introduce you to Smith-Cooper International 0209CV30IL. This check valve unit from Smooth-Cooper International is special because it is inspired by traditional design and innovative technology.
Made using top-quality brass, The Smith-Cooper International 0209CV30IL is resistant to rust, which means that you won't have to bear the hassle of replacing it in the foreseeable future. It supports a maximum water pressure of 200 PSI and can withstand temperatures up to 350 degrees Fahrenheit, which is more than decent in our opinion.
Furthermore, this check valve is in line with the American National Standards Institute for guaranteed quality, plus it is attested to California AB1953. We were very impressed with the brand's initiative to take all the measures to bring the best quality check valve to you. Impressive, isn't it? Well, there's more.
This product does not create any hammering noise, hence letting you go about the day in a peaceful way. Finally, you can install it horizontally or vertically as per your requirements.
Smith-Cooper International 0209CV30IL is one of the most durable and corrosion-proof sump pump check valve options available. However, we noticed that it is on the heavier side. But overall, it brings with it some of the best quality control materials, making it worth the investment.
What We Like
- Durable design
- Can withstand very strong temperatures
- Made of the highest quality assured materials
- It does not make the hammering noise
What We Don’t Like
- A little heavy
Material: Brass | Size: 3/4" NPT Female | Connection Type: National Pipe Tapered (Inlet), FNPT (Outlet) | Water Pressure Limit: 200 PSI
8. Little Giant CV-114/112
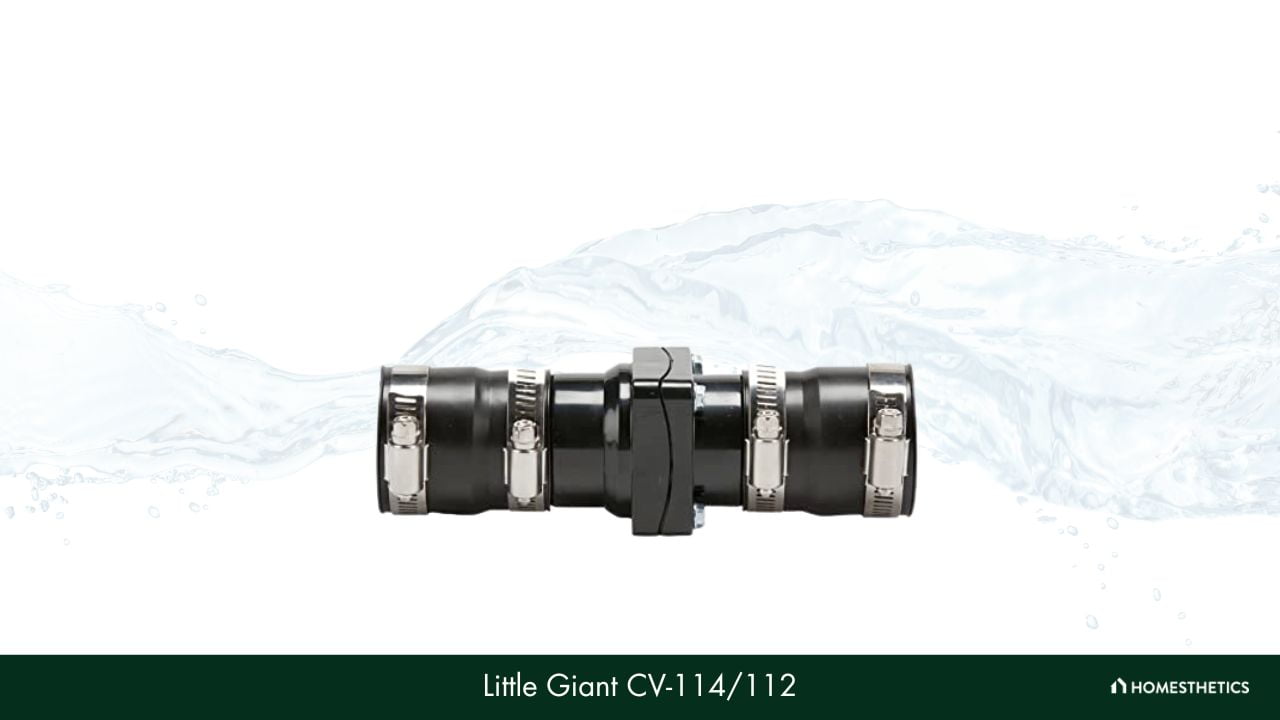
For over 80 years, Little Giant has committed itself to making high-grade and reliable pumps. And the CV-114/112 check valve from the brand lives up to its name and reliability by preventing water backflow in your sump pump in the most efficient ways.
We consider the main highlight of this product is its build quality, made of ABS plastic, hence ensuring durability. It is easy to install, thanks to the easy-slip fit design, and it features a one-way flapper valve that helps prevent water from flowing back in horizontal lines.
Apart from this, it can work with 1-1/4" or 1-1/2", the two most popular sizes of IPS pipes. You can use it on the sump pump to make it more efficient. Featuring a sleek black body, this product is one of the most reasonably-priced options on the list.
Furthermore, we liked that it comes with a limited period warranty, and also, the Little Giant CV-114/112 lasts longer as it features a one-way valve.
We did not come across any significant drawbacks while testing this product. However, there is one issue that the manufacturer needs to address immediately. We found out that sometimes, the valve does not shut, which leads to the flow of water back into the system.
What We Like
- Super easy to install
- It fits both sizes of IPS pipes
- Reasonably priced
- Comes with warranty
What We Don’t Like
- Sometimes the valve does not shut
Material: ABS Plastic, PVC, Stainless Steel | Size: Fits Both 1 1/4" & 1 1/2" Pipes | Connection Type: Slip x Slip | Water Pressure Limit: N/A
Best Sump Pump Check Valve Comparison Table
| Product | Material | Size | Connection Type | Water Pressure Limit |
|---|---|---|---|---|
| Superior Pump 99555 | ABS Plastic | Fits Any 1 1/4" or 1 1/2" NPT Male/Female Thread | National Pipe Tapered (Inlet), MNPT (Outlet) | 11 PSI |
| Campbell B00JFF205Y | PVC | 1 1/2" | Slip x Slip | 150 PSI |
| Zoeller 30-0181 | Plastic, Metal | 1 1/2" | Slip x Slip | 4.3 PSI |
| Wayne Pumps 66005-WYN | PVC | 1 1/2" Threaded Male End, 1 1/4" Outflow Shoulder End, 1 1/2" Shoulder End Adapter | Threaded (Inlet) | N/A |
| Jackel DJ-545 | ABS Plastic, Stainless Steel | Fits 1 1/4" or 1 1/2" Black, Galvanized or DWV Schedule 40 Pipes | N/A | N/A |
| Zoeller 30-0041 | PVC | 1-1/2" | N/A | 50 PSI |
| Smith-Cooper International 0209CV30IL | Brass | 3/4" NPT Female | National Pipe Tapered (Inlet), FNPT (Outlet) | 200 PSI |
| Little Giant CV-114/112 | ABS Plastic, PVC, Stainless Steel | Fits Both 1 1/4" & 1 1/2" Pipes | Slip x Slip | N/A |
Buying Guide for the Best Sump Pump Check Valve
We hope by now you have gone through the top 8 options of sump pump valve options, so were you able to make a decision?
We are pretty sure that you are still confused. Choosing the best option can be bewildering as there are a few other factors that need to be taken into consideration apart from the brand and the price.
On that note, we have provided this buyer's guide to help you select the best sump pump check valve. In this section, we have explained all the important factors that you need to know before making a buying decision. Keep reading.
-
Build Quality
The build quality of a check valve is one of its most important features. Most check valves are made using ABS plastic or metals such as stainless steel or brass. Both metal and plastic are good.
Having said that, plastic valves are easier to install than metal ones; also, metal valves are prone to corrosion. On the other hand, however, metal valves are more durable and tend to last longer than plastic valves.
-
Size
It is very important that you buy the right size of the check valve; otherwise, you won't be able to connect it to the sump pump or the drainage lines. We strongly advise conducting prior research before buying, checking all details carefully, and only then buying.
-
PSI
Kindly ensure that you are familiar with the PSIs. If your sump pump waters at a different rate, then the check valve may not handle the pressure and lead to leaks. We recommend you know the maximum water pressure of the check valve before buying.
Can I replace my sump pump check valve on my own?
Yes, you can replace your sump pump check valve on your own. However, if you’re not comfortable with DIY plumbing, it’s best to seek help from a professional to avoid any potential damage to your sump pump system.
How do I install a sump pump check valve?
Installing a sump pump check valve involves placing it on the discharge pipe, above the sump pump. You’d need to cut the pipe to fit the valve, insert the valve and secure it with stainless steel hose clamps. It’s crucial to ensure the valve is situated in the correct direction to facilitate one-way flow.
Is there a specific orientation when installing a check valve?
It depends on the type of valve being used. Spring check valves can operate in any orientation, while swing check valves are sensitive to gravity and must be installed in the correct orientation.
How often should I replace my sump pump check valve?
Generally, it is recommended to replace your sump pump check valve every 5-7 years, or whenever you notice it’s not functioning correctly. Signs of a faulty valve may include unusual noises, continuous cycling of the pump, or water flowing back into the sump pit.
Conclusion
Installing a check valve on a sump pump is important to ensure that the water keeps flowing in a single direction. This prevents the sump basin from getting flooded and increases its longevity.
On that note, we have come to the end of our review-based guide. We hope by now you will be able to choose the best sump pump check valve.
Before winding things up, we would like to mention our top picks of sump pump check valves, so let us do a little recap. Superior Pump 99555 is the best overall. Campbell B00JFF205Y does not make much noise, while Zoeller 30-0181 is affordable and easy to install.
Now, we will take your leave.
Till next time!
Related Articles
The walls of your house serve as the ultimate spot for displaying any beautiful object to the common eye. However, at times, you may not be able to mount your favorite frames on the walls due to the presence of studs that could hinder the drilling processes.

In such cases, stud finders can come in pretty handy at finding the tough-to-detect studs hiding inside our walls. It makes the job of hanging heavy objects on the walls easier, without compromising the safety of wiring or piping, behind the surface.
However, it may be stressful to find the best stud finder, without going over your decided budget. If you’re going through a similar dilemma, we have listed our top 7 stud finders that’ll fulfill your needs precisely.
Also, go through our exclusive buyers’ guide to know about all the important features that would help you find the ideal stud finder for yourself.
Best Stud Finders
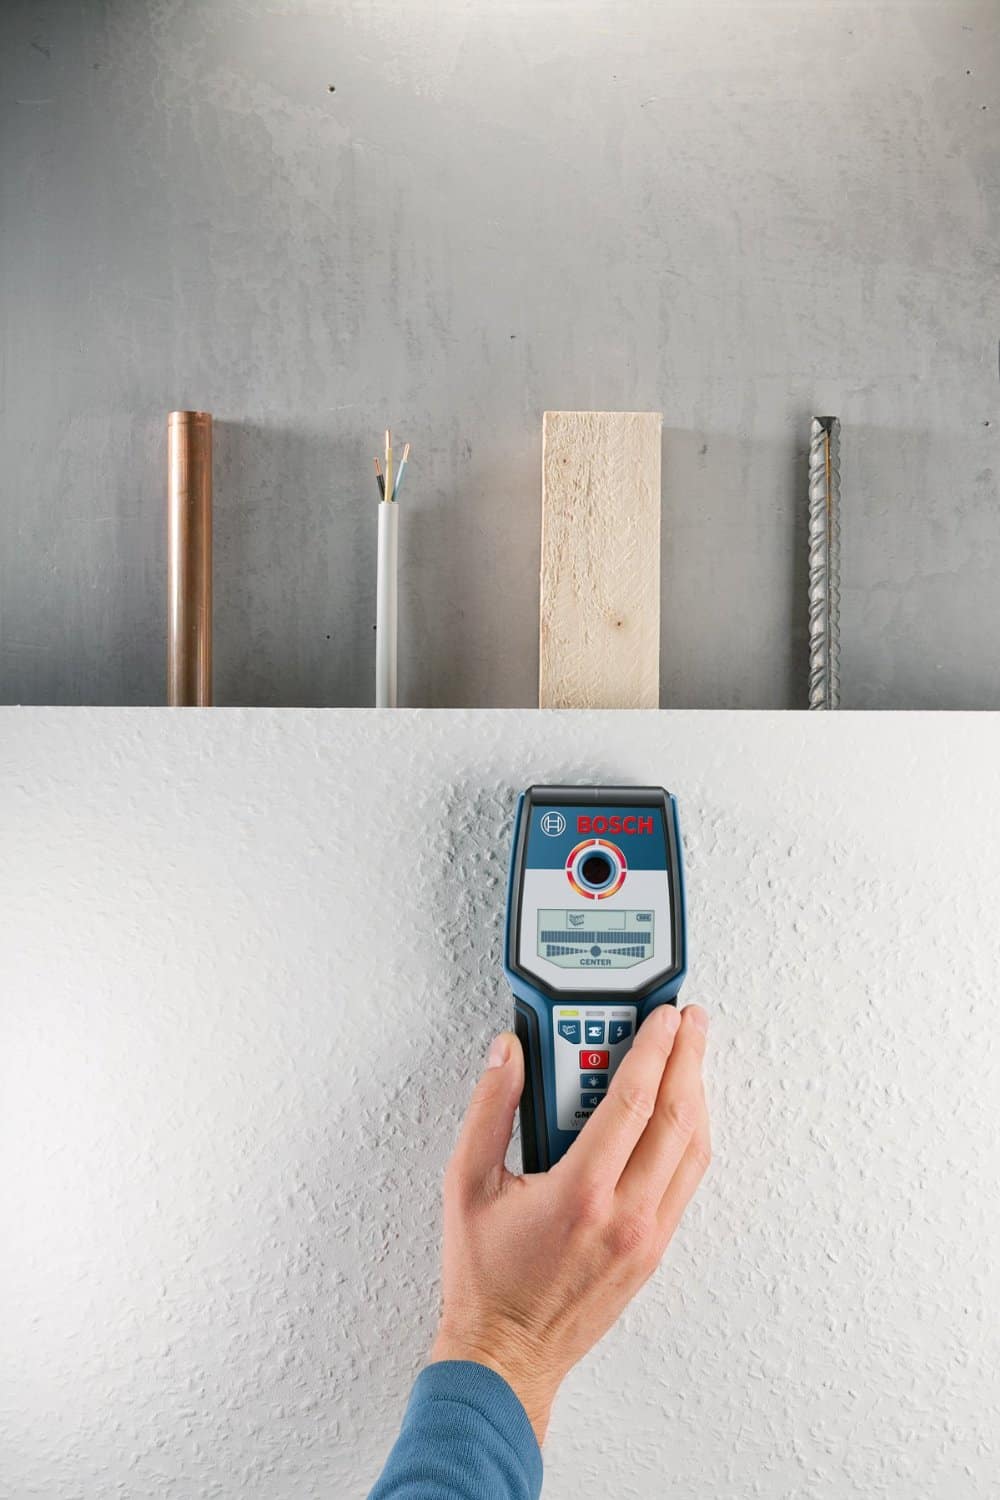
Here is the list of the 7 best stud finders that you can use to quickly and accurately locate studs in walls.
1. Franklin Sensors FS710PROProSensor 710+ - Best for Semi-Professional Use
Stud finders are usually a must-have in every household, and one can require these devices whenever they need to mount something up on the wall. However, a common household need doesn’t always call for professional wall scanners.
The new FRANKLIN FS710PRO stands out as an efficient tool in this regard, catering easily to inexperienced beginners, and ensuring a semi-professional user experience for all.

Franklin Sensors ProSensor 710+ Stud Finder with 13-Sensors,...
- Higher Accuracy, Better Technology: With 13 patented...
- Shows FULL WIDTH of Studs: The wide LED display shows the...
Experience
First and foremost, we are quite satisfied with the efficiency this decent model provides at a fairly economical price range. Equipped with advanced 710 Pro sensor technology, this model is good enough to detect wall studs under its 7" measurement area quickly.
Moreover, its 13-LED light array is capable of signaling detected data, giving us an accurate and satisfactory user experience. Coupled with a multi-sense technology, this feature significantly lessens the average time consumed at getting the job done.
This model provides us with a decent detection depth of 1.6 inches, which is fair and adequate for our average household chores. If compared, its sensory area is deeper than a considerable number of stud finders out there.
Moreover, what is even more impressive is its capability of efficiently detecting wood and metal alike. Talking about its user-friendliness, it is an easy-to-operate stud finder that comes with a simple one-step operating button.
What could have been better?
Although it can be an ideal value for money, we are a little disappointed that it product does not support reconditioning. Also, it could’ve been better if the product came along with audio alerts and voltage identification features.
Pros
- 1.6 inches detection depth
- 13-LED light array for efficient signaling
- Efficient multi-sense technology for enhanced performance
- Detects wood and metal
Cons
- Cannot be reconditioned
- Lacks audio alert and voltage detection
Sensor Type: Electric | Battery Required: Yes | Battery Type: AA | LCD Display: No | Detection Capability: Wood, Metal | Detection Depth: 1.6"
2. Precision Sensors ProFinder 5000+ Deep Scanning Stud Finder - Best for Deep Stud Detection
Although magnetic stud finders are quite efficient at what they do, electric stud finders are also becoming a trend among professionals in recent times. And in that regard, the PRECISION PROFINDER 5000 stands out as a decent electric stud finder that gets the job done efficiently, in no time at all!
Precision Sensors ProFinder 5000+ Deep Scanning Stud Finder
- Deep Sensing Technology- The Profinder 5000+ Has More Sensor...
- One-Step Operation- Just Press Button: When Placed On The...
Experience
To begin with, this model is visibly equipped with a larger number of sensory pads, when compared to an average stud finder. This way, this product has allowed us to dig deeper into the walls during every single use, and efficiently sense some hard-to-detect studs. Overall, its deep-sensing technology pretty much lives up to its name.
We’re not very professional when it comes to operating wall scanners. Despite that, we found it quite easy to operate this model without expert guidance. This product runs smoothly on AA batteries, saving you from the wearing hassle of device charging.
Its LEDs are also well-capable of signaling stud locations, making it easier for you to acknowledge the wall areas you need to reconfigure.
Weighing nearly 1.4 pounds, the PRECISION PROFINDER 5000 is an easy-to-use mobile device that can fulfill your average household needs.
What could have been better?
Although we are not expecting industrial-grade efficiency from this household product, the performance of its sensors is pretty unsatisfactory when its battery is low. Its deep-sensing technology may confuse the stud and non-stud objects at those times, resulting in false signaling.
Pros
- Light-weight and very easy-to-use product
- 1.7 inches depth for efficient stud detection
- More sensory pads; deep-sensing technology
- Can be operated on AA batteries
Cons
- May seldom confuse between the stud and non-stud objects
Sensor Type: Electric | Battery Required: Yes | Battery Type: AA | LCD Display: No | Detection Capability: N/A | Detection Depth: 1.7"
3. BLACK+DECKER Line Laser with Stud Sensor - Best for Multi-Purpose Functionality
We are big fans of multi-functional products. Most of us would like to opt for a single product that fulfills a fair number of requirements at once. And, the BLACK AND DECKER BDL190S BULLSEYE does impress its users with its diverse features contained in a single powerful unit. If you’re a smart buyer, then you might want to consider this model.
BLACK+DECKER Line Laser, Auto-leveling with Stud Finder...
- Two-In-One Accuracy - Two-In-One Line Laser And Stud Sensor...
- Intuitive Design - Easy-To-Read Lcd Display For Users Of All...
Experience
At a fair price, the BLACK AND DECKER stud finder is a decent option to look out for. Its stud sensory feature adequately detects not only metallic and wooden studs but live AC wires as well. We are quite impressed by its depth of locating studs, as its 0.75" stud detection depth is one of the best features that helped us in detecting studs from thick drywalls.
It seems to be quite a user-friendly product, embedded with an array of bright LED lights that illuminate instantly when a stud is discovered. Moreover, a fancy “STUD FOUND” text also appears on the screen, which gives this model a smarter outlook. Equipped with its horizontal laser feature, this model is one of the fanciest tools we’ve come across.
Apart from detecting studs, it also makes an ideal tool that can be used for hanging picture frames from the wall or installing other interior-decor items. As a bonus, this model is capable of automatic leveling, saving you the hassle of custom adjustments.
What could have been better?
This model did not leave us much room for complaints. However, we tested this product on a set of materials with inconsistent density and humidity. Surprisingly, this device lacks efficiency at detecting studs on carpets' paddings, newly painted surfaces, and carpets.
Pros
- Efficient at detecting studs at a density of 0.75″
- Can detect live AC wires
- Auto-leveling technology for multi-functionality
- Smart LCD and LED display
Cons
- Cannot detect studs under inconsistent density
Sensor Type: Electric | Battery Required: Yes | Battery Type: AA | LCD Display: Yes | Detection Capability: Wood, Metal, Live AC Wires | Detection Depth: 0.75"
4. Zircon MultiScanner i520 Center Finding Stud Finder
Every beginner understands the importance of easy-to-use products that make our lives simpler with their efficiency. Speaking of this, the ZIRCON MULTISCANNER is one of the best products we’ve come across. Equipped with advanced CenterVision technology, this is a decent product that’s capable of detecting the center of hard-to-find wall studs within a short time period.
Zircon MultiScanner i520 Center-Finding Stud Finder with...
- Locates the edges and center of wood or metal studs up to 1...
- Scans for metal and live AC wires
Experience
To begin with, this model boasts a smart StudScan mode feature, giving us a decent stud detection depth of 0.75", or 19 mm. On top of that, its patented DeepScan mode appeared to give us twice its regular efficiency. This feature gave us a satisfying depth of 1.5", or 38 mm while detecting non-ferrous metals. However, we were able to detect ferrous metals up to 3", or 76mm while using its MetalScan mode, which impressed us more.
This model is also an ideal go-to option to opt for if you’re trying to detect live AC wires across your thick drywalls. Its AC Scan mode gave us a 2" deep depth, which is good enough for a product at this economical price range.
However, the feature that makes this model stand out is its AutoCorrection Technology, which reduces typical errors while stud-detection. Its LCD screen comes with a smart indication feature, signaling towards the directions and center/edges of wall studs for our convenience.
What could have been better?
As we’ve noticed, the accuracy of the stud-detection of this model becomes questionable when its charge is low. However, remembering to charge this device on time rids us from this issue.
Pros
- DeepScan mode gives us a 1.5″ depth
- MetalScan mode gives us a 3″ depth
- Efficient 2″ AC Scan detection depth
- AutoCorrection Technology to minimize errors
Cons
- Inaccurate performance when battery is low
Sensor Type: Electric | Battery Required: Yes | Battery Type: 9V | LCD Display: Yes | Detection Capability: Wood, Metal, Joists, Ferrous & Non-Ferrous Metals, Live AC Wires | Detection Depth: 0.75" to 3"
5. CH Hanson 03040 Magnetic Stud Finder
Being a worldwide renowned manufacturer, CH HANSON is one of the best brands that comes to our mind when we’re talking about value-for-money products. Coming at a pretty reasonable price range, the 03040 MAGNETIC STUD FINDER is unarguably an efficient tool that fulfills your DIY home improvement project needs with ease.
CH Hanson 03040 Magnetic Stud Finder
- CH Hanson 03040 - Magnetic Stud Finder
Experience
This model is good enough for you if you’re looking for something simple and convenient to use. While testing, its accuracy of finding hidden studs under the wall seemed to be pretty efficient as a magnetic device. It’s mainly because it's equipped with rare and strong earth magnets, which are well capable of detecting metal nails/screws.
Being a magnetic device, it saves us from the hassle of frequent charging or battery drainage, and calibration needs. Coming to its user-friendliness, this model boasts a very compact easy-to-hold design that doesn’t put much stress on our palms while working.
Using this product is very easy; just place it on the drywall and move it in an “S” pattern, and it efficiently detects any nearby stud. Also, we didn’t have to mark the studs on the wall with pencils. Also, Its magnets are powerful enough to be left hands-free once in contact with a metal, which simplifies the job for you even more.
What could have been better?
Although this product is well capable and more efficient compared to many other magnetic stud finders, it lacks the capability of discovering the edges of metal studs. Also, it lacks efficiency at detecting live AC wiring and wooden studs, which gives it a slight disadvantage.
Pros
- Isn’t operated by batteries
- Compact size and ergonomic design
- Powerful rare earth magnets for higher efficiency
- Can be used hands-free
Cons
- Cannot detect the stud edges properly
- Inefficient at detecting AC wires
Sensor Type: Magnetic | Battery Required: No | Battery Type: N/A | LCD Display: No | Detection Capability: Wood, Metal | Detection Depth: 1"
6. Studpop Magnetic Stud Finder
Studpop is an emerging brand that specializes in manufacturing and supplying some of the most efficient and easy-to-use power tools under a low price range. The new STUDPOP MAGNETIC STUD FINDER is a decent example of why one shouldn’t start judging a book by its cover. Despite its small size, this product offers an array of convenient features at a reasonable price, making it an ideal go-to tool for simple household tasks.
StudPoP® Original Smart Magnetic Stud Finder – No...
- ACTUAL REVIEW: "If you have very thick plaster walls, this...
- MORE POWERFUL THAN THE COMPETITION: The StudPoP's unique...
Experience
Due to its 8" x 6" x 2" compact size, we had several questions about the efficiency of the STUDPOP MAGNETIC STUD FINDER at first glance. However, this product did not disappoint us with its simple and quick stud-location efficiency. Moreover, it is easily one of the most ergonomically designed stud detectors we’ve come across.
Equipped with a rare earth magnet, this model gives us a satisfying experience of detecting quick studs across walls. However, unlike most of the stud finders out there, this product is quite efficient at finding hard-to-detect studs across plaster walls, lathes, and tiles as well. Being a magnet-operated product, it also rids us of battery and calibrator-related issues.
Scanning walls with this product is pretty convenient, as it makes a mildly loud “pop” sound every time it comes across a stud/nail. Overall, it’s a reliable go-to option for homeowners and is pretty handy when it comes to quick and efficient wall scanning.
What could have been better?
Considering its low price, there isn’t much that we’ve expected from this model. However, we wish that this product could be efficient at detecting the edges of metal studs as well. Although it's portable and flexible, it would have been better if the model came equipped with an aperture to be tied to strings.
Pros
- Very low priced
- Easy-to-use product
- Ergonomic design
- Makes a pop sound when the stud is detected
Cons
- Inefficient at detecting the edges of studs
- Lack of an aperture reduces its portability
Sensor Type: Magnetic | Battery Required: No | Battery Type: N/A | LCD Display: No | Detection Capability: Metal Fasteners | Detection Depth: N/A
7. Stanley FMHT77407 FatMax Stud Sensor 300
Having a professional-grade tool that comes with the user-friendliness of a rookie is always an advantage. The new STANLEY FATMAX has a decent list of semi-professional features to offer under a fairly affordable price range. For those looking forward to purchasing a two-in-one product that’s ideal for both personal and commercial projects, give this a try.

Stanley FMHT77407 FatMax Stud Sensor 300
- Backlit LCD screen to display sensor's readying, even in low...
- AC detection up to 2" deep; wood and metal detection up to...
Experience
While testing its METAL SCAN mode, we were quite amazed by how efficiently the product detected metal studs nestled in the drywall, up to a maximum depth of 3". Not to forget, its AC TRACKING mode gives us an adequate detection depth of 2". Finding regular studs accurately with this device is a cakewalk, thanks to its one-pass center-finding technology.
This product comes equipped with an advanced LCD, which shows smart notifications regarding low battery and self-calibration. It also graphically shows the location of the discovered stud, which is quite simple to read and comprehend. What we liked the most is that once the center of a stud is detected, the LCD instantly portrays the “CENTER” icon along with a beeping alert.
This model runs on durable 9v batteries and supports auto-calibration that altogether maximizes its efficiency and accuracy by a great deal. All of this may sound complex, but this product is surprisingly so easy-to-use that a 10-year-old could use it at its highest efficiency.
What could have been better?
The accuracy of its stud detection is somewhat influenced by the density or humidity of the surface that’s being scanned.
Pros
- Auto-calibration feature for higher accuracy
- Easy-to-read LCD
- Ergonomic design for easy-grip
- Fairly adequate depth
Cons
- Accuracy is affected by the humidity and density of the wall
Sensor Type: Electric | Battery Required: Yes | Battery Type: 9V | LCD Display: Yes | Detection Capability: Wood, Metal, Live AC Wires, Deep Metal Scan | Detection Depth: 1.5" to 3"
Best Stud Finder Comparison Table
| Product | Sensor Type | Battery Required | Battery Type | LCD Display | Detection Capability | Detection Depth |
|---|---|---|---|---|---|---|
| Franklin Sensors FS710PRO | Electric | Yes | AA | No | Wood, Metal | 1.6" |
| Precision Sensors ProFinder 5000+ | Electric | Yes | AA | No | N/A | 1.7" |
| BLACK+DECKER Line Laser with Stud Sensor | Electric | Yes | AA | Yes | Wood, Metal, Live AC Wires | 0.75" |
| Zircon MultiScanner i520 | Electric | Yes | 9V | Yes | Wood, Metal, Joists, Ferrous & Non-Ferrous Metals, Live AC Wires | 0.75" to 3" |
| CH Hanson 03040 | Magnetic | No | N/A | No | Wood, Metal | 1" |
| Studpop Magnetic Stud Finder | Magnetic | No | N/A | No | Metal Fasteners | N/A |
| Stanley FMHT77407 | Electric | Yes | 9V | Yes | Wood, Metal, Live AC Wires, Deep Metal Scan | 1.5" to 3" |
Buying Guide For The Best Stud Finder
A lack of useful insights and tips often leads us to purchase non-reliable products, which is a bad investment in the end. That’s why we have listed a set of important features to look out for before you finally buy an ideal stud finder.
Type of the sensor
There are mainly two types of sensors in stud finders, i.e. electric and magnetic sensors. If you’re looking for a very simple product that doesn’t come along with battery-related issues, magnetic sensors are your cup of tea. However, you should opt for electricity if you have expectations such as graphical stud location signaling, wire voltage readings, and so on.
Size of the sensor
As obvious as it is, sensor size becomes a very important factor when choosing an ideal stud detector. If you have a tight budget and low expectations, go for the ones with smaller sensor sizes. However, if you can afford to slip in a little extra cash to avail of attractive features such as greater depth and higher accuracy, opt for the one with a larger sensor.
Efficiency at targeting the centers
When you’re buying a stud finder (especially an electric one), it's very important to check its efficiency at detecting the center of the stud. Make sure you buy the ones with higher capabilities of targeting the centers, as it is very helpful in detecting the studs more accurately.
Design and grip
Some stud finders are unnecessarily large and designed in an inconvenient manner. This may result in fatigued arms, during lengthy tasks. Make sure you go for the ones with a very ergonomic design.
Alert and display
LCDs are an advantage of electric models, which helps in locating the studs more accurately. Also, make sure the product also comes equipped with audible notification alerts. This way, the product reduces the chances of missing the stud-detections.
Stud finders are generally safe, as long as you follow the manufacturer’s instructions and guidelines. The accuracy of stud finders depends on the device quality and technology. High-quality electronic stud finders can be very accurate when used properly, while magnetic stud finders have a lower level of accuracy. Stud finders may face difficulties detecting metals in lath-and-plaster walls, walls with multiple layers, or walls with irregular depths. Accuracy can also be affected by the presence of electrical wiring, pipes, or HVAC systems. To use an electronic stud finder, place it against the wall and turn it on. Slowly move it horizontally or vertically across the wall until the indicator lights up or sounds, signaling that a stud has been detected.Stud Finders FAQs
Are stud finders safe for use?How accurate are stud finders?Are there any limitations on using a stud finder?How do I properly use a stud finder?
Conclusion
After extensively reviewing the top 7 stud finders, it's clear that the right device can simplify your DIY tasks at home and provide reliable results for any mounting project. Top-of-the-line devices are equipped with advanced technology and additional features that cater to a range of skill levels and needs.
From these highly-rated options, here are the top three expert recommendations:
The Franklin Sensors FS710PRO ProSensor 710+ is an ideal option for semi-professional use with its impressive 1.6-inch detection depth, 13-LED light array, and efficient multi-sense technology. It boasts the versatility to detect both wood and metal studs effectively.
On the other hand, the Precision Sensors ProFinder 5000+ Deep Scanning Stud Finder is a good option for individuals in need of deep stud detection. It offers 1.7 inches of detection depth, an array of sensory pads, and the convenience of running on AA batteries.
Lastly, the BLACK+DECKER Line Laser with Stud Sensor is the right choice for those seeking a multi-function stud finder. Its various features include detecting studs at a density of 0.75 inches, sensing live AC wires, and providing auto-leveling technology for added functionality.
Investing in one of these top-quality stud finders can save you time and frustration when it comes to completing your home improvement projects. Choose the best device for you based on your specific needs and skill level, and confidently tackle any wall-mounting job with ease.
Related Articles
13 Best Screwdriver Sets on the Market Today
13 Best Tile Saws Reviewed | Buyer’s Guide
11 Best Wood Chisels to Enjoy Today | Buyer’s Guide
11 Best Sliding Compound Miter Saws
The best septic tank treatments help maintain healthy bacterial balance in your septic system, preventing clogs, odors, and costly backups while promoting long-term efficiency. These treatments introduce billions of enzymes and beneficial bacteria that break down organic waste, reduce scum buildup, and minimize the risk of drain field failure. Whether you're managing a residential tank or maintaining an off-grid cabin, routine treatment using high-quality liquid, pod, or powder-based formulas ensures smooth water flow and improved waste decomposition. However, not all septic treatments are equally effective—many low-grade products fail to maintain biological activity, especially when exposed to cleaning chemicals or harsh temperature changes. That’s why we’ve reviewed the 12 best septic tank treatments available today, comparing each for its treatment lifespan, bacterial strength, odor control, and ease of use. We've also included a buyer’s guide to help you select the right formula and frequency for your setup—plus tips on avoiding common septic mistakes like flushing “flushable” wipes or overdosing enzymes. With proper maintenance, the right septic treatment can extend your system’s lifespan and save you thousands in repairs.

Septic Tank Treatment Definition
Septic tank treatment is the process of introducing billions of beneficial bacteria and other biological additives into septic tanks in order to maintain a healthy septic system. The bacteria and enzymes used in this process help break down human waste, reduce odors, and prevent drain field clogging.
Septic-specific enzymes are essential for effective septic tank treatment as they help speed up the breakdown of organic material while providing additional oxygen to the bacterial colonies, ensuring a healthy environment for your septic system. Regular maintenance with proper septic tank treatments can extend the life of your system and keep it functioning efficiently for many years.
Tip
No matter what the package says, do not use flushable wipes of any kind if you are using a septic tank. If you are forced to use them for whatever circumstance, throw them in the trash bin, and don’t flush them.
Best Septic Tank Treatments
Are you looking for the best septic tank treatment to help maintain and keep your tank running efficiently?
Healthy septic tanks require regular maintenance and treatment to prevent clogs and backups that can lead to costly repairs. Here is the list of the 12 best septic tank treatments.
1. Green Gobbler SEPTIC SAVER Bacteria Enzyme Pacs - Best for Affordability
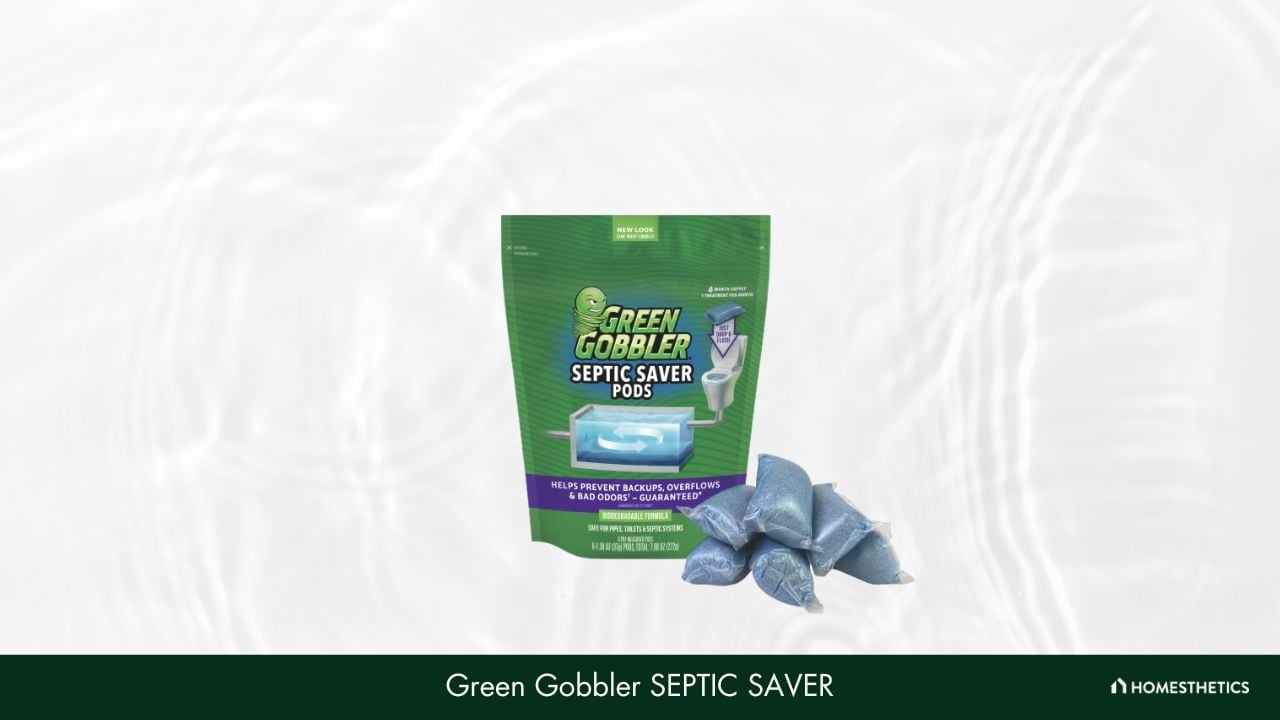
Green Gobbler is a brand that we can trust blindly when it comes to providing cost-effective septic tank treatment without compromising on quality. Their all-new SEPTIC SAVER stands out as an excellent go-to option to fix sewage problems at an affordable price. Let’s take a more in-depth look at its core features!
Accumulation of grease, fats, organic matter, and similar waste is a significant reason we experience frequent blockage in the sewage system. However, it should come as no surprise that the SEPTIC SAVER is one of our best recommendations, mainly because of its stable composition. To be precise, it’s made from 100% strong and capable bacteria and enzymes that digest the underlying waste entirely, clearing your septic pipes for uninterrupted flow.
Moving on, this product also offers great value for the price, all thanks to its bargain-basement range. Usually, septic tank treatments can cost up to $7,000, but this item gets the job done even quicker at a fraction of the cost. With every purchase, you get six dissolvable pouches that altogether add up to 6 months of treatment at such a low price.
Unlike professional septic solutions, using these enzymes is extremely easy and does not call for expert assistance. All you need to do is flush an entire package down the toilet once every 30 days, and the powerful solution will function effectively. The cherry on top is the brand’s assurance of quality, as it comes with a 30-day money-back guarantee.
When it comes to effectiveness, there are not enough brands that are as promising as Green Gobbler. Performance-wise, this product has surpassed our expectations greatly. However, it’s a little upsetting that it doesn’t always remain in stock due to the high demand.
What We Like
- Very easy to use
- Affordable price tag
- Money-back guarantee
- Sufficient for six months
What We Don’t Like
- Not always in stock
Package Weight: 7.8 oz | Treatment Duration: Monthly | Septic Tank Type: All septic systems | Active Ingredients: Bacteria and enzymes | Safe for Pipes: Yes
2. Cabin Obsession Septic Tank Treatment - 1 Year Supply of Easy Flush Live Bacteria - Best for Longevity

Speaking of the best value, our upcoming recommendation is from Septic Treatment by Cabin Obsession, one of the bestselling brands today. Along with a host of excellent features, this product has made cleaning your blocked sewage system look like a cakewalk. Read on to know more!
One of the biggest reasons why we’re in love with this product is the bang for your buck it offers. As the name suggests, the manufacturers provide 12 months' worth of solutions with every purchase, making it quite a cost-effective option to consider. For those currently running low on budget, the longevity this item offers makes it an irresistible deal.
Furthermore, it’s incredible how easy it is to use this product - only one flush down the toilet gets the sewage pipes unclogged. It saves you initial costs and the additional expenses of hiring a septic treatment professional. Also, you’d only need to use it once a month, which makes the job even more comfortable.
Speaking of composition, the brand has always been known for its scientifically selected bacterial cultures. Likewise, this product comes with a massive amount of active and influential bacteria that can quickly decompose the most stubborn sludge and waste. Not only that but it is tested to be environment-friendly, which guarantees to leave zero detrimental side effects post-use.
Last but not least, this product also comes with a risk-free money return guarantee, which speaks volumes about the quality the brand strives to deliver. Simply put, the brand accepts free returns within the first six months if you’re unsatisfied with the results.
When it comes to cleaning septic waste, it proves to be an excellent solution for the price. However, we’ve noticed that it fails to eliminate the septic odor at times. However, it can digest the solids without any issues.
What We Like
- Best value for money
- Six-month return policy
- Beginner-friendly product
- Active bacteria included
What We Don’t Like
- May not entirely eliminate odor
Package Weight: 16.8 oz | Treatment Duration: Monthly | Septic Tank Type: All septic systems | Active Ingredients: Bacteria and enzymes | Safe for Pipes: Yes
3. Instant Power 1868 Septic Shock 67.6 Fl Oz - Best for Odor Elimination
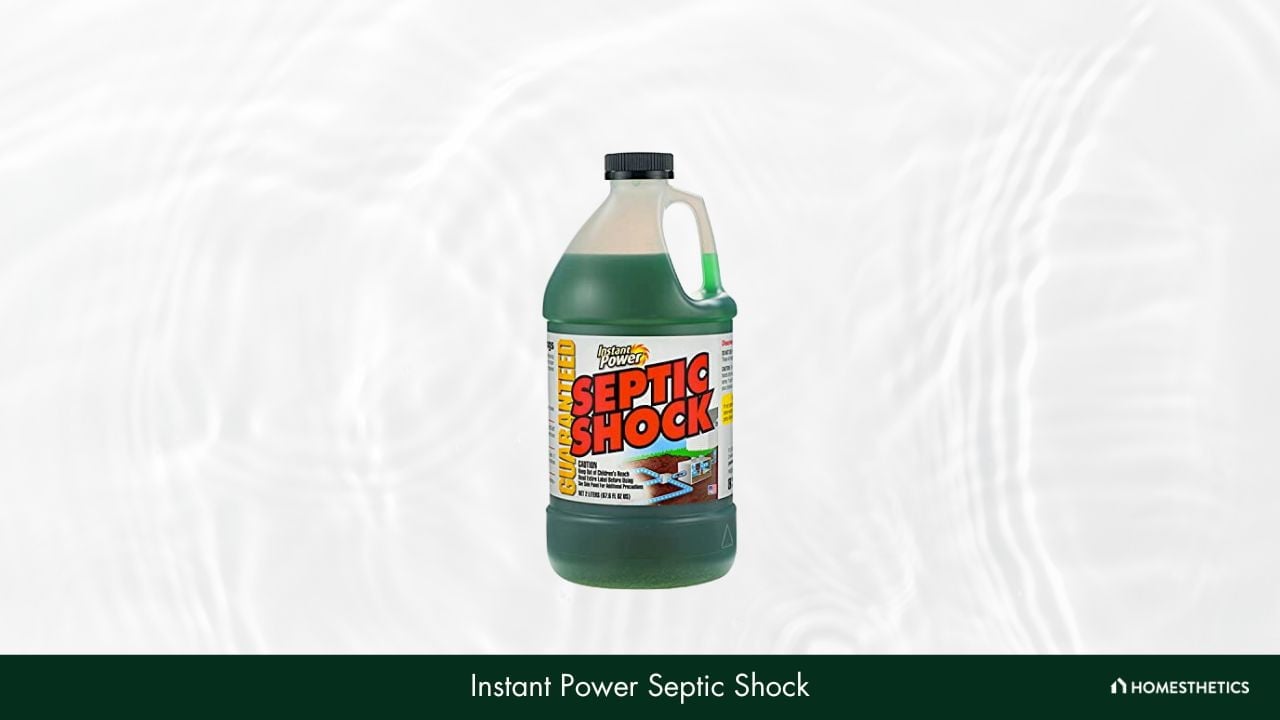
Just as the name suggests, Instant Power is a brand that manufactures sewage-unclogging products that are as quick as a flash. We’ve recently tested the all-new Septic Shock, and it stood out to be quite a beginner-friendly treatment solution under an affordable budget. Let’s find out what it offers!
For those dealing with an utterly odorous bathroom, the Septic Shock comes off as an absolute lifesaver. The USP of this product is its sheer ability to cancel out any disgusting smell coming out of your septic tank, which gives it an instant advantage over our previous recommendation. Just a few drops of this solution not only clear the clogged sewage canal but also deal with the foul smell precisely.
Speaking of its unclogging properties, we were amazed at how effectively the solution digests unwanted sludge and organic matter without any detrimental side effects. Whether it’s soap, grease, or paper, a dosage of Septic Shock clears out all stubborn waste in a way that beats professional treatment.
The secret behind it is the composition, which consists of millions of active and beneficial bacteria. To be precise, the solution comprises lipase, protease, cellulose, and alpha-amylase bacterial strains, which effectively dissolve the clogging matter within a few minutes. Under such a negotiable price bracket, it makes quite a sweet deal.
Speaking of best values, this product comes in a 67.6 Fl Oz bottle, which is guaranteed to last for months. On top of that, the manufacturers offer a 100% money-back guarantee, being is the icing on the cake.
Although this product works its magic on regular septic tank clogging matter, it may not be as effective if used on tile bed blockages. However, as mentioned, the brand maintains optimal integrity by issuing a money-back guarantee if you’re not satisfied.
What We Like
- Clears the intolerable septic tank smell
- Composed of multiple beneficial bacteria
- 100% money-back guarantee
- Digests grease, paper, and soap
What We Don’t Like
- Remains unaffected on tile bed packages
Package Weight: 72.16 oz | Treatment Duration: One-time | Septic Tank Type: All septic systems | Active Ingredients: Chemicals | Safe for Pipes: Yes
4. GreenPig Solutions 52 Concentrated Formula Live Septic Tank Treatment - Best for Skin-Sensitive Users
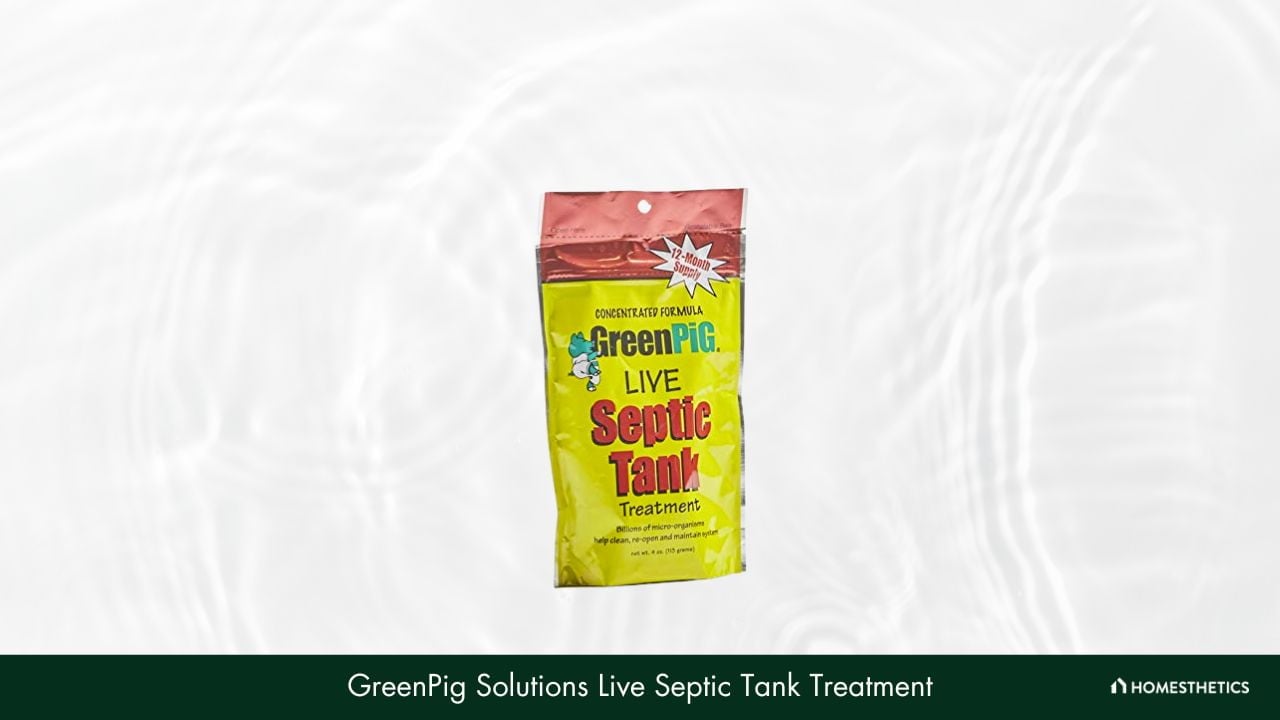
GreenPig Solutions is an emerging name in the market that has changed septic tank treatment with its world-class solutions. The brand has recently manufactured a set of water-soluble dissolving packets that can clear any stubborn bathroom clogging overnight. For those who need a one-stop solution that lasts about a year, it’s quite a value-for-money option.
As the name suggests, this is one of the best-value products to look out for when it comes to avoiding septic waste issues. Simply put, the manufacturers provide an impressive 1-year supply with every purchase, which gives you quite a long-lasting solution under an affordable budget.
Moreover, you wouldn’t need a large quantity to clear your tank in this case, mainly because it is formulated to perform more with less. To be clear, one packet of GreenPig Solution can take care of a 500-1500-gallon tank with ease.
The manufacturers have strictly adhered to industrial standards while developing this formula, which enables it to be so effective at eliminating thick sludge layers. The patented GreenPig formula comprises one billion active bacteria that help in clearing out the most stubborn clogging matter very smoothly, including soap scum, paper, and oils. Just one dosage of this formula gives you an unrestricted septic flow for a month.
One of the most significant issues with septic tank treatment solutions is the detrimental reaction it has on human skin once it comes in contact. However, this product is tested to be non-reactive to the skin, which saves you from rashes and irritations while working on sewage cleansing.
Some users have reported that although it doesn’t damage your skin, it isn’t as friendly to sewage pipes. You’re quite likely to notice stains or decay marks on the surface with continuous use, which isn’t a good sign.
What We Like
- Eliminates unwanted sludge
- 1-year supply per purchase
- One billion active bacteria
- Digests grease paper easily
What We Don’t Like
- May leave stains on the tank surface
Package Weight: 4 oz | Treatment Duration: Monthly | Septic Tank Type: All septic systems | Active Ingredients: Bacteria and enzymes | Safe for Pipes: Yes
5. Bio-Clean Drain Septic Bacteria - Best for Multipurpose Use
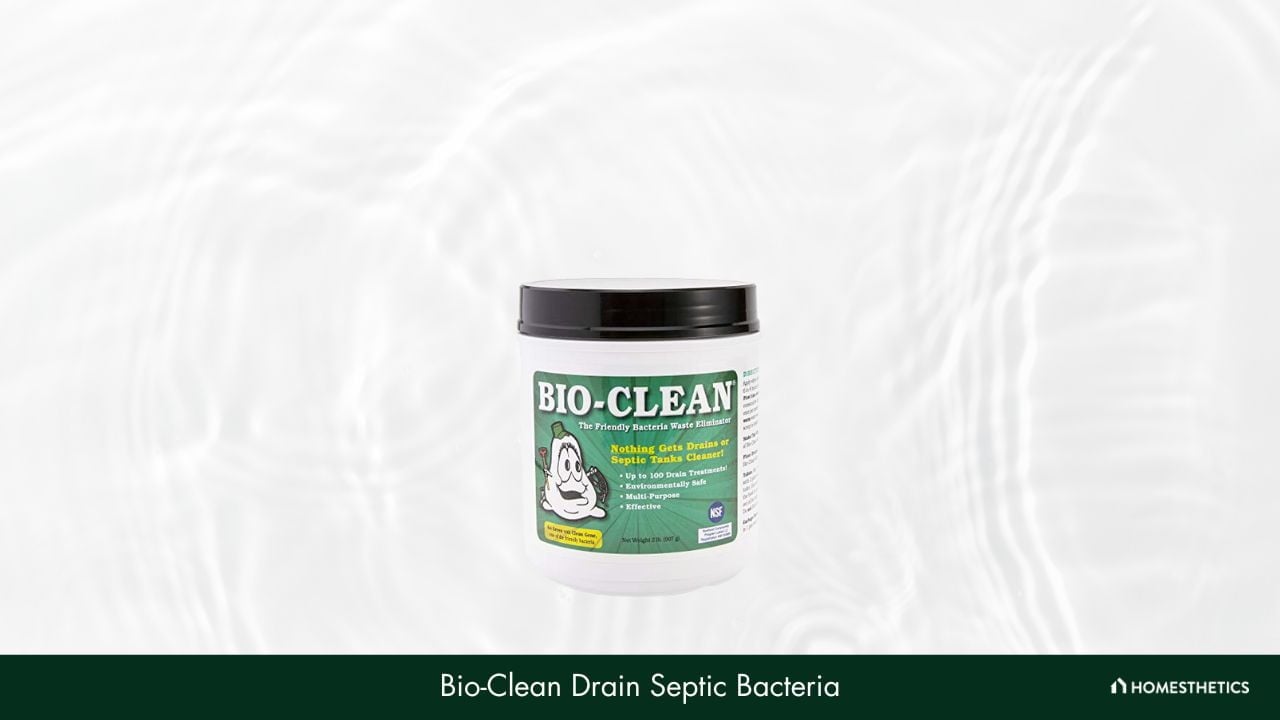
Bio-Clean has the right product to end your stress if you’re tired of the plain old septic tank treatment hassle. This brand has recently launched an incredible Drain Septic Bacteria solution that’s been making waves with its potent properties. Let’s take a more in-depth look at its core features!
Not your average sewage-clearing solution, this product has been specially formulated with natural bacteria and enzymes. Such a powerful combination enables it to completely digest dead and obstructive waste that interrupts your sewage flow. One dosage of Bio-Clean drain septic bacteria guarantees professional treatment at an unimaginably low cost.
This product comes in a 2-pound canister, which lasts up to about 100 medium-range sewage treatments. Although it’s a bit less than our usual recommendations, its comparatively low price justifies the quantity.
However, the USP of this product is the multi-functional ability that gives it an instant advantage. This multi-purpose solution not only clear septic tank obstructions but also works wonders on kitchen sinks. You can even clean motorhomes and cat litter pans with this product, making it an excellent value-for-money product.
Unlike other low-cost septic tank clogging solutions, this product is 100% environment-friendly and non-reactive to your skin. Thus, you can easily use it without worrying about leaving detrimental side effects.
Unfortunately, this product doesn’t come with any money-back guarantee. Apart from that, it may not be the best option to consider if you’re looking forward to cleaning a 1500-gallon tank, mainly because of its limited quantity.
What We Like
- Compact and affordable
- The integrated formula for waste digestion
- Lasts about 100 drain treatments
- Multi-purpose capabilities
What We Don’t Like
- Doesn’t have a money-back guarantee
Package Weight: 32 oz | Treatment Duration: Monthly | Septic Tank Type: All septic systems | Active Ingredients: Bacteria and enzymes | Safe for Pipes: Yes
6. Green Gobbler Ultimate Main Drain Opener/Drain Cleaner/Hair Clog Opener
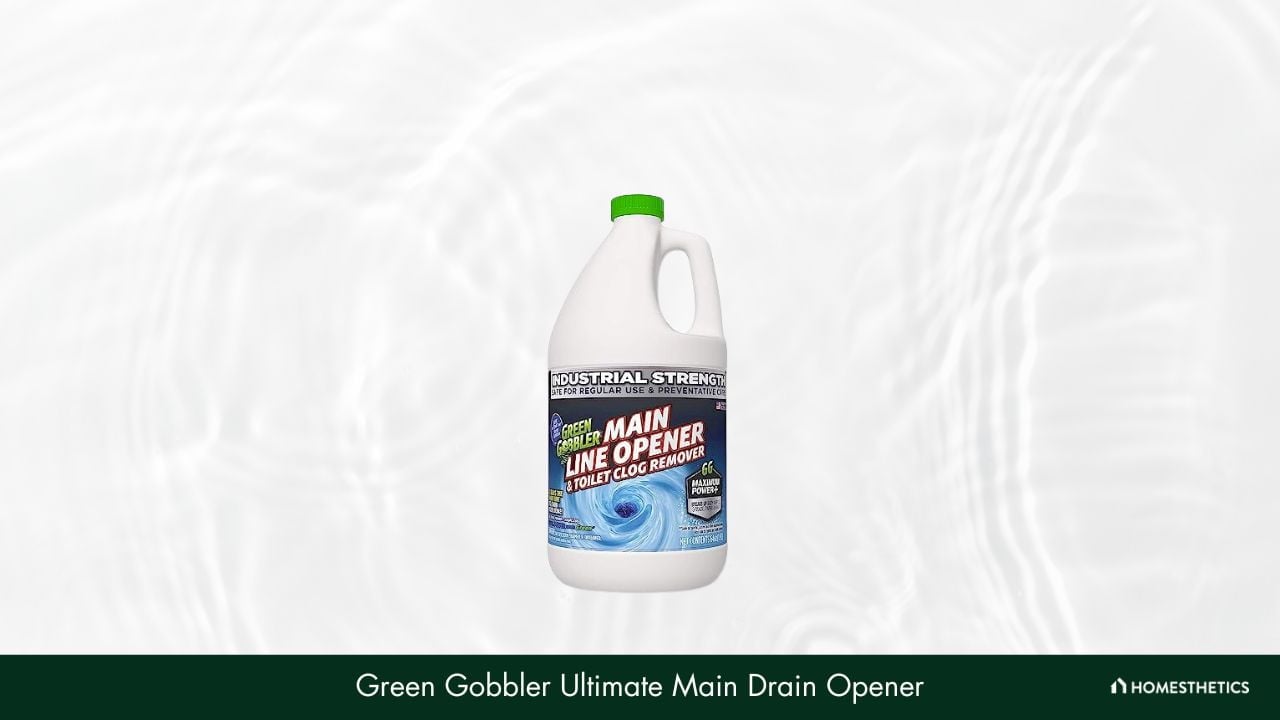
Green Gobbler has returned to our list with another septic clogging solution, best known for its multi-functional properties. If you’re looking for a cost-effective liquid to remove the stubborn clogging matter in your toilet, the Ultimate Main Drain Opener is an appropriate option. Let’s check out its core features.
First and foremost, this product features a thick and high-density composition that has been tested to digest the densest of clogging matter for an uninterrupted flow in your toilet. The solution dissolves into the water and clings to the pipes very easily. This way, it becomes a lot easier to digest the obstructing matter to normalize the septic flow in your household.
The real catch is the non-harmful nature of this solution, which ensures zero damage to the pipe while cleansing the sludge. The industrial-strength formula enables it to address the clogs without decaying the sewage system specifically. This product is quite effective at dealing with unwanted obstructive matter such as grease and oils. However, it can even digest condensed solid matter such as paper and baby wipes.
Most of us usually use chemical-based solutions that are very harmful to the environment. However, apart from being non-harmful to the pipes, Septic Shock also stands out as an environmentally friendly solution. On top of that, it also comprises non-flammable and skin-friendly properties, so don’t worry if you accidentally drop a little on yourself while preparing the cleanse.
Quantity-wise, this product doesn’t appear to offer us high values. You’d need to pour a little more than the average liquid quantity to get the job done, which results in the bottle emptying quicker than usual.
What We Like
- Dissolves organic matter precisely
- Eco-friendly and skin-friendly solution
- Doesn’t damage the sewage pipes
- Money-back guarantee offer
What We Don’t Like
- Dissatisfactory quantity
Package Weight: 64 oz | Treatment Duration: One-time | Septic Tank Type: All plumbing systems | Active Ingredients: Chemicals | Safe for Pipes: Yes
7. Walex BIO-31112 Bio-Active Drop-Ins Septic Additive
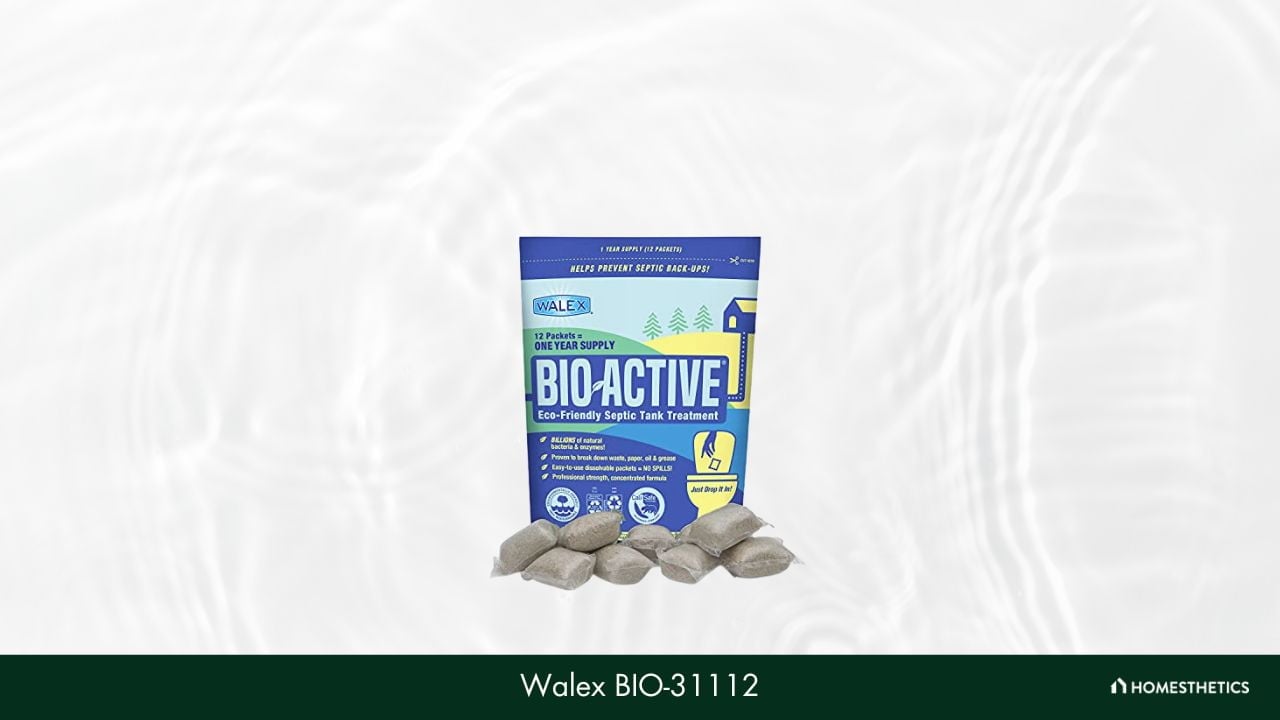
As we’re halfway into the list, it seems appropriate to introduce BIO-31112 Bio-Active drop-ins, one of the most user-friendly septic clogging solutions. Although Walex, as a brand, has always been known for making professional jobs look effortless, this product takes ease of use to another level.
Usually, it becomes a little tough for regular homeowners to cleanse their clogged sewage system, mainly because the solutions aren’t reasonably easy to use. However, in this case, all you have to do is drop a packet in your toilet and flush it away.
Moving on, the formula of this product is quite effective at digesting the underlying obstructive matter in your septic tank. BioActive comes with a patented composition of active bacteria that helps in clearing out medium-scale blockages overnight. The biological population of the bacteria helps unclog your toilet and takes care of the offensive smell with precision.
Apart from that, the price is also on the lower side while offering excellent quantity, which makes it an overall sweet deal. Under such an affordable budget, you get a year’s worth of supplies to get rid of any septic tank problems without consulting professional help.
This product has also been tested to not leave any harmful effects on your plumbing system with regular use. Moreover, it doesn’t leave any rashes or irritation on your skin if you come in contact.
When it comes to performance, this product offers excellent bang for the buck. However, it’s not always in stock, which is a little disappointing. Apart from that, the manufacturers do not offer any money-back guarantee if the solution fails to work.
What We Like
- Extremely user-friendly
- Billions of active bacteria
- Doesn’t harm the pipes
- Affordable price tag
What We Don’t Like
- No money-back guarantee
Package Weight: 14 oz | Treatment Duration: Monthly | Septic Tank Type: All septic systems | Active Ingredients: Bacteria and enzymes | Safe for Pipes: Yes
8. Rid-X Septic Tank Treatment Enzymes
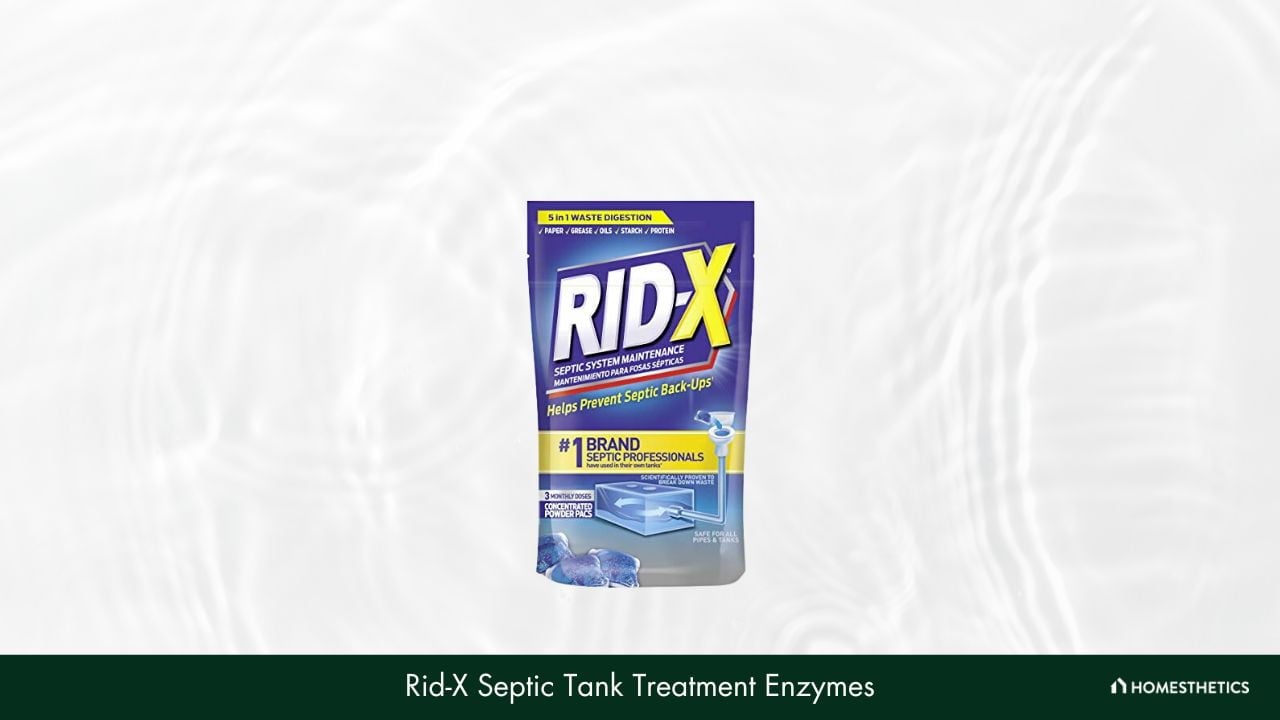
Rid-X is one of the most reliable brands that Americans trust when it comes to efficient septic tank treatment. We’re amazed by how precisely this product aids in obstructing any scope of septic backups, and the credit goes to its excellent composition. Let’s check out what it brings to the table.
As per National Nielsen Data, Rid-X is currently one of the most effective brands in septic tank treatment. However, it shouldn’t be surprising as the product is extremely good at getting rid of the toilet clogging matter without punching a hole in your pocket.
When it comes to performance, the USP of Rid-X is its capability to prevent any underlying septic backup. That is because the solution focuses on consistently breaking down and dissolving the obstructive matter, which becomes even better with occasional little plumbing. Under such a fair budget, there are not many alternatives that regularly digest waste.
The credits go to its advanced composition, as the natural bacteria and enzymes packed in these mini pouches are quite effective at getting rid of almost any substance. Whether it’s soap or paper, the solution clears it all with precision. Moreover, despite such hardcore action, this product doesn’t harm the pipes, making it a lot safer to use regularly.
Speaking of value for money, the brand offers you three months of supply at an unimaginably low price. A single dosage lasts a month, but it also appears strong enough to cleanse tanks as large as 1500 gallons.
We’re not sure about how skin-friendly it is, so we’d advise users to take necessary safety precautions to prevent any skin problems. Also, most of our other recommendations come with one year's worth of supply at a slightly higher cost, which gives it a slight disadvantage.
What We Like
- Gets rid of septic backups and odor
- User-friendly dissolvable pouches
- Can cleanse large 1500-gallon tanks
- Active bacteria and enzymes
What We Don’t Like
- Quantity may not be sufficient
Package Weight: 3.84 oz | Treatment Duration: Monthly | Septic Tank Type: All septic systems | Active Ingredients: Bacteria and enzymes | Safe for Pipes: Yes
9. Roebic K-37-Q Septic Tank Treatment
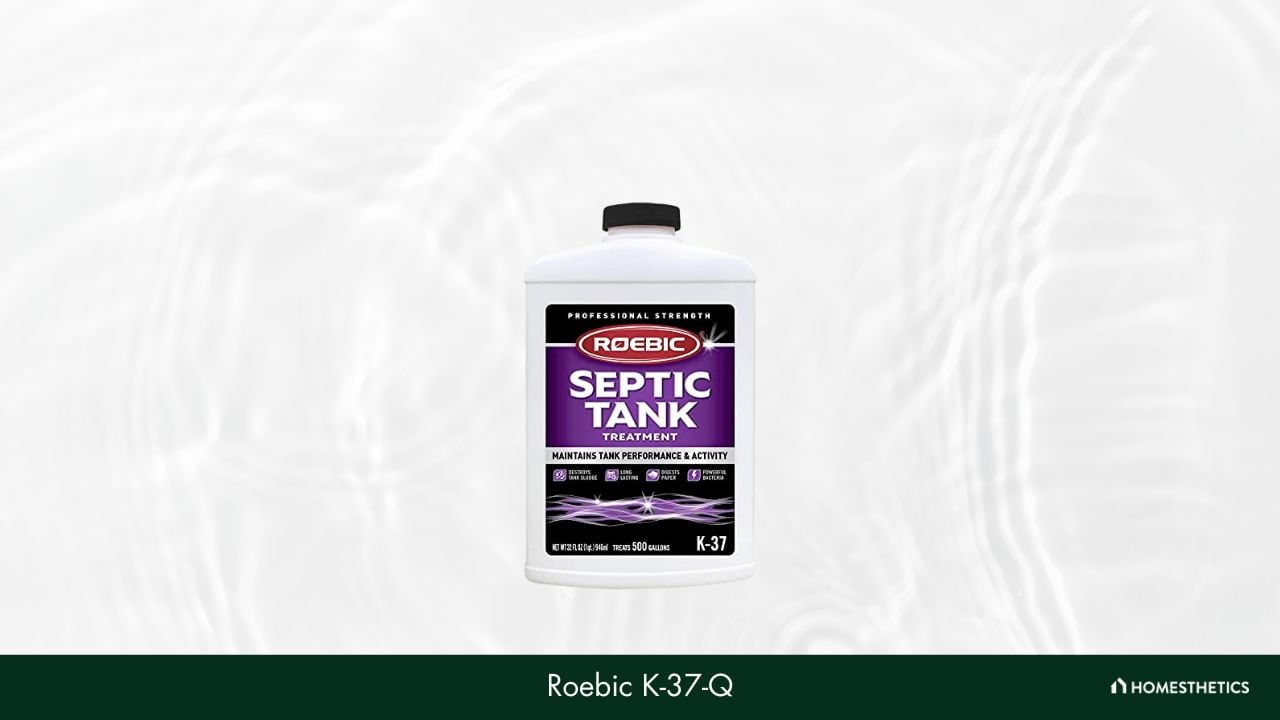
Roebic has a successful brand history of manufacturing best-in-class toilet hygiene solutions. The all-new K-37-Q raises the bar further for professional septic tank treatment, as its scientifically tested composition consistently digests clogging solids. Let’s take a more in-depth look!
If you’re tired of dealing with a clogged toilet every other day, then the K-37-Q should be your go-to option. This product is best known for its ability to rapidly break down solids, making it easier to get rid of unwanted sludge in your septic system. Other than that, it’s also one of the best solutions to consider if you’re looking forward to canceling out the stinking odor immediately.
Furthermore, one of its best features is its biodegradability, which makes it a very environmentally friendly option to consider. This way, the solution doesn’t react badly to matters such as soap and detergent, creating an unhealthy atmosphere in your tank. It’s incredibly safe to use and guarantees no harm to your plumbing structure.
We’re also fans of its multi-functional capabilities, as you can use it to clear out drain fields. That is due to the brand’s patented bacterial formulae, strong enough to digest paper and grease within a short time. It also helps in processing water very efficiently, resulting in an uninterrupted septic flow.
Last but not least, we’d recommend it to beginners as it’s effortless to use. You just need to shake the solution thoroughly and pour it into the toilet. It requires as few as two flushes to dissolve entirely into the tank and lasts for a very long time.
Although it can take care of tanks as big as 500 gallons, we wouldn’t recommend it if you have a bigger tank. It’d have been better if the manufacturers backed up their quality with a money-back guarantee offer.
What We Like
- Very economical product
- Active bacteria and enzymes
- Beginner-friendly solution
- Long-lasting treatment
What We Don’t Like
- Not recommended for extra-large tanks
Package Weight: 33.4 oz | Treatment Duration: One-time | Septic Tank Type: All septic systems | Active Ingredients: Bacteria and enzymes | Safe for Pipes: Yes
10. Sanco Industries Root Destroyer
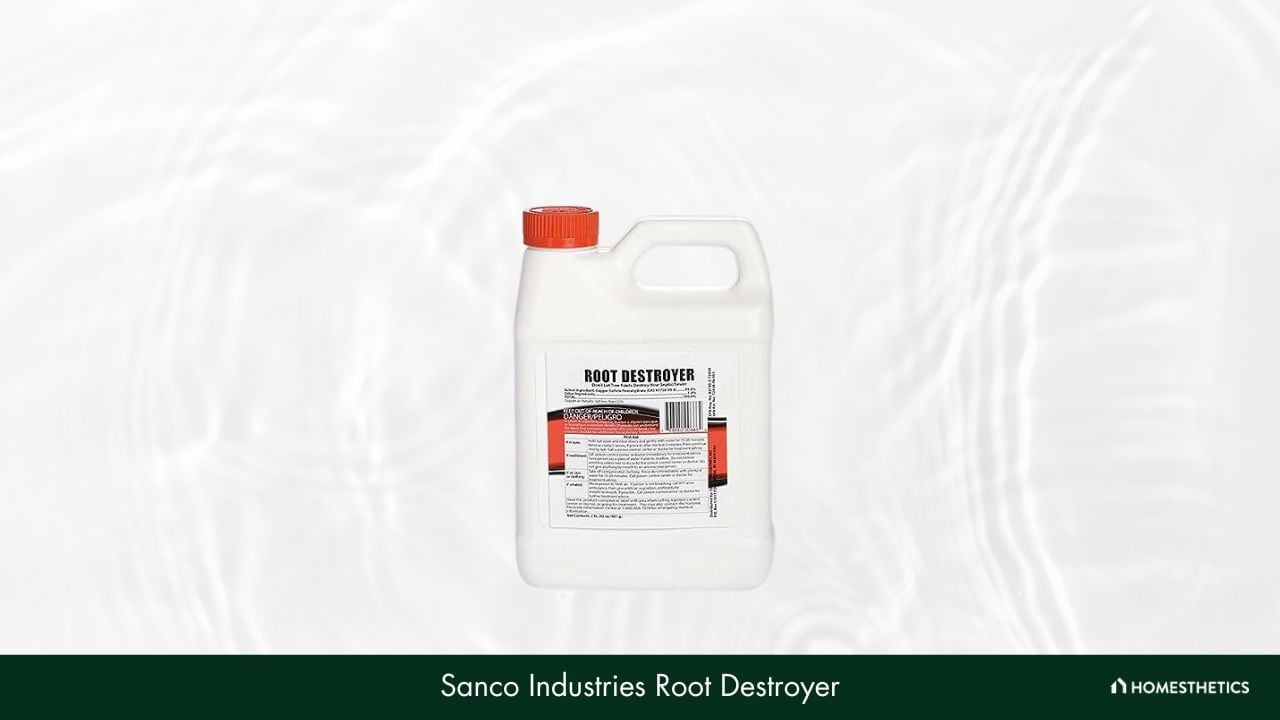
Sanco Industries is a brand that has always offered some of the best industrial-standard septic treatment products over the years. If budget isn’t a factor, its Root Destroyer solution is what you should choose for long-lasting toilet unclogging problems due to leech roots. Let’s take a more in-depth look at its core features.
Straight off the bat, this product is backed up by intensive scientific research to bring out an appropriate composition that obliterates the waste obstructing your sewage pipes. The Root Destroyer solution comprises copper sulfate crystals, which help in digesting the thickest solids. Ultimately, it’s very efficient at killing the septic pipe roots, which gives it an advantage over various alternatives.
However, unlike other hardcore solutions, this product doesn’t harm the trees despite such continuous and advanced treatment. Not to forget, it can minimize the bacterial impact for about two weeks.
We’re pretty amazed by how precisely this solution functions, as it ensures that only the unwanted roots that appear inside the leach line will be taken off. Just a small dosage is sufficient to wipe away the target, which decomposes and washes away eventually. However, in this course, the remaining tree remains unaffected, making it an eco-friendly product to protect your sewage pipes.
Not your average toilet cleaner, this product has garnered our attention with its unique capabilities. However, its price is very much towards the higher end, so it may not be your tea cup for those looking for a cost-effective solution. Also, it’s not the ideal product to digest grease, paper, and similar regular solids.
What We Like
- Eliminates leech roots
- Doesn’t harm the trees
- Fairly easy to use
- Long-lasting product
What We Don’t Like
- A little expensive
Package Weight: 32 oz | Treatment Duration: One-time | Septic Tank Type: All septic systems | Active Ingredients: Chemicals | Safe for Pipes: No
11. Black Diamond Stoneworks GET SERIOUS Grease Trap Treatment
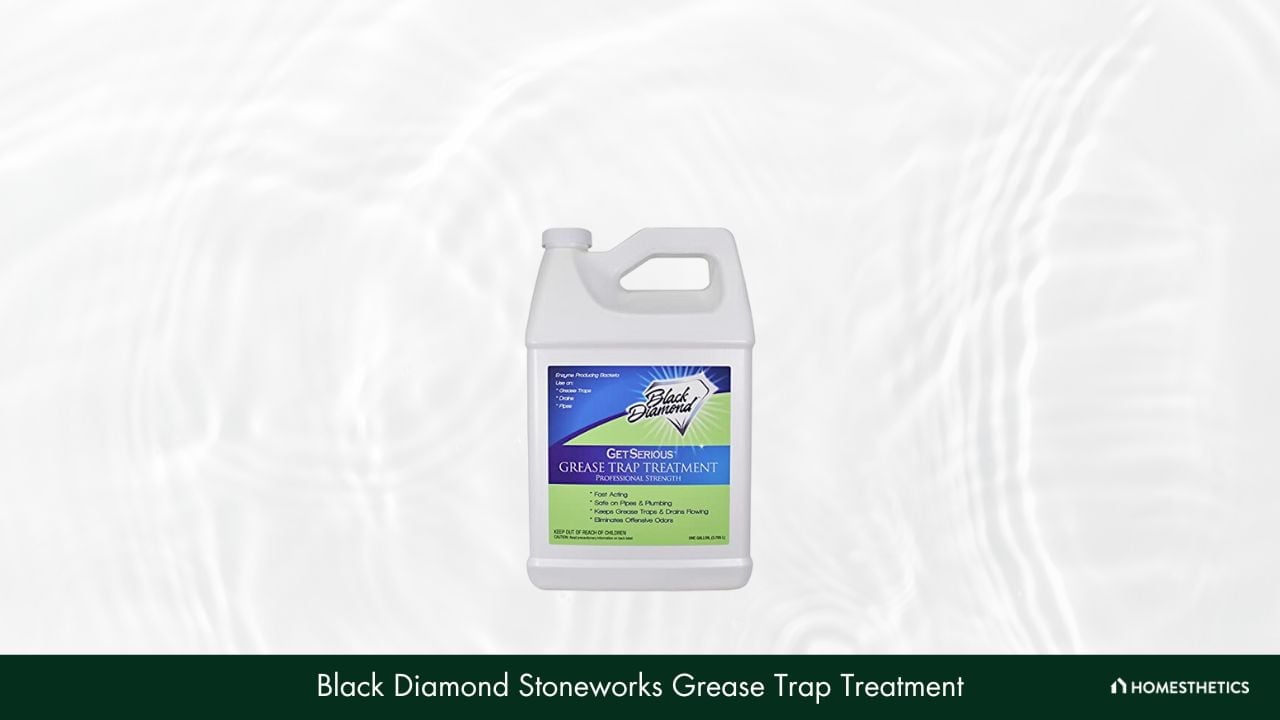
Now that we’re nearing the end of our list, it’s time to get serious! Jokes apart, Black Diamond has been recently making waves with the best-in-class GET SERIOUS septic tank treatment range, which is highly popular among both DIY enthusiasts and professionals. Let’s check out what it offers!
If you’ve had any experience shopping for commercial-grade septic enzymes, you shouldn’t be unfamiliar with the brand history of Black Diamond. This brand has raised the standards for next-level toilet treatment with the GET SERIOUS product range. When it comes to cleaning stubborn grease and sludge from your sewage pipes, professionals rely on this solution.
However, despite being a high-end product, the brand offers excellent value with this package. At a fraction of the original cost, this solution assures you of commercial-level tank treatment that lasts for a very long time. Especially if you have slow-draining sinks and lines in your household, use it for the best results.
One of the best things about this package is its unique capability of cleaning sewage pipes. While most of the products tend to harm the longevity of tubes in the long run, this product cleanses the pipes to restrict the buildup of grease on their surface. Other than that, it does an excellent job of blocking the offensive odor caused by the clogging.
Compared to similar alternatives, this product appears to be a little more expensive than the average option. Nevertheless, the brand doesn’t offer quality assurance in return, which gives it a significant disadvantage in the market.
What We Like
- Trusted by professionals
- Clears the intolerable septic tank smell
- Composed of multiple beneficial bacteria
- Cleans the sewage pipes
What We Don’t Like
- A tad pricey
Package Weight: 136 oz | Treatment Duration: Monthly | Septic Tank Type: Grease traps | Active Ingredients: Bacteria and enzymes | Safe for Pipes: Yes
12. RV Toilet Treatment Easy Flush Drop-Ins
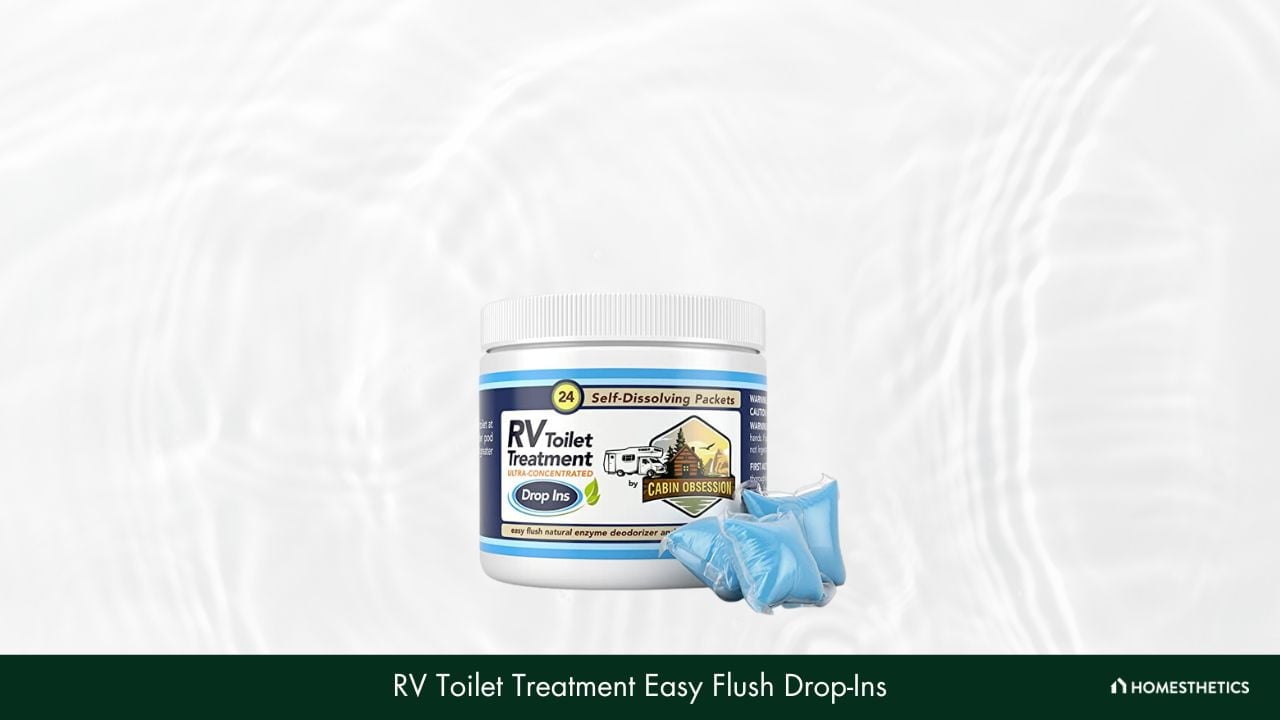
Cabin Obsession is famous as a brand that has changed the game with its easy-to-use innovations. The RV Toilet Treatment drop-ins are extremely useful for daily travelers, as they help you fix your bathroom problems without fail. Let’s take a more in-depth look at its features!
When you own a Recreational Vehicle (RV), toilet clogging problems become a prevalent issue to deal with. Cabin Obsession has developed this fantastic solution that is pretty easy to use, hence saving you unnecessary hard work while you’re on the go.
First and foremost, the solution’s formula is specially developed to work twice as fast as a natural alternative. One dosage gets the toilet unclogged within a few minutes, so that you don’t feel suffocated for long inside such a compact space. Moreover, it leaves a pleasant smell after the job is done, which gives you a refreshing feeling.
Also, as the name implies, this product is very easy to use. You just need to drop a pouch in the toilet and flush, and the solution takes care of the rest. Our expert advice would be to flush down the solution right before leaving for the best experience.
It’s pretty impressive that the product is entirely biodegradable; the packets are built to dissolve automatically after being released into the water. Apart from that, the solution itself is potent and active, which helps in reducing solid waste clogging your RV toilet precisely.
As this product is mainly developed to unclog RV toilets, we wouldn’t suggest it to those searching for solutions to address their domestic septic tank flow issues. The quantity is comparatively less and may appear a little overpriced for many.
What We Like
- Very economical product
- Active bacteria and enzymes
- Beginner-friendly solution
- Long-lasting treatment
What We Don’t Like
- Not recommended for large tanks
Package Weight: 10.4 oz | Treatment Duration: Weekly | Septic Tank Type: RV toilets | Active Ingredients: Bacteria and enzymes | Safe for Pipes: Yes
Best Septic Tank Treatments Comparison Table
| Product | Package Weight | Treatment Duration | Septic Tank Type | Active Ingredients | Safe for Pipes |
|---|---|---|---|---|---|
| Green Gobbler SEPTIC SAVER Bacteria Enzyme Pacs | 7.8 oz | Monthly | All septic systems | Bacteria and enzymes | Yes |
| Cabin Obsession Septic Tank Treatment – 1 Year Supply of Easy Flush Live Bacteria | 16.8 oz | Monthly | All septic systems | Bacteria and enzymes | Yes |
| Instant Power 1868 Septic Shock 67.6 Fl Oz | 72.16 oz | One-time | All septic systems | Chemicals | Yes |
| GreenPig Solutions 52 Concentrated Formula Live Septic Tank Treatment | 4 oz | Monthly | All septic systems | Bacteria and enzymes | Yes |
| Bio-Clean Drain Septic Bacteria | 32 oz | Monthly | All septic systems | Bacteria and enzymes | Yes |
| Green Gobbler Ultimate Main Drain Opener/Drain Cleaner/Hair Clog Opener | 64 oz | One-time | All plumbing systems | Chemicals | Yes |
| Walex BIO-31112 Bio-Active Drop-Ins Septic Additive | 14 oz | Monthly | All septic systems | Bacteria and enzymes | Yes |
| Rid-X Septic Tank Treatment Enzymes | 3.84 oz | Monthly | All septic systems | Bacteria and enzymes | Yes |
| Roebic K-37-Q Septic Tank Treatment | 33.4 oz | One-time | All septic systems | Bacteria and enzymes | Yes |
| Sanco Industries Root Destroyer | 32 oz | One-time | All septic systems | Chemicals | No |
| Black Diamond Stoneworks GET SERIOUS Grease Trap Treatment | 136 oz | Monthly | Grease traps | Bacteria and enzymes | Yes |
| RV Toilet Treatment Easy Flush Drop-Ins | 10.4 oz | Weekly | RV toilets | Bacteria and enzymes | Yes |
Types of Septic Tank Treatment
-
Enzymatic Septic Tank Treatment
A septic tank enzyme treatment is a beneficial bacteria-produced catalyst that accelerates biochemical reactions, aiding in the breakdown of organic materials in your septic tank. Enzymatic septic tank treatment is a form of care for your septic system. It helps to break down organic materials and is used in combination with bacteria for optimal results.
The treatment contains both bacteria and extracellular enzymes, which work together to improve the health of your system. Different types of enzymes are used to treat different kinds of organic waste, such as fats, proteins, and carbohydrates. These enzymes help break down the organic matter so that it can be further broken down by bacteria.
Enzymatic septic tank treatment is an effective way to maintain the health of your septic system when compared to other treatments such as bacterial or chemical septic tank treatments. Enzymatic treatments provide a more targeted breakdown of organic matter while also providing an added layer of protection against clogging or blockages in the pipes.
-
Bacterial Septic Tank Treatment
Bacterial treatments are single-use treatments that use bacteria to break down organic matter. These treatments are specifically formulated for anaerobic septic systems and are designed to help the system function at its highest capacity by breaking down solid waste and preventing clogs. They also aid in the digestion of proteins, starches, fats, and oils. Bacterial septic tank treatments differ from enzymatic and chemical septic tank treatments in their focus on bacterial action.
Enzymatic treatments contain enzymes that act as catalysts to break down solids. Chemical treatments rely on chemicals like chlorine or other disinfectants to help break down solids.
All three types of septic tank treatments come with their own advantages, so it is important to understand what each can do before making a decision about which one is best for your needs.
-
Chemical Septic Tank Treatment
In septic treatments, the chemical variant is a great treatment option to help prevent septic tank issues. It comes in both pods and tablets and works by breaking down solid waste and restoring balance in the septic tank system.
Chemical treatments are typically used for preventive septic tank maintenance, rather than when an issue has already occurred. In comparison with enzymatic septic treatment and bacterial septic treatment, chemical septic treatment is more comprehensive as it breaks down both solids and liquids. Chemical treatments are also often more affordable than the other two options.
All of the above septic tank treatment formulas come in different shapes and sizes. As you may have already figured out from our list, most septic tank treatments come in pods (solupacks) or liquid forms. But other than these, you may also find tablet and liquid treatment products. And the selection will largely be based on your convenience.
-
Treatment Pods
Treatment pods are widely popular because of their simple and effective design,” as all you have to do is drop one in the toilet and flush. The degradable casing dissolves upon contact with water to release the ingredients. Although the release time may be slightly slow, users are saved from the hassle of mixing or measuring stuff. This is by far the most popular treatment and the easiest to use, as you simply flush the pods, and once in contact with water, the pod casing dissolves and the tank treatment begins.
-
Liquid Treatment
Liquid treatments are primarily formulated to treat intense clogs, and in most cases, you have to pour the entire bottle into the toilet or tank and then flush. However, some brands may require you to dilute the product or pour only a specified quantity.
-
Tablet Treatment
Tablet septic tank treatments work pretty much the same way as pods, except that they don’t have the protective casing. As they lack a casing, tablets break down gradually and thus lengthen the process a bit.
-
Powder Treatment
Last but not least, all powder treatment products can be used for tanks of any size as long as you pour out the right quantity for that specific tank. But they should be allowed to sink for some time in the toilet or tank before flushing. Otherwise, the powder may force into the air while flushing. Powders are a mix-and-match solution, in the sense that being an open solution allows you to add more or less depending on the size of your tank. Some powders are measured in cups to help you use the right amount.
How to Properly Use the Best Septic Tank Treatment
-
Follow the Directions on the Package
Septic tank treatment is an essential part of keeping your septic system running smoothly, and playing by the rules can be as simple as not throwing toilet paper in the tank while the treatment takes place. The best septic treatment will contain specific enzymes that help break down solids, oils, and other materials in the tank, thus preventing clogging of the septic.
It is important to follow the directions on the package of your septic tank treatment carefully to ensure that it works as intended. First, determine how much of the product you need to use depending on the size of your tank. Next, make sure to add the product slowly and directly into the toilet bowl so that it can be evenly distributed throughout the tank.
Finally, avoid placing any additional items such as chemicals or paper towels into the toilet bowl until after you have added the septic tank treatment and allowed it to work for at least 24 hours.
Always follow the directions on the package for the best performance out of your septic system.
-
Check Your Septic Tank Regularly
Regular maintenance and inspection of a septic tank are one of the best treatments to ensure that your septic system works properly. A well-maintained septic tank can help prevent clogged septic tanks, as well as costly repairs. It is recommended to have your septic tank inspected every month or at least every six months to ensure it is in proper working order. During the inspection, make sure that all parts are functioning correctly, including any pumps and alarms. Also, check for any signs of possible damage, such as cracks or leaks.
-
Do Not Overdose
When it comes to taking care of your septic tank, there are a few things to consider in regard to treatment options. You mustn’t overdose on septic tank treatment, as this can cause an imbalance of the good bacteria needed to keep your system running smoothly.
To ensure that you don’t overdose, be sure to read the instructions carefully and only use the recommended dose for each treatment. Additionally, it is important not to overuse treatments, as they can build up in your system and eventually become toxic.
Try to stick with one or two treatments per year, unless there is an emergency situation requiring more frequent treatments. Finally, it is always best practice to have a professional inspect your system regularly and provide additional advice on how best to take care of your septic tank.
Buying Guide for the Best Septic Tank Treatment
Now that you’re familiar with the best options in the market, let’s take it a step further and learn about the factors that a reliable septic tank treatment must have. Taking note of these features can help you choose better according to your needs.
-
Treatment Capability
One of the most prominent attributes of septic tank treatments is their ability to unclog a specific tank size. Most of the regular options are capable of covering the capacity of 500 gallons, which is sufficient for average households. However, if you’re buying one for commercial purposes, it’s better to go for 1500 gallons.
-
Life-Span
Most of us opt for DIY septic tank treatment because of its sheer cost-effectiveness. However, if the product you’re using doesn’t come with a reasonable life span, it may indirectly lead to high expenses as the 2nd or 3rd use might be delayed past the object's expiration date. Happily, a clogged septic system is not a common occurrence if the system is designed properly.
If you’re a very routine-oriented person, using products that come with one trial is good enough. However, if you’re looking for seasonal cleaning, it’s better to choose alternatives that come with a minimal life span of 3 months.
-
Odor and Foul Smell
Offensive smell becomes a very concerning issue whenever our toilets are clogged. Some treatments can efficiently dissolve the solids, but various objects such as feminine hygiene products, wet wipes, and toilet paper might take longer, and thus, in certain cases, it might take a while for the smell to leave completely. However, using alternatives that come along with odor control properties can help you hit two birds with one stone. Changing what ends up in your tank can certainly help as well.
If you're experiencing odor issues, it goes without saying that you should definitely get a septic tank treatment into account, as it's an effective method to reduce unpleasant smells. A septic tank can dissipate odors and foul smells, but it will also break down scum and leave your tank clean and smelling fresh.
-
Environmental Friendliness
Finally, the solutions need to be eco-friendly due to the advanced bacterial population. Otherwise, it can harm the surrounding environment detrimentally if used regularly. That said, we’d suggest you choose products that are made from plant-based ingredients for safety.
However, when it comes to this product, environmental friendliness becomes an even broader subject. For example, most of the easy-to-use drop-ins come in pouches, which can also be a part of the clogging problem if not addressed properly. That is why you should always choose enzymes that come in dissolvable and biodegradable pouches.
What is the best septic tank treatment?
Any well-reviewed septic treatment, such as Green Gobbler, Rid-X, or Bio-Tab, will do, and there are many other reliable treatment pods available on the market. The most important aspect is to follow the manufacturer’s instructions carefully when using any septic tank treatment, as these substances can be harmful to your health and your plumbing system if misused.
Can I put yeast in septic tanks?
No, it is not recommended to put yeast in septic tanks as yeast is a fungus, not a bacterium. Thus, you are not replacing bacteria, but instead competing with it for a food source. No supplier of a black water septic/treatment plant will recommend adding yeast; instead, a bacteria blend and enzymes should be used. Yeast is an actual organic material that can cause anaerobic bacteria to grow, which can lead to septic system problems.
The short answer is: No because yeast can cause septic tank backups and clogs as it actually competes with the bacteria or enzymes you would add naturally.
How do I keep my septic tank healthy?
Proper septic tank maintenance implies having your tank pumped every 3-5 years, using water efficiently, and disposing of household chemicals responsibly. Avoid getting grease, coffee grounds, and other non-biodegradable items such as wet wipes or feminine hygiene products into the tank. You can even go as far as installing a water filter to prevent solid materials from entering the tank, and planting trees and shrubs near the tank to absorb excess water. Make sure to keep the lid of your septic tank closed and check it regularly.
Do septic tank treatments actually work?
Yes, septic tank treatments work well; a lot of homeowners and households vouch for them. Septic treatments are designed specifically for this task, and they help the natural process by breaking down the organic material inside the tank, reducing the amount of buildup. This can help reduce the risk of septic tank failure and thus extend the life of the tank, and last but not least, prevent backflow into the house.
Do septic tank enzymes actually work?
Septic tank enzymes are great for breaking down organic waste, but they are a prevention system at the septic tank level, which means that they won’t help with a clogged toilet or major septic drain clog. Use them regularly to keep your septic system healthy and functioning as it should, but use them with moderation as overdoing them may damage your system
How do I increase bacteria in my septic tank?
The fastest and most effective way to increase bacteria in a septic tank is to add a septic tank bacteria treatment. Adding the bacteria treatment regularly will ensure balanced bacteria levels and keep the septic tank functioning properly, but make sure not to overuse it; too much of anything can have negative consequences.
Do note that having your tank pumped out on a regular basis also helps reset the balance in the tank, and it’s one of the most important maintenance conditions for septic tank treatments.
Is Rid-X or Ridex good for septic tanks?
According to the EPA and the Ohio Department of Health, not only are additives like Rid-X not recommended, but they actually have a detrimental and potentially hazardous effect on your septic system’s waste treatment process.
Although Ridex is capable of removing odors, eliminating grease and grime, and breaking down proteins and starches when used in septic tanks, please do note that it does not contain enzymes and may not be as effective as other products designed specifically as septic tank treatments.
Conclusion
Septic tanks are an essential part of your residence, and you should focus on keeping them clean and smooth for a healthier environment.
On that note, we hope that you’ve enjoyed going through our 12 best septic tank treatments list. Before we leave, here’s a recap of our editor's picks! For those searching for a large quantity that lasts for about 12 months, the Cabin Obsession Septic Tank Treatment is an appropriate choice.
Moving on, the Green Gobbler Septic Saver has the catbird’s seat when it comes to the quick reduction of smell. Also, the Instant Power Septic Shock is an excellent choice for those who need a one-stop solution that liquefies any type of clogging matter.
That said, we’ll see you soon with more interesting expert recommendations. Till then, stay tuned!
Related Articles
9 Best American Standard Toilets Right Now
8 Best Bidet Toilet Combos Right Now
13 Best Soft Close Toilet Seats
15 Toilet Brands for Your Future Home
7 Best Dual Flush Toilet [Reviewed & Buyer’s Guide]
Toto Neorest NX1, 550H & 700H [Reviewed & Buyer’s Guide]
Kohler Santa Rosa Toilet Review [All You Need to Know]
Convenient Height Toilet Review [All You Need to Know]
11 Best Toilet Flappers [Buyer’s Guide]
The best residential flagpoles combine durability, proper height, and smooth halyard operation to proudly display your flag in any weather condition. While residential and commercial flagpoles often share similar design fundamentals—such as a halyard system for raising and lowering the flag securely—residential models are typically optimized for easy installation, aesthetic appeal, and wind resistance. Material choice is also key: high-quality flagpoles are usually constructed from aluminum or fiberglass, offering corrosion resistance, lightweight handling, and long-term structural integrity. Despite their shared purpose, flagpoles differ in height, mounting style (in-ground vs. wall-mounted), pulley configuration (internal vs. external halyard), and wind load capacity, making selection more nuanced than it appears. In this guide to the 6 best residential flagpoles, we break down top-rated options based on construction quality, ease of installation, weather resistance, and overall performance to help you choose a model that suits your location, climate, and display preferences.

Listed below are the 5 best residential flagpoles from our list:
- Ezpole Liberty: This product offers a solution to collapsing sections, common in other telescoping flagpoles, with the help of a unique locking mechanism, ensuring a perfect residential flagpole look.
- Valley Forge: Known for its strength and reliability, this five-section in-ground residential flagpole comes with a comprehensive installation kit, offering a firm and uniform look once assembled.
- Super Tough: With an impressive height of 25 feet, this flagpole stands out for its ability to hold two flags and its exceptional strength owing to its 8-gauge aluminum construction.
- Telepole Manufacturing “Superior 1”: Made from 10-gauge aluminum, this flagpole stands out due to its superior quality and durable base and is unique for its additional fifth telescoping section.
- Windstrong Heavy Duty Residential Flagpole: Combining durability with convenience, this telescoping flagpole offers the ability to rotate the type of flag you want to fly while ensuring a securely grounded base.
Here’s the list of the 6 best residential flagpoles today, each carefully selected based on their size, material, and overall construction, to add a patriotic touch to your home.
1. Ezpole Liberty

Ezpole, a telescoping flagpole, offers users a great solution to the problems found in other telescoping flagpoles: if not adequately secured, sections of the telescoping flagpole can collapse, ruining the look of your residential flagpole.
Ezpole is equipped with a locking mechanism that prevents an accidental collapse, a common feature found in other telescoping residential flagpoles. Adding to the convenience is the ease of raising and lowering the flag.
The Ezpole is made of 16-gauge aluminum, and the three sections that it possesses extend the flagpole as high as 21 feet. Adding to the beauty of the pole is the gold ball embellished at the top of the pole. You also get a nylon flag along with the pole, which you can attach with the help of two stainless steel clips.
What We Like
- Reasonably Priced
- 2 different sizes
- Telescoping flag pole
- Made of Aluminum
- Comes with an American flag
- 1/16’ wall thickness
What We Don't Like
- Lock mechanism requires physical strength
- Shorter in comparison to other flagpoles
Materials: Aluminum | Dimensions: 60" x 36" | Weight: 17 pounds | Fabric Type: Nylon
2. Valley Forge

If you are looking for a residential flagpole that is both steady and reliable, then this five-section in-ground residential flagpole is the best for you. With a base measuring 3.4 inches in diameter and material that includes 16-gauge aluminum, the strength and durability of the flagpole are no surprise.
The pole comes with an installation manual and a kit that includes all the critical components required for steadying the flagpole. The package also consists of a high-quality polyester flag, which is as durable and appealing as the residential flagpole.
Made in America, this flagpole is made for true Americans. It instills in the purchaser a great sense of patriotism. The beauty of the residential flagpole stems from the fact that although it has five different sections, it is uniform-looking once assembled. The 20-foot residential flagpole has a nylon rope for the purpose of lowering and raising the flag.
What We Like
- Comes with a kit complete with all components
- Flag is made of quality polyester
- Easy and straightforward installation
- Wide base provides strength and durability
What We Don't Like
- PVC Ground sleeve
Materials: Aluminum | Length: 25' | Weight: 12.8 pounds | Fabric Type: Polyester
3. Super Tough

If you are on the lookout for a new tall residential flagpole, then the flagpole from Super Tough is all that you need. Standing at an impressive 25 feet, the residential flagpole can be an impressive installation for your front lawn.
The flagpole has the potential of holding two flags, both of which are attached to a polypropylene halyard with the help of metal snap hooks. The flagpole consists of four sections, and at the bottom part of the flagpole, the external halyard is fastened to the aluminum cleat.
The four sections of the pole add to the convenience of transportation and installation. The installation kit comes with all the necessary components necessary for the installation. The package includes a truck with a pulley, the mounting sleeve, and the hardware integral for installation.
As you can get by the name, the super-tough residential flagpole is made of exceptionally thick 8-gauge aluminum which gives the product the strength and durability it possesses.
What We Like
- Pole is made of commercial-grade aluminum
- Extended length of the flagpole makes it suitable for large residential properties
- Mechanism is convenient and easy to use
- 4 available finishes
- value5
What We Don't Like
- Height of the pole makes it somewhat challenging to install the flagpole
Materials: Aluminum | Length: 25' | Weight: 15.12 pounds | Fabric Type: Nylon
4. Telepole Manufacturing “Superior 1”

With particular emphasis on quality and durability, this flagpole from Telepole Manufacturing is made of the best quality materials. The base of the flagpole is a testament to its quality and durability as it is made of extra-durable 10-gauge aluminum. The content and the material used in manufacturing make the flagpole almost twice as thick as the other flagpoles.
In addition to the strength and durability, it is the five telescoping sections that make the product stand out from the rest of the products. While most of the telescoping flagpoles have four parts, the additional section adds to the flexibility of the product.
The flexibility assists in raising and lowering the flag, adding to the convenience offered. The locking mechanism in comparison to other residential flagpoles is relatively easy to use but is firm and reliable at the same time.
The flagpole comes with two stainless steel spring-loaded buttons that help in holding each section.
What We Like
- Thicker and more durable aluminum base
- Components are made of aerospace-grade thermoplastic materials, which are better than the PVC found in other residential flagpoles
- Flagpole can fly two flags simultaneously
- Comes with a unique tool for unlocking the buttons that retract the pole
What We Don't Like
- Does not come with a flag
Materials: Aluminum | Length: 25' | Weight: 21 pounds | Fabric Type: N/A
5. Windstrong Heavy Duty Residential Flagpole

The telescoping flagpole from Windstrong is one of the few residential flagpoles that are successful in combining durability with convenience. While you may still need extra care when removing or replacing a flag, the convenient mechanism has made it easier by allowing you to rotate the kind of flag you want to fly.
Like many other residential flagpoles today, the Windstrong also possesses a telescoping design. While the telescoping nature of the flagpole adds to the convenience, it also results in one major disadvantage found in other telescoping flagpoles.
Like all other flagpoles not locking the flagpoles can result in the joints bowing under pressure from more substantial winds. In terms of durability, the Windstrong flagpole is one of the best available. The base of the flagpole is 2 and a half inches in diameter, the bottom keeps the flagpole secured on the ground.
The flagpole has walls made of aluminum that are 1/16” thick, this is the standard thickness found in all other flagpoles.
What We Like
- Flagpole comes in two different sizes
- Telescoping flagpole
- In-ground flagpole
- Base of 2 and a half inches
- 1/16” wall thickness
- Comes with a 4’x 6’ US American flag
What We Don't Like
- More expensive than its counterparts
- Not ideal for windy locations
Materials: Heavy Duty, Reinforced Steel | Length: 25' | Weight: 28.5 pounds | Fabric Type: Nylon
6. Grace Alley Flagpole Kit
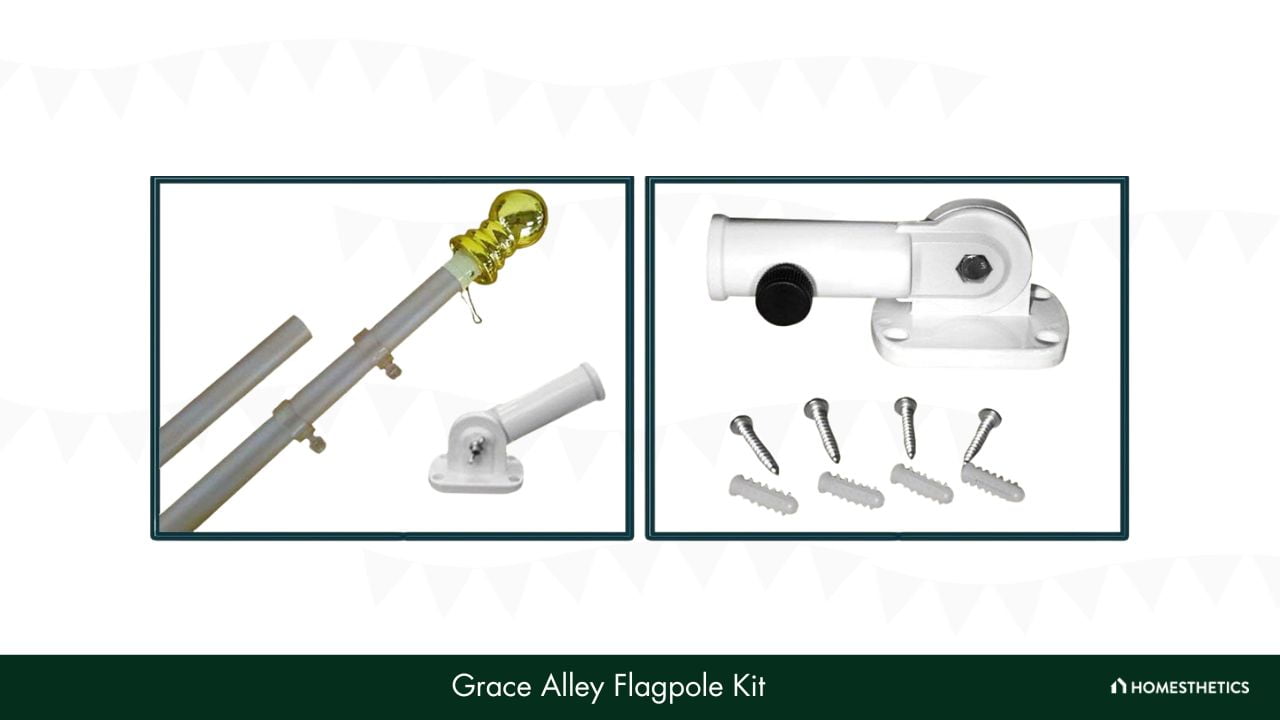
Not all people are fans of large and intimidating flagpoles sticking out from their property. Some may not even have the liberty of installing such a flagpole owing to the limitations of their local municipal regulations.
For users who are not quite fans of large flag poles, Grace Alley has developed the ideal flagpole. In addition to suiting the needs of the user, the residential flagpole serves the patriotic cause too. Unlike most of the other flagpoles mentioned in this compilation, the Grace Alley flagpole is wall-mounted. This implies that the flagpole will originate directly from the infrastructure of the owner's property.
In addition to obeying the laws and regulations of your municipality, the Grace Alley flagpole is very easy to install. This ease in installation also makes the process of replacement reasonably simple for the user as removing the flag from the wall mount is not as arduous as the other methods.
In comparison to ground-mounted flagpoles, the Grace Alley Flagpole compromises durability to some extent. However, this does not stop the flagpole from standing a step above its competitors. The aluminum used in manufacturing the flagpole and the 1” diameter base adds to the strength of the product given the considerably smaller size it has.
What We Like
- Least expensive flagpole
- Wall-mounted flagpole
- Easy to install and change
- Made of aluminum
- Comes with a 3’ x 5’ US American flag
- Has two different finishes
What We Don't Like
- Shortest residential flagpole on the list
- Durability
Materials: Premium Aluminum | Length: 6' | Weight: 2.49 pounds | Fabric Type: Fabric
What is the Best Residential Flag Pole?
Presented below is a comparative table that succinctly summarizes the key attributes of the prestigious residential flag poles available. This table scans aspects like the materials used, the overall length of the pole, its weight, and the type of fabric best suited for it.
| Product | Materials | Length | Weight | Fabric Type |
|---|---|---|---|---|
| Ezpole Liberty | Aluminum | 21' | 17 pounds | Nylon |
| Valley Forge | Aluminum | 20' | 12.8 pounds | Polyester |
| Super Tough | Aluminum | 25' | 15.12 pounds | Nylon |
| Telepole Manufacturing “Superior 1” | Aluminum | 25' | 21 pounds | N/A |
| Windstrong Heavy Duty Residential Flagpole | Heavy Duty, Reinforced Steel | 25' | 28.5 pounds | Nylon |
| Grace Alley Flagpole Kit | Premium Aluminum | 6' | 2.49 pounds | Fabric |
Buying Guide for the Best Residential Flag Poles
Size/Height
The first and most important thing that you should consider is the location of the flagpole. Ideally, a flagpole should be visible from all angles without interference from obstacles, such as trees and other households located nearby.
A 20-foot-tall flagpole is perfect for residential areas. However, if your home is two to three stories tall, then a 25-foot flagpole may be ideal for you.
Material and Construction
The next thing you need to take into consideration is the material used to construct the flagpole. Aluminum and fiberglass are the two choices preferred by users, with both bringing a unique style and layer to the flagpole.
If you want to free yourself from the hassle of cleaning and maintaining the flagpole, then aluminum is the best option for you. Flagpoles made of aluminum are durable and lightweight and don't need maintenance to keep them looking new.
Residential flagpoles made of fiberglass, however, have a glossy gel coat that can withstand most scratches.
Although there are many factors that you need to consider, size and material are the most significant. Now that you are aware of the essentials of choosing a flagpole, here are some of the best residential flagpoles available.
Choosing the ideal flagpole depends on many factors, including the climate of the region you live in and the rules and regulations of the area. It might be challenging to find a flagpole that satisfies your needs in all aspects, but there may be a couple of residential flagpoles that stand above the rest.
From the above 6 best residential flagpoles today, here are the top three expert recommendations. Ezpole Liberty is an ideal option for residential use, offering a secure, telescoping flagpole with a locking mechanism to prevent collapse. Valley Forge's 20-foot Flagpole Kit is a good option, providing a steady and reliable flagpole made of durable materials.
For those in need of a tall and impressive flagpole, Super Tough's Heavy Duty Residential Flagpole is the right choice, offering exceptional strength and the ability to hold two flags. These top three options cater to various needs, ensuring a proud and beautiful display of flags on residential properties.
The list above is a brief overview of the best products in the industry; the final decision of choosing the best depends on your needs and limitations; therefore, research and choose wisely.
Taking care of growing mold in the home is now much easier with at-home mold detection kits.
![7 Best Mold Detection Kit of 2024 [Reviews & Buyer’s Guide]](https://homesthetics.net/wp-content/uploads/2023/07/Best-Mold-Detection-Kits.jpg "7 Best Mold Detection Kit of 2024 [Reviews & Buyer’s Guide]")
The thing about mold is that it’s not just ugly to look at, but it is also a root cause of many health issues. Additionally, if you are trying to sell or rent your home, having mold growing inside automatically makes it less appealing to prospective clients.
You could always hire a professional to take care of the mold, but these detection kits can be helpful during the early stages. And this brings us to the part where we all ask - which mold detection kit is the best? That is precisely what we are here to tell you.
We have gathered some information on the seven best mold detection kits that are available in the market. With this comprehensive review, we hope to help you come to a quicker decision on which one to invest in.
Let’s get right to it, shall we?
Listed below are the 5 best mold detection kits from our list:
- Mold Armor FG500: This affordable, easy-to-use, and DIY-friendly kit delivers quick results within 48 hours and can be used both indoors and outdoors. Its multiple testing methods provide enhanced detection capabilities, but it only allows one test per area.
- Mold Inspection Network DIY Mold Test m2015: Offering comprehensive testing, this kit is accompanied by a detailed instructional booklet and includes the lab fee in its price. However, it only supports visible mold testing and lacks AIHA accreditation.
- Healthful Home HH2003: Noted for its precision in invisible mold detection, this kit from Healthful Home delivers quick results within five minutes and offers an optional lab consultation. On the downside, it only supports one testing method and excludes lab testing prices.
- First Alert Mold Detection Kit MT1: Easy to use and effective in testing across multiple locations, this kit from First Alert is accredited by the National Institute for Occupational Safety and Health. However, it only tests visible mold and incurs extra charges for lab analysis.
- Seeml Labs Mold Inspector in a Box: This compact and budget-friendly kit delivers professional-grade testing with accurate results from an AIHA-LAP-accredited lab, within the same day of receiving samples. Its limitations include surface testing only and a lack of pre-printed envelopes or mailing labels for sending samples.
Here is the list of the 7 best mold detection kits that you can use to quickly and easily identify mold growth in your home.
1. Mold Armor FG500 - Best for Quick Results
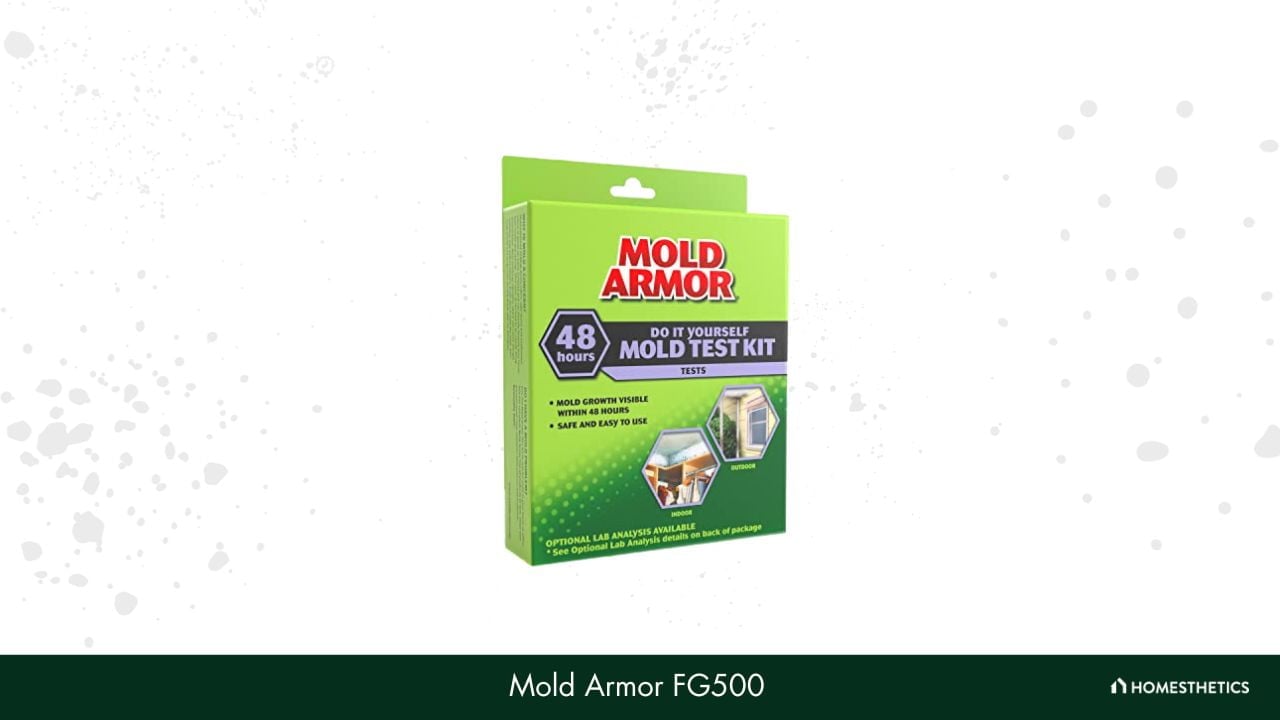
One of the most affordable kits in the market is this one by Mold Armor. Available in packs of two, three, and four, this is an easy DIY test kit that will help identify any mold quickly. In addition, it is safe and extremely beginner-friendly. Let’s take a look at some of its features.
If you are looking for a mold detection kit that provides results in significantly less time, then the Mold Armor kit is for you. This is an easy-to-use kit that tests for toxic molds that can cause issues to your health. Once the mold is tested with this kit, you will get visible results within 48 hours.
Additionally, this testing kit can be used indoors and outdoors. It also tests indoor air quality to detect any unseen mold that can cause potential harm. But that’s not all; it has three testing methods - indoor air quality method, AC and heating sample method, and surface sample testing method. The last one is for mold that is present and visible.
In a nutshell, it is safe and beginner-friendly. The air quality testers have a petri dish, swab, and mold growth medium. These inclusions ensure that the testing is effortless and smooth, even if it’s your first time.
While the test kit does have three testing methods, there is only one of each. This makes it difficult to test in more than one area, leading you to buy more than one kit. Additionally, some users mention that the customer service team is not as responsive.
What We Like
- Contains petri dish, swab, and mold growth medium
- Fast visible results
- Optional lab testing is available
- Easy to use and beginner-friendly
What We Don't Like
- Can only test one area per test method
Dimensions: 1.3" x 5.1" x 7" | Weight: 2.39oz | Result Time: 48 Hours (DIY), 3 Weeks (Optional Lab Analysis)
2. Mold Inspection Network DIY Mold Test m2015 - Best for Comprehensive Testing
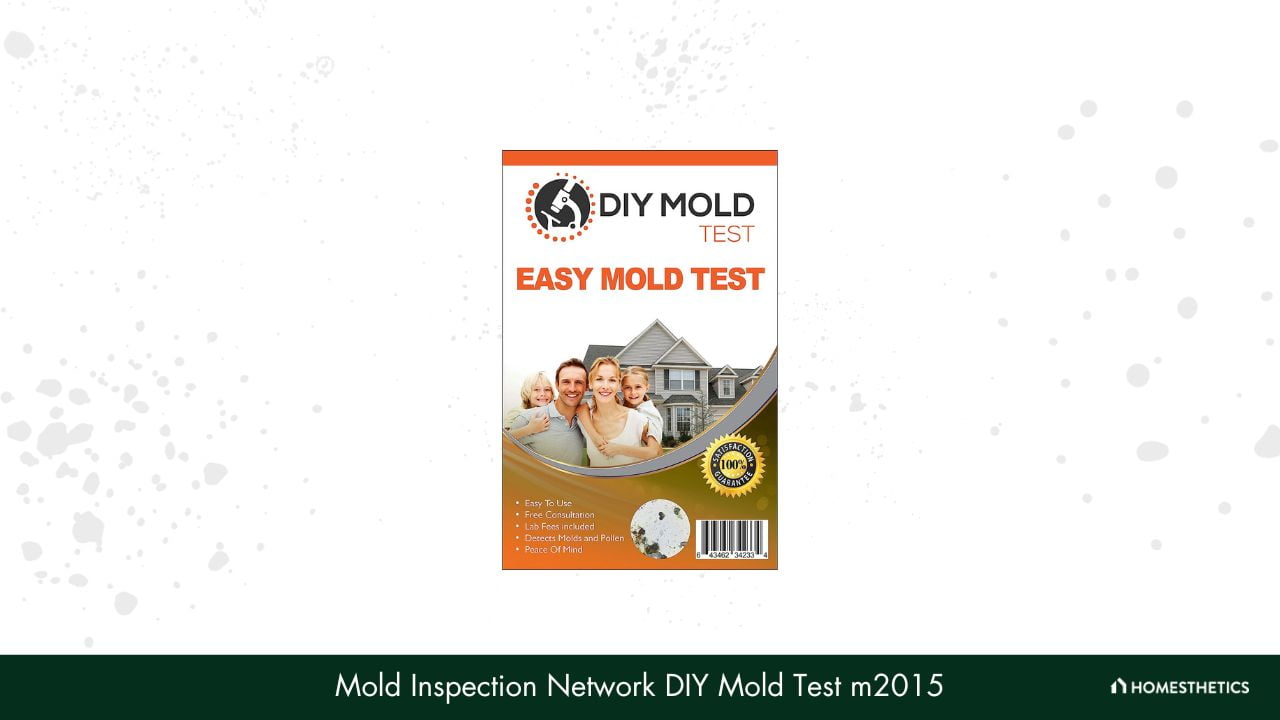
Another safe and easy-to-use kit on this list is the one by Mold Inspector Network. It has a detailed booklet that accurately guides the user on how to conduct the test. Plus, it is mid-ranged and offers adequate detail on the mold present. It is also quite a popular choice on Amazon.
Looking for professional mold detection kits at an affordable rate has been made easy thanks to this kit by Mold Inspection Network. It comes with three surface sample kits so you can test mold more than once or in three separate areas. Additionally, it comes with a guide and inspection booklet.
What’s great about this kit is that the lab fee is included in the price of the surface sample kits. So, all you need to do is test the mold and send it to the lab, and you will receive a detailed report within seven days. This is an excellent feature since it saves you from spending a ton of money on professional services and does not compromise on thorough testing.
Moreover, the booklet and the guide are pretty informative as well. It’s mainly because of these manuals that you can conduct top-quality testing from the comfort of your home at an affordable rate.
One of the few drawbacks of this kit is that it only has a visible mold test. There is no airborne test included in this kit, so you can only use it if there is visible mold in the house. Moreover, it can also be an issue that AIHA does not accredit it.
What We Like
- Lab report fees included
- Affordable
- Kit includes guide and inspection booklet
- Multiple surface kits
What We Don't Like
- No airborne test included
Dimensions: 8.66" x 5.79" x 0.71" | Weight: 1.76oz | Result Time: 7 Days
3. Healthful Home HH2003 - Best for Invisible Mold Detection

Another kit in a similar price range is this one by Healthful Homes. This one is quite popular as well and was seen on the Today Show. Interestingly, it claims to be a very sensitive test with patented technology that can detect mold that air samples overlook.
Another excellent test kit for people who do not want to wait around for days for the result is this mold test kit by Healthful Home. This one is a 5-minute test kit that, as the name suggests, tells you if you have black mold in the house. And the best part is, the mold does not even have to be visible.
One of the great features that this test kit has is the inclusion of a lab consultation. Get all the information you need before buying the kit and then send the tests to the lab. Then, for an extra fee, in just five days, you will know exactly which mold is growing in the house (even if it is behind the walls).
Additionally, the test kit includes two collection trays where the sample can be placed using a cotton swab. Once you drop the special liquid in, the results will show up within 5 minutes. Overall it is pretty easy to use and does not include too many components to overcomplicate the process.
One significant drawback of this testing kit is that it is just one testing method. This can be a bit restrictive in case you are looking to do another test. Another issue users have had is that it costs a bit more and does not include lab testing prices.
What We Like
- Quick results
- Fast response from the lab
- Accredited by AIHA
- Straightforward to use
What We Don't Like
- Only one testing method
Dimensions: 8" x 5" x 1" | Weight: 1.76oz | Result Time: 5 Minutes (DIY), 5 Days (Optional Lab Consultation)
4. First Alert Mold Detection Kit MT1
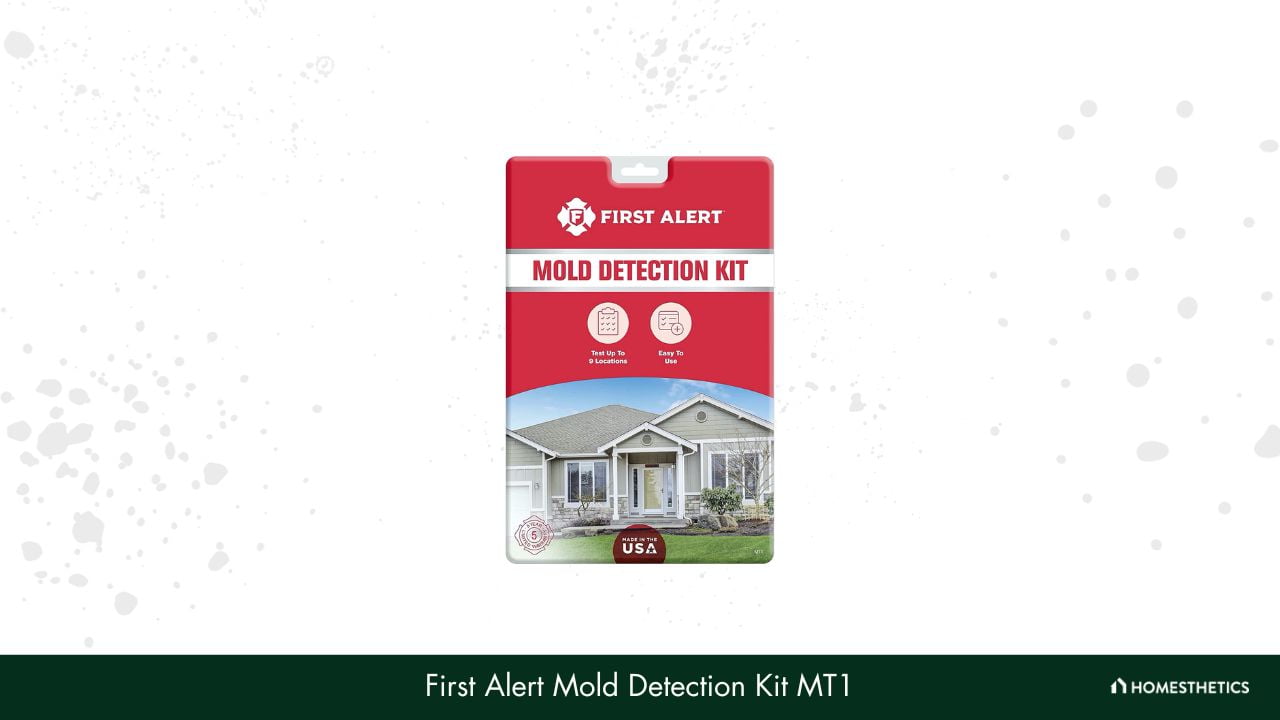
Next on the list is this mold detection kit by First Alert. It is pretty easy to use and understand on the first go. It is also straightforward to send back to the lab for analysis at an extra cost. This is one test kit, but it also comes in packs of two or three.
We all know that mold can cause multiple health issues like respiratory problems, cough, eye irritation, etc. And, the worst part is that it might be multiple locations. To tackle an issue like this, turn to the mold testing kit by First Alert. It is a no-fuss kit that detects visible mold in 9 different locations.
But that’s not all; these tests are accurate and certified by the National Institute for Occupational Safety and Health. Additionally, you can find everything you need for a precise test in this kit. It comes with six test tapes, three polybags, a test card, a manual, and a pre-printed return envelope. If you need lab analysis, this kit makes mailing the sample a cakewalk.
We appreciate that this kit is super easy to use. What’s even better is that it can be set up in nine different locations so you can conduct a thorough inspection. Also, these can be bought in packs of two and four.
One significant drawback with this kit is that you have to send in the sample. It can only be used on visible mold, and there is no option for immediate results. On top of that, the cost of sending the sample is not included, and there is an extra charge.
What We Like
- Can set it up in multiple testing locations
- Accurate and Certified
- Easy to use and beginner-friendly
- Includes pre-printed envelope for easy return
What We Don't Like
- Can only get results for a lab at an extra cost
Dimensions: 7" x 1" x 10" | Weight: 3.2oz | Result Time: 5 to 7 Days
5. Seeml Labs Mold Inspector in a Box
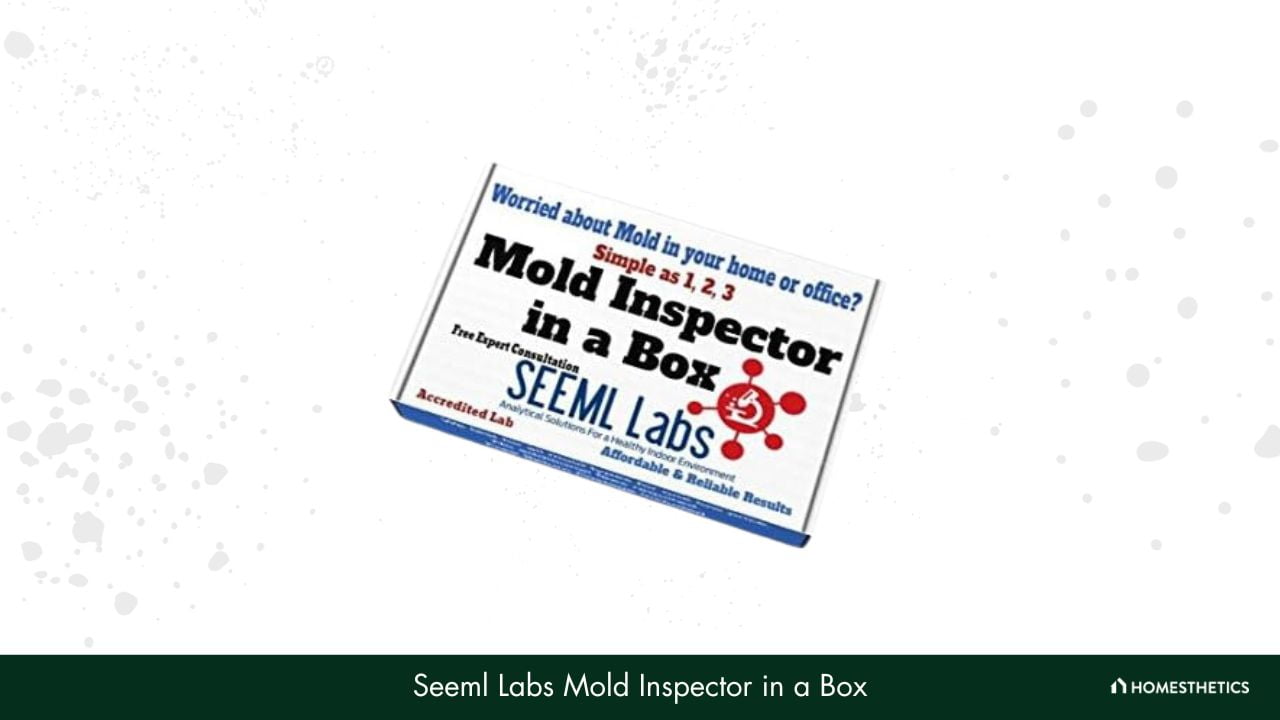
Now we have the compact mold detection box by Seeml Labs. This mold inspector in a box has everything you need to conduct a professional-level inspection of the house. So let’s explore a little more to see what the container has to offer.
Thanks to the mold inspector in a box by Seeml Labs, professional testing is now within your budget. This kit takes away from you spending big bucks on professional services by providing everything you need. Even the results come from an AIHA-LAP-accredited lab. Additionally, you know the results are accurate as the lab specializes in mold testing.
You will appreciate that the total cost includes lab fees. What’s even better is that as soon as the lab receives your sample, they will give you the result on the same day. The report is emailed, and a free consultation is also available to understand it. Additionally, the kit includes detailed instructions to ensure the testing is done right.
In a nutshell, this is a straightforward surface sample kit. It includes one swab and two tape lifts and can take up to three samples.
One of the most significant issues people have had with this kit is that it is only surface testing. While it may be affordable and offer tremendous value, it does not detect mold that is not visible. Some users also find it disappointing that there is no mailing label or pre-printed envelope for sending samples.
What We Like
- Fast results from an accredited lab
- Kit includes everything you need for professional testing
- No extra fees for lab report
- Detailed instructions
What We Don't Like
- No envelope or mailing label to send results
Dimensions: 8.07" x 4.92" x 1.42" | Weight: 4oz | Result Time: Same Day Lab Receives Samples
6. ProLab Mold Test Kit MO109
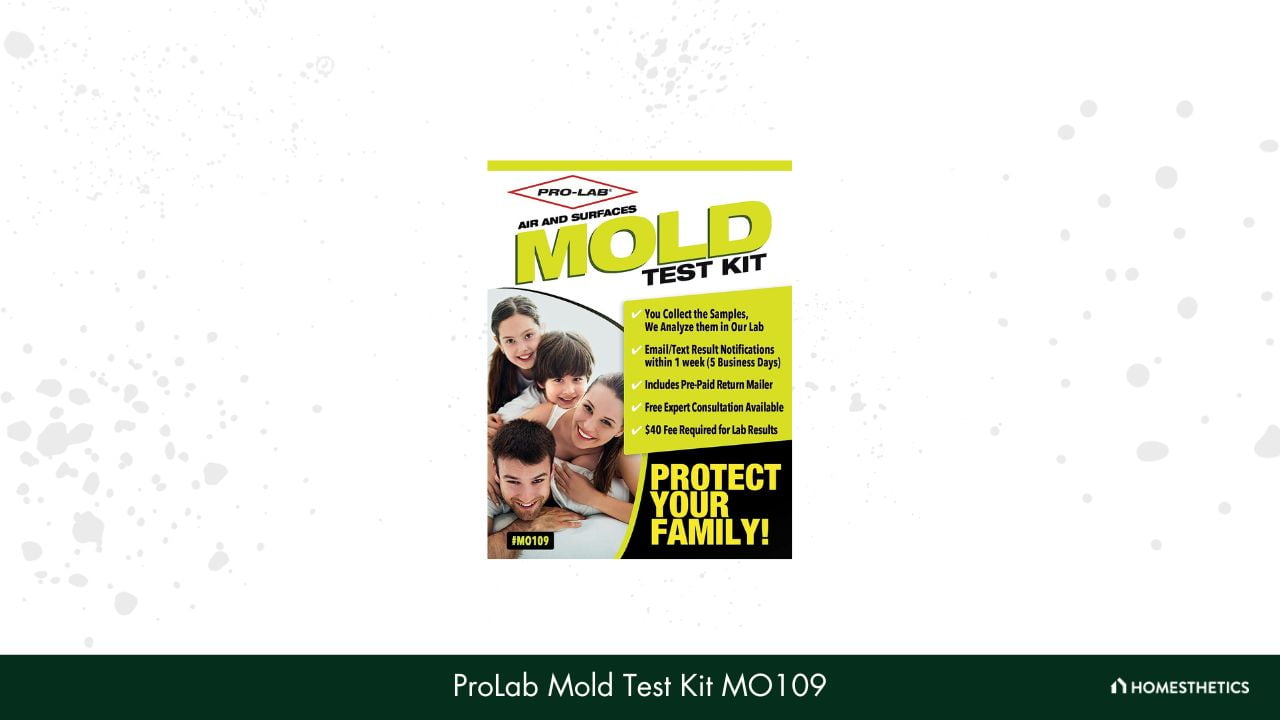
Affordable testing with the same quality as a professional service is now within arms reach with the ProLab Mold Test Kit. There are two ways to find out if there is mold in the house, and both tests are very beginner-friendly. Additionally, express service to get a detailed report is available.
If you are looking for a test kit that can give you a complete professional testing experience, then the ProLab mold test is the one to go for. This one has four tests - two air sampling methods and two surface tests. As it has both air and surface sample tests at an affordable cost, you do not have to worry about hiring anyone at any step.
Additionally, you will know if the house has any hidden mold within 48 hours by using the air sample method. If the mold is visible, then you can collect the sample and send it over to their lab for analysis at an additional price. But that’s not all; the lab will send back an accurate report within 3-7 days.
You will also appreciate that a free consultation is included in this price to understand the result and type of mold better.
While most users did not mind paying the additional fee for a lab report, some did mention that the report was not as detailed as they hoped. However, it is a much better alternative to hiring someone who will charge hundreds of dollars for the same.
What We Like
- Accurate results
- Easy to use
- Free lab consultation included
- Multiple tests in the kit
What We Don't Like
- Lab report not as detailed as expected
Dimensions: 1" x 5" x 7" | Weight: 1.6oz | Result Time: 48 Hours (DIY Air Sampling), 3 to 7 Days (Lab Analysis)
7. Health Metric Mold Test Kit
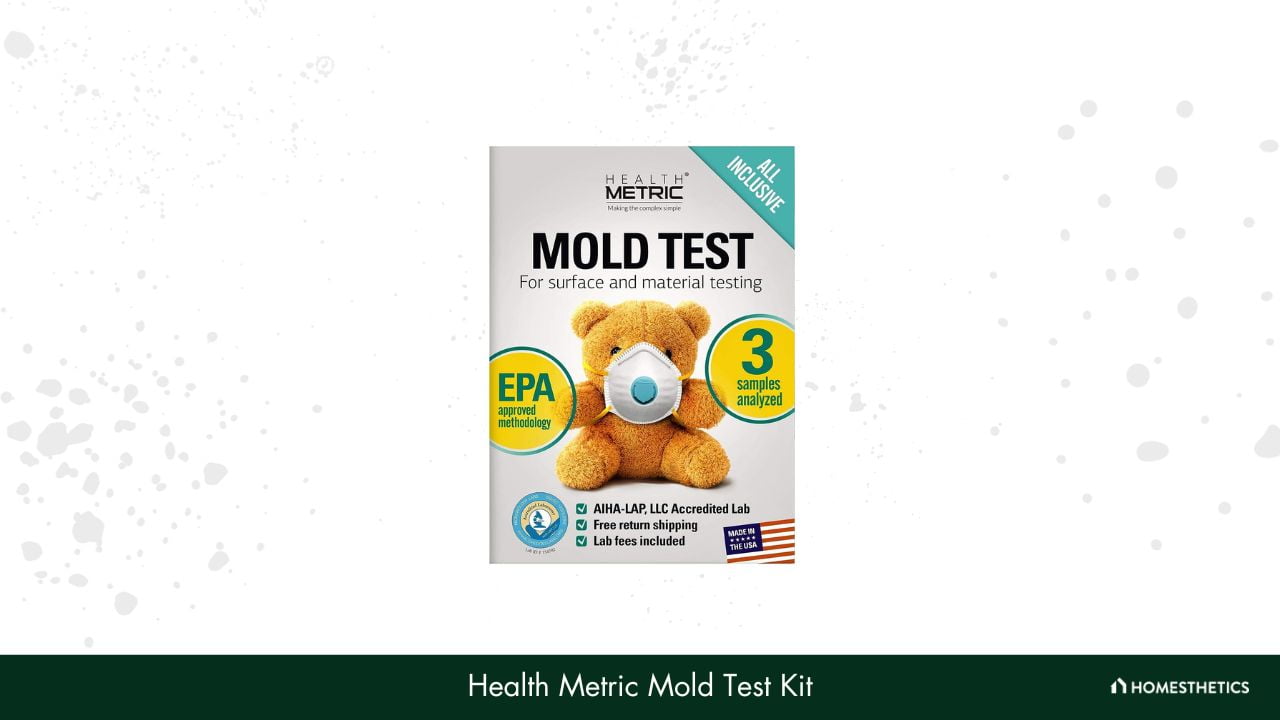
Finally, on this list, we have the Health Metric mold test. This one is a bit high end but for all the right reasons. The kit price includes all the essential services like lab analysis and shipping with no hidden fees. Read on below what all this kit has to offer.
It is an all-inclusive kit with no hidden fees; what’s not to like? The Health Metric Mold Test Kit includes two sample testing methods - surface and bulk testing. The three sample tests and pre-paid shipping of these samples to the lab are included in the price. Moreover, this brand takes pride in not having any hidden fees with its testing kits.
Additionally, there are two testing methods included in this kit. You can use it to test surfaces as well as bulk test materials like insulation and fiber. It also comes with easy-to-understand instructions that make the whole process smooth. Even sample collection and mailing is a cakewalk as it comes with mailing labels.
All in all, this is the closest you can get to professional testing at a much lower price. In addition, you can rest assured that the results are accurate as the lab is AIHA accredited.
The test in itself is very accurate, and users seem to love it. While it is highly recommended, the only complaint people have with it is that the results take a long time to come. However, it is worth the wait.
What We Like
- Surface and bulk testing methods included
- Pre-paid shipping and mailing label
- All-inclusive kit
- A detailed and accurate report
What We Don't Like
- Result time is slow
Dimensions: 6.73" x 5.08" x 0.67" | Weight: 3.2oz | Result Time: 5 to 7 Working Days
What is the Best Mold Detection Kit?
This section provides a direct comparison of top-rated mold detection kits, focusing on crucial product specifications. The accompanying table outlines key attributes such as dimensions, weight, and result time.
| Product | Dimensions | Weight | Result Time |
|---|---|---|---|
| Mold Armor FG500 | 1.3" x 5.1" x 7" | 2.39oz | 48 Hours (DIY), 3 Weeks (Optional Lab Analysis) |
| Mold Inspection Network Mold Test | 8.66" x 5.79" x 0.71" | 1.76oz | 7 Days |
| Healthful Home HH2003 | 8" x 5" x 1" | 1.76oz | 5 Minutes (DIY), 5 Days (Optional Lab Consultation) |
| First Alert Mold Detection Kit MT1 | 7" x 1" x 10" | 3.2oz | 5 to 7 Days |
| Seeml Labs Mold Inspector in a Box | 8.07" x 4.92" x 1.42" | 4oz | Same Day Lab Receives Samples |
| ProLab Mold Test Kit MO109 | 1" x 5" x 7" | 1.6oz | 48 Hours (DIY Air Sampling), 3 to 7 Days (Lab Analysis) |
| Health Metric Mold Test Kit | 6.73" x 5.08" x 0.67" | 3.2oz | 5 to 7 Working Days |
Buying Guide For The Best Mold Detection Kit
Now that we are done reviewing the seven mold detection kits available on the market, let’s discuss something important.
Don’t you wonder why is it that these specific seven made it to our list? If that is the case, then you are in luck. We have collected a little more information for your benefit and put together this brief buyer’s guide.
This guide will mention some crucial features you need to look out for when buying your first mold detection kit.
-
Testing Methods
One of the most critical things in a kit is the equipment and supplies it provides. The kit must have proper swabs or strips to collect the sample. This is because looking for strips or swabs elsewhere becomes an added cost, which is not ideal. However, most kits have either swaps or strips, if not both.
-
Support
While some tests give you instant results, they do not always indicate in proper and accurate detail what the mold type is and if it is toxic. This is where adequate support is required. Having an accredited lab to test the samples, a responsive customer care team, and tutorials on conducting the test are essential.
-
Price
Price is also an essential factor. The reason people opt for DIY kits is that they are supposed to be cost-efficient. Hence, it is crucial to pick something that will not eventually come up to the cost of hiring a professional service. Therefore, all the recommendations on this list are within an affordable price range.
Are mold detection kits safe to use?
Yes, mold detection kits are typically safe to use. Nonetheless, it's advisable to take necessary safety precautions when dealing with potential mold spots, such as donning gloves and safety glasses.
How accurate are mold detection kits?
Mold detection kits can be notably precise at detecting the presence of mold, though they may not always identify the mold type. Factors such as the sampling method and environment can influence the accuracy. For the most conclusive results, professional testing is always recommended.
How do I use a mold detection kit?
While instructions for use may vary from kit to kit, generally, users collect a sample from an observable mold spot using a swab or tape or acquire an air sample in a Petri dish. If home use is intended for the kit, the collected sample is then left to incubate. If laboratory analysis is necessitated, the sample is sent to a lab.
Can I use a mold detection kit to check for mold in my vehicle?
Indeed, a mold detection kit can be employed in any environment where mold presence is suspected, including a vehicle.
Tired of using insect repellent sprays and vaporizers to get rid of the pests barging in when the weather is warm?
![8 Best Magnetic Screen Doors [Reviews & Buyer’s Guide]](https://homesthetics.net/wp-content/uploads/2023/09/Best-Magnetic-Screen-Doors-1.jpg "8 Best Magnetic Screen Doors [Reviews & Buyer's Guide]")
It’s high time you get a good magnetic screen door for your room. It will provide optimum protection by keeping away all kinds of pests and shall also keep the room airy and comfortable. Moreover, a screen door would probably cost you much less than the total amount you’ve spent on repellent sprays and vaporizers!
But we understand that the availability of countless options can make choosing a good model difficult. Don’t worry, we’ve got your back with this guide to the 8 best options out there, and have also included a buyer’s guide to help you make a well-informed decision.
Without further ado, let’s get going!
Listed below are the Best Magnetic Screen Doors:
- AUGO: The AUGO Magnetic Screen Door is noteworthy for its self-sealing magnetic closure and tough polyester mesh for enhanced pest resistance, its effectiveness is offset by subpar customer support.
- MAGZO: The MAGZO Magnetic Screen Door features a unique hook & loop locking mechanism and fireproof fiberglass material enhancing its suitability for various weather conditions. Packaging can be an issue.
- iGotTech SO-03-103: The iGotTech SO-03-103 Magnetic Screen Door is distinguished by its pet-friendly design and hands-free closure ensured by 26 powerful magnets. Frequent maintenance is required.
- Homearda: The Homearda Magnetic Screen Door is a cost-effective option that offers quick installation via strong Velcro strips and enhanced stability with weighted gravity sticks. Potential for emitting a chemical odor.
- Mkicesky: The Mkicesky Magnetic Screen Door is known for its automatic opening/closure owing to powerful edge magnets and resilient anti-tear fiberglass material. Installation difficulty due to heavyweight.
Here is the list of the 8 best magnetic screen doors that you can use to maximize airflow throughout your home while keeping annoying bugs and pests out.
1. AUGO Magnetic Screen Door - Best for Family Gatherings
Shield your room from the menace of pests once and for all with this magnetic screen door from AUGO. It comes equipped with efficient features to keep the atmosphere in the room healthy and facilitates an easy walk-through each time. Overall, we were really impressed with how it performed, so it’s definitely among our top recommendations.
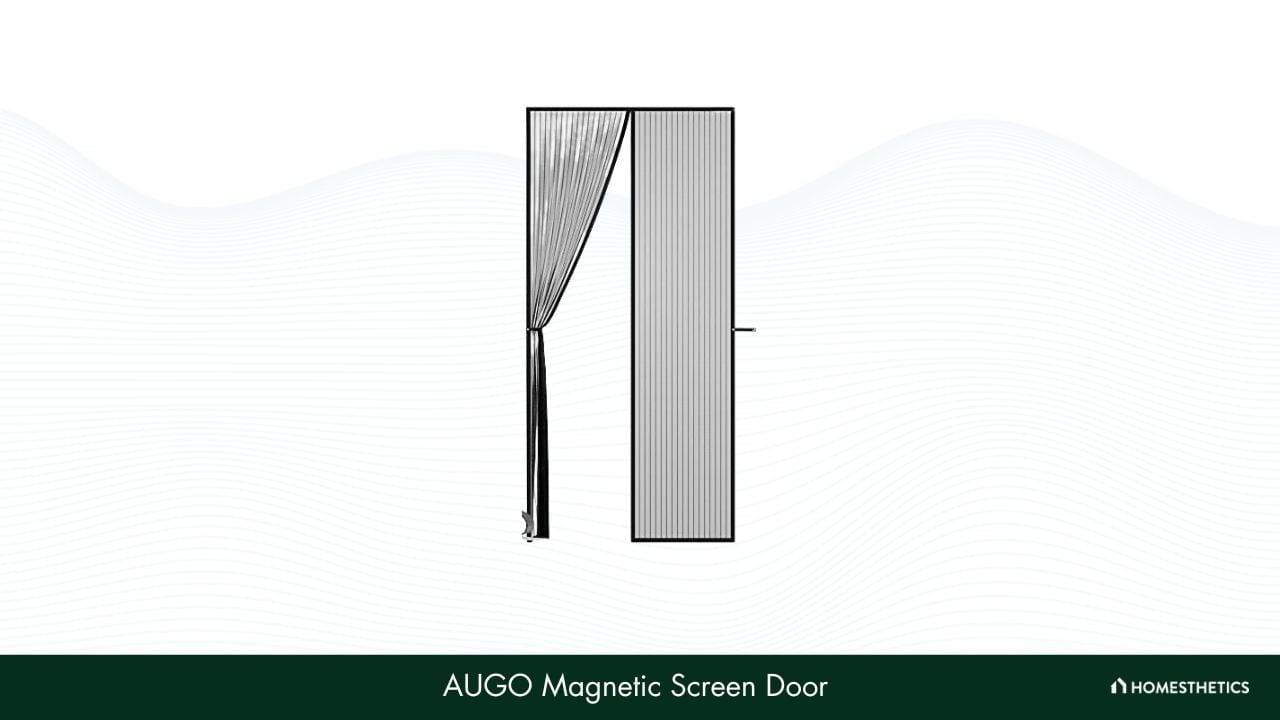
First and foremost, this screen door has self-sealing magnets running along its entire length that close it securely to keep away all pests. Plus, the magnetic closures are strong and durable enough for the job and hence do away with the hassle of closing the door manually.
As for the meshing used, it’s made from tough polyester with great tear resistance, which makes it capable of withstanding a lot of impact. This lets you enjoy parties and family gatherings without having to worry about the force being applied to the door. It has a pretty lightweight build so that children and pets can easily walk through and open it without the use of their hands.
Not only that, but there’s also a velcro installation on its entire frame, which makes sure that the installation is secure and firm. Lastly, tacks are included in the package to enable extra stability.
The customer support provided by the brand is not very effective as you might not get a satisfactory response to any query. However, you are least likely to face any issue with this product as most customers have expressed utmost satisfaction with its performance.
What We Like
- Keeps away all pests effectively
- Magnetic closures lock it securely
- Capable of withstanding impact
- Velcro ensures secure and firm installation
What We Don't Like
- Customer support not very responsive
Size: 38" x 83" | Fits Door Size: 36" x 82" | Number of Magnets: 30 | Screen Material: Polyester
2. MAGZO Magnetic Screen Door - Best for Weather Resistance
Up next is this model from MAGZO, which also offers top-notch performance in keeping your rooms pest-free, healthy, and relaxing. Backed by excellent workmanship, it stands out from other models with regards to both looks and durability. Plus, the great user convenience on offer is the icing on the cake!
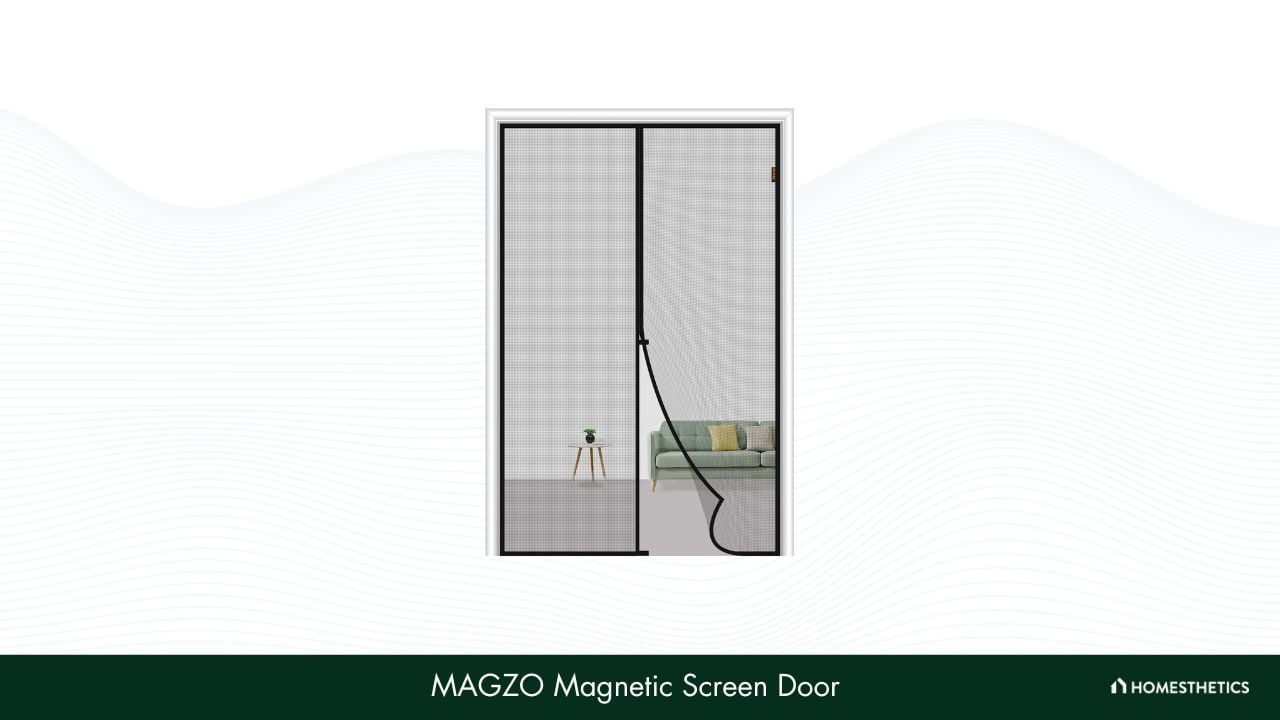
What we liked the most about this screen door was the hook & loop mechanism used for closure, which locks it effectively, unlike the ordinary models. Rest assured that it would never be blown open by the wind.
This screen also helps maintain a comfortable atmosphere by allowing sunshine and fresh air into the room and ensures that the outside view is not blocked. Added to this, pets can easily go in or out of the room whenever they want with just a light push.
Even its fireproof fiberglass material is praiseworthy, as it imparts great strength and durability while providing good resistance to corrosion and chemicals. Finally, the installation process is simple and quick, thanks to the descriptive instruction manual included in the package.
This model may sometimes arrive with the package torn in several places, which is probably due to the use of weaker packaging material. As a result, it becomes more prone to damage during delivery. But performance-wise, we have no complaints about this excellent product.
What We Like
- High-quality locking mechanism
- Maintains a comfortable atmosphere
- Pet-friendly mesh
- Fiberglass imparts great strength and durability
What We Don't Like
- Weak packaging material
Size: 32" x 81" | Fits Door Size: 30" x 80" | Number of Magnets: N/A | Screen Material: Fiberglass
3. iGotTech SO-03-103 - Best for Pet-Friendliness
This iGotTech screen door is another highly effective solution to keep pests away from your home. It is enhanced with several advanced functionalities to provide much greater comfort and efficiency than other flimsy models on the market. Also, the brand offers a beneficial money-back guarantee in case you’re not satisfied with its performance.
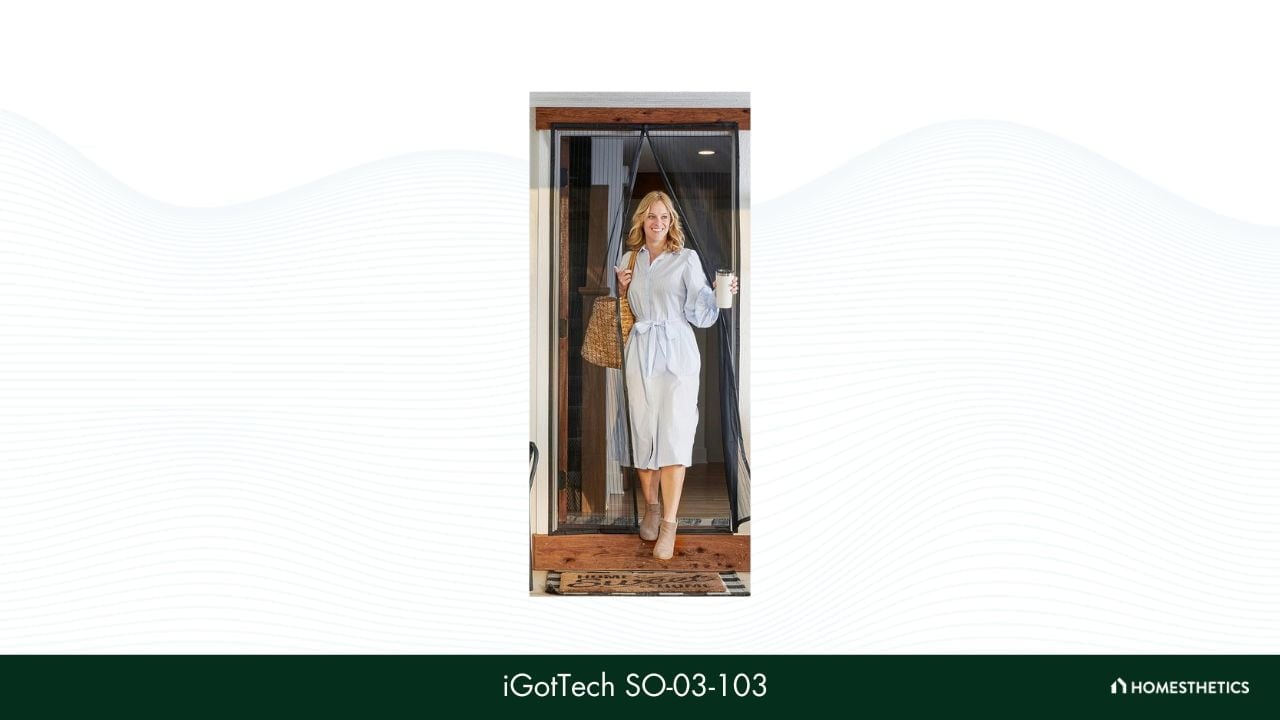
First of all, the closing mechanism of this model uses as many as 26 strong magnets that are stacked all along the adjoining edges. This ensures insects are completely blocked from the room and also helps close the door automatically after anyone enters, including your little ones and pets.
Furthermore, entering through the door is super-easy even when your hands are full. Another beneficial feature is the hook & loop seal along the top and both the sides like our previous pick, which rules out the chances of the screen falling off.
Speaking of the installation process, that’s also a breeze since the package includes everything needed, plus a very comprehensive video tutorial. Last but not least, this screen door is available in a variety of sizes, so you can choose the ideal fit as per your needs.
Although this screen door works perfectly to provide the ideal protection, convenience, and comfort, it needs more frequent maintenance than other models. We’d suggest cleaning it at least twice every week if you choose to go for this product.
What We Like
- Blocks pests completely
- Effortless opening and hands-free closure
- Installation process is a breeze
- Available in a variety of sizes
What We Don't Like
- Needs more frequent maintenance
Size: 36" x 83" | Fits Door Size: Up to 34" x 82" | Number of Magnets: 26 | Screen Material: Polyester
4. Homearda Magnetic Screen Door
If you are on the lookout for a more budget-friendly solution to keep the home pest-free, this screen door from Homearda will be the ideal pick. It offers pretty good all-round performance, offering great efficiency and utility with its range of high-quality features. To know more about this model, move on to the next few sections.
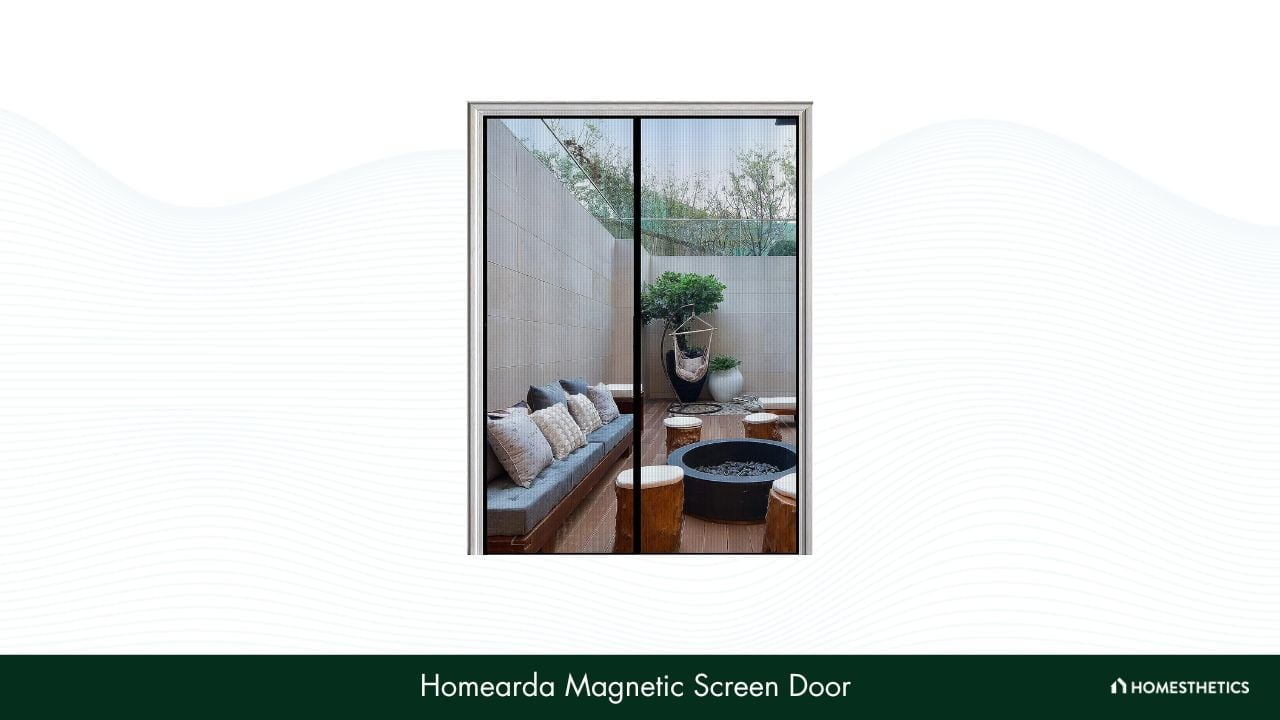
The best thing about this screen door is that it comes with very strong velcro strips to attach to the door frame for installation. As such, you can put it up quickly and more conveniently by utilizing the velcro as per your needs and can even take it down very easily.
Another great addition is the pair of weighted gravity sticks in the bottom edges of the door, which prevents it from being blown open. Plus, it offers a faster yet silent closure each time, thanks to the 26 magnets sewn into adjoining edges like the iGotTech SO-03-103.
There’s even a 100% satisfaction guarantee on offer with this screen door, which makes users eligible for a refund or replacement in case they are not satisfied.
Some customers complained that the screen door produced a disturbing chemical odor which lingered in the room for quite a while. They further pointed out that it turned stronger when the door was left open with the help of the straps attached. Hence, people who are sensitive to any kind of odor should ideally go for another model.
What We Like
- Can be put up quickly and more conveniently
- Gravity sticks prevent it from being blown open
- Offers a faster and silent closure
- Comes with a 100% satisfaction guarantee
What We Don't Like
- Produces a disturbing odor
Size: 39" x 83" | Fits Door Size: Up to 36" x 82" | Number of Magnets: 26 | Screen Material: Fiberglass
5. Mkicesky Magnetic Screen Door
Halfway through our list, we’ve picked this strongly built model from Mkicesky that maintains the safety and comfort of your home in the long term. Its good-quality features make it powerful enough to withstand the ravages of daily use. As such, it is definitely one of the best screen doors you’ll find on the market.
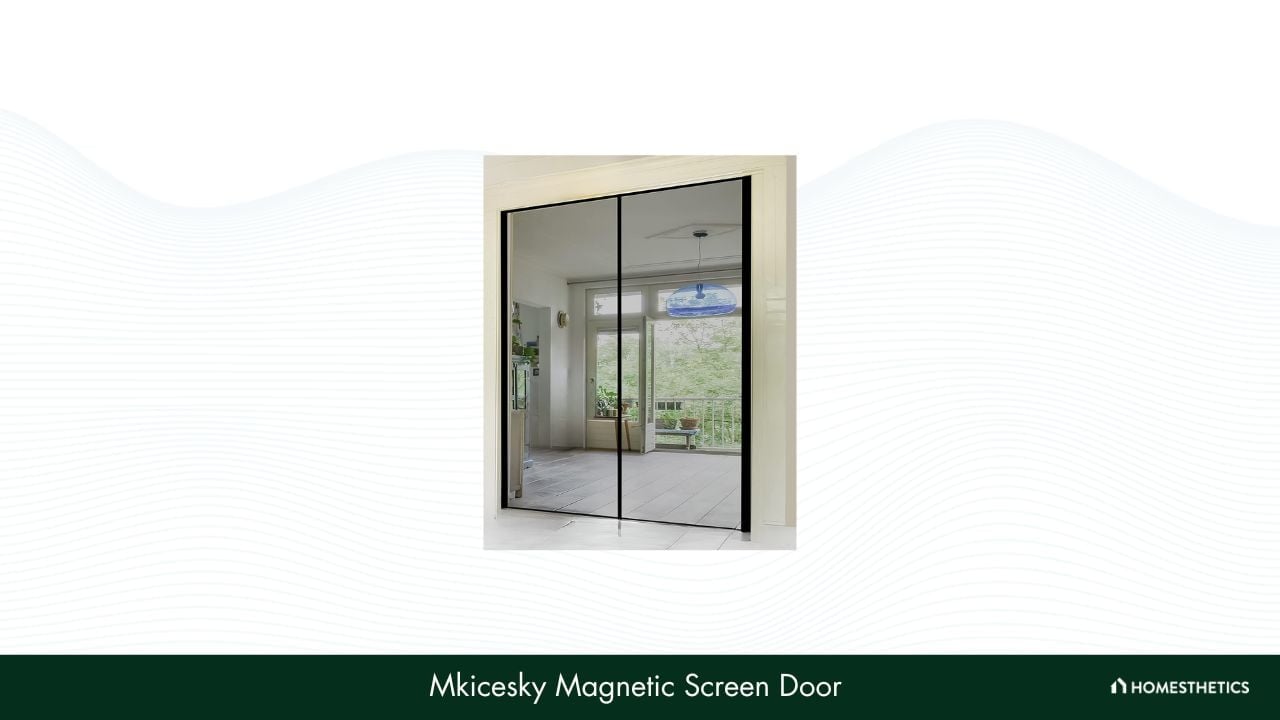
To begin with, the closing mechanism of this model is par excellence as it is filled with powerful magnets sewn firmly in the edges. This facilitates automatic opening and closure without any gaps in between and, in turn, prevents dust from sneaking in. Plus, the magnets are sealed with ultimate strength to ensure that they never fall off.
The anti-tear fiberglass material of the screen is also very strong, which enhances its longevity to a great extent. In fact, its strength is 10 times that of the polyester material used in traditional screen doors, and it resists rust, fire, staining, and corrosion like a pro.
We even loved the 0.059-inch dense grids of the meshing, which let fresh air and sunlight into the room, thereby keeping the comfort intact. And that’s not all; you get a beneficial lifetime warranty with this magnetic screen door, so you can always contact the manufacturer in case of any issues.
A downside of going for this screen door is that it’s much heavier than most other models. Hence, handling it during installation and taking it down might be a bit tiring. But we were quite pleased with its performance otherwise.
What We Like
- Facilitates automatic opening and closure
- Fiberglass material enhances its longevity
- Resists rust, fire, staining, and corrosion
- Keeps the comfort of the room intact
What We Don't Like
- Much heavier than other models
Size: 72" x 80" | Fits Door Size: Up to 70" x 79" | Number of Magnets: N/A | Screen Material: Fiberglass
6. Sentry Screens IHLSMS3683BE
Provide adequate protection from pests and also keep your doorway stylish with this model from Sentry Screens. Offering a slew of convenient features, it has been appreciated by many customers across the country and also comes at a budget-friendly rate. So, let’s move on to learn more about this screen door.

The 60g fiberglass screen of this model sets it apart from many others on the market as it’s perfect for high-traffic areas and also much more durable. Thus, you are sure to get a long-lasting and consistent service out of it.
Another big advantage is that the heavy-duty magnets fitted all along the reinforced edges are 65% more effective than the average models out there. As such, the door closes much faster and seals more tightly, withstanding the effect of stronger breezes efficiently.
Coupled with this is a set of six 20g weights fitted in the bottom hem of the screen that further enhance its wind resistance. You will also be glad to know that this model has been approved by the US military and is widely used in its base camps in different countries.
Although most customers appreciated its performance, they pointed out that there weren’t enough screws included in the package and the velcro strips were not durable enough. As such, you would need additional screws for installation plus the velcro might have to be replaced within a year of the purchase.
What We Like
- Fiberglass screen suitable for high-traffic areas
- Closes much faster and seals more tightly
- Offers good wind resistance
- Approved by US military
What We Don't Like
- Velcro not durable enough
Size: 36" x 83" | Fits Door Size: 34" x 82" | Number of Magnets: 26 | Screen Material: Fiberglass
7. Aloudy AL-SD-BK-3999
Our next pick for you is this screen door from Aloudy, suitable for elongated entryways and French doors. It offers a considerably good performance in keeping away pests and letting fresh, healthy air into any room. You can get this model in two sizes viz. 39 x 83 inches and 39 x 99 inches.
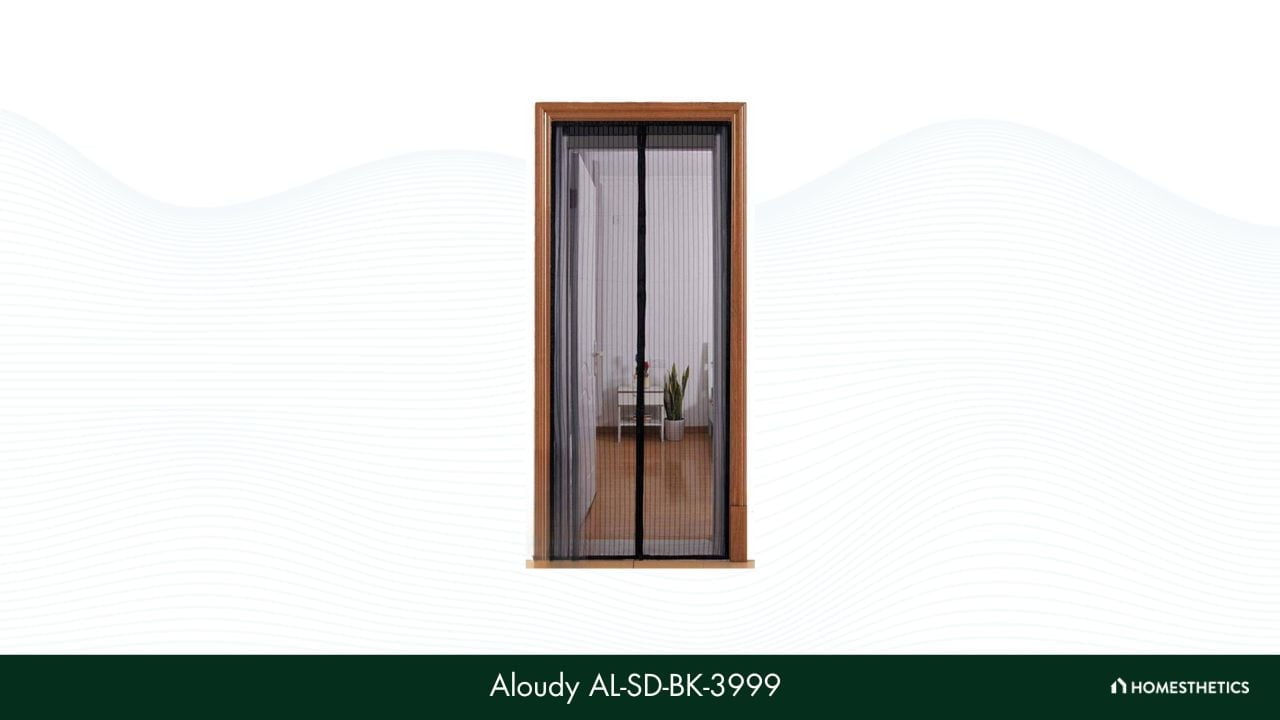
This model gets its strength from the high-quality velcro strips for the sides and the top included in the package, which attach to the door frame with great firmness. These strips also make the installation simple and rule out the need for any expertise or tools.
Added to this, the polyester mesh is among the strongest you will find out there and has powerful magnets stitched into its seams with utmost perfection. This helps keep the room free from pests and excessive dust by ensuring perfect closure each time.
Children and pets can also move in and out with ease and never affect the screen, thanks to the lightweight nature of the door and its great overall strength.
We were a bit disappointed to find that there was no information provided regarding the warranty for this model. So, it would be best to contact customer support to enquire about the warranty if you decide to go for it.
What We Like
- Velcro strips attach with great firmness
- Simple and tool-free installation
- Ensures perfect closure each time
- Lets children and pets move in and out with ease
What We Don't Like
- No information provided regarding the warranty
Size: 39" x 99" | Fits Door Size: Up to 36" x 98" | Number of Magnets: 26 | Screen Material: Polyester
8. OWNPETS Magnetic Screen Door For Dogs
Searching for a good-quality screen door for dogs that can be fixed to an existing magnetic screen door or window? Towards the end of our list, here’s a model from OWNPETS that fits the bill nicely. It ensures the canine member in your family never finds it difficult to move through the door or doesn’t accidentally damage any of the doors.
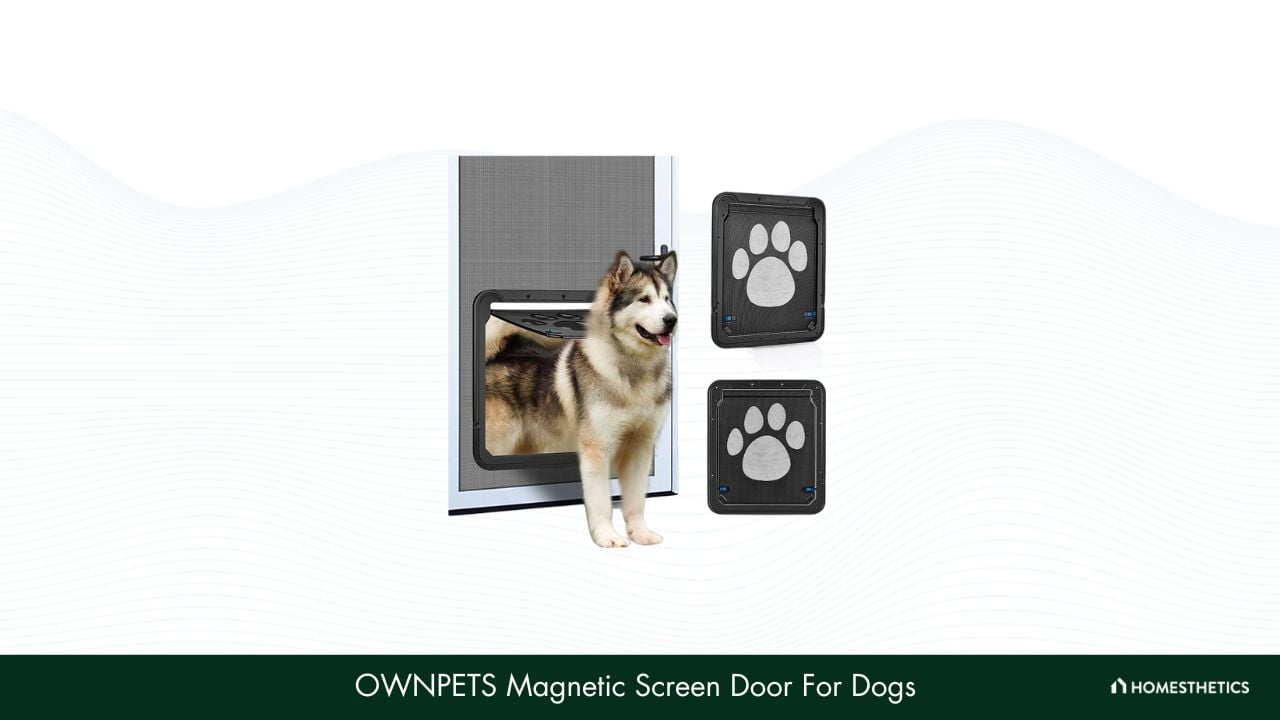
Notably, users can choose between two different sizes of this pet screen door, viz. 16 x 14 inches and 11.4 x 9.4 inches. Both these variants are designed in such a way that your beloved pet never feels uncomfortable while moving through them, and the inner door is also very easy to push.
What’s more, it functions with a self-closing mechanism whereby the built-in magnets automatically close the inner door after your pet leaves. Door locks are also provided on the bottom corners to prevent your pets from venturing outside when they are unsupervised.
In addition, you can install the door quite easily as the complete instructions are included in the package, and all the required tools are provided therein.
The mesh of this screen door is made from relatively inferior material and hence might require more frequent cleaning. Actually, the dust from your pet’s paws sticks to the mesh easily and forms a thin layer over it, which needs to be removed at least once a week.
What We Like
- Available in two different sizes
- Automatic closure
- Door locks ensure your pet’s safety
- Provides a longer service life
What We Don't Like
- Mesh made from relatively inferior nylon material
Size: 16" x 14" | Fits Door Size: N/A | Number of Magnets: 2 | Screen Material: Acrylonitrile Butadiene Styrene
What Is the Best Magnetic Screen Door?
When evaluating the best magnetic screen door, it is crucial to consider parameters such as the product's size (measured in inches), the door size it can fit (also measured in inches), the number of magnets it incorporates, and the screen material used in its construction. The following table provides a comparative analysis of some of the leading magnetic screen doors in the market.
| Product | Size | Fits Door Size | Number of Magnets | Screen Material |
|---|---|---|---|---|
| AUGO Magnetic Screen Door | 38" x 83" | 36" x 82" | 30 | Polyester |
| MAGZO Magnetic Screen Door | 32" x 81" | 30" x 80" | N/A | Fiberglass |
| iGotTech SO-03-103 | 36" x 83" | Up to 34" x 82" | 26 | Polyester |
| Homearda Magnetic Screen Door | 39'' x 83'' | Up to 36" x 82" | 26 | Fiberglass |
| Mkicesky Magnetic Screen Door | 72" x 80" | Up to 70" x 79" | N/A | Fiberglass |
| Sentry Screens IHLSMS3683BE | 36" x 83" | 34" x 82" | 26 | Fiberglass |
| Aloudy AL-SD-BK-3999 | 39" x 99" | Up to 36" x 98" | 26 | Polyester |
| OWNPETS Magnetic Screen Door For Dogs | 16" x 14" | N/A | 2 | Acrylonitrile Butadiene Styrene |
Buying Guide For The Best Magnetic Screen Door
To choose a magnetic screen door wisely, keeping in mind some features characteristic to these doors is essential. Making a choice only by glancing through the specifications of some high-performing models may fetch you only partial results. So, here we’ll be discussing some key points that you need to consider before proceeding to buy a magnetic screen door.
Sizing
When it comes to replacing windows and doors, measuring the dimensions of the frame is a primary requisite. This ensures that the chosen model provides the desired protection from pests. So, at the start, remember to measure the length and width of the door frame to determine the accurate size you will need.
While some brands offer only one size, most others come in multiple dimensions. Here, you should note that if the door at your home has an odd size that falls between the standard sizes, going for a larger model will be best. You will only have to adjust the dimensions so that it fits nicely to the door.
Fasteners Used
These doors have multiple fasteners to hold them closed and to keep them fixed on the frame. Magnets are mainly used for closing both sides of the door, while tacks are installed on the door frame to enhance the strength of the structure.
A third type of fastener is a hasp, which is fixed on either side to prevent the door from being opened by strong winds. Keep in mind that while magnets are the primary fastening components used in all screens, tacks and hasps are available in select models.
Materials
The mesh of a magnetic screen door is primarily made from either polyester or fiberglass. However, ABS plastic is used in some models to provide greater durability. And with regards to the frame material, wood, and metal are used in the majority of models.
A screen door with a fiberglass mesh will be most suitable for heavy-traffic areas as this material is relatively more durable than polyester. Also, such a mesh facilitates better air circulation. But a polyester mesh is a more affordable option, lets in greater sunlight, and is easier to see through.
On the other hand, a door frame built with metal is more durable and weather-resistant than a wooden one.
Do magnetic screen doors keep out all types of insects?
While no screen door can guarantee 100% protection, magnetic screen doors are usually effective in keeping out common types of insects like mosquitoes, flies, and bees.
Are magnetic screen doors energy efficient?
Magnetic screen doors can increase energy efficiency by allowing natural ventilation, thus reducing the need for air conditioning. However, they do not provide a complete seal like a regular door, so may cause drafts in colder weather.
Are magnetic screen doors safe for children to use?
Yes, magnetic screen doors do not pose a significant injury risk and can be used safely by children. They automatically close behind without needing to be pulled or pushed.
Can I use a magnetic screen door if I have pets?
Absolutely. An added benefit of magnetic screen doors is that they allow pets to move in and out freely, saving the need to constantly open the door for them.
Are magnetic screen doors easy to install?
Yes, magnetic screen doors are relatively easy to install. They usually come with a full hardware kit and instructions guiding you. Typically, they use adhesive velcro strips that attach to the door frame, and require no special tools for installation.
How long do the magnets in a magnetic screen door last?
The magnets used typically have a long lifespan and should work efficiently throughout the life of the screen. However, extreme temperatures or rough handling can potentially affect their longevity.
How durable are magnetic screen doors?
The durability of a magnetic screen door depends on the quality of the material and the strength of the magnets used. High-quality options use durable mesh that resists wear and tear and strong magnets that securely close the door.
How do I clean a magnetic screen door?
Most magnetic screen doors can be cleaned with a cloth and soapy water. It is generally not recommended to machine wash them as this can damage the magnetic strips. Always refer to the cleaning instructions provided by the manufacturer.
So, that was all about the most efficient magnetic screen doors available right now. We hope you enjoyed reading this guide as much as we enjoyed testing and reviewing the different models. Now, it’s time for you to choose a suitable screen door, so go ahead!
It's essential to keep in mind that magnetic screen doors do not significantly contribute to soundproofing. If you're interested in improving your door's soundproofing, refer to our how to soundproof a door guide for more information.
But before we wrap up, here’s a quick recap of our favorites from the list. If you prefer to go for a screen door with a fiberglass mesh, the MAGZO Magnetic Screen Door will be the perfect choice to go for. On the other hand, the AUGO Magnetic Screen Door is the best budget buy in our opinion.
Agree with our verdict? Let us know in the comments section below. Till next time, take care.
Protecting your mail is an important part of keeping your home and personal information safe. We tested a variety of mailboxes to find the best options for keeping your mail secure but only 5 passed the tests and were deemed worthy of being showcased in our review. Read on to find the mailbox that best meets your needs. In our review, we've evaluated their build, storage space, materials, locking mechanism, and the amount of safety they can provide from the elements.

All these have been evaluated from the residential mailbox point of view but it goes without saying that locking wall-mount mailboxes and lockable mailboxes in general of any kind can fit the needs of small businesses just as well.
Listed below are the 5 best locking mailboxes from our list:
- Epoch 7106 Mail Boss Locking Mailbox: Known for its impressive sturdiness and large capacity, this mailbox offers superior resistance to theft and vandalism, featuring a 14-gauge galvanized steel construction and 12-wafer disc lock.
- Mail Boss 7506 Mail Locking Mailbox: Distinguished by its extremely robust build, it presents a secure space for mail along with an anti-pry latch that provides exceptional protection against theft and vandalism.
- Architectural Mailboxes 6200B-10 Locking Mailbox: With substantial space for mail and parcels, this locking mailbox stands out for its resistance to elements, ensuring your mail remains dry and dirt-free.
- Mail Boss 7500 Locking Mailbox: Showcasing a robust structure and ample mail volume, it comes ready for installation and offers a pick-safe latch and wafer tumbler lock for enhanced security.
- Gibraltar Mailboxes Mailsafe Locking Mailbox: As a modestly-sized mailbox with a contemporary design, it offers an ultra-secure cam lock and a magnetic latch ensuring security and a rust-resistant and durable structure for longevity.
Are you looking for a secure and reliable locking security mailbox? If so, you've come to the right place! Here is the list of the 5 best locking mailboxes that you can choose from to keep your mail safe and secure.
1. Epoch 7106 Mail Boss Locking Mailbox – Our Top Pick

After going through a lot of locking mailboxes (We didn’t really, they were all safely locked), we have chosen the Epoch 7106 Mail Boss as our top contender.
Three words can be used to describe the 7106: Strong, Secure, and Huge. It has a capacity of 2375 cubic inches, ideal to keep your parcels and mail safe.
The body is made with 14 gauge galvanized steel and is powder coated. The lock and latch are very hard to pry open. The thick body prevents it from being vandalized. The door itself is 12 gauges thick and mounted on stainless steel hinges. The lock is a 12-wafer disc log.
This big boy is strong enough to withstand a crowbar. It is also waterproof, keeping your mail and parcels safe from rain and seepage. It comes with a mounting plate, making it easier to install.
What We Like
- Very strong and sturdy built
- Easy installation
- Very spacious
- Waterproof
- Very well protected against theft and vandalism
What We Don't Like
- Too big and bulky
- More space than needed for domestic use
- Relatively expensive
- Mail slot is very narrow
Dimensions (inches): 21 x 11.25 x 13.75 | Capacity (cu. in.): 2870 | Material: Electro-galvanized steel | Security Features: Patented anti-pry latch and 12-disc wafer lock with dust cover | Color Options: Bronze, granite, white
2. Mail Boss 7506 Mail Locking Mailbox – A Very Strong Contender

One of the strongest mailboxes available, the Mail Boss 7506 cannot be pried open even with a crowbar!
The thick and robust body is made with electro-galvanized steel, giving it superior protection against rust and looking worn. All the hinges are stainless steel so they won’t rust over time. Its insides are lined with neodymium magnets, allowing its door to latch perfectly.
Internal space is 1760 cubic inches, enough for a few days of mail and small parcels. An advanced baffle door conceals the clip for any outgoing mail, adding an extra layer of protection against prying hands.
The lock is a reliable 12-disc wafer. Three keys and all the necessary installation material is provided with the mailbox. In addition to the baffle door, the 14 or 16-inch galvanized steel body makes it one of the safest choices.
What We Like
- Extremely strong built
- Very easy to install
- Adequate space
- The latch cannot be pried
- Well-protected against theft and vandalism
What We Don't Like
- Not safe against rain, mail can get soaked
- Space not enough for magazines
- Key jamming issues can sometimes occur
Dimensions (inches): 21 x 10.75 x 11.25 | Capacity (cu. in.): 1760 | Material: Alloy steel | Security Features: Patented anti-pry latch and 12-disc wafer lock with dust cover | Color Options: Black, bronze, white
3. Architectural Mailboxes 6200B-10 Locking Mailbox – The Big Box
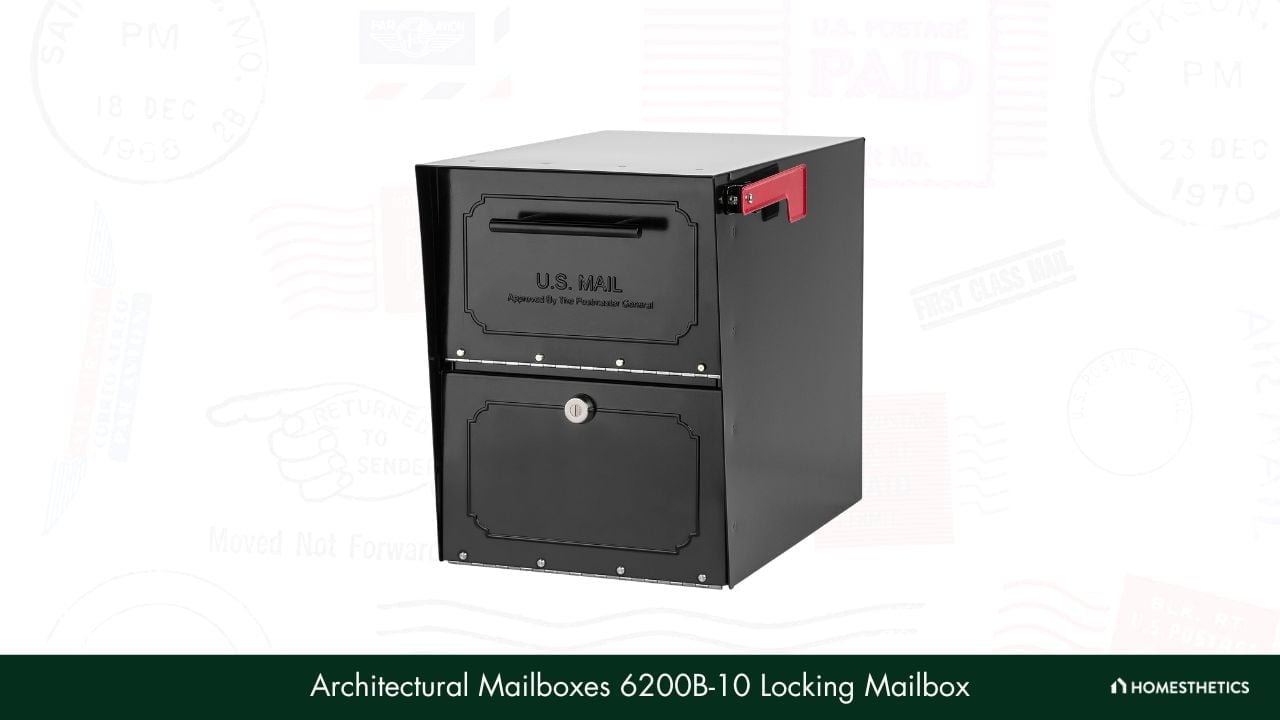
If you frequently receive parcels, you might want to go for the 6200B-10 by Architectural Mailboxes. With it, you will have a 2256 cubic inch space enough for regular-sized parcels, it also has a fine finish with powder coating.
It is especially protective against moisture and dirt. The doors are lined up with rubber seals, which ensure that your mail is dry (protected from rain seepage) and dirt-free. Also, it helps prevent corrosion inside the mailbox.
The mailbox is made from a single metal piece of stainless steel. The parcel compartment has its own internal baffle. Locks and some internal items are made with zinc to prevent corrosion. It is also very easy to install.
What We Like
- Sufficient space for mail and parcels
- Especially resistant to the elements
- Durable and long life
- Large receiving slot
- Easy to install and comes with necessary parts
What We Don't Like
- Look is very boxy
- Too large a slot can be exploited by small hands
- Larger deliveries can clog the hopper, making it hard to open the mailbox
Dimensions (inches): 18 x 15 x 11.5 | Capacity (cu. in.): 2256 | Material: Heavy-gauge galvanized steel | Security Features: Stainless steel cam lock with dust cover | Color Options: Black, bronze, pearl gray, sand, white
4. Mail Boss 7500 Locking Mailbox – Install Ready & Durable
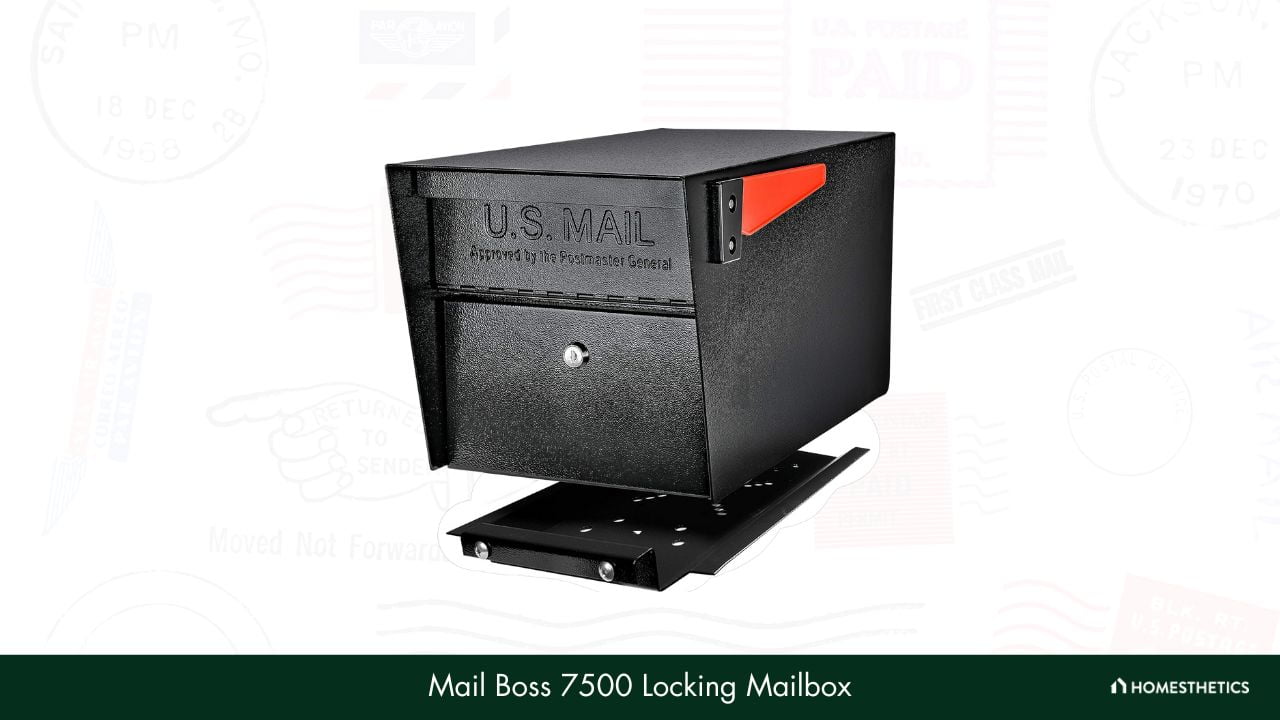
A robust build, extra volume for mail, and a hard-to-break-in system. If that’s what you are looking for in your mailbox, then the Mail Boss 7500 is your thing. Made with galvanized steel, with powder coating for extra protection against sunlight, this mailbox is as strong as it comes. With a capacity of 1706 cubic inches, it’s big enough for a week’s worth of mail.
Security wise it has a wafer tumbler lock and a pick-safe latch. It also has a baffle door to prevent the theft of small packages. The safe comes with three keys. Another great feature is that it comes with a Fast-Trak mounting plate that can be fitted to posts of various types.
What We Like
- Efficient locking mechanism
- Comes with all the installation accessories
- Large space
- Protected latch
What We Don't Like
- Chances of rusting after a few months
- Affixed plate makes it inconvenient for certain posts
- Design makes it hard to fully utilize the space
Dimensions (inches): 21 x 11.25 x 16.5 | Capacity (cu. in.): 1760 | Material: 14- and 16-gauge electro-galvanized welded steel | Security Features: Patented anti-pry latch and 12-disc wafer lock with dust cover | Color Options: Black, bronze, white
5. Gibraltar Mailboxes Mailsafe Locking Mailbox – Simple Medium-Sized Option
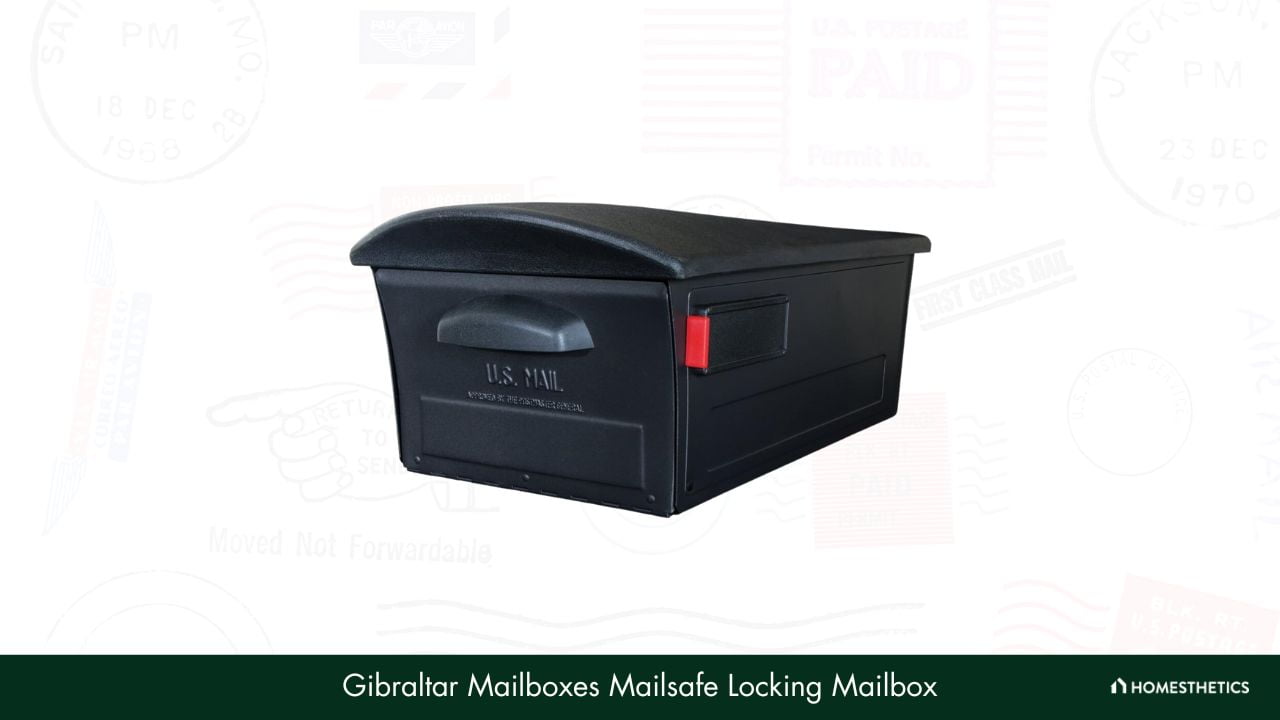
Gibraltar offers this medium-sized, sturdy locking mailbox with a contemporary design. It is ideally made to sit on top of the mailbox post, flat and squat. It has an interior volume of 1450 cubic inches with a mail slot that measures 10 inches across and 1.75 inches high. It is able to accommodate envelopes that are thicker than usual.
The mailbox comes as a single unit, pre-assembled, and simply needs to be mounted on a separate mounting plate. It’s well built, with galvanized steel forming the core structure, covered with polypropylene plastic to make it rust-resistant and more durable. The outside is also coated with an ultra-violet inhibitor, which helps it look as good as new by saving it from sunlight and extending its life.
There is a magnetic latch that ensures the secure setting of the door, and an ultra-secure cam lock that ensures the security of the contents of your mailbox.
What We Like
- Durable built
- Concealed locking mechanism
- Aesthetically pleasing
What We Don't Like
- Locking arm holder is plastic
- Needs to be installed perfectly leveled
Dimensions (inches): 21.6 x 13 x 9.5 | Capacity (cu. in.): 1450 | Material: Plastic | Security Features: Dual-latch locking system and pry-resistant door | Color Options: Black, gray, white, beige
What is the Best Locking Mailbox?
| Product | Dimensions (inches) | Capacity (cu. in.) | Material | Security Features | Color Options |
|---|---|---|---|---|---|
| Epoch 7106 Mail Boss Locking Mailbox | 21 x 11.25 x 13.75 | 2870 | Electro-galvanized steel | Patented anti-pry latch and 12-disc wafer lock with dust cover | Bronze, granite, white |
| Mail Boss 7506 Mail Locking Mailbox | 21 x 10.75 x 11.25 | 1760 | Alloy steel | Patented anti-pry latch and 12-disc wafer lock with dust cover | Black, bronze, white |
| Architectural Mailboxes 6200B-10 Locking Mailbox | 18 x 15 x 11.5 | 2256 | Heavy-gauge galvanized steel | Stainless steel cam lock with dust cover | Black, bronze, pearl gray, sand, white |
| Mail Boss 7500 Locking Mailbox | 21 x 11.25 x 16.5 | 1760 | 14- and 16-gauge electro-galvanized welded steel | Patented anti-pry latch and 12-disc wafer lock with dust cover | Black, bronze, white |
| Gibraltar Mailboxes Mailsafe Locking Mailbox | 21.6 x 13 x 9.5 | 1450 | Plastic | Dual-latch locking system and pry-resistant door | Black, gray, white, beige |
Types of Locking Mailboxes
Wall-Mounted Locking Mailbox
Wall-mounted locking mailboxes are a great choice for homeowners looking to keep their mail secure while also maximizing the use of their outdoor space and thus a very popular option These mailboxes can be attached to a wall, fence, or any other structure, and are available in a variety of designs and colors, making it easy to find one that matches the look of your home and your existing setup, they can match your fence, your home, whilst saving space and looking great. Wall-mounted locking mailboxes offer an entire range of security features, such as keypad access, a hasp lock, an anti-pry latch, or even a combination lock just like any other mailbox so rest assured this type of mailbox doesn't come with any security caveats.
Post-Mounted Locking Mailbox
Post-mounted locking mailboxes are splendid because they have a more traditional look, they are a bit further from the home and thus the distance can be a security layer for you as a homeowner. In this case, arguably the secure mail receptacle can also serve as a decorative outdoor feature as you can get very creative with cool-looking mailboxes, as they are isolated from the home they don't necessarily need to fit the home style. These mailboxes are always mounted on a post and can be made from a variety of materials, including metal, wood, and plastic. These too, just like wall-mounted locking boxes, offer complete security features, such as a keypad lock, a hasp lock, a key lock, an anti-pray latch, and a combination lock for high security.
Curbside Locking Mailbox
Curbside locking mailboxes are a bit more discreet way to keep your mail secure without compromising on design options. These mailboxes are mounted directly on the ground of your driveway or property line, making them easy to access and providing extra security for your mail just like the post-mounted boxes. Curbside locking mailboxes also feature a full range of security features, including combination lock, digital lock, keypad lock, and hasp lock.
Post-Mounted Mailbox vs. Curbside Mailbox
Post-mounted mailboxes are mounted directly onto a post, either on an existing post or a post that is installed in the ground. These mailboxes are generally larger than curbside mailboxes and offer more protection against theft or vandalism, as they are more difficult to access. They are also more decorative and aesthetic and the customization options are endless, you can have them in any color, any style, and you can find mailbox artists to help you materialize your dream box if you so desire.
Curbside mailboxes, on the other hand, are typically smaller and are placed at the edge of the curb or sidewalk. These mailboxes are easier to access and less secure, making them more vulnerable to theft or vandalism. They also lack the decorative appeal of a post-mounted mailbox, they are the more practical, utilitarian, and modern mailbox variant.
Buying Guide for the Best Locking Mailbox
There are some purchases that can spin your head simply because there are so many options to choose from and so many factors to consider when it comes to security mailboxes. Thankfully, a locking mailbox isn’t one of them. You can easily choose a locking mailbox by looking at four simple factors.
Security Features and Locks
The whole point of going for a locked mailbox is the security of your mail. So the first feature you should look for is the security that the mailbox offers. It is smart to go with mailboxes that either have a wafer tumbler locking system or a cam lock, as they both are relatively hard to pick.
You should also look for baffle doors and strong latches so that people cannot pry them open. See that the insertion slot is not so big or so easily accessible that someone with small hands can reach your mail through it, mail theft and mail thieves still are a real concern.
Manufacturing Material
The material your mailbox is made of is also very important. It is not something you replace often so it should be made from strong stuff that can withstand rusting, constant sunlight, and rain. Galvanized Steel is a very desirable material in this regard. But make sure its thickness is 12 gauge or more.
A powder finish is also better than simple paint. It would mean that your mailbox will stay relatively safe from scratches and chipping.
Internal Space Available
While choosing a locking mailbox, it is important to know how much space you will need. If your regular mail is simply letters, bills, and notices, a small mailbox would do. But if you regularly receive parcels, get your medicine delivered, or have a subscription to magazines, go for a bigger mailbox.
A bigger mailbox is also desirable if your mail gets accumulated for a period of weeks at a time.
Protection Against Elements
Another important question: How well protected is your locking mailbox against the elements? Some mailboxes are coated with a UV ray-deflecting agent that protects them from sunlight. Some mailboxes have a non-metal outer layer to prevent rusting.
The most damaging element is water. See if the mailbox you are choosing will keep its contents safe when it rains.
What U.S. Postal Service Regulations Must I Follow?
USPS (United States Postal Service) has set a few guidelines that must be followed while setting up a mailbox, locking or otherwise. Failing to comply with those guidelines means that postal services can stop delivering to your residence.
As per Federal Highway Commission, your mailbox should be 6 to 8 inches from the curb. USPS has a recommendation for the posts as well, 2 inches in diameter for a circular or 4×4 inches for a rectangular post, buried 24 inches into the ground.
Mail slot should at least be 7 inches (10 inches for priority mail or it has to be bent) long and 1.5 inches high.
How Does the Postal Worker Put Mail in a Locking Mailbox?
For a locked mailbox, the delivery person simply pushes in the letters and parcels that can get through the front slot of the locking mailbox. For locking mailboxes with a hopper, larger parcels can be placed without compromising the mail inside.
These mail and parcels can be accessed by the owner using a key that opens the back of the mailbox.
Will the Postal Worker Need a Key?
For residential locking mailboxes: No.
For cluster mailboxes used by closed communities or apartment buildings: Yes.
Where Can I Get Extra Keys?
Mostly, spares are provided with a locking mailbox. If you still need extra keys, you can order them directly from the mailbox manufacturers or their retailers.
Or you can get a blank key and have it cut to fit your lock by a keysmith.
Ground Mount Versus Stand Mount – What’s the Difference?
Posts for your mailboxes can either be buried in the ground, or anchored using bolts on a flat cement slab or the concrete of your pavement.
The ground mount, which has to be buried, is usually 43 inches long because a lot of it needs to be buried in the ground.
Stand mounts are usually 28 inches high. They are also called surface mounts.
Can I Use My Existing Post With My New Locking Mailbox?
Yes. Especially if your existing post is in fine condition and according to the guidelines. You don’t have to go through the process of replacing it.
Most locking mailboxes come with universal fittings that can be easily mounted on nearly all posts. If your mailbox seems incompatible with your post, don’t change the whole post. Instead, buy a universal mounting plate, they are inexpensive and easy to install.
Can I Paint My Locking Mailbox?
Yes. This isn’t against regulation. But be sure to protect the street number decals and the flag on your mailbox. There is also a chance that your mailbox warranty gets voided if you paint it.
How Do I Maintain My Locking Mailbox?
Curbside locking mailboxes are manufactured to tolerate the elements. Still, cleaning and maintaining them is a good habit. Rub and clean the dust off of them. Wash them once in a while. Remember to oil the hinges and tighten them if they are loose.
Check the seals and magnets to see if they are ok. If something is blocking or preventing the proper closure of your doors, fix that. Otherwise, it won’t be as protected from elements as you want it to be.

What if we told you that finding the best grout removal tool that precisely fits your needs isn’t as hard as it seems?
Most of our readers keep requesting we introduce more and more grout removal tools under a fair budget. We get it - home renovation isn’t a cakewalk unless you have one of these gadgets. It makes removing the most stubborn grout look as natural as spreading butter on a loaf. So, what stops us from buying one?
The market will never run out of products, but you have to learn to distinguish a reliable variant from an average one. To make the decision easier for you, our experts dove deep into the web and scraped out 12 of the best value-for-money options to consider. Also, we’ve added a buyer’s guide containing all the info you need to know what’s best.
So, without beating around the bush any further, let’s get into it!
Whether you're a seasoned contractor or a homeowner tackling a DIY project, these tools will make your grout removal tasks a breeze. So, without further ado, here's the list of the 12 best grout removal tools.
1. DEWALT DWE315K Corded 3-Amp Oscillating Tool kit - Best for Versatility
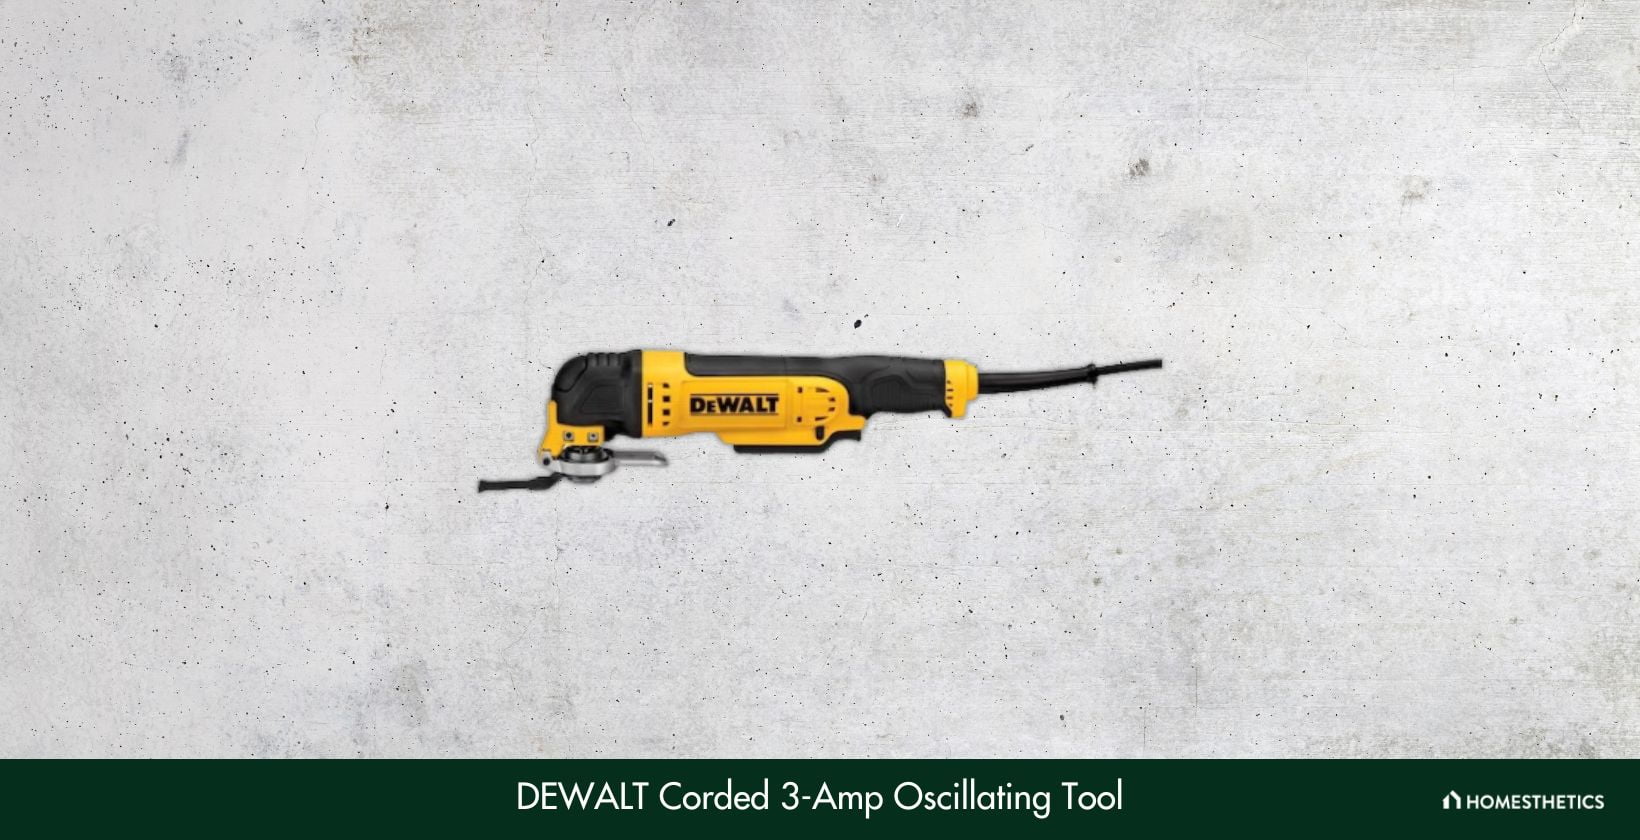
Whether you’re a heavy-duty professional or a home improvement DIY-er, Dewalt will never fail to surprise you with its distinctively efficient innovations. That said, the DWE315K gets the catbird’s seat on our list, as it’s highly rated for its superb performance and convenience features. Let’s find out more!
With this ultra-efficient tool, DEWALT has raised the bar quite high for convenience and product versatility. To begin with, the DWE315K is not only one of the top-performing grout removal tools on our list; it also comes in very handy for a plethora of secondary applications.
Whether you need a tool for cutting, scraping, sanding, or removing different materials, it’s the right fit. And when it comes to grout removal, it ensures zero damage to the tiles.
The reason behind its outstanding power is DEWALT’S patented 3 amp motor, which makes cutting, sanding, etc. feel like a breeze. With a maximum speed limit of 22,000 OPM, it allows you to take on the hardest of maintenance jobs with sheer confidence and precision.
Moreover, this product comes in a full-fledged 29-pc professional kit, comprising every possible attachment/accessory you’d need, and even more. As a bonus, you also get a sturdy box for storage.
When it comes to user comfort, this product gets it right with its ergonomic design and beginner-friendly control. Most importantly, its double-grip variable speed trigger allows you to control the motor for a more precise user experience. Last but not least, it also comes packed with a 20v volt battery, enabling you to work for longer hours.
Although this model had left us in awe with its versatile 29-pc kit, we were a little bummed out to find that its blade selection is minimal in comparison. You also might need to spend top dollar for replacement parts if your blades are damaged, as they’re pretty expensive.
What We Like
- Easy to carry and use
- Accessories can be changed easily
- Compact and ergonomic design
- Highly versatile toolkit
What We Don't Like
- Expensive replacement parts
Power Source: Corded | Power: 3 A | Tool Type: Oscillating Tool | Oscillation Speed: 0-22,000 OPM | Blade Type: Quick-Change Accessory
2. DEWALT 20V MAX XR DCS355D1 Multi-Tool Kit - Best for DIY Enthusiasts

In case you’re searching for a more beginner-friendly alternative to our previous pick, then we have just the right DEWALT product in mind. The 20V MAX XR multi-tool kit promises nothing less than sheer precision and accuracy, making it ideal for DIY enthusiasts with a tight budget. Let’s take a quick peek at its core features!
First and foremost, DEWALT’s promise regarding its performance makes it worth everybody’s attention. To be exact, the brand claims that its patented DEWALT brushless motor has been engineered to deliver 57% higher run time over any typical alternative, and totally lives up to it.
It’s designed for smooth performance and is built with premium-grade materials to last for a lifetime. If you prefer value-for-money products, then it is a package you shouldn’t ignore.
We’re also quite amazed by how it doesn’t convert the grout into dust while working, preventing you from cleaning up a huge mess post-use. Using it hardly makes your arms ache, as its ultralight body is designed ergonomically to provide sheer comfort to the user. Apart from that, it also ranks high in terms of user safety. We’re fans of its efficient grip, which prevents you from being affected by vibrations at higher speeds.
Moreover, this tool comes in a versatile 28-pc kit, including a wide array of sanding and cutting accessories for a smoother experience. It makes a quality grout removal tool, but you can also use it for several other jobs like our first pick. Last but not least, you get a universal accessory adaptor that complies with almost every brand.
Although it’s as versatile as our previous recommendation, it’s not nearly as powerful. We wouldn’t recommend it if you’re searching for a heavy-duty tool, as it may severely damage the motor. Furthermore, it’s priced nearly the same as the DWE315K, which we found a little unjustified.
What We Like
- Durable storage kit
- Ergonomic and lightweight body
- Long-lasting motor
- High blade accuracy
What We Don't Like
- Not recommended for heavy-duty use
Power Source: Cordless | Power: 20 V | Tool Type: Multi-Tool | Oscillation Speed: 0-20,000 OPM | Blade Type: Quick-Change Accessory
3. Dremel 4000-2/30 Rotary Tool Kit - Best for Home Improvement Jobs
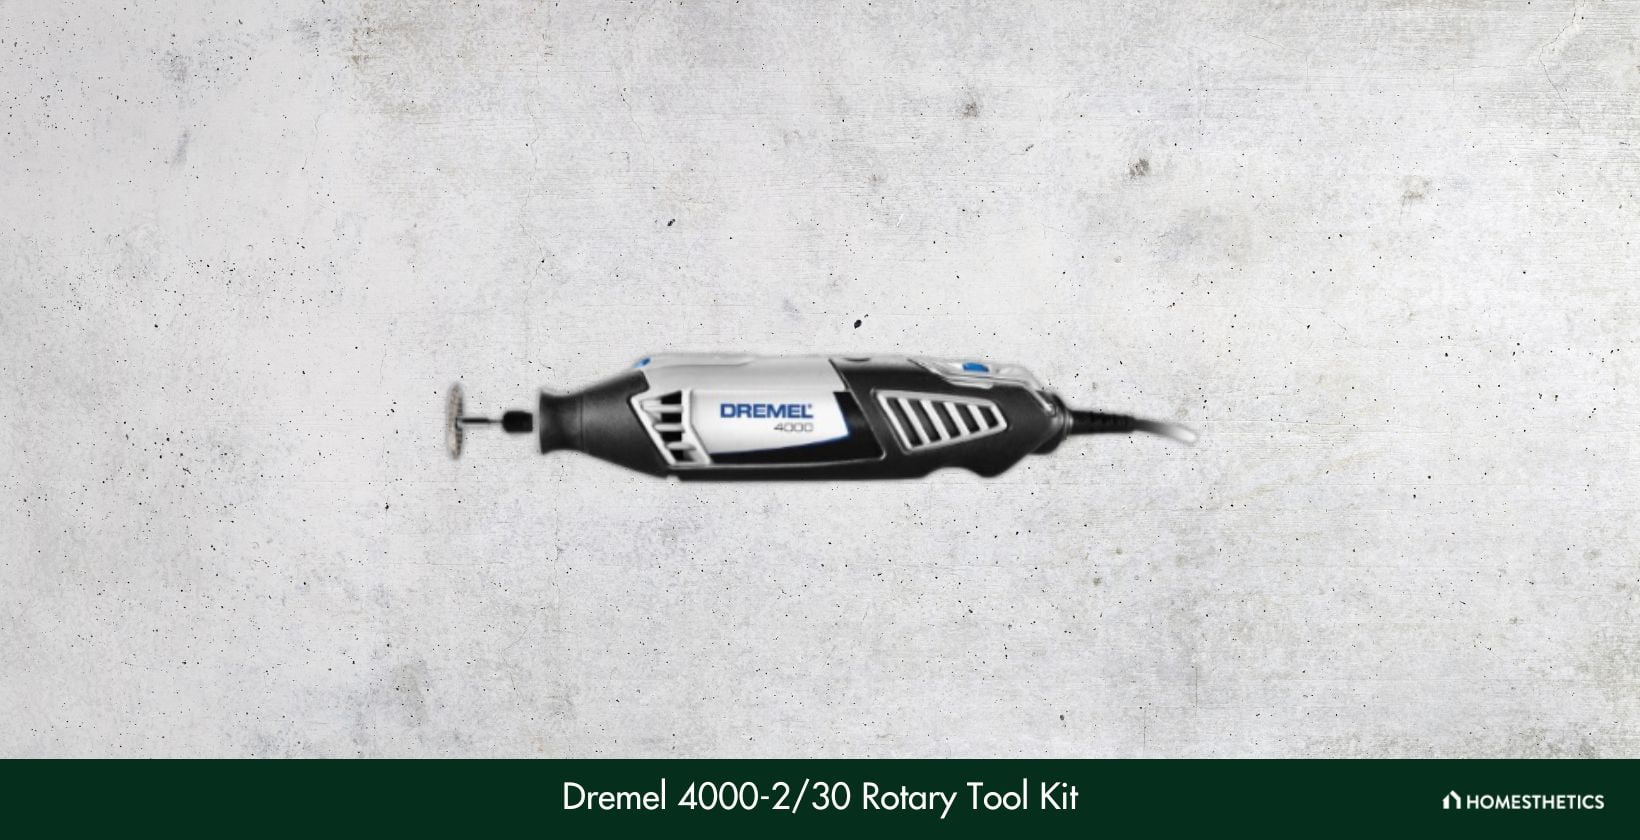
Dremel has been slowly emerging as one of the most trusted brands among American households when it comes to next-level innovations. The Dremel 4000-2/30 tool kit stands out as an efficient rotary tool kit, offering quality performance without costing a fortune. For those who are intrigued by highly versatile tools, this one is the real deal.
This product sets a very high standard for power with its incredibly high-performance motor, making it appropriate for heavy-duty jobs. To be precise, it can smoothly deliver a maximum speed of 35,000 OPM without any vibrations, which speaks volumes about its top-notch mechanism. As a bonus, similar to the DEWALT grout tools, it also features a variable speed trigger that allows you to control its power accordingly, upping the bar for utmost versatility.
This kit comes with a durable 4000 corded rotary tool, along with which you get 30 premium-grade accessories/attachments for higher versatility. With such an abundance of attachments, handling tasks such as grooving, slotting, shaping, and hollowing becomes quite easy. As a bonus, it enables the tool to handle the most detailed tasks in hard-to-reach areas. To ensure that the accessories aren’t lost or misplaced, Dremel provides a sturdy case for storage.
Coming to its build, the product appears to be reasonably attractive, and sturdy and is guaranteed to last for years to come. We’re fans of its 360-degree grip that ensures that the user doesn’t end up with fatigued wrists after using it for a long. Last but not least, you get an innovative ventilation mechanism that prevents overheating issues.
We’ve noticed that despite being very compact and user-friendly, it doesn’t offer a satisfactory user experience. To be honest, it has a frequent tendency to make a mess out of dust while being used for grout removal, which is a bit stressful at times.
What We Like
- Easy to carry and use
- Accessories can be changed easily
- Compact and ergonomic design
- Highly versatile toolkit
What We Don't Like
- Can be very messy at times
Power Source: Corded | Power: 20 V | Tool Type: Rotary Tool | Oscillation Speed: 5,000-35,000 OPM | Blade Type: Quick-Change Accessory
4. DEWALT DWE305 12-Amp Corded Reciprocating Saw/Grout Grabber - Best Multipurpose Tool
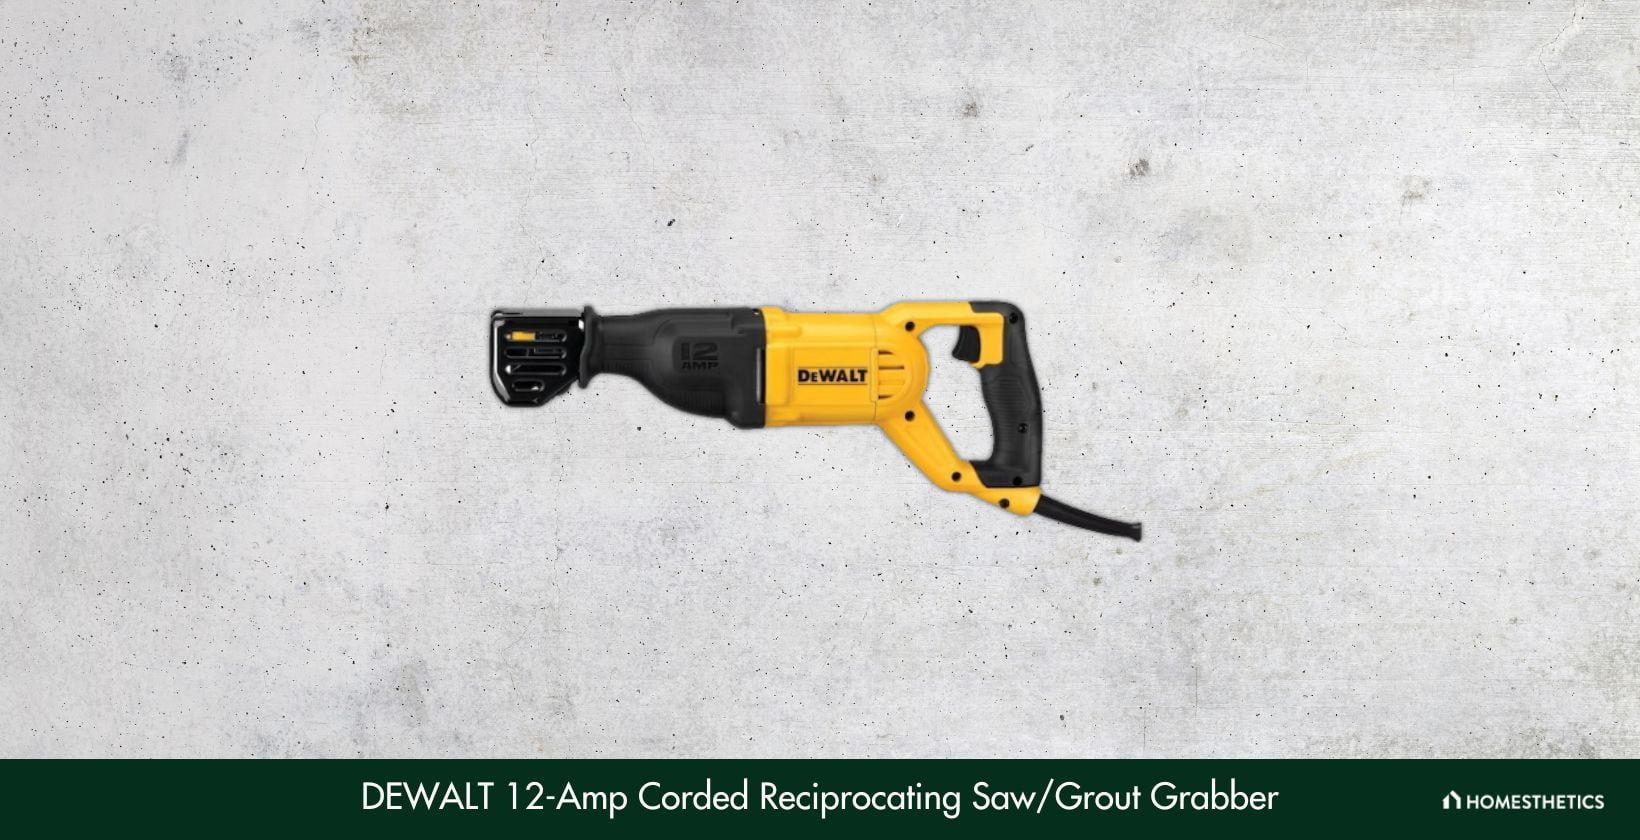
If you’re a sucker for multipurpose tools, this two-in-one tool manufactured by DEWALT will blow your mind. Apart from being an efficient grout grabber, it also makes a capable reciprocating saw. Such ultra-high performance under an affordable makes it a complete steal. Let’s check out its core features!
Although it might not be the best suggestion we have for heavy-duty jobs, its ability to handle middle-duty grout removal remains unparalleled. This product offers a decent oscillating speed of 0-2,900 OPM, with a 1-⅛” stroke length. If you’re planning to take on simple home improvement jobs with ease, you’ll be delighted with its precision and accuracy. You can also handle cutting jobs with its reciprocating saw.
As it is a DEWALT tool, it’s not a surprise that it gets an advanced variable speed trigger. This user-convenient feature makes cutting a lot easier, as you can control the device’s speed as per your wish. Speaking of cutting efficiency, the manufacturers offer a 4-position blade clamp, which makes the tool highly eligible for flash cutting. Furthermore, we’re also satisfied with the patented brushless motor that lasts long, despite being used rigorously.
If compared to our other product suggestions, it’s quite underperforming in terms of power. Also, we’re not a big fan of its bulky design; it could have been a little more ergonomic and beginner-friendly. Last but not least, we’ve found that the product can’t be adequately controlled at lower speeds, which is a bummer.
What We Like
- A highly versatile multipurpose tool
- Sturdy build material
- Low-cost budget
- Variable speed trigger
What We Don't Like
- Not very controllable at low speeds
Power Source: Corded | Power: 12 A | Tool Type: Reciprocating Saw | Oscillation Speed: 0-2900 SPM | Blade Type: Reciprocating Saw Blade
5. Grout Grabber GG001 Grout Removal Tool - Best for Manual Use
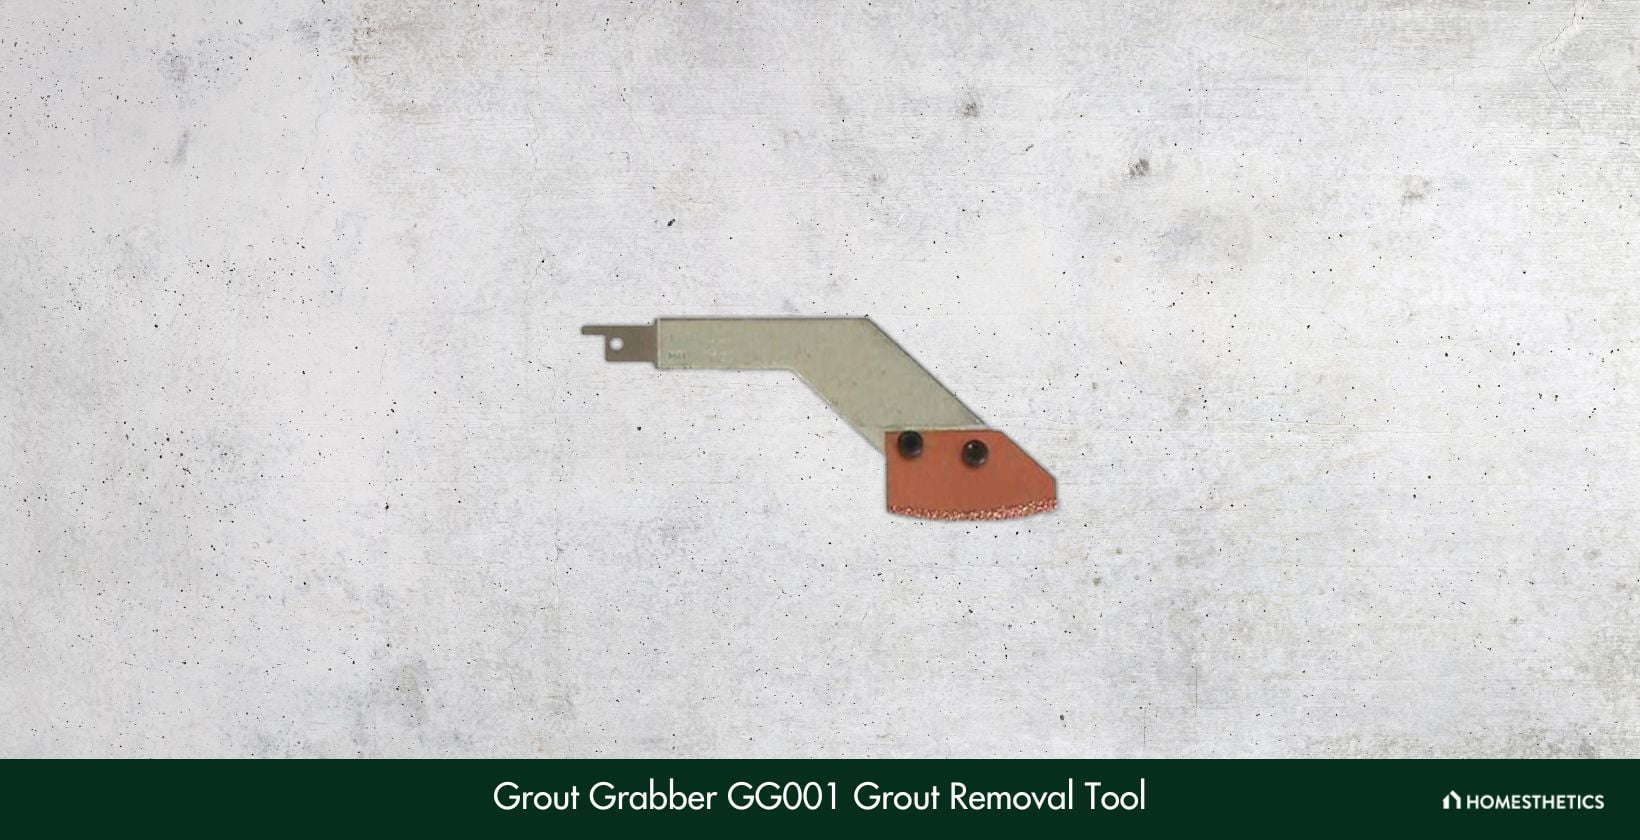
Not everyone can afford world-class brand products, and neither do we require so for tasks that need minimal assistance. If this is the case with you, then the Grout Grabber GG001 unit is the most budget-friendly option to consider. Although it isn’t an independent tool per se, it still works wonders as an accessory. Let’s find out more!
Before we proceed any further - if you previously didn’t own a reciprocating saw, skip directly to our next product recommendation. That’s because it’s attached to saws to scrape your tile joints for grout removal. However, the bright side here is that the model beats every other alternative on our list in terms of portability. It’s so compact that you can carry it around in your back pocket without a care in the world.
What makes it even more convenient is its universal compatibility; it can be fitted on any reciprocating saw, which is quite incredible for such a low-priced product. Moreover, its build quality is extremely durable, enabling you to push it beyond its limits for a rigorous grout removal session. Furthermore, it’s guaranteed that you won’t chip the tiles while using it. For such an entry-level tool, such premium-grade user convenience is simply impressive.
To be frank, this product is strictly for those with a tight budget and minimal expectations. It’s not very long-lasting, and you’d notice the blades to be wearing out quite often. We’ve also tried using it on old and compacted grout, and it failed to impress. Last but not least, the tool tends to jump around at higher speeds, which can be risky for the user.
What We Like
- Easy to carry and use
- Suitable for DIY jobs
- Compact and ergonomic design
- Very budget-friendly
What We Don't Like
- Doesn’t work on old grout
Power Source: Manual | Power: N/A | Tool Type: Grout Removal | Oscillation Speed: N/A | Blade Type: Carbide-Coated Blade
6. Dremel 4300-5/40 High-Performance Rotary Tool Kit
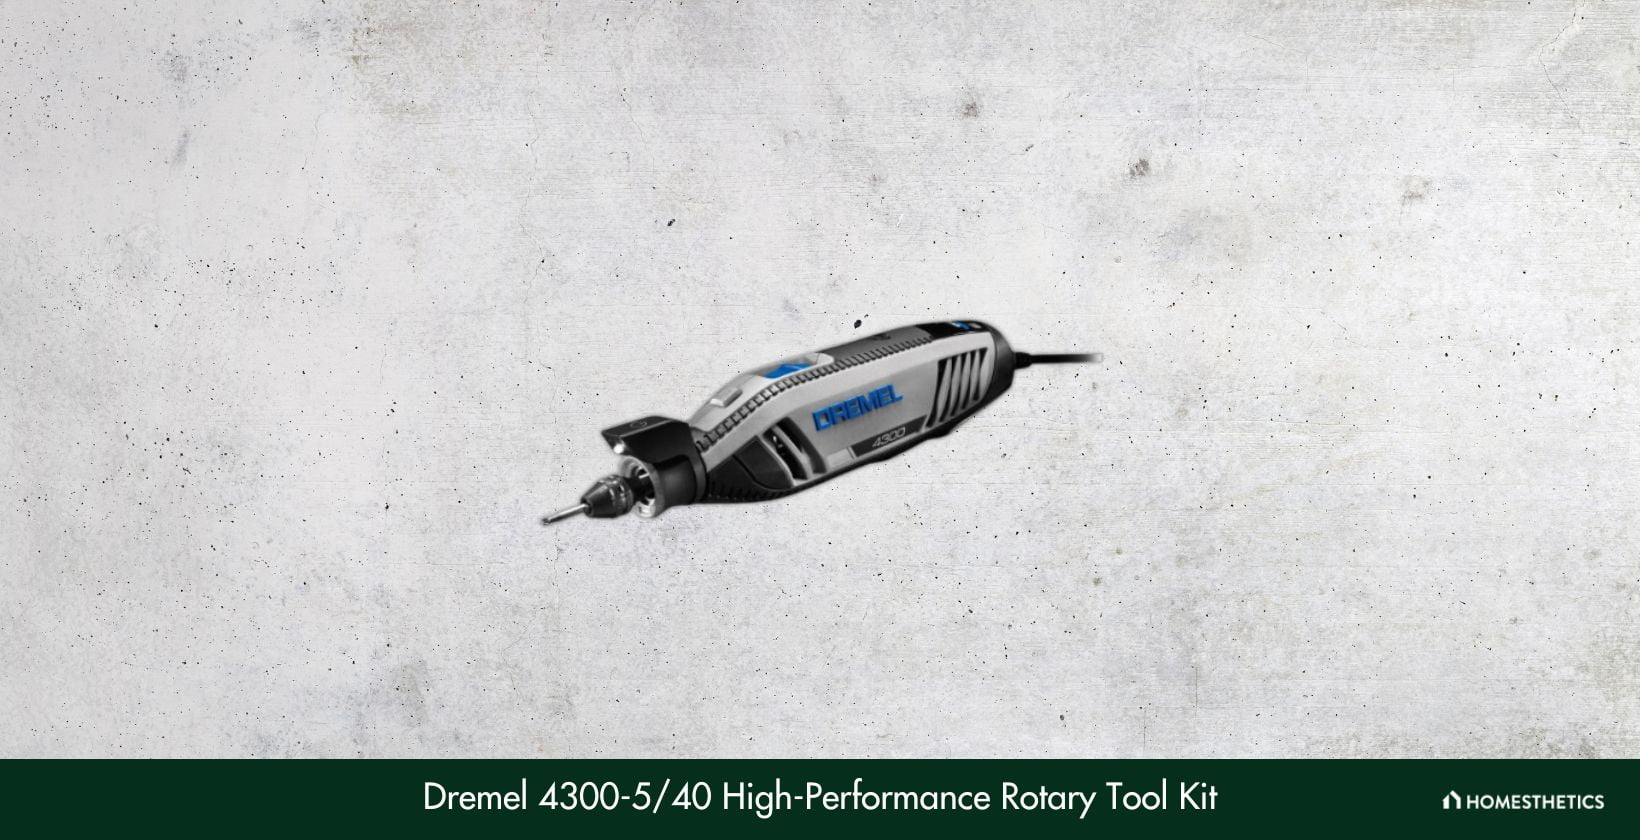
For the Dremel Tools fans searching for high-performance tool kits under a fair budget, the 4300-5/40 rotary tool kit is an intelligent alternative to consider. This convertible tool offers the utmost versatility and performance, which makes it suitable for heavy-duty jobs. Let’s find out more!
This product had initially caught our attention with its exclusive 1.8 amp motor, which offers superb performance to take on the hardest of jobs with ease. It allows you to rev it up to 35,000 OPM with electronic feedback, ensuring consistency in its power. Moreover, it has impressed us with its accuracy. Also, it’s quieter than most of our other product recommendations, giving itself a higher rank in terms of user convenience.
This 4300 high-performance rotary tool kit comes with multiple attachments that altogether enhance its versatility a few notches. You get a composed set of 40 attachments/accessories for a multipurpose user experience, which allows you to handle secondary jobs such as sanding and cutting. However, the icing on the cake is the iconic pivot light that keeps rotating to provide sufficient brightness for you to grout in hard-to-reach areas.
It might not feature a brushless motor, but it also doesn’t push you toward heavy maintenance stress. With this motor, you get a replaceable brush system that ensures a longer product life. Finally, you get a variable speed trigger to control its power, which is pretty incredible.
Although it’s a compelling device, it also has its fair share of drawbacks. It can get unstable at higher speeds due to frequent vibrations, and you might end up chipping the tiles. Also, we’re not pretty satisfied with its size, as it can be problematic for those with less space for storage.
What We Like
- Durable storage kit
- Advanced user control settings
- Long-lasting motor
- Replaceable brushes
What We Don't Like
- High vibrations
Power Source: Corded | Power: 1.8 A | Tool Type: Rotary Tool | Oscillation Speed: 5,000-35,000 | Blade Type: Quick-Change Accessory
7. BOSCH 1375A 4-½-Inch Angle Grinder

Moving on towards some of the most compact grout tools in the game, the BOSCH 4.5-inch angle grinder has created a big buzz with its ultra-smooth operation. Despite being an extremely maneuverable device, it packs sufficient power to go head-to-head against some of our professional-grade alternatives. Let’s check out its specs and functions!
This efficient grout grabber can be availed at a very pocket-friendly price, which makes it worth everybody’s attention. Apart from being very affordable, it’s also effortless to carry around, provided it weighs about 3.75 pounds. We’d especially recommend it to anyone who’s into plumbing, vehicular fabrication, and DIY home renovation jobs. It delivers superb performance without being damaged by regular use.
Moving on, this product comes equipped with an immensely strong 6.0 amp motor that performs up to 11,000 RPM with zero loads, which pretty much explains why it’s a top-notch professional’s choice. Moreover, we’ve found that its motor comes with a tiny field diameter that enables you to perform cutting jobs with much ease. It’s designed very ergonomically, and its handle grip makes it a very easy tool to grout.
When it comes to durability, BOSCH takes the cake with its epoxy-coated design that safeguards the tool from any abrasive debris. As a bonus, you get a Service Minder Brush system that immediately halts the motor if it detects any preventive maintenance needs. Overall, nothing defines the best values better than the BOSCH angle grinder.
We’ve found its lock button to be extremely sensitive, which may be a safety hazard in multiple cases. Furthermore, the motor makes an unpleasant noise while running when the electricity voltage is subpar.
What We Like
- Highly durable
- Suitable for commercial use
- Powerful motor
- Versatile applications
What We Don't Like
- Sensitive lock button
Power Source: Corded | Power: 6 A | Tool Type: Angle Grinder | Oscillation Speed: 11,000 | Blade Type: Grinding Disc
8. QEP 10020 Grout Removal Tool
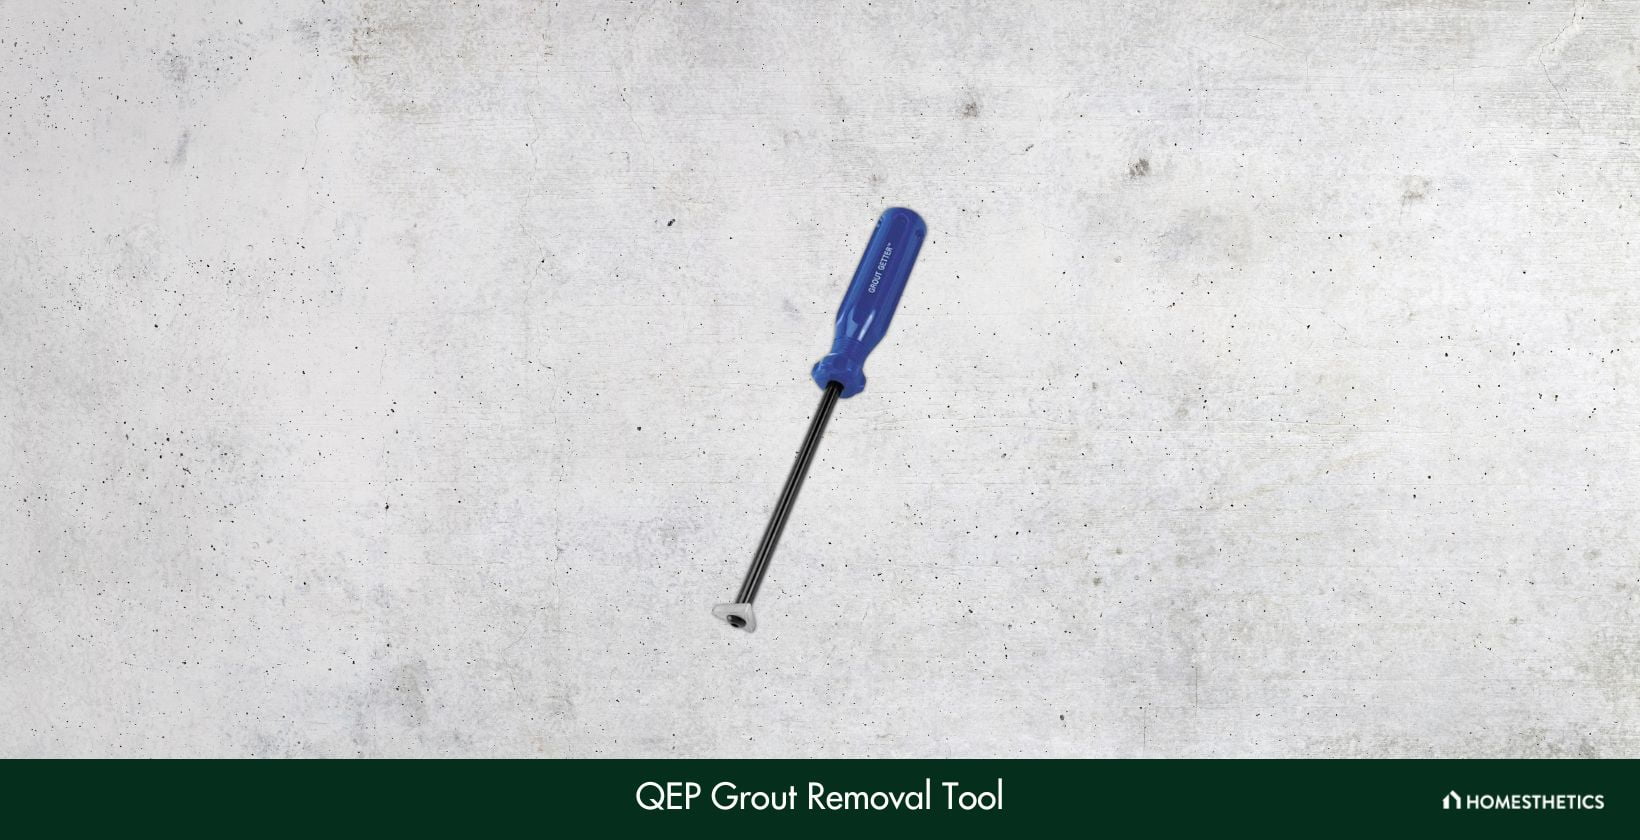
Some of us still like to do things the old-fashioned way, and we have just the right suggestion for those who prefer manual tools over automated alternatives any day. The QEP 10020 unit stands out as one of the most straightforward grout removal tools on our list, and it’s the appropriate companion to your simple day-to-day maintenance jobs.
Similar to the Grout Grabber GG001 unit, it is a very easy-to-use tool for quick grout removal. We’re fans of its ultra-compact design, making it eligible for being carried with no problem. You can easily slide in your toolbag without worrying about storage space; that’s how easily maneuverable it is. Although it isn’t necessarily a power tool, it gives 100% control to the user, which comes very handy while scraping off unwanted grout.
Using the QEP 10020 ensures nothing less than 100% user satisfaction, as it helps in obtaining a very clean and precise end result. The product also ranks very high in terms of ergonomics, and its ultralight body gives it an even higher advantage. Consequently, it doesn’t cause any stress on your arms after using it for long hours. The comfort grip helps the tool from slipping away, which is essential for the user’s safety while working.
Although it is unarguably one of the most inexpensive grout tools you’ll find in the market, it doesn’t mean that the product isn’t durable. In fact, it comes equipped with reversible carbide tips, which offer multiple scraping edges for long-lasting tool life.
As evident, it’s bound to take a long time to finish the tasks because it’s totally hand-held and manual. Also, we wouldn’t recommend it for medium/heavy-duty jobs, as its lack of automation restricts its eligibility for personal use.
What We Like
- Easy to carry and use
- Suitable for DIY jobs
- Compact and ergonomic design
- Very budget-friendly
What We Don't Like
- Not suitable for commercial use
Power Source: Manual | Power: N/A | Tool Type: Grout Removal | Oscillation Speed: N/A | Blade Type: Carbide-Coated Blade
9. Kraft Tool ST147 Grout Saw
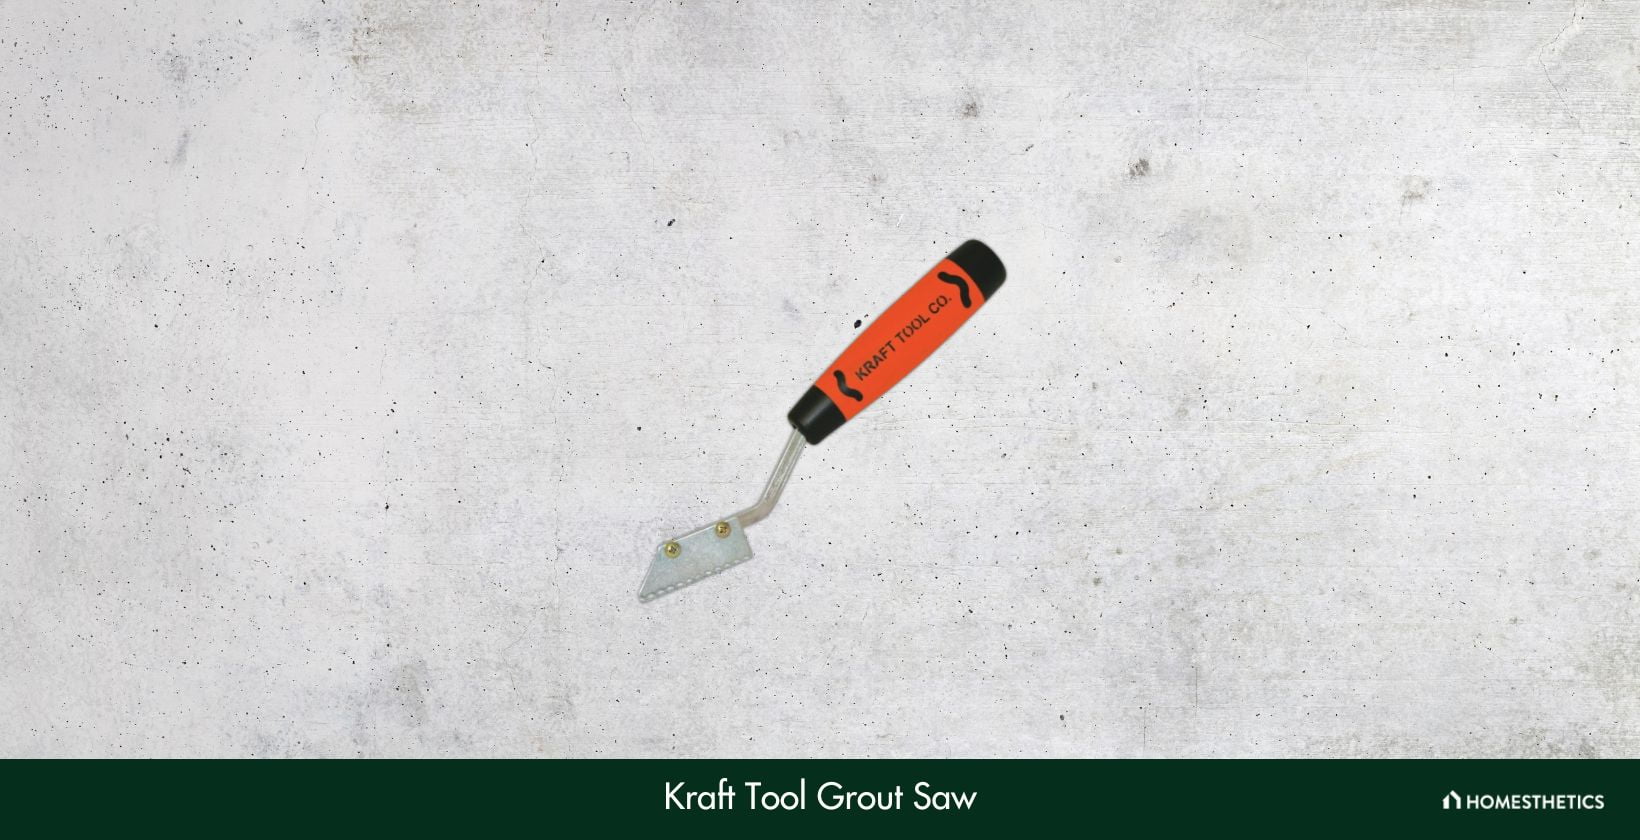
Kraft Tool is one of the hottest up-and-coming brands in the American tools market, which has set the bar higher for manual grout tools with its ST147 unit. Right at first glance, it managed to grab our attention with its unique design. Speaking of performance, it’s an ideal competition for the QEP 10020. Let’s find out more!
Like our previous recommendation, this product is also a very budget-friendly grout removal tool to consider taking on small personal jobs. It’s completely manual, which means that you’re totally in charge of the job. It isn’t nearly as noisy as our other product suggestions, offering you a smoother and more comfortable experience. Neither would you be facing any vibration issues, provided that it is totally hand-held. Consequently, it allows you to scrape with ease.
It weighs around 3.2 ounces, which prevents you from ending up with fatigued wrists after using it for a long. The sturdy handle enables you to have a better grip at the base, which is needed to gain optimal control of the tool. Furthermore, we’ve found that its blades are replaceable, which instantly raises the bar higher for user convenience. Although it’s not recommended for heavy-duty usage, it is pretty accurate for minor tasks.
Provided that this product is solely developed for small-duty use, expecting it to compete with the heavyweights on our list would be quite futile. However, despite being so compact, it’s a little disappointing that it fails to offer optimal performance in the narrow joints.
What We Like
- Very handy and portable
- Meager price tag
- Durable build quality
- Doesn’t produce a dusty mess
What We Don't Like
- Not good at scraping narrow joints
Power Source: Manual | Power: N/A | Tool Type: Grout Removal | Oscillation Speed: N/A | Blade Type: Replaceable Saw Blade
10. REETREE Caulking/Grout Removal Tool
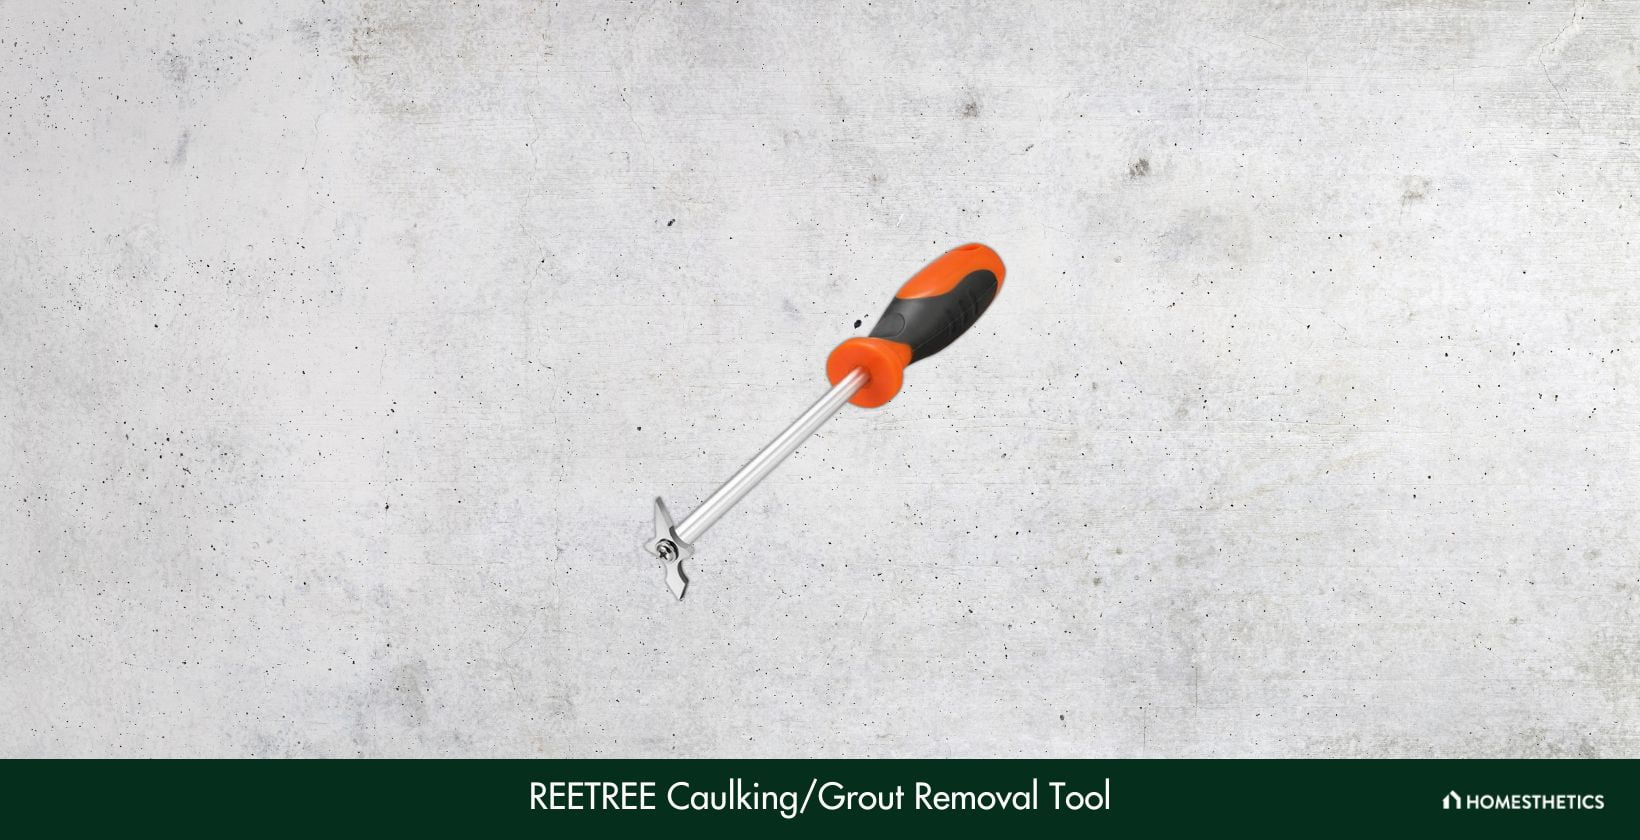
Next on our list is the kingpin of the manual grout tools category, the REETREE Caulking grout cleaner. This product, despite being entirely hand-held, offers extreme versatility and efficiency, which is incredible. Let’s have a quick peek at what it offers!
At such an affordable price, REETREE offers every possible feature you’d need from a manual grout removal tool. First, its design is exceptionally entry-level enabling you to perform small-duty grout removal/scraping with ease. The blades have been positioned in a way that doesn’t chip the tiles while being used, which is pretty incredible. Consequently, you can comfortably remove stubborn grout, dirt, caulking, and mortar stuck between the joints without chipping the tiles.
When it comes to building quality, the REETREE tool gains a straight edge over most of the manual alternatives in the market, which gives it a significant advantage in this category. We’re impressed with its sturdy quality, provided it’s built with super hard Tungsten steel that is much harder than the tiles. As a result, the chances of the tool being damaged while being used are meager, extending the product life by a fair deal.
The product also ranks very high in terms of efficiency, and its sharp tip allows you to dig deep into the surface and fit the width of maximum tile joints. This way, you can even use it to clean cracked tiles without any worry. If that doesn’t define best values, what does?
As most of the users have reported, it is tough to scrape off the wall edge grout with this tool, restricting its capability a little. Also, being a manual product, it may not be the best option for heavy-duty professionals.
What We Like
- Impressive build quality
- Ergonomic design
- Long-lasting razor-sharp edge
- Very reasonably priced
What We Don't Like
- Inefficient at removing wall edge grout
Power Source: Manual | Power: N/A | Tool Type: Grout Removal | Oscillation Speed: N/A | Blade Type: Tungsten Steel
11. Genesis GMT15A 1.5 Amp Multi-Purpose Oscillating Tool
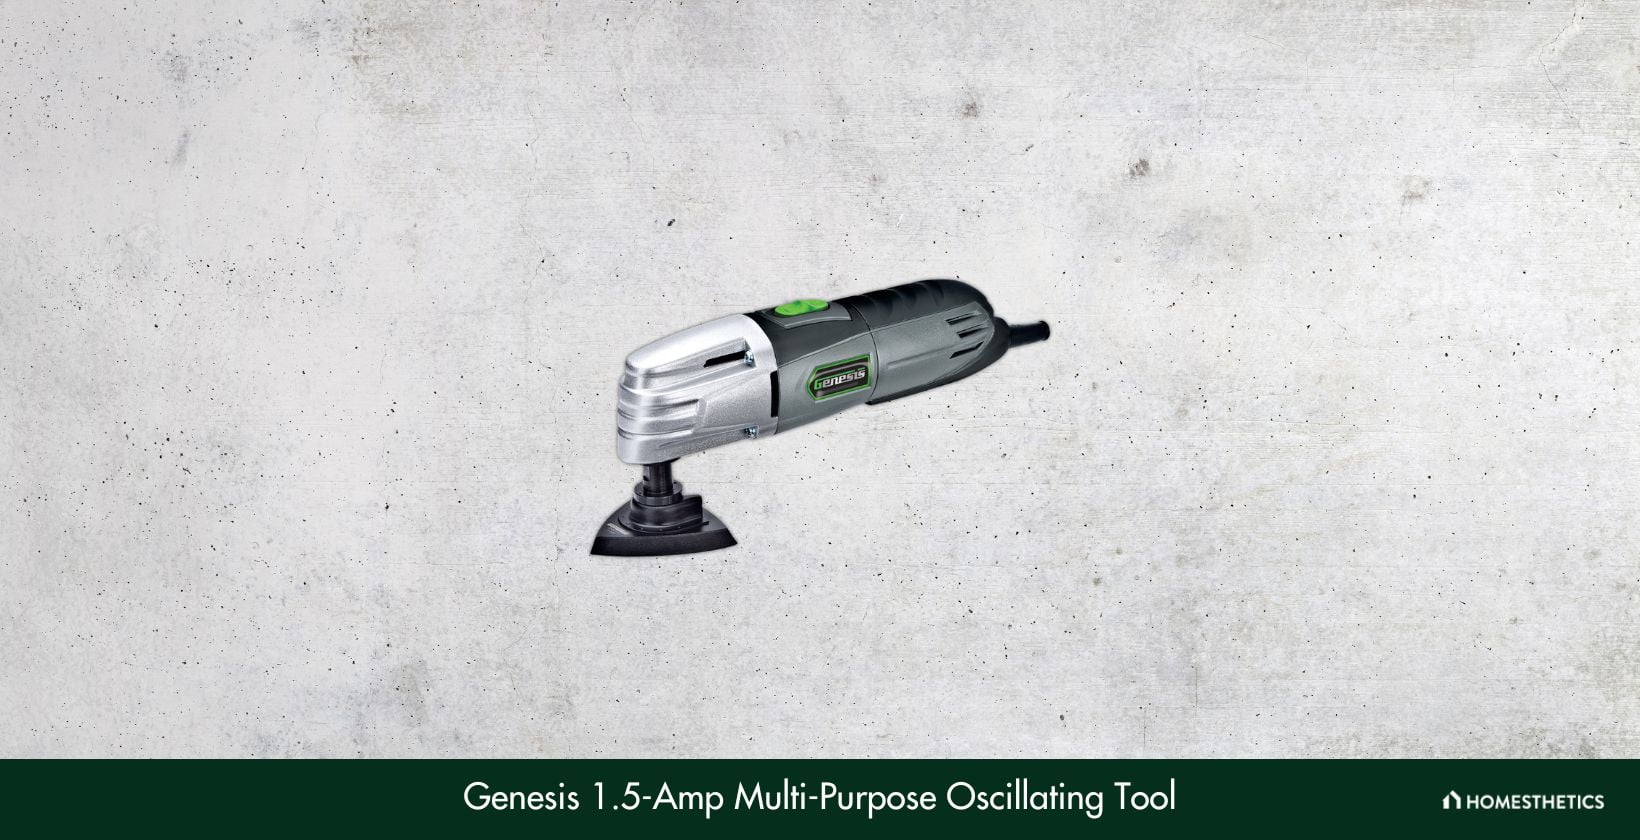
Our list would have been incomplete without mentioning the Genesis GMT15A, one of the best-selling multifunctional oscillating tools you’d find. It packs serious power that allows it to deliver numerous functions, making it a perfect tool for home renovation jobs. Let’s have a more in-depth look at its key features!
This product has seriously impressed us with its build quality, as its die-cast aluminum gear case safeguards it from any internal damage to extend its life overall. Also, the futuristic design plays a significant role in preventing the tool from overheating issues.
Furthermore, the four-pin flange system ensures that the external attachments are tightly connected to the device while being used for versatile jobs. This way, Genesis has raised the bar too high for safety.
When it comes to power, this product beats most of our other recommendations with its 1.5 amp motor that can rev as high as 21,000 OPM. With such high oscillation power, it makes grout removal easier and smoother than ever.
Apart from that, its multiple accessories (including a scraper blade, flush cut blade, saw blade, delta sanding pad, sandpaper, and Allen wrench) make it eligible for tasks such as scraping, cutting, sanding, etc.
Despite being a pro-grade tool, it weighs as little as 2.8 pounds. Consequently, you can carry it around anywhere with ease. Its non-slip handle also provides a comfortable grip to perform stress-free home renovation jobs without stressing out your arms. Finally, it comes with a two-year warranty period as an assurance of quality.
Some users have reported that during long-term regular use, its motor begins to malfunction. It’s best to use it periodically, which can otherwise threaten its longevity. Apart from that, we also found it to be quite loud, and it’s best to wear protection gadgets while using it.
What We Like
- Highly durable
- Suitable for commercial use
- Powerful motor
- No overheating issues
What We Don't Like
- Not recommended for regular use
Power Source: Corded | Power: 1.6 A | Tool Type: Oscillating Tool | Oscillation Speed: 0-21,000 | Blade Type: Quick-Change Accessory
12. Makita XMT03Z 18V LXT Lithium-Ion Cordless Multi-Tool
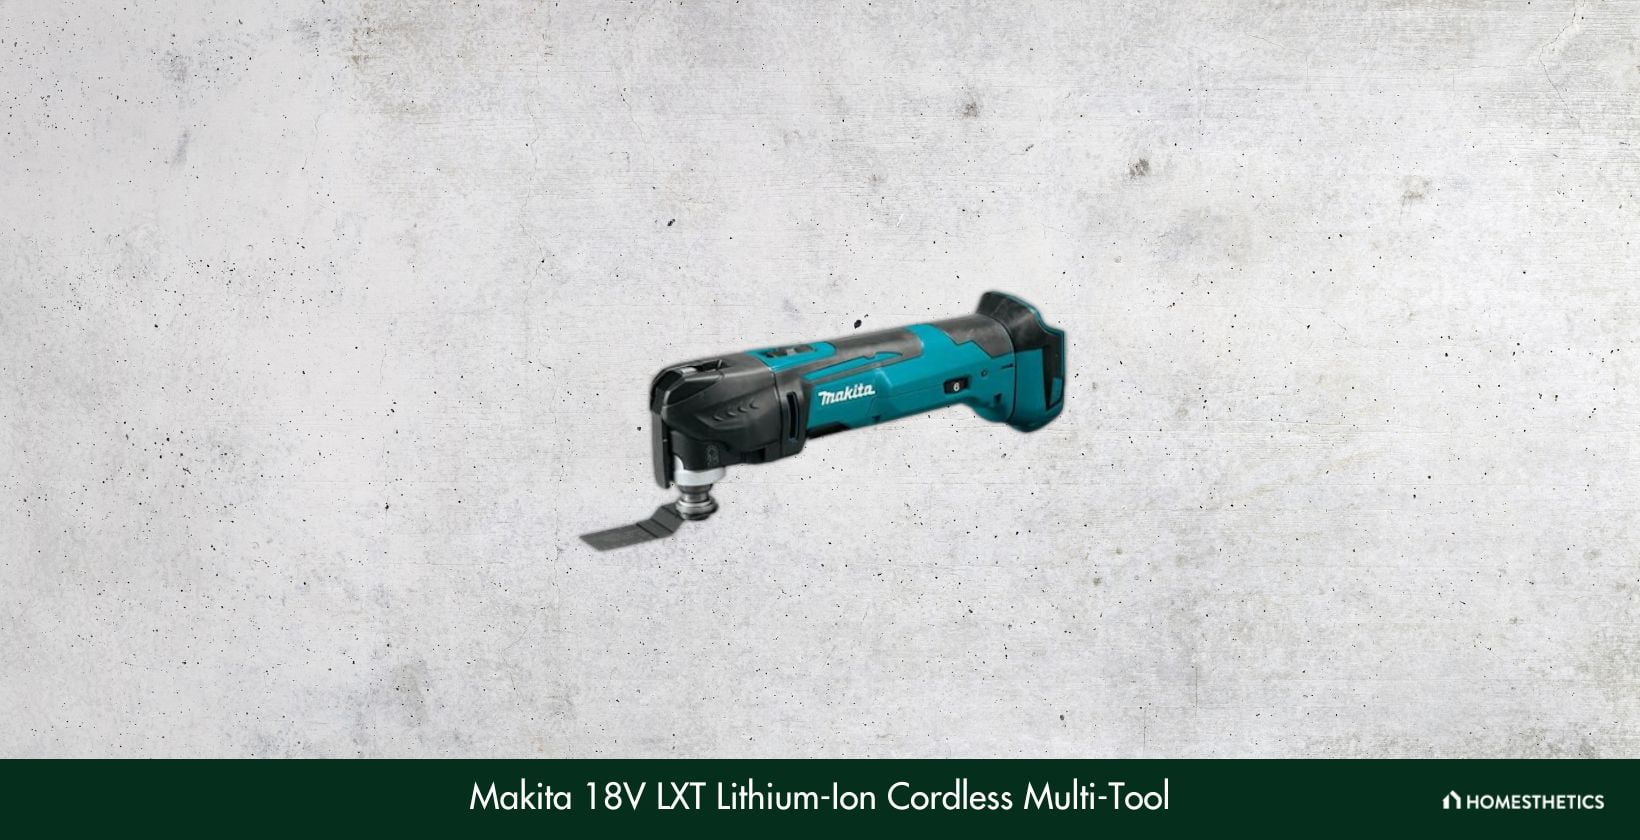
The final product on our list is one of the most popular grout removal innovations launched by the globally leading brand Makita Tools. The XMT03Z makes an efficient companion for roaming professionals, as the cordless feature gives it an upper advantage. Let’s check out its core features!
A unique feature that this product offers is its cordless feature. In brief, it comes with an 18v battery that allows it to run for about 20 minutes on a single charge. If you’re a roaming professional who also works in areas with no electric outlet, then it’s the best option to consider. Furthermore, it can be placed upright when it is not being used, making it a little more convenient.
Its powerful electric motor can deliver up to a maximum speed of 20,000 RPM, allowing it to take on middle-duty home renovation tasks with ease. As a bonus, you also get an extraordinary oscillation angle of 3.2 degrees, which enhances its performance a notch. Whether it is grout removal, sanding, cutting, or any similar task, this versatile product provides you sufficient help in completing it within a short period.
This product appears to be very easy to use, as its large on/shutdown makes it a lot more convenient to operate. Moreover, you get a tool-free clamp system that allows you to install the accessories a lot quicker.
First things first, this product is pretty large and bulky. Using it for a long time continuously may lead to pain in your wrists, so beware. Also, it would’ve been better if the product came with an LED in the front for high visibility in dark areas.
What We Like
- Cordless grout removal tool
- Impressive battery life
- High-speed cutting and scraping
- Affordable price range
What We Don't Like
- Quite bulky
Power Source: Cordless | Power: 18 V | Tool Type: Multi-Tool | Oscillation Speed: 6,000-20,000 | Blade Type: Quick-Change Accessory
What Are the Differences Between the Top Grout Removal Tools Essential for Home Improvement?
The table provides detailed comparisons of top grout removal tools, highlighting power sources, tool types, and blade specifics.
| Product | Power Source | Power | Tool Type | Oscillation Speed | Blade Type |
|---|---|---|---|---|---|
| DEWALT DWE315K Corded 3-Amp Oscillating Tool kit | Corded | 3 A | Oscillating Tool | 0-22,000 OPM | Quick-Change Accessory |
| DEWALT 20V MAX XR DCS355D1 Multi-Tool Kit | Cordless | 20 V | Multi-Tool | 0-20,000 OPM | Quick-Change Accessory |
| Dremel 4000-2/30 Rotary Tool Kit | Corded | 20 V | Rotary Tool | 5,000-35,000 OPM | Quick-Change Accessory |
| DEWALT DWE305 12-Amp Corded Reciprocating Saw/Grout Grabber | Corded | 12 A | Reciprocating Saw | 0-2900 SPM | Reciprocating Saw Blade |
| Grout Grabber GG001 Grout Removal Tool | Manual | N/A | Grout Removal | N/A | Carbide-Coated Blade |
| Dremel 4300-5/40 High-Performance Rotary Tool Kit | Corded | 1.8 A | Rotary Tool | 5,000-35,000 | Quick-Change Accessory |
| BOSCH 1375A 4-½-Inch Angle Grinder | Corded | 6 A | Angle Grinder | 11,000 | Grinding Disc |
| QEP 10020 Grout Removal Tool | Manual | N/A | Grout Removal | N/A | Carbide-Coated Blade |
| Kraft Tool ST147 Grout Saw | Manual | N/A | Grout Removal | N/A | Replaceable Saw Blade |
| REETREE Caulking/Grout Removal Tool | Manual | N/A | Grout Removal | N/A | Tungsten Steel |
| Genesis GMT15A 1.5 Amp Multi-Purpose Oscillating Tool | Corded | 1.6 A | Oscillating Tool | 0-21,000 | Quick-Change Accessory |
| Makita XMT03Z 18V LXT Lithium-Ion Cordless Multi-Tool | Cordless | 18 V | Multi-Tool | 6,000-20,000 | Quick-Change Accessory |
Buying Guide for the Best Grout Removal
When searching for the most reliable grout removal tools, you must be aware of a list of features to consider to make sure that you’re choosing the best option out there. Here’s a comprehensive list of the main factors to consider before purchasing.
-
Tool type
The types are mainly two- automatic and manual. If you’re a hardcore professional, you’d need more power and convenience, which can be availed from the mechanical/automatic variants. However, if you’re a DIY enthusiast who’s searching for personal-use tools, then the manual variants are a smart and budget-friendly option to consider.
-
Blade type
As the blade is an essential part of the tool, it’s vital to ensure that you’re not settling for average quality. The most common blades among grout removal tools are made of carbide, which provides excellent durability and performance. But in case the budget isn’t an issue, you can go for tungsten steel blades, which offer higher performance and longevity.
-
Size and design
It’s essential to ensure that the product is ergonomically designed for a smooth and stress-free user experience. Bulkier models lead to storage issues, so it’s best not to opt for one unless you have enough space in your toolbox.
If you prioritize portability more than anything, then manual grout removal tools are the best options to consider. You can simply carry these without any issues, all thanks to their ultra-compact size.
-
Safety
Last but not least, let’s not forget that we’re dealing with blades that oscillate at an average of 20,000 OPM. It’s fundamental to ensure that the product comes with sufficient safety measures to prevent any unforeseen accidental damage for a more secure user experience. For instance, make sure that it comes equipped with a protective gear case that saves both you and the tool from any accident.
What types of grout removal tools are available?
Several types of grout removal tools are available, including oscillating tools, rotary tools, reciprocating saws with grout grabbers, manual grout removal tools, and more. Each type serves a specific purpose and offers different features.
Can I use a rotary tool for grout removal?
Yes, rotary tools with grout removal attachments are commonly used for grout removal. These tools have high-speed rotating bits that can effectively remove grout from joints.
Are manual grout removal tools effective?
Manual grout removal tools, such as grout saws or grout scrapers, can be effective for small-scale projects or when dealing with delicate surfaces. They require a manual effort but offer precision and control.
Can grout removal tools be used on any type of grout?
Grout removal tools can generally be used on most types of grout, including cementitious, epoxy, and acrylic grouts. However, it’s important to check the manufacturer’s guidelines and ensure the tool is suitable for the specific grout type you are working with.
Conclusion
That said, we hope that our expert guide to the best grout removal tools in the game has helped you a little in finding the one that best suits your requirements. Before we sign off, here’s a brief recap of our editor’s picks.
The Dewalt DWE315K has it all under a reasonable budget - whether it is speed, power, or convenience. The Dremel 4000-2/30 tool kit is the most versatile kit we’ve tested till now, and you can consider it if you need a tool for more than just grout removal. Last but not least, the Grout Grabber GG001 unit is the perfect low-budget pick for DIY home improvement folks.
Stay tuned with us for more informative content, and we’ll see you soon!
Granite is considered an investment by most homeowners. However, maintaining it well increases its value and appeal over time, justifying its high price.
![8 Best Granite Sealers Of 2024 [Reviewed & Buyer’s Guide]](https://homesthetics.net/wp-content/uploads/2021/04/Best-Granite-Sealer-of-2021-11.jpg "8 Best Granite Sealers Of 2024 [Reviewed & Buyer's Guide]")
A natural stone like granite can add aesthetic appeal and value to any home. However, it is also a relatively expensive addition. To maintain its looks and value over time, it is imperative to seal it using the best granite sealer.
Fortunately, there are dozens of granite sealers in the market to choose from. It is natural to be overwhelmed by the options, but don't worry! We are here to help.
In this guide, we will talk about the top 8 granite sealers for your home. Furthermore, we have curated a short guide to help you choose the most suitable one for your needs.
So without further delay, let's get straight to the reviews.
Best Granite Sealers Reviewed

Here's the list of the 8 best granite sealers that will help preserve and enhance the natural beauty of your granite surfaces.
1. Granite Gold GG0036 Sealer - Best for Food Safety
Are you looking for a food-safe granite sealer for your kitchen countertops? Consider the Granite Gold Sealer, which is entirely non-toxic, biodegradable, pH balanced, and safe for your home. Moreover, it is versatile and comes in a ready-to-use spray bottle. To know more about it, read on.

Granite Gold Water-Based Sealer Spray Protection for...
- Granite Gold Sealer creates a barrier providing maximum...
- Specially formulated for granite, marble, travertine,...
Why Did We Like It?
When it comes to applying a granite sealer on kitchen countertops, you need one that is food-safe and non-toxic. Fortunately, the Granite Gold Sealer is one of the best options on the market.
The spray comes in a water-based solution that is easy to use and very convenient for regular applications. Spray it directly on the granite surface and wipe it off using a lint-free, soft cloth. Repeat the steps a couple of more times for the best results.
Every ingredient in this granite sealer is non-toxic and non-acidic, so you don't need to worry about abrasive chemicals damaging the surface. Furthermore, the formula is pH balanced and efficiently forms a protective barrier. This protects the beautiful natural stone from stains, marks, scratches, and soil build-up.
Remember to allow the formula to cure for 24 hours after applying it. We also recommend waiting for at least 20 minutes between applications for the best results.
What Could've Been Better?
Our only gripe with this product was its long curing time. You need to wait for at least 24 hours for it to cure completely, during which time it is best to avoid using the countertop. This may be inconvenient for some users who need to use their kitchen countertops or other granite surfaces during the curing period.
Pros
- Easy-to-use spray bottle formula
- pH balanced
- Forms a protective barrier on granite surfaces
- Affordable
Cons
- Long curing time
Type: Penetrating | Coverage: Up to 75 sq. ft. | Suitable Surfaces: Granite, Marble, Quartz | Application Method: Spray | VOC Content: Low | Non-Toxic: Yes
2. Miracle Sealants 511QT6 Impregnator Sealer - Best for Long-Lasting Protection
Applying a sealer every few months can be tedious work. The Miracle Sealants 511QT6 Impregnator Sealer is one of the best products out there because of how long-lasting and effective it is. This sealer eliminates the need for frequent applications as it protects and adds shine to any granite surface within minutes.

Miracle Sealants 511 Impregnator Advanced Penetrating Sealer...
- SCS Certified INDOOR ADVANTAGE GOLD
- Interior & Exterior Use
Why Did We Like It?
In our opinion, the most attractive feature of this granite sealer is its promise of longevity. Sealing granite countertops and other surfaces can seem like a chore after a point in time, especially when it requires frequent resealing.
With Miracle Sealants, we could sit back and relax for up to 2 years without worrying about when to reseal the surface. Not just that, if applied correctly, this can be effective for up to 20 years. Of course, we don't recommend waiting that long, just to be on the safe side.
Moving on, we loved how easy it was to apply this product. Just pour it out on a safe, clean surface and apply it to your granite countertop. Allow it to cure for at least 3 to 5 hours before using the surface again.
The formula has a unique UV protection feature that protects your granite surface from most weather elements.
What Could've Been Better?
Overall, this liquid granite sealer is an excellent purchase. That said, it can be slightly challenging to pour out from the container, especially since it does not come with an in-built sprayer. You need to be careful while pouring out its contents, or there is a risk of spillage and unnecessary wastage.
Pros
- Fast-drying solution
- Does not leave white streaks
- Adds gloss and shine
- Long-lasting formula
Cons
- Pouring out the contents can be tricky
Type: Penetrating | Coverage: Up to 1,000 sq. ft. | Suitable Surfaces: Granite, Marble, Slate, Limestone, Travertine | Application Method: Spray, Sponge, Roller | VOC Content: Low | Non-Toxic: Yes
3. Rock Doctor 35106 Granite Sealer - Best for Easy Application
Our next recommendation features an excellent granite sealer that comes in an easy-to-use aerosol form. Because of its ease of use and convenience, this product has become one of the most popular choices among users. Moreover, it is fast-working and very effective, so you don't need to wait too long before using the surface again.

Rock Doctor Granite Sealer for Marble, Stone, and Tile...
- LONG LASTING SEALER & PROTECTOR: Rock Doctor Granite & Stone...
- WATER BASED: Provides protection from spills, water rings...
Why Did We Like It?
Do you like your granite countertops to look clean and shiny all year round? Of course, doing this regularly requires time, effort, and investment. What if we told you there was a product that was easy to use, would clean and add shine to granite, and lasts for almost a year?
It may sound too good to be true. However, we extensively tested the Rock Doctor Granite Sealer on various granite surfaces before reaching our conclusion. In our opinion, this is one of the best granite sealers on the market.
Its ease of use makes it an ideal product for most. Furthermore, it comes in a handy spray bottle that covers an area of 100 square feet. All you need to do is spray it on your granite surface, let it sit for a few minutes, and wipe it off.
The best part is, it not only cleans and protects but also adds a natural shine to the stone surface.
What Could've Been Better?
All said and done; this product is relatively short-lived. You will need to reapply the sealer at least once every six months or once a year. Although this isn't a deal-breaker, you need to keep it in mind when considering this product.
Pros
- Adds shine and gloss
- Safe to use on kitchen countertops
- Easy to use spray form
- Provides a natural barrier
Cons
- A short-lived formula that needs to be reapplied frequently
Type: 2-in-1 | Coverage: Up to 100 sq. ft. | Suitable Surfaces: Granite, Marble, Quartz, Travertine | Application Method: Spray | VOC Content: Low | Non-Toxic: Yes
4. Black Diamond Stoneworks GP QT 2-in-1 Cleaner & Sealer
Whatever your needs are, the Black Diamond Stoneworks 2-in-1 Cleaner & Sealer can be an ideal option. Whether you are looking for a small product to cover smaller areas of granite or a large 4-gallon one, this brand offers multiple options for all your requirements.

Black Diamond Stoneworks GRANITE PLUS! 2 in 1 Cleaner &...
- 2-in-1 cleaner and sealer – Daily use formula cleans and...
- Streak-free shine – pH-neutral solution delivers a...
Why Did We Like It?
If you are looking for a straightforward solution for all your granite-related problems, look no further. The Black Diamond Stoneworks 2-in-1 Cleaner & Sealer is the answer. This product is available in multiple sizes; from a small 1-pint bottle to larger 4-gallon options.
In terms of usage, it is super easy and convenient, thanks to its spray bottle formula. It enables you to spray the fast-working formula directly on the granite surface, where it starts to work within minutes.
Moreover, this formula works efficiently to clean and seal any granite surface. You can use it daily to clean and maintain the surface or reapply the sealer once every few months when required.
We recommend opting for the 1-quart bottle size as it is the most convenient one to use. One bottle will cover up to 300 square feet, so you don't need to worry about running out of formula.
What Could've Been Better?
The only minor drawback we noticed with this product was its relatively long curing time. As such, it took about eight hours to cure completely, which can be annoying for some users. However, you can apply the sealer at night and allow it to cure without disturbing the surface, enabling you to use it the following day.
Pros
- Convenient spray bottle formula
- Environment-safe ingredients
- 2-in-1 solution
- Available in a variety of sizes
Cons
- Long curing time
Type: Penetrating | Coverage: Up to 50 sq. ft. | Suitable Surfaces: Granite, Marble, Quartz | Application Method: Spray | VOC Content: Low | Non-Toxic: Yes
6. Aqua Mix 30882-4 Sealer's Choice Gold
If you have granite flooring at home or are looking to seal large surfaces, consider the Aqua Mix Sealer's Choice Gold. It is available in a large 32-ounce bottle which is ideal for sealing and protecting extensive surfaces. Moreover, it does not add a sheen or gloss to the surface, preventing it from becoming slippery and causing accidents or injuries.
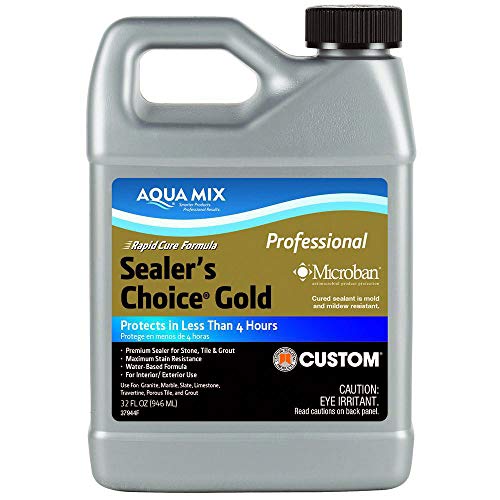
Aqua Mix Sealers Choice Gold - Quart
- Premium Sealer for Stone, Tile and Grout Maximum stain...
Why Did We Like It?
Moving on to our next item, we have the Aqua Mix Sealer's Choice Gold. This granite sealer typically comes in a large bottle which is ideal for sealing and preparing large surface areas. You can use this product for sealing large granite countertops, floors, and other granite surfaces.
Overall, the formula will cover almost 375 square feet and works ideally as a pre-grouting sealer. That said, pouring out the formula can be a messy affair since there is no spraying mechanism included. It is best to gently pour out the formula on a large surface and use a mop or cloth to spread it.
One of the best things about the sealer is that it does not contain any ingredients that will provide a sheen or gloss to the granite surface. This is especially important when you want to pour the mixture on a floor, as slippery floors can be hazardous.
What Could've Been Better?
Unless you plan on using this formula on a smaller surface area, pouring it out should not be much of a problem. Since it does not come with a sprayer, nor does it feature a spout, pouring the formula can be slightly tricky.
Pros
- Long-lasting formula
- Ideal for large surface areas
- Versatile
- Safe to use for kitchen countertops as well as floors
Cons
- Pouring the formula out can be slightly messy
Type: Penetrating | Coverage: Up to 1,000 sq. ft. | Suitable Surfaces: Granite, Marble, Quartzite, Limestone | Application Method: Spray, Sponge, Roller | VOC Content: Low | Non-Toxic: Yes
7. Tuff Duck Granite Sealer
We have almost reached the end of our list; however, we still have a couple of recommendations for you. Moving on, we want to introduce to you the Tuff Duck Granite Sealer. This product is ideal for those looking for a long-term solution for their granite surfaces. Read on to find out more about it.
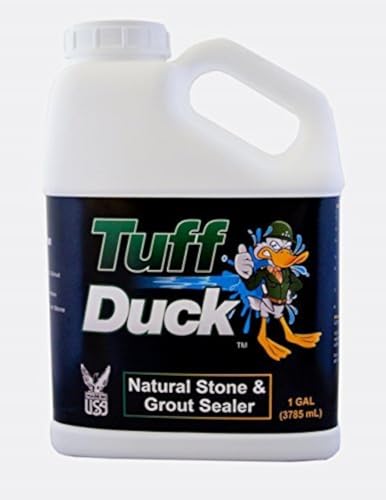
Tuff Duck Granite, Grout and Marble Sealer 1 Gallon Stone...
- Maximum protection for Granite, Grout, Marble, Travertine,...
- Penetrating sealer will not affect the natural appearance of...
Why Did We Like It?
The next granite sealer we have for you is from the brand Tuff Duck. This item, much like the previous one on our list, is ideal for extensive granite surfaces like floors and tiles. That said, you can safely use it in your kitchen and bathrooms as well if required.
This 1-gallon granite sealer formula can cover up to 800 square feet, so you don't need to worry about running out of product while sealing your floors. Moreover, it contains powerful active ingredients that effectively form a tough barrier against most stains, marks, oils, spills, and other contaminants.
What's more, you don't need to wait for more than 2 to 5 minutes before wiping it off the granite surface. Its ease of use and fast working time makes it one of the most popular granite sealers on the market.
What Could've Been Better?
Overall, this item is excellent for most large granite surfaces that need to be sealed. That said, the smell of the product is relatively strong. We recommend having proper ventilation while using it and ensuring that there are no pets or children around, at least till the smell dissipates.
Pros
- Leaves behind a glossy finish
- It does not create streaks
- Easy to apply
- Long-lasting formula
Cons
- The smell can be pretty strong
Type: Penetrating | Coverage: Up to 200 sq. ft. | Suitable Surfaces: Granite, Marble, Travertine | Application Method: Spray | VOC Content: Low | Non-Toxic: Yes
8. Stone Care International 5203 Stone Sealer
Are you looking for a powerful granite sealer that won't stain or leave annoying white steaks? Consider the Stone Care International Stone Sealer. This product is excellent for both professional and residential use. Furthermore, it is a food-safe formula, enabling you to use it on kitchen countertops and eating spaces.
Stone Care International Granite Stone Sealer - 16 Ounce -...
- For use on granite, marble, quartz and all other natural...
- Ammonia and phosphate free and safe on surfaces
Why Did We Like It?
Those in need of a multipurpose product for their granite surfaces will appreciate the Stone Care International Stone Sealer. You can use this formula as per your requirements, making it an extremely versatile and convenient solution for most users.
While the formula offers excellent cleaning and polishing capabilities, it is best used as a sealer. Apply the formula directly on your granite surfaces and allow it to sit for a couple of minutes. Wipe it off gently using a clean, soft cloth. Repeat this once every six months for the best results.
Although this large jug was made to seal extensive granite surfaces, you can use it on smaller surfaces like kitchen countertops as well. Purchase the high-quality trigger that enables you to spray the formula directly on countertops and other surfaces. Apply the same process and wipe it off gently after a few minutes.
What Could've Been Better?
Our only gripe with this item was its heavy fumes and odors. As such, it is best to properly ventilate your rooms when using the sealer. Moreover, ensure that you keep all your doors and windows open, as well as turn on the fans. The odor should dissipate naturally within a few hours.
Pros
- Easy-to-use formula
- It can be used with a trigger
- Safe for food counters
- Long-lasting solution
Cons
- Heavy fumes and odor
Type: Penetrating | Coverage: Up to 200 sq. ft. | Suitable Surfaces: Granite, Marble, Travertine | Application Method: Spray | VOC Content: Low | Non-Toxic: Yes
Best Granite Sealers Comparison Table
| Product | Type | Coverage | Suitable Surfaces | Application Method | VOC Content | Non-Toxic |
|---|---|---|---|---|---|---|
| Granite Gold GG0036 Sealer | Penetrating | Up to 75 sq. ft. | Granite, Marble, Quartz | Spray | Low | Yes |
| Miracle Sealants 511QT6 Impregnator Sealer | Penetrating | Up to 1,000 sq. ft. | Granite, Marble, Slate, Limestone, Travertine | Spray, Sponge, Roller | Low | Yes |
| Rock Doctor 35106 Granite Sealer | Penetrating | Up to 100 sq. ft. | Granite, Marble, Quartz | Spray | Low | Yes |
| Black Diamond Stoneworks GP QT 2-in-1 Cleaner & Sealer | 2-in-1 | Up to 100 sq. ft. | Granite, Marble, Quartz, Travertine | Spray | Low | Yes |
| Aqua Mix 30882-4 Sealer’s Choice Gold | Penetrating | Up to 1,000 sq. ft. | Granite, Marble, Quartzite, Limestone | Spray, Sponge, Roller | Low | Yes |
| Tuff Duck Granite Sealer | Penetrating | Up to 200 sq. ft. | Granite, Marble, Travertine | Spray | Low | Yes |
| Stone Care International 5203 Stone Sealer | Penetrating | Up to 800 sq. ft. | Granite, Marble, Travertine, Limestone, Slate | Spray, Sponge, Roller | Low | Yes |
Buying Guide For The Best Granite Sealer
With that, we have finally reached the end of our comprehensive list of recommendations. Hopefully, you have already found the right product for your needs. However, if you haven't decided yet, no worries.
In this section, we will discuss some of the most important things to consider when purchasing the right granite sealer for your home. So, let us begin!
Sealer Form
Although we have primarily added liquid sealers to our list, you will find several other forms in the market. These vary from aerosol sealers to wax and other polishing compounds.
As such, applying liquid and aerosol sealers is an easier option. Wax and polishing compounds typically require some elbow grease, so we do not recommend this if you have back or shoulder problems.
Moreover, liquid sealers penetrate the natural stone surfaces much more efficiently, making them a better option for most users. You can also consider aerosol cans if convenience and fast coverage are of importance.
Longevity
You may have realized that different granite sealers come with varying longevity options. While some sealers guarantee to last for at least a year or more, others may require reapplication more often.
There is no right or wrong answer to how often you should seal granite surfaces. Surfaces that are used frequently may require more frequent application of sealers than others. However, keep in mind that sealing a granite surface requires a bit of effort, which you should be prepared for.
It is vital to remove all items from the granite surface before you begin. Furthermore, you should only seal the surface after having thoroughly cleaned it. In this case, it may be easier to opt for a 2-in-1 granite cleaner and sealer if you want to make the job slightly more manageable.
Curing Time
Any granite sealer requires a certain amount of time to cure before you can use the surface again. While most products require a couple of hours, you may come across certain sealers that need to be left undisturbed overnight or even for 24 hours.
If you aren't in a hurry to use the surface, you may consider opting for heavy-duty granite sealers, which require more time to cure. However, if you need to use the granite surface and cannot afford to leave it undisturbed overnight, it is best to opt for formulas that cure within a couple of hours.
Glossy Vs. Matte
Several granite sealers in the market promise to add shine and gloss to the surface after curing. Theoretically, glossy granite is much more aesthetically pleasing and appealing than matte surfaces.
That said, it is not always the safest option for all surfaces. For example, opting for glossy granite floors may not be safe, especially if you have children, pets, or elderly people using the floors. The slippery surface may cause accidents and injuries which could have easily been avoided.
Depending on your needs and tastes, it is imperative to check the finish of a granite sealer before purchasing it. Sealers that add sheen can be ideal for kitchen countertops and other smaller surfaces, but not for bathrooms, tiles, and floors.
Granite is a porous material that can easily absorb liquids and stains. Using a granite sealer helps to create a protective barrier on the surface, making it resistant to stains and easier to clean. The frequency of applying a granite sealer depends on various factors such as the quality of the sealer used, the level of usage, and the porosity of the granite. Generally, it is recommended to reapply the sealer every 1 to 3 years for optimal protection. The application process may vary depending on the specific sealer, so it’s important to follow the manufacturer’s instructions. In general, you’ll need to clean the granite surface, apply the sealer evenly with a brush or cloth, let it penetrate for the recommended time, and then wipe off any excess sealer. It is recommended to use a sealer specifically formulated for granite or natural stone surfaces. These sealers are designed to penetrate the pores of the granite and provide effective protection without damaging the stone. Some granite sealers may enhance the natural shine of the stone, while others provide a more matte or natural finish. It’s important to choose a sealer that matches your desired aesthetic preference. While a granite sealer provides a protective barrier, it may not be able to prevent all types of stains. It is still important to clean up spills promptly and avoid using harsh or acidic cleaners on the surface to maintain its longevity. Some granite sealers can also be used on other types of natural stone surfaces such as marble, travertine, and limestone. However, it’s essential to check the sealer’s instructions and suitability for the specific stone before application.Granite Sealers FAQ's
Why should I use a granite sealer?How often should I apply a granite sealer?How do I apply a granite sealer?Can I use any sealer on my granite countertops?Will a granite sealer make my countertop shine?Can a granite sealer prevent all stains?Can I use a granite sealer on other types of natural stone?

Conclusion
Finding the right granite sealer does not have to be an overwhelming task.
We hope our guide helped you understand the various types of granite sealers in the market. Moreover, we sincerely hope that you found the right one for your requirements.
Before we sign off, we want to take a moment to talk about some of our favorite products. Overall, we like the Granite Gold GG0036 Sealer as it contains biodegradable ingredients and is safe to use for most homes.
However, those looking for a powerful, professional sealer can consider the Miracle Sealants 511QT6 Impregnator Sealer and the Black Diamond Stoneworks GP QT 2-in-1 Cleaner & Sealer.
Leave a comment below and let us know if you agree with our verdict. Until next time, stay safe!
Related Articles
11 Best Shower Body Sprays Today Reviewed
5 Best Shower Systems With Body Jets
Top 10 Best High Pressure Shower Heads
Imagine walking into your garage early in the morning to find the space all dirty and flooded due to a late-night storm.

Of course, you’d never want this to be a reality, so if you feel the garage isn’t as well-protected as before, it’s time to change the existing door threshold seal. Chances are that it has turned weaker and is unable to shield the space from harsh weather elements effectively.
But know that there are other vital variables to consider, like the inner strength and longevity of the material you’re using and how well the seal is insulating the garage. You’ll naturally have to be well-informed about all of them before zeroing in on a good-quality seal.
Thankfully, you don’t have to worry about all that, as you just need to go through the following reviews. So, let’s get on with it!
Listed below are the 5 best garage seals from our list:
- Papillon Universal Garage Door Seal: Notable for its energy-saving capability, this customizable garage door seal features durable EPDM rubber material, easy installation, and a visible safety strip, although it may require special adhesive for painted or epoxy floors.
- DGSL Garage Door Seal: Praised for its capability to accommodate uneven floors, this garage door seal includes a U-shaped design and 7-fold insulation, providing pest resistance and noise reduction, but it might take longer to install.
- Bowsen Garage Door Weather Seal: Best for extreme climates, this seal boasts of materials that can withstand temperatures from -40° to 240°F, providing efficient insulation and waterproofing, yet there's a chance that the wrong size might be delivered.
- Jin&Bao Universal Garage Door Threshold: Known for its solid design and extended length, this door seal ensures excellent adhesion and it's resistant to extreme temperatures while enhancing safety with its high-visibility yellow strip, although it might be challenging to cut and install.
- M-D Building Products Garage Door Seal: Made of high-quality vinyl, this garage door seal acts as a shock absorber and insulator against cold air and prevents pest entry, although it may sometimes arrive damaged.
Here is the list of the 9 best garage seals that you can use to help protect your garage from the elements and keep it secure.
1. Papillon Universal Garage Door Seal - Best for Energy Saving
We start off with this customizable option from Papillon that has fetched high ratings from homeowners across the country. Offering superior durability and easy installation, this door seal is also an efficient energy-saver for any space with an attached garage. Let’s move on and learn more about all its features.
First off, the door seal uses flexible EPDM rubber that’s durable enough to withstand harsh weather conditions and drive-overs like a pro. This ensures your garage remains protected from moisture, leaves, snow, and wind-blown rainwater throughout the year. Also, you can rule out chances of the seal coming loose or shifting despite frequent drive-overs.
It won’t even dry out, crack, shift, or break once you’ve put it up correctly. Installation is a breeze since you can customize the seal effortlessly with a utility knife. Moreover, the product measures a bit longer to ensure all users have the ideal length per their door frame size.
Plus, a bright safety strip across its length ensures the seal is clearly visible in dim light. That’s how you can easily spot the door frame in such situations. Also, do note that you can choose between three length variants of this seal, viz. 10, 16, and 20 feet based on the size of the door threshold.
In case you have a painted or epoxy garage floor, the adhesives generally used for garage door seals might not work for this one. It’s better to buy a special adhesive beforehand if you decide to go for this option. Apart from that, we feel the product does its job quite well.
What We Like
- Weather-resistant
- Guides night drivers
- Won’t lose or shift easily
- Easy to install
What We Don't Like
- Requires special adhesive for painted or epoxy floors
Length: 10' | Width: 3.5" | Height: 0.5" | Material: EPDM Rubber | Color: Black, Yellow
2. DGSL Garage Door Seal - Best for Uneven Floors
Next up is another dependable option from the leading brand DGSL that has a reinforced design and is adjustable for different garage doors. No matter whether it’s an uneven floor or a pest infestation issue, the seal will tackle it all efficiently. You also get the product in four different lengths and two color variants.
The best part about this door seal is its effective design — it's U-shaped and comes with an O-ring or rubber tubing of a ½-inch radius. This makes the seal much tighter and ensures it closes efficiently on uneven flooring, giving it an edge over standard products.
Another feature that impressed us was the 7-fold insulation on the seal. This keeps the garage warm during winter, reduces noise up to 5 times, and locks wind-blown dust efficiently. So, you can be comfortable and focused while handling any car cleanup or maintenance work.
The rubber material used also offers the right balance of strength and flexibility. It will fit the T-end tracks of most garage doors perfectly and can withstand rough weather and drive-overs for years at a stretch.
Do note that the installation will take much longer when you’re fixing it on your own. So, it’s better to call another person to help with either the sizing or the setup. That’s why we’d suggest going for our previous pick if ease of installation is a primary lookout for you.
What We Like
- Dust-proof performance
- Efficient insulation
- Pest-resistant
- Reduces noise
What We Don't Like
- Takes longer to install
Length: 10' | Width: 3.75" | Height: N/A | Material: Rubber | Color: Black
3. Bowsen Garage Door Weather Seal - Best for Extreme Climates
Get year-round weather protection with this high-quality synthetic rubber seal from Bowsen that has also garnered rave reviews. Coming with a two-year warranty, the seal has a high-performance design and can efficiently withstand prolonged use. Also, you won’t need to rack your brain with the installation.
For starters, this door seal uses high-quality EPDM rubber that can withstand temperatures between -40° to 240°F. Rest assured, it won’t crack or shift even in regions with extreme climates, so you can double up your garage as a comfortable workstation. The material is also highly waterproof, and you can rule out the chances of water damage.
Another feature worth noting is its high flexibility, which lets you trim it effortlessly as per the dimensions of your door frame.
On that note, let’s tell you that the setup will take roughly 15 minutes, even if you’re doing it alone. Just lubricate the door track with soapy water, attach the seal firmly to it, and you’re good to go.
Moreover, the high-performance U-shaped design adds to its strength and makes it compatible with most door tracks. It also offers efficient insulation, retaining the warmth from garage heaters and saving energy costs.
If you decide to go for this one, ensure you’ve received the size ordered. Quite a few customers reported that they got the wrong size and had to wait for a couple of days for the replacement. But rest assured that this seal will perform in line with your expectations.
What We Like
- Water-resistant
- Crack-proof
- Universal compatibility
- Efficient insulation
What We Don't Like
- The wrong size might be delivered
Length: 10' | Width: N/A | Height: N/A | Material: EPDM Rubber | Color: Black
4. Jin&Bao Universal Garage Door Threshold
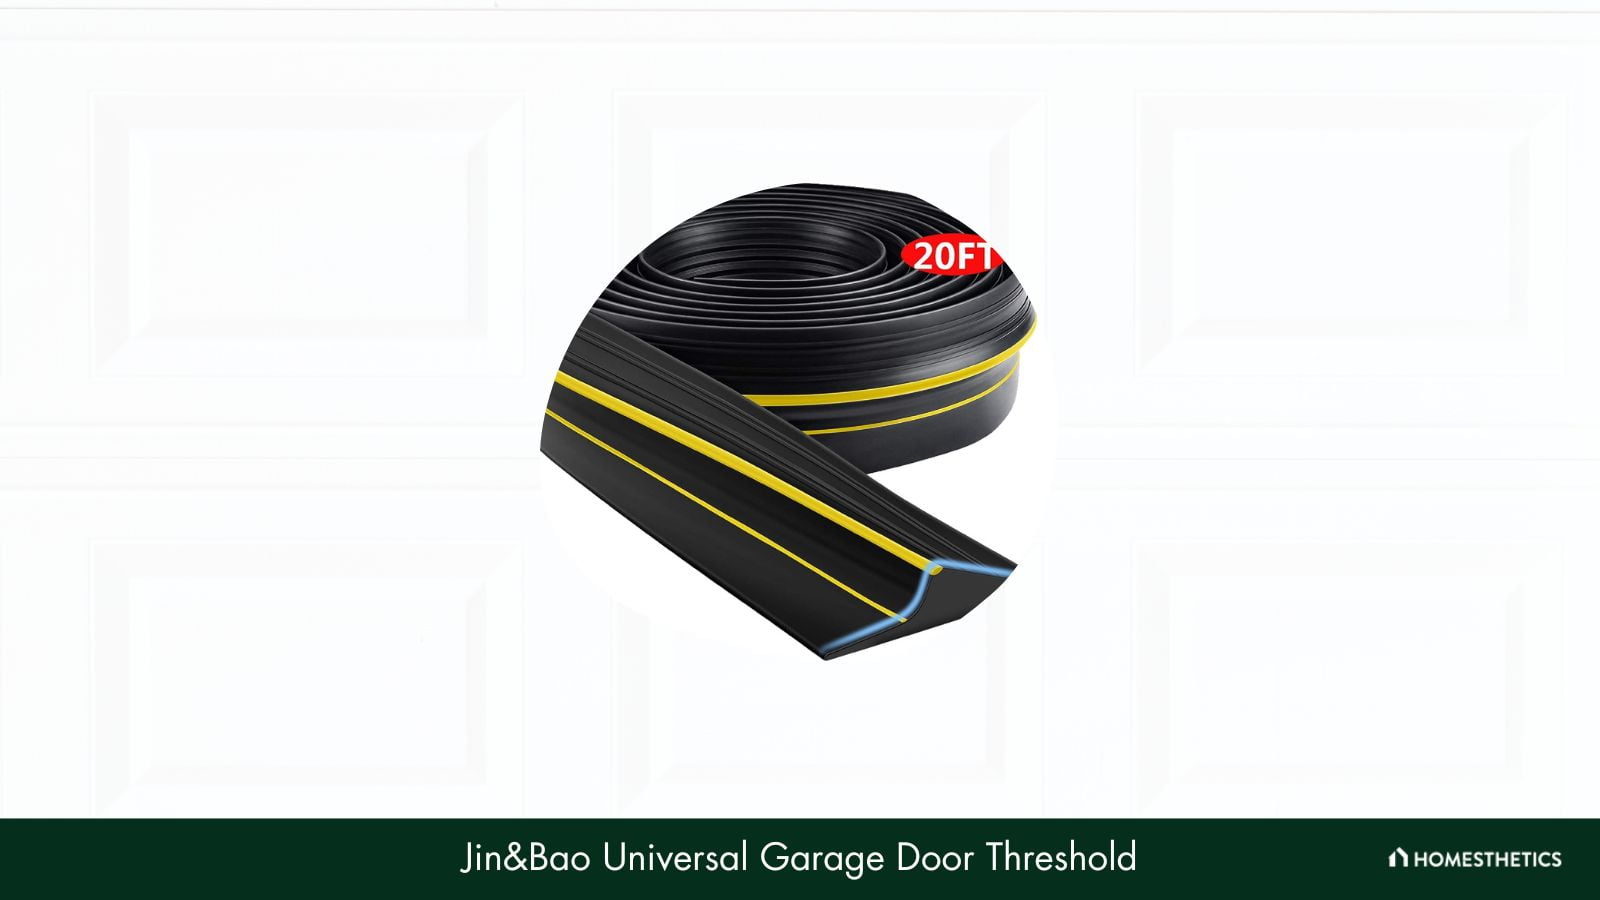
Closely following our previous choices is this solid door seal from Jin&Bao designed to offer all-around protection to any garage space. What makes it stand out is its innovative design and extended length of 20 feet. Also, you get a 6-month warranty for the seal along with prompt 24x7 customer service.
Once this door seal is in place, we can vouch that it won’t slip or loosen with time, unlike other products on the market. What does the trick is a combination of anti-slip ridges and a serrated base that creates the ideal surface for excellent adhesion.
Apart from this, we found the material durable enough to withstand exposure to extreme temperatures. It stays in perfect shape between -40 to 284°F, helping you steer clear of cracks, shifts, or breakages.
Also, the seal can keep away dust, moisture, rain, and snow so that your garage stays tidier than when using ordinary products. This seal even has a yellow safety strip like one of our previous picks, which ensures clear visibility in any lighting condition.
Last but not least, the length of 20 feet makes it suitable for doors of all sizes.
The installation might seem a tricky affair for this option, as it doesn’t come with a user manual and is somewhat difficult to cut, according to some customers. So, we’d suggest using a miter saw for this purpose and making the correct measurements in one go.
What We Like
- Perfect adhesion
- Moisture-proof
- Temperature-resistant
- Good visibility
What We Don't Like
- Difficult to cut
Length: 20' | Width: 3.7" | Height: 0.6" | Material: Rubber | Color: Black, Yellow
5. M-D Building Products Garage Door Seal
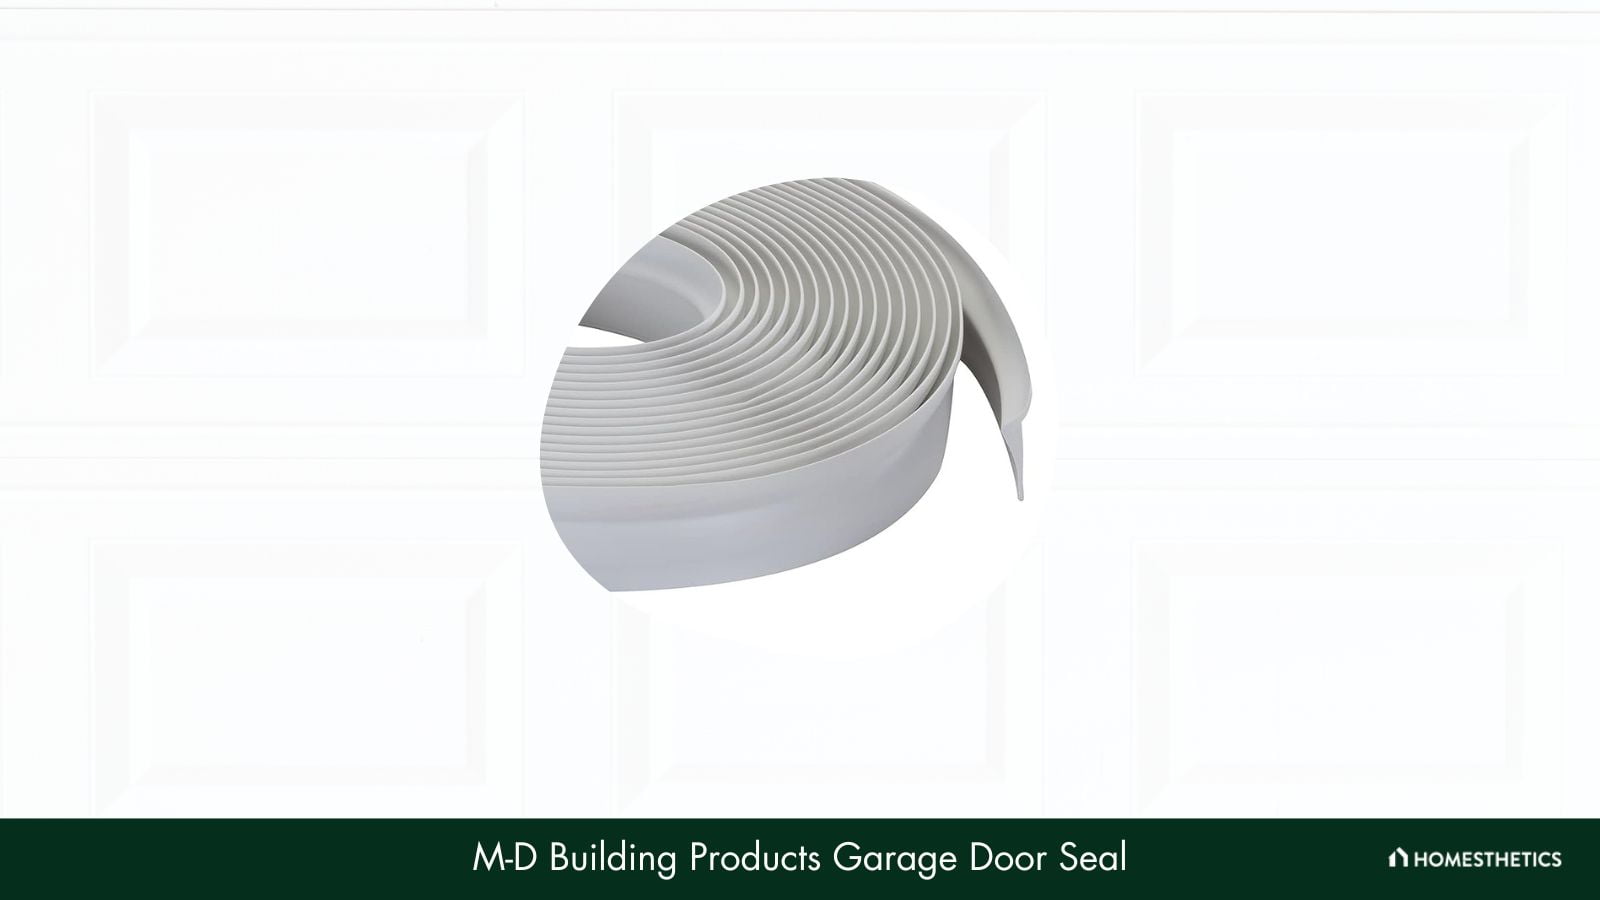
Here’s a vinyl product that we also found worth investing in, as it comes in a simple but effective design to provide optimal protection throughout. The seal can even keep your garage well-insulated and measures much longer than standard options, which makes it suitable for a wider range of doors.
Made out of high-quality vinyl, this seal acts as a shock-absorbing cushion once you set it up properly. This helps retain its internal strength amid harsh weather conditions and ensures it suffers minimal wear from drive-overs. Plus, the insulation is on point, with the seal preventing the cold air from blowing in through the side and top.
Even installing the seal is pretty easy — you won’t need an adhesive, but the pressure from the door will help attach it to the trim. Just fasten it after the installation using the screws provided in the package to ensure it stays in place. Trust us, it isn’t complicated and will just take a few more minutes.
The seal also offers commendable durability, as its strong vinyl surface keeps rain, moisture, and dust particles at bay. And rest assured, you won’t have pests sneaking in now and then.
A few customers revealed that this seal arrived in a damaged condition, probably because the packaging wasn’t strong enough. So, check the product thoroughly before installing it and report such an issue to the brand at the earliest.
What We Like
- Efficient shock-absorbing power
- Simple installation
- Weather-resistant
- Effective insulation
What We Don't Like
- May arrive damaged sometimes
Length: 30' | Width: 1.5" | Height: N/A | Material: Vinyl | Color: White
6. Eapele Garage Door Threshold
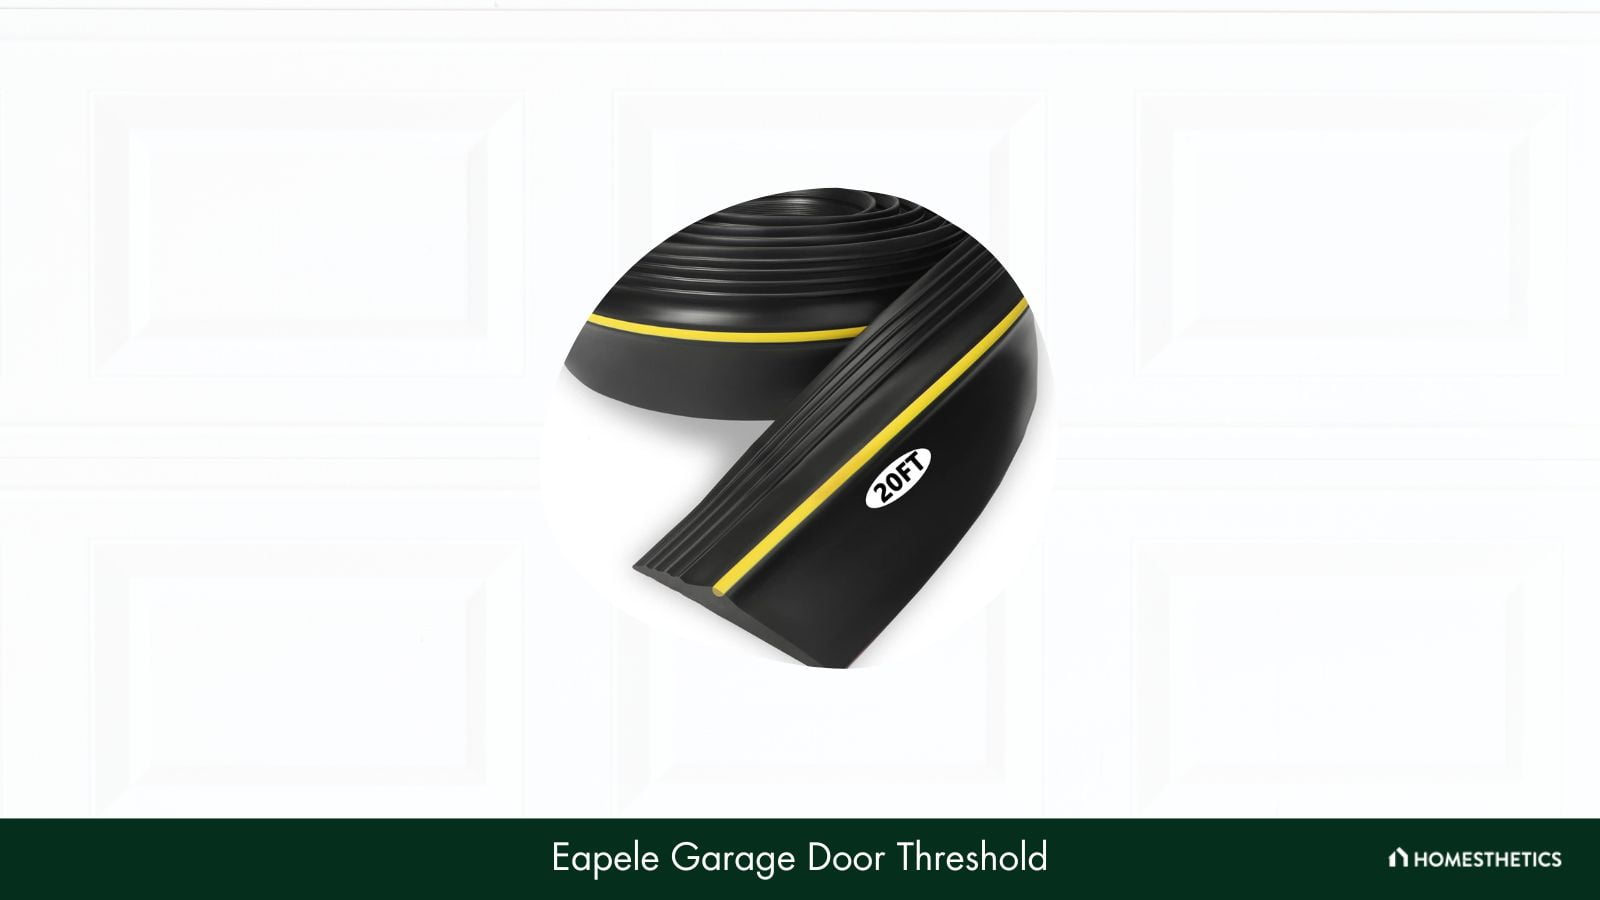
If good temperature resistance is what you're looking for, this garage door bottom seal will be an excellent option. It also offers the desired ease of use and attaches efficiently for long-term protection. Plus, the brand offers prompt and efficient customer support to address any quality issues.
An interesting feature of the door seal is its soft yet strong rubber material. This makes it least likely to shift or crack despite prolonged use and is easy to size at the same time. A sharp utility knife is all you will need to get the job done.
Plus, as we already mentioned, the seal offers robust resistance to harsh climates, staying intact between temperatures of -40°F and 284°F. Its resistance to dirt and debris, moisture, and rain is also at par with the other options on our list, as it makes for a solid weather-proof barrier on the threshold.
Furthermore, the seal is available in 10-foot and 20-foot variants to suit garage doors of different sizes. Not to forget the yellow stripe along its length that shines bright in minimal lighting and in the dark too.
The 20-foot variant of this door seal might sometimes come with ripples toward the edges, rendering that part unusable. But other than this, the superior temperature resistance and moisture-locking capability make it one of the most durable door threshold seals on the market.
What We Like
- High-temperature resistance
- Effective moisture resistance
- Clear visibility
- Crack-proof
What We Don't Like
- value1
- value2
Length: 20' | Width: 3.5" | Height: 0.5" | Material: Rubber | Color: Black, Yellow
7. West Bay Universal Garage Door Threshold
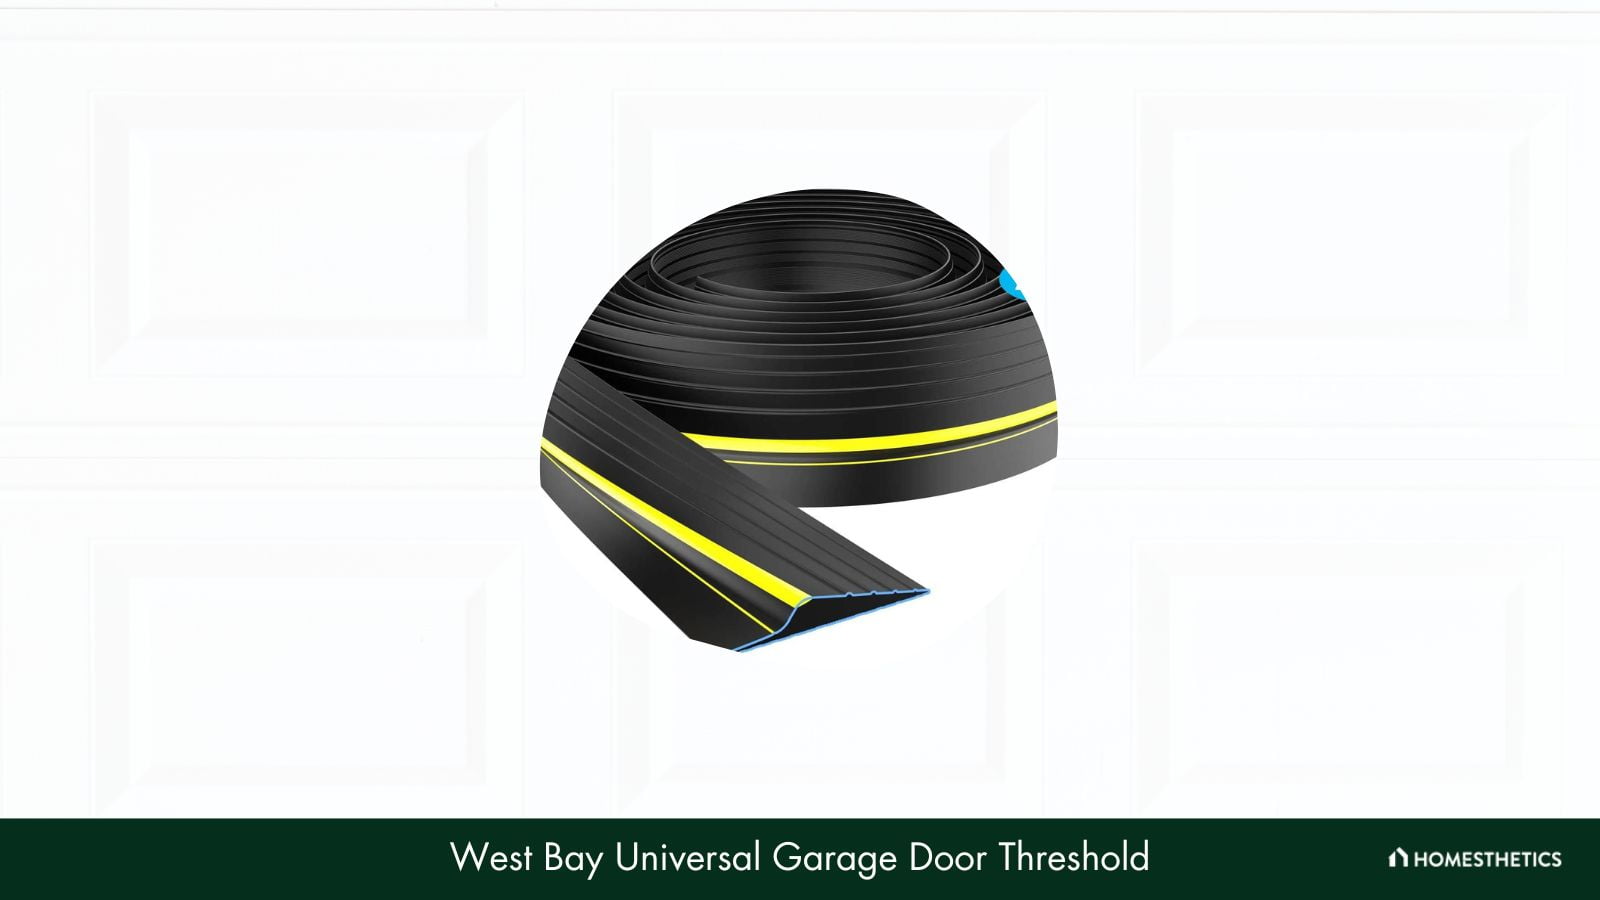
Next on our list is this universally compatible door seal that facilitates high energy efficiency and is tough enough to withstand years of extensive use. It also offers commendable noise reduction and adequate visibility in dim light. All in all, rest assured that your garage will be safe and protected while this seal is in place.
Firstly, this door seal surpasses most other options in terms of its maximum thickness of 1.5 cm, ensuring a tighter fit with any door. Do note that most seals come with an average thickness of 0.7 cm, which can affect their long-term durability if the material isn’t of high quality.
This feature also makes the product strong enough to withstand a load of heavy vehicles driving over it. Furthermore, this seal can help reduce energy expenses considerably, thanks to its efficient insulating ability. Just make sure you place it properly on the door threshold.
Speaking of the installation, it’s quite convenient as the seal is easy to cut and comes in two-length variants to suit different needs.
It also offers a crack-proof performance and is unlikely to move out of place if you use a good-quality sealant. Plus, it’s equally resistant to slipping when you’re driving on rainy days.
In regions experiencing very low temperatures around the year, this seal isn’t the ideal option as it might become less flexible in such chilly weather. This can, in turn, lead to hardening and breakage of the surface if the seal suddenly bends at right angles.
What We Like
- Tight-fitting
- Effective insulation
- Easy to cut
- Long-lasting
What We Don't Like
- Less resistant to low temperatures
Length: 20' | Width: 3.7" | Height: 0.6" | Material: EPDM Rubber | Color: Black, Yellow
8. ToLanbbt Store Universal Garage Door Seal
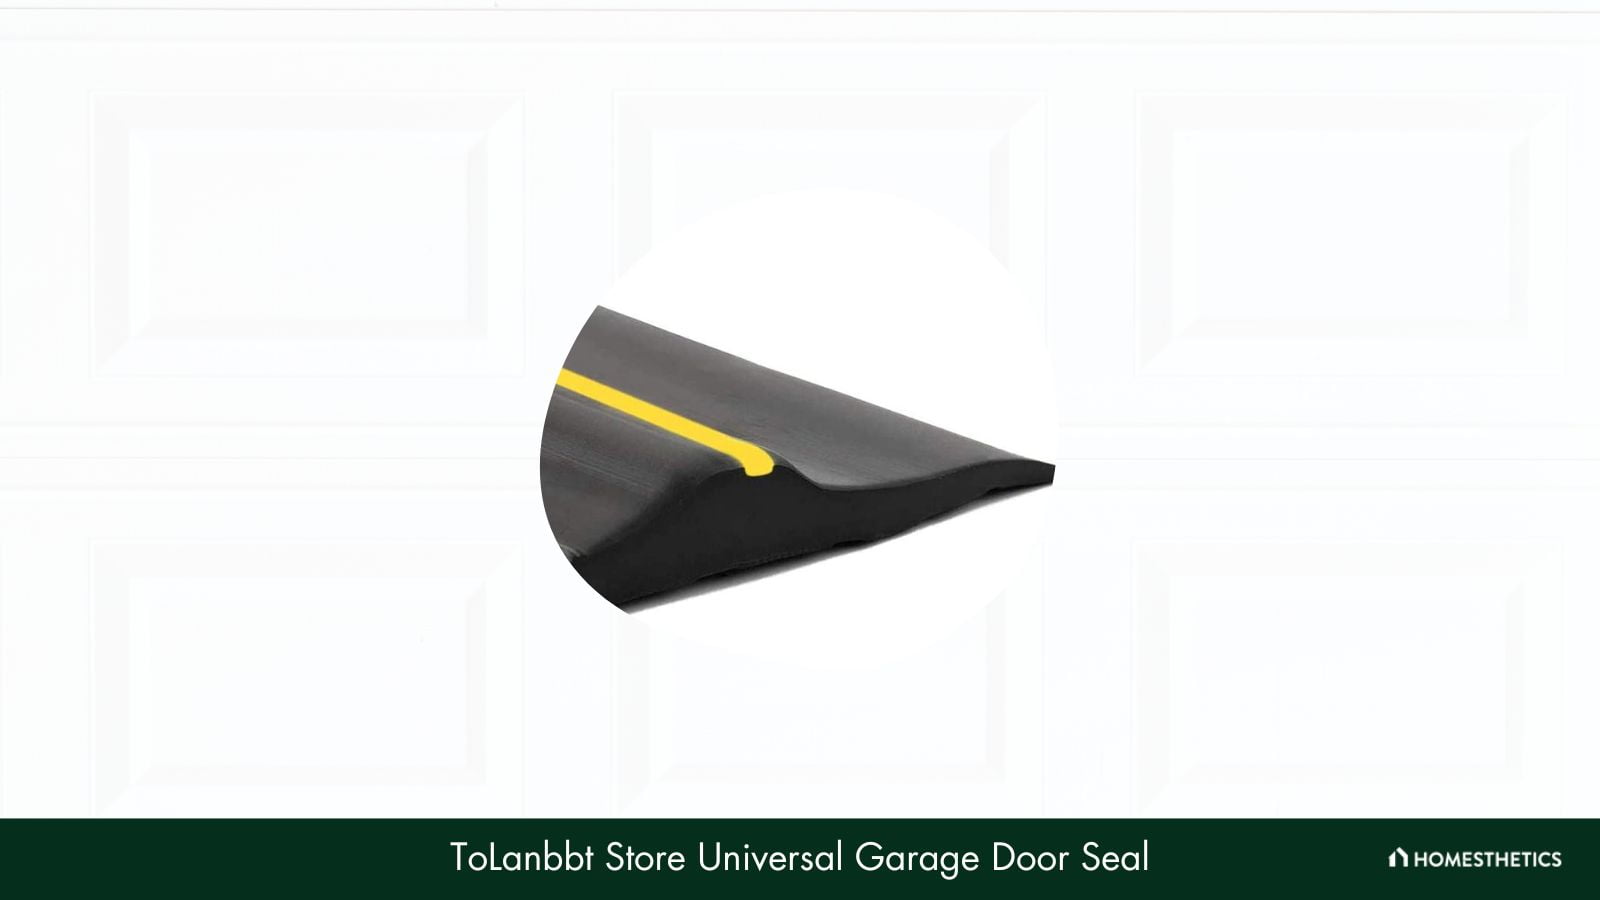
Especially suitable for tackling rainwater and moisture, this seal features a unique design to create a strong bond with the door threshold. It also offers standard all-around durability for long-lasting performance. Additionally, the seal is available in three variants of different lengths, viz. 16.5 feet, 20 feet, and 10 feet.
We were glad to find that the standard-grade EPDM rubber material offered a water-resistant performance at par with high-quality products. Moreover, this barrier can keep out debris, dirt, and leaves effectively, ensuring the garage stays in good shape during the season.
Another feature to watch out for is the grooved base that helps the seal fit tightly to the garage floor. In fact, this makes the product suitable for a range of floors, including asphalt, concrete, and specially treated surfaces.
The anti-slip ridges are an added advantage, as they keep the seal from slipping during rainfall.
Furthermore, you get standard temperature resistance with this seal, which ensures it doesn’t crack, dry out, or shift in extreme climates. It’s also worth noting that all the variants of this seal are easy to cut and install on any garage door.
The yellow safety strip on this seal is not as bright as some other options on our list, so it’s best to get an extra strip to ensure proper visibility. Apart from that, we feel this strip performs fairly well in protecting a garage.
What We Like
- High water-resistance
- Dust-proof
- Tight-fitting
- Temperature-resistant
What We Don't Like
- The safety strip isn't bright enough
Length: 10' | Width: 3.5" | Height: 0.5" | Material: EPDM Rubber, Thermo Plastic | Color: Black, Yellow
9. CloudBuyer Garage Door Weather Stripping
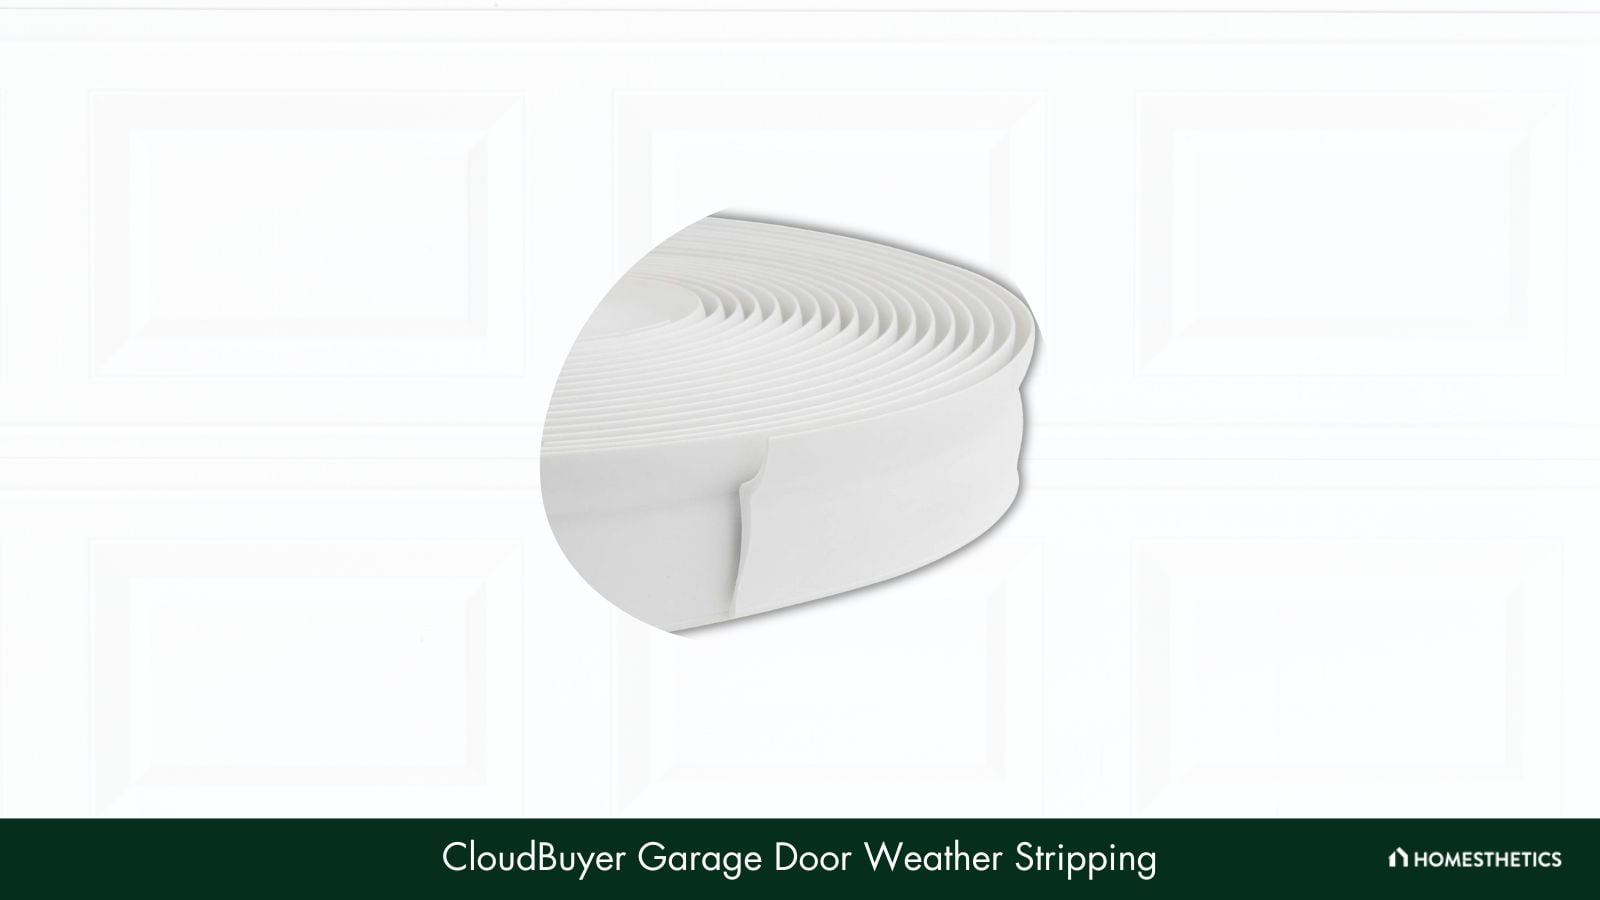
Next, we’d like to talk about this vinyl weather seal from CloudBuyer that has a slew of high-quality features to offer consistent protection. It’s designed for use on the top and side of doors and comes with a valuable 3-year manufacturer warranty. Also, you get two color variants of this seal.
The highlight of this door seal is its superior-quality vinyl or PVC material, which provides effective weather resistance throughout. Adding to its durability is the simple yet tough design that provides a tight fitting to prevent rain, dust, and leaves from blowing in during storms or due to heavy rainfall.
Interestingly, the vinyl used for the seal consists of UV inhibitors which ensure the surface remains flexible and soft and doesn’t deteriorate due to sun exposure. Rest assured that the flexibility won’t reduce even during extreme temperatures.
Its insulating ability is also at par with other high-performing threshold seals, ensuring your garage stays comfortable throughout the year. At 32.8 feet, this seal is longer than many other options on the market and is suitable for different door sizes.
The only negative is that the white variant of this seal might turn slightly brownish or yellowish with prolonged use. However, do note that this is merely an external change and doesn’t affect the quality of the seal in any way.
What We Like
- Efficient sun protection
- Effective insulation
- Consistent flexibility
- High-temperature resistance
What We Don't Like
- Color might change slightly with time
Length: 32.8' | Width: 1.65" | Height: 0.3" | Material: PVC | Color: White
What is the Best Garage Door Seal?
This section provides a straightforward comparison of top-rated garage door seals. The table below displays key product specifications, including length, width, height, material, and color.
| Product | Length | Width | Height | Material | Color |
|---|---|---|---|---|---|
| Papillon Garage Door Seal | 10' | 3.5" | 0.5" | EPDM Rubber | Black, Yellow |
| DGSL Garage Door Seal | 10' | 3.75" | N/A | Rubber | Black |
| Bowsen Garage Door Seal | 10' | N/A | N/A | EPDM Rubber | Black |
| Jin&Bao Garage Door Seal | 20' | 3.7" | 0.6" | Rubber | Black, Yellow |
| M-D Building Products Garage Door Seal | 30' | 1.5" | N/A | Vinyl | White |
| Eapele Garage Door Seal | 20' | 3.5" | 0.5" | Rubber | Black, Yellow |
| West Bay Garage Door Seal | 20' | 3.7" | 0.6" | EPDM Rubber | Black, Yellow |
| ToLanbbt Store Garage Door Seal | 10' | 3.5" | 0.5" | EPDM Rubber, Thermo Plastic | Black, Yellow |
| CloudBuyer Garage Door Seal | 32.8' | 1.65" | 0.3" | PVC | White |
Buying Guide for the Best Garage Door Seal
Glancing through some good-quality options for door seals can apparently seem enough for making a suitable choice. But it isn’t that easy — for instance, something that works for your neighbor’s garage might not be so effective for yours.
That’s because the right choice will depend upon your needs when it comes to protecting the garage space. Plus, several factors are at play in determining the performance of a door seal.
Let’s take a closer look at what you’ll need to consider while choosing the right option.
Length
The desired length of the door threshold plays a key role in ensuring ease of installation and a perfect fit. So, use a tape measure to gauge the length of the door opening and make a choice accordingly. It’s best to go for a product that’s slightly longer so that you can customize the size to create a watertight door seal.
Do note that door seals typically measure 10 to 20 feet long, but there are several options available for larger doors too.
Height
Another crucial consideration is the height of the threshold, as the correct height will ensure it covers the entire gap between the floor and the door bottom. So, you’ll need to measure this gap to find the required height.
A point worth noting here is that the measurement should be accurate for the entire length of the gap. So, we’d suggest gauging this gap at a semi-regular interval.
Protection
A door seal serves to protect the garage space, including the vehicles, appliances, tools, and other similar valuables. As such, you should go for an option that will prevent rainwater, melting snow, or stagnant water from running into the space.
That’s not all; it needs to keep away dirt, debris, and leaves while ensuring the garage is insulated from the outdoor temperature.
Soundproofing
Soundproofing is an important aspect to consider when choosing a garage door seal, as it can help to minimize the noise levels from compressors or other equipment inside the garage. A quality door seal with soundproofing capabilities will create a more comfortable and quieter environment, making it an ideal choice for those sensitive to noise or working in the space for extended periods.
Material
Last but not least, the seals should be long-lasting enough to offer consistent protection for at least a couple of years.
Good flexibility is an important quality in this regard, as this will ensure there’s no damage to the garage door while you’re closing it. Moreover, a flexible seal will fit tightly onto the floor to keep pests from sneaking in while effectively blocking the dirt, debris, and rain, and enhancing soundproofing.
Make sure to consider the specifications of the option and go through the customer reviews carefully. This will help you understand whether the product will meet your expectations regarding weather protection and soundproofing.
Once you’ve taken all these factors into account, weigh them according to your needs and then choose a suitable option. For instance, if you live in a region with an extreme climate, temperature resistance, and soundproofing should be your foremost priorities.
How to replace a garage door seal?
Replacing a door seal is pretty simple — just be careful while pulling the old seal from the groove cut in the door opening. Use a good-quality pair of pliers for the job.
After that, you’ll need to follow these simple steps:
- Clean the door opening
- Mark the space where you’re installing the seal
- Apply a good-quality adhesive to the space
- Place the threshold
- Close the door after you’re done, and allow the adhesive to cure for a day before opening it.
Will you need a different installation method for a concrete floor?
The installation method for door seals typically involves the use of an adhesive and does not alter based on the type of garage flooring. As long as the floor is clean and reasonably level, the threshold of the door can be easily installed using adhesive.
How frequently should you replace a garage seal?
The duration for which a door seal lasts is largely dependent on the flexibility and quality of the material used, thus, it might either last a single season or sustain for several years. This is why the reviews included in this article only feature products sturdy enough to last a couple of years. Nonetheless, one should frequently inspect the garage door for potential gaps or rubber cracks to ensure its optimal function.
Maintaining a home is not an easy task, requiring considerable effort and hardwork.

The job doesn’t stop at just building a house; you have to look after it and keep up with the maintenance from time to time. Be it bathrooms or the living area, all of it can be a handful.
Among all this, people often overlook their driveways. Those spaces need the most repair work because of their constant exposure to traffic, both vehicular and on foot.
Constant heat, humidity, and rain damage the concrete over the years, and for revival, it needs sealing. In turn, sealers provide a protective coat over the surface, making it look brand new.
However, choosing the best sealer is challenging but we have got you covered with our list of the nine best products. Let’s get started then, shall we?
Listed below are the Best Driveway Sealers:
- Foundation Armor SX5000: The Foundation Armor SX5000 Perfect for versatile applications, this solvent-based sealer ensures decade-long protection and maintains the natural look of the surface, unlike some other sealers. However, it lacks a glossy finish.
- MasonryDefender Concrete Driveway Sealer: Its ease of application and adding a slight gloss sets it apart. But be aware, that it might darken dense surfaces.
- Liquid Rubber: The Liquid Rubber Waterproof Sealant is known for ultimate durability and flexibility, this UV-stable, water-based sealer is eco-friendly. But note its smaller coverage area and steeper price.
- ToughCrete Concrete Sealer: This one excels in providing industrial-grade protection and a spectacular coverage area. On the flip side, its water resistance is somewhat lower.
- Foundation Armor SX5000 WB: The Foundation Armor SX5000 WB is famed for its easy application and strong, water-based protection formula, it's a top choice for durability. Just like SX5000, it also yields a non-glossy finish.
Here's the list of the 8 best driveway sealers of 2024, ensuring your driveway receives the protection and rejuvenation it deserves.
1. Foundation Armor SX5000 - Best for Versatile Applications
This driveway sealer by Foundation Armor is deemed safe by the Department of Transportation in most states. Meaning, the SX5000 is an ideal choice for a variety of exterior and interior applications. Its five times powerful formula not only seals driveways but also other infrastructures like roadways, sidewalks, and garage floors.
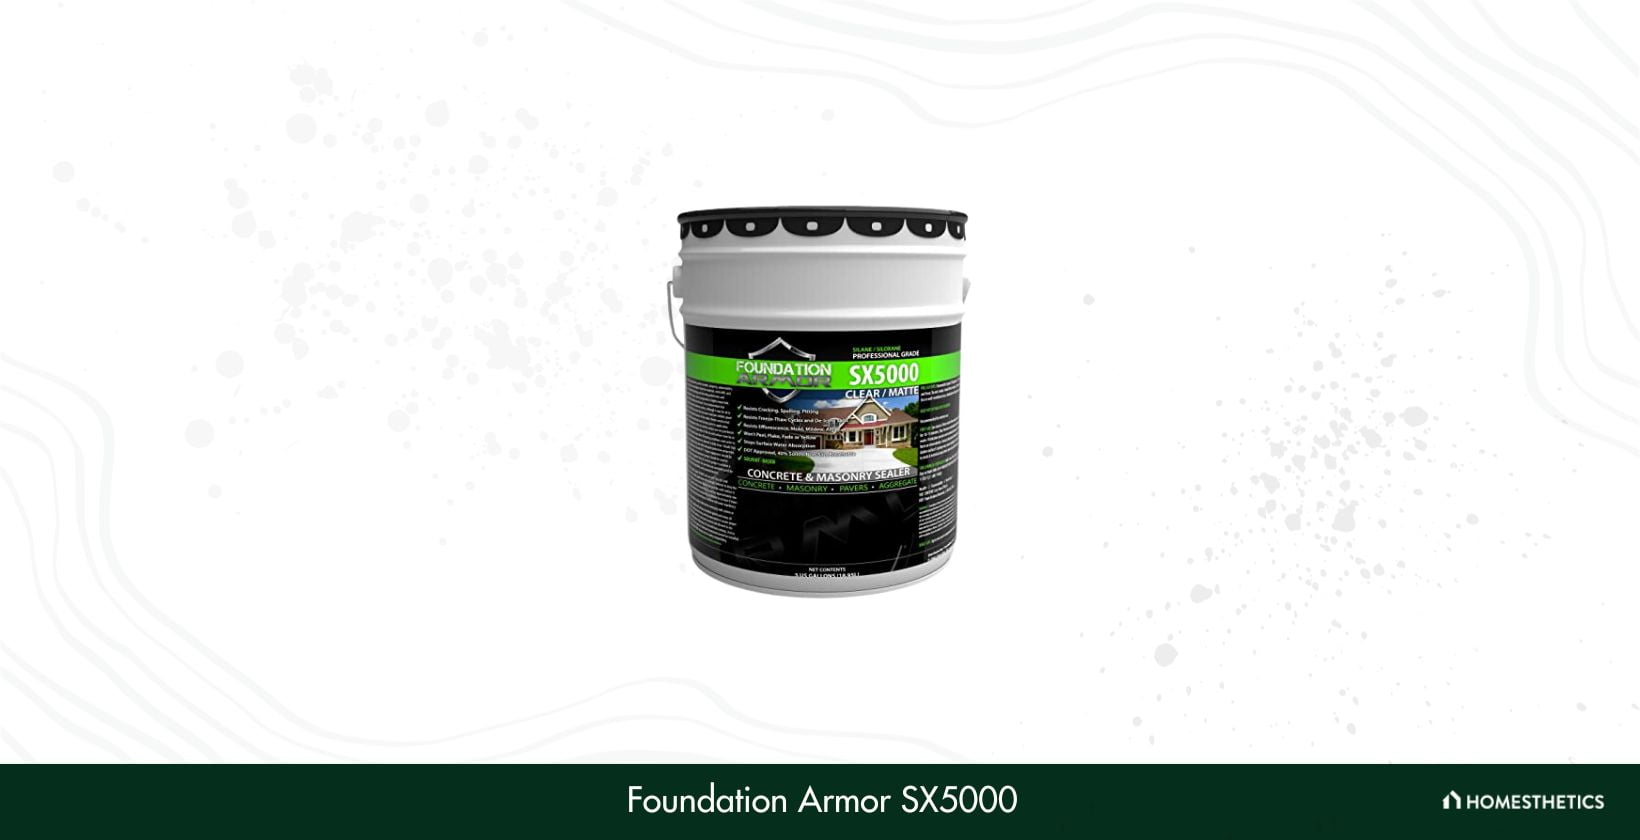
The breathable composition with low volatile organic compounds makes this product stand out from the rest. Plus, its high solid penetrating siloxane or silane components have a solvent base and prove versatile. So, you can use it vertically and horizontally on both exterior and interior surfaces like pavers, concrete, and flagstone.
The sealer neither alters the color and look of the area nor leaves behind any slippery film. It maintains the unsealed natural feel of the surface, which users will appreciate. In fact, you can easily apply it using a pump sprayer to ensure protection for seven to ten decades.
Another interesting fact about the SX5000 is that its deeply penetrating hydrophobic formula works mostly beneath the surface. The five times extra active substances chemically react with the substrate and form a water-repelling barrier inside the pores. This waterproof film reduces the absorption of water by up to ninety-five percent, which consequently eliminates surface deterioration and damage.
This excellent sealer is hand’s down the best product on our list. After thoroughly observing all the features and testing all the parameters, we can conclude that the SX5000 is a perfect driveway sealer. But we’ll mention that it doesn’t give a glossy or wet look to the surface, which some of you might prefer.
What We Like
- Two thick coats can last for a decade
- Highly water-resistant
- Doesn’t affect the appearance of the surface
- No imported resins
What We Don't Like
- Doesn’t have a wet or glossy look
Material: Resin | Dimensions: 15 x 15 x 12 inches | Weight: 38 pounds | Coverage per Gallon: N/A | Type: Solvent-based Sealer | Water Resistant: Yes
2. MasonryDefender Concrete Driveway Sealer - Best for Easy Application
The concrete driveway sealer from MasonryDefender is easy to apply and comes with a three-year warranty. You can maintain the brand new finish of your driveway and protect all the concrete surfaces in your house from cracking or pitting. Also, it works like magic when coupled with an all-purpose masonry and concrete cleaner.
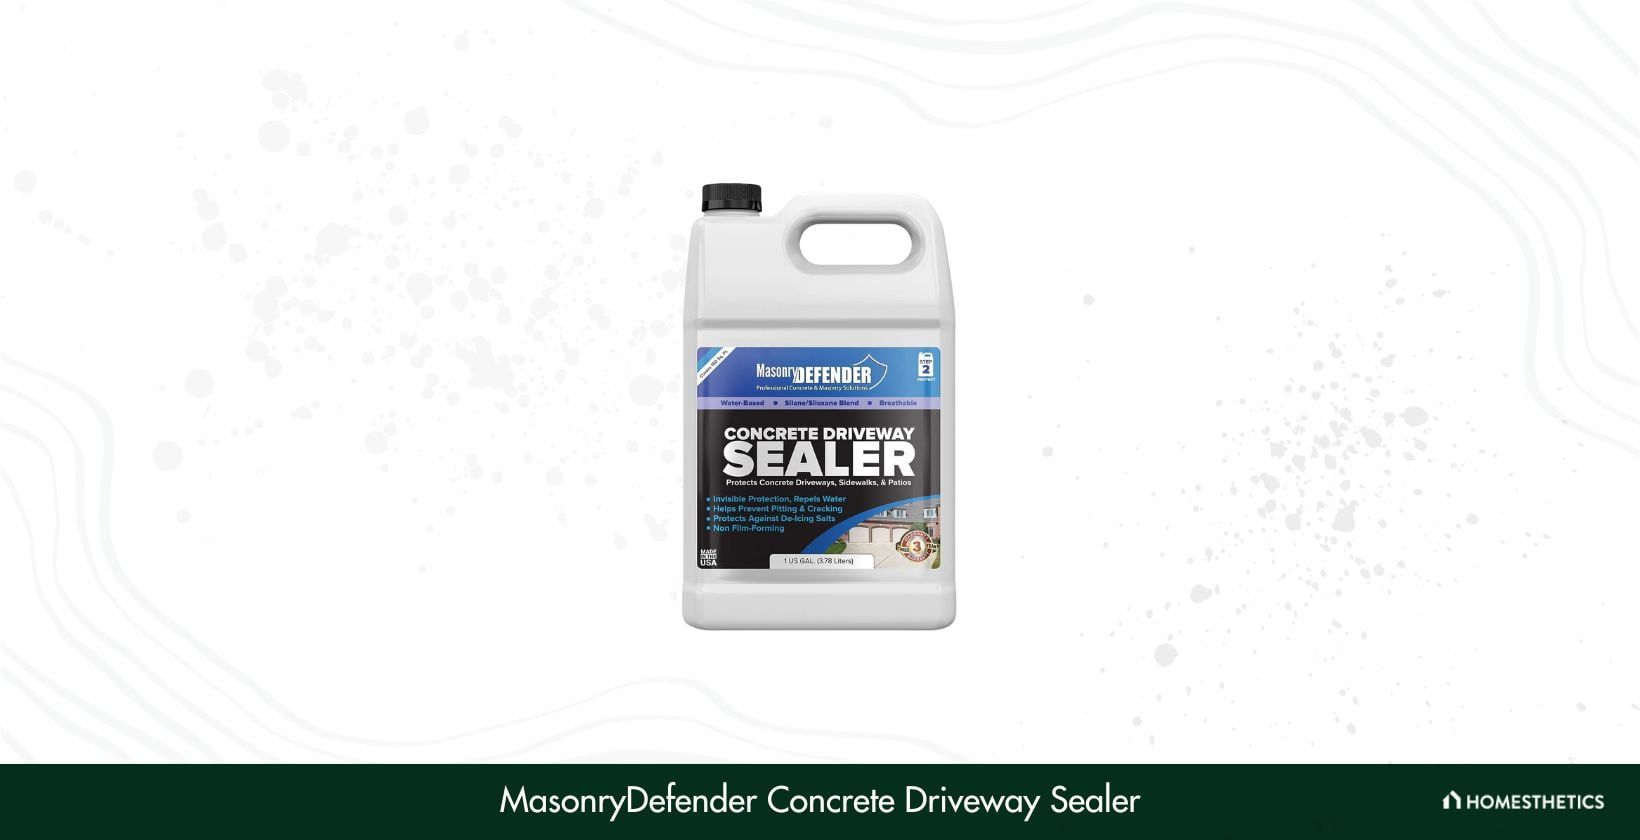
Each unit contains one gallon of the sealer and is available at an affordable price. As a result, it has a coverage area of 90-150 square feet, depending on the porosity of the surface.
But the highlight of this product is its easy and convenient application, so let’s discuss that in detail. First and foremost, you must clean the surface thoroughly and leave it to dry for four to six hours.
Once the area of use has been degreased, you can continue to apply the sealer. Make sure to use a low-pressure sprayer to cover your driveway evenly.
The MasonryDefender sealing agent protects most of the exterior, horizontal and above-grade surfaces. Moreover, it adds a little gloss to the natural texture and color of the substrate.
Now, although the chances are less since it’s a top-quality product, if you’re unsatisfied with it, you can request a return. The product is backed by a warranty of three years to take care of all expenses.
Well, everything is on point with this one, except for one tiny setback. It might cause slight darkening when used on thick or dense surfaces. Hence, we advise testing it on a small area of the surface before treating it.
What We Like
- Long-lasting waterproof barrier
- Easy maintenance
- Short drying and curing period
- Doesn’t change the surface appearance
What We Don't Like
- Darkening effect on dense surfaces
Material: Siloxane | Dimensions: 11.81 x 7.52 x 4.53 inches | Weight: 8.36 pounds | Coverage per Gallon: 90-150 sq. ft | Type: Water-based Sealer | Water Resistant: Yes
3. Liquid Rubber Waterproof Sealant - Best for Flexible & Durable Protection
Well-established in the sealant market, Liquid Rubber was founded nearly two decades ago. With the mission statement of providing budget-friendly and eco-friendly products, the company strives to deliver only the best. It produces waterproof sealers for residential, commercial, and industrial markets. These products are hundred percent safe for your pets, kids, and plants.
The Liquid Rubber Waterproof Sealant becomes exceptionally flexible after curing. Its elasticity increases by a thousand percent, and we are not exaggerating. We even tried poking it with a sharp saw file after curing it, but it didn’t budge. You won’t have to worry about wear and tear at all with this one.
The sealant forms a flexible membrane that is 1.5 to 2 millimeters thick after applying four to five coats and is UV stable. This implies that it doesn’t degrade after prolonged exposure to the sun, making it suitable for use on roofs. You can use it to bridge seams, gaps, joints, vents, and protrusions.
Furthermore, it has a water-based formula, free from VOCs, solvents, or toxic odors. It’s safe for people of all ages and pets and doesn’t inflict any hazard on people with breathing difficulties. Overall, it is a well-rounded sealer and totally worth investing in.
We have no complaints about this sealing agent but cannot help ranting about the high price. It’s slightly more expensive than other products and has less coverage area per gallon. But its higher price tag is justified since it is far more durable than the others, so it is cost-effective in the long run.
What We Like
- Water-based coating
- Highly flexible and durable
- UV protected and eco-friendly
- Doesn’t produce harmful odors
What We Don't Like
- Low coverage area per gallon
Material: Polymer | Dimensions: 12 x 12 x 16 inches | Weight: 8.86 pounds | Coverage per Gallon: 15-30 sq. ft | Type: Water-based Sealer | Water Resistant: Yes
4. ToughCrete Concrete Sealer
The industrial-grade sealers by ToughCrete are now available for residential use too. Just like Foundation Armor, this one is approved by the Department of Transportation. It has a deeply penetrating siloxane composition, which efficiently protects sidewalks, patios, garage floors, driveways, and many other concrete surfaces from weather adversities.
Instead of using watered-down or diluted sealants, try to invest in high-solids microemulsions like those produced by ToughCrete. It’s better to pay a little more once and for all instead of recoating your driveway every few years. With the strength and durability fit for large-scale industrial use, these sealants are now available on the market for homeowners too.
The sealing agent works wonders on cinder blocks, bricks, CMU, chimneys, and outdoor fireplaces. It protects the structures from spalling and deterioration as the siloxane components work both below and above the surface. Additionally, it provides protection against chloride ions and ice-melting salts.
Freeze-thaw damage occurs when the surface is covered with ice and keeps melting or freezing because of the temperature change. The concentrated solids in the sealant provide protection against such instances. Moreover, you can coat an enormous area of six hundred square feet in one gallon, which indeed makes this one a deal worth grabbing.
Coming to the downsides, although we were delighted by the coverage range but didn’t find its water resistance up to the mark. Water typically forms beads on sealed surfaces, but that wasn’t the case with this one. It absorbs water to some extent which isn’t a good sign.
What We Like
- Largest coverage area per gallon
- Versatile
- Prevents freeze-thaw damage
- Industrial-grade protection
What We Don't Like
- Low water-resistance
Material: Siloxane | Dimensions: 7.48 x 3.9 x 11.88 inches | Weight: 8.4 pounds | Coverage per Gallon: 600 sq. ft | Type: Siloxane-based Sealer | Water Resistant: Yes
5. Foundation Armor SX5000 WB
Next up, we have another fantastic sealer from the trustworthy brand Foundation Armor. This one is more or less similar to the previous one from the same brand, the primary difference being its water-based formula. Since this one doesn’t release any noxious fumes, it might prove to be a better choice for you.
Applying sealing agents and recoating driveways are a drag, but not with this one. With the simple application process for SX5000WB, sealing concrete could become a fun little weekend DIY project. It doesn’t need any modifications or prepping up. You can use it right out of the bottle after transferring it into your rolling pan or sprayer.
Each gallon can cover an area of 175 square feet, which means with one unit, you can seal up to 875 square feet of concrete. If your surface has less porosity, then coverage might be even broader than that. Two coats are optimum for performance benefits and a long lifespan.
Before applying, clean your driveway and remove any residual sealers or coatings and allow it to dry. Evenly spray the first coat from a low-pressure sprayer and a second one on top while it’s still wet. Leave it undisturbed for at least twenty-four hours and prevent water contact at all costs. You’ll be good to go in just three simple steps.
Just like the SX5000, it doesn’t give a glossy wet look. Apart from that, it has all the great qualities of an ideal sealing agent. If you want a shiny look, then we suggest using the clear finish MasonryDefender Concrete Sealer.
What We Like
- Five times more powerful penetrating components
- Silane and siloxane formula
- Water-resistant and durable
- Doesn’t form a slippery film
What We Don't Like
- Dry and dull finish
Material: Resin | Dimensions: 15 x 15 x 12 inches | Weight: 45 pounds | Coverage per Gallon: 175 sq. ft | Type: Water-based Sealer | Water Resistant: Yes
6. AQUA-X 11 Concrete And Stone Sealer
The concrete and stone penetrating sealers from Aqua-X are known for their clean and clear finish. You can improve the quality and durability of your unglazed tiles and patio pavers with this sealing agent without burning a hole in your pocket. Want to know more about it? Just keep reading.
Professionally designed, Aqua-X 11 is so easy to apply that anyone can use it without much effort. Formulated with water as the base, it is water repellant and protects the stone floors and concrete surfaces from damages like pitting and spalling. It also prevents salt damage and freeze-thaw.
The best thing about this product is its large coating area per gallon. You can seal an area of around 800 square feet. That’s the largest coverage we’ve come across so far. Another quality worth highlighting is its easy application. You can just spray it on, and you’ll be done with just one coat.
The waiting period for this quick-drying sealant is really short. The surface can sustain foot traffic just after an hour of application and vehicular traffic after two. The weather conditions might alter the drying time, but it stays in this range more or less.
The sealer has an easy one-coat application, but that has its own implications. You’ll have to re-seal your driveway again after two to four years. If you want it to last longer, then you’ll have to put on three to four coats. Thanks to the enormous coverage area, you can afford multiple coats.
What We Like
- Large coverage area
- Convenient application
- Superfast drying
- Non-toxic formula
What We Don't Like
- Needs recoating in 2-4 years
Material: Silicone | Dimensions: 7 x 3 x 10 inches | Weight: 8.64 pounds | Coverage per Gallon: 800 sq. ft | Type: Water-based Sealer | Water Resistant: Yes
7. Driveway Elastomeric Emulsion Crack Filler
The Driveway elastomeric filler is different from the rest because of its unique elastomer-modified emulsion with an asphalt base. It’s a competent sealer and can also be used effectively as a filler. Available in three different packages, you can buy it in bulk for a better deal.
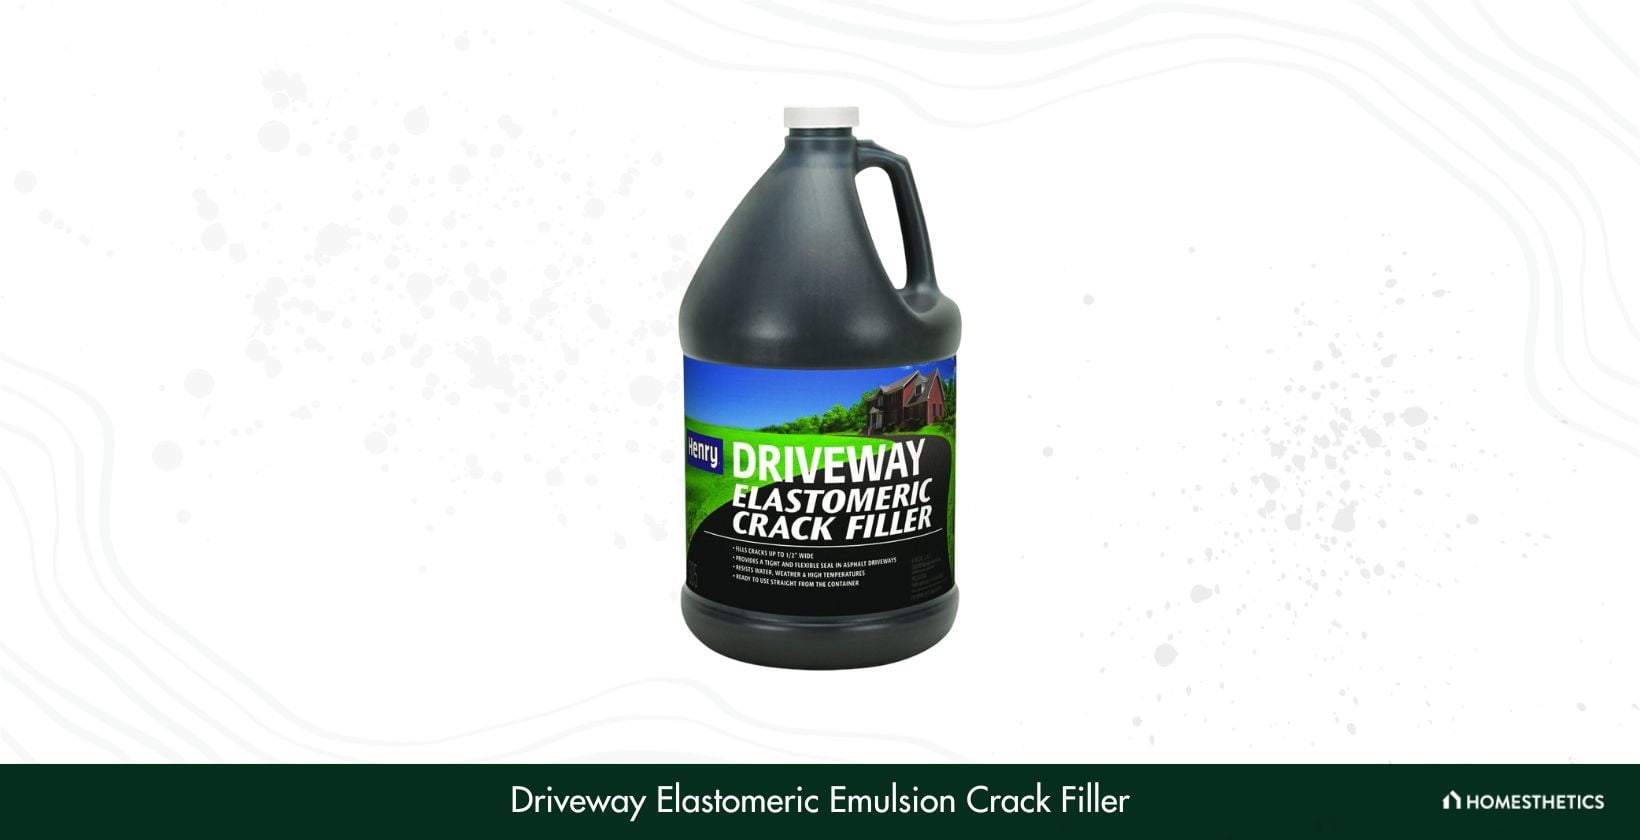
We liked this product primarily because of its unique composition. Most of the sealers have a water-based or solvent-based formula, but this one is made up of modified asphalt. Rubber polymers are incorporated into bitumen under extreme pressure and temperature to form the elastomer emulsion.
In addition to that, it also contains special chains of monomers that promote adhesion. This consequently forms a tight seal after curing. The protective layer is rigid yet flexible, and this elasticity allows it to stand against temperature changes and weathering. You can use the sealer directly from the container.
Unlike others, this one is black in color owing to the presence of asphalt. Because of this, it can be used as a filler for fixing holes and cracks in the sidewalks. Once completely dried, the film has excellent resistance to water and doesn’t let it seep through.
It’s quite handy to use the filler directly from the bottle, but we found it a little clumsy. The nozzle had to be manually cut, which is fine, except it was covered all over in tar. That causes a lot of unnecessary dripping, so you’ll have to be careful while using.
What We Like
- Excellent adhesive properties
- Water-resistant and weatherproof
- Forms a tough and elastic film
- Can be used as a filler
What We Don't Like
- Clumsy to use
Material: N/A | Dimensions: 3 x 1 x 2 inches | Weight: 8.53 pounds | Coverage per Gallon: N/A | Type: Asphalt-based Sealer | Water Resistant: Yes
8. Driveway E-Z Stir Asphalt Filler And Sealer
We have another blacktop asphalt-based sealer for you with two-in-one qualities. If your driveway needs a minor fixing here and a little covering there, then this is the product you’re looking for. The highlight of the filler is its easy-stirring technology. The name says it all, as you can see.
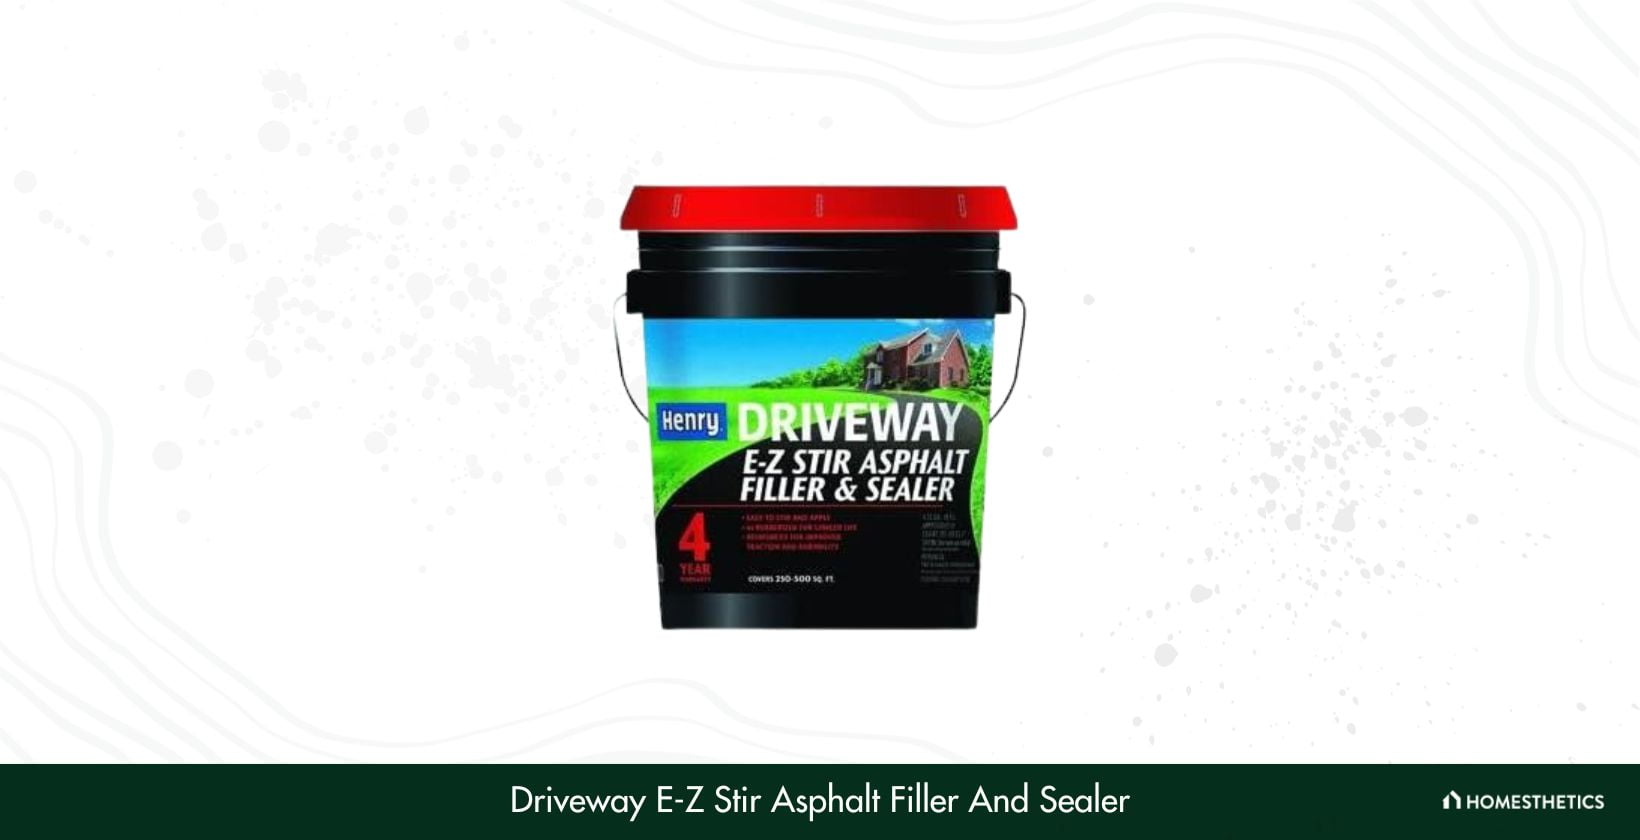
Most of the Driveway products are known for their dual utility as a sealer as well as a filler. With the strength and adhesion of asphalt, it sticks well on the surface and forms a durable coat. The layer is not as flexible as the Elastomeric Emulsion but is still agreeable.
The solution has a thick paint-like consistency but doesn’t offer any resistance while mixing. It is rare to find a sealer that is easy to stir despite being sticky in texture. This is why we were so impressed by it.
Depending on the porosity of your concrete, it can cover an area ranging from 250 to 500 square feet. One bucket contains 4.75 gallons of sealer at a reasonable price. Overall, it is a fairly good purchase.
We just have one minor complaint with this one, and that is the drying time. You’ll have to wait for at least twenty-four hours before walking on it. Other options available on the market can be touched just after two hours of application, so waiting for one whole day is a turnoff.
What We Like
- Easy to stir and mix
- Matte black coating
- Asphalt based
- Two-in-one qualities of filler and sealer
What We Don't Like
- The drying period is long
Material: Rubber | Dimensions: 3 x 1 x 2 inches | Weight: 50 pounds | Coverage per Gallon: 250-500 sq. ft | Type: Asphalt-based Sealer | Water Resistant: Yes
What Is the Best Driveway Sealer?
In this comparative analysis of driveway sealers, we'll appraise eight high-quality products based on their material composition, packaging dimensions, weight, coverage capacity per gallon, sealer type, and water resistance. The various materials include resin, siloxane, polymer, silicone, and asphalt-based varieties. The mentioned parameters facilitate an in-depth understanding of each sealer's quality and efficacy, enabling consumers to make informed decisions.
| Product | Material | Dimensions | Weight | Coverage per Gallon | Type | Water Resistant |
|---|---|---|---|---|---|---|
| Foundation Armor SX5000 | Resin | 15 x 15 x 12 inches | 38 pounds | N/A | Solvent-based Sealer | Yes |
| MasonryDefender Concrete Driveway Sealer | Siloxane | 11.81 x 7.52 x 4.53 inches | 8.36 pounds | 90-150 sq. ft | Water-based Sealer | Yes |
| Liquid Rubber Waterproof Sealant | Polymer | 12 x 12 x 16 inches | 8.86 pounds | 15-30 sq. ft | Water-based Sealer | Yes |
| ToughCrete Concrete Sealer | Siloxane | 7.48 x 3.9 x 11.88 inches | 8.4 pounds | 600 sq. ft | Siloxane-based Sealer | Yes |
| Foundation Armor SX5000 WB | Resin | 15 x 15 x 12 inches | 45 pounds | 175 sq. ft | Water-based Sealer | Yes |
| AQUA-X 11 Concrete And Stone Sealer | Silicone | 7 x 3 x 10 inches | 8.64 pounds | 800 sq. ft | Water-based Sealer | Yes |
| Driveway Elastomeric Emulsion Crack Filler | N/A | 3 x 1 x 2 inches | 8.53 pounds | N/A | Asphalt-based Sealer | Yes |
| Driveway E-Z Stir Asphalt Filler And Sealer | Rubber | 3 x 1 x 2 inches | 50 pounds | 250-500 sq. ft | Asphalt-based Sealer | Yes |
Buying Guide For The Best Driveway Sealer
Are you feeling like an expert already? Well, we’re happy if you’re more confident now, but hold your horses. We’re done with only the review part of our extensive guide, and a crucial section is yet to be covered.
Just knowing about all the top products is not enough; you need to understand all the features you need to look for clearly. We’ll now discuss all the parameters you should know to properly assess the quality of a driveway sealer.
Keep these essential points in mind:
Look And Texture
Driveway sealers come in a wide variety of finishes like matte, gloss, semi-gloss, satin, etc. Some give a dry appearance after curing, while some have a high-gloss wet look. It is nice to have so many options, but it can get a little confusing at times.
If you already have a clear picture of the final look of your driveway, then well and good, but if you are in a rut, don’t worry. We have a few suggestions for you. First, refer to the gloss scale present in the description of your sealer and choose accordingly.
Take a few sample sealers and try them on small areas of your concrete surface to check the look. Some sealers alter the color of the surface they are used on, so practical testing is your best bet.
Ease Of Use
You wouldn’t like spending your day off doing a dull task like re-finishing your driveway, would you? That’s why it’s important to know beforehand about the effort you’ll need to put in while doing the job.
Some sealers can be used directly from the container, and on the other hand, some need a lot of heating and mixing for prepping up. The lifespan of both these types vary, the latter being more durable. So this is a choice you’ll have to make using your better judgment.
Sealing agents can either be sprayed on the surface using a pressure sprayer or can be put on like paint with the help of a roller. Check the product description for the exact process and choose according to your convenience. However, we’ll suggest opting for the spray-on type.
Durability And Protection
Most of the products mentioned on our list have a long-lasting and robust formula; some can even last for a decade, as we have mentioned. There’s no benefit in buying a cheap sealer and going through the tiresome process of recoating again and again. It’s prudent to invest in a durable one, once and for all, even if you have to pay extra bucks for it.
Why should I use a driveway sealer?
Using a driveway sealer helps extend the lifespan of your driveway by protecting it from cracks, potholes, and other forms of deterioration. It also enhances the overall appearance of the driveway and makes it easier to clean and maintain.
How often should I seal my driveway?
The frequency of sealing depends on various factors such as the type of sealer used, weather conditions, and the amount of traffic on the driveway. In general, it is recommended to seal your driveway every 2-5 years.
Can I apply a driveway sealer myself, or do I need professional help?
You can apply a driveway sealer yourself if you have the necessary tools and follow the instructions provided by the manufacturer. However, for larger driveways or if you are not comfortable with the process, it may be advisable to hire a professional for the job.
How long does it take for a driveway sealer to dry?
Drying time can vary depending on the type of sealer and weather conditions. In general, it may take anywhere from 24 to 48 hours for the sealer to fully cure. It’s important to avoid walking or driving on the freshly sealed surface during this time.
How do I maintain a driveway after sealing it?
Regular maintenance of a sealed driveway includes cleaning it with mild soap and water, removing any stains or debris promptly, and reapplying a sealer as recommended by the manufacturer. Avoid using harsh chemicals or tools that can damage the sealer or the surface.
Can a driveway sealer fix existing cracks or damage?
Driveway sealers are primarily used as a preventive measure and to protect the surface from further damage. They are not designed to repair existing cracks or significant damage. It’s best to address any repairs before applying a sealer for optimal results.
The exterior design of houses matters a lot and all of us like receiving compliments for a well-maintained abode. While we pay thousands to get the décor on point, it’s easy to forget about the driveway.
Your driveway needs maintenance too, after all, it is one of the first things that visitors look at. If yours has lost its charm over time, now you know exactly how to make renovations.
Although we gave you all the essential insights for buying the perfect sealing agent, let’s have a quick brush-up and pick our favorites. The Foundation Armor SX5000 is the best option because of its potent formula and lifespan of ten years.
Moreover, the Liquid Rubber Waterproof Sealant is known for its water-resistant and weatherproof composition. But if you’re looking for a budget buy, then the MasonryDefender Concrete Driveway Sealer is your best bet.
And, we’ll leave you at that. See you next time!
What if we got a dollar for every time attractively low prices lured us into buying unreliable drywall screw guns?

We’d have enough money to buy an expensive, high-end model.
Let’s get straight to the point - are you looking for the best budget companion for your day-to-day drywall installation, plumbing, and carpentry jobs? Don’t worry, we’ve got you covered with our expert guide to the 13 best models in the market, each offering a wide range of top-notch features.
We’ve also added a concise buyer’s guide to walk you through the essentials to consider before buying a drywall screw gun.
Now, without any further ado, let’s get down to business!
Best Budget Drywall Screw Guns
Here's the list of the 9 best budget drywall screw guns of 2024, because we understand the struggle of finding reliable tools without breaking the bank.
1. DEWALT DCF620B 20V MAX XR Drywall Screw Gun - Best for Professionals
With over 96 years of manufacturing sheer excellence and precision, Dewalt is recognized as one of the leading brands in the global power tools industry. When we speak of drywall screw guns that promise majestic performance, the first product that comes to our mind is the DEWALT DCF620B 20V MAX model. What’s the hype about? Let’s find out.
DEWALT 20V MAX XR Drywall Screw Gun, Cordless, 4,400 RPM,...
- Drywall screw gun has greater speed than DW272 corded...
- DEWALT built brushless motor is made for efficient...
Why Did We Like It?
Those who can’t afford to compromise with high-end efficiency would absolutely love the DCF620B. Agile and smooth, this product features the iconic DEWALT brushless motor that easily outperforms every corded screw gun we’ve tested. Besides, you get a comparatively longer run time with this motor, much-needed for hardcore professionals.
However, it doesn’t end there - its superiority is best experienced through its exceptional speed. This genius runs at an ultra-fast application speed of 4,000 RPM. With such high torque, you can focus more on getting the job done without any interruptions. Apart from that, it’s powerful enough to drive around 2,000 screws at a time.
However, the icing on the cake here is the trail-blazing patented Cone-Lock feature, pretty useful for maintaining safety and accuracy. Once adjusted (which is relatively effortless), this feature helps the gun deliver consistent screw depth. Not only that, but it also prevents you from encountering accidental shifts mid-way through its secure-locking capabilities.
Being a DEWALT product, the fit and finish are evidently of superior quality, guaranteeing a longer life overall. The manufacturers also offer a whopping 3-year limited warranty period to back up its durability, giving you an overall better deal.
What Could’ve Been Better?
This product has surpassed nearly all our expectations, so we couldn’t find any significant aspect that needs improvement. However, the only criterion where it falls short is its lack of pre-included batteries. The users have to purchase it separately, which is far from convenient.
Pros
- Depth can be adjusted effortlessly
- Extra features for safety and accuracy
- LED light included for convenience
- Lightweight and ergonomic
Cons
- No batteries included
Voltage: 20V | N/m: N/A | Speed: 4,400 RPM | Weight: 2.9 lbs | Dimensions: 9.8 x 4.2 x 11.5 inches | Battery Powered: Yes
2. Makita XSF03Z 18V LXT Lithium-Ion Brushless Cordless Drywall Screwdriver - Best for Battery Efficiency
When it comes to best-in-class corded power tool technology, Makita is every professional’s first choice. Their all-new XSF03Z 18V cordless screw gun redefines performance and convenience with the strength it packs within its compact body. Let’s take an in-depth look at its core specs and functions.

Makita XSF03Z 18V LXT Lithium-Ion Brushless Cordless Drywall...
- BL Motor delivers 0-4,000 RPM to handle a variety of drywall...
- Push Drive Technology - in lock-on mode the motor starts...
Why Did We Like It?
Speaking of performance, if there’s any product that could go against the DEWALT 20v MAX model, it’s none other than the Makita XSF03Z. Like our first pick, it also comes packed with an efficient brushless motor that offers an ultra-smooth and uninterrupted user experience. For those pursuing a full-time career in carpentry, it’s the much-needed tool to upgrade your toolbox.
At its maximum speed, this product can smoothly deliver up to 4,000 RPM without any vibration issues. The runtime is also taken care of, thanks to Makita’s best-in-class technology. The electric-controlled brushless motor has been configured to consume meager power, allowing every charge to offer a 50% longer runtime compared to its competitors.
However, what we liked the most is despite offering groundbreaking performance for such long hours, it doesn’t bother you with overheating issues. To be precise, the motor doesn’t deal with carbon brushes, enabling it to maintain optimal coolness. Not only does this feature make it eligible to use for long periods without any discomfort, but it also extends its life by a considerable extent.
What Could’ve Been Better?
When it comes to drywall installation, this product is an absolute gem. However, when it comes to compatibility with other materials, it thumbs its nose. Also, it’d have been better if it came along with a storage box for safety and protection.
Pros
- High-quality build materials
- Built-in LED light for convenience
- Ergonomically designed
- Ultra-quiet motor operation
Cons
- Not efficient on other materials except a drywall
Voltage: 18V | N/m: 5.65 Nm | Speed: 5,000 RPM | Weight: 3.8 lbs | Dimensions: 8.8 x 3.2 x 9.2 inches | Battery Powered: Yes
3. SENCO DS332-AC 3” Corded Auto-Feed Screwdriver - Best for Versatility
SENCO Tools has been globally recognized as the deliverer of exceptional performance since 1935. Although the brand is mainly known for its high-end pneumatic tools, its all-new DS332-AC corded screw gun has created a buzz with its vast range of features. Under a super-affordable budget, it doesn’t get better than this.
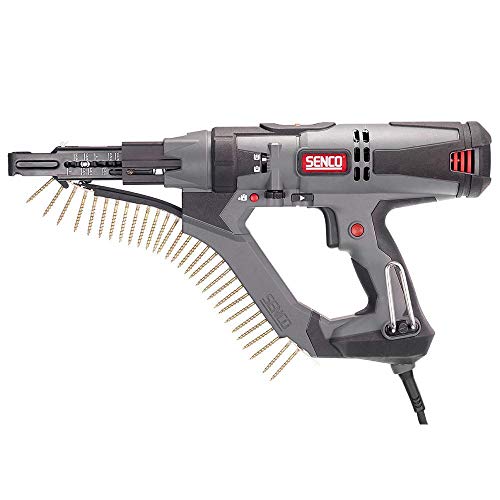
Senco DS332-AC 3" Corded 2500 RPM Auto-feed Screwdriver
- 2, 500 RPM high-torque motor and patent pending corner-fit...
- Tool-free screw length adjustment and belt hook-right or...
Why Did We Like It?
SENCO has been a favorite among professionals due to its innovations that stand the test of time, and the DS332-AC is no exception. This product packs very high performance for a mid-range screw gun, which can be felt as soon as you push its high-torque motor beyond its limits.
Robust and long-lasting, the patented SENCO motor comes equipped with an iconic corner-fit feed system that makes drywall installation a cakewalk. Big ups to the manufacturers for introducing next-gen technology, as this auto-feed feature also eliminates the usage of screw bands like the typical old-school variants.
Besides that, you also get a decent application speed of 2,500 RPM, good enough for medium-duty tasks.
Speaking of convenience features, this product comes with an incredible tool-free screw length adjustment system that makes it easier to handle. Furthermore, you also get a sliding screw guide and depth lock capabilities that enhance its performance a little.
The best part here is that, unlike our previous recommendation, the SENCO screw gun can perform well on materials other than drywall. To be more precise, this product comes with both drywall and wood nosepieces, which speaks volumes about its versatility.
What Could’ve Been Better?
This model is unfortunately available in a corded setting, for which it will always have a disadvantage against cordless alternatives that are comparatively more portable. If nothing else, you’d have to settle with restricted movement while working.
Pros
- Sturdy and long-lasting construction
- Ergonomically designed
- Appropriate for medium-duty construction
- Screw length adjustment system
Cons
- Not available as cordless
Voltage: 120V AC | N/m: N/A | Speed: 2,500 RPM | Weight: 4.8 lbs | Dimensions: 16.5 x 14.6 x 5.5 inches | Battery Powered: No
4. Milwaukee 2866-20 M18 FUEL Drywall Screw Gun
When it comes to brands that have made our lives simpler, Milwaukee is one of those pioneering tool manufacturers that don’t need an introduction. Their all-new 2866-20 M18 FUEL drywall screw gun merges the gap between entry-level ease of use and superior performance. Let’s check out what it brings to the table.

Milwaukee 2866-20 M18 FUEL Drywall Screw Gun (Bare Tool...
- POWERSTATE Brushless Motor: Delivers 4,500 RPM's to provide...
- Auto Start Mode: The tool trigger can stay locked on without...
Why Did We Like It?
First, this is one of the most visually appealing screw guns that we’ve come across in a while. Its elite red and black finish gives it a very sophisticated outlook, guaranteed to make heads turn. Besides, its industrial-standard design also adds another star to its appearance, while making it very comfortable to work with.
When it comes to performance, this product crushes the competition with the incredible Milwaukee motor that revs up to 4,500 RPM. This feature gives you the confidence to take on any job, even if it’s quite heavy-duty. To back up its performance, the manufacturers offer 3x times longer runtime than some of the best-selling screw guns in the market.
The USP of this product has to be its autostart feature, which comes in handy while handling professional jobs. To be precise, the motor features a smart sensor that only turns it on when it’s placed close to the drywall. Not only does that make it a lot more convenient, but it also ensures that the motor isn’t damaged by mild wear and tear.
What Could’ve Been Better?
Like the DEWALT 20V Max, this product also doesn’t come with pre-included batteries. Being a cordless tool, the manufacturers must focus on enhancing their user experience, which is compromised as the users have to search for batteries separately.
Pros
- Excellent application speed
- Minimal power consumption
- Ergonomically designed
- Autostart feature
Cons
- Doesn’t pre-include batteries
Voltage: 18V | N/m: 13.97 Nm | Speed: 4,500 RPM | Weight: 3.8 lbs | Dimensions: 8.9 x 3.3 x 9.4 inches| Battery Powered: No
5. BLACK+DECKER BDCDD120C 20V MAX Lithium Single Speed Drill/Driver
Anyone experienced enough to recognize ultra-reliable power tools isn’t a stranger to Black+Decker, a globally-leading brand best known for changing the game with its innovations. The BDCDD120C model is the ultimate solution to your drywall construction needs, that too, at a bargain-basement range. Let’s check out its key specs and features.

BLACK+DECKER 20V MAX Cordless Drill/Driver Kit with...
- HIGH PERFORMANCE - High-powered cordless drill/driver with...
- FATIGUE-FREE - Lightweight (3.15 lbs) and compact so you can...
Why Did We Like It?
As DIY enthusiasts, having to work in confined areas is a regular job. Thanks to the user-convenient design, you can quickly push it through limited spaces for drilling, so that you don’t miss out on the minute details. The incredible design gets the job done without causing any user fatigue at all, only made possible due to its ultra-compact and lightweight body.
The product amazes us with its convenience features, the most surprising of which is its LED lights. This feature makes it easier to adjust screws in restricted spaces by brightening the surface, which is incredibly useful.
Furthermore, it gives you 100% user control over its functions, such as its depth adjustment feature. To put it simply, the drywall drill nose comes with a variable dial adjuster that lets you decide the depth measurements, giving you the freedom to take on any small-scale job with sheer confidence.
Also, being a cordless screw gun, it automatically has the upper hand over the typical corded variants. It doesn’t depend on any plug-in electrical outlet to operate, and its 20v MAX Lithium-Ion battery offers a fantastic runtime. Last but not least, unlike some of our top picks, this one comes with pre-included batteries.
What Could’ve Been Better?
We can’t deny that it’s a brilliant choice if you’re selecting a tool for small-scale DIY jobs. However, it’s not as powerful as our other recommendations; thus, it isn’t the right fit for heavy-duty professionals.
Pros
- Premium build quality
- Sufficient torque for DIY jobs
- Pre-included batteries
- Ideal for drilling in confined spaces
Cons
- Not recommended for heavy-duty use
Voltage: 20V | N/m: 13.09 Nm | Speed: 650 RPM | Weight: 2.5 lbs | Dimensions: 10.6 x 3.6 x 8.5 inches| Battery Powered: Yes
6. Ryobi 18-Volt ONE+ Brushless Drywall Screw Gun
Speaking of power tools brands that never disappoint, Ryobi Tools is a brand that has always stayed a step ahead of the competition in terms of technology. For those searching for an agile cordless screw gun that offers the reliability of the traditional corded ones, the 18 Volt ONE+ is your best bet.
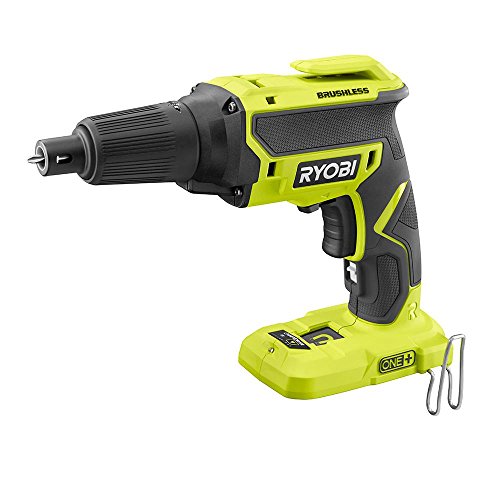
RYOBI ONEAND 18V Cordless BRUSHLESS Drywall Screw Gun Tool...
- RYOBI ONEAND 18V Cordless BRUSHLESS Drywall Screw Gun Tool...
Why Did We Like It?
Like any other tool, Ryobi hasn’t compromised with the fit and finish of the 18v ONE+ model either. Attractive and durable, this product has been specially built to withstand rough use to accompany your heavy-duty endeavors. Its scratch-resistant cover not only preserves its charm for years but also ensures that the motor remains safe from wear and tear.
This product brings in one of the best brushless motors that we’ve tested by far. The high-end performance that it offers would have you believe you’re using a heavy-duty corded gun.
, it provides a top application speed of 4,700 RPM, which is generally impossible for cordless variants. It’s made even smoother by its heavy-duty clutch, engaging as soon as you press the bit to the fastener.
Speaking of power source, it runs on an 18V battery that offers an impressive runtime, despite having fancy battery-consuming features such as built-in LED lights. The secret behind it is the best-in-class QuietDrive feature, due to which the product is well-capable of battery conservation. Other than that, it also doesn’t let the motor produce excessive noises while working.
What Could’ve Been Better?
Although the noise issues are taken care of by the manufacturers, the prevalent vibration issue remains unsolved. This product may feel uncomfortable at high speeds due to the shakiness, which needs an urgent fix.
Pros
- Very powerful and reliable
- Built-in LED lights
- Detachable nose cone
- Variable speed adjustments
Cons
- Tends to vibrate often
Voltage: 18V | N/m: 5 Nm | Speed: 4,700 RPM | Weight: 2.7 lbs | Dimensions: 10.1 x 3.1 x 8.5 inches| Battery Powered: Yes
7. Milwaukee 2605-22 M18 18-Volt Cordless Rotary Hammer Kit
Looking for an ergonomic screw gun that packs exceptional impact energy? Our penultimate recommendation, the Milwaukee 2605-22 model, is the one-stop solution to your needs. Whether it's reliability or speed, this torque monster has it all covered. Let’s check out its core specs and functions.
No products found.
Why Did We Like It?
We hardly come across screw guns that make screwing through concrete drywalls look like duck soup - this product is one of those rare cases. The torque that it’s engineered to deliver is tremendously punchy, going up to 4,800 BPM without any vibrations.
Furthermore, we’re in love with how, despite offering such potent power, it doesn’t hamper task accuracy with irritating vibration issues, setting higher standards for handling.
With this product, you get an incredibly reliable Red Lithium battery technology that gets the maximum job done per charge. With such a long-lasting run time, you don’t have to worry about continually plugging the gun for charging after every few hours of work. As a bonus, it comes with a smart fast charger that makes it twice as convenient.
What Could’ve Been Better?
Performance-wise, there isn’t a single thing that we’d like to change about this remarkable genius. However, it’s priced a little towards the higher end, which is why it’s not accessible to the masses.
Pros
- Lightweight and compact
- Removable auxiliary handle
- Shock-absorbant build material
- 100% user control
Cons
- Pretty expensive
Voltage: 18V | N/m: 17.7 Nm | Speed: 1,400 RPM | Weight: 10.9 lbs | Dimensions: 18.5 x 14.1 x 5.8 inches| Battery Powered: Yes
8. DEWALT DCF622B 20V MAX XR Versa-ClutchTM Screw Gun
Dewalt has returned to our list with another medium-range screw gun with a host of features that set a higher benchmark for quality. The DCF622B Versa-Clutch or the mini-me version of the best-selling DEWALT DCF620B 20V MAX embodies its predecessor’s excellence, that too, under a less costly price bracket.
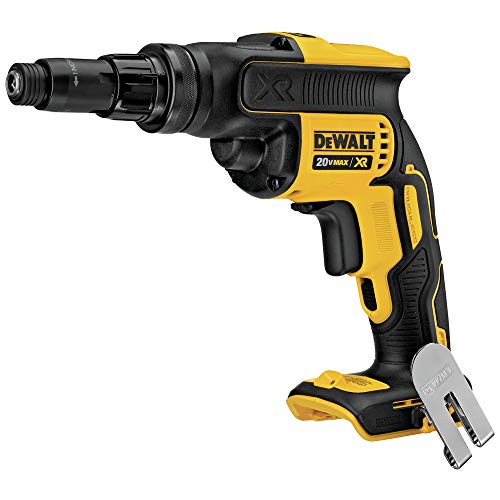
DEWALT 20V MAX XR Screw Gun, Versa-Clutch, Adjustable...
- The cordless impact wrench is ideal for metal fastening...
- Help prevent damage to material and fasteners with...
Why Did We Like It?
DIY enthusiasts always rely on DEWALT for the best bang for their buck when it comes to power tools. The Versa-clutch lives up to the brand’s legacy, as it provides sufficient torque and performance to handle medium-duty or personal screwing/drilling jobs with precision.
To begin with, this product features an agile and powerful brushless motor, specially engineered to offer consistent power and smoothness to take on any job. You can operate it at a maximum application speed of 2,000 RPM, good enough for small-level jobs. However, the catch here is the ultra-quiet and vibration-free operation that the motor delivers, allowing it to be used for long hours.
When it comes to premium build quality, DEWALT is always pulling out all the stops. Likewise, this product is constructed from high-quality materials that withstand minor wear and tear to protect the motor. The motor life is also taken care of as you get ventilation fins sidewards to prevent overheating issues.
Last but not least, as the name implies, this product comes equipped with a best-in-class versa-clutch feature that enhances its longevity. To be precise, it helps eliminate any damage to the fasteners and materials while ensuring that it delivers highly accurate performance.
What Could’ve Been Better?
You’d wonder whether the most significant issue of this unit is its below-average battery performance - but it’s even worse. The product, in fact, doesn’t even come pre-included with batteries. With such subpar runtime, we wouldn’t recommend it for heavy-duty jobs.
Pros
- Excellent safety features
- Lightweight and ergonomic
- Decent application speed
- Premium fit and finish
Cons
- Disappointing battery life
Voltage: 20V | N/m: 226 Nm | Speed: 2,000 RPM | Weight: 3.3 lbs | Dimensions: 9.8 x 4.2 x 11.5 inches| Battery Powered: Yes
9. Milwaukee Electric Tool 2615-21 CT Right Angle Cordless Drill Kit
Our final pick of the day is Milwaukee’s class-leading 2615-21 product range, the go-to kit that makes drilling through confined spaces look like a walk in the park. Whether you’re a plumber, carpenter, or professional handyman, you should put your money here to access sheer excellence. Let’s take an in-depth look at what it offers.
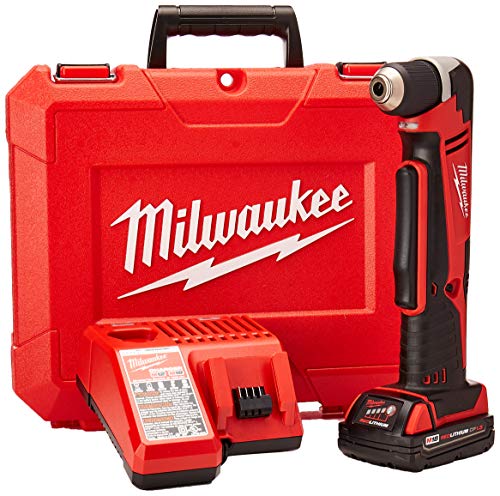
Milwaukee Electric Tool 2615-21CT Right Angle Cordless Drill...
- Includes right angle drill, battery pack, charger, and...
- Lightweight and compact design
Why Did We Like It?
Its all-in-one kit alone speaks volumes about the ease of use and convenience it brings to the table. With this kit, you get a fully-functional screw gun and a fast charger, along with housing screws, perpendicular flex shafts, chuck screws, and whatnot. All packed inside a sturdy carrying case for safety - now, isn’t that something?
Boasting an incredible application speed of 1,500 RPM, the Milwaukee 2615-21 stands out as a smart choice for small-duty professional jobs. Besides, we’re fans of its electronic clutch that produces a peak torque of 125 inches/lbs. You also get to shuffle between 11 variable clutch settings, making it easier to control the torque delivery.
As we’ve mentioned earlier, it makes an incredible option to consider while drilling through hard-to-reach areas. , it comes with a compact 3.¾” head length, being the main secret behind its best-in-class maneuverability.
What Could’ve Been Better?
This product is so precise that even after nitpicking for hours, we couldn’t arrive at constructive criticism regarding enhancement. That’s the reason why it’s mostly out of stock, which seems like the only relevant downturn in this case.
Pros
- Excellent safety features
- Lightweight and ergonomic
- Decent application speed
- Premium fit and finish
Cons
- Not always in stock
Voltage: 18V | N/m: 14.1 Nm | Speed: 0-1,500 RPM | Weight: 4.3 lbs | Dimensions: 15.8 x 12.5 x 4.4 inches| Battery Powered: No
Best Budget Drywall Screw Guns Comparison Table
| Product | Voltage | Nm | Speed | Weight | Dimensions | Battery Powered |
|---|---|---|---|---|---|---|
| DEWALT DCF620B 20V MAX XR Drywall Screw Gun | 20V | N/A | 4,400 RPM | 2.9 lbs | 9.8 x 4.2 x 11.5 inches | Yes |
| Makita XSF03Z 18V LXT Lithium-Ion Brushless Cordless Drywall Screwdriver | 18V | 5.65 Nm | 5,000 RPM | 3.8 lbs | 8.8 x 3.2 x 9.2 inches | Yes |
| SENCO DS332-AC 3” Corded Auto-Feed Screwdriver | 120V AC | N/A | 2,500 RPM | 4.8 lbs | 16.5 x 14.6 x 5.5 inches | No |
| Milwaukee 2866-20 M18 FUEL Drywall Screw Gun | 18V | 13.97 Nm | 4,500 RPM | 3.8 lbs | 8.9 x 3.3 x 9.4 inches | No |
| BLACK+DECKER BDCDD120C 20V MAX Lithium Single Speed Drill/Driver | 20V | 13.09 Nm | 650 RPM | 2.5 lbs | 10.6 x 3.6 x 8.5 inches | Yes |
| Ryobi 18-Volt ONE+ Brushless Drywall Screw Gun | 18V | 5 Nm | 4,700 RPM | 2.7 lbs | 10.1 x 3.1 x 8.5 inches | Yes |
| Milwaukee 2605-22 M18 18-Volt Cordless Rotary Hammer Kit | 18V | 17.7 Nm | 1,400 RPM | 10.9 lbs | 18.5 x 14.1 x 5.8 inches | Yes |
| DEWALT DCF622B 20V MAX XR Versa-ClutchTM Screw Gun | 20V | 226 Nm | 2,000 RPM | 3.3 lbs | 9.8 x 4.2 x 11.5 inches | Yes |
| Milwaukee Electric Tool 2615-21 CT Right Angle Cordless Drill Kit | 18V | 14.1 Nm | 1,500 RPM | 4.3 lbs | 15.8 x 12.5 x 4.4 inches | No |
Buying Guide For The Best Drywall Screw Gun
Now that you’ve checked out the 13 best budget models let’s check out some key factors that can help you choose the one that suits your needs precisely. Here are some of the factors that an efficient drywall screw gun must feature.
Motor Configuration
Brushless motors are recently trending due to enhanced power delivery, produced by the elimination of carbon brushes. However, brushed motors are the less costly old-fashioned alternatives for personal tasks.
Torque/RPM
As it’s a rotary tool, an impressive peak torque will always gain a significant advantage. If you’re buying tools for heavy-duty commercial use, don’t consider settling for less than 3,000 RPM.
Clutch
With great power comes the responsibility to control it from going balls out. The clutch, aka torque controller, helps you decide how much torque the machine should be producing. It’s imperative to choose guns with a softer grip, regardless of the type of work.
Battery
Last but not least, it’s necessary to ensure that the product guarantees an impressive run time. For that, you’d need Lithium-Ion batteries that last very long on a single charge.
The main benefits of using a budget drywall screw gun are affordability and convenience. These tools are often priced lower than their more expensive counterparts, making them a good option for those on a tight budget. They also offer basic functionality that is sufficient for most DIY projects and home repairs. When choosing a budget drywall screw gun, look for features such as variable speed control, depth adjustment, and a comfortable grip. You may also want to consider the weight and size of the tool, as well as its overall durability and reliability. Yes, you can use a budget drywall screw gun for other projects that require driving screws into wood or other materials. However, keep in mind that these tools are designed specifically for drywall and may not be suitable for heavy-duty tasks or professional use. Not necessarily. While budget drywall screw guns may not have all the advanced features of more expensive models, they can still be reliable and durable if they are made by a reputable brand and used correctly.Budget Drywall Screw Guns FAQ's
What are the benefits of using a budget drywall screw gun?What features should I look for in a budget drywall screw gun?Can I use a budget drywall screw gun for other projects besides drywall installation?Are budget drywall screw guns less reliable than more expensive models?

Conclusion
Congratulations! You have officially learned everything there is to know to finally choose a screw gun that you won’t regret buying. Just in case you are still having doubts, here’s a quick recap of our editor’s top picks.
The DEWALT DCF620B model is the one-stop solution for hardcore professionals. The Makita XSF03Z remains somewhere close, that too, with a 50% longer run time. Last but not least, the SENCO DS332-AC offers the best bang for your buck, especially if you’re on a low budget.
We’ll return soon with more insightful product recommendations.
All drywall guns above are amazing, so whether you are looking to screw the best soundproofing drywall, mold-resistant or fire-resistant drywall, you would be good with either gun above.
Till then, stay tuned. And remember - the drill never ends, folks!
Related Articles
Following appliance instructions, avoiding overloading of circuits, replacing or repairing damaged power cords, and unplugging devices when not in use can help ensure home electrical safety. Other methods include providing appliances with proper space for air circulation and keeping them away from moisture.

Our reliance on electrical devices and appliances has never been greater than it is today.
We use such devices in almost every sphere of our lives, including health, education, entertainment, etc. However, not following safety precautions can pose electrical health hazards, such as electrical shocks or fires, leading to loss of life and property.
I've put together this guide about useful basic electrical safety tips that can help you avoid such risks.
The Need For Maintaining Electrical Safety At Home
Most homes have electrical circuits that support 120 volts of current, which can be fatal if it comes into contact with your body.
Apart from such direct health hazards, electricity can lead to fires and explosions, causing property damage worth thousands of dollars. That is why it is crucial to follow certain safety precautions when using electrical equipment and appliances.
Here are some basic electrical safety tips here that can help you ensure safety and prevent electrical accidents at home.
Basic Electrical Safety Tips

1. Make Sure To Follow Appliance Instructions
When using any electrical appliance, the first thing to do is go through the instructions in its manual. Doing so will not only help you avoid accidents like electrical shocks but also ensure that the appliance works properly and does not get damaged. If you experience any problems with the appliance, stop using it immediately and get it checked by an electrician.
2. Avoid Overloading Electrical Sockets
Any electrical outlet is designed to handle only a specific number of devices or appliances at one time. If it is overloaded, it can lead to electrical hazards, such as electrical shocks.
Overloaded sockets are one of the most common causes of electrical problems in households. To prevent such problems, remove excess plugs from the sockets, check that the protective faceplate on the sockets is intact, and ensure the outlet is not heating.
You should also use smart plugs to monitor the power load and avoid using appliances through extension cords.
3. Replace Or Repair Faulty Or Damaged Electrical Cords
Damaged or faulty power cords are a major electrical safety risk and should be dealt with as soon as possible. Check for signs of damage like fraying and cracking on all standard and extension cords, including electrical wiring, to replace the faulty ones. Also, avoid placing power cords underneath furniture or rugs.
Extension cords, in particular, should not be left lying around, as they are a tripping hazard and may get trapped underneath furniture, resulting in overheating or short-circuiting.
4. Keep Electrical Devices And Appliances Away From Water
Avoid placing any electrical tools and devices close to water sources, as contact with water can result in electrical shock or short-circuiting. Some household electrical items that are likely to get into contact with water include microwaves, coffee pots, blenders, etc. Plus, look at your electrical outlets to ensure they have not come into contact with water.
5. Unplug Devices And Appliances When Not In Use
Keeping your electrical devices and appliances unplugged when not in use is one of the easiest ways to ensure electrical safety. And doing so offers additional benefits besides preventing electrical accidents. There is no phantom power drain, leading to higher energy efficiency, and the chances of the devices overheating are reduced.
Also, when you unplug appliances, like heaters and humidifiers, from sockets when they are not being used, it helps reduce the load on the outlets and protects the appliances from power surges. Thus, it can be quite useful in preventing your home's electrical system from getting damaged.
6. Ensure Your Appliances Have Adequate Space For Air Circulation
Electrical devices require proper air circulation to avoid overheating, which can lead to electrical hazards like short-circuiting and fires. So, make sure to provide your appliances proper space and avoid using them in closed spaces, like cabinets.
Additionally, don’t store flammable objects near electronic and electrical appliances, like an extension cord for improved electrical safety.
7. Store Used And Unused Power Cords Separately
Another basic electrical safety tip is to separate your used and unused electrical cords and store them in an organized manner to prevent electrical issues, such as an electrical fire. This will protect them from damage and help them last longer. I would also suggest avoiding winding power cords around objects as that can cause them to stretch and overheat.
And do not place a power cord on hot surfaces since that can damage their insulation.
8. Check That All Exhaust Fans Are Clean
Many appliances have inbuilt fans that can get clogged with debris and dust with regular use. When that happens, the appliance has to work harder and use more power, resulting in higher power bills. Since it does not work properly, it can lead to the buildup of harmful gasses that may result in electrical fires.
In addition, it can cause damage to the appliance and shorten its lifespan, and you may need to spend a huge amount of money on frequent repairs. To prevent such problems, I suggest cleaning the appliance fans regularly or hiring a licensed electrician for maintenance.
9. Use The Correct Wattage For All Appliances And Fixtures
Using the proper wattage for various fixtures and appliances is important to avoid electrical problems, like a short circuit. Light fixtures do not require more than 60 watts of power, while the optimal requirement is 40 watts. Make sure to check the wattage of the fixtures before installation so that you don’t overload outlets.
For lighting fixtures, do not place more than a single bulb in a lamp unless they can be turned on and off separately. Also, avoid using energy-efficient bulbs with incandescent ones as that may lead to potential risks like fire hazards or other electrical problems.
10. Store Appliances Like Water Heaters Properly
Appliances like built-in furnaces and water heaters should be installed properly and away from combustible items. Similarly, portable heaters should be kept away from drapes and always placed on a stable surface. As I mentioned before, avoid plugging such appliances in extension cords and use direct power outlets.
11. Hire Professionals For Electrical Repairs
Electrical faults can occur at any time and due to various causes. Sometimes, you may want to fix such problems yourself, but I wouldn't recommend that. It is always better to hire a qualified electrician to perform electrical repairs since they can ensure that proper safety precautions are in place. They also have the tools and expertise needed to fix electrical problems, check the current flowing with circuits, and replace big and small appliances.
12. Install Ground Fault Circuit Interrupters
One of the best electrical safety tips is to get a ground fault circuit interrupter installed at your home. This can detect electrical problems like short circuits or faulty insulation and turn the power off, helping prevent problems like a fire or an electric shock. Ideally, GFCI devices should be installed in kitchens and bathrooms.

Conclusion
These were some of the easiest and most effective electrical safety tips that you can follow to avoid electrical problems and ensure maximum safety. But there are some others as well that can also be quite helpful, such as disconnecting appliances when cleaning them and always following electrical safety regulations.
If you have kids or pets at home, I suggest installing child-proof electrical equipment, which can go a long way in keeping them safe. Additionally, educating your kids about proper electrical safety rules will help reduce the chances of electrical hazards and ensure complete home electrical safety.
Reclaimed wood is different. It has a memory and a story to tell beyond its extraordinary cozy and warm aesthetics. You can actually read parts of his life and glance at its elegance texture for hours. Smart reclaimed wood furniture and decor projects envisioned for a green trendy home can offer you the opportunity to nestle elements with history in your scenery with little to no costs.

Old boats, pieces of railways, barn wood or old buildings are a few elements that can hide the mature texture that you`re looking for. Thousands of artisans worldwide surge inspiration from the dramatic organic pieces that you`re pursuing, using them to materialize actual pieces of art fully decorated with knots, burrows, nail holes, gray areas and discoloration.
If you choose to decorate with reclaimed wood you also get to use the energy invested into the item without any costs, saving the planet energy put into growing the tree that you would slice with the creation of a new piece of furniture and thus reducing waste. Be a responsible consumer and avoid mass produced furniture that depletes our resources at an alarming rate; you can construct your own working conditions, schedule and routine into the making of these smart reclaimed wood furniture projects. If crafting is not really your thing you can also consider purchasing handcrafted goods from small business owned families that invest love and time into them; you can find thousands of great items with memory on etsy.com.
Cast a glance at the gallery below and surge inspiration from the phenomenal crafts, we would love to hear your opinion on the subject in the comment section below.
Reclaimed Wood Furniture and Décor Projects
#1 Build a Useful Reclaimed wood Hallway table
The beautiful furnishing below has been built from cedar wood and adds a rustic touch to a simple hallway that can now welcome guests with a cozier feel. The item can be tailored to your needs to boost functionality.

Reclaimed Cedar Wood Entryway Table via TRUECONNECTION
#2 Store your shoes in a salvaged wood shoe rack
You can create a modular shoe rack for your mudroom by using steel pipe legs and salvaged wood. The most extraordinary part is that you can design it as you want and by using the steel pipe modules you can also improve on it without sacrificing anything.
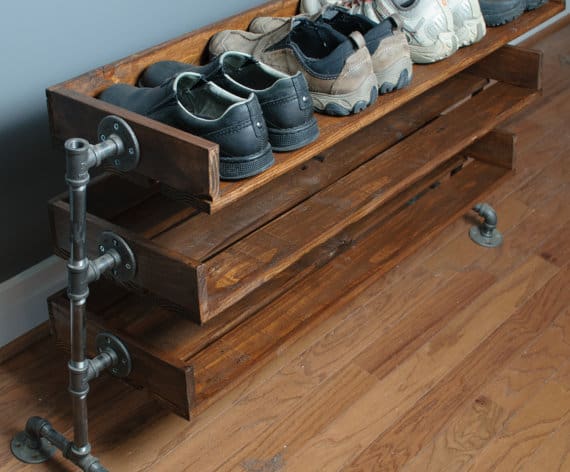
Reclaimed Wood Shoe Rack via ReformedWood
#3 Improve a bench in the garage with a wooden shoe rack
You can build a salvaged wood shoe rack bench from scratch or you can emphasize a wooden bench in your garage, porch or mudroom with an add-on that will boost functionality in a great manner.

Reclaimed Wood Shoe Rack Bench via BreakingandRemaking
#4 Build a farmhouse dinning table
Rustic pieces do have a certain vibe that other pieces simply can`t grasp. Infused with coziness and warmth, the wooden textures have mesmerized the humanity for thousands of years. You now have advanced tools at your disposal to actually create reclaimed wood farmhouse dinning tables and benches for your interior decor. These will become a simple immortal addition to you home, becoming more beautiful and noble as time passes over them.

Reclaimed Wood Farmhouse Dining Table And Bench via UniqueIndustry
#5 Salvaged wood dinning room chairs
A rustic touch to a modern living space can do wonders. If you take a moment to glance at the unique details that add character to a space you will slowly realize that you need a wooden texture in your home.
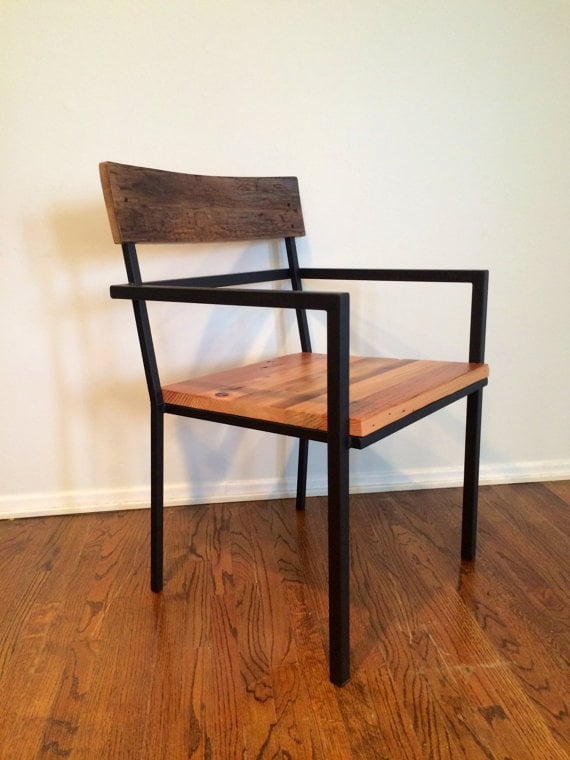
Reclaimed Wood Dining Room Chairs via KageDesignStudio
#6 Wooden planter box holding mason jars

Simple to realize and insanely beautiful at the same time. Plant mason jars in it and transport them wherever you feel the fit best.
Wood Planter Box via RedClayWoodworks
#7 Craft a reclaimed wood kids' table
Spoil your kids with this adorable Reclaimed Wood Child’s Table. It has the design of a miniature picnic table, but looks classy enough to fit in any grown-up space. The tabletop and benches are made from reclaimed walnut wood and are mounted on a solid, steel base making this a super sturdy table for rambunctious toddlers and preschoolers.

Reclaimed Wood Child’s Table via TheWhiteShanty
#8 Extend your counter space with a reclaimed wood kitchen island
If you need just a little more counter space and storage you can design a beautiful wooden kitchen isle finished with butcher block top. In small spaces this piece on wheels can take versatile roles and boost practicality to great extent.
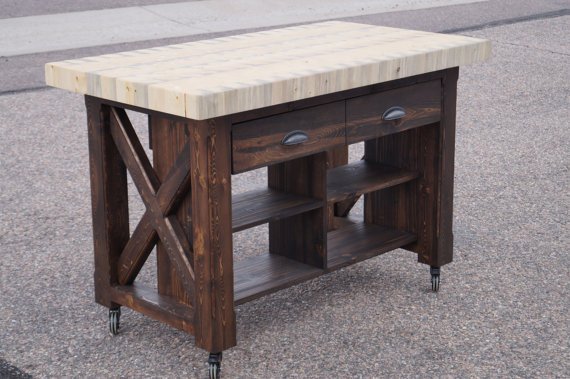
Reclaimed Wood Kitchen Island via ColoradoTablesLLC
#9 Create a reclaimed wood kitchen pot rack from an old beam
Salvage an old beam from a construction site and store your kitchen utensils in a beautiful noble manner. The farmhouse aesthetics are a great addition to you kitchen and you can customize this piece through lighting and gas pipe hangers.
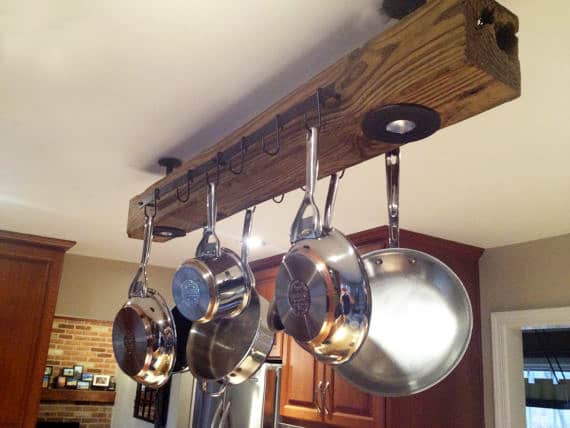
Reclaimed Wood Kitchen Pot Rack via JoyAllenDesigns
#10 Use a sculptural wood piece to create a bar
Simple and efficient to realize, a reclaimed wood bar height table can be a great addition for entertaining. The one showcased below has been realized from black walnut wood. The natural curve of the tabletop and its shine is bringing the wonderful texture forward making everything warmer and cozier.
Reclaimed Barn Wood Bar Height Table via michaelheuser
#11 Wooden bar stools with metallic structure
Realized from stool and walnut barn wood in this case the pieces below do exude a sleek modern vibe. You can use them to transform your isle into a dinning table or to simply emphasize your home bar. Their industrial aspect is just a little more cozier thanks to the warmth of the wood. What do you think?

Reclaimed Wood Bar Stools via TheWhiteShanty
#12 Create stunning vintage reclaimed wood media consoles
The craft below is definitely not easy to realize but the results are simply breathtaking. If you are happy enough to find such a metallic structure somewhere take it under your wing and transform it to something memorable; here the steel mesh intensifies the piece and accentuates its vintage urban vibe in a splendid manner.
Urban Vintage Industrial Media Console via leecowen
#13 Accessorize your living room with a reclaimed wood coffee table
Simple and easy to realize the coffee table below takes advantage of a metallic structure and it completes its industrial allure with distressed barn wood. The simple setup can easily morph into an all wood setup in which knots in the wood and various footprints of time do come forward beautifully.

Reclaimed Wood Coffee Table via ArtistandCarpenter
#14 Create a modern reclaimed wood chair
This chair requires no introduction but its DIY alternative will definitely need a long how-to tutorial. Sleek and modern design lines are defining the cumulation of textures into a great piece, plan it through and have patience, you will make it.
Modern Reclaimed Wood Chair via nicklopezart
#15 Reclaim your position with a salvaged wood desk
Thanks to the hairpin legs and the rustic look of the top the piece below signals warmth in a contemporary design. The piece of wood carries a great story, being salvaged from a hundred year old Midwestern American structure. The mid-century vibe provided by these desk hairpin legs to a piece of Douglas fier wood is simple breathtaking.

Urban Reclaimed Wood Desk via UrbanWoodGoods
#16 Reclaimed wood and leather lounge chair
A contemporary look worn proudly by a craft with wood and leather. The lounge chair below can can be nestled wherever you need it. The wood used is supposedly over a hundred years old and it uses soft cow leather hand stitched to obtain its cool domestic look.

Reclaimed Wood And Leather Lounge Chair via TicinoDesign
#17 Superb rustic reclaimed wood standing shelves from a barn
These beautiful pieces have transformed the interior in which they reside in a breathtaking manner, mounted on an industrial flat, stainless steel frame the shelf adds authenticity to the space along with coziness and warmth.
Reclaimed Barn Wood Standing Shelves via TicinoDesign
#18 Wood platform bed frame with bed hairpin legs
By tailoring your own furniture you get to create custom sizes that you actually want, and need. The wood platform below can count as a huge bed or a regular one with built in side-table. The end of a table can hold your books comfortably or serve as a bench to use when you need to change. The craft below is supposedly realized from Douglas fir wood salvaged from old buildings and it has a steel frame on steel hairpin-like legs.

Reclaimed Wood Platform Bed Frame via CroftHouseLA
#19 Beautiful reclaimed barn wood headboard
Boost your bedroom look with a gorgeous salvage barn wood headboard close to its original state. Mount two rustic lights on it to boost practicality and enjoy the cozy aesthetics values. A great focal point in a mesmerizing interior design.

Reclaimed Barn Wood Headboard via ReBarnCHF
#20 Simple reclaimed wood bathroom shelf
Add some extra storage in your bathroom in a beautiful package. An elegant rustic charm can be achieved through a simple wooden shelf wearing that french country home finish.

Reclaimed Wood Bathroom Shelf via honeystreasures
#21 Salvaged pallet wood bed tray
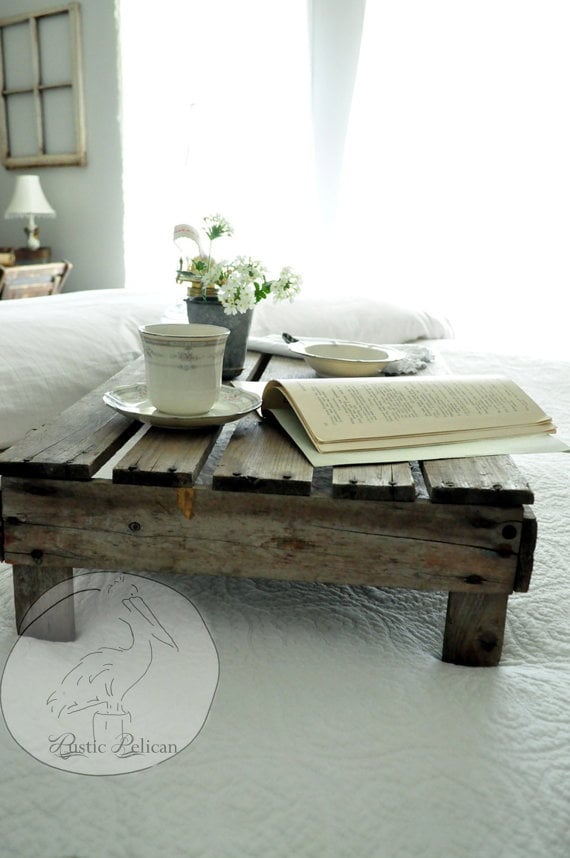
Serve your breakfast in bed or work with your laptop comfortably in fluffiness.
Reclaimed Wood Bed Tray via RusticPelican
#22 Construct a wood vanity cabinet for your sink
This craft, as well, can be tailored to your needs. You can build a vanity cabinet that uses galvanized buckets or galvanized bathtubs for a phenomenal industrial rustic look.
Reclaimed Wood Vanity Cabinet With Sink via WoodArtWorld
#23 Reclaimed wood sliding barn door
If you have the opportunity to nestle such a cozy solution in your decor do not hesitate, it simply works.
Reclaimed Wood Sliding Barn Door via DownHomeLiving
#24 Super cool reclaimed wood diy wall paneling
You can easily entitle this piece wall art. The coziness and warmth of the wood as a permanent background in your living room might be the most beautiful thing you can plant on your wall.
Reclaimed Wood DIY Wall Paneling via ABWframes
#25 Enhance festive entertaining with an oak barn wood beer cooler

Reclaimed Oak Barn Wood Beer Cooler via TerramaeAndCo
#26 Industrial wood lounge chair and ottoman

It might not be everyone`s cup of tea but the lounge chair wears a beautiful rustic industrial design that will beautifully enhance certain design lines.
Reclaimed Wood Lounge Chair & Ottoman via Mainstreetmercantile
#27 Build a reclaimed wood chest
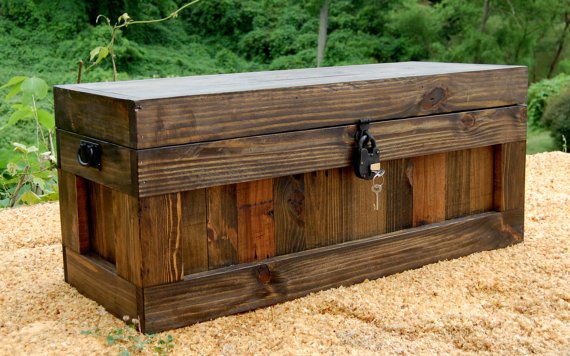
Reclaimed Wood Chest With Padlock And Key via LooneyBinTradingCo
#28 Graphic glass and wood installations
Details are making the difference. Everything lies in the details. Decorating with reclaimed wood highlights this fact, making a statement through its texture and density encapsulating memory. You can use installations of wood and glass to trigger feedback, emotion in plane environments.

Reclaimed Wood And Glass Clothespin Floating Shelves via TicinoDesign
#29 Reclaimed wood mason jar lighting fixture
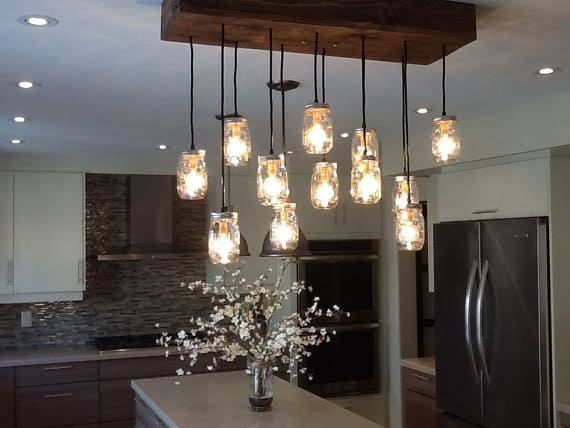
A touch if intimacy in an elegant rustic lighting fixtures can go a long way. In the setup above it simply transforms the space subduing everything around it.
Reclaimed Wood Mason Jar Chandelier via TheHoneydew
#30 Neat reclaimed wood railroad spike coat rack
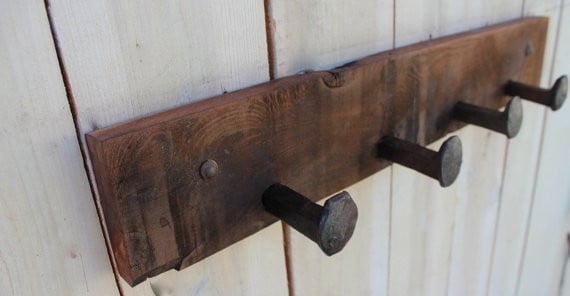
Simple and efficient, bagged with memory and meaning, the coat rack above simply demolishes pretty much everything that you can purchase now new.
Reclaimed Wood Railroad Coat Rack via honeystreasures
#31 Bluetooth wooden speakers

The audio wizard diy enthusiasts already know that this is an extraordinary option for its center piece. The wood required for such a craft requires certain parameters that are hard to match with salvaged wood. The piece that will match the requirements will change the game through exclusivity and authenticity/.
Bluetooth Reclaimed Wood Speakers via SalvageAudio
#32 Elegant rustic reclaimed wood mirror
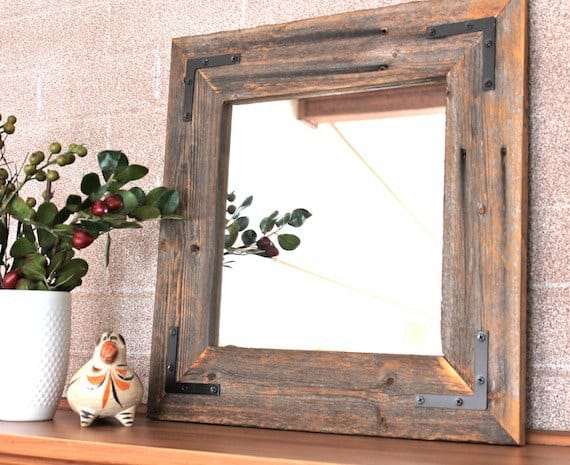
Reclaimed Wood Mirror via HurdandHoney
#33 Rustic pallet wood clock
Beautiful and unique, your own elegant portion of time.
Reclaimed Pallet Wood Clock via Haleyjunebug
#34 Simple to realize wood wine rack

Enhance your entertaining kit with a simple and beautiful wood wine rack.
Salvaged Wood Wine Rack via RusticModernDecor
#35 Hallway mail and keys organizer from salvaged pallet wood
Pallet Wood Key And Mail Organizer via BreakingandRemaking
#36 Jute mail print on reclaimed wood mail box
Salvaged Wood Mail Box via BordenSpecifics
#37 Wooden stool realized from reclaimed wood
Very practical and beautiful wooden stool realized from salvaged wood. Notice the dark finishing that boosts its coziness and warmth.
Reclaimed Wood Stool via PegandAwl
#38 Wooden cutting board with handles
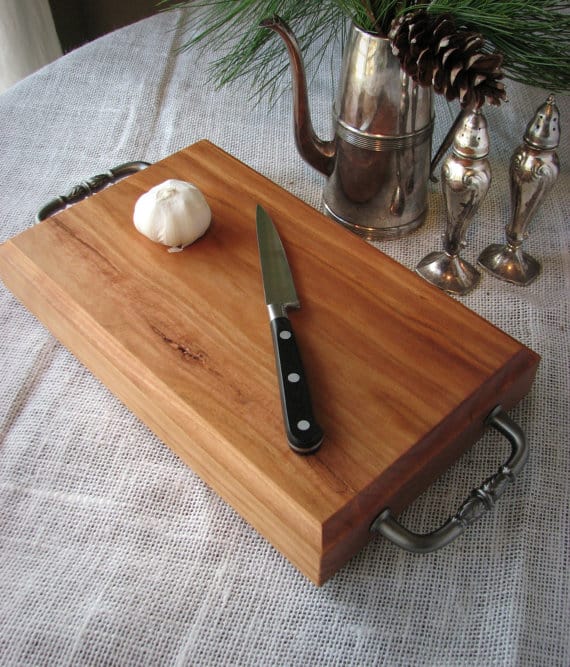
It is recommended to use a piece of hardwood for a longer life span. Adding handles might appear useful but think about its placement and utilization properly before installing them.
Cutting Board via ecoSMITH
#39 Beautiful wooden drink coasters

Immense beauty in a small package, everything you would like from a coaster.
Neat Coastersvia KimbleStudios
#40 Salvaged wood beer tote

Beer Tote via RockyMountainWood
#41 Build or up-cycle a wooden stair
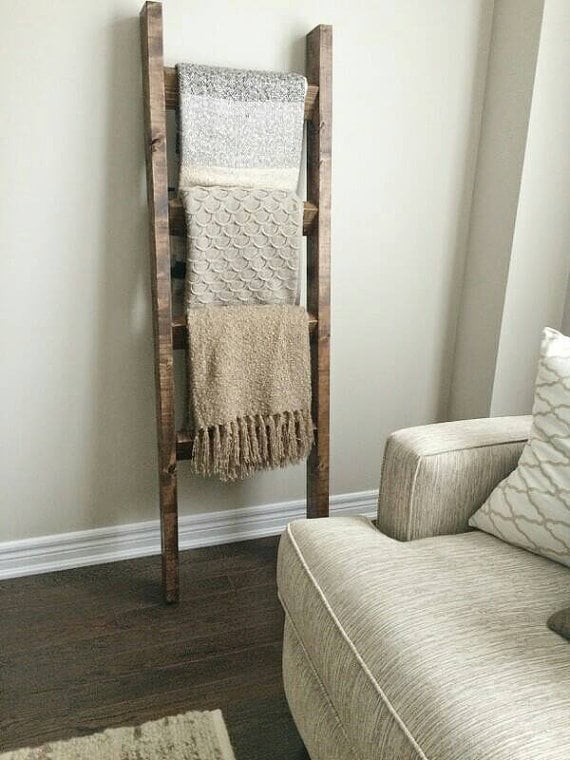
You can use it for towels in the bathroom or for blankets in the living room and in both cases, the effects will be splendid.
Blanket Ladder via PipeAndWoodDesigns
#42 Use salvaged wood to build your own chalkboard sign
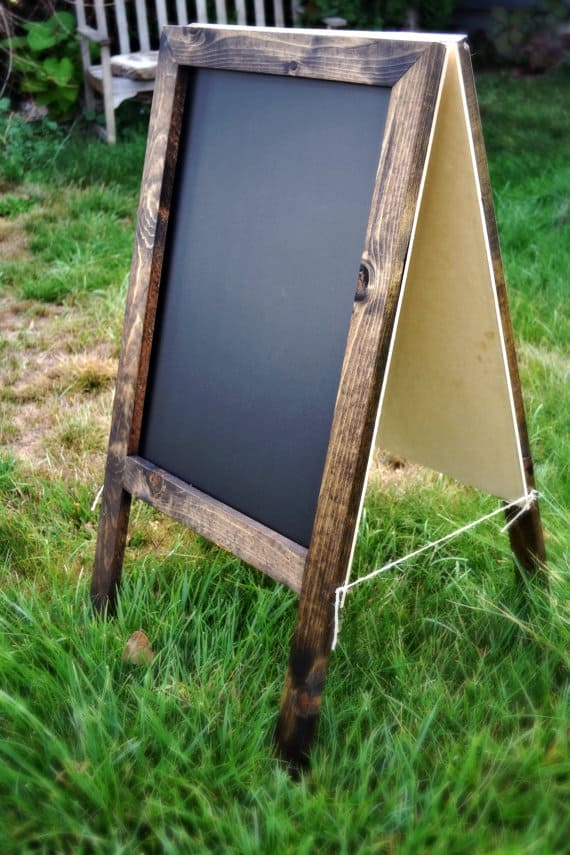
Neat and easy to realize craft. Use it to add a vintage touch to your shop, event or even home kitchen.
Chalkboard via MintageDesigns
#43 Reclaimed wood tub caddy
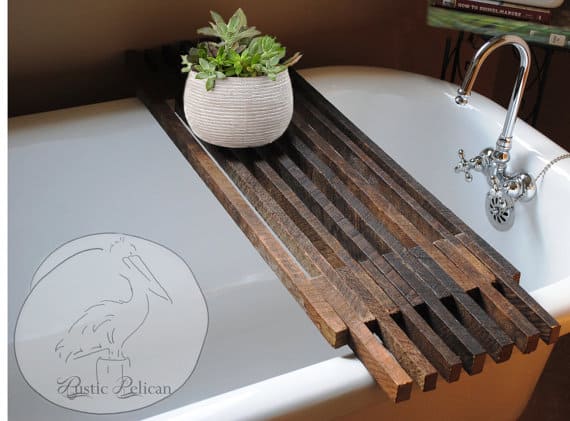
Simply breathtaking look for a relatively easy craft. If you soothe your nerves with hot long baths you will definitely enjoy this beautiful element of design.
Wood Tub Caddy via RusticPelican
#44 Tiny tiny reclaimed wood soap holder
A small element of design that can easily transform your bathroom counter through its texture.
Salvaged Wood Soap Holder via OnceUponAHive
#45 Wood towel hooks for your bathroom
The wooden texture can be brought in pretty much any interior design though thousands of elements. Choose to insert it through towel hooks in your bathroom to see how it will look and adapt from there.
Towel Hooks via AmbersWoodenBoutique
#46 Wood toilet paper holder
Rustic Wood Toilet Paper Holder via BandVRusticDesigns
#47 Salvaged wood tree rope swing realized in minutes

Realize a simple rope swing in just a few minutes and enjoy the beautiful weather outside.
Salvaged Wood Tree Rope Swing via knottypinedesigns
#48 Reclaimed wood dog feeding station with rustic look

Make the life of your furry friend easier by raising its feeding station off the ground. If you use salvaged wood your costs will be next to zero.
Rustic Wood Dog Feeding Station via Kustomwood
#49 Use salvaged wood to construct a pet bed

You can create a comfortable small bed for your friend and make his or her life just a little cozier.
Reclaimed Wood Pet Bed via RusticPelican
#50 Salvaged Wood Serving Tray

Wood Serving Tray via TheHarvestTrailJourn
What do you think about these crafts? We would love to hear your opinion on the subject in the comment section below. Salvaged wood is an immense resource and if collected and used properly it has immense potential too, it can transform space in a breathtaking manner..
Related Articles
19 Different Types of Mid-Century Modern Furniture
Unusual and Bizarre Furniture Designs You Have Ever Seen
9 Best Hand Sanders For Furniture
You have the opportunity to realize something beautiful, something great, something cost efficient cozy and warm. You just need time, patience and love to invest in a small craft that will remain as a living memory in your household. It is wood; it is the supreme material that surrounds us and transforms the world as we know it through its beautiful cozy and warm textures.

We have curated a list of 19 Smart and Beautiful DIY Reclaimed Wood Projects To Feed Your Imagination and we invite you to cast a glance at the galley below. You will find crafts of various difficulties and different types, choose your favorite and start crafting!
RELATED ARTICLES
49+ Insanely Smart Reclaimed Wood Furniture and Decor Projects For a Green Trendy Home
16 Beautiful and Inexpensive DIY Wood Lamp Designs to Materialize
30 Sensible DIY Driftwood Decor Ideas That Will Transform Your Home
23 Recycled Wooden Pallet Wall Art Ideas to Realize This Summer
15 Breathtaking DIY Wooden Lamp Projects to Enhance Your Decor With
#1 square reclaimed wood wall art
#2 personal handcrafted mail organizer from reclaimed wood
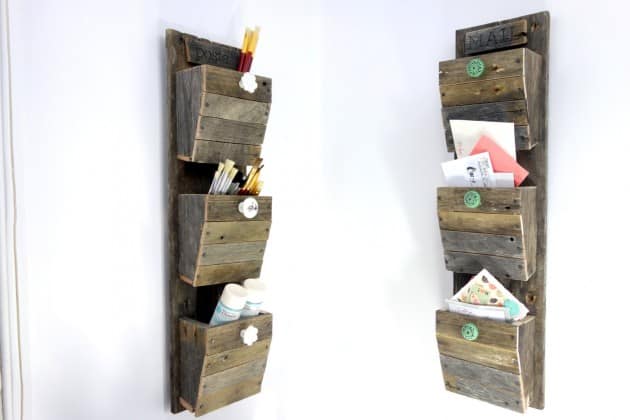
#3 neat wooden pallet wine rack
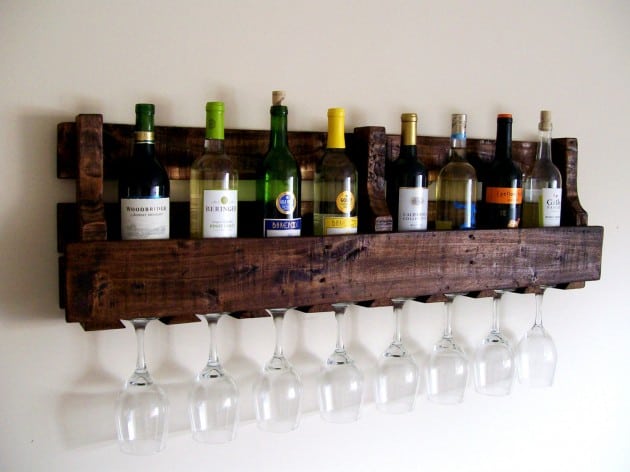
#4 address PLAQUES realized from pieces of reclaimed wood

#5 vintage colors on a salvaged wood clock
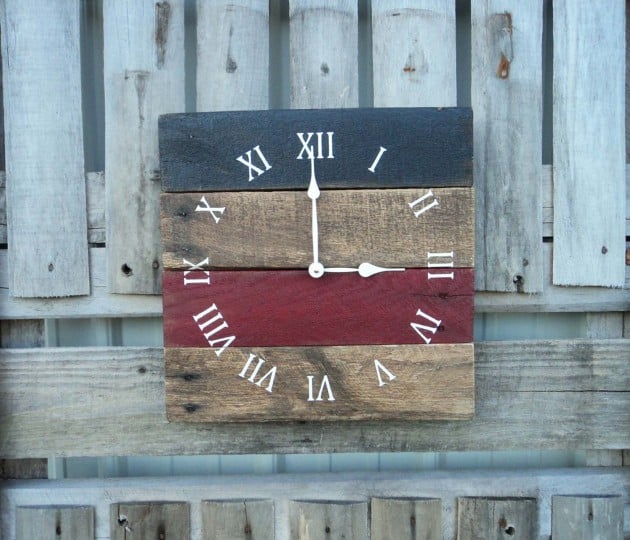
#6 build a reclaimed wood bookcase in just a few minutes

You can use these as modules and play with them in different settings or simply scale the project up into one piece if needed.
#7 craft a rustic wooden tray for your coffee table

#8 enhance a reclaimed wood desk and use it

#9 build a rustic wall mounted magazine rack and mail organizer

#10 beautify old benches or tables with wooden surfaces

#11 super neat reclaimed wood shelving unit

#12 tailor hallway shelf to hold your keys and mail
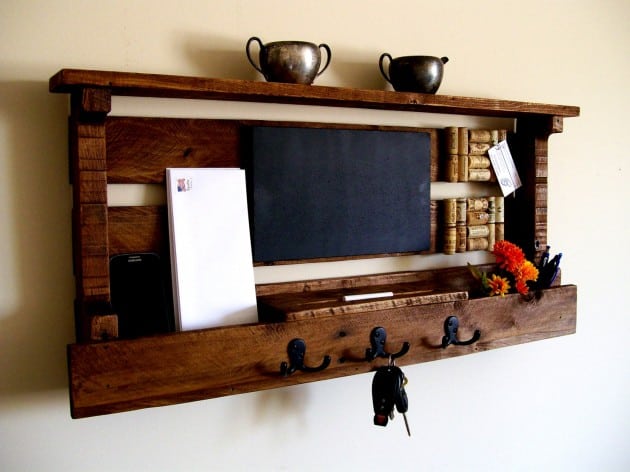
#13 neat reclaimed wood tv stand or coffee table

#14 build your own bed out of reclaimed wood
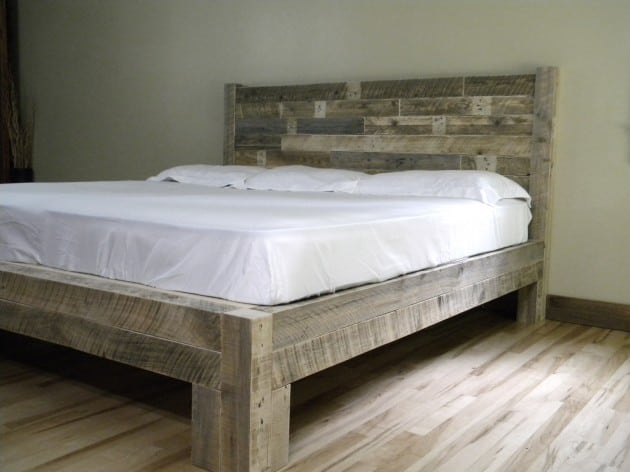
#15 tiny Salvaged wood tray with rope handles
#16 Enhance your party kith with a rustic 4 pack beer tote

#17 reclaimed wood wall art doubling as a green wall
#18 Coat rack aided by reclaimed wood
#19 industrial pipe arms combined with a wood shelf
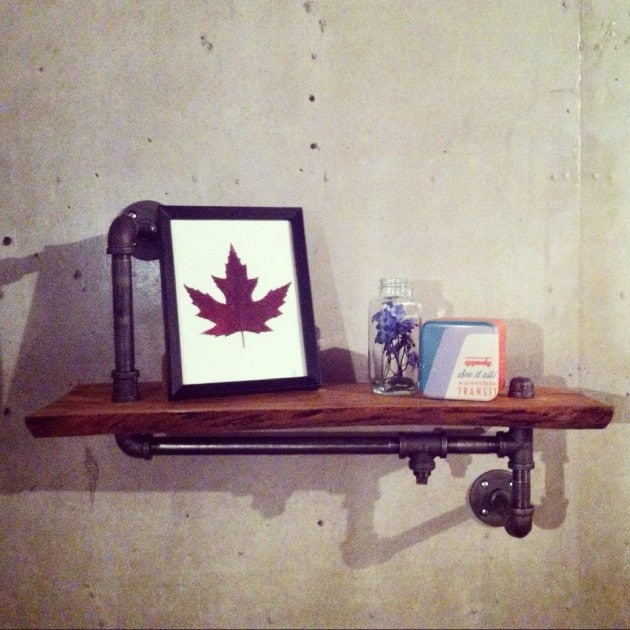
Simple yet beautiful and efficient. Wood is simply stunning. What do you think? We would love to hear your opinion on these DIY reclaimed wood projects in the comment section below.
If the dull and flaky walls of your home are becoming an eyesore, reviving your space is the need of the hour.
![Sherwin Williams Vs. Benjamin Moore [A Clear Winner?]](https://homesthetics.net/wp-content/uploads/2021/09/Sherwin-Williams-vs.-Benjamin-Moore-01.jpg "Sherwin Williams Vs. Benjamin Moore [A Clear Winner?]")
Painting is the easiest way to spruce up the interiors of your home. Sherwin Williams and Benjamin Moore are two top brands that come to mind while searching for the best paint. Both these brands have been favorites of professional painters and DIY enthusiasts.
Since both brands offer top-notch quality paints for your home, choosing the perfect one for your walls would be a challenging task. But, to make things easier for you, we gave a shot at some of the paints from these brands to get a clearer picture.
We have handpicked a few of the best paints from these brands to discuss their features, what's good and what's bad to help you make an informed decision.
So, without any further delay, let's dive right into the details.
Sherwin Williams vs. Benjamin Moore

The walls of the home aren't painted every year, and so, the paint you choose to brighten them must be durable enough to withstand wearing, fading, and chipping. While the Sherwin Williams paints are ideal for your furniture, cabinets, and other similar tasks, the Benjamin Moore paints are perfect for coating the exteriors.
The two powerhouse paint brands are the go-to brands for the professionals, mainly because of their top-notch quality and performance. Also interesting is the fact that these two paint brands offer both high-grade and low-grade paints to suit your needs and budgets.
Both brands can revive the interiors of your home through their vibrant colors. They can add style and enhance the aesthetic value of your space while also preventing them against the elements.
A Glance At Sherwin Williams
For over 150 years, Sherwin Williams has been adding life to the living spaces of the Americans. If you want to quick-fix the walls of the office or add a dramatic haul to the bedroom, Sherwin Williams paints will transform the entire tone of your space.

Speaking of its products, there is a whole kit and caboodle of all the painting needs of the painters. From primers, sealers, wood stains to aerosols and floor coatings, you get everything you want. Apart from paints, you get painting equipment and safety gear too.
With their wide variety of stains, you can enhance the fences, revive furniture, repaint your cabinets, and even add vibrant hues to the plain walls. Speaking of the color palette, Sherwin Williams palettes are pretty impressive. From finest whites to warm and cool neutrals, you can lay your hands on any color. They are curated to add style and elegance to your space.
A Glance At Benjamin Moore
Benjamin Moore's infinite color palettes will perfectly suit your taste. No matter whether you are looking for whites, neutrals, or rich marsala red, they perfectly add style and class to your space. Their colors can add exuberance to your dull living room and even liven up your bedroom.
For decades, they have been delivering top-quality stains and finishes throughout the nation. What's more interesting is the coverage it offers to your walls. Speaking of durability, these paints are highly durable and protect the exteriors of your home from the elements.
With their specialty glazes, finishes, and paints, you can overhaul the walls into spectacular pieces of art. Also, their color palettes are designed by the expert for your convenience. From their vast color collections, you can choose any color and brighten up the interiors of your space.
Whether you are a professional painter, a DIYer, or a hobbyist, Benjamin Moore's diverse color collection is perfect for all your painting, repainting, and DIY projects.
Sherwin Williams vs. Benjamin Moore: A Comparison
The two powerhouse paint brands of the USA, Sherwin Williams and Benjamin Moore, are a painter's favorite, mainly because of their premium-quality stains. And now, after getting an idea of the two brands and their products, we assume you're ready to jump right into the comparison of the two.
Without a doubt, the paints of both these brands offer excellent coverage, shine, and durability. And so, if you are a hobbyist or a DIYer looking for the best stain for the next project, you need to know what sets the two brands apart.
So, we will go through certain important factors you must pay attention to while choosing between the two.
-
Paint Coverage
Regardless of the size of your project, coverage is the most important feature while choosing any paint for your project. As such, the premium paints from Sherwin Williams and Benjamin Moore are slightly expensive. However, they offer exceptional coverage, hiding marks and old stains without a hitch.
Also, whether you use rollers or brushes, the coverage remains unaffected. And, with just one coat, you're done with the painting task. As such, the professionals have been using this paint for years because of the excellent coverage it offers.
Furthermore, the Aura product of Benjamin Moore is highly popular among the masses because of the smooth finish and even coverage that it offers to your surface. Plus, you'd also be pleased with the Regal Select paint in one primer, which offers even better coverage than the standard Regal paints.
And, if you're going for Sherwin Williams, then you must lay hands on Sherwin Williams Cashmere as its paint and primer in one combo provide a buttery smooth application.
Going with slightly expensive paint might be better if you are a DIYer, a hobbyist, or an enthusiast working on any painting project or repainting your living space. This is because the cheaper ones do not offer even coverage. Also, they tend to leave lines on the surface, which is not the case with these paints.
-
Color Fan Decks And Color Files
If you've been into painting for quite some time, you must already know about the "fan deck." However, in case you don't, let us tell you.
Put simply, they are a collection of all the shades offered by the brand. They are named so as the book spreads out like the fan. Fun, isn't it?
Both the Sherwin Williams and Benjamin Moore offer a fan deck that consists of paint chips of the shades offered by the brand. We've got our hands on both the fan decks, and we can say that both of them offer a wide range of hues for you to choose from. However, the Sherwin Williams one stands out in contrast to Benjamin Moore's.
The Sherwin Williams fan deck is the most versatile as it consists of over 2,000 colors which is pretty impressive. Moreover, it features sheen, gloss, and even gray-shade primer chips. This makes it easy for you to understand the texture and shade without the hassles of visiting a store.
Benjamin Moore's color fan deck is curated by the experts. They offer around 5 fan decks ranging from subtle and sophisticated hues, airy pastels, and neutrals to dramatic deeps and bold hues. With such a diverse range, you can choose whichever shade you want.
There is no doubt that the color palettes of both brands are manifold. However, we've seen customers prefer Sherwin Williams over Benjamin Moore because of its myriad shades.
Whether you should choose Sherwin Williams or Benjamin Moore's fan deck depends entirely upon your needs and preferences. However, if you are a professional painter, you must go for the Sherwin Williams fan deck. And Benjamin Moore's fan deck is excellent for all the novices, DIYers, and hobbyists.

-
Quality
Whether you are looking for a quick fix or want to give a complete makeover to the interiors, a paint of high quality can provide the much-needed finish to your surface. The market is saturated with cheaper paints of inferior quality, which are prone to peeling and chipping. Also, they leave a banding effect on the surfaces.
But none is the case if you go for premium quality paints. So, a top-notch quality paint will be the best option for your next renovation project. As such, the high-grade paints from Sherwin Williams and Benjamin Moore are slightly expensive; they provide a smooth and even finish to your surface.
Although you'd notice the quality of both the paints is similar to each other, most people prefer Benjamin Moore over Sherwin Williams. So, in terms of quality, both these brands are equally good, and you can use either one for your projects.
Be it Sherwin Williams or Benjamin Moore, you may use whichever appeals to you, for they both are premium quality paints and will provide a smooth finish.
-
Durability
Both Sherwin Williams and Benjamin Moore's paints are highly durable. They are resistant to wearing, chipping, and flaking. If painted on the exteriors, such as fences, they protect the surface from the elements.
If you are planning to go for Sherwin Williams, you must try out the Duration Home Interior Acrylic Latex paint, for they are highly durable. This would be perfect for adding durability to the walls of your home.
Also, if you are looking to add durability to the trims and cabinets, you must try the Emerald urethane trim enamel. It will provide the much-needed durability to your surfaces, making it resistant to wear and tear. Apart from this, SuperPaint and ProClassic would also be excellent options to add durability to furniture, cabinets, and walls.
But, if you plan to use Benjamin Moore for your next renovation project, Aura is a must-try, for it is the most sophisticated line of paints. It is best for those spaces which will be frequently cleaned for it offers excellent durability.
So, as far as durability is concerned, both Sherwin Williams and Benjamin Moore are similar. However, people tend to prefer Benjamin Moore over Sherwin Williams because of its improved durability.

-
Performance
You don't paint your home every now and then. So, you might as well choose a high-performing paint. Both brands are on the same terms as far as performance is concerned. While talking about performance, coverage, and touch-up are the two areas you need to consider. The number of coats you need to cover your surface is known as coverage. The better the brand you invest in, the fewer coats you will require.
Moreover, cheap quality paints offer nothing but poor coverage. So, it's better to invest in a top-notch brand to ensure efficient performance.
And, the next thing to consider is touch-ups. If, after a few years, your paint begins to flake or chip away, the brands offer touch-ups. Of course, you'd want a good touch-up that will blend seamlessly with the previous coating and not a bad one that leaves marks. So, you must invest in high-end paints for flawless touch-ups.
In terms of performance, both Sherwin Williams and Benjamin Moore are outstanding. In fact, it is the go-to paint for all professional painters and amateurs. However, while testing, we found out that Benjamin Moore surpassed Sherwin Williams because it is super easy to apply, offers more durability, and is easy to clean.
So, if you are a novice and have not much experience with paints, Benjamin Moore is the best to get your hands on. However, for professionals, Sherwin Williams is an excellent choice.
-
Accessibility
Getting your hands on Sherwin Williams and Benjamin Moore isn't difficult. As they are popular paint brands, you can easily buy them from the local stores. However, there's a slight difference in ownership. Sherwin Williams stores are locally owned, while Benjamin Moore has authorized dealer outlets.
The novices just have to google outlets near them and walk into their favorite brands' store to get their hands on the pastel or neutrals to create their masterpiece.
-
Affordability
If you're wondering which of the two brands comes with an affordable price tag, then let us tell you that there isn't much of a difference.
Benjamin Moore's one paint can of 2 gallons will cost you around between 45 to 50 dollars. But, we've noticed Sherwin Williams is slightly on the expensive side. So, if you are looking for an affordable option, Benjamin Moore is perfect. But if your client demands Sherwin Williams coating, you might as well shell out a few extra bucks.
Also, the prices fluctuate every now and then. So, it is best to keep an eye on them so that you can have a great deal when the prices are low. And, if you want to pinch pennies, you can keep an eye on their space for deals and discounts.
Sherwin Williams Paints vs. Benjamin Moore Paints
Sherwin Williams and Benjamin Moore are the two powerhouse brands providing quality paints for all your needs. In terms of quality and performance, both brands are on cut-throat competition as both ensure even coverage and a smooth finish to whatever project you have at hand
However, you won't buy paints from both brands. So, to make things easier for you, we'll now compare a few popular products from Sherwin Williams and Benjamin Moore to help you gain more clarity so that you pick the best.
So, without any further ado, let's dive right into the deets.
-
Benjamin Moore White Dove vs. Sherwin Williams Alabaster
If you're looking for the white paint to brighten up your space, then both these paints from the two brands are excellent. These high-quality paints create a perfect backdrop for all your masterpieces.
When it comes to appearance, they look pretty similar to each other. But, after testing both, we can say that the Benjamin Moore White Dove gets an edge over Sherwin Williams Alabaster due to its enhanced durability.
In comparison to the white dove paint, which is easy to spread and clean once dried, the alabaster paint dries rapidly and provides a glossy surface. Although both the paints are just about the same price, the Benjamin Moore provides an excellent value for your money if you're looking for a 2 gallon can.
The Benjamin Moore white dove is the best for novices, amateurs, and DIYers, while the alabaster paint is excellent for professionals.
-
Benjamin Moore Ben vs. Sherwin Williams Opulence
Benjamin Moore Ben offers excellent coverage to your walls, flawlessly hiding all the marks and stains. That being said, it comes with an expensive price tag. But if you're simply planning to repaint your bedroom, Sherwin Williams opulence will be perfect.
Both of these paints come with the same coverage, and so just with 2 coatings, you're done. But while testing the two paints, we came across the fact that Sherwin Williams spreads quickly with a roller and provides smooth walls than the Ben by Benjamin Moore. Because of its smoothness, you are able to roll the walls in a breeze.
It is true not a lot of enthusiasts or hobbyists pay attention to this. But, if you are a professional in this field, you know how important this factor is. If you are a DIYer, you'll love the Sherwin Williams Opulence because of its buttery smooth application.
-
Benjamin Moore Regal Select vs. Sherwin Williams Cashmere
If you have a large-scale project at hand, we assume you're in quest of a variety of paint offering different finishes. As such, the Regal Select and Cashmere by the two powerhouse brands come in a variety of finishes to meet your needs.
Although both the paints are of premium quality, the Regal Select is a cut above Cashmere. And this is why it costs a few bucks more than Cashmere. Also, the Regal Select is easier to spread, clean, and is highly durable than the Cashmere.
So, if quality is your major concern, Benjamin Moore is a better bet any day. However, if it isn't available in the local store, you can order it directly from their website.
-
Benjamin Moore Advance vs. Sherwin Williams ProClassic
If you are confused between Benjamin Moore Advance and Sherwin Williams ProClassic, then let us ease your confusion. We tested both the products and found Benjamin Moore's Advance paint was of better quality than the Sherwin Williams ProClassic. The novices, DIYers, and hobbyists can easily use this paint, for it is easy to spread.
Also, you do not have to recoat the surface to ensure an even finish, thanks to its thick consistency. Furthermore, using a sprayer will provide a better sheen to your surface.
We also noticed that the Advance paint did not emit as much odor as the ProClassic paint, thanks to its low VOC. So, you can work for long hours without worrying about headaches.
However, the ProClassic's odor isn't very strong. It has some weird plastic kind of smell which disappears in a day. Simply put, the Advance paint is almost odorless while the ProClassic emits an odor.
As for the quality, the Advance paint is of much better quality than the ProClassic. Overall, both the paints offer a smooth finish and excellent coverage. Also, it is relatively easy on your pockets.
If you are sensitive to strong smells, Benjamin Moore's Advance paint will be the best for you. But if you can withstand odors and want to freshen up your room with a subtle glow, Sherwin Williams is the best option.
Why Prefer Sherwin Williams?
Sherwin Williams is without a doubt world's most renowned brand offering stains and coating for various purposes. What catches our attention is that it offers over 2000 colors to choose from to get what you want. Whether you are looking for brighter white or crabby apple, Sherwin Williams has it all. Also, you can get shades customized and paint the interiors with your favorite hues.
You'll love the buttery smooth application and excellent coverage offered by their paints. Whether there are marks or stains on the walls, Sherwin Williams covers all the imperfections flawlessly. Also, they furnish your home with elegance, thanks to their premium quality.
Furthermore, their stain-blocking paints cover the previous stains flawlessly on your walls. And Sherwin Williams paints are super easy to clean and can also withstand fading. Plus, if you’re confused regarding the shades, they've got experts to help you out.
Why Prefer Benjamin Moore?
Whether revamping a client's house or renovating your own space, Benjamin Moore's wide variety of shades will perfectly add life to your space. Their Natura range of paint is odorless because it contains no VOCs. You can ensure long working hours without posing any threat to your health.
They are the painter's favorite because they can be easily spread using rollers. You can clean them easily using water and mild soap. What's interesting is that they offer excellent coverage. Simply apply 2 coats, and your job is done. Moreover, you'll love their vibrant hues, which add class, elegance, and style to the homes.
Furthermore, whether you are looking for a quick fix or dramatic overhaul, you can do anything without costing a fortune. Also, their high-pigmentation technology doesn't let the color fade, ensuring they last really long. So, they are highly durable.
Frequently Asked Questions
Since both the brands are pretty identical in terms of performance, coverage, and finish, we understand you might have some queries regarding the two. So, we'll be answering a handful of the most commonly asked questions. Let's have a look.
-
Which Is The Better Brand For Painting The Exteriors?
Although both the brands offer premium quality paints, we recommend Sherwin Williams for painting the exterior surfaces. You can go for Sherwin Williams Exterior Acrylic Latex, for they are highly durable. Their thick consistency offers excellent coverage to your surfaces. Use them once, and they will last for years.
Also, another amazing product for your exteriors is the Super paint from Sherwin Williams, which offers excellent protection against the elements and also withstands peeling and fading. Also, it is resistant to mildew and dirt.
-
Which Company's Paint is The Best?
As it is, it all depends upon the user's needs and preferences. However, in our opinion, Benjamin Moore edges over Sherwin Williams, mainly because of its enhanced durability.
They are easy to apply, resistant to fading, and chipping and have a quick dry time compared to Sherwin Williams. Also, they are the go-to paints for professionals.
-
Which Brand Is Best For DIY works?
For a DIY person, Benjamin Moore would prove to be an excellent option. Its thick consistency provides excellent coverage. You can use a roller or a brush and easily apply it to your walls. You also don't need to worry about the paint running down due to its thick consistency. So, for a beginner or a DIYer, this is an excellent option.

Summing It Up
When it comes to paints, both Sherwin Williams and Benjamin Moore are the best in the US.
While Benjamin Moore is more popular among the novices and DIYers, Sherwin Williams is much preferred by professionals.
They are pretty identical to each other in terms of performance, coverage, durability, and accessibility. Both brands indeed manufacture similar quality products, and so it isn't easy to pick a winner. Ultimately, it boils down to your needs and preferences. Honestly, in our opinion, it is a tie.
With that, we come to the end of our guide. Hopefully, you will be able to pick the correct one for your needs. Let us know which brand you'd opt for your painting tasks.
Till then, happy painting!
Have you been thinking about using oil paints? If yes, then you must have come across various solvents.

The most common variants available on the market are the traditional paint thinners and mineral spirits. On the shelf, the bottles of both solvents look similar, and it can especially be confusing for a beginner to choose between the two.
Making the right choice is crucial to make a decision that would give you better results while applying the paint. As many people can be sensitive to these solvents, knowing about the products helps you to take better safety precautions.
Hence, we have come up with this informative guide to help you choose between paint thinners and mineral spirits. Moreover, we will take a look at each variant to see if they are really that different. And, don't forget to check our suggestions of ways to use the solvents.
So, without much ado, let's begin!
Paint Thinner Vs Mineral Spirits Differences
![]()
Before we get into the differences seen in the two solvents, it's important to look at an overview of each variant. This would give you a snapshot of what to expect from the solvents and to decide on the right choice for your task. So, let's have an in-depth look at both products.
What Is Paint Thinner?
When choosing a solvent, the most common option to come across is the paint thinner. It has been in use for a long time, and most of us recognize paint thinner because of its strong smell, which can be off-putting for many people.
This solvent used to be a go-to option for those when most paints used to have an oil base. However, paint thinners also work with acrylic paints and many other paints except latex-based products.
One of the things that you should know is that, like many other solvents, paint thinners are also a derivative of petroleum. Hence, it's highly flammable and toxic, so you should be extra careful while working with the substance.
From the very name of this product, you can understand that its primary use is to thin out paint, specifically oil-based variants. All you need to do is add the paint thinner in the right proportions to change the viscosity or thickness of the paint. And then, you can apply the thinned paint with a brush or use it for spray painting.
These thinners also work well to strip paint from a surface as well as to clean brushes. These can also be used as a cleaning medium for taking off grease and grime from metal tools or even sanded surfaces.
Compared to other solvents, paint thinners are less refined, containing a higher amount of volatile organic compounds (VOCs), such as methylene chloride, formaldehyde, and benzene. Thus, working in a well-ventilated space is always recommended while using a traditional paint thinner.
Furthermore, many people prefer to use paint thinners because of their low price, especially when bought in bulk. Having said that, these paint thinners aren't a good choice for those who are prone to skin irritation from chemical solvents.
What Are Mineral Spirits?
Mineral spirits are also widely available in the market and are sometimes sold under the name of white spirits. This solvent is also derived from petroleum, but it goes through an elaborate refining process to limit the amount of volatile organic compounds (VOCs).
Even though all mineral spirits aren't free from toxicity, some manufacturers produce variants that are safe for the environment. One of the critical differences between mineral spirits and the usual paint thinners is their reduced smell. In fact, many companies have been able to get rid of the smell completely, and those variants are sold under the label of being "odorless."
Many professionals these days prefer to use mineral spirits inside confined spaces and homes because of their low toxicity levels. However, you should still avoid long-term exposure to the product.
When it comes to the use of mineral spirits, it's similar to that of the traditional paint thinners and can be used for the same jobs. Apart from working as a thinner for paints, some variants of mineral spirits are more potent, so it's much more effective when used as a paint stripper or a cleaning agent.
Another excellent feature of the mineral spirits is the low evaporation rate. Hence, it elongates the usability period of the paint, giving you a little more time to get a smoother texture.
Nevertheless, mineral spirits do come at a higher price point compared to traditional paint thinners. As only a tiny amount is needed for any task, a bottle of it may last you a long time.
So, if you're looking for a solvent that doesn't smell bad, and would work for indoor spaces, then you may think about opting for mineral spirits.
![]()
Differences Between Paint Thinners And Mineral Spirits
Are you a little confused about the differences between the two solvents? Let's have a detailed look at the contrasting points present between paint thinners and mineral spirits. While getting a solvent for your task, make sure to keep these points in mind to choose a product that will work according to your expectations.
-
Presence Of Volatile Organic Compounds (VOCs)
One of the first things to know about both solvents is the presence of volatile organic compounds (VOCs). These are predominant compounds present in petroleum-based products, and they are emitted from the solvents in a gaseous form. And prolonged exposure to toxic fumes can lead to health problems.
Moreover, the effect of these compounds is especially felt in an indoor environment as there isn't a way for the gas to escape. And, these toxic organic compounds are commonly found in all kinds of paint thinners and even paints. So, it's always advisable to wear proper safety gear while working with these substances.
To be honest, both solvents have volatile organic compounds (VOCs), but the traditional paint thinners contain a greater amount compared to mineral spirits. Also, some manufacturers of mineral spirits have refined the solvent even further to bring VOCs down to the minimal level.
Because these compounds give rise to pollution, it's advised to choose a solvent that's safer for the environment. Hence, the mineral spirits do have the upper hand, especially when you are going to use the solvent in an enclosed space.
If it's your first time buying a solvent, check the label present on the bottle to see its toxicity warnings. Furthermore, make sure to see if the solvent is suitable for indoor tasks.

-
Composition
As both solvents are used to thin paints, they can sometimes be mislabeled as just paint thinners. However, looking at the composition of a solvent can give you a clue about its differences.
If you are searching for mineral spirits, make sure to have a look at the bottle to see that it contains 100% unblended mineral or white spirits. This solvent is usually colorless and almost odorless because of going through a rigorous filtration process.
In comparison, the usual paint thinners have a blended composition and may even contain additives. It may include compounds like blended mineral spirits, turpentine, naphtha, acetone, or other substances that can thin out the paint.
Moreover, paint thinners are also known for containing a certain level of benzene which can help to mask the smell and allow the substance to produce a smoother mix with paints.
Interestingly, some paint thinners are entirely made of turpentine, an oil derived from pine trees. But, most people steer clear of using it because of the strong smell, which is retained for a longer time.
Knowing the composition of a solvent is also quite crucial to use it for the right job. One point of similarity present in mineral spirits and paint thinners is the inability to work with latex-based paints. Other than that, mineral oils are thought to be a more versatile substance, but you should still have a look at the packaging to find out its compatibility with your project.
-
Odor
Most people will agree that an off-putting thing about most solvents and paints is the obnoxious odor. This is especially true for those who are sensitive to strong smells, and working with such substances can lead to adverse effects on their health.
Additionally, when a solvent is being used for an indoor project, the smell may last for a while. Hence, anyone using the space may feel the woes of the odor released by the substances.
In the aspect of odors, mineral spirits are our first preference as most of them are low odor variants. And, some manufacturers have even gone forward and come up with completely odorless mineral spirits. So, if you're averse to the strong smell of traditional paint thinners, go for mineral spirits.
However, if you are going to choose the usual paint thinner, try to find a low-smelling variant. Besides, while working with a smelly paint thinner, always wear a mask to protect yourself from the toxic fumes.
-
Effectiveness
As a solvent can be used for different purposes, you should definitely check its level of effectiveness before making a decision. You will notice that there's a raging debate between people who prefer to use traditional paint thinners and those who use mineral spirits.
The best way to check the effectiveness of a product is by testing it out, but that's not always possible. Hence, it's necessary to check out the previous reviews to ensure that the solvent will work for your task.
Now, a solvent that works well while thinning paint may not be the best substance for cleaning metal tools. So, before purchasing, find out the use case for the particular solvent.
After going through the opinion of professionals, we concluded that mineral spirits are more versatile and effective. Additionally, pure mineral spirits are an excellent cleaning agent that can even get rid of sticky adhesives.
And, the best part about using mineral spirits is the smooth texture that it renders to paint. If you are working with expensive paint, it's always better to opt for mineral spirits.
Having said that, for certain materials, the usual paint thinners might be the most effective option. In such a situation, you may need to choose the paint thinner over the mineral spirits.
![]()
-
Cost
Even though we should judge a product by its quality, most of us end up basing it on the cost. And, the usual paint thinner is one of the cheapest solvents available on the market. Hence, many people gravitate towards getting it but do think about the other factors before making a final decision.
Although mineral spirits are a tad more expensive, we do think that they can be a great investment, one of the crucial points being the safety that comes with them. Moreover, there are areas where paint thinners having a high VOC content are banned.
The pure or white mineral spirits can at times cost 40-50% more than traditional paint thinners. As they also tend to be more effective for any work, we think that it can be an excellent investment. Those who are working on a bigger project can always get the bulk packs to cut down on the cost.
Additionally, if you are working with home improvement contractors, make sure that they are using healthy and safe products. And, if the work deals with an indoor area, the best choice is to go for the mineral spirits because it comes with less toxicity.
Usages Of Paint Thinner And Mineral Spirits
A common confusion among people is about the use case of mineral spirits and paint thinners. Even though we have stated that the substances are somewhat different, one of the points of similarity has to be their usage. The most basic use of both substances is to thin out paint, usually oil-based and alkyd-based paints.
Apart from the paints used for home improvement, paint thinners are also used by artists while painting. And, you may have seen them being used to cleaning wet paint brushes because of their ability to strip paint.
However, contrary to popular beliefs, neither solvents can remove dried paint from paint brushes. Additionally, if you have spilled paint on any surface, you can quickly clear up the mess with the solvents.
Surprisingly, paint thinners and mineral oils are also used to rub off the waxy substance present on the wood. And, the solvents can clear any adhesive. We especially like how mineral spirits work as it isn't sticky so that you can control it easily.
Another common utilization for these solvents is as a cleaning agent. It's commonly used for car parts and auto equipment that are covered in grease.
Furthermore, odorless mineral spirits can be used around the house for various purposes. When your furniture is dirty, take a tiny amount of mineral spirits to remove all the dirt. And, you can even use it on the floor for a quick clean-up. For getting these uses, try to get mineral spirits that are non-reactive and always patch test on the surface before proceeding to do the whole job.
Also, when you're using mineral spirits for cleaning, it's necessary to clean up the area after that to avoid accidents due to its flammability.
![]()
Safety Measures For Using Paint Thinner And Mineral Spirits
By now, it must be clear to you that maintaining safety is crucial while using any kind of solvent. Hence, we thought of telling you about some safety precautions that must be followed while using paint thinners and mineral spirits.
First, it's a must to wear a mask to avoid the foul odor and the toxic VOCs that come out of these solvents. Rather than using a thin mask, try to wear a respirator to have better protection.
Moreover, every solvent comes with a safety data sheet that gives you all the precautions. If you are new to using solvents, it's a prerequisite to go through the material to understand how the toxic substance can be harmful.
Common symptoms after inhaling a chemical like benzene is dizziness, difficulty breathing, and nausea. The probability of facing such a situation arises when you work with paint thinner in a confined space.
Another point to remember while working with paint thinners and mineral spirits is to wear well-fitted gloves. As these substances are irritants and toxic, you don't want to ingest them. And, you should also ensure to wear clothes that cover most of your body.
If you feel that your skin has come in contact with the solvents, immediately stop working and proceed to wash the area with soapy water. If there is a sign of irritation, visit an emergency practitioner as soon as possible.
However, the most crucial safety issue with these solvents is their flammability. Even a tiny spark can quickly lead to a big fire, so the work area should be away from any source of heat or exposed flames. Also, be careful not to let anyone smoke around the area to avoid accidental fires.
![]()
Paint Thinner Vs Mineral Spirits FAQ
1. Is Paint Thinner Same As Acetone?
Even though both acetone and paint thinner are commonly used solvents, they aren't the same thing. Acetone is a more specific term used to describe a chemical solvent usually derived from propanone. Whereas paint thinners may be composed of various solvents.
One of the most familiar uses of acetone is to remove nail paint because of its paint stripping capacities. Other than that, acetone is also used in places like the metal industry. In comparison, paint thinners often have limited use of thinning paints and for cleaning surfaces.
2. Can I Pour Mineral Spirits Down The Drain?
No, as it’s a safety hazard, pouring mineral spirits down the drain is never okay. It can cause damage to the sewers, and there's also a high probability of it leaching into the environment, significantly contaminating the groundwater. As it's a highly flammable substance, you need to be very careful about its disposal, or else it can pose a threat to people who come close to it.
The best way to discard unused mineral spirits is by calling up your hazardous-waste recycler or landfill. They will tell you the steps to follow before discarding the solvent so that it doesn't harm anyone or the environment.
3. Is Baby Oil The Same As Mineral Spirits?
One of the common mistakes people make is to get confused between mineral spirits and mineral oils. The latter is the substance that you usually find in baby oils. Even though both products are derived from petroleum, the mineral spirits are toxic and odorous, while mineral oils are colorless and odorless.
Apart from being used in the beauty and skincare industry, mineral oils are widely used for finishing wood and easing constipation. In comparison, mineral spirits are primarily used for thinning out paint or cleaning various surfaces and stripping paint from brushes.
4. What Is The Difference Between Paint Medium And Paint Thinner?
If you're about to work with acrylic paints, it's essential to know the difference between a painting medium and a paint thinner. While a paint thinner is mainly used to reduce the thickness of paint, a painting medium adds texture to it.
It's common to see a medium categorized by a glossy or a matte finish that will render to the paint. However, a thinner will help to thin out the paint to make applying it easier. Paint thinners are also helpful in airbrush or spray paintings as it makes the color slightly transparent without changing the properties of the paint.
5. Are Mineral Spirits And Paint Thinner The Same?
The mineral spirits and paint thinners are quite alike to each other and used for similar tasks. But, the mineral spirits are usually more refined than paint thinners, making them almost odorless and less toxic. And, it hikes up the prices of mineral spirits and is often used in more sophisticated projects in contrast to paint thinners.

Verdict
We have come to the very end of comparing the paint thinner with the mineral spirits, and we're sure you're excited to know the winner among the two. However, declaring a winner isn't easy, as both solvents have their individual pros and cons.
Moreover, even the professionals who regularly work with solvents opine that both variants work quite similarly. But, some think that the mineral spirits are a bit more effective than usual paint thinners.
Besides, if you're sensitive to the strong odor of regular paint thinners, then mineral spirits would definitely be a better choice.
However, for those who want to save a little more money and have the means to follow all safety precautions, you may opt for the paint thinners. Also, do let us know if there are any queries regarding the two solvents.
Till then, goodbye and take care!
Related Articles
Best Acrylic Paint Brushes for Artists & Students Reviewed
Is Paint Flammable? Types of Paints That Combust and Don’t
How to Remove Spray Paint from Concrete
How To Thin Latex Paint For A Wagner Spray Gun
Learn How To Soften A Hard Paint Brush
13 Best Epoxy Spray Paint Resins To Consider Today
13 Best Acrylic Paints for Beginners & Professionals Reviewed
11 Best Palettes for Oil Painting Reviewed
The availability of multiple tools for a single task has surely made life easier.

But it also needs users to decide which one will be the best for your purpose. And that’s where the confusion arises.
Now, painting is one of those many jobs, and paint sprayers and rollers are two such tools that can be of great help for the purpose. But the confusion remains the same, i.e., choosing between them.
Each of the two types has different features and applications, and there are a ton of options under each category available out there, which makes the task more difficult. So, to help you out, we’ve picked the best 3 models of each type and have also included a detailed buyer’s guide to help you make a well-informed decision.
Without further ado, let’s get going!
Paint Sprayer Vs Roller

Paint Sprayer
Graco Magnum 257025 Project Painter Plus Paint Sprayer
- Ideal for projects up to 5 gallons in size, allowing you to...
- Fully adjustable pressure control to give you ultimate...
If you need to finish your spray painting work quickly without compromising on precision, this model is the one to go for. With high-quality quality finishing on offer, any dull surface can be transformed completely using this paint sprayer from Graco Magnum. Notably, the tool has a 110V intake and includes a 1-year limited warranty.
Why Did We Like It?
We were glad to find that this unit lets us spray paint in the unthinned form. All you have to do is adjust the pressure to a higher level to get the job done. There are three tip sizes offered, with the maximum size being 0.015 mm.
Moreover, it’s equipped with a RAC IV tip-switch feature that lets you reverse the tip when it is clogged with paint. As a result, you can continue spraying without facing any interruption in between.
Another great feature is the flexible suction tub that’s integrated into the design. This makes it possible to spray the paint directly from a 1 or 5-gallon bucket of paint, thereby allowing maximum user convenience.
Speaking of its application, you can use it for a variety of purposes like painting garage doors, decks, fences, or even houses. Additionally, you get storage compartments in the package to store the spray gun, power cord, and extra spray chips that will come in handy while working.
What Could’ve Been Better?
The instructions for set-up and use in the included operation manual are quite lengthy. So, some customers, especially first-timers, may take more time to comprehend them. That said, it works pretty well without showing any major problems.
Pros
- Adjustable pressure
- Allows uninterrupted spraying
- Can spray paint directly from buckets
- Has a wide range of applications
Cons
- Lengthy instructions for set-up and use
HomeRight Super Finish Max HVLP Paint Sprayer - 450 Watts,...
- PAINT SPRAYER FOR COUNTLESS DIY PROJECTS: The HomeRight...
- ADJUSTABLE SETTINGS TO SUIT ANY PROJECT: You can adjust the...
Get ultimate convenience with this efficient unit from HomeRight, which is one of the well-known brands in the paint applicator industry. It lets you complete all your spray painting jobs with minimum hassle and maximum efficiency. So, you can get through the otherwise strenuous spraying tasks with absolute ease.
Why Did We Like It?
First of all, three high-quality brass tips provided with this model help achieve superior precision and performance. Not only that, but these offer optimum flexibility and versatility for the various painting projects that you have to handle.
Furthermore, this paint sprayer runs with a power of 450 Watts, which helps you complete a variety of projects effortlessly. It can work with a range of varnishes and paints such as milk paint, enamels, chalk-type paint, clear sealer, and primers.
We also loved the additional adjustable settings on the sprayer, which lets you adjust its air cap to spray the paint in a round, horizontal, or vertical motion. You can even adjust the knob of flow control to decrease or increase the paint output. That way, you can customize the flow as per the coating needs for the particular surface.
What Could’ve Been Better?
Although this product works well to give you good results every time, the warranty included with it may not be useful in all cases, especially if you are facing minor issues. Some users have also complained of delayed responses to issues reported through the customer helpline.
Pros
- Suits different spraying needs
- Works with a variety of paints and varnishes
- Adjustable spraying pattern
- Allows customizable paint flow
Cons
- Warranty not useful enough
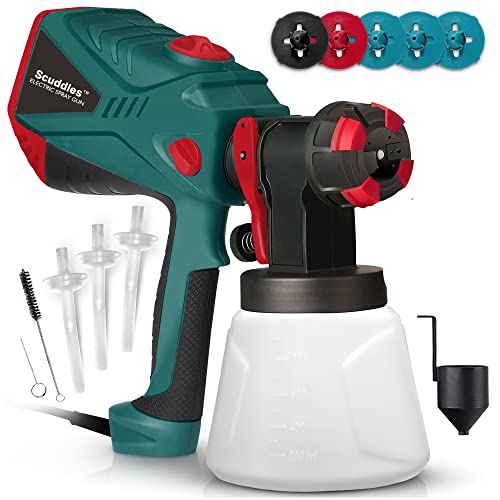
Scuddles HVLP Paint Sprayer Gun with 1200 Watt Power, 5...
- 🔰 𝗪𝗛𝗔𝗧`𝗦 𝗜𝗡 𝗧𝗛𝗘...
- 🔰 𝟑 𝐏𝐎𝐖𝐄𝐑𝐅𝐔𝐋...
Another unit that helps users get through the job easier is the Scuddles Paint Sprayer. You can get the ideal coat for almost every surface by applying minimal effort. As such, creating a smooth and beautiful finish for your wooden surfaces, walls, outdoor fencing, and several others will not be a problem anymore!
Why Did We Like It?
First things first, this paint sprayer uses 5 specialized nozzles to work with different kinds of paints and varnishes. Three 2.6 mm nozzles are suitable for spraying thicker paints such as chalk-type paints or latex. On the other hand, the two remaining ones with sizes of 1.8 mm and 2.2 mm, respectively are designed for thinner paints.
This model also has an efficient 34-fl oz container to hold a considerably large amount of paint and replacement bottles can even be bought at an affordable price. Such a bottle will help switch between paints easily and more quickly.
As far as cleaning and maintenance are concerned, the package includes a couple of tools to simplify the process. For instance, there’s an unclogging needle that helps unclog any hardened paint remaining in the machine, while a thick brush is included for easy overall cleaning.
Lastly, we really liked the high power output of 1200W, which helps achieve clean, smooth, and superior-grade finishes each time.
What Could’ve Been Better?
We felt that this unit takes a bit longer to complete larger tasks such as painting large fence segments in the yard. Hence, you’ll have to be slightly more patient while handling such tasks. Nonetheless, you can rest assured that this sprayer does its job quite well.
Pros
- Works efficiently with different paints
- Large container capacity
- Easy cleaning and maintenance
- Smooth, clear, and superior-grade finishes
Cons
- May take longer to complete larger tasks
Paint Roller

Bates - Paint Tray Set, Paint Rollers, Paint Brushes for...
- COMPREHENSIVE SET: Package includes 11 piece: Tray, Roller...
- PROFESSIONAL QUALITY: This paint tray set is high quality...
The Bates Paint Roller delivers reliable performance by completing all painting jobs within a short period. It is equally suitable for beginners and professionals, thanks to its utility-based features. What’s more, you can get started with your painting jobs immediately as it comes with the complete set of tools required for the purpose.
Why Did We Like It?
Perhaps, the most noteworthy feature of this paint roller is the presence of thick filaments in the roller brush. Due to their thickness, these filaments are capable of holding more paint so that you can save more time while getting a perfect finish, unlike ordinary paint rollers.
Added on to this are the ½-inch thick naps of the roller, which help you paint something as big as an entire house smoothly. Both the naps and filaments are made from a sturdy material, promising years of service.
Beyond that, it’s quite convenient to operate owing to the lightweight build and consists of a durable plastic handle coated with rubber. The latter enhances your comfort, making the procedure much smoother compared to some of its competitors.
What Could’ve Been Better?
We think the packaging of this product could be improved since it is weaker and more prone to damage during delivery. The tray containing the roller and the other tools is fragile and may often arrive with cracks in several places. Also, the tools may be a bit untidy in some cases.
Pros
- Filaments help in fast painting
- Provides a perfect finish
- Convenient to operate
- Enhances comfort
Cons
- The package may be damaged during delivery
 Wooster Brush R017-9 Sherlock Roller Frame, 9-Inch
This uniquely designed paint roller from Wooster Brush consists of multiple efficient features that work to provide a praiseworthy performance. It is one of the most reliable paint rollers currently available in the market, offering optimum user convenience. Depending on your needs, you can even purchase this brush in packs of 2 and 3.
Why Did We Like It?
First and foremost, we were impressed with the effortless application of the brush, which is made possible with the internal bearings that help it to revolve smoothly over almost any surface. In fact, it maintains a smooth application even when there is more paint on the nap. So, you don’t need to worry about efficiency when painting large surfaces.
Plus, a quick-release spring is provided to prevent the roller from slipping while painting. Not only that but it can also be removed easily with a single tap after you’re done with the painting. Thus, you are relieved from the hassle of handling a paint-covered roller.
Beyond that, there is a durable nylon cage reinforced with green fiberglass that protects the bearings and the spring. Lastly, the polypropylene handle with reinforced threads provides a firm yet comfortable grip.
What Could’ve Been Better?
Some customers have reported that although the handle has a screw hole to fix it onto an extension pole, that fixture is not efficient enough, as it may loosen up after some time. So, the handle might spin slightly while painting.
Pros
- Offers smooth performance
- Doesn’t slip while painting
- Can be removed easily after painting
- Provides a firm and comfortable grip
Cons
- Can’t be used efficiently with an extension pole

Pro Grade - Paint Roller Covers - 1/2 X 9 Inch Microfiber 6...
- 6 Paint Roller Covers : 1/2" Microfiber Painting Roller...
- Microfiber Paint Roller Cover Designed for use with all...
If you already have a roller at home and want a budget-friendly painting solution, going for these paint roller covers will be a great option. They are designed to deliver uniform coats on a range of surfaces to provide highly satisfying performance.
Why Did We Like It?
Undoubtedly, the biggest advantage of these roller covers is their lint-free finishing, thanks to the ½-inch microfiber material. It provides uniform coverage while ensuring minimal stipple and the naps are reusable after cleanup. This ultimately results in the long-lasting service life of the covers.
Another beneficial feature is that they are quite easy to use and maintain. Just insert one onto the roller head, and you’re good to go. And since the covers are washable, the cleaning process becomes pretty simple.
What’s more, they are very durable and have a polypropylene core that resists damage due to solvents and water, preventing cracks or tears. Last but not least, they can be effectively used for applying paint on both walls and furniture.
What Could’ve Been Better?
The only disadvantage of using these covers is that they might sometimes slide off the roller frame during use. This can be annoying if it occurs regularly, as it involves the hassle of inserting them back each time. That said, they can deliver seamless finishes on a variety of surfaces.
Pros
- Provide even coverage
- Ensure minimal stipple
- Easy to use and maintain
- Long-lasting
Cons
- Might slide off the roller frame
Paint Roller vs Sprayer Buyer’s Guide
You won’t be able to decide whether to go for a sprayer or roller by just looking at some of the best models of each type. Hence, it is important to know their key features and also understand where the differences between the two types lie.
So, let’s look at some of their most important features along with the several purposes for which they can be used.
-
Ease Of Use
For those who are beginners to using sprayers, the application may come across as a bit difficult the first time. It might require quite a few trial and error sessions to get accustomed to the process of paint-spraying. As such, drips, uneven coverage, spills, or runs are some of the inconveniences that are usually faced by first-timers.
Aside from that, the preparation may require more time than usual. In comparison, rollers are easier to operate and need minimal prep work. A crucial part of the preparatory system is masking, which we will discuss separately a little later.
It’s worth noting that if you feel tired or are interrupted for some reason, you can stop painting and continue the next day. That's because winding up for the day is not difficult. You are free to quickly wash the rollers or even stow them in a zipped bag to keep their efficiency intact. However, a downside of using a roller is that it may sometimes leave behind drips on the floor
On the other hand, if the sprayer is filled with paint, you have to continue the work until that paint is used up. Otherwise, it will dry up and might even cause clogs.
-
Time Taken
For those who can devote limited time to their painting jobs, the time taken to complete the task on hand becomes a vital factor. But let us assure you that neither of the tools will take an exceptionally long time for the purpose. Though using a sprayer will require much more preparation, the total time is almost the same as that of painting with a roller.
-
Coverage
The convergence offered by a painting tool is yet another crucial parameter because it determines the efficacy of your job. For instance, some tools may not reach certain areas (like in the corners or edges), or it may happen that the coat is applied thicker in some parts. By preventing such possibilities, you can achieve a uniform coat with superior finishing, just how you want it to be.
Now, with a sprayer, you can paint even the narrow crevices on some surfaces, which is otherwise difficult using a brush. Naturally, this advantage will come in handy for painting the hard-to-reach parts of various textured surfaces, such as brick walls, lap siding, popcorn ceilings, cornices, and brick walls.
Another great benefit of using sprayers is that experienced users can achieve a smoother finish devoid of any lap marks, as the sprayer aerates the paint for smoother coating.
However, if the surface is a bit dirty, a roller will make the paint adhere to it better than a sprayer. Thus, you should scrub the wall first to eliminate any dirt or debris before using a sprayer to ensure that you get the desired results.
-
Applications
The differences in the features, coverage, and preparatory requirements make these tools suitable for different applications. Generally, sprayers are used for outdoor projects and empty spaces. Exteriors that have matured landscaping like sunrooms, garages, or extensive decks can be painted quite comfortably using this tool.
As we have mentioned earlier, although greater accuracy can be achieved by using sprayers, there is a risk of overspray involved. That’s why this tool is suitable for empty spaces. After all, your hard work will not yield satisfactory results and the time saved won’t be worth it if the painting isn’t consistent and thorough.
On the other hand, if you have to paint an outdoor surface on a windy day, using a sprayer may not be the ideal choice, as there’s a high risk of spilling the paint. A roller will be much more useful in this case because it’s suitable for interior spaces such as walls and furniture. On a side note, if you need to paint a ceiling, a sprayer is a good option.
-
Cost
The cost is always a factor when you’re using a painting tool for your home or any other DIY project. Although there are various sprayers that have relatively affordable price tags, most of the good-quality models are a bit more expensive.
In comparison, rollers are more budget-friendly and hence are pretty cost-effective for painting small to medium-sized surfaces. As a result, you can use them for tasks such as painting furniture or other such fixtures at home.
With regards to maintenance, rollers have an upper hand as they can be washed and cleaned easily. However, sprayers must be maintained with utmost care to ensure proper and consistent paint application.
-
Masking Requirements
Masking is an important step of the preparation process before starting with the painting part. In simple words, it's the method of protecting specific parts of the surface that you don’t want to be painted. In the case of sprayers, the masking requirement is much more than when using rollers.
Ideally, you should cover every square inch of the space that doesn’t have to be painted with a masking film. If you don’t have a masking film, you can even use a drop cloth for the purpose. But since rollers don’t spray or “squirt” the paint, very little masking is needed to mainly protect the edges or corners.
-
Scope For Detailing
Sprayers offer scope for better detailing, as users have the chance to create different patterns and textures. Thus, you can use sprayers for tasks such as crown molding, deep exterior textures, masonry, and cottage cheese ceilings. In contrast, rollers are more suitable for plain painting tasks, especially those that need uniform coats of paint.
Verdict
Choosing the right tool is the key to achieving beautifully painted surfaces. So, make sure you have your needs and preferences in mind before heading on to purchase one.
And on that note, we have come to the end of our guide. We hope that by now, you have a clear idea about what paint sprayers and rollers can offer, making the decision to pick the right tool slightly easy.
But before we call it a day, let’s take you through our favorites from the list. The HomeRight C800971 Paint Sprayer is a great option if you are searching for a high-performing tool for painting large outdoor surfaces.
However, if you are on the lookout for a tool to paint your indoor furniture with utmost precision, the Bates Paint Roller will be a perfect choice.
That was all we have for you today. Till next time, take care!
Related Articles
7 Best Rollers For Polyurethane
Graco X5 vs X7 Comparison Review
Sherwin Williams Vs. Benjamin Moore
37 Awesome and Cheap DIY Pallet Fence Ideas to Realize Swiftly