Inspiring Ideas for Modern Home

The best mold-resistant paints are specially formulated with antimicrobial agents to prevent the growth of mold, mildew, and moisture-related fungi on interior and exterior surfaces—making them essential for protecting your home in damp, high-humidity environments. Mold is a type of fungus composed of microscopic filaments called hyphae, and it thrives in poorly ventilated areas like bathrooms, basements, kitchens, and laundry rooms. Not only can mold appear as black spots, fuzzy patches, or slimy discoloration, but prolonged exposure can also trigger serious health issues, particularly for individuals with asthma, allergies, or respiratory sensitivities. Fortunately, mold-inhibiting paints offer a long-lasting barrier by combining moisture resistance with low-VOC or zero-VOC formulations that are safe for indoor use. In this guide, we’ve reviewed the 5 best mold-resistant paints available today—comparing their coverage, durability, finish quality, and effectiveness on drywall, concrete, tile, and wood—to help you choose the right solution for keeping your living space clean, breathable, and mold-free.

Listed below are the best mold-resistant paints:

  • Rust-Oleum 276087: The Rust-Oleum 276087 water-based paint has a fast-acting formula that ensures swift mold elimination. Its drying time of 30 minutes is the quickest among the options. It doesn't cover as much area (160 sq ft) as the Fiberlock Aftershock does.
  • Fiberlock Aftershock: This water-based paint, with a coverage area of 250-400 sq ft, has a 1-hour drying time and offers robust mold resistance that has been trusted for over three decades. The application is limited to only interior surfaces.
  • Rust-Oleum 5001: The Rust-Oleum 5001 is an oil-based paint that features a highly effective mold-resistant formula. It has a drying time of 1 hour, and it adheres well to numerous surfaces, which gives it an advantage over water-based paints when it comes to application versatility.
  • KILZ 239041: A water-based paint that ensures high-quality mold resistance. The 1-hour drying time makes it comparable to Fiberlock Aftershock and Rust-Oleum 5001. Drawback: coverage area of only 75-100 sq ft.
  • KILZ LLC 13510701: The KILZ LLC 13510701 is a water-based paint and primer combo that dries in 1 hour and covers an area of 250 to 400 sq ft, competing closely with Fiberlock Aftershock. The limited warranty is a weak point.

1. Rust-Oleum 276087

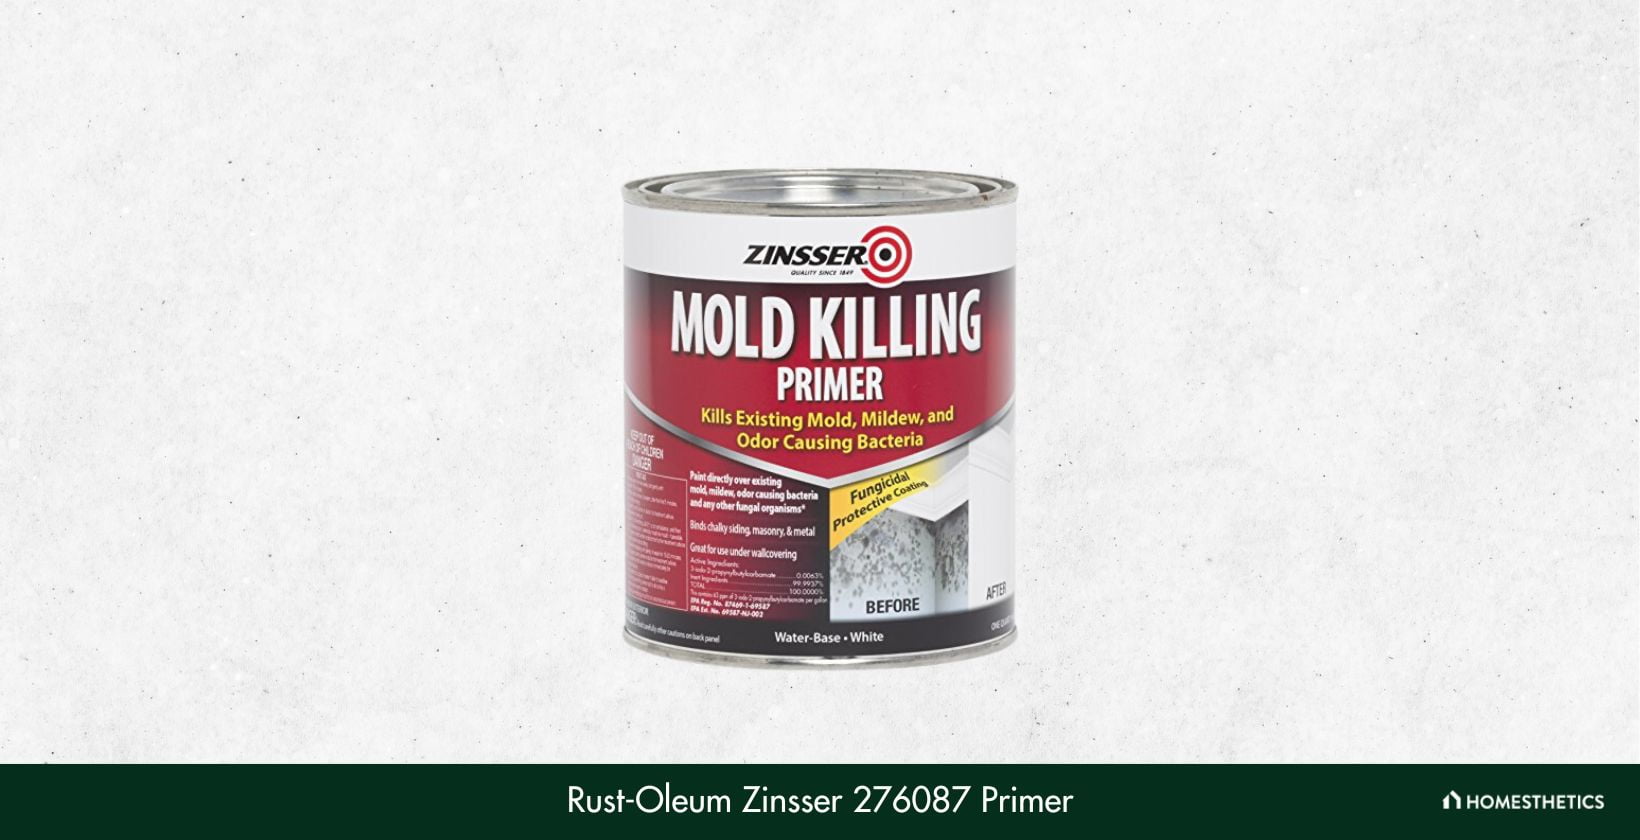
The Zinsser range from Rust-Oleum can make all your painting projects successful. From repairing cracked paint to killing mold, it has a solution for everything. As such, the Rust-Oleum 276087 (Zinsser mold killing primer) is a protective primer specially formulated to kill mildew, mold, odor-causing bacteria, and fungi. 

If you’re looking for mold-resistant paint that works faster to eliminate mold formations from your home, then this product is worth looking into. Its effective formulation will cut down on your application efforts as well.

Being an Environmental Protection Agency-registered antimicrobial, it guarantees to prevent mold growth in the future. Additionally, you can cover a large area with just a single can of this paint, which will save you from making a hefty investment.  It also gets dry to the touch in 30 minutes and can be recoated within 1 hour, ensuring faster project completion.

Apart from that, it can be used alongside any topcoat and is ideal for combining with Zinsser perma-white. You can easily wash the paint using soap and water, so maintenance wouldn’t be a problem. 

There aren’t a lot of disadvantages of this product that bothered us. Although you can get a long-lasting color with this Zinsser primer and prevent mold formation, you will need to work fast with its application, as it tends to solidify very quickly. 

Volume: 32 fl oz | Paint Type: Water-based | Finish Type: Matte | Color: White | Coverage Area: 160 sq ft | Drying Time: 30 minutes

2. Fiberlock Aftershock - EPA Registered Fungicidal Coating

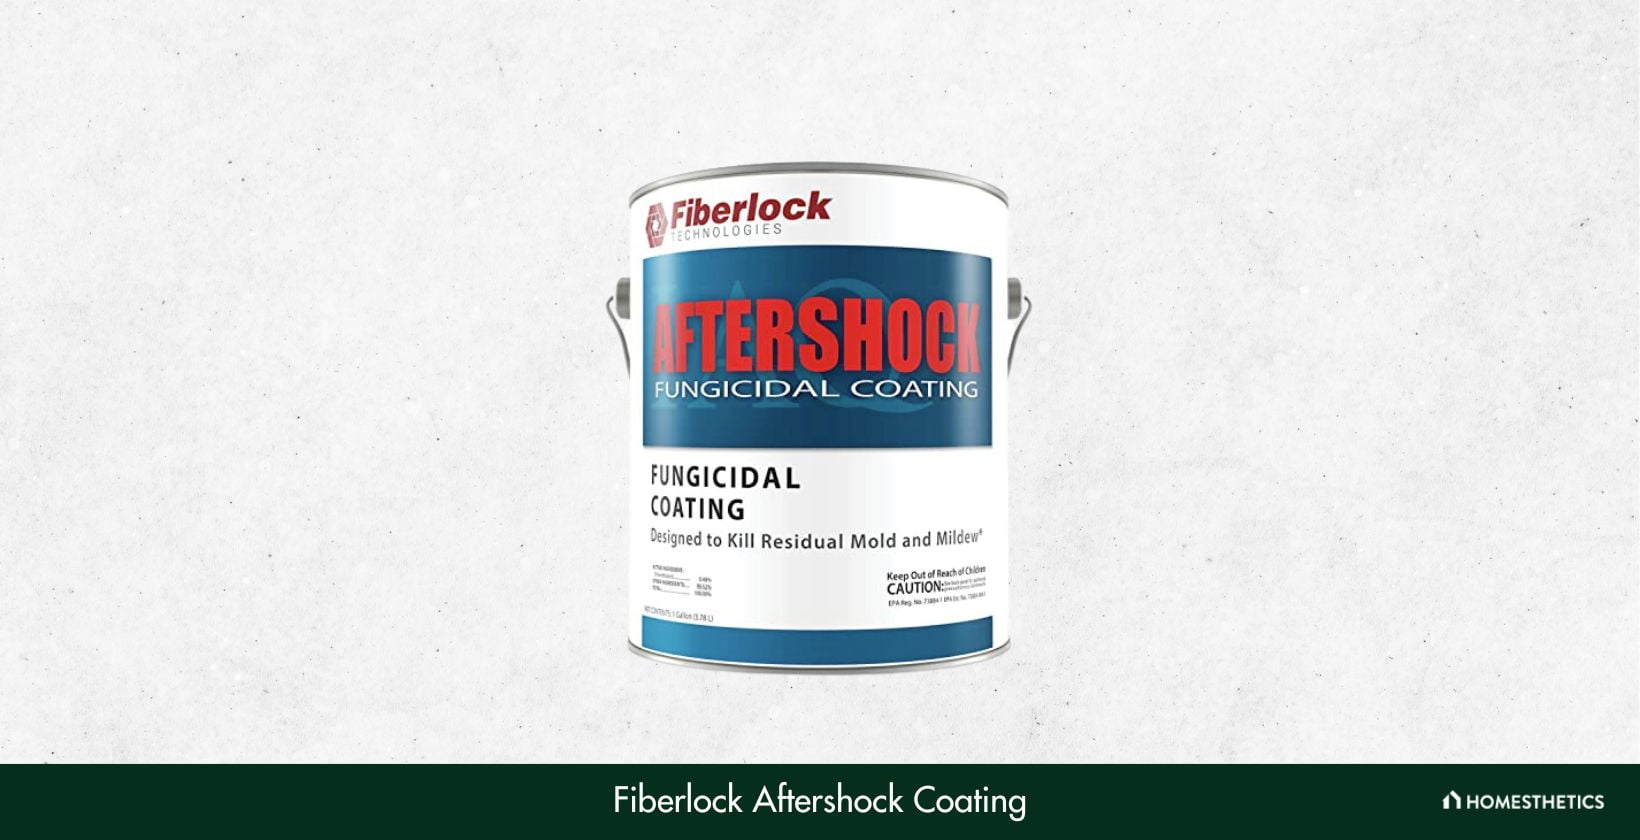
For more than three decades, Fiberlock Technologies has been designing and manufacturing products to address environmental, health, and safety hazards. Fiberlock Aftershock, a premium product, is the first-of-a-kind fungicidal coating that kills mold and mildew on pre-cleaned surfaces. 

This premium Fungicidal coating is tested and verified to resist and kill mold, mildew, and fungus on pre-cleaned surfaces. Furthermore, its EPA registration confirms preventing any future outgrowth of fungus, thereby promising to keep you safe and healthy. 

Being a low-VOC product, it helps reduce allergy-causing toxins as well as the concentration of contaminants in groundwater, landfills, and even in the ozone layer. And much like its predecessor, you can easily clean this paint with the mere use of water and soap. 

Apart from that, its low-odor formulation means you can breathe fresh and clean air. The brand also suggests that you can use this mold-resistant paint on interior surfaces such as wallboard, plaster, concrete, drywall, primed metal, wood, and galvanized metal. 

We could not find many improvements that could be made to this product, and customers seemed reasonably satisfied with it. The price is also pretty budget-friendly, but it would have been much better if it could have been applied to exterior surfaces and for HVAC systems.  

Volume: 128 fl oz | Paint Type: Water-based | Finish Type: Satin | Color: White | Coverage Area: Smooth Surfaces: 250-400 sq ft, Porous Surfaces: 150-300 sq ft | Drying Time: 1 hour at 70°F

3. Rust-Oleum 5001

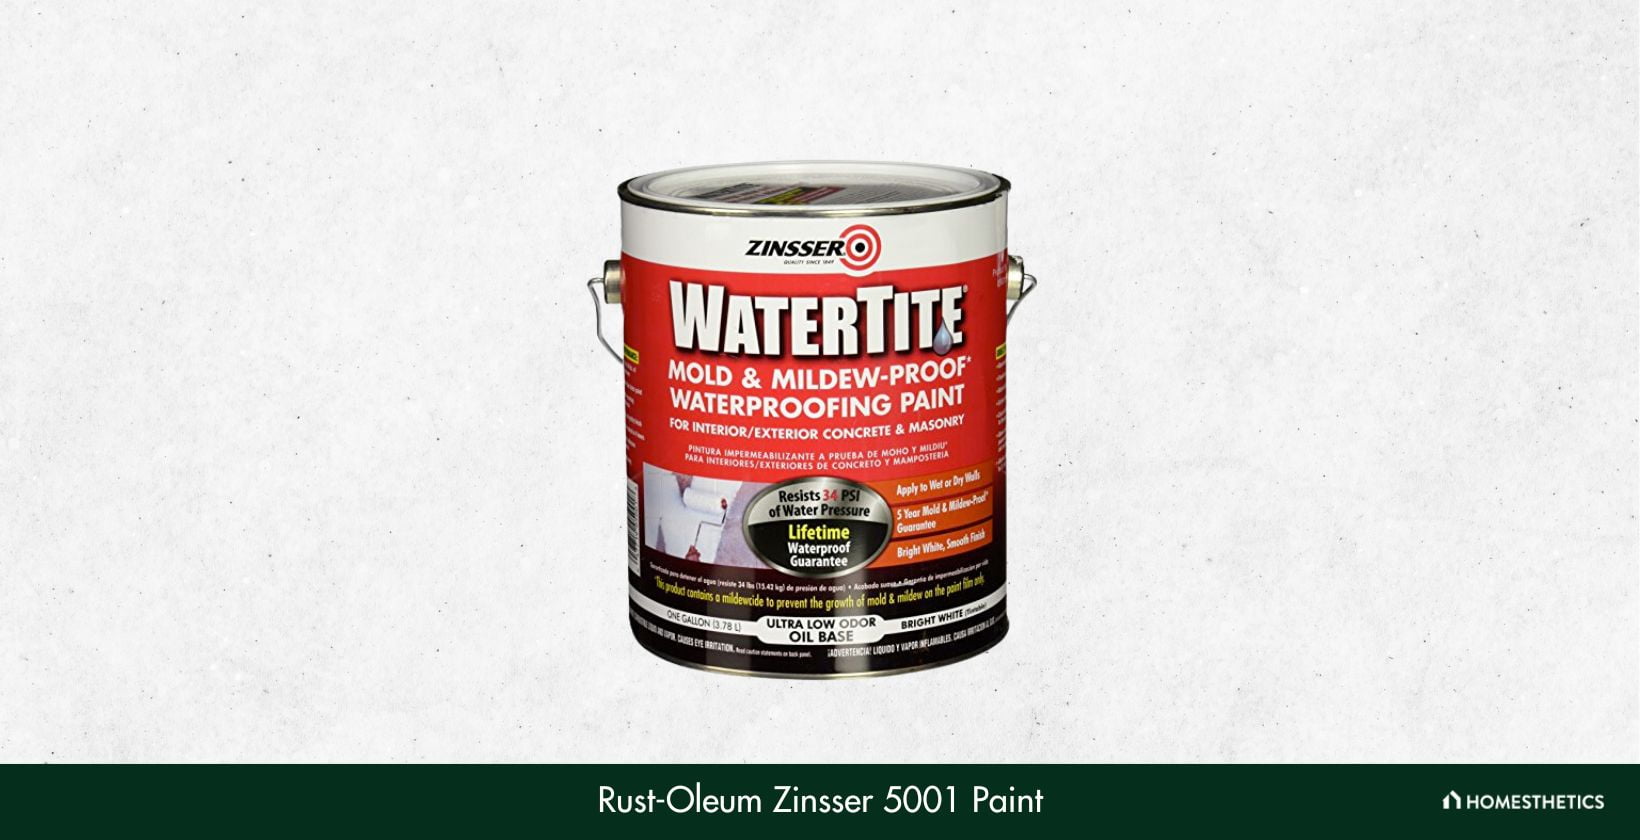
As stated in one of our previous product reviews, Zinsser can be applied to remove mold and stains effectively and quickly from any surface. Similarly, the Rust-Oleum 5001 is an oil-based mold-resistant paint by Zinsser that will provide more durability compared to your traditional waterproofer. 

The Rust-Oleum Mold-resistant paint is designed to repel mold, mildew, and water. With an oil-based formula that has a low odor, it can easily be washed, and you would not feel suffocated surrounded by walls painted with it. 

Apart from that, it is proven to block 34 PSI of water pressure and is backed with a lifetime guarantee and a 5-year guarantee for its antimicrobial and water-resistant properties, respectively. 

Apart from its mold-resistant capabilities, applying this paint can give your house an elegant and graceful look. It does come in a bright white color and gives your wall a smoother finish, especially when paired with a mold-killing primer. And once applied, the paint dries within an hour, which means you can complete your project quickly. 

Last but not least, you can apply this mold-resistant paint on dry, wet, as well as masonry walls. 

There are a lot of advantages to using the products in terms of ensuring a mold-free home. However,  this product would have been much better if it were a bit less costly and affordable for most users. 

Volume: 128 fl oz | Paint Type: Oil-based | Finish Type: N/A | Color: Bright white (tintable) | Coverage Area: N/A | Drying Time: Within 1 hour

4. KILZ 239041

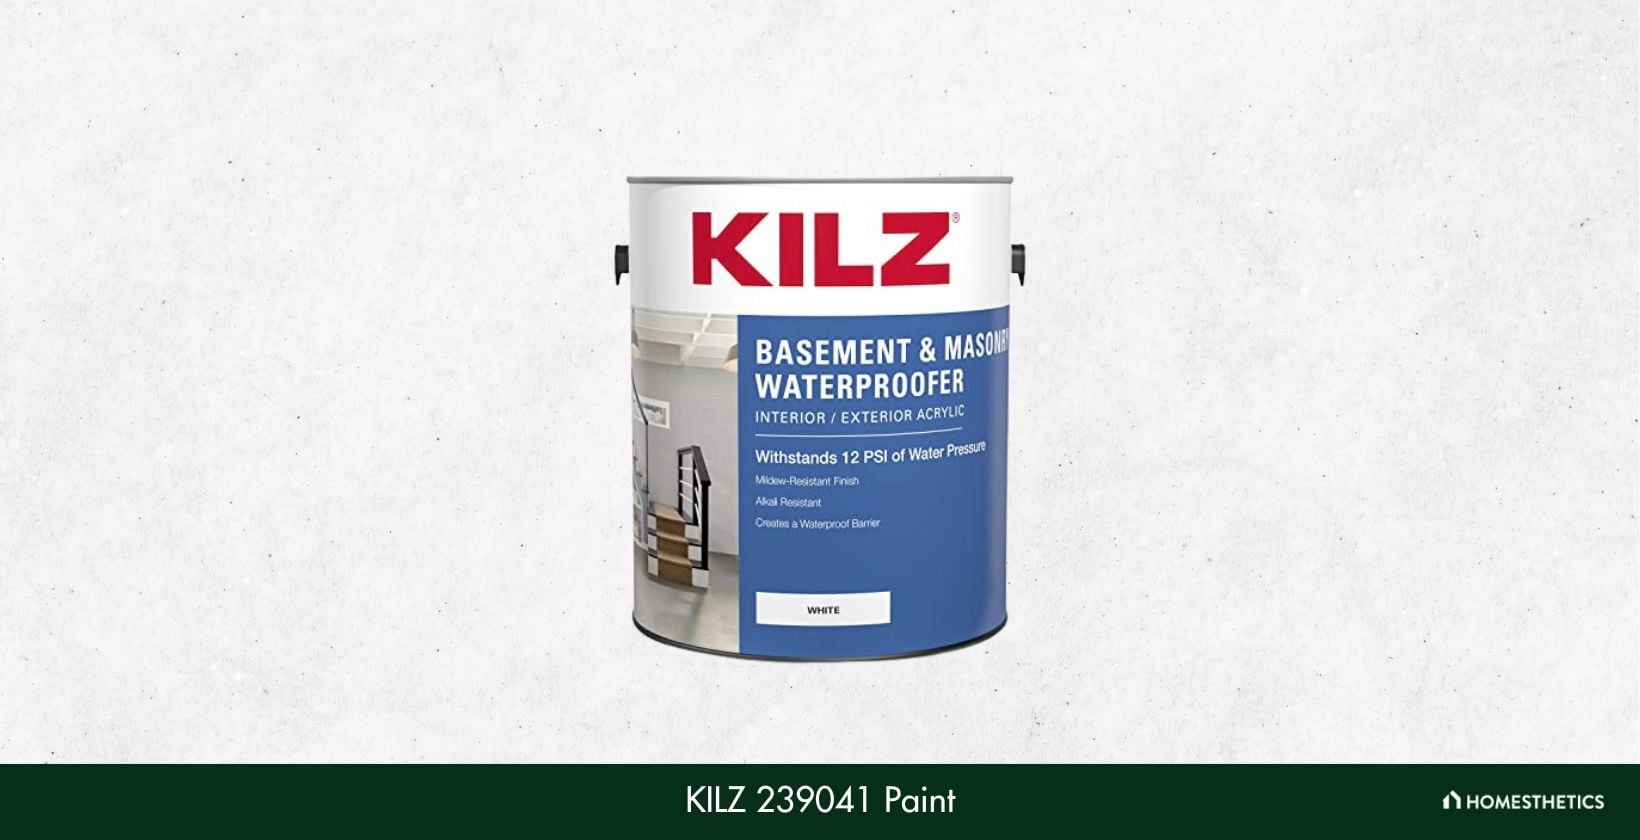
KILZ offers standard and high-quality waterproofing products that not only protect your home from bacteria and germs but also give it an elegant look. Likewise, this interior or exterior basement and masonry waterproofer by KILZ will suit all your expectations and limit your exposure to mold. 

Are you worried that the exterior of your house is not as beautiful as the interior? It is because it has to deal with a copious amount of pollution and rain. Similarly, our bathroom also gets exposed to a lot of water daily, leading to the formation of molds and other fungi.  

In this case, applying this waterproof paint by KILZ will not only protect your walls from odor-causing bacteria or germs but will also help keep your house beautiful. The use of a nanotechnology formula in the color can resist water and give the walls a glossy look. Moreover, its low-odor waterproofing property provides a durable and long-lasting finish. 

Lastly, the extra coverage on offer will let you cut down on the additional costs of purchasing more paint for covering the entire house. 

You cannot use a KILZ waterproofer over mold-resistant paints or latex-based paint. Hence, it’s important to remove other stains before applying this one. You shouldn’t be bothered much about it when building a new house, as the walls are fresh in that case. But old walls need to be cleaned before applying this paint to ensure a smooth finish. 

Volume: 128 fl oz | Paint Type: Water-based | Finish Type: Matte | Color: White | Coverage Area: 75-100 sq ft | Drying Time: 1 hour (to touch)

5. ‎KILZ LLC 13510701

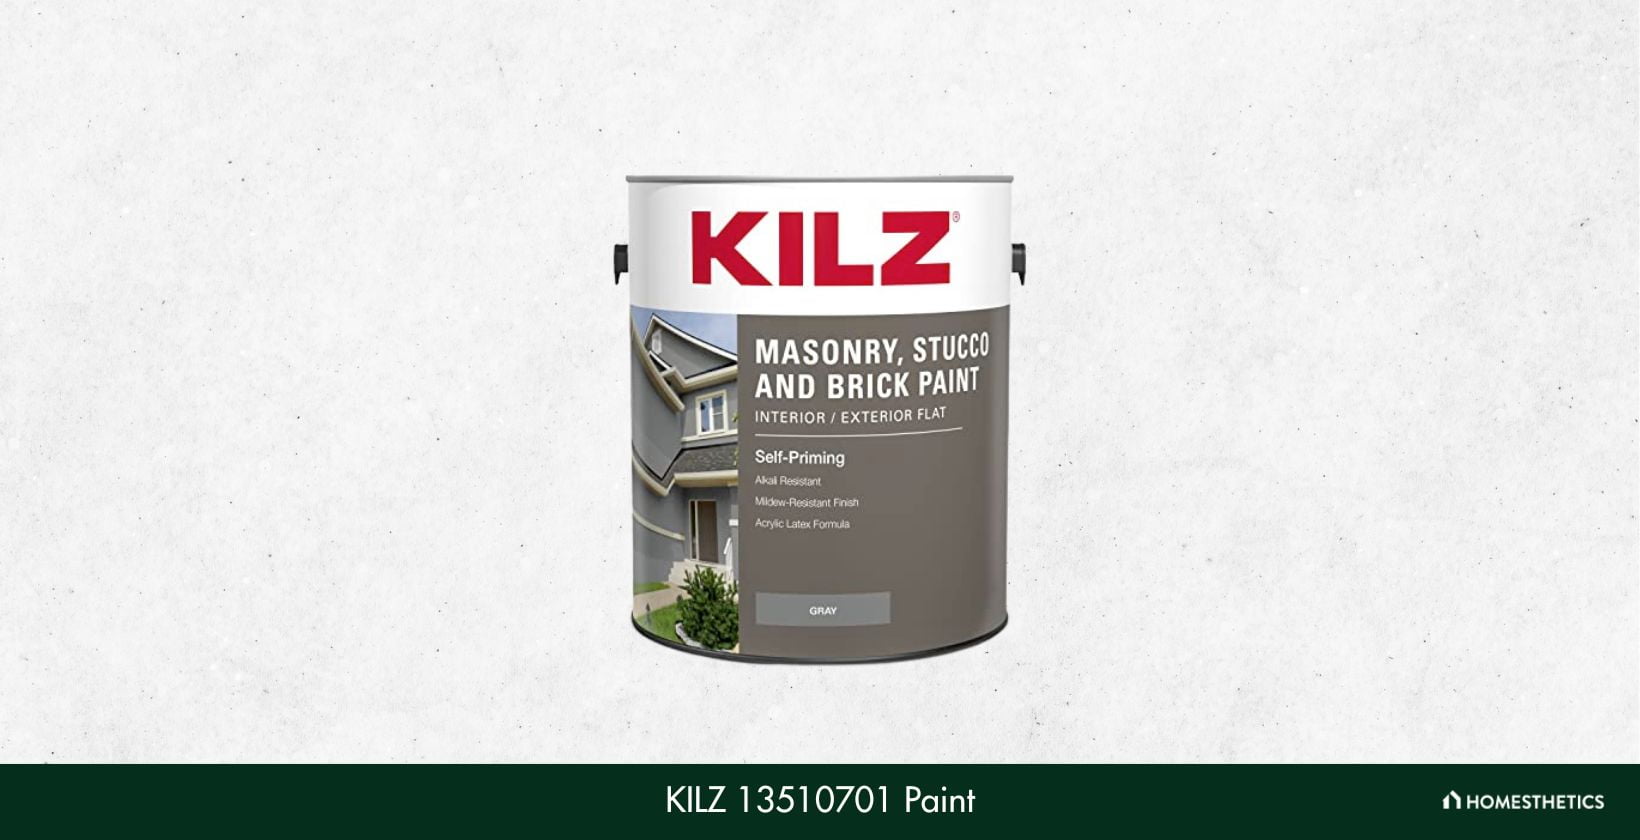
KiLZ has been utilizing EPA-registered ingredients in their mold-killing primers and paints to guarantee lifetime protection from mold. This high-quality, alkali-resistant paint offers extraordinary concealing properties with water repellency. Along with that, its coal smoke color will render a dazzling look on your walls.  

Imagine using paint as both primer and paint, which will reduce any additional investment for buying a primer. If you feel the same, then this mold-resistant paint by KILZ will be an ideal choice for your home. 

For one, the formula is effective in counteracting mold and mildew growth. Once it has been applied to your walls, the mold will get trapped inside and be killed. Apart from that, its self-priming texture gives your surface a decorous and water-resistant finish. You will get a natural-looking texture with this water-based acrylic latex color; the only thing to keep in mind is cleaning the surface before applying the paint. 

Furthermore, you can cover nearly 250-400 square feet with one gallon of this paint, depending on the surface texture. It means your costs get lowered further without compromising on quality or performance. 

You might receive a limited warranty on this mold-resistant paint in terms of its antimicrobial and water-resistance capabilities. Besides, you might need to apply several coats to get the desired look and to prevent it from fading over time. 

Volume: 128 fl oz | Paint Type: Water-based | Finish Type: Flat | Color: Gray | Coverage Area: 250-400 sq ft | Drying Time: N/A

What is the Best Mold-Resistant Paint?

If you're searching for the best mold-resistant paint, below is a comparative table of volume measured in fluid ounces, paint type, finish type, color, coverage area in square feet, and drying time in hours and minutes.

Product Volume Paint Type Finish Type Color Coverage Area Drying Time
Rust-Oleum 276087 32 fl oz Water-based Matte White 160 sq ft 30 minutes
Fiberlock Aftershock 128 fl oz Water-based Satin White Smooth Surfaces: 250-400 sq ft, Porous Surfaces: 150-300 sq ft 1 hour at 70°F
Rust-Oleum 5001 128 fl oz Oil-based N/A Bright white (tintable) N/A Within 1 hour
KILZ 239041 128 fl oz Water-based Matte White 75-100 sq ft 1 hour (to touch)
‎KILZ 13510701 128 fl oz Water-based Flat Gray 250-400 sq ft N/A

Best Mold-Resistant Paint Buying Guide

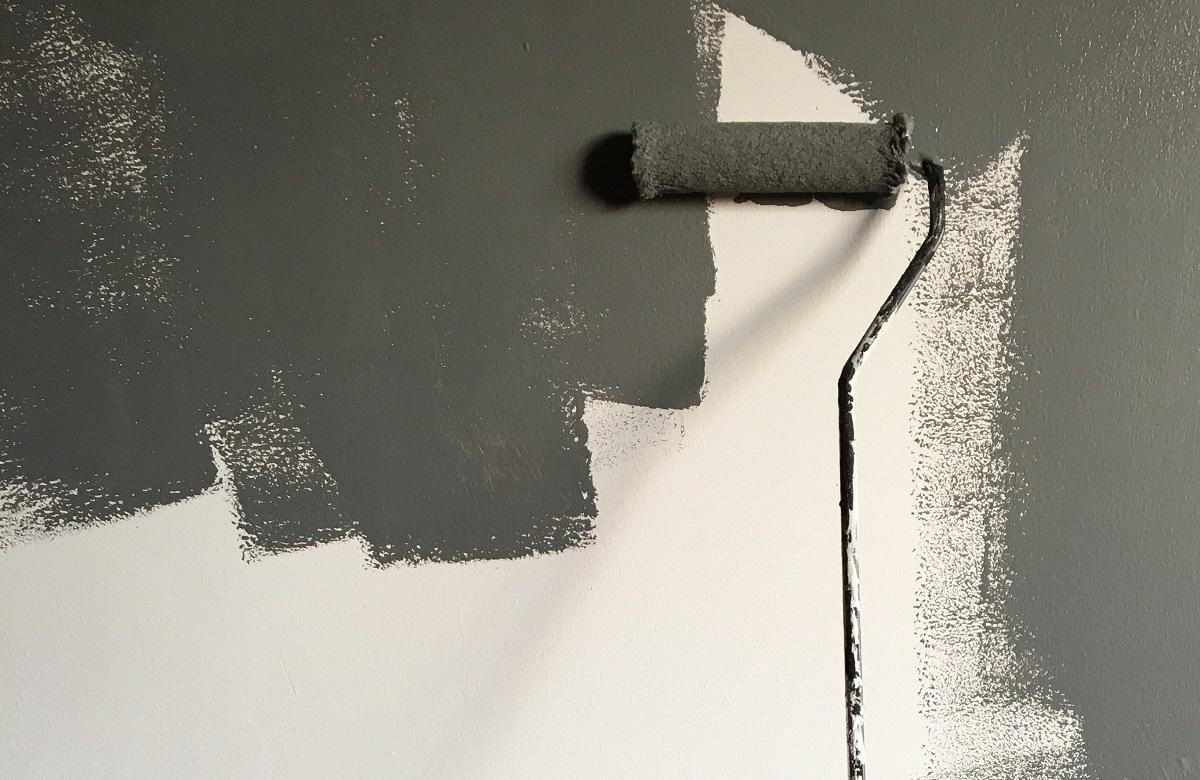
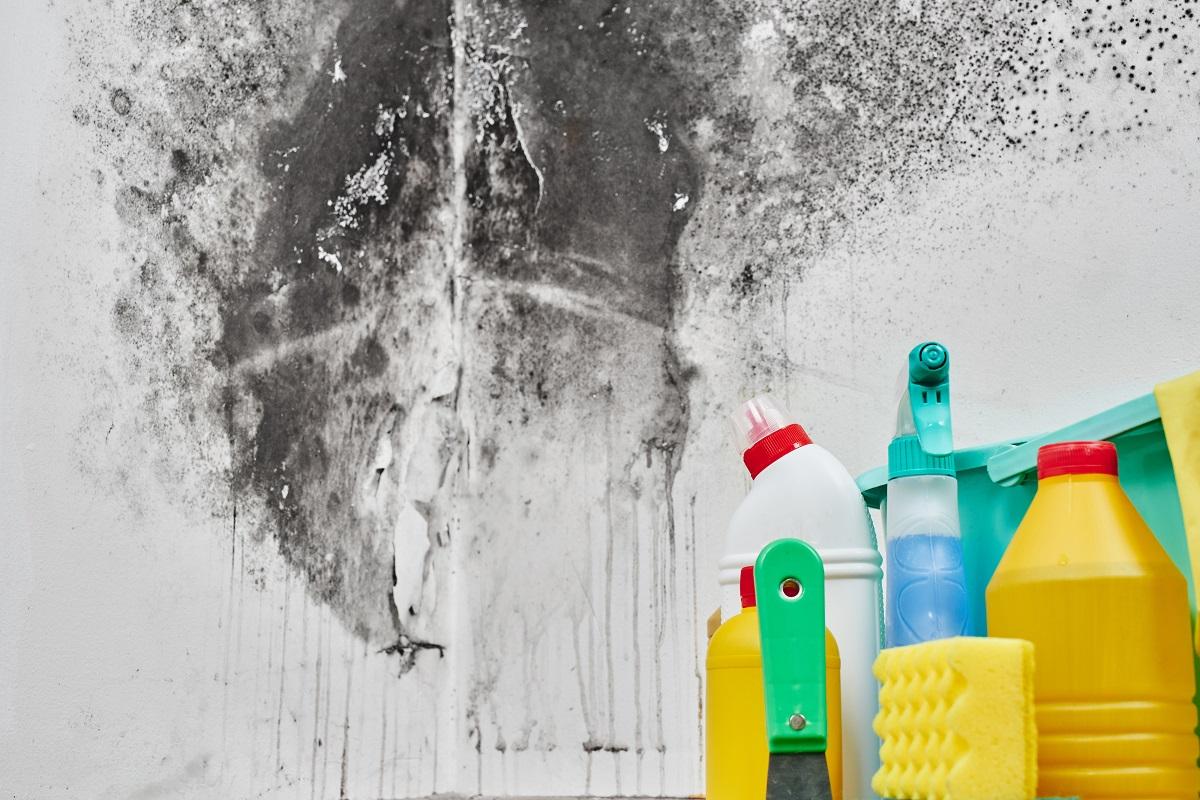
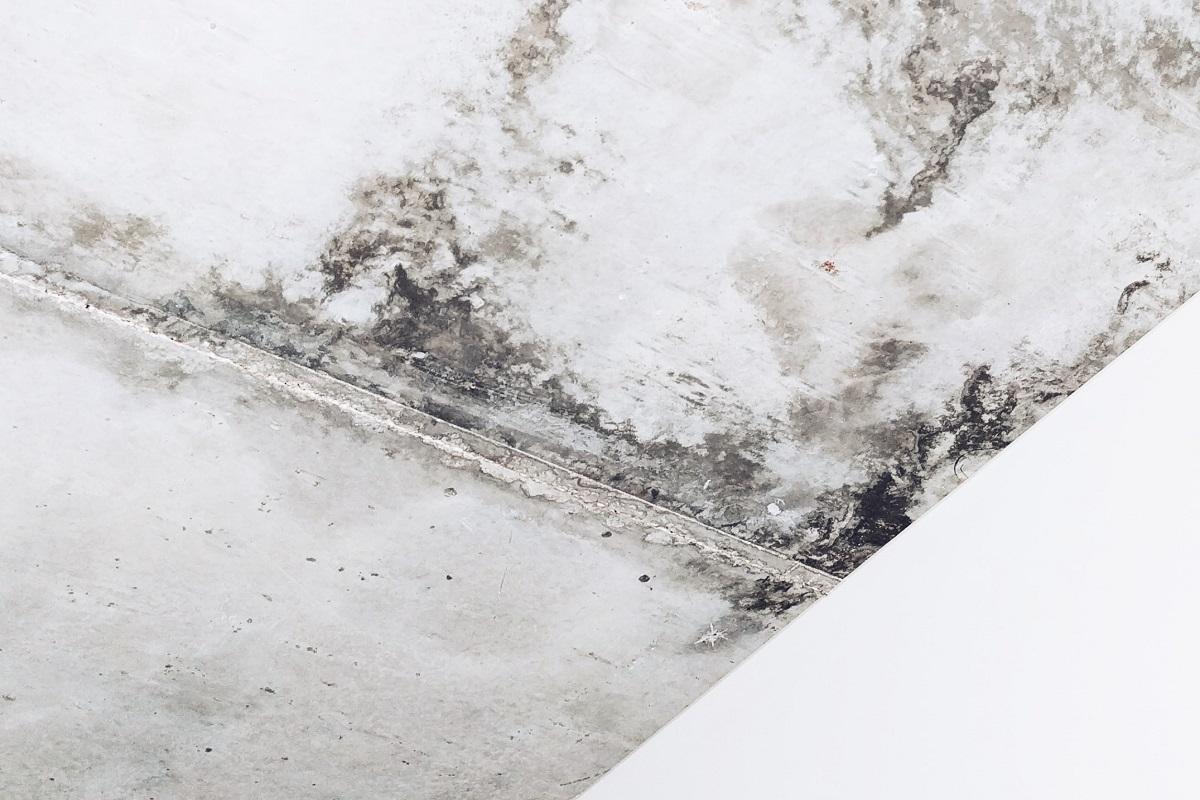
Mold and mildew-resistant paints contain strong fungicides that destroy molds. These fungi thrive on humidity and will need to be dealt with quickly before they affect your and your family’s health. But you can’t pick any mold-resistant paint at random, which is why we have curated this buyer’s guide with the key factors to keep in mind before buying one. 

  1. Areas of Application

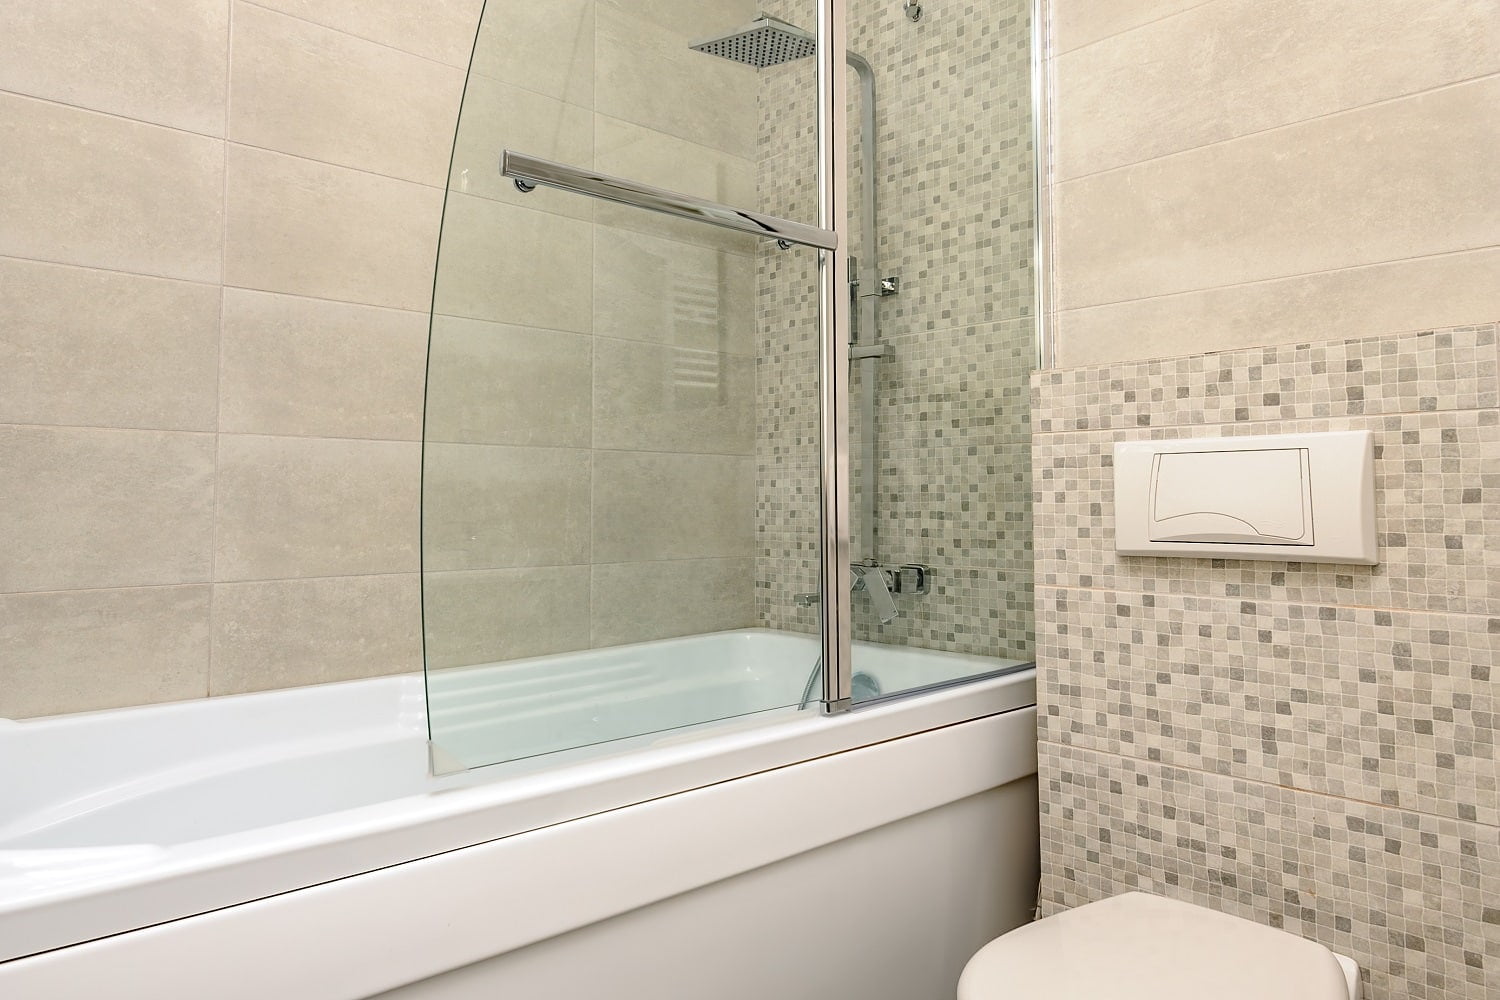
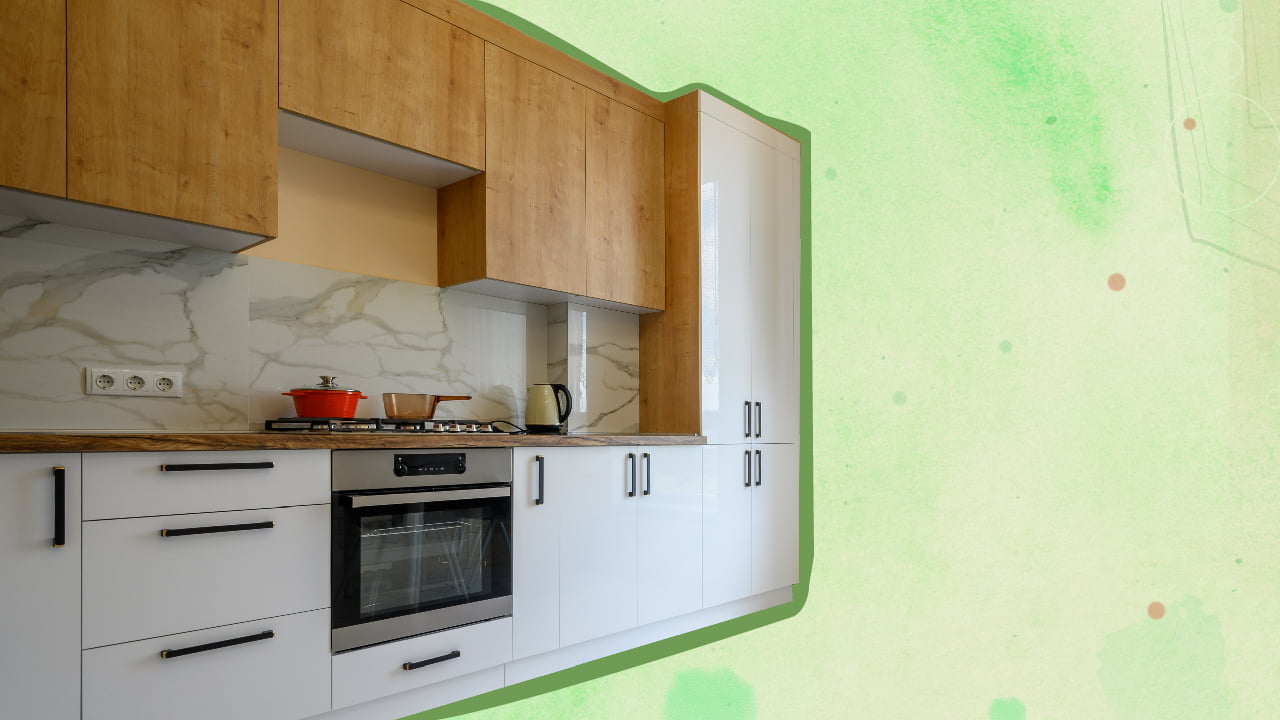
The rooms most vulnerable to developing mold include toilets, bathrooms, kitchens, laundry rooms, and utility rooms with less or no ventilation. Hence, such paints should be applied to areas where the deposition of water or moisture is very high. 

Aside from that, you may use them for your basement or workshop to get mold-free walls and reduce the chances of mold growth there.

But as not all brands do not create similar paints, you need to check the formula before going ahead with a product. We’d also suggest opting for a brand that offers more than two years of warranty on its paints. 

Remember that mold-resistant paint should be applied to dry, clean, and mold-free surfaces. Using it where you already had mold formation can help avoid future problems. But before its application, the surface needs to be cleaned thoroughly. 

However, it might not kill the ones already growing on a surface. So, applying it to such surfaces may, well, be a waste of money. Also, it is to be kept in mind that anti-mold paints do not guarantee mold growth in the future, especially in cases of excessive water damage or flooding. 

  1. Durability

The durability of mold-resistant paint determines how long it can protect the walls from mold formation. Naturally, this factor is a significant concern for homeowners. Besides, anti-mold paints are costly, so users need to emphasize this particular aspect. 

Agencies like the EPA conduct checks to test the durability of these paints and whether they will be effective in the longer term. And the results can give you an idea about the expected longevity of the product. So, it will be viable for you to look out for EPA-registered paints. 

Additionally, many paint manufacturers provide guarantees over these products based on their longevity. Such policies basically depict the quality of ingredients being used. The more extended the warranty, the greater the quality, and vice versa. 

  1. Undercoat

There is more to mold-proof paints than just applying them to a surface. It will be much more effective if used as an undercoat, thereby making it serve as a mold-killing primer. Although it might increase the cost, it will provide increased protection against mold and mildew. 

This method is especially recommended for areas most vulnerable to molds, like as a bathroom, where mold spores can create major problems. 

  1. Additives

Instead of purchasing pure mold-resistant paint, some people opt for buying mold-resistant additives and mixing them into ordinary paints. This might seem a cheaper option for many, but you will need to ensure that everything is mixed correctly. 

We’d suggest getting professional help for mixing and painting such products. They have adequate knowledge about the mixture ratios and the right application method. 

  1. Coverage

As stated above, you will need to ensure that the surface is free from any mold and mildew before you start painting. It can turn out to be a time-consuming task, but it is the most crucial step. If you fail to clean the surface, the paint might not deliver desirable results. 

Plus, you will find that mold-resistant paints work better when applied in a thin rather than a thick coat. In some cases, a single coat of paint over the undercoat may seem just perfect, but in other cases, you may need to apply two or three coats for it to be effective. Hence, it’s feasible to buy a paint that provides more coverage.

  1. Cost

Mold and mildew-resistant paints are more expensive than regular ones and are available in various-sized containers. And truth be told, the high prices are inevitable, as it performs a specialized job and uses specific ingredients fit for the purpose. 

That said, you can cut down on your costs by browsing around hardware stores or options to find the best deals. 

  1. Nature of Paint

A quality anti-mold paint must be alkaline and breathable, free of any organic elements. Hence, paints that contain tempera or other crude oil derivatives need to be discarded. This is because microorganisms will proliferate if the walls have a lower pH level. 

While purchasing an anti-mold paint, it needs to be ensured that it contains ingredients like vinyl resins, transpiring, and antibacterial, antifungal, or antimicrobial agents that are water-repellent. 

  1. Application Methods

Once you have selected the best mold-resistant paint, don’t forget to check the application instructions provided by the brand. This will also help you keep the specialized tools handy for the purpose. 

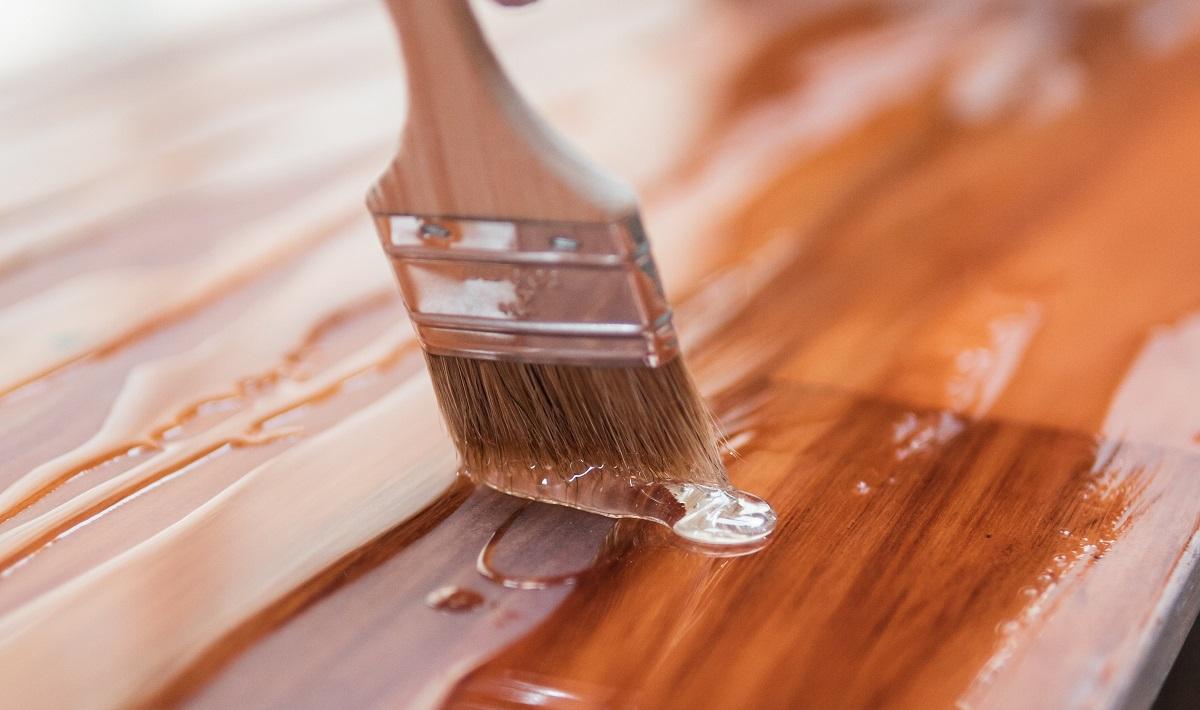
An anti-mold paint is usually applied just like any other paint. Hence, you can use either a roller or a brush to apply the coats. 

Now, since most paints are white in color, you can add a colorant, but not more than 5%. But before that, make sure to have tools like a paintbrush, masking tape, paint roller, personal protective equipment, and painting sheets. 

Is mold-resistant paint toxic?

Mold-resistant paint toxicity largely depends on the specific formulation. Some paints could contain biocides or other chemicals that may be harmful if inhaled, ingested, or come into prolonged contact with the skin. Always use them in a well-ventilated space and follow the manufacturer's safety instructions.

How does mold-resistant paint work?

Mold-resistant paint works by containing chemical biocides or natural substances that inhibit the growth of mold, mildew, and other fungi. These components work by making the environment nonconducive to such organisms' growth. Despite being applied on the surface, these anti-mold agents permeate the paint layer and remain effective for several years, providing long-lasting protection against mold and mildew.

Are mold-resistant paints completely effective against mold?

Mold-resistant paints' effectiveness against mold largely depends on environmental conditions, including humidity, temperature, and ventilation. While these paints can significantly inhibit mold growth, they are not entirely foolproof. Optimal mold prevention generally requires a combination of mold-resistant paint and other measures, including proper moisture control and ventilation.

Can mold-resistant paint cover existing mold stains?

Mold-resistant paint is not designed to cover existing mold stains. It can inhibit the growth of new mold, but existing mold and stains should be thoroughly cleaned and removed before applying mold-resistant paint. This ensures the paint's effectiveness and prevents further spread of the mold.

Can mold-resistant paint be used in all areas of a home?

Mold-resistant paint can be used in any area of a home, but it is especially beneficial in spaces prone to moisture and humidity, such as bathrooms, kitchens, laundry areas, basements, and attics. Despite its wide range of applications, it is not necessary to use it in areas where the risk of mold growth is minimal unless there are specific concerns about mold in those areas.

Can mold-resistant paint be used outdoors?

Yes, mold-resistant paint can be used outdoors. It is particularly useful in climates with high humidity or in areas prone to moisture, such as exterior walls, foundations, and decks. When selecting a mold-resistant paint for outdoor use, it's crucial to ensure that the product is also designed to withstand weather and UV exposure.

Is it hard to apply mold-resistant paint?

It is not typically hard to apply mold-resistant paint, as the process is similar to applying regular paint. That being said, proper surface preparation, including cleaning and mold removal, is essential for the effectiveness of the paint. Follow the manufacturer's specific instructions for the best results.

Will mold-resistant paint prevent mold forever?

Mold-resistant paint does not prevent mold growth forever. While it significantly reduces the risk, the effectiveness decreases over time, particularly if the root causes of mold, like persistent moisture, are not addressed. Routine inspection, proper ventilation, and moisture control are crucial alongside the application of mold-resistant paint for long-term mold prevention.

Are there eco-friendly mold-resistant paints?

Yes, there are eco-friendly mold-resistant paints available on the market. These products are typically formulated with low VOCs (volatile organic compounds) and use natural or mineral-based ingredients to deter mold growth, offering a more environmentally friendly alternative to traditional mold-resistant paints. As always, verify these characteristics with the manufacturer before purchase.

Understandably, selecting an appropriate mold-preventing paint from a huge collection can be a daunting task for you. But we hope that our reviews of the best mold-resistant paints available on the market will ease that job. 

It’s time for us to wrap up today’s guide. But before that, here’s a quick recap of our favorites.

For us, the Rust-Oleum 276087 is the most suitable option, as it ensures mold-free walls and renders a classy and glamorous look to them. Plus, the paint dries in less than 30 minutes, giving you the added advantage of completing the painting job faster. 

You can also opt for Fiberlock if budget is not an issue for you. It is the first anti-fungal paint that kills existing mold and prevents mold from growing in the future. 

Ultimately, it comes to your needs and requirements. So, you will also need to look into your budget and room decor before selecting an appropriate paint. 

And we will see you next time!

A home is never complete without a lovely paint finish to complement the whole design of the home, be it a modern or a classic design. And while many would opt for a solid, plain color for the walls, there are others who opt to be more creative even on a simple way. Faux painting is one of the simplest, but nonetheless stunning ways of finishing off a home or even just a room. Faux painting or finishing aims to copy or mimic surfaces of marble, wood or textile and require different technique to achieve each surface effectively. This amazing technique makes a home or a room wall stand out from the rest of the decors and chosen furniture.

How to Impress With Faux Painting

simple strokes for different effects

Creating a texture on a flat surface can be achieved by using different techniques. In faux painting, creating texture can be done by using different brush strokes. Each overlapping stroke builds up the overlapping effect on the surface and forms the faux painting layers even if only one paint color is used.

5ba55683ca3f8d5ea7974bad7a354250

Source

sponging A way to a lovely wall

Marble effects can be achieved through sponging. This technique is used in faux painting and is very effective in creating stunning effects. Sponging a single hue or multiple colors over another solid color creates a lovely marble effect.

7464f27737252c3f1bfb2570ac4780c9

Source

texture through a common household item

While sponges and brushes are great tools, other household items can also be used to achieve a perfect faux painting. This example which uses tissue paper creates a marvelous effect on the ceiling. The brown paint seem to glow into a golden color and sinews are formed naturally from the crumpled tissue paper.

09adc6405d77004da7992e56799aa00e

Source

Ombre of earthy tones and faux painting

Colors and hues going light to dark is a sight to behold. This is why ombre is a great choice in painting a wall at home. This becomes even better when faux painting and ombre is combined and a neutral color is used. This can be a perfect bedroom wall finish or an accent wall in the living room.

c80c5e33f45e9c10ec37c55e6d10e32b

Source

highlighting the best corner of the home

The most comfortable place or corner of the home deserves a relaxing view. Creating an accent wall with white and blue faux painting is refreshing and most definitely an inviting way to sit back and relax on that lovely corner. Add complementing and comfortable furniture and the natural beauty of flowers and you will have a space every guest will envy.

ae363484ca8896679b39ca8b7edb15bf

Source

marvel on a faux painting that aims to recreate marble

The natural beauty of marble, the swirls of colors, sinews and overlapping hues make it a sight to behold. Imagine this inside a home complementing all the furniture and fixtures. Simply majestic and definitely breathtaking.

OLYMPUS DIGITAL CAMERA

achieving a verdigris look on a classic drawer

Verdigris is often a green pigment that appears when acetic acid is used in copper. This faux effect creates that old but lovely look on a classic drawer. Place this in a room and it will instantly become the center of attention.

0d3533faf3ee4197be55f5adda8a4622

Source

Spanish staircase highlighted with faux painting

The romantic Spanish inspired staircases becomes even more splendid with a faux painting wall for a background. The staircase itself becomes more vivid against the soft earth tone faux painting. The chandelier, plants, windows and pots add more drama to this lovely scene.

a3b63d1034d9ed7af3de5fd40012ece0


stunning bathroom in faux red finish

Red is a color that some people find too strong for their taste. Adding details in red through faux painting, however, can change this perspective and can definitely change anyone's mind. The red is somewhat subdued by the brown mix and the stones and rocks used for the whole theme of the bathroom makes the red pop without the harsh effect on the eyes.

dc6dfd37594756af6f53aad7d623ed86

Source

achieving a natural wood color and look

One of the most natural faux lookes comes from wood. The different hues and the texture from wood attract more people than anything other materials can. Restoring the faux design of a door gives it more attitude and makes it look more attractive than just having it in plain paint.

db14b19917e9d38d3eea8f2ca9abc7ff

Source

splash of every color in different hues

Plain painting or finishing in a home is great, but adding a little more detail to the plain wall painting will add a different drama level to the wall and the whole room. This faux painting using different colors creates the illusion of dyed cloth. Each color blends well with each other and offers a majestic effect to the furniture and the rest of the room.

fc5f9523902eb55b701c86b41a00c229

Source

lovely marble mix of red and blue

Mixes of colors are very common for marble, and achieving this can be quite easy through faux painting. This lovely marble effect can be used on your walls for a decadent look.

9d02ab987f74cdcac3057712fe4587fd

soft faux painting for a classical look

Dreamy rooms are lovely in plain finishing, but finishing a dreamy room in faux painting makes the room exquisite. All the lovely ladies will agree on this setup and will truly have a great time accessorizing a room with soft colored faux painting and a vintage vibe.

39d396fcd41ebd19fe3553fe78b77a14

Source

serenity in faux white and blue

Green and blue faux painting can remind anyone of nature and the natural color of the sea. The calming effect makes this faux painting ideal for any home and the effect does not wear off easily. Anyone who wants to bring inside his home the serenity of the sea will find this combination of colors in faux painting to be ideal.

d168418f17f563b35e862ee6a58000a0


A mix of texture in earthly tones

Faux painting also includes the illusion of embroidery, and the image below is a perfect example. The details of the design are stunning and can remind anyone of the days of classic paintings and impressive works of art. The earthly tone used for this faux painting also lets the details stand out without compromising its own lovely effect on the whole piece.

824fb730788d51164f7cb10c1ae96c6d


creating faux effect on wood in teal

Teal can create the verdigris effect and can be lovely for faux painting. Adding this effect on natural wood creates depth and a rustic feel to the material. Use this technique for a vibrant country home feel.

2cbc6666ccab639a8497be136b21b8e1

Source

Accent wall made with faux painting

While many people find an accent wall unnecessary, this ombre faux accent wall will surely make people think otherwise. It is stunning and gives a home the right oomph. The "ooh's" and the "aah's" will come naturally for guests as they marvel in this beauty that lets the room stand out amongst the rest.

018125621e3e7b180ea053eb4836a2f8

Source

Have you ever give faux painting a try? Feel free to share your projects in the comment section below.

When you have spare paint cans or bottles lying around the house, it is important to know whether they are inflammable. 

Some paints may seem completely harmless until the time you realize that they are not. That’s because they may contain elements that make them combustible, thereby posing a threat to your safety. But does that mean you stop using them? Not at all!

What you need is the right kind of knowledge that helps you understand which paints are inflammable and which are not. With a good understanding, you will be able to use and store them safely. And once you take proper precautions, there’s nothing to worry about. 

The enthusiasm to learn more about paints must have brought you here, and you are at the right place. In this guide, we discuss the major types of paints and their characteristics. This will help you understand them better and enable you to use them more efficiently. 

So, without any more delay, let’s dive right in!

What’s Flammable And What’s Not? 

Is Paint Flammable?

Truth be told, there is no one answer to this question. Almost all paints are different from each other and they exhibit different characteristics. Whether a paint is flammable or not is determined by the kind of solvent that is present in it. The solvent holds the various ingredients in the paint together and helps in delivering the color and texture. 

Paints that are flammable contain a good amount of solvent that gets transferred to the walls after you are done painting. And once the painting is over, you can smell the solvent evaporating from the walls. This is when you need good ventilation to ensure that you do not breathe in any harmful chemicals. 

If you end up in a windowless room for hours right after it has been painted, there’s a high chance that you will inhale toxic chemicals. And that can cause serious damage to your lungs. 

In case you have any difficulty in understanding if a paint is flammable or not, there’s a small trick that can help. Always remember that water-based paints are not inflammable and are completely safe for use. 

On the other hand, aerosol paints come with propellant pressurized cans that enable you to deliver an even layer of paint. However, it is this feature that makes them inflammable. So, you must take proper care when working with one. 

Are Acrylic Paints Flammable? 

Acrylic paints are completely water-based, so there’s no chance that they will be inflammable. They usually don’t contain any trace of flammable oils in it, and the water content acts as an emulsifier. 

When you are using acrylic colors that are water-based, you can easily wash them with soap. This makes maintenance pretty easy and does not require you to come in contact with toxic elements. And when you are using acrylic paints, there is no need for a thinner, which can be quite inflammable. 

However, this in no way means that it is safe to put acrylic colors on your body or put them in your mouth. In case you accidentally put some on yourself, try to remove it immediately. 

Actually, acrylic colors are pretty non-toxic when used on regular surfaces. Each brand has a different drying time, and you would get all the details printed on the instruction manual. On average, it does not take more than a day’s time for acrylic paints to dry. 

That said, we’d still suggest that you use acrylic paints in well-ventilated space. This is because the other chemicals present in it might make you feel suffocated. 

Are Spray Paints Flammable? 

Spray paint is highly flammable, and you must take proper care when handling it. Just like soda is pressurized in the can, so are spray paints. They are highly pressurized and contain a good amount of butane and propane gasses. These two elements work as propellants. 

You might be wondering why to use a propellant in a spray can? Well, it is the gasses and the pressure that help the color come out of the can with much ease. The moment you press on the nozzle, the pressure gets released, and the paint gets pushed to the bottom of the spray can. 

Once the pressure is put on the valve, it reaches the end of the can and enters the dip tube, and comes right out of it. This way, the paint comes out of the nozzle, and there’s some amount of propellant in it too. And this is what makes the spray color pretty flammable.

At other times, the paint comes out of the can in the form of a uniform mist. Propellants contain particles that repel each other, which means that the longer they stay, the further the mist will be repelled. 

Make sure that you apply the paint in a way that the repelling is uniform for the color to get used properly. The further the nozzle is placed from the canvas, the better will be the application and the spread. And ensure that you take proper care to not puncture the can, as that would release all the pressure at one go. This will make all the contents come out at once. 

Are Oil-Based Paints Flammable? 

Oils are flammable, and so are oil-based paints. They catch fire easily because of the solvents present in them. A lot of users choose to use latex paints instead. But, there are indeed many users who still prefer to use oil-based paints. However, more and more people are getting inclined towards using latex paints today. 

People are looking for other alternatives because of the restrictions that many states place on the use of oil-based paints. Because of the limits, getting hold of these paints and their disposal both become pretty challenging. Other than that, most oil-based paints have chemical solvents that give rise to volatile gases. 

As a result, some states do not allow users to dispose of oil-based paints in toilets and drainage. Without proper measures, they can create quite some trouble in the water treatment plants. Paint thinners also need to be carefully disposed of as they might give rise to a fire if not handled properly. 

However, this is not the case in every country, and there are many places where painters choose to use oil-based colors. If you are planning to do the same, we only recommend that you handle it with care. When you do that, the risks become considerably less. 

Are Latex Paints Flammable? 

Latex paints, like acrylic, are composed of water-based components and acrylic polymer, which makes them entirely non-flammable. Apart from the polymer microparticles that are used as binders in both types, there’s hardly any difference between the two. 

As we have mentioned in the previous section, a lot of people are selecting latex as a better alternative to oil-based paints. So, you will get to see many people opting for it to color their indoor and outdoor walls. The shift in preference seems justified as latex paints are not at all harmful to the skin because there are no toxic elements in them. 

Latex paints that you use today are made of synthetic resins, which do not easily expand or contract as oil paint does. Even if you come in contact with them, they are not harmful and can be easily washed off. But make sure that you do not ingest them or purposely paint your body with one. 

The other advantage is that latex paints are porous in nature and as a result, they don’t not trap moisture. However, ensure that you give the primer some time to dry off before putting in the latex paint. Otherwise, the final output will not be nice. 

Paint Safety Recommendations 

It is not like flammable paints cannot be worked with. However, you need to know the correct ways of handling them. Be it flammable or non-flammable color; you need to know how to use them well. 

Efficient Storage 

Make sure that you store the paints well to ensure that they do not cause any problem. And while storing them, remember to not put the flammable variants near a heat source. Even a tiny mistake can lead to big troubles in situations like this. 

Apart from that, remember to not smoke near the paint and maintain the highest amount of safety. Consider keeping a fire extinguisher nearby. If you store the pigments well, their chances of catching fire are significantly less. So, try to keep them away from kids and pets and try disposing of them at a toxic dumping site if they are flammable.

Effective Ventilation 

To prevent fire or uneasiness caused by toxic chemicals in paints, it is essential that you work in areas that are well-ventilated. We understand that it is not always possible to set up an outdoor workshop. In that case, try to work near the windows and keep them open. If you still feel a little stuffy, it is best to install a fan in the room to improve air circulation. 

Proper Cleaning 

As we have mentioned before, there are many paints that contain toxic substances. So, it is best to clean the work area and yourself after you are done working for the day. Any uncleaned trace may cause a lot of damage. 

Also, do not forget to clean the ladders, cleaning cloths, and tools in your workshop. 

Is Paint Flammable?

Final Words 

With that, it’s a wrap for today.

We hope that you had a great time learning about the different types of paints and understanding how to handle them best. One must pay good attention to paint quality, but that does not mean that there is no need to neglect your safety. 

All paints are different and exhibit different characteristics. And before you start working with them, it is essential that you know whether they are inflammable or not. In case they are, you can take the necessary measures to stay safe. With good knowledge about paints, it will get easier for you to use them without any hassle. 

If you have any further queries, feel free to reach out to us in the comments section below. And for more exciting reads, keep a watch on this space. 

Until next time, fare thee well!

Related Articles

7 Best Gold Paint For Wood

9 Best Paint Primer For Drywall Tested

Epoxy Paint For Wood 101

9 Best Paint Brush For Polyurethane

5 of The Best Paint for Canvas Today

How To Paint Trim Near Carpet

7 Best Cold Galvanizing Paints

How to Remove Spray Paint from Concrete

7 Best Primers For Covering Red Paint

11 Best Paint Roller To Hide Imperfections Tested

9 Best Paints For Closets 

6 Best Paint Primer For Rusted Metal

Using stencils, a foam roller, and concrete paints, you can enliven your concrete patio with a stylish makeover! 

Nothing brightens a beautiful Sunday morning like sitting on your beautiful, artistically designed patio. And though you always have the option of calling professionals to do the job for you, it will lack a personal touch that only you can bring. 

Luckily, the process is fairly simple, and the ideas for the desired aesthetic of your porch are abundant. You are bound to find something that suits your tastes perfectly. 

So, without further ado, here’s how you can add that personal touch to your concrete porch! 

11 Ideas For Painting Concrete Porch

11 Ideas For Painting Concrete Porch

1. Graphic Stencils

Repeating patterns are pleasing to the eye. With graphic stencils, you can create an appealing look for your patio to inspire a mood of your choice. 

You can also get creative and mix a few concrete driveway ideas and designs to bring a fresh look to the patio floor. 

2. Wooden Finish

The concrete texture may not be to everyone’s liking. Not helping the matter is its dull gray color that is simply too dull to inspire any feeling within. What you can do about this is to make it appear wooden by using paint and clever brushwork. 

With a wooden finish, your porch floor will instantly appear more lively and classy. 

3. Thick Stripes

In a similar vein to graphic stencils, thick stripes are aesthetically pleasing when spaced out evenly. Use contrasting colors or stick to the simple gray-and-white combination to bring variation to the monotonous look of a concrete patio. 

The great thing about using a stripe motif is that it’s easy to execute for pretty much anyone. 

4. Painted Tiles

Tiling your floor may be expensive, but using clever brushwork and paint can achieve a fragmented look that seems like tiles. All you need is your preferred variety of paint and stencils to achieve this look. From floor epoxy to acrylic, you can utilize many different kinds of paints for this. 

Make your porch floor seem premium with the faux tile design. 

5. Rock Paint

You can find a mix of colors that you can use to make your patio floor appear like natural rock. Combine this with natural decorations, and you’ll have a patio that blends seamlessly into the décor. 

6. Abstract Patterns

Mix and match different paints to achieve your own abstract look. Plan how your concrete patio is going to look like, and execute it with a combination of decorative paint and a customized paint roller. 

Feel free to experiment with the colors to make your porch floor stand out among others. 

7. Stained Concrete Patio

You can create an artistically stained concrete porch floor by using weak acid along with salts. Acid opens up the pores in your floor, and salt acts as a catalyst for a chemical reaction, resulting in the concrete surface losing color. 

The concrete stain will be one-of-a-kind, thanks to the unpredictable nature of acids. However, it pays to be careful when handling acid to avoid excessive and unsightly splotches. 

8. Experiment With Color Schemes

This is where your creativity will shine the most. With the use of various coloring methods, you can replicate the look of natural materials like stone or earth or enhance your porch floor further by taking inspiration from murals and artwork. Now, you’re probably thinking, how to paint a garage door in a way that matches the concrete porch or patio paint? 

Contrast is key when it comes to painting your porch. Even if you choose to keep your concrete surface a solid color, the garage door’s color and patio décor will enhance its appearance by bringing about a change to the monotony. 

The resulting look can be funky or elegant, or it can include floral designs or bold accent colors. All you’ll have to do is broaden the horizons of your imagination. 

9. Checkerboard Pattern

The checkerboard pattern is a classic, timeless design that you can modify to add a fresh angle. Split the squares in half, transform them into a geometric design, and combine them with décor and furniture of contrasting colors for a modern look. 

10. A Glossy Finish

You may opt to coat the entire surface of your concrete patio with semi-gloss latex paint. The paint will form a protective layer over the floor and give it a gorgeous, fresh look that will always appear new. What’s more is that it makes cleaning more manageable as well, since dirt won’t be able to stick to the surface as readily. 

Cast aside the worries of your concrete floor appearing dull with a glossy, modern finish. 

11. Experiment With Textures

You can customize not only the look but the feel of the concrete as well. Be it with concrete panels to create a variation against the solid color or simpler, brick-like textures, you’ll be looking at a significant transformation of your patio. 

With the right kinds of paint color, you may morph your concrete porch into appearing sand-like or make variations thereof. 

How To Paint A Concrete Porch Or Patio

How To Paint A Concrete Porch Or Patio

Painting a concrete floor is fairly straightforward, a process that demands your time only. Not only are professionals expensive to hire for something as simple, but they may also end up taking longer to finish the job. And that’s not ordinarily ideal. 

With the following steps, you can implement the ideas mentioned earlier and have the perfect painted concrete porch. 

1. Wash The Concrete Patio

You can sweep debris and unwanted elements on your previously painted concrete porch away with a leaf blower or a good old-fashioned clean broom.  

By using a pressure washer, you can remove all the unwanted elements from the concrete surface. If you don’t own a pressure washer, use your garden hose to thoroughly rinse the concrete and scrub the floor with a wire brush. The surface has to be free of any blemishes before you proceed and so, make sure you do so thoroughly. 

2. Repair Cracks And Irregularities

Next, you’ll need to repair any damage that may be present on your concrete surface. Apply concrete caulk sealant where you spot cracks and irregularities and allow it to dry for the next day. There are handy applicators that make placing caulk easier, which may be worth looking into. 

Next, you can use sandpaper or a wire brush to smooth the excess caulk out, after which you can use a vacuum cleaner to clear out the debris. Be wary of the dust it produces, and keep a broom nearby for quick sweeps. 

If your concrete porch is damaged severely, you may have to contact professionals for help. Otherwise, it may lead to a botched paint job or chipping prematurely. 

3. Etch The Concrete Floor

No one likes a messy finish and so filling up pores in your concrete patio is paramount. To do so, you can make use of a powerful chemical known as muriatic acid. Of course, being highly reactive, you should take care while handling the acid. Ensure you don the appropriate protective gear before you get etching’. 

Apply it evenly on your concrete porch using a spraying bottle. Now, it’s also essential to consider which material the bottle is made of. An ordinary plastic bottle will serve just fine as long as the acid is diluted sufficiently, but it’s best to have one made from PVC. 

Allow the acid to perform its task for around 10 minutes, after which you can rinse it off with a garden hose. 

4. Prime The Concrete Porch

Here’s where the long stretch begins. Priming and painting is a lengthy process that can take days to finish completely, so be sure to vacate your schedule before starting. 

It takes multiple coats of primer to properly prep the patio for painting. Moreover, it has to completely dry between each coat to apply the next one smoothly. 

This is where you bring out your paint roller and painter’s tape. The former applies paint quicker and more consistently than a paintbrush, and you’ll use the latter to cover up areas you don’t want to be painted. 

You’ll be done within a few hours, depending on the size of your porch, before letting the primer dry. It can take up to a full day to properly dry and so, it’s vital to keep in mind that no debris touches the floor. Your patio floor will have noticeable spots if it does happen. 

5. Painting The Porch Or Patio

The painting process is nothing out of the ordinary, especially when it comes to the first coat. With the first coat, you’ll be applying a layer of solid color that acts as a base coat for your design. It’s simple: apply the concrete paint evenly using a paint roller, wait for it to dry, and repeat the process twice. Now comes the fun part. 

There’s a good chance you’re thinking of using stencils to bring that extra elegance or spice to the front porch. Fortunately, there is no shortage of the latest, cutting-edge stencils for you to choose from. From a simple repeated stencil pattern to more abstract ones, the process of using them is essentially the same. The only thing you’ll need to maximize your painting efficiency is a paint sprayer. 

Now, if you’ve used painter’s tape during priming, you’ll need it for stencils as well. Use it to keep the stencil steady while spraying the paint over it. Keep your hands steady and your eyes focused because if the paint goes out of the stencil bounds, there are no quick do-overs. You’ll have to apply a second coat of the base paint over it or just make peace with it. 

Once you’ve applied the concrete paint, remove the stencils using the previously-applied painter’s tape. Allow it to dry and voila, you’re done. 

Ideas For Painting Concrete Porch Frequently Asked Questions ?

How do you keep paint from running under stencils?

You can temporarily stick your stencils to the patio to ensure the paint does not bleed in. To do this, use a mild, water-based adhesive on the back of your stencil and seal it to the surface. 

After you’ve painted over the stencil, peel it off and you’ll find no visible signs of bleeding. 

Which is the most long-lasting paint for concrete?

You can choose epoxy if you need the pattern to last as long as possible. Epoxy resin nets you not only a durable finish but a pretty design as well. 

It is worth noting that due to the acrylic plastic base, it lasts quite a long while as well while offering a wider variety of colors in comparison to epoxy. 

What can you do to make my concrete patio less slippery?

You can use rock salt to create small pores on the surface of your patio by applying it on wet concrete and allowing it to cure. Once the salt has done its job, you’ll be left with a textured finish that provides excellent traction as well. 

How long does it take for floor epoxy to cure?

Floor epoxy can take upwards of nine hours to dry at room temperature. Any cooler, and the drying time rises to 18 hours. If you’re applying multiple coats, it could take several days before the concrete porch surface is ready to be walked on again. 

Ideas For Painting Concrete Porch Conclusion

Ideas For Painting Concrete Porch Conclusion

Your patio will add to the impression anyone has of your house, and it should showcase a bit of your personality. Add a visual flair to your home with your painted concrete porch, and make it stand out among others. 

Stencils are a no-brainer for most purposes, and you can easily prepare them without hired aid. You can get creative; perhaps choose a color and pattern that will define the look of your home altogether. 

No matter your choice, it’s critical to remember that painting your concrete porch will take days’ time. If you’ve opted for a more complex layout, it could be a full week before you can use it. And before long, your dream patio will be ready to be gaped at again! 

Rollers and brushes can take a backseat now that the Wagner Spray Gun is here!

No disrespect to these age-old tools, but the new generation of high-volume low-pressure paint sprayers are re-defining how DIY-ers paint their homes. From highly detailed cabinets to large rugged surfaces like popcorn ceilings, the Wagner Spray Gun gets paint into all the nooks and crannies.

And, all this in a fraction of the time it would take to roll paint over home exteriors or brush between the crevices of furniture. Needless to say, the finishing on projects will have neighbors asking for your painter’s number.

But, of course, the new hand-held spray guns from Wagner are easy-to-use for professionals and amateur painters alike. In case you are using the Wagner spray paint at home, remember to thin the latex paint during prep.

Follow this guide to know how you can do it yourself!

How To Thin Latex Paint For A Wagner Spray Gun

Paint can with paint brush for repairs isolated

There are a slew of options to choose from when it comes to paints for your Wagner Spray Gun, but one thing is for sure – they all have to be thinned before use.

Failing to do so will leave you with a clogged nozzle that takes some hard scrubbing and about 15 minutes to clean. Frustration aside, this is enough time for dried paint marks to form – thus, undoing the even finish and time-efficiency promised by the spray gun.

At the same time, thinning the paint too much will leave you with wastage and an ugly mess. With that being said, it is important to follow this guide meticulously. So, without further ado, let's get started by preparing the paint!

Step-By-Step Guide

Step 1| Prep The Paint

For the first step, you will need your choice of latex paint, of course!

Prepping the latex paint means ensuring that there are no lumps and bits stuck to the bottom or sides. These hateful little clumps are a direct ticket to a clogged nozzle, so don’t look past them.

Begin by holding the can of paint by its handle and swinging it back and forth for about a minute. Usually, store-bought paints come premixed and don’t need any more mixing, so unless your paints have been lying around for some time, you can afford to skip this step.

However, premixed or not, you should use a wooden stir stick or a mechanical stir stick to mix the paint once the lid is off. While stirring, make sure that the paint at the bottom has been mixed well and is not clumpy.

Step 2| Pour

The next step is to pour about a quarter of the prepared latex paint into a clean paint bucket.

At this point, use a stir stick to lift some of the paint and let it drip into the bucket. The visibly heavy drops mean it is still too thick to go into the spray gun. With that being said, you are looking for a paint that has a runny consistency, and which drips down in one long line resembling a string.

Step 3| Add Water And Conditioner

To reach the target consistency, start by adding a little bit of water at a time. Additionally, you can add a conditioner like Floetrol for a smoother finish.

As a rule of thumb, ½ a cup of water for every gallon of paint is the recommended number. However, it’s best to start with an ounce – adding more if the need arises.

While experienced painters can usually tell just by looking if the paint is done, beginners may have to experiment a bit. But, don’t be too nervous about getting it too thin. After all, you can always add some more paint to the mixture to thicken and fine-tune it gradually.

Step 4| Mix

Using a wooden stir stick, keep stirring and lift it occasionally to check the consistency.

Keep in mind that a powerful stir stick attached to a drill may be a swift method to mix thick paint, but it might also create air bubbles if used on this diluted mixture. And as you may already know, air bubbles will disturb the evenness of your paint job in the long run.

Now, once you are done concocting the mixture and it forms a long runny line, move on to the next step for the ultimate consistency test.

Step 5| Testing Consistency

To know if you have reached that sweet spot between too thick and too thin, you can go about it two different ways. One is by running the paint through a mesh funnel, while the other utilizes a viscosity cup.

The funnel test is the go-to method for more seasoned painters, although the latter provides a more accurate picture. Moreover, some paints are sold with a viscosity cup as part of the package itself. However, it is worth noting that mesh funnels also serve the purpose of filtering out any contaminants and paint flakes that may clog up the spray nozzle.

Nevertheless, if you have a funnel with a thin spout, then pour down some of the paint through it into the bucket. In case it doesn’t run through smoothly, add some more water and mix again before testing.

On the other hand, if you are planning to use a viscosity cup, then make sure to have a stopwatch ready before beginning. Once ready, dip the cup inside the mixture and lift it instantly. At the same time, start the clock and stop it as soon as the viscosity cup completely runs out of paint.

Ideally, the time it takes for the cup to become empty should be about 35 seconds. However, anything between 25 and 40 seconds will do the job.

Optional Step

Once you are successful with the consistency test, don’t forget to jot down the ratio of water to paint that has been used. In fact, do this the first few times and experiment a bit with the ratios. And before you know it, you will be eyeballing quantities and mixing like a pro.

And, that’s it – you now know how to thin latex paint for a Wagner Spray Gun! To maximize every spray painting experience, read ahead to learn about some neat tips that you won’t find anywhere else.

Tips And Tricks

  1. Using Old Paint

You don’t need to go out of your way to buy a fresh can of paint if you already have some lying around the house. However, old paint tends to coagulate and form big globs that need to be broken down.

To do this, grab the can holder and sway it back and forth for a few seconds. After this, hold it in front of your chest with the back end facing you. What you want to do is shake the sediments that have been collected at the bottom. Now, do this by simply shaking vigorously in a front-to-back motion for about a minute.

Additionally, you can pour the paint through a funnel to get rid of dirt, debris, and big chunks of paint that may have dried up.

  1. Mixing With A Wooden Stir Stick

Apart from preventing air bubbles that would come from a mechanical stir stick, mixing water and paint manually provides a feel of the paint thickness against the stir stick. In other words, you can tell if the paint is thin enough and mixed well just by stirring it around.

In fact, just a few sessions of thinning latex paint, and you won’t even have to do any tests anymore!

  1. Consider Weather Conditions

Temperature and humidity – both can affect how much, or how little, thinning agent has to be added for the perfect consistency. Heat and humidity, especially, are every painter’s worst enemy as they dry up latex paints in no time. On the other hand, lower temperatures decrease the adhesive properties in paint.

The best way to combat these inconsistencies is by following the instructions on the spray gun and setting the airflow accordingly. Moreover, if you are painting during summer, it is highly advisable to thin and work with small quantities of paint before beginning another batch.

  1. Using A Conditioner

As mentioned earlier, the Wagner Spray Gun is suitable for all types of paints, although the paints will need to be thinned accordingly. Latex paint is water-based so it mixes well with water. 

However, oil-based paints would require you to buy commercial paint thinners from the market. At the same time, you cannot use these paint thinners on water-based products.

In case you do want an oil-based finish on your latex paint jobs, Floetrol is one fan-favorite you can trust. To cut things short, Floetrol is a paint conditioner that leaves a shiny and professional finish on spray paint projects, while also making paint more workable under extreme weather conditions.

  1. Test Patches

Apart from the two consistency test options mentioned in the step-by-step guide, there is yet another test that your paint mixture must pass to be certified ready-to-use.

Yes, we are talking about a patch test. Go ahead, get a piece of plywood or any surface that can stand upright. Then, test-spray on this patch and wait for it to dry.

Overly thinned latex paint will be runny, messy, and unable to cover the area where it has been sprayed. Other signs are drip marks and a long drying time.

On the other hand, paint that resembles the texture of an orange peel after drying needs to be thinned more. In the end, the right consistency will have you spraying mist-like paint that creates even layers that don’t run.

Frequently Asked Questions

  1. Can paint thinners be used as a thinning agent for latex paint?

Latex paint is water-based, whereas commercial paint-thinners are mostly reserved for oil-based paints. In other words, paint thinners and mineral spirits are petroleum-based products that will completely strip the adhering properties of latex paint.

With that being said, unless you want to completely ruin your latex paint, don’t think about using paint thinners. Water-based paints like latex paint have been formulated to be best suited with water – hence, water is your safest and most readily available option.

  1. Why is my latex paint not covering my wall even after thinning?

Although there are other signs to look for like runny lines of paint, the most common reason for less coverage is over-thinning. Apart from this, you should check if the product is from a trusted brand and not damaged.

In case it turns out that the paint mixture is too thin, simply begin by adding little amounts of paint to it and mix the contents together with a stir stick. After this, follow the viscosity tests given in the guide and adjust some more if the need arises.

  1. Do I need to hire a professional to paint with latex paint and an HPLV spray gun?

Hiring a professional is always a good idea, but it is far from necessary! The new generation of HPLV spray guns, such as those by Wagner, are small, hand-held, and easy to use devices. However, research well before you begin spray painting if you don’t want to have a frustrating experience.

Perhaps, the most important rule to follow is thinning the paint before spraying. Other than that, forgetting to check whether the spray gun itself is compatible with latex paint is a common rookie mistake.

Moreover, humidity, air pressure, temperature, and the type of spray gun you want to use – all of this will alter the required water to paint ratio for thinning latex paint. Needless to say, it might take some time to become an expert at spray painting with latex paint, but it can be done!

  1. Do all paints need to be thinned before painting with a Wagner Spray Gun?

Generally, all kinds of paints need to be thinned when used with a Wagner Spray Gun because the nozzle has been engineered to diffuse thin, mist-like layers of paint. Naturally, a thick consistency clogs the opening and dries up.

Water-based paints like latex and acrylic are thick so they undoubtedly need to be thinned and filtered out. At the same time, oil-based paints such as enamels, despite being a thinner variant, still need to be thinned to prevent the spray gun nozzle from choking.

Worker painting wall with spray gun in white color. Copy space.

Final Words

While most people preach “think before you say,” a seasoned spray painter swears by “thin before you spray.” And, rightly so!

Using a Wagner Spray Gun is one of the fastest ways to get a gorgeous and even coating of latex paint in any part of the house. But, you can’t get there unless you know how to efficiently thin each batch of paint.

And now that you have our 5-step guide and handy tips to lead the way, the only thing left to do is practice and trust the process. Just remember to write down the ratios of water to paint each time you finish a batch.

Also, now that you know how weather can tip the balance even in tried-and-tested concoctions, making notes about it next to the findings is a great exercise. With all this in mind, soon enough you will discover the secret formula for thinning latex paint, come rain or shine.

Till next time, happy painting!

Related Articles

9 Best Pump Sprayers For Staining Fence

10 Best Wood Wax

9 Best Concrete Stains to Consider

Learn How To Soften A Hard Paint Brush

11 Best Paint For Concrete Walls In Basement

13 Best Paint for Furniture | Reviews & Buyer’s Guide

10 Highest CFM Air Compressors  

9 Best 6-Gallon Air Compressors for Your Home & Garage

13 Best Paints for Bathroom Ceilings

2 Luminess Silk Reviews [All You Need to Know]

HVLP vs. LVLP [All You Need to Know & Winner]

5 Best Sprayers For Plasti Dip

9 Best Chrome Spray Paint

How Much Does It Cost To Bottom Paint A Boat?

How Much Does Benjamin Moore Paint Cost? [Guide]

Alcohol Ink Art Tutorial [Alcohol Inks 101]

9 Best HVLP Spray Guns [Review & Buyer’s Guide]

6 Best One Coat Paint and Primer

7 Best Primers to Cover Dark Paint

Best Exterior Primer Paints

7 Best Exterior Primer For Peeling Paint

6 Best Paint Primer For Rusted Metal

9 Best Stains For Cedar

7 Best Cold Galvanizing Paints

11 Best Paint Scrapers to Rock

How to Remove Spray Paint from Concrete

7 Best Primers For Covering Red Paint

11 Best Paint Roller To Hide Imperfections Tested

9 Best Paints For Closets 

How To Paint Trim Near Carpet 

Graco X5 vs X7 Comparison Review 

7 Best Gold Paint For Wood

9 Best Paint Primer

Sherwin Williams Vs. Benjamin Moore [A Clear Winner?]

7 Best Gun Paint to Consider

Has the fear of dripping paint over your carpet stopped you from painting trims? Well, there are ways to paint trims, even with carpets installed.

You might be wondering how to paint the trim if you have a new and fluffy carpet installed on the floors. Rest assured, a tidy and leak-proof paint job is possible for all types of flooring! 

Painting the trim or baseboard completes the fresh and finished look of the room. And usually, with wooden flooring, painting is relatively easy. But with carpet flooring, it becomes a little more complicated.

Although it might not be the easiest thing to do, it's possible. Don't let the carpet get in the way of your trim painting process. Just put on your DIY hat and follow this guide.

These steps will help you navigate even in the trickiest of carpet situations, so read on!

What You Need to Know Before Painting Trims

Empty room interior,parquet floor with white wall,house interior.

There are a few basic things to consider before we get into the stepwise process of painting. You need to know the type of trim and carpet on the floor, which painting method to follow, and the supplies required. Let's get into the details of each aspect.

  1. Type Of Trim And Carpet

It's essential to know and understand the space you are working with when you are painting trims. Consider the type of flooring; which type of carpet is it? 

If the carpet is thin with short threads, processes like taping it will make the job easier. If it is a very fluffy carpet, the regular tape might not be enough to cover the edges. In that case, alternative options like thicker tape or tapes with low adhesive strength will be required.

The kind of paint used will differ according to the trim material. Most trims are made of wood, but trims/baseboards can also be made of other materials such as PVC. So, the kind of paint applied will also differ.

  1. Method Of Painting

Some methods involve removing the trim or baseboards entirely and then painting them. Then, they are dried and reattached to the walls. It sounds like a tedious job that will take days to complete.

Another option is to lift the carpet, finish painting, and then put it back in place. Again, removing the embedded carpet consists of a lot of manual work. Also, if you have just installed a new carpet, you might not want to remove it just for painting trims.

Yet others prefer the skill of freehand painting. This method is acceptable if you are a seasoned and confident painter. However, for most people, the taping method may be ideal. A painter’s tape is stuck on the trim, after which it is painted. We will discuss the method in this guide.

  1. Supplies Required

DIY painters cannot beautify trims without the necessary equipment. Here is a list of things you will need -

Preparation Before Painting

So, are you wondering how to paint the trims flawlessly without damaging your carpet? Don’t worry; take a look at these steps that may help prevent it.

  1. Clean The Area

First of all, clean the area thoroughly before picking up your paintbrushes. Make sure you scrub the dirt and dust away with a microfiber cloth or sandpaper. Removing tough stains and grime is essential for the fresh coat of paint to spread evenly on the trim.

If there are any loose bits of old paint or an uneven surface, it can be leveled and smoothened with a few scrubs. Don't leave dust, old pieces of color, and wood chippings on the carpet. Vacuum carefully to clean it up before moving to the next step.

  1. Caulk The Trim

Caulking the trim is not essential, but it will give an even and polished finish. Molding caulk also fills up the uneven surface and seals the cracks and gaps in the wall and trim. It helps paint to spread quickly without creating any displeasing bumps and fissures.

In general, it works well on wooden trims. But there shouldn't be any problem, even if your baseboard is made of PVC. Apply the caulk with your finger throughout the surface of the trim and wipe it out with a clean cloth. You can also use a wet sponge to apply it and wipe off the excess caulk.

  1. Select A Brush

There are a couple of options for painting trims, the most common being a regular nylon paintbrush. Bristle brushes, foam brushes, roller pads, and roller brushes are also commonly used. Some people prefer foam brushes since they are easy for beginners to use, but this is entirely a personal preference.

If you have no prior experience with painting, a bristle brush might be challenging to operate. The fibers might cause uneven lines across the trim and end up looking unpleasant. In such cases, it is recommended to use a smaller size brush or a foam roller - because a bulky brush isn't for everyone. A 2 to 3-inch wide brush is good enough for painting trims.

Paint The Trim Near Carpet In 3 Steps

Let's begin with the three-step guide on how to paint trims near the carpet area.

Step 1: Tape The Area and Carpet

Firstly, make sure to select a painter's tape which leaves no residue on the carpet. It's important to use tape that protects your carpet from paint and does not damage it when you peel it off. A masking tape or painter's duct tape should be fine for protecting the edges of the trim and the flooring.

If you want to avoid a sticky mess, use small pieces of tape. Create sections of the area or wall to trim and apply the painter's duct tape in 3 or 4-inch sections. Then, lay the painter's tape firmly on the floor, flat at the edge. 

A small portion of the tape should be on the trim, and the remaining should be on the carpet. At this point, check if the tape is completely covering the carpet at the edge near the trim. 

Now use a putty knife or butter knife to push the edge of the tape into the carpet. The bottom of the trim can be exposed but make sure the edges of the carpet are entirely covered with the tape.

If you are worried about spilling beyond the tape, place an old cloth beneath the area you are about to paint. This will catch any stray drops and splashes while you are painting.

Step 2: Correctly Dipping The Brush

Once that is done, make sure to prime the trim before painting, as any previously used paint might have some oily residue. If not removed, the new paint color will not stick easily to the surface. 

Ideally, select a primer that will easily stick on oil paint. There are paints specifically designed for trim painting. If you choose this option, keep in mind that they can be more expensive than regular paint.

Firstly, dip the brush in paint and wipe off one side of the excess paint. This is a pretty important step when it comes to painting as you should try and avoid having excess paint on your brush. It is likely to drop all over the trim and even beyond the tape, which you have carefully placed. 

So, ensure that you must wipe the brush and remove any excess paint before you move toward the surface of the trim. Be careful not to soak the roller sponge or brush excessively in paint, or else it will drip all over your carpet.

Step 3: Paint

Now apply paint to the trim using smooth brush strokes. Move your brush from left to right (or right to left) in one stroke instead of many tiny strokes. This uninterrupted stroke will give a smoother finish to the surface. 

After a few strokes, you may better understand how much paint you should pick up on the brush to get good coverage without spilling. A quick tip - before painting the entire trim, create an outline that separates it from the wall for better control while painting.

By doing this, you are ensuring that there is no leakage of paint above the trim. Once the outline is made, paint the entire base of the trim. One section can be covered using two or three even strokes.

Again keep a rag close in case there is a splatter of paint. Ensure that you wait until the first coat is dry before applying the second or even third coat. If you're wondering how many coats of paint are required on the trim - usually two or three coats should be good enough to get a neat finish.

Care After Painting

Once the paint is dry, pull off the tape. Moreover, check that fresh paint is not peeled off in the process. Also, ensure that there is no leakage of color (which is possible if the paint is still wet.)

If you want to make sure that there is no paint leakage, wait for the paint to dry overnight or for two days before removing the painter's duct tape. Once the paint is dry, remove the duct tape and clean it with a clean brush if there is any dried residue. 

A corner of the open office space with a modern interior design

Conclusion

That was our detailed DIY guide on how to paint trims if you have carpets on the floors. Following these steps will indeed get you fresh trims with unspoiled carpets in a matter of hours. 

With the method mentioned here, it should take 2 to 4 hours to paint, depending on the size of the room. And what's more, there is no need to spend hundreds of dollars on hiring a professional to paint the trims of your house.

The type of carpet won’t be an issue anymore to neglect painting the trims in your house! So, when are you picking up that paintbrush to freshen those trims?

Related Articles

15 Different Types of Carpet

Alcohol Ink Art Tutorial [Alcohol Inks 101]

9 Best HVLP Spray Guns [Review & Buyer’s Guide]

6 Best One Coat Paint and Primer

7 Best Primers to Cover Dark Paint

7 Best Exterior Primer For Peeling Paint

6 Best Paint Primer For Rusted Metal

9 Best Stains For Cedar

9 Best Pump Sprayers For Staining Fence

10 Best Wood Wax

9 Best Concrete Stains to Consider

Learn How To Soften A Hard Paint Brush

11 Best Paint For Concrete Walls In Basement

13 Best Paint for Furniture | Reviews & Buyer’s Guide

10 Highest CFM Air Compressors  

9 Best 6-Gallon Air Compressors for Your Home & Garage

13 Best Paints for Bathroom Ceilings

2 Luminess Silk Reviews [All You Need to Know]

HVLP vs. LVLP [All You Need to Know & Winner]

5 Best Sprayers For Plasti Dip

9 Best Chrome Spray Paint

How Much Does It Cost To Bottom Paint A Boat?

How To Thin Latex Paint For A Wagner Spray Gun

How Much Does Benjamin Moore Paint Cost? [Guide]

43 Insanely Cool Basement Bar Ideas for Your Home

Best Exterior Primer Paints

7 Best Cold Galvanizing Paints

11 Best Paint Scrapers to Rock

How to Remove Spray Paint from Concrete

7 Best Primers For Covering Red Paint

11 Best Paint Roller To Hide Imperfections Tested

9 Best Paints For Closets 

Painting has been for a long time an incredible expression of the most inner feelings, a personalized display of the multiple ways we can perceive the world surrounding us through our eyes, with multiple deductible and traceable overall lines and topics present at the same time all over the world.

Techniques and basic materials have evolved over time, offering us endless possibilities to allow our creativity to run free and voice about our personalities and taste but the basic principles set by our ancestors from Greek and Roman times have remained as key rules in creating, transposing and elaborating a sketch or painting and we are talking here about perspective, human body proportions, depth, representation of the static and of movement and so on.

This unique set of rules is applicable indifferently of the basic material, no matter if we are talking about canvas painting ideas or watercolor paintings on special types of paper and of the chosen technique-oil, acrylic, textile, watercolor or glass painting.

Today we are going to focus our attention to the first basic steps one must take in learning how to paint glass.

800px-Henry_G._Marquand_House_Conservatory_Stained_Glass_Window

By Designer : Richard Morris Hunt (1827-1895)maker : Eugène Stanislas Oudinot (1827-1889) - Self-photographed / PierreSelim, CC0

"Colored glass has been produced since ancient times. Both the Egyptians and the Romans excelled at the manufacture of small colored glass objects. Phoenicia was important in glass manufacture with its chief centres Sidon, Tyre and Antioch. The British Museum holds two of the finest Roman pieces, the Lycurgus Cup, which is a murky mustard color but glows purple-red to transmitted light, and the Portland vase which is midnight blue, with a carved white overlay. In early Christian churches of the 4th and 5th centuries, there are many remaining windows which are filled with ornate patterns of thinly-sliced alabaster set into wooden frames, giving a stained-glass like effect.Evidence of stained glass windows in churches and monasteries in Britain can be found as early as the 7th century. The earliest known reference dates from 675 AD when Benedict Biscop imported workmen from France to glaze the windows of the monastery of St Peter which he was building at Monkwearmouth. Hundreds of pieces of colored glass and lead, dating back to the late 7th century, have been discovered here and at Jarrow." [Wikipedia]

South_rose_window_of_Chartres_Cathedral01

The South Transept windows from Chartres Cathedral By Ludwig Schneider - Own work, CC BY-SA 3.0

Even though this beautiful technique has had its significant origin in the stained glass of churches and monasteries, nowadays many contemporary artists dedicate their passion to expressing creativity on glass in impressive manners.But we know for a fact that you do not have to be a professional to learn some basic tricks and tips and start painting your own designs at home as a wonderful method of relaxing and exploiting one's latent creativity.You can apply a set of principles and steps to any chosen glass item you wish to transform and embellish. Learn how to paint wine glasses, how to paint glass bottles and how to use spray paint for efficient fast results.

Tips and tricks on how to paint glass

What type of paint should i choose?

This is the first question one should ask himself before starting a diy glass painting project, because the paint type will determine the possibilities you could have in designing an item and actually being able to achieve exactly what you were looking for without struggling too much. from what we have found, glass paints can be divided under 5 big categories based on their consistency, inner structure and finished appeal.

  1. Acrylic enamel paint or enamel paint designed for glass and other shiny surfaces
  2. Acrylic glass paints
  3. Acrylic paints that require a medium added
  4. Solvent based paints
  5. Special markers

1. Acrylic Enamel Paint

Acrylic enamel paints fall under the "easy to use" category and do not require heat to set. Their composition is based on water which will help the paint to dry and harden rather quickly, offering a very glossy end result. They come in a variety of hues and some types an actually be use don ceramics too, being dishwasher safe after having cured.We recommend the [easyazon_link identifier="B076CQGKQ6" locale="US" tag="homesthetics0a-20" type="link" link_id="272373"]Plaid Folk Art Enamel Beginner Set[/easyazon_link] for the basic tones you will need in the beginning, as it is usable on ceramics, wood, Styrofoam, plaster, terra cotta and tin as well and provide easy cleanup with soap and water.

Tips and Tricks on How To Paint Glass homesthetics acyclic enamel paint

2. Acrylic Glass Paints

The acrylic glass paints contain a formula specially designed to adhere to plastic, glazed ceramics and glass, with a transparent hue that might come in handy in the case of stained glass projects. Depending on the manufacturer, this type of glass paint can be let to air dry or will require heat setting in the oven. For a professional looking aspect we recommend the [easyazon_link identifier="B005KOH3R4" locale="US" tag="homesthetics0a-20" type="link" link_id="272374"]Pebeo Vitrea 160 Glossy Glass Paint Set[/easyazon_link] applicable on glass, crystal, porcelain, china, glazed earthenware, terracotta, metal, enameled sheet steel, and copper. This specific glass paint type needs to be set in the oven and according to the bottle instructions,  the colors are permanent, microwave safe, UV resistant and have remarkable resistance to dish-washing and to normal detergent.


3. Acrylic Paints That Require a Medium Added

[easyazon_link identifier="B0033PF3S8" locale="US" tag="homesthetics0a-20" type="link" link_id="272375"] Folk Art 869 2-Ounce Glass and Tile Medium[/easyazon_link] by Plaid Enterprises is a medium used to allow the paint to adhere to the glass surface. This particular product confers the glass a frosty, sandblasted appeal that will allow regular acrylic paints to adhere perfectly to the surface.


4. Solvent Based Paints

[easyazon_link identifier="B005KOH47S" locale="US" tag="homesthetics0a-20" type="link" link_id="272376"]Pebeo Vitrail Stained Glass Effect Glass Paint[/easyazon_link]  is a solvent based paint that will not require heat to set and will air dry in about 8 hours.Its appeal is a transparent one, suitable for stained glass projects and applicable on glass, polyester, acetate, canvas and metal; we recommend using [easyazon_link keywords="pebeo cobra deco" locale="US" tag="homesthetics0a-20" type="link" link_id="272377"]pebeo cobra deco[/easyazon_link] or [easyazon_link keywords="Iris Brushes" locale="US" tag="homesthetics0a-20" type="link" link_id="272378"]iris brushes[/easyazon_link].You can thin the paint by adding mineral spirit or white spirit. Unfortunately, you cannot use this type of paint on items you consider using everyday as the paint itself bears only a light wash without soaking.


5. Special Markers

There is a variety of glass painting markers available that can even guarantee dish-washing safe items. Markers are perfect for glass painting beginners as they are very easy to control. The downside is that a consistent flow is not always possible because you will have to pump the actual paint from time to time for it to reach the tip of the marker. The [easyazon_link identifier="B006H4ZH5G" locale="US" tag="homesthetics0a-20" type="link" link_id="272379"]Pebeo Vitrea 160 Assorted Glossy Markers[/easyazon_link] are applicable on  glass, crystal, porcelain, china, glazed earthenware, terracotta, metal, enamelled sheet steel, and copper and will fully dry after a minimum of 24 hours. They require baking which will add incredible resistance to dish-washing and to normal detergents.


Should I Prepare the Glass Before Applying the Paint?

When we usually start a canvas painting project we prepare the canvas and apply a ground color as the prime background for the rest of our colorful layers. The same principle applies to glass too. You have to make sure the surface is perfectly clean and grease free in order to obtain a uniform stained glass appeal.

Start by washing it thoroughly sing warm water and soap. Another method involves using water and vinegar and a final wipe with an alcohol damped paper towel. Remember our hands have natural oils that can smudge the glass surface, so we recommend you to use latex or surgical gloves.

Let the glass air dry or use a clean porous paper cloth to remove water. If your project involves applying a basic uniform color to a wine bottle for example, keep in mind that the transparency of the glass will complicate the process of obtaining a good even coverage. Apply several coats for an opaque effect and let the paint layers set before applying another by respecting the paint manufacturer's instructions in the bottle.

There is no specific brush type required. Some manufacturers prefer and recommend their own brush that can come along with a specific paint, but both natural and synthetic brushes will work well. As for the size and shape of the actual brush, it all depends on the design you are trying to achieve. As a beginner, if you are looking for an intricate model, choose a rather small pointy paint brush that will allow you to be more precise and fallow your guidelines properly, as well as to distribute the glass paint evenly on the surface.The [easyazon_link identifier="B00BRRO2NG" locale="US" tag="homesthetics0a-20" type="link" link_id="272380"]Martha Stewart Crafts Glass Brush Set[/easyazon_link] contains 5 special angled brushes that will help you in painting wine bottles for example and are made from Nylon bristles, ideal for glass painting and fine detailing.

Another useful item that should have a place in your painter tool box is the [easyazon_link identifier="B00BUT8HIM" locale="US" tag="homesthetics0a-20" link_id="170607" type="link"]Craft Martha Stewart Crafts Glass Scraper And Pick Set[/easyazon_link]which will definitely come in handy in glass painting projects, allowing you to correct mistakes, clean the paint from your glass surface and remove bubbles from it as well.


How should I heat-set my glass painted item?

When it comes to paint types that require heat setting in the oven, the exact temperature required for the paint layer to dry perfectly is usually dictated by the paint's manufacturer so we highly encourage you to read them carefully before tying to heat dry your glass product.

Check your oven's temperature and never, ever insert the glass into a preheated oven. This will lead to the glass shattering under the huge temperature difference. Insert the glass into the oven, set the right temperature and timer, let it dry and allow the glass to cool to the room's temperature before taking it out of the oven.

We again advise you to fallow the instructions written on your paint product in order not to ruin your work of art at the very end. Just be patient and take it one step at a time.

Are glass paints safe to use on food or fluid containers?

Here again the concern issue depends on the paint's composition and chemical structure. Check and double check the instructions before applying glass paint on the interior side of your wine glasses. Non toxic is not the same thing as food safe so take precautions and do not paint the areas that can come in contact with food or liquids. From our knowledge such a product does not exist yet but if you know different we would very much like it if you could share it with us.

How to Paint Glass Step by Step

1. Set your basic materials within reach

When starting a painting project it always indicated to prepare in advance and set all your required materials within reach. Some types of paint can set very fast and won't allow you much flexibility so arrange all your utensils on the working table. For this particular project we have used an A4 sized glass piece, a set of Idea glass paints that will air dry in about 8 hours and an erasable black liner to set the basic design lines on the glass surface.

IMG_2058-002

IMG_2065-001

2. Prepare and clean the glass surface

As mentioned on the above tips and tricks, it is very important to clean and prepare the glass surface before starting applying layers of paint and unraveling the beuatiful design you have envisioned.We have used a glass cleaner product that contains alcohol and wiped the glass thoroughly. Afterwards we have let it air dry, naturally, to avoid unwanted marks that a cloth might have left. Remember to use gloves to prevent the natural oils of your skin from smudging the surface.

IMG_2067-001

3. Sketch the basic design lines of your art work

For a simpler approach we have drawn our simple iris design on a piece of paper before starting the actual work on the glass piece. This might come in handy if you are not sure of the precise form of your future creation. Now you have the chance to think about the hues you will use and the positioning of the design on your glass canvas.

IMG_2073-001

4. Reproduce the design on the glass surface

Place the piece of paper underneath the glass piece and start drawing by using a black liner. You can use a permanent marker if you have a steady hand. Otherwise, opt for a removable one and keep an alcohol damped cloth nearby to remove unwanted smudges that will definitely happen. Once the lines have been set you can start adding your hue layers.

IMG_2075-001

5. Start applying the layers of glass paint

As a glass painter beginner it is not recommended to buy a variety of pain tones from the very start. Choose the basic primary colors and learn to mix and match them to obtain the right tones you desire for your creation. Do not forget about the pain thinner which will definitely ease the process. be careful though to not overuse it or you might end up with a dripping set of paints on your glass which will never set right.

IMG_2077-001

6. Mix and match hues to obtain the right tones

Once the primary design is done you can focus on your background.For this basic simple design we have chosen a yellow and white combination color ground that could accentuate the iris flower. We have used a flat brush to apply in large strokes the paint layer and obtain a more artistic stroke.

IMG_2080-001

7. Let the glass painting air dry or heat set it depending on the paint's specifications

The particular paint type we have used air dries in about 8 hours and does not require heat setting. Make sure to read the instructions and we highly advise you to respect them accordingly in order to really profit from your investment in glass painting materials.

DSC_0359-001 DSC_0354-001 DSC_0358-001

How to Paint Glass Bottles Ideas

Single Snowflake on a Transparent Wine Bottle


how to paint glass homesthetics (14)

A Mosaic of Colors

how to paint glass homesthetics (9)

A Solid Tone Versus a Transparent Base

how to paint glass homesthetics (13)

Paint a Colorful Dream-catcher

how to paint glass homesthetics (12)

Wine Bottles Transformed Into Candle Holders

how to paint glass homesthetics (11)

how to paint glass homesthetics (10)

Limit Yourself to One Tone and Enhance the Bottle With String Lights

how to paint glass homesthetics (6)

Have Fun and Choose a Girly Theme

how to paint glass homesthetics (7)

Paint on a Solid Base Color
how to paint glass homesthetics (4)

SOURCE

Opt for a Fairy-tale Scene

how to paint glass homesthetics (3)

SOURCE

Mix Styles and Add a Piece of a Story Onto Your Bottle

how to paint glass homesthetics (2)

SOURCE

Learn to Uniform Paint a Bottle from the Inside Out

how to paint glass homesthetics (1)

SOURCE

Choose Fun Characters and Transform the Bottle Into a Lamp

how to paint glass homesthetics (1)

SOURCE

Decorate Your Christmas Dinner Table With a Holiday Inspired Decoration

how to paint glass homesthetics (21)

SOURCE

Test Your Skills and Patience at an Intricate Wine Bottle Paint Design

how to paint glass homesthetics (20)

SOURCE

Embellish Your Patio at Night with a Floral Wine Bottle Lamp

how to paint glass homesthetics (19)

SOURCE

Imagine Your Favorite Tropical Scenery

how to paint glass homesthetics (18)

SOURCE

Transform a Wine Bottle Into the Perfect Canvas for a Miniaturized Creation

how to paint glass homesthetics (17)

SOURCE

Choose Transparent Glass Paints for a Wonderful Effect When Lit

how to paint glass homesthetics (16)

SOURCE

A Delicate Candle Holder for the Outdoors

how to paint glass homesthetics (15)

SOURCE

Create an Intricate Complex Pattern

how to paint glass homesthetics (8)


Decide on a Holiday Theme and Create Wonderful Decorations

how to paint glass homesthetics (5)

SOURCE

How to Paint Wine Glasses

Transform Your Wine Glass Collection

HOW TO PAINT GLASS HOMESTHETICS

SOURCE

Opt for a Delicate Design That Will Embrace the Entire Glass

HOW TO PAINT GLASS homesthetics (2)

SOURCE

A Delicate Beautiful Design Created on a Solid Ground
Learn The Basic Tips and Tricks on How To Paint Glass homesthetics (3)

SOURCE

When in Doubt Always Opt for a Simple One Toned Creation

Learn The Basic Tips and Tricks on How To Paint Glass homesthetics (4)

SOURCE

Adorn Your Wine Glasses With an Array of Flowers

Learn The Basic Tips and Tricks on How To Paint Glass homesthetics (5)

SOURCE

A Fun Design for a Special Occasion

Learn The Basic Tips and Tricks on How To Paint Glass homesthetics (6)

SOURCE

You Can Use a Stencil

Learn The Basic Tips and Tricks on How To Paint Glass homesthetics (7)


Spring Lilac Embracing a Wine Glass

Learn The Basic Tips and Tricks on How To Paint Glass homesthetics (8)

SOURCE

Gorgeous Chromatic Creation Appreciated From Within

Learn The Basic Tips and Tricks on How To Paint Glass homesthetics (1)

SOURCE

Let Your Design Take Roots

Learn The Basic Tips and Tricks on How To Paint Glass homesthetics (2)

SOURCE

How to Paint Mason Jars

Paint the Whole Mason Jar Body

How To Paint Glass homesthetics.net mason jar painting (6)

SOURCE

Create Luminaries Out of Mason Jars

How To Paint Glass homesthetics.net mason jar painting (7)

SOURCE

A Flowery Mason Jar for Spring

How To Paint Glass homesthetics.net mason jar painting (8)

SOURCE

Well Colored Composition With a Spring Vibe

How To Paint Glass homesthetics.net mason jar painting (1)

SOURCE

Use Lace to Paint Mason Jars

How To Paint Glass homesthetics.net mason jar painting (1)

SOURCE

Watermelon Painted Mason Jars for a Summer Party

How To Paint Glass homesthetics.net mason jar painting (2)

SOURCE

A Romantic Candle Holder Display

How To Paint Glass homesthetics.net mason jar painting (3)


Let Your Imagination Take Charge

How To Paint Glass homesthetics.net mason jar painting (4)

SOURCE

Paint Your Own Dream-Catcher Mason Jar

How To Paint Glass homesthetics.net mason jar painting (5)

SOURCE

In the end imagination, creativity and dedication will define your work. Keep the basic rules in mind and simply have fun with any glass painting project. We would love to complete our collection with your own work so feel free to share your creations along with opinions and ideas in the comment section below.

If you are looking to paint glass ornaments we have featured the best paints here.

Happy painting!

Although aluminum looks sleek in its natural silvery form, people often want to paint aluminum surfaces to complement their home decor. 

As such, all DIYers and painting enthusiasts should know how to paint this popular metal. However, if you don’t know how to go about it, there’s absolutely nothing to worry about as it’s hardly as tough as you think. 

There are a ton of ways to paint aluminum surfaces that will allow you to achieve a fantastic paint job. In this informative guide, we will be learning all the nitty-gritty about painting aluminum so that you get the desired results each time. 

Without any further delay, let’s get straight to the good stuff, shall we? 

Things You Should Know About Painting Aluminum 

For the best results, painting aluminum requires some extra steps in the preparation stages. For example, first, you will need to sand your aluminum surface to ensure that the paint adheres well to it. You can do this with medium-grit sandpaper that’ll help scrape the surface. 

Then, you’ll have to apply an etch primer to provide a solid base coat, which will allow the paint to stick to the surface. In this way, you will be able to achieve a top-quality paint job that’ll truly stand the test of time. 

That said, if you want to make it more durable, we suggest finishing it off with a topcoat or a sealer and letting it dry for 24 hours. Fortunately, all these supplies are easily obtainable at hardware stores, and they are reasonably easy to apply.       

What You’ll Require To Paint Aluminum 

Before starting, you will need a few supplies to deliver a top-quality finish. To begin with, you will require a respirator and gloves if you are using topcoats, self-etching primers, and spray paints. If you come in direct contact with these materials, they can prove to be harmful to your health. 

So, you need to make sure that you take proper safety measures. Furthermore, we strongly advise against using these primers or spray paints indoors as they release harmful chemicals that can put you at risk of developing breathing issues. 

Lastly, ensure that you have some of the basic items near you, such as an old piece of cloth and sandpaper, in order to prep the aluminum surfaces before painting. 

How To Paint Aluminum 

close-up. fragment aluminum folding door. photo with a copy-space.

Follow these steps to successfully paint aluminum

  1. Sand The Aluminum Surface 

First, you need to sand the surface properly before getting started with the spray paint. This will ensure that the surface is sufficiently rough for the spray paint to adhere well to it. You need not put extra effort into this step; just add some texture to make the next steps easier.   

  1. Rub Off Excess Dirt And Dust Using A Cloth 

Next, you’ll have to use an old rag or a cloth to get rid of all the dirt and dust created from sanding the aluminum surface. The idea is to get the surface free from all the debris to allow the scuffs to absorb the paint.    

  1. Apply Multiple Coats Of Self-Etching Primers 

Now, you’ll have to apply the self-etching primer to create a durable surface for the spray paint. You will need to apply 3-4 coats for optimal results. On that note, make sure you do this outside or in a paint booth to prevent the paint from sticking onto other surfaces.   

  1. Apply Multiple Layers Of Spray Paint 

This is the part where you apply spray paint. It doesn’t matter which brand you are using; just ensure that you have worn a respirator for protection. Ideally, you should apply 4-5 coats to deliver a top-notch finish and make the paint less susceptible to flaking due to wear and tear.   

  1. Let The Spray Paint Cure 

Once done with spray paint, keep the object in a dry and safe place for a minimum of 24 hours. This will ensure that the paint gets sufficient time to adhere itself completely to the surface.  

  1. Apply A Few Layers Of Clear Coat 

If you intend on using the painted object outdoors, we highly suggest applying a few layers of clear coat to properly seal in the paint. This will ensure that the color remains intact for a long time.  

Top 3 Coatings For Aluminum Surfaces 

If you are painting aluminum for the first time, you may not be aware of the top aluminum primers and paints. For this reason, we have listed 3 products that we consider to be the best in their respective departments, and that may help you achieve the desired results. 

  1. Rust-Oleum Painter’s Touch Paint + Primer

This product from Rust-Oleum is both a paint and a primer. Made using an oil-based formula, it ensures long-lasting protection for your aluminum surface. Let’s move on to the next section to know more about this product in detail.  

Why Did We Like It?

Honestly, we were quite impressed with what this product has to bring to the table. It has a drying time of just 20 minutes, which is relatively lower than most options you’ll find on the market. Plus, a can of this product can cover up to 12 square feet, which is pretty decent, given the size of the container. 

The main issue with aluminum paint and primers is that they have an offensive odor that makes them very difficult to apply. But you don’t have to worry about that while using this, as it's an oil-based formula, having exceptionally low odor.

On top of that, it is available in a wide variety of color options, enabling users to choose a color that would suit their requirements. Apart from aluminum, this item can be used on various other surfaces, including plaster, plastic, ceramic, and a lot more. 

Overall, it is one of the top-rated paint cum primers available on the market.     

What Could’ve Been Better?

Without a doubt, it is an exceptional paint cum primer, especially given its low drying time and various color options. But, unfortunately, that same cannot be said about the can that it comes in. We noticed that its lid is rather hard to pull, which might be an issue for many users. Other than this minor inconvenience, the product works perfectly fine. 


Pros

  • Low odor
  • Available in various color options
  • Decent coverage
  • Apart from aluminum, it can be applied on a range of other surfaces


Cons

  • A bit difficult to pull the lid


  1. Rust-Oleum Stops Rust Paint

Our next pick is a paint from Rust-Oleum that works out amazingly well on aluminum surfaces. It is popular among DIYers and professionals for providing a hoard of benefits. So, let’s dig a little deeper.  

Why Did We Like It?

If you are looking to protect aluminum objects from corrosion, besides providing an eye-catching finish, then this product could be your best bet. The paint’s oil-based formula helps you deliver a durable protective coating that offers top-notch rust prevention. 

Furthermore, it is resistant to chipping, fading and abrasion, and UV rays, which means once you spray it, you can expect this paint to stay unflawed for a long time. Not to mention, it provides a glossy finish, making your aluminum surfaces look fresh and brand new. 

Plus, you would be pleased to know that it dries in just 4 hours, unlike most paints that take an entire day. Beyond that, it features an economical price tag, making the product ideal for DIYers and people who have recently gotten into painting. Lastly, a quart of it can provide a coverage of up to 90 square feet.  

What Could’ve Been Better?

We didn’t come across any considerable downsides to this aluminum paint from Rust-Oleum. However, if we had to nit-pick, we would say that it has a strong odor. But that said, you can easily tackle it by wearing a respirator.


Pros

  • Sports an affordable price tag
  • Resistant to rust and UV rays
  • Provides a decent coverage
  • Delivers an eye-catching finish


Cons

  • It has a strong odor


  1. Rust-Oleum Aluminum Primer

Next, let us introduce you to a latex aluminum primer that’ll work to protect your aluminum surface from various harsh weather elements. Keep reading to know more. 

Why Did We Like It?

Perhaps, the most advantageous feature of this primer is its excellent adhesion, which helps the product to bond tightly on a range of interior and exterior aluminum surfaces with ease. Plus, its oil-based acrylic formula ensures a durable protective coating that makes the surfaces less susceptible to rusting.

Beyond that, it dries within 2 hours, which is a bonus, if you ask us. And not only that, a pack of 17 fluid ounces of this item can cover surfaces of up to 90 square feet, which is great. 

Once applied, it creates a flat aluminum finish that can be easily covered with a range of topcoats. Overall, it is one of the best primers for aluminum surfaces that any DIYer can hope to get their hands on.     

What Could’ve Been Better?

The only gripe we have against this primer is that the packaging material used is not durable enough. When it came to us, the can was dented, which was a bit disappointing  


Pros

  • Offers a durable coating
  • Has a low drying time
  • Bonds tightly
  • Provides a decent coverage


Cons

  • Packaging material used is not good


Aluminum Surface Paint Buyer's Guide

Here are a few factors that you must consider when buying aluminum paint to ensure optimal results. 

  1. Consistency

Consistency is one of the most important factors you should consider when buying paint, specifically designed for aluminum surfaces. On that note, always go with a paint that has a thicker consistency as they are known to work better on metal surfaces, especially aluminum. 

  1. Easy Application

You should always go with a paint that allows you to paint surfaces without breaking a sweat. When it comes to painting aluminum, spray paints are considered to be a popular choice. This is because they are pretty quick and easy to apply.   

  1. Water And Weather-Resistance 

Last but not least, you will want to ensure that your paint provides a durable and long-lasting coating that can withstand weather elements. So, when buying paint, check if it is resistant to water, UV rays, etc. This factor is especially crucial if you will be painting things that will be outside all year. 

How To Paint Aluminum Frequently Asked Questions (FAQs)

Here are some of the most frequently asked questions that we have tried answering to the best of our ability. We are confident that after reading this part, all your doubts regarding painting aluminum will be cleared. 

    1. What type of paint sticks best to aluminum surfaces?

Oil-based paints work the best on aluminum surfaces simply because they offer more durability and stronger adhesion than water-based paints.

    2. Do aluminum surfaces require a special kind of paint?

Yes, there are special paints that are specifically designed to be used on aluminum surfaces. So, make sure that you check the packaging before buying as it will have the materials appropriate for use labeled on it.

     3. What are some of the top brands of aluminum paints?

Some of the top-brands of aluminum paints are:

    • Krylon
    • Rust-Oleum
    • Seymour Of Sycamore

     4. What are the other ways of protecting aluminum objects?

Apart from applying a coat of paint, you can protect your aluminum objects by anodizing them or by simply applying a coat of primer. It mostly depends on the intended use of the object.

How to Paint Aluminum

Final Thoughts

Not only does painting aluminum objects protect them from rust and various weather elements, but it also makes them visually appealing. 

With that, we have come to the end of our informative guide; hopefully, it has helped you gain extensive knowledge on painting aluminum. Just make sure that you prep the surface well before painting, as it’ll help the paint adhere properly to the surface. 

Also, keep in mind that oil-based paints work best for painting aluminum surfaces, so make sure you choose the same.

On that note, it’s a wrap for today. Hope to see you soon!  

Related Articles

6 Best Paint Primer For Rusted Metal  

7 Best Gold Paint For Wood 

7 Best Gun Paint to Consider

7 Best Cold Galvanizing Paints

7 Best Primers For Covering Red Paint

9 Best Paint Brush For Polyurethane

13 Best Epoxy Spray Paint Resins To Consider Today

An outdated garage door can affect the decor and make your house look shabby. But the best concrete paints can help with this. 

Give your garage doors a new look by painting them in a whole new color. You can use more than one shade and refer to project inspiration ideas for the job that are available online. 

The important thing is to repair old doors before painting them. Once you have covered up chipped and oxidized garage doors, they will look new and elegant, enhancing the curb appeal. 

Also, door paints last a long time, and you will not have to worry about painting it again for the next few years. Just remember to coat all the panels well and paint your garage door twice if you want a deeper shade. 

We will discuss all this in more detail in the following section. 

How To Paint A Garage Door

How To Paint A Garage Door

We will first tell you about the things you will need before selecting the right paint. Then we will move on to the process of painting garage doors. 

Things You Will Need 

1. Paint Brushes

We will ask you to keep a collection of brushes handy for the project. You might need different sizes to cover the trim, the sides of the windows, as well as to paint the frame. 

2. Garage Door Paint

You can opt for acrylic latex exterior paint, which can be the perfect choice for garage doors. However, check the door materials beforehand and see if the paint can be applied to them. 

3. Exterior Primer 

A good-quality primer will promote adhesion and ensure the paint sticks to the garage door. But you can avoid using it if you are applying two coats of paint with a built-in primer. 

4. Stir Sticks 

The paint should not separate before you apply it to the garage door, so use stir sticks to mix it well before using.

5. Pan And Roller

A roller can be used to paint the stiles quickly without the process being messy. 

6. Dropcloth 

You must already know how important it is to keep the garage door step clean and free from paint splashes. Keep a drop cloth at the base of the door so that the paint does not ruin the flooring. 

7. Step Ladder 

If you are trying to reach the top of the door but are not tall enough, you will need a step ladder. Garage doors can be pretty high so get one before you start working. 

8. Painter’s Tape 

You need to define the edges and sand flat surfaces to make sure the painting job is done well. Hence, painter’s tape is required to cover such areas and deliver a professional finish. 

Painting A Garage Door: Steps To Follow

Painting A Garage Door

Step 1: Choose The Garage Door Color 

Buy the garage door paint after thorough consideration of the other shades used in the house. Now you can find acrylic exterior paint in most home improvement stores but the paint should be such that the door looks good while guaranteeing protection from bad weather. 

Remember that the door is going to receive direct sunlight, so check how the colors will look in the sun before opting for the right shade. We will recommend picking samples first and checking how the color will look on the door. 

And while purchasing, remember to buy an exterior paint primer, which will allow the paint to stick well and cover the door surface smoothly. You can even look for concrete floor paint ideas online as well if you want to paint the area in front of the door. 

Next, consider the material the door is made of, such as wood, aluminum, or vinyl, as the exterior paint needs to adhere to the surface well. Check the label carefully before you purchase it to see if the paint can be used on your garage door surface. 

Step 2: Clean The Garage Door 

The garage door will be close to the street, and that means it can get dirty easily. You will have to clean the garage doors before applying the paint to prevent dust contamination. 

Use a bucket of water or a hose pipe for the job by pouring water on the surface and wiping it with a washcloth. If the door is grimy, you will need a power washer for cleaning it. Hire a power washer from a local hardware store or ask a cleaning company to help with this step. 

Once you are done cleaning the door, you can keep a drop cloth below the garage door that will collect any excess paint trickling down the surface. This will also keep the wet edge from touching the cement and prevent paint from ruining the floor. 

Step 3: Make A Note Of The Weather 

Before you start painting garage doors, you should always check the weather. Get an update from the internet or from the local news if there is any rain shower prediction in the next 24 hours. 

For the primer to set, you will need a few days of dry weather, and it is best to plan accordingly. We will always recommend setting the dates on the calendar depending on when the monsoon season begins. 

If it rains suddenly during the paint job, you will have paint running all over the surface and the floor. This can be very messy and it is best prevented at all costs.  

Step 4: Use Painter’s Tape To Cover Different Areas 

Do the garage doors have some designs on them, or do they come with recesses and patterns? You will need to work carefully so that the fresh paint does not get into these areas. To keep these areas safe, purchase painter’s tape, which is pretty cheap and easily available online. 

You can stick it all over the desired area and create boundary lines while working. The paint will not be absorbed through the tape, keeping those specific areas safe. Also, you can use tape if you are applying two different colors to the door. 

Step 5: Prime Before Painting

Use a paintbrush to apply a primer to the garage door. You will have to apply it from side to side and make sure that the door is entirely covered with a thin layer of primer. This should be enough for the new paint to stick to the base properly. 

Once you are done working with the primer, wash the paintbrush well before applying the paint. 

In case you cannot find a primer, you can skip it by applying an extra thin coat of paint. It should help in preparing the garage door for the second layer. 

Step 6: Cover The Recesses 

You will need to reach the recesses in the door with your paintbrush and coat them with paint properly. Then you can paint the main door surface and color the corners. Try not to get paint on the stiles or the raised edges initially as you will need to paint them again later, but we will get to that soon.

For now remember that while painting, the brush should be wet and not dripping with paint. Otherwise, it may streak or run, which will hamper the final effect. 

Step 7: Cover The Stiles 

The stiles can now be covered with paint and you will find them on top of the recesses. Use a pan and a roller to get the job done, while applying smooth strokes for a professional finish. Also, if the paint layer is thin and you can see the primer through the paint, you will have to apply another layer on top.

Give at least 12 hours in between for one layer to dry and before applying the second coat. But there’s no need to apply a second coat if you are using light colors. 

Step 8: Keeping It Clean 

Once you have applied an even coating of paint, you will have to ensure the surface stays clean after the paint dries. To do so, keep washing the garage door once in a while so that dirt does not settle on the surface.

How To Paint The Garage Door Frame In A Different Shade?

You will need a brush to paint this frame, and we will recommend a small or medium-sized brush for the job. Use it to paint inside the frame and begin from the top always. 

Then slowly move down until you have painted the entire door frame. You can clean any excess paint from the corners, which has gotten into the trims. 

Safety Tips To Remember 

You will be handling mineral spirits and brush cleaners, which includes chemicals. This can be harmful to the body when inhaled constantly, so use a mask to prevent breathing in the toxic fumes. 

Also, it is a good idea to wear goggles while trying to sand or chip old paint because the fine particles can easily get into your eyes. And if you find paint splashes on the ground, you can look for driveway paint ideas to cover up the driveway with paint to make it look even more beautiful. 

How To Paint A Garage Door Frequently Asked Questions ?

In this section, we will be listing the questions that are frequently asked by people who are looking to paint garage doors. 

Is painting the garage door with a primer very essential?

Applying primer is not mandatory; however, it makes the paint stick to the surface better. If you do not want to apply primer, opt for a paint that comes with built-in primer. 

What is the time needed for one fresh coat of paint to dry? 

You will need around 12 hours for one coat to dry, so while painting a garage door, make a note of the weather. In very humid climates, you may have to leave it for 15 hours till it dries to the touch. After the last coat has been painted; wait for 2 to 3 days before using the freshly painted garage door. 

Can a roller be used to paint garage doors? 

If you have a flat garage door, you can use a roller to paint it. Also, you can paint the stiles with a roller but do not use it for the edges. 

Do you need to call a professional to paint a garage door? 

While you may want to paint garage doors yourself, reconsider if more than one door needs painting. It will be time-consuming, and you may not be able to dedicate the required effort to the project. 

Also, if you are wondering how to paint a garage door that is old and chipped, let us tell you that a lot of preparation is needed. You will need to fill up the holes and the chipped parts before applying the paint. 

Hiring a professional ensures it can be done in a shorter time while the finished project will look extremely refined. On the flip side, you will have to spend more money to hire a professional painter. 

How To Paint A Garage Door Final Words

How To Paint A Garage Door Final Words 

It is essential that you prepare the garage door surface well before painting, as it is easy to find streaks or the paint trickling down if you are not careful. 

If the weather is humid and it is difficult for the door to air dry, use a floor or a table fan for the job. Face them toward the door and let them dry the paint faster. 

Moreover, when you want to make patterns on a base paint layer, wait for the base to dry completely. We will recommend leaving it for 2 to 3 days before you paint designs on the surface. 

Hope you now know enough about how to paint a garage door, and do not forget to have fun while you are at it. 

A fresh coat of paint can add pizzazz to any room. From rich hues to earthy tones - there’s nothing a splash of color can’t fix! 

If you don’t have time or money for a full-blown renovation project, then a quick paint job is the best way to hide stains, deformities, and design flaws in your house or commercial property. However, you need premium quality paint for the project, and Benjamin Moore is one of the top brands that come to our mind. 

With an interesting history, a prolific range of top-quality products, and 3500+ color options, you couldn’t have asked for a better alternative. 

If you are wondering about the paint costs, we will answer that question and much more. In this guide, we have compiled the different products from Benjamin Moore and elaborated on their features and price. 

So, without further ado, let’s begin!

Brand Overview

Before we delve into details, here’s a quick overview of Benjamin Moore and what makes it one of the most sought-after paint brands available today. 

Started in 1883, with the aim of selling premium quality paints and stains, Benjamin Moore has expanded its portfolio and strived to become one of the leading market brands. What makes it unique is its tie-up with thousands of independent retailers spread across North America and its focus on using innovative technology to produce excellent paints and finishes. 

In 2000, this brand was acquired by Berkshire Hathaway and since then has taken long strides to produce a sustainable range of paint coatings.

What Determines The Cost Of Benjamin Moore Paint?

What Determines The Cost Of Benjamin Moore Paint?

Benjamin Moore offers a wide variety of high-quality paint products, and although the prices are on the higher side, the brand also has some budget-friendly options. Having said that, we believe it is better to make a one-time investment and choose an expensive option that will provide a premium finish and look stellar for years to come. 

Before discussing specific product prices, we think it’s best to look at the factors determining these prices. For instance, a paint that offers excellent coverage and can cover both interior and exterior surfaces is naturally going to cost more than one that can work only on interior surfaces. 

So, in this section, we will be looking at the factors that determine the cost of Benjamin Moore’s paints. Let’s get started. 

  1. Finish Type

The foremost factor that determines the price of the paint is the sheen or finish type. Benjamin Moore offers the following finish types:

    • Flat Finish

If your wall is uneven or has other imperfections, there’s no better way to hide these than by opting for a flat finish. It provides excellent coverage and is not as reflective as some other finish types.  

    • Eggshell Finish

This finish type is usually recommended for high-traffic areas such as the kitchen or family rooms as it is easy to clean. In addition, it provides a subdued polished glow that makes the area look elegant and sophisticated.

    • Matte Finish

Matte finish is shine-free and can successfully hide surface imperfections. Besides, it is pretty long-lasting and is recommended for bedrooms, ceilings, and study areas. 

    • Satin Finish

Satin finish lies midway between matte and high-gloss finish types. It has a velvety luster and is usually used in dining halls to give it a rich look. Since it can be washed easily, you don’t have to break your back to maintain it. 

    • Semi-Gloss Finish

A semi-gloss finish provides a highly reflective surface and can work on doors, window frames, and cabinets. Besides, it has an easy-to-clean surface and can be used in high-traffic areas too.  

[easyazon_image align="center" height="500" identifier="B0086TLHH2" locale="US" src="https://m.media-amazon.com/images/I/51TJ6vin7vL._SL500_.jpg" tag="homesthetics0a-20" width="473" type="image" link_id="239307"]

  1. Sustainability

Different product lines from the brand, such as Regal, Ben, and Eco Spec, meet all safety standards and are formulated to release a low amount of VOCs (volatile organic compounds). 

The Natura range from the brand, in particular, was considered to be the benchmark in environmentally feasible paints and was certified asthma and allergy-friendly. Eco Spec, which received the Green Seal Certification, later replaced it. 

Given the growing emphasis on using sustainable paint products, Benjamin Moore has started focusing on manufacturing “greener” options that do not release any harsh fumes or emissions. As a result, the price of these products is higher owing to their advantages. 

  1. Mildew Resistance 

Certain additional qualities such as mildew resistance, weatherproof properties, and durability affect the price of paint. 

If you are looking to paint the kitchen, bathroom, or other moisture-prone areas, then you’ll have to shell out a more significant sum for mildew-resistant paints. Similarly, if you wish to paint exterior surfaces such as sheds, then you need durable and weatherproof paint. So, these additional features increase the price of paint per gallon but improve its functionality and longevity. 

How Much Does Benjamin Moore Paint Cost?

Now that we have analyzed the factors that determine paint cost, it is time to delve into the specifics. Having a comprehensive idea about the cost of different product lines from Benjamin Moore will help you get a ballpark estimate for your paint job. It will also help you decide what paint best suits your needs. So, let’s look at all the deets!

Interior Paints

Benjamin Moore has a vibrant line of interior paint products that are fade-resistant and easy to work with. Besides, they remain smooth and are hard-wearing. So, there are no chances of chipping or cracking. Out here, we have listed the diverse range of interior paint products from the brand with their features and prices. 

  1. Aura

Formulated using Color Lock Technology, Aura stands out because of its color vitality and durability. The colors are thick and vivid and can endure regular washing without fading. 

Besides, the paint retains color consistency over time and produces vibrant, accurate hues because of the Gennex Color Technology engineered to improve paint longevity and resist fading. This makes it stand out among its competitors, who use surfactants (chemicals) to disperse the pigments evenly. Although the colors are rich initially, they fade over time because of the presence of chemicals.  

Apart from durability, this color technology also has excellent ‘hide’ potential, and the paint itself is self-priming. So, you don’t have to apply more than two coats to get a gorgeous finish. In addition, it is mildew resistant and can cover up to 400 sq ft per gallon, depending on the wall type. 

Coming to the finishes, we have this range available in matte, satin, eggshell, and semi-gloss finishes. 

Wait...there’s more! The Aura Bath And Spa series is a subdivision of this range and comes with a matte finish for easy cleaning. Also, it is ideal for moisture-prone areas such as kitchen, bathroom, and other high-humidity areas. 

At last, we come to the price. Aura paints will cost you a tidy sum of $80 per gallon. Although this is by no means humble, we’d argue its features far outweigh the price. 

How Much Does Benjamin Moore Paint Cost?

  1. Regal Select

The Regal Select line from Benjamin Moore is acrylic-based and comparatively less expensive than the Aura range. It is spatter-resistant, blends seamlessly into corners without creasing, and is easy to work with, even for DIY enthusiasts or first-time painters.

This paint-primer is available in innumerable color options and provides excellent coverage. So, it can effectively hide previous stains, and you don’t need to apply several coats to get a striking color. Moreover, the painted wall doesn’t require active scrubbing and is easy to clean with a simple soap and water solution. 

This line is also formulated using the Gennex Colorant Technology. The absence of harsh chemicals makes it safe and sustainable, as does the low VOC concentration. Besides, it emits less odor, so you don’t have to worry about pungent paint odor engulfing your house. 

The Regal Select line is mildew resistant and available in all five finishes - flat, matte, satin, semi-gloss, and eggshell. Thus, it can be your top pick for all home-improvement projects and can be applied to several surfaces such as ceilings, walls, drywall, wood, and plaster. 

Priced at $59 per gallon, the Regal Select range is worth every penny you spend on them. It provides an elegant, uniform finish, and one gallon can cover up to 450 sq ft without compromising on paint thickness or coverage. So, you get what you pay for!

  1. ben Interior Paint

ben Interior Paints should be the ultimate choice when trying your hands at a paint job for the first time. It is much more affordable than the Aura and Regal Select line and formulated with the specific goal to provide an easy painting experience.

This premium-quality painter-primer gives a flawless finish to your hallway, dining room, cabinets, and other surfaces that require regular cleaning. In addition, the flat finish type is ideal for ceilings and other low-traffic areas. 

Apart from flat, it comes in two other finishes - eggshell and semi-gloss. Thus, you can rely on ben Interior Paints for your home improvement projects if the more expensive options go beyond your budget. 

It is spatter-resistant, contains low VOCs, and is formulated with Gennex Color Technology to get gorgeous and rich hues at nominal prices. What’s more, it is washable and priced reasonably at $42 per gallon. 

Since you can cover roughly 400 sq ft per gallon, we can safely state that this is one of the most affordable paint solutions you can get from this brand.

  1. ADVANCE Interior Paint

If you are looking for waterborne-alkyd hybrid paint specifically formulated for cabinets, wood surfaces, trim, or doors, then you’ll be pretty impressed with the efficacy of ADVANCE Interior paint. 

It has a separate paint primer that can improve adhesion, block stains, and provide a level surface for your painting job. 

The paint line is spatter-resistant, easy to apply, and clean. Besides, it is durable and contains low volatile organic compounds. So, you can get a furniture-like finish on a wide variety of indoor surfaces without worrying about the paint chipping or cracking over time. 

Moreover, the paints can be tinted with waterborne colorants from Benjamin Moore to get different colohttp://homesthetics.net/best-ceiling-paint/rs and excellent coverage. It is available in several finishes, including matte, semi-gloss, high-gloss, and satin, and is priced a little over $50 per gallon. 

  1. Muresco Ceiling Paint

We’ll end our list of interior paint products from Benjamin Moore by talking about this Muresco Ceiling Paint. As you already understand, this paint is specifically formulated to hide imperfections, level, and coat ceilings. It is a paint-primer combination, so you wouldn’t need multiple re-coats to get a flawless finish. 

Besides, it is only available in a flat finish type to eliminate chances of glare and goes over easily without splattering. It is priced at $42 per gallon, which is pretty reasonable given its fantastic quality. 

Exterior Paint

Exterior paint should be tougher, with the ability to withstand harsh weather conditions. Besides, it should be resistant to water damage and mildew formation, all the while providing excellent coverage for your outdoor surfaces. Benjamin Moore delivers on all these grounds and much more. Let us tell you more about its line of exterior paints!

[easyazon_image align="center" height="360" identifier="B07BNSRC43" locale="US" src="https://m.media-amazon.com/images/I/311Fb5sCsnL._SL500_.jpg" tag="homesthetics0a-20" width="360" type="image" link_id="239308"]

  1. Regal Select

Formulated using advanced alkyd technology, the Regal Select range provides superb adhesion, even to grained, chalky surfaces and other hard-to-coat surfaces like wood and vinyl. Since it has sufficient open time and superior flow, it is ideal for detailing jobs. 

Moving on, the paint can be applied and cured in temperatures as low as 35℉ and gives a durable finish that isn’t prone to cracking, chipping, or peeling over time. So, your painted exteriors will look fresh for years to come. In addition, the colors are vibrant, mildew-resistant, and fade-resistant, thanks to the Gennex Color Technology. 

Benjamin Moore offers three finishes for its Regal Select exterior range - flat, soft gloss, and low luster. Also, the products come with a lifetime warranty. Given its numerous advantages and versatility, this range is priced at a pretty price of $64 per gallon.  

An exciting addition to this line was the Regal Select High-Build Paint, an acrylic-based formula for hiding small cracks and providing outstanding coverage. 

Available in three finishes, the high-build exterior range has excellent flow and can be applied to several surfaces to cover imperfections and get a smooth surface without several coats. This is priced at around $56 per gallon. 

  1. Aura

Engineered with Proprietary Color Lock and Gennex Colorant Technology, the Aura line of Benjamin Moore’s exterior paints provides rich, radiant colors that retain their vibrancy over time.

Moreover, it provides superior coverage and fantastic durability against varying weather patterns. It dries quickly and can be cured in lower temperatures besides being mildew-resistant. 

Also, it provides brilliant adhesion and can double as a primer in most instances unless the surface has major deformities. Available in four finishes, semi-gloss, low luster, satin, and flat, it is priced similarly to the interior paint range at $80 per gallon. 

The Aura Grand Entrance range of exterior paints is explicitly meant for doorways and trim and is available in two finishes - high-gloss and satin. 

How Much Does Benjamin Moore Paint Cost?

  1. ben Exterior Paint

If you are looking for sustainable and affordable exterior paint, then Benjamin Moore’s ben Exterior line is for you. There are several impressive features of this range. For starters, it offers brilliant coverage and has a superior flow for consistent application. Besides, it comes with a 25-year limited warranty - so your walls are likely to remain intact for years to come. 

The 100% acrylic resin formulation delivers unrivaled adhesion, mildew resistance, and fade resistance. The quick-drying formula makes wooden, primed, and previously painted surfaces weatherproof within two hours of application. 

In addition, it can dry in temperatures as low as 35℉, so you don’t have to wait till summer to complete your paint job. It is available in three finishes, flat, low luster, and soft gloss, to fulfill all your exterior painting needs. 

The best part? It is reasonably priced at $48 per gallon, making it the least expensive product from the Benjamin Moore paint range. 

  1. Coronado Rust Scat

If you are looking for rust-preventative coatings for your metallic outdoor surfaces, then the Coronado Rust Scat is a perfect choice. Easy to apply, even over painted surfaces, you can use this paint line over ferrous and non-ferrous metals. 

It provides excellent adhesion and is available in several attractive finishes, including gloss, semi-gloss, and satin. In addition, it is available in both water-based and alkyd-based forms and is priced at $55 per gallon. 

Exterior Stains

While we are on the topic of Benjamin Moore paints, we cannot miss out on its fantastic line of exterior stains that are specifically formulated for wooden surfaces. 

  1. Arborcoat Stain

The Arborcoat stain line is available in different color options and can provide a durable and attractive finish to all wood types. In addition, it prevents blistering, stains, scuffs, and peeling. Its mildew-resistant and UV-resistant properties protect the wood while also enhancing its texture.

Besides, this self-priming stain is formulated with Gennex Color Technology to retain the original vitality and sheen. It is priced at $42.99 per gallon.

  1. Coronado Maxum

Another excellent wood stain, the Coronado Maxum Stains and Primer range, provides mildew resistance and a durable coating that will accentuate the beauty of your wooden surfaces. 

Available in waterborne-alkyd, acrylic, and alkyd forms, this line has fantastic color retention and is resistant to scuffs and fading. Besides, it is available in solid color, semi-transparent, and translucent choices. The price varies according to the type but is usually around $30 to $35 per gallon. 

How Much Of Benjamin Moore Paint Is Needed To Paint A Room?

Before commencing with any paint job, you need to determine the amount of paint needed for your ceiling, windows, doors, and walls. Besides, you need to look into other essential items like rollers, brushes, tape, roller trays, etc., for the project. This helps you get a comprehensive idea about the tools you’ll be needing and plan a budget accordingly. 

Now that you know the prices of all the different paint lines from Benjamin Moore, it is time to do some calculations and understand how much paint will be needed for the room. 

Several factors determine the quantity of paint needed for a room. For instance, a drywall that is being painted for the first time will absorb a lot of paint, whereas a room that has been painted before and has no prominent stains will require fewer coats. So, there can be no one-size-fits-all answer to this question. 

However, you can measure the length, width, and height of your room after subtracting the area of the door and windows to get a ballpark estimate of the room surface area. This will help determine the quantity of paint needed. As we have mentioned earlier, one gallon of Benjamin Moore paint can cover anywhere between 300 to 400 sq ft.

Since the standard room sizes in the USA vary between 132-144 sq ft, one gallon of paint can cover around two rooms. 

How Much Of Benjamin Moore Paint Is Needed To Paint A Room?

How To Minimize The Cost Of Benjamin Moore Paint?

There are no two ways about the fact that Benjamin Moore is one of the high-end paint brands on the market. However, its efficacy and features justify the expense, and its longevity makes it cost-effective. But, if you want to economize and reduce the paint cost, we have some tips out here that’ll come in handy. 

  1. Bulk Purchase

That’s right! You can choose to purchase 5-gallon paint buckets that are available at a lower cost than one-quart or one-gallon variants. If you are remodeling and repainting the house, you’ll undoubtedly be requiring over one gallon. So, it is advisable to purchase the paint in bulk to get discounts and lower the cost per gallon. 

  1. Reduce The Number Of Coats

While it might seem like you are compromising on color vitality and coverage by reducing the number of coats, that’s far from the truth. Hear us out!

A well-primed surface requires a lesser number of coats, and although the paint lines from Benjamin Moore are said to be “self-priming,” there’s no harm in applying a primer underneath. This improves the coverage, accentuates the paint color, and increases the paint’s adhesion to the wall surface. As such, you’ll be minimizing the quantity of paint used. 

This can particularly work wonders if you are painting on drywall or any other porous surface, especially for the first time. 

  1. Shop From Local Stores

Local stores are more likely to offer discounts and slash prices from time to time. Besides, they sometimes have dented boxes that are kept at the back of the store. As long as the paint inside is good, you can use them for your renovation project. Also, you don’t have to pay shipping costs on store-bought products, so that’s a bonus. 

In addition, several hardware stores offer paint swatches that’ll make color selection much more effortless. 

 How Does Benjamin Moore Fare Against Its Competitors?

If you have done ample research on Benjamin Moore paints, you might have inadvertently come across Sherwin Williams. Both of these brands have a prolific range of high-quality products for your interior and exterior painting needs.

But, what makes Benjamin Moore stand out is that it delivers the same performance (arguably better) at a lower cost. For example, let’s take the most expensive products from both brands. The Aura line from Benjamin Moore is priced at $80 per gallon, whereas the Emerald line from Sherwin Williams is priced at $90 per gallon. 

The same goes for exterior paints. The Regal Select line from Benjamin Moore is priced at $64 per gallon, whereas the Superpaint Exterior Latex line from Shermin Williams is costlier at $70 per gallon. 

So, if you’re wondering if there’s any other brand that can offer the same characteristics at a lower price, the answer is no. Benjamin Moore, although expensive, manages to deliver quality products that pack a punch and justify the cost.

How Does Benjamin Moore Fare Against Its Competitors?

What Is The Best Way To Paint Walls?

If you are a person who loves DIY jobs, then taking up the task of painting your house is the best way to save quite a few bucks. So, instead of hiring a contractor and shelling out the extra cash, you can save up and invest in high-quality Benjamin Moore paints. 

One of the best features of this brand is that it’s pretty easy to work with. All you need is a few good rollers, brushes, and other items required for painting, and you’re good to go. In this brief guide, we’ll tell you how to go about painting your interior walls. Let’s take a look!

Step 1: Choose The Right Tools

For any paint job to be successful, you need the right tools. So, look for high-quality rollers, brushes, an extension pole, and a pan. You can find them online or at your local hardware store. You mustn’t compromise on their quality since it can directly hamper your home improvement project. 

In addition, you can choose between Aura or ben interior paint line, depending on your requirements and budget. Both these lines have spatter-resistant paint that offers quick touch-ups and a smooth finish. 

Step 2: Prepare The Wall

The next step involves properly cleaning the wall to remove any grease, soot, grime, mildew, or other stains. Although most of the paints in the Benjamin Moore range are self-priming and do an excellent job of providing adequate coverage, you can save on the number of coats by priming the wall in advance. 

In addition, you can opt for a deep-colored or tinted primer if you are working with darker hues. 

Step 3: Cut Into The Room

“Cutting in” the room signifies painting along the edges, the ceiling line, switches, door, windows, etc. This can get quite tricky since it demands precision, and we’d advise you to be careful and choose an appropriate brush for it. 

Step 4: Start Rolling On The Walls

Pour the paint on the well-lined tray and load the roller by moving it back and forth on the pan till it’s completely saturated. Then work on the walls with it, following the top-down approach. However, do not apply too much pressure because it might lead to the paint running down or dripping. Allow the roller and paint to do the job. 

 Step 5: Avoid Streaks

One of the most challenging tasks you will be faced with while painting walls is avoiding streaks. This usually happens when you try to paint a large area in one go.

So, paint smaller areas and keep the roller wet. In addition, every time you reload it, start by working on a fresh row and then merge it with the painted area. This minimizes the chances of lap marks and produces a uniform surface. 

Step 6: Let It Dry

It is advisable to apply at least two coats of paint to ensure sufficient coverage and hide previous stains. Besides, it improves the paint vibrancy. 

So, apply two coats and leave sufficient time in between them. Also, let the paint cure properly before you place the wall fixtures or frames back. 

Benjamin Moore Paint Cost FAQ

Can I Get Paint Samples From The Brand?

Yes! Benjamin Moore offers a wide selection of color swatches and paint samples for interior and exterior surfaces. You can order these online, and they are available in standard one-pint sizes that cost $10.99. So, before committing to any one color, you can try out multiple color samples.

Where Can I Find Benjamin Moore Paints?

As some of you might already know, you wouldn’t be able to find Benjamin Moore paints at Target or Home Depot. This is because the brand has a longstanding commitment to local paint and stain dealers and sells its products exclusively to them.

So, you can find them at your local hardware shop in the US or Canada.

What Makes Benjamin Moore Products Eco-Friendly?

Benjamin Moore strives to produce environment-friendly products and has taken significant strides in this direction. It has a range of products with zero or low VOCs. Besides, the Gennex Color Technology is a waterborne tinting system that doesn’t use any surfactants or chemicals to retain color consistency and quality.

In addition, you can easily access the Safety Data Sheet that elaborates on the toxicity of each paint type. All these factors, combined with the low odor emission, make it one of the most eco-friendly paint brands on the market.

Which Is The Most Eco-Friendly Paint From The Brand?

The Eco Spec range that replaced the Natura line is the greenest paint from the brand. It has minimal odor, adheres to stringent environmental safety policies, emits zero odor and VOCs, and has received several third-party certifications that hail it as one of the most sustainable paint options.

How Long Does The Paint Take To Dry?

There’s no fixed answer to this question. As a rule of thumb, the paint dries quickly in a dry environment, and latex-based paints dry faster than alkyd ones. So, it is best to refer to the technical data sheet that the brand provides for its products. It has specific details about the paint-dry time.

Benjamin Moore Paint Cost FAQ

Final Words

Benjamin Moore has become a favorite among interior designers and coveted among homeowners for its carefully formulated product line with breathtaking colors, high coverage, and fade resistance. 

Even though the paints from this brand cost more, they prove to be quite economical in the long run, as you wouldn’t have to re-paint the house for a very long time. In addition, the paint is immune to mildew formation and weather damage. So, even though its price is a pocket pinch, you will not regret it. 

If you are willing to splurge, the Aura range of interior and exterior paints will be your best bet. However, if you want something on a modest budget, the ben interior and exterior line should be your go-to choice. 

With that, we will take our leave. Do let us know what you think in the comments below.

Until next time, happy painting!

Related Articles

9 Best Pump Sprayers For Staining Fence

10 Best Wood Wax

9 Best Concrete Stains to Consider

Learn How To Soften A Hard Paint Brush

11 Best Paint For Concrete Walls In Basement

13 Best Paint for Furniture | Reviews & Buyer’s Guide

10 Highest CFM Air Compressors  

9 Best 6-Gallon Air Compressors for Your Home & Garage

13 Best Paints for Bathroom Ceilings

2 Luminess Silk Reviews [All You Need to Know]

HVLP vs. LVLP [All You Need to Know & Winner]

5 Best Sprayers For Plasti Dip

9 Best Chrome Spray Paint

How Much Does It Cost To Bottom Paint A Boat?

How To Thin Latex Paint For A Wagner Spray Gun

Alcohol Ink Art Tutorial [Alcohol Inks 101]

9 Best HVLP Spray Guns [Review & Buyer’s Guide]

6 Best One Coat Paint and Primer

7 Best Primers to Cover Dark Paint

Best Exterior Primer Paints

7 Best Exterior Primer For Peeling Paint

6 Best Paint Primer For Rusted Metal

9 Best Stains For Cedar

7 Best Cold Galvanizing Paints

11 Best Paint Scrapers to Rock

How to Remove Spray Paint from Concrete

7 Best Primers For Covering Red Paint

11 Best Paint Roller To Hide Imperfections Tested

9 Best Paints For Closets 

How To Paint Trim Near Carpet

To be honest, even when you use the best concrete paints, an outdoor concrete surface will need to be repainted every couple of years. 

There are several reasons behind it, including the regular wear and tear that's sustained by the concrete surface. However, you don't need to worry, as repainting the surface isn't as hard as it seems. 

That's why we thought of creating this guide to help you repaint peeling paint on concrete. We have also tried to provide tips that will let you achieve a better finish to prevent the paint from peeling anytime soon. 

What Causes Paint To Peel From A Concrete Surface?

What Causes Paint To Peel From A Concrete Surface

Before we learn about how to repair peeling paint, it's essential to find out what might be the underlying problem. While some paints may peel due to regular wear and tear, at times, even a freshly applied coat of paint may come off due to low adhesion. 

Let's see some other reasons why the paint might be peeling from a concrete surface. 

1. Moisture

One of the most common reasons of peeling paint on concrete is moisture. This is especially prevalent on outdoor concrete surfaces like a porch or driveway, which is exposed to rain and snow. 

Moisture can be problematic if a concrete surface isn't treated or fixed before applying the layer of paint. On top of that, it's essential to note that you must only paint a concrete surface that's absolutely dry. When moisture is left behind, it will prevent the layer of paint from adhering to the surface and eventually cause it to peel.

Some concrete surfaces need a moisture barrier to prevent damage. That's because the alkaline tendency of concrete often attracts water which reacts with alkali and leaves behind crystals or a whitish substance known as efflorescence on evaporation. These substances usually brush against the layer of paint, causing it to peel. 

2. Lack Of Preparation

Another key reason that paint ends up peeling from a concrete surface is the lack of preparation before painting. It's important to prep the surface so that it's absolutely clean before applying the paint. 

Any presence of grease, wax, oil, and dirt may cause the paint to peel. That's why treating a concrete surface with paint strippers and other cleaning agents is recommended to guarantee proper adhesion. 

This step includes filling up any gaps or cracks on the concrete surface before painting. Professionals also recommend acid etching concrete surfaces like floors and porches to smoothen them properly for an even paint job. 

3. Using Incompatible Paints

You may not realize it, but the paint used for the concrete surface may have been incompatible. For instance, in many cases, people just use an acrylic concrete paint on outdoor concrete surfaces, which may end up peeling sooner. 

It's advisable to use an epoxy or latex paint meant for outdoor surfaces as it will surely last longer. Furthermore, follow the instructions properly to get optimal adhesion to prevent paint flakes and peeling. Sometimes it might be better to check out other options like a concrete stain to see whether they're more suitable for a specific concrete surface. 

4. Too Many Layers

Believe it or not, paint often peels from concrete surfaces due to the application of too many layers. People often add multiple layers hoping that the paint is going to last longer on the surface, which isn't the case. 

It's best to stick with a maximum of two layers and use them in conjunction with a good primer as well as a sealant. Also, it's necessary to let thin layers dry completely before a new paint layer is applied.

5. Exposure To Corrosive Substances

One of the common reasons for peeling paint that's often overlooked is the use of harsh chemicals on the surfaces. It's usually caused due to the use of a strong detergent or cleaning agent on the painted surface, which loosens the paint. In many cases, the paint on a concrete surface may start to peel, crack, or blister soon after it has been exposed to harsh corrosive substances. 

How Do You Paint Over Peeling Paint On Concrete?

abstract yellow and white color concrete texture background. How Do You Paint Over Peeling Paint On Concrete.

Now that you know about the reasons for peeling paint, it's time to learn how to repaint the surface. Remember that it's essential to follow these steps to ensure that the painted surface won't deteriorate quickly. 

1. Clean The Surface And Remove Existing Paint

The first step of repainting the surface is to make it as clean as possible. You'll need to remove peeling paint from the concrete using a scraper and wire brush, making sure that nothing is left behind. 

Some people like to treat concrete floors and walls with a paint stripper to make the process easier or power wash the surface to get rid of all the paint. If required, you may use the pressure washer to remove dirt and debris, while pressurized water is also useful in removing efflorescence from an alkaline concrete surface. 

In the case of painted garage floors, there might be a further requirement of using a degreaser to get rid of grease stains. Meanwhile, check out how to paint a garage door to give your garage space a revamped look. 

Once the concrete surface is free from paint and dirt, let it dry for a couple of days to ensure no moisture is left behind. 

2. Fix The Surface

After wire brushing and power washing a concrete surface, you're more likely to see any damage it might have sustained. This would be the best time to fix any holes or cracks with a recommended filler. If there's too much damage, ensure the surface is checked by a professional to identify whether it needs special care. 

A properly prepared concrete surface needs to be smooth, so after filling the damaged areas, you can use sandpaper to even out the surface. You can pressure wash it once more to eliminate any debris left behind after sanding. 

3. Acid Etching

If you're working on a previously painted concrete floor, acid etching might be a necessary step for the new paint film to stick better. Typically, a 10% solution of muriatic acid and water is applied on a clean, dry concrete floor for this process. 

The solution is left for 10-15 minutes, and then the surface is washed with clean water. This etching process is supposed to neutralize the surface, and a properly etched concrete floor should have a texture like 120-grit sandpaper. Etching is also said to prevent saponification and efflorescence, which are common problems of improperly treated concrete floors. 

4. Apply A Sealant And Primer

Did the old paint on your concrete surface peel due to excess moisture? It would be best to use a few coats of moisture sealant on the surface before applying the paint. Just make sure that the entire surface is completely dry so that moisture isn't able to seep under the sealant. 

Another key step is to coat the surface with a proper primer which acts as a barrier between the concrete and the paint. If possible, look for a 2-in-1 primer plus sealer product to make the process easier. And remember to use even strokes to apply both the sealant and primer so that the surface is properly coated. 

5. Paint The Surface

Once the primer has cured, it's time to start painting. We recommend using a roller for most of the surface as it's easier to use, even for a beginner. Just remember that the first coat should be light, and you should lay it down evenly with overlapping strokes. And use a paintbrush on the corners and rough edges for a smooth finish. 

It's best to let the first paint layer dry for at least 24 hours before laying down the second coat. But, you should always follow the instructions provided by the brand to achieve optimal results. 

When painting an outdoor concrete surface like a porch, try to do it when there's no possibility of rain for a couple of days. Or, get a quick-drying concrete paint meant for outdoor use to make the process hassle-free. 

Check out ideas for painting concrete porch to turn a dull, bare concrete surface into something eye-catching with simple paints. We recommend using a top coat or concrete paint sealer to make the paint job even more long-lasting. 

How Do You Paint Over Peeling Paint On Concrete FAQs ?

Can you paint over loose or peeling paint?

Well, it's certainly tempting to go ahead and paint over the existing peeling paint, but that won't be right. Painting over an already peeling paint won't be a great solution as the new layer will invariably start to peel in a few days. 

Start by scraping the existing paint with a wire brush to smoothen the surface. Then, you should apply a primer if needed and paint over the concrete surface with a new layer of paint. Remember not to use a thick layer as it may affect the quality while drying, which can lead to the paint peeling off sooner than expected. 

Why is paint peeling off your concrete wall?

There can be various reasons for loose paint on concrete walls, but the most common one is the presence of moisture in the masonry. When you paint a concrete wall too soon, the water present inside the masonry can lead to poor adhesion and the paint peeling. 

Moisture seeping into masonry is an issue when concrete exterior walls are regularly exposed to environmental factors like snow and rain. Another reason for peeling paint on walls is stress caused by factors like age and exposure to extreme conditions. 

Whatever might be the reason, ensure to use a paint stripper to get rid of the existing paint and scrub the walls thoroughly before applying a fresh layer of paint. 

What is the best paint to use on concrete?

One of the reasons paint peels from concrete is due to the use of the wrong type of paint. That's why before starting a project, it's essential to get a high-quality paint suitable for concrete surfaces that will last for a long time. 

By far, latex and epoxy paints are the preferred option for most concrete surfaces. In fact, you'll be able to find these paints in formulations that even work on glossy surfaces. 

Whenever you're buying concrete paint, make sure to check where and how it's supposed to be used. For instance, if you want to repaint peeling garage floors, then it's wise to choose a paint that's designed to resist chemicals and hot tire pick-up. 

Pastel grungy concrete wall background. How Do You Paint Over Peeling Paint On Concrete.

How Do You Paint Over Peeling Paint On Concrete Final Words

All in all, if you have concrete surfaces at home that are peeling, make sure to repaint them properly for the surface to last longer. We hope this guide will surely help you with the much-needed tips to make the painting process a bit smoother. 

There can be times when there might be underlying issues with concrete surfaces which may require professional expertise. In such cases, don't forget to contact a local contractor for further help while painting concrete floors and surfaces. 

Another thing that you should remember is to use protective clothing and gear while working with concrete paint. And try using a good quality paint with little to no harmful chemicals if you're a beginner to ensure safety while painting a concrete surface. 

In a society based on consumerism and mas producing, we tend to get quite irritated when we discover that our items are faux, inferior, a duplicate and we hilariously become outraged.We search to stand out from the crowd from the way we dress to the gadgets we acquire and the interior decor we choose for our homes. Today we are talking about an aspect of interior design that stands its ground to prove that "faux" does not equal a lesser standard nor a lower quality degree: faux painting.

The main idea behind this commonly used technique is based on the principle of replicating certain textures of different material through various painting techniques. In interior design this has become a preferred choice by DIY-ers who appreciate and love handcrafting themselves, whilst spending big sums of money in the process. Natural materials are the usual options for replicating as they can be quite expensive: wood, stone, marble but composite materials such as concrete has its place in interior design trends as well.

Faux Painting Basics 101


Faux Painting Basics 101- Tips, Tricks and Inspiring Faux Finishes-001

Source

Whilst the process itself might stand for something faux, false, the techniques that lead to the end result are complex and require some practice for best outcomes. Overall integration into the room's layout and ambiance is crucial as well as obtaining an uniform texture.

You can usually separate the faux painting process into several techniques with complete different results. Most of these techniques use paint or glaze in the process and the accuracy of the end result depends on the quality of the technique applied and the dexterity of the applier. Let's go through the basic faux painting techniques and expand our knowledge into diy interior design.

Concrete-ing

We will start our list with a composite material that has increased its popularity in interior design over the last few decades: concrete. Concrete-ing as it is called represents the process of replicating the cool grey contemporary aspect of concrete finishing by using a mixture of white grey and black paint and glazing with a 9-inch plaster blade. You can take this step by step in the tutorial provided by Apartment Therapy here.

4720813020_ea9b5783e0_o

Image  by Lerkenfeldt Photography

Graining

Graining creates a wood-grain finish by dragging a graining tool on a wet painted surface. Natural beige hues will be our first choice but pastel tones have made a comeback as well recently. Below this technique has been used to create the illusion of a wooden headboard in tones of blue.

faux-bois-headboard

Source unknown

2037-11-24 Wood Graining Tool 1 013a_thumb[5]

Source

Strie Painting

If a fabric wallpaper is not an option money wise, implement the strie painting technique.After having applied a coat o paint on the wall use a long-bristled brush to give direction and pattern to the paint.

100852135.jpg.rendition.p

Source

Sponging

Out of all of our faux painting techniques, sponging must be the most famous and loved one. If used properly, the mundane kitchen sponge can create dense, complete textures and arrays of hues on your walls. Start by dipping the sponge in paint and adding layers and layers of colors onto the wall as evenly as possible. Use hues from the same color pallet for creating depth and elegance without exaggerating.

sponge-walls

Source unknown

Denim Painting

The following technique is not quite likable from our point of view bu we thought we should include it nonetheless: the denim painting trend. Shades of blue or indigo are quite difficult to insert in an interior design but if done right, you can create the cross-stitching texture of the denim by using both vertical and horizontal strokes on the wall.

denim-faux-finish-for-walls-GREAT-idea-to-add-texture-and-interest-for-an-upscale-look-on-a-budget-Looks-like-grasscloth-or-real-denim-jeans-from-www.heatherednest.com-5-of-5

Source

Bricking

Faux painting bricks seem a tad extreme but can be considered a faux painting technique. In this case you have to create a stamp for the walls using a piece of plywood and synthetic sponges. Glue them on the plywood to create the brick pattern than apply paint in red and brown shades. Know you can use this created stamp to "brick" your walls.

ceiling-brick-design

Source unknown

Ragging

Another preferred faux painting technique is the ragging. After having painted the wall in your color of choice use a rag and press it on to form a specific pattern and texture.

IMG_7783

Source

Rag-rolling

You can use the rag to create a more uniform effect by rolling it onto the painted wall. You can even add a different shade of paint onto the rag and thus create depth and layers. Below a blue shade was rag-rolled on a Baltic green and everything finished with an antique glaze using a sponge. The overall effect is one of ageless elegance.

e74e661c3fddc50ca966024dff590e32

Source

Marbleizing

We all desire to have Carrara marble in our homes but such a material drills a hole in our budget. Luckily we can opt for faux marble by following this step-by-step tutorial. Attention to details is advised and recommended.

marable-furniture-makeover

Source

Leathering

You can even replicate leather by using rolled bits of chamois on top of an already painted wall.Use glaze on the chamois for a distressed leather effect.

29c894ac699fd5043cc4777b736d4ec5

Source

Stippling

A stippling brush with its short stiff bristles is usually used in the process of obtaining a fine textured wall. Use it slowly for that extra delicacy.

stipple_faux_technique-733x1024

Source unknown

Stenciling

We have all used a stencil in our life at least once. The stenciling technique is the perfect choice for replicating any type of wall paper you could imagine. The only difficulty lies in maintaining your stencil clean to avoid smudges on the wall, as well as maintaining a desired layout of the design itself.

moroccan-ornamental-l17

Source

Plastering

Venetian plaster is usually used to add texture to a wall and has become popular in vintage appealing interior designs. Apply it to the wall using a knife then finish it up with a layer of fresh paint or glaze.This technique is best use don vaulted ceilings.

ae363484ca8896679b39ca8b7edb15bf

Via Pinterest

Distressing

Many of you out there are huge fans of the shabby chic trend.The distressing technique is well applied in this range, managing to transform brand new pieces of furniture into seemingly old worn out vintage items. Attention is crucial in the process, use sandpaper to sand the corers, the space near the handles, usually the portions that are more often used to infuse authenticity into the object.

8-Tips-for-Distressing-Furniture3

Source

Dragging

A technique  able to obtain various textures and patterns is the dragging. For this you will require a dragging brush which you will pull down across a painted surface in slow motion. You can use this procedure on top of the faux concreting for an industrial vibe of your interior design.

faux-dragging-gray-wall

Source unknown

Have you ever tried one of the above-presented techniques? Feel free to share your personal projects in the comment section below.

Landed here while browsing a list of the best concrete paints online? 

Then do stay with us for a few minutes, as we’ll be sharing something that's vital for your next paint job. Choosing the paint is undoubtedly a key factor, but there’s much more to consider. 

Have you thought of the primer you’ll need apart from the paint? You might not be sure if you'll need one at all — many homeowners face the same dilemma when painting concrete. 

Indeed, it’s tricky to understand the role of a primer in the job. That’s why we’ve penned this guide to take you through all the essentials. Read on!

Do I Need To Prime Exterior Concrete Before Painting

Do I Need To Prime Exterior Concrete Before Painting

To get a clear answer to this question, you’ll need to look at several key aspects. So, let’s start. 

The Concerns Of Painting Concrete Directly

You may, of course, choose to apply paint straightaway on a concrete surface — but know that it isn’t sure to stick on. Industry experts suggest using a good-quality primer beforehand to get a long-lasting coat of paint that won’t crack or peel. 

But what if you don’t use a primer? 

Concrete often gives rise to a phenomenon called efflorescence — crystalline salt deposits are formed when this material comes in contact with water or moisture. And these deposits can make it difficult for the paint to adhere to the surface, even causing decay or chipping of the paint in many cases. 

How does that happen? The pores in concrete allow water to either seep in from outside or up from the ground. And even smoothly troweled concrete has tiny pores which might let moisture pass through. This causes residue and minerals to form within the concrete, eventually producing white powdery salts on its exterior. 

How Does Priming Help Exterior Concrete?

Simply put, a primer provides the paint with a surface to stick to and uniform color to paint on. This makes the paint more long-lasting, enhances the look of the concrete surface, and makes it resistant to chipping. 

Primer works by filling in the holes where salt deposits or dirt have settled and then soaking into the concrete, preventing mold and mildew growth due to moisture. Furthermore, it can soak into cement to protect it from long-term damage and can smoothen an uneven surface so that it easily accepts paint. 

Preparing Concrete Before Priming And Painting

The first step in the priming or painting process is to clean the concrete properly. That’s because small pores may hold oil, debris, and dirt in large amounts, making the surface difficult for primer and paint to adhere to. 

Not cleaning the concrete would mean letting the primer lock in all that dirt and oil. And over time, the oil may begin to degrade the primer and paint from within, so make sure you clean the surface really well before priming. 

You can employ a variety of methods to ready concrete for painting. Here, we’ll discuss the simplest method, for which you’ll need:

Now, you’ll need to follow these steps:

Step 1

Begin by removing all traces of previously applied paint from the surface using a paint scraper. You’ll also need a pressure washer if you’re working outdoors or a wire brush in case it’s an indoor project. 

Step 2

Next, use a cleaner such as trisodium phosphate to effectively remove stains and dirt. You may also go for more eco-friendly products like those from Krud Kutter.  

Step 3

Before you start priming the surface, make sure to apply a sealer. That’s because concrete is really porous and needs proper sealing to ensure it’s able to accept the primer effectively. Do note that this is essential for an indoor job; otherwise, it can cause moisture to seep into the concrete. 

Step 4

At this point, the surface will be ready for priming. We know the job is a long-winded one, but the results are worth the effort! 

The Need For Repair

In case the concrete surface has a lot of rough spots, you’ll need to repair it before painting or priming. 

Smooth off the portion that’s bumpy or rough using an angle grinder. Then use the grinder and a blade to smooth out the rough spots. Remember that a smoother surface will hold the primer and paint better, and the job will also be more cost-effective. So, make sure to smoothen the surface as much as you can. 

Apart from smoothing, grinding, and cleaning, you should also check for crevices or cracks and repair them beforehand. Examine the brittle areas too, and proceed to remove them and fill in the affected portion. You wouldn’t want a freshly painted surface to start breaking soon. 

Types Of Concrete Primers

Primers used for concrete are of several types, and you can prepare them in three ways — using oil/alkyd, tinted/shellac, and acrylic/latex bases. Also, these primers can be formulated for both interior and exterior applications. 

Do note that homeowners on a tight budget can go for a universal primer formulated for any surface. However, if you want the paint job to be most effective, we’d suggest buying primers meant for concrete only. You may have to shell out more, but the outcome will be much better.

Now, let’s take a closer look at the various types of concrete primers you’ll find on the market:

1. Acrylic Masonry Primers

These primers are specially designed to shield concrete against discoloration, lime burns, and efflorescence. You can use them on unpainted, properly cured, or new concrete, both for outdoor or indoor applications.

2. Acrylic/ Latex Primers

The porous nature of concrete makes a water-based acrylic primer more likely to soak into concrete than an oil-based primer. This results in a stronger bond, allowing the concrete paint to grip the surface better and reducing the chances of flaking and chipping in the future. Plus, these primers can seal interior concrete to prevent dust buildup. 

3. Acrylic Block-Fillers

If you’re dealing with cinder blocks, know that these primers are specially manufactured for unpainted or new, split-face, or smooth concrete blocks. Remember that these are meant for bare blocks, so you’ll need something else if the blocks have a cement parge coat. 

On a side note, a parge coat is a thin polymeric or cementitious mortar applied for refining a masonry or concrete surface. 

4. Polyurethane/Epoxy Primers

The specialized type of acrylic/latex primer is not only heavy-duty and incredibly strong but can also resist a harsh, chemical work environment in an industrial work area. However, these aren’t used much in residential paint jobs. 

Essential Tips To Follow

Engineer man in yellow uniform and helmet holding a trim roller for wall painting and showing positive hand sign. High quality photo. Essential Tips To Follow.

The following tips can be of great help if you haven’t primed or painted a concrete surface before:

1. Use A Good-Quality Paint

It’s best to go for a paint that’s truly worth the trust, so make sure to read through the reviews of the products you’re considering. Paints suitable for masonry products are usually thicker and can expand or contract with concrete in the future. 

For instance, a non-slip paint makes concrete surfaces less prone to accidental falls while also steering clear of rough spots through the smooth coating it provides. It will also be a great option if you’re looking for ideas for painting concrete porch

On a side note, avoid general-purpose paint as it’s prone to cracking when used on concrete. 

2. Get The Right Coverage 

The part of the concrete surface that’s not protected by primer will render the paint loose and prone to weather damage. So, once you’re done applying the coat, check whether you’re left to cover any portion. 

3. Use The Right Tools

Coat the primer or paint on larger areas using a paint roller, but utilize a brush to get into the small pores and cracks where rollers can’t reach. This will ensure you get a perfect primer or paint coat for every concrete surface. 

Need To Prime Exterior Concrete Before Painting Frequently Asked Questions ?

Is painting a concrete surface better than staining it? 

You can’t label painting concrete as a better practice than staining — it will partially depend on your preferred visual effect. While painting concrete floors or walls will impart a solid hue, staining is a more subtle coating process. 

That’s why painting concrete will yield a striking effect and mask imperfections, but staining will make the surface appear relatively translucent. Also, the latter is generally preferred for a long-lasting effect as it soaks into porous concrete better.

How long does a painted concrete surface last? 

A paint coat on concrete generally lasts up to five years before you need another one. Do note that this is when the surface is primed, prepped, and painted properly. In case it hasn’t, chances are that you’ll see it flaking soon. 

Can you paint concrete without etching?

Know that etching is a vital step in getting a concrete surface ready for painting. You can paint over peeling paint on concrete but, without following necessary steps the result may vary. It strengthens the bond between the paint and the surface, ensuring the paint sticks for a longer time. 

So, it’s best not to skip this step if you need a long-lasting concrete floor. Just be careful about the etching agent you’re using — avoid more vigorous ones such as hydrochloric acid. Instead, you can choose a more eco-friendly version from a brand like Rust-Oleum. 

Is There a Spray Paint For Concrete?

Yes, you’ll find several spray paints meant for concrete. But we’d suggest opting for an acrylic latex paint rated for exterior paint jobs. It will soak into the pores most effectively, resulting in a strong bond. And once you’re done applying an initial coat, you may choose to spray extra layers for accenting or coloring. 

What type of primer do you need for a high-footfall surface, such as a concrete basketball court? 

Specialized concrete surfaces like basketball courts require a specific type, such as a clear concrete primer. That’s why you should be just as careful while fetching the right type of primer as when you’re choosing the best paint for an outdoor concrete basketball court

Does a concrete garage floor require priming? 

Yes, priming a garage floor is also a must, or else the paint won’t adhere well to the concrete surface. 

Garage floors should withstand heavy-duty impact to some extent, so the primer will have to be tough. You may choose an epoxy primer for its robustness, but if the surface has grease and oil stains, a PU primer will be the ideal choice. 

Need To Prime Exterior Concrete Before Painting Final Words

Need To Prime Exterior Concrete Before Painting Final Words

All set to start your overdue paint job? 

With a high-quality concrete primer by your side, rest assured you’ll get the best results. We’d again remind you to take the utmost care while cleaning the surface. And after you’re done with the job, let the primer dry for a few hours before using the concrete surface for other purposes. 

Here’s another piece of advice before we sign off. Don’t hesitate if you feel the concrete needs intensive repair — reach out to a reliable contractor to get the job done. They can even complete the paint job if you’re not confident about going the DIY way. 

Applying primer on concrete prior of painting is an essential process, concrete is not bathroom tiles which are paintable without applying primers. Checkout our this exclusive article on paint for bathroom tiles to know more on the topic, and enhance your DIY knowledge.

Adding a fresh layer of paint to your home can bring a new breath of life and have any household looking brand-new. 

For homeowners with multiple floors looking to paint the exterior, it can be daunting when allocating a budget for the project. Labor costs, the paint itself, and other hidden costs can add up quickly. 

In order to get the job done, you can choose to do it yourself or hire a professional crew to get it done for you. Both have their own costs and materials required that can affect how much money is to be spent. 

We have put together a guide in order to help you plan your budget in the most efficient way. Without further ado, let us begin planning the renovations!

How Much Does It Cost To Paint A 2 Story House Exterior

Hiring A Crew

Before planning anything, you should decide whether you want to do the job yourself or if hiring a crew is the route to choose. Either option is plausible so long as a breakdown of costs is known beforehand. 

If you are looking to hire a crew, the very first thing to keep an eye out for is the experience a company has. Employing licensed professionals will ensure that the overall experience and result is of the highest quality possible. 

On the one hand, a professional crew will take all the required steps to ensure the paint is applied with precision to last long. Taping off areas, cleaning and prepping the house for application, and other steps are taken carefully. Additionally, a professional painter will have the knowledge of how much paint is needed, how many coatings, or when to use a primer. 

On the other hand, a crew that does not have as much experience can make the entire project take much more time than is necessary. What’s more, the end result may not be as put together as you may like. 

Another aspect of cost to keep in mind is the quotes offered by contractors as there are multiple floors being worked on. Having an additional floor can potentially raise the cost depending on where you get a statement done. 

Furthermore, hiring a crew will entail paying for scaffolding and the necessary equipment to reach that higher second floor. Insurance provided by the contractor is a good idea to have especially when dealing with multiple floors. There is a plethora of potential damages to the house and workers, so insurance should be considered as precaution. 

Average Cost Of Hiring A Crew

When looking into hiring a crew to work on your house, only the best available contractors should be considered. This is a project that is more of a one-and-done deal. Touch-ups in the future can be a nuisance and can be avoided entirely by having a quality job done right off the bat. 

Many private painters or contractors work based on the hours worked. To get a frame of reference to compare with the statements you get, the average rate is anywhere from $25 to $100 per hour. Hiring more personnel can raise the cost accordingly but also expedite the process overall. 

For example, a common breakdown of labor costs includes priming and painting. If two painters are hired, this job can take anywhere from 16 to 32 hours to cover the entire area, including trimming. This brings the total cost to $1,600 to $3,200 just for labor. However, it can be cut in half by excluding priming. 

Compare this to the national average cost of painting a house at $1,700 to $3,700. A two-story house calls for more work to be done, so the average cost of hiring a crew falls on the higher end of this average. 

Costs of labor, materials, and tools, as well as the potential danger when working on elevated surfaces, bring this average cost up. To decide on the best contractor that will give you a valuable outcome for your money, pay attention to their ratings to get an idea of other’s experience when hiring them. 

Of course, a highly rated company is favored over lower-rated ones. These crews are assured to get the job done efficiently with a long-lasting, beautiful result. However, their prices are sure to be more than lower-rated crews due to their higher level of expertise. 

Breakdown Of  Expenses In Hiring A Crew

There are a few extra expenses that may pop up when hiring a crew. Before hiring one, it is a good idea to understand what these expenses are so you aren’t blindsided and come up short when the job is completed. 

Crews use their own tools and incur their own unique costs that do not factor in if you go the DIY route. Every painting team has its own rates and how willing they are to work on a risky project involving an additional second floor. 

  1. Transportation

One cost factor that is not considered in the DIY method is the transportation of the crew and materials to the house. Paying for fuel for the truck or any repairs necessary while working on the project are factors the crew needs to consider. 

These costs are handled by charging more to get a project done. Essentially, beyond paying for the actual labor and materials involved, you need to factor in the extra costs of transportation for the crew. 

  1. High-Quality Work

A reliable service company will entail a requirement of higher-quality paint and effort overall. Caulking and spackling are common extra features that high-end painters use to give a longer-lasting finish. These can add their own costs to the project overall. 

  1. Insurance

Another unique cost factor of hiring a crew is paying for insurance. Licensed contractors are an industry standard for their quality performance and safety provided to their workers. To reimburse the costs of insurance, these contractors charge a bit more. After all, working on multiple floors can be risky and result in even more expenses. 

  1. Sales Commission

If you have used a salesperson sent from a contractor to hire a crew, it is necessary to pay for their services. These representatives are widely used by contractors to scout for potential jobs and can incur their own expenses once the project is completed. 

  1. Area Covered

When getting a quote from the contractor, there are a few different factors that affect the way they draw up their pricing. One of these factors is the area covered; there’s a fixed rate for every square foot to be covered. These can go from $1 for a square foot to $4 for the same, depending on the contractor’s rates. 

Doing It Yourself

Choosing to take matters into your own hands can be a challenging task. To ensure your project is done as efficiently as possible, preparation and planning are key. 

Of course, the polished look that using a professional crew to paint your house will bring is not possible when doing the job yourself. However, finances can be adjusted more flexibly, something that is not possible when working with a contractor. 

Knowing what materials are needed and how to use them can save you spending extra time and money just to complete the job. Here is what you should consider before deciding to paint your house by yourself. 

  1. Paint

Of course, the most basic of materials required when painting your house is the paint itself. Look for exterior paint which is compatible with the material on the exterior of your house. 

A commonly overlooked factor that can determine the longevity of the paint is compatibility. Paint adheres differently to different materials, so looking for paint that can permeate the surface of your house well can help it last longer. 

Additionally, the paint’s colors can shift in hue depending on the underlying material it is coated on. The worst possible setback is finding out the paint you bought doesn’t match the shade you had in mind—all the more reason to pick up a quality paint that is compatible. 

  1. Scaffolding

Painting the first floor of the house is a breeze as all the walls are within reaching distance. At the most, an extended brush may be used to reach those higher spots. 

However, when painting the second floor, it may not be enough to use a brush on a pole to cover the entire exterior. Not to mention the places you need a precise application such as windowsills and trimming. 

As a result, ladders or scaffolding to give you an elevated working base is a necessity when it comes to painting the second floor. To add an extra layer of stability and convenience, an additional ladder and plank can be used to create a platform. 

Altogether, purchasing a way to reach the second floor can potentially be the costliest factor when painting the exterior. 

  1. Application Instruments

Paint can be applied using a couple of methods with varying ease and effectiveness. One of the traditional methods is using a roller and brushes. This method is not as commonly used as it takes a long amount of time compared to other application methods. 

However, for smaller two-story houses, it is still a bonafide option that can get the job done quickly. It is not recommended when working on larger areas; holding a roller above your head can become tiresome in the long run. 

An alternative to the traditional brush and roller is using a paint sprayer to coat the paint on. This method requires little to no effort as the sprayer applies an even coating every time. Additionally, the even coatings give a cohesive, professional look to your house.

Purchasing a handheld sprayer off of Amazon is enough to get the job done quickly. However, these sprayers can cost more than a simple brush and roller. What the sprayer lacks in affordability it makes up for in efficiency and convenience.  

Masking tape and film are not exactly instruments used to apply the paint, but they are still an important part of the application process. Using masking tape is easy to apply and remove as well, helping you have cleaner lines between surfaces. 

Taping off areas with film, which you do not want to be painted, can come in handy, especially if working with multiple colors or surfaces. Any accidental brush strokes or dripping paint will fall onto the film and can simply be removed after the paint has dried. 

Additionally, masking tape and film will be needed when covering up your windows. You wouldn’t want to have to clean up any stray flecks of paint off your windows after the project is done. 

  1. Surface Preparation

Before starting on painting the house, the surfaces should be prepped so the paint can adhere properly. Different materials require different prep methods and tools, but the extra effort is worth it in extending the lifespan of the paint job. 

As a general rule of thumb, using a power washer to clean off the exterior is a good idea. Dirt, insects, and any possible flaking are removed for a smoother surface. If there are any materials or elements which can be removed easily, the paint will adhere to those pieces and eventually flake off quickly; the paint sticks better when applied to the walls directly. 

Additionally, if there are patches of the house that need some touching up, it is a good idea to get them repaired before painting. Repairing a section of the house after the renovation is said and done can give an unfinished look to the house. 

While it is not a requirement for every house’s exterior paint job, purchasing sandpaper can come in handy for prepping certain surfaces. Every house uses different materials in its construction. For houses that have wood panels and walls, rubbing some sandpaper can smoothen out the wood and give the paint a flush look. 

  1. Safety Equipment

Prevention is better than cure; do not compromise when it comes to safety. Especially when working at a height and with materials that can be harmful if inhaled. 

Working with paint can be dangerous if safety equipment is not properly used. Items such as safety glasses, cotton masks, and work gloves will help protect against any potential injuries and adverse health effects. 

  1. Caulking

Covering windows in the painting renovation process is essential in keeping water out of the house and maintaining temperatures within. Caulk is applied to the window frames to create a seal; this can save you energy bill costs by keeping the inside at a comfortable temperature. 

Estimating The Cost To Do It Yourself

How is one to begin estimating the cost of painting a house’s exterior by yourself? A good first step you could take is to get a tape measure and find how much area needs to be covered. 

If you have never done this before, break the house into basic shapes and measure each side. Add these shapes together to get the total surface area of the house’s exterior. Keep in mind the line where two shapes meet can be ignored as it falls within the surface area of the house’s exterior. 

From here, the rest of your planning will fall into place. You can get a rough idea of how much paint you will need, any tools to apply said paint, as well as what you’ll need in order to have a safe and even application. 

Once you have an idea of how much area you are covering, there is the issue of calculating the windows and other areas which do not need paint. This can be tricky to figure out yourself, but using a paint estimator tool, it can be done in no time at all. 

There are numerous online tools that will help you calculate costs to cover a certain area with paint. These tools are useful as they can factor in windows into the estimation, saving you a bit on paint costs. 

Purchasing painting tools are not too heavy on the budget, but if unavailable, it will still add expenditure to the project. Additionally, any prep materials needed should be purchased beforehand. These are not too expensive either; at least $100 should cover the basic prep tools required. 

Overall, the costliest amenity when painting the house yourself will be the time and energy taken to complete. 

Price Of Paint For Different Materials

Many modern houses incorporate a variety of material types in their build. Depending on the material, the paint type needed as well as unique application methods, the cost of painting different surfaces can vary. 

Consider what materials make up the exterior and search for the corresponding paint that is compatible with it. Using paint that is specially designed to coat a specific material can add to the structural integrity of the underlying material. This means wood, stone, brick, and any other material lasts longer with a strong coat of paint. 

  1. Vinyl Panel Siding

One of the most popular exterior materials of houses today is vinyl panel sidings. These are used for their durability and ease of painting. Applying a fresh coat of paint can change the entire aesthetic of the house, as well as touch up any dings and dents in the vinyl siding.

If your house uses vinyl panels on its exterior, the cost to paint one square foot will set you back $1.35 to $3.25. For the benefits that a paint job brings, the cost to get the paint supply is well worth it. 

  1. Wood 

Another commonly seen material in house exteriors is wood. Wood is one of the easiest materials to paint, not to mention the easy availability of tools needed to do so. For natural wood surfaces, expect anywhere from $1 to $3 per square foot. 

Plywood is a type of wood paneling that is used to give the effect of actual wood planks on the outside of a house. This material can be costlier to paint due to its specialized routed design. A bit more than natural wood paint, it can cost $1.50 to $4.00 per square foot. 

Engineered wood is used widely for its ease in painting. Not only does the cost per square foot sit at a comfortable $1 to $2, but the wood comes pre-primed as well. Overall the painting application process is incredibly easy when working with engineered wood. 

  1. Aluminum

Panels of aluminum are used to add a rustic aesthetic to the outside of the house. Essentially large, smooth sheets of metal, these surfaces are non-porous. This can make it challenging for the paint to adhere to it if a compatible paint is not used. 

As aluminum is exposed to the elements, there is an inevitable breakdown and fade over time. To touch up the paint job or change the look completely, the specialized paint can set you back $0.83 to $2.50 per square foot. 

The amount of paint needed is not too much, as spreading the paint across the non-porous surface is relatively easy. However, purchasing primer is a requirement to prep the aluminum paneling, so the paint has something to grip. 

  1. Steel Siding

Houses that use steel siding on the exterior do not necessarily require a coat of paint. It is similar to aluminum panels, save for the increased durability of the steel siding. 

Regardless, if you do choose to paint your steel siding panels, the specialized paint can cost $1.50 to $2.50. It should be noted again that painting your steel siding panels will not increase its durability and is purely an aesthetic choice. 

  1. Brick And Stone

In areas that see a high occurrence of strong wind, it is common to see stone and brick elements being used in the exterior of the house. These add a natural look to any home while keeping it rooted strongly to the ground. 

As both these materials are porous in nature, painting them can be costlier. More coats may be needed to have effective coverage. For bricks, the paint can cost anywhere from $2.40 to $4.20 per square foot. Additionally, the cost to paint a square foot of brick costs around $2.40 to $5. 

An alternative to having the look of brick or stone without all the maintenance attached is brick and stone veneer panels. These veneers are made from fiber cement and are textured to resemble their respective natural counterparts. 

They are much easier to paint as compared to natural brick and stone; paint is not absorbed as much. The cost to paint these fiber cement veneers ranges from $2.50 to $4.50.

  1. Concrete

One of the more uncommon materials used in houses, concrete is used for its durability. While it can withstand its fair share of exposure, adding a layer of paint can minimize the amount of maintenance needed. 

Painting concrete can require a primer to prep the surface; however, the application process is quite simple. It requires a bit more labor but is easy to apply the paint regardless. Factoring in the primer and paint, concrete costs around $1 to $3.50 for one square foot. 

  1. Fiber Cement

Modern houses use fiber cement for its specially designed composition for easy paint application. The surface is non-porous, which means multiple paint coats are not necessary for the paint to take hold. 

When installing the fiber cement, you have the option to have either a pre-primed or pre-painted cement installed. A pre-primed surface can save you labor costs, but to paint a square foot of fiber cement will set you back around $1.25 to $3.25.

Man painting a brick wall in red

Price Of Paint Types

Just as there are specialized paints for a corresponding material type, there are also types of paint formulas available. These formulas have a unique composition which makes them interact with the surface it is applied to in different ways. 

Based on the type of finish you are looking for, a certain formula can change the way a certain paint turns out once it is dried. Some types of paints may be easier to work with or provide better protection than others. You can choose a suitable option depending on what features you are looking for in the paint.

  1. Exterior Latex Paint

Using exterior latex paint with a water base has many benefits when applied to a surface. This paint is incredibly easy to apply with its fast drying time. Additionally, the water-based formula has a simple clean-up to help apply it precisely in specific areas. 

In terms of other benefits of using exterior latex paint, the paint is resistant to yellowing over time. This ensures it keeps its bright hue for longer, even if exposed to UV rays and other elements. 

Costing anywhere from $20 to $50 for a gallon, this paint is a moderately priced option. There are a wide variety of color options to choose from, no matter what aesthetic you are going for. 

  1. Exterior Acrylic Latex Paint

Working with vinyl and smooth surfaces can be difficult to paint without a compatible paint type. For these surfaces, acrylic latex paint is the most suitable option. 

Where this paint shines is in the easy clean-up of accidental applications using soap and water for a precise application. Additionally, it is easy to work with as there are little to no VOCs produced. 

On the other hand, exterior acrylic latex paint does have some drawbacks. For example, the paint does not have a texture that can withstand water exposure. This can make it inaccessible for use on houses that get an ample amount of rainfall. 

What’s more, the paint is not the most durable option available. It is prone to chipping after some time and requires more maintenance as a result. 

However, if this paint is compatible with your housing materials and climatic conditions, it is a great paint to use. It is usually priced at around $20 to $50 per gallon, similar to the normal exterior latex paint.

  1. Exterior Oil-Based Paint

For wood siding and trim specifically, using an oil-based formula may have better effectiveness. The oil will help the paint permeate the wood for a stronger bond. 

As the oil-based paint is a penetrating paint, the drying time can be longer than other options. This can make completing a project take up more time, but there are also some benefits to this. The longer time allows you to work with the paint for a longer period, so once it is dried, it has the cleanest finish possible. 

Making sure the paint is applied the way you want it before it dries is important, as cleaning up dried oil-based paint can be challenging. If by chance, there are any clean-ups required, then turpentine or mineral spirits must be used to break it down. 

Additionally, the paint has quite a few environmentally harmful VOCs in its formula. Once dried, the paint has a tendency to fade and yellow over time. In some cases, it has even cracked fully to expose the underlying material. 

The average price of a gallon is usually $20 to $70, making it one of the more expensive paint types available. However, the paint is worth it for its easy application and ability to spread smoothly. 

Price Of Paint Primer

Using a primer on your house can determine how effective the paint sticks and lasts on a surface. Applying primer prepares the surface to adhere to the paint better and prevent the colors from fading. 

Primers are necessary on surfaces that are being redone completely or being painted for the first time. Additionally, for surfaces with an already existing paint job, a primer will help the new layer to adhere on top of the old. 

When changing the color of an exterior paint job from a lighter shade to a darker or vice versa, a primer can come in handy. It lowers the number of coats required for any changes to be noticeable, which ultimately does save on paint costs. 

Different primers have been designed to be used with a corresponding paint type. It is important to use a matching primer with its paint counterpart for maximum effectiveness. 

  1. Exterior Latex Primer

When working with latex paint, using a latex primer, otherwise known as an acrylic primer, can make applying the paint easier. This type of primer has a fast drying time and little to no VOCs. It is also versatile, being compatible with metal, fiber cement, wood, and masonry. 

When applying the primer, it can be cleaned easily in case it drips or is accidentally applied on a surface—all these benefits in one primer that is priced at $20 to $80 a gallon. 

On the other hand, the acrylic primer does have a few weaknesses and shortcomings. It is not able to withstand UV rays well, often cracking and chipping easily as a result. 

  1. Adhesive Primer

Designed for use on surfaces that do not have the most grip or texture, this primer can adhere with the most efficiency. Materials such as vinyl and metal are some of the surfaces this primer is compatible with. 

Applying it is easy as it can be sprayed on for an even coating that dries in little to no time. As is the case with many primers, cleanup is easy for tight spots. Priced anywhere from $15 to $60 a gallon, this primer is a strong choice for those with glossy surfaces. 

  1. Exterior Oil-Based Primer

A truly unique primer, exterior oil-based primers are incredibly strong in adhering to the materials. They have a special restorative quality when used on dark spots, stains and removes any odors. 

An additional useful feature is the ability of the primer to act as a sealant when used with wood. This makes it an ideal primer for wooden surfaces as it can protect the wood from any cracking. 

One caveat of using an exterior oil-based primer is that it can leave streaks and brush marks. As such, applying it should be done carefully with smooth strokes.

Purchasing one gallon of this primer ranges from around $20 to $50. Altogether it is a great value for money, especially if you have a large surface area of wood to cover. 

  1. Exterior Shellac Primer

Using shellac primer on the exterior of your home can bring a variety of benefits. For one, the drying time is minimal and has a strong bond once dried. In fact, out of all the primers, shellac primers have the strongest adhesion. 

Furthermore, the primer is able to cover stains and remove odors indefinitely. All these benefits are included in this primer that is usually priced at $20 to $60. 

However, you should keep in mind some potential drawbacks when working with this primer. Shellac primer can be a tedious process, so application should be made carefully. In order to remove the dried shellac, you can use an acetone nail polish remover or denatured alcohol. 

As cleaning it off of a surface can be a chore, it is not advised to apply this primer with a spray. A brush is more preferred for increased control over the application. 

Additionally, the shellac primer can have a strong smell and thick viscosity. This can make working with it over a longer period or large area a hassle. 

How Much Does It Cost To Paint A 2 Story House Exterior

Price Of Exterior Paint Finishes

Adding a finish to the paint on your house can elevate its appearance and bring out the color of the paint more. These finishes range from matte textures to a shiny, glossy finish. 

These finishes can have different effects depending on what material it is applied on. As a result, keeping in mind what finish paint has should be a consideration, match a suitable finish to the materials in your house. 

  1. High Gloss Finish Exterior Paint

Paint that has a high-gloss finish will make the colors pop when it is dried to the point of being reflective. Due to the tendency to draw the eye, this type of paint finish is used on areas that you want to highlight—for example, a door or entrance or as detailed trimming. 

The durability of this paint finish is incredibly strong and can withstand heavy climatic conditions well. One gallon of high-gloss finish averages anywhere from $50 to $70. 

  1. Semi-Gloss Finish Exterior Paint

For a more discreet finish, a semi-gloss paint can be used on trim for a touch of detailing. This paint does not have as much of a shine as the high-gloss finish. 

Once dried, it is easy to clean surfaces painted with this paint. Applying it on surfaces that see a lot of exposure to dust or mud is a good idea. Exterior surfaces can be maintained much easier with this finish covering those smaller, hard-to-reach spots. 

As this finish does not have a highly reflective sheen to it, it is priced in a lower range of $40 to $60 for a gallon. 

  1. Satin Finish Exterior Paint 

An attractive finish for its smooth texture and sheen, the satin finish appears to have a satin texture to it. Not only does it have a charming appearance, but the paint is incredibly durable. 

Satin finish paints are able to withstand a number of stains, scuffing, and scratches. Moreover, it does bring down the intensity of colors, making them deeper than they actually are. 

By lowering the brightness of the paint’s colors, a satin finish paint can hide these blemishes well. Additionally, it is easier to clean as any evident damage is hidden in the deep colors of the paint. 

One gallon of this type of finish will usually set you $30 to $50. While it may be useful in hiding blemishes and dents, you should also keep in mind its tendency to darken already dark colors.

  1. Eggshell Finish Exterior Paint

Easily one of the most common finishes used, eggshell has a barely perceptible sheen to it. There is little to no gloss on the surface once it has dried, making it a low-profile look while adding a pop of color to the exterior. 

To get an idea of the sheen that an eggshell has, it is similar to that of an actual eggshell. The slight sheen allows it to hide indents and damages to the surface. 

What’s more, this paint finish has an easy application process even for novices. Applying it with a brush will not leave any streaks or brush marks. Once dried, this finish is easy to clean and maintain, which further increases its versatility and functionality. 

All the benefits that an eggshell has in its maintenance, application, and appearance, make it a favorite finish to use. Picking up a gallon of this paint finish will set you back anywhere from $30 to $40. 

  1. Flat Finish Exterior Paint

Possibly the most affordable paint finishes, flat finish paint will cost around $15 to $40 for one gallon. Out of all the options, it has the least reflection and has a slightly dry texture to it. 

Additionally, it is able to easily cover up imperfections and blemishes due to its matte appearance. While it is able to hide a number of flaws, it is prone to chipping away easily. 

Another drawback to using a flat finish paint is the attraction it has to dirt. Any stray dust or dirt will hold onto the surface well due to the texture of the finish. 

How Much Does It Cost To Paint A 2 Story House Exterior

Conclusion

Now that you know what materials and types of primer, paint, and finish you need to paint the exterior of a house, you can begin formulating a budget. Add in your tools and other safety equipment costs for a better idea of the necessary expenditures. 

Also, don’t forget to take into account the efficiency of using certain types over others; these can cut down the labor, time spent, and cost overall. Depending on your house’s materials and the area to be painted, the cost can fluctuate. 

Alternatively, you can choose to hire a crew to get the job done for you. This can be costlier, but the job will be completed sooner with a high-quality result. 

No matter which option you go with, the exterior of any house can only benefit from a fresh coat of paint. It is an investment that adds value and a touch of personality to any home. 

Related Articles

Epoxy Paint For Wood 101

How To Paint Trim Near Carpet

How to Remove Spray Paint from Concrete

Best Exterior Primer Paints

13 Best Epoxy Spray Paint Resins To Consider Today

9 Best Paint Primer For Drywall Tested

9 Best Paint Brush For Polyurethane

8 Best Basement Cement Floor Paints

7 Best Exterior Primer For Peeling Paint 

7 Best Primers For Covering Red Paint

How To Solve The Problem Of Bay Window Curtains

Using the best concrete paints is one of the most affordable and easiest ways to revamp concrete flooring. 

Concrete is by far the most prevalent flooring option, especially in high-traffic areas and surfaces that are exposed to external factors. The high durability and low maintenance have definitely played a part in the popularity of concrete over the years. 

Having said that, most people perceive concrete floors to be lackluster compared to other flooring options. Even though it isn't necessarily true, concrete floors can get a bit dull over the years. 

There's no need to worry, as a couple of concrete paints can easily fix the drab concrete floor and transform it into an attractive surface. Today we're here to provide concrete floor paint ideas, to help you create beautifully painted concrete floors without much hassle. 

What Are The Advantages Of Painting Concrete Floors?

What Are The Advantages Of Painting Concrete Floors

More than ever before, options for concrete paints are on the rise. This wasn't the case a few years back, as most people preferred to opt for acid-staining exterior surfaces to achieve better durability. 

Painted concrete surfaces have come a long way, and now you can choose ultra-durable paints that won't chip or peel. This brings us to one of the basic advantages of painting concrete floors which is ease of use. The primary application is no different than painting the walls of a home, so you can easily paint concrete surfaces by yourself using simple tools like paintbrushes and rollers. 

On top of that, concrete paints aren't that expensive, especially when you opt for self-application. Even additional components like decorative color chips are available for an economical price which helps to cut down on the overall cost. 

Don't like the texture or finish of your concrete floor? There's no need to worry as two coats of the right concrete paint can easily hide everything from minor imperfections to concrete stains. Currently, you can find paints in various color options, so customizing any concrete surface won't be an issue. 

These days you can especially find concrete paints that are meant to protect high-traffic areas from further damage. These easy-to-apply paints are meant to be used in garages, walkways, porches, patio, or pool decks, and they resist chemical spills as well as hot tire pickup. 

Another advantage of painting concrete surfaces is that cleaning them is hassle-free, as they're usually water-based acrylic formulations. You won't really need to use any special procedures to maintain the surface once the painting project is over. 

How Are Concrete Floors Painted?

Now that you know why painting concrete floors is a good option, let's find out how it's actually done. But, before you start the process, make sure that the paint is suitable for the surface. 

In case you're looking for durability, it's best to opt for concrete paints that are ideal for indoor and outdoor use. You can also pick anti-skid or slip-resistant paints for surfaces like your garage floor and porch. 

1. Preparing The Surface

The first step is usually to scrape the concrete surface with a wire brush and scraper to remove any high spots. You should also use a degreaser to get rid of as much dirt and grime as possible, especially in areas like the garage. It's even recommended to use water for rinsing the surface and drying it off with a wet/dry vacuum. 

Another step for prepping is to fill the cracks or low spots present on the floor using a concrete crack filler or sealant. Make sure to even out the top surface after applying the filler and remove all crumbling concrete debris using a vacuum cleaner. In case the cracks are too deep, it's best to contact a flooring contractor as they can help you check if there are any underlying damages in the concrete. 

At this point you might be wondering - “do I need to prime exterior concrete before painting?An extra step done by some is to etch the concrete surface with a concrete etcher for the paint to stick better. Then, a generous coat of a suitable primer is applied to the floor, so try to pick a primer that works for both epoxy and concrete surfaces. 

You can skip the primer if the paint doesn't demand one, but it does help in evening out the surface and provides better adhesion. 

2. Application

Once your concrete surface is dry and free from moisture, it's time to begin painting. It's no different than painting any other surface, so you can easily spread the paint with any paintbrush. In case you decide to use an epoxy-based paint, follow the instructions on the container to mix it well before application.

While laying down the first coat, ensure that it's as even as possible for a professional-looking floor. Wait for it to dry completely before applying the second coat for the best coverage. 

3. Sealant

To be honest, most people don't add a sealer as the paints already come with sealant-like properties. However, you can definitely add a clear finish concrete sealer to make the newly painted concrete floor long-lasting. That's because a good-quality sealer can protect it from scratches, peeling, and regular wear and tear. 

Other than that, a sealant is preferred by those who like a shiny finish. The high-gloss finish can elevate the look of outdoor concrete surfaces and make them resistant to oil, gas, or acids. But remember to check the compatibility of the sealer with the concrete paint before proceeding with the application.  

Concrete Floor Paint Ideas

Concrete Floor Paint Ideas

1. Faux Stenciled Rug

One of the most popular trends is to use a stencil to create a painted rug on the concrete floor. All you need to do is strategically lay down the stencil and use a paint roller to apply the concrete paint. Just make sure not to lift the stencil too soon, or you may damage the design.

Also, top the whole surface with a coat of clear sealant to reduce damage from regular wear and tear. 

2. Diamond Motifs

Love the look of traditional concrete floors? You can DIY a diamond motif floor using painter's tape and concrete paint. Begin by measuring the area and then use the tape to create the diamond shapes. Alternatively, you can find vinyl diamond-shaped stencils that make your job easier. 

We recommend laying down a coat of white or gray paint as a base. Then create the diamond designs and fill them in with brighter or darker colors for a contrasting look. 

3. Faux Grout Lines

Another simple design you can create by using painter's tape is faux grout lines. This design looks excellent on basement floors and porches, so start by laying down a light-colored concrete paint and let it dry before using the tape to create faux tiles. 

You can proceed to paint the surface with a slightly darker-colored paint to create the illusion of grout lines. And make sure to lift the tape carefully so that the lines come out even. 

4. Bold Stripes

Want to change the dull look of your laundry rooms or porches? Think about using bright or pastel-colored concrete paints to create bold stripes. There's not much that needs to be done apart from measuring the total area and dividing it into equal horizontal stripes. You can even use black and gray paint for the stripes to give the floor a bolder or more traditional look. 

5. Graphic

There's no point in shying away from using fun graphics to highlight a concrete surface area of your home. You can opt for fun vinyl graphic stencils and paint the surface to create unique patterns. Just learn how to remove paint from concrete to get rid of as much hardened residue from a previous paint job to have a smooth surface. 

6. Painted Tiles

Let's be honest, tiles can be quite expensive, especially when you need to cover a large area. But, you can still get the tiled look on a concrete surface by clubbing faux grout lines with stencils. 

More people are using it to create unique tiled looks in living rooms or patios, as these spaces usually draw a lot of attention from guests. We like the use of vinyl stencils with Greek, Moroccan, or Portuguese tile designs as they provide more quirky finishes. 

7. Adding Flakes

We couldn't miss mentioning vinyl chips or flakes as they have always been used to create extremely durable floors with an industrial feel. You just need to throw flakes on a wet layer of paint to get the desired look. The experts recommend using a good-quality transparent sealer on top to prevent the flakes from peeling off. 

Concrete Floor Paint Ideas Frequently Asked Questions ?

Are concrete stains better than paints?

One of the reasons many homeowners prefer using concrete stains over paints is durability. While a layer of paint sits on the top, a concrete stain penetrates the surface, making it long-lasting. 

Stains might be a better option if you prefer a more earthy and translucent finish or want to mimic the look of marbled floors. Having said that, working with a stain, especially the acid-based variants, can be a bit challenging for a beginner. 

Those who want to use paints but are concerned about durability can purchase concrete paints formulated for interior and exterior durability to achieve a better finish.

What type of paint is best suited for concrete?

As you would have guessed, paints for concrete are available in different formulations and apart from the water-based concrete paints, variants made of latex and epoxy are available. But, most professionals suggest using water-based paints due to their quick drying time. 

Other than that, whenever you're purchasing paint for concrete surfaces, try to find one that's specifically meant for that floor type. For instance, many brands make garage floor paint for garage floors designed to resist scratches and abrasion from tires. 

Are there any drawbacks of painting a concrete floor?

Like any other medium, concrete paints have some drawbacks, which might make them unsuitable for concrete floors. One of the foremost things to know is that paints applied on high-traffic floors need frequent touch-ups but this issue can be solved by topping it with a high-quality sealer. 

Another thing to note is that concrete paints are opaque, so you won't be able to achieve mottling effects or color variations. You'll need to use a concrete acid stain to achieve such finishes. 

We want to add that some concrete paints tend to be slippery, but you can use a slip-resistant variant or mix the paint with anti-skid additives to improve traction. 

Concrete Floor Paint Ideas Final Words

Concrete Floor Paint Ideas Final Words

We hope this guide will help you paint any concrete surface in your home in eye-catching designs and patterns. 

Remember to order a suitable paint in the right amount based on the square footage of the concrete surface. Also, apply a fresh coat of paint only on dry and moisture-free concrete surfaces to avoid peeling. 

Contact a professional contractor if you find it challenging to plan the paint job for concrete surfaces on your property. They are experts who can help you get the desired outcome and can even make the concrete surfaces look better than before. 

Taking suggestions from a professional is especially important if you have a polished concrete floor. Such surfaces need extra attention to detect any damages that might exist in the concrete. 

Until next time, goodbye, and take care! 

Hard water is when the water has oxides of metals like Calcium and Magnesium, which makes the soap unable to form lather. What this can also do is clog water pipelines by forming mineral deposits.

While city officials take care of the deposits formed underground and in-house pipelines, what they do don’t do is take care of the shower-heads.

That one’s on you.

You may have seen something nasty clogging in the shower head holes sometimes. That’s calcium, which if not removed will keep on depositing on the shower head until its wholly blocked.

It shortens the span of life of the shower-head. It can ruin the paint, can cause corrosion and make water coming out of it harmful for your skin and scalp. Calcium and other mineral particles can get accumulated on the skin and scalp causing hair loss and pimples.

So it is indispensable to keep the shower head free of all the mineral build up. It’s good for the life of the shower-head, and it’s good for you. Now, let’s talk about how to do it.

While getting a super expensive cleaning solution can do the work, but that’ll be overkill. Household distilled vinegar is enough for the job. It’s simple and almost effortless.

So, here’s a guide on how to remove calcium deposits from shower-heads Easily!

Top 10 Best High Pressure Shower Heads of 2022 | Editor’s Top Choices

99 Super Cool Shower Curtains to Transform Your Bathroom Today

How to Remove Calcium Deposits from Shower-heads

how to remove calcium deposits easily

How to Remove Calcium Deposits with Shower-head Removal

  • Step 1 – Remove the shower-head

Get an adjustable wrench and slowly loosen the bolt that attaches the head to the wall. Do it slowly and carefully.

If the calcium deposit is too massive, then you might have a hard time doing it. The tip is to put adequate pressure and have patience. Once it’s almost out, use your hands to unscrew it completely.
Always remember that shower-heads are significantly weighted, so be careful and deliberate, or you may hurt yourself.

  • Step 2 – Prepare the cleaning solution

Now take a plastic bag, pour a cup of water in it. And then add a cup of distilled vinegar in it. Have enough solvent in the packet to entirely submerge the shower-head.

Leave it unattended for about an hour. After that, you should see that calcium deposits have disintegrated and detached from the shower-heads body. But if not so, wash it and do it again with a higher concentration of vinegar.
A fair warning will be not to make it too concentrated. It may damage the paint.

Once, you get satisfying results. Get ready from some scrubbing.

  • Step 3 – Cleaning the shower-head

Rinse the shower head with some water. Now, use a metal sponge to scrub in a circular motion. Do it nice and smooth. Otherwise, you’ll scratch the surface of the shower head.
If done correctly, the treated calcium deposits should be entirely off the surface. Now place the shower head under running water in a sink. It will make sure that no residual calcium is left.

Once done, dry off the shower head for easy fitting. Use an adjustable wrench to fit it on the wall again.

how to remove calcium deposits easily with vinegar

How to Remove Calcium Deposits Without Removing the Shower-head

Here is one more straightforward way that does the trick. It’s a simpler trick that works better for low to moderate deposits.

  • Step 1 – Prepare the solution

As mentioned in step 2 of the previous method, take a bag and make a vinegar solvent. Now submerge the attached shower-head in the bag of solvent and using tape or rubber bands, wrap it around the shower-head.

Leave it in that state for about an hour. Now be careful to not spill it over your face or eyes while you do it. If it happens by accident, rinse your eyes with clean water immediately.

  • Step 2 – Washing the shower-head

Take the bag off of the shower head. Now pour a mug of water over the shower head and gently scrub with a  piece of cloth afterward. Run water through the shower for some time. So that all the residue gets out and no vinegar is left in the shower-head.

Use a brush to scrub the holes of the shower-head so if there are some small calcium particles in the faucet; make sure they get out as well. Have patience and do it thoroughly to have a good result.

Obviously, this method doesn’t work as good as the first one. Some calcium deposits and particles may get left out as the water rinse is not thorough enough. In that case, it’s just better to take the faucet off and do it properly.

If the calcium deposits are too much, then it won’t work at all. So if you see that the deposit is way too much, then go with method number one.

how to remove deposits of calcium with vinegar

Image via Abigail Lynn@shmabbss

  • Why Vinegar

Vinegar has acetic acid which is an excellent solvent to dissolve mineral deposits. Since it’s a natural chemical, it produces no harmful fumes while cleaning or anything like that.

It’s also extremely inexpensive. Worth pennies for every cleaning session and you’ll save quite a few dollars if you use this over some specialty cleaner from the supermarket.

But be careful with vinegar. Be sure to avoid contact with your eyes. If you do happen to get vinegar in your eyes accidentally, wash them with clean water.

Also, keep vinegar out of the reach of your kids. A significant amount of vinegar can be poisonous for adults, and it’s even worse for kids.

  • Preventing calcium deposits

Keeping the bathtub and shower clean can help reduce the chances of getting calcium deposits. Just use a towel or sponge to wipe off the wet surface of your tub and shower.

It hardly takes a minute or two, so it’s a matter of habit only. And It’s a good habit indeed. Your bathroom will thank you for it.

Hard water can have some adverse effects on the skin and can be poisonous on ingestion. High mineral content can also cause hair loss because fine particles settle on the scalp.
So, if your local water source is exceptionally hard, then do consider installing a water softener system. It’ll remove all the extra minerals in the water causing deposits.

While it will be good news for your hair and skin, you also won’t have to worry about cleaning the shower head as often.

Image via Abigail Lynn@shmabbss

Final Words

So there you have it — two methods to clean shower-heads.

Mineral deposits can harm the shower-head as well as the health of your skin and hair. While installing a water softener can be an end all and be all solution to the problem, meanwhile, keeping the shower-head clean can help. Also, it’s much cheaper.

Remember, you don’t need some fancy specialty cleaner. Vinegar is fine for the job. Acetic acid is a fantastic solvent for these kinds of deposits, and it’s all natural and safe.

One important thing to remember is to be careful while scrubbing the shower head. Many times, while cleaning, I’d rub it too hard and hurt the paint on the body of the shower-head or directly chip it.

Also, be careful while taking out and installing back the shower heads. It’s a massive piece of metal, so it can seriously hurt you if you are not careful with it.

And that’ll be it. All the information one might need to clean and maintain shower heads and maybe more importantly, why.

With that, I hope this guide was helpful in your venture.

Top 10 Best High Pressure Shower Heads of 2022 | Editor’s Top Choices

Walk-in Showers 101 | Pros & Cons, Tips & Tricks, Design Ideas

99 Super Cool Shower Curtains to Transform Your Bathroom Today

11 Best Shower Body Sprays Today Reviewed

5 Best Shower Systems With Body Jets

11 Best Shower Curtain Rod Reviewed

13 Best Kohler Shower Heads

7 Best Grout Sealers For Shower

11 Best Dual Shower Head

Difficult stains and streaks making your fiberglass shower and tub look dull? It’s time for some scrubbing action!

However, that’s not always required, provided you clean and maintain your bathroom fixtures regularly using the right cleaning agents. No, we don’t mean going in for abrasive cleaning solutions and scouring pads; unless absolutely necessary.

It’s a common misconception that only commercial cleaners can help remove mold and mildew formation. Today, we’re set to clear the air surrounding this topic.

For this, we’ve carefully created this comprehensive guide explaining how cleaning a white fiberglass shower or tub actually works. And to help facilitate better understanding, we’ve provided a few crucial cleaning tips and techniques for you to consider.

So, without further ado, let’s begin!

Cleaning a White Fiberglass Shower or Tub

portrait of young woman cleaning shower door

Soap and hard water build-up tend to cause stains and streaking on the surface of your fiberglass tub or shower, making it dull and shabby. You may consider abrasive cleaners to remove them, but you’ll only end up causing more damage.

Abrasives and scouring pads lead to permanent scratches when used on fiberglass surfaces, which, in turn, collect more dirt and dust. So, if you wish to maintain the glistening aesthetic of your white shower or tub, choose a safer yet effective cleaning technique.

That’s not all; we’d recommend giving equal importance to regular cleaning since it acts as the best defense against mineral deposits and soap scum.

Cleaning Tips & Techniques

In this section, we’ve explained a few critical tips and techniques for cleaning a white fiberglass shower or tub.

  1. Regular Maintenance

As mentioned earlier, regular cleaning is crucial to prevent mineral deposits and scum build-up. Therefore, spending a few minutes of your time wiping down your fixture or tub using a non-abrasive terry cloth towel or a soft sponge after every use goes a long way.

It wicks away moisture, preventing the formation of mold and mildew. Additionally, opening doors and windows to promote proper ventilation plays a vital role.

  1. Using Natural Cleansers

Cleaning fiberglass fixtures using the combination of vinegar and baking soda can help bring back their lost shine. All you need to do is sprinkle baking soda on your shower or tub, and then spray with vinegar to form a paste.

After allowing it to sit for a few minutes, use a non-abrasive sponge to scrub the surface. You can rinse away the residue with clean water once you’re satisfied with the results. But don’t forget to wipe the surfaces dry with a soft towel to prevent the possibility of stains.

  1. Removing Difficult Stains

Natural cleansers like vinegar and baking soda may not be effective in removing difficult water spots and stains, even after you leave the paste to sit for over an hour. In such cases, you may opt for commercial cleaning solutions as recommended by the manufacturer.

Using a drop of soap with hydrogen peroxide can help combat stubborn stains. However, if you need a stronger solution, we’d suggest upgrading to a more potent combination of borax and lemon.

  1. Necessary Precautions & Preparations

Before you dive into the cleaning process, it’s better to take a few precautions from your end to avoid the unnecessary hassle of removing stubborn stains and mineral deposits.

That said, leaving toiletries and other bathing products on the floor of your shower or the surface of the tub is not just inconvenient, it also leads to the formation of rings and debris. Investing in a wall-mountable bathroom shelf or cabinet can help prevent this. Plus, it provides an accessible storage space for all your bathroom essentials.

It’s crucial to note that loofahs and shower curtains can also harbor mildew and mold. So, make sure you keep them clean by laundering separately.

Modern apartment's white and beige bathroom interior

Final Words

Showers and tubs made using fiberglass are not only durable, but they’re also known for their glistening, elegant finish. And being white in color, they manage to transform the entire aesthetic appearance of your bathroom, adding a touch of sophistication to its decor.

However, without regular cleaning using the right technique and cleanser, fiberglass fixtures, tubs, and showers are prone to stains, streaks, and spots. This is because of mineral deposits and soap scum, which are usually difficult to remove. On that note, we now come to the end of our informative guide.

With this, we’ll take your leave. Till next time!

11 Best Shower Body Sprays

How to Remove Calcium Deposits from Shower-heads With Vinegar

Top 10 Best High Pressure Shower Heads of 2022 | Editor’s Top Choices

Walk-in Showers 101 | Pros & Cons, Tips & Tricks, Design Ideas

99 Super Cool Shower Curtains to Transform Your Bathroom Today

15 Easy DIY Tricks on How to Get Stickers Off Glass Rapidly

5 Best Shower Systems With Body Jets

11 Best Shower Curtain Rod Reviewed

7 Best Grout Sealers For Shower

11 Best Dual Shower Head

How to Get Fiberglass Out of Skin Safely & Easily

So, you're sick of mold and mildew growing on your walls and want to get rid of them as soon as possible? 

There are quite a few simple and straightforward methods, such as simply painting, bleaching, or sanding the walls to eliminate them altogether. Yes, you read it right- removing mold is not as tough as it may seem to be. 

Molds can deposit on both interior and exterior surfaces, especially in high-humidity areas. And constant exposure to them can cause irritation, allergic reactions like red eyes, sneezing, skin rash, and other issues. 

Now, what can you do to get rid of this unwanted allergen? Will painting on it be enough? Will it be a very costly process? 

We know loads of questions might be looming in your mind. But just stay calm and keep on reading to know all about effectively eliminating the problem of mold formation. 

Painting Over Mold To Kill It

Mold. Aspergillus. Detergents, household gloves, a sponge, a bucket on a white wall background with a black fungus.

1. Can You Paint Over Mold?

Can paint be applied to mold? Will it kill a mold infestation, or make things even worse? If painting is enough, then which type should be used? And can you do it yourself or is there a need to call upon an expert?

We are here to provide answers to all of your queries. So first things first, yes, painting for killing mold completely can be a viable strategy, provided circumstances are right. 

If you fix the underlying cause of mold growth, you can get rid of it permanently. You can apply one or two coats of mold-killing primer over the growing mold and then paint over it. 

We’d recommend getting mold-resistant paint instead of a traditional one, as it’s an easy way to get rid of molds without putting extra effort into looking for something else. It can be a cheap and reliable option if you experience frequent mold manifestations in your house. With the availability of several mold-resistant paint options on the market, carefully go over them and select one that suits you best. 

But don’t get overwhelmed by the choices you get. We’ll tell you what type to go for in which situations. 

2. What Type Of Paint Will Be Viable?

As mentioned, several types of mold-resistant paints are available on the market. Some are based on ammonia formulas, some on beach formulas, and others on mold-eating enzymes. 

Many of you might opt for vinegar-based paint, and we won’t discourage you from doing that. Being chemical-free and natural, it is found effective against most types of mold. However, it is not the ultimate solution, as it can be ineffective against some mold varieties and may also leave behind a heavy pungent smell, which can be challenging to get rid of. 

That being said, it still works comparatively better than paints based on ammonia formulas, which don’t really work against the majority of molds. Even worse, it provides a suitable environment for them to grow and spread. So, you should definitely avoid them.

On the other hand, bleach-based solutions work in most situations but may not always. Although they may stain the surface, they may also and allow all the mold to keep growing underneath it. So, it becomes imperative to identify the type of mold that is growing on your walls before choosing a compatible paint, and we’d suggest you take advice from a professional painter. 

3. Things Needed Before Painting Over Mold

     1. Safety First

Many people try sanding over a mold-infested wall to clean it before painting, but this isn't the right thing to do. When you sand an infested surface, the tiny particles spread all around the air, which is not something you’d want. It reaches directly to your lungs, which can be very dangerous and potentially deadly. 

If the mold infestation is that bad, we’d strongly suggest calling a professional. This might cost you some extra bucks, but the overall safety makes it worth the investment. 

But if you find yourself capable of doing it well, we’d advise taking necessary precautions, like wearing 3M’s full-face respirator and rubber gloves before sanding. It will protect you from inhaling mold particles. 

Putting on rubber gloves is always important to avoid contact with toxins that might be present in the paint. They prevent the chemicals from touching the skin, and you might not want to take any chances with your health. You will find quality gloves that can be reused multiple times. 

Some may only be meant for single use and should be discarded after a certain number of uses. Also, make sure to discard them properly, away from humans and animals. 

Even after sanding, you might find some patches that are difficult to get rid of. In such cases, consider applying a mold sealant prior to painting over the mold. This process, known as encapsulation, is used to seal remaining mold particles, which even sanding couldn’t remove. Once it dries off completely, you can apply one or multiple coats of a mold-killing primer and then coat it with the paint. 

Just make sure to avoid any bleach-formulated paint on the surface; it can even make the mold problem worse. Furthermore, always wear quality rubber gloves while working to remove the mold. 

      2. Wipe The Area

It will always be essential to wipe the area with any clean and wet rags, as it provides an excellent base for paint to settle on. Once wiped and rinsed, dispose of the rag safely, away from animals and people. 

      3. Let Dry

Once the painted surface has dried off completely, apply one or two coats of the primer (like the Zinsser mold-killing primer), followed by mildew-resistant paint. You can use polyurethane rollers available on the market to apply the primer and paint. Just replace the foam covers, and you can use a single roller to paint your entire house. 

Some things need to be taken care of during the process. If you are treating a vast area, make sure to use a sprayer that is ideal to use with your mold-resistant paint (wearing the protection, of course). Make sure you do not use your garden spray bottle, as plastic material isn’t always compatible with such paints. 

Important Points To Remember

     1. What Happens When You Paint Over Mold?

What specifically happens depends on whether you have a hazardous or non-hazardous mold on your wall. Determine that before you take any action. So, if you’re confused about whether the mold inside the house is toxic or not, call over a mold expert. 

If there is no mold or mildew growth on your wall, it will be suitable to paint over areas with moisture problem that resists its spread and formation. And, it is entirely safe to paint over non-toxic cases such that it doesn’t get dangerous for you and your family. 

Always make sure to apply single or double coats of primers or a mold sealant prior to applying a layer of paint. 

Applying a mold-killing primer or mold sealant eliminates the root cause of the mold problem. It is not the case with the direct application of mold-killing paint. The residing mold continues to damage the house from the inside, and it oozes from the porous surfaces after some time. 

Let me explain how? When you’re painting directly over existing mold, it cuts off fresh air circulation, leading to a severe mold issue. In case it is a humid room like a basement, kitchen, bathroom, laundry room, window frames, or other surfaces, the situation is even worse. You wouldn’t want that, obviously. 

      2. Painting Over An Anti-Mold Paint

Mold-killing paints might not look as glossy as traditional options available on the market, so many might want to have another coat of paint over it. It is highly unrecommended as applying a coat of another paint doesn’t allow mold-resistant paint to work its magic. 

Also, before purchasing or applying any paint, make sure to see the product details on its website. These paints are generally applied in a room with a temperature above 50 degrees Fahrenheit. Also, the room needs to be properly ventilated to avoid any future growth of mold. 

      3. Choosing The Best Mold-Resistant Paint

Color is a primary lookout for anyone who is painting their house. After all, who wants their space to look dull, right? You will find some gorgeous and stellar bathroom paint colors on the online marketplace. Just a reminder, it is viable to have lighter colors in smaller rooms, which inhibits the growth of mildew.

You can remove molds with elbow grease, and a good cleaning solution is easily painted over an appropriate paint. Paints should be applied on high moisture areas and provide a facile growing environment for mold. But as all brands don’t offer similar quality products, you must check the formula used before going for a specific unit. 

Again, paint doesn't kill mold entirely but prevents it from further growing. So, after you do the prep, choose the best paints that are affordable and deliver the best solutions. For damp areas like bathrooms and basements, Rust-Oleum is your best bet. The formulation of the paint locks out the moisture completely and deters any mold or mildew growth. 

We have seen many of you go for mold-resistant additives and mix them into ordinary paints. It can be a viable solution as long as you mix it properly. In such a case, call over a professional, as they know mixture ratios and the correct application method. Many brands also offer a one-time free consultation about mixing and applying paint correctly. 

Lastly, you already know that molds grow faster in an environment with lower pH levels. So, always go for paints free of any organic elements and alkaline and breathable.  

What Else Can You Use?

     1. Chlorine Bleach

Regular household bleach or sodium hypochlorite works best for destroying mold and removing fungal stains from a wall. However, it can be very harsh when in concentrated form, so you must dilute it before using it. 

     2. Hydrogen Peroxide

It is less harsh than a bleach solution but kills mold, and lightens stains as effectively. However, it will have a similar bleach effect as chlorine bleach; it works much slower compared to the latter and has no residue or fumes. 

     3. Distilled White Vinegar

Being acidic, it gradually breaks down the mold structure and kills it. Vinegar is gentle compared to the previous two solutions, but mold spots might pertain and you might need to further scrub it with a household cleaner. 

     4. Baking Soda And Borax

Baking soda (Sodium Bicarbonate) and borax, having a high pH value, inhibit mold growth and survival. Being inexpensive, it also doesn’t put a dent in your pocket. Additionally, it is non-toxic and mixes easily with water, serving as a quality agent for removing any stains but is not an effective cleaning agent. 

Painting Over Mold To Kill It

Final Words

That’s it from our side. We hope that you have got a bigger picture of how you can paint over mold to kill it. 

Once the paint has been applied and dried off properly, there’s nothing much that you can do after that. However, if you are still concerned about future mold problems, a lot of things can be done. Generally speaking, make sure that your room deters mold growth, by keeping it dry and ventilated for an adequate influx of air. 

If your room is too susceptible to moisture deposition and new mold growth, you might need extra help from a dehumidifier. It will help keep your space dry and warm. Apart from that, you can constantly monitor the humidity levels of your room. 

We hope that our efforts will help you lead a mold-free life. Good luck and take care!

Related Articles

5 Best Mold Resistant Paint

9 Best Paint Primer For Drywall

7 Best Mold Detection Kit

How To Paint Trim Near Carpet

17 Drywall Alternatives For Your Future Home

10 Best Composite Decking Brands

11 Best Paint Primers

11 Best Budget Drywall Screw Guns

7 Best Exterior Primer For Peeling Paint

7 Best Primers For Covering Red Paint

7 Best Primers to Cover Dark Paint

7 Best Cold Galvanizing Paints

6 Best Paint Primer For Rusted Metal

6 Best One Coat Paint and Primer

Best Exterior Primer Paints

Is your heat press machine all grimy and sticky after recent applications? It's time to clean up that mess before it interferes with your designs.

If you're running a graphic merchandise shop, you'll need to keep the machine clean at all costs. Any residue stuck on the platens could harm your work as it tends to superimpose itself on subsequent applications.

While it's unnecessary to clean the heat press every time you imprint garments, mugs, tiles, etc., we recommend performing a weekly cleanse without fail. The best part is that it takes very little time, and you can do it using tools available at home.

However, not everyone is aware of the process. So, if you're looking to learn how to clean your heat press machine, here's a step-by-step guide.

Let's begin.

Cleaning A Heat Press Machine 

Items Required For The Task

Cleaning a heat press requires very few items, and usually, they are all available at home. Following are the things you'll be needing for the job.

    1. A clean piece of cloth
    2. Non-abrasive cleaner (liquid hand wash or dish soap)
    3. Abrasive cleaner
    4. Heat-proof hand gear
    5. Towel
    6. Bucket or container

Steps To Clean Teflon-Coated Machines

Follow these instructions for cleaning heat press machines with a Teflon or non-stick coating.

Step 1

First things first, unplug the heat press from the electrical power source and let it cool down if it was used recently. This is a cautionary measure, and you should follow it without fail to avoid accidents and injuries.

Step 2

Take a bucket or a sterile container to mix some liquid cleaner with warm water. You don't want to over-dilute the solution as that will produce little to no results. In this case, you'll have to use a non-abrasive cleaner, and as such, a liquid hand wash or dish soap should work fine.

Step 3

Once your cleaning solution is prepared, dip a clean, dry piece of cloth in it and use it to wipe across the press platens.

Important note: Do not at any point in time apply an abrasive liquid cleaner to your non-stick or Teflon-coated heat press. This can severely damage the unit and negatively impact its functionality.

Alternative Method

If the above process failed to provide desirable results, and it could not clear away all the residue, follow the steps explained below.

Step 1

Plug the heat press back into the outlet and this time, let it heat up for a few minutes.

Step 2

This bit is important for your safety, so do not skip it. Wear a heat-proof hand protection gear and carefully wipe off the residue using the same soapy water solution. In case there are some leftovers after the first cleaning, this application will deal with it.

Step 3

Once you're done, turn off the machine and let it cool.

Step 4

After the heat press reaches room temperature, use a piece of soft cloth to rinse the platens with cool water. This will take care of any soap residue lingering on the surface.

Step 5

Follow up by wiping other parts of the heat press to get rid of any fingerprints or dust.

Step 6

Finally, dry the machine with a clean towel and use it for the next applications.

Steps To Clean Machines Without Teflon Coating

Obviously, not all heat press units have platens with non-stick coating. But, don't worry, we have covered that too. Follow these steps to clean a heat press without Teflon coating.

Step 1

Start by disconnecting the heat press from the electrical outlet and let it cool down to room temperature.

Step 2

Unlike models with non-stick coating, here, you'll have to use an abrasive cleaning product that will successfully remove all residue from the platens. The cleaner essentially works like mild sandpaper and gently scrapes off the residue.

There are several such products available on the market, but if you want some suggestions, we recommend Comet, Ajax, or GoJo. This application requires some elbow grease, so be prepared to scrub the heat press with a soapy solution containing water and any of these products.

Step 3

After the scrubbing session, plug in the heat press and let it heat up. Wear the heat-proof hand gear and carefully scrape off the remaining residue on the platens. Doing so will help you eliminate any bits and pieces left after the previous step.

Step 4

Turn off the machine after getting rid of all accumulations and allow it to cool down. Use a clean, soft piece of cloth dipped in cool water to wipe the platens. This will get rid of soap particles stuck on the surface.

Step 5

Follow up by wiping down other parts of the heat press with a damp cloth. This will remove any fingerprints or dust gathered over time.

Step 6

Lastly, use a towel to dry the heat press machine.

Final Words

That's all from us!

Now that you know how to clean a heat press machine, we hope you'll be able to keep it in pristine and good working condition throughout. However, before you get to work, here's a piece of advice.

Make sure that the soap solution or water does not come in contact with internal electronic parts. Otherwise, it can lead to serious damage and might even put your machine out of use. Also, wear the right safety gear while cleaning the machine as you don't want to risk an injury. On that note, we'd like to take your leave.

Till next time!

Peeling veneer on cabinets is fairly common, but fixing them is pretty simple. The most common way to fix a peeling veneer is by gluing it down or using adhesive. However, for severely damaged cabinets, the entire veneer has to be replaced.  

Particle board cabinets are cost-effective alternatives to hardwood cabinets. They offer multiple colors and designs that greatly complement any room. But cabinets that do not utilize high-quality veneers and the best screws for particle board often start peeling when exposed to extreme conditions like high humidity and rough use.

To help you fix your particle board cabinet to achieve optimal utility, I have curated a step-by-step guide on repairing peeling veneers.

What Is Veneer?

What Is Veneer

In woodworking and home furniture, a veneer is a thin layer of wood or bark that is glued to the surface of particleboard cabinets. Veneers can be made from either real wood or wood filler, typically used to imitate the smoother finish of real wood furnishings. Carpenters glue them to the cabinet doors and panels.

Providing a natural wooden aesthetic to your cabinet space, veneers are a suitable alternative to real wood usage. Reconstituted wood veneers can especially protect endangered wood species while offering superior texture and color. 

However, installing veneers requires more skill than simply laminating cabinets.

How To Repair Peeling Veneer On Particle Board Cabinets

Peeling veneers do not necessarily require professional carpenters to fix them. I have repaired many cabinets with damaged veneers, and they all look as good as new. So, don’t throw out your perfectly functional kitchen cabinets yet! Follow these steps instead. 

Things You Will Need To Fix Damaged Veneer

  • Putty knife
  • Paint primer
  • Sandpaper
  • Measuring tape
  • Veneer adhesive or wood glue
  • Ruler or straight edges
  • Paint
  • Disposable brush
  • Contact cement
  • Wood veneer or laminate veneer pieces
  • Woodworker’s clamps
  • Soft cloth or rag

Depending on the extent of veneer damage, I suggest using one of these four methods:

1. Glue Down Peeling Veneer

Step 1

Using a set of pliers, peel back the laminate or veneer layer. File down the wood underneath with sandpaper to create a smooth surface. You can also use a putty knife to scrape away any old cement.

Tip

Do not peel or remove any excess length of the veneer. Stop pulling when you feel a little resistance to the existing adhesive.

Step 2

When the area is sanded and prepared, apply contact cement on the particle board and under the old veneer. You can use a disposable paintbrush for smoother application. 

However, I suggest not using a foam brush with contact cement since it leads to uneven and patchy cementing. Moreover, ensure that the laminate piece or veneer does not touch the board until it dries.

Tip

Remember to apply contact cement on the edges of the particle board to prevent more peeling.

Step 3

Once the contact cement has dried, gently press the two surfaces together. Do this carefully since misalignment or bubbles are common during this step. I suggest holding them in place for an hour to ensure better attachment.

Place the attached work between two scrap board pieces and use a woodworker’s clamp to hold it down.

Step 4

Remove the excess contact cement with your fingers or a knife. If that doesn’t work, you can use a pencil eraser to make it pill.

Tip

Use a j-roller to confirm if the entire length of the particle board is covered with cement. 

2. Use Spray Adhesive

Even though clamping the particle board down after cementing is essential, it is often not possible. Using clamps can be challenging for certain parts, like a cabinet door. In these cases, a spray adhesive is ideal for applying wood glue underneath the peeling section and then putting them together. Employ a j-roller for neat application. 

3. Replace The Veneer Or Peeling Laminate

When the particle board is not in good shape, it may not be lucrative to repair the peeling veneer. In this situation, replacing the veneer or laminate is the best choice.

Step 1

Melt the existing glue to loosen the peeling pieces using a heat gun. Then, gently peel the veneer from the particle board. For difficult pieces, use a sharp utility knife to remove them.

Step 2

Clean the area with a damp cloth to remove excess dirt or debris. Then, measure how much replacement veneer you need and cut them into pieces. I recommend using a circular saw to chop the new veneer for better precision–they can be easily available in hardware stores. For more insights into cutting tools, read my article titled How To Cut Particle Board.”

Tip

Don’t worry if you cut slightly larger pieces since you will sand them anyway.

Step 3

Apply contact cement on the new veneer and the particle board. Once the cement is dry, glue them together by using a clamp to hold down the cabinet door. 

Step 4

Trim off any excess new veneer, and smooth out the edges of the cabinet door with sandpaper. I always clean all the veneer surfaces with a damp cloth before applying a coat of paint.

4. Repairing Veneers With Water Damage

If your cabinet veneer has water damage, you must add a few steps before using the previous methods. 

Step 1

First, ensure that the wet particle boards are dry. Use an air dryer until there is no wetness at all. When they are dry, use a grit sandpaper for sanding the surface. Sanding these areas can help remove excess wet spots and give you a smoother surface to work on.

Step 2

Wipe the dust off the surface and proceed to dry it again. Then, apply a thin layer of waterproofing agent before gluing or replacing the veneer. 

Should You Replace Or Repair Peeling Veneer?

When the veneer on the cabinets peels due to excess heat or moisture, a simple repair is appropriate, especially in cases of localized damage. Follow the first and second methods to repair small, limited damage.

For larger areas of veneer damage, too, repairing can be cost-effective. However, it might not appear as smooth as professional repairs. Follow the third method for an extensively peeling veneer.

If the peeling is not localized and is spread across multiple cabinets in a particular area, calling a professional is essential. Upon inspection, they will either tell you to replace your cabinets or let them initiate a veneer replacement project. You can choose whichever option is affordable to you. 

Tips To Maintain Veneer And Prevent Peeling

Taking proper care of your furniture coatings ensures greater longevity. Here are a few steps you can take to prevent peeling and damage to your particle board cabinets. 

1. Regular Cleaning

  • Always use a sponge or soft cloth and a mild soap-water solution to clean the surface
  • Avoid applying too much pressure and excessive scrubbing
  • For cleaning stains, use diluted household cleaners without adhesives
  • Do not scrub surfaces to remove grease, and use a lukewarm solution instead

2. Disinfecting Surfaces

  • Remove dirt and grease from the cabinet surface
  • Before using a disinfecting solution to the entire surface, apply it to a small area for a patch test
  • If it does not do any harm, you can proceed with the disinfection process

Lastly, avoid keeping veneer cabinets in excessively hot and humid conditions.

Repair Peeling Veneer On Particle Board Cabinets Final Thoughts

Repair Peeling Veneer On Particle Board Cabinets Final Thoughts

While fixing a patchy veneer is pretty simple, severe cases like water infiltration or veneer rotting may require professional help. This kind of damage requires more factory-level measuring, cutting, and pasting. To achieve a better finish and durability, I suggest hiring a professional carpenter or company in such cases.

If you’re repairing it yourself, I recommend following some safety measures. These include working in a well-ventilated area, especially while using contact cement. Also, if the damaged veneer is on a cabinet door, remove and fix it in an open space such as a garage. 

That’s all about repairing peeling veneer on particleboard cabinets. I hope my step-by-step guide helps you fix your kitchen cabinets without any hassle. If you like such informational guides or manuals, check out my article How Much Weight Can Particle Board Hold?”

Until next time, stay safe!

Are you tired of ugly spray paint stains ruining the beauty of your concrete slab? 

If the stain has been on the surface for ages, the chances are that it has become stubborn over time and thus more challenging to remove. However, it is not an impossible task. With a bit of help from DIY techniques, you can easily get it removed in no time.

But, the market is filled with thousands of equipment and materials that promise to take stains off the concrete. And this can often lead to confusion.

So, today, in this guide, we talk about the seven most effective methods you can implement to remove paint easily. We give you a detailed step-by-step breakdown of the processes and discuss the pros and cons of each technique. 

So, without any more delay, let’s check them out!

How To Remove Spray Paint From Concrete Surfaces

Graffiti artist paints colorful graffiti on a concrete wall. Modern art, urban concept.

Process 1| Scrubbing With Soapy Water

Instead of rushing to the supermarket looking for materials that would save the concrete, you should first look for what is available in the house. It is not too much of a difficulty to find soap, water, and a stiff bristle brush for the job. 

Trust us when we say that it is a great idea to give this method a try as it is the most economical way to deal with the problem. If the affected area is small, this should work perfectly!

[easyazon_image align="center" height="500" identifier="B00JEQG4X8" locale="US" src="https://m.media-amazon.com/images/I/61Q6SoTGT-S._SL500_.jpg" tag="homesthetics0a-20" width="500" type="image" link_id="241498"]

What You’ll Need

For this process, you will need materials that you can find within the house. If you do not, getting one from the supermarket would not be too troublesome. 

The most important thing you need to procure is a scrub brush with stiff bristles, two buckets, warm water, and mild soap. If you are working outdoors, what is required is a garden hose and, if indoors, a mop and a bucket. 

And do not forget to get yourself some protective gear like safety goggles, respirators, or light-duty gloves.

How To Do It

The first thing that you need to do is remove excess dirt by wiping down the area meticulously. After that, make sure that you put on your protective gear correctly and check for any discrepancies. 

Now go ahead and add warm water to a bucket. In the second bucket, mix some more warm water with a few drops of dish soap, just to get the solution a little foamy. Now wet the affected area on the concrete with warm soapy water. 

Once that is done, dip the stiff brush in the soap solution and move it over the concrete, applying pressure in a circular motion. Use a paper towel after that to soak up any paint that comes off and wipe the area clean with warm water. 

If you are working indoors, mopping the area one more time would be a good idea. 

Pros And Cons

The best thing about this method is that it is the most cost-effective way to treat the issue as you are most likely to find all the materials to be present in the house. Secondly, it does not involve any toxic material to remove the paint from the concrete.

However, the major downside to this technique is that it involves a very mild solution and can take a considerable amount of time and effort to remove the paint. If the color has stained the concrete a long time back, the chances are high that it will not be entirely gone.

Considerations

You should consider going with this option only if the paint splattered on the concrete is relatively fresh. If you are wondering why, let us explain. 

Concrete is highly porous and tends to absorb color quite fast, and as a result, the paint settles deep into it. Once settled in the intricate grooves of the concrete, it gets hard to remove it with a mild soap solution. But it is always worth a try as a first measure before getting the big guns out!

Moreover, keep in mind that you might have to repeat this process a few times to see the results. If it does not work in the first two tries, you can also add white vinegar to the solution to make it stronger. A lot of people suggest that it is a great agent in removing difficult stains.

But if you do choose to try it, make sure that you mix it in the right proportion. When not done correctly, it tends to strip the coating of the concrete, leaving it dull and famished. We suggest that you do a spot test to check how it affects the concrete you are using it on. This can save you from the trouble of damaging the entire slab and realizing it only when it is too late.

Moving on to the brush, make sure that their bristles are stiff so that you can scrub the slab vigorously. But that does not mean that you select a wire brush! If you do, that might leave permanent scratches on the concrete. 

Process 2| Making Use Of Graffiti Remover

After you are done using soap and water, if the stain is still present, it means that you have to experiment with something else to get rid of it. In such an instance, you can give graffiti removers a try!

Graffiti removing materials effectively penetrate the paint structure and loosen its grip from the concrete or other surfaces. They are available in the market in various forms, such as wipes, pastes, aerosol cans, and even liquid solutions. To use it in the best way, we suggest that you carefully read the instructions on the label. 

[easyazon_image align="center" height="375" identifier="B07RMJM5XZ" locale="US" src="https://m.media-amazon.com/images/I/51orZvlLzbL._SL500_.jpg" tag="homesthetics0a-20" width="500" type="image" link_id="241499"]

What You’ll Need

Before you start with the process, there are a few items that you have to buy. As you can already guess, the first and foremost thing that you would need is a graffiti remover. For this, select any variety that you desire and your budget permits. 

Apart from that, you will require a brush with stiff bristles, warm water, one bucket, and disposable cloths or absorbent paper towels. Do not forget to get some protective gear before starting with the process. And like the previous method, if your affected area is outdoors, get hold of a garden hose. 

[easyazon_image align="center" height="375" identifier="B07RMJM5XZ" locale="US" src="https://m.media-amazon.com/images/I/518xTbkazYL._SL500_.jpg" tag="homesthetics0a-20" width="500" type="image" link_id="241500"]

How To Do It

The first step in the process is to clean the area to remove unwanted grime and dirt. And since this process involves chemical materials, it is best to put your protective gears on soon. 

And once that is done, apply the graffiti remover on the affected areas. But before applying, read the label carefully so that you add it in the proper proportions. When done, let the mixture sit for a while. After that, take the stiff bristle brush to scrub the area clean and take the paint off by moving the brush in a circular motion. 

As the paint starts coming off the concrete, use a disposable piece of cloth or a paper towel to wipe the area. Apply warm water from the bucket to give it a final rub, and use a hose if the concrete slab is outside your house. 

The ideal thing to do is to keep repeating the process until the paint is entirely removed. If you are working inside the house, consider mopping the area one more time once you are done. 

Pros and Cons

It is true that you do not need to break the bank to buy a graffiti remover. They are generally inexpensive, and you get plenty of options to choose from. And even though they are chemical products, they are not too harsh. Definitely not as strong as paint thinners.

If you use it judiciously, two to three scrubs should be good enough to get the paint off from the concrete unless it’s years old!

A significant drawback to this method is that it is pretty time-consuming. And we suggest that you do not start with the process when you are in a hurry. Depending on the remover you use, it might take 20 minutes or more between two applications before scrubbing away the colors. 

And as we have mentioned before, it does require multiple applications to show its effectiveness. 

Considerations

Before you start applying the graffiti remover, study the surface well. If it is vertical, keep in mind that trigger sprays will make the paint slowly drip down, causing the color to spread further. 

To avoid such a situation, make sure that you do not oversaturate. And to stop the paint from spreading, you can consider using painter’s tape and plastic sheets. It is simple, and all you have to do is tape the surface under the paint and attach a drop cloth to prevent the area from run-offs.

And as we have mentioned before, graffiti removers are chemical products, so do not forget to put your protective gears on!

Process 3| Using A Paint Thinner/ Stripper

Strippers and thinners are highly effective in breaking down or ‘thinning’ the paint on various surfaces, even concrete.

Paint thinners come in solvent forms, which means that they can efficiently dissolve substances, and paint is no different. Besides thinners, there are other solvents that people use to remove paint, such as turpentine, denatured alcohol, acetone, and the likes.  

Even though paint strippers are manufactured differently than paint thinners, they are also ideal for getting rid of the paint. They are available in two forms mainly: non-caustic variants that won’t harm your skin and chemical solvent-based formulas. 

[easyazon_image align="center" height="500" identifier="B07WNKGK69" locale="US" src="https://m.media-amazon.com/images/I/515Tyu3zWnS._SL500_.jpg" tag="homesthetics0a-20" width="500" type="image" link_id="241501"]

What You’ll Need

To begin with, you’ll need to get your hands on an effective paint stripper or a thinner. There are many options that are available in the market. Other than that, what you will need is a piece of clean disposable cloth and gear to protect you while working. 

How To Do It

By now, you should know what the first step is. Yes, you guessed it right! Take a piece of cloth and wipe the affected area clean to ensure that there is no dirt. 

Before you start with the process, it is essential that you check the working area to see if the ventilation is good and that you’re protected. Since you are working with strong chemicals, it is crucial that you take proper care to avoid accidents. 

Make sure that you read the label carefully and go through the instructions minutely. This will help you understand in what proportions you should apply the solvent. Following the guideline, apply the thinner to the affected portions of the concrete. Use a clean piece of cloth to wipe the paint off once you are done. 

Repeat the process a few times until the color comes off entirely. 

Pros and Cons

If you are removing paint off concrete for the first time, going ahead with this process is a good idea. It does not involve using any materials that are too expensive and does not require high-level skills to ace the game. The application and cleaning process is relatively simple!

However, it does pose some danger unless you are careful. Paint strippers and thinners are mostly solvents and are thus flammable. So, make sure that you keep them away from heat sources and do not use them to light candles or smoke a cigarette around them. 

And if you are working indoors, you will have to be more cautious as the vapor stays and travels through the house for a long time. 

Moreover, they can leave a damaging impact on your skin. So, it is not just enough to wear gloves when working with these solvents. We recommend that you use a cloth to cover your entire arm. 

Considerations

First and foremost, your safety is of utmost importance to us, and we recommend that you keep the area well ventilated when working with thinners. Make sure that you cover your nose, mouth, and all exposed areas of the body well. Unless you take proper care, these elements have the capacity to affect your respiratory system and skin too. 

It is a good idea to go for soy gel strippers as they are a more organic way to get rid of the paint. The advantage of using this is that you can avoid the unpleasant pungent odor and the risk of damaging your skin. 

Coming to paint thinners, you can take the help of cloth to easily blot the affected area on the concrete instead of applying it directly. Using this technique helps you to gain better control. 

And if the surface you are applying it on is vertical, do not forget to protect it from run-offs with painter’s tape and plastic drop cloths. 

 Moving on, one good way to replace paint thinner is using mineral spirits. Comparatively, they smell less than thinners and have a good history of successfully getting rid of paints. 

Process 4| Using TSP

The deeper we go into this list, the stronger the chemicals become. On a scale, this is somewhere in the middle and is an effective solution. TSP, or trisodium phosphate, is a proven chemical used for paint removal. 

There are many variants that are available online. However, if you do not want to wait for long, it is best to get it from a local hardware store. When you hit the market, you will find that TSPs come in two forms: liquid and powder. Take the one that suits your requirements the best. 

[easyazon_image align="center" height="500" identifier="B08M1MF6H2" locale="US" src="https://m.media-amazon.com/images/I/410ivA3Gi6L._SL500_.jpg" tag="homesthetics0a-20" width="500" type="image" link_id="241502"]

What You’ll Need

It goes without saying that you will need a good quality TSP, either in liquid or powder form. Besides that, the other things required are a stiff brush, one big bucket, one small bucket, and warm water. Do not by any chance undermine the importance of protective gear while using this. So, don’t forget to get your hands on some safety goggles, work gloves, and a mask.

How To Do It

First things first, make sure that you clean the affected area well before you proceed with this method. Unless it is free of dirt and grime, the chances are high that the TSP won’t function properly. 

After that, cover yourself with protective gears to ensure that the chemical has no detrimental impact on you. Follow the instructions and put the product label to the T to understand how to dilute it well. This is a very crucial step, and you cannot afford to mess up here as that might damage the concrete. 

Now dip the brush in the solution and scrub the affected concrete well with it. Let the solution sit on the stone for around 25-minutes before you scrub it again. Do it a few times before cleaning the area with warm water. 

If you are working outside the house, using a hose is a good idea to help you get the job done considerably fast. Keep repeating the process until the paint ultimately comes off the surface. And to give it the final polish, wipe it with a paper towel or a piece of dry cloth.

Pros and Cons

There’s hardly any doubt that using TSP is one of the ideal ways to remove color stains from concrete or other surfaces effectively. And the best part is that it is readily available in the market, comparatively cheap, and does not require the skills of a scientist to dilute it and apply. If you want to find a shortcut, there are even no-rinse TSP options available, and you can give them a try!

However, TSP suffers from one significant downside: it is a toxic solution. So, it is mandatory that you take utmost precautions when using it. 

Some local governments have banned the use of TSP completely, and some have restricted the extent of use. It is a good idea to check the regulations to make sure you are breaking no laws. 

Considerations:

Homeowners will unanimously agree that TSP is a great agent and acts as one of the most effective cleaners and paint removers. And it is equally excellent when it comes to dealing with old paint stains. 

But you should not forget that the chemical included in it is highly toxic, and thus you should handle it accordingly. It can cause severe damage to the environment through surface runoffs. So, we suggest that you give alternatives like borax powder a try. It is not as strong as TSP, though. 

Moreover, we recommend that you not use TSP on windy days if applying outdoors. The wind may carry the product to the nearby trees and plants and cause irreversible damage to them. You should try to confine the product to the affected area as much as possible. 

Moving on, TSP has a strong odor and can damage your lungs if inhaled directly. To avoid such problems, always put on your respirator mask before commencing with the work. 

One added tip, TSP, and pressure washer make a powerful combination in getting rid of paint stains. And that takes us to the following method we have on our list. 

Process 5| Using Power Washer

A pressure washer or a power washer is a piece of equipment that sprays a concentrated, fast squirt of water. This is a great way to remove stains and substances from various surfaces. And it works very effectively when it comes to getting rid of spray paint from concrete.

[easyazon_image align="center" height="500" locale="US" src="https://m.media-amazon.com/images/I/61m-ACU8tpL._SL500_.jpg" tag="homesthetics0a-20" width="500" type="image" link_id="241503" ref="sun-joe-spx3001-2030-psi-1-76-gpm-14-5-amp-electric-pressure-washer-with-hose-reel-green" identifier="B00LX8Z03K"]

What You’ll Need

For this, you have to do some basic research to figure out whether you should buy an electric or a gas power washer. Apart from that, you will require big plastic sheets and waterproof clothes. And last but not least, do not forget to get yourself some protective gear. 

How To Do It

The first thing you have to do without fail is to put the gears on to protect yourself from unwanted harm. After that, please read the instructions on the washer label carefully and assemble it. 

Make sure that you choose the desired nozzle depending on the stain size. Now stand 10 feet away from the area and point the jet straight at the stain. Keep changing the spraying angle and apply it back and forth on the concrete. Repeat the process until the paint is entirely removed. 

Pros and Cons

This method is ideal for users who want to remove paint stains from large concrete pieces. Because you do not have to do it manually, it saves time and effort too. And if you end up combining it with TSP or a graffiti remover, you will see the results even faster. 

Additionally, they help you save water. By replacing the garden hose with a pressure washer, you can save 80 percent extra water. 

However, if you are on a tight budget, this might not be the perfect option for you. Power washers are expensive devices, and you need to either invest in buying them or renting one. And it will take you some practice to understand how to operate it best. 

Considerations:

Pressure washers generally come with a set of nozzles that are color-coded to indicate the force of the water stream. If you are using it to remove paint, go with size 15. It is ideal for getting rid of color stains. However, if the paint is too stubborn, you can start with size 40 and slowly notch it down. 

When opting for a device, make sure that its capacity ranges between 2,000 to 3,000 psi. The gas and electric variants come with varied capacities, and you must choose one that offers the right amount of power needed for paint removal. 

Before you start working with it, make sure that the water flow is good. If it is not, then the sprayer won’t have the adequate power to remove the spray paint off the concrete. 

Additionally, take your time and do not rush when you are working with power washers. And ensure that you do not stand too close to the affected area and keep a minimum distance of 10 feet. You can, however, gradually move closer to get the best results. 

Also, it is important that you keep in mind that this is a powerful tool that releases strong water jets. Protecting yourself with gears and having a solid grip on the sprayer at all times is an absolute must. If you are not careful, the water jet can slice through your skin. 

When you are using it, the best thing to do is keep the pets and kids away to ensure their safety. We always recommend that you take some training before you start using a pressure washer. And with so many tutorial videos available on the internet, it is hardly a task anymore. 

Process 6| Making Use Of A Sandblaster

To make use of this process, you need to acquire some skills first. If you have not used a sandblaster before, you’ll surely need some training. It has the capacity to remove concrete layers, so you understand that knowing the proper techniques is essential. 

In case it is not done correctly, it might damage the concrete permanently. 

[easyazon_image align="center" height="500" identifier="B07QX2RTS8" locale="US" src="https://m.media-amazon.com/images/I/41dCqHf+V4L._SL500_.jpg" tag="homesthetics0a-20" width="393" type="image" link_id="241504"]

What You’ll Need

For this purpose, you will need a sandblaster, ideally a portable one with a power of 50 psi. Apart from that, what is required is sandblasting media such as coarse sandblasting sand. 

Once you have gathered these things, get hold of a dry-wet vacuum (suitable for indoor/ outdoor activity) or a power washer (outdoor purposes). And most importantly, do not forget your protective gear. 

How To Do It

First and foremost, check if the protective gears are adequately secured to ensure that your skin and respiratory system encounter no harm. Now place yourself 1 foot far from the area that is affected and switch on the sandblaster. 

Once you turn it on, adjust the nozzle and use it back and forth to target the affected area. Keep doing this until the paint starts coming off. After that, use the vacuum cleaner to clean the concrete dust left behind after you are done. 

If you are cleaning a concrete slab outdoors, you can even use a power washer to clean the area. 

Pros and Cons

What we like most about this product is that it is effective and does not consume much time. If you are familiar with using a sandblaster, it will be a cakewalk. 

However, we must warn you that it is a pretty expensive process. You will either need to buy the equipment or rent one, depending on your convenience. And it also generates a lot of dust and requires heavy vacuuming, adding to a lot of extra work. Getting a suitable vacuum further adds to the expenses. 

Additionally, keep in mind that this method is only suitable for people with advanced technical skills. If you have never used a sandblaster before, we recommend that you take training courses first. 

Considerations:

As we have already mentioned, this equipment generates a lot of concrete dust. It is because it uses compressed air mixed with coarse sand to get rid of the topmost layer of the stained concrete. 

So, it goes without saying that you have to ensure that you are well-protected not to encounter any harm from the powerful sandblaster. Nobody wants to get their skin pelted with sand particles or get coarse dust in their eyes. We recommend that you protect your entire body before starting with the work. 

Also, we have noticed that it is best not to point it at a particular area for too long when using this device. You will get the best results when you keep moving the tool instead of focusing it on a point. If you do that, the chances are that the top layer of the concrete will suffer extreme damage. 

Moreover, if you have no prior experience using this device, it is best to hire a professional who would get the job done with precision. You need proper knowledge about grit and air pressure to get the best result. In case you are not sure how it works, getting someone to help you is the best bet! 

Process 7| Using an Angle Grinder

We have reached the end of our list, and there was no way we would have skipped out on this method. Angle grinders are one of the most effective methods to get spray paints removed from concrete surfaces.

It is pretty similar to a sander and allows you to attach various grit wheels in order to handle different projects. Again, we would say that you should skip this method unless you have prior experience of using this machine. 

If not done correctly, the chances are that it will drastically alter the concrete surface structure. And if lady luck is not on your side, the damages might be permanent too. 

What You’ll Need

For this purpose, you will require a good-quality angle grinder that comes with a shroud and a paint stripping wheel. Apart from that, you will need a vacuum cleaner or a pressure washer. And do not forget to get your hands on some protective gear while you are at it.

How To Do It

To begin, you need to ensure that the area is completely clean and devoid of dust or grime. Once you are done with wiping the place clean, put on your protective gears before proceeding further. 

Move yourself a few feet away from the area that has the paint stain and switch the device on. Slowly move towards the spot and switch on the grinder. As you reach closer, press it lightly on the affected area and move it in a circular clockwise motion. 

We recommend that you keep repeating the process until the stain comes off ultimately. Once it does, use the vacuum cleaner or the power washer to clean it. 

Pros and Cons

For those familiar with using an angle grinder, removing paint stains will be a cakewalk. It is one of the quickest and most straightforward solutions for getting rid of stubborn spray paint stains from concrete. And as this method involves grinding color off the concrete surface, there’s no need for harsh chemicals. 

However, a significant downside to this process is that it involves the use of heavy-duty equipment and thus calls for suitable protective gears. Now, these gears can drive a hole in your pockets as they are expensive. 

Additionally, it requires advanced DIY skills to make use of this method. If not done correctly, you may end up causing permanent damage to the concrete. And once you are done, you will be left with a heap load of concrete dust, cleaning which is pretty labor-intensive. 

Considerations:

Grinding and sandblasting are quite similar when it comes to generating dust. And for that reason, wearing a respirator for protecting your mouth and nose is an absolute must. We suggest that you also put on a well-fitted eye protector to avoid the dust from entering your eyes. 

It is also a good idea to put on some heavy-duty gloves or padded clothing to prevent your hands from getting hurt. To reduce dust, there’s one good solution. You can attach a shroud with the grinder, which basically works as an in-built vacuum taking off the concrete dust. 

Also, as we have mentioned before, grinding and sandblasting are pretty similar. So, it is best to not concentrate the equipment on a particular area for too long. Keep moving the tool in a circular clockwise motion. 

And you have to either buy or rent a machine before you can start with the process. If purchasing one exceeds your budget, it is great to hire a professional who can help you with the task. 

Moreover, it is good to keep a vacuum handy to ease your cleaning job once you remove the paint stain!

Things To Know

The processes will work the best only when you understand what you are getting into. You have to know the workings of the paints and the structure of the concrete. 

Remember that concrete is highly absorbent because it is porous, so spray paints stain easily by reaching the deeper pockets of the stone. We recommend that you address the stain problem as soon as it happens to stop the color from entering deep into the layers. 

That would just make it more challenging to get rid of the stain! 

But while you are at it, do not forget to take care of the concrete. If you are not cautious, the paint-removing solutions might have a detrimental impact on the stone. 

Make sure that you do not leave any chemical solution on the concrete for too long. Use a soap and water mix to wipe it off. Otherwise, it will start eating away at the concrete. Toxic chemicals that have the power to dissolve the paint can easily cause permanent damage to the stone. 

And note that something that can dissolve concrete can easily affect your health too. While working with them, make sure that you do not come in direct contact with the chemicals and do not make the mistake of inhaling them. 

A hand in black gloves paints graffiti on a concrete wall. Illegal vandalism concept. Street art.

Final Words

And that’s all we have for you today, friends.

We had great fun compiling all this information for you. And we hope that you could learn a good deal about removing spray paints from concrete surfaces from reading this comprehensive guide. 

All these processes that we have mentioned are relatively simple to perform and will help you effectively get rid of the stains. However, some of them require some expert-level skills, nothing that a training course wouldn’t equip you with. 

With that, it’s a wrap. Keep a watch on this space for more exciting reads. And write to us in the comments section below if you have any queries. 

Until next time, fare thee well!

Related Articles

Alcohol Ink Art Tutorial [Alcohol Inks 101]

9 Best HVLP Spray Guns [Review & Buyer’s Guide]

6 Best One Coat Paint and Primer

7 Best Primers to Cover Dark Paint

7 Best Exterior Primer For Peeling Paint

6 Best Paint Primer For Rusted Metal

9 Best Stains For Cedar

9 Best Pump Sprayers For Staining Fence

10 Best Wood Wax

9 Best Concrete Stains to Consider

Learn How To Soften A Hard Paint Brush

11 Best Paint For Concrete Walls In Basement

13 Best Paint for Furniture | Reviews & Buyer’s Guide

10 Highest CFM Air Compressors  

9 Best 6-Gallon Air Compressors for Your Home & Garage

13 Best Paints for Bathroom Ceilings

2 Luminess Silk Reviews [All You Need to Know]

HVLP vs. LVLP [All You Need to Know & Winner]

5 Best Sprayers For Plasti Dip

9 Best Chrome Spray Paint

How Much Does It Cost To Bottom Paint A Boat?

How To Thin Latex Paint For A Wagner Spray Gun

How Much Does Benjamin Moore Paint Cost? [Guide]

Best Exterior Primer Paints

7 Best Cold Galvanizing Paints

11 Best Paint Scrapers to Rock

7 Best Primers For Covering Red Paint

11 Best Paint Roller To Hide Imperfections Tested

9 Best Paints For Closets 

How To Paint Trim Near Carpet

11 Best Concrete Bonding Agents

11 Best Concrete Crack Fillers [Sealing and Repairing Cracks Easily]

Painting concrete surfaces is not easy, even if you use the best concrete paints for the purpose. 

It requires a tremendous amount of effort and several tools, including brushes, rollers, and sprayers. Moreover, the chances of accidental spills are high, and you will need to be prepared to remove such paint quickly before it dries, which can be even more difficult. 

This is because there are multiple removal methods, but not all are guaranteed to deliver results in each situation. Also, you need to ensure that the surface does not get damaged while removing the paint, the chances of which are quite high. 

And, the methods that are most effective are generally not very well known to most people. That's why we decided to put together this detailed guide on the subject to help you out. So, without further ado, let's get started! 

How To Remove Concrete Paint

abstract yellow and white color concrete texture background. How To Remove Concrete Paint.

Tools Required

These are the tools you will need to undertake the paint removal process for your concrete surface:

  • Protective gear - This will include gloves and a respirator for dealing with paint fumes
  • Vacuum cleaner or broom - For removing dirt and debris from the surface
  • TSP alternative - Used for cleaning the painted surface
  • Scrub brush - Required for scrubbing the concrete surface
  • Putty knife (optional) - Can help remove chipped-off paint
  • Paint stripper - For removing the paint while also cleaning the surface
  • Power washer or hose - Used for washing away the paint

The Paint Removal Process

1. Cleaning The Concrete Surface

Before you get down to the actual process of removing the paint, it is important to prepare the concrete surface properly for the purpose. And that involves cleaning the surface to remove debris or dirt using a vacuum cleaner or a broom. 

Once that is done, you will need to scrub the surface using a solution of warm water and trisodium phosphate alternative (TSP) or warm water and soap. For scrubbing, use a wide wire brush that can effectively remove dust or dirt particles lodged or embedded into the surface. 

Also, make sure to wear protective gear such as gloves, goggles, and long sleeves if using TSP instead of an alternative. This is because it is highly toxic and can cause eye and skin irritation. 

2. Application Of A Paint Stripper

You may notice that some of the paint has already started to chip during the cleaning process. If that happens, try to scrape away as much paint as possible and apply a paint stripper to the remaining area.

Generally, mineral or turpentine spirits can be used for the purpose, but if they do not work, look for a paint stripper especially suited for concrete surfaces. 

3. Leaving The Paint Stripper To Set

After applying the paint stripper to the concrete surface, you will need to leave it for some time and let it do its job. This period may vary from 30 minutes to over eight hours, depending on various factors, such as the area to be cleaned and the type of paint used. 

Also, keep in mind that applying the paint stripper in extremely hot or windy conditions can cause it to dry prematurely. 

4. Scrubbing The Surface

Once the paint stripper has been left for an adequate period, it is time to scrub the surface again using your wide-wire brush. Keep on scrubbing until no more paint can be removed. You can also use warm soapy water with the brush in the case of latex paint, but it will not be effective in the case of oil-based paint. 

Similarly, spray paint can be harder to remove since it gets applied quickly in multiple layers and often requires several applications of the chosen removal method. 

5. Using A Power Washer

The best way to remove stubborn paint stains that cannot be removed simply by scrubbing is to use a power washer or high-powered garden hose. A power washer is ideal for exterior surfaces such as a basketball court or patio. Therefore, it can provide effective results even if you have used the paint for outdoor concrete basketball court.

Other surfaces where a power washer can be used include driveways and walkways.  

6. Repeating The Steps

If you cannot remove the paint completely with these steps, simply repeat them by reapplying the chemical paint stripper and scrubbing the surface.  

7. Final Cleaning

Once the paint has been removed completely, use the power hose to rinse the surface and remove all the paint stripper and other chemicals used during the process. After the surface dries, you can paint or seal it as required. 

Staining or sealing the concrete surface will help improve its appearance while protecting it from the elements and harmful UV rays. 

Paint Removal Methods That Do Not Require Chemicals

old grunge wall texture background. Paint Removal Methods That Do Not Require Chemicals.

Due to the health risks of chemical paint removal techniques, many people prefer using more natural methods. In this section, we've mentioned a few of them so you can try them out before resorting to methods that utilize TSP or similar chemicals. 

Just keep in mind that the first step in all paint removal methods is to clean the surface thoroughly for maximum effectiveness. So that you can paint over peeling paint on concrete effortlessly and create a visible flawless new surface. 

1. Sandblasting

Sandblasting can help you effectively remove paint from outdoor and indoor concrete surfaces without relying on chemical paint strippers. But it can damage the surface, so be careful and work slowly when using this device.  

Additionally, wear equipment like safety glasses, ear protection, and a face mask because silica in crystalized form is dangerous and should not be inhaled. Wearing long sleeves can also help provide protection to your skin. 

For removing concrete paint, turn the sandblaster on and slowly open the valve, letting out the sand particles. You will need to slowly move the machine using upward and downward motions, covering the painted area. Also, avoid pointing the nozzle at one spot for long, as that can damage the surface. 

2. With A Soda Blaster

A less aggressive and abrasive option than sandblasting is soda blasting, which can help remove stubborn paint stains without causing any damage to the concrete underneath. Soda blasters utilize sodium bicarbonate in granular form for removing paint from concrete floors and other surfaces and can even be used to remove epoxy off your concrete surfaces.

You can easily rent a soda blaster from the local hardware store and will also need some industrial-grade sodium bicarbonate. Common baking soda will not work for paint removal purposes. 

This technique will release fine particles of dust into the air, so wear appropriate protective gear, including gloves, safety glasses, and a mask. Also, make sure that the compound does not come into contact with any nearby plants as its pH level is very high, which can harm them. 

3. Pressure Washing The Surface

A pressure washer can be very effective for removing paint from exterior concrete surfaces such as the garage floor. If you do not own one, check the nearby hardware stores where they can be rented. Select a pressure washer with a flow rate of four gallons a minute and a pressure class of 3000 psi at the very least. 

When using the washer, make sure that the nozzle range lies between 15 and 25 degrees, which will create a powerful spray and can even help remove spray paint. The distance between the wand and the surface should be one foot, at the very least.

Once ready, hold the washer at a downward angle and sweep it across the surface. At this angle and distance, the water will be strong enough to remove stubborn paint residue without causing any damage. 

4. With A Floor Grinder

One of the fastest techniques of removing paint from any concrete surface involves using a floor grinder. This machine uses light abrasion for paint removal, resulting in a smoother concrete surface afterward. 

After using the machine to remove the paint, it is a good idea to reseal or repaint it to keep it protected and improve its appearance. You can easily rent walk-behind or handheld floor grinders from nearby hardware stores. 

Again, this method will generate tiny dust particles, even though some floor grinders have attachments that reduce dust, making cleaning up easier. Even in that case, be sure to wear safety clothing during the paint removal process. 

5. Using Vinegar

One of the safest and most economical methods of removing concrete paint involves using vinegar. Vinegar is easily available in most households and is very effective as a paint remover. It also does not harm the environment and removes stains from oil-based paints, which cannot be removed easily using many other methods. 

But when using vinegar cleaner on a concrete surface with a finish coating or sealer, you should test it and ensure that it is safe for the surface. 

For this method, warm the vinegar using your microwave or stove until it becomes hot but do not boil it. Then, use a paint brush or sponge to apply it onto the painted surface before letting it soak for at least 15 minutes. 

As the paint starts to separate from the surface, it will start bubbling. For removing incredibly stubborn stains, you may need to apply more vinegar after an interval of 15 minutes and again let it lie for some time before removing. 

Finally, remove the paint using of the best paint scrapers or wire scrub brush and wash the surface using water and soap. Then, leave it to dry. 

6. With Paint Thinner

As mentioned, spray and oil-based paints can be incredibly difficult to remove. And if all other methods fail, you may need to depend on a paint thinner used for commercial applications to remove such paints. But before applying it, test a small area by applying the thinner and leaving it for a few hours.

If the thinner does not damage the surface, apply it to the painted surface and leave it to soak. This period can vary between six and eight hours. Then, use a paint scraper or a stiff brush to remove the loosened paint, followed by washing and rinsing the area to remove any chemical residue. 

Commercial paint thinners also contain harsh chemicals, and before handling, you should wear protective gear to prevent any contact with the skin and ensure safety. 

7. Using A Homemade Paint Stripper

You can easily create a homemade paint stripper using absorbent materials such as cat litter and clay to remove paint stains from concrete. These materials remove paint by absorbing it as they dry, working in a manner similar to paint thinner and making it easy to scrape away any remaining paint. 

For making your homemade paint stripper, you will need a cup of cat litter, one cup of well-ground clay, and half a cup of paint thinner. Combine all the ingredients together until they form a paste, and apply this to the painted area. Make sure to wear protective gloves during application. 

Once done, let the mixture dry for about two hours, and then remove the loose paint using a paint scraper or wire scrub brush before rinsing the surface. 

8. With Dishwashing Soap

If the paint is still wet, you can simply clean the concrete surface using soapy water to remove it. Use two tablespoons of dishwashing soap and a cup of hot water and scrub the surface with a brush or sponge to remove the paint. After that, rinse the surface with fresh water and check for paint residue. 

If some paint is still left, use any of the above techniques to remove it but be careful while disposing of the paint. Most paints are toxic to plants and can be harmful to the environment. 

How To Remove Paint From Concrete Frequently Asked Questions ?

How Much Pressure Does A Power Washer Require To Remove Concrete Paint?

A power washer should have a range of 2000 psi to 4000 psi for removing concrete paint. Ideally, a power washer with a 3000 psi rating is more than enough for most purposes. 

Is It Necessary To Prime Exterior Concrete Before Painting?

Many people are bothered by the question, “do I need to prime exterior concrete before painting?” We’d like to mention that it is a crucial part of painting concrete and plays a significant role in determining the final result. Without proper priming, the exterior surface will have a poor finish, and the paint will have a higher chance of cracking and peeling quickly.

How Long Does Concrete Paint Last?

While the period for which concrete paint lasts depends upon the quality of the paint used and the use of the surface, it generally ranges from three to five years. After that period, you will need to apply a new coat. 

Roughly pink gold painted concrete wall surface background. How To Remove Paint From Concrete Final Thoughts.

How To Remove Paint From Concrete Final Thoughts

Removing paint from a concrete surface can often take considerable time and effort, besides multiple applications of different techniques. In some cases, you may not be entirely successful in removing it and should consider alternative options. For accidental paint spills, you can try to paint over the entire area to provide uniformity. 

Or hire professional paint removal services, though this will involve some financial investment. In any case, the options are numerous, and you should think carefully before deciding. Also, when using any DIY paint removal techniques, make sure to wear safety equipment and take all the necessary precautions. 

With that said, it is time to conclude this guide. 

If you missed it, please checkout our previous article on how to store clay in a safe place for future use and in a way that can be used later without the clay getting damaged.

Until next time! 

It can be irritating to get paint off your brush. However, there is a way to avoid this tedious process, and we have the solution. 

If you are into DIY painting projects, you must have dealt with many hardened brush sets. While you might buy a quality brush, you may not be able to maintain it well.

Whether you are using polyurethane, house, or oil paints, the bristles need to be taken care of. They should not be exposed to strong chemicals directly without proper consultation. Also, if the bristles are made of natural hair, then they have a higher chance of breaking off or getting diluted in chemicals. 

We were facing the same problem when we decided to do our research on it. After that, we decided to create our own guide about how to clean polyurethane brush kits. 

So, dive in! 

How To Clean Polyurethane Brush Kits 

How To Clean Polyurethane Brush

What Are The Supplies Needed For Cleaning Polyurethane From A Brush? 

Before you can get the paint off, you will need to keep all the required materials in one place. Remember that just washing the brush with hot water along with soap is not enough. Dried polyurethane can be quite tough to remove, and you will require a set of supplies for it. 

Moving on, you might find some of the ingredients in your house while others need to be bought. You will be needing:

  • Paper towels
  • Brush cleaner
  • Mineral spirits
  • Plastic containers or glasses 
  • Plastic Bag 

Some people use fabric softeners for cleaning dried paint, but you cannot fully trust it. If you have used water-based paints, then soap will not be able to remove it. Plus, you cannot wash it in a basin as all those chemicals could damage your drainage system. 

Moreover, if the chemicals reach the sewer system, it could cause more damage. Hence, try purchasing mineral spirits and consult your local hardware store to learn about how to dispose of the chemicals. 

Cleaning Process 

Step 1| Cleaning With Paper Towels 

To begin with, you will need mineral spirits in a container for dipping the towel. In case you cannot get it, use lacquer or paint thinner for this job. These thinners can remove polyurethane and oil paints. But be careful if you are using anything other than mineral spirits as they might remove the paint from good quality brushes as well as damage them. 

Next, take the mineral spirit and dip a paper towel in it. Then the brushes can be cleaned with a paper towel soaked in mineral spirits. It should work well with the brush bristles and release some of the polyurethane from a brush. However, you will still have paint on the brush after soaking. 

It will only make the process easier and ensure that the paintbrush has less paint on it. Please remember to wear gloves while working to prevent mineral spirits from touching your skin. Additionally, ensure that all windows are open and the area is very well ventilated because the fumes need to leave the room as fast as possible. 

Step 2| Using Mineral Spirits 

Next, take a good amount of mineral spirits in a container. Again, you can use a paint thinner but be very careful with it. Then dip your paintbrush in the solution so that all the bristles are in the spirit solution. You can get it for both a natural brush and a synthetic brush. 

Typically, the brush bristles that are covered with polyurethane paint need to completely emerge, while the upper part of the ferrule needs to be kept away from the paint thinner.

Step 3| Keeping It Soaked 

Once some of the polyurethane has come off, you can fill another container with mineral spirits and put your polyurethane brush in it. The dried polyurethane will slowly come off as you swirl the hard paintbrush inside the container. You can then leave the brush in the fluid overnight. Do not wash polyurethane brushes at this time. 

Take it out of the liquid to check before you dip it again. This is based on your judgment, and you can handle it accordingly. 

Step 4| Taking Out Dirty Mineral Spirits 

Remember that harsh chemicals like mineral spirits cannot be thrown in the sink or on the ground outside your house. You will need to take the dirty mineral spirits and ensure that it reaches a hazardous recycling plant. The spirit, paint thinner, or oil paint mixed with the remaining polyurethane can be caustic and harmful for drain pipes. 

Step 5| Repeat The Process 

Cleaning polyurethane brush sets can be a difficult job, and the bristles deserve to be completely free from it. Now, you might want to repeat the entire process as the polyurethane coating may not disappear completely. 

So, go forward and take some mineral spirits to repeat the entire process. Swirl the cleaning brushes in the formula before you leave it for a few hours. Then clean again to see if the paint has been more or less removed. The second attempt should ensure maximum cleaning power and should make your brush cleaner. 

Also, please avoid vigorous scrubbing as that could lead to the breakage of natural hair bristles. 

Step 6| Rinse well 

Once you have removed most of the polyurethane from the brush, it is time to bring out hot water. Keep your brushes in hot water for a while to loosen excess paint. You can also use dish soap along with water to create a soapy water mixture. This should make it easier to wash polyurethane brush kits. 

Your brush bristles deserve proper care, and hence, you need to be very gentle with the brushes. After washing it thoroughly, you will need to use a brush comb. A brush comb will slowly clean polyurethane off the bristles. 

Step 7| Dry The Brushes Well 

Next, you will need to clean the brushes well with paper towels and check if all the dried polyurethane has been removed. Make sure that you do not tear the bristles while you are taking out the polyurethane from a brush. You might also end up loosening the bristles, which will create further problems. Gently wipe with a towel and then keep them dry. 

Once the brushes are dry, you will need to store them. If you have used natural brushes, then you will need to keep them wrapped in paper. Use old newspapers for this purpose. However, if synthetic brushes need to be taken care of, you can wrap them up in a plastic sheet. Both the materials will keep brush bristles dry and prevent them from breaking or bending in time. 

How To Clean Oil-Based Polyurethane Brush: An Alternative Method

If you are using oil-based polyurethane, then you can try working with water, dish soap, and paint thinner. It is best if you wear gloves as well as well-ventilated masks before starting work. Keep the area well-ventilated so that all the toxic fumes can leave the house immediately. 

  1. Using A Thinner

First of all, you will need to get hold of paint thinners. This can be bought from any local store. Once you have it, pour some into a cup. Ensure that there is enough fluid in the bowl to cover the hard paintbrush bristles. There is no need to fill it to the top.

Next, you will need to dip the paintbrush in the paint thinner and keep it in the same way for the next 20 minutes or so. This will help the paint in loosening up slowly. 

After 20 minutes or half an hour, start bending and moving the brush from one side to another. It should be bent in such a way that the thinner touches the metal area of the brush. This will keep it from drying or hardening up. 

Then it is time to take the brush out. Wring it gently so that the remaining paint thinner leaves the brush along with the paint. You can repeat the process till the paint comes off well, and you have a clean polyurethane brush.  

  1. Cleaning The Paint Brush 

Wear your gloves before beginning the process. You will need clean gloves to keep your skin safe while washing the brush. Then put some dishwashing soap on the brush and work it well. Ensure that the natural or synthetic bristles are covered with it before rinsing them out. 

We will recommend rubbing it well to get all the dried or dissolved paint out. Then rinse and wash out the soap. Wash for some time to make sure that all the soap has left the bristles. If any of it remains, it will only harden up, and you might face difficulty in cleaning it. 

  1. Drying The Brush 

Now, it is time to dry the brush well without letting it harden up. You can take a microfiber brush to clean the bristles well. Do it until no water drips from the body. Once it is done, you can let the brush rest for a while. 

If you want to paint with oil paint, then there are ways to clean a brush without paint thinner

Storage And Care Guide

Now that you know how to clean polyurethane brush kits, there are a few things that you must keep in mind when it comes to brush care. Be very careful with the brushes and ensure that bristles do not come out of the metal part. Permanent breakage would lead to damage of the entire brush, which is not needed. 

  1. Short Breaks

If you are painting a large space, you might need to take breaks in between. Generally, one would keep the brush on a newspaper, paper towel, or an old rag while they take a break. Remember that even if you leave it for half an hour, the brush could be spoiled. There are more efficient ways to store the brush, and you can try them out. 

In case of a short break, it is best to leave the brush in the paint tub itself. Ensure that one-third of the bristles are inside the paint can. Then the paintbrush will not dry up at all, and you can begin painting as soon as you return. 

  1. Short Breaks 

If you are going to take a longer break, then leaving the brush inside the paint may not be a good idea. Some would want to wrap the brush in a sheet of plastic and store it. But again, if you leave it in this way for a long period, then the plastic may stick to the brush as the paint dries. 

The plastic wrap will contain air inside, and that aids in the process of drying up the extra paint. Also, plastic will let moisture get inside, hardening it up. 

A good alternative to plastic is aluminum foil. This foil will keep the brush dipped in polyurethane paint safe and prevent it from drying up fast. However, remember that you need to wrap the brush well with aluminum leaving no space in between. Then you can cut off the remaining foil bits. This should prevent hardened bristles, and you can go on long breaks.  

  1. Water-based and Oil-Based Polyurethane 

If you are using oil-based polyurethane, then it is best to choose natural brushes. Natural bristles are better suited, and the oil-based paint will be applied evenly. Also, it is easier to clean oil-based polyurethane from natural bristles. 

However, if you are working with water-based polyurethane, then synthetic brushes will fit the bill. Synthetic bristles will not hold on to the water-based paint and will help you remove the hardened polyurethane easily. 

Moving on, you should know that both oil-based and water-based polyurethane is used for floor finishing. It provides a lovely shine, and now, you can clean the brushes well too. 

How To Clean Polyurethane Brush

Conclusion

Once you learn a good clean-up technique, it should save you a lot of money in the long run. You should be able to make a brush last longer, and you do not have to pay for a new one. Some people even use a fabric softener to keep the brushes clean. 

Also, do not try to scrub the hard paint from brushes as that might have a detrimental effect. Just follow all the instructions above carefully. That should make the paint leave the bristles by itself. 

It is finally time to wrap up, and you can let us know how you clean brushes in the comment section below. We will come back soon with another comprehensive guide for you. 

Till then, take care and goodbye! 

Related Articles

9 Best Paint Brush For Polyurethane

9 Best Exterior Polyurethane

How Long Does Polyurethane Take to Dry

How Many Coats Of Polyurethane

13 Best Paint for Furniture 

13 Best Paints for Bathroom Ceilings 

13 Best Ceiling Paints

11 Best Polyurethane Protective Coatings

13 Best Spray Paints For Metal

7 Best Airbrush for Miniatures & Models

How to Make Resin Jewelry 101 

11 Best Epoxy Resin For Crafts 

9 Best LVLP Spray Guns 

5 Best Epoxy Resin for Tumblers

9 Best Exterior Wood Stains Today

9 Best Varnishes for Wood

10 Best Clear Coat for Kitchen Cabinets

Although having clean gutters sounds easy, it is not quite a simple task. Some might believe that installing gutter guards takes care of the problem once and for all.

However, the truth is that even the best gutter guards need cleaning. But, if the system is better, it doesn’t have to be cleaned as frequently. The job of the gutter guard is to protect gutters from twigs, leaves, and other debris, all the while allowing water to pass through them unhindered.

But, over time, debris does start accumulating in the gutters and needs to be hosed out. Although it is an easy task, it should not be left unattended if you wish to avoid damage to the house.

So, the important question here is - how should you effectively clean gutter guards? Let us get into the details without any further delay.

Why Do We Need Gutter Guards?

Close-up detail of cottage house corner with brown metal planks siding and roof with steel gutter rain system. Roofing, construction, drainage pipes installation and connection concept.

Although we’ve touched upon it briefly, a gutter guard can be defined as something which protects our gutters from debris and dirt. It could become problematic if these accumulated too much. Most gutter guards work in the same way; they catch small leaves and the castoffs of trees, allowing us to blow them away once they’re dry. Further, they allow the rainfall to pass down the roof before going into the gutter.

There are various designs when it comes to these guards, and homeowners can easily install them too. Alternatively, you can hire professionals to take care of the installation. Apart from keeping gutters clean, these guards also help in various other ways.

Firstly, gutter guards prevent animals from making nests or homes. There’s no need to frequently climb up a ladder to clean the gutter, making it safer. The guards can easily be attached to existing gutters, and they prevent water from getting pooled. In turn, this stops too many bugs from accumulating around stagnant water.

Not only do the guards protect the gutters and keep them functional for a longer time, but they also help in rainwater harvesting, for those interested.

How to Clean Gutter Guards?

First off, you should do away with the notion that gutter guards eliminate the need to clean gutters at all. Several products might claim to do so, but it merely means that you don’t have to constantly clean them out after every storm or when leaves fall in autumn. That aside, it is recommended that you check them annually and clean them as needed.

Now, before we get to the steps of cleaning the gutter guard, here’s what you’ll need. Grab a drop cloth, a ladder to reach the higher places, hand protection, and a hose if you have someone assisting you.

Finally, this brings us to the step by step cleaning process.

  1. Place the Drop Cloth

Placing the drop cloth should be the first thing to do since it serves as a safety net of sorts. It should ideally be under the area where you’ll be working. This way, the cloth can catch the debris that might fall during the cleaning process.

It saves you from the hassle of having to clean out your lawn or garden bed just to remove the debris from cleaning your gutter guard. Moreover, it protects the bushes or shrubs that might be in the way of the falling debris.

  1. Securing the Ladder

In order to clean the gutter guard, you’ll be on your ladder for a long time. Usually, these guards run along the roof, which means the altitude is rather high, and a fall from that height is most likely to hurt you.

Therefore, it is best to take all possible precautions. Secure the ladder before using it, and take any other additional safety measures that you see fit. If possible, have someone hold the base of the ladder for an additional degree of safety and stability.

  1. Using Hand Protection

Since cleaning the gutter guard requires you to work with your hands, it is best to use protection. We recommend wearing gardening gloves so that you don’t accidentally stab yourself in the hand with a twig or something sharp while cleaning out the gutter.

We recommend keeping the gloves on before climbing the ladder so that you can use both hands for the cleaning process.

  1. Remove Materials Off Guards

Once you’ve put on the gloves and climbed up the ladder, it is time to get to work. First, you should remove all the debris that the guard has caught. Normally, this is a simple enough task. The leaves, twigs, or branches can be swept off with a single stroke of the hand. If something feels stuck, then it is advisable to pull at it gently until the object becomes loose.

[easyazon_image align="center" height="489" locale="US" src="https://m.media-amazon.com/images/I/51SL0AOygxL.jpg" tag="homesthetics0a-20" width="500" type="image" ref="200-feet-shur-flo-x-leaf-guard-gutter-protector-for-5-k-style-gutters-mill-finish-aluminum-50-panels-x-4-00-each" link_id="229211" identifier="B06ZYJBXWG"]

  1. Remove the Guard

Notably, this step is only applicable to those who have hinged guards or removable ones. After everything on top of the guard has been cleaned off, you can open it up completely. In the event that you feel the openings are blocked, or if it is a brush style guard, then you might choose to rinse it off.

This opens things up. Further, you can look inside the gutter to see if there are things accumulated that the rainwater hasn’t rinsed. It is ideal for removing anything that can be grasped and keeps the gutter clean too.

  1. Hose Down the Guard

If you see that your gutter guard is not removable, we recommend using a hose. Let the water flow freely through the openings and then go through the gutter. This clears out any possible blockages by removing the dirt that might have accumulated there.

  1. Replace the Guards and Secure Them

In the event that you might have removed the guards, be sure to secure them and put them back in the correct manner. After that, perform a quick check to see if anything is caught in them or blocking them, despite the rinsing or hose down. If everything looks fine, then clean up the site.

Kinds of Gutter Guards and How to Maintain Them

Though there are different kinds of gutter guards, maintaining them and keeping them clean and debris free is rather similar. All the guards are designed to keep debris from getting into the gutter itself. So, occasionally, a branch, twig, or leaf might need removal.

  1. Brushes

These usually work with your pre-existing gutters. They are very budget-friendly and are easy to install, as well. The bristled brushes almost appear as a large brush that might be used for bottle cleaning. It fits directly into the gutter and allows the water to pass through while catching the larger debris.

To maintain this, you have to clean out some of the debris that might get stuck and also check for the dirt that hasn’t been completely washed through.

  1. Perforated Guards

These are made of metal, and they fit over the gutter. Thus, water can pass through, but understandably, the perforations stop the debris from doing the same. Here, the debris is accumulated on top, so it is extremely easy to sweep them clean once they are dried up.

  1. Mesh Screen Guards

These are actually quite similar to the perforated variants. Here, a super fine mesh is placed over the gutter. Thus, the water can flow through easily, thanks to the many open spaces. At the same time, no debris is allowed into the gutters.

Here too, debris might get accumulated at the top. At this time, it would be easy to clean the screen by wiping the top of the gutter guard completely clean.

  1. Foam Blocks

One might choose to set these into the gutters to allow the water to flow through easily. Although the foam is well equipped to prevent debris from entering, the dense nature of these guards ensures that you have to rinse them from time to time.

Sometimes, you also have to remove some bits that get stuck to the surface, like twigs or a pine needle. This is one of the more inexpensive guards, which is also simple to maintain.

  1. Reverse-Curve

These designs often fit over existing gutters through attachments to the roof. Sometimes, they serve as an entire gutter system, which allows rainwater curving down the gutter and washing the debris away at the same time. Overall, this is considered to be extremely effective, and if installed in the right manner, little to no maintenance is needed for this system.

Brown new gutter metal system pipe. Vertical construction for draining rain water from building roof on the wall. Drain protection.

Final Words

At the end of the day, you have to remember that a clogged gutter can turn into a nightmare for homeowners. The roofs might get damaged as well, so it would be smart to clean the gutters occasionally.

Here, we have shown the different kinds of gutter guards you can install to minimize the hassle of cleaning the gutter itself. But, each of these has to be maintained too. Routine inspections work best, especially after storms or during times when you know the gutters might be exposed to debris.

Hopefully, following the guide here, you will have an easy time cleaning out your gutters. It is best to follow the safety measures we’ve recommended. As an additional tip, we should mention getting a bucket during the cleaning process to keep the debris for later disposal.

If you have any other questions about keeping the gutters and the gutter guards clean, feel free to reach out to us. Adios!

Related Articles

23 Hip Roof Types & Styles for Your Future Home

Learn About the 20 Most Popular Roof Types for Your Future Home

What is the Mansard Roof, Advantages and Disadvantages Sheltered

6 Eco-Friendly Roofing Materials and Why You Need Them

13 Best Roofing Nailers

Shur Flo Gutter Review | All You Need to Know

EasyOn Gutter Guard Review 101 | All You Need to Know

5 Best Foam Gutter Guards [Reviewed & Buyer’s Guide]

10 Best Solar Gutter Lights

Do Sheds Need Gutters?

23 Extraordinary Beautiful Ways to Repurpose Rain Gutters in Your Household

LeafGuard Review | Everything You Need to Know

You must remove dust and dirt from a massage table with a damp cloth and clean it with soap and water solution or non-abrasive cleaners. Then use a dry cloth to remove moisture. Regularly checking and cleaning the table upholstery and accessories is also recommended for effective maintenance. 

Failing to clean a massage table can have serious consequences for the therapist and client. A dirty table can harbor harmful bacteria and germs, leading to the spread of infection and illness. 

Additionally, a dirty table can be uncomfortable and uninviting for clients, negatively impacting the overall massage experience. So, in this article, I will be discussing the steps to clean and maintain a massage table properly. 

Why Is It Necessary To Keep The Massage Table Clean?

Why Is It Necessary To Keep The Massage Table Clean

Keeping a massage table clean is not only an ethical responsibility but is also essential for the health and safety of both the therapist and the client. Besides being unhygienic, neglecting to clean and maintain the table can result in wear and tear, requiring costly repairs or replacements. 

How Often Should We Clean The Massage Table?

No one would want to lie down on a massage table covered with massage oils used by previous clients. So, the frequency of cleaning will depend on several factors, including how often the table is used and the type of clients you see. 

For example, if you see a high volume of clients daily, you may need to clean the table after every use. On the other hand, if you only see a few clients per week, you may need to clean the table once or twice a week.

It's also important to clean the table between clients, especially if the client has any illnesses or open wounds. This will prevent the spread of germs and bacteria and maintain a hygienic environment. Additionally, it's important to regularly check and clean the table accessories and upholstery, such as face cradles and armrests.

Some tables may require special cleaning solutions or methods to ensure they do not get damaged. In any case, it's essential to follow the manufacturer's specific instructions and maintenance tips when cleaning a massage table. Additionally, it's a good idea to keep a log of when the table was cleaned and when it will be cleaned to ensure you keep a regular schedule.

What To Clean Massage Table With?

When cleaning a massage table, it's important to use the right cleaning solutions and methods to ensure that the table remains hygienic and in good condition. To start, use a damp cloth to remove stains and wipe down the surface of the table. 

Cleaning products, like a mild soap or disinfectant solution, can be used to clean the massage table's surface, paying special attention to areas that come into contact with the skin. For more challenging stains, you can mix bleach with water in a 1:10 ratio and carefully clean the surface.

When selecting cleaning solutions, it's important to choose products that are safe for use on the materials of the table and to avoid harsh chemicals that can damage the table. You can also check for any recommended cleaning solutions or methods from the table manufacturer. After cleaning, it's important to dry the table completely before replacing any linens or padding.

Warning

Refrain from using cleansers containing alcohol/ethanol, chlorine, or any harsh ingredients in high concentrations. I have also had bad experiences with citrus-based cleaners, as they can cause cracks on vinyl textiles.

Using the wrong cleaning products on your massage table might void the warranty so always read and use the manufacturer's recommendations. 

In addition to the above steps, it's also important to maintain a clean and hygienic environment in your massage room. This includes regularly wiping down surfaces, vacuuming or sweeping the floor, and keeping a clean towel as a draping sheet. It's also a good idea to keep a spray bottle of disinfectant solution on hand for quick cleanups between clients.

Overall, the cleaning process may require a lot of effort, but it's important to ensure the safety and comfort of clients, as well as the longevity of the table.

How To Clean A Massage Table Final Words

How To Clean A Massage Table Final Words

Besides the usual wiping, make sure you give your massage table a thorough wash every week. And while you’re at it, I suggest inspecting the various parts of the table to ensure they are in good condition. 

It is also wise to protect your table from extreme temperatures and other external factors. And if you’re unable to choose the right cleaning agent, simply use some vinegar, as it is gentle enough to be used on table upholstery. 

That said, I’ve finally come to the end of this informative guide on how to clean your table. I hope my research will come in handy to massage therapists out there. However, I highly recommend contacting the massage table manufacturer, too, for specific instructions and simple upholstery care. 

If you enjoyed this article, I recommend checking out my latest guide on “How to build a massage table?” 

Dryer vents demand regular maintenance for longer life, and that's why it's imperative to have a reliable cleaning kit.

And if you're reading this, you're probably on the verge of giving up on your pursuit to find the best dryer vent cleaning kit that money can buy. It's obvious; the severe lack of sufficient information and the increasing number of products in the market can confuse anyone.

But don't worry, we've handpicked 9 of the best dryer vent cleaning kits in the market, each bringing something new to the table. Don't forget to check out our concise buyer's guide to understand the key features that determine which of our recommendations suits your needs precisely.

On that note, let's dive deep into the deets!

Best Dryer Vent Cleaning Kits

SSUCv3H4sIAAAAAAAACnSSu27DMAxF9wL9B0NzjDqxEzsZi6Jbt25BB1pibMGKFOjRB4L8eyXLajW0m3lIXfKSvt7fFQXpwXBKDsU1RD7mQjhjNViupMfVauEaJUOdE2TcKs1B5LAHS0cJZ/RQOiECvs1JYixYZ9CEZguiYHHwGhH+SMSJjjEuUmJO+hc+RZ6VYgVIVjxpLieyyiqM61MFSTi2+0frEeg0aOUkMw+v+Gmd9uP8ofjCDUUhQKJy5lc6frylBcCAkn7NHjPvGgVC9H6MpWT6sKjP+TbAMa6yRbwrCiIU1JnSRXPK5ZA9U3acD5OeUW/F6jACSTaIUOoCvQhXOXlNTHwEY4LzxLNG1P8G6pz1kcrOBhZVwvzxQriuN1W37na7pqvbqt2vu6UgHnzkXmceJwn5mE6c5dZ5mIC0ALjdnrpyW9VN2fR0X+53fVNu6r6Frq6abkP94m/fAAAA//8DAFbUUwK6AgAA

Here is the list of the 9 best dryer vent cleaning kits to help you safely and effectively remove lint buildup from your dryer vents.

1. Gardus RLE202 LintEater Rotary Drying Vent Cleaning System - Best for Energy Efficiency

Gardus boasts a rich history of streamlining class-leading dryer vent products to eliminate the stress of interior renovation. Their all-new LintEater RLE202, with a host of incredible features, stands out to be one of the most efficient rotary drying vent cleaning systems that you’ll come across. Let's take an in-depth look at its key features.

Dryer Vent Duct Cleaning Kit - Gardus RLE202 LintEater...
  • Ensures Home Safety - Our dryer duct cleaning kit helps...
  • Easy to Use - Easily attach the dryer vent brush to your...

Why Did We Like It?

One of the biggest reasons why we're always searching for reliable drying vent cleaning kits is the cost-effectiveness that follows. For those who fancy having the most bang for their buck, the Gardus RLE202 stands out as an incredible option. Agile and efficient, this kit cuts the average drying time by half to conserve energy, resulting in lower utility bills.

Also, this full-fledged cleaning kit features almost every tool required to enjoy a highly convenient maintenance session. With this 10-piece package, you get a dryer adapter, a diameter lint trap brush, a self-sufficient auger brush, a long blockage elimination tool, and various other useful accessories.

However, the best part here is how smoothly this kit is compatible with cordless drills, making it easier to clean the drying vents regularly. You can also use the pre-included adapters to connect the equipment with other appliances like electric blowers, eliminating any sign of lint from the vents.

Furthermore, you also get a fantastic reach that makes it convenient to penetrate confined areas for more in-depth cleaning. The 3" screw-connect rods are quite flexible, contributing to the high convenience it offers.

What Could've Been Better?

Speaking of efficiency, this product surpassed our expectations with its robust features. However, the only issue that we found here is that the system can only be rotated clockwise, which may create some inconvenience when you're pulling it out.


Pros

  • Comes with various accessories
  • High-performance vacuum adapter
  • Premium build quality
  • Offers incredible reach


Cons

  • Only rotates clockwise


Dimensions: 18 x 4 x 4 inches | Weight: 32 ounces| Length: 12 feet

2. Mountain Trades Flexible 28" Drying Vent Cleaning System - Best Budget Option

Some people are just solely in search of a budget-friendly and reliable solution to their day-to-day vent maintenance requirements. Mountain Trades is a brand that we can blindly trust when it comes to such cost-effective cleaning kits. The 28" flexible drying vent cleaning system surpassed our expectations with its praiseworthy features.

Dryer Vent Cleaner Kit Vacuum Attachment and Dryer Vent...
  • 🔥 The Leading Cause Of Dryer Fires Are Attributed To...
  • 💰 Don't Waste Money On A Service Call! Use This Dryer...

Why Did We Like It?

While going through the hard-to-reach areas for a thorough vent cleaning session, flexibility is what we search for the most. Thanks to this kit's incredible design, it becomes effortless to skim out the stubborn lint from confined spaces to maintain your vents for a longer time overall.

For those who didn't know, lint buildup is one of the most common reasons why dryers are prone to fire hazards. Regular vent cleaning and maintenance is advised to extend its longevity, for which, this robust and strongly-built cleaning kit stands out to be very useful.

Moving on, lint removal is made even more comfortable with the variety of useful accessories that this product comes with. The most convenient is the 28-inch lint removal brush, which comes in very handy while scrubbing off the underlying lint from the walls. Once you're finished, use the sizable crevice tool for efficient vacuuming that helps in removing even more dangerous dust.

However, if the crevice tool isn't compatible with your vacuum, the kit comes with multiple vacuum hose adapters for enhanced convenience. The manufacturers have designed these adapters to fit as many vacuums as possible, offering the best value for money.

What Could've Been Better?

Various users have complained that though it fits almost any vacuum, it tends to loosen up after a short work period. If you're using a Shark vacuum, this cleaning kit might not be the best fit for your equipment.


Pros

  • Useful accessories for convenience
  • Budget-friendly alternative
  • Compatible with most vacuums
  • Efficient at cleaning stubborn lint


Cons

  • Doesn’t stay tight for long


Dimensions: 15.5 x 6 x 1.4 inches | Weight: 12.8 ounces | Length: 2.33 feet

3. The Dryer Vent Store Dryer Duct Cleaning Kit - Best Minimalist Kit

Next up on our list is The Dryer Vent Store, one of the most established names in the cleaning and maintenance kit industry. Their all-new dryer duct cleaning kit has amazed us with the vast array of features it comes with, despite its limited accessories. Let's take a look at its core features.

Vacuum Attachment for Dryer Vent, Crevice Cleaning Tool for...
  • 🔥 Reduce Your Risk Of A Dryer Fire: Remove Built Up Lint...
  • 🎁 Includes: 1Vacuum Lint Trap Cleaning Tool, 1 Dryer Lint...

Why Did We Like It?

Less is more, and likewise, the minimalist approach to user convenience that the brand is known to follow is visible in this exceptional dryer duct cleaning kit. At first glance, it may not appear as a full-fledged professional kit; however, don't underestimate its capabilities for its limited number of accessories.

First, this product has amazed us with its incredible lint removal capabilities, which prove to be quite useful in maintaining the safety of your dryer vents. To be precise, this product comes with a lengthy 30-inch lint removal brush that makes getting rid of dangerous lint look like a walk in the park.

Like our previous recommendation, this product also features a robust 24-inch crevice tool that comes in very handy while taking care of the remaining lint across the surface. Once attached to the vacuum, it functions precisely to safeguard your dryer vents from any accident with its hardcore cleaning capabilities.

However, if your vacuum isn't initially compatible with the kit, the two vacuum hose adaptors make it easier with their universal fit. To make it even better, these adapters also go the extra mile to attach other useful accessories to the vacuum for a more versatile user experience.

What Could've Been Better?

First and foremost, you don't get a wide range of attachments with this kit, which somehow restricts its efficiency a little. Apart from that, the build quality of the lint removal brush could have been a little sturdier.


Pros

  • Budget-friendly price
  • Long-neck vacuum adapter
  • Premium build quality
  • Offers incredible reach


Cons

  • A limited number of accessories


Dimensions: 16.3 x 5.6 x 2 inches | Weight: 12.8 ounces | Length: 2.5 feet

4. General Electric PM14X10056DS Appliance Brush Set

For those looking for the possibly cheapest one-time solution to their vent cleaning needs, this General Electric appliance brush set is worth giving a try. Although it isn't a durable and long-lasting kit you can use for years, it can be an emergency lifesaver at a fraction of the cost. Let's check out its features.

Universal Appliance Brush Set PM14X10056 – Flexible...
  • MAINTAIN APPLIANCE EFFICIENCY: Maintain efficiency with a...
  • MULTI-USE VERSATILITY: Designed for refrigerator coils,...

Why Did We Like It?

Although it's a one-time usage kit, the high-quality efficiency it delivers is guaranteed to have you giving it another chance for future vent maintenance purposes. That's because we've observed that it offers incredible reach for in-depth lint removal, as the long nose is capable of penetrating through areas that aren't easy to reach.

The best thing here is that the usability of this product isn't solely restricted to drying vents. This product raises the bar high for versatility for the competitors because it can also be used to clean refrigerator coils and HVAC coils with utmost precision. At such a low price, there's hardly another brand offering such high convenience features.

Speaking of fit and finish, this product has surpassed our expectations with its robust and flexible body. The exoskeleton can bend on all sides effortlessly, making it easier to penetrate confined spaces without any issues.

For best results, we'd recommend keeping a vacuum cleaner ready at arm's reach while pulling out the brush after removing the lint.

Last but not least, the fact that this product offers more than what you pay makes it an excellent value-for-money option for those running low on budget.

What Could've Been Better?

As we've already mentioned, this product falls short of various best-in-class features that we search for in dryer vent cleaning kits nowadays. That said, we won't recommend it if you're searching for a long-lasting option that helps you get rid of the harshest of lint from the walls.


Pros

  • A very cost-effective option
  • Bendable body for efficient cleaning
  • Highly versatile applications
  • Premium build quality


Cons

  • Lacks several best-in-class features


Dimensions: 24 x 3 x 3 inches | Weight: 6.4 ounces | Length: N/A

5. Mr. Clean Appliance Vent Brush

Speaking of brands that have made cleaning and maintenance easier for inexperienced beginners, Mr. Clean is a name that's a stranger to none. Their appliance vent brush has been recently creating a buzz in the market with its exceptional ease of use and reliability, making it a lovely deal for the price.

Mr Clean Appliance Vent Brush
  • Removes lint and fuzz that causes allergies and fires in...
  • Easily cleans tight spaces such as ceiling fans, air...

Why Did We Like It?

One of the most significant issues that hamper the longevity of off-brand cleaning kits is that coming in contact with water ruins the quality. However, this vent brush ranks very high in overall build quality, making it quite a long-lasting piece of equipment for the price. The nylon bristles that protect its metal core safeguards the model from rust or corrosion when it's wet.

Not to forget, this product has impressed us with its fantastic reach, delivering sufficient length to reach spaces that aren't possible to clean with our bare hands. Its lint removal brush is approximately 22 inches long, making it easier to enter restricted areas of the vents for a detailed cleaning session. Also, the sharp brush can easily scrub off the harshest of lint within seconds.

Furthermore, its ergonomic handle doesn't let you suffer from fatigued arms after using the brush for long hours. The brush is also very lightweight and compact, making it easier to store and carry around for busy professionals.

Last but not least, like our previous pick, this product can also bend smoothly, which sets a higher benchmark for flexibility. If you're dealing with stubborn lint hiding within the vents, using this brush will be highly advantageous for thorough cleaning.

What Could've Been Better?

The biggest issue with this product is the huge mess it creates while getting the job done. You're guaranteed to observe huge chunks of lint building up while you use it for removal, which makes the clean-up a little more tedious. Other than that, the brush bends 360 degrees sometimes, which is a little inconvenient.


Pros

  • Budget-friendly price
  • Long-neck vacuum adapter
  • Premium build quality
  • Offers incredible reach


Cons

  • Creates a big mess


Dimensions: 28 x 3 x 2 inches | Weight: 0.63 ounces | Length: 1.83 feet

6. Deflecto Dryer Duct Cleaning Kit

Next on our list is Deflecto, a brand that defines value for money at its finest. For anyone looking forward to cleaning the harmful lint buildup in their vents under a small budget, this all-new dryer duct cleaning kit is appropriate. Let's check out its core specs and functions!

Deflecto DVBRUSH12K/6 Dryer Duct Cleaning Kit, Lint Remover,...
  • Includes a high quality synthetic brush head and 6 durable...
  • This efficient dryer vent brush can be used with or without...

Why Did We Like It?

It's surprising how, despite an ultra-compact size, this product offers exceptional help while deep-cleaning the vents. Thanks to the high-end synthetic build material, the brush doesn't wear off quickly while pushing it deep for a thorough cleaning session. As a bonus, you get six cleaning rods that provide a sufficient extension of 12 ft.

Also, for such a versatile kit, this product comes off to be extremely lightweight. Weighing around 1.05 pounds, it's possibly the easiest to carry around and use without stressing your palms.

Furthermore, we're in love with how easy it is to ease, making it a suitable cleaning tool for beginners with zero prior experience. To be precise, unlike other kits, this brush doesn't depend on the power drill, allowing it to be used independently for more user-friendly operations. To make it even better, the manufacturers provide a detailed instruction manual that breaks down the do's and don'ts in laymen's for easy comprehension.

Not to forget, this product is extremely flexible, which helps it penetrate areas that are generally hard to reach. This feature enables it to unclog the ducts precisely for higher safety, relieving you from the crippling stress of burning your house down.

What Could've Been Better?

When it comes to cleaning metal ducts, this product stands out to be one of the best cleaners. However, the chances of it being ripped apart while cleaning insulated material hose are incredibly high.


Pros

  • Superior build quality
  • Appropriate for in-depth cleaning
  • Attractive price range
  • Long-lasting and durable


Cons

  • Not useful on insulated ducts


Dimensions: 4 x 4 x 24 inches | Weight: 16.8 ounces | Length: Up to 12 feet

7. Flexible Dryer Vent Cleaning Kit

Although it's not a full-fledged professional cleaning kit, it's incredible how it caters to your day-to-day personal maintenance tasks with precision. Let's take a more in-depth look at its core features.

Sealegend Dryer Vent Cleaner Kit Dryer Lint Vac Attachment...
  • Home essentials: Sealegend dryer vent cleaner kit work with...
  • Flexible Cleaning Supplies: This vacuum attachment hose is...

Why Did We Like It?

When it comes to fulfilling regular vent cleaning needs under a tight budget, there's hardly another kit as appropriate as our current recommendation. It's incredibly user-friendly, which is something DIY enthusiasts keep searching for. Whether you're in the mood to handle the jobs manually or attach it to a power drill, this product has it all covered with its versatile usability.

When it comes to in-depth cleaning, the 12 ft long rod gives you the freedom to push it deeper into the ducts. Furthermore, you can also detach the rods one by one, which helps make storage an easy job.

The vent brush is also built with incredibly sturdy material that allows it to withstand heavy lint removal. You can even clean the exhaust ports with the high-quality bristles; that's how much it focuses on the minor details while using. As a result, it minimizes any possible scope of fire risks in your dryer.

What Could've Been Better?

We're not completely satisfied with the build quality of the long rods, as numerous buyers have reported that the kit lacks stability. On top of that, the manufacturers don't ship it with a warranty period.


Pros

  • Extremely user-friendly
  • Affordable price tag
  • Flexible and ergonomic design
  • Near-professional results


Cons

  • Poor build quality


Dimensions: 16.73 x 6.1 x 2.87 inches | Weight: 7.1 ounces | Length: 12 feet

8. Holikme 15 Feet Dryer Vent Cleaning Kit

Our eighth product of the day is the Holikme 15 ft dryer vent cleaner, a product that caters to your regular vent cleaning needs with precision. It's an absolute delight for bargain hunters with a wide array of features that spell convenience. Let's check it out!

Holikme 15 Feet Dryer Vent Cleaner Kit, Lint Remover,...
  • Home Essentials:dryer vent cleaning brush head(Please...
  • Dryer Lint Brush Vent Cleaner:It is to be bendable to...

Why Did We Like It?

For those who are planning to improve their dryer machines' overall efficiency, this product gives your appliance the much-needed boost with a deep and thorough cleanse. It's designed specially to reach tough and stubborn lint with utmost precision, clearing out the blockages that harm the machine from performing at 100% potential.

Not to forget, you also get a massive 15 feet flexible rod that helps in reaching the hidden ducts better. As a bonus, its synthetic brush head manually scrubs out tough lint without damaging the vent surface. The high user convenience it provides under such a negotiable price bracket makes it an absolute steal of a deal.

What Could've Been Better?

Although the brush can also be attached to a drill, the subpar build material doesn't last very long. Unless you're using the kit manually, the brush may need to be replaced quite often.


Pros

  • Excellent at cleaning lint
  • Affordable price tag
  • Can be stored easily
  • Synthetic brush head


Cons

  • Poor brush material


Dimensions: 4 x 4 x 180 inches | Weight: 14.4 ounces | Length: Up to 15 feet

9. Vanitek 26-Inch Long Flexible Dryer Vent Cleaner Kit

Ever wondered how convenient it'd be if you could avail of an extra-large universal lint removal kit without punching a hole in your pocket? In case you're searching for something similar, take a moment to check out the Vanitek 26-inch long flexible dryer vent cleaning kit. Let's check out what it offers.

Vanitek Dryer Vent Cleaner Lint Brush, Long Flexible...
  • The Vanitek multi-use long flexible dryer lint brush vent...
  • SPECS: The long cleaning brush Length is 26”, Without...

Why Did We Like It?

First, this product is not only meant for your dryer vents, as it's even eligible to brush off the excessive lint residing in your refrigerator. To be precise, the manufacturers have designed the tool brilliantly to support freezer coil cleaning, enhancing its versatility a notch. In case you're low on money, this all-in-one kit can come in extremely handy.

Speaking of its design, we've noticed that its bristles are longer and sharper than its alternatives in the market. This aggressive design helps the brush bite the stubborn lint deeper and brush it from the core. To make it even better, you get a non-slip plastic handle that allows you to work even more comfortably, resulting in near-professional cleaning.

We're also quite impressed with the bristles' build quality, as the galvanized wound steel material ensures that the brush won't bend if you exert high pressure. Other than that, the vacuum remover rubber tip prevents the brush from causing any scratches, preventing the vent from any damage.

What Could've Been Better?

If you're searching for kits that help clean in-depth lint, this might not be your cup of tea. The short length gives it a significant disadvantage against the best-selling alternatives on our list.


Pros

  • Very powerful bristles
  • Strong build material
  • Can be used to clean refrigerators
  • Attractive price tag


Cons

  • Could be longer


Dimensions: 1.5 x 1.5 x 26 inches | Weight: 3.84 ounces | Length: 2.16 feet

Best Dryer Vent Cleaning Kit Comparison Table

Product Dimensions Weight Length
Gardus RLE202 18 x 4 x 4 inches 32 ounces 12 feet
Mountain Trades Drying Vent Cleaning System 15.5 x 6 x 1.4 inches 12.8 ounces 2.33 feet
The Dryer Vent Store Dryer Duct Cleaning Kit 16.3 x 5.6 x 2 inches 12.8 ounces 2.5 feet
General Electric PM14X10056DS 24 x 3 x 3 inches 6.4 ounces N/A
Mr. Clean Appliance Vent Brush 28 x 3 x 2 inches 0.63 ounces 1.83 feet
Deflecto Dryer Duct Cleaning Kit 4 x 4 x 24 inches 16.8 ounces Up to 12 feet
Flexible Dryer Vent Cleaning Kit 16.73 x 6.1 x 2.87 inches 7.1 ounces 12 feet
Holikme Dryer Vent Cleaning Kit 4 x 4 x 180 inches 14.4 ounces Up to 15 feet
Vanitek Dryer Vent Cleaner Kit 1.5 x 1.5 x 26 inches 3.84 ounces 2.16 feet

Buying Guide For The Best Dryer Vent Cleaning Kit

Now that you've accessed the 9 best models that money can buy, it can become tougher to make a final decision. And that's why our detailed buyer's guide aims to walk you through the key factors that may help you make a smart choice that you won't regret.

On that note, here are the key features to double-check before buying a dryer vent cleaning kit.

  1. Cleaning Brush

The first and most important feature of a reliable kit is the cleaning brush itself. Also known as lint removal brushes, this is the ultimate accessory that makes it easier to maintain your drying vents' cleanliness. And when it comes to cleaning brushes, compromising on quality shouldn't be an option. If the brand isn't guaranteeing a durable and flexible brush, move on to the next.

  1. Vacuum Attachment

After the preliminary cleaning has been done via the cleaning brush, you have to focus on equipping the vacuum adapters for more in-depth and thorough cleaning. This feature enables you to vacuum-clean the insides of the dryer after the first lint removal. This finishing touch helps eliminate the hidden waste that can't be removed by manual contraption.

  1. Storage

One of the most significant issues that vent cleaning kit owners face is while storing the long cleaning rods. If you're planning to buy one, make sure that it comes with long foldable rods. These not only offer impressive reach, but they're also effortless to store even if you're running out of space.

Dryer Vent Cleaning Kits FAQs

  • Can dryer vent cleaning kits damage my vents or dryer?

    When used correctly, dryer vent cleaning kits are safe and unlikely to cause any damage to your dryer or venting system. Always follow the manufacturer’s instructions and be gentle when cleaning to avoid potential damage.

  • Are dryer vent cleaning kits compatible with all types of dryers?

    Most dryer vent cleaning kits are designed to work with a variety of dryer models and venting systems. Always check the compatibility information provided by the manufacturer to ensure the kit will work with your specific dryer and venting system.

  • Can a dryer vent cleaning kit help reduce energy costs?

    Yes, by maintaining proper airflow and ventilation, a dryer vent cleaning kit can improve your dryer’s energy efficiency, resulting in shorter drying times and, ultimately, lower energy costs.

  • Can I use a dryer vent cleaning kit in a multi-story building?
  • Can I use a dryer vent cleaning kit on an outdoor vent?

    Yes, dryer vent cleaning kits can also be used on outdoor vents. Ensure that the kit contains the appropriate attachments and enough flexible rods to reach the entire length of the vent.

  • How do I store my dryer vent cleaning kit?

    Store your dryer vent cleaning kit in a cool, dry place to prevent moisture damage. Keep all parts together in the provided storage container or a toolbox, and ensure that brush heads are properly cleaned and dried before storing.

  • Dust and dirt trapped by the clothes dryer filter

    Conclusion

    An untidy drying vent is a ticking time bomb because there's always an underlying fire risk. That's why you should always make sure that you remove stubborn lint with a reliable cleaning kit.

    In case you're still confused about which one to choose, here are our editor's top picks. If budget isn't a factor, then the Gardus LintEater RLE202 model is the one-stop solution to your day-to-day cleaning and maintenance needs.

    However, the General Electric PM14X10056DS Appliance Brush Set also provides decent performance under an affordable budget. Last but not least, the Mountain Trades 28" Flexible Cleaning Kit should be every DIY enthusiast's go-to option.

    We'll see you soon with more useful reviews. Till then, stay tuned!

    Brick masonry, while durable and architecturally significant, remains inherently porous, making it vulnerable to water infiltration, efflorescence, and freeze-thaw deterioration over time. A high-performance brick sealer, particularly a penetrating waterproofing formula, mitigates these issues by chemically bonding with the substrate, reducing capillary absorption while preserving vapor permeability. Whether treating load-bearing brick walls, historical facades, or exposed exterior surfaces, selecting the best brick waterproofing sealer depends on permeability, silane/siloxane content, UV resistance, and application method. This expert-backed guide evaluates 9 leading exterior brick sealers engineered for long-term masonry protection in varied climates and use cases.

    Listed below are the Best Brick Sealers:

    • Black Diamond Stoneworks: The Black Diamond Stoneworks Wet Look Sealer is known for its strength in color preservation and its defining glossy 'wet look'. Users should be aware of possible milky sheen formation, common with this effect.
    • MasonryDefender All-Purpose: The MasonryDefender All-Purpose Sealer stands out due to its exceptional waterproofing and 'breathability', preventing moisture accumulation. Note that it can cause slight darkening on denser surfaces.
    • Foundation Armor SX5000: The Foundation Armor SX5000 offers reliable protection, achieving approval from the Department of Transportation. A hallmark is its deep penetration into masonry, saving the natural texture. Appropriate application conditions are necessary for optimal performance.
    • Thompson's Water Seal 24111: The Thompson's Water Seal 24111 excels in versatile waterproofing across various porous materials. It boasts strong defense with only a single coat. Bear in mind that this sealant is exclusively for outdoor use.
    • Foundation Armor WL550: The Foundation Armor WL550 is proficient in delivering a fashionable 'wet look' by subtly darkening the surface. It provides durable internal protection to the material. This wet-look effect sometimes results in white spotting.

    Here's the list of the 9 best brick sealers to protect your bricks from cracking and preserve their beauty, while keeping unwanted moisture out.

    1. Black Diamond Stoneworks Wet Look Sealer - Best for Preserving Color

    While clear sealants may be widely used, the gloss sealant from Black Diamond adds an elegant, polished look to any type of masonry. Bricks are a suitable material for this sealant as it does not darken their color. Furthermore, it is resistant to water, chemicals, UV rays, and any blunt force, providing all-around protection. 

    When looking for a brick sealant, keeping the color of the underlying brick is a critical aspect to maintain. While many sealants have the tendency to change the shade of the brick to a darker hue, this was not the case with the Black Diamond Wet Look Sealer. 

    An easy application process makes using this sealer a great experience. One of its most helpful features was the ability to clean up the application with water. Easily removing any unnecessary formula from the surrounding area was convenient. 

    Additionally, the strength of the sealer does not leave much to be desired. Its water resistance works well with the water simply rolling off the treated surfaces. UV rays have no effect, and neither do strong chemicals, making this sealant perfect for use anywhere.   

    Achieving the “wet look” on a brick surface can be a beautiful effect to pull off. The wet-look stone sealer from Black Diamond aims to accomplish this to some degree. However, a white, milky residue/layer is formed at times, which is the case with many “wet look” sealants.

    Suitable Surface: Masonry, Bricks | Dimensions: 7 x 4.5 x 11.25 inches | Weight: 8.4 pounds | Dry Time: N/A | Indoor: Yes | Outdoor: Yes

    2. MasonryDefender All-Purpose Sealer - Best for Waterproofing

    A clear formula with fantastic waterproofing features is what makes up this all-purpose sealer from MasonryDefender. It is a breathable formula, which means any trapped moisture is let out to prevent a film from forming. Additionally, it is resistant to freeze and thaw damage,e making it perfect for surfaces exposed to regular moisture.

    Special features in formulas can increase certain functions in them over those of others. The waterproofing of this MasonryDefender all-purpose sealer gives an exceptional performance. 

    Not only does it have a clear finish, but the formula can expel moisture that seeps past the sealant layer. This “breathability” prevents any water from forming pockets underneath it. 

    Using a low-pressure garden sprayer is all that is needed to apply the sealant to the material. This ensures an even coating throughout for full coverage. If any extra areas are covered mistakenly, they can be wiped off using a soap and water mixture. 

    Thanks to its water-based formula, there is little odor released during application. Additionally, the water-based solution makes cleanup more manageable as well. Overall, the application is a convenient process.  

    Applying this sealant formula is not supposed to affect the color of the underlying material. However, on denser surfaces, the formula does cause a slight darkening to occur. When using it on a compact brick surface or any similarly dense masonry, be aware of this potential concern. 

    Suitable Surface: Porous | Dimensions: ‎12.13 x 8.11 x 3.98 inches | Weight: ‎8.56 pounds | Dry Time: 2- 6 hours | Indoor: Yes | Outdoor: Yes

    3. Foundation Armor SX5000 - Best for Natural Look

    Approved and used by the Department of Transportation in several states to protect roads and bridge decks, the SX5000 from Foundation Armor is a trusty sealant option. Not only does it have a clear finish, but it preserves the natural texture and color of the material it covers. 

    Getting approval from the Department of Transportation is not a small feat; expectations were high when using this sealant. The way it works is it penetrates the pores of the masonry to form a barrier. There is no surface layer formed as such. 

    As a result, the waterproofing is all within the material itself, cutting out about 95% of water absorption. Additionally, the internal bond of the sealant keeps the natural look of the material. There is no clear indication or surface film to show a sealant has been applied. 

    To help the application process, a pump sprayer is used to apply even coats. There is a rating of seven to ten years with two back-to-back coats. These coats are resistant to UV rays, freeze and thaw cycles, and efflorescence, increasing the lifespan of the concrete. 

    Particular conditions must be met to apply this sealant effectively. Conditions such as the time of application, as well as climatic conditions, can affect how well the sealant will perform once applied. This can open up a plethora of possibilities as to why the sealant is not performing adequately. 

    Suitable Surface: Roads, Bridge decks, Porous | Dimensions: 15 x 15 x 12 inches | Weight: 38 pounds | Dry Time: N/A | Indoor: Yes | Outdoor: Yes

    4. Thompson's Water Seal 24111

    Thompson's Water Seal is a versatile sealant to waterproof a variety of material surfaces. It works best on more porous surfaces to build a barrier against moisture. The waterproofing is strong enough to repel water on most surfaces completely.  Additionally, it is easy to apply to any surface with a brush or roller. Overall, it is a safe choice for sealing porous surfaces from moisture. 

    Setting this waterproof sealant apart from the others is the versatility with which it handles different materials’ porous levels. This flexibility ensures the formula will be able to handle moisture well, no matter where it is applied. 

    Incredibly easy to handle and apply, the setting and drying time is relatively minimal. Either a brush or a spray gun can be used to apply the solution. Only one coating was sufficient in keeping the water off the treated surface. 

    No mixing or thinning is necessary with this sealant. Simply pressure wash the surface clean and apply the solution directly once dried. 

    Depending on the porosity of the material treated, the sealant was able to repel the water completely. The sealant was able to bead the water to roll right off on some materials.  

    Due to the nature of the formula, this sealant is designed for use primarily on external surfaces. This does limit its usability if the surface is to be treated indoors. Of course, the versatility of compatible materials does make up for this, but the exterior exclusivity of the formula does handicap it.  

    Suitable Surface: Porous | Dimensions: 7 x 4.5 x 12.25 inches | Weight: 9.55 pounds | Dry Time: N/A | Indoor: No | Outdoor: Yes

    5. Foundation Armor WL550

    Another great product from Foundation Armor, the WL550, is an excellent choice for those who want the “wet look” on their masonry. It attains this effect by darkening the surface material slightly. As it is a penetrating sealant, there is no film formed on the surface; all the protection is within the material itself. 

    Applying the WL550 is an easy procedure to go through. It spread easily along the surface and permeated into it almost immediately. The strength of a single coat is astonishing in how robust the waterproofing is in such a small volume. 

    The effectiveness of the waterproofing of this material is impressive. There was some beading of the water droplets on some surfaces. Using a sprayer is advised to get an even coating. An even coating of sealant allows the waterproofing to perform better. 

    Additionally, the material remained clear, with no films formed for a polished result. The darkening of the material in order to maintain the wet look is a great feature. Masonry looks fresh and high-quality with this sealant that also protects it sufficiently.  

    Wet-look sealants tend to have white spots formed after some exposure to water. The WL550 is no exception to this. While the chances of it happening are on a case-by-case basis, it remains a possible occurrence in your application and use. 

    Suitable Surface: Concrete, Brick, Masonry | Dimensions: N/A | Weight: N/A | Dry Time: N/A | Indoor: Yes | Outdoor: Yes

    6. LastiSeal Brick & Masonry Sealer

    For an excellent sealant that can be used indoors or outdoors, LastiSeal offers an outstanding formula in its brick and masonry sealer. A 15-year warranty backs their claims of a long-lasting waterproof barrier. Additionally, it is resistant to UV and freezing damage as well for complete protection against any natural elements.

    Once this sealant is applied, it almost immediately pulls into the material. The thin viscosity allowed it to penetrate the pores of the surface well. After applying multiple coats, there was no sheen on top of the material to give away any signs of a sealant being applied. 

    Multiple coats allow for a more secure barrier to be formed to keep moisture out. The performance of the LastiSeal formula was outstanding in preventing leaks and water as well as standing up against UV rays. 

    A unique feature of this sealant is the no-odor solution that makes it safe for indoor use. It is versatile and can be used on masonry, concrete, and wood. Additionally, with a fast drying time of two to three hours, this formula is convenient to use for any surface, be it indoors or outdoors. 

    This sealer does not have a thick consistency like other sealants. As a result, the method of application used can determine how evenly it is applied. Using a spray gun with thinner viscosity sealants is recommended for even coats. Brushes are another great alternative, while rollers have the least control over even applications. 

    Suitable Surface: Masonry, Concrete, Wood | Dimensions: ‎12.71 x 6.42 x 6.3 inches | Weight: 9 pounds | Dry Time: 1 - 3 hours | Indoor: Yes | Outdoor: Yes

    7. MasonryDefender Interior/Exterior Brick Sealer

    Designed for use exclusively with bricks, this sealant from MasonryDefender is a heavy-duty performer. It is compatible with both indoor and outdoor bricks to keep out moisture and preserve the integrity of the brick. Maintaining the color of the brick is essential, but the MasonryDefender sealant also adds a slight sheen when dried for a clean look. 

    Using this sealant for any brickwork is a great investment opportunity. Not only does it keep out moisture, but it also preserves the bricks themselves. 

    Brick dust is a common occurrence where the interior bricks chip and wear away into a fine dust. This sealant keeps the brick together and eliminates the need for any cleanup of brick dust permanently. 

    Additionally, it was able to provide a washable surface for cleaning interior bricks. These two features combined make this solution perfect for indoor brickwork such as chimneys. 

    The bright sheen that the sealant gives off when dried makes a simple wall look more attractive for outdoor use. Any water is repelled to prevent water-freeze damage in the bricks. Overall, it is a great performer for bricks both indoors and outdoors.  

    As is the case with many water-based acrylic sealants, a white, cloudy layer can form on the surface of the material. This is not a guaranteed occurrence with every application of the sealant. It is simply a possibility that should be considered before applying it. Testing beforehand on smaller areas is always advised. 

    Suitable Surface: Bricks | Dimensions: ‎11.77 x 7.83 x 4.13 inches | Weight: 8.82 pounds | Dry Time: 1 - 2 hours | Indoor: Yes | Outdoor: Yes

    8. Serveon Sealants H2Seal H2100

    Serveon’s sealant is truly a feat in the waterproofing sealant world. A clear formula that can keep your bricks looking their natural best while keeping moisture out. Stains and other growth, like moss and mold, are removed with this formula. Paired with an easy application process that leaves no white film, the Serveon is a fantastic option.

    Any sealant that preserves the natural look of the material it is coated on is always welcome. The white film that is susceptible to forming on other sealants does not occur as often when using the Serveon sealant. The application conditions are lenient and, as a result, easy to handle.

    A helpful feature is the maintenance that the sealant performs on the material. Preventing any stains from moisture, as well as keeping mold and moss from forming, are valuable features in damp environments. The resulting extension to the life and appearance of the treated material is a welcome bonus.

    Drying times on the Serveon sealant is pretty minimal. The thin viscosity of the solution allows it to permeate the material easily. The resulting barrier formed within the material keeps out water and other unwanted contaminants well.  

    While the Serveon sealant is touted as a single-coat application, it still has a thin viscosity. This may not be sufficient for some more porous surfaces. As such, multiple coats may be necessary to achieve a completely waterproof seal around the treated area.

    Suitable Surface: Bricks | Dimensions: 6.5 x 3.5 x 11.5 inches | Weight: 8.65 pounds | Dry Time: 1 hour | Indoor: Yes | Outdoor: Yes

    9. LastiSeal Brick & Concrete Sealer

    Another sealant from the LastiSeal brand, the brick and concrete formula, is an alternative sealant option. It shares similarities with the sealant from LastiSeal, which specializes in brick and masonry. All the protective resistances to UV rays, de-icing salt, and water are present in this sealant. 

    There is little that sets this sealant apart from the brick and masonry formula from the same LastiSeal brand. This is by no means a disadvantage, as the performance of this brick and concrete sealant is more than satisfactory. 

    With a simple application process that requires little preparation, this sealant was applied easily. A few passes of the pressure hose washed off any residue and dirt to allow the sealant to permeate the material and form the barrier. 

    The sealant is rated to last a full 15 years of waterproofing before requiring a re-application. While these claims are astounding on paper, it is still a remarkable feat if they withstand even half the time of seven years. Regardless, the sealant has an incredibly strong bond that is not susceptible to being worn away anytime soon.  

    Similar to the brick and masonry sealant, this brick and concrete sealant requires specific conditions to be applied correctly. The time of day, as well as temperature and climatic conditions, can affect how well the solution permeates the material’s surface. Specifically, meeting these conditions can be challenging for some in locations with extreme weather. 

    Suitable Surface: Bricks, Concrete, Porous | Dimensions: 15 x 10 x 10 inches | Weight: 23 pounds | Dry Time: 1 - 3 hours | Indoor: Yes | Outdoor: Yes

    What Is the Best Brick Sealer?

    Choose the correct brick sealant from various market offerings by examining their characteristics: Suitable Surface Material, Dimensions (in inches), Weight (in pounds), Dry Time (after application), Indoor, and Outdoor applicability.

    Product Suitable Surface Dimensions Weight Dry Time Indoor Outdoor
    Black Diamond Stoneworks Wet Look Sealer Masonry, Bricks 7 x 4.5 x 11.25 inches 8.4 pounds N/A Yes Yes
    MasonryDefender All-Purpose Sealer Porous 12.13 x 8.11 x 3.98 inches 8.56 pounds 2- 6 hours Yes Yes
    Foundation Armor SX5000 Roads, Bridge decks, Porous 15 x 15 x 12 inches 38 pounds N/A Yes Yes
    Thompson’s Water Seal 24111 Porous 7 x 4.5 x 12.25 inches 9.55 pounds N/A No Yes
    Foundation Armor WL550 Concrete, Brick, Masonry N/A N/A N/A Yes Yes
    LastiSeal Brick & Masonry Sealer Masonry, Concrete, Wood 12.71 x 6.42 x 6.3 inches 9 pounds 1 – 3 hours Yes Yes
    MasonryDefender Interior/Exterior Brick Sealer Bricks ‎11.77 x 7.83 x 4.13 inches 8.82 pounds 1 – 2 hours Yes Yes
    Serveon Sealants H2Seal H2100 Bricks 6.5 x 3.5 x 11.5 inches 8.65 pounds 1 hour Yes Yes
    LastiSeal Brick & Concrete Sealer Bricks, Concrete, Porous 15 x 10 x 10 inches 23 pounds 1 – 3 hours Yes Yes

    Buying Guide For The Best Brick Sealer

    Sealing bricks is often an overlooked necessity as, in our daily lives, bricks are the most widely used sturdy construction materials. While they may be able to withstand significant amounts of force, moisture and extreme exposure can break them down from the inside. 

    Moisture can seep into untreated brick and expand the pores inside, causing it to crack and decay. Similarly, freezing and thawing of ice surrounding the brick cause the brick to expand and contract, also causing an eventual breakdown. 

    This is why a sealer is a necessary precaution to take in order to preserve the look and quality of the brick for extended periods of time. However, sealers have different attributes that protect the brick from specific contaminants better than other sealant options. 

    In order to make the most informed decision, keep in mind these points to ensure the sealer you buy has all the right specifications for your bricks’ condition.

    Finishing Options

    Some brick sealants have a special finish that can bring a specific look to the brick once dried. Common finishes in brick and masonry sealants are clear, “wet look,” and matte look. 

    For those who wish to maintain the natural look of the brick, a clear finishing formula can be used. This solution permeates the brick, and it is not immediately evident that a sealer has been applied. 

    As is evident from its name, the “wet look” sealer finish gives off a wet look to the brick once dried. Some prefer wet-look finishes as they keep the brick looking new and high-quality. The caveat here is the potential for a white film to form, albeit the chances of it occurring are not guaranteed. 

    Matte finishes are used to add a subtle look to the treated brick. These matte finishes are not as shiny as the wet-look finishes and not as see-through as a clear finish. It gives off more of a sheen that is between the two other finishing options. 

    Depending on the material being treated, different finishes will have different effects. Keep in mind how the finish will interact with the brick when choosing a sealant.

    Interior Or Exterior Use

    When choosing a sealer, one of the most important factors is whether the brick to be treated is indoors or outdoors. Depending on the location of the brickwork, some sealers will work better than others. 

    Exterior sealers are typically more durable in handling climatic conditions such as UV rays and heavy moisture exposure. These sealers are explicitly designed to be able to hold up in these conditions. 

    On the other hand, sealers that are meant for interior work will not perform well in outdoor conditions. They have been formulated to protect against different kinds of contamination and breakdown.

    Application Method

    The number of coats required determines how much sealant is needed for a project. One-coat applications use far less formula and are easier to apply. Alternatively, multiple coats can be tedious for larger areas and require more sealer. 

    Depending on the viscosity of the sealant, the application method will have different effectiveness. Spraying is compatible with thinner sealers and gives an even coat, while brushes or rollers are better suited for thicker viscosity sealers. 

    Why should I use a brick sealer?

    Brick sealers are necessary to protect bricks from moisture, freeze-thaw cycles, and other contaminants that can cause decay and deterioration. They help extend the lifespan of the bricks and maintain their appearance.

    Should I use the same sealer for interior and exterior brickwork?

    No, it is important to choose a sealer specifically formulated for the intended use. Exterior sealers are designed to withstand UV rays and heavy moisture exposure, making them more durable for outdoor conditions. Interior sealers are formulated to protect against different types of contamination and are not suitable for outdoor use. Using the appropriate sealer for each application will ensure optimal protection.

    What is the best application method for brick sealers?

    The effectiveness of the application method depends on the viscosity of the sealer. Thinner sealers are well-suited for spraying, as it provide an even coat. Thicker viscosity sealers are better applied using brushes or rollers to ensure proper coverage. Choose the application method that is compatible with the sealer you are using for the best results.

    How long does a brick sealer last?

    The longevity of a brick sealer depends on various factors, including the type of sealer, environmental conditions, and maintenance. In general, brick sealers can last anywhere from a few years to over a decade. It is recommended to reapply the sealer when signs of wear or water absorption become noticeable. Regular maintenance and cleaning can also help prolong the lifespan of the sealer.

    Any one of these sealants is more than satisfactory in the results they give. They get the job done in keeping bricks fresh and clean. 


    Whether you’re enhancing the finish or safeguarding against the elements, selecting the right brick sealer is key to preserving the structure and appearance of your masonry. Black Diamond’s Wet Look stone sealer is an excellent choice for those seeking a bold, high-gloss finish, while the SX5000 from Foundation Armor offers a clear, penetrating seal that maintains the natural texture and color of the bricks. For those prioritizing moisture control, the MasonryDefender All Purpose Sealer delivers exceptional waterproofing by allowing vapor permeability while blocking liquid absorption. Regardless of your aesthetic preference or environmental conditions, applying a high-quality brick sealer can significantly extend the lifespan and resilience of your surfaces. To further protect and understand your materials, take a look at our breakdown of standard brick dimensions to ensure proper coverage, and explore our deep dive into the legacy and craftsmanship of brick to appreciate the material's architectural significance.

    Placing acoustic foam panels on a wall can create a calm space to escape busy life or have a higher quality environment to work in, as they can help soundproof your room and improve noise reduction considerably.

    Regardless of what you use these acoustic panels for, one thing is clear. They are only as effective as the bond that holds them to the wall. As such, the type of glue that you use will determine the lifespan of the acoustic foam panel.

    We realize that finding the best adhesive for acoustic foam may prove to be difficult, as the foam is not the most solid surface to work on. So, to help you get started, we have gathered the best adhesive for acoustic foam options and how to pick the most suitable one.

    With that said, let's get right into it and find the best adhesive for foam!

    Listed below are the 5 best Adhesives for Acoustic Foam Panels from our list:

    • Gorilla Glue: Recognized for its superior bonding quality, the ability to peel off cleanly for repositioning and its non-photosensitive bond, ensuring lasting high-quality finish.
    • 3M Super 74: Stands out for its specialized formula for foam surfaces, lace design spray pattern for cohesive coverage, and flexible bond time ranging from 15 seconds to 30 minutes.
    • Auralex Acoustics: Unique for its high adaptability to multiple projects, offering temporary to permanent bonding options, and significantly reduces odor and VOCs compared to others.
    • Loctite: Highlighted for its fast drying times, tactile consistency, and mist spray pattern ensures even coverage, maintaining an impressive shiny finish.
    • 3M PH202: Renowned for its no-tools-required, exceptionally straightforward application process, peel-and-stick feature, and damage-free removal, proving it as an accessible and practical choice.

    Whether you are looking to improve the sound quality in your home theater or recording studio, acoustic foam is an essential component. But simply placing the foam on the walls won't be enough - you need to use the right adhesive to ensure the foam stays firmly in place. Here is the list of the 7 best adhesives for acoustic foam:

    1. Gorilla Glue - Best for Superior Bonding

    Gorilla Glue is always one of the leading contenders when it comes to achieving superior bonding quality without breaking the bank and it might be the best adhesive for foam. It makes sense, seeing as their acoustic foam spray adhesive is packed full of features to make it user-friendly. From versatility to a seamless application, this is a great glue to mount acoustic foam with.

    Applying acoustic adhesives onto walls is a delicate task, which is why the ability to reposition acoustic panels after using the Gorilla Glue is a valuable feature to have. They peel off the walls cleanly to allow you to correct any accidental applications and have a clean-looking result.

    Despite being able to peel Gorilla Glue off the walls,  it still has a superior bonding quality that makes it stand out from other spray adhesives. This is because of the wide pad nozzle that ejects the glue in a fine mist for precise applications. As a result, getting even coverage without clumps is more accessible than ever.

    One consideration that we appreciated on Gorilla Glue's part was their forward-thinking in the lifespan of their acoustic adhesives. The bond between the acoustic foams and walls will not be photo-sensitive and break down or yellow over time, giving a high-quality, lasting finish.

    Seeing as this spray adhesive comes out in a fine mist, it was no surprise that the working time it had was relatively less. In fact, extra moisture was needed at times to maintain the putty consistency before it was applied.

    Type: Polyurethane | Volume: 11 Oz | Application: Multi-Purpose | Bond Strength: Strong | Drying Time: 1-2 Hours | Weather Resistance: Good | Heat Resistance: High | Solvent Resistance: Moderate

    2. 3M Super 74 - Best for Quick Application

    The Super 74 - Clear from the 3M brand is a strong contender for the best adhesive for acoustic foam, thanks to the unique formula explicitly made for foam surfaces. This is especially useful for bonding projects like acoustic panels to get a secure application that is more robust than other options.

    Like many other sprayed adhesives, the Super 74 - Clear uses a pattern distribution to spread the glue. In this case, 3M has decided to go with a lace design which helps to have a more cohesive coverage across the applied surface. This unique shape also has the benefit of securing the foam to the wall at multiple points, making for a firmer grip overall.

    Furthermore, by specifically creating the adhesive formula to adhere to foam, 3M allows the bond time to be adjusted to your needs. Ranging from 15 seconds to a full 30 minutes, you will have ample working time to get the adhesive in place before it hardens.

    Additionally, this 3M acoustic foam glue can be used with a variety of surfaces and weights. Attaching acoustic panels to wood and other types of wall materials is possible.

    A caveat to working with the Super 74 is the potentially dangerous levels of fumes produced while spraying. There is a warning to wear safety equipment and use it in a well-ventilated area, which shows just how serious the VOCs can get. Those with respiratory ailments may want to reconsider this particular spray adhesive.

    Type: Aerosol Spray | Volume: 16.9 Oz | Application: DIY Projects | Bond Strength: Medium | Drying Time: 15-30 Minutes | Weather Resistance: Good | Heat Resistance: Moderate | Solvent Resistance: Limited

    3. Auralex Acoustics - Best for Versatile Use

    Truly one of the more unique spray adhesives, the FTSPRAY from Auralex Acoustics is a special multi-purpose spray that can adapt to whatever bonding projects you are working on. Whether it is temporarily gluing lightweight objects or permanent fixtures, it is able to give a solid performance every time.

    One of the best adhesives for acoustic panels, the FTSPRAY from Auralex Acoustics is a feat of engineering in terms of its versatile application. It can be used for temporary applications, meaning you won't have to worry about the glue peeling when you move a piece around. At the same time, a more generous application will give you a permanent hold that can't be as easily removed.

    Another noteworthy feature among the technical specifications of FTSPRAY is its composition. This formula uses more solids than other spray adhesives for acoustic foams. Essentially, this means there is more control afforded over the glue before it hardens.

    What made working with this particular spray adhesive even more seamless was the lack of toxic fumes and the nasty stink it had. Even in lower-ventilated rooms, it didn't become uncomfortable or need to be aired out for long.

    A slight inconvenience when it comes to the FTSPRAY is the clean-up after the application. Simple water and soap weren't enough to get it off the skin or walls; we had to use GooGone and other products to completely remove the spray adhesive, which made getting a clean, finished product difficult.

    Type: Acoustic Foam Glue | Volume: 17 Oz | Application: Soundproofing | Bond Strength: Strong | Drying Time: 1-2 Hours | Weather Resistance: Good | Heat Resistance: High | Solvent Resistance: None

    4. Loctite

    What makes the Loctite performance adhesive one of the best adhesives for acoustic foam panels is its fast drying time and clear composition. Its superior tacky quality allows it to adhere better to a range of surface materials for a highly effective bonding power. This is one spray adhesive that is worth checking out.

    Right away, the first thing that stands out when working with the Loctite spray adhesive is the consistency of the formula. Yes, it is clear, but it is also incredibly tactile, almost like caulk. While it may be similar to a caulk gun in terms of sealant quality, the aerosol cans make for a more accessible method of application on bonded materials.

    Additionally, the Loctite also helped create a unique shiny finish to the painted walls. As the formula is clear, this added sheen elevates the quality of the surface to give it a more professional appearance.

    Furthermore, one of the more functional technical specifications of this "caulk gun in a can" is the mist spray pattern it uses. By spreading out, it is able to cover more areas with even coats rather than clumping up.

    Loctite performance adhesive is a permanent bonding option, and as such, does not allow much room for error. Adjusting acoustic foam panels after they have been applied will see the glue peel even the paint from the walls in the process.

    Type: Multi-Purpose | Volume: 13.5 Oz | Application: Various | Bond Strength: Strong | Drying Time: 5-10 Minutes | Weather Resistance: Good | Heat Resistance: High | Solvent Resistance: Moderate

    5. 3M PH202

    Included in this pack of 3M command picture hanging strips are 18 pieces of small adhesives that give outstanding performance and value for their price. These strips don't leave residue on the walls and have a straightforward peel-and-stick application—definitely one for those who prefer a quick and easy process to hang up acoustic foams.

    What makes the command picture hanging strips one of the best adhesive options is the fact that no tools are required in the installation. No nails or sprays are involved; the strips can be used as-is right out of the packaging, allowing for one of the most straightforward application methods possible.

    Combining four hung strips will give you a total holding strength of four pounds. Using these pieces together should be more than enough strength to support the weight of acoustic foam with no issues. Whether it is on painted walls or wood, this adhesive is able to adhere to all types of surfaces.

    Another valuable feature that these hanging strips have is the ability to remove the panels without causing damage to the wall or acoustic panels. It may take a few attempts to figure out the best arrangement of panels for you, so giving a large room for error and rectification is appreciated.

    Despite being able to combine the holding power of the hung strips, they are pretty limited in their actual coverage. If you have a larger area to cover with acoustic panels, you may need multiple packs to keep the panels stuck and complete the installation.

    Type: Double-Sided Tape | Volume: 18 Pairs Strips | Application: General Purpose | Bond Strength: Medium | Drying Time: Instant | Weather Resistance: Good | Heat Resistance: Moderate | Solvent Resistance: None

    6. UPINS Square Double Sided Foam Tape

    Hanging acoustic foam without glue is a common request and another option if you are planning to use sticky pads comes from UPINS in their considerable 120-pack model of double-sided foam tape. These square pieces are made of EVA foam to give them improved durability against various elements like heat and extra moisture.

    In particular, the improved resistance against extreme temperatures and water proved to be the most noteworthy among the technical specifications of the double-sided tape for acoustic foam. Not having to worry about the adhesive falling off of a surface that was too hot or cold was a great relief.

    Additionally, by having the double-sided tape for acoustic foam individual pieces made of EVA, UPINS allows you to customize the shape to fit any surface you are working with. Arranging acoustic panels is much more accessible by tailoring the adhesive to follow the contours of the foam.

    Seeing as these are double-sided tape, it is no wonder they have such a straightforward application. Each piece measures only three mm thick, so they don't hang off of the wall; simply peel and stick them on the wall, and you're good to go.

    Although there is an incredible 120-piece count included in this model, the strength of the individual adhesive does leave something to be desired. If you are working with heavier foams, then you may find the bonding strength insufficient to support their weight.

    Type: Double-Sided Foam | Volume: 120 Pcs | Application: DIY & Crafts | Bond Strength: Medium | Drying Time: Instant | Weather Resistance: Limited | Heat Resistance: Low | Solvent Resistance: None

    7. Ultimate Acoustics

    Ultimate Acoustics has designed an acoustic spray foam glue that is both easy to apply and work with and effective at the same time. A unique spray pattern holds the acoustic foam firmly without seeping into the surface of the material. These features make it among the best adhesives for acoustic foam options out there today.

    While there are many methods to apply acoustic adhesives, this Ultimate Acoustics spray glue uses a fast and efficient way to create a strong bonding quality. Thanks to the unique spray pattern and wider nozzle than other spray adhesives, it is able to cover more area in one pass. This can help you lower the quantity needed and save a few bucks in the long run.

    Additionally, the wide spray nozzle creates a textured design on the acoustic foam panels, creating a superior bonding quality that lasts. When it comes to foam products, creating a grip for the adhesive to hold onto is imperative to maintain the tight bond between the surfaces.

    Another handy feature is the range of bonded materials and surfaces to which it can be applied. From fabric to paper, and even wood panels as well, the low soak quality prevents the spray foam glue from getting lost in porous surfaces.

    If there was one minor inconvenience faced while working with this spray glue, it has to be the nasty stink it gave off. While the fumes were not to the point of being highly toxic, we still highly recommend it be only used in a well-ventilated or open area.

    Type: Acoustic Foam Adhes. | Volume: 12 Oz | Application: Sound Treatment | Bond Strength: Strong | Drying Time: 1-2 Hours | Weather Resistance: Good | Heat Resistance: High | Solvent Resistance: Limited

    What is the Best Adhesive For Acoustic Foam?

    Presented below is a comparative table that thoroughly outlines the notable features of the superior adhesives for acoustic foam. This includes details such as adhesive type, volume, application method, bond strength, drying time, and its resistance to weather, heat, and solvents.

    Product Type Volume Application Bond Strength Drying Time Weather Resistance Heat Resistance Solvent Resistance
    Gorilla Glue Polyurethane 11 Oz Multi-Purpose Strong 1-2 Hours Good High Moderate
    3M Super 74 Aerosol Spray 16.9 Oz DIY Projects Medium 15-30 Minutes Good Moderate Limited
    Auralex Acoustics Acoustic Foam Glue 17 Oz Soundproofing Strong 1-2 Hours Good High None
    Loctite Multi-Purpose 13.5 Oz Various Strong 5-10 Minutes Good High Moderate
    3M PH202 Double-Sided Tape 18 Pairs Strips General Purpose Medium Instant Good Moderate None
    UPINS Square Double Sided Foam Tape Double-Sided Foam 120 Pcs DIY & Crafts Medium Instant Limited Low None
    Ultimate Acoustics Acoustic Foam Adhes. 12 Oz Sound Treatment Strong 1-2 Hours Good High Limited

    Buying Guide For The Best Adhesive For Acoustic Foam

    Before deciding what the best adhesive for you would be, there are a few factors that you should be aware of to make the most informed decision possible. Knowing the type of adhesive can help you have a seamless experience and a higher quality result in the end. Safety should also never be compromised no matter the type of glue being used, so we have also included a few pointers to keep in mind as well.

    1. Types Of Glue For Acoustic Foam Panels

    • Spray-On Adhesive

    One of the most common types of glue to apply for acoustic foam is a spray-on adhesive. It has the most basic application process; just aim the can at the surface to be bonded and sprayed.

    Something to keep in mind is that acoustical foam adhesive may require additional safety equipment, even if it has an eco-friendly composition. The fine mist may enter the lungs and cause respiratory problems or even be an eye irritant, so goggles and gloves are a must.

    • PVA Wood Glue

    PVA wood glue is the ideal choice if you are bonding acoustic foam to wood panels. Not only does this type of glue have a clear finish, but it can also give the wood elements some extra shine. Being designed specifically for wooden surfaces, the bond created is robust and resistant to strong impacts as well.

    • Liquid Nails

    Having a rapid adhesion, liquid nails, as the name suggests, have an almost instant bonding time. Durability and lifespan are also incredibly robust in this type of glue, even when exposed to climate conditions. For those who want a fast and easy bond, then liquid nails are a great way to go.

    2. Safety Tips

    Being aware of the basic safety tips when working with adhesive can save you from serious injuries or accidents. Depending on the manufacturer, formulas used in adhesives can be highly toxic and cause a number of health risks such as respiratory ailments and eye irritation.

    We recommend looking for an eco-friendly formula that does not include such toxic ingredients to prevent these risks. However, if you are working with an adhesive that has harmful components, using safety glasses and gloves is crucial. Sprays should also be used only in a well-ventilated area with the included manufacturer instructions followed closely.

    What type of adhesive is best for acoustic foam?

    The best adhesive for acoustic foam is typically a spray adhesive designed specifically for foam materials. Foam-safe, solvent-based adhesives are commonly used for their strong bonding capabilities without damaging the foam’s structure.

    Can I use regular glue for mounting acoustic foam?

    It is not recommended to use regular glue for mounting acoustic foam. Regular glues may contain harmful chemicals that can damage the foam or compromise its sound-absorbing properties. Stick to adhesives specifically designed for foam to ensure a secure and safe installation.

    Is it easy to remove acoustic foam mounted with adhesive?

    The ease of removing acoustic foam depends on the type of adhesive used. Foam-safe, solvent-based adhesives often provide a strong bond but may leave residue when removed. However, some adhesives are designed for easy removal without damaging the foam or the surface.

    Can I reuse acoustic foam after removing it from a surface?

    In most cases, reusing acoustic foam after removal may be challenging due to potential damage to the foam or adhesive residue left behind. It’s best to replace the adhesive or use new foam when remounting.

    Can I use adhesive for acoustic foam on painted surfaces?

    Yes, many adhesives designed for acoustic foam are safe to use on painted surfaces. However, it’s essential to test the adhesive on a small, inconspicuous area first to ensure it does not cause any damage to the paint.

    How much adhesive should I use for mounting acoustic foam?

    The amount of adhesive required depends on the size and thickness of the acoustic foam panels. Follow the manufacturer’s guidelines and use enough adhesive to ensure complete coverage on the backside of the foam for a secure bond.

    Can I use adhesive for acoustic foam on other materials, like wood or metal?

    While acoustic foam adhesives are specifically designed for foam materials, they may also work on certain surfaces like wood or metal. However, always check the adhesive’s compatibility with the specific material before use.

    Can I use double-sided tape instead of adhesive for mounting acoustic foam?

    Double-sided tape can be used for mounting lightweight acoustic foam on some surfaces. However, it may not provide as strong of a bond as foam-specific adhesives, especially for thicker or heavier foam panels.

    Is it safe to use adhesive for acoustic foam in areas with high humidity?

    Some adhesives are designed to withstand high humidity, but it’s crucial to check the product specifications or choose a waterproof adhesive if you plan to use it in areas with moisture or humidity concerns.

    With that, we will conclude our guide on finding the best adhesive for acoustic foam. Hopefully, you were able to find what you were looking for to make the most informed decision possible.

    Our top choice for the best adhesive is the Gorilla Glue for its low soak and even coating pattern. However, for a more heavy-duty option, the 3M Foam Fast is your best bet, as it is designed specifically for foams and fabrics, making the installation of acoustic panels a breeze with industrial strength.

    By using these adhesives and keeping our pointers in mind, you will be sure to get those acoustic panels up in no time at all. As a general rule, make sure you are aware of all the safety tips of the adhesive as they vary across manufacturers.

    While Gas Stoves definitely have plenty of advantages over electric cook-tops, they fall short when it comes to maintenance.

    Gas Stoves have a tendency to get quite greasy and dirty, thanks to all the food spills and high-heat, and getting them cleaned thoroughly can be a really tough job!

    Just wiping your stove down and making it shiny is not enough. In order to get your stove really cleaned, you need to take things apart and clean out all the nasty stuff that accumulates in the interiors.

    Not only is a clogged gas burner unsanitary, but it can also ruin your burner's efficiency by giving off a weak flame, and hence cause you to incur more costs.

    So, if you're struggling to clean your gas burner or have no idea where to start, we are here to help you out! This article will guide you through the entire process of cleaning your gas burner, and give you tips on how to better maintain your gas stove burners.

    So let's get started!

    Gas Stove Cookware

    Before we get started with the actual cleaning process, naturally, you have to declutter first but before that let's first discuss an elementary thing that you can do to ensure your stove doesn't get as messy.

    One of the most important but overlooked things that you can do not to create a mess is getting good cookware for cooking On the Gas ! This is not only necessary to maintain better hygiene, but also has a great deal of impact on the quality of your cooking.

    You can have the most high-tech kitchen with all the fancy attachments and equipment, but if you don't have good cookware, all that is pretty much useless!

    Bad quality pots and pans can entirely ruin the cooking experience for you by causing uneven heat distribution, and often causing your food to burn! Plus, they are much more prone to food spills which are one of the biggest contributing factors towards clogged burners.

    So, do yourself a favor, and buy some good quality pots and pans for your kitchen if you haven't already. We promise it will prove to be a great investment!

    How to Clean Gas Stove Burners

    Cleaning your Gas Stove Burner can be a complicated process, and I have no shame in admitting that I myself struggle with it sometimes. But, by following the steps described below, this chore can become a hell lot easier.

    1. Read the Instruction Manual Provided by the Manufacturer

    This is the first thing that you need to do before you get started. It helps a lot to know what kind of care is best for your stove and also things that you should avoid.

    Different manufacturers have somewhat different mechanics when it comes to Gas Stoves, and knowing which parts are safe to remove and which are not can help you avoid causing serious damage to your gas burner.

    If you are confused about how to start your cleaning process, the product manual is a good starting point. They usually come with pretty detailed instructions, and sometimes even recommendations about which cleaning products to use.

    2. Assemble the Cleaning Materials

    After you have read through the manual and have an idea regarding the process, go ahead and gather all the products and materials that you'd need to get started. Make sure you keep all of them handy and readily available. You don't want to be fumbling around all over your kitchen looking for your cleaning cloths.

    You'll need the following items -

    • Dish Soap
    • Baking Soda
    • Cleaning Cloths
    • Paper Clip or a Straight Pin
    • Lots of Water

    3. Prepare your Stove for Cleaning

    Before you start with cleaning, make sure your stove is cool. Turn off all the burners on your oven and give it some time to cool off properly before you start removing the parts. Cleaning a hot stove can result in your hands getting burnt, and that's not good!

    Once your burners are cooled down, you can start removing the parts of the stove that can be removed. This includes the burner grates and the caps, along with any other part that can be removed as per the product manual.

    Next, you need to fill up your sink with hot water and add a few drops of dish soap into it. If a sink is not available, you can also use a large bucket or a wash basin.

    You then need to place your burners and other removable parts into your sink and make sure they are fully submerged. Let them stay there while you clean up the other parts of the stove.

    If there is a lot of grease buildup, simply submerging these parts will not be sufficient. To clean up excessively greasy burners, prepare a paste of one part water and one part baking soda. Use a brush to gently scrub the parts to remove the grease and then proceed to rinse them up thoroughly.

    4. Unclogging the Burners

    This is a task that you need to be very careful with. High heat and food residues often cause the buildup of grease and other nasty stuff inside the tiny little holes on your burner from where the flame comes out. The burners need to be cleared out in order for your stove to function optimally.

    For this purpose, use a small straight pin or a paper clip and gently unclog each small hole on your gas burner. In case you own an older cooktop that has a standing pilot light, make sure you shut off the gas valve before you being.

    Removing blockages will substantially restore the function of your stove burner. However, you need to exercise caution while performing this procedure. First of all, you need to make sure you do not clean the ports using toothpicks! This is a very common mistake that people make, and end up further adding to their problem.

    It very often happens that the wooden pick breaks while trying to unclog the pores and gets stuck inside the hole, clogging it further. You also do not want to dig too deep inside the little holes.

    5. Use a damp cloth to clean the gas burners

    While cleaning up the gas burners, you need to ensure that no water seeps inside the little holes of your burner. Use a slightly damp cloth that is not wet to wipe the burners. Also, never spray any type of cleaning product directly onto the burners as that can be really dangerous.

    To clean around the burners, using a brush is a good idea as it is hard to reach these places with rags. Use a toothbrush to get into the small openings and crooks around the burners, and then finally wipe the entire stove clean with a clean cloth.

    6. Turn on the Pilot Lights

    Once you're done with cleaning up the burners and placing all the parts in their respective places, give your stove one final shine by cleaning it up with a cloth. Now follow the instructions provided on your product manual to turn the pilot lights back on, and that's it!

    You're done cleaning up your Gas Stove Burner, and can now proceed to cook some delicious meals!

    Conclusion

    There is nothing better than a nice and clean gas stove to cook on! Plenty of experienced chefs swear by gas stoves and refuse to cook on anything other than gas burners. Thus, taking good care of your gas stove is essential, and it's not that hard to achieve.

    We hope our little guide on how to clean Gas Stove Burners has been helpful to you!

    Related Articles

    Waring Pro ICT400 Double Induction Cooktop [Reviewed]

    Legendary Camp Chef Explorer 2 Stove Under the Microscope

    Induction Cooktop 101| Consumption, Usage, Voltage, Temperature

    7 Best Two-Burner Gas Cooktop

    Kitchen degreasers are chemically formulated cleaning agents designed to emulsify and dissolve lipid-based residues, including cooking oils, baked-on grease, and protein-rich soils. Unlike general-purpose cleaners, degreasers contain surfactants, solvents, and often alkaline compounds that break down the molecular structure of grease, making them essential for maintaining hygienic, food-safe surfaces in both residential and commercial kitchens. Surfaces like stainless steel appliances, ceramic tile, range hoods, oven interiors, and non-porous countertops often accumulate carbonized fat deposits that water-based cleaners cannot remove. This guide examines the 12 best kitchen degreasers, selected based on criteria such as chemical composition, surface compatibility, VOC content, application method (spray, foam, or concentrate), and user safety—providing reliable solutions for effective and damage-free degreasing.

    Best Kitchen Degreasers

    Here's a list of the 12 best kitchen degreasers of 2024 to keep your culinary space spotless and grease-free, whether you're a professional chef or a home cook.

    Spray Nine 26832 Heavy Duty Cleaner, Degreaser &...
    • Triple Action Power: Professional-strength cleaner,...
    • Rapid Sanitization: Get surfaces sanitized in just 10...


    Highlights

    • A non-toxic formula with industrial-grade cleaning results
    • Also works for the surface cleaning of mechanical and electrical appliances
    • Offers better results when used with watered-down vinegar

    Spray Nine 26832 Heavy Duty Degreaser is not just your regular cleaner. It is also a great sanitizer. With this industrial degreaser, you are not just getting rid of all the grease layers from the stove hood and counters, but you are also disinfecting them. Its formula kills all the harmful bacteria and viruses on the surface in the first 45 seconds of the application. And 15 minutes after the application, you can wipe off all the broken-down grease and gunk with a single mopping flick.

    Spray Nine Kitchen Degrease is also a formula that you can use for many different household cleaning purposes. Whether it is soap scum and stains in and around the bathtub and bathroom tiles or dry stains on clothes or soot and smoke marks on walls, you can deal with them through Spray Nine Cleaner/Degreaser. While using it against thing grease buildups or delicate items, it’s better to water down the formula to rule out any unwanted consequences.

    While offering its cleaning action on a range of materials like ceramic, metal, stone, vinyl, plastic, concrete, and rubber, this heavy-duty degreaser is not made for timber surfaces. So, if you have to deal with a grease problem on a wooden kitchen cabinet, use some other degreaser formula. Moreover, its extensive use can also result in producing a strong chemical odor.

    Otherwise, Nine Spray Cleaner/Degreaser is a complete cleaning and disinfection formula that doesn’t just clean any surface but also deodorizes it.  


    Pros

    • Its bacteria-killing formula prevents mold and mildew growth
    • Instant disinfection and cleaning action
    • Equally good for laundry and general cleaning
    • A biodegradable formula 


    Cons

    • Give off a strong chemical smell after the application
    • Doesn’t work on wooden surfaces 


    Type: Spray | Surface Compatibility: Multi-surface | Dimensions: ‎16 x 11.75 x 12.25 inches | Weight: ‎1.64 pounds | Scent: Citrus

    Super Clean Multi-Surface All Purpose Cleaner Degreaser...
    • Superclean Dissolves Grease On Contact And Quickly Removes...
    • Industrial Strength, Yet Biodegradeable And Phosphate Free....


    Highlights

    • A biodegradable and phosphate-free cleaning formula
    • Exhibits cleaning versatility in different concentrations
    • Equally good against dirt and grime buildups

    SuperClean Multi-Surface Cleaner Degreaser is also an industrial-grade, non-toxic cleaning formula that can virtually sort out all your cleaning woes. From the grease buildups under the hood of your car to the oil slime on the BBQ grills and coffee stains on light fabrics, you can count on SuperClean to deal with all these varied stains and buildups.

    If you are looking for an all-around cleaning and degreasing agent for home use, then there are not many options better than SuperClean Multi-Surface Cleaner. However, you need to use it in the right ratios to make the most of its all-purpose attributes.

    For instance, if you are dealing with grease removal from auto parts, drain pipes, garbage disposals, BBQ grills, or concrete surfaces, then use SuperClean cleaner undiluted and with its full strength.

    For carpet cleaning and general grease buildups in the kitchen on the stove hood, exhaust fans, and counters, dilute one part of the cleaner with three parts of water. The same ratio will give good results on fiberglass accessories and plastic furniture.

    And if you are looking to use the cleaner in the interior of the car (seats, dashboards, and other upholstery) then dilute the mixture further i.e., use one part of SuperClean Cleaner with eight parts of water. You can also use the same mixture to get rid of thick grease from pots and pan,s and also the stains in the bathtub.

    For laundry, porcelain, and woodwork items, dilute one part of the degreaser formula with 16 parts of water. In short, SuperClean Cleaner can be used for all cleaning purposes in different concentrations. 


    Pros

    • A gentle, non-toxic but strong industry-grade cleaning formula
    • Good for all surfaces, materials, and appliances
    • A great option as a car cleaning agent 


    Cons

    • You can’t use it in the same concentration for all cleaning purposes
    • Give underwhelming cleaning results on some metallic surfaces 


    Type: Spray | Surface Compatibility: Multi-surface | Dimensions: ‎3 x 4.5 x 11.25 inches | Weight: ‎2 pounds | Scent: Unscented


    Highlights

    • An odorless, biodegradable formula
    • Offers bulk cleaning with a watered-down mixture
    • Amazon’s Choice product

    Stanley Home Products has been around for nearly 90 years, offering quality household products of everyday use. Their degreaser was also probably the first industry-grade cleaning solution for residential users. This is the reason why Stanley has now titled it as an Original Degreaser. This concentrated and high-strength degreaser formula is ideal for all sorts of cleaning and on all sorts of surfaces.

    From a stove hood to a golf club, everything is cleanable with Stanley Original Degrease. Its instant-action formula is ideal for all the tough and stubborn dirt and grease buildups, and stains. Apply the Stanley Original Degrease and give it 15 minutes and you will find out its preeminence over other cleaners.

    No matter how old or badly infested a grease or stain surface is, its surfactant-based formula will get rid of all the unwanted substances in this prescribed timeframe. In some cases, like with an old grease buildup, you might also need to rub the surface a little. But in the end, you will get all brand-new, shining surfaces.

    The best thing about Original Degreaser is that its cleaning action is not just confined to hard-surface cleaning. You can also use it for carpet and upholstery cleaning.

    Now, come to the USP of this product, and we think that’s the reason Stanley Original has been continuously outshining its competitors. It’s an extremely cost-friendly cleaning solution for your household needs. From a single 32-ounce bottle of Original Degreaser, you can actually make 32 ounces of degreasing solution. Stanley Original Degreaser is hard on stains and grease but easy on the pocket.

    Stanley Original Degreaser is an Amazon’s Choice product and enjoys an impressive 4.7-star customer rating!


    Pros

    • Kitchen Degreaser, laundry stain remover, and engine cleaner—all in one
    • An eco-friendly formula
    • Most economical degreasing solution in the market 


    Cons

    • Might struggle against thick grease surfaces 


    Type: Liquid | Surface Compatibility: Multi-surface | Dimensions: 3 x 2.5 x 2 inches | Weight: 2 pounds | Scent: Citrus


    Highlights

    • Industrial-grade degreasing formula
    • Can be diluted for bulk use
    • Works on nearly all hard surfaces

    Zep Commercial Cleaner and Degreaser has an effective biodegradable degreasing formula but with a dash of citrus. Not only does this add-on amplify the cleaning prowess of the solution, but it also gives it a fresh and revitalizing smell. Zep Cleaner and Degreaser is one of those cleaning solutions that are ideal for both professional and residential use.

    Whether you are dealing with oil and grease buildup on large machinery in a loom or trying to get rid of the slime from your stovetop, Zep Cleaner and Degreaser will give evenly effective results. There are really few cleaning products that are equally in demand in these two different consumer markets.

    If we particularly talk about its home use, then we can’t think of a cleaning commitment that this degreaser can’t fulfill. If you are looking to get rid of latex oil paint stains from your floorboards, use Zep Commercial. Or want to service your engine’ exterior to clean it from all the dirt and grime, make a mix of the Degreaser with water and use it.

    Similarly, you can use it on floors, carpets, BBQ grills, and every other home accessory that you need to clean for dirt, dust, and grime.  You can also make gallons of everyday cleaning solution from a single bottle of Zep Commercial Cleaner and Degreaser.

    While using it in full strength and concentration, practice some diligence. For example, if you are using it on timber surfaces, then don’t leave the solution for more than 30 minutes, or else you may have to bear with a permanently stained surface. 


    Pros

    • An industrial degreaser with an equally effective application for home use
    • Works while giving off a fresh citrusy smell
    • Works on all hard surfaces 


    Cons

    • Not suitable for fabric stain removal
    • Damage the kitchen finish if left uncleaned for more than 30 minutes 


    Type: Spray | Surface Compatibility: Multi-surface | Dimensions: 12.44 x 12.44 x 12.81 inches | Weight: 8 pounds | Scent: Citrus

    Citra Solv Concentrated Cleaner & Degreaser - Valencia...
    • Made in United States
    • Package dimension : 6.1" L x 10.92" W x 24.89" H


    Highlights

    • A non-toxic formula
    • Comes with a child-safety lid
    • Amazon’s Choice product

    Many products are able to lure customers by their packaging and this Citra Solv degreaser is one of those products. Earlier, it came in a can, but now it is packaged in a sleek and handy transparent bottle.  The shimmering golden color of the solution emitting out of the bottle makes this new packaging more attractive.

    But that’s not just it. If Citra Solv has worked to improve the packaging, then it has also ensured that the degreasing formula of its product is as good as any other similar product available in the market.  Citra Solv Degreaser can work against all sorts of grime, grease, and dust buildups on every surface.

    From your patio to the furniture and kitchen to your car, Citra Solve Natural Degreaser is ideal for all sorts of cleaning jobs. And besides dirt and grease, you can also use it against chewing gum, ink, pet stains, and lipstick stains.

    Like any other high-quality degreaser, Citra Solv Natural Cleaner & Degreaser can also be watered down for bulk cleaning and delicate fabric stains. You can make four gallons of cleaning solution from a single 32-ounce bottle.

    As a kitchen cleaner and degreaser, we think this Citra Solv product also stays ahead due to its pleasant smell. The manufacturer has specially added Valencia Orange essential oil to the solution for that. After removing all the grease from the stove hood and counters, Citra Solve Natural Degreaser leaves your kitchen with a fresh citrus smell.

    Due to the latest improvements by the manufacturer, Citra Solv now enjoys the tag of Amazon’s Choice. A rating of 4.6 stars also shows its popularity among consumers. 


    Pros

    • Concentrated formula ensures extended budget-friendly use
    • Essential oil in the degreaser leaves a pleasant smell after the cleaning
    • Works on all sorts of materials 


    Cons

    • Not packaged in a spray bottle
    • Might not give similar results on large and old grease buildups 


    Type: Spray/Liquid | Surface Compatibility: Multi-surface | Dimensions: 4 x 2 x 10 inches | Weight: 1.9 pounds | Scent: Citrus

    Goo Gone Degreaser - Removes Kitchen Grease, Grime and...
    • Cleans Counters - fast-working formula that won't harm your...
    • One-Step Cleaner - foaming formula great for use on...


    Highlights

    • One-step cleaning solution
    • Cleaning involves no damp leftovers
    • Keeps the finish of glass and timber appliances intact

    If you are particularly looking for an ultimate cleaning solution for all the grease and baked-on food buildups in your kitchen, then here is the product that you need: Goo Gone Kitchen Degreaser. We know that the name of this decreased product sounds a bit comical. But we are also aware that when it comes to grease removal, this product means business in equal measures.

    Goo Gone Kitchen Degreaser comes in an ergonomic spray bottle so that you can directly apply it to the stovetop, hood, exhaust fan, and kitchen counters. Here, you are not required to take care of or to set the ratio of the concentrated chemical formula with water. The manufacturer has set the formula that has built-in effectiveness against kitchen grime and baked-on buildups.

    The other good thing about Goo Gone Kitchen Degreaser is that its use is surprisingly unmessy in comparison to all the other degreasers that we have discussed. The trigger of the bottle sprays the powerful foam that doesn’t need any rubbing or scrubbing. Also, you are not required to soak the grease buildup in the solution. A single spurt of the heavy-duty degreaser is enough to break down the stubborn grease and grime patches.

    In short, you don’t need any elbow grease with the use of Goo Gone Kitchen Degreaser.  


    Pros

    • A biodegradable formula makes it safe to use on food-grade material
    • Comes in a handy spray bottle for instant use
    • Equally effective on ceramic, wooden, metal, and tile finishes 


    Cons

    • Not ideal for heavy grease buildups in drain pipes in dishwasher
    • Doesn’t work well for bulk cleaning 


    Type: Spray | Surface Compatibility: Multi-surface | Dimensions: 2.25 x 3.5 x 8.7 inches | Weight: 1 pound | Scent: Citrus

    Krud Kutter 305373 Kitchen Degreaser All-Purpose Cleaner, 32...
    • Cleans and removes tough greasy, grimy messes from a variety...
    • Ready to use non-toxic formula, simply spray and wipe clean


    Highlights

    • Pet-friendly cleaning formula
    • Comes in a handy spray bottle
    • Can be used as an all-purpose cleaning agent
    • Free of harsh chemicals

    This kitchen degreaser is quite different from the earlier reviewed product of Krud Kutter. Krud Kutter 305373 is a handy kitchen cleaner and degreaser that comes in a spray bottle for instant application. Like the Goo Gone formula, it also comprises the chemical concentration that gives effective grease removal results with direct application.

    Apart from taking care of all the baked-on and grease buildups on range hoods, countertops, and dinnerware, you can also use it outside of the kitchen. For instance, clean your plastic and wooden furniture with it. You can also try the degreaser on your car accessories and other home items.

    We are calling for this non-kitchen use of Krud Kutter 305373 because of its non-toxic formula. There are no ammonia, phosphate, bleach, or other harsh chemicals present in this Krud Kutter Degreaser.  So, you don’t have to worry about any sort of fading and discoloration with its application on any hard surface. Nonetheless, we won’t recommend its use on delicate fabrics.

    Krud Kutter is also a good kitchen degreaser because its non-toxic formula is entirely harmless for the cleaning of food preparation surfaces. Compliance with EPA safer products standards also guarantees that you are using an eco-friendly product.

    Krud Kutter 305373 is quite popular among homeowners looking for instant grease cleaners!


    Pros

    • The non-toxic formula is harmless for food preparation surfaces
    • Safe for pets
    • Offers similar degreasing results on multiple materials
    • Non-kitchen use is also possible
    • Ensures odorless cleaning mechanism
    • The absence of harsh chemicals ensures discoloration prevention 


    Cons

    • Not suitable to be use on varnished tops
    • Not insulated
    • Not ideal for hard and extensive degreasing work


    Type: Spray | Surface Compatibility: Multi-surface | Dimensions: 4.88 x 3 x 10.25 inches | Weight: 2.33 pounds | Scent: Unscented


    Highlights

    • More than a kitchen degreaser
    • Comes in a gallon and a quart packaging
    • A good solution for floor mopping

    This is the second Zep Degreaser that has ended up on our list of the best kitchen greasers. There are many reasons why we are calling it one of the best degreasers available on the market right now. To begin with, it is a formula that is equally good for commercial and residential applications. Zep has also taken care of this versatile use in the packaging of the degreaser.

    For homeowners, Zep Fast 505 Cleaner and Degreaser is available in a 1-quart spray bottle. Meanwhile, commercial users can procure it in a 1-gallon package. To be effective in all different settings, Zep Fast 505 Cleaner and Degreaser offers degreasing solutions on all sorts of surfaces.

    Whether it’s the wooden countertop of a kitchen or a heavy metallic workstation of a mill, Zep Fast 505 Cleaner can get rid of all the dirt, grime, and slime with a single application. Apart from getting rid of oil and water-insoluble buildups, you can also use it for general cleaning and mopping. If your kitchen sees a lot of frying all the time, then we would recommend you use the diluted form of Fast 505 Cleaner to mop the floor to sort out all the out-of-sight oil splatters.

    Some degreasers are not good for use on wooden surfaces (e.g., Krud Kutter). But that’s not the case with Zep Fast 505 Cleaner and Degreaser; you can use it to free the wooden and timber finishes from grime without worrying about their discoloration. 


    Pros

    • A simple spray and wipe formula ensures hassle-free cleaning
    • Can work on multiple surfaces, including wood
    • Also comes in a gallon for professional use 


    Cons

    • Not a skin-friendly formula
    • Not suitable for fabrics 


    Type: Spray | Surface Compatibility: Multi-surface | Dimensions: 6 x 12.1 x 6 inches | Weight: 1 pound | Scent: Citrus

    LA's Totally Awesome All Purpose Concentrated Cleaner, 32 oz
    • 32 fl. Oz.
    • Cleaner, degreaser, and spot remover all-in-one


    Highlights

    • A non-inflammable and non-toxic formula
    • Designed for all sorts of cleaning purposes
    • Comes in an easy-to-use spray bottle

    The vanity-filled name of the manufacturer (LA’s Totally Awesome) has no bearing on the degreasing product that it offers.  LA’s Totally Awesome All Purpose Concentrated Cleaner is surely an all-around cleaning solution. Its 32-ounce spray bottle contains a magic potion that can get rid of grease and also tough stains from clothes. Then you can also use it on furniture and in a car interior.

    Some kitchen degreasers contain some inflammable elements and therefore they are not prescribed for cleaning stovetops and grates. Such is not the case with LA’s Totally Awesome Degreaser. Its non-inflammable formula is also free of ammonia, acids, phosphates, and bleach.

    In short, it is one of the safest degrees on the block. You can use it on food-prep surfaces and also in areas where pets are present. And one thing more, if you are trying to remove a pet stain from the carpet, use this pet-friendly cleaner and degreaser.

    The absolute absence of toxic and harsh chemicals also makes it an ideal cleaning agent for septic tanks. This all-purpose cleaner is also skin-friendly. Even in its concentrated form, it doesn’t cause any reactions or rashes on the skin. So, you can use this solution in the laundry, in the kitchen, and in your car or any part of the house without wearing gloves.

    You can also dilute it with water to make it an effective everyday cleaning agent.  


    Pros

    • Non-inflammable formula ideal for cleaning stove grates
    • A non-toxic, pet-friendly mixture
    • No harsh chemicals are used, and skin-friendly
    • Can be used on all surfaces 


    Cons

    • It can’t be used as a bleaching agent in the kitchen drain and bathroom


    Type: Spray | Surface Compatibility: Multi-surface | Dimensions: 3 x 1 x 2 inches | Weight: 2.31 pounds | Scent: Unscented

    Simple Green Pro HD Heavy Duty Cleaner Concentrate 1 Gallon...
    • Simple Green Pro HD is a PROP 65 product, non-corrosive,...
    • Developed for multi-purpose contractor applications...


    Highlights

    • A non-corrosive cleaning formula
    • Equally good for industrial and residential use
    • Offers cost-effective bulk cleaning
    • Can be used on all materials and surfaces

    Simple Green Pro HD Heavy Duty Cleaner is exactly what is described in its title. It is a simple cleaning and degreasing formula for all heavy-duty cleaning purposes. It comes in a one-gallon bottle, which some users might find inconvenient when there are a variety of easy-to-use spray degreasers available in the market. However, for all those users who are looking for cost-effective and bulk cleaning, this bottle size is perfect.

    The best thing and the USP of Simple Green Pro HD Heavy Duty Cleaner is its non-corrosive cleaning formula. For that reason, it can also be used for cleaning and degreasing even in the internal parts of the machinery. Its metal-friendly action makes it one of the most sought-after cleaners in industrial settings.

    Moreover, it has an instant cleaning mechanism and action against water-insoluble substances, making it an equally good degreaser in residential spaces. Get a gallon of Simple Green Pro Heavy Duty Cleaner, dilute it with water, and take care of all the grease splatters and baked-on buildups for months. Its non-corrosive and non-abrasive cleaning action also guarantees effective cleaning and degreasing of many other home appliances. 


    Pros

    • Industrial degreaser cleaner that is equally good for home degreasing
    • Can be diluted for bulk cleaning
    • Provides odorless cleaning 


    Cons

    • Only comes in bulk packaging
    • Not great on fresh oil stains 


    Type: Spray/Liquid | Surface Compatibility: Multi-surface | Dimensions: 7.5 x 5.5 x 10.3 inches | Weight: 9.38 pounds | Scent: Unscented

    Weiman Heavy Duty Gas Range & Stove Top Cleaner and...
    • POWERFUL GAS RANGE CLEANER: Dissolves cooked-on, stubborn...
    • REMOVES TOUGH GREASE AND BURNED-ON-FOOD: Formulated with a...


    Highlights

    • A threefold-action cleaning formula
    • Can be diluted for bulk cleaning
    • Ideal for kitchenware cleaning and degreasing

    Weiman is not promoting its degreasing product as an all-purpose and all-rounder. Instead, it firmly claims the niche market of gas range and cooking top cleaners. But the truth of the matter is, the use of Weiman Cleaner and Degreaser is not just limited to kitchenware. You can also use it to clean your bathroom or any surface that is made of metal, fiberglass, tiles, or ceramic. Similarly, it is marketed as a degreaser product, but that’s not what this Weiman product is all about.

    From rust to dirt and water-insoluble residues, you can use it against a range of other unwanted substances. You can also use it on a cloth after diluting it with water. Weiman Gas Range Cleaner and Degreaser comes in an easy-to-use spray bottle so you can directly apply it to the range hood and stove grates. Being a specialized cleaning solution for range tops, it gives astonishing and quick results against burnt marks as well.

    The unique thing about Weiman Cleaner and Degreaser is its threefold action. It cleans the surface, gives it a sheen, and protects it from immediate dirt and dust buildup. The non-abrasive formula of the product also ensures that your kitchen appliances or other expensive finished surfaces don’t experience any fading or discoloration. 


    Pros

    • Comes in an easy-to-use spray bottle for direct application
    • A specialized range of top cleaners that is equally good for other cleaning tasks
    • Carries out cleaning, shining, and protection in a single application 


    Cons

    • In some instances, elbow greasing is required to get rid of stains and buildups 


    Type: Spray | Surface Compatibility: Gas range cook tops | Dimensions: N/A | Weight: 0.75 pounds | Scent: Unscented

    Grab Green Kitchen Power Degreaser, 16 Ounce (Pack of 3),...
    • Contains: 3- 16 Ounce Spray Bottles of Grab Green Natural...
    • Naturally Effective: This biodegradable formula works...


    Highlights

    • An all-natural formula
    • Comes in an easy-to-use spray bottle
    • Amazon’s Choice product

    If you are one of those people who strongly believe in offsetting your impact on the environment and strive for cruelty-free products, then get Grab Green Natural Power Degreaser Cleaner as your kitchen degreaser. The product is sourced from natural compounds and is free of industrial preparations. Moreover, the pre-marketing trials of the product don’t involve any animal testing. So, it is also a cruelty-free product.

    Grab Green Natural Power Degreaser is completely free of all those synthetic elements that not just take their toll on the environment but can also cause direct harm. The degreasing formula of Grab Green is completely free of phosphates, dyes, solvents, masking agents, and parabens. This ensures a harmless and non-toxic cleaning action that also remains pet-friendly.

    It is important to mention here that while keeping its product eco-friendly and organic, Grab Green hasn’t compromised on the functionality of Natural Power Degreaser Cleaner. It is as good as any other quality degreaser available in the market right now. Its quick cleaning action, complemented with an easy-to-use spray bottle, makes for hassle-free degreasing.

    Just spray the liquid on the surface and wipe it off with a paper towel, and there you are with a clean, grease-free surface. In some instances, where you are dealing with baked-on greases and burnt spots, you have to keep the solution in place for some time to get better results.

    Grab Green Natural Power Degreaser has earned the tag of Amazon’s Choice product in the category “non-toxic oven cleaner”.  


    Pros

    • Equally good on granite and stone surfaces
    • Added essential oils to give off natural scents of thyme and fig leaves
    • Free of toxic and harsh chemicals 


    Cons

    • Not good for extensive degreasing work, drains, dishwashers, etc 


    Type: Spray | Surface Compatibility: Multi-surface | Dimensions: 9 x 2 x 9 inches | Weight: 3.54 pounds | Scent: Unscented

    Best Kitchen Degreasers Comparison Table

    Product Type Surface Compatibility Dimensions Weight Scent
    Spray Nine 26832 Heavy Duty Spray Multi-surface 16 x 11.75 x 12.25 inches 1.64 pounds Citrus
    SuperClean Multi-Surface Degreaser Spray Multi-surface 3 x 4.5 x 11.25 inches 2 pounds Unscented
    STANLEY Original Degreaser Liquid Multi-surface 3 x 2.5 x 2 inches 2 pounds Citrus
    Zep Commercial Citrus Cleaner Spray Multi-surface 12.44 x 12.44 x 12.81 inches 8 pounds Citrus
    Citra Solv Natural Cleaner Spray/Liquid Multi-surface 4 x 2 x 10 inches 1.9 pounds Citrus
    Goo Gone Kitchen Degreaser Spray Multi-surface 2.25 x 3.5 x 8.7 inches 1 pound Citrus
    Krud Kutter 305373 Spray Multi-surface 4.88 x 3 x 10.25 inches 2.33 pounds Unscented
    Zep ZU505128 Fast 505 Spray Multi-surface 6 x 12.1 x 6 inches 1 pound Citrus
    LA’s Totally Awesome Cleaner Spray Multi-surface 3 x 1 x 2 inches 2.31 pounds Unscented
    Simple Green Pro HD Spray/Liquid Multi-surface 7.5 x 5.5 x 10.3 inches 9.38 pounds Unscented
    Weiman Gas Range Cook Top Cleaner Spray Gas range cooktops N/A 0.75 pounds Unscented
    Grab Green Natural Power Degreaser Cleaner Spray Multi-surface 9 x 2 x 9 inches 3.54 pounds Unscented

    Best Kitchen Degreaser Buying Guide 

    Buying Guide For The Best Kitchen Degreaser

    A good kitchen degreaser is more than just a cleaning solution. You might have got this from the above reviews, any good quality product doesn’t just cut through the grease buildups on kitchen appliances. 

    What Is a Kitchen Degreaser?

    A kitchen degreaser is an alkaline hydrocarbon solvent (mostly xylene and kerosene) that can dissolve water-insoluble substances such as oil, grease, and grime. The absence of acidity from its formula ensures that your kitchen surfaces don’t fade or discolor as an unwanted consequence of grease cleaning.

    Importance of Kitchen Greasers

    Even if you are good at the everyday cleaning of your kitchen, you can’t do anything about the oily, greasy layer that gradually builds up over different kitchen surfaces. If your kitchen is a buzzing spot for fried food, then this layer turns up in less time.

    This oily, slimy feel throughout the kitchen taints the cooking experience. And not just that, this buildup also infests the space with an odd odor that is felt quite strongly when you enter the kitchen for the first time in the morning.

    A good quality degreaser helps you in making your kitchen a lot better working space. You can’t have that grease and grime sorted with your everyday cleaners. In short, with all the frying, baking, and stove cooking that is happening in the kitchen, you will need a degreaser to ensure a better cleaning regimen.

    To make it easy for you to buy the right product, we are going to review 15 of the best kitchen degreasers that are available in the market right now. The numbering here doesn’t indicate any ranking or preference. It is just done for better readability.

    So, there are some other characteristics as well that you should factor in while buying a kitchen degreaser to get the product best suited for your personalized use. It is needless to say that the cleaning and degreasing prowess of a kitchen degreaser will remain at the forefront and will always override the characteristics that we are going to discuss.

    Versatility | A Special or an All-Purpose

    The above review section has made it quite clear how versatile a degreaser product can be. There are many products that you can use against grease, stains, and other dirt buildups on all types of materials and surfaces. Then, some products don’t work on glass and wooden surfaces. Similarly, some products are too harsh for fabric cleaning.

    Even though a more versatile degreaser can save you some bucks, it might turn out to be the manifestation of the adage “jack of all trades, master of none”. If you are looking for just a degreaser solution, then buy a product that is exclusively designed for this purpose.

    And even if you are going for an all-purpose and versatile degreaser, don’t make an impulsive decision just by factoring in the price. Look at the manufacturer and the market reputation of the product instead. You can pick any of the all-purpose products from the above because we have only included the best of the best.

    Best Kitchen Degreaser

    Odorless or Scented Ones

    The majority of heavy-duty degreasers made for bulk cleaning usually give off a chemical smell after their use. That’s a trade-off you have to make to keep your extensive cleaning low-cost. On the other hand, small handy spray bottles come with added scents and essential oils to give a pleasant finishing touch to your degreasing tasks.

    We have also discussed some degreasers that come with lemongrass, thyme, and citrus scents. If you want to keep your kitchen clean and also emanating good smells, then get those scented degreasers.

    The Viscosity and Consistency of a Kitchen Degreaser

    Many people don’t factor in these characteristics when buying a kitchen degreaser. However, they play an integral role in giving you the desired cleaning results. No matter how instant a degreaser product claims to be, it takes some time to settle in and break down the stubborn grease patches.

    If you are using a low-viscosity degreaser on vertical and inclined surfaces, then it will quickly drip down to the ground without inflicting the required cleaning action. And as a result, you will get unsatisfactory degreasing even if the formula in question is high-quality or industry-grade.

    For all such steep and outright vertical surfaces, you should invest in foam degreasers. They come in spray bottles and cling to the surface to effectively break down the grease. We have also discussed some spray kitchen degreasers above.

    Safety

    With any cleaning product, safety has always been a pressing issue. Kitchen degreasers are no different, and their safety index tells us how good they are for home use. If you have noticed, the majority of degreasers in our list are biodegradable, organic, and free of synthetic toxins. All these attributes indicate that a degreaser product is safe to use on food-prep surfaces and in settings with pets and children.

    If you are buying a degreaser strictly for home use, then we would strongly recommend that you factor in those safety features.

    How to Use a Kitchen Degreaser Effectively?

    Kitchen degreasing seems a pretty straightforward task, i.e., apply a degreaser on the surface that needs to be cleaned, wait for some time, and wipe the broken-down grease off.  However, there are some minute details that you should consider in using a kitchen degreaser to its maximum effect.

    Wash the Surface First

    Before the application of the degreaser, it is better to wash the surface that you want to degrease. For instance, if you are going to decrease the stovetop, then first wash it with water and regular soap or cleaning solution. It will wash off all the large food particles and other water-soluble buildups.

    After this wash, you will only leave with that stubborn baked-on grease for which you are using a kitchen degreaser. This pre-degreasing wash will improve the action of the degreaser agent.

    Use Warm Water

    For better cleaning results and a completely non-sticky feel on the kitchenware and especially utensils, use warm water for pre-degreasing wash and to rinse off the degreased items.  

    Dry it, don’t leave it for Air Drying

    If you don’t want water stains on your expensive wooden finishes, then dry them with a plain cloth or paper towel at the end of any degreasing activity. Leaving them to gradually dry by air can result in water stains that become pretty hard to remove once the surface is completely dried.

    Don’t Use Abrasive Degreasers

    Unless you are dealing with extensive and long-in-the-making grease buildups, avoid using abrasive degreasers because they contain hazards. Moreover, they can also cause fading and discoloration to the kitchen surface you are degreasing.

    A good quality all-purpose degreaser will sort out your tough kitchen cleaning while providing equally good results for many other cleaning jobs in and around the house. We hope that you will find the right degreasing product for your kitchen from the 13 products we have reviewed here.

    Kitchen Degreasers FAQ's

  • Are kitchen degreasers safe to use on all surfaces?

    It is important to check the label or manufacturer’s instructions before using a kitchen degreaser on a particular surface. While most degreasers are safe for use on common kitchen surfaces like stainless steel, ceramic, and glass, some surfaces like aluminum or certain types of painted surfaces may require a more specific or gentle cleaning product.

  • Can kitchen degreasers be used on food preparation surfaces?

    It is generally recommended to avoid using heavy-duty degreasers directly on food preparation surfaces. However, there are specific kitchen degreasers available that are formulated to be safe for use on such surfaces. Always check the label or product instructions for guidance.

  • Can kitchen degreasers remove baked-on grease?

    Yes, many kitchen degreasers are effective at removing baked-on grease. For stubborn or heavily soiled areas, you may need to apply the degreaser and let it sit for a longer period or repeat the cleaning process.

  • Are kitchen degreasers environmentally friendly?

    Some kitchen degreasers are formulated to be more environmentally friendly, using biodegradable ingredients or following eco-friendly manufacturing practices. Look for products that are labeled as eco-friendly or environmentally friendly if this is a concern for you.

  • Can I make my own kitchen degreaser?

    Yes, there are homemade degreaser recipes available that use common household ingredients such as vinegar, baking soda, and dish soap. However, it’s important to note that homemade solutions may not be as effective as commercial kitchen degreasers, especially for tough grease buildup.

  • Can kitchen degreasers eliminate odors?

    Some kitchen degreasers are formulated with ingredients that help eliminate odors, leaving your kitchen smelling fresh and clean. Look for degreasers that specifically mention odor elimination properties on the label.

  • Conclusion

    Effective kitchen maintenance hinges on the right degreasing agent—one capable of breaking down stubborn, oil-based residues without damaging surfaces or leaving behind harmful residues. This guide has outlined top-performing degreasers optimized for both residential and commercial use, focusing on solvent strength, surface compatibility, safety, and cost efficiency.

    From our evaluation, three standout formulations offer targeted performance for distinct needs. Spray Nine 26832 Heavy Duty Degreaser combines industrial-grade cleaning with EPA-registered disinfecting properties—ideal for non-wood surfaces exposed to persistent buildup. SuperClean Multi-Surface Degreaser provides broad-spectrum efficacy across metal, plastic, and sealed surfaces, making it a reliable all-purpose solution. Stanley Original Degreaser delivers strong results at a competitive price point, offering the best value for routine kitchen maintenance.

    Choosing the correct formulation based on surface type, soil load, and application method will ensure consistent hygiene, protect kitchen finishes, and reduce cleaning labor. For reference, revisit the product comparison and guide sections to match the right degreaser with your kitchen’s specific demands.

    Related Articles

    7 Best Oven Cleaners For Baked-On Grease

    10 Best Hand Cleaners for Mechanics and Grease

    The holiday season is almost around the corner. While there is still some time left before it is upon us in full swing, you know how hectic Christmas preparations can get when the time comes near. Most people reuse their decorations from the Christmases that have come and gone. It makes sense since it is practical, but how long can you keep on using the same decoration pieces?

    If you feel that you need to give your Christmas preparations this year a makeover to revitalize your home, you will understand the importance of buying more decorative items. One of the most integral parts of Christmas decorations in every American home is the inclusion of burlap ribbons and wreaths.

    For those of you who are looking for some fresh décor ideas to make your house beautiful, ambient, warm, and cozy this year and fully enjoy the Christmas spirit, we have put together a list of the best Christmas decoration burlap ribbons and burlap wreaths that you should consider buying.

    Best Burlap Ribbon Options 

    We are going to start off with reviews of some of the best burlap ribbon options that you can purchase for Christmas 2022.

    Etercycle came out with a burlap ribbon roll set that includes 12 different styles of burlap ribbon rolls. It is our top choice as it is the most pragmatic product out there. It is the perfect Christmas décor item.

    No products found.

    All of the items within the Natural Burlap Ribbon Rolls Set by Etercycle are made using soft and natural jute material, which is durable and of good quality. The burlap ribbon rolls consist of ribbons made in a way that they are not easy to break or tear. This means that the Natural Burlap Ribbon Rolls Set by Etercycle is an investment that can last a long time before any natural wear and tear start to affect its quality.

    [easyazon_image align="none" height="1050" locale="US" src="https://images-na.ssl-images-amazon.com/images/I/61fshMayJtL.jpg" tag="homesthetics0a-20" width="1050" type="image" link_id="221361" ref="etercycle-natural-burlap-ribbon-rolls-set17-peices-multiple-styles-jute-fabric-ribbons-twine-burlap-flowers-for-arts-crafts-diy-gift-wrap-wedding-party-home-decoration" identifier="B07QRQG1YD"]

    Each of the ribbons in the Natural Burlap Ribbon Rolls Set by Etercycle is 6-and-a-half feet long with varying width options that you can choose from. There is a jute twine in the package as well as four burlap flowers with two different designs that you can choose.

    Easy to use, the Natural Burlap Ribbon Rolls Set by Etercycle comes in small rolls that you can cut at any length and shape. You can use the set and combine all the different burlap ribbon rolls to be as creative as you want to be with your Christmas decoration needs.


    Pros

    • Made with soft jute material
    • Easy to use
    • Does not tear easily


    Cons

    • Some customers found the rolls to be disheveled
    • Some customers found the packaging poorly done


    M&A Décor really knows how to help people prepare for special occasions throughout the year with their wonderful line of products. It comes as no surprise that when looking for the best products to help you prepare for Christmas celebrations this year, a product by M&A Décor is also on the list.

    No products found.

    The Burlap Ribbon Twine Set for Crafts Wired 2 inch ribbon jute string on a spool by M&A Décor is a set of wired burlap lace and jute twine, perfect for all kinds of Christmas decoration options. The burlap ribbons in the Burlap Ribbon Twine Set for Crafts Wired by M&A Décor are 2 inches wide and 5 yards long. It is safe to say that there is more than enough length in one set for the entire Christmas decorations for your home. 

    The Burlap Ribbon Twine Set for Crafts Wired by M&A Décor features wired ribbons that make it a lot easier for you to create as many shapes as necessary or your Christmas decoration options. You can go for customized decor as simple or as complex as you require. How you use the Burlap Ribbon Twine Set for Crafts Wired by M&A Décor is all a matter of your personal preference.


    Pros

    • Made with high quality fabric
    • Twine string allows you to create any shape
    • Wired design for better customization


    Cons

    • Not as durable as other products
    • Not a lot of design options


    SS Shovan is known for its Christmas decoration items. The reason for this is that their products are simple and elegant. Very easy to use, SS Shovan products help customers get a complete look for their Christmas decorations so that they can enjoy the holiday season with the cozy and warm vibes that their products create.

    The Natural Burlap Ribbon Roll with White Lace Trims Tape by SS Shovan comes in a set of 6 different rolls of natural burlap ribbons. Their white lace trips have an intricate yet elegant design, giving a rustic aesthetic to the products.

    [easyazon_image align="center" height="1116" locale="US" src="https://images-na.ssl-images-amazon.com/images/I/81-9xZsb%2BxL.jpg" tag="homesthetics0a-20" width="1400" type="image" ref="6-pieces-burlap-ribbon-natural-jute-fabric-ribbons-rolls-set-multiple-styles-for-arts-crafts-diy-gift-wrap-wedding-party-home-decoration" link_id="221367" identifier="B0766JXR74"]

    79 inches of ribbon in each spool of the Natural Burlap Ribbon Roll with White Lace Trims Tape by SS Shovan give you more than enough length to make your own way as far as Christmas decorations are concerned. Use your imagination and craft the perfect set of ribbon decorative elements for your home’s Christmas decoration this year.

    The Natural Burlap Ribbon Roll with White Lace Trims Tape by SS Shovan is definitely one investment you want to make for an enjoyable and memorable Christmas with your family this year. Set your imagination free with this product and satisfy your creativity by exploring your decorative options through this wonderful product.


    Pros

    • Ideal length of ribbons
    • Is a set of very easy to use decorative ribbons
    • Simple yet elegant designed white lace trims


    Cons

    • Just enough for one time use for Christmas
    • Some customers did not like the rustic look


    When you are finalizing your Christmas preparation list for decorating your home, you might think you are done and you have almost everything sorted out. But after a few days, you may feel like something is missing and there a need to add to the decorations. That’s where you need something like this.

    LWR CRAFTS Natural Burlap Ribbon with Lace (Blue)
    • The Burlap Ribbon Is Made of Nautral Jute and Lace.
    • It Is 2 3/8 Inches Wide, 6 1/2 Feet Long. The Edge is...

    LWR Crafts introduced this simple and effective product in convenient packaging. The Natural Burlap Ribbon with Lace by LWR Crafts is a 2 3/8 inch thick ribbon that is around 6 feet long. Made from completely natural jute fabric and embellished with lace in blue color, the Natural Burlap Ribbon with Lace by LWR Crafts is a pretty good way to add to your Christmas décor without making it too obvious. 

    For those who love the simplicity and do not want wastage, the Natural Burlap Ribbon with Lace by LWR Crafts is perfect for decorating your home this Christmas. LWR Crafts has created this product with lacings of four different colors that you can choose from White, blue, pink, and grey. You can choose a combination of the different colors to create wonderful decorations so that you and your family can enjoy a warmer and cozier Christmas this year.


    Pros

    • Made with reusable jute fabric
    • Is an eco friendly product
    • Simple way to make your home look more beautiful


    Cons

    • Shorter than described on the packaging
    • Some customers found the packaging done badly


    Sometimes, you need a comprehensive solution when it comes to your Christmas decorations. While it is fun to be able to make your own Christmas decoration ornaments by customizing the ribbon spools, it can be a lot of effort. That is where products like the Natural Burlap Flowers Set by Amaoz come in to make your life easier.

    No products found.

    The Natural Burlap Flowers Set by Amaoz is a complete set of natural burlap ribbons, which has readymade burlap flowers that have a unique and rustic feel to them. The fabric used is natural jute, which is adorable and has a chic finish to it.

    [easyazon_image align="center" height="1500" locale="US" src="https://images-na.ssl-images-amazon.com/images/I/81M6WKgKELL.jpg" tag="homesthetics0a-20" width="1500" type="image" link_id="221373" ref="natural-burlap-flowers-set-include-9-styles-handmade-rustic-burlap-flowers-lace-burlap-ribbon-roll-and-natural-jute-twine-for-diy-craft-wedding-gift-tags-wrap-wine-bottle-home-embellishment-23pcs" identifier="B07S1J9D53"]

    The Natural Burlap Flowers Set by Amaoz consists of a set of 12 different handmade burlap ribbon flowers as well as other cute decorative elements. That and the fact that there are four different rolls of burlap ribbons Natural Burlap Flowers Set by Amaoz that are laced with exquisitely done white trimmings make it a set that you should really consider getting this year.

    The best thing about it is that you can use the Natural Burlap Flowers Set by Amaoz for decorations throughout the year for a variety of different applications, other than for Christmas decorations.


    Pros

    • Made with eco friendly fabric
    • Versatile product
    • Readymade burlap ribbon ornaments


    Cons

    • Not a lot of options of style
    • Some customers found it too small in size and quantity


    Are you looking to achieve a greener and more natural look for your Christmas decorations this year? Sometimes, it pays off to go for something out of the box when it comes to your Christmas décor and create an ambiance that is odd yet refreshing at the same time.

    Tenn Well Burlap Leaf Ribbon, 66 Feet 5mm Natural Jute Twine...
    • PREMIUM QUALITY: The burlap leaf ribbon consists of...
    • DURABLE TWINE: This 4 ply natural jute twine is soft but...

    If you really are going for it, then the Natural Jute Twine, 5MM Burlap Leaf Ribbon with Artificial Vine Green Leaves is your best bet to getting creative with your Christmas decorations this year. The premium quality Natural Jute Twine, 5MM Burlap Leaf Ribbon with Artificial Vine Green Leaves is essentially a burlap ribbon with artificial leaves attached, which creates a natural-looking environment.

    [easyazon_image align="center" height="1001" locale="US" src="https://images-na.ssl-images-amazon.com/images/I/61P9AyRiRvL.jpg" tag="homesthetics0a-20" width="1001" type="image" link_id="221376" ref="tenn-well-66ft-natural-jute-twine-5mm-burlap-leaf-ribbon-with-artificial-vine-green-leaves-for-wedding-home-garden" identifier="B07C9Z1FHR"]

    If you are looking to add a touch of nature to the ornamental display on this auspicious occasion, then the Natural Jute Twine, 5MM Burlap Leaf Ribbon with Artificial Vine Green Leaves gives you the ability to do just that. The jute rope used is 4-ply which allows it to remain soft yet durable at the same time.

    The Natural Jute Twine, 5MM Burlap Leaf Ribbon with Artificial Vine Green Leaves is the best way to add some greens in a natural style to your home for creating a warmer and cozier ambiance for Christmas this year.


    Pros

    • Creates an out-of-the-box look
    • Has a length of 66 feet
    • Perfect for decorating your home


    Cons

    • Customers have reported that the leaves fall off
    • It is a little difficult to use


    If you want the perfect product to put the finishing touches of all your hard work into your Christmas decorations, you want to add something that has a delicate look along with a strong finish so that it can stay this way throughout the holiday season. David Accessories has made just something that might fit that role.

    Burlap Ribbon Perfect for Wedding Home Decoration Gift Wrap...
    • There are clear plastic on the both side in order to...
    • Burlap ribbon in natural jute available in color grey.

    The Burlap Ribbon for Christmas Decoration by David Accessories is a simple solution for all the Christmas decoration enthusiasts who are looking for a solid bit of ornamental ribbon, which will make their decorative work look even better this Christmas. The Burlap Ribbon for Christmas Decoration by David Accessories consists of a readymade and well-bound burlap ribbon flower. 

    In order to ensure that this beauty retains its shape for a long time, the ribbon used in the Burlap Ribbon for Christmas Decoration by David Accessories is covered with a thin layer of plastic that keeps it in a study shape for a long time. It is so easy to use. All you have to do is find a place for it and stick it there. It does not get simpler than that when you do not have the time to keep on fixing your decoration every day.


    Pros

    • Very easy to use
    • Durable and strong
    • Accentuates your Christmas décor


    Cons

    • Wired edge is too rigid
    • There have been cases of flawed weaving


    Christmas holidays and the color red have a special connection with each other. There is no Christmas you will ever see without a necessary dash of this beautiful color adorning Christmas decorations throughout American homes or around the world. How about getting a beautiful burlap ribbon that allows you to get the most elegant shade of red as part of your Christmas decorations this year?

    DARICE 2914-052 240gm Burlap Ribbon, 2.5-Inch by 10-Yard,...
    • Burlap Ribbon 2.5 Inch Sewn Edge 10Yard Red 240gm
    • It is 100 Percent Jute

    We think that the Red Colored Burlap Ribbon by Darice is by far the most superior quality red burlap ribbon that we have come across. Made from 100 percent pure jute material, this is a high-quality ribbon. One of the biggest complaints that people have with Jute ribbons is the fact that the sides are so fragile that the whole thing starts to fall apart. Not the Red Colored Burlap Ribbon by Darice.

    Darice put in a lot of effort in its products to make sure that the Red Colored Burlap Ribbon does not fall apart. The sides are sewn properly to make sure that the whole ribbon stays well put together in your Christmas decorations throughout the holiday season without the need of fixing or replacing the decorations every single day.


    Pros

    • Made with 100 pure jute
    • Has a very beautiful red color
    • Sides are sewn properly


    Cons

    • Made in China
    • Not too long


    Perhaps one of our most favorite when it comes to the recommended burlap ribbons that you should consider for your Christmas decorations this year, the Red and Black Plaid Burlap Ribbon Christmas Wired Ribbon by Uratot is one thing you do not want to miss out on.

    URATOT Red and Black Plaid Burlap Ribbon Christmas Wired...
    • Classic style: the burlap ribbon is designed in red and...
    • Multi-functional ribbon: the hemp texture looks perfect for...

    If there is anything that can make your home’s Christmas decorations warmer, cozier and a lot more welcoming with the spirit of Christmas, it is the Red and Black Plaid Burlap Ribbon Christmas Wired Ribbon by Uratot. It is simply too good not to use for your Christmas if you do not already use it every year.

    [easyazon_image align="center" height="500" locale="US" src="https://images-na.ssl-images-amazon.com/images/I/612MtrdItgL.jpg" tag="homesthetics0a-20" width="500" type="image" link_id="221384" ref="uratot-red-and-black-plaid-burlap-ribbon-christmas-wired-ribbon-wrapping-ribbon-for-christmas-crafts-decoration-floral-bows-craft-5cm-x-6m" identifier="B07VSR746T"]

    The Red and Black Plaid Burlap Ribbon Christmas Wired Ribbon by Uratot has a beautiful and classic style adorned with an immaculate composition of black checks on a red-colored fabric that is soft to the touch and so warm.

    Easy to use, convenient and so well made, the Red and Black Plaid Burlap Ribbon Christmas Wired Ribbon by Uratot is a bit of an investment to make in terms of how much it costs but it is one thing you will regret not buying. It is easily one of the top recommendations for burlap ribbons to help you create a warm and cozy Christmas home.


    Pros

    • Made with high-quality fabric
    • Has a very beautiful color scheme
    • Perfect for Christmas decoration


    Cons

    • A little on the expensive side
    • There simply isn’t enough of it in a single roll


    Best Burlap Wreath Options for a Cozier Christmas

    Now that we have taken a look at some of the best burlap ribbons that you can consider for your Christmas decorations this year, we think it is right about the time we take a look at burlap wreaths. After all, your Christmas decorations can never be complete without wreaths in there, can they?

    No Christmas decoration is complete without a wreath hanging on the door that opens into your home, is it? Well, if you are looking to make an impact of going green and you want to get a wreath that is eco-friendly, we have just the thing on this list for you.

    Spring Front Door Wreath Mesh Wreath 24 Inch Handcraft...
    • Unique Design- Made of handcraft natural burlap. Design is...
    • Adjustable Dimensions & Premium Quality- 24*24*4in. It is...

    The Inch Handcraft Natural Burlap Christmas Door Wreath by Huashen is made from pure jute that has a rustic finish to it. Adorn it with any number of ornamental elements to give it a more Christmas-like touch and you have the perfect wreath to hang from your door. This wreath is made of handcrafted and completely natural burlap with a 22-inch diameter. You get plenty of room to design this wreath according to your preferred style. Whether you are going for something extravagant or something incredibly simplistic, you will be able to pull it off with this natural burlap Christmas door wreath made by Huashen.

    [easyazon_image align="center" height="709" locale="US" src="https://images-na.ssl-images-amazon.com/images/I/81D1LiesjgL.jpg" tag="homesthetics0a-20" width="1560" type="image" link_id="221387" ref="huashen-fall-winter-front-door-wreath-mesh-wreath-24-inch-handcraft-natural-diy-burlap-door-wreath-on-grapevine-for-festival-celebration-front-door-wall-window-decoration-home-decor" identifier="B07G82SRTG"]

    Make your Christmas cozier and warmer with our top pick for the best Christmas burlap wreath by getting the Inch Handcraft Natural Burlap Christmas Door Wreath by Huashen. The price is so reasonable, you might not be able to help yourself and get some more of these to gift to your friends and family as well.


    Pros

    • Made with 100 percent pure Jute
    • Is Display on window door or anywhere in your home
    • Creates a welcoming ambience as you enter the house


    Cons

    • You need to buy decorative elements separately to beautify it
    • Lack of color options to choose from


    The best wreath you can get to add a classic-looking and rustic aesthetic to your Christmas decorations is just what you need. Something designed keeping in mind the fact that people like to add their own touch to the wreath, the Decorative Rustic Wreath with Burlap and Vine Accents by Darice is definitely a very good investment to make.

    Darice Decorative Rustic Wreath with Burlap and Vine Accents...
    • Decorative rustic wreath with burlap and vine accents
    • This product is manufactured in china

    Made using a combination of burlap and vine accents, the Decorative Rustic Wreath with Burlap and Vine Accents by Darice is effectively like an empty canvas for the Christmas decoration DIY enthusiast who wants to get their own way with how they adorn their doors this year’s Christmas. 

    The wreath measures 16 inches in diameter while being around 2 inches deep. This means you have plenty of room to add as many ornamental decorations and really become creative with how you design your own wreath for this Christmas.

    The Decorative Rustic Wreath with Burlap and Vine Accents by Darice is a very popular item that starts flying off of the shelves as soon as it comes in stock. So you should make it a point to get one of these as soon as you can. You can go for as complex or as simple an aesthetic as you want with the Decorative Rustic Wreath with Burlap and Vine Accents by Darice.


    Pros

    • Made with burlap ribbon and vine accents
    • Highly customizable
    • Accentuates your Christmas decorations


    Cons

    • is too large to use on windows
    • Some customers found the packaging poorly done


    When it comes to Christmas wreaths, nothing gets better than a beautiful and green-colored burlap wreath. Sometimes, sticking to the classics is all you need. If you do not want to go for something that uses artificial plastics and other synthetic decorations, the Green Burlap Round Wreath for Christmas by VHC Brands is perfect.

    VHC Brands Solid Color Textured Jute Farmhouse Christmas...
    • Single fabric
    • Loom woven, machine stitched, hand-wrapped

    Imagine getting the same aesthetic as those nature-centric Christmas decoration wreaths without the use of any plastic. That is what the Green Burlap Round Wreath for Christmas by VHC Brands offers you. This simple yet elegantly designed wreath is a highly customizable wreath that comes in a deep green color that resembles the color of pine needles.

    [easyazon_image align="center" height="1280" identifier="B07523SQNG" locale="US" src="https://images-na.ssl-images-amazon.com/images/I/81pQ9dlY09L.jpg" tag="homesthetics0a-20" width="1920" type="image" link_id="221393"]

    This Christmas wreath also comes with a 12-inch thick 3-ply twine which allows you to easily hang it once you are done with designing this wreath and adding everything you want to so that your Christmas is warmer and cozier this year.

    Aligning with the Christmas spirit aesthetic, you can adorn the Green Burlap Round Wreath for Christmas by VHC Brands with as many ornaments as you want to give it that extra bit of vibrancy to make the best of your Christmas celebrations this year.


    Pros

    • Made with burlap
    • is a completely single-fabric loom
    • Accentuates your Christmas decorations


    Cons

    • Quite pricey compared to other products
    • Some customers found the packaging poorly done


    Who says that all your purchases have to be something that you need to put extra work into to hang as a part of your Christmas decorations? Sometimes, you just do not have the kind of time to add more decorations to the wreath. That is where the Burlap Wreath by Palmetto Moon Boutique comes in to make your life easier.

    No products found.

    The Burlap Wreath by Palmetto Moon Boutique is a ready-to-use wreath designed and manufactured by Palmetto Moon Boutique. This is a handmade and incredibly ornate Christmas wreath that really has an ethereal quality to it.

    The Burlap Wreath by Palmetto Moon Boutique is a mint-colored burlap wreath, which is intricately decorated with a lot of simple colored elements complete with a beautifully-knotted burlap ribbon flower to make it look even better. This wreath is so well made that you can hang it on your door straight from the box but the burlap material allows you to add as many decorations to it as you would want to make it look just right to hang on your door for this Christmas.

    [easyazon_image align="center" height="500" locale="US" src="https://images-na.ssl-images-amazon.com/images/I/612AzyTDx1L.jpg" tag="homesthetics0a-20" width="395" type="image" link_id="221396" ref="burlap-wreath" identifier="B07DH9W6J7"]

    The Burlap Wreath by Palmetto Moon Boutique is an easy-to-use wreath that you just have to hang on your door straight out of its packaging.


    Pros

    • Comes ready to use
    • Made with high-quality burlap fabric
    • Accentuates your Christmas Decorations


    Cons

    • Expensive Christmas wreath
    • Some customers don’t like the lack of colors on the wreath


    Are you tired of getting the same old green-colored wreaths for Christmas every year? We get that it is a good idea to stick with traditional color schemes, but you have to admit that it does kind of tend to get a little bit boring. If you’re looking to change things up a little bit, you might have the perfect solution with the Burlap Pumpkin Wreath by Accent Depot The Lakeside Collection.

    The Lakeside Collection Harvest Gatherings Burlap Pumpkin...
    • Vibrant autumn colors! Looks great all season long Details:...

    The Burlap Pumpkin Wreath by Accent Depot The Lakeside Collection is a burlap wreath that has that distinctive autumn leaf color, which has a shade almost like it’s made from pumpkin essence itself. This beauty is a vibrant wreath that you do not have to do much to make even better.

    Simply using the Burlap Pumpkin Wreath by Accent Depot The Lakeside Collection as it comes out of the package is enough. But if you want, you can adorn it with ornaments to give it a splash of different colors to make your door even more welcoming during this Christmas season. 

    This is definitely one of our top choices when it comes to Christmas decorations since it allows us to take our Christmas decorations out of the norm. you can even use this as a centerpiece for your overall Christmas decorations and hang it inside the house along with other decorations to get that extra special look this Christmas.


    Pros

    • Made with premium quality burlap fabric
    • Has a very vibrant color scheme
    • Accentuates your Christmas decorations and stands out


    Cons

    • Might be a little too brightly colored
    • Some customers found the color scheme that does not seem Christmas like


    Are you looking for a burlap wreath to adorn your windows or your door this holiday season that has a more somber look? If you are, then Burton & Burton might have made just the perfect thing for you. Something that is neither too boring nor too flashy, their Brown and Beige Plaid Wreath is ideal.

    No products found.

    The Brown and Beige Plaid Wreath by Burton & Burton has a neutral color scheme, which is a mix of both brown and beige-colored burlap ribbons with embellishments of white-colored lace intricately worked into the ribbons. The pine needles composed within the whole burlap ribbon wreath make for a look that is both somber and Christmas-esque at the same time. 

    The Brown and Beige Plaid Wreath by Burton & Burton has a strong foam housing that allows you to add as many ornamental elements to it as you want to create a look that will suit your needs this Christmas season. Whether you are going for a display on the door, the walls inside your home or in the windows, the Brown and Beige Plaid Wreath by Burton & Burton is a special product that will not disappoint you.


    Pros

    • Made with natural neutral shades
    • Easily customizable
    • Durable foam body


    Cons

    • It is a lot more delicate than other models
    • Some customers found the wreath to be boring


    While you might find this entry on the list a bit odd, Easter Wreath is a company that makes wreaths for use on Christmas, but that does not mean you cannot take advantage of them and utilize them as a part of your Christmas celebrations, right?

    No products found.

    For those of you who have a sense of adventure and a little willingness to do a bit of DIY, the Speckled Easter Eggs Burlap Wreath by Easter Wreath makes for a pretty fantastic Christmas wreath. Made using burlap and foam, the Speckled Easter Eggs Burlap Wreath by Easter Wreath features a string for easy hanging and has a host of different pale-colored eggs adorning it.

    If you take the time out and paint the eggs on the Speckled Easter Eggs Burlap Wreath by Easter Wreath based on a Christmas theme, you will get a unique and incredibly beautiful wreath for Christmas this year, which everyone will fall in love with. You can even leave the eggs unpainted and choose to decorate it with different colored ribbons for that warm and vibrant look so that you can reuse this wreath when the Easter holidays arrive. What more could you ask for?

    Get your whole family involved and get a Speckled Easter Eggs Burlap Wreath by Easter Wreath to make your Christmas a lot cozier and warmer.


    Pros

    • Made with high-quality burlap
    • Features an easy-to-use string
    • Allows you to be more creative with your decorations this year


    Cons

    • Not meant to be used for Christmas
    • Some customers found the packaging poorly done


    If you want to make the most of your Christmas decorations and take advantage of two of the most popular Christmas wreath trends, you might want to consider getting the Black and Natural Chevron Burlap Wreath by Simply Blessed Gifts.

    No products found.

    The Black and Natural Chevron Burlap Wreath by Simply Blessed Gifts is actually a brilliantly designed Christmas decoration wreath. Manufactured using the most popular wreath materials right now: Burlap and Chevron, the Black and Natural Chevron Burlap Wreath by Simply Blessed Gifts has an intricate design that gives it a completely different aesthetic than what you are used to. You can use the Christmas wreath and hang it up straight as it is from the box or decorate it further to create a more vibrant and colorful look this Christmas. The choice is up to you but however you choose to go about it, one thing is guaranteed – this will make one of the loveliest parts of your home’s Christmas decorations this year. 

    Both the chevron and the burlap are beautifully interwoven into the Black and Natural Chevron Burlap Wreath by Simply Blessed Gifts to make a beautiful wreath that is just perfect to make your Christmas warmer and cozier this year.


    Pros

    • Made with burlap and chevron
    • Is an important Christmas symbol
    • Accentuates your Christmas Decorations


    Cons

    • You need to Scotchguard the wreath
    • Some customers found the packaging poorly done


    Final Thoughts

    If you have been reusing old Christmas decorations every year, you must probably be surprised to know about the different kinds of options for you to choose from.

    We hope that the reviews of all the best burlap ribbons and burlap wreaths will give you quite a few ideas on how to plan your home’s Christmas decorations this year.

    Related Articles

    14 Awe-Inspiring Ceramic Christmas Decorations

    19 Christmas Tree Paper Decorations for a Delicate Look

    14 Best Christmas Tree Lights to Consider This Year

    Learn How to Store Icicle Lights After Christmas

    17 Burlap Ribbon & Wreath Options

    White and silver Christmas trees have gained popularity for their timeless elegance and versatility. These trees blend sophistication with festive charm, fitting seamlessly into various décor styles, from minimalist to luxurious. Whether used to create a winter wonderland indoors or add a modern touch, white and silver trees offer endless creative possibilities. Each design can be tailored to suit different settings, from simple and sleek to grand and glamorous, making them a perfect choice for anyone looking to elevate their holiday décor. This article explores 30 unique styles, highlighting the beauty and diversity of white and silver trees to inspire magical holiday displays.

    01. Elegant White & Silver Tree with Shimmering Ornaments

    Create an elegant white and silver tree adorned with shimmering ornaments. Featuring a tall white Christmas tree, the design includes sparkling silver ornaments and twinkling lights, set against the backdrop of a grand living room. This combination brings classic holiday charm with a refined, modern touch.

    01. Elegant White & Silver Tree with Shimmering Ornaments

    02. Minimalist White Tree with Sleek Silver Accents

    Perfect for minimalist spaces, this white tree features sleek silver accents. The simple design uses silver baubles and ribbons, creating a clean, uncluttered look that suits modern apartments. This approach keeps the festive spirit while maintaining an understated aesthetic.

    02. Minimalist White Tree with Sleek Silver Accents

    03. Frosted White & Silver Tree with Delicate Snow Finish

    A frosty and festive option, this white tree is adorned with silver frost and delicate accents. Silver ornaments and a light dusting of snow help recreate a cozy, snow-covered setting, perfect for those who want to bring a touch of winter into their décor.

    03. Frosted White & Silver Tree with Delicate Snow Finish

    04. Luxury White & Silver Décor with Metallic Baubles

    Add a luxurious touch to your holiday décor with white and silver elements. This design includes silver garlands, metallic baubles, and glittering tinsel, turning a white Christmas tree into a refined statement piece that embodies sophistication and grandeur.

    04. Luxury White & Silver Décor with Metallic Baubles

    05. Winter Wonderland Tree with Soft White Lights

    Transform your space into a winter wonderland with a white and silver theme. The white tree features silver snowflakes, icy ornaments, and soft white lights, creating the illusion of a snowy holiday scene. It’s ideal for bringing the magic of winter indoors.

    05. Winter Wonderland Tree with Soft White Lights

    06. Sparkling Silver Tree with Glitter Ornaments

    A sparkling silver and white Christmas tree offers a bright, festive look. Silver glitter ornaments combined with string lights create a radiant, luminous appearance, making this design versatile for different décor themes.

    06. Sparkling Silver Tree with Glitter Ornaments

    07. Silver Ribbon Tree with Metallic Ornament Details

    Enhance your tree with silver ribbons for a sleek, modern aesthetic. This white tree is wrapped in silver ribbon garlands, paired with minimalistic metallic ornaments. The design offers a sophisticated touch without overwhelming the visual space.

    07. Silver Ribbon Tree with Metallic Ornament Details

    08. Silver & White Snowy Tree with Frosty Pinecones

    Embrace snowy aesthetics with a white and silver tree. Featuring silver icicles, frosty pinecones, and a snow-covered finish, this design brings the beauty of a winter landscape into any room, creating a serene seasonal setting.

    08. Silver & White Snowy Tree with Frosty Pinecones

    09. Silver & White Outdoor Tree with Lantern Lighting

    Bring the elegance outdoors with a silver and white Christmas tree. Surrounded by snow and illuminated by lanterns, the outdoor tree creates a serene, glowing presence, enhancing any exterior space during the holiday season.

    09. Silver & White Outdoor Tree with Lantern Lighting

    10. Whimsical White Tree with Playful Moon Ornaments

    A whimsical white Christmas tree adorned with playful silver accents. Silver stars and moon ornaments add a lighthearted, enchanting quality, making this design perfect for those seeking a more fun and imaginative holiday décor.

    10. Whimsical White Tree with Playful Moon Ornaments

    11. Metallic Silver Tree with Mirrored Star Topper

    Metallic silver accents on a white tree offer a modern, stylish holiday look. Sleek silver ornaments paired with a mirrored star topper create a streamlined and chic appearance, ideal for contemporary décor themes.

    11. Metallic Silver Tree with Mirrored Star Topper

    12. White & Silver Snowflake Tree with Glittering Icicles

    Add snowflake ornaments for a frosty, magical touch. A white tree adorned with silver snowflakes and glittering icicles brings the essence of winter to life, creating a festive and whimsical feel for holiday celebrations.

    12. White & Silver Snowflake Tree with Glittering Icicles

    13. Glamorous White & Silver Tree with Shiny Ribbon

    Add a touch of glamour with a glamorous silver and white Christmas tree. This style would complement a gold & glam tree design, where sequined ornaments and shiny ribbons create a dazzling effect. Sequined ornaments and shiny ribbons create a dazzling effect, making this design a glamorous focal point for the holiday season.

    13. Glamorous White & Silver Tree with Shiny Ribbon

    14. Silver Star Tree with Large Striking Topper

    Top your white tree with a bold silver star for a striking appearance. Large silver baubles complement this design, making it a classic yet bold choice for those looking for a timeless festive setup.

    14. Silver Star Tree with Large Striking Topper

    15. White Tree with Silver Bells and Angel Topper

    Add a touch of jingle with silver bells on your white tree. Silver bells, baubles, and a silver angel topper bring traditional holiday charm, making this design ideal for those seeking a classic festive feel.

    15. White Tree with Silver Bells and Angel Topper

    16. Vintage White & Silver Tree with Retro Ornaments

    A vintage-inspired white and silver tree with classic ornaments. Silver tinsel, retro ornaments, and a retro topper evoke memories of Christmas past, adding a nostalgic and warm feel to any décor.

    16. Vintage White & Silver Tree with Retro Ornaments

    17. Silver-Tipped White Tree with Shimmering Ornaments

    A white tree with silver-tipped branches offers a unique twist. The shimmering ornaments and twinkling lights create depth and dimension, making it an eye-catching centerpiece.

    17. Silver-Tipped White Tree with Shimmering Ornaments

    18. White Tree with Silver Garland and Elegant Lights

    Silver garlands elevate a simple white Christmas tree, creating a refined and elegant look. This design is perfect for those who want a festive touch without over-decoration, blending simplicity with sophistication.

    18. White Tree with Silver Garland and Elegant Lights

    19. Glowing Silver & White Tree with Reflective Ornaments

    Create a glowing, ethereal silver and white tree for a magical holiday ambiance. Silver fairy lights and reflective ornaments add a warm glow, creating a serene and inviting environment.

    19. Glowing Silver & White Tree with Reflective Ornaments

    20. White Tree with Silver Icicles and Frosted Pinecones

    Silver icicles add a wintry touch to a white Christmas tree. The design is enhanced by frosted pinecones and glowing white lights, bringing the beauty of a winter landscape indoors.

    20. White Tree with Silver Icicles and Frosted Pinecones

    21. Modern White & Silver Tree with Minimal Geometric Design

    For a sleek, modern aesthetic, this white tree features minimalistic décor. Silver geometric ornaments and a streamlined design give this tree a contemporary edge, making it perfect for modern interiors.

    21. Modern White & Silver Tree with Minimal Geometric Design

    22. White Tree with Silver Tinsel and Sparkling Fairy Lights

    Add silver tinsel for extra sparkle. The shimmering ornaments, glowing fairy lights, and silver tinsel create a festive and joyous atmosphere, making this tree a lively holiday centerpiece.

    22. White Tree with Silver Tinsel and Sparkling Fairy Lights

    23. White Tree with Silver Baubles and Twinkling Lights

    A simple, elegant white tree decorated with large silver baubles. For those who enjoy vibrant holiday setups, accents inspired by red Christmas trees could provide a dynamic contrast to this understated look.

    23. White Tree with Silver Baubles and Twinkling Lights

    24. Frosted White Tree with Silver Accents and Snowy Finish

    A frosted white tree adorned with shimmering silver accents. Snow-dusted finishes and icicle lights bring a frosty, icy aesthetic, adding an elegant touch to holiday décor.

    24. Frosted White Tree with Silver Accents and Snowy Finish

    25. Outdoor Silver & White Tree with Soft Lantern Glow

    An outdoor silver and white Christmas tree shines beautifully under the stars. Surrounded by lanterns, the outdoor tree glows softly, making it a lovely feature for exterior holiday gatherings.

    25. Outdoor Silver & White Tree with Soft Lantern Glow

    26. White Tree with Silver Pinecones and Warm Lighting

    Add silver pinecones for a rustic yet elegant look. Glittering garlands and warm lights enhance this tree’s natural beauty, offering a cozy, festive feel.

    26. White Tree with Silver Pinecones and Warm Lighting

    27. Icy White & Silver Tree with Snowflake Ornaments

    A frosty, icy white Christmas tree with silver accents. Silver icicles and snowflake ornaments bring winter chill to the décor, creating a refreshing aesthetic.

    27. Icy White & Silver Tree with Snowflake Ornaments

    28. White Tree with Silver Snowflakes and Tinsel Décor

    Snowflake ornaments bring a festive touch to this white and silver Christmas tree. Glittering tinsel and lights enhance the design, offering a bright and cheerful appearance.

    28. White Tree with Silver Snowflakes and Tinsel Décor

    29. Silver Sequin Tree with Shining Holiday Baubles

    Go glamorous with silver sequins on your white Christmas tree. This design, with sequin garlands and shining baubles, transforms a simple tree into a sparkling centerpiece, ideal for a festive, stylish holiday décor.

    29. Silver Sequin Tree with Shining Holiday Baubles

    30. Shimmering Silver & White Tree with Glowing Metallic Accents

    A shimmering, elegant white tree adorned with glowing silver details. The blend of silver ornaments, glowing lights, and metallic accents creates a beautiful, festive display suitable for any holiday setting.

    30. Shimmering Silver & White Tree with Glowing Metallic Accents

    Whimsical Christmas Trees offer a creative twist on traditional holiday decorations, turning festive setups into imaginative and playful scenes. Each design is built around a unique theme, brought to life with carefully curated ornaments, color schemes, and DIY details. Whether inspired by candy, woodland creatures, or coastal elements, these trees bring a touch of enchantment to the season, inviting holiday cheer and creativity. From bright and colorful arrangements to serene and magical atmospheres, these trees serve as beautiful centerpieces for homes aiming to elevate their festive décor. Below, explore 20 distinct whimsical Christmas tree ideas, each with its special elements and style, perfect for transforming any space during the holiday season.

    01. Candy Wonderland Tree with Oversized Lollipops and Pastel Ornaments

    A candy-themed whimsical Christmas tree featuring oversized lollipops, candy canes, and pastel ornaments creates a playful holiday atmosphere. The design mimics a vibrant Candyland, incorporating large-scale candy decorations that add a touch of whimsy and color. Placed against a bright and colorful background, this DIY festive decoration makes a delightful centerpiece, perfect for those looking to infuse their space with a fun, sweet holiday spirit.

    01. Candy Wonderland Tree with Oversized Lollipops and Pastel Ornaments

    02. Frosty Woodland Whimsy Tree With Frosted Branches and Creatures

    The frosty woodland whimsy tree brings a touch of winter nature indoors, with frosted branches, woodland creature ornaments, and glowing fairy lights. Set in a modern Scandinavian home, the design merges natural elements with cozy, modern textiles, creating a warm and inviting holiday atmosphere. It suits those who love a mix of rustic and contemporary aesthetics, adding seasonal charm to any space.

    02. Frosty Woodland Whimsy Tree With Frosted Branches and Creatures

    03. Rainbow Unicorn Dream Tree With Pastel Garlands and Unicorns

    A magical, whimsical tree adorned with pastel rainbow garlands, shimmering lights, and handcrafted unicorn ornaments. Positioned in a minimalist Scandinavian living room, the design combines playfulness with elegance, making it a stylish yet fun holiday décor choice. Its soft, dreamy background ensures a soothing and enchanting festive setup.

    03. Rainbow Unicorn Dream Tree With Pastel Garlands and Unicorns

    04. Vintage Whimsical Christmas Tree With Antique Ornaments and Pearls

    The vintage whimsical Christmas Tree beautifully captures the essence of vintage Christmas trees, combining antique ornaments and soft gold lighting for a timeless holiday look. This blends antique ornaments, pearl garlands, and soft gold lighting. The design features subtle nostalgic touches set against modern clean lines, offering a classic yet cozy look. DIY elements make it an engaging and creative centerpiece, ideal for spaces aiming for a warm and nostalgic holiday setting.

    04. Vintage Whimsical Christmas Tree With Antique Ornaments and Pearls

    05. Peppermint Dream Tree With Red and White Striped Ornaments

    The peppermint dream tree embodies festive cheer with red and white striped ornaments and candy cane garlands. This design brings a bright, playful touch to any holiday room, creating a cheerful environment full of vivid, peppermint-themed décor. A great DIY project for those wanting to add a lively holiday twist to their space.

    05. Peppermint Dream Tree With Red and White Striped Ornaments

    06. Gingerbread Whimsical Christmas Tree With Candy Cane Details

    Decorated with gingerbread man ornaments and candy cane details, this whimsical tree evokes a warm, festive feeling. Positioned in a cozy kitchen setting, additional decorations such as sugar cookies, cinnamon sticks, and twinkling lights fill the scene, creating a holiday baking atmosphere that combines visual appeal and nostalgic scents.

    06. Gingerbread Whimsical Christmas Tree With Candy Cane Details

    07. Pastel Fairy Tale Tree With Delicate Ribbons and Sparkling Lights

    The pastel fairy tale tree features whimsical characters, delicate ribbons, and sparkling lights, creating a magical, castle-like ambiance. This design is perfect for those who love a softer, dreamy approach to holiday decorations, with pastel hues and enchanting DIY elements that capture a fairy-tale spirit.

    07. Pastel Fairy Tale Tree With Delicate Ribbons and Sparkling Lights

    08. Sea Breeze Whimsical Tree With Starfish and Oceanic Elements

    For homes embracing coastal vibes, the sea breeze whimsical tree offers an inspiring take on themed Christmas tree ideas. Its starfish and seashell ornaments add a unique touch, seamlessly blending beachy charm with holiday traditions. Positioned in a beach house, this design merges festive decor with seaside elements, creating a bright and inviting setup perfect for those who want to infuse their holiday space with a touch of summer.

    08. Sea Breeze Whimsical Tree With Starfish and Oceanic Elements

    09. Festive Polar Bear Tree With Snowy Branches and Icy Garlands

    The festive polar bear tree brings a wintry wonderland to life, featuring polar bear ornaments, snowy branches, and icy blue garlands. The soft, cozy elements create a touch of Arctic charm indoors, transforming spaces into winter-themed sanctuaries ideal for the holiday season.

    09. Festive Polar Bear Tree With Snowy Branches and Icy Garlands

    10. Whimsical Rainbow Lights Tree With Cascading Bright Lights

    Cascading rainbow lights adorn this tree, creating a dynamic visual effect, especially in dark rooms. The whimsical ornaments and bright, glowing lights make it an ideal choice for those who wish to highlight bold and colorful décor in their festive spaces.

    10. Whimsical Rainbow Lights Tree With Cascading Bright Lights

    11. Playful Penguin Party Tree With Snowball Garlands and Penguins

    The playful penguin party tree features ornaments and snowball garlands, ideal for festive, winter-themed party setups. Set in a lively, fun space, the design embodies a cheerful holiday spirit that is great for family gatherings and playful décor.

    11. Playful Penguin Party Tree With Snowball Garlands and Penguins

    12. Frosted Cupcake Whimsical Tree With Candy-Colored Ribbons

    A sweet, cupcake-themed tree with candy-colored ribbons and bakery-inspired elements. Positioned in a festive kitchen, the design adds a cheerful, inviting touch, perfect for those who want to celebrate the holidays with a sweet and fun theme.

    12. Frosted Cupcake Whimsical Tree With Candy-Colored Ribbons

    13. Snowy Fairy Tale Whimsical Tree With White Feathers and Fairies

    The fairy tale tree features frosted branches, white feathers, and soft, magical fairy ornaments. Set in a serene living room with neutral tones, the design brings a calm and magical touch, suitable for minimalist homes looking to add a bit of holiday enchantment.

    13. Snowy Fairy Tale Whimsical Tree With White Feathers and Fairies

    14. Space Adventure Whimsical Tree With Metallic Stars and Astronauts

    Futuristic elements like astronaut ornaments, metallic stars, and glowing lights decorate this tree, set against sleek, sci-fi décor. It brings an intergalactic feel to holiday celebrations, ideal for those wanting a unique, space-themed festive decoration.

    14. Space Adventure Whimsical Tree With Metallic Stars and Astronauts

    15. Carnival Whimsy Christmas Tree With Circus-Inspired Ornaments

    Bright, circus-inspired ornaments and colorful garlands bring the carnival whimsy tree to life. The design turns any space into a lively, playful scene, filled with fun DIY elements perfect for a vibrant and festive atmosphere.

    15. Carnival Whimsy Christmas Tree With Circus-Inspired Ornaments

    16. Snowy Owl Whimsy Tree With Pinecones and Rustic Accents

    Adorned with owl ornaments, snow-covered branches, and pinecones, the snowy owl tree is set in a rustic living room with warm, wood accents. This design brings the charm of a forest retreat indoors, providing a cozy and inviting setting perfect for the holiday season.

    16. Snowy Owl Whimsy Tree With Pinecones and Rustic Accents

    17. Bohemian Dream Whimsy Tree With Macramé Garlands and Feathers

    A boho-chic tree featuring macramé garlands, feather ornaments, and dreamcatchers. Positioned in a Scandinavian-style room with neutral tones and layered textiles, the design offers a relaxed, inviting décor, ideal for those who prefer a laid-back holiday style.

    17. Bohemian Dream Whimsy Tree With Macramé Garlands and Feathers

    18. Starry Night Sky Tree With Moon Accents and Celestial Lights

    The starry night sky tree, decorated with star ornaments, moon accents, and celestial-themed lights, sets a peaceful and enchanting mood. Perfect for dark-themed rooms with soft drapes, this design brings the beauty of the night sky into festive décor, creating a serene holiday ambiance.

    18. Starry Night Sky Tree With Moon Accents and Celestial Lights

    19. Tropical Paradise Tree With Flamingos and Pineapple Ornaments

    A tropical-themed tree decorated with flamingos, pineapples, and palm leaves. Set in a bright room with colorful wall art and beachy accents, this design blends traditional Christmas décor with a sunny, festive vibe, ideal for those wanting a summer twist on holiday decorations.

    19. Tropical Paradise Tree With Flamingos and Pineapple Ornaments

    20. Whimsical Ice Cream Cone Tree With Colorful Faux Syrup and Sprinkles

    This delightful tree features ice cream cone ornaments, colorful faux syrup, and candy sprinkles, topped with a cherry. Positioned in a cheerful room with candy-colored décor, it offers a playful, dessert-inspired theme that adds a fun and inviting touch to holiday decorations.

    20. Whimsical Ice Cream Cone Tree With Colorful Faux Syrup and Sprinkles

    There are basically two dates for when you can take your Christmas tree down. According to Christian tradition, you can take the tree down on the twelfth day of Christmas, that is, 12 days after Christmas. On the other hand, the new and secular tradition is to take the tree down after New Year’s. 

    Every year Christmas decorations and Christmas trees are put up. And every year, the same question crosses our minds: when is it the right time to take a Christmas tree down? 

    Tradition dictates that the Christmas decorations and the tree should be taken down on the twelfth night of Christmas, that is, January 5 or January 6, also known as the Feast of Epiphany. However, many people also tend to take down the tree after New Year’s. 

    You definitely don’t want to run the risk of encountering the Ghost of Christmas Past, so read ahead to find out when you should take down your Christmas tree. 

    The 12 Days Of Christmas Tradition

    The 12 Days Of Christmas Tradition

    Christian theology observes a period of 12 days after Christmas, known as the 12 days of Christmas. It is the period of time from the birth of Jesus Christ to the visit of the Magi, also known as the three wise men. 

    The Christian Tradition Of Taking Down The Tree By Epiphany (January 6)

    The Christian Tradition Of Taking Down The Tree By Epiphany (January 6)

    Obviously, there can be no universal agreement on this tantalizing question. But there is a general opinion on when you can leave Christmas decorations and the tree up. 

    Most people tend to take down their Christmas tree and holiday decorations around January 5 or January 6. This is because that is the twelfth night of Christmas. 

    This is in accordance with the Christian tradition. January 6, or the Feast of Epiphany, marked the visit of the Magi, the three wise men, to baby Jesus in Bethlehem and the baptism of baby Jesus. 

    There is also some debate on the date marking the Feast of Epiphany. Some Western churches like the Roman Catholics, the Lutherans, and the Anglicans, observe the Feast of Epiphany on January 6. On the other hand, several Eastern Orthodox churches believe the Feast of Epiphany to fall on January 19 and Christmas Eve to fall on January 6. 

    The Church of England observed the twelfth night on January 5. However, some others celebrate the 6th of January as the twelfth night since they count the 12 days after Christmas day. This is why there is confusion on what is the correct date. 

    The Secular Tradition Of New Year’s Day

    The Secular Tradition Of New Year’s Day

    This secular tradition is lesser known than the 12 days of Christmas tradition. Many people believe that leaving the Christmas tree and Christmas decorations up for too long might bring bad luck. This is why they don’t want to start the new year celebration with the decorations of the previous year. You can also call this a superstitious tradition. 

    Factors To Consider When Deciding When To Take Your Christmas Tree Down

    1. Personal preference

    Ultimately, it all comes down to your personal preference. The date depends on the ease of keeping up the tree and the decorations. If the cheery brightness of the Christmas lights is hiking up your energy bills, it might be better for you to take down your Christmas decorations and tree as soon as possible. 

    1. Superstitions and beliefs

    Superstitions and beliefs are a part of the package during the Christmas celebrations. Deciding when to take down your Christmas decorations and Christmas tree boils down to your superstitions and beliefs. For instance, many believe against carrying the decorations into the new year to avoid bad luck. So, you would fare better by taking down the tree and decorations on New Year’s Eve. 

    As for your beliefs, you can always follow the old Bethlehem tradition. If you believe in the story of the three wise men, you should follow the twelfth-night tradition. It will help reaffirm your beliefs and also keep you connected to your religion. 

    1. Practical considerations

    No matter how beautiful your Christmas trees and decorations might be, you will have to take them down after a point. This is because they might sometimes act as a safety hazard. You might trip over the decorations, some kid might swallow the small decorations, start a fire, etc. 

    Tips For Disposing Of Your Tree

    You can reuse the holiday décor, but you cannot reuse a real Christmas tree. So, here are some ecological ways you can dispose of your Christmas tree. 

    1. Recycling options

    Some cities offer locations where you can drop off your Christmas trees after taking them down. Some of it might get ground up and then used as mulch on city lands. They are sometimes also just collected and dropped off at the nearest landfill. There, they can decompose and break down slowly over time. You can browse the Internet for recycling options near you. 

    1. Composting options

    Any used Christmas tree can be used as compost to improve the fertility of the soil. Note that the technique for composting remains the same as for any other compost. This compost can then be used to fertilize crops or vegetable gardens. 

    Many cities set up these composting services to get compost in large quantities. Just look around on the Internet to find such a service near you. 

    1. Disposal options for artificial Christmas trees

    Unlike a real Christmas tree, you can actually reuse an artificial Christmas tree. So, why dispose of it in the first place? Take the more eco-friendly way, and store it securely. Use some zip ties or fishing lines to tie the tree in place. Store it away safely in a tree bag to reuse it again next year in all its glory. 

    How long can I keep a Christmas tree up without it becoming a fire hazard?

    Technically, a Christmas tree is always a fire hazard for your house. However, you can safely keep it up for about 4 weeks, provided you keep watering it during that time frame. 

    How can I make sure my Christmas tree stays fresh as long as possible?

    Taking proper care of your tree is essential to make sure it lasts the entire holiday season. 

    • Make a clean, straight cut across the bottom of the tree 
    • Keep the tree in water 
    • Keep the tree in a cool place 
    • Opt for LED lights for less heat 

    What are some creative ways to repurpose a Christmas tree?

    You can actually use your tree in many creative ways after the festive season is over. 

    • Use the branches to make a wreath 
    • Cut the trunk into small pieces and use it around your garden 
    • Use the branches to make a bird feeder 
    • Use it as compost 
    • Use it as firewood 
    • Replant it in your garden 

    How do I store the Christmas tree decorations?

    Decorating your tree with ornaments, stockings, lights, etc., is part of the Christmas traditions. Here are some tips on how to store those decorations after you take the Christmas tree down: 

    • Wrap the fragile items in bubble wrap for protection 
    • Wrap the lights around cardboard to avoid entanglement 
    • Put all in cardboard boxes and label them accordingly 

    What is epiphany?

    Epiphany, also known as the Three Kings Day, marks the official end of the holiday season, dated January 6th every year. It signifies the ancient Christian feast day, celebrating the baptism of Jesus Christ and the arrival of the Magi. Celebrations take place across the world in the form of special services in accordance with the Christian calendar. 

    Conclusion

    Thus, there is no right or wrong answer for when to take down your Christmas decorations and tree. It all comes down to your personal preferences and beliefs. If you follow Christian traditions, it is best to take your tree down on the twelfth day of Christmas. Or, you can just take it down before the new year begins to avoid any bad luck that may come your way. 

    Whenever you take down the tree, the important thing is to spend your Christmas in peace with your loved ones.  So, whether it’s New Year’s Eve or the twelfth night, make sure to have a jolly good Christmas season before you take your tree down. 

    Use an elegant Christmas tree collar to hide the unsightly tree stand of your Christmas tree. Available in woven, metallic, and wooden types, a tree collar can act as a protective cover and a décor item at the same time.

    Everyone loves a lush and green Christmas tree in some beautiful corner of their house. But what about the unsightly tree stand? The base of a Christmas tree is hardly an attractive part. Stray wires, flimsy branches, and unfavorable mud are some things you might wish to hide from plain sight.

    Traditionally, Christmas tree skirts were used to cover up the base of the tree. But that look is now old and less convenient, with people now moving on to Christmas tree collars. But what exactly is a Christmas tree collar? Let’s get into the what, how, and why.

    What Is A Christmas Tree Collar?

    A Christmas tree collar is just a protective covering that goes around the Christmas tree stand, where a tree skirt would normally go. It is designed to hide the base of your tree and be sleek and functional. It is conical in shape and goes around the base of a tree, hiding it.

    Tree collars seemed to have originated on Pinterest by the DIY-girlies, who started to cut the bottoms of galvanized metal buckets to hide the Christmas tree stand. The rise of handmade ornament trees on such platforms has further popularized creative ways to add charm to Christmas tree bases.

    It is easy to forget about the base of the tree while you are decorating your Christmas tree. If you don’t like a traditional Christmas tree skirt, a Christmas tree collar is a great option for making the stand of your tree look streamlined and sleek. You could also experiment with themed Christmas tree ideas to pair the collar with cohesive décor for a standout holiday display.

    Different Materials Used To Make Christmas Tree Collars

    Different Materials Used To Make Christmas Tree Collars

    You can buy Christmas tree collars in a variety of different materials depending on your budget and preference.

    1. Galvanized Tree Collars

    Galvanized tree collars are of a silvery-steel color and have the classic galvanized ‘spangle’ look. This silver tree collar would look best with silver and gold tree ornaments to complete the whole metallic look.

    2. Woven Tree Collars

    You can also buy woven Christmas tree collars, which are mostly available in neutral colors like taupe, pale brown, yellow, and gray. A woven Christmas tree collar would provide the perfect warm and cozy look to your tree. It would blend in with the lushness and would not distract from your Christmas decorations.

    Whether it's rattan, wicker, or seagrass, a woven tree collar is something that will blend in with most types of decorations. Thus, it will definitely be a part of your Christmas décor for a long time.

    3. Metal Tree Collars

    Another material used to make Christmas tree collars is metal. A tree collar doesn’t just have to be in a galvanized silver color. You can also buy metallic tree collars in red or gold. They will give a more rustic vibe to your Christmas tree if that is the look you are going for.

    4. Hammered Tree Collars

    You can also get a hammered metal tree color for a more rough and striking look. The dazzling surface would provide a twinkling effect at the bottom of your tree. Even your Christmas lights would reflect against the hammered surface to give off a shiny look. These hammered collars are available in copper, silver, and brass. So you can easily match your decorations to each color.

    5. Wooden Tree Collars

    A wooden tree collar is a great option for a farmhouse vibe. You can choose between lighter or darker wood and also choose amongst the painted options. Wooden tree collars are pretty unique as well since they are square instead of round.

    Different Types Of Christmas Tree Collars

    There are different types of Christmas tree collars available for you to choose from. Here is a brief description of each type to help you make an informed purchase.

    1. Hinged Tree Collar

    Hinged collars have 2 or 3 hinges in them, so you can actually open them up and wrap the tree collar around the tree stand. The hinges make a hinged tree collar very easy to install since you just have to open it up and fix it in place. They are suitable for almost all Christmas tree sizes.

    Additionally, the hinged tree collar provides an opening for tree watering. This is why a hinged collar is the best option for a fresh and real tree.

    2. Ring Tree Collar

    A ring tree collar is a solid round piece that cannot be adjusted for size. These solid collars are more durable since they don't have any moving parts that have a chance of breaking. Since the size of this tree collar cannot be adjusted, this option is best for people who use an artificial tree or the same-sized fresh tree every year.

    Obviously, if you ever decide to go for a different-sized tree, this tree collar would become useless.

    3. Square Tree Collar

    If you thought ring tree collars were less common, a square tree collar is even more unique. So, if you are searching for something that is unique and quirky, a square tree collar is the best option for you. Since square tree collars are usually made from wood, they would blend in very well with cozy Christmas décor.

    The only drawback is that since the base of a Christmas tree is round, a square tree collar might fit a little weirdly. Arranging gifts around the square tree collar can also be a bit tricky.

    4. Panel Tree Collar

    Panel tree collars can be disassembled into smaller segments, This makes them very easy to store since you only require a small storage space. But you do require some assembly before you can install them on your Christmas tree.

    Advantages Of Using A Christmas Tree Collar

    People have been using Christmas tree skirts for years to cover up the base of the Christmas tree. But the look has now gotten old and used. It is also not very functional since kids or pet animals might trip over it. Additionally, it is very easy to mess up the look of the skirt.

    This is why many people have been choosing tree collars over the traditional tree skirt. It is more convenient to use than a skirt. It also gives a better look. Whether you choose a woven or metallic tree collar, your Christmas tree is bound to look the very best.

    No more unsightly tree stands or the messy look of a tree skirt. A Christmas tree collar would help provide an extremely sleek and streamlined look.

    How To Choose The Right Christmas Tree Collar?

    How To Choose The Right Christmas Tree Collar?

    A Christmas tree collar is supposed to cover the base of your Christmas tree. So, it should cover up the base of the tree perfectly and look elegant at the same time. There are several factors you can keep in mind while looking for the perfect Christmas tree collar.

    1. Size

    The most important factor you need to think about is the Christmas tree collar size. Since it is supposed to hide the unsightly tree stand, there would be no point to it if it didn’t cover the tree stand completely. You will have to get the exact measurements of your tree stand to make sure the tree collar fits all the way around your tree base.

    The opening in the middle of the tree collar should be wide enough to allow the Christmas tree’s base to fit inside while all the other parts of the tree collar remain firmly attached to the ground.

    There is not a lot of variety available in the sizes of Christmas tree collars since most Christmas tree stands are of the same general size. A diameter of 27 inches is the most common size you will find. If your tree, however, is on the wider side, you can find even bigger options. As for the height, you can get a tree collar measuring anywhere between 9 and 12 inches in height.

    It would be better if you measure the size of your tree stand beforehand since the whole point of a tree collar goes away if it doesn’t fit around the base of your tree perfectly.

    Keep in mind the proportions as well. You wouldn’t want a tree collar that is so big that it distracts from the other decorations on your tree, right? On the other hand, a tree collar that disappears beneath the tree is also not desirable. So, try to get a tree collar that fits in perfectly with your tree and the rest of your Christmas decorations.

    Tip

    Try to get a tree collar whose width is the same as that of your Christmas tree at the halfway height. This way, you will get a perfectly proportionate look.

    2. Color And Finish

    A Christmas tree collar doesn’t have to just cover the base of your tree. It can also serve as a Christmas décor. Tree collars are available in a variety of colors like taupe, pale brown, red, silver, brass, etc. Try to match the color of your Christmas tree collar with the color of your Christmas décor.

    This way, you will get a more cohesive and elegant look. For instance, woven tree collars look great with red or green Christmas decorations. Hammered tree collars, on the other hand, look best with rustic-looking Christmas décor.

    Metal tree collars look great with more elegant and sleek decorations.

    3. Durability

    You also need to keep in mind the durability of the Christmas tree collars. After all, you are going to be using it every single year. Also, note that it will be stored away in some dark corner of the house for most of the year. So, there is a chance your tree collar might get ruined during its long storage.

    A metal or galvanized tree collar is bound to stay in shape for a long time by virtue of its durability. Obviously, metal is hard to ruin. You just need to store it away from moisture and dust to make sure it lasts you a long time.

    A woven basket, or a woven tree collar, on the other hand, is more fragile and flimsy. It has a greater chance of getting ruined by the time you take it out for Christmas.

    So, you really need to weigh out the options here. The warm cozy look or the durability?

    4. Storage

    As talked about before, your Christmas tree collar will be stored away for most of the year. So, you need to figure out how much storage space your tree collar is going to take for around 11 months of the year.

    Buying a collapsible Christmas tree collar is a great option since you easily disassemble it to store it in a small area. Additionally, tree collars that can break into small segments are easy to assemble and store.

    However, if your chosen Christmas tree collar is not collapsible, you will have to make a special storage space for your tree collar. Keep Christmas ornaments and decorations inside the tree collar so it is kept safe. Also, don’t forget to keep the box the tree collar came in. That would greatly help in storing a non-collapsible tree collar.

    How To Use A Christmas Tree Collar

    Most Christmas tree collars are hinged, meaning you can open them from some points and wrap them around your real or artificial tree. However, if your Christmas tree collar is just one piece, you will have to install it in place at the base of your tree before you put up the rest of the tree.

    To make sure the tree collar is a good fit for your Christmas tree, you need to measure the tree stand beforehand. Buy the tree collar according to the measurements you take. This way, your tree collar will fit perfectly to the tree stand.

    You can also fill in some satin cloth, cotton, or any other preferred material to give a look of fullness. This will make your tree collar look even more streamlined and sleek.

    Decorating Your Christmas Tree Collar

    As said before, a Christmas tree collar doesn’t have to be just functional. You can decorate it to make it look more festive and match the vibe of the rest of the Christmas decorations. It ultimately depends on your personal style.

    You can stick Christmas-themed stickers and ornaments on the tree collar to make it match the holiday season. You can also hang tassels and decorations from the tree collar.

    Additionally, you can also fill in the inside of the tree collar with different materials to achieve a Christmas look. Whether it’s a blanket, satin cloth, gifts, a garland, velvet, Hessian fabric, or artificial grass, you can fill in the empty space with whatever you want to turn the tree collar into a fancy cover.

    In the same way, try to match the color and the finish of the tree collar with the rest of your decorations. A hammered tree collar might look out of place in more warm-toned Christmas decorations. But a woven tree collar would fit right in! So, go with the vibe.

    Can I use a Christmas tree collar on any type of Christmas tree?

    Yes, you absolutely can. Whether it’s real trees or artificial trees, you can use a tree collar with either. It is a great option for real trees since it will stop any kids or small pets from messing with the water-filled base of the Christmas tree. 

    Can I make my own Christmas tree collar?

    Don’t like the traditional styles of Christmas tree collars? Well, you can make your own. Turn your plain-old tree into a beautiful one by making a tree collar on your own. Be sure to measure the size of your tree stand before you start working on the collar. 

    You can make a tree collar out of wicker for a woven tree collar. You can also take a galvanized bucket and slice the bottom off to get a galvanized tree collar. You can find many other ways to DIY (Do it yourself) your own tree collar. Just start scrolling on Pinterest! 

    Do Christmas tree collars hold water?

    No, they don’t hold water since they are hollow inside. Just fill the tree stand you normally use with water and then wrap the tree collar around the base. 

    Conclusion

    I highly advise you to try out a tree collar this year. Ditch the ugly look or the dirty tree skirt, and go for the functional tree collar. Whether it’s collapsible or solid, a tree collar will surely improve the look of your Christmas tree and give it a more chic and sophisticated appearance. 

    I mean, you get to decorate it, choose your preferred color and finish, and it is easy to store. What more could anyone want? 

    Vintage Christmas Trees are experiencing a revival in holiday décor, bringing timeless charm and nostalgic warmth into contemporary homes. This article presents 25 distinct vintage Christmas tree themes, each featuring unique ornamentation, color palettes, and designs inspired by eras like the Victorian period, the Gilded Age, and the mid-20th century. From antique glass ornaments to rustic burlap ribbons and shimmering tinsel, these curated tree styles evoke the magic and elegance of holidays past. Each section highlights the iconic elements, specific ornaments, and décor settings that make these vintage trees stand out, offering endless inspiration to create a holiday display that celebrates history, tradition, and personal memories. Whether you envision a Victorian-inspired look or a lively 1950s holiday style, these ideas will guide you in crafting a Christmas setting with timeless appeal and nostalgic beauty.

    01. Antique Glass Ornaments Tree with Pastel Tinsel Décor

    A vintage Christmas tree adorned with pastel antique glass ornaments, shimmering tinsel garlands, and a classic angel tree topper offers a nostalgic holiday aesthetic. Placed in a cozy living room with wooden floors, this tree creates a warm ambiance that brings back memories of classic holiday décor. Framed vintage photographs and a softly glowing fireplace add to the heartwarming holiday setting, making it a perfect fit for those who cherish tradition.

    01. Antique Glass Ornaments Tree with Pastel Tinsel Décor

    02. Victorian Elegance Christmas Tree with Lace Ribbons & Candles

    The Victorian elegance Christmas tree features cascading lace ribbons, candle clip ornaments, and handmade paper fans, bringing a luxurious vintage style to holiday décor. Set in a Victorian-inspired living room with velvet drapes and rich wooden furniture, this tree exudes the sophistication of the 19th century. Soft lighting highlights each detail, giving the tree an elegant and refined appearance that suits lovers of historical décor.

    02. Victorian Elegance Christmas Tree with Lace Ribbons & Candles

    03. Retro Red and Gold Tree with Star Topper and Shiny Garlands

    Decorated with red and gold baubles, shiny garlands, and a star topper, the retro red and gold tree embodies the charm of the 1950s. Set in a mid-century living room with colorful lights and retro furniture, this tree recreates a classic holiday vibe. Vintage ornaments and a record player playing holiday tunes add to the nostalgic spirit, capturing the playful joy of a mid-century Christmas.

    03. Retro Red and Gold Tree with Star Topper and Shiny Garlands

    04. Nostalgic Tin Ornament Tree with Plaid Ribbons & Nutcrackers

    The nostalgic tin ornament tree, adorned with hand-painted tin ornaments, wooden nutcrackers, and red plaid ribbons, evokes an old-world holiday style. Positioned in a rustic room with exposed beams, patchwork quilts, and antique toys, this tree transports you to a cozy, traditional Christmas. The décor’s warm tones and rustic charm make it perfect for vintage holiday settings.

    04. Nostalgic Tin Ornament Tree with Plaid Ribbons & Nutcrackers

    05. Pearl and Lace Vintage Tree with Sepia Photo Ornaments

    The pearl and lace vintage tree draped with strands of pearls, lace bows, and sepia-toned photo ornaments adds a touch of vintage elegance to holiday décor. Set in an opulent parlor with ornate wallpaper and a crystal chandelier, this tree exudes timeless charm. Framed antique photos personalize the look, while pearl strands lend sophistication to this vintage-inspired holiday scene.

    05. Pearl and Lace Vintage Tree with Sepia Photo Ornaments

    06. Old World Charm Tree with Brass Bells and Clock Faces

    Hand-carved wooden ornaments, vintage clock faces, and brass bells give the old-world charm tree a warm, historical appeal. Positioned in a stately library with leather-bound books and dark wood shelves, this tree brings a nostalgic atmosphere to the room. The intricate details of wooden ornaments against the background of books and soft lighting create a holiday scene that celebrates timeless tradition.

    06. Old World Charm Tree with Brass Bells and Clock Faces

    07. Shabby Chic Christmas Tree with Fabric Ornaments & Snowflakes

    Distressed fabric ornaments, crocheted snowflakes, and pale pink ribbons create a soft, romantic look for the shabby chic Christmas tree. This tree combines vintage charm with shabby chic style in a light-filled, pastel-themed room. The combination of whitewashed furniture, lace curtains, and fabric accents gives this tree a gentle holiday appeal. This design is ideal for those looking to combine vintage charm with the unique appeal of whimsical Christmas trees.

    07. Shabby Chic Christmas Tree with Fabric Ornaments & Snowflakes

    08. Classic Toys Tree with Wooden Toys and Red Velvet Ribbons

    With wooden toy ornaments like rocking horses and tin soldiers, candy canes, and red velvet ribbons, the classic toy tree evokes childhood holiday memories. Set in a nostalgic room filled with vintage toys and a cozy fireplace, this tree captures the magic of classic Christmas décor. The playful decorations and comfortable ambiance make this tree a fitting choice for family-focused holiday décor.

    08. Classic Toys Tree with Wooden Toys and Red Velvet Ribbons

    09. Victorian Lace and Baubles Tree with Porcelain Baubles

    The Victorian lace and baubles tree, adorned with lace garlands, porcelain baubles, and velvet birds, brings the luxurious feel of the Victorian era to holiday décor. This tree creates an opulent Christmas scene against dark wood paneling and patterned wallpaper. Flickering candlelight highlights each delicate detail, making this a sophisticated choice for lovers of Victorian-style elegance.

    09. Victorian Lace and Baubles Tree with Porcelain Baubles

    10. Rustic Country Christmas Tree with Burlap Ribbons & Stars

    The rustic country Christmas tree is a cozy, countryside-inspired tree featuring burlap ribbons, dried orange slices, and metal stars. Set in a country home with exposed beams and a roaring fireplace, this tree captures the simplicity and warmth of rural holiday décor. These design features offer great inspiration for those who love rustic Christmas trees, emphasizing simplicity and charm rooted in countryside traditions.

    10. Rustic Country Christmas Tree with Burlap Ribbons & Stars

    11. Tinsel and Glitter Retro Tree with Glass Ornaments & Foil Star

    The tinsel and glitter retro tree adorned with shimmering tinsel garlands, glittering glass ornaments, and a foil star topper exudes the festive spirit of the 1960s. Positioned in a mid-century room with bold patterns and colorful décor, this tree transports you to a lively holiday setting. The glimmering tinsel adds sparkle, enhancing the nostalgic feel of a retro Christmas.

    11. Tinsel and Glitter Retro Tree with Glass Ornaments & Foil Star

    12. Christmas Past Memories Tree with Photos & Handwritten Notes

    Decorated with family photos, handwritten notes, and keepsake ornaments, the Christmas memories tree tells a story of holidays gone by. Surrounded by a nostalgic room filled with vintage memorabilia like antique stockings and a phonograph, this tree creates a heartwarming holiday scene. This tree captures the essence of family traditions and holiday nostalgia.

    12. Christmas Past Memories Tree with Photos & Handwritten Notes

    13. Gilded Age Christmas Tree with Gold & Bronze Ornaments

    Gold and bronze ornaments, satin ribbons, and antique brooches adorn the Gilded Age Christmas tree, bringing the elegance of the Gilded Age to life. Set in a grand living room with velvet curtains and a marble fireplace, this tree shines with luxurious holiday décor. The gold accents and rich textures give the tree an opulent yet vintage look, ideal for those who appreciate grand, historical décor.

    13. Gilded Age Christmas Tree with Gold & Bronze Ornaments

    14. Classic Santa Claus Tree with Velvet Ribbons & Sleigh Bells

    Vintage Santa Claus ornaments, red velvet ribbons, and sleigh bells create a festive look for the classic Santa Claus tree. Placed in a cozy family room with a fireplace and holiday stockings, this tree celebrates the magic of a classic holiday scene. The cheerful decorations and warm setting make it perfect for a family-focused Christmas.

    14. Classic Santa Claus Tree with Velvet Ribbons & Sleigh Bells

    15. Vintage Postcard Christmas Tree with Pinecones and Baubles

    The vintage postcard Christmas tree, adorned with old postcards, twine-wrapped baubles, and pinecones, captures the nostalgia of distant holidays. Set in a rustic cabin with log walls and cozy blankets, this tree evokes memories of travel and tradition. The postcards add a personal touch, ideal for those who cherish memories of Christmases past.

    15. Vintage Postcard Christmas Tree with Pinecones and Baubles

    16. Rustic Victorian Candlelit Tree with Linen Bows & Brass

    With faux candle lights, brass ornaments, and linen bows, the rustic Victorian candlelit tree exudes timeless elegance. Positioned in a dimly lit room with soft candlelight and vintage furnishings, this tree creates a warm, nostalgic holiday atmosphere. The candles and brass accents make it a fitting choice for Victorian-inspired décor.

    16. Rustic Victorian Candlelit Tree with Linen Bows & Brass

    17. Vintage Star Garland Tree with Hand-Cut Star Garlands

    The vintage star garland tree decorated with hand-cut star garlands, glittering baubles, and a golden star topper creates a traditional holiday look. Set in a quaint living room with plaid curtains and a rocking chair, this tree evokes classic Christmas charm. The handmade stars and warm décor make it a perfect choice for a homely holiday atmosphere.

    17. Vintage Star Garland Tree with Hand-Cut Star Garlands

    18. Wooden Sleigh Bell Tree with Plaid Ribbons and Horses

    Wooden sleigh bells, plaid ribbons, and horse ornaments give the wooden sleigh bell tree a countryside-inspired holiday look. Positioned in a rustic barn-style living room with wooden beams and lanterns, this tree evokes a traditional, nostalgic holiday. The natural tones and sleigh bells add to the old-fashioned charm.

    18. Wooden Sleigh Bell Tree with Plaid Ribbons and Horses

    19. Victorian Frosted Bauble Tree with Glass Baubles & Pearls

    Frosted glass baubles, pearl garlands, and lace bows decorate the Victorian frosted bauble tree, bringing a refined winter look to holiday décor. Set in an elegant parlor with soft lighting and ornate furnishings, this tree captures the essence of a Victorian winter. The frosted elements and soft pearls create a serene, timeless holiday scene.

    19. Victorian Frosted Bauble Tree with Glass Baubles & Pearls

    20. Rustic Wooden Charm Tree with Wicker Stars & Plaid Garlands

    Hand-carved wooden ornaments, plaid fabric garlands, and wicker stars give the rustic wooden charm tree a warm, inviting look. Positioned in a cozy log cabin with natural wood furniture, this tree blends well with rustic holiday décor. The wood accents and warm tones make it a fitting choice for a cabin Christmas setting.

    20. Rustic Wooden Charm Tree with Wicker Stars & Plaid Garlands

    21. Tin Soldiers and Candy Cane Tree with Ribbon Garlands

    Tin soldier ornaments, candy canes, and ribbon garlands create a classic holiday look for the tin soldiers and candy cane tree. Set in a traditional family room with a fireplace and cozy décor, this tree embodies the spirit of a classic holiday. The festive red and green color scheme adds to the warm, welcoming feel.

    21. Tin Soldiers and Candy Cane Tree with Ribbon Garlands

    22. Golden Era Christmas Tree with Satin Bows & Clock Faces

    Gold leaf ornaments, satin bows, and antique clock faces give the golden era Christmas tree an elegant holiday appearance. Positioned in an opulent drawing room with velvet curtains and a chandelier, this tree brings to life the luxurious décor of the Golden Era. The golden tones and rich textures create a timeless holiday ambiance.

    22. Golden Era Christmas Tree with Satin Bows & Clock Faces

    23. Retro Glass Bauble Tree with Paper Fans & Tinsel Garlands

    The retro glass bauble tree adorned with colorful glass baubles, tinsel garlands, and paper fan ornaments brings a lively 1950s holiday style. Set in a mid-century modern home with bold wallpaper and retro furniture, this tree embodies the festive spirit of a 1950s holiday. The vibrant colors and shiny tinsel create a cheerful holiday display.

    23. Retro Glass Bauble Tree with Paper Fans & Tinsel Garlands

    24. Gingham and Tinsel Christmas Tree with Tin Hearts & Bows

    Decorated with gingham bows, tinsel strands, and tin hearts, the gingham and tinsel Christmas tree captures traditional holiday charm. Set in a farmhouse living room with rustic furniture and a fireplace, this tree creates a warm, comforting holiday scene. The combination of classic patterns and tinsel brings a nostalgic, heartwarming touch to holiday décor.

    24. Gingham and Tinsel Christmas Tree with Tin Hearts & Bows

    25. Old-Fashioned Woodland Tree with Burlap Bows & Pinecones

    Wooden animal ornaments, pinecone garlands, and burlap bows bring a woodland-inspired holiday feel to the old-fashioned woodland tree. Positioned in a cozy cabin with a stone fireplace and natural décor, this tree captures the essence of a rustic, nature-inspired holiday. The warm tones and natural elements make it perfect for those who enjoy an outdoorsy holiday décor style.

    25. Old-Fashioned Woodland Tree with Burlap Bows & Pinecones

    The evergreen trend of using upside-down Christmas trees dates back to the middle ages according to stories like the legend of Saint Boniface saving a child of Eastern Europe. Such trees are space-saving, trendy, and aesthetically pleasing and you can decorate these trees using traditional, creative, or DIY ornaments. 

    If you are bored of decorating your Christmas tree the same way every year, an upside-down tree is all you need! 

    The origin of such upside-down Christmas trees dates back to the medieval ages when people believed they symbolized the Holy Trinity. However, today they are used as a space-saving Christmas tree alternative. In this blog post, we will explore everything that you need to know about these inverted trees. Let us begin! 

    Origin And History Of Upside-Down Christmas Trees

    Origin And History Of Upside-Down Christmas Trees

    Early Depictions In European Churches

    One of the earliest inverted Christmas tree origins can be traced back to the medieval artworks of European churches, such as those in Poland. Though there are several meanings of such upside-down trees, one possible interpretation is that such trees symbolize the upside-down nature of the world. This means that the roots of the tree (representing the heavenly realm) point towards God and its branches (representing our world) point towards earth. 

    The story behind upside-down Christmas trees, according to the Bible, is that Adam and Eve ate the forbidden fruit from the Tree of Knowledge, so they were expelled from heaven. This Christian doctrine of the fallen man depicts the reversed world order caused by the sins of the first humans. Medieval artists painted an upside-down tree to show how the order of the world was disrupted. 

    However, the tradition of hanging an upside-down Christmas tree is also credited to Saint Boniface. He was a Christian missionary who one day came across a group of pagans worshiping an oak tree in the eighth century. 

    The group was preparing to sacrifice a young boy to their higher power. Boniface decided to convert them to Christianity to save the boy, so he cut down the tree. A small fir tree emerged from its roots when the oak tree fell. Saint Boniface used this to symbolize Christ's birth and everlasting life. This is one of the most popular inverted Christmas tree origins stories in Christianity. 

    Upside-Down Christmas Trees In The Middle Ages

    It is believed that using an upside-down Christmas tree was popularized as a tradition in the middle ages by Eastern European Christians (such as those of Poland). They used inverted trees to represent the Holy Trinity and Christ's crucifixion. 

    As mentioned before, the roots of inverted trees pointed toward heaven - while the branches pointed toward the Father, Son, and the Holy Spirit. An upside-down Christmas tree was popularly used in churches during the middle ages. However, gradually this symbol of the Holy Trinity made its way to the homes of the common public as a way to keep evil spirits away. 

    Popularity In Modern Times

    Even though the tradition of possessing an upside-down Christmas tree may have died out briefly in Europe, it is regaining its popularity again. In countries like the United States, inverted trees are considered a trendy and modern alternative to traditional Christmas trees. 

    While an upside-down Christmas tree has a unique backstory - not everyone is installing it for religious reasons, of the Holy Trinity and Christ. People looking for a space-saving Christmas tree that happens to be aesthetically pleasing also love to invest in an upside-down Christmas tree. 

    Celebrities like Ariana Grande have contributed to the rise in popularity of upside-down trees by installing them in their house during the holiday season as a part of their Christmas traditions. 

    What Are The Advantages Of Upside-Down Christmas Trees?

    1. Space-Saving

    If you have ever invested in a traditional Christmas tree, you must know that it takes up a lot of floor space. This can be another menace if you live in a smaller apartment. You must also install a stand and skirt to secure your Christmas tree during the holidays. 

    On the other hand, an upside-down Christmas tree takes significantly less floor space. It does not need a stand to be securely fixed in a certain area of your home. As a result, you save a lot of valuable floor space that you can use for other (more important) purposes. 

    2. Aesthetically Pleasing

    Many people choose to go for an upside-down Christmas tree because they are aesthetically pleasing. If your sense of style includes a balanced combination of boldness and elegance, an upside-down tree may be all you need to spice up your festive decorations this year. 

    An upside-down hanging tree can help you create an eye-catching display in your home. You can also use upside-down trees with more modern and sophisticated decorations. Add a few Christmas lights and ornaments, and voila! Your Christmas home décor will become a visual treat. 

    3. Unique And Trendy

    If you like to stand out, making succulent Christmas trees or decorating upside-down alternatives should be your goal this festive season. Thanks to social media, the latter has become quite trendy today. Yet, only a few people are installing them in their houses, giving you the perfect opportunity to opt for something unique!

    An upside-down tree is impossible to ignore, especially if decorated nicely. It can help you add the perfect wow factor to your home during the holidays by going against the norms yet staying in touch with the trends! For those who appreciate whimsical Christmas trees, an upside-down tree offers a playful and unexpected twist on the traditional.

    How To Decorate An Upside-Down Christmas Tree?

    How To Decorate An Upside-Down Christmas Tree?

    1. Traditional Decorations

    You can also use the decorations that people typically use for decorating a traditional Christmas tree for an upside-down Christmas tree. Traditional decorations on an upside-down Christmas tree can help you spice up your tree without going overly bold. 

    Hanging lights, tinsel, decorative ornaments, such as a tree-topper, and so on is a good way to beautify your Christmas décor. You can easily place them on the evergreen branch of your upside-down Christmas tree!

    2. Creative Decoration Ideas

    Using traditional decorations on an upside-down tree may seem safe, but it may not allow you to explore your creative side. In such cases, you can try out several ideas that go against the norms and let you shine the designer in you. 

    For instance, hang your upside-down tree from ceiling-hanging fixtures like a chandelier. This can be an amazing décor idea for people who want to create a dramatic effect.

    However, investing in fancy hanging fixtures is one of many ways to go about creative decoration ideas. You can also use non-traditional Christmas ornament sets to decorate your upside-down tree, such as ribbons, feathers, etc. This can help you create a unique and eye-catching look in your house. 

    Finally, you can play with colors to add a creative look to your Christmas tree. Experiment with different color combinations and see what color scheme fits your style the best. For instance, if you want a modern and sophisticated look this Christmas, you might want to decorate your tree with all-white ornaments. 

    Tips For Hanging Ornaments

    It is important to note that inverted Christmas trees work against gravity. Hence, it would help if you were extra careful while decorating them. Here are a few tips that you can follow to ensure that you do not mess up decorating such Christmas trees:

    1. Use Lightweight Ornaments

    Since you will be hanging your Christmas tree upside-down from your rafter, it is crucial to use lightweight ornaments. If you opt for heavier alternatives, the branches of your Christmas trees may end up sagging or tilting over time.

    Opting for lightweight ornaments will help you minimize the damage caused to your tree, thus making it last longer. You can go for more ornaments like fabric or paper, feathery or pompom decorations, etc., while you decorate a fir tree upside down in position. 

    2. Secure The Ornaments

    While decorating a fir tree upside down, it is important to note that your ornaments are at a higher risk of falling off due to gravity. Hence, you should always secure all the ornaments carefully. 

    Tip

    Attach the decorative ornaments to the branches of your inverted Christmas trees by securing them with either glue dots or double-sided tape to hold your decorations in place.

    3. Hang Ornaments Close To The Trunk 

    Uneven weight distribution on a tree upside-down in position can lead to bent branches and damaged trees. Hence, it would help if you always tried to even out the weight of your ornaments while decorating your tree. A great way of doing that is to hang more ornaments closer to the trunk of your upside-down tree.

    Where To Buy Upside-Down Christmas Trees?

    1. Local Department Stores

    A shopping mall or local department stores are a few of the most accessible regions to purchase holiday decorations. However, since the recent rise in the popularity of hanging trees is still relatively newer than that of a traditional tree - you might not find the former at every local retail store near you. 

    It is also important to note that the demand for hanging trees varies in different regions. Hence, it is always a good idea to call and check if the department stores have the topsy-turvy trees you are looking for. 

    2. Online Retailers

    Online retailers are a great alternative to local department stores if you want to buy topsy-turvy trees. They provide you with several varieties, shapes, and sizes of such trees at competitive rates. The best thing about shopping online is that you can browse through multiple options without stepping a foot outside your house. 

    However, before buying your ideal topsy-turvy trees online, it is crucial to go through their reviews carefully. Notice trees hanging in the review pictures of the customers who bought your choice of an upside-down tree, and assess whether or not it coincides with what you are looking for. Once you are satisfied with the reviews and specifications of the tree, purchase it from the shopping site! 

    3. DIY Options

    If you want to decorate a Christmas tree upside down but can't find the perfect fit anywhere - why not make it yourself? Creating topsy-turvy trees can be a fun DIY project for your loved ones this holiday season!

    To make your own upside-down Christmas tree, you will need an artificial traditional Christmas tree and a stand to hang it from your ceiling. Fix the artificial tree on the stand as per the directions in the latter's instruction manual. 

    Next, decorate the tree with ornaments like gold-painted pine cones and lights - as you would decorate a traditional tree. Once you are done, hang the tree upside down from the ceiling with a sturdy hook or wire. 

    Can you decorate an upside-down Christmas tree like a regular tree?

    Yes, you can decorate an upside-down Christmas tree like a regular or tabletop Christmas tree. You can hang all the ornaments, such as tinsels and gold-painted pine cones, and then, using a strong hook, hang the entire tree upside-down from your ceiling. 

    However, it is important to note that there is one difference between decorating an upside-down tree and a traditional tree. While working on the former, you need to secure all the decorations tightly so they don't fall off once the tree is hung upside-down. But while working with the latter, you need not worry about such things. 

    Are upside-down Christmas trees safe to use?

    Yes, upside-down Christmas trees are generally safe if you follow the necessary precautions, such as securing them properly with a strong hook. However, it is important to note that you should only purchase trees of appropriate weight and size for the location where they will be hung. This way, you can minimize the chances of accidents, such as a tree falling. 

    What are some creative ways to display an upside-down Christmas tree?

    There are many ways of getting creative with a spruce hanging upside-down tree, such as hanging it from a chandelier and suspending it from your ceiling with a decorative chain. However, to ensure your guests notice trees hanging, you can also consider mounting them to a wall. 

    Do you need a special stand for an upside-down Christmas tree?

    Yes, it is a good idea to invest in a special stand for an upside-down Christmas tree. Such stands are sturdier but have to be purchased separately. 

    How do you store an upside-down Christmas tree?

    Just like any other type of Christmas tree, storing an upside-down artificial Christmas tree can be tricky. However, it can be done if you follow the right steps. The first step to storing such trees would be carefully removing all the decorations from their branches. Next, uninstall the tree from your ceiling or well and rest it on its base. 

    You can wrap your tree in a plastic protective cover to avoid dust or debris buildup. Store the tree in a cool and dry place, ideally away from direct sunlight exposure. 

    How long do upside-down Christmas trees typically last?

    Generally, a spruce hanging upside down a tree can last several years. However, this duration can vary depending on the quality of the tree, the environment it is stored in, and how well you maintain it. 

    Can you use an upside-down Christmas tree outside?

    You can use an upside-down tree outside this Christmas and holiday season but note certain points. For instance, you should only go for trees specifically designed for use outside - because most of them are manufactured for indoor use. 

    Next, it is important to install an upside-down tree carefully. By hanging it outside, you will be putting your tree at a greater risk of strong winds, rains, and other weather conditions that may damage it. Hence, securing and protecting your tree by wrapping it in a suitable protective layer, such as plastic is important. 

    There are several themed Christmas tree ideas that you can go for this year. The modern and minimalist theme involves simple yet elegant decorations, such as metallic ornaments in gold and silver.

    The rustic and natural theme is the best option for people who want to create a more cozy vibe this Christmas. However, if you want to make a bold statement this holiday season - go all out with a glamorous and sparkling theme. 

    Conclusion

    Using upside-down Christmas trees can bring a unique twist to your routine holiday decorations. They help you save on floor space, aesthetically pleasing, and, most importantly - trendy! The backstory of an upside-down tree that involved a Saint saving a child from paganism makes it all the more special. 

    An upside-down Christmas tree can help you express your creativity and style to a great extent. You can find several decorative inspirations on platforms like Instagram and Pinterest to decorate your hanging trees. 

    From minimalist to bold decorations, all the way to rusty themes - you can try your hands on your choice of style while decorating your next upside-down Christmas tree! 

    It's already Christmas time, and you have probably filled your home with jolly and festive decorations. Starting the tone for the holidays in your home is really important if you want you and your family and friends to feel great. Christmas decorations have a huge impact on the way we feel, so don't miss decorating your home this year. Even small details make a big difference, so make sure you add something festive in every room in the house. I bet that most of you have skipped the bathroom and didn't decorate it in the jolly mood. Honestly, the bathroom can look pretty amazing for this lovely holiday, so check out the Unexpected Christmas Bathroom Decoration That Will Catch Your Eye. You will get hooked on them and will definitely want to decorate even this room with some Christmas decorations. There are plenty of ways to do it, so find your favorite one!

    Source

    This soap dispenser with a Christmas tree inside of it is totally adorable and it's not going to leave you indifferent for sure. You will want to have it in the bathroom, and the good news is that you can make it on your own and you have the full tutorial on the link below.

    Source

    Source

    Source

    Adding some garland, some Christmas ornaments, and some candles here and there will set the tone immediately. Your guests will be amazed at your awesome and careful decorations.

    Source

    Source

    Add some garland around your sink and make it pop! It's a super easy decoration that won't take you much time and money, so what are you waiting for?

    Source

    Source

    What do you say about adding some interest to the shower curtain by hanging Christmas balls on it? They will make your day better, believe me!

    Source

    This festive dustbin is going to be everyone's favorite decorative item! Get one if you can for your bathroom and put smiles on many faces.

    Source

    Source

    Source

    I'm totally in love with this mini Christmas tree in a bathtub! Add some Christmas lights in there and feel the magic in the bathroom too!

    Source

    Source

    The Christmas berries are also a great addition to your bathroom, so if you have some think about adding them in some unexpected places which will bring joy to the room.

    Source

    How do you see these rather simple but insanely effective Christmas Bathroom Decorations? We would love your thoughts and decor ideas in the comment section below!

    Related Articles

    13 Best Paints for Bathroom Ceilings.

    99 Super Cool Shower Curtains to Transform Your Bathroom  

    111 World`s Best Bathroom Color Schemes For Your Home

    14 Awe-Inspiring Ceramic Christmas Decorations

    19 Christmas Tree Paper Decorations for a Delicate Look

    14 Best Christmas Tree Lights to Consider This Year

    Learn How to Store Icicle Lights After Christmas

    17 Burlap Ribbon & Wreath Options

    30 Best Christmas Window Decoration Ideas

    The Balsam fir has a conical shape, a strong, spicy aroma, and dark green needle-shaped leaves. Another common Christmas tree is the Fraser fir, which has soft leaves, grows to a medium height, and can easily support different types of decorations. 

    Selecting a Christmas tree is one of the first things many people do with the onset of the Christmas and holiday season. But with so many different types of Christmas trees available, this process can be quite complicated. You can easily get confused between the various species of fir, spruce, cypress, and other trees. 

    That’s why I’ve put together this guide on the subject to help you out. 

    1. Balsam Fir (Abies balsamea)

    1. Balsam Fir (Abies balsamea)

    The Balsam Fir, commonly found in the northernmost parts of the United States, is an evergreen tree with a straightforward conical shape and dark green needle-like leaves. It's known for its robust scent and excellent needle retention. However, it's important to note that these soft needles can cause stomach issues if consumed by pets. 

    This tree, which can reach up to 66 feet in height, is often used as a moderate-sized Christmas tree. Although its branches are not very strong, they can still hold decorations. Typically grown in Canada and brought to the US during the holidays, this type of tree adds a simple yet festive touch to the season. 

    The balsam fir not only enhances the holiday spirit but also plays a vital role in supporting local wildlife. For those interested in how various tree species contribute to natural habitats, delve deeper with ‘nature and wildlife trees.’

    2. Fraser Fir (Abies fraseri)

    2. Fraser Fir (Abies fraseri)

    The Fraser Fir, distinguishable by its dark green, silver-lined color, is among the top choices for Christmas trees due to its exceptional suitability for decorations. It's sturdy enough to host various ornaments on its upward-growing, stiff branches that still bear soft, needle-like leaves. However, pet owners should exercise caution as just like the Balsam Fir, their consumption can cause stomach issues in pets. 

    This tree's triangle-like shape adds to its overall appeal, looking good from every angle, and it can reach a height of up to 50 feet. Additionally, Fraser Fir is well-known for its distinctive fragrance and excellent needle retention, qualities that, when combined with proper maintenance, make the tree's scent last longer, enhancing the festive atmosphere in the house.

    3. Noble Fir (Abies procera)

    3. Noble Fir (Abies procera)

    The Noble Fir, one of the most grandiose Christmas trees, has an impressive height potential of up to 260 ft., exhibiting a deep green color. Its exceptionally dense branches with blue-green needle-like leaves grow in bracts, offering a uniquely lush look. Just like with the Fraser Fir, pet owners should remain cautious of any potential needle consumption that could cause stomach issues in pets. 

    The branches of the Noble Fir, native to the Pacific Northwest, are sturdy yet flexible, making them an ideal choice for creating fresh holiday wreaths, or even for holding up heavier decorations on the tree itself. They have an upward curve, facilitating the attachment of ornaments. Noticed for robust branches and excellent needle retention, this tree also carries a strong fragrance, which makes it a coveted choice for adding a merry touch to holiday decorations. 

    The Noble Fir is renowned for its robust branches and captivating fragrance, making it a popular choice for those looking to theme their holiday decorations. Discover a variety of decorating themes including the Noble Fir by exploring 'themed Christmas tree ideas.'

    4. Grand Fir (Abies grandis)

    4. Grand Fir (Abies grandis)

    The Grand Fir, a distinct Christmas tree variety, towers over many others with its potential to grow up to 300 ft. Discovered in areas like Northern California and the regions close to the Pacific Ocean, it stands out with its glossy, shiny dark green needles organized in two neat rows, each featuring a unique white stripe with a yellow-green hue. Just like the others, keep an eye out for pets as the needles may upset their stomachs if consumed. 

    Its bark dons a grayish-brown color, and the tree is well-reputed for its dense foliage and unique fragrance blend. This scent, stronger than most but still pleasing to the senses, carries a slight hint of citrus, layered on top of the traditional spicy Christmas aroma. The Grand Fir, traditionally used to freshen up interiors by bringing its boughs inside, features moderate branch strength which supports decorations nicely, maintaining a balanced appeal in festive décor. 

    5. Arizona Cypress (Cupressus arizonica)

    5. Arizona Cypress (Cupressus arizonica)

    The Arizona Cypress, native to northern Mexico and the southwestern United States, is a unique Christmas tree variety with its distinctive blue-grey/silver-green color. This pyramid-shaped, evergreen tree offers an appealing combination of drought, heat, and wind resistance, making it a robust choice for the holiday season. It can grow up to 60 feet, marking it as an ideal mid-sized option, further standing apart from other trees for being pet-friendly. 

    Beyond just holiday festivities, the Arizona Cypress offers pragmatic benefits such as erosion control and acting as a windbreak. With its moderate branch strength, it handles the weight of decorations and Christmas ornaments well, further solidifying its position as a preferred choice for a Christmas tree. 

    6. Colorado Blue Spruce (Picea pungens)

    6. Colorado Blue Spruce (Picea pungens)

    The Blue Spruce, bearing a deep blue-green color that sets it apart from other Christmas tree species, spotlights a unique silvery-blue shade in its leaves. Originating near the Rocky Mountains and being the state tree of Colorado, this species is often known as the Colorado Blue Spruce. It can grow up to 75 feet, providing a grand backdrop for the holiday season with its sturdy branches renowned for their capacity to bear heavy ornaments. It's also pet-friendly as the sharp needles tend to deter curious pets from approaching the decorations. 

    Although the Blue Spruce's sharp leaves lend the tree a unique aura, they might make it a less suitable choice for homes with young children. Therefore, it's recommended to wear long sleeves and gloves during its decoration. However, its distinct color and excellent needle retention more than compensate for this little inconvenience, making it a notable addition to the realm of Christmas trees. 

    7. Leyland Cypress (Cupressus x leylandii)

    7. Leyland Cypress (Cupressus x leylandii)

    The Leyland Cypress, savored for its dark green-gray color, is an acclaimed Christmas tree choice, particularly in the southeast US. Often utilized for creating fences and hedges, this tree's potential height of up to 60 feet offers a versatile choice for holiday décor. Its soft grayish-green leaves are scent-free and don't produce any sap or pollen, making this tree perfect for those with pollen allergies, contributing to its reputation as a pet-friendly option. 

    Exhibiting a pyramidal shape due to the upward-growing leaves, this tree brings a unique aesthetic appearance. Moreover, the Leyland Cypress is one of the fastest-growing Christmas trees and is praised for its good needle retention, experiencing very few leaf falls throughout the festive season. All these features make it an advantageous and popular choice for Christmas celebrations. 

    8. White Fir (Abies concolor)

    8. White Fir (Abies concolor)

    The White Fir tree, often called the Concolor Fir, boasts a striking blue-green color with flattened, pointed-tip leaves that curve upwards, lending it a conical shape. This hardy Christmas tree species can soar up to an impressive 195 ft, but pet owners should be wary as its consumption can potentially cause stomach issues in pets. 

    What truly sets the White Fir apart is its unique aroma. When the silvery blue/green leaves are crushed, they release a captivating citrus-like scent, making it a wonderful option for those that enjoy a fragrant tree. With moderate branch strength suitable for supporting decorations and outstanding needle retention resulting in very few leaves falling off throughout the season, this tree adds a carefree, aromatic touch to the holiday festivities. 

    9. Douglas Fir (Pseudotsuga menziesii)

    9. Douglas Fir (Pseudotsuga menziesii)

    A commonly seen option on farms, the Douglas Fir is a tremendously popular Christmas tree choice. It boasts shiny, soft leaves in a dark green-blue color, growing in dense clusters. These leaves, cautionary for pet owners due to potential stomach issues if consumed, produce a sweet scent and grow in all directions, giving this tree its pyramidal form. Despite being typically medium-sized, Douglas Firs can reach astounding heights of up to 330 ft. 

    Douglas Firs require ample water to maintain their well-liked features, without which their leaves might fall off. Even though their lifespan doesn't compare to many other Christmas tree types, their fragrance and good needle retention still make them a favorite. So, to ensure the Douglas Fir remains vivacious throughout the holiday season, it's recommended to get a freshly cut tree for display. 

    10. Canaan Fir (Abies balsamea var. Phanerolepis)

    10. Canaan Fir (Abies balsamea var. Phanerolepis)

    The Canaan Fir, featuring a lovely shade of blue-green, shares similarities with both the Balsam and Fraser Firs, especially in its pyramid-like structure and upward-growing needles. However, it outperforms Balsam Fir in needle retention, matching Fraser Fir for that quality trait. Be cautious with pets around this tree though, as the consumption of needles could cause stomach issues. 

    Its flat, darker green leaves and medium-height growth contribute to its elegantly simple look, perfectly complemented by sturdy branches ideal for Christmas decorations. Commonly found in the mountains of West Virginia, the Canaan Fir may be one of the newer Christmas tree types, but its popularity is soaring thanks to its outstanding needle retention and accessible elegance.

    11. Eastern White Pine (Pinus strobus)

    11. Eastern White Pine (Pinus strobus)

    The Eastern White Pine, distinguishably characterized by its long, thin, needle-like leaves in clusters, projects an enchanting shade of blue-green. Its pointed tips can grow up to five inches in length, while remarkably, the leaves carry no aroma, making this a great Christmas tree choice for those with scent sensitivities. The Eastern White Pine is pet-friendly and holds its needles for the longest duration of all, even though it is the least fragrant. 

    While its branches are less sturdy, rendering them less suitable for heavy decorations, these branches are nevertheless utilized in creating centerpieces, wreaths, garlands, and more. Interestingly, the Eastern White Pine is the largest of all pine trees in the US, demonstrating a potential to grow up to an impressive 230 ft. 

    12. Norway Spruce (Picea abies)

    12. Norway Spruce (Picea abies)

    Boasting a rich, deep green color, the Norway Spruce, originally from Europe, carries a long history of being used for decorative purposes since the 16th Century in Germany, earning it the loving nickname of 'holiday spruce'. Each of its leaves sports a needle shape with pointed tips, contributing to its traditional Christmas tree look. Pet-friendly and with moderate to high branch strength, they can grow impressively tall, reaching a height of up to 180 ft. 

    Despite its rapid growth, Norway Spruces' needles tend to drop quickly once cut, so it's advisable to get this tree just a week before Christmas to enjoy it at its best. The popularity of this tree was affirmed when it was chosen to decorate the iconic Rockefeller Center in New York City for Christmas in 2020. 

    13. White Spruce (Picea glauca)

    13. White Spruce (Picea glauca)

    The White Spruce, radiating a pleasing blue-green color, is wonderfully suited for showcasing decorations and Christmas lights, owing to its moderate but sturdy branch strength. Recognized by various names, such as the Canadian Spruce, Western White Spruce, and Skunk Spruce, this tree is a popular pet-friendly Christmas tree option. 

    Hailing from the northern parts of the US, the White Spruce closely resembles the Colorado Blue Spruce, with short, needle-shaped leaves. However, it differs significantly in its scent, as its leaves release an unpleasant odor when crushed. Despite this, the tree is lauded for its superior needle retention, making it an excellent, vibrant choice for a festive display that endures throughout the holiday season. 

    14. Scotch Pine (Pinus sylvestris L)

    14. Scotch Pine (Pinus sylvestris L)

    The Scotch Pine, characterized by its stunning blue-green color, first rose to Christmas tree fame in Great Britain and holds multiple monikers, including Scots Fir and Scots Pine. With its robust, dark green leaves encircling the central branch, and its red bark providing a standout contrast, this pet-friendly tree is aesthetically pleasing and great for hosting Christmas decorations, thanks to its sturdy branches. 

    Despite its leaves being sharp, making it advisable to use gloves during decorating, the Scotch Pine is still a preferred choice. Notable for its excellent needle retention, it emits a pleasant fragrance that lasts for a long duration and can soar up to a mighty 115 ft. in height. As an easy-to-maintain Christmas tree, and being the national tree of Scotland, the Scotch Pine is a deeply cherished choice for festive decorations. 

    15. Virginia Pine (Pinus virginiana)

    15. Virginia Pine (Pinus virginiana)

    The Virginia Pine, displaying a lush, dark green color, is easily recognizable by its pairs of twisted and short leaves. Its dense foliage, which can be simply trimmed to achieve the perfect Christmas tree shape, is both pet-friendly and visually distinctive. This tree offers a modestly sized Christmas tree option, as it can grow up to 70 ft. tall. 

    One of the key highlights of the Virginia Pine is its low branches that facilitate easy decorating, perfectly suited to host heavy decorations thanks to the sturdy branches. It also has a robust nature that allows it to stand firm. Its needles stay on the tree for an extended time, reducing the need for frequent cleaning, thereby making it a convenient and attractive choice for Christmas decorations

    16. Red Cedar (Juniperus virginiana)

    16. Red Cedar (Juniperus virginiana)

    The Red Cedar, often referred to as the Eastern Red Cedar is a Christmas tree variety recognized by its rich, dark green color. Its branches grow closely together, providing thick and lush foliage. The leaves of this tree grow straight upwards, creating an appealing pyramidal form—a feature complemented by its dark and shiny green quality. Typically, a Red Cedar can grow over 40 ft tall. It's a favorite Christmas tree in areas such as Arkansas, Oklahoma, and Missouri, not only for its aesthetic appeal but also for its pet-friendly nature and moderate branch strength. 

    Contrary to its name, the Red Cedar is part of the Juniper family and not a cedar tree. Its namesake, however, stems from its beautiful Red Wood and pleasant aroma, earning it the alternate nickname of Aromatic Cedar. Coupled with its reputation for rapid growth, the Red Cedar makes for a remarkable and sweet-smelling addition to the holiday décor. 

    17. Korean Fir (Abies koreana)

    17. Korean Fir (Abies koreana)

    The Korean Fir, a relatively new contender in the realm of Christmas trees, certainly adds an exotic touch to holiday festivities. Its leaves display a unique dual tone, with a dark green color on top and a captivating silvery hue underneath, resulting in a visually appealing contrast. This multicolored display, coupled with a classic pyramid shape and the ability to grow up to 50 ft tall, makes the Korean Fir stand out among its peers. While the consumption of needles may cause stomach issues in pets, the tree's sturdy branches make it suitable for hanging decorations. 

    But perhaps the most striking feature of this tree is its purple cones, a distinctive trait among Christmas trees. Another appealing factor is its high resistance to heat, representing a practical advantage over other fir trees and making maintenance comparatively easier. This blend of beauty and resilience makes the Korean Fir an exceptional Christmas tree option. 

    Do Christmas trees need a lot of sunlight?

    For Christmas trees to thrive well, bright natural light and cool temperatures are most important. So, when you bring your Christmas tree indoors, make sure to keep it in a spot that receives plenty of sunlight but is away from any heat vents and fireplaces. Ideally, I would suggest bringing the tree in for a maximum of ten days at a time. 

    Alternatively, try keeping the Christmas tree near the doorway for a few days to help it recharge after it has spent some time in the limited light indoors. And when keeping the tree indoors, use a humidifier to make sure the air is moist and, if possible, lower the temperature. 

    How long does a Christmas tree last?

    A Christmas tree that is watered regularly and well-maintained can last for around four to five weeks. After that period, it will start drying out. One easy way to know whether the tree is in good condition is to check whether the leaves or needles are falling off. Or see if the branches bow down when decorations are attached. 

    If you notice the leaves falling off, it may indicate that the tree is not getting enough water and is drying. Similarly, a Christmas tree that cannot support the weight of various decorations and ornaments may not be in good health. Finally, what species the tree belongs to can also affect how long it lasts. 

    Which type of Christmas tree has the best fragrance?

    The Balsam fir (Abies balsamea) is often said to have the best-smelling fragrance among all types of Christmas trees. It has a warm, rich, sweet-smelling scent with woody undertones, generally associated with freshly harvested conifer trees. 

    Because of this pleasing aroma, balsam tree sap is often used in the perfume industry. Other types of Christmas trees known for their aroma include the grand fir, noble fir, scotch pine, and white fir. Many of these have a citrus-like scent that is slightly spicy and can bring freshness into your home. 

    Where did the tradition of decorating Christmas trees begin?

    According to most sources, the tradition of decorating Christmas trees started in Germany in the 16th Century. Christians brought trees into their homes and decorated them with sweets, candies, pastries, flowers, apples, gingerbread, etc. Tin figures and glass baubles were also used for decorating Christmas trees. 

    Some Christians built wooden pyramids and decorated them using candles and other items when trees were not as easily available. 

    Do Christmas trees need a lot of water?

    The amount of water required by a Christmas tree will depend on what type of tree it is. Some Christmas tree species, such as the Arizona cypress and Korean fir, are heat and drought-resistant and do not require much water. On the other hand, several species require a lot of water and can die quickly if they are not watered regularly. 

    In most cases, I would advise watering the Christmas tree daily, at least for the first eight to ten days after it is brought in. For a standard-size Christmas tree with a trunk diameter of five inches, you need to make sure it has at least five quarts of water at all times

    It is also a good idea to ask the seller about additional water requirements for the type of Christmas tree you plan to get. 

    Tip

    When bringing your Christmas tree indoors, cut across the base of the tree trunk that is one inch in length. Then, place it in the stand with water. Doing so will help you eliminate any resin and help the tree absorb water more effectively. 

    Decorating Christmas trees is an important tradition that goes as far back as the 16th Century. And putting up trees during the holiday season is something almost everyone looks forward to every year. However, selecting the right type of Christmas tree is crucial for practical and aesthetic reasons. 

    With the appropriate Christmas tree, you will find it easier to put up decorations and require less effort to keep the tree in good condition. Since such trees will be easier to decorate with ornaments and objects without bowing under their weight, they will look much more attractive. 

    Just make sure to provide your Christmas tree with enough light and water so that it lasts throughout the holiday season. 

    Christmas is just a few days away, and we could not be more excited. It is a time of joy, celebration, peace, and tranquility – a moment when everything falls into place, and we have the chance to spend more time with our loved ones. By now, the Christmas tree is usually decorated in anticipation of Old Saint Nick, and the remaining time is spent adorning the rest of the household, preparing sweets and treats for the Christmas family dinner, and making last-minute errands and gift purchases.

    For those who haven't had the chance to take a break and properly prepare for the winter holidays, finding the right Christmas tree can seem overwhelming. However, recycling comes to the rescue, offering a charming and creative alternative to the traditional pine tree: pallet Christmas tree designs. The incredibly versatile pallet can serve as the foundation for string lights, handmade decorations, and even as a canvas for your painting skills. You can use the wood in its classic pallet shape or disassemble and rearrange the pieces as you see fit. Let's take a look at a few ideas.

    Pallet Christmas Tree Designs

    1. simple distressed pallet tree in a silver coat

    Use half a log to form the base of the tree and white string lights for an elegant effect.

    1. SIMPLE DISTRESSED PALLET TREE IN SILVER COAT

    2. hand painted white Christmas tree on a brown pallet

    You could sketch the tree with a pencil and follow the lines using white spray paint. Add nails from which you can then hang your colorful ornaments.

    2. HAND PAINTED WHITE CHRISTMAS TREE ON BROWN PALLET
    Source

    3. nature pallet cut to form the shape of a tree

    This simple craft is very spectacular, using very small string lights to go with the delicacy of the tree.

    3. NATURE PALLET CUT TO FORM THE SHAPE OF A TREE
    Source

    4. paint and handmade decorations in vintage hues

    It's the fastest Christmas tree alternative you could choose.

    4. PAINT AND HANDMADE DECORATIONS IN VINTAGE HUES
    Source

    5. add shelves to hold decorations

    A tree with shelves? Well, a pallet tree can accommodate them for displaying different types of decorations.

    5. ADD SHELVES TO HOLD DECORATIONS
    Source

    6. pallet wood is used to form a complex tree

    You can use pallet planks to form a 3d tree, just juxtapose the wood and place the ornaments on the formed "branches".

    6. PALLET WOOD USED TO FORM A COMPLEX TREE
    Source

    7. minimal and elegant Christmas tree design

    For a modern interior design keep the tree simple as well, go for a two-tone combination when it comes to the ornaments.

    7. MINIMAL AND ELEGANT CHRISTMAS TREE DESIGN
    Source

    8. cute pallet tree holding multiple figurines

    It's the right design to display all those funny and cute figurines you have been saving over the years.

    8. CUTE PALLET TREE HOLDING MULTIPLE FIGURINES

    Source

    9. a colorful array of globes and string lights

    Light is the key element in this design, shaping the tree and contrasting it with the natural wood and the colorful globes.

    9. A COLORFUL ARRAY OF GLOBES AND STRING LIGHTS

    Source

    10. Scandinavian inspired Christmas tree

    10. SCANDINAVIAN INSPIRED CHRISTMAS TREE

    Source

    11. simple chevron patterned tree

    Create a chevron-inspired pattern for your tree and insert small lights equally distributed.

    11. SIMPLE CHEVRON PATTERNED TREE

    Source

    12. let is snow painted tree on pallet wood

    Express your artistic skills on a blank pallet plank and paint your favorite tree.

    12. LET IS SNOW PAINTED TREE ON PALLET WOOD

    Source

    13. a different type of tree design using horse shapes

    13. A DIFFERENT TYPE OF TREE DESIGN USING HORSE SHAPES

    Source

    14. elegant simple little trees using multiple textured woods

    The alternation of wooden textures with their rich and complex tones gives elegance to this simple tree.

    14. ELEGANT SIMPLE LITTLE TREES USING MULTIPLE TEXTURED WOOD

    15. a tree frame with ornament support connecting the frame lines

    15. A TREE FRAME WITH ORNAMENT SUPPORT CONNECTING THE FRAME LINES

    Source

    16. an advent calendar Christmas tree

    16. AN ADVENT CALENDAR CHRISTMAS TREE

    Source

    17. distressed pallet wood assembled into a rustic outdoor tree

    Invite the holidays in with a rustic-inspired Christmas tree placed on your front porch.

    17. DISTRESSED PALLET WOOD ASSEMBLED INTO A RUSTIC OUTDOORS TREE

    Source

    18. simple pallet wood tree

    18. SIMPLE PALLET WOOD TREE

    Source

    19. classic shape holding elegant white and silver decor

    Create a clean minimal design and allow the wood to shine.

    19. CLASSIC SHAPE HOLDING ELEGANT WHITE AND SILVER DECOR

    Source

    20. write fun messages on each pallet plank

    20. WRITE FUN MESSAGES ON EACH PALLET PLANK

    Source

    Have you ever considered using a pallet to form your Christmas tree instead of buying the classical pine one? Feel free to share your decorations and ideas in the comment section below.

    Related Articles

    14 Awe-Inspiring Ceramic Christmas Decorations

    19 Christmas Tree Paper Decorations for a Delicate Look

    14 Best Christmas Tree Lights to Consider This Year

    Learn How to Store Icicle Lights After Christmas

    17 Burlap Ribbon & Wreath Options

    The holiday season is the perfect time to showcase creativity and personalize your festive décor. Themed Christmas trees offer a unique way to celebrate your passions, from pop culture favorites to timeless classics, global inspirations, and everything in between. Whether you're drawn to magical designs like Harry Potter and Disney, nostalgic styles like Vintage Toys and Victorian elegance, or adventurous displays like Star Wars and Travel themes, there's something for everyone. This guide explores 30 unique tree ideas to inspire your holiday setup, helping you transform your home into a festive wonderland.

    01. Harry Potter Christmas Tree: Enchant Your Holidays with Wizarding World Magic

    Transform your holiday décor into a spellbinding experience with a Harry Potter Christmas tree. Themes include Gryffindor's bold red and gold ornaments, Slytherin's mysterious green and silver garlands, and magical features like floating candles. Add a Hogwarts Castle tree topper, house crests, and charming creatures such as owls and Nifflers to recreate the magic of Hogwarts in your home.

    02. Disney Christmas Tree: Bring Magical Holiday Cheer to Your Home

    Celebrate Disney magic with a tree adorned in themes from classic characters like Mickey and Minnie Mouse to princess-inspired elements with tiaras, glittering castles, and pastel lights. Themes from Frozen and timeless Disney classics like The Lion King and Aladdin add a unique charm to the décor.

    03. Star Wars Christmas Tree: Celebrate the Holidays in Galactic Style

    Bring the Force into your festive season with Star Wars-themed trees. Choose from designs featuring Darth Vader, Yoda, or Baby Yoda (Grogu). Add galaxy-inspired ornaments like lightsabers, planets, and ships like the Millennium Falcon or the Death Star to create an out-of-this-world celebration.

    04. Marvel Superheroes Christmas Tree: Assemble a Heroic Holiday Display

    Infuse your décor with the excitement of Marvel's superheroes. Choose from ornaments inspired by Spider-Man, Captain America’s shield, Thor’s hammer, and Iron Man’s helmet. Create a bold display using red, blue, and gold decorations, topped with the Avengers logo.

    05. Frozen-Themed Christmas Tree: Create a Winter Wonderland with Elsa and Anna

    Step into the magical world of Arendelle with a Frozen-themed Christmas tree. Icy blue and white ornaments, sparkling snowflakes, and figures of Elsa, Anna, and Olaf evoke the elegance of Elsa’s ice palace and Anna’s warm charm.

    06. Game of Thrones Christmas Tree: Rule the Holidays with Westeros-Inspired Décor

    Rule the holidays with a Game of Thrones-themed Christmas tree. Decorate with house sigils, swords, crowns, and dragon motifs. Themes inspired by House Stark, House Targaryen, or House Lannister feature red Christmas trees with rich crimson and gold ornaments, adding medieval grandeur to your festive setup.

    07. The Lord of the Rings Christmas Tree: Bring Middle-earth Magic to Your Holidays

    Celebrate Middle-earth with a tree inspired by Rivendell’s elegance, the Shire’s cozy charm, or Gondor’s majesty. For a magical touch, decorate with symbols like the One Ring, elven leaves, hobbit doors, and the White Tree of Gondor.

    08. The Nightmare Before Christmas Tree: A Spooky and Festive Holiday Décor

    Combine the spooky charm of Halloween with festive cheer using ornaments inspired by The Nightmare Before Christmas. Decorate with Jack Skellington, striped ribbons, eerie pumpkins, and ghostly accents for a delightfully creepy display.

    09. Mario Christmas Tree: Power-Up Your Holidays with Super Mario Décor

    Gamers will adore a Mario-themed Christmas tree featuring iconic game elements like Super Stars, mushrooms, and blocky question ornaments. Add characters like Mario, Luigi, and Princess Peach for a playful and vibrant tree.

    10. Candyland Christmas Tree: Sweeten Your Holidays with Candy-Themed Décor

    Add sweetness to your festivities with a Candyland-themed Christmas tree. Decorate with candy canes, lollipops, and gumdrops for a playful and colorful display inspired by the beloved board game.

    11. Beach-Themed Christmas Tree: Celebrate the Holidays with Coastal Charm

    Transform your home with a beach-themed Christmas tree adorned with seashells, starfish, and sand dollars. Coastal-inspired colors like soft blues, sandy beige, and white evoke a serene seaside vibe.

    12. Vintage Toy Christmas Tree: Nostalgic and Whimsical Holiday Décor

    Celebrate the charm of yesteryear with a vintage toy Christmas tree adorned with classic ornaments like wooden trains, tin soldiers, teddy bears, and spinning tops. These nostalgic decorations evoke childhood memories and bring warmth to your holiday décor.

    13. Space-Themed Christmas Tree: Blast Off into a Stellar Holiday Season

    Explore the final frontier with a space-themed Christmas tree. Decorate with planets, rockets, astronauts, and glowing star ornaments in deep blues and silvers. Create a galaxy-inspired look perfect for stargazers and sci-fi fans.

    14. Ballet-Themed Christmas Tree: Graceful and Elegant Holiday Décor

    Celebrate the beauty of dance with a ballet-themed Christmas tree adorned with ballerina figurines, pointe shoes, tutus, and Nutcracker motifs. Delicate ribbons and soft lighting enhance the festive display.

    15. Classic Literature Christmas Tree: A Timeless Tribute to Literary Masterpieces

    Bring your love for books into your décor with a classic literature Christmas tree. Add miniature books, quills, and ornaments inspired by Pride and Prejudice, Moby-Dick, and The Great Gatsby.

    16. Music Lovers Christmas Tree: A Melody of Festive and Harmonious Décor

    For music enthusiasts, a music lovers Christmas tree offers endless inspiration. Decorate with musical notes, miniature instruments, and sheet music garlands, enhanced by warm glowing string lights.

    17. Rustic Farmhouse Christmas Tree: Cozy and Charming Country-Inspired Décor

    Capture the simplicity of country living with a rustic farmhouse Christmas tree. Burlap ribbons, wooden ornaments, and pinecones create a charming, inviting atmosphere. Plaid accents and vintage touches complete the rustic look.

    18. Art Lover’s Christmas Tree: A Creative and Colorful Holiday Masterpiece

    Express your passion for creativity with an art lover’s Christmas tree. Miniature easels, paintbrushes, and ornaments inspired by famous works like Starry Night or abstract patterns add a vibrant and unique artistic flair.

    19. Steampunk Christmas Tree: A Whimsical Blend of Vintage and Futuristic Holiday Décor

    Celebrate a blend of industrial and vintage charm with a steampunk Christmas tree. Decorate with gears, clockwork ornaments, brass accents, and glowing Edison bulbs to create a captivating mechanical aesthetic.

    20. Sports Fan Christmas Tree: Deck the Halls with Team Spirit

    Showcase your team pride with a sports fan Christmas tree. Customize with team colors, miniature jerseys, and ornaments shaped like footballs, basketballs, or baseballs for a fun, spirited holiday look.

    21. Wildlife and Nature Christmas Tree: Rustic and Earthy Holiday Décor Ideas

    Bring the outdoors in with a wildlife and nature Christmas tree. Decorate with wooden wildlife ornaments, pinecones, twigs, and berries for a serene, rustic holiday display inspired by the natural world.

    22. Vintage Victorian Christmas Tree: Timeless Holiday Elegance

    Add 19th-century charm to your décor with a vintage Victorian Christmas tree. Lace ribbons, antique ornaments, and velvet bows create a timeless, sophisticated look. Candleholders and intricate baubles enhance the elegance.

    23. Whimsical Fairytale Christmas Tree: Enchanting Holiday Décor Ideas

    Turn your space into a magical wonderland with a whimsical fairytale Christmas tree. Fairy figurines, glowing lights, and pastel ornaments evoke the charm of enchanted forests and storybook adventures. Many consider designs like these as the epitome of whimsical Christmas trees, where fantasy-inspired themes bring a dreamy quality to festive displays.

    24. Nautical Christmas Tree: Coastal-Inspired Holiday Décor

    Celebrate your love for the sea with a nautical Christmas tree. Seashells, starfish, anchors, and soft coastal colors create a breezy holiday atmosphere for beach lovers.

    25. Angel-Themed Christmas Tree: Heavenly Décor for a Serene Holiday

    Add celestial charm with an angel-themed Christmas tree. Glowing angel ornaments, white feathers, and golden accents create a peaceful, serene atmosphere perfect for the season.

    26. Peanuts Comic Strip Christmas Tree: Nostalgic Holiday Décor

    Celebrate the joy of Charles Schulz’s Peanuts with a themed tree featuring Snoopy, Charlie Brown, and comic strip-inspired ornaments. Highlight the charm of Snoopy’s doghouse as a tree topper.

    27. Minecraft-Inspired Christmas Tree: Blocky Holiday Décor for Gamers

    Delight Minecraft fans with a tree decorated with pixelated Creeper faces, TNT blocks, diamond ornaments, and glowing LED string lights. Add swords and pickaxes for a perfect geeky holiday setup.

    28. Floral Garden Christmas Tree: Nature-Inspired Holiday Décor

    Bring botanical beauty to your décor with fresh flowers like roses, poinsettias, and ivy garlands. Jewel-toned ornaments and fairy lights add an elegant garden-inspired look to your Christmas tree.

    29. Gothic Christmas Tree: Darkly Enchanting Holiday Décor

    Embrace dark elegance with a Gothic Christmas tree. Black lace garlands, raven feathers, and crimson roses pair beautifully with skull ornaments and Victorian-inspired decorations for a haunting holiday display.

    30. Travel-Inspired Christmas Tree: Journey Around the World in Festive Style

    Celebrate wanderlust with a travel-inspired Christmas tree adorned with landmarks, miniature suitcases, passports, and ornaments symbolizing global destinations. Add iconic touches like the Eiffel Tower or Machu Picchu.

    Rustic Christmas trees bring an inviting warmth to holiday décor by blending natural materials, vintage accents, and handcrafted details. From burlap and twine to cinnamon and wood ornaments, these trees embrace simplicity and evoke nostalgia, creating an atmosphere perfect for cozy Christmas gatherings. Each of the following trees reflects a unique rustic style inspired by farmhouse, bohemian, Scandinavian, and woodland elements, offering seasonal inspiration that captures the essence of a natural Christmas. Designed to align with seasonal trends, these rustic trees provide timeless appeal with handmade ornaments, sustainable décor options, and festive, nature-inspired themes, making them ideal for creating an authentic holiday ambiance that complements traditional or modern interiors.

    01. Burlap Elegance Christmas Tree with Burlap Ribbons and Pinecones

    The burlap elegance Christmas tree showcases a rustic design with handmade burlap ribbon garlands, large pinecone ornaments, and a wooden star topper. Positioned in a cozy living room with wooden floors and soft, yellow string lights, this tree has a farmhouse style that complements wrapped gifts in brown kraft paper and twine. The natural elements and understated décor create a warm, welcoming Christmas setting perfect for rustic home interiors.

    01. Burlap Elegance Christmas Tree with Burlap Ribbons and Pinecones

    02. Citrus and Spice Tree with Dried Oranges and Cinnamon Sticks

    The citrus and spice tree combines dried orange slices, cinnamon sticks, and plaid ribbons, adding visual and aromatic appeal to holiday décor. This tree, positioned in a wooden cabin with stone walls and a nearby fireplace, radiates a cozy, festive ambiance with fragrant citrus and spice ornaments. Soft golden fairy lights add warmth, enhancing the natural, rustic atmosphere.

    02. Citrus and Spice Tree with Dried Oranges and Cinnamon Sticks

    03. Farmhouse Charm Tree with Chalkboard Ornaments and Twine Bows

    The farmhouse charm tree embraces rustic charm with mini chalkboard ornaments and natural twine bows, evoking a cozy farmhouse feel. The tree is set in a country-style living room with distressed furniture, plaid pillows, and a roaring fireplace. Its warm lighting and natural decorations give the space a festive yet homely holiday ambiance, emphasizing a farmhouse aesthetic.

    03. Farmhouse Charm Tree with Chalkboard Ornaments and Twine Bows

    04. Countryside Comfort Tree with Wooden Ornaments and Burlap Garlands

    The countryside comfort tree is adorned with hand-carved wooden ornaments shaped like stars, reindeer, snowflakes, burlap garlands, and cotton flowers. This rustic tree is set in a farmhouse interior with exposed beams and a large window framing snowy fields outside. Soft, warm lighting enhances its cozy look, capturing the peaceful essence of countryside holiday décor.

    04. Countryside Comfort Tree with Wooden Ornaments and Burlap Garlands

    05. Plaid and Pine Tree with Jute Baubles and Acorn Ornaments

    The plaid and pine tree features jute-wrapped baubles, small acorn ornaments, and large gingham bows, blending into a charming rustic look. Positioned in a cozy cabin with wooden furniture, plaid blankets, and a glowing fireplace, this tree combines natural materials with traditional décor for a nostalgic countryside aesthetic.

    05. Plaid and Pine Tree with Jute Baubles and Acorn Ornaments

    06. Scandinavian Simplicity Tree with White Stars and Snowflakes

    The Scandinavian simplicity tree incorporates whitewashed stars, simple snowflake ornaments, and linen fabric drapes. This minimalist tree stands in a neutral-colored room with light wooden furniture, soft throws, and clean, uncluttered décor. Its simplicity creates an elegant holiday aesthetic that perfectly aligns with Scandinavian-inspired, rustic themes.

    06. Scandinavian Simplicity Tree with White Stars and Snowflakes

    07. Woodland Log Christmas Tree with Reindeer and Pine Branches

    The woodland log Christmas tree brings a unique rustic woodland look, decorated with small wooden houses, reindeer figures, and pine branches. Set in a woodland-themed room with log walls, fur rugs, and a stone fireplace, the tree’s natural decorations align with a cozy cabin aesthetic, creating an atmosphere reminiscent of a forest retreat.

    07. Woodland Log Christmas Tree with Reindeer and Pine Branches

    08. Cozy Cabin Tree with Woolen Stockings and Twig Star Topper

    The cozy cabin tree incorporates woolen stockings, pinecones, and a handmade twig star, bringing warmth to holiday décor. Set in a log cabin with a stone fireplace, fur throws, and wooden furniture, the tree’s handcrafted decorations contribute to a winter retreat atmosphere, evoking the charm of a rustic holiday in the mountains.

    08. Cozy Cabin Tree with Woolen Stockings and Twig Star Topper

    09. Vintage Hearts and Bells Tree with Fabric Hearts and Metal Bells

    The vintage hearts and bells tree captures the essence of vintage Christmas trees with its fabric hearts in red and white, vintage metal bells, and burlap flowers, giving it a nostalgic holiday style. Surrounded by rustic décor, such as lanterns and wrapped gifts in plaid paper, the tree creates a cozy country Christmas look, appealing to those seeking a traditional holiday ambiance.

    09. Vintage Hearts and Bells Tree with Fabric Hearts and Metal Bells

    10. Woodland Critters Tree with Animal Ornaments and Moss Garlands

    The woodland critters tree is decorated with small wooden animal ornaments, moss-covered garlands, and twine-wrapped baubles, evoking an enchanted forest vibe. It stands out among nature and wildlife trees for its whimsical design inspired by woodland creatures. Set in a forest cabin interior with natural wood flooring and a stone fireplace, the tree’s whimsical ornaments bring an element of woodland magic to rustic holiday décor.

    10. Woodland Critters Tree with Animal Ornaments and Moss Garlands

    11. Nostalgic Brass Bell Tree with Plaid Ornaments and Brass Bells

    The nostalgic brass bell tree is adorned with plaid ornaments, brass bells, and dried berry sprigs, creating a vintage holiday look. Set in a cozy living room with Victorian-style furniture, patterned rugs, and a roaring fireplace, the tree’s brass decorations add a touch of nostalgia, enhancing the space’s warm holiday charm.

    11. Nostalgic Brass Bell Tree with Plaid Ornaments and Brass Bells

    12. Farmhouse Straw Christmas Tree with Straw Ornaments and Snowflakes

    The farmhouse straw Christmas tree includes straw ornaments, wooden snowflakes, and jute-wrapped stars, adding a rustic, farmhouse style. Set in a warm country living room with distressed wooden floors and soft lighting, this tree emphasizes simplicity and tradition, bringing a welcoming holiday atmosphere.

    12. Farmhouse Straw Christmas Tree with Straw Ornaments and Snowflakes

    13. Lace and Burlap Tree with Lace Ornaments and Wooden Baubles

    The lace and burlap tree combines white lace ornaments, handcrafted wooden baubles, and burlap drapes, creating a refined yet rustic look. Set in a minimalist, Scandinavian-inspired room, the tree’s delicate lace and burlap accents blend natural textures with a simple, cozy aesthetic for an understated holiday feel.

    13. Lace and Burlap Tree with Lace Ornaments and Wooden Baubles

    14. Rustic Boho Macramé Tree with Macramé and Bead Garlands

    The rustic boho macramé tree features macramé ornaments, wooden bead garlands, and whitewashed pinecones, embodying a bohemian Christmas style. Placed in an artsy studio with tapestries and natural rugs, the tree’s handmade decorations create a warm, artistic, and boho-inspired holiday setting.

    14. Rustic Boho Macramé Tree with Macramé and Bead Garlands

    15. Knitted Cozy Tree with Knitted Ornaments and Felt Stars

    The knitted cozy tree includes knitted ornaments, felt stars, and dried flowers, creating a festive, homey atmosphere. Positioned in a snug living space with blankets and a roaring fireplace, this tree’s handcrafted details contribute to a cozy holiday aesthetic, perfect for intimate gatherings.

    15. Knitted Cozy Tree with Knitted Ornaments and Felt Stars

    16. Plaid Paper Star Tree with Handmade Stars and Plaid Garlands

    The plaid paper star tree features handmade paper stars, plaid fabric garlands, and simple wooden tags, creating a traditional holiday look. Set in a country living room with vintage furniture and a wood-burning stove, this tree’s handmade décor evokes the charm of a classic Christmas.

    16. Plaid Paper Star Tree with Handmade Stars and Plaid Garlands

    17. Winter Wonderland Tree with Snow-Dusted Pinecones and Branches

    The winter wonderland tree is decorated with snow-dusted pinecones, faux fur ribbons, and natural branch accents, bringing a snowy woodland aesthetic. Set in a living room with snowy windows and wooden flooring, the tree’s frosted elements create a magical winter setting perfect for holiday celebrations.

    17. Winter Wonderland Tree with Snow-Dusted Pinecones and Branches

    18. Eco-Friendly Charm Tree with Recycled Fabrics and Dried Herbs

    The eco-friendly charm tree incorporates recycled fabric ornaments, dried herbs, and wooden baubles, promoting sustainable holiday décor. Set in a room with reclaimed wood furniture and potted plants, this tree’s eco-friendly materials align with an environmentally-conscious approach to rustic holiday decorating.

    18. Eco-Friendly Charm Tree with Recycled Fabrics and Dried Herbs

    19. Outdoor Bird Haven Tree with Birdseed Ornaments and Birdhouses

    The outdoor bird haven tree is adorned with birdseed ornaments, wooden birdhouses, and burlap bows, creating a nature-inspired aesthetic. Positioned in a snow-covered backyard with wooden benches and a fire pit, this outdoor tree attracts birds, offering a peaceful, rustic holiday décor for outdoor settings.

    19. Outdoor Bird Haven Tree with Birdseed Ornaments and Birdhouses

    20. Cabin Comfort Tree with Rope Garlands and Antler Ornaments

    The cabin comfort tree uses handmade rope garlands, antler ornaments, and woolen plaid stars to evoke a cozy mountain cabin style. Set in a high-altitude cabin with fur rugs and a stone fireplace, the tree’s decorations reflect rustic charm, enhancing the atmosphere of a winter retreat.

    20. Cabin Comfort Tree with Rope Garlands and Antler Ornaments

    Red Christmas trees make a bold, festive statement, blending traditional charm with modern flair. This collection covers a variety of red Christmas tree styles, from minimalist and sleek to whimsical and luxurious. Each style is uniquely designed to bring out the beauty of the season, suitable for a range of décor themes. Below, you'll find detailed descriptions for each type, highlighting design elements, decorations, and the perfect settings. Whether you prefer elegant sophistication or playful creativity, there’s a red Christmas tree to inspire your holiday décor.

    01. Elegant Red Velvet Tree With Golden Ornaments and Garlands

    An elegant red velvet Christmas tree adorned with golden ornaments, red and white garlands, and cinnamon sticks creates a luxurious festive atmosphere. Set against a snowy window backdrop, the warm glowing lights enhance its rich, classic style. Ideal for spaces looking to capture a traditional yet elegant holiday spirit.

    01. Elegant Red Velvet Tree With Golden Ornaments and Garlands

    02. Modern Red Minimalist Tree with DIY Paper Stars

    A sleek, modern red Christmas tree with minimalist decorations, featuring white twinkling lights and DIY paper stars. Set in a bright, airy living room with soft neutral tones, this design merges simplicity with festive charm, creating a contemporary holiday look.

    02. Modern Red Minimalist Tree with DIY Paper Stars

    03. Whimsical Red Candy Tree with Festive Sweet Decorations

    The whimsical red candy-themed Christmas tree brings fun and playful energy, making it a delightful addition to themed Christmas tree ideas. Decorated with DIY candy canes and colorful sweet treats, surrounded by festive lights, it captures a joyful holiday spirit. Perfect for family-friendly settings that invite cheer and creativity.

    03. Whimsical Red Candy Tree with Festive Sweet Decorations

    04. Scandinavian Red Tree with White Ornaments and Candles

    A minimalist Christmas tree in bright red, accented with white ornaments and simple string lights, this design embodies Scandinavian simplicity. Placed in a room with soft gray tones, woven rugs, and candles, it creates a warm, cozy holiday setting, ideal for those who prefer understated elegance.

    04. Scandinavian Red Tree with White Ornaments and Candles

    05. Glam Red & Silver Sparkle Tree with Crystal Accents

    A glamorous Christmas tree in striking red, decorated with silver and crystal ornaments reminiscent of white & silver trees, metallic garlands, and a star topper. Set against a modern living room backdrop with sleek furnishings, large windows, and shimmering curtains, it brings sophisticated festive flair to any space.

    05. Glam Red & Silver Sparkle Tree with Crystal Accents

    06. Cozy Red Tree with Knitted Ornaments and Wooden Stars

    This cozy red Christmas tree features hand-knitted ornaments, wooden stars, and soft white LED lights. Nestled in a snug corner with a reading nook, fluffy pillows, and a warm blanket, it invites a comforting holiday ambiance, ideal for intimate spaces that evoke warmth.

    06. Cozy Red Tree with Knitted Ornaments and Wooden Stars

    07. Luxurious Red and Black Tree with Velvet and Gold Touches

    A luxurious red Christmas tree adorned with black and gold ornaments, black velvet ribbon, and golden accents. This design, set against a chic living room with a marble fireplace and velvet armchairs, embodies opulence and refined holiday décor, perfect for sophisticated settings.

    07. Luxurious Red and Black Tree with Velvet and Gold Touches

    08. Red and Gold Regal Christmas Tree with Velvet Garlands

    A regal red Christmas tree, adorned with gold and red velvet ornaments, gold ribbon garlands, and a royal star topper. Positioned in an elegant living room with dark wood furniture and candle-lit wall sconces, it exudes luxury and traditional grandeur.

    08. Red and Gold Regal Christmas Tree with Velvet Garlands

    09. Red Velvet Bow Tree with Golden Stars and White Lights

    The red Christmas tree festooned with numerous red velvet bows, small white lights, and golden stars is a festive delight. Placed in a minimalist Scandinavian living room, it balances the elegance of velvet with simple holiday charm, ideal for clean, modern décor.

    09. Red Velvet Bow Tree with Golden Stars and White Lights

    10. Bright Red and Neon Modern Pop Art Tree with Metallic Toppers

    A bold red Christmas tree with neon pink and yellow ornaments, metallic garlands, and star toppers. Designed for a modern pop-art-inspired living room, featuring bold patterns and graphic art, this tree brings a vibrant, eclectic energy to the holiday season.

    10. Bright Red and Neon Modern Pop Art Tree with Metallic Toppers

    11. Red and Blue Nautical Christmas Tree with Seashell Garlands

    A nautical-themed red Christmas tree decorated with blue and white ornaments, seashell garlands, and starfish accents. Perfectly suited for coastal-inspired rooms with driftwood décor and sea glass vases, it offers a refreshing holiday aesthetic for beach lovers.

    11. Red and Blue Nautical Christmas Tree with Seashell Garlands

    12. Red and Purple Bohemian Dreamcatcher Tree with Macramé Décor

    This bohemian red Christmas tree, with purple ornaments, dreamcatchers, and macramé garlands, stands out against a vibrant backdrop of layered rugs and lush plants. It brings a warm, eclectic boho-chic charm to holiday décor, perfect for creative and casual settings.

    12. Red and Purple Bohemian Dreamcatcher Tree with Macramé Décor

    13. Red Rose and Velvet Ribbon Nordic Elegance with Gold Baubles

    A sophisticated red Christmas tree adorned with red roses, luxurious red velvet ribbons, and subtle gold baubles. Positioned in a Scandinavian living room with light wood accents and white walls, it offers elegance and warmth, making it ideal for refined yet cozy décor.

    13. Red Rose and Velvet Ribbon Nordic Elegance with Gold Baubles

    14. Frosted Poinsettia and Snowy Christmas Tree with Twinkle Lights

    The red poinsettia-decorated Christmas tree, with frosted branches and silver snowflake ornaments, evokes a winter wonderland feel. Set in a Scandinavian home with light gray walls and snowy views, it is perfect for those seeking a magical, classic holiday look.

    14. Frosted Poinsettia and Snowy Christmas Tree with Twinkle Lights

    15. Red Hearts and Golden Bell Ornament Tree with White Garlands

    A festive red Christmas tree adorned with red heart ornaments, golden bells, and delicate white garlands. It fits seamlessly into a modern Scandinavian home with sleek décor and faux fur rugs, adding a touch of style to a cozy holiday atmosphere.

    15. Red Hearts and Golden Bell Ornament Tree with White Garlands

    16. Elegant Red Satin Bow and Garland with Silver Ornaments

    An elegant red Christmas tree with oversized satin bows and matching garlands, highlighted by silver ornaments. Positioned in a modern Scandinavian living room, the design offers a refined festive ambiance, perfect for those seeking a balance of elegance and minimalism.

    16. Elegant Red Satin Bow and Garland with Silver Ornaments

    17. Enchanting DIY Christmas Scene with Colorful Handmade Garlands

    A playful red Christmas tree decorated with whimsical blue ornaments, colorful ribbons, and handmade garlands. Set against a bright playroom backdrop, this DIY-friendly design adds a cheerful, crafty touch, perfect for creating a fun and interactive holiday environment.

    17. Enchanting DIY Christmas Scene with Colorful Handmade Garlands

    18. Modern Red Christmas Tree with Metallic Ornaments and LEDs

    The modern red Christmas tree, with sleek metallic ornaments, minimalist garlands, and twinkling LED lights, fits perfectly in contemporary spaces. Clean lines, marble flooring, and chic white furnishings accentuate its sophisticated, stylish holiday décor.

    18. Modern Red Christmas Tree with Metallic Ornaments and LEDs

    19. Elegant Red Plaid Christmas Tree with Gold and Velvet Accents

    This elegant red plaid Christmas tree combines gold ornaments, rich velvet ribbons, and delicate baubles. It fits seamlessly into Scandinavian-inspired rooms, creating a luxurious yet inviting holiday atmosphere, perfect for classic and modern homes alike.

    19. Elegant Red Plaid Christmas Tree with Gold and Velvet Accents

    20. Red Christmas Tree with Elegant Crystal Touches and Snowflakes

    A refined red Christmas tree embellished with crystal snowflakes, delicate garlands, and soft white lights. Set in a sophisticated Scandinavian home, it adds a touch of elegance and warmth, ideal for upscale holiday décor that emphasizes subtle beauty.

    20. Red Christmas Tree with Elegant Crystal Touches and Snowflakes

    Besides providing a realistic feel, real Christmas trees help to support local growers and are highly sustainable and affordable. However, they are difficult to maintain and are often unsafe. On the other hand, fake trees are convenient, safe, and can be reused for a long time. But they are not as sustainable as real Christmas trees. 

    Everything about Christmas sparks joy in the minds of people. Even mundane tasks like decorating the home or preparing gifts feel enjoyable during this time. 

    On that note, decorating a Christmas tree is probably one of the most fun activities that you can participate in. But when it comes to the Christmas tree, there is a lingering debate among many people nowadays. This debate is regarding the use of real versus fake Christmas trees. 

    So, if you are curious, then keep reading to learn more about the differences between these two types of Christmas trees

    Real Vs Fake Christmas Trees

    What Are Real Christmas Trees?

    What Are Real Christmas Trees?

    Let’s start off this comparison by discussing what real Christmas trees are. As you can guess, real Christmas trees are grown naturally like any other tree.

    In that context, Christmas tree cultivation takes place on specialized Christmas tree farms. Farmers may use more than one species for this process, with the most common types being fir, spruce, and pine. That’s because they provide the most authentic feel for a Christmas tree. They may even use succulent plants to make miniature Christmas trees.

    The farmer plants the seedling on their farm and grows it over time using high-quality fertilizer and compost. Subsequently, they take care of the tree by pruning it periodically and spraying pesticide chemicals to check the growth of pests. And once it becomes fully grown, smaller portions are chopped off and sold as Christmas trees. As you can see, the process is just like traditional agriculture.

    Naturally, there are different pros and cons to using real Christmas trees, as I have discussed below.

    Pros Of Using A Real Christmas Tree

    1. Provide A Realistic Feel

    Realism is the biggest advantage of using a natural Christmas tree. You get the natural scent of the tree, which eliminates the need to purchase additional scents to get that Christmas-y vibe. I’d argue that the evergreen fragrance of pine, spruce, or fir feels way more appealing than any artificial scent, reminiscent of vintage Christmas trees. And if you can complement it with some scented candle decorations, it will feel truly magical!

    Besides, it’s not just the scent that is realistic, either. The natural green color and spread of the foliage look quite attractive and fluffy too. And once you deck it out with the traditional Christmas decorations, it will help to capture the festive feeling perfectly.

    2. Reduces The Initial Costs

    A real tree is not that expensive to purchase, which is another advantage. After all, it wouldn’t make sense to spend all of your money on buying a Christmas tree, would it? If you do that, you won’t have enough money to buy Christmas presents for your friends and family, and that will ruin the whole festive mood!

    Warning: The price of a real tree depends on the tree species you wish to get. Normally, fir trees, or more specifically, Fraser fir trees, have a slightly higher price than spruce or pine. So, you need to keep this in mind while making the purchase.

    3. Highly Sustainable

    Many people believe that reusing an artificial Christmas tree is better for the environment in the long run, but I disagree. Instead, I would say that real trees are more sustainable, as they can be easily recycled. Or, if the tree is small enough, you can reuse it as a tabletop Christmas tree decoration for your home.

    Most live trees are grown organically as a sustainable crop. In other words, no trees are chopped down from forests, and no harmful chemicals are used either. Moreover, if you use the tree carefully, you can reuse it for a few years.

    4. Supports The Community

    If you buy a live tree from one of the local tree farms near you, it will help the growers and improve the local economy. That will subsequently help in building the community, which is the true spirit of Christmas, after all!

    Cons Of Using A Real Christmas Tree

    1. Require A Lot Of Work

    Sure, a real Christmas tree might look beautiful and fresh, but if you wish to keep the Christmas tree that way, you have to put in a lot of effort. You have to water the tree regularly, prune its branches from time to time, and sweep away any fallen leaves and needles. Such an aspect makes them disadvantageous for many people.

    2. Relatively Unsafe

    Since the leaves in these trees are natural, they will attract bugs and accumulate allergens, which can cause health problems for many people. Apart from that, the branches and dried leaves can catch fire easily, which makes the tree a potential fire hazard.

    What Are Fake Christmas Trees

    As the name suggests, fake Christmas trees are manufactured artificially in factories. Due to this reason, they are also known as artificial Christmas trees.

    The process of making an artificial tree is a lot quicker than growing a tree naturally on a tree plantation. Similarly, they can be produced in bulk, which makes them better suited to meet the ever-growing demand for Christmas trees.

    You can choose between different types of artificial options, such as flocked and frosted trees, which can be tailored to meet specific aesthetic preferences, much like luxury and designer trees. And you can customize the specifications of the tree before purchasing.

    With that being said, here are the pros and cons of using artificial trees.

    Pros Of Using An Artificial Christmas Tree

    Pros Of Using An Artificial Christmas Tree

    1. Can Be Reused For A Long Time

    If you buy an artificial tree, you can reuse it for several years. This is the biggest advantage of using such a tree, as it eliminates the hassle of having to purchase a new tree every year.

    2. Safe To Use

    The artificial trees do not have natural foliage like fake trees, which means that they are free from bugs and allergens. Additionally, the tree is manufactured with fire-resistant materials, which makes them a lot safer than real trees.

    3. Highly Convenient

    Besides being safe, artificial trees are convenient to use as well. These trees require little to no maintenance, which makes them the preferred choice for many people. You don’t have to water or prune the trees periodically, and neither do you have to worry about cleaning up any mess left by fallen leaves.

    Cons Of Using An Artificial Christmas Tree

    Cons Of Using An Artificial Christmas Tree

    1. Not Environmentally Friendly

    When it comes to a fake tree, the lack of sustainability is the biggest complaint that people have. The manufacturing process causes water and air pollution and has a significant carbon footprint, which is not at all advantageous.

    Furthermore, you will have a lot of trouble recycling these trees as well since the plastic and metal materials do not undergo biodegradation easily. Thus, it will linger in the environment as waste and pollute the atmosphere.

    Real Or Fake Trees - Which Is Better?

    Now that you know the advantages and disadvantages of both types, it is time to address the primary question - which option is better? Well, this decision mostly comes down to personal preference

    For example, if you are a consumer who wants an authentic experience, you should get real trees. The same is applicable to those who care about the planet and are concerned about environmental issues like habitat destruction or climate change. However, if you prefer convenience over the other aspects, you can pick a fake tree. 

    What Is The Process For Disposing Of A Real Christmas Tree?

    If you wish to dispose of a natural tree, you can mulch or compost it in a landfill. Alternatively, you can plant it in the forest in its natural environment, where it will keep growing. You can contact specialized eco-agencies and organizations to take care of this aspect. There are several of these establishments operating in the United States, so you shouldn’t have any trouble finding one.

    How Many Years Can You Expect A Fake Christmas Tree To Last?

    Most artificial Christmas trees are manufactured to last for at least 20 years. However, this is entirely dependent on the usage and maintenance of the tree. If you use it with care and store it properly after the holiday season is over, it will last longer than 20 years. Fail to do that, and the tree will become damaged within a couple of years. 

    Which Type Of Christmas Tree Is More Cost-Effective In The Long Run?

    When it comes to the initial costs, it is advisable to buy a real tree since it is cheaper than an artificial tree. But if you can reuse an artificial tree for several years at a stretch, you won’t have to spend any money on a new one. Therefore, it is the best choice for saving money in the long run. 

    What Are The Different Materials Used To Make Fake Christmas Trees?

    More than one material is used in the manufacturing process of an artificial tree since the tree has multiple components. In most cases, metallic materials like iron and steel are used for making the underlying stems and branches of the tree. Conversely, plastic materials like Polyvinyl Chloride are used to make the foliage and decorations of the tree. 

    Conclusion

    And that is everything I had to say about the differences between real and fake Christmas trees. I hope you have been able to make up your mind regarding which one you want by now. 

    As you can see from the above discussions, both these types have their pros and cons. That is why you should evaluate your options carefully before making the purchase. 

    Here, you should keep in mind that you will have to bear the costs of packing and shipping the tree after purchasing. So, unless the seller mentions otherwise, this is an additional cost you will need to bear, no matter the type. 

    Pastel Christmas trees are trending this holiday season, capturing the charm of whimsical, cozy, and creative decorations in soft, inviting hues. This article explores 20 pastel-themed Christmas tree designs that bring fresh, stylish looks to holiday décor, each with unique themes, colors, and ornaments. From glamorous Barbie-inspired trees to whimsical unicorns, these setups are ideal for DIY enthusiasts looking to add playful and seasonal charm to their homes. The ideas blend Scandinavian simplicity, Bohemian touches, and enchanted fantasy motifs to inspire a pastel-filled holiday season. With each theme showcasing a different take on festive design, these pastel trees are perfect for creating a cozy, stylish atmosphere that enhances any holiday space. Dive in for inspiration on transforming your holiday décor with these imaginative pastel creations, crafted to bring warmth and magic to your celebrations.

    01. Barbie Glamour Pastel Christmas Tree with Pink and Gold Décor

    The Barbie glamour pastel Christmas tree brings soft pink and gold tones into a luxurious DIY holiday setup inspired by Barbie. Adorned with Barbie doll silhouette ornaments, glittery pink and gold baubles, and shiny ribbon garlands, this tree creates a chic, playful atmosphere. Cozy décor elements, such as blush velvet chairs, metallic pink stockings, and pastel pillows, complete the inviting scene.

    01. Barbie Glamour Pastel Christmas Tree with Pink and Gold Décor

    02. Bohemian Pastel Christmas in Scandinavian Style with Dreamcatchers

    The Bohemian pastel Christmas tree combines soft pastels of pink, lavender, and mint green with dreamcatchers, macramé ornaments, and natural wooden beads. Set in a warm Scandinavian-style room, this tree design is complemented by woven rugs, tassel garlands, and subtle candlelight, creating a tranquil, creative holiday atmosphere.

    02. Bohemian Pastel Christmas in Scandinavian Style with Dreamcatchers

    02. Bohemian Pastel Christmas in Scandinavian Style with Dreamcatchers

    03. Candyland Pastel Christmas Tree with Candy-Shaped Ornaments

    The Candyland pastel Christmas tree features candy-shaped ornaments in pastel pink, lavender, and mint, with oversized bows and fluffy cloud garlands. Surrounded by pastel-colored cushions and a soft rug, this family-friendly setup offers a playful candyland atmosphere for the holidays.

    03. Candyland Pastel Christmas Tree with Candy-Shaped Ornaments

    04. Cotton Candy Cloud Pastel Christmas Tree Dream with Fluffy Accents

    The cotton candy cloud pastel Christmas tree brings together soft pink, blue, and purple tones with fluffy cloud-like ornaments. Sparkly baubles and fairy lights add a magical feel, and the cozy room décor includes pastel candles, stockings, and warm lighting for an enchanting holiday ambiance.

    04. Cotton Candy Cloud Pastel Christmas Tree Dream with Fluffy Accents

    05. Elegant Feathered Pastel Christmas Tree with Soft Feathers

    The elegant feathered pastel Christmas tree uses soft feathers in pink, mint, and lavender to create a delicate holiday look. Twinkling fairy lights, silver and gold metallic accents, and plush rugs in a cozy living room add an elegant touch to this DIY décor style.

    05. Elegant Feathered Pastel Christmas Tree with Soft Feathers

    06. Grand Enchanted Castle Pastel Christmas Tree with Castle Ornaments

    The grand enchanted castle pastel Christmas tree is decorated with miniature castle ornaments in pink and mint, golden garlands, and plush velvet baubles. Set against draped pastel curtains, silver chandeliers, and DIY castle banners, this luxurious yet cozy setup adds a touch of royalty to the holiday season.

    06. Grand Enchanted Castle Pastel Christmas Tree with Castle Ornaments

    07. Lavender and Baby Pink Tree with Cozy Lace Garlands

    The lavender and baby pink Christmas tree is ideal for smaller, cozy spaces, featuring baby pink ornaments and DIY lace garlands. Warm ambient lighting, plush cushions, and soft fairy lights make this setup perfect for an intimate, feminine holiday look.

    07. Lavender and Baby Pink Tree with Cozy Lace Garlands

    08. Magical Mermaid Pastel Christmas Tree with Oceanic Ornaments

    The magical mermaid pastel Christmas tree brings an oceanic vibe to the holidays, featuring pink, blue, and lavender hues along with handmade mermaid figurines, jellyfish ornaments, and pearl garlands. A cozy room with pastel pillows and DIY coral centerpieces completes this seaside fantasy.

    08. Magical Mermaid Pastel Christmas Tree with Oceanic Ornaments

    09. Ombre Pastel Christmas Tree in Scandinavian Style with Gradient

    The ombre pastel Christmas tree transitions from soft pink at the top to mint green at the base. Silver and white ornaments and a cozy Scandinavian room with DIY glitter garlands and warm lighting make this design modern and festive. While its pastel tones are a highlight, its minimalist aesthetic makes it a complementary option alongside classic styles, such as black and white trees, which often enhance Scandinavian-inspired décor.

    09. Ombre Pastel Christmas Tree in Scandinavian Style with Gradient

    10. Pastel Floral Christmas Tree with Pink and Lavender Blossoms

    The pastel floral Christmas tree brings a garden-inspired touch with pink and lavender floral ornaments. DIY paper flower garlands, cozy pastel décor, and warm white lights set a serene holiday atmosphere, ideal for those who love natural aesthetics.

    10. Pastel Floral Christmas Tree with Pink and Lavender Blossoms

    11. Hand-Painted Pastel Ornament Tree with Unique DIY Designs

    The hand-painted pastel ornament tree offers a personalized DIY holiday option with hand-painted ornaments in pink, mint, lavender, and blue. Wrapped in fairy lights and set in a modern room with pastel décor, this tree is a visually appealing and approachable DIY project.

    11. Hand-Painted Pastel Ornament Tree with Unique DIY Designs

    12. Pastel Rainbow Christmas Tree Extravaganza with Ombre Shades

    The pastel rainbow Christmas tree extravaganza showcases an ombre transition from blush pink to mint green with silver and iridescent ornaments. Twinkling fairy lights and cozy living room accents make this setup a visually striking centerpiece for any holiday space.

    12. Pastel Rainbow Christmas Tree Extravaganza with Ombre Shades

    13. Pastel Stars and Moons Tree with Celestial-Themed Décor

    The pastel stars and moons tree features celestial-themed ornaments of stars and moons in soft colors. DIY celestial garlands, warm lighting, and a white faux fur tree skirt create a dreamy, holiday-inspired setting.

    13. Pastel Stars and Moons Tree with Celestial-Themed Décor

    14. Playful Pastel Pompom Tree Delight with Colorful Pompons

    The playful pastel pompom tree delight uses pompom decorations in mint, pink, and blue. DIY felt snowmen, handmade garlands, and twinkling string lights bring a joyful holiday feel to family-friendly spaces.

    14. Playful Pastel Pompom Tree Delight with Colorful Pompons

    15. Serene Mint Green Pastel Christmas Tree with Rose Gold Accents

    The serene mint green pastel Christmas tree features minimalist rose gold ornaments on a mint green tree. Velvet armchairs, pastel cushions, and gold accents in a cozy living room create a calm, inviting holiday vibe.

    15. Serene Mint Green Pastel Christmas Tree with Rose Gold Accents

    16. Stacked Pastel Box DIY Christmas Tree with Soft Hued Boxes

    The stacked pastel box DIY Christmas tree is crafted from pastel-colored boxes in shades of mint, pink, and blue, topped with a gold star. Wrapped in fairy lights and placed in a modern living room, it makes for a unique and visually striking holiday centerpiece.

    16. Stacked Pastel Box DIY Christmas Tree with Soft Hued Boxes

    17. Sugarplum Nutcracker Pastel Christmas Delight with Nutcracker Décor

    The sugarplum nutcracker pastel Christmas tree features pastel pink, purple, and blue hues with candy-shaped ornaments and nutcracker figurines. Whimsical candy-cane garlands, velvet stockings, and glittery presents make this setup a joyful and inviting scene.

    17. Sugarplum Nutcracker Pastel Christmas Delight with Nutcracker Décor

    18. Teal and Soft Yellow Christmas Tree with Nature-Inspired Décor

    The teal and soft yellow Christmas tree includes nature-inspired pastel leaves and acorns, paired with subtle yellow ornaments. In a rustic living room, DIY pastel garlands, cozy cushions, and fairy lights enhance the warm holiday ambiance. This setup evokes the charm of natural and eco-friendly trees, using organic tones and decorations that seamlessly blend with the rustic living room's aesthetic.

    18. Teal and Soft Yellow Christmas Tree with Nature-Inspired Décor

    19. Tiffany-Inspired Pastel Christmas Elegance with Blue and Silver

    The Tiffany-inspired pastel Christmas tree uses pastel blues and whites with silver and pearl ornaments for a luxurious, chic look. Tiffany-blue ribbons, satin-wrapped gift boxes, and silver candleholders create an elegant holiday ambiance.

    19. Tiffany-Inspired Pastel Christmas Elegance with Blue and Silver

    20. Unicorn Magic Pastel Christmas Tree with Whimsical Unicorn Décor

    The unicorn magic pastel Christmas tree features unicorn ornaments in pink, lavender, and sky blue, with fluffy garlands and rainbow-colored baubles. The cozy setting includes a unicorn plush toy and glittery star topper, creating a magical holiday space.

    20. Unicorn Magic Pastel Christmas Tree with Whimsical Unicorn Décor

    Some popular outdoor Christmas light ideas include using fairy lights around trees, hanging lighted wreaths on the door, and adding electric festive figures to the yard. Considering your budget and the overall look you want, you can experiment with a plethora of outdoor lighting options. 

    Nothing gives me as much joy as the sparkle of outdoor Christmas lights. 

    From classic white string lights to colorful candy cane lights - the possibilities for outdoor Christmas lights ideas are endless. You can go traditional with free-standing festive figures or try a modern twist with minimal, monochromatic outdoor Christmas lights. 

    That said, in this article, I’ll be sharing some of the most enchanting outdoor Christmas light ideas that you can try out in the next holiday season. So, grab a cup of hot cocoa and get ready to spread some festive cheer! 

    27 Outdoor Christmas Lights Ideas

    1. Invite Santa, His Reindeer, Or A Snowman!

    1. Invite Santa, His Reindeer, Or A Snowman!

    What’s a better way to ring in the festive season than to have Santa and his sleigh right in your yard? 

    In this particular outdoor setup, you can see a stag with Santa’s sleigh decked up with gifts. Place it on your porch to welcome guests, or move it to the roof to save some outdoor space. Alternatively, you can choose other free-standing festive figures and storybook elements to narrate different sections of the Bible. Regardless, your outdoor lighting setup will be a sight to behold!

    2. Welcome The Christmas Cheer With Icicle Lights

    2. Welcome The Christmas Cheer With Icicle Lights

    When used right, frosted icicle lights can make the perfect Christmas décor. You can give your home a wintry feel this holiday season by placing icicle lights along the rooftop. This will make them stand out beautifully against the dark sky.

    You can take this idea up a notch by incorporating the same color of lights into your trees. Simply follow the branches of the trees to achieve a wintery look. The effect is simple, refreshing, and uncluttered, yet it exudes an incredibly festive vibe.

    3. Add A Whimsical Touch With Lanterns

    3. Add A Whimsical Touch With Lanterns

    You can add a whimsical Christmas touch to your porch by filling old lanterns with white or yellow fairy lights. Then you can drape some string lights around the lantern and leave some on the floor for an effortlessly aesthetic vibe. 

    4. Embrace The Festive Feel With Colored Lights

    4. Embrace The Festive Feel With Colored Lights

    Don’t be afraid to go overboard with colors. After all, ‘tis the season to be jolly! So, whether it’s your yard, the front door, or the entire house - deck it up with multicolored lights. 

    A few colorful Christmas lights scattered around can create a joyful atmosphere and a kid-friendly vibe, emanating a constant and vibrant gleam, which is ideal for the festive season. You can select a traditional red and green color combination or go for color-changing fairy lights to make a bigger impression.

    5. Transform Your Porch Into A Winter Wonderland

    5. Transform Your Porch Into A Winter Wonderland

    If you think adding color lights all over the house is too much for your taste, try adorning the front porch only. For instance, this ornamental round side porch looks no less than a winter wonderland with twinkling lights all over the Christmas tree and the balustrade. So simple, yet so stunning!

    6. Sprinkle Some Starlight

    6. Sprinkle Some Starlight

    Not everyone has the budget to buy extravagant outdoor lights, and that’s okay - your house can still make heads turn, just like this Scandinavian-inspired Christmas porch. Simply make some paper lanterns in the shape of stars and snowflakes - this can be a fun activity for the kids too.

    Once the DIY paper lanterns are ready, insert bulb lights inside and hang them on the ceiling. 

    7. Make It Moody

    7. Make It Moody

    If you dig the moody vibe, try using white lights or white bulbs with lush wreaths, mistletoes, and plants all around the doorway. Not only is this one of the easiest outdoor Christmas light ideas, but it is also a unique and minimal way to embrace the holiday spirit.

    8. Deck The Porch Columns

    8. Deck The Porch Columns

    Here is another Christmas décor idea for those who like to keep things simple. Just wrap each column with chunky green garlands, complete with big red bows and Christmas lighting. Keep everything else as it is and simply turn on the usual lights on the porch. You could also use some light strings indoors to give a sneak peek through the doors and windows. 

    And this entire setup will look even better if your porch or yard is covered with sparkling white snow!

    9. Add A Twinkling Door Wreath

    9. Add A Twinkling Door Wreath

    Next, I have another effortless DIY Christmas project for you and your little ones. Take some pre-lit Christmas wreaths or garlands and a red bow. I suggest using three wreaths, like the aforementioned picture. Assemble them together and place the bow in the middle so that it reflects the warm white light from the wreaths and the rest of the décor.

    Consider placing this three-ring wreath on your front door and add two mini Christmas trees on each side. This outdoor Christmas lighting setup is sure to add a festive glow to the front porch without occupying much outdoor space.

    10. Keep It Simple

    10. Keep It Simple

    If your house features a sloping roof, or you’ve got a 60s-inspired A-frame cabin, why not transform it into a life-sized gingerbread house nestled in the woods? Adorn the roofline and the path leading to the house with large bulb lights spaced at intervals, creating a striking visual effect with a simple, uncluttered approach. 

    11. Light Up The Outdoor Christmas Tree

    11. Light Up The Outdoor Christmas Tree

    If you are blessed with a vast front yard with an evergreen tree, consider adding a Christmas tree embellished with gleaming ornaments and colorful lights. This approach is an excellent and fun way to extend holiday wishes to visitors, especially if your house is situated far back from the road.

    12. Carve Out Your House With Rope Lights

    12. Carve Out Your House With Rope Lights

    Have you ever considered using the nighttime darkness to your benefit when decorating your home? Try utilizing conventional multi-colored rope lights to create an outline of your home. Just make sure to follow each corner of the house precisely using the rope lights.

    13. Brighten Your Home With a Christmas Light Projector

    13. Brighten Your Home With a Christmas Light Projector

    Welcome the Christmas spirit throughout your home by using an LED light projector. You can select from various displays, such as Santa Claus sneaking in, twinkling lights, snowflakes, and falling snow effects. 

    The most significant advantage of this type of Christmas lighting is that it eliminates the need to climb up ladders and untangle string lights. However, when purchasing a projector, ensure that it has display modes, brightness, and adequate coverage area. Additionally, verify that the projector is water-resistant and suitable for outdoor use.

    14. Go All Out With Christmas Lights

    14. Go All Out With Christmas Lights

    This is an advanced technique that demands some commitment, but the outcome is incredibly stunning! 

    Essentially, you're using lights like paint and creating color blocks on your house. Start by collecting lights in various colors and arranging them. Adorn your walls with red lights, line your windows with green lights, and embellish your roof with white lights for a complete Christmas transformation.

    15. Wrap Christmas Lights On Tree Trunks

    15. Wrap Christmas Lights On Tree Trunks

    Do you have large trees all over your front yard? Try covering the tree trunks with string lights of the same color. Doing so creates the impression of pillars, which is quite clever if you ask me! 

    Tip

    The essential aspect of this idea is to leave the leaves and branches without any decorations. This way, the trees will appear as if they stop in the air, giving them the appearance of pillars.

    16. Light Up The Front Yard

    16. Light Up The Front Yard

    If your house is situated far from the road, you can use a string of lights to wrap some greenery or a mailbox on the front lawn. It’ll serve as a visual connection to the primary light display at the front of your home.

    17. Spell It Out

    17. Spell It Out

    You must have seen those light letters influencers use in their rooms, often spelling out their names. Well, you can shift them outdoors to spell out words like “joy,” “Xmas,” “merry,” and more. I think this simple outdoor Christmas light idea is effective yet gorgeous in spreading the warmth of the Christmas season to neighbors and passersby.

    For a more subtle look, you can opt for smaller alphabet decorations to hang on your Christmas tree. Within a few minutes, you’ll have the cutest Christmas tree in town!

    18. Add More Sparkle With Extra String Lights

    18. Add More Sparkle With Extra String Lights

    If you’ve got some extra string lights left, consider including topiary in your outdoor Christmas light ideas. To achieve a modern and stylish look, you can use blue-white string lights to accentuate sleek shapes like cones, spheres, etc. However, if you prefer a more playful and whimsical feel, use the twinkle setting.

    19. Don’t Forget The Fence

    19. Don’t Forget The Fence

    If you want to stand out in the next Christmas and holiday season, consider recreating this outdoor lighting setup. Rather than focusing on the yard or the porch, you can choose the fence as the focal point of the outdoor Christmas lights. 

    Embellish it with a lighted garland, complete with red bows and ribbons. You could also define the roofline with white string lights to add depth to the overall display. 

    20. Frame Your Windows With Extravagant Lights

    20. Frame Your Windows With Extravagant Lights

    Want to outdo mall light shows this Christmas? Well, use the power of festive lights to create innovative and unique frames for your windows. Purchase malleable string lights and wall clips, then outline the shape on your wall and fasten the lights in place using the clips.

    Tip

    It is best to use separate light strings for each window, so measure the required length before ordering them. 

    21. Create A White Christmas Vibe

    21. Create A White Christmas Vibe

    If you live in an area where it seldom snows, you might need to think outside the box to experience a white Christmas. 

    Well, this lighting setup is ideal for a wraparound porch. All you have to do is adorn your bushes, stair rails, pillars, and roofline with sparkling white Christmas lights. Even without any additional decorations, this pure white theme evokes the feel of snow in the hottest of locations.

    22. Enhance The Roofline

    22. Enhance The Roofline

    Make use of lighting to accentuate your home’s exterior, such as this cottage with a slanted roofline illuminated with enchanting white lights. This stunning yet simple outdoor Christmas lighting adds depth to your front yard on gloomy winter evenings.

    23. Add A Warm Touch With Candles

    23. Add A Warm Touch With Candles

    Even if you use electric Christmas lights, keep some candles on hand for when you want a more intimate atmosphere or to share a drink without the jarring bright lights. For instance, you can keep the LED candles under your bench or place them along the handrail.

    Or simply light a candle in the middle of your porch table for a candlelit Christmas ambiance.

    24. Trim Your Bushes And Light ‘Em Up!

    24. Trim Your Bushes And Light ‘Em Up!

    When it comes to incorporating Christmas into your home décor in a modern and refreshing way, here's a unique idea for your front yard. If you have many bushes, consider trimming them into spherical shapes to create a floating effect. 

    Next, adorn them with mini lights in white, green, and red colors for a fresh take on traditional Christmas decorations. This idea is particularly suitable for those looking to add a trendy touch to their home’s exterior.

    25. Bask In The Golden Glow

    25. Bask In The Golden Glow

    This Christmas light idea is perfect if you’re got a bright red or green door. Or, you can paint your door for a fun, festive touch!

    Then add some golden ball ornaments on potted Christmas trees and deck up the surrounding areas with warm string lights. Doing so will result in a soft and inviting glow that epitomizes the classic appeal of the holiday season. 

    Lastly, you can add a lighted garland on the front door to add a timeless charm to the overall look.

    26. Create A Firework Scene With Starburst Lights

    26. Create A Firework Scene With Starburst Lights

    Using fireworks can be a hassle, but modern Christmas enthusiasts have found an alternative solution! 

    How about purchasing some starburst lights, which provide the appearance of a continuous firework display without any of the noise and smoke? They make for a stunning addition to a large light display or can be used alone to create a more otherworldly atmosphere.

    27. Cover Large Spaces With Net Lights

    27. Cover Large Spaces With Net Lights

    If the thought of wrapping individual string lights around large surfaces like walls, hedges, and railings stresses you out, consider using a net version instead. This will not only save you time but also ensure that the lights are evenly distributed, resulting in a stunning and visually appealing backdrop.

    However, when covering a large area, decide the overall vibe you want to go for. That said, cool-toned lights in white or blue colors will create a frosty winter wonderland effect. On the other hand, warm-toned outdoor lights will complement traditional decorations and create a cozy ambiance. 

    Given below are just a few of the most popular types of outdoor Christmas lights available: 

    • String lights are the most common type of outdoor Christmas lights, consisting of a string of bulbs that can be wrapped around trees, bushes, and other outdoor features. 
    • Net lights are a mesh of lights that can be easily draped over bushes or hedges to create a uniform look. 
    • Icicle lights are designed to mimic the appearance of hanging icicles and are often hung from rooflines or eaves. 
    • LED lights are energy-efficient and long-lasting, making them a popular choice for outdoor Christmas displays. 
    • Battery-operated lights are convenient for outdoor displays that are far from electrical outlets and do not require any wiring or extension cords. 

    Are LED lights better for outdoor use than traditional incandescent bulbs?

    Yes, LED lights are more energy-efficient, which means they use less electricity to produce the same amount of light as incandescent bulbs. They also have a longer lifespan and are more durable, making them more suitable for outdoor use. 

    Moreover, LED lights emit less heat than incandescent bulbs, reducing the risk of fire hazards. And the fact that LEDs are available in a variety of colors makes them all the more convenient for outdoor Christmas displays. 

    What are some safety tips to keep in mind when hanging outdoor Christmas lights?

    • Use Outdoor-rated Lights

    Ensure that the lights you use are rated for outdoor use and are properly insulated to protect against environmental elements. 

    • Inspect The Lights

    Before hanging the lights, inspect them carefully to make sure there are no damaged wires or broken bulbs. Discard any damaged lights. 

    • Use Proper Extension Cords

    Use extension cords rated for outdoor use, featuring the appropriate length for your needs. Do not use indoor extension cords for outdoor lighting. 

    • Avoid Overloading Outlets

    Do not plug too many lights into a single outlet or extension cord, as this can create a fire hazard. Use multiple outlets and extension cords as needed. 

    • Use A Ladder Safely

    When hanging lights on tall trees or the roof, use a sturdy ladder that is positioned on a level surface. Do not stand on the top rungs of the ladder, and have someone hold the base for added stability. 

    • Turn Off The Lights When Not In Use

    Turn off the lights when you are not at home or when you go to bed at night to reduce the risk of fire. 

    • Keep Electric Decorations Away From Power Lines

    Do not hang decorations near power lines or other electrical equipment, as this can be dangerous. 

    Conclusion

    And those were all the outdoor Christmas light ideas I had for you. I hope this guide will be helpful for those who want to make their home shine this holiday season!

    Whether you're decorating a small front porch or a sprawling backyard, there's a way to add a festive touch to your abode. So, put on some Christmas songs, and get ready to jazz up your home with outdoor Christmas lights!

    Nature and wildlife Christmas trees offer a refreshing approach to holiday décor by embracing wildlife themes and natural elements that bring the beauty of the outdoors indoors. This curated collection showcases 30 unique tree designs inspired by forest animals, ocean life, birds, flowers, and rustic landscapes, perfect for celebrating nature during the festive season. With motifs ranging from woodland creatures to ocean-themed décor, these trees capture the essence of nature, combining organic textures, animal-inspired ornaments, and seasonal greenery for a distinctive holiday experience. Each style here introduces elements like pinecones, feathers, antlers, and floral accents, creating various looks from cozy woodland settings to vibrant garden themes. These ideas are tailored for those who want their holiday décor to reflect an eco-inspired celebration, blending festive charm with the serenity and beauty of natural surroundings.

    01. Woodland Wildlife Christmas Tree with Fox, Owl, and Squirrel Décor

    The woodland wildlife Christmas tree evokes a cozy, nature-inspired aesthetic with ornaments shaped like woodland animals such as foxes, owls, and squirrels. Pinecones, leaves, and soft string lights enhance the rustic appeal, ideal for adding warmth and a sense of the forest to holiday décor.

    01. Woodland Wildlife Christmas Tree with Fox, Owl, and Squirrel Décor

    02. Bird-Lover’s Christmas Tree with Birdhouses and Feather Ornaments

    The bird-lover’s Christmas tree celebrates avian life with handmade bird ornaments, small birdhouses, and feather decorations. Soft greenery accents and a wildlife-friendly theme create a charming, natural appeal perfect for bird enthusiasts.

    02. Bird-Lover’s Christmas Tree with Birdhouses and Feather Ornaments

    03. Pinecone and Acorn Nature Tree with Rustic Forest Accents

    The pinecone and acorn nature tree brings a rustic forest atmosphere to the holiday season with natural pinecones, acorns, and small wooden animal ornaments, making it an ideal choice for those who love rustic Christmas trees. This design captures the essence of a woodland setting, ideal for nature-themed décor.

    03. Pinecone and Acorn Nature Tree with Rustic Forest Accents

    04. Deer & Antler Wildlife Tree with Forest-Inspired Décor

    The deer & antler wildlife tree uses deer figurines and antler ornaments paired with twine garlands and soft lights to create a wild forest look. This theme reflects a rustic holiday style perfect for outdoor enthusiasts.

    04. Deer & Antler Wildlife Tree with Forest-Inspired Décor

    05. Forest Animals Christmas Tree with Bear, Raccoon, and Wolf Ornaments

    The forest animals' Christmas tree pays homage to woodland creatures with felt animal ornaments, including bears, raccoons, and wolves. The addition of pine branches and faux mushrooms further enhances its forest-inspired design.

    05. Forest Animals Christmas Tree with Bear, Raccoon, and Wolf Ornaments

    06. Feathered Friends Christmas Tree with Berries and Bird Décor

    The feathered Friends Christmas tree features feathered bird ornaments, berry branches, and soft lighting, making it an excellent example of luxury and designer trees for nature-inspired decor. This tree is perfect for bringing a wildlife touch into holiday décor.

    06. Feathered Friends Christmas Tree with Berries and Bird Décor

    07. Butterfly Garden Tree with Floral Accents and Butterfly Ornaments

    The butterfly garden tree incorporates butterfly ornaments, floral accents, and greenery for a garden-themed holiday display. This nature-focused design brings a delicate, airy look to Christmas décor.

    07. Butterfly Garden Tree with Floral Accents and Butterfly Ornaments

    08. Mushroom & Moss Woodland Tree with Faux Mushrooms and Moss

    The mushroom & moss woodland tree combines faux mushrooms, moss garlands, and small forest animal figurines with soft fairy lights, creating a magical forest vibe.

    08. Mushroom & Moss Woodland Tree with Faux Mushrooms and Moss

    09. River Stones & Branches Tree with Earthy Stone and Twig Garlands

    The river stones & branches tree incorporates river stone ornaments, twig garlands, and wooden accents, bringing a rustic, earthy aesthetic to holiday décor.

    09. River Stones & Branches Tree with Earthy Stone and Twig Garlands

    10. Ocean Wildlife Christmas Tree with Starfish and Sea Turtle Décor

    The ocean wildlife Christmas tree brings an ocean theme indoors with starfish, shells, dolphin, and sea turtle ornaments, softened with blue and white lighting for a coastal holiday style.

    10. Ocean Wildlife Christmas Tree with Starfish and Sea Turtle Décor

    11. Insect & Butterfly Tree with Leafy Garlands and Beetle Ornaments

    The insect & butterfly tree features butterfly and beetle ornaments, leafy garlands, and bee decorations, celebrating insects in a nature-inspired theme.

    11. Insect & Butterfly Tree with Leafy Garlands and Beetle Ornaments

    12. Woodland Critters Tree with Squirrel, Rabbit, and Hedgehog Décor

    The woodland critters tree celebrates forest animals with ornaments shaped like squirrels, rabbits, and hedgehogs, complemented by pinecones, moss, and twigs for a woodland-themed holiday look.

    12. Woodland Critters Tree with Squirrel, Rabbit, and Hedgehog Décor

    13. Animal Track Christmas Tree with Clay Track Imprints

    The animal track Christmas tree uses clay ornaments imprinted with animal tracks, adding greenery, berries, and small animal figurines to create a distinctive wildlife theme.

    13. Animal Track Christmas Tree with Clay Track Imprints

    14. Nocturnal Wildlife Christmas Tree with Owl, Bat, and Moon Décor

    The nocturnal wildlife Christmas tree highlights nighttime creatures like owls and bats, with moon ornaments and twinkling lights to mimic a starlit night in the forest.

    14. Nocturnal Wildlife Christmas Tree with Owl, Bat, and Moon Décor

    15. Forest Flora Christmas Tree with Ferns, Moss, and Berry Accents

    The forest flora Christmas tree combines faux fern fronds, moss, red berries, and small flowers to create a lush, forest-inspired holiday theme.

    15. Forest Flora Christmas Tree with Ferns, Moss, and Berry Accents

    16. Winter Woodland Tree with Frosted Pinecones and Snowy Décor

    The winter woodland tree brings frosted pinecones, bark, and faux snow indoors for a winter-themed woodland aesthetic.

    16. Winter Woodland Tree with Frosted Pinecones and Snowy Décor

    17. National Park Wildlife Tree with Bear and Mountain Ornaments

    The national park wildlife tree features ornaments of bears, wolves, trees, and mountains, evoking the essence of national parks.

    17. National Park Wildlife Tree with Bear and Mountain Ornaments

    18. Arctic Animal Tree with Polar Bear, Penguin, and Snowflakes

    The Arctic animal tree uses polar bear, penguin, and snowflake ornaments to create an Arctic wildlife theme with a frosty, festive look.

    18. Arctic Animal Tree with Polar Bear, Penguin, and Snowflakes

    19. Reindeer & Pinecone Tree with Berry Garlands and Reindeer Décor

    The reindeer & pinecone tree combines figurines of reindeer, pinecones, berry garlands, and snowy accents to capture a rustic holiday ambiance.

    19. Reindeer & Pinecone Tree with Berry Garlands and Reindeer Décor

    20. Woodland Fairy Tree with Enchanted Forest Animals and Fairies

    The woodland fairy tree features fairy figurines, mushrooms, small forest animals, and twinkling lights, creating a magical, enchanted forest theme.

    20. Woodland Fairy Tree with Enchanted Forest Animals and Fairies

    21. Tree of Pollinators with Bee, Butterfly, and Hummingbird Ornaments

    The Tree of Pollinators celebrates pollinators with bee, butterfly, and hummingbird ornaments, accented with flowers and green leaves.

    21. Tree of Pollinators with Bee, Butterfly, and Hummingbird Ornaments

    22. Desert Wildlife Christmas Tree with Cactus and Lizard Accents

    The desert wildlife Christmas tree uses cactus, lizard, roadrunner ornaments, succulents, and earthy garlands for a unique desert holiday look.

    22. Desert Wildlife Christmas Tree with Cactus and Lizard Accents

    23. Pinecone Hedgehog Tree with Green Foliage and Pinecone Décor

    The pinecone hedgehog tree incorporates handmade pinecone hedgehog ornaments with soft green foliage and fairy lights for a charming look.

    23. Pinecone Hedgehog Tree with Green Foliage and Pinecone Décor

    24. Garden Bird Tree with Bird Nests, Eggs, and Figurines

    The garden bird tree uses small bird nests, egg ornaments, and bird figurines, providing a cozy, garden-inspired décor for the holiday season.

    24. Garden Bird Tree with Bird Nests, Eggs, and Figurines

    25. Under-the-Sea Christmas Tree with Seahorse, Coral, and Shells

    The under-the-sea Christmas tree incorporates seahorse, coral, and seashell ornaments, with soft blue lighting for an ocean-inspired holiday look.

    25. Under-the-Sea Christmas Tree with Seahorse, Coral, and Shells

    26. Meadow Flowers Tree with Wildflower, Butterfly, and Bee Décor

    The meadow flower tree features ornaments shaped like wildflowers, butterflies, and bees, creating a meadow-like effect in Christmas décor.

    26. Meadow Flowers Tree with Wildflower, Butterfly, and Bee Décor


    27. Fox & Owl Tree with Pinecones and Warm-Toned Fairy Lights

    The fox & owl tree includes fox and owl ornaments, pinecones, and warm-toned fairy lights for a rustic woodland-inspired Christmas tree.

    27. Fox & Owl Tree with Pinecones and Warm-Toned Fairy Lights


    28. Earthy Moss & Stone Tree with Moss-Covered Ornaments

    The earthy moss & stone tree combines moss-covered ornaments, smooth stones, and twig garlands, adding a grounded, nature-focused look to holiday décor.

    28. Earthy Moss & Stone Tree with Moss-Covered Ornaments

    29. Treetop Birds Tree with Eagle and Nest-Inspired Ornaments

    The treetop birds tree celebrates birds like eagles and owls with ornaments of nests, leaves, and small pinecones for a treetop-inspired theme.

    29. Treetop Birds Tree with Eagle and Nest-Inspired Ornaments

    30. Natural Bark & Twig Tree with Small Animal Figurines

    The natural bark & twig tree provides a rustic feel with bark ornaments, twig garlands, and small animal figurines, enhancing its earthy, natural holiday look.

    30. Natural Bark & Twig Tree with Small Animal Figurines

    Natural & eco-friendly trees are emerging as a popular choice for those seeking sustainable holiday décor options. This article highlights 30 inventive Christmas tree alternatives crafted from recycled materials, natural elements, and living plants, each offering a unique and eco-conscious take on festive décor. Using materials such as driftwood, recycled cardboard, living plants, and bamboo, these creative designs bring together tradition and environmental responsibility, encouraging a low-impact approach to holiday celebrations. With styles ranging from rustic to minimalist, these trees are perfect for small spaces or as unique centerpieces, aligning with a commitment to sustainability. Whether it’s an upcycled wine cork tree or a fragrant potted herb option, each design reflects a thoughtful way to bring natural beauty into the holiday season while reducing waste and promoting green practices.

    01. Driftwood Christmas Tree with Coastal Seashell Ornaments

    The Driftwood Christmas tree offers a sustainable, coastal-inspired holiday decoration made from repurposed driftwood. Arranged in a triangular shape and embellished with seashell ornaments and fairy lights, this tree introduces a rustic seaside ambiance, ideal for environmentally-conscious homes seeking natural holiday décor.

    01. Driftwood Christmas Tree with Coastal Seashell Ornaments

    02. Recycled Cardboard Christmas Tree with Eco-Friendly Paints

    The recycled cardboard Christmas tree brings an eco-friendly edge to holiday décor by using recycled cardboard. Geometric layers of cardboard are painted with environmentally safe paints and decorated with handmade paper ornaments, making it an inventive, low-waste option for the holidays.

    02. Recycled Cardboard Christmas Tree with Eco-Friendly Paints

    03. Potted Living Christmas Tree with Natural Oranges Slices

    The potted living Christmas tree is a live tree option planted in a decorative pot, which can be replanted after the holidays. This tree is adorned with natural ornaments like dried oranges, cinnamon sticks, and wooden decorations, making it ideal for eco-friendly homes aiming to reduce waste.

    03. Potted Living Christmas Tree with Natural Oranges Slices

    04. DIY Wood Pallet Christmas Tree with Fabric Ornaments

    The DIY wood pallet Christmas tree repurposes old pallets for a rustic, sustainable holiday decoration. Stacked and painted with green eco-friendly paints, the tree is completed with LED lights and handmade fabric ornaments, creating a festive design that minimizes resource consumption.

    04. DIY Wood Pallet Christmas Tree with Fabric Ornaments

    05. Tree Branch Christmas Tree with Clay Ornaments

    The tree branch Christmas tree uses simple, fallen branches arranged into a minimalist design. This tree is adorned with handmade clay ornaments and LED lights, creating an eco-conscious display that is both modern and natural.

    05. Tree Branch Christmas Tree with Clay Ornaments

    06. Succulent Christmas Tree with Wooden Star Decorations

    The succulent Christmas tree presents a living alternative to traditional trees, crafted from potted succulents arranged in a pyramid shape. Decorated with small wooden stars and eco-friendly lights, this green option is perfect for holiday setups that prioritize sustainability and live greenery.

    06. Succulent Christmas Tree with Wooden Star Decorations

    07. Dried Flower Christmas Tree with Lavender and Eucalyptus

    The dried flower Christmas tree provides a fragrant holiday display, adorned with dried lavender, eucalyptus, and wildflowers. This eco-friendly option emphasizes preserved natural elements, creating a distinctive décor piece with a rustic charm.

    07. Dried Flower Christmas Tree with Lavender and Eucalyptus

    08. Tree of Books Christmas Tree with Pinecone Ornaments

    The Tree of Books Christmas tree is an eco-conscious design made by stacking books in a triangular shape, topped with fairy lights and pinecone ornaments. This intellectual twist is perfect for book lovers aiming for a sustainable holiday décor option.

    08. Tree of Books Christmas Tree with Pinecone Ornaments

    09. Burlap & Twine Christmas Tree with Wooden Star Accents

    The burlap & twine Christmas tree incorporates sustainable materials, decorated with burlap ribbon, twine garlands, and wooden star ornaments. This rustic setup suits homes looking for simple, natural holiday décor that aligns with eco-friendly principles.

    09. Burlap & Twine Christmas Tree with Wooden Star Accents

    10. DIY Pinecone Christmas Tree with LED Lights

    The DIY pinecone Christmas tree is crafted from layered pinecones, with wooden beads and LED lights for decoration. This small, tabletop-friendly design is a low-waste, nature-inspired option for adding festive cheer to compact spaces.

    10. DIY Pinecone Christmas Tree with LED Lights

    11. Ladder Christmas Tree with Citrus and Wooden Stars

    The ladder Christmas tree repurposes an old wooden ladder, which is decorated with natural ornaments like dried citrus, cinnamon sticks, and wooden stars. Wrapped with fairy lights, this rustic design offers a sustainable alternative for holiday décor.

    11. Ladder Christmas Tree with Citrus and Wooden Stars

    12. Upcycled Fabric Christmas Tree with Cotton Garlands

    The upcycled fabric Christmas tree uses scrap fabric strips tied to a wooden frame, decorated with eco-friendly cotton garlands and handmade fabric ornaments. This option provides a resourceful way to incorporate fabric remnants into holiday décor.

    12. Upcycled Fabric Christmas Tree with Cotton Garlands

    13. Clay & Twine Ornament Tree with Handcrafted Clay Décor

    The clay & twine Ornament Tree is a minimalist decoration featuring handcrafted clay ornaments and twine garlands. Surrounded by pinecones and wooden decorations, this tree sustainably enhances natural holiday themes.

    13. Clay & Twine Ornament Tree with Handcrafted Clay Décor

    14. DIY Driftwood and Shell Tree with Nautical Ornaments

    The DIY driftwood and shell tree blends driftwood and seashells to evoke a coastal holiday theme. This tree is decorated with seashell garlands and nautical ornaments, creating a beach-inspired décor option with a sustainable twist.

    14. DIY Driftwood and Shell Tree with Nautical Ornaments

    15. Living Wall Christmas Tree with Wooden Ornament Details

    The living wall Christmas tree grows vertically, using lush green plants arranged on a wall. Decorated with wooden ornaments and eco-friendly lights, this design brings greenery indoors and works well in compact living spaces.

    15. Living Wall Christmas Tree with Wooden Ornament Details

    16. Recycled Wine Cork Christmas Tree with Beads and Lights

    The recycled wine cork Christmas tree features stacked wine corks adorned with small beads and eco-friendly lights. This whimsical design is ideal for wine lovers looking to incorporate upcycled materials into their holiday décor.

    16. Recycled Wine Cork Christmas Tree with Beads and Lights

    17. Cinnamon Stick Christmas Tree with Orange and Star Anise

    The cinnamon stick Christmas tree uses cinnamon sticks, dried oranges, and star anise to create a fragrant, natural holiday décor option. This tree introduces cozy, seasonal scents to any holiday setup.

    17. Cinnamon Stick Christmas Tree with Orange and Star Anise

    18. Macramé Christmas Tree with Boho Cotton Fiber Décor

    The macramé Christmas tree is a wall-hanging option made from natural cotton fibers, adorned with wooden beads and fairy lights. This boho-inspired decoration fits well with eco-conscious holiday themes.

    18. Macramé Christmas Tree with Boho Cotton Fiber Décor

    19. Pallet Wood Christmas Tree with Burlap and LED Lights

    The pallet wood Christmas tree reuses reclaimed pallets for a rustic, eco-friendly holiday look. Decorated with burlap ribbons, wooden ornaments, and LED lights, this tree's natural tones create a versatile base that could easily complement other festive elements, including metallic accent trees, for a balanced mix of rustic and modern styles.

    19. Pallet Wood Christmas Tree with Burlap and LED Lights

    20. Recycled Paper Christmas Tree with Jute Garlands

    The recycled paper Christmas tree emphasizes minimalism crafted from rolled recycled paper painted white and adorned with wooden stars and jute garlands. This low-impact tree is ideal for sustainable holiday décor enthusiasts.

    20. Recycled Paper Christmas Tree with Jute Garlands

    21. Handmade Wool Pom-Pom Tree with Wooden Bead Details

    The handmade wool pom-pom tree uses wool pom-poms in green shades, with wooden beads and natural cotton string lights. This festive and soft-textured tree provides a unique, eco-friendly alternative for holiday displays.

    21. Handmade Wool Pom-Pom Tree with Wooden Bead Details

    22. Upcycled Bicycle Wheel Christmas Tree with Fairy Lights

    The upcycled bicycle wheel Christmas tree consists of stacked bicycle wheels decorated with fairy lights and paper ornaments. This industrial-inspired design offers a creative, sustainable choice for holiday décor.

    22. Upcycled Bicycle Wheel Christmas Tree with Fairy Lights

    23. Twig and Branch Christmas Tree with Carved Wood Ornaments

    The twig and branch Christmas tree features intertwined twigs and branches, decorated with hand-carved wooden ornaments and LED lights. This natural, rustic design is well-suited for woodland-inspired holiday themes.

    23. Twig and Branch Christmas Tree with Carved Wood Ornaments

    24. Wooden Crate Christmas Tree with Potted Plant Décor

    The wooden crate Christmas tree stacks crates to form a tree shape, with each crate decorated with small potted plants, candles, pinecones, and acorns. This arrangement creates an innovative, eco-friendly holiday display.

    24. Wooden Crate Christmas Tree with Potted Plant Décor

    25. DIY Moss Christmas Tree with Wooden Star Decorations

    The DIY Moss Christmas tree is a miniature, indoor-friendly option crafted entirely from fresh moss, and decorated with small wooden star ornaments and LED lights. This tree offers a natural, lush look for compact spaces.

    25. DIY Moss Christmas Tree with Wooden Star Decorations

    26. Cardboard Tube Christmas Tree with Eco-Friendly Ornaments

    The cardboard tube Christmas tree uses recycled cardboard tubes arranged in a triangular shape, with eco-friendly ornaments for decoration. Its clean, minimalist aesthetic can harmonize beautifully with softer options, like pastel Christmas trees, to create a light, calming holiday display while staying environmentally conscious.

    26. Cardboard Tube Christmas Tree with Eco-Friendly Ornaments

    27. Living Potted Herb Christmas Tree with Fragrant Orange Slices

    The living potted herb Christmas tree is a fragrant, eco-conscious design using potted herbs like rosemary, decorated with dried oranges and cinnamon sticks. This holiday display offers both aesthetic appeal and the benefit of a post-season herb garden.

    27. Living Potted Herb Christmas Tree with Fragrant Orange Slices

    28. Paper Mache Christmas Tree with Recycled Ornaments

    The paper Mache Christmas tree is made from molded paper Mache painted green with eco-friendly paints and decorated with recycled paper ornaments. This sustainable tree option is suitable for those who prioritize low-waste, handmade décor.

    28. Paper Mache Christmas Tree with Recycled Ornaments

    29. Bamboo Christmas Tree with Jute and Fiber Décor

    The bamboo Christmas tree introduces a minimalist holiday décor option, made from bamboo poles arranged in a triangular shape, and adorned with natural fiber ornaments and jute twine garlands. This eco-friendly design suits modern interiors focused on sustainability.

    29. Bamboo Christmas Tree with Jute and Fiber Décor

    30. Upcycled Tin Can Christmas Tree with Fairy Lights

    The upcycled tin can Christmas tree repurposes tin cans painted in green tones, stacked and decorated with small fairy lights and eco-friendly ornaments. This modern, industrial-inspired tree provides a creative, low-impact holiday decoration.

    30. Upcycled Tin Can Christmas Tree with Fairy Lights

    Multi-colored Christmas trees bring a unique, dynamic twist to holiday décor. Whether you’re aiming for retro vibes, a soft pastel theme, or a bold, neon glow, these trees offer a style for everyone, celebrating seasonal trends with fresh takes on traditional holiday motifs. Each décor idea is adaptable, from classic Christmas elements to vibrant, rainbow-inspired layouts, enabling everyone to create a tree that reflects personal style. This guide covers 31 inspiring multi-colored Christmas tree ideas, each blending traditional themes with modern aesthetics, making them perfect for diverse holiday settings. Embrace these vibrant concepts to elevate your festive display and create a lively, memorable holiday season.

    01. Festive Multi-Colored Christmas Tree with Classic Ornaments

    A festive multi-colored Christmas tree brings a lively look to holiday spaces with red, blue, green, and gold ornaments set against glowing lights. This setup captures a classic holiday aesthetic, ideal for a cheerful, festive atmosphere in a cozy living room.

    01. Festive Multi-Colored Christmas Tree with Classic Ornaments

    02. Retro Multi-Colored Tree with Vintage-Inspired Décor

    Retro multi-colored trees offer a nostalgic charm with vintage-style ornaments, classic tinsel, and traditional string lights. Perfect for retro-themed rooms, this design reflects a mid-century holiday look.

    02. Retro Multi-Colored Tree with Vintage-Inspired Décor

    03. Rainbow-themed Christmas Tree with Bold Color Blocks

    Rainbow-themed Christmas trees make a bold statement with red, orange, yellow, green, blue, and purple ornaments arranged in distinct color blocks from top to bottom. This design brings a vibrant, eye-catching element to holiday décor. For a more focused color scheme, a 'blue Christmas tree' offers a serene, cohesive alternative.

    03. Rainbow-themed Christmas Tree with Bold Color Blocks

    04. Neon Multi-Colored Tree with Futuristic Lights

    Neon multi-colored trees add a futuristic touch with neon pink, blue, green, and yellow lights. This design suits modern living spaces, creating a glowing effect that enhances the festive setting.

    04. Neon Multi-Colored Tree with Futuristic Lights

    05. Candy-Colored Christmas Tree with Pastel Ornaments

    Candy-colored Christmas trees add a playful element with pastel pink, blue, and yellow ornaments, often accented with candy cane décor. This setup creates a whimsical holiday look, perfect for festive gatherings.

    05. Candy-Colored Christmas Tree with Pastel Ornaments

    06. Boho Multi-Colored Christmas Tree with Eclectic Accents

    A boho multi-colored Christmas tree brings eclectic style through unique ornaments, feathers, and woven decorations. This design suits relaxed, cozy spaces, adding a free-spirited feel to holiday décor.

    06. Boho Multi-Colored Christmas Tree with Eclectic Accents

    07. Multi-Colored Tree with Gold Accents for Elegant Look

    Multi-colored trees with gold accents introduce a touch of luxury through gold tinsel and metallic garlands. Red, blue, and green ornaments complete this elegant design, adding sophistication to holiday spaces.

    07. Multi-Colored Tree with Gold Accents for Elegant Look

    08. Metallic Multi-Colored Tree with Chic Ornaments

    A metallic multi-colored tree offers a chic, glamorous appearance with blue, pink, silver, and gold ornaments, highlighted by fairy lights. This design works well for modern and luxurious holiday décor.

    08. Metallic Multi-Colored Tree with Chic Ornaments

    09. Multi-Colored Tree with Fairy Lights for Magical Ambience

    Multi-colored trees with fairy lights add a magical touch, with twinkling lights that highlight rainbow ornaments. This design suits festive, cozy gatherings, enhancing holiday ambiance.

    09. Multi-Colored Tree with Fairy Lights for Magical Ambience

    09. Multi-Colored Tree with Fairy Lights for Magical Ambience

    10. Soft Pastel Multi-Colored Tree with Subtle Ornaments

    Soft pastel multi-colored trees provide a gentle holiday look, featuring pink, baby blue, mint green, and lavender ornaments. This setup is ideal for those seeking a subtle, refined festive atmosphere.

    10. Soft Pastel Multi-Colored Tree with Subtle Ornaments

    11. Jewel-Toned Multi-Colored Tree with Rich Ornament Colors

    Jewel-toned multi-colored trees create a rich, luxurious aesthetic, featuring ruby, emerald, and sapphire ornaments with gold accents. This style brings a sophisticated look to holiday spaces.

    11. Jewel-Toned Multi-Colored Tree with Rich Ornament Colors

    12. Multi-Colored Ombre Christmas Tree with Gradient Effect

    Multi-colored ombre trees feature a gradient effect, with ornaments in colors that flow from bright to deep shades, like pink to blue. This style makes a striking, modern statement.

    12. Multi-Colored Ombre Christmas Tree with Gradient Effect

    13. Multi-Colored Tree with Star Ornaments for Whimsical Touch

    Star ornaments bring a whimsical touch to multi-colored trees, with red, blue, yellow, and purple stars. This design suits family-oriented holiday spaces.

    13. Multi-Colored Tree with Star Ornaments for Whimsical Touch

    14. Multi-Colored and White Christmas Tree with Mixed Ornaments

    Combining white and multi-colored ornaments, this tree blends traditional and modern styles, fitting minimalist or eclectic décor themes. For those who prefer simpler aesthetics, exploring options like 'black and white trees' might also add a stylish, contemporary contrast.

    14. Multi-Colored and White Christmas Tree with Mixed Ornaments

    15. Rainbow Glitter Christmas Tree with Sparkling Ornaments

    Rainbow glitter Christmas trees feature glittery ornaments in a spectrum of colors. This setup is ideal for creating a festive, sparkling atmosphere at any holiday gathering.

    15. Rainbow Glitter Christmas Tree with Sparkling Ornaments

    16. Multi-Colored Tree with Striped Decorations for a Playful Look

    Striped ornaments add a playful vibe to multi-colored trees, accompanied by tinsel in a festive room. This design is ideal for colorful, holiday-centered spaces.

    16. Multi-Colored Tree with Striped Decorations for a Playful Look

    17. Multi-Colored Minimalist Christmas Tree with Refined Ornaments

    Minimalist multi-colored trees feature small ornaments in red, yellow, blue, and green, complemented by delicate string lights. This design offers a refined, modern look.

    17. Multi-Colored Minimalist Christmas Tree with Refined Ornaments

    18. Multi-Colored Christmas Tree with Animal Ornaments

    Multi-colored trees with animal-shaped ornaments add a playful, whimsical element, featuring creatures like elephants, giraffes, and birds. This style suits family-friendly holiday setups.

    18. Multi-Colored Christmas Tree with Animal Ornaments

    19. Multi-Colored Tree with Balloons for Festive Vibe

    Adding multi-colored balloons to the tree creates a lively, festive look, perfect for parties and gatherings. This playful style captures a celebratory feel for the holiday season.

    19. Multi-Colored Tree with Balloons for Festive Vibe

    20. Multi-Colored Christmas Tree with Pom-Poms for Crafty Look

    Pom-poms introduce a crafty, colorful look to multi-colored trees, ideal for fun, playful décor themes that emphasize DIY charm.

    20. Multi-Colored Christmas Tree with Pom-Poms for Crafty Look

    21. Multi-Colored Tree with Paper Ornaments for DIY Appeal

    Handcrafted paper ornaments on a multi-colored tree offer a creative touch. This setup is perfect for DIY enthusiasts, adding a unique, personal element to holiday décor.

    21. Multi-Colored Tree with Paper Ornaments for DIY Appeal

    22. Festive Multi-Colored Tree with Ribbons for Added Charm

    Festive multi-colored trees with ribbons offer a colorful, inviting look. Red, green, blue, and gold ribbons wrap around the tree, enhancing the holiday ambiance.

    22. Festive Multi-Colored Tree with Ribbons for Added Charm

    23. Multi-Colored Tree with Lights and Tinsel for Extra Sparkle

    Bright lights and shimmering tinsel bring extra sparkle to multi-colored trees. This festive setup captures the holiday spirit in vibrant shades, perfect for celebrations.

    23. Multi-Colored Tree with Lights and Tinsel for Extra Sparkle

    24. Multi-Colored Boho Christmas Tree with Tassels and Feathers

    Boho multi-colored trees feature tassels, feathers, and eclectic ornaments, creating a relaxed, artistic look. Ideal for cozy spaces, this tree style reflects a carefree holiday spirit.

    24. Multi-Colored Boho Christmas Tree with Tassels and Feathers

    25. Multi-Colored Tree with Floral Decorations for Freshness

    Adding flowers to a multi-colored tree brings a fresh element to holiday décor, combining natural aesthetics with festive ornaments.

    25. Multi-Colored Tree with Floral Decorations for Freshness

    26. Multi-Colored Christmas Tree with Polka Dots for Quirky Style

    Polka dot ornaments give multi-colored trees a fun, quirky style, ideal for casual holiday décor with a touch of playful charm.

    26. Multi-Colored Christmas Tree with Polka Dots for Quirky Style

    27. Multi-Colored Christmas Tree with Geometric Ornaments

    Geometric ornaments on a multi-colored tree introduce a modern twist, with bold shapes in red, blue, yellow, and green and metallic garlands enhancing the effect.

    27. Multi-Colored Christmas Tree with Geometric Ornaments

    28. Bright Multi-Colored Christmas Tree with Bow Ornaments

    Bows in red, green, blue, and yellow add a decorative, festive touch to a multi-colored tree, creating a cheerful holiday look.

    28. Bright Multi-Colored Christmas Tree with Bow Ornaments

    29. Multi-Colored Christmas Tree with Snowflakes for Winter Look

    Snowflake ornaments bring a wintery, bright element to multi-colored trees, enhancing cold-weather holiday décor.

    29. Multi-Colored Christmas Tree with Snowflakes for Winter Look

    30. Multi-Colored Christmas Tree with Gift Box Ornaments

    Gift box ornaments add a classic festive touch to multi-colored trees, fitting well with traditional holiday décor themes.

    30. Multi-Colored Christmas Tree with Gift Box Ornaments

    31. Multi-Colored Tree with Disco Balls for Retro Festivities

    Multi-colored trees with disco ball ornaments bring a retro touch to holiday décor, perfect for parties and lively celebrations.

    31. Multi-Colored Tree with Disco Balls for Retro Festivities

    Minimalist Christmas trees have become a central theme in holiday décor, bringing simplicity and elegance to festive settings. This curated guide explores 31 unique minimalist Christmas tree ideas that use materials such as bare branches, geometric wire, natural wood, and modern acrylic for a fresh, understated look. Each design emphasizes a distinct minimalist approach ideal for small spaces, eco-friendly living, and modern aesthetics. Perfect for seasonal trends, these ideas offer various styles that easily adapt to any home décor, from rustic natural trees to contemporary designs with minimal ornamentation.

    01. Bare Branch Minimalist Tree with Neutral Toned Décor

    A single bare branch captures a natural, minimalist Christmas tree style. Placed in a neutral-toned pot, it includes a few small white baubles and warm lights, creating a simple yet festive display ideal for minimalistic settings.

    01. Bare Branch Minimalist Tree with Neutral Toned Décor

    02. Geometric Wire Tree with Modern Gold Wireframe

    The geometric wire tree introduces a modern touch to Christmas décor with its angular, wireframe structure. Made from gold wire, this minimalist tree is decorated with round black and white ornaments, bringing a sleek and contemporary edge.

    02. Geometric Wire Tree with Modern Gold Wireframe

    03. Wooden Triangle Tree with Subtle White Lighting

    The wooden triangle tree is a minimalist structure fashioned from light wood. This triangular frame is decorated with soft white lights and a few natural-colored ornaments, blending simplicity with warmth.

    03. Wooden Triangle Tree with Subtle White Lighting

    04. Hanging Branch Christmas Tree with Neutral Ornaments

    This minimalist Christmas tree suspends a single branch adorned with fairy lights and neutral-toned ornaments, offering an airy, contemporary look for the holidays.

    04. Hanging Branch Christmas Tree with Neutral Ornaments

    05. Birch Pole Christmas Tree with Rustic White Accents

    Natural birch poles arranged in a triangular shape create a rustic minimalist Christmas tree. White ornaments and soft lighting add to its organic and simple charm.

    05. Birch Pole Christmas Tree with Rustic White Accents

    06. Invisible String Light Tree with Ambient Wall Glow

    This design uses invisible string lights on a blank wall to form a Christmas tree shape, embracing modern minimalism without branches or ornaments. It highlights the power of lighting specials to create a soft, festive ambiance while maintaining simplicity.

    06. Invisible String Light Tree with Ambient Wall Glow

    07. Simple Ladder Tree with Warm White Fairy Lights

    A plain wooden ladder wrapped in white fairy lights and adorned with small ornaments transforms into a minimalist Christmas tree that adds subtle holiday charm.

    07. Simple Ladder Tree with Warm White Fairy Lights

    08. Modern Cone Tree with Sleek White Finish

    A white cone shape serves as a sleek, minimalist Christmas tree with no additional decorations, embodying a refined, modern aesthetic.

    08. Modern Cone Tree with Sleek White Finish

    09. Metal Rod Minimalist Tree with Silver and Black Baubles

    This tree uses black metal rods arranged in a triangular form with a few silver and black baubles. The minimalist design combines industrial style with festive elements, making it a perfect choice for those seeking luxury and designer trees that embody modern sophistication.

    09. Metal Rod Minimalist Tree with Silver and Black Baubles

    10. Wall Sticker Christmas Tree with Matte Black Outline

    Matte black wall stickers create a Christmas tree outline on a wall, offering a minimalist, space-saving option for compact spaces or streamlined interiors.

    10. Wall Sticker Christmas Tree with Matte Black Outline

    11. Single Pine Bough Tree with Glass Vase Accent

    A clear glass vase with a single pine bough and one or two simple ornaments embodies minimalist holiday décor in a natural, understated style.

    11. Single Pine Bough Tree with Glass Vase Accent

    12. Light Garland Tree on the Wall with a Soft Holiday Glow

    This wall-mounted tree shape is created with a light garland arranged in a triangular form, offering a soft, ambient glow for minimalist holiday décor.

    12. Light Garland Tree on the Wall with a Soft Holiday Glow

    13. Floating Shelves Christmas Tree with Minimal Décor

    Floating shelves arranged in a triangular tree shape on the wall serve as minimalist holiday décor with additional functionality. Small decorations on each shelf create a modern, layered look.

    13. Floating Shelves Christmas Tree with Minimal Décor

    14. Wooden Peg Tree with Simple Neutral Ornaments

    A pole with pegs serves as a minimalist tree by holding a few neutral-colored ornaments. This design emphasizes natural simplicity and a clean, geometric look.

    14. Wooden Peg Tree with Simple Neutral Ornaments

    15. Hanging Ornament Tree with Floating Holiday Effect

    This minimalist tree consists of ornaments arranged in a tree shape and suspended from a wooden dowel, providing a floating, festive effect.

    15. Hanging Ornament Tree with Floating Holiday Effect

    16. Driftwood Christmas Tree with Natural, Earthy Appeal

    A natural driftwood arrangement in a triangular shape forms an earthy, minimalist tree with few or no ornaments, suited for coastal and rustic décor.

    16. Driftwood Christmas Tree with Natural, Earthy Appeal

    17. Wire Circle Ornament Tree with Black and White Accents

    A circular wire frame with a few white and black ornaments creates a minimalist, clean-lined Christmas tree that’s ideal for modern settings.

    17. Wire Circle Ornament Tree with Black and White Accents

    18. Stack of Green Books Tree with Literary Topper

    Green books stacked in a triangular shape, topped with a pine cone or ornament, form a literary-inspired minimalist Christmas tree for book lovers.

    18. Stack of Green Books Tree with Literary Topper

    19. Twig and Yarn Tree with Neutral Ornament Details

    Twigs bound together with white yarn create a minimalist tree with a few neutral ornaments, blending rustic and simple design elements.

    19. Twig and Yarn Tree with Neutral Ornament Details

    20. Painted Wall Outline Tree with a Simple Holiday Shape

    This minimalist Christmas tree features a simple outline painted directly onto a blank wall, offering a low-cost, space-saving holiday décor option.

    20. Painted Wall Outline Tree with a Simple Holiday Shape

    21. Branch with Hanging Ornaments with Matte Silver Touch

    A bare branch in a glass jar, decorated with a few matte silver and white ornaments, serves as a minimalist Christmas tree for a natural holiday look.

    21. Branch with Hanging Ornaments with Matte Silver Touch

    22. Wooden Blocks Tree with Stacked Triangular Form

    Small wooden blocks stacked in a triangular Christmas tree shape create a minimalist, natural décor option with no additional ornaments.

    22. Wooden Blocks Tree with Stacked Triangular Form

    23. Transparent Acrylic Tree with a Modern, Minimalist Appeal

    A transparent acrylic tree in a triangular form offers a modern, futuristic take on Christmas décor with no additional decorations needed.

    23. Transparent Acrylic Tree with a Modern, Minimalist Appeal

    24. Rope Wall Tree with a Simple Triangular Shape

    A single rope arranged in a tree shape on a wall brings a minimalist touch to holiday décor without taking up floor space, perfect for compact areas.

    24. Rope Wall Tree with a Simple Triangular Shape

    25. Chalkboard Tree Outline with Customizable Chalk Décor

    A chalkboard Christmas tree outline drawn with white chalk allows for quick, creative holiday décor that can be easily customized or updated.

    25. Chalkboard Tree Outline with Customizable Chalk Décor

    26. Single Candle Tree with Pine Sprig Detail

    A tall white candle surrounded by pine sprigs represents the simplicity and warmth of Christmas, creating a minimalist holiday atmosphere.

    26. Single Candle Tree with Pine Sprig Detail

    27. Cardboard Cutout Tree with Matte Holiday Silhouette

    A simple cardboard cutout shaped like a Christmas tree and painted in matte white or green provides an eco-friendly and minimalist holiday décor option.

    27. Cardboard Cutout Tree with Matte Holiday Silhouette

    28. Wire Triangle with Fairy Lights with Subtle Glow

    A triangular wire frame wrapped in fairy lights emits a soft glow, forming a minimalist tree with no added ornaments for a subtle holiday effect.

    28. Wire Triangle with Fairy Lights with Subtle Glow

    29. Branch Tree with Neutral Pom-Poms with a Subdued Look

    A single bare branch adorned with soft, neutral pom-poms in a vase provides a minimalist Christmas décor that is both natural and understated.

    29. Branch Tree with Neutral Pom-Poms with a Subdued Look

    30. Wooden Spiral Christmas Tree with Natural Finish

    This tree features a spiral structure made from natural wood, forming a minimalist tree shape with no additional decorations.

    30. Wooden Spiral Christmas Tree with Natural Finish

    31. Neutral Ceramic Tree with a Matte Minimalist Look

    A small, neutral-colored ceramic Christmas tree crafted in matte white or gray provides a minimalist holiday look with an understated, natural appeal.

    31. Neutral Ceramic Tree with a Matte Minimalist Look

    We can spot pallets all around the home and yard when we are decorating with DIY projects, and we have to admit that they make some awesome up-cycling projects which allow you to have new decorative objects on a low budget. If your budget is limited this Christmas, don't be desperate because you can decorate your home in some pretty stupendous ways by using pallets. You will find these Mind-Blowing Christmas Pallet Projects That Will Give A Festive Touch To Your Home really amazing and would love to give them a try immediately.

    If you have pallets in your basement that are just collecting dust, it's time to put them to a good use and beautify your home for the holidays. Everybody is going to love the cheerful and creative ambiance in your home, trust me! Now get some ideas from the photos below!

    Source

    Source

    Source

    Making a Christmas wreath has never been easier! Get some pallets, cut them in small pieces of different size, color them in the festive colors and use nails to stick them them together. Add a nice final touch with some burlap and red ribbon!

    Source

    Display your Christmas cards and photos on this wonderful Christmas tree made of pallets.

    Source

    Source

    Source

    Does your home miss a Christmas tree this year? The alternative designs that require pallets come in abundance, and you can choose the design you like the best from the plenty of trees in this article.

    Source

    The pallet Christmas trees are great both for the home as well as your backyard. Do you feel like going big this Christmas with decorations? Fill your yard with these adorable trees and brag to the neighbors that you have done them yourselves! They will certainly envy you and compliment you on the good work!

    Source

    Express your Christmas wishes in a super creative way by making a sign out of pallets and writing your message on them. It's an unconventional way of saying Merry Christmas that everybody will notice for sure!

    Source

    Source

    Source

    Source

    I can't describe the uniqueness of all these Christmas trees, and I find it really hard to pick a favorite. All of them look totally fabulous, so see which one will fit the best in your existing decor and copy the design.

    Source

    Source

    Source

    Source
    Do you love these pallet projects as much as we do? I hope that you have put your eyes on your favorite decoration and that you are going to give it a try pretty soon!

    What do you think about these awesome pallet projects?

    Do you like pallet projects?

    We thought you did, here are some awesome pallet fences, pallet bed frames, and pallet beds, cast a glance!

    Related Articles

    14 Awe-Inspiring Ceramic Christmas Decorations

    19 Christmas Tree Paper Decorations for a Delicate Look

    14 Best Christmas Tree Lights to Consider This Year

    Learn How to Store Icicle Lights After Christmas

    17 Burlap Ribbon & Wreath Options

    Thinking about Christmas this early in the year might seem over the top and useless but we cannot help ourselves but dream about the glorious magic this holiday conveys.Family gathering around the fireplace, drinking hot coco and sharing stories, the delicious smell of home made cookies and the beuatiful delicacy of the Christmas tree colorful decorated and nestling over an abundance of gifts. Joyfulness, happiness, lots of smiles, these are what describe the winter season best .So, with this magical spirit in mind, we cannot stop thinking about our next crafting project meant to complete this picture and we are talking here about creative DIY Christmas cards projects and ideas, all lovely, imaginative and beautiful in their own manner. It is a wonderful thing to be able to personalize your gifts for your loved ones, to leave your mark on them and make them unique, one of a kind, special. We have collected over 90 DIY Christmas card ideas from where you can surge inspiration. Find guidance in the links featured under each craft or simply use the suggestions to create your own take on the project. Make card crafting a family event and teach your little toddler how to make special diy Christmas cards for friends and family. Enjoy!

    Creative DIY Christmas Cards

    1. cardboard paper and button snowman Christmas card

    via  tallwavehightide

    ake Your Own Creative DIY Christmas Cards This Winter

    A red ribbon can look anything look more festive, don't your agree?

    2. wildlife inspired Christmas card

    via  designbolts

    ake Your Own Creative DIY Christmas Cards This Winter

    Notice how the envelope matches the card's design.

    3. Christmas tree card made from rope

    via  fynesdesigns

    make Your Own Creative DIY Christmas Cards This Winter

    You can transform a store bought card.

    4. the classical Santa diy card

    via  dpinewss

    make Your Own Creative DIY Christmas Cards This Winter

    5. elegant gold and white design

    via  christmas2014

    make Your Own Creative DIY Christmas Cards This Winter

    Use washi tape for a fast completion of the craft.

    6. fun joyful reindeer card

    via pinterest

    make Your Own Creative DIY Christmas Cards This Winter

    You can paint the head using your thumb.

    7. merry Christmas tags for special gifts

    via  handmade4art

    make Your Own Creative DIY Christmas Cards This Winter

    8. simple red and white stitched Christmas tree card

    via  ideas.sewandso

    w

    9. a three Christmas tree card design

    via studiocalico

    a

    10. gold and pink DIY 3D Christmas cards

    via  blog.bog-ide.dk

    b

    11. old paper recycled into a simple card

    via  myshabbysoul

    BIGLIETTI AUGURI 027ridT

    12. colorful stockings made from felt attached to Christmas cards

    via fionacarter

    29-creative christmas card homesthetics (29)

    13. the hues of Christmas in one diy package

    via northshorestamper

    29-creative christmas card homesthetics (2)

    14. a happy happy snowman invites you to be merry

    via  stampingwithloll

    29-creative christmas card homesthetics (3)

    15. cute penguins decorating diy Christmas cards

    via  mollymoocrafts

    29-creative christmas card homesthetics (4)

    Another wonderfully cute craft that can be made by your little ones as well.

    16. a mix of joyful Christmas stickers

    via joyfulcreationswithkim

    29-creative christmas card homesthetics (5)

    17. a glue gun and some glitter will do the trick

    via  frommycraftroom

    29-creative christmas card homesthetics (6)

    18. red green and white Christmas ornament card

    via chicaandjo

    29-creative christmas card homesthetics (7)

    19. decorating with 3d paper Christmas globes

    via creativityprompt

    29-creative christmas card homesthetics (8)

    20. learn to fold paper into a Christmas tree

    via hative

    29-creative christmas card homesthetics (9)

    21. simple colorful card message

    via beanbugcrafts

    29-creative christmas card homesthetics (10)

    22. an encrypted Christmas card

    via etsy

    29-creative christmas card homesthetics (11)

    This diy card should be designed with a specific person in mind.

    via Etsy

    29-creative christmas card homesthetics (12)

    24. modern Christmas card

    via  zazzle

    29-creative christmas card homesthetics (13)

    You can use a red sticker and cut the signs from it, then attach a blank cardboard paper behind.

    25. cute elegant Christmas card idea

    via  behance

    29-creative christmas card homesthetics (14)

    26. a Christmas card that doubles as a 3d puzzle

    via behance

    29-creative christmas card homesthetics (15)

    27. folded Christmas card that can be displayed

    via behance

    29-creative christmas card homesthetics (16)

    28. complex 2-piece Christmas card

    via behance

    29-creative christmas card homesthetics (17)

    29. buone feste kirigami card

    via behance

    29-creative christmas card homesthetics (18)

    The art of kirigami might seem complicated at  first glance but you will come to love it.

    30. overlapping materials and patterns

    via jillibeansoup

    29-creative christmas card homesthetics (19)

    31. colorful globes and trees attached to a simple white Christmas card

    via hgtv

    29-creative christmas card homesthetics (20)

    32. cut little own painting idea for a diy Christmas card

    via notonthehighstreet

    29-creative christmas card homesthetics (21)

    You can also use a sticker for the owl and just draw the branch. Use your fingerprint for the leaves.

    33. ho ho ho Santa Christmas card

    via ashbeedesign

    29-creative christmas card homesthetics (22)

    34. using scrap materials to sew a tree

    via ashbeedesign

    29-creative christmas card homesthetics (25)

    35. cute minimal design using buttons

    via notonthehighstreet

    29-creative christmas card homesthetics (26)

    A minimal design will appear to be so funny and cute.

    36. a button green olive Christmas tree card

    via noelle-paperandice

    29-creative christmas card homesthetics (27)

    37. red and green Christmas stockings card

    via  stampingwitherica

    29-creative christmas card homesthetics (28)

    38. Christmas cheer in red and green

    via jillsink.typepad

    Make Your Own Creative Christmas Cards This Winter-homestheitcs.net (8)

    39. invite Rudolf on your card

    via consumercrafts

    creative christmas cards diy homesthetics (1)

    Find a reindeer shape online and trace it on the cardboard before cutting.

    40. simple sewing projects

    via chezlarsson.com

    creative christmas cards diy homesthetics (22)

    Choose the most colorful season appropriate ribbons.

    41. a complex colorful tree card

    via scraptime.ca

    creative christmas cards diy homesthetics (21)

    42. beautiful reindeer head card using felt

    via whatscrafting.com

    creative christmas cards diy homesthetics (20)

    We love the simplicity of this design.

    43. a red and white bow seems festive

    via stetlerarts.blogspot.com

    creative christmas cards diy homesthetics (19)

    44. glitter and sparkle for an appropriate occasion

    via styleathome.com

    creative christmas cards diy homesthetics (18)

    45. text cuts and buttons in a creative composition

    via scrapperia.blogspot.com

    creative christmas cards diy homesthetics (17)

    46. sew your own reindeer

    via cfabbridesigns.com

    creative christmas cards diy homesthetics (16)

    47. cute stitched gift cards for Christmas

    via aspoonfulofsugardesigns.com

    creative christmas cards diy homesthetics (15)

    48. the simplest and most elegant designs of all

    via frolic-blog.com

    creative christmas cards diy homesthetics (14)

    49. a gingerbread house Christmas card

    via onecharmingparty.com

    creative christmas cards diy homesthetics (13)

    This craft looks so delicious you might be tempted to eat the candy yourself.

    50. lovely paper craft

    via marthastewart.com

    creative christmas cards diy homesthetics (12)

    51. the spirit of winter in a pair of gloves

    via Family Fun

    creative christmas cards diy homesthetics (11)

    52. the cheerful Christmas motifs

    via Etsy

    creative christmas cards diy homesthetics (10)

    53. recycle buttons and straws

    via  acreativemint.typepad

    creative christmas cards diy homesthetics (9)

    54. scribble a merry Christmas theme

    via Etsy

    creative christmas cards diy homesthetics (8)

    55. delicate creative Christmas cards

    via afieldjournal.blogspot

    creative christmas cards diy homesthetics (7)

    56. cardboard and simple paper stacked snowflake

    via twopeasinabucket

    creative christmas cards diy homesthetics (6)

    57. elegant classical Christmas card decor

    via pinterest

    creative christmas cards diy homesthetics (5)

    58. white paper and cardboard

    via cherry-blossom-world.blogspot

    creative christmas cards diy homesthetics (4)

    59. kirigami scribbled Christmas trees

    via f4fabulousblog

    creative christmas cards diy homesthetics (3)

    60. delicate snowflake decoration

    via splitcoaststampers

    creative christmas cards diy homesthetics (2)

    61. snow globes for the merriest wishes

    via mayholicraft

    Make Your Own Creative Christmas Cards This Winter-homestheitcs.net (5)

    62. creating volumetric scenes using paper

    via craftsunleashed

    Make Your Own Creative Christmas Cards This Winter-homestheitcs.net (7)

    63. an embossed Christmas tree

    via nicole-samuels

    Make Your Own Creative Christmas Cards This Winter-homestheitcs.net (18)

    64. cute fun elf legs

    via fiskars

    Make Your Own Creative Christmas Cards This Winter-homestheitcs.net (20)

    65. buttons transform into Christmas globes

    via purplehouseblog

    Make Your Own Creative Christmas Cards This Winter-homestheitcs.net (12)

    66. cute double sided geometric Christmas cards

    via howaboutorange

    Make Your Own Creative Christmas Cards This Winter-homestheitcs.net (14)

    67. felt can be stitched into a globe

    via silvialagataconbotas

    Make Your Own Creative Christmas Cards This Winter-homestheitcs.net (9)

    68. using pre-cut shapes to form a Christmas trees

    via craftsunleashed

    Make Your Own Creative Christmas Cards This Winter-homestheitcs.net (10)

    69. stack paper cuts to form tiny presents on a card

    via wehearthome

    Make Your Own Creative Christmas Cards This Winter-homestheitcs.net (11)

    70. have fun cutting colorful felt

    via northstory

    Make Your Own Creative Christmas Cards This Winter-homestheitcs.net (13)

    71. keep things simple

    via thebottomsupblog

    Make Your Own Creative Christmas Cards This Winter-homestheitcs.net (15)

    72. finger painting reindeer seems like fun

    via gemmagarner

    Make Your Own Creative Christmas Cards This Winter-homestheitcs.net (16)

    73. exercise your handwriting skills

    via mintedstrawberry

    Make Your Own Creative Christmas Cards This Winter-homestheitcs.net (19)

    74. be original and creative

    via hideousdreadfulstinky

    Make Your Own Creative Christmas Cards This Winter-homestheitcs.net (21)

    75. white on white with a touch of gold

    via oubly

    Make Your Own Creative Christmas Cards This Winter-homestheitcs.net (22)

    76. why not have an owl Christmas card

    via 365daysofcrafts

    Make Your Own Creative Christmas Cards This Winter-homestheitcs.net (1)

    77. tiny cute penguin creative Christmas card

    via mayholicraft

    Make Your Own Creative Christmas Cards This Winter-homestheitcs.net (3)

    Mimic the design or use a transparent sheet of paper to copy it.

    78. make  a penguin stamp and get crafting

    via pleasenotepaper

    Make Your Own Creative Christmas Cards This Winter-homestheitcs.net (4)

    79. use a sponge creatively

    via instructables

    Make Your Own Creative Christmas Cards This Winter-homestheitcs.net (6)

    80. lovely Christmas hues display

    via  Etsy

    Christmas-Holiday-Cards

    81. a family photo can suffice

    via decoratingaddict

    blogger-image--1666736022

    82. keep things simple and cute

    via Etsy

    Button-Snowman-Card

    83. you can create even complex designs

    via Etsy

    Christmas-Cards-with-Flowers

    Stacking up different textured paper bits is the key here.

    84. hang a musical glittery globe

    via  meowchie.snydle

    Christmas-Card-with-Musical-Ornaments

    85. stack up some gifts

    via stampingwithloll

    Christmas-Packages

    86. glittery starry Christmas wishes

    via stamp-a-latte

    Christmas-Star-Cards

    87. green trees and cardboard look Christmasy enough

    via curbly

    Christmas-Tree-Craft-Cards

    88. use text cuts to form a Christmas tree

    via  grannemedselma

    Christmas-Tree-from-Old-Books

    89. cute paper shapes organized in the form of a tree

    via  hative

    Creative-Homemade-Christmas-Cards

    90. over the top Christmas card

    via  flickr

    Cute-Christmas-Cards

    91. the cutest snowman card

    via  mollymoocrafts

    DIY-Lovely-Christmas-Cards

    So lovely and simple to make.

    92. elegant Christmas in shades of blue and ivory

    via  bloglovin

    Many-More-Christmas-Cards

    93. fold book pages into trees

    via Etsy

    Old-Book-Christmas-Cards

    94. stitching and pearls can decorate a tree

    via  flickr

    Pearl-Christmas-Cards

    95. a special girlish creative  diy Christmas card design

    via buzzfeed

    Ribbon-Cards

    96. exercise your drawing skills with creative diy Christmas cards

    via  jofirthyoung

    Simple-Homemade-Christmas-Cards

    97. creative diy Christmas cards with elegant minimal cuts

    via  Etsy

    Tag-Christmas-Cards

    In the end, we would love to hear your opinion on the above creative diy Christmas cards presented as well as your favorite choice. Leave your valuable feedback in the comment section below.

    Related Articles

    14 Awe-Inspiring Ceramic Christmas Decorations

    19 Christmas Tree Paper Decorations for a Delicate Look

    14 Best Christmas Tree Lights to Consider This Year

    Learn How to Store Icicle Lights After Christmas

    17 Burlap Ribbon & Wreath Options