Inspiring Ideas for Modern Home

If you're looking for the best side-by-side refrigerators, the GE GSS25GSHSS is the best one to get. It maximizes storage space while ticking all the right boxes.

Each side-by-side refrigerators has different strengths when you compare them to each other, and they come in at various price points.

In this full guide, I'll explain the pros, cons, and features of the 8 top freezer refrigerators that come in a side-by-side layout.

The Top 8 Side-By-Side Refrigerators on the Market Today

Here are the top 8 side-by-side refrigerators that you can buy. I've ranked each depending on their best features compared to the others, so you can see which is a better fit for you.

1. GE GSS25GSHSS Side-by-Side Refrigerator - Best Overall

GE's side-by-side refrigerator is one you'll want to keep in your kitchen. It comes in an on-trend slate, high-gloss black/white, and stainless steel finish.

This side-by-side refrigerator measures 25.3 cubic feet, with 16.07 cubic feet designated to refrigerate fresh food and 9.25 cubic feet for frozen foods.

It has adjustable shelving that utilizes the entire depth and width to maximize the fridge space. You can even adjust the fridge to store wine.

The freezer space has enough room to fit your frozen food comfortably and even comes with a built-in ice maker. This allows you to get ice in ice cubes or crushed ice form.

However, this side-by-side refrigerator, courtesy of GE, isn't meant to be used in a garage, and it doesn't have any innovative features that can really wow users.

Total Capacity: 25.3 cubic feet | Dimension: 69.5 x 35.75 x 35.25 inches | Finishes Available: Black, stainless steel, slate, white | Smart: No | Dispenser: Ice and Water

2. Frigidaire GRSC2352AF Side-by-Side Refrigerator - Best Value for Money

This side-by-side stainless steel fridge from Frigidaire gives you all the basics you need from a side-by-side refrigerator at a great value price.

It comes in black stainless steel and stainless steel finish options, and the material they use is fingerprint-resistant stainless steel to reduce smudging.

First, it has a system that keeps temperatures consistent in both the fridge and freezer compartments.

The best parts of this side-by-side fridge are the crisper drawers. They keep fresh food from rotting with technology that filters out ethylene gas from the crisper drawers.

It also has a through-the-door ice and water dispenser that can output both cubed and crushed ice. This feature is becoming a staple on any side-by-side fridge.

One downside of this side-by-side model is that it runs a bit warmer when set to the default factory settings. However, you can fix this with a quick calibration.

Total Capacity: 22.3 cubic feet | Dimension: 69.9 x 36.1 x 28.5 inches | Finishes Available: Black and standard stainless steel | Smart: No | Dispenser: Ice and Water

3. Frigidaire FRSS2623AS Side-by-Side Refrigerator - Best Budget Option

This Frigidaire side-by-side fridge comes in similar finish options as the last fridge model. It comes in a black, white, stainless steel, and black stainless steel finish.

Another similarity this side-by-side refrigerator has to the other model is the inclusion of through-the-door water and ice dispensers.

It has a ton of storage space, having an advertised capacity of 25.6 cubic feet. Whatever you store inside, you can be sure the air inside is kept at consistent temperatures.

While these side-by-side fridges don't have all the smart features or high-end features that other side-by-side refrigerators have, it nails all the basics really well.

It also doesn't draw too much power from the wall, making it a great pick for a budget side-by-side refrigerator. At the price of $1,199 at Best Buy, it's a steal.

Total Capacity: 25.6 cubic feet | Dimension: 69.88 x 36.13 x 35 inches | Finishes Available: Black and standard stainless steel, white, black | Smart: No | Dispenser: Ice and Water

4. GE GZS22IYNFS Side-by-Side Refrigerator - Best Counter Depth

Getting counter-depth side-by-side fridges can be an essential factor in your purchase decision if you want a fridge that doesn't stick out beyond counter depth.

This counter-depth refrigerator is a great option because it maximizes the refrigerator compartment space while remaining compact.

The GE counter-depth side-by-side refrigerator comes in 21.8 cubic feet of space, with 14.23 cubic feet for the fridge door side and 7.56 cubic feet for the freezer door side.

The fridge area on this counter depth has gallon door bins, a deli drawer, and two produce drawers. The freezer capacity is a bit limited, but it has two bins that can store whole chickens.

The ice and water dispenser is well blended into the fridge doors and provides cubed and crushed ice along with filtered water. It also blended in well with the rest of the fridge.

The control panel also sits on the dispenser, where you can control the temperature. Finally, it has hidden hinges to complete the seamless look that fits your kitchen well.

Note

If you want both a shallow and slimmer fridge, try checking out the best narrow fridges.

Total Capacity: 21.8 cubic feet | Dimension: 70.125 x 35.75 x 30.75 inches | Finishes Available: Black, slate, white, stainless steel | Smart: No | Dispenser: Ice and Water

5. Whirlpool WRS588FIHZ Side-by-Side Refrigerator - Best For Large Kitchens

This side-by-side refrigerator from Whirlpool is large enough for your family's needs, with 28.4 cubic feet of storage capacity. This is one of the most enormous side-by-side fridges I've seen.

The fridge compartment has 17.56 cubic feet and a large freezer capacity of 10.93 cubic feet. Frameless glass shelves help maximize space, although adjusting them is a bit limited.

It also has adjustable door bins that have a gallon-sized jug capacity, with the ice maker helping to save space by being integrated directly into the freezer door.

The through-the-door ice and water dispenser works well. While the ice maker itself is a bit noisy, the water dispenser has measured fill, so you don't worry about overfilling.

The Whirlpool side-by-side refrigerator also has an air filter system to keep all your fruits and vegetables fresh for as long as possible.

Finally, it will definitely look good in your kitchen, with various finish options to choose from. They include fingerprint-resistant stainless steel, black stainless steel, white, and black.

Total Capacity: 28.4 cubic feet | Dimension: 68.875 x 36 x 34.875 inches | Finishes Available: Black and standard stainless steel, white, black | Smart: No | Dispenser: Ice and Water

6. KitchenAid KRSF705HPS Side-by-Side Refrigerator - Best For Reliability

This Kitchenaid side-by-side refrigerator is definitely pricey, but if you're looking for a fridge that will last you years, it will be more than worth it.

The main features of this fridge are the ten-year-long warranty, large 25 cubic feet capacity, dual temperature management, humidity-controlled drawers, and the Freshflow air filter.

This fridge is also Energy Star certified, which means that your electricity bill won't be hit too hard. This is because it doesn't let cold air escape as much as other fridges.

It doesn't have some of the smart features that other side-by-side refrigerators might have, but the reliability, ample space, and energy savings make up for it.

This all combines to make this fridge an excellent long-term option. At around $2800, it's definitely an investment.

Total Capacity: 25 cubic feet | Dimension: 69 x 35.5 x 34.75 inches | Finishes Available: Stainless steel | Smart: No | Dispenser: Ice and Water

7. LG Door-in-Door LSXS26366 - Best Door-in-Door

This door-in-door refrigerator from LG has a headlining feature that helps keep cold air inside, which helps save on your electricity bill.

Instead of opening the whole fridge door, this door-in-door feature allows the user to open a smaller one that lets less cool air out of the fridge compared to opening the entire door.

However, you can still open the full door to access larger items that you might want to get inside. This makes it save energy while being more convenient.

Even with the energy-saving focus, it has strong LED lighting versus the competition, which can help you see the food in the fridge and freezer better.

It also has a dual ice maker and water dispenser integrated into the left door for convenient use. However, ice production is a bit lacking, which is one downside.

While it is a bit pricey at $1799, you're paying for the extra feature, which could save you money and increase overall convenience.

Total Capacity: 26.1 cubic feet | Dimension: 70.25 x 35.875 x 36.312 inches | Finishes Available: Black and standard stainless steel | Smart: No | Dispenser: Ice and Water

8. LG LRSOS2706S Side-by-Side Refrigerator - Best For Smart Features

A smart fridge has a lot of benefits, especially if you've already integrated many of your other appliances into a smart home setup.

This LG side-by-side refrigerator can connect to the LG ThinQ app or an intelligent home assistant so that you can control the temperature straight from your smartphone.

You can also use an intelligent home assistant like Google Assistant or Amazon Alexa to make adjustments using voice commands, which is definitely convenient.

You can use LG's InstaView feature, which is an illuminated glass window where you can easily see the contents of your fridge without opening it.

If you want to make a drink with an ice sphere instead of traditional cubes, this fridge has a craft ice dispenser that can do just that. However, you're limited to 3 spheres per day.

Total Capacity: 27.1 cubic feet | Dimension: 70.25 x 35.88 x 33.44 inches | Finishes Available: Black and standard stainless steel | Smart: Yes, pairable with Google Assistant or Amazon Alexa | Dispenser: Craft Ice, Regular Ice, and Water

Comparisons Of Top Side-By-Side Refrigerators

Side-By-Side Refrigerators Total Capacity Dimension Finishes Available Smart Dispenser
GE GSS25GSHSS Refrigerator 25.3 cubic feet 69.5 x 35.75 x 35.25 inches Black, stainless steel, slate, white No Ice and Water
Frigidaire GRSC2352AF Refrigerator 22.3 cubic feet 69.9 x 36.1 x 28.5 inches Black and standard stainless steel No Ice and Water
Frigidaire FRSS2623AS Refrigerator 25.6 cubic feet 69.88 x 36.13 x 35 inches Black and standard stainless steel, white, black No Ice and Water
GE GZS22IYNFS Refrigerator 21.8 cubic feet 68.875 x 36 x 34.875 inches Black and standard stainless steel, white, black No Ice and Water
KitchenAid KRSF705HPS Refrigerator 25 cubic feet 69 x 35.5 x 34.75 inches Stainless steel No Ice and Water
LG Door-in-Door LSXS26366 Refrigerator 26.1 cubic feet 70.25 x 35.875 x 36.312 inches Black and standard stainless steel No Ice and Water
LG LRSOS2706S Refrigerator 27.1 cubic feet 70.25 x 35.88 x 33.44 inches Black and standard stainless steel Yes Craft Ice, Regular Ice and Water

What is a Side-by-Side Refrigerator?

Side-by-side refrigerators are fridges with one side each for fresh and frozen food. For those who need to access frozen food often, this is a convenient option.

It has two outward-opening doors that you can open either one at a time or at the same time. This means you won't waste cool air if you only need to open the freezer.

The half-and-half out swinging doors that side-by-side refrigerators have also mean that they don't need much clearance to open fully. This means they're suitable for compact kitchens.

It does all of this without sacrificing any cubic feet of space inside.

Differences between a Side-by-Side Refrigerator and other Refrigerators?

There are a few differences between side-by-side refrigerators compared to other refrigerators. Here are the most notable differences.

Freezer Drawer Location

A French door refrigerator will have you bending down to reach the freezer space, while a top freezer refrigerator will have you reaching up top.

Side-by-side refrigerators are much more convenient because everything will be at eye or chest level. This can also be a great feature for those with back pain who can't bend much.

Opening Mechanism

Since side-by-side refrigerators have two out-swinging doors, you can open either the freezer or the fridge side without wasting the cool air in the opposite compartment.

It also means that you need less space in front to fully open the doors of the fridge.

What You Should Know Before Buying a Side-by-Side Refrigerator

There are a few factors you should consider and think about before buying any side-by-side refrigerator. I've listed the most important ones below.

Refrigerator Type

Before you pick up a side-by-side refrigerator, you should first consider whether it's the best option for you compared to other types of refrigerators.

French door fridges are a popular option now, which have the freezer compartment separate at the bottom. They also have two out-swinging doors similar to side-by-side models.

If you want to have more fridge storage space, French door models might be for you. However, they do sacrifice freezer capacity and convenience to access.

Top freezer fridges are another option that is more budget-friendly but also sacrifices freezer capacity, aren't as modern looking, and are not as convenient.

Consider

Whichever type of fridge you choose should be based on your budget and needs, so do a little more research to check what the best refrigerators are for each type.

Exterior Color and Design

Another thing to consider is what color and design you want in your fridge. Some models only offer one finish, while others have a wide variety.

Ideally, you'd want one that matches your kitchen's color and finish perfectly, but that's sometimes hard to tell when images on a screen aren't accurate to real life.

You can also try using complementary colors that aren't precisely the same shade but work well when placed next to each other.

This part is the one most suited to each person's preferences.

Features

With technology getting more integrated into our lives every day, many new features get included in newer side-by-side refrigerators.

Some smart fridges can connect to an app, where controlling the temperature, choosing your snack, or seeing what you're low on could be viewable on your phone.

Others have features like humidity control and air filters that make your fruits and vegetables stay fresh for longer.

Pick a fridge that best fits the features you know that you and your family will use. It's no use buying a fridge full of features that you won't really make use of.

Door Design

There are four main door designs: ice and water dispenser, windowed, door-in-door, and standard.

Standard is just a plain surface. The next most common type is a door with a combo ice and water dispenser. It makes it convenient to get ice and water without opening the fridge.

Windowed designs are standard on smart LG fridges that allow you to see the inside contents without you having to open them.

Finally, door-in-door designs allow you to open smaller door-in-door compartments built into the door so that you don't have to open the whole door. This helps save electricity.

Storage Space and Capacity

Another consideration you should make is how much space you'll need. This is usually indicated on the product page or box in cubic feet (cu. ft.)

For example, get a counter-depth fridge if you need a smaller fridge that can easily fit in your kitchen and won't jut out. They usually come between 20 cu. ft. and 22 cu. ft.

Meanwhile, the largest fridges are nearly 30 cubic feet in capacity. These are more for larger families that need to store more in their fridges.

Also, consider what you'll be putting into the fridge. Some sizes can't fit frozen pizza boxes because their dimensions won't allow it, even if the cubic foot measurements are correct.

Size and Kitchen Footprint

What use is a huge fridge if you can't fit it inside your kitchen? Getting one that's the right size is just as important as getting one with the correct capacity.

The previously mentioned counter depth fridge is perfect if you have limited floor space between your fridge and, for example, an opposing countertop table.

Ideally, you should be looking for side-by-side refrigerators that have the highest cubic foot-to-size ratio.

For example, if you're getting a counter-depth fridge, get one that goes all the way up to 21 cu. ft. or 22 cu. ft. Getting one that's smaller won't maximize the space.

Cost

Probably the most important consideration to make is when it comes to the price you're paying. You don't have to get the highest-end fridge if your budget is limited.

There are many great value and budget options that do the basic fridge functions well. Some even have features that more expensive models don't have!

Try to get a model that maximizes the features and performance for the lowest price. Better yet, get ones that are on sale for the best value.

You can expect to pay between $1,100 for more budget models to upwards of $2,700 for the more premium models.

Organization Options

The best organization options on side-by-side refrigerators are those that are edge-to-edge and adjustable. This maximizes the cubic foot space inside the fridge.

Take note of what you'll need to put in the fridge, too. If you regularly bring home large items like a frozen whole chicken, get one with larger bins that can store them.

Adjustable organization options are the best because you can adjust them based on what groceries you buy. For example, You might need more cubic foot space for milk.

On many of my recommended fridges, you can easily remove some of the glass separators higher to accommodate a tall milk carton.

Ice Maker and Dispenser

Having a dual ice maker and water dispenser is a great convenience feature to have on any side-by-side refrigerator.

Instead of having to open the fridge and get water or ice from inside the refrigerator or freezer, you can just get it directly from a dispenser located on the outside of the freezer side.

Some models even have ice dispensers that can make ice spheres that will melt slower. This is very convenient, especially for making iced coffee and alcoholic drinks.

If you prefer a cleaner look, there are also fridge options that don't have ice makers. The choice is yours!

Side By Side Refrigerators FAQs

  • Now that you know more about the best side-by-side fridges, you might still have questions related to how they work. I’ve answered the most commonly asked questions below.

  • Is a Side-by-Side Refrigerator better than French Door Refrigerators?

    Both types of fridges have their pros and cons. The main consideration you should make is if you don’t want to bend down a lot to get to the freezer.

    If you have regular back pain and can’t bend down a lot, then I’d get the side-by-side refrigerator, as it keeps the freezer at eye or chest level.

    French door refrigerators have more space for the refrigerator compartment but have less freezer capacity. Side-by-side fridges are more balanced between the two.

  • What Features Can I Get With my Side-by-Side Refrigerators?

    There are many features you can get with side-by-side fridges – ranging from smart ones to temperature and air-filter-focused ones.

    The main features I recommend that you should look for are dual ice maker and water dispensers, easy temperature control, and excellent energy efficiency.

  • Are Side-by-Side Refrigerators Out of Style?

    While french door fridges have increased in popularity, there are still ways to make side-by-side fridges look modern and sleek.

    Get fridges in a black stainless steel finish, slate finish, or standard stainless steel finish to keep them looking fresh and stylish.

  • My Top Picks

    Here are my three top picks for the best side-by-side refrigerators you can buy.

    Frigidaire FRSS2623AS - Best Budget Option

    This Frigidaire model is the best budget option, being only $1,199 at Best Buy. It has a capacity of 25.6 cubic feet, through-the-door ice, and water dispenser, and is energy efficient.

    This makes it a great budget option that will save you money in both the short and the long term.

    Frigidaire GRSC2352AF - Best Value for Money

    The second Frigidaire 22.3 cubic foot side-by-side model is the best value.

    Along with the features of the previous model, it also has air filters that remove ethylene gas from the fridge to keep everything fresh.

    GE GSS25GSHSS - Best Overall

    The GE 25.3 cubic foot side-by-side fridge is the best overall because it ticks all the boxes for basic features and maximizes space with adjustable shelves.

    Conclusion

    Getting a side-by-side refrigerator is something you should do a bit of research on before choosing to buy.

    Whichever one you pick, you should choose one based on your needs. Get the fridge that you know you'll appreciate and use the features it comes with.

    SAI has created and curated a community of inspired artists.

    These artists not only create beautiful pieces of work using SAI but also create many brushes and texture templates to help other artists.

    If you are an avid SAI user or even a budding one, you might be on the lookout for such assets to breathe new life into your work.

    But as with any other open community, you might have realized that finding the right thing is an incredibly time-consuming thing. And finding good quality free assets is even more tedious.

    So, to help you and many other artists like you, we have traveled throughout the internet to find the best paint tool SAI brushes and textures.

    Don’t keep yourself waiting and give it a read!

    Best Paint Tool SAI Brushes and Textures

    Here is the list of the 20 best Paint Tool SAI brushes and textures that you can use to create stunning, digital artwork.

    1. Blotmap Set VIII - Best for Unique Artwork

    If you are looking for brushes to give a new flavor to your artwork, this is a really good place to start.

    Best Paint Tool SAI Brushes and Textures

    Blotmap Set VIII is a set of unique blot-style brushes that are designed by DA user K-OG.

    The brush set is primarily categorized into three types, namely, Dark, Walt, and Grainy.

    These brushes provide an incredibly unique look to any kind of artwork you might be doing. And even newcomers to this platform have raved high praises about this brush set.

    So, in case, if you haven’t already tried it and are looking for an interesting change of looks, then you must test it out.

    By: K-OG | No. of Brushes: 3

    2. Brush Supplement #2 - Best for Comprehensive Variety

    If you are new to trying out custom brush sets in SAI, then this is one of the biggest and most comprehensive free brush sets that you can try.

    DeviantArt user DarlingMionette has created one of the most complete brush sets that we have ever witnessed with about 15 different kinds of strokes, namely, Rough crayon, Marker, Chalky, Airbrush, Watercolor, etc.

    Being about 6 megabytes in size for the entire set, it is one of the largest sets we have ever seen.

    But we also absolutely love it and recommend it to any SAI artist because of the sheer variety.

    By: DarlingMionette | No. of Brushes: 25

    3. 40 Brush Settings - Best for New Avenues

    DeviantArt user DocWedigo created this superb set of brushes and textures that is an absolute treat for each and every SAI user.

    Best Paint Tool SAI Brushes and Textures

    The 40 free brush settings are absolutely amazing and open up a lot of new avenues for a budding SAI artist.

    And they accompanied texture pack is nothing but an absolute delight for any artist, whether it be a new SAI user or a veteran.

    So, don’t keep yourself waiting, test it out and make it a part of your workflow right away.

    By: DocWedigo | No. of Brushes: 40

    4. Easy Paint Tool Sai Brushes - Best for New Users

    If you are absolutely new to this platform, then you might be looking for something easier to comprehend and make you more familiar with SAI.

    There are several easy starter brush kits that you can try out but this particular one we found out is one of the easiest, safest, and complete brush sets out there.

    The site even has a tutorial that explains every nook and cranny of the tool to the minutest detail.

    So, if you are a little intimated by this vast community of artists and the accompanying plethora of tools, this will be an easy start for you.

    By: QTMelon | No. of Brushes: N/A

    5. Grass Brush - Best for Detailed Natural Elements

    The name might trick you into thinking that is a brush stamp that looks like grass leaves, but that is indeed not the case.

    Best Paint Tool SAI Brushes and Textures

    On this platform, you’ll rarely find stamp or pattern brushes, and this isn’t one either. So, you might need to get more familiar with drawing digitally before you plan on to use this brush set without getting frustrated.

    The strokes are very smooth and form curves without any hassle. For that reason, the brush set is also incredibly useful for drawing objects other than grasses, bushes, and leaves.

    There is a huge number of possibilities with this brush set, that’s why, if you are an intermediate or experienced SAI artist, you must try it out!

    By: ChildOfMoonlight | No. of Brushes: N/A

    6. SAI Textures

    This simple and straightforward SAI texture pack from DeviantArt user Piromanova is extremely helpful.

    The free texture pack contains 17 unique and interesting textures that are all meant to be used for brushes.

    Each individual is also highly flexible and modular in terms of opacity, shape, etc. So, you can kill a lot of time just playing around with these textures.

    The set is definitely worthy of high praise and if you are looking for something interesting for your next project, giving this a try is a really good idea.

    By: Piromanova | No. of Brushes: 17

    7. Colorful Texture Pack

    If you have scrounged through the conventional assets and find yourself bored, then you might want to take a look at this.

    Colorful Texture Pack

    This pack brings some free colorful and delightful textures that are of satisfying quality. Each texture is 2000x3000 pixels large and it works perfectly at 300 DPI, which is excellent for print.

    There are only 5 textures in the set but you can use Photoshop to alter them and give yourself a variety of options to choose from, and you can even increase your options by using them with various brush options.

    It’s a rather large package, sizing at about 38 megabytes but is totally worth the effort.

    By: AF-studios | No. of Brushes: 5

    8. Artist Textures

    If you are looking for something easy yet interesting, then this Artist Texture Pack is bound to satisfy your needs.

    The free unique-looking textures are really easy to play around with and can serve to be extremely helpful, maybe, some more than others.

    But since there’s quite a variety of textures, you’ll find at least something that you’d love about this set. From basic patterns to paper and cardboard textures, you’ve got it all.

    If you are an experienced user, there’s good news for you. The textures used in this set are completely open-sourced and are from Creative Commons photos or public domain photos. This means that you can freely alter and redistribute these assets without any backlash or legal consequences.

    So, don’t wait anymore! Go ahead and play with it!

    By: aheria | No. of Brushes: 32

    9. Electroslime SAI Brushes

    Electroslime, a Gumroad user, has created this splendid pack of brushes for artists that can be used for a huge variety of projects.

    The pack has cloud-style brushes that are suitable for both pens and brushes, and the best part is that you’ll always find some use of it no matter what your project is about.

    Best Paint Tool SAI Brushes and Textures

    For the same reason, it’s an excellent option for beginners and new artists as well, and veterans of the platform might already have it in their arsenal.

    In the end, you can download this brush pack for yourself no matter your expertise because of its handiness.

    By: Electroslime | No. of Brushes: 4

    10. Nintendo ARMS Brush Pack

    Based on the art style and graphic design of the game Nintendo ARMS, creator PhantomZ2 has blessed us with this interesting brush pack.

    Nintendo ARMS Brush Pack 

    The style of the brush pack is a clear mimic of the designs used in the game but the look is so unique and stylish that you can surely make it a part of your own work without a hitch.

    You’ll find it even more useful if you happen to work on Manga and cell-shaded artworks, but no matter what your preferences are, we are sure that you can find some use for it.

    So, if you love the design principles that are used in the art style of Nintendo ARMS, then this brush pack will surely steal your heart.

    By: PhantomZ2 | No. of Brushes: N/A

    11. Custom SAI Brushes

    If you are a graphic designer who frequently works with illustrations and custom effects, then this brush set will surely pique your interest.

    DeviantArt user DigiKat04 has created this wonderful brush set with unique patterns for the pleasure of the entire community.

    Custom SAI Brushes

    In the pack, you get about 12 free brushes that have a huge variety including styles like Flat, Lace, Scale, and Flake brushes.

    The best part is that even digital painters can spice up their creations by using these varied brushes together in unique combinations.

    All and all, this interesting brush pack is great for any SAI user according to use and if you don’t like it, after all, you still have nothing to lose. It’s free!

    By: DigiKat04 | No. of Brushes: 12

    12. LoZ Breath of The Wild Brush Pack 

    We don’t think that Nintendo’s blockbuster title Legend of Zelda needs any introduction. And if you are in love with the art style and design choices, you’d be delighted to know about this splendid pack from Gumroad user PhantomZ2.

    For obvious reasons, if you create art for video games, you’ll find this pack to be extra lovely. And considering that such a unique and recognizable art style is available to free, you have no reason to skip this one.

    So, if you are planning to do your own concept art from scratch or happen to work as a graphic designer for a gaming company, then be sure to try it out because it’s good and it’s absolutely free.

    By: PhantomZ2 | No. of Brushes: N/A

    13. SAI Brushes by Isihock

    To be honest with you, there’s not a lot of “specialty” with this brush pack, and with that, you might even be wondering why are we even discussing it then.

    The reason is that these brushes are perfectly balanced. DeviantArt user Isihock has created a collection of 7 brushes that are born from the very precise needs of an experienced artist.

    And it can be used by other SAI artists to ease up their work as well. The pack includes a Painting Brush, 2 Marker tools that are completely different, a Pencil tool, an Acrylic tool, a Fur tool, and a Water tool.

    All of these brushes fulfill extremely specific use cases that are very frankly discussed by the artist on the page. But there’s a strong possibility that you can use them in your own unique way.

    All and all, the pack is extremely compact and incredibly useful. So, don’t forget to try these out!

    By: Isihock | No. of Brushes: 7

    14. Paint Tool SAI Brushes 

    These fancy and incredibly interesting brushes by DeviantArt user Ayazuea are extremely useful for a digital painter.

    If you are into creating concept arts that are more on the realistic side, you’ll love the feel of these brushes and the way they flow on the screen.

    One of the nicest brushes that we used from this set is the one that are meant for smudging. It creates an extremely realistic blend of colors and shades that are pleasing to look at.

    For some reason, it’s unlike any other brush we have used before that is meant for a similar purpose.

    You might even fall in love with the brushes that are designed for creating shadows because you might have experienced how difficult it is to create thin and real-looking shadows.

    Overall, it’s a compact brush set of only 6 brushes but all of them are so highly specific and useful that there’s no way to not love these.

    By: Ayazuea | No. of Brushes: 6

    15. SAI Brushes 2

    DeviantArt user ToadsDontExist has created this updated and extended brush pack after the success of his first brush pack SAI Brushes.

    There is no one way to describe all of the brushes but if you are an avid user of the platform, you can’t live without these brushes.

    All of these brushes are unique and extremely useful. If you have these brushes, you’d never have to halt while working just because you don’t have the right brush for the job.

    So, no matter what kind of expertise you have with the platform, if you download these, you’ll often find yourself using brushes from this specific brush pack.

    And even if you encounter problems with some of the brushes, don’t worry because the creator has SAI Brushes 3 rolling out soon.

    By: ToadsDontExist | No. of Brushes: N/A

    16. Paint Tool SAI Brushes Credit 01

    This brush pack is a collection of unique brush styles that were originally created by different artists. They are collected and repacked by DeviantArt user itachiXOXOkisame.

    But, in any case, the brush collection has some of the most strange, yet extremely useful brushes that we have ever witnessed ourselves.

    The brushes are primarily categorized into 6 different groups, square, manga, skin, glitter, zebra, and tweed.

    The best part is that all of the brushes are completely unique and interesting, so, no matter what your use case is, you are bound to enjoy these brushes.

    And some of the brushes are so unique and helpful that we wonder why no one else has designed something similar yet.

    So, go ahead and try these out and we are sure that you’ll love them as much as we do if not more.

    By: itachiXOXOkisame | No. of Brushes: 6

    17. Paint Tool SAI Brushes

    Creator Matysia from DeviantArt has made these incredibly good brushes for the benefit of all SAI users.

    These 12 brushes include styles of a pen, Copic marker, brush, hair, rough brush, cloud, dirt, watercolor, and blur.

    All of these brushes are very well designed and serve their respective purpose in an incredibly neat fashion.

    The thing to love about these brushes is how useful they are for a manga or concept artist because of how good they are achieving at their respective effect.

    For example, the blur and the watercolor brushes might seem to serve a similar effect but an actual watercolor artist will be able to tell the difference and appreciate the design with a single stroke.

    And added to that, you also get rare brush patterns like the dirt brush for absolutely free. So, what’s there not to love about this brush set, right?

    By: Matysia | No. of Brushes: 12

    18. SAI Brushes by H4NDS0M3-J4CK

    If you are incredibly new on this platform and are inspired by the excellent examples that are set by the rest of the community, these brushes are bound to satisfy your ambitions.

    The primary reason is that the brushes are incredibly smooth and graceful, and are closest to the experience that you’ll have on paper or other good-quality digital tablets.

    For some fortunate reason, shading and lighting with these brushes is an absolute pleasure. And these brushes will help you with a variety of work.

    Even if you are a veteran of the platform, you might still want to try these out because you may just find out something you love.

    Overall, these brushes are unique, good quality, and absolutely free. So, go ahead and make them yours.

    By: H4NDS0M3-J4CK | No. of Brushes: N/A

    19. SAI Brushes by Mutealice

    These amazing brushes from Mutealice offer amazing versatility to the artist who is not just into but into creating full-blown concept art.

    Out of the 9 brushes, 7 brushes can be used for creating watercolor-like soft blends. Of course, the degree of softness varies depending on the brushes you choose.

    Besides that, the other 2 brushes are a little less wide and can be used for sketching. One of the brushes, out of the remaining 2 brush strokes, has soft and feathered edges which provides a unique experience.

    Overall, these brushes are extremely good for concept artists because of the kind of blends they can produce.

    By: Mutealice | No. of Brushes: 9

    20. #08 Paint Tool Sai Brushes by CatBrushes

    CatBrushes’ creation brings you a set of 6 brushes that have a unique profile, to say the least. One of the brushes produces medium-thickness strokes with rough edges, and although interesting, there is limited use to it.

    2 of the brushes have a dry stroke pattern that looks extremely interesting if you are interested in creating artworks on Sai.

    There is one brush for doing soft coloring. It has a texture resembling that of dry chalk and looks extremely pretty.

    And the remaining 2 brushes are, technically, for blending. But the blends are extremely unique in our opinion.

    One of them resembles the feeling of using watercolor markers with a slanted tip and the other one creates rough blends that look like you have used round-tip watercolor pens with diluted ink.

    Anyway, the brushes are extremely unique and since we have not witnessed anything quite like it, we, at least, recommend you give it a try.

    By: CatBrushes | No. of Brushes: 6

    Best Paint Tool SAI Brushes and Textures Comparison Table

    SAI By No. of Brushes
    Blotmap Set VIII K-OG 3
    Brush Supplement #2 DarlingMionette 25
    40 Brush Settings DocWedigo 40
    Easy Paint Tool Sai Brushes QTMelon N/A
    Grass Brush ChildOfMoonlight N/A
    SAI Textures Piromanova 17
    Colorful Texture Pack AF-studios 5
    Artist Textures aheria 32
    Electroslime SAI Brushes Electroslime 4
    Nintendo ARMS Brush Pack PhantomZ2 N/A
    Custom SAI Brushes DigiKat04 12
    LoZ Breath of The Wild Brush Pack PhantomZ2 N/A
    IsihockSAI Brushes Isihock 7
    Paint Tool SAI Brushes Ayazuea 6
    SAI Brushes 2 ToadsDontExist N/A
    Paint Tool SAI Brushes Credit 01 itachiXOXOkisame 6
    Paint Tool SAI Brushes Matysia 12
    H4NDS0M3-J4CK SAI Brushes H4NDS0M3-J4CK N/A
    Mutealice SAI Brushes Mutealice 9
    #08 Paint Tool Sai Brushes CatBrushes 6

    Paint Tool SAI Brushes and Textures FAQs

  • How do I install new brushes in Paint Tool SAI?

    To install new brushes, download the desired brush set and place the files into your “brushes” folder (typically found in your Paint Tool SAI installation directory). Restart the program for them to appear in your tool palette.

  • Can I use custom brushes from other programs in Paint Tool SAI?

    While some brushes might be compatible with multiple programs, custom brushes created specifically for other editing programs might not work with SAI. Look for brushes that are specifically designed for Paint Tool SAI for optimal results.

  • How can I create my own brushes in Paint Tool SAI?

    To create a custom brush, head to the “Tool” panel, select an existing brush and modify its settings like density, blending, and texture. Save the settings as a new brush for future use.

  • How do I add textures to brushes in Paint Tool SAI?

    To add textures, first, add the texture file to SAI’s “papertext” folder. Then, within the program, select the desired brush, click on “Texture” in the settings panel, and choose the texture from the dropdown menu.

  • How do I change the hardness or density of a brush in Paint Tool SAI?

    To adjust the hardness or density, select the brush you want to modify and use the “Density” slider in the settings panel. A lower percentage creates a softer brush, while a higher percentage creates a harder brush.

  • How can I find more high-quality SAI textures?
  • Conclusion

    Navigating the world of Paint Tool SAI brushes and textures can be daunting, especially with the myriad of options available. By understanding each brush set's unique qualities and purposes, you can elevate your digital artwork and streamline your creative process.

    From the above 20 best Paint Tool SAI brushes and textures, here are the top three expert recommendations.

    For those seeking to create unique artwork, Blotmap Set VIII by K-OG is an ideal option with its distinctive blot-style brushes.

    Artists looking for a comprehensive variety in their brush set will find Brush Supplement #2 by DarlingMionette is a good choice, offering 25 diverse brushes ranging from rough crayon to watercolor.

    Lastly, for those wanting to explore new avenues in their art, the 40 Brush Settings by DocWedigo is the right choice, providing an extensive selection of brushes and textures that cater to both beginners and experienced SAI users.

    Whichever brush set you choose, remember that practice and experimentation are key to mastering your craft and unlocking your full artistic potential. Happy creating!

    Related Articles

    53 Best Medibang & FireAlpaca Brushes & Textures For Digital Artists

    25 Best Free GIMP Brushes for Drawing & Painting Digitally

    20 Free FireAlpaca Brushes for Digital Painting & Drawing

    21 Best Manga Studio & Clip Studio Paint Brushes [Free Download]

    Best Free Aseprite Tutorials For Pixel Artists & Game Designers

    Speed Paintings 101 |What It Is, Tips, Tricks, Tools & Video Tutorials

    54 Best Photoshop Brushes | Best Drawing & Painting Brush Packs

    80 Best Procreate Brushes for the Realm [Free & Premium Brush Sets]

    14 Amazing Free Krita Brushes and Brush Packs for Digital Art

    11 Best Color Theory Books for Artists Everywhere

    13 Websites With Copyright and Royalty Free Art to Consider

    Types of Digital Art Right Now Explained

    25 Best Concept Art Books for Artists Everywhere

    8 Best Cartooning Books For Artists Today

    5 Types of Concept Art to Consider Today

    10 Epic Tips & Tricks for Concept Art Portfolios Today

    51 Enigmatic Forest Concept Art That Will Amaze You

    67 Surreal Castle Concept Art Depictions to Surge Inspiration From

    16 Best Pixel Art Programs and Software | All OS

    Window air conditioners are cooling systems that are usually mounted on a window and can be removed after use. These systems are significantly easier to install with the right mounting tools when compared to central units.

    Installing a central air conditioner is not only a tedious process but also an expensive one. Due to this, most homeowners prefer installing window air conditioning units.

    Though these window AC units are easy to install, they do require some know-how to get the job done properly. So, to help you with window AC unit installation, I have compiled this guide to talk about the factors you need to consider before using a window AC!

    Window Air Conditioners

    Window Air Conditioners
    © Homesthetics - Purnima Ghosh

    Window ACs are installed between the sill and sash window, which enables it to compress the air drawn from outside and remove the heat. Once the heat is removed, the hot air is blown back outside, whereas the cold air is blown into the room. 

    The assembly process of these air conditioners requires the right mounting tools to ensure they don't fall off the window sill. Though the installation process is not complex, it still requires more effort compared to setting up a portable air conditioning unit. 

    You must also ensure the heating, ventilation, and air conditioning (HVAC) system is installed closed to the AC power plugs and sockets. This will eliminate the need to use extension cords, guaranteeing safety.

    Considerations For Window AC Unit Installation

    Considerations For Window AC Unit Installation

    Before you use a window air conditioning unit or try installing one, it is crucial to see if it will be the right fit for your home. So, make sure you determine whether the size of the device and the window size of your home are compatible with each other. In case they aren't, it might be better to opt for a portable air conditioning unit. 

    Compatibility With Windows

    Compatibility With Windows
    © Homesthetics - Purnima Ghosh

    As mentioned, the window unit that you use should be able to fit on your window without any problems. Most window ACs are made to be compatible with single or double-hung windows. However, making a few changes and adjustments to these window AC units can also allow them to be installed on double-hung windows, sliding windows, or casement windows in the United States. 

    Window ACs show the maximum and minimum width of the window they can fit into, along with the minimum window opening. The window opening is meant to be wider than the air conditioning unit itself but still narrow to fit the air conditioner’s baffles.

    Furthermore, the window should also be able to open to its maximum capacity, which allows the air conditioner to stay between the sill and the sash. 

    Choosing A Window Air Conditioner For Your Room Size

    For efficient energy use, choosing a window air conditioner that is the correct size is key. If the air conditioner is way too small, it won't have the power to cool the entirety of your room. On the other hand, a larger air conditioner can use extra power, leading to expensive energy bills. 

    Ideally, the cooling capacity of an air conditioner is measured in British Thermal Units or BTU. Smaller air conditioners have a power output range of 5,000 BTU, whereas bigger ones have a range of 20,000 BTU. 

    To calculate the size of the air conditioner that will be the best fit for your room, you will first need to determine the room's square footage. This can be done by multiplying the length of the room by its width. Once you derive a number, multiply said number by either 20 or 25, which is the number of BTUs needed to cool a single square foot of your living space. 

    For instance, a 10 by 20-foot room would be around 200 square feet. This means it would require a unit with at least 4,000 or 5,000 BTUs. 

    Steps To Install A Window Air Conditioner

    Once you've successfully selected the right window air conditioner for your home, it's time to begin the installation process. 

    Step 1: Measuring

    As mentioned, before you decide on a window AC unit, ensure that you measure the windows. You can start by measuring the width and height of the window opening with a tape measure. When choosing window ACs, try to find ones that have at least 2 inches of space on both sides of the housing. This allows the baffles of the air conditioning unit to be extended. 

    Step 2: Assembly

    Once you've selected a window air conditioner, you can begin the installation process. First and foremost, attach the flanges, rails, accordion-style panels, etc., to the housing of the unit. Ensure that you refer to the instruction manual provided by the manufacturer and use the screws that come with the device. 

    Step 3: Preparation

    Open the window to its maximum capacity or wide enough to fit the air conditioner. Then, lift the whole unit and place it at the lower end of the window frame. At this point, have a helper hold the device in place while you proceed with other tasks. 

    Step 4: Positioning

    Most window ACs on the market come with two flanges -  the first one is situated at the top of the device, whereas the second one is at the bottom. Flanges work best to improve the installation process by making it easier and safer. 

    Position the lower flange in a way that it sits on the sill. You can then bring down the window sash until the bottom rail meets the top flange of the air conditioning unit to ensure that your air conditioner is held in place.

    Based on the size of your window air conditioning unit and the window style of your home, you might be required to install a window air conditioning mount for proper temperature control. 

    Tip

    Remember to consult your building manager about regulations regarding window AC unit installation. And if your air conditioner comprises L brackets, ensure to attach them prior to placing the unit onto the windowsill to make installation easier.

    Step 5: Attaching

    Most window ACs come with a couple of angle brackets that can be used to attach and secure the lower and upper sash. These brackets are quite important since they prevent the risk of the sashes falling apart or opening the window accidentally. Both these scenarios are quite dangerous as they can lead to your AC unit falling out of the window. 

    Once the window air conditioner is properly secured, place the angel brackets in the area where the top and bottom sash meet. Use a pencil or chalk to draw guidelines on the bottom sash for the screw holes before drilling the pilot holes to attach the screws. 

    Coming back to the accordion-style panels that you attached, extend them fully and attach them to your window with the screws that were provided by the manufacturer. Once everything is done, check for any remaining screws and ensure all the screws have been properly tightened with a screwdriver. 

    Step 6: Paneling

    Most window air conditioners are designed with side panels that are accordion-shaped. These panels can retract and extend in order to fit various-sized windows. Furthermore, these panels act as a seal for any gaps and prevent insects or other pests from getting into your home.

    Once you've properly mounted the air conditioner to the window, extend the side panels till they fully cover any gaps. However, if you notice that there are still small gaps and cracks near the panel, you can make an airtight foam seal by using foam weather stripping. 

    After you're done and fully satisfied with the installation, the positioning of the panel, and the air conditioner, find the mounting holes located on the panel. With the help of a drill, make small holes in the window sash that align with the mounting holes. Using a screwdriver and two screws, secure the panel to the sash. 

    In case your air conditioner does not have an air conditioner screen, using a window AC unit installation kit might be the best option. You can also create a window frame by yourself with some wood or plastic sheeting that covers the gap. 

    Step 7: Insulation

    The final step of the installation process is to seal the gap between both the lower and upper window sash. Since both these window sashes have been lifted to create space for the unit, it is necessary to close the gap once you're done. 

    Generally, window air conditioners comprise one foam insulating strip in the packaging. Cut the strip to the right length and attach it to the gap, ensuring that it fits snugly. 

    But in case your window air conditioner unit does not have insulating strips, you can get one online. 

    How to Install a Window AC Final Words

    Final Words

    Installing a window air conditioner is a simple process and does not need any professional experience. Following the steps I mentioned above will help you easily install your window air conditioner. 

    However, ensure you complete the entire process carefully and do not miss out on anything. Omitting one or more steps can lead to several problems, such as the unit falling out of the window or making your home susceptible to burglary. 

    Getting the right canvas is one of the most important jobs of an artist. 

    Doesn’t matter what medium you use or what tools are at your disposal, if the surface of the painting is not right, then you’ll never be able to achieve the desired result. 

    Moreover, getting the right canvas can also be a tricky job. With all the variety of surfaces that you can get, you’ll have to know what is perfect for your job. 

    But don’t you worry because we have gathered all the best canvases for oil painting on this list! You’ll find at least one canvas that is perfect for your use, no matter what your need is. 

    So go ahead and give it a read! 

    Best Canvases for Oil Painting

    Best Canvases for Oil Painting

    Whether you're a beginner or a professional, these canvases are sure to provide you with the best surface for your oil paintings. So without further ado, here's the list of the 10 best canvases for oil painting.

    1. Masterpiece Artist Canvas - Best for Professional Artists

    MASTERPIECE 42156 Vincent Pro 7/8" Deep Vintage L21C Belgian...
    • Vintage Artfix L21C Belgian Linen, 5 oz. raw, 13 oz....
    • Canvas Depth: 7/8", Canvas relief: 5/16" (From Str. Bar)....

    Masterpiece Artist Canvas is objectively the best canvas we have on our list. No other canvas on this list can match its quality and performance. From the material that is used to make this canvas to the way it is crafted, everything about this canvas is impeccable.

    Experience

    The surface is made from 100% thick cotton and it is also double primed and sized to give the best possible experience for oil painters. Our experience of painting on it was breathtaking.

    And along with that, the canvas wrap is also incredibly tight and well done. There is surely no chance of any sort of bubbling or tearing happening with this one.

    It uses both solid pine and fir stretcher bars, along with cross braces. So there won’t be any chance of slacking or warping with this canvas. It’ll stay as good as new.

    Of course, this canvas is meant for professionals who can afford the premium cost of this canvas but can’t afford to compromise on quality. And sure enough, for the money, you are getting the best canvas.


    Pros

    • Canvas is made from 100% thick cotton which has a great tooth for oil paint
    • Double-primed and sized to give the best experience
    • Wrapping is also incredibly tight and there’s no sign of slacking


    Cons

    • It is very expensive


    Type of Canvas: Stretched | Material: Cotton | Primed: Yes | Size Range: 8x10-18x24 | Pack Size: 12

    2. Arteza Economy Stretched Canvas - Best for Beginners & Casuals

    ARTEZA Stretched Canvas, 8 x 10 Inches, Pack of 12, Blank...
    • 100% Cotton Art Canvases for Painting: Our canvas boards for...
    • Painting Canvas in Bulk: This canvas set includes 12...

    Arteza is a famous brand when it comes to art supplies and this is their economic entry, which, we think, is perfect for students and beginner artists. It’s a stretched canvas that comes at an affordable price and is accessible to students. And the quality is so good that even professionals can make good use of it. 

    Experience

    The canvases are of good quality - certainly, better than most student-grade canvases - and they come at a cheap price. The canvas is stretched and it’s an amazing surface to work on.

    These are also individually wrapped which is great for storage purposes and feels professional. These are outstanding canvases for casual artists but even for professionals, this is a great practice canvas.

    There’s a bit of pillowing on the edges, so, it’s certainly not perfect. But at least there are no ugly staples on the front side, which makes these canvases much more presentable than other student-grade canvases.

    Overall, given its quality and price, it’s an excellent choice for beginners and casuals and an excellent practice canvas for professionals.


    Pros

    • Stretched canvases that are amazing for painting
    • Great price and extremely affordable for students
    • Great option for professionals for practice


    Cons

    • The pillowing on the edges is not a good sight to see


    Type of Canvas: Canvas Panels | Material: Cotton | Primed: Yes | Size Range: 6x6 - 12x16 | Pack Size: 12

    3. U.S. Art Supply Canvas Panels - Best for Students & Archival

    Academy Art Supply Canvases Panels 8 x 10 inch - 100% Cotton...
    • Professional White Canvas: Design your phenomenal...
    • Cotton Acid-free Canvas: Made from natural cotton with...

    U.S. Art Supply is a well-renowned company for producing top-quality art products of all kinds.  These canvas panels are also of incredible quality. Even though these canvases are primarily made for students, professionals can enjoy these as well. The papers also have good enough quality for archival purposes. 

    Experience

    These panels are amazing for working with oil paint. The surface is triple-primes and the way the brushes glide on it makes painting a really enjoyable experience.

    The acid-free paper will not corrode even if stored away for long periods of time. You will not need any special medium to make these canvases good for archiving. It’ll not become yellowish or brittle even if stowed away for a long time.

    One delightful surprise is the variety of colors, sizes, and bundles of the canvases. The fact that they also give black canvases blew up our minds.

    Overall, the quality of these student-grade canvases is splendid. And these redeeming features, like being acid-free and the variety, make this canvas a great buy.


    Pros

    • These canvases have great value for money
    • It has an acid-free paper that is great for archiving
    • It has a good variety of colors and sizes, and it also comes in various types of bundles


    Cons

    • It is not intended to be used by professionals


    Type of Canvas: Stretched | Material: Linen/Cotton | Primed: Yes | Size Range: 9x12 | Pack Size: 1

    4. Old Holland Stretched Canvas - Best Mid-Range Quality Option

    Old Holland 9X12in Oil Primed Stretched Belgian Linen Canvas
    • Old Holland Claessens Oil Primed Belgian Linen Canvas - 9" x...
    • 9" x 12"

    Old Holland is a reputed company in the world of art supplies. Established in 1666, it has been denoted as one of the most respectable brands of art-related products. All their products have a classy design and are crafted to excel at serving artists. These canvases form a perfect middle-of-the-road option between the professional-grade and the student-grade options. 

    Experience

    This Belgian linen canvas has incredible smoothness to it. And along with the tight surface, painting becomes really enjoyable with this canvas.

    It is, of course, to be expected because the canvases are made using long staple fiber. The quality of the surface is splendid.

    As for color reproduction, two layers of gesso is enough to make your oil colors pop. It also makes the flow of the paint incredibly smooth and the end result will look gorgeous.

    With a moderate price, this canvas is an incredible option for both students who want to up their lever and professionals who are looking for something more inexpensive.


    Pros

    • Great middle-of-the-road option
    • Great quality compared to its price
    • Surface is incredibly smooth and tight
    • The color reproduction is excellent as well with oil paint


    Cons

    • It is not as good as some other professional-grade canvases


    Type of Canvas: Stretched | Material: Cotton | Primed: Yes | Size Range: 12x12 | Pack Size: 6

    5. Daveliou Stretched Canvas - Best for Intermediate Artists

    Daveliou 12”x12” Stretched Canvas for Painting, Triple...
    • Premium Stretched Canvas — Create unique art with Daveliou...
    • Durable Non Toxic Materials — The individually wrapped...

    Daveliou Stretched Canvases are artist-grade canvases that are exceptionally good for oil painting. The quality of the building and the painting experience make it an amazing pick for professional oil painters. It’s also an excellent choice for outdoor painters because of its water-resistant nature.

    Experience

    The canvas is masterfully crafted as it is built from 3 plies and is stapled to a kiln-dried wooden frame on the backside. Its build is good enough for showcasing.

    Daveliou has its own primer for these canvases and it gives the surface ample tooth for any good quality oil paint brush to latch onto it. Painting on this canvas is an incredibly enjoyable experience.

    The canvas is also water resistant and it's a heaven-sent for outdoor oil painters. Along with that, the canvas is also backed by a 1-year guarantee.

    Overall, it’s a great buy for intermediate artists - students who are looking for ways to level up their artwork.


    Pros

    • It is a well-built canvas that is good enough for showcasing artwork
    • Value for money is on-point for intermediate artists
    • It has a 1-year guarantee
    • The painting experience on this canvas is splendid


    Cons

    • The price point is a little above most students’ budgets


    Type of Canvas: Stretched | Material: Cotton | Primed: Yes | Size Range: 8x10 | Pack Size: 10

    6. Art Alternatives Stretched Canvas Super Pack

    Art Alternatives stretched White Canvas Super Value Pack-8 x...
    • Art Alternatives Unbleached 4 oz cotton canvas for all media
    • Primed with acid-free gesso-ready to paint, collage, draw,...

    Art Alternatives Stretched Canvas Super Pack is one of the cheapest entries on this list. But even at a low price of $5 per canvas, these canvases are of decent quality and are great for beginners. The canvases have a stretched surface, are individually packed, and have a primed surface. 

    Experience

    The quality of the canvas is astonishing given its price point. The surface is primed, therefore, it is great for oil as well as other mediums like acrylics. The cheap price, the performance of the surface, and the versatility hence make it an attractive offer.

    Like the artist-grade canvas from Daveliou, these canvases are also stretched and stapled to a kiln-dried fir wood. Another statement for its quality.

    But there are, of course, some downsides. One of which is reported by many artists. And that is the surface soaks up too much oil. It’s not a problem that can’t be fixed by just a little bit of Gesso.

    Overall, it’s an amazing buy for beginners given the value for money at such a low price.


    Pros

    • Extremely inexpensive – about $5 per canvas
    • Canvases are well built – fir wood frame and stretched surface
    • Versatile canvas, which can be used with other mediums too
    • It’s a great buy for a beginner or casual artists


    Cons

    • Absorbent to oils, hence, a coating of gesso will be absolutely necessary


    Type of Canvas: Canvas Panels | Material: Cotton | Primed: Yes | Size Range: 4x4 - 12x16 | Pack Size: 12 - 48

    7. Artlicious Canvas Panels

    Artlicious Canvases for Painting 12 Packs - 8 x 10” Blank...
    • Endless Possibilities with 12 Pack of Canvas Panels for...
    • Premium Touch: Every blank canvas panels for painting is...

    Artilicious Canvas Panels are inexpensive but good-quality canvases that are excellent for outdoor painting and practicing. The key reason for being their cheap price, as already mentioned, and the portability due to their small size. These canvases are imported from India. 

    Experience

    The canvases are made from pure cotton and the panels have a rough texture that is primed. Because of that, the surface is ideal for oil painting and the overall experience is enjoyable.

    It is extremely portable due to its small profile. That’s why we think these canvases are good for beginners, kids, and casual artists and perfect for artists who like to paint outside.

    Although, we should mention that if you are an intermediate artist or a professional one then these canvases are not the right choice for you. Mainly because these are not of good quality.

    Still, given the price point, the overall quality and the use case we have in mind, these canvases might be the right one for you.


    Pros

    • Made from 100% cotton imported from India
    • These canvases are extremely inexpensive
    • Perfect choice for outdoor painters


    Cons

    • The quality of the canvases is less than satisfactory for intermediate and professional artists


    Type of Canvas: Stretched | Material: Cotton | Primed: Yes | Size Range: 6x6-72x72 | Pack Size: Individual

    8. Blick Premier Cotton Canvas

    Blick is a well-renowned art company that is responsible for some of the best art products. And these Cotton Canvases are absolutely amazing as well. The canvas is made out of really good quality material and according to us, it is ideal for intermediate and professional artists. 

    Experience

    The canvas surface is made from pure cotton and it is triple-primed. Hence, it provides great tooth and a great painting experience but it still retains the signature woven texture of canvases.

    The paper is stretched completely tight and the provided wood doesn’t warp at all. Hence, the build quality is impeccable and it is good enough to be hung off of a wall directly after finishing.

    There are 3 different sizes available of varying depths. Overall, it’s an incredible buy for intermediate and professional artists.

    The quality is impeccable but the price is a little unjustified for beginners because they usually wouldn’t care about the fine details of it.


    Pros

    • Made from 100% cotton and the surface is triple primed
    • The frame doesn’t warp at all and the paper is stuck on tight
    • Great quality product meant for professionals and intermediate artists


    Cons

    • It’s expensive and not recommended for beginners or casual artists


    Type of Canvas: Stretched | Material: Linen/Cotton | Primed: Yes | Size Range: 24 x 30 | Pack Size: 3

    9. Winsor & Newton Stretched Canvas

    Winsor & Newton Classic Cotton Canvas, 14" x 18"
    • Warp resistant kiln-dried solid wood stretcher bars
    • Highly pigmented titanium dioxide gesso primer

    Winsor & Newton is a reputed establishment that has catered to the needs of various artists of different skill levels with all kinds of products. According to us, this canvas is a great choice for intermediate-level artists. The quality and the price of the product really hits a sweet spot for art students.

    Experience

    The surface of the canvas is triple-primed which gives the canvas an amazing tooth that grips the strokes really well. The painting experience is significantly more enjoyable than some of our other intermediate-level entries.

    The canvas also doesn’t have any noticeable slack because the surface is back-stapled and is handmade. The winding is very tight and the craftsmanship is pretty impressive for the price. 

    There are 7 different sizes that you could choose from and you can buy these canvases individually or in a pack of 6.

    Overall, given the price point and the quality, this canvas is an excellent choice for art students. Any intermediate-level artist, looking to improve the quality of his/her artwork, will also find this canvas very delightful.


    Pros

    • Surface is triple-primed and the tooth is almost perfect for oil painting
    • Winding is very tight and it is handmade
    • Comes in 7 different sizes and can be bought individually as well


    Cons

    • More expensive than most other intermediate-level canvases


    Type of Canvas: Stretched | Material: Cotton | Primed: Yes | Size Range: 4x4 - 14x18 | Pack Size: Individual

    10. Fredrix Canvas Pad

    FREDRIX Creative Series White Canvas Pad, 18" x 24"
    • A versatile option for oils, acrylics, water soluble oils,...
    • 10 sheets per pad

    Fredrix Canvas Pad is one of the best canvases for purely practice purposes. Especially, for beginners. It’s a great option for learning new techniques and acquiring new skills with practice. You can use these sheets to experiment with new styles and strokes. 

    Experience

    The sheets of this pad are triple-primed and it bears the signature texture of some of the best canvas panels. Hence, the experience of painting on these sheets is pretty amazing in itself but for practice, there’s no better option.

    Couple these sheets with cheap oil paint and you can practice to your heart’s content without ever worrying about breaking your wallet.

    The price tag hovers somewhere around $7-8 for 10 sheets. We don’t think that there is any other option that is cheaper and gives a more decent experience for practicing with oil paint.


    Pros

    • Triple-primed sheets that impressively mimic the texture of a good canvas panel
    • It is extremely cheap – $7-8 for 10 sheets of paper
    • Great for beginner artists who want to hone their craft


    Cons

    • These are not as good as canvas panels for obvious reasons


    Type of Canvas: Canvas Pad | Material: Cotton | Primed: Yes | Size Range: 18x24 | Pack Size: 10 sheets

    Best Canvases For Oil Painting Comparison Table

    Product Type of Canvas Material Primed Size Range Pack Size
    Arteza Economy Stretched Canvas Stretched Cotton Yes 8x10-18x24 12
    U.S. Art Supply Canvas Panels Canvas Panels Cotton Yes 6x6 - 12x16 12
    Old Holland Stretched Canvas Stretched Linen/Cotton Yes 9x12 1
    Daveliou Stretched Canvas Stretched Cotton Yes 12x12 6
    Art Alternatives Stretched Canvas Super Pack Stretched Cotton Yes 8x10 10
    Artlicious Canvas Panels Canvas Panels Cotton Yes 4x4 - 12x16 12 - 48
    Blick Premier Cotton Canvas Stretched Cotton Yes 6x6-72x72 Individual
    Masterpiece Artist Canvas Stretched Linen/Cotton Yes 24 x 30 3
    Winsor & Newton Stretched Canvas Stretched Cotton Yes 4x4 - 14x18 Individual
    Fredrix Canvas Pad Canvas Pad Cotton Yes 18x24 10 sheets

    Buying Guide For The Best Canvas for Oil Painting

    Here are some pieces of information about canvases that should help you make a better decision when it comes to buying canvases.

    Type of Canvases

    There are many types of canvases to choose from and they can be categorized on the basis of various factors as well. So, here are a few common types of Canvases.

    On the basis of fabric

    Canvas makers typically use two kinds of fabrics in making the surface of the canvas and those are:

    Cotton

    Cotton is the most popular fabric choice for canvases. It’s a shorter fiber with good feedback when the brush is put against the surface.

    It’s also more inexpensive to produce compared to our other fabric option - linen. Of course, two canvases made from cotton may not be the same because the cotton that is used in making the canvas also varies in terms of quality.

    There are different grades of cotton and depending on the price of the canvas, the performance can vary significantly.

    For example, an artist-grade canvas like Masterpiece Artist Canvas uses heavy duck cotton that has amazing feedback and great tooth. But it also comes at a high price.

    While on the other hand, Artilicious Canvas Panels can’t be compared to it even though it is also made from cotton.

    Linen

    Linen is a less popular choice for making canvases. These fibers are longer than cotton fibers and they are made from flax.

    As a consequence of this, linen canvases are smoother and sturdier than cotton fabrics. They don’t have the same kind of feedback as cotton fabrics.

    At the end of the day, it all becomes a thing of preference. While cotton’s springiness has been artists’ favorite for centuries at this point, many prefer the smoothness and rigidity of linen ones.

    On the basis of forms

    Canvases can be also categorized on the basis of their forms. The following are the three broad kinds of canvases that you can use for oil painting:

    Canvas Pads

    Canvas pads are similar to other drawing pads that you can get from a stationery store. But instead of having regular papers, these pads have individual sheets of canvas.

    It’s a great option for artists to practice and test out new skills. Because canvases are usually expensive, you don’t get a lot of room for experimenting but canvas pads solve that problem by mimicking the feel of a canvas at an incredibly inexpensive price point.

    Canvas Panels

    Canvas panel is sort of a middle ground between canvas pads and stretched canvas - both in terms of price and in terms of ideal use case.

    Unlike canvas pads, canvas panels have a hardboard but not a stretcher frame like stretched canvases which are intended for more professional work.

    Outdoor painters usually prefer canvas panels over stretched canvas because canvas panels are highly portable.

    Canvas panels are great for practicing and studies for professionals, while beginners and intermediate artists can use a canvas panel for a final product as well.

    Stretched Canvas

    Stretched Canvas is meant for more professional use. It has nice springy feedback which is very important for professional artists.

    The stretcher frame gives an incredible amount of durability to the canvas. It inhibits the painted surface from warping and tearing for a long time.

    Although stretched canvases can vary a lot depending on the kind of paper and frame used, they are in general more expensive than both canvas pads and canvas panels.

    Preparing your canvas

    To get the very best performance from the canvas you are using, you’ll have to apply a coat of primer for a good tooth and a smooth finish.

    Most professional artists even apply multiple layers of Gesso to get the perfect result that they want.

    Doing this is important because a non-primed canvas will absorb a lot more paint than a primed one. And oil paint is expensive, so, investing in a gesso will eventually save you a lot more money.

    A more important reason is that a primed surface will have a smoother finish and better tooth. The good tooth will help you be incredibly accurate with your paint.

    What’s Perfect for Oil Painting?

    Oil Painting is a medium of painting that gives you an immense amount of freedom. Using oils you can get life-like shades, tints, and blends that some of the other mediums can never allow you to do.

    In this list, we have listed what we think are the best canvases for oil painting but if you are looking for one on your own, then any canvas will do the job.

    What you need to worry about is your preference - as in cotton or linen, stretched or panels, etc. Just keep in mind to apply a layer of gesso before you paint apply a layer of gesso before you paint.

    Canvas For Oil Painting FAQ's

  • What is the difference between a stretched canvas and a canvas panel?

    A stretched canvas is a canvas that has been stretched over a wooden frame, while a canvas panel is a canvas that has been mounted on a rigid board.

  • What is the best material for a canvas for oil painting?

    The most common materials used for canvases for oil painting are cotton and linen. Linen is considered to be the higher quality material due to its strength and durability, but it is also more expensive.

  • Should I use a primed or unprimed canvas for oil painting?

    It is recommended to use a pre-primed canvas for oil painting, as it helps to protect the canvas from the oil paint and improves the adhesion of the paint.

  • What is the difference between a cotton canvas and a linen canvas?

    A cotton canvas is softer and more flexible, while a linen canvas is stronger and more durable. Linen is also less prone to decay over time compared to cotton.

  • What is the difference between a pre-stretched canvas and a raw canvas?

    A pre-stretched canvas is a canvas that has been stretched over a wooden frame and primed, while a raw canvas is unprimed and unstretched.

  • How do I prepare a canvas for oil painting?

    If using a pre-stretched canvas, make sure it is clean and dry before beginning to paint. If using a raw canvas, it will need to be primed with a gesso primer before painting.

  • How long does a painted canvas take to dry?

    The drying time for an oil painting on canvas can vary depending on the thickness of the paint and the environmental conditions, but it typically takes several days to a few weeks to fully dry.

  • Can I reuse a canvas for oil painting?

    Yes, it is possible to reuse a canvas for oil painting. You can either paint over the existing painting or use a solvent to remove the old paint before painting again.

  • Conclusion

    Thank you for taking the time to read our article on the best canvases for oil painting. We hope our reviews have been helpful and informative for both experienced artists and newcomers alike. It's always exciting to discover new materials that can help bring your artistic visions to life, and the right canvas can make all the difference!

    Out of these 10 best canvases for oil painting, here are our top three recommendations:

    1. Best for professional artists: Masterpiece Artist Canvas is an ideal option for those who refuse to compromise on quality. With its 100% thick cotton surface, double priming, and sturdy construction, it truly is the best canvas for serious painters.
    2. Best for beginners and casual artists: Arteza Economy Stretched Canvas is a good option for students and beginner artists. The canvases are of good quality, stretched for ease of use, and boast a reasonable price point. They can even work as practice canvases for professionals.
    3. Best for students and archival purposes: U.S. Art Supply Canvas Panels is the right choice if you need a canvas that lasts longer and comes in exciting varieties. The triple-primed panels are acid-free, making them perfect for archiving your artwork without the risk of damage or discoloration.

    The right canvas can help enhance the beauty of your oil paintings and bring joy through every stroke. It's incredible to see how different canvases can cater to different needs, preferences, and budgets. Whether you're an established artist, an aspiring pro, or just starting on your artistic journey, we hope our recommendations help you find the perfect canvas for your oil painting projects. Happy painting!

    Related Articles

    8 Best Oil Paint Brushes

    11 Best Oil Paints for Beginners & Professionals Artists Alike

    Learn What is the Best Surface for Oil Painting

    How Long It Will Take Oil Paint To Dry  & How to Speed It Up

    Oil Painting for Beginners Basics & How to Use Oil Paints

    Learn How To Dry Oil Paint Faster Overnight

    12 Oil Painting Supplies That Every Oil Painter Needs in the Studio

    11 Best Palettes for Oil Painting Reviewed

    5 Things You Should Know Before Painting Oil Paint on Glass

    Learn How to Make Oil Paints Dry Faster

    What Are The Benefits of Oil Painting?

    Best Canvas for Acrylic Painting | Student & Artist Grade

    When working with oil painting or other thicker paints, palettes are much more convenient to use.

    A palette is a tool that is specifically invented for creative minds.

    Rather than constantly using alternatives, getting a palette will make the work easier and more organized. It also gives the artist a sense of completion and professionalism.

    Anyway, palettes can be of any material including wood, plastic, ceramic, tempered glass, etc.

    And, if you’re looking for a palette to match with your style and preferences, you have just entered the right place.

    In this article, we shall review 11 different palettes for oil painting; and what each one has to offer.

    So without any more delay, let’s get started!

    Best Palettes for Oil Painting

    Whether you're a beginner or a seasoned pro, you're sure to find a palette that will meet your needs and help you create beautiful works of art. So without further ado, here's the list of the 9 best palettes for oil painting.

    1. Art Advantage Non-Stick Palette - Best for Easy Cleaning & Lightweight

    Art Advantage Palette 15.5”x11.75” Peel-Up Plastic Paint...
    • Durable Plastic Paint Palette: Made from durable,...
    • Peel-Up Acrylic Paint Palette: Designed for acrylics, this...

    Our first on the list is a non-stick palette made of dependable plastic. Its surface measures 11 x 15 inches and it weighs 7.2 ounces.

    This oval-shaped white palette also has a thumb hole to make handling easy. Besides that, the palette looks pretty simple, yet has a highly professional appeal. 

    Experience

    The Art Advantage Non-Stick Palette is very small and lightweight, which is good for long hours of work. Working with this palette does not leave your hands feeling deadened later.

    We also like that this palette is pretty easy to clean up after work. The smooth plastic surface does not hold any stains.

    Whether the leftover paints have dried or still remain wet, removing them only requires water and a sponge. And in the case of dried-up paints, you can just scrape it off with a palette knife and then rinse it.

    Although this palette provides ample space (for its size) to mix oil paints, somehow we think that separate allotments would have been better and more organized.

    You probably have experienced that some white plastic palettes can face discoloration in the long run, due to long work hours. But with this palette, the sleek plastic surface prevents that from happening.


    Pros

    • The smooth surface makes cleaning pretty easy
    • It is very light and ideal for long hours of work without stressing your hand 


    Cons

    • This palette does not contain separate allotments to organize the paints better


    Material/Type: Plastic | Shape: Oval | Size (inches): 15.51 x 12.51 | Number of Wells: n/a | Non-Stick Surface: Yes | Peel-Off Capability: No
    1. Mijello Ellipse Peel Off Palettes - Best for Versatile Mixing Space

    Mijello XL Ellipse Peel-Off Palette with Thumb Hole for...
    • Enjoy a clean palette with each use and 4 non-skid rubber...
    • Dried acrylic paint peels off; oils easily wipe away

    This is a palette that’s ideal for oil and acrylic paints. It is constructed from highly condensed plastic and that makes it very durable.

    On the palette, there are two separate mixing areas: one surrounding the palette, and the other is a big oval-shaped area in the center. It also has a medium-sized thumbhole.

    Experience

    What’s great about this palette is that it allows you to peel off the leftover dry paint every single time you finish using it.

    It is pretty handy at times when you’re busy that you forget to clean up, and you see the paint has dried up. You can just peel it off and this will save you the time you’ll spend scraping, washing, and drying it during busy schedules.

    The two separated wells are really helpful when you have to mix different paints.

    First, they are both large and they offer a lot of space for mixing oil paints. It’s great when you have to work with multiple colors. This will save a lot of time spent on changing/pouring color after color.

    It is also pretty affordable for its quality and service.

    However, every time you have to use the palette again (after it’s cleaned), it does not hold paints really well because of its extra slippery surface. And this will create a lot of mess.


    Pros

    • It is a high-quality and really affordable palette
    • The leftover and dry paints can be peeled off easily to save some time for cleaning and drying 


    Cons

    • The slippery surface can create a lot of mess on every first use


    Material/Type: Plastic | Shape: Oval | Size (inches): 18 x 15 | Number of Wells: 1 Central Well | Non-Stick Surface: No | Peel-Off Capability: Yes
    1. Stephen Quiller Color Wheel Palette - Best for Portability & Versatility

    Mini Artist Color Wheel Packaged
    • Illustrations of Color Harmonies
    • Complementary, Split Complementary,

    Next is a square-shaped palette which is 14” x 14” wide. It contains 24 small wells, along with 8 larger corner wells and a large paint mixing area in the middle.

    The palette comes with a firm lid so that in case you leave wet paint, it’ll prevent them from spilling out.

    Experience

    We love that there are a lot of color plots on this palette. And this helps to sort out colors easily and more precisely.

    The mixing pad also has a large space that’s perfect for when you need to use multiple colors for your painting, without having to clean it every now and then.

    We love that there is a lid that comes along with this palette. The lid has helped to prevent paint spills or any other possible accidents. It’s very thoughtful from the manufacturer’s side.

    However, the palette itself is very thin. So you might have to handle it with care when you’re working with it.


    Pros

    • There are plenty of color wells that help with better organizing and sorting out colors
    • It comes with a secure lid that helps prevent the potential spilling of paints 


    Cons

    • The palette’s construction is pretty thin, which requires to be handled with care


    Material/Type: Plastic | Shape: Round | Size (inches): 5.98 x 7.87 | Number of Wells: N/A | Non-Stick Surface: No | Peel-Off Capability: No
    1. New Wave Glass Palette

    New Wave POSH Glass Artist Palette | Neutral Grey, 12 x 16...
    • The POSH Glass Artist Palette is made of tempered glass for...
    • Uses: The perfect addition to your artist painting supplies....

    This palette is made of tempered glass and comes in 3 colors: transparent, grey, and white.

    The surface is very wide and allows free mixing of colors. You can rinse off wet paint easily because it is smooth. Otherwise, if it’s dry, it can just be peeled off.

    All its four edges are covered with safety guards for protection and safety.

    Experience

    With this palette, cleaning is pretty easy. We can just scrape off dry paint by using a sharp palette knife or a new blade.

    We like that the slippery surface receives all types of paints, especially oil and acrylic paints. And blending them becomes pretty easy.

    The palette is a bit heavy but it is very comfortable to hold because it is flat and sleek. And we think this is one of the best things about this palette.

    Moreover, these palettes come in different sizes and weights. So you can get one according to your preferred size.

    To make sure that the palette stays in good shape for a long time, putting it in the freezer will help serve this purpose.

    However, the price of this palette is expensive and it might not be ideal for an artist who is on a tight budget.


    Pros

    • This palette is very easy to clean with water, solutions, sponges, and palette knives
    • It is comfortable to hold and is great for long hours of work
    • The edges are protected with a rubber material to assure safety


    Cons

    • It is expensive


    Material/Type: Tempered Glass | Shape: Rectangular | Size (inches): 12 x 16 | Number of Wells: N/A | Non-Stick Surface: Yes | Peel-Off Capability: N/A
    1. Mijello MAP-3025 Multi-Purpose Palette

    Martin 92AP3025 Universal Airtight Peel-Off Palette
    • Airtight palette for acrylic or oil paint keeps colors fresh...
    • Features 28 divided wells and one large central mixing area

    Here is another palette that comes with a secured lid.  The lid of this palette is airtight to prevent paints from drying off quickly. 

    It has got 28 paint wells, and this is great when using multiple paint colors. Besides that, it also has a larger rectangular mixing area in the center. 

    Experience

    Just as the name suggests, the Mijello Multi-Purpose Palette can be used for different kinds of paints.

    What we really like about this palette is that it has double shutters on all sides to prevent paint from drying out too soon. This saves a lot of time that you would have spent scraping/cleaning dry paint. It can also prevent the wastage of good paint every now and then.

    But in the case of leftover dry paints, you can always just peel them right off the smooth surface, followed by rinsing and drying it.

    Unlike certain palettes, you can carry this one around because it has a lid on it to protect the paints. So, this is ideal for artists who like to paint outdoors.

    Since the palette is heavy, it can numb the arm after long hours of use. So what we think could have made this palette better is if it has a holder (if not necessarily a thumb hole).


    Pros

    • The palette comes with a tight lid to protect liquid paints from drying
    • It offers a lot of wells to keep multiple paints


    Cons

    • It is heavy and it does not have a holder


    Material/Type: Plastic | Shape: Rectangular | Size (inches): 9 x 13 | Number of Wells: 24 | Non-Stick Surface: Yes | Peel-Off Capability: Yes
    1. Caran d’Ache Palette Aquarelle

    CREATIVE ART MATERIALS Caran D'ache Palette Aquarelle...
    • Manufactured from white plexiglas
    • Convenient size and Weight

    Next up is a palette that looks completely different from the regular ones. It’s stylish, sleek, and made from plexiglass.

    The Caran d’Ache Aquarelle Palette is pretty light and sleek. It’s ideal for traveling artists and art students.

    This palette is smooth on one side while it’s textured on the other.

    Experience

    This palette is fit for carrying around in a bag. It doesn’t consume much space, or any space at all for that matter, because it is very thin and also very light. Students and artists who are on the go will likely find this to be very convenient for their work.

    We love that the palette offers two purposes; which is a feature that we don’t normally find with regular palettes.

    On its rough/textured side, we can actually use dry, soluble paints. And so far, it has been really good and has given out terrific results. While on the smooth surface, we mix our normal liquid paints.

    On top of that, the palette is also very polished on its smooth side. And this makes it very easy to clean or peel off dry paint.

    But apart from being a high-quality palette, it is somewhat small and leans a little bit to the expensive side.


    Pros

    • This palette is pretty flimsy and different in shape
    • It is portable which is great for students/artists on the go
    • It has a smooth and rough side for wet and dry paint mixing


    Cons

    • The palette comes at somewhat of an expensive rate


    Material/Type: Metal | Shape: Rectangular | Size (inches): 10 x 5 | Number of Wells: N/A | Non-Stick Surface: Yes | Peel-Off Capability: N/A
    1. New Wave Posh Tabletop Palette

    New Wave Posh Table Top Palette Wood 12x16
    • Handcrafted: Our wooden artist paint palettes are...
    • Material: Hard white maple wood provides the paint palette...

    The New Wave Posh Tabletop Palette is made from maple wood. It is completed with a grey finish which adds to its elegance.

    What makes this palette unique is that it is entirely crafted by hand and that sets it apart from other machine-made palettes.

    Because it is made from polished wood, that makes it water-resistant and warp-free.

    Experience

    We admire this palette because it’s made of wood and that adds to its grand and luxurious looks.

    One might think that wood palettes are restricted to indoor use. However, this palette resists both water and outdoor elements. So it is great for outdoor paintings just as it is for indoor use.

    The mixing surface accepts all kinds of paints and is also very easy to clean, especially with a damp cloth.

    One thing that this palette lacks is a thumb hole. Because it is large, we think that a thumb hole would have completed it since handling becomes a little difficult. Otherwise, keeping it in place will also work fine if you’re working in the comfort of your own home.


    Pros

    • The palette’s surface is polished and very smooth, making it water-resistant, dust-resistant, and easy to clean up
    • It has got a superior, elegant look
    • Cleaning the palette is pretty easy with a damp/wet cloth


    Cons

    • It lacks a holder/thumb hole which could make it easier to handle


    Material/Type: Wood | Shape: Rectangular | Size (inches): 12 x 16 | Number of Wells: N/A | Non-Stick Surface: No | Peel-Off Capability: No
    1. Richeson Wooden Palettes

    Jack Richeson 696037 Wooden Oval Palette, 12" x 16"
    • The Package Length of the Product is: 16.0"L
    • The Package Width of the Product is: 12.0"W

    We have another grand wooden palette -- and that is the Jack Richeson Wooden Palette. 

    This one is an oval-shaped palette. It accepts all kinds of paints as well because the surface is smoothly polished. 

    It is medium-sized and it comes at a fairly affordable and reasonable price. 

    Experience

    The palette is quite sturdy and robust. It does not easily develop scratches from scraping or scrubbing off dried paint.

    On being a wooden palette, we think it’s great that it has a thumb hole. It can help reduce numbness caused by handling it for too long.

    The surface receives all types of paints beautifully since it is pretty smooth. It can also be cleaned up easily under running water.

    Also, the palette shows no signs of damage even after it has dropped a number of times.

    However, it can cause them to dry quickly and you have to coat it with oil so that it will prevent the paints from drying faster. This should be done once a while.


    Pros

    • It is a highly condensed, strong palette that prevents scratches and breakage
    • The surface is very smooth and accepts all paints well, especially oil paints
    • It has a thumb hole for comfortable handling even during long hours of painting


    Cons

    • Sometimes, it requires you to oil the surface so that the paints do not dry off fast


    Material/Type: Wood | Shape: Oval | Size (inches): 12 x 16 | Number of Wells: N/A | Non-Stick Surface: No | Peel-Off Capability: N/A
    1. Pro Art Oil Palette Pad

    Pro Art Palette Disposable Pad Oil 9"x 12" 50pc
    • Pro Art Palette Disposable Pad Oil 9"x 12" 50pc
    • Disposable paper eliminates clean up.

    So far we have discussed washable and reusable palettes. However, these next ones are disposable palette papers in a pad. 

    The Pro Art Oil Palette Pad contains 50 sheets of tearable palette paper. 

    These sheets are made of treated papers to make them impenetrable when mixing oil paints. 

    Experience

    The best thing about these paper palettes is that when you’re done, you can just discard them. There’s no need to set aside time for cleaning them as you do with washable palettes.

    Also, you can even use them more than once, depending on how you mix your paints and how you clean them.

    These are very light and thin sheets. It makes them convenient and easy to take to the studio or to school, in the case of art students.

    Besides being light, all the sheets have thumb holes which, in this case, just adds more to the comfort of handling them.

    However, because these are paper palettes, they have the tendency to make your paints dry out much faster than they should. And to solve this, you need to spray spritz water on them to maintain the moisture of the paints.


    Pros

    • Sheets are both disposable and tearable
    • They receive oil/acrylic paints well since they are impenetrable
    • The pad is very lightweight and thin which makes transporting them easy


    Cons

    • Since these are paper palettes, they can cause paints to dry off pretty fast


    Material/Type: Paper pad with palette shape | Shape: Rectangular | Size (inches): 9 x 12 | Number of Wells: 50 wells | Non-Stick Surface: No | Peel-Off Capability: N/A

    Best Palettes For Oil Painting Comparison Table

    Product Material/Type Shape Size (inches) Number of Wells Non-Stick Surface Peel-Off Capability
    Art Advantage Non-Stick Palette Plastic Oval 15.51 x 12.51 n/a Yes No
    Mijello Ellipse Peel Off Palettes Plastic Oval 18 x 15 1 Central Well No Yes
    Stephen Quiller Color Wheel Palette Plastic Round 5.98 x 7.87 N/A No No
    New Wave Glass Palette Tempered Glass Rectangular 12 x 16 N/A Yes N/A
    Mijello MAP-3025 Multi-Purpose Palette Plastic Rectangular 9 x 13 24 Yes Yes
    Caran d’Ache Palette Aquarelle Metal Rectangular 10 x 5 N/A Yes N/A
    New Wave Posh Tabletop Palette Wood Rectangular 12 x 16 N/A No No
    Richeson Wooden Palettes Wood Oval 12 x 16 N/A No N/A
    Pro Art Oil Palette Pad Paper pad with palette shape Rectangular 9 x 12 50 wells No N/A

    Guide to Buying the Perfect Palette

    Buying Guide For The Perfect Palette

    If you are still wondering which features you should look for in a palette, take a look at our few suggestions:

    • Smoothness: A palette that is smooth allows you to mix oil paints really well. Not only that, but they are also very easy to clean up afterward.
    • Comfortable to hold: When looking for a palette, make sure you find one that’s comfortable to hold. Whether it has a thumb hole or not, a palette should not strain your hand.
    • Lightweight: Finally, a good palette should be light. It must be easy to carry around with you. It also shouldn’t take up too much space inside your bag.

    Palettes For Oil Painting FAQ's

  • What are the different types of palettes for oil painting?

    There are several types of palettes for oil painting, including plastic palettes, glass palettes, metal palettes, and wooden palettes. Each has its advantages and disadvantages, so choosing the right one for your specific needs is important.

  • How do I choose the right palette for oil painting?

    When choosing a palette for oil painting, consider factors such as the size and shape of the palette, the material it’s made from, the number of wells, and whether it has a non-stick surface. It’s also important to consider your own personal preferences and painting style.

  • Can I use any type of palette for oil painting?

    While you can technically use any type of palette for oil painting, certain types may be better suited to your needs. For example, plastic and glass palettes are easy to clean, while wooden palettes may be better for artists who prefer a more traditional feel.

  • What is the best material for a palette for oil painting?

    The best material for a palette for oil painting will depend on your individual needs and preferences. Glass and plastic palettes are non-porous and easy to clean, while metal and wooden palettes may have a more traditional feel.

  • Do I need a non-stick surface on my palette for oil painting?

    A non-stick surface can be helpful when working with oil paints, making mixing and blending colors easier. However, it’s not strictly necessary, and some artists prefer to work without a non-stick surface.

  • How many wells do I need on my palette for oil painting?

    The number of wells you need on your palette for oil painting will depend on your individual needs and painting style. Some artists prefer a large number of wells for mixing and blending, while others prefer fewer wells for a simpler setup.

  • Conclusion On Palettes for Oil Painting

    Conclusion

    Thank you for taking the time to read this comprehensive article on the best palettes for oil painting. We hope you found it both valuable and informative. Our goal is to make sure you choose the right palette that best fits your artistic needs, preferences, and budget.

    Out of these 9 best palettes for oil painting, here are our top three recommendations:

    1. Best for easy cleaning and lightweight design: The Art Advantage Non-Stick Palette is an ideal option for artists who value quick and effortless cleanup after their painting sessions. Its lightweight design also allows for long hours of work without causing hand fatigue.
    2. Best for paint-mixing versatility: The Mijello Ellipse Peel Off Palette is a good option for those who require a larger space for mixing multiple colors. It also offers peel-off capabilities of dried paint, which can be beneficial in terms of efficiency.
    3. Best for portability and versatility: The Caran d'Ache Palette Aquarelle is the right choice for on-the-go artists, due to its thin and lightweight design. The dual-sided feature, offering a smooth side for wet paints and a textured side for dry paints, makes it versatile for different types of media.

    As artists ourselves, we know that each person's preferences vary when it comes to selecting the perfect palette. Consider your own painting habits, the space you have available for work, and your budget when selecting one of these top-rated picks. Ultimately, the key is to choose a palette that enhances your experience, allowing you to fully enjoy and express your creativity in every painting session.

    Remember, the right palette can make all the difference in elevating and simplifying your creative process. We hope our recommendations and insights will help you choose the best possible palette to fuel your passion for oil painting. Happy painting!

    Related Articles

    10 Best Canvases for Oil Painting | Beginner & Artist Grades

    8 Best Oil Paint Brushes of 2023

    11 Best Oil Paints for Beginners & Professionals Artists Alike

    Learn What is the Best Surface for Oil Painting

    How Long It Will Take Oil Paint To Dry  & How to Speed It Up

    Oil Painting for Beginners Basics & How to Use Oil Paints

    Learn How To Dry Oil Paint Faster Overnight

    12 Oil Painting Supplies That Every Oil Painter Needs in the Studio

    5 Things You Should Know Before Painting Oil Paint on Glass

    Learn How to Make Oil Paints Dry Faster

    What Are The Benefits of Oil Painting?

    A paintbrush is like an artist’s body part – vital and indispensable.

    Creating an art masterpiece without the right brush is a long shot. If you look at the successful artists and experts worldwide, you will find one thing in common – a set of paintbrushes that is perfect for them, tailored to fit their needs. 

    When it comes to oil paints, choosing the right brush is even more critical. There are many reputed brands providing art and craft supplies. We have carefully shortlisted eight of the best oil paintbrushes that you should consider. 

    Without further ado, let’s get to the detailed reviews of these oil paint brushes

    Best Oil Paint Brushes

    Best Oil Paint Brushes

    Whether you're a beginner or a professional artist, this list will help you find the perfect set of brushes to take your oil painting to the next level. So, without further ado, here's the list of the 7 best oil paint brushes.

    1. Art Advantage Oil Brush Set - Best For Beginners

    Art Advantage Brush Set t Oil/Acrylic 24pc
    • Art Advantage Brush Set t Oil/Acrylic 24pc

    Art Advantage offers an affordable and comprehensive paintbrush set, specifically designed for beginners, students, and art hobbyists. The collection includes 24 paint brushes of varying sizes and finishes – six brushes each of Flat Synthetic, Flat Natural, Round Synthetic, and Round Natural. The set comes in a well-organized storage pouch.

    Experience

    We have included the 8724VP Paintbrush Set from Art Advantage in this list for one reason – it is one of the most inexpensive paintbrush sets available in the market and works well for beginners and hobbyists. You get an adequate variety of brush types in this set that works well with both oil and acrylic paints.

    We especially liked this set as it includes twelve sturdy hog bristle brushes and twelve white nylon brushes. Each set of twelve has one flat brush and one round unit in sizes 2, 4, 6, 8, 10, and 12.

    If you are new to the field of art and have a lot to learn, you would not want to spend a fortune on art supplies. This set is specifically designed for beginners who most likely operate on a tight budget.

    You need to be aware of the fact that this paintbrush set is not meant for professional artists and experts. There is only so much you can get for a substantially low price. As long as you are comfortable with average quality at rock-bottom prices, this set will not disappoint you.


    Pros

    • One of the most reasonably-priced paintbrush sets available in the market
    • Offers versatile use across different mediums, including oil and acrylic
    • Ideal set for beginners and art students 


    Cons

    • It is not well-suited for professionals and experts, who will prefer a better, long-lasting brush set 


    Bristle Material: Synthetic and natural bristle brushes | Brush Shape: Round, Flat | Handle Material: Wood | Quantity in Set: 24

    2. Da Vinci Maestro Brush - Best For Professionals

    da Vinci Brushes 4225 Watercolor Brushes, Size 3 (Series...
    • Maestro kolinsky red sable sampler set of Rounds
    • Includes Size 3 in series 10, 11, 35 and 5506 to compare and...

    The second spot in our recommendations has a paintbrush set for beginners, so let’s talk about the flip side of the coin. At the second spot, we have included the Da Vinci Maestro, which is a series of high-quality, top-of-the-line brushes that can be used with oil and acrylic paints.

    Experience

    You can choose from seven varieties of paint brushes in the Maestro series by Da Vinci – Round, Rigger Medium, Rigger XL, Filbert, Linear Medium, Cats Tongue, and Bright. You can also choose the perfect size to meet your needs, ranging from 0 to 24.

    There is no gimmick here – this is undoubtedly one of the most premium paint brushes available in the market and accordingly commands a steep price. We especially liked the top-notch finish of these brushes, handmade in Germany from male winter Kolinsky Red Sable.

    If you are a professional artist or an expert who is looking for a premium paintbrush, the Da Vinci Maestro is the winner hands down. You get superior control and spring with the seamless ferrules and plated brass.

    Da Vinci brushes have been a go-to product for professionals and experts for several generations. You will be pleased to know that these brushes are handcrafted from sustainably-sourced wood to prevent any adverse environmental impact. We recommend these brushes due to their long-lasting needle-like point and longer bristles that allow faster tip action and tight point snap.


    Pros

    • Premium paintbrush from a reputed brand, guaranteeing optimal quality
    • An ideal product for professional artists and experts
    • Each brush is handcrafted in Germany, goes through a thorough quality inspection, and is carefully packaged
    • Only gold and nickel-plated brass ferrules are used in this brush, making it rust-resistant


    Cons

    • It is quite expensive, with each brush costing close to $30 


    Bristle Material: Kolinsky Sable | Brush Shape: Round, Flat | Handle Material: Wood | Quantity in Set: 4

    3. Princeton Catalyst Polytip Oil Brushes - Best Value For Money

    Princeton Catalyst Flat Brush, Synthetic, Long Handle, Size...
    • BREAKTHROUGH TECHNOLOGY—The Catalyst series features...
    • ADVANCED POLYTIP BRISTLES—Each fiber has two to three...

    The Princeton Catalyst Polytip Bristle Brushes serve as an advancement in the scientific breakthrough of synthetic fiber technology. It is available in eight varieties – Fan, Flat brushes, Egbert, Round, Filbert, Bright, Short Filbert, and Angle Bright. It is also available in all sizes, ranging from 0 to 24.

    Experience

    We recommend the Princeton Catalyst Polytip Brushes to anybody who wants to get their hands on a nearly artist-grade brush without having to pay an exorbitant price. These brushes are available at an average price of most synthetic bristle brushes but can effectively mimic the high quality of natural fiber brushes.

    You might be thinking about how a synthetic fiber brush can compete with top-notch natural fiber painting brushes like the Da Vinci Maestro we just reviewed. The answer is reasonably straightforward – these brushes are made in a unique manufacturing process wherein each synthetic fiber is split at the end, allowing for a far heavier load that improves flow as well as efficiency.

    If you are a student or a hobbyist who wants to get a taste of artist-grade art supplies without burning a hole in your wallet, you should consider buying these paintbrushes. If you are a seasoned veteran in the art field, you know this is a close replica of artist-grade paint brushes, but you may still find it useful if you want to save some bucks.

    We especially liked painting with brushes because they are incredibly responsive and super stiff. These oil paint brushes are specifically designed for use with acrylic and oil paint.


    Pros

    • The bristles maintain an excellent shape even after heavy use
    • It is moderately priced to be attractive for students as well as experts
    • The synthetic tips are split at the end to have an increased volume 


    Cons

    • It is not the sturdiest option if you indulge in scumbling techniques and the brushes may lose their shape 


    Bristle Material: Synthetic Bristle | Brush Shape: Flat | Handle Material: Wood | Quantity in Set: 1

    4. Winsor & Newton Winton Long Handle Brush Set

    Winsor & Newton Winton Long Handle Brush (5 Pack) (Round 6,...
    • Made From Quality Hog Bristles, Hand-Set Into...
    • The Natural Curve Of The Hog Bristle Produces A Resilient...

    A list of art and craft supplies will rarely be complete without at least one product from the reputed house of Winsor & Newton. The Long Handle Brush Set includes five oil paintbrushes – Fan (size 3), Flat (size 6), Bright (size 8), Filbert (size 6), and Round (size 6).

    Experience

    What we loved about the Long Handle Brush set from Winsor & Newton is the superior build of each brush. These brushes are made from the best Chinese hog bristles and are seamlessly handcrafted into corrosion-resistant ferrules. Although specifically designed for use with oil paints, these brushes work equally well with acrylics too.

    You will notice a slight natural curve of the bristle on these brushes, allowing them to retain shape even after heavy use. The brush handles have a green-colored natural wood finish, which is protected by four coats of lacquer. You will not have to worry about these paint brushes for oil looking old and discolored anytime soon.

    These animal fiber bristle painting brushes are not as top-notch as Sable but are significantly better than most synthetic bristle brushes. When you buy this set from Winsor & Newton, you get a better-than-average brush set at a very reasonable price.

    However, if you are looking for an artist-grade brush set and have considerable funds at your disposal, you should go for an expensive and better alternative.


    Pros

    • A carefully designed starter set for beginners, students, and hobbyists
    • The Winsor & Newton brand promises optimal quality and long-lasting performance
    • The set includes a nice variety of medium-sized brushes, perfect for starting with oil paints
    • Costing around $4 per brush, it is one of the most affordable quality brush sets in the market


    Cons

    • It is not meant for professional artists and experts, who may find its quality to be sub-standard 


    Bristle Material: Natural,Hog | Brush Shape: Round, Flat | Handle Material: Wood | Quantity in Set: 5

    5. LorDac Arts Detail Paintbrushes

    LorDac Arts Paint Brush Set, 7 Artist Brushes for Painting...
    • PREMIUM DESIGN FEATURES — Benefits of Taklon synthetic...
    • EXCELLENT VARIETY FOR MULTIPLE EFFECTS — 7 professional...

    One of the most inexpensive paintbrush sets in this list, the LorDac Arts Detail Paintbrush set includes 12 brushes that can be used with oil, acrylic, or watercolor paint. The set includes five liners (sizes 0000, 000, 00, 0, and 1), five rounds (sizes 0000, 000, 00, 0, and 1), and two flats (sizes 0 and 1).

    Experience

    LorDac Arts Details Paintbrush is the only product in this list that is made from Taklon synthetic bristles. We love these bristles because relative to natural hair bristles they are less likely to break, more hygienic, easier to clean, and last longer.

    The set has a comprehensive variety of brushes, each featuring a short handle design to enable precision work. We recommend this set to students and beginners as it is very reasonable, costing less than $1.5 per brush.

    We especially liked the durable construction of each brush in this set. The ferrules are made of aluminum and are double-crimped onto the handle, ensuring long-lasting performance and resistance to damage from paint and solvents.

    You will appreciate the ergonomic design of these brushes – perfectly balanced thick, and short handles ensure a stress-free and fatigue-free painting experience. It is reasonably straightforward to maintain precision points with these brushes, helping substantially with detailed painting.


    Pros

    • One of the most inexpensive brush sets on the market
    • Offers versatile use and works well with oil, acrylic, and watercolor paint
    • Features sturdy construction and double-crimped ferrules to ensure longevity
    • Features synthetic Taklon bristles which are better than natural hair bristles


    Cons

    • In spite of all the right things about this brush set, it is not artist-grade and may not appeal to veterans in the art industry 


    Bristle Material: Synthetic Bristle | Brush Shape: Round, Flat | Handle Material: Wood | Quantity in Set: 7

    6. Grumbacher Academy Oil & Acrylic Brush

    Grumbacher Academy White Nylon Bristle Oil & Acrylic 3-Brush...
    • Includes brushes: Flat 6, Flat 8 and Flat 10
    • Soft, white nylon bristles ensure even strokes and excellent...

    Next on our list of recommendations for oil paint brushes is an all-out winner for students, beginners, and hobbyists. Grumbacher offers student-grade Academy brushes, made of white nylon synthetic fibers. These brushes are excellent for use with oil as well as acrylic paint. Grumbacher offers these brushes in the flat brushes variant in three sizes 6, 8, and 10.

    Experience

    When it comes to recommending a paintbrush for students, we will undoubtedly pick the Grumbacher Academy Oil & Academy Brush. It has a sleek design and soft nylon synthetic bristles, making it ideal for various painting techniques, including glazing.

    We cannot emphasize how easy and comfortable it was to carry out fine detailed work with these brushes. If you indulge in any painting endeavor which requires you to minimize brush strokes, you will realize how comfortable these brushes from Grumbacher are.

    You will appreciate the thoughtful design of these brushes. It features a long handle with an oversized center, which allows you an unparalleled comfort level to paint for hours on end. While painting your next masterpiece, this brush will not be causing any hand fatigue or discomfort.

    The design of this brush from Grumbacher is not only ergonomic but also attractive. The brush has a durable wood shaft that is covered with a beautiful blue metallic finish. Students will like this brush as it works well with all popular paint mediums like watercolor, acrylic, and oil painting.


    Pros

    • Made from versatile synthetic bristles and can be used with oil and acrylic paint
    • Features an oversized center and a long handle, allowing for comfortable use even for hours
    • Handcrafted explicitly for beginners and students 


    Cons

    • Available in limited varieties and can be used for some specific painting projects only 


    Bristle Material: Synthetic Bristle | Brush Shape: Round, Flat | Handle Material: Wood | Quantity in Set: 3

    7. Escoda Optimo Oil Paintbrush

    Escoda - 2410-1 Art Products Escoda Optimo Series Artist Oil...
    • ARTIST PAINTBRUSH MADE WITH PURE KOLINSKY HAIR - Optima...
    • SIZE 1 OIL AND ACRYLIC PAINTBRUSH - Pointed round shape...

    Escoda Optimo offers a premium artist-grade Kolinsky Sable brush which is great for controlled, delicate works of art. The fine-haired bristles form a soft brush head, enabling better flow and control. These are available in nine different brush sizes in either round or flat brush variants.

    Experience

    We are essentially paying homage to the adage “Last but not least” by keeping the Escoda Optimo Paintbrush at the end of our product review list. It is one of the most beautiful artist-grade oil paint brushes you can get your hands on. It is handcrafted from the best Kolinsky Sable bristles.

    Escoda uses its exclusive triple crimping process to make these brushes. You will never have to worry about any of the bristles falling out from the ferrule or the unit breaking into two parts, even after the most substantial use.

    We especially liked this premium product as a lifetime guarantee backs it, so you know you get your money’s worth when you shell out those extra bucks to buy it. It is also ISO 9001/100 certified, proving that it adheres to the best consistency and quality standards.

    It is an artist-grade brush and students or beginners will not be willing to spend so much. A trivial limitation of the brush is that it is specifically designed for oil painting brushes and does not fare well when used with other mediums like watercolor and acrylic paints.


    Pros

    • Comes with a lifetime guarantee, ensuring best-in-class consumer satisfaction
    • Holds an ISO 9001/100 certification, meeting the best consistency and quality standards
    • One of the most excellent artist-grade Kolinsky Sable brushes available in the market
    • The ferrule of this brush is crimpled thrice, to ensure that none of the bristles fall out even during heavy use


    Cons

    • Expensive and cannot be used with other mediums like acrylic and watercolor paints


    Bristle Material: Kolinsky Sable | Brush Shape: Round | Handle Material: Wood | Quantity in Set: 1

    Best Oil Paintbrushes Comparison Table

    Product Bristle Material Brush Shape Handle Material Quantity in Set
    Art Advantage Oil Brush Set Synthetic and natural bristle brushes Round, Flat Wood 24
    Da Vinci Maestro Brush Kolinsky Sable Round, Flat Wood 4
    Princeton Catalyst Polytip Oil Brushes Synthetic Bristle Flat Wood 1
    Winsor & Newton Winton Long Handle Brush Set Natural,Hog Round, Flat Wood 5
    LorDac Arts Detail Paintbrushes Synthetic Bristle Round, Flat Wood 7
    Grumbacher Academy Oil & Acrylic Brush Synthetic Bristle Round, Flat Wood 3
    Escoda Optimo Oil Paintbrush Kolinsky Sable Round Wood 1

    Best Oil Brushes Buyers’ Guide

    Buying Guide For The Best Oil Paintbrushes

    Buying the perfect paintbrush is more complicated than most people realize. Professional artists and experts know what to look for in a paintbrush, but the same cannot be said for beginners and hobbyists. We have summarized some helpful information that can help you choose the best paint brushes that meets your needs.

    1. Size and Shape of Brush

    There are two essential factors to consider when you purchase a paintbrush – the size and the shape.

    As a general rule of thumb – go for a size 6 or smaller brush for intricate details, size 6 to size 14 for color blocking or medium-scale work, and size 14 or above for washing, backgrounds, or large-scale paintings.

    Paintbrushes are available in many shapes, but if you are going to work with oil paints, you should be concerned with three – Flat for edges, lines, and color blocking, Filbert for blending, Round for patterns, curved lines, and detailed work.

    1. Cleaning and Maintaining Your Brushes

    No matter which paintbrush you choose to buy, it will last as long as you do the needful for preserving its useful life. Unlike most of other art supplies, a paintbrush is very delicate and needs utmost care. Even the most expensive brushes will give in to damage unless you clean them regularly.

    You should choose a brush that is easy to clean, with regular soap water or inexpensive solvents that are readily available.

    1. Parts of a Brush

    You should be aware of the different parts of an oil painting brushes to gain a better understanding of what makes a brush better than the rest. There are three major components of a brush – bristles, handle, and ferrule.

    Bristles can be made of sable or hog hair, natural or synthetic, hard or soft. Handles can be long or short and are usually made from plastic or wood. A longer handle is preferred by artists who prefer a lighter touch on the canvas. The ferrule is the metal band that holds the bristles on one end and attaches to the handle on the other. A durable ferrule is vital for a long-lasting paintbrush.

    Oil Paint Brushes FAQ's

  • What are the different shapes of oil paintbrushes?

    Oil paint brushes come in a variety of shapes, including round, flat, filbert, fan, and angular. Each shape is suited for different types of brushstrokes and painting techniques.

  • How do I choose the right brush size for oil painting?

    When choosing the right brush size for oil painting, consider the size of your canvas and the level of detail you want to achieve. Smaller brushes are best for fine details, while larger brushes are better suited for broader strokes and larger areas of color.

  • How do I clean my oil paintbrushes?

    To clean oil paint brushes, use a solvent such as turpentine or mineral spirits. Rinse the brush in the solvent until the paint is removed, then rinse it with soap and water. Avoid using hot water or harsh cleaners, as these can damage the brush.

  • How do I store my oil paintbrushes?

    To store oil paint brushes, rinse them with solvent to remove any remaining paint, reshape the bristles, and allow them to air dry. Store them upright in a brush holder or wrapped in paper or cloth to protect the bristles.

  • How often should I replace my oil paintbrushes?

    The lifespan of oil paint brushes depends on how often they are used and how well they are cared for. As a general rule, brushes should be replaced when they start to lose their shape or become too worn to create the desired brushstrokes.

  • How do I care for natural hair oil paint brushes?

    To care for natural hair oil paint brushes, rinse them with solvent after each use, reshape the bristles, and store them upright in a brush holder. Avoid using hot water or harsh cleaners, as these can damage the brush.

  • What are synthetic oil paint brushes?

    Synthetic oil paint brushes are made from man-made materials like nylon or polyester. These brushes are often less expensive than natural hair brushes and are suitable for a variety of painting techniques.

  • Can I use the same brushes for acrylic and oil painting?

    While it’s possible to use the same brushes for acrylic and oil painting, it’s generally not recommended. Acrylic paint can be harder on brushes and can cause them to wear out more quickly. It’s best to use separate sets of brushes for each medium.

  • Best Oil Paint Brushes Final Thoughts

    Conclusion

    We hope you've found this article on the best oil paintbrushes informative and helpful. Thank you for taking the time to read it! Now that you are well-versed with various oil paintbrush options, it's time to reveal our top three recommendations. Ready to take your painting endeavors to the next level?

    Out of these 7 best oil paintbrushes, here are our top three recommendations:

    1. Best for beginners: Art Advantage Oil Brush Set is an ideal option for those who are just starting with oil painting, due to its affordability and variety, as well as its compatibility with both oil and acrylic paints. However, remember it's not designed for professional artists and experts.

    2. Best for professionals: Da Vinci Maestro Brush is a good option for professional artists and experts who are looking for premium, high-quality brushes for the finest work. Made from Kolinsky Red Sable and handcrafted in Germany, these brushes offer superior control, spring and rust resistance, albeit with a higher price-tag.

    3. Best value for money: Princeton Catalyst Polytip Oil Brushes is the right choice for painters who want to experience artist-grade brushes without breaking the bank. Made with advanced synthetic fiber technology, these brushes mimic the quality of natural fiber brushes and are suitable for both acrylic and oil paint.

    As you take a moment to decide which of these top three best oil paintbrushes to invest in, we encourage you to consider not only the quality but also the value and suitability for your specific painting style and needs. Whether you are a beginner, a professional artist, or a hobbyist looking to hone your skills, rest assured that your creativity will be beautifully expressed with these fantastic oil paintbrush options. And, as you embark on your journey with oil painting, remember that progress is made by practicing your craft, enjoying the process, and never being afraid to make a few happy accidents along the way. Happy Painting!

    Related Articles

    10 Best Canvases for Oil Painting | Beginner & Artist Grades

    11 Best Oil Paints for Beginners & Professionals Artists Alike

    Learn What is the Best Surface for Oil Painting

    How Long It Will Take Oil Paint To Dry  & How to Speed It Up

    Oil Painting for Beginners Basics & How to Use Oil Paints

    Learn How To Dry Oil Paint Faster Overnight

    12 Oil Painting Supplies That Every Oil Painter Needs in the Studio

    11 Best Palettes for Oil Painting

    5 Things You Should Know Before Painting Oil Paint on Glass

    Learn How to Make Oil Paints Dry Faster

    What Are The Benefits of Oil Painting?

    Pastel pencils are just amazing when it comes to producing artworks that are not only vibrant but have an amazing color depth to them as well. 

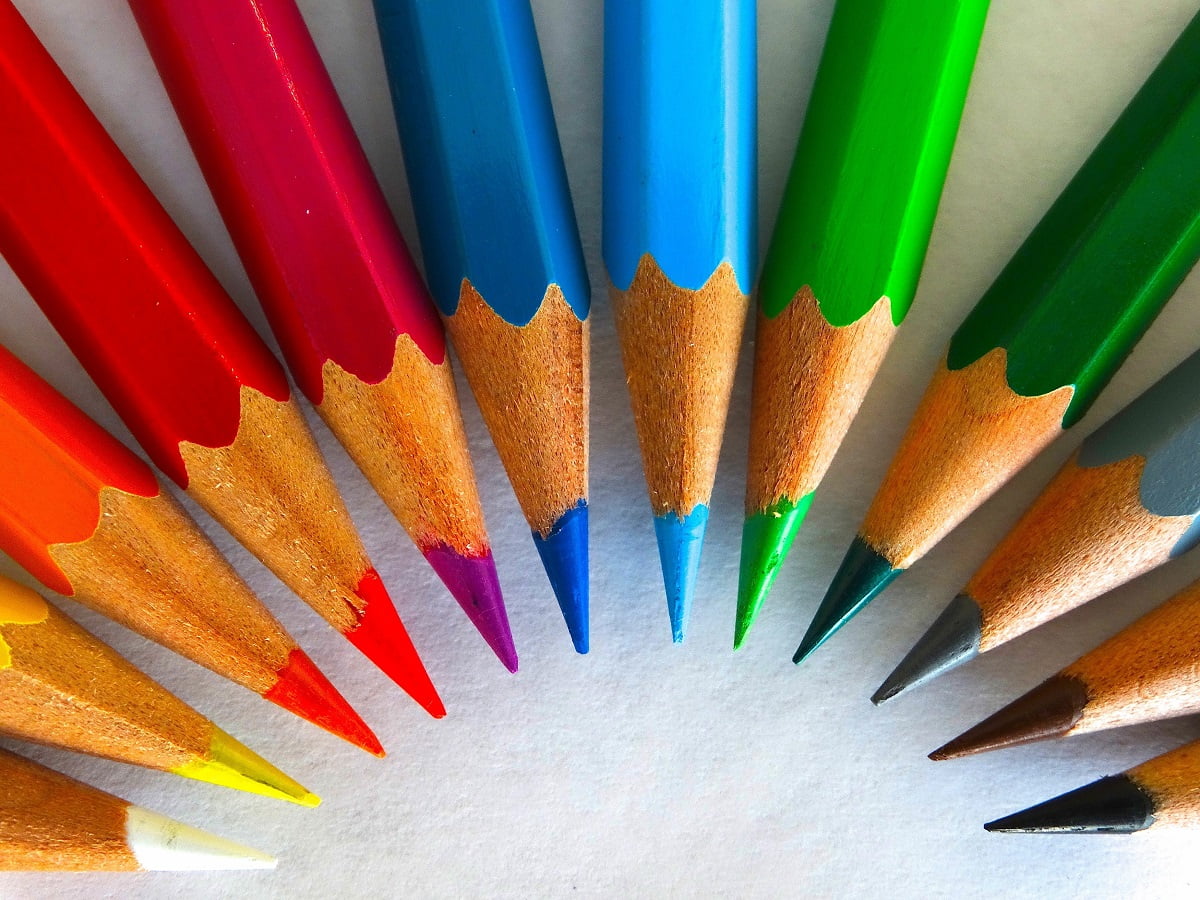
    They might be one of the newer forms of coloring medium in the market, but definitely not the least sought after. 

    Their ease of use and vibrancy make them one of the most popular coloring mediums today. 

    However, with so many brands and models in the market, it can be rather difficult to pick the right pastel pencil set that can fit your needs and budget the best. 

    So if you too are struggling with your choices, then to help you out we have brought our top 7 list along with a helpful guide. 

    We are confident that our article today will be able to solve all your pastel pencil-related problems. 

    Best Pastel Pencils Of 2023

    Best Pastel Pencils

    Whether you're a professional artist or just starting out, these pastel pencils are sure to take your artwork to the next level. So, without further ado, here's the list of the 7 best pastel pencils.

    1. Stabilo CarbOthello Pastel Pencils - Best for Affordable Versatility

    STABILO - CarbOthello - Chalk-Pastel Pencil - ARTY+ - Tin of...
    • The excellent quality chalk-pastel coloring pencils come in...
    • colors can be mixed and blended.

    The Stabilo CarbOthello range of Pastel pencils is perhaps one of the most popular models out there in today’s market. They are extremely easy to use and can be utilized effortlessly by amateurs and student artists alike. They are quite affordable as well and come in five different set ranges to fit a wider variety of needs and purposes. 

    Experience 

    One unique aspect of the Stabilo CarbOthello pastel pencils is that they come with their own lightfastness rating, which not many of the other standard models come with. The Stabilo CarbOthello pencils have a star on the barrel that indicates their individual ratings, which really comes in handy when creating detailed artwork.

    And more importantly, you can purchase these pencils individually as well. So if you’re out of a particular shade, then you can go ahead and purchase that color without having to invest in a complete set.

    The lead diameter of the Stabilo CarbOthello is 4.4mm in width, which makes these pencils just perfect for both smaller more detailed, along with larger more colorful artworks. And even though these pencils might have a lot of vibrancy to their shades, they are indeed very affordable and will come in handy for both professional users and student painters.

    However, the variety of colors that the Stabilo CarbOthello sets provide can feel inadequate for many users. Their largest set comes with just 60 colors, which may not be the best for attempting the most vibrant art pieces.


    Pros

    • Comes with its own lightfastness rating on the barrel
    • Affordable and can fit both amateurs and professionals alike
    • 4.4mm width lead perfect for both detailed and large-scale artworks
    • Easy to use and can be purchased separately


    Cons

    • The amount of color variety may feel inadequate for many


    Set size: 12, 24, 36, 48, 60, and 72 | Lead hardness: Soft | Color range: 60 colors | Lightfastness: Excellent | Water-resistant: Yes
    1. General’s Pastel Pencils - Best for Beginner Artists

    General Pencil 4400-36A Assorted Colors Multipastel (R)...
    • The pencils have a smooth pigment rich bendable formula that...
    • Great for beginners as well as professional artists

    General’s has been known to be one of the best charcoal pencil manufacturers for some years now. And their range of pastel pencil sets is made specifically with beginner users and amateur artists in mind. The sets are quite cheap with easy-to-use and easy-to-apply features, thereby making them a fan favorite among student artists. 

    Experience 

    What we absolutely loved about the General’s set is that these pencils are sturdy; incredibly sturdy. You can sharpen them to a point and not have to worry about the lead crumbling even during rough use and constant sketching exercises.

    They are extremely smooth on the roughest of paper surfaces as well and will help you to easily make large-scale artworks that do not require much detailing.

    All in all, we will be recommending the General’s Pastel pencils more for beginners than professionals really. As their lead width is on the thicker side; control may be an issue and producing smaller and more detailed artwork with them may just be very difficult.

    But on the plus side, these pencils are perfect for large-scale works where detail is not really a factor. Using them is relatively easy as well, and it won’t take much to get used to these pencils.

    However, you cannot buy these pencils individually, so if you’re out of a particular shave, you will have to invest in a whole set.


    Pros

    • One of the cheapest pastel pencil sets on our list today
    • Extremely amateur-friendly, as these pencils are very easy to get used to
    • Durable lead which can glide over the roughest of papers
    • Perfect for large-scale paintings and sketching


    Cons

    • Not recommended for detailing and precise art 
    • The shades are not sold individually 


    Set size: 36 | Lead hardness: Soft | Color range: 36 colors | Lightfastness: Not specified | Water-resistant: No
    1. Faber-Castell Pitt Pastel Pencils - Best for Detailed Artworks

    Faber-Castell Pitt® Pastel Pencils - Tin of 60
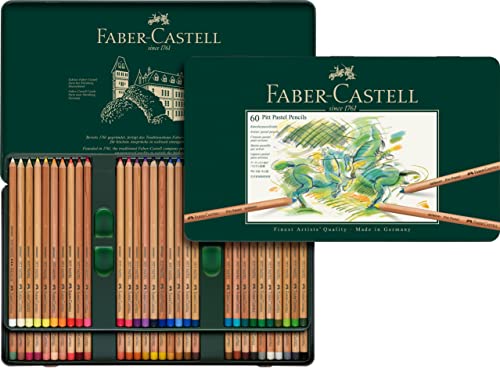
    • The Pitt Pastel Pencils contain a high level of pigment with...
    • Faber-Castell is renowned for its high quality, innovative...

    Established in 1761, Faber-Castell has been one of the world's biggest and most well-known manufacturers of art supplies for centuries now. Their latest in-line Pitt Pastel Pencils are one of the most versatile models which along with being budget-friendly have a really good light fastness and performance as well. 

    Experience 

    As a middle-of-the-road pastel pencil set, the Faber-Castell Pitt is something that both amateurs and professionals seek out for their art pieces. And though in terms of price and set range, they might feel like an average to standard pastel set, however, that is not the case with their performance.

    When it comes to consistency, the Pitt pastel has a sort of light, buttery smoothness to them which not even some of the more high-end brands are able to produce.

    Moreover, these pencils have a water solvent binding to them as well. Hence, if you’re looking to turn those pastel shades into a nice rich watercolor, then you will be very easily able to do that with the help of a damp brush or even a wet sponge.

    For professional painters, Faber-Castell tries to help them out by providing a convenient color chart on their website. This helps them to get an idea of the color variants they want if they are planning to do detailed artwork.

    However, their largest set comes with 60 different colors, which again like the Stabilo CarbOthello set might not be adequate for the most vibrant of artworks.


    Pros

    • One of the most versatile pastel pencil sets
    • Perfect for both detailed works and larger arts
    • Has a professional grade consistency but comes at a very affordable price tag
    • The Faber-Castell website has a color chart that gives an idea of the color variations


    Cons

    • Not enough shades for the most vibrant art pieces


    Set size: 60 | Lead hardness: Medium | Color range: 60 colors | Lightfastness: Good | Water-resistant: Yes
    1. Derwent Pastel Pencils

    Derwent Pastel Pencils, Wooden Box, Assorted Colors, 72...
    • Traditional pastel application with a more precise pencil...
    • Smooth, round barrel allows for the pencil to be held...

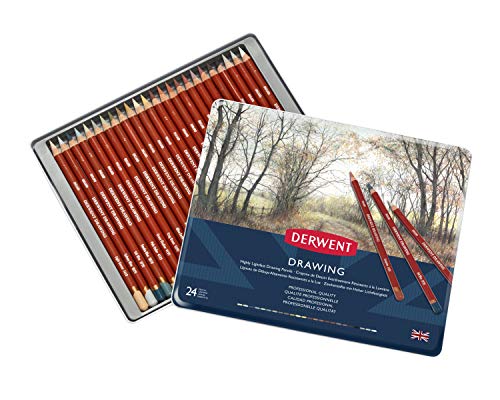
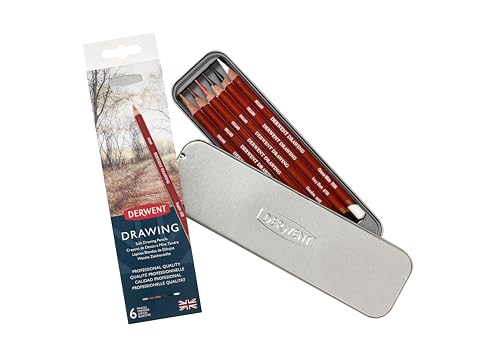
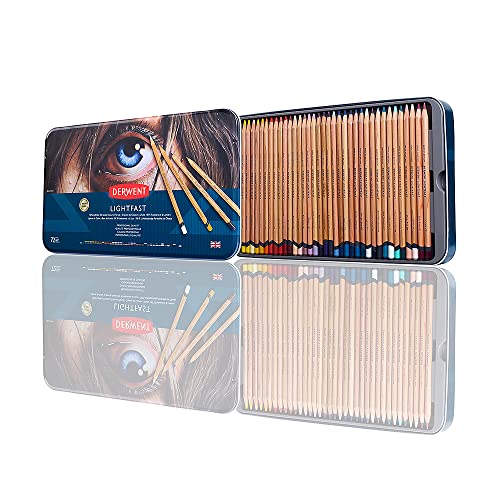
    The Derwent brand has been in the art supply industry for years now. They have designed and produced a wide variety of quality art tools from charcoal pencils, to student-friendly watercolor pencils along with synthetic water brushes. They love to make their products for newer users and beginners, and their pastel pencils are definitely not alien to that fact. 

    Experience 

    The largest Derwent set comes with 72 different color variants all wrapped neatly inside a tin and wooden box. So not only will they allow you to effortlessly make vibrant and unique artwork, but you can also carry these pencils around wherever you go.

    The Derwent set is just perfect for all forms of plein-air painting. You never know when inspiration might strike, hence the portability of this set is what makes it so very popular among globe-trotting artists and outdoor student painters alike.

    Professional artists love the Derwent set for their amazing vibrancy and consistent performance across all types of surfaces. Each of the pencils comes with a product number on the barrel as well, so that if you’re out of a shade, you will be easily able to purchase it separately.

    However, one gripe that we do have with the Derwent model is durability. The lead of these pencils is prone to crumbling is subjected to rough use for a considerable amount of time. So if you are using the pencils on finer details for a small-scale pastel piece, then it’s important to keep this aspect of the pencils in mind.


    Pros

    • Perfect for beginners and for those new to using pastel pencils
    • 72 different colors allow a great amount of vibrancy
    • Portability ensures that the pencils are perfect for plein air painting


    Cons

    • The lead tends to crumble during detailed works


    Set size: 24 and 72 | Lead hardness: Soft | Color range: 72 colors | Lightfastness: Good | Water-resistant: Yes
    1. Koh-i-Noor Gioconda Soft Pastel Pencil Set

    No products found.

    Another pastel pencil set that’s built specifically for beginners. The Koh-i-Noor Gioconda has 48 different color varieties in them, which may not seem like much, but the amount of detail that they can provide is truly astounding. 

    Made in the Czech Republic, the Koh-i-Noor Gioconda pencils can be just what you’re searching for and are pinning to go from a brand outside of the US. 

    Experience 

    Something which is not typically found in a student set but Koh-i-Noor provides is a color chart. Now you might just be wondering, what significance will a color chart bring in a pastel set that’s made for beginners? 

    Well, the Koh-i-Noor Gioconda pencils have a lead width diameter of 3.8mm, which will be one of the smallest on our list today. What a thinner lead provides, is an amazing amount of detail to every art piece and this is where the color chart comes in. 

    Even though this is a student-level set, it will still allow you to make incredibly detailed works without many problems. The pencils even come with a lightfastness rating along the barrel, which again is of great help for detailing purposes. 

    However, with just 48 colors vibrancy can indeed be an issue. And none of the shades are sold separately, so if you do run out on color, be prepared to invest in an entire shade. 

    But, all in all, this student-grade pastel pencil set is a great contender to all the other high-end brands out there. 


    Pros

    • Comes with its very own color chart
    • The 3.8mm lead width is just perfect for detailed artwork
    • Has it’s very own lightfastness rating on the barrel
    • Perfect for students and beginner users


    Cons

    • Not enough color variation
    • The pencils are not sold separately


    Set size: 48 | Lead hardness: Soft | Color range: 48 colors | Lightfastness: Not specified | Water-resistant: No
    1. Conté à Paris Pastel Pencils

    Conté à Paris 48 Count Assorted Pastel Pencils
    • The exceptional diameter of the Conte a Paris pastel pencil...
    • The pastel is perfect pencil companion to soft pastel...

    As one of the best options for a complimentary medium for soft pastel pieces, the Conté à Paris pencils are just amazing when it comes to producing reliable, clean lines on larger artworks. They have the quality of soft pastels and have quite a buttery texture and consistency which blends rather well with all the other mediums. 

    Experience 

    What we find to be so very unique about the Conté à Paris pastel pencil set is their led diameter. Unlike the other pastel pencil sets on our list today, the lead width of the Conté à Paris is not at all narrow.

    They have gone the opposite way and provided their pencils with a lead diameter of 5.0mm which is quite a lot. So, what these pencils will allow you to do is to help you to create reliably clean outlines for any soft pastel piece without having the fear of the stick crumbling.

    These pencils also blend exceptionally well with the soft pastel colors, as they have a very rich texture and a buttery consistency allowing them to provide rich tones and shades on paper.

    The pencil shades are also sold individually, so investing in an entire set again is also out of the question. But, their set only comes with 48 different colors which can be rather small for certain vibrant pieces. And doing really detailed artwork with a 5.0mm lead diameter can be incredibly difficult as well.


    Pros

    • Rich, buttery texture that blends well with soft pastels
    • The 5.0mm tip is incredibly useful for creating outlines for soft pastels
    • Durable lead tip leaves no crumbles behind during use
    • Pencil shades are sold separately


    Cons

    • Comes in only 48 different colors
    • Detailing will be an issue with the 5.0mm tip


    Set size: 48 | Lead hardness: Hard | Color range: 48 colors | Lightfastness: Good | Water-resistant: Yes
    1. Caran D’ache Pastel Pencils

    When people generally think of Caran D’ache and their range of art supplies, ‘expensive’ is probably the first word that comes to their mind. Well, we wouldn't blame them for thinking that really, as most of their products, especially the high-end models come at a fortune and are specifically aimed towards professionals who do a lot of commissioned work. 

    Experience 

    The Caran D’ache Pastel Pencils may be expensive, but when it comes to quality, not many models will be able to compete with what these are able to bring to the table.

    The Caran D’ache comes with the widest color range out of all the other models on our list today. It will provide you with a fantastic 84-color variation so that you can achieve the most vibrant of artworks as effectively as possible.

    All the pencils have some of the best lightfastness as well, and a lot of them can go up to 100 years without showing any signs of fading. They also provide a color chart with each set which not only displays the whole line-up but also the separate pigments that are used in making each pencil.

    In terms of lead diameter, the Caran D’ache pencils are on the smaller side. With a 3.0mm width, they are perfect for finer detailing work and making intricate patterns which a lot of professional artists generally do.

    Hence, if you really don’t mind the pocket-emptying expenses of the Caran D’ache pencils, then they will be the best you can ever hope for.


    Pros

    • Has one of the best texture and lightfastness ratings
    • Comes with 84 colors for making the most vibrant and vivid artwork
    • Easy to use and comes with a color chart
    • The 3.0mm tip is perfect for detailed work


    Cons

    • Extremely expensive, and out of reach for average customers
    • Somethings to keep in mind when using Pastel Pencils


    Set size: 84 | Lead hardness: Soft | Color range: 84 colors | Lightfastness: Excellent | Water-resistant: Yes

    Best Pastel Pencils Comparison Table

    Product Set size Lead hardness Color range Lightfastness Water-resistant
    Stabilo CarbOthello Pastel Pencils 12, 24, 36, 48, 60 and 72 Soft 60 colors Excellent Yes
    General’s Pastel Pencils 36 Soft 36 colors Not specified No
    Faber-Castell Pitt Pastel Pencils 60 Medium 60 colors Good Yes
    Derwent Pastel Pencils 24 and 72 Soft 72 colors Good Yes
    Koh-i-Noor Gioconda Soft Pastel Pencil Set 48 Soft 48 colors Not specified No
    Conté à Paris Pastel Pencils 48 Hard 48 colors Good Yes
    Caran D’ache Pastel Pencils 84 Soft 84 colors Excellent Yes

    Pastel Pencils Buyer's Guide


    Buying Guide For The Best Pastel Pencils

    Before investing your money in any art material, it’s important to look out for the features that it’s providing and seeing if they will adequately fit your requirements or not. And this habit should be maintained for picking pastel pencils as well. 

    So if you’re getting your pencils from the local art supply store or from an online retailer then make sure to keep the following points in mind. 

    1. The Budget

    Unless you’re a professional painter, you will rarely want a pastel pencil set that will put a hole through your hard-earned savings. Hence, the price you pay is always essential when deciding on new art materials. 

    There are a lot of money-grabbing art supply manufacturing companies out there that you should look out for. They create substandard products that promise a lot, and deliver very little but come at a really steep price. 

    So, keep a realistic budget, find reliable companies through customer reviews, and select the ones who have the best value-for-money pencil sets. 

    You can try going for high-end pastel pencil sets as well, but these ones can be quite expensive and fit professional needs better. 

    For beginner painters or for those who haven’t used pastel pencils before, going for a cheaper set is the wiser choice. But cheap here shouldn’t necessarily mean low quality. Just be on the lookout for standard sets which are budget-friendly. 

    1. Variety in Purchase options

    Not everyone looking for pastel pencils want to purchase a complete set. There are a lot of users who want to pick a few particular shades separately and not invest in a whole bunch of colors that they will never use. 

    So make sure to use the pencils of a brand that will allow you to buy the shades you want separately. Because if you’re using a brand that doesn’t sell shades separately then after using up a particular color buying them from another brand may bring inconsistencies in your artwork. 

    Certain companies like General Pastel Pencils and Koh-i-noor Gioconda Pastel Pencils provide colors separately, and will really come in handy for large-scale artworks. 

    However, on the other hand, if you’re into smaller art pieces and like using a lot of color shades, then a complete pastel pencil set might be the way to go. 

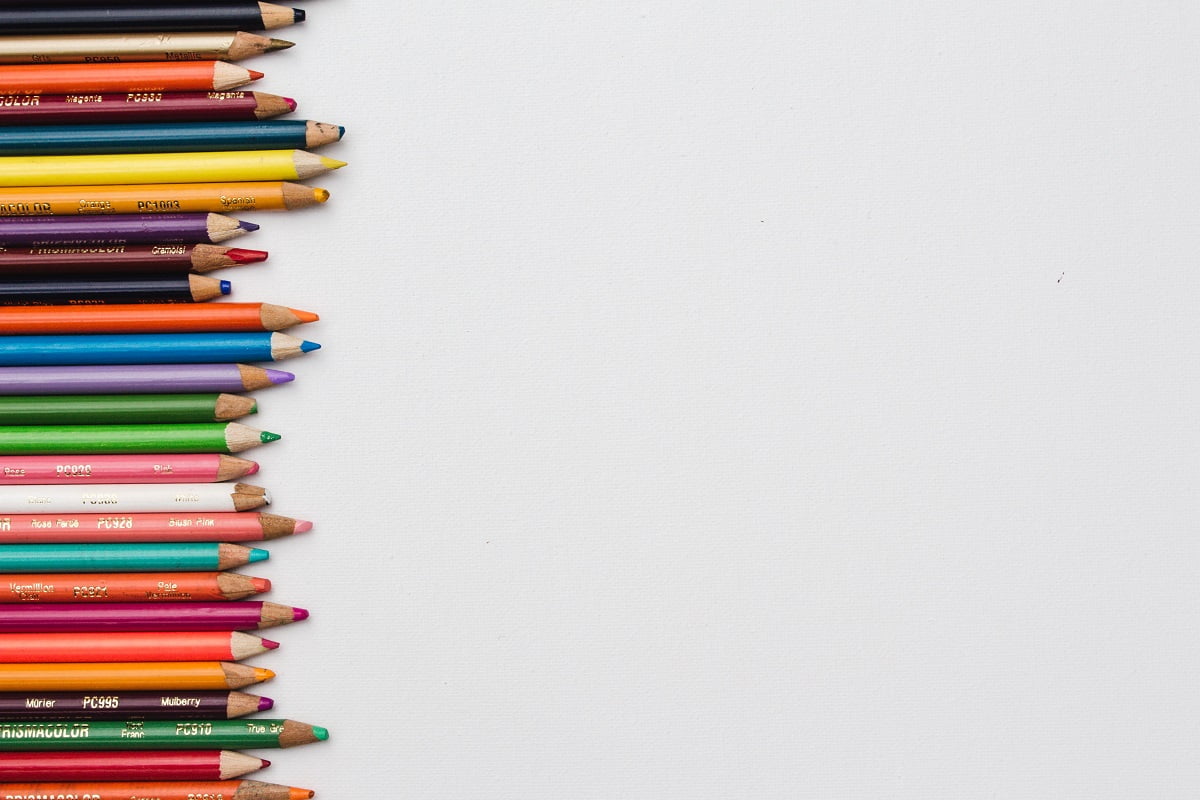
    1. The Available Colors

    Pastel pencils are just amazing when it comes to blending with each and creating different color shades and contrasts. And more the variety of colors present in a set the more vivid and colorful can the resulting artwork can get. 

    However, unlike soft pastels which host up to 400 different colors, pastel pencils, on the other hand, are quite limited when it comes to variety. 

    Caran D’ache is probably the only company that comes close to 100 different shades while the rest (like Derwent and Koh-i-noor) are near average at the 60 mark. 

    1. The Diameter of the Lead

    Not a lot of people are aware of the importance of the diameter of the lead of a pastel pencil. In our opinion, it is perhaps one of the most important features of these pencils alongside color shade and color variety. 

    The diameter of the lead of any pastel pencil determines the amount of control that you have over that coloring medium. An artist, may he/she be a professional or an amateur needs to have complete control over the medium that he/she is using. 

    Precision and finesse are key when it comes to creating pieces that house a lot of intricate detailing and vividness. So, if you’re working on one such concept, then it’s best to go for pastel pencils that support a narrower diameter. 

    The bigger the diameter, the lesser will you be able to control the medium; however, you will be able to color faster and speed up the task with them. Hence, for large artworks that don’t need a lot of detailing, or even for some abstract Avant-garde paintings, pastel pencils with bigger diameters will suit the purposes just fine. 

    Additionally, another thing which you should take note of is that the pencils with bigger diameter barrels are a bit more expensive than the narrower ones. 

    And if you are not certain which diameter lead will suit your needs the best, then you can always opt for a middle-range one which can give you a basic idea on what you’re looking for. 

    1. The Difference Between Professional Grade and Student Grade Pastel Pencils

    Not just pastel pencils but any form of art supply comes in two particular variants: professional and student. 

    There was a time when professional-grade art supplies were out of reach for the more amateur painters. However, recent advancements in technology have bridged the gap considerably, but that’s not to say that commercial-grade pastel pencils are cheap. 

    And, on the other hand, it will also be wrong to think of student-level pencils to be products that are of low quality. There are a lot of brands that sell great quality pastel pencils but at a very affordable rate. 

    Moreover, today, the biggest difference that you will spot between these two categories will be with lightfastness ratings, pigment purity and general composition. 

    The student-grade pastel pencils are perfect for those who are still new to using this type of drawing medium. Or if you’re planning to try out new techniques and new styles of painting, then the student-grade pencils will be able to help you achieve that without breaking the bank. 

    However, if you do a lot of commissioned pieces and try to make your art as vivid and colorful as possible, then professional pastel pencils might be the best choice for you. 

    Additionally, there are a lot of companies that provide color charts with their professional-grade pencils. This will help you to compare each pencil individually and make it significantly easier to chart out color schemes for your next piece. 

    1. Just pastel or watercolor as well?

    There are a lot of pastel pencils in today’s market that comes with a water solvent binding. This allows the already existing color strokes to act as a source of watercolor with just the use of a slightly wet and damp brush. 

    This makes these sorts of pastels quite similar to watercolor pencils, but their tones and shades are richer and much more vibrant. So if you’re having issues with your existing soft pastel piece, then you can get these variants of pencils and jazz up your artwork a bit. But they are a bit expensive and out of reach for a lot of average customers, and we shall not be recommending them to beginner users as well. 

    1. Portability

    Not all companies provide their pastel pencils with nice little boxes so that you can carry them around everywhere. So if you love to do a lot of plein air painting or just like to travel everywhere with your art kit, then it’s always more preferable to go with a set of portable pastel pencils. 

    Best Pastel Pencils FAQ's

  • Should you just work with pastel pencils?

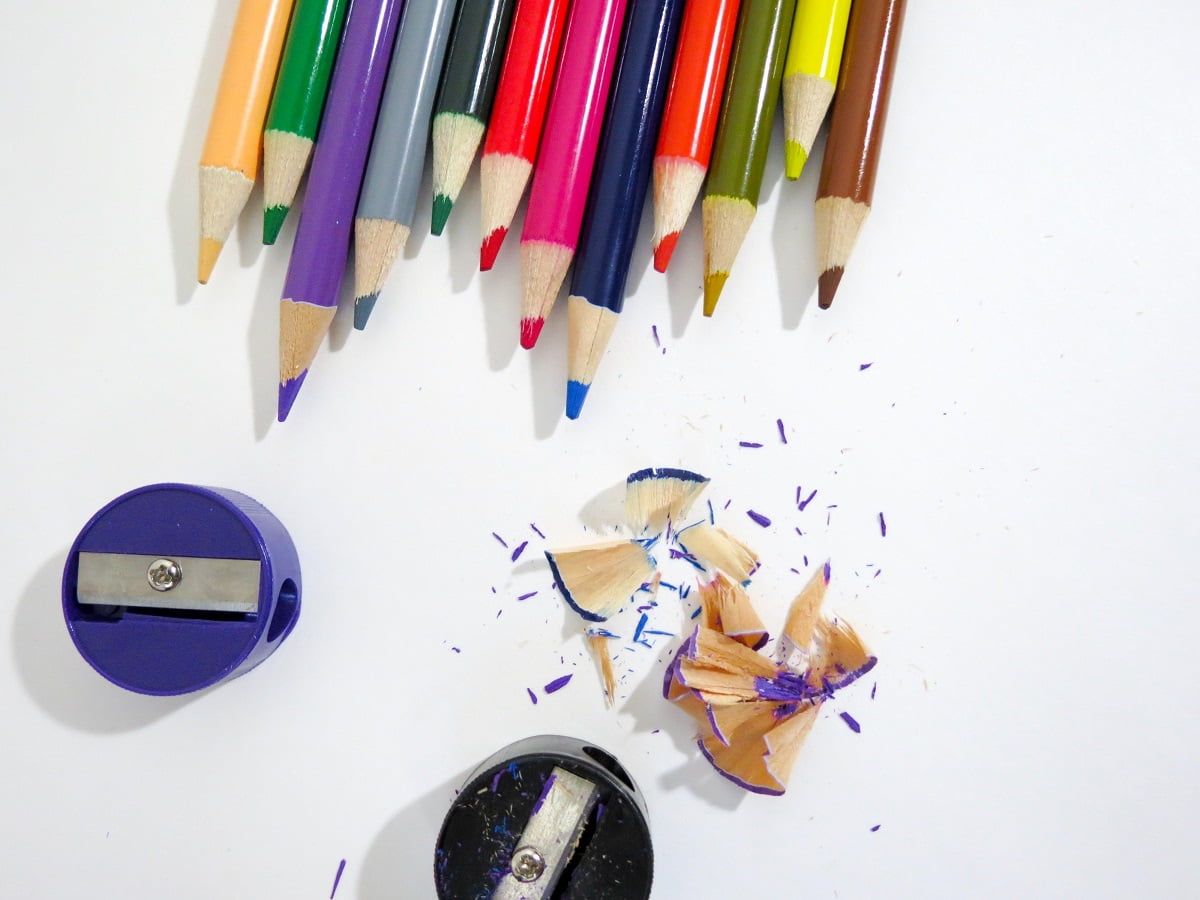
    Initially, when you’re starting out with this medium, it’s better to work with nothing but the pencils until you familiarize yourself with them. And once when you start to grow in confidence, then you branch off to other sections such as fixatives, which deal primarily with preservation, along with blending stump. 

    Tools such as a blending stump or even a tortillon can be a fantastic way of getting more even gradients in your artwork while employing newer techniques and sketching methods. 

  • How would you sharpen your pastel pencil?

    Unlike your normal color pencils and watercolor pencils, sharpening a pastel pencil can indeed be very tricky. 

    If you’re using a traditional pencil sharpener,  you will notice that after bringing the pastel pencil to a fine point, the lead will inevitably break. This can be rather annoying if you’re doing a lot of detailing work or using pencils which are quite expensive and don’t sell separately. 

    As an effective alternative to the traditional pencil sharpener, a sanding block can be a valid option. But if you don’t mind spending a bit to keep the sharpness and durability of your pencils in check, then you can buy those special pastel pencil sharpeners which a lot of brands like Derwent manufacture and sell. 

  • Which type of paper suits pastel pencils the best?

    If you are new to the pastel pencil scene, then the mixed media paper will be your best bet. 

    But for professional users, we will recommend the specially made oil pastel papers which have a stark surface contrast from other traditional drawing papers. 

    These papers have a set tooth which is much deeper and will allow the pastel shades to effortlessly latch onto the surface and immediately blend into it. 

    Mixed paper media, on the other hand, will help the pastel to latch on but blending and layering is quite inferior in comparison. 

  • Pastel pencils vs. regular chalk pastels

    Pastel pencils are like a ‘medium-soft pastel encased in wood,’ whereas the chalk pastel, on the other hand, have a firmer body which is easier to work with. 

    The major differences between these two medium lie in pigment concentration and binder ratio. The chalk pastels have a higher concentration of binder, which is what makes them firmer and perfect for line work. 

  • From where to purchase pastel pencils online

    Though there are a lot of art supply stores online which sell these products at discounted and non-discounted prices, in our opinion Blick and Amazon are the best out of them. 

    But this is only true for the US; if you live in some other country and planning to get one of the above set there, then it’s best to first look up which retailers provide the best service there and plan accordingly. 

  • Happy Coloring

    Conclusion

    Thank you for taking the time to read our carefully researched article on the best pastel pencils available today. We hope the insights and experiences provided have been helpful for you in choosing the perfect pastel pencil set to suit your artistic needs. Your talent deserves the best tools, and finding the right pastel pencil can make a world of difference in achieving exciting and vibrant artwork.

    Out of these 7 best pastel pencils, here are our top three recommendations:

    1. Stabilo CarbOthello Pastel Pencils are an ideal option for those who need a pastel pencil set that offers a lightfastness rating on the barrel and great affordability. Their 4.4mm width lead makes them suitable for both detailed and large-scale artworks.
    2. General’s Pastel Pencils are a good option for beginners and amateur artists looking for a budget-friendly set that performs well on rough surfaces. They are extremely durable and perfect for large-scale paintings and sketching, but may not be suitable for detailed, precise art.
    3. Faber-Castell Pitt Pastel Pencils are the right choice for artists who want a versatile pastel pencil set that is suitable for both detailed works and larger art, whilst still maintaining an affordable price tag. Their website's color chart is also a helpful feature that adds to the overall convenience of using this set.

    We encourage you to explore these recommended pastel pencil sets, as well as the other fantastic options we've outlined in this article. Experimenting with different brands and styles of pastel pencils can help you discover new techniques and unlock your full artistic potential. Happy drawing, and may your artistic journey be filled with vibrant colors that bring your creations to life!

    Artists are a talented bunch of people. 

    Contrary to popular belief, they toil day and night to create those breathtaking masterpieces; masterpieces that break the dull monotony of life, inspire us, and stir our imagination. 

    Of course, for being such skilled crafts-persons, they need to have the right implements. Given their finesse, it is natural for them to get picky about their stationery. Pens, brushes, paper, canvas, models, pencils, you name it.

    Wait, did we mention palettes yet? A palette is what an artist pours paint on to dab his brush into, and, as you’ve guessed, it’s indispensable to any artistic endeavor which involves paint and a brush. 

    Choosing this all-important palette can be a daunting and challenging task, given how competitive the market is. Fortunately, we’re here to help, as we’ve rounded up the ten best palettes for acrylic paint

    So, let’s get started! 

    Best Palettes For Acrylic Paint

    To help narrow down your search, we've put together a list of the 7 best palettes for acrylic paint. Whether you're a beginner or a professional artist, these palettes are sure to enhance your painting experience and help you achieve the perfect color blends.

    1. Amaco Paragona Glass Palette - Best for Premium Quality & Feel

    Amaco Glass Artists Palette rectangular
    • Amaco Glass Palette - 11" x 14", Rectangular
    • 11" x 14"

    The second item on our list is Amaco’s Paragona Glass Palette. This palette is, as you’ve guessed, made of glass, but it’s no ordinary glass. It’s made of safety glass, which does not crumble away even if it breaks.

    Read on to find out more about it.

    The Paragona is made of safety glass, which is a very upmarket material and puts it in the category of premium palettes. It is meant to be rested on a table instead of being held in hand, so it’s suitable for jobs that don’t require moving around.

    It comes with a white safety vinyl back, which helps with grip on flat surfaces as well as in hand. It measures 11 x 14 inches, which makes it larger than the Darice by half an inch on each side. The glass is tempered, which is the same technology used for making screen guards. It is also non-porous, meaning the colors won’t stick or seep through the glass.

    Experience

    During our time with Paragona, we found it to be one of the best palettes on the market.

    The glass construction makes the Paragona feel incredibly upmarket. However, the construction does not pose a safety threat, as, during our drop test, the glass merely broke, and not a single shard was ejected.

    The vinyl back makes it easy to grip and also helps it stay in place on angled surfaces.

    The glass itself is non-porous, meaning colors will neither seep into the glass nor stick to its surface. During our time, we tested this palette with acrylic paint and, with a little bit of peeling, it came off easily.

    The surface is, naturally, smooth, as are the edges, so this palette is kind to brushes.

    This palette is, of course, washable and reusable.


    Pros

    • Tempered glass construction feels upmarket
    • Colors neither seep through nor stick to the glass
    • The vinyl back feels good and sticks to surfaces well
    • Washable and reusable


    Cons

    • Slightly pricey
    • No organization system


    Material: Glass | Size: 15 x 11.5" | Shape: Rectangular | Number of wells: N/A | Cleaning Method: Easy to clean

    2. Strathmore 300 Series Palette Paper - Best for Disposable Convenience

    Strathmore 300 Series Palette Paper Pad, Tape Bound, 12x16...
    • Ideal paint mixing palette for an easy, mess-free clean up
    • Convenient and disposable paint-mixing surface

    Okay, before we get accused of cheating by including palette paper instead of a “real” palette, hear us out. The basic job of a palette is to hold your paints and enable you to mix them, so we don’t see how palette paper fails you as far as doing that is concerned. 

    We’re reviewing one of the best palette papers on the market today: the Strathmore 300 Series Palette Paper. It comes in two sizes, 9 x 12 inches and 12 x 16 inches. It comes in a tape-bound pad form which includes 40 sheets of palette paper. 

    The Strathmore pad is one of the best options in the market if you’re looking to buy a surface for mixing your paints but don’t want to invest in a palette.

    As the sheets are disposable, it is recommended to buy them for one-time use applications, as they are made of high quality, and replacing them repeatedly may prove to be costly.

    The paper features a quality of 67 gsm, which makes mixing easy. The paper also tears easily, should the need arise to tear a bit of it.

    One side of the sheet features a slight wax coating to prevent the seeping and leaking of the paint to the other side.

    The sheets are also very versatile as they can be used on top of conventional palette pads as well.

    Experience

    In our experience, the Strathmore paper proved to be one of the best surfaces to mix colors on and works great as a substitute for a traditional palette.

    Starting with the quality of the paper, the 67 grams per square meter count means that mixing colors is easy and it doesn’t feel cheap in any way. We appreciated the wax coating on one side, and during our usage, it did not let the paint seep.

    We tried both sizes and felt that the smaller size is suited for casual applications whereas the larger size is best suited for more professional takes.

    The disposal of these papers makes them great, and you don’t have to deal with any messy cleanup.


    Pros

    • Mixing paints is easy, thanks to the paper’s great quality
    • Two different sizes
    • Easy to tear off
    • Wax coating on one side prevents seepage


    Cons

    • Not as convenient as traditional hand-held palettes


    Material: Paper | Size: 9 x 12", 12 X 16" | Shape: Rectangular | Number of wells: N/A | Cleaning Method: Disposable

    3. Blick Clear Acrylic Palette - Best for Traditional Design Lovers

    The fourth item on our list is the Clear Acrylic Palette by Blick Art Materials.

    Don’t let the name fool you into thinking that the palette is made of glass, as it is made of clear plastic.

    Blick Art Materials is a family-owned business that supplies arts and craft equipment.


    The palette has clear plastic construction, as opposed to a glass construction, as some might believe.

    This palette features a traditional palette shape, i.e., it looks like an engorged crescent moon and features a thumbhole.

    There are no wells or recesses for pouring your paints, so this palette should be held more or less upright.

    Experience

    In our experience, the Blick Clear Acrylic Palette proved to be a very well-rounded option for those looking for a simple, no-frills palette.

    Starting with the design, the traditional ‘C-shape’ of the palette brings back memories of old wooden palettes to mind. It features a thumbhole whose position is very well-judged.

    The lack of wells and recesses of some sort means you will have to hold the palette more-or-less upright, which can get tiring at times.

    The edge(s) of the palette are smoothened out, and this palette is brush-friendly. Cleaning, though, is a tough task, as you will need some alcohol solution to clear the dried acrylic paint from your palette.


    Pros

    • Simple, functional palette
    • The traditional design looks great
    • Thumbhole is convenient
    • Rounded edges are brush-friendly


    Cons

    • No wells or recesses
    • Cleaning is tough


    Material: Acrylic | Size: 9" x 12" | Shape: Rectangular | Number of wells: N/A | Cleaning Method: Disposable

    4. Masterson Stay-Wet Premier Palette

    Masterson Sta-Wet Premier Palette Airtight Paint Palette...
    • The Sta-Wet Premier Palette is a unique system for...
    • Unique sponge and palette paper combine to keep paint moist

    The fifth item on our list is the Masterson Stay-Wet Premier Palette. As the name indicates, this palette is designed to stay wet and prevent your paints from drying up.

    Paint life is the main priority for Masterson. It features a patented sponge along with permeable palette paper, which works together to keep the paint moist. It also features a lid that keeps the paint wet for use, even between painting sessions.

    The palette ships with one sponge insert and five palette paper sheets, so you might incur recurring costs if you plan on using this product for a long time.

    The palette measures 16 x 12 inches, one of the largest palettes we’ve come across so far, so space shouldn’t be a problem.

    Experience

    In our experience, the Masterson proved to be a wonderful palette that truly does keep paints moist.

    Starting with the setup, it is fairly straightforward. Just run the sponge through tap water, place it in the box, place the paper on top and you’re set!

    We were surprised that the paper is porous when most of the industry is trying to make their sheets as impermeable as possible. However, permeability is essential if the paints are to remain moist.

    We found that the sheets are washable and reusable, which is novel and rather surprising!

    This palette not only saves money on paints, then, but also saves money on sheets.


    Pros

    • Keeps paint moist for long periods
    • Washable and reusable
    • Novel idea
    • Great for saving money


    Cons

    • No walls or recesses
    • Dealing with a wet sponge may prove to be cumbersome


    Material: Acrylic | Size: 16 x 12" | Shape: Rectangular | Number of wells: N/A | Cleaning Method: Disposable

    5. Richeson Wooden Palette

    Jack Richeson 696040 Wooden Armed Palette with Left Hand...
    • Left Hand grip ( for Right handed painter )
    • Palette measures 26-1/2x 18

    Yep, here it is! This is the traditional wooden palette that the Picassos of Yore used to create their masterpieces. This palette by Richeson is as simple as it gets.

    This product is, basically, the same old wooden palette that has continued for centuries. It features a traditional design, which, when viewed from a certain angle, looks a man talking!

    It comes in six size options, ranging from 9 x 12 inches to 18 x 26 ½ inches. The palette comes in four shapes: rectangle, oval, and two for left-handed or right-handed people.

    On all of these palettes, the thumbhole is reinforced with extra wood to boost stability.

    Experience

    In our experience, the Richeson palette is the best example of the KISS (Keep It Simple, Stupid!) rule.

    The wood on our test unit was well-polished, smooth, and devoid of protrusions and jagged edges.

    The wood also helps keep paint from falling off, should you feel the need to tilt the palette, which is why it was the preferred material for a long while.

    We found that the extra wood under the thumbhole, while great for stability, also prevents the palette from sitting flat on surfaces, which is appreciated, as reaching a flat palette is cumbersome.

    The edges need a little work, though, as they might damage your brushes if you aren’t careful.


    Pros

    • Simple, functional, and proven design
    • Paint does not fall off easily
    • Comes in a multitude of shapes and sizes


    Cons

    • No real distinguishing features
    • Edges could’ve been smoother


    Material: Wood | Size: 26.5 x 18" | Shape: Rectangular | Number of wells: N/A | Cleaning Method: Requires thorough cleaning

    6. Artilicious Paint Tray Palette

    Artlicious Paint Palette - Plastic Paint Tray Palettes for...
    • ALL THE COLORS AT YOUR FINGERTIPS - The reusable painting...
    • STURDY & LONG LASTING - Made with sturdy plastic, these...

    The seventh item on our list is the Paint Tray Palette by Artilicious.

    It has a plastic construction and comes in either a 3-pack oval shape or a 6-pack round shape.

    It features white plastic construction.

    This palette comes in two shapes. The oval shape features a thumbhole and mostly round wells, with a few exceptions. The circular shape features ten uniform round wells and resembles the chamber of a revolver.

    The palette is made of white molded plastic for durability and ease of cleaning. It is suitable for containing oils, watercolors, and acrylic paints.

    Experience

    During our time with the Artilicious, we found it to be very similar to the Darice paint palette, albeit with a different shape and with a few other differences.

    We tried the oval palette first and are glad to report that it preserves the classic palette shape properly. It has six round wells and four irregular wells, which do an excellent job of holding the paints in their places.

    The round palette drops the thumbhole but gains a large center area in addition to the ten small round wells.

    The palettes are made of durable plastic which neither looks nor feels very premium, but it enables the Artilicious to be light on the wallet and easy to clean. We had a great time painting with these palettes and found that the colors come right off with simple tap water, even if you leave them overnight.


    Pros

    • Available in two shapes
    • Features lots of wells for organization
    • Plastic construction is cheap, durable, and easy to clean


    Cons

    • Plastic construction might put some people off
    • Wells’ edges aren’t very smooth


    Material: Plastic | Size: 8.8 x 6.5" | Shape: Oval | Number of wells: 10 | Cleaning Method: Easy to clean

    7. Large Plastic Palette

    Easyou High Grade Nonstick Plastic Palette Large Palette...
    • Good for students and artist to mix colors.
    • Durable plastic palette with smooth surface. Easy for use...

    Well, we’re yet to see a more meta name! The Large Plastic Palette is, well, just a large plastic palette! Measuring 11 ¾ x 16 ½ inches, this palette will not leave you wanting for size.

    This palette is like most of the other palettes we’ve featured on the list so far. It has a plastic construction and features the typical oval shape with a thumbhole, so it’s suitable for artists who prefer to work standing up.

    Instead of wells, the palette features three thin dividers, which aren’t very useful for organizing but are useful for preventing watercolors from spilling and mixing.

    Experience

    During our time with the Large Plastic Palette, we found that it works just fine as a, well, large plastic palette!

    The palette is, obviously, made of plastic. It is high-quality plastic, though, and feels reasonably premium in hand. It is resistant to stains, and if they do occur, they’re very easy to wash off.

    This palette is huge and does feel slightly unwieldy at times, but, if you’re looking for a lot of real estate from your palette, you will not be disappointed.

    We are, however, disappointed with the thumbhole. If you’re right-handed, you won’t face any problems, but if you’re left-handed, the ridges and irregularities will not let you work properly.

    The same goes for the edges of the dividers, which are rough and can potentially harm your brush.


    Pros

    • Very large; you won’t be left wanting for space
    • Dividers are a nice little extra
    • Comes in the classic oval shape


    Cons

    • Thumbhole could’ve been better designed
    • Dividers and edges might harm your brush


    Material: Plastic | Size: 16 x 12" | Shape: Round | Number of wells: N/A | Cleaning Method: Easy to clean

    Best Palettes For Acrylic Paints Comparison Table

    Product Material Size Shape Number of wells Cleaning Method
    Amaco Paragona Glass Palette Glass 15 x 11.5" Rectangular N/A Easy to clean
    Strathmore 300 Series Palette Paper Paper 9 x 12", 12 X 16" Rectangular N/A Disposable
    Blick Clear Acrylic Palette Acrylic 9" x 12" Rectangular N/A Disposable
    Masterson Stay-Wet Premier Palette Acrylic 16 x 12" Rectangular N/A Disposable
    Richeson Wooden Palette Wood 26.5 x 18" Rectangular N/A Requires thorough cleaning
    Artilicious Paint Tray Palette Plastic 8.8 x 6.5" Oval 10 Easy to clean
    Large Plastic Palette Plastic 16 x 12" Round N/A Easy to clean

    Buying Guide For The Best Palettes For Acrylic Paint

    If you’re in the market for a new palette, keep these factors in mind before deciding on one.

    1. Wells

    Some dividers come with wells for organizing your paints whereas some feature a smooth, flat surface. Decide which kind you want beforehand.

    If you are methodical in your approach, get a palette with wells, and if you’re a free spirit, we recommend a spartan palette.

    1. Shape and size

    We have reviewed several palettes in this list, and they come in many different shapes and sizes. Get a palette that perfectly suits your needs.

    For example, get a large rectangular palette if you plan to work sitting down on a table, otherwise, get an oval palette with a thumbhole.

    Thumbhole

    1. Thumbhole

    The aforementioned thumbhole should be your number one priority if you like working standing up. Look for a palette (preferably oval) that has a thumbhole and make sure that it’s not too rough and fits both your hands.

    1. Construction material

    Palettes come in several different constructions, the most popular being plastic.

    If you’re looking for a premium palette, consider a safety glass or wooden palette, otherwise, if you’re on a budget, consider a plastic palette.

    1. Disability

    We’ve also featured disposable sheets on this list, which are essentially sheets of hard paper that can be disposed of once you’re done with them. These usually cannot be washed. So, if you’re fine with the recurring costs, go for it, otherwise, buy a traditional palette.

    Palettes For Acrylic Paint FAQ's

  • How many wells should a palette have for acrylic paint?

    The number of wells a palette should have for acrylic paint depends on your personal preference and the type of painting you will be doing. Some artists prefer palettes with many small wells for precise color mixing, while others prefer palettes with fewer, larger wells for more fluid mixing.

  • What is the best material for an acrylic paint palette?

    The best materials for an acrylic paint palette are glass, plastic, or acrylic. Glass is a popular option because it is non-porous, scratch-resistant, and easy to clean. Plastic or acrylic palettes are also durable and easy to clean, making them popular among artists.

  • Do I need a palette with wells or compartments for acrylic paint?

    While it’s not absolutely necessary to have a palette with wells or compartments for acrylic paint, it can be helpful for keeping colors separate and organized. This is especially important when mixing small amounts of paint to achieve precise color blends.

  • How do I clean my acrylic paint palette?

    First, remove any excess paint with a paper towel or cloth to clean an acrylic paint palette. Then, use warm water and soap to gently scrub the palette clean. For stubborn stains, you can use a paint scraper or plastic tool to gently scrape away the paint.

  • Can I use a paper palette for acrylic paint?

    Yes, paper palettes are popular for acrylic paint because they are disposable and easy to use. However, they may not be as durable as other types of palettes, and they can become soggy if too much water is used.

  • What size palette should I use for acrylic paint?

    The size of the palette you should use depends on the size of your canvas and how much paint you will be using. A larger palette may be more suitable for larger paintings, while a smaller palette may be more suitable for smaller paintings or detail work.

  • Should I choose a palette with a lid?

    A palette with a lid can be useful for keeping your paint wet and preventing it from drying out too quickly. However, it is not absolutely necessary, and some artists prefer not to use a lid.

  • Best Palettes For Acrylic Paint Conclusion

    Conclusion

    Thank you so much for joining us on this colorful journey as we explored the best palettes for acrylic paints! We hope this article has been informative, engaging, and helpful in guiding you toward the perfect palette for your artistic needs. We understand the importance of having the right tools to enhance your creativity and let it shine. With so many great options available, it's finally time to reveal our top three recommendations:

    Out of these 7 best palettes for acrylic paints, here are our top three recommendations:

    1. Amaco Paragona Glass Palette is an ideal option for artists seeking a premium, upmarket feel. Its tempered glass construction not only feels luxurious but ensures that colors won't seep through or stick to the surface. The white safety vinyl back provides added grip and stability, making this palette suitable for table-based projects.

    2. Strathmore 300 Series Palette Paper is a good option for those who want a disposable, hassle-free surface for mixing paints. With its high-quality paper and convenient wax coating, this palette paper works great as a substitute for a traditional palette. As a bonus, it comes in two different sizes to suit varying artistic needs.

    3. Blick Clear Acrylic Palette is the right choice for those desiring a simple, functional, and traditional design. Its classic "C-shape" look, comfortable thumbhole, and rounded edges create a user-friendly experience. Bear in mind that cleaning the palette might be slightly challenging and it lacks built-in wells or recesses.

    Now that you have our top three picks, it's time for you to unleash your creativity and let your art flourish with the perfect palette! Remember, the right tools can make all the difference in the final outcome of your work. Once you've selected your ideal palette, go forth and create masterpieces that showcase your unique artistic expression!

    Read More on Acrylic Painting

    5 of The Best Paint for Canvas

    Painting Surfaces For Acrylics | Acrylic Prepping 101

    Painting on Paper with Acrylics & 5 Paper-Like Surfaces

    Acrylic Pour Painting

    20 Oil And Acrylic Painting Ideas For Enthusiastic Beginners

    Learn The Basic Acrylic Painting Techniques for Beginners

    22+ Delicate Beautiful Acrylic Painting Ideas To Try

    Learn How to Use Acrylic Paint as Fabric Paint

    Learn How to Thicken Acrylic Paint Correctly

    Learn How to Clean Acrylic Paint Brushes Brilliantly

    Learn How to Make Acrylic Paint in Your Studio

    Learn How To Get Dried Acrylic Paint Out Of Brushes Successfully

    Acrylic Painting Materials That You Really Need In The Studio

    Learn How To Make An Acrylic Painting Waterproof

    Acrylic Paint Thinner 101 | How to Thin Your Acrylic Paints Correctly

    Best Cheap Acrylic Paints – Strengths and Weakness of Brands Compared

    Best Canvas for Acrylic Painting | Student & Artist Grade

    13 Best Acrylic Paints for Beginners & Professionals

    10 Best Paper for Acrylic Paint

    103 Best Acrylic Painting Ideas

    Best Acrylic Paint Brushes for Artists & Students

    Almost all artists around the globe can agree that paintbrushes are one of the most - if not the most - important thing of a painting kit.

    So, it’s a no-brainer that if you are a painter who is serious about your art then you should be looking for brushes that can help you bring your ideas to life without any hassle. 

    Especially, for acrylic painting brushes have to be of impeccable quality because acrylic paint on its own is a very harsh medium and if the brushes are not suited for it then they won’t last long. 

    For that reason, we have gathered some of the best brushes that we think are great to be used with acrylic paint and tested them out in a 3 days painting session!

    And just to help you out a little more, we have also added a small guide about how to care for your brushes at the end. 

    So, let’s get on with the best acrylic paintbrushes, shall we? 

    Best Acrylic Paint Brushes


    Best Acrylic Paint Brushes

    To help you navigate the world of paintbrushes, we've put together a list of the 9 best acrylic paintbrushes. Whether you're a beginner or a professional artist, these brushes are sure to enhance your painting experience and help you achieve the perfect brushstrokes.

    1. Grumbacher Goldenedge Acrylic Paint Brush - Best For Durability And Budget-Friendliness

    Grumbacher is one of the most famous brands when it comes to art supplies. Many of their other products have impressed our artists and these acrylic paint brushes are no slouch either. Goldenedge paint brushes are made out of synthetic fiber which is great for acrylic painting as they last really long and perform fantastically.

    Grumbacher Goldenedge Acrylic Paint Brush

    Experience

    Goldenedge paintbrushes are available in 9 different sizes and all of them give a quality painting experience while still being budget-friendly - especially for students.

    The synthetic fiber used in its making is of top-notch quality and it can withstand the harsh treatment of acrylic paint without any problem.

    Don’t be afraid to repeatedly wash it with water because even after soaking it several times, in our testing, the bristles stayed intact and performed flawlessly.

    Its durability is also aided by its quality brass ferrule which holds the bristles tight together and doesn’t let them wither away easily.

    The brass ferrule is also very comfortable to use and didn’t cause any sort of fatigue for us in our long acrylic painting sessions.

    Even if these brushes are affordable and geared more towards beginner and intermediate artists, we recommend them for professional to professionals as well because they perform really well and will last you ages if maintained properly, we could not be happier with them after painting with them an entire day!


    Pros

    • Performs really well with acrylic paint, the paint holds well and the finish is really smooth and even
    • Synthetic fibers are super durable and they give an excellent spring to it, it can be washed repeatedly without any signs of wear and tear
    • The brass ferrule is of incredible quality and holds the bristles really well together. It is also very comfortable to use


    Cons

    • Size option is very limiting as it only has 9 different sizes


    Bristle Type: Synthetic Golden Taklon | Shape: Round, Flat, Filbert | Handle Type: Long, Glossy, Yellow | Size Range: 0-20

    2. Princeton Acrylic Paint Brush - Best For Variety And Performance

    This offering from Princeton has enough merits to please any acrylic painter - even professionals. With great hog fiber bristles that are also synthetic, these brushes perform more than just fine for acrylic as well as oil painting. Available in a huge variety of shapes, if you decide to vouch for these brushes you’ll never need another one.

    Princeton Acrylic Paint Brush

    Experience

    The hog fiber bristles have multiple splits at the end of each bristle, making them way more color than other bristles and giving a more smooth and even coat of paint.

    And the bristles are also very durable as they are synthetic and even after soaking them several times, there was no sign of any kind of wear and tear.

    Apart from that the brushes also come in various sizes and kinds - Round, Flat, Filbert, Bright, Fan, and Angle Bright - so, if you love these brushes then you’ll have to never go for anything else if you don’t want to.

    And it is possible because not only these brushes are durable and perform really well, but they also are very comfortable to use for longer sessions of work.

    After trying it in various situations we can honestly say it performs better than most other brands and we recommend it for intermediate and professional artistry.

    But you’ll have to shell out a few extra dollars to get all of these merits.


    Pros

    • Has a plethora of sizes and shapes to provide every need  
    • Great quality hog bristles that perform really well
    • The synthetic form makes the bristles extra durable and wear and tear proof
    • The handle is incredibly comfortable to use


    Cons

    • It is kind of expensive


    Bristle Type: Synthetic Sable | Shape: Round, Flat, Filbert | Handle Type: Short, Matte, Black | Size Range: 0-20

    If you are an absolute beginner and looking for a brush set to just get started then the Mont Marte Gallery series Acrylic Paint Brush Set is our top recommendation for you. In the kit, you get two round, two flat, and two Filbert brushes that is good enough for getting started with acrylic painting.

    MONT MARTE Gallery Series Brush Set, Synthetic, Standard,...
    • 6 synthetic hair paint brushes included: 1 x round 6, 1 x...
    • Professional quality: brushes are made with taklon bristles

    Experience

    The Taklon synthetic bristles used in the making of these brushes are extremely durable and with proper maintenance, they will last you years of use.

    They don’t frail or wither with repeated washing and soaking in water.

    The bristles also give a nice spring to the brush and hold acrylic paint fantastically providing a smooth and seamless acrylic painting experience.

    In the box, you get 2 Round (#6 and #16), 2 Flat (#8 and #10), and 2 Filbert (#8 and #10) brushes that are great for getting started with painting.

    The brushes look very sleek and beautiful as well with their gunmetal ferrule. It holds the bristles extremely tightly while giving a comfortable painting experience.

    Our hands-on review showed that it’s a great starting kit for beginner of painting but we don’t recommend this to any intermediate or professional artists because the brushes are only available in sets. And there’s not enough variety of sizes.


    Pros

    • Has great synthetic bristles that are very durable and hold paint well  
    • Ferrule is also very comfortable to use and keeps the brush intact
    • Kit comes with a convenient set of brushes to get started with painting
    • The brushes look very sleek and gorgeous


    Cons

    • Not meant for professional use because of the lack of variety and no individual availability


    Bristle Type: Synthetic Taklon | Shape: Round, Flat, Filbert | Handle Type: Long, Matte, Black | Size Range: 0-16

    4. Royal & Langnickel Short Handle Acrylic Paint Brushes

    Royal & Langnickel is a well-established art product manufacturer that has been in business since the 1950s. These short-handle brushes are great for detailing and in general, a smaller scale of work. The set has 10 round brushes of various sizes - all meant for minute details - and a shader brush. 

    Royal & Langnickel Majestic Detail Artist Brush Set,...
    • Classed as our highest quality available.
    • Synthetic, Multi-Diameter Hair

    Experience

    For detailing with acrylic paint, this brush set is our top recommendation.

    The brushes have short handles because this set is designed for detail work but the overall body is girthy giving a comfortable experience while having a long work session.

    The ferrule is made from a black coated brass right which gives it a sleek and elegant look while providing ample grip to the bristles. They also resist rust and any other form of depreciation really well.

    Talking about the bristles, they are very stiff which is great for detailed work. They are also extremely durable due to their synthetic make and we didn’t notice any significant wear and tear even after washing them repeatedly.

    Drawing from experience, the small round brushes are meant for detailing and the durability of the bristles is even more important than regular brushes, we are glad to say that these bristles are plenty durable and after painting with them in various angles, with different paints, they performed flawlessly. 


    Pros

    • Synthetic bristles are very durable and incredibly stiff which is great for minute details  
    • The handle is extremely comfortable and causes no fatigue while working for longer sessions
    • The brass ferrule is really durable and gives these brushes a distinctly sleek and elegant look


    Cons

    • Brushes are only meant for working with minute details


    Bristle Type: Synthetic Bristle | Shape: Round, Flat, Filbert | Handle Type: Short, Matte, Black | Size Range: 0-12

    5. Jerry Q Acrylic Paint Brushes

    For the people who want to save a few bucks but still get a good quality set of brushes, Jerry Q is our recommendation. With nylon bristles and 12 different brushes in a single set, these brushes are good enough for beginners and new art students. Apart from performing decently with the acrylic medium, these brushes can also be used for watercolors. 

    Jerry Q Art 12 Pcs Detail Paint Brushes, Golden Synthetic...
    • High Quality Golden Synthetic Hair, No Shedding, Highly...
    • Short Wooden Handles, Variety of 12 Brushes for Fine Details

    Experience

    The best part about this brush set is its cheap price tag and the performance it can manage to deliver even after being so inexpensive.

    With a sub $10 price for the set, you are only paying about $0.75 for each brush. And the quality of the brush makes it an amazing bargain.

    The variety of brushes is actually pretty decent. As a beginner, you’ll easily be able to work on details as well as large blocks. The brushes have long handles that are comfortable to use for long work sessions.

    The bristles are decent. They are made out of nylon and are very durable. Repeated washing showed no signs of damage and the color grip is decent.

    Don’t expect too much from these brushes and you shall enjoy them. These are nylon and we have discovered while painting with them that they lack a certain finesse, that is the main reason why we are not recommending it to professionals who have really honed their skills and need something very particular to work with.


    Pros

    • In the set, you get 12 different brushes with a good variety
    • Extremely affordable, about #0.75 for each brush
    • The brushes have long handles and are very comfortable to use
    • Nylon brushes are very durable and have a decent grip on acrylic paint


    Cons

    • These are not meant for professionals


    Bristle Type: Synthetic Nylon | Shape: Round, Flat, Filbert | Handle Type: Long, Glossy, Clear | Size Range: 0-16

    6. Winsor & Newton Monarch Acrylic Paint Brushes

    Winsor & Newton is a beloved manufacturer in the art community because of their quality products and reasonable pricing. And Monarch Acrylic Paint Brushes live quite well to that reputation. The brushes have stiff bristles and long handles, and come in a variety of shapes and sizes to choose from. 

    Winsor & Newton Monarch Acrylic Paint Brushes

    Experience

    The bristles are a little stiff because they are designed for acrylic paint. But they are not very hard, rather they have a live bounce and give good feedback while painting.

    They showed no signs of withering in our tests and worked perfectly every time.

    The long handles are comfortable to use for long sessions and if you usually do large-scale acrylic painting then you’ll love these even more.

    These brushes are sold individually, so, you have the liberty to expand your arsenal the way you want to with these brushes. And the fact that these brushes come in a variety of shapes and sizes adds to that modularity even more.

    After spending some time with these brushes and enjoying their strokes, the thing we love the most about them is that we can recommend them to everyone. These brushes are well-suited for beginners and professionals alike. The brushes are moderately priced and have a good value for money but they perform well above their price point, a thing which can't be said for many products these days.


    Pros

    • Bristles are great, they have a nice spring and give good feedback while painting  
    • Sold individually which gives a great amount of liberty when it comes to personalizing your kit
    • Brushes have long handles that are very comfortable to use


    Cons

    • A little more expensive than starter sets but the quality is worth it for many people


    Bristle Type: Synthetic Bristle | Shape: Round, Flat, Filbert | Handle Type: Long, Matte, Black | Size Range: 0-20

    7. Blick Master Bristle Brushes

    When it comes to quality and premium experience, there’s hardly any other brand that can top Blick. With Master Bristle Brushes you get a lifetime guarantee and if anywhere down the road your brush gives in and you order the same one again, it’ll give exactly (and we can’t stress this enough) the same experience.

    Blick Master Bristle Acrylic Brushes

    Experience

    Blick brushes are made with master molds. Hence, each brush of a specific character set is manufactured completely ditto to another. There’s nothing that can top its consistency.

    As for its endurance, each bristle of the brush is patiently planted inside the ferrule by hand. This provides immense durability and the brushes never even show a hint of shedding - which is very common with machine-made brushes.

    After closely examining the brush and painting for hours we noticed the handle is also crafted with extreme care and they are immensely comfortable to use.

    On the other hand, Blick also has one of the widest - if not the widest - selection of brushes. So, however specific your desired brush may be, we are sure that you can find one from Blick.

    Blick provides professional artists around the globe with the utmost satisfaction and if you are a professional and you aren’t satisfied with your current brush set, try Blick (or da Vinci). You’ll love it!


    Pros

    • Impeccable quality and consistency with these brushes  
    • Performance is outstanding and many professional artists vouch for these brushes
    • Brushes come with a lifetime guarantee
    • The selection range is one of the widest we have ever seen


    Cons

    • Of course, these brushes are also super expensive


    Bristle Type: Natural Chungking Bristle | Shape: Round, Flat, Filbert | Handle Type: Long, Glossy, Natural | Size Range: 0-20

    8. da Vinci Acrylic Paint Brushes

    Da Vinci is one of the most respected art companies in the world. It’s been established for over 110 years at this point and its products have been faithful to many professionals around the world. All their products have impeccable quality and their brushes have been professionals’ favorites for many years - including these acrylic brushes. 

    da Vinci Brushes Acrylic & Oil Set 5542a2, Grigio New Wave...
    • Grigio: another breakthrough in synthetic brushes from da...
    • 4 brush set - Rounds - Series 7795 sizes 1, 2, 4 & 6

    Experience

    Unlike Da Vinci’s oil paint brushes which are made from Kolinsky sable fibers, these acrylic brushes have synthetic bristles. This reduces the price drastically as an acrylic paint brush set of 3 will cost you only $40 in comparison to $300 for a single oil paint brush.

    But the choice of synthetic brushes is a good one not only in terms of price but also in terms of durability. Natural fibers can withstand the harshness of acrylic paint.

    The performance of the brush is nothing but flawless. The slight bounce of the bristles gives good control of the brush as well as makes it easy to wash.

    The body of the brush has a comfortable grip and is made from sustainable wood that has the least possible ecological impact.

    Da Vinci has one of the widest selections of brushes. There’s nothing better than Da Vinci for professional artists. It is only second-bested by Blick in our opinion.


    Pros

    • Bristles that have a good bounce and smooth application  
    • The body is comfortable to hold and is made from sustainable wood
    • One of the most reputed brands in the art industry
    • Widest selection of brushes and are sold individually


    Cons

    • Slightly expensive but totally worth the price, especially, for professionals


    Bristle Type: Synthetic, Natural Blend | Shape: Round, Flat, Filbert | Handle Type: Short, Matte, Green | Size Range: 0-30

    9. LorDac Acrylic Paint Brushes

    LorDac Acrylic Paint Brush Set is a great affordable option for artists on the go. The brushes are well made and the performance is pretty decent. In the set, you get 7 different brushes in total - 3 rounds, 2 Flat, 1 Filbert, and 1 Angular. 

    LorDac Arts Paint Brush Set, 7 Artist Brushes for Painting...
    • PREMIUM DESIGN FEATURES — Benefits of Taklon synthetic...
    • EXCELLENT VARIETY FOR MULTIPLE EFFECTS — 7 professional...

    Experience

    The synthetic bristles are decent enough. They have a nice spring and give a smooth finish while acrylic painting.

    They are also plenty durable and we saw no signs of damage after repeated washes. The ferrule is also good. It gives a nice grip and holds the acrylic brushes very well - no apparent shedding even after extensive use.

    The brush set also comes with a cool traveling case. It’s a great option for artists on the go and students who have to travel a lot around with their equipment. An intelligent design choice allows the travel case to be reconfigured into a brush holder.

    Ultimately, the set comes at a very reasonable price and performs pretty great for the money. It’s a great bargain for beginners and hence, makes it on our recommendation list.


    Pros

    • Bristles are pretty decent, they are durable and perform really well
    • The brush set is extremely affordable, a great bargain for beginners
    • Comes with a travel case that can be transformed into a brush holder
    • The set comes with a healthy variety of brushes


    Cons

    • The acrylic brushes are not sold individually


    Bristle Type: Synthetic Bristle | Shape: Round, Flat, Filbert | Handle Type: Long, Matte, Black | Size Range: 0-20

    Best Acrylic Paintbrushes Comparison Table

    Product Bristle Type Shape Handle Type Size Range
    Grumbacher Goldenedge Acrylic Paint Brush Synthetic Golden Taklon Round, Flat, Filbert Long, Glossy, Yellow 0-20
    Princeton Acrylic Paint Brush Synthetic Sable Round, Flat, Filbert Short, Matte, Black 0-20
    Mont Marte Gallery Series Acrylic Paint Brush Set Synthetic Taklon Round, Flat, Filbert Long, Matte, Black 0-16
    Royal & Langnickel Short Handle Acrylic Paint Brushes Synthetic Bristle Round, Flat, Filbert Short, Matte, Black 0-12
    Jerry Q Acrylic Paint Brushes Synthetic Nylon Round, Flat, Filbert Long, Glossy, Clear 0-16
    Winsor & Newton Monarch Acrylic Paint Brushes Synthetic Bristle Round, Flat, Filbert Long, Matte, Black 0-20
    Blick Master Bristle Brushes Natural Chungking Bristle Round, Flat, Filbert Long, Glossy, Natural 0-20
    da Vinci Acrylic Paint Brushes Synthetic, Natural Blend Round, Flat, Filbert Short, Matte, Green 0-30
    LorDac Acrylic Paint Brushes Synthetic Bristle Round, Flat, Filbert Long, Matte, Black 0-20

    Buying Guide For The Best Acrylic Paint Brushes

    If you're an artist or an aspiring one, a quality set of acrylic paint brushes is crucial for your painting journey. In this comprehensive buying guide, you'll find helpful tips on choosing the best acrylic paint brushes for your unique needs.

    1. Bristle Type

      • Natural Bristle Brushes: Made from animal hair, these brushes hold paint well and can produce a nice smooth finish. However, they may not be as durable or resilient as synthetic bristles, especially with acrylic paints.
      • Synthetic Bristle Brushes: Made of polyester or nylon, these brushes tend to be sturdier and maintain their shape better, making them more suitable for acrylic paints.
    2. Bristle Shape

      • Round: Ideal for detail work, lines, and small areas.
      • Flat: Suitable for layering colors, filling large areas, and creating sharp edges.
      • Filbert: Oval-shaped, offering versatility for blending, strokes, and detail work.
      • Angle: Great for lines, edges, and curves, as well as reaching into tight corners.
      • Fan: Useful for blending, smoothing, and creating textures.
    3. Handle Length

      • Short Handles: Good choice for detail work and working close to the painting surface.
      • Long Handles: Provide a more comfortable grip and better control when painting on larger canvases or easels.
    4. Ferrule Material

      • Brass: Strong and durable, but more expensive.
      • Aluminum: Lightweight and affordable, but may become loose over time.
      • Plastic: Less durable, prone to breaking, and may not provide a secure grip on the bristles.
    5. Price & Quality

      • Consider purchasing a brush set within your budget, but remember that pricier options may provide better performance, comfort, and durability in the long run.
    6. Cleaning & Maintenance

      • Proper cleaning and maintenance are essential for prolonging the life of your brushes. Look for brushes that are easy to clean and have a reputation for retaining their shape.

    Essential Tips for Choosing the Best Acrylic Paint Brushes

    Remember that the right brush depends on your personal preferences and painting style. Test different shapes and bristle types to discover what works best for you.

    Trying out brushes in person, when possible, can be invaluable. Handle the brushes, test their weight, and observe their balance and materials to ensure a comfortable painting experience.

    Additional Tip

    Always clean your brushes thoroughly after painting and store them flat or upright with the bristles pointing up to maintain their shape and avoid damage.

    By considering the factors mentioned in this guide, you'll be able to confidently select the best acrylic paint brushes for your artistic journey. Happy painting!


    Acrylic Brushes Care Guide

    Now that you have got your favorite acrylic paint brushes, here are some tips and tricks regarding washing and storing the acrylic brushes that should help you keep them in healthy shape for as long as possible.

    Acrylic paint is extremely harsh on brushes and you’ll have to take good care of them if you want to keep using them for a long time.

    Washing

    The key takeaway from here is to remember to never let the paint dry on the brushes. Acrylic paint when left unwashed will seriously damage the brush no matter what is used to clean them afterward.

    The task can be a little tedious and annoying given how fast acrylic paint dries. But to wash them properly we advise you to use the double wash system.

    It’s actually pretty simple. You’ll just have to keep two jars of solvents to properly clean the brushes.

    The first jar should just have clean water to wash the initial pigments off the brush. This will make sure that the paint won’t quickly dry and damage the bristle.

    The second jar should have some soapy mixture of water - or a brush cleaner solution - for a deeper rinse of the brush.

    After washing, let the brushes dry up for a while, or use a soft fabric to soak the remaining water from the bristles.

    Storing

    Drawing from experience, apart from washing, proper storage of your acrylic brushes is also important for their good health.

    It’s really not that hard. You’ll just have to be careful when storing them. Ensure you’re storing the acrylic brushes with the tip facing upwards.

    That way the bristles won’t be broken or bent when stored for a long time. Use a jar or a brush stand to store the brushes and make sure they are properly washed and dry before storing.

    Don’t buy natural brushes for acrylic paint

    We all love acrylic brushes with animal hair fibers because they give a very smooth, elegant, and satisfactory experience.

    Even though they are a bit pricey, we do recommend animal hair fibers for oil paint and watercolors. But when it comes to acrylic paint, stay away from natural hair fibers.

    Always buy synthetic fibers if you are planning to paint with acrylic paint. Apart from being way cheaper, there are other two good reasons for that.

    First, natural fibers can’t withstand the abuse of acrylic paint. They will get severely damaged and will start to fall out even with careful washing and good storage practices.

    And second, natural fibers don’t have a nice spring. When painting with acrylic paint, you’d want a good bounce from the bristles for smooth and accurate finishing. While synthetic fibers have that kind of spring, natural ones are just soft and smooth with no bounce.

    Through our trial and error, we discovered that f you want brushes for acrylic paint that last a good amount of time and perform well, go for synthetic brushes. And as a bonus, you’ll also have to pay less for them.

    Acrylic Paintbrushes FAQ's

  • What is the difference between natural and synthetic bristles for acrylic paintbrushes?

    Natural bristles, such as hog or sable hair, are made from animal hair and are best suited for oil painting. On the other hand, synthetic bristles are made from man-made materials such as nylon, polyester, or taklon, and are better suited for acrylic painting. Synthetic bristles are also more affordable and easier to maintain than natural bristles.

  • How do I choose the right size brush for acrylic painting?

    The size of the brush you should use for acrylic painting depends on the size of your canvas and the level of detail you wish to achieve. For large areas, use larger brushes and for details and lines, use smaller brushes. It is recommended to have a range of brush sizes available.

  • Can I use watercolor brushes for acrylic painting?

    While watercolor brushes can be used for acrylic painting, they are not ideal due to their soft bristles which may not work well with the thicker consistency of acrylic paint. It is recommended to use brushes specifically designed for acrylic painting.

  • How do I clean my acrylic paintbrushes?

    To clean acrylic paintbrushes, rinse them with warm water and gently rub the bristles with soap or brush cleaner until the water runs clear. Avoid using hot water as it can damage the brush hairs. After cleaning, reshape the brush and allow it to air dry.

  • Should I buy individual brushes or a set of brushes for acrylic painting?

    This depends on your personal preference and budget. Buying a set of brushes can be more cost-effective and provide a range of brush sizes, while buying individual brushes allows for more customization and control over your brush collection.

  • What is the best shape of brush for acrylic painting?

    The best shape of brush for acrylic painting depends on the technique and style of painting you will be using. Flat and bright brushes are best for large areas and washes, while round and filbert brushes are better for detail work and blending.

  • Conclusion

    Thank you so much for reading our article on the best acrylic paintbrushes. We're thrilled you took the time to explore these options with us. We know how important it is to find the perfect paintbrush for your creative projects, so we tested each product in various situations to give you the most accurate reviews possible. Let's take a look at our top three recommendations for different factors and preferences.

    Out of these 9 best acrylic paintbrushes, here are our top three recommendations:

    • Best for durability and budget-friendliness: The Grumbacher Goldenedge Acrylic Paint Brush is an ideal option. Its synthetic fibers last really long, and the brass ferrule ensures the bristles stay intact even after repeated use. Moreover, these brushes are available at a reasonable price, which is great news for students who are just starting their creative journey.
    • Best for variety and performance: The Princeton Acrylic Paint Brush is a good option. With their quality hog fiber bristles and synthetic durability, these brushes perform exceptionally well for a smooth and even coat of paint. They're also available in numerous shapes and sizes, catering to different painting styles and requirements.
    • Best for beginners: The Mont Marte Gallery Series Acrylic Paint Brush Set is the right choice. This set has six brushes made from sturdy Taklon synthetic bristles with a nice spring to hold acrylic paint well. The selection of brush shapes is perfect for those just starting with acrylic painting, and the gunmetal ferrule ensures a comfortable painting experience.

    As you pick the best acrylic paintbrushes for yourself, always prioritize your personal preferences, budget, and skill level. We hope our reviews and recommendations have made your selection process faster and simpler. Remember, investing in a quality paintbrush can make all the difference in your art journey. Happy painting!

    Read More on Acrylic Painting

    5 of The Best Paint for Canvas

    Painting Surfaces For Acrylics | Acrylic Prepping 101

    Painting on Paper with Acrylics & 5 Paper-Like Surfaces

    Acrylic Pour Painting [All You Need To Know]

    20 Oil And Acrylic Painting Ideas For Enthusiastic Beginners

    Learn The Basic Acrylic Painting Techniques for Beginners

    22+ Delicate Beautiful Acrylic Painting Ideas To Try

    Learn How to Use Acrylic Paint as Fabric Paint

    Learn How to Thicken Acrylic Paint Correctly

    Learn How to Clean Acrylic Paint Brushes Brilliantly

    Learn How to Make Acrylic Paint in Your Studio

    Learn How To Get Dried Acrylic Paint Out Of Brushes Successfully

    Acrylic Painting Materials That You Really Need In The Studio

    Learn How To Make An Acrylic Painting Waterproof

    Acrylic Paint Thinner 101 | How to Thin Your Acrylic Paints Correctly

    Best Cheap Acrylic Paints – Strength and Weakness of Brands

    8 Best Palettes For Acrylic Paint & How to Choose What You Need

    Best Canvas for Acrylic Painting | Student & Artist Grade

    13 Best Acrylic Paints for Beginners & Professionals

    10 Best Paper for Acrylic Paint

    103 Best Acrylic Painting Ideas

    Colored pencils are some of the easiest and most exciting mediums for putting those vibrant colors onto paper. It is not only satisfying to take up a neat little set and get right down to fill any blank space up with vivid shades and stunning textures, but it’s also a great way to let the day’s steam off and bust that stress well! 

    You do get a lot of versatility out of color pencils than most other color mediums which could take time to get used to. 

    However, the one thing that could be really tricky regarding color pencils is when you get that unwanted stray line out of the boundary, which just won’t erase. It can be pretty frustrating, especially for beginners to scrub out such marks and stains which can ruin the entire picture. 

    But the good news is you can easily avail erasable colored pencils that put the problem of color stains on paper right out of the equation! And if this is what you’re looking for right now, then we’re here to get you out of that situation! 

    'Cause in the following read, we’ll be reviewing some of the best erasable colored pencils for you to check out right now! 

    Best Erasable Colored Pencils


    Best Erasable Colored Pencils

    To help you find the best erasable colored pencils for your needs, we've put together a list of the top options available on the market today. So, without further ado, here’s the list of the 6 best erasable colored pencils.

    1. Tombow Irojiten Colored Pencil - Best for Luxurious Colors

    The Japanese color brand Tombow is reputed globally, owing to its Irojiten range of colors that produces some of the most vivid and creamy textures ever! These pencils come in two dominant variant packs- “Vivid” which gives off the most luxuriantly dark tones and “Tranquil” which consists of lighter colors. 

    We did try out the “Vivid” range and now duly realize why it’s known as one of the best color pencils ever, and that too, in the erasable colors department! 

    Experience

    The Irojiten Vivid comes in a set of 24 or 12 colors that also includes a color pencil eraser and a single-slot sharpener. The wooden casing is made using hard cedar wood which makes it considerably formidable and resistant to breakage or splintering.

    But the best part about these was, unquestionably, the color pay-off. We were simply stunned by how beautifully the leads glided onto the paper and delivered rich shades of vibrant hues in the pitch-perfect color saturation it offered.

    The coolest thing about this one is that it blends so satisfyingly smoothly when it comes to blending and layering upon colors. Unlike most other color pencil variants that get patchy especially while layering, these go on like a dream with even consistency in every way.

    Now, to say about the “erasability” of these colors, there were a few pros and cons. The block of eraser that the set includes for you does a fine job of removing almost all of the stains for you. But, since the color is that rich, it might leave behind the faintest hint of the stain behind, which, however, won’t even be visible to the eyes if you didn’t look closely.

    But, the problem with this is that it might not work the same way with a regular eraser for that matter.

    But, apart from this, this is one color pencil set that in our opinion every art enthusiast should try out for once at least!


    Pros

    • Lux colors and incredibly consistent pay-off
    • Doesn’t damage or harm the paper in any way, even while being erased
    • Could be used by both beginners and professionals


    Cons

    • The lead could feel a tad bit hard to maneuver initially
    • Pretty expensive


    Quantity: 90 | Type: Wax-Based | Erasable: Yes | Colors: 90 Unique Colors
    1. Prisma Col-Erase Erasable Colored Pencil - Best for Precision Work

    Prismacolor Col-Erase Erasable Colored Pencils, Non-Photo...
    • Lighter than standard blue, non-photo blue is designed for...
    • Non-repro blue color eliminates the need to erase before...

    Prism's Color has always been known to offer a range of some of the finest grade color mediums for the world to use and create spectacular art pieces. 

    The Col-Erase Erasable Colored Pencils from the brand work beautifully to deliver a stunning color payoff. The durable and robust medium point keeps the pencils from cracking at any point in time during usage even under constant pressure. 

    Experience

    We did have high hopes for this Prismacolor product, and in all honesty, it performed really well for that. The color pay-off is decent gliding on evenly even during long stretches and strokes. The comfortable, easy grip and size of the pencils make it ideal for beginners and professionals alike.

    When we tested out the color-saturation and layering capacity of the pencils, we were pleased to find that the medium to fine lead of these pencils worked with the ease of the standard graphite pencils, because the wax content was considerably less compared to other brands. This prevented the smattering of colors, making it excellent for precision detailing.

    Each pencil comes with an eraser attached to the pencil head that helps you to erase any extra colored lines. It does the job well enough for fine lines and even the standard strokes. The only issue regarding this could be if you go really dark on the lines and over a large surface area, in which case it could leave a stain behind.

    All in all, The Col-Erase from Prisma color is one of the most affordable and fine options in the erasable color department that you shouldn’t definitely miss out on!


    Pros

    • Works like the standard graphite pencils making for easy and clean use
    • Brilliant color deliverance and layerability
    • The erasers work quite well in erasing stains and unwanted colored lines without damaging the paper
    • Ideal for precision work


    Cons

    • Could get a tad bit patchy when it comes to filling larger blank spaces


    Quantity: 12 | Type: Wax-Based | Erasable: Yes | Colors: 1 color
    1. Staedtler Erasable Colored Pencils - Best for All Ages

    Staedtler Erasable Colored Pencils, 12 Colors (14450NC12)
    • 12 colors-erasable pre-sharpened
    • Anti breaking coating covers entire length lead to prevent...

    So when it’s Staedtler, you know that there isn’t really a chance of things going wrong in your art gig. Recognized as one of the top art supply brands around the globe, Staedtler does a marvelous job at coloring life for you! 

    And the Erasable Colored Pencils from the brand do just that and allow the scope for experimentation owing to their erasable colors! So now you can color to your heart’s content without worrying about making mistakes! 

    Experience

    Well, we knew that we could expect nothing but the absolute best from this German-based brand that has been a favorite amongst every artist since it’s emergence into the field.

    One of the hallmarks of Staedtler is the brilliantly designed hexagonal pencils that provide a pretty easy and comfortable grip and an incredibly durable, crack, or chip-resistant overall structure.

    The lead itself is highly pigmented and pays off smoothly in a semi-waxy finish. This fine, soft lead works beautifully for detailing and filling up significant blank spaces. These features make the pencils an ideal coloring medium for literally all ages.

    The pencils come with an eraser stump end that you could use to erase bits and portions of colored areas. The erasers are latex-free and work fine, and there isn’t much that’s left behind on the paper once you’ve used them, but these can be a tad bit hard in form. It’s better to use a thicker paper texture for these erasers.

    But apart from this, the pencils are an appropriate coloring medium for school projects, or for more serious artworks such as illustration and detailing.


    Pros

    • Perfect for all ages
    • Beautifully designed for easy maneuvering with a chip-resistant structure
    • Erasers on the pencils do a good job of removing color


    Cons

    • Thinner sketching papers might get affected by the erasers


    Quantity: 12 | Type: Wax-Based | Erasable: Yes | Colors: 12 Unique Colors
    1. Pilot Frixion Erasable Colored Pencils

    No products found.

    We’ve all had our favorite Pilot pens for a range of purposes that included everything from writing crisp letters to doodling at the back bench. The Frixion Erasable Colored Pencils from the brand is an exclusive range of uniquely designed coloring pencils with non-dusting erasers that works almost like a pen, making coloring the blank spaces an even more enjoyable task for all! 

    The erasers ensure that a mess-free coloring spree that helps keep the environment clean, especially for kids. 

    Experience

    So although we have greatly loved our days with our favorite Pilots, we were a bit skeptical about the Frixion Colored Pencils, given the fact that we were aware of the mixed reviews that it had got. 

    But, it did really impress us with the kind of performance it put up even against all of these top brands that we’re reviewing today. These pencils come in a durable casing and deliver almost an inky yet texturized vibrant pay-off that looks absolutely amazing. This makes it a hot favorite amongst kids and an ideal choice for school projects. 

    This is made even more exciting by the fact that the erasers that you get with these leave no shaving and dirt behind. It cleans up the stains easily and quickly, keeping the worktop clean. The fine tips of the product make it perfect for detailing and intricate work or even writing (what Pilot does best)! 

    The only part we found to be a tad bit tricky is that you’d really have to add pressure in order to get bolder, more defined lines because the pay-off is kind of diluted and light otherwise, especially when you have to color larger spaces. 

    Also, we wish that these were a bit more affordable. 


    Pros

    • Fine lead makes it pretty easy to detail or write
    • Mess-free erasing thanks to the non-dusting rubber tips on the pencils
    • Quite expensive


    Cons

    • Color payoff may become lighter while filling larger spaces
    • Quite expensive


    Quantity: 12 | Type: Wax-Based | Erasable: Yes | Colors: 12 Unique Colors
    1. Crayola Erasable Colored Pencils

    Crayola Erasable Colored Pencils (50ct), Bulk Colored Pencil...
    • 50 ERASABLE COLORED PENCILS: Includes 50 Erasable Crayola...
    • VIBRANT COLORS: Explore a palette of 50 rich, vibrant colors...

    When you read “Crayola,” it’s almost always a trip down memory lane because just about each one of us has grown up using these special brand of colors. And what makes these special is the superior, consistent performance that has essentially woven Crayola into our childhood. 

    The Erasable colored pencils from the brand offer a decent range of removable colors that is ideal for every kid and for all kinds of school or home projects. 

    Experience

    Apart from the fact that we went absolutely kiddish while testing these out, Crayola still didn’t cease to surprise us with its consistent performance even after all this while! As expected, the color deliverance is great on these that fill up the largest areas on paper without ugly patches or scratches. 

    However, the leads of these are pretty soft with a greater wax content than those from the other brands. So, although, this pays off in immensely vibrant and rich colors, they can smudge and stain the other portions of the paper. 

    This is another set that gives you a separate block of erasers, and this really does a fine job of cleaning up the color stains in a jiffy. But these do leave shavings quite a lot, and it might just be difficult to scrub off really dark areas with it. Also, regular erasers won’t quite work. 

    But, Crayola indeed provides a lot more than most other brands at a price that’s more reasonable and affordable than others. 

    Basically, the colored pencils from Crayola are ideal for kids but not so much for professionals. 


    Pros

    • Rich, vibrant color payoff with a smooth, glossy texture
    • Eraser cleans up stains well without harming the paper
    • Very easy to use, especially for kids
    • Pretty reasonably priced


    Cons

    • Colors can stain and smudge
    • Erasers do leave a lot of shavings


    Quantity: 50 | Type: Wax-Based | Erasable: Yes | Colors: 50 Unique Colors
    1. Crayola Twistable Erasable Colored Pencils

    Crayola Erasable Colored Pencils (36ct), Colored Pencils for...
    • CRAYOLA ERASABLE COLORED PENCILS: Includes 36 Erasable...
    • VIBRANT COLORS: Explore a palette of 36 rich, vibrant colors...

    The Crayola Twistable Erasable is a newer launch from the brand that boasts of an exclusive range of twistable tube pencils that has a durable plastic casing rather than the traditional wooden variant. 

    The colors are as pretty and vibrant as the original Crayola colored pencils. The Twistable pencils are entirely erasable and each pencil comes equipped with rubber tips at their ends, that can be used to scrub out any unwanted mark or stain. 

    Experience

    The Twistables from Crayola are definitely a fantastic upgrade to what we reviewed for you earlier from the same brand. It delivers a decent color payoff in every stroke, gliding smoothly over the surface.

    The leads will obviously need no sharpening as you can simply twist it up and use it to color whenever you want. This makes it so much more convenient and easier to use and is perfect for kids to use anywhere. The set contains 12 shades that come with the erasers at the end.

    The eraser does a good job of removing colored lines or marks. However, we thought that compared to the classic Crayola erasable pencils that came with a separate block of eraser, this one might just be a bit too patchy touch to use, especially over larger surfaces.

    Also, darker strokes could be a challenge and effort to remove even using these erasers.


    Pros

    • Very convenient, non-toxic, and hence, very safe to use by kids
    • Delivers a decent color pay-off
    • Pretty affordable than the ones from most other brands
    • Erasers work well, but not as much for darker lines


    Cons

    • Layering could be a bit difficult using these


    Quantity: 36 | Type: Wax-Based | Erasable: Yes | Colors: 36 Unique Colors

    Best Erasable Colored Pencils Comparison Table

    Product Quantity Type Erasable Colors
    Tombow Irojiten Colored Pencil 90 Wax-Based Yes 90 Unique Colors
    Prisma Col-Erase Erasable Colored Pencil 12 Wax-Based Yes 1 color
    Staedtler Erasable Colored Pencils 12 Wax-Based Yes 12 Unique Colors
    Pilot Frixion Erasable Colored Pencils 12 Wax-Based Yes 12 Unique Colors
    Crayola Erasable Colored Pencils 50 Wax-Based Yes 50 Unique Colors
    Crayola Twistable Erasable Colored Pencils 36 Wax-Based Yes 36 Unique Colors

    What to Consider While Buying Erasable Colored Pencils?

    Buying Guide For The Best Erasable Colored Pencils

    While purchasing a set of erasable colored pencils isn’t normally a big deal under any circumstance, knowing how to select just the right product will take more than just time and basic know-how regarding the product itself. 

    Art supplies don’t come in cheap and to land up with an inferior-grade product would be mean a loss of money and time. Also, things like colors or other art mediums should be bought with extra care and attention to ensure that they are absolutely easy to use, especially by children. 

    And, to simplify things further for you, we have decided to include this short buyers’ guide for you to know what to consider while buying erasable colored pencils! 

    1. Lead Quality: The quality of the lead is the main factor to consider when buying whatever kind of colored pencils you want to buy. Remember, softer leads will have more wax content while harder leads could be a tad bit difficult to work with initially. 

    How easy it might be to erase the lines created by either type will depend on the kind of pigment formulation the brand offers. This will also decide what brands would work best for children and beginners and what should you avoid if you’re a professional. So, you could test a few out individually before deciding on a complete set. 

    1. Crack and chip-resistance: the leads of the colored pencils, as well as the casing, should be durable enough to resist cracking or chipping which might lead to wastage of the product and hence, stacks heavily against the investment. Softer leads are more prone to breaking and should be handled with care during usage. 
    2. Eraser: This is the essential determinant for an erasable pencil. The erasers provided to remove the colored marks should work well enough to not leave any stain or mess behind. It’s always a good idea to go for those that come with non-dusting erasers. 

    These keep your worktop super-clean and mess-free for. You should also consider whether or not you could use a regular eraser for the kind of pigments your pencils offer by checking how well the one included in the set fares. 

    1. Safety: Always, and we mean, ALWAYS go for non-toxic products. Otherwise, the shavings from the erasers mixed with the pigments from the pencils can cause respiratory diseases if they aren’t certifiably safe. This is where you should, at all costs, consider investing in a good brand, especially if kids are gonna use it. 
    2. Price: Although colored pencils generally come at a really affordable and reasonable price tag, certain top-notch brands can be pretty expensive. However, if you’re looking to buy a set to experiment with or keep it casual and not-so-professional, then we would advise you to go for individual purchases from different brands rather than investing in a full set right away. 

    This way, you get to customize your own pallet and understand which brands and kinds of color will work best for you while cutting down on the overall significantly.

    Erasable Colored Pencils FAQ's

  • Are erasable colored pencils as good as regular colored pencils?

    While erasable colored pencils may not have the same color intensity and vibrancy as regular colored pencils, they are still a great option for beginners and for those who want to make fewer mistakes in their artwork.

  • Can erasable colored pencils be used on all types of paper?

    Erasable colored pencils can be used on most types of paper, but it’s recommended to use them on paper with a smooth texture for the best results. Rough or textured paper can cause the eraser to smudge the colors and leave marks.

  • Do erasable colored pencils come in sets or individual colors?

    Erasable colored pencils are usually sold in sets, but individual colors can also be purchased separately. It’s best to purchase a set that includes a wide range of colors to allow for more creativity.

  • Can erasable colored pencil marks be blended like regular colored pencil marks?

    Erasable colored pencil marks can be blended like regular colored pencil marks, but it’s important to blend them before erasing, as the eraser can remove some of the color and affect the blending.

  • Conclusion

    We appreciate you taking the time to read our article on the best erasable colored pencils. We're confident that this information has given you the insights you need to make an informed decision on which erasable colored pencils to purchase. The right set of erasable colored pencils can make all the difference in your artistic creations, allowing you to make adjustments and achieve the perfect results effortlessly.

    Out of these 6 best erasable colored pencils, here are our top three recommendations:

    1. Tombow Irojiten Colored Pencils - Best for Luxurious Colors: Packed with a range of vivid and creamy colors, the Tombow Irojiten Colored Pencils is an ideal option for those who seek top-notch color payoff and blendability.
    2. Prismacolor Col-Erase Erasable Colored Pencils - Best for Precision Work: With its easy-to-use design and excellent erasability, Prismacolor Col-Erase is a good option for artists who need precision in their work without worrying about making mistakes.
    3. Staedtler Erasable Colored Pencils - Best for All Ages: Thanks to its comfortable grip and high pigmentation, the Staedtler Erasable Colored Pencils is the right choice for artists of all ages and skill levels.

    Armed with these recommendations, you're ready to embark on a creative journey filled with vibrant colors and endless possibilities. Don't be afraid to experiment with different techniques and color combinations, as the erasable nature of these colored pencils makes it easy to refine your skills and achieve your desired results. So, go ahead and unleash your imagination with these fantastic erasable colored pencils. Happy coloring!

    Related Articles

    15 Best Electric Pencil Sharpeners

    11 Best Colored Pencils for Beginners & Professional Artists

    9 Best Cheap Colored Pencils

    13 Best Sharpener For Colored Pencils

    11 Best Adult Coloring Books That Will Color Your Mood

    7 Best Electric Pencil Sharpener For Colored Pencils

    10 Best Paper For Colored Pencils

    Learn How to Shade With Colored Pencils Swiftly & Correctly

    12 Colored Pencil Tips & Tricks to Enhance Your Skill

    Learn How To Use Colored Pencils | 12 Brilliant Beginner Techniques

    You Won’t Believe What Colored Pencils Are Made Of!

    10 Colored Pencil Techniques to Enhance Your Drawings Swiftly

    Learn How To Blend Colored Pencils Correctly Fast

    10 Best Derwent Gift Sets

    Soft pastels are one of the most widely used art supplies. How do you select the best soft pastels for your artistic endeavors?

    With many companies offering hundreds of soft pastels, both individually and in sets, choosing the perfect product can be a challenge. When it comes to soft pastels, there is a lot more than what meets the eye. 

    If you have not used soft pastels before, this is the perfect guide for you. Even if you are an art veteran and have used soft pastels before, we might have some information that could help you upgrade to a better set of pastels.

    After going through hundreds of products and studying their reviews, we shortlisted about a dozen products and used them extensively on various projects.

    After using the pastel sets, we handpicked the seven best options that you must consider.

    Best Soft Pastels 

    Whether you are a student or a professional, one of these recommended products will surely fit the bill. Stick around till the end to read the buyers’ guide and FAQs that will help you choose the perfect soft pastel for your painting endeavors. Without further ado, let us delve into detailed reviews of 6 of the best soft pastels available in the market right now.

    1. Schmincke Half-Stick Extra-Soft Artist Pastel Set - Best for Color Richness

    Schmincke offers handmade pastels in three sets of 18 colors each. Each pastel in this set is made from fine ground artists’ pigments in high concentration. This set from Schmincke has made its way into our list of recommendations owing to its highest lightfastness and minimum binders.

    Schmincke - Pastels, 30 colors, multi-purpose, 77 230 097,...
    • 🎨 THE BRAND: Schmincke has been producing the best,...
    • 🎨 Pastel: Large cardboard set "Multipurpose", with 30...

    Experience

    There is a reason for giving the numero uno spot to Schmincke’s Half-Stick Extra-Soft Artist Pastel set – optimal quality at an affordable price. We especially liked the smoothness and color of each pastel in this set. These extra-soft pastels are made in Germany in a precise and slow manufacturing process to ensure consistent quality.

    One of the typical hassles of using a pastel set is that some of the colors are more frequently used than others and thereby tend to run out quickly. Replacing a specific color from a pastel set is often troublesome and time-consuming. Schmincke recognizes this common hindrance faced by artists and offers over 400 individual pastels, allowing for quick and hassle-free replacement of any shade.

    If you have not used any of the Schmincke pastels already and are skeptical about their quality, you can purchase any of the individual pastels and then go for the set. The range of colors provided by Schmincke is second to none. To give you an idea, if you want to use Ultramarine Deep variants in a project, with Schmincke, you get Black, Pure Color, White, White +, and White ++.

    It can get challenging to find the perfect colors when you have so many options – almost like finding a needle in a haystack. Schmincke offers a detailed color chart for a straightforward comparison of colors. You can use the color chart to know the lightfastness rating and pigment purity of each pastel stick. Schmincke’s Pastel Set is undoubtedly a top pick for artists and professionals everywhere.


    Pros

    • Easy to blend, giving you unlimited creative color options
    • Wide range of colors provided by Schmincke enables the creation of the most intricate and meticulous art pieces
    • Made in Germany using a slow and accurate manufacturing process to maintain consistent quality
    • Each pastel stick in the set features optimal lightfastness and minimum binders
    • These pastel sticks are known for high pigment concentration


    Cons

    • Some artists have observed that the texture of these pastels is not as soft as they prefer


    Number of Colors: 30 | Stick Size: Full Stick | Softness: Extra soft | Lightfastness: Good | Packaging: Cardboard box

    The next soft pastel set in our list of recommendations comes from the reputed house of Royal Talens. The Rembrandt line of soft pastels comes after over 100 years of excellence in offering soft pastels. With these pastels, an artist gets what she wants – optimal quality and long-lasting performance.

    Rembrandt Soft Pastels Basic Set 300C30.5
    • These professional-quality soft pastel sticks are...
    • English (Publication Language)

    Experience

    The Rembrandt Pastel kit from Royal Talens offers a unique feature. We loved the composition of these pastel sticks – the manufacturing process relies on kaolin clay to work as a binder, which adds a slightly firm finish to these pastels (not firm enough to be classified as hard pastels). Having a relatively solid finish for soft pastels, artists get a secure grip and control.

    Added grip and control allows for smooth strokes on the paint surface. But these pastels are not just magnificent for stroke work. You will be pleased to know that the unique binder of these pastels can crumble with ease, enabling you to blend various colors with ease. Each pastel stick measures 1.375” in length.

    With Rembrandt Pastels, you need not worry about quality. Two of the standout features of these pastels are the rich pigment concentration and high lightfastness. Rembrandt offers these pastels in 218 colors – 61 with a lightfastness rating ranging from 25 to 100 years and 157 with a lightfastness rating of more than 100 years. You can rest assured that these pastels will maintain their luster throughout your lifetime.

    Like every top-notch pastel brand, Rembrandt pastels are available in affordable sets as well as individual sticks. You can conveniently restock any color from a collection. Royal Talens also provides an in-depth color chart for reference for professional artists who may want to review the swatches and pigments.

    There are no gimmicks or false promotions when it comes to Rembrandt. These pastels are artist-grade and command a slight premium in price. If you have a few extra bucks to spare, these pastels are the best option.


    Pros

    • Rembrandt pastel sticks contain zero sharp edges or hard bits, which can lead to scratches or bright spots during application
    • Each pastel stick is hand-checked multiple times throughout the production process to ensure optimal quality
    • It is a perfect kit for artists who are looking for top-notch quality
    • Rembrandt pastels come in a wide range of colors and are easy to blend


    Cons

    • It can be a tad bit expensive for students and beginners


    Number of Colors: 30 | Stick Size: Half Stick | Softness: Soft | Lightfastness: Good | Packaging: Cardboard box

    Next, on our list of recommendations is the Mungyo Soft Pastel set that has 64 colors. The unique feature of this set is that each pastel stick is designed as a square instead of a circle. The square design is ideal for optimal grip and effortless stroke work.

    MUNGYO Soft Pastel 64 Color Set Square Chalk (US English...
    • Vivid and brilliant colors - available up to 64 colors (US...
    • All techniques of the pastel can be applied easily ;...

    Experience

    The first two soft pastel sets in our list cater to professional artists and experts. It is time to include a pastel set for students, beginners, and hobbyists. We recommend the Mungyo Soft Pastel Square Chalk set to anybody who is operating on a tight budget and wants reasonably priced pastels.

    You will want to buy this set because of the sheer value for the money it provides. At a price less than $15, you get 64 pastels – that is less than 25 cents per pastel stick. It is natural to think that if a comprehensive pastel set is priced so low, it might be of inferior quality. We have used it extensively, and we can assure you that it is not the case with Mungyo’s set.

    This set is not artist-grade and does not come with a color chart. There is no information on the pigment concentration and lightfastness rating. These pastels are made in Korea and are far from the best products available in the market. It serves as a perfect starter kit for students or hobbyists who want to learn.

    There have been a few complaints about the poor packaging of this pastel set, which has led to some of the sticks breaking in transit. We got our set in perfect condition, and we found the packaging to be excellent – protected by a cover sheet and foam cushion in the box. The pastels are small in size and will run out soon after being put to use.


    Pros

    • One of the cheapest pastel sets available in the market, costing less than 25 cents per pastel stick.
    • Comprehensive set, with 64 colors of soft pastels
    • Ideal starter set for art students, hobbyists, and beginners
    • Unique square design of the pastel sticks allows for better grip and more effective stroke work


    Cons

    • Pastels are very small and will run out very soon after being put to use
    • There is no color chart in the set, so the lightfastness rating and pigment purity cannot be ascertained


    Number of Colors: 64 | Stick Size: Mini Stick | Softness: Soft | Lightfastness: Fair | Packaging: Foam cushion

    Halfway through our recommendations comes one of the most comprehensive pastel sets available in the market. Sennelier offers the half-stick Paris collection that consists of 120 colors. Sennelier is one of the most renowned brands in the pastels industry and has been providing art and craft supplies for over 100 years.

    Sennelier Soft Pastels Half Stick Set 120/Pkg-Paris, Paris
    • Manufacturing process of the Sennelier cylindrical pastel...
    • Wide range of luxurious, brilliant colors

    Experience

    If you are looking for the most delicate soft pastels, you go for one of the most reputed brands in the pastel industry – Royal Talens, Holbein, or Sennelier. Based out of France, Sennelier has been the go-to brand for many famous artists since 1887. If you need proof, Picasso and Van Gogh used Sennelier products.

    So why is Sennelier so good? We especially liked the full range of colors that Sennelier offers – 525 in total. Finding the right colors for your next art masterpiece will not be a hassle if you search the Sennelier color chart. We recommend the half-stick Paris collection because of its top-notch permanence, pigment purity, and lightfastness rating.

    The set comes in a sturdy cardboard box, which allows secure storage. If you will be performing substantial overlapping work with these pastels, it is preferable that you fix between layers. Avoid heavily fixing the final layer to preserve the original tones. You will appreciate the extra soft finish of these pastels.

    One of the downsides and a significant one at that is the price of Sennelier pastels. Soft pastels can cost up to nearly five dollars per piece and its most extensive set consisting of all 525 colors comes at a steep price exceeding $1,000. It is not your average pastel brand and commands a significant premium relative to other brands.

    Due to its expensive price tag, the Sennelier half-stick Paris set is not well-suited for art students, beginners, and hobbyists. If you are still new to the world of soft pastels or are still experimenting and learning, this is not the set you want to buy.


    Pros

    • Set contains artist-grade, extra soft pastels of premium quality that are made in France
    • It features best-in-industry pigment purity, permanence, and lightfastness rating
    • Sennelier offers 525 color options, providing a diverse range of color options for artists
    • It is made from a perfect mix of high-quality pure pigment and a natural transparent binder


    Cons

    • It is one of the most expensive soft pastel brands, making it suitable only for professional artists, art teachers, and experts


    Number of Colors: 120 | Stick Size: Half Stick | Softness: Soft | Lightfastness: Excellent | Packaging: Cardboard box

    5. Blick Artists’ Soft Pastels

    Any art or craft supply list will be incomplete without a Blick product. All artists in the USA have heard of or used Blick’s products. The Artists’ Soft Pastels are available in a wide array of vibrant, rich colors, ideal for all kinds of color sketching and pastel painting.

    Experience

    Over recent years, Blick has emerged as a go-to brand for all types of art and craft supplies. Do not label it as just an average store brand. While Blick’s NYC store has the most extensive and well-thought-out collection of supplies for artists, their products always pack a punch.

    We especially liked the Blick Artists’ Soft Pastels because of their high pigment concentration and minimal binders. Like the premium brands of Royal Talens and Sennelier, the final color is bright and vibrant. These pastels are available individually as well as in sets. Each pastel stick measures 2.5 inches in length and 0.5 inches in diameter.

    You will notice a soft, velvety texture in these pastels, which enables consistent coverage and easy laydown. These pastels from Blick are versatile and can be used for layering, blending, and softening edges. We ought to mention that, unlike most past pastels, they do not crumble easily. You get optimal lightfastness with these pastels.

    What makes Blick click is the affordable price of its products. Most Blick products cost about 25% less than its premium alternatives, but the quality of these products has a negligible difference. If you can buy an artist-grade product from a non-premium brand at a moderate price, it is a win-win situation.

    Blick’s Soft Pastels set is affordable for both professionals and students. Blick offers the most bang for your buck, and these soft pastels will not disappoint. If you are looking for an upgrade from a basic pastel set without spending a fortune, this is the brand for you.


    Pros

    • Set has artist-grade pastels that have high pigment concentration and negligible binders
    • Pastels do not crumble easily and provide intense, bright color
    • Ideal for various techniques like layering, blending, and softening edges
    • Moderately priced, making it affordable for students and professionals alike
    • Each pastel has a velvety texture and optimal lightfastness


    Cons

    • It is a store brand and does not command a super brand value like other premium brands


    Number of Colors: 60 | Stick Size: Full Stick | Softness: Soft | Lightfastness: Good | Packaging: Foam cushion

    Faber-Castell is a name that a majority of artists are familiar with, both students and professionals. The FC128272 Creative Studio Soft Pastels set includes 72 colors. The vibrant color deposit in these pastels provides an exceptionally bright and intense finish. These pastels are ideal for drawing fine lines and details and for shading larger background areas.

    Faber-Castel FC128272 Creative Studio Soft Pastel Crayons...
    • Soft colour deposit for extremely intense and vivid colours
    • Ideal for drawing fine details and shading larger areas

    Experience

    The last recommendation we have is a treat for art students and hobbyists. Take the Loew-Cornell set we just reviewed and make it more comprehensive and reasonable to get the Faber-Castell FC128272 set. It includes 72 vivid colors of half-stick pastels, making it an excellent addition to any student’s art supplies.

    We especially liked the sturdy cardboard box this set comes in, making it ideal for traveling. These pastels are designed in the traditional square to offer better precision and control. Each pastel stick measures 1.125 inches in length. You will be pleased to know that these pastels conform to ASTM D4236 and are 100% safe to use.

    The pastels feature a stable consistency and can adhere to various surfaces like card, paper, stone, and wood. We loved how easy it was to clean a wrong stroke – wipe with your finger, pastel brush or a paper wiper. These pastels are excellent for all kinds of blending projects, especially for subtle blends.

    The primary reason for including this pastel set in our list is its cost-effectiveness. At a price of around $27, 72 colors of half-stick pastels is a great buy. As the Loew-Cornell set, this set suffers from similar drawbacks. There is no color chart so you cannot find the pigment purity and lightfastness rating of these pastels.

    Faber-Castell does not sell these pastels individually. So if some of your pastels run out sooner than the rest, you have to either buy those colors from another brand or purchase the entire set again. Despite these shortcomings, it is an excellent set for art students, beginners, and hobbyists who do not want to spend a lot of money.


    Pros

    • One of the most reasonable soft pastel sets for students
    • Comprehensive set consisting of 72 colors of half-stick pastels
    • Each pastel in this set conforms to ASTM D4236
    • These pastels work perfectly for creating subtle blends


    Cons

    • The set does not include a color chart, so information about the pigment purity and lightfastness rating is not available
    • Pastels are not sold individually, making restocking troublesome and expensive


    Number of Colors: 24, 48, 72 | Stick Size: Half Stick | Softness: Soft | Lightfastness: Good | Packaging: Metal case

    Best Soft Pastels Comparison Table

    Product Number of Colors Stick Size Softness Lightfastness Packaging
    Schmincke Half-Stick Extra-Soft Artist Pastel Set 30 Full Stick Extra soft Good Cardboard box
    Rembrandt Soft Pastels Basic Half Sticks Set 30 Half Stick Soft Good Cardboard box
    Mungyo Soft Pastel Square Chalk Set 64 Mini Stick Soft Fair Foam cushion
    Sennelier Half Pastel Paris Collection 120 Half Stick Soft Excellent Cardboard box
    Blick Artists’ Soft Pastels 60 Full Stick Soft Good Foam cushion
    Faber-Castell Creative Studio Soft Pastel Crayons 24, 48, 72 Half Stick Soft Good Metal case

    Buying Guide For The Best Soft Pastels

    Now that we have shortlisted seven of the best soft pastels from hundreds, you might be wondering how to choose the ideal product for you out of these seven. We have covered all the factors you need to consider to select the best soft pastel for your needs.

    1. Budget Constraints

    One of the most basic and crucial factors that determine which pastel set you will be purchasing is your budget. The amount of money you are able and willing to spend on pastels will either limit or expand your options.

    Professional artists and experts who make sufficient money from their work will go for artist-grade pastels. They want uncompromising quality and top-notch pastels with high pigment concentration, optimal lightfastness, and permanence.

    Art students and hobbyists operate on a tight budget and will go for student-grade pastels. They are looking for affordable supplies to practice and learn and do not need high-end products.

    1. Characteristics of Soft Pastel

    Soft pastels can help you create some beautiful art, but the process is not always as glamorous. Some natural features of soft pastels make it chalk-like, meaning it will crumble and produce a lot of dust. Soft pastel does not adhere to the paint surface, thereby leading to a need to use fixative with layering.

    Due to these characteristics of soft pastels, it is imperative that you use them in a well-ventilated area to avoid breathing in the pigments and binders, which may be toxic. If you are not game for the messy process that using soft pastels entails, you should probably go for oil pastels instead.

    1. Individual or Set?

    Most of the pastel sets we have recommended are available both individually and in sets. Buying individual pastels allows you to test them, especially if you are considering buying one of the premium sets. Before investing hundreds of dollars in a comprehensive collection, it makes sense to test specific colors.

    Purchasing a set is advisable because it is more cost-effective in the long run. Students and hobbyists should buy sets. You should preferably buy a set from a company that also sells its pastels individually to ensure convenient restocking and replenishment of the set.

    1. Color Charts and Selection

    Color charts make an essential part of pastel sets, especially for premium and expensive products from reputed brands like Royal Talens and Sennelier. Color charts give you a vivid look at what the colors will look like on paper. They also contain some vital information that professionals want to know to assess the quality of pastels, like permanence, lightfastness rating, and pigment purity.

    When it comes to soft pastels, having a wide range of colors in the studio is always a good idea. It is easy to blend soft pastels, but the more you mix, the lesser the vibrancy of each color. Having a comprehensive set that includes various colors will go a long way in your artistic journey.

    1. Pastel Stick Size

    Soft pastels are available in two stick sizes:

    • Full stick, measuring about two inches in length.
    • Half stick, measuring about one inch in length.

    It is a personal choice whether you will buy half-stick or full-stick pastels. Depending on your comfort and hand size, you can choose to use either of the two. The pastel quality remains the same across both sizes.

    Soft Pastels FAQ's

  • What are soft pastels?

    Soft pastels are pastels containing mostly pure pigment with a very low proportion of binders. Soft pastels are known for having brighter colors and being incredibly smooth. Soft pastels are notoriously famous for producing a lot of dust as well.

  • Can soft pastels and oil pastels be used together?

    Soft pastels and oil pastels are like the flipsides of a coin – soft pastels can be brushed off the surface due to low adhesion whereas oil pastels adhere to the surface but do not dry completely. It is not common to use oil and soft pastels together due to the vastly different finish of each medium.

  • How is a soft pastel different from a hard pastel?

    A hard pastel and a soft pastel mostly have the same ingredients, only in different quantities. Hard pastels contain less pure pigment and more binders, making them more durable and less bright.

  • What type of paper should be used with soft pastels?

    Pastels are incredibly versatile art mediums. Soft pastels can be used with nearly all surfaces that have a decent amount of tooth and texture. Some artists prefer only pastel paper, while others use regular drawing paper. You can even use boards, sandpaper, and canvas.

  • Is a fixative required for a soft pastel?

    Soft pastels do not adhere to most paint surfaces and can come off quickly if a fixative is not used. It is recommended to use fixative with soft pastels for the preservation of artworks. If you are going to use layering, using fixative is a must between layers.

  • Is it safe to use soft pastels?

    Soft pastels are known to produce a lot of dust, significantly higher than hard pastels and oil pastels. Most soft pastels are safe to use though. As a general rule of thumb, buy pastels that are non-toxic, and ASTM certified.

  • Conclusion

    We're absolutely thrilled that you've joined us in exploring the wonderful world of soft pastels! We hope you found this article to be an exciting and eye-opening journey into the colorful realm of this versatile artistic medium. It truly is an amazing way to express your creativity and create stunning masterpieces.

    Out of these 6 best soft pastels, here are our top three recommendations:

    Best for color richness: Sennelier Soft Pastels is an ideal option. Sennelier's luxurious and buttery texture delivers intensely pigmented and vibrant colors, making it a standout choice for artists who seek true-to-life color representation in their work. With a vast array of hues and shades, this select set ensures that your creative vision is never compromised.

    Best for affordability: Faber-Castell Creative Studio Soft Pastels is a good option. Catering to the budget-conscious artist without compromising on quality, these pastels offer an excellent balance between price and performance. The pastels' strong pigments, smooth blending, and durability make it a popular choice for novice and experienced artists alike.

    Best for beginners: Prismacolor NuPastel Artists' Pastels is the right choice. These hard pastels provide great control and precision for those who might be new to the art form. They're less prone to breakage than softer alternatives, making them more forgiving and user-friendly for beginners getting a feel for the medium.

    We are confident that, armed with the knowledge we've provided in this article, you'll be well-equipped to make an informed decision on the best soft pastels to suit your personal artistic needs. Go on, unleash your creativity and enjoy the spectacular colors and texture that soft pastels can bring to your artwork. Remember, the only boundaries in art are the ones we create ourselves, so dream big and make your mark! Happy coloring!

    Hands down, acrylic paints are one of the most versatile painting mediums available on the market. 

    They are excellent for beginners who want to jump into art and are a popular art supply for students or professional artists because of their ease of use. On top of that, most art brands carry a variety of acrylic paints, including student and professional lines. 

    This creates an opportunity for amateur art enthusiasts or students to pick up basic paints to begin their journey as an artist. However, a common problem with student-grade paints is the inferior quality. These paints usually make the artwork look terrible and may demoralize a person from further projects. 

    Therefore, we thought of coming up with a list of excellent yet cheap acrylic paints easily accessible to budding artists. Without further ado, let's get started! 

    Best Cheap Acrylic Paints

    Best Cheap Acrylic Paints

    To help you find the best affordable acrylic paints, we have compiled a list of 23 options with their most important features and attributes. So, whether you're a beginner or a professional artist, here's the list of the 23 best cheap acrylic paints for you to consider.

    1. Liquitex BASICS - Best for Blending and Pouring

    Liquitex BASICS

    By far, one of the most talked-about lines of cheap acrylic paints is the BASICS line from Liquitex. As you can understand, it's a student-grade acrylic paint, but it's equally popular among professional artists. 

    The best thing about these paints is the consistency that's neither too thick nor thin. You can easily spread the paint with a palette knife, and there's no streaking due to the presence of the highest-quality fine art pigments in the formula. Moreover, the paints seem to work pretty great with blending and pouring mediums, giving you more versatility while working with them. 

    Coming to the color range, Liquitex BASICS are available in 72 options, with the small tubes containing 4 oz of paint, while the biggest pot contains paint worth 32 oz. 

    Quantity: 32 oz tube | Color Selection: 72 colors | Finish: Matte | Lightfastness: Yes

    2. Apple Barrel Acrylic Paint - Best for Versatile Surfaces

    Apple Barrel, Pastel Dreams & Vivid Wonders Collection...
    • CONVENIENT SIZE & FUN BRIGHT COLORS - This versatile acrylic...
    • MATTE FINISH - Each of these bold and bright colors dries to...

    Another widely available but cheap option is the Apple Barrel acrylic paints, mostly known for their versatility. Indeed, you can apply them on different surfaces, including wood, ceramic, plastic, terra cotta, and even plaster. 

    This acrylic dries fast, so you won't need to worry about messing up your project.  As this is a water-based formula, the paint glides on any surface without giving you any trouble. And, it doesn't dry streaky, giving your paintings and DIY projects a nice finish. 

    Moreover, the Apple Barrel acrylic paint can be found in almost a hundred colors, while the company has recently launched the popular acrylic paint in a gloss finish. This paint line contains kid-friendly products with a non-toxic formula, so you won't have to worry even if your kids get this paint all over them. 

    Quantity: 2 oz bottle | Color Selection: 224 colors | Finish: Matte | Lightfastness: No

    3. Arteza Acrylic Paint - Best for Glossy Finish

    ARTEZA Acrylic Paint Set, 60 Colors (0.74 oz Tubes) –...
    • COMPLETE 60-COLOR SET WITH METALLICS - Includes 60 acrylic...
    • THICK, HIGH-VISCOSITY CONSISTENCY - The paint has a creamy,...

    A cheap acrylic paint lineup that has been the talk of the town is from the art supplies brand, Arteza. To be honest, the company has a vast range of acrylic paints, including excellent pouring paints. 

    It's easy to blend and layer these Arteza acrylic paints either with a brush or a palette knife. What’s more, you can use them on paper or canvas, and the best part is that the paints don't crack or chip even if there's any unevenness on the surface. The acrylic paint dries to a glossy finish, leaving your paintings even more appealing. 

    These acrylic colors are also lightfast, so your paintings would remain vivid and bright years after you have created them. Additionally, the best way to start using the Arteza acrylic paints is through the 60 colors set, whereby you get 0.74 oz. tubes of individual colors in a box. 

    Quantity: 4 oz bottle | Color Selection: 60 colors | Finish: Matte | Lightfastness: Yes

    4. Golden Fluid Acrylic Paint - Best for Fluid Techniques

    GOLDEN Fluid Acrylics, Principal Professional Fluid Set, Ten...
    • Experience the even, flowing consistency of richly pigmented...
    • Includes - Benzimidazolone Yellow Medium, Pyrrole Red,...

    Golden has been a leading name in the art industry for a long time. And even though the company has different lines of acrylic paints, we were drawn to the fluid acrylic paint. As you can understand, these paints are supposed to have low viscosity compared to their heavy-bodied counterparts. 

    Moreover, Golden recommends the use of this color for a variety of projects such as dry brush techniques, adding fine details, acrylic pouring, spraying, and even staining. The fluid acrylic paint line also contains some of the best metallic and iridescent colors. Hence, there's no need to add any fillers or extenders, as the color payoff of these paints is pretty consistent. 

    Compared to the other student-grade acrylics we mentioned, this will cost you a bit more money, but it still falls under the affordable category. However, what makes the paint truly worthy has to be its lightfastness which is comparable to any artist-grade paint. 

    Quantity: 1 oz bottle | Color Selection: 43 colors | Finish: Matte | Lightfastness: Yes

    5. Winsor & Newton Galeria Acrylic Paint - Best for Transitioning Artists

    Winsor & Newton Galeria Acrylic Paint, 10 x 60ml (2--oz)...
    • PROFESSIONAL PIGMENTS, SMARTLY BALANCED: Bright, stable...
    • EFFORTLESS CONSISTENCY, VIBRANT RESULTS: Smooth, satin...

    Hearing the name of the brand, Winsor & Newton, may make you think that we are going to mention some expensive acrylic paints, but that's not true. Known mainly for watercolors, Winsor & Newton has released other art supplies like acrylic paints. 

    As such, the Galeria acrylic paint line from Winsor & Newton is dedicated to vibrant and fluid paints for a smooth painting experience. This high-quality acrylic paint is available in 57 colors, including metallic and transparent shades. 

    Even though it's a beginner-friendly range, the Galeria acrylic paints have premium-quality pigments with a high pigment load comparable to the professional range. Additionally, using it is an excellent way to ease yourself into the techniques of using artist-grade paints. 

    Quantity: 2 oz tube | Color Selection: 57 colors | Finish: Glossy or matte | Lightfastness: Yes

    6. Blick Studio Acrylic Paint

    Blick Studio Acrylic Paint 

    Originally, Blick was a platform for ordering art supplies, and then the company went ahead and launched its own supplies. You’ll find that the student-grade acrylics are packaged under the label Blickrylic and have got some great customer reviews. 

    Blick describes the product as a true acrylic paint that has been priced affordably to make it available for most people. Moreover, the paints come in 30 rich and vivid, carefully chosen shades, and you can easily mix them to make new colors. They are even compatible with acrylic paints or mediums from other brands, making them highly versatile. 

    What's more, these acrylics can be used on various surfaces like wood, canvas, cardboard, and paper. You can even use it on fabrics and heat-set the paint using an iron to make it waterproof. Naturally, this acrylic paint dries to a permanent semi-gloss finish which looks quite good irrespective of the painting surface.  

    Quantity: 2 oz tube | Color Selection: 59 colors | Finish: Matte | Lightfastness: Yes

    7. Daler Rowney Graduate Acrylic Paint

    Daler Rowney Graduate Acrylic Paint Set, 10-Tube Assorted...
    • No more dull acrylic paint sets! Each tube of water-based,...
    • This colorful and vibrant set comes with 38ml tubes of...

    Next up, we have the Daler Rowney Graduate acrylic paints that are pretty popular in the art supplies market. Along with being available worldwide, the brand is known for its good quality products available at an affordable price point. 

    The Graduate line contains medium-bodied acrylic paints with good pigment strength and high lightfastness. So, even if you're making the paintings in college, you can expect them to look just as attractive after some years. Also, as the formula is water-based and solvent-free, the paint can be easily mixed with art mediums from other brands. 

    Moving on, these acrylic paints from Daler Rowney dry with a flexible finish, preventing your paintings from developing cracks. In a nutshell, it's a smooth, fast-drying, easy-to-use paint, so students and amateurs can learn to paint with it. 

    Plus, this affordable acrylic can be used on several surfaces, including paper, canvas, wood, and ceramic. 

    Quantity: 120 ml tube | Color Selection: 40 colors | Finish: Glossy or matte | Lightfastness: No

    8. Sennelier Abstract Acrylic Paint

    SENNELIER Abstract Acrylic Pouches, Primary Matt Color Set...
    • Housed in an extra-sturdy, easy-to-transport squeezable...
    • Package features a transparent window that shows the exact...

    Moving on, we have the Sennelier Abstract acrylic paints that the brand defines as innovative. Unlike many other cheap acrylic options available on the market, it's a heavy-bodied multimedia paint with a high pigment concentration. 

    Coming to the colors, the brand offers you a brilliant range of 60 shades, comprising satin, high-gloss, iridescent, and fluorescent. We especially appreciate the transparent pouch as it lets you see the true color to make the right choice. 

    Moreover, apart from the original heavy body range, Sennelier has launched a soft body matte range of 35 vibrant colors in 2 fl oz pouches. The brand describes this paint as creamy-to-thick, making it great for elaborate acrylic paintings on canvases. At the same time, the consistency is perfect for covering a surface like clay or wood. 

    Long story short, the potent formula truly brings forth the idea of having an all-purpose acrylic paint for a variety of art projects. 

    Quantity: 2 fl oz | Color Selection: 60 colors | Finish: Glossy or matte | Lightfastness: Yes

    9. Mont Marte Acrylic Paints

    Mont Marte Acrylic Colour Paint Set Signature 24pc x 1.21 US...
    • Acrylic painting set including 24 colors: Titanium White,...
    • Creamy consistency

    Are you trying to find acrylic paints available in bulk? If so, you may really like the bigger acrylic color pump bottles from Mont Marte. Even though the paint ends up being exceptionally cheap, we were pretty impressed by their color payoff and quality. 

    You will find that the bottles are usually labeled as "school studio acrylic" or as just acrylic color, but both are similar and have the same color options. The pump bottles contain 67.6 fl oz. or half a gallon of paint which is an excellent amount for classrooms or art studios. 

    This water-based, fast-drying, and non-toxic acrylic paint is also suitable for kids, teens, and amateur artists. Rather than having a very thin or thick consistency, the paint has an in-between creamy viscosity to make it suitable for various art projects. 

    Currently, the full Mont Marte acrylic paint range has 100 colors available in various finishes. 

    Quantity: 67.6 fl oz tube | Color Selection: 100 colors | Finish: Glossy or matte | Lightfastness: Yes

    10. Pébéo Studio Acrylics

    Pébéo 832-353 - Studio Acrylics Fine Acrylic - Acrylic...
    • ACRYLIC PAINTING FOR ALL: This classic acrylic is ideal for...
    • SATIN MATTE FINISHES: Thick and satin, Studio Fine Acrylic...

    Pébéo is one of the oldest art supply brands that's still dominating the market with great products. We especially picked the Pébéo Studio Acrylics for this list as it's a suitable student-grade heavy body paint. Currently, it is available in 62 attractive colors and offers a beautiful satin finish. 

    The brand has crafted the paint for use by professionals and students on canvases, wood, cardboard, and even metal. And despite being a heavy body variant, this acrylic paint is quite pliable, delivering a smooth finish. At the same time, you can use it for textured work as the paint can retain brush or spatula marks. 

    Nevertheless, what stood out the most were the colors in the Pébéo Studio Acrylics range. Apart from being richly pigmented, the colors are pretty bright and a dream to work with when mixed with other paints. 

    Quantity: 100 ml tube | Color Selection: 48 colors | Finish: Glossy or matte | Lightfastness: Yes

    11. Caliart Acrylic Paint

    Caliart Acrylic Paint Set with 12 Brushes, 24 Colors Wood...
    • Acrylic Paint Set With 12 Brushes: Premium paints glide on...
    • Rich Pigments, Certified Safe & Non-Toxic: No need to worry...

    Are you looking to use acrylics for a one-time project? If so, you shouldn't bother about spending a lot of money on them. However, as we don't want you to sacrifice quality, our suggestion would be to opt for the Caliart acrylic paint. 

    These paints are priced affordably, but we really like how they glide onto any surface to provide a consistent color payoff. The company even uses premium-quality pigments in these paints to make them appear vibrant. 

    Besides, the best feature of this acrylic paint is its formulation that's certified safe and non-toxic. Therefore, you can get the Caliart acrylic paint set (available in a handy set of 24 shades in 2 oz bottles) for your kids as it's safe for all ages. 

    Quantity: 2 oz bottle | Color Selection: 24 colors | Finish: Matte | Lightfastness: Yes

    12. Chroma Atelier Interactive Acrylic Paint

    Chroma Atelier Interactive Acryl 20ml 12-Tube
    • Atelier Interactive Acrylics allow the artist control over...
    • Drying time can be extended and dry colors can be...

    Most acrylic paints tend to be quick-drying to make the painting process simpler. That said, some people really enjoy the malleability of paints as it helps in seamless blending. 

    Atelier Interactive tries to solve the problem by mixing tradition with innovation to create one of the best artist-grade acrylic paints. These acrylics can be easily used for controlled wet blending to get the desired effect. 

    On top of that, the Atelier range has a lot of mediums that can change the texture of the paints. The company even has a special "Unlocking Formula" to keep your paintings wet for a longer time. 

    Additionally, the Atelier Interactive acrylic paints are available in 75 colors with seven new pastel shades. 

    Quantity: 2 oz tube | Color Selection: 75 colors | Finish: Satin | Lightfastness: Yes

    13. Holbein Heavy-Body Acrylic Paint

    Holbein Heavy Body Artist Acrylic Luminous Set of 6, 60ml...
    • Holbein Heavy Body Acrylics - Set of 6, Luminous Colors, 60...
    • Luminous Set of 6

    Holbein is known for producing one of the best heavy-body acrylic paints available on the market. Yes, it might cost you a bit more money, but the paints provide a professional finish to your projects. 

    However, what makes Holbein heavy body acrylics unique is the vast color range of 113 shades. The company states that these colors have been created from Western and Eastern influences to provide a special palette to artists. Added to that, mixing these acrylics is seamless and effortless. 

    Besides the heavy body range, acrylic paints are available in fluid and matte versions. For instance, we even like the acrylic-colored gesso as it's perfect for working on canvases. 

    Quantity: 60 ml tube | Color Selection: 113 colors | Finish: Glossy or matte | Lightfastness: Yes

    14. Matisse Acrylic Paints

    Matisse Structure Sampler Set of 12 12 ml Tubes
    • These heavy body, high viscosity acrylics are brilliant and...
    • Perfect For Impasto Painting techniques, Painting large...

    Matisse is best known for the Structure Formula paints that are available in 95 vibrant colors on the market. The company describes it as an impasto paint meant to be used with palette knives and brushes to get textured effects. 

    Moreover, most of the shades have a lightfastness rating of ASTM I or II, which helps preserve the archival quality of your paintings. And you can even mix these paints with various Matisse mediums to make them more versatile. 

    Otherwise, try out the Flow Formula or Fluid Formula if you're looking for low-viscosity paints. But irrespective of the viscosity, the color payoff is consistent, and the paint is easy-to-use. 

    Quantity: 75 ml tube | Color Selection: 95 colors | Finish: Glossy or matte | Lightfastness: Yes

    15. Reeves Acrylic Paint

    Reeves Acrylic Paint Paint-75 ml, Assorted, 75 ml (Pack of...
    • ACRYLIC PAINT SET - Our premium acrylic set features highly...
    • VIBRANT COLOURS - This acrylic set includes five vibrant...

    Reeves has been the way to go for many years when it comes to purchasing affordable art supplies. The acrylic paint from Reeves is vibrant with a high pigment load and is available in 50 beautiful colors. 

    Rather than being too flowy or thick, this paint has a buttery consistency that lets you apply it on various surfaces. And, because of the high-quality pigment, there's no streaking. 

    We would especially recommend the Reeves acrylic paint to students and amateur artists. You can purchase sets of 24 or 10 colors to get an idea of the shade range and color payoff. 

    Quantity: 75 ml tube | Color Selection: 50 colors | Finish: Glossy or matte | Lightfastness: No

    16. Amsterdam Acrylic Paints

    Amsterdam Standard Series Acrylic Tube 120ml Titanium White...
    • A very high level of lightfastness thanks to the use of pure...
    • An exceptionally durable paint film (the binding agent...

    Amsterdam creates its acrylic paints with high-grade pigments through a total acrylic emulsion process. The most popular product range from Amsterdam is the standard series having 90 colors available in different quantities. We were especially impressed by the pearl and metallic colors. 

    These are medium-viscosity paints, so you can easily spread them on any surface, canvas, or wall. And according to regular artists, this product works well for techniques like multi-layering, wet-on-wet, and glazing. 

    Moreover, Amsterdam has 18 cheap acrylic paint sets. Some are even based on themes like urban landscapes and portraits. The largest acrylic paint set we found had all 90 shades in handy 20 ml tubes. 

    Quantity: 120 ml tube | Color Selection: 70 colors | Finish: Glossy or matte | Lightfastness: Yes

    17. Castle Art Supplies Acrylic Paint

    Castle Art Supplies 48 x 22ml Acrylic Paint Set |...
    • MADE TO MAKE IT EASY Squeeze paint direct for bold impact or...
    • UPGRADE YOUR ACRYLICS ARMOURY Wide ranging set of large...

    An acrylic paint set is often the best place to start for a beginner to get introduced to a new painting medium. However, it can be a challenging task to find the right set with proper colors and quality. Castle Art Supplies have made it easier to pick premium quality acrylic paint sets at an affordable price. 

    Currently, the company has options of 12, 24, and 48-piece acrylic paint sets. Along with that, there's an exclusive metallic set with 24 shades. 

    The paints are suitable for painters of all skill levels and are convenient to use in the paint. On top of that, these paints are non-toxic and water-based, so you can give the sets to kids. 

    Quantity: 22 ml tube | Color Selection: 48 colors | Finish: Glossy or matte | Lightfastness: Yes

    18. Tri-Art Acrylics

    Tri-Art Acrylics

    Among all the art supplies companies we check out for this list, Tri-Art has one of the most diverse product lists. Like other brands, it separates the products according to levels of quality but also introduces special items. 

    The best-selling item from Tri-Art is the high-viscosity acrylic paints, and a close second would be the liquid acrylics that have a creamy consistency. Moreover, Tri-Art makes acrylic gouache, full-body acrylic, and even acrylic printing ink. 

    For absolute beginners, Tri-Art has introduced Primary Paint, a liquid acrylic with rich pigments, and this paint is available in ten colors. It has a beautiful matte finish with resistance to cracking and chipping. 

    Quantity: 120 ml tube | Color Selection: 88 colors | Finish: Glossy or matte | Lightfastness: Yes

    19. M. Graham & Co. Acrylic Paint

    M. Graham & Co. 5 Color Acrylic Set Art - Paints, Plus 6th...
    • 5 Color Acrylic Set, Plus Bonus 6th Color
    • M. Graham paint set

    Are you fond of using watercolors? If so, you'll surely like using the acrylic paints made by M. Graham & Co. The company believes in designing the finest paints for artists, so it skips on using inferior fillers and bulking agents. Furthermore, the paints are created in small batches with premium pigments in the highest concentration. 

    These artist-grade paints are excellent for adding details to your paintings or even for creating entire washes with a consistent color payoff. As this paint has a gouache-like consistency, it's best for intermediate-level artists. 

    Quantity: 2 oz tube | Color Selection: 70 colors | Finish: Glossy or matte | Lightfastness: Yes

    20.Grumbacher Academy Acrylic Paint

    Grumbacher Academy Acrylic Paint, Gloss, 90ml/3 oz Metal...
    • 6-COLOR STARTER SET: This set is ideal for starting your...
    • MIX, TINT, AND SHADE: Primary paints can mix a wide range of...

    Another best cheap acrylic paint option available on the market is the Grumbacher Academy Acrylics. The range contains 48 brilliant colors with an ASTM lightfast rating of 1. These acrylics are AP certified, so they can be used for your schoolwork. 

    However, the best thing about these paints has to be their spectacular tinting quality due to the high concentration of pigment used for every shade. If your acrylics seem to dry quickly, go for the Grumbacher metal 90 ml tubes for getting longer usage. 

    We think both professional artists and students would like these acrylic paints because of their thick consistency and excellent color payoff. 

    Quantity: 75 ml tube | Color Selection: 48 colors | Finish: Glossy or matte | Lightfastness: Yes

    21. Lascaux Acrylic Paints

    The Art of Throwing [Paperback] by McErlain, Alex
    • Lascaux Artist Acrylics - Cadmium Green Light, 45 ml tube
    • 157 Cadmium Green Light

    Lascaux, the name comes from a prehistoric cave in France that was discovered to have paintings made by ancient human beings. Similarly, the tagline of this brand is "the spirit of colors," which has helped it create excellent high-quality paints. Artists worldwide enjoy using Lascaux acrylic paints because of the variety of colors and textures. 

    The Lascaux Artist Metallics are especially popular as the thick body paint has a consistency similar to that of oil paints. At the same time, the Lascaux Artist range contains 54 vibrant colors with outstanding lightfastness, weather resistance, and a beautiful semi-matte finish. 

    Quantity: 85 ml tube | Color Selection: 54 colors | Finish: Glossy or matte | Lightfastness: Yes

    22. Old Holland New Masters Classic Acrylic Paint

    Old Holland New Masters Classic Acrylic 60 ml Tube - French...
    • Old Holland New Masters Classic Acrylics - French...
    • 673 French Ultramarine Extra

    Let's start by saying that after you have gained some experience working with acrylics, it's a great idea to invest in quality paints. One such brand preferred by professional artists is Old Holland. The company is primarily known for making excellent oil paints, and the New Masters Classic acrylic paint line is based on them. 

    There are 168 lightfast opaque, and transparent colors available in this range that dry to a satin gloss finish. Moreover, the paints are made with 100% pure acrylic binder, making your painting last for a long time. 

    Quantity: 60 ml tube | Color Selection: 168 colors | Finish: Glossy or matte | Lightfastness: Yes

    23. Utrecht Acrylic Paints

    Utrecht Acrylic Paints 

    Last but not least, we have the Utrecht Artists' Acrylic, a heavy body paint with a smooth buttery texture. Utrecht uses the finest pure pigments and a 100% pure acrylic polymer to give the paints a premium quality with the highest possible concentration. 

    However, if you aren't ready to pay the high price, the Utrecht Studio Series acrylics are just as good and have similar pigments. As it's AP-certified and non-toxic, kids can use the paints for schoolwork. 

    Both variants are available in several vibrant colors with different opacities. But, only the colors of the Artists' Acrylic come in acrylic paint set options. 

    Quantity: 2 oz tube | Color Selection: 96 colors | Finish: Glossy or matte | Lightfastness: Yes

    Best Cheap Acrylic Paints Comparison Table

    Product Quantity Color Selection Finish Lightfastness
    Liquitex BASICS 4 oz tube 48 colors Matte Yes
    Apple Barrel Acrylic Paint 2 oz bottle 224 colors Matte No
    Arteza Acrylic Paint 4 oz bottle 60 colors Matte Yes
    Golden Fluid Acrylic Paint 1 oz bottle 43 colors Matte Yes
    Winsor & Newton Galeria Acrylic Paint 2 oz tube 60 colors Glossy or matte Yes
    Blick Studio Acrylic Paint 2 oz tube 59 colors Matte Yes
    Daler Rowney Graduate Acrylic Paint 120 ml tube 40 colors Glossy or matte No
    Sennelier Abstract Acrylic Paint 120 ml pouch 60 colors Glossy or matte Yes
    Mont Marte Acrylic Paints 2 oz tube 24 colors Glossy or matte Yes
    Pébéo Studio Acrylics 100 ml tube 48 colors Glossy or matte Yes
    Caliart Acrylic Paint 2 oz bottle 32 colors Matte Yes
    Chroma Atelier Interactive Acrylic Paint 2 oz tube 75 colors Satin Yes
    Holbein Heavy-Body Acrylic Paint 60 ml tube 107 colors Glossy or matte Yes
    Matisse Acrylic Paints 75 ml tube 95 colors Glossy or matte Yes
    Reeves Acrylic Paint 75 ml tube 45 colors Glossy or matte No
    Amsterdam Acrylic Paints 120 ml tube 70 colors Glossy or matte Yes
    Castle Art Supplies Acrylic Paint 22 ml tube 48 colors Glossy or matte Yes
    Tri-Art Acrylics 120 ml tube 88 colors Glossy or matte Yes
    M. Graham & Co. Acrylic Paint 2 oz tube 70 colors Glossy or matte Yes
    Grumbacher Academy Acrylic Paint 75 ml tube 48 colors Glossy or matte Yes
    Lascaux Acrylic Paints 85 ml tube 60 colors Glossy or matte Yes
    Old Holland New Masters Classic Acrylic Paint 60 ml tube 168 colors Glossy or matte Yes
    Utrecht Acrylic Paints 2 oz tube 96 colors Glossy or matte Yes

    Cheap Acrylic Paints Buying Guide

    Buying Guide For The Best Cheap Acrylic Paints 

    Are you still a bit confused about picking the best cheap acrylic paint? Don't worry, as we will help you out by providing some of the essential features to look for in any paint. Usually, when thinking about using cheap paint, we expect it to be bad. 

    But, keeping a note of these points while picking the paint may lead you to cheap acrylics that perform way better than what's expected from them. We did use these points to shortlist the products mentioned in this article. So, we can give the assurance that none of the acrylics would let you down while painting. 

    Now, let's have a look at how to choose great acrylics for yourself at a cheap price. 

    A. Color Range

    To be honest, you can possibly make various shades using primary colors along with black and white paints. However, it can quickly get inconvenient if you're working on a large project or want the paints for kids. And we even think that having access to various color options can make you more productive while painting. 

    On top of that, acrylic painting calls for vibrant colors, and the brightness might be affected while mixing paints. But, the problem with cheap acrylics is that they typically come with a limited color range. 

    Moreover, we found that the options typically lack the right in-between shades. This makes creating color transitions and blending exceptionally challenging while painting. Therefore, if you're someone who uses a lot of colors, always go for brands with a proper color range. 

    Furthermore, other factors like transparency and finish matter when it comes to colors. This is especially true for people working with different painting mediums and surfaces. So, whenever you're thinking of getting cheap acrylic paint, check for details like finish, hue, transparency, brightness, and radiance, among other things. 

    We highly recommend looking for a proper shade card to check the actual colors. If possible, visit a drawing supply store near you to get ahold of the swatches and color charts or order them online. 

    B. Overall Quality

    It might be too much to expect the best cheap acrylic paint to have a quality similar to artist-grade paints. But, we would definitely want the paint to have an overall good quality. This includes the use of decent pigments to make vibrant colors and proper binders that keep the paint from cracking or separating. 

    A typical problem seen in cheap acrylics is the texture being glue-like or too gloopy. This is due to the use of an improper binder or any other additives that ruins the formula of the paint. Moreover, these paints tend to remain tacky even when the painting has been left to dry for days. 

    Therefore, even while looking for affordable or student-grade acrylics, go for products that have proven quality. That's why we trust paints produced by known brands like Golden or Liquitex as there's some assurance of quality. 

    Having said that, we know that it can be hard for a beginner to assess the quality of a product. In that case, you can either purchase a small tube of the paint or check if a sample is available at the nearest store. If you like how the paint feels, go ahead and order more. 

    C. Viscosity

    One of the things to understand while using acrylics is the viscosity of paints. Don't worry; it's not a difficult concept, as viscosity stands for how the paint flows. Typically, acrylics are divided into two categories, heavy body, and soft body. 

    When you look at artist-grade paints, most of them tend to have a heavy body. As the viscosity is high, the colors tend to be thick, making it perfect for textured work. So, if you're transitioning from oil paints to acrylics, heavy body paints might suit you better. And they can be used with a palette knife. 

    On the other hand, thin-body acrylics are creamy and flowy due to their low viscosity. Along with painting, thin body paints are perfect for pouring, glazing, and DIY crafts and can be used on various surfaces. 

    Nonetheless, acrylics such as Liquitex BASICS are getting more popular that come with a medium viscosity. Therefore, you can use these paints for DIY crafts as well as for elaborate paintings. 

    Another thing to note is that thick body paints can be easily thinned by adding mediums to decrease viscosity. Similarly, pouring mediums can be added to thin-body acrylics to give them a more consistent flow. 

    D. Lightfastness And Permanence

    Have you ever wondered how paintings look great even after decades? It's due to the paints having excellent lightfastness and permanence ratings. 

    Lightfastness determines the probability of paint fading over time when it's exposed to light, especially sunlight. Now, it isn't realistic to forever trap your painting in a dark, flightless room. But, you can always try to use paints that don't fade drastically over time. 

    Therefore, while making the purchase, always look for the lightfastness rating of a paint. However, do note that the lightfastness may vary based on colors. So, at times you may need to pick alternatives to increase the archival quality of an acrylic painting. 

    Similar to lightfastness is the concept of permanence. This helps you understand how the paint will act over time. Needless to say, cheap acrylics that are loaded with low-quality binders and additives don't last for a long time. If you're looking for acrylics to do commission work, it's best to rely on paints with either AA or A permanence rating. 

    Having said that, you should also invest in a high-quality varnish to increase the life of your paintings. Furthermore, the varnish seals the painting to protect it from dust, mites, harmful UV rays, and other harmful forces. 

    Best Cheap Acrylic Paints

  • Can you add water to cheap acrylics?

    Yes, you can add water to any acrylic paint. For some reason, adding water to acrylics is a controversial topic, and it’s considered out of bounds among professional painters. But, we would like to let you know that using water is absolutely okay if you’re able to figure out the correct proportions.

    Moreover, adding water in a 1:1 ratio to a heavy body acrylic wouldn’t make such a difference. In turn, it does make the paint have a better flow.

    Having said that, adding water to low body paint, especially in huge quantities, may lead to over-dilution. Also, some people use the over-dilution method to create beautiful washes.

    To be on the safer side, try using the smallest amount of water at the beginning until you figure out the perfect ratio. And, if your goal is to increase the drying time of the paint, try using a retarder for better results.

  • Do cheap acrylics have bad quality?

    Not, an acrylic paint being cheap doesn’t necessarily mean that it’s going to be of bad quality. Contrary to it, most popular art supplies brands actually use the same pigments or formulations while creating the cheaper versions. This helps the brand to make the product lines more consistent, and you get to have an excellent product at a better price.

    Having said that, there are some acrylics on the market that look a bit off. That’s why we recommend using a small sample of any paint before splurging on getting the large sets or a big bottle of paint. Many professional painters, in fact, use cheaper versions instead of artist-grade paints as they believe in using their skills to make good art.

  • Final Words On Best Cheap Acrylic Paints

    Conclusion

    That's everything we had to tell you about purchasing the best cheap acrylic paints available on the market. As you may understand, we have tried to limit your choices by narrowing down only the best products. 

    We are absolutely sure that you would have a blast painting with any of our suggested acrylic paints. Having said that, it's crucial to note that every painter has distinct preferences while working with acrylics. In other words, you may need to try a couple of paints before finding the one that suits your style. 

    Also, remember to refer to the buying guide when you're unsure about getting any cheap acrylic paint. With that, we have come to the end of this informative piece. 

    Until next time, goodbye, and take care! 

    Read More on Acrylic Painting

    5 of The Best Paint for Canvas

    Painting Surfaces For Acrylics

    Painting on Paper with Acrylics & 5 Paper-Like Surfaces

    Acrylic Pour Painting

    20 Oil And Acrylic Painting Ideas For Enthusiastic Beginners

    Learn The Basic Acrylic Painting Techniques for Beginners

    22+ Delicate Beautiful Acrylic Painting Ideas To Try

    Learn How to Use Acrylic Paint as Fabric Paint

    Learn How to Thicken Acrylic Paint Correctly

    Learn How to Clean Acrylic Paint Brushes Brilliantly

    Learn How to Make Acrylic Paint in Your Studio

    Learn How To Get Dried Acrylic Paint Out Of Brushes Successfully

    Acrylic Painting Materials That You Really Need In The Studio

    Learn How To Make An Acrylic Painting Waterproof

    Acrylic Paint Thinner 101 | How to Thin Your Acrylic Paints Correctly

    8 Best Palettes For Acrylic Paint & How to Choose What You Need

    Best Canvas for Acrylic Painting

    13 Best Acrylic Paints for Beginners & Professionals

    10 Best Paper for Acrylic Paint

    103 Best Acrylic Painting Ideas

    Best Acrylic Paint Brushes for Artists & Students

    Getting the right acrylic paint can be a tricky job. You’ll have to factor in a lot of factors - like consistency, vibrancy, permanence, etc. to know whether or not a given paint is worth the price. 

    And then you’ll have to judge whether or not it’s the right one for you! 

    If you are not in the mood to create an excel sheet and compare all the different brands and varieties, then you’ve come to the right place. 

    We have done the hard work for you! We have tried and tested several brands of acrylic paints and have brought the best ones on this list. 

    Here are the 13 Best Acrylic Paints for Beginners and Professionals! 

    If you are looking for the best cheap acrylic paints that do not sacrifice quality, you can find them here.

    Best Acrylic Paints and Paint Colors


    Best Acrylic Paints and Paint Colors

    Whether you're a beginner or a professional artist, there's something on this list for everyone. So without further ado, here's the list of the 13 best acrylic paints to inspire your next masterpiece.

    1. Utrecht Artists' Acrylic Paint Colors - Best Overall Performance

    Utrecht is a famous company in the art community as the maker of some of the best gear for professional artists. They have been serving for the past 50 years or more and now are part of another globally renowned company, Blick. This product, in particular, is one of the best acrylic paints and professionals’ favorite.

    Experience

    The colors are of top-notch quality. They are amazingly vibrant and the paint has a very high pigment count. And the saturation of individual colors is as expected.

    Of course, the lightfastness and permeance of each color vary from each other but the quality is uber with no doubt.

    They also mix evenly and accurately. The colors, truly, are artists’ grade colors.

    The colors can be bought individually or as a set of 65, and are available in 3 sizes of tubes - 2, 5, and 16 oz.

    They are quite expensive but the performance and quality make it totally worth the price.


    Pros

    • Amazing color performance in terms of vibrancy, accuracy, lightfastness, and permeance
    • Available in various options of size and are sold individually and as a set of 65
    • Truly artist grade quality and from a brand that has been established for over 50 years


    Cons

    • It is expensive but totally worth the price for a professional


    Size/Volume: 2 oz | Finish/Texture: Matte | Pigment Quality: Professional Grade | Consistency: Thick & Creamy
    1. Blick Artists' Acrylic Paints - Widest Color Selection

    Blick is a world-famous company when it comes to professional-grade art products. We have already talked once about it in the previous section.

    Blick Artists’ Acrylics are available in 70 different colors and all of them are absolutely the best quality. Although a bit expensive these colors are totally worth the price.

    Experience

    The colors have a very high pigment count, are astoundingly lightfast, and have great saturation and accuracy.

    It’s not news, though, because Blick is one of the world’s most renowned art companies for a good reason.

    The colors are available in 4 sizes - 2, 8, 16, and 65 oz. You’ll have to be decisive about the quantity of each color you get with Blick because they are super expensive.

    There are 70 different colors in total. Out of the 70, 38 are made from a single pigment source and they perform the same in terms of lightfastness and permanence. The other 32 are made from a combination of pigments.


    Pros

    • Colors are amazingly vibrant, lightfast, and accurate, and A-grade performance
    • Available in many sizes and each color can be bought individually
    • This lineup has one of the widest color selections


    Cons

    • It is expensive but totally worth the price for professionals


    Size/Volume: 2 oz, 4 oz, 8 oz | Finish/Texture: Matte, Satin, Gloss | Pigment Quality: Professional Grade | Consistency: Thick & Buttery
    1. M. Graham Acrylic Paint - Best for Oil Paint Transitioning

    M. Graham & Co. 5 Color Acrylic Set Art - Paints, Plus 6th...
    • 5 Color Acrylic Set, Plus Bonus 6th Color
    • M. Graham paint set

    Graham is a US-based company that makes good quality paint - oil, watercolors, acrylic, etc. - for artists all around the world. This line-up comes in a set of 6 colors that can also be bought individually. The colors are Azo Yellow, Naphthol Red, Ultramarine Blue, Phthalo Green, Mars Black, and Titanium White.

    Experience

    The colors have a high pigment count, which makes the color vibrant no matter what surface you are using. The performance is also great in terms of lightfastness and permanence. These truly are professional-grade colors.

    Although the colors mix accurately and you get the primary colors, the inclusion of only 6 colors makes creating other colors a manual process, which is cumbersome.

    The feel of the paint is great if you are switching to acrylic from oil paint. The application and the performance are pretty similar between the two.

    Since the colors are meant for professional artists, they don’t come for cheap and there are two sizes available for the paint - 2 oz (59ml) and 6 oz (150ml).


    Pros

    • Vibrant and saturated colors with high pigment count
    • Each color can be bought separately or you can buy a set of 6
    • Great for artists who are switching to acrylic from oil paint


    Cons

    • Although all the primary colors are present, with only 6 total colors, it is cumbersome to produce other colors


    Size/Volume: 2 oz, 5 oz | Finish/Texture: Matte, Gloss | Pigment Quality: Professional Grade | Consistency: Heavy Body
    1. Arteza Acrylic Paint Set - Best for Casual Painters & Kids

    ARTEZA Acrylic Paint Set, 60 Colors (0.74 oz Tubes) –...
    • COMPLETE 60-COLOR SET WITH METALLICS - Includes 60 acrylic...
    • THICK, HIGH-VISCOSITY CONSISTENCY - The paint has a creamy,...

    Till now, we have only discussed professional-grade expensive acrylic paint. In this entry, Arteza brings an option for casual painters, kids, and decorative artists. The paint has decent performance at an affordable price along with a wide variety of colors to choose from - 60 different colors in a given set. 

    Experience

    The colors perform pretty well for the price. They are plenty vibrant and they mix reasonably accurately. The pigment count and permanence may not be that impressive but for the price, it is to be expected.

    One thing that did impress us in terms of performance was the colors’ lightfastness which is more than just sufficient given the price.

    There’s a wide variety of colors in the set but unfortunately, the colors can’t be purchased individually.

    The colors are completely safe and non-toxic, so don’t be scared to give these to your child. Also, the caps can be resealed without any hassle making it a perfect buy for the occasional creator.


    Pros

    • Very affordable price
    • Colors perform really well for hobbyists, beginners, and kids
    • Huge variety of colors
    • Tube caps can be resealed for long-term storage


    Cons

    • Colors can’t be bought individually


    Size/Volume: 22 ml | Finish/Texture: Matte, Gloss | Pigment Quality: Student & Professional Grade | Consistency: Consistent & Smooth
    1. Chroma Atelier Interactive Acrylics - Best for Watercolor Transitioning

    Chroma Atelier Interactive Acryl 80ml 7-Tubes
    • Atelier Interactive Acrylics allow the artist control over...
    • Drying time can be extended and dry colors can be...

    Chroma Atelier Interactive Acrylics don’t give exactly the experience of painting with acrylics. It is best suited for artists who are switching to acrylics from watercolors. The paint has been engineered in such a way that it behaves more like watercolors than acrylics while still giving similar results. 

    Experience

    This paint doesn’t form a skin over the canvas or paper as conventional acrylic does when it dries. That means you can use water to rehydrate the paint again with water and control the spread again, somewhat, like watercolors.

    All acrylic painters know that correctly blending is one of the hardest things to do with acrylic paint because it dries up so fast. This paint doesn’t have that issue. There’s no sense of urgency with this paint when it comes to blending.

    That’s why watercolor artists would feel at home with this paint, and we recommend you also try this if you do a lot of blending and not glazing.


    Pros

    • Good performance in terms of vibrancy and accuracy
    • Blending with it is super easy – like watercolors
    • It comes at a pretty reasonable price


    Cons

    • It’s not very lightfast and is less permanent than conventional acrylic paint


    Size/Volume: 80 ml | Finish/Texture: Satin, Gloss | Pigment Quality: Professional Grade | Consistency: Smooth & Creamy
    1. Golden Heavy Body Acrylic

    Golden Heavy Body Acrylic Introductory Set (0000074-0)
    • This set of 6 Professional Golden Heavy Body Acrylics...
    • Heavy Body acrylics are known for their smooth, thick,...

    Golden’s Heavy Body Acrylic is our top pick for artists who are more comfortable with heavy-body acrylic paint. For the uninitiated, heavy body paint is more viscous, or in other words, heavy. They form thicker skin and usually dry up faster.

    There are 6 colors in this set (which can also be bought individually) - Phthalo Blue, Hansa Yellow Medium, Quinacridone Magenta, Titanium White, Carbon Black, and Phthalo Green.

    Experience

    Painting with heavy-body acrylic is a thing of preference and if it’s your preference then Golden Heavy Body is our top recommendation for you.

    The colors perform amazingly. The colors are obviously very saturated and vibrant. They are also incredibly lightfast and permanent.

    One thing to keep in mind if you are new to heavy-body acrylic is that blending is difficult with it. You'll have to resort to glazing and use a knife for mixing colors. Even special acrylic brushes will not be able to handle the harshness of heavy-body acrylic paint.

    And the fact that there are only 6 different colors makes getting specific colors and blends a totally manual process, which is quite cumbersome.


    Pros

    • It has amazing saturation and vibrancy due to a high pigment count
    • The quality and performance are professional grades
    • Smooth experience and amazing permanence


    Cons

    • It is expensive


    Size/Volume: 2 oz | Finish/Texture: Matte, Gloss | Pigment Quality: Professional Grade | Consistency: Thick & Heavy
    1. Daler-Rowney Acrylic Paint

    Daler-Rowney - FW Acrylic Artists Ink Set - Primary Colors...
    • Intensely Colored Ink - Daler-Rowney acrylic ink is made...
    • High Lightfastness - Our acrylic ink is fully intermixable,...

    Daler-Rowney provides good acrylics at a cheaper price than other brands like Golden, Liquitex, Winsor, and Newton. We included this option because of the quality you get for the price, and more importantly, because we know that artists need cheap acrylics for background filling.

    Experience

    Every painter has to use a large portion of colors to fill up the background and other large areas of the painting. For that purpose, we recommend using this cheap acrylic for Daler-Rowney.

    Don’t let the cheap price tag fool you because the colors are actually pretty decent, and in the box, you get a total of 10 different colors. The variety is sufficient for base filling.

    Do keep in mind that the colors are not of professional grade, so we don’t recommend using this color set for anything more than background filling for serious work.

    Other than that, also keep in mind that the colors are a little on the thicker side.


    Pros

    • It is inexpensive
    • Good color variety right out of the box
    • Thick and buttery consistency
    • Great for casual use


    Cons

    • It is not meant for professional use


    Size/Volume: 1 oz | Finish/Texture: Matte, Satin, Gloss | Pigment Quality: Professional Grade | Consistency: Viscous & Moist
    1. Matisse Structure Formula Acrylics

    Matisse Structure Formula Acrylics is a great option for kids because of its modularity in terms of consistency and its affordable price. We also recommend it to casual artists and hobbyists. In the set we reviewed, you get 12 different shades of 12ml each.

    Experience

    Controlling the paint is one of the toughest jobs when it comes to painting with acrylic paint. So, if you are new to painting, in general, then it can scare you away.

    That’s where this paint impressed us the most. You can dilute this color with water or medium to give a thinner and more fluid experience.

    You can also make it thicker using impasto or texture medium if you prefer that experience.

    Otherwise, the colors perform decently enough for the price. The vibrancy is great for the price and the permanency is above average.

    If you are new to the art or have kids who want to discover their artistic side, then go with this as it’ll be really helpful for learning the basics.


    Pros

    • Very affordable
    • Color performance is pretty decent
    • Paint permanency is great for the price
    • Paint is extremely modular in terms of consistency


    Cons

    • It is only meant for casual use


    Size/Volume: 2 oz, 4.2 oz, 8.4 oz | Finish/Texture: Matte, Gloss, Satin | Pigment Quality: Professional Grade | Consistency: Heavy Body
    1. Castle Art Supplies Acrylic Paint Set

    Castle Art Supplies 48 x 22ml Acrylic Paint Set |...
    • MADE TO MAKE IT EASY Squeeze paint direct for bold impact or...
    • UPGRADE YOUR ACRYLICS ARMOURY Wide ranging set of large...

    Castle Art Supplies Acrylic Paint Set is our top budget pick that is meant for beginner and casual artists. These colors come at almost half the price of the Arteza color set we talked about. The set has 48 different colors, and the quality and the performance of the paint are well beyond the expectations one could have given the price.

    Experience

    The colors have a decent pigment count, and they are pretty vibrant. The permanence and the lightfastness are also well above average.

    The experience of painting with this color set is also very satisfactory, especially, given the price point.

    The set has 48 different colors, which is more than enough in terms of variety. The variety of the color set becomes even more important if you consider that this paint set will mostly be used by beginners and casual artists.

    The only gripe that we have with this color set is the fact that the tubes are not big - 22ml each - and the colors can’t be purchased individually. Because of this, the basic colors, which are used the most, run out pretty soon.


    Pros

    • It is the best value for money in the budget category
    • Colors perform decently in terms of permanency, vibrancy, and experience
    • There are 48 different colors in the set


    Cons

    • Colors can’t be purchased individually


    Size/Volume: 22 ml | Finish/Texture: Matte, Gloss | Pigment Quality: Student Grade | Consistency: Consistent & Smooth
    1. Grumbacher Acrylic Paint Set

    Grumbacher Academy Acrylic Paint, Gloss, 24ml/0.8 oz Metal...
    • Set includes one tube each: Burnt Sienna, Burnt Umber,...
    • ASTM lightfast rating of 1- Excellent

    Grumbacher Acrylic Paint Set is the best student-grade acrylic set according to us. At the student grade bracket, this acrylic set gives the closest performance to professional-grade acrylic paint. These colors can be bought individually as well as in sets. There are four sizes available as well - 2.5, 3, 5.07, and 6.76 oz.

    Experience

    The experience of painting with these colors is amazing. The consistency is extremely smooth and the feel of the paint is spectacular for the price. It’s a little surprising to see such a good performance in a student grade color set.

    The colors excel in vibrancy as well. It seems like the paint has a high pigment count and the colors are, very poopy and bright. The results look very close to what we’d have gotten with professional-grade paint.

    The paint is decently permanent and lightfast as well. But the colors vary from each other in terms of durability, so, we recommend you to check their website for the specifics.


    Pros

    • Well into the affordable range for most artists
    • 48 different colors in the set, and it offers plenty of variety
    • Consistency and vibrancy are almost at par with professional-grade paint
    • Color is extremely durable as well with great lightfastness and permanency


    Cons

    • However good this acrylic paint may be, these are not professional-grade colors


    Size/Volume: 75 ml | Finish/Texture: Matte, Gloss | Pigment Quality: Student & Professional Grade | Consistency: Thick & Viscous
    1. Liquitex Professional Acrylic Set

    Liquitex BASICS Acrylic Paint Set, 48 x 22ml (0.74-oz) Tube...
    • WHY BASICS; Liquitex invented artists' acrylics back in 1955...
    • HIGHEST QUALITY PIGMENTS Basics uses the the same high...

    Liquitex is a brand of art supplies that was founded in 1955, and since then, Liquitex has made some of the best art products, including paint. This heavy-body acrylic set performs outstandingly in every regard, and we can recommend this paint enough to professionals who use heavy-body acrylics. 

    Experience

    This heavy-body acrylic has outstanding performance in every area. The consistency is marvelous, with a buttery flow and a gorgeous satin finish. 

    The colors are pretty bright and vibrant, even though the pigment count is not very high. It’s good in a way because many professionals like more somber colors. 

    The durability of the paint is incredible. The paint is extremely lightfast and permanent, no matter the color. The paint is water-resistant and UV resistant. 

    It is our top recommendation for professionals who prefer heavy-body acrylics. 

    The set we reviewed had 12 different colors, and the colors can also be individually purchased through various online and offline retailers. The color variety is a bit underwhelming, but we figure it’s enough to satisfy most artists’ needs. 

    There are four sizes to choose from - 2, 4.65, and 32 oz. 


    Pros

    • The colors have an amazing performance in terms of vibrancy and consistency
    • It has a gorgeous satin finish
    • The colors are incredibly durable as well; they are water-resistant and UV resistant


    Cons

    • It is expensive


    Size/Volume: 4 oz | Finish/Texture: Matte, Satin, Gloss | Pigment Quality: Professional Grade | Consistency: Fluid & Satin
    1. Winsor & Newton Galeria Acrylic Paint

    Winsor & Newton Galeria Acrylic Paint, 10 x 60ml (2--oz)...
    • PROFESSIONAL PIGMENTS, SMARTLY BALANCED: Bright, stable...
    • EFFORTLESS CONSISTENCY, VIBRANT RESULTS: Smooth, satin...

    Winsor & Newton's Galeria is a series of paint that bridges the gap between the student-grade and the professional-grade paints. With a modest price tag, this paint set provides more than most student-grade paint sets. It’s sort of a middle ground of acrylic paint and hence, it makes it on our list. 

    Experience

    The colors are reasonable, vibrant, and sort of mimic the look of professional-grade paint while being a lot cheaper. We think professional artists who are new to acrylics will find this paint the most useful.

    The colors are fairly lightfast and permanent but you’ll have to look up online for details about the durability of individual colors.

    Although the colors we are discussing here come in a set of 10, you can buy 57 different colors individually as well.

    There are in total 4 different sizes for the paint - 60, 200, 250, and 500 ml. Although you do keep in mind that some colors don’t have all the sizes available.


    Pros

    • Perfect paint set for intermediates or professionals who are new to acrylics
    • Colors perform reasonably well and are extremely durable
    • There’s a wide selection of colors available – 57 in total – that can be bought individually
    • Moderate price tag and good performance, providing a middle ground of acrylic paints 


    Cons

    • The size options and their availability is a bit problematic


    Size/Volume: 60 ml | Finish/Texture: Matte, Satin, Gloss | Pigment Quality: Student & Professional Grade | Consistency: Smooth & Soft
    1. Sennelier Acrylics

    Sennelier Artist Acrylique Set, Includes Ten 21ml Tubes of...
    • Extra fine acrylic paints by Sennelier
    • Made with the highest quality pigments

    This acrylic set makes it here because of the incredible handiness of blending and glazing with these. The colors perform reasonably well and at an affordable price. The smoothness of the flow and color vibrancy is a delightful experience. 

    Experience

    The colors are on the more saturated and strong side. The colors pop out after drying and overall, it’s a good look.

    The consistency is on the softer side - kind of thin. The paint seems to glide on the canvas and the experience, hence, is very smooth and pleasing.

    For that very reason, we think that this acrylic set is perfect for blending, glazing, and mixing colors.

    On the other side, the colors are also very durable. They are decently lightfast and retain their saturation very well. Overall, it’s a good pick.


    Pros

    • Colors are well-saturated and vibrant
    • Paint has a buttery experience when put onto the canvas
    • Colors are plenty durable – light-fast and don’t lose their saturation


    Cons

    • Not recommended for professionals, fall short in performance when compared to artist-grade paints


    Size/Volume: 21 ml | Finish/Texture: Matte, Satin, Gloss, Iridescent | Pigment Quality: Professional Grade | Consistency: Creamy & Rich

    Best Acrylic Paint Sets Comparison Table

    Product Size/Volume Finish/Texture Pigment Quality Consistency
    Utrecht Artists’ Acrylic Paint Colors 2 oz, 5 oz, 8 oz Matte, Gloss, Satin Professional Grade Thick & Creamy
    Blick Artists’ Acrylic Paints 2 oz, 4 oz, 8 oz Matte, Satin, Gloss Professional Grade Thick & Buttery
    M. Graham Acrylic Paint 2 oz, 5 oz Matte, Gloss Professional Grade Heavy Body
    Arteza Acrylic Paint Set 22 ml Matte, Gloss Student & Professional Grade Consistent & Smooth
    Chroma Atelier Interactive Acrylics 80 ml Satin, Gloss Professional Grade Smooth & Creamy
    Golden Heavy Body Acrylic 2 oz Matte, Gloss Professional Grade Thick & Heavy
    Daler-Rowney Acrylic Paint 1 oz Matte, Satin, Gloss Professional Grade Viscous & Moist
    Matisse Structure Formula Acrylics 2 oz, 4.2 oz, 8.4 oz Matte, Gloss, Satin Professional Grade Heavy Body
    Castle Art Supplies Acrylic Paint Set 22 ml Matte, Gloss Student Grade Consistent & Smooth
    Grumbacher Acrylic Paint Set 75 ml Matte, Gloss Student & Professional Grade Thick & Viscous
    Liquitex Professional Acrylic Set 4 oz Matte, Satin, Gloss Professional Grade Fluid & Satin
    Winsor & Newton Galeria Acrylic Paint 60 ml Matte, Satin, Gloss Student & Professional Grade Smooth & Soft
    Sennelier Acrylics 21 ml Matte, Satin, Gloss, Iridescent Professional Grade Creamy & Rich

    Best Acrylic Paint Set Buyer’s Guide

    Buying Guide For The Best Acrylic Paint Set

    FUN FACT | Did you know acrylic paints dry way faster than other paints? 

    If we are able to curb your interest, here is our article on how long acrylic paints take to dry. Many take this as a blessing whereas others feel this is not suitable for painting. 

    Go on and give it a read! 

    Here are some parameters that are used to judge the quality of acrylic paint. 

    Vibrancy

    The vibrancy of the paint depends on the pigments that are used to make the paint. The source of the pigment, its purity, and its concentration decides the brightness of the paint. 

    The paint that has ‘Hue’ in its name is made from a combination of pigments to produce that specific color. These are, hence, not naturally sourced. 

    Typically, artist-grade paints are more vibrant and have better pigments than student-grade paints. 

    Consistency

    Acrylic paint can be of various kinds in terms of consistency. And in acrylic paints, consistency matters a lot because the experience is significantly different, and different consistencies are used to achieve different results. 

    Heavy body paint is, especially, a different breed of its own. Because it has an almost putty-like consistency and the artists use it to achieve very different results from other acrylic paints. 

    Lightfastness

    Lightfastness is the ability of the paint to resist the depreciation that is caused by light and radiation. Lightfast paint retains its saturation even after long exposure to light. 

    ASTM categorizes colors using 5 buckets of lightfastness: Very Poor, Poor, Fair, Very Good, and Excellent. 

    Often lightfastness varies from color to color even if they come from the same line-up. This is because different kinds of pigments are used for different colors. 

    If you are concerned about the lightfastness of the paint you use, be sure to check the ratings of individual colors from the website of the manufacturer. 

    Permanence

    The permanence of a paint tries to quantify or categorize the permanency of that paint. Of course, this also includes how lightfast the paint is, but it also includes other aging factors of the paint. 

    Often, casual artists can ignore the permanency of the paint but professional artists are very serious about this. 

    Our recommendation for them will be to carefully note the permanency of individual colors from the manufacturer’s website as permanency also varies with the colors. 

    Acrylic Paints FAQs

  • What is the best acrylic paint for professionals?

    Utrecht is a famous company in the art community as the maker of some of the best gear for professional artists. They have been serving for the past 50 years or more and now are part of another globally renowned company, Blick. This product, in particular, is one of the best acrylic paints and professionals’ favorite. 

  • What is the best acrylic paint for beginners?

    Till now, we have only discussed professional grade expensive acrylic paint. In this entry, Arteza brings an option for casual painters, kids, and decorative artists. The paint has decent performance at an affordable price along with a wide variety of colors to choose from – 60 different colors in a given set. 

  • What is the best acrylic paint for kids?

    Matisse Structure Formula Acrylics is a great option for kids because of its modularity in terms of consistency and its affordable price. We also recommend it to casual artists and hobbyists. In the set we reviewed, you get 12 different shades of 12ml each. 

  • Top Acrylic Paint Conclusion

    Conclusion

    So, that’ll be all for this article. 

    We listed our top picks for acrylic paints and also included our review about them.. Keep in mind that these entries are listed to cater to unique and different needs, so there’s not any sort of ranking. 

    We hope that you enjoyed reading this piece and found it helpful. We hope you the very best in your endeavors, and thank you for reading! 

    Read More on Acrylic Painting

    10 Best Paper for Acrylic Paint

    Best Canvas for Acrylic Painting

    8 Best Palettes For Acrylic Paint & How to Choose What You Need

    Learn How To Make An Acrylic Painting Waterproof

    Acrylic Painting Materials That You Really Need In The Studio

    10 Best Acrylic Paint Brushes for Artists & Students

    Learn How To Get Dried Acrylic Paint Out Of Brushes Successfully

    Learn How to Make Acrylic Paint in Your Studio

    Learn How to Clean Acrylic Paint Brushes Brilliantly

    Painting on Paper with Acrylics & 5 Paper-Like Surfaces

    Learn How to Thicken Acrylic Paint Correctly

    Painting Surfaces For Acrylics | Acrylic Prepping 101

    Best Cheap Acrylic Paints – Strength and Weakness of Brands Compared

    22+ Delicate Beautiful Acrylic Painting Ideas To Try

    Learn The Basic Acrylic Painting Techniques for Beginners- Ideas and Projects

    20 Oil And Acrylic Painting Ideas For Enthusiastic Beginners

    The canvas is the cornerstone of any painter’s journey with their art. 

    Being such a critical part of your progression as an artist, it’s crucial to know which canvas is the best suited for your particular usage. The adage “different strokes for different folks” also holds well for choosing canvases. 

    To make your job of scouring through hundreds or even thousands of canvases on the market today easier, we’ll walk you through the top ten canvases for acrylic paints. We then follow our reviews up with a small guide on how to choose the best canvases for your art style and work. 

    Without wasting much time, we’ll now move toward reviewing the first canvas on our list! 

    Best Canvas for Acrylic Reviewed

    best stretched cotton canvas

    So, whether you're a professional artist or a beginner, here's the list of the 10 best canvases for acrylic that you can consider for your next masterpiece.

    1. Blick Premiere Cotton Canvas - Best for Versatility and Quality

    While most of us know Blick from their popular online art and craft supplies store, it might be a surprise to note that they manufacture their own supplies as well. And in fact, they do it very well. This particular canvas is completely woven by hand, and the surface is perfect for painting with acrylic paints. It’s a 12x12 woven canvas with cotton derived from India.

    Experience

    Blick has left no stone unturned in making sure this canvas has nothing to lose when compared to the best in the business, and that too with a more affordable price. The canvas is gallery-wrapped and back-stapled with uncut corners and a large amount of selvage, allowing you to re-stretch the canvas in the future. For tension adjustments, keys come as standard.

    It comes in three different profiles: .875", 1.5", and 2.375", thus giving you a huge boost when it comes to displays. These are useful when you want to display your works in studios, museums, or galleries. The canvas weighs around 10 oz when it’s pre-primed, and once primed it weighs around 15 oz. It’s triple-primed with a high-quality, acid-free gesso.

    The priming process includes being sanded between primer layers, which makes for a fairly smooth surface with a good enough tooth for most art uses. What’s more, the entire range of All large Blick canvases come with supports as standard. The wood quality and woodwork are also wonderful - all in all, it’s a brilliant and value-for-money canvas for all your painting needs.


    Pros

    • Comes with a high-quality triple-primed canvas, with a great tooth quality
    • Three different profiles available as per intended usage
    • Canvas material is super smooth to work with


    Cons

    • Raw corners may not be suited to everyone’s tastes


    Material: Cotton | Primed: Yes | Size Options: 31 sizes | Depth: 1 1/2" | Acid-free: Yes
    1. Arteza Stretched White Canvas - Best for Students and Hobbyists

    A little bit farther from the fully professional Blick reviewed above, Arteza is a name renowned in the student and hobby artist community - instead of delivering the best of the best, it gives you a relatively very affordable yet decent quality canvas. They become even more affordable when it comes to bulk ordering - and if you’re not satisfied, they offer full refunds. 

    ARTEZA Stretched Canvas 11x14 Inches Pack of 8 – Blank...
    • Cotton Canvas for Various Painting Styles. Made with cotton,...
    • Eight Medium-Sized Canvases in One Set. Includes eight 11x14...

    Experience

    Well, looks like you won’t be needing a refund any time soon - the Arteza Stretched Canvas in White is a solid performer, any way you look at it. First off, there’s the material - it’s 100 percent cotton and comes with a good quality acid-free acrylic gesso. The canvas comes pre-stretched, and hence you have a nice, light spring for your brush.

    It’s an 11” x 14” size canvas, which is perfect for almost any student or hobby artist. It always comes in packs and is extremely well-priced when it comes to per-unit cost. The wood used is pinewood and is back-stapled to ensure the canvas sticks well. The gesso layering is about 8 oz. It also comes in a number of other sizes as well, and the smaller sizes are cheaper still.

    Your paints will glide on the surface, and thus the canvas responds to each stroke of the brush. This gives you a great surface to paint on - except if you’re a professional artist. Then the surface is much rougher and comes with a harder tooth than you’re used to. Other than that, the Arteza is a universally usable, decent-quality product that comes with great value for money.


    Pros

    • Best value and quality combination for students and intermediate hobbyists
    • 100%  cotton surface that responds well to your strokes
    • Decent-sized canvas for all your painting needs


    Cons

    • Might be too rough for professional painters


    Material: Cotton | Primed: Yes | Size Options: 19 sizes | Depth: 7/8" | Acid-free: Yes
    1. Darice Stretched Canvas - Best for Mid-Level Artists

    If you’re looking for a canvas that comes with a bit more panache than the Arteza, yet do not want to wander into the full professional territory, the Darice Stretched Canvas presents a great compromise, and that too at a wonderful price. It comes in a huge variety of sizes and packs, from the smallest 8” x 10” in a single pack to a 30” x 40” pack of 40.

    Darice Studio 71, 7 Piece, 11 by 14 inch, Stretched Canvas...
    • BLANK CANVAS–Every masterpiece begins on a blank slate,...
    • VERSATILE –This medium weight canvas on a wood frame is...

    Experience

    Darice presents a slightly different take on the canvas. Instead of having just one size in packs, they have a whole range of sizes to suit each and every artist. These are acid-free, medium-weight canvases that are double-primed (you might notice that the Arteza was single-primed, while the Blick was triple-primed and sanded). It’s much lighter than the Blick, however.

    The material choice is also great - it’s 100 percent decent quality cotton, again slotting in somewhere between the Blick and the Arteza in terms of smoothness and the tooth of the canvas. The best part is, it’s lighter than either and also comes with wood stretcher keys to help you tighten the canvas. The thickness is approximately an inch, give or take.

    Darice has been around starting off with a single store in 1954 and then expanding all over. Now, it’s an internationally renowned brand - and its products are definitely of a good standard. A number of people have reviewed this as being solid enough and toothy enough for their artwork, and in all but the most professional uses the canvas finds work.


    Pros

    • Double-primed canvas which is also lightweight yet high quality
    • The cotton is smooth enough for most uses
    • Good value for money when you buy larger packs


    Cons

    • Some users complain of issues with stapling and some tightness problems at times


    Material: Cotton | Primed: Yes | Size Options: 13 sizes | Depth: 5/8" | Acid-free: Yes
    1. Masterpiece Artist Canvas - Monet Pro

    Once you go full professional, you wouldn’t be willing to make compromises which you did as a hobbyist or as a student. Hence, we present to you the Monet Pro, named after the Impressionist pioneer. Coming in with a double primed surface, a cross brace, and no finger joints to avoid chances of breakage over time, the Monet Pro is a wonderful canvas.

    MASTERPIECE 43062 Monet Pro 1.5" Deep Monterey 10.5 oz...
    • Monterey is 7 oz. raw, 10.5 oz. finished, cotton canvas,...
    • Canvas Depth: 1.5", Canvas relief: 1/2" (space between...

    Experience

    Masterpiece has been around in the market for years now, and the one thing that sums up their art supplies is the phrase “no compromises”. Whether it’s the quality of the raw materials or the design and finishing of their products - they do not look the other way for even the smallest of details. This holds true for this product as well - it’s easily one of the best canvases reviewed.

    First, we come to the canvas surface. It is double primed and has just the right amount of tooth and undulation for acrylic paints to flow when being painted, but at the same time, stick to the surface when dried. There is another proprietary smoothing process for the surface, making sure you get the best possible painting experience on the canvas.

    Other important features include an adjustable tension and a best-in-class stretching process. The cross brace at the back for sizes over 16 inches helps ensure stability. For those who are environmentally conscious, the canvas is made from sustainably sourced wood. This is a lightweight, classy canvas that guarantees one of the best possible painting experiences.


    Pros

    • Comes with a cross brace instead of finger joints to hold the canvas, tightest corners of all canvases tested
    • Environmentally conscious manufacturing
    • Double primed, extra processing to ensure super smooth painting


    Cons

    • Priced on the higher end


    Material: Cotton | Primed: Yes | Size Options: 23 sizes | Depth: 1 1/2" | Acid-free: Yes
    1. Daveliou Stretched Canvas

    Coming back to the humble hobbyist and student - if you’re looking for the best possible compromise between value and quality, the Daveliou is one of our top picks. The edges are staple-free, and Daveliou uses its own gesso for priming the canvas - making sure that your painting experience is a joyous one. These frames also stay clean until used!

    Daveliou 12”x12” Stretched Canvas for Painting, Triple...
    • Premium Stretched Canvas — Create unique art with Daveliou...
    • Durable Non Toxic Materials — The individually wrapped...

    Experience

    The canvas is a perfect mix of value and performance - coming in at a highly reasonable price point, given that it does not have regular staples holding the canvas together. The frame itself is around ⅝” thick and comes as standard with a triple priming process already complete. You do not have to spend a single moment in preparation or setting up - this one comes ready as it is.

    The canvas comes prepared with a non-yellowing agent, which allows it to stay clean for as long as you wish for it to - it does not get yellowed with time. It is lightweight enough to be carried around from place to place, even though it comes triple-primed. Their gesso is also cruelty-free and vegan. The canvas comes in three different sizes - 8" x 10”, 11" x 14", and 16" x 20".

    A number of media including oil, acrylic, casein, tempera, and collage media are at home with this canvas, so you can easily create mixed media artwork if you wish to.


    Pros

    • Perfect value/performance ratio
    • Lightweight
    • Come Standard with a triple priming process already done


    Cons

    • None


    Material: Cotton | Primed: Yes | Size Options: 16 sizes | Depth: 3/4" | Acid-free: Yes
    1. US Art Supply Black Stretched Canvas

    This canvas is specifically for those who intend to work with a pitch-black backdrop and yet need a wonderful painting experience. A little bit off-center, this canvas delivers a solid painting experience with acrylic paints as well as other media. Though it’s made out of black fabric, make no mistake - it can easily stand its own among the hordes of canvases out there.

    U.S. Art Supply 18 x 24 inch Black Stretched Canvas 12-Ounce...
    • Pack of 4 - Professional Artist Quality: 3/4" thickness...
    • 100% Cotton Canvases: Pure cotton canvases with medium...

    Experience

    This canvas is incredibly good for painting those night skies, planets, or galactic scenes from outer space. However, the world is your oyster - since this canvas delivers a wonderful overall performance, with a triple-primed satin-smooth surface and comes with sustainably derived wood. The canvas also does not cost all that much relative to other canvases on the market.

    Even though this is triple-primed, we suggest students also consider this because of its affordability and the great performance it delivers. It comes with a profile of around ¾” and the gesso used to prime the surface is acid-free high-quality gesso. It weighs around 7 ounces unprimed and 12 ounces once triple-primed.

    The stapling is done on the back of the canvas, with the edges having no staples on it. The canvas isn’t dyed black but instead comes pre-painted since there are no paints on the back side of the canvas. Overall, barring a few issues with the tightness of the canvas, this is a perfectly good canvas to paint on with acrylic paints.


    Pros

    • Comes pre-painted black, which spares you the effort of having to paint the canvas yourself
    • Triple-primed for a smooth painting experience
    • High-quality gesso being used


    Cons

    • A few artists report that the canvas loosened over time


    Material: Cotton | Primed: Yes | Size Options: 8 sizes | Depth: 3/4" | Acid-free: Yes
    1. Art Alternatives Stretched Canvas

    If you’re looking for a compact enough canvas to hang on the wall once you’re done painting, the best bet you have is the Stretched Canvas by Alt Alternatives. It comes primed, but there’s no bleaching to speak of. Though it requires some prep unlike many others reviewed, it presents a great value for money proposition, especially for those just beginning with acrylic paint.

    Art Alternatives stretched White Canvas Super Value Pack-8 x...
    • Art Alternatives Unbleached 4 oz cotton canvas for all media
    • Primed with acid-free gesso-ready to paint, collage, draw,...

    Experience

    While this comes unprimed, you can easily use this to learn how to prime a canvas or prime it to your particular convenience if you’re experienced with painting on canvas. It comes in a number of size options, but the usual recommended size is 11” x 14”. The canvas is just half an inch wide, so you can easily hang them up once you’re finished. The cotton comes unbleached.

    The canvas has a natural and untarnished look and feel. For beginners who want to understand how to prime their own surface, they can easily learn on these canvases since they’re pretty affordable. Unlike other surfaces, you’re in charge here - so how toothy or harsh the surface is depends entirely on how well you prime the surface. The corners are completely square.

    The canvas is gallery wrapped, so you can easily paint on the sides as well. The canvas comes plastic wrapped individually, as well as the entire shipment of the pack. The weave of the canvas is somewhat visible with the original gesso - easily fixable with a couple of extra layers of paint. Overall, it’s a wonderful canvas that gives you the power to customize your canvas.


    Pros

    • Can be primed as many times as you desire with the gesso of your choice
    • Thin enough to be hung on walls or other display surfaces
    • Squared corners are useful


    Cons

    • Some of the weaves are visible when the canvas is shipped


    Material: Cotton | Primed: Yes | Size Options: 50 sizes | Depth: 3/4" | Acid-free: Yes
    1. Conda Artist Stretched Canvas

    The Conda stretched canvas is the canvas to go for if you want the best bang for your buck, and you don’t mind switching surfaces for it. The Conda canvas comes in very close to the cheapest canvases on the market, and yet somehow - it comes triple-primed! The tooth to price ratio of the Conda is nigh on the best on the market. You can also add your own gesso on top.

    CONDA Stretched Canvas for Painting, 5x7 inch 10 Pack of...
    • 100% COTTON CANVAS: Cotton Makes the Ideal Art Surface. It...
    • PINEWOOD STRETCHED BARS: These stretched canvases are...

    Experience

    If you’re someone who’s just starting out with painting with acrylic paints, you’re best off getting a multi-pack of Conda’s canvases since they’re incredibly low-cost. However, do not take it as a sign of cheapness - it delivers a solid painting experience, and acrylic paints respond very well to it. To adjust the tension, the canvas comes with wooden wedges on the back.

    It comes in packs of 10, which may cost less than one single canvas from other options in certain cases. It’s a medium-grained canvas that finds use here. The wooden frame is pure fir or pine and the canvas comes pre-stretched for a great painting experience. The sizes range from 8” x 10” to 16” x 20”, so you have enough flexibility in choosing sizes.

    There are more than a few imperfections on the canvas surface, but that’s acceptable given the beginner-friendly nature of the canvas. This canvas is perfect, especially for toddlers and children who are just getting their bearings - it’s smooth enough to work on right out of the pack and is affordable enough to let the kids freely paint to their heart’s content.


    Pros

    • Very affordable compared to other canvases on the market
    • Relatively thin, can be hung on walls easily
    • Perfect for children and beginners


    Cons

    • A few inconsistencies and a general looseness of the canvas


    Material: Cotton | Primed: Yes | Size Options: 16 sizes | Depth: 3/4" | Acid-free: Yes
    1. Masterpiece Artist Canvas – Elite

    This is the best of the best. At prices for a single canvas which are four times as much as for a pack of ten for most canvases, this canvas comes with no compromises at all. You only get the best painting experience possible. Instead of cotton, you get luxurious Belgian linen. The stretcher bars have no seams, and the corners are astoundingly well-made.

    Masterpiece Artist Canvas Elite Canvas, 16-Inch by 20-Inch,...
    • State-of-the-art construction from kiln dried solid wood
    • Patented keyable bracing system

    Experience

    The Elite represents the pinnacle of Masterpiece’s canvases. If you want the best canvas for your work, this is, without a doubt, the canvas you should go in for. There are two variants on offer, suitable for two different kinds of users - one is the Oil-primed canvas and the other is the Acrylic-primed canvas. The Acrylic primed canvas is the one that we considered.

    The Acrylic-primed canvas comes with two coatings of size as well as four coatings of gesso primer, which comes in at around 14.4 oz per square inch. Unlike most other canvases, this has a hefty width of around 1.5”, so you can stay assured of the support your canvas will have while painting. The stretcher bar is quite heavy, so make sure your studio has enough space.

    The texture of the canvas is wonderful for acrylics, and the linen itself sits just perfectly on top of the wooden structure. It comes off perfectly, and you can easily transfer the painting to another location. It comes in a huge variety of sizes, many of which are similar - so make sure you know the perfect size for your painting before going ahead and getting this canvas.


    Pros

    • Represents the absolute best among canvases on offer today
    • Corners, linen, gesso, and stretching are all done just right
    • The best tooth among all canvases considered


    Cons

    • Very pricey and heavy


    Material: Cotton | Primed: Yes | Size Options: 21 sizes | Depth: 1 1/2" | Acid-free: Yes
    1. Creative Mark - Stretched Canvas

    Last but not least by any means, the Creative Mark represents the golden mean of the canvases on offer today - it’s a perfect intermediate-level canvas, with just the right mix of features and cost-effectiveness to make it wonderful for painting regularly. The Creative Mark comes with perfectly finished corners and a triple-primed linen surface to boot.

    Creative Mark The Edge Deluxe Cotton 2-1/2" Deep Stretched...
    • Beefy 14oz. Primed Weight: With a raw weight of 8 oz., this...
    • Hand Stretched and Triple-Acrylic Primed: Our canvas for...

    Experience

    This particular stretched canvas comes with perfectly folded corners to ensure that you can display this frameless as well as with a frame depending on your choice. These canvases are perfect for oils, water mixable oils, alkyds, acrylics, mixed media works, and frameless artwork presentations. Further, you can have it in either a 1.5” or a 2.5” width.

    Without priming, the Creative Mark canvas comes in at around 8 oz, but it goes up to a solid 14 oz once they’re finished priming. It comes triple-primed, but you should probably go in for another layer or two of gesso before having a go at the canvas. The perfectly finished corners make it much easier to paint until the very edge of the canvas, should you want to do so.

    The primer itself is something you can talk home about because it’s pretty good compared to what else is available on the market - bar the very best canvases which ship for more than $50 per unit. Thus, you should have no problems painting on this canvas - it makes for a solid value proposition and ticks all the right boxes too. It comes in a variety of size options too.


    Pros

    • Perfectly finished corners, usually only found in the best canvases
    • Options for choosing the width of the canvas
    • The primer coating developed by Creative Mark gives more expensive canvases a run for their money


    Cons

    • Some users report inconsistent corners due to shipping problems


    Material: Cotton | Primed: Yes | Size Options: 70 sizes | Depth: 3/4" | Acid-free: Yes

    Best Canvases For Acrylic Comparison Table

    Product Material Primed Size Options Depth Acid-free
    Blick Premiere Cotton Canvas Cotton Yes 31 sizes 1 1/2" Yes
    Arteza Stretched White Canvas Cotton Yes 19 sizes 7/8" Yes
    Darice Stretched Canvas Cotton Yes 13 sizes 5/8" Yes
    Masterpiece Artist Canvas – Monet Pro Cotton Yes 23 sizes 1 1/2" Yes
    Daveliou Stretched Canvas Cotton Yes 16 sizes 3/4" Yes
    US Art Supply Black Stretched Canvas Cotton Yes 8 sizes 3/4" Yes
    Art Alternatives Stretched Canvas Cotton Yes 50 sizes 3/4" Yes
    Conda Artist Stretched Canvas Cotton Yes 16 sizes 3/4" Yes
    Masterpiece Artist Canvas – Elite Cotton Yes 21 sizes 1 1/2" Yes
    Creative Mark – Stretched Canvas Cotton Yes 70 sizes 3/4" Yes
    With this, we wrap up reviews of the top 10 canvases on the market today, for both students and artists alike. They cover a variety of materials, and canvas types, as well as surfaces suitable for a variety of media. However, should you not find these products readily, we have a buyer’s guide incoming which will help you take the call on which canvas is best for you. 

    Go through it thoroughly in order to sort through the best canvases on the market, and to find out which one suits your particular usage. Without further ado, let’s begin with the buyer’s guide! 

    Buying Guide For The Best Canvases for Acrylic Painting

    If you’re on the lookout for a canvas for your particular needs, you should know which factors come into the picture whilst getting one. Since your canvas goes a long way in making sure your art stands out, you should take care of each and every one of these factors listed below before going in for your next supplies run.

    1. Kind and quality of the fabric

    The kind of quality of the fabric used for the canvas should be a top priority when buying an acrylic paint canvas. It should not be hard enough for the paint to stick immediately, but it should eventually dry well enough to last long.

    1. Layers of priming

    Following the point above, the layers of priming play a huge role in the kind of canvas you end up getting. As s student or a hobbyist, you probably don’t require more than say a single layer or at maximum, a double layer of primer. If you’re a professional, do look for three or possibly more layers of primer to get the perfect canvas finish.

    1. Quality and type of wood used in the canvas

    The woodwork of your canvas has long-term implications for its stability. You should stick to Oakwood for the best results. Make sure the canvas you purchase has some kind of indication or verification as to the quality of the wood with the packaging it comes with.

    1. Presence of finger joints

    Finger joints are not at all recommended for any case but are the cheapest of the canvases. Finger joints have a tendency to come off with time. If you’re planning to preserve your canvas over long periods of time, this can potentially mean bad news for the canvas.

    1. The material of the gesso

    The gesso is the substance with which the priming process is done. Gesso gives the canvas a shimmery, shiny, satin-like smoothness - but bear in mind that it costs a lot of money as well. As such, you’re better off getting a canvas that has already been primed. Look for acid-free gessos, since they allow your paint to hold much better and for a longer time span.

    Even if the canvases come double or triple-primed, make sure to add your own layer of gesso if you can. That way, you can adjust the level of smoothness and tooth the canvas gives while painting.

    1. Price

    The price of the canvas shouldn’t be overly cheap (it takes an effort to build a good quality canvas), but make sure you aren’t being duped. Even the higher-quality canvases which come with three primer layers and high-quality wood, with good teeth don’t cost too much per canvas.

    Canvas For Acrylic FAQ's

  • What is the difference between cotton and linen canvas for acrylic painting?

    Cotton canvas is a popular choice for acrylic painting due to its affordability and versatility. It is available in a range of weights and textures, and it can be stretched or mounted easily. Linen canvas, on the other hand, is more expensive but considered a higher quality option due to its strength, durability, and resistance to decay. It is also known for its unique surface texture that some artists prefer.

  • Can you use acrylic paint on a primed canvas?

    Yes, acrylic paint can be used on a primed canvas. In fact, priming a canvas is recommended for best results. A primer helps to create a smooth surface and improves the adhesion of the paint to the canvas. It also prevents the paint from seeping through the canvas fibers and yellowing over time.

  • What is a stretched canvas?

    A stretched canvas refers to a canvas that has been stretched and secured onto a wooden frame. This is typically done by stretching the canvas tightly over the frame and then stapling it to the back. Stretched canvases are ready to use and can be painted on directly without the need for additional preparation.

  • What is the best size canvas for acrylic painting?

    The best size canvas for acrylic painting depends on the artist’s preference and the intended use of the artwork. Small canvases are ideal for detailed work and studies, while larger canvases are better suited for larger compositions and expressive brushwork. Common sizes include 8×10 inches, 11×14 inches, and 16×20 inches.

  • Can you reuse a painted canvas for a new acrylic painting?

    Yes, it is possible to reuse a painted canvas for a new acrylic painting. However, the old painting must be completely dry and the surface should be lightly sanded or primed to create a fresh surface for the new paint. Some artists prefer to gesso the entire canvas again to create an even base for the new painting.

  • Putting It All Together On Best Acrylic Canvas

    Conclusion

    Thank you for reading our article on the best canvases for acrylic painting! We hope you enjoyed it and found it helpful in selecting the perfect canvas for your painting needs. A quality canvas is crucial for bringing your vision to life, so it's important to invest in one that suits your style and level of expertise.

    Out of these 10 best canvases for acrylic, here are the top three expert recommendations:

    • Blick Premiere Cotton Canvas is an ideal option for those who are looking for a versatile and high-quality canvas at an affordable price. Its triple-primed, smooth surface makes it easy to work with, and the different profile options provide a great display advantage for your artwork.

    • Arteza Stretched White Canvas is a good option, particularly for students and intermediate hobbyists. Its combination of quality and value makes it a perfect choice for those who are still exploring the world of acrylic painting, as well as those who need to purchase canvases in bulk.

    • Darice Stretched Canvas is the right choice for artists who want high-quality material and double-primed canvases without venturing into the professional range. It is a great compromise in terms of quality, size, and price, offering a wide variety of options to suit each artist's needs.

    As you continue to hone your skills and perfect your craft, remember that the canvas you choose can have a significant impact on your final results. Keep experimenting and discovering what works best for you, and don't be afraid to invest in a new canvas that fits your evolving needs as an artist. Happy painting!

    Read More on Acrylic Painting

    5 of The Best Paint for Canvas

    Painting Surfaces For Acrylics | Acrylic Prepping 101

    Painting on Paper with Acrylics & 5 Paper-Like Surfaces

    Acrylic Pour Painting [All You Need To Know]

    20 Oil And Acrylic Painting Ideas For Enthusiastic Beginners

    Learn The Basic Acrylic Painting Techniques for Beginners

    22+ Delicate Beautiful Acrylic Painting Ideas To Try

    Learn How to Use Acrylic Paint as Fabric Paint

    Learn How to Thicken Acrylic Paint Correctly

    Learn How to Clean Acrylic Paint Brushes Brilliantly

    Learn How to Make Acrylic Paint in Your Studio

    Learn How To Get Dried Acrylic Paint Out Of Brushes Successfully

    Acrylic Painting Materials That You Really Need In The Studio

    Learn How To Make An Acrylic Painting Waterproof

    Acrylic Paint Thinner 101 | How to Thin Your Acrylic Paints Correctly

    Best Cheap Acrylic Paints – Strength and Weakness of Brands Compared

    8 Best Palettes For Acrylic Paint & How to Choose What You Need

    13 Best Acrylic Paints for Beginners & Professionals

    10 Best Paper for Acrylic Paint

    103 Best Acrylic Painting Ideas

    Best Acrylic Paint Brushes for Artists & Students

    How does the paper make a difference in any painting? Is there a specific type of paper you should be using for the best results with acrylic paint?

    When it comes to acrylic artwork, the canvas is the go-to option. There are many options available in the market, each with varying features. Picking the right canvas is the first step in creating a masterpiece.

    Without further ado, let’s get to the product reviews.

    Best Paper for Acrylic Paint

    With so many options available, it can be overwhelming to decide which paper to choose. To make your decision easier, we have compiled a list of the best paper for acrylic paint. From texture to thickness, we have considered all the essential factors to ensure that you get the best results for your artwork. So, without further ado, here’s the list of the 8 best papers for acrylic paint.

    1. Art Alternatives Stretched White Canvas - Best for Affordable Multipack

    Taking the second spot on our list is the Art Alternatives Stretched White Canvas. It comes in a multi-pack consisting of seven unbleached 4 oz. cotton canvases. It is ideal for use with oil, acrylic, and alkyd paints. We have reviewed the 11 inches x 14 inches canvas that has a depth of 0.5 inches. 

    Experience

    First of all, we have to mention how affordable this canvas is. If you are a beginner and do not want to spend a lot in your initial painting ventures, this is a perfect choice. We especially liked the careful individual plastic packing of each of the seven canvases in this pack. 

    The lightweight canvas almost mimics linen, and at a thickness of 0.5 inches, you get the option of displaying it with or without a frame. We like the gallery wrapping of the canvas that allows you to apply paint to the sides. The corners are a perfect square. 

    We recommend that you do not use very heavy layers of paint on this canvas as it is not hand-stretched and may sag. If you find the canvas to be a little loose, you can spray the back and corners with water and let it dry to make it tight as a drum. 


    Pros

    • Suitable for professionals as well as beginners
    • Multi-pack of seven canvases makes it highly affordable
    • Unbleached cotton gives the canvas a natural look
    • Each canvas is individually wrapped to prevent contamination until you need it


    Cons

    • Not as tightly stretched as other hand-stretched canvases


    Size: 11 x 14" | Pack Quantity: 7 | Pre-Primed: Yes | Suitable for: Acrylic | Acid-Free: Yes | Backing Material: Wood

    2. US Art Supply Stretched Canvas 4-Pack - Best for Nighttime Landscape Paintings

    U.S. Art Supply 18 x 24 inch Black Stretched Canvas 12-Ounce...
    • Pack of 4 - Professional Artist Quality: 3/4" thickness...
    • 100% Cotton Canvases: Pure cotton canvases with medium...

    US Art Supply Stretched Canvas is available in two variants – Black 4-pack and White 6-pack. We have chosen the Black 4-pack and used it extensively to give you a comprehensive and accurate review. US Art Supply offers this canvas in various sizes. In the Black 4-pack, we have reviewed, each canvas measures 8 x 10 inches with ¾ inch depth. 

    Experience

    The US Art Supply Stretched Canvas pack is ideal for use with all kinds of oil and acrylic paints. We liked the hand-stretched canvas that is tight enough for multiple layers of paint. The 0.75-inch profile of these canvases coupled with staple-free edges allows for a convenient frameless display on walls.

    We liked the smooth finish of the canvas, thanks to three layers of environment-friendly, acid-free acrylic gesso. The triple-primed canvas ensures that none of your acrylic paint is soaked up. You will appreciate the fact that these canvases are hand-stretched over stretcher bars obtained from environmentally managed forests.

    The black finish of these canvases is well-suited for creating night-time landscapes or deep-space scenes. Each canvas weighs about 12 oz after priming and is 100% cotton.


    Pros

    • Black color makes it perfect for painting night-time sceneries
    • Multi-pack of four canvases provides optimal value for money
    • It is triple-primed with acid-free acrylic gesso
    • Each canvas is hand-stretched over kiln-dried stretcher bars


    Cons

    • Canvases are not individually packed and may stick together at times


    Size: 18 x 24", 12 x 12", 16 x 16", 16 x 20" | Pack Quantity: 4 | Pre-Primed: Yes | Suitable for: Oil, acrylic | Acid-Free: Yes | Backing Material: Wood

    3. Darice Cotton Stretched Canvas, Pack of 2 - Best for Budget Artists

    Darice Cotton Stretched Canvas, Pack of 2 – 16” x 20”...
    • STRETCHED CANVAS – Every masterpiece begins on a blank...
    • VERSATILE – This medium-weight, wood frame canvas is...

    Darice offers the Cotton Stretched Canvas in eleven different sizes and ten-pack variants. We have selected the pack of two 18” x 24” canvases and reviewed it. Darice has been providing affordable art and craft supplies for over 60 years and is a renowned brand trusted by artists worldwide. 

    Experience

    We believe that a list of the best canvases for acrylic paints cannot be complete without the Darice Cotton Stretched Canvas. The brand is known for its art and craft supplies, and we were not disappointed. Each medium-weight, acid-free canvas is ideal for use with acrylic paints.

    The canvas is double primed so you do not have to worry about high absorption and can start painting as soon as you unpack it. We liked the affordable price tag on this top-notch canvas pack, and we recommend it to artists operating on a tight budget.

    The canvas has an ergonomic design and is back-stapled to allow you to paint on the sides as well. In case you find the canvas to be a bit loose for your liking, it comes with stretcher keys that can be used to tighten it.


    Pros

    • Thoughtful inclusion of stretcher keys allows you to re-stretch the canvas
    • Canvas is available in a wide array of sizes, making it suitable for all kinds of paintings
    • Double-primed canvas provides a smooth surface with reduced absorbency


    Cons

    • Packaging can be improved to protect the canvases better


    Size: 16 x 20", 11 x 14", 12 x 16", 18 x 24" | Pack Quantity: 2 | Pre-Primed: Yes | Suitable for: Acrylic | Acid-Free: Yes | Backing Material: Wood

    4. Masterpiece Artist Canvas 43018 Monet PRO

    MASTERPIECE 43018 Monet Pro 1.5" Deep Monterey 10.5 oz...
    • Monterey is 7 oz. raw, 10.5 oz. finished, cotton canvas,...
    • Canvas Depth: 1.5", Canvas relief: 1/2" (space between...

    Masterpiece Artist Canvas from the Monet Pro Line is available in various size options and styles. We have reviewed the 8” x 10” Cotton 10.5 oz. – 3X – Carmel Portrait Smooth variant. It is made from 100% cotton and has a depth of 1.5 inches. 

    Experience

    We loved the Masterpiece Carmel Portrait Smooth Canvas. It is based on 100% cotton, medium-weight canvas and is sized and double primed with archival quality, acid-free acrylic gesso. You will not have to worry about the paint being absorbed too quickly by the canvas surface.

    You will appreciate the versatile use of this canvas – it goes with oils, acrylics, and alkyds. A significant reason for including this canvas in our list was the additional procedure undertaken to make the canvas texture incredibly smooth.

    In addition to the usual features that are common in most high-quality canvases, what sets this specific canvas apart is its “Canvas Relief” feature. There is ½ inch space between the stretcher bar and the canvas surface to prevent the possibility of pressing the fabric and touching the bar underneath.

    You get the option to re-stretch the canvas, if needed, with the help of pre-installed corner and brace keys.


    Pros

    • Stretcher bar of this canvas is made from sustainably obtained wood
    • Double primed with archival quality, acid-free acrylic gesso
    • Stretched up to 50% tighter than other canvases
    • Comes with pre-installed corner keys and brace keys


    Cons

    • It is relatively expensive, especially for beginners


    Size: 8 x 10" | Pack Quantity: 3 | Pre-Primed: Yes | Suitable for: Oil, acrylic | Acid-Free: Yes | Backing Material: Wood

    5. Arteza Stretched White Blank Canvas

    ARTEZA Stretched Canvas, 16 x 20 Inches, Pack of 6, Blank...
    • 100% Cotton Art Canvases for Painting: Our canvas boards for...
    • Painting Canvas in Bulk: This canvas set includes 6...

    From the house of Arteza, we bring to you the 11” x 14” Stretched White 100% Cotton Canvas. It can be used by all types of artists – beginners, hobbyists, and professionals – and is ideal for use with oil, acrylic, water, tempera, and gouache paints. It comes in a super value pack of eight canvases, each having a 5/8” profile. 

    Experience

    There are a few features of this canvas pack from Arteza that are worth highlighting. First of all, each canvas has a highly sturdy construction with the fabric being stretched over and stapled onto pinewood stretcher bars.

    Secondly, each canvas comes coated with 8 oz of acrylic, acid-free titanium gesso primer. You can start painting your favorite art as soon as you unpack this canvas. We especially liked the thoughtful individual packaging of each canvas in this set. We recommend this canvas pack from Arteza for gifting purposes, owing to its win-win features.

    The Arteza Stretched White Canvas comes in a wide array of dimensions, making it convenient for anybody to find the perfect size they need. You will appreciate the 100% money-back guarantee that Arteza offers with this canvas set, which goes to show how much the company values customer satisfaction.


    Pros

    • Each canvas is primed with acid-free, acrylic titanium gesso
    • Each canvas is individually wrapped to ensure safe storage
    • Comes with a 100% money-back guarantee, providing consumer satisfaction
    • Highly affordable; thanks to the super value pack containing eight canvases


    Cons

    • Having only one coat of acrylic gesso primer, this canvas can be improved by adding another layer


    Size: 16 x 20" | Pack Quantity: 6 | Pre-Primed: Yes | Suitable for: Acrylic | Acid-Free: Yes | Backing Material: Wood

    6. CONDA Artist Stretched Canvas

    CONDA Stretched Canvas for Painting, 5x7 inch 10 Pack of...
    • 100% COTTON CANVAS: Cotton Makes the Ideal Art Surface. It...
    • PINEWOOD STRETCHED BARS: These stretched canvases are...

    CONDA offers the Artist Stretched Canvas in three size variants. We used the 5” x 7” canvas pack that includes six pieces. It is made from 100% unbleached cotton and is acid and oil-free. It is ideal for oil as well as acrylic painting. 

    Experience

    We had an enriching experience using the CONDA Artist Stretched Canvas pack. Each canvas is triple-primed with acrylic gesso to ensure that the color holds on the surface and there is no chance of the paint seeping through to the back of the fabric.

    We especially liked the traditional handmade design of the canvas, which is tacked and has wooden wedges to adjust tension. A significant positive of the pack is that each canvas is packed individually so you can safely store canvases not being immediately used.

    You will want to buy the CONDA Canvas pack as it offers top-notch quality at an affordable price. The wooden frame of each canvas is made from pure fir wood with the utmost care and craftsmanship to guarantee a sturdy and stretched canvas.

    We recommend this canvas pack to anybody who is just starting on their artistic journey, only because of how inexpensive it is.


    Pros

    • Pack of 10 canvases, making it reasonable for beginners
    • FSC certified
    • Each canvas is made from 100% unbleached cotton and is acid-free
    • Includes wooden wedges that allow you to adjust the tension if needed


    Cons

    • The texture on the canvas fabric is a bit rough, and some professionals may not like it


    Size: 5 x 7", 4 x 4", 6 x 6", 8 x 8", 8 x 10", 11 x 14", 16 x 20", 18 x 24" | Pack Quantity: 6 | Pre-Primed: Yes | Suitable for: Acrylic | Acid-Free: Yes | Backing Material: Wood

    7. The Edge All Media Cotton Canvas

    Creative Mark The Edge Deluxe Cotton 1-1/2" Deep Stretched...
    • Beefy 14oz. Primed Weight: With a raw weight of 8 oz., this...
    • Hand Stretched and Triple-Acrylic Primed: Our canvas for...

    The Edge All Media Cotton Canvas is available in dozens of sizes and two depth variants – 1.5” and 2.5”. We have reviewed the pack of three 24 inches x 36 inches, 1.5-inch deep canvases. Each canvas is perfect for alkyds, oils, acrylics, frameless artwork presentations, and mixed media works. 

    Experience

    This list would be incomplete without the Edge All Media Cotton Canvas offered by Creative Mark. We especially liked the “tuck-n-roll” style of its construction, which leaves the edges staple-free and clean for painting and frameless display. 

    A particular highlight of this canvas is the unique primer developed and used by Creative Mark which is significantly better than other primers and allows your paintings to preserve their vibrant colors with maximum adhesion. 

    You will be pleased to know that each of the three canvases in this pack is hand-stretched by skilled craftsmen to ensure that the fabric is not loose. The material is stapled in each corner at the back. The raw canvas weighs 8 oz., and the primed canvas weighs about 14 oz. 

    We also liked the durable construction of the wooden stretcher bars in this canvas. If you take our word for it, buying this canvas is a no-brainer. 


    Pros

    • Better than average durability and texture
    • Top-notch triple priming of this canvas ensures optimum results with oil and acrylic paints
    • It is back-splined, stretched, and stapled at each corner for a tight and sturdy finish
    • Ideal for painting on the edges and displaying without a frame


    Cons

    • It is not one of the most pocket-friendly options


    Size: 4 x 4" - 36 x 36" | Pack Quantity: 3 | Pre-Primed: Yes | Suitable for: Acrylic | Acid-Free: Yes | Backing Material: Wood

    8. Daveliou Stretched Canvas

    Daveliou 12”x12” Stretched Canvas for Painting, Triple...
    • Premium Stretched Canvas — Create unique art with Daveliou...
    • Durable Non Toxic Materials — The individually wrapped...

    The Daveliou Stretched Canvas is available in a pack of five pieces in three sizes – 8 x 10 inches, 11 x 14 inches, and 16 x 20 inches. It is made from 100% pure three-ply/280-gsm cotton. It has a 5/8” profile and is suitable for use with oil and acrylic paints. 

    Experience

    At the final spot on our list of recommendations is the Daveliou Stretched Canvas. We extensively used the 11 inches x 14 inches canvas pack and were convinced to include it in our list. The canvas features staple-free edges and a perfectly firm surface. 

    We especially liked the top-notch build of this canvas. It is made from pure cotton, which is meticulously stretched and wrapped on a kiln-dried, beveled stretcher bar frame. You will not face any problems with this canvas regarding its tightness. 

    A significant highlight of this canvas from Florida-based Daveliou is the use of their proprietary gesso primer, which adds just the perfect absorption and tooth to the canvas surface. 

    You will be pleased to know that this canvas comes with a one-year money-back guarantee, making it a definite customer favorite. 


    Pros

    • Relatively reasonable, especially being a five-canvas pack
    • Each canvas in the package is individually wrapped
    • Ideal for all types of media
    • It comes with a one-year money-back guarantee


    Cons

    • Some discrepancies have been reported about products having loose corners 


    Size: 12 x 12" | Pack Quantity: 6 | Pre-Primed: Yes | Suitable for: Acrylic | Acid-Free: Yes | Backing Material: Wood

    Best Paper For Acrylic Paint Comparison Table

    Product Size Pack Quantity Pre-Primed Suitable for Acid-Free Backing Material
    Art Alternatives Stretched White Canvas 11 x 14" 7 Yes Acrylic Yes Wood
    US Art Supply Stretched Canvas 4-Pack 18 x 24", 12 x 12", 16 x 16", 16 x 20" 4 Yes Oil, acrylic Yes Wood
    Darice Cotton Stretched Canvas, Pack of 2 16 x 20", 11 x 14", 12 x 16", 18 x 24" 2 Yes Acrylic Yes Wood
    Masterpiece Artist Canvas 43018 Monet PRO 8 x 10" 3 Yes Oil, acrylic Yes Wood
    Arteza Stretched White Blank Canvas 16 x 20" 6 Yes Acrylic Yes Wood
    CONDA Artist Stretched Canvas 5 x 7", 4 x 4", 6 x 6", 8 x 8", 8 x 10", 11 x 14", 16 x 20", 18 x 24" 6 Yes Acrylic Yes Wood
    The Edge All Media Cotton Canvas 4 x 4" - 36 x 36" 3 Yes Acrylic Yes Wood
    Daveliou Stretched Canvas 12 x 12" 6 Yes Acrylic Yes Wood

    Paper For Acrylic Paint Buyers’ Guide

    Buying Guide For The Best Paper For Acrylic Paint

    We have shortlisted ten of the best canvases from the hundreds available in the market. When it comes to picking one of these ten products that will perfectly meet your requirements, you should consider the following factors:

    1. Primed for Perfection?

    When it comes to canvases, it is not rocket science to add a coat of primer. Most of the products we shortlisted come with two or three coatings of acrylic gesso primer, which ought to be sufficient in most cases. To be on the safer side, you should consider applying an additional coat of primer before you paint.

    A perfectly primed canvas prevents the absorption of paint and allows you to create your art without unnecessary hassles.

    1. Opt for Bulk Buying

    Whether you are a beginner or a professional, it makes sense to buy your canvases in bulk. Having a decent stock of painting materials and canvases is cost-effective in the long run.

    Like everything, there is a learning curve when it comes to using canvases. Bulk buying ensures you get used to painting on a specific surface. When buying in bulk, we advise you to go for individually packed canvases to avoid damage and wastage over time.

    1. Absorption and Tooth

    Absorption and Tooth are the bread and butter of canvases. Gesso primer coatings help to build up the tooth on the surface of a canvas, which makes it smoother and provides a good texture.

    Another essential factor to consider is absorption. You do not want to buy a canvas that soaks up your paint as soon as you apply it, as that can make detailed art nearly impossible to create.

    Papers For Acrylic Paints FAQ's

  • What type of paper is best for acrylic paint?

    Acrylic paint can be used on a variety of surfaces, but paper with a weight of 300 gsm or more is ideal for acrylic painting. Look for papers that are specifically labeled as suitable for acrylic paint.

  • Can I use regular paper for acrylic painting?

    Regular paper is not recommended for acrylic painting, as it is not sturdy enough to hold the weight of the paint. The paint may bleed through or the paper may wrinkle and warp.

  • Can I use watercolor paper for acrylic painting?

    Watercolor paper can be used for acrylic painting, but it may require more paint and layering to achieve a solid color. Look for watercolor papers with a weight of 300 gsm or more, and avoid papers with a strong texture.

  • Can I use canvas paper for acrylic painting?

    Canvas paper is a good option for acrylic painting, as it mimics the texture of canvas without the added cost. Look for papers with a weight of 300 gsm or more and a surface that is specifically designed for acrylic paint.

  • Do I need to prepare the paper before painting with acrylics?

    Some papers may require priming before painting with acrylics to prevent the paint from soaking into the paper fibers. Check the manufacturer’s instructions for the specific paper you are using.

  • Best Paper For Acrylic Paint Final Thoughts

    Conclusion

    Thank you for taking the time to read our article on the best papers for acrylic paint, and we hope you found it insightful and helpful. We understand how essential it is to choose the right surface to work on for your masterpiece, and after thoroughly testing various products, we are excited to share our top expert recommendations. Acrylic paintings are vibrant and bring life to any canvas, so finding the perfect match is crucial.

    Out of these 8 best papers for acrylic paint, here are the top three expert recommendations:

    1. Art Alternatives Stretched White Canvas is an ideal option for those looking for affordability, especially beginners. The seven canvases included in this pack are perfect for practicing without needing to worry about the cost. The lightweight construction and individually wrapped canvases also add value to the overall experience.

    2. US Art Supply Stretched Canvas 4-Pack is a good option for artists wanting to create nighttime landscapes or deep-space scenes due to their black finish. The hand-stretched canvases provide a tight surface to work on, and the triple-primed acid-free acrylic gesso delivers a smooth finish perfect for acrylic paints.

    3. Darice Cotton Stretched Canvas, Pack of 2 is the right choice for artists on a tight budget who still desire a high-quality canvas. Double-primed and designed to minimize paint absorption, these medium-weight canvases are suitable for a variety of acrylic painting projects.

    In revealing our top three recommendations, we factored in the availability of multiple sizes, the ability to re-stretch the canvas, and whether the canvas is pre-primed. Our choices cater to a range of artist preferences, whether you are just beginning your artistic journey or an experienced professional. It's our pleasure to help you find the best product for your needs so you can continue creating beautiful acrylic masterpieces. Happy painting!

    Read More on Acrylic Painting

    5 of The Best Paint for Canvas

    Painting Surfaces For Acrylics | Acrylic Prepping 101

    Painting on Paper with Acrylics & 5 Paper-Like Surfaces

    Acrylic Pour Painting [All You Need To Know]

    20 Oil And Acrylic Painting Ideas For Enthusiastic Beginners

    Learn The Basic Acrylic Painting Techniques for Beginners

    22+ Delicate Beautiful Acrylic Painting Ideas To Try

    Learn How to Use Acrylic Paint as Fabric Paint

    Learn How to Thicken Acrylic Paint Correctly

    Learn How to Clean Acrylic Paint Brushes Brilliantly

    Learn How to Make Acrylic Paint in Your Studio

    Learn How To Get Dried Acrylic Paint Out Of Brushes Successfully

    Acrylic Painting Materials That You Really Need In The Studio

    Learn How To Make An Acrylic Painting Waterproof

    Acrylic Paint Thinner 101 | How to Thin Your Acrylic Paints Correctly

    Best Cheap Acrylic Paints – Strength and Weakness of Brands Compared

    8 Best Palettes For Acrylic Paint & How to Choose What You Need

    Best Canvas for Acrylic Painting | Student & Artist Grade

    13 Best Acrylic Paints for Beginners & Professionals

    103 Best Acrylic Painting Ideas

    Best Acrylic Paint Brushes for Artists & Students

    Stained glass work is a long-practiced art, having its origins in the seventh century and today, we are going to discuss few of the best soldering iron for stained glass work right now.

    The art flourishes to date, but the methods have seen a sea of change, ever since the advent of powered tools. Soldering irons are a tried-and-tested way of making sure your colored glass pieces stay together. Hence, they’re an essential part of any stained glass artist’s toolkit! However, the decision of getting a soldering iron for glass work can become cumbersome and feel heavy - this is where we come in to the picture.

    Today, we’ll look at some of the best soldering iron for stained glass work on the market, followed by a small guide to help you decide which soldering iron is best for you.

    Let’s start with the reviews!

    Best Soldering Iron For Stained Glass


    Best Soldering Iron For Stained Glass

    Whether you're a beginner or an experienced stained glass artist, these soldering irons are sure to provide you with the precision and control you need to create beautiful and intricate designs. So, without further ado, here’s the list of the 5 best soldering iron for stained glass.

    1. Hakko FX601 - Best for Precision and Beginners

    Hakko FX601-02 - Soldering Iron with High Heat Capacity
    • Dial controlled temperature selection
    • Compatible with T19 tips

    The Hakko FX601 is one of the most well-rounded products on the market. It’s one of the lightest soldering irons and is very quick to heat up as well. For most projects, the Hakko FX601 will hold heat long enough for you to finish work, but larger projects may see it cool faster than it should.

    Being a 67-watt ceramic element iron, you don’t lose anything compared to a standard 100-watt metal element soldering iron.

    Experience

    On small to medium-sized projects, the Hakko FX601 is a joy to hold and use. The ceramic iron immediately strikes you as being nearly weightless compared to a regular metal iron. The temperature adjustment is surprisingly precise since usually soldering irons falter in holding the set temperature.

    The temperature always stays within 10 degrees above or below your desired value. This makes it ideal for soldering glass without much tinkering with the temperature, once set. Further, the heat recovery capabilities are solid with this iron, which adds to the user experience. This is a major issue, particularly with older irons. The cleaning process recovery time is one of the best in its class.

    The highest temperature it can achieve is around 540 degrees Celsius. It ships with a regular-sized tip, which you can replace with any T19 series tip available on the market. For heavy-duty work, this will suffice - but only just. It is the best iron for regular use.

    Verdict

    This iron can hold its own among the best in its class. The ergonomic nature and ceramic element mean it is a wonder to use and operate, while the flexibility of adjustable temperature adds to its usability. The iron holds temperature well, is fast to heat up, and can tolerate high temperatures. We strongly recommend this to anyone who’s starting out, and as an all-purpose iron for seasoned users.


    Pros

    • Easy to hold for long hours 
    • Solid construction, ceramic element lasts longer 
    • Holds temperature well 


    Cons

    • Might not perform at its best in larger projects 


    Power Source: Corded | Wattage: 65W | Temperature Range: 240°C - 540°C | Tip Temperature Accuracy: ± 1.8°C | Heating Element: Ceramic
    1. Weller W100PG - Best for Reliability and Simplicity

    Weller W100PG Weller Farenheit Heavy Duty Soldering Iron...
    • Safe - the soldering iron uses industry leading Weller...
    • Temperature - the soldering iron temperature is controlled...

    The Weller W100PG is a standard-use iron from Weller. Weller needs to introduction to the field of soldering irons - these have long been used, and even passed on from generation to generation. Generally speaking, Weller products have a shelf life of a decade or even more - and the W100PG is another such machine.

    Experience

    The heavy-duty W100PG does a solid job of handling pretty much anything you throw at it. It comes equipped with a 100W nichrome heater, whose temperature can be controlled using this soldering.

    Various tips, which allow you to go from 600 degrees Fahrenheit to 800 degrees Fahrenheit.

    The temperature regulation is such that the solder won’t affect any of the glass, but will act as a perfect connection between your panels.

    The Weller W100PG boasts a lightweight (for a metal element) design, which doesn’t come with or require any base station. However, if you’re just starting out, we recommend having one of your own just the same. The parts used are all heavy-duty, and rest assured, will last you ages even under the most heavy use.

    One of the major reasons why Waller and all of its products are so popular for soldering glass panels is their simplicity. There is no moving part, a simple heater in the midst, and a set of nominally priced replaceable tips are all the modifications you can make. This is why Weller products have been around since decades before this review and will last for decades hence.

    Verdict

    A no-frills, no-nonsense soldering iron - the epitome of a simple electrical appliance that does what it says on the label, and does it extremely well. It’s a no-brainer for those who have more experience soldering, but for newer users, we recommend going for irons with adjustable temperatures and faster cooling times.


    Pros

    • Weller has been around for ages, and its products have an air of reliability par none 
    • Simple to use 
    • Lightweight 


    Cons

    • New users may have difficulty operating it 


    Power Source: Corded | Wattage: 100W | Temperature Range: 371°C - 482°C | Tip Temperature Accuracy: ± 1.1°C | Heating Element: Nichrome
    1. Hexacon SI-P250 - Best for Heavy-Duty Projects

    Hexacon SI-P250 HD Plug Tip Iron
    • Extra Heavy Duty Plug-Tip Soldering Iron
    • Equipped with a 5/8" semi-chisel soldering tip (No. HT499X)

    For those who routinely work on large projects, or require industrial-level heating capability, the Hexacon SI-P250 should be on top of your list. This 250W behemoth of a soldering iron usually hasn't been used by stained glass workers, but the trend is slowly catching up. For those working on heavier metals like iron, this iron is a definite recommendation.

    Experience

    Hexacon might not be known to you as a prominent soldering iron manufacturer if you've traditionally been involved in stained glass work. This is bound to happen, since Hexacon is generally known for its industrial soldering irons, capable of heating up to much higher temperatures than your run-of-the-mill soldering iron.

    The Hexacon SI-P250 works as well as expected, with a minimal heat recovery time and a solid feel. The unique hexagon shape is distinctive and using it is quite ergonomic while working. The material choices make the SI-P250 indestructible for all intents and purposes. The ⅝” diameter of the tip and the wedge design makes it useful for any soldering work you can think of.

    This soldering is specifically aimed at the most heavy-duty tasks a soldering iron can be realistically expected to do. Hence, for those dealing with medium-to-low-scale stained glass projects, we would recommend going in for the other featured soldering irons. However, for heavy-duty tasks, nothing else comes close.

    Verdict

    Hexacon is a new addition to soldering irons, specifically with respect to stained glass work. Those looking for the last word in heavy-duty soldering irons need to look no further. The impeccably finished body and the high-quality soldering tip make it a joy to use for as strenuous a task as you can think of.


    Pros

    • Best-in-class construction 
    • Heating times are much ahead of the competition  
    • Soldering thick metals is no big task    


    Cons

    • Steep learning curve for first-time users 


    Power Source: Corded | Wattage: 250W | Temperature Range: 315°C - 482°C | Tip Temperature Accuracy: ± 1.1°C | Heating Element: Stainless Steel
    1. American Beauty 100W Ergo Handle

    American Beauty 3138-100 Pencil-Style Soldering Iron, 100...
    • Ni-chrome compression wound heating elements are proven to...
    • Paragon iron-clad lead-free soldering iron tips consistently...

    You’d be surprised to be hearing of this name, too. American Beauty is generally associated with workmen and industrial usage, but this uniquely designed soldering iron is hard not to recommend. The L-shaped handle and strongly built tip make this tool a great addition to your stained glass toolbox.

    Experience

    The American Beauty 100W model is another hardy, easy-to-use soldering iron. What sets it apart from the rest is the wonderfully shaped handle and tip, which makes it easier to reach the hardest of places in your glasswork. The best part is, it doesn’t skimp on any essential features for the sake of this novel design.

    It heats up as well as you’d expect a 100W nichrome element soldering iron to, with very little to fault in the overall experience of using it. One obvious caveat is that you’ll definitely need a base station with this because of the shape. Otherwise, there is little to fault in this simple, ergonomic soldering iron.

    Their level of customer service and support is also par none. The design allows for swapping out all parts for better ones, should you require it. However, you won’t (and shouldn’t need to, given the cost difference) need one any time soon, since the American Beauty ships with extremely solid parts to boot. Overall, if you like it, go for it.

    Verdict

    As a general-use soldering iron for your stained glass work, very little comes close. Sure, there is a price to pay - but between the consumer experience, the ergonomic shape, and the powerful heating element, you get your money’s worth. A solid buy in any case.


    Pros

    • Ergonomic design like none other 
    • High quality, modular internal parts which can easily be replaced 
    • Superior customer experience, a rarity in this segment 


    Cons

    • You could get a regular 200W iron for nearly the same price 


    Power Source: Corded | Wattage: 100W | Temperature Range: 260°C - 650°C | Tip Temperature Accuracy: ± 3.3°C | Heating Element: Resistance Wire
    1. American Beauty Heavy Duty 200W

    American Beauty 3158-200 Heavy-Duty Soldering Iron, 200...
    • Ni-chrome compression wound heating elements are proven to...
    • Paragon iron-clad lead-free soldering iron tips consistently...

    American Beauty makes wonderful products, as introduced in the previous review. However, what if you wish to do more heavy-duty work? Sometimes, try as you might, 100 watts of power just can’t cut it. For those looking for a reliable, yet ergonomic 200-watt soldering iron, this one is a solid contender.

    Experience

    Owners of the American Beauty soldering irons generally tend to leave them on with power throughout the day, with no interruptions. This is a testament to the quality of materials used as well as the build quality. The company has a track record of decades’ worth of solid, trouble-free experiences.

    We can attest to the last line very well. In soldering thick metal pieces to glass, the soldering iron broke no sweat and handled it like a piece of cake. This 200W iron is definitely not aimed at small projects or lighter metals, hence you should be clear with your priorities beforehand.

    The American Beauty Heavy Duty 200W should be on top of your list if you’re looking for a reliable, easy-to-use, modular soldering iron.

    Verdict

    With almost nothing to fault, the 200W American Beauty is the go-to heavy-duty user’s choice. Backed by decades of experience, even if not that popular in the stained glass work circles, it’s definitely worth a shot - although pricey for what it is. You’ll thank yourself for having bought it a decade or so from now when it’ll work as well as it does today.


    Pros

    • Heavy-duty heating gives short heat-up times 
    • Solid materials and construction 
    • Indestructible build quality, easy to use 


    Cons

    • Pricier than other heavy-duty irons 


    Power Source: Corded | Wattage: 200W | Temperature Range: 260°C - 871°C | Tip Temperature Accuracy: ± 3.3°C | Heating Element: Resistance Wire

    Having wrapped up the product reviews, we now head on to the key factors which will help you make a decision on which soldering iron suits you best for your stained glass work. We can roughly break these factors into two categories, the technical aspects as well as convenience.

    Best Soldering Irons For Stained Glass Comparison Table

    Product Power Source Wattage Temperature Range Tip Temperature Accuracy Heating Element
    Hakko FX601 Corded 65W 240°C - 540°C ± 1.8°C Ceramic
    Weller W100PG Corded 100W 371°C - 482°C ± 1.1°C Nichrome
    Hexacon SI-P250 Corded 250W 315°C - 482°C ± 1.1°C Stainless Steel
    American Beauty 100W Ergo Handle Corded 100W 260°C - 650°C ± 3.3°C Resistance Wire
    American Beauty Heavy Duty 200W Corded 200W 260°C - 871°C ± 3.3°C Resistance Wire

    Buying Guide For The Best Soldering Irons For Stained Glass

    When it comes to stained glass projects, choosing the right soldering iron is paramount to producing high-quality artwork. To help you make the most informed decision, we have put together this comprehensive guide detailing the factors you should consider when buying a soldering iron for stained glass.

    1. Type of Soldering Iron

    There are two common types of soldering irons used for stained glass work:

    Standard Soldering Irons: These irons feature a consistent power output and offer excellent heat transfer capabilities. They are ideal for beginners and users who need a budget-friendly option.

    Temperature-Controlled Soldering Irons: These irons allow you to regulate the temperature, which is particularly beneficial for various types of glass and different techniques. They are recommended for more experienced users.

    2. Power and Temperature Range

    Power output, expressed in watts, affects the iron's heat generation and temperature stability. Look for a soldering iron with a power rating between 80 and 100 watts. This ensures rapid heating and a temperature range suitable for most stained glass projects.

    3. Tip Size and Material

    Soldering iron tips come in various sizes and materials, which influence their heat transfer capabilities and durability.

    Copper tips offer better heat transfer but require more frequent replacement.

    Iron-Plated tips are more durable, with lower heat transfer rates.

    Look for a tip size in the range of 1/4" to 3/8" for optimal results with stained glass projects.

    4. Ergonomics and Comfort

    Select a soldering iron that is easy to grip and maneuver for extended periods. This will help reduce fatigue and ensure precision during soldering.

    5. Brand Reputation and Reviews

    Choose a soldering iron from a reputable brand with positive reviews, signifying that the model is reliable and long-lasting. Well-known brands in the stained glass industry include Hakko, Weller, and American Beauty.

    6. Budget

    Determine your budget and compare the features offered by the soldering irons within your price range to find one that meets your needs and preferences.

    7. Additional Features

    Look for features such as:

    • A built-in stand or separate stand for safety
    • Interchangeable tips for increased versatility
    • Fast heat-up times
    • LED status indicators for temperature
    • ESD (electrostatic discharge) safe option if you work with sensitive electronic components

    Important Tip: Remember to maintain your soldering iron properly by cleaning and tinning the tip, storing the iron safely when not in use, and using high-quality solder. This will ensure that you achieve clean, precise solder joints and extend the life of your soldering iron.

    Technical considerations

    1. Power [Watts]

    Strictly in numeric terms, the higher the power, the faster the soldering iron heats up. However, numbers don’t always tell the complete story. Power (in watts) simply tells you how fast it heats up, but not how long the heat is retained and how quickly it is recovered from a relatively less hot state.

    Hobby soldering irons come in at around 65 to 100 watts, and regular use is between 100 to 200 watts. Heavy-duty irons are in the 200 to 300 watts range.

    1. Element Material

    Generally, only two types of elements are offered in soldering irons, nichrome (also known as metal) and ceramic. The metal element heats up a large metal body, in contrast to the ceramic element, which heats up the area close to the tip. Hence, metal element soldering irons heat up slowly but retain heat for longer as compared to ceramic element soldering irons.

    The choice really comes down to which end of the compromise is more important to you. If you work in longer bursts where you expect the iron to keep running, go for the metal element iron. If you are comfortable working in shorter bursts where you require a lesser heating time, the ceramic element iron is better suited for you.

    1. Temperature Controller

    A simple heads-up, not every soldering has, or is expected to have a temperature controller. This is similar to a dimmer switch, which controls the voltage in order to give you the desired temperature. However, most units with controllers (except some like the Hakko reviewed above) have wildly varied temperatures at the tip regardless of which temperature you select. Take care of this before going in for a temperature-controlled soldering iron.  

    Convenience

    Modularity and replacement parts

    Modularity here refers to how easily the device can be broken apart into smaller parts for more flexibility. Some soldering irons have little-to-none flexibility, wherein even their tips cannot be swapped out. Other soldering irons come with fully modular designs, allowing you to replace the body, the holder, and the tips (which are of various kinds).

    If you’re content with your current configuration, there is not much need for a modular design. On the other hand, if you wish to experiment later on or don’t want to run to the hardware store for large projects, you’re best off going for a modular design.

    Soldering Iron For Stained Glass FAQ's

  • Can I use a soldering iron for stained glass on other materials?

    Yes, a soldering iron for stained glass can be used on other materials such as metal, wood, and plastics, but it’s important to use the appropriate solder for the material.

  • How do I choose the right tip for my soldering iron for stained glass?

    The tip size and shape should be chosen based on the project’s requirements. A fine point tip is ideal for detailed work, while a chisel tip is better for larger areas. A variety of tip sizes and shapes can be purchased separately.

  • How do I know if my soldering iron for stained glass is working properly?

    Check the temperature control to ensure that the temperature is consistent and accurate. The tip should heat up quickly and maintain a consistent temperature throughout use.

  • Can I use a regular soldering iron for stained glass?

    While a regular soldering iron can be used for stained glass, it’s not recommended as it doesn’t have the necessary temperature control and power needed for working with glass.

  • What is the ideal wattage for a soldering iron for stained glass?

    The ideal wattage for a soldering iron for stained glass varies based on the thickness of the glass you’re working with. Typically, a 80-100 watt iron is sufficient for most projects.

  • Conclusion

    First of all, thank you for taking the time to read through our article! We hope you found it both informative and useful in your quest to find the perfect soldering iron for your stained glass projects. Now that you've been through the experience of each product, it's time to reveal our top three expert recommendations.

    Out of these 5 best soldering irons for stained glass, here are the top three expert recommendations:

    1. The Hakko FX601 is an ideal option for both beginners and experienced users alike thanks to its easy handling, lightweight design, and precise temperature control.
    2. For those in search of a no-frills, reliable soldering iron, the Weller W100PG is a good option as it is known for its simplicity, quality, and ease of use.
    3. If you're tackling heavy-duty projects, the Hexacon SI-P250 is the right choice, offering outstanding construction quality, and unparalleled heating capabilities.

    By choosing one of these top three soldering irons, we're confident that you'll find a suitable partner for your stained glass projects. Of course, each product has its pros and cons, so you should carefully evaluate your specific needs and requirements before making a final decision.

    In the end, your satisfaction with your soldering iron is what matters most. Now that you're well-equipped with this knowledge, we hope that you'll feel more confident making the right choice for your stained glass endeavors. So go ahead and try out these fantastic tools and enjoy the beautiful world of stained glass! Good luck, and happy soldering!

    Related Articles

    13 Best Soldering Iron Of 2023

    The 5 Best Wood Burning Tools & Pyrography Pens

    Is the skillet your all-around cookware and bakeware in your kitchen? You might want to reconsider.

    Depending on your cooking methods, specialized kitchenware like the broiler pan and baking sheet can elevate your resulting dishes.

    Discover here the difference these bakeware tools make and know which to use to achieve the best results for your dish.

    Broiling vs Baking: What Are the Differences?

    Broiling vs Baking
    © Homesthetics - Monica Hewitt

    Your oven has different heating zones. The difference between broiling and baking lies in which ones they take advantage of.

    Here's how broiling is different from baking:

    Broiling

    Broiling

    Source: Kitchen Arena

    Broiling depends on a single concentrated heating element only. This can either be from the top or bottom of your oven, but it uses high heat from 500 to 550° F to quickly crisp the exterior of foods.

    It may not be a common cooking method for you in contrast to baking. But if you want to achieve fast cooking for veggies, fish, poultry, and steak, you might want to know about this method.

    Baking

    Baking

    Source: Tasting Table

    What about baking then? Baking involves all oven elements. Instead of direct heat, baking aims to slowly achieve even heating from 200 to 500° F. Because baking time usually takes longer.

    Baking is best for delicate foods, such as substantial veggies like carrots, squash, and potatoes.

    Aside from desserts and loaves of bread, you can use baking for pasta and thicker cuts of meat to ensure that they're cooked on the inside without the risk of burning the exterior of your dish.

    You should know that some foods, such as casseroles, may require you to bake AND broil. To make the best-tasting casseroles, you'll need to bake the dish to heat its filling evenly and broil it afterward to crisp its crumb or cheese toppings.

    Broiler Pan Overview
    © Homesthetics - Monica Hewitt

    Broiler Pan Overview

    Broiler pans have two components: the perforated drip rack and the high-walled tray.

    This facilitates the separation of fats, oils, and grease, especially when dealing with meat. When cooking with a broiler pan, you'll need a marinade or glaze to help your meal or veggies stay juicy.

    Find the best broiler pan here.

    Baking Sheet Overview

    Baking sheets are interchangeably called sheet pans. A flat surface characterizes them; a low rim contains heavier ingredients like vegetables.

    A baking sheet is different from a cookie sheet. Though both shallow, a baking sheet has rolled edges on its sides.

    These sheet pans have different sizes: eighth, quarter, half, two-thirds, and full.

    Broiler Pan vs Baking Sheet
    © Homesthetics - Monica Hewitt

    Broiler Pan vs Baking Sheet: Head-to-Head Comparison

    So which is one better? Let's compare them based on the following features:

    Heat Resistance

    Broiling pans are made of much thicker metal than baking sheets. Unlike many baking sheets, they won't warp when exposed to extreme heat.

    Winner

    Broiler Pan.

    Capacity

    A baking sheet offers a larger surface area. They can hold more steaks and chops, so you can use a baking sheet instead when serving more people.

    Winner

    Baking Sheet.

    Fat Release

    The rack of broiler pans allows fat and oils to drip away from your food. Because of this, you get to eat a less greasy yet drier meal. You can use marination or dips to build on its moisture instead.

    Winner

    Broiler Pan.

    Non-Stick Surface

    The design of a broiling pan won't give you any problems with remnants and juice sticking to your pan.

    If you use a baking sheet even with a separate rack, you can't just use parchment paper to line your pan. You must use high-temperature oil or pan spray to provide a non-stick coating.

    Winner

    Broiler Pan.

    Burn Prevention

    A baking sheet provides even warming. The dishes you'll place on your baking sheet won't get scorched immediately, even if you leave them unattended for several minutes.

    Winner

    Baking Sheet.

    What Different Pans Can You Use for Broiling?

    Look for bakeware that specifies it's "broiler-safe." Aside from this, you can also look into the following broiler-safe cookware that can withstand short bursts of intense heat in your oven:

    Cast-Iron Pan

    Cast-iron cookware is widely used because of its great durability and conduction properties. It is made of thick and heavy non-stick metal, so you won't have to worry about leaving it unattended.

    Compare frying pan vs skillet here to know more.

    Roasting Trays

    You can use a roasting tray with a stainless steel rack sitting inside it to imitate the design of your broiler pan. It's best to line your vegetable ingredients at the bottom of the pan to prevent your drippings from catching fire.

    Compare the broiler pan vs the roasting pan here.

    Aluminum Foil Trays

    Aluminum foil can withstand a higher temperature. You can shape it into a tray for better containment or use disposable aluminum pans for easier cleanup.

    What Different Pans Can You Use for Baking?
    © Homesthetics - Monica Hewitt

    What Different Pans Can You Use for Baking?

    Baking uses lower temperatures, so you have more bakeware and materials.

    Baking sheets made of aluminum are commonly used because they conduct heat efficiently. Other cookware materials include stainless steel, silicone, ceramic, and glass.

    The following pans are specialized for baking desserts, but they can also be used to bake thicker foods, such as roasts and casseroles:

    Standard Cake Pans

    This bake-safe cookware comes in different shapes and sizes, but their volumes are often similar. This is to provide shape options without involving complicated partial recipe conversions.

    Take, for example, the 6-inch round pan and the 8-inch round pan. Both pans offer 4-cup capacities. Another better example is the 9-inch round pan and the 8x8-inch square pan. They have different shapes, but they offer 8-cup capacities.

    Springform Pans

    Springform cake pans have a removable bottom interlocked with a spring-locked ring. The design is to facilitate easy serving so that cheesecakes and quiches don't have to be inverted anymore.

    Muffin Tins

    If you want smaller servings instead of having one big serving for your dish, you can bake them onto muffin tins. They have 12 to 36 concave cups in one bakeware.

    Instead of your usual desserts, you can use these for savory baking eggs, sushi, or rice cups.

    Loaf Pans

    You can guess from the name that this bakeware is used for baking loaves of bread.

    Loaf pans are also referred to as pound cake pans. They have high supporting walls, which hold up your mixture when the dough rises.

    Instead of bread, you can also use this pan for baking lasagna and meatloaf.

    Bundt Cake Pan

    Bundt cake pans have a non-stick coating with a fluted or grooved shape and a center tube. Their shape facilitates even baking for the outer crusts.

    Since these pans are made of heavy material, you can use them for recipes that need to be left in the oven for longer.

    Angel Food Cake Pan

    On the other hand, these pans have flat tops and smooth edges in addition to their tall center tube. These pans can also have a removable bottom to help remove cakes easily.

    Broiler Pan And Baking Sheet FAQs

  • Here is additional information that might be helpful to you:

  • What Can Substitute for a Broiler Pan?

    You can use a baking sheet or a roasting pan instead.

    Use a sheet pan instead to achieve a toasted effect, as in bread or crisp vegetables. However, the broiler’s high heat can warp its thin material, so you might have to dispose of it afterward.

    Use a roast pan instead if you don’t want your meat, fish, and veggies to cook in their fat. Make sure you place its rack to separate them from the drippings.

  • Can You Use a Cookie Sheet as a Broiling Pan?

    No, you can’t use a cookie sheet to broil food.

    Unlike a baking sheet, a cookie sheet isn’t completely lined by an outside rim. Since a cookie sheet is often shallow or flat, it has no full rim lining to prevent food from spilling.

    The rim lining of a cookie sheet is only for you to grab onto for putting the cookie sheet into the oven. As such, a cookie sheet is best for baking cookies or biscuits and never bread or other foods that may drip.

  • Broiler Pan Vs Baking Sheet Final Verdict
    © Homesthetics - Monica Hewitt

    Final Verdict: Which One Is Better for You?

    Now that we know the difference between a broiler pan and a baking sheet, it's time to know when to use each one.

    Use a Broiler Pan If...

    • You want to warm the exterior only. Similar to grilling, it sears the exterior of food only. Use it to achieve a golden-brown crust or a crown of melted cheese.
    • You're dealing with thin cuts of meat. It can't cook deep into your food. You'll have to use ingredients that are easily cooked.
    • You are in a hurry. If you don't have an hour to spare, resort to this pan.

    Use a Baking Sheet If...

    • You need even cooking. This is for cooking the inside and through of food without the risk of burning its outside.
    • You're dealing with dense dishes. To ensure cooking their interior, you must bake your thick-cut meat and dense dishes first before using the sheet.
    • You have time to spare. Use this tool if you can wait hours or have something else to do while waiting.

    Conclusion

    Broiler pans and baking sheets may look similar, but they are built differently for different purposes.

    Although one can substitute for the other at certain times, you can't expect the same quality regarding the results.

    Use each one for the specific method they're meant for to ensure you and your family can enjoy well-made dishes.

    The CEER rating measures the energy efficiency of the AC, representing the ratio of cooling output to power consumption. It considers both the normal operation power consumption and standby/off-mode power consumption. By considering the CEER rating, consumers can make informed decisions about their energy consumption.

    CEER, or Combined Energy Efficiency Ratio, is used to evaluate the energy efficiency ratings of air conditioners.

    Understanding CEER is crucial for consumers making informed decisions when choosing an air conditioner. The higher the CEER rating, the more efficient the system will be, potentially saving you money on your energy bills in the long run.

    In this guide, I will explain what CEER rating is and what makes it a significant indicator for ACs.

    Defining The Term CEER

    Defining The Term CEER

    CEER (Combined Energy-Efficiency Ratio) is a key energy-efficiency metric used to evaluate the amount of electricity used for room air conditioners. The CEER rating is a more comprehensive metric than the more popularly used EER and SEER ratings for mini-splits. 

    It is defined as the ratio of measured cooling output (in BTU per hour) to the measured average electrical energy input and standby/off-mode power consumption. Basically, CEER measures how much output the cooling system of an air conditioner generates as against the power it consumes, both during normal operating conditions and during standby/off-mode. 

    By taking into account both normal operation and standby/off-mode power consumption, the CEER rating provides a more accurate assessment of the energy efficiency of the window units. Accordingly, consumers can make informed decisions when choosing energy star-certified best battery-powered AC units.

    Comparing CEER, EER, And SEER?

    SEER, EER, and CEER are all energy-efficiency metrics used to evaluate the best air conditioners. EER (Energy Efficiency Ratio) measures the cooling output of an air conditioner in BTU per hour against the power it consumes during normal operation in Watts. 

    SEER, or Seasonal Energy Efficiency Ratio, extends the measurement to a typical average temperature range over an entire season rather than just a single temperature. CEER, or Combined Energy-Efficiency Ratio, goes one step further by also taking into account the power input of the air conditioning unit during standby/off-mode.

    It provides a more comprehensive evaluation of energy efficiency. It's important to note that a higher EER and SEER rating may indicate a more energy-efficient unit.  On the other hand, the CEER rating helps users understand the full energy usage of the unit.

    Tip

    When deciding on an air conditioner, it's recommended to consider all three ratings to make an informed choice.

    How Does The DOE Calculate CEER Rating Of An Air Conditioner?

    The United States Department of Energy (DOE) calculates the CEER rating using a standardized testing procedure. The test involves measuring the cooling output of an air conditioner in BTU per hour while measuring the power consumption during both normal operation and standby/off-mode. 

    The BTU output is then divided by the sum of the normal operation power consumption and off-mode/standby power usage to arrive at the CEER rating. This rating is then used to compare the combined efficiency of different air conditioner models and make it easier for consumers to make informed decisions. 

    Moreover, the testing procedure is conducted in a controlled laboratory environment, using strict guidelines established by the DOE to ensure accuracy and consistency. By following this standardized testing procedure, the DOE can provide consumers with reliable and accurate CEER ratings for air conditioners.

    What Is The Difference Between Standby And Off Power?

    Standby power and off power refer to the power consumed by an air conditioner when it is not in use. Standby mode is the power consumed by the unit when it is turned off but still connected to the electrical supply. 

    In this mode, the unit remains powered on but does not perform any cooling or heating functions. 

    On the other hand, off power refers to how much power is consumed by the unit when it is completely turned off and unplugged from the electrical supply. The distinction between standby and off-power is important because the CEER considers the power consumption of all types of air conditioners during both normal operation and standby/off-mode. 

    Considering the power consumed by the unit even when it is not in use, the CEER rating provides a more comprehensive assessment of the energy efficiency of a window AC.

    How Is CEER Expressed?

    CEER, or Combined Energy-Efficiency Ratio, is expressed as a ratio of cooling output in BTU per hour to power consumption in Watts. The CEER rating provides an overall realistic energy efficiency of an AC, with a higher number indicating greater efficiency.

    Why Is It Important To Check The CEER Rating?

    Why Is It Important To Check The CEER Rating?

    Checking the CEER rating of an air conditioner is important because it provides valuable information about the energy efficiency of the unit. By considering both the normal operation power consumption and standby/off-mode power consumption, the CEER rating provides a comprehensive evaluation of the total energy used by the air conditioning unit

    This information can help consumers make informed decisions about their energy consumption and reduce their energy bills over time. 

    In addition, using an air conditioner with a high CEER rating can help reduce the carbon footprint and contribute to a more sustainable future. Furthermore, checking the CEER rating can also ensure that a consumer is purchasing a high-quality air conditioner that will provide reliable cooling performance for years to come. 

    In short, checking the CEER rating of an air conditioner is a simple and effective way to make informed decisions about energy usage and sustainability. 

    What Is A Good CEER Rating For AC Units?

    A good CEER rating for an air conditioner varies, depending on the AC unit type and its intended use. Generally, a CEER rating of 14 or higher is good for residential window air conditioners, while a rating of 12 or higher is adequate for commercial or central air conditioners. 

    The higher the CEER rating, the more energy-efficient the central air conditioner and the lower the energy bills. However, it is important to note that the CEER rating should not be the only consideration when purchasing an air conditioner. Other factors, such as the size of the unit, cooling capacity, and local climate, should also be taken into account. 

    Ultimately, the best CEER rating for an air conditioner will depend on various factors, and it is important to do thorough research and make an informed decision.

    Final Words On Understanding CEER Rating

    Final Words On Understanding CEER Rating

    It is a common misconception that the larger an air conditioning unit, the smaller the CEER number. In reality, the unit size has no direct relationship with its CEER rating. 

    The CEER rating measures energy efficiency and is determined by the ratio of cooling output to power consumption. 

    Factors such as the type of refrigerant used, the quality of the components, and the design of the unit can all impact the CEER rating, regardless of the size of the unit. When shopping for an air conditioner, it is important to consider the CEER rating and other factors such as cooling capacity and local climate. 

    This will help ensure that the unit is appropriately sized for the space and provides the desired level of energy efficiency. 

    And with that, I come to the end of this article. If you liked this informative guide, I recommend checking out my recent article titled “What is a MERV rating?” 

    We agree- climbing ladders for mundane tasks like cleaning and replacing fixtures is far from being exciting.

    Still, most of us wouldn’t mind having some help to facilitate both accessibility and safety while dealing with those corners near the ceilings. Yes, you have guessed it right; it’s telescoping ladders that we are talking about.

    That’s why it comes as no surprise that they form an integral part of every homeowner’s tool arsenal. But given the plethora of similar-looking and functioning models, picking just one from the lot can leave you all confused.

    As such, we take it upon ourselves to help you out by putting together this list of the 13 best telescoping ladders up for grabs. Additionally, we have included a buyer’s guide towards the end so that our readers can make a fully-informed decision.

    Let’s start, then!

    Best Telescoping Ladders

    Best Telescoping Ladders

    1. Ohuhu Y17-80100-07

    One of our top recommendations is the Y17-80100-07 Telescoping Ladder from the house of Ohuhu. This lightweight and easy-to-carry unit has a sturdy aluminum construction that accounts for its longevity and stability. What’s more, the host of user-friendly features make it easy to use for novices and pros alike.

    Aluminum Telescoping Ladder, Ohuhu Upgraded 12.5 FT ANSI...
    • One Button Retraction: Convenience is key! That’s why...
    • America National Standards Type I Ladder: Ohuhu extension...

    Why Did We Like It?

    Before anything else, we were encouraged by the positive customer feedback to try this unit, and we are glad we did. Firstly, it’s made from high-quality aluminum alloy, which makes it extremely sturdy without adding on to the weight. With a maximum extension of 12.5 feet, it can easily carry up to 330 pounds. On top of that, the non-slip end cap prevents it from slipping on different surfaces.

    Talking about the extension, the design uses a one-button retraction mechanism on both sides for seamless operation. All you have to do is press down the buttons and extend the steps. 

    Likewise, press the two red buckles located under each rung to collapse one rung at a time. The slow retracting system allows users to decide on the desired height while reducing air resistance for reinforced stability. Plus, it negates the chances of pinching your finger. Last but not least, the portable carry handle facilitates easy mobility.

    What Could’ve Been Better?

    Perhaps our only complaint is that the package may arrive with slight damages; although it may not impact the ladder inside. Nevertheless, it’s one of the most cost-effective ladders on the market, making everyday DIY tasks a breeze!


    Pros

    • Intelligent locking pins for secure extension
    • Strengthening footboard
    • Adjustable height
    • Non-slip and easy to carry
    • Cost-effective


    Cons

    • Packaging may get damaged during shipping


    1. WolfWise FBA

    Impressed with the utility of our previous pick, we decided to try its lookalike, viz., the WolfWise  Telescoping Ladder. Its compact structure and robust construction make for a convenient climbing experience, be it for pruning trees or those occasional DIY coloring jobs indoors.

    WolfWise 15.5FT Aluminum Telescoping Ladder with Stabilizer,...
    • Safety: Stabilizer bar and non-slip mat improve the...
    • One-Button Retraction: New upgraded internal structure, no...

    Why Did We Like It?

    First things first, this telescoping ladder is made from an aerospace-engineered 6061 aluminum alloy for reinforced sturdiness. Moreover, the clean-touch anodized finish makes the frame resistant to rust and corrosion, which could otherwise have been one of the significant problems while using it outdoors.

    It can be extended up to 12.5 feet, and like the Ohuhu Y17-80100-07 Telescoping Ladder, it has a one-button retraction mechanism that takes only 5 to 8 seconds for full retraction. 


    Besides, the smart-close system makes the steps fall slowly so that users don’t pinch their fingers during retraction. Once retracted, its length accounts for only 1/4th of the maximum height to make for easy storage in cramped spaces. Complete with the heavy-duty closing strap, storing it won’t make you rack your nerves.

    We should also mention that it comes in three maximum height variants (12.5 feet, 10.5 feet, and 8.5 feet), each of which can carry up to 330 pounds. 

    What Could’ve Been Better?

    We’d recommend cleaning the steps and hinges before the first use to ensure seamless opening and closing of the ladder. This is mainly due to the packaging materials getting stuck in the corners, which can hinder the overall operation. Other than that, we have nothing to complain about.


    Pros

    • Quick and safe retraction
    • Wide steps
    • Rubberized feet
    • Compact and easy to store


    Cons

    • Light cleaning required before first use


    1. Little Giant Ladders 15422-001

    The Little Giant Ladders 15422-001 Ladder is a multi-purpose model that will come in handy for a variety of DIY tasks around the home and workshop. Sporting a compact and sturdy design, it has earned rave reviews for its long-lasting sturdiness.

    Little Giant Ladder Systems, Velocity with Wheels, M22, 22...
    • THE ORIGINAL MULTI-POSITION LADDER Little Giant Ladders...
    • ONE LADDER. UNMATCHED VERSATILITY. A-frame. Extension....

    Why Did We Like It?

    Getting straight to the design aspect, this telescoping ladder is made from a special Aerospace-grade aluminum alloy, making it sturdy enough to hold up to 300 pounds. But the apparently heavy-weight construction doesn’t make it heavy. Plus, it meets and exceeds all the necessary OSHA and ANSI standards so that users can rest assured about safety.

    Its lightweight build is well complemented by the tip and glide wheels to facilitate smooth portability.

    The model we opted for can be extended up to 22 feet, which is more than what you’d need for regular household tasks. But you can also choose from the other height variants according to your requirements. 

    Each model is equipped with rock lock adjusters that control the height configuration by locking the frame into the required rung tube. Similarly, you can convert it into an A-frame, trestle-and-plank, or 90-degree staircase using the hinge locks located on the exterior frame.

    Lastly, you can choose to get different accessories like project trays, work platforms, etc., along with the ladder.

    What Could’ve Been Better?

    We were a bit disappointed to see the poor packaging, which may make the ladder prone to damages during shipping and delivery. Thankfully, the unit we ordered didn’t encounter much damage except for slightly brushed wheels, but this is an issue that the brand should definitely look into.


    Pros

    • Supports 5 different configurations
    • Smooth wheels
    • No maintenance required
    • Backed by a lifetime warranty


    Cons

    • Poor packaging


    1. Luisladders Telescoping Ladder

    If portability sits high on your priority list, then the Luisladders Multi-Use Telescoping Ladder may be your go-to unit. Built from a high-quality metal alloy, its practical design has the right mix of durability and stability for years of uninterrupted use.

    No products found.

    Why Did We Like It?

    Much like its predecessor, this unit is also made from superior-grade aluminum alloy that makes it capable of withstanding up to 330 pounds. The anti-slips rugs can be easily adjusted with 1-inch increments using the inward side latches. Besides, the protection spacers prevent accidental bumping and friction between the steps.

    We also appreciate the one-button easy close mechanism that reduces the risk of users pitching their fingers while retracting the ladder. This is made possible by the one-button easy close system, where all you have to do is keep the switches on the steps closed and then press the button. The ladder will descend slowly and gradually to ensure optimum safety.


    As far as the storage is concerned, it has a durable strap that holds the frame in place when fully collapsed. Moreover, there’s a comfortable grip handle that facilitates portability without putting too much strain on the hands. And it comes in as many as three maximum height variants, i.e.,12.5 feet, 12.46 feet, and 8 feet.

    What Could’ve Been Better?

    Some buyers have reported that the rungs tend to get jammed, especially when collapsing the ladder. Although we didn’t face the issue, you may try applying a little oil on the hinges for easy opening and closing. Apart from that, we don’t have any other significant complaints.


    Pros

    • Corrosion and rust-resistant frame
    • Non-pinch hinges
    • Anti-slip steps
    • Heavy-duty strap for durable storage


    Cons

    • Hinges may get jammed


    1. Xtend & Climb Pro Series 785P Plus

    True to its brand name, the Xtend & Climb Pro Series 785P Plus Telescoping ladder is a robust and durable unit built for professionals. That said, it can be the perfect addition to your residential tool arsenal without burning a hole in your pocket.

    Xtend & Climb Pro Series 785P+ Telescoping Ladder, Blue
    • Meets new 2019 ANSI/OSHA standards for safety compliance and...
    • Aerospace Engineered using airplane grade aluminum alloy for...

    Why Did We Like It?

    We were intrigued by its familiar appearance to the Luisladders Multi-Use Telescoping Ladder and wanted to see if it performs as well. And thankfully, we weren’t too disappointed. 

    Its “aerospace engineered” frame is built from airplane-grade aluminum alloy for optimum durability and long service life. Plus, it meets the new 2019 ANSI standards for safety compliance and duty rating, thereby reassuring users of the quality of construction. 

    We absolutely loved the extension range on offer, meaning the ladder can reach a height up to 15.5 feet and retract to a mere 36.5 inches. Unlike a lot of other models that use hands, the extension system can be activated by the foot to extend and lock it in place. At the same time, the angled thumb release ensures proper and safe hand position.

    It’s finished off with slip-resistant steps and double over-molded feet so that it maintains the right amount of traction on varied surfaces.

    What Could’ve Been Better?

    The retraction could’ve been slow and more gradual as users almost always run the risk of pinching their hands. In that sense, it’d be better if the ladder is carefully held by two people on the sides, away from the rungs. Besides, the brand doesn’t specify the maximum carrying weight.


    Pros

    • Compact retraction
    • Integrated carrying handle
    • Clean touch anodized finish makes it easy to clean
    • Double over-molded feet


    Cons

    • May pinch the fingers during retraction
    • Maximum carrying weight not specified


    1. Toolitin TL-20190928-125G

    Toolitin has made a name in the workshop tool industry, and the TL-20190928-125G is a good example of that. Engineered from a combination of metal and heavy-duty plastic components, it provides a prolonged service life with minimal maintenance.

    Toolitin Telescoping Ladder,12.5 FT One Button Retraction...
    • ★ UPGRADED MATERIAL : The Toolitin telescopic Extension...
    • ★ INTELLIGENT LOCKING MECHANISM DESIGN : We have upgraded...

    Why Did We Like It?

    This Toolitin telescoping ladder is built from a mix of premium aluminum alloy and durable plastic. While the aluminum surface is oxidized to prevent the formation of rust and corrosion, the plastic parts are reinforced with nylon fiber to improve the overall load capacity without weighing too heavy. Here, we should mention that it has a maximum load capacity of 330 pounds.

    The adjustable height mechanism comprises an intelligent locking mechanism where each rung is equipped with two red-colored push buttons underneath. Simply press them together to collapse the rungs till you reach the desired height (maximum height is up to 12.5 feet), and the rungs will get automatically locked in place.


    This feature also makes the retraction pinch free as each step falls smoothly and gradually. Once fully retracted, it measures only about 34 inches long, so you can store it conveniently under the bed or behind any door. And it’s also available in two other heights, viz., 8.5 feet and 10.5 feet.

    What Could’ve Been Better?

    Honestly, we are bummed out about the fact that despite having rubber-equipped footing, the ladder lacks stability on slippery surfaces like marble floors. Hence, you might want to avoid it if you’re planning to use it on such surfaces as we didn’t face any issues on rugged surfaces.


    Pros

    • Resists rust and corrosion
    • Automatic locking system
    • One-button easy retraction
    • Can be stored in compact spaces


    Cons

    • Not adequately stable on certain surfaces


    1. Archom Extension Telescoping Ladder

    Now that we are almost halfway through the list, here’s the Archom Extension Telescoping Ladder making an entry. Featuring a familiar design to that of some of our other recommendations, it’s one of the most affordable units that come in multiple heights.

    ARCHOM Telescoping Ladder 9.5 FT - Aluminum Telescopic...
    • 【High-quality Telescoping Ladder】: Our telescoping...
    • 【Safety of Use】: Experience ultimate safety with our...

    Why Did We Like It?

    For starters, the durable frame is constructed from aluminum alloy, which makes it resistant to both corrosion and water-related damages. Hence, you can use it anywhere, be it indoors or outdoors. The unit we got can be extended anywhere between 25 inches and 9.5 feet, but you can always choose the longer variants (10.5 feet, 12.5 feet, 13.5 feet, and 15 feet). 

    Owing to the inward sliding latch, users can adjust the height of the rungs in 1-feet increments, which negates the risk of injuries. You can extend it by supporting the bottom pedal with one foot and pulling out the topmost section while ensuring that the switch clips underneath each step are securely locked.


    The frame culminates into the non-slip feet with big and grooved rubber covers that maintain stability on almost any surface. Not only that, but the strap attached to the last step can also be tied to the bottom pedal for extra stability.

    What Could’ve Been Better?

    We felt that the frame is somewhat flexible, meaning it can wobble a bit when extended to the maximum height. However, it’s nothing to be concerned about as the rubber footing does a great job of keeping the ladder stable even for the maximum load capacity.


    Pros

    • Waterproof and corrosion-resistant
    • Complies with EN131 safety standards
    • Securing strap on the bottom
    • Non-slip feet


    Cons

    • May wobble a little


    1. Energy Bear Telescoping Ladder

    With a decade-long experience in the telescoping ladder industry, Energy Bear has attempted to raise the bar with its multi-purpose telescoping ladder. Integrated with several user-friendly and safety features, it can carry up to 330 pounds while remaining stable on almost any surface.

    Telescoping Ladder Extension Multi-Purpose 18.5 FT Aluminum...
    • ✪ NON-SLIP BLOCK+MOVABLE ROLLER WHEELS---In order to...
    • ✪ WIDENED PEDAL+THICK ANTI-AIR ALUMINUM ALLOY---The first...

    Why Did We Like It?

    At first glance, we were really impressed with the sleek yet durable structure that assures users about the safety on offer from the get-go. In hindsight, it’s the thick, anti-air aluminum frame with oxidized finishing that takes care of stabilizing the ladder on almost any indoor or outdoor surface. 

    Moreover, the four non-slip blocks on the bottom balance bar reinforce friction on the ground. It also consists of two moveable auxiliary wheels for seamless portability. You can easily attach the bar to the base of the ladder using some mounting screws.

    Speaking of the extension capabilities, it can extend up to 18.5 feet, making it one of the tallest models on our list. The wide, rugged steps ensure that your feet can maintain a firm hold even with thick sneakers on. 

    Furthermore, each rung has two safety lock buttons on either side for securely customizing the height as required. It measures just 3.7 feet when fully collapsed, so storage in compact spaces won’t be an issue.

    What Could’ve Been Better?

    For some reason, the steps have a peculiar angle, which makes it difficult to stand on the ladder for prolonged periods. This can especially be more problematic when it doesn't have a wide supporting surface throughout, like when trimming the branches of smaller trees. Hence, you may want to avoid the ladder for such tasks.


    Pros

    • Thick plastic parts to reduce overall weight
    • Mechanical locking with twin buttons on each rung
    • Corrugated non-slip foot pad
    • Secure fastening strap


    Cons

    • Angled steps are difficult to stand on for long


    1. Handvoll Telescoping Ladder

    The Handvoll Telescoping Ladder is a versatile unit that’s suitable for both professional job sites and residential DIY projects. Its solid construction is backed by a robust aluminum frame and is EN131 certified for better peace of mind among users.

    Handvoll Telescoping Ladder 15.5ft Aluminum Extension...
    • ⛑Step By Step! From professional construction sites to...
    • ⚙A Quick Adjustment! Hanging a picture frame and...

    Why Did We Like It?

    First and foremost, this unit can be manually extended anywhere between 3 feet and 15.5 feet by simply lifting the rungs. Once lifted, the secure-locking spacers will automatically lock the  steps, and so will the latches on the support polls. Each step has an anti-slip rung ridged design that prevents the feet from sliding.

    Collapsing the ladder isn’t a herculean task either, as all you need to do is press down the thumb buttons. Since each rung is equipped with these buttons, the retraction mechanism won’t pinch your fingers. And much like its predecessor, there’s a balance bar with L-shaped rubber feet for added security and stability.

    We appreciate that the design makes room for a pair of removable hooks above the topmost rung, which will be beneficial both while working with it and during storage (users can hang it). Besides, the fastening straps keep the ladder adequately compact so that it doesn’t occupy much space in the tool cabinet or the back of the car.

    What Could’ve Been Better?

    It may be helpful to know that this telescoping ladder requires some assembly, but some users have reported that the brand doesn’t provide sufficient instructions for the same. Furthermore, weighing almost 55 pounds, it isn’t the most lightweight unit and doesn’t have wheels for easy portability.


    Pros

    • Individual locking buttons for secure retraction
    • 4 anti-slip feet
    • Ridged step design
    • Removable hooks on top


    Cons

    • Doesn’t have adequate assembly instructions
    • Heavy and doesn’t have wheels


    1. Gimify A726411

    Another versatile unit that will suit commercial as well as residential or DIY projects is the Gimify A726411 Telescoping Extension Ladder. Available in multiple sizes with advanced features, it can hold up to 330 pounds and requires almost zero maintenance even with daily use.

    Gimify Telescoping Telescopic Extension Ladder 12.5 FT...
    • 【Premium Telescoping Ladder】Features an impressive...
    • 【Safety & Quick to Use】Safety comes first! Every step...

    Why Did We Like It?

    Similar to all of our other recommendations, this ladder is also made from durable aluminum alloy that has an anodized finishing for optimum resistance against rust and corrosion. While we tried out the variant that can be extended up to 12.5 feet, you may also choose to get the 10.5 feet variant. Beyond that, there’s another 12.5 feet model that comes with several advanced features.

    Coming to the utility factor, every step has an independent double-height latching lock that controls the extraction and refraction of that particular rung. As a result, users have precise control over the height adjustment without worrying about pinching their fingers.


    For a ladder that can carry up to 330 pounds, it only makes sense for the frame to have non-slip end caps, and this unit doesn’t miss out on that. Lastly, the lightweight structure folds down to as little as 24 pounds to facilitate easy portability and storage.

    What Could’ve Been Better?

    Some users have complained that the base doesn’t feel sturdy enough on some surfaces, even with the anti-skid footing. We think it’d have been better had there been a balance bar for the base or at least a couple of mounting holes to add one. 


    Pros

    • Rust-resistant frame
    • Extra-wide steps
    • Anti-pinch latch locking system
    • Lightweight and compact when retracted


    Cons

    • Lacks stability on some surfaces


    1. BEETRO TC0338

    As we near the end of the list, we found the Beetro TC0338 Telescoping Ladder to be worth including in our list. Its space-saving design is meant to make for convenient storage while the sturdy extension mechanism facilitates various DIY tasks like cleaning, changing lights, etc.

    BEETRO 8.5ft Aluminum Telescoping Ladder, Extension Folding...
    • SELECTED MATERIAL -The telescoping ladder is made of...
    • MAX CAPACITY - The maximum load-bearing capacity is up to...

    Why Did We Like It?

    Starting with the construction, it’s made of high-quality aluminum with plastic for latches and spears as well as rubber for the foot caps. Not only does the design extend its service life by resisting the formation of rust and corrosion, but it also makes the ladder capable of holding up to 330 pounds. 

    The retraction and extension mechanism is similar to that of some of the models mentioned earlier. Each step has latches on either side, which need to be unlocked while extending or retracting. And once you have the desired height, lock the latch to secure the steps in place. 


    With a maximum height of 8.5 feet, it’s more suitable for residential DIY jobs like cleaning windows, hanging pictures, or installing light fixtures. While the rubber protection spears on the side ensure that your walls don’t develop any unwanted marks from the edges of the frame, the rubber fitting maintains sufficient traction on even marble and ceramic surfaces.

    What Could’ve Been Better?

    Some people may find it annoying to lock the latches manually, without which the rungs will invariably collapse. Moreover, the all-aluminum body makes it one of the heaviest ladders on our list, and the absence of wheels hampers its portability to some extent. That said, the compact structure upon complete retraction can fit in cramped spaces.


    Pros

    • Strengthening step design for better stability
    • Rust-resistant structure
    • Individual locking latches
    • Secure strap


    Cons

    • Manual locking may be time-consuming
    • Heavy, not equipped with wheels


    1. SUNCOO Extension Ladder

    The Suncoo Extension Ladder is a portable and versatile unit that has an effortless retraction and extension mechanism. Its GS and EN131 certified design has a maximum load-bearing capacity of up to 330 pounds with a host of features for a safe climbing experience.

    No products found.

    Why Did We Like It?

    To begin with, the Suncoo Extension Ladder is made from thickened airplane-grade aluminum alloy for optimum strength and durability. Additionally, the clean-touch anodized finishing makes it waterproof and corrosion-resistant. For maintenance purposes, you can simply wipe it down with a soft and dry cloth to get rid of dirt and debris.

    Furthermore, every rung has an independent locking mechanism that comprises two steel locking pins for manual locking. This also ensures anti-pinch technology since the steps can be adjusted individually. Besides, the extra-wide, textured rung surface keeps your feet stable even when the ladder is fully extended up to 12.5 feet.

    The frame is finished off with a pair of non-slip rubber caps to maintain stability and friction on both indoor and outdoor surfaces. Last but not least, the heavy-duty, adjustable secure strap helps keep the ladder closed for storage purposes. 

    What Could’ve Been Better?

    Despite having an anti-pinching retraction mechanism, we felt that the rungs tend to fall faster than some other models. Hence, we’d strongly recommend “closing” one step at a time by unlocking the pins. Also, make sure that you don’t have your fingers placed on the edge or the middle of the rung.


    Pros

    • Spring-loaded locking system
    • Lightweight and portable
    • Anti-slip wide steps
    • Thick aluminum tube for extra stability


    Cons

    • Falling rungs may pinch fingers


    1. Yvan Multi-Purpose Telescoping Ladder

    Before wrapping up the list, we’d like to talk about the Yvan Multi-Purpose Telescoping Ladder. One of the brand’s premium models, it’s engineered with ultimate user convenience in mind and doesn’t compromise on quality or versatility.

    Yvan Telescoping Ladder,12.5 FT One Button Retraction...
    • Premium Materials: Yvan‘s telescoping Extension Ladder is...
    • One Button Retraction: While guaranteeing the quality, our...

    Why Did We Like It?

    One of the first things that grabbed our attention was the oxidized-finished aluminum surface that accounts for both durability and appearance. Beyond that, the plastic parts are reinforced with nylon fiber for better wear resistance and load capacity. It can easily accommodate up to 330 pounds without flexing. 

    Each rung features an intelligent locking mechanism that’s marked by independent red locking buttons for securely locking the steps. The maximum height on offer is 17 feet, which is sufficient for accomplishing regular household tasks and DIY hobby projects. And with the angled, anti-skid rubber footing, you don’t have to worry about stability.

    Thanks to the one-button retraction system, all the rungs collapse one after the other without user intervention. We loved the slow “falling speed,” which ensures that the steps don’t fall on the user’s hand to cause injuries. 

    Last but not least, the secure strap holds the “collapsed structure” for compact and convenient storage. 


    What Could’ve Been Better?

    As we have already mentioned, this ladder is one of the premium models manufactured by the brand. Hence, the price may be a significant constraint for potential buyers. At the same time, we’re a bit disappointed that the design doesn’t include wheels, especially considering that some of the more affordable models have a wheeled base.


    Pros

    • Stabilizing bar at the base with rubber padding
    • Simple and safe retraction
    • Secure locking mechanism
    • Plastic edges to prevent slipping and marks on the walls


    Cons

    • Expensive
    • No wheels


    Telescoping Ladder Buyer’s Guide

    By now, you must have figured out that there are some features common to almost all telescoping ladders. However, making the right choice requires more than knowing just the advantages of the best options on the market. Unless you factor in your requirements, there’s a good chance of ending up with the wrong model despite spending a hefty sum of money.

    So, we have curated this extensive buyer’s guide that will help you with all the information you need to know before making the purchase. Read on….

    1. Height And Maximum Carrying Capacity

    Without a doubt, the first thing to consider is the height of your preferred telescoping ladder. In this regard, we’d suggest going for one that can be extended at least up to 12.5 feet for daily household jobs. Likewise, you may opt for a higher model for intense DIY projects or using it in the workshop.

    While at it, keep an eye on the working height, which is often not the same as the maximum height of a ladder. This is because most brands recommend users not to use the first two or three steps, thereby affecting the feasible height.

    As far as the carrying capacity is concerned, always go for a ladder that can hold a minimum of 330 pounds.

    1. Locking And Retraction Mechanisms

    During height adjustment, users would want to make sure that the steps are locked securely to prevent the ladder from accidentally collapsing. That’s why all telescoping ladders have locking pins on each rung, which either get locked in automatically or have to be pushed manually. But we’d strongly recommend checking even the automatic locks to ensure complete safety.

    In case of retraction, a lot of models have a one-button retraction, meaning all the rings will fall one after the one one the press of a button or tab located at the bottom. If you plan to buy such a ladder, go for a slow retraction speed so that even if the rungs fall on your hands, there won’t be any severe injuries.

    1. Rubber Footing

    Rubber capped feet are your best bet to ensure sufficient traction on different surfaces, ultimately resulting in better stability. You will also find many models that have an additional stability or balance bar that has extra rubber padding to reinforce stability.

    1. Portability

    The portability factor will largely depend on the build material. However, modern telescoping ladders have advanced construction so that even heavy-duty metal (like airplane-grade aluminum) bodies don’t strain your muscles when you carry them around. We’d advise getting one with auxiliary wheels to make portability an absolute breeze.

    1. Rust Resistance

    Since a majority of users would want to use their telescoping ladder both indoors and outdoors, a frame that resists rust and corrosion without requiring much maintenance is much sought after. Aluminum or aluminum alloy bodies with anodized finishing can be easily cleaned with a soft, dry cloth and are the ideal choice to prevent rust and corrosion.

    1. Safety Strap

    Finally, a safety strap is a good feature to hold the ladder once it’s retracted completely for hassle-free storage, especially in compact spaces.

    Woman repairs. Girl at home. Woman in a white overalls.

    Verdict

    Now that you know about the best telescoping ladders, you can quit delaying replacing the ceiling lights. Just go ahead and pick one according to your needs and budget.

    We hope our efforts will eventually lead you to your “perfect match.” But if you’re still in two minds about taking the right pick, then allow us to help you by naming our top three favorites from the list.

    The Ohuhu Y17-80100-07 Telescoping Ladder takes first place on the podium for being one of the most cost-effective units on the market. And for the second position, we have the WolfWise FBA_LP230943 Telescoping Ladder, complete with its smart locking mechanism. 

    Lastly, the  Little Giant Ladders 15422-001 Ladder is a good choice if you’re looking for a wheeled base model.

    We’d love to hear about your verdict in the comments section below. Till the next time, take care!


    Related Articles

    9 Best Folding Ladder

    7 Best Home Fire Escape Ladder [Reviewed & Buyer’s Guide]

    13 Best Telescoping Ladders to Climb

    11 Best Ladder to Climb

    13 Best Step Ladders to Climb This Year 

    A BTU calculator helps calculate the temperature requirements of a room, allowing you to choose the right heating or cooling system. Several factors, including room size, ceiling height, type of room, and the number of people, affect BTU requirements.

    British Thermal Unit, or BTU, is a measurement of heat that is used to classify an appliance's heating or cooling capacity. It is extensively used in the United States and the United Kingdom as a basic unit of measurement. A BTU calculator for air conditioners helps determine how much heat the AC unit can remove from a space.

    AC BTU Calculator

    AC BTU Calculator

    Results

    Heating BTU Calculator

    Heating BTU Calculator

    What Is BTU?

    British Thermal Unit (BTU) is a unit of energy measured as the heat required to heat one pound of water by one degree Fahrenheit. 1 British Thermal Unit equals 252 calories, 1,055 joules, 0.293-watt hours, or the energy released by a burning match.

    In other words, 1 watt is equal to 3,412 BTU per hour. This is important because knowing the British Thermal Unit value helps compare different fuels. But you might wonder how it is possible to relate BTU with fuel because these are physical objects quantified by barrels or volume.

    However, I found that you can convert fuels to BTU based on the heat content or energy in each barrel. And given that all fuels are a source of energy due to their intrinsic properties, it’s much better to use BTU than a physical quantity. For instance, you can compare oil and natural gas better using British Thermal Units.

    Another important application of BTU is the measure of the electrical energy generated by electrical appliances like air conditioners. If an air conditioning unit has a higher BTU, its cooling capacity will also be higher.

    You should note that for air conditioners, BTU refers to the amount of heat an air conditioner can remove from the room. 

    What Is A BTU Calculator?

    A BTU calculator helps determine the cooling needs of a room or house. So, this calculator will help you choose the right window air conditioner or central air conditioner needed for your home. 

    You must input the various values into a BTU calculator, including:

    • Size 
    • Ceiling height of the room
    • Type of room
    • Number of people occupying the room
    • Sun exposure 
    • Insulation condition
    • Climate 

    What Is The Purpose Of A BTU Calculator?

    The basic purpose of a BTU calculator is to help you choose the right size air conditioner by determining the BTUs needed to cool or heat a room. You can calculate the desired temperature change by determining the increase/decrease from the outdoor temperature to achieve the necessary indoor temperature.

    For instance, a home in Boston can experience temperatures as low as -5 degrees Fahrenheit in winter. To survive such harsh conditioners, you can use a heater BTU calculator to find a rough estimate for keeping your home warm. In most instances, indoor temperatures should be 75 degrees Fahrenheit, which means an overall increase of 80 degrees Fahrenheit. 

    What Are The Factors That Affect BTU?

    In this section, I have shortlisted many factors that affect the results of a heater or air conditioner BTU calculator.

    1. Insulation Condition

    When objects are in a state of radiative influence of thermal contact, it may lead to lower heat transfer, known as thermal insulation. If you remember middle school science, heat always flows from a warmer to a cooler region until there’s no temperature difference between these areas.

    Keeping in mind this principle, BTU requirements will be lower when heat loss is less, owing to proper insulation. Thanks to stricter building codes and state-of-the-art technology, modern homes have better insulation, while old homes suffer from poor insulation.

    But that doesn’t mean you have to switch homes, as it’s possible to upgrade the insulation of the whole house and lower energy consumption. Most importantly, it increases the valuation of the entire house.

    Note that every material has an R-value, which is the thermal resistance of the material to heat flow. How much heat transfer occurs in a material depends on the R-value; a higher value guarantees greater heat resistance.

    So, when choosing insulation material for your home, opt for products with a higher R-value, even though they cost more because they will result in less energy transfer.

    To determine how many BTUs you need, input a general value in the “insulation condition” field - good, bad, or average. Rooms with many windows have poor insulation because walls have a higher thermal resistance. So, you can install a double-glazed window to prevent heat loss.

    2. Ceiling Height And Size

    A larger room will require more BTUs to cool or heat compared to a smaller room. To calculate the BTU usage and the subsequent air conditioner size, simply figure out the volume of the space.

    Based on the room size, this chart highlights the BTU range corresponding to the area (square feet) to help you choose what size heater or air conditioner you need.

    Area (square feet) to be cooled Capacity (BTUs per hour) needed
    100-150 5,000
    150-250 6,000
    250-300 7,000
    300-350 8,000
    350-400 9,000
    400-450 10,000
    450-550 12,000
    550-700 14,000
    700-1,000 18,000
    1,000-1,200 21,000
    1,200-1,400 23,000
    1,400-1,500 24,000
    1,500-2,000 30,000
    2,000-2,500 34,000

    3. Desired Temperature

    To enter the desired temperature increase /decrease into the calculator, find the difference between the target and outdoor temperatures. For me, a comfortable temperature range is between 70 and 80 degrees Fahrenheit. 

    Let me explain this further with an example. Winter temperatures in Atlanta can fall to 30 degrees Fahrenheit but on average, the mercury hovers around 45 degrees Fahrenheit. If you want to achieve a desired temperature of 75 degrees Fahrenheit, the required increase in temperature would be 75 - 30 = 45 degrees Fahrenheit.

    BTU usage will be higher when homes are situated in areas with higher temperature fluctuations. So, you will need a unit with a higher BTU rating for heating or cooling a home in Alaska than a house in Honolulu.

    Additional Points To Remember

    Other factors that determine the BTUs needed for heating or cooling a single room or the entire house include:

    1. Location Of The Cooling System Condenser

    The position of the current air conditioner condenser is critical, and you should place it in a shady area, preferably toward the east or northern side of the house. When a condenser is exposed to direct sunlight, it works harder and uses more BTUs to efficiently cool a room because the surrounding air temperature is higher.

    Moreover, placing the condenser in a shady area increases the lifespan of the unit, along with reducing the energy needed to cool a room. You can try planting shady trees surrounding the condenser, but that might hamper the airflow. In some cases, trees present in the vicinity choke the condenser and block airflow into the unit.

    2. Ceiling Fan

    Ceiling fans increase efficiency and make your home comfortable by improving air circulation and lowering BTU usage. Every room has areas with less airflow, known as dead spots, like a bathroom with no vent, the back of the couch, the back corner of the room, and the laundry room. 

    If the thermostats are placed in dead spots, you won’t have a comfortable temperature in the space. But using ceiling fans ensures the temperature is evenly distributed across a room.

    3. Number Of People

    The number of people in a room determines how much the AC needs to work to lower indoor temperatures. Since every individual dissipates body heat into the surrounding area, you will have to use a unit with more BTUs lower the temperature. On the flip side, you will need fewer BTUs to warm the room. 

    4. Air Conditioner Size

    The air conditioner size is crucial for cooling a room or the entire home just as you want. If the air conditioning unit is too big, your home will cool rapidly, and the unit won’t run many of the intended cycles. Hence, this will reduce the longevity of the air conditioner.

    But when you use a small air conditioner compared to the room size, it will run throughout the day. So, use an AC BTU calculator to choose the right size air conditioner. 

    5. Shape Of Your Home

    A narrow house with more walls will face more heat loss than a square house with the same square foot area. So, it would help if you choose an air conditioner or heater depending on the shape of your home.  

    6. AC Unit Lifespan

    When an air conditioning unit is nearing the end of its lifespan, efficiency will naturally go down. The lifespan of an air conditioner depends on several factors, including your property’s location, usage, maintenance, etc.

    Moreover, when the amount of refrigerant in the unit is running low, an air conditioner might operate at 50% less capacity.

    Relationship Between BTU and kW

    As I have mentioned earlier, BTU/hr is used only in the US and UK. Other countries in Europe and around the world use kW to measure the cooling power of an air conditioner.

    Kilowatt is a measure of the energy that an appliance consumes at any given time. In heating, ventilation, and air conditioning (HVAC) systems, Kilowatt measures the amount of heat the appliance gives out. For your mini split or window air conditioner, Kilowatt measures the cooling potential of the unit in an hour. 

    Note

    I must add here that Kilowatt is actually a derivative of the watt, which is the standard unit of power as per the International System of Units (SI System). Thus, one Kilowatt is equal to 1,000 watts. 

    BTU to kW Air Conditioning Calculator

    1 kWh is equal to 3412.14 BTU per hour, which is a figure you derive by entering the kWh value into the BTU calculator. Alternatively, one BTU is approximately equal to 0.00029307107 kWh. You can easily get the conversion of BTU to kW by multiplying your AC's BTU rating by this number, or by using our BTU to kW conversion calculator.

    Tip

    While you are trying to make these conversions, it is best to use a calculator. In fact, a calculator comes in handy when you are trying to understand the various aspects of your air conditioning unit. 

    For instance, the electrical current used by your HVAC system can be determined using a watt-to-amps calculator. Similarly, you can get a better understanding of the energy efficiency of your appliance by using a calculator for converting between EER and COP numbers.  

    BTU Calculator Final Words

    Conclusion

    I suggest using an air conditioner BTU calculator to estimate how much heating or cooling capacity you need to achieve the desired room temperature, a BTU to kW can help if you know the BTU and just need the conversion to kW.

    Tip

    Although you might ignore it, the color of the roof is crucial to keep your home cool or warm. A dark-colored roof will absorb more radiant energy than a light-colored surface. Plus, you must keep the roof clean because even a dirty, white roof is less effective than a cleaner surface.

    Moreover, sun exposure, climate, and available insulation play a crucial role in determining the cooling capacity or heat output of the model. With a BTU calculator, you can also find out whether a mini-split AC would suffice or if you need a high-capacity air conditioning unit.

    So, punch in the numbers and leave the rest to the calculator to use the right air conditioner! 

    For any art lover, a pack of good-quality art supplies is a must to ensure they’re able to express their ideas just the way they want. 

    However, choosing a gift for them requires more than just picking some colored pencils or paintbrushes. In fact, zeroing in on a good product can be challenging, given that there are a plethora of art supplies out there. Plus, there are loads of brands to choose from, so figuring out a reliable one only adds to the confusion.  

    That’s why we’re here to help you out. In this guide, we’ve reviewed the ten best art supplies from Derwent. This century-old brand is trusted worldwide for its varied range of quality art supplies, so it has something for every art lover out there. As a bonus, we’ve included a buyer’s guide to help you make a well-informed decision. 

    So, without further ado, let’s get started!  

    Best Derwent Gift Sets

    The colorful multicolored pencils for drawing and painting, color variations

    1. Graphic Drawing Pencils Set

    For a seasoned artist who loves to create detailed sketches of professional standard, this gift set is no less than a match made in heaven! It can help them draw portraits and recreate landscapes with the ultimate precision and would provide a significant boost to their creativity.

    Derwent Graphic Drawing Pencils, Medium, Metal Tin, 12 Count...
    • STURDY PRECISION – With a hexagonal barrel, you gain...
    • BROAD RANGE – Choose the pencil that works for you....

    Why Did We Like It?

    First and foremost, each pencil in the set comes in an efficient design to enable better accuracy for all your drawings. While the hexagonal barrel shape facilitates smooth drawing, the core of each piece is made differently to suit different drawing needs

    Notably, hard degree (H) pencils with a 2.2mm core are ideal for drawing sharp lines. But those with a 3.5mm soft degree(S) core are better suited for drawing softer lines.

    Furthermore, this set contains a combination of hard and soft pencils of 12 different degrees to express your artistic vision in your own way. That’s why they’ll work equally well for shading, blending, or various kinds of illustrations.  

    You can even sharpen the core to a fine and long-lasting point to emphasize the smaller details precisely. So, you’ll never have to worry about the core breaking apart as with ordinary pencils.  

    What Could’ve Been Better?

    The tin enclosing these pencils might arrive a bit damaged sometimes owing to the use of poor-quality packaging material. Note that this makes the contents prone to damage during delivery, which is why you must check the product carefully soon after receiving it.  


    Pros

    • Design enables better accuracy
    • Versatile set of pencils
    • Sharp core
    • Durable structure


    Cons

    • Poor packaging


    2. Colored Drawing Pencils Set

    Looking for a pencil set that provides the same accuracy but offers several color choices to unleash the creativity of your little ones? Then this pack of colored drawing pencils will be an ideal pick. It’s also equally suitable for adults, which is why it will be a great Christmas present for a friend who has an artistic streak. 

    Derwent Colored Drawing Pencils, Metal Tin, 24 Count...
    • The perfect medium for sweeping landscapes to detailed...
    • 8mm diameter pencils have soft, creamy round 5mm leads

    Why Did We Like It?

    The best thing about these colored pencils is the characteristic creamy consistency, which lends a soft velvety finish to your artwork. Adding to this is a soft, round, thick core with high pigmentation to create dense color for all illustrations. 

    These qualities make it perfect for creating vibrant and detailed wildlife paintings and sweeping landscapes. Moreover, art students can also use it for their portraiture and nature studies. 

    Coming to the specifications, each pencil has an 8-mm barrel and a thick 5-mm core that are ideal for ensuring lightfast drawings for all your projects. These wax-based pencils are also quite durable and can be used with equal efficiency in both water-soluble and dry mediums. 

    Last but not least, identifying the core color of each piece is effortless since the pencil top is colored in the same shade.  

    What Could’ve Been Better?

    A slight drawback of these pencils is that they might not fit in all sharpeners, especially the manual ones. However, you can deal with this issue by using an Exacto knife for the purpose, and this method is also quite easy. 


    Pros

    • Drawings get a velvety finish
    • Highly versatile
    • Enables lightfast drawing
    • Easy color identification


    Cons

    • May not fit all sharpeners


    3. Graphitint Pencils

    Another great pick is this set of colored pencils that can help graphite art enthusiasts effectively introduce some color to their drawings. Coming in a comprehensive range of 24 appealing colors, this fine-point pencil set comes in a secure and sturdy metal tin. To know more about this product, move on to the next few sections. 

    Derwent Graphitint Pencils, Metal Tin, 24 Count (0700803)
    • Graphitint Pencils appeal to artists looking to add...
    • Soft and smooth and can be blended to produce an endless...

    Why Did We Like It?

    Interestingly, when you use these Graphitint pencils in their dry form, they provide a subtle colorful touch to the painting. This is especially useful for adding dimension to any graphite drawing. On the other hand, if you wish to use dense and vibrant colors in any artwork, adding water can help you achieve the hue with utmost perfection. 

    These pencils are also quite smooth and soft, which is why you can blend them effortlessly to create a beautiful array of soft shades. 

    Plus, you can remove or modify the colors by just using clean water and an eraser. This is why you can correct slight smudges or drawing mistakes quite easily. 

    They even come in a perfect size, that is, with an 8 mm barrel and a 4 mm core that together provide appreciable precision in all your graphite drawings. Additionally, these pencils are available in a set of 12 pieces.  

    What Could’ve Been Better?

    Some customers pointed out that the color tabs on the top of the pencils seemed slightly confusing, making it difficult to identify the colors correctly. Thus, in case you face a similar problem, it will be best to use the colors on a rough sheet first so that you can be sure about the shade. 


    Pros

    • Can add dimensions to a painting
    • Offers vibrant color
    • Easy to erase or modify
    • Can create an array of soft colors


    Cons

    • Color identification is slightly difficult


    4. Inktense Pencil Set 

    Next up, we have this water-soluble ink pencil set that’s perfect for creating a translucent effect in your drawings. Users can also combine them with other media once they’ve dried out. In fact, these pencils can provide endless possibilities for exploring your creativity.

    Derwent Inktense Pencils 24/Pkg, Colors may vary
    • Pure, vibrant watersoluble ink pencils that combine the...
    • Use them to create strong vivid tones then wash over with...
     

    Why Did We Like It?

    Artists who are fascinated by the intense hues of traditional ink pens will surely be in awe after using these pencils. After all, they offer a very similar visual appeal while blending easily and can be smoothly applied over a large area. That’s why this pencil set can be great for those looking to recreate bright visuals on the canvas. 

    Washing the colors with some water also adds a translucent look aside from intensifying the shades. And like some of our other recommendations, this one comes with a durable 8mm round barrel and 4-mm core to facilitate efficient usage. 

    Even the wax content of the core is on point, which makes sharpening these pencils much easier than average products. Plus, the colors are easy to identify as the color tabs on the top match the core perfectly.  

    What Could’ve Been Better?

    You won’t get many lighter shades in this watercolor pencil set. So, if that’s what you require, you may have to use another set of colors or paints. You might even have to blend quite a few colors to get the exact shade needed. 


    Pros

    • Create intense hues
    • Add translucent effect
    • Easy to sharpen
    • Easy color identification


    Cons

    • Comes with fewer light shades


    5. Drawing Pencils and Accessories Set

    Halfway through our list, we’ve picked this set of six drawing pencils and a sharpener that can help art lovers create expressive and loose tonal drawings with ease. In fact, they can use it to recreate anything on their canvas ranging from nature and wildlife to portraits and landscapes.

    Derwent Drawing Pencils and Accessories, Soft, Metal Tin, 6...
    • Perfect medium for wildlife and nature studies, as well as...
    • Round 8mm cedar barrel is stained rich brown
     

    Why Did We Like It?

    We loved the classic design of these pencils, especially the external structure painted in earthy red that beautifully represents the feel of the entire set. Even the colors displayed at the bottom portion of the pencil are easy to identify, so the users are least likely to land in confusion. 

    Coupled with the appealing design is the efficient round barrel of 8mm that makes drawing the different tones effortless and minimizes the chance of mistakes. Plus, the 5-mm thick core can effectively handle the pressure exerted while drawing so that you can make narrow or broad sweeps smoothly. 

    As for the color range, it consists of brown ochre, chocolate, Chinese white, sanguine, sepia red, and ivory back. All these colors can work well to lend an earthy feel to the illustrations, which makes them perfect for artists focussing on nature studies.  

    What Could’ve Been Better?

    Some customers complained that the metal tin housing the pencils is a bit flimsy, which makes it more prone to damage due to regular use. But apart from that, most of them were quite satisfied with the quality of the pencils and the color selection. 


    Pros

    • Appealing classing design
    • Effortless drawing
    • Durable core
    • Lends an earthy feel to all drawings


    Cons

    • Flimsy metal tin


    6. Lightfast Coloured Pencils

    Another dependable option for adding vibrant color to any illustration is this colored pencil set consisting of 72 different shades. Its pencils are designed to provide professional-grade perfection to any artwork that requires using a variety of colors. With this set at their disposal, artists can even create different effects in their drawings. 

    Derwent 2302722 Lightfast Coloured Pencil Tin (Pack of 72)...
    • 100% LIGHFAST – Revolutionary oil-based core creates rich,...
    • REVOLUTIONARY CORE – The core is resistant to prolonged...

    Why Did We Like It?

    The single biggest advantage of these pencils is their oil-based core that helps artists produce rich colors effortlessly on paper. Also, the core is highly resistant to color change over time, ensuring that your artwork doesn’t fade away. It even comes with a long-lasting point suitable for the heavily detailed drawings or layering work. 

    Adding to the efficiency of these pencils is their strong and durable round barrel that facilitates 100% lightfast drawing. The colors even have a very creamy texture which allows you to blend them on the page to create an effect similar to paint, which is ideal for still-life illustrations.

    Speaking of the color laydown in the set, the range of opaque colors can be used to create different kinds of bold and expressive drawings.  

    What Could’ve Been Better?

    Like one of our previous recommendations, the packaging material used for this set is much weaker, which is why the package might arrive damaged sometimes. In some cases, it might cause one or more pencils to break on the way. As such, you must check the product carefully soon after it’s delivered to ensure it’s in perfect condition. 


    Pros

    • Produces rich color
    • Facilitates effective color blending
    • Prevents artwork from fading away
    • Ensures 100% lightfast drawing


    Cons

    • Poor packaging


    7. Blender and Burnisher Pencil Set

    This small set of pencils is specially designed for blending and burnishing any artwork to create a smoother look for a paint-like appearance. As such, you can combine it with any other set of colored pencils to create illustrations that require blending a variety of rich colors with utmost perfection. 

    Derwent Blender and Burnisher Pencil Set, Drawing, Art...
    • The blender pencil is soft and colorless and allows you to...
    • The burnisher is a hard colorless pencil that provides a...

    Why Did We Like It?

    First things first, this set consists of two pairs of colorless blender and burnisher pencils along with a plastic sharpener and an eraser. While the blender pencils have a soft core that lets you blend two colors easily and effectively, the burnishers provide a glossy and rich finish. 

    You can use these variants to create different effects such as layers, streak-free areas of a single color, or a very strong shade in a part of the artwork. 

    As for the two included accessories, they also work with the desired efficiency so that you can keep the pencils adequately sharp and correct any mistakes easily. Together, such features make this set a great alternative to blending tortillons and stumps. 

    This set even comes at an affordable rate, so you can complete your collection of art supplies cost-effectively.  

    What Could’ve Been Better?

    A point of caution is that sometimes these pencils might smear if you try applying water over them. Keep in mind that this especially happens while working on watercolor paper. That’s why it’s best to use these pencils on other varieties of paper in case you plan to use water to amplify the paint-like effect.  


    Pros

    • Easy and effective blending
    • Can create a glossy and rich finish
    • Good-quality sharpener and eraser
    • Cost-effective


    Cons

    • Not ideal for use on watercolor paper


    8. Inktense Paint

    Watercolor paints that can deliver the right color intensity in any artwork are a rarity these days. And this Inktense paint pan from the brand is among the few that fit the bill perfectly. Its unique formulation allows artists to express their ideas just the way they desire. As such, it has been appreciated by art lovers across the country. 

    Why Did We Like It?

    What we liked the most about this product was the high pigmentation of the colors, which guarantees a vibrant finish in every artwork. And this color stays fixed after it dries up to ensure your creation retains its charm in the long term. 

    Another great advantage is that the pigments are designed for quick drying once they are washed out and become permanent after drying. This lets you place or layer the contrasting colors next to one another without having to worry about color bleeding. 

    This property even makes the paint suitable for a variety of surfaces, including silk, clay, vellum, and parchment. As such, art lovers who are fond of everything DIY can use this paint pan to design DIY gifts for their friends. 

    We also found the design of this set to be really convenient to use as it includes a durable mini water brush, five mixing palettes, and a sponge.  

    What Could’ve Been Better?

    The range of colors provided in the palette is somewhat limited. That's why you might require more mixing and matching to create different shades as per your needs. Naturally, this can seem a bit of a hassle to all art lovers. But quality-wise, we have no complaints about this product. 


    Pros

    • Produces a vibrant finish
    • Suitable for a variety of surfaces
    • Dries quickly
    • Convenient design


    Cons

    • Limited range of colors


    9. Watercolor Pencils

    Towards the end, here’s a durable and versatile pencil set that combines the control of pencils with the beauty and vibrancy of watercolors. Both these properties can together help art lovers achieve the precision that they want in their paintings. Read on to know more about all its features. 

    Derwent Colored Pencils, WaterColour, Water Color Pencils,...
    • STURDY PRECISION – Easy to sharpen, break-resistant...
    • WATER SOLUBLE – Combine the control of a pencil with the...

    Why Did We Like It?

    The most noteworthy feature of these Derwent watercolor pencils is their efficient, break-resistant structure that’s ideal for hours of extensive use. Plus, features such as the hexagonal barrel and the 3.4mm core facilitate the much-desired accuracy for detailed illustrations. 

    Even the water solubility of these pencils is on point, providing artists the versatility they desire without affecting the quality of the paintings. Thus, they can easily create textured lines with their wetted tips or use damp paper to achieve bright colors with soft edges. 

    The core colors also have a softer formulation, which helps create layers and blends easily. As such, they help create a variety of effects ranging from delicate watercolor washes to bold colors. Another advantage is that the shades can be adjusted by adding water as per the need since the colors aren’t permanent.   

    What Could’ve Been Better?

    We were a bit disappointed to find that these pencils lost their sharpness faster than other products. As such, users will have to sharpen them more frequently. But apart from that, we feel it’s a fairly reliable choice considering the durability and precision offered throughout.   


    Pros

    • Break-resistant structure
    • Suitable for detailed illustrations
    • Highly versatile
    • Easy layering and blending


    Cons

    • Require more frequent sharpening


    10. Charcoal Pencils

    We’ve also included this small set of charcoal pencils that can be used to create intriguing pieces of charcoal art effortlessly. These offer the right balance of convenience, durability, and precision, ensuring all your paintings turn out just the way you want.

    Derwent Charcoal Pencils, Metal Tin, 6 Count (0700838)
    • Easier to sharpen than traditional charcoal sticks
    • Tone is similar to graphite

    Why Did We Like It?

    Made using a super-effective combination of fine clays and charcoal particles, these charcoal pencils can provide the right tonal value to any drawing. Plus, the rich and smoothly textured core helps make the strokes effortlessly, thereby facilitating greater accuracy for all projects. 

    In comparison to the traditional charcoal sticks, these pencils are also much easier to sharpen and ensure reduced mess. Even the sharpener provided in the set functions smoothly to enable fast and smooth sharpening. 

    Apart from this, the pencil set can easily be used to blend different colors and comes in a smooth laydown that’s suitable for most drawings. Note that the set includes one light, two medium, two dark, and one white or tinted charcoal pencil. 

    Among these, the tinted charcoal variety can be of great help in adding dimension and depth to detailed drawings.  

    What Could’ve Been Better?

    Several customers pointed out that this pencil set came with some pieces damaged, which made them difficult to use. That said, a few of them expressed their relief over the prompt and efficient customer service offered as it ensured the box was replaced within a few days.  


    Pros

    • Provides the right tonal value
    • Facilitates greater accuracy
    • Helps in easy blending
    • Adds dimension and depth


    Cons

    • Few pieces might be damaged in the tin


    Derwent Gift Sets Buying Guide

    To choose a set of good-quality art supplies, you’ll need to consider some common characteristics of these products that will determine their effectiveness in the long run. 

    As such, going through the specifications of the leading options on the market won’t suffice. That’s why we’ve compiled this guide to the key factors you must keep in mind before making a choice. 

    1. Type

    Products used for artwork can be of different types, including drawing pencils, paints, colored pastel pencils, graphite pencils, blenders and burnishers, and many others. Some types, such as paints and drawing pencils, come in various color intensities, color ranges, and variants.  

    Now, as you’re purchasing the art supplies set as a gift for a close one, you must have an idea about their preferences with regard to such products. That’s why one of the primary considerations is to determine the type of art supplies suitable for that person. 

    For instance, a person who’s fond of sketching landscapes or portraits will like a set of drawing or charcoal pencils more than watercolor paints or pastel pencils. But if they’re fond of experimenting with their artwork, a set of blending and burnishing pencils will provide them with great scope to explore their creativity. 

    So, make sure you go through the product details thoroughly and read through some customer reviews, too. That way, you’ll be able to know about its applications and overall quality. 

    2. Pencil Specifications

    If you’re planning to buy a pack of drawing or colored pencils, it’s a must to check the specifications of the product. Among these, the most important ones are the barrel size and shape and the core texture and size. While the core is the part generally made from graphite and used to draw or write, the barrel or shaft is the wooden casing surrounding the core. 

    Now, keep in mind that a wider barrel and a thinner core will help users make smoother and sharper strokes effortlessly. But in case the core is thicker and softer, the pencil will be more suited for making lighter strokes. 

    Additionally, in the case of drawing pencils, the core texture will determine whether the pencil is suited for lighter or darker strokes, that is, the degree of the pencil. And since you'll have to use both light and dark strokes for most sketching projects, it will be best to buy a set that includes pencils of different degrees. 

    3. Quality Of Watercolors

    To purchase a set of watercolor paints or pencils, you’ll have to consider the intensity and water solubility of the constituent colors. And for that, you’ll need to go through some customer reviews of the product you’re considering. 

    This will help you understand whether the colors are suitable for making vibrant illustrations and experimenting with different kinds of artwork. For instance, colors that are easy to blend or burnish can be used to create different effects in any artwork. 

    4. Accessories 

    The availability of good-quality art accessories such as erasers and sharpeners in a set of art supplies will naturally make it more valuable to an artist. That’s why it’s important to check whether the set comes with such accessories and they’re of the desired quality. Again, you’ll have to go through the customer reviews to be sure about their quality. 

    Best Derwent Gift Sets

    Derwent Gift Sets Verdict

    On that note, it’s a wrap for today. 

    We hope you enjoyed reading about the best art supplies on the market as much as we enjoyed reviewing them. Now, you’ll surely be able to decide on the present you’ve been planning all this while for that art enthusiast friend. So, go ahead and make your pick! 

    But before we bring down the curtains, let us quickly take you through our favorites from the list. The Graphic Drawing Pencils Set is perfect for people fond of sketching whatever they see around them. 

    On the other hand, the Colored Drawing Pencils Set is ideal for art enthusiasts interested in nature studies who love to add a touch of color to their paintings. 

    With that, we’ll call it a day. But watch out for this space, as we’ll be back soon with more interesting guides. 

    Related Articles

    13 Best Sharpener For Colored Pencils

    15 Best Electric Pencil Sharpeners

    11 Best Colored Pencils for Beginners & Professional Artists

    9 Best Cheap Colored Pencils

    11 Best Adult Coloring Books That Will Color Your Mood

    7 Best Electric Pencil Sharpener For Colored Pencils

    10 Best Paper For Colored Pencils 

    Learn How to Shade With Colored Pencils Swiftly & Correctly

    12 Colored Pencil Tips & Tricks to Enhance Your Skill

    Learn How To Use Colored Pencils

    6 Best Erasable Colored Pencils Right Now

    You Won’t Believe What Colored Pencils Are Made Of!

    10 Colored Pencil Techniques to Enhance Your Drawings Swiftly

    Learn How To Blend Colored Pencils Correctly Fast

    13 Best Watercolor Pencils and Water Soluble Art

    57 Beautiful Colored Pencil Drawing Ideas

    High humidity is detrimental to your home construction, insulation, moisture-sensitive equipment, and even your overall well-being. Running an air conditioner during hot and humid weather can help reduce humidity levels in your home and improve air quality to tackle these issues.

    In simple terms, air conditioning is the process of creating and maintaining certain temperature levels, relative humidity, and air quality indoors. It removes excess heat and moisture by taking the warm air into the system and disperse cold air. This is why it is important to install air conditioning in homes and offices since increased levels of moisture lead to mold growth and pollute indoor air.

    So, I've curated a guide to help you understand how an air conditioning system can hemp reduce humidity. Read on.

    Understanding Humidity

    Understanding Humidity

    Humidity, often referred to as relative humidity, is the concentration of water vapor present in the air. Water vapor, in scientific terms, is water in its gaseous form, which is invisible to the human eye, yet we feel in terms of how ‘sweaty’ we are or how ‘wet’ the climate feels.

    While mild humidity is mostly harmless except for the discomfort it causes, excess humidity can be detrimental to people with respiratory illnesses like asthma, bronchitis, COPD, pneumonia, etc.

    We usually use relative humidity (a ratio of absolute humidity to maximum humidity present in the air, measured in percentage) to determine the weather and chances of precipitation. When relative humidity exceeds 50%, moisture-related issues such as poor insulation and mold growth may occur. Especially in winter, you should ensure humidity levels are low to prevent condensation and damage to the construction and insulation of your home.

    Factors That Affect Humidity

    Two main factors affect the relative humidity in the air: temperature and pressure of the system of interest. As the temperature rises, the moisture levels in the air also increase. Likewise, the relative humidity drastically reduces in cold temperatures as the moisture condenses.

    Moreover, relative humidity is indirectly proportional to the air pressure. So, when there’s an increase in air pressure, the moisture levels decrease gradually. That’s why it’s more difficult to keep your upper floors cooler on a hot day since the air pressure decreases with elevation.

    Effects Of High Humidity

    High humidity levels can harm the human body and air conditioning systems more than dry air. Some of its effects are as follows:

    1. Overheating Of The Body

    Surprisingly, excess humidity fools the body into thinking the temperature is high. This makes your body produce excess sweat to cool down and may often lead to heat exhaustion or stroke. That’s why many medical practitioners recommend not staying outdoors for prolonged periods in summer and having a dehumidifier or AC unit with a dehumidification feature at home.

    2. Asthma And Allergy Symptoms

    If the indoor humidity of your home is high, your existing respiratory illnesses will worsen. You’ll likely experience symptoms like difficulty breathing, panic attacks, headaches, violent coughs, sinus infections, etc. But putting the air conditioner on when there’s extra moisture in the air can help prevent this.

    3. Excessive Sweating

    As mentioned before, high humidity will trigger your body to produce sweat. At the same time, the increased levels can prevent efficient moisture evaporation, so the sweat will remain on your body, making you feel uncomfortable.

    4. Damaged Equipment

    Excess moisture is known to cause damage to mechanical equipment and temperature-sensitive materials. Anything that runs on motors, pistons, or any movable technology can be affected by moisture - this is especially true when it comes to an AC system. HVAC specialists also agree that high humidity can affect the efficiency of air conditioners and increase energy bills even though they can remove humidity.

    5. Mold Growth

    If you have high indoor humidity levels, there is a high chance that your home will develop mold and mildew. Indoor mold growth can affect your home’s insulation and absorb cool air, making it difficult for your cooling system to achieve the set temperature. This is why energy bills run high in places with excess heat and humidity, even if the frequency of AC operation is relatively lower.

    Moreover, areas like the bathroom and kitchen are more susceptible to mold growth, as they have higher relative humidity.

    Signs of High Humidity

    There are common signs that will help you determine whether your indoor humidity is high:

    • Condensation on windows in the form of water droplets or fog
    • Excess mildew in the bathroom, kitchen, ceilings, or walls
    • Mold growing on surfaces like closets and basements
    • Cracking, blistering, or peeling paint on the exterior or interior of the house
    • Dust mite population, which causes dust allergies and respiratory problems
    • Musty or moldy smells in your home

    Having an air conditioning system running is, therefore, extremely important in areas with high humidity. Even though air conditioners need to work longer to reduce humidity, they can go a long way in preventing damage to your home’s structure, material, and insulation.

    So, investing a little more in your energy bills on hot, humid days can actually save you renovation expenses in the long run! Further, there’s no point in compromising indoor air quality since it can directly affect your physical well-being.

    How Does An Air Conditioner Work?

    Before trying to understand how an air conditioner removes humidity in your home, it is important to understand how it actually works.

    An air conditioner lowers the temperature, right? But how does it do it? Well, the warm, indoor air from the room is first sucked through the grilles located on the lower side of the machine. This air moves through chiller pipes filled with a refrigerant that helps to cool it down.

    The air then passes over an evaporator coil which contains a cooling agent circulating throughout the air conditioning system, changing from its liquid to gaseous form or vice versa when required. When the air passes over it, this cooling agent absorbs the heat and moisture - this is where a heat transfer takes place. After this absorption is complete, the excess condensation drips onto the condensate pan beneath the coil.

    Tip

    Remember to clean out the condensate pan frequently to avoid the chances of the moisture evaporating and going back into the indoor air.

    Then, this air passes over a heating element, which, when turned up during winter, produces more hot air, making the AC unit act as a heater. However, this feature might not be available in all portable AC units, so check the product description if you’re going for this type.

    Then, an AC fan blasts this air into the room through another grille or duct. If the heating element is turned down, the incoming air is much cooler, and the cooling cycles are more efficient. Similarly, the higher the set fan speed, the faster the incoming air will be projected into the room. Thus, the fan speed determines how fast the room will be cooled down or heated.

    So, as you can easily understand, an air conditioner can both cool and remove humidity in your home, thereby improving indoor air quality.

    Does AC Reduce Humidity?

    As already discussed, air conditioners lower humidity using their evaporator and condenser coils. The refrigerant that cycles between indoors and outdoors facilitates the functioning of an air conditioner; however, its main function is to cool the indoor air while the fan cycles it into the room. And the fact that air conditioners lower humidity is rather a side-effect of the condensation process.

    Since the indoor coils are very cold, more moisture from the indoor air condenses on them. The moisture then condenses into water, which is expelled through a drainage hose, condensation tank, or air exhaust hose (depending on the air conditioner type). This cycle continues for some time and effectively lowers the indoor humidity levels in your home.

    How Much Humidity Can Air Conditioners Remove?

    An air conditioner is mostly purchased for heating, ventilation, and air conditioning; however, it can also control humidity levels. This feature is known as dehumidification, and you can check the ‘dehumidification rating’ on the specifications sheet of an air conditioner. Expressed in Pints per hour (Pt/h) on the specs sheet, it tells you how much humidity your AC unit can extract from the air per hour.

    For example, if a 1400 BTU AC unit has a maximum dehumidification rate of 4.0 pt/hr, then your unit can, in ideal conditions, extract more than 100 pints (or 15 gallons) of water from the air per day. Long story short, you can avoid purchasing a separate whole-house dehumidifier if you invest in a high-quality AC system.

    Benefits Of Reducing Humidity

    A. Improved Indoor Air Quality

    Since humidity constitutes condensed water vapors, it allows dust and debris to cling to the water droplets, thereby lowering indoor air quality. What’s more, high humidity levels can absorb harmful chemicals from home appliances and materials, increasing pollution. 

    Running an air conditioner in dehumidification mode can help reduce humidity and eliminate these pollutants. This will also make your home environment unfavorable for pests like cockroaches, silverfish, spiders, etc. So, besides reducing mold and mildew formation on your walls and providing cool air, low humidity can reduce the chances of pest infestations and damage to your home insulation. 

    B. Health Benefits

    The various health issues that come with high humidity are the number one reason I prefer to run my air conditioning system to remove moisture, even if it’s cold outside.

    Low humidity levels will help you cope with several respiratory diseases, including asthma, COPD, pneumonia, etc. Since a designated dehumidifier or AC removes humidity and prevents mold and bacteria, there’ll be fewer triggers in your home that can worsen these symptoms.

    Moreover, lowering the humidity level can help manage skin diseases such as acne, eczema, and psoriasis, which are easily triggered in hot and humid conditions. All in all, a balanced humidity level has several health benefits.

    Tip

    If your air conditioner has a clogged filter, its dehumidification capacity and ability to remove impurities from the air reduces significantly. That’s why I recommend cleaning the AC filter thoroughly at least once a month to maintain good indoor air quality.

    C. Increased comfort

    Of course, if the indoor air is clean and you reap health benefits from it, your comfort levels will also increase. Not having to deal with pest infestations and moldy walls can eliminate a lot of hassle regarding pest control and renovations. Moreover, having low humidity levels can make your home more comfortable for children and pets. 

    Generally, your home will feel more comfortable at humidity levels ranging from 30 to 50% . You can measure this level using a thermostat with humidity control to help set the AC at the right temperature or setting.

    Other Ways To Reduce Humidity

    Running the air conditioner is usually sufficient to bring down the humidity levels below 50% in humid climates. However, if the cooling system still seems to be insufficient in case of extreme humidity, here are some other ways through which you can tackle the problem.

    1. Proper Ventilation

    Running the exhaust fan when you shower, clean, or cook in the kitchen, bathroom, or laundry is important to ensure proper air circulation. Spot ventilation will tackle humidity at its root by reducing moisture in those particular areas. If there's pleasant weather in your area, consider opening all the windows instead to save electricity.

    2. Wipe Off Any Standing Water

    Any water vapor accumulation on surfaces can contribute to high humidity levels. So, if you see water on kitchen counters, shower tiles, or floors, quickly wipe it off until completely dry to prevent mold and mildew.

    3. Adjust the AC Fan

    It takes time for your air conditioner to expel the condensation from the evaporator coils - that’s why running the AC fan continuously can direct moisture back into your home. The best way to avoid this is to set the AC fan to ‘auto’ so that it runs only during the cooling cycles.

    4. Change the AC Filter

    HVAC specialists recommend changing the air filter at least once every month to reduce humidity and maintain indoor air quality. A clogged filter traps dust and debris and often harbors mold and bacteria, if it remains wet for prolonged periods. This, in turn, blows mold spores and humidity into your room, increasing your discomfort.

    5. Clean The Evaporator Coil

    If your air conditioner is having difficulties reaching the set temperature and dehumidifying properly, the evaporator coil probably needs cleaning. A dirty coil prevents efficient cooling and traps moisture within its system, so it’s essential to clean it regularly. However, don’t try cleaning it yourself and call a professional as  any improper handling can lead to mechanical malfunction or compressor failure.

    6. Upgrade Your AC System

    If your air conditioner is not able to remove humidity efficiently, it’s time for a replacement. And when purchasing a new AC system, look for advanced features, like a thermal expansion valve (TXV), variable fan motor, dehumidifier settings, etc. While a TXV delivers a specific amount of refrigerant depending on the set temperature, the variable motor facilitates adjusting the fan speed. Both features help improve cooling and dehumidification.

    Final Thoughts

    Air conditioning is really important to control humidity and maintain optimal temperatures for comfortable living. Besides these obvious functions, using an air conditioner to reduce humidity has several benefits, including mold and mildew prevention, increased comfort, and alleviation of respiratory diseases. 

    Even in extremely hot and humid climates, ACs can successfully eliminate excess moisture in the air. However, if an air conditioner is not working for you, there might be some problem with its mechanical parts or air filter. In this case, follow the simple techniques that I’ve mentioned above.

    With that, it’s time for me to wrap up. See you next time!

    An air exchanger is an HVAC system that replaces stale air inside your house with fresh air from outside. Its heat exchanger technology can improve heating, ventilation, and air conditioning by reducing excess humidity, heat, moisture, and air pressure.

    Even the best air conditioners cool and heat the same stale indoor air, thereby filling your home with various allergy stimuli and pollutants, like dust, pet dander, bad odor, etc. And with the advent of building insulation in home construction, the moist air inside your home cannot escape. 

    According to the United States Environmental Protection Agency, this can lead to mold growth and higher air condensation, increasing the risk of respiratory disease. But an AC air exchanger can help, and I will tell you how.

    How Does An AC Air Exchanger Work?

    How Does An Air Exchanger Work

    For several years, I’ve been noticing excess moisture and stagnant air in my home despite installing very efficient air conditioners. However, after hours of research, I discovered that installing an air exchanger is the safest way to ensure good air quality. So, if you’re breathing toxic, stale air daily, I recommend buying an air exchanger. But before you do that, let me tell you how they function. 

    To put it simply, an air exchanger is a box with two input and two output ports through which stale air is eliminated and fresh outdoor air is brought in. Inside the box, there are two fans–one that helps suck in the fresh air, and the other that blows indoor air out of the exhaust ports. If you look at it as a whole, it resembles the average battery-powered AC unit, more so because it uses ductwork installed in the walls and ceiling to function. 

    Working Of An AC Air Exchanger

    Coming to its indoor components, a ducted air exchange system has two ends–a fresh air distribution grille and a stale air exhaust grille. The former is usually located in every room of the house, close to the location of the furnace, especially in the kitchen, bedroom, living areas, etc. Meanwhile, the exhaust grilles are installed higher, usually close to the ceiling, where hot air, high humidity levels, debris, and other pollutants accumulate. 

    Some air exchangers use the existing heating and cooling system and pass enough fresh air through the air conditioning ducts. They also facilitate portable AC units to reduce heating and cooling costs, especially if they’re ventless

    Tip

    It’s best to look for heat exchangers that are compatible with your existing central air conditioning; otherwise, you will need a dedicated ductwork installation. And this separate installation will further increase the overall cost of the unit. 

    How Does Heat Exchange Take Place Through Air Exchangers?

    Typically, air exchangers work to replace the warm air indoors with cold air from outside for energy-efficient ventilation. Air conditioning experts accomplish this by installing a concentric steel cylinder that is connected to the ducts running through the whole house. 

    The warm air and accumulated heat from the rooms pass through the indoor cylinder installed along with the air exchanger, leading to a heat exchange. During this process, the heat transfers to the outdoor cylinder, which is simultaneously bringing in outside air into the house. Some heat exchangers also use plate-and-fin structures like window AC units to achieve better ventilation.

    What’s more, the same exchanger systems can act as heat recovery ventilators during winter by storing the heat and transferring it to the fresh, incoming air. This way, the air exchanger does the job of an air filter and reduces indoor air pollution and its possible health consequences.

    Heat exchangers are generally classified into various models based on how the air moves. For instance, counter-flow exchangers facilitate  hot and cold air entering and flowing parallel to each other in opposite directions. On the contrary, the interior and exterior air move perpendicularly in cross-flow units. However, some axial flow units use a large wheel with a heat pipe unit, which is powered by a refrigerant like R-22.

    Benefits Of Air Exchangers

    Air exchangers not only provide fresh air but also eliminate various pollutants such as smoke, radon gas, off-gassing from carpets, etc., while reducing cooling and heating costs. Besides air exchangers can:

    • Help provide an odor-free space with efficient fan and air filters
    • Act as a dehumidifier to reduce moisture in the air, thereby reducing chances of allergy and respiratory illnesses
    • Function as energy recovery ventilators to speed up the air exchanging process for efficient energy use
    • Decrease mold and mildew growth by reducing humidity
    • Reshuffle the air around the house for a drier environment to live in
    • Prevent window condensation by bringing in the cool air
    • Prevent interior paint from deteriorating due to excess air pressure which makes dust particles stick to the paint
    • Reduce the need to frequently clean air conditioner coils

    What Is An AC Air Exchanger Final Thoughts

    Final Thoughts

    Most new homes don’t have an air or heat exchanger; however, its varied features and benefits call for an installation. Besides generating new air through vents, it can help improve the overall health of your family by eliminating harmful pollutants from your living rooms. However, air exchangers alone cannot address severe ventilation and air pollution issues, even though they provide support to your evaporative coolers.

    So, it’s best to consult licensed home conditioning experts if you notice too much humidity and debris build up in your indoor air. Until next time, take care!

    In theory, you should not recharge your AC as the unit is not using the Freon in the cooling process. This being said, most units require a refrigerant charge once every 2-5 years, the lower the number the bigger need to replace the AC unit, as with refrigerant leaks comes great environmental responsibility, and danger to health because Freon (refrigerant) is a toxic substance. Plus, recharging your home AC is just a temporary fix, as your unit may eventually leak again.

    For most homeowners, an air conditioner is the only saving grace when the temperatures are soaring.

    But what if it gives up on you on a sultry hot afternoon? Absolute horror!

    That’s when you may wonder if you need to recharge the air conditioner unit. Accordingly, you may also want to know how often the cooling system is recharged.

    To help you with that, I have curated this brief yet informative guide discussing when and how often to recharge your AC unit.

    How Often Do You Need To Recharge Your Air Conditioning System?

    How Often Do You Need To Recharge Your Air Conditioning System

    You might be surprised to know this, but you don’t need to recharge your AC unit. Even if a technician says that your AC needs more Freon (refrigerant), it doesn't mean the substance gets used up like gas in a car. Rather, the refrigerant absorbs heat from the surroundings and expels it from your house. So, it transforms from liquid to gas and back to liquid form but never diminishes during the cooling process. 

    Besides, most air conditioners only need to be recharged once every 2-5 years unless you face a refrigerant leak. In case of a leaking refrigerant, the AC system will cease to function efficiently. So, you may notice a dip in its cooling capacity or hear the compressor operating more frequently than it usually would. 

    Now, if your central air conditioning unit is low on refrigerant, know that you shouldn’t recharge it yourself. The reason is that AC refrigerant is a hazardous substance. 

    Warning

    If you’re not trained to handle refrigerant lines, you shouldn’t handle any related repairs since direct contact with Freon may cause lung damage or even sudden death.

    Not to forget, recharging the refrigerant levels is only a temporary solution, as it is bound to leak again. So, you’ll only have to recharge the AC unit more often, which will obviously cost more money. 

    Lastly, recharging your central air conditioner after a refrigerant leak will void your manufacturer’s warranty. Hence, to be on the safer side, it is best to consult a licensed technician to handle the job.

    How To Detect A Refrigerant Leak

    The most common problem homeowners face with their AC units is a refrigerant leak. Even the best air conditioners from brands like LG, Hitachi, or Whirlpool Corporation are bound to face cooling, voltage, or other electric issues. 

    Hence, below are some of the tell-tale signs of a leaking refrigerant.

    1. Frozen Evaporator Coils

    A refrigerant leak usually occurs on the evaporator coil, causing it to freeze or develop ice buildup. A professional should address this immediately to prevent any health issues among people exposed to the leak. 

    2. Compressor Runs More Frequently

    As mentioned earlier, when the central air conditioner requires more refrigerant, it means that the system is not able to cool the air as it should. Consequently, you will notice the inverter compressor working harder and may even produce more noise and vibration. 

    3. Inefficient Cooling Capacity

    One of the obvious signs of a refrigerant leak is the lack of cooling in the surroundings. However, a low refrigerant charge may not be the only culprit behind a malfunctioning AC. 

    For instance, your AC unit may have a dirty air filter or a faulty thermostat preventing you from enjoying a cool and comfortable room temperature. 

    But regardless of the issue, you must consult a licensed service technician to check the AC unit as soon as you notice the aforementioned signs. Especially in the case of a refrigerant leak, it is best to take quick action since if left unchecked, it can eventually damage the unit. And the worst part is that you may end up with high energy bills, even though your AC is not working optimally.

    What To Do If Your Air Conditioning System Has Low Refrigerant Levels

    • Turn off the air conditioning system from the breaker box
    • Call a professional technician as soon as possible
    • Check the exteriors of your AC for any visible signs of damage
    • If you have an outdoor unit, remove the cover to look for any problems
    • Inspect inside your house for visible signs of water damage
    • Switch on your air conditioning system and ensure there are no unusual smells and sounds in the vicinity 
    • Always check your monthly electric energy consumption for any discrepancies 

    How Does An AC Technician Perform A Refrigerant Charge

    1. Assessing The AC

    First, the technician may check the air filter and thermostat to determine whether the AC is malfunctioning due to a leak or not. Thereafter, they may proceed to check the indoor unit as well as the outdoor unit to detect any AC problems.

    All these steps are taken to determine the reason behind low refrigerant levels. Accordingly, they will be able to decide if their leak readings are correct or not.

    2. Explain The Issue And Suggest Solutions

    In case of a refrigerant line leak, the technician may inform you about what is causing the leak and how to fix it. They may suggest any one of the following two methods…

    A. Fixing The Refrigerant Leak

    Fixing the leak requires electronic equipment along with UV dye or a bubbling agent. Using these materials, the technician can detect the location of the leak. Accordingly, they will drain the cooling system, fix the leak, and recharge your central air conditioner.

    To be on the safer side, make sure that they test the system before leaving.

    B. Recharging The AC Without Fixing The Leak

    If this is the first time you’ve experienced a refrigerant leak, simply recharging the AC may do the job without fixing the root cause of the problem. However, I recommend doing so only if you plan to get a new unit soon.

    Recharge Home AC Conclusion


    Recharge Home AC Conclusion

    That’s all for today, folks! With these simple tips, you can increase the efficiency of your conditioner while ensuring the safety of your loved ones. So, while it may be tempting to DIY certain electrical fixes and save some money, it’s best to let the experts handle it. 

    For more information on heating, ventilation, and air conditioning, I suggest reading my latest article, “What is a MERV rating?” And if you want to practice efficient energy consumption, I suggest checking another one of my informative guides, What is a Dual Inverter Air Conditioner?”

    MERV stands for Minimum Efficiency Reporting Value, which is used to predict the efficacy of air filters in removing contaminants from indoor air. As such, a filter with a high MERV rating can filter out finer contaminants better than one with a lower MERV rating.

    Understanding your air filter’s effectiveness is a crucial first step in ensuring clean, allergen-free indoor air to breathe in. And its MERV rating is one such factor that can help you in this regard.

    But what is a MERV rating, and what are its implications in the long run? Dive in to learn about it all!

    What Is A MERV Rating?

    What Is A MERV Rating?

    MERV, an acronym for minimum efficiency reporting value, is a rating system first developed by the American Society of Heating, Refrigeration, and Air-Conditioning Engineers (ASHRAE) in the 1980s. Simply put, this rating system was established to help people gauge the efficacy of the air filters used in a building’s HVAC system.

    A higher MERV rating of an air filter enhances its ability to trap and remove contaminants like dust, pollen, smoke, and other airborne particles. This also means that a filer with a high MERV rating is more efficient at trapping finer particulate matter than one with a low MERV rating. In hindsight, a higher MERV rating can help improve your indoor air quality drastically.

    The MERV Rating Chart

    MERV filter ratings are industry standard, meaning you can use them to compare filters irrespective of their size and brands. Moreover, these ratings typically appear in a numerical chart from 1-20, but for the sake of convenience, they are often grouped together.

    So, in the following section, I will quickly take you through the different groups and how each of them is suitable for different situations. 

    1. MERV 1-4

    An air filter with a MERV rating between 1 and 4 can efficiently remove particles measuring up to 10 microns. Although they aren’t the best for filtering tiny particles, they can still be used to remove dust mites, textile or carpet fibers, and sanding dust, among other things. As a result, these MERV filters are generally preferred for installation in places where people are prone to dust allergies. 

    Air filters rated between MERV 1 and 4 are considered more suitable as furnace filters in residential furnace (central heating) systems, window-mounted ACs, as well as pre-filters in commercial spaces.

    2. MERV 5-8

    Air filters with MERV ratings from 5 to 8 are better at removing smaller particles measuring between 3 and 10 microns. These air filters can be used in spaces like industrial workplaces and paint booth inlets, which are usually susceptible to mold, spores, dust lint, and cement dust, in addition to the pollutants mentioned above.

    Not only that, but MERV 5 to 8 air filters can also help improve indoor air quality of commercial and residential buildings. Or, you can use them as pre or final filters.

    3. MERV 9-12

    Designed to filter out dust particles measuring between 1 and 3-micron, these air filters can remove both large and small particles, like pollen, house mites, and even Legionella bacteria. Besides, they can be used to filter out different types of dust particles, like:

    • Cement dust
    • Lead dust
    • Sanding dust
    • Humidifier dust
    • Coal dust
    • Nebulizer dust

    These air filters are largely considered the threshold of high-efficiency particulate air filters and find widespread use in big residential and commercial buildings, hospital labs, and as pre and final filters.

    4. MERV 13-16

    MERV filters rated between 13 and 16 can remove more than pollen, dust mites, and sand, as they can trap particulates measuring between 0.3 and 1 micron in size. As such, they are employed as final filters in surgery rooms, smoking lounges, inpatient care rooms, and commercial buildings equipped with multiple heating and cooling machines.

    These high MERV-rated air filters can efficiently remove:

    • Tobacco smoke
    • Pet dander and lint
    • Copier toner discharge
    • Insecticide dust and fumes
    • Sneeze nuclei
    • Hair spray
    • Powder makeup particles like face powder or setting powder

    5. MERV 17-20

    As you may have already understood, air filters with a MERV rating between 17 and 20 are considered the best of the lot, as they can remove small particles to the tee. To give you a better idea about their efficacy, these filters are used in air conditioners and HVAC systems to eliminate:

    • Combustion smoke
    • Radon progeny
    • Microscopic allergen particles
    • Carbon dust
    • Virus carriers
    • Other contaminants measuring less than .30 microns in size

    What Are Pre And Final Filters?

    What Are Pre And Final Filters?

    Pre-filters facilitate the initial stages of filtration, capturing the contaminants before the air reaches the expensive final filters. This method is generally used for multi-filtration level HVAC systems to protect the final filters from wear and tear and extend their service life.

    Final filters, on the other hand, constitute the last stage of filtration in both single and multi-filtration systems. When used in the former, they serve as the primary stage of filtration. They can also be combined with multiple pre-filters to reinforce the efficacy of the HVAC unit.

    How To Choose The Best Filter For Your Home Or Office?

    You may be thinking that understanding the MERV scale alone will help you pick the right air filter for your needs. However, this isn’t the case, as there are a few other factors to consider.

    Aside from indicating filtration efficacy in removing contaminants, your filter’s rating can help you figure out its power consumption in the long run. From what I have seen over the years, higher MERV ratings almost always translate to higher energy bills.

    This is because a higher MERV-rated filter will trap more particles, putting more strain on your HVAC or ventilation system, thereby increasing your energy consumption. Long story short, the highest MERV-rated filter may not always be the solution to your problem.

    For best results on energy efficiency, you should check the CEER rating of your AC as well. However, people who need only occasional cooling without intensive air filtration needs often choose battery-powered units. You can learn more about these portable versions in my other readers.

    So, how to select the right filter rating for your needs? The recommended MERV rating for residential use is generally between 8 and 13. However, since industrial settings produce more contaminants than most households, you can opt for a higher rating between 14 and 20.

    The same is true for establishments like a hospital laboratory or surgical room, which can produce toxic air contaminants not usually found in residential spaces or offices.

    Mid to Lower MERV Rating [8-13]

    Higher MERV Ratings [14+]

    What Is MERV Rating

    Do HEPA Filters Come With MERV Ratings?

    Yes, HEPA (high-efficiency particulate absorbing) filters come with MERV ratings, just like standard filters used in heating, ventilation, and air conditioning systems (including portable units). In fact, HEPA filters with the best MERV rating are designed to remove very small contaminants from indoor air (measuring 0.3 microns).

    Hence, HEPA home air purifiers have become extremely popular for removing dust, pollen, smoke, and other particles that can cause allergies or any respiratory disease like asthma. You will also find air conditioners compatible with HEPA filters for the same reason. However, it’s important to note that these filters won’t last for eternity and should be changed regularly.

    Tip

    If your HVAC or air conditioning system is making unusual noises or taking more time to produce cool air, it may be time to change the filter. Contact an HVAC technician to diagnose the issue and fix it at the earliest.

    What Is MERV Rating

    Final Words

    Honestly, the MERV rating is just one aspect to ensure the energy efficiency of your air filters. Unless you’re maintaining them properly and replacing them when needed, the filters will be exposed to undue pressure, which can cause the energy bills to rise exponentially.

    So, if you’re experiencing restricted airflow from your HVAC or ventilation system, it’s making unusual noises, or there’s sudden indoor air pollution, then it may be time to change the filters. I’d strongly recommend availing the services of a qualified and licensed professional to get the job done. Otherwise, you may end up damaging the filters or the overall system irreparably.

    Moreover, it’s important to ensure regular maintenance of your ACs and ventilation systems so that they have a prolonged service life.

    R22 or chlorodifluoromethane is an air conditioning refrigerant that was once extensively used in air conditioners, car AC systems, heat pumps, and other refrigeration devices to absorb and remove heat. However, in recent years, it has been declared as a global environmental hazard.

    If your cooling systems were installed in or before 2010, they likely use R22, also known as Freon. This greenhouse gas, which goes by the chemical name of hydrochlorofluorocarbon 22 (HCFC-22), has become a cause of serious concern as it results in global warming and depletion of the ozone layer.

    So, if your HVAC units use an R22 refrigerant, this article is for you. Here’s your complete guide on this coolant.

    Why Do You Need A Refrigerant?

    Why Do You Need A Refrigerant?

    Before I delve into details, I’m sure some of you are wondering what the purpose of a refrigerant is. Well, let me tell you more about it. 

    A refrigerant is a chemical inside the HVAC unit’s compressor that changes from gaseous to liquid form and vice versa. It is responsible for the heating and cooling which occurs in your heating, ventilation, and air conditioning systems. 

    R22 Freon has been one of the most popular refrigerant options, used extensively in central air conditioners and heating systems. However, as of January 2020, the Environmental Protection Agency (EPA) banned the production and import of this substance as it was found to be detrimental to the Earth’s ozone layer. 

    Companies that repair units containing R22 were asked to use only repurposed or recycled ones to maintain the AC unit. Without refrigerants, your HVAC systems wouldn’t function properly. So, if there is any problem with your refrigerant, it is best to let an EPA-certified HVAC technician handle it. 

    Why Was R22 Banned From The United States?

    In 1987, several global agencies around the world, including the United States Environmental Protection Agency, created the Montreal Protocol. According to the terms of the agreement, a timeline was established to phase out the production and import of harmful chemicals. 

    This was done to protect the ozone layer, which forms a barrier between harmful UV radiation and the Earth. The rise in greenhouse gases combined with ozone depletion spells danger for the planet, as it can result in skin cancer, reduce agricultural productivity, and disrupt marine life. 

    R22 Freon is considered highly toxic and if it leaks, it can damage the environment. As a result, from 2010 onwards, there was a ban on using R22 as a refrigerant in any heat or air conditioning system. 

    Thus, to protect the ozone layer and mitigate the adverse impact of global climate change, the import and manufacture of R22 has become entirely illegal. 

    Is R22 Still Available?

    The Montreal Protocol and the Clean Air Act (United States) have prohibited companies from manufacturing R22. Hence, R22 is available today only in reused and recycled form. 

    However, homeowners have not been asked to discard their systems containing R22. The presence of R22 in air conditioning units is not a problem in itself. But, the problem arises in case of a leak since this refrigerant is released into the environment. 

    So, homeowners are advised to service existing air conditioners and hire experienced EPA-certified technicians for repairs if the system malfunctions.

    How To Find Out Whether Your HVAC System Uses R22?

    Now that you know what is R22 and why it is so dangerous for the environment, it is time to check whether your air conditioning system uses this refrigerant. How? I’ll tell you all about it. 

    1. Check The Owner’s Manual

    Look around in the cupboard for your device’s manual, which usually carries all the information. If the R22 refrigerant is used in the unit, it will be labeled as HCFC-22. 

    2. Inspect The Unit

    The outdoor unit or compressor of the air conditioner will have a nameplate with all the details about it. So, check it out. 

    3. Hire A Technician

    An experienced HVAC technician will inspect your unit and figure out whether it uses R22. The best part about hiring a technician is that they can answer all your questions about the refrigerant used in your existing equipment and how it carries global warming potential. 

    What To Do If Your System Uses R22?

    If your existing system uses R22, it may be a cause of concern, given the Freon ban. However, let me ease your worries. A typical air conditioner is a closed system and the refrigerant passes through a well-secured loop. It doesn’t deplete like gas depletes when the car runs. As a result, you won’t need a new R22 refrigerant at regular intervals.

    That being said, if there is a refrigerant leak in your HVAC system, it can lead to a bit of trouble. If your air conditioner or heat pump is not functioning properly and you consistently incur high energy bills, it is a sure-shot sign of a refrigerant leak. 

    Generally speaking, you will have two available options in case of a leak:

    • Buy a new air conditioner
    • Add R22 to the existing system

    What Are The Alternatives To R22?

    If you look at some of the best air conditioners manufactured after 2010, you will realize that they use a relatively safer alternative to R22. These environmentally friendly refrigerants do not have ozone-depleting properties and are not detrimental to the environment.

    Let me take you through some of them.

    1. R-410A

    R-410A is used in the cooling system of residential areas. It has all the specs of R22 refrigerants and is EPA-certified. It is also a top refrigerant option for portable air conditioners.  

    2. R407C

    R407C is also among the acceptable refrigerants. It is a blend of 1,1,1,2-Tetrafluoroethane, pentafluoroethane, and difluoromethane. It can be used in new equipment or may be used to replace R22 used in existing HVAC units.

    What Is Retrofitting?

    What Is Retrofitting?

    In retrofitting, your HVAC unit is retrofitted to use a new refrigerant. So, you can replace the R22 refrigerant in your refrigeration equipment with a more environment-friendly option. 

    This process involves replacing certain primary components of your HVAC system with newer ones that are compatible with the safer refrigerant. However, the replacement must be carried out by an experienced technician because if it is not done properly, it can damage your system and also compromise any warranty you may have on it. 

    Warning: Although replacing R22 with an EPA-approved refrigerant is possible, it is an expensive and long-drawn-out process. This is because your AC system is designed to work with only a particular refrigerant type, and replacing it will require you to replace several other parts of the machine. As such, it is best to invest in a new device altogether.

    Environment-Friendly Alternatives To Air Conditioners

    If you are looking to replace your R22 system or want to do away with the hassle of replacing the refrigerant in case of leakage, there are some eco-friendly alternatives to air conditioners available. Let’s check the others out.

    1. Evaporative Cooler

    Evaporative coolers cool the air in the house with the help of a pump instead of a refrigerant. They contain water-saturated pads over which hot air from outside is passed. These units work best in areas that do not experience a very hot temperatures.  

    2. AC Air Exchanger

    Let me briefly tell you what an AC Air Exchanger is. The air exchanger uses a vent and fan system to suck out the stale air from inside your house and replace it with fresh outside air. 

    Its purpose is not to cool the house but ensure a continuous supply of fresh air. Perhaps the only disadvantage is that these systems must run at all times. 

    3. Battery-Powered Units

    You can also opt for a ventless portable air conditioner or a battery-powered AC unit, both of which do not use refrigerants. While portable air conditioners use water instead, battery-powered AC units operate with the help of batteries.  

    What Is R22

    Final Words

    Nothing compares to the sheer relief an air conditioner brings on a scorching summer day. I get it!

    If you plan to buy a window air conditioner, understanding the CEER rating is important. CEER is an acronym for combined energy-efficiency ratio. It understands the energy efficiency of a window air conditioner, both in standby mode and when the unit is running. As such, the higher the rating, the better the system and the fewer units it will consume. 

    But, let’s be honest, an AC unit comes with its share of troubles. If your existing HVAC system contains the R22 refrigerant, consider investing in a new unit. A system replacement may be expensive, but it provides a long-term solution and saves you from high-priced repair costs in the future. 

    While tower AC units have a higher cooling capacity to cool a large space and even larger rooms, portable ACs are known for their compactness and low electricity consumption. Both have pros and cons; however, the choice mostly depends on individual needs and budget.

    Most people rely on air conditioners for heating, venting, and air conditioning, so there are various options to choose from, including window air conditioners, mini splits, portable units, tower ACs, etc. But towers and portable air conditioners are now in vogue as they are energy efficient and convenient to maintain.

    That’s why I will walk you through these two types of air conditioning and its benefits and shortcomings to equip you with enough knowledge to make an informed decision. Let’s dive in!

    What Are Tower Air Conditioners?

    What Are Tower Air Conditioners

    Since the invention of air conditioners, tower ACs have been largely overshadowed by window air conditioners and split ACs. And even though they are quite the underrated AC units, they can effectively cool larger rooms at a low electric energy consumption. Similar to split ACs, they have an internal unit and an external compressor to circulate the refrigerant to the condenser.

    But how does a tower air conditioner really work? Much like splits, they use refrigerants that run through a condenser coil to produce cool air and blow the air using a built-in fan. But since the internal and external units are connected via ducts in a tower air conditioner, it is difficult to move it around. 

    However, since it is a floor unit, you can conveniently change the angles of the grilles through which the cool breeze comes out to achieve a comfortable temperature. Besides, a tower air conditioning system is equipped with high cooling outputs, such as 2 or 4 tons. 

    What Are Portable Air Conditioners?

    A portable air conditioner is a popular air conditioning solution for temporary cooling in home and office spaces. Unlike traditional window AC units that need to be fixed on double-hung windows, a portable unit is a freestanding appliance that you can set up anywhere in your home. 

    Plus, portable units remain indoors entirely as they don't have an external compressor–all one comes with is a hose and a window kit for installation.

    Besides being easily portable, these AC units offer various features that help maintain temperature and moisture levels even in bad weather. These include digital controls, customizable timers, carbon filters, turbo fans, and many more. Facilitated by these features, a portable AC unit takes the hot air from your home, cools it, and then circulates it.

    Some expensive portable air conditioners have two hoses–one pulls in fresh air from outside, and the other discards excess humidity and warm air from the room. Moreover, a portable air conditioner can benefit those with multiple rooms but aren’t keen on buying multiple split or window units. 

    So, if you're looking for an air conditioner for occasional use or a large portable AC that you can swing back and forth between different rooms, consider opting for a portable unit.

    Tower AC VS Portable AC

    Now that I have highlighted some of the defining features and distinguishing traits of a tower and portable air conditioner, it’s time I delve deeper. For your benefit, I’m going to compare some key factors in both tower and portable AC units and see who has it better!

    1. Cooling Capacity

    Tower AC

    Even though tower ACs are larger in size, they can maintain the room temperature in an energy-efficient way by circulating cool air throughout the room. Unlike traditional air conditioners, tower ACs have less electric energy consumption as their compact internal components circulate the air faster. Moreover, the various features a tower AC unit offers, including timers and speed settings, help you further navigate its energy efficiency abilities. 

    Portable AC

    Portable air conditioners are as energy efficient as tower ACs, if not more. They work with a similar technology as a window unit, drawing hot air from the room and circulating it through chilled condenser coils. 

    By doing so, the hot air is cooled down and blown into the space as fresh, cool air. This process is very energy efficient and can help maintain an optimal temperature in extreme weather.

    A portable unit also has various features to help you navigate its cooling power– from programmable timers to the digital and remote control– there’s plenty to choose from. 

    2. Electricity Consumption

    Besides checking an air conditioner’s cooling power in terms of British Thermal Units (BTU), most people are also concerned about its power consumption. Both of these factors contribute to energy bills, and knowing about them properly can give you an idea of their running costs.

    Tower AC

    Although tower air conditioners are becoming increasingly popular because of their cooling capacity, style, and functionality, they are high on power consumption. 

    Generally speaking, tower ACs use twice as much electricity as compared to other units, such as portable and window ones. Since tower ACs generate large amounts of cold air simultaneously, they usually lead to higher costs in terms of energy bills. 

    They place a significant electric load and consume more energy; however, tower ACs are still more energy-efficient than many other cooling solutions. If you learn to use it more judiciously, you can reduce electrical consumption and save money.

    Portable AC 

    Ideal for cooling a small space like a bedroom or office room, portable air conditioners also use a significant amount of energy, depending on their BTU rating. Since a portable unit can put some strain on your home’s electrical system, you should consider installing some blow fuses or triple circuit breakers if you go for these units.

    However, a good trick to ensure your portable units are energy efficient is by checking the SEER and BTU ratings before purchasing. If you manage to find one with a good rating, you’ll be able to save money on energy and utility bills.

    3. Space Saving

    Tower AC

    A tower AC usually has a considerable size and weight, and on top of that, it will have ducts running throughout the room, so it’s not exactly very space-saving. 

    These ACs are usually popular for their elegant and substantial exterior, so opt for tower units if you want to show off your AC in a living space or hall. But it might not save you much floor space, given it’s installed on the floor itself.

    However, the best tower air conditioners are portable if the ducts connected to the units have enough leverage. 

    Portable AC

    If you want space-saving features, portable air conditioners definitely top the list. They are compact and lightweight options that you can easily move to different rooms as and when needed. Its portability also saves you a lot of money, as you no longer need to buy multiple AC units–just bring the portable AC unit into the room you’re in and enjoy the fresh air! Plus, you can put it inside a storage shelf or cupboard to save floor space when not in use.

    4. Price

    Tower AC

    Of course, like most household appliances, the price of tower ACs increases with more accessible features, energy efficiency, installation and placement options. What’s more, you’ll find freestanding and mounted window AC versions at different price ranges. However, despite the various benefits and options, tower units are usually more expensive than other cooling units.

    Such a higher price range is usually due to the advanced technology, higher cooling capacity, digital control panel, and self-cleaning programs.  

    Portable AC

    Although portable air conditioners are usually more affordable than tower units, their price greatly varies depending on several important factors. The size and cooling capacity determine its price range, so larger and more powerful units will cost more than the compact ones. This is also because a larger portable air conditioner is better at controlling temperature and humidity.

    Other factors like the brand, design, special features, and accessibility contribute to different price tags, so it's best to do your research and choose only those features you need to stay within budget.

    5. Maintenance

    Tower AC

    Tower units require regular maintenance- from cleaning the air filters to checking the condenser lines–so it is a frequent, time-consuming investment. However, it is very easy to clean the filters yourself to ensure that there’s no dirt and debris build-up blocking the air path. But when it comes to checking other mechanical parts, it's probably best to hire a professional.

    Moreover, checking and taking proper care of the turbo fans and valves are very important to help the tower unit function efficiently. But, keep in mind, it can be quite expensive to hire professional maintenance services all the time.

    Portable AC

    A portable air conditioner is comparatively easier to maintain on your own, mainly because the internal mechanism isn’t very hard to figure out. You just need to clean the unit inside out, replace the air filters or empty them regularly, and check the air vents, so nothing is blocking the airflow.

    Tip

    Try using a chemical substance like isopropyl alcohol to remove the dirt from the vents to prevent any build-up. You can also purchase a degreaser if you find grease accumulating in the grilles. 

    However, if you’d rather not clean the vents regularly, opt for ventless portable units that remove a lot of maintenance needs your way. Simply follow the basic maintenance steps, and you can enjoy cold air all summer!

    Portable & Tower AC FAQs

  • Can You Move A Tower AC?

    Tower ACs are movable and comprise of two components – an external and internal unit. While the internal unit can be placed anywhere in the room or house, the external unit has to be fixed at a particular place outdoors. So, simply speaking, tower ACs are more movable than mini splits and window ACs, but they aren’t as dynamic as portable ones.

  • Are Tower ACs Better Than Mini Splits?

    Both the AC units are quite similar to one another: both have two distinct units where one is installed outdoors to vent the warm refrigerant gas. However, tower ACs occupy floor space unlike mini splits that are affixed on the wall. Moreover, mini splits are usually more energy efficient, but tower ACs are preferred for their aesthetic value and movability.

  • What Are The Disadvantages Of A Portable AC Unit?

    Even though portable ACs are compact and easy to use, they often use more energy to cool the same square foot area compared to other units. This is because most portable ACs do not have a high energy efficiency rating or an Energy Star certification. So, if you’re looking for an AC that will keep your utility bills under budget, then consider opting for other types.

  • How Long Can Portable ACs Run?

    Similar to other AC units, a portable unit doesn’t have any limitations related to its running time. However, many products have shut-off mechanisms or automatic thermostats that turn off the AC when the ideal temperature has been reached to reduce energy usage. If your portable AC doesn’t have such settings, consider switching it off once the room feels comfortable.

  • How Good Is The Coverage Of A Tower AC?

    Tower ACs have a significantly wider coverage since their air outlets blow out cold air at a 90-degree angle. This, combined with the longer height of their blower fan, helps tower ACs cover a much wider area in less time. 

  • Tower AC vs Portable AC To Sum It Up

    To Sum It Up

    Tower and portable ACs have quite a few pros and cons that require careful consideration. Both can be energy efficient and offer smart cooling; however, they differ in installation, portability, and running costs. If you’re willing to invest in a unit that will quickly cool larger rooms but have higher running costs, a tower AC might work for you.

    However, if you have smaller rooms requiring more floor space but would rather not buy multiple cooling solutions, consider portable units. Another thing to consider is noise level- tower ACs have low noise levels, but portable ones are notorious for making louder noise while generating cold air.

    That brings me to the end of my detailed comparison- just tick the factors that most affect you and decide which one suits your cooling needs best.

    Until next time!

    A device that draws in hot air from the outside, cools it by passing it over evaporative pads and releases it indoors is known as a swamp cooler. Such units are capable of reducing air temperature by 15°F to 40°F.

    Running central air conditioners to beat the summer heat will skyrocket your utility bills, straining your finances. An excellent alternative to traditional air conditioners is a swamp cooler– a small and portable unit to cool a space using moisture.

    But, will a swamp cooler be ideal for cooling small spaces? To figure this out, you need to understand what swamp coolers are and how they operate, so my guide explains just that.

    What Is A Swamp Cooler?

    What Is A Swamp Cooler?

    Also known as an evaporative cooler, a swamp cooler is a device that relies on a fan to recirculate the air within a room via wet evaporative cooler pads. A while later, the unit releases the moist air back into the space, thereby providing a cooling effect. 

    How Does A Swamp Cooler Work?

    Despite being around for centuries, not many know how swamp coolers work. 

    Evaporative coolers are quite different from traditional air conditioning systems, which relies on absorption refrigeration cycles or vapor compression to cool the air of the space. Based on the time-honored and age-old process, swamp coolers rely on the evaporative cooling process to cool the warm air inside a space. 

    In an evaporative air conditioner, water is filled at the base and the water supply valve keeps filling it up until the float touches the predetermined level. As soon as it’s filled with water, the water pump of the swamp cooler transports the water to the evaporative cooling pads through distribution lines. 

    When the evaporative pads are dampened, the blower motor draws the warm outside air, filters, and cools it by passing it over the wet swamp cooler pads. Subsequently, the warm air is turned into cool air via the evaporative cooling process, which is then forced through the ductwork or vent. This way, a swamp cooler works to lower the relative humidity of the space, thereby cooling it. 

    Although it doesn’t rely on refrigerant gasses or chemical processes to supply cool air, you will have to keep your door and windows open. Or regulating the flow of cooler air will become challenging. 

    Even opening a window partially will do the trick, and it will provide more effective cooling than your DIY air conditioners. 

    Where central air conditioners are closed systems, evaporative coolers are open systems. What that means is they need a steady flow of clean outside air in order to supply cold air indoors. Also, shutting down doors and windows of other parts of your home will allow the cooler to work more efficiently, cooling your room by lowering the air temperature quickly. 

    Benefits Of Using A Swamp Cooler

    Besides cooled air, an evaporative cooler offers numerous benefits– and they are as follows:

    1. Energy-Efficient

    The primary reason some people prefer swamp coolers over portable air conditioners or central air conditioning systems is their energy efficiency, also known as efficient energy use. What that means is these units consume less energy compared to other cooling solutions offered on the market. 

    It is the absence of a compressor and a refrigerant that makes an evaporative cooler energy-efficient. And remember, the lesser energy swamp coolers consume, the lower will be your utility bills. 

    So, this makes them an ideal option for people who want to keep themselves cool during the sweltering summer season without increasing electricity bills. 

    2. Filters Dust, Allergens, And Other Impurities

    Sure, you know that swamp coolers draw in air from the outside, cool it and distribute it as cold air across the space. But did you know that it cools the incoming air before releasing it indoors?

    When an evaporative cooler pulls the outside air, dirt, allergens, dust, and other impurities come along with it. Before releasing the cooled air into the space to reduce excess humidity, it filters the air by trapping these allergens and impurities. 

    As a result, fresh and clean air is circulated in the space; therefore, you need not worry about inhaling dirt or dust. 

    Remember that air conditioners are designed to supply cold but dry air to a space, whereas evaporative coolers supply clean air constantly by recirculating the air. With an evaporative cooler, the humidity levels can also be balanced if the doors and windows are kept open. 

    3. Cost-Effective Alternative To Air Conditioning Systems

    There’s no denying that air conditioning systems– central or window– cost a lot of money. Aside from the cost, the price to install them is also high, while they consume a lot of energy, adding to the electric bills. 

    In comparison, swamp coolers are a cost-effective alternative to air conditioning systems. Not only are they sold at relatively low prices, but their installation costs are also low. 

    Most evaporative coolers, unless they are large, take very little time to set up. Only large units require a little bit of labor for installing  the vents and ducts, but it isn’t a challenging task, so you can do it yourself. 

    4. Healthy And Eco-Friendly Cooling Solution

    I’ve already made it clear that swamp coolers supply cool air by evaporation. That means the air supplied to the space is somewhat moist, so the air won’t be excessively dry. 

    Best of all, evaporative coolers rely on eco-friendly and non-polluting technology, unlike compressor air conditioners, which are equipped with HFCs (hydrofluorocarbon) and CFCs (chlorofluorocarbon). In conclusion, evaporative cooling is an eco-friendly cooling solution, ideal for climate-conscious people. 

    Types Of Evaporative Coolers Or Swamp Coolers

    Types Of Evaporative Coolers Or Swamp Coolers

    Several types of evaporative coolers are available on the market, with some models being portable and others mountable. Keep in mind that every evaporative cooler works on the same principle of evaporative cooling. 

    The hotter the outside air, the better the device will operate. And understanding each type is crucial for every individual planning to use them for the summer season. So, I’ll discuss each of the 8 types of swamp coolers in this section. 

    1. Direct Evaporative Cooler

    Otherwise known as single-stage evaporative coolers or mechanical evaporative coolers, direct coolers are arguably the most popular type of swamp cooler you’ll find on the market. Such coolers use an electric fan to draw hot air from the outside via a dampened membrane. After converting the warm air into cooler air, it is expelled indoors to make your home cozy and comfortable. 

    Since these coolers increase humidity, people living in humid climates might refrain from using them. The only obvious way to reduce humidity levels is to run them alongside ventilation fans and, of course, open the doors and windows. 

    Or you can place them in the window for consistent airflow. 

    Often inexpensive and portable, a direct evaporative cooler is low maintenance, saving owners a lot of their precious time and effort. What’s even better is that it is ready to use out of the box, meaning users won’t have a tough time setting it up. Simply unpack the unit, plug it into the electrical outlet, fill the water reservoir, and turn it on! 

    2. Indirect Evaporative Air Cooler

    Though using the same principles as the direct evaporative cooler, the indirect coolers are ideal for places with humid climates because they don’t add to the humidity. 

    Indirect evaporative coolers are able to reduce the humidity levels because they isolate the evaporatively cooled air from the inside air, which is later treated and pumped inside. Usually, this happens when air is cooled by passing over a series of damp pipes, which in turn makes the inside air cold, running through the interior pipes. 

    As it doesn’t increase the humidity of the room, it’s recommended for wet spaces. But one significant downside of such evaporative coolers is that they are larger than other swamp coolers and priced slightly higher. Nevertheless, they are still more affordable than air conditioning systems. 

    3. Window-Mounted Swamp Coolers

    As is understood from the name, window-mounted swamp coolers are mounted on the wall, roof, or window. They are often categorized as permanent or semi-permanent cooling solutions. 

    Of course, these coolers aren’t easy to transport like most window-mounted units because of their heavy weight. Once mounted on the wall, they are secured with bolts or fasteners to ensure they remain in place. 

    4. 2-Stage Evaporative Coolers

    Combining direct and indirect evaporative cooling technologies, 2-stage evaporative coolers cool air more efficiently than two coolers. However, the downside is that this technology isn’t widespread. 

    Coming to its workings, it draws the outside air via an indirect cooling system. Through the direct evaporative membrane, the air is cooled further and the humidity of the inside air is raised up to 65%. 

    5. Central Ducted Swamp Coolers

    Such swamp coolers are installed outdoors to supply cool air throughout a building. 

    The unit on the outside is either mounted on the roof or placed on the floor. After the installation, it is connected to the duct (flow) system to supply cold air to a large space. 

    Much like every other swamp cooler, they draw warm air from the surrounding area and move it across the wet evaporative components to cool the air. Later, the cold air is blown into the space via the duct attached to the unit. 

    Central swamp coolers are available for both residential and commercial spaces. 

    One thing to mention is that the ducts of the central swamp coolers must be larger than those of refrigerant-based AC systems. So, you cannot just connect a central evaporative cooler to an already installed duct system. You will have to call an HVAC system professional for consultation before installing one on your property. 

    6. Portable Swamp Coolers

    Because these swamp coolers are small and easy to move, they are named portable swamp coolers. 

    Like portable air conditioners, they come with a wheeled base, so moving them from one room to another won’t be a hassle. On top of that, they are easy to store because they don’t require much space– simply roll them and place them in your storeroom during the cooling season. 

    Plus, almost all portable evaporative coolers use direct evaporative technology. 

    7. Tanked Or Pipe Evaporative Coolers

    All evaporative coolers need water to supply cool air to whichever space they are placed in. 

    Some coolers on the market can be connected to a pipe, water hose, or tank for a constant supply of water. Such coolers are known as tanked or pipe evaporative coolers. 

    Out of the 2, tanked evaporative coolers require constant supervision because water must be filled in them regularly. However, installation isn’t much of a task and DIY enthusiasts like me will be able to pull it off with ease. 

    Piped swamp coolers, on the other hand, do not need to be filled with water regularly. But in comparison to tanked evaporative coolers, they aren’t easy to install. Furthermore, they are likely to leak after a period of time, which would be a problem. 

    8. 2-In-1 Evaporative Coolers

    The 2-in-1 evaporative cooler doubles as a fan; hence, the name. I found the 2-in-1 evaporative cooler a highly convenient machine because you can run the fan even when the cooler isn’t being used. Because of the presence of the fan, this cooler distributes fresh air across a space better than others on the list. 

    Installation 

    Installation 

    So far, I’ve covered the basics of swamp coolers, but now, I will proceed to discuss the installation and maintenance of these units. Whether you should DIY install them or hire a professional to set up a unit is your call. 

    I’d say they are easy to install and most homeowners will be able to pull off the task with ease. Swamp coolers can be installed in 2 ways: they can be connected to duct systems or positioned in a central location. 

    When connected to a duct system, a swamp cooler will distribute air to multiple rooms of your home, so this method will be feasible for large apartments. Meanwhile, central-location installations are done for small spaces, as such installations cool one room at a time. 

    At times, units with evaporation cooling technology are fixed on the roof in a down-flow arrangement. Such placements are common for residential buildings. 

    Many experts, nevertheless, suggest mounting horizontal units on the ground because of 2 reasons:

    • Maintaining ground-mounted units is easy
    • Risk of leaks is low than when installed on the roof

    As for the window installation, small horizontal-flow coolers are preferred to cool a small room or a section of a large room. Although such swamp coolers aren’t ideal for a more humid climate, it’s best to use them in areas with moderate climates. 

    Portable swamp coolers are much sought-after in the western part of the United States, where summers are mild. Generally, such coolers can lower the temperature of a space by 5 or 15 degrees Fahrenheit. 

    And as I mentioned above, the majority of brands sell swamp coolers with wheels for easy portability. However, one significant downside of such units is that their cooling capacity is affected by the humidity levels of your space. Considering that, such swamp coolers only deliver a slight cooling effect. 

    Maintenance

    Although installation isn’t that much of a challenge with swamp coolers, maintaining them is high-intensive labor. 

    To ensure your swamp cooler functions efficiently for years to come, cleaning the unit regularly is important. Minerals and sediment build up inside the unit can tamper with the functionality of the cooler. Removing them periodically will save you from spending hundreds of dollars every year on the maintenance of the unit. 

    Once in a while, preferably every year, a thorough cleaning is recommended, followed by routine maintenance multiple times over the cooling season. 

    As a rule of thumb, the number of maintenance sessions depends on the usage of the cooler. If a unit is used more often, it needs to be cleaned after every few weeks. But in the case of a swamp cooler that is rarely used, you need not clean it as regularly. 

    There are a few parts of a cooler that needs attention to ensure the unit functions properly for the coming years. For swamp coolers, which are operated for prolonged hours in places with humid climates, you need to check the evaporative cooling pads, water pump, reservoir, and filters once every month. 

    Besides, make sure to replace the swamp cooler pads every cooling season, preferably twice. Or if the swamp cooler is being operated continuously, replacing them once every month will be the best bet. 

    Tip

    If your wet evaporative cooler pads are made of synthetic or paper, you can clean them with mild acid. But before you do that, I suggest checking the instructions manual to know if they are acid-tolerant. Alternatively, you can clean them with lukewarm water and mild detergent. 

    Also, whenever you change the evaporative cooler pads, don’t forget to clean the filter for maximum efficiency. 

    Swamp Cooler FAQs

  • Is a swamp cooler suitable for all climates and environments?

    Although usable in all kinds of environments, swamp coolers work well in a hot and dry climate, more like desert climate. 

    In the United States, swamp coolers are particularly useful in southwestern or arid western parts of the country like Arizona. The reason that they work well in areas with low humidity is that they utilize evaporative cooling technology to cool a space. 

    By moving the warm yet fresh outside air over saturated evaporative cooler pads, they cool the air and distribute it across the space. 

  • Are there any health concerns associated with using a swamp cooler?

    A swamp cooler whose components are cleaned thoroughly won’t pose any health risks. 

    However, if not maintained regularly, it will allow mold and mildew to thrive, which could be troublesome. What allows mold and mildew to grow are the wet cooling pads or humid climate. 

    If there’s an infestation of mold and mildew in the unit, they will spread across the space whenever the unit is turned on. This can pose a threat to the well-being of your family, irrespective of whether they are allergic to mold spores or not.

    When mold is present in the indoor air, it will be inhaled by people in the room. Therefore, it may lead to breathing issues, especially among those already suffering from respiratory conditions. 

    In regards to swamp coolers, the only solution to prevent mold spores from infesting is to keep the moisture level in check. While opening windows will help, a HEPA air cleaner will be a better option. 

    If you suspect mold growth within the unit, clean it before turning it on. However, I’d suggest calling for professionals, given that mold is harmful to human health. 

  • How long does a swamp cooler typically last?

    Surprisingly, swamp coolers come with a longer lifespan and can last as much as 25 years, provided you maintain them properly. Although cleaning the filters and cooling pads can be done yourself, make sure the unit is serviced by professionals at least twice a year. Regular maintenance and consistent care will prevent system breakdowns. 

  • Can a swamp cooler be used in commercial buildings and large spaces?

    Yes, swamp coolers are usable in large industrial spaces and commercial buildings. However, your small and portable swamp cooler won’t work; you’ll have to use an industrial evaporative cooler or central swamp cooler for the space. 

    Much like residential coolers, they work on evaporative cooling technology, but the only difference is they are equipped with a powerful centrifugal fan. 

  • What is a swamp cooler Conclusion

    Conclusion

    To recap, swamp coolers are affordable alternatives to traditional air conditioners to beat the heat during the summer month. 

    What’s more, they do not run on refrigerant cycles like air conditioning systems; instead, they cool a space via evaporative cooling technology. And that’s why they consist of evaporative pads, which cool the humid outdoor air and distribute it across the space. 

    Unlike air conditioners, they do not cool an entire space but only people sitting in front of them. Also, they increase the humidity levels of a space, which could be problematic for some. 

    However, they are a reliable option if you cannot afford to spend hundreds of dollars on a portable AC or central air conditioning system. Just remember, they require frequent maintenance; otherwise, they won’t cool a room efficiently. 

    Despite the structural and operational similarities between window ACs and wall ACs, differences like the installation method, running cost and cooling efficiency separate the two. Window ACs are more affordable and have versatile cooling capabilities, while wall ACs are quieter and more energy-efficient.

    Window and wall air conditioners are two of the most widely used AC types on the market for personal use.

    Both AC types serve well as the primary cooling device, but there are several differences that make them better for one use-case over another. This makes choosing between them quite the complex affair, as each air conditioner has its benefits and drawbacks.

    So, let’s explore both AC types in great detail to see which one fits your needs the best!

    How An Air Conditioner Works

    How An Air Conditioner Works

    To understand what makes window and wall air conditioners more preferable, it would be better to know how an AC works first. At its core, the purpose of an air conditioner is to reduce the ambient temperature and humidity in a room.

    The way it achieves this is by using a liquid refrigerant as a coolant, which is run through coils known as evaporator coils. AC units typically have a fan set up behind the evaporator coils that blow the cold air produced by the refrigerant into the room. At the same time, the liquid refrigerant absorbs the heat from the room.

    This turns the refrigerant into a gas, which is then redirected towards the compressor. Next, the compressor compresses the refrigerant into a high-pressure gas, after which it flows through the condenser coils. Here, another fan blows over the refrigerant to reduce its heat which turns it back into a liquid, ready to be reused.

    Window Air Conditioners

    Window air conditioners are one of the simplest air conditioning solutions, usually mounted on a window. This AC type comes with all the complex working parts of the air conditioner housed in a single unit, which simplifies the installation process.

    How A Window Air Conditioner Works

    There aren’t many things that separate a window air conditioner from others in terms of its way of operation. The largest differentiator here is that the air conditioner is a single unit, which makes understanding its working process simpler.

    The Inner Components Of A Window Air Conditioner

    A typical window air conditioner comes with a double-shaft fan motor that has fans affixed to both sides of the motor. These fans are positioned at the evaporator and condenser sides, which enables the cooling effect of the fan.

    Located at the front of the air conditioning unit is the evaporator side that expels conditioned air into the room. This is where the cooling coil, evaporator blower, operation panel with digital controls, filter drier, and drain pan are located. Most of the heavy lifting when it comes to cooling happens here.

    At the back of the AC unit is the condenser side that lets out hot air. The back of the air conditioner includes components critical to air conditioning, such as the compressor, propeller fan, condenser coil, and fan motor.

    If you’ve ever peeked at the inner workings of a window AC, you may have found an insulated partition that separates the two sides. This parting keeps the warm and cool sides of the air conditioner completely isolated from one another. In turn, both sides of the window air conditioner work in tandem to keep your home cool.

    The Advantages

    1. Affordable Cost

    Window air conditioners tend to have a low purchasing price and cost less to operate. This is in sharp contrast against other AC types like a wall-mounted air conditioner. They are known to be expensive to buy and run on a monthly basis.

    The reason for this is two-fold: the low installation costs and relatively simple construction. Owing to a simple installation process, the charges for having a window unit installed are quite low. 

    And since all the working parts of the unit are assembled in a single box, the overall cost of the unit reduces drastically.

    2. High Energy Efficiency

    Few air conditioner types can match the energy efficiency of a window AC. The Energy Efficiency Ratio (EER) of most window air conditioner units is usually quite high, meaning that they consume less power to run effectively.

    Some ACs also come with an Energy Star rating that denotes how energy efficient the device is. You will be saving a lot of money on electricity bills by using a window AC over other air conditioner types.

    3. Versatile Cooling Capabilities

    Window units generally offer a high cooling capacity, ranging from 5,000 to 12,500 British Thermal Units (BTU). And combined with their low running cost, they give you the biggest bang for your buck. These are often more powerful than other air conditioner types.

    Additionally, they can serve as a low-cost addition to your existing HVAC (Heating, Ventilation, and Air Conditioning) system as a supplemental cooling unit. You can use central air conditioning to regulate the temperature of the entire house with a window AC to keep a specific room cool.

    The principle behind using a window air conditioner for supplemental cooling is to reduce the load on the HVAC system. What this does is it causes the HVAC system to consume less power, dramatically reducing your overall energy costs. 

    And combined with the already low energy requirements of a window AC, you may see a sharp decline in your overall electricity costs.

    4. Saves Floor Space

    Window Air Conditioners don’t take up any floor space inside or outside your house. The indoor unit remains out of the way and doesn’t need to be moved to create space. And there is no outdoor unit that takes up valuable space on your roof.

    If you’re looking for an air conditioner to install in a smaller space, a window AC will serve just fine. You won’t need to reorganize an already cramped space to make room for the cooling device.

    The Disadvantages

    1. Noise Levels

    Window AC units tend to be quite loud due to the way they are constructed. Other air conditioner types have some sort of extended separation between the evaporator and condenser sides, whereas window units don’t. 

    If you’re a light sleeper, the noise produced by window units can be quite troublesome.

    2. Reduced Natural Light

    A window AC is not exactly small, which means that it will occupy a significant portion of your window. Not only will this obstruct your outdoor view, but it will also prevent natural light from entering the room.

    If you’re fond of the morning sunshine pouring through the windows, a window AC may not be the best option.

    Wall Air Conditioners

    At first glance, wall air conditioners appear similar to window air conditioners, except that they are installed directly into an exterior wall. The area around the inner unit is sealed with a robust trim, preventing cool or fresh air in the room from escaping.

    Due to their constructions being so similar, both wall and window units share many advantages and disadvantages.

    The Inner Workings Of Wall Air Conditioners

    Much like window air conditioners, through-the-wall units are a single unit that includes both the condenser and evaporator sides. And since they have similar basic construction, wall air conditioners work the same way as window AC units.

    Both have inner units that contain the cooling coil, operation panel, filter drier, evaporator blower, and drain pan. And they have outer units with a compressor, propeller fan, condenser coil, and fan motor.

    Installation location aside, the largest difference between window and wall ACs is that through-the-wall AC units vent only through the back of the ACs. Window units, on the other hand, can vent from the back and sides of the outer unit.

    The Advantages

    1. Unobstructed Window

    Since these are installed directly onto an external wall, your window remains free of a large unit blocking it. Wall air conditioners sit in a pre-set sleeve made into the exterior wall specifically for this purpose, which keeps it secure and out of your way.

    The view from your window will remain as gorgeous as ever with a wall air conditioner installed.

    2. Quiet Operation

    During installation, the wall sleeve is sealed thoroughly to prevent air from leaking and keep the air conditioner efficient. As a consequence, the exterior unit is left on the other side of the wall, which dampens its noise quite a bit.

    Light sleepers may not be disturbed by the running noises of the wall air conditioner.

    3. No Ductwork Required

    Ductwork can become quite expensive when installing an AC, particularly when ducts have to run through every room. Not only can it burn a hole through your pocket, but it is also extremely inconvenient for your family.

    The pre-installed sleeve aside, wall ACs require no major changes to the construction of your house. So, skipping out on ductwork can be a major boon to your wallet and the tranquility of your home.

    4. Better Temperature Control

    You have a greater degree of control over the ambient temperature with a wall air conditioner through a cool or heat mode. A wall air conditioner is capable of heating or cooling a single room effectively, making it cooler or warmer than the rest of the house.

    The Disadvantages

    1. Relatively High Installation Cost

    A wall AC can’t simply be set up on a window frame. If you don’t have a wall sleeve installed in an exterior wall already, having a wall air conditioner fitted can become quite expensive. The installation will involve making room on an external wall for the sleeve and then proceeding with the regular installation process. This is both time-consuming and expensive, which can quickly lighten your wallet.

    Additionally, some wall AC models don’t include a wall sleeve, requiring you to purchase one separately. This can further add to the professional installation costs.

    2. They Are A Permanent Fixture

    It takes a great deal of effort to replace a wall air conditioner with another. And if you’re thinking about replacing it with a different AC type, you may also have to think about the giant hole in the wall.

    Even replacing wall conditioners with one of the same type is a hassle. Unless you purchase the same model, the new AC will likely not fit in the wall sleeve and will require additional modifications.

    Tip

    Through-the-wall air conditioners are a long-term commitment. So, if you’re looking to buy a wall AC, it’s best to think twice.

    Comparing Both AC Types

    Comparing Both AC Types

    Despite both air conditioners being quite similar in construction and operation, they have major differences with their own unique advantages and disadvantages. Because of these specific pros and cons, picking one over the other is not an easy task.

    Let’s compare a few aspects of window ACs against wall ACs to see which one comes out on top.

    1. Cooling Capacity

    Window air conditioners have a higher cooling power, cooling down rooms as large as 1,500 square feet. Through-the-wall ACs, on the other hand, are capable of effectively cooling areas up to 700 square feet in size.

    2. Efficient Energy Use

    The use of an air-tight seal around wall air conditioners makes all the difference when it comes to energy efficiency. Thus, through-the-wall ACs consume less energy than window air conditioners, provided that both units are equivalent counterparts of one another.

    3. Ease Of Installation

    Installing window ACs is a job that requires no more than one technician to set it up in a specified window space. The same can’t be said about wall ACs, giving window air conditioners a clear win in this category.

    4. Noise Levels

    Window air conditioners are noisy, but wall ACs have a way of mitigating the noise. Thus, through-the-wall air conditioners would be preferable for quieter operation.

    5. Cost

    Overall, wall units are more expensive to set up and operate. Additionally, since they require permanent installation, they need to be able to withstand the weather which necessitates periodic maintenance.

    Window ACs, being more portable and highly affordable to buy and run, are better in this category.

    Air Conditioner Maintenance

    AC maintenance is a key part of the longevity of any cooling unit. As such, the ease of maintenance becomes a significant point of discussion when purchasing an air conditioner.

    What follows is a brief overview of the maintenance process of each air conditioner type.

    1. How To Maintain Window ACs

    Maintaining a window AC unit is not a highly involved process. As a general rule, you would want to have the unit serviced at least once a year in addition to regular cleaning. The former is best left to a professional, while you can do the latter on your own.

    Cleaning a window unit involves the following steps:

    • Cleaning the washable air filters
    • Clearing the coil fins
    • Realign any bent fins
    • Clean the fans and the drain pan

    Tip

    Be sure to use a rag with a bit of warm, soapy water for cleaning your window air conditioner. And once summer is long gone, consider unmounting and storing the air conditioner until it arrives again. You may keep the AC in a safe spot like a backyard shed or garage during the winter. This will help keep it in good shape for years to come.

    2. How To Maintain Wall ACs

    The cleaning process of wall AC units is similar to that of window ACs, with the only difference being the cleaning frequency. Since wall ACs are a permanent fixture, you will need to maintain them more often. And due to their immovable nature, they can be a bit finicky to clean. 

    Should you ever run into an issue with your through-the-wall air conditioner, do not hesitate to contact a professional for help.

    Window And Wall AC Related FAQs

  • Can a window or wall AC unit be left running all day?

    Leaving either a window or wall air conditioner running all day is not an ideal proposition. By doing so, the air conditioning unit will run for a long time, consuming more energy and increasing the electricity bills. Moreover, you risk overloading the AC and eventually causing it to malfunction.

  • What are the lifespans of window and wall ACs?

    A window AC will serve you consistently well for eight to ten years on average. Depending on the build quality and maintenance frequency, it may last even longer.

    On the other hand, a wall unit will last up to 10 years with proper care. This is easier said than done, though, since wall air conditioners require more maintenance than window ACs.

  • Window AC vs Wall AC Conclusion

    Conclusion

    There is quite a large overlap in the functionalities and purpose of window and wall air conditioners. They share a near-identical structure and several benefits, but a few key points make all the difference when picking one over the other.

    If you’re looking for a cooling device that is easy to run and has low overall costs, a window unit will serve you well. It will continue to run for nearly a decade, so long as you maintain the unit properly.

    But if you want long-term savings and don’t mind a permanent cooling device in your room, a wall AC could be the way to go. It will be highly energy-efficient throughout its lifespan and run quietly until it runs its course.

    At the end of the day, the right air conditioner pick here depends on your cooling needs.

    The wattage of window AC units can be a versatile tool to gauge their cooling effectiveness and energy efficiency. Low wattage results in less energy consumed, and solutions like weather stripping and regular maintenance help maintain low power consumption.

    Wattage is a measurement of how much power a device consumes. For window air conditioners, this can allow you to gauge both the cooling capacity and the electricity bill. And these factors will heavily affect which air conditioner unit you choose.

    Follow this comprehensive guide to understand all about AC wattage, how to measure it, and what factors affect it. With this knowledge, you will be able to keep the electricity bill in reins, ensuring they don’t lighten your wallet much.

    Understanding Window AC Wattage

    Understanding Window AC Wattage

    1. Wattage And Energy Consumption

    In the most elementary terms, wattage is simply the rate at which any electrical device consumes energy per unit of time. A watt unit can be defined as one joule of energy consumed by the device in a second. 

    Of course, each individual watt is not enough to measure the energy consumed by several large devices. This is why you will find the energy cost in kilowatts instead of just watts.

    Wattage informs you about the cooling power of AC units, be it a window or central air conditioner. AC units with higher cooling capacity will naturally consume more power, and vice versa. By looking at its wattage, you can avoid choosing the wrong AC size.

    And depending on the type of window AC, you may find its energy consumption listed in either watts or kilowatts. Smaller window air conditioners use less than a kilowatt of power per hour, making watts preferable as a measurement over kilowatts. 

    On the other hand, larger window air conditioners use 5,000 watts or more power when installed in locations like large halls. In such cases, you may want to use kilowatts as the primary unit of energy consumption.

    2. How Many Watts Does A Window AC Unit Use

    The wattage of a window AC is often listed in the specifications list. That said, depending on where you live, the cooling capacity or power consumption of the device may be in another unit.

    If you run into a unit other than watts or kilowatts, you needn’t fret. There are two other ways you can determine how many watts a window AC unit uses, as detailed below.

    A. Using Amperes And Volts

    A volt is the potential energy in any two points of a wire when 1 ampere of charge emits a watt of power between them. To put it simply, it is a measurement of the strength of an electric current.

    On the other hand, an ampere (colloquially known as an amp) is a measurement of electric current in the International System of Units (SI). Consider it to be the rate of electron flow in an electrical conductor like copper wire.

    You will find these units listed in the specifications sheet of a window AC unit. The multiplication of both of these measurements will produce the wattage of the device as a result.

    For instance, a 15-amp device with 150 voltage will have a wattage of 2,250 watts.

    B. Using BTU And EER Rating

    I. BTU

    The British Thermal Unit (BTU) is one of the most common units that denote the window air conditioner’s cooling capacity. One BTU is defined as the amount of energy required to raise the temperature of 1 pound of room-temperature water by 1 degree Fahrenheit.

    Moreover, some window air conditioners use BTU per hour as a unit of measurement, which can be considered the rate of energy transfer. The greater the BTU per hour rating, the more powerful and energy-consuming the AC will be.

    II. EER

    EER (Energy Efficiency Ratio) is another measurement of the cooling capacity of an AC for a particular amount of electricity. Most ACs like window and portable air conditioners are assigned this value, and the higher the rating, the more energy efficient the AC will be. This makes its inclusion in the conversion formula much more significant, as it results in a more accurate representation of the wattage of a device.

    Some regions also use an Energy Star rating for determining the energy efficiency of an appliance. A high Energy Star Certified rating is given only to energy-efficient window ACs, which often includes low wattage window AC.

    III. Formula To Measure Wattage Using BTU And EER

    To find out the wattage of a window air conditioner, use both of these units in the following formula:

    W = BTU/EER

    To convert this into kilowatt-hour, simply divide the result obtained by 1,000.

    Another point of consideration is the SEER rating which is sometimes used instead of EER. Like EER, it is the measurement of the cooling power of an AC per unit of electrical input. The only difference here is that SEER is calculated during the summer only, which is why it stands for Seasonal Energy Efficiency Ratio.

    Tip

    A general rule of thumb to know the EER of your cooling device is to multiply the SEER rating by 0.875. And you can input this value in the equation detailed above to derive the wattage of the window air conditioner.

    3. Comparing BTUs To Wattage For Measuring Cooling Capacity

    The reason there are two units for gauging the cooling capacity of an air conditioner is due to the different measurement systems. BTU is a product of the British Imperial System of Units, while watt is the standard unit of power from the International System of Units. Intriguingly, the United Kingdom uses the metric system, while the United States of America continue to use the British Imperial system of measurement.

    On a fundamental level, BTUs and wattage denote different things. BTU measures the amount of energy consumed, while wattage is the rate of energy transfer. The former is typically limited to heat transfer rate or air conditioning, while the latter has a wider range of applications.

    Since your monthly electricity bill is likely to be in kilowatts (kW), it may be preferable to use wattage as the primary unit for cooling capacity. Gauging the impact of your new window air conditioner on the energy bills becomes much simpler because of this simple reason.

    And while the BTU is a perfectly good representation of measuring cooling capacity, it only denotes the power of the unit. Nothing more or less, which may make it more complex to know if a typical air conditioner has a drastic effect on your bills.

    That said, there is a direct equivalence between BTU and wattage when considering both units in a vacuum. Every watt is equal to 3.412 BTUs per hour, and multiplying this number by 1,000 will net you the kilowatts the device consumes.

    What Affects Window AC Wattage

    Ideally, a window air conditioner should use as little energy as possible while cooling your room down sufficiently. Of course, the AC unit alone isn’t responsible for consuming more or less power than what is necessary. 

    There are several factors that govern the wattage of a window air conditioner, such as AC size, room layout, and more. Let’s take a look at each of these factors to see how they increase or decrease the wattage of an AC.

    1. AC Unit Size And Power

    If an AC is too large or too small for a room, it will consume more watts of electricity than what is necessary. This will have a noticeable impact on your electric bills, and the larger the size disparity, the higher the money spent will be. The reasons behind this are quite simple.

    Air conditioners designed for large rooms consume more power to cool down the given space. When such a unit is installed in a smaller room, it consumes the same amount of power to cool the room down. The issue here is that a smaller air conditioner would achieve the same while consuming a fraction of the power.

    Conversely, an air conditioner that is too small for a large room will have to work considerably harder to cool it down. It will take longer to have a cooling effect, if any, than what an appropriately large AC would.

    An energy efficiency indicator known as CEER (Combined Energy Efficiency Ratio) will help you determine the correct AC size. The higher this ratio, the higher the AC efficiency.

    2. The Size And Layout Of The Room

    The size and layout of a room is equally as important when determining how much electricity an AC consumes. After all, not all rooms have a box-like structure, and some areas, like the attic, often have a slanted ceiling. Factors like sun exposure also affect how much electricity an AC consumes.

    Due to this variation in size and layout, an air conditioner that doesn’t match the cooling requirements of the room will consume more power. To avoid paying more on your electric bill, you can look for the maximum recommended cooling area in the manufacturer’s specifications. Even for rooms with an unorthodox layout, this is a sound practice. 

    3. Regional Climate And Temperature

    Warmer climates and higher local temperatures will have your window air conditioner working double-time to cool your home down sufficiently. The AC compressor has to work for longer and consistently at full throttle to compensate for the ambient temperature. Naturally, this leads to a marked increase in power consumption, something that is far from desirable.

    While this is largely out of your control, you can mitigate it somewhat by running the air conditioner at 78 degrees Fahrenheit. And if you find 78 degrees a little too warm, consider starting here and gradually lowering it until you reach the preferred temperature.

    How To Calculate Window AC Wattage

    How To Calculate Window AC Wattage

    1. Calculating The Wattage Needed For A Specific Room Size

    Let’s assume that a typical room has a ceiling that is about 8 feet high. To properly cool this room down, a window AC unit would require at least 20 BTU per square foot of living space. So, for a room with 250 square feet of living space, the AC will need to have a cooling capacity of 5,000 BTU.

    Consider the following circumstances that can increase or decrease this value:

    • 10% less cooling capacity for shaded rooms
    • 10% more cooling capacity for rooms exposed to the sun
    • Add 600 BTU per additional person if more than two people occupy a room
    • Increase the cooling capacity by 4,000 for kitchens

    Once you have determined the correct BTU rating for your room, use the formula detailed earlier to convert it to watts. And since both units are directly proportional, the higher the BTU value, the more wattage the window AC unit will need.

    2. The Importance Of Choosing The Right AC Size

    For energy savings and cost-cutting, there are several reasons why you should choose the right AC size. These include power usage, cooling efficiency, frequency of repairs, and longevity of the window AC unit.

    Since cooling efficiency and power usage have already been a point of discussion earlier on, let’s go over the other two.

    A. Repair Frequency

    If an air conditioning unit has to work too hard for cooling or if it’s short-cycling frequently, it’s more likely to break down. Repairs do not come cheaply for a window air conditioner, or even portable air conditioners and central air conditioners, for that matter. And having to repair or replace parts on the system will quickly become expensive.

    Not only is it a hefty blow to your wallet, but it is also extremely inconvenient for you and your family. You can take two preventive measures to avoid such a scenario: size your AC properly, and maintain the HVAC (Heating, Ventilation, And Air Conditioning) system regularly.

    B. Improved Lifespan

    An air conditioning unit is a hefty investment and naturally, you’ll want it to work well for as long as possible. 

    But if your window air conditioner is oversized and short-cycling, it will draw in extra power to start each time. The frequency at which this occurs can be damaging to your air conditioning unit. Similarly, if your AC is too small and running constantly, it will strain the cooling system enough to damage it in the long run. Having to recharge your window AC unit with refrigerant repeatedly is far from ideal.

    You can avoid this by choosing the proper size for your air conditioning units. Be sure to look up all the pertinent information before you make the purchase!

    Tips For Reducing Window AC Wattage

    Tips For Reducing Window AC Wattage

    1. Air Conditioner Maintenance

    Window air conditioners are complex devices with several moving parts that make them work. In the event of a part working in a sub-optimal condition, it will consume extra watts of electricity. And instead of working quietly, the window AC unit may begin emanating unusual noises.

    To avoid this, you can have a professional perform routine maintenance on your cooling unit once a year. By having your AC serviced, you will notice an improvement in the cooling efficiency and power consumed by the system.

    Additionally, be sure to clear out any dirty air filter to keep the airflow unimpeded. By doing so, your window AC will not have to work harder than it needs to, keeping it in good condition for a long while.

    2. Have Your Walls Insulated

    Wall insulation is a great way to reduce the wattage of your window or portable AC units. This results in cool air being trapped in the room so that the AC doesn’t have to consume as much power for temperature maintenance.

    You will reap the most benefits from wall insulation during the summer when the temperatures are at their peak. Window, central and portable air conditioners all benefit from insulation.

    3. Draw Your Curtains And Blinds

    Direct sunlight can quickly warm up a cool room, effectively reducing the efficiency of your window air conditioner. By drawing your curtains, window blinds, or solar screens, your room will cool down quickly. Thus, your AC won’t consume as many watts of electricity to maintain the ambient temperature.

    4. Install Portable And Ceiling Fans

    Once your air conditioner has cooled your room down sufficiently, it will turn off until the temperature rises again. This can be mitigated somewhat by circulating the air inside the room, and what better way to achieve this than by using a fan! 

    By using a portable or ceiling fan to spread the cool air inside the room, your air conditioner will have some of its workload reduced. And since fans consume few watts of electricity to keep running even at the highest speed setting, you may save about 40% on the utility bill.

    Tip

    Consider turning the AC off completely once the room is cool enough and turning the fan on instead. You will notice that the room remains cooler for a significantly longer period when the fan is on.

    5. Use A Programmable Thermostat

    A programmable thermostat can help you reduce the wattage of your window air conditioner, effectively lowering the estimated yearly energy cost. You can use it to create schedules for your AC or program it to turn on or off when the room temperature reaches a certain point.

    Smart thermostats can sense when a room is not in use, which is when it will turn the air conditioner off. Or, if you so wish, it can keep the AC running on low power to cool the room down until your return.

    6. Install Weatherstripping

    Weatherstripping is a low-price solution to plugging air leaks in your home. This involves using one of several kinds of strips made from wood, rubber, or foam to insulate the house, improving its efficient energy use.

    The main goal of weather stripping is to prevent cold air from leaking out of your home. Once all the primary leakage points, like cracks, doors, and windows, are all sealed, your air conditioner will work a lot more efficiently.

    7. Don’t Use Heat-Producing Devices

    Home appliances like stoves, dishwashers, and ovens create a lot of heat as they work, which can increase the room temperature. As a result, the AC has to draw more electric power to compensate for the increase in room temperature, increasing your electricity costs.

    You can mitigate the electric energy consumption of your devices by using them when the temperature isn’t as high. With this, your AC won’t be overloaded, improving its performance and keeping it working well for a long time.

    Wattage Of Window AC Related FAQs

  • How many watts does a window AC use?

    Typically, a window AC wattage ranges from 400 watts to 2,425 watts, depending on the size of the room. An average-sized room may only require a 900-watt or 3070-BTU window air conditioner.

    Using this air conditioner for around 8 hours every day requires about 200 kilowatt-hours of power per month.

  • What is tonnage in air conditioning?

    Unlike the measurement of weight, a ton denotes the cooling capacity of the air conditioner rather than its weight. It is calculated with the size and layout of the room being the primary considerations.

    A simple way to calculate the tonnage of your window AC unit is to divide its BTU rating by 12,000. For instance, an 18,000 BTU AC would have a tonnage of 1.5 tons.

  • Window AC Wattage Conclusion

    Conclusion

    Learning about AC wattage may seem daunting at first, but the core concept is simple to understand. It can be a great way to gauge the performance and energy efficiency of an air conditioner, something that remains useful even after purchasing one.

    Window air conditioner wattage is dependent upon several factors, the primary of which is the size of the cooling unit. Be sure to size your air conditioner appropriately when purchasing one, as it can dramatically affect your electricity consumption and costs.

    And lastly, you can take steps both significant and simple to reduce the AC wattage. The number of ways of optimizing the energy efficiency of your cooling unit is endless, and using them pays massive dividends in the long run.

    Excessive humidity has a negative effect on air conditioning systems as it impacts the capacity of your device to offer sufficient cooling. In fact, high humidity levels affect heating systems as well, making it difficult to attain optimal temperatures within your house.

    For achieving optimal indoor comfort, you will need HVAC systems that have humidifiers and dehumidifiers installed to keep the temperature and humidity levels in check. Ideally, the humidity level should be below 60%, but this is seldom possible since temperatures fluctuate throughout the year. In this guide, I will be telling you how humidity affects air conditioning and what you can do about it.

    Let's begin.

    What Is Humidity?

    What Is Humidity

    Before I can tell you more about how humidity affects heating and cooling systems, it is important to have a concrete idea of what humidity is.

    Humidity is nothing but the amount of water vapor present in the air at any given point. If the amount of water vapor is high, the humidity will subsequently be high. When the air is holding a high volume of vaporized water, it cannot hold anything else, and as a result, it becomes very sticky as your skin is unable to dissipate sweat.

    Humidity is usually expressed in terms of relative humidity. By definition, relative humidity is a measure of the amount of moisture present in the air when compared to the amount the air can hold at the same temperature. It is always expressed in percentage.

    Needless to say, the excess moisture in the air can have an adverse impact on your day-to-day life. Not only does it lead to lethargy, but it also results in the malfunctioning of household electronics (including HVAC systems) as well as mold and mildew formation.

    Ideally, the relative humidity levels inside the house should be between 30% to 50%. However, during scorching summer months, humidity levels spike way above that, and your air conditioning system becomes ineffective in dealing with this rise. As a result, it is unable to effectively cool the indoor air.

    How Does Humidity Affect Air Conditioning?

    The work of an air conditioner is to cool the indoor air by eliminating excess heat and moisture. Before I can help you understand how high humidity affects air conditioners, let me tell you a little about how AC systems work.

    The refrigerant present in your AC system collects and drains the condensation that is produced as a result of water vapor in the air. The warm air passes over the evaporator coil, and cool air is then released into your home. So, the air conditioner removes not just excess heat but also lowers humidity levels inside your space.

    That being said, air conditioners have to work harder when the humidity levels are high. If your system does not offer enough cooling capacity, it won't be able to function effectively. As such, you will be sitting in a humid, suffocating home environment while your electricity bills continue to rise.

    Signs Of High Humidity Levels

    There are a few common signs of increasing humidity that you should watch out for. These are:

    1. Clammy Air

    If the air inside your home feels moist, to the point where even your skin feels clammy, then it's a sign of humidity inside the house.

    2. Foggy Windows

    When vaporized water in the air is suspended with no route for escape, it tends to get bottled up inside the premises and fog up the windows.

    3. Musty Odor

    A musty smell around the house is a common sign of high humidity. This is because high indoor humidity results in dampness in the house, which causes this problem.

    Problems Caused By Low Humidity

    Both high and low humidity wreaks havoc on your heating, ventilation, and air conditioning (HVAC) system. While high humidity levels will make it difficult for the air conditioning system to cool your house, if humidity levels drop dramatically, it affects heating systems during winter.

    During winter, humidity levels are usually low, and the relative humidity inside the house is low as well. As such, your home will feel a lot cooler, and this will put a strain on your heat pumps or furnace, affecting its heating capacity.

    Thus, both high and low humidity levels are responsible for making the indoor air uncomfortable. The ideal home temperature should be between 70 to 78 degrees Fahrenheit. However, when humidity levels rise or fall below the ideal level, it becomes difficult to maintain this temperature, and it, in turn, changes the apparent temperature inside the house.

    Humidity Control In HVAC Systems

    Humidity Control In HVAC Systems

    It is possible to control the humidity in your home by installing a humidifier or dehumidifier on the HVAC system. Let's learn more about them.

    Role of Dehumidifiers

    The work of a dehumidifier is to pull moisture from the air before it is passed through the ducts of your home. The dehumidifier can be paired with your air conditioner and operated with a remote control. Some latest air conditioning systems not just cool the air but also humidify, dehumidify, and purify it.

    Role of Humidifiers

    If the humidity levels in your house fall low during winter months, installing a humidifier on your HVAC system is the perfect solution. It adds moisture to the air that enters your home and thus keeps the relative humidity around 50%, which will make your home feel warmer and more comfortable.

    Tip

    I highly recommend using humidifiers in colder regions. As the device adds more moisture, your place will feel warmer, thereby reducing your energy bills.

    Importance Of Proper Humidity Levels

    When indoor humidity levels are well within control during peak summer months, your air conditioner is able to do its job effectively, and its cooling capacity is maximized. As such, you will feel more rejuvenated and cooler.

    Besides, issues such as musty odor, clammy air, or foggy windows will be eliminated. The cherry on the cake would be your energy bills, which will drop down as your AC system wouldn't have to work as hard to cool the house.

    When humidity levels are extremely low during winter months, your house can feel cooler than usual, and this puts unnecessary pressure on your heating system. Getting a humidifier installed will stabilize the humidity levels in the house and make low temperatures more bearable.

    Tips To Manage Humidity In Your Air Conditioning System

    To ensure that your HVAC system operates efficiently and your house remains comfortable, no matter the weather outside, install a hygrometer. The work of a digital hygrometer is to monitor humidity levels.

    Besides, you should get a dehumidifier installed to remove moisture from the air in your home and keep the air conditioning system running properly. You should also get a humidifier installed that increases humidity levels.

    In addition, there are certain ways you can manage extreme humidity in your cooling system. Let me tell you more about it.

    1. Install A Correctly Sized Air Conditioner

    First things first, make sure your air conditioner is correctly sized. If the capacity of your air conditioner is larger than needed, it won't remove moisture as effectively and will cause high humidity.

    This happens because more powerful air conditioners have compressors that don't need to run for long and turn on and off frequently. So, the system never runs long enough to remove as much moisture as necessary from the air. To fix this problem, I recommend installing an appropriate-sized system.

    2. Regular Maintenance Of HVAC Systems

    You should get your air conditioning systems checked and serviced by an electrician regularly. They will inspect your system, particularly the evaporator coil and air filter, and remove excess dirt if it has accumulated on them.

    3. Proper Ventilation And Insulation

    You can install exhaust fans, especially in the kitchen, as they help to remove excess moisture from the air. Similarly, properly insulating your house also keeps humidity levels in check and helps maintain an optimal temperature in the house.

    4. Do Not Use Fans And Air Purifiers

    In hot and humid climates, fans and air purifiers have no real use as they do not help lower humidity. Although fans move the air, they do not remove humidity. Similarly, air purifiers do not remove excessive humidity from your room and only work towards removing contaminants and purifying the air.

    Note

    A lot of households use ventless portable air conditioners, but although these work well in dry climates, they are not designed for humid areas. However, if you do have a ventless portable AC system, particularly one without a hose, you can make it functional by mounting it on the window sill.

    How Does Humidity Affect Air Conditioning Final Words

    Final Words

    Now that you know how humidity affects the heating and cooling systems of the house, I'm sure you will consider investing in a humidifier and dehumidifier. Most HVAC systems today are equipped with cutting-edge technology that can ensure optimal temperature and humidity levels in your house.

    Remember, high humidity affects an AC system negatively since it cancels out its cooling effect. Therefore, even if you keep your air conditioner running, you will not get nearly as many benefits, and the house feels a lot warmer than it is.

    You must take sufficient steps to ensure the humidity levels remain normal throughout the year, no matter the weather outside. This is particularly important if people in your house suffer from allergies or respiratory illnesses.

    My suggestion would be that you get in touch with an HVAC expert who can upgrade your heating and cooling systems. As such, you can enjoy more energy savings and a comfortable, relaxing home environment.

    A musty smell from your air conditioner can be due to dirt, and a DIY cleaning session can usually fix it. However, chemical or burning odors from your smelly air conditioner need more immediate attention and technical repair from a trusted professional.

    Air conditioners aren't supposed to smell like anything. If everything is functioning correctly, they should cool, dehumidify or heat your room without any noticeable changes in what the central air conditioner smells like.

    Therefore, if you notice your air conditioning system giving off an unusual odor before reaching the end of its lifespan, it's always a sign of a problem that needs addressing.

    There are different kinds of central air conditioner smells, which arise from various internal and external issues. So, don't just spray room freshener and hope for the best. You should permanently and safely fix the problem.

    Thus, let's explore why your air conditioner smells bad and how to eliminate the odor, but do note preventive maintenance will help you in the future.

    Why Air Conditioning Smells Bad And Their Causes

    Common Air Conditioner Smells And Their Causes

    1. The Smell Of Rotten Eggs

    Description

    Your air conditioner smells bad and revolting, making you feel nauseated and have a headache if you breathe in it too long. If you're lucky enough to be unfamiliar with the smell of rotten eggs, it can also come from rotten, standing dirty water sometimes.

    Chemically speaking, this smell is usually an indicator of Hydrogen Sulfide in the air. Also, energy gas manufacturers usually add some of this chemical substance to your gas supply so that the gas smell immediately alarms you about a leak.

    Reason

    A rotten egg odor emanating from your air conditioner can have two reasons: primarily, it can be a gas leak.

    Another possibility is that a small, dead animal like a rodent, raccoon, cat, or pigeon made its way into one of your vents and died there. It's sad and disturbing to some, but you need to find where the carcass lies and get the area disinfected. Aside from being pungent, the rotten smell indicates that your home is filled with germs.

    2. The Smell Of Burning Plastic

    Description

    Have you ever accidentally left a PET bottle or plastic spoon too close to the oven? It smells quite pungent, similar to gunpowder, and makes you cough. 

    The unpleasant air conditioner burning smell that emerges is similar to burning plastic. Other places you might have encountered this burning smell are rubber car tire combustion and overheated electric wires. It can also be a bit similar to tobacco smoke or stale cigarette smoke.

    Reason

    As you can guess, burning plastic AC smells signify nothing good for your air conditioner. Its most common cause is a fire in the air conditioning system circuits.

    A printed circuit board can overheat for several reasons, ranging from overuse to unregulated voltage fluctuation. Thus, you should take immediate steps when your air conditioner smells like this. 

    First, use a plastic or wooden object to switch off your AC - do not touch any part of it with your naked hands or a metallic object. Then, you should contact an electrician and check your other appliances for similar smells. 

    3. Body Odor

    Description

    At first, you think you're the problem, and taking a shower will remove the unpleasant odor from your room. However, you soon realize that the indoor air quality is ruined by a sweaty air conditioner smell whenever you turn on your AC, regardless of who's in the area.

    This is the most common answer to “Why does my air conditioner smell bad?” But it’s the most difficult to spot, especially when it's mild. 

    So, instead of ignoring a consistent stench of sweat in your room, determine if it's coming from your air conditioner. The best method is to leave it running in an empty, disinfected, and closed room for about 20 minutes. If the air conditioner smells like sweat after this, you know it's not you.

    Reason

    The odor from smelly socks and sweat doesn't stem from the body itself. Instead, they're gasses released by the germs that thrive in the moisture. Therefore, these same germs can infest your AC interiors, and the air conditioner smells terrible.

    As you can see, this smell signifies a clogged-up air conditioner, and you should check the appliance to find the affected areas and clean them.

    4. Sweet Chemical Smell

    Description

    This bad smell seems unnatural but not as unpleasant as the others. At worst, your air conditioner smells like paint or glue. Therefore, this makes it more dangerous because you're more likely to ignore a severe situation.

    This can be the result of a refrigerant leak. This refrigerant gas usually helps your air conditioner lower your room temperature. However, the coils and chambers storing the coolant fluid sometimes corrode, leading to a leak.

    Refrigerants are not meant to be inhaled and might even be a fire hazard. Additionally, depending on your air conditioner's age, it can cause significant damage to the environment. ACs manufactured before the Montreal Protocol use R-22 chlorofluorocarbon refrigerant, and a sizable leak can seriously affect the ozone layer and contribute to global warming. It also makes your AC stop cooling your room.

    Reason

    Corrosion creates cracks in the copper coil, but it's not the only way a leak can happen.

    Air has rare formic particles that create pinholes in metal when they touch it. If your air conditioner encounters one of these particles, even a tiny hole will be enough space for the high-pressure coolant to hiss out.

    Another reason behind refrigerant leaks is the condenser movements. These chambers rotate rapidly to cool the air, and they can create heavy vibrations in the surrounding parts. It can cause physical damage to the refrigerant coil.

    5. Strong Vinegar Smell

    Description

    Vinegar smells strong, pungent, and sour. If you get this kind of AC smell, it leads to poor indoor air quality and makes the room almost impossible to inhabit.

    Acidic organic compounds are released when bacteria respond anaerobically, i.e., without oxygen. Thus, it's unlikely that your air conditioner reeks of actual vinegar, but similar compounds can make you think of the smell.

    Reason

    Anaerobic bacteria thrive in suffocating, moist, and dirty areas. A buildup of debris and grime on your air filter will invite germs to proliferate and fill your room with pungent gasses.

    Another cause of this smell is condensation. Have you ever noticed little droplets on your window if you turn your AC on too high on a humid day? This can also happen inside the air conditioner and air ducts, and it's more challenging to wipe off. As this water collects, all kinds of bacteria and fungi fester.

    6. Mildew Or Ammonia Odor

    Description

    This is another common air conditioner smell, and it's one of the deadlier ones. Mildew has a musty smell, similar to rotting vegetables, sewage, or a skunk. However, it can also start smelling stronger, resembling a dirty public toilet.

    This bad smell is similar to ammonia, and you should address this air conditioner smell immediately. Ammonia is harmful enough to your body on its own. If you're exposed to it for too long, it can cause headaches, dizziness, and suffocation.

    Reason

    Your air conditioner has an evaporator coil, and this area absorbs the humidity from the air when you turn on the dehumidifier settings. However, atmospheric water typically isn't pure. Tiny microbes and mold particles cling to the molecules.

    But that's not all. If you have mold, mildew, or bacteria growth inside your AC, they're releasing certain substances that have an unpleasant smell, like ammonia or cat pee. These are known as mycotoxins, which are the microbes' waste materials. 

    How To Fix Common AC Odor Problems

    How To Fix Common AC Odor Problems

    Now that you know why your air conditioner smells bad, you can address the root cause. Below are the methods of solving the common issues. You can do it yourself, but serious problems require professional help. 

    1. Refrigerant Leak

    Besides the sweet Freon smell, you can check for some other symptoms of a refrigerant leak. It will leave tiny icicles on your air conditioner pipe and dehumidifier. Also, you might hear some unexpected air conditioner noises, like pulsating or buzzing sounds. Your AC smells bad, and you’ll find water leaks. Your electricity bills might also get higher.

    A refrigerator leak needs to be fixed by an experienced mechanic. It's best to call your air conditioning brand's customer helpline and explain the situation.

    However, this is also an excellent opportunity to ask about the coolant type and get it replaced. If your AC still uses the old freon refrigerant, consider asking for an upgrade to a greener coolant that'll keep you safer in the future and reduce air pollution.

    2. Natural Gas Leak

    Exhaust gas accidents and leaks don't usually originate from the air conditioner, but they're more noticeable when the home air conditioner runs. Natural gas leaks are detrimental to your health, and people have died from exposure to it.

    Your first reaction to the sulfur smell should be to gather your family members and pets and leave the house. Now, while you wait in a safer area, a plumber from your gas company or fire department will fix the leak.

    This professional plumber will find the leak, clean all the pipes surrounding it, and seal it with epoxy. Your home should be safe to enter after the seal solidifies and the residual gas flows away naturally.

    3. Dirt Collection

    Your AC parts gathering dust is unavoidable - a simple consequence of regular use and entropy. So, cleaning it now and then keeps the most common air conditioner smells away.

    Usually, the air filter gathers the most dust and is also the simplest to clean. Follow the instruction manual to take it out safely, and then brush off the excess dirt. You can hold it under running water to finish the job, but let it dry completely before putting it back in the AC.

    4. Mold And Mildew Growth

    Mold is more difficult to clean up than dirt because some microbes can stay behind even after you wash the air filter, and they'll just grow into a smelly colony again. If your air conditioner smells like rot, but it’s pretty mild, you can try using disinfectant when you clean your air filters. 

    However, if the smell persists after this or you smell ammonia, it's a more serious mildew issue that requires professional help. A technician will scrub every inch of your AC and comb your home for other places this mildew could be growing. It's necessary to eliminate the possibility of dangerous gasses and black mold.

    A man holds a dirty napkin in his hand against the background of an air conditioner. Split system maintenance. Conclusion.

    Conclusion

    Hopefully, you can identify where your air conditioning smell is coming from and DIY a solution or get it fixed with outside help. Some air conditioner smells are from problems in your HVAC system and lack of maintenance, while others stem from problems throughout your house.

    Gas leaks are always dangerous. They smell like sulfur to warn you, but their real danger is the odorless carbon monoxide that suffocates you slowly without many symptoms. So, always pay attention to this problem and treat it like a fire.

    However, if the source of the pungent air conditioning smells lies in your AC unit and doesn't go away after repairing it, you should be compensated by the heating and cooling company. These recurring issues are serious health hazards, and they’re abnormal. Thus, the air conditioning company should provide you with better repairs or a replacement based on your warranty.

    Running an air conditioner under 65 degrees can help you combat the cold and improve indoor air quality. However, it comes with several risks that may cause damage to the internal parts, including the compressor, evaporator coil, and heat pump.

    So, you want to run your air conditioner in cold weather to maintain optimal temperature without investing in an electric heater? Well, that’s a totally plausible option, given air conditioners these days have heating and dehumidifier features in addition to basic cooling.

    But it’s wise to remember that you can cause irreversible damage to your AC unit if it runs at low temperatures for a long time. However, there are ways you can minimize the risks and improve the unit’s overall longevity. Read on.

    Benefits of Running AC Under 65 Degrees

    Benefits of Running AC Under 65 Degrees

    Even though there’s a high chance of inflicting cold weather damage if you run air conditioners below 65 degrees Fahrenheit, there are some benefits you can gain from it. They are:

    A. Improved Comfort Levels In The Home

    While it’s essential to keep your home cool in the summer, cold weather calls for some warm air to protect you from the freezing outdoor temperature. And during cooler weathers, an air conditioning system can help promote air circulation, reduce humidity, and increase indoor temperature by a few degrees. This way, you can improve the comfort levels at home without having to buy a separate unit for heat production for the colder months.

    B. Potential Cost Savings On Energy Bills

    Using an air conditioning unit during low temperatures below 60 degrees Fahrenheit can remove the need to buy a room heater. And heating appliances have higher energy costs than air conditioners, as they don’t have energy efficiency ratings or smart compressors. 

    I’ve been immensely relieved to find that my energy bills have been reduced after I stopped using the old-school, chunky electric heaters during winters.

    C. Protection Of Sensitive Equipment Or Materials

    Besides improving your comfort levels, an air conditioner can protect sensitive equipment and materials like musical instruments, books, weather-sensitive machines, plants, etc. Some of these things need to be kept at a comfortable temperature in order for them to survive or function properly. And running your air conditioning system at cooler temperatures can help you maintain them for prolonged periods.

    Drawbacks of Running AC Under 65 Degrees

    Any temperature below 60 degrees Fahrenheit is not the ideal AC temperature and can cause damage to most units. Moreover, some units aren’t meant to be turned on during cooler temperatures. For example, an AC with an outdoor condensing unit may suffer severe damage in cold weather, as the outside temperature is usually much higher. That’s why ventless portable air conditioners are better suited for these weather conditions.

    However, if your air conditioner uses lighter-grade oil, it can function even in low temperatures; but this may affect its cool air production in the summer, as it won’t thicken as much. For your better understanding, here’s why running air conditioners under 65 degrees is a bad idea:

    A. Increased Risk Of System Failure

    Typically, the lubricant of AC units is specifically designed to help heat pumps function during the summer. When the outside temperature is below 60 degrees Fahrenheit, this liquid thickens, preventing the heat pump and evaporator coil from properly functioning. It's the same situation as when your car doesn’t have enough fuel to lubricate the pistons.

    In this instance, your air conditioning unit has to work twice as hard, which can cause internal wear and tear, leading to mechanical failure.

    B. Reduced Lifespan Of The AC Unit

    Besides the obvious potential of compressor damage, there’s the issue of weather sensors. Most HVAC manufacturers include this sensor in their units to help you conserve more energy and save money. However, this feature may not allow you to turn on your air conditioner on colder days when the temperature drops below 65 degrees.

    If you have an older model that doesn’t have this sensor, you’ll be able to run the AC, but it will damage the unit and prevent liquid migration if the temperature is too cold. 

    C. Higher Energy Consumption And Associated Costs

    Even if your air conditioner is working well in winter months and removing cold air from the space, the indoor coils may freeze up and form ice particles in the refrigerant. What’s more, the Freon gas will have a hard time circulating in the unit, causing severe damage to the system.

    Factors to Consider Before Running AC Under 65 Degrees

    Factors to Consider Before Running AC Under 65 Degrees

    A. Climate And Humidity Levels

    When operated at an ideal ‘ambient temperature,’ you can efficiently use an air conditioner for heating, ventilation, and air conditioning. This is a technical phrase used to denote the recommended temperature for the compressor and coils to function properly. As a general rule, running air conditioners at 65 degrees or lower is not advisable due to its various drawbacks.

    Moreover, it's important to check the humidity levels in your room before you operate the AC. But don't air conditioners also help decrease humidity? Yes, they do, but excess moisture in the air can cause issues like rust and malfunctioning of the liquid refrigerant. If you want to avoid this, it’s best to reduce the humidity to a certain level - using ceiling fans (or box fans if you prefer high-speed airflow) before turning on the AC.

    B. Type And Age Of The AC Unit

    Older units run a higher risk of damage since their internal compressor and other mechanical parts may be already worn out with usage. In contrast, new air conditioners will work better in cooler temperatures, as they’re more powerful and can run on lower amounts of refrigerant.

    When it comes to functioning in cold weather, the type of AC unit must be considered. For example, portable units where the entire system is inside your home will last longer in colder weather, as they aren’t exposed to the outdoor temperature. Meanwhile, mini splits with their outdoor units may risk damaging their internal system.

    C. Level Of Insulation And Sealing In The Home

    Home insulation and sealing prevent heat transfer in and out of your home, reducing heating and cooling costs. Since these act as barriers between indoors and outdoors, your room will be much warmer in the cold months and cooler in the warm season. This way, you won’t have to run your air conditioner at 65 degrees for a long time to balance the temperature inside.

    Tip

    It’s advisable to get your home insulation checked by professionals before every winter - this ensures heat retention during the season, so you wouldn’t need to use the air conditioner as often.

    Tips for Running AC Under 65 Degrees Safely and Efficiently

    A. Regular Maintenance And Inspections Of The AC Unit

    By conducting regular inspections, you can limit the damage caused by running an air conditioner under 65 degrees Fahrenheit. It’s better to call a professional service to clean the internal machine and refill the oil or refrigerant if needed. This way, you can stop the damage at the roots and prevent it from spreading.

    B. Use Of Programmable Thermostats To Regulate Temperature

    Another way you can save money and energy is by purchasing AC units with programmable thermostats. Simply set it at 60 degrees or above so that it stops the compressor fairly quickly once the desired temperature is reached. This helps prevent air conditioners from running too long and consuming energy unnecessarily.

    C. Proper Insulation And Sealing Of The Home

    Check your home insulation and sealing to see if there’s any unwanted air leakage. If you haven’t revamped the insulation for years, consider getting it done before the winter so you won’t have to rely on air conditioners for long.

    Running AC Under 65 Degrees

    Final Thoughts

    Running an air conditioner under 65 degrees helps maintain good indoor air quality and keeps you comfortable throughout the day. It also aids in maintaining weather-sensitive equipment and materials that require a particular temperature and humidity range to survive. However, there are various downsides to this practice - and honestly, the damage can be quite severe.

    This is why you should carefully consider the cooling and heating capacity as well as the different features of your air conditioner to see if it can function at such temperatures. And if you’re going to run it anyway, always take precautions and use the energy-saving tips to avoid damaging your air conditioning unit.

    If you liked this informational guide, stick around for similar updates. Until then, goodbye!

    The amps or ampere rating of an air conditioner measures the amount of electric current it draws and how much electricity travels through the machine at any given time. The average amp rating for portable ACs is 3.1A to 12.8A

    With summers right around the corner, air conditioners are bound to be used quite frequently. However, most homeowners remain unaware of how many amps their cooling system uses. This can lead to problems such as an expensive power bill and, worse, power overload.

    So, understanding the amp usage of your machine is necessary, so let's take a look at how many amps a portable air conditioner uses in detail.

    Air Conditioner Amperes

    Air Conditioner Amperes

    Amperes in air conditioners define the amount of electricity that travels from one particular point to another in a given time frame. When a device "draws amps," it generally talks about the amount of electric power needed to run the system. 

    If the machine draws more amps than necessary, it can result in an overload or a circuit breaker trip. If such is the case, immediately remove the AC from that particular circuit breaker. 

    How Many Amps Do Portable ACs Use?

    On average, portable air conditioners use about 3.1A to 12.8A, with 12A being the most common portable AC amps. By looking at any reliable air conditioner amperage chart, I can derive that the higher the BTU (British Thermal Units), the more the amperage. However, there are a few exceptions to this case. 

    There are some portable air conditioners with low amps and high BTU (British Thermal Unit) that have become quite popular. An example of this is the Costway Portable Air Conditioner. 

    Most portable AC units draw amps at a level that falls on the higher side of the scale. After comparing the most popular portable air conditioners on the market, it was found that a majority of portable ACs draw 9A or higher. Similarly, only few portable AC units tend to draw around 6A to 8.9A. 

    Portable Air Conditioner Amps Considerations

    The ampere of a portable air conditioner will be provided by the manufacturer. Ideally, this number would be the maximum amount of amperes that the air conditioner can and should draw when being used. 

    However, several other factors can heavily influence the number of amps drawn by the air conditioning unit, including the cooling stage, settings, input power supply, and cycle. Generally, portable air conditioners can effortlessly run on basic circuits found in most homes, like 15A and 110V circuits.

    These traditional circuits and breakers tend to provide for startup surges. Due to this reason, the ampere of a portable air conditioner is not a significant concern for most American residents that run their device from the mains power or a standard household outlet. 

    However, for those who run their air conditioning units on generators or batteries, the ampere of a portable AC can be of more concern. If your power system does not efficiently provide for portable air conditioner startup amp surges, it can threaten the device and cause damage. 

    A common rule of thumb is that startup surges are typically twice or thrice higher than the running amps of an air conditioner. Before you set up your appliance, it is recommended to contact a licensed electrician to gain clarity and run the AC system without any problems or risks. 

    A. High Amps Portable Air Conditioner

    A startup surge does not necessarily happen when the device is turned on for the first time. Most portable air conditioners with components like condensers, compressors, and evaporators tend to cycle through on and off during each functioning period. 

    When these components keep cycling through on and off, the air conditioner draws in more power than necessary. However, this sudden spike in the number of amps drawn drops significantly once the startup power settles down. 

    The portable AC unit also tends to draw many low levels of amps, lower than the listed level, when it is not actively cooling your home. To further reduce the overall amperage drawn by the air conditioning unit, you can alter the power settings, increase the temperature settings or change the cooling mode. 

    For instance, the Eco mode on portable air conditioners is an energy-efficient option that minimizes the number of amps used.

    B. Low Amp Portable Air Conditioner

    Portable air conditioners with a lower amperage level tend to draw around 3.1A or up to 6A. Approximately, a small percentage of portable air conditioning units that were compared fall under this low ampere category. 

    An example of a portable air conditioner that draws low amps is the Costway EP24041 air conditioner. But similar to their higher amp counterparts, low amp air conditioners tend to go through startup power surges. This factor, along with a few others, are critical consideration for the amperage of a portable air conditioning system. 

    How To Calculate The Amps Usage Of An Air Conditioner

    To calculate the ampere required to run your air conditioning system, it is necessary to take these factors into consideration. 

    1. BTU Rating

    The BTU (British Thermal Units) rating of an air conditioner determines the amount of heat it can pull out from a room at a given period of time. If the BTU units are higher, it results in a better cooling power of an air conditioning unit, especially in a larger space. 

    Tip

    To identify the BTU rating of your air conditioner, refer to the label attached to the side of the device. Usually, BTU ratings can range anywhere from 5,000 to 28,000 BTU. However, some manufacturers specify the cooling capacity of the device using tons. For better reference, remember that 1 ton equates to 12,000 BTU. 

    2. EER Rating

    EER rating, or the Energy Efficiency Ratio, is an efficiency measure of an air conditioner that uses electricity to cool down a specific space. Generally, the energy efficiency rating of the device is mentioned on the same label as the one where the BTU rating is mentioned. Ideally, the energy efficiency rating of most air conditioners ranges from 13 to 25.

    3. Voltage Capacity

    Voltage ratings measure the electric current flowing from one particular point to another. The higher the voltage rating, the faster the current moves through the circuit. Based on the model of the AC unit and the size, the average voltage of an air conditioner can range anywhere between 100V and 280V. 

    To find out the voltage of your air conditioner, refer to the label that is located outside the condensing unit. In case the voltage is not mentioned, it can still be calculated using your air conditioner's BTU rating. 

    Typically, a 5,000 BTU air conditioner will have a voltage of 120V, whereas average central air conditioners have voltages around 230V. 

    How To Convert BTU And EER Rating To Wattage

    To calculate the wattage of your air conditioning unit, all you have to do is simply divide the BTU rating by the EER rating. 

    Or to be specific, AC Wattage = BTU/ EER.

    For instance, let's take a 15,000 BTU air conditioner along with an EER  of 16. 

    Hence, the wattage would be:

    = 15,000/ 16 

    = 937.5 watts 

    How To Convert Watts And Volts To Amps

    To calculate the amp usage of your air conditioning system, simply divide the unit's wattage by its voltage rating. 

    In simpler terms, Amps = wattage/ volts 

    For instance, let's take a 5,000 BTU air conditioner, along with an EER rating of 13 and 120 volts. 

    As mentioned above, you can find the wattage using the formula: wattage = BTU/ EER 

    = 5,000/13

    = 384.6 watts 

    Now, to find Amps, I can use the formula:

    Amps = wattage/voltage 

    =  384.6/ 120

    = 3.2 amps 

    If you find calculating the ampere rating by yourself a tedious task, you can easily use an AC amps calculator that is available online on Amazon. Now that you know all about calculating amps for your portable air conditioner let's look at the amperage of other types of air conditioners. 

    How Many Amps Do Window Air Conditioners Use?

    A window air conditioner is generally preferred to cool a small to medium-sized room, with a floor space of up to 550 square feet. On average, a window AC comes with a BTU rating that ranges between 5,000 and 12,000, while the voltage of a window AC ranges between 115V and 220V. 

    Before using a window AC, it is important to know how many amps the window AC uses. This is because window air conditioners generally consume much higher amps when compared to that other air conditioners or electrical appliances. Based on the BTU capacity of the device, a window air conditioner usually draws anywhere between 4 and 20 amps in the United States. 

    How Many Amps Does A Central Air Conditioner Use?

    A central AC unit is the most commonly found AC type in most residential spaces. These devices come in two different varieties - a full package system comprising a single unit and a split air system with two units located indoors and outdoors. 

    Central air conditioners are used to cool a larger space or a house with several rooms. Based on the size of the device and the model, a central air conditioner can draw around 15 to 20 amps. 

    Portable AC Amps Final Words

    Final Words

    Ending up with an air conditioner that does not match the energy requirement of your home and uses more energy is a frustrating experience. This is why knowing how many amps your device uses is essential. 

    Furthermore, you can have an estimate of the energy consumption as well as the costs you may incur. So, refer to my article to know more about the air conditioner capacity and the amperage rating to make an informed decision for efficient energy use. 

    When it comes to buying a new dehumidifier for the bathroom, you might feel overwhelmed since a lot of factors must be taken into consideration. 

    Nevertheless, you can simplify the search by asking the right question while choosing them. One of the most critical questions you must consider is, “What size dehumidifier is appropriate for my bathroom?” 

    Yes, you heard us right; size and capacity play a crucial role in choosing the suitable dehumidifier for your bathroom. For instance, a small dehumidifier will fail to get the job done if you have a massive bathroom with ample space. 

    Besides this, they are designed to absorb a specific moisture unit within a day. This unit of moisture is known as PPD or pint per day. Therefore, choosing the right model requires you to measure the amount of humidity in your bathroom. 

    However, other factors can influence the model you require for your bathroom. On that note, we have compiled this guide so that you find the appropriate dehumidifier for your bathroom. 

    How Do I Select The Right Size Dehumidifier

    Modern humidifier and air purifier, place for text. How Do I Select The Right Size Dehumidifier.

    As we have mentioned earlier, two important factors play an important role in deciding which dehumidifier is ideal for your bathroom. 

    In this section, we will focus on different room sizes and which dehumidifier will be appropriate. Before we begin, you will need to measure the area of your bathroom in sq. ft. measurement. You can follow these steps to measure your bathroom: 

    • Begin the process by measuring the length of the bathroom in feet unit
    • Repeat the same process while measuring the width of the bathroom
    • Multiply both of the measurements to get the area in sq. ft.

    In addition, some owners prefer to move the dehumidifier around their house. In this situation, we recommend measuring the largest room in your house so that you can purchase a large dehumidifier. Besides this, you can use the following tips to decide which dehumidifier is compatible with your bathroom. 

    1. Large Spaces ( Approx 2,500 Square Feet)

    In case you are living in an area that experiences high humidity, you might require a whole-house dehumidifier. Moreover, it can be ducted to the HVAC system of your house, making it easy to install. You can use a whole-house dehumidifier to prevent mold and mold odor in your room. 

    Initially, you might view this as an expensive investment since whole-house dehumidifiers are more costly than portable units. However, it is manufactured to cover large areas of 3000 sq. ft. or more. This makes it a cheaper alternative since you don’t need to purchase multiple models for your house for a long period. 

    Apart from this, it can be used to enhance the efficiency of your AC since it can provide cool and dry air, which is soothing for the skin. 

    2. Small Spaces (Approx 100 To 250 Sq Ft)

    When it comes to small rooms, it is tough to install a 70-pint dehumidifier since it takes up most of the space; therefore, it leaves less space for moving around. Besides this, it can create a lot of noise while drawing moisture from the air. Hence, we recommend using a mini dehumidifier. 

    Generally, a mini-humidifier is designed to cover a space of 100 to 300 sq. ft. Therefore, it doesn’t create any noise and effectively balances the moisture level in your room. In addition, it is ideal for small bedrooms, nurseries, and children's rooms since it is easy to move around and compact. 

    Nevertheless, it does have one minor drawback, which is it can’t retain excess moisture due to its small water tank. 

    Most brands nowadays design mini dehumidifiers to turn off once the reservoir is full automatically due to its small pint capacity. This ensures that the device doesn’t get spoiled due to an overload. 

    3. Cool Environment

    For those who live in a cold region that experiences cold weather throughout the year, we suggest not purchasing a dehumidifier since it will not work. In fact, the water in the reservoir can end up freezing, which causes it to waste more energy than usual. Eventually, the unit can get damaged internally, and you might require to spend a lot of money to repair it. 

    Instead of using a regular dehumidifier, you can opt for a desiccant dehumidifier to help you with the humidity problem. Desiccant models have a fitted rotor filled with sheets as the main component. These sheets are made from desiccant material which makes them extremely porous and highly absorbent. 

    Therefore, as soon as the fan draws the air into the unit, it passes through the rotor sheets, and the moisture is absorbed. 

    Notably, a desiccant dehumidifier is quieter since it doesn’t require a compressor. Furthermore, it offers better energy efficiency while keeping your room dry. 

    4. Hot Environment

    For those who are living in the southern part of the world, you will require a larger dehumidifier since the humidity levels will not go lower than 70%. As such, a refrigerant model is ideal since it can extract high moisture levels from the air. Moreover, it works in hotter temperatures, whereas desiccant models fail to draw moisture from the air. 

    The refrigerant models draw moisture from the air through the fans and convert them into cool air through coil sets. Besides this, the refrigerant liquid circulating through the model in the form of gas plays a very important role in keeping the air cool and retaining moisture. Hence, you balance the moisture levels at your place while it keeps the rooms cool. 

    However, refrigerant models are usually bulky, which makes it hard to move around. Therefore, you should only purchase them if you have plenty of space. 

    How To Choose The Right Dehumidifier Capacity Model To Absorb Excess Moisture

    As we discussed earlier, area coverage is one of the most important factors to consider while picking a dehumidifier. In the same way, you must check the humidity levels since it can greatly influence the model you will require. Most owners use humidity meters to check the humidity levels in the house, but this is not needed. 

    Keeping this in mind, here are a few key signs you should consider while selecting the different types of dehumidifier capacity. 

    A. Moderately Damp Spaces

    When it comes to moderately damp areas, you don’t need a bulky or large-capacity unit since it has low moisture levels. Therefore, it doesn’t require too much energy to extract moisture from the air. On that note, we recommend using a 30-pint dehumidifier for a large space of 2,500 square feet. In fact, this unit can easily absorb all the moisture without creating too much noise. 

    On the other hand, smaller areas ranging from 500 square feet to 1000 square feet will require a ten or 20-pint dehumidifier. Moreover, it is designed to be extremely compact so that you can store them in a small corner without any difficulty. 

    B. Very Damp Spaces

    If you notice damp spots all over the place, it is a clear sign that your house requires a higher capacity unit to absorb all the humidity and bring down the humidity levels. Large areas ranging from 1000 to 2500 sq. ft. will require a 50-pint dehumidifier to get the job done. Moreover, it can draw out humidity without getting overwhelmed by excess power consumption. 

    In contrast, smaller areas with high humidity will require a 30-pint unit. Since it will be compact, you don’t have to worry about storing them. 

    C. Wet Spaces

    While checking the moisture levels, if you notice wet spots in the entire house, you will require a strong humidifier to absorb the excess humidity from the air and the environment. Hence, we suggest using a dehumidifier model with an absorption rate of 50 to 70 pints. A 70-pint unit can easily remove all the moisture from your house in no time. 

    However, they tend to be a bit noisy; therefore, you should only keep them on for a short period. 

    In case you are living in a smaller space that ranges from 500 to 1000 sq. ft., we recommend a 50-pint unit. It might look bulky for a small space, but it will get rid of the excess moisture while preventing mildew and molds from occurring. 

    D. Extremely Wet Spaces

    Lastly, if you notice standing water in different parts of your room, we recommend getting an LGR dehumidifier. This unit is specifically designed to get rid of the moisture while it helps to dry the place and prevent water damage. However, LGR units are extremely bulky and expensive. 

    Instead, you can opt for a 70-pint dehumidifier for large spaces and a 50-pint unit for small spaces. Both of these units can reduce the moisture levels provided you let them run for a long period. If you are wondering, “where to place a dehumidifier in a bathroom?” we recommend installing it far away from a tap or water source. 

    Other Factors To Consider While Choosing A Dehumidifier

    Dehumidifier with touch panel, humidity indicator, uv lamp, air ionizer, water container works at home in bathroom. Air dryer. Other Factors To Consider While Choosing A Dehumidifier.

    Apart from room size and humidity conditions, several other factors can greatly influence the choice you make while selecting a dehumidifier. In addition, different households may not have the same factors and weather conditions, so you must carefully examine each of these factors before making your final choice. 

    Here are a few examples you must look out for: 

    1. Pets

    If you are a pet owner, it is crucial to keep the humidity levels low since dogs, and other furry pets tend to feel extremely hot in a high humidity climate. Moreover, if your dog has thick fur, it will take them a long time to cool down, which can cause them to develop heat strokes and other medical problems. 

    On that note, we recommend using a whole-house dehumidifier or a larger humidifier since it will reduce the excess moisture in the air. This will ensure your furry friends have a comfortable space to live and move around. In case you are short on money, you can use cat litter as a dehumidifier since it works well in absorbing moisture. 

    2. AC

    Having an air conditioning unit can significantly enhance a dehumidifier's performance since both home appliances work similarly. If you like to use the AC often during the summer, we recommend getting a small dehumidifier to accompany it. In fact, it will remove any moisture remaining in the air while using less energy. 

    By working together, these home appliances can create a cool and dry environment that will soothe your mind and help you to feel comfortable while relaxing. Nevertheless, you must ensure to turn off the unit as soon as the room gets cold. 

    3. Humid Climate

    In case you are living in a region that experiences a humid climate throughout the year, the relative humidity will be slightly higher indoors. One of the most effective ways of choosing the right unit for this type of situation is by adding ten pints to the model you prefer. For instance, if you were thinking of using a 50-pint unit, we suggest using a 60-pint unit instead. 

    This will allow the dehumidifier to remove the excess humidity present in your room. 

    4. Nearby Dryer And Washer

    When it comes to small apartments and townhouses, the dryers and washers are usually placed near your living space, which can cause the humidity to spike up in your house. Therefore adding an extra 5 pints to the model you are planning to choose will compensate for the excess moisture present in the air. 

    How Big Of A Dehumidifier Do I Need For My Bathroom FAQs

    How Big Of A Dehumidifier Do I Need For My Bathroom FAQs ?

    Is It Better To Purchase A Bigger Dehumidifier For Your Bathroom?

    Technically speaking, there is no harm in purchasing a bigger dehumidifier for a small bathroom since it will work faster to draw out all the moisture from the air. Hence, you can save energy since you don’t need to keep it on for a long time. 

    However, a bigger dehumidifier tends to be noisy and a lot more expensive. 

    Which Size Dehumidifier Will Be Ideal For The Basement?

    While choosing the appropriate size dehumidifier for your basement, you must consider two important factors, which are as follows: 

    • Area of the basement
    • Level of humidity

    For instance, most basements tend to be damp; therefore, choosing a large-capacity dehumidifier will ensure the job is done. Besides this, you must calculate the area of the room in sq. ft. since it will help you to determine if the room is small or big. This will help you choose the right dehumidifier for that space. 

    Do You Require A Dehumidifier For Each Room?

    Ideally, you should install a dehumidifier in each room if you live in a humid region, but you must take into account two factors. Firstly, if you live in an apartment and all the rooms are close to each other, you can use a single large dehumidifier to draw air from all the rooms. Just make sure to keep the entrance of the rooms open so that the dehumidifier can access the rooms easily. 

    Secondly, if you live in a multi-story building, you must purchase a whole-house dehumidifier for each story in the building. You can opt for an easy-to-carry dehumidifier since it is extremely portable and easy to carry around. 

    Is There Any Harm In Using A 70-Pint Dehumidifier When Your Room Requires 30-Pints?

    You can install a 70-pint dehumidifier for your room since it will absorb all the moisture in the air in no time. Moreover, you can save energy since you don't need to turn it on for the whole day. 

    However, it does make a lot of noise if you install it in a small area. Nevertheless, you can ignore this drawback if your primary goal is to save more energy and money in the long run. 

    How Big Of A Dehumidifier Do I Need For My Bathroom Final Words

    How Big Of A Dehumidifier Do I Need For My Bathroom Final Words

    With that, we have come to the end of our extensive guide. Before logging off, we want to summarize a few points to make your search for a dehumidifier easy and simple. 

    Firstly, you should always consider the size of a bathroom since all brands design their dehumidifier for a specific space and size. You can measure the area of your bathroom by multiplying the width and length of the space. 

    Apart from this, you should consider the level of humidity in your bathroom. If your bathroom is constantly wet, you will require a dehumidifier with a moisture absorption rate of 50-pint to 70-pint. 

    Checkout our previous article on how to properly use colored pencils to gain information on painting and sketching. This article is off topic for people searching for the right dehumidifier for bathroom, but can be helpful for other uses.

    That said, it’s a wrap. See you next time! 

    The need for a dehumidifier for the bathroom becomes apparent with all the steamy hot showers you take, leaving tiles and other surfaces untidy. 

    The moist environment of a bathroom can make use of a dehumidifier that can clean the excess moisture from the air and make it pleasant to breathe. And the cherry on top? It will also dry out the bathroom, which is excellent for someone in line to enjoy a relaxing bath after you. 

    There are a lot of perks of using a dehumidifier in the bathroom, and we have tried covering all of them today. So, leave all your clammy worries aside and see what a bathroom dehumidifier can do. 

    Can You Use A Dehumidifier In The Bathroom?

    Dehumidifier with touch panel, humidity indicator, uv lamp, air ionizer, water container works at home in bathroom. Air dryer. Can You Use A Dehumidifier In The Bathroom.

    Installing a dehumidifier in a house seems like a plan to many, even though some might not actually require one. The main purpose behind installing a dehumidifier is to remove the excess moisture in the air as opposed to humidifiers, and people who live in moist climates can’t go a day without one. 

    But why does it sound so odd when a person says, “Oh! I left my bathroom dehumidifier on?” 

    Is it so weird to install dehumidifiers in the bathroom? Well, it isn’t so. You can and, in fact, should install a bathroom dehumidifier, and there are plenty of reasons behind that. You use the bathroom multiple times a day, be it for washing hands or taking a nice hot relaxing bath. 

    That’s why the air in the space needs to be clean and easy enough to breathe for your sake. Not only the bathroom but other spaces like a laundry room or the crawl space also need a dehumidifier to maintain breathable air.

    A dehumidifier can provide a breathing space for people with asthma or allergies, as moist air can trigger some alarming issues making their condition worse. Dust mites thrive in areas with a relative humidity level of 65% or over. They can do a full family planning if the levels stay that way which can cause sneezing, wheezing, and worse, trigger existing allergies. 

    Therefore, dehumidifying the bathroom to safe humidity levels of 30-50% is ideal and should always be maintained to ensure your bathroom’s air is breathable and doesn’t cause issues. 

    Common Reasons To Install Bathroom Dehumidifiers 

    The hot air in the bathroom after a hot shower increases the humidity, and it grows further if you put wet clothes or dry your laundry in the same. The problem escalates if the bathroom is all but a tiny space with no windows whatsoever. This makes it hard for air to circulate, which deteriorates the air quality causing health concerns like breathing problems.

    This excess moisture in the air needs to be cleared out regularly, and that’s what a bathroom dehumidifier does. It works as an air purifier and as an air filter which rips the air off its excess moisture, which can bring a dynamo effect of problems if left untreated. 

    If you don’t know what these problems are or why a dehumidifier is the only option for some homeowners or renters, then take a look below. 

    1. Low Ventilation With No Windows

    Most people might be wondering, “Why a dehumidifier when windows could just do the job?” Well, that’s because some bathrooms aren’t lucky enough to have a window which reduces ventilation and air stays stuck in one place without moving around. For people with such bathrooms, there’s no other option besides a bathroom dehumidifier which will clean damp air and maintain its breathability. 

    Besides, even if you have windows in the bathroom, will you be willing to open them in the chilling winters? Sounds blasphemous, right? That’s why dehumidifiers stay the only option with bathrooms having low ventilation. Now, if you’re worried that a humidifier will hoard a large chunk of space in your bathroom, then fret not.

    Portable dehumidifiers work like a charm for people with tiny bath spaces, and they do an excellent job of moisture removal and are on par with an exhaust fan. 

    On that note, if you’re wondering, “how big of a dehumidifier do I need for my bathroom?” then know that it all depends on the size of the bathroom. Other than that, it also depends on the level of humidity it experiences, and on that basis, you can get a unit that will successfully solve the problem. 

    2. No Bathroom Extractor Fan

    Many people get baffled when they realize that there are some bathroom units with no bathroom fan to clean out all the steam after a hot shower, and they should be. That’s because exhaust fans are great for removing moisture from the air, and bathrooms with low ventilation especially need them. They vent out warm, moist air and help in air circulation, maintaining its quality.

    And units with no exhaust fan face issues with moist air more often than one with one. So, if yours doesn’t have a bathroom fan and you’re a renter at that, then getting a bathroom dehumidifier is an ideal solution. As exhaust fan installation may cause some damage, a portable dehumidifier without any necessary pleading or requests to the owner is great.

    Now, as we’re discussing air vents and their importance, there’s an ongoing debate regarding dehumidifiers vs bathroom vents and what people should go for. The answer is quite simple for that; it all depends on the persistence of moisture in your bathroom. If it’s occasional, then a bathroom extractor fan is enough, and if the moisture is persistent, then a dehumidifier is great.

    3. Condensation On Bathroom Tiles, Mirror, And Other Surfaces

    People often complain about crying or sweating bathroom walls, especially during winters when steam from hot showers condenses. This happens when hot air comes in contact with a cold surface and ends up condensing on the walls or other surfaces to cover it with water droplets. 

    This is quite problematic as increased exposure to such condensed water particles on surfaces like mirrors or wallpapers can end up destroying it. Additionally, these water droplets not only reduce the aesthetic and décor of the bathroom but also lead to mold growth, especially black mold, which is harmful. To counter this issue of condensation, bathroom dehumidifiers are necessary, especially if the bathroom has poor ventilation. 

    4. Mold And Mildew

    Another growing concern among renters with excess moisture in the air is the growth of mold and mildew in bathrooms. An area with moist air and low ventilation is heaven for unpleasant mold and mildew, which thrive in such an environment. And sadly, our bathrooms happen to be such havens for them. 

    They grow in cracks that experience frequent moisture, like around bathtubs, showerheads, and caulking, and taint the ambiance of the whole place. This growth can end up destroying essential appliances in the bathroom and lead to other health concerns. Thus, bathroom dehumidifiers become important to counteract their growth and protect the safe environment of your bathroom.

    5. Respiratory Issues

    Excess air moisture is a curse for people who suffer from respiratory issues like asthma, bronchitis, or other allergies as it can trigger the symptoms causing them. Under extreme circumstances, it can also lead to issues in breathability and deteriorate the overall air quality as organisms thrive in warm moisture-ridden air. 

    Therefore, dehumidifying air from time to time is vital to maintain proper air quality and avoid issues that can cause your underlying health problems to relapse. Besides, if you have elders at home, then a bathroom dehumidifier is extremely important to ensure your bathroom air remains clear. 

    6. Musty Odor

    Lastly, the musty odor that moist air carries is highly unpleasant, and you might end up spraying lots of freshener to tackle this issue which usually only worsens the situation. Likewise, moist air feels sticky on the skin, and you might want to take baths again and again to feel refreshed, which is quite troublesome. 

    This is why dehumidifiers are necessary, not only in bathrooms but also in the house, especially in places that experience lots of humidity. Furthermore, the thing about moist air is that it takes a turn for the worse in rainy seasons, which only adds up to the headache. 

    Therefore, installing a dehumidifier is a wise choice as you can plug it in, set a dehumidification setting to an optimal level, and just forget all your damp worries. They make cleaning moist air efficient, inexpensive, and less cumbersome. 

    Things To Consider While Installing A Dehumidifier In The Bathroom

    Things To Consider While Installing A Dehumidifier In The Bathroom

    Once you have identified the need for a dehumidifier in a small bathroom with poor ventilation, next comes educating yourself a bit about dehumidifiers and their types. Some people blindly opt for dehumidifiers without knowing a thing about their functioning, which poses problems later on. 

    That’s why we’ve created a brief buyer’s guide on bathroom dehumidifiers and what you should consider before buying the same. 

    1. Drawbacks Associated With Dehumidifiers

    Dehumidifiers are great for reducing humidity, preventing mold, and maintaining the quality of air in poorly ventilated units. However, they have their fair share of drawbacks too, which makes people think twice before incorporating them into their HVAC system. If you don’t know what these are, then find more on them below.

    A. Expensive

    One of the significant drawbacks of dehumidifiers, as opposed to exhaust fans, is that they are expensive, and the more advanced one you go for, the extra it will cost. Though they are an excellent one-time investment, some people don’t feel the need to spend over $200 when an inexpensive option in the form of an exhaust fan exists.

    Still, you should know that though they are expensive, they are extremely easy to set up and require minimal installation. In that sense, their installations are cheap, unlike ceiling exhaust fans, which need rewiring, breaking, and prior permission from the owner if you’re renting.

    B. Take Up A Lot Of Space

    People with small bathrooms don’t like the thought of their valuable bathroom space being hoarded by a dehumidifier which is quite troublesome. If you’re planning to install a bathroom dehumidifier permanently with a hose for emptying the sucked-up moisture, then extra space to accommodate the unit is crucial. 

    Though a small dehumidifier doesn’t take up too much space, it won’t work efficiently either if your bathroom is large and faces persistent humidity issues. Hence, if you’re planning to install a dehumidifier, then it’s better to prepare your heart for the valuable space that will be taken up by the unit.

    C. Regular Maintenance 

    We all know that a bathroom exhaust fan needs to be cleaned and regularly maintained for proper functioning, and in the same manner, a dehumidifier needs proper maintenance too. In fact, if you’ve opted for a tank dehumidifier that stores moisture inside the tank, then this tank needs to be drained manually and cleaned, if not daily.

    But this issue can be countered if you don’t want to manually drain water from the dehumidifier by opting for a high-efficiency dehumidifier with a drain hose. A tankless, tamper-proof dehumidifier with a continuous drain option is great for hands-off humidity control featuring a control panel for better control, and you should definitely go for it.

    D. Noise 

    Many people are of the idea that dehumidifiers don’t make noise, unlike exhaust fans which can be quite loud while performing their regular job. However, they don’t know that dehumidifiers are noisy too, and in units with loud compressors, the problem becomes worse. That’s because dehumidifiers work like refrigerators and make somewhat the same kind of noise.

    You can hear the noise of the compressor, dripping water, and the condenser fan while the dehumidifier is working. But don’t worry, as this can be easily tackled if you choose the right dehumidifier. 

    People with a Tosot dehumidifier have no issues with noise as it’s very quiet even in the highest setting (52 decibels) and just 48 on the lowest. It carries a white noise which isn’t so problematic or irritating, so you can go for it too.

    2. Electricity Cost

    Most bathroom dehumidifiers work on electricity and need to be constantly plugged in if the moisture problem is persistent. This will shoot up the electricity cost inevitably and if you aren’t ready for that, then consider your options well.  

    Though dehumidifiers don't cost much in terms of electricity compared to other household appliances like refrigerators or ACs, they still run 24/7, which can add to your electricity bill. But this can be tackled as most dehumidifiers today are energy star certified. And if you go for high-efficiency dehumidifiers with high dehumidifying capacity, then it will be more energy efficient. 

    3. Kind Of Dehumidifier To Install

    Another thing that you need to consider before buying a dehumidifier is the kind of dehumidifier that will work best according to your current circumstances or needs. Here, you need to pay close attention to the brand, dehumidifying capacity, type, and the right size of dehumidifier that best fits your bathroom. 

    There are many types and brands of dehumidifiers available on the market today, and each one of them vows to be the best. But that’s for you to decide after closer inspection into your needs. For example, if you face persistent humidity issues in the bathroom, then getting a dehumidifier with great dehumidifying capacity would be excellent. 

    It won’t only save energy but will remove moisture and ensure the air is dry enough. On that note, if you have a large bathroom, then getting a large dehumidifier with optimum capacity is ideal. While deciding on the size of the dehumidifier, you should closely inspect your bathroom size and then get one with the right capacity to store water after dehumidification. 

    If you’re planning to get a dehumidifier featuring a water tank, then choosing the right tank size and tank capacity to hold water is important. Though it’s suggested to get one with a continuous drain hose as it doesn’t require manual draining, which seems like a hassle to many.

    Also, you should always get a dehumidifier with a washable filter which can be cleaned once every month for better performance and durability. 

    White dehumidifier in the bathroom of the apartment. Close-up, selective focus. Dehumidifier In The Bathroom Frequently Asked Questions.

    Can You Use A Dehumidifier In The Bathroom Frequently Asked Questions ?

    Where should I install the dehumidifier in the bathroom?

    As a dehumidifier is an electrical appliance, it’s better to install it in an area in the bathroom with less splashing. However, you should also place it somewhere close to the drain-source if your unit features a drainage hose.

    Is it a good idea to install bathroom dehumidifiers?

    Yes, installing a bathroom dehumidifier is the right decision, as bathrooms face high humidity and moisture after hot showers. They need to be dehumidified regularly to prevent the growth of mold and mildew and ensure air remains dry and fresh.

    Which is better - the bathroom dehumidifier or the exhaust fan?

    Bathroom dehumidifiers and exhaust fans have the same goal of dehumidification, and they both have their own perks and usage. In bathrooms that experience persistent moisture problems, bathroom dehumidifiers are good, whereas an exhaust fan is great for occasional problems with humidity. 

    Other than that, a ceiling exhaust fan has a complicated and costly installation compared to a dehumidifier. However, the latter tends to be an expensive purchase than the former. So, you should consider these factors before buying an exhaust fan or a bathroom dehumidifier. And go for the one that best suits your needs. 

    Does a dehumidifier work when windows are open?

    Windows should be closed when the dehumidifier is on. Otherwise, it won’t be able to work efficiently. 

    Can You Use A Dehumidifier In The Bathroom Final Remarks

    Can You Use A Dehumidifier In The Bathroom Final Remarks

    Bathroom dehumidifiers are great for preventing the problems caused by damp air, like the growth of mold, condensation, poor breathability, and others. They act as an air filter and improve the quality of air while also drying the clammy bathroom after you’re done showering. 

    So, don’t be shocked when you hear someone using a dehumidifier in the bathroom, as a room, basement, lobby, or laundry aren’t the only places that suffer from excess humidity. Try installing the same in your bathroom and see how all your underlying moisture problems wash away after using them. 

    Do you feel uncomfortable inside the closed bathroom of your home? It is probably due to moisture that makes the air heavy and promotes the growth of bacteria and molds. Thankfully, you can get rid of the humidity with a dehumidifier for bathroom spaces or an exhaust fan vent. 

    The water vapors become trapped within a closed bathroom, due to which it becomes hot and humid inside. That is why it is recommended that you install an exhaust vent or a dehumidifier in your bathroom. 

    Both of these options can effectively remove all the ambient moisture from a closed bathroom space. But now you may ask - what is the better option among these two? Well, they have their respective pros and cons. While a dehumidifier is portable and easy to install, an exhaust vent is relatively cheaper and space-saving. 

    In this guide, we have addressed the differences between each of them so that you can decide what’s best for you. So, let’s get going then, shall we? 

    What Is A Bathroom Dehumidifier?

    Dehumidifier with touch panel, humidity indicator, uv lamp, air ionizer, water container works at home in bathroom. Air dryer. What Is A Bathroom Dehumidifier.

    A bathroom dehumidifier is an appliance that eliminates the excess moisture from your bathroom. When you use it, the machine pumps out the humid and stagnant air inside and replaces it with fresh air. 

    Most bathroom dehumidifiers operate in a manner similar to an air conditioner or a refrigerator. They suck in the air from your bathroom and remove the moisture via condensation. The condensing moisture is drained away while the dry air is cycled inside your bathroom to give you a comfortable environment. 

    Many dehumidifier models may also simultaneously cycle outside air to keep your bathroom fresh. If the unit uses a refrigerant, you can get cool air from the dehumidifier, which is a bonus, especially if you live in areas with a warm climate.

    There are some dehumidifier models that work with the help of a desiccant. This is a specialized substance that is extremely effective at absorbing water, even in the smallest amounts. Therefore, it absorbs all the moisture from the air to give you a fresh and dry ambiance inside the bathroom.

    Silica gel is the most common and well-known desiccant that is used in such dehumidifiers. You might have come across silica gel since they are used inside computer cabinets, storage areas, and wardrobes to keep them free from moisture.

    The moist air of the bathroom is cycled through the desiccant to keep the moisture levels under control. And once the desiccant becomes saturated, it is reactivated by passing warm air through it.

    Regardless of the type, you will find that they are extremely effective in removing moisture build-up from the bathroom, even when you are taking a shower. As such, dehumidifiers prevent mold growth inside the bathroom for a hygienic environment. 

    Bathroom Dehumidifier Pros

    There are numerous advantages to using a bathroom dehumidifier, as we have discussed below.

    1. Provides Precise Humidity Control

    These electrical appliances come with a precise humidity sensor or a humidistat that can control the moisture levels with exceptional accuracy. This feature helps ensure that your bathroom is neither too humid nor too dry. 

    2. Can Be Used For Long Periods

    Modern dehumidifier units are highly energy-efficient, which allows you to use them for extended periods without ramping up your energy bills. Because of that, they can keep your bathroom dry and fresh throughout the day. 

    This is even more of an advantage if you live in humid climates where the bathrooms can become exceedingly moist and uncomfortable. If you can use the dehumidifier throughout the day, it will keep all the moisture out. 

    3. Highly Convenient Usage

    Bathroom dehumidifier units are often equipped with automatic controls, which eliminates the need for manual intervention altogether. So, all you need to do is turn it on and set a target humidity level, and the machine will do the rest. 

    It will automatically turn on once the humidity rises or falls below the specified levels. Conversely, once the target moisture level has been achieved, it will turn off on its own, thereby conserving electricity. 

    4. Easy To Install

    Most dehumidifier units come with detailed installation instructions so that you can get them up and running without a hitch. Even if they don’t, manually setting them up beside the bathroom window or outlet is incredibly easy. Take the machine out of its box, plug it into the nearest power outlet, turn on the switch, and you will be good to go. 

    Additionally, you don’t have to worry about drilling holes or running electrical wires either, which makes it even more convenient to install. 

    5. Portable

    A majority of dehumidifier models come with portable design elements, such as wheels and carry handles. Thus, you can conveniently carry the unit with you and install it elsewhere. 

    This is highly advantageous if you are planning to move out of your current home. Besides, it allows you to remove the dehumidifier from the bathroom in case you are planning a renovation or a periodic maintenance routine. 

    6. Low Maintenance

    Dehumidifiers require very little maintenance, even after extended periods of usage. So, you won’t need to clean it every few months, which means that you save a lot of time and money on its upkeep. 

    Bathroom Dehumidifier Cons

    While it is obviously a great choice to remove moisture from your bathroom, a dehumidifier does have its drawbacks, as discussed below.

    1. Expensive Purchase

    Dehumidifier units are relatively expensive to purchase compared to appliances, such as exhaust fans. Besides, the more features there are in the appliance, the higher the price tag becomes.

    This is a major reason why many people shy away from them, as the costs for purchasing one may exceed their budget considerably. And although there are many cheap dehumidifiers available for purchase today, they may not be of good quality. Eventually, they may encounter issues that will increase long-term expenses.

    2. Occupies Space

    Despite being portable and easy to install, dehumidifier units take up a lot of floor space in your bathroom. This can be a major inconvenience, especially if you have got a small bathroom, as in such a case, you will be left with little room to move around.

    Moreover, there is a chance that water from the shower may fall directly on the appliance, which can lead to disruptions and short circuits if it is not waterproof. So, unless you have a spacious bathroom, you might want to reconsider getting a dehumidifier.

    3. Require Periodic Drainage

    While most of the operations of a modern dehumidifier machine are automatic, there are some tasks that need to be done manually. One of them is emptying the drain condensate from the tank from time to time.

    Unless your dehumidifier has auto-drainage features, the liquid water from the condensation process will accumulate in a storage tank below the machine. You will need to empty it manually to avoid the water from overflowing from the tank and making a mess everywhere.

    Luckily, if you attach a pipe to this tank, you can bypass this process. But then, you will need to maintain the drainage pipe so that it doesn’t become blocked by debris.

    What Are Exhaust Vents?

    Close up man hand installing vent cover from ceiling Mounted Air Conditioner. What Are Exhaust Vents.

    Exhaust vents are openings on the bathroom wall that serve to provide adequate ventilation to the room. Installing a vent is a tried and tested method of removing humid air from your bathroom. The system consist of an exhaust fan at the end that helps to remove humid air from the bathroom, thereby keeping it dry. 

    In this regard, the exhaust fan is the core component in a bathroom vent. Without it, there will be no means to channel the air through it. The fan rotation is directed in such a manner that it sucks in air from the interior and expels it outwards.

    That said, the fan’s rotation can be reversed to supply fresh outdoor air inside the bathroom. Not only that, but it also helps circulate the bathroom air such that it doesn’t become stagnant. The bathroom exhaust vent always needs to be open when the fan is turned on, or else it will fail to circulate the air and reduce bathroom humidity. 

    In addition to moisture removal, an exhaust vent fan eliminates other materials suspended in the air, such as mold spores, dust, and smoke. Thus, a bathroom exhaust fan has a lot more uses than just humidity control. However, you might need to install multiple fans for this purpose.

    Bathroom Exhaust Fan Pros

    There are several advantages to using bathroom exhaust fans, and some of the major ones have been discussed below.

    1. Highly Versatile

    An exhaust fan installed in the bathroom vent is highly versatile since it can be used for a range of other benefits. As we have stated above, the fan removes smoke, dust, and mold spores from the air, providing a dry and hygienic environment within the bathroom.

    On top of that, it removes any foul odors from the bathroom. So, a person, especially a guest, entering the bathroom will not have to withstand any foul stench.

    2. Considerably Cheaper

    Compared to a dehumidifier, a bathroom fan is relatively cheap, which is why it is preferred by many people. Of course, if you want to spend more money, you can get some of the pricier options that have additional features and a premium feel. But if you are looking for a standard fan with basic functionalities, you can easily get one without breaking your bank. 

    Even if you install multiple fans for your bathroom vent, the price that you will need to pay will be less than a typical dehumidifier. 

    3. Quick Action

    An exhaust fan in your bathroom vent acts fairly quickly than a typical dehumidifier. It starts sucking out the moist air from the bathroom almost instantly after you switch it on.

    This is a significant advantage if your bathroom is used frequently. The fast action removes the moisture and odors from the bathroom while you are using it. So, the next person in line does not need to wait long before using the bathroom.

    4. Can Be Mounted On The Windows And Walls

    Unlike a dehumidifier, which can only be kept on the floor, the exhaust fans can be mounted on a wall or a window. In fact, window exhaust fans are relatively easier to set up than wall fans.

    Either way, you will have more space in your bathroom, which will make your life easier when using the shower. You will have plenty of room to move around. And, the fan will remain protected from water splashes since it will be at a considerably higher level than most of your bathroom fixtures.

    Bathroom Exhaust Fan Cons

    Despite its versatility and affordability, there are certain disadvantages to using an exhaust fan in your bathroom:

    1. Difficult To Install

    The installation process for an exhaust fan is fairly complicated, especially when compared to a dehumidifier. You need to put in a lot of effort in preparing the vent, wiring, and mounting the fan. In fact, adjustments to ensure the fan has been properly installed will require even more time and effort.

    So, if you are not as qualified or don’t feel like putting in the effort, getting a professional to do it for you is your best bet. But be ready to shell out quite a bit of money if you decide to do that because professional installation services do not come cheap. Most of the time, the costs of installation will be almost as high as a standard dehumidifier.

    Therefore, the price advantage that you get with an exhaust fan will be completely lost in this case. And because of this, many people may find it inconvenient to install a bathroom exhaust fan.

    2. Blocks Your Window

    If you decide to mount the exhaust fan on your bathroom window, it might be a bit cheaper than mounting it on the wall or ceiling. But it will completely block out the window, which can be considered as a disadvantage.

    You won’t be able to use your window normally, especially when using the fan. Furthermore, it will prevent sunlight from entering your bathroom. This can be problematic if you use the window as the primary light source during the daytime.

    3. Requires Frequent Maintenance

    The blades of a bathroom exhaust fan are generally exposed, due to which dirt and grime may accumulate on them pretty easily. Over time, this will make the blades heavier, and as a result, their spinning speed will decrease. Meaning, the overall efficiency of the fan will be negatively impacted.

    Besides, the accumulation of dirt may clog the blades, in which case you won’t be able to use the fan at all. To avoid such issues, you will need to clean the fan regularly, which can be a hassle. 

    4. Not Very Accurate

    Unlike a dehumidifier, an exhaust fan does not come with a humidity sensor, so it isn’t easy to control the moisture levels. You can try using a separate humidistat in your bathroom to complement the exhaust fan, but even then, the results will not be as accurate as a standard dehumidifier.

    5. Creates Negative Air Pressure

    When you use an exhaust fan conventionally, it expels the air inside the bathroom outwards. As more air gets expelled, the air pressure inside your home will decrease compared to the ambient air pressure outdoors. This will create negative air pressure inside your home, which will cause unfiltered air from the outside to seep in through cracks and crevices.

    In order to compensate for this, your HVAC system will need to work harder than normal. Not only will that increase your energy bills, but it will also overload the HVAC system, eventually leading to issues and breakdowns.

    6. Allows The Entry Of Bugs And Other Critters

    Exhaust fan vents are generally open to the outside world to allow the passage of air. But when the fan is not in use, the vent outlet allows the passage of bugs and small critters inside your bathroom. And soon enough, you will have to contend with a bug infestation in your household.

    So, if you do not want to see roaches or spiders while taking a shower, we suggest that you install vent flaps. That will close off the fan outlet when it is not in use, thereby keeping most of the bugs out. However, it is not a foolproof solution since smaller bugs, such as ants and mites can still get through.

    Bathroom Dehumidifier Vs Bathroom Vents: Which Is Better For You?

    Now that we have discussed the pros and cons of both dehumidifiers and vents or exhaust fans, the question automatically arises - which one is a better fit for your bathroom? Well, answering this question is not as simple because it depends on a lot of factors, such as the frequency of usage, size of your bathroom, budget, and so on.

    Both of these appliances are highly effective at removing moisture. But your decision to get one over the other should be based on the factors that we have mentioned above. For instance, if your bathroom is used throughout the day or you live in a humid climate, a dehumidifier is a better option. 

    Conversely, if you have a smaller bathroom, you will be better off with an exhaust fan. But in that case, you will need to take into account the aspects of installation and maintenance, which can be inconvenient.

    Additional Suggestions For Keeping Your Bathroom Moisture-Free

    In this section, we have provided some suggestions and tips that you can follow to complement these appliances and keep your bathroom free from mildew growth. So, if you are curious, keep reading below.

    1. Use Cat Litter As A Dehumidifier

    Yes, you read that correctly - you can use cat litter as a form of a homemade dehumidifier. Cat litter is typically made from clay and silica gel, and the latter is a powerful desiccant, as we have discussed before.

    If you are now wondering how to use cat litter as a dehumidifier, it is pretty simple, actually. All you need to do is place some of the cat litter in an open container and keep it in one corner of your bathroom. 

    2. Use Mildew-Resistant Paint

    In case you are planning to renovate your bathroom, you should consider using mildew-resistant paint on the walls. Such paints actively prevent the growth of mildew so that you can maintain a hygienic environment in your bathroom.

    3. Use An Enclosure Around The Shower

    If you use an enclosure for your shower, the water will not splatter all over the bathroom. Instead, most of the water will be confined to a single area, which will reduce the load on your exhaust fan or dehumidifier.

    Ideally, you can use plastic curtains to enclose your shower and prevent the water from splashing all over. But if you want more sophistication and privacy, you can use sliding glass panels.

    4. Fix Any Leakages

    Leakages are one of the biggest reasons for excessive moisture inside your bathroom. It creates persistent humidity inside the bathroom, due to which you will need to run the dehumidifier or vent for longer. Aside from that, a leaky bathroom fixture can ramp up your water bills significantly.

    So, it is in your best interests to get them fixed as soon as possible. If you sit on the problem, it might get even worse, which will cause a lot of trouble for you later on.

    Dehumidifier with touch panel, humidity indicator, uv lamp, air ionizer, water container works at home in bathroom. Air dryer. Dehumidifier Vs Bathroom Vents Frequently Asked Questions.

    Dehumidifier Vs Bathroom Vents Frequently Asked Questions ?

    How big of a dehumidifier do I need for my bathroom?

    The sizes of dehumidifiers are usually measured in pints, and it denotes the volume of water that is removed in 24 hours. Taking that into consideration, how big of a dehumidifier you need depends on the square footage of the bathroom and the relative humidity levels. 

    For instance, a 20-pint dehumidifier will be sufficient for a 300 square feet bathroom with relative humidity levels of 50 to 60%. So, once you measure these variables, you can consult a suitable dehumidifier size chart to determine the most suitable option.

    What is the ideal relative humidity level for your bathroom?

    The humidity levels in your bathroom should preferably be maintained between 30 and 50%. That way, there will be very little moisture in the air, but it won’t feel too dry either.

    Can you use an exhaust fan and dehumidifier at the same time?

    Yes, you can use both of these appliances at the same time, as the combination will considerably speed up the dehumidification process. But if you have a small enough bathroom, or the relative humidity levels outside are low, running them both at the same time can be redundant.

    Can you control the speed of the exhaust fan?

    Most exhaust fan models typically do not come with speed controls, so you can’t control their speeds. That said, there are some brands that provide speed control mechanisms for their fans. Therefore, it would be best if you refer to the product documentation to learn more about this aspect.

    Dehumidifier Vs Bathroom Vents Final Words

    Dehumidifier Vs Bathroom Vents Final Words

    Now you know about the comparative differences between a bathroom dehumidifier and an exhaust fan vent. We are hoping that we have been able to satisfy your curiosity with this guide. 

    Keeping the bathroom fresh and dry is of utmost importance for a homeowner. And both of these options provide you with the means to do that. But if you are not as experienced in such matters, it is quite natural to feel confused. 

    That is why you should make a well-informed decision so that you don’t have any regrets later on. The decision should be based on objective measurements and facts, and if you have gone through our guide, you will know what these are. 

    Until next time! 

    Being a good painter is no guarantee of achieving greatness if you don't use the best colored pencils

    It means that even if you know how to paint and draw realistic portraits, there's no surety of people appreciating the artwork. This is because everything from the type of pencil to the paper quality determines how the final drawing looks. 

    That's what separates good painters from great painters, so we will offer a helping hand in today's guide. We will explain why you should draw with colored pencils on canvas to make your artwork unique. 

    Can You Use Colored Pencils On Canvas?

    Can You Use Colored Pencils On Canvas

    While some people shy away from drawing with colored pencils on canvas because they aren't the easiest surface to sketch on, all you need is practice. And it's important to choose a suitable pencil depending on the medium to draw precise strokes.

    Drawing with a colored pencil is different since the drawing surface has to absorb the color from charcoal or graphite. So, preparing the surface and using a durable pencil that won't warp with time is essential.

    Once you have the right pencil, look closely at the surface, and you will find harsh crossovers. This means applying only a little pressure is enough to get the accurate shade because as the surface sinks, the color is likely to sink as well.

    We recommend using soft-grade pencils on an unprimed canvas for the best results. But if needed, you can prime the canvas slightly to take advantage of its unique toothy texture.

    Also, note that drawing with colored pencils on a canvas surface is pocket-friendly, and when you learn how to add layers, the colors appear more vibrant and life-like. The only downside is that the surface chips away at the pencils quickly; that's why a smooth drawing surface will prove more convenient, which we discuss in the next section.

    Why Should You Use Colored Pencils On Canvas?

    Colored pencil drawing on canvas isn't straightforward because it doesn't offer a very smooth drawing surface compared to other mediums. The toothy texture means soft colored pencils wear out quickly since the surface rapidly absorbs the color pigments. 

    So, there are 2 things to keep in mind - you will have the sharpen the pencils frequently and be careful while applying the strokes. For everything else, read the following points:

    1. Durable Support Canvas

    The great thing about drawing on canvas is that you can create bold drawings that are difficult to replicate on other mediums. Since it's tougher than paper, even heavily primed canvas can handle more erasing and burnishing, which makes it easy to correct both major and minor changes. 

    If you were wondering how to erase colored pencil from canvas without affecting the artwork, now you know.

    2. Saturated Color

    Because canvas isn't a smooth surface, and you will find weave patterns on the medium, it quickly absorbs the color from the pencils. The best color pencil paintings on canvas are vibrant and highly saturated, so sharpen the pencil for the desired effect. 

    Greater vibrancy will increase the chances of the pencil blunting soon; that's why don't forget to keep a sharpener with you. But what if you don't want a vibrant effect? Is that possible? 

    It certainly is, and all you need is to gently sketch with the pencil for the white texture of the medium to show ever so slightly. This creates an airy feel, perfect for painting atmospheric environments or skies.

    We should mention that it's difficult to achieve the desired vibrancy on primed canvas, and it would be best to leave it unprimed. In other words, smoothing the canvas makes it behave more like paper which you wouldn't want in this instance. With experience, you can prime the canvas properly to the desired texture for the painting to stand out.

    3. Realistic

    Colored pencils on canvas deliver a more realistic effect than paper, provided you have a suitable solvent. It's possible to make the necessary adjustments depending on your painting, with drawn and painted looks making the portraits more eye-catching. 

    Overall, canvas is better for achieving a painted look which gives it a unique appeal.

    4. Versatile

    One of the main advantages of canvas is its versatility, and you can apply gesso to get a smoother surface. A gesso spread surface reduces the coarseness of canvas based on the quantity you apply. This is important for artists who want to portray details through their paintings and make minute changes. 

    Things To Consider Before Drawing On Canvas?

    Just knowing about the qualities of canvas isn't enough to become a successful artist. You must consider whether you want to use charcoal pencils, hard-graphite pencils, stretched canvas or oil paints.

    We have listed 2 basic points in this section to help you get the desired finish.

    1. Pencil Selection

    Even though some people are confused about the best color pencils for canvas, let us tell you that the obvious choice is a soft-grade pencil. Considering that you can alter the toothy surface of the canvas to a smoother medium, remember that it can tear, break, and be damaged when you apply too much pressure.

    Although you will get a lighter shade with such a pencil on canvas, it will keep the surface safe and free from harm. Moreover, as the surface thread won't tear easily, you can use these pencils for sketching, shading, or drawing.

    2. Apply Gesso

    While some artists prefer the rough texture of canvas, others use gesso to shade on a smoother medium. If you are intrigued, apply this light acrylic paint thinner and watch how the surface becomes stiff and hard. 

    Since the surface is now completely even, the chances of making mistakes decrease considerably, and you can sketch or shade easily. But especially pleasing is the fact that gesso acts as an added layer of protection by keeping the surface free of debris and dust accumulation.

    Can You Use Colored Pencils On Canvas Frequently Asked Questions ?

    Which colored pencils are suitable for drawing on canvas?

    Before drawing on canvas, you must have thought - what are colored pencils made of and which colored pencils are the most suitable? You should ideally look for durable and soft-grade pencils, among which the Faber-Castell Polychromos Colored Pencil Set is the best.

    These pencils have the highest order of pigments, and you can paint, draw, or sketch with aplomb without compromising speed or precision. The best part is that you can blend the colors well, which gives Faber-Castell the edge over other brands. 

    That's why seasoned artists and first-timers can easily use this set, ensuring that the charcoal shades look nice on the medium.

    Can you use colored pencils with acrylic paint?

    Yes, colored pencils and acrylic paints are a perfect match which ensures you can draw multiple layers, shades, and borders for greater efficiency and attractiveness. Moreover, this combination makes it easier to use colored pencils, as it guarantees precise control for the best results.

    The primary reason artists use acrylic paints with colored pencils is that they help portray an aesthetic vibe that is challenging to achieve otherwise. And there are hardly any chances of ruining the canvas, so you can get a unique finish with practice.

    Are harder-grade graphite pencils suitable for drawing on canvas?

    While some artists like the texture and color of hard-graphite pencils, it would be wise not to use them. These pencils have the maximum chance of damaging the texture of canvas because the medium is made of soft-threaded lines. 

    These pencils can tear the interlinking threads no matter how careful you are. Even light pressure can result in the pencil penetrating the canvas, which ruins the painting.

    Can you use oil-based or watercolor pencils on canvas?

    It's possible to use watercolor and oil-based pencils on canvas, but it would be best to choose products with a solid core for the latter. The harder the cores, the better the results on unprimed canvas, which will allow the colors to mix and blend easily.

    Similarly, you can work with watercolor pencils on canvas, regardless of the type of primer and quality of the medium. In most cases, these color sets are suitable for adding light shades without paints.

    Can You Use Colored Pencils On Canvas Conclusion

    Can You Use Colored Pencils On Canvas Conclusion

    You can't become an overnight success, and it will take years of practice before you master the art of using colored pencils. 

    But our guide showed you how you could do it, so keep learning various techniques and art forms to stand out. As Ralph Waldo Emerson said, "Every artist was once an amateur," and after reading our guide, we hope you have a better idea of what pencils to use. 

    Once you have the right equipment and understand the intricacies of painting on canvas, it won't be long before the art world takes notice of your paintings. 

    For seasoned artists, who play around with the highest grade oil paints effortlessly, it’s exciting to work on new or basic oil paints techniques. No matter whether you’re a budding artist or have been in the field for a couple of years, mastering the oil painting process is definitely on your bucket list. 

    But we understand that there are many considerations to make while approaching any oil painting, such as learning essential oil painting techniques. Each oil painting technique can be used to determine how long do oil paints last of different genres, or in other words, to create magic on the canvas! 

    Today we’ve compiled this extensive guide to make you aware of the oil painting styles to try out. Things will surely seem simpler after you give it a read. 

    Oil Paints Techniques

    Oil Paints Techniques

    To learn the art of applying different oil painting techniques to your artwork, you’ll first need to know about the different tools needed for the purpose. If you’re keen to use oil paints, make sure you know how to blend oil paints and have all the supplies ready for use. 

    The Tools You’ll Need

    1. Paint Brushes

    While choosing the paint brushes for painting, search for brushes that are specially meant for use with oil paints. Based on the subject of your painting, it’s best to choose brushes of different sizes and shapes as they will be required for various oil painting styles. 

    2. Canvases And Paint Sets

    At the start, a basic oil color set will be enough for working on your projects. Birchwood or Masonite canvases are generally preferred by beginners since the linen variety can be expensive. 

    These basic canvases work well for an extended period, provided you prime them properly before painting. But over time, you will be more inclined to purchase professional-grade paint sets rather than costly canvases. 

    3. Brush Cleaners

    You’ll need a good-quality cleaning solution to wash the brushes when you’re done painting for the day. Solvents like turpentine are pretty effective in this regard, and you can also utilize them for thinning pigments while painting. On a side note, you should use them only in well-ventilated spaces as they have a strong odor that can be suffocating. 

    4. Palette Knife

    While you’re combining colors, it’s best to utilize palette knives as such a tool will help you mix different colors evenly and prevent the brush from getting too pigmented. Moreover, you can apply palette knives to paint the artwork structurally as they add to the paint texture. 

    5. Paint Palette

    Generally, melamine or plastic palettes are quite easy to use and are the conventional palettes for oil paints. But in case you’re searching for the quintessential curved palettes, wooden boards having thumb holes are a great option. Just make sure you’re conditioning the surface using linseed oil to keep the colors from seeping through. 

    Oil Paints Techniques

    The Top 13 Oil Painting Techniques You Can Apply

    1. Blocking In

    To start with, we’ll be discussing this technique which literally requires blocking in the general shapes and colors applied on the canvas. 

    Blocking means to apply the colors and create the general composition without worrying about minute details. Using this technique, painters can develop an idea about where the artwork is headed. 

    Typically, thinned paint and large brushes are applied for this technique, as it will result in a no-frills artwork, which you can see by squinting your eyes for a moment. You can start adding the details and making all adjustments from then on. 

    To block in, you’ll have to begin by toning down the main color you’re using. Once that’s done, you can build up the color saturation as required in the course of the painting. 

    Keep in mind that if you block in a color with high saturation, the painting might end up being overwhelmed with too many hues. Consequently, you’ll have to spend a large fraction of your time toning it down again. 

    At times, a large section of the blocked area is kept exposed in a finished artwork. Blocking is one of the most popular techniques applied for plein air artwork as it lets you cover the canvas much faster by following a general color harmony and layout. 

    2. Underpainting

    A monochromatic underpainting can be utilized to create light and dark tones on the canvas before applying color. Those new to the oil painting genre might have difficulty applying colors to an empty canvas at the beginning. 

    Underpainting is a way of resolving this problem, as it serves as the first paint layer on a canvas prior to adding color. It’s more of a guide on the areas you would like to concentrate on while completing your painting. Note that this helps remove the fear of making an error when you ultimately start painting. 

    To use this method, you’ll first need to sketch a rough structure of your artwork using a thin paint layer. Subsequently, block off the area where you’d like to apply certain color tones and elements. 

    This ensures you have a basic idea for the composition as it acts as a map that you can refer to. Hence, you can start with the painting in a planned manner. 

    3. Impasto

    Know that this technique of textural painting might require additional patience and practice. Impasto painting is especially suitable when you wish to add dimension to your paintings. 

    The traditional impasto painting style involves making thick paint strokes on the canvas, with every mark added intentionally. Notably, this style of painting is often regarded as bolder than many others, as the brushwork is visible after you’re done painting. 

    An advantage of the impasto technique is that the colors can be combined directly on a canvas, so the more striking areas attract the attention of the beholder. This thicker paint style lets you enhance the three-dimensionality of your work since you can alternate between a palette knife and a brush to bring about this depth. 

    The sole method to use in this regard is to apply paint to the brushes liberally and then spread it freely on the canvas. Beginners in oil painting should start by applying thick foreground paint and then thin it out gradually. This method can help create an illusion of distance, and you can enhance this by adding paint blobs to the close-up portions of the painting. 

    4. Glazing

    Glazing is another widely used technique when it comes to oil paintings, with glazes being applied on top of opaque paint layers that have been dried. In art, the word glaze implies a semi-transparent, thin paint layer. 

    Usually, monochrome underpaintings are created with opaque colors, and the glazes are built up on top, which allows every layer to dry in the meantime. But this technique is quite time-consuming owing to the greater drying time of oil paints. Based on the layers of glaze you’re using, the time taken to produce an oil painting can be anywhere between a couple of weeks and a few years. 

    While glazing, you should ideally use more translucent paints. For instance, white isn’t very appropriate for glazing since it’s quite opaque. As the glazes are applied in different layers the different colors blend optically, but the pigments aren’t actually mixing. As a result, interesting effects are created that can be very useful for portrait painting. 

    As painting involves multiple layers of colors, you should take care to follow the fat-on-lean rule for the process. Every subsequent paint layer should contain more oil than the previous one to prevent the paint from cracking. 

    Several painters apply both impasto brushwork and thin glazes to give rise to variations in the artwork. Notably, the areas where impasto is applied will look as though they’re slightly protruding in comparison to the soft glazes. 

    5. Alla Prima

    The Alla Prima, or wet-on-wet technique, is a direct painting style where you apply the paint without letting the earlier layers dry out. Artists employing this method can complete their artwork as quickly as within a single painting session. 

    This method is different from the traditional strategies used for painting layer by layer by letting the paint dry in between. Artists often create lots of layers, sometimes more than 50, prior to completing the painting. This was naturally a quite time-consuming painting technique, as the paint would take anywhere between a couple of days to a few months to dry completely. 

    Several great impressionist artists adopted the Alla Prima method, as they could use it to capture elusive light as fast as possible. Some famous painters who applied this technique were Claude Monet, John Singer Sargent, Joaquin Sorolla, and Vincent van Gogh. 

    6. Blending

    In the blending technique, two different colors are blended together while they’re slightly wet, which results in a smooth transition between different hues. Note that the transition hue will be produced after the two colors blend together, so if you’re blending yellow into blue, the transition color will turn out to be green. 

    This technique falls among the most overused painting techniques by people who are new to oil painting, as they wish to create realistic and smooth artwork. But excessive blending can easily cause the painting to develop an overly-refined and plastic appearance. 

    On the contrary, blending is more effective when applied sparingly wherever necessary. The colors and brush strokes should be left undisturbed otherwise. 

    While you’re looking at it from a close distance, it might look rough, but on stepping back, the broken colors and brush strokes will merge, creating an illusion of form. So, don’t try to make the artwork look perfect from a close distance. 

    We’d advise going through some of the paintings by John Singer Sargent. They appear to be a mess of colors and bold strokes when you’re viewing them closely, but the painting comes together when you take a step back. 

    7. Grisaille

    This term refers to monochrome artwork that’s executed only using a gray tone or different gray shades. Interestingly, “Gris” is the French word for gray, and while brown-scale paintings are called Brunaille, the green-scale ones are known as Verdaille. 

    Grisaille was widely utilized during the Renaissance as a stand-alone painting technique to mimic sculptures. You can also utilize this method as a preliminary painting phase, whereby grisaille serves as an underpainting that can be glazed later on. 

    However, as the Alla Prima technique is more prominent nowadays, this method has taken a backseat. 

    8. Scumbling

    Next up is another interesting technique which involves applying the paint in a thin amount using a brush with stiff bristles, creating the impression of a broken glaze. It also provides a textured look that causes the underpainting to remain exposed to some extent. 

    Scumbling is, in effect, a dry-brush method that requires little or no use of an additional medium. It’s different from glazing in that artists don’t wish for smooth paint application over the whole surface. They will rather want a broken application that leaves certain areas exposed. 

    This method is ideal for producing an impressive atmospheric depth in a painting. For instance, you can go through some paintings by the artist Turner, who employed scumbling to produce an atmospheric feel in many of his artwork. 

    9. Chiaroscuro

    A technique originated in Italy, Chiaroscuro means “light-dark” in Italian and is basically all about creating a structure and balance of light and dark in the painting. 

    This also came into being in the Renaissance period when artists would produce strong contrasts between dark and light to render a dramatic effect to produce 3D forms. Some prominent artists who have used this method include Giovanni Bagilone, Rembrandt Harmenszoon van Rijn I, and Michelangelo Merisi da Caravaggio. 

    Caravaggio ultimately became a leading figure in the art movement known as Tenebrism, where the Chiaroscuro technique was applied using violent light-dark contrasts. Rembrandt also employed this method to produce several dramatic portraits. 

    10. Sgraffito

    Sgraffito is created by applying decoration to wet paint by eliminating some portions of the paint film to make the lower layer prominent. 

    Apply the handle end of a brush to scratch the surface, as that will help achieve the finer details. Rembrandt applied this method in a few of his portraits to create fine highlights in the hair of the subject. 

    If you need to scrape off larger portions of the paint, utilize the side of a palette knife. Notably, this method will produce different results if you’re working on textured surfaces, like canvases with prominent weaves. 

    That’s because a portion of the paint will then settle in that weave, and you wouldn’t be able to remove it by scraping. Ultimately, it can create a more grainy or uneven effect. 

    11. Oiling Out

    In this technique, the oily part sinks into the underlying layers of an artwork, which reduces the vitality of the upper layers. Sinking often takes place in patches and not over the entire painting owing to the different drying times of the paints applied. Keep in mind that certain colors dry quicker than others. 

    However, this method isn’t essential for beginners, as it’s rather an advanced technique and not imperative for learning to oil paint. 

    If you consider the practical part, oiling out involves dabbing an artist quality oil medium in a thin amount over the portions of a painting that have sunk in. You should only apply this step once the painting has dried out, as you wouldn’t want the colors to mix and create a mess. 

    12. Imprimatura

    This term stands for “toned ground” and is a technique whereby a color stain is used on a prepared canvas. It’s often applied as the first stage while developing any painting. 

    Notably, there are quite a few benefits of using this technique, but, mostly, it makes establishing dark and light tones quite easy while you’re using a mid-toned surface. Another advantage is that not all the paint layers would be opaque depending upon your painting style. There might be some transparent areas in the painting where the imprimatura technique can be allowed to shine. 

    Alternatively, you can use this method to seal the underdrawing, which can make it easier to trace over later on. Just like underpaintings, artists generally use earth pigments for imprimatura as they dry faster. However, even transparent pigments that can help achieve mid-tones will work well. 

    13. Sfumato

    In Italian, Sfumato means “soft as smoke” or “softened.” Developed by the world-famous artist Leonardo Da Vinci, this technique can be seen in certain darker parts of his artwork, such as Virgin on the Rocks. 

    This technique involves creating shape transitions and gradual color, with the outlines appearing hazy and soft and the shapes blending into each other. It aims to imitate the eyes’ perception of out-of-focus subjects – the artist lets you focus on a certain area by creating sharper details there. Note that this is slightly similar to blending but is employed for producing a stylistic effect. 

    Oil Paints Techniques Frequently Asked Questions

    Oil Paints Techniques Frequently Asked Questions?

    What are the basic rules of oil painting?

    To achieve the best results in an oil painting, artists generally apply 3 tried and tested principles that serve well for any subject: 

    • Thick On Thin

    When you’re painting with heavy color, you should always apply the thicker layers over thinner layers because the latter dries out more quickly. If you are fond of the Impasto style with its bold and thick brush strokes, it’s essential to keep in mind that the thicker layers should be painted on top. Thin layers painted over impasto layers will eventually crack. 

    • Fat-On-Lean

    Every successive layer should be more flexible compared to the one underneath it. You can achieve this by adding oil paint mediums to each layer that will provide it with greater flexibility than the earlier layer. The painting will be protected from cracking, so you can also regard this rule as “flexible on non-flexible.” 

    • Drying Slow Over Drying Fast

    It’s best to continuously apply colors that dry fast as the underlying layers. If a fast-drying layer is put on top of a slow-drying one, the painting might crack. That’s because the slow drying layers twist and pull the layers above as they start drying, resulting in a crack in the painting. 

    Should you wet the brush before beginning with an oil painting?

    When you’re working wet-on-wet, the paints will blend, which is highly useful for producing gradients or transitions. But a dry brush will provide a more textural effect that’s ideal for painting dirt or brick. 

    Oil Paints Techniques

    Oil Paints Techniques Final Thoughts

    We hope you enjoyed knowing all about the different oil painting techniques, just as we enjoyed curating this guide. So, what are you waiting for? 

    Gather all the essential painting supplies and start painting your latest art piece using the technique you liked the most. Remember to consider your proficiency level in using oil paints while opting for a suitable technique. 

    But before we bring down the curtains, here’s a pro-tip for you. While applying oil paints, use both sides of your brush differently to control the strokes, thereby improving your adaptability and speed during painting. 

    Plus, turning the brush on one side will let you produce finer lines than simply applying the flatter end of the brush, that’s ideal for wider strokes. 

    It’s time to wrap up our guide, but we’ll be back soon with more informative content on painting techniques. So stay tuned. 

    Getting a dehumidifier for the bathroom has become quite common in areas experiencing excess humidity. 

    Besides, bathroom dehumidifiers are excellent devices for promoting air circulation and preventing airborne bacteria, mold, and mildew. And since the primary function of a bathroom dehumidifier is to remove moisture from damp bathrooms, many wonder if it can help dry used towels. 

    Now, we know drying damp towels may not sound like a major dilemma, but it becomes a challenging task for those living in areas with high humidity levels. The problem becomes worse if you’re living in a small apartment with no open and airy space for drying wet towels. 

    That’s when a bathroom dehumidifier that won’t take up too much space can save the day by drying towels hanging in the bathroom within a few hours. Not only that, but your towels will be free from the unpleasant musty smell caused by bathroom humidity. 

    So, without further ado, let’s see how else can a bathroom dehumidifier help keep your bathroom dry and fresh! 

    What Is A Bathroom Dehumidifier And What Is Its Main Purpose?

    What Is A Bathroom Dehumidifier And What Is Its Main Purpose

    A bathroom dehumidifier is nothing but a high-efficiency version of the good old dehumidifier you may use in any other room. The term “high-efficiency” means that the dehumidifier is small yet powerful enough to remove moisture from the bathroom and prevent excess condensation.

    As such, most models for bathrooms are small dehumidifiers, and they get to work as soon as you plug them in.

    Can You Use A Dehumidifier In The Bathroom?

    Yes, a dehumidifier is a must-have to improve the overall air quality of your bathroom. In fact, it maintains a humidity level that is suitable for your health as well as the environment. 

    Plus, if your bathroom does not have any windows and you share it with multiple people, it becomes all the more important to invest in a good quality bathroom dehumidifier. With the help of a small dehumidifier, coupled with a bathroom fan, you can enjoy a fresh and clean bathroom even after a steaming hot shower.  

    However, you must be careful about the placement of the dehumidifier in the bathroom. Since it is an electronic device, you must ensure that it does not come in direct contact with water. So, do not keep it near the bathtub or under the shower. 

    Things To Keep In Mind Before Using A Bathroom Dehumidifier

    1. Number Of Bathroom Users

    A bathroom that is used by multiple members of the family is generally more humid than one that is used by a single person. This is because it is used more frequently, whether the users want to take a shower or relieve themselves. Regardless, the plumbing fixtures will be used, the bathroom floor will get wet, and the towels will get damp. 

    Hence, to prevent mildew issues and health problems among your loved ones, it is best to place a dehumidifier in the bathroom.

    2. Number Of Bathroom Windows And Vents

    If your bathroom lacks windows and vents, it is more prone to high humidity, which results in mold and mildew build-up. Additionally, if the bathroom does not have a ceiling fan or a vent fan, the lack of air circulation will worsen the humidity levels. 

    As a result, you may notice musty smells in the bathroom, and any damp clothing will not dry and instead emit the same musty odors. 

    In such a case, too, a bathroom dehumidifier can eliminate moisture from the air. You can even keep the bathroom door open to allow ventilation so that the clothes and towels can dry faster.

    3. Location Of The Bathroom

    The location of the bathroom also plays an important role in determining the bathroom humidity level. For instance, if the bathroom is located at the center of the entire house, with other rooms surrounding it, again, you will experience excess humidity and condensation.

    To combat the issue, you must opt for a small-size dehumidifier in the bathroom and preferably in the surrounding rooms as well. Doing so may prevent mold growth and dry out any pools of excess water on the floor, bathroom counter, etc. 

    4. Cause Of Musty Odors In The Bathroom

    A. Damp Towels

    Towels in the bathroom are bound to be used by multiple people after showers, using the toilet, washing their faces, and more. And with high humidity levels in the bathroom, the towels may end up damp or wet for extended hours, resulting in musty smells. Not to forget, the excess moisture creates the perfect breeding ground for bacteria and fungi.

    So, to safeguard the health of your loved ones and ensure the bathroom smells fresh all day, getting a high-efficiency dehumidifier is recommended.

    B. Toilets

    It is no surprise that toilets can smell nasty at times, and the odor is impossible to eliminate without bathroom vents, air fresheners, etc. However, if you live in a small house or apartment, it may not be possible to ensure good ventilation in the bathroom.

    Things get worse if your bath and the toilet are located in the same room. This is because flushing the toilet expels bacteria-filled water droplets from the toilet bowl into the surrounding area. Needless to say, these tiny droplets contain bacteria, germs, and microbes.

    Consequently, your bathroom turns into an unclean and unsafe environment for those suffering from asthma, allergies, low immunity, etc. That’s when a small bathroom dehumidifier helps dry the bathroom floor and walls and removes odor trapped in the moisture-filled air.

    C. Drains

    Last but not least, the drain system of your house can collect dirt and debris, thereby emitting foul odors. Now, in this case, a dehumidifier can get rid of the odor but not the root cause of the problem. 

    So, we recommend cleaning the drain pipes regularly or getting them inspected by a professional plumber. You could also make a quick DIY drain cleaner by mixing a quarter cup of baking soda or a cup of white vinegar with hot water. Simply pour this mixture down the drain to clear any foul-smelling blockages. 

    How To Prevent Problems Caused By Bathroom Dehumidifiers?

    1. Electrocution 

    Some dehumidifiers, mostly larger units, are equipped with a power cord that needs to be plugged into a nearby electric outlet. Such models increase the risk of electrocution since the bathroom is a place that is prone to being wet. And all of us know that water and electricity together can cause fatal mishaps.

    Hence, if you use a dehumidifier in the bathroom, ensure that it is placed farthest from the wettest spots. Also, make it a point to wipe the electric outlet with a dry towel every time you notice some condensation around it. 

    Other than that, we always recommend opting for rechargeable dehumidifiers for the bathroom. Notably, these non-electric dehumidifiers work for about 20-30 days on a single charge. So, you neither have to worry about charging it frequently nor about electrocution. 

    2. Disorganized Cords

    Since the bathroom floors are usually wet and slippery, disorganized cords will only make the conditions more dangerous. However, placing the dehumidifier on the bathroom counter can solve the issue to a great extent. Do check that the unit is not placed too close to the edge to prevent it from dropping on the floor and getting damaged. 

    3. Lack Of Bathroom Space

    Usually, bathrooms aren’t very spacious, making them more prone to humidity and mold growth. Consequently, adding a dehumidifier will cramp up the area even more.

    Hence, we recommend opting for smaller units or mini dehumidifiers. You can place them in any corner of the bathroom and enjoy some much-needed ventilation without compromising on space.

    Alternatively, you could get your hands on a dehumidifier with a hook. The appliance can be hung anywhere, making it a space-optimizing option. 

    Does A Dehumidifier Help Dry Towels In Bathroom Frequently Asked Questions ?

    Dehumidifier vs bathroom vents - which one is better?

    Dehumidifiers, bathroom vents, exhaust fans - all of these can help eliminate moisture from the air. But when it comes to a dehumidifier vs bathroom vents, it is best to invest in the former. This is because even with a bathroom vent or window, your bathroom is prone to staying humid during monsoon or winter months. 

    But a bathroom dehumidifier can significantly speed up the process of drying and freshening up damp bathrooms. And if your main aim is to make towels dry faster, a dehumidifier is your best bet!

    For how long should you leave the bathroom dehumidifier on?

    You can leave the bathroom dehumidifier running for 24 hours to do away with the hassle of repeatedly turning it on and off. However, in most cases, letting it run for 15-20 minutes after each shower will improve the air quality in the room.  

    Can you use a dehumidifier while taking showers?

    You must have noticed how the bathroom mirror ends misty after a hot shower, and you can hardly see a thing. To avoid such cases, you can use a dehumidifier in the bathroom while taking a shower. 

    But keep in mind that while showering with a dehumidifier on will help prevent excess condensation, it may not lower the humidity levels effectively. This is because when you take a hot bath, the rate at which your body releases moisture is higher than the speed of the dehumidifier while drying the area.

    You can, however, increase the fan speed of the bathroom dehumidifier and place it strategically to prevent mold and other repercussions of high humidity. 

    Does A Dehumidifier Help Dry Towels In Bathroom Final Words

    Does A Dehumidifier Help Dry Towels In Bathroom Final Words

    So, all this time, if you’ve been thinking about whether a bathroom dehumidifier is worth it or not, we hope this guide has helped you make a wise decision!

    Dehumidifiers work to keep your space dry and fresh, thereby keeping mold, mildew, and bacteria away. And by ensuring clean air within the room, you’ll also be investing in your family’s health and well-being.

    However, while buying a dehumidifier, make sure you check the size of its water tank and opt for one according to the level of humidity in your bathroom.

    That said, we’ll be signing off now. See you next time!

    The DeLonghi Pinguino is an excellent portable air conditioner, despite not having heating functionality. It has a powerful cooling and dehumidification function to make up for it. Also, it has a silent operation, even when the fan is used at the highest speed. And best of all, it is cheap and consumes less energy.

    An air conditioning machine is a necessity for modern households. I mean, how else can you combat the high pollution, heat, and humidity levels nowadays?

    Different types of air conditioning systems are available today, such as mini-split, window, portable, and even wearable options. In this regard, portable air conditioners are particularly sought after, thanks to the cooling and convenience they offer. And the DeLonghi portable AC is one of the most popular picks that you can get.

    That’s why I have reviewed this product here, and if you want to know what I thought of it, then keep reading!

    What Is A Portable Air Conditioner?

    No products found.

    Before I get into the main review, I would like to provide a brief discussion on what portable air conditioners are. If you are not as experienced in these things, you might find the information here to be helpful.

    Simply put, a portable air conditioning unit is an HVAC system that is portable (hence the name). Unlike conventional mini-split or Window ACs, they are not fixed to a single spot and, therefore, can be moved around freely. 

    On that note, some manufacturers include additional windows kits with their portable ACs, which allow you to use them like window air conditioners. This adds a fair bit of versatility to the appliance, which is always a desirable aspect. 

    A typical portable AC unit has a compact design, which further adds to the convenience. Moreover, they have a lightweight build quality and often come with features like wheels and carry handles, which allow you to move them from one place to another. 

    However, these air conditioners take up floor space in your room since they cannot be mounted on the walls or the windows like conventional ACs. Although, you won’t have to worry about this issue if your AC unit comes with a window kit.

    What Are The Benefits Of Using A Portable Air Conditioner?

    There are several other advantages of using a portable AC besides its portability. Sure, the ability to move your AC between different rooms is a major selling point of these home appliances. But that’s not the only reason why these air conditioners are popular among consumers.

    For starters, these ACs are not as expensive to purchase as traditional mini-split or window units. So, if you are a bit short on funds, you will find the lower price point of a portable AC to be quite attractive.

    Apart from that, these air conditioners provide effective climate control for small spaces. For instance, if you have a small apartment room, the cooling, and heating provided by a portable AC can be a lot more effective than a mini-split or window unit. The latter types are generally intended for use in larger spaces, which means that they would be overkill for your small apartment room.

    In that context, portable ACs can be used to provide directional cooling and heating. For example, if you are using only one side of a large room, you can conveniently turn your AC unit to face that side. That way, the AC will not have to cool the entire room but rather just a part of it, which is a lot more efficient by comparison.

    Speaking of efficiency, you will notice that portable ACs consume a lot less energy than regular window or mini-split ACs. That, in turn, will help to keep your monthly energy bills in check. As a result, you can save a lot of money in the long run.

    And lastly, portable ACs are a lot easier to install than other types of ACs. This is all thanks to their simple and lightweight design, which allows you to set them up even with little to no prior experience.

    Are There Any Drawbacks To Using Portable Air Conditioners?

    The short answer to this question is - yes, there are some drawbacks to using a portable AC. On that note, I have already mentioned that it occupies floor space in your room (unless it comes with a window mounting kit). As such, you can easily bump into it, which can damage the machine. 

    Apart from that, these ACs normally have a lower cooling capacity, which makes them unsuitable for use in medium or large-sized rooms

    DeLonghi - A Brief Overview

    Now that you know about portable ACs and their benefits and drawbacks, let’s get into the review, starting with a brief description of the brand. DeLonghi (or De’Longhi) is renowned for its range of high-quality espresso machines, as well as other similar types of appliances, such as coffee makers, coffee grinders, and so on.

    Despite being around for quite a while, the brand has made its foray into the market of HVAC systems fairly recently. Likewise, the Pinguino portable air conditioner is one of its most popular offerings. In fact, it is regarded by many to be one of the best portable air conditioners available today.

    But is it really as good as everyone says? Well, let’s find out!

    DeLonghi Pinguino Portable Air Conditioner Review

    What Are Some Of The Key Features Of The DeLonghi Pinguino?

    Here, I have listed some of the most notable features of the DeLonghi Pinguino portable AC. It’s because of these features that the product has become so popular among consumers today.

    • Good cooling capacity
    • Silent operation
    • Great energy efficiency
    • Balanced temperature and humidity control
    • Convenient to use
    • High-quality build
    • Reliable operation

    What Functionalities Do You Get With The DeLonghi Pinguino?

    The AC comes with a 3-in-1 functionality, which offers a good degree of versatility to the appliance. It includes a cooling unit, a dehumidifier, and a fan, which should be enough to meet your air conditioning needs. 

    This air conditioner utilizes the brand’s Cool Surround technology, which gives you convenient cooling at all times. Thanks to this feature, the unit is able to monitor the ambient temperature and humidity levels continuously. Based on that, it adjusts the dehumidifier and cooling unit to a desired target temperature, thereby giving you a comfortable room environment.

    Here we should mention that the Cool Surround sensors are not built into the AC unit, but rather the smart remote control. This makes the AC unit even more convenient to use. However, it does come with a conventional electronic control panel as well. So, you can control the AC unit directly from there if you wish.

    That said, this model does not come with heating functionality, which means that it is not suitable for use in colder climates.

    How Does The DeLonghi Pinguino Perform?

    I was pleasantly surprised by the performance of this particular DeLonghi air conditioner. For a portable unit, it performs exceptionally well, which makes it one of the best options that you can buy. 

    The air conditioner has a powerful cooling output, which makes it a great choice for medium or large rooms up to 700 square feet. As per the SACC standards, the cooling output of this unit is 8,600 BTU (British Thermal Unit), while it is 14,000 BTU according to the ASHRAE standards. 

    This sets it apart from many other portable AC models available today, which have considerably low cooling outputs and can only cool small or medium-sized rooms. As a matter of fact, its high cooling output makes it comparable to a regular mini-split or central air conditioner. 

    Besides, the fan comes with three different speed settings, which help to circulate the cool air uniformly inside the whole room. At the highest speed setting, it pumps out a powerful stream of cold air that provides quick cooling. And despite such a powerful performance, the air conditioner is incredibly quiet, which makes it the perfect choice for your living areas like bedrooms. 

    This dehumidifier unit is also pretty powerful, and it can remove high volumes of moisture from the air. In addition, it features the unique Eco Real Feel technology, which provides energy-efficient cooling and dehumidification. That, in turn, makes it an excellent choice for hot and humid climates.

    How Has The DeLonghi Pinguino Been Designed?

    The design and build quality is an important factor to consider since it determines the durability of the machine. In that context, I was impressed with the design of this AC. The Pinguino is a well-built appliance that exemplifies the quality that DeLonghi is known for.

    There is a window kit included with the AC, which allows you to mount it up on your window. Additionally, it comes with a long and flexible exhaust hose through which you can remove the waste water and hot air from the room. Here, you can utilize its auto-evaporate function to eliminate or recycle the condensed water automatically, thereby enhancing convenience.

    Furthermore, it features a motorized louver that directs the airflow to give you even cooling throughout the room. Besides, it includes a washable air filter that keeps out dust and pathogens to give you clean and fresh air at all times. You can easily remove and wash the filter under the faucet, which makes it easy to maintain in the long run.

    Weight: 72 lbs. | Dimensions: 17.5” x 15.35” x 31.7” | Cooling Power: 8600 BTU (SACC)/14000 BTU (ASHRAE) | Maximum Square Footage: 700 sq. ft. | Maximum Noise Level: 52 dB | Refrigerant: R410a | Fan Speeds: 3 | Operation Modes: Cooling, dehumidification, fan | Voltage: 115 V

    If you have liked this review so far, be sure to check out my review of the Honeywell portable AC, which is yet another worthy cooling option for your home.

    Final Verdict

    That brings me to the end of this detailed review. So, the question that arises now is - should you get the DeLonghi Pinguino Portable AC? Well, if you ask me, I would say - yes, you definitely should.

    You can use this AC for large, medium, and small rooms, which adds a good bit of versatility. Yes, I understand that it doesn’t have heating functionality, but if your city experiences a moderate climate, this should not be an issue.

    On top of that, it is easy to operate, and it uses considerably less energy than other similar portable ACs. And last but not least, the AC comes at a relatively affordable price, which gives you excellent value for your money.

    With 3 fan speeds, a programmable 24-hour timer, and a 10-hour sleep mode, the Honeywell Portable Air Conditioner is an excellent option, you get an in-built fan and dehumidifier with this unit without spending a lot of money. 

    Considering the hot summer temperatures in the USA, owning an air conditioning unit has become a necessity. 

    And since a central air conditioning system is quite costly, it is beyond the means of those living on a steady income, with even a window unit proving expensive. Hence, I find portable air conditioners a more suitable option, and the Honeywell air conditioner has certainly helped me survive the scorching summer heat! 

    Honeywell Portable Air Conditioner Review

    No products found.

    A. Accessories And Parts: Comes With Everything Needed For Installation

    Unlike most heating, ventilating and air conditioning systems, the Honeywell Portable Air Conditioner is supplied with each and every accessory that will be needed for setting it up. So that when the unit arrives, the only thing you will have to do is choose the right window for installing it. 

    Here's what the Honeywell Portable AC is supplied with:

    • Honeywell MO Series unit
    • Window kit
    • Exhaust hose
    • User manual 
    • Remote control 

    B. Setup Process: Not Much Of A Hassle

    What makes it the best portable air conditioner, in my opinion, is the setup process. 

    Despite being a portable unit with in-window installation and an exhaust hose, the Honeywell Portable air conditioner required very little setup. Weighing about 13.5" D x 14.6" W x 27.7" H, this portable unit is more lightweight than other portable air conditioners I've tested. 

    I took out the unit from the packaging and placed it in my office space, where I decided to run it. Once the unit was positioned properly, I connected the exhaust hose to the rear and routed it via the window. Then, I quickly skimmed through the instructions and sealed the window kit to the casement. 

    As soon as the window kit was installed, I double-checked the hose and the kit. When everything seemed fine, I plugged the unit into an electrical outlet and turned it on. 

    C. So, Is The Honeywell Portable AC Easy To Install?

    For DIY enthusiasts like me, installation won't take much time, and the unit is ready for use in less than 15 minutes. 

    Although it's a fairly easy process, people with little to 0 DIY knowledge may face issues. In that case, going through video tutorials online may help. Or, if possible, ask for a helping hand to make sure you install the window kit correctly from the get-go. 

    One of the significant downsides of this great unit is that the package lacks sealing foam tape. And that's what separates it from other units, like a central air conditioner or a split system. Since I already owned sealing foam tape, I didn't have to wait to set up this unit. 

    So, if you don't own one, getting one will save you the trouble of running to the store during the installation process. But a positive aspect of this portable air conditioner is that the window kit relies on wing bolts rather than screws. That made installing the window kit easy, as I just had to slide the edges into place and tighten the bolts. 

    D. Design: Simple, Sleek, And Space-Saving With A Modern Touch

    Sitting on 4 caster wheels, the Honeywell Portable Air Conditioner boasts a slim and compact profile. Towards the top is a digital control panel equipped with an LED that adds to the user-friendliness of the unit. 

    On the front is an air vent to distribute cool air throughout the space while filtering dust, pet danders, and other particles. Because this Honeywell portable air conditioner includes an exhaust hose, it needs to be placed near a window like most portable AC units. 

    Towards the rear coil to absorb warm air or heat from indoors and expel it outdoors. And since it has a wheeled base, this portable unit is easy to move. Further portability is enhanced with its lightweight design, which allows people to transport the unit from one corner of the house to another.

    E. Performance: Powerful Unit That Doubles As A Dehumidifier  

    Despite being small and compact, the Honeywell Portable Air Conditioner packs quite a punch. 

    I say so because it's a 3-in-1 unit, meaning you get a fan, air conditioner, and a dehumidifier in one device. Operating within the temperature range of 61°F to 89°F, this portable air conditioner cools my office space of about 250 square feet in 30 minutes. 

    However, since its cooling power is 8,000 British Thermal Units, it can be used to cool spaces up to 350 square feet. Speaking from experience, I placed it in my dining room of about 400 square feet, and it did a reasonable job, thanks to the 3 fan speeds. 

    And on those evenings when I prefer relaxing in my basement, I wheel the unit to the space and switch to dehumidifier mode. Its built-in dehumidifier eliminates up to 44 pints of moisture per day. 

    For longer unattended dehumidification, this unit comes with a continuous drain option, which is rarely found in portable units. When used as a dehumidifier, you can set it up within minutes and go about your day without worries. 

    F. Noise Level: Quiet Operation 

    Despite being such a powerful unit, this portable air conditioner is surprisingly quiet. This portable air conditioner relies on dual motor technology to supply cold air to a space. 

    When compared to Delonghi Pinguino Portable AC, I discovered that the unit generates about 50 to 53 dB (decibel) of sound at the highest setting. Although it isn't as quiet as a whisper, it is similar to the sound produced by an electric fan. So, you can sleep, work on your laptop, and even read a book without any disturbance, even when it is in cooling mode. 

    G. Maintenance: Relatively A Low-Maintenance Unit

    One of the reasons I opted for the Honeywell Portable AC for my office space is the fact that it's a low-maintenance unit. Unlike other air conditioning systems, you need not call professionals to clean the filters or for any sort of maintenance-related chore. 

    The exhaust hose, the vent, and the air filter are the three main areas to keep an eye on. I'll give a clear picture of each of these components. 

    1. Exhaust Hose

    The exhaust hose of this Honeywell Air Conditioner doesn't feature a grill cover or a plate. That means dirt, debris, foreign particles, and even small animals can settle in them. You need to be careful more so, if you place the unit near an exterior window. 

    To make sure animals don’t make a home inside the hose and affect the efficiency of the unit, you will have to keep checking the exhaust hose regularly. 

    2. Vent 

    With regular usage, debris, and dirt could settle in the vent of the Honeywell Air Conditioner, so it's equally important to check it regularly. Checking them isn't the only task– you will have to clean the vent along with the coils to prevent dust and debris from accumulating. In case you don't clean them often, remember the buildup will affect the performance of the AC unit. 

    3. Air Filter

    Besides circulating cooled air in your space, the air conditioning unit keeps the indoor air clean by trapping foreign particles. And the air filter is in charge of purifying the indoor air by trapping dirt, pet danders, and other impurities. 

    Nevertheless, I found that cleaning the air filter is very easy, as it's washable. And every homeowner can do it themselves without calling for professionals every few months. 

    H. Extra Features: Energy-Saving Timer And Sleep Mode 

    With this portable air conditioner, you get additional features that separate it from the competition. 

    Among them, what deserves mention is its energy-saving feature. Unlike a central air conditioning unit, the Honeywell Portable Air Conditioner consumes less energy. 

    At first, I didn't believe its claims of saving energy, but contrary to my expectations, there wasn't much increase in my utility or electricity bills. So, if you're hunting for an AC unit that will help you survive the heat without mounting electricity bills, the Honeywell Portable Air Conditioner is a great machine. 

    Further, the efficient energy use of this AC unit is enhanced by the "sleep" mode. When I run the AC for more than 3 hours, I switch to the "sleep" mode, which reduces energy consumption to a great extent. 

    In "sleep" mode, the AC unit adjusts the humidity and room temperature automatically, making the space cozy and comfortable by distributing cold air across the space. One word of warning: the temperature decreases by 0.5 to 1 degree each hour for up to 2 to 3 hours. 

    Another noteworthy feature is the 24-hour timer that allows users to set the number of hours they want to run the AC unit for. To test the timer function, I tweaked the setting to turn the unit off at 5 PM in the evening, and the air conditioner responded accurately.

    I. Safety: Shuts Off To Prevent Accidents

    Safety is yet another feature I was looking for when searching for the best portable air conditioners, and guess what? The Honeywell Portable Air Conditioner promises extra safety by offering thermal overload protection on the compressor motor. 

    Not many know why such a mechanism is installed on the motor– basically, it's a protection device that turns off the motor in case it overheats. Technically, it is installed to keep the motor safe from burning to prevent accidents. 

    That means even if you run the unit continuously for long hours, you can rest assured there is no way the motor will burn or get damaged. 

    J. Controls: Intuitive And Responsive

    Tweaking the settings was also convenient on this unit, thanks to the remote control and the LED soft-touch control panel. 

    What I liked about the digital panel is that it's located at the top, not on the front or either side. And this ingenious placement makes it easy for me to adjust the settings without having to move from my office desk or bed. 

    The digital control panel of this portable air conditioner has buttons for: 

    • Power on/off
    • Setting timer (up to 24 hours)
    • Switching fan speeds (3 modes)
    • Adjusting temperature from 60°F to 90°F
    • Switching modes– fan, air conditioner, and dehumidifier

    You can change the settings as often as you want without any hassle, especially since the touch controls are intuitive. Like, when I had to adjust the fan speed, I simply used the "fan” button and adjusted it to the "III." Then, I adjusted the temperature using the up and down buttons. 

    On this air conditioning unit, the temperature is displayed in both Fahrenheit and Celsius, adding to its user-friendliness. Except for "sleep" mode, the digital control panel features all the settings, unlike other air conditioners. So, you will have to use the remote control to activate the "sleep" mode. 

    Like the digital control panel, the remote control is easy to use, meaning you won't have to go through the hassles of setting it up or pairing the unit via Wi-Fi. 

    Honeywell Portable AC Things to Consider

    Pros

    Here's why the Honeywell Portable Air Conditioner would be an ideal pick for your space:

    1. Compact

    Until now, I have never come across a portable air conditioner as compact as this AC unit from Honeywell. It boasts a sleek and slim design, which doesn't occupy much floor space and is ideal for small spaces. 

    2. Multifunctional

    Rarely are portable air conditioners multifunctional, but this unit from Honeywell is a 3-in-1 device. Besides using it to pump hot air from the room, you can use it as a dehumidifier and reduce humidity. 

    3. Easy To Set Up

    As the unit comes pre-assembled, you need not break a sweat to install this unit, unlike other AC units. After unpacking, all you need to do is position it near a window, install the window kit, and that's it! 

    Cons

    Here's why you shouldn't opt for the Honeywell Portable Air Conditioner:

    1. Not Ideal For Large Spaces

    For spaces larger than 400 square feet, the Honeywell Portable Air Conditioner wouldn't be the right choice. That's because it has a cooling power of 8,000 BTU, which will prove useful in cooling a small to medium-sized room. 

    2. Isn't Energy Star-Rated

    Even though the unit is integrated with energy saver timer and sleep mode features, it isn't Energy Star-rated. So, if you're looking for AC units that are Energy Star-certified, there are better choices than this one. 

    Manufacturer: Honeywell | Model Number: MO08CESWK | Item Weight: 54 lb. (mass) | Product Dimensions: 13.5" D x 14.6" W x 27.7" H | Maximum Air Flow: Not Listed | Room Coverage: 250 to 350 sq. ft. | Warranty: 1 Year Limited Warranty | Capacity: 44 pint | Exhaust Hose Length: 12” to 47” | Voltage: 115 Volts | Noise Level: 54 dB | Color: White/Black

    Wrapping It Up

    Coming with a wheeled base, the Honeywell Portable Air Conditioner is one of the lightest yet most versatile units available on the market today. Although its 8,000 BTU cooling power makes it an excellent choice for small spaces, it doesn't do such a good job of cooling large spaces.

    Nevertheless, this portable AC unit scores high on versatility as it can be used as a fan, dehumidifier, and air conditioner– now that's a new one!

    Hopefully, my detailed review has helped you figure out if the unit is the right pick for you. Just keep in mind that finding an AC unit that serves as a dehumidifier and fan, too, at this price point is challenging.

    So, if you're looking for a product that would beat the heat and suck in the humid air, this unit will fit the bill!

    Ever been astonished by the sheer number of options on your visit to an art supplies store? 

    Well, you aren't alone, as it's quite bewildering to see the development in the area of painting mediums. Even though we appreciate the choices, they can often end up being intimidating for a beginner. 

    One of the most challenging decisions is to choose between acrylic paint vs oil paint. Both the mediums are equally popular, and you can find proponents on either side who swear by the paints and their advantages. To make your choice a tad easier, we have come up with a guide laying down the differences between top grade acrylic paints and its high quality oil paints counterpart. 

    So, without further ado, let's get started! 

    Essential Differences Between Oil And Acrylic Paints 

    Acrylic Paint Vs Oil

    1. Composition

    When you're getting to know paint mediums, one of the first things to focus on would be the composition of a particular paint. Before beginning, we would like to point out that the composition or formulations vary between brands. So, even though a popular brand may list the ingredients used in the paint, they won't be open about their particular quality. 

    On observing popular oil paints closely, we found that most of them have an oil base, color pigments, and a binding agent. The oil of choice is usually linseed or safflower, but it may differ based on the price of the paints. These natural oils are responsible for providing the paints with a smooth and creamy texture, helping them glide on the canvas. 

    We were surprised to know that most acrylic paints have a very similar composition to oil paints except for the use of an oil base. Instead, the binder used in acrylic paint is an acrylic polymer that holds the pigments and turns into a protective film once the water has evaporated. 

    Water is also added as it acts as a binder between the polymer and pigments, leading to an acrylic polymer emulsion. Overall, the presence of water instead of oil makes the acrylics fast drying and safe for almost everyone, including children, if the paint has non-toxic pigments. 

    Both acrylics and oil paints can be used for diverse projects and applied on different surfaces. However, before using oil paints, it's advised to apply a primer so that the oil doesn't get soaked or affect the surface. 

    2. Drying Time

    We can start with oil paints and then see how long acrylic paints take to dry

    When it comes to the oil paint medium, one of the advantages often highlighted is the slow drying time. As we have already mentioned, it comes from the presence of an oil base which takes more time to dry. 

    If you prefer to work on a piece for long and have the flexibility of correcting mistakes, then oil paints are the way to go. However, it means that you'll need to be much more patient and careful while working with the paints. Layers need to be applied with precision following the thin-to-thick method and left to dry in-between to get the right outcome. 

    Coming to acrylic paints, they do have a bad reputation for drying too quickly. It's not really a negative as the paint is more versatile and can be applied on a number of surfaces where the quick drying time minimizes the chance of mistakes. Nevertheless, when working with acrylics on a canvas, it's best to use a combination of retardants and wet palettes to keep the paint fresh. 

    These days you can also find relatively slow-drying acrylics, which can help get an experience similar to working with oil paints. Still, the threshold of making mistakes is quite low with acrylics, so you need to plan well before starting to work on a big project. 

    3. Blending And Mixing Colors

    Professional painters often rave about using oil paints due to how easy it is to blend colors. Most of them prefer to have a limited color palette consisting of primary colors, along with brown, black, and white. It's said to be sufficient for creating numerous colors in various tones and shades. The creamy texture of oil paints and their slow drying time also contribute to the comfort of mixing colors. 

    Moreover, the presence of fewer binding agents lets the different paints come together and blend into each other creating the typical soft effect. The colors remain fresh on the canvas for a longer time, so you can come back to the painting and blend a layer to fix any mistakes or add textures. 

    Another popular blending technique for oil paints is wet-on-wet which lets you achieve some of the smoothest transitions. It especially comes in handy while painting portraits owing to the subtle shadings that need to be added. 

    Your painting experience is going to be quite different with acrylics as the paints tend to dry quickly. So, you need to be fast in mixing colors when working on a large canvas. Besides, acrylic paints from other brands may at times not work with each other due to the presence of different binders. 

    4. Color Shift

    Have you ever experienced a color-changing entirely after it has dried? This phenomenon is known to be quite familiar with acrylics, so it's advised to test out a color before working on a big project. The culprit is usually the white binder used in acrylic paints, which can change color when dry. 

    However, you can easily avoid this problem by getting paints with a clear binder. Another option is to splurge a bit more before you start acrylic painting to get artist-quality paints that don't have the problem of color shifts. 

    The problem of color shift isn't usually seen for oil paints when they are of a good grade. But, if you aren't careful while priming the canvas, it can soak oil from the paint, making a color appear dull. To avoid this, make sure to prime the surface adequately and refrain from using too much solvent with the paints. 

    Nevertheless, apart from the immediate color shift, you may even see the color of a painting becoming dull or yellow with time. It's usually due to the poor lightfastness of the pigments or oxidation of paints. 

    The problem is more apparent in oil paintings, where some bright colors may turn yellowish with time as the oil dries and oxidizes. To make your paintings long-lasting, make sure to check the lightfastness rating of your oil-based paints. You may want to get oil paints with inorganic pigments as they are less prone to getting dull with time. 

    Artists using acrylics have an advantage regarding lightfastness as most of the excellent quality paints have been extensively tested for being long-lasting. Some acrylic paints even guarantee to last more than 200 years without getting dull. You can test the phenomenon yourself, as the vibrant colors of acrylics retain their quality even after drying. 

    5. Layering

    For a beginner artist, the concept of painting in layers can be a bit challenging to grasp initially. On observing famous paintings closely, you're bound to notice that most of them are composed of multiple layers. The masters spend countless hours perfecting the application of the paint layers with paintbrushes. To be a good painter, you'll need to learn the techniques based on the paint medium. 

    For instance, the oil medium is thought to be quite forgiving as the paints take time to dry completely. So, the painters have more time to blend the layers or fix mistakes. Painters may choose to work with thick paint layers, but they must wait for the subsequent layers to dry before moving forward with a painting. 

    Having said that, the slower drying times of oil paints can also be frustrating, especially as they can vary based on the pigments used in a particular color. You may choose to add a siccative to slow drying paints to accelerate the process. 

    When it comes to acrylic paints, most artists like the flexibility of acrylic paints that can be laid in thin or thick layers. In fact, many people prefer to work with acrylics and a palette knife to create elaborate impasto art pieces with thick paint layers. And the great thing is that the layers of acrylic dry quite quickly, letting painters finish projects within a day. 

    Besides, you can even thin down acrylic paints with other mediums or simply water to create transparent glazes or watercolor-like washes. The only downside is that acrylics can easily crack when exposed to extreme temperatures or contaminants, so you have to let them dry in a cool, dry place. 

    6. Finish Of Paintings

    When you're choosing between two painting mediums, you'll also need to consider the expected finish of the painting. While oil is known to provide a high gloss finish, the most common acrylics may leave a matte finish. 

    But, thanks to the availability of mediums, you can now purchase high-gloss or matte additives to change the finish of your painting. You can even get mediums to make your oil paints thick to get an opaque texture. 

    7. Availability Of Space

    If you didn't know already, oil painting needs to be done in a well-ventilated and spacious area due to the presence of fumes in some of the colors. This is usually due to the oil base used in paint or the use of a medium like turpentine while painting. Moreover, white spirit can especially irritate the skin, so you need to be careful about handling the substance. 

    Even though most painters may think that oil paintings can't be made inside, that isn't necessarily true. You'll need to find a space that gets enough air so that the fumes wouldn't be able to affect your body. Otherwise, it's better to take your work outside in an area that doesn't receive direct sunlight. 

    If you want to enjoy painting using oil paints without worrying about the harmful fumes, try using non-toxic colors and an odorless solvent for the purpose of mixing. However, some artists note that odorless solvents aren't great at cutting through the paints, unlike solvents like turpentine. 

    Those who have limited space and want to avoid the hassle of spending time prepping can opt for acrylics which are much more manageable. You can easily mix the paints with just water and begin to paint. Besides, most acrylic paints are completely safe for children, so you can use them when they're close to your workspace. 

    Irrespective of the paint of your choice, it's important to invest in high-quality paints and check their composition before making a purchase. This is especially true for oil paints, as high-quality oil paint will seldom let you down, and they have premium pigments that aren't harmful. 

    Also, check your acrylic colors to see if there's any mention of trace amounts of ammonia which may require you to use the paint in a well-ventilated area. 

    8. Cleaning Painting Materials

    Along with spending a lot of money on the paints, you'll also need to buy other painting supplies to start creating your art pieces. So, the last thing you'll want to witness is a paintbrush ruined with dried paint. To avoid this, you'll need to clean your painting tools routinely. 

    The cleaning process is pretty simple with water-based paints like acrylics, as all you need to do is place your brushes and palettes under running water. You can even use a bit of soapy water to get rid of the stubborn colors. Just make sure not to let the acrylic paints dry on your brushes, palettes, or other art supplies, as removing the colors would be tough. 

    Compared to acrylic paints, removing oil paint from art tools and other surfaces is pretty hard. As they aren't water-soluble, you'll need a medium like linseed oil or walnut oil to dilute the paints for easy removal. 

    After you're done painting, dip the brushes in your choice of oil and wipe them on a paper towel. You may need multiple passes before the brushes are clean and free from color residue. Next, run your brushes under warm water and clean them with a bit of soapy water to remove any staining. 

    Remember to wear gloves while handling oil colors and supplies used for an oil painting to remain safe from any harmful elements. Also, never leave a brush sitting idle in a solvent or paint thinner for too long as they may hurt the bristles and the handles. 

    Acrylic Paint Vs Oil

    Painting Tips

    As we have said already, using acrylic and oil paints is much more than just applying the colors on a canvas. So, we would like to share some painting tips that we came across while researching different painting mediums. These will surely help you become a better painter by enhancing your skills with paints, be it acrylic or oil. 

    1. Tips To Work With Oil Paints

    Here are some tips to know before you start an oil painting: 

      • Spend time looking for suitable solvents or paint thinners for oil paints
      • Picking colors is an important aspect of oil painting, so decide your palette beforehand
      • Mix colors with a palette knife as it provides more control than brushes
      • When painting with oil paints, let a subsequent layer dry before applying a new color
      • As oil paints stay wet for longer, remember to carefully handle the canvas
      • An oil painter should always start by applying thin layers, gradually moving to thick
      • If you plan to paint the next day, keep your paintbrushes dipped in solvents overnight

    2. Tips To Work With Acrylic Paints

    Here are some tips to know before you start an acrylic painting: 

      • There's no need to purchase acrylic mediums for your first art piece as the paints are water-soluble
      • To keep the acrylic paints fresh in the palette, you can occasionally spritz them with water
      • Once you have started painting, don't rush to finish the piece; instead, work in sections as acrylics dry fast
      • After the drying process is over, make sure to apply a sealant or fixative to your acrylic paintings to make them last longer
      • Instead of throwing away your leftover wet colors, store them in small airtight containers to use in later paintings

    Acrylic Paint Vs Oil Frequently Asked Questions

    Acrylic Paint Vs Oil Frequently Asked Questions ?

    Is oil paint better than acrylic?

    Even after learning about the key differences between the two painting mediums, people still want to know which one is better. Well, the answer varies based on the preferences of whoever is using the paints. Someone who has just started to paint and has little to no skills would definitely appreciate a versatile and quick medium like acrylic. 

    On the other hand, those who have spent some time perfecting their techniques or know the basics of painting may prefer oil paints. One of their common reasons behind it is the flexibility offered by oil paints due to their slow drying time. 

    In the end, we would advise you to try out both mediums to see which one suits your style the most. If you're a total beginner, try using heavy body acrylic paints, then slowly graduate to more accessible oil paints. 

    Can acrylic paint be directly applied to a canvas?

    Unlike oil paints that require you to prime the canvas, acrylics don't demand it. You can very well begin by applying the paints on a canvas, paper, or even board. Having said that, to get a better outcome, it's always best to prep your canvas with gesso. 

    All you need is to apply a double layer of gesso on the canvas and let it dry. Or, you can buy primed canvases that have already been treated with gesso to reduce your tasks. 

    One of the reasons artists prefer to use primed canvases is that the colors appear much brighter and smoother. In an unprimed canvas, the paints may sink into the weaves of the fabric leading to a textured and dull appearance. 

    Do professional painters use acrylic paints?

    A common myth you'll come across as a beginner is that professional artists don't prefer to use acrylic paints. But, it's far from the truth, as the choice of painting medium often depends on the outcome a painter is trying to achieve. Even though oil paint is a pretty popular medium among professionals, there are plenty of people who like using acrylics. 

    Moreover, with the advancement in technologies, it has become easier to bridge the gap between the two paints. The foremost complaint about the quick drying time in acrylics can be easily fixed with a retarder or slow drying medium. Plus, artists often state that layering is easier with acrylics, along with the simplicity of using the medium. 

    Some famous artists who have preferred using acrylic paints include Andy Warhol, Robert Motherwell, Mark Rothko, and Bridget Riley. 

    What is the best surface for oil paints?

    As a beginner, one of the first things that you need to figure out is the surface to use for your art pieces. In the case of oil paintings, the surface of choice is usually primed and stretched canvas. Earlier, the canvases needed to be stretched and primed by the painter, but now readymade canvas options are available online and in stores. 

    Essentially, you need to make a surface non-porous so that it doesn't soak up the oil from the oil paints, which can lead to cracking once dried. Another pretty popular option is the canvas board, which is more economical and takes less space than stretched canvases. You can also try painting on MDF boards after prepping them adequately with proper primers meant for oil paintings. 

    Even though paper may appear an unlikely choice, you can find papers meant for oil paints. Try looking for heavyweight papers with canvas texture or oil painting pads as they are excellent options and may not require the use of gesso. 

    Acrylic Paint Vs Oil

    Acrylic Paint Vs Oil Final Words

    That's everything we had to tell you about the differences between acrylic and oil paints. We hope that this guide will come in handy for you to choose between the two paints when you're thinking about investing in a new art project. 

    Irrespective of their differences, there's a learning curve associated with both mediums. So, even though you may find it challenging at first, you'll get comfortable using the paints with time. 

    Also, ensure to invest in decent quality painting materials as they can make quite a bit of difference in the outcome of an art piece. We recommend trying out both acrylic and oil paints before settling for one. This will ensure what acrylic paint is for and for oil paints too. 

    All things considered, we'll suggest a beginner to side with acrylic painting as it's less daunting and an easier stepping stone. Additionally, the water-based paints dry faster, letting you spend time on multiple projects. 

    Until next time, take care, and happy painting! 

    As with other coloring mediums, finding the best colored pencils can often be a complicated task. 

    This is not only because of the wide range of options from different manufacturers but because of the difference in their construction. What may surprise many people is that colored pencils do not contain lead, unlike regular ones. 

    Instead, they generally include pigments, binders, and other substances, which directly affect their quality and the user experience. And since these pencils cater to both professional artists and hobbyists, you can find extremely pricey as well as economical options on the market. 

    Finding the right one, however, requires some knowledge about how they are made and what materials are used for the process. And in this guide, we’ll be sharing this information so that it becomes easy to select the most suitable option and eliminate hassles. 

    So, without further ado, let’s get started! 

    Colored Pencils - Origin And History

    Colored Pencils

    The first use of wax-based mediums for art was during the Golden Age of ancient Greece, as recorded by Pliny the Elder. And while wax and oil-based colored pencils for artistic purposes came into being during the 20th century, such pencils were already in use for marking and checking much before that. 

    A colored pencil or pencil crayon generally contains a core of pigment in a wood casing, with the pigment being either oil or wax based. The first companies that started manufacturing colored pencils included Faber-Castell, Caran d’Ache, and Berol Prismacolor. 

    Over time, the popularity of such pencils kept increasing and reached its peak during the 1990s, leading to the establishment of the Colored Pencil Society of America (CPSA). This organization promotes the use of colored pencils and also sets the standards for lightfastness. Other similar organizations are present in countries like the UK, Canada, and Australia. 

    And even though many artists prefer using other mediums like paint over colored pencils, the range of such pencils available has never been greater. This is mainly due to the variation in the quality and quantity of the materials used to manufacture them. 

    Substances Used To Manufacture Colored Pencils

    1. Wood

    Traditionally, the casing of a colored pencil used to be made from wood that has been hollowed out from the inside, making space for the core. However, in recent times, woodless colored pencils are becoming more popular, which use sustainable sources for the barrel. More and more companies are shifting to such materials instead of using regular wood. 

    2. Pigments

    The pigments present in colored pencils determine their quality and performance and can vary widely among brands. Also, there can be a lot of differences in colors depending on the pigment used. That is why it is the main factor that separates costly high-end options from low-cost ones. High-quality pigments are present in expensive options and result in more vibrant colors. 

    Also, a single pigment can result in multiple colors, and pure pigments provide brighter, more vivid colors than others. For artists, such information comes in handy as it can help find colored pencils containing the same pigments and also makes it easy to combine appropriate colors. 

    Apart from that, the lightfastness rating of a set of colored pencils depends upon the pigment used. This rating determines how quickly the color will fade when exposed to light. Generally, it is extremely difficult for colored pencil manufacturers to develop products with superb lightfastness ratings, mainly because of the chemical nature of the organic pigments.

    Reputable brands that professional artists choose, such as Caran d’Ache, usually provide information regarding the pigments used and their lightfastness rating. 

    Some pigments fade faster than others, and the standard lightfastness ratings are:

    • I - excellent lightfastness  
    • II - very good lightfastness
    • III - fair lightfastness
    • IV - poor lightfastness
    • V - extremely poor lightfastness 

    Lightfastness can also be determined using the blue wool scale, but most colored pencil brands on the market do not follow these guidelines. 

    3. Binders

    Binders, also known as resins, are responsible for keeping the pigments in place after they are combined together. They ensure that the pigment is distributed evenly along the core of the pencils. Manufacturers can use different types of binders, such as paraffin wax, oil compounds, gum arabic, and others.  

    The type of binder used in a colored pencil determines its performance when the pigment interacts with the paper. 

    4. Extenders

    Extenders are used along with binders and help make sure that the core has a firm, solid structure. Whether a colored pencil feels rigid or soft depends on the extenders used. Also, a greater amount of extenders can reduce the pigment and binder required, helping lower the price of the pencils. 

    Differences Between Lead Pencils And Colored Pencils

    Apart from having a core that is not made from graphite, colored pencils have some other features that distinguish them from lead ones. 

    In most cases, these pencils are highly resistant to water and hence do not smudge easily, unlike graphite pencils. They also offer greater control and precision, making them easier to work with, and can be easily damaged by light and heat, thus requiring greater care. 

    Types Of Colored Pencils

    Types Of Colored Pencils

    Unlike regular lead-based pencils, colored ones do not contain any graphite but can still be divided into different grades. The main grades of colored pencils include:

    1. Artist Grade

    Artist-grade colored pencils are higher quality pencils with well-pigmented colors, which makes them more vibrant and resistant to UV rays. They also have a wider color range and tend to be more durable. Artist-grade pencils are also resistant to water and are available as individual pencils or in sets. 

    2. Student Grade

    Student-grade colored pencils are generally inferior to artist-grade ones since they are generally meant for classroom or informal use. However, that does not mean that they are of poor quality and can deliver great performance for hobbyists and students while also being more affordable. 

    These pencils also do not have a lightfastness rating and have a color range limited to 36 or 24 colors. However, due to lower quality pigments used in such pencils, you can even get erasable colored pencils which can be great for beginners.  

    3. Mechanical Pencils

    Mechanical colored pencils are not manufactured like standard colored pencils and are similar to mechanical graphite pencils. The only difference is that they contain colored pigments instead of lead. 

    4. Watercolor Pencils

    Watercolor pencils or water-soluble pencils come with pigments that can dissolve in water and are usually used to create a watercolor effect. But they can also be used like regular colored pencils without water. 

    5. Pastel Pencils

    Like hard pastels, pastel pencils can be used separately or with various mediums and may be wet, dry, or blended. The main use of pastel pencils is for creating rough sketches or for details. 

    Colored Pencils Subsets

    Besides the various grades of colored pencils, there are some subsets based upon their construction, which include:

    1. Wax Based

    Wax-based colored pencils are one of the most popular types and are so named because they have a core made from wax. These pencils help create a smoother, slicker appearance and are most commonly used by artists for blending. It is also possible to layer different colors easily using such pencils.  

    The feature that makes wax-based colored pencils a favorite choice for many is that they can easily be used with solvents. This helps dissolve the pigment onto the paper very effectively and makes the pencils easy to work with. Artists generally use solvents like xylene or baby oil with colored pencils. 

    Some blending pens are also made using xylene, which counteracts the paraffin wax used in colored pencils and is generally a better choice leading to cleaner artwork. The only downside to using such pencils is the high possibility of wax blooms, which happens when the wax starts to oxidize over time.

    Fortunately, dealing with this problem is easy and only requires wiping your artwork with a clean, dry cloth. And to prevent it from happening again, simply seal off the drawing which will block the surface from interacting with air. 

    2. Oil Based

    Oil-based colored pencils are less common than wax-based ones, and very few brands offer them. That said, these pencils can provide more vivid colors and a softer, smoother appearance than waxed-based ones. They also need solvents, such as turpentine or mineral spirits, to dissolve properly. 

    When using oil-based pencils, it is best to avoid xylene or baby oil, as these can spoil the paper and your artwork. 

    Colored Pencil Techniques

    If you’re wondering how to use color pencils, here are some common techniques to try out. 

    1. Layering

    Generally used during the initial stages of coloring, layering can be used to provide finishing touches. Several primary colors are used in multiple layers to build up different tones, which provides the completed artwork with a grainy, textured appearance. 

    2. Burnishing

    Burnishing is generally used on a drawing that has already been colored and requires the application of a light-colored pencil or colorless blender. It results in a shiny surface since the colors get deeply embedded into the grain. 

    3. Roughening

    This technique involves placing a rough paper underneath the artwork and rubbing the drawing with a smooth object to create textures. It is followed by drawing on these textures to complete the artwork. 

    4. Scoring Patterns

    Scoring patterns is a technique used for creating highlights by using a sharp pen and transparent or tracing paper. Place the tracing paper over the section of the drawing to be impressed and create the desired pattern or line over it. 

    5. Color Fusing

    Similar to blending, this technique combines the color pigments with a colorless blender, solvents, or both. It can also be done by combining all the colors into a single one. 

    What Are Colored Pencils Made Of Frequently Asked Questions ?

    Is it possible to create colored pencils using DIY techniques?

    Manufacturing colored pencils is a highly specialized process involving combining pigments, binders, and extenders together and placing them into molds. It requires a lot of tools and training and hence cannot be accomplished using DIY methods. 

    Can colored pencil marks be erased?

    If you’re wondering how to erase colored pencil marks, the first thing to remember is that not all colored pencil markings can be erased. Only those made using erasable pencils allow doing that since they use pigment that can easily be removed from the paper. 

    So, make sure to get such pencils if that is an important requirement. 

    How long do colored pencils last?

    While the lifespan of colored pencils depends upon factors like their quality and how they are stored, in most cases, they last from two to five years easily. And when stored properly in a dark and cool place, they can last for as long as ten years. 

    What Are Colored Pencils Made Of Final Thoughts

    What Are Colored Pencils Made Of Final Thoughts

    Whether you’re a professional artist or a hobbyist who loves to draw, knowing about the tools used can greatly impact your experience and the quality of the work. 

    And in the case of mediums like colored pencils, this becomes even more important as there are lots of poor-quality options on the market. Now that you know what colored pencils are made of, finding the most suitable options should be easier. 

    Just make sure to consider various factors such as lightfastness and erasability and your personal requirements before making a choice. Doing so will ensure that you end up with the option most suitable. 

    With that said, it is time to conclude this guide. Until next time! 

    Imagine living in a hot region where the humidity is at its peak! Sounds like hell? Well, you can counter this problem if you invest in a high-quality dehumidifier for the bedroom

    Dehumidifiers come in all shapes and sizes, which makes them one of the most versatile appliances you can get for your house. In fact, some brands offer a wide variety of dehumidifiers that can be used for different purposes. 

    For instance, an energy-efficient dehumidifier is designed to save energy so that you don’t have to pay a high electricity bill. Similarly, a portable dehumidifier can be used in any room since it is compact and easy to move around. 

    Furthermore, a versatile dehumidifier comes equipped with all types of features, such as humidity control, energy efficiency, and portability. Therefore, we have compiled this guide to help you find the best dehumidifier for your bedroom. 

    Where Should You Place A Dehumidifier In Your Bedroom

    Where Should You Place A Dehumidifier In Your Bedroom

    If you are wondering where to put a dehumidifier in the bedroom, there are plenty of options to look forward to. For instance, you place the dehumidifier right in the center of the room to remove most of the moisture from the air. However, you must be careful since installing it too close to the bed can cause massive inconvenience. 

    Besides this, you must not install the dehumidifier near the laundry rooms since the excess moisture can cause the unit to malfunction. But you can place it beside a cooling system as it will aid the appliance and help the room cool down faster than usual. 

    In case you are planning to install a dehumidifier near your bathroom, we recommend fixing all leakages and broken pipes since the excess moisture can interfere with the machine. If you plan to install a whole-house dehumidifier, you can directly connect it to the home’s HVAC system for better coverage. 

    Benefits Of A Dehumidifier In A Bedroom

    Placing the dehumidifier in the right place can have several advantages. One of the benefits of a dehumidifier in a bedroom is that it can improve the air quality since it collects all forms of dust and contamination. This helps people who are suffering from asthma and other respiratory problems. 

    Apart from this, it can be used to prevent pests from entering your room since most pests prefer a humid and warm climate to survive. In addition, most brands have an integrated energy factor control designed as a part of the main feature. This ensures that the energy usage is lower than a cooling system. 

    Similarly, you can prevent mildew and mold from growing in your house with a dehumidifier. This is because it can remove moisture which plays an important role in fungal growth. 

    Seven Most Energy Efficient Dehumidifiers

    1. HomeLabs

    HomeLabs is one of the most versatile and energy-efficient brands on the market. It specializes in making high-quality dehumidifiers, microwaves, air-conditioners, and kitchen appliances. Amongst the various dehumidifier models, the HomeLabs Energy Star Dehumidifier is one of the best sellers. 

    The 50-pint energy-saving unit is ideal for those people who want to save on energy consumption. Moreover, the unit is specifically designed to remove moisture from a 4500-square feet room. 

    Apart from this, the brand has included an automatic shutoff feature in all its models that turns off the appliance as soon as the tank is full. In fact, all the units come with a continuous drain option which prevents the tank from overloading. 

    2. Vremi

    Vremi is a brand dedicated to making dehumidifiers that can extract high humidity levels from the air. This ensures you don’t have to worry about dehydration or irritation in your throat and skin. It also specializes in making kitchen accessories such as silicone food storage containers, refrigerators, colanders, and many more. 

    When it comes to the dehumidifier, it has a 50-pint capacity which is capable of removing excess humidity from a 4500-square feet room. 

    Most dehumidifier units under this brand come equipped with wheels and handles so that you can easily love them around your house without facing any difficulty. Just make sure to adjust the preferred moisture level, and it will get the job done. Plus, it has a drain hose outlet which aids in emptying the tank. 

    3. Midea

    Unlike most brands that design dehumidifiers with high noise levels, Midea specializes in making dehumidifiers with low noise compressors. This prevents the unit from reaching the maximum noise levels while it absorbs humidity from the air. It is also one of the largest producers of major home appliances since its main objective is to make friendly solutions to solve household problems. 

    Midea dehumidifiers are known for their compact design, ideal for small spaces. They also work well in damp spaces as long as the room has an area of 1500-square feet. Therefore, you can use them in the kitchen and bathroom as well. 

    Besides this, you can try other Midea appliances such as refrigerators, air conditioners, and freezers since all of them boast efficient features and durability.

    4. Black + Decker

    Black + Decker is one of the oldest American brands that design energy-star certified dehumidifiers for residential and business purposes. It also manufactures other products such as hardware, power tools, home appliances, fastening systems, accessories, and many more. Moreover, all the dehumidifier units are compact and powerful enough to cover an area of 3000-square feet. 

    The brand also provides a removable and washable mesh filter which makes it easy to maintain the dehumidifiers. 

    Besides this, the environmentally-friendly refrigerant coil ensures the product doesn’t contribute to global warming by releasing harmful greenhouse gas. Additionally, the units have an audible alert system that notifies the users whenever the tank is full. 

    5. Honeywell

    Honeywell is an American multinational corporation that specializes in four different business sectors. When it comes to safety and productivity solutions, its dehumidifiers are one of the best on the market. In fact, this is one of the few brands that offer wifi connectivity along with their units; hence you will get timely alerts whenever the tank is full. Also, users can control the unit by using their phones to issue commands. 

    Typically, a Honeywell dehumidifier features a 20-pint tank capacity, detachable water tanks, and a continuous drainage outlet. Apart from this, all the units are energy-star rated so that you can pick the most energy-efficient model for your bedroom and save money in the long run.  

    6. Frigidaire

    Frigidaire is a brand that specializes in manufacturing high-quality kitchen and laundry appliances that are energy-efficient and extremely reliable. Besides this, it produces home appliances such as dehumidifiers, air conditioners, accessories, and many more. 

    The 50-pint Frigidaire dehumidifier comes with a built-in pump that is designed to empty the water tank automatically. Therefore, you don’t have to apply any labor while cleaning the tanks after they get full. Apart from this, the unit has a custom humidity control option that allows users to set the right humidity level for their house. 

    In addition, it provides all the units with caster wheels so that you can easily move the appliance around the house without any inconvenience. It also produces small and compact dehumidifiers of 20 and 30 pints in case you run short of storage space in your house. However, these units take a longer time to absorb the moisture in the air. 

    Most Efficient Brand Dehumidifier For Bedroom Frequently Asked Questions ?

    Can You Use The Water Collected By The Dehumidifier For Personal Use?

    Normally, we don’t recommend using the water collected by the dehumidifier since it is considered greywater or a form of wastewater. The water is usually collected from areas such as sinks, dishwashers, baths, and showers; therefore, they might contain some contamination. 

    However, some people prefer to use this water for cleaning windows by adding bleach and vinegar to turn it into an antibacterial solution. Moreover, you can use it to water your garden plants by spraying the water through a garden hose. 

    How Often Should You Clean The Dehumidifier? 

    In general, you must clean the dehumidifier filters regularly since dust and other forms of debris can affect the appliance and cause it to malfunction. On that note, some brands offer a permanent or washable filter along with their units, allowing users to clean them easily.

    In contrast, some dehumidifiers come with disposable filters, which must be replaced once it has collected all the dirt and moisture from the room. We highly recommend going through the cleaning instructions since some brands provide a strict cleaning process. 

    Can Energy Efficient Dehumidifiers Be More Efficient Than Air Conditioners? 

    Technically speaking, there is not much of a difference between air conditioners and dehumidifiers since they both work in similar ways to reduce humidity in the air. However, dehumidifiers are more energy efficient than air conditioners. 

    You can use an air conditioner and a dehumidifier simultaneously if you want to lower the overall cost of energy. The AC will cool down the place while the dehumidifier will extract all the moisture from the air. Hence, you can maintain a comfortable temperature in your room. 

    man's hand turning on a dehumidifier in the entrance of a house or office. To prevent joint pain. Most Efficient Brand Dehumidifier For Bedroom Final Words .

    Most Efficient Brand Dehumidifier For Bedroom Final Words

    As mentioned earlier, dehumidifiers are one the most effective ways of reducing moisture from the air. Besides this, you can improve the average efficiency of the unit by following a few key points. 

    Firstly, always make sure to buy a dehumidifier according to the size of your room. Large rooms require dehumidifiers with higher pint rates, while smaller rooms require a low pint unit. Similarly, if your home experiences high relative humidity, we suggest going for a higher pint model since it will absorb most of the moisture from the air. 

    On the other hand, if you are living in a cold region, a normal dehumidifier might not give you the best results. Instead, you must go for a versatile dehumidifier that is designed for all types of weather conditions. 

    While working with clay for sculpting is fun, it can be truly disappointing to find your unused clay all dried up. 

    Now you need to remember that air-dry clay and water-based clay will easily dry if you leave them exposed to air for a few days. But you may have bought a lot of clay that cannot be used at once. 

    So, we are here to tell you the right way to store clay so it stays moist. You will need very basic materials for the job, which will be mentioned below. Just read through this guide carefully, and you’ll be able to store your clay for a long time in the right manner. 

    Let’s get started. 

    How To Keep Clay Moist

    How To Keep Clay Moist 

    This section is divided into two parts, the first talks about keeping clay that you have partly molded moist so that it can be worked with later. And the second part talks about how to store clay blocks. 

    The materials needed for this job include

    • Small container
    • Water
    • Sponge
    • Paper towels 
    • Sealable plastic bag
    • Lidded bin 

    Storing Clay That You Are Working With

    1. Keep A Sponge And A Water Spray Bottle

    First of all, take a small bowl of water and keep a sponge near you. The water will keep the clay moist as you work with it or store it. 

    2. Occasionally Wet The Clay

    If you are working with clay, then ensure that you make it moist occasionally. To do that, take the sponge and put it in the water bowl. Then wring out the excess water and gently pat the clay from all sides. Do not use excess water, which may lead to very wet clay. 

    You can alternatively use a spray bottle to spray on the clay from all sides. Also, if you wish to store clay that you are molding for a few days, it is essential to spray water once in a while to prevent it from drying. 

    3. Wrapping The Clay

    Also, when you are not using the clay, you can wrap it in a damp paper towel and store it. Just moisten some paper lightly and ensure that they do not tear. Then use them to wrap the clay piece well. 

    You can also follow this process and wrap clay in a wet towel if you are to store clay for some time. This can be while working on other parts of your sculpture. 

    4. Storing in a Plastic Container

    After you have wrapped the clay in a damp cloth, it needs to be stored in plastic bags. You can use sealable plastic bags or ziplock bags, for that matter. Ensure that the paper is not very wet before putting the clay inside the plastic bag. 

    Also, if you are using a ziplock bag, take the air out by gently pressing the sides. Then place the wrapped clay inside and seal it immediately. 

    The moisture is then trapped inside the paper towel, and the bag and the clay will remain moist for longer. Also, it will remain moldable until the next time that you find it. 

    You can also use plastic cling wrap as an alternative if you do not find a ziplock bag. 

    5. Keep In A Cool, Dark Place

    The bag needs to be kept away from any sources of light. You can keep it in a cool place, like a dark storage cabinet. Just remember never to store clay pieces inside the freezer. The freezing temperatures can dry clay and remove and freeze all the water in it, which can lead to fracturing or flaking of the clay. 

    Similarly, never leave the clay in direct sunlight, as that is detrimental to the clay. It can remove all the moisture content, and the high temperature can lead the clay to crack and dry out completely. 

    Now, if you are wondering where to store clay other than a cabinet, the cellars or the basement are good places. They generally have a lower temperature, and the water content of the clay can be preserved. 

    However, if you plan to work with clay a lot, keep it inside a clay storage cabinet. These are special pieces of furniture that are made to keep ceramic and art supplies along with the clay. 

    Storing Blocks Of Clay

    1. Spritz With Water

    If you have a block of clay, then spritz some water on it. Ensure that the water is clean and cool before spraying. 

    2. Seal The Clay

    You will have to take a plastic bag that is bigger than the block of clay. Then place it flat on a surface with the opening facing towards you. Keep the block of clay near this opening, and then roll the clay in the plastic packet. You will need to roll it in the opposite direction from you like a burrito. 

    Then you can tuck both the corners towards the bottom and seal the packet. For this job, any kind of plastic can be used, including garbage bags, trash plastics, and yard waste bags. 

    3. Place The Clay In A Lidded Container

    You can take any lidded container and keep the clay wrapped in plastic. After you keep it inside, the lid should be tightly placed on top. We recommend cutting a large amount of clay into small pieces so that you can only take out the amount needed. 

    This will protect the rest of the clay from being exposed to outside conditions. 

    4. Store In A Cool, Dark Place

    You will have to keep the clay in a dark and cool place away from extreme weather conditions. Heat and extreme cold can be detrimental, and the cellar, basement, and storage cabinets act as the best storage places. 

    How To Revive Dried Stored Clay

    If you have left clay in the open for a long time, then it can dry up completely, but there is a way to revive it. You can take some water and soak a paper towel in it. 

    Then wrap the clay with this towel and store it in a cool and dry place for the next few days. Also, for storing large amounts of clay, you can cut the clay into small bits using a wire cutter. Then wrap them up and store them inside plastic bags, and this should make them moist again. 

    Alternatively, you can poke holes in large pieces of dried clay as well. Then pour water into the holes, and that should restore the moisture in the clay block. 

    Tips To Remember

    1. Storing Air-Dry Clays

    If you do not keep air-dry clay and water-based clay moist, then they are susceptible to cracking. That would mean you will have to make the clay moist and start the work all over again. You may also need a new clay block if the previous one is damaged beyond repair. 

    2. Modeling Clay And Polymer clay

    When considering modeling clay v/s polymer clay, know that modeling clay can be bought if you want to practice sculpting with clay. It is self-hardening and is an air-dry clay that you should not keep exposed outside. It is best to store it in a damp box with plastic wrap, as the process mentioned above. 

    Also, you can lightly spritz it with water to help it stay moist and remain in a workable state. However, polymer clay is different as it is made from polyvinyl chloride. This is known to be versatile and can be baked to cure permanently. 

    3. Wetting The Clay

    When wetting the clay, make sure you do not add too much water, as that can destroy it. Just dampen paper towels or a cloth towel and use it to keep the clay moist. Also, if you are stopping in the middle of clay projects, then store the clay immediately in the same process that we mentioned above. 

    How To Store Clay Frequently Asked Questions ?

    Can hardened clay be revived and stored?

    Yes, you can use a damp piece of napkin to wrap the hardened clay and keep it inside a plastic bag. Leave it for a few days, and then remove this napkin. The clay should have absorbed moisture and softened by then. 

    How to store oil-based clay?

    There is no need to worry about oil-based clay as it will not dry up with time. You can easily keep it anywhere and mold it as and when needed. Only water-based clays are prone to drying and cannot be exposed to air for long. 

    How To Store Clay Final Words 

    How To Store Clay Final Words

    By now, we hope you have the answer to “how to make modeling clay soft again?” So, you should be able to store all kinds of clay properly. Just remember to keep water-based clay sealed tightly with moisture, and it should be ready for future work sessions. 

    Also, we recommend removing the original packaging that the clay comes in to preserve it better. This is because the plastic container/packaging will only keep your clay well until opened. Then you will have to cut it into smaller pieces and store them in containers. 

    Now you are ready to be creative and work with clay. If you are just beginning out, know that there are multiple tutorials that you can check out on YouTube. 

    Also, if you liked going through this article, watch this space for more informative guides. 

    You can also checkout our exclusive article on removing paints from concrete to get an idea on painting on concrete surfaces.

    Until next time, bye! 

    To be honest, looking for the best paint for furniture is more challenging than it seems, especially for wooden furniture. 

    Most people think they need to buy expensive wood paint or stains to give their furniture a refreshing look. While that can be true in some instances, you can also experiment with paints already present in your home. 

    One such option has to be acrylic paints which are quite versatile and can be used on a number of surfaces. However, they aren't the most common options for painting wooden furniture. That's why we thought of creating this guide to let you know whether it's worth the effort to paint furniture with acrylic. 

    This guide should also give you a better idea of things to remember while painting wooden furniture, so without further ado, let's get started! 

    Can You Paint Furniture With Acrylic Paint?

    Closeup of female having thin brush in hand carefully painting old cupboard in red color. Home workshop for renovation of furniture. New life for old things. Can You Paint Furniture With Acrylic Paint.

    Yes, acrylic paints can very well be used for painting furniture, particularly those made of wood. In fact, options such as acrylic latex paint and acrylic chalk paint have been the go-to paints for homeowners. You just need to use a proper primer and prep the surface of the furniture before painting to make the acrylic paint long-lasting. 

    Apart from wood, acrylic paints can be used for other furniture materials like metal, plastic, and wicker. If in doubt, buy an acrylic paint that's manufactured for use on furniture to get expected results. Many professionals actually like acrylic paints on furniture as they're typically water-based, which makes cleaning up and fixing mistakes easier than other paint options. 

    It's even better that brands have got on the trend of using acrylic paints on furniture and have formulated paints that can be used to paint outdoor furniture. They are perfect for painting wooden porch or lawn furniture that are regularly exposed to rain, snow, and harsh sunlight. You can find multiple indoor-outdoor acrylic paints online. 

    Steps To Follow While Painting Wooden Furniture

    It's not the best idea to paint directly on wooden furniture; that's why we will let you know about the steps to follow to get the desired results. This will surely help you revamp any furniture piece even if it isn't in the best shape. 

    1. Select The Right Acrylic Paint

    Believe it or not, the type of acrylic paint you choose for the furniture will make a big difference in getting the desired look. One of the best things about acrylic paints is that they are available in a number of finishes and colors, so you'll never run out of options. 

    An essential factor to remember while picking suitable paint types is whether the furniture will be placed outdoors or indoors. It’s recommended to pick an acrylic latex paint or other acrylic paints meant for outdoor use for furniture kept on porches or lawns as these are durable paints. 

    You should also spend some time deciding on the finish, as at times, a matte paint works better than the usual satin sheen of acrylics and high gloss paints. We recommend looking up things like how to paint furniture with Farrow and Ball before selecting an acrylic paint to ensure it's easy to use for DIY projects.

    2. Clean The Wooden Surface

    Before you can proceed to paint any furniture, it's essential to get the surface as clean as possible. So, use warm water and soap to get rid of any dirt, debris, and oil stains. Sometimes, outdoor furniture may have tough stains, but you can easily remove them with a strong detergent and a scrubbing sponge.

    3. Sand The Wood

    The next step is to sand the surface of your furniture to achieve a smooth texture. Applying acrylic paint on wood can often highlight even the most minor damages, but light sanding will help remove dents, nicks, or scratches. Sanding is also a great technique to remove old paints from painted furniture. 

    In case there are more significant dents or cracks, use a wood filler to smoothen the surface. And remember to sand again afterward so that the entire surface of the furniture is even. 

    4. Apply A Primer

    We know that prepping wood furniture takes a lot of time, but believe us when we say that the outcome is pretty impressive. Don't skip on this step and ensure to coat the entire surface of your furniture with a good-quality primer. 

    A primer is essential when using acrylic chalk paints as it can hide blemishes. Moreover, a wood primer will help the paint colors to shine through without you needing to apply several coats. You should also prime furniture as it guarantees that the paint will last longer. 

    5. Apply The Paint

    Needless to say that this is the most crucial step when you want to paint any furniture. Remember to get high-quality paint brushes as they help to avoid brush marks, especially when using homemade chalk paint. Always apply the paint in even brush strokes with slight overlaps to achieve a smooth and durable finish. 

    If the furniture is quite large, use a paint roller as they are easier to maneuver for beginners, and the job takes less time. Also, read the instructions to know how many coats of paint are required to avoid applying too many layers. We recommend leaving the first coat to dry for 24 hours before you return to check if it requires any touch-ups. 

    6. Finish With A Sealant

    If you want to protect the look of smooth surfaces and ensure the paint lasts for a long time, never forget to use a sealant. A top coat of transparent sealant works best on both indoor and outdoor furniture to preserve their look after a paint job. 

    Moreover, remember to let the paint dry completely before applying the sealant with a paint brush or roller for a lasting finish. A paint sprayer filled with sealant may also work well for applying the final coat on a large piece of furniture. 

    Paint Furniture With Acrylic Paint Frequently Asked Questions ?

    Can you paint raw wood with acrylic paints?

    Technically speaking, you can use water-based paint like acrylic paint on raw wood. But, we wouldn't recommend doing so as the finish wouldn't be the best. It's best to prime wooden furniture before painting to achieve the best result because priming ensures that the paint job will last for a long time, especially with a sealant. 

    Furthermore, painting on raw wood with acrylics isn't recommended as it often delivers a patchy finish. 

    Can acrylic paint be used on stained wood?

    In many cases, a piece of wooden furniture is stained to highlight the wood grains and protect it from termites. You can proceed with painting stained wooden furniture, but make sure to follow the steps of wood preparation properly. 

    When the stain is glossy, a little bit of sanding should get rid of the shine while it would also let you smoothen uneven spots on the wood. A few coats of primer can even help subdue dark stains to provide an accurate finish with the acrylic paint. 

    Can you use acrylic wall paint on wood furniture?

    When it comes to painting outdoor furniture, many people prefer to paint them to match the color of a particular wall. The good thing is that you can actually use the same acrylic wall paint on the wooden surface of the furniture to get an even finish. 

    We especially recommend chalk-style paint due to its matte finish, which many people use to create a chic look. Remember to check out how to use chalk paint for furniture to achieve a smooth finish. Other than that, you can also find acrylic latex paints that work for walls and wooden furniture. 

    Paint Furniture With Acrylic Paint Final Words

    Paint Furniture With Acrylic Paint Final Words

    All in all, go forward with the furniture project if you have been wondering whether to use water-based acrylic paint instead of the usual furniture paint. We hope that this guide will help you get the desired finish. 

    In case you're still wondering if the acrylic paint lying in your garage is going to work, consult a professional. They may also help you figure out whether your wood furniture would benefit from a coat of oil-based paints. 

    Other than that, whenever you're working with paints, ensure to follow the instructions mentioned on its packaging and use protective gear. If it's your first time in furniture painting, we recommend using a non-toxic acrylic paint. 

    Want to read more articles on paints and painting like this article? Check out our next article on how to erase a colored pencils drawing to gain more knowledge on the subject.

    Until next time, goodbye, and have fun painting! 

    The heating system in your house may break and release cold air instead of hot air. This could be because an incorrect thermostat setting is keeping the air running despite turning it off. Alternatively, your heating system may malfunction because of a broken vent.

    A heating system in the house is necessary when it's cold, as it can heat the room and maintain a comfortable temperature. However, sometimes the heating systems can break down and release cold air instead.

    When that happens, it will cost more money and waste electric energy. Therefore, you will have to fix it as soon as possible. So, here’s a complete guide for you when your vent is blowing cold air.

    How To Fix Furnace Blowing Cold Air Coming From Vents

    How To Fix Furnace Blowing Cold Air Coming From Vents

    There could be multiple reasons for your furnace blowing cold air. I have gathered some possible reasons for that and how to fix it.

    1. Cold Air Blowing Because Of Incorrect Thermostat

    The thermostat in your home is a small device that is a crucial part of the heating or cooling system. This is because, with a press of a button, you can set the temperature range and comfortably stay warm.

    So, when the furnace is blowing cold air from the vent, the first thing you should do is check the thermostat setting. As you do that, see if the device is set to "ON." If so, the problem could be because of that, as it keeps the fan running despite you turning the heat off. As such, simply change the setting from "ON" to "AUTO."

    Once you do that, the fan will automatically turn off when the heat is turned off and will not blow cold air.

    2. Broken Or Dirty Flame Sensor

    Cold air can also blow because of a broken or dirty flame sensor located inside the furnace. The flame sensor is a device that detects flame and burns natural gas, maintaining the heating cycle. Moreover, when the device is broken or dirty, it can automatically turn the heat off so that natural gas does not leak into the house. Along with that, the fan could still blow cold air into the vent.

    Accordingly, you will have to clean or replace the device. For that, I suggest calling a professional instead of trying your hand at it.

    3. Issues With Ignition And Pilot Light

    Another reason your furnace is blowing cold air could be due to a broken ignition system. In such a situation, the fuel in the heater will not ignite and will not be blowing hot air. Instead, it will release cold air only.

    When that happens, check if the pilot light is on; if not, you will have to fix the device. If you want to do it yourself, you can use the manual that comes with the device and follow the instructions. When you are done, reignite and see if the flame goes out in a few minutes. If that happens, you might have a bigger problem, and you will need professional help.

    Furthermore, if you cannot relight the pilot light, check the gas supply to see if it is a gas furnace. See if the gas valve is turned on; if it is, clean the gas valve properly for continuous supply.

    Warning: When you relight the pilot switch, turn off the gas valve so that there are no leaks while you repair it. This is crucial because you can start an accidental fire with leaks and harm yourself.

    4. Dirty Or Clogged HVAC Filter

    The HVAC filter is an important part of your heating system. Since it helps in filtering dust particles, it maintains good air quality and keeps you healthy. However, it's a device that can get dirty and clogged and will need cleaning from time to time. Otherwise, the air will get blocked inside the furnace, and that can cause overheating, further leading the heater to auto-turn off.

    With a dirty air filter, only cold air will come out of the air duct. An easy solution to this is to clean or replace the HVAC filter from time to time.

    5. Low Refrigerant Charge In The AC System

    A low refrigerant charge in the air conditioning systems can also be one reason cold air comes out of the vents. The cause of low refrigerant can be due to leaks in the coil or heat pump. Moreover, with low refrigerant, you will also lose the capacity and airflow of the heater. Whenever you realize that the first thing you can do is charge the refrigerant. If there is a leak in the heat pump system, call your HVAC expert to fix the leak.

    6. Holes and Cracks In The Vents

    The vents connected to your HVAC system direct warm air out of the air ducts. However, it can break and crack for several reasons, like rust, earthquakes, etc. If there are cracks in vents, it will draw cold air and feel like the furnace blowing cold air.

    So, troubleshooting such a problem will require checking the vents, probably located in the attic, for cracks and holes. If you notice any crack, small or big, you will either have to patch it up or replace the whole section.

    7. A Broken Compressor

    The compressor of your heating system is located inside the heat pump, and it makes everything run smoothly. However, with time the compressor can break for several reasons. For instance, you could have over or undercharged it, or maybe there is a faulty motor. Moreover, it could be due to a dirty evaporator and coil or a faulty run capacitor.

    When that happens, your heater will not work properly and impact the heating process.

    8. A Broken Limit Switch Can Also Be The Problem

    The limit switch is also another important device inside your heating system. Since the device automatically turns the burner off when the heat exchanger gets too hot, it is an important safety feature. However, it can malfunction and keep blowing hot air overheating the heat exchanger or turn the burner off continuously and stop the heating cycle.

    9. Faulty or Broken Fan Or Motor

    The blower fan and the inductor draft motor inside your gas furnace help in blowing hot air when it's in heating mode. The blower fan can malfunction when it is too old or has high static pressure. Moreover, it can go out because of inadequate ductwork. That’s when you can fix the problem by lowering the static pressure. If that does not work, you can replace the blower.

    Besides, the inductor draft motor also works inside the furnace to remove exhaust gas. If the device gets faulty, the heater will push air that is filled with exhaust gas which is obviously dangerous for your health.

    Now, the cause of a faulty draft motor could be due to a blocked flue pipe or some other restrictions. To fix the problem, you can try cleaning the blockage or restrictions or installing a new motor.

    Why Is Cold Air Coming From Vents When Heat Is Off

    Final Words

    Educating yourself on the heating and cooling system in your home is important. I say this because it maintains the temperature of the room, keeping you comfortable. However, it can break and not work optimally.

    When that happens, follow the instructions above, and you can fix the problem at the earliest. But, as furnace repair can be tricky, you will have to get professional help to diagnose and fix the problems.

    Humidity is an unfortunate by-product of the lovely rains, which can be mitigated by getting a dehumidifier for your bedroom.

    A dehumidifier can help reduce the humidity level of a room, but there is one small catch to them: figuring out the right setting. Since these appliances come in many models and sizes, picking out one that suits your room and residential temperature becomes vital to their success.

    So, what should the ideal temperature setting be for your bedroom? The ideal setting should be between 70 and 90 degrees F for residential refrigerant dehumidifiers. But there are other factors that need to be looked into - which is why we have curated this guide. 

    Relative Humidity

    The term ‘relative humidity’ refers to the amount of moisture present in the atmosphere in relation to what would be present in saturated air. If the temperature is high, the amount of moisture the air can hold is also high, and vice versa.

    Every part of your home will have a different relative humidity depending on where they are situated. If you live close to a forest or a beach, you’ll experience a higher level of humidity, making a dehumidifier all but necessary.

    The relative humidity level will contribute to your decision of getting a dehumidifier, if it hasn’t already.

    How Does A Dehumidifier Work

    Air purifier , Business woman use filter for clean room in a living room. How Does A Dehumidifier Work.

    To put it simply, a home dehumidifier reduces the relative humidity of the air by either refrigeration or absorption/adsorption. The two methods are equally effective in stopping the rise of humidity levels in your home.

    1. Refrigeration

    Most dehumidifiers use refrigeration as their primary way of reducing the relative humidity in your home by letting in warm air through a fan in the device. The warm, moist air passes over pipes containing coolants, condensing the moisture in the air, after which the air is allowed back into the room. This improves the air quality in addition to lowering the moisture levels of the room.

    2. Absorption/Adsorption

    Some dehumidifiers reduce the moisture levels of the room by absorbing the water content out of the air. It involves drawing in air through a duct, which is then passed through a rotating wheel that absorbs the moisture. Dry air is then allowed back into the room.

    The way absorption and adsorption differ is that absorption involves water soaking into a material, while adsorption has the moisture content picked up on the surface of the material.

    Utilizing Dehumidifiers

    If your house feels very humid during the summer, you can put a dehumidifier to good use and trap the moisture in the air. There is no clear-cut temperature value you can set on your dehumidifier to keep the humidity perfectly at bay. However, you can use it to keep the moisture in the air low enough to ensure an optimal comfort level.

    The objective of using a dehumidifier is to increase your comfort and remove issues born of humidity, such as pests, odors, and mold.

    1. Sizing Your Dehumidifier

    There is no such thing as a dehumidifier that is perfect for every room.  Dehumidifiers come in all kinds of shapes and sizes, catering to the kind of space they’ll be used in. 

    Too small and your dehumidifier will not be effective at all. Too large, and you may end up drying out your skin and hair because of the excess drying agents. Not to mention you’ll end up wasting your money and space on something that can be achieved with a smaller device.

    For reference, a dehumidifier as large as a smoke alarm is fine for a bathroom, but too small for a bedroom.

    2. Placing The Dehumidifier

    The right location to keep your dehumidifier is in the middle of the bedroom. This will allow the device to reduce humidity levels much more efficiently than when placed in the corner.

    Close your doors to maximize the dehumidification and cool the room down to save your device from excess load. It’s also a good idea to have an air conditioning unit working in your bedroom with the dehumidifier to distribute the energy expenditure.

    3. Maximizing The Efficiency

    Remember to turn the device off after a while, as the aforementioned drying agents may have an unintended consequence. It’s important to utilize your dehumidifier in moderation and run it alongside your air conditioner.

    4. Maintenance

    You’ll need to remove the moisture reserves of the appliance once in a while. Once a month would suffice, if you use your dehumidifier regularly.

    Some dehumidifiers will signal you to empty the reserves once full, as they’ll turn off automatically if you don’t.

    Ideal Settings For Bedroom Dehumidifiers

    Dehumidifier settings vary based on a number of factors, such as the room temperature, humidity levels, and size of the room. Let’s explore these settings in detail.

    1. Temperatures

    Differences in room temperature will require the dehumidifier to work harder in order to maintain cooler air and a comfortable level in the room. This is because the inside of the condenser will have to be cooler than the surrounding atmosphere to properly condense the humidity. Meaning, if the temperature drops, your dehumidifier will struggle to keep the room temperature low.

    Residential dehumidifiers ideally work in the range of 70 to 90 degrees Fahrenheit. Other kinds of dehumidifiers, for example Low Grain Refrigerant or Desiccant dehumidifiers, work more efficiently in different temperature ranges.

    2. Humidity Level

    You can perform a simple test for humidity levels to know if you should turn the dehumidifier on. If it is excessively high, using your dehumidifier is a no-brainer. You can keep the device on 30-50%, which is considered by most to be the right humidity level.

    Test The Humidity Level Of Your Bedroom

    To find out the relative humidity of your room, you can perform the ice cube test. While this will not give you the exact figures of the moisture content of your bedroom’s air, it will give you a general idea.

    Simply put a few cubes of ice into a glass of water, stir, and wait for a few minutes. If there is no moisture on the outer side of the glass, your room has dry air, which may mean you need a humidifier. 

    In case the condensation on the outer side of the glass is high, the air has high moisture content and will require you to use your dehumidifier.

    Safety Precautions

    The combination of water and electricity is quite the safety hazard, which is why you should read the safety guidelines of your dehumidifier before operating it. You can follow these precautions in addition to the manufacturer’s guide to minimize any risks of dehumidifier-related accidents:

    • Always plug the device in a three pin socket
    • Remove dust build-up from the dehumidifier
    • Wash air filters regularly
    • Check drainage passages for debris
    • Keep the appliance away from the walls, furniture, and curtains
    • Turn it off when not in use
    • Be vigilant for any burning smell or unusual noises

    Health Benefits Of Using A Dehumidifier

    The benefits of a dehumidifier in the bedroom extend beyond making your afternoons more comfortable, even though they do make the humidity pretty tolerable. They have tangible health and hygienic benefits that can significantly improve your quality of life. Not to mention the elimination of musty smells.

    Excess moisture carries with it bacteria and microorganisms that may enter your body when you breathe in. Not only that, but pests like dust mites and cockroaches also thrive in areas with moist air, which are hygienic hazards that must be terminated quickly. You will even see a rise in mold growth in a damp environment.

    Dehumidifiers eliminate the very source of the problem by reducing high humidity levels and keeping the temperature low. With dust mites and mold growth in check, you’ll also have lowered chances of an allergic reaction or asthma.

    What Temperature Should I Set My Dehumidifier In Bedroom FAQs ?

    How long should I run a dehumidifier in my bedroom?

    You can safely run a dehumidifier for around 12 hours every day for maximum reduction of your bedroom’s humidity level. This will keep your room feeling fresh for far longer than otherwise.

    But, it isn’t a good idea to keep it running 24x7, as it will cause the dry air to have an effect on your skin and hair.

    How much energy do dehumidifiers consume?

    Dehumidifiers remain turned on for a long time, resulting in their relatively low wattage and hourly electrical usage racking up.

    Some dehumidifiers can consume up to 23 kWH of electricity per day, making their electrical consumption a substantial hit on the wallet.

    How does a dehumidifier prevent mold growth?

    Mold thrives in the presence of warm air and moisture, and the fungi will spread as long as they are in a moist environment. While dehumidifiers don’t kill mold directly, they stop their primary method of transmission and reproduction, thus stopping them from ever taking root.

    Should I keep the windows open while using a dehumidifier?

    No, you should keep the windows closed while your dehumidifier is running. Open windows invite more moisture, meaning more work for your dehumidifier. Not only does it increase the electrical consumption, but it also keeps the humidity levels from dropping.

    Asian woman turning on and using the modern air purifier while staying in the living room, air purifier is a popular appliance - household electricity. Air purifier can help to purify the air. What Temperature Should I Set My Dehumidifier In Bedroom Conclusion.

    What Temperature Should I Set My Dehumidifier In Bedroom Conclusion

    By keeping the room temperature and bedroom size in mind, you’ll be able to maximize the reduction of indoor relative humidity in your bedroom. If you live in a tropical climate and are on the fence about purchasing a dehumidifier, think of all the sweat and discomfort that high humidity brings.

    Scrutinize in great detail the most efficient brand of dehumidifiers for the bedroom and consider looking into the device. Not only will it reduce the humidity level of the room, the indoor air quality will also increase. 

    The benefits of a dehumidifier are plenty, and with the best setting, you’ll eliminate discomfort before long.

    In most cases, an AC unit should have 350 to 400 CFM per ton of cooling for the most effective results. But sometimes, the number of CFMs required may be more or less depending on certain factors like humidity and HVAC unit size.

    If you’re planning to get a new air conditioner installed, the CFM rating is one of the most important things to consider.

    People generally assume an AC unit with a higher CFM rating offers better cooling. But this is not always the case, which is why learning about how many CFM per ton of cooling you require is quite essential.

    And that’s just what this detailed guide can help you do. So, let’s start!

    What Does CFM Refer To In Air Conditioning?

    What Does CFM Refer To In Air Conditioning?

    CFM, or cubic feet per minute, is a measurement unit that determines the amount of air that an air conditioning unit can move in a minute. A higher CFM means that your air conditioner can move a larger amount of air in that time. Generally, you require 350-400 CFM for every 12,000 British Thermal Units or BTUs for optimal cooling.

    BTU is the measurement unit used to measure the cooling power of an air conditioning system, and 12,000 BTUs are equal to one ton. It is a common misconception that a higher CFM offers better cooling. In reality, there are other factors, such as BTUs, that determine how effective your air conditioner is.

    The cooling capacity of air conditioning systems installed in homes generally ranges from 18,000 BTUs to 60,000 BTUs, or 1.5 to 5 tons. Other factors that can affect cooling include the climate, home size, installed insulation, and humidity level.

    CFM also applies to heating capacity in the same manner. 350 to 400 CFM per 12,000 BTUs provides adequate airflow to help circulate the heated air through the supply ducts. It also pulls cool air back to the air handler or furnace.

    A 3-ton HVAC system should have around 1050 to 1200 CFM, while a 3.5-ton one should be able to move 1600 CFM at the very least. But as I mentioned before, this can vary depending on various factors. For instance, if you reside in an area with a hot and humid climate, an HVAC system capable of moving 450 CFM per ton might be a better option.

    In contrast, households that are insulated properly may only need an AC unit with a capacity of 350 CFM per ton. I recommend consulting an HVAC technician who can provide accurate information regarding the exact amount of CFMs required for your home.

    Calculating CFM

    The CFM of a blower depends upon the size of its centrifugal fan and the horsepower capacity of its motor. Every blower fan assembly is given a rating when it is manufactured. And this rating determines how many cubic feet of air it can move in a minute, depending on its speed.

    The CFM per square foot depends on the following factors:

    • HVAC system size
    • Blower CFM rating
    • Size of the area where the system is installed

    You can use this formula to determine the correct CFM required for a particular room - Tonnage x CFM of the blower / Number of square feet. For instance, a 2000 square foot room that has a 4-ton AC unit with a blower with a 400 CFM rating will have a CFM of:

    4-ton AC x 400 CFM blower / 2,000 square feet = 0.8 CFM per square foot. However, including the number of air changes per hour or ACH would require additional calculation. Let’s take another example for this purpose.

    A room with an area of 1600 cubic feet and a height of eight feet would need the air to be changed every ten minutes at 160 CFM. This means that the air will need to be changed six times every hour.

    For more frequent air changes, a larger amount of air will need to be supplied to the room, and there should also be another return air vent. Calculating the CFM can also be done through various websites that provide tools like online calculators where you just need to enter the data regarding the room and HVAC size.

    CFM And HVAC Size

    A larger heating, ventilation, and air conditioning system can deliver more CFMs, but this also depends on the size of the blower. Knowing how many CFMs your system can deliver can make it easy to know the CFM requirement of the room it is installed in. It can also help you know how much time it takes to change the air.  

    For instance, a 1-ton AC unit has a CFM rating of 350 to 400, while that of a 1.5-ton one will range from 525 to 600. Similarly, a 2-ton AC unit will have a CFM rating ranging from 700 to 800, and a 2.5-ton one will have a rating between 875 and 1000. A 3-ton AC unit can deliver 1050 to 1200 CFMs, and a 3.5-ton one can deliver 1225 to 1400 CFMs. 

    Finally, a 4-ton unit has a CFM range of 1400 to 1600 CFMs, while for a 5-ton unit, the CFM can range from 1750 to 2000. Now, let’s look at the furnace capacity, which can also be very useful for airflow calculation. 

    A 60,000 BTU furnace generally has a CFM rating ranging from 1750 to 2000, while an 80,000 BTU one will have it between 2320 and 2250. For a 160,000 BTU furnace, this rating lies between 4670 and 5350.  

    Standard CFM Rates

    As I’ve explained above, when it comes to cooling capacity, 400 CFM per ton is the industry standard. Other flow rates depend on the cooling system you use to lower the room air temperature. 

    How Many CFM Per Ton Of Cooling

    For High Latent Heat Systems

    Latent heat cooling systems use a cooling medium that can change its state depending on the temperature. Such a medium is usually a refrigerant that can change from liquid to gas during the cooling process. For such systems, 350 CFM per ton of cooling capacity is ideal.

    Sensible Heat Systems And Heat Pumps

    Often heat pumps do not send air through the evaporator or cooling coil but around them. This air is called bypass air, and these systems require 500 CFM per ton of cooling capacity for the best performance.  

    Why Do More Humid Climates Require AC Units With Less CFM?

    Many people wonder why humid climates require air conditioning systems with less CFM, assuming that more CFMs will be required to cool the environment. However, the reason you need fewer CFMs is related to how an air conditioner operates to remove hot air from its surroundings. 

    When an air conditioner cools down a room, it also removes moisture from the area. Cooler air cannot hold as much moisture as warmer air and, therefore, has a lesser amount of latent heat. The process by which HVAC systems remove moisture from the air is called dehumidification, which is also important for removing heat. 

    As a rule of thumb, such systems will work much harder in humid climates to get rid of the heat and moisture. But they do not need to move a large amount of air for effective cooling.

    Why Do Drier Climates Require More CFMs?

    You may think that AC units installed in drier climates will require fewer CFMs since dry air is easier to cool. But in reality, the higher latent heat in dry air makes it harder to cool than air in humid climates. Because of this, an HVAC system is unable to remove as much moisture from the air.

    With more moisture, the air still has some heat left remaining, which is why your AC will need more CFMs to cool the house properly. 

    Situations Where A Higher CFM Is Needed

    Here are a few situations where you may require more CFMs than is needed on average.

    1. A Large Sized Home

    A larger home will require an air conditioner with a bigger cooling capacity and more CFMs. This is because the air conditioner will have to move a larger amount of air so that all the rooms in the house are cooled properly.

    On the other hand, those with smaller houses may not need as many CFMs for effective cooling. 

    2. Having Improper Insulation

    In the case of houses that are not insulated properly, the cooling system has to work harder to maintain a lower temperature. The building insulation may be poor due to the use of inferior quality insulating materials used in its construction. Similarly, the attic may not be insulated properly, or there may be gaps in windows and doors, allowing air to pass through.  

    If your home does not have proper insulation, more CFMs will be required to keep it cool.

    3. Residing In A Hot Climate

    Households located in areas where the climate is hot will require more CFMs to get rid of moisture. But if the humidity is high and the air contains a lot of moisture, the number of CFMs required may not be as much, as I explained above.

    When humidity levels are around 50%, 500 to 600 CFMs per ton will be required.

    What Happens If You Do Not Have An Adequate Number Of CFMs?

    Having an adequate number of CFMs is crucial to ensure that your AC can function optimally. In the absence of an appropriate number of CFMs, certain issues may arise, which can include:

    • Improper cooling
    • Stuffy and hot rooms
    • Higher power bills
    • Short-cycling of the AC unit
    • More frequent breakdowns
    • Shorter lifespan of the unit

    When it comes to the question of how many CFMs are required for a room, there is no standard answer. The ideal number of CFMs will depend on how frequently the air needs to be changed. You can use the room size per square foot to calculate the number of CFMs needed for two air changes per hour or 2 ACH.

    A room with an area of 200 square feet will require 53 CFMs at 2 ACH, while one with 500 square feet will need 133 CFMs. Larger rooms, such as those with 2000 or 3000 square feet, will need 533 and 800 CFMs, respectively. 

    Air Circulation And Cooling Efficiency

    Proper air circulation is also an important factor that should be considered when determining the cooling efficiency of your HVAC system. The reason is that if air cannot circulate properly, such as in a locked room that does not provide any space for air to escape, air pressure builds up inside.

    This means that it cannot accept any more air coming from the air conditioner, and there will be no temperature drop, leading to ineffective cooling. To prevent this from happening, you can install a door that is slightly trimmed at the bottom, providing a gap for air to pass through. Ideally, this gap should be ¾ inches for best results.

    How Many CFM Per Ton Of Cooling

    What Is Better, High CFM Or Low CFM?

    To ensure better indoor air quality and more effective cooling, having the right number of CFMs is vital. But the number of CFMs required for different-sized homes can vary, with some needing a higher CFM while others may require a lower one.

    Issues With A Higher CFM

    Sometimes, having an extremely high CFM can lead to certain problems. One of them is that such a CFM will result in a breeze blowing through your home, which may not be comfortable at all times. This is especially true in winter when you need better heating instead of cooling. 

    Similarly, higher CFM can worsen the humidity in very humid climates. Apart from removing heat from the air, your AC unit removes humidity from the air by passing the air over its evaporator coil. This coil is very cold, because of which condensation occurs and turns the moisture in the air to water, which passes through the wastewater pipe and goes into the drain. 

    However, when the CFM is too high, air passes over the evaporator coil very quickly without allowing the moisture to condense. Thus, the overall humidity in your home will increase, leading to problems like mildew and mold growth.  

    Problems With A Lower CFM

    HVAC systems generate a huge amount of heat while operating. If the CFM is too low, proper air circulation cannot take place, and this heat has nowhere to go. When this happens, rooms located near the system can become extremely hot, while those further away will get uncomfortably cold in winter. 

    However, during summer, the reverse will take place, with the living space closer to the furnace becoming colder and areas further away becoming hotter. That is why having the right number of CFMs is ideal, which is generally 350 to 400 CFM per ton. 

    Indoor air quality is affected by several factors, such as the number of occupants in a room, how the room is used, and others. In some rooms, such as the kitchen, the air contains a lot of moisture and different odors. Similarly, a room used as a home workshop may have a lot of dust.

    Rooms with more occupants, such as the dining room, will also have inferior indoor air quality. In all these situations, you will need to change the air more frequently, and that is why the CFM should also be higher.    

    Ductwork, CFM, and ACH

    To ensure that your rooms get enough CFMs, the size of the ducts making up the HVAC duct system should be large enough. As is obvious, a smaller-sized duct will allow a smaller amount of CFMs to pass through. However, the size is not the only consideration, as the shape also affects how many CFMs are delivered through the HVAC ductwork. 

    One of the most challenging tasks for HVAC technicians is determining the most suitable duct size for a specific room. To make the task easier, they generally rely on computer programs that consider factors like the room size, CFM rating of the blower, size of the HVAC system, etc. 

    An important factor that can affect how well the HVAC ducts work is static pressure, which refers to the amount of pressure present while the blower fan is in operation. When this pressure is higher, the system has to work harder to supply air and ensure proper air circulation

    Tip

    When selecting the ductwork size, you need to consider the amount of CFM that has to move through it. 4-inch ducts deliver 20 CFMs, 6-inch ones deliver 75 CFMs, and 8-inch ones deliver 160 CFMs. Keep in mind that the total duct runs should not be more than the CFM output of your AC unit.

    Application Of CFMs To Different Types Of HVAC Equipment

    All types of HVAC fans come with a rating for CFMs, which lets you know about the ideal CFM for the machine. Both the required ACH and recommended CFM ratings should be considered when looking for components like air purifiers, heat pumps, ductless air conditioners, and others.   

    Such ratings are also present for whole-house fans, ceiling fans, dehumidifiers, garage heaters, portable ACs, and attic fans. 

    The Relation Between Air Velocity, CFM, And HVAC Equipment

    Air velocity is closely related to CFM and should be considered when determining how many CFM per ton is required for lowering the air temperature in a room. It is defined as the quantity of air that is moved per unit of time and is measured in liters/meters per minute (LPM) or feet per minute (FPM). 

    This varies significantly for different components of your HVAC system and can determine how effective it is in cooling a particular space. For standard air ducts, the recommended air velocity or air flow ranges from 700 to 900 FPM for residential structures. But it is considerably higher for commercial and industrial systems, generally ranging from 1000 to 1800 FPM.  

    For replaceable air filters, the recommended airflow is 700 to 750 FPM, while that for low-velocity disposable ones is 300 FPM. Similarly, the airflow for a washable high-velocity air filter is 650 FPM. A heat pump or condensing coil should have an FPM of 1000, while for the evaporator and cooling coils, it ranges from 400 to 600 FPM. 

    Finally, the maximum recommended airflow for a heating coil is 700 FPM.

    How Many CFM Per Ton Of Cooling

    Final Thoughts

    With that, this guide has come to an end, and hopefully, now you know how many CFM per ton of cooling is required. In most situations, 400 CFMs per ton of cooling will be more than adequate, but there may be instances where you need a higher or lower amount of CFMs.

    If you’re not sure about the number of CFMs required for proper cooling in your home, I recommend talking to an HVAC professional. Such professionals can perform an inspection of the house and recommend the most suitable system that can provide the required number of CFMs.   

    This will help make your home comfortably cool without worrying about the technical aspects. 

    As a beginner drawing with colored pencils, you are bound to make mistakes, and you will have to erase several times before completing a picture. 

    While the standard pencil erasers may not do the job well, there are a number of options that are designed to remove colored pencil marks. Some common erasers that you can try, include - 

    • Plastic erasers
    • Electric eraser
    • Vinyl eraser
    • Kneaded eraser

    But before you do so, it is essential to know the right method of using these erasers. Also, you need to work on high-quality paper to ensure it does not tear or crinkle easily when erasing. 

    There are some other alternatives that we have discussed as well if you do not have colored pencil erasers. Read on to learn all about them. 

    How To Erase Using A Colored Pencil Eraser

    School, education. Book with pencils on the table. How To Erase Using A Colored Pencil Eraser.

    Step 1- Choosing The Right Colored Pencil Eraser 

    You need to get your hands on the right colored pencil eraser before you begin the work. Such type of erasers are cheap, and you will not have to pay more than $5 for a product. 

    Step 2- Test The Colored Pencil Erasers 

    Before erasing colored pencil marks, test the eraser on a small portion of the paper. To do so, you can start by erasing a corner of the pencil marks. Check to see if you notice streaking while erasing and make circular motions with the eraser. We always recommend beginning from one corner so that it does not affect the main picture. 

    Step 3- Using The Colored Pencil Erasers 

    Remember that even if it is premium-quality paper, the colored portions will be fragile, and it is best not to apply too much pressure on the paper. Colored rubber erasers are thick, firm, and coarser than normal erasers and can tear the paper easily. 

    Hence, do not apply the same pressure as you would when using a normal eraser. Rub on the colored area gently and check for streaking marks so that they can be removed as well.  

    Is Using A Vinyl Eraser A Good Idea? 

    You can always use a vinyl eraser to remove colored pencil marks if a colored pencil eraser is not available. Follow the steps below to do it properly. 

    Step 1: Find Vinyl Erasers 

    Vinyl erasers are available in different shapes, and you can purchase one on the basis of your needs. You will find these erasers online and they can be used to erase pigment from a colored paper. We will recommend getting the eraser pencil versions since they are easy to hold, and you can work on smaller areas as well as large surfaces. 

    Step 2: Test On A Small Area 

    Before you erase the entire picture, we will recommend erasing a small area. You may have purchased erasable colored pencils, but this eraser may or may not work well on them. So, choose a small area and rub in circles to test the product. If you notice too much streaking or the color does not fade, then you will have to use a different eraser. 

    Step 3: Erase The Colored Pencil Marks

    Vinyl erasers are very stiff and are considered to be the hardest among all other options. Hence, you will have to be very careful so that you do not tear the drawing paper. Rub gently and take your time with the process to ensure you have removed all the unnecessary details before coloring on the paper again. 

    Can You Use Kneaded Erasers Instead Of Colored Pencil Erasers? 

    Top view of a set of school supplies with copy space. Colored Pencil Erasers.

    Kneaded erasers are made of a sticky substance that looks like putty. These are easy to shape, and you can shape them depending on the area that needs to be erased. For detailing on small areas, the kneaded eraser can be made pointed, while for large areas they can be stretched to erase colored pencil drawings quickly. 

    Kneaded erasers are easily available online, and purchasing them should not be tough. But know that a kneaded eraser will not erase colored pencil marks completely as it will only lighten the marks to help you color over them. A kneaded eraser works like wall putty, and you will get a similar effect. 

    Moreover, you can begin by using a kneaded eraser over a small area. Test it before to see how the paper reacts, and always begin from a corner so as not to destroy the entire image. After testing, start rubbing the eraser gently to remove colored pencils marks without streaking. 

    Now you may be wondering how much pressure to apply While kneaded erasers are soft, you should always refrain from applying too much pressure. Rub and fold the eraser as you work your way through the drawing. It will keep picking up color pigments, and you can fold over that section. 

    After you are done, remember to clean the kneaded eraser well. To do this, stretch the eraser and then rub it on another surface to get the pigments out. 

    Making Use Of An Electric Eraser 

    Sometimes black lines are difficult to remove with normal erasers, but an electric eraser can do the job well. It can lift pigments from the top, making a region brighter and cleaner. But before you use an electric eraser, make sure to add a little solvent to the desired region. This loosens the pencil marks making it easier to remove them. 

    It is best to test the solvent on a small area to see what happens to the paper. Then you can continue erasing the other parts of the drawing. 

    Using Tape: An Alternative Method 

    Before you use scotch tape, take a standard eraser and rub it gently on the paper without applying a lot of pressure. You will just need to lift the color for the tape to be effective. 

    Step 1: Cut A Small Strip Of Tape 

    If this is your first time working with scotch tape, then begin by cutting small pieces of tape. You can also use clear tape, artist tape, or masking tape for the job. 

    Step 2: Testing The Tape

    As we have already established, it is essential that you erase a small portion to get the hang of the process. Also, the tape can damage the paper, and you will have to test it first to see if the paper can withstand it. 

    Attach a small piece to one of the corners of the picture and then rub gently over it. There is no need to apply a lot of pressure as it may damage the picture when you peel the tape off. 

    Step 3: Using A Pen 

    You can use a sharp pencil to write on top of the artist's tape by using a normal pencil sharpener. Also, make sure you apply even pressure on all the areas with the pencil, and that should make the pigment stick to the tape. Most colored pencil artists use this method to easily remove pencil marks from high-quality paper. 

    Step 4: Peel Off The Tape 

    After the pigment sticks to the tape, peel off the tape slowly but firmly. Most colored pencils leave marks that come off with tape, but there is a chance that the paper may rip. So, do not repeat the process over the same area as the paper becomes thin and more vulnerable to tearing.

    After it has peeled, you may still see some color remaining, for which you can use a standard eraser to eliminate the marks.

    How To Erase Colored Pencil Frequently Asked Questions ?

    It is essential to learn about how to organize colored pencils and erasers as well when you are working with them.  We will always recommend taking them out of the pack and lining them up according to shades. 

    This will ensure you have access to all the colors when needed and you can keep the eraser of your choice beside the colors. Moving on, we will talk about some of the frequently asked questions about colored pencils in this section, so keep reading.  

    Can colored pencil marks be removed without an eraser? 

    There may be times when you do not have a colored pencil eraser to erase colored pencil marks. You will be surprised to know that bread can help you in the process. 

    Yes, take some bread without the crust and then create a small ball with it. Use it just like a kneaded eraser and then rub it gently to erase colored pencils. 

    Another method is to use a rubber band for this job, as you can roll a rubber band and then rub it over the surface. Anything rubbery should do the job in case proper materials are not available. However, ensure that you do not end up smudging the colored pencil marks. 

    We will also talk about one more alternative, and that is flip-flops. You read that right, flip-flops are made of rubber, and the sides can be used to rub remove pencil marks. But they are big, and we will recommend cutting a small portion of the flip-flops before using them. 

    Why do some pencil erasers become hard over time? 

    Erasers are made of rubber, and rubber becomes hard and brittle when exposed to continuous sunlight. You can restore their quality again by sprinkling some water on them. 

    How can you learn to use color pencils? 

    If this is your first time coloring, watch a few beginner videos to learn how to use color pencils. You can learn about the process of using different shades and blending them perfectly with each other. Also, keep practicing so that you can get better with time. 

    How To Erase Colored Pencil Final Words

    How To Erase Colored Pencil Final Words

    While some erasers are specifically designed to remove colored pencil marks, you will still need to test them before using them on the paper. While choosing colored pencils, check the back of the pack to see if they are erasable. 

    Additionally, do not use a number of different erasers together but opt for just one and check if it works for your drawing. In case it does not, you can try another type for the job. 

    Using the right tools is essential to protect the paper. We believe that a white eraser is a better option to choose than the traditional pink eraser as it can often be too firm, damaging the paper easily.

    If you like this article on erasing colored pencils, checkout our previous article on furniture paints and can you use acrylic paints on furniture to gain an outstanding look to your drawing room or any other part of your home.

    Acrylic paintbrushes require care and attention, especially when it comes to cleaning them after you’re finished with the painting.

    Unlike watercolors, acrylic paints have a tendency to stick to the brushes, which can cause long term damage and render even the most expensive brushes useless.

    Today we’re going to look into the causes of such damages, and help you avoid them.  

    First off, we’ll describe the process of getting your brush as close to the store-bought condition as possible.

    Then, we’ll look into common causes of damage to your brushes, and help you mitigate these damages to the maximum extent possible. Finally, we’ll cover a few common questions you might have regarding care and cleaning. Without further ado, let’s begin!

    How to Clean Acrylic Paint Brushes Step by Step

    Once you’re done reading this section, you won’t go back to your general methods of cleaning - for very valid reasons, too. With that in mind, next up is the walk-through.

    Method 1 | No soap, simple rag/paper towel and water

    1. Wiping the excess paint left over using a dry cloth rag or paper towel 

    While there’s no absolute need to perform this step, doing so can help you avoid damage later. Indeed, this step will take you some time - but that time will be well spent in caring for your brushes. Wrap the dry cloth rag or paper towel around the brush and get the excess paint out.

    This has to be performed as soon as you’re finished with the painting. The only thing to keep in mind is to not delay this process under any cost - else it might be too late.

    1. Using a paper towel or a cloth rag, gently glide over the surface of the paintbrush 

    Until you notice the brush not making marks anymore, brush the bristles of the paintbrush with a paper towel or a cloth rag. You’ll remove all the excess paint this way.

    1. Take a cup of water and swish the brush around in it until the brush is clean 

    You do not need to perform this step for too long, but until the time you have a significantly cleaner brush. Make sure you keep the brush straight and that the bristles do not get bent in any case. For this purpose, the water that you used while brushing (if you did use water) is good enough, you only have to get the remaining excesses out of the brush.

    Method 2 | Soap and water-based cleaning

    1. Use lukewarm running water to clean the paintbrush 

    Hold the paintbrush under a medium strength faucet with both the hot and cold faucets engaged, until the water is mildly warm. Hold the paintbrush for around ten seconds to rinse it, while rotating the brush so as to hit all different sides of the bristles. The pressure definitely helps you in dislodging any leftover paints from dry cleaning the paintbrush.  

    1. Use your fingers or a fine comb to gently pinch through the bristles to get rid of paint

    You’re best off using a fine-toothed comb since blunt nails and fingers are not as likely to get those small pesky bits of paint out of the paintbrush. Do remember, however, that the paint isn’t yet fully clean, though it may appear to be so. Your best bet is to continue the water cleaning as described in step 1 of this method.

    1. Use gentle soap on the bristles of the paintbrush to clean it thoroughly 

    Turn off all the faucets, and take some smooth, preferably pH-neutral soap (or shampoo of similar quality), and get to work with gently massaging the bristles with the soap.  For larger brushes, make sure you get the soap into all the different size bristles, whether large or small.

    When you’re working the soap through the paintbrush, you should get the soap to the metallic part joining the bristles and the body of the brush, known as the ferrule. The ferrule needs to be cleaned regularly, otherwise you the bristles get hardened over time and eventually the shape of the bristles of the paintbrush changes.

    1. Run the paintbrush through lukewarm water again 

    This step follows the entire cleaning process as described above. You have to work your fingers through the water stream above, up until the soap has been completely rinsed off from the surface of the bristles and the ferrule.

    1. Take some soap and gently swirl it on to the bristles 

    You have to swirl the brush through a few drops of soap you’ve taken in one hand while holding the brush in the other hand. This is done to exactly copy the movements your brush makes while painting. Make sure you reach the bristles near the ferrule as well.

    1. Now, rinse the brush out 

    This step should be done under the same lukewarm temperature of running water that we’ve discussed earlier. This should result, ideally, in there remaining no bristles left with residual amounts of soap.

    1. Dry the brush thoroughly yet gently 

    The brush has a tendency to adapt the same shape it has for long periods of time, whether dry or wet. Consequently, you should take care that you dry the brush with a gentle cloth or paper towel, making sure there’s no residual water left. However, once your brush is sufficiently dry, you should stop at this stage. Take a breath - you’ve successfully cleaned your paintbrush!

    This wraps up our section on the best methods to clean your brush properly. Now, we proceed towards the next part of our discussion - common mishaps and pitfalls to avoid when dealing with acrylic paintbrushes.  

    Common Pitfalls to Avoid While Dealing with Acrylic Paintbrushes

    This part of the article deals with avoiding mistakes one is likely to make while dealing with the care of paintbrushes. Let’s begin with the first such mistake:

    1. Letting acrylic paint dry on a paintbrush

    Among the cardinal sins which one could commit against their paintbrushes, this comes up near or on the top. Your brush must, at all times, be either wet or at least moist when it comes in contact with the paint. A dry paintbrush means the harder it becomes to remove all the residual paint which accumulates on the bristles and near the ferrule.

    To avoid this, always have a cup of water nearby which can help you keep the brush relatively moist if not fully wet. If you’re not using the brush, you should keep it on the rim of the cup.  Also, it’s not as if brushes which go crusty have no use - there’s just some effort involved in reviving the paintbrush and getting it to good-as-new condition.

    1. Resting your paintbrush with bristles down in the water

    This is a common mistake people tend to make while painting. This is by far the easiest way to kiss your perfectly new paintbrush a fleeting goodbye. This causes the hairs to go all wonky and frizzled, and there’s no way to undo this damage. Even if you can get away with this because of cheaper brushes, we recommend not doing it just the same.

    1. Getting paint stuck on the ferrule

    This is another problematic situation you want to avoid. The ferrule is the silver, metallic part of a brush which connects the bristles of the brush with the body (wooden or otherwise). The problem with getting paint on the ferrule is that even after washing the ferrule, some paint will remain stuck between the bristles and near the joint.

    This wraps up the top few ways in which artists tend to take their paintbrushes on a one way journey to the bin. Avoiding these takes actively participating in care for your tools, and realising that caring for your paintbrushes is equally important as is being involved in the painting process.

    Coming now to the final part of today’s discussion - questions you have regarding the process. Now, we will cover a few important questions artists tend to ask regarding brushes and cleaning in general.

    We start off with ruined brushes.

    How to Clean Acrylic Paint Brushes FAQ

  • If my brush is ruined should I throw it away?

    Absolutely not! You can find a number of uses even for the most crusty and sticky of brushes. If you find yourself having to paint abstract art or know someone who does, these brushes are perfect for rough usage in this way. You can also use these brushes for any artwork which does not require many intricacies or complex detailing.

  • What if I have to attend to a situation while painting?

    Take 10 seconds and rotate your brush in water very gently yet quickly, and then squeeze out all of the excess paint on a paper towel or cloth rag. Swish it gently as before and then leave it resting across the rim of the water cup. This process generally takes anywhere between five to ten seconds.

  • Read More on Acrylic Painting

    10 Best Paper for Acrylic Paint in 2022 | Artist and Beginner Grade

    10 Best Canvases for Acrylic Painting | Student & Artist Grade

    8 Best Palettes For Acrylic Paint & How to Choose What You Need

    Learn How To Make An Acrylic Painting Waterproof Right Now

    Acrylic Painting Materials That You Really Need In The Studio

    13 Best Acrylic Paints for Beginners & Professionals Reviewed

    10 Best Acrylic Paint Brushes for Artists & Students Reviewed

    Learn How To Get Dried Acrylic Paint Out Of Brushes Successfully

    Learn How to Make Acrylic Paint in Your Studio

    Painting on Paper with Acrylics & 5 Paper-Like Surfaces to Consider

    Learn How to Thicken Acrylic Paint Correctly Right Now

    Painting Surfaces For Acrylics | Acrylic Prepping 101

    Best Cheap Acrylic Paints – Strength and Weakness of Brands Compared

    22+ Delicate Beautiful Acrylic Painting Ideas To Try

    Learn The Basic Acrylic Painting Techniques for Beginners- Ideas and Projects

    20 Oil And Acrylic Painting Ideas For Enthusiastic Beginners