There is more than one method you can use to soundproof your tile floor. You can install acoustic underlayments, vinyl mats, or acoustic floor tiles. If you want a simpler option, you can lay mats and carpets over the tile flooring to reduce airborne and impact noises.
Installing tile floors has become a popular choice among many modern homeowners, thanks to their visual appeal.
However, regular tile flooring is not suitable for reducing noise. So, if you do not want the downstairs neighbors to complain about your spontaneous dancing sessions, you should get the tile flooring soundproofed right away.
But the question is - how can you accomplish this task? That is what I have discussed here, so let’s get going!
Why Should You Soundproof Your Tile Floor?
There are two main types of floor noises - impact noise and airborne noise. The former is caused due to impacts on the floor, while the latter is caused by ambient noises.
For instance, if you drop an object on the floor, it will generate impact noise. On the other hand, the noise generated while listening to loud music or watching TV is airborne noise. The latter is more of a problem since the impact vibration can travel through the floor quicker than ambient noise. Because of that, soundproofing your floor becomes important, no matter the material.
However, a tile floor is not very good at reducing or eliminating either type of noise. In other words, the tiles transmit all types of noises through the floor, and these noises eventually reach the ceiling of the room that lies directly below.
This shouldn’t be a cause for concern if you live on the first floor. But if that’s not the case, then the people living directly below will be able to hear whatever you are doing in your room. And if they don’t have an insulated ceiling, they are not going to be particularly happy about it either.
How To Soundproof A Tile Floor?
To be honest, soundproofing a ceramic tile floor is not that different from soundproofing a floor made of hardwood or concrete slab. There is more than one method you can follow for this purpose, as discussed below.
1. Acoustic Underlayment
Acoustic underlayment is an additional layer of insulation that is placed underneath the tiles. It is often made from rubber, which is possibly one of the best materials for sound insulation. As such, it helps to eliminate both airborne and impact noises.
Installing it is quite easy, for all you need to do is simply roll the underlayment mat on your subfloor and cut it to the correct dimensions. After that, you need to fill out any gaps with acoustical sealant, and then you can lay the tiles over them. If you wish, you can use adhesive on the tiles, but that is not necessary.
2. Vinyl Flooring
Vinyl is more efficient at eliminating noises than conventional ceramic tile. Thus, you can use a vinyl mat on your tile floor to eliminate airborne noises completely. It can also reduce the intensity of impact noises to a great extent.
Moreover, it is incredibly easy to use and can be placed even after your tile floor has been installed. Just roll it out on the floor, and you will be good to go. On that note, you could install it as an underlayment if you wish, which makes it a versatile option.
3. Carpets Or Mats
Another simple method to eliminate sound transmission on a tile floor is to use a carpet or a mat. If you lay out a carpet over the tiles, it will eliminate all airborne noises. Besides, it will provide cushioning on the floor, which reduces the sound generated by dropped objects.
You could also install an anti-vibration mat, which is much more effective at minimizing impact vibrations. With them, you can move your heavy furniture around without making life difficult for your downstairs neighbors.
The installation process is similar to the previous option - simply place the mats or carpets over the tile floor, and you will be done. You need to keep the floor dimensions in mind while purchasing them, or else they will not cover the whole room. In addition to that, you need to consider the thickness of the mat or the carpet too.
4. Acoustic Floor Tiles
Acoustic floor tiles are highly effective at eliminating sounds generated from airborne sources, such as people talking, loud music, and so on. These tiles can even eliminate impact noises, such as those arising from footsteps and dropped objects.
They are often made from sound-deadening substrates like foam, fiberglass, or any other materials recommended by the Tile Council of America. However, foam pads are used more than other materials since they are the most cost-effective.
The procedure to install them is the same as the one used for regular ceramic tiles, and therefore, they do not pose any challenge in this regard.
Tip
For the best results, I recommend using them in conjunction with mats, especially if you move your heavy furniture around a lot. But if you only want to eliminate airborne noises, then using carpets is optional.
Tile Floor Soundproofing Final Words
Let’s face it - everyone likes to enjoy some peace and quiet while at home. This is why soundproofing is essential - not just for your flooring but for other parts of your home as well.
In that context, making your tile floor soundproof is the most socially responsible thing you can do, especially for the people living below you. Besides, it helps to ensure that your flooring meets the impact insulation class rating. A low rating here will mean trouble - both for your neighbors and for you.
So, if you want to avoid compliance risks, you should get your tile floor insulated without any delays. And to do that, you can use any one of the methods I have discussed above.
Technically, you cannot make your house completely soundproof since sound waves can have wavelengths of several meters and can travel through micro gaps and partitions. However, identifying the type of noise prevalent in your surroundings and soundproofing hardwood floors by adding mass and decoupling can help to some extent.
Hardwood floors can become a nuisance without carpets, rugs, or any other soundproofing material.
While they are less noisier than the more affordable laminate flooring, a hardwood floor can hardly block impact and airborne noise. Hence, you will have to resort to installing an underlayment, using green glue sealant, inserting deck screws, and other soundproofing methods.
So, to make your task easier, I have discussed some of the best methods of hardwood floor soundproofing.
How Soundproofing Hardwood Floors Works 101
Types Of Noise
To choose the right soundproof flooring, you must understand the types of noise you are dealing with. Although there are various categories of noise all around us, I’ll be talking about the two categories that are most prevalent - airborne noise and impact noise.
1. Airborne Noise
This type of noise travels across the room, like the sound of your TV, pets, crying children, etc. Hardwood floors are not essentially soundproof, so airborne noise is bound to travel further distances and create an echo.
Generally, soundproofing airborne noise in a room with hardwood floors is difficult. You can get started by adding furniture, curtains, carpets, and more.
2. Impact Noise
Impact noise is created by objects coming in contact with the bare floor. Most impact-style noises are sounds created by feet stomping, dropping something on the floor, etc. It is no surprise that if you have children and pets, your house is more prone to impact noises.
Interestingly, it is easier to prevent impact noise despite its loud nature. Hence, hardwood floor soundproofing is recommended, especially if you live above neighbors.
Common Soundproofing Methods
1. Adding Mass
Adding more mass and density to objects, walls, floors, etc., allows them to absorb sound more effectively, thereby reducing noise in a room.
2. Sound Absorption
Using a soft material to cover weak spots in a noisy room can help reduce impact noises. Hence, thick carpets, blankets, curtains, etc., are recommended as easy soundproofing solutions.
3. Sound Damping
Using damping materials can reduce the oscillations of the soundwave, keeping noise levels at a minimum.
4. Creating Distance
Creating physical distance can help reduce the Sound Pressure Level and loudness of sound. However, this is just a concept and not a practical solution when it comes to soundproofing homes and living spaces that obviously cannot be moved!
5. Decoupling
Sound waves can travel through multiple layers of an object. Decoupling hampers the direct contact between such layers, breaking the path of sound waves. As such, the noise level can be decreased dramatically.
How To Soundproof Hardwood Floors
1. Use Green Glue On The Hardwood Floor
If removing and reinstalling the wood floor is possible, consider using a green glue soundproofing compound. This is one of the most common soundproofing materialsthat can be used between your subfloor and the new wood floor. It helps dampen flooring noise that can travel through the various layers of your wood flooring.
I especially recommend green glue to amateurs and DIY enthusiasts since it is easy to use, thanks to the tube and bucket packaging. Also, you don’t have to apply the adhesive compound in any particular pattern. Just use it generously to cover every part of the existing floor.
Besides, you can use green glue for soundproofing walls or attaching multiple layers of soundproof drywall. In fact, I highly recommend this soundproofing material for noisy apartment buildings with paper-thin walls.
Tip
Although green glue is easy to use, ensure that you are quick and stick the required layers while the glue is wet. Plus, you must wait for about a week for the glue to get completely dry and provide effective sound reduction.
2. Lay A Carpet Or Rug On Wood Floors
Using a thick carpet is the easiest way to reduce impact noise, as it acts as a barrier between the falling object and the hardwood floor. And although hardwood floors are quite attractive, preventing you from using fancy rugs and carpets, I highly recommend using both or either of the two. Both are made of soft material and hence, absorb sound effectively.
Moreover, you can always remove or change them according to the decor of your room, making them a highly customizable soundproofing solution. The fact that they are available in various shapes, sizes, colors, and patterns makes them all the more suitable for rented homes and apartments.
Tip
Consider adding a carpet or rug under speakers, music players, TVs, etc., to create a soft surface for effective noise reduction and tone softening.
3. Insert Deck Screw
This method requires a bit more effort, but I think it’s worth the resulting peaceful and quiet environment. Right off the bat, you’ll require a deck screw, a bit driver, and a drill bit with a countersink.
Start by analyzing any weak spots or areas that may be producing squeaky sounds. Then remove the top flooring to reveal the subfloor. Only focus on problematic areas and not the entire floor.
Now, employ a drill bit with a countersink and drill pilot holes on the squeaky surface. Ensure that the bit is slightly smaller than the screws you choose for this soundproofing project.
Finally, nail down hardwood floors in position and insert the sharp tip to gently screw wherever required. Repeat the process for other squeaky areas as well.
4. Opt For Hardwood Floor Underlayment
In case of new construction or renovation, I suggest planning well in advance and installing underlayment under the hardwood floor. The underlayment creates a soft surface for the hardwood floor to rest on. Owing to its soft materials, like foam and cork, most types of underlayment can prevent both impact and airborne noise, making it ideal for soundproofing floors.
Of course, installing hardwood flooring underlayment will add to your construction costs, but I think it is a small price to pay for some privacy.
5. Install Rubber Mats
Laying rubber mats is yet another effective way to soundproof floors, especially the existing floors in your child’s room. Alternatively, you could add natural rubber mats to pet areas or your personal workout room. Basically, they act as a buffer on hard surfaces like wood flooring and reduce noise levels.
Much to every homeowner’s delight, you can get a rubber mat in any color, size, shape, and design you want. Not to forget, they are easy to clean and maintain.
Moreover, when choosing a rubber mat for your kid’s playroom, you can opt for a colorful puzzle-piece style variant. They not only reduce sound but also prevent children from getting hurt, thanks to the softness of the material.
On the other hand, heavy-duty rubber mats are ideal for a workout room as they absorb both the blow and the impact of the noise on your hardwood floors. So, whether you run around or drop heavy weights on the floor, a good quality rubber mat is essential to prevent damage to you and the floor.
How Much Does It Cost To Soundproof Flooring?
Unfortunately, there is no exact cost estimation for soundproofing floors. The cost largely depends on the type of soundproofing materials you use and their price per square foot. You can search for square-foot calculators online to get an estimation of the overall cost.
If you’re on a budget and deal with more impact-style noises than airborne sounds, I suggest getting rugs that will cost approximately $100. Of course, the price may vary depending on the rug choice and the number of rugs you’d want to have in your room.
On the other hand, if you want to totally soundproof a room or apartment, depending on the size of the space, you may have to shell out $500-$2,000. Further, if you’re planning to renovate the space or any type of new construction, it is best to install soundproof flooring beforehand to reduce future expenditures.
Do You Have Soundproof Requirements?
Another point to consider before starting a soundproofing project is to check the building codes of your city or locality. The building codes throughout the United States are mandatory for the residents to maintain privacy and comfort.
Note that some building code inspections require field tests before issuing a certificate of occupancy, while others rely on design recommendations and specifications from the architect. Since purchasing or renovating a property is a huge investment in itself, I highly recommend ensuring that you’re following all the rules and codes. Doing so will save a lot of your time, effort, and money in the long run.
Why Is Soundproofing Difficult?
Sound waves travel through the tiniest of gaps and often through various surfaces, making soundproofing a tricky task. Moreover, there are different pitches and frequencies of sound vibrations all around us. Some may be soft and travel short distances, while others may travel longer and create louder noises.
For instance, you must have noticed how shrill children can sound or how loud dogs bark. This is because their sounds are high-pitched, which is often perceived as louder than lower-pitch sounds. However, low-pitched sounds can be transmitted through longer distances, allowing us to hear them even from far away.
Not to forget, oftentimes, we hear sounds but have no idea where they are coming from. This is another reason that makes it difficult to completely soundproof a room.
Soundproofing Hardwood Floors Conclusion
Out of all the methods discussed above, the cheapestnoise control solution is to add more furniture and soft materials to the room. Especially if you have a shared wall with your neighbors, it is best to use larger pieces like a bookcase to block soundslike people talking, electronics, etc.
I also recommend using multiple soundproofing methods together for the best result. You can even combine soundproofing with sound masking and sound insulation projects to further improve the sound quality in your space.
Soundproofing a room for music is no rocket science if you have the right soundproofing and sound-absorbing material like mass-loaded vinyl and foam gaskets to block sound waves. However, before getting started, it is important to understand the basics of soundproofing the doors, windows, and flooring of the room to achieve a quiet, distraction-free environment for recording music.
Do you often produce groovy beats during the wee hours of the night? Or are you a voice actor practicing for your next big gig?
No matter how good you are at singing, playing an instrument, voice acting, etc., your neighbors are probably not the best audience! So, to ensure your privacy and good relations with your neighbors, I’ve shared some foolproof methods tosoundproof a room for music. But before that, let’s get back to basics…
Soundproofing A Room For Music Cheaply
What Is Soundproofing?
Soundproofing is the process of blocking sound waves from traveling from one room to another. It involves adding mass and density to the walls of a room, using soundproofing materials like acoustic panels, mass-loaded vinyl, foam gaskets, etc.
The process may be as easy as filling air gaps or constructing new soundproof walls. So, the amount of effort, time, and money the soundproofing project may take will depend on the noise levels of your room/home. That said, completely soundproofing a room and preventing 100% of the sound waves from entering and leaving the area is impossible. However, you can prevent sound transmission to some extent, often enough to ensure your privacy.
Usually, the common types of noises that may disrupt your recordings include impact noise, external noise (like traffic noise), and equipment noise (from ACs, refrigerators, etc.). By soundproofing a room, you can keep the inside noises inside and prevent outside noises from entering your home studio.
Soundproofing Vs Acoustic Treatment
You must not confuse soundproofing with acoustic treatment. Soundproofing can only block sound, while acoustic treatment absorbs excessive ambiance for better sound quality in a recording room. As such, the latter, sometimes in conjunction with soundproofing methods, is used while constructing professional recording studios.
Four Common Ways To Soundproof A Music Room
1. Add Mass And Density To Block Sound Waves
Depending on the materials used for constructing the walls of your room, sound waves will vibrate and traverse through them. Hence, one of the easiest ways to reduce sound in a room is by adding weight to the walls.
As such, knowing the Sound Transmission Class (STC) rating and Noise Reduction Coefficient rating (NRC) of soundproofing materials is essential to create a quiet music room.
Tip
I recommend using a dense material like concrete for walls if you’re planning to construct a new recording space at home. However, to soundproof an existing wall, you can use mass-loaded vinyl, multiple layers of soundproofing drywall and green glue adhesive compound, etc.
2. Decoupling To Prevent Sound Transmission
Often the most overlooked process, decoupling involves creating a sound barrier or buffer between two structures/materials in direct contact. It breaks the path of sound vibrations that can often travel long distances, depending on the frequencies.
Most of the time, a dense material like rubber is used for decoupling. As such, you can try the following ways to decouple and soundproof a room:
Apply noise-proofing joist tape to isolate existing studs
Build a floating floor with dense rubber isolation pads
Isolate layers with resilient sound clips and resilient channels to create a “floating” ceiling or wall
Build double walls, leaving enough air gap to fill with additional insulation
3. Sound Damping For Improved Sound Quality
The process of damping works similarly to adding mass, but it dissipates sound waves to kinetic energy, producing heat. Again, green glue is an effective sound-damping compound that can attach twosoundproofing building materialslike MDF, plywood, drywall, etc.
Tip
If you do not wish to soundproof an existing wall, I recommend creating a sound isolation barrier with the aforementioned materials. You can then use it to temporarily cover openings like doors and windows as and when you want.
4. Filling Air Gaps With Acoustic Panels, Caulk, Etc.
How many times have you heard background noise or random sounds around you but never understood where they came from? I’ve experienced that, too, and it’s often because sound waves can enter through micro air gaps. So, covering all of those gaps and crevices is essential to block unnecessary noise.
I recommend using foam gaskets to seal air gaps on doors, windows, electrical outlets, etc. For other cracks on walls, floors, and ceilings, opt for acoustic caulk that’s pliable enough to fit into smaller, harder-to-reach areas. Or, use acoustic panels, preferably with a fiberglass core.
Lastly, I suggest investing in a door sweep to cover the small space between the bottom of a door and the floor of your music room.
Soundproofing A Music Room In 5 Easy Steps
Now that you know some of the most-used ways to soundproof a room, let me share how I combine them to create the ideal environment for music. Note that some of the steps given below may need construction skills, so if you’re not comfortable with that, feel free to skip those steps. And if all else fails, you can always contact a professional to construct a home recording studio within your budget.
That said, here’s what I do to soundproof a room for music.
1. Select A Suitable Practice Space
You can use the best quality equipment, but none of it will be effective without a suitable space. So, choose carefully.
While it may not be possible to have a lavish room for yourself, you can try out a closet or any other small space. Think about how most recording studios have a smaller, separate room where the actual recording takes place. On that note, a closed space may be uncomfortable at first, but it can be effective in blocking as much sound energy as possible.
Tip
I recommend staying away from bathrooms, kitchens, or any other room with a lot of appliances. You should also try using a room with no windows or openings. If the walls do have holes or cracks, you can use a soundproofing or sound-absorbing material, like acoustical caulk, high-density foam tape, etc.
2. Employ Sound Insulation To Create A Quiet Environment
Sound insulation is a must to further keep inside sound inside and prevent outside noises from entering your recording space. I recommend equipping your music and practice room with acoustic foam tiles, bass traps, sound absorption (acoustic) panels, etc.
Tip
Don’t forget to check out your nearest home improvement stores for foam, cork, or natural rubber panel insulation.
You can also soundproof a room on a budget (with very limited effects) by hanging heavy curtains and thick blankets, installing a pillow headboard, laying soft rugs/carpets on the floor, etc. Additionally, try shifting couches and mattresses against a shared wall to prevent the transfer of sound waves.
Warning
If you use linens and clothes to soundproof room surfaces, ensure the layers are placed far enough from one another to prevent sound transmission through contact points.
3. Soundproof Your Door To Block More Sound
When installing doors, try opting for heavier, denser materials. But if you have a hollow door, opt for spray insulation to fill the gaps. Additionally, as mentioned before, you can install a door sweep to close the air gap between the door and the floor.
4. Invest In Thick Carpeting And Other Soft Furnishing
Besides soundproofing walls, doors, windows, and other gaps in the room, soundproofing the floor will help with noise control. For this, you can construct a floating floor to block sound vibrations. Or invest in a high-quality thick carpet, and layer it with rugs, if possible.
For a floating floor, I do not recommend DIYing it, so contact a professional instead. They can use floor floaters or hard rubber pucks to decouple the second layer of flooring from the existing one. Conversely, they may even float your existing floor by changing the joists below your sub-flooring. However, remember that the latter option is quite challenging and may not be feasible in most locations.
5. Add A Second Layer To Soundproof Walls
Although this step decreases the space in your room, I think it’s worth the extra soundproofing. This process can be done by amateurs, too, as long as you wear your safety gear. Simply stick multiple layers of drywall and attach it to the existing wall of your music room. Or, install multiple sheets of mass-loaded vinyl within the layers of drywall.
However, make sure you leave enough gaps between the layers to break the passage of sound vibrations.
6. Test The Room For Music
Last but not least, test your recording room before putting it to professional use. Doing so will help you analyze any weak points in the room. I recommend singing, playing the drum, or producing any other sound for at least 30 minutes to know if the music room needs further soundproofing.
If it does, even after incorporating all the steps mentioned above, you can opt for soundproof or blackout curtains. Even if the room does not have windows, installing either of the two can add another layer of soundproofing and reduce noises of low frequencies as well.
Soundproofing A Room For Music Conclusion
Although making a room completely soundproof is not technically possible, you can take certain measures to prevent noise in your music room. And the best part is that most of the soundproofing methods discussed above are easy enough for beginners and do not require advanced tools. Even the soundproofing materials I suggested do not demand much skill for installation.
For best results, however, I recommend using multiple methods in combination. For instance, you can consider soundproofing the wallsand adding suitable furniture to soundproof a room. Or, install a floating floor or ceiling, and invest in a white noise machine.
So, don’t force your neighbors to attend a concert or listen to a podcast they didn’t sign up for, and soundproof your home recording studio today!
Mineral wool is the best soundproof insulation material that can be used for soundproofing purposes, but it is a pricey option. Meanwhile, cost-effective materials that can be used include blown-in fiberglass or cellulose insulation, foam, cotton, and batt insulation.
Soundproofing has become a necessity in many homes nowadays.
Whether due to the increased use of gadgets, more traffic on the streets, or to ensure privacy, more and more people are looking for ways to soundproof their homes. And while there are many soundproofing techniques available for this purpose, before you try them out, it is essential to learn about soundproofing insulation.
And this is just the guide that can help you out.
Types of Soundproof Insulation Explained
Fundamentals Of Soundproofing
To understand how soundproofing insulation works and what are the best materials for the purpose, you first need to know a few basic things about soundproofing.
What Is Sound?
Sound is a wave generated by a vibrating body and can travel through solid, liquid, and gas mediums. This means it can be transmitted through air, water bodies, and even solid objects, like doors and walls. For soundproofing purposes, sound can be classified into different types, including:
1. Airborne Sounds
Airborne sound travels through the air, and traffic noise, conversations, etc., are examples. Usually, such sounds can be reduced using sound insulation barriers.
2. Impact-Based Sounds
Impact-based sounds occur due to vibrations caused in a surface when another object strikes it and possesses more energy than airborne sounds. Some examples include the sounds of slamming doors, a hammer striking, and even of footsteps. Reducing these sounds is more difficult since vibrations are caused within various surfaces.
3. Flanking Sounds
Sounds that travel through surfaces like electrical outlets or ductwork are called flanking sounds or flanking noises, and it can be quite difficult to locate their source.
What Is Noise?
Noise is generally defined as unwanted sound that can cause disturbance in an area, but this is a subjective definition. What one person may consider as noise, another may not, but noise usually has the characteristics of being unpleasant and loud.
Measurement Of Noise Levels
Noise levels are measured in the following ways:
1. Sound Pressure Level
Sound Pressure Level the pressure level of sound measured on a logarithmic scale, and the unit used is decibels (dB). The use of a logarithmic scale means that the pressure level can change significantly even with a slight change in the scale.
2. Loudness
The loudness of any sound will depend upon factors such as the point where it is heard and the person hearing it. For instance, even a low-intensity sound may appear very loud in a quiet room.
How Effective Is Soundproofing?
The process of soundproofing aims to reduce sound waves from traveling through the various surfaces of a building, such as doors, walls, and the ceiling.
While it is possible to block out all sound from a specific room completely, it is not very easy to do in most cases. The reason is that many soundproofing techniques are generally very complicated and require a lot of time, resources, and effort.
Soundproofing methods that are usually used can only reduce noise and not eliminate it. Fortunately, for many people, a reduction in the noise level is adequate.
Sound Transmission Class - What Is It?
Sound Transmission Class or STC is a rating system that indicates how effective a building partition or assembly is in preventing the transmission of sound waves. A higher STC rating indicates that the building is more effective in reducing noise. But even insulation materials with a high STC rating may not be able to attenuate low-frequency sounds, such as bass-heavy music or sounds of machinery.
According to the International Building Code, an STC of 50 is required for buildings with multiple families, while an STC of over 60 is considered to be the best. STC ratings are generally used for airborne sounds like conversations.
Methods Of Sound Insulation
The most commonly used methods of sound insulation include the following:
1. Providing Additional Mass
It is more difficult for sound waves to travel through an object that is large and heavy. This means you can reduce sound by adding mass to surfaces that you want to soundproof, such as a hollow core door, which can help in sound reduction. And there are many ways by which this can be done, such as by installing drywall or using mass-loaded vinyl.
2. Decoupling
Surfaces that are in contact with one another make it easier for vibrations to travel through. Separating or decoupling them, such as the two sides of a wall, can reduce the sound that reaches your ears.
3. Insulation
The cavity of the wall that needs to be soundproofed can be insulated to reduce sound from one reaching the other side. Generally, this is done by adding some insulating material between two sides.
Advantages Of Sound Insulation
1. Improved Acoustics
Soundproof insulation materials are very effective in preventing noise from entering a specific space. This means that besides soundproofing, they can help improve the acoustics of a space and can be used in areas like a recording studio.
2. Effective Noise Reduction
Many extensive soundproofing techniques are quite complicated and require considerable time and resources. But with the right sound insulation materials, it is possible to get good results easily.
3. Reduced Transmission Of Heat
Many materials used for soundproof insulation offer additional benefits besides noise reduction, such as reducing heat transfer, which helps regulate the temperature of a space.
Soundproof Insulation Materials
You can use several types of insulation materials for soundproofing purposes, and some of the best ones are mentioned here.
1. Mineral Wool Insulation
Slag, which is produced when steel is manufactured, or natural stone is heated and spun to manufacture mineral wool insulation fibers. Then, oils and resins are added to enhance the strength of the wool. The biggest advantage of this material is that it uses recycled products and is fire-resistant.
That said, mineral wool insulation is among the costlier materials you can use for soundproofing walls. A cost-effective alternative to mineral wool insulation is fiberglass insulation. Mineral wool, also known as stone wool insulation, has an STC rating of 45, which is great for noise control.
2. Blown-in Fiberglass Insulation
Blown-in fiberglass insulation is manufactured by spinning the fibers of heated glass and combining it with plastic to make it more flexible. This material is among the most commonly used for sound-deadening insulation since it is affordable and is available in rolls, loose fills, and batts.
Fiberglass insulation, also known as glass wool insulation, has a good R-value and an STC rating of 39. On the flip side, it may not be the best solution for people who are prone to allergies.
3. Cotton Insulation
Cotton insulation is manufactured from cellulose fibers that are obtained from clothing items like jeans. It is available in batts that can be installed easily between stud boards. Since it is made from recycled cotton, this type of insulation is biodegradable and can be treated with boric acid to improve its fire resistance.
While it has a high STC rating of 51, cotton insulation can be a bit expensive.
4. Cellulose Insulation
This is another material used for sound insulation made from recycled and waste materials, like shredded cardboard and newspapers. It can be made fire-resistant by applying materials like boric acid and can be used in various spaces to make them quiet.
Cellulose insulation, also available as blown-in insulation, is affordable and has a good R-value with an STC rating of 39. But keep in mind that cellulose can produce a lot of dust, so those with allergies may not find it suitable.
5. Foam Insulation
Foam insulation is among the most popular building insulation materials and is available in various forms, such as solid boards or spray foam. Different types of plastics are used to manufacture foam insulation, and you can choose between open-cell and closed-cell foams.
Open-cell foam insulation is much better at absorbing airborne noise and can expand easily to fill up cracks and holes when used as spray foam insulation. Closed-cell foam is not as effective since it has lower porosity.
Spray foam insulation is a versatile option that can easily be used in many different spaces where rolls or batts cannot be used. Like many other soundproof insulation materials, foam insulation is treated with fire-retardant materials to make it fire-resistant. Also, it has an STC rating of 39.
Factors To Consider When Buying Sound Insulation Materials
To ensure you get the desired results, selecting the right insulation material for soundproofing is vital. For that, you need to consider certain factors, which have been mentioned here.
1. The Scope Of The Project
Depending on the scope of the project, you may be able to get results simply by installing sound insulation materials or may need to use additional soundproofing techniques. For instance, in a building where pests are a frequent problem or it is hard to work on the surfaces, sound insulation may not be adequate. Therefore, you’ll need additional materials and tools to work on such surfaces.
2. Budget
Before deciding on the materials, you should research and find out the prices of different materials available for soundproof insulation. This will help you come up with a suitable budget and decide which materials to use and how extensive the project can be.
3. Project Handling
The insulation materials that can be used to create a sound barrier will also depend upon who is going to undertake the project. If you plan to complete it yourself using DIY techniques, it is better to go with materials that are easier to use. On the other hand, if the soundproofing is to be done by professionals, using professional-grade insulation materials would be wise.
Tip
A useful tip to help you choose the right insulation material is to consider its mass. The greater the mass of the material, the more effective it will be in blocking sound. For instance, if you are planning to use mineral wool, go with rigid boards made from the material.
They will not only have the density of the wool but will also have more mass which can drown vibrations easily.
Soundproof Insulation FAQs
Are thicker insulation materials better for sound insulation?
The R-value refers to the energy efficiency of the sound insulation material, and high-mass materials have a higher R-value. A higher R-value means that the material requires less energy to keep your room insulated. Hence, materials with greater mass are more effective in preventing sound transmission.
Which sound insulation material is best for interior walls?
While there are several materials you can use to soundproof interior walls, in most cases, mineral wool offers the best results. This is due to its high density, which prevents the air between walls from transmitting sound waves. However, it is an expensive material, which won’t be suitable for those on a budget.
Soundproof Insulation Conclusion
Soundproof insulation can help reduce unwanted noise in your home. The materials available for the purpose can be used in a variety of situations and can even complement other soundproofing techniques.
While you may not be able to eliminate all sounds, these materials can help in noise control to a considerable extent. If you find selecting the right material challenging, it is a good idea to hire the services of a soundproofing expert.
They can perform an inspection of your home and recommend the most suitable materials that can be used for sound insulation. What’s more, in cases where you may have doubts about installing the material, such experts can perform the installations quickly and efficiently, saving a lot of hassle.
And with that, this comprehensive guide on soundproof insulation has come to an end. Until next time!
Using acoustic foam panels, along with adding extra soundproofing material and sealing the perimeter is one of the most effective ways to prevent noise from traveling through the garage door. Besides, acoustic blankets, noise-blocking curtains, and mass-vinyl barriers are dependable options to make your garage a quiet space.
A garage is one of the most versatile locations in any home, be it for jamming with friends or getting some me-time.
You can even use it as a workshop for your DIY projects. Whatever the case, a soundproof garage is what you need to tinker away without disturbing others. Today, I’ll share the five best soundproofing materials that prevent noise from entering or escaping the garage.
So, keep reading!
Reasons To Soundproof Garage Door
The primary reasons why every homeowner must consider soundproofing garage doors are as follows:
Preventing noise from traveling out of the garage
Minimizing the amount of noise that enters the garage
For instance, you might use the garage for band rehearsals or as a workshop for completing DIY projects. In either case, you will want to reduce the amount of sound that enters the space and work with as little distraction as possible.
In such situations, soundproofing your garage door would be wise, as it will minimize noise transmission.
Not only will it improve sound absorption (acoustics), but it will also prevent hot or cold air from entering(or escaping) the garage. Therefore, adding soundproofing materials in your garage will prevent heat loss, so you will save some money on energy bills every month.
Types Of Sound That Enter The Garage
Before kickstarting your garage soundproofing project, it’s important to figure out the type of sound that invades your garage space. That’s because the soundproofing material you must use depends largely on the sound that enters your garage.
Basically, two types of sound can enter your garage space– structure-borne noise and airborne noise. I’ve discussed them in detail– so let’s take a look.
1. Structure-Borne Noise
Also known as impact or structural noise, structure-borne noise transpires when any item collides with a solid structure, i.e., the garage door. This collision, in turn, results in vibrations, which are heard as noise.
The sound of rain thumping against the roofing and someone banging on the garage door is a classic example of structure-borne garage noise.
2. Airborne Noise
As the name suggests, airborne noise travels in and out of your garage via air. Sounds such as that of power tools, music, and voices are some examples of airborne noise that gets transmitted through your garage door.
So, is the noise in your garage airborne or structure-borne? One easy way to figure that out is by putting your hand on the garage door whenever you hear a noise in your garage.
If the noise is accompanied by a vibration, it’s structure-borne; however, in the absence of a vibration, the sound is airborne.
How To Soundproof A Garage Door
1. Install Acoustic Foam Panels
One of the most effective yet slightly expensive sound attenuation methods is to install acoustic panels in your garage. Unlike acoustic blankets, foam panels offer a polished appearance, making your garage appear more like a recording studio.
Installing acoustic foam panels is fairly easy, although you can hire a professional if you’re not into DIY. Adhesive spray, push pins, impaling clips, or double-sided tapes– you can use a variety of things to install acoustic panels on garage walls, doors, or the ceiling.
Note that if you intend to pull down the acoustic panels anytime soon, going for a less permanent installation method would be the best way forward. For maximum sound isolation, you can use these soundproofing foam panels to insulate the window pane and doors alongside the walls.
Do remember that these would only work when used in conjunction with an effective soundproofing system, with lots of additional mass applied to the entire surface.
2. Use Acoustic Blankets For Soundproofing Your Roll-Up Garage Door
Acoustic blankets are a practical solution for soundproofing roll-up garage doors because they are affordable alternatives to acoustic panels.
More or less, acoustic blankets are 78 inches in length and 72 inches in width and come with reinforced metal grommets for easy installation. What makes them a reliable soundproofing material for noise reduction is that they absorb sound. So, neither would unwanted noise enter the garage nor would the garage door screech or rumble while opening or closing.
For better sound absorption, hang the blankets after folding them, which would prove effective in reducing noise transmission.
3. Insulate Your Garage Door With Mass-Loaded Vinyl
Another popular option for soundproofing garage doors is mass-loaded vinyl which is known to improve the STC (Sound Transmission Class) rating of a wall. This flexible material attenuates excess noise, so it’s a practical option for noise control.
The mass-loaded vinyl barrier, a polyvinyl chloride-based product, is an easy-to-install material that can be adhered to the wall, floor, or garage ceiling using spray adhesives, nails, and screws. To make your garage a quiet space, you can use more than one layer, which would enhance sound isolation.
Not many know that mass-loaded vinyl absorbs sounds of all frequencies, making it a reliable pick for garages where band practice takes place.
4. Use Noise-Blocking Curtains
Sure, an insulated garage door blocks noise, but did you know it also offers thermal insulation?
If you’re looking for a soundproofing material that offers both thermal and sound insulation, noise-blocking curtains are worth considering. As against a regular curtain, a noise-blocking curtain is thick and dense, which is why it can be installed anywhere– surrounding walls, windows, or doors.
Unlike other soundproofing materials, they need not be attached to the wall using any adhesive or nail (fastener); instead, you’ll need a curtain rod to install them. All you need to do is slide the metal grommets in the curtain rods, and your garage will be soundproof within a few minutes.
Like blankets, noise-blocking curtains don’t do much to reduce bass noise, so keep that in mind. However, it makes the space comfortable as it prevents energy loss, so you’ll be able to work comfortably no matter the weather outside.
5. Get Rid Of Air Vents Or Create An Air Vent Sound Maze
Ever thought that air vents could lead to noise leaks besides letting in the fresh air?
Tackling air vents is the first and the most important thing when it comes to soundproofing projects; otherwise, all your efforts would go in vain. Here, as a homeowner, you’ve got two choices– get rid of air vents or create an air vent sound maze.
Getting rid of them is one of the easiest ways to soundproof your garage. But without air vents, your garage would be toasty, which would be problematic in summer.
One way to combat this issue is to install an air conditioner or oscillating fans in your workspace to keep it cool.
If you don’t mind undertaking a bit of DIY task, creating an air vent sound maze will help you soundproof your garage efficiently. All you need is acoustic foam and wooden sticks for the task.
First, you will have to trim the acoustic foam such that it’s of the same length and width as the wooden stick. Thin sticks aren’t much help in noise reduction, so make sure you use thick ones. Once trimmed, you will have to arrange them as shown in the diagram below, which will prevent sound from invading.
A Step-By-Step Guide On Soundproofing A Garage Door
The benefits of an insulated garage door are plenty. For anyone who wishes to soundproof their garage door on their own, here’s a step-by-step guide to help you complete the project with ease.
1. Gather Supplies
The first thing is to gather supplies needed to soundproof a garage door; having the right tools and equipment will allow you to complete the project quickly and efficiently. You need:
Sound insulation material like fiberglass panels, sound-deadening blankets, spray foam or acoustic foam panels
Weatherstripping tape
Spray or Green Glue adhesive
Garage door seal kit
Measuring tape
Cutting tool
Nails or fasteners
Garage door motor lubricant
2. Lubricate The Garage Door Components
After gathering supplies, lubricating the garage door motor is the next thing to do. Take the garage door motor lubricant and spray it over the motor along with the opening and closing mechanisms for smooth working.
3. Measure Your Garage Door And Cut The Soundproofing Material
Measuring the length and width of garage doors is crucial for garage soundproofing projects. So, grab the measuring tape, measure the door and keep the measurements handy because you’ll have to cut soundproofing materials accordingly.
No matter which material you intend to use, mark the length and width on it with a pencil and then start cutting to avoid mistakes.
4. Install The Insulation
When the material is cut, it’s time to install it, so apply Green Glue all over the garage door in generous quantities. You will have to apply the adhesive only if you plan to install MLV or acoustic panels. For fiberglass panels, you can use nails, screws, or other adhesives.
Also, make sure to clean the door before applying adhesive because a dirty door would prevent the material from adhering to the surface.
Tip
To seal gaps on the bottom of the door, you’ll have to use weatherstripping tape. Conversely, a garage door seal kit is considered effective for sealing the top and the sides of the garage door. Besides soundproofing, it will keep the garage insulated from outside weather, meaning you’ll save money on energy bills.
How To Soundproof A Garage Door Summing It Up
So, do you want to work peacefully on your carpentry projects in your garage, or does your garage make loud noises when opening or closing?
Either way, the only thing that can help you is soundproofing your garage doors. Of all the soundproofing materials, acoustic panels are effective in noise control, but they are slightly on the expensive side.
So, if you’re looking for materials to soundproof your side-to-side or roll-up garage door on a reasonable budget, acoustic blankets or noise-blocking curtains would certainly fit the bill.
Once soundproofed, you’re free to start your projects without the fear of getting noise complaints. However, if worst comes to worst, replacing your existing garage door with a ready-insulated one would be a wise thing to do.
Good luck, folks!
Soundproofing a gaming room using acoustic panels, mass-loaded vinyl, and other sound insulation materials like soundproof curtains can help you get the ultimate gaming experience. You can use various such soundproofing techniques for existing surfaces as well as when building a room from scratch.
Noise control and reduction when playing video games require much more than wearing the best gaming headset, especially if you have a dedicated gaming room. And thankfully, there are many soundproofing techniques you can use to keep outside noise from entering the room and inside noise from escaping outside.
Dive into today’s guide, where I will take you through the different methods for soundproofing doors, walls, windows, the ceiling, and the floor using soundproofing materials and through structural alterations. Do note that the field of acoustics is an extremely wide and complex, there is no "soundproof gaming foam" but there are simple enough ways to improve your acoustic gaming room performance in a DIY project, more on that, and others in the article!
How To Build A Soundproof Gaming Room
Whether you’re building a new gaming room or looking to modify the existing one, the following tips and tricks will come in handy in both cases. However, keep in mind that you may have to employ a combination of the soundproofing techniques mentioned below for optimum results.
Soundproofing The Door
Just like with any other room, the door of your gaming room will be a central structure that will facilitate the entry and exit of sound. Hence, most gaming room soundproofing projects begin with soundproofing the door to absorb or block sound. And there are a few ways to achieve this:
1. Covering Gaps
Gaps around your door frame are the main culprit for sound leakage, but thankfully, you can seal them to reduce noise entering or leaving the room. For this, I’d suggest applying a weather-stripping seal on the door frame, so there’s no gap when you close the door.
After applying one layer of the seal, close the door and see if there are any remaining gaps. If there are, you will need to apply some additional layers till there are no visible gaps remaining.
As for the gap below the door (between the door and the floor), you’re better off using silicone door sweeps, which are generally easy to install, thanks to the adhesive-equipped design. Simply measure the gap and cut the door sweep as required, after which you can paste it below the door.
2. Adding Mass To The Door
Unless your game room has an all-metal construction, sealing the door gaps alone won’t do much good. Since most gaming rooms are, well, like the other rooms in a house with almost the same features as a bedroom or guestroom, the door structure tends to be hollow.
What this means is that there’s enough gap within the structure of the door through which sound waves can travel easily without losing energy. So, the sound will come out pretty loud from the other side of the door, even when it’s closed.
However, you can solve this noise problem by adding more mass to the door, thereby thickening its structure and “forcing” the sound waves to lose energy when they travel through it. And the easiest and cheapest way to do it is by hanging a thick moving blanket on the door using screws or textile adhesives.
Aside from acting as a barrier to unwanted noises, these soundproof blankets can render better sound absorption properties to the door. As a result, you will be able to prevent sound from entering and exiting the room, as well as reduce echo in the room.
Tip
Add at least two layers of different soundproof materials on a thin door.
3. Installing Acoustic Panels Or MLV
If you don’t want moving blankets to spoil the look of your gaming room and can spend a little more onsoundproofing material, then acoustic panels can be the way to go. Depending on your needs, you can find different variations of these panels that serve different purposes.
For example, textured acoustic foam panels can enhance your door’s sound absorption and deaden sound by transmitting the sound waves that hit it in different directions. Likewise, foam panels with flat surfaces are generally considered better for sound absorption and reducing echo. In other words, they help improve the sound quality or acoustics in your room- an advantage that will benefit gamers who don’t have noise-canceling gaming headsets.
As for the installation of these panels, you can use hanging strips, screws, or even adhesives depending on the material of your door.
Alternatively, you can substitute acoustic panels with mass-loaded vinyl (MLV) panels that are cut into the right sizes according to the door surface you need to cover. And feel free to paint over the panels with textile paint or wrap them in thick fabrics to enhance the décor of your room.
However, if you need to cover a lot of space, using MLV panels won’t be one of the most affordable options for soundproofing.
Soundproofing The Walls
Aside from the door, the walls of your gaming room can increase the noise levels by allowing outside noise to enter the space. Oftentimes, you can cancel out all the noise in the room by simply soundproofing the walls.
Again, there are multiple ways to soundproof the walls of your gaming room. While some of them may be more suitable for DIY projects (as you don’t need to take down the wall), others may require the assistance of professionals.
As such, I always recommend my readers to start with the non-invasive methods and follow them with the invasive ones if desired results aren’t achieved.
1. Adding Mass To The Walls
Just like you’d do with the door, adding mass to the walls can increase the density of the structure and prevent the transmission of sound waves through it.
You can use soundproofing curtains or soundproofing blankets for this purpose, but they are typically more suitable for blocking low-frequency noises. Aside from that, MLV panels may come in handy, too.
Not only that, but you can also install more drywall layers to the existing wall surface to increase its density. Although standard drywall does a decent job, I’d suggest going for soundproof drywall panels if your budget permits.
The important thing to remember here is that the more layers you have on the wall, the better will be the noise blocking property of the wall. However, this can be a problem for smaller rooms, as you’d end up losing a lot of space. In such cases, you’d want something more effective that does the job just in a couple of layers.
Tip
You can stack furniture near the walls as a temporary solution until you get your hands on the right soundproofing materials.
2. Installing Sound Dampening Materials
If you aren’t looking for blocking noise per se but still want to improve the sound quality in the room, soundproof foam panels or thick acoustic panels can be the best solution. They aren’t very expensive or heavy and can be easily installed without you worrying about them coming off.
Gamers who record live streams or podcasts of their gaming experience prefer opting for this method in addition to more effective noise reduction methods for clear audio recording.
3. Soundproofing Treatment For Walls
If you’re bothered by too much noise in the gaming room, then you may need to go for invasive soundproofing techniques involving adding sound-insulating materials inside the wall. And to speak the truth, there’s nothing better than insulating the walls from the inside to facilitate active noise control at all times.
Let me now take you through the best methods for building a soundproof wall from scratch.
A. Installing MVL Panels
Installing MVL panels within the walls is one of the most effective noise-canceling options you can employ. In this technique, the panels are directly screwed on the wall studs, after which the drywall layers are added to finish the wall assembly.
B. Adding Insulating Material Between The Studs
Another way to prevent your walls from transporting the sound to the entire room is insulating the space between the studs with a soundproof material like mineral insulation wool batts. Although you can do this on your own when the wall is still being built, make sure to wear gloves and a face mask, as the slivers can cause injuries and breathing troubles.
C. Decoupling The Walls
If you’re building a new gaming room altogether or constructing a soundproof box (or soundproof gaming booth, as it’s often called), then you can also try decoupling the walls. Simply put, this technique involves separating the external drywall structures from the inside wall using resilience channels and sound isolation clips.
By employing this technique, you essentially reduce the contact points between the internal structures of the wall, thereby blocking the pathway for sound transmission.
Soundproofing The Window Panels
Most gaming rooms have windows, which can add to the sound transmission property of the wall through their glass structure or gaps in the wooden frame. However, the good news is that you can easily tackle these problems the DIY way by hanging soundproof curtains on standard curtain rods.
The added advantage of these thick curtains is that they may aid the insulation of the room, making it more energy-efficient to cut down on your energy bills in the long run.
For cracks in the wooden frame, you can use any acoustic caulk to fix them. A better way would be to cut small pieces of acoustic panels and paste them on the cracks using the caulk for reinforced soundproofing.
In case of severe sound transfer, you may need to build an additional window frame with plywood panels and attach it to the main window frame. Furthermore, install soundproofing curtains on the new window frame to reduce noise optimally.
Soundproofing The Ceiling
A soundproof ceiling is extremely important for designing a soundproof gaming room, especially if the floor above it isn’t treated for soundproofing. And here are a few ways that can get you success:
1. Adding Insulating Materials
Sound-dampening materials like foam panels and even rubber mats can be installed on the ceiling of the gaming room to absorb any unwanted noise coming from upstairs. But my favorite way to soundproof ceilings is adding acoustic tiles, which also help elevate the look of the ceiling like nothing else.
The best way to go about the job is starting with chalking out a grid-like structure, covering the areas that are more susceptible to noise leaks, and adding the tiles using the right adhesive. But this method can become a bit expensive, especially if you have a lot of area to cover.
2. Creating A Dropped Ceiling
If your gaming room is spacious enough and you’re looking to change its décor, consider adding a dropped ceiling structure using standard drywall. Additionally, fill the space between the main ceiling and the dropped ceiling with some sound-insulating material, as any unused space of light and plumbing fixtures can become “sound transporters.”
Apart from that, you can insulate the dropped ceiling using foam panels or rubber mat pieces, provided they don’t add too much weight to the structure.
If you’re constructing the room from scratch, you can fill the gaps between the ceiling joists using soundproofing material as you’d do for the wall studs. However, I’d suggest seeking professional help for this, so speak to your contractor in advance.
Tip
You can also soundproof the floor above the roof using rubber mats, thick carpets, and rugs, or a wooden subfloor to reduce noise transfer between the floor and ceiling.
Soundproofing The Floor
The final step in designing a soundproof gaming roof is soundproofing the floor. Now, depending on how much sound transfer your floor facilitates, you can employ simple techniques like adding thick rugs and carpets. For example, placing EVA foam or anti-vibration mats can absorb high-frequency sounds, so your family members can stay undisturbed if you love playing video games on loudspeakers.
Although these may not block the noise, they can absorb the sound waves to prevent echo and improve the sound quality in the room. Apart from that, you can install a subfloor (floor underlay) made of MDF or plywood panels on the floor and use a soundproof sealant like Green Glue compound to secure it on the floor.
Additional Tips For Building A Soundproof Gaming Room
Here are a few things you can try to keep your gaming room from disturbing your family members and neighbors:
1. Design A Soundproof Housing For Your Gaming System
If soundproofing the entire room seems too much of a hassle, simply build a soundproof housing for your gaming system using soundproof drywall. Or, you can use standard drywall and reinforce the surrounding surfaces with any of the sound insulation materials mentioned above.
Just make sure it has enough room for you to sit comfortably inside in front of the system. And poke some holes in the wall directly behind the system to keep it from overheating.
2. Place The Speakers On A Foam Mat
Placing the speakers and woofer directly on a hardwood floor can make the room extremely noisy, as the sound waves vibrate through the wooden structure and amplify. So, use an acoustic foam panel or mat below them to absorb the sound.
3. Use Anti-Vibration Fan Mouths
Anti-vibration fan mouths can be very effective in reducing the fan noise of your computer, especially when the fans are overworking to cool the system. I’d strongly recommend implementing this trick if you play graphics-intensive games (like Nintendo Switch) for long hours.
Soundproofing Gaming Room Final Thoughts
With that, it’s time for me to wrap up today’s guide.
But it won’t be fair if I end it without providing you with one more pro tip: in case you need to use multiple layers of drywall, attach them using an acoustic sealant like Green Glue compound for the best results. You can even use this hack to substitute a single layer of soundproof drywall if it threatens to burn a hole in your pocket.
Goodbye and happy gaming!
Soundproofing a garage may require soundproofing the door, walls, ceiling, or all using different soundproofing materials like acoustic panels, drywall layers, and Green Glue compound. Additionally, you can soundproof unfinished walls or design soundproof dropped ceilings.
Soundproofing your garage can be a great way to protect both your neighbors and your home from unwanted noises. Not only that, but it will also shield you from unwanted outside noise when working in the garage.
That’s why I’ve curated this exhaustive guide to help you soundproof your garage doors, walls, and ceilings using various invasive and non-invasive methods. Read on to know it all!
How to Soundproof a Garage
Why Should You Soundproof Your Garage?
Some of my readers may be asking about the need to soundproof their garage. After all, it is, in most cases, an isolated space that houses your car and sometimes acts as a storeroom. And yes, I agree that for cases like these, soundproofing will essentially be a waste of time and money.
However, some people use their garage as a DIY workshop, band practice room, home office, recording studio, or attached home theater. Hence, soundproofing the space becomes just as important, if not more, as soundproofing the rest of the home.
Besides, no one can predict the future, and you never know how you may end up using your garage in the coming years. So, it may not be a bad idea to soundproof it just after you finish reading this guide!
How To Go About Garage Soundproofing?
The process of soundproofinga garage actually starts with deciding on a few important things, the first of which is determining if you want to prevent sound from entering or exiting the space. This way, you can employ specific soundproofing techniques to make your soundproofing project optimally successful.
For example, if you plan to use the garage for band practice or DIY projects, you’d ideally want to keep the sound from escaping so that it doesn’t disturb your neighbors. The same holds true if you use it as a workshop and need to use any power tool frequently.
On the other hand, a garage turned into a home office should prevent outside noise from entering through the garage door and garage walls so that you have a peaceful environment to work in.
However, there may be some situations when you need to prevent the noise from entering and exiting the garage simultaneously. For example, if you want to turn your garage into a mini home theater, then you’d want to keep the sound inside for an immersive movie-watching experience as well as prevent outside noise from disturbing you.
Besides, soundproofing plays an important role in improving the sound quality inside the garage, which will be beneficial if you use the space for music practice. In hindsight, effective garage soundproofing techniqueswill facilitate better reverberation so that you hear better, especially if you play the drum or guitar frequently.
Is Your Garage Affected By Impact Or Airborne Noises?
Another factor that will play a large role in determining the right soundproofing methods for your garage is whether the space is being affected by airborne or impact noise.
For the unversed, airborne noise waves primarily travel through the air until they hit a surface, like your ears. Examples of this type of noise transfer include hearing people talking, dogs barking, or TV playing in the adjacent room.
Some airborne noise also travels via nearby structures, meaning you hear it after it passes through a solid surface like a wall or door. However, such noises are usually muffled as some of the sound waves are reflected before transmission and/or lose most of their energy during transfer.
Airborne sound leakage typically happens through gaps in the floor, door, or ceiling, fixing which usually doesn’t take a lot of effort.
The other type of noise to take care of is impact noise, produced by the interaction of an object with a structure. This interaction creates vibrations that travel through the structure and exit as sound waves. For example, the sound produced when you drag furniture on the floor or hammer a nail into the wall is impact noise.
How To Soundproof A Garage?
If you have a completely detached garage that is isolated from other rooms without windows, the task of soundproofing it will become a lot easier and less time-consuming.
But soundproofing a garage, in many cases, is a multi-step process that includes soundproofing the different structures like the walls, doors, and any window. This can include sealing any existing gaps as well as installing sound absorption materials, depending on the source of the noise and how it’s transported.
For instance, an empty wall will reflect the sound waves hitting it directly, causing an echo. In such cases, you may need to use acoustic foam panels or acoustic blankets for absorbing sound waves to minimize sound reflection. Aside from that, the uneven texture of these panels will transport the reflected sound waves in different directions, thereby reducing their intensity.
Sound leaks, on the other hand, are caused by gaps that allow outside noise to enter the garage or inside noise to escape. Hence, you would typically need to apply a sound barrier like acoustic tape to seal them.
What follows below is an exhaustive guide on the different ways of soundproofing a garage so that you can get all the bases covered. So, dive in!
How To Soundproof Garage Doors
If you have a metal garage door made of steel, know that it will generally have a hollow core and transfer more sound both ways. As such, the best way to counter this is to replace it with a solid-core garage door made of engineered wood. However, it may not be practical for everyone to make such a huge investment just to block noise.
That’s why here are a few ways you can try tosoundproof your existing garage door. You can use one specific method or combine two or more, depending on how severe the noise transmission is.
1. Sealing The Gaps
Sealing doors below the garage door can help in blocking sound both ways, and you can use compressible weather-stripping rubber seals for this purpose. Aside from blocking noise, these garage soundproofing products can add an extra layer of insulation to your garage for trapping heat during the winter, making it more energy-efficient.
For any leaks on the sides of the garage door (including the top), consider specialized seal kits that are easy to install the DIY way. All you need to do is size the strips according to the length of the sides and apply them firmly using screws or adhesive.
Tip
use some acoustic caulk to add an extra layer of the seal between the strip and the gap. You can use a caulking gun with a thin nozzle for even application.
Whether you aim to block sound completely or want to achieve overall noise reduction, sealing gaps is an essential first step to making the garage soundproof.
2. Deadening The Sound
Deadening the sound using soundproofing materials can help reduce noise transmission both ways, especially for low or medium-frequency sounds. For this, you can use heavy-duty soundproof curtains or hang noise-blocking curtains. But before that, make sure you measure the door properly so that you don’t end up with too long or short a curtain.
Alternatively, you can increase the door mass by installing any soundproofing material like mass-loaded vinyl (MLV) panels. The idea behind this method is that by increasing the density of the door structure, you can reduce both airborne and impact noises that use the door for transmission or bounces of it.
Use vinyl cement for securing the panels on the doors and the same acoustic caulk hack mentioned above to seal any remaining gaps between the panels and the door.
Aside from that, you may consider using sound-damping foam mats, which can add both sound-absorbing and blocking properties to the door. Such mats come with a “sticky back,” so you can simply paste them on the door. Plus, this is a cheaper solution compared to installing MLV.
No matter which option you choose, always ensure that you aren’t putting excessive weight on the door opener. Otherwise, it may interfere with the opening and closing of the door or the door seal.
Soundproofing Garage Walls
Once you’re done soundproofing the garage door, it’s time to move on to the walls. One thing to keep in mind here is that you may need to employ invasive techniques for the best results, especially for blocking loud noises. However, I’d recommend starting with the non-invasive ones and observing their efficacy for some time.
1. Install Acoustic Foam Panels
One of the easiest things you can do to soundproof your garage walls is to add acoustic foam panels to them. These sound-absorbing panels will be extremely useful if you want to reduce the echo inside the space without breaking the bank. And the best part is that you don’t need to resort to installing acoustic foam panels on every inch of the walls as long as you know the exact location of the noise leak.
However, installing acoustic panels alone may not help you soundproof a garage if used on its own.
This is because these panels essentially prevent the sound waves from bouncing on the surfaces inside and amplifying, but they don’t do much to stop the entry or exit of sound waves per se. You will find soundproof panels (or acoustic panels, as they are commonly called) in different shapes and sizes, meaning covering those odd spots or corners won’t be an issue.
Tip
If your garage acts as a workshop,install the acoustic panels on the walls right behind the workstation, where you use the power tools for maximum results.
2. Hang Acoustic Blankets
You can also soundproof your garage walls (including glass windows) by hanging acoustic blankets that deaden the sound waves before they reach the structure behind them. As such, this method is most effective in preventing airborne sounds by absorbing them in their way.
Heavy-duty acoustic blankets, like the industrial ones, come equipped with grommets that make the installation process easier and faster.
3. Soundproofing Unfinished Walls
If you’re just building your garage or remodeling it and it has unfinished walls, then you have the best shot at creating soundproof walls.
From what I have seen, most residential garage walls are made of cement blocks or thin timber blocks placed over metal or wooden studs. So, if you have exposed studs or empty wall structures, you can add soundproofing materials like MLV or mineral wool insulation before installing the final layer of panels or drywall.
Tip
Apart from mineral insulation wool and wooden panels, you can use other soundproofing materials like fiberglass panels before finishing the walls.
In case your garage walls are being constructed of concrete or cinder blocks, then soundproofing the exposed studs will require some additional effort. For this, I’d suggest covering them with wooden panels or a few layers of drywall. Being porous in nature, concrete can easily adhere to thin treated wooden panels, after which you can install the drywall on the studs.
Some other ways to soundproof unfinished garage walls include:
A. Opting For “Room-Within-Room” Construction
Well, no, I’m not asking you to build a new room within your garage, but by room-inside-room construction, I mean separating two layers of drywall to reduce the contact points between them. And this, in turn, will reduce sound transfer between surfaces. For this, remove the existing drywall structure and build another drywall frame in a way that's separated from the former.
This process of separating the drywall frames is known as decoupling; however, you will need to keep a few things in mind before employing this method.
Firstly, decoupling can be a costly affair, depending on how big your garage walls are. So, it’s generally not the best way to soundproof a garage cheaply.
Secondly, ensuring proper structural stability of the two frames can be difficult, especially if you aren’t into DIY construction projects. And lastly, you may lose a lot of garage space (about a foot or more) on average due to the separation of the walls.
B. Double Wall Construction
Much similar to a room within room construction, a double wall construction has less decoupling but high efficacy when it comes to blocking noise.
C. Staggered Wall Stud Construction
If you don’t have much space in the garage for performing the above-mentioned room-in-room construction, then a staggering wall stud construction can be an effective alternative. All you need to know is to replace the existing wall frame with a 6-inch wide framing that has staggered studs.
D. Using Resilient Channels And Sound Isolation Clips
If the other construction alternatives aren’t feasible for you, you can try attaching resilient channels or sound isolation clips on the inner side of the drywall frame to complete the wall assembly.
For the unversed, a resilient channel is a narrow metal bar that attaches directly to the walls, and you can attach the noise clip to it. Finish it off by attaching a layer of drywall to the open end of the isolation clip. This will help absorb sound so that the sound waves don’t transmit from the drywall to the studs.
Make sure to leave some room at the junction where the drywalls of the wall and ceiling connect and fill it up with a sealant to reinforce the decoupling.
Image of ceiling joist
4. Add Mass To Your Existing Garage Wall
Adding a couple of drywall layers to existing garage walls can improve the overall sound absorption (acoustics) of the space for absorbing sound waves with low frequencies.
I’d strongly recommend including a soundproof material (like insulation wool or Green Glue compound) between two or more layers of drywall for optimal sound attenuation. However, this may not be as effective as decoupling the wall.
Garage Ceiling Soundproofing
You can use pretty much the same methods mentioned above for soundproofing garage ceilings. For example, you can try installing acoustic foam panels on the ceiling to absorb sound waves, or you can substitute them with acoustic ceiling tiles. In either case, start by designing a grid-like structure on the ceiling and then fill the space with panels or tiles.
Apart from this, you can design a drop ceiling by using the main ceiling as the foundation, but make sure the space between the two is filled with some soundproof material like mineral wool. Leaving too much empty space or installing fixtures like pipes and lights can aid sound transmission.
In case of exposed ceiling joists, you can fill the space between the joists and the ceiling with any efficient soundproofing material to reduce the echo. But for better results, consider adding one or two layers of drywall, which will block sound more effectively, thanks to its density.
Soundproofing Garage Floors
Soundproofing the garage floor can be achieved by placing EVA foam mats or anti-vibration pads on the surface to absorb the high-frequency noise coming from power tools. In case of low-frequency noises, you may spread a thick carpet on the floor to see (read: hear) results.
But if these tricks don't solve the problem, you may have to install acoustic insulation or soundproof material underneath the flooring. Since this will involve removing the existing flooring, it’ll be a better idea to hire a professional for the purpose.
Garage Soundproofing Final Words
If you’re serious about using your garage as a full-time music practice room, home theater, or workshop, then it’s in your best interest to combine different soundproofing methods.
And in such a case, I’d strongly recommend checking the STC (sound transmission class) of the soundproofing materials being used. Measured in decibels, this rating will give you a fair idea of how much sound the material can block. Remember that a high STC decibel rating will give you better soundproofing properties.
Likewise, check the NRC (Noise Reduction Coefficient, ranging from 1 to 100) of sound-absorbing materials, which is measured in percentage. The combination of high STC and NRC ratings will determine how soundproof your garage will be.
You can soundproof your floor during installation or after it has been finished. Before installation underlayment, floor joist isolators, or dense acoustic insulation can be used while after installation you can use carpets, rugs, mats, and even proper furniture placement to minimize sound. Another popular method is to remove structural noises by replacing old screws and pins.
Tired of hearing noise complaints from your neighbors living downstairs? Well, it’s time that you make your floor soundproof.
Everyone likes to have peace and solitude at home, so you can’t really blame your neighbors if they complain about noises coming from your room.
Thankfully, by making your floor soundproof, you can avoid such complaints altogether. So, how can you soundproof the floor of your house? That’s what I have discussed here, so dive in!
How to Soundproof Floors
Soundproofing Basics
Before I delve deeper into the topic, let me give you a brief idea about what soundproofing is. Simply put, it is a process that aims to minimize or eliminate sound propagation. If you soundproof a room, you can prevent noises from leaving the room. The opposite is also true, which means that you won’t have to deal with any external noises.
Besides the floor, you can soundproof any part of your room. For instance, if you soundproof the walls, you can prevent noise from propagating through them. This means that people living in the adjacent room will not be bothered by noises coming from your room. Similarly, if you soundproof the ceiling, you won’t have to worry about the upstairs neighbors disturbing your sleep in the middle of the night.
In this regard, soundproofing is done to eliminate two types of noise - impact noise and airborne noise. The former is caused due to impacts, while the latter is caused by ambient sounds. For example, if you hit your walls with a hammer, it will generate impact noise. On the other hand, if you are playing loud music, the sound will travel as airborne noise.
Impact noises are normally more troublesome than airborne noises since the energy of an impact vibration can propagate quicker than ambient noise. Furthermore, the noises generated from impacts are a lot louder and more difficult to manage than the noises generated by a barking dog or talking people. This is because the vibrations from an impact travel directly through the materials of the walls and ceilings.
If it is a bit difficult to understand, then refer to the infographic below. It demonstrates how vibrations travel through the walls and floors to generate noise in adjacent areas.
Why Should You Soundproof Floors?
Soundproofing is essential because it helps to improve the absorption (acoustics) of sound inside a room. Many homeowners understand the necessity of soundproofing their walls and ceiling, but when it comes to the floor, they feel skeptical, especially if they live on the first floor.
Yeah, I admit that If you live on the lowermost floor, then it might not always be necessary to soundproof your floors. However, if there is living space below you, then floor soundproofing is required.
Besides, soundproof flooring is not just meant to reduce the noise nuisance for your neighbors. It is also required to improve the impact insulation class (IIC) rating of the floor. This, in turn, contributes to the sound transmission class (STC) rating, which is a mandatory requirement under the law.
According to the International Building Code 2021, the STC rating of a building needs to be above 50. Therefore, if you want your home to be legally compliant with the regulations, soundproofing floors is a must.
In that context, different types of floors require varying levels of soundproofing based on their sound transmission capabilities. For instance, floors made of stone or ceramic tiles transmit a lot more noise than floors made of hardwood or concrete slabs. Thus, you will need more soundproofing materials for insulating a tile floor than what you will need for soundproofing hardwood flooring.
That said, the overall procedure is more or less the same, regardless of the flooring type. You just need to decide when you want to soundproof your floor. That’s because the methods to soundproof finished floors are different from the methods implemented during floor installations.
How To Soundproof An Existing Floor?
There are many ways in which you can soundproof an existing floor, as you can see below.
1. Laying Carpets And Rugs
The simplest method to soundproof a finished floor is to use wall-to-wall carpeting. If you use a carpet on your tile or stone floor, it can efficiently absorb the sound from impact, thanks to the shag. Besides, it minimizes the force of impact, which prevents the items from breaking when they are dropped, which is an additional advantage.
If you want to reduce the impact noise in certain sections of the floor, you can use rugs, which are usually smaller in size than carpets. As a matter of fact, using rugs below your heavy furniture is an excellent idea, as it minimizes the impact of noise when you move them.
On that note, moving furniture becomes much easier if there is an underlying rug. Instead of carrying or dragging the furniture item across your floor, you can simply pull it with the rug, which requires considerably less effort. So, not only does it reduce unwanted noise, but it also increases convenience, which makes it an excellent pick for finished floors.
Installing carpets or rugs on your floor is pretty straightforward, which is another advantage of this option. All you need to do is roll it over your floor, and you will be good to go.
However, you need to measure the dimensions of your floor beforehand, especially for a wall-to-wall carpet that covers the whole floor. If you don’t, you will end up with uncovered areas on the floor that lack soundproofing.
You need to consider the thickness of the carpet or rug you want as well. A thick carpet can absorb more noise but is relatively expensive to get. On the other hand, a thin carpet is a lot cheaper, but it can absorb less noise by comparison.
2. Using Mats
Using floor mats is another method for soundproofing a finished or new floor. The basic principle is very similar to the one used for the carpets and rugs, as you need to lay them over your existing floor to make it soundproof. Even so, there are certain differences with this option that need to be considered.
The first and most obvious difference is the materials used. Typically, the shags of carpets and rugs are made from wool, cotton, or nylon. In contrast, soundproofing mats are made from rubber, cork, vinyl, plastic, or composite materials.
Natural rubber is an excellent material for sound insulation, which is why it is commonly preferred over other soundproofing materials. You can easily use rubber mats over your floor to minimize impact noise and ambient noise. Likewise, they can be used as carpet padding below your carpets to enhance their soundproofing capabilities.
Composite mats are generally made from a combination of wood, fiber, and plastic. They are pretty thick, which helps to absorb sound efficiently. On the flip side, they are expensive, which reduces their feasibility.
Regardless of the materials, most floor mats are available in two forms - rolls and interlocking tiles. This is another aspect that differentiates them from carpets, which are only available in a single form.
The rolls are similar to a rug, and you need to lay them over your floor. However, a roll of rubber mat is relatively large and heavy, which can make it slightly difficult to handle.
If you do not want to deal with that hassle, you can go with an interlocking floor mat. Installing it is much easier by comparison and feels a lot like solving a jigsaw puzzle. Besides, interlocking floor mats are available in different color options, which helps to improve the floor aesthetic.
3. Install Deck Screws And Nail (Fastener)
This is a method that is primarily used for wooden and hardwood floors. Such floors are generally made from wooden floorboards that are held together with adhesives or fastener nails.
In many cases, the adhesive wears off over time, or the nails become rusty and corroded. Ultimately, they come loose from the floorboards, which causes the floorboards to become squeaky. Squeaking sounds are a result of the floorboards rubbing against each other, and hence they can be considered to be a structure-borne noise.
If you want to eliminate the squeaking sounds (or any other structural sound, for that matter), you should install new deck screws. That will restore the integrity of the wood flooring and get rid of any odd structural noises.
To install the deck screws and nail (fastener), you will first need to remove the old nails and adhesives if they haven’t come off already. You can use a claw hammer to pry out the old rusted nails from the wooden floorboards.
In some situations, the rust may cause the nails to become stuck to the boards. If you come across such nails, you can use rust remover to loosen them up for easier removal.
Likewise, you can remove the old adhesives by scraping them off with a brush or sandpaper. You can also use vegetable oils to remove old adhesives. First, you have to pour the oil over the adhesive and let it soak for a while. Then you have to wash it off with water or wipe it with a clean cloth.
After that is done, you can install the new screws and nails. For the screws, you can install them with a screwdriver, and for the nails, you can use a simple hammer.
4. Furniture Placement
Have you ever wondered why an empty room sounds louder than a filled-up room? It is because objects, such as furniture, are good absorbers of sound. Therefore, you can make the floor (and, by extension, the room) soundproof by placing your furniture items in a specific manner.
Such a system is highly effective for blocking out airborne sounds. And with correct placement, you won’t have to worry about dropping objects on the floor either. For instance, if you have more than one table in the room, then a dropped item will likely fall on them instead of the floor, thereby eliminating impact noise.
As you can guess, there is no installation necessary for this method. All you need to do is move your furniture to the noisiest parts of the room, such as near your TV or music system. That will effectively soundproof your room for listening to music or watching movies loudly.
On that note, you can use this technique to soundproof an existing wall by placing the furniture items close to this wall.
However, one disadvantage of this method is that you will need lots of furniture to get the maximum level of soundproofing. If you have enough furniture in your apartment, it shouldn’t be a problem. But if you don’t, then it would not be feasible to buy furniture just to soundproof the floor. In that situation, you can opt for another soundproofing method.
Tip
I recommend using cushioned furniture items, such as sofas, couches, mattress beds, and so on. The cushioning on these items can absorb sounds better, thereby giving you a quieter experience.
How To Soundproof Floors During Installation?
It is always better to soundproof a floor when it is being installed. You don’t have to take my word for it, though; just ask any construction engineer, and they would suggest doing the same.
There is a good reason for this - the features of a floor under construction can be easily adjusted or modified to accommodate soundproofing measures. You cannot do such modifications with a finished floor unless you want to demolish and rebuild it again.
With that in mind, here are some methods that can be used to soundproof a floor during installation.
1. Use Underlayment
Floor underlayment is a layer of insulating material that is placed either below or just above the flooring material. They are typically used to provide thermal or acoustic insulation. The former helps with regulating room temperatures, while the latter is used for soundproofing.
Acoustic floor underlayment can be made from different materials, as I have listed below.
Vinyl - Usually consists of compounds like polypropylene or polyvinyl chloride (PVC)
Rubber - Uses either natural or synthetic rubber and offers excellent soundproofing
Cork - Works best for tile, stone, cement, or marble flooring
Felt - Most suitable for hardwood, bamboo, or laminate flooring
Foam - Made from polypropylene and works best for an engineered or a floating floor
Rubber is the most effective acoustic underlayment, followed by vinyl, which is comparatively cheaper. And the best part is that they can be used for almost any type of floor, which makes them highly versatile.
If you want to underlay them below the flooring materials, you need to place them right over the subfloor. Most underlayments come in the form of rolling sheets, which means that you will need to lay them out like a carpet over the subfloor surface.
After that, you have to apply adhesives to fix them in place. I recommend using an acoustic caulk or Green Glue due to their innate soundproofing capabilities. If the underlayment roll comes with pre-applied adhesive, though, this step can be skipped.
In any case, once they are secured, you need to fill out any gaps using a sealant. Following that, you can lay down the flooring material to complete the installation. You have to use adhesives to glue these materials in place. However, if you intend to use floor lamination or a floating floor, that won’t be necessary.
2. Use Dense Acoustic Insulation
Below the floor surface lies the sub-floor, and underneath that lies the ceiling drywall of the room below. In this regard, the space between the subfloor and the ceiling drywall can be stuffed with dense insulating materials, such as foam. This is just what you need to do here, and it will muffle most impact and airborne sounds from traveling through the floor.
Most buildings contain some level of sound insulation between these layers. Although, if you want better soundproofing, you can add more insulation. Simply stuff the hollow space with the insulating material, and then you can move on to the rest of the floor installation. But make sure not to use too much stuffing, as it may make it difficult to attach the subfloor.
3. Soundproof The Floor Joists
A floor joist is a structural component that lies below the subfloor. It bears the weight of the whole floor and everything that lies above it. So, it is essentially a load-bearing structure, similar to pillars.
In that context, if you soundproof the joists of your floor, you can eliminate all sound transfer through the floor. The best strategy for this purpose is to use floor joist isolators. They are thick pieces of rubber that are usually placed between the floor joists and the subfloor. This creates a gap between them, which prevents sound from propagating.
As for the installation of these joist isolators, you need to slide them in place over the joist frames carefully. Then, you can nail the subfloor in place and install the rest of the flooring components over it.
The gap created by an isolator also acts as a thermal and vapor barrier which prevents the entry of moisture and keeps the floor temperature under control.
What Is The Cost Of Soundproofing The Floor?
When thinking of getting a soundproofed floor, the cost is possibly the first and foremost thing to pop into mind. And to be honest with you, there is no simple answer to this question.
While the materials used for soundproofing do not cost a lot of money, the procedure for getting it done is a bit costly. This is especially true if you want to get the floor soundproofed during installation. Such processes require skilled labor, which is often expensive.
The costs for soundproofing also depend on the size of your room. If your apartment is a small one, you can get it done without straining your bank account. However, if you have a large apartment or home, you might need to shell out a lot of cash. Personally, I would not suggest going for full soundproofing in that case unless you can bear the costs.
That said, some options, such as buying carpets or mats, are considerably cheaper. So, if you have a tight budget, you can consider these options instead.
Soundproofing Floors Final Words
Soundproofing your floor is not just a matter of convenience - it helps maintain your privacy too. I mean, would you really want your neighbors to hear your private conversations? Of course not!
Thus, to make it easier for your neighbors and yourself, you should make the floor soundproof right away. And if possible, you should get your walls, ceiling, doors, andwindows insulated as well.
Anyways, that brings me to the end of this detailed guide. I hope you find the information here to be helpful.
See you around then!
Adding mass to the ceiling is the best way to soundproof a basement. However, if you can spend a bit more, adding resilient channels to the structure will eliminate noise coming from the floor overhead to a great extent. The easiest, most affordable way to handle sound absorption however is to apply foam, cotton, fiberglass or polyurethane acoustic panels directly on the basement ceiling, hanging ceiling baffles can also increase sound absorption.
One of the worst things about modern life in the city is noise, especially construction noise in the neighborhood.
But you have the freedom to turn your basement into a soundproof haven and relax in that quiet space. What’s more, a soundproof basement ceiling will allow you to throw basement parties or continue jamming sessions without disturbing anyone.
Let's start this article with a disclaimer, by creating a big distinction between soundproofing and sound absorption from the get-go though:
Soundproofing translates into the act of preventing sound from entering or exiting a space by using materials that block or reduce sound waves. Soundproofing materials are usually dense, thick, and heavy, such as drywall, mass-loaded vinyl, and acoustic foam, the most common soundproofing method is thus adding mass to existing partitions.
Sound absorption translates into reducing or eliminating sound by using materials that absorb and dissipate sound waves. Sound absorption materials, such as acoustic foam and fabric-wrapped panels, convert sound energy into heat energy, which is then dissipated into the environment, and thus adding acoustic panels to your basement ceiling is sound absorption method, not a soundproofing method.
To make this article a bit easier to read, and because popular culture uses the term soundproofing loosely for the general act of minimizing sound I will use it too, just not to get hanged up on technicalities but please do note in the filed of acoustics these two terms are not interchangeable.
Interested to know more? Then read on till the very end!
Basement Ceiling Soundproofing 101
What Type Of Noise Enters The Basement?
So, do you know what type of noise enters the basement?
Knowing the types of noise that get into the basement is important when it comes to soundproofing a basement ceiling. And if you aren’t much into DIY home renovations, you probably won’t know the type of noises that usually invade such spaces.
Basically, two types of noise break through the basement ceiling– airborne and impact noise. Traffic-related vibrations are also likely, though these are rather difficult to solve at later stages.
Since the first floor of any building is the busiest, you’re likely to encounter both types of noises in the basement. Whatever sounds you hear in your basement fit in either of the two categories.
Here I’ve discussed the two types of noises to help you decide which solutions would be effective for a basement ceiling soundproofing project.
1. Airborne Noise
As is understood, airborne noise refers to the unwanted sound that travels from one place to another via air after leaving its source. When the sound waves collide with a structure, some energy passes across while a fraction of it is reflected, and the remainder is absorbed.
Either airborne noise reflects off the ceiling or floor or passes through them to the basement.
Your toddlers screaming in the nursery while playing or your teenager blaring loud music on speakers are classic examples of sound traveling to the basement through the air. A few other examples of airborne noise are:
Barking dogs
Conversations between people
Cars starting or moving down the road
Radio and television
Airborne sounds can be blocked by adding extra layers to the structure rather than modifying it entirely. But one thing to keep in mind is that some airborne noises are low-frequency sounds, so blocking them completely might be challenging. Like, the sound of an airplane passing overhead or thunder would be more difficult to block than somebody’s footfall on the ground above.
2. Impact Noise
Impact noise, on the contrary, occurs whenever any object hits or touches a surface, because of which mechanical energy is transferred into the structure as vibrations. Later, these vibrations leave as sound waves from the other side.
The sound of the ball hitting the floor or someone thumping their feet while climbing stairs are classical examples of impact noise. Some other examples of impact noise are:
Moving furniture
Water sloshing through the pipes
A construction jackhammer
Impact noises are quite common in basements, mainly because the ceiling is on the first floor of the building. As against all other floors, the first-floor witnesses a lot of foot traffic, which is why blocking impact noises completely is slightly tricky.
Since they travel through the flanking, you might have to modify the structure of a building to alter or distort the direction of these sound waves.
Common Types Of Basement Ceilings
More often than not, soundproofing projects are DIY unless you wish to make structural changes.
Before you start the project, it’s important to know about the different types of basement ceilings, so you can understand how the two types of noise enter the space. Also, the soundproofing solutions you opt for will depend upon the type of ceiling you have in your basement.
Here’s a quick rundown of the common types of basement ceilings.
1. Dropped Ceiling
Also known as suspended ceilings, dropped ceilings are a sought-after option for basements.
Drop ceilings are fixed beneath the structural ceiling and feature lightweight tiles that are attached to a grid, which hangs from the joists overhead. Therefore, you get a large cavity to work with, and you can employ the principles of a decoupled ceiling.
In a drop ceiling, noise transfer is no doubt high, but it can be soundproofed effectively, which means you can use a variety of soundproof insulation materials.
2. Exposed Joists
Exposed joists, often referred to as open ceilings, reveal the bottom of the flooring alongside the joists overhead. Though sound transfer is high in this structure, you get plenty of space to work, which means you get the freedom to employ a variety of soundproofing methods.
On top of that, you won’t have to prep the surface to add soundproofing materials, which further cuts down the cost.
3. Finished Ceiling
Finished basement ceilings are often made up of drywall sheets that are fastened to the floor joists overhead. A finished ceiling may not have insulation material lodged in the cavity.
The opportunities to soundproof such a ceiling are limited unless you tear down the original drywall to add soundproofing materials. And it will double the cost, which means you might end up overspending on soundproofing.
4. Unfinished Ceiling
As against the finished ceiling, an unfinished basement ceiling is when the mechanical and structural design, such as beams, is left as it is, meaning in its natural state. In an unfinished basement ceiling, you need to start everything from scratch, so you can use whichever soundproofing material you want.
Elements Of Soundproofing A Basement Ceiling
After discussing the types of noises and ceiling comes the elements of soundproofing a basement ceiling. Essentially, there are four elements to soundproof the ceiling of a basement which must be followed for a flawless layout.
1. Adding Mass
Sound waves are made by vibrations, and when more mass is added, it becomes difficult for such vibrations to propagate. However, this is frequency dependent, and the efficacy of a mass panel is proportional to its thickness and density as well as the sound wave frequency.
So, remember to add a large volume of drywall to create a sound barrier and block unwanted noise from invading any space. However, since you cannot add too much mass to soundproof the ceiling, keep in mind that it will eliminate only airborne noise. That means it would be ineffective in minimizing impact noises.
2. Decoupling Joists
When two sides of a wall are separated mechanically to prevent noise from passing through, it is known as decoupling. However, decoupling isn’t effective for blocking sound waves of all frequencies. Therefore, I suggest using it alongside other principles to soundproof a basement ceiling effectively.
3. Damping
The third aspect of soundproofing is damping, which prevents sound vibrations in the joists of the ceiling. When it comes to damping, there’s no shortage of compounds, so finding one wouldn’t be a problem.
For instance, acoustic drywall is one option that dampens sound waves while absorbing them; hence, it’s more effective than traditional drywall.
4. Absorption
Absorption is the fourth and final principle of soundproofing a basement ceiling. As a rule of thumb, the thicker the material you use, the more effective it will be in absorbing sound of certain frequencies.
All you need to do is place the sound insulation material at the back of the barrier, and it will absorb sound, reducing noise.
7 Ways To Soundproof A Finished Basement Ceiling Cheaply
1. Seal Gaps
When soundproofing a basement ceiling, the most important thing is to seal gaps, no matter which part you’re working on.
Gaps are undoubtedly the biggest culprit that allow sound to travel from one place to another. Almost every basement ceiling has cracks or gaps, which may not be noticeable at first.
Use caulking to seal gaps on the basement ceiling because installing soundproofing materials before sealing the gaps won’t be effective in blocking noise. Remember, even the smallest gaps can contribute to noise transmission.
So, sealing gaps and cracks should be the priority for soundproofing your basement.
2. Add Rugs To The Room Above Your Basement
Anyone who wishes to soundproof their ceiling without spending a ton on sound insulation materials must get rugs for the rooms above the basement.
Rugs dampen vibrations that occur on the flooring above the basement ceiling. When shopping for rugs, opt for the fluffiest and thickest ones because they absorb sound better than thin ones. In this regard, I suggest opting for shag rugs because they are soft and voluminous.
However, if the room already has carpet installed and you don’t wish to spend money on rugs, add heavy-duty floor mats.
For maximum sound absorption, you must place mats in the middle of the carpet and the floor above your basement. Beneath the rag, you can add acoustic floor underlayment to improve its functionality. Besides damping sound, it will function as an anti-slip mat, so you can lay it on laminate and hardwood floors without worries.
Alternatively, you can place furniture like a bookshelf or couch on the flooring above the ceiling of the basement. Adding furniture is an excellent way to eliminate sound transmission without spending a penny.
3. Fix Squeaky Floorboards
Squeaky floorboards can also lead to sound transmission. So, you’ll need to fix them before installing a soundproofing solution to prevent noise transfer to the basement from the rooms above.
A bit of DIY work is needed to fix the floorboards, so be prepared for it. For this, you'll need to first locate the squeaky boards, identify the joist line and fasten the screws back down.
Here I recommend using screws with either removable heads or flat heads to make sure they do not protrude through the finished floor. Also, don’t forget to use a wood filler to fill the gaps between the finished floor and the subfloor.
Or, you can glue a wood block and place it between the subfloor and the ceiling joist beneath the squeaky board. By filling the gap, this wood block prevents the board from bending; you can join them using screws to enhance durability.
4. Insulate The Joist Cavities With Acoustic Insulation
Acoustic insulation is effective for sound absorption, not noise reduction. Usually, such insulation is used in ceiling and wall cavities to reduce the sound intensity so that airborne noise doesn’t pass through.
In this regard, acoustic tiles are also an excellent option for improving the absorption (acoustics) of a basement.
Mostly, basements have open floor plans, with some featuring a separate bathroom. So, one of the best ways to eliminate echo and reverberation in the basement is to install acoustic panels on both the ceilings and some sections of the walls.
In simple words, insulating the ceiling cavity will reduce the transfer of airborne noise; however, it won’t be effective in eliminating the transmission of impact noise.
Sound insulation materials can be used on both drop ceilings and open ceilings. For insulating a finished basement ceiling, you might have to tear down the drywall, install the insulation material in the cavity and restore the drywall.
On the other hand, you can use blown-in insulation to insulate existing walls; however, it’ll be costly. Besides materials, you’ll be spending on labor charges, which will further add to the expense.
Go for insulation materials that are three-inch thick, and make sure you don’t stuff them into the cavity too tightly. Hence, mineral wool insulation would be the best bet because of its performance and fire-resistant properties.
5. Rearrange Furniture In The Room Above The Ceiling Of The Basement
Rearranging furniture may not be the most efficient noise control strategy, but it’s a quick-fix option for soundproofing your basement. You must consider rearranging furniture in the room above the basement ceiling because placing couches, bookshelves, or other furniture in high-traffic areas will reduce footfall, minimizing impact noise.
Inspect the room properly to identify areas with the most noise pollution and place furnishings there. Besides couches and bookshelves, chairs and cabinets are considered effective in eliminating sound transfer, so you can rely on them for noise control.
6. Use Mass-Loaded Vinyl As Carpet Underlay
Made of polyvinyl chloride, mass-loaded vinyl barriers prevent noise from passing to the basement from the floor above, so it’s a dependable option for soundproofing basements. While there are several ways to install mass-loaded vinyl, attaching it to the ceiling or placing it under carpets blocks noise effectively.
Though dense, this material is highly flexible and comes rolled up, so even a novice would be able to install it without issues.
Another way to install this material is to staple it to the existing drywall ceiling without having to take it off. One thing to note is that the mass-loaded vinyl barrier is available only in black color. And if you want to keep it out of sight, install a drop ceiling with drywall and resilient channels after the MLV is in place.
7. Consider Hanging Acoustic Fabric Panels
All those who want to make their basement a stylish space can opt for acoustic foam panels instead of basic tiles. However, I’ve found that they don’t really block noise, as they are very porous. Instead, they allow sound to enter, and some of it gets absorbed. The rest is reflected from walls, and some amount is transmitted.
Other than hanging them on the walls, you can attach them using L-brackets or Z-clips.
As against the finished ceiling, soundproofing the ceiling of the basement, whose joists, trusses, ductwork, and beams are exposed, is slightly challenging. However, it’s not impossible– here’s how you can soundproof a basement ceiling with exposed mechanical and structural designs.
1. Add Insulation
Unfinished basement ceilings often have empty joists, which allow sound to pass through. So, the first thing to do is to stuff insulation into the joists; otherwise, preventing noise transfer would become impossible.
And if the basement ceiling was completed in a hurry, you'll need to inspect it to figure out if insulation material has been used or not. More often than not, the ceiling of basements is finished for aesthetic purposes. In such cases, you'll need to drill holes in the plasterboard to check whether it is insulated.
If it isn’t insulated, you know the drill– tear down the drywall, insulate it and reinstall it. Batt insulation is a popular pick among homeowners for soundproofing a basement ceiling because it’s easy to install.
2. Use Resilient Channels
The next step is to fix resilient channels to the studs at a right angle. When it comes to soundproofing a basement ceiling, resilient channels are important because they act as a shield between the drywall ceiling and the foundation. Hence, they will separate the foundation from the ceiling, which will prevent sound from transmitting.
You can also use hat channels or sound isolation clips to further soundproof drywall.
3. Install The Drywall
Now that resilient channels are installed, you can move ahead and attach drywall. To avoid last-minute trips to the local store, make sure you decide which type of plasterboard you want to install. Also, order enough drywalls to envelop the entire ceiling.
Another aspect is to make sure that the fasteners pass across the channels, not the joists. Or the process of decoupling would fail.
Throughout the process, keep in mind the ventilation and lighting process. So when installing the drywall, don’t forget to slit around electrical components and vents while making sure you place resilient channels away from lighting fixtures.
4. Use Green Glue To Coat The Plasterboard Before Layering
Green Glue is a substance that works as an adhesive between the layers of plasterboard and is an integral part of the soundproofing process. And while we’re on this topic, remember that applying Green Glue between two drywalls won’t be easy if you don’t have a drywall lifter.
Fasteners can also be used alongside Green Glue to securely join two layers of drywall. Keep in mind that this is a slightly lengthy procedure, so it may take a few days to complete. And in case you cannot spare much time, either you can construct a drop ceiling and/or install mass-loaded vinyl.
5. Use Acoustic Caulk To Seal The Gaps
As previously mentioned, any gaps between the subfloor and the joists will allow noise to pass through the basement. So, sealing gaps is a step you cannot skip, even if your ceiling features double layers of drywall; acoustic caulk is a good option for doing this.
6. Finish Drywall
After applying acoustic caulk, you'll need to smooth it out and add finishing touches, which encompasses a range of things from painting to installing light bulbs. Once you’re done adding everything, your basement will be ready to use.
Benefits Of Soundproofing A Basement Ceiling
Unable to decide if soundproofing a basement ceiling is a good idea? Here I’ve discussed a few benefits of soundproofing a basement ceiling.
1. Reduced Noise Pollution
We live in an overstimulated and sound-saturated environment, so noise pollution is becoming more prevalent.
Long-term exposure to persistent noise has been linked to negative health impacts, especially bass frequencies and acute noises. Soundproofing a basement ceiling will reduce noise pollution and lead to:
Improved focus and concentration
Better sleep
Decreased anxiety
Reduced risk of tinnitus or hearing loss
2. Sleep Or Read Comfortably In Your Basement
If your neighbors love throwing parties every now and then, understandably, the loud music may make it difficult for you to fall asleep or stay asleep. Soundproofing the basement ceiling will allow you to sleep comfortably or study in your basement, no matter the time of the day.
3. Save On Energy Bills
Even the smallest gaps can allow heat to escape and cold air to enter, which would lead to energy loss. Soundproofing the ceiling of your basement can prevent energy loss from your home, eventually reducing energy bills.
What Is The Cheapest Way To Soundproof A Basement Ceiling
Whether you’re running short of money or don’t want to spend too much, insulating the floor above the ceiling of the basement is the cheapest way to soundproof it.
Laying down rugs or carpets would effectively insulate the floor overhead the basement. And if you don’t mind spending a few more dollars, consider installing floor underlayment, which would make the floor denser and thicker. Hence, it would absorb sound and prevent airborne noise from entering the basement.
Tip
Before starting your basement soundproofing project, rent a drywall lifter for a couple of days or weeks so that you’ll be able to install drywall with ease. A drywall lifter is a handy tool that holds the plasterboard sheets, so you’ll be able to screw or glue them in place without hassle when soundproofing the basement ceiling.
Soundproof Basement Ceiling Summing It Up
Basements aren’t only meant for storing things; instead, they can be used to watch movies, record music, or even catch forty winks during the day.
But you can make the space usable by soundproofing its ceiling. Although it may sound like a daunting task, soundproofing a basement ceiling is a lot easier than insulating other areas of your home.
I suggest going for fluffy rugs and acoustic panels when it comes to soundproofing the ceiling of a basement because they are relatively easy on the pockets. And if budget isn’t an issue for you, installing resilient channels would be the best bet.
So, go ahead and try these soundproofing techniques in your basement and turn it into a soundproof oasis!
Most efficient ceiling soundproofing technique for both new and existing is to increase the mass and density of the ceiling, increasing sound absorption by adding insulation. This will reduce sound transfer through your ceilings through a combination of acoustic insulation, sound insulation clips, resilience channels, and soundproof panels, thus reducing sound transfer increasing acoustic comfort levels.
When soundproofing a home, many people tend to overlook the importance of soundproofing the ceiling. However, blocking, or at least reducing the sound from above, is important to create a peaceful indoor environment.
That’s why I’m here today to help you understand the different noises that your ceiling may be transferring and how to block them using sound-insulating materials. I will also tell you everything you need to know about building a soundproof ceiling from the ground up (read sky down).
How to Soundproof New and Existing Ceilings
What To Know Before Soundproofing Your Ceiling
Although you may be tempted to start with soundproofing your ceiling immediately, I’d ask you to hold your horses. That’s because there are a few important factors to be aware of before you begin, which will make the soundproofing optimally effective.
Firstly, let me start by introducing you to the types of noises your ceiling may transport to the rest of the room. Now, you may think that I’m being too technical, but trust me- this is the crucial first step to determining which soundproofing techniques will work the best for your needs.
Generally, there are two types of sounds that you should consider before soundproofing your ceiling:
1. Airborne Noise
As the name may have already told you, airborne noise is transported through the air until it reaches a solid surface like the floor or ceiling. Also known as acoustic noise, airborne sounds or noises travel through the vibrations created by the air-wave to reach the floor above you, and finally, the ceiling.
2. Impact Noise
Impact noise or structural noise is created when someone or something “impacts” a surface and creates sound vibrations that bounce off the surrounding surfaces from the point of origin. These vibrations ultimately hit the floor above you and travel to your ceiling through the structures in between, thereby making their way into your room if the ceiling isn’t properly insulated.
For instance, if you can hear the footsteps of your upstairs neighbors walking above you, it’s essentially the impact sound waves that you’re hearing.
However, keep in mind that not all noises in your room can be solved using ceiling soundproofing techniques. Your room may be impacted by flanking noise, which is picked by structures like the connecting points between your floor frame and walls. In such cases, effective noise reduction will require treating the wallsand floor.
Types Of Ceilings
Once you’ve figured out if you’re being troubled by airborne or impact noise (or both), it’s time to determine the type of ceiling you have. As such, most residential ceiling types are categorized into:
1. Solid Ceilings
A solid ceiling is typically made of drywall or plaster, and it’s generally easier to soundproof. Such ceilings are usually made from gypsum panels encased in paper, which make them a better acoustic barrier than ceilings made of hardwood, fiberboard, and hardboard.
Moreover, a single layer of a solid ceiling has more mass and fewer intermediary structures (such as pipes and light fixtures) between it and the floor. It also has inherent sound isolation properties, and it’s comparatively easier to add to its mass for reducing unwanted sound transfer.
Perhaps, the biggest advantage of solid ceilings is their affordability, which makes them a fit for all budgets.
2. Suspended Ceilings
A suspended or drop ceiling is a removable structure that uses a solid ceiling as its base and “hangs” from it. Drop ceilings are primarily used for aesthetic purposes, and these “sub-ceilings” have more room for accommodating structures like lighting fixtures and plumbing pipes. In hindsight, the presence of these fixtures promotes more sound transfer.
It’s generally more challenging to soundproof suspended ceilings, especially for people who don’t have the right tools or knowledge about their home structure. Besides, they aren’t as effective as drywall ceilings if less sound transfer is on top of your priority list.
Soundproofing Ceilings - All You Need To Know
With everything said and done, it’s now time for me to address the big question- how do you soundproof the ceiling? And let me start with a piece of good news, you can soundproof an existing ceiling as well as build a soundproof ceiling from scratch.
Soundproofing An Existing Ceiling
Soundproofing an existing ceiling includes both invasive and non-invasive methods, so you can choose the ones that best suit your needs and budget.
1. Design A Dropped Ceiling
Don’t get me wrong- I’m not contradicting the disadvantage of a dropped ceiling mentioned above by suggesting designing a dropped ceiling to reduce impact and airborne noise. Designing dropped ceilings below existing ceilings provides you with the opportunity to install more sound absorption materials for effective sound blocking through:
A. Installing Acoustic Ceiling Tiles
Acoustic ceiling tiles, when installed properly, can soundproof a ceiling by enabling sound absorption from the structures between the ceiling and the floor above. All you need to do is create a perimeter around the existing ceiling area using T-channels and L-channels to create a grid-like structure. Once this is done, proceed to install each tile using a strong adhesive, which will help absorb sound from the floor above.
Tiles with dB-ratings are also available which can offer excellent performance when combined with soundblocker strips. Acoustic hangers can also be used to reduce sound transference further.
Tip
Make sure you follow the instructions on the adhesive package for even application and the strongest bond.
B. Adding Mass To The Solid Ceiling
Adding more drywall or sheetrock layers can act as absorption mass for an existing solid ceiling, thereby reducing sound and facilitating better sound insulation. This technique can yield desirable results for both impact and airborne noise, which is why most homeowners employ this method before moving on to others.
For this, start by building a wooden frame on the ceiling and use it as the base for installing sound isolation clips or resilient channels. Cover it with another layer of drywall. You can even use two layers if you need more sound isolation, as impact noise reduction requires more depth and mass than airborne.
2. Use Sound Damping Methods
You can add mass-loaded vinyl (MLV) panels or apply dampening materials like Green Glue compound to your drywall ceiling. However, both these methods work best when used in conjunction with multiple layers compared to a single layer of drywall.
You won’t have to remove the existing drywall ceiling for this, as you can apply both these materials on it following the manufacturer's instructions. After this, place another layer of drywall on top and screw it in place. Finish it off by sealing the boundaries of the attached drywalls with acoustic caulk such as AC95 for maximum sound reduction.
The Green Glue compound or MLV will fill the space between the two layers of the drywall to prevent the transmission of sound waves and reduce vibration. Subsequently, it will convert the sound waves into other forms of energy, like heat energy, and dissipate it uniformly to “kill off” the noise.
And both these methods can be used to stop the transfer of airborne and impact noise without altering the construction of the ceiling too much.
You can also add an additional (third) layer of drywall on top with the same damping compound in between the second and third layers if the noise reduction isn’t satisfactory. This means you will end up with a double layer of damping compound.
But keep in mind that increasing the layers will make the ceiling bulkier, taking up more space and making the room look smaller. Hence, this technique may not be very suitable for smaller rooms.
Building A Soundproofing Ceiling
If you’re building a home or renovating your home, then here are a few methods you can try for effective ceiling soundproofing. Note here that most of these techniques will require the expertise of a professional, so make sure you speak with your contractor in advance.
1. Enhancing An Ordinary Drywall Ceiling
Although I’m all for installing soundproofing drywall ceilings to prevent noise transfer, I know that they can be a costly affair. And I’ve seen many homeowners use cost-effective techniques to make such ceilings decently soundproof, especially for reducing airborne noise.
One of the easiest ways to do so is to install a sound insulation material like mineral wool insulation or fiberglass insulation in the ceiling space. The latter, in particular, can achieve satisfactory results when used in thick layers. Plus, it won’t cost as much as mineral wool insulation.
2. Installing A Decoupled Ceiling
A decoupled ceiling essentially involves installing a sound-insulated ceiling with a double layer of ⅝-inch drywall and a damping compound like Green Glue compound. This entire structure is installed using hat channels and high-resilience soundproofing clips.
However, the hat channels aren’t connected to the ceiling joists directly, as doing so can impact the ability of the structure to work properly. Instead, the hat channels are fixed using soundproofing clips, excluding the areas of the wall joists and drywall. For these areas, small screws are used every 10 inches apart to fix the drywall.
The contractors measure the total area covered by the wall joists and divide the hat channels into small pieces accordingly.
For the next step, the hat channels are positioned with the smaller ends pointing toward the joists and the bigger ends directed toward the floor. Then, the clips are used to attach the channels so that there’s no space between the attachments and the ceiling for sound transfer.
3. Attaching Floating Ceiling Joists
If you’re looking for a budget-friendly method to reduce impact noises transfer through a standard drywall ceiling, then floating ceiling joists may be the right solution. These constitute another way for designing a decoupled ceiling that’s fixed (and not hanging like a dropped ceiling).
Attaching floating joists requires the addition of a new joist between an existing pair of joists so that the former extends at least 2 inches below the latter. At the same time, an uncompressed sound-insulating material is used to stuff the gap between the pair of joists. And you’re done!
4. Soundproofing The Floor Above The Ceiling
Here’s an intensive technique to soundproof the floorabove the ceiling - start by removing the drywall ceiling above you to expose and remove the subfloor above it.
Next, apply a sound-damping material on the drywall layer and keep it aside. To prevent loudnoise transfer, I’d suggest preparing two layers of drywall with the sound-damping material placed between them for replacing the subfloor. You can use hat channels to install the newly prepared ceiling.
Aside from preventing airborne and impact noises, this method may be effective in reducing flanking sounds.
Some Other Tips
1. Check The Sound Transmission Class (STC) Rating
Whether you plan to soundproof your ceiling the DIY way or with the help of professionals, I’d strongly suggest figuring out the STC rating of the soundproofing materials you want to use. Simply put, this rating, measured in dB, will help you understand how effective the material is in preventing sound transfer.
The ideal STC rating range should be between 20 and 60 dB, with better ratings signifying better sound transfer prevention. You can also seek help from a professional to determine the anticipated complete STC rating of the completed soundproof ceiling. This way, you can change the technique or combine different soundproofing methods for the best results.
2. Replace The Duct Work
As I have mentioned earlier, drop ceilings leave too much space for accommodating fixtures and ductwork that transfer sound waves between the floor above and your ceiling. So, if feasible, try to replace the existing right ducting with flexible ducts or install affordable duct liners to help redirect the sound away from your ceiling.
3. Soundproof The Floor
You don’t need to employ invasive or expensive procedures for low-frequency noise transfer. If you can get access to the floor above you, try using simple hacks like placing a thick rubber rug with an anti-slip bottom to improve the sound absorption (acoustics) of the floor.
4. Seek Cooperation
No matter if you need to work on existing ceilings or build new ones, always make it a point to inform your upstairs neighbors about your plans. And apologize in advance for any inconvenience that may be caused in the process.
Ceiling Soundproofing Final Words
If you want to soundproof existing ceilings, I’d suggest starting with non-invasive techniques like adding acoustic tiles and adding extra layers to them. After all, why go through the hassle of tearing down a ceiling if you can soundproof it from the outside?
But if adding acoustic tiles or extra layers of drywall don’t work for you, it will be in your best interest to contact a professional for a hassle-free ceiling soundproofing experience. Besides, professional contractors will be aware of the building code regulations of your area, so you don’t have to worry about running into any legal trouble later.
I’ll see you another day!
Considering how noisy an apartment with thin walls can get, it is unfortunate that most residential areas resort to the same to chase lower costs and more profits. That’s when you can use soundproofing materials like wall inserts and clearsonic isolation enclosures to increase the mass of your apartment walls and block sound.
Paper-thin walls hamper not only the integrity of your apartment but also your privacy.
And in the worst-case scenario - you may suffer from sleepless nights, thanks to the budding musician, a restless child, or a noisy dog next door! Hence, soundproofing your room,ceiling, floor, or the entire property/apartment becomes essential.
So, today, I’ll discuss how to soundproof your apartment, listing a few things you should keep in mind and busting some myths thereof.
Apartment Wall Soundproofing 101
What Is Soundproofing, And Why Do You Need It?
Soundproofing involves blocking sound and noise and preventing sound transmission from one room to another. Since a thin wall cannot block sound efficiently, a professional may add mass and density to the existing wall to enhance sound absorption.
For instance, to soundproof an existing window, you may need soundproof window inserts or a thick curtain. Similarly, to soundproof the front door, sometimes an acoustic door seal kit may do the trick, or you may require an acoustic door.
Rest assured that depending on your unique soundproofing requirements and location, you will get a wide range ofsoundproofing methods and materialsto choose from. Given below is a noise map of the United States (with yellow depicting the loudest noise) to help you choose a suitable soundproofing solution.
Now, coming to why your apartment may need soundproofing, the first and foremost reason is privacy. Thin apartment walls can easily transmit unwanted noises from one place to the other. Proper soundproofing allows you to maintain your and even the neighbors’ privacy, as it works both ways.
For this reason, soundproofing is a must in offices, movie theaters, and other commercial places. It allows people with different schedules to co-exist and work in harmony without getting disturbed by airborne noise. Additionally, a soundproof apartment building has the edge over other properties in terms of resale value.
Examples Of Soundproofing Materials
Window Inserts
AudioSeal Mass Loaded Vinyl (MLV) Soundproofing Barrier
If you recently moved into a previously-used apartment, chances are that the apartment walls are full of holes for transferring cables and other purposes. These holes can aid noise transmission, especially if the shared walls are paper-thin.
Hence, sealing these holes is imperative to reduce noise in your apartment. And while there are plenty of sealants on the market, I recommend opting for green glue. The substance is somewhat similar to gypsum, so it not only acts like a sealant but also makes an excellent sound barrier.
Warning
Note that there are different types of green glue, and not all of them can be painted over. So, to avoid ruining the look of a thin wall, it is best to choose a product that can adhere to soundproofing paint.
2. Insulate Impact Noise With MLV
Mass-loaded vinyl is yet another material ideal for reducing background noise in apartments. Even vinyl mats, in general, can effectively cut down any airborne sound. Notably, vinyl is not just suitable for sound insulationbut also thermal insulation. It is not a good conductor of heat and cold, thereby keeping the indoor temperature in check.
Vinyl mats essentially work like thick acoustic panels that block unpleasant and unwanted noises of low frequencies. They also lower the resonant frequency of the wall, letting it vibrate at lower frequencies. This improves bass frequency attenuation.
3. Use Furniture To Reduce Empty Spaces
A simple yet effective soundproofing method is to fill up an empty room with furniture. This reduces echo and other noises.
Consider adding a large bookcase to the shared wall. By storing more and more books, you can create a thicker sound barrier. Alternatively, you can place a wardrobe, hang wall décor, or shift other types of furniture tosoundproof an existing wall.
Warning
This method will not offer drastic noise reduction. But it is an easy way out for those living in a rented apartment with limited permission to renovate the rooms.
4. Install Acoustic Panels
Acoustic wall tiles can assist as soundproofing solutions for thin walls. They are affordable and easy to install, so you don’t necessarily need to pay for the services of a professional. However, they don’t have enough mass to block sound entirely, but instead reduce the ambient sound in a space. They should be used in combination with other soundproofing treatments.
Coming to the construction of acoustic wall tiles, most of them are made of polyester, making them oil-resistant, lightweight, and odorless. And thanks to the sticky side of the panels, you do not need many materials to install them. Just peel them off, stick them next to one another, and your soundproof wall is ready!
5. Use Acoustic Foam
Acoustic foam panels are yet another excellent soundproofing solution, especially for studios, since they block at least 70% of noise from external sources. However, I recommend using acoustic foam panels in conjunction with any of the aforementioned soundproofing methods.
Tip
Since acoustic foam panels effectively reduce airborne noise, it is best to use them with any material that blocks impact sound. While purchasing multiplesoundproofing materials may get expensive, I think it is a valuable investment to effectively soundproof walls.
6. Invest In A White Noise Machine
If you need an instant solution to stop noise from passing through your thin walls, I recommend purchasing a white noise machine.
White noise machines drown out background noise by constantly producing broad-band noise signals; this is called Sound Masking. As such, a non-distractive form of noise will replace other noises, allowing you to work without distractions and sleep without disturbances.
Tip
I suggest using a white noise machine along with other noise-reducing materials, like soundproof padding or soundproofing blankets. You can further invest in a sound masking system to reduce sounds of different frequencies.
7. Use Soundproofing Paint
Depending on the amount of noise controlyou need, you can try painting thin walls with soundproofing paint. If there is not much noise, using soundproofing paint can help eliminate half the noise entering your apartment.
But, unfortunately, if there is a lot of external noise, the paint may not help even a bit. Hence, given below is a chart explaining the noise levels of different types of sounds…
Noise Levels Chart
Soundproofing paint boasts a thick consistency, so I recommend adding extra layers after the first coat of paint. Doing so will help lower noise levels, as the paint keeps the room insulated against low frequencies.
If you recently moved to a new apartment, repainting the room with soundproof paint and adding furniture is your best bet for quick soundproofing.
8. Seal Doors And Windows
Use weatherstripping to seal gaps around windows and below the door sweep to reduce the noise level in your apartment. Since weatherstripping tape consists of vinyl, felt, foam, rubber, and silicone, it is ideal for blocking unwanted sound. Not to forget, installing the material is easy enough to do it yourself, as all you need is a putty knife for the process.
Another method for soundproofing your doors and windows is caulking. But ensure that you are careful while working with a caulking gun, as the slightest mistakes can cause major defects. Besides impact noises, cold air and heat can also enter through the gaps around windows and doors. Hence, sealing such gaps can result in efficient temperature control.
Warning: If you live in a rented apartment, always check with your landlord if caulking around the windows is acceptable.
9. Install Soundproof Curtains
Another budget-friendly way of soundproofing thin apartment walls is by installing soundproof curtains. Some of these curtains may double up as blackout curtains, preventing harsh sun rays from entering your room and thereby allowing you to get more sleep!
Much to every homeowner’s delight, most soundproof curtains are available in various sizes, fitting most standard window sizes. I highly recommend installing them in your bedroom for a more quiet and relaxed environment.
10. Block Weak Points With A Soundproofing Blanket
If you’re lucky enough not to have thin walls, know that noise may transfer through weak points in a wall. One of the common culprits of weak spots in walls is the plumbing system which may be relatively noisy in that area.
Using blankets in such weak points helps dampen the sound by up to 50%. You can use nails or mounting putty to fix the blanket on the wall.
11. Add Extra Layers Of Drywall To Paper-Thin Walls
Thin walls are excellent conductors of sound, and hence, soundproofing involves adding mass and density to the affected area. One way of doing so is by adding multiple layers ofsoundproof drywall to the apartment walls. The added thickness will work wonders in blocking sound coming from your surroundings.
B. With Construction Work
With large apartments getting split into smaller, rentable units, the shared walls end up becoming thinner and cheaper. Hence, you will have to add more mass and insulation to make soundproof walls for your apartment.
Given below are the things you will need and the method for constructing a soundproof wall from scratch.
Things Required
Note that the method provided below fills a space of 5x7 square feet. Accordingly, the measurements and quantities of the materials are as follows…
Basic building supplies, like masking tape, drill, ruler, rock knife, etc.
Two tubes of green glue noise-proofing compound
Full-sized caulk gun for green glue
Framing supplies (for outside the “wall” and 1-inch struts for every 16 inches)
R-13 insulation
3-inch drywall screws
Two layers of drywall of the sound transmission class (STC) rating you require
One tube of green glue sealant
Safety equipment, like gloves, face masks, glasses, etc.
Steps To Construct A Soundproof Wall In Your Apartment
Step 1
Start by building a frame for the wall and placing the studs 16 inches apart for standard insulation. For effective decoupling, I recommend maintaining a 2-inch gap between the wall and the doors. Also, try using a stud along the edges of the drywall for better adherence and an overall neat look.
Step 2
Use a few layers of tape to protect the floor and attach the frame to the doorway. You can use screws to easily install the doorframe. Depending on the floor material, you may require spacers to fix the frame along the floor.
Step 3
Next, you must add insulation to the wall but make sure you’re wearing all of your protective gear. Fiberglass insulation should not come in contact with your skin and eyes at any cost.
Step 4
Now, cut the two layers of drywall according to the size of your wall. I recommend keeping the seams staggered for easy construction and effective sound isolation.
For cutting, you can use a rock knife and break the seam by laying the drywall on a flat surface. Alternatively, you can use a power tool or saw for a neater cut.
Additionally, you can choose to cut the drywall big enough for a tight fit or leave a gap of around ¼ inches to fill up with soundproof caulk. However, ensure you measure the doorway properly before cutting the drywall to avoid any blunders in the following steps.
Step 5
Start by attaching the first layer of drywall, and use drywall screws every 16 inches. Finish it off by filling the seams with green glue. This step may not be necessary since it’s the first layer, but it does make the constructed wall sturdier and more soundproof.
Now, let everything dry for 24 hours.
Step 6
Take the second layer of drywall and lay it flat on the ground. Squeeze out two tubes of green glue all over the drywall, ensuring that every corner is covered.
Now, pick up the drywall and attach it to the previous layer before the glue dries out. Make sure you are quick and careful while performing this step. Use screws every 16 inches around the seam to keep the two layers affixed.
Step 7
Next, caulk the seams of the second layer of drywall; you could even use tape and mud for the same. Then add some texture if you’d like, and finally, paint the wall with your favorite color.
Apartment Wall Soundproofing Conclusion
Soundproofing your apartment is more than just using heavy curtains and thick blankets. You’ll require a professional or an experienced DIYer for properly soundproofing an area with soundproofing materials. And the fact that these soundproofing materials do not cost a lot of moneyis the cherry on the cake!
However, before I sign off, I’d like to bust some common myths about soundproofing. For instance, many believe that echo can be resolved with soundproofing, whereas, in reality, you’ll have to work on sound absorption to reduce sound bouncing.
Another myth is using soft furnishing and textile to block sound. While doing so can work in combination with other soundproofing methods, adding pillows and rugs alone will not do anything unless you address structural faults in your apartment. I suggest using acoustic panels and then topping them off with a sound-absorbing pillow headboard.
Installing an additional layer of acoustic drywall over an acoustic membrane between materials and closing all gaps with an acoustic sealant to block cracks and gaps in both new and existing walls is the most efficient noise reduction method but using resilient channels, applying blown-in insulation, or covering the entire wall with soundproof blankets and curtains are other common solutions known to reduce noise.
Whether you’re trying to get some shut-eye or working from home, a constant babble of noises from next door can become a source of frustration and affect your mental well-being. In such situations, the only sensible option is to soundproof existing interior walls through which the sound is heard.
My guide shares some of the best soundproofing methods by which you can do so!
Learn How to Soundproof Existing Wall
Soundproofing Elements To Keep In Mind
To ensure your soundproofing methods work properly, you must know what factors affect their effectiveness. While most materials function independently, they can be used together to deliver the best results when you soundproof existing walls.
1. Blocking Or Reduction
Sound waves function by creating vibrations in objects, which may be solid, liquid, or gas. But how easily they can travel through various objects depends upon the mass. A larger and heavier object will have more mass and it will be more difficult for sound waves to travel through it.
Thus, a solid surface that is dense enough can reduce sound when placed in the path of the sound wave, preventing them from traveling from one spot to another. What’s more, the solid surface needs to be boxed in at either end to prevent diffraction. Further, complete coverage of the target walls is essential to ensure effective soundproofing.
2. Absorption
Certain materials have sound-absorbing properties that help reduce sound and one common example of such a material is the fiberglass insulation used in walls. However, sound-absorbing materials are most useful in blocking mid- and high-frequency sounds that do not have as much energy as low-frequency waves.
To block low-frequency sounds, you will need to use a larger quantity of the material. Absorption efficacy and thickness have a causal relationship as far as the frequency response of a panel is concerned. In case the existing walls are hollow, the air is trapped inside, which vibrates when sound is created from sources like your neighbor talking or from traffic.
You can use insulation materials with sound-absorbing properties, such as low-density cellulose, to prevent this.
3. Mechanical Decoupling
Since sound waves travel through surfaces, it is possible to reduce sound by decoupling them. When two surfaces are not in contact with one another, it makes it more difficult for sound waves to travel through them.
For soundproofing an existing wall, decoupling can be done by using certain materials, such as studs.
4. Sound Damping
Sound damping is the process of eliminating vibrations that are causing the sound and may be done using an external agent. Some of the best items for sound damping are compounds made using a viscoelastic adhesive.
Factors To Consider When Soundproofing Existing Walls
1. Budget
The first thing to consider is how much money you are willing to spend on soundproofing walls. A larger budget will allow more extensive techniques to be utilized, while a limited one will restrict you to more basic methods. That said, the effectiveness of the methods does not depend on their cost.
2. Time
Time is another factor that will determine what methods you can use to soundproof existing walls. Different methods require varying amounts of time, and some may take longer than others to complete.
3. Noise
Which soundproofing method will work best will depend to a large extent on the source and type of noise. It may be a high or low-frequency noise or may be temporary, and such factors will affect how you can approach the problem.
4. Tolerance
The final factor to consider is your tolerance to sound. If the sound does not cause significant disturbance, you can get away with using basic sound masking techniques. On the other hand, if it is hard to ignore, more extensive methods will be required.
Types Of Noises
Before you can start soundproofing walls in your home, it is important to identify the source and type of sound to be blocked. Generally, two types of noise can cause disturbances - structure or impact-based sound and airborne sound.
1. Impact Based Sound
Impact-based sound occurs when an object strikes another object and causes it to vibrate. These vibrations travel through various surfaces in the building, such as the walls, until they reach your ears.
2. Airborne Sound
In the case of airborne sound, you cannot feel the vibrations through various surfaces but can still hear the sound. Some examples include the voices of your neighbor talking next door or the sound of traffic from outside.
Soundproofing An Existing Wall - Best Techniques
1. Using An Acoustic Sealant
If your existing interior walls have cracks or holes, there is enough space for sound to pass through. To prevent that from happening, apply acoustic sealant or caulk in the holes to fill them, creating an airtight seal.
Apart from the cracks, make sure to apply the sealant around the edges of the walls. This will reduce both impact-based and airborne sounds from passing through those walls.
But in most situations, that will not be enough to drown out the noise completely since vibrations can travel through cracks and gaps in other surfaces. That is why you should look for such openings in windows, doors, and other areas of the room to seal them up.
Once the caulk has been applied, you need to seal up the light switches and electric fixtures as well, which will require plate insulation gaskets. These styrofoam pieces can be placed around the outlets to prevent vibrations from traveling through them.
When using caulk, just make sure not to use regular latex caulk since that does not have good sound absorption (acoustics) capabilities.
2. Using Green Glue To Install Another Drywall
Drywalls are easy to install and highly durable, which makes them suitable for construction or remodeling jobs. You can install additional drywall to separate the main wall, allowing sound waves to bounce off against the drywall.
However, before using this method, make sure to use sound insulation materials on the surface of the wall. Green glue is well suited for this purpose since it can be applied easily and is inexpensive. You need to apply it between the drywall layers so it can effectively absorb vibrations of low-frequency, such as construction noise.
Once the compound has been sprayed, attach the drywall and use acoustic caulk to fill up any cracks and gaps. Alternatively, you can use sheets of acoustic drywall that have a better sound transmission class.
3. Using Resilient Channels
This method works on the principle of decoupling and requires isolation clips or metal channels for superior noise reduction. Once installed, you will get a separate space within a room where sound cannot reach. After that, drywall can be installed to isolate this structure from the rest of the room. This makes it much more difficult for sound waves to travel through.
Isolation clips used for this purpose usually come with rubber feet that can absorb sound vibrations. You can even apply some insulation and acoustic caulk in the space to further reduce incoming sound and keep the room quiet.
Using resilient channels can be very effective if you want to soundproof walls, but it is one of the more expensive methods. And it will require a lot of effort since the existing drywall will need to be removed before the channels can be installed.
4. Applying Blown-In Insulation
Another method that utilizes the principle of sound absorption is the application of blown-in insulation. Blown-in insulation is a material similar to foam that can be blown into your wall with the help of a blower machine for noise reduction.
This low-density cellulose insulation traps air pockets in the wall, thus reducing echoes generated from airborne noise. The advantage of using this material is that it is completely non-toxic, is manufactured after recycling, and is fireproof.
On the other hand, if you have limited time, using fiberglass may be a better option since it dries quickly without any heat. Installing blown-in insulation can also be quite complicated, so it is best to get it done through a professional.
5. Hanging Soundproofing Blankets
Soundproof blankets can also be used for noise control since they are good at absorbing sound waves from walls and work just like foam panels.
To put up the blankets, use heavy-duty adhesive hooks or curtain rails. This method is easier than those that require decoupling your walls or using acoustic tiles and is not as invasive.
A soundproof blanket absorbs vibrations rather than reducing them, and its effectiveness depends upon its weight. Heavier blankets work better for soundproofing purposes than lighter ones. Generally, such blankets may not be able to block out noise completely, but their foam can absorb sound waves and prevent them from bouncing off walls.
6. Using Mass Loaded Vinyl
Mass-loaded vinyl is a highly dense material made of polyvinyl chloride similar to natural rubber and is often used for sound masking. The extra mass can be very effective in blocking out sound to create a quiet space. It is also very flexible and environment-friendly and provides an additional layer over the walls for sound reduction.
MLV is a popular option as it prevents sound vibrations and waves from traveling through the walls. To use mass-loaded vinyl, install a double-layer drywall on top of it horizontally or vertically using a screw or nail. Then, apply an acoustical sealant to the seams to seal them and complete the drywall installation.
7. Applying Soundproof Paint
While it is not the most effective method, using sound dampening paint is another option worth trying out. It can add additional mass to dampen the sound waves and reduce noiseeasily. You can even find soundproof paints that contain latex, which offers the additional advantage of preventing sound waves from bouncing around the room.
When using soundproof paint, keep in mind that it is most effective in reducing high-frequency sounds rather than low-frequency ones. This means noises, such as that of an airplane, chainsaw, etc., can be insulated very well.
Also, when using soundproof paint, conducting proper research regarding the brand is recommended since it is not as commonly used as acoustic foam tiles or MLV.
8. Rearranging The Furniture
An empty room can make it easier for sound to travel through walls, so filling it with items can reduce noise without any high-end soundproofing materials. But this method will also not be as effective as mass-loaded vinyl or decoupling.
The easiest way to reduce soundis by adding or rearranging the furniture in the room. Chairs, tables, sofas, and other furniture can help prevent sound waves from reaching the walls, but you need to locate walls that are most exposed to noise.
In most cases, the interior walls require soundproofing since they are thinner than exterior walls. Heavier and thicker furniture, like a bookcase, wardrobe, or armchair, work well to block noise since they have a lot of mass.
Additionally, consider placing a rug or carpet on the floor to reduce the amount of sound that travels through the flooring.
9. Using QuietRock
QuietRock is a relatively new type of drywall developed especially for removing unwanted noise in a room. This method is similar to the one where you install an additional drywall layer but requires the use of QuietRock instead of drywall.
One sheet of QuietRock is as effective as four sheets of regular drywall. You can install QuietRock by screwing it onto the existing drywall, while applying Green glue between the layers will help you get even better results.
10. Installing Acoustic Foam Panels
Acoustic panels made from foam are designed to block noise, which they do by absorbing sound waves. These panels are often used in recording studios to ensure minimal interference from unwanted sounds. Hence, they are available in various thicknesses ranging from one inch to four inches as well as multiple color options.
To install acoustic foam panels, you need to use a special adhesive, which makes the process quick and simple. Aside from preventing sound from traveling through walls, acoustic foam panels can help improve the acoustics of any room.
11. Hanging Acoustic Fabric Panels
Like acoustic foam panels, you can use fabric panels which are great at sound absorption and are also aesthetically attractive. Acoustic panels can absorb vibrations easily, which makes them a good option for improving the acoustics of a room.
You can hang these panels in various arrangements as needed for absorbing ambient noise within a room. They can even be used on top of the wallpaper, along with other sound reducing measures, to keep a room insulated against sound.
12. Using Soundproof Curtains
If you want a quick and easy soundproofing solution, consider using soundproof curtains close to your walls. These curtains are available in various designs and colors, can easily be hung using regular curtain rods without much effort, and keep a room relatively quiet.
Multiple curtains can also be used in a space and you can remove them when needed. Soundproof curtains can be placed in front of glass windows to reduce the sound coming from the other side, or use them as room dividers. And since these textile fabrics are available in various patterns, colors, and prints, you can find one that matches the decor of the room.
Tip
When soundproofing walls, keep in mind that sound energy can enter a space through other areas as well, such as doors, windows, and even the ceiling. You can use solid core doors or a dropped ceiling to ensure silence in a room.
Soundproof Existing Wall Conclusion
These were some of the best Do-It-Yourself soundproofing techniques for existing walls without removing drywall. They do not require a big budget, and most of them can be completed within a short period of time.
However, since houses vary in their design and construction, not every method will prove suitable. But many of the methods in this guide can be adjusted and customized easily depending on the situation.
It is also a good idea to try out multiple methods of soundproofing rather than relying on a single one since the chances of success are higher.
The most effective way of soundproofing a door is to apply soundproofing rubber to the door perimeter or use weatherstripping. Other methods involve installing a door gasket, acoustic panels or solid core doors to absorb sound waves effectively.
When compared to old houses, modern-day apartments are noisier due to faulty construction, open floor designs, and extensive use of entertainment devices. These make soundproofing a necessity in many situations, such as if you have neighbors who create a ruckus or when working from home.
In such cases, soundproofing the door should be the priority since it is the main entrance to the house. So, my guide explains the most effective methods to accomplish that.
How To Soundproof A Door
Best Door Noise Reduction Techniques
1. Installing A Door Gasket
When sound travels through gaps, it gets amplified. Such gaps are usually present around the door frame, which can be blocked using a door gasket. A door gasket is generally made from high-quality neoprene and attaches easily to the top and sides of the door jamb, effectively blocking out sound.
You can find many types of door gaskets on the market to soundproof your door, even vinyl and adjustable ones. These also block moisture, dust, and light and can be used on doors that may not be rectangular or are warped.
2. Applying Soundproofing Materials To The Door Perimeter
Another excellent method you can try is to apply soundproofing materials to the door perimeter. Such materials may be made from highly dense neoprene but will require the removal of any existing molding around the door.
Once the molding has been removed, you can apply the material around the door edges. And to make this technique more effective, apply some insulating sealant or acoustical caulk in various gaps and cracks.
3. Using Weatherstrips
Weatherstripping is one of the most common ways of soundproofing a door. This allows you to fill in the gaps between the door frame and the door through which sound enters, while ensuring the door closes tightly.
When choosing weatherstripping, you should go with higher quality options since they can last for a longer period. To install it, first clean the area properly where it has to be applied and make sure that it is completely dry.
While applying, use a lot of pressure to create an airtight seal to block sound waves. You can also nail it to the door surface, as it will even prevent the door from slamming shut.
4. Installing A Door Sweep
In many cases, the largest gap that exists between a door and the door frame is at the bottom. To block sound from entering through this gap, you can install a door sweep at the base of the door. These are usually constructed using natural rubber, silicone, or dense metal like aluminum available in various sizes.
They are also widely compatible, can be installed under exterior and interior doors, and offer additional benefits besides soundproofing. For instance, a door sweep prevents bugs and insects from entering your home from under the door. And they can help control the temperature by covering the gap from where air can enter and escape.
That being said, keep in mind that installing a door sweep is not very simple. The reason is that most door sweeps have to be installed by drilling screws into the door, so you will need a drill, screws, and a screwdriver.
But finding a door sweep that is the perfect size for your door can take some time. Hence, getting an automatic door sweep is another option you can consider.
5. Getting A Solid Core Door
If you are willing to invest in long-term soundproofing techniques, then getting a solid core door might be the best option. A hollow core door is made using thin wooden sheets and tends to wobble, which is not the case with solid ones. Most interior doors have a hollow core, while exterior ones have a solid core.
You can get a metallic door or solid wood doors that absorb sound more effectively. Remember that wooden doors tend to dampen sound rather than block it completely, while metallic ones can reflect the sound waves back.
6. Applying Mass Loading Vinyl
Vinyl sheets provide additional mass to the door and help prevent sound waves from traveling through. Applying such sheets is also easy; you can get one or more heavy vinyl sheets and cut them to match the door size. These can then be applied to the door using sound-dampening glue or pressure-sensitive adhesive strips.
Alternatively, mass-loaded vinyl sheets can even be installed within the core of the door.
For best results, cover as much surface of the door as possible with the sheet, and you can even apply a double layer, though it can cost more money. These panels are usually available in thicknesses ranging from 1/16 to ¼ inch.
7. Installing Acoustic Panels
If you’re looking to soundproof your door without spending a lot, installing acoustic panels might be the perfect solution. Acoustic or soundproof panels are made from very dense foam or polyvinyl chloride, which provides greater air resistance. When sound waves hit these surfaces, they tend to bounce back rather than travel through.
The biggest advantage of such panels is that they do not cost as much as more expensive soundproofing solutions, like fiberglass soundproofing blankets, and can be used with drywall. Also, acoustic panels are made from many different materials, like wood and foam, and can even be used on the ceiling.
You can use adhesive strips to install soundproofing panels, but some people prefer splitting open the door and installing these panels within. But this is a very complicated process, and it might just be easier to get a customized door with such panels already installed.
8. Filling Cracks Using Gap Foam
Foam sealants are available for filling cracks and gaps in doors through which sound waves travel. These sealants expand as the foam grows, creating an effective barrier against vibration.
However, these tend to be most effective when a highly dense sealant is used since it has a good sound transmission class. In other words, the denser the foam, the better the result.
Gap foam is usually applied in the form of a spray, which should be sprayed from the inside before moving toward the outside of the door. Also, it is a good idea to apply the foam to door knobs that are hollow since these have holes that go right through.
Generally, gap foam is applied after other soundproofing methods have been used, such as acoustic panels and door sweeps. Or you can attach foam flooring tiles to the door using Velcro pads.
9. Using A Soundproof Blanket
Soundproofing blankets are usually made from fiberglass, a material that is excellent for absorbing sound. These are quite easy to install and can be placed or removed on top of the door as needed, but prove quite expensive.
An alternative to a costly soundproof blanket is a moving blanket, which is a textile made using durable fabric. But this usually lacks grommets for attaching and may not be available in the appropriate size. Also, such a blanket can affect the appearance of your door, so it might be ideal for an interior door that is usually hidden.
A soundproof blanket is best for places like a recording studio due to its excellent sound absorption capability. To install a soundproofing blanket, place suction cups on the back of the door from which the blanket can be hung.
10. Installing Soundproofing Composite Material
Composite soundproofing material consists of a noise barrier and a sound absorption material for use inside, outside, or under the door. Such material is available in the form of thick sheets that are quite heavy and can prevent sound transmission through the door.
The composite material can be screwed or glued onto the surface of the door. Soundproofing composite material can also be used as a mat under the door, but when used like that, it should cover the gap between the door and the floor.
Alternatively, you can use a custom-made door that has composite material within it.
11. Applying A Fiberboard
Fiberboards are similar to composite materials since they can be used on the outside and inside of the door. The difference between the two is that composite material is much more malleable and can be bent easily.
To install it, open the door and insert a fiberboard within to ensure proper sound insulation. You can place the fiberboard inside, outside, and around the sides of the door handle and frame to fill in cracks or gaps.
Keep in mind that a denser board will be better for soundproofing than thin ones, like plywood.
12. Using Sound Isolation Padding Tape
You can use sound isolation padding tape, which can create an airtight seal around the door and even serve as an alternative sound barrier similar to door gaskets and weatherstripping. Using sound isolation padding tape is also among the most cost-effective ways if you want to ensure complete silence.
Padding tape is generally used to install wallboards and is self-adhesive. So, it can be applied easily and even be used on windows as a temporary noise reduction measure until you decide on a permanent solution.
13. Getting A Soundproofing Kit
If getting individual soundproofing materials like panels and blankets sound too complex, you can get a premade soundproofing kit. Such kits include all the necessary items required for noise control, such as acoustic panels, door sweeps, weatherstripping, composite material, fiberboard, etc., and are easily available in the United States.
A soundproofing kit usually comes with items like water-based caulk, which can be used to fill up cracks and holes around the door. To do so, apply a bead of caulk into the crack while wiping away excess amounts using a utility knife. Similarly, in case the door has glass installations, you can use silicone to block sound.
14. Using Sound Absorbers
Another way of making a door soundproof is to absorb sound coming from the other side of the door. This is because the level of sound that a door can block will depend on the sound coming from the other side.
Many items usually present in a room can help reduce noise, such as wall pictures, floor rugs, furniture, and more. If the room on the other side of the door does not have many sound absorbers, more sound will reach the door and pass through it.
So, consider adding more furniture or items like rugs to the room on the other side of the door. This will reduce the need for soundproofing the door significantly. You can get an area rug or mat that can prevent sound from bouncing off the floor and creating echoes. Similarly, placing paintings on the walls will make the room much quieter.
15. Installing Meeting Stiles
In rooms with double doors, it may not be possible to soundproof them completely. For that, you can use meeting stiles which ensure a tight seal between the doors when they close. Meeting stiles may be made from various materials, such as composite material and rubber.
Installing meeting stiles is not a very complex process and doesn’t take much time. You just need to select the right-sized stile and screw it in place using bolts to check whether the doors shut tightly.
16. Using Acoustic Door Thresholds
Using an acoustic door threshold is another method you can try if you’re wondering how to soundproof a door. Such thresholds are generally made of neoprene and have rubber protrusions that prevent sound from passing through gaps between the door and frame. However, they have to be attached to the floor instead of the bottom of the door, unlike door sweeps.
This allows the door to be opened or closed without the sweep being dragged across the floor, which can itself become a source of noise. An acoustic threshold is often essential in rooms where the floor is carpeted since door sweeps are not very effective with a carpet.
Thresholds may be available in a flat shape or have an upward-facing extension to create a double seal when used with a door sweep. Here, I’d like to mention that apart from soundproofing door thresholds, it’s important to ensure that all perimeter gaps are sealed properly. Even a small gap can reduce the efficacy of a soundproof door.
17. Applying Soundproof Paint
Few people are aware that you can use soundproofing paint on doors for noise reduction. The reason is that such paints can only block mid-range audio frequencies, such as the sound of people talking. So, higher frequency acoustics, such as that of a flute or a phonograph record, or low-frequency sounds like that of traffic will not be reduced.
Soundproof paint is most effective when used on a large, flat surface but it can make the surface texture uneven. That is why you will need to apply multiple coats to make the coat a bit thick.
But this is an excellent alternative if you’re looking for an inexpensive method to make any space quiet. Just make sure to use other soundproofing methods along with it to get the desired results.
18. Filling The Door With Sand
You can use this method to soundproof a hollow door, but it is extremely complicated and will require a lot of preparation. The door will first have to be cut using a hacksaw so its interior can be filled with sand and sealed properly.
Also, to attach the door back, you will require industrial-strength door hinges since normal ones can be pulled right out due to the weight of the sand-filled door. An industrial-strength hinge will remain connected to the door jamb and support even the heaviest doors.
Once the door is reattached, it will be able to block out all sound completely since the sand will act as a sponge for maximum absorption.
19. Installing A Door Seal Kit
An acoustic door seal kit is an excellent solution for people who want to soundproof a door but have a limited budget. Such kits are used to seal the air gaps around a solid core door and are excellent for noise reduction purposes.
While it is possible to use a door seal kit on hollow doors, it is most useful when used with solid-core ones. When using such a kit on a hollow door, combine it with a soundproof curtain or blanket to enhance its soundproofing ability.
20. With A Soundproofing Curtain
You can use a soundproofing curtain to reduce the noise that passes through a door, but it is not an easy solution. This is because curtains hang in front of the door, with the sides left open, providing gaps through which sound can travel.
That is why when using a soundproofing curtain, you should try to attach them in a manner that creates a tight seal around the door. You can even sew different sides of the curtain to make it thicker but make sure it covers the entire length and width of the door.
Soundproof curtains are generally more affordable than soundproof blankets and serve as great temporary solutions for noise control.
Tip
If you’re looking for a temporary, tool-free solution without wanting to spend anything, use household items to soundproof a door. For instance, the gap at the bottom of the door can be stuffed with rags or towels to prevent noise from filtering through.
The Importance Of Soundproofing Your Door
Since doorways are the largest opening in a room, they are responsible for allowing maximum noise to pass through. This means any soundproofing treatment should make them the priority, so here are a few reasons why soundproofing the door is crucial.
1. Doors Always Allow Sound To Travel Through
Even when a door remains shut, the gaps around it, especially at the bottom, allow noise to leak through. In addition, most interior doors are hollow from the inside, so they do not offer any obstruction to sound waves. Due to these reasons, doors allow more sound inside a room than any other opening.
2. Soundproofing Can Also Provide Temperature Insulation
Many soundproofing materials provide excellent temperature insulation and keep the room temperature at the required level. This happens because these materials prevent air from passing through them, so you don’t have to experience extreme temperatures. And because of this, the thermostat will require less energy and time to make the room cooler or warmer.
3. For Privacy
Soundproofing the door can ensure proper noise controland privacy, preventing others from hearing what is going on inside your home. Alternatively, it can reduce disturbances in various rooms, especially important if you are planning to create a home music studio or have pesky neighbors who like to eavesdrop.
4. To Improve The Value Of The House
Whether you’re planning to sell your house in the future or making renovations and repairs for the long term, soundproofing can help. People will generally pay more for a house that has soundproofed rooms, and such houses are perfect for selling to music production studios.
5. For Fire And Smoke Protection
Soundproofing a door is also essential for protection against smoke and fire. Since door soundproofing essentially involves closing all gaps around a door, the same can be effective in blocking smoke and flames from getting in.
Things To Keep In Mind When Soundproofing A Door
Before you start soundproofing your doors, here are a few things to keep in mind.
1. Begin With The Most Affordable Solution
You can find soundproofing solutions at different price points, ranging from budget options to extremely costly ones. But not every solution is perfect for each home. So, it is a good idea to go with the most affordable option in the beginning before moving on to high-end solutions if that does not work.
Starting small will also offer the advantage that it will likely not require much time and effort. Plus, these are good techniques for people who do not want to make a lot of changes to the door, floor, or surrounding spaces.
2. Find Out Where The Noise Is Coming From
The type of soundproofing treatment which will be most effective will depend on where the sound is coming from. For instance, if the noise is coming from outside, the front and back doors will require more intensive treatment than the interior ones.
Similarly, if you have a noisy neighbor, you may require an effective soundproofing treatment for the door of the room.
3. Hire A Professional If You Find The Project Challenging
A DIY soundproofing and home improvement project may not always be successful, but this does not mean it cannot be done. If you find the project challenging, simply hire a professional to get the job done. Plus, many professionals can complete soundproofing projects at affordable rates.
Some Soundproofing Myths You Should Know About
There are several myths surrounding soundproofing, and knowing about them can be very helpful when undertaking such a project.
1. Glue Or Paint Can Be Used For Soundproofing
Sound waves can be obstructed by materials that have high density and mass. So, materials like glue or paint, which lack these properties, are not very effective for the purpose. That said, applying multiple coats of thick paint specially developed for the purpose can help reduce soundtransmission.
2. Rugs Are Very Effective For Soundproofing Purposes
Rugs can be used for absorbing sound but cannot block out noise completely. The reason is that even the thickest and largest rugs do not have enough mass to absorb all sound in the vicinity. That is why they have to be used along with other soundproofing methods.
3. Insulation, Foam Blocks, And Regular Blankets Can Be Used For Soundproofing
In this case, also, it is possible to reduce the sound but not get rid of it completely for the same reason. Generally, if you’re using such materials for soundproofing, make sure to use heavier and thicker blankets or foam blocks. They have more mass and thus are better at blockingsound.
4. Curtains Are Very Effective For Soundproofing Purposes
As explained above, curtains can help make a door insulated against sound, but they need to be installed properly for that. This means there should not be any gaps around the door or curtain through which sound can travel.
5. Egg Cartons Can Be Used To Soundproof A Door
Egg cartons can be used to reduce echoes in a room. However, they do not offer the same results when used for soundproofing a door.
How To Soundproof A Door Final Thoughts
Soundproofing offers several benefits, such as preventing disturbances and ensuring privacy. Generally, I recommend using more than one method to get better results, especially since not all the techniques are suitable for every house.
But if you are unsure about implementing these methods, the best thing to do is call a professional soundproofing service. Such companies send soundproofing experts to your home for a detailed inspection and help complete soundproofing quickly.
It may cost you between $500 and $10,000 to soundproof your rooms. However, different factors need to be considered for setting the soundproofing budget. These include the room size, the type and number of rooms, materials used, sections of the room that need soundproofing, and labor costs. One of the most important factors is how much sound we need to prevent from entering or leaving.
The levels of sound pollution are on the rise nowadays. Because of this reason, soundproofing your rooms has become a necessity.
In fact, that is the only way you can get some peace at home. Or else you will lose your sleep from all the external noises and keep your privacy at stake!
But the question many people have is - how much does it cost to soundproof a room? That’s what this guide is all about, so read on…
How Much Does It Cost to Soundproof a Room?
The Basics Of Soundproofing A Room
Before I get to the main discussion, let me give you a quick rundown of what soundproofing is. It is essentially a process to minimize or eliminate the propagation of sound. In other words, it blocks all external sounds from entering the room and prevents the sounds inside the room from going out.
You can soundproof any room in your house if you wish. However, it is most common for rooms that are frequently lived in, such as the bedrooms and living areas. On that note, you can soundproof different parts of a room as well, such as the wall, ceiling, floor, door, window, and even the curtain.
As a matter of fact, you will need to insulate these parts individually if you want to make your whole home soundproof. But if you want to make any single component soundproof, you can do that too.
How Does Soundproofing Work?
In order to understand how it works, you will need to delve a little bit into the science of acoustics. Any sound that you hear inside a room is a result of acoustic vibrations of a particular frequency reaching your ears. However, the source of these vibrations may vary, which gives rise to two types of noise - airborne noise and impact noise.
Airborne noise is the one that is generated from ambient sources, such as people talking, dogs barking, watching TV, and listening to music. On the other hand, impact noise is generated when two surfaces or objects strike each other. Some examples of impact noise are the sound of walking, using a drilling machine on the wall (this is a combination of airborne and impact), bouncing a ball off the floor, and so on.
It is a known fact that a sound wave travels faster through solid objects like walls than through the air. Therefore, the sound vibrations from an impact noise can travel directly through the walls. In contrast, the vibration generated from an ambient noise source travels through the air before reaching the walls or floor of your room.
The basic goal of soundproofing is to eliminate both types of noise. And because of that, the process involves using soundproofing materialsto block the propagation of acoustic vibrations. In other words, these materials absorb the noise to give you a quiet experience inside the room. Conversely, it prevents any sound from leaving, meaning that you can listen to your favorite music or reorganize your room without bothering the neighbors.
Why Should You Soundproof Your Room?
Soundproofing your room is necessary because it gives you (and your neighbors) a peaceful environment to live in. Besides, it ensures that your apartment is compliant with the sound transmission class (STC) ratings.
As per the International Building Code 2021, a building needs to have an overall STC rating of 50 to ensure compliance. Thus, if your apartment has an STC rating below that, it is not compliant with soundproofing regulations and can land you in legal trouble. So, if you wish to avoid that, you should make your room soundproof as soon as possible.
Which Parts Of Your Home Need Soundproofing?
I have already stated that you can soundproof different parts of your room, as well as the different rooms of your house. In fact, it is a great idea to soundproof your entire apartment in one go. However, doing so can be an expensive affair, and your bank account might not allow it.
So, it’s a good idea to soundproof some sections first and deal with the remaining parts at a later time when you have the money and resources. That way, you can manage the process better without going broke.
In that context, many homeowners may feel some degree of skepticism about soundproofing their doors, windows, and curtains, considering that they occupy very little area in your home. On that note, people who live on the first floor and on the topmost floor may feel skeptical about soundproofing their floor and ceiling, respectively.
Likewise, some people may think that soundproofing basements, garages, and attics are unnecessary since they are not lived in as much as the other rooms.
To a certain extent, I can understand their skepticism. But if you want to be on the safe side, it is best to soundproof all of them. Each of them contributes to improving the STC rating of your apartment, and the higher the rating, the better it will be for you.
How Much Does It Cost To Soundproof Your Room?
Now that you have some idea about soundproofing, it’s time to get to the business end of the topic. To make your home soundproof, you will need to spend between $500 and $10,000. In this regard, the costs of soundproofing may vary greatly based on different factors. I have listed each of these factors below.
Room size
Acoustic performance requirements
Number of rooms
Materials used
The section of the room
Labor requirements
The first two factors are pretty self-explanatory, and they are the first things to consider when looking to undertake a soundproofing project.
All of these factors are interrelated, and they need to be considered together to determine the cost. In other words, you cannot afford to ignore any of them, as that can drastically impact your budget calculations.
Keeping that in mind, I have discussed the soundproofing costs in greater detail in the subsequent sections.
A. Soundproofing Costs By Size
The cost of soundproofing a room depends on its size, which is usually measured in square feet. For soundproofing a finished room, the standard rate is roughly $10 to $30 per square foot of space. On the other hand, for a room that is under construction, the average cost of soundproofing varies between $12 to $25 per square foot of space.
Therefore, after measuring the dimensions of your room, you can easily calculate how much it will cost you. It goes without saying that you will need to shell out a lot more money for soundproofing a large room than a small one.
Of course, that is not the only factor you need to consider while making the budget. You also need to take into account the overall complexity of the project. For instance, soundproofing one square foot of area on your ceiling requires more effort than soundproofing the same area on your wall. So, the costs for the former will naturally be higher than the costs for the latter.
B. Soundproofing Costs By Rooms
The next factor to take into account is the room type. Some rooms, especially the ones that are lived in more, require greater soundproofing than others. For example, your bedroom needs a lot of soundproofing since you use that room for sleeping. In contrast, soundproofing your attic will cost a lot less since that room is not used as much.
With that in mind, here are the price ranges for soundproofing the different rooms of your house. Note that these are only the average prices, which means that the costs you need to bear might vary depending on the size, complexity, and other factors.
1. Costs For Soundproofing Bedrooms
The bedroom is one of the most common areas that people soundproof in a home, and with good reason. It is a place that is used for sleeping, so it needs to be free from outside noise and disturbance.
For that purpose, you need to soundproof the floor and the ceiling in addition to the walls. Likewise, it is important to soundproof the doors and windows of the bedroom to ensure maximum sound insulation.
Depending on the size and the number of tactics used, soundproofing a typical bedroom may cost between $500 and $5000.
2. Costs For Soundproofing Garage
Another area of a home that is commonly made soundproof is the garage. Besides storing your vehicles, a garage is often used as a utility room for do-it-yourself (DIY) projects. Apart from that, many people use their garages to practice music. All of these activities generate noise that might bother your neighbors, which makes it important to soundproof this room.
Soundproofing a whole garage can be an expensive affair because the garage typically does not have any sound-absorbing materials. This means that you will need to soundproof walls, doors, and the floor of the garage. If there are any windows, you will need to soundproof them too. All in all, if you want to soundproof your garage fully, it might cost you between $1000 and $5000.
3. Costs For Soundproofing Entertainment Rooms
This is the part of your home that you use for entertainment purposes. It generally contains a home theater, a music system, a gaming setup, and other means of entertainment. So, it can get quite noisy inside, which makes soundproof insulation essential for this room.
Usually, the level of soundproofing will depend on how you use the room. If you use it only as a home cinema, the level of soundproofing will be slightly different than what you need for soundproofing a gaming room.
On the contrary, if you want to soundproof the room for music, you will need to consider the acoustics of the room. This way, you can avoid disturbing your neighbors and ensure good sound quality within the room.
In any case, soundproofing your entertainment room can cost anywhere between $1,000 and $10,000.
4. Costs For Soundproofing Bathrooms
Do you consider yourself to be a bathroom singer? If you do, then it might be a good idea to soundproof your bathroom. Now, I am not judging your musical prowess, but your bathroom singing might not be appreciated by the neighbors, especially if they are trying to get some shut-eye.
Thankfully, soundproofing your bathroom shouldn’t be a particularly expensive affair, considering a bathroom is relatively smaller in size than the other rooms. However, to achieve complete sound insulation, you might want to install soundproof windows and a sliding glass door, among other things. Such components are a bit pricey, which can increase the costs.
No need to worry, though, for the prices will not be as high as other living areas in your home. In that context, the cost of soundproofing your bathroom may range between $500 and $3,000.
5. Costs For Soundproofing A Home Gym
If you have a gym at home, then it is a good idea to soundproof that room. A home gym typically contains mechanical equipment that generates a fair bit of noise. Also, many home gym users have sound systems to work out while listening to music, which creates even more noise. Besides, you wouldn’t want your neighbors to hear you huffing and puffing in the gym, believe me!
That is why most soundproofing projects for the gym should focus on the walls, ceiling, and floor. The floor, in particular, needs to have adequate soundproofing, as impact noises from gym equipment like weights will travel directly through it.
With all things considered, soundproofing the gym will cost you between $500 and $7,500, depending on the size and the type of gym activities.
6. Costs For Soundproofing The Kitchen
Cooking and its associated activities make a lot of noise, which makes it essential to soundproof the kitchen. You can stop sounds from entering or exiting the kitchen by installing soundproof drywall, insulated windows, and acoustic panels on the walls and ceiling. Some of these components can be a bit expensive, so you might need to dish out between $1000 and $6000 to make your kitchen soundproof.
C. Soundproofing Costs By Materials
Besides the size and number of rooms, the materials used play a major role in determining the costs. In this regard, I am referring not only to the soundproofing material but also to the materials used in the room. Both of them need to be considered if you are looking to soundproof your whole home.
Each part of your home is made from a different material. The sound waves travel differently through each material, which is why the soundproofing solution needs to be implemented accordingly.
For example, the floor is usually made from wood, tile, or stone, and in some cases, even concrete. The first few materials are not very good at absorbing sounds, and as a result, they will require greater soundproofing.
On the other hand, the walls and ceiling are normally made of concrete slabs or drywall panels. These materials can absorb sound to a greater extent, which means that the level of soundproofing required here will be less.
That is why it is important to consider the material used in the construction of the room, as it can help save a lot of money. With that being said, below are some of the most common materials used in soundproofing projects.
1. Drywall
Drywall is the material that is most commonly used for insulating existing walls and ceilings, as well as floors in some cases. Soundproofing drywall sheets are typically made from specialty materials that are acoustically enhanced and have a high density. Some manufacturers may use multiple layers of insulating materials to reduce sound leaks. In any case, it will cost around $30 to $40 per sheet of drywall.
For homes that have paper-thin walls, it is advisable to use double drywall to eliminate the propagation of sound. In that case, the costs will double, so you need to keep that in mind while preparing the budget.
2. Acoustic Foam Panels
Acoustic foam panels are commonly used for soundproofing walls and, in some cases, the ceiling too. The polypropylene foam materials absorb all airborne noises and minimize the intensity of impact noises traveling through the wall.
Such material is relatively inexpensive, and it will cost you around $2 to $3 per square foot of panel. Thus, it is a great soundproofing method if you are on a limited budget.
3. Acoustic Tiles
Acoustic tiles are generally made from sound-insulating materials like natural rubber or foam, which makes them different from conventional tiles. They can be used for walls, ceilings, and floors and can eliminate most airborne and impact noise.
The tiles are square-shaped since it helps make the installation process easier. There are different tile sizes available today, ranging from 4-inch square tiles to 20-inch square tiles. On that note, a 20-inch square acoustic tile costs around $10 to $20.
4. Mass Loaded Vinyl
Mass-loaded vinyl, or MLV, is a highly effective soundproofing material that is typically installed on the walls and the floor. It is often made from polyvinyl chloride (PVC) and comes in the form of rolled sheets that need to be placed over the wall or the flooring. They can also be placed along the inner linings of the walls and floor, but doing that requires a lot more work.
On average, a single roll of MLV covers 50 square feet of space. Each roll costs between $100 and $200 overall, or $2 to $4 per square foot.
5. Carpets
Carpets are used to soundproof floors, and they are fairly effective at eliminating most airborne and impact noise. They are made from sound-insulating fabric materials arranged in the form of a shag pile, which determines the carpet thickness. The thicker the carpet is, the more sound it can absorb, and vice versa. In any case, using carpets for your floor will cost you $3 to $10 dollars per square foot.
Tip
If the floor is too thin, you can spend a little extra to purchase a soundproof carpet pad. When placed below the carpet, it can enhance the insulating capabilities of a carpet considerably. Such a pad is made from natural rubber or vinyl, which are some of the best sound-insulating materials around.
6. Soundproof Curtains
Sound-dampening curtains are commonly used on the doors and windows of a house. They are made from sound-absorbing fabrics, similar to carpets. Likewise, the thickness of the curtain determines how effectively it can block out sounds.
They are ideal for use in living areas and in the room of a child. As for the costs, they can vary based on the thickness and quality of the fabrics used. But on average, buying a soundproof curtain will set you back by $100 at most.
D. Soundproofing Costs For Different Parts
Now it’s time to discuss the costs of soundproofing based on what part of the room you wish to work on. Such an approach allows you to soundproof the most concerning areas first. What’s more, it is a great strategy for those who have a short budget.
In that context, the key areas that you need to consider are the walls, floor, ceiling, doors, and windows. The soundproofing methods and materials for each section are different, which gives rise to cost differences for each of them.
Some of these methods are only used for a finished room, while others are implemented when the room is under construction. The methods used for the former are usually a lot cheaper but are relatively less effective. On the contrary, the methods used for the latter are a bit more expensive but are highly effective in blocking most sounds from the room.
Anyways, I have discussed the costs for soundproofing different parts of the room below.
1. Wall Soundproofing
The most important area of the room that needs soundproofing is the wall. You can choose to soundproof the walls either during construction or when the room is finished. If you choose the former, you need to use products such as Rockwool sound insulation or mineral wool batts.
These are stuffed between the wall frames, which helps to provide insulation against sound. The first option will cost you $1 to $2 per square foot, while the latter will cost you $2 to $3 per square foot.
You can also opt for acoustical caulk to seal the wall layers. It acts as an adhesive as well as a soundproofing sealant, which means you get multiple uses. That said, you will require roughly 28 to 30 ounces to cover a medium-sized wall, and it will cost you around $15 to $30. Apart from that, you can opt for double drywall during construction, which I have already discussed before.
If you want to insulate a finished wall, you can go with acoustic foam panels and tiles, both of which I have mentioned in the previous section. As an alternative, you can go with soundproof paint, which absorbs sounds much better than regular paint. It costs $30 to $40 per gallon or $2 to $4 per square foot.
Overall, it will cost you anywhere from $100 to $350 to soundproof a single wall.
2. Ceiling Soundproofing
The average cost to soundproof the ceiling of a room is around $200 to $500. It may vary based on the methods chosen, the area, and labor costs.
Similar to the walls, you can choose to soundproof the ceiling either when it is finished or when it is under construction. If you choose the latter, you can follow methods that are similar to soundproofing a wall. In the case of the latter, you can choose between installing acoustic foam panels or mass-loaded vinyl.
Another alternative is to use soundproof fiberglass panels, which will cost you $1 to $4 per square foot. In addition to damping sound, it makes the ceiling look visually attractive, especially if you have a dropped ceiling. That ultimately makes it an appealing choice for many homeowners.
3. Floor Soundproofing
Just like the walls and the ceiling, you can choose to soundproof the floor either during construction or when it is finished. Whichever option you choose, it will cost you between $200 and $2000 to soundproof the floor entirely. Of course, the area, labor costs and the number of rooms need to be considered too, as usual.
If you choose to soundproof the floor during installation, you can opt for a soundproof floor underlayment, which costs less than $1 per square foot. You can insulate the floor joists and subfloor with the underlayment, which eliminates all types of sound.
Conversely, for a finished floor, you can use floor carpets, rugs, or interlocking mats, which offer the best degree of soundproofing at a relatively low price. You can get floor mats and rugs between $1 and $3 per square foot.
4. Door Soundproofing
The average cost of soundproof doors can vary from $50 to $3,000. You can purchase acoustic door thresholds, which cost around $50 to $100 per door. Apart from that, you can use door sweeps or a moving blanket to prevent any sound from getting in or out. Both of these options will cost between $60 and $120 per door.
If you want complete soundproofing and have the funds for it, you can use acoustic panels. It will cost a few hundred bucks, depending on the materials and the number of doors you have.
5. Window Soundproofing
The windows are typically made from glass panels embedded in a wooden or metallic frame. These materials have poor soundproofing capabilities, which means that you will need to make a significant investment to soundproof your windows.
If you are on a budget, though, you can opt to use soundproof curtains, which I have discussed before. Based on your choices, the process may cost you anywhere between $100 and $1500 per window.
E. Labor Costs For Soundproofing
A soundproofing project is not an easy task to undertake. It needs to be done by qualified soundproofing contractors, or else it might not be as effective. Because of this, the costs of labor become a crucial aspect to consider.
In most cases, you will have to pay labor costs by the hour. So, it is in your best interests to get it done as quickly as possible. However, if the soundproofing project requires extensive work, that might not be possible.
Most contractors today charge between $15 and $60 for labor. Based on that, you can prepare a budget for your soundproofing project.
How Much Does It Cost To Sound Proof A Room Final Words
By now, I am guessing you have gained a pretty good idea about soundproofing costs.
In addition to the ones mentioned above, you need to take into account any complex structures you have since these require extra work. For instance, if you have lamination on the floor or wall, it needs to be removed before the actual work can start.
Before I wrap up, let me give you some tips to save money. Try to purchase the building insulation materials in bulk. By doing that, you can avail discounts and offers available only on mass purchases.
Similarly, you should do some research before hiring a contractor. That way, you can get quality service at an affordable cost.
When it comes to weddings I have never had an honest opinion. All I knew was that I imagined mine very classy and elegant.The following Floral Wedding Centerpieces Collection has got be thinking about the importance of such details in the making of the perfect day for yourself and the one you love. How do you choose the right flowers, the right combinations? What role does the lighting of the space have in the overall scheme? We are not entire sure we have discovered all the answers but lets have a look at the suggestions below.
Floral Wedding Centerpieces
A matched themed seems like an idea that adds elegance and uniformity to the wedding design. Silver tableware white candle light and a delicate white centerpiece create a romantic serene atmosphere best experienced in a private small gathering.
A floral dream with cascades of white flowers and a canopy of candles will create a true wonderland, the perfect choice for a winter wedding.
A colorful centerpiece with a variety of flowers all brought together and complimented by the golden tableware.
Bright fresh green complements an all white wedding theme.
There is always room for a little bit of sparkle, especially on your wedding day.
This centerpiece is really one of my favorites, exuding elegance and joy at the same time through its delicate pastel flowers.
For the perfect rustic elegant themed wedding, antique looking decors complemented by white flowers and candle light are the way to go.
There is such a thing as too many candles so not overdue it.
The above three examples are an abundance of flowers and decors which we do not particularly like but seem to have appeal at weddings.
A simple wedding centerpiece can be put to value by the proper lighting.
Gold or silver compliments flowers beautifully.
Don't go over the top and overcrowd the tables with decorations.
An elegant combination that takes into account its surroundings.
Sometimes a simple centerpiece is the perfect one. I adore the combination of wood and delicate white flowers.
For a french wedding choose lavender as a key element.
Tall wedding centerpieces might give length to the decor but are quite over the top in my opinion.
We end the gallery with an exquisite example of Floral Wedding Centerpiece both elegant and fresh and simple at the same time. We have chosen three favorites as you can observe in the main photo collage of this article, all delicate discreet and with a cozy warm laid back vintage appeal.Taste is something difficult to understand and accept, but the general truth is that each wedding is different and should reflect the personality of its main characters. You are free to choose the favorite flowers and as many candles as you wish on your special day and make it your own unique special memory.
Decorating a blank wall can pose a tricky challenge. You are put in an uncertain position, unable to decide and to choose the path you should take. Take a step back, breath in, take a look around and reflect on your style, taste and on the already existing interior decor of your home. Now imagine how a paper wall art piece can fit into everything and go with that decision forward. You can dare to create your own, you will be surprised how addicting and challenging this creative process actually is. We have selected 23 incredible pieces, realized by talented artists that prove how delicate, complex and superb paper art can be. Get inspired from the collection and start a wonderful journey through the land of paper crafts.
1. asian inspired paper wall art creations
Add an Asian vibe to your blank walls in an unexpected way.
Are you committed? This incredible paper craft exceeds expectations, it might take a while and a certain degree of patience but the results are surreal.
Have you ever considered taking on paper crafts? Feel free to share your thoughts and own creations in the comment section below.
Crochet is a wonderful form of textile art, and crochet hooks are widely used around the world and the 8 best ergonomic crochet hooks sets are here, they`re extraordinarily fit for carpal tunnel and arthritis!
However, crochet does have some very specific requirements as far as the tool-set goes.
In particular, among the huge variety of crochet sets, there are a few which stand out among the crowd.
This guide intends to introduce eight of the best products on the market today, as well as detail our experience of using those best ergonomic crochet hooks.
So, without further ado, let’s begin with the product reviews!
Best Ergonomic Crochet Hooks for Carpal Tunnel, Arthritis
Material: Aluminum, size: 15cm ( 5.9" ), color: Multi color...
The 14 pieces set by BCMRUN is rather unique, in that it gives you 14 hooks made completely out of aluminium from top to bottom. This is best for those who have difficulty holding regular, plastic/rubber grip crochet hooks. These are Boyle type hooks, rounded and tapered rather than the inline hooks which are narrow.
Experience
The BCMRUN 14 piece set gives you a wonderful experience, which come in some non standard sizes - but they measure up approximately equal to standard sizes. They are priced more than affordably, hence, the fact that you get almost every size which you can think of - and then some - is absolutely unbelievable.
The only snag here is that the crochet hooks do not exactly match up to letter sizes, but a small workaround is to label the approximate sizes on the hooks.
The aluminium feel, fit and finish mirrors that of much more expensive name brand items, and the experience is pretty similar to those as well. Also, the hooks come in a variety of colors, which again makes it less difficult to find the right hook.
The hooks come in a gradation of 0.5mm from 3.0mm to 10.0mm. Some of the sizes are very difficult to come across, so if you’re keen on a certain size, get this set for just that purpose.
Pros
Brilliant design and finishing at miniscule cost
Boyle styled hooks are hard to come by
The sizes on offer are pretty unique and rare themselves
Cons
The thin handles may be uncomfortable for some some
INTERCHANGEABLE NEEDLES: The ultimate in knitting...
INCLUDED: Set includes 9 pairs of 4.75" long interchangeable...
The Knit Picks Caspian Crochet set is finished completely in wood, making it a good addition to those looking for antique crochet hooks. The finish in Caspian is inspired from sea waves, and thus is finished in a mixture of green, blue and teal. This set comes with eight hooks, all finished in high quality wood.
Experience
These hooks evoke a lot of confidence from within, in that these hooks are incredibly comfortable and easy to hold. These have a deep groove which helps you grab the loops properly, which is a common complaint with aluminum tipped hooks.
These sit somewhere between the Boyle and the Bates styles of crochet hooks, which is a wonderful yet unexpected compromise. Your hooks are neatly kept and organised in a vinyl case which ships with the set.
The hooks themselves are fabricated out of birch, and that too with multiple layers of birch. This gives it another level of heft and strength, which is unique since traditionally wood-based crochet hooks are considered fragile and not at all long lasting.
Hence, this is a set of crochet hooks which you should keep if you’re missing any of the regular sizes - you will not be disappointed.
Pros
Incredible wood finish with Caspian color
Standard sizes, most regularly used
The vinyl case is a welcome addition since handling these hooks becomes a problem
✅100% ACCURATE USA STANDARD LETTER SIZING. This CROCHET...
✅SMOOTH CROCHET NEEDLES AND HOOKS makes crocheting with...
These are a slightly different variant of the crochet hooks that are offered by Athena’s Elements, which have been reviewed above. These hooks come with an extra ergonomic handle which makes it much easier to hold the hooks while crocheting. Also, the lengths of the metal hooks is long enough to go through 7 or 8 loops without any problems whatsoever.
Experience
What surprised us the most the length of the hooks. The lengths of the hooks’ metal ends is 2 inches for the wider hooks and 1.75 inches for the smaller ones, which gives it enough of a leeway to keep on performing without any problems whatsoever. The sizes of the hooks are always present on the hooks, with stamping of the letter sizes and the lengths written clearly and lucidly.
The hold of the hooks is strong enough to not give problems during use, but are comfortable enough to use for hours before any problems begin to show. The specialty is that people who are coming back to using crochet hooks after years of use, or suffer from medical conditions, are likely to face very little problems in adapting back to these hooks.
Another wonderful product from Athena’s Elements!
Pros
Lengths of the hooks are admirable and class leading
Letter size indication will definitely save time over use
Another contender finished in wood, the Knitters Pride Crochet Hooks set comes in a wonderful Simfonie Wood finishing which is conducive to long term crocheting. The set of hooks is available in 8 sizes, right from size E to size L (3.5mm to 8.0mm in metric sizes). These are handcrafted specifically by people who are experts are crocheting themselves.
Experience
The experience of using these crochet hooks was incredibly smooth and easy. These hooks are not at all hard to the touch, and the hooks are equipped with grooves which prevent slippage. Another plus point of these hooks is that they come in a variety of colors, which is a unique trait among wood-fabricated crochet hooks.
It also comes with a handy, clear vinyl case where you can store your crochet hooks rather easily. They are incredibly lightweight to boot.
The lightweight nature of these hooks ensures long hours of using this set of crochet hooks without any problems. Further, there is ample variety in the sizes which ensures that you can work on your projects without any hurdles.
Pros
Wide variety of colors in the set
Wood based hooks with protection against slipping
Wonderful experience of use
Cons
The variety in sizes may be less compared to competitors
The TRUSTYIWEN set of 12 bamboo based crochet hooks offers serious competition to other bamboo products reviewed as above, by offering 12 crochet hooks from size 2.5 US to size 15 (roughly 3mm to 10mm), they are comfortable and lightweight.
They are extremely well priced and easy to handle. In spite of the bamboo feeling a little brittle because of the low weight, be assured that the hooks are strong enough to use at all times.
Experience
Such is the nature of competition, that markets tend to bring prices down to almost unbelievable levels. This set of 12 crochet hooks is a perfect example of such a market condition, which makes it incredibly affordable to have all the sizes that you intend to have. The wide variety of crochet hooks make it easy to have multiple projects running at the same time.
The hold and finish of the hooks is as good as you could expect from a budget edition, but it doesn’t disappoint. The price is actually the really surprising point here - 12 crochet hooks, fabricated out of bamboo and then subjected to a carbonization process hence, at this cost - unbelievable.
Pros
Unbelievably low cost
Wonderful user experience
Cons
The wood finish is rather brittle, and you may feel it’s about to break at some point though actually it doesn’t.
This completes our review of the best ergonomic crochet hooks sets in 2023.
Before going out there and making your year end purchase, we recommend you to have a long hard look over the reviews above to find out which specific crochet hooks set meets your requirements.
Happy Hunting!
Hanging beds or suspended beds are great elements in interior design, comfortable, interestingly-floating around and practical they ought to be present in everyone`s home. Today hanging beds can be purchased from multiple online stores or crafted using numerous diy hanging bed tutorials brought forward by the crafting community but whether your buying or crafting the simple principles stand: comfortable, sturdy, airy in weight and simply incredible looking the bed must be.
Start by thinking how you are going to use the bed and where it will be positioned and you`ll start to realize how it ought to be to fit your needs and design standards. To help you in this endeavor a selection of incredible hanging beds have been curated; the examples vary a great deal and they range from do it yourself projects that an enthusiast can realize in 30 minutes to high end bed designs brought forward by huge retailers.
If you are looking for something that stays on the floor but still has sort of floaty feel, an easy to build platform bed might be a solution.
Cast a glance and find something inspiring !
A bohemian decor of extraordinary beauty uses intricate colorful patterns on a white background to create an airy, joyful atmosphere. Notice that the hanging bed uses branches and rope to provide comfort in mid-air.
Circular design that uses a radial structure woven with rattan can be extraordinary sturdy and graphic.
Source Unknown
A salvaged wooden boat can sail you towards peace, calm and tranquility. A simple setting can adorn this item of memory beautifully.
via Pinterest
Rope and branches have been used to shape the hanging bed above, here the wood`s naturalness creates a slight contrast with the airy, ethereal white ambiance. Plush textiles bring in coziness.
The paper white installation simply changes the perception on this splendid setting, despite the papers 2D limitations the garlands create a great 3D effect of depth beautifully building on the concept of suspension in an airy ambiance.
Wooden planks, a matching mattress and four strings of ropes keeping a bed in balance. That might be all it takes to achieve a truly beautiful and equally comfortable suspended bed.
The simplest bed frame that you can craft can be suspended in a matter of minutes. Simply make the frame to match its future mattress.
via anthropologie.com
A net in the right frame could represent the ideal concept of suspension yet the space to build this experience on is definitely not easy to find.
via babble
Swing your problems with a simple design in the right ambiance.
via Pinterest
Old furniture pieces can receive a second chance through numerous means yet to provide their owner comfort would be a great treat. Above, an old bench now floats in a splendid color to the owner`s delight.
Simple efficient graphic piece of furniture that you can craft and anchor to a tree.
via thedevotedwife.blogspot.com
The realm of dreams is filled of tranquility, calm and peace and to slowly fall asleep in the midst of the forest listening to nature`s melodies surely is a dream for many of us.
A bed that has been envisioned for the outdoors; the black and white design can be considered neutral if compared with the highly sculptural heavy chains used.
An intimate hanging bed that provides shade when needed is definitely worth considering.
via Pinterest
Pallets and a matching mattress are everything you need.
via richaldito.com
A simple design that follows the weaving technique of a dream-catcher inside a metal ring to provide the needed structure in a flexible form that boosts comfort.
The marvelous shabby chic design above looks nothing but adorable and insanely comfortable; a great setting to enjoy your morning coffee in fresh air on the front porch.
via designmom
A bedroom that opens up to your backyard should not be blocked by a stationery bed; there the suspended option greatly contributes in emphasizing the feeling of space.
Source Unknown
Simple and graphic design ready to rock your world.
If a tree is not an option nor is it a wooden beam in your terrace or pergola the alternative is a wooden frame; two triangles will provide excellent sturdiness and balance for your bed or sofa.
via gardeninglife.xyz
To use a floating piece of furniture to find peace at the end of a long day or week is an experience that ought to be pursued. Numerous diy tutorials make this task affordable and doable happily; what do you think? We would love to hear your thoughts !
There are a lot of Digital Painting platforms out there which allow artists to paint out their ideas and concepts amazingly well.
Krita being one of the most popular among them.
From being incredibly versatile, to amazingly user-friendly, this platform provides something unique for every user.
So, when it comes to Krita paint brush sets, there is a lot to choose from.
As more and more tool developers and artists are making their very own brush packs every day, it can be rather hard to pick the ones that you need for your project.
So, to help you out, we have comprised a list of some of the best brush packs for the Krita platform, which are sure to appeal to both professionals and amateurs alike.
In the Digital Designing world, the GDquest team has done some amazing work with the Krita software. From Making unique and helpful video tutorials to a variety of paintbrush and blending tools, GDquest has for some time now, inspired beginner and adept designers in creating their dream projects.
GDquest Krita brush set is the ‘freemium alternative’ to their more exclusive game art brush pack, which does cost a hefty sum. However, for the more amateur users, this free brush set is going to be more than enough in helping them achieve exactly what they are looking for.
Their more recent bundle is in v7.0, and you can very easily download it for free from their page.
One amazing thing about GDquest, which we absolutely love is that they update all their tools and features periodically. They hotfix bugs and feature crash as well, and are constantly aware of user feedback, as they try to make their applications some of the more convenient Krita tools out there.
Moreover, this brush set comes with its very own tutorial video and guide. Hence, if you’re quite new to Krita and don’t have a proper grasp of its brush stroke techniques, then this set can come rather handy.
This a fantastic brush pack made by Radian 1 and released in DeviantArt for the wider community to view and download.
The pack is a bit unique in comparison to some of the other free brush sets out there, as it comes with a lot of customizable options which are more of a characteristic trait for paid brush packs.
With this pack, you will gain access to a variety of custom patterns, as well as gradients and workspaces to get you fully equipped for your next art project.
As this, brush pack is mostly geared towards painting, it might not be a convenient pick for you, if you’re looking to do more with them like blending and surface detailing.
But do keep in mind that you will not be able to directly download the brushes form the DeviantArt itself. Instead, Radian 1 has the pack hosted on Google Drive, and all you need to do is visit that link and download the brushes.
Moreover, it’s also important to update your Krita application before downloading and using these brushes. They require a Krita v3.2 or higher to function, so do try and be up to date on it.
The 4th volume of the Modular Brush set series from Grind God is going to be one of the most versatile and varied brush pack set on the list.
It has over 120 brush presets with over a dozen custom styles that will allow you to make those final touches on your artwork to make it a very unique one.
Now, with so many presets and options available, it’s really not all that surprising that the download file size is much bigger than average. The 34 MB size doesn’t just contain the brushes but some convenient demos as well, to help orient you with the color textures as well as the brush strokes.
The reason why we list this brush set as a very varied one is because it contains a little bit of everything. From containing ‘fountain pen styles,’ to ‘loose worn-out paint brush marks,’ this brush set comes very highly recommended from our end for amateurs and professionals alike.
A new V5 version is out now; however, even though it’s a significant improvement in quality than the V4, it doesn’t have all the brushes that are available in the previous version.
This brush pack is from the Mumbai based illustrator Raghavendra Kamath, which has been there on several art sites for some time now. It supports Krita versions all the way back to 2.0 and is absolutely free to use and download.
You might be thinking that these brushes might just be too old and lacking in quality when compared to newer alternatives, but you will be quite surprised to find how consistent and versatile they are.
The pack contains a handful of some traditional brush styles like sponge brushes, custom pens, as well as some stamp-styled brushes, which are incredibly high in stroke quality.
Additionally, even though this brush set is up for grabs on so many art sites, it’s best to download it from GitHub where it was originally published.
But it’s important to note here that this brush set is quite old and the features have not been updated or patched with the latest Krito versions
Hence, some of the applications might be a bit buggy, and you may not be able to get what you want as a result. These are just some of the things to keep in mind when using this brush kit.
Jackpack’s Krita brush bundle is the newer design set which we have recently had the opportunity of using.
The presets and the features are pathed with the latest Krita 4.0 version and work seamlessly with the program to help artists have an amazing drawing experience.
However, just because these high-quality features are patched to the latest version doesn’t mean that they will not be supported in the older Krita models.
It will effortlessly run without a problem till V2.8, but for anything below that, it’s better to test out the compatibility first.
Now, in terms of the advantages: all of the brushes present in this brush kit are designed with ‘pixel-perfect’ strokes in mind. Hence, it will allow you to customize and resize the brushes in whichever way suits your art and style.
But, not all the brush features will support the same level of mirror symmetry, and you will have to experiment with it a lot to see which ones will work the way you want it to and which ones wouldn't.
The whole pack comes free of cost in the Gumroad main website; and if you do want to make a donation to them, there is an option in the website which will allow you to do just that.
These Hushcoil Brushes are a relatively newer set to the Krita 4 version and pretty unique in how it goes about its brush stroke use and the range of features it houses.
These brushes are quite detailed, to say the least, and contains about 280 different formatting features, allowing one to be very versatile with their art styles and designs.
Primarily, the brush kit has four bundle packs, each representing a different type of classification from Concept to Paintbrush, to the Pen and Pencil and the Basic work set.
Where the Concept and the Paintbrush category appeals more to the more adept professional users, the Basic brush kit, on the other hand, is just perfect for beginners as well as amateur Krita users.
Combining these different categories together, you will be able to create some very unique and different brush strokes and have access to a wider range of art styles which you otherwise wouldn’t.
If you want to download these brush sets, then you will find them hosted on Gumroad for free. Gumroad is an amazing site for marketing such brilliant digital painting tools, and it showcases a lot of the sets made by this particular creator.
Making cartoons and anime pages on Krita is incredibly fun and easy. So if you’re inner mangaka is itching to make its very own webtoon serial then this brush set is a must-have.
Now, this brush kit is pretty exciting to use. As it mimics the traditional cartooning tools like pens and brushes, it will allow any artist to make those classic comic designs and graphic novel sketches very easily.
However, even though they might mimic the traditional sets, don’t for one moment think that they lack any sort of stroke quality. Every brush in the set works at 300 DPI, and you will be able to design artworks in high-def quality and make unique designs for digital screens.
And if you’re not all that sure if you want to use these brushes at all or not, then the Deviant Art main page has a small sample of the brushes which you can use and get an idea about them.
So, do feel free to try out this amazing brush set whichever way you want, and experiment with different styles and stroke settings, to see which of those will match your tastes and which ones wouldn’t.
David Revoy is a superstar in the digital designing world. Apart from making high-quality graphic designing tool and brush kits for the Krita platform, he also has a YouTube channel where he teaches newer Krita artists various applications and features that the platform allows.
He helps to inspire them to try out new styles and stroke and also encourages them to learn as they experiment.
This brush set from him focuses more on the charcoal shades and strokes. However, these tools are primarily designed as custom brushes, and not every user will have much use for them, especially the ones who are much more experienced with actual charcoal work.
The brush kit comes with three separate brushes, each catering to a particular art style and art genre.
They are very easy to install and patches rather well with the latest Krita versions and has a set of convenient features as well
In terms of variety, the brushes range from super thin to very thick and painterly. So, if your art needs more detailed strokes or broader outlines, you can rest assured that you will be able to achieve both with this brush kit.
The second version of Nylnook’s brush pack series is, without a doubt one of the best sets geared towards the traditional pen and paper style.
This pack is not all that well known and has slipped through the notice of many professional users. It has about 36 brushes and stroke styles available, which may not be much, but the sheer quality of these strokes is just astounding.
Moreover, we believe that these brushes might just be exactly what a beginner needs to get a better grasp of Krita and all of its various features. The pack also comes with full details about the brushes, as well as the techniques, along with the installation instructions on both the Faramagit page and the original blog post.
The brush tool is well patched by the creator and is regularly updated to fix bugs and compatibility issues which may occur with the improving Krita versions.
However, with the limited amount of brushes and stroke styles, this pack might feel insufficient by the more adept users. But these 36 brushes are ideal for the beginner who is still getting the hang of Krita.
The Krita V2 Brushpack is the more user-friendly brush pack set from David Revoy which a lot of beginners tend to opt into when getting into the Krita platform.
So, what makes the David Revoy beginner set one of the best?
Now, the popularity of this brush set has a lot to do with the variety and versatility of the brushes that are present in them. They are also very easy to use, comes with their own instructions, as well as a tutorial guide to help get you up and going.
From light sketch pencils to digital inking pen to even eraser styles and paint brush sets, this brush pack comes with a lot of amazing tools and features.
It has around 64 brush styles and is going to be our recommendation if you are new to Krita and want to master the platform as efficiently as possible.
If you want an example of what this brush set is capable of, then you can take a look at David’s work on Patreon.
He does the whole work with the brushes available on the set and goes about manifesting the art in such a way that it’s going to be rather easy for anyone to mimic and follow.
Though made initially for the Krita 2.9, you will still be able to use the David Revoy Painterly Brushes on any version of the painting platform.
This set of primary brushes are more catered towards the needs of more adept Krita users than beginners really. But the newer users can still try out this set as the brushes here are very easy to use and install, and is very rich in stroke quality as well.
These painterly brushes are modeled after the real bristle brushes and mimic most of their stylistic patterns and strokes.
The pack comes with a handful of brushes that David often uses and showcases on a lot of his Krita tutorial videos. He basically uses them to paint certain art tropes like backgrounds and stock images.
These are also the brushes which he uses in his webcomic series called ‘Pepper&Carrot.’
In many of his tutorials, he teaches how one can use these brushes to make a lot of unique color blends. The blending styles is where the real magic of these brushes lie; being able to work with opaque colors as well as lighter ones to create new blends is what makes this set so very fun.
The quite popular digital artist Vasco Alexander Basque has created a very special set of custom watercolor brushes just for Krita users.
The brush set has a varied collection of brushes and stroke styles, with features that support dabbing as well as splattering. Dabbed and Splatter brushes can help you get a wider style range with your strokes, and make certain works like bricolages and abstracts that can truly refine your skills with the Krita platform.
However, these two are not the only brush styles that come in this set; there are other such tools which offer a much-refined stroke for detailed works, which can be easily controlled and used.
If you’re fairly new to water coloring in Krita, you can try your hand at small projects with this set. They are free to download from GitHub and is compatible with all the versions of Krita above 2.8.
But, do keep in mind that the strokes of these brushes are designed to be fairly small with a size range of 30px to 100px. They might be a bit low in quality, but the amount of things you can achieve with them is just amazing.
The minimalist brush pack by Aliciane is another brush set which is just fantastic for the newer Krita users.
Elésiane Huve (aka Aliciane) is a freelance illustrator and digital painter who uses Krita as her main digital platform for all her works.
He has made this brush set for the newer users, derived from the David Revoy amateur brush sets, with some changes here and there. She has tried to make this a very basic set which will help the newcomer get an idea of how Krita works and how he/she can go about the platform to make whatever they want.
When compared to David’s set, the brushes here have altered line widths, a different line cleanliness, and opacity sensitivity, especially while making marks with more pressure.
It comes with a few unique brush types as well, such as the smudge brushes as well as a custom move tool to add the much-needed versatility to this otherwise simple and minimalist set.
The pack comes with 8 brushes in total, which is pretty small, but considering these are aimed to aid beginners, one can hardly complain. They are also free to download and work flawlessly with Krita 2.8 and higher.
Aldys Brush Pack has been around in Krita for a very long time now, and may just be the oldest on our list today, even older than the Raghavendra set.
Now, what makes them such a popular choice for a brush pack tool in Krita, is how beginner-friendly these brushes are. The brushes are incredibly basic and consist of a little bit of everything, and is just fantastic if you ever feel like flexing your artistic skills and trying out something new once in a while.
From containing airbrushes to oil brushes to smudge graphite as well as some pattern brushes, they have a lot of versatility amongst them.
However, these brushes are quite outdated, and we would not recommend that you do any form of commercial work with them as there might be some compatibility issues with the latest Krita versions.
The DPI is also not all that high, and it may disappoint in certain aspects of your professional work, and you may not be ultimately able to achieve what you set out to.
Final Thoughts
For digital painting, concept creation, or even for making your very own webtoon, Krita is an amazing platform to have. And we hope that our list of brush sets today was able to help you in understanding this platform a bit more.
The structure of a home is an important element which defines the outward look but also the interior spaces which will be used. Since the inception of a plan , a structure may define the future living experience , a variety of materials can be used and time again new materials appear , at first they are quickly dismissed but in time they gain momentum and their use is widespread. Today , the choice in materials and structural components is greater then ever , and materials tend to take into account not just the immediate issues of weight flexibility but also the larger economical context , its easy use etc. Containers fall into a specific category of structures , because through their shape they can be easily adapted into a living space and as far as structure goes they are more or less a complete metal box . Their wide use makes them easy to come by and their geometry creates an opportunity to create a comfortable home while at the same time repurposing materials and making a great conversion from transport/cargo to a more enduring role suitable to their metallic components.
Architects offer a wide range of solutions , both stylish and contemporary , proving that design can go a long way when it comes to conversions , but also the fact that the metal box-like structure and its basic layout can easily be adapted . The material itself has many uses , but in this installment it doesn't just justify costs but also provides an adequate use for a material so precious and enduring such as metal , thus offering houses with a sturdy flexible structure.
Shipping Container Homes
#1 Maison Container Project by Patrick Partouche
Maison Container Home Realized by Patrick Partouche
First is the House designed by Patrick Partouche-called the Maison container project. The containers create here an interesting volume through their position in relation to each other, creating an interesting and simple facade . Located on a 2,240 square feet area near the river Lille in France , it cost some € 221,000 to build this lovely house.
The interiors make full use of the container structure and their ability to join and create wide spaces , thus a comfortable interior is located inside with a grand opening toward the garden . This container home is perfectly balanced both in its outward looks and in its interiors.
Shipping Containers Left Intact to Enhance Privacy
Lovely Hammock in the Living Area Providing a Comfortable and Care Free Seating Option
Spiral Staircase Leading to the Top Floor of the Container Home
Bright and Bold Shades Adding a Vibrant Touch to the Furniture
Contemporary Kitchen Featuring a Stainless Steel Countertop
#2 Old Lady House by Adam Kalkins
Adam Kalkins-Old Lady Home
Made almost entirely out of shipping containers , Adam Kalkin proves that a great solution that takes into account landscape and textures can transform the containers into a genuine living space.Taking terrain into account and having a central court/garden the house offers many wonderful perspectives and views and with its carefully selected interior textures , sliding glass windows and doors and eco-friendly materials creates a warm cozy home.
Container Home Lit Beautifully
.
Snapshot Inside a Container Home
Colorful and Bright Bedroom in the Old Lady House
Massive Use of Glass Allowing Natural Light and Ventilation
#3 Containers of Hope by Benjamin Garcia Saxe Architecture
Bright and Bold Design in a Bold Color
Benjamin Garcia Saxe Architecture and his "Containers of Hope " provide quite a high standard of living and an inexpensive option available to wide range of people. They are designed using just 2 containers , and giving a total area of just 1000 feet of living space , however coupled together with a minimal interior design and the way windows are positioned within the volume according to the function of a room , a spacious area can be simulated . They can easily provide an alternative for an apartment , and at just 40 000$ they can be a viable option for either a home , or a vacation retreat for the entire family . This specific design can be found outside San Jose, Costa Rica.
Access Into an Elevated Container Home
Containers of Hope Warmly and Cozy Lit Through Lighting Fixtures
Container Home Using a Glass for Transparency and Extensive Viewsa
Superb Interiors in Muted Tones
Bath Area Separated Through a Glass Partition
Striking Pendant Lamp Steal the Show in a Cordell Shipping Container
Cordell Shipping Container House with a Smart Use of Flowing Space
#4 Crossbox House by CG Architects
Green Shipping Container Home
Nest up is Cossbox House designed by CG Architects. Made out of shipping containers , it creates a playful and stylish image , one that can easily be integrated into the look of contemporary architecture . With carefully selected textures and colors an interesting outward image is projected on to the viewer . But this is not all because the interior is just as chic as the exterior and relates in an interesting way with the surrounding landscape. Its an intelligent design with refined look and use of lavish wooden tones , simple finishing of the walls in white coupled with wide space impression given by the simple geometrical shapes of the containers .
CrossBox Shipping Container Home With a Modern Look
Green Shipping Container Home
CrossBox Shipping Container Home Sheltering Exquisite and Extravagant Interiors
CrossBox Container with a Lovely Warmly Lighting and Expansive View
#5 Private Cabins at the Alterra Beach Resort
Container Cabins at the Alterra Beach Resort
Alterra Glamping on the Pinamar beach in Argentina is a wonderful colorful resort and with the help of architect Clorindo Testa an eco-friendly touch was added by using old re-purposed shipping containers as private cabins on the beach for tourist and guests . The cabins offer all contemporary luxuries in this resort hidden from the noise and hustle of the modern world . The design is based on the relation of the cabin with the surround natural background , thus ensuring a serene and peaceful atmosphere for the occasional guest/tourist.
Lovely Patio Area in Permanent Connection with the Exterior
Shipping Container Cabins Located at the Alterra Beach Resort
#6 Shipping Container Guest Houses by Poteet Architects
Poteet Architects bring you an alternative to the tradition guest house with this cheap and minimal design that couples the simple geometry and looks of a container with a warm interior design using wooden finishings for the wall and floor . The design even provides a patio space on which you can enjoy the surrounding landscape . The patio and giant glass sliding doors create an interesting connection with the exterior landscape and add up to a very crafty idea . This way you can easily incorporate the design into any any housing plan easily!
Elevated Platform Offers A Stable Base for the Container Home
Vivid Decor Nestled in a Compact Interior Design
Glass Windows Connecting the Exterior With the Interior in Magnificent Manner
Natural Vegetation on the Rooftop Regulating the Temperature Inside
#7 Vivacious Shipping Container Homes by Marcio Kogan
Marcio Kogan creates and interesting experience through the use of painted shipping containers , but the trick is they are just the main part of his composition that uses shipping containers to play with color and texture. Unlike previous examples he does not utilize exclusively just containers but rather they are an important element in the entire house as a whole . The space is carefully crafted around the idea of a more traditional house but every space complements the other so that together with the containers create an interesting living experience.Its colorful design is natural for the brazilian lifestyle , creating an interesting volume that is exciting and enticing .
Brilliantly Colorful Painted Shipping Container Home
Modern Interiors with Cool Pendant Lights
#8 Casa El Tiamblo by James & Mau Arquitectura and Infiniski
Casa El Tiamblo Realized Out of a Shipping Container
Designed by James & Mau Arquitectura and Infiniski, Casa El Tiamblo brings a new option to the table , using blue shipping containers , they create a metallic rough exterior that opens up the interior spaces towards the garden. Other than the standard shape of a container that gives the rooms a specific geometry , the interiors can fool anyone into thinking that containers are not part of the house design. This project showcases the fact that comfortable living conditions can be achieved using minimal and cheap structures such as shipping containers, with a clever and extravagant interior design much can be achieved in the way of atmosphere and feel.
Luxurious Bedroom Inside the Casa El Tiamblo
Open Modern Kitchen a Container Home
#9 Shipping Container Home in Colorado by Studio H: T
Designed by Studio H: T, the volume of this house is made by wedging together 2 shipping containers , but coupled with the context of the landscape it creates an unique solution , that shows how containers can be used to create high standard home. While the intersection of two simple geometrical figures may not sound like much ( since shipping containers are used) , what they manage to achieve with this in the interior is truly remarkable. Passive cooling technology, water recycling units and solar energyensure that the house is autonomous and independent, especially given its location in wild landscape of Colorado.
Colorado Rocky Terrain Carrying a Shipping Container Animated by Life
Interior Design in Dark Hues
#10 Take a Break with Starbucks Crafted from Shipping Containers
Innovative Starbucks Design in Washington Crafted from Shipping Containers
The Starbucks drive-thru in Tukwila, Washington has been created using 4 shipping containers , the same used by the company . The idea to use the shipping containers that are used by Starbucks belonged to Tony Gale , the company architect. The idea suits well the purpose , and conveys very well the feeling of mobility that a drive-thru should have. While not exactly a house or a home it proves the infinite possibilities of shipping containers , and how a high quality architecture can be achieved and at the same time a great conversion of older , long serving shipping containers is achieved.
Four Starbucks Containers Used as a Structure
Starbucks Drive Through
Innovative Starbucks Design in Washington Crafted from Shipping Containers
#11 Green Frame House by Studio Astori De Ponti Associati
Minimalist Look Inside the Minimalist House
This modern home design by Studio Astori De Ponti Associati presents itself as minimalist stylish and even futuristic option. while it does use the conventional structure of a shipping container it communicates with the exterior far more then other designs based on shipping, thus relying more on intelligent interior design to create a pleasant and stylish living space both inside and outside . Through its large windows the interior communicates and transmits the interior image to the exterior , so its transparence helps make up for shortcomings in exterior geometry and texture. A truly smart design indeed !
Green Frame House
Minimalist Design Showcased in Shipping Container House
Container Home Exuding Italian Flair
#12 Prefab Shipping Container Home from Home Contained
Prefab Container Home
However you try , the original look of a container will always be industrial and rugged, and while some may like it , it wont fit anywhere and everywhere and in every context .The prefabricated container homes designed by ‘Home Contained’ tries to create home , but using the cheap structure of a container, adding to this structure not just by changing the color but also by using more elaborate interior textures co cover up the original appearance of the container. This includes numerous other additions such as glass curtains , concrete patios and anything that can be added to alter the image of "life in a shipping container". Home Contained creates in this way viable alternative for more traditional homes.
Elegant Flowing interiors Nestled in a Shipping Container Home
Lovely Patio Area in Permanent Connection with the Exterior
Cool Blue Hues Enhancing a Refreshing Bath Area
Colorful Decor Giving the Home a Vibrant Look
Lavish Bedroom Interior Design in Calm Relaxing Tones
Neat Organized Shelf Space and Floating Cabinets Enhancing the Feel of Space
#13 Shipping Container Office Space by Lab Inc.
Shipping Container Office Space by Lab Inc
After a coffee shop , we can't ignore a more traditional use for shipping containers such as offices. The solution is based on the idea of creating a pleasant comfy work place using a cheap structure close to home . This option offers an interesting solution , the design coupling two of the main uses of shipping containers , the office has an ergonomic , minimalistic design that is pleasing and comfortable for the every day work , from 9 to 5 !
Office Area Nestled in a Beautiful Natural Setting
Beautifully Organized Ergonomic Interior Design
Patio Area Meant to Break The Routine
#14 Fascinating Shipping Container House in California by Leger Wanaselja Architects
Container Home in California With Superb Aesthetic Values
Container homes don't come in just one floor , this option gives its user not just the first floor , but also the look of normal house . Incorporating two shipping containers , it manages to create a traditional house image , without any difficulty . Using shipping containers and not being able to tell is a great achievement , and this design looks every bit like the house "next door ", but also using a cheap , fast structure that is enduring and durable. Leger Wanaselja Architects created this house by stacking 2 container , one upon the other and then intelligently arranging the interior to create a large living space and comfy bedrooms. Having 1,350 square feet and a two-floor living room , coupled with the solar powered energy this is a very attractive option.
California Container Home Wearing a Traditional Structure Apparel
Regular Interior and Exterior Design In a Container Home
Living Room Area in a Stacked Shipping Container House
#15 Colorful Cordell Shipping Container House by Numen Development
Home Realized out of Cordell Shipping Container
Architect Christopher Robertson from Numen Development brings another home from a container , that looks and feels both spacious and complete . Through use of various other materials and clever interior design , the classic image of a container home is completely covered . Robertson's design creates some of the most interesting spaces and images , rivaling those found in a conventional home , with a much more expensive structure. Using 4 containers , 2 40 foot for the living room and bed rooms , another container 20 feet long for the kitchen and the final one as a guest-room , a complete comfortable home for any standards was achieved.
Cordel Shipping Container Home With Impeccable Interior Design
Cordell Shipping Container Home Seamlessly
Cordell Shipping Container Home Sheltering a Contemporary Kitchen with an Ergonomic Form
Cordell Shipping Container House with a Smart Use of Flowing Space
Striking Pendant Lamp Steal the Show in a Cordell Shipping Container
#16 -2+ Weekend House by Jure Kotnik Arhitekt
Crafted from ConHouse container units, the 2+ Weekend House from Jure Kotnik Arhitekt this house is the embodiment of fast easy and chic . Although these shipping containers were crafted for this specific purpose , it is proof the ever growing popularity of containers as homes. Emphasizing mobility and ease of access and construction , its a cheap fast solution that provides some architectural quality for people who want either a cheap solution or tend to move a lot.
2 Plus Weekend Retreat in Black and PInk by Jure Kotnik
Narrow Creative Staircase Leading to the Top Floor
#17 Jean Nouvel’s Les Grandes Tables
The Les Grandes Tables of Seguin Island in France is a perfect example of how using basic recycled shipping containers as a structure , with enough additions a completely different image can be achieved , opposite to the basic geometry of the containers. It embodies the idea that with minimal resources architecture can achieve a maximum effect . Located inside the structure is a restaurant for 120 guests and greenhouse for more exotic plants , which are uncommon on the island. This a shining example of how modern architecture can achieve a spectacular result using minimal means and resources.
The Jean Nouvels Les Grandes Tables Restaurant in France
A Shipping Container Restaurant in Paris
Audacious Design Combining Creativity With Low Costs
#18 Boxpark Shoreditch: London’s First Shopping Mall Made Out of Shipping Containers
Containers as a high-quality shopping space (akin to a mall ) is a new idea and concept and the Boxpark Shoreditch is the first in this line , crafted using 61 containers, it appeared after several small business owners could not buy or rent any shops in the urban area of London . Hence came this idea that would solve this problem . More interesting through its use rather then design it uses 41 containers on the lower part and 20 on the upper floor. The flexibility and adaptability of the design makes up for the more rugged design providing a solution for customer and owner alike.
A Mall Realized Out of Containers Wearing Black
Shoppers Delight with Ample Choices in Black and White
The Boxpark Shoreditch Has Been Assembled Out of 61 Containers
London`s First Shipping Container Mall Interior Design
#19 Quebec Container Home by Maison IDEKIT
Shipping Container in Quebec
Bernard Morin and Joyce Labelle took the idea of a homes as shipping containers to a whole new level. Several designs often strive to either make a point out of living in a container and flaunt its exterior rugged and industrial looks , or try to cover it up as much as possible and make it look like a usual home as much as possible . This design answers the question "what if you only use the structure of containers and invest the same amount of money as you would in a normal house ? , how would the end result look ?", so here it is , a good looking villa . Though at its 3000 square feet and five bedrooms , costing a whopping 175, 000 $ it can no longer make a case for cheap fast and easy .
#20 WingHouse Unravels its Magic
WingHouse is truly unique in the way it adapts to the surrounding space and how it is built to generate spaces. The first odd thing about it is the fact that everything is cramped around in the same space. But here is where the design truly shines , using extendable wings ( extended through the use of a crane) the house can extend and create additional space for all your requirements. A great option for both a home but also for an office or business place , that can extend and expand to accommodate new offices .
#21 Redondo Beach House by DeMaria Design
DeMaria Design Envisioned Redondo Beach House
DeMaria Design brings us another design that integrates the containers both within the landscape and creates a nice exterior image without using the industrial look so often found in other container homes. Located in Redondo Beach California , the house's main attraction is the way in which it communicates with the exterior by way of access through the two containers which generate a hallway . The interior is thus quite introverted , da use of other materials like concrete to mold a beautiful modern exterior facade also helps bring this home to a higher standard than its original intended structure may have permitted.
Redondo Beach Home
A Sneak Peak Into the Interior Design of the Redondo Beach House
#22 Tommy Hilfiger’s Berlin Shipping Container by Artdepartment-Berlin
Apearing at the Bread & Butter Fashion Trade Show for internationally renowned Tommy Hilfiger brand, this idea takes shipping containers and turns them into an exhibition space , for Tommy Hilfiger. The interior is in this case WAY more interesting than the exterior , with a mix of containers placed in a witty way , some large spaces have been created inside this structure. The true nature of this container-museum is revealed inside , a place that showcases Icons in style and and fashion and the changing world trends . On the outside , the containers a direct aproach with painted on images , while on the inside entire rooms , streets and spaces of varying volume and atmosphere are recreated !
The Brand Hilfiger and Its Essence Is Carried Through
Fascinating Art Work in Vibrant Hues Splattered on the Facade
Fashionable Interior Design Flooded by Natural Light Enjoying Expansive Views
#23 Ergonomic Container Home in Mojave Desert by Ecotech Design
Container House in the Heart of the Mojave Desert
It seams we have another great design made entirely out of container units. Ecotech Design comes with this house employing 6 shipping containers , creating a modern looking villa with a single bedroom in the mojave desert. The design is all the more inspiring since it creates a modern looking home , without covering up the containers or using additional materials for better textures. Instead it uses white and grey for the volumes of the house , which against the background of the Mojave give it a very good contrast. The project emphasizes high-energy efficient design and low cost , making it a viable option for any place not just the Mojave Desert.
Container Home Located in the Mojave Desert
Mojave Desert Shipping Container House -Entrance View
Mojave Desert Shipping Container House Meant To Keep Away the Heat
Mojave Desert Shipping Container Home with a Lavish Design That Replaced the Traditional Residence
Bedroom Offering Expansive Views
Wooden Hues Giving the Home a Natural Touch
Ample Living Space Inside a Container Home
#24 Del Popolo Mobile Pizzeria provides a Great Idea for Budding Businesses
Del Popolo Mobile Pizzeria Truck
Homes are not just the only final means of the shipping containers , so if you are interested in a going into business venture that involves a mobile platform for serving and cooking food we have the thing for ! This is the Del Popolo mobile pizzeria and its a marvel to behold since this is a mobile italian traditional style pizzeria with an old wood heated oven to make the classic italian pizza recipes come true anywhere and anyhow . Jon Darsky spent about 180 000 $ to convert this container , but now he bring to anyone anywhere a classic italian pizza parlor , so tis worth the money!
Mobile Pizzeria Forged From a Re-purposed Shipping Container
#25 Danze & Davis Give an Extreme Shipping Container Makeover to a Texas Home
Extreme Transformation of Some Shipping Containers Into a Home
Finally we have this lovely home in Bastrop Texas , that proves once and for all that given enough containers you can achieve any final effect , in this case the end result being a warm comfy cozy house that offers a living experience of a very high standard. Despite using containers , this house is not constrained either in the interior space or the exterior look. This house makes the list for the fact that a great effect was achieved with few resources , not many exterior materials are used beside the containers to give it a modern and yet rustic and traditional look. Inside a comfy and cozy home awaits us . Danze & Davis have managed to create a genuine home that feels like so much more then the temporary industrial look of shipping containers. For its functionality and simplicity , but also for achieving a rustic traditional and overall pleasant outward look without using a lot of material other then the containers themselves , this design showcases the flexibility and adaptability of containers as a structure for our homes!
Inside the Container Home With Exposed Steel Surfaces
What do you think about these shipping container homes?
We would love to hear from you in the comment section below!
Any person dedicated to its backyard landscape must poses a small space in which s/he can shelter the tools needed and another space in which plants and flowers in pots would be deposited during the winter.
Agneta Enzell chose a beautiful black and white design for a shed dedicated to an orangery situated just a couple of meters away from the house. She advised us to look for the simple, neutral background for our shed in order to highlight the colorful landscape around it. A simple black and white shed with classical Scandinavian influences became her second home; she united the utility with pleasure and created a simple small shed in which she finds peace calm and for herself, she is listening to the rain, taking breakfast and dinner surrounded by nature, enjoying the sunset in a serene atmosphere, a warm and cozy environment of herself to sustain her passion.
Black and white decor has become a traditional combination that can be both playful and elegant at the same time. Ok, so we know it might seem like we are all set on black and white decor inspiration, but honestly, we can't get enough of them. The contrast between these two non-colors is the one that generates a certain tension in the design scheme, being able to be at the same time a perfect background for the main pieces of the decor or the focal point of the entire room. The more usage of black the more sober the atmosphere so be careful not to overdue it and create a claustrophobic chamber. Accents are of the most importance, whether colorful or with a specific design or texture because they are the ones that unite all the components and merge them into one solid creation.
Black and white decor collage
White creates the sensation of openness and liberation. Thus it should be used in open spaces like open-kitchens and living rooms and even in the bedroom if you like a more serene clam atmosphere. In contrast the black, a grave, strong non color implies a more intimate, serious state of mind and it is suitable for the privacy of you bedroom or study. Nonetheless don't feel obliged to not use it in the kitchen where combined with a steel furniture can turn it into an industrial designed room. Add touches of crystal and gold and choose rich textures and materials like silk and velvet, leather and transform your living room into a luxurious decadent space perfect for romantic evening or dinner parties. Just keep in mind to find that balance and to have fun with the design itself.
Black and white decor-picture frames wall
Black and white decor- vintage bathroom
Simple interior design with black accents
Modern interior design with simple black and white elements
Minimalist black and white kitchen decor
Modern black and white decor kitchen
Simple living room design with a black and white color scheme
Rich black color scheme
Scandinavian interior decor
Black and white sitting nook
Black and white living room
Elegant bedroom designed in black and white
Patterned bedroom in black and white
Minimalist interior design
Small industrial black and white kitchen
Luxurious black and white kitchen
Modern living room decor
Stripped black and white wallapaper
Simple yet elegant open ktichen
Retro inspired living room with black and white and yellow pillows as accents
White and black wall and ceiling transiiton
Chalk black wall
Black shiny leather living room furniture
Minimalist decor of a living room in black and white
When someone close to us says black and white interior design we all instantly imagine a modern minimalist interior design; while our imagination is definitely feeding us a good thread we should start feeding it with some classic traditional black and white interior designs as well. Starting with this article today we are going to slowly review some interior designs that are wearing black and white on a beautiful traditional style.
We are starting the series with the living room because it is our inner home, our center around which we all orbit trough the day, trough the weeks, months and years. Moreover the black and white living room design is definitely the black and white design that will be showcased to most of our guests, for the special ones that will get past the living room we will have other spaces dressed in tradition black and white published soon.
Depending on the living room you might want to think the black and white ratio and to paint different items within the interior if you would like to manipulate the perception of the viewer. For example black walls are making the space seem smaller yet very pretentious, noble and elegant where stark white walls are going to brighten the space and emphasize the feel of space, enlarging the room.
The proportion of black and white in the interior will also discourage or encourage tones as accents, in a interior design in which the black and white ratio is balanced an item in this color palette or close to it will be hardly remarked while a red one will be the main focal point at an given time.
It is up to you to decide how your small universe will get dressed in black in white, our point being that a black and white living room design can very well be classic or traditional, a far cozier and warmer space then a black and white minimalist living room.
We encourage you to take a look on the pictures selected bellow and leave us your opinion in the comment section bellow.
Floating bed designs are rather special, they evoke a feeling of superiority, and they seem to flow above the floor emphasizing the feel of space allowing air to pass through the room easier. In contemporary interior design and architecture, modern homes and interiors are being designed as simple and as clean as possible featuring well-defined lines in an open space. In certain spaces the floating bed design presents a certain appeal, a shattering vibe that places it above everything else, seen from the ground level it looks monumental and through materials and textures, you can surely match any design line.
The aesthetic values presented by the futuristic minimalist look are unparalleled in elegance and style always offering that holiday-like experience: a relaxing and rejuvenating immersive look.
Floating Bed Design Ideas
An ethereal ambiance flooded by light and coziness to cherish, embrace and pursue.
The brick wall mural becomes a focal point that greatly emphasizes the floating bed stance.
In this setting the pattern is gained by the brick wall, intensifying the vertical plane where the flooring remains a constant. The immense rug continues the headboard upwards yet again defying the normal setting, constructing something beautiful; surreal.
The powerful wooden texture and the sober elegant charcoal gray can be beautifully nestled in a timeless setting.
A minimalist take on the floating bed can definitely make the concept justice; here the red textile and the sculptural geometric gain one`s attention in an instant while the added modern lighting fixtures do provide comfort and functionality whilst remaining graphic.
Elegance wrapped in wooden textures complemented by contrasts between black and white.
Source Unknown
Simple Chic Modern Bedroom With a Gray Bed Floating by Kia Designs
Floating beds are nestled in sleek minimalist contemporary designs, especially urban looks seamlessly but they can be easily introduced in any traditional or playful setup as well. The collection showcased below is meant to inspire you into adding such a bed to your own master bedroom as well, they can easily enhance small bedroom designs.
Levitating Bed Upholstered in a Beautiful Eco Leather Respecting The Environment
Floating Bed Offering a Sophisticated Look to a Black and White Bedroom Design
A simple setting can always work with something extraordinary; here the epoxy floor shines throughout the room emphasizing the feeling of space with the support provided by the floating bed.
An interesting tropical experience.
Contemporary Golden and Brown Hues Embracing a Modern Bed
by Vicki Bergelt Interior Design
Vivid Bedroom with a Classy Looking Floating Bed
Superb Minimalist Floating Bed With a Bookshelf in the Corner
by Daniele Lago
Higher Up on a Floating Bed
You can guess that the idea started from the concept of floating, flying, and levitating, a dream that has been on people's minds for a long while now. Contemporary designers have enhanced this allure by generating stunning decor in which the bed has the main role, floating above other furnishings.
Hanging beds are an excellent option as well with a more casual look but the floating bed sure exudes innovation, elegance, and class above it. Unassuming simplicity and a refined form can be bold statements for your magnificent bedroom, present them through a floating bed design!
Fascinating Exquisite Bed Embedded in a Sculptural Shape
Bed Design With Storage Units Underneath Enhancing The Space
by Mark English Architects
Wood and Expansive Views Enhancing a High Ceiling Master Bedroom with a Floating Bed
by Square Three Design Studios
Wherever you reside and breathe the strongest enemy of architecture is gravity, the structure ruins an architecture piece unless the artist managed to include it seamlessly. The strong appeal of the floating bed comes from this contradictory state in which the bed defies gravity laws.
Plush Bed Surrounded by Wooden Surfaces Offering Warmth and Coziness
Stylish Contemporary Bedroom with Giant Floating Bed
Built In Storage Units Underneath the Floating Bed Keeping the Clutter Away by Moon Design + Build
A floating bed that allows the inhabitant to enjoy the extraordinarily colorful traditional rug below. The attic space accentuates the importance of this floating bed that indirectly emphasizes the feeling of space.
Jaw-Dropping Design in an Extreme and Exclusive Floating Bed
Unique Chandelier Above a Bedroom with Expansive Views Surrounding a Floating Bed by Audrey Matlock Architects
Providing a Panoramic View
In today`s architecture, the residences tend to connect with the exterior world more than ever, they are offering expansive views of the outside world whether it`s a grim city sky silhouette or the most extraordinary or an infinite ocean. Modern homeowners and architects are spending their efforts into obtaining the best snapshots possible on their sites.
Floating beds are emphasizing this chain of thought by being able to provide a 360-degree view as they can reside in the center of the room. Regular bed designs are often chained to a wall or corner sadly. Imagine a glass home surrounded by green lush vegetation in the center of which a stunning bed will float allowing you to enjoy any image.
Graceful Serene and Stylish Floating Bed
by Susan Kennedy Design
Black and White Bedroom Design Featuring a Floating Bedroom
Modern Bedroom with a Chic Warm and Cozy Atmosphere
A floating bed is a superb piece of furniture. A relaxing place that can help you kick out your woes. It is a piece of art that shines and enhances any surroundings. Most essentially its aesthetic values are filling you with a sense of delight and calm.
Majestic Black and White Bedroom with Fascinating Floating Bed
by Imagine Living
Impeccable Magnetic Floating Bed For The Most Exclusive Bedrooms
Simple Compact Floating Bed Design in an Elegant State
Expansive Views Offered to a Floating Bed Positioned in the Center
by Bertram Architects
Sleek Modern Bedroom Design Enhanced by a Pendant Light and a Floating Bed
Perception Equals Reality
As with any piece of furniture these days, floating beds are coming in a variety of forms, colors, and textures, you can even have wooden accents or insertions of different materials to complement the design line in which it will be installed. This encourages homeowners to move towards floating beds.
Moreover in high-end designs, the interior designers go as far as manipulating every perspective in the room through a smart design and savvy interiors, here the floating beds are making a statement for their selves. In a small studio apartment with limited space floating beds can be even more effective as they will enhance the feeling of space through a fresh and light impression.
Floating Bed Design Protected by a Sloping Roof
by Stanislav Ermolenko
Serenity and Tranquility in a Bedroom With Expansive Views and a Floating Bed
by Abramson Teiger Architects
Huge Queen Size Floating Bed in an Ergonomic Bedroom Design by FORMA Design
Floating beds will definitely turn up the style quotient of your bedroom by several notches. They give your home an unconventional and innovative vibe by blending in sleek modern minimalism with a warm and inviting atmosphere managing to achieve the perfect aesthetic values, just ensure your mattress is ready!
High-End Minimalist Floating Bed Design with Wall Support
A floating geometric design can be enhanced with the proper lighting.
A neutral color palette can bring tranquility; calm and peace.
via modernambition.co
Playful Bedroom Design With a Read Floating Bed
by HILIT
Your wooden cabin can receive a floating bed just as easily as your modern flat; proper craftsmanship and woodworking describe a modern-rustic look. The added floating nightstands emphasize practicality to one`s advantage.
Bold Modern Floating Bed in a Soothing Setting
Stylish Floating Bed Enhanced by the Surroundings
by David Gray Architects
Minimalist Open Bedroom Design
by Diego Bortolato
A child floating bed can look exquisite whilst emphasizing the feeling of space and being entirely safe with an added safe rail.
A beautiful season to start crafting and gardening is upon us and slowly, step by step along with nature we start shaping garden projects and simple diy projects alike, infusing our creative mindset into our cozy household. A short collection of up-cycled furniture ideas for your home and garden has been curated for this marvelous spring season, the gallery includes simple crafts that mainly present re-purposing crafts, these now wear color and vegetation, greatly emphasizing their new position.
If in your spring cleaning process you decide to make a furniture change the article below is here to help, showcasing how a simple element can be re-purposed in your garden or home in a matter of minutes, conserving energy. A refreshing change indoors can become a refreshing change outdoors, old windows, doors and headboards can become swing sets, pergola ensembles or garden sheds, items that could enhance your household, provide additional storage or comfort.
Cast a glance at the ideas showcased below and surge inspiration, we would love to hear your feedback in the comment section below.
Upcycled Furniture Ideas for Your Garden and Home
#1 Up-cycle a headboard into a beautiful outdoor couch
In a matter of minutes with and old door or headboard and wood from a pallet you can create a new patio furniture piece of great beauty.
#2 use an old dresser on your porch to adorn greenery
Feature greenery, vegetation, the most beautiful decor piece on your patio from an old piece of furniture. You can display the address as well along a welcome message.
#3 Build a small shed out of old doors and store your tools
Three four old doors can become a new small shed to nestle your garden tools; an old phone cabinet can also do the job well but needless to say that they`re not easy to obtain. Get creative with simple elements.
#9 paint an old chair and transform it into a new flower garden ensemble
A chair treated like a raised flower bed can boost color and greenery a great deal; simple and fast to realize this craft will surely change the image of your garden or patio.
#10 Re-purpose an old kitchen cabinet into a potting station
Your potting station should be properly organized for the sake of your flowers. Repurpose an old furniture piece, paint it in vivid color and make the process easier and more interesting.
#11 two old doors can become a beautiful arbor-pergola ensemble
Two doors can sustain a few slabs; these will encourage vines to climb over the ensemble and beautify your garden.
#12 use your old sink to shape a small bird bath
The sound of the little animals can really animate your garden. A sink can be their new bath.
In the bedroom we can freely sigh at the end of the day, glancing at the ceiling, slowly closing our eyes; undoubtedly one of the most extraordinary feeling, certainly one of the most overlooked ones that we really appreciate. In the bedroom we recharge our batterie and in the bedroom we seek comfort and calm, regardless of its size, we know its our sacred refugee, a place in which none will bother, none will disturb.
Today we address once again the issue of small spaces, small bedrooms in particular. We have collected 15 ingeniously smart and functionable bedroom space saving solutions able to complement and emphasize the feeling of space in our tiny bedrooms. Along with these crafts and a few smart tips and tricks on space saving solutions you can refresh the atmosphere in your bedroom in no time. Cast a glance at the gallery below and craft away !
We would love to hear your opinion on the subject in the comment section below; we think smart spaces are cozier and warmer, they describe a more personal intimate space where the individual can really make a change by infusing his own style into the spatiality, what do you think?
No matter how much you try, you will never achieve that level of home organization where you won't need any extra storage space. There will always be something else that you need to stow away but you don't have the appropriate storage solution. However, you can work on improving the storage and organization potential of your home by constantly adding new and more practical solutions.
Shelves are one of the best ways to add more storage to your home without much hassle, but I am not talking about shelving units that you can buy at any furniture store. No, what I want to show you is a way to make your own shelves that can also become a part of your home decor.
The shelves that you use for storage in your home don't have to be a purely practical piece of furniture. On the contrary, you can use the shelves as parts of your decor in a couple of ways. The easiest way to jazz up your home decor is by displaying decorative items on your shelves. But that's not enough. We are going to show you some rustic shelves that are a decorative piece by themselves. Oh, did I mention that you can DIY them? The rustic shelves that we are going to show you in this collection are actual DIY projects that you can make by yourself.
We've made sure to include tutorials that are going to guide you with step by step instructions. This way you will have no issues building these rustic shelves for your home. At first, working with wood might seem like a really difficult task but the projects that we've included really only require simple operations. There is nothing complicate at all so you have nothing to worry about!
DIY Rustic Shelves Ideas
1. Use reclaimed wood to create these classic farmhouse flair shelving unit
The DIY Rustic Shelve collection above sure is something else but we would love o hear your thoughts first hand ! How are you using wooden boards and rustic shelves in your home ? Leave your valuable feedback in the comment section below !
The garden is finally starting to get the attention deserved with summer just around the corner and spring in all its splendors these days. DIY projects in this area are starting to feed the imagination of many gardeners, inspiring to recycle and up-cycle creatively in their own backyard landscape in a glance. Simple items can now be put to good use through inexpensive garden projects realized with clay pots or wine bottles, maybe even your own handmade pottery items sculped from modeling clay. You can create entire fairy tale setups with broken pots or a brand new miniature pond through multiple up-cycled items. All you need is ambition.
Collect the graphic items that you would like to transform, in this case clay pots and seek the suitable project for your small garden, from that to reality only time stands. Below you will find enough details for each idea through the link to materialize them happily with your loved ones.
Simple and Inexpensive Garden Projects
1. Transform a Cracked Clay Pot Into a Gnome House
We found the ideas showcased above insanely creative and purely joyful especially if realized with your little loved ones around you. These up-cycling ideas can easily become highly powerful and educative life lessons on responsibility and sustainability. We would love to hear your opinion on these garden projects realized with clay pots in the comment section below.
Dealing with a small space is something rather common these days and requires creative organizational skills for proper usage of the space for storing and usage. The kitchen represents the most crowded ensemble of our homes, filled with so many utensils, gadgets, pots, pans and so on. There aren't too many drawers and cabinets to store all the kitchen utensils one can gather in a lifetime. We usually tend to forget all about the blank walls and the immense potential they represent for storage space.So let's dive into the many wall storage ideas and options we have found out there.
Pots and pans take up so much space in the kitchen cabinets so why not hang them on hooks? Add a pegboard on blank walls for storing purpose, offering a beautiful alternative to the open shelving idea. Tension rods are other option from which you can hang different kitchen utensils, as well as wire baskets that are very useful for storing fruit and vegetables.
Paint the kitchen door with chalk-paint and use as a to do everyday list.
How do you store all of your kitchen utensils? Do you like the open storage concept, with everything out where anyone and everyone can see them? Use it as a decorative statement. Feel free to express your ideas and thoughts in the comment section below.
"There is a harmony in autumn, and a luster in its sky, which through the summer is not heard or seen, as if it could not be, as if it had not been!"
Percy Bysshe Shelley
"Autumn is a second spring when every leaf is a flower." Albert Camus
"Autumn's the mellow time." William Allingham
Red, yellow and orange leaves have taken over summer's cloth and surrounded us with this frenzy of colors and a canopy of goods. Although you might feel a little bit melancholic about yesterday's days of hot summer, autumn has its charm too and it is up to you to make the most of it and really appreciate it. So surround yourselves with treats and DIY goods and become a part of nature's wonders. Smashy little orange pumpkins, shiny red apples , squashes, fall leaves all can become an essential part in your decorations. And because the weather is still warm enough to stay and enjoy it outside, we have come up for you with some interesting ways and methods of decorating your patio from where you can sit, relax and admire. Choose colorful vases and tableware, warm autumny blankets and cushions, make yourselves candle holders and lanterns, attract your kids in making the classical jack the lantern from orange pumpkins or just hang an easy to make wreath to bring the autumn spirit into your home. And the best aspect is that this redecoration will cost you near to nothing and can really lift your mood up . And with Halloween and Thanksgiving right around the corner, it is a great way to start making plans and practice your DIY skills. Who knows, maybe there's an artist in you waiting to be revealed?!
Warmth and coziness, these are the two words defining the winter in our living experience. For some of us thought this warmth and coziness is found in the heated indoor swimming pool that challenges us to leave the snug and cozy textile and go for a swim whilst admiring the snow through zenith lighting. In the winter months, taking a dip outside is a daunting experience without a doubt, one that is unable to maintain you in shape if you are a dedicated swimmer, the problem can be solved by bring the pool in the interior space. Indoor swimming pools are becoming more and more popular each day thanks to clear usability and functionality matters.
Narrow Swimming Pool Chamber With Illumination Zenith
Indoor swimming pools are going to elevate and enhance the ambiance of your interior and like outdoor swimming pools, indoor swimming pools will encourage social interaction of the inhabitants through out the year whilst enhancing aesthetic and ergonomic values in a shattering manner. In this article we have carefully handpicked over 50 stunning indoor pool ideas meant to aid you in your project or simply feed your imagination for your dream home, you will see small or large swimming pools, covered by glass on metallic structure or sheltered by the main mansions, olympic training pools and gym connected swimming pools.
Whether you just sit and relax in your pool or you train for Olympics all year round, the interior swimming pool is a magnificent experience to be enjoyed.
Living Space Extended Trough a Glass and Metal Structure Over the Swimming Pool
Indoor Swimming Pool With Wooden Roof Structure
Luxurious Textures Surrounding a Narrow Swimming Pool
Enjoying the Sun and Shade Trough a Glass Extension
Indoor Pool with an Unusual Shape
Diving Board by the Indoor Pool
Creative Small Indoor Pool That Mimics a Tropical Pond
Glass Covered Swimming Pool Design
Organic Fluid Indoor Pool Design
Various Geometric Shapes Inducing a Dynamic and Fluid Vibe
High End Luxurious Black Pool with Art Glass at the Buttom
Small Sitting Area By the Ravishing Pool
Simple and Captivating Rectangular Design Line
Pendant Lighting Illuminating the Interior Pool
Luxurious Swimming Pool Lighten Magnificently
Highly Luxurious Indoor Pool with Sauna and Shower Area Attached
Jaw-Dropping View Outside an Interior Swimming Pool
Moroccan Style Indoor Pool with a Bar and Lounge Area
Olympic Size Swimming Pool For Professional Swimming Training at Home
Extraordinary Blue Refreshing Large Swimming Pool Design
Retractable Glass Roof The Best Compromise Between Indoor and Outdoor Swimming Pool
A popular design line, theme and motif for contemporary indoor pools is creating a world within a world, a really big trend these days. This method will allow you to brake the monotony of your life with a surreal alternate world snapped from your busy urban life. Depending on your space and budget you can create a corner of Bali, a rocky mountain-like waterfall for your pool, a Mediterranean like design or a Moroccan one. Imagination has no limits, Google your favorite vacation spot and materialize it in your own home.
Aquarium with Salt Water and Waterfalls in a Tropical Lagoon Setting
Seating on the Pool Deck by the Pool Adding Color Depth Spatiality
Neat and Sleek Elegant Modern Indoor Pool Design
A Superb Way to Slide Away from a Busy Day Into a Refreshing Swimming Pool
Neat and Sleek Elegant Modern Indoor Pool Design
Shattering Indoor Pool with Waterfalls
Minimalist Interior Swimming Pool Design Communicating with the Exterior Infinity Pool
Blurring Lines
For a while now people have imagined indoor pools only surrounded by stoic concrete walls, possibly on all four sides.While this setup is almost mandatory in regions with rough winters in warm winters is not and if conditions do allow you, you can opt for the best compromise. A glass extension of your home on a slim metallic structure that will protect your indoor swimming pool whilst offering extraordinary snapshots of the surroundings, extraordinary natural lighting, the exterior temperature in the summer and the sun`s power to heat up the pool when possible, the best compromise that will allow your to enjoy your swimming pool in the most magnificent matter. These see trough domes will allow you to enjoy extraordinary rainy days in the comfort of your own, possibly, heated swimming pool.
Elegant Stylish Screened Enclosure Surrounding the Pool
Indoor Swimming Pool with a more Classical Approach
Multidimensional Layered Designs
Happily we are all different and while some of us would like an indoor dramatic escape pool other would like to enhance the design and appeal of their contemporary home. Some homeowners choose to connect their lavish indoor pool to their living room or dinning area in an impeccable composition.
The indoor swimming pools are also easier to maintain all year round, they`re far easier to clean then outdoor pools as well. The right dehumidifier and climate controls systems have to be perfectly in place and in great function though.
A Simple Pathway Above the Pool Interfering with Spatiality and Offering A Place to Jump From Into the Pool
Large transparent roofs will enhance the feeling of space,allow natural ventilation when opened, bring a lot of light and create a very airy and serene atmosphere. Most of these systems are allowing you to choose from complete privacy to unobstructed views and the other way around, these systems can complement a contemporary indoor pool in an extraordinary manner.
Blue and White Interior Pool Design Remembering Us of Serene Greece Beaches
An Indoor Swimming Pool That Will Make You Forget About All the Possible Holidays
The interior pool is not just a pool. A piece of water in your home must reside in an extraordinary decor. Make no compromises on the deck space, tiles and lighting when you want to obtain a specific ambiance. You will know that the work is not completed and it might even disturb you visually. A huge investment should be enjoyed to the fullest, be sure that you get the desired shape and ambiance .
Wooden Walls Offering Warmth and Coziness
The Setting Under the Spotlight
Light and Lighting plays a crucial and vital role in any interior design but when it comes to indoor pools it`s a whole different story. A dark swimming pool is horrifying for most of us, not knowing that there is nothing in the swimming pool is even worse. Beside the lights in the swimming pool, the ones setting the scenery and ambiance are highly important as well, these can create various effects, from a mysterious ambiance to a highly futuristic one with no shade at all.
Several different layers of lights, maybe in different colors can create a magnificent image,remember you should always consider the current scenery when changing or adding something new.
Luxurious Contemporary Swimming Pool Design
A multitude of windows Offering Light to the Interior Swimming Pool
Hot Tub and Orb Fireplace Guarding the Swimming Pool
Tropical Indoor Paradise with Waterfall
Beautiful Illuminated Indoor Pool with Wooden Ceiling
Extraordinary Glass Extension For the Swimming Pool
Medterranean Style With a Touch of Rustic Charm
Elegant Interior Swimming Pool Design Animated by Superb Lighting
Waterslides and Jets Bringing a Playful Elemnet to the Pool
Small White Interior Design Pool
Indoor Pool Offering Warmth and Coziness
Indoor Lap Pool to Complete Your Workout Routine
Creative Painted Ceiling Adding Drama to the Scenery
Home Gym by the Swimming Pool
Minimalist Indoor Pool Design with Grey Walls and Recessed Lighting
Reupholstering furniture can be left up to the experts, or you can take a tutorial and learn for yourself. One benefit of this of course being the fact that it would be easier on your pocket. Then there is the satisfaction of sitting back and enjoying your own handiwork. You know what you want and how you want it done, so no one to complain too if it does not come out the way you expected. Reupholstering old furniture is also for the purpose of giving your home or office a new look without having to empty your wallet.
The good thing about reupholstering furniture, is that once you start to take the pieces apart, you'll soon realize that it was meant to be replaced when it got worn out. All you will need are a little sewing skills, and some tools like a staple gun, screwdriver and hammer to begin with. Start with something simple like a single chair then when you have built up your confidence and knowledge, you can move on to the living room sofa. Start by shopping around for the color fabric you desire and foam if needed.
You have the choice of sewing your fabric and then pull it over the worn furniture - this would be called the slip cover method. However, most of the pictures in this article deals mainly with totally reupholstering furniture from scratch.
Take a look at the pictures in this article and you will have a great idea on how to reupholster your own furniture.
Enjoy!
Before And After DIY Reupholstering Furniture Ideas
29 great reupholstering ideas. This is a great project to take up next summer. Share your comments with us on this article in the comment section below.
Are you thinking of efficient ways to build a home? It’s time you went beyond the concept of modular houses, and thought out of the box.
Focus your creative mind on a specific metal building, reflecting barn-style living spaces. What are we talking about? A barndominium, barn home, or whatever you may call it.
Well, the term can be alien for those who are new to the housing markets, but you can rest assured that this building-type is a trend that’s here to stay. That’s why we’ve decided to help you get familiar with the concept of a barndominium.
Through this guide, we’ll be providing relevant information on all there is to know regarding this type of building. Furthermore, we’ll elaborate on what you can expect in terms of its floor plans and pricing. You’ll also gain valuable insight on its benefits in the long-run.
So, without further ado, let’s begin.
What Is A Barndominium?
and that the term “barndominium” itself can be quite confusing, especially if you’re not familiar with building types. So, let’s make it simpler for you, and for this, we’ll start by breaking up the word.
A barndominium is composed of two words, namely - “barn” and “condominium.” Earlier, the name was given to barns that were converted into living spaces. In other words, it is basically a metal or steel building with living quarters.
However, nowadays, designers and planners are incorporating several features into these houses to ensure sustainable living. Some of these features include:
Energy-efficient windows to help block the sun’s rays, keeping the heat trapped inside during the cold winter months and outside during the summers.
Stained concrete flooring to meet your style preference and budget requirements.
Spray foam insulation to enhance the thermal insulation value of the house without air filtration.
Plumbing fixtures, tanks, pipes, and other apparatuses for easy access to water.
Barndominium Floor Plan
Now that we’re fully acquainted with the term “barndominium,” it’s time we elaborated on its floor plans to create a better understanding. On that note, barndominium house plans feature country home designs, strongly influenced by barn styling.
The best barndominium floor plan differs from the popular “farmhouse” trend! Instead, the designs usually feature an open concept floor plan, a gambrel roof, and of course, the rustic aesthetic appeal of repurposed pole barns.
Earlier, the floor plans of a barndominium were limited, but people saw its potential as a living space with time. As such, today, there are a variety of barn homes for you to choose from, ranging from year-round homes to carriage houses.
But then again, is it worth the investment? Let’s answer this question in the following section of our guide.
Should You Buy A Barndominium?
Well, owing to its open concept floor plan, the answer to this question is pretty straightforward for those tired of the daily hustle in big cities. If you’re one of those people, a barndominium can be a great place for a weekend getaway.
That’s not all; there are plenty of factors, which make barndominiums a reliable investment option. In this section, we’ll be highlighting some of their benefits to help you come to a decision. Let’s take a look.
Versatile Design
The best quality of a barndominium is undoubtedly its open and customizable floor plan, which makes it suitable for a wide range of purposes. You may use your living space as a restaurant, garage, shop, community center, entertainment area, or even a church.
Easy To Build
You need not wait for months or years to move into your new home as barndominiums are easy to build with or without the help of a contractor. So, if spending money isn’t a feasible option, we’d definitely recommend you to do it yourself.
Moreover, material kits for the construction purpose are already available in the markets, making your task simpler and less time-consuming.
Additional Space
Thanks to its versatile design, you can easily increase the available space of a barndominium when required. In other words, it allows you to add walls to the living space or leave it open, depending on your requirements.
Barndominiums are, in fact, known for their spacious design and high ceilings, which ensure the uninterrupted flow of air and light. So, you can easily arrange and customize their interiors as per your preference without having to worry about them being too crowded or stifled.
Durability
We all seek durability when it comes to finding houses, and the same goes for barndominiums. Luckily, you don’t have to worry much about the building’s maintenance as it’s sturdy and offers protection against troublesome elements, such as pests. So, rest assured it won’t wear out over time, giving you complete peace of mind both during and after purchase.
You must be thinking about what makes a barndominium more durable than other buildings. The answer’s simple - they're steel buildings and thus have a steel or metal construction.
Protection From Elements: Metal, being sturdier than wood, is capable of withstanding storms and earthquakes better.
Insurance Costs: Steel or metal barndominiums come with better rates from insurance providers.
Keeps Pests Away: Pests can never damage a metal structure; as such, your barndominium will last you through the years to come.
No Combustion: There’s no need to worry about fire hazards since metal barndominiums may deform due to high temperatures and fire but will never catch on fire.
Won’t Rot: Moisture and mold are the two primary concerns when it comes to a wooden structure. You’ll have to protect your home from damage by taking the right preventive measures. Fortunately, steel or metal structures don’t face these issues; they’re easier to maintain and have a longer lifespan.
Strength To Weight Ratio: Despite being robust, metal is quite light, so you won’t have to spend a fortune on material transportation costs. That’s not all; the basic assembly of a barndominium is not as labor-intensive as traditional houses.
Cost-Effective
One of the primary reasons why people don’t mind investing in a barndominium is because it’s quite cost-effective. Rest assured, you won’t be burning a hole in your pocket for it.
Conventional homes are more expensive than these buildings, costing something around $290,600, i.e., $145 per square foot for a 2,000 square feet building. However, when buying a barndominium, you can expect unlimited exterior doors, premium windows, an engineered foundation, metal shells, and so much more for only $38,000 approx.
You’ll only have to pay $75 or $90 at most for a 5000 square feet barndominium. Now, to help you invest in a suitable barndominium at a price under your budget, we’ve come forth with a pricing guide.
Barndominium Pricing Guide
Here we’ll be addressing a few crucial concerns related to the average price and customizable home kit of a barndominium. Other than this, we’ll be helping you learn how to calculate its final price.
What Is The Average Cost Of Barndominiums?
As mentioned earlier, barndominium costs for large high-end buildings are quite expensive, costing around $25,000 or more. The price is inclusive of the building materials, slabs, and high-grade finish but exclusive of appliances or any other essential that you may need.
However, if you’re in search of a basic shell with living quarters, just a shell, you’ll easily find a barndominium that’s completely built and ready for finishing at a price less than $26 per square foot, the barndominium cost is in direct correlation with its quality as you would expect but considering the resilient nature of the establishment one could consider the average barndominium cost to be inexpensive.
All the hard work in putting the building together will already be done, so you’ll just have to put your finishing touches on its interiors. For instance, putting up the windows and doors, painting the walls, and more. But for these barndominiums, you’ll require a cheap and custom barn home kit, which brings us to our next point.
Why Do We Need A Custom Barn Home Kit?
If you plan on building your barn home from scratch, we’d suggest purchasing a prefabricated barndominium kit. It can save up to 50% of the total costs of building a barndominium without the help of a builder.
What are these kits? They are predesigned plans and materials available at reduced prices to help you build a barn home. That’s not all; these kits come with everything you’ll need to build your barndominium within no time.
You can choose from the different plans and square foot sizes to find a suitable match for your home. If not, you may also customize the size and floor plans according to your specific requirements. But keep in mind that these changes will be reflected in the overall construction price.
Several companies specializing in barn homes offer plans or fabrications, depending on where you live. This is because some of them only serve regional areas within a specific mile range when working with a client.
Ideally, they prefer having clients within a 100-mile range to deliver barndominium kits without much of a hassle. However, with the demand for barn homes on a continuous high, larger builders in Texas are extending their service into New Mexico and Oklahoma.
They no longer just deliver the shell of a building but also offer exterior doors, stained concrete floors, engineered concrete slabs, energy-efficient windows, spray foam insulation, and a continuous roof.
To sum up, investing in a custom barn home kit reduces the cost of building a barndominium. It is the most cost-effective way of building a home and highly beneficial for first-time homebuyers who can’t afford homes in today’s market.
How To Calculate The Final Barndominium Cost?
As you already know, there is a wide range of barn home floor plans and sizes to choose from. And depending on what you specifically want in your living space, the barndominium cost can vary by a huge margin.
So, if you want to calculate the total average cost of completing the project, you have to take three variables into consideration, i.e., the price of the barndominium kit, labor costs, and the price of the finishing materials (drywall, cabinets, insulation, and paint).
Needless to say, the total cost of building the barndominium will be the sum of the three variables: the kit price + material costs + labor costs.
For example, suppose the final cost of building the barn home is around $45,000, and it’s built on a 1000 square feet area. In that case, the cost per square foot of the area would be around $45.
Final Words
As more people have started seeing the true potential of a barndominium, its popularity has significantly increased over the years. That said, the best part about investing in a barn home is that it offers long-term returns without burning a hole in your pocket.
What’s more, you’re able to design it however you want while preserving its spacious feel. And you don’t even have to use it for the purpose of living. There are multi-functional uses of a barndominium; it’s up to you to choose what you wish to do with this safe, durable, and affordable home.
On that note, we have reached the end of this guide. And we hope you were able to find all the information needed to build your very own barndominium.
Office furniture should always be associated with efficiency, and a Lucite office desk is a good choice if you want to organize a small corner without intruding too much in a room and keeping things clear and tidy.It's his attribute of transparency that gives the furniture the illusion of taking little to no space and its shine makes everything seem more luxurious . It does have a small inconvenience though: everything is seen more clearer so you have to keep things nice and neat all the time, which can end up being a plus after all.
You can find all sorts of acrylic desks from completely transparent ones to lacquer desktops with acrylic legs. Further on we will present you a selection of acrylic home office desks meant to inspire you in creating your perfect interior design.
Acrylic Home Office Desks for Your Interior Design
1. Acrylic Home Office Desks
The first piece is designed out of 4 smaller ones that slide together and adapt to the dimensions of your interior space. [fromPenny Farthing Design House]
Acrylic Desk from Penny-Farthing Design House
If you like compact, unitary pieces and not divided ones try utilizing a console table .The Peekaboo Clear Console is a simple form bent to avoid accidents but without having a wide surface to work with. [from CB2]
Peekaboo Console
Peekaboo Console Desk
2. Acrylic and Glass Desks
If you like the aspect of sleek clean glass try combining acrylic desks with glass desktops. Such a desk is the Lawrence Desk below.
Lawrence Desk by H-Studio
If you have a dining acrylic table to spare you can use it very well as a desk. The Atlas Dining Table is a piece that can work beautifully as a home desk .[from Acrylics of Naples]
Atlas Dining Table from Acrylics of Naples
The Apollo Dining Table/desk below features acrylic pedestals that are sold in pairs. [from Allan Knight]
Allan Knight Acrylic Pedestal Base
3. Desks With Acrylic Legs
The zebra wood and black granite top of the Lobeira Desk below is quite impressive and in combination with the acrylic legs offers an impressive design. [from Allan Knight]
Allan Knight Lobeira Desk
4. Alexandra Von Furstenberg Acrylic Desks
Alexandra Von Furstenberg is known for her colorful bold acrylic designs and her love for clean, geometrical shapes is transposed in her pieces. Neon colors or transparent ones Alexandra's pieces integrate perfectly into any modern design and even traditional ones, contrasting strongly with the rest of the design.
Brillant Acrylic Console Table
AVF Luminous Acrylic Desk
Ice Acrylic Dining Table
5. Lucite Desks
Lucite is the brand name for the acrylic first manufactured by the DuPont Chemical Company beginning in the 1930s. All Lucite pieces are acrylic, but not all acrylic pieces are referred to as Lucite. In fact, other acrylic brand names include Perspex and Plexiglas. Lucite was initially used in the manufacturing of war materials during the 1940s, but its appeal was eventually noted by fashion and furniture designers alike.
The Lucite desk below mixes the wonder of acrylic legs with the shine of a lacquer top. [fromTarnish & Tinsel]
Lucite Desk
Another Lucite desk by Plexi-Craft (shown below) combines a traditional and a modern styles, customizable by the purchaser. [from Sketch 42]
Lucite Desk of Amanda Nesbit
You can use Lucite tables which initially where used for another purpose as office desks and add a plush office chair to make it more personal.
M.-Design Interiors Inc.
6. Lucite and Glass Desks
Glass is always a good choice to empower an acrylic desk and make it look more elegant and sleek. The piece below has Lucite base and a glass top.[from AtlantaHomesMag.com via Decorpad]
Glass and Lucite Desk
Depending on the thickness of the glass the effect is more or less glamorous.[from Modern 24/7]
Lucite and Glass Desk
Vintage has its charm and a vintage Lucite desk with a glass top can work wonders into your interior design. [from Janel Holiday Design]
Lucite and Glass Desk
So in conclusion the possibilities when it comes to acrylic home office desks are endless and you just have to keep in mind to be creative and to customize your every piece to make it your own. Be bold and try colored in mass acrylic or a combination of Lucite and glass desktops. Vintage pieces are a great find and if you are lucky to find an acrylic vintage piece make sure to integrate it in your interior design and exhibit it properly.
In our bathrooms we should be able to find calm, peace and relaxation at the end of the day. It is simple, natural and normal more then anything. To seek serenity in our own shelter and our own refugee. In bathroom we gather ourselves and breathe reflecting upon our busy days, the schedule for the next day or the dreams which drift us from reality. It is up to you to enhance these moments with a candle, a fascinating immersive scent and ambient lighting. If you have the opportunity though you can enjoy far better moments at the end of the day. Through a luxuriant outdoor shower or outdoor bathtub you can breathe the fresh scent of greenery and clear your eyes in the most spectacular ambient lighting :the sunset.
Nothing spectacular has to happen to have these at your discretion, you need will and perseverance to push a DIY project into reality. Whether you simply break the walls of your bathroom, replace them with glass folding walls able to open up fully towards the exterior or buy a new bathtub and position in the backyard, you will obtain terrific results.
You need to have hot water and a privacy screen, if you are exposed. You need to embrace and breathe fresh air. We invite you to seek inspiration in the pictures showcased below and let us know which is your favorite outdoor shower and outdoor bathtub from the selection .
What do you think about these luxuriant outdoor showers and outdoor bathtubs? What would you pick?
What is the first thing you take into consideration when you go on a furniture shopping spree? Is it style, design or the level of comfort and practicality? Nowadays design means more than satisfying the primary needs of the consumer, and the product design has overcome so many boundaries set in the past that you can not find a style line anymore in this industry. One would say that today's products have adapted to the taste and needs of all types of people and that there is a design right for everyone. And while we can not argue with that, we strongly believe that a designer should transmit something through its piece and that he should always have in mind the customer. Of course, we are not talking here about avangardist designer who create new products just for the pure art of design itself and not for the purpose of selling their objects. The following collection features objects from both spheres that can be considered at least controversial if not utterly bizarre and weird. We invite you to a world where boundaries do not exists and imagination has gone beyond your craziest dreams: 40 Of The Most Unusual and Bizarre Furniture Designs You Have Ever Seen.
38 Ingenious Ways to Up-cycle Repurpose and Reuse Vintage Ladders have been showcased underneath, all of them creative, all practical in their decor. Cast a glance through at the gallery and discover new and creative way to use ladders in your new interiors. The simple element, the ladder, is able to take multiple roles in the household from towel rack to entertainment center or bookshelves when combined with additional items.
The wooden ladders showcased underneath should be inserted into Scandinavian interior designs, shabby chic and rustic lines where they are able to complement resident elements properly. Surge inspiration and craft away!
Ways to Up-cycle Repurpose and Reuse Vintage Ladders
#1 Hold Baskets on Top of The Latter While You Hang Pots Underneath
What do you think about the ideas presented above? Would you choose to use the classical ladder in the interior design? Feel free to share your own ideas in the comment section below.
Related Articles
Wall art is what gives life and personality to our rooms. The right design and the right color combination can completely transform any space and turn it into a cozy home or sterile environment, dependent to your tastes. Choose to go safe with neutral elegant tones, or really make a statement with bold colors and chic designs. We have gathered a collection of 34 Beautiful Wall Art Ideas And Inspiration to prepare you for your next home makeover. Creativity is required as well as some degree of craftiness. But most important, have fun with the projects. it will give hole new meaning to any wall art piece you will create. Feel free to share your projects in the comment section placed at the end of this article. Enjoy!
Beautiful Wall Art Ideas
1. Blue tones in an elegant composition
2.Color splash for a spring fresh attitude
3.Wood as wall art can be very rustic and homey
4.Flower branches add so much life to your room
5.Collage interesting pictures in a different way
6.Black and white combinations never go out of style
7.Industrial designs can be applied to wall art as well
8.Tri-dimensional art can be what you are looking for
9.Mirrors amplify any room , just display them in a fun way
10.Colorful flowers for the romantic in you
11.Paint wooden pallets in fresh navy colors
12.Add inspirational quotes to your dinning room wall
13.Music makes us lose control
14.Display your family photos in a beautiful unique way
15.Old books have personality and style
16.Design come sin any shapes sizes and can appear anywhere
17.Have the world at your feet
18. Thread work as wall art
19.Use decals in different patterns to express your style and personality
20.Buttons can form beautiful compositions
21. Display of love
21.Love is on the wall, everywhere I look around
22. Heart photo display
23.Photo clock instead of a regular display
24. Stenciling wall art
25.Giant scrabble is perfect anywhere
26.Black and white in perfect combinations
27.Contemporary abstractions are very in right now
Light plays a crucial role in any interior design and its presence can empower or diminish the aesthetically qualities of a room. It influences any atmosphere and softens tones, colors, shapes or even transforms them all entirely. Thus finding the right lighting fixture for your home can be a very difficult assignment which will definitely require a lot of patience and time form your part. And that is why we propose you to try and make your own lamp or chandelier suitable to your taste and requirements. We know, you will say " who has the time and skill for that?' but we find that the simplest easiest DIY projects re the most beautiful and enjoyable. It does not require some incredible talent or inspiration.
There are hundreds of easy tutorials and guides that will lead you on the right path to your desired result. We have previously wrote 5 Tips For Getting The Right Interior Lighting For Your Home which we hope will help you further more in your search for the proper way of illuminating your interior design scheme.
Further on we have gathered a collection of 30 Easy DIY Beautiful Shimmering Luminaries and Lamps Ideas You Should Definitely Try Now.
From rope lighting fixtures to origami, re-purposing old mason jars and even your very own cloud will definitely inspire you in your research.
Lego, the small plastic bricks that have crafted a world of their own, are very well cemented in contemporary pop-culture and simply extraordinary. These have pushed us into publishing this top of 26 of the best DIY lego crafts . The little bricks have managed to portray many appealing settings for kids, and some adults alike , such as pirates, space missions , sci-fi ,adventure and exploration , star wars, lego architecture kits and many more. A true alternate Lego world has been created, with a tremendous lasting impact on our culture. Lego became big during 90's with its colorful and creative approach that has been easily sold to kids .These DIY lego crafts expand not only the Lego world but also prove the flexibility and usefulness of Lego bricks in basic design .
While the late 80's and early 90's are Lego's heyday , the concept of building with toy bricks was not so new and can be traced back to the beginning of modern architecture. First composition using bricks of various colors , but without the lego binding system, was used in composition and toy designs belonging to the Dessau Bauhaus school of arts and architecture and in De Stijl art genre, as it fit well with that composition style. Even during the 1930 , toys can be found made from small wooden bricks brightly colored , but it gained momentum in the late 80's where commercials and marketing brought the danish Lego bricks to a humongous audience . Since then Lego has had a number of series which have established themselves as classics and are even collected for their value.
So there are two ways to go, either want something funny hip and cool for the kids , or you have plain nostalgia about your Lego brick building days , keep in mind that they may still be truly useful and don't throw them away. The binding mechanism made by Lego is pretty solid so the bricks can be used to make any number of household items and fun Lego crafts . This can be a great way to liven up your home and add a happy "toy" feel to a room. This works even without the bricks, as they are such a pop-culture image , anything resembling them even remotely will have an effect. This can be done to create some out of size funny objects , ideal for a kids bedroom , in which pillows shaped as Lego bricks can easily blend . Essentially DIY lego crafts is self implied , Lego being based on do it yourself , whether it`s a space ship or an indian fort. So basically every Lego kit is like one of the DIY lego crafts presented.
But if you don't want to be just funny or make something for the kids bedroom, remember that Lego bricks have a good binding mechanism and can themselves be used to build more than just pirate and space ships. Granted nothing too grand can be achieved , unless you make a point out of making cool DIY lego crafts , you can make with enough time and patience some interesting pieces of furniture such as lamps , candy jars , key hangers , and even Christmas decorations. With an easy way to make some interesting designs that are both smart and easy to take apart, Lego bricks prove another point , that ingenuity transpire the original purpose of a design and its flexibility will help it withstand the test of time . The bottom line is clear than : Lego bricks are design to build pretty much anything within their scale and sometimes beyond it , so let your imagination and creativity flow and materialize something extraordinary, something worth sharing with your loved ones.
What do you think about these extraordinary DIY Lego Crafts? Are you ready to play?
Scroll down to feed your imagination with 27 of the most useful diy furniture projects in the world.
It is that simple.
Curated with care, the diy projects showcased below have strong abilities to magically transform your decor by being extremely useful, functional whilst being extremely graphic. From vertical storage options to up-cycled coffee tables the furniture projects are varied to match multiple functions and bend into multiple designs with ease.
Keep in mind that these are here to feed your imagination, the upholstery projects are definitely not restricted to chairs and armchairs and rustic benches designs are not limited by shutters. Gather the proper resources and put your creativity to good use; combined with perseverance and passion great things will follow.
Creative DIY Furniture Projects
1. Build a simple hardwood storage unit with rustic appeal
2. Give a vintage look to old furniture
3. Reclaimed roots can be used as coat hangers
4. Create your own movable kitchen island
5. Storage should never be neglected
6. Old shutters look incredible used as benches in the living room
7. Add up some crates and transform them into beautiful storage
8.You can get this simple creative desk from a wooden pallet and 3 pieces of plain wood
9. Recondition your office chairs in colorful tones
10. Hair pin legs are such a wonderful addition to a few wooden beams
11. Create storage for your bathroom using an old door
12. Or add a mirror to it and embellish your small garden
13. Get matters into your own hands and spray paint those old looking dinning chairs
14. Simplicity is the ultimate sophistication
15. Create useful storage for your hallway
16. Give your furniture a fun twist
17. A small coffee table can add color and contrast to any interior design
18. Simple wooden headboard give elegance to your bedroom
19. Repaint upholstery in paste tones for a fresh makeover
20. Choose strong unique pieces of wood for your backyard furniture
21. Add a few beams to COLORFUL cement block and you've got yourself a beautiful bench
22. Old door used as vintage storage unit
23.Turn an old tire into an ottoman
24.Unite old chairs into a unique corner bench
25. An old cable roll can be used as a coffee table
26. Glass and wood merge perfectly into a contemporary design
27. Learn how to paint old furniture and transform your home
We would be delighted to hear you valuable feedback in the comment section bellow. Craft away!
We live in a society addicted to technology and its perks. Everything seem to get smarter with each passing day from computers to cars, cellphones, you name it, there is a gadget out there that can make your life easier.Most of the people surrounding us seem to spend more and more money on technology but as hard as you try you can't keep u with the innovations.
Today we have focused on iPhones, because, let's face it, almost everyone seems to own one. In particular, we have gathered a collection of DIY iPhone Case Ideas you might find appealing. Maybe you just want to give that old transparent case a new look and design it your own way, with every single detail in place. The ideas featured bellow take usage of the transparent case and dress it up with colored paper placed under it or photos of your loved ones, or others just apply studs and other accessories to a simple plastic case. We especially love the wooden carved case which you can design yourself if you have some Illustrator skills and carve it at a professional shop.
All the ideas are meant to give your case a new look and have a meaning behind the design you create on your own. You can even try to draw on a white plastic case with colored sharpies if you feel you are up to the task. Just be creative and if you choose to make a DIY iPhone Case, make one that represents who you re and what you like. Then the effort would have payed off.
So what do you think? Are DIY iPhone Cases a good idea? Or you just like to buy the ones the stores have to offer? We would love to hear your opinions in the comment section below.
Related Articles
The industrial design line can benefit from multiple resources when it comes to sculptural pieces, it can surge power allure color and texture from the time`s footprint through rust, through oxidation or simply discoloring, earning unmatched authenticity and original aesthetic values. Time tells the story of a sculpture that thrived where the rest haven`t for various reasons. 23 clever diy industrial furniture projects have showcased underneath; each and every one is able to make a statement for itself and for the industrial design movement in which they blend.
We invite you to cast a glance at the gallery below and explore your surroundings. Every item has the potential to enhance your world in a manner; invest time, gain knowledge and experience and progress. Keep in mind that the objects themselves can be new; you can empower them along with the test of time in your ensemble.
Clever DIY Industrial Furniture Projects
1. Gas Station Sinks Realized From Tires and Old Fuel Pumps Transformed Into Water Faucets
22. Old Washing Machine Transformed Into a Breathtaking Night Stand
23. Old Tractor Farming Part Reused Along With Salvaged Wood in a Sculptural Piece
We would love to hear your opinion on these diy projects in the comment section below and see your latest crafts; don`t be a stranger, share your knowledge and experience .
A reader really cherishes his books and he is known to be surrounded by them all the time, taking advantage of every moment to feed his imagination through reading. A wonderful thing to know, a wonderful activity to practice.
A true bookworm sculpts the space around him for this splendid activity, he searches for smart ways to store books around him, he creates reading nooks and has distinct reading spots that he simply loves in his home, in his town and even a special position to read on the bus if he gets the pick.
In your shelter however you get to pick every-time and from a bookshelf nestled in your kitchen up to spa bathroom libraries or hallway tiny reading reserves you have thousands of opportunities to design to your advantage. We have selected just 22 ingenious ways to store books in the comment section below but their relevance speaks for themselves. Cast at the gallery below and leave your valuable feedback in the comment section below.
Homemade Pallet Furniture Designs have taken the world by storm, there is not one thing in your backyard that wooden pallets can`t cover along with a creative mind. Whether we talk about storage units, raised planting beds, coffee tables or lounge tables; wooden pallets are the way to go if you are looking for a memorable crafting experience. Gather your friends and family and invite them to join your diy wooden pallet furniture project, you can even challenge them to a contest, it can work even better.
The newly created furnishings can work in any decor thanks to the coziness and warmth brought into the picture by wood textures. Insert them raw in a stark white design line and you have the perfect Scandinavian Design premise to evolve from. Get creative and feed your imagination with these handmade pallet furniture designs below; if these are not enough you can find more wooden pallets recycling ideas here.
What do you think about the selection of homemade pallet furniture designs showcased above? We would love to hear how you up-cycle wooden pallets in the comment section below.
Natural elements in our homes are elements of great important and immense beauty that cannot be replaced with anything synthetic, nothing faux. It is simple, it is normal to be admire and love the natural elements, they`re pure, they`re the result of natural growth and time and like us, they carry memory and life.
Natural stone bathtubs designs have been showcased below, highlighting how much beautiful a bathroom can become if we were to change a simple isolated element. Cast a glance and pick your favorite design.
Natural Stone Bathtubs
#1 regular bathtub wrapped in stone with wooden background
Decorative switch plates are not items widely used despite their endless design possibilities but the gallery below will point out why in certain interiors these are valuable items, able to make a discrete change in the interior design. 21 unique ways to decorate light switches plates in contemporary designs have been presented.
We invite you to cast a glance at the gallery below and envision how well these would fit into theme specific spaces like coffee shops, kids bedrooms or play rooms.
What do you think about the gallery above? We would love to hear your opinion in the comment section below.
Old records and vinyls are a part of the music history and their role has never been forgotten ever since they have appeared in our lives. Most of us still have lots of vinyl records hidden away somewhere in an attic or forgotten in the back of a closet. You can find some interesting ways to give them a new purpose and life and still keep their memory intact. But don't imagine we are advising you to destroy valuable vinyls. We are taking here about scratched ones or broken beyond repair.They can be transformed into beautiful, amazing wall clocks or storage boxes very easily and if you have the knowledge and skill you can even bend them into fluid organic bowls. Lamp, coffee table, wall art, wind chime, all look gorgeous and vintage and could fit perfectly in any interior design scheme. Even in your kid's room. There are a lot of vinyl clocks with superheroes your little one would simple adore and other creative ideas like wall art or book storage you will find interesting. Our 25 DIY Recycled Vinyl Projects awaits you below. Enjoy!
DIY Recycled Vinyl Projects
1. Book storage
2. Forest clock
3.Vinyl coffee table
4. Vinyl dreamcatcher
5.Vinyl stools
6. Vinyl switch protection
7. Magazine storage
8. Baby
9. The London clock
10. The Batman clock
11. Clouds and moon clock
12. Vinyl lamp
12. Butterfly vinyl wall art
13. The process of making a figure clock
14. The vinyl record handbag
15. Vinyl bent into flower vases
16. Collection of clocks
17. The Beatles clock
18. Flower pots
19.Organic fruit bowl
20. Wall art display
21. Creative laser cut clocks
Related Articles
Metallic circles with a humble shine can be spotted below. Metallic things that once have been loved and adored for their functionality and their shape, all these are today an item of the past. Today, the luckiest of the round items is being the subject of creative DIY projects. Re-purposing bike rims lying around might sound like an activity for today`s so called hipster group but bear with me, you will be amazed.
Old bike wheels, the rims especially can be used to create actual green igloos in which the metal is completed by climbing plants, old bike rims can also be used to make pot racks, small fences and even picture frames for your wall decor.
It goes without saying that the energy invested in these graphic geometrical subjects would have been lost if they were to hit landfill. What do you think about the crafts materialized above? We would love to hear your opinion in the comment section below.
19 of the world's best ways to repurpose old furniture in your garden have been featured below. They`re here to amaze and beautify, they`re here to change and save the world at the same time. Imagine how much time has been invested into creating your old couch, imagine how many hours it has been used by you and your loved ones; it would be a waste to just throw it away when you can create a beautiful flower bed out of it. Up-cycling old items is so much more then reducing costs, it speaks a lot about an individual that cares enough about its items, an individual that conserves the effort of others as much as possible whilst saving the planet a little bit of energy.
We invite you to cast a glance at the gallery showcased below and surge inspiration for your own garden, there are thousands of items that were unable to make it to our top, thousands that are able to beautify your garden with ease. Whether you`re going to create new unusual flower pot for your garden or a small water fountain we invite you to cast a glance at the unusual garden flower recipients and start your own DIY project as soon as possible; nothing beautifies the world more than greenery and its flowers.
Best Ways to Repurpose Old Furniture
#1 Wooden Stump Carrying Old Mailbox Transformed Into Flower Planter
Simple unique and extraordinary creative crafts beautifying the world in just one article. We really consider these 19 of the world's best ways to repurpose old furniture in a yard and we are aware that there are far more ideas out there to add to our guide. What do you think?
Interior furniture defines our spatiality in which we spend our day to day activity, through simple change we can redefine and change spaces easily, this impacting your work and state of well being. Most of the time we buy new fresh furniture to reinvent a space, but this can also be done by ingeniously reusing and converting items and materials to create new and unique furnishings with simple DIY interior furniture ideas.
Further on we will present you 10 ideas meant to help you define your new space. Some are brilliant, some are just inspiration, you are the one to decide what suits you and what you need to start your own project, maybe, off the books.
Creative DIY Interior Furniture Ideas
1. Empty Bottles and Wood Boards Shaping Simple Sturdy Bookshelves
Simple solution for shelves can be realized by teaming up empty bottles and wood boards
image via thankgodfordesign.com
2. A Bookshelf With a Rope Bridge Look
Resembling a Rope Bridge This Bookshelf Look Extraordinary and Adds Authenticity to Your Interior Design
Using a road sign for a table can be a statement, but also an interesting piece of furniture that will brighten up your room. You can use a customized sign for effect .
Wood pallets can be used to make any piece of furniture : tables , beds, chairs , so keep that in mind when your plan your DIY interior furniture project.
image via exnwhy.com
What do you think about these 10 DIY interior furniture ideas? Will you try and materialize your own? We would love to see it and add it to our guide or simply hear your opinion in the comment section below.
Covering the TV screen with artwork is a cost-effective way to camouflage the TV when it isn’t turned on. But if you don’t mind shelling out extra cash to enhance the décor of your living space, getting a smart TV like Samsung Frame TV will be the best bet.
Sure, a wall-mounted television isn’t the most aesthetically pleasing item in your living room or bedroom. But it’s an indispensable piece if you love binge-watching your favorite shows while hunkering down on the sofa.
Since choosing between binge-watching sessions and a good interior design is difficult, I’ve found some creative ways to hide the TV. From creating a gallery wall to installing a TV lift, I’ve got you covered with a multitude of clever hacks.
How To Hide A TV + Hidden TV Ideas
Despite advances in technology, modern televisions with flat-panel displays, thinner frames, and hidden buttons are still considered an eyesore. That’s because they don’t blend in seamlessly with the décor, so most people prefer hiding or camouflaging the TV screen.
If you love to watch TV but don’t want it to become the focal point of your space, the good news is that you can hide it or minimize its appearance.
Fortunately, there are numerous ways to hide a TV in plain sight so that it does not appear as a giant black box resting on a console or hanging on a wall. From gallery walls to cabinets or mirrors, I’ve got you covered with some ingenious ways to hide a TV.
5 Ways To How To Hide A TV In Plain Sight
1. Cover Your TV Screen With Artwork
During the day, when your TV is turned off, covering it with artwork will camouflage it well. One of the best ways to use art to hide your TV is to have a fixed piece of artwork that could be elevated upwards like a sliding panel.
Or you can install a flat canvas that can be retracted whenever the television is turned on– basically, acting as motorized sliding doors for the TV.
If sliding artwork or retractable panels don’t appeal to you, a foldable screen with artwork will definitely come to your rescue. Foldable artwork is useful whenever the TV screen isn’t in use and unfolded when you turn it on, offering the best of both worlds.
2. Upgrade To A Smart TV
In a modern living room, a regular TV won’t enliven your space as much as a smart TV would.
Smart TVs come with interactive features and an integrated internet connection to enhance user experience. Since they are standalone products, using digital art to cover the TV screen is one of the most cost-effective ways of camouflaging it.
To add a personal touch to the space, you can lay out a slideshow of your family photo or your own pictures on the TV screen. Although all smart TVs have the art feature, the Samsung Frame TV has some of the best digital art. The main benefit of owning a framed TV is that it mimics a piece of art, thanks to its flat and thin design.
Adding a decorative frame will also make the TV look like a framed picture.
3. Add Cabinet Doors
Wall-mounted TVs, especially those recessed into the walls entirely, make a space less cluttered.
Still, if you think the big black box in your living room is ruining the beauty of the space, adding cabinetry would be a practical solution. Note that this can only be done if there’s enough wall space on both sides of the television for the door to open easily.
Decorative cabinet doors are also feasible for TVs that aren’t mounted to the walls, although you will have to frame the doors first. And if you’re not short of space, I suggest going for barn doors (sliding doors).
4. Install A TV Lift
One of the creative ways to hide your TV is to install a TV lift– yes, you heard that right!
TV lifts or cabinets are usually installed underneath the bed from which the TV rises via a remote control. Or you can opt for those that flip down from the ceiling. The best thing about TV lifts is that they come in a variety of sizes, so you’ll find one for your space without much hassle.
5. Paint The Wall Dark
A big black screen against a white wall would make it pop out and divert your visitors’ focus (optics) from other accent pieces in the space.
So, if you’re not ready to install cabinet doors or add a TV lift to your space, painting the wall dark will make the screen less prominent. That’s because TV screens blend better with darker walls than lighter ones.
Although most people prefer going all-black in such cases, I suggest opting for navy blue to blend the TV screen with the background. Paint your wall black only if you want your space to appear dramatic or timeless; otherwise, navy blue will be a great choice.
Hidden TV Ideas– 11 Ingenious Ways To Hide Your TV Stylishly
Making your TV as unobtrusive as possible is slightly challenging, and I understand that. That is why I’ve brought you 11ingenious modern ways to hide your TV in style.
1. Distract With Accent Pieces
Surrounding your TV with accent pieces can disguise it, diverting the attention of your guests to the other important things in the room.
Books, wireless lamps, ornaments, or vases– you get plenty to choose from when it comes to decorating the space around the TV. Or you can simply opt for a few glass, ceramic, or gold items and place them carefully in the storage unit. By doing so, your TV will fade into the background and the accent pieces will become the focal point.
You can also arrange a wood wardrobe and the shelving unit symmetrically to make the space calming and balanced. A bookcase and a pair of armchairs will also be a great addition to the space, on which you can recline and read a book.
2. Hang A TV Mirror
Want to make your living room more friendly and cozy? Mirror TVs are worth investing in if you wish to create a social space not dominated by televisions.
What’s interesting is that mirror TVs are available in a variety of sizes, so you can choose a small or large unit easily. To turn it into a mirror, all you need to do is turn it off, and the TV will disappear.
3. Place It In The Corner
Instead of putting your TV in the center of your living room, slotting it into one corner of the space will hide it from sight.
Hanging the TV above the fireplace mantel or the middle of the room will dominate the space. On the other hand, positioning it to the side beneath the shelving while painting the backdrop in a dark shade, ensures the TV blends seamlessly with the dark backdrop.
4. Install A Sliding Panel
A country-styled paneled wall revealing the flat-panel display is one of my favorite ways to disguise the TV.
For this, you will have to first mount the TV to the walland build a shallow cabinet on the four sides. One thing I would like to mention is that creating mesh doors would be a practical solution in case you have a surround sound system. Mesh doors would hide the speakers but make sure that the sound flow isn’t obstructed.
When it comes to mounting TV, you get a variety of options to choose from. Like, a static arm is quite useful for homeowners with limited space, but for optimum viewing, articulated brackets would be the best bet, so the screen can be tilted or pulled forward.
5. Mix Your Big Black Screen With Shelving
In this approach, you will need a few framed pictures, while the color of the storage must be similar to the bezel of the screen. Place it carefully around the TV, as it will be a clever hack for small spaces, but will also make your TV set appear as part of the display.
6. Fit Your TV Flush To The Wall
Building a media room from scratch? Well, the good news is that you have the luxury of designing the space as per the dimensions of the big black screen. You can fit the TV in a custom joinery to hide the depth of its screen so that it doesn’t stick out and dominate the space.
7. Add A Bold Media Unit
While this may not conceal your TV unit entirely, it is effective in deflecting attention. On rich walnut veneer, install glass shelves and integrated spotlights while adding a few decorative pieces. Now carefully place the TV in one corner of the shelf, and turn on the spotlights to highlight the bold accent pieces.
Whichever accent pieces you choose, make sure they complement the other furniture in the space. Like, if there’s a dining room next to your media room, go for accent pieces that are similar to the items displayed in the dining room.
And if you have a small space, hang your TV against a dramatic backdrop, and it will blend into it seamlessly.
8. Get A TV Bed
If you like catching up with the latest release on Netflix, adding a TV bed is one of the best ways to hide the TV. TV beds also allow you to create a decluttered space, as such beds hide unsightly cables and wires from sight.
In a TV bed, the footboard is slightly longer than usual, from which the TV can be raised via a lifting mechanism.
9. Arrange Your Furniture Away From The TV
One thing I learned a little late is that angling all your furniture towards the TV can make it the focal point of the space.
Instead of placing your sofas and chairs towards the TV, arrange them in a convivial setup to deflect attention. This way, the people who come over to your place will know that the space isn’t a media room but a living room. .
10. Invest In A TV That Is A Work Of Art
Every interior designer suggests incorporating a TV that works as a piece of art so that you won’t have to hide it when it isn’t in use.
Samsung is one such brand that has invented a Serif TV with input from Ronan and Erwan Bouroullec, French interior design experts. The two experts have also added a “curtain mode,” which is midway between on and standby mode.
On such a TV, you can set up a slideshow of your own photograph, view a clock, and access some apps.
Around the rear, a woven fabric panel is added to keep the connectors out of sight so that your unit should look excellent from each and every side. Other than Samsung, Loewe and Bang & Olufsen offer super-stylish TV sets.
11. Buy A Projector
In an open-plan living room, a projector would be an excellent addition because of its high-resolution picture quality, allowing you to watch on a 100-inch or larger screen. Best of all is that the screen doesn’t need to be displayed 24/7, meaning you wouldn’t have to spend time and resources camouflaging it like your TV.
For a premium experience, I suggest spending on a motorized projector screen which can be pulled out of sight when you’re not watching anything.
Tip
One of the common mistakes homeowners make is to go for a TV that is too big for their room, because of which they struggle to disguise it. To avoid the hassle, I suggest going for a TV whose center of the screen is right below the level of your eye. That’s because peoples’ heads tend to drop a bit when relaxing, so mounting it overly high will cause discomfort.
A TV is an integral part of every living room, but it makes or breaks the harmony of any space where it’s placed. Therefore, sometimes hiding it is the only option to emphasize the finest aspects of the room.
Using a projector or artwork to create a gallery wall or decorating the shelving unit with accent pieces will divert your guests’ attention from the plain black screen. And if you don’t mind spending a bit to hide the TV in plain sight, installing a TV lift or sliding panels would be the best bet.
Remember, your budget plays a crucial role in determining which technique you should opt for disguising your TV. You need not spend tons of dollars to camouflage the TV; so, decide wisely.

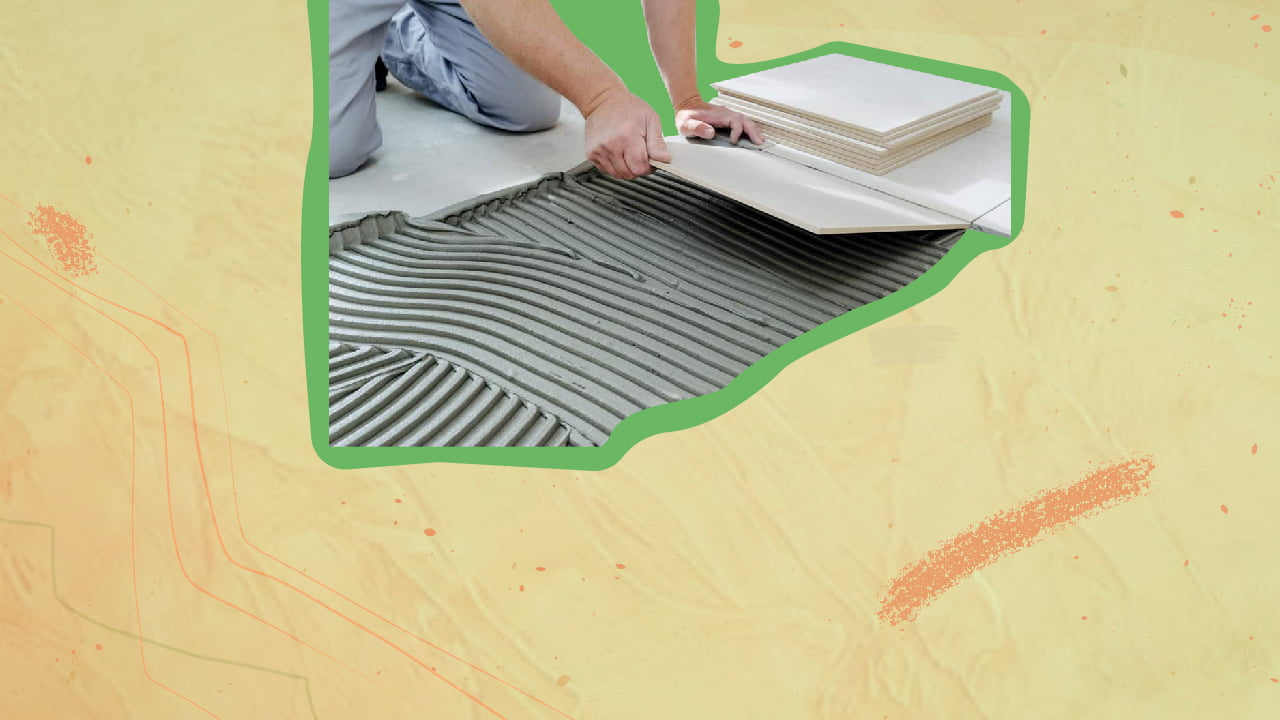


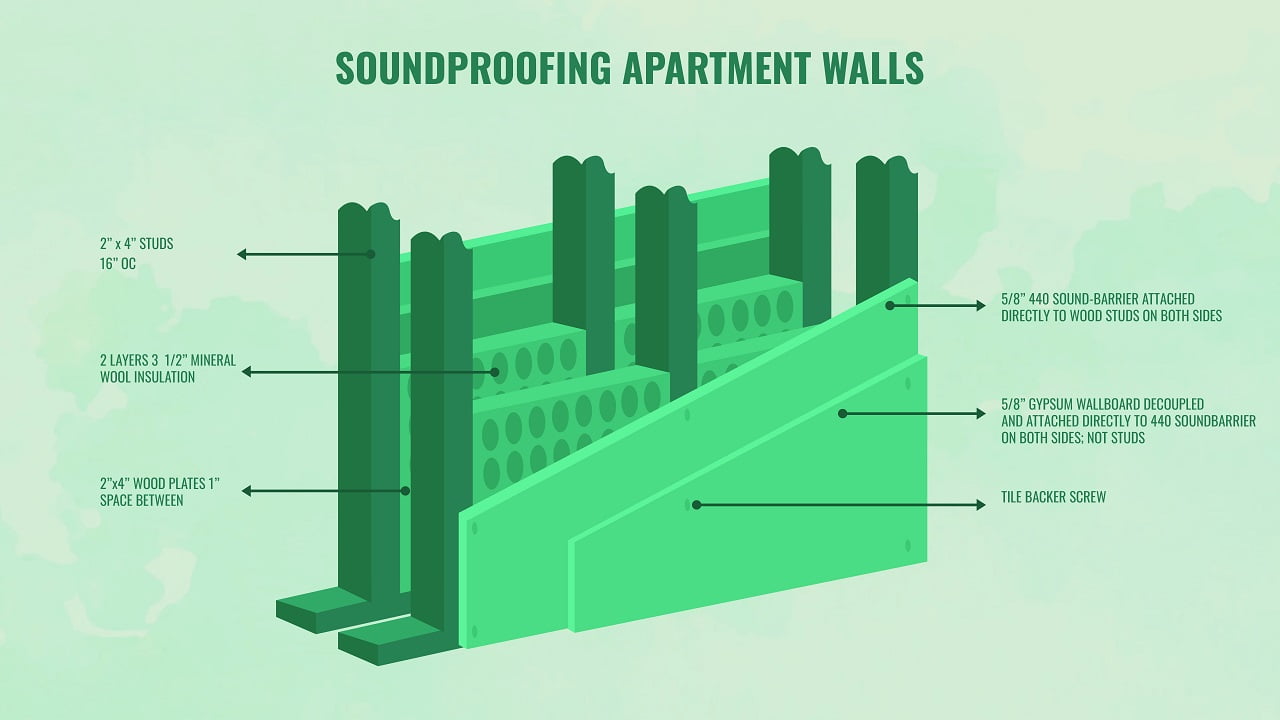


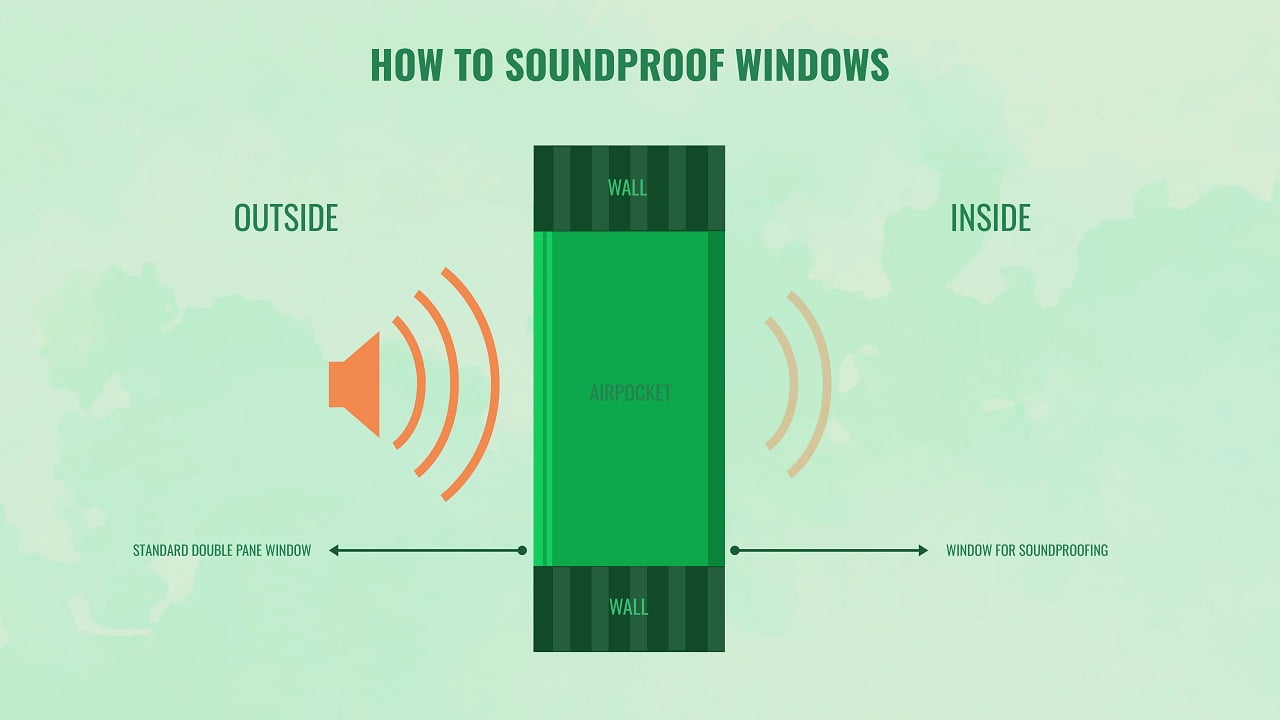


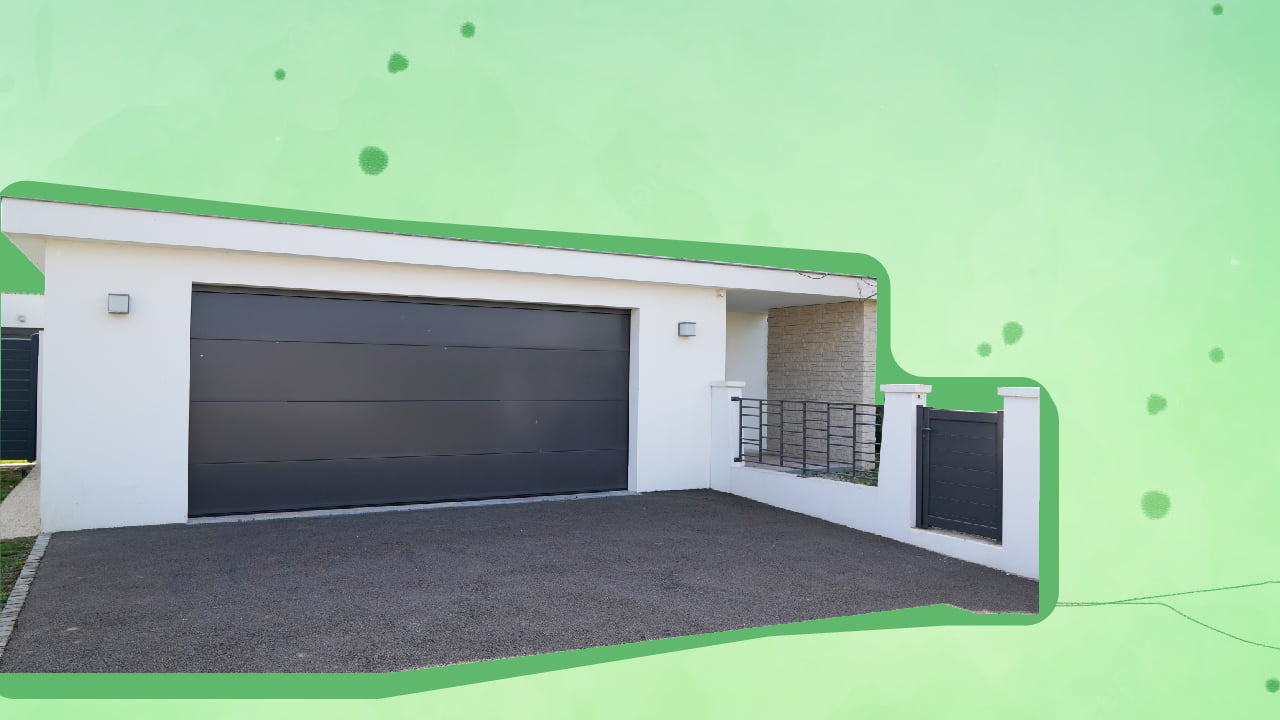

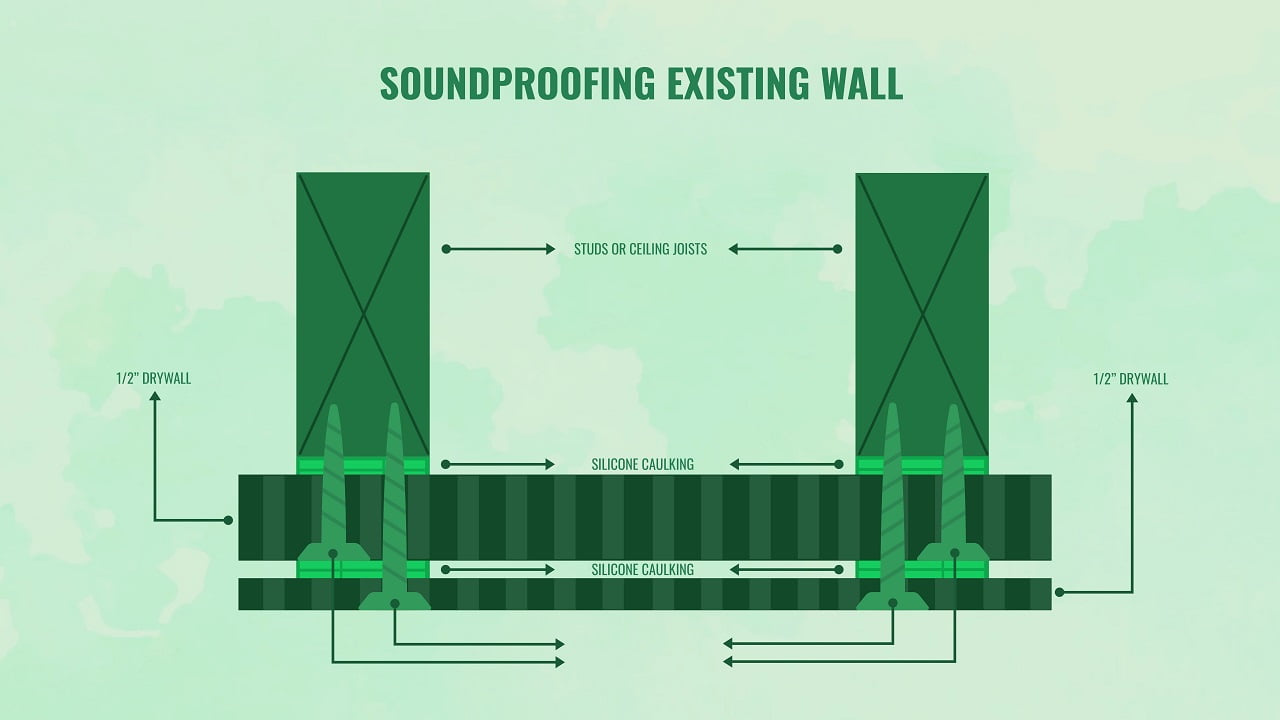


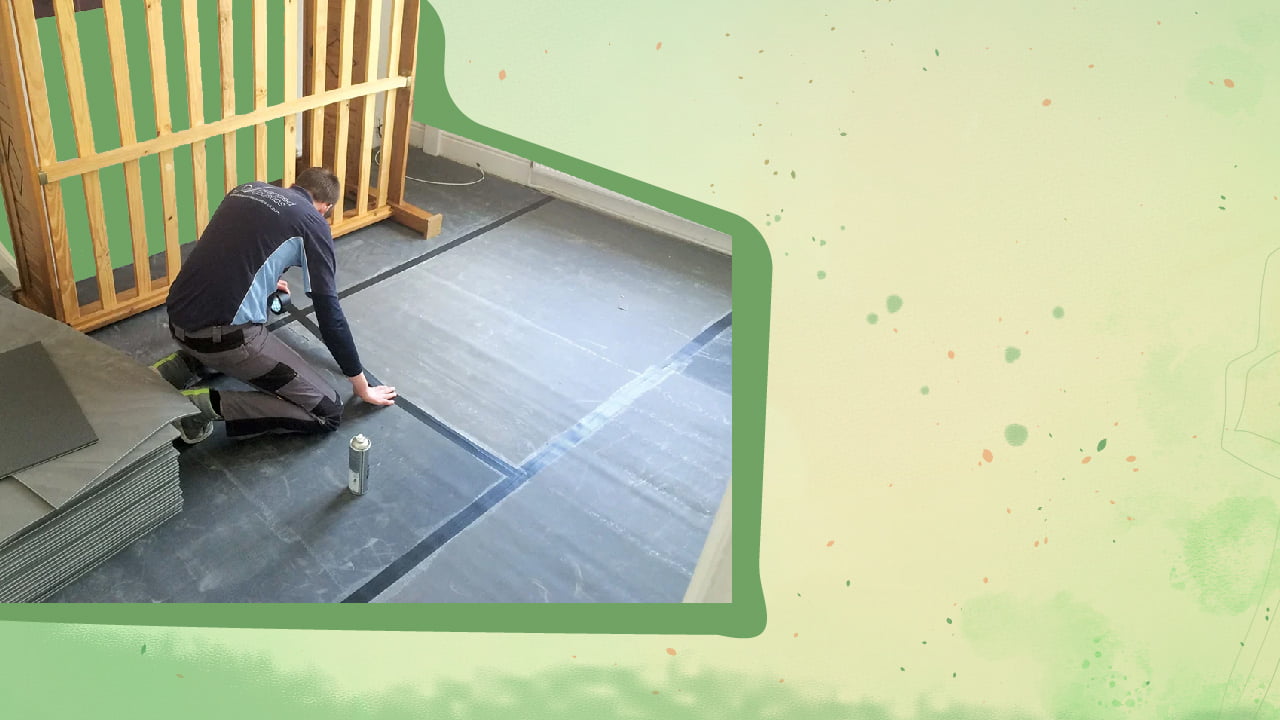
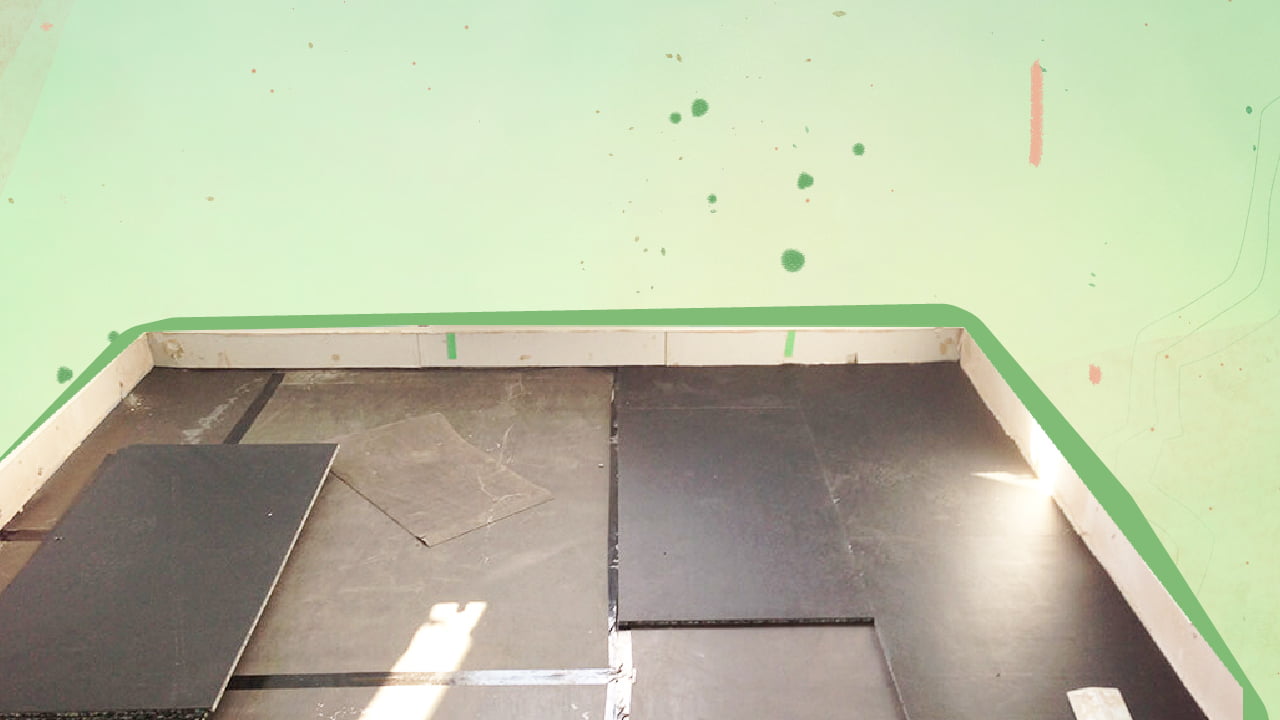

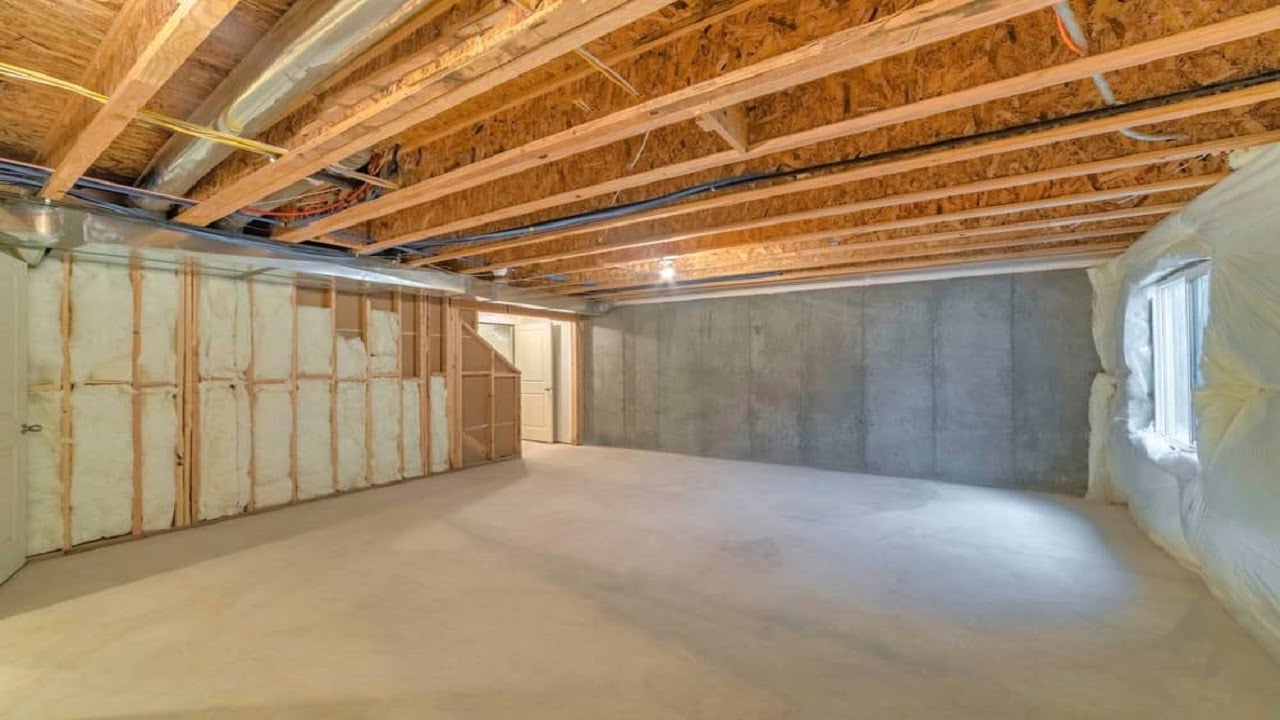


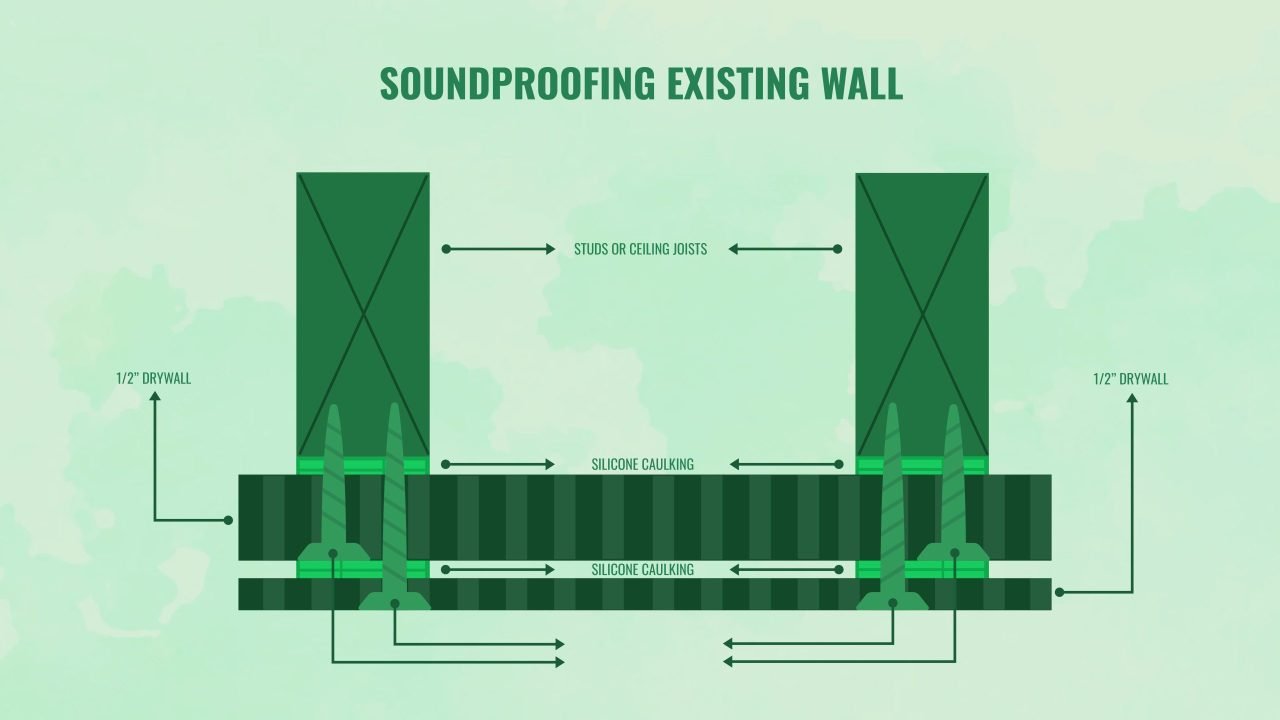
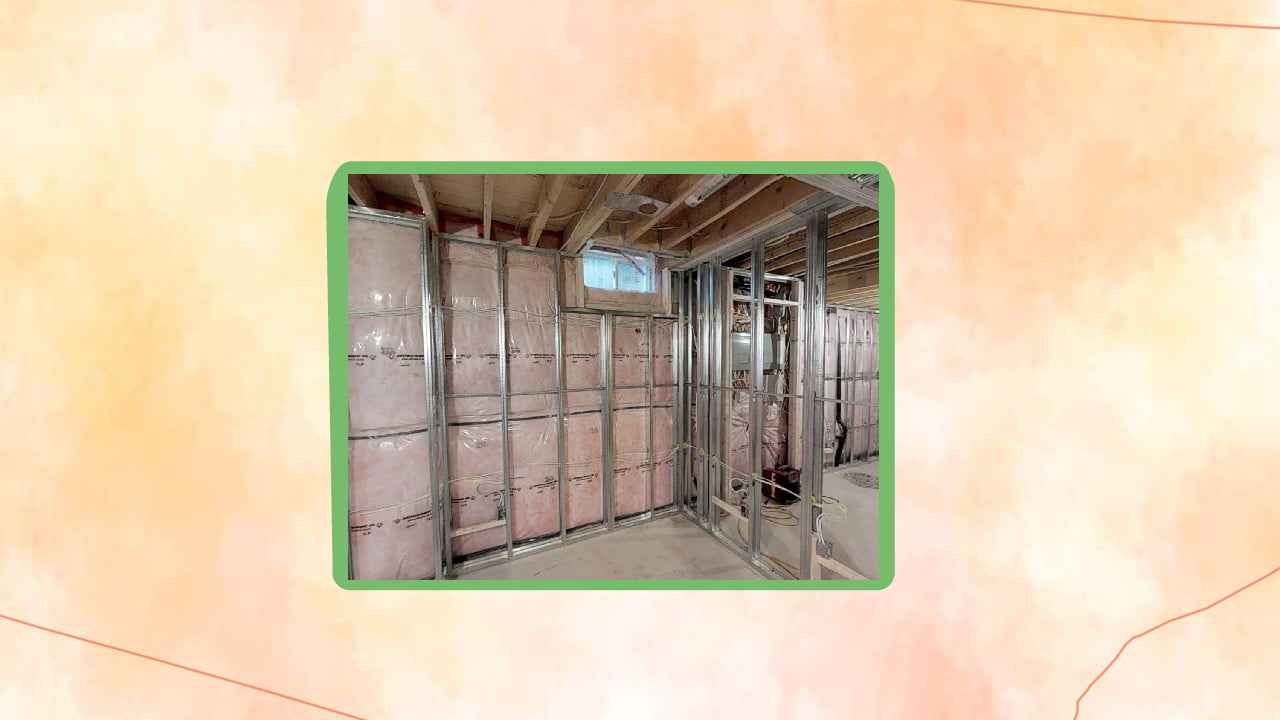


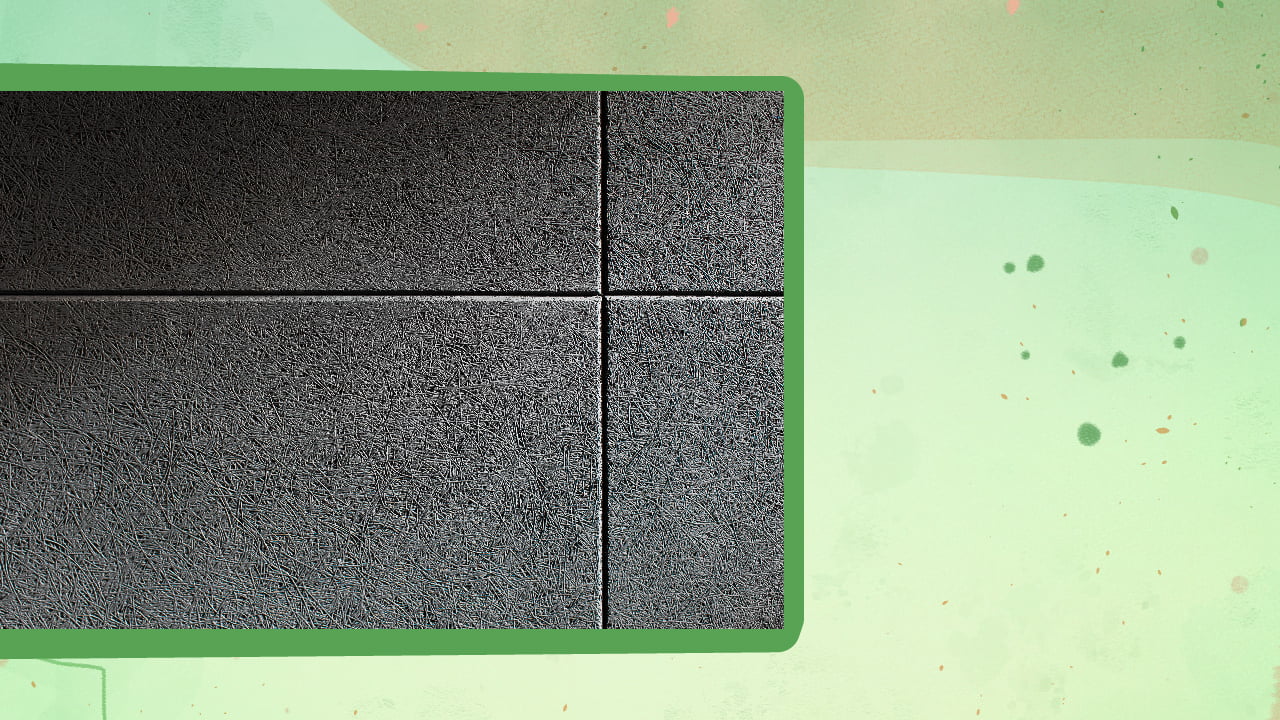
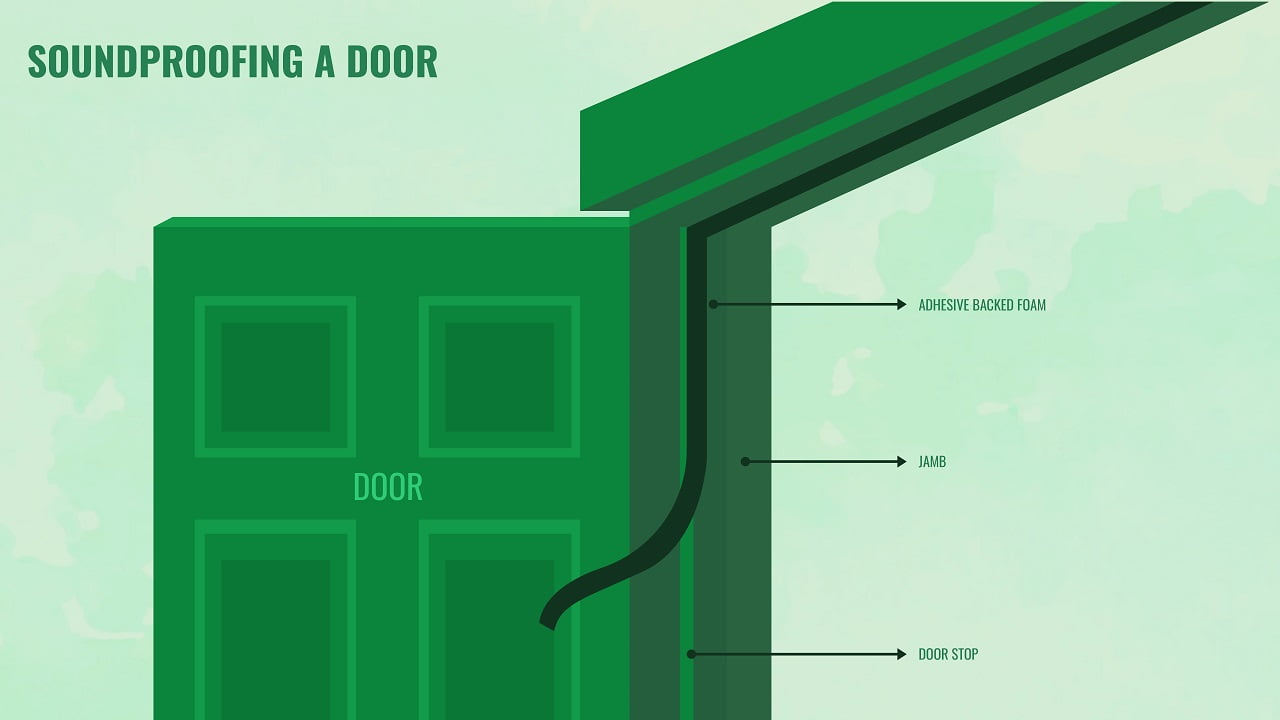
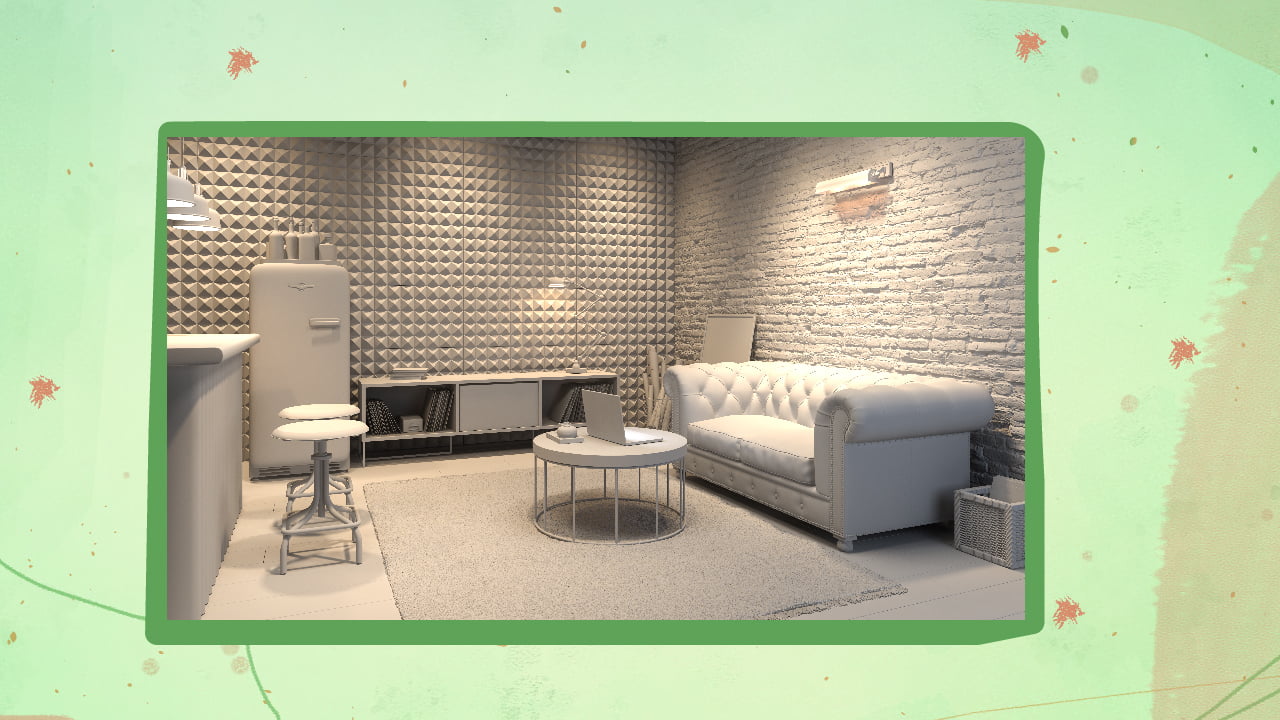


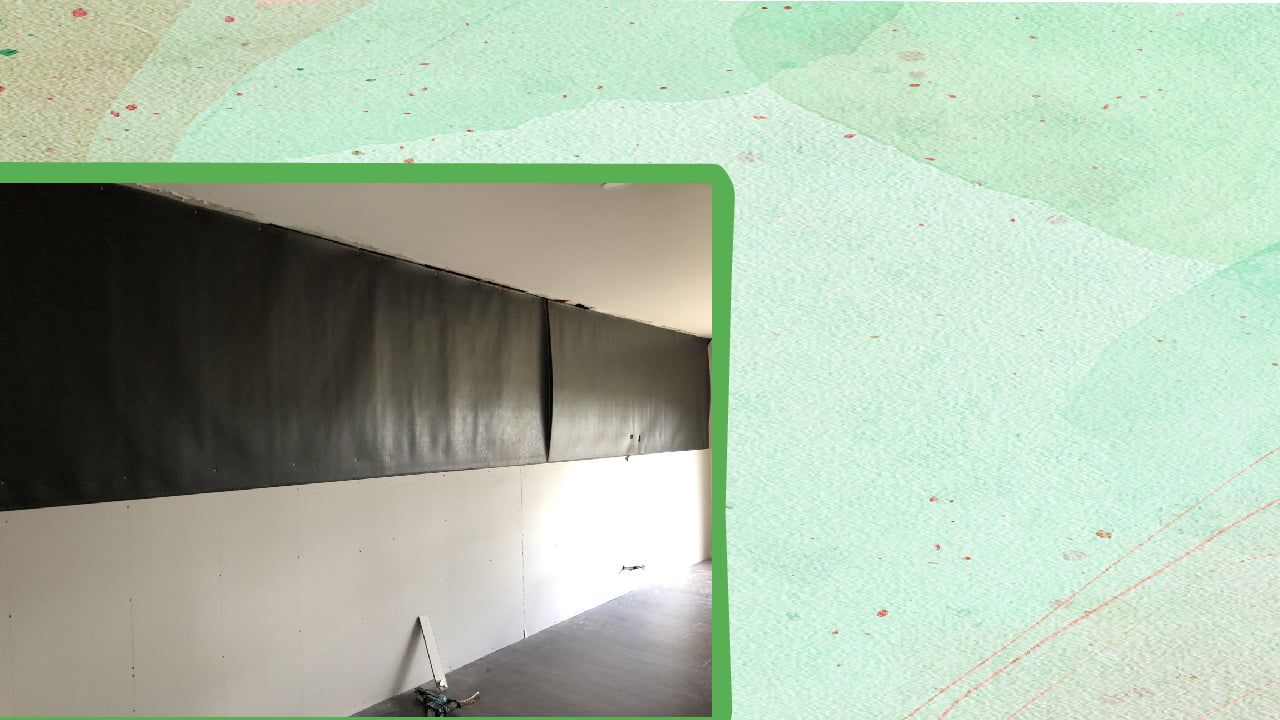

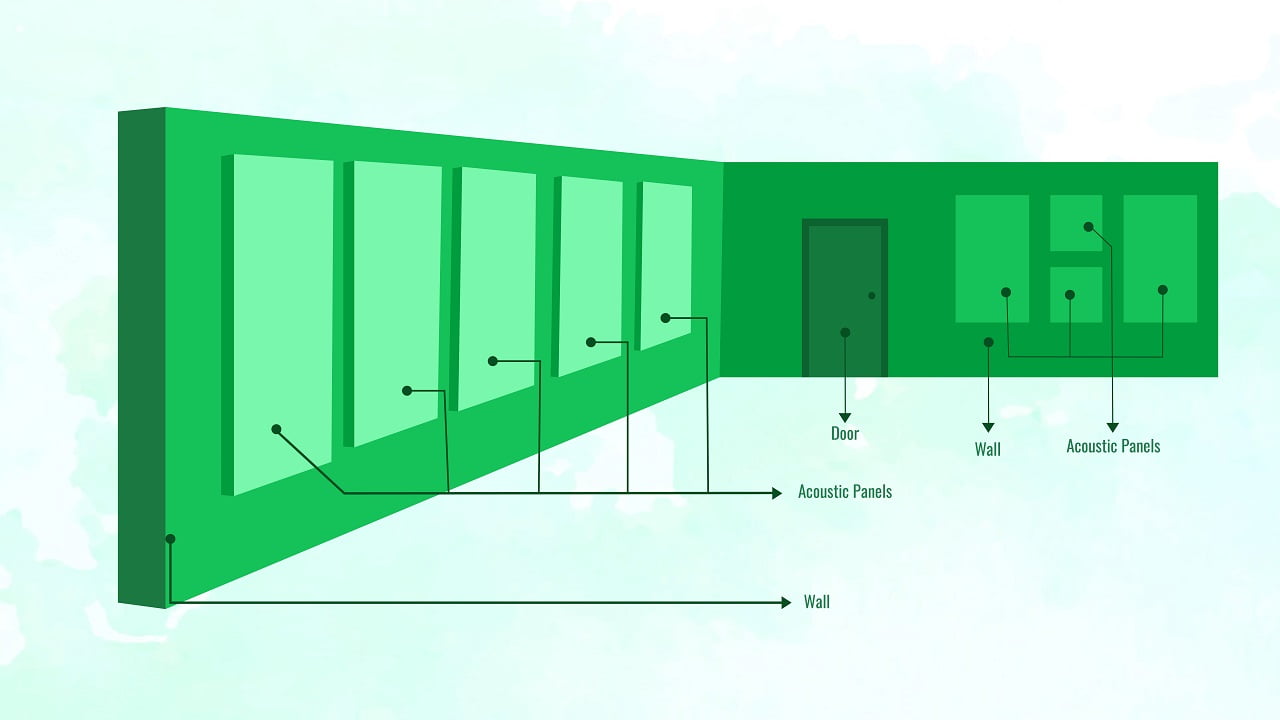
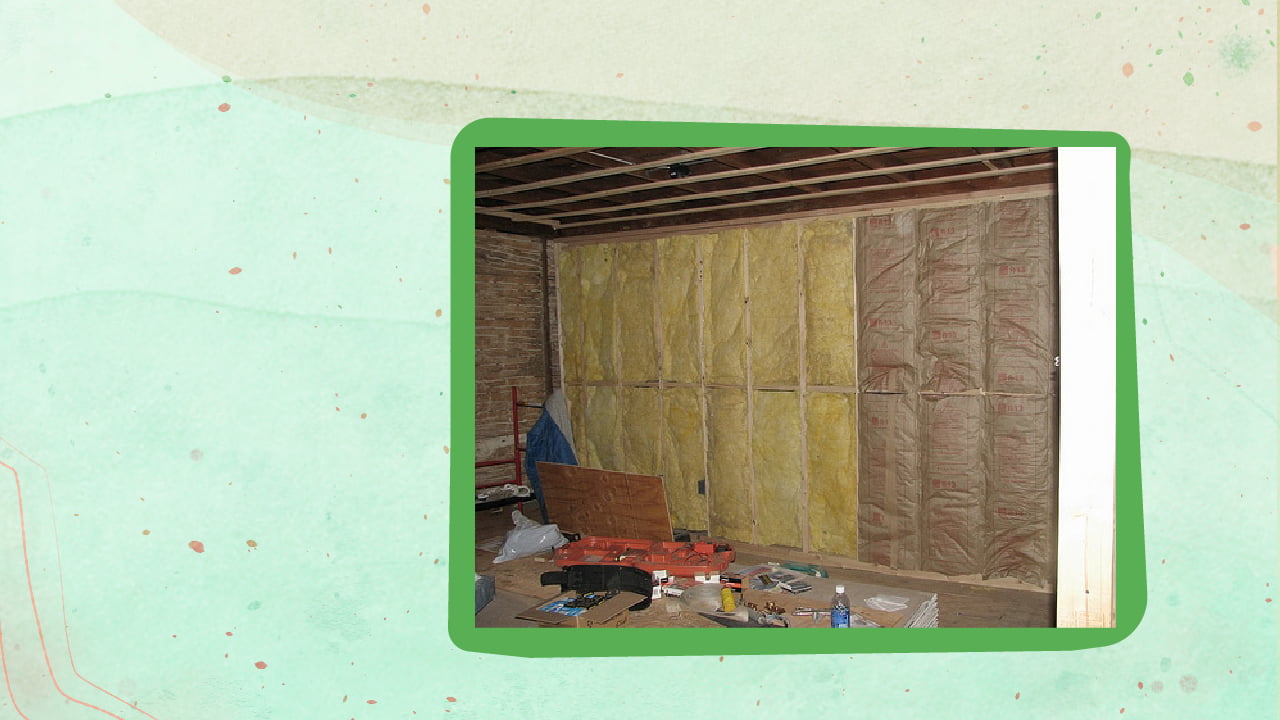


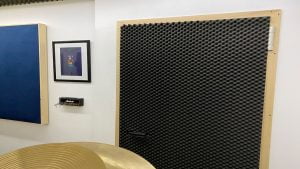


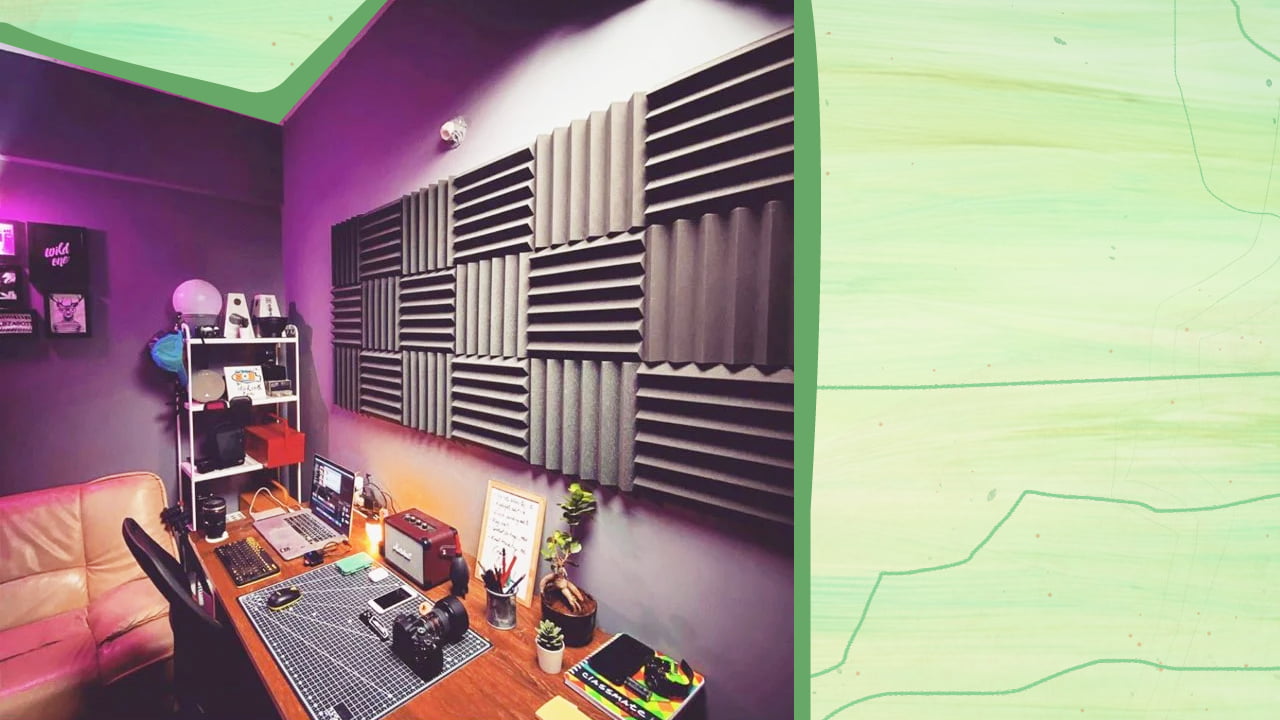


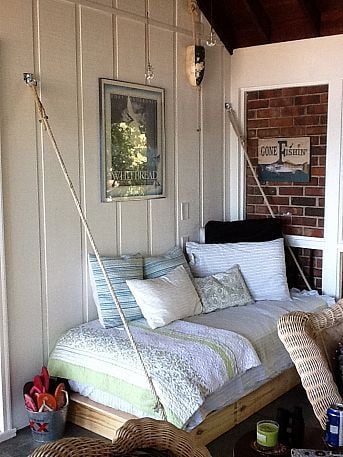


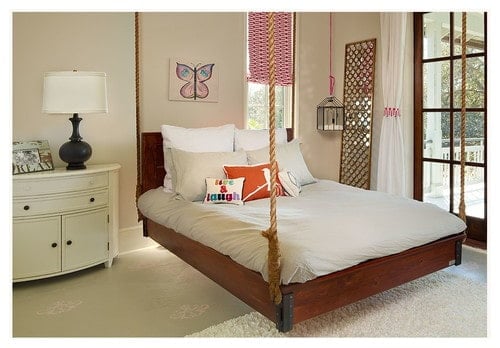


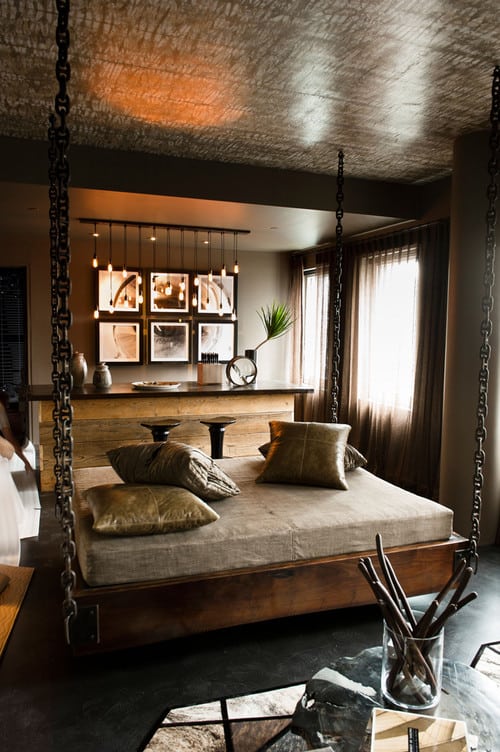


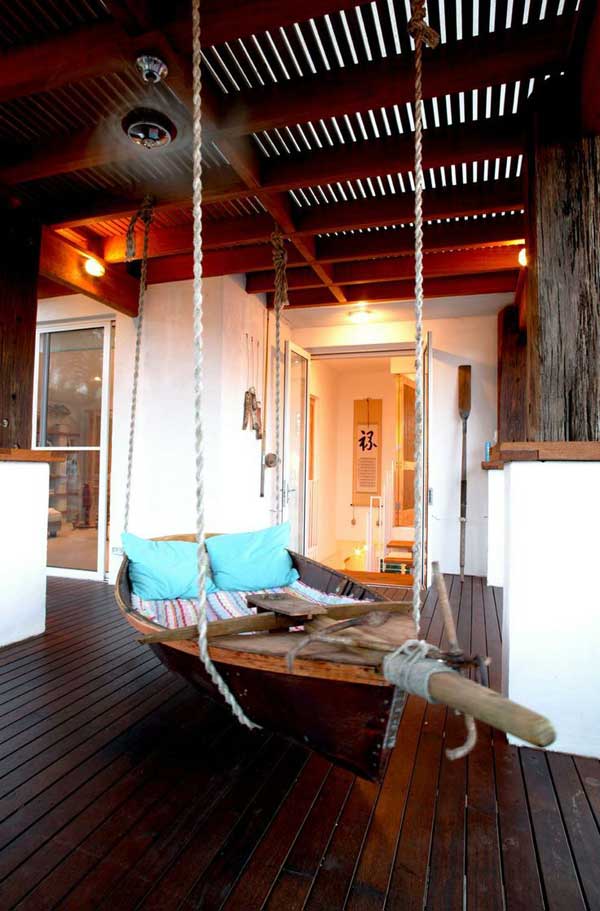
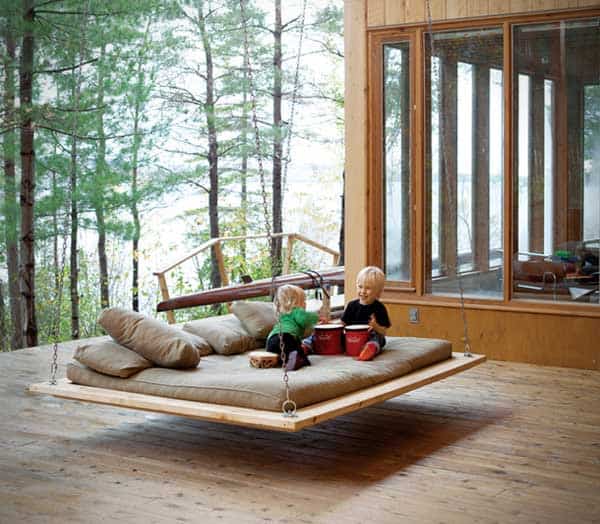

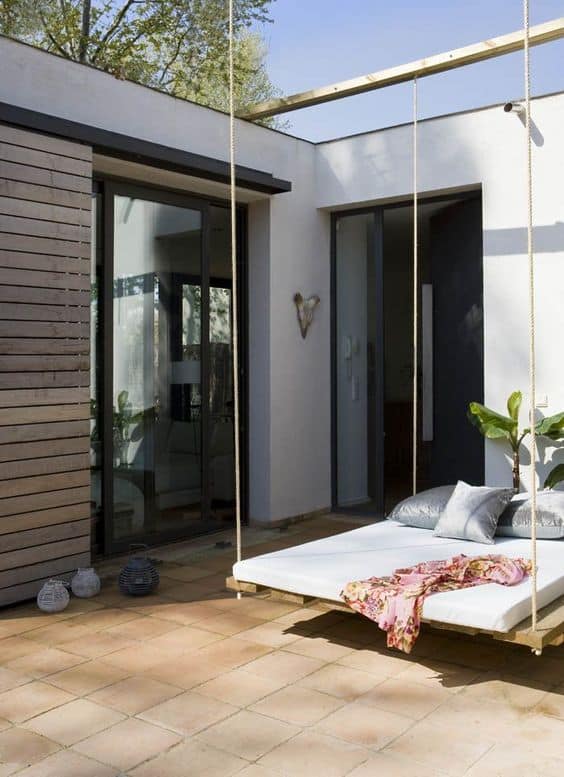

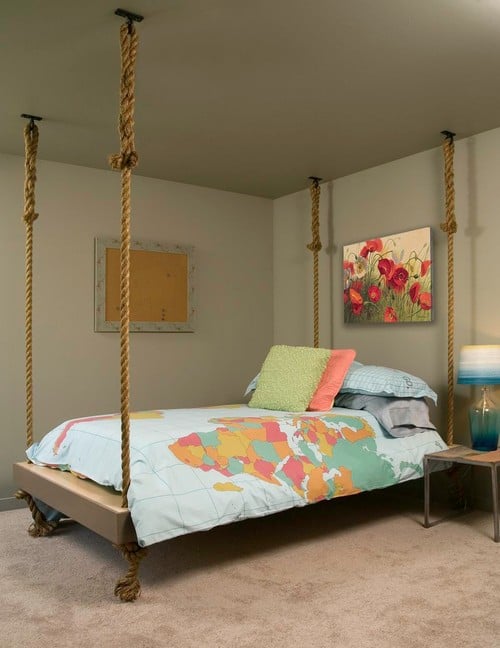
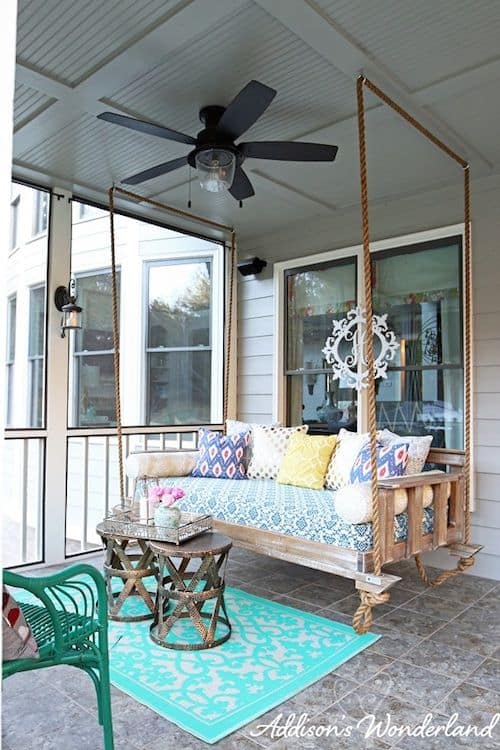
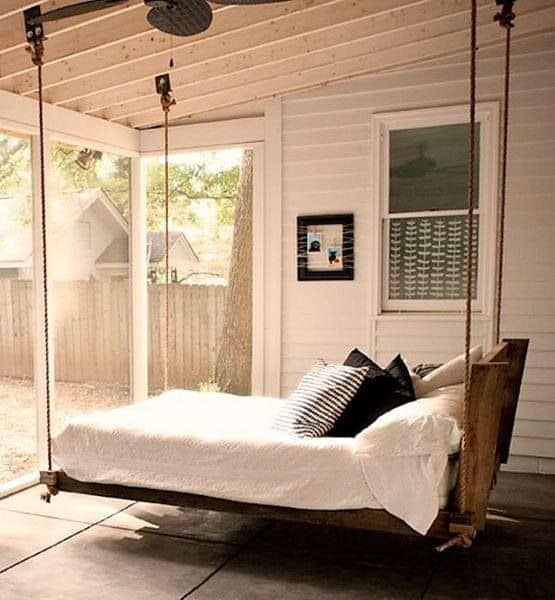


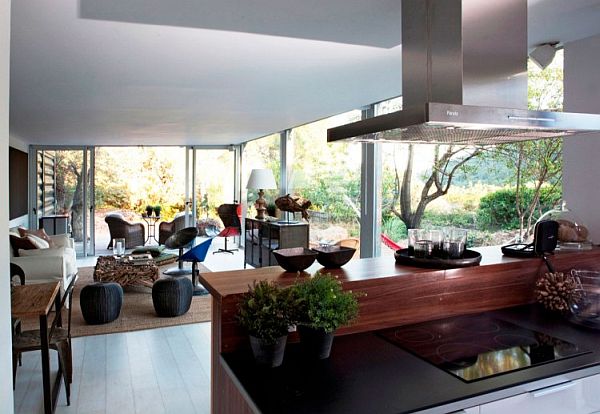


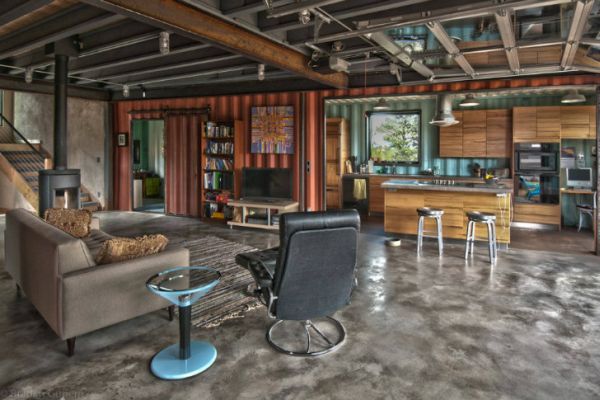


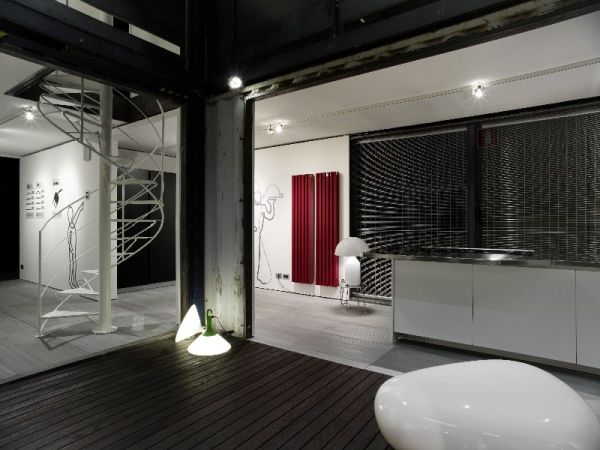
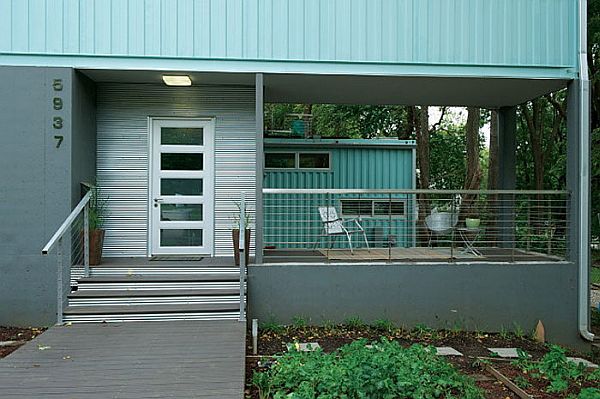


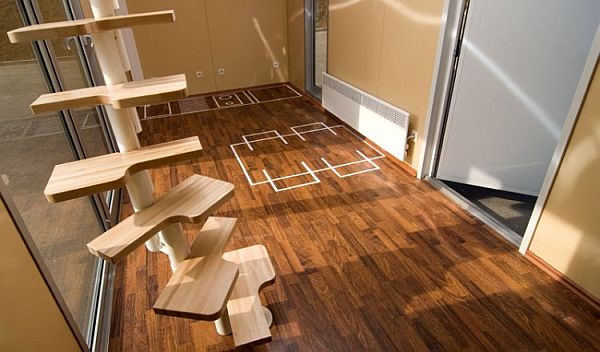


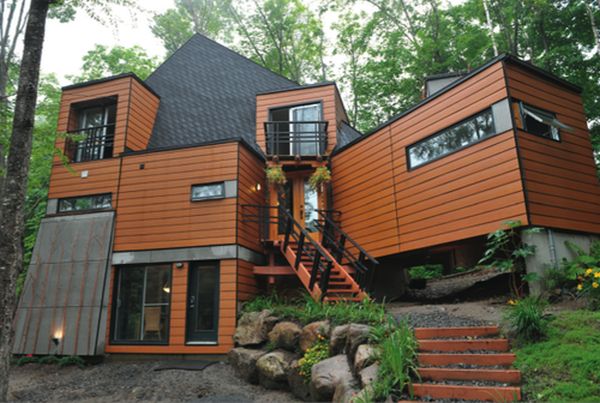
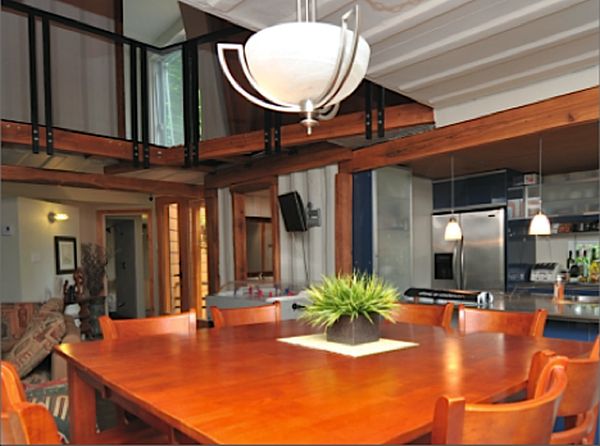


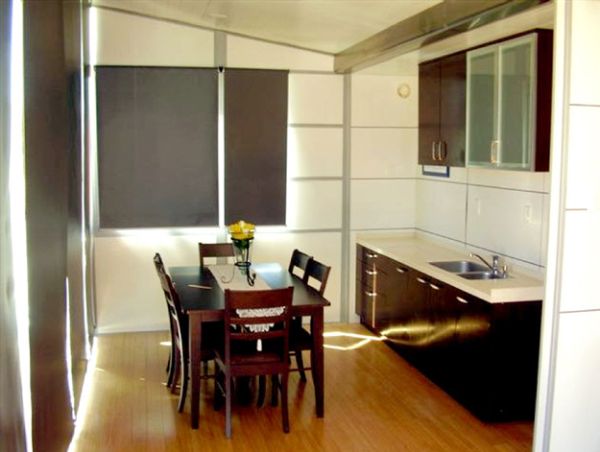


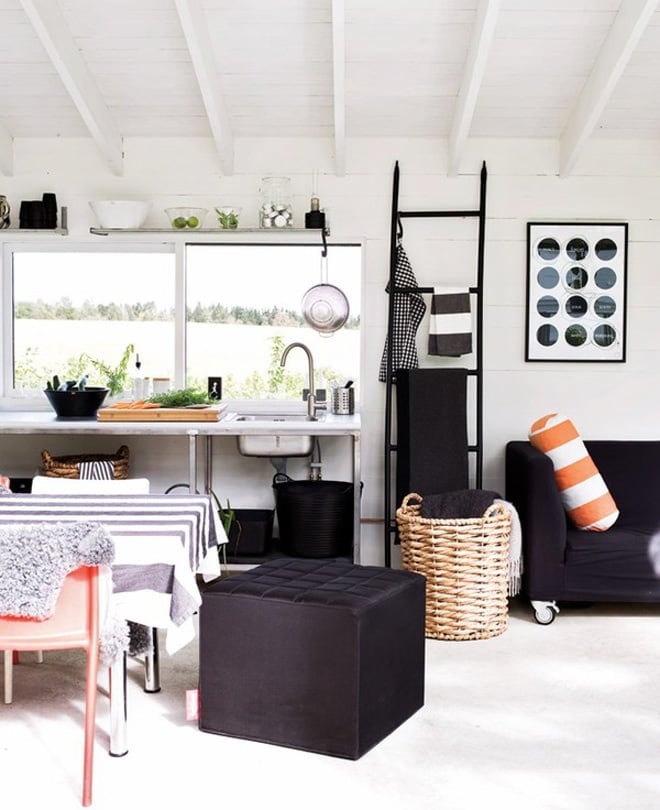


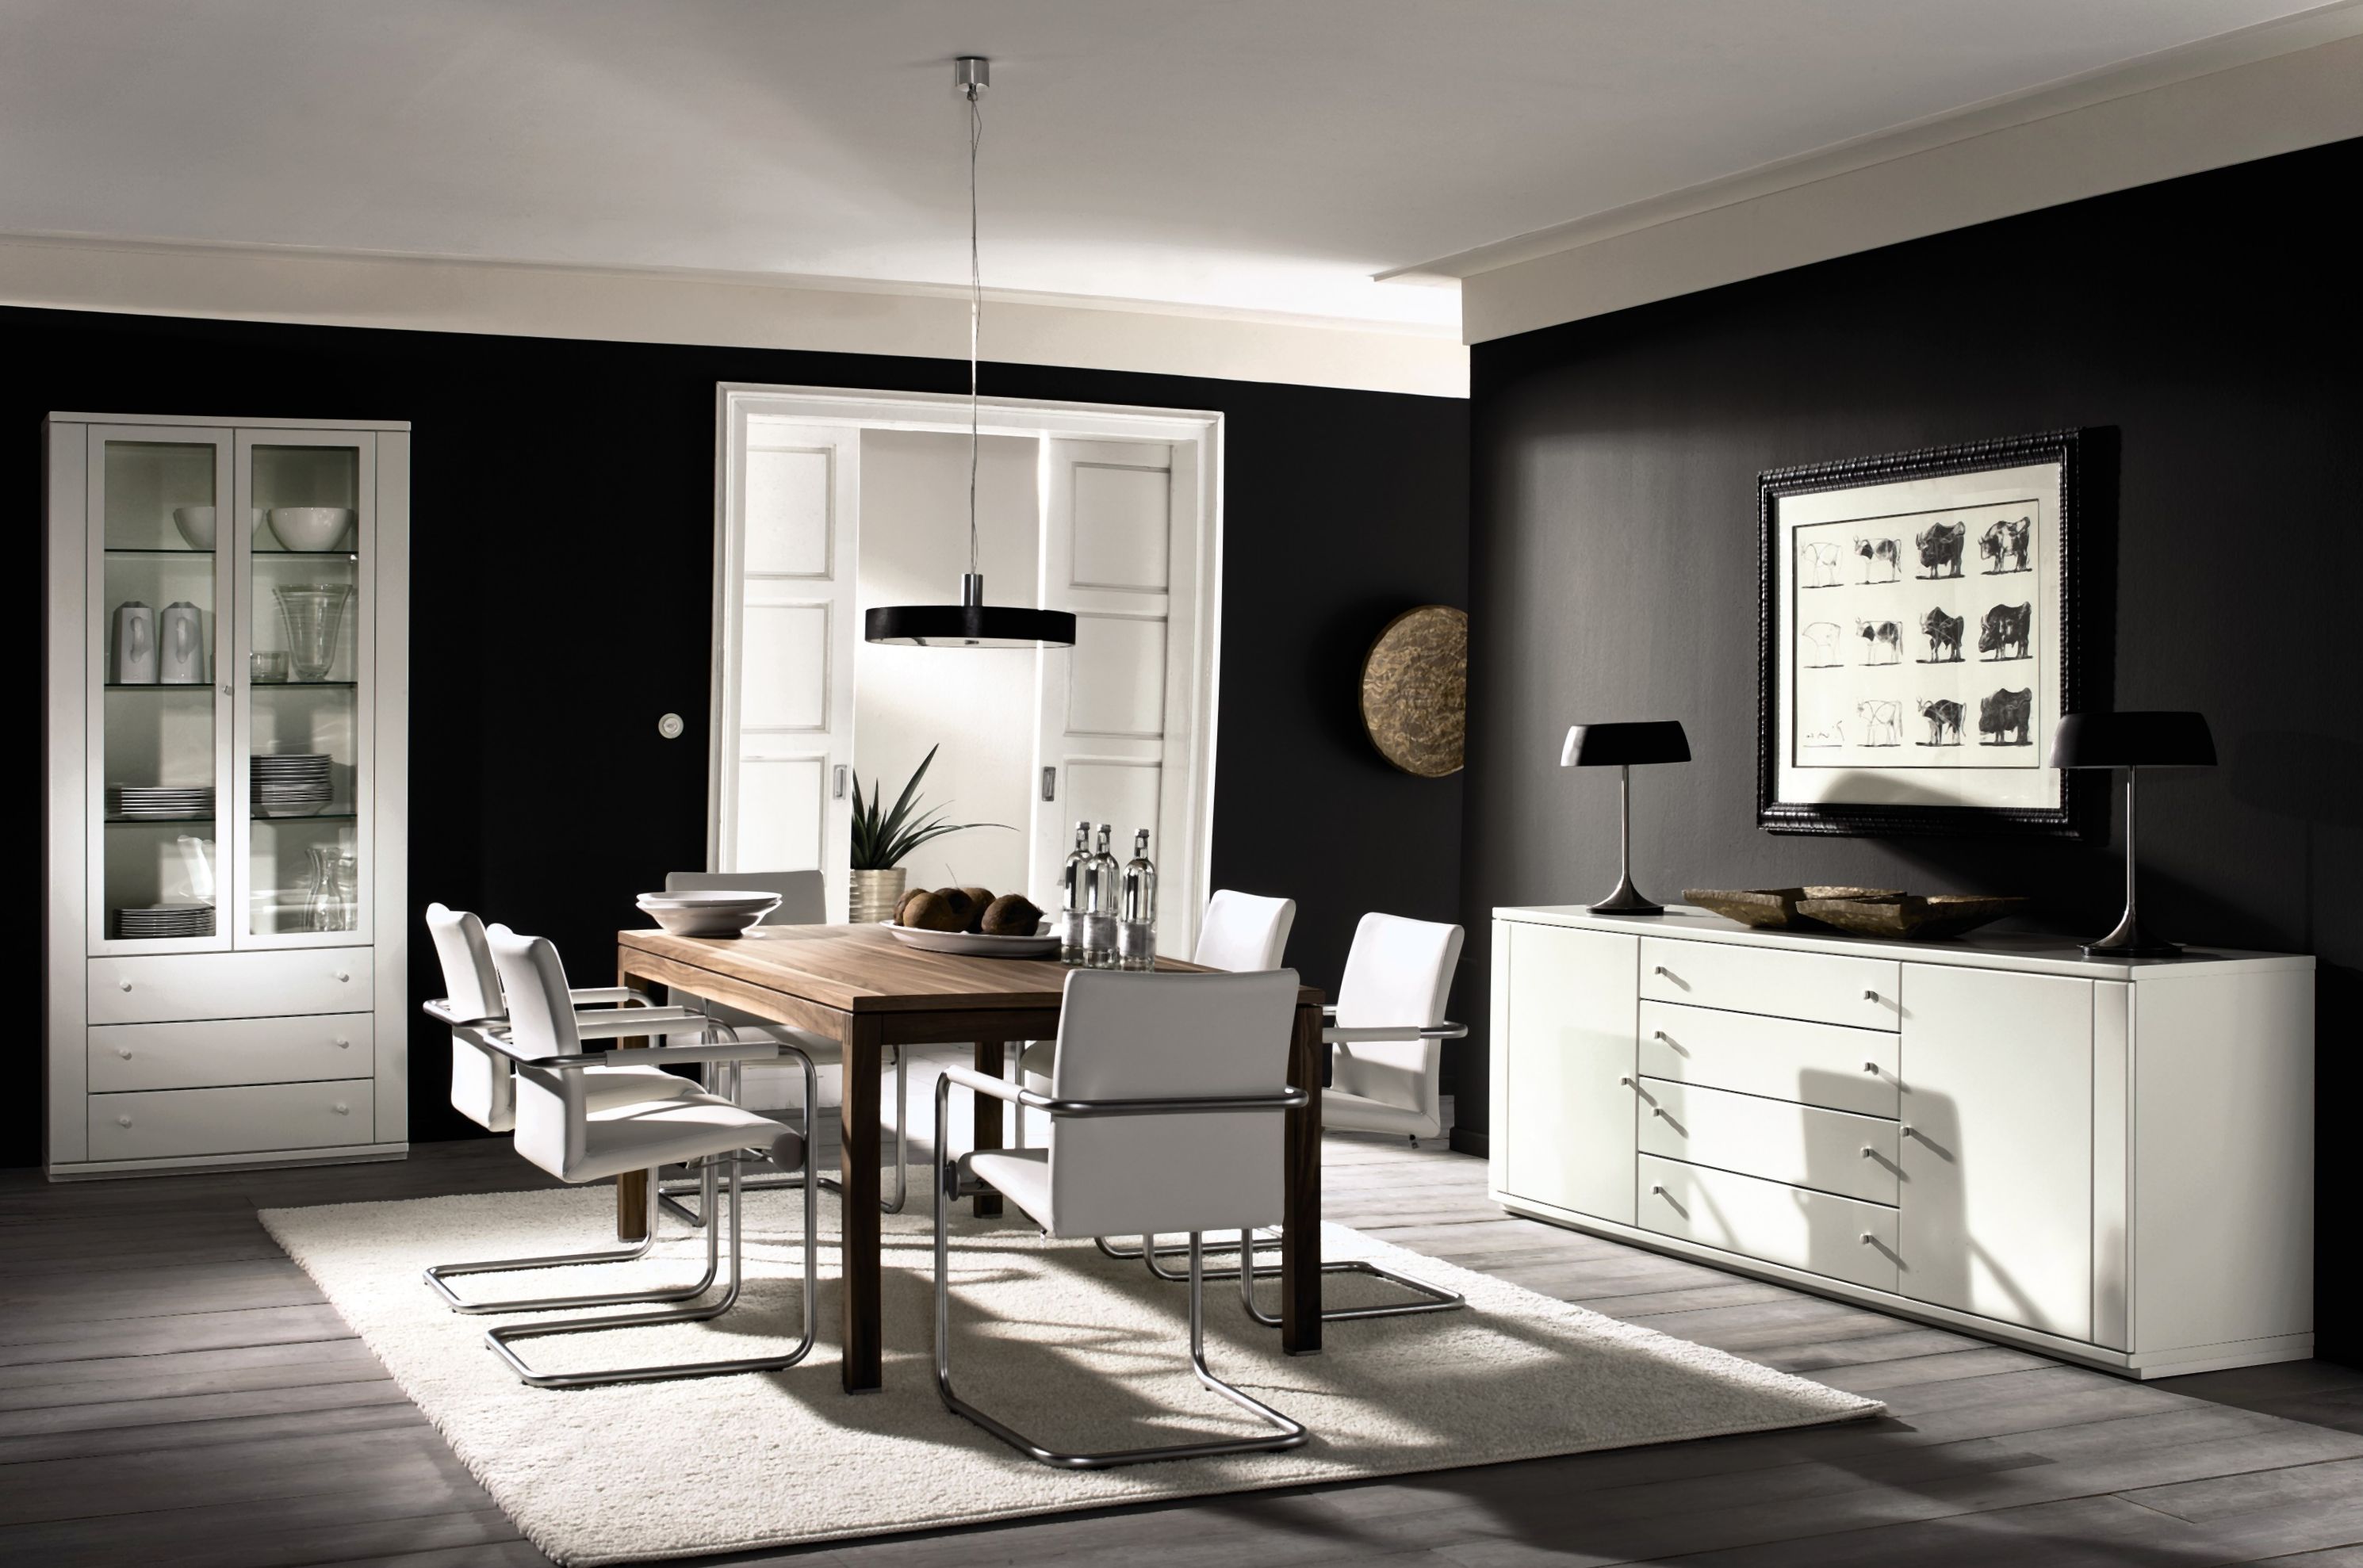
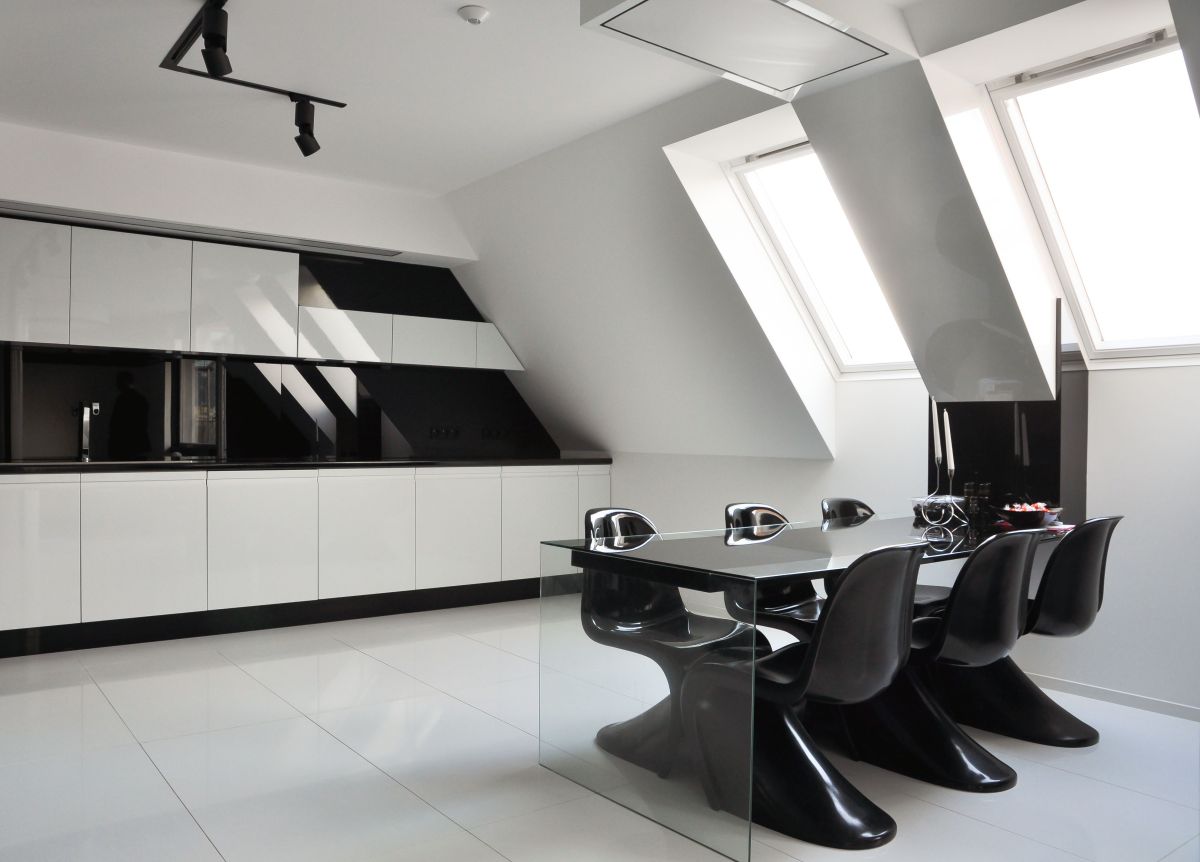
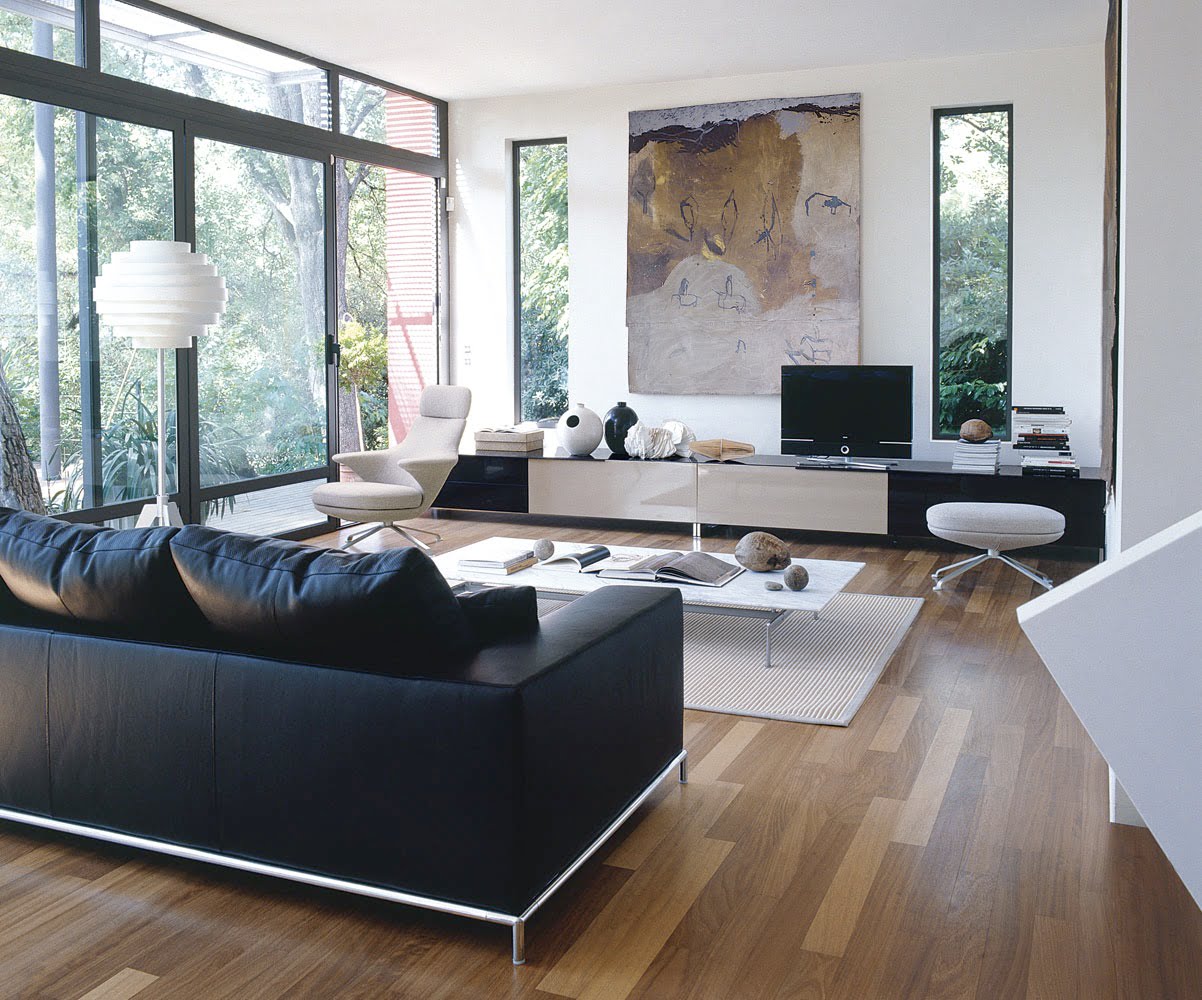


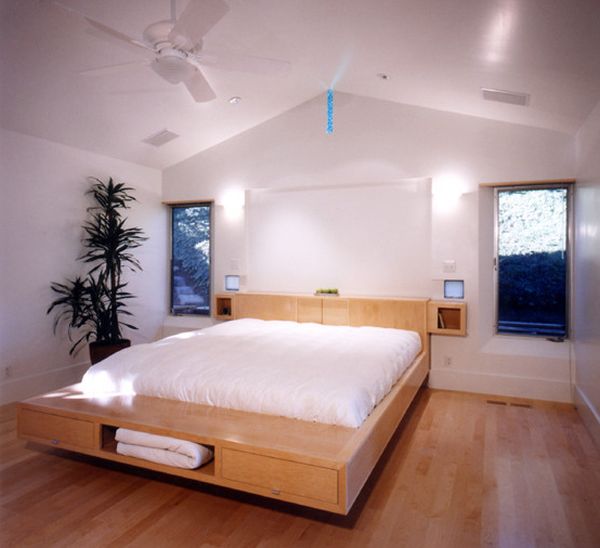


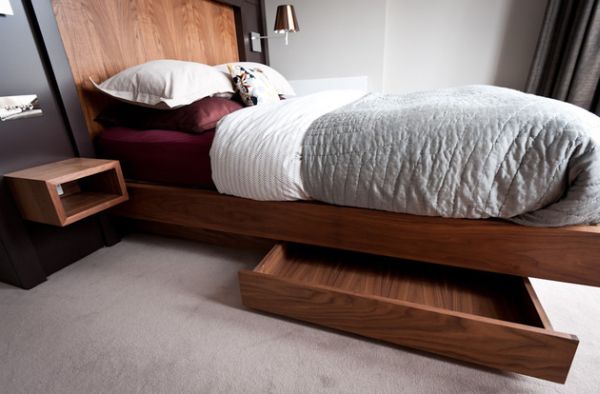
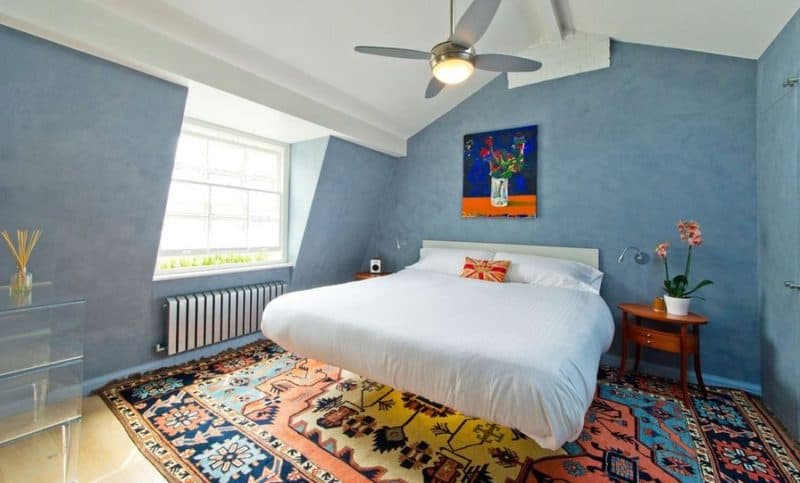
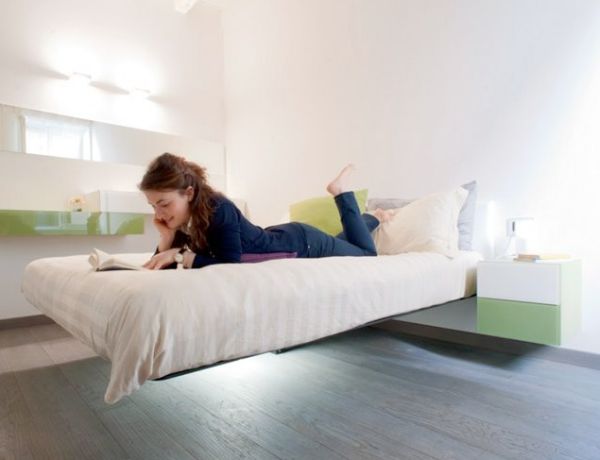


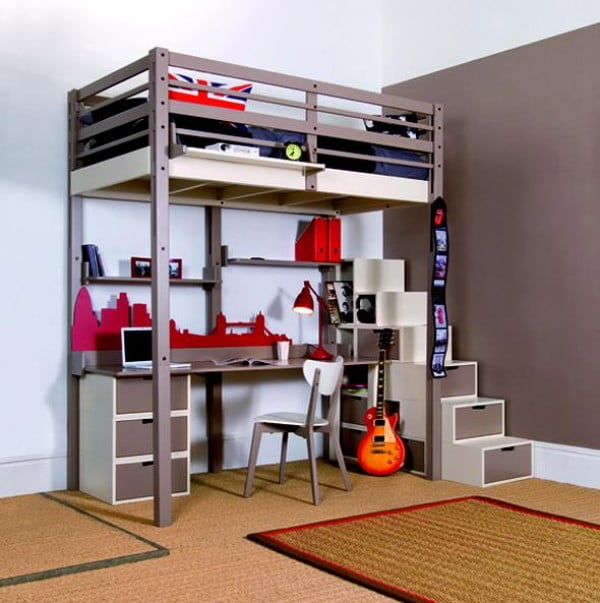

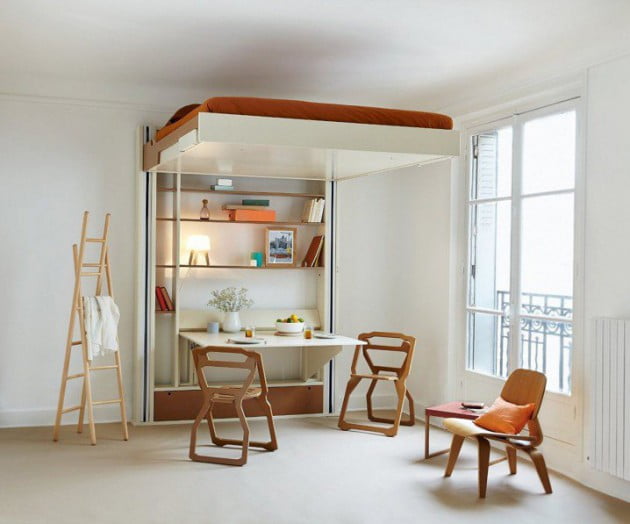
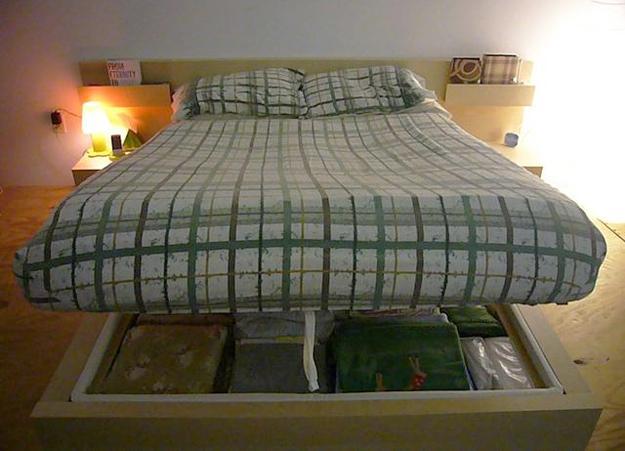
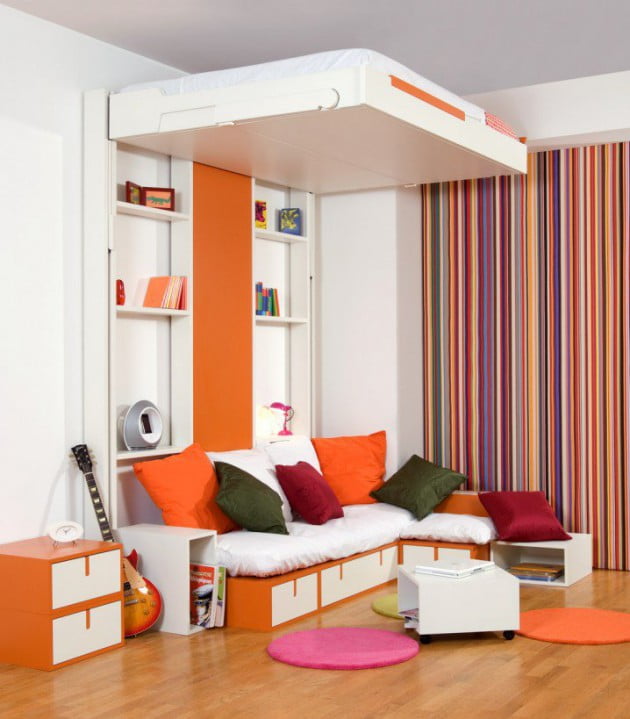


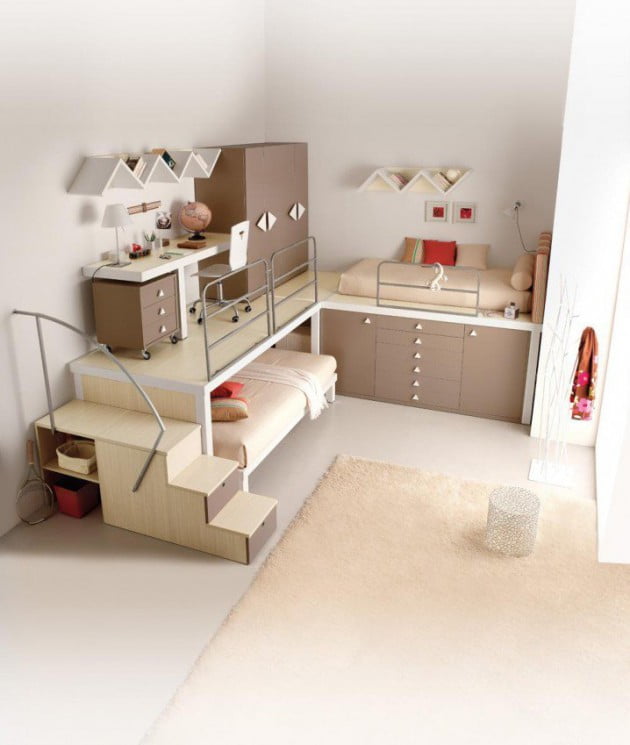
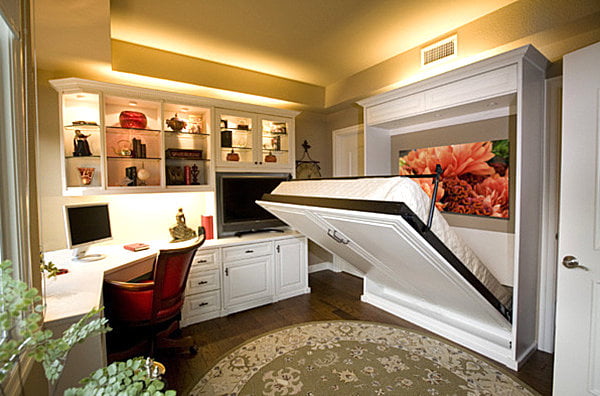

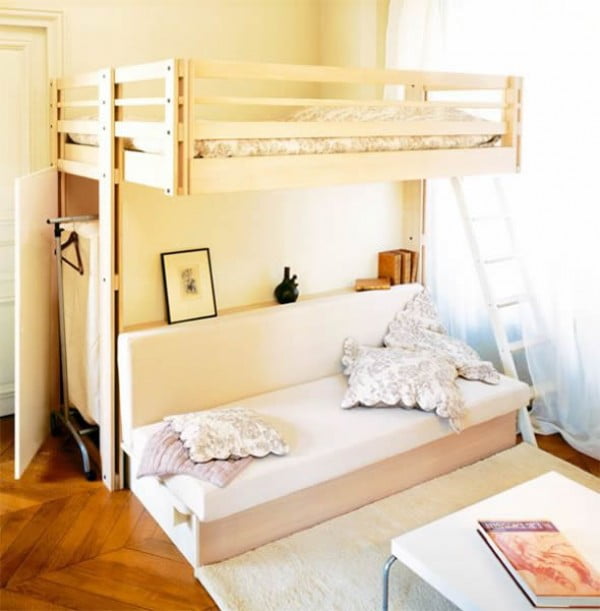
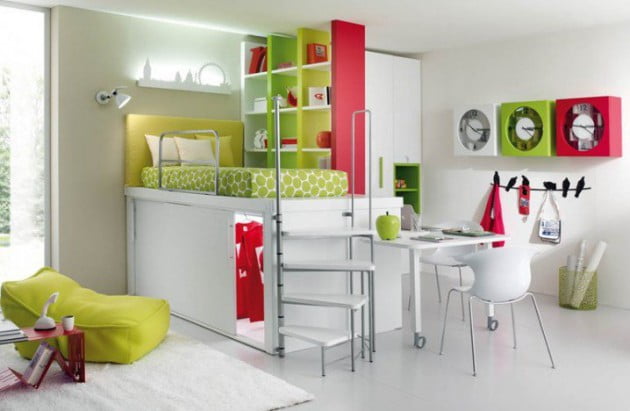


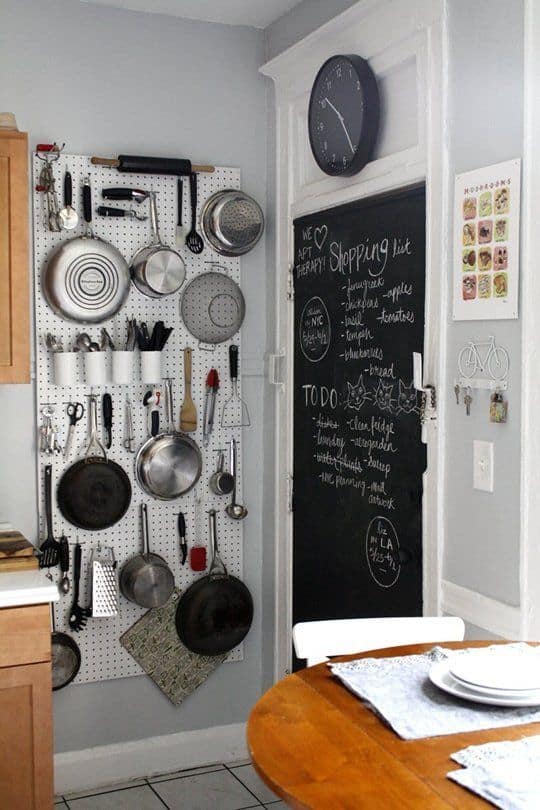

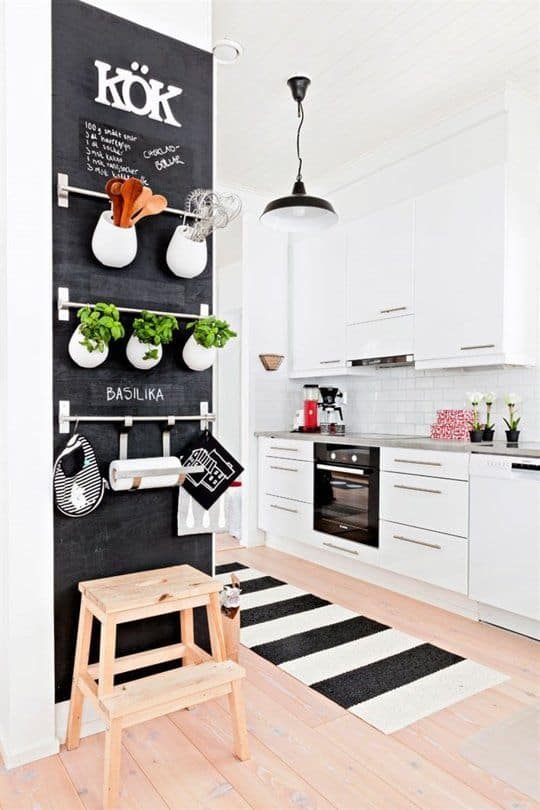

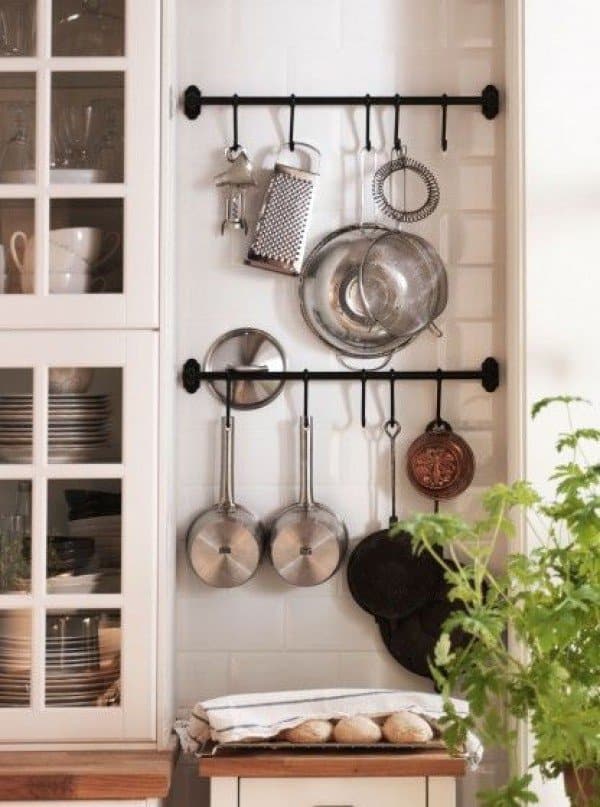
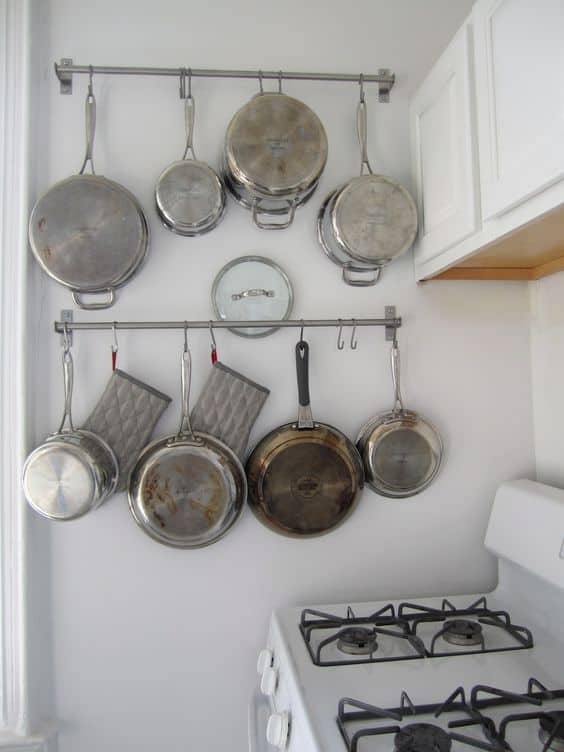


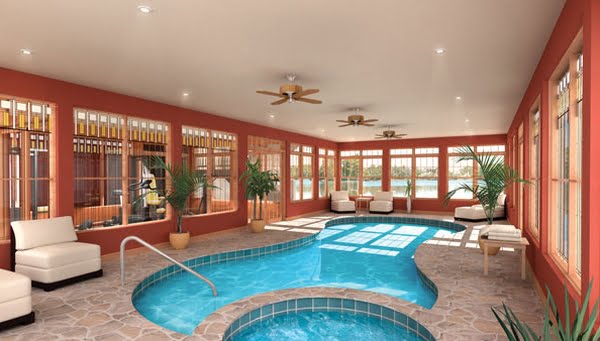

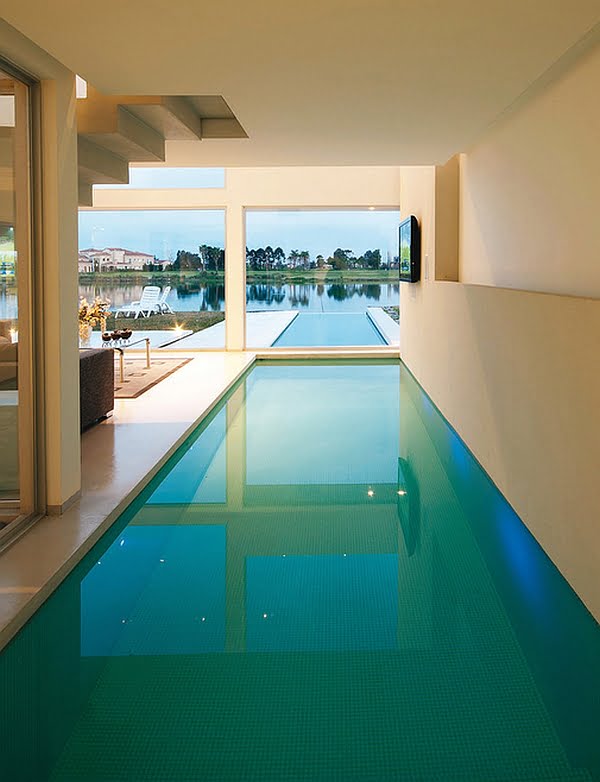

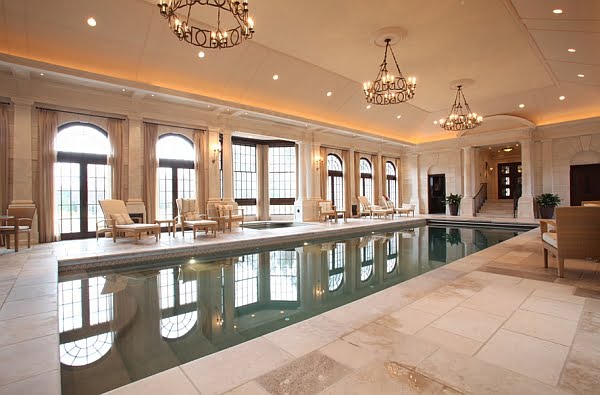
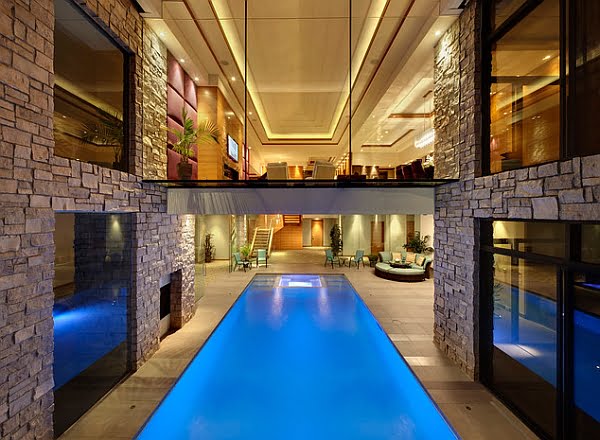


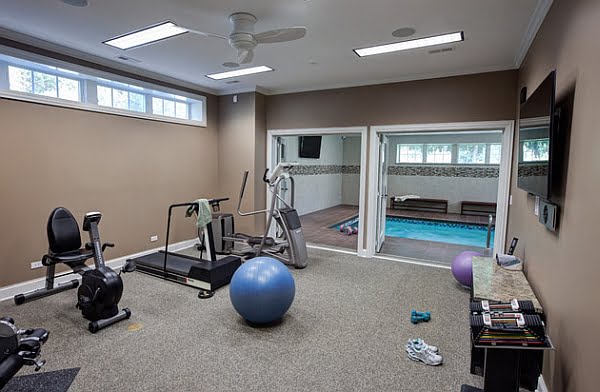
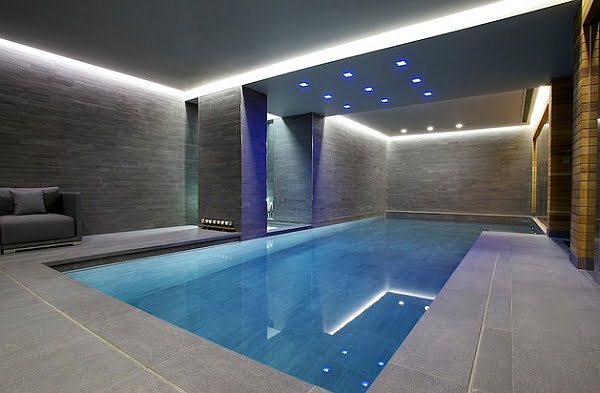

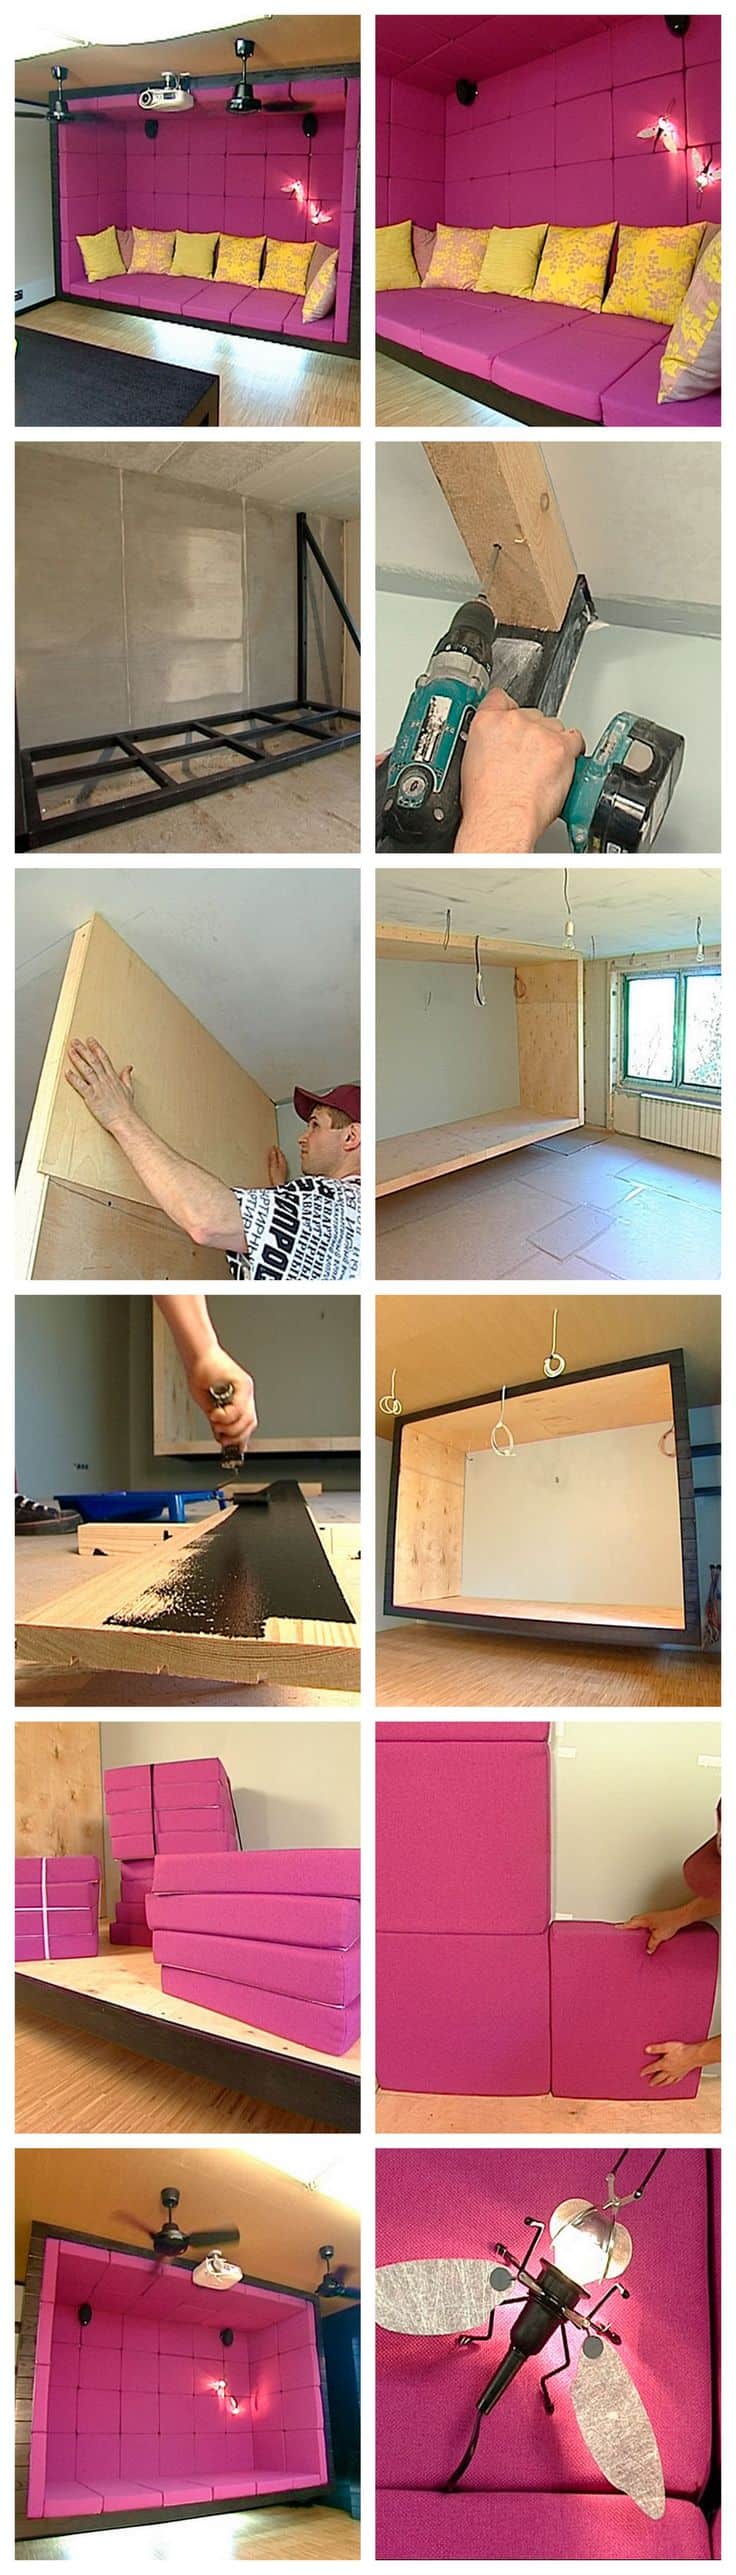

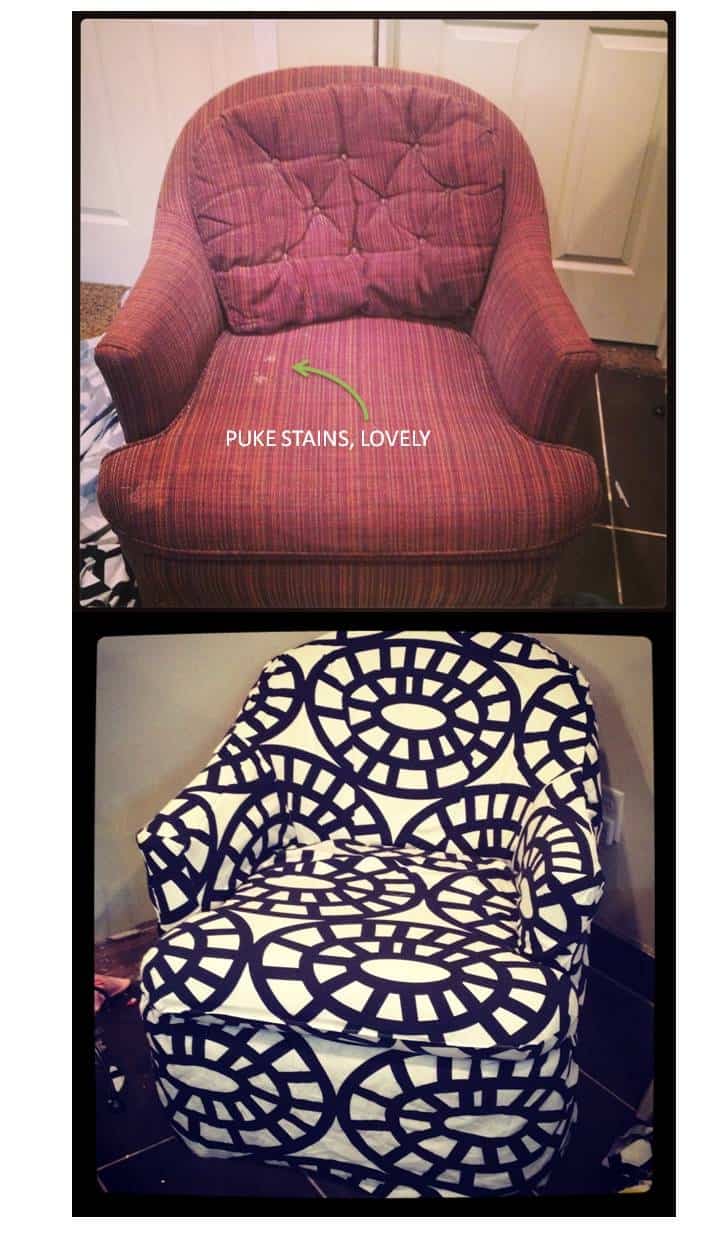


 and that the term “barndominium” itself can be quite confusing, especially if you’re not familiar with building types. So, let’s make it simpler for you, and for this, we’ll start by breaking up the word.


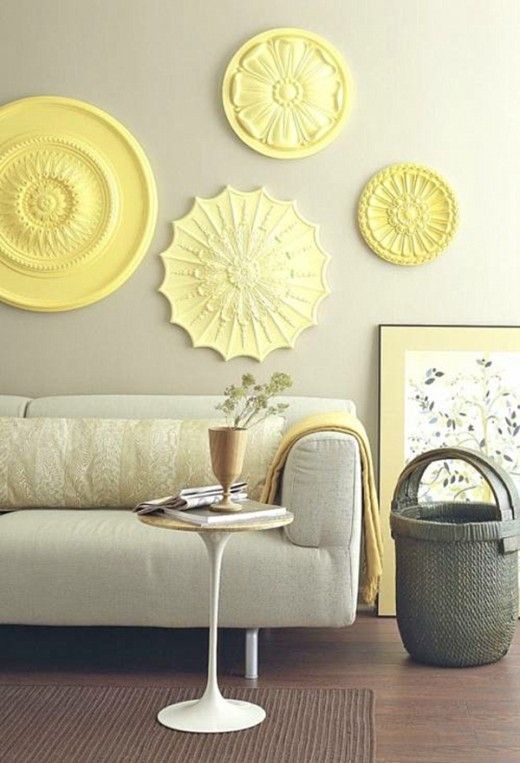


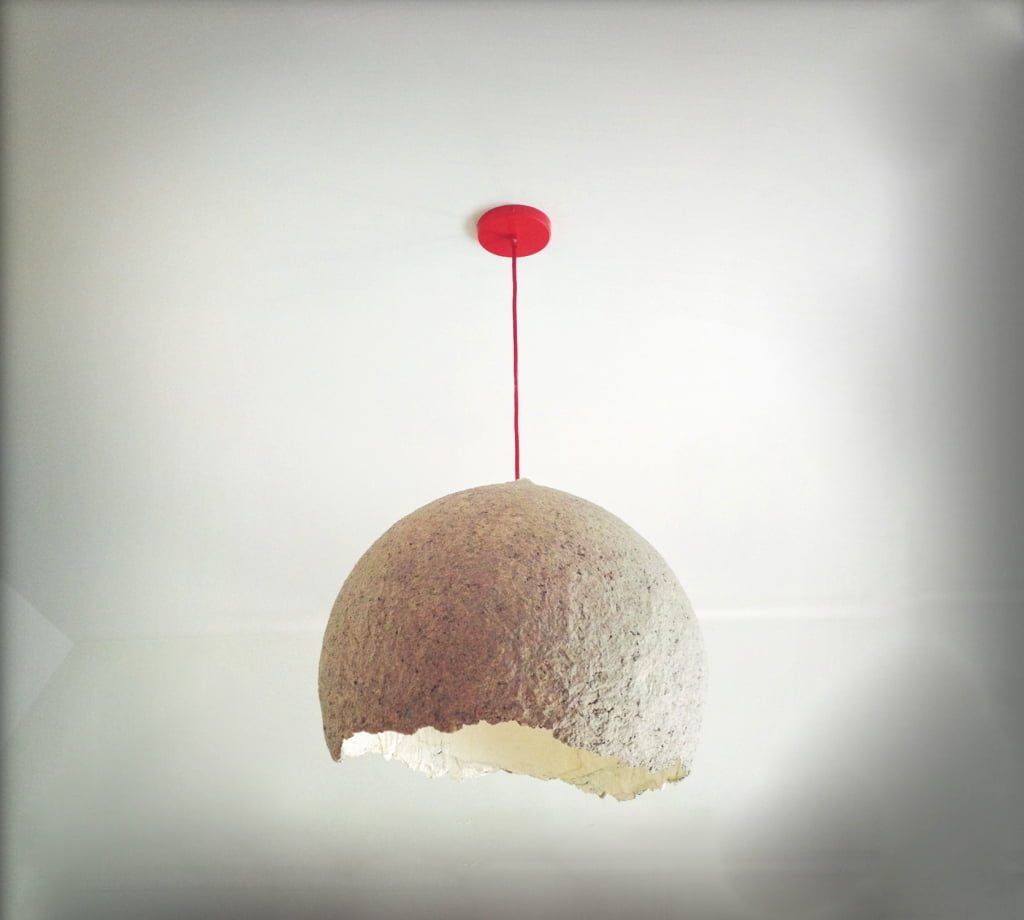


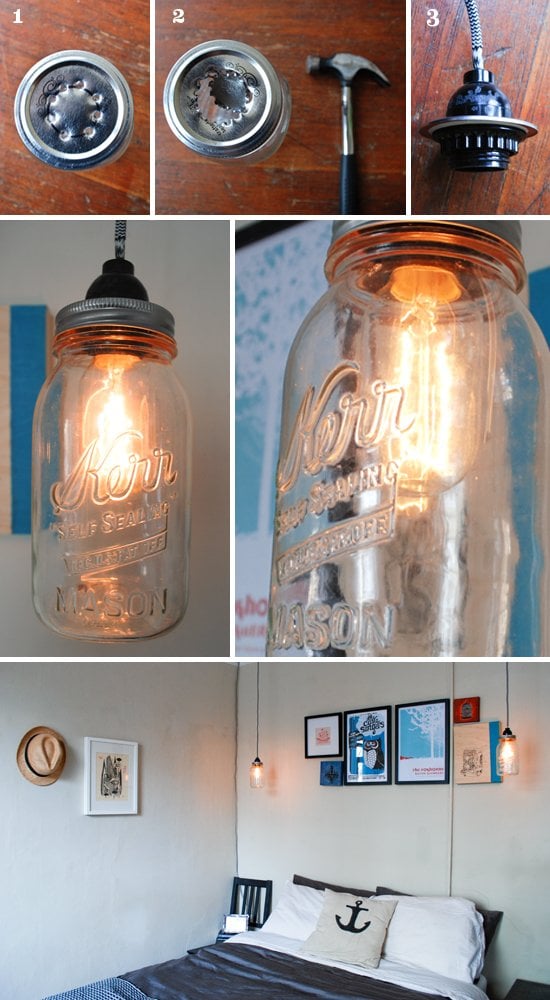


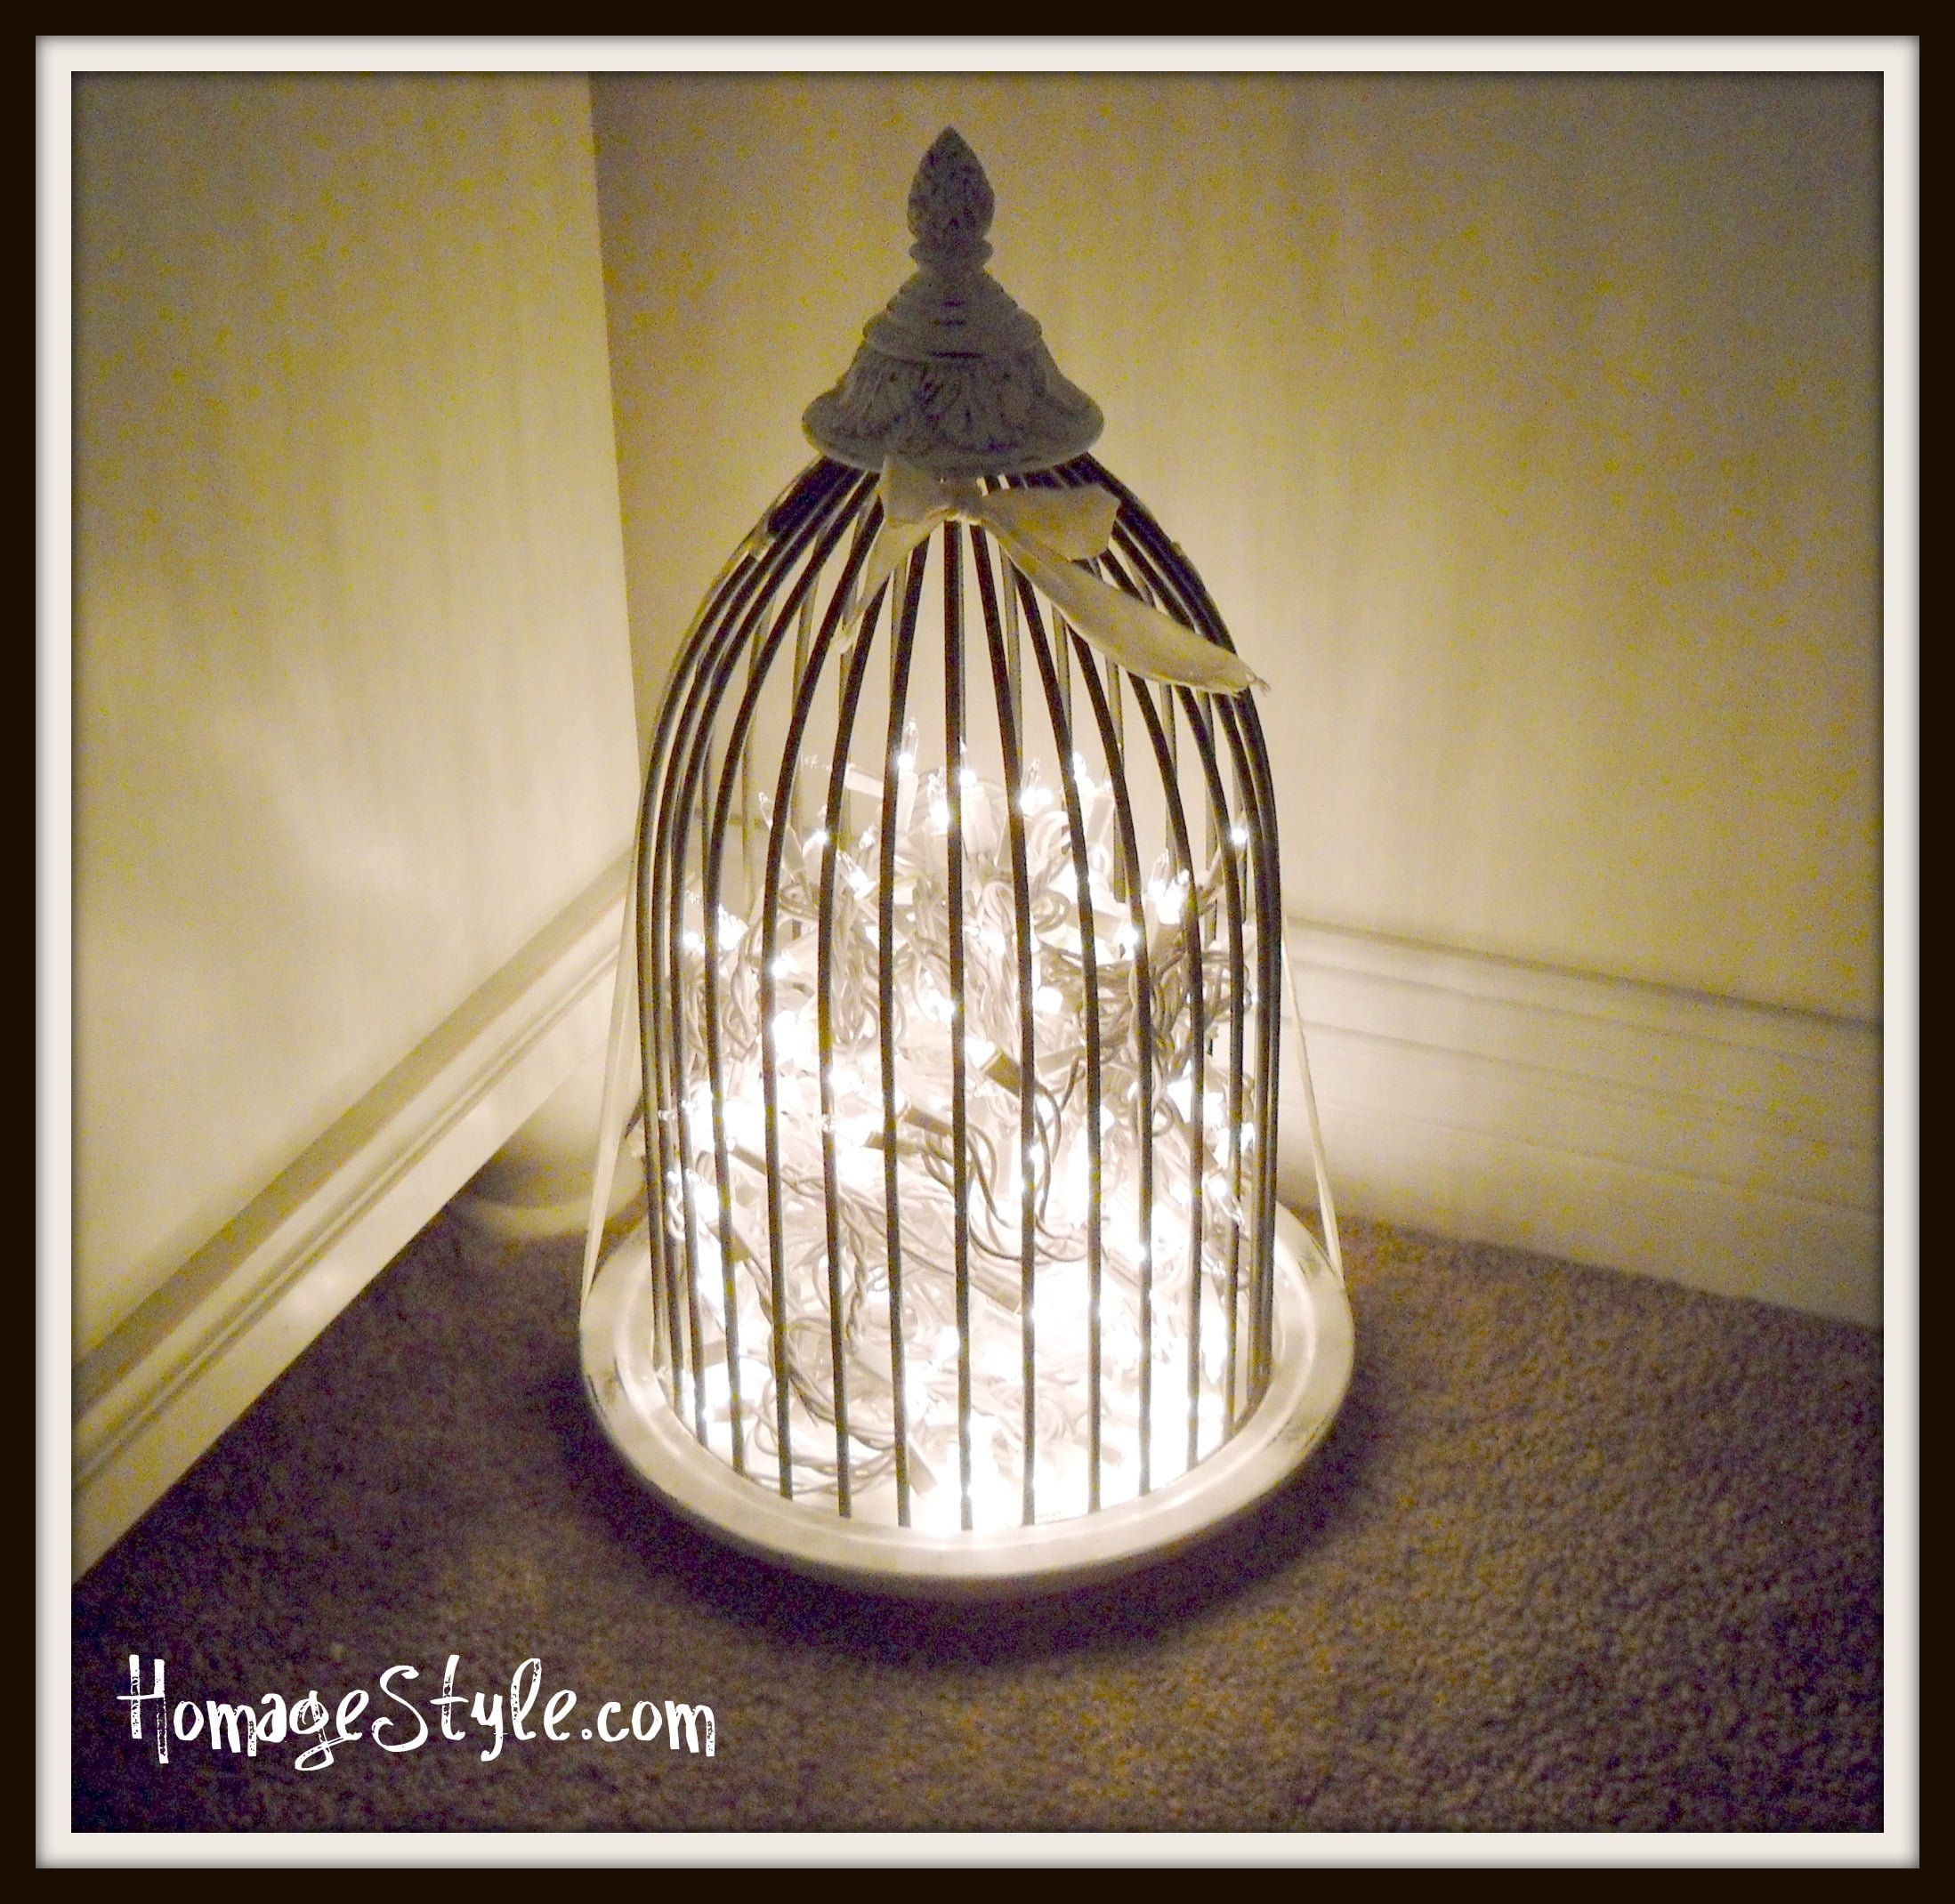


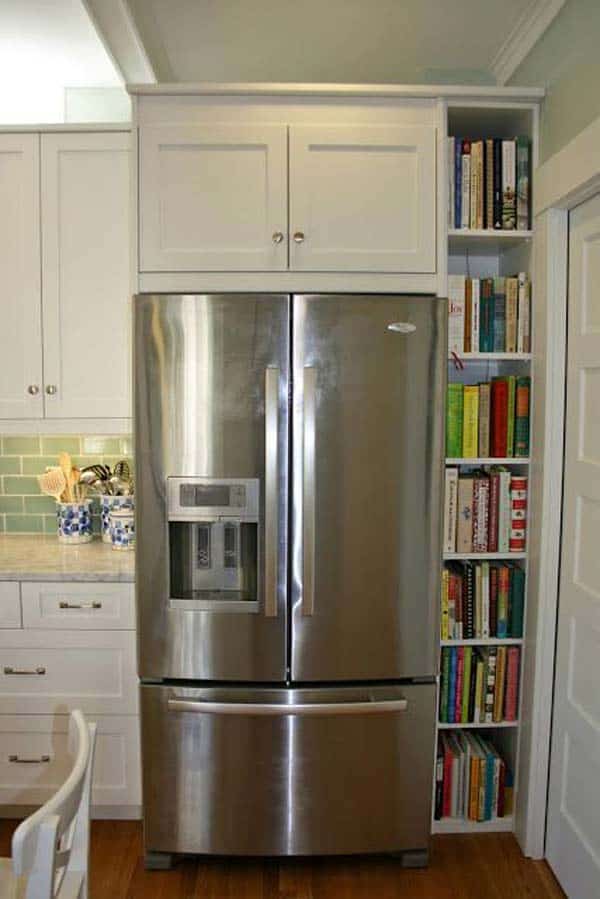
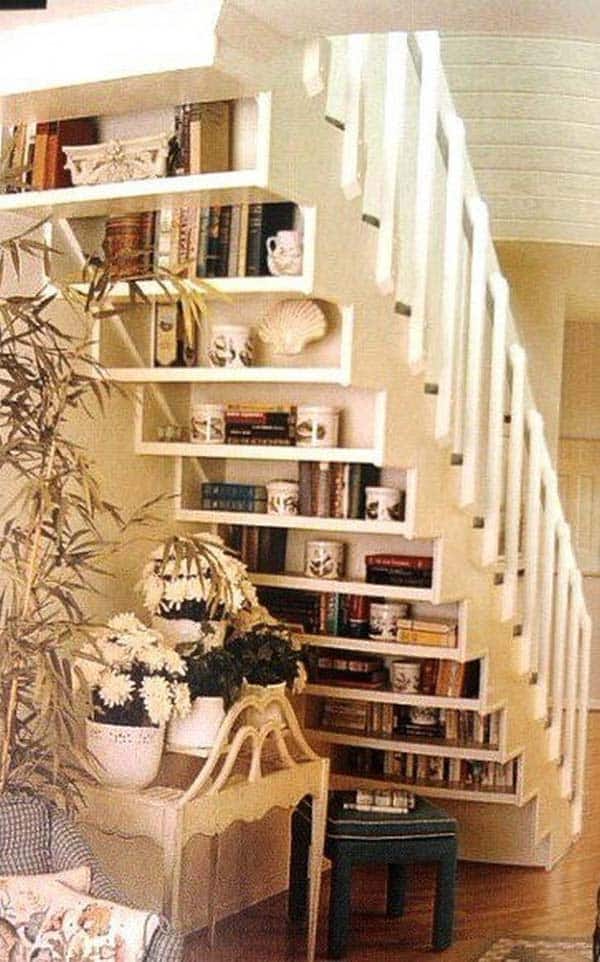
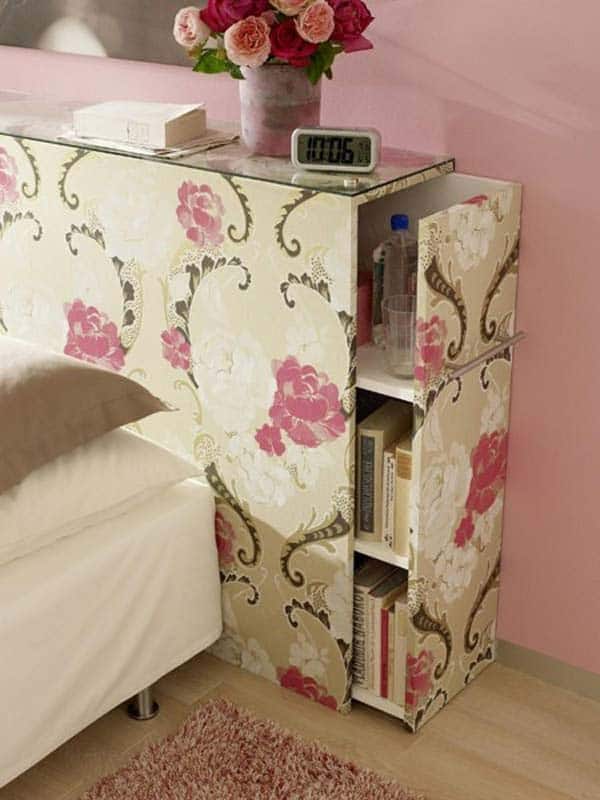
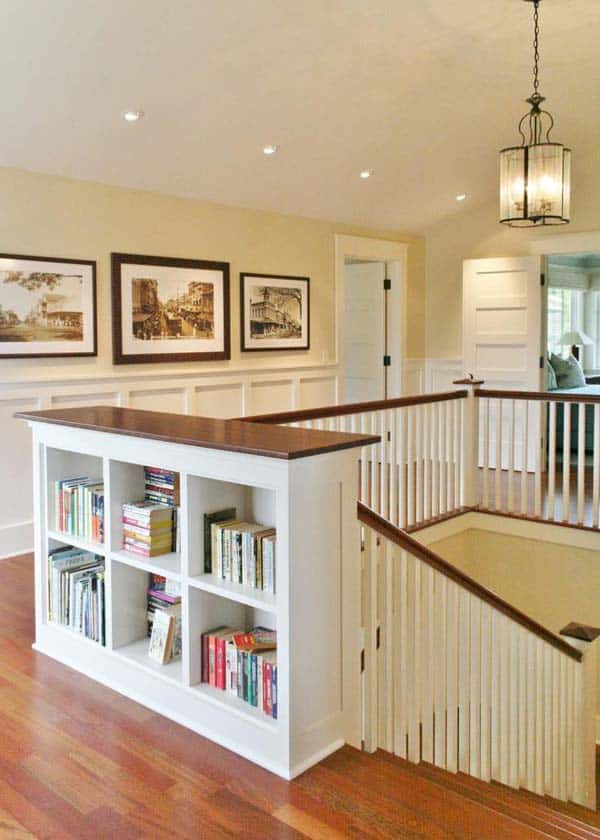
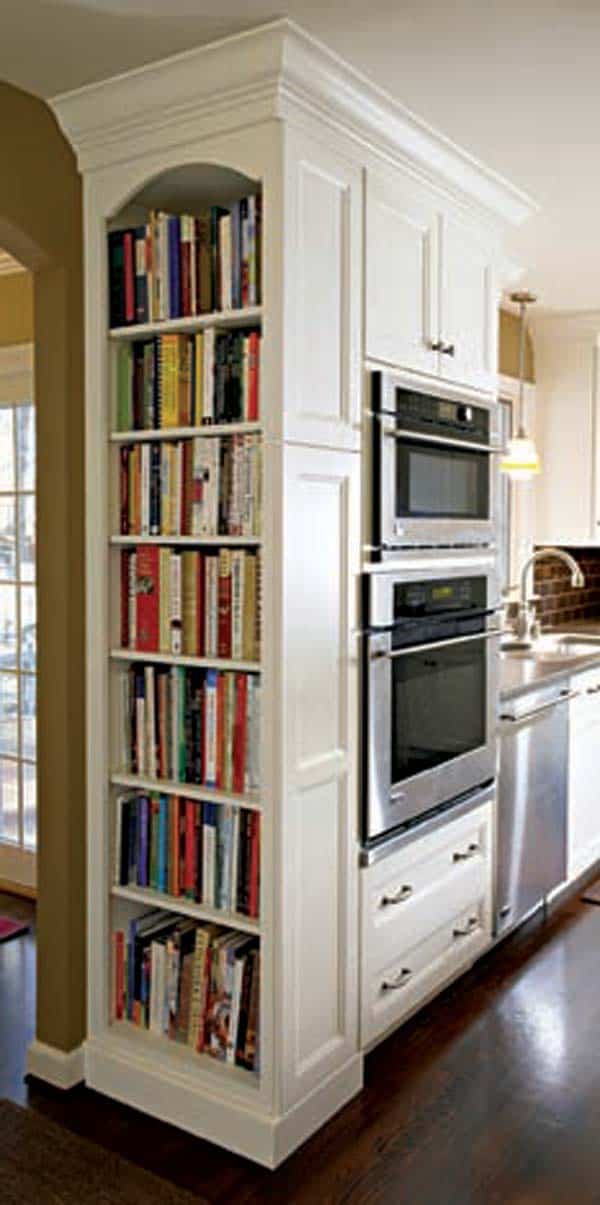


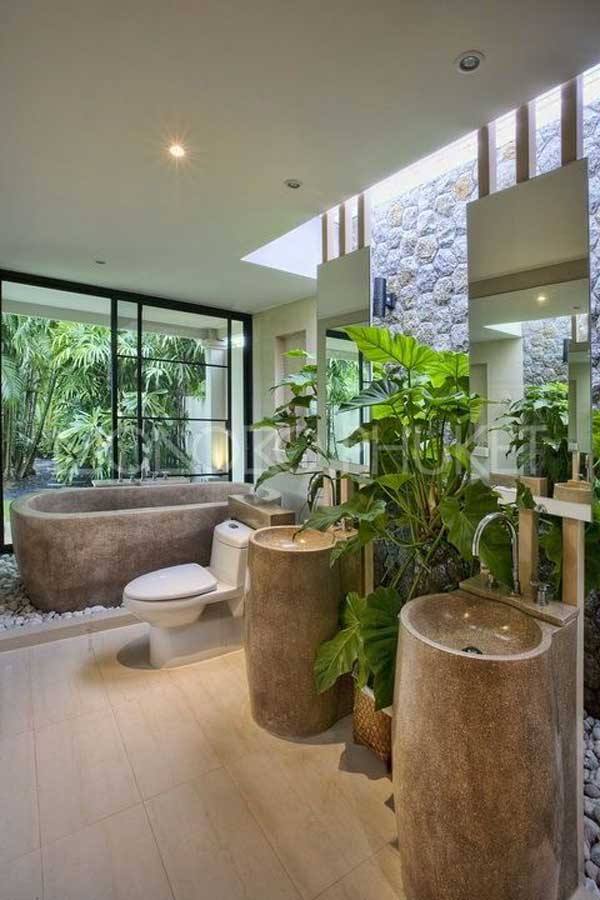
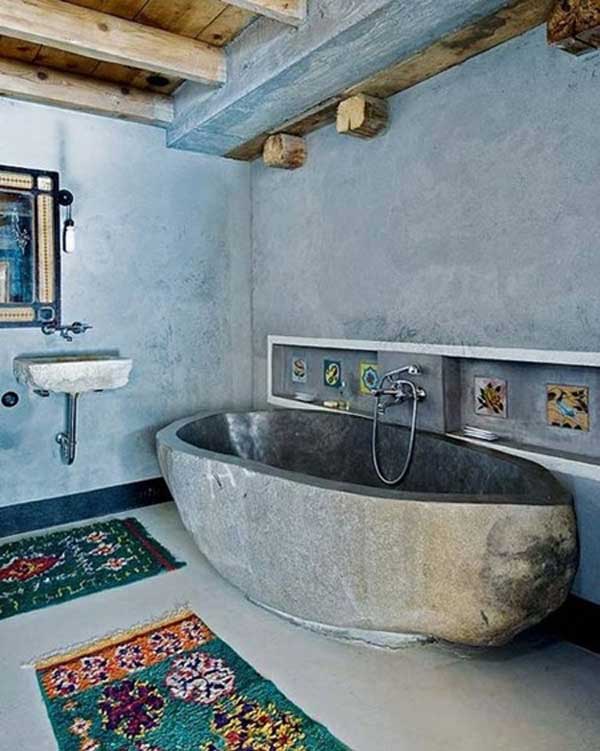
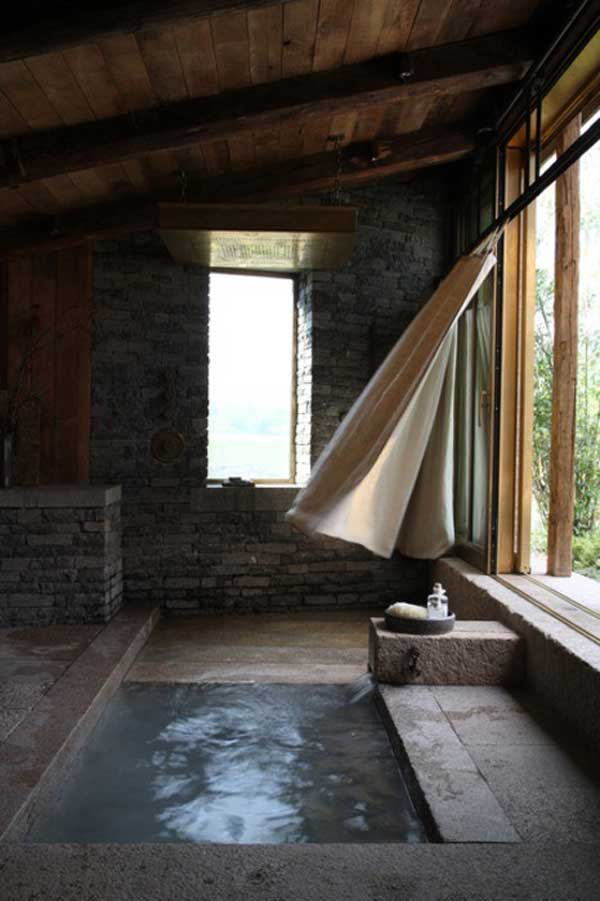


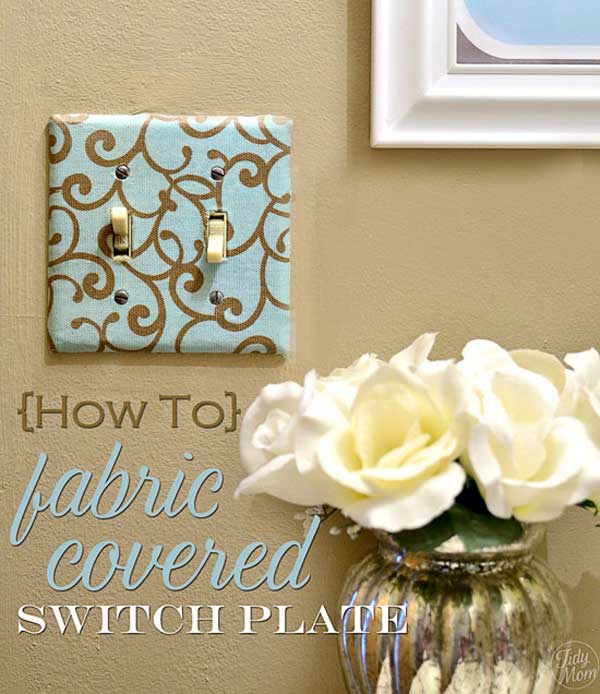


![Wood pallets can be used to make any piece of furniture : tables , beds, chairs , so keep that in mind when your plan your DIY interior furniture project. [ Read More at www.homesthetics.net/?p=15205&preview=true&preview_id=15205&preview_nonce=74c4e926f9&post_format=standard © Homesthetics - Inspiring ideas for your home.]](https://homesthetics.net/wp-content/uploads/2014/09/exnwhy.jpg)


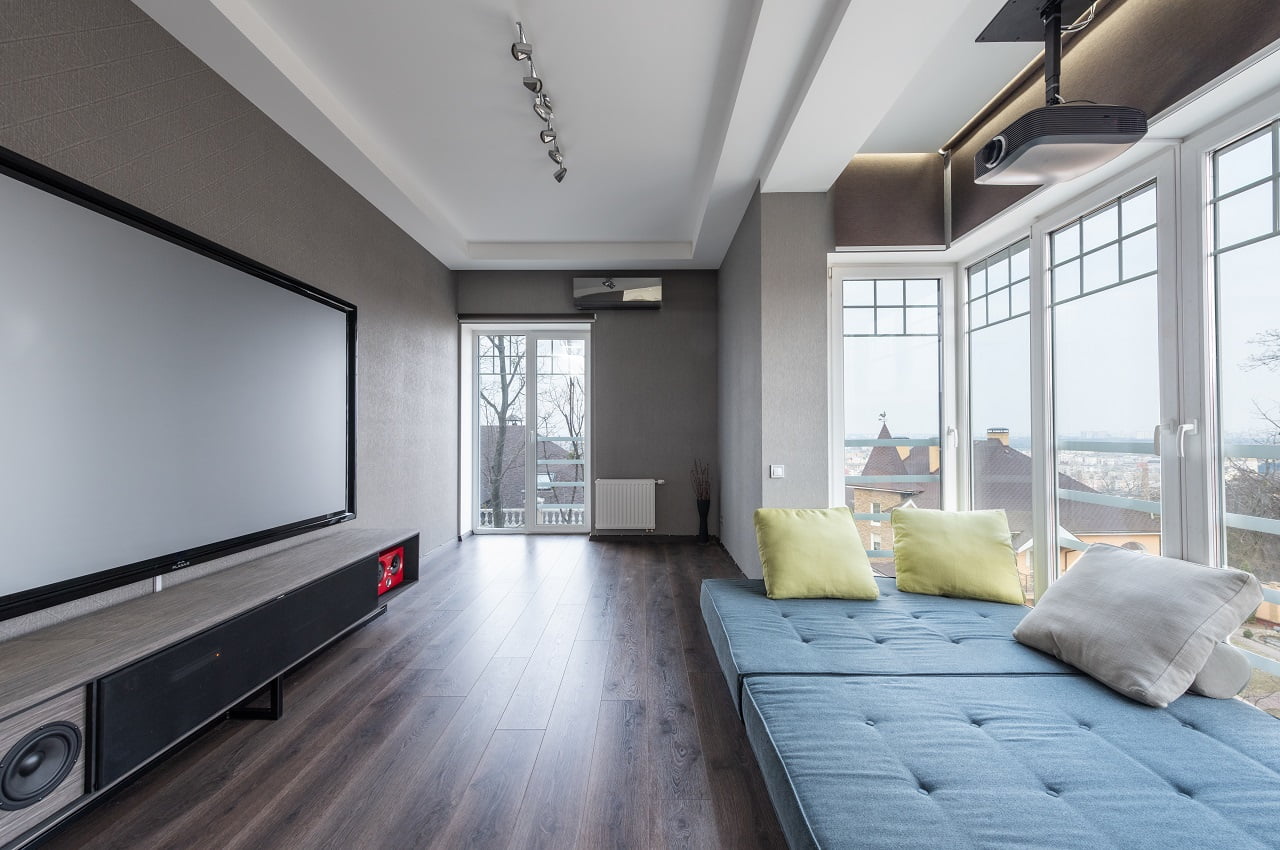
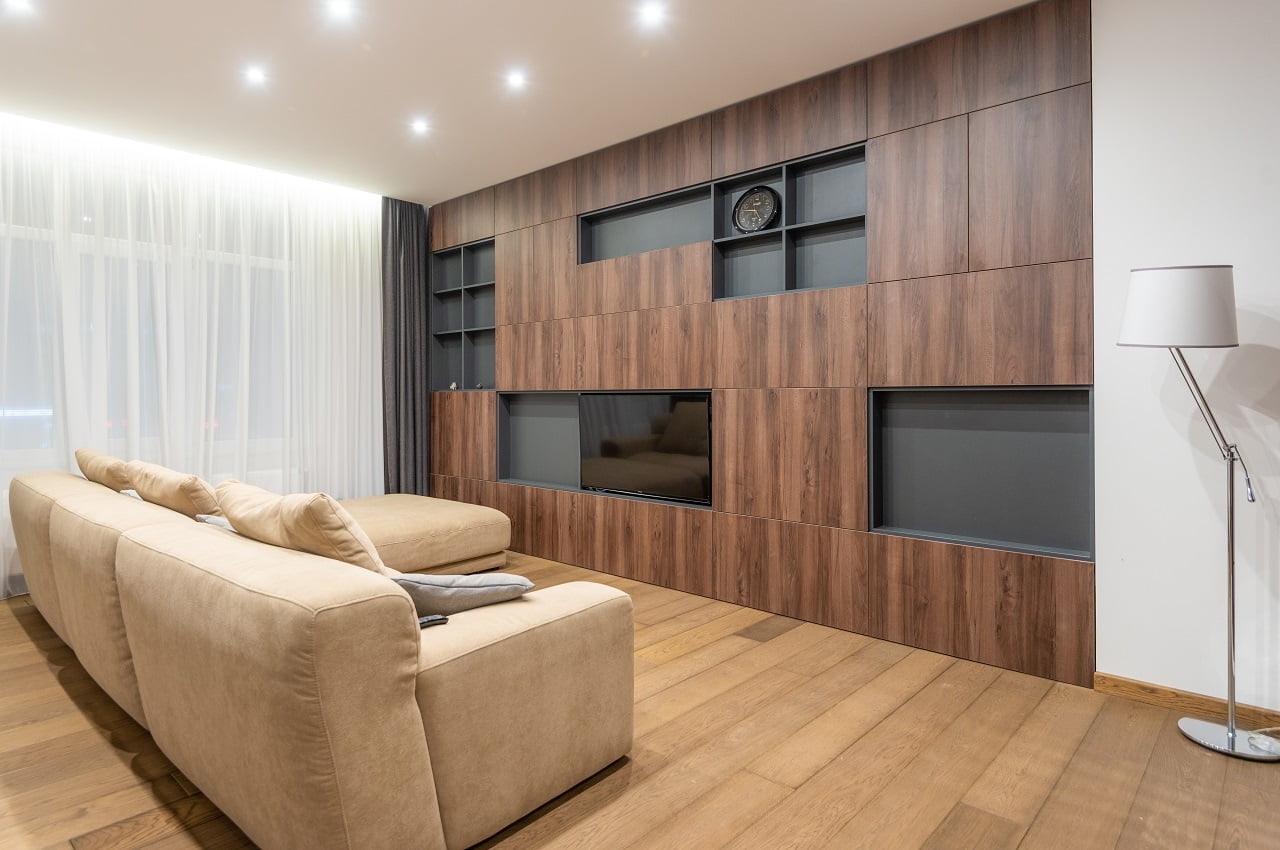