Understanding the difference between a vinyl cutter and a vinyl plotter is essential for anyone involved in sign-making, custom apparel, or vinyl-based design work. Though both tools work with vinyl material, their functions are distinct. A vinyl cutter uses a precision blade to follow vector paths and physically cut designs from adhesive-backed vinyl—ideal for creating decals, stickers, heat transfer graphics, and lettering. In contrast, a vinyl plotter traditionally uses a pen to draw designs or outlines onto vinyl surfaces without cutting them, often for visual mockups, design drafts, or guide markings. Choosing between the two depends on your end goal: cutting for final production, or plotting for layout and design planning. In some cases, hybrid machines can offer both functions.
Tip
Note: A vinyl plotter is not the same as atraditional plotter used in architecture or CAD applications. While both use vector-based inputs, traditional plotters typically print on paper and are used for technical drawings, whereas vinyl plotters are designed specifically for vinyl media in creative or commercial production settings.
Vinyl Cutter And Vinyl Plotter | What Are They?
Before we can guide you to understand the difference between a vinyl cutter and a plotter, it would be a good idea to understand the basics of both. What are they? How do they function?
We are starting with the basics, and we will tell you about their differences in-depth. This will help you better understand how these two machines fulfill very distinct purposes.
Let’s start with vinyl cutters. To put it very simply, these machines come with computer-controlled blades that cut the vinyl into your desired shape. If you want a letter carved out of vinyl, this is the machine for you! You can make logos, animal figures, or human forms, all with this device.
The vinyl plotter, which is also a cutter, goes one step extra. Instead of just cutting and shaping the vinyl, it also prints on it. Now that’s quite a wonder! You can use vinyl plotters to create prototypes and samples of almost anything that you desire. It cuts and prints on the vinyl as per your requirements.
Differences Between A Vinyl Cutter And a Plotter
Now that we know a little about the devices, it’s time we jumped in to understand how they are different from one another. If you are planning to buy one, this should guide you to understand the requirements better.
Printing And Cutting
A vinyl cutter uses a knife to make the cuts. The blade is small and looks like a utility knife that carves things using a mechanical arm. It receives commands that the computer sends and makes the cuts following the programmed patterns. The arm that has the knife attached to it moves following the commands that it receives.
A vinyl printer, on the other hand, does not always cut the vinyl. What it does is that it prints the fed design directly on the vinyl through a computer or a cartridge. This is quite helpful if you have to color and shape elaborate pieces. This device is a lot more convenient in such scenarios.
Cost
If you are planning to get your hands on a vinyl cutter, honestly, there is no need to spend a large amount of money. But, again, it all depends on what kind of cutters you are on the lookout for.
Your wallet will not suffer a big dent if you start with the basic options. Within a range of $100- $300, you can get well-functioning vinyl cutters without having to worry about anything else.
But if you are looking for a cutter for commercial or large-scale applications, you would have to spend a few extra bucks. A fair estimate would be something around $300-$600.
These cutters cost more because they come with additional tools, scanners and most importantly, are a lot bigger. Yes, they are costly, but considering the utility, totally worth the price.
Moving on, vinyl plotters are way more costly than vinyl cutters. They are more professional-grade instruments and are not as affordable as the cutters. If you buy within the low-end range, the plotters vary somewhere between $500-$2000. And these are plotters that are 24 inches and do not offer that many features.
If you are planning to buy one for commercial use, the price will go up considerably. This is because, for this purpose, you would need larger ones (36 inches and above) with more utility features, extra tools for a better experience, and upgraded software. And this would make the cost go up to $10,000 easily.
The Use
The devices function differently, and their uses would be different too. However, sometimes we have found people who even use them together.
Vinyl plotters are better suited for projects such as blueprints, advertisement billboards, banners, and the like; these are best used when printing is involved. A plotter is a more cost-effective alternative in projects like these because it paints directly on the vinyl.
If you were to get different colored pieces of vinyl and cut them to your requirements, it would be quite costly. Apparel companies, car manufacturers all use plotters for printing on vinyl.
On the other hand, if the job demands working primarily with a single color, vinyl cutters are more commonly used. This is why you would see people using cutters for logos, car decals, signs, and so on.
Moreover, you can use the cutters to work on an array of materials such as cardboard and trimming papers. You do not have to restrict yourself to using it on just vinyl.
The Knife v/s The Pen
It is widely known that a pen is mightier than a sword. However, when it comes to plotters and cutters, we have to say that pens and knives are equally functional.
A major difference between a cutter and a plotter is the use of knives and pens. Regular vinyl cutters use knives to cut and shape the vinyl, whereas plotters use pens to design and print on it.
The knife allows the cutters to print a design on the vinyl or any other material it is working on. Instead of just designing on the material, it cuts the vinyl in real-time. If you plan to put a logo on your shop window, a vinyl cutter will cut the logo to the perfect size needed.
On the other hand, the vinyl plotter uses the mighty pen to print more intricate and detailed designs. To design a prototype of a car, or for apparel designing, vinyl plotters can become your best friend!
These give you a perfectly detailed replica of the things that you want to design eventually. Anyone deciding to play around with colors when designing should make use of the pens that plotters come with.
Final Words
Now that we’ve outlined the key differences between a vinyl cutter and a vinyl plotter, you’re better equipped to choose the right tool for your workflow. Whether your goal is to cut intricate decals, create custom heat transfers, or plot out design guides for vinyl applications, understanding how each machine functions—and what it’s designed to do—is the first step toward making an informed investment.
Before deciding, consider your core needs: Are you producing finished, cut vinyl designs for signage or apparel? Or do you need to mark or outline designs for further processing? Clarifying your use case will help you determine which machine—or combination of both—delivers the precision, efficiency, and creative flexibility your work demands.
We hope this guide has helped demystify the cutter vs. plotter debate. Stay tuned for more insights and tools to support your creative and production processes.
Ever wondered how people have gorgeous plastic bags with eccentric designs or how brands print their names and logos on plastic bags? Allow us to tell you!
Printing on plastic bags has become popular now, more than ever. Those of you who have reusable plastic bags should consider adding a creative touch to them to make them stand out.
If you have a small business or are trying to build a brand, printing on plastic bags will help spread the word! Now, the question is, how do you get this to happen? Don’t worry, we have got you covered.
Without further ado, let’s talk about all the deets.
How To Print On Plastic Bags
Selecting A Method
The first thing to consider before moving on to the printing is what method would be appropriate, based on the reason for printing.
Printing for long-run productions where there are many bags requires an economical and time-efficient method. The most common commercial method of printing is called flexography.
However, if you are looking to print one bag as a hobby or a manageable amount of bags for your small business, opt for screen printing as it is more suitable for short runs.
Flexography
Flexography is quite common among people printing large quantities of bags for commercial purposes. It takes lesser time and is cost-efficient since the printing is done on a large scale.
In this method, a design is impressed on a printing cylinder, and an uncut roll of plastic passes between rollers that have an adhesive.
The design is then imprinted as the material passes. Once it has been fully imprinted and dried, the plastic goes through the rollers again so that it is separated to create freshly designed individual plastic bags.
This type of printing method is also widely applied to create many labels and plastic coverings of day to day products. It allows the usage of multiple colors as opposed to screen printing.
Screen Printing
For shorter runs of plastic bag printing, screen printing is the ideal choice. It can also be done at home and does not need heavy-duty equipment.
The only issue with this process is that it is a little labor-intensive but it is worth the effort. In screen printing, individual plastic bags are printed as opposed to uncut plastic rolls in flexography. And usually, one color is used for the design.
To screen print on a plastic bag, the bag has to be placed on a flat surface. It is crucial to ensure that the bag is stable and secure.
Next, a metal screen is lowered onto the bag, and the ink is applied by dragging a squeegee along the length of the screen. Once the design is printed, it is placed on a surface to dry.
The great thing about this method is that it can be done at home. So, if you are looking to advertise your brand on bags or try it as a hobby, it is unnecessary to start doing this on a commercial scale.
Screen Printing At Home
To do this at home, the same method mentioned previously can be followed. Since that was a commercial process, you might have to use additional material for smoother printing.
You will need an emulsion liquid mixed with a sensitizer to soak the design in, and cardboard papers to separate the bag’s two sides so the ink doesn’t get transferred.
While spreading the ink with a squeegee, do not apply force, and don’t worry if the design does not print right. It’s absolutely fine to repeat the spreading process till it is printed clearly.
To dry the bag, it can be placed on a flat surface and left to dry, or a blow dryer can be used as well.
Plastic or Paper Bags
Paper bags are reusable and are also a great alternative to plastic bags, but it might not be cost-efficient for people who are starting a new business.
Reusable plastic bags are a cheaper alternative not just to produce, but they can also be bought at lower rates. Plus, a lot of reusable plastic bags are usually lying around the house that can be easily used.
Additionally, plastic bags have a certain uniformity in terms of material. They will not be adversely affected with ink, while paper bags tend to get rigid after the ink dries.
Heat Press
Apart from flexography and screen printing, a heat press can be used on plastic bags with thicker material, which allows them to tolerate a certain amount of heat.
A heat press is a machine where the design is printed onto the material using heat and pressure. Although it is commonly used on fabrics, plastic bags are also being printed on using this method.
Using a heat press is reasonably straightforward, but there are a few points to keep in mind while choosing to use a heat press machine.
Choosing The Right Bag
Since a heat press uses high temperature and pressure to apply the design, it is crucial to pick the right kind of plastic bag.
Polythene bags will not be able to withstand the heat and will instantly melt. So, it is advised not to use those if a heat press is your preferred method of printing.
Instead, use polypropylene bags for the heat press method as the material is thicker and more heat-resistant. Long story short, there is a lower risk of these bags melting in the process.
Choosing The Right Temperature
Now that it has been established that polypropylene bags are a better option, let’s talk about the temperature of the machine. These bags may be heat-resistant, but there is still a need to be careful while putting them under the machine.
It is advisable to start the process at a lower temperature and then gradually increase it if the design is not printed correctly.
Choosing The Right Machine
Printing using a heat press requires a lot of control and accuracy. And, to tie in all the points above, the right machine has to be used. If you plan on doing this at home, make sure that the machine used gives enough flexibility to alter the temperature based on the requirement.
Additionally, the pressure aspect is also vital in this method. Whichever machine you opt for has to allow adequate pressure to be applied. And, the plates have to be flat to avoid creasing the bag.
Final Words
With multiple methods to choose from, it may seem challenging to understand and grasp all the processes entirely, but it gets easier once you select one and start.
While printing on plastic comes with its own set of complications, it is not as difficult as it seems initially. Once anyone gets the hang of it, it opens up doors to more experimentation and creativity.
Moreover, it is a great way to use those reusable plastic bags that are sitting and collecting dust at home.
We hope that this guide we have created gives you a better idea about the printing process and methods. Feel free to reach out if you still have any doubts.
When it comes to painting, many people have the notion that only born artists can create fantastic artwork. However, it isn't that tough at all!
And to support this fact, there can be no better example than acrylic pour painting as it can be created by anyone and everyone. All you need to have is a love for experimenting with colors and some idea about the different aspects of this artwork.
Plus, you don’t need to invest a lot of time in creating these paintings. So, let go of all hesitations about whether this will be the ideal artwork to engage in. To help you do that, we have curated this guide to put forward all the essential facets of acrylic pour painting. That way, things will seem much simpler to you.
With all said and done, let’s get going!
What Is Acrylic Pour Painting?
An acrylic pour painting is very different from most other types of artwork, and to master it, you need to learn about acrylic pouring first.
Acrylic pouring involves making acrylic paint pourable using a medium and then applying it on a surface to create abstract art. Usually, acrylic colors are made to flow into each other to give rise to the unique color effects and patterns that you will find in most such paintings.
That’s why it’s used to paint backdrops for dreamscape sceneries. Not only that, but it can also be applied for painting home decor such as coasters and countertops made of faux marble.
Now, there are several techniques for creating acrylic pour paintings and several important aspects to learn about before you take on your first painting project. In the subsequent sections, we will discuss all these techniques and aspects in detail, so let’s move on.
What Do You Need for Acrylic Pour Painting?
First and foremost, you need to have all the essentials ready for use before starting any artwork. In the case of acrylic pour painting, the primary materials required are acrylic paint, a pouring medium, and a suitable surface.
These requirements remain the same for almost all the pour painting techniques that will be dealt with later on in the article A few additional ingredients are needed for some of them, which will be discussed as and when we talk about the particular technique.
However, assuming that no other ingredients are mentioned for a technique, it will only require using a pouring medium and paint.
Using the Right Pouring Medium Is Important
The pouring medium plays a key role in creating an acrylic pour painting since it is mixed with the paint to create the required flow and ensure proper mixing of colors. You may have to keep some colors separate for a particular painting, which can be effectively achieved with the help of a suitable pouring medium.
This way, you can make sure that the colors never combine into a slushy mix. Moreover, the colors remain bright and beautiful despite being diluted. And its benefits don't end here.
Using a good pouring medium also ensures that the paint mixture doesn’t dry quickly. This, in turn, eliminates the possibility of cracks developing in the painting. Besides, using the right medium helps maintain the adhesion on the surface.
Notably, different brands and types of mediums are available in the market. Each of them has a different visual influence on your pour art and also possesses different characteristics. So, make sure to choose one according to your requirements.
Suitable Canvases for Acrylic Pour Paintings
Canvas Boards
A canvas board is typically a cardboard or MDF board covered by canvas material but they don’t perform the same way.
Generally, the former is considered less suitable for acrylic pour paintings as the moisture trapped between the cardboard and the canvas may cause it to loosen as the moisture makes it more prone to warp and ripple after the paint dries. In comparison, an MDF board can be a quicker and more efficient surface to paint on.
While using a canvas board for your pour paintings, keep in mind that it has the canvas glued back and front. It’s the back that you must handle carefully as staining that part with paint might cause the glue to become ineffective.
Stretched Canvas
Stretched canvas is a favorite among most acrylic artists as it helps them create a 3D look when the sides of the canvas are covered in paint.
Although there aren’t a lot of precautions to take care of, you should ensure wiping it clean before use and that its center is tight. One way to ascertain this is by tapping the center to see if it gives a thumping sound or has a sag in the middle. If you’re faced with the latter, the paint may take longer to dry.
To deal with this, all you have to do is spray the underside of the canvas with water and then dry it using a blow dryer. Rest assured that the middle portion of the canvas will tighten up in a short while.
Different Acrylic Pour Painting Techniques
Acrylic pour painting becomes all the more diverse and interesting for DIY-lovers due to the availability of a number of different techniques. As a result, you can produce different effects and patterns on the canvas, which make the paintings more attractive and intriguing.
In the following sections, we briefly discuss the most significant techniques. So, let’s get going!
Basic Techniques
Firstly, let us look at the techniques which are fit for beginners and pros alike. You can attempt these techniques using standard preparation and by utilizing simple tools available in most households.
The Simple Pour
We begin with the easiest of them all, the clean or simple pour. As the name suggests, it involves pouring the paints next to one another on a surface and keeping them separate. Following this, you can swirl the color in as many places as you like with the help of a sharp object, such as a toothpick.
For creating a simple pour, you need to follow a few straightforward steps. Start by mixing each of the colors with the medium of your choice to create a consistency like that of warm and runny honey. You should ensure that the flow is smooth yet not too drippy or too thick.
After you are done with the mixing, take the colors one at a time and pour them on the surface. Finally, you can manipulate the surface so that the colors move around and their edges blend seamlessly or use a tool as described above. Alternatively, you may leave the paint intact to keep the colors clearly distinct.
Flip Cup Pour
For this technique, place a cup full of the paint upside down on a surface, and then take it off to let it flow out. An alternative to the latter part of the technique is to poke holes on the top to relieve the pressure so that the paint comes out from under the cup.
An advantage of using this technique is that you can create ethereal blends and dynamic patterns and can even add cells, which we will talk about later in our guide.
For making an acrylic painting through this technique, start by mixing the paints with the medium in individual containers. At this point, you can also add dimethicone or silicone if you like.
Next, layer the paint in a glass or cup by plopping all the colors together in it or pouring them down its sides. However, the cup must be flipped in the right way to prevent the appearance of improper pouring. In case the cup is smaller, the best way would be to flip the surface over and place it over the cup first, and then grasp the cup and the surface simultaneously to flip them over again.
Similarly, with larger cups, you may use a piece of cardboard or plastic first and then manipulate it and place its edge on the desired part of your surface. Finally, slide the cup off onto the surface to create the flip cup pour painting.
Dirty Pour
This technique is popularly used in finishes on faux marble, and can help produce absolutely amazing designs and patterns. Like the previous technique, this one also requires layering individual colors in a cup, followed by pouring them on the surface at once.
Once done, manipulate the surface to achieve the style and pattern that you desire, as with the simple pour technique. On a side note, you should avoid creating a very thick paint layer to prevent the painting from cracking.
Puddle Pour Technique
Another relatively simpler technique that you can try is the puddle pour. In this case, you’ll have to pour the colors one after another on a base color, and then move the canvas or use air to spread them all over it so that the color puddles are connected.
Since it creates a natural blend of all the colors, this technique is ideal for creating rainbow pours using three of the primary colors such as yellow, cyan, and magenta. In this regard, being familiarized with the color wheel will help you prevent the formation of muddy colors.
Intermediate Techniques
When you become accustomed to the basics of pouring and mixing paints, you can try out the next level of acrylic pouring techniques. Some of these may be slightly more lengthy than the ones discussed above, but they can yield quite amazing designs and patterns.
Controlled Marble Pour Technique
Applied for faux marble finishes, this technique is achieved using a carefully planned pour. Although a controlled marble pour painting can be created with the help of the flip cup pour technique, you may also do it by adopting a more intricate method, which is described below.
Right from choosing the colors to applying the finishing touches, this technique requires you to proceed wisely. To start with, we’d suggest choosing three different shades of one color, for instance, dark gray, white, and black. This will make sure that all the colors coat the different gradients of the marble surface with finesse.
Next, choose a suitable marble line color for making up the dark or light lines spread all around the marble and keep it aside. After this, combine each of your desired colors with the pouring medium and then layer the two main colors very carefully in a cup, while keeping the third line color separate.
Now, pour these layered colors on the surface and manipulate it gently so that they blend along the edges. Follow it up by creating a pour spout with the cup used for layering, then taking the marble line color and drizzling it in lines across the surface. On that note, making these lines run off the side of the painting would render a distinct 3D look to your creation, so give that a try!
Finally, manipulate the surface one last time to make the lines flow with the marbled background. Allow it to dry thoroughly.
Swipe Acrylic Pouring
A swipe pour painting can be achieved by pouring different colors and swiping the paint using a tool such as a slightly damp paper towel or a flat frosting spatula. You should ensure that the mixture of the paint and medium has the right consistency to create the desired look. The colors can either be kept separate or mixed together as per your preferences.
Be careful to swipe the canvas from one end to another and follow the same pattern throughout. At the same time, don’t apply too much pressure on the surface as that may cause the paint to be scraped off or the colors to be mixed more thoroughly than desired, resulting in a muddy look.
Balloon Smash Pouring Technique
This name sounds fun, doesn’t it? Well, every bit of it is fun-filled indeed! The technique involves using a bouncy and inflated surface like a balloon to paint different shapes in several small puddle pours. Moreover, you can combine a balloon smash pour with a dirty or clean pour to create flower-like designs.
For putting it on a canvas, start by mixing a base color as per your choice with the medium. Then pour it in a thin layer over the surface and spread it to the four corners or edges of the surface frame. Now, pour the other colors or the contents of the dirty pour cup to make small puddles on the canvas.
Initially, you should create only one or two puddles to see how the blend of colors works and then create the others. Next, grab a beach ball or a balloon with a rounded side and smack the middle portion of each puddle either by applying force or gentle pressure. You can easily create captivating marine imagery or lovely abstract flowers using this method.
Tree Ring Pour
Though this technique utilizes dirty pours, the method of pouring the paint on the surface is different, which results in the creation of mesmerizing designs.
To create a tree ring pour, layer and mix your colors in a cup just as in the dirty pour technique. Then squeeze the pour cup to create a pour spout that is pointed and start pouring the paint circularly till all of it has been poured. Lastly, manipulate the canvas in a circular motion to make the pour look like a tree ring.
Tree ring pour is known to create immense depth in the paintings, but you should be very careful about choosing the colors and combining them. A good way would be to play with dark and light colors layered one on another to create eye-catching lines and blends.
Advanced Techniques
You can explore some high-level acrylic pouring techniques after having mastered the beginner and intermediate techniques. As such, we’ve selected four such popularly practiced techniques in this section, for which you might need a few more tools or materials.
Resin Pouring
In the resin pouring technique, the acrylic colors are mixed with a two-part resin to create layers and depth in the painting. Remember that you should always add the paint to the resin and not the resin to the paint. Besides, you can tint the resin by adding a touch of acrylic to it, adding more resin is required if you need the final look to be opaque.
We love how this technique can be used to create stunning ocean pour paintings ideal for interior decoration.
While making the mix of resin and acrylic paint, you should ensure that both the components are incorporated properly. It is also essential to keep an eye on the working time of the resin to work faster but without compromising on the mixing time.
After the resin is mixed with the paint, pour it on the surface and then blend the colors with hands (while wearing gloves). Be cautious not to create a mix, otherwise the painting may turn muddy. Now, complete the process by popping the surface bubbles using a torch held a few inches away from the surface.
Wait for about a day (if not more) for the resin to dry up, and you will have a truly stunning painting! Don’t forget to keep your hands and eyes protected while working with resin as it is hard to remove from the skin and can be painful if it gets into your eyes.
String Pull Pours
As is evident from the name, this technique essentially utilizes a chain or a string to achieve the final look. Simply put, it lets you create wisps similar to feathers on an acrylic-poured background. The “airy” and “light” designs thus created can be outlined to draw striking feathers or may even be left as-it-as to make the painting look more natural.
Furthermore, you can even create striking flowers through this technique. We would now explain how all this is done, but remember that the basic steps will be the same for both types of paintings.
First things first, the mixture of the background color with the medium should be slightly thinner so that it doesn’t swallow up the strokes made with the string. After you have mixed all the individual colors with the medium, pour the background color on the canvas and spread it evenly.
Now, the string should be loaded with a color as per your color placement needs. For instance, if you want the colors to be placed randomly on the canvas, creating a dirty pour and saturating the string with that mix will be the best way to go about it.
But in case you want specific placement of the colors on the canvas, you should create lines with alternate colors on a flat surface. As a result, the different segments of the line will be colored differently. After this, you’ll have to stretch the string and lay it on the line of paint to coat it evenly.
The next few steps will vary based on the painting that you would want to create.
Feather-Like Design
For achieving this design, you should first take the string and lay it on the canvas vertically. Then the top of the string should be dragged towards the lower portion to create one side of the feather. Similarly, repeat the same process by pulling the string in the opposite direction to complete the feather.
Flower-Like Design
To achieve this design, lay the coiled string on the canvas with its other end pointing towards you. Then pull the chain or string towards you while still laying it flat on the canvas, allowing it to uncoil gradually as you pull. While creating any of these designs, you should be cautious not to over-manipulate them.
Dutch Pour Technique
Also referred to as the “blow pour,” this technique requires you to pour paint on a canvas and manipulate it using a blow dryer or another tool to evenly spread the color. If you want to create unique and interesting shapes or abstract flowers, this is a great technique to try out.
The first step of this technique is the same as in the case of the string pull pour, where you need to pour a background color on the canvas. After this, layer the remaining colors in a dirty-cup style and then pour a number of puddles on the canvas. It’s then that you have to use a blowdryer to blow the paint so that the puddles are connected.
As an additional step, you may drizzle any metallic color such as gold on the surface to add that extra bling to the painting. Lastly, manipulate the surface using a straw or manually blend the drizzles to provide a natural look.
Dip Pouring
Interestingly, dip pour paintings have to be created using two canvases, viz., pouring paint on one surface or canvas and pressing another one against it. It’s a bit tricky as there’s a risk of the painting becoming muddy, especially if the artist isn’t well-versed with the color theory.
To achieve a dip pour painting, use a dirty pour or clean pour on one surface. Once you’re done with the pouring, press the other surface firmly against it and slowly pull them apart. After this, you may manipulate the surfaces if you wish or leave them intact if the paint applied isn’t too thick. This process can give rise to amazing waves, feathers and even ripple-like patterns.
How to Get Cells in Your Paintings?
Cell-like patterns are formed mainly when the density of the different acrylic paints being used is different. There are lots of tricks to facilitate the formation of cells in pour paintings. However, the number and size of the cells primarily depends upon the density difference between the pigments in the colors.
Generally, artists use three techniques to achieve cells in their acrylic pour paintings, which differ according to the materials used. We describe each of these techniques briefly as follows:
Cell Formation Using Silicone
Silicone oil helps in strengthening cell formation in pour paintings since silicone or oil doesn’t blend properly with water. As a result, pouring mediums or acrylic paints that are water-based separate them from silicone oil when mixed. Ultimately, there is a chemical reaction that leads to more cells building up in your pour painting.
At the same time, you should be careful not to use any random silicone oil since different oils and sprays have different properties and compositions, which may not work equally well. And the final look created by using the oils will also differ. For instance, some may produce smaller washed-out cells while others might give rise to larger and more clearly defined structures.
Most artists engaged in acrylic pour paintings aim to create as many clearly differentiated and contrasting cell patterns as possible. However, it requires using silicone oil with low viscosity since that can create stronger color gradients and make the colors flow faster.
However, a high-viscosity silicone oil is ideal if you prefer creating more smaller-sized cells throughout. By using such an oil, the colors will flow at a relatively slower pace, and the cells will be clearly delineated.
As for the amount of oil to be used, we’d advise adding 2 or 3 drops to all colors apart from white and the pouring medium itself. At this point, you should be careful not to mix the silicone too vigorously or for too long, otherwise you are less likely to achieve a successful cell effect.
Utilizing the Difference in Density of Color Pigments
Cells are formed in pour painting on the basis of the difference in density of the color tones used. Hence, you should select colors of varying densities to create cells in the paintings.
The process involves layering the surface with a denser color (such as white) and using a less dense color (such as red) for the base. This results in the denser color pushing down and the color with lower density rising towards the top in the form of cells. As a result, the denser color forms the outline or the net structure.
So, if you take the red and white combination cited above, you would get a painting with red cells adorned with a white border. Such paintings are commonly referred to as “broken net” structures or layers.
Generating Cells Using Heat
The third and final technique is the most advanced and can yield larger or more controlled cells. We’d strongly recommend using a butane torch or heat gun for this technique as the heat emanating from these devices helps in making the cells more prominent on the surface of the paint layer and also considerably enlarged.
You can get the best-looking cells by moving a torch over a flip-cup pour painting. Apart from that, torching it again for a short duration will lead to the creation of additional small cells that can provide the final touch to your paintings. However, you shouldn’t use the torch for too long or hold it too close to the same spot as that might create dents and clumps on that particular spot.
Tips for Creating a Good Acrylic Pour Painting
You will always want to create the best-looking pour paintings to adorn your interiors. But to achieve that, all the steps involved should be followed accurately. So, keeping in mind a few key factors common for all techniques is essential as it will help you complete the process without any major hiccups. And in the following sections, we describe each of these factors briefly.
Maintaining Color Consistency
Irrespective of the technique you adopt, each color-medium mixture that you’re using must have optimum consistency. Hence, you should always use high-quality color additives and acrylic paints, which will ultimately help you produce perfect pour paintings.
In hindsight, you’ll be able to bring the ideal consistency in the colors as your experience in this painting style increases. For beginners, however, a syrup or honey-like consistency will be great as it can create a thin color stream. Here, we should also mention that you should be careful to see that it doesn’t become too watery.
Protective Measures
Acrylic paint can be difficult to remove from most surfaces, so you should be extra cautious in ensuring that the work surface or other adjoining areas don’t get stained. Likewise, the color mixture might run into a spot that you don’t wish to paint, so that should also be taken care of.
That’s why it is essential to protect the said spots with a cardboard or plastic sheet and the floor (or the particular work surface) must be adequately protected. Aside from this, your hands must be protected sufficiently, so remember to wear gloves before you start painting. We recommend using rubber gloves for this purpose.
Avoid Air Bubbles
Air bubbles are a major hindrance when it comes to creating acrylic pour paintings. But that can be dealt with in the right way using a few techniques. Firstly, you can quickly run a torch over the painting, which will cause the bubbles to pop up. Other than that, you can avoid air bubbles altogether if you make the mixture one day before creating the painting.
Use the Right Amount of Pouring Medium
The ideal quantity of pouring medium to be used will, of course, vary with the technique adopted, the paint used, and the final painting you wish to create. If a thicker paint is being used, it is best to apply more medium than usual as that will help in achieving a good consistency. In such cases, the typical paint-to-medium ratio used by painters is 1:3.
Preparing the Surface
The painting surface must be prepared properly for creating the piece. Firstly, you must pre-treat it using Gesso to facilitate better adhesion of the paint to the surface and to prevent it from penetrating the substrate. Moreover, the painting ground should be level and balanced to avoid unwanted manipulation.
Also, after the painting is complete, you should rest the canvas in a raised position to ensure that the flowing paint doesn’t stick to its underside. You can use anything like drinking glasses, pinboard pins, or cups can be used to hold it in position.
Using the Pour Cup of the Right Size
This might seem nominal at first, but using a cup of the right size is important to ensure the proper mixing of colors. For example, if you layer 2 oz. of red, white, and green paint in an 8 oz. cup, the green and red paints will start mixing.
This mixture will also roll down the sides of the cup and continue mixing on the canvas. Ultimately, it will lead to the formation of a brown (red and green color combined) color that might not be required for the painting at all.
Long story short, using a cup that is too large may make the painting too muddy. So, if 2 oz of paint has to be used, a cup of 3 oz would work well for creating the artwork.
Mistakes Commonly Made in Paint Pouring
Since there’s a lot of mixing and pouring involved in the process, it’s natural to falter in some places. Here are certain common mistakes that should be avoided while creating acrylic pour paintings:
Combining the Colors Wildly
You should never pour and mix colors vigorously without any prior knowledge of the color theory, which may lead to the formation of muddy spots in the painting. So, researching a bit about the basic color theory is important before you proceed to make an acrylic pour painting.
After this, you need to consider three to four colors that will go well if used together. Starting with primary colors, i.e., blue, yellow, and red will be a good decision. Additionally, white can be included between the layers, so that the edges of each color are sharper and cleaner.
Incorrect Consistency
Most beginners tend to make their first color mixtures either too viscous or too fluid. This leads to the formation of broken cells, which lose their shape upon drying, and a lot of paint also runs off the canvas. So, to make the perfect mixture, amateur artists may have to carry out much trial and error.
Being Impatient
You can’t expect the first few paintings to be extraordinary masterpieces, so give it some time and continue to experiment with different techniques. Use small canvases initially as it shall help you learn from mistakes and will also save material.
How to Prevent Cracks in the Paintings While Drying
Preventing cracks in your pour paintings is an important part and hence must not be taken lightly. After all, your painting would get the perfect look only if the paint dries up without developing any cracks.
Usually, this issue occurs when the topmost layer of the painting dries up much quicker than the underlying layers. As a result, the topmost layer turns skin-like and hardens quickly while the lower layer is still wet, causing the top to break and cracks to appear. To avoid this possibility, here are some precautions that you must take:
Maintaining the Right Room Condition
Fluctuations in room temperature and humidity levels may increase the chances of cracks developing in your pour painting. In short, the painting shouldn't be exposed to excess moisture or dry conditions while drying as that may have a negative effect on the process.
Avoid Making Too Many Paint Layers
If you aren’t satisfied with a particular pour painting, you may consider repainting it. And although this process may even be repeated several times, it might lead to cracks in the painting. So, you must avoid adding multiple paint layers on the canvas. While using two layers of paint is tolerable, using a canvas more than two times may not be the right thing to do.
A great alternative to avoid the possibility of cracks would be to wipe the liquid paint off the canvas immediately after you notice that the pouring is not proper.
Do Not Use Water
Adding too much water will make the binding agent in the paints and medium weaker, resulting in loss of its adhesive properties as this will increase the probability of cracks developing in your painting. So, we’d suggest not to use more than 50% water in each mixture.
Don’t Varnish the Painting Early
You should add the finishing touch only after the painting is totally dry. Hence, it is best to wait for at least 2 weeks before adding varnish to complete the look.
Final Words
Engaging in a new kind of artwork is like starting a new and beautiful journey as it offers a multitude of aspects to explore. And of course, nothing can match the joy of creating a beautiful painting all by yourself!
We hope you’ve enjoyed our sneak peek into the world of acrylic pour paintings. So, what are you waiting for? Get some acrylic colors and try your hand at a pour painting! We can say for sure that the hands-on experience will be even more enjoyable.
Keep painting, keep learning, and keep improving. Till next time, take care!
If you often find yourself binge-watching oddly satisfying videos of acrylic pouring, we’re on the same page!
One of the latest trends in art forms, the technique of pouring paints is known to have started in the 1930s by David Alfaro Siqueiros. Nowadays, many budding artists are jumping onto the bandwagon, considering how fun it is to mess around with colors but always end up with an incredible art piece!
Even when it comes to the amount of time and materials needed, acrylic pouring is a convenient art form to pick. So, if you’re someone who is always on their toes with limited art supplies, this method can be a therapeutic hobby for you.
And what better time to develop a new hobby than during a pandemic, when all of us are confined to our homes? Thus, we have curated this extensive guide that goes into all the details you need to know about acrylic pouring mediums.
Acrylic Pouring Mediums 101
What Is A Pouring Medium?
Since acrylic paints are known to dry fast, a pouring medium is required for free flow and a smooth texture. It does the job of a binder and a diluting agent, thus allowing easy mixing of colors. Additionally, a medium prevents cracking and fading once the paint dries up completely.
In short, it is what makes the thick and dry consistency of acrylic paints more suitable for pouring art techniques.
Properties Of A Pouring Medium
Slows The Drying Process
When the drying process slows down, you get more time to work with the paints, thereby allowing more abstract and fun designs! Also, a slower drying time means no cracking and chipping of paints.
Adds Fluidity
Acrylic paints are relatively thicker than drier forms of paint. Thus, by adding a medium, your paints will become smoother and easier to pour.
Retains Vibrancy
Even though you are “diluting” the paints by adding a medium, the pigmentation and saturation of your paints will never be sacrificed. After all, the main attraction of an acrylic pouring artwork is its multiple layers of vivid colors!
Can Water Be A Good Pouring Medium?
Yes and no!
Yes, water is a cheaper alternative to a pouring medium as it makes acrylic paints more fluid. So, beginners on a modest budget can start with water and slowly transition to an actual medium.
However, you get what you pay for. Using water will reduce the vibrancy of your paints and may result in a dry, chapped texture. Since water dilutes the color pigments and binding agents, different colors will not stick on most types of canvases and solid surfaces. Consequently, the layers will not stick together for a long time.
Moreover, as you may have guessed by now, your painting will not be durable on certain objects, especially when placed in an exposed environment. Hence, when you opt for water as the pouring medium, you will be compromising on the vibrancy, quality, and durability of the artwork.
On the other hand, a high-quality pouring medium will offer the fluidity of water while maintaining the true pigmentation of your acrylic colors.
Different Types Of Pouring Mediums
You can find various types of pouring mediums to add to your acrylic paints. Although all of them serve the primary purpose of adding fluidity, their varying properties serve different secondary purposes.
For instance, a glossy medium, as the name suggests, adds a shiny coating to your painting. There is no doubt that the painting will look brilliant, and you will save the extra time and effort of adding a varnish in the end.
However, most pouring mediums are “all-purpose,” which implies that they enhance the flow, vibrancy, and binding properties of the paint.
Professional Pouring Medium vs. Alternative Pouring Medium
Professional Pouring Medium
Products like Liquitex, PEBEO, and Decoart fall under this category. These products are specifically designed to enhance the flow technique of acrylic paints. Besides the properties of a good-quality pouring medium mentioned above, this variant ensures long-lasting pigmentation and prevents any acidic reaction in the paints.
Pros
Durable and long-lasting vibrancy
Prevents cracking and chipping of dried paint
Better flow dynamics
Does not dilute and desaturate colors
Cons
Expensive
Alternative Pouring Medium
Using an alternative pouring medium is a more budget-friendly option for beginners. Flood Floetrol is a popular option in this category. Its properties are similar to that of a professional pouring medium, but the durability of the artwork is not guaranteed. This is because alternative products usually contain acid, which can cause the painting to fade.
Moreover, factors like UV production and viscosity may differ, due to which experienced artists prefer using a professional pouring medium.
Pros
Budget-friendly
Larger packaging
Mimics the favorable properties of professional pouring medium
Cons
Uncertain durability
Achieving The Perfect Ratio
We’ll be honest- finding a ratio that works for you requires practice. Depending on the consistency you prefer, we cannot fix the perfect ratio of paint to pouring medium. However, if you’re a beginner and do not wish to waste your paints to poor mixing, start with a 1:1 ratio. Mix the paint and medium for 30 seconds and observe the consistency.
If it resembles liquid honey, you’re good to go. Otherwise, you can add more medium or water. But remember that the amount of water should not exceed 30% of the total volume of the mixture. This is to avoid the negative effects of too much water in an acrylic painting.
Along with practice, patience is key. Instead of adding a lot of medium at once, add small amounts so you can control the consistency. Once you’ve struck the perfect balance between acrylic paint and pouring medium, it will be easier to recreate it in the future for more artworks.
For your convenience, here are some popular pouring mediums accompanied by their foolproof mixing ratios.
Pouring Medium
Acrylic Pour Recipe
Vinyl Glue
1 part acrylic paint
1 part water
1.5 parts vinyl glue
Floetrol
1 part acrylic paint
0.5 part water
1.5 parts Floetrol
Liquitex Pouring Medium
1 part acrylic paint
0.5 part water
1.5 parts Liquitex Pouring Medium
Should You Stick To One Medium?
If you’re a budding painter or artist, we recommend experimenting as much as possible. Since perfecting the acrylic pour recipe is a journey in itself, you might as well try out different types of mediums. Usually, expert painters have their favorites, so they prefer using them repeatedly to achieve desirable results.
If you just want to test the waters, we recommend choosing a medium within your budget. Even if you don’t get the best results, you will get an idea of the mixing and pouring process. If you don’t want to use water, try vinyl glue, and slowly progress to professional options.
Do not go overboard with pouring mediums and additives. Note that the mixture should not contain more than two ingredients other than the paint itself. So, one all-purpose pouring medium coupled with an additive for gloss or cell formation should suffice.
What Is The Best Pouring Medium?
While the answer to this is a subjective one, there are some common favorites in the market. Take a look-
Liquitex Pouring Medium
This product is undoubtedly a favorite among artists. It owes its reputation to its uniform consistency and high quality. In fact, in recent times, the brand struggles to meet the demand, with so many people wanting to try the acrylic pouring technique. Unfortunately, this has resulted in a price hike.
Since Liquitex is a brand dedicated to art products, the base price itself is higher when compared to other pouring mediums. Thus, if you’re tight on budget, you might want to consider the next option.
Floetrol
An affordable pouring medium, Floetrol is a hardware product designed for house painting. For this reason, it offers excellent durability and pigmentation. Additionally, it elongates the curing time and allows easy spraying of paint.
Another interesting factor is its ability to form cells. So, you don’t need to add any type of oil when using this medium. You can add Floetrol to a mixture of paint and Liquitex for beautiful cell formation on your artwork.
GAC800
Similar to Liquitex, this pouring medium also prevents cracking even after adding thick layers of paint. However, one significant difference would be the amount you will need to add to the paint for a smooth texture. Believe it or not- the ratio of GAC800 to acrylic paint is 10:1. Isn’t that extreme?
While it may sound strange to beginners, you can give this product a shot while practicing. Additionally, the brand has its unique “GAC800 + paint + alcohol” formula to get the perfect painting results.
Glue
Elmer’s Glue, Book Binders Glue, or any other craft glue also acts as an effective and inexpensive pouring medium. Although some artists may not agree to it, desperate times call for desperate measures! If you strain and mix the glue and the paint properly, you will get a vibrant and high-binding formula.
Since water does not offer many desirable properties of an actual medium, craft glue is a cheap alternative that actually works! However, keep in mind that glue is relatively acidic, which may affect the longevity of your artwork.
Things To Consider Before Choosing A Pouring Medium
Surface Hardness
The surface hardness of the pouring medium determines the look of the artwork once it dries up. Some pouring mediums become soft and sticky while others become hard and sturdy. Depending on your preference and requirements, choose a medium that will not tamper with the quality of your paints.
Color Protection
Albeit not a necessity, some projects may require a medium that provides UV protection. For instance, if you’re painting objects or decor items that will be exposed to the sun, a protective medium will prevent potential fading and damage.
Gloss Level
Some pouring mediums contain special additives for adding gloss to your paintings. The amount of sheen remains constant throughout. Consequently, your artworks will not require an additional coat of varnish.
Flow Behavior
Mediums with high flowability are preferred for even distribution of paints while pouring. If a medium does not allow much flow, both mixing and pouring become difficult. While paints with lesser flow behavior may be suitable for some projects, acrylic pouring artwork usually requires a very fluid consistency.
Drying Time
Different pouring mediums require different amounts of time to dry. Some mediums may dry within a few hours, others dry overnight, and a few require a week. Depending on the urgency of your project, you can choose a medium accordingly.
Consistency
The consistency of a pouring medium should be inversely proportional to that of your paints. For instance, if you’re using dense and thick inks, you’d want a pouring medium with a thinner consistency. Contrarily, thinner paints require a thick pouring medium for the best results.
DIY Pouring Medium
While working on the right ratio of paint and medium, you might feel like a single medium does not suffice. In this case, you can mix two mediums that will guarantee the best results. For instance, a combination of Floetrol and vinyl glue is an effective homemade medium you can store for a week. Here’s what you need to do to make this DIY pouring medium-
Step 1
Pour out Floetrol and all-purpose glue in separate containers. Keep in mind that the ratio of glue to Floetrol should be 1:4, so pour accordingly.
Step 2
Strain both the products to avoid lumps and uneven texture. Sometimes the medium and glue can form chunks when stored for a long time. However, it does not always mean that it is “spoiled” or outdated.
Step 3
Finally, mix both the products and stir them together until they are well combined. This step is crucial to prevent any separation of the mediums in the later stages.
How To Make An Acrylic Pour Painting
Step 1| Prepare The Workplace
Acrylic pouring is a fun but messy technique. If you’re working inside the house, you would want to protect the floor and other objects around the work area. Use a plastic sheet or some newspaper to prevent stains nearby. Once dried, these stains and splashes can be hard to remove, so it is best to avoid them in the first place.
Step 2| Bring Your Tools And Equipment
This technique does not require much tools and equipment, so you might as well keep them nearby. Once you start pouring, you will not be in a position to halt the project every now and then to search for required materials. Additionally, as mentioned before, the process is messy, so we recommend wearing gloves and an old t-shirt/ smock/ apron.
Step 3| Check The Level Of Your Surface
A spirit level will be helpful in this step as the surface must be completely flat to avoid unwanted spills. Even the slightest amount of tilt can cause the poured paint to run across the canvas and ruin your artwork.
Step 4| Time To Mix
Grab a cup or any suitable container and fill it with acrylic paint and pouring medium. Check the instructions of the medium for the correct ratio. Repeat this step for every color you wish to incorporate in your artwork.
Ensure that the mixture has a honey-like consistency for the best results. Also, you can add a few drops of silicone oil for cell formation in your painting.
Step 5| Let The Bubbles Rise
Once the mixture is complete, leave it aside, so the bubbles appear on the surface. This waiting time prevents the formation of pockmarks while painting. You can even prepare your mixture a day before making the artwork.
Step 6| Mix The Colors
Now, take a large container or cup and pour the prepared mixtures into it. Take your time carefully pouring each color in such a way that it forms layers of multiple colors.
Step 7| Flip The Cup
Now is the fun part! After pouring all the colors into the big cup, flip it at the center of the canvas. Try not to spill any paint in this step. After a few seconds, lift the cup slowly and ensure all the paint drains out. You can move the cup in small circles until it is empty.
Step 8| Spread The Paint
Tilt the canvas in various directions until the paint has coated the surface evenly. Don’t forget to cover the sides of the canvas as well.
Step 9| Heat And Blow The Painting
The final step is to blow the paint with a heat gun or a hairdryer. This will help form more interesting patterns and encourage cell formation. Once you’re satisfied with the result, let the painting dry for a few hours or days, depending on the type of paints you use. Try not to store it in a very hot room to prevent cracking.
And that’s how you make an acrylic pour painting!
Basic Acrylic Pouring Methods
Both beginners and experts can enjoy basic techniques in this genre of art. The amount of expertise and preparation for such techniques or minimum, and the materials required are probably lying around your house already. Here are some quick and easy acrylic pouring methods you can try out-
Flip Cup Technique
The steps to this pouring technique have been discussed above. However, there are several ways to tackle the cup to achieve different results. Take a look-
The Quick Flip
This is the most exciting idea out of the lot, making it comparatively messier. But that’s the fun part! Just flip the cup as fast as you can, so the paint is not just poured but also splattered around the canvas.
Slow And Steady
If you’re working with a large canvas, this method is for you. Place a thin piece of plastic or cardboard over the cup and flip it. Try not to spill any paint at this point. Now, place the plastic/ cardboard on the pouring surface and carefully slide it off so that the cup is in direct contact with the surface.
Simple Flip
Alternatively, if your surface is small enough to be manipulated, simply place it upside down on top of the cup. Flip both the cup and the small canvas at the same time.
Poke It!
After using any of the methods mentioned above, instead of removing the cup, try poking holes on the sides. This will make the paint flow out and create attractive designs on the canvas.
Basic or “Clean” Pour
Hands down, the easiest pouring art technique is the basic “clean” pour. For this, all you have to do is pour paint directly on the surface. You can either finish your painting after pouring the colors or use any pointed tool to make swirls and patterns while the colors are still wet. Either way, you will end up with a stunning abstract art piece.
A pro tip is to tilt the surface in the preferred direction to cause more flow and movement in the paint. This will blur the stark lines between different colors, creating a smooth effect.
Although this method is easy enough for beginners, some artists may mess up the paint consistency. So, remember to balance between desirable thickness and fluidity when performing a “clean” pour.
Puddle Pour Technique
As the name suggests, this method requires you to pour paint directly onto the canvas and form “puddles” all over it. You can start with one color and top it off with suitable colors. Since this technique results in a more blended look, you should be well-versed with the color wheel to avoid “muddy” patches. For starters, we’d suggest staying away from black.
Dirty Pour Technique
This technique is a great way to utilize leftover paints from other projects and achieve a faux marble effect. In this method, instead of pouring the colors separately, you mix all the colors in one container and drain them altogether. Sounds exciting? Read the steps below to find out how to ace this style of pouring!
Step 1
Mix the paint and medium for every color separately. When working on a fresh piece, you can choose your favorite colors. However, even if you’re using leftover paint, the result is sure to exceed your expectations!
Step 2
Now, take a cup and pour all the colors in. You don’t have to worry about forming separate layers of paints. You can make thin lines or simply “plop” the various colors on top of one another.
Step 3
Pour the contents on the surface. You can move the cup in any direction to create more designs. And as always, tilt the canvas too. Ensure you don’t leave a very thick layer on any part of the canvas.
Step 4
Use a heat gun or a hairdryer to finish it off. You can even coat it with a layer of varnish or add some dry glitter beforehand for that extra sparkle!
Intermediate Acrylic Pouring Methods
If you feel like you’ve got enough practice with the previous techniques, try the next step to level up! The methods mentioned below will require a bit more effort, but the results will make it all worth it. Let’s dive right in-
Tree Ring Pouring Technique
This is similar to the dirty pour technique, except that your pouring movement needs to be more controlled this time. Although you can use contrasting colors, we recommend using different shades of the same color for a more natural, subtle look. Here’s a step-by-step tutorial of the tree ring technique-
Step 1
Mix the colors in a container, preferably with a pointy end for a more controlled flow. Try to form separate layers of colors.
Step 2
Now, pour the mixture at the center of the surface. We recommend using a circular surface since the paint lines are going to be circular. You can start with pouring straight and then make small and controlled swirls.
Step 3
Tilt the canvas to stretch the paint as much as possible till the entire surface is covered. For this technique, most artists avoid using any additives for cell formation. Since this method aims to mimic the look of tree rings, we believe the painting looks best without any cells.
In the case of a long, rectangular canvas, you can try the traveling tree ring effect. Follow the same steps but move your hand in different directions while making swirls.
Controlled Marble Pour Technique
Now, here’s a technique for achieving the perfect marble effect with a little bit of planning and manipulation. We recommend using just three colors of the same family. You can even add one metallic shade. Follow the steps below to mimic the gorgeous gradients of real marble-
Step 1
This method is at the intermediate level because the artist must be well-versed with color theory. Looking at pictures of marble will give you an idea of the kind of colors and effects you should aim for. Accordingly, choose the colors you want to blend and the color that will make the dark marble line.
Step 2
Carefully mix two shades in a cup, ensuring that they form different layers. Do not mix the third color at this point.
Step 3
Pour the contents of the cup onto the surface. Tilt the canvas to blend and merge the colors.
Step 4
Now, squeeze the cup or use one with a spout to pour the third color. While pouring, lift your hand higher to form a thin line and drizzle the paint across the canvas. Try to create intersecting lines for a natural marble effect.
Step 5
Tilt the canvas for the last time to manipulate the poured paint.
Swipe Acrylic Pouring Technique
For this method, you can mix different colors separately or combine them for a dirty pour. In fact, you can use any of the basic pouring techniques to start a swipe painting. Then you can use a flat tool like a spatula, popsicle stick, or a piece of cardboard to swipe the paints across the canvas.
Remember to be gentle since you don’t want to scrape off the paint or merge the colors too much. Additionally, we highly recommend using a heat gun to enhance cell formation. Once you’ve got enough practice, try mixing neon colors with black for some vibrant and stunning results.
Ballon Smash Technique
This technique is like reverse paintball! But we guarantee the fun quotient is no less. Along with the art tools required for acrylic pouring, you must have a balloon or any inflated spherical object. Read on to know how to ace this exciting technique-
Step 1
You can start with a clean pour, dirty pour, or both- that’s up to you. Pour the paint all over the canvas and manipulate it to cover the entire area. You can even use the swipe technique to do so.
Step 2
Pour a contrasting color in such a way that it forms a small puddle. The number of puddles depends on your preference. However, we recommend trying it out with just one or two to understand how this method works.
Step 3
Now, take a balloon and place it on each puddle. Different amounts of pressure will result in different designs, so experiment as much as you can. This technique is perfect for recreating marine life or outer space in an abstract form.
Advanced Acrylic Pouring Methods
Once you are confident with the basics, it’s time to challenge yourself with these advanced techniques. These methods will require more precision and patience, so buckle up!
Resin Pouring Technique
Resin is a transparent substance of high viscosity used in acrylic pouring artworks to create depth. If you want to create an abstract representation of ocean waves, this style is the one for you.
Step 1
Read the instructions of the resin product before starting. Most of them produce harmful fumes, so we recommend wearing safety glasses and gloves when working with resin.
Step 2
Add your paint to the resin and not the resin to your paint. This blunder can ruin the consistency, so be careful in this step. Also, make sure you know the working time of the resin and mix the paint within that time frame.
Step 3
Pour the paint and resin mixture on the canvas. Use your hands to blend the colors wherever needed.
Step 4
Use a heat gun or any pointed tool to get rid of the bubbles on the surface. However, do not overheat the painting, or else the resin may burn. After 24 hours, your wonderful piece of art is ready for display.
String Pull Pouring Technique
This technique creates whimsical abstract designs which resemble feathers, flowers, and more. Besides sturdy canvases, we think this technique will make beautiful greeting cards for your loved ones.
Step 1
Start by mixing your colors with the desired medium. Remember to dilute the “background” color more than the rest so that it is thinner and allows the string paint to retain on the surface. Cover the canvas with the background color.
Step 2
When it comes to painting the string, you’ve got two options. One, you can use the dirty cup method to pour a little bit of paint mixture on a flat surface and cover the string with it. Two, you can form a color pattern on a flat surface.
For instance, pour a line of pink, follow it up with purple, and then white. Repeat till the line of paint is long enough to saturate the string.
Step 3
In this step, you can choose whether you want to perform a flower pull or a feather pull. For a flower pull, place the string in a curved zig-zag design with the end pointing at you. Then, pull the string towards you in a smooth motion.
The feather effect is relatively easier to perform. Place your string straight across the canvas and pull the top part towards you. Be gentle and allow the string to drag across the surface. Repeat on the other side to form a full feather.
Remember that this technique is quite difficult to master, so don’t get disheartened in the first few tries. With regular practice, you will gain better control over your hand movements and form suitable paint consistency.
Dutch Pouring Technique
This is something most of us have tried during the art class in school. Also known as blow pour, this acrylic pouring style involves “blowing” the paint to form interesting shapes and designs. Perfect for producing abstract varieties of flowers, stars, and snowflakes, here’s how you can create a Dutch Pour painting-
Step 1
Combine your background color with the desired medium and pour it on the canvas. Ensure that no blank spaces are left.
Step 2
Mix the rest of your colors with the medium in separate containers, preferably with a pointed opening. Then, pour the colors on the canvas one by one. You can use the dirty pour method to layer the colors or simply form puddles all over.
Step 3
Grab a straw and blow the paint to connect the puddles. You can even use a blowdryer on a low setting.
Cell Formation In Acrylic Pour Paintings
As mentioned before, adding silicone oil to your mixture will result in cell formation, further enhancing the beautiful patterns in the painting. However, the type of oil can determine whether your artwork will be adorned with large cells or multiple, smaller ones. Keep in mind that you must add the oil to the mixture before pouring it on the canvas. Doing it afterward will not form any cells.
Silicone Oil vs. Hair Oil
When looking for an additive, you can find two types of silicone oil on the market. One has a low viscosity that adds more flow to the paint and forms large cells with relatively more saturated color gradients.
On the other hand, silicone oil with high viscosity slows the flow behavior of the paint and forms small cells. Moreover, the color gradient is not as sharp with this type of oil.
Hair oil is another additive that is easily available and can help you achieve stunning results on your painting. Adding hair oil allows the paint to form large cells with multiple smaller ones inside. But before purchasing a hair oil for this purpose, check the ingredients and ensure that it contains “Dimethicone.”
Acrylic Pouring Kit
If you want to kick-start a new hobby or profession in acrylic painting without making blunders, we suggest opting for a pouring kit. Such a set contains two types of pouring mediums, silicone pouring oil, mixing cups and supplies, mini canvases, and more. With some acrylic paints and this kit, you can have fun with colors right away!
Painting Ground For Acrylic Pouring
While you can try acrylic pouring on any surface, starting with a flat canvas is your best bet. This will help you practice with different patterns and gain expertise in the field.
Canvas
A typical canvas consists of a thin board with a cotton cloth tightly covering it. Most canvases are acid-free, meaning your painting will not distort and degrade due to any chemical reaction. Thanks to its solid base, you will get enough stability while pouring acrylic paints.
Gessobord
This painting ground is a hardboard coated with acrylic gesso. Other than acrylic paints, this pre-primed painting ground is suitable for oil paints or a mixture of both.
Wooden Board
You can use plywoods of different shapes and sizes to form decor pieces with acrylic pouring techniques. These boards are sanded smooth to provide an easy surface to work with. Suitable for professionals and beginners alike, you can never go wrong with a wooden board.
Preparing The Painting Ground
If you are using a gessobord, you may not require any priming for the painting ground. In other cases, you can use a Gesso to facilitate better adherence and low penetration of the colors. Besides checking that the canvas is leveled equally, don’t forget to keep it at a raised position to allow the poured paint to fall naturally.
You can use thumbtacks, glasses, or cups to ensure a raised and balanced position of the painting ground.
Conclusion
Albeit a bit tricky to decipher, abstract art forms are a lot of fun to create. The result can either look like an avant-garde artwork or a messy kindergartener’s first drawing! There’s no in-between.
Regardless, acrylic pouring has a huge fan base, and hopefully, after reading this guide, you can understand why. With so many different techniques, you can try your hands (preferably gloved) on all of them and even encourage other family members to join in. What’s better than spending some quality time together and ending up with unique paintings?
With that, we’ll be signing off now. Happy painting!
It can be challenging to start painting when there's just too much you can paint. It can get overwhelming, which could stop you from taking the next steps to learn how to paint.
A few easy canvas painting ideas can help you with your creative journey since they keep those ideas going.
We've gathered 70 simple and easy canvas painting ideas for beginners to get inspired by, allowing you to start painting as soon as possible.
70 Simple Canvas Painting Ideas to Try
You can paint many things, whether you're a beginner or an expert. A common issue for artists of different levels is how difficult it is to find the right subject to paint.
Having a list with a variety of ideas can be the solution to help you find what to paint.
These are some easy canvas painting ideas for beginners and even more advanced painters to try.
Flowers are some of the first things we learn to draw as kids. Since we're so used to seeing these things, it can be easy to plan out how you will paint them on a canvas.
Try painting different kinds of flowers to get used to different textures, styles, and colors.
Butterflies are exciting subjects for painting because of the details on their wings. They tend to be symmetrical, making it easier to work on if you paint a butterfly with two wings.
Try looking at different patterns and colors to help paint these beautiful creatures of nature.
Abstract painting has become more popular, mainly because of its uniqueness. You can experiment with different colors and designs without being direct about what you've painted.
These are some of the easy acrylic painting ideas on this list and are a fun addition to your home and interior design.
Acrylic paint pouring is another easy way to do abstract art, especially for beginners. You can pour different paint mixes on a blank canvas and see what you can create.
These new techniques don't usually need a step-by-step tutorial since they rely on your unique combination of colors.
Painting the galaxy and stars is another common easy canvas painting idea for beginners. It plays with cool colors and shadows, allowing you to depict anything from outside the earth.
You can be creative with how you paint the stars and the universe, from using Q-tips to an enormous paintbrush. The (night) sky's the limit.
Sailboats are serene, excellent subjects for paintings, especially when painted with a good, clear background. Its details are easy to work with, making it great for beginners.
You can learn how to blend colors to get a great sunset effect.
Who needs a paintbrush when you can get creative with the things you have at home? You can use cotton balls to create a fun and unique texture for the leaves of autumn trees.
This project is so easy that even a kid can make it.
Dedicating a painting to a man's best friend is a great project. It's one of the easy canvas painting ideas with sentimental value, especially for fur parents.
Whether you're capturing a puppy's serene face on a canvas or their funny antics, it's a great way to immortalize them.
Painting the moon onto a canvas is excellent practice for your painting technique. It focuses on playing with the blacks, whites, and grays that make up the painting.
It's another excellent way to capture something from the night sky onto a canvas.
Geometric wall art is another common abstract painting idea that works well with acrylic paint. It focuses on sharp angles, shapes, and shades of your colors.
You can add this to your living space to add a little color to your home decor.
Step up from the butterfly idea and have the insect sit on a flower. It will help you learn how one element in a painting is connected to everything else.
It's one of the easy painting ideas that can help enhance your skills as an artist.
The city skyline can be a serene subject for any artist, no matter how chaotic the rest of the city may be. You can play with colors and brush strokes to get the details needed to depict your subject.
Learn to apply your paints in a deliberate way to get the intricate details of the city.
Capturing bison in the mist on a canvas is another excellent way to have the wonders of nature close to you.
This painting idea may look a bit complicated. It's best to look for a step-by-step tutorial to guide you while working on this painting project to help break things down.
Here are more ideas on how to leave the brush behind and get creative with painting. This idea is so much fun, especially for the kids.
This painting project is fun, making it easier to get younger people into art and painting. You can also put it up in the kids' room after as a decoration.
When life gives you lemons, turn them into a work of art.
Lemons are one of the easy painting ideas that can help you work on light and shadows. Its quirky shape also enables you to work with different angles.
Swirls and colors are a fun way to work with acrylic paint, especially if you love abstract painting. Each attempt will be different from the one before.
They're another one of the more simple canvas painting ideas for beginners that can help work on their technique.
A black canvas is interesting to work with, especially for beginners who want to experiment with colors. The brighter your colors, the more they stand out against the darkness.
You can either focus on your vibrant colors or a simple white. It helps highlight the details of your work.
Whether you're a Disney or a fantasy fan, a mermaid would be a great idea for a whimsical canvas painting.
Since it's a fictional creature, it's open to interpretation, making it more fun to create. Don't be afraid to experiment with features and backgrounds.
The texture of clouds is always a peculiar thing. Since there are different kinds, you can try each, studying different color combinations and strokes to create this masterpiece.
Learn to play with the colors and weather involved. A slight change from sunny to cloudy can mean a significant shift in the features of your cloud painting.
Daisies are usually simple to create, whether with a pen or acrylic paint. It makes this canvas art easy to work with, especially if you're a beginner.
Try to add little insects and other features to make your art more unique. All of them will help you work on relationships between the different elements you create.
Canvas is an ideal medium if you want a great way to share inspirational and motivational quotes. You can add elements related to the words you've painted on the canvas.
It can be a quote that an author posted or words that you live by. Make it colorful and fun to bring out the positivity in the room.
You can also place these quotes on mini canvases. Having a wall filled with this much positivity is always uplifting to people.
There are times when words to a song just hit differently. The more it inspires you, the more they become great canvas painting ideas since they keep you motivated.
Paint the words that speak to you the most. It's a great way to remember notable artists' words and have these lyrics in your style.
Like the quotes, you can also try having this on different canvases. They can be fun to create, especially since they keep the creative juices going.
Deserts are serene places that have been the subjects of paintings for many people. They're even more impressive on canvas since they capture this wonder of nature.
This canvas art is another way to work with sunsets. It's great for learning how to blend those bright colors to create the perfect sunset.
Painting hydrangeas mean you have to work with small details, especially for the petals of the flowers. It also works with various colors. You can stick to one color with different shades or different ones altogether.
You can be creative with painting the small details. Some work with smaller brushes, while others work with cotton swabs.
There are also different settings you can do for hydrangeas. They will surely be beautiful whether you have them on a vase or a field.
If you're into more tropical vibes, you can try to paint a palm tree on your canvas. They go well with various backgrounds, whether it's the urban scene of Los Angeles or the serene beaches.
You can either work with the silhouette of your palm trees or have your subject in broad daylight. The latter will help you work on the tree's intricate details.
Another Christmas canvas painting idea is a vintage Christmas truck. You can add elements, like Christmas trees and gifts, to give it a festive feel.
Learn to paint this vintage dream of a machine in this specific setting to get the elements down. Once you can get used to it, you can try other climates and vehicles.
String art is another fun canvas painting idea for beginners, especially since it also ditches the traditional painting technique and works with other materials.
You must dip your string into the paint before laying it on a blank canvas. You can set it in different angles and shapes. Then, pull and watch the magic happen.
The most common outcome for this kind of painting is an abstract floral pattern. However, you can also experiment to get different results.
Seascapes are another common subject for acrylic painting. They're also serene, especially when painted onto a vast canvas. It makes them great for décor and gift ideas.
Learn to capture the texture of the waves and the sky with this acrylic painting.
This painting on canvas will make you want to be in a field of dandelions, especially with how beautiful it can be.
It may seem tricky to get the small details of these flowers. However, they can also be satisfying to create. Each stroke needs to be deliberate to make them look great.
Painting a cherry blossom tree is another idea that focuses on small details. You can work on how the colors change throughout the canvas despite just working with pink.
Try to experiment with what highlight colors would go best with the pinks of the cherry blossom tree.
Metallic colors are fun to work with, especially with abstract art. They can blend well with other colors, especially with neutrals. The striking colors in this style are gold and silver.
Learn how to balance out different each color to form a masterpiece to hang at home.
Splatter painting is a great way to go wild with your paintings, especially with how the paint interacts with the canvas.
Simply splatter your colors onto the blank canvas. You can end up with an abstract painting or work out the shapes to outline the different features to create a specific picture.
Minimalism is one of the easiest ways to start learning how to paint. Their colors are more solid, focusing on simple neutrals rather than vibrant tones and highlights.
It'll help you learn to focus on how you can paint shapes. Keep things simple and minimal.
Everyone loves unicorns, especially with how many colors can go into their hair. It makes them great to practice your skills while creating something beautiful.
Try painting this with pastels to offer a more whimsical vibe.
A flower garden path is another serene painting idea you can work with, especially if you want to work with more than one flower.
Learn to match colors to know which flowers will look great together in your little garden.
What Do I need to Paint on Canvas?
Being prepared to do a painting project safely announces to everyone, "All my supplies are complete."
What do you need to start painting?
Here is a list of materials for you to prepare before any project.
Paints
One of the main stars of painting is the paints needed to help bring your art to life.
Oil paints and acrylic paints are the typical choices for the canvas, with the latter being preferred by beginners. You can also experiment with other types, like watercolor paints, pastels, and spray paint.
Paintbrushes
Paintbrushes are usually bought as a set, making it easier to pick up something with the essentials needed to paint.
You can easily try different kinds of brushes without significantly investing in them.
Canvases
Canvases can come in different sizes and various materials. You can choose what will best fit your work.
For beginners, it's best to go for the basic and traditional canvas. Look for a standard cotton-stretched canvas to get started.
Palette or Squeeze Surface
When painting, you need to mix and experiment with colors. It's best to have a palette or squeeze surface nearby.
You can also have a test material to see how the paint would look while mixing.
You can buy these materials at your local art supply or dollar store.
Painting Surface
Your canvas will need a place to sit while you work on it. You'll need to ensure it's at a proper elevation and angle to help you work comfortably.
You can usually get an easel in your local hardware store. If you work on a tabletop, ensure it's covered in newspaper or scrapbook paper to keep the table clean.
Tapes
It's great to have painters' tape, contact paper, or masking tape when painting.
It helps create borders on your canvas or around it, protecting your work or workspace from having unwanted splotches of paint.
Palette Knife
If you're starting to step up your painting game, having a palette knife can be another way to apply paint on your canvas.
This tool can help you work with new techniques and styles.
Cleaning Supplies
We all know how messy painting can get. It's best to have paper towels and a rag to wipe off any paint on your canvas or other surfaces.
It's also essential to have a container with water to clean out your brushes as needed.
Painters' Smock
Wearing something you don't mind getting dirty when working with paints is best.
We recommend having a smock on while you work to protect your clothes.
Canvas Painting FAQs
You may have more questions about canvas painting and how you can start bringing those canvas painting ideas to life.
We’ve gathered the most common questions to give you more tips on painting.
What Do You Apply After Painting on Canvas?
Usually, you would add varnish to protect the paints you used. We recommend using acrylic resin varnishes, especially on acrylic paints, since they have a glossier, cleaner, and more robust finish.
You can also use a mod podge, which acts as a glue or seal for the paints.
Are Acrylic Paints Best for Beginners?
Yes, they’re the most recommended for beginners. They’re affordable and easy to work with, making it easier for beginners to focus on their techniques.
Once you’re used to these kinds of paints, you can experiment with others, like oil paints and watercolors.
Over time, you’ll be able to find the best medium for you.
Conclusion
To learn how to paint, you have to keep practicing. These canvas painting ideas are only the first step to becoming the next Picasso.
Get your canvases ready and bring that artwork to life.
When it comes to the best clay for sculpting, many people prefer to side with modeling clay.
Both children and adults like this flexible material as they can make fun sculptures out of it. And the popularity of the clay has led companies to introduce various types of modeling clays catering to different age groups.
Most associate modeling clay with its pliability, which is preferred for children as they are able to reuse it to make new things every day. But, that might not be true for someone who wants to preserve their project.
That's why today we're here to discuss whether you can bake modeling clay. We hope this guide will help you in figuring out if modeling clay would be the best for your projects.
Can You Bake Modeling Clays Of All Types?
One of the things you need to know before purchasing any modeling clay is that all variants can't be baked or hardened. The most common colorful kids modeling clays available on the market are meant to be reused, so they can't be baked. They usually have an oil-based formula that prevents the material from drying out.
Having said that, there are options available that allow you to either bake or air dry them to make the clays non-pliable. A popular option is polymer-based clays, which are preferred by artists and sculptors. The projects made using polymer clay can be baked as per instructions provided by brands to harden them within minutes.
Another alternative is air-dry modeling clays. After creating a project, you need to let it sit for a period of 24-48 hours, during which the moisture will dissipate to harden the clay.
At times, packaging for modeling clays can be vague, and brands don't mention whether they can be hardened. Before making the purchase, check the package to see if it mentions drying or baking.
We also want to point out that it isn't a good idea to try clays that don't explicitly mention the baking process. Doing this can be especially hazardous when the material contains toxic compounds. If in doubt, check out the recommendations of professional modeling clay artists about which modeling clay would be best for preserving projects.
Two Ways To Harden Modeling Clay
Even though you may not be able to harden modeling clay by baking, you can try other techniques. These would require you to get a few extra things, but they are a handy and economical way to harden projects made from modeling clay.
1. Use A Polymer Clay Sealer
A polymer clay sealer is one of the best ways to harden modeling clay figures to preserve them for a long time. You just need to brush the sealer on your project and wait for it to dry. The sealer would make the project much less pliable than before, but be careful while handling your sculptures as they may get damaged if you apply too much pressure.
2. Dip Them In Resin
Do you love making tiny knick-knacks or jewelry using modeling clay? If yes, dip your models in a layer of quick-drying resin to make them non-pliable.
All you need to do is get a pack of quick-drying resin and mix it according to the manufacturer's instructions. Then, carefully dip the items into the resin and put them on a dust-free surface. Wait for them to dry, and the resin should create a transparent, waterproof coating over the modeling clay.
Remember to be careful when using resin, as some can be toxic. Always follow safety precautions and never involve children while working on resin projects. The good thing is that resin becomes non-toxic after curing and doesn't react with your modeling clay pieces.
How To Bake Modeling Clay Items?
Make sure to get a modeling clay that can be hardened by baking in an oven. Usually, the package of such clays will provide you with detailed instructions related to the temperature and duration needed to bake the sculptures until they are completely hardened.
Some brands even create video tutorials of the procedure to make the process simple for you. The general rule is that the clay items should be baked at a lower temperature, and the drying time would depend on their thickness. Most sculptors agree that when in doubt, you should bake the items for a bit longer for them to harden fully.
Here are the detailed steps based on the basic instructions provided by modeling clay brands:
A. Preheat The Oven
The first step is always to preheat the oven as per the baking instructions provided by a brand. In case you decide to combine clays from different brands, use a lower baking temperature out of the two instructed temperatures to prevent overbaking the sculptures.
B. Prepare The Baking Surface
Based on the different methods we studied, most brands recommend using an aluminum foil-covered metal cookie sheet as the baking surface for modeling clay items. You may also try to use other materials like parchment paper, but make sure it doesn't have artificial colors as they may seep into your projects.
C. Provide Support To The Pieces
Want some pieces to harden in an upright position? Use rolled-up pieces of aluminum foil to prop them up to prevent the pieces from toppling. Sculptors even prefer to use oven-safe glass and ceramic pieces as support for fragile items that may fail to remain upright.
D. Baking The Items
This step is pretty simple, as all you need to do is put the pieces into the oven and wait for them to bake for the specified duration. Most brands recommend baking clay items for 15 minutes, but you may need to wait a couple of more minutes for thicker pieces. You can also choose to glaze or paint the pieces before baking.
Remember not to open the oven immediately after the baking time is over, and let the pieces cool down before checking on them. If you feel that the sculpture isn't fully hardened, re-bake it for 10 more minutes.
E. Dunk Pieces In Ice Water
While going through the different methods used by polymer clay artists, we found that some prefer to dunk their pieces in ice water right out of the oven. They believe it helps prevent thermal shock and makes the pieces shinier. But, this step is completely optional, and you may skip it if you're a beginner.
For the process, sculptors usually take out the clay pieces as soon as the baking time is over. Then, they use a pair of tongs to place the pieces in a freshly prepared ice bath. The pieces should be completely submerged in water, and the bath should last for no more than 30 seconds.
Can You Bake Modeling Clay Frequently Asked Questions?
Can you bake air-dry modeling clay?
Even though air-dry clay isn't supposed to be hardened in the oven, some advanced sculptors still prefer to do it to reduce the drying time. However, the baking temperature should be less than 175°F to prevent the clay from overbaking. And make sure to leave the oven door open to let the moisture in the clay escape.
What’s the difference between sculpting clay and modeling clay?
In strict terms, modeling clays aren't meant to be baked or hardened. On the other hand, sculpting clays are nothing but natural air-dry clays that harden when exposed to air. If you're looking forward to preserving your clay projects, try using beginner sculpting clay that can be suitable for everything from sculptures to pottery items.
Can modeling clay melt in the oven?
No, most modeling clays, including polymer clays, shouldn't melt in the oven, but the modeling clays of the plasticine variant may melt due to the oils present in them. So, before purchasing any modeling clay for permanent projects, ensure it's free from the plasticine compound.
Can You Bake Modeling Clay Final Words
That's everything we have to tell you for now. We hope that all the details on how to harden modeling clay will help you create long-lasting craft pieces.
As you might have noticed, the best method to have non-pliable, hardened modeling clay items is to choose the right clay. So, spend time researching different types of clay to pick one that suits your crafting projects.
Until next time, take care, and goodbye!
Looking for easy things to draw? Whether you're new to sketching or just want to fill your sketchbook with relaxing, creative ideas, drawing is a simple yet rewarding way to pass time and unwind. Many people enjoy doodling casually during breaks or as a stress-relieving hobby, but often get stuck wondering what to draw next. That’s why we’ve curated a list of fun, beginner-friendly drawing ideas that require minimal effort yet allow you to build your skills and creativity. From everyday objects and cute animals to abstract patterns and nature-inspired prompts, this guide features 66 easy things to draw—perfect for sketchbooks, art journals, or warm-up sessions when you want something light, approachable, and satisfying to work on.
66 Easy Things to Draw
That being said, creating new ideas can be overwhelming and difficult, so we've listed some easy things to draw for you to start.
Who doesn't like sipping a hot cup of coffee in cool weather? More often than not, we often get ideas on what we liked the most. This picture sums it all up.
Tall pine trees, perfect weather, and a sip of hot coffee might go down as one of the best combinations we could ever experience in our lifetime.
Our dream vacation is to be secluded in a place of solitude, peace, and tranquility. To top it off, a great-tasting coffee and perfect weather are the icing on top.
We love drawing a mouse! The step-by-step process isn't usually complicated, and you'll have a good one with simple steps to draw.
Even a seasoned artist loves drawing creative things like animals. For your next art project, a simple mouse drawing idea is one of the easiest things to draw.
There's all the rage about doodles in recent years, and leaf doodles are one of the easiest things to draw, in our opinion, from basic shapes like oval shapes, circles, diagonal, and more.
Nevertheless, it is a beautiful drawing that showcases nature's diversity in all walks of life. It's just a simple drawing, but it can spark your art skills.
Undoubtedly, dandelions are one of the easiest things to draw; even beginners can do it.
From straight lines, curved edges and many more. It doesn't require you to be professional to make it look cool—one of the more common, easy drawing ideas.
Trees and leaves are some easy drawings you can do to spark your artistic ability. It doesn't involve any complex and intricate ideas.
You must draw straight lines, circles, and simple shapes and connect them. The fun thing is you don't need to draw these cute things using colored pencils.
Flowers are easily one of the easiest things to draw, especially the lily flower or your favorite flower like the daisy flower.
It's a fun drawing experience as you don't need intermediate skills to draw one.
All you have to do is practice drawing different shapes and combine them seamlessly to create a lily. This finished drawing should give you plenty of ideas moving forward.
Lips are one of the easiest things to draw regarding facial features. It all starts with basic contours and curvatures.
Moreover, most facial expressions can be defined through geometric shapes, which makes it easier to draw. After that, your creativity, skills, and imagination should round it up.
Pine trees and tree houses are creative things you can easily draw without mastering the art of sketching. It doesn't involve intricate details and is often constrained to simple shapes and sizes.
It is also fun to describe or draw some of the things you missed during childhood, as this can only serve as a memory these days.
Doodles are fun designs you can sketch and draw without having no skills at all. Draw doodles are a creative way of drawing simple shapes and cute things.
It's a quick drawing idea you will most likely learn to love and like without having your creative juices flowing inside your head.
Camping is where the fun usually starts outside the hustle and bustle of urban life. With simple shapes and sketches, it makes the element of camping one of the easiest things to draw.
Drawing the moon, night sky, pine trees, and even the bonfire are all perfectly drawn figures contained in one. It also shows us to be thankful for nature itself.
Drawing portraits, cartoon characters, and even your favorite animal is hard for some people. Often, all you need is to practice drawing letters and take it from there.
This example is pretty much something a beginner can do, and how well they can incorporate different concepts and imagination into just lettering alone.
Mountains, night skies, moon, flowing water, fire, and many more are some things to draw that can spark your imagination.
You don't need to sketch unique figures and lines to create this amazing piece, which is why drawing nature is one of the coolest things we enjoy the most.
As we've mentioned, lettering and nature can always go hand in hand when drawing cool things. As the saying goes, simplicity is beauty.
However, the letter can gravitate toward something even greater if you put in some scenery and nature-inspired drawn figures like trees, clouds, and the moon.
The easiest things to draw are action figures, cartoon characters, and even cool things. We often visualize things we see in public and envision them through sketching or drawing.
This Small Volkswagen Camper is a great start if you want things to draw for an art project. It only involves shapes like circles, squares, straight lines, and ovals.
There are so many emotions that can spark what a candle represents. It can be the passing of a loved one, light from darkness, and many more.
Candles are easy drawing ideas and some things to draw that can easily spark the imagination. It doesn't need much; you only need a pencil or a blending stump.
Drawing the entire cat requires professional drawing skills. However, outlining a cat's body is one of the better drawing concepts you can do without being too challenging.
Quick sketches of its head are even achievable by a beginner, and it doesn't usually need a real artist to outline its body.
If you want to draw other animals from the animal kingdom, you can check someanimal ideas for drawing here! We also suggest you start outlining their body and take it from there.
Geometrics is the easiest way to draw different kinds of things, like, for this one, a portrait of potted plants. Cactuses aren't hard to sketch, and including a vase or table isn't hard either.
But if you want to give it a new life, art supplies and creative things like colored pencils are the best way to spark new life in your imagination.
18. Fantastic Fast Sketching With Elements for Decoration
Decorations can give you bright and fun concepts on things to draw outside of your normal sketching routine. Plants, vases, and cactuses are fantastic and fun subjects to improve your drawing skills.
You would probably agree that Jellyfish may look unusual and funny to draw.
However, when you learn how to draw a jellyfish craft in your art project, you may easily depict the cute things in the underwater world and create art, such as jellyfish pictures.
Drawing an emoticon is fun and a great addition to texts and messages. They help convey our feelings, which we can put into art.
This activity involves painting and drawing for kids, as emoticons are easy to draw to enhance their imagination, artistic skills, and creativity.
22. Seashells Fast Sketches
Source: Unknown
Seashell drawing comes with distinct and intricate patterns. With so many unique seashells, the sketch is pretty easy and has iridescent colors when polished.
It's easy to draw because it comprises simple lines and basic shapes.
You may add shading and highlights to draw fairly quickly on the surface - you need to do a pencil and a page to create and enhance your drawing skills.
All iconic cartoon character drawings, art, and designs can be broken down into basic and simple shapes. As you see, Elsa, the main character of Frozen, is a fun choice.
You will only focus on her face and the hairline on her shaped braids. Adding details on the braid and different hair sections on top is one of the easiest things to draw.
In urban silhouettes, sketches, drawings, and paintings are done in black and white or the other way around. Silhouettes of an urban area create ensembles more than just individual buildings.
The picture creates a solid plain image against a bright background. The design concerns towns, suburbs, and cities' appearance, arrangement, and function.
The luminescent red poppy flowers are a kind of art and are among the easiest things to draw. It symbolizes the blood of the fallen and is a reminder of life’s beauty despite the wars.
We have the First World War as an inspiration for Poppy Flower sketch art, to remember the war, as the corn poppy is its symbol. It symbolizes peace and remembrance to have a peaceful future.
Leaves string art is a kind of art for mental stimulation. We want something that will let the artist create their own process and which they are forces them to make decisions.
The strings of leaves drawings have a lot of meaning in different cultures. But the most common symbolism it has relates to hope, fertility, abundance, peace, growth, death, victory, and rebirth.
This cute and small drawing art is by far the best and perfect way to improve your drawing skills, and it is only a part of many things to draw in your sketchbook!
This picture can give you a feeling of stillness when you draw cute things using your style, and are always eager to try something new.
As you see, all three round shape drawings are the same size. That is why the outcome of the art remains stagnant. Draw circles and shapes, and lead where it gets you.
This sketch drawing of a couple holding hands shows the real logic behind it.
It’s one of the easy things to draw that will make us, or other viewers, think outside the box, which makes it one of the coolest things every artist could ever draw.
Holding hands drawing does not only have that romantic connotation, but it’s also associated with solidarity, support, friendship, affection, and reconciliation that we need to instill in our daily lives.
Artists tend to go for unusual things to draw and express their thoughts, to show the originality of their art.
One example is the endless line in the sculpture of a woman. It shows minimal lines that create an interesting, ambitious, and perhaps challenging sculpture today.
This shadow blur of a man behind the matte glass shows the art of a reflection of a silhouette through the light, and is not a bad idea when thinking of things to draw.
We think this is just a personal preference, but most artists agree that it's one of the best things to draw as it represents religious and social standards.
There’s more to it than that, as it indicates our cultural values and symbolizes beauty when we find the inspiration for the drawing.
This art will use any means of shaping the elements we always want to draw. In life, we want something that even a sketch will give a sense of believable form.
Hatched-in pencil arts always give any drawing a sense of depth and realistic volume. It’s when the light and shadow show the details of the subject.
Women have always been a symbol of life. Since the beginning, women have held the world on their shoulders.
Like any one of us, women can be both powerful and soft - that could make a good exploration in the eyes of a man.
We consider this art as one of the creative things to draw about women, for she showcases her blue dress to express the true symbolism of a woman. That despite everything in life turns to blue, women can still shine no matter what.
The house sketch is such art because of the rough drawing that the artist notes. The sketch drawing is the preliminary idea for a house design that will eventually become a reality.
The home’s sketch is one of the creative things wherein artists will realize greater precision and excellent details.
Usually, the drawing of a house is the start of developing new imaginations to be used later before the actual building takes place.
Penguins symbolize resilience and hope. It’s probably one of the best creative things about art anyone can make. That’s why this drawing is always a way to go.
The penguin drawing is associated with fortune and good luck. Of course, they should always look fluffy, as their downy fluff is what they are usually known for.
Drawing dinosaurs can be complicated; that’s why there are few easy things to draw animals, like alligators.
Alligators are mouth-eating creatures that are close to the dinosaurs. They have those distinct head and mouth shapes, and it would be easier to depict them when we want to draw a beautiful cartoon alligator.
We always think we’ve seen better drawings and representations of the human face and body.
But we haven’t seen or witnessed anyone draw with single lines, as these things to draw might be challenging. With this drawing, you can see how simple lines create a better outcome.
Mickey Mouse easily finds that if you want fun and easy things to draw, like cartoon characters.
Its face is full of symmetrical drawings. This amazing character is a no-brainer for beginners. As we all love Mickey, he also loves to make people happy and bring families together.
44. A Love Letter Picture
Source: Unknown
Writing or drawing a love letter is one of the sweetest things you can do for your loved ones.
You can add a heart shape or a few parting words, and it'll be good to go.
This fun and creative drawing lets you imitate some fun things to do, especially in the sun's heat.
It's one of the entries for Inktober, and it is one of the better and easy things to draw if you're starting. These are some easy drawing ideas to do during your free time.
Most people don't know how to draw a skull. They didn't know how easy it was to draw one. Here are some skull drawing ideas to draw during your free time.
Scooby doo is by far one of the most popular dogs. It doesn't take much to draw him. While he might be known for his cowardly nature, he is courageous enough when needed.
Draw simple lines and shapes, and you'll know why he is one of the easiest dogs to draw on the planet!
Planets like Jupiter, Saturn, and even Earth are easy planets to draw. There are a lot of planets, and you can draw them with the distinct features that separate them.
Social media icons are almost etched in our heads, which makes them one of the easiest things to draw. As you can see, they are easy things to draw involving simple shapes.
This concept might not be the heartbreak you most commonly see in romantic movies, but this can be a picture that is easy to draw. The electrocardiogram concept is one of the most popular designs to draw.
The sun and waves go hand in hand when going to the beach. You can draw this portrait requiring only a few strokes to get it done. You can also draw the sand and people to make it more appealing.
Bugs Bunny is a character most kids like to draw. If you compare it to a traditional rabbit, it can be hard to draw. However, with this plain rabbit, it can be easy to draw their facial features, including its long and puffy ears.
Flower portraits and styles are fascinating things to draw. It doesn’t require amazing skills to draw them. All you need to do is visualize flower patterns and let your imagination take over.
An image of a falling cat in your head is hard to fathom. However, this design allows you to draw a falling cat with simple shapes and lines.
You can even draw additional features like ladders and chairs where they usually fall.
What Are Some Drawing Skills You Should Master?
If you want to be an amazing artist, there are many things that you should master.
Besides, drawing is not just a form of art for fun and escape; mastering this craft can go a long way to achieve greater things.
Draw From Imagination
If you can draw from your imagination, the sky is your limit. A lot of artists struggle to turn their imagination into artwork.
One reason behind this is their unfamiliarity with constructive drawing. Some of the most experienced artists draw from what they can envision.
However, like most skills, they can be mastered through experience and longevity with the craft.
Design
Design is the concept of making your outcome look good. Although it might be one of the uncertain ways to say it, believe us, it's all there is to it.
Ask questions like "How can I make my art visually appealing?" or How can I improve the balance overall? Design and imagination are where creativity plays a major role.
You will soon realize that there's an endless possibility of what you can do if you're going to base it on design alone. Mastering the art of designing takes years and experience to master.
Construction
For any artist, construction is the most important drawing skill to master. It usually involves mastering 2 to 3-dimensional figures and shapes and taking it from there.
If you master the concept of constructing to start your pieces, then some easy things to draw become easier for you to handle, and the harder ones become even more achievable.
How Do You Keep the Creative Juices Flowing?
More often than not, artists lack the inspiration to draw for many particular reasons. It can be burning out to draw things, lack of things to draw, and many more.
Worry not; it happens to the best of us!
Two of the more common reasons why our creative juices stop can be losing the motivation to draw or the inspiration behind our drawings isn't the same anymore.
Sure, it can be frustrating; however, there are many ways to avoid this. We need to remove this feeling because as we spend time on these things, it will only grow bigger and bigger.
In addition, when you try to force things, it will make it harder for you.
We'll make some ways to keep those inspirations and motivations flowing with these simple step-by-step tips, so they can jumpstart the engine that fuels the desire to draw creative things easily.
Go Outside
Nothing beats the feeling of going outside and feeling that cold breeze. Listening to the birds' sounds and the wind blowing can easily help calm you down, far from your worries and anxieties.
If you want to draw, walking outside can draw out plenty of inspiration; you never know what you can stumble upon.
In addition, walking gets your blood flowing, meaning you get plenty of oxygen to your brain.
As a result, I get you plenty of ideas and things to draw when you've finally come back home.
Losing the motivation for things to draw is a common occurrence among artists, which is why we recommend stepping out into the open.
Listen to Chill Music
For some, music has been a great outlet and source of motivation. Listening to music can take you to places only your mind can go.
Instead of looking for some easy things to draw on the internet just for the sake of it, leave your pencil and sketch pad behind and grab your headphones and listen to songs that you are most comfortable with.
Often, listening to music can spark creative ideas in a good way. It can be either a memory of the past or a present memory that made you smile.
Although we all have different tastes when it comes to music if you want your creative juices flowing, listening to music is one of the best things if you want inspiration to draw.
We recommend you listen to " free-flowing " music; this type of music can be more interpretative, like soul, jazz, and even blues. These types calm the mind and let those juices come into your head.
Free Doodling
Free doodling is one of those easy drawing activities that can result in a finished artwork. Sometimes, drawing marks, lines, shapes, and objects can jumpstart you into doing creative things like drawing.
You'll always have things to draw when doodling. You must grab your pen, pencil, and paper and draw weird figures, shapes, and many more.
Sometimes, doodling releases pressure on the top of our heads that we place on ourselves.
When you doodle, there's no pressure to make a masterpiece because you only draw "just to draw."
Experiment
Most of the time, artists go into an artistic "rut" because what they do has become repetitive. What this scenario implies is to broaden your horizon and experiment.
Often, artists are so caught up in their medium that it has caused them to lack motivation in their drawing.
As we've mentioned, stepping out of your comfort zone would be better when something becomes repetitive.
Go and experiment in a way that can help you spark another sense of inspiration or motivation for the things to draw.
While we're not saying you abandon your "first love," what we're trying to do here is to add another dimension to your skills.
Drawing can sometimes be dragging, but incorporating new things can be a breeding ground for new ideas.
Using new mediums is like going on a new trip; you never know what will come, but it can be an eventful time to discover and replenish yourself with the things you are missing.
For some, going on these experiences can set your artistic desire ablaze with newfound ideologies. Don't limit yourself; experiment!
No Pressure
One of the most common things that can kill your creativity is putting pressure on your head.
This scenario is especially true if you need more things to draw or motivation for drawing.
It's quite easy to think that the things to draw are infinite; however, if we place this kind of mindset in our heads, it can breed pressure, and this pressure limits our creativity on things to draw.
While some thrive in pressure, some find it no fun at all. More often than not, it can simply suck the life out of you if you let it overwhelm you.
Meditate
Every day activities and worries can easily build up clutter in our heads. We often find ourselves overwhelmed with the things we do.
Paying bills, sending kids to school, washing the dishes, and looking for things to draw can easily drain you, which is why you should step out of your comfort zone, meditate, and let life flow within you.
One of the reasons why meditation is great when doing creative things like drawing is that it removes unnecessary thoughts that creep into your head.
It's a good idea to help your mind relax and ease off the day-to-day activities you are doing.
Take a few moments each day to be alone, sit back and relax, and release these troubling thoughts that bother you. This way, it can allow creative things and thoughts to enter your mind.
Draw, Draw, and More Draw!
Like most artists, practice makes perfect! It is why we recommend you draw every time you have the time.
Practice drawing during your free time or at any time of the day. Whether it's one of the easiest things to draw or the hardest, you must ensure you are at your peak performance when it's time to draw.
This way, creative things will soon pop out from here and there as you will always have things to draw as different concepts and designs come rushing into your head.
Drawing on different platforms helps! If you use an iPad for drawing, you can check the best drawing apps for iPad to see which caters to your needs the best.
Easy Things To Draw FAQ
You might find your answers below if you have additional questions regarding easy things to draw or drawing.
What Are Good Art Supplies to Use When Drawing?
Here are some great supplies you can use when drawing:
Drawing Pencils
Colored Pencil
Pastel Colors Crayons
Sketchpad
Pen or Colored Pens
Paper
Here are just some of the things you need if you want to draw. If you want more, you can always add more.
If you want to become a digital artist and want to know what supplies to get, check out some of the best iPad for drawing, the best cheap drawing tablets, and the best mechanical pencils for drawing here!
Is It Too Late to Start Drawing?
There’s never a “too late” thing to draw. Even some elderlies beyond their 80s and 90s are capable of drawing.
The only problem is when it’s “too late to draw” if these elderlies are experiencing age-related diseases like arthritis, osteoporosis, and many more.
On the flip side, there’s never too young or too late if you want to start drawing. Any age is a good age to start drawing.
This time and age have taught us there’s never a perfect time to learn something new. It is because today or tomorrow is the best time to do it.
So, regardless of age, any age is appropriate if you want to draw. Only your imagination can hold you back.
As we’ve mentioned, the only way to go is up! Draw, draw, draw, and more draw to ensure you get the desired result.
Why Is Drawing Healthy?
Most people draw because it is their way of setting their mood for something. For some, they draw because they want to steer away from the day-to-day activities that cause them stress.
Releasing stress through drawing is one of the best ways to alleviate it. Look for some easy things to draw, and don’t look for hard ones, or you will be stressed again.
Fortunately, there are plenty of creative things to do during your free time, and drawing has become synonymous with it.
If you’re sad, draw. If you’re happy, draw. If you’re stressed, draw. If you’re depressed, draw. Most of the time, we don’t need much to declutter our heads, and for the most part, drawing can help you with those things.
Just grab your pen or pencil and a piece of paper, and you’ll go about your drawing without minding all the stressors in the world.
Conclusion
We have our own way to space from life's stressors; for the most part, finding some easy things to draw is one of them.
Whether they are weird shapes, sizes, lines, and the like, drawing has become an escape for most of us.
Fortunately, there are quite a few things to draw. It's fun, thrilling, exciting, and, most importantly, relieves anxiety and stress.
This article should give you plenty of ideas to draw whenever you have free time!
Well, today we'll present you a few simple DIY ideas to reuse corks. The light- textured material is suitable for several interesting ideas from stamps to holiday wreaths, bathmats, decorative objects and even an embroidered cork necklace. And we are sure there many many other options we would love to find out from you. If you have a pile of old wine corks stashed away somewhere it is time to take them out and start getting creative. Another option is to go to local restaurants and bars and see if you can take away some of their corks of their hands and use them in your own little projects. And why not recycle? The process of creating corks is an environmental friendly, non-pollute one so continue the link by recycling your wine corks and put them to better use instead of increasing our daily waste amount.
DIY Ideas On How To Reuse Corks
1. Cork candles
Set a romantic atmosphere by using wine corks as small little candles on top of glass bottles.
2. Small Plant Pots
There are a few plants that can actually grow anywhere so why not make tiny plant pots out of corks? Attach a magnet on the back as well.
You are among the ones who never seem to find their keys? Try adding a twist to them by using a cork as a key chain.
4. Mirror Cork Board
Boards are great ideas because you can use them to pin all your ideas and important papers you don't want to lose. Add corks to an old mirror frame for an interesting twist.
Coasters are so necessary, especially when you handle hot objects and this cork coaster is very easy to do.
10. Cork Lamp
A cork lamp may seem a little bit odd but with a wooden foot the look may strike you as being interesting.
11. Cork Decorative Ball
A cork ball? Well why not? You can see them in magazines and in fancy shops used as decorative objects in book-shelving and now you can make one for yourself much cheaper.
12. Cork Decorative Letters
Letters add an interesting twist to a wall and with wine corks you can make them very easy and fast. Make them for your living room or yours and your loved one's initial on the bedroom wall.
How often does it happen to you that a knife handle breaks? Try replacing it with a wine cork. It will be more fun to use, soft at grip and overall a good idea to save an old knife.
We, women own lots and lots of jewelry and not having them displayed we often forget we have certain pieces. Try making some jewelry hangers from corks inside a picture frame and placing the frame next to your mirror.
15. Cork Decorative Necklace
Last but not least, the cork decorative necklace. We admit it might seem like a strange idea but nowadays fashion is all about the strange and unconventional. Saw colorful tread around pieces of corks and put together a necklace for the weird in you.
We hope you have found our small collection interesting and we encourage you to present us other cool ideas involving wine corks in the comment section below and on our social networks pages.
The Japanese art of origami is an intricate, complex process requiring a 3D vision and a certain technique. The DIY Kirigami Architecture is a branch of the origami art reproducing in sheets of paper cut and glued architectural pieces and ensembles that usually are made as a pop-up card. The following Notre Dame Cathedral DIY Kirigami Architecture example is a very complex one, requiring a lot of patience and precision in cutting the exact parts properly and making the hole ensemble stand and fold right. The designer of this piece is Yee, a designer, paper engineer, paper architect and author with incredible ideas and creations. You can find several beautiful delicate DIY pieces on his website at an affordable price. We have tried one of his models and the end result was incredible. Enjoy!
"The development of origamic architecture began with Professor Masahiro Chatani’s (then a newly appointed professor at the Tokyo Institute of Technology) experiments with designing original and unique greeting cards. Japanese culture encourages the giving and receiving of cards for various special occasions and holidays, particularly Japanese New Year, and according to his own account, Professor Chatani personally felt that greeting cards were a significant form of connection and communication between people. He worried that in today’s fast-paced modern world, the emotional connections called up and created by the exchange of greeting cards would become scarce.
In the early 1980s, Professor Chatani began to experiment with cutting and folding paper to make unique and interesting pop-up cards. He used techniques of origami (Japanese paper folding) and kirigami (Japanese papercutting), as well as his experience in architectural design, to create intricate patterns which played with light and shadow. Many of his creations are made of stark white paper which emphasizes the shadowing effects of the cuts and folds. In the preface to one of his books, he called the shadows of the three-dimensional cutouts created a “dreamy scene” that invited the viewer into a “fantasy world."[via Wikipedia]
"When you open this Origami Architecture creation there is wondrous movement and a structure arises which is so interesting and fascinating that it captures your attention. The dreamlike scene created by light and shadow invites you to a fantasy world. The unfolding process is unforeseen and even if you try to draw a diagram or think about it, you may find it difficult to comprehend the mechanism.
Why it is white?
It is not essential to color the paper used to make pop-ups. The play of light and shade over a plain surface can look beautiful, and clearly informs the eye about the structure of the piece. By contrast, a colored surface can be confusing because the eye sees the two dimensional decoration dominating the three dimensional form, which creates the illusion of a flat surface. Leave your pop-ups plain. They will still look stunning." [via Yee's Job]
We live in a society addicted to technology and its perks. Everything seem to get smarter with each passing day from computers to cars, cellphones, you name it, there is a gadget out there that can make your life easier.Most of the people surrounding us seem to spend more and more money on technology but as hard as you try you can't keep u with the innovations.
Today we have focused on iPhones, because, let's face it, almost everyone seems to own one. In particular, we have gathered a collection of DIY iPhone Case Ideas you might find appealing. Maybe you just want to give that old transparent case a new look and design it your own way, with every single detail in place. The ideas featured bellow take usage of the transparent case and dress it up with colored paper placed under it or photos of your loved ones, or others just apply studs and other accessories to a simple plastic case. We especially love the wooden carved case which you can design yourself if you have some Illustrator skills and carve it at a professional shop.
All the ideas are meant to give your case a new look and have a meaning behind the design you create on your own. You can even try to draw on a white plastic case with colored sharpies if you feel you are up to the task. Just be creative and if you choose to make a DIY iPhone Case, make one that represents who you re and what you like. Then the effort would have payed off.
So what do you think? Are DIY iPhone Cases a good idea? Or you just like to buy the ones the stores have to offer? We would love to hear your opinions in the comment section below.
Related Articles
Corks are a resource for DIY projects in most houses. The occasional wine with friends and family can be the source of corks stacking up beautifully waiting for something to happen in their lives. If you are not a wine drinker you surely know someone that is and is not paying attention to the corks, throwing them in the thrash every time. Cork is an extremely nice material and such resource should not end up in the garbage but used in DIY cork recycling projects creatively. There are not thousands of corks around you taking up space so there is no excuse not to keep them stored somewhere for a moment and start a diy project at a certain time, making the world a better place.
DIY Cork Recycling Projects
#1 - DIY 3D Cork Wall Art
#2 - Steady Wobbly Furniture and Silence It
#3 - Create Cheese Knives
#4 - Graphic Cork Flower Pots
#5 - Thread Spool Corks
#6 DIY Cork Coasters
#7 Upcycled Old Window and Wine Corks Into a Superb Coffee Table
#8 - Cork Fridge Magnets Holding Memories
#9 Cocktail Cork Decorations
#10 - Simple Cork Necklaces
#11 - Superb Knitted Cork Toys
#12 - Create Fishing Bobbers
#13 - Make Card Holders
#14 - Keep Your Chips Closed
#15 - Plant Your Vegetables Beautifully Vertical
#16 - Create Tiny Sailors and Boats
#17- Use Corks as Knobs on Drawers
#18 - Pin Cushions Corks Beautifully Colored
#19 - Cork Journal
#20 - Lampshade
#21 - Cork Candles
#22 - Superb DIY Cork Chandelier
#23 - Cork Small Stamps
#24 - Cork Plant Signs
#25 - Cork DIY Wreath
#26 - Use Corks as Firestarters
#27 - Make DIY Heels Stays
#28 - Cork Necklace
#30 - Smartphone Cork Dock
#30 - Extravagant DIY Cork Pen
Painting something can be hard, dirty work, but, if done properly, it can do miracles, reviving any room, object or utensil. It gives them a new life and meaning. Refreshing your home by painting is a must in every home. Paint gathers dust and germs and need periodical cleaning as well, even though last generation paints claim to not retain dust. Spring is coming fast and, with it, spring cleaning should definitely occupy a place on your to do list. Choose colorful, fresh fun colors and tones and bring the light back into your home with some fun DIY painting crafts and ideas. Although hiring a professional painter is highly recommended, why not take matters into your own hands? Something done by yourself has a deeper meaning than any designer interior scheme you could buy. The projects featured below cover a variety of painting projects and crafts from wall painting to cutlery paint dipping and furniture hand decorations. Use unusual fabrics and items to create unique textures and patterns for your paintings. Enjoy our collection of 49 DIY Painting Crafts And Ideas.
1. Painting walls
2. Decorating vases
3. Use leaves for art
4. Create special candle holders
5. Give texture using cloth
6. Creyon paint your bag
7. A splash of colors
8. DIY agate watercolor art
9. Circle a painting
10. Be romantic
11. Paint the world
12. Fun paw painting
13. Colors merging
14. Refresh your cups
15. Use a broom for texture
16. DIY hand dotted tumblers
17. Color chip wall art
18. Spray paint handles
19. Sharpy art
20. DIY chevron heart wall art
21. Paint your fridge
22. Splash color
23. Decorate your chairs
24. Use a doily and spray paint
25. Use gold
26. Vanishing painting
27. Drink from flowers
28. Paint some logs
29. Use what you've got
30. Feather painting
31. Use scotch tape
32. Leaf painting
33. Revive your stairs
34. Paint your wine bottles
35. Create a unique wall in your home
36. Hand painting is fun
37. Paint a light bulb and spread the colors
38. Paint stitch a wall
39. Use stamps for smaller pieces
40. Use fresh happy colors
41. Foot painting
42. Blow everyone away
43. Nature can do wonders
44. Leave your mark
45. Revive your glass vases
46. Dip your cutlery in paint
47. Find bizarre objects to use as paint utensils
48. Have fun with light bulbs
What do you think about these DIY Painting Crafts and Ideas? We would love to hear from you in the comment section below!
I love to change things up from time to time, including my phone case. But always buying a new one seems like a waste of money so why not decorate the case yourself according to your taste and desire? The gallery below features 25 DIY Phone Cases which are quite specific to iPhones but the process can be applied to any phone and case. Just be inventive and the result might surprise you!
1. Navy Anchor Case: If you are in love with all things navy, this is the perfect choice for you. Learn how to use a Silhouette die-cutting[easyazon_link identifier="B01I51ME1S" locale="US" tag="homesthetics0a-20" type="link" link_id="272361"]Silhouette die-cutting[/easyazon_link] printer to create an anchor, or try using an xacto knife or look for vinyl decals to achieve a similar look, the best heat transfer vinyls that we currently use with the Cameo are right here. (via 36th Avenue)
2. The Stud Case: If you are into rock, try this tutorial which uses sheets of studs rather than traditional ones, easier to glue. (via I Spy DIY)
3. Photo Collage: Take a blank iPhone case, add some Mod Podge and some magazine cuts and invite summer in earlier.. (via Calypso Letters)
4. Geometric Leather Case: If you are rather organized, you will prefer something a little more geometric. Try this leather case with a touch of geometry. (via A Beautiful Mess)
5. Repurposed Glitz Cases: Mod Podge and your phone, with a touch of sparkle. (via Design Sponge)
6. Map Cases: We love these map cases! Cut a map to size and place it under a transparent case. (via Maps Blog)
19. Impressionist Case: Water coloring is so romantic and beautiful! Find some prints you love in this technique and add them to your clear case. (via B Soup)
22. Spray Paint Lace Case: Using lace as a stencil is so easy and fun you will love it instantly. *Update: Melissa’s blog is no longer live, but you can see the steps for creating this case on The Huffington Post. (via Look What Melissa Made)
23. Wool Felt Sleeve: Make cozy wool sleeves for winter and add colorful details to brighten them up. (via Poppytalk)
25. Cross Stitch Case: The last project is a kit that helps you create these wonderful traditional stitch cases. (via Amazon)
So, what do you think? Would you give DIY Phone Cases Projects a go? We would love to see your projects and opinions in the comment section below.
Recycling is our main goal here at Homesthetics and we encourage any initiative in this direction. So when we have found this creative How to Build a Milk Jug Igloo video we were very excited. Milk jugs are often thrown away and the plastic from which they are made is very harmful to the environment. The project is a creative fun method of explaining to your kids about the entire sustainable concept while keeping things entertaining and offering them the unique chance of creating their forts igloo or fort.
The video above used about 250 milk jugs to create the fun igloo, a number which sounds over your reach. But you could actually ask your friends,neighbors and family to help you and encourage them to recycle as well. Another great option is a website called Freecycle where by adding your area you will find people interested in recycling as well willing to help you create your milk jug igloo. There is an entire community out there willing to share their knowledge on this domain.
Providing your little ones the chance to be a part of a creative environmental friendly project while teaching them about Inuit history and traditions is the most important aspect of this project. It is an important lesson for them to learn and to take nature and recycling problems serious and responsible. The end result can provide a great reading playing nook for the little ones as well as a greta winter experience to be shared with family on snowy days.
What do you think about this unusual project? Is it something your would be willing to try with your little ones? We would love to hear your thoughts on the matter in the comment section below. And feel free to also share your own projects with us. Craft away!
Children are creative entities awaiting to release their imagination and transpose it into fun crafts that will keep them entertained and connected with the environment. Anything that arouses their senses, stimulates their interest and creative juices can trigger their wonderful enthusiasm which we all adore to see more often and surround ourselves with. There are multiple methods of connecting with a child's creativity but painting has been proven to be a very effective one. Consider teaching your little one how to mix various hues with a sponge or empty tissue paper rolls to exercise their imagination. This way, the idea that one has to stick to a paintbrush in order to create a masterpiece, will be transpired to to them as a narrow minded way of thinking. Finger painting will enable youngsters to express their true feelings on canvas while teaching them to transfer what they see in nature on paper, developing their focal ability and enhancing their sense of environmental awareness.
Imagine your little kindergartners creating their own array of colors and using bubble wrap or other miscellaneous household items to discover the artist in them, while having fun. Realize that even bouncing objects that has been dipped in some form of colorant, onto a blank sketch, can be a great craft idea. It is possible to invent and create fun and easy painting ideas for kids of any age. Colors carry their own meaning, significance, so when working with preschoolers especially, use bright, vivid hues like yellow, orange, blue and green to awaken their mind and instill a willingness to participate.Consider these 19 fun and easy painting ideas for kids and yourself as well as a fun relaxing activity for a free weekend.
It is possible for kids to have fun using many different forms of coloring to create their own unique images of their understanding of the world around them.Get your imagination going and have fun along them in a colorful painting journey. We would love to hear your take on this creative topic in the comment section below.
In this chaotic world highly driven by consumerism we rarely get the chance to see something different, something rare; and we are happily blessed with such a piece we instantly recognize the item as something extraordinarily expensive, a limited edition piece of furniture, a car or some sort designer item that few individuals in this world can afford. Things are changing and manufacturing and crafting gain extraordinary values as they represent the individuality of each and everyone materialized in custom, unique, one of a kind objects.
Now is the time to take on diy projects, from simple to complicated, from colorful to elegant and subdued ones, we are to shape the universe around us rapidly, we are to design our lives.
In gallery that follows we have presented splendid homemade cell phone case ideas that we have find interesting, intriguing and easy enough to recommend for a fast craft in the evening or Sunday afternoon. Cast a glance, surge inspiration and leave your valuable feedback in the comment section below.
Homemade Cell Phone Case Ideas
1. ice cream homemade phone case
It might look sweet, delicious yet it is not edible.
There are few things in this world which cannot be improved with lace and a simple phone case ain`t one of them. Choose the right color to bring the lace delicate look forward and enjoy your new phone case !
A clear case can receive the splendid brush treatment, whether you are experienced or just starting out this homemade surely is worth a chance; you direct everything from the colors up to the painting.
Washi tapes are known to be responsible for thousands of truly inspiring diy projects ideas around the inter-web and yours may be next one, simply pick up the washi tapes that you find interesting and start playing around !
Source Unknown
8. colorful polka dot homemade case
Polka dots in one or multiple colors can go beautifully on a clear case, you choose the density and colors, you enjoy your new case.
A craft session with the little ones may present them creatively how they can repurpose various textiles and pieces of paper into new items thus saving the plant a bit of energy; this can be a super creative lesson on sustainability and responsibility.
In a few minutes salvaged textiles that you no longer need can become super awesome ice-cream or pieces of cake able to contain your phone in color and style.
Simple, graphic, splendid results can be obtained with colorful sharpies, you can customize a bland phone case beyond belief, choose the pattern, the illustration, the colors, get coloring !
via Unexpected Expectations
12. DIY felt homemade case
Easy to work with and available inany possible color, felt can make wonders regardless of application and homemade cases are no exception.
It can be that simple ! You need to print to scale different patterns or motivational messages, cut them out and position them between the phone and the case.
It goes without saying that the pattern can be changed to fit your design idea and that the studded case itself can be realized on any bland case, regardless of the phone`s manufacturer.
Simple designs that can be realized fast are presented above; a one-hour session for an enthusiast DIY can easily result in two to three homemade cell phone cases that he or she can be proud of. What do you think? How would you personalize your case and what`s your favorite design from the selection above? We would love to hear from you in the comment section below!
Do you ever wonder about indulging your children in outdoor activities? Are you exhausted seeing them play video games and watch television all day long? Now you can give your children their very own playhouse - a perfect incentive to get them playing under the sun, right there in your backyard.
A playhouse is a small clubhouse or a fun house in your backyard where kids can play, read and nap. With a playhouse near your house, you don't have to worry about losing sight of you children. So you can check the safety box too.
Building a little playhouse for your children and their friends to hang out and play in becomes easy, a tad easier than tree houses for sure. With the availability of raw materials and building tools at very economic rates, all you need is a little bit of motivation to start working on your backyard project with these free playhouse plans.
Free DIY Playhouse Plans
So gather your tools, let your imagination and instinct take charge, and you can have one of these beautiful playhouses, right there in your garden. Try these free DIY Playhouse Plans.
The Easy Indoor Playhouse
Let's start with this easy and basic free playhouse plan. It's a miniature simple looking shed, but you can modify it in a lot of ways. You can cut windows in any shapes, cover them with curtains, or attach flower boxes to them. Adding small shelves inside will store your child's favorite toys and games too. Since this has a wooden exterior, you can paint it in different colors. Hanging Christmas lights on the roof will make it look magical at night.
This playhouse is a really amazing project for low-budget and space-saving plan. It uses regular basic products for the build, so you'd hardly need to shop for raw material. Since this playhouse is small in size, it's quite appropriate for toddlers and preteen kids.
The roof, doors, and windows seem easy enough to build so that it won't take much of your time or efforts. The designer of this playhouse used a self-made 3D wall, which frankly gives a different look to the playhouse. Over all, this playhouse seems like a nice hang out place for small children.
This is another simple playhouse that you can construct in your backyard. The instructions are very easy to follow, with a visual step-by-step aid for reference. It has a small play room with a porch out in the front. It uses a single roof slanting on the main room and then the porch.
I love the fact that they have used the framework of an actual house and miniaturized it for a playhouse. This is sure to make your kids smile.
A Wendy House is the above mentioned simple house with feminine touches. But worry not, this idea can be used as a playhouse for all kids. It has a small porch out front, with a small fence around it, and a slanting roof. You could decorate both the interior and exterior of the playhouse in a way your kids like.
Adding a small table and chair set on the porch will look adorable. Keeping small flower pots around the fence will make the house look cute, maybe the kids will be interested in tending their own small garden. You may even paint cartoon characters on the walls to add color to your little Wendy house.
If you're planning to build a traditional playhouse in your backyard, without all the thematic additions, these plans are what you've been searching for. It's a sort of miniature house with a fenced porch in the front. The windows are large to let in plenty of sunlight and breeze.
The homely décor seems quaint. It reminds me of the pretty houses from an English countryside. The pastel colors painted on the outside just adds to the freshness of the house. This playhouse just radiates happiness when you look at it.
Do you have a shed just sitting there in your backyard, with nothing but trash inside? How about you convert the entire shed into a fun playhouse! This will be an easy plan for someone who does not have expertise in building backyard projects, but still wants to take up on one.
Getting rid of the mold is easy. You can make windows with supplies from a local store, fix broken wooden planks, add a fresh layer of paint, et voilà! Your basic backyard playhouse is ready to use.
The Pallet Playhouse
If you're low on budget and not used to detailed DIY constructions, this playhouse design is perfect for a small scale project. The entire playhouse is built using ready-made or recycled wooden pallets. These wooden pallets are easily available.
You can repurpose and modify the pallets to suit your own design. You can experiment with different shapes, reuse old wood, or use different colors to paint this brilliant playhouse. I do think this house will look prettier with hanging flower pots or vines. Your thoughts?
This playhouse will remind you of your childhood at your grandparents’ place in the countryside. It's a simple design looking like it is straight out of the 1950s or 1960s. It's a quaint place with a door and large windows streaming plenty of sunlight.
It's made with wooden pallets so that it won't be as expensive. Give this idea a try, and you may see your kids relive your childhood at your grandparents’ place. You can sit by the playhouse and tell them old tales and amaze them.
Another easy pallet design for an economic playhouse. This playhouse seems larger in size than the previous one. You can use the rustic theme for your playhouse, with pallet boxes doubling as seats and tables. Fairy lights or warm yellow lamps can give a really good look to the playhouse.
Another great thing about this DIY playhouse is that it can also be used by adults for their backyard parties. An underground shack or a garage theme can look amazing. After all, who doesn't like a minimal worn out ambiance for their garden outhouse?
You can build a small cob cottage for your little ones with natural raw materials. It just feels like you've been transported somewhere away from the city, and into the woods. The tiny size of this playhouse makes it look like a fairyland house, somewhere the elves might prefer to live.
The grass thatched roof gives it a very aesthetic look. Using soil and stone also regulates the temperature inside the playhouse, so you don't have to worry about your child playing outdoors in the summer heat. If you let vines grow around the house naturally, this playhouse will look mind blowing.
Do your children love going hiking in the woods and camping in mountain cabins? Now you can build them their own log cabin playhouse that gives them the feeling of camping in the woods. You can use wooden logs instead of planks for a more authentic look. You can also consider building a small pond, or a fire pit nearby.
It's a very economic backyard project if you're running a tight budget. So if your kids insist on having a playhouse, you can give this idea a look.
The Cottage Playhouse
This is a very adorable playhouse. It's a small wooden house with the framework of a cottage. It doesn't look too difficult to build with basic tools. You'll need just simple and basic cuts of wood for this playhouse.
It seems small yet comfortable and cozy. Kids can also have a really peaceful nap in there. I imagine it will look really pretty at night when decorated with fairy or Christmas lights.
Children love the beach! The sand, the water, and palm trees are so amazing to be around. This playhouse can make your child live the island dream every day. It's a simple playhouse with all the characteristics of a backwater cottage house from tropical islands.
The long window shutters, the designs on their railings, the small steps, and the stilts especially just add to the theme of the house. Grass thatched roof will add a natural look to your playhouse. You can build a small pond underneath the playhouse and install a sandbox nearby to make it look like an actual island.
If you have woods or hills behind your house, this playhouse can be yours. It matches the earthiness of its surroundings. This DIY playhouse looks really pretty because of the abstract shape and the rustic wooded look it has. The glass roof gives it a modern contrast, and if there's a less dense canopy overhead, I imagine the stargazing will be the most fun at nights. The entire supporting wooden frame makes it a sturdy structure so that the playhouse won't buckle under rough use. You can also go a bit more rustic, cast a glance at the log cabin playhouse idea at #11.
This playhouse perfectly complements the castle you build for your kids. It's a double storied fun fort that your knights can run around in, with their flags and swords.
You can alter the décor of the fort into a medieval or a modern theme with drawbridges or camouflage tarps. A few lovely tapestries, synthetic flower bouquets, toy swords, shields and axes, small lamp lights, and mini portraits hung inside will add to the charm and feel of the fort. A tiny portable speaker that plays heroic music and battle sounds will spike up the make belief. You can even dig a long circular moat around the fort to give it an extra aesthetic look.
This miniature princess playhouse can fit perfectly in your backyard. You can decorate it to resemble a castle, adding brass décor for the interiors. You may add a dragon and plush fairy toys for your kids to play with.
It seems like quite a detailed project to undertake, but if you're familiar with the basics, this guide can help you easily. You can simplify this design for a simple construction project. But there's a guarantee your kids will love it nonetheless.
If you don't want to build an elaborate play fort, you can build this playhouse instead. It's a simple outdoor playhouse raised on a platform. You can build steps to the house or a ladder, and attach a slide. You can also attach longer tunnel slide that goes around the playhouse and lands in a sandbox.
This play fort comes with obstacles from an obstacle course. You will love this design if you want your kids to pursue some outdoor athletic activities. There are various designs for an obstacle-course playhouse available on the internet to choose from.
You can attach rope ladders, rock climbing walls, pulleys and slides to add charm to your little playhouse. You can even build a small pond as a moat for an extra challenge. See your kids race to the playhouse and have fun doing so.
We have another idea for a play fort in your backyard. It's small and quaint, but it's something kids are sure to love. It's a diy playhouse which can be easily built by someone experienced with tools. It has a small room with three walls. And there's a deck too!
You can decorate the place by storing toys and books inside, or adding chairs. The playhouse will look pretty fun with a slide as an exit. Painting the fort in bright colors will surely attract your child's attention, and your neighbors’ too. You can use different railings to add to the charm.
Here we have a swing set - clubhouse combination which is easy enough to construct. It's a high deck with railings which is quite effortless to construct. The more challenging part is the attached swing set, but don't worry, it's not impossible.
Painting the deck in pastel colors can take away the otherwise monotonous look of the playhouse. Decorate it with flower pots and keep cushions for more comfort. Since it's just a roofless deck, you might not be able to store toys and books around, but you can modify the design to accommodate a roof.
How about building an entire play set along with a playhouse? Yes, it sounds difficult to build, but trust me, these plans are very simple and comprehensive. It's just an upgraded version of the playhouse mentioned above.
It's a comfortably big playhouse with an attached swing set and a tunnel slide. It is two storied, so children can have fun going up and down the ladder and coming down through the tunnel slide. It has a rock climbing wall too! Check it out:
Kids love playing above the ground level for sure, that's why we have so many ideas for elevated playhouses. It is sort of two-storied, with a house on the higher floor, and an empty space on the bottom one. You can add a sandbox there. It's a complicated procedure, but the instructions are easy to understand, and the construction is simple to work on.
If you're up for a challenging backyard project and don't mind extensive detailing, this cottage edition hideaway is a brilliant idea. It is elevated with a small ladder leading up to it, and a slide for the exit. There's a pretty reading corner inside, made all cozy with cushions and pillows. Under the reading book is the storage of toys and books
There's also a mini kitchen for your kids. The entire décor of the playhouse seems so homely, resembling the cottages from Europe. The best part about this playhouse is, the handmade window shutters which slide.
We saw some playhouse designs built on high platforms or elevations. This design is similar to those designs, although this follows quite a detailed plan. You can adjust the height and size of the house if required, according to the space available in your backyard.
The platform is huge, and considerably high. You can reduce the risk of children falling off the edge by adding a deck or slides. You can build an adjoined sand box too. All in all, this playhouse is really fun if your kids love playing outdoors and having a bird's view of their surroundings.
This is a simple outdoor playhouse, easy to build and to charm in looks. It has a simple interior decoration, with curtains hanged around the beams, shelves and small chairs. It seems like a place children will like to nap at, or study peacefully. Teenagers will love to spend time alone here, without going away from home.
You can build it on the ground or elevate it on a platform. Although if you choose to build it on a platform, you may consider adding a slide for extra fun.
How about building a playhouse that's also a treehouse? It's a simple treehouse built on an elevated platform against a tree. It's a low effort project and is quite easily approachable by beginners.
You can decorate the playhouse as you wish, or better yet, give a free reign to your kids and let their imagination run wild. It can be a fun clubhouse, or a treehouse, for the kids to hang out without their friends.
We've seen so many economic and easy to build a DIY playhouse for your backyard. This design is one of them. It's built on an old tree stump, so it's not that high up from the ground. It is made entirely out of repurposed wooden pallets, and it cost around $30 according to the website.
You can add cushions, pillows, and blankets, and use the playhouse as a resting spot for summers. Or you can decorate the place with lights, or install a lamp for late night reading. It feels entirely domestic, and rightfully so.
The Indoor Clubhouse
This playhouse acts as a perfect companion to your child's otherwise normal room. It doubles as a playhouse and a bed. The lower level works as a playhouse, and the stairs lead to the bed, saving up a lot of room space. So if you don't have a backyard to build a playhouse in, you can go for this nifty idea.
This playhouse is really one of its kind, and quite frankly, really clever. It's a converted closet with a very stylish modified entrance. If you look closely, only the porch has been constructed around the previous existing closet door. So you can decorate the entrance according to any theme you like.
The inside of the closet can be large enough for children to play around. You can store books, toys, and games inside the closet. It's a very nifty idea, and economic too. You don't even need to have a backyard to build your very own playhouse now!
More details at allthingsheartandhome.com
PVC Pipe Fort
This diy playhouse is very easy to assemble and disassemble. It can be suitable for both indoor and outdoor use. This design seems quite easy to put together, and the best part is that it is quite portable.
The frame of the playhouse can be built really easily and in any desirable shape. And you can cover it with whatever unique material you like. The playhouse in this picture is a simple cube covered with curtains of varying colors. You can also try to build it in a shape of a tent.
Reading in a garden on a breezy summer day seems so dreamy. It's such a soothing and relaxing activity. You can inculcate this habit in your children or encourage your teenager to read more, by building them their own little library in the backyard.
Using an old tent, or hanging curtains on the poles give it a really homely feeling. Adding cushions and blankets inside can make reading a very relaxing experience. Fix shelves into the wall to store your kid's favorites story books or adventure novels, and see them get lost in their world of fantasy.
Are you looking for a playhouse design which isn't the same old box-shaped one? Then this unique design is something you're sure to love. Building this playhouse doesn't take many skills, and replicating this project is not a far-fetched idea because the instructions are quite easy to understand.
This playhouse built in a triangular shape is small and quaint, and can fit in a small space. It has a small loft, a play area, storage under the floorboards, and the best part - a foldable roof top. So you can keep the toys inside the playhouse without any worries regarding their damage.
Now, this idea is quite ingenious. The designer came up with it on his own because he didn't like simple playhouses, and he made an instruction guide for anyone who wanted to make a similar playhouse. There's a new trend in carpentry where furniture can be folded and fixed into a corner to save space. This playhouse makes a very opportunistic use of that trend.
It's a small minimalist wooden shack, but really cozy inside. There is a foldable table installed inside the playhouse to save space. The windows are made from plexiglass for protection. There's an adorable picnic table too, right outside the playhouse.
The Repurposed Modern Playhouse
If you don't want a pre-fabricated kit for your kids’ playhouse, you can build your own design from scratch. Using repurposed material like wooden planks, corner posts or pipes can reduce your expense on this project.
You may attach a slide and use the area under the DIY playhouse for the sandbox. The interior of this playhouse has been decorated in a way that resembles a modular home. It even has its own mailbox!
A-Frame Playhouses are one of the traditional playhouse designs that still work today. The best thing about these types of playhouses, is that they can be modified and redesigned easily.
This diy playhouse uses old doors with popping bright colors in the place of wooden panels. These doors can be easily found at a local recycling shop. The already painted colors add to the abstract nature of a freestyle playhouse. It can be made cozy with cushions and blankets, with curtains for covering the doorways.
All hands on the deck! Every kid wants to be a pirate and imagine having adventures across oceans. So build your kids a playhouse which lets them explore their pirate adventures. You can attach a steering wheel to the deck of the ship, unfurl flags on the mast, fight with swords, and release the Kraken!
The plans for this playhouse are quite extensive, so you'd need a bit of experience in construction and carpentry. You can even build a small pond around your pirate playhouse for extra charm.
All kids love to be cowboys and cowgirls. This playhouse caters to the theme of the wild, wild West. Building this saloon is simple and quick.
You can use old wooden articles to add a dingy look to the playhouse. Cardboard cutouts and picture frames of Yosemite Sam or Wile E. Coyote will fit just brilliantly with the entire theme. Not to forget the iconic swinging saloon door for a cool entrance. Let your imagination run wild.
This DIY assembly playhouse resembles the medieval gothic architecture from the old times. It has high ceilings with high doors and windows. There's a small porch landing outside the door with picket fence fixed around it. You can decorate the playhouse with different kinds of flower pots, or make a small pavement leading up to the porch with garden pebbles.
Look at this designer yet rustic playhouse! It looks straight out of fancy magazines. The details of this project look amazing. It looks like a house belonging to a wizard from the woods.
It has a small chimney, pretty windows with flower boxes, and tiny benches surrounded by an adorable garden. You can add to the decor of this playhouse by hanging a few portraits inside, some small chairs on the porch for the kids to sit in, and a tiny table inside. Kids will feel right at home with this playhouse resembling an actual house.
The Hobbit is one of my favorite books since childhood, as it is for many kids. If your children love to live life, Hobbit style, this playhouse will be perfect for them! It's short, so no adult can enter the pretty hole in the ground and ruin fun time. The nontraditional design is refreshing to see in the backyard, and will make guests and other kids look awed at your little project.
You can pep it up a little more by adding a lot of fun Hobbit related stuff like the famously infamous one ring, copies of the Hobbit and the Lord of the Rings, a few plushies of the characters, and perhaps some Hobbit themed pies as a weekend serving! Installing a small portable speaker inside and playing the whimsical Hobbiton soundtrack will definitely take the kids to Middle-Earth!
This product looks like it's straight out of the unique architecture catalogs. It's quite different than most of the modern playhouses we've seen so far, but look wise it's really mesmerizing. You can assemble this stylish playhouse anytime, anywhere.
The abstract polygonal doors and windows make you feel like you're in future, on an alien planet. The windows are covered up with thick glass, so you don't have to worry about your child getting injured by it. Monochromatic light will make the playhouse look like a futuristic spaceship.
If you're interested in getting a portable playhouse design, look no further. Modern architecture has brought to you this simple playhouse which needs no tools or carpentry skills. You can assemble or take it apart in no time. The flat interlocking panels can be easily shipped or carried with you to allow assembly anywhere. So if your little one loves to be in the playhouse a lot, you can carry it with you wherever you go.
Paint the panels in bright colors and see you kids have maximum fun. Hang toys from the windows, or store books inside the playhouse. There are infinite possibilities.
This playhouse can be used by both kids and adults. The modern and sophisticated look of this playhouse is very stylish. It has two rooms divided by an indoor wall, and curtains can be added as per your requirement. The sliding doors and windows really add to the entire futuristic theme. So if you don't mind spending on a playhouse, you can consider having this unique product in your backyard.
What do you think of these DIY Playhouse Plans? Find anything unique and likable? Most of them have caught my eye, and I’m sure to try one of these shortly.
What I like most about these designs, is the fact that you can modify them the way you like. You can experiment with absolutely anything: wood, metal, glass, cloth, whatever you can spare. So even if you're tight on budget, you can repurpose old supplies and make something new, something refreshing!
I suppose most of you have pet dogs or cats, or maybe both! So you can build an adjoining kennel too. Kids will surely have a great time playing with their furry friends in their private hideaway.
So get working on your brilliant ideas today, and surprise your little ones with their fun playhouse.
With an increasing number of people beginning to get in touch with their creative side, crafting has become a common practice over the last few years.
Irrespective of whether one is a knitter, potter, painter, quilter, or even an all-rounder, the DIY projects require a good amount of handiwork. While there’s no substitute for talent and skills, the materials used in the projects do play an important part in ensuring its success and aesthetic appeal.
Thus, it is imperative to try and secure quality materials. But, where does one get such items? Well, there are numerous online stores that make the acquisition of artistic materials extremely seamless and save you from the hassle of carrying numerous art supplies to and from the workplace.
We’ve got a guide to the best stores for top art supplies at cheaper rates. Now, let us walk you through them individually.
It’s almost impossible not to have heard of Etsy if one is remotely involved in the world of art. The site is made available in nearly all countries, and connectivity is improving with an increase in international shipments.
When it comes to products, the site’s varied stockpile aims to amaze. Aspiring artists can find all kinds of materials, including fabrics, patterns, quilt software, and embroidery samplers. It’s highly unlikely for Etsy not to have a product an artist might want.
Of course, there’s a slight risk since most are individual sellers, but the feedback is genuine. Furthermore, the easy navigation with drop-down options allows buyers to streamline by date, price, relevance, and keywords. It makes for smart filtering and is an added benefit.
As perhaps the premier online retail site in the world, it should come as no surprise that Amazon has an impressive stock of crafting materials. The diverse products also have extremely competitive costing, which Amazon can bear, thanks to their magnitude. But, it does help up-and-coming artists, who can’t always afford to pay top prices for quality products.
Coming to the products, the site has everything DIY artists might desire, from cake decorations to craft tools and sewing materials to paper products.
Finally, the delivery system is also commendable. Although suppliers are usually in charge of individual shipping policies, there is a regional branch in most countries, so there are no difficulties for the conglomerate to best serve customers.
As one of the oldest retail sites, eBay is home to a wide variety of items. Art and craft supplies are no exceptions, though much like Etsy, there are only individual sellers here.
Artists have to check the feedback sections to filter out the good products from the bad, but it makes the purchase process more informed since the buyer becomes familiar with the item too.
All said and done, the chief draw of eBay is the price bargaining options the site provides. Of course, some sellers opt to let go of their goods at set prices. But, many have auctions, and artists might prefer such methods, to obtain them at a fraction of what the products might actually cost.
Nasco was started with a very different purpose but has now become a preferred destination for those seeking art supplies. The company started off with aids for teaching in vocational classes for agriculture. Now, although the site shines for its broad range of crafting and art materials, it hasn’t forgotten its roots.
Therefore, the truly commendable feature is the ‘extras’ section on the craft supply site. It helps aspiring artists to seek advice or even inspiration for their projects. All one has to do is head to the vast roster of lesson plans and videos, which are fantastic, not to mention highly informative.
Factory Direct Craft has had a long journey from the flea markets to inculcating a global base of customers. The site is best known for handicraft materials, apart from a wide assortment of home decor items, wedding supplies, seasonal crafts, and materials for scrapbooks. Accordingly, the company extends support to crafters, artists, and other creative individuals.
While their standard collection is designed to satiate all needs, some artists might prefer the sale section if they wish to obtain supplies at a bargain. Off-seasons are particularly beneficial since artists are likely to find a host of products listed there, at a fraction of the original prices.
Finally, if DIY artists wish to seek some guidance or inspiration, the site’s blog has several useful tips.
As the name suggests, the site was made as a solution for designers and craft professionals, who might run into troubles about the pricing while acquiring the necessary supplies. With the slogan “Create More, Spend Less,” the site aims at minimizing the cost and hassle that goes into doing an art project.
Essentially, Create For Less is a virtual warehouse for art supplies that can be accessed by interested parties. Accordingly, artists no longer need to browse different stores for supplies, since everything is hosted under one roof. The pricing is competitive, too, reflecting the company’s policy.
Buying in bulk helps DIY artists acquire all the supplies they need, in one go. Moreover, easy and safe shipping guarantees the delivery of the same.
Much like Create For Less, DollarDays is the go-to site for artists who want to get supplies at a bargain. The site enshrines the principle that they want to be a part of something bigger than itself, and is focused on supplying wholesale goods at extremely affordable prices.
Notably, it does not deal just with crafts and arts, but DIY enthusiasts can access a wide range of products, including kits, beading, as well as paper products. On top of that, all items are at affordable rates.
But, if someone is looking for a better bargain, DollarDays has clearance and ‘49 cents or less’ sections. Safe and secure international shipping is also an added perk.
With a simple and navigable interface, Stuff4Crafts is already a preferred choice for many. The site’s motto that buyers are guaranteed to save money is reflected in its extremely competitive prices.
At the same time, a vast roster of crafting materials is available here, including candles, jewelry, scrapbooking, sewing, and painting materials, as well as general crafts.
Being one of the biggest online sites, Stuff4Crafts keeps attracting new artists each day while retaining the existing base of clients thanks to an attractive points program. It offers splendid rewards to the customers who keep returning to Stuff4Crafts. The site also offers free and safe shipping within the US.
S&S Worldwide prides itself on being a helpful company and has around 110 years of experience in catering to those who seek hands-on learning products, which are fun. While providing quality products with more savings options, S&S urges artists to embrace their creativity and the spirit of learning.
Not only does the site have a well-stocked roster of artistic products, but it also offers international supply and delivery options, improving accessibility drastically.
Understandably, aspiring artists might be cautious about their budgets. But, if the price is a major factor, then one should check out the discount center on the site. It has an impressive collection of goods at heavily slashed prices, making it ideal for a bargain.
MisterArt has been around since the early days of online business. The site takes immense pride in having maintained the position of one of the largest global sources for online crafts and art materials at discounted prices.
Sculptors, painters, scrapbookers, and photographers can all flock to one destination, assured of finding the tools, solutions, and materials they might need.
Since MisterArt is home to a team of creative individuals, the site aims at providing the best services, products, and prices in the market. In fact, MisterArt makes it a point to ensure they match the prices. If a buyer shops around and sees a more competitive cost, the site not only matches it but adds a gift certificate toward future purchases.
JOANN has operated for nearly 75 years, inspiring creativity. All this while, the business has expanded from a single store in Cleveland to a burgeoning e-commerce business in the industry. Thankfully, the company’s principles have remained unchanged and still focus on being a one-stop shop for artists looking for guidance, supplies, or inspiration to live their dreams and passions.
Inspiring the creative spirit of DIY enthusiasts, the online site has an assortment of artistic products. These include lace, threads, embellishments, patterns, needles, decor fabrics, and even paper crafting. The JOANN stores often conduct classes on crafts, which helps artists come up with ideas for projects.
Since 1911, Blick has been committed to service, quality, and excellence. The site aims to support artists through all stages of their careers. So, whether you are an amateur or professional, Blick has the right products to cater to your needs.
The leading art company is preferred by students and artists due to its assistance, tools, and products that help individuals grow creatively and reach their complete potential. As the site aims to make the shopping experience seamless and enjoyable, buyers are bound to come across quality art supplies that are priced in a competitive manner.
Thanks to the fact that the team working behind the scenes is familiar with the art world, it helps Blick cater to the community more effectively.
Although the business has been around since 1985, it was a brick-and-mortar store before expanding into e-commerce. It is a completely employee-based company that focuses on satisfying all requests from budding artists and crafters.
Artist and Craftsman Supply is branded as America’s local store for art supplies and boasts a wide range of products, including paintings, brushes, crafts, drawings, and surfaces, among others. There are also special kits for students, not to mention how-to videos and blogs aimed at inspiring artistic creativity.
Those who wish to save some money on purchases can try to be part of the regular contests and giveaways hosted on the site, which makes products available at a bargain.
While Michaels might be new to the online market, the art store has been around for a long time. Not only did it focus on aggressive national expansion at one point, but it also backed it up with stellar products and top-notch infrastructure. Michaels brings the same ethic to its online store.
With a wide range of craft and art products, the site aims at encouraging creative individuals to reach the peaks of imagination, using their skills. One can find framings, wall and floral decor, and even seasonal merchandise here.
Due to its already strengthened base of operations, including carefully replenished inventories, Michaels is never out of the products an artist might need. The site also ensures safe delivery.
Oriental Trading has the simple goal of making the world a fun place. It offers over 40,000 unique products, many of which are perfect for artists and crafters looking to actualize their creative process.
It is an ideal shopping destination for budding individuals who cannot afford to spend too much on supplies. Oriental Trading has a fantastic option, labeled the 110% lowest price guarantee. If a buyer shops around and sees a site with a lower price for a product or shipping, not only does Oriental Trading match it, but slashes the rate by 10%.
All the while, Oriental Trading never compromises on the quality of the product or the efficiency of the delivery, which makes it a preferred choice among many.
OOLY makes arts and crafts fun. The site aims at providing products that bring happiness to artists of all ages - those who are young and those young at heart. OOLY’s products are colorful, inspiring, and fresh. They provide creators with several options to make the spaces around them livelier with the artwork.
With school supplies, art and craft products, DIY supplies, and writing items, OOLY attempts to make the world a more colorful place. Competitive pricing and secure delivery options also make this option a favorite among several budding artists.
Apart from bringing joy to artists through their products, OOLY caters to everyone’s artistic sensibilities via locally organized projects.
Discount School Supply was founded with a simple aim. The goal is to provide quality products at affordable prices while ensuring that the service is impeccable. Now that it has transitioned from a store to an online site, the core principles remain unchanged.
It is aimed at parents, teachers, and students, who can start their school year with these products. However, many of the arts and crafts supplies come in handy to those with an artistic mindset.
The shipping policy is a special draw for those ordering numerous art supplies. Discount School Supply has one invoice rule, where they bill customers for the products only after every item selected is shipped. Needless to say, shipping is safe and quick too.
Verdict
There are numerous options online from where one can buy art supplies. Most of these sites have competitive pricing, which makes it cheaper than going to a physical store. Moreover, with guaranteed deliveries, one can save the trouble of lugging art materials.
We have provided a comprehensive guide that should come in handy no matter the artists’ expertise. Those who need professional products can always head to sites like Blick, while casual artists should get all their supplies at places like OOLY.
Bulk buyers will find Create for Less to be ideal, while sites like Etsy and Amazon are already immensely popular.
Using this list of top online craft stores for DIY projects, one should be able to find all the supplies that might be needed.
But, that said, we would love to hear about your experience of shopping for art supplies online. So, do reach out to us!
Marc Jacobs, an American fashion designer, once said, “makeup is the finishing touch, the final accessory,” and we think this is absolutely true!
While we believe that true confidence lies within ourselves, makeup can provide that much-needed boost. And Luminess has stepped in to help achieve just that. They are offering a wide set of products along with an Airbrush makeup system.
So, if you have been craving to achieve that perfect professional finish, the airbrush stylus will help you achieve it. And do not worry if you have never used one before.
The brand has thought it through, providing 2 kits. One is for beginners, while the other is for experts who have prior experience with airbrushing.
Furthermore, we will introduce you to the kit and the brand offerings before moving on to its types. So, what are you waiting for? Dive in!
The Luminess Air Airbrush Makeup Kit
We want to put our best selves forward every time we step out of the house. And one thing that builds self-confidence is the perfect makeup kit. It will not only help in making one’s face flawless but will also provide you with more confidence every time you walk down the streets.
The Luminess Air Airbrush Makeup Kit makes use of an airbrush stylus to apply its different products, leaving you with a smooth and professional finish every time.
No products found.
What Is Inside The Kit?
This tool kit includes a number of components that will together provide your face with excellent coverage. In this section, we will discuss them in detail.
Instructional Video
The kit will always come with an instructional video that will provide necessary tips and tricks to make the application process easy. This will not only introduce you to the products but will also provide information on how to use each one of them. We will recommend watching it before airbrushing your face.
Airbrush Stylus
This is one of the major parts of the system, and the stylus is actually a gun that will help you with spraying. It comes with a sliding trigger that will help you adjust and change the pressure of the makeup.
If you pull it all the way back, you will be getting a pressurized spray that will spread over a small but focused area. Bring the trigger midway for a more balanced spread, and you should be able to handle it well.
Compressor
For the airbrush to function, you will need an airbrush compressor. This will supply air and ensure that it works well in spreading the makeup.
It is also very simple to operate; you will only need to press one button to start and stop. Once you have switched it on, attach it to the compressor, and it should power up immediately.
Moisturizer
Before you apply any form of makeup, it is important to use a good moisturizer. Now Luminess offers water and mineral-based makeup, which works wonderfully on dry skin too. But it is always better to moisturize before applying the foundation.
Now we know there are multiple shades when it comes to skin tones, and you would generally be looking for something that resonates with the best. That’s why the company provides 12 different shades for the varied skin tones out there, including fair, warm, deep, tan, and medium shades, to name a few. They will blend well and work on most skin types easily.
Also, you will not need a concealer while using this foundation. This will help in hiding sun damage, freckles, and acne marks easily. It will also hide fine lines giving you complete and flawless coverage.
Plus, the formula is oil-free and will not clog your pores. Hence, you can wear it for long without worrying about rashes and acne.
Blush
You also get a blush that is airbrush-specific, and it will work like standard blushes. Remember to use this sparingly to prevent tinting your face too much. Now there are 8 shades of blush, so you can select one depending on your skin tone. Choose among fair, medium, tan, deep and warm shades, and the blush will complement your shade perfectly.
Hose
This company has been very concerned about the user's convenience; hence, it has designed the hose to be pretty long. The length is perfect, so you will not need the compressor very close to you.
Highlighter
Last but not least, this pack includes a highlighter that works well in accentuating the cheekbones. It will make certain areas of your face lighter and enhance your look.
Advantages Of Using The Kit
Stylus and compressor is easy to work with
Carry case included for better portability
Provides a natural look if applied well
Lasts for a long time
Instructions provided in a DVD
Known to be sweat-proof
What Could Have Been Better?
This kit might take some time to get used to, and you will have to apply it carefully in the beginning. If you over-apply, the face might look cakey, spoiling the entire look. We will recommend that you practice at home a few times.
Since this is a different way of applying makeup, it might take some time to be a pro. But once you learn, you can get the perfect natural look easily.
Also, ensure that you clean the stylus once in a while. Otherwise, it can clog and prevent fluid from coming out. For unclogging it, you will require water and a thin brush. In case that is not available, you can use one of your fingers too.
The 2 Luminess Air Systems
2 different types of brush systems are offered to the customers, and they are based on different levels of expertise. We will discuss both of them below, and you should read on to know all about them.
A True Legend: The LUMINESS Legend airbrush device is...
More Coverage, 10x Less Makeup: Airbrush application...
The Luminess Air Legend System is designed for those who are trying out airbrushes for the first time. This will introduce you to the world of airbrush makeup, and you can try applying different types of foundations, highlighters, blushes, and primers with this.
What’s more, there are color options too, and you can get a set in your favorite color. That said, there are 4 unique colors to choose among, including:
Black and rose gold
White and black
White and aqua
Hot pink
Pick your favorite and get this makeup set to match the dressing table in your room. You will be getting a bottle of blush, skin brightening glow cream, primer or moisturizer, and 2 bottles of foundation in the kit.
Professional Results at Home: The LUMINESS Air Icon Pro...
10X Less Makeup, 3X More Coverage: Airbrush application...
While the Legend system was for beginners, the Luminess Air Pro System is for those who have already experimented with airbrushing and are seeking a professional option. While some parts of both sets are the same, there are some differences.
Firstly there is a difference in the kind of compressor used, and this one offers more modes. While the Legend system has a compressor that can be operated with an on/off button, this one uses a dial. This dial can be turned to regulate the speed of the compressor, and you can select among 3 modes.
Its speed can be adjusted on the basis of pressure per square inch of the airbrush gun. This allows for more versatile use, and you can get more creative with this.
Plus, this set includes a bottle of bronzer, which is not given with the previous one.
These systems come with a number of benefits, and we have listed them down in this section.
Discounts
The brand keeps offering discounts on its products and you might chance upon offers which would reduce the price by 50 percent or more. Keep a watch over their website, or you could also sign up for a newsletter from them.
Now we know that the price of using this is high and you will have to keep paying as you use it. But the offers can bring down the price to a large extent,
Plus, the makeup essentials, including foundations, primers, blush, are available in online stores. Finding and purchasing them is not going to be difficult, and we were truly happy about that.
User-friendliness
This is a very compact system, and you can easily carry it around with you. For starters, a carrying case is provided, and you can fit in all the items inside.
Secondly, the compressor is very small, and it can fit on tabletops, shelves, or in front of a mirror. You can even use it in vanity vans with extremely limited space.
No Skin Reactions
The makeup contains water and mineral-based formula, which works very well for the skin. It would not react and will not clog pores. In fact, it is free of any alcohol and hence it does not irritate the skin at all..
Color Matching System
Are you confused about how to find that perfect shade? Do not worry at all because Luminess has a solution for you. The brand has a color matching system, and you will just have to upload a picture of your face in natural lighting.
Based on your skin tone, one of the company’s makeup experts will get back to you about the shade that will fit best. Then you can proceed to buy products of the same one.
Final Words On Luminess Silk
If you are someone who needs to wear makeup throughout the day, then the Luminess Air Silk Makeup System is a great choice. It does not clog up pores and will not irritate the skin, making it perfect for sensitive skin. Also, if you are prone to sweating, do not worry about this makeup melting away.
It will stay in place throughout the day and will provide you with proper coverage. Now, this is typically not made for large makeup projects, but it works perfectly well for daily wear. You can begin using it every day for the office or going out.
With this, we will take your leave, and we hope you have got enough information about Luminess products. If you have any further queries, you can let us know in the comment box below.
Children from the 90s' and earlier times had a lot of fun watching those spectacular superhero movies and cartoon shows.
But to get an action figure inspired by their favorite hero, they had to wait till their parents took them to a toy store, that too a 'good' one.
All this now seems a thing of the distant past, as online toy stores have come into the picture. There are a plethora of such stores right now, each, in turn, having hundreds of options. It's just about logging on to a suitable store and choosing the toy. Then on, it's a matter of minutes, and your toy is booked!
Selecting the right store is the only difficulty you might face, with such a huge number of websites available. This lone task will also become easy for you, as we've picked the 33 best online toy stores from the unlimited choices available.
As one of the biggest online stores and perhaps the most obvious inclusion in the list, Amazon needs no introduction. It has a collection of millions of toys of a wide variety as well and hence is evidently the largest available online source of toys.
With great variety comes the difficulty in making the right choice, which is where several filters of Amazon can help you out. The site also lets you check best-sellers and new releases in separate sections, which are updated on a daily basis.
Amazon offers several perks, including free two-day shipping to those who have subscribed to Amazon Prime. For the rest who do not have a Prime subscription, a shipping fee is mostly applicable.
Toy Wiz
For a child who loves to own new collectible toys such as fidget spinners, and special action figures, there is no better place than ToyWiz. You may even find those rare Pokemon cards available in their collection.
Besides, if your little one is waiting for a toy scheduled to release soon, you can book one of the first of the lots through a pre-order sale. There are lots of exciting pre-orders featured on the site.
The company has been in the e-commerce business for more than a decade and hence is a trustworthy name. It is also loved by buyers for the excellent customer service it offers. As for the shipping fees, the standard costs are $5.99 for a seven to ten-day delivery and $29 for a three to five-day one.
Toy Universe
True to its name, this store is indeed a separate world of toys, with thousands of different items available on the website. Despite having started in Australia, it is now delivering orders in New Zealand and the United States as well.
Besides popular brands and new arrivals, you will also find a whole lot of creative and educational games and toys on this website. For instance, the range of art and craft games would help to instill creativity by fueling a child's imagination.
A uniform shipping charge of $9.95 is applicable for orders across Australia, excluding bulky ones. The international charge is calculated during the checkout of an item. It depends upon the location, the items in the order, and the delivery service you choose.
The renowned retail store chain in the United States also offers a large online collection of toys to its consumers. By browsing through the toys section of the website, you will discover a lot of offers applicable to many of the items.
This store has several interesting categories of toys available, which will appeal to any child who has that creative streak in him or her. For instance, the pretend-and-play section has toys that let children dress up to be their favorite cartoon or fairytale character.
The website offers free shipping facilities for orders of $35 or more. For purchases less than that amount, a flat fee of $5.99 is charged. But additional charges may be associated with products not bought and sold directly through Walmart.
Toys R Us
An iconic name in the world of Toys, this store went through a tough time in the last few years due to the growth of online toy shopping sites.
Quite recently, it was revived by a partnership with another leading toy company. The Toys R Us website is currently alive and well and is much loved by consumers.
The large variety of toys offered by the store can give tough competition to the leading online e-commerce platforms. Besides, the website also brings you toys from the most sought-after brands such as Disney, Marvel, and Mattel.
Toys R Us has different websites dedicated to different delivery regions and ties to maintain a moderate shipping rate for consumers. The charge is calculated on the weight and dimensions of the items, the shipping method you choose, and the delivery location.
Another online e-commerce platform that offers an immense variety of toys to choose from is Fish Pond. It has dozens of categories for the toy section, with each category listing hundreds of thousands of options. So there remains little doubt about whether you will get what you are looking for.
Also, you can find the most interesting collectible toys on the website, including exclusive Hot Wheels models and rare DC collectible action figures. For the little Marvel and DC comic lovers, this site has quite a lot to offer!
The icing on the cake is that Fish Pond offers free shipping to its consumers worldwide, which is a rare phenomenon indeed! Thus, gifting a toy to that little cousin of yours who lives far away won't be expensive at all.
The most interesting aspect of this store is that it specializes in toys that facilitate brain development in children. As such, Fat Brain Toys has carved its own niche in the toy business and is quite popular among consumers.
Each educational learning game and toy available in the store is designed to focus on the intellectual growth of a child. Also, the website has separate sections featuring its new releases and best-sellers, which cater to two different sets of consumers.
The store has a flat shipping rate for its consumers within the United States which is as low as $3.99. The items are shipped via UPS Ground. Whereas, international shipping costs include the standard shipping rate plus the customs fees for the destination country.
One of the earliest names in the world of toys, this store started its journey as early as in the 1700s in London with the name 'Noa's Ark'. Without a doubt, it is one of the best in the business and never fails to impress its customers.
Besides a wide variety of toys, the online store offers innumerable options that come at quite affordable prices, making it all the more popular. Also, the store offers quite a convenient return policy if the toys fail to meet your expectations.
Till now, the online toy store delivers products to 27 regions within Europe. A shipping charge of £3.99 is applicable to items shipped within the UK, while a fee of £9 is charged for delivering to 27 destinations in Europe.
A department store with a diverse and fun-filled toy corner, Kohl's online toy collection has an assortment of some of the finest games and toys available.
The particular categories of toys that impress Kohl's customers are its outdoor toys, children's bikes, wagons, and pools. Also, the filters available on the website are quite convenient, helping customers get just the toy they are looking for.
As for the shipping charges, orders above $75 are eligible for free standard shipping, whereby the product is delivered within 3-6 days. The store also offers a free ship-to-store option. For orders below that amount, a shipping fee of $8.95 is applicable. The 2-day shipping charge for products priced at below $100 is $19.95.
This is another online store that offers a variety of products, including toys, and is quite popular among customers. The affordable prices of all the goods sold here have played a major role in increasing its popularity.
The online store has a huge variety of toys which range from the newest in the market to the antique collectible ones. And all of these come at prices hard to believe!
Target offers free shipping for orders above $35, another factor that contributes to its popularity. Besides, with a Target Red Card, you are eligible for free two-day shipping on the majority of items on the website. The store allows consumers to pick up their orders from their nearest Target store.
eBeanstalk
Are you looking to buy toys suitable for a child of a particular age? In that case, this store will be the right place to search in. There is also a great variety of toys in the store.
A great shopping tool on this site classifies the toys available according to the age and gender they are fit for. This is achieved with the help of experts in child psychology. Interestingly, this store has a collection of attractive furniture for children such as little cabinets, table and chair sets, and school house tents.
Ebeanstalk offers free shipping for orders above $49 and the delivery generally takes two to five days. The store also arranges overnight shipping or international expedited shipping for specific orders, which can be availed by calling on the toll-free number.
This is another great online store based in the United Kingdom and belongs to the Entertainer, the largest independent retail company of the country. You can get any The updated stock of the latest toys offered ensures that you get any new arrival.
Besides, a unique present finder feature on the website helps consumers to come up with a perfect toy to gift for a special occasion. Furthermore, they can also sign up for free to an email newsletter on the latest toys and hottest deals available.
As for shipping within the UK, it is free for orders above 39.99£, while a fee of 3.99£ is charged for those below that amount. The Toy Shop also delivers its products worldwide, with shipping charges depending upon the location.
The company to come up with world-famous toys such as Barbie and Hotwheels, Mattel can well be called a toy connoisseur. It is another trustworthy name in the business, which has had a steady loyal consumer base.
The online store consists of toys from reputed brands such as Jurassic World, BTS, and Disney's Toy Story. You can also find several rare collectible toys on the website, including action figures, animal figures, and classic playsets. In short, it is a wonderland for toys!
The standard shipping rate for the US is $9.95, while for Canada it is $10. The international shipping fee is as high as $60 for orders of less than $170. Signing up as a VIP member would make you eligible for free shipping offers, discounts on first orders, and many more rewards.
The online store based in the UK has as much as three decades of experience in toy production, a rare distinction indeed. As the name suggests, the website brings children toys designed to make learning a playful journey.
Categorized according to a child's age, the toys help to build the intellectual ability fit for that age. Each toy is interesting in its own way and would keep a child absorbed, in addition to the fun they would get out of it. Besides, the customers are also guaranteed that the toys are proven safe for the kids.
Apart from the UK, the online store delivers toys to 80 countries across Europe, Africa, Asia, and the Middle East. The shipping charge depends upon the location. For delivery within the UK, free shipping is applicable for products priced at more than 50£.
If your little one is a huge Marvel or DC fan, then this is the number one online store to browse through for toys. The store exclusively focuses on action figures inspired by the favorite comic superheroes across generations.
Interestingly, you can find a pre-order collection consisting of some of the best upcoming toys in the block. Among the currently featured toys are a Transformers 2.0 Starscream masterpiece and a statue of the popular Harry Potter character Rubeus Hagrid.
The website offers worldwide shipping, with the charges being calculated based on the product weight and dimensions. The international shipping rates do not include any taxes or customs fees that might be charged in the destination country.
This massive online retail store also features a vast collection of new toys and games at quite affordable prices. Over the years, it has become one of the most famous and well-performing online retail platforms.
There is also immense variety in the toys that the site offers. The collection includes some rare categories such as pretend and play and outdoor gaming equipment. You are sure to find some of the most exciting new arrivals as well.
The website offers standard free shipping daily on orders over $45 in 48 states of the US, excluding Alaska and Hawaii. For orders below $45, a charge of $4.95 is applicable.
The online store also delivers to 180 countries across the globe. The international shipping rates depend on the delivery service, the product type, weight and dimensions, and the destination postal code.
Over the ages, Disney has won the hearts of children and adults alike through its legendary animated shows on t.v and grand big-screen ventures. Besides this, its online store has an ever-attractive collection of toys.
The online Disney store is heaven for kids in the true sense as it features all the legendary action figures from its television shows and animated films. It also includes toys, games, and other merchandise from popular franchises such as Marvel, National Geographic, and Star Wars.
The Disney store offers several attractive deals on toy prices, and the shipping rate varies according to the price range. As for international shipping, the charges depend upon the size of the product and the destination.
Though this online store is well known for its range of industrial products, it is also a dominant name in the toy business. There are various categories of toys and games on offer in the toy & collectibles section of the website.
The toy vehicles category particularly draws the attention of visitors to the website. This category offers plenty of amazing and rare options to choose from. Some examples are toy tractors of different types, wagons, and remote-controlled monster treads.
To date, the online store delivers products to all states within the US. You will be delighted to know that it offers free shipping for any order worth more than $50. The charge applicable for orders of $25 to $49 is $11, while a fee of $8.5 is charged for orders below $25.
The online store is named after the renowned comic creator Todd McFarlane who is also its founder. Hence, it goes without saying that the store features many toys based on some of the incredible characters from McFarlane comics.
The online site brings forth toys that would appeal to different age groups. For instance, while it has action figures of characters from the Batman comics, it also includes a collection of toys based on The Game of Thrones.
Currently, the McFarlane store is featured as a separate toy store on Amazon's website. It also sells its products through many other online e-commerce platforms. The shipping charges applicable for the toys would hence depend on the e-commerce site which you are using.
Imagine Toys
This online toy store based in Michigan has gained a prominent place in the toy industry. It offers a fresh collection of toys to consumers, different from the bulk that is present in mass-market toy stores.
The store offers a vast range of toys that can be plenty of fun for kids and at the same time have great educational play value. Also, the toys have been tested with children of the appropriate age to ensure psychological and educational development.
Furthermore, the store offers a hundred percent guarantee to take back a product you are not pleased with. Currently, the store delivers toys to locations within the US only. The shipping costs are calculated in the weight and dimensions of the items ordered. Deliveries are mostly completed within the next business day.
A niche online store dealing exclusively in baby toys, Fisher-price is undoubtedly one of the best few out there. The variety of baby toys you will find in this subsidiary of Mattel is immense.
Ranging kick and play piano gyms for infants to play and crawl toys for toddlers, this store has it all. Moreover, the site categorizes its toys according to the age range in months. In this way, it can be all the more easy for you to select the right baby toy for a child.
As regards the shipping charges, Fisher-Price ships order worth more than $50 for free. This offer excludes orders to Puerto Rico, Alaska, and Canada. You can also sign up as a VIP member to be eligible for various offers.
Kmart is one of the biggest online retail stores in the US and has gained immense popularity over the last few years. Evidently, the toy collection is huge and encompasses all the toy categories that you can think of.
Every kid cannot like the same kind of toy, and that's something you must always remember while you are getting a toy as a gift. This is why Kmart offers you lots and lots of different types of toys for boys and girls.
Moreover, the online store offers free shipping on orders over $49. Items sold through third-party sellers may be excluded from the free shipping list, so make sure you check the finer details.
Another iconic company dating back to 1932, LEGO is one of the world's leading toy manufacturers. The automatic building brick or the LEGO brick, a basic unit of every building game available now, is their very own product.
Apart from the regular categories of product type, price, and popularity, the online store lets you shop by themes and interests as well. This makes the process of choosing the right toy a lot easier.
Also, LEGO often has special sales on the online store where toys are sold at slashed prices. Toys are available on the site even before they reach the shelves of the LEGO stores. Products are shipped all over North America, with standard free shipping on orders above $35.
This popular online store features several categories of attractive merchandise for children, including toys and games. The products sold on the site are all listed at affordable prices and hence suit the budgets of one and all.
Apart from having a variety of options for toys, the site also has a classification of party themes where customers can pick their preferred toys for a particular event. The different toys available for each theme can help children explore their creativity.
You can get free shipping for toy orders worth more than $35 at the US Toys online store. For purchases of less than $35, a handling charge of $4.99 is applicable which will automatically apply during checkout.
Kiddlestix Toy Store
This leading toy store in the United States Oklahoma has a quite popular online shopping platform offering an appealing collection of toys.
Toys on this site help to foster the developmental growth of a child while encouraging them to have fun by engaging with the world. The cognitive and emotional well being of the child is also ensured in the process. Besides, there are toys available for several age groups including teens and young adults.
The site ensures a fast, fair, and efficient system of processing and shipping for you. The charges depend upon the shipping method you choose. Accordingly, the shipping cost is determined and the delivery rate is estimated during checkout.
The renowned toy store in Denver has an efficient and popular online store with all kinds of toys that you can think of. There is hardly any toy which you won't be able to find here.
Moreover, the online store offers quite pocket-friendly prices for the items sold here, which makes it hugely popular. Also if you are confused between the innumerable options while choosing a gist, the gift suggestions page is the perfect solution. It has gift certificates, play sets, and many more options featured.
The shipping rates for products on this online store vary with the items ordered and the shipping method chosen. Also, some products may be available through specific methods of shipping such as store pick up.
In an age when online toy stores are flooded with new arrivals and pre-order collections, Rogue Toys brings you an assortment of collectible and vintage toys.
The look and feel of the website induce nostalgia, taking you back to the times when the Simpsons and Star Wars were a rage. Apart from iconic cartoon characters and television series, toys are inspired by superheroes and villains from timeless comic books as well.
The online store ships its orders via postal services such as USPS, UPS, and FedEx. You have to choose the service you prefer, and the charge varies accordingly. The shipping rate charged by such services depends upon the weight of the items ordered.
The iconic brand that started its journey back in 1858, is currently one of the biggest online fashion retailers. Its online store features a vast section of all sorts of toys available at quite affordable prices.
You will be able to narrow down your search for toys with the help of a number of filters such as age range, toy or game type, characters, and brands. Apart from this, there is also a section that features the top-rated toys by customers.
Macy's ships its products to as many as 100 countries across the world, allowing foreign customers to get hold of their amazing toys. For international shipping, it has partnered with global e-commerce company Borderfree which calculates the cost during checkout.
Voted the best toys store in New City by the New York Magazine, this store has the perfect toys collection that any child will just love! The website of this store is equally amazing, with its user-friendly interface and the intact collection put forward online.
All the toys that you will find in the store are carefully chosen and organized for suiting a wide range of ages and preferences. Interestingly, the home page of the online store features the top toys on offer under the title "staff-picks".
Kidding Around ships its products within the United States via UPS or USPS. As such, the shipping costs for these postal service companies are applicable.
Labeled as one of the top toy stores in the world in an article by USA Today, this famous toy store offers toys of hundreds of different kinds. The online toy store can be accessed via Amazon.
OP Taylor has three toy stores at different locations in the United States. Interestingly, many of the toys sold are produced in its store located in downtown Brevard which covers an area of 6000 square feet. The website which is featured on Amazon includes most of the products available at the store.
Amazon's shipping charges and services are applicable for this store's orders. The shipping rate is dependent on the product weight and dimensions and the delivery location.
This impressive online store for gifts and stationery also houses an attractive collection of handmade toys. A variety of colorful toys for different age groups are present in the store.
A unique aspect of Tantrum's toys is that they showcase a fusion of the classic and mid-century styles with the best of modern art. Also, all the toys are curated within the theme of a lively old-fashioned circus.
Any visitor to this online store would be transported to a time of nostalgic beauty and fun. Instances of toys sold on the website are French dolls, Danish mice, and a toy tea set designed in France by Djeco.
The online store ships its products to locations within the United States. The shipping charges vary with the toy being bought and the delivery location.
Buy Buy Baby
A one-stop shop for all baby care products, this online store offers a wide range of toys as well. Its user-friendly interface makes the site easily navigable by anyone.
You shall also find a number of useful filters in the toy section, such as product type, price, ratings, brands, and book themes. Besides, the online store also has a provision for a "price match promise." Consumers are offered similar prices to other stores if they can show proof of getting a better price at another store.
As regards the shipping rate, the online store provides free standard shipping on orders above $30. For orders worth less than that amount, a fee of $5.99 is charged. Currently, the store ships products within the United States only.
This online toy store based in Los Angeles has become a leading name in the business due to its rising popularity. Recently, it was voted the best alternative for Toys R Us in a poll conducted by LA Weekly.
You will find it all in this online store, whether it's a unique toddler toy, a building kit, or a dollhouse. There are even some great antique toys available on the website. Furthermore, the online store lets you sort the results based on a number of options such as popularity, price, rating, and the latest items.
Currently, the store delivers products within the United States only. The shipping method and subsequent costs are calculated before checkout based on the destination postal code.
Conclusion
With this, we come to the end of our comprehensive list of the 33 best online toy stores. We hope the task of choosing a suitable store will be much easier for you now.
Before we sign off, we would like to put forward the options we consider noteworthy among these online toy stores for their different useful features. Target will be a good website to log on to for someone on the lookout for pocket-friendly options.
Toy Universe offers a greater variety than many other options on the list, making sure that you find the one toy you are searching for. Niche toy stores such as Big Bad Toy Store and Fat Brain Toys will be ideal places if you are sure about the kind of toy you want.
Do let us know whether you agree with our choice in the comments section. Till next time!
A painting project can seem exciting until you take a look at your clothes and see multiple stains on them.
Artists are no strangers to paint staining their house floors, clothes, and mostly their paint brushes. However, when using acrylic paint, getting the stains out of the surfaces might not be easy. You need to take some precautions and, more importantly, know the techniques that you can implement to remove stubborn acrylic stains.
Getting rid of wet acrylic is pretty simple, but it’s not easy to remove dried acrylic paint. In this guide, we will tell you how acrylic paint works, how to best remove them, and what materials can be used for the job.
Washing off acrylic paints is a hassle; thus most high quality body paints don’t use acrylics, although there is a concept of acrylic body paints. Check out our article on types of face and body paints to know more before you apply acrylic as face paint for your upcoming dress up party.
So, without any further delay, let’s dive right in!
Does Acrylic Paint Stay Permanently On Clothes?
The answer is both a yes and a no. If you are working on wet acrylic paint which has not dried up or been exposed to heat, removing them from clothes would not be much of a problem. However, things are very different when you are handling dried acrylic paint.
After the cloth is washed and dried, the difficulty of removing the acrylic paint will multiply. If you have used this paint before, you would know that it is water-resistant but not waterproof, unless you apply a special sealant on it. So, if you are planning to wear an untreated t-shirt in the rain, we would refrain you from doing this.
To make acrylic paint permanent, it is best that you apply a proper material to seal paint and then treat it with heat.
Acrylic paint is made up of pigments that are put in an acrylic polymer emulsion. This paint is plastic and completely water soluble while still wet. The color does not become plastic-like and resistant to water until it gets dried up completely.
Do Acrylic Paint Wash Off Clothes?
With proper treatment, you can get acrylic paint washed off clothes. For this, you might need quick solutions like isopropyl alcohol and hairspray. As we have mentioned before, this paint is water-soluble till it dries, so if you catch it before the color dries off, it can be rinsed off completely.
You will have to do the needful with the wet paint and work timely in case you want to get it removed. To get rid of the color, you’ll need to wash acrylic paint before it dries and hardens up. The acrylic paint stain is not likely going to come off easily with a regular wash. With a simple wash, the color may fade slightly, but in order to remove the paint completely, you would need to apply the special treatment.
We will talk about some of the ways in the second half of the guide!
Can Acrylic Paint Be Removed From Skin?
Before we get to answering this question, let us first clarify that it is best to try and avoid getting acrylic paint on your skin. Acrylic paint might have an adverse impact on your skin, especially in sensitive areas like the face.
One major problem that people come across when trying to remove acrylic paint from their faces is that they cannot use any harsh chemicals. So, if you were thinking of using a nail polish remover to remove the color from your skin, throw that idea out of the window.
If the acrylic paint dries up, peeling it from your skin might be a painful experience. So, try removing it while it is still wet.
Can Acrylic Paints Be Removed From Wood?
In case you have used acrylic paint on wood, you would know that it tends to stick very well to the surface and deliver a nice finish. However, at times there might be excess paint in the corners that you need to remove. For this, you would not have to do a lot as the process is pretty simple.
Just like the fabric medium, it is pretty simple to remove acrylic paint from wood, provided the colors are still dry. But even dried acrylic paint can be removed from wood quite conveniently. However, you will need a few other types of equipment for this, namely soap and water.
If you want to do a complete removal, you will require a few other accessories like rubbing alcohol, sandpaper, and other solutions that remove acrylic paint from wood.
These supplies will help remove acrylic paint from the wooden surface without causing any damage to it.
How To Remove Acrylic Paint From Clothes?
We get a lot of queries from readers about how to remove acrylic paint from most surfaces. However, we have noticed that most people face trouble when removing paint from clothes.
So, to help you, we are here with a few possible techniques that can help you get rid of paint from fabrics with ease. Let’s take a look!
1. Pretreatment
As we have mentioned before, to remove color from the fabric, it is best that you act on it while the paint is still wet. The other thing to do is to pretreat an acrylic fabric paint stain before applying any of the removal techniques that we are soon going to discuss.
Before the stain dries up and hardens, use a clean cloth or a paper towel to blot as much color as possible. If you see stubborn bits of paint stuck in the fabric, we recommend you use a toothbrush or a paintbrush to remove the color. Acrylic paint (waterproof) can be a blessing or a problem, so suggest that you start acting on it before the paint dries up completely.
Having said that, you may be stuck in a situation where you might have to work on dry acrylic paint. In that case, we suggest that you make use of accessories like a blunt knife, spoons, or stiff brushes to scrape off the plastic-like dried paint. The more paint you can scrape off, the easier it will be to get rid of the stains.
Before you start undoing earlier acrylic paint projects using chemicals to get rid of the color, make sure to not skip the pretreatment step!
2. Acrylic Paint Washable With Dish Soap
When acrylic colors are wet, they are water-soluble and can be easily washed off with dish soap. If you are working in your own art studio, first arrange all the essential accessories before starting with the work.
To begin with, you need to mix an equal amount of water and dish soap in a container. Proceed by soaking a clean cloth in the mix and wring it out to ensure there’s no extra water in it.
Once this is done, dab the stained area with the wet cloth. Make sure to not rub it, as that might cause the paint to spread to the other parts of the fabric.
After that, put the fabric in cool water and wash it properly. Keep repeating the process until the stain is no longer present.
Pro tip: Try avoiding the washing machine as that might cause the stain to spread further.
This method is the easiest and the cheapest of all the solutions to remove paint stains. Having said that, it works best when the paint is still wet and has not dried up completely.
3. Using Hairspray
Most of the over-the-counter hairsprays that you use contain a number of polymers along with hydrocarbons and alcohol. So, they are great for removing stubborn paint from a number of surfaces, especially fabrics.
However, before you start with the process, we recommend that you try the spray on an inconspicuous area of the cloth. Not all fabrics can handle this chemical, so check it out first before applying it to a larger area.
Begin by putting the fabric in a sink and spraying properly over the stained area till it is soaked. If done correctly, the hairspray should make the paint soft, and you should be able to peel it off with ease. Once done, immerse the garment in cold water. If you see that there are remaining flakes of paint, try scraping them off with your fingernails.
Keep repeating the hairspray and rinse cycle until most of the acrylic paint is out of the fabric. Finally, put the cloth in a washing machine and give it a good rub to ensure that there are no remaining bits of color left on the surface.
4. Nail Polish Removers To The Rescue
If you check the chemical composition of nail polish removers, you will see that they mostly contain acetone, which is one of the main components in paint thinners as well. So, you can understand that this solution would do a great job when it comes to removing paint stains.
Refrain working with bare hands and wear a pair of work gloves if you have sensitive skin. Also, before you begin working, alway check to see how the chemical is reacting to the fabric. Not every fabric can handle the strong chemicals present in a nail polish remover.
For example, if you are planning to remove stains from surfaces like spandex, nail polish removers might cause lasting damage to it.
To begin, take a clean cloth and soak it in a nail polish remover. After that, you need to press the soaked cloth on the stained surface and keep it for five minutes. If you see that parts of the stains have become loose or flaky, that means that the remover has worked well.
Remember that when fabrics are exposed to acetone for a long time, they might get damaged. So, act quickly and use a blunt knife or a spoon to remove as much paint as possible. Do this efficiently, and do not let the acetone sit on the fabric for too long.
If you see that there is more paint left on the surface, keep repeating the process until all of it is gone. And for the final step, wash the fabric in warm water using regular detergent. That should get all the stain out from the cloth!
As we have mentioned earlier, nail polish remover might damage the weave of the fabric that you are using it on. So, we recommend that you use a fabric softener once you are done with all the steps. That should help undo some of the damage and help the fabric last for a longer time.
5. Murphy’s Oil Soap
If you have lived with grandparents, you would be no stranger to the smell of Murphy’s oil soap, which is used for the wooden floors. This works great as an acrylic paint wash and works perfectly with oil paints too. If you are a frequent user of acrylic paints, it is best that you keep this cleaner handy.
When the paint is still a bit wet, use this cleaner to get rid of the paint from the wood.
Just remember that you might have to work a bit hard for removing dry paint from a wooden surface. For example, if you are working on a paint-stained brush, you can soak it in a solution that contains equal parts soap and water. You have to keep the paintbrush in the solution overnight, and next morning you’ll just need to rinse the color off the brush.
To make the most of the cleaner, try and follow the pretreatment step to get rid of the excess colors before you begin with the process. After that, put the stained cloth under a running tap to wash away as much of the excess paint as possible. Once you are done with the first step, soak a clean piece of cloth with Murphy’s oil soap and dab the stained area with it.
While you are at it, make sure that to not rub it too hard that the paint further settles into the fabric. After you are done rinsing the cloth with the cleaner, rinse the garment with clean water and check if the stain has been removed.
Once the garment is totally dry, check for paint flakes. You can pick with your nails or use a tweezer to remove them. Flakes are easier to remove when they are dry. However, be careful while you are at it, and handle it with care to ensure that the fabric is not damaged.
Will A Wash Help Remove Acrylic Paint Off Clothes?
If you pretreat the stained fabric well, there’s a good chance that the wet colors will easily come out of the material. However, if the paint has completely dried, a simple wash won’t be enough to get the stains out.
For removing stubborn stains, follow the steps that we have mentioned in this guide. And once you are done, do not forget to put your clothes in the washing machine for a final wash.
A word of advice, if you put paint-stained clothes in the washing machine, do not put any other garments in the mix. If you do that, there is a good chance that the stain will damage the other pieces of the garment as well.
How To Prevent Acrylic Colors From Staining Objects?
When you are working with acrylic paint, a little splatter here and there is inevitable. But there are a few tips that you can follow to avoid a significant amount of paint stains. Let’s take a look.
If your children are playing with acrylic colors on the study floors, we recommend that you spread newspapers all over. This will protect the floors from getting damaged.
On the other hand, if you are starting an art project, wear old clothes and not new ones that might get stained. One or two splatters of paint won’t make too much of a difference if they are old and worn-out.
Do Acrylic Paints Wash Off Final Words
With that, it’s a wrap!
We have tried to cover all about the possibility of removing acrylic paint from clothes and other surfaces. All the methods that we have listed down are helpful and will enable you to easily remove paint stains from different surfaces. Removing dry acrylic paint can seem like a challenging task, but it is not an impossible feat!
After a finished project, there are a lot of stains that artists have to deal with. Hopefully, using these methods, you have been able to deal with stubborn stains. Also, pay close attention to the preventive measures that we have mentioned.
If you liked reading this guide and want to see more of such reads, we suggest that you keep a watch on this space. Until next time, take care!
Let’s put it this way—you’ve got the best clay for sculpting, acrylic paints, and every other supply needed for creating an amazing model.
But, if you don’t bake the model at the right temperature or air-dry it properly, it would be of no use. Hence, the secret to creating a perfect masterpiece lies in the hardening of the sculpted clay.
From polymer to oil-based, there are different types of clay used by professionals and hobbyists alike. While oil-based clays can be air-dried, polymer and water-based ones are baked at high temperatures in cooking ovens or kilns to solidify them.
So, if you’re a beginner in the art world who doesn’t know the way around modeling clays, this guide is for you. Today, we’ll walk you through some of the easiest (beginner) sculpting clay techniques to help you pull off the projects in a breeze.
Keep reading!
How To Harden Modeling Clay - 2 Easy Ways
Artists and sculptors prefer easy-to-use and non-toxic modeling clay to create prototypes and models. However, its versatility doesn’t end here, as it is also used by children, art students, potters, and animators for creative purposes. Whether you’re a DIYer who wishes to carve ornaments or an amateur potter, hardening the clay is important to make your artwork durable.
Now, there are four different types of clay used by artists—ceramic, polymer, paper, and oil-based modeling clay. And the method you opt for depends largely on the clay you use for the project.
Having said that, we’ve enlisted two quickest and easiest methods to harden clay. So, let’s check them out.
1. Hardening Modeling Clay By Dipping In Epoxy Resin
If you’re a jewelry maker who sculpts earrings, pendants, and necklaces out of clays, epoxy resin is a must-have in your craft kit. That’s because dipping your creations in epoxy will solidify them and create a waterproof coating that will withstand the test of time.
All you need to do is mix the epoxy resin as per the instructions on the package and dip small jewelry pieces in for a couple of minutes. Once dried, you can sand the piece to eliminate drips accumulated on the bottom. Not only will it solidify your art pieces, but it will also add shine to them.
2. Harden Clay Using A Polymer Sealer
Another quick way to harden modeling clay is to use a polymer sealer on your artwork. Simply grab a brush, dip it in the polymer sealer, and coat a thin layer of it all over the sculpture. After it dries, your creation will become durable, and you can use it without the fear of tampering.
However, make sure you read the instructions on the package before applying it to your sculptures to avoid making mistakes.
Step-By-Step Guide On How To Harden Polymer Clay By Baking
The best way to harden polymer-based modeling clay is by baking it in the oven for a few minutes. Though clays are baked in less than ten minutes, the exact time depends upon the type of clay you are using.
Step 1: Create A Vent Hole
You will first have to create a vent hole on your models before tossing them in the oven. Usually, it is created on closed-off air pocket models to prevent the clay from cracking due to temperature variations. So, grab a needle and pierce the model till you reach the inner air pocket.
Step 2: Read The Instruction Manual Properly
More often than not, clays are baked at 275°F for about ten minutes. However, the baking temperature and time vary from clay to clay which is why going through the instruction manual is recommended.
Another thing we’d like to mention is that the thickness of the clay plays a crucial role in determining the baking time. Hence, make sure you read the instruction manual thoroughly to avoid over-baking the clay model.
If your model is fabricated out of clays from different brands, set the temperature of the oven at 265°F. You can even follow the directions provided by the brand whose clay you have used the most in creating the masterpiece.
Step 3: Preheat The Oven
Most likely, the oven is preheated between 220°F and 300°F, but we suggest referring to the instruction manual in the polymer clay packaging. Once you figure out the right temperature, turn on the oven and preheat it.
Step 4: Put The Model On A Ceramic Baking Dish
Moving on, place your model on a ceramic baking dish, preferably an oven-safe one, and toss it in the preheated oven. In the absence of a dish, you can use a ceramic tile, glass dish, or even parchment paper.
As a piece of advice, dispose of the surface after baking clays because polymers contain a lot of colorants.
Step 5: Place The Baking Dish Into The Oven
As soon as the oven is preheated, place the ceramic dish into the oven and turn it on to start baking. In case you’ve painted the model, bake it for a couple of minutes more than the time specified in the manual.
When baking models that are more than 1-inch thick, bake them for about 30 to 40 minutes at a lower temperature to avoid burning them.
Step 6: Take Out The Model From The Oven And Dunk It In Ice Water
As soon as the oven beeps, take out the ceramic dish from the oven and transfer the model to a pot filled with ice water. Keep it submerged in the cold water for about 30 seconds so that the clay doesn’t get over-baked.
Also, make sure you use a spatula to separate the model from the ceramic, not tongs, as they tend to leave marks on the clay. Alternatively, if you’re unable to separate the model from the surface, submerge it in water along with the ceramic dish.
3 Ways To Harden Non-Hardening Modeling Clay Without Baking
While baking is the most preferred option among professionals, beginners may find it slightly overwhelming. That’s because baking clay in the cooking oven requires constant supervision and can get damaged if baked at high temperatures.
But don’t worry, for we’ve enlisted a few ways that will come in handy while hardening non-hardening clay without using the oven.
1. Use A Dehumidifier
Pots, ornaments, coffee mugs, or flower vases—no matter what you wish to create, using a dehumidifier is the best way to harden non-hardening clay. All you need to do is unpack the clay and place it in front of the dehumidifier to maintain the humidity level. In the absence of a dehumidifier, a space heater or a humidifier will serve the purpose.
2. Chemical Reaction
Another preferred option for hardening non-hardening clay among hobbyists is using chemical binders, such as vinegar or glue. Irrespective of whichever binder you use, add around four ounces of clay and start sculpting your masterpiece.
3. Heat Gun
Though uncommon, some people use heat guns for hardening non-hardened clay. However, we suggest trying it only if you’re well-versed with its operation, or you may end up damaging the clay.
4 Tips To Dry Self-Hardening Clay
Compared to traditional ones, self-hardening clays (air-dry clay) need not be fired in kilns for the purpose of hardening. This means the model you carve out of them will have to be hardened at room temperature.
While most harden within 24 hours, some self-hardening clay may take up to a few days to solidify. However, you must keep in mind that the drying time depends upon the size and the thickness of your project.
That being said, we’ve mentioned a few tried-and-tested tips that every artist and DIYer must keep in mind while hardening air-dry clays.
1. Keep It In A Well-Ventilated Area
The first thing that you should do after completing your project is to keep the model in a dry and well-ventilated room. Ideally, the model should be left undisturbed for about 24 to 48 hours, but keep checking it every five to six hours to ensure no cracks.
Though most clays dry within 48 hours, some may take up to 72 hours to solidify completely. Of course, the thickness of the clay and the moisture in the air play a significant role in the drying process.
If your air-dry clay isn’t drying even after 12 hours, use a hair dryer at high temperatures to dry it. Alternatively, you can dry it in the oven at a low temperature for about one or two hours if you have access to one.
2. Flip Over The Piece After A Few Hours
Pieces like pots, earrings, or pendants are multi-dimensional, so you’ll have to flip them over to let the other side dry. Preferably, you should flip over such pieces after 12 to 24 hours to avoid damaging the clay.
3. Repair Cracks That Appear During The Drying Process
During the drying process, cracks or dents may appear on the clay model. So, if that happens, dip your fingers in clean water and rub it over the dents to smooth them out, and repeat the procedure if needed.
At times, large cracks may appear on your models, which you’ll have to fix by adding water to the clay and putting it in a plastic bag for about ten minutes or so. After that, knead the clay and keep adding water till it becomes usable.
4. Paint The Clay After It Dries
When it comes to air-dry clay, make sure you paint it only after it has completely dried. Once it is fully cured, grab a paintbrush and coat it with tempera or acrylic paint.
After leaving it aside to dry for 24 hours, coat a paint sealant or spray it over the surface to protect the coating. For models with intricate details, using a fine or thin paint brush will be the best bet.
Tips And Tricks To Harden Plasticine Modeling Clay
Most people love crafting kids’ toys out of plasticine modeling clay but don’t know how to harden them. Though it may appear overwhelming in the beginning, hardening plasticine isn’t impossible.
To make it easy for you, here are some time-tested methods for hardening plasticine that are worth a shot.
Apply sealant or varnish to the modeling clay
Mix it with epoxy resin
Add a premium-quality hardener to the clay
Cast it in plaster of paris
Allow it to cure in UV light
How To Sculpt Clay: Tips For Beginners
If you’re a newbie in the world of clays, you may find sculpting a bit challenging. But, with patience, practice, and determination, you’ll soon become a pro at clay art.
Here we’ll walk you through some techniques that you must follow while sculpting clay.
Sketch your design on paper before sculpting
Condition the clay by warming up and kneading it to make your models durable
Practice basic sculpting before moving to complex ones
Bake clay in the oven as per the instructions on the package
How To Harden Modeling Clay Frequently Asked Questions ?
How Long Should You Air-Dry Modeling Clay?
Though we suggest referring to the package instructions, 24 to 48 hours is sufficient to air-dry modeling clay.
Can Polymer Clay Be Painted After Baking?
Yes, polymer clay is compatible with paint, which means you can coat it with any color you want to make designs pop.
How To Harden Modeling Clay Final Words
On that note, we’ve reached the end of our guide on the topic.
Clay is an excellent art medium, and you can use it to carve almost anything you wish—ornaments, flower pots, vases, wall arts, paperweights, or pencil holders.
Honestly, modeling clay serves as a fun, relaxing, and therapeutic activity, but the secret to a stunning masterpiece lies in its hardening. So, whether you bake or air-dry your creations, don’t forget to follow the instructions of the manufacturer and do it the right way to avoid ruining them.
With that, we’ll call the curtains for the day. Till then, take care!
Nothing takes the wind out of your creative sails like finding that your sculpting clay has hardened to unusability. But solutions like clay softeners can help the best clay for sculpting become limber and ready to use again.
Besides, there are many other simple ways to make your hard clay soft again, such as using plasticizers and fresh clay. Even if it has become rock-solid, the clay can be rejuvenated for use again. The point of no return with clay is quite far, and it can be revived to pristine condition in most cases. So, dive in to know about them!
Squish Test To Gauge The Stiffness Of The Clay
Before anything else, it’s important to check the stiffness of the clay so that you can employ the right technique to soften it. And here’s an easy way to do that.
Squeeze your polymer clay between your palms to check if it’s still somewhat squishable. The clay can still be restored if edges can be worked with. Being still a ways away from the point of no return, you can try a few things to revive it to its former glory using some of the methods mentioned below. Just ensure that the method you use is compatible with the material your clay is made of.
But if the clay feels as stiff as a brick, the chances of revival are slimmer. Nevertheless, you can still try to work with it.
How To Soften Modeling Clay?
Clay softeners are perhaps the easiest and most accessible option to bring your polymer clay back to a perfect working condition. But it is far from being the only way to restore the softness of polymer clay.
In the following sections, you'll find several ways to make your modeling clay usable again.
1. Using Clay Softeners
Clay softeners come in both solid and liquid varieties and should be added to the clay once it has been warmed a little.
Add a few drops of liquid clay softener (like the Sculpey clay softener) or a small piece of solid clay softener to your warm clay: one part softener to five parts of clay. Knead until your polymer clay has reached the desired consistency.
Something to remember while using a clay softener is that it dilutes the color of the clay it is applied to. If you wish to retain the color of the clay, limit the amount of softeners added. Alternatively, you can mix in colors meant for clay to have it retain its vibrance.
2. Using A Rubber Mallet
If the clay you're working with is not rock-hard, you can use a hammer to smash it until it starts to move again. Throw your clay in a zip-lock plastic bag and put in a little bit of elbow grease. You can also add a small amount of fresh clay to make it work.
Remember that your clay will break into pieces if it is too hard. So, warming it up before using a mallet is preferable, as it reduces the chances of the clay being brittle.
3. Using A Food Processor
Chop up your hard polymer clay into small bits, chuck it into a food processor, add a softening agent (like petroleum jelly) and blend away. The blades of your food processor will work the softening agent into the clay, softening it and making the pieces usable again. Use the blender in short bursts to effectively have the softening agent do all the magic.
Take the pieces out of your food processor and knead them together. The clay should be usable again.
4. Mixing With Fresh Clay
You can also mix fresh, soft polymer clay with hard clay. Like softening agents, these can cause the color of your clay to fade. Hence, try to ensure that the fresh clay is of the same color as the hardened one.
5. Using Heat
You can simply use your body heat, which is surprisingly effective in softening modeling clay. But this will only work if the clay isn't too hard.
You can also use a hot water bottle for this purpose. However, ensure that the clay doesn't become too hot, or it will harden even further.
Once warmed up, knead the clay with your hands until it is of the desired consistency again.
6. Using A Conditioning Machine
You can use a conditioning machine if the clay is slightly hard. A conditioning machine compresses the clay to make it limber, smoother, and workable again. Pasta machines will work just as well, as they flatten the clay and release the air trapped in it. You can use the pasta machine repeatedly to create layers of clay of your desired thickness, which is ideal for making handcrafted materials.
On the other hand, moderately hard polymer clay can be softened by working it well enough.
Why Does Modeling Clay Become Hard?
Many factors contribute to modeling clay hardening. For instance, polymer clay contains plasticizers that make it limber. Over time, it loses these substances, causing them to become Other reasons for old polymer clay becoming hard is being left out in the heat for too long and aging. If stored in a warm place, the clay bakes and may not be salvageable anymore.
Drying up is also a common reason for hard clay. If stored long enough, the clay will eventually harden and need restoration.
The Troubles Of Working With Hard Clay
Once hardened, clay will be tough to work with, as it becomes brittle and begins to affect the overall quality of the project. Even if you manage to sculpt something, there will be cracks and deformities on the surface of the sculpture once it’s baked.
This will, in turn, affect its durability, but that is not the only problem. Firstly, you'll need more effort to model and condition the clay, which will cause undue hand fatigue or strain. The clay won't bend and shift quickly, no matter how much effort you put in.
The Different Kinds Of Modeling Clay
Clay can be broadly classified into four categories: polymer clay, air dry clay, natural clay, and oil-based clay. When it comes to modeling vs polymer clay for sculpting projects, the former, along with air dry clay are the most common kinds of clay. Natural clay is used to make ceramic products, while oil-based clay is favored for its malleability.
Each of these clays behave differently when dried and require various methods for revival once hardened. Oil-based clays react to mineral oils the best when softening, while air dry and polymer clays can be made limber with softening agents.
Air Drying Clay Vs Polymer Clay
When it comes to air drying clay vs polymer clay, there are a few key differences you may want to be aware of. Polymer clay is generally more favorable to work with since it won't dry as quickly, nor will it become brittle upon drying. Air dry clay is a mixture of glue and clay that air dries, while polymer clay needs to be baked due to its plastic base.
As far as the revival process is concerned, air dry clay can often be restored with water, while polymer clay must have its plasticizers replenished for it to become limber again. The degree to which either can be restored is different, and each method has a unique effect on the type of clay.
How To Soften Polymer Clay That Has Aged?
Polymer clay can last a long while, so clay that has aged enough to be rock-solid is something of a rarity. Nevertheless, it can be restored to a usable condition fairly easily with the use of plasticizers.
Using Plasticizers
Polymer clay contains plasticizers that keep it soft. And over time, the clay will lose enough of their plasticizers to make it rock-solid. Hence, adding them back to it will make your polymer clay workable again. In this regard, mineral oils and baby oils are some of the more common plasticizers that you can find on the market.
Kneading some mineral oil or baby oil into your hardened clay will gradually soften it up. However, if you mix too much of these oils into the polymer clay, you’ll end up with a blob that cannot be sculpted with.
Hardened Natural Clay
Unlike polymer clay, natural earth clay can be restored relatively easily. It will take a lot of time to fully revive, but the result is well worth the effort.
Reviving Natural Clay
With this method, you will be able to reuse your hardened earth clay within a day or two. For this, you’ll need a bag of clay, a large bucket, mortar and pestle or hammer, water and a container to store the clay slurry in.
Break the stiff clay into small pieces and grind it down using mortar and pestle. Mix the powdered clay in water and make a slurry out of it. Ensure the sludge is not too diluted, as it can become difficult to manage afterwards. Leave it out to dry until the clay has regained its malleability.
Stiffening Polymer Clay
Working with polymer clay that is too soft can be a mess. Likewise, it can be difficult to shape if it is too sticky or slimy. This happens if there is an abundance of moisture in the environment or if the weather is too warm.
Since polymer clay consists of plastic, warming it up softens it considerably. Hence, the first solution to making it stiff again is to cool it down by putting it in the refrigerator for some time. Alternatively, let the clay sit in a cool room. If it does not make the clay workable again, you can move on to a different solution.
Another option you could try is to mix fresh polymer clay in the hardened batch. This will even out the excess moisture, reducing the sliminess to a considerable degree. Make sure to use an ample amount of fresh polymer clay; otherwise, the stickiness will linger in the mixed clay.
The last resort would be to squeeze the excess moisture out of your polymer clay. To do so, flatten the clay and sandwich it between two sheets of paper. Place a heavy object on top and leave it for a few hours. The paper should absorb the surplus fluids from your clay, making it stiff enough to be worked with again.
However, keep in mind that removing too much moisture from your clay can make it brittle and unfit for use. It would be advisable to be careful while using this method.
How To Make Modeling Clay Soft Again Frequently Asked Questions ?
Can clay be revived if it has hardened completely?
If you’re working with polymer clay, you can try using solid and liquid clay softeners or plasticizers to restore it. To restore air drying clay, you may use water and heat to revive it.
Though it takes a long time, clay can harden to the point of no-return. Hence, we’d suggest keeping your expectations tempered when working with old clay.
Can a microwave be used to restore dry clay?
Yes, a microwave oven can be used to heat up hard polymer clay. Use the oven in short 10-second bursts until the clay can be kneaded with your hands. Do so until you get the desired consistency.
Since you’ll be essentially heating up plastic when heating the clay, let fresh air into your microwave afterwards. This will help remove the harmful chemicals from the oven.
Can you use lotion as a softening agent?
You can use lotions to help knead the clay, but they don’t generally contain plasticizing oils, which is why they won’t do much to soften the clay. It would be better to use mineral or baby oil instead.
How effective of a clay softener is olive oil?
Olive oil, when used in moderation, can be pretty effective. A few drops of olive oil will be enough to make the clay malleable. Knead it in properly and it should be good to go.
How To Make Modeling Clay Soft Again Conclusion
No matter the kind of clay you use, the process of restoration is nearly always universal. It all comes down to the composition of the clay, which is what determines how one can make it usable again.
For amateurs and professionals, polymer clay is an ideal clay for sculpting and artifact creation. It lasts for a long time and can be worked with even after it has aged a bit. Owing to its contents, the clay can be restored to its former glory with no troubles.
This guide has listed a few of the ways to restore your clay to working condition again. You can experiment with the methods detailed here and see what works the best for your needs.
Not everybody is born with an elephant’s memory, which leads to a tendency to lose things. However, finding things is much easier and effortless with advancing technology.
If you are the kind of person who always wished there was a tracker on everything, you’re in luck. Tech companies have taken the onus of making life a little bit easier for everyone by making products that track lost items. The two most popular ones right now are TrackR and Tile.
In our guide today, we will be exploring what both these products are about. We will be going into some details like how they function, some similarities, and of course, what differentiates them from each other. Hopefully, by the end of this guide, you will be able to make a clear decision about which one is better for your needs.
So, without further ado, let’s look for some answers!
TrackR vs. Tile | All You Need to Know
Before we get into which out of the two products is better, let’s talk about why you might need a tracker and when to buy one. Most Bluetooth trackers are quite affordable and compact, so they do not take up a lot of space. These trackers are great for small items as well as for kids and pets that like to run about.
Bluetooth trackers are ideal for people who have a tendency to lose things like keys, glasses, wallets, or just want a tracker as a precautionary measure. Since they are usually compact, attaching them to anything does not add to the item’s weight. And that’s why products like TrackR and Tile are so popular. Now, let’s explore each of them individually!
TrackR launched in 2010 and has been a helpful little device to everyone ever since. This one launched before Tile, so it had an advantage since it was the first of its kind. It’s basically a small Bluetooth tracker that effortlessly attaches to any item. TrackR is a battery-operated device with replaceable batteries.
Coming to how it works, it is reasonably easy to understand. It can connect to your phone or any device that has Bluetooth. Once it is attached to the item, it will keep an eye out for it. If the item goes too far from the phone, it can notify you, hence making it an excellent anti-theft device as well.
All the tracking is done via a phone app which makes it easy to monitor. The product itself is not very expensive and is catered to people who are on a tight budget. Apart from having a loud and audible alarm, it also has lights to make it more visible. However, it does come with its own set of drawbacks.
TrackR comes in two versions - TrackR Bravo and TrackR Pixel. Unfortunately, those are the only two options available that are limiting when compared to Tile’s product options (which we will discuss in a bit). Plus, it is not waterproof, so it cannot be attached to anything that primarily stays outdoors like bikes.
TrackR Types
As we mentioned above, TrackR is available in two versions. They are both great trackers with a decent range of about 100 feet. Plus, it is compatible with both iOS and Android devices. However, the Bravo is an older version which is why Pixel is the preferred one.
While they both function quite well as trackers, Pixel is more compact than Bravo. Moreover, the former is also louder in terms of decibels. Pixel has a decibel level of 90 while Bravo stands at 82. Another great thing is that the shape of the TrackR Pixel is circular with light around it, which makes it more visible in dimly lit rooms.
Tile launched in 2013 but gained traction rather quickly. It is a small weightless tile that can track anything it is attached to. Just like TrackR, this one also needs to be connected to Bluetooth. After its initial launch, it released another generation with added features and enhanced performance in 2015.
In the second generation batch, the products were made to have a better range and louder speakers. The tile mobile app is pretty simple to understand as well. All you need to do is head over to the map section of the app to see where things are.
From this point on, it is quite easy to find the missing item. Just like any map, you can navigate to the item to locate its exact spot. After reaching the area, if it is still not visible, then click on the “find” button, and a loud audible alarm will go off.
As we mentioned earlier, the second generation has a better Bluetooth range than the first. The most baseline model has a range of about 200 feet, which is a lot more than what TrackR has to offer. Tile’s premium model has an increased range of 400 feet.
Other than these features, an additional (and subscription-based) feature is info sharing. Tile users can share information regarding the items a Tile is attached to along with tracking privileges on paying the subscription fee. This makes it easier for two people to locate shared things like house keys and car keys.
Tile, as good as it sounds, also has a few drawbacks. To start with, it is much more expensive than TrackR, especially the premium models. Plus, it does not have replaceable batteries, which means that users will have to buy a new one if it gets spoilt.
Tile Types
Tile takes a very common problem everyone has and attempts to solve it while maintaining an elegant design that is suited for all. Tile Sport is rugged-looking and made for the outdoors, while Tile Style focuses on having a feminine design as it is made for women. However, both of these are waterproof with an IP68 rating. Apart from the different look, they are essentially the same.
Apart from Style and Sport, Tile has two more variants - Mate and Slim. Tile Mate is the baseline model and the least expensive of the lot. Slim, on the other hand, is a bit more expensive and has a sleeker look. They both have a range of 100 feet and a waterproof rating of IP 57.
They are both similar in everything except design as Tile Slim is made to fit into thinner spaces like a wallet and passports. On the other hand, Tile Mate is a little thicker and can be attached to backpacks or used as a keyring.
Tile and TrackR - Similarities
App
The first similarity between the two is that they both need to be used with an app. Whether it is an iOS or Android device, the app is the most critical aspect of this product. In order to use these trackers to the fullest of their capabilities, it is necessary to register on the app and then set it up.
Usage
There is no way this can work if the tracker is not attached to the item since those items usually do not have an independent bluetooth connection. Hence, the trackers need to be hooked, glued, or just slipped into all your stuff that needs monitoring.
Alarm
The tracker loses its efficiency if it cannot alert the user of the missing items’ whereabouts. This is why both the products have loud and audible alarms that will notify you about the items as long as you’re in the range. TrackR even has an alarm that will go off if the item goes too far away from the phone.
Tile and TrackR - Differences
Batteries
One of the most significant differences between the two is that one has replaceable batteries while the other does not. TrackR is the one with replaceable batteries, and what this does is, it eliminates the expense of buying new batteries. Since Tile does not come with replaceable batteries, people will have to buy new models if the old one gets spoiled.
Water Resistance
TrackR is not waterproof while Tile is, making it a better option for people who need to monitor outdoor items. The baseline products have an IP 57 waterproof rating, while the newer premium ones have a rating of IP 67. The latter is aimed for more outdoor use and the Sport variant is one of them.
Needless to say, this waterproof rating does not allow the Tile to be submerged in water. However, slight water contact like at the pool or during light rains is not going to affect its performance. This is a lot better than TrackR, which is not waterproof at all.
Range and Geofencing
TrackR only offers a range of 100 feet in all its models. This is a lot lower than Tile, the baseline model of which has a range of 200 feet, and it goes up to 400 feet in the premium models. However, the good thing about TrackR is that it will notify you if the item is too far from the phone.
Geofencing is a product’s ability to inform you about the area you are in. TrackR’s feature where it notifies that the device is out of range is called Geofencing, which is not available in Tile.
Shape
Lastly, the two differ in shape. Tile is a small square-shaped device, sometimes with a hook to convert it into a keychain, while TrackR is circular. This is not much of a factor that can determine whether you will buy it, but it is definitely something to keep in mind.
Which Bluetooth Tracker Is Superior?
After discussing both in detail, it is evident that these trackers are not very different from each other. However, the differences they do have can be a strong reason for choosing one over the other. There are certain aspects to be sure about before you decide which one is best suited to your needs.
The first thing to consider is whether the item that needs tracking is an indoor or outdoor item. If it is mostly indoors, buying TrackR will be a much better option since it is not waterproof and does not need a huge range. This can actually save you some bucks as well.
However, if the item that needs tracking is a bike or car, then Tile is better. Even if you want extra protection and a longer range for an indoor item, then Tile is the one to choose. The only issue is that it is a bit more expensive than TrackR.
The next thing to keep in mind is whether you want to spend money on new batteries or a new tracker altogether. If it is the latter, then it won’t be an issue to invest in Tile. This is mainly because Tile does not come with replaceable batteries and needs to be replaced if damaged.
In this regard, TrackR is better if you do not want to spend excessive amounts on new trackers. Having a spare set of batteries at home is much more cost-efficient than going out and buying new trackers.
Geofencing can also be a significant point to consider, but this is only helpful if it is actually needed. This is especially for people who want to put trackers on pets and children. This way, they will know if the kid or pet has run out of range.
Conclusion
And there you have it - a detailed guide on everything you need to know about TrackR and Tile. We hope this has been informative and cleared the air of confusion regarding these products.
Both the brands we have reviewed are very efficient and reliable, so it can be challenging to pick a favorite. We strongly suggest noting down which features are the most important and then seeing if the desired brand has those features.
To sum it up, TrackR is affordable, small, and does what it says. Tile, on the other hand, is the more premium alternative. The choice is, now, in your hands.
We shall be back soon with many more such guides. Until then, stay safe and alert!
Do you consider yourself a bookworm? You may be looking for ways to consume as many books as possible within a short timespan. Fortunately, e-readers have made this possible.
A true bookworm understands the pleasure of sifting through hundreds of books in a library. The sensory pleasures of touching, smelling, and turning the pages of a book are often absent in e-readers. So, you may wonder why most avid bookworms are now turning to e-readers rather than physical books.
Well, the reason is simple yet nuanced. We will tell you all about it in the sections below. However, this guide will elucidate the differences between the two most popular e-readers - the Kindle Paperwhite and the Nook Glowlight.
If you have been thinking about purchasing one but are confused between these two products, don't worry. Read on to find out all you need to know about these two highly popular e-readers.
Kindle Paperwhite vs. Nook Glowlight
In the year 2007, Amazon began developing its first-ever Kindle. It started as a user-friendly e-reading device that has massive battery life and provides an excellent reading experience for avid readers.
However, it wasn't till late 2012 that the first-ever generation of Kindle Paperwhite came out. The Paperwhite was reasonably priced and had fantastic features, making it extremely popular amongst readers of all generations.
Meanwhile, one of the largest book companies in the world - Barnes & Nobles, developed their first-ever e-reader called the Nook in 2009. Most people seem to believe that this move was an attempt to save the company from shutting down or experiencing immense losses. This may be true; however, the Nook soon became a trendy device amongst book lovers.
Those who enjoy reading books may be wondering if it's the right time to go digital. The dilemma is understandable since most experiences are now digital, and you may want to preserve the sanctity of book reading by sticking to physical books.
That said, there are several benefits of switching to e-readers which you cannot experience through physical books. Before we begin exploring the two most popular e-readers - the Kindle Paperwhite & the Nook, let us tell you why you should consider switching to an e-reader.
Why Should You Consider Buying An E-Reader?
Access To More Books
This is a phrase that sounds like music to every book lover's ears. Although nothing is stopping you from buying as many physical books as you want, there is the issue of storage space and cost.
With the advent of e-readers, the amount of space required to store one, a hundred, or even thousands of books has decreased exponentially. A single e-reading device can efficiently hold thousands of book titles without running out of space. Moreover, you can delete books to make room for newer ones.
Although most e-reading devices have their own repository of books that you can access, you can also download books from the internet and read them. Essentially, the entire world (or rather, its books) is at your disposal.
It Is Cost-Effective
The pleasure of visiting a bookstore or library, spending hours finding the perfect titles, and finally exchanging money for your new book is incomparable. That said, you often end up spending more money than you would like on new books.
If this sounds familiar and you are looking to curb the expenditure, buying an e-reader may be the best solution. With e-readers, you have access to thousands or even millions of free ebooks.
Furthermore, the ebooks you purchase online typically come at a third of the original prices. You can also choose to 'borrow' ebooks from online libraries, which could either be free or cost very little.
In this way, you end up saving significant amounts of money and have easy access to an enormous online repository for free books.
A Single Charge Lasts For Days
One of the most concerning issues with getting yet another device is frequent charging. Most devices like phones and tablets require daily charging, which, let's face it, can get slightly annoying.
If you are worried about adding yet another device to the daily charging list - don't be. One of the best aspects of e-readers is their massive battery life. Both the Kindle Paperwhite and Nook Glowlight have 8-hour battery lives. And unless you spend 8 hours a day reading, you can expect to charge the device once every few days or weeks, depending on the usage.
However, if you decide not to use the e-reader for a few days, you won't come back to find it dead. Typically, an e-reader has a long standby time, lasting for weeks with a single charge.
Environment-Friendly
You know how more books correlates to more cutting of trees? Well, with e-readers and ebooks, you can effectively do your part to stop the felling of trees for paper. Furthermore, it reduces wastage and pollution that may occur if people decide to throw away or burn books. All new books are released in e-format available over the internet, enabling you to make eco-friendly choices without giving up reading.
It Fits Everywhere
Avid book readers hardly go anywhere without a book in hand. Whether you're going to the bank or for a cup of coffee, or even to meet a friend at the park, it's unlikely that you will travel without a book in stow.
However, this habit can get particularly challenging if you have too many things to carry and not enough space. The introduction of e-readers has eliminated this issue.
Most e-readers are incredibly sleek and handy. Moreover, they fit easily into a purse, backpack, or even large pockets. The best part is, you can carry thousands of books within a single e-reading device.
Furthermore, you don't need to worry about your 'books' getting wet in case of sudden rain or snow. This is especially true if you purchase a water-resistant e-reader or buy a cover that can protect it against water, UV rays, and dust.
You Can Change Fonts And Text Size
This isn't something you would think is crucial; however, imagine coming across a beautiful novel that you can't get into because of its text size. Unfortunately, with physical books, this is something most readers learn to make do with.
With e-readers, however, you can change not only the text size but also the font. Furthermore, you can customize line spacing, space between letters, margins, how you want to scroll, the background and text color, etc.
This feature is one of the most important and crucial features of e-readers. Being able to change text size and font can completely transform your reading experience, especially if you have trouble reading small text.
Zero Distraction
Many may argue that you can enjoy eBooks on phones and tablets, so why should you opt for a dedicated e-reader? Well, the answer to this is ridiculously simple.
The biggest issue with using phones and tablets is that you are bound to get distracted by calls, text messages, and social media notifications. Try as you may, at some point in time, the annoying 'pings' from social media accounts are bound to break focus. Before you know it, you will have scrolled through pages and pages of Twitter, Instagram, and other social media platforms.
Those looking for a distraction-free reading experience will appreciate the minimalism of e-readers like the Kindle Paperwhite and Nook Glowlight. Unlike phones and tablets, a dedicated e-reader does not allow you to lose focus from reading by bombarding you with social media notifications and phone calls.
Kindle Paperwhite vs. Nook Glowlight
Now that you understand the advantages of e-readers, it's time to help you choose the right one. There are dozens of e-readers in the market; however, the right one depends on an individual's preferences, likes, and budget.
In this guide, we will compare the two most popular e-readers - Amazon's Kindle Paperwhite and Barnes & Nobles' Nook Glowlight. We have divided the guide amongst factors like design, display, resolution, features, ecosystem, and other essential features.
Design
Both e-readers offer a distinctly different design, and the choice is ultimately a personal preference. The Kindle Paperwhite is rectangular and has a sharp, sleek appearance. It features a solid black design with soft corners and a matte black body. Its matte finish is prone to attracting fingerprints, so if you plan on using it regularly, you may want to consider getting a case for it.
On the other hand, the Nook Glowlight has a distinct square shape and features silicon-trimmed edges. This makes the device easier to grip. Moreover, unlike the matte black Kindle, the Nook features an off-white color which can take a while to get used to.
Most users would agree that the Kindle's black color offers better contrast while reading. That said, the Nook's off-white shade has a classy appearance but can take some time to get used to. Of course, the white Nook requires you to be a little more careful while handling it regularly, or it may end up with unwanted stains and marks.
How To Turn Pages
The most significant, defining difference between the Kindle Paperwhite and the Nook Glowlight is how users interact with the device. For starters, the Nook has implemented buttons on the bezels of the device, which can be pressed to turn pages. These are called the page-turning buttons, and they are immensely popular amongst users.
On the other hand, the Kindle Paperwhite uses haptic feedback to turn pages straight from the screen. This is called PagePress, and it relies on the touchscreen navigation on the Kindle screen.
Moreover, the Nook features a capacitive home button that you can use to navigate back to the home screen. The Kindle, however, has no home button or page-turning buttons.
Whether you like the touchscreen display or the button feature depends on personal preference. You can also flip through several pages at once by holding down the page-turning buttons, which might be an interesting way to turn pages.
Size & Weight
When it comes to the size and weight of both devices, they are eerily similar. The Nook, however, is slightly broader and bulkier than the Kindle Paperwhite, which is marginally longer.
That said, although the Nook looks bulkier than the Paperwhite, it weighs nominally less. The Nook weighs 175 g, while the Paperwhite weighs 182 g - which is not much of a difference.
However, the difference is felt primarily because of the design, grip, and comfort of both devices.
Similarly, the Paperwhite measures 6.6″ in height, 4.6” in breadth and is 0.32″ thick. The Nook measures 6.5″ in height, 5″ in breadth and is 0.4″ thick. There isn't much difference between the two, making them very similar in their outer structure and design.
Screen
One of the most important factors to consider when purchasing an e-reader is its screen. In this section, we will compare the screens and displays of both devices to understand which one is right for you.
Both devices come in a handy 6-inch display and on-built light features. However, the Kindle is known to innovate and develop its designs continually. With the most recent Kindle Paperwhite, you will find a display rate of 300 PPI. Again, this is just slightly ahead of Nook's 212 PPI; however, this marginal difference can make all the difference to a user looking to buy the right device for themselves.
Another essential factor to consider is that the Paperwhite comes with an IPX8 waterproof rating. The Nook features both a waterproof and dust-proof design; however, it does not feature an IP rating.
When it comes to choosing between the two, it is essential to consider your needs and requirements. Those who plan on taking their e-readers into the bathroom to read may prefer the waterproof design of the Kindle Paperwhite. However, if water-resistance isn't a factor to consider, the Nook may be an ideal option.
Keep in mind that users have reported the touch responsiveness to be slightly better on the Kindle than the Nook. That said, the Nook is a tad brighter than the Kindle Paperwhite, on its highest brightness setting.
As you can see, there is no right or wrong choice. Both devices offer similar features that are marginally different from each other. However, the one you like better depends on personal choice and budget.
Battery Life
Whether you opt for the Paperwhite or Nook, battery life is something you won't have to worry about. Both the devices boast an impressive 8-hour battery life. However, keep in mind that this refers primarily to the screen usage time. As such, you can leave both the devices uncharged for weeks at a time without worrying about them running out of charge.
Ecosystem
The next thing we want to talk about is the Kindle Paperwhite vs. Nook Glowlight ecosystem. The number of available books and genres may be the topmost deciding factor when considering the best e-reading device.
Well, the Kindle Paperwhite seems to win in this category because of the vast number of book titles it hosts. Currently, Amazon's Kindle holds about 6 million book titles, vs. the Nook's 3 million.
Another factor to consider is that the Kindle Paperwhite book costs are slightly cheaper than the Nook Glowlight. Now, it's not much of a difference. However, the number of bestsellers you will find on the Kindle is significantly more than the Nook.
Coming to non-mainstream books, both the Kindle Paperwhite and Nook Glowlight have separate sections where writers can publish their own content. So, if this is something that you are interested in, both platforms are well worth exploring.
Other Distinguishing Features
Now that we have compared the top features of the Kindle Paperwhite and Nook Glowlight, we can talk about some of the distinguishing features between them. To begin with, we will talk about all the unique features offered by the Kindle Paperwhite and then go on to the Nook Glowlight.
So, let's begin!
Kindle Paperwhite Features
Reading Technology
One of the best aspects of the Kindle is its in-built Bookerly technology. This technology beautifully crafts the font on the screen of your Kindle device. You can choose from various fonts and text sizes to make your reading experience as comfortable as possible.
Not just that, the Bookerly technology allows you to choose from various modern or traditional fonts which you can easily switch between, offering the optimal reading experience.
In-Built Dictionary
Don't you hate it when you are forced to type a new word into Google or whip out an old-fashioned dictionary to find the meaning of a word? Well, with Kindles built-in dictionary, you don't have to.
Finding the meaning of a word you don't know is incredibly easy. All you need to do is to hold down the word on the screen, and it will instantly show you its meaning. Moreover, you don't need to be connected to the internet for this - allowing access to the dictionary no matter where you are.
Moreover, you can highlight specific parts of the text and make notes on it, or save certain parts of the text like quotes if you wish.
X-Ray Feature
The next feature we want to tell you about is the unique X-ray feature of the Kindle Paperwhite. Similar to the in-built dictionary, this feature allows you to view information about a character, a topic, an event, a place, or any other item in the book.
You can essentially learn more about the various aspects of the book and examine its foundation and nuances.
Web Browsing Capability
The Kindle Paperwhite has limited web browsing that allows you to find out what other readers think of the book you are reading. Moreover, you can sign-in through your Goodreads account to find out more about books and read reviews without hassle. The Nook, however, does not feature any form of web browsing.
Furthermore, you can add parental lock and control features that limit the kind of books you want kids to read. On the other hand, the Nook simply features password protection that can be used to restrict purchases.
Audiobooks
Although many of the older generation Kindle Paperwhite models do not support audiobooks, the newer generation ones do. This is especially beneficial for those who want to pick up a book where they left off but don't necessarily want to read. The audiobook feature works excellently, and it syncs automatically, enabling you to begin reading where you last stopped the audiobook.
Amazon Prime
Having an Amazon Prime account can be a wonderful addition to your new Kindle Paperwhite. The account enables you to explore various book titles and genres and buy books at a lower price. Moreover, you even have the option to read book samples before purchasing them if you wish to.
Another benefit of having an Amazon Prime account linked with your Kindle Paperwhite is that you can download books through the Prime account and have them synced automatically with the Kindle device.
You don't need to go through a long process to download or sync books as everything is synced automatically with all the devices where you have Amazon Prime installed. Furthermore, you have the option of downloading several free ebooks with the Amazon Prime account, which will automatically end up on the Kindle Paperwhite.
Export Notes To Email
Have you ever come across a particularly intriguing part of a text or a quote on a book that you want to save for future reference? Well, with the 'export to email' feature, you can do this conveniently!
This is an in-built feature that you can use straight from the Kindle Paperwhite. Highlight the portion of the text you wish to send, and then click on the 'export to email' option. You can choose between different formats like PDF or a simple format which you can open on a spreadsheet.
Reading Speed Tracking Feature
Another notable feature of the Kindle Paperwhite is the reading speed tracking. As the name suggests, this feature automatically processes your average reading time and tells you how much time remains to finish a chapter.
You can easily customize the feature to show the amount of time you have left in a chapter or the entire book. Moreover, you can check the location of the page on the book. This tells you how much you have left to read.
Explore
Much like the synopsis of a book on its back cover, the explore option allows you to explore the book before you begin reading it. Here, you can find all the information you need to know about the author, a summary of the book, and whether there are any prequels or sequels to it.
Nook Glowlight Features
Now that you know everything you need to about the Kindle Paperwhite, it's time to move on to the Nook Glowlight. Much like the Kindle, this device has several unique built-in features that can make your reading experience better. Here are some of the top in-built features you can explore.
Nook Reading App
The Nook Reading App is a free feature that comes with your Nook device. Once you get this app, you can sync all the Nook books amongst various devices that have the Nook Reading app. Much like the Amazon Kindle app, it allows you to sync downloaded or deleted books, add bookmarks, notes, and pick up where you left off from any device.
Download eBook In Various Formats
With the Kindle Paperwhite, you are somewhat restricted to exploring the book options available within the Kindle app. However, the Nook Glowlight allows you to download EPUBs, which are ePublications of books found online.
Many may argue that the addition of this feature immediately makes the availability of different books wider on the Nook than the Kindle Paperwhite.
However, we can let you in on a little secret which Kindle doesn't want you to know. You can download ebooks in formats like PDF and Mobi on the computer, which can then be sent to your special Kindle email address. However, you may need to connect the Kindle to the PC for this feature.
You can also use this feature by downloading ebooks on the computer or tablet in PDF or Mobi format and then sending this to your Kindle using a special software. That said, the process can be somewhat tedious and annoying, which dissuades most readers from indulging in it.
Screen Temperature Settings
A particularly vital feature that is missing from the Kindle Paperwhite is the screen temperature setting. Essentially, this setting on the Nook Glowlight allows you to reach warmer tones on the reading device, making the reading experience more enjoyable and softer for the eyes.
Although the Kindle Paperwhite allows you to change the brightness, the overall look of the screen resembles paper. Moreover, the in-built light, which is directed towards the screen rather than your eyes, helps reduce eye strain but doesn't emit a soft, warm light.
LendMe Feature
Another excellent feature of the Nook is the LendMe feature. This allows you to borrow books for 14 days at a fraction of the original price, which is excellent if you want to read a short book but don't necessarily want to purchase it.
That said, the Kindle Paperwhite allows you to borrow books from the public library. This process is relatively effortless and seamless, which is why many users prefer it to the LendMe feature of the Nook.
Final Words
As you can see, both the Kindle Paperwhite and the Nook Glowlight have their strengths and weaknesses. However, the device you buy will ultimately depend on personal preference.
That said, the Nook Glowlight is available at a slightly lower price than the Kindle Paperwhite. Many may argue that certain Kindle features make it slightly superior to the Nook, allowing Amazon to charge the extra cost for it.
Let us know which e-reader you like better - the Kindle Paperwhite or the Nook Glowlight. Till next time, happy reading!
Concept items that you can’t believe don’t exist represent a fascinating intersection of visionary design and unmet everyday needs. In a world constantly shaped by innovation and rapid development, product design often prioritizes mass-market appeal—leaving countless brilliant, niche ideas to remain forever in the concept phase. These prototypes, though never mass-produced, showcase astonishing creativity, function, and intuitive design that could genuinely improve daily life. From practical gadgets to elegantly simple solutions to common problems, each concept featured in this list reflects the overlooked potential within the design world’s cultural sphere. Below, we highlight 26 genius concept items that remain unrealized—but absolutely should exist. Which of these would you use in your own life?
New Product Ideas That Don't Exist Yet
1. Edible Jell-O Squishable Cups
These are made from "agar agar". That means that they can be thrown in the grass after use, and they will decompose and act as a nurturing agent for plant life. Your next backyard entertaining event should be more productive than expected with these recipients.
2. Towel Dryer That Disinfects Towels With UV Light
yankodesign.com
This will refresh your towels and avoid any funny smell.
Designed by puredesign.
Shoes Able To Transform into a Temporary Mobile Shelter at Need
This will simplify the lives of camping enthusiasts in the warm seasons.
By design collective Sibling
4. Water Sterilizer For Fresh Foods
yankodesign.com
This concept uses electrolysis to destroy harmful bacteria in fruits, veggies, kitchen appliances, chew toys, and baby bottles, all without chemical detergents, ensuring a clean and safe end result.
This must be invented, how useful it would be to see the place and hole that will be discarded.
Designed by Kisang Yoon and Kyubok Lee.
7. Colorful Toybox That Devours Toys
yankodesign.com
This item would also encourage the child to pick up their toys and deposit them somewhere. The box also rolls so they can ride and pick up the toys in their path.
Designed by Tzung-Yu Lu.
8. Chair Design Through “Pages”
yankodesign.com
Creatively colorful and comfortable, this chair has been inspired by a book and its pages. It allows the individual to adjust the seat height and backrest cushion by simply turning the colorful pages.
9. Chalkboard Trolling Gadget Converting Chalk Dust to Sticks of Chalk
11. Dog Toy Doubling as a Very Effective Toothbrush
yankodesign.com
Entitled Brush n’ Play, by Yunfan Tan. It is creative and useful, solving two problems with one item. Brushing the teeth of your dog indirectly while keeping your dog happy.
12. Boot Solutions For Shorter People
These will aid you in washing your car, installing the Christmas decorations, or cutting the branches of a tree.
Get more info on Quirky.
13. Bath Stones That Maintain Water Warm in the Bathtub
yankodesign.com
Designed by Sunmi Hwang, Hyunjoo-Lee & Jiwon-Seok.
14.A hamper/washer/dryer In One Item
yankodesign.com
This emphasizes small apartments and small bathroom designs through functionality.
Designed by Guopeng Liang.
15. A Date Stampler
yankodesign.com
This would theoretically help a whole lot, allowing you to organize your files with ease through a simple rapid date.
Designed by Gonglue Jiang.
Donate or sell your books whilst allowing the new owner to use it as new.
18. The Safe Trek App
behance.net
Extremely vital to security, this app is. You basically turn on the application if you feel unsafe at a certain point during your trip. Once you have arrived at a safe location, you enter a code. If the code is not inserted after a certain time or if your finger leaves the screen without entering the code, law enforcement will be notified immediately, allowing them to track your location and trip since the button has been pressed.
Designed by Frederico Cardoso.
yankodesign.com
This extension cord will be seamlessly installed in your home, underneath your rugs.
Designed by Chen Ju Wei.
20. Floor Plan Light Switch With Your Exact Room Layout
yankodesign.com
This gadget lights up and tells you where in the home the lights have been left on and with the simple press of a button. You can also shut them off remotely through and app and the custom made design will allow you to turn them off manually with more ease as well.
Designed by Taewon Hwang.
21. Printer Tanning Paper With Solar Energy Instead of Using Ink Cartridges
yankodesign.com
Design by Hosung Jung, Junsang Kim, Seungin Lee & Yonggu Do.
22. Roomba 2.0: “Jell” Balls Robots Cleaning Your Homes
yankodesign.com
Extremely high-tech balls dispersing cleaning agents through your home and returning to base after they are done. Extremely fascinating concept.
Designed by Juan Lee.
23. Electromagnetic Dumbbells That Can Adjust Their Weight Automatically
yankodesign.com
By simply adapting the level of electric power that flows through them, you can adapt their weight. One set can range from 3 kg to a stunning 24 kg.
Designed by Suhyun Yoo, Hongseok Kim, and Juhyeon Lee.
The most luxurious way to nap and relax. A giant magnet maintains the sofa at a certain height, levitating in your own home, at your disposal.
Designed by David Koo and Zheng Yawei.
What do you think about these genius concept items? Are they worth inventing? We would love to hear your opinion in the comments section below.
Working out can be super satisfying, but going to the gym every single day can be a pain and might cost a fortune, just like the best home gym equipment. Even building a proper workout area at home can get really expensive. But do you know that you can have a gym set up at your home with a few materials and a lot of enthusiasm to get handy with things? However, the most basic of things such as a squat rack would cost around $400, even when they’re found on Craig’s List.
If you’ve always fancied having your very own squat rack in your home gym but were skeptical about the budget, worry not! Here are 13 ideas to make a great Squat Rack idea to try by yourself.
Homemade Squat Rack Ideas
Wooden Squat Rack Simple Yet Sturdy
Wood is one of the materials that are easily available. So, just keep your squat rack simple and minimalistic, with some planks of strong wood, a metal bar and some screws. And voila, you have a basic, simple yet really sturdy rack that’s ready for some workout.
This is the easiest and most cost-efficient way to build a squat rack, if you’re really running low on your budget, or need a power rack set up urgently, then a bucket rack is the one thing you can resort to.
All you would be needing is two five-gallon paint buckets, some concrete mix, wooden planks, hammers, nails, and wooden glue. By setting up the wooden planks as a frame with the help of hammers and nails, and fixing them in the concrete mixture, which is placed in the paint buckets, you can make a cheap DIY squat rack.
If you are blessed with enough space at your home and don’t want to compromise with the size of the squat rack, yet keep it well within the budget, then you could go for this kind of setup.
With the help of a few basic tools like wood, tape measure, electric drill, hand saw, and nails, you could work on this project by yourself. It could be perfect for a garage, or if you have some extra square feet at your home, no need to get the fanciest all-in-one gyms, you can have a simple rack to get started in the comfort of your own home.
Now this one is for those who don’t have a lot of space at home. You could simply use the wall as an extension for the squat rack. Also, it doesn’t need to go to the hardware store and buy a lot of supplies. Just take in a few planks of wood and nail it to the wall strategically, with the help of the hammer, and you’re done.
If you’re a huge fitness fanatic but are under budget constraints, then you can actually make this squat rack and pull-up bar at your him with just a few supplies.
All you have to do is get some scrap wood that can be braced against the wall and then make marks according to your needs, drill the holes, and create cradles for the bars so that you could accommodate your weight bars as well. Interesting, right?
Fifty dollars and very little space – that’s all you need to make this sweet little squat rack. All you need is to get some wood and follow the blueprint in the tutorial to make it.
Well, you might not be able to put some extreme weights in there, but you could curl up anything around the 300-pond range in there.
Don’t even have a little space to fit in your gym equipment in your house, but badly want to have that squat rack for a long? With this super compact metal rack, you can just fix it in this fully functional squat rack and a pull-up bar, and it won't even take up a lot of your wall space. Why not give it a try?
If you have a spare room and a whole lot of time on your hand, you can just have an entire private gym set up for yourself, with your own squat rack and lifting platform, for just a little under 300 dollars.
In case you’re skeptical about the weight that wooden racks hold, you could build a sturdier one instead with the help of metal pipes, and this project would work best in your garage.
Galvanized pipes are a great choice for this kind of squat rack, where you could attach the rack to the wall with hinges, or any rotating attachment. While the bottom part can be fastened to a winch or similar cable and then placed in an upward position. You could even suspend some pipes for the ceilings as pull-up bars if you want.
This kind of squat rack has a really sturdy base built with lots of wood and can be used both indoors and outdoors, depending on the space available, and your preferences for working out.
Here’s another cheap wooden squat rack project with a bench that you can make with less than sixty dollars. Also, it needs very little space as it is braced against the wall.
Using both pipes and wood together can make a really great heavy-duty power rack. You would be needing a whole bunch of wooden planks, pieces, nails, pipes, safety bars, pull-up bars, and other building tools. It would take quite some planning and time for the building, but you would really be happy with the end result.
This is one other way to make a simple squat rack with materials under 100 dollars. Most of the items could already be lying in and around your home, if not, you could get them at the stores. The method involves making frames with planks of wood and attaching them together with support. And it can easily take up to 400 pounds on the rack.
So, the next time you think of setting up a workout station at your place, stop shelling out a lot of money on buying commercial gym equipment. Make a squat rack using these Squat Rack Ideas and save a lot of dollars.
Installing wireless doorbells can be an excellent way to improve home security without the hassle of in-wall wiring. However, placing a wireless doorbell on a UPVC frame requires special equipment, such as self-tapping screws, wedges, corner mounts, or no-drill mounts.
Your home security is not a matter of joke, and installing the best wireless doorbells is an affordable and effective way to ensure safety.
Since wireless doorbells operate on radio waves, their installation is pretty straightforward, and you can place them anywhere without worrying about any electrical wiring. That said, installing them on UPVC frames can be trickier. So today, we'll discuss the installation steps and methods for setting up wireless doorbells for UPVC.
Wired Vs Wireless Doorbell Installations
You need some kind of doorbell - wireless or wired - to ensure better home security and your family's safety. But whether you want to go for a wired or wireless model solely depends on your preferences and the installation requirements of the doorbell.
Even though wired doorbells offer a more permanent solution, the installation can be cumbersome. You'll need in-wall wiring and remove some sections of your drywall to install the 20-gauge wires for a wired doorbell close to a power source. In contrast, since wireless models don't require in-wall wiring, they are much easier to install.
Furthermore, you can install the chime base anywhere in a wired doorbell, but you'll need to wire it. The bell chime unit is always installed at the main outlet for a wireless model. You'll also need to consider the limitations of wall blockage and distance for a wireless doorbell, while wired variants don't have such limitations.
Some wireless models might also face radio interference if you install them near other wireless bells. On the other hand, wired doorbells don't pick up radio frequencies and won't face any interference. Moreover, a wireless doorbell requires a battery for its push button unit, but a wired model doesn't need batteries anywhere in its system.
What Are The Features To Look For In A Wireless Doorbell?
1. Heat And Water Resistance
Since a doorbell is installed outside the main door, people always expect it to be weather-resistant. However, not all doorbells have weather-resistant qualities and can break down quickly under harsh weather conditions.
It's essential to look for a doorbell with water and heat-resistant qualities that can last through different seasons without getting damaged due to rain, snow, or fluctuating temperatures. In this context, any Ring doorbell can be an excellent choice because all Ring doorbells are specially designed to withstand all weather conditions.
Tip
Always check the product description and packaging to determine whether the doorbell is genuinely weather-resistant.
2. Signal Strength
The signal strength of a chime will determine its standard distance at which you can detect its signal without any wall interruptions. For instance, the 50-meter chimes have a signal strength to cover short distances, so they are mostly used in reception areas. Additionally, their bell push unit is installed in a wooden frame by the front door.
100-meter chimes have more signal strength and can cover larger areas. However, 200-meter chimes are more suitable for large residential properties with thick walls, and you can also use them as portable units because of their excellent signal strength.
Some manufacturers offer 250-meter and 500-meter chimes to cover extended areas wiring additional push buttons to the main chime unit. Additional push buttons ensure that you can install suitable wireless doorbells for hard-of-hearing people.
3. Signal Frequencies
Since a wireless bell depends on radio waves to transmit its signal, it's best to choose a model that can work using multiple radio frequencies. This way, you can ensure that no other wireless device is interfering with the signal transmission of your wireless doorbell. However, if you face some kind of radio interference or signal disruption, you can change the bell's privacy code to adjust its frequency.
4. Battery-Powered Vs. Electric Models
Depending on their power sources, wireless doorbells are of two types - electric and battery-powered. If you want to install the doorbell near a power outlet, you can use an electric model. On the other hand, if you don't have a working power outlet near the doorbell location, you may prefer a battery-powered variant. However, make sure to buy extra batteries and change them when required.
5. Several Chime Options
Modern wireless doorbells offer different chime options for the doorbell sound, from traditional dings and basic buzzing sounds to elaborate melodies. You can choose any chime option based on your preference. Not to mention, you can choose the customizable chime option to upload your favorite doorbell sound.
6. Chime Volume Control
Some wireless doorbell models feature audio control options to easily adjust the chime volume as you want. With these wireless models, you can quickly turn down the chime volume at night while sleeping or turn it up if you're working in the kitchen.
7. Bell Size And Style
It goes without saying that wireless doorbells are available in various styles and sizes. Always consider the amount of space you have near the front door where you'll install the doorbell to choose the right size. If you don't have enough space but select a large doorbell, it'll look completely out of place.
Similarly, choosing a doorbell with the right design and style is important to maintain the outdoor decor of your house. Basic wireless doorbells usually have a plastic body and are primarily available in neutral colors. However, luxury doorbells offer various colors, styles, designs, and finishes, such as metal, wood, and ceramic. So, choose a doorbell style and design that goes well with your house decor.
Steps For Wireless Bell Installation
Before you move on to installing a wireless bell, sort out all your tools and equipment carefully so that you don't run back and forth to get the tools in the middle of the installation. You'll need the following equipment for the installation process:
Flat-tip screwdriver
Drilling machine
Drill bit and drivers
Measuring tape
Wireless doorbell
Once you've gathered the tools, it's time to take a look at the steps to install the doorbell.
Step 1: Plug In The Wireless Chime Unit
If you have an electric wireless doorbell, find a 120V power outlet closer to the front door to plug in the chime unit. You can simply install the chime unit on the wall for a battery-powered doorbell.
Make sure to set up the chime unit at a place close to the main entrance door but yet inside enough so that you can hear the bell chimes from anywhere in the house. If your house has a front hallway or corridor, it can be a good spot to place the chime unit.
Warning
Make sure to turn off your home's circuit breaker first while plugging the chime unit into the power socket for an electric doorbell. Moreover, don't set up the bell chime unit near any heat source, like a baseboard heater or radiator.
Step 2: Place Battery Inside Bell Push Button
Whether you're using a battery-powered or an electric model, you need batteries for the push button as long as it's a wireless doorbell. Use the flat-tip screwdriver to remove the opening of the battery door and insert an AA battery inside the unit. Double-check the directions of the battery and close the battery space.
Step 3: Choose A Location To Place The Push Button
The accurate height at which you should place the push button is typically between 44 and 48 inches from the ground. Use the measuring tape to mark the height on the doorknob side of the frame instead on the side of the hinges to place the push button properly.
Step 4: Test Push Button
Hold the push button at the chosen location and press it to check whether the chime unit receives the signal. There will be an audible ringing sound once the doorbell chime receives the signal. It's always best to test the push button before installing it in your doorframe to avoid removing it again if there's any signaling problem.
Step 5: Mark Screw Locations Of Push Button Unit
Some push-button units have a separate back mounting plate you can use to make the locations of the drill holes. Other units use the back of their housing as a standard baseplate for mounting. In that case, you have to open the unit using a flathead screwdriver and use its back to mark the drill hole locations.
Step 6: Install The Push Button Unit
Once you've tested the push button unit and marked its drill hole locations, it's finally time to place it on the doorframe. Drill pilot holes around half of the diameter of the push button's mounting screws. Next, attach the baseplate by drilling in the screws, and then place the unit on the mounting plate and test it.
What Is An UPVC Frame?
Installing wireless bells in UPVC door frames can be a bit different from installing them on traditional wooden doors. But before we discuss the installation methods, it's essential to know what UPVC frames are. UPVC, or Unplasticized Polyvinyl Chloride, is a sturdy, high-quality, and cost-effective material widely used to frame windows and doors.
However, a UPVC frame doesn't have a flat surface and is similar to crown molding, making it challenging to mount wired or wireless devices, like the Ring Doorbell. So, you must apply the correct methods to set up a wireless doorbell on UPVC frames, as we've discussed in the next section.
What Are The Different Ways To Mount Wireless Doorbells On UPVC Doors?
1. Using Self-Tapping Screws
Self-tapping screws can come in handy when you need to work with materials that are accessible from only one side. These screws are quite effective in installing wireless doorbells on UPVC frames. Self-tapping screws are of two types - thread-cutting and thread-forming. It's best to drill pilot holes before installation if you're using thread-forming screws because they are flat-tipped.
On the other hand, you can simply drive the base plate in the desired location without drilling any pilot hole while using thread-forming screws. But you can also drill holes for thread-forming screws if you want to make the installation easier.
Since many wireless doorbells have a surveillance camera, install the doorbell around four feet from the ground allowing the camera to capture the footage of anyone approaching the door.
2. Using Corner Mounts And Wedges
You can also use corner mounts and the wedge to properly install the wireless doorbell based on the shape of the UPVC frame or desired installation location. Some doorbell manufacturers sell corner mounts and stackable wedges, or you purchase them from your local hardware store.
A corner mount or wedge will help to offset the angles of your wedge-shaped UPVC frame, offering a clear view of any visitor approaching the door. Place the corner mount like a standard baseplate and secure the wireless doorbell. A single or double corner mount will also help to set the doorbell in a forward-facing position if you have an angled UPVC frame.
3. Applying Adhesive On Base Plate
Installing wireless doorbells becomes a lot easier if you use no-drill mount baseplates, which use adhesives to attach the baseplate to the UPVC frame. However, these mounts are only suitable for attaching doorbells on flat surfaces. It'll be difficult to use adhesives to attach base plates on a curved surface or a surface having ridges.
Make sure to clean the surface of your UPVC frame thoroughly before applying the adhesive to attach the doorbell's base plate. Try to avoid using an adhesive for installation when the weather is particularly humid.
Place the adhesive tape and hold it for a while before releasing it and peeling the other side. Repeat this process when installing the base plate. The no-drill mounting adhesive is waterproof, so you don't need to worry about the base plate breaking down under harsh weather conditions once it is installed properly.
4. Applying Silicone On Base Plate
Using silicone can also effectively mount base plates without drilling any pilot hole in the UPVC frame. Place the doorbell's base plate on the selected location and apply a thin layer of silicone around its edges. Once the silicone has dried up, you can attach the doorbell to the base plate.
Warning: Never apply silicone on the wireless doorbell itself because silicone prevents the device from letting out the heat generated.
How To Troubleshoot A Wireless Doorbell?
A UPVC frame can disrupt radio signals, limiting the signal range between the outside push button and the inside chime unit. Under such circumstances, the push button won't be able to send signals to the chime unit, and your wireless doorbell will stop working. So, you might ask - how to fix a wireless doorbell if it faces such frequency disruptions from the UPVC material?
The simplest thing to remedy this situation is to move the location of your push button unit from the UPVC frame. Moreover, if your doorframe has metal wall studs, reposition the unit by a few inches, so it's not placed directly over them. Removing the push button unit to a new location can help improve the signal range of your wireless doorbell.
You might also need to troubleshoot your wireless doorbell under cold weather conditions because temperatures below 41℉ can degrade the life of the push button battery. So, try to replace the battery much more frequently during winter to keep the doorbell running longer. Also, keep the push button unit dry because snow or rain can cause the battery terminal to rust.
Wireless Doorbells For UPVC Doors Final Thoughts
Installing wireless doorbells on UPVC is easier than installing them on brick or concrete walls. However, you need to follow the installation procedure accurately to avoid causing any damage to the doorbell units while setting them up.
Furthermore, test the doorbell after you have set up all the units to check whether the device is working properly. If the doorbell requires troubleshooting, you can follow the steps mentioned above or call a professional.
Always exercise caution while dealing with electrical outlets to set up electric wireless doorbell models. You can hire a professional for the installation if you're not comfortable with applying DIY techniques.
You can fix your wireless doorbell at home by performing several checks and narrowing down the source of the problem. These may involve battery checks, proper positioning, rebooting the device and the app, and weather damage checks, to name a few.
Wireless doorbellsare more convenient and accessible than wired ones, but like most electronics, they can sometimes malfunction. A wireless doorbell not working can become a nuisance very rapidly as you miss out on visitors standing on your doorstep.
So, to help you solve any issues with your wireless doorbell and keep it safe from future problems, we’ve created a troubleshooting guide for you to follow. The pertinent information is just a scroll away!
How Does A Wireless Doorbell Work?
A wired doorbell is simple enough: the visitor presses the doorbell button that completes an active circuit, creating a ringing sound. On the other hand, wireless doorbells are quite different since the doorbell isn’t physically connected to a speaker for the sounds to be emitted.
Most wireless doorbells work on radio wave frequencies, sending radio signals to a receiver that picks up the signal when the doorbell button is pressed. The receiver could be a dedicated remote control for the doorbell, or it could even be your smartphone. This is then followed by a sound, light or a combination of both to alert you of potential visitors.
The complexities involved in executing this process makes troubleshooting a wireless doorbell more challenging than a wired one. A wireless doorbell involves intricate circuitry, fixing any problem with which is usually left best in the hands of a professional.
That said, you can follow some of our DIY troubleshooting tips to prevent or solve some issues with the doorbell.
Troubleshoot Your Wireless Doorbells
The intricacies involved in a wireless doorbell’s workings mean that several small things could go wrong to stop it from functioning. So, we will now help you to find what’s wrong with your device and how you can fix it. You’ll only need a screwdriver and a few spare batteries.
1. Doorbell Button Not Working
When you press the button on a wireless doorbell for uPVC doors (or any other door, for that matter), it usually emits a sound from the chime unit.
Now, there are a number of issues that could lead to wireless doorbell buttons not working, with the most obvious of them being drained batteries. So, it’s recommended to check the doorbell and the door chime unit batteries before moving on to the other parts.
As for other issues like a damaged button or chime unit, you can spot them when you install a wireless doorbellfor the first time.
Solving The Issue
Use a screwdriver to remove the battery compartment of your devices and replace the batteries in your doorbell and chime units one by one. You can pinpoint which unit has the faulty batteries by checking each battery in a different device.
Once you’ve done so, try turning your units on again and see if they function normally. If they do, good job! If not, let’s move on to the next step.
Tip
Sometimes, the issue may not be with the battery but with the battery connectors. You can use cotton swabs dipped in vinegar to clean the terminals and dry the compartment with a clean cloth afterward. There’s no need to throw away fresh batteries, is there?
Since wireless doorbells work on radio wave frequencies, there’s a chance that the signal emitted by the doorbell unit no longer reaches the receiver. This can occur due to a number of factors, such as the number of walls between the unit and the receiver. In some cases, other electronics may interfere with the signal sent by the doorbell transmitter, resulting in the receiver not detecting it.
Usually, the signal range is quite liberal, with some devices ranging up to 100m, making the receiver placement the actual culprit.
Solving The Issue
Relocate the receiver so that it’s closer to the doorbell transmitter. If possible, try to limit the number of walls between the two units as well. There’s a good chance this fixes the issue, but if it doesn’t, let’s explore more options.
Tip
There’s a greater chance that your doorbell system isn’t functioning properly because of interference caused by other wireless devices. This may also result in your doorbell going off randomly, even when there is no visitor at your door. Try to relocate your receiver to a place where there are few electrical devices in its vicinity.
3. Weather Problems
Environmental factors are often overlooked when purchasing a new wireless doorbell. For example, if you live in a place where it just won’t stop raining, there’s a chance that your doorbell system simply weathered under the weather.
Likewise, too much temperature fluctuation can damage the doorbell, thereby affecting its functioning.
Most doorbells come with a protection rating that will inform you of their resistance to the weather and their capability to resist water. You can check your manual to see if this issue has occurred with your doorbell.
Solving The Issue
There are only a few things that you can try with your doorbells if the weather damage is extensive. Use a screwdriver to open the panel and check how badly the unit has been damaged. In some cases, cleaning the unit alone can solve all your doorbell woes, otherwise you may need to have it looked at by a technician.
In the worst cases, you’ll see extensive rusting in the metallic parts of the unit, or wires that have seen better days in such cases. As a result, you may have to replace the broken doorbell, but it all depends on how bad the damage is.
4. Wireless Doorbell Chime Not Loud Enough
Your doorbell may not be loud enough for you to hear from another room, or even in its vicinity. This issue occurs primarily due to two reasons: the positioning of the speaker and volume control.
If the doorbell is positioned in a way that blocks its chime box, its sound may become muffled, unable to be audible from across the house. This is an easy problem to fix in most cases.
Alternatively, your doorbell volume may not be high enough, which you can check in the bell’s instruction manual.
Solving The Problem
All you need to do if your doorbell chime box is blocked is to reposition it and give the speaker ample room. Some models have the counterintuitive design of having the speaker on the same side as the bell. In such cases, place your doorbell on a flat surface, such as a shelf, from where it can be heard easily.
As for the volume control, follow the instructions listed on the owner’s manual. Some doorbell models come with built-in volume control that you can adjust using the unit itself or with a mobile app.
5. Security Code Swap
If your doorbell was disconnected from the receiver unit, it could lead to the device not functioning at all. This is due to the security codes on both units not matching properly, resulting in the doorbell unit being unable to signal the receiver.
Solving The Problem
This issue can usually be fixed by resetting both the doorbell and the receiver units. The units should sync up once you’ve reset the consoles and input a new security code, and the doorbell should function once again. Refer to the owner’s manual for instructions specific to your doorbell, as this process may vary between different models.
6. Video Doorbell Troubles
Automated doorbell units operate using a stable internet connection and so, the issues you’ll face are likely associated with the WiFi connection or the power. A poor WiFi connection may cause the doorbell to freeze, which is when you should check if the internet services are down in your area.
Solving The Problem
If you own an automated doorbell, try turning it off and then back on again. Sometimes, a fresh reboot is all it takes to get your automated doorbell going again.
In case the issues persist, consider clearing the cache of your doorbell app to see if it resolves the issue. And lastly, reinstall the app if nothing else works.
What To Do If These Tips Don’t Work
The user’s manual is your best friend in the event of your wireless doorbell not working. Sift through every piece of information you can find in the manual pertaining to the problem and see if that solves it. If not, contact the manufacturer for help with your device-specific problem.
How To Fix A Wireless Doorbell Conclusion
Wireless doorbells, much like most wireless devices in modern times, are a boon for our daily lives. And when their convenience is interrupted by an untimely fault, they can usually be fixed without requiring professional help.
However, they are fragile and prone to failure once they have aged sufficiently. Wireless doorbells can also become non-functional when dropped, making handling it with care all the more important.
With regular maintenance and proper care, the devices will continue to serve you for a good while.
On that note, we will now wrap up today's proceedings. Until next time!
The Ring doorbells have gained attention among homeowners, as currently, the brand produces some of the best doorbells on the market. Apart from easy installation and added security, these doorbells are quite easy on the pocket.
A smart wireless doorbell is an essential addition to all homes. It is important to ensure that your home is safe and secure and your time away is not full of worry and anxiety.
Thus, investing in smart video doorbells - wired or wireless - is a smart decision you can make for your home.
So, package thieves, intruders, or your prom date - you will not have to wait for the door to open to find out! You can use your mobile device to access the doorbell cameras and talk to them using its intercom systems.
Ring Video Doorbell Pro and Basic
Ring is a home security company that specializes in smart doorbells and various other equipment that can guarantee safety for your home. It has manufactured video doorbells that come with the option of wired or wireless. Ring Pro is one of their most popular video doorbells.
Common Features
Before we compare the two best Ring doorbells, wired vs. wireless, let us look at the common features of these doorbells.
Ease Of Installation
Both the Ring video doorbells, wired and wireless, aka Ring and Ring Pro, are very easy to install, thus, enabling homeowners to save time as well as money. As such, setting these Ring doorbells themselves will help them cut the cost of installation. This DIY installation feature makes these doorbells an appealing choice.
Reliable
Irrespective of wired or wireless doorbells, one thing you can be sure of is the reliability of Ring video doorbells. It will provide you with the same security as that of all their models. They last quite a long time as well.
Apart from the hardware reliability, the software has been appreciated by homeowners as they report little to no bugs while using it.
App-friendly
The best feature of the Ring video doorbell is the fact that they are compatible with mobile devices. So, you won’t have to worry while going out for a nice vacation or doing your everyday routine. You can always access the footage of these video doorbells on your phone and keep a check on arriving guests using the Ring app.
Night Vision
Since most crimes happen after dark, the Ring video doorbell having improved night vision is definitely a plus. They allow the user to access videos and download them in high quality, even in night mode. So, wired or wireless ones, both doorbells ensure your home is protected.
Motion Detection
As the name suggests, Ring video doorbell has advanced motion detection facilities that help alert the user when someone is at their door. This prevents trespassing, break-in attempts, and other sorts of notorious activities in the vicinity.
High-definition Videos
The whole point of Ring video doorbell is to record intrusion or unlawful entry. If the quality of the video is questionable and the perpetrators’ faces remain unclear, it is pointless and no different from a traditional doorbell.
Hence, Ring doorbells have high-quality videos that capture everything crisp and clear and record arriving guests at your doorstep.
Two-way Communication
If someone’s at the front door and you don’t want to bother opening it, you can always talk to them using a smartphone or Ring’s intercom system. Ring video doorbell wireless and Ring doorbell Pro boast a two-way audio system that enables you to converse with high-quality sound without being exposed. They also provide you with an audio recording of events outside your door.
Affordable
Both the Ring devices are priced reasonably. So, homeowners on a budget can definitely check them out. Note that most wired or wireless doorbells from other brands are on the pricier side.
Differences
As similar as they seem to be, the Ring video doorbell and the Ring Pro video doorbell have some key differences. The main difference is that one is a traditional wired doorbell system or a purely hardwired Ring doorbell (Ring Pro), and the other isn’t, making it a wireless doorbell (Ring). Other differences include:
Field Of View
The field of view for the Ring video doorbell is 155 degrees, and 160 degrees for the Ring video doorbell Pro. This makes the Pro version comparatively better, as it can capture more in one frame. This wide-angle can record more of your surroundings, thus giving you a better idea of what’s going on.
Cost
The Ring video doorbell Pro is more expensive than the Ring video doorbell. Though both are affordable, the availability of more features makes the Ring Pro model slightly more expensive.
So, if you’re willing to spend a little more, the Ring video doorbell Pro is a good option.
Installation
The Ring doorbell is a wireless system, and the Ring video doorbell Pro is a purely wired system. They are both easy to install, even though the wired doorbell may take slightly longer than the wireless one as it may require wiring. Yet, they don't have complex wiring systems, which makes installation easier compared to other wired doorbells.
Moreover, the Ring doorbell device has a rechargeable battery and has to be taken out to recharge, and you would have to keep in check with their wireless transmitter as well as the wireless receiver. However, traditional wired systems are more reliable than wireless doorbells as you don’t have to keep changing the batteries.
Lighting
When it comes to lighting, The Ring doorbell Pro uses LED lights for a better image while in night vision mode. However, the Ring video doorbell lacks this feature. If security at night is important to you, we suggest opting for the Ring pro video doorbell, as it makes night vision footage clearer.
Alert
Another minute difference would be that Ring doorbell Pro offers customization of alerts and the Ring chime. Ring video doorbell, however, does not offer this feature.
FAQs Regarding Ring Video Doorbell Wired And Wireless
Do You Need The Ring Subscription?
The Ring doorbell offers a subscription service called Ring Protect. Though not mandatory to own, the plan comes with its own advantages. The prices can range from $4 to $20 per month.
Without a Ring Protect plan, you can have the following:
Live video footage of your home
Motion detection notifications from the camera
Two-way communication system with the doorbell
Whereas with a Ring Protect plan, you get
Ability to save recorded videos and share them if necessary
Snapshots from the camera during the day
Extended warranty for your device
Some discounts for your next Ring device purchase
Does Ring Doorbells Work With Alexa?
The Ring doorbell has recently been given an upgrade, so it can now be connected to your Amazon Alexa. Connecting your doorbell to Alexa will enable you to access the doorbell through voice commands. All you have to do is set up your Amazon Alexa account and allow it to detect the Ring doorbell.
This will also enable Alexa to notify you when you have a visitor or if someone is at your front door. If you do not wish to get up and check who is at your door, you can just ask Alexa to do so for you, and it will be displayed on your Ring app.
Yes, the Ring video doorbell, both wired and wireless, does record footage of your porch. Once the camera in the doorbell detects motion at the front door, it will start recording.
When someone alerts the doorbell by either moving around or directly pressing the doorbell button, it sends a notification to your Ring app that someone is present at your front door. Once you open the app, it turns into a live stream, allowing you to talk to the person at the door through the two-way communication system of the doorbell.
With the Ring Protect subscription, you will be able to hold on to the recorded videos for a longer period of time.
How Do Video Doorbells Work?
These video doorbells, as the name suggests, enable you to be aware of who is at your door without stepping out. They are not full-fledged home security systems but rather an addition to them. It can be classified as a mix of a CCTV camera and a smart doorbell. It alerts you when someone is at your door and helps you gain visual and audio access to the person.
As soon as the doorbell camera captures someone outside the door, you instantly get an alert on your mobile device. This helps you get an idea of arriving guests and take action in case of an intruder.
These smart doorbells also integrate well with other home security systems and other smart home devices. These work together to help make your home a safe and secure place to live in without any worry.
Are They Worth The Price?
One popular query is if these smart doorbells are actually worth their cost. And the answer is a resounding “yes!”
Video doorbells are a great addition to the security of your home. It is important to know what is happening outside without putting yourself in a vulnerable position, and video doorbells help you do just that. Be it a family or a bachelor – safety is of utmost priority to all.
From people stealing that pizza you just got delivered to attempts to break into your home – everything can be recorded in these video doorbells. This helps you to take necessary action for the same.
So, investing in a gadget that helps you feel more safe and sound in your home is definitely worth it.
Ring Doorbell Wired VS Wireless Final Thoughts
If you’re looking for a smart doorbell for your new home, the Ring video doorbell wired is ideal. It has various features that enable the user to feel safe and secure in their own home. Since it does not need any electrician to install it, you will be saving up on installation charges. Not to forget, the Ring mobile app makes it a user-friendly device.
Lastly, it provides high-definition videos with night mode and advanced motion sensors.
However, if you want to avoid taking down the drywall and would like an easy change from your old doorbell to a newer one, the Ring wireless doorbell is ideal. It comes with the exact set of features that makes it a suitable choice for your home's security. It is also extremely easy to install and avoids the hassle of wiring. It can also be deemed safer in certain ways as it avoids the risk of fire due to faulty or exposed wiring.
The Google Nest wireless doorbell is one of the best wireless doorbells that features easy installation and cost-effective functions. But the wired option may be more suitable if better video resolution and field of view are a priority.
If you’re looking for the best wireless doorbell, chances are you’ve come across the Nest line of devices from Google.
These include both wireless and wired options and offer some exciting features, but many people find it confusing to choose between the two. That’s where this guide can come in handy to learn about the advantages of each option before making a decision
About Google Nest
The Nest brand was originally founded by Matt Rogers and Tony Fadell, former Apple employees, in 2010 and specialized in the development of smart home devices. In 2014, Google purchased the company and merged it with its home devices unit in 2018. All Google Home smart devices were rebranded as Google Nest devices in the same year.
Since 2019, Google Nest has become a household name synonymous with smart home devices, among which the best known is the Nest Learning Thermostat. This device automates the process of water heating, as well as controlling the temperature of the room.
Another popular device is the Google Nest Smoke and Carbon Monoxide Detector, which detects fires quickly and can be controlled using a smartphone. It also includes a smoke alarm and can inform you about the location of the fire.
Then there are the Google Nest cameras for indoor and outdoor purposes. These come with glass lenses and need to be connected to the main power supply to function smoothly. All Google Nest devices are compatible with various smart home products from the brand, and might even work with devices from other brands.
Common Features Of The Nest Wired And Wireless Doorbells
1. Colors And Design
The wired and wireless Nest doorbells feature a similar design, which makes them a popular option. This modern and elegant design is well suited for most contemporary homes and includes standard drill holes for installing the doorbells easily with the existing doorbell system.
They are also available in multiple colors, and Google has used the snow white, ash gray, linen beige, and ivy green options for both wired and wireless versions. Depending on which color you pick, the device can stand out or blend in with the surroundings.
2. Video Recording
The Nest line of doorbells features excellent video recording, which can help you know who is at the door. This includes night vision recording as well but the resolution of the videos recorded differs slightly between the two devices.
Additionally, the camera can be turned on or off depending on the location, and its functionality can be enhanced with the Nest Aware subscription. This turns on the Face Detection feature and is available for both wired and wireless options, but it is more useful in the case of the former.
3. Functionality
Despite belonging to different generations, the Nest wired and wireless doorbells function in a similar manner. When someone presses the button on the device, a message will appear on their smartphone, which can be answered directly. In case you cannot answer, there is a selection of premade messages that you can use.
Both devices feature a Quiet Time function for disabling the chime functionality for short periods when you are not at home. These smart doorbells utilize machine learning to differentiate between people, pets, packages, and even vehicles.
4. Compatibility
Both the Nest wired and wireless doorbells are only compatible with Google Assistant smart devices. This means that you won’t be able to use them with other assistants like Alexa or Siri. However, the recordings of the wired version can be viewed using devices like Amazon Fire TV and Echo Show.
Google Nest doorbells work with your existing chime, which can be used instead of smart speakers for alerts. And both devices work flawlessly with Google Smart Speakers to announce who is at the door. The doorbells even work Nest Hub, Google Nest cameras and other smart devices from the company.
Differences
While most of the features and functionality remain the same, there are a few differences between the wired and wireless Nest doorbells.
1. Dimensions
Both the battery-powered and wired Nest doorbells have similar designs but slightly different dimensions. The wired Nest doorbell is smaller, with a height of 5.15 inches, compared to the 6.29 inches of the battery-powered Nest doorbell. Also, it has a width of 1.6 inches, which is slightly more than the 0.94 inches of the wireless version.
The depth varies of the wired Nest doorbell is 1.1 inches while the battery-powered unit has a depth of 1.81 inches. This difference in dimensions is due to the built-in battery of the wireless model.
But these subtle differences are usually only visible if you place both models next to each other.
2. Video Quality And Field Of View
The most significant difference between the Nest battery-powered doorbell and the wired option lies in the video recording quality. While the wired Nest doorbell can record videos at a 2K resolution, the wireless one is limited to 1080p Full HD recordings.
Similarly, the wired Nest doorbell offers a 180-degree field of view while the second-generation wireless version comes with a 145-degree field of view. It even records videos in portrait mode, compared to the wired option that records it in landscape mode.
Keep in mind that the camera capabilities directly affect the cost of the device, which is why the wired Nest doorbell is costlier than its successor.
3. Installation And Removal
Despite coming with a built-in battery which makes the wireless version slightly beefier than the wired option, installing it is easier. It can be screwed onto the wall outside the house with the help of an angle wedge without much effort, or you can wire it into the existing doorbell circuit.
The wireless option can also be removed easily whenever required, such as in situations where you might be planning to move.
In contrast, for installing the wired Nest doorbell, you will need a 16 to 24V AC transformer. It may also require an internal chime to provide sound alerts without relying on speakers powered by Google Assistant. But you may need to hire a professional to get it installed.
4. Storage
Storage is an important factor to consider when buying a device such as a smart doorbell. Ideally, the device should provide an event video history that can be viewed easily whenever required. However, more and more manufacturers are making this a premium feature.
This is also true in the case of Google, which offers the Nest Aware subscription for its smart devices like doorbells. The subscription provides 30-days of video history along with the capability of detecting people or packages, which makes it especially useful for the wired option since it lacks offline storage. It even includes a feature to call emergency services while providing intelligent alerts.
On the other hand, the wireless doorbell allows you to record 3 hours of video without additional storage. Since this feature does not depend upon WiFi, it can prove quite handy. The wireless doorbell further comes with object detection to record packages, people, and vehicles. However, it does not offer 24/7 recording, only available with the wired version.
5. App Control
Despite the two Nest doorbells coming from the same brand, they are controlled using different smartphone applications. The wired Google device is managed using the Nest app, while the battery-powered one can be controlled with the newer Google Home app.
As for ease of use, the Nest app is a bit easier to use than Google Home, especially when it comes to finding recorded videos. But the company has announced that it plans to combine the best features of both apps into a single one in the future.
6. Performance
Specifications aside, differences exist in the real-world performance of both video doorbells. The wired Nest doorbell can record videos in landscape mode in 2K resolution, with sharp image quality, well-exposed lighting, and details that are not obscured by shadows.
In this case, the only exception is fast-moving videos, where some details may be lost. On the other hand, the Nest battery-operated doorbell records videos in 1080p in portrait mode, with a 145-degree viewing angle. Images, while being well-balanced and clear, are overall inferior in quality compared to those taken by the wired doorbell.
The wired Google Nest doorbell can also send notifications to your Google device or smartphone quickly. But the battery-powered version requires more time to perform such actions, especially if it isn’t hardwired.
7. Cost
The wired Nest doorbell comes with certain features that are missing from other options, such as higher video recording resolutions and a wider field of view. Because of that, it costs more than the wireless variant, which despite being newer, is more cost-effective.
Nest Doorbell Wired Vs Wireless FAQs
Can the Google Nest doorbells detect noise?
The audio detection feature is present in the wired Nest doorbell, which can detect loud noises but cannot detect low sounds. Once it detects such noises, the device sends a notification to your Google device.
But this feature is not available in the battery-powered version, though its motion sensing capabilities can be enhanced using the Nest Aware subscription. Alternatively, you can pair it with the Nest Hub to search for sounds.
How is the Ring wired doorbell different from the wireless version?
If you’re confused about the Ring doorbell wired vs wirelessoptions, here are a few differences between the two. The Ring wired doorbell, also known as the Ring Pro, has a 160-degree field of view, compared to the 155-degree viewing angle on the wireless option.
It also has a smaller form factor, though that does not affect its functionality, and inbuilt LED lights for higher-quality videos.
Is it possible to use the Nest doorbell without an existing doorbell?
The answer to this question depends upon the type of Nest doorbell you plan to install. In the case of the Nest wired doorbell, it needs to be connected to the existing doorbell system of your home.
Meanwhile, the battery-powered option can be installed directly if it is installed wirelessly. But if it has to be hardwired, then it will also require an existing doorbell system.
Can you use more than one Google Nest doorbell?
You can use more than one Google Nest doorbell; however, the maximum number of such devices should not exceed 10 per home. And this includes both wired and wireless doorbells.
The number of doorbells you can actually use will depend on your internet bandwidth, with higher bandwidths supporting more devices.
Is the Google Nest doorbell waterproof?
Both the wired and wireless Google Nest doorbells come with an IP54 rating, which means that the devices are protected against water sprays and dust. That said, the IP54 rating does not make these devices waterproof, and they should not be submerged or soaked in water. The doorbells can tolerate splashes of water, such as from rain, but nothing more than that.
Nest Doorbell Wired Vs Wireless Conclusion
Both the Nest wired and wireless doorbells offer different advantages and are suitable for various needs. This means selecting between them is ultimately a matter of personal preference, so you need to consider which factors are most important.
For people who require easy installation and removal, the Nest wireless doorbell is a better option. It does not require hiring professionals for installation and can even be removed if you plan to move. The only downside is that the device has to be taken down every time it has to be charged.
On the other hand, when you’re looking for a device with impressive video recording capabilities, the wired option is a better choice. The 2K video recording and a wider field of view deliver a better experience but comes at a higher price point.
Those willing to spend a little extra should go with this option, while others can save more by choosing the wireless one. There are several other manufacturers offering smart doorbells, such as Ring, Arlo, and more. And it is a good idea to make comparisons, such as the Arlo wired vs wireless doorbell, and comparing them with the Google devices to make a decision.
Tip
If the Nest doorbell keeps going offline, restart the modem and WiFi by unplugging the power cords. Wait for 30 seconds before replugging the cords and check the doorbell video stream to see if you are back online.
When it comes to video doorbells, the wired and wireless options by Arlo are pretty good choices. The wired option offers better motion detection. Conversely, the wireless option provides constant surveillance at all times and is better for those seeking convenience.
Honestly speaking, a door feels a bit incomplete without a doorbell. Just ask yourself, could you possibly imagine using the main door of your house without (wired or wireless) doorbells? Yeah, neither can we.
And when it comes to doorbells, Arlo is one of the best brands out there. Unfortunately, many users may get confused between the wired and wireless doorbell variants of the brands. If you are one of them, then this guide is for you, for it compares both of them in detail.
Arlo - A Brief Overview Of The Brand
Before we get to the comparison, let’s discuss a little bit about Arlo. It is an American brand that specializes in making home security solutions. Back when it was founded in the early 2010s, it manufactured only surveillance cameras.
But over the years, it has expanded its portfolio to include other types of products such as doorbells, floodlights, home security systems, and security accessories. In fact, the brand has even ventured into the domain of personal security with its Arlo Safe mobile app.
Arlo manufactures both wired and wireless home security products, so you can pick whichever seems suitable to you. On top of that, it offers a convenient subscription program for its customers, which comes with different perks such as discounts, security notifications, and so on.
In that context, Arlo Essential wired and wireless video doorbells have gained a significant reputation since their introduction. This is because of the unique video feature that allows you to see who’s at the door. Besides, both of these doorbells have a much better build quality than other similar options available today, which makes them a preferred option among consumers.
We have compared these two products in the subsequent sections, so we suggest that you keep reading.
Common Features
This section highlights the features that are common to the wired as well as the wireless video doorbell. As we have stated before, both of these doorbells come with an in-built camera for safety, which distinguishes them from conventional doorbells. Apart from this, there are several other shared features between the two doorbells, which we have discussed below.
1. HD Video With HDR Functionality
If you want to get the optimal level of protection from a video doorbell, then the video quality of the doorbell camera is one of the first things to consider. Surely, you would not want to see a blurry, pixelated view of the person standing outside, right?
With a good-quality camera, you will get a clear picture of whoever comes up to your door. Even if anyone decides to snoop around your house, the camera will pick it up. Subsequently, you can take the appropriate measures to protect your home from these unwanted people.
On that note, both the wired and wireless variants of the Arlo Essential video doorbell come with an HD-quality camera that has excellent video quality. This lets you get a crystal clear view of the area outside your front door. Furthermore, the doorbell cameras come with High Dynamic Range (HDR) capabilities, which produce a vivid image with impeccable detail.
In addition to that, the cameras have a wide, 180-degree field-of-view, which means that you can see the whole area in front of your door. And there are infrared LEDs installed in the cameras, which allow you to see clearly even at night.
2. Comes With Two-Way Audio
Besides the video capabilities, the audio features need to be taken into account too. Think about it - if your video doorbell does not have any audio functionality, then the people who come up to the door won’t be able to communicate with you. As such, they will just need to stand there helplessly until you open the door for them.
In fact, if you have never seen the person standing at the door, then you would not be able to ask them who they are.
Fortunately, you won’t need to worry about any of these issues with the wired and wireless variants of the Arlo video doorbell. Both these models are two-way audio enabled so that you can listen and speak to your visitors.
What’s more, they come with a recording feature for voice messages. So, if you are unable to answer the door, the visitor can record a message for you by pressing the doorbell button. You can then listen to the message later at your convenience.
3. Smart Doorbell Features
Most video doorbells these days come with smart features for convenience. With these advanced features, you can accomplish fairly complex tasks with relative ease. In fact, if a video doorbell does not have any of these features, it can be a major deterrent for most consumers these days.
Luckily, the Arlo Essential doorbell variants come with a range of smart features to make your life easier. For starters, they are compatible with most smart home systems, such as Google Assistant, Amazon Alexa, and Apple HomeKit, among others.
The smart doorbells can be added to the Arlo mobile app, which acts like a hub for all your Arlo devices. With the Arlo app, you can control and customize different aspects of these doorbells, such as changing the existing doorbell chime, adjusting the audio and video feed, and so on.
This app also allows you to view the live camera feed conveniently on your mobile phone. Thanks to the fast Wi-Fi connectivity, you won’t get any lag in the video feed either. And if you have an Arlo Secure subscription, you can get access to a host of other smart security features. These features include advanced object and package detection, intelligent alerts, emergency 911 calls, and more.
That said, the doorbells do not come with local video storage options, so you will need to store the recorded video in a separate drive. But if you have an Arlo Secure plan, you can get free cloud storage for your video clips. Likewise, you can view your video history for up to 40 days with a subscription.
Differences
Now that you know about the common features shared between the Arlo wired and wireless video doorbells, it’s time to talk about the differences. There are quite a few of them, which we have discussed in the following section.
1. Power Source
The most obvious difference between the wired and wireless video doorbell variants is the power source. The wired version needs to be connected to your household electrical supply in order to work.
This means that if there are any power cuts, your doorbell will stop working until the electricity is restored. However, you won’t need to recharge it periodically as it does not come with any batteries. So, once you get past the setup, it becomes relatively easy to use.
On the contrary, the wireless variant is battery-powered, so you don’t need to worry about power cuts. Although, you will need to recharge it once the battery power has drained. Thankfully, the battery life is good, which means that you can use it for a long time after a complete recharge. Similarly, the recharging process is quick enough, which helps to minimize the downtime.
Warning
Make sure to check the voltage ratings of the power source before using the doorbells. For the wired doorbell to work as intended, the voltage rating of the supply needs to be 16-24V. And for charging the wireless doorbell, you need to use an outlet with a voltage rating of 8-24V.
2. Installation
Another major difference between the Arlo doorbells is the installation process. Due to its design, the wired doorbell is slightly difficult to install since you need to place wires in the right places.
This also means that you cannot install it anywhere you like. The good news, however, is that you can install it using the existing doorbell wiring, which makes the process a bit easier.
In contrast, the installation process for the wireless video doorbell is much more convenient. Since it does not require any wiring, you can place it anywhere without a hitch.
3. Price
The price is an important factor to consider when buying a video doorbell. After all, you wouldn’t want to exceed your budget as that can cause financial difficulties.
In this regard, the wired version of the Arlo Essential video doorbell comes at a moderate price when compared to other brands. But when compared to the wireless version, it is considerably cheaper, which makes it an ideal option if you have a limited budget.
Because of the wire-free convenience and a few other extra features, the Arlo Essential wireless video doorbell has a much higher price tag. So, you might have to think twice before getting this doorbell system installed if you have budget restrictions.
4. Motion Detection
Another point of difference between the two video doorbell variants is the range of motion detection. The wired variant comes with a detection range of 16.4 feet, while the wireless doorbell has a motion detection range of 9.8 feet.
Thus, with the wired version, you can detect movement within a larger area, making it a much more secure option. Moreover, it has a constant supply of power, which allows you to keep the camera on most of the time. This helps support the Arlo Foresight feature, which enables you to see what triggered the motion sensors in the first place.
The wireless doorbell does not come with this feature since it would consume a lot of battery power to keep the camera constantly running.
If you’ve liked reading our comparison so far, then be sure to check out our comparative guide between the Google Nest doorbell wired vs. wireless. In case you are having trouble deciding between the two smart video doorbell options, the guide will help you out.
Arlo Wired Vs Wireless Doorbell Conclusion
In our opinion, you may consider going with the wired variant of the doorbell, especially if you live in an unsafe neighborhood. The larger movement detection range and the Arlo Foresight feature provide extra security for your home. And it comes at a lower price, which is great for your budget too.
On the other hand, if you want more convenience, you can consider the wireless variant. It is much more straightforward to install and eliminates the hassle of dealing with wires entirely. Also, if you live in an area that experiences frequent power cuts, then going with this option is a wise choice.
However, if you want wireless doorbells for hard-of-hearing individuals, then neither of these choices will fit the bill. In that case, you should look into other doorbells that support visual alarms.
We hope that the information here has helped you make up your mind. Until next time, we bid you goodbye!
Your wireless doorbell may be ringing constantly due to frequency and battery issues, among other things. These problems can usually be resolved on your own without the extra cost of repair.
As popular as wireless doorbells have been getting, their maintenance is considered negligible. But this is not true. Any smart device will need proper care to function without hassle.
The constant ringing of a smart doorbell is one common issue that many do not know how to resolve. In this guide, we help you figure out exactly what you need to do to fix it and how it can be avoided in the future.
How Does A Doorbell Keep Ringing By Itself?
There can be many factors like dust, shortage of wires, or installation issues that make a wireless doorbell keep ringing on its own. You are more likely to face this problem if you have an old doorbell that isn’t cared for very well. That’s why your doorbells need proper maintenance, too, just like other electronic or battery-operated fixtures in your home.
A constantly ringing doorbell can be both frustrating and confusing. You may assume someone to be at the door in the middle of the night but end up finding nobody. Similarly, you may think that the ringing is on its own when in actuality there is someone at the door.
Although there are various reasons as to why your doorbell may be ringing on its own, we can boil it down to four main factors.
Sticking doorbell buttons
Frequency signal interference
Battery issues
Corrosion and moisture accumulation
Doorbell chime
The good news is that most of the issues mentioned-above are generally rectifiable the DIY way, and we will tell you all about them in the following sections.
What Is A Sticking Doorbell Button?
If you have been using your doorbell for a while now and failed to do proper maintenance, you may be facing the sticking button issue. But what exactly is a sticking button?
It happens when the doorbell button gets stuck in a position that ends up pressing the doorbell, thus making it ring constantly. This can result from the accumulation of dust and dirt from your hands on the doorbell.
Initially, it would be an occasional occurrence, maybe when you press the button. But eventually, the stuck button and consequent ringing will turn into a regular problem to leave you frustrated.
Furthermore, if a small gap forms between the connecting points of the doorbell due wear and tear of time or other unforeseeable factors, it’ll develop electrostatic charges that will end up making the doorbell ring continuously. This is why keeping a check of your wireless doorbell is absolutely necessary.
How To Fix This Issue?
The first and foremost thing to do will be to clean your doorbell and the area around it. Once you have cleaned the area thoroughly, you can unscrew the doorbell from the wall. You can then separate the casing from the doorbell button and look for any accumulation of dirt around the button.
We’d also suggest using compressed air to make sure all of the dust and dirt is removed from the button. Once you’re satisfied with the cleaning, put the button back on the casing and attach it to the wall.
It is important to remember that regular maintenance of your doorbell will help prevent such false alerts from occurring again.
A little trick you can do to close the gap on the bell is to spray a little WD-40 on the gap. Be sure not to overspray, as that can cause more dirt and dust to get accumulated. A little goes a long way with this trick.
If cleaning the button does not solve the problem, check the powerbox of the doorbell. Chances are either the powerbox or the doorbell's connection to the powerbox is the culprit.
What Are Some Other Causes Of A Ringing Wireless Doorbell Ringing On Its Own?
1. Signal Interference
Wireless systems have gained popularity and are usually the first choice for homeowners when it comes to home security. However, many wireless systems can end up ringing on their own due to signal frequency interference.
If your doorbell is from Ring or any popular brand, for that matter, you would know it uses a frequency range of 400MHz to 500MHz to function. This is a standard frequency range.
The doorbell ends up ringing when the doorbell chime receives these frequency signals. But if a nearby doorbell also uses the same frequency, it will cause signal interference and end up making your doorbell ring.
Considering that the frequency range for most wireless doorbells are the same, the chances of this happening are quite high.
Likewise, similar frequency bands or wireless devices in the vicinity can cause this issue. For example, if your CCTV camera uses the same frequency as your wireless doorbell, it increases the chances for signal interference.
How To Fix This Problem?
Most wireless devices have a privacy code, also known as channel selector. This code enables you to set the exact amount of operational frequency you want for that device.
So, you can change the sub frequencies of your wireless doorbell by simply changing the privacy code. For example, if the current frequency is 400MHz, you can change it to 400.5MHz.
You do have to keep in mind that the doorbell button transmitter and the doorbell receiver should be of the same privacy code. This will help the doorbell use the same frequency to operate while reducing the chances of signal interference from other devices.
People most often change the sub-frequency by 0.5 so that there is no drastic change in frequency and the other devices around would not be using the same frequency.
Privacy codes are usually found at the back of both the transmitter and the receiver. It can be a slide or a small button where to change the frequencies, you will have to slide it to the desired frequency.
You may have to change your frequency a certain number of times before you find the right one with very little signal interference. The instruction manual of your device will provide you with clear information on how to change the privacy code.
What If You Cannot Change The Frequency?
Most doorbells these days do give you the option of changing frequencies. So, facing this issue would be a miniscule probability.
However, if you do face this issue, you first need to identify the device that your doorbell's frequency is clashing with. Once you have managed to identify that, you can proceed to change said device’s frequency. This stops the frequencies cursing interference.
Most doorbells these days do give you the option of changing its frequencies. So, facing this issue would be a miniscule probability.
However, if you do face this issue, you first need to identify the device that your doorbell's frequency is clashing with. Once you have managed to identify that, you can proceed to change said device’s frequency. This stops the frequencies cursing interference.
2. Dead Batteries
If your wireless doorbell has been functioning for a while now, and you haven’t replaced the batteries, checking on them would be a wise choice. Even the best batteries won’t retain charge for a lifetime, so it’s imperative to keep a check on them and change them when needed. You can use a multimeter to check if the batteries still have charge or are dead.
How often you change the batteries will largely depend on the model of the wireless doorbell. Certain models can continue functioning for long periods of time, like a year or two, without needing a battery change. On the other hand, some models will need you to change the batteries every couple of months.
Low batteries do not cause the constant ringing most of the time, However, in certain cases they can be a significant reason as to why your doorbell keeps ringing.
3. Corrosion And Moisture
Although most doorbells and their buttons are waterproof, nature has a way of playing its tricks. Moisture and corrosion can sometimes get to the doorbell and cause it to function poorly.
To inspect your doorbell, all you have to do is remove the cover of the pushbutton and look for any corrosion. If you do not find any, you are good to go.
In the event that you do end up finding corrosion, you can remove it gently or scrape it off the doorbell. And conducting regular checks will prevent moisture and corrosion destroying your wireless doorbell.
4. Doorbell Chime
Oftentimes, the problem lies with the doorbell chime unit kit, which makes your doorbell ring. Check your digital kit to see if this is the case, and replace it with a new one if required. Make sure that the new kit is compatible with your doorbell.
Brands like Ring and Nest have a certain set of digital bell kits that are compatible with their devices. So, make sure you get the right one to avoid inefficiency..
Wired Or Wireless- Which Doorbell Is Better ?
A wired doorbell system is generally much harder to install as compared to wireless systems since there is a complicated wiring process that is involved. So, unless your house is being remodeled, the better idea would be going for a wireless system.
Wireless doorbells are easy to install and can save you time as well as cost of installation. Unlike wired doorbells, wireless doorbells do not need drilling or any other extra steps that may take time. These doorbells contain every component a wired doorbell contains but can be installed a lot quicker.
Another reason wireless doorbells stand out are the added safety features and convenience they offer, which are rarely present in wired doorbells. Many popular doorbell brands like Ring or Nest offer more features within their wireless models, like:
1. Extra Receivers
Some wireless doorbells may enable you to add multiple receivers. You can place one near your door or your living area and another at the farther end of the house. So, if someone were to press your doorbell and you happen to be away from the living room, you can still hear them.
2. Flashing Light
These doorbells also have a flashing light on their receivers, which blinks when someone presses the doorbell. This is a great feature for those with hearing impairment, as they will still be alerted about someone's presence at their door.
To install your wireless doorbell, you need to install a chime unit first. Ideally, it should be plugged into a 120v outlet near to your living area. The chime should be heard throughout the house so locate an outlet that is preferably in the center of the house.
2. Place Battery In Push Button
The second step to installing a wireless doorbell is to place the battery in the button. For this, you can use a flathead screwdriver to open up the push button unit. Then place the batteries that were provided with the doorbell into the unit. Make sure they are placed correctly. Once you are done, close the push button unit.
3. Install The Push Button
Once you have the push button ready, you can look for a good spot to fix it- anywhere at your front door with a height that is comfortable would be fine. But before you screw the button unit in place, it would be a good idea to test the doorbell. Once you make sure that it works fine, you can go ahead and screw in the push button at the desired location.
Can A Faulty Doorbell Cause A Fire?
If you own a wired doorbell, there are possibilities of a fire if it has exposed wires. It also poses a threat to the ones using the bell as there are chances of electrocution. However, if you're using a wireless doorbell, there is very little to no chance of a fire. This is because there is no doorbell wiring, thus reducing the risk of a fire.
How To Fix A Ringing Wired Doorbell?
If your wired doorbell is facing the same issue, and fixing the sticking button did not solve the constant ringing, it’s highly likely that a short or loose wire is causing the issue. Or if you are really unlucky, it could be both. However, these problems can be solved by checking the transformers or the doorbell chime.
Wireless Doorbell Keep Ringing Final Words
A doorbell ringing constantly at random times is a very common issue, but you don't have to worry about it too much. A little DIY can help you save money and your ears that probably might need some rest after the continuous ringing. You may also want to keep an eye out for some little prankster who may be doing this to your doorbell!
We hope this article helped you with your smart doorbell issues. If you found this information helpful, do check out our article “How do wireless doorbell systems work?” on our website.
A wireless doorbell system consists of a transmitter and receiver. When someone presses the transmitter button on your door, it sends a signal to the indoor receiver, which then triggers the doorbell to ring.
Are you still using a traditional wired doorbell for your front door? Well, it’s about time you upgraded to wireless doorbells.
Let’s state the obvious - won’t need to worry about wires. Besides, when compared to a regular doorbell, a wireless doorbell offers convenience - both in features and usage.
However, you might be wondering - if it doesn’t have any wires, then how does it work? That is just what we have addressed in this guide. So, if you want to satisfy your curiosity, then keep reading!
What Is A Wireless Doorbell?
If you are not very well-versed in wireless doorbells, then allow us to give you a brief idea about what they are in this section. The information here will help you to understand the discussions presented in the later sections better.
In the old days, people used to knock on the doors to announce their arrival. Eventually, doorbells were developed, which provided a more efficient method for doing the same. And today, we have wireless doorbells that have the same principle as a wired doorbell, albeit without any wires.
Essentially, it is an alarm system for your front door that can be used without connecting to your household wiring system. These doorbells are usually battery-powered, which means they need to be charged from time to time.
Wireless doorbells also come with additional features to improve your home security. And they are much more versatile than conventional doorbell systems due to their wireless design.
How Do Wireless Doorbells Work?
Compared to a traditional wired doorbell, the mode of operation for a wireless doorbell is entirely different. A regular doorbell uses a series of wires to connect the switch with an electromagnet, which is its core component. When you press the switch, the circuit with the electromagnet is completed, which produces the sound that alerts you.
In contrast, a standard wireless doorbell contains no electromagnets since there are no wires to speak of. Instead, these doorbells use radio signals to generate audio or visual alerts when the button is pressed.
That is why the primary components of a wireless doorbell are a transmitter and a receiver. The transmitter is attached to the button, which you place outside your front door. Likewise, the receiver is placed on the electronic chime box inside the house.
When the doorbell transmitter button is pressed, it sends out a radio signal. The chime box receiver picks up this signal and subsequently triggers an audible alert that you can hear.
Another thing to note is that the transmitter and receiver use variable frequencies, which prevents interference with other similar devices nearby. In a way, you can say that their method of operation is more similar to radios than regular doorbells.
As for the power supply, there is no need for any electrical wiring with these devices. They are powered by batteries, which makes them highly convenient to use. That said, you do need to recharge the batteries through an electrical outlet once they run out. Thankfully, most wireless doorbell models can be easily recharged, thereby reducing downtime and increasing convenience.
Benefits Of Wireless Doorbells
Due to their wire-free interface, they have numerous advantages over wired doorbells. We have discussed these benefits below, read on.
1. Easy To Install
One of the many complaints about regular doorbells that we have heard over the years is that they are quite complex to install. And that is true because connecting a device to the main electrical system of your house always comes with risks, especially if you are not as experienced. Not connecting electrical wiring properly to the doorbell prevents it from functioning, and it increases the chances of electrical hazards.
This is where wireless doorbells come in handy since you do not need to worry about potential safety risks. Owing to their wire-free design, you can install them without breaking a sweat. Simply install the doorbell button on a wall outside the front door, and then do the same for the receiver indoors.
In addition to that, you can place the doorbell anywhere you want, which makes it even more convenient to set up. This is unlike wired doorbells, which need to be placed along existing power lines, thereby reducing their overall flexibility.
2. Highly Versatile
A typical wireless doorbell is much more versatile than a traditional doorbell. The transmitter and receivers have a fairly long range, which means that you can install them anywhere in the house. On the contrary, a wired doorbell has to be installed as per the length of the wire.
What’s more, you can install multiple receivers on a wireless doorbell. For instance, if you have a large house, you can install two or more receivers across different rooms. That way, you can hear the bell no matter where you are.
You can also choose the alert type of a wireless doorbell, which can help if you have hearing problems. For example, if you are hard of hearing in one or both ears, you can use a bright light alert instead of a buzz or a chime on the receiver. Wired doorbells are not very user-friendly in this regard since they mostly come with audible chimes.
3. Customizable
Another aspect that users may find appealing about wireless doorbells is their customizability. You can conveniently adjust the volume of the chime bars according to your preferences. It also enables you to change the alert sound entirely. There are different chimes pre-loaded on the chime bar, which means that you can pick whichever you like the most.
You can do the same with the visual alerts as well. Its brightness, color, and pattern can be modified according to your liking, which gives your doorbell a personal touch. Such customizations cannot be done on regular wired doorbells, which is why many users might find them boring.
4. Come With Smart Features
Most wireless doorbells these days come with a host of smart features that improve overall user-friendliness. These features are unavailable on most traditional doorbells since their wired design can be a major hindrance to implementing digital systems.
That said, one such smart feature used in wireless doorbells is Wi-Fi connectivity. It can help sync the doorbell unit with smart home systems. Apart from that, it allows you to use the doorbell with mobile apps for greater security and convenience.
Another feature used in a smart doorbell is video and audio recording capabilities. Most wireless variants come with built-in cameras and microphones, which allow you to see and communicate with the visitor at your door.
5. Provide Improved Security
Compared to traditional doorbells, wireless variants are much more secure and safe. This is due to the different smart features that come with these doorbells.
With the audio and video recording features, you can see everyone who comes up to your door. The doorbell cameras come with wide viewing angles and motion detection. Thus, if anyone decides to snoop around your home, you can also see them on your phone, laptop, or PC. Moreover, these video doorbells allow you to record and store the video footage for you to check out later.
Likewise, the microphones come with a sound and tone sensor, which alerts you when anyone gets near the door. Besides, they can be seamlessly connected to your home security system, which keeps your household safe from unwanted people.
Warning
The smart security features mentioned here consume considerable amounts of battery power, which can reduce the lifespan of your doorbell. So, make sure to use them judiciously to avoid any issues.
Drawbacks Of Wireless Doorbells
While a wireless doorbell works as a better alert system than a traditional doorbell, it comes with its fair share of limitations, as discussed below.
1. Expensive
The biggest drawback of wireless doorbells is that they are considerably expensive. This shouldn’t come as a surprise, considering the features and convenience they provide to the user.
However, the higher price tag might act as a deterrent for consumers, especially if they have a limited budget. Even the most basic wireless doorbell model is considerably pricier than a wired doorbell, due to which many might prefer to buy the latter.
2. Difficult To Troubleshoot
While most wireless doorbells are designed to be durable, they are, after all, machines. And like any other machine, they can encounter issues from time to time. Troubleshooting these issues might be challenging for most users, considering how sophisticated they are than their wired counterparts.
You might often encounter issues such as constant ringing or no ringing at all. These problems can occur in both wired and wireless doorbells. But if your wireless doorbell keeps ringing, you’ll have to go through a lot more trouble to fix it than a wired doorbell.
More About The Working Of A Wireless Doorbell System
The best wireless doorbell for your home should come with the following functionalities:
A. Operating Range And Efficiency
Since these doorbells use radio waves instead of wires, the operating range becomes a crucial factor to consider. A wireless doorbell features a large operating range to allow the transmitter and receiver to communicate with each other over a longer distance.
The operating efficiency needs to be taken into account as well. If your doorbell transmitter is strong enough, it can transmit signals through thick walls without degradation. Conversely, a sensitive receiver can pick up the faintest signals with greater efficiency to give you a clear alert.
B. Battery Life
For a wireless, battery-operated doorbell to work efficiently, battery life obviously plays a crucial role. Most wireless doorbell systems come with a high enough battery capacity of approximately six to twelve months so that they can be used for a long time between charges.
Similarly, the charging process is quick enough so that you can reduce downtime. There are options that can be used even when charging, which in turn, eliminates the downtime entirely.
C. Durable Build
Wireless doorbells (especially the outdoor transmitter button) are built to withstand the weather elements like dust, rain, snow, or heat. So, your doorbell will function at all times, regardless of the environmental circumstances.
How Do Wireless Doorbell Systems Work Final Words
A wireless doorbell is one of those appliances that might seem relatively insignificant but can make a notable difference in your home’s security. With the number of features and conveniences it comes with, it’s a worthy upgrade of a traditional doorbell.
Now that you know how wireless doorbell systems work, you can operate them a bit more easily. And we hope that the information provided here has been able to clear away most doubts about this device.
It’s now time for us to wrap up. If you found this guide insightful, then you may also check out our guide on how to use pool test kits.
Adios!
Polyurethane is the most popular finish for hardwood floors. Why, you ask?
It’s because the most important features of a good finish are good and long-term protection for the floor. That’s not all; the finish has to fight off impurities, such as grime, dust, and dirt to keep the floor healthy. And polyurethane does all that effectively.
But then, the question arises - should you opt for water-based or oil-based variants? And that’s exactly what we’ll discuss in this guide today.
This floor finish dries up rather quickly after application. Usually, it takes about two hours to dry up well enough to apply more coats. The advantage of this is that you can apply many coats in a single day.
As a result, your job might be done faster with this water-based floor finish. And it will even be low on odor. What’s more, a clear finish will keep things convenient and quick because all you need is water to clean up the floor when you want to.
Furthermore, a water-based polyurethane floor finish accentuates the ‘character’ of the wood slightly. So, if you just want a protective floor finish without much ado, apply this finish to the hardwood in your room.
Also, if you already like the color of the wood on the floor, simply highlight it with this solution. For example, if you love the way maple speaks to you, buy a water-based polyurethane floor finish to keep it that way!
Some Disadvantages
The biggest consideration before using water-based polyurethane is the expense involved in coating the floor with this finish. Water-based finishes are almost twice as costly as oil-based variants.
Furthermore, water-based polyurethane floor finishes contain only 30-35% solids. This is not enough to protect the floor in one application. That becomes one of the reasons for you to apply four coats as opposed to two or three, which may seem sufficient upon application.
That’s not all; the look of the floor after the coating dries up, may not be shiny or bright at all. In fact, the floor can exude almost a dead-pan look. You may face some difficulties in following the strokes of your applications because the water-based finish is completely clear.
In other words, marking the strokes at the right places might be necessary to do a neat job.
The best part about using oil-based variants for the floor is that the applications get fewer in this instance. The finish costs much less than water-based solutions for floor finishes. Moreover, it does not require too much maintenance over a considerable period of time.
Also, it goes perfectly with certain kinds of wood. It leaves an amber glow to the floor that looks rich and glossy in some instances.
Oil-based polyurethane contains 45 to 50% solids. It is the presence of these solids in the floor finish that give it a protective layer after application.
Some Disadvantages
The coats of this oil-based polyurethane floor finish take a long time to dry up. The waiting time between each application is five hours. When you apply the final coat to the floor, you might as well say goodbye to the room for one half of the day!
So, it takes twelve hours for the finishing touches to settle and dry up. Before using this floor finish, it is best to organize the house or working space in such a way so that you don't need the room for a day.
How To Maintain The Floor Finish
For starters, sweep the floor every day or vacuum it from time to time to pull out the latent impurities stuck there. Put carpets or rugs in those areas that are used frequently by people. Apart from that, you may vacuum the dust off the rugs once in a while to maintain the house.
This is a simple and effective way to clean and preserve the floor finish, irrespective of your preference - water or oil-based polyurethane.
On that note, we will sign off. Till next time, take care!
Have you been searching for a good-quality air purifier that would improve your room air quality like a pro?
In all probability, you might have come across the SilverOnyx air purifier while searching online, as it has garnered lots of positive reviews lately. But, are you totally sure that it’s the best option for you?
Well, getting the answer to that question is important before deciding to buy it. And that requires considering a lot of factors, including its features, advantages, and disadvantages.
However, we can confidently say that you’ll be impressed with the user-friendly features on offer once you’ve used this air purifier. That’s because we have used it extensively for quite a few months.
So, based on our experience, we’ve documented this review to help you form a clearer idea about the essential facets of the product.
AIR PURIFIERS FOR HOME: Our powerful 5-in-1 filtration, HEPA...
INCREDIBLE FOR LARGE ROOMS: Breathe easier with this...
Most of you might have heard of SilverOnyx as it is a quite popular brand across the country for its range of superb electronic devices. But as far as air purifiers are concerned, this is the first model that the brand has brought forth in the market.
In case you are wondering whether it would perform as effectively as some of its competitors, we can assure you that it does well to uphold the reputation of the brand. So, let’s find out how.
Filtering System
Filtering is undoubtedly the most crucial factor in deciding the performance of air purifiers. Now, since the SilverOnyx air purifier comes at a very budget-friendly rate, you might doubt the quality and efficiency of the integrated air filters. But let us tell you that the filters offer more than what the price point suggests!
A five-stage cleaning system takes its performance to a different level altogether. On that note, let’s have a look at how this system works.
Pre-Filter- At the onset, a mesh pre-filter helps capture the larger particles such as pet dander and hair. This part is attached to the primary HEPA filter.
HEPA Filter- The super-efficient H13 True HEPA filter in this unit eliminates up to 99.97% dust, and allergens sized up to 0.3 microns. It comes with 60% more surface area than some more flat varieties used in models of the same weight. As a result, the cleaning capacity of the SilverOnyx air purifier is enhanced to a great extent.
Activated Carbon Filter- This layer effectively neutralizes any smoke and odor indoors.
UV-C Light Filter- Contaminants such as germs and mold are destroyed with the help of this filter. This is achieved by the UV-C photocatalyst and bulb.
These four filters are the basic types that you’ll find in most air purifiers. Long story short, the combined power of these ‘Fabulous 4’ makes the SilverOnyx air purifier really powerful. Apart from that, it comes with an ionizer (5th stage), which destroys airborne allergens detrimental to health and can be switched on or off as required.
Size And Design
When it comes to electronic appliances, both performance, and design draw a lot of attention. And you would surely agree that it’s difficult to get the best of both worlds.
However, you’re in for a surprise here as well. This air purifier comes in a more popular cylindrical shape, which is different from the typical tower-shaped models.
It has quite a sleek construction, which makes for an attractive appearance and also convenient handling of the unit. Moreover, it’s safe to use around children since the shape renders a strong footprint for an air purifier.
Furthermore, it’s height is shorter than many other cylindrical models, which makes it a reasonably-sized air purifier for bedrooms. Simply put it on a side table, and you’re good to go!
Another great feature we observed was that the air intake grill is positioned under the power switch while the outlet grill is at the top. As such, it uses the concept of “bottom-to-top” airflow, which is the best way to circulate indoor air with a cylindrical design.
On a side note, here’s a small tip to ensure the purifier functions properly. You should always keep the top and side outlet grill unblocked to ensure 360-degree air distribution. Avoid putting the purifier against the wall, as it will restrict proper airflow, thereby reducing its efficiency.
Fan Speed
Filters may be the most crucial for air purifiers, but they are incomplete without a fan. That’s because a fan forces air at high speeds into the filter to effectively remove the contaminants from the incoming airflow.
Generally, purifiers come with 2 or 3 adjustable fan speeds to suit your needs. This SilverOnyx purifier, however, is a step ahead in this regard too, since it comes with 5 fan speeds.
Thus, you get more flexibility to choose the ideal setting according to the air quality and room size. For instance, if the air is polluted by litter smell or dust, you can increase the speed to the top-most level for a quicker action.
Quieter Performance
A noisy air purifier is a nuisance to any room, but that’s not a concern if you have this SilverOnyx air purifier at home. Despite having five different fan speeds, we found that it generates significantly less noise than many other models.
In fact, while using the product, we decided to measure the noise level on a typical day. And it was a mere 25 decibel, which is exactly that of a whisper-like sound. Almost too great to be true, we’d say!
This unit ranks high in terms of energy efficiency as well. You’ll be happy to hear that the maximum power consumption that it records is a mere 24watts. What does the trick is the low-voltage DC and brushless DC motor of this air purifier. This feature becomes beneficial in the long run when you need to use it for more than 8 hours without racking up the electric bill.
Advanced Features
On top of the benefits we’ve talked about till now, this purifier offers quite a few more, thanks to the availability of some superior-grade features. So, let’s quickly dive into them:
a) Auto-Mode- This feature can be of great help if you’re not sure about the best fan speed. It uses an integrated sensor that determines the air quality to set the ideal fan speed automatically. This is an effective way to regulate the overall power consumption while ensuring good air quality.
b) Timer- You also get to schedule the time when your air purifier has to be turned off. The working time can be adjusted anywhere between 30 minutes and 24 hours.
b) Sleep Mode- Activating this mode dims the light above the control panel instantly. Such a feature can be found only in a select few models.
c) Indicator For Filter Replacement- This is yet another rare feature, lighting up on time to alert you that a filter replacement is due.
Customer Service
While maintaining top-notch quality in all its products, SilverOnyx also takes care of customer satisfaction quite well.
This is one of the primary reasons for which we would highly recommend this brand. Interestingly, it offers the much sought-after free shipping facility, unlike lots of other reputed brands.
Besides, the customer helpline is much more effective with its prompt response to almost any query. And a 30-day return policy is also offered in case you are not satisfied with the product.
Maintenance
We were glad to find that unlike several other models, this unit didn’t need much maintenance. Sure cleaning the filters is necessary, but you can simply rinse them lightly or clean with a vacuum.
Filter replacements are a major concern for most people. But in the case of the SilverOnyx purifier, some of the long-lasting filters don’t require the usual 2-time replacement per year.
What Could've Been Better?
Although this SilverOnyx unit is among the most high-performing air purifiers available currently, it does have some minor disadvantages. But from our experience, we can assure you that these won’t make much difference in its efficiency.
Firstly, it takes a bit longer to purify the air in very large rooms. For a surface area of 500 sq ft., the unit may take around 7 or 8 hours to effectively eliminate up to 99% airborne particles, due to a slightly lower CADR value. The CADR (Clean Air Delivery Rate) is a measure of the rate at which an air purifier can remove a specific contaminant from the air.
Apart from this, we found the warranty of 1 year to be a bit disappointing. In comparison, other models like the Levoit LV-H132 allow you to extend the warranty period by an additional one year.
The air quality in your room will directly affect your health and well-being. So, if you decide to go for an air purifier, you should choose the one that does its job really well.
As such, considering some key features becomes important, as is keeping in mind your needs. Hence, in this section, we’ve listed some essential points that you should look for before buying a suitable air purifier.
Types
Different categories of air purifiers tackle air pollution using various methods, which vary according to their power source. As such, you can choose between the kinds that are available as per your preferences.
One such type is a mechanical purifier, which comes with a web of fibers to trap particles. On the other hand, electronic models like the SilverOnyx purifier use ionizers and electrostatic precipitators to charge and filter them. Another well-known type is the activated carbon method to adsorb molecules that produce bad odors.
Air Purifying Capacity
Not all electronic purifiers use the same technology, which is why their air-purifying capacity is different. In this regard, the filtering system becomes significant. So, make sure you check the information on the number and types of filters while going through the details of a product.
Notably, the SilverOnyx purifier offers a superior filtering system that consistently works to remove the majority of harmful particles from the air.
Apart from this, checking the fan speed adjustability is also important. This will allow you to regulate its functioning as per your needs. For regions with higher pollution rates, greater adjustability is a must.
Noise Level
The level of noise produced by purifiers is another key factor to take into account. In particular situations (for example, if you are using it in a baby’s room or a bedroom), a quiet operation even at high fan speeds will be more suitable.
Noise from purifiers originates from the filtering system working continuously. However, in good-quality models such as the Silveronyx purifier, it is almost inaudible. This is because they incorporate sound-dampening mechanisms, thereby enhancing the utility of the product.
Note that inferior air purifiers might produce a steady humming noise similar to that produced by an AC unit. So, do remember to go through the information on the noise level while considering any unit.
CADR Rating
Choosing a model with a standard CDR rating is important to ensure that it can efficiently work in average-sized rooms. This rating is a way to estimate the coverage of an air purifier.
As we mentioned earlier, the SilverOnyx purifier comes with a slightly lower CADR count but is sufficient to maintain the air quality in average-sized rooms. Do keep in mind that a CADR count of below 80 implies the purifier might not be ideal for even medium-sized rooms.
Design And Portability
By design, we are not just referring to the external design and look of the purifier here, but also to an intrinsic aspect. The purifier should have the controls positioned conveniently and should have an overall compact design.
But the position of the inlet and outlet grills is also important since it determines the direction of air circulation. Keep in mind that a “bottom-to-top” airflow through the purifier enables a more efficient performance.
In addition to this, portability is a significant factor to consider when buying air purifiers. Small and lightweight models can be kept on a shelf or desk and can also be moved easily from one room to another. Hence, it might be better to go for a smaller size.
As for the larger models, they are usually much heavier, making them more suitable for use in a single room. However, some larger purifiers do come with casters to facilitate partial portability.
To make an efficient choice, consider the size and number of the rooms you’ll be using the air purifier in.
Extra Features
Purifiers that come with additional features on top of the regular controls are always better since they provide more flexibility and convenience. These include indicators for filter replacement, timers, and auto modes. Some even come with a remote to enhance user convenience further.
So, if you are not faced with a tight budget, going for a purifier that offers additional features and is priced just slightly higher is beneficial.
As we have discussed earlier, the SilverOnyx does come with quite a few additional features, making it a great choice if the flexibility of use is a primary lookout for you.
Impurities That Purifiers Deal With
Air purifiers eliminate various substances from the air, contrary to the common belief that they only act on dust particles. The air we breathe consists of pollens, smoke, and other various harmful allergens, which are acted upon by good-quality air purifiers.
Thus, they render your home safe from the risk of most airborne diseases. The risk of such diseases is greater in certain regions across the country, so it becomes all the more essential to go for a super-efficient air purifier.
Brands like SilverOnyx provide the protection that you desire, as their air purifiers come with sound filtering systems.
SilverOnyx Air Purifier Review
Are Air Purifiers Safe For Small Children?
Yes, most modern air purifiers are designed to ensure the safety of kids. The use of good-quality filters enhances safety, so the ones like this SilverOnyx model consists of a HEPA filter are a step ahead of others.
As we discussed earlier, the safety of use around kids depends on the design too, as it should make a strong footprint. The SilverOnyx qualifies as a great one in that regard.
Do All Air Purifiers Remove Odors?
Well, this largely varies from one model to another, as not all purifiers have efficient odor-removing filters. Those like SilverOnyx incorporate activated carbon filters. Hence, they successfully remove most types of odors from the air.
Do All Air Purifiers Remove Pet Hair?
This would depend on the availability of a pre-filter in the purifier, which is capable of removing larger particles like pet hair and dander. The SilverOnyx does come with that feature, so you don’t need to worry about this if you go for it.
Are Air Purifiers Effective On Viruses?
Viruses causing airborne diseases cling to dust particles or droplets easily and air purifiers can capture such substances, thereby eliminating these viruses effectively. The common types of air-born diseases include influenza, common cold, and respiratory ailments such as asthma.
Can Air Purifiers Cool Down A Room?
Air purifiers can’t alter the temperature of a room directly. However, they come with fans that blow or circulate the air, so the procedure of moving air would make a room cooler. Note that a purifier with a higher airflow can blow out more air, which may reduce the air temperature slightly.
How Long Should I Use An Air Purifier?
If you didn’t know this till now, purifiers are designed to be used 24/7. Those with smart-sensors can adjust the speed of the fan automatically, so you can run them all day long without worrying about power consumption.
So, here was our guide on all the essentials regarding the SilverOnyx air purifier. We hope you’ll find it helpful.
In our opinion, this product is a must-buy for those in search of a convenient and truly effective air purifier. The low noise level and power consumption only add to its usefulness. And the best part is that you get all these benefits at a quite budget-friendly price.
So, go ahead and try out the SilverOnyx air purifier. And when you do, let us know in the comments section about your experience- we’ll be glad to know about it all!
Choosing the correct type of humidifier for your house can bring a drastic improvement in air quality.
There are different sizes of humidifiers available that are suited to cover a certain square footage. Matching a suitable model with its corresponding square feet is vital to get the most benefits out of it.
While there are whole-house humidifiers available, using one unit for a single room has its own benefits as well. Saving on power consumption and controlling which rooms are ventilated - just to name a few.
With so many considerations and factors that affect the efficiency of a humidifier, what is the best size for your home? We will go over this and a few quality models to choose from in our comprehensive guide.
Without further ado, let us get into it!
What Size Humidifiers Do I Need?
Humidifiers - Mist Temperature
Humidifiers are available in two options of what temperature mist they release. You can go with either a cool mist or a warm mist humidifier.
Going with either temperature variant has its own unique benefits to add moisture back into the air. After all, regulating the moisture output and humidity of a space can help cut down on respiratory allergens.
A. Cool Mist Humidifier
Cool mist humidifiers are used widely for their coverage and health benefits. In homes with young children and pets, the cool mist given off by the humidifier can limit the number of fire hazards in a room.
Additionally, cold mist humidifiers are versatile in that they purify the air besides maintaining the humidity level of a space. The number of square feet that a cool-mist humidifier covers are more than that of its warm mist counterpart.
In essence, a cool-mist humidifier is a two-in-one unit that does it all with more energy efficiency than a warm mist model. It does this by turning the warm air cold with the cool mist droplets.
However, they come at a higher price tag as compared to a warm mist model. Additionally, the cool mist generated requires an internal fan to maintain the temperature as the mist is released. As such, the noise levels can be high when working in higher settings.
It is a great investment if a cool temperature and additional health and safety benefits are what you are looking for.
Types of Cool Mist Humidifiers
There are two types of cool mist humidifiers available - classified depending on the method of distribution of the water particles into the air. These come in either an evaporative or an ultrasonic unit.
In evaporative cool mist humidifiers there is a wick filter within the unit that absorbs the water from the tank. This water is then evaporated and spread throughout the room by a fan blowing air through this wick filter. The resulting output is a fine cool mist spread throughout the room
The second cool mist humidifier type is known as an ultrasonic humidifier. These units use ultrasonic vibrations to generate the ultra-fine mist. What's more, they are usually quieter in operation as compared to the evaporative models.
Features Of A Cool Mist Humidifier
Using a cool mist humidifier can bring about a change in the air quality and temperature in the room. As the unit does not require any heating, there is a considerably lower power draw, saving you a bit on the electric bill.
Additionally, these models are safe for use around children and pets as there are no potential accidents due to hot water. The cool mist adds a refreshing feeling to any room's humidity levels.
Using a cool mist humidifier does have a few drawbacks such as the higher noise level. Furthermore, the colder mist can make a room feel slightly colder. If you live in cold climates, you may want to reconsider before spreading cold moisture throughout your rooms.
B. Warm Mist Humidifier
Warm mist humidifiers are widely used as they are able to remove bacteria by heating up the water in the tank. Before the steam and warm mist are released into the air, mold spores and bacteria are killed off.
As the mist has been heated, it is able to have a higher concentration in the air. This can be especially beneficial in acting as a heating element in colder rooms.
What's more, warm mist humidifiers ensure minimal noise levels during operation. And the internal fan that is necessary for the cool mist model is not required in this humidifier.
Features Of A Warm Mist Humidifier
Using a humidifier that utilizes warm mist to regulate humidity levels in a room can bring additional health benefits. By heating up the water to a boiling point within the tank, any bacteria and mold is killed off right away.
Furthermore, the warm mist humidifier works silently as there is no internal fans required for its operation. This makes using them in areas where noise is a factor such as nurseries and offices more plausible.
However, warm mist types of humidifiers are not as efficient in terms of their coverage. The warm mist takes time to travel and is limited to the immediate area around the humidifier. As the mist is evaporative, by the time the droplets travel away from the system, they have cooled down and dissipated.
What's more, the price of buying one of these machines tends to be more than the cool mist counterpart. Although, it is beneficial in doubling as a heating element and potentially save some energy spent on heating.
What Is The Ideal Humidifier Size?
If an air humidifier is not a centralized unit, it is typically portable to some extent. These smaller-sized units are used to control the humidity level of a single room at a time.
Classifying the types of humidifiers according to their size can be done based on their water tank size, how many square feet they cover, and their water output.
A. Small Size Humidifier
On one end of the spectrum, there are small 1/4-liter humidifiers that can be powered with a USB cord. These models are not as effective as a larger-sized model.
When it comes to efficiency and effectiveness of these types of humidifiers, they are more suited for smaller rooms and areas. The moisture output is not sufficient to have an effect on the overall humidity of a room.
Due to their compact design and limited effective area, they are ideal for use in cars and small office spaces. In fact, controlling the humidity is much easier when the area to be covered is small.
B. Large Size Humidifier
On the other side, we have large industrial models that are heavy-duty performers—effectively covering more square feet along with more moisture output.
These humidifiers are capable of covering 3,600 square feet, so regardless of the room size, they will be sure to maintain the humidity level in the air easily. With such extensive coverage, these large models can be essentially used as whole-house humidifiers.
Larger humidifiers typically have a larger water reservoir to store the gallons of water needed for the steam and mist. On average, they can store up to six gallons of water while having an output of 12 gallons. It is easy to see how quickly dry air becomes hydrated and healthier to breathe.
When choosing an air humidifier model, keep in mind the quoted capacity on the packaging refers to the tank capacity, not the moisture output. On average, the volume of moisture output is more than that of the water tank. And a larger water tank volume will benefit in cutting down on frequent refills.
However, a large-size humidifier should be used only in rooms that are capable of taking full advantage of its coverage. A misplaced large humidifier in a small room size can cause mold and bacteria to form. Moreover, the humidity level will saturate the entire room to the point of excess, compromising the safety of your respiratory system.
Taking proper measurements of the square footage of a room is essential to match it with a compatible humidifier size. The relative humidity given off by a compatible unit can determine how beneficial it is in improving air quality in the room.
A safe choice of an adequately sized humidifier is one that can cover 700 square feet. These models are able to cover most bedrooms and a living room easily without compromising on safety. However, to guarantee a large-sized humidifier is the right choice for you, it is recommended to use one only in rooms with an open layout.
A quiet humidifier from Honeywell, this model can gently release cool moisture back into the air. It has an incredibly easy refill design from either the top of the humidifier or by removing the tank entirely and refilling at a faucet. By being able to remove the tank, maintenance is also an easy process with this model.
There are no filters involved in this cool mist humidifier, so you won't have to buy a replacement filter eventually. Instead, a nebulizer is vibrated at an ultrasonic frequency then released by a directional mist outlet. Using this unit can cut down on dry air and dust that can irritate the respiratory system.
Pros
1.25-gallon tank capacity can be used for 36 hours
Everlasting Comfort has an ultrasonic humidifier that is rated to humidify rooms up to 500 square feet. With such a wide operation range, it can be easily used in almost any room of the house. What makes it unique is the essential oil tray that spreads a fresh aroma throughout the entire room.
Additionally, this humidifier has a filter-less design, saving you on further costs to replace the filter. Although this is a cool mist model, it operates silently thanks to the ultrasonic technology to dissipate the mist.
Perfect for colder climates, this humidifier doubles as a diffuser for essential oils and can relieve symptoms like dry skin. With a smart connectivity feature, the humidity in a room can be regulated easily.
This model is perfect for nurseries as the noise levels while in operation are minimal. Additionally, there is a sleep mode to keep the control lighting off or dimmed.
Pros
Automatic shut off when empty
1.05 gallon tank can run for 40 hours
360-degree nozzle for full coverage
Three mist control settings
Cons
Bottom refill design can be challenging to access tank
Why Purchase A Humidifier?
Placing a humidifier in rooms can not only control the humidity of the house, but save you from certain side effects of respiratory irritants. The mist that the system gives out is effective in cutting down on germs and white dust.
Taking into account all the benefits of a humidifier, there is not many things to consider. The benefits of using an air humidifier system outweighs any potential drawbacks.
Some common side effects due to dry air include sore throats, cracked lips, itchy skin and bloody noses. In some extreme cases it is possible to have respiratory ailments and an irritated sinus passage. All these side effects can be minimized or removed completely simply placing a humidifier in your rooms.
Beyond just personal health benefits, a humidifier can preserve the wooden elements in your house. Everything from furniture to the flooring and structural integrity will become more durable and less susceptible to damage. By putting moisture back into the air, the amount of damage due to drying out is minimized.
Additionally, plants can also benefit from having a humidifier in the same rooms they are in. The unit acts as a regulator to humidify the room and remove any dry air. As a result, white dust is kept to a minimum while the water level in the air is kept at an ideal level.
Conclusion
With the benefits of using a humidifier in your house, it is clear to see how this investment pays off in the long run.
Any of the three portable models listed above can function efficiently regardless of what room size you have. Placing humidifiers in each of your rooms can significantly cut down on white dust and improve air quality.
So, to sum up, investing in air humidifiers is worth the price tag they come with. Your house as well as your respiratory system will thank you, and be that much healthier.
Branding dominates purchase, whether you like it or not!
No matter how big or small your investment is, there's no good reason why you wouldn’t like a branded commodity. After all, who doesn’t like owning products that are from a popular brand? And let’s face it, when your neighbor says she has a particular brand’s bathtub, it only makes you more proud of your decision!
But in doing so, there’s possibly no reason why you’d compromise utility and cost-efficiency. That’s why the actual value of a product will always depend on its utility and durability.
That being said, there are a few brands that strike the right balance between quality and pomp. And one such brand that makes us keep coming back to its products is Kohler. We just can’t get enough of their plumbing fixtures!
But in case you’re still wondering if buying a Kohler product will be worth your hard-earned bucks, read our factual reasons for speaking highly of this brand.
Is Kohler A Good Brand?
Where Did It All Begin?
Before we walk you through the deets, allows us to shed some light on the brand’s inception. In 1873, John Micheal Kohler, an immigrant from Australia, along with his partner Charles Silberzahn, spent $5,000 to buy the Sheboygan Union Iron and Steel Foundry from its owner and Kohler’s father-in-law, Jacob Vollrath.
Shortly afterwards, they began producing various items, including pieces of ornamental iron like cemetery crosses and settees, and castings for furniture factories and steel farms under the name “Kohler.” However, it was in 1883 when the brand got its big breakthrough.
John applied enamel to a horse trough made of cast-iron and was able to build the brand’s first-ever bathtub. Since then, plumbing fixtures is what Kohler has been best known for. Although the brand has had its share of controversies over the years, their top-notch products have earned the trust of customers worldwide.
Kohler has tried its hand in different specializations, but its bathroom and kitchen fixtures are the main products that run synonymous with the brand name. Almost all of the company’s plumbing fixtures are available in various hardware, DIY, and home improvement stores across the States. And its iconic bathtub remains one of the top-selling products to this day!
But that’s not all; Destination Kohler, the company’s real estate and travel wing, owns several properties in the US and Scotland. In 2017, the brand acquired Clark Energy - a US-based company specializing in end-to-end production of engine-based power plants. Apart from that, Kohler is also the authorized GE global distributor for its reciprocating engines.
Is Kohler A Good Brand?
To answer it in a single word, we will say a big yes! There’s no doubt that Kohler demands all your attention when you think of buying a plumbing fixture. But what makes the brand worth all this praise? Let's’ find out!
Tradition Of Quality
For a brand that has been in the market for more than a century now, you can completely trust it to meet all your plumbing needs. Be it toilets, faucets, or bathtubs, Kohler has got it all. But what appeals to us the most is the quality of their products. The brand puts equal effort in maintaining and improving product quality in accordance with present and future requirements.
For instance, Kohler toilets are a very popular choice in the US, which directly competes with other leading brands like American Standard, Woodbridge, and Toto, among others.
A simple online query about any Kohler product will fetch a lot of positive reviews, which is a testimony of the brand’s positive presence. And there are a couple of good reasons for that. In 2015, Kohler created a walk-in division, which put on display the engineering of bathtubs that are specifically designed for users with disability or mobility issues.
This range became popular rather quickly and earned the brand a reputation for being considerate to all sections of the society. Its creations are sold via independent dealers throughout the country.
In the same year, The Builder Magazine named Kohler as the ‘best quality’ and ‘most used’ brand in the bath accessories category. It also bestowed the brand with the top spot in the list of ‘most used’, ‘customer brand familiarity’, and ‘quality rating’ for the whirlpool bath fixtures range. Moreover, the brand creates customized artist works with hand-painted sinks and toilets.
Raging International Success
As we have mentioned multiple times, Kohler has successfully created a name for itself in the global market, thanks to its range of quality products.
Visit any home improvement store in Asia or Europe, and you will likely find Kohler as one of the mainstay brands that they have on offer. In fact, many users say that it’s the ‘Apple equivalent’ of bathroom fixtures. Now that’s what we call reputation!
Beyond that, Kohler created a joint venture called Kohler-YinXiang Ltd.in China in 2007 to manufacture small-scale gasoline engines. The brand intends to import these engines, rather than manufacturing them in the country. Likewise, Kohler’s UK subsidiary is the Gloucestershire-county-basedKohler Mira Ltd., which is best known for its Mira showers.
Plus, Kohler has an active involvement in various development projects with other countries like Australia, India, France, and Singapore, among others. What else can possibly speak of its global popularity?
Ever-Evolving Technology
Modern life is incomplete with technology, and Kohler understands this like no other. Recently in 2022, the brand unveiled a line of ‘Kohler Connect’ products (at the year’s CES convection), consisting of smart connected products like mirrors, bathtubs, showerheads, shower valves, and toilets.
These fixtures will be equipped with WiFi, voice assistance (compatible with Google Assistant, Apple HomeKit, or Amazon Alexa), and app control support, thanks to the brand’s own Kohler Konnect App. To that end, the company’s engineers are using the Microsoft Azure Cloud System, and Kohler has already spent millions for this purpose, with more investments to follow.
It’s worth mentioning that the brand’s love affair with technology began in the early 20th century when it started making drinking fountains with a ‘bubbling valve’. These valves later came to be known as bubblers, which helped with the vertical motion of water.
Kohler’s activities are ably helmed by a group of socially conscious administrators, executives, and managers. Consequently, the company is continuously striving to give back to the community and the planet as a whole. In their 2017 Sustainability And Stewardship Report, the brand put forward their progress in creating more energy-efficient and eco-friendly products.
Besides, the company puts continual efforts via its Habitat For Humanity Project that builds homes for the underprivileged. In addition, it holds regular drives for providing clean and safe water through the Kohler Run For Charity event. And it had also lent a helping hand for victims of the Mexico earthquake in 2017.
Apart from that, it supports various charities and NGOs worldwide, which are involved in pushing for relevant advocacies.
Warranty
Unless stated otherwise, all Kohler products come with an automatic limited warranty of one-year. This also covers defects in design and material for one-year post-installation. Besides, there are several other additional warranties for different products, which are available on the warranty page of the brand’s official website.
Controversies
To give you a fair picture, it only makes sense for us to list down some of the infamous controversies that have troubled the brand.
In 1998, the company planned to buy back all shares that didn’t belong to the family. For this, each family member was required to exchange their shares for unsalable limited rights share. However, the company was yet to become a public-traded firm, meaning the number of floating shares were less.
Going ahead with the plan, Kohler offered a sum of $54,000 per share, an evaluation which was challenged by several shareholders. Not only that, the IRS (Internal Revenue Service) filed a prosecution case, which was ultimately won by the company.
The very next year, Kohler found itself in the midst of another controversy when the US Department of Labor alleged that the company practiced discriminatory hiring against females. Prior to this, the company did formally announce that women employees should have a minimum height of 5’4’’ (the average height of an adult female).
Owing to its obligation to the government, Kohler was barred from implementing this hiring criterion. They settled the case and hired more than 100 from among the 2,000 women candidates who applied for a position between 1994 and 1995.
In The Late 2000
A few years later in 2005, China’s Labor Watch accused Kohler China Co. of violating workers’ rights in its Foshan factory. The welfare organization accused Kohler of implementing excessive work hours, low wages, insufficient overtime compensation, and uncompensated work injuries, among other things.
Perhaps the last controversy erupted at the beginning of this year when the company settled a multi-million dollar lawsuit. The US Department of Justice, the Environmental Protection Agency, and the state of California filed a complaint as the company’s small engine production violated the Clean Air Act and California law.
Where Can You Buy Kohler Products?
Popular e-commerce websites like Amazon, Wayfair, and Houzz can be surfed for almost all of the brand’s products. But if you prefer taking a detailed look, feel free to walk into any Kohler or major home improvement store in any part of the country.
There you have it! We hope that this guide could tell you why we think Kohler is a good brand. Sure, it didn’t have a smooth evolution, but the brand has done a commendable job in maintaining and improving the quality of both its products and services.
This is evident from the fact that Destination Kohler has been appointed as the official tourism agency for the Village of Kohler, Wisconsin.
At the same time, we also agree that Kohler might not be as famous as some of its American competitors, but there are still plenty of reasons why you should choose it over others. Plus, it has always been a forerunner in engineering products for the future. So, try a Kohler product today and decide for yourself.
Are you an underground musician trying to come up with new tunes and melodies at home?
Or are you at the other end of the spectrum, sick and tired of your neighbor’s jamming sessions? Well, in both cases, installing soundproof drywall will help reduce noise and promote better relations with your neighbors!
In fact, soundproofing drywall is the most effective solution to block sound waves. And the best part is that most homeowners can install soundproof drywall themselves without requiring professional skills and knowledge.
That said, let’s get a little more into the nitty gritty of soundproofing drywall and find the best out of the lot…
Best Soundproof Drywalls
What Is Soundproof Drywall?
Also known as acoustic drywall or pre-damped drywall, soundproof drywall consists of multiple layers of standard drywall made with a combination of clay, mica, mineral gypsum, and two layers of paper. Additionally, it contains internal sound-deadening barriers usually made of ceramic/viscoelastic.
As sound travels through hard surfaces, the soft layers act as sound-absorbing materials, making soundproof drywall better than just multiple layers of drywall.
How Does Soundproofing Work?
The speed of sound is 343 m/s (1,230 km/h; 767 mph), and it travels as waves from the source to the surrounding area. Contrary to how light travels in shorter waves, sound consists of longer wavelengths too, which can diffract around walls as well as travel through the tiniest air gaps.
Moreover, unlike light, which only travels through specific media, sound can traverse through most solid materials without much change in its form and volume. Notably, metal is a superconductor of sound as it can transmit sound waves at a speed of 21,460 km/h (13,330 mph).
Sound waves are basically vibrating air particles that reach our eardrums, making them vibrate. These vibrations are “heard” as sound, so larger vibrations create louder sounds. As such, soundproofing involves adding mass and density to an area to eliminate sound transfer.
Sound Transmission Class (STC)
Developed in 1961, Sound Transmission Class (STC) is a rating given to structural surfaces based on how sound vibrations travel through them. Usually, internal walls boast an average STC of 40, while hotel walls may have an STC of 60 or more.
Given below are the STCs by audio distinguishability, STC ratings, and the level of sound that can be comfortably heard through them:
STC
What you can hear at this level*
25
Soft speech can be heard and understood
30
Normal speech can be heard and understood
35
Loud speech audible but not intelligible
40
Loud speech audible as a murmur, heard but not understood
45
Loud speech can be heard, the threshold at which privacy begins
50
Loud sounds can be heard but faintly, indistinguishable
60+
Good soundproofing starts here; most sounds do not disturb neighbors
*Values in this table relative, as they are influenced by background noise levels in the receiving room, the greater the better perceived sound insulation
Accordingly, it is imperative to know the STC score of soundproof drywall while choosing one for your room. However, you must remember that not all sounds are measured by the STC scale, as the range is at the standard decibel level of the human voice (125-4000 Hz). As such, to prevent very low-frequency and high-frequency sounds from traveling, you must consider other measures.
How Does Soundproofing Drywall Reduce Sound Transfer?
1. Dampening
Soundproof drywalls act as dead panels, which is imperative to reduce sound transmission. However, they become more effective when used with a sound-damping compound like Green Glue. Basically, Green Glue imitates natural rubber and absorbs sound vibrations. You can further employ fiberglass sound insulation to the soundproofing drywall panels to add approximately ten more points to the STC rating.
2. Insulation
According to the relationship between mass and sound, the higher the mass, the lower the frequency of vibration. As such, heavier interior walls ensure better soundproofing, so consider using a double layer of 5/8″ drywall to achieve a higher STC rating at a lower cost.
3. Decoupling
Sound waves travel from one surface to another. That’s when decoupling helps separate the drywall adhesive from the steel studs, thereby disrupting the path of sound transmission. Hence, a staggered stud wall makes an effective sound barrier.
4. Absorption
You can use a variety of sound-absorbing materials in your wall assemblies to reduce noise. Some of these materials are viscoelastic foam, rubber, fiberglass, mass-loaded vinyl (MLV), etc.
Best Drywall For Soundproofing
1. QuietRock Drywall
Known as the first sound-dampening drywall, QuietRock drywall is a popular pick among homeowners who wish to maintain privacy. The brand has been in the industry for almost two decades, so it is no surprise that you’ll find multiple drywall options catering to varying needs.
Plus, thesesoundproof drywall panelsare easy to install, making them suitable for beginners or DIY enthusiasts who wish to try their hands at framing (construction). All QuietRock drywall panels come with a tapered edge too.
Depending on your budget, you can opt for QuietRock EZ Snap or QuietRock 545, the former being a budget buy while the latter is a premium pick. However, I must add that QuietRock 545 offers the ultimate amount of soundproofing (goes up to 80 STC), which is, of course, favorable but not always required by regular homeowners.
In fact, this high-end drywall for soundproofing is often used in studios and movie theaters and not in residential areas.
Thanks to the three-layered construction of QuietRock soundproof drywall, they are much easier to install than traditional drywall. You will need minimal effort and time to snap the drywall panels into place.
Speaking of construction, the noise-reducing drywall features two layers of gypsum drywall with a viscoelastic polymer in between. The middle layer acts like a rubber compound, thereby increasing viscoelasticity and blocking sound waves of varying frequencies.
Overall, QuietRock boasts a better STC rating than the standard drywall. So, try covering the entire wall with these panels for the best result.
Quietrock Panels
Thickness
Width
Length
Weight
Core
STC*
EZ Snap
⅝”
48”
8’,9’,10’
2.6 lbs/ft2
QRES/Type X
48-60
EZ Snap Mold Resistant
⅝”
48”
8’,9’,10’
2.6 lbs/ft2
QRES/Type X
48-60
QuietRock 510
1/2”
48”
8’,9’,10’12’
2.13 lbs/ft2
QR510/Regular
47-69
QuietRock 530
⅝”
48”
8’,9’,10’12’
2.88 lbs/ft2
QR530/Type X
52-74
QuietRock 530RF
⅝”
48”
8’,9’,10’12’
2.88 lbs/ft2
QR530/ Type X
52-74
QuietRock 545
1 ⅜”
48”
8’
6.25 lbs/ft2
QR545/Regular
60-80
*STC: The variation is influenced by the frame material type (wood or steel). Wood frames perform better acoustically and thus produce higher STC scores.
2. National Gypsum SoundBreak Board
National Gypsum is yet another brand that’s slowly emerging as a popular choice for soundproof drywall, the panels are a Gold Bond building product and they offer the Gold Bond Soundbreak acoustical panel range.
The brand offers a variety of sound-dampening drywall, but I recommend Sound Brake XP 1/2 inch Wall Board for those on a budget. However, if you’ve got more to spare, Sound Break XP Ceiling Board 3/4 inch is a high-quality drywall forsoundproofing commercial spaces. The paper in the Soundbreak panels is made from 100% recycled material and is resistant to mold, mildew, and moisture.
Generally, any National Gypsum panel boasts an STC rating of 64, thereby effectively absorbing sound transmission despite the budget-friendly price.
National Gypsum Panels
Thickness
Width
Length
Weight
STC*
SoundBreak XP Wall Board
½”
48”
8’,10’
N/A
39-51
SoundBreak XP Wall Board
⅝”
48”
8’,10’
N/A
43-63
SoundBreak XP Ceiling Board
¾”
48”
8’,10’
N/A
59-60
SoundBreak XP Retrofit Board
5/16”
48”
8’,10’
N/A
36-53+
*STC:The variation is influenced by the frame material type (wood or steel). Wood frames perform better acoustically and thus produce higher STC scores.
3. CertainTeed SilentFX Panels
Best known for its acoustic panels, Silent FX QuickCut, CertainTeed is another brand you can consider. Just as the Quietrock, both variants are offered with tapered edges.
Its bestseller offers a width of ⅝ inches and is easy to install, almost like the soundproof drywall panels from QuietRock. Plus, it is a fire-resistant board that can absorb airborne sound fairly well, although not as efficiently as QuietRock 545.
CertainTeed Panels
Thickness
Width
Length
Weight
STC*
SilentFX Quickcut
½”
48”
8’,9’,10’12’
2.1 lbs/ft2
41-54
SilentFX Quickcut Type X
⅝”
48”
8’,9’,10’12’
2.8 lbs/ft2
40-64
*STC: The variation is influenced by the frame material type (wood or steel). Wood frames perform better acoustically and thus produce higher STC scores.
4. CertainTeedType X Drywall
Type X drywall is another common pick from CertainTeed, more so because it offers the best of both worlds - soundproofing and fireproofing. Both regular SilentFX and Type X gypsum boards meet the ASTM C 1396 standard specification. However, the regular drywall is made with gypsum, which provides natural fire resistance but is not fire rated.
Type X drywall has special core additives that make it fire-resistant, the fire-resistant board boasts a thickness of ⅝ inches, offering a dense layer of protection. In fact, it is denser than paper and gypsum drywall. Type X boards have a UL/ULC marking on the back of each board to confirm the fire-resistance rating.
For best results, I recommend using a double type X 5/8″ drywall with 3-1/2″ of insulation and steel studs on a wood stud wall. Coupled with the green glue between the layers of drywall, you can get two hours of fire resistance and amp up the STC rating to 58.
Drywall Panel
Thickness
Width
Length
Weight
STC*
CertainTeed Type X Gypsum Board
5/8"
54"
8’,9’,10’12’
N/A
50+
*STC:The variation is influenced by the frame material type (wood or steel). Wood frames perform better acoustically and thus produce higher STC scores.
5. Multiple Layers Of Traditional Drywall
Of course, if you have standard drywall lying around the house, you can use layers of the existing drywall to soundproof your room.
We suggest using 5-8 layers of existing drywall panels to close any air gaps that may allow sound transfer. However, doing so will shrink the size and floor space of the room and can add a lot of stress to the walls and ceilings.
Moreover, using layers of standard drywall sheets can get expensive. Not to forget, stacking standard drywall layers will take a lot more effort and time than using a single layer of drywall for soundproofing. As such, if you hire professionals for the job, using layers of traditional drywall will become all the more expensive.
How To Choose The Best Drywall For Blocking Sound Waves
Knowing the brands that manufacture the best soundproof drywall is just half the journey completed. Next comes understanding the factors you must consider to choose the appropriate drywall for soundproofing. Here are some that I keep in mind while buying soundproof drywall…
1. Installation Process
Anyone can install drywall with a few instructions, so there is no brand that particularly stands out in this aspect. However, if you choose to install more than one layer of regular drywall, the process will become relatively challenging.
I recommend going for soundproofing drywall panels instead of alternatives, especially for beginners who have no knowledge of construction. You’ll be saving a lot of time and energy.
2. Durability
Soundproofing drywall from the aforementioned brands is known to be durable. And if you add moresoundproofing material, the drywall will become tougher and more resistant to damage. In the case of accidents, too, soundproof drywall can be repaired easily.
3. Cost
Among the brands I recommended, QuietRock is the priciest, with many high-end variants available for commercial soundproofing purposes. But remember that while it may be difficult to resist the “best” drywall for soundproofing, it may not always be required, especially in residential areas.
Coming to installation, most professionals will charge similar rates, depending on the number of layers of drywall you plan to use. Overall, I suggest checking the building materials of the drywall you choose and analyzing whether the total costs will be worth it.
4. Soundproofing Preferences
Ask yourself the reason for soundproofing your space. Is it because you want a quiet space for yourself, isolated from the rest of the household? Or is one side of the house facing the traffic and the hustle and bustle of city life?
Whatever the reason may be - ensure you research soundproof drywall, the different frequencies each type of drywall can block, the installation process, and more. Checking customer reviews of the products will also help get a clearer picture of the quality and durability of the soundproofing drywall.
Moreover, if you’re looking to cut down distractions and promote productivity in a workspace, consider sound masking for the best results.
5. Frequency Of Use
If you’re considering soundproofing a room that is used often, you may want to invest in a premium option like the relatively expensive QuietRock drywall. On the contrary, if it’s a room that is used, say, once a week, you can simply add standard drywall layers.
6. Other Factors To Keep In Mind
When installed correctly, your wall assembly should be able to prevent noise and resist fire. On that note, you must ensure a gap between the soundproof drywall and the adjacent walls and ceiling. These gaps can be filled with acoustic caulking for effective noise reduction.
Moreover, switch boxes, heating pipes, vents, and other fixtures can transmit sound waves. So, I suggest using putty pads for sound damping. Also, note that resilient clips and channels can reduce sound by 12-15 STC points.
How Much Does Soundproof Drywall Cost?
Compared to standard drywall, soundproof drywall costs higher, around $50, as opposed to a $10-dollar standard drywall. But when I say that opting for soundproof drywall is more cost-effective, I mean using a single layer of it, whereas you’ll require more layers when using regular drywall.
At the end of the day, however, it comes down to your preference. If your space is relatively quiet anyway, adding a layer of traditional drywall or using soundproof curtains may do the trick!
Conclusion
The best drywall for soundproofing will definitely work better than your existing sheetrock. Although the material costs may be considerably high, it is a small price to pay for a tad bit of privacy!
Not to forget, high-quality drywall offers significant fire resistance and water absorption and prevents mildew growth. As a result, soundproofing your walls can indirectly help safeguard your health and improve your quality of life.
Finally, I recommend installing soundproof curtains, window shutters, and rugs on the entryway to soundproof your doors and windows further.
The best soundproof panels are the Sonic Acoustics Hexagon Panels, offering excellent noise reduction capabilities without breaking the bank. That said, every panel set aims at a different requirement, and the right choice rests on the user’s preferences. Further, attenuation will only be achieved with 100% coverage of the target walls.
Creating a quiet environmentis quite important for a home recording studio, especially if you live in a noisy locale.
Moreover, a home office setup benefits immensely if it is in a quieter place, improving your productivity and allowing you to focus on the task. And to achieve this, you’ll need a set of soundproofing panels that suit your specific needs.
To help you choose the right product, I’ve curated a list of the 8 best soundproof panels that perform this task effectively.
Made from high-density materials, the Sonic Acoustics Hexagon Panels are designed to provide sound insulation while being flame retardant, non–toxic, and corrosion-resistant. These hexagon panels can be used as wall art to decorate and are available in various colors and styles.
The material primarily used to make the Sonic panels is polyester fiber, a commonly used element for absorbing sound that is effective at noise control. For frequencies ranging from 2000 to 6000 Hz, the material can absorb more than 90% of the noise. The acoustic panels have an average NRC rating of 0.92, which is sufficient for most small and medium-sized spaces, but may not be enough for large rooms.
Sonic Acoustics panels come in a 12-panel set with a surface area of 14 x 12 inches each, which completely covers my home office room. However, the hexagon shape means that the panels can’t cover every corner of the room whole. For this purpose, the acoustic panels were made to be cut easily and affixed to the surface in the desired shape.
The set can be installed with a general-purpose adhesive that can be sprayed on walls to stick the panels in the desired positions. I was also able to use a roll of 3M double-sided tape to stick the soundproof panels to the walls after reading the manufacturer’s instructions.
The Troy Studio Acoustic Foam Panel features groove-style sound-absorbing foam that can double as wall décor. These sound panels are square-shaped, thick, dense, and non-toxic while being affordable for beginner home studio setups.
TroyStudio Foam Panels are made primarily from polyurethane open-cell foam for room reverb cancellation, echo, and noise control. This, in turn, helps improve the sound quality in a room and makes recordings much less noisy. These panels feature an NRC rating of 0.75, which is ample for small spaces and can effectively reduce undesired sound reflection once set up properly.
Installing acoustic panels of this set is as easy as cutting them up and using spray adhesive. I was able to get them up and ready using a box cutter and the adhesive, albeit with some trouble keeping them adhered to the wall.
Coming in a pack of six, 12, 18, and 36, the acoustic panels cover a lot of space per panel on the wall. With a surface area of 12 x 12 inches per panel, eight of them were enough to cover the length of my home office walls. The high surface coverage, in addition to the 2-inch thickness and low weight, make these panels suited for acoustical treatment.
The sound-absorbing foam brick has beautiful appearance and...
Made of environmentally friendly polyurethane foam. In order...
What we like
48 panels in a pack
Acoustic wedge foam sound absorption tiles
Polyurethane panels
Environmentally friendly
What we don't like
A bit less effective at soundproofing
The Xin & Log Acoustic foam panels are a set of foam bricks with a checkered pattern that absorbs sound. This checkered pattern was made with wavy triangular shapes that help with noise reduction in addition to the visual design.
These sound panels are made from environmentally-friendly polyurethane foam that is also non-toxic. A common problem with some soundproofing materials is that they have a noticeably foul odor, something that is completely absent from the Xin & Log panels.
At 12 x 12 inches, the Xin & Log panels are sized sufficiently for small or medium-sized rooms such as vocal booths, studios, and control rooms. However, the low NRC rating of 0.4 and thickness of a single inch may somewhat deter it from being effective as a sound treatment option.
The polyurethane panels are soft enough to be cut through with shears or box cutters, and they can be installed using double-sided tape or spray adhesive. And they come in a pack of 48, ensuring that you have enough acoustic foam tiles to line your walls completely with the foam panels.
You can find the Xin & Log Acoustic Panels in black and black-and-blue colors, which you can match with your preferred aesthetic schemes.
Material: Polyurethane Foam | Surface Area: 12 x 12 inches | Thickness: 1 inch
Fashionable Appearance: This unique hexagonal sound...
Easy to Cutting and Remove: Easy to cut with a sharp knife...
What we like
Hexagonal acoustic foam panels
Odorless and non-toxic polyester fiber
Straightforward reshaping and installation
Panels can be detached post installation
What we don't like
Thin acoustic foam panels
Available in plenty of colors, the Dekiru Acoustic panels are hexagonal soundproofing implements with bevel edges for both aesthetic and functional purposes. This design choice enables the acoustic panels to effectively minimize echo while doubling as honeycomb wall décor.
The Dekiru panels come in a set of 12 and are made with odorless, non-toxic, flame-retardant, and formaldehyde-free polyester fiber. This material remains soft and easy to breathe in, making it simple to reshape the panels. Moreover, the panels can be detached from the walls and relocated without leaving visible blemishes or holes in your walls.
With a surface area of 14 x 13 inches, the panels promise to dampen sounds by a noticeable degree. That said, I found their 0.4-inch thickness to be a point of contention, ultimately limiting how much sound the panels absorb.
As for the installation, it is simple and straightforward and can be performed using 3M adhesive tapes, spray adhesive, nails, or glue. I would recommend using spray adhesive to keep the walls free of major blemishes if you ever wish to relocate your acoustic panels.
🧽【Quick-Recovery】Be different from other Acoustic...
🔇【1 Inch but High Density】You may be concerned that...
What we like
Quick recovery acoustic panels
Wedge-style panels
Highly elastic and high-density material
High noise absorption
What we don't like
Self-adhesive may not hold for long
The HEMRLY Acoustic Foam Panels feature a wedge design on high-density and highly elastic materials for soundproofing small and medium-sized spaces. They are available in three colors: carbon black, gray, and black-gray.
These panels are self-adhesive, meaning that they come with glue applied to the non-wedge side. All you need to do is remove the cover on the back, line the acoustic tile up against a wall, and apply sufficient pressure. Installation can be completed within minutes, requiring very little effort at most. And if needed, the HEMRLY panels come with some extra tape just to be safe.
As for the soundproofing capabilities, the 12 x 12 inches panels can absorb sound and echoes from the surroundings. They can be used in recording studios or at home offices for professional needs or to create a quiet environment to relax in.
The soundproofing foam can be cut and reshaped to fit a room as necessary, and it can be machine-washed without any issues. And once compressed, the acoustic panels take a few minutes to decompress, cutting down on the waiting time before beginning installation.
Material: Acoustic foam | Surface Area: 12 x 12 inches | Thickness: 1 inch
★ Professional Sound Absorbing Properties - Acoustic foams...
★ Quality - Our Acoustic Foam Panels are made with...
What we like
High soundproofing capability
Wedge-style design
Available in a set of 52
Can be used in various areas
What we don't like
Only available in black
The wedge-style Audiosoul Acoustic Panels come in a pack of 52, featuring sound maskingcapabilities that can reduce noise pollution and remove echoes. Made from professional-grade acoustic foam, they can be used in professional soundproofing projectsand treatments for rooms, doors, garage spaces, and more.
Owing to the acoustic foam, the Audiosoul Acoustic panels are lightweight while being quite dense, further reducing the intensity of unwanted sound reflections. Furthermore, the foam remains dense and consistently firm across its surface to keep the noise reduction high.
Covering a surface area of 12 x 12 inches, the 52-acoustic panel set will be ample to cover most spaces. But, if you do not need 52 panels, the Audiosoul panels are available in 24 and 12 packs as well, available at an affordable rate.
These panels, when combined with acoustic foam bass traps, can suppress noises of any frequency. Without a bass trap, the acoustic panels can successfully dampen the sounds of mid and high frequencies.
Installation is fairly standard in the Audiosoul sound-dampening acoustic panels; simply use double-sided tape, spray adhesive, or glue to install them to hard surfaces.
Material: Polyurethane acoustic foam | Surface Area: 12 x 12 inches | Thickness: 1 inch
【Ultimate Audio Clarity Enhancer】 Crafted from advanced...
【Sustainable Design】 Our acoustic foam panels stand the...
What we like
High-quality polyurethane foam construction
Capable of high noise reduction
Available in three colors
Suits home setups
What we don't like
May take a few hours to expand
Designed to be used in spaces like home offices and studios, the JBER Acoustic Foam Panels are wedge-style panels that reduce outside noise in an enclosed space. These can be used to spot-treat a studio or a home recording space as well if needed.
JBER Acoustic Foam panels are made from acoustic polyurethane foam, an odorless and flame-retardant material with high noise-reduction qualities. The sound-dampening panels can improve the sound quality of recordings by reducing background noise, echo, and reverb.
You can find the JBER acoustic panels in a 12 or 48-pack in three different color schemes: black, red, and charcoal. Each panel is sized at 12 x 12 inches with a 1-inch thickness, making it sufficiently sized for most home setups. YouTubers, music producers, and podcast hosts can make use of these panels.
When combined with a layer of sound insulationpanels, the JBER foam panels can completely soundproof a room with no issues. And much like other acoustic panels on this list, the sound-absorbing panels can be resized and altered without affecting their acoustic capabilities.
Material: Polyurethane acoustic foam | Surface Area: 12 x 12 inches | Thickness: 1 inch
Premium Material Construction:Crafted from top - grade...
What we like
Pyramid pattern for improved noise reduction
Polyurethane foam dampens reverberations
2-inch thick acoustic panels
High-density foam
What we don't like
Panels take a while to decompress
Featuring a pyramid pattern, the SD SODOCT Acoustic Foam Panels are designed to increase the contact area with sound. This leads to the absorption of flutter echoes and standing waves, which is necessary for acoustic treatment.
Made from polyurethane acoustic foam, the SD SODOCT panels are non-toxic and flame-retardant panels that control and dampen reverberation and typical background noises. This contributes to better sound clarity in recordings, video and audio calls, interviews, and more.
Each panel is sized at a standard 12 x 12 inches, with a thickness of two inches. The extra inch of thickness makes a noticeable difference in the sound-dampening qualities of a room. Adding to the noise reduction is the high material density, which sits at 25 kg/m3, deterring residual sound effectively.
The premium acoustic foam panels are easy to alter and install, owing to their soft nature. It is worth noting, however, that the panels take a day or two to decompress after unpacking.
When choosing a set of soundproofing panels, you’ll want to ensure that the product you purchase performs its task well. Sound treating a room is a necessary part of any recording studio, after all.
The best soundproofing panels reduce sound, dampen sounds and provide you with better sound quality. They can also reduce the intensity of unwanted noise and reverb, making your recordings sound clear and professional.
Here is a brief overview of each quality that most foam panels have to transform your room into a quieter place.
A. The Make
Soundproofing panels are made with all kinds of materials, ranging from natural materials like wood to artificial ones, such as foam. What each of these has in common is that they stop sound waves from entering a space, reducing any noises that come from the outside. As a result, the room becomes quieter and more suited for working or recording purposes.
Depending on the size of your room and the scale of your needs, you can choose from a host of panel materials. Each soundproofing solution will have a different way and in turn, a different level of effectiveness for successfully performing its task. Smaller rooms and spaces can work with thinner and sleeker soundproofing panels, while larger, noisier rooms require thicker foam panels.
There are more than 30 soundproofing materials to choose from at different price ranges and effectiveness, so you won’t be starved for choice. Some of the most common soundproofing material types are acoustic membranes, fiberglass, textile materials, and soundproof drywall, to name a few.
A common misconception is that an egg crate can be used as an effective soundproofing solution. While this isn’t exactly untrue since adding any kind of mass to your walls will reduce noise, the effectiveness of crates is extremely limited. So, it’s best to use materials made specifically for soundproofing purposes.
B. Noise Reduction Coefficient Rating
The Noise Reduction Coefficient Rating (NRC) is a measurement of how much sound a soundproofing panel can reduce and dampen. These ratings range from 0.00 to 1.00, with the latter being the most effective.
Small spaces don’t require much soundproofing, so you can use a panel with a relatively low NRC rating without an issue. Larger spaces, however, benefit immensely from panels with an NRC rating that approaches or is 1. Background noises and bass frequencies become an issue the larger a space is, necessitating greater soundproofing solutions.
C. Dimensions
Typically, soundproof panel sets come in bundles of six, 12, and 24, with a surface area of 1 ft2, 2 ft2, and 2ft x 4ft each.
Your set of soundproof panels should be able to cover an entire room well, and the panel dimensions determine how much of your walls they cover. An average home studio can use up to 48 1ft2, which is why most starter panel bundles come in a combination of all the panels you’ll need. These combinations may include 48 of 1 ft2 panels, 12 of 2 ft2 panels, or six of 2ft x 4ft panels.
D. Surface Pattern
Most soundproof panels come with a pattern on them to dampen any sounds, with wedged and pyramid patterns being the most widely used.
Though there is a marked improvement in the soundproofing performance of panels with patterns as opposed to those without, the pattern type makes little difference. For instance, the difference between the soundproofing performance of wedged and pyramid patterns is minimal, so feel free to choose as per your aesthetic tastes.
2. Soundproofing Principles Used
Soundproofing a room makes it acoustically isolated by reducing or outright blocking sound waves passing in and out of it. Acoustic isolation stands on five key principles, namely deflection, absorption, decoupling, thermal conversion, and constrained layer damping. Each of these principles works independently, with soundproofing panels making use of one or more of them at once for added effectiveness.
Let’s look at these principles briefly to know how your soundproof panels work and focus on which principle will net you the best results.
A. Deflection
Deflection is a principle that works by adding mass and density to the walls, floor, and ceiling of a room. The density and thickness of a soundproof panel act as a deterrent for sound waves, causing them to lose energy as they pass through the soundproof panel.
This is a principle put to use by most soundproofing panels on the market and is effective in rooms of all sizes.
B. Absorption
Have you noticed that some soundproof panels have perforations? These perforations facilitate the absorption of sound, achieving acoustic isolation while preventing reverbs, resonance, and amplification of sound waves.
C. Decoupling
Decoupling occurs when the area of the direct link between the structure and soundproof materials is reduced. This interrupts sound vibrations that travel through a room’s connectivity from one side to the other.
You can think of this principle being enforced by creating what is, effectively, a room within a room.
D. Thermal Conversion
This principle converts sound waves into trace heat energy through friction in the acoustic sound insulation membrane. Professional-grade soundproofing solutions employ this strategy to maximize noise reduction and dampening, in addition to the other principles on this list.
In contrast to some of the other principles, thermal conversion doesn’t rely on mass for soundproofing, making it standalone as a soundproofing material.
E. Constrained Layer Damping
Constrained layer damping reduces the natural resonant frequencies of a structure by using specific materials in a given ratio. This is typically enforced by applying damping compounds in the middle of two rigid panels like plasterboard or drywall.
When sounds strike these compounds, shearing forces between panels cause friction in the damping compounds, essentially converting sound energy to heat.
3. The Differences Between Soundproofing And Sound Absorption
Soundproofing and sound absorption are fundamentally different concepts, but they are often confused with one another. In truth, sound absorption is a subset of soundproofing and is chiefly used in two ways.
The voids in a stud wall can cause unwanted reverberations, which is where sound absorption materials are used as a part of soundproofing systems. Oftentimes, absorption materials are used to line the surface space of walls and ceilings to reduce soundresonance in the room by absorbing sound waves.
Soundproofing is a process that is much more involved than sound absorption, employing all manners of sound and reverb reduction techniques. The materials used for soundproofing prevent sound waves from entering or passing through a room, creating what is known as acoustic isolation.
Soundproof Panels FAQs
What is the difference between soundproofing and sound absorption?
Soundproofing is the blocking of sound from entering or leaving a space. Sound absorption, on the other hand, is about soaking up sound waves to reduce echo and reverberation within a room. Soundproof panels are designed for sound absorption.
Can soundproof panels completely eliminate noise?
While soundproof panels significantly reduce noise levels, they are not designed to completely eliminate noise. They can, however, dramatically improve the sound quality within a room by reducing echo and background noise.
Are soundproof panels safe for indoor use?
Yes. Most quality soundproof panels are designed with indoor safety in mind. They are typically fire-retardant and non-toxic. However, it’s always wise to check the product specifications before purchasing.
How many soundproof panels do I need for my room?
The number of panels needed depends on the size of your room, its shape and the sources of noise you want to address. Manufacturers often have guides or calculators to help determine how many panels you’ll need for your specific circumstance.
Do I need a professional to install soundproof panels?
Not necessarily. While a professional can ensure panels are installed for maximum effectiveness, most soundproof panels come with instructions that are easy to follow for DIY installation.
How do I install soundproof panels?
Soundproof panels can be mounted or hung on walls, ceilings, and even doors. They usually come with installation instructions that are easy to follow. Some require adhesive strips or glue, while others may need to use mounting brackets.
Are soundproof panels easy to maintain?
Yes, they are. Just use a vacuum to remove dust from the surface as needed. For tougher stains or dirt, use a damp cloth with mild soap. Be sure to check the manufacturer’s instructions for any specific care requirements.
Conclusion
Picking a soundproofing panel on a budget can be an ordeal, but it needn’t necessarily be so. After all, all that matters is that unnecessary noises are removed from your room once you soundproof it.
At the end of the day, the soundproof panel set I found to be the best was the Sonic Acoustics Hexagon Panels. It showcases noise reduction at an affordable price point that makes it worth a recommendation. That said, the remaining soundproofing solutions are not far behind.
Some sound absorption panels offer high soundproofing capabilities, while others have a high panel count per set. Each of these products offers something for every niche and based on your personal preference, you can make an informed decision on the matter.
The Nicetown high-end thermal curtains, with their two-layer triple weave blackout fabric and uniquely designed silver grommets, are great for soundproofing purposes. Similarly, Deconovo soundproof curtains have a thermal insulation layer and high-density material to eliminate noise.
Soundproof curtains can prove ideal for reducing noise in your home or office. Made using mass-loaded vinyl and PVC blended with crushed limestone, these curtains are great at absorbing sounds, such as conversations and traffic noise.
They can even be used with other soundproofing techniques for better results. Due to the popularity of soundproof curtains, you can choose from numerous options, and this guide reviews some of the best ones.
Best Soundproof Curtains
Here's the list of the 11 best soundproof curtains for efficient noise reduction, perfect for quieting your space and enhancing your privacy.
Complete blackout curtains block light and reduce noise for...
Curtains measure 52 inches wide x 84 inches long per panel,...
What we like
Wide range of colors
High-quality construction
Does not contain any chemical substance
Reliable soundproofing
What we don't like
Aligning the curtain pleats requires some effort
With over 20 years of experience in the industry, Nicetown is among the top brands for many people looking for curtains. Based in Nicetown-Tioga, the brand manufactures these high-end thermal curtains using polyester, measuring 52 inches wide and 84 inches long, which makes them suitable for most rooms.
The curtains are available in a wide range of color options, including aqua, black, beige, bright yellow, gray, and more. This makes it easy to choose the one that fits your room the best. Along with that, they have a uniquely designed silver grommet for easy installation.
Coming to the construction, this soundproof curtain is manufactured using two layers of triple-weave blackout fabric. Because of this, it works well to regulate the temperature of the room where it is installed and ensures complete privacy.
And since the manufacturer does not use harmful materials, such as formaldehyde, in the manufacturing process, these curtains are environment-friendly and completely safe to use.
As for noise reduction, the Nicetown thermal curtains can absorb two times as much sound as standard curtains, which is possible due to their greater thickness. This provides them with greater density and prevents the entry of all loud noises in the room.
But soundproofing walls, doors, or windowsis not the only purpose for which these curtains can be used, as they are full blackout curtains. This means that they can be used to darken a room completely by keeping sunlight out when you want to nap during the day.
Color: Black | Material: Polyester, polyester blend | Pattern: Solid | Top Style: Grommet, rod
Darkening & Light Control – Crafted from premium 100 %...
Noise Reduction & Energy Savings – Triple‑weave fabric...
What we like
High-quality textile
Versatile
Low maintenance
Multiple color options
What we don't like
Actual colors can be slightly different
Manufactured using polyester, these curtains are available in sets of two panels, and each drape measures 52 inches in width and 96 inches in length. They are great for absorbing ambient noise and can be used in almost any room.
The curtains come with silver grommets, which are noteworthy for having an anti-rust coating, ensuring long-lasting durability. On top of that, they are thermal insulated and can be used to regulate the temperature, depending on the weather conditions outside. You can even use them to block out sunlight and keep a room dark during the daytime.
This is possible due to the high-density blackout material, which features a triple weave for greater density. Similarly, the fabric is soft to the touch and has a silky texture, which makes this curtain suitable for contemporary home décor.
These curtains are also available in solid colors, and there are numerous options to choose from, like beige, black, khaki, etc. While testing these soundproof curtains, I discovered they are versatile and can be used in almost any room, such as the living room, gaming room, kitchen, nursery, or office.
Moreover, these curtains do not require a lot of maintenance since they can be machine-washed easily. If you have doubts regarding the right size, contact customer service and choose the most appropriate option.
CURTAIN DETAILS: The room divider curtain's fabric is super...
SPACE SOLUTION: Curtains can be a clever and temporary...
What we like
Suitable for smaller spaces
High-quality construction
Attractive design and colors
Durable
What we don't like
Lesser number of grommets per inch
Another option from the Nicetown brand, these soundproof curtains have been specially designed for small spaces and partitions. They are best suited for a scenario where you want to divide a larger space into multiple smaller ones without putting up walls.
The density and heaviness of the curtains make sure that objects or people are not visible from the other side. Plus, the higher shading rate of the fabric enhances this property.
Constructed using triple-weave polyester fabric, these soundproofing curtains have a high density that can block out all unwanted noise from the area. Since they work by sound absorption rather than bouncing the sound waves, they can be used withsound masking techniques, to soundproof doorsand windows.
For installation, these Nicetown curtains come with 14 silver grommets that look good in modern homes and are easy to set up. What's more, you can easily remove and pack up the curtains when they need to be moved, delivering greater convenience.
Use them in a wide variety of spaces, such as your bedroom, office, study, living room, and more. The high-quality materials coupled with superior finishing ensure these soundproof curtains will last several years without any complaints.
Like other curtains from the Nicetown brand, this option is available in various colors and can be used for temperature regulation or as blackout curtains.
WELL MADE: Sold as 2 panels, each measuring 52"W x 84"L...
FINE DETAIL: Each curtain has 8 HOLES and the inside...
What we like
Easy to install
Modern design
Superb soundproofing
Reliable temperature regulation
What we don't like
Expensive
The next item on this list is the Miulee soundproof curtains, which also come with thermal insulation technology for room temperature regulation. This soundproof curtain is 52 inches wide and 84 inches long, adequate for most spaces, and has a set of two panels.
Similarly, the grommet top has an interior diameter of 1.6 inches and has been designed to make it easy to slide the curtain rod through them. The curtains have a velvety texture that feels good in the hand and provides an attractive appearance by adding a touch of elegance to your rooms.
Moreover, you can select from 15 colors, so it is easy to find an option that fits well with the decor of your rooms. And depending on the color, the blackout velvet curtains can block out 70% to 80% of sunlight.
But the highlight of these curtains is their thermal regulation capability, which can help keep a room warm in winter and cool in summer. This is possible because of the thick fabric that limits the amount of air entering or leaving a room to make your thermoregulator more efficient.
Besides helping reduce noise, the heavy material of the curtains also guarantees privacy, and you can use these curtains in areas like the study or home office. I would further like to point out that this curtain can be machine washed and does not require a lot of maintenance.
Color:Olive green | Material:Velvet | Pattern: Solid | Top Style: Grommet
Room divider curtains, such as this one from Lordtex, allow you to eliminate unwanted noise from a room without occupying too much space. These curtain panels have a width of 100 inches and a length of 84 inches, including 12 silver grommets. The grommets enable the curtain to be used with both decorative and regular curtain rods, thanks to their 1.6-inch interior diameter.
For making these curtains, the manufacturer has used 100% polyester fabric with similar colors on the front and back for room darkening. But what makes them stand out from the crowd is the fact that they are manufactured in an Oeko-Tex Standard 100-certified factory.
This means that the material is completely free of harmful substances and will not cause any allergies or other adverse side effects. And the triple weave blackout fabric is also thick enough to be able to block out 90% of UV rays and sunlight. This helps in darkening rooms and can be used in areas where you want some privacy.
Alternatively, you can use the Lordtex sound-deadening curtains as room dividers for partitioning rooms and creating separate spaces. The curtains are compatible with several types of spaces and can be used in shared bedrooms, lofts, apartments, dormitories, and even classrooms.
Sound proofing can also be achieved quite easily using these curtains, and you can hang them in front of sliding doors or even as backdrops for photoshoots for sound insulation. Due to their thickness, the curtains do not deform easily and can be machine-washed.
3 LAYERS - Package includes 2 panels total width 104 inch. 1...
NOISE REDUCTION - Detachable felt fabric liner is in the...
What we like
Good-quality construction
Easy to maintain
Great for blocking light
Value for money
What we don't like
Not 100% soundproof
Ryb Home is best known for its custom curtains, blinds, shades, and other home products, but these soundproof curtains are a popular choice from the company. These curtains have three fabric layers - two layers for the front and back, and a detachable middle fabric made from felt.
This construction makes them a dependable option for any DIY soundproofing project since the three layers work well in absorbing sound. You can use them in front of doors, glass windows, and walls for effective noise control.
One of the key features of the Ryb Home soundproof curtains is that they do not contain any formaldehyde or other harmful substances, making them a safe choice. This means those with allergies can use them without experiencing any side effects.
Additionally, the three layers allow this blackout curtain to keep 100% of the sunlight out, which is not an easy feat to achieve. Because of this, harmful UV rays are kept out, and you can enjoy your daytime sleep in complete comfort.
The triple weave fabric also performs well when it comes to temperature regulation, and you can experience greater savings. With this curtain, it is possible to keep a room warm or cold easily for an extended period without the thermoregulator.
Finally, installation and maintenance are easy, and you just need to remove the detachable felt fabric liner before machine-washing the curtain. If required, you can use non-chlorine bleach while washing and even iron the curtains for a bit once they are dry.
Color:Gray | Material:Fabric | Pattern: Solid | Top Style: Grommet
When it comes to blackout curtains, Buhua takes a different approach. Instead of offering such curtains in a single bold color, the brand offers patterned curtains, such as this one. This curtain comes in various color options, and there are some unique ones to choose from, such as white and silver.
The Buhua soundproof curtain has a silky texture, and the foil branch pattern helps break up the monotony that is often created by solid color curtains. Hence, it can help add some style to your home without requiring a lot of effort.
These curtains have a width of 52 inches and a length of 63 inches, which makes them suitable for most rooms. And they can even be used in spaces such as in front of doors since these soundproof curtains work by absorbing noise. Their thick and dense material can reduce sound easily, preventing them from bouncing off surfaces and creating echoes or reverberations.
Another advantage of this construction is that you can use these curtains to block out sunlight, and they can filter out 85% to 95% of light. For people who prefer to sleep late or take a nap during the day, this curtain can provide adequate darkness for comfortable sleep.
Besides blocking light, you can use the Buhua curtains to control the temperature inside your home. The thick material helps restrict the flow of air, thus providing better heat and sound insulation. And like some of the best soundproof curtains, these can be machine washed for easy maintenance.
Color:Grayish white | Material: Polyester | Pattern:Branch | Top Style: Grommet
Any list of the best soundproof curtains would be incomplete without mentioning these soundproof curtains from the Melodieux brand. These are premium curtains designed for bedrooms, living rooms, and more, and they come with unique chevron-printed designs.
The curtains are available in several colors, and the off-white background with the colored chevron prints suits almost any setting. Each curtain has a width of 52 inches and a length of 84 inches, and the package includes matching tie-backs.
To make installation easy, the curtains come with eight bronze top grommets in each panel that fit up to one-and-a-half-inch curtain rods. Simply slide these grommets through the curtain rail for hanging the soundproofing curtains.
The manufacturer has used triple weave tri weave fabric for making these curtains, which works flawlessly for the purpose of noise reduction in your living room, gaming room, or bedroom. And this material does not have a chemical coating, which makes it a completely safe option.
Additionally, it can block 90% of light and UV rays, allowing you to use the curtains to darken a room. This also means that you can use these soundproof curtains to ensure privacy since the thick material can block visibility completely.
I also discovered that using these curtains can make your thermoregulator more efficient, which is due to the fact that they can block the passage of air between various rooms. This means your room will get warmer or cooler as required much faster, resulting in greater energy savings.
And you can clean the Melodieux soundproof curtains by simply machine washing them.
Color:Red | Material:Fabric | Pattern:Chevron | Top Style: Grommet, rod
PRODUCT INFO: 100% blackout curtains. Both sides of the...
DESIGN and TEXTURE: The curtains are made by faux linen...
What we like
Blocks out all light
High-quality construction
Low maintenance
Affordable
What we don't like
Colors can be slightly different from the pictures
Most blackout curtains do not block out light completely, which is why these soundproof curtains from Deconovo stand out. They are 100% blackout curtains manufactured using faux linen fabric and can filter out any light that enters your room, making them perfect for bedrooms.
The package has two curtain panels, each measuring 52 inches wide and 72 inches long. Available in multiple colors, these curtains have the same color on both sides, making them attractive from either side. And their threads are well trimmed while the fabric is wrinkle-free, which further adds to their appearance.
To make installation easy, there are eight silver grommets, each with an interior diameter of 1.6 inches through which the curtain rod can slide. This high-quality construction of these grommets and the soundproof curtains make them an extremely durable choice.
Similarly, the material of the curtains is soft and heavy, which provides them with a nice texture and allows them to block outside noise easily without costing much. But unlike the competition, this material does not fade, and the curtain will retain its original appearance for a long time.
What's more, you can use these curtains in areas where you want some privacy by creating partitions or barriers as people on the other side cannot see through the fabric. And the thick material can provide thermal insulation and can help maintain the right temperature in any room, in addition to sound reduction.
You can even machine wash and iron these budget soundproof curtains for maintenance purposes.
Color:Gray | Material:Linen | Pattern: Solid | Top Style: Grommet
Total Blackout Performance: Crafted with double-layered,...
Thermal Insulation and Energy Efficiency: These curtains act...
What we like
Wide application
Durable construction
Effective soundproofing
Modern printed design
What we don't like
Relatively heavy
When looking for soundproof curtains, going with a renowned brand like Beauoop is a good idea, and I've reviewed one of its best offerings here. These curtain panels measure 50 inches in width and 108 inches in length, which makes them large enough to cover your doors and windows.
Manufactured using triple weave double layer thermal insulated blackout fabric, the curtain has impressive sound-dampening qualities. It can be placed in various areas of the room to absorb any sound wave that comes in through the window and ensure that theroom is quiet. This construction also provides the curtain with a high level of durability, so rest assured it will last a long time.
Functionality aside, the fabric of the curtain is soft to the touch and feels pleasant, and it is available in six color options. These feature a geometric design, enhancing your interior decor and making the curtains suitable for almost any room.
Apart from that, they work well for blocking out sunlight and can keep out 95% to 99% of light, depending on which color curtain you use. So, they can be used to create the perfect environment for watching movies in your home cinema or for taking a daytime nap.
The heavy material also makes these curtains ideal if you want to create partitions and ensure privacy. And they work equally well for thermal insulation purposes, helping maintain an optimal temperature inside without excessive use of the thermoregulator.
This means you can enjoy the benefits of lower energy bills in addition to the other advantages offered by these great soundproof curtains.
Color:Spa/Gray | Material:Fabric | Pattern:Geometric | Top Style: Grommet
3 LAYERS - Package includes 2 panels total width 104 inch. 1...
NOISE REDUCTION - Detachable felt fabric liner is in the...
What we like
Easy to install and remove
Safe
Superb light blocking
Easy to clean
What we don't like
Gets easily wrinkled
Next up, I have the Ryb Home thermal insulated noise-reducing curtains, which come with features like detachable felt fabric for easier installation and removal. This curtain has three layers, one at the back, one at the front, and the detachable felt fabric in the middle.
All materials used in the manufacturing process are safe, and harmful substances like formaldehyde are not present. The three layers work together to absorb sound and can provide good results, though this will depend on your environment to a certain extent.
These are also 100% blackout curtains, as the triple weave blackout fabric and the three-layer design can keep UV rays and harsh light out of your room. So, they are a great pick for rooms that are used for daytime naps.
And this construction and design also make these curtains well-suited for building insulation purposes. You can use them to keep the room warm in winter and cool in summer without spending as much energy and saving on power bills.
Apart from that, these curtains are extremely easy to install, thanks to the silver grommets that are provided with the curtains. Like all standard grommets, these have an interior diameter of 1.6 inches, which makes them compatible with most curtain rods.
Lastly, these Ryb Home sound-deadening curtains are easy to maintain, and you can simply put them in the washer when they need to be cleaned. You only need to remove the felt liner and nothing else before washing it so that it does not get damaged.
Color:Biscotti beige | Material:Fabric | Pattern: Solid | Top Style:Grommet
These are the 11 best soundproof curtains as per my analysis, but the purpose for which they are required can vary significantly. That is why it is essential to consider certain factors when choosing between them. And I've mentioned such crucial information here in this buyer's guide.
Dimensions
The dimensions or size are one of the first things to consider when looking for the best soundproof curtains. To ensure that the curtains are of the correct size, measure the spot where the curtains have to be attached, such as the front of your doors and windows.
It is important to remember that the curtain should extend at least six inches on each side as well as the top and bottom. Having a curtain larger than the window frame or door will ensure that sound does not leak from the sides, especially since curtains can only block high-frequency sounds.
You should also check that the curtain reaches down to the floor for the same reason. Such long sound dampening curtains are often made from velvet since this texture is better for external noise reduction. In the case of larger windows, the curtains can even be extended to the ceiling, but avoid using such curtains over smaller windows.
Additionally, look for curtains that have some extra material, which can help create a larger number of folds. More folds result in greater thickness and ensure better sound absorption.
Weight
The weight or mass of the curtain is another factor to consider. Sound-absorbing curtains are much heavier than regular ones and also have multiple layers to prevent sound leakage. Different layers can include window liners, curtain liners, and blackout liners. Multi-layered curtains are denser and thicker and are ideal for active noise control, but the weight of the curtain will also matter when installing the curtain.
You should make sure that your curtain rod can support their weight. The best soundproof curtains can weigh over ten pounds and require special mounts as they cannot be installed using standard curtain rods. Or you can get a heavy-duty rod and wall plugs to support such heavy curtains.
Many soundproof curtains even require special mounts for the same reason.
Material
How much noise can pass through sound reducing curtains depends to a large extent on their construction. Soundproofing curtains are manufactured using various materials, with the outer fabric generally made from cotton or polyester. In contrast, the inner lining can be made from velvet, felt, wool, or suede.
These sound absorbing materials have tightly-woven fibers in multiple layers that can help absorb sound more easily. You can also go with curtains made from thermal weaves, which are similar in nature.
Layered curtains or those with thermal weaving can also help keep your home warmer and can help in efficient energy use. Also, they can block out sunlight during the summer and keep your room cooler for the same reason. Thermal insulated curtains also the additional advantage of keeping ultraviolet rays out, which can cause the flooring and furniture to fade.
However, these things will often depend upon the color of the curtain, and darker-colored curtains will provide improved acoustics. An alternative solution to blackout curtains is to get a blackout liner when using a regular curtain, which can help keep sunlight out.
Soundproofing curtains may be available as multilayered, insulated, or blackout options. Multilayered curtains are manufactured using various materials sewn together, while insulated ones provide additional protection against heat and cold.
NRC Rating
NRC rating is a measure of how good a material is in absorbing sound and is measured from zero to one. Curtains that have an NRC rating of zero absorb no sound, while those with an NRC rating of one can absorb all sound completely. Generally, an NRC rating is present only in the case of good soundproofing curtains.
When considering this factor, look for curtains with an NRC rating of 0.7 or more since they are better at noise reduction and can absorb more sound energy. That said, even the best soundproof curtains with a lot of mass usually have an NRC rating of around 0.85.
A curtain with an NRC rating of 0.85 can absorb about 85% of sound, so it is a great choice for blocking room noise, music, and other sounds. You can check out the FAQ on the product page of the curtains to learn about the NRC rating.
Price Range
Soundproof curtains are available at several different price points, so it is important to consider what you need and how much you are willing to spend. In most cases, the best soundproof curtains are not very cheap and are most suitable for people willing to spend a considerable amount.
On the flip side, many curtains are available at a very low price, but these may not be able to block all noise coming into the area. That is why finding the best budget soundproof curtains isn't easy, and you need to plan carefully when making a decision.
Installation And Maintenance
How easy it is to install soundproof curtains is a major factor you should consider when comparing various options. Most soundproof curtains that have multiple layers, especially thermal insulation ones, are heavy and will require more effort in installation. They cannot be installed using standard curtain rods due to their weight and will require a heavy-duty curtain rod.
In contrast, noise-reducing curtains made from lighter fabrics, like cotton and linen, can be easily installed. Also, curtains may come with grommets or with a hook-and-loop fastener, which can affect the installation process.
Aside from installation, you should look at the maintenance instructions. A soundproof curtain needs to be kept in good condition to ensure that it lasts longer. This is especially true if you work in a recording studio or similar profession.
Many of the options available can be machine washed, which makes cleaning them a simple process. And you can even iron them to keep them wrinkle-free, but this may not be advisable in the case of all acoustic curtains.
Soundproof Curtains FAQs
How does the weight of the curtain affect soundproofing?
The weight or mass of the curtain plays a significant role in soundproofing. Sound-absorbing curtains are typically heavier than regular curtains and have multiple layers to prevent sound leakage. Ensure that your curtain rod can support the weight of the curtains, as some soundproof curtains may require special mounts or heavy-duty rods for installation.
What materials are soundproof curtains made of?
Soundproof curtains are constructed using various materials. The outer fabric is often made from cotton or polyester, while the inner lining can be made from velvet, felt, wool, or suede. These materials have tightly-woven fibers in multiple layers that help absorb sound more effectively. Thermal weaves can also be used to make soundproof curtains, which offer additional benefits such as insulation and blocking out sunlight.
How does the price range vary for soundproof curtains?
Soundproof curtains are available at different price points. Higher-quality soundproof curtains, which provide better noise reduction, tend to be more expensive. Cheaper options may not offer the same level of noise blocking. Consider your needs and budget when choosing soundproof curtains.
How easy are soundproof curtains to install?
The ease of installation depends on the type of soundproof curtains. Those with multiple layers and thermal insulation are heavier and may require special mounting hardware or heavy-duty curtain rods. Lighter fabrics, like cotton or linen curtains, are easier to install. Some curtains come with grommets or a hook-and-loop fastener, which can affect the installation process.
What maintenance is required for soundproof curtains?
It’s important to keep soundproof curtains in good condition for optimal performance. Many options can be machine washed, making cleaning them a simple process. However, not all acoustic curtains are suitable for ironing, so refer to the manufacturer’s instructions. Proper maintenance ensures that the curtains last longer and maintain their soundproofing capabilities.
Conclusion
There you have it! While each of these curtains possesses impressive soundproofing capabilities, it is advisable to use them along with other soundproofing techniques, such as a soundproof blanket or acoustic panels.
Now, before I sign off, I would like to mention my favorites here. My top pick would be the Nicetown High-End Thermal Curtain, which comes with two layers of triple weave fabric, manufactured using safe materials and available in multiple colors.
Another excellent option would be the Deconovo Soundproof Curtains, featuring rust-proof grommets and a high-density blackout fabric for filtering light.
Mineral wool is the best soundproof insulation material that can be used for soundproofing purposes, but it is a pricey option. Meanwhile, cost-effective materials that can be used include blown-in fiberglass or cellulose insulation, foam, cotton, and batt insulation.
Soundproofing has become a necessity in many homes nowadays.
Whether due to the increased use of gadgets, more traffic on the streets, or to ensure privacy, more and more people are looking for ways to soundproof their homes. And while there are many soundproofing techniques available for this purpose, before you try them out, it is essential to learn about soundproofing insulation.
And this is just the guide that can help you out.
Types of Soundproof Insulation Explained
Fundamentals Of Soundproofing
To understand how soundproofing insulation works and what are the best materials for the purpose, you first need to know a few basic things about soundproofing.
What Is Sound?
Sound is a wave generated by a vibrating body and can travel through solid, liquid, and gas mediums. This means it can be transmitted through air, water bodies, and even solid objects, like doors and walls. For soundproofing purposes, sound can be classified into different types, including:
1. Airborne Sounds
Airborne sound travels through the air, and traffic noise, conversations, etc., are examples. Usually, such sounds can be reduced using sound insulation barriers.
2. Impact-Based Sounds
Impact-based sounds occur due to vibrations caused in a surface when another object strikes it and possesses more energy than airborne sounds. Some examples include the sounds of slamming doors, a hammer striking, and even of footsteps. Reducing these sounds is more difficult since vibrations are caused within various surfaces.
3. Flanking Sounds
Sounds that travel through surfaces like electrical outlets or ductwork are called flanking sounds or flanking noises, and it can be quite difficult to locate their source.
What Is Noise?
Noise is generally defined as unwanted sound that can cause disturbance in an area, but this is a subjective definition. What one person may consider as noise, another may not, but noise usually has the characteristics of being unpleasant and loud.
Measurement Of Noise Levels
Noise levels are measured in the following ways:
1. Sound Pressure Level
Sound Pressure Level the pressure level of sound measured on a logarithmic scale, and the unit used is decibels (dB). The use of a logarithmic scale means that the pressure level can change significantly even with a slight change in the scale.
2. Loudness
The loudness of any sound will depend upon factors such as the point where it is heard and the person hearing it. For instance, even a low-intensity sound may appear very loud in a quiet room.
How Effective Is Soundproofing?
The process of soundproofing aims to reduce sound waves from traveling through the various surfaces of a building, such as doors, walls, and the ceiling.
While it is possible to block out all sound from a specific room completely, it is not very easy to do in most cases. The reason is that many soundproofing techniques are generally very complicated and require a lot of time, resources, and effort.
Soundproofing methods that are usually used can only reduce noise and not eliminate it. Fortunately, for many people, a reduction in the noise level is adequate.
Sound Transmission Class - What Is It?
Sound Transmission Class or STC is a rating system that indicates how effective a building partition or assembly is in preventing the transmission of sound waves. A higher STC rating indicates that the building is more effective in reducing noise. But even insulation materials with a high STC rating may not be able to attenuate low-frequency sounds, such as bass-heavy music or sounds of machinery.
According to the International Building Code, an STC of 50 is required for buildings with multiple families, while an STC of over 60 is considered to be the best. STC ratings are generally used for airborne sounds like conversations.
Methods Of Sound Insulation
The most commonly used methods of sound insulation include the following:
1. Providing Additional Mass
It is more difficult for sound waves to travel through an object that is large and heavy. This means you can reduce sound by adding mass to surfaces that you want to soundproof, such as a hollow core door, which can help in sound reduction. And there are many ways by which this can be done, such as by installing drywall or using mass-loaded vinyl.
2. Decoupling
Surfaces that are in contact with one another make it easier for vibrations to travel through. Separating or decoupling them, such as the two sides of a wall, can reduce the sound that reaches your ears.
3. Insulation
The cavity of the wall that needs to be soundproofed can be insulated to reduce sound from one reaching the other side. Generally, this is done by adding some insulating material between two sides.
Advantages Of Sound Insulation
1. Improved Acoustics
Soundproof insulation materials are very effective in preventing noise from entering a specific space. This means that besides soundproofing, they can help improve the acoustics of a space and can be used in areas like a recording studio.
2. Effective Noise Reduction
Many extensive soundproofing techniques are quite complicated and require considerable time and resources. But with the right sound insulation materials, it is possible to get good results easily.
3. Reduced Transmission Of Heat
Many materials used for soundproof insulation offer additional benefits besides noise reduction, such as reducing heat transfer, which helps regulate the temperature of a space.
Soundproof Insulation Materials
You can use several types of insulation materials for soundproofing purposes, and some of the best ones are mentioned here.
1. Mineral Wool Insulation
Slag, which is produced when steel is manufactured, or natural stone is heated and spun to manufacture mineral wool insulation fibers. Then, oils and resins are added to enhance the strength of the wool. The biggest advantage of this material is that it uses recycled products and is fire-resistant.
That said, mineral wool insulation is among the costlier materials you can use for soundproofing walls. A cost-effective alternative to mineral wool insulation is fiberglass insulation. Mineral wool, also known as stone wool insulation, has an STC rating of 45, which is great for noise control.
2. Blown-in Fiberglass Insulation
Blown-in fiberglass insulation is manufactured by spinning the fibers of heated glass and combining it with plastic to make it more flexible. This material is among the most commonly used for sound-deadening insulation since it is affordable and is available in rolls, loose fills, and batts.
Fiberglass insulation, also known as glass wool insulation, has a good R-value and an STC rating of 39. On the flip side, it may not be the best solution for people who are prone to allergies.
3. Cotton Insulation
Cotton insulation is manufactured from cellulose fibers that are obtained from clothing items like jeans. It is available in batts that can be installed easily between stud boards. Since it is made from recycled cotton, this type of insulation is biodegradable and can be treated with boric acid to improve its fire resistance.
While it has a high STC rating of 51, cotton insulation can be a bit expensive.
4. Cellulose Insulation
This is another material used for sound insulation made from recycled and waste materials, like shredded cardboard and newspapers. It can be made fire-resistant by applying materials like boric acid and can be used in various spaces to make them quiet.
Cellulose insulation, also available as blown-in insulation, is affordable and has a good R-value with an STC rating of 39. But keep in mind that cellulose can produce a lot of dust, so those with allergies may not find it suitable.
5. Foam Insulation
Foam insulation is among the most popular building insulation materials and is available in various forms, such as solid boards or spray foam. Different types of plastics are used to manufacture foam insulation, and you can choose between open-cell and closed-cell foams.
Open-cell foam insulation is much better at absorbing airborne noise and can expand easily to fill up cracks and holes when used as spray foam insulation. Closed-cell foam is not as effective since it has lower porosity.
Spray foam insulation is a versatile option that can easily be used in many different spaces where rolls or batts cannot be used. Like many other soundproof insulation materials, foam insulation is treated with fire-retardant materials to make it fire-resistant. Also, it has an STC rating of 39.
Factors To Consider When Buying Sound Insulation Materials
To ensure you get the desired results, selecting the right insulation material for soundproofing is vital. For that, you need to consider certain factors, which have been mentioned here.
1. The Scope Of The Project
Depending on the scope of the project, you may be able to get results simply by installing sound insulation materials or may need to use additional soundproofing techniques. For instance, in a building where pests are a frequent problem or it is hard to work on the surfaces, sound insulation may not be adequate. Therefore, you’ll need additional materials and tools to work on such surfaces.
2. Budget
Before deciding on the materials, you should research and find out the prices of different materials available for soundproof insulation. This will help you come up with a suitable budget and decide which materials to use and how extensive the project can be.
3. Project Handling
The insulation materials that can be used to create a sound barrier will also depend upon who is going to undertake the project. If you plan to complete it yourself using DIY techniques, it is better to go with materials that are easier to use. On the other hand, if the soundproofing is to be done by professionals, using professional-grade insulation materials would be wise.
Tip
A useful tip to help you choose the right insulation material is to consider its mass. The greater the mass of the material, the more effective it will be in blocking sound. For instance, if you are planning to use mineral wool, go with rigid boards made from the material.
They will not only have the density of the wool but will also have more mass which can drown vibrations easily.
Soundproof Insulation FAQs
Are thicker insulation materials better for sound insulation?
The R-value refers to the energy efficiency of the sound insulation material, and high-mass materials have a higher R-value. A higher R-value means that the material requires less energy to keep your room insulated. Hence, materials with greater mass are more effective in preventing sound transmission.
Which sound insulation material is best for interior walls?
While there are several materials you can use to soundproof interior walls, in most cases, mineral wool offers the best results. This is due to its high density, which prevents the air between walls from transmitting sound waves. However, it is an expensive material, which won’t be suitable for those on a budget.
Soundproof Insulation Conclusion
Soundproof insulation can help reduce unwanted noise in your home. The materials available for the purpose can be used in a variety of situations and can even complement other soundproofing techniques.
While you may not be able to eliminate all sounds, these materials can help in noise control to a considerable extent. If you find selecting the right material challenging, it is a good idea to hire the services of a soundproofing expert.
They can perform an inspection of your home and recommend the most suitable materials that can be used for sound insulation. What’s more, in cases where you may have doubts about installing the material, such experts can perform the installations quickly and efficiently, saving a lot of hassle.
And with that, this comprehensive guide on soundproof insulation has come to an end. Until next time!
Using acoustic foam panels, along with adding extra soundproofing material and sealing the perimeter is one of the most effective ways to prevent noise from traveling through the garage door. Besides, acoustic blankets, noise-blocking curtains, and mass-vinyl barriers are dependable options to make your garage a quiet space.
A garage is one of the most versatile locations in any home, be it for jamming with friends or getting some me-time.
You can even use it as a workshop for your DIY projects. Whatever the case, a soundproof garage is what you need to tinker away without disturbing others. Today, I’ll share the five best soundproofing materials that prevent noise from entering or escaping the garage.
So, keep reading!
Reasons To Soundproof Garage Door
The primary reasons why every homeowner must consider soundproofing garage doors are as follows:
Preventing noise from traveling out of the garage
Minimizing the amount of noise that enters the garage
For instance, you might use the garage for band rehearsals or as a workshop for completing DIY projects. In either case, you will want to reduce the amount of sound that enters the space and work with as little distraction as possible.
In such situations, soundproofing your garage door would be wise, as it will minimize noise transmission.
Not only will it improve sound absorption (acoustics), but it will also prevent hot or cold air from entering(or escaping) the garage. Therefore, adding soundproofing materials in your garage will prevent heat loss, so you will save some money on energy bills every month.
Types Of Sound That Enter The Garage
Before kickstarting your garage soundproofing project, it’s important to figure out the type of sound that invades your garage space. That’s because the soundproofing material you must use depends largely on the sound that enters your garage.
Basically, two types of sound can enter your garage space– structure-borne noise and airborne noise. I’ve discussed them in detail– so let’s take a look.
1. Structure-Borne Noise
Also known as impact or structural noise, structure-borne noise transpires when any item collides with a solid structure, i.e., the garage door. This collision, in turn, results in vibrations, which are heard as noise.
The sound of rain thumping against the roofing and someone banging on the garage door is a classic example of structure-borne garage noise.
2. Airborne Noise
As the name suggests, airborne noise travels in and out of your garage via air. Sounds such as that of power tools, music, and voices are some examples of airborne noise that gets transmitted through your garage door.
So, is the noise in your garage airborne or structure-borne? One easy way to figure that out is by putting your hand on the garage door whenever you hear a noise in your garage.
If the noise is accompanied by a vibration, it’s structure-borne; however, in the absence of a vibration, the sound is airborne.
How To Soundproof A Garage Door
1. Install Acoustic Foam Panels
One of the most effective yet slightly expensive sound attenuation methods is to install acoustic panels in your garage. Unlike acoustic blankets, foam panels offer a polished appearance, making your garage appear more like a recording studio.
Installing acoustic foam panels is fairly easy, although you can hire a professional if you’re not into DIY. Adhesive spray, push pins, impaling clips, or double-sided tapes– you can use a variety of things to install acoustic panels on garage walls, doors, or the ceiling.
Note that if you intend to pull down the acoustic panels anytime soon, going for a less permanent installation method would be the best way forward. For maximum sound isolation, you can use these soundproofing foam panels to insulate the window pane and doors alongside the walls.
Do remember that these would only work when used in conjunction with an effective soundproofing system, with lots of additional mass applied to the entire surface.
2. Use Acoustic Blankets For Soundproofing Your Roll-Up Garage Door
Acoustic blankets are a practical solution for soundproofing roll-up garage doors because they are affordable alternatives to acoustic panels.
More or less, acoustic blankets are 78 inches in length and 72 inches in width and come with reinforced metal grommets for easy installation. What makes them a reliable soundproofing material for noise reduction is that they absorb sound. So, neither would unwanted noise enter the garage nor would the garage door screech or rumble while opening or closing.
For better sound absorption, hang the blankets after folding them, which would prove effective in reducing noise transmission.
3. Insulate Your Garage Door With Mass-Loaded Vinyl
Another popular option for soundproofing garage doors is mass-loaded vinyl which is known to improve the STC (Sound Transmission Class) rating of a wall. This flexible material attenuates excess noise, so it’s a practical option for noise control.
The mass-loaded vinyl barrier, a polyvinyl chloride-based product, is an easy-to-install material that can be adhered to the wall, floor, or garage ceiling using spray adhesives, nails, and screws. To make your garage a quiet space, you can use more than one layer, which would enhance sound isolation.
Not many know that mass-loaded vinyl absorbs sounds of all frequencies, making it a reliable pick for garages where band practice takes place.
4. Use Noise-Blocking Curtains
Sure, an insulated garage door blocks noise, but did you know it also offers thermal insulation?
If you’re looking for a soundproofing material that offers both thermal and sound insulation, noise-blocking curtains are worth considering. As against a regular curtain, a noise-blocking curtain is thick and dense, which is why it can be installed anywhere– surrounding walls, windows, or doors.
Unlike other soundproofing materials, they need not be attached to the wall using any adhesive or nail (fastener); instead, you’ll need a curtain rod to install them. All you need to do is slide the metal grommets in the curtain rods, and your garage will be soundproof within a few minutes.
Like blankets, noise-blocking curtains don’t do much to reduce bass noise, so keep that in mind. However, it makes the space comfortable as it prevents energy loss, so you’ll be able to work comfortably no matter the weather outside.
5. Get Rid Of Air Vents Or Create An Air Vent Sound Maze
Ever thought that air vents could lead to noise leaks besides letting in the fresh air?
Tackling air vents is the first and the most important thing when it comes to soundproofing projects; otherwise, all your efforts would go in vain. Here, as a homeowner, you’ve got two choices– get rid of air vents or create an air vent sound maze.
Getting rid of them is one of the easiest ways to soundproof your garage. But without air vents, your garage would be toasty, which would be problematic in summer.
One way to combat this issue is to install an air conditioner or oscillating fans in your workspace to keep it cool.
If you don’t mind undertaking a bit of DIY task, creating an air vent sound maze will help you soundproof your garage efficiently. All you need is acoustic foam and wooden sticks for the task.
First, you will have to trim the acoustic foam such that it’s of the same length and width as the wooden stick. Thin sticks aren’t much help in noise reduction, so make sure you use thick ones. Once trimmed, you will have to arrange them as shown in the diagram below, which will prevent sound from invading.
A Step-By-Step Guide On Soundproofing A Garage Door
The benefits of an insulated garage door are plenty. For anyone who wishes to soundproof their garage door on their own, here’s a step-by-step guide to help you complete the project with ease.
1. Gather Supplies
The first thing is to gather supplies needed to soundproof a garage door; having the right tools and equipment will allow you to complete the project quickly and efficiently. You need:
Sound insulation material like fiberglass panels, sound-deadening blankets, spray foam or acoustic foam panels
Weatherstripping tape
Spray or Green Glue adhesive
Garage door seal kit
Measuring tape
Cutting tool
Nails or fasteners
Garage door motor lubricant
2. Lubricate The Garage Door Components
After gathering supplies, lubricating the garage door motor is the next thing to do. Take the garage door motor lubricant and spray it over the motor along with the opening and closing mechanisms for smooth working.
3. Measure Your Garage Door And Cut The Soundproofing Material
Measuring the length and width of garage doors is crucial for garage soundproofing projects. So, grab the measuring tape, measure the door and keep the measurements handy because you’ll have to cut soundproofing materials accordingly.
No matter which material you intend to use, mark the length and width on it with a pencil and then start cutting to avoid mistakes.
4. Install The Insulation
When the material is cut, it’s time to install it, so apply Green Glue all over the garage door in generous quantities. You will have to apply the adhesive only if you plan to install MLV or acoustic panels. For fiberglass panels, you can use nails, screws, or other adhesives.
Also, make sure to clean the door before applying adhesive because a dirty door would prevent the material from adhering to the surface.
Tip
To seal gaps on the bottom of the door, you’ll have to use weatherstripping tape. Conversely, a garage door seal kit is considered effective for sealing the top and the sides of the garage door. Besides soundproofing, it will keep the garage insulated from outside weather, meaning you’ll save money on energy bills.
How To Soundproof A Garage Door Summing It Up
So, do you want to work peacefully on your carpentry projects in your garage, or does your garage make loud noises when opening or closing?
Either way, the only thing that can help you is soundproofing your garage doors. Of all the soundproofing materials, acoustic panels are effective in noise control, but they are slightly on the expensive side.
So, if you’re looking for materials to soundproof your side-to-side or roll-up garage door on a reasonable budget, acoustic blankets or noise-blocking curtains would certainly fit the bill.
Once soundproofed, you’re free to start your projects without the fear of getting noise complaints. However, if worst comes to worst, replacing your existing garage door with a ready-insulated one would be a wise thing to do.
Good luck, folks!
Adding mass to the ceiling is the best way to soundproof a basement. However, if you can spend a bit more, adding resilient channels to the structure will eliminate noise coming from the floor overhead to a great extent. The easiest, most affordable way to handle sound absorption however is to apply foam, cotton, fiberglass or polyurethane acoustic panels directly on the basement ceiling, hanging ceiling baffles can also increase sound absorption.
One of the worst things about modern life in the city is noise, especially construction noise in the neighborhood.
But you have the freedom to turn your basement into a soundproof haven and relax in that quiet space. What’s more, a soundproof basement ceiling will allow you to throw basement parties or continue jamming sessions without disturbing anyone.
Let's start this article with a disclaimer, by creating a big distinction between soundproofing and sound absorption from the get-go though:
Soundproofing translates into the act of preventing sound from entering or exiting a space by using materials that block or reduce sound waves. Soundproofing materials are usually dense, thick, and heavy, such as drywall, mass-loaded vinyl, and acoustic foam, the most common soundproofing method is thus adding mass to existing partitions.
Sound absorption translates into reducing or eliminating sound by using materials that absorb and dissipate sound waves. Sound absorption materials, such as acoustic foam and fabric-wrapped panels, convert sound energy into heat energy, which is then dissipated into the environment, and thus adding acoustic panels to your basement ceiling is sound absorption method, not a soundproofing method.
To make this article a bit easier to read, and because popular culture uses the term soundproofing loosely for the general act of minimizing sound I will use it too, just not to get hanged up on technicalities but please do note in the filed of acoustics these two terms are not interchangeable.
Interested to know more? Then read on till the very end!
Basement Ceiling Soundproofing 101
What Type Of Noise Enters The Basement?
So, do you know what type of noise enters the basement?
Knowing the types of noise that get into the basement is important when it comes to soundproofing a basement ceiling. And if you aren’t much into DIY home renovations, you probably won’t know the type of noises that usually invade such spaces.
Basically, two types of noise break through the basement ceiling– airborne and impact noise. Traffic-related vibrations are also likely, though these are rather difficult to solve at later stages.
Since the first floor of any building is the busiest, you’re likely to encounter both types of noises in the basement. Whatever sounds you hear in your basement fit in either of the two categories.
Here I’ve discussed the two types of noises to help you decide which solutions would be effective for a basement ceiling soundproofing project.
1. Airborne Noise
As is understood, airborne noise refers to the unwanted sound that travels from one place to another via air after leaving its source. When the sound waves collide with a structure, some energy passes across while a fraction of it is reflected, and the remainder is absorbed.
Either airborne noise reflects off the ceiling or floor or passes through them to the basement.
Your toddlers screaming in the nursery while playing or your teenager blaring loud music on speakers are classic examples of sound traveling to the basement through the air. A few other examples of airborne noise are:
Barking dogs
Conversations between people
Cars starting or moving down the road
Radio and television
Airborne sounds can be blocked by adding extra layers to the structure rather than modifying it entirely. But one thing to keep in mind is that some airborne noises are low-frequency sounds, so blocking them completely might be challenging. Like, the sound of an airplane passing overhead or thunder would be more difficult to block than somebody’s footfall on the ground above.
2. Impact Noise
Impact noise, on the contrary, occurs whenever any object hits or touches a surface, because of which mechanical energy is transferred into the structure as vibrations. Later, these vibrations leave as sound waves from the other side.
The sound of the ball hitting the floor or someone thumping their feet while climbing stairs are classical examples of impact noise. Some other examples of impact noise are:
Moving furniture
Water sloshing through the pipes
A construction jackhammer
Impact noises are quite common in basements, mainly because the ceiling is on the first floor of the building. As against all other floors, the first-floor witnesses a lot of foot traffic, which is why blocking impact noises completely is slightly tricky.
Since they travel through the flanking, you might have to modify the structure of a building to alter or distort the direction of these sound waves.
Common Types Of Basement Ceilings
More often than not, soundproofing projects are DIY unless you wish to make structural changes.
Before you start the project, it’s important to know about the different types of basement ceilings, so you can understand how the two types of noise enter the space. Also, the soundproofing solutions you opt for will depend upon the type of ceiling you have in your basement.
Here’s a quick rundown of the common types of basement ceilings.
1. Dropped Ceiling
Also known as suspended ceilings, dropped ceilings are a sought-after option for basements.
Drop ceilings are fixed beneath the structural ceiling and feature lightweight tiles that are attached to a grid, which hangs from the joists overhead. Therefore, you get a large cavity to work with, and you can employ the principles of a decoupled ceiling.
In a drop ceiling, noise transfer is no doubt high, but it can be soundproofed effectively, which means you can use a variety of soundproof insulation materials.
2. Exposed Joists
Exposed joists, often referred to as open ceilings, reveal the bottom of the flooring alongside the joists overhead. Though sound transfer is high in this structure, you get plenty of space to work, which means you get the freedom to employ a variety of soundproofing methods.
On top of that, you won’t have to prep the surface to add soundproofing materials, which further cuts down the cost.
3. Finished Ceiling
Finished basement ceilings are often made up of drywall sheets that are fastened to the floor joists overhead. A finished ceiling may not have insulation material lodged in the cavity.
The opportunities to soundproof such a ceiling are limited unless you tear down the original drywall to add soundproofing materials. And it will double the cost, which means you might end up overspending on soundproofing.
4. Unfinished Ceiling
As against the finished ceiling, an unfinished basement ceiling is when the mechanical and structural design, such as beams, is left as it is, meaning in its natural state. In an unfinished basement ceiling, you need to start everything from scratch, so you can use whichever soundproofing material you want.
Elements Of Soundproofing A Basement Ceiling
After discussing the types of noises and ceiling comes the elements of soundproofing a basement ceiling. Essentially, there are four elements to soundproof the ceiling of a basement which must be followed for a flawless layout.
1. Adding Mass
Sound waves are made by vibrations, and when more mass is added, it becomes difficult for such vibrations to propagate. However, this is frequency dependent, and the efficacy of a mass panel is proportional to its thickness and density as well as the sound wave frequency.
So, remember to add a large volume of drywall to create a sound barrier and block unwanted noise from invading any space. However, since you cannot add too much mass to soundproof the ceiling, keep in mind that it will eliminate only airborne noise. That means it would be ineffective in minimizing impact noises.
2. Decoupling Joists
When two sides of a wall are separated mechanically to prevent noise from passing through, it is known as decoupling. However, decoupling isn’t effective for blocking sound waves of all frequencies. Therefore, I suggest using it alongside other principles to soundproof a basement ceiling effectively.
3. Damping
The third aspect of soundproofing is damping, which prevents sound vibrations in the joists of the ceiling. When it comes to damping, there’s no shortage of compounds, so finding one wouldn’t be a problem.
For instance, acoustic drywall is one option that dampens sound waves while absorbing them; hence, it’s more effective than traditional drywall.
4. Absorption
Absorption is the fourth and final principle of soundproofing a basement ceiling. As a rule of thumb, the thicker the material you use, the more effective it will be in absorbing sound of certain frequencies.
All you need to do is place the sound insulation material at the back of the barrier, and it will absorb sound, reducing noise.
7 Ways To Soundproof A Finished Basement Ceiling Cheaply
1. Seal Gaps
When soundproofing a basement ceiling, the most important thing is to seal gaps, no matter which part you’re working on.
Gaps are undoubtedly the biggest culprit that allow sound to travel from one place to another. Almost every basement ceiling has cracks or gaps, which may not be noticeable at first.
Use caulking to seal gaps on the basement ceiling because installing soundproofing materials before sealing the gaps won’t be effective in blocking noise. Remember, even the smallest gaps can contribute to noise transmission.
So, sealing gaps and cracks should be the priority for soundproofing your basement.
2. Add Rugs To The Room Above Your Basement
Anyone who wishes to soundproof their ceiling without spending a ton on sound insulation materials must get rugs for the rooms above the basement.
Rugs dampen vibrations that occur on the flooring above the basement ceiling. When shopping for rugs, opt for the fluffiest and thickest ones because they absorb sound better than thin ones. In this regard, I suggest opting for shag rugs because they are soft and voluminous.
However, if the room already has carpet installed and you don’t wish to spend money on rugs, add heavy-duty floor mats.
For maximum sound absorption, you must place mats in the middle of the carpet and the floor above your basement. Beneath the rag, you can add acoustic floor underlayment to improve its functionality. Besides damping sound, it will function as an anti-slip mat, so you can lay it on laminate and hardwood floors without worries.
Alternatively, you can place furniture like a bookshelf or couch on the flooring above the ceiling of the basement. Adding furniture is an excellent way to eliminate sound transmission without spending a penny.
3. Fix Squeaky Floorboards
Squeaky floorboards can also lead to sound transmission. So, you’ll need to fix them before installing a soundproofing solution to prevent noise transfer to the basement from the rooms above.
A bit of DIY work is needed to fix the floorboards, so be prepared for it. For this, you'll need to first locate the squeaky boards, identify the joist line and fasten the screws back down.
Here I recommend using screws with either removable heads or flat heads to make sure they do not protrude through the finished floor. Also, don’t forget to use a wood filler to fill the gaps between the finished floor and the subfloor.
Or, you can glue a wood block and place it between the subfloor and the ceiling joist beneath the squeaky board. By filling the gap, this wood block prevents the board from bending; you can join them using screws to enhance durability.
4. Insulate The Joist Cavities With Acoustic Insulation
Acoustic insulation is effective for sound absorption, not noise reduction. Usually, such insulation is used in ceiling and wall cavities to reduce the sound intensity so that airborne noise doesn’t pass through.
In this regard, acoustic tiles are also an excellent option for improving the absorption (acoustics) of a basement.
Mostly, basements have open floor plans, with some featuring a separate bathroom. So, one of the best ways to eliminate echo and reverberation in the basement is to install acoustic panels on both the ceilings and some sections of the walls.
In simple words, insulating the ceiling cavity will reduce the transfer of airborne noise; however, it won’t be effective in eliminating the transmission of impact noise.
Sound insulation materials can be used on both drop ceilings and open ceilings. For insulating a finished basement ceiling, you might have to tear down the drywall, install the insulation material in the cavity and restore the drywall.
On the other hand, you can use blown-in insulation to insulate existing walls; however, it’ll be costly. Besides materials, you’ll be spending on labor charges, which will further add to the expense.
Go for insulation materials that are three-inch thick, and make sure you don’t stuff them into the cavity too tightly. Hence, mineral wool insulation would be the best bet because of its performance and fire-resistant properties.
5. Rearrange Furniture In The Room Above The Ceiling Of The Basement
Rearranging furniture may not be the most efficient noise control strategy, but it’s a quick-fix option for soundproofing your basement. You must consider rearranging furniture in the room above the basement ceiling because placing couches, bookshelves, or other furniture in high-traffic areas will reduce footfall, minimizing impact noise.
Inspect the room properly to identify areas with the most noise pollution and place furnishings there. Besides couches and bookshelves, chairs and cabinets are considered effective in eliminating sound transfer, so you can rely on them for noise control.
6. Use Mass-Loaded Vinyl As Carpet Underlay
Made of polyvinyl chloride, mass-loaded vinyl barriers prevent noise from passing to the basement from the floor above, so it’s a dependable option for soundproofing basements. While there are several ways to install mass-loaded vinyl, attaching it to the ceiling or placing it under carpets blocks noise effectively.
Though dense, this material is highly flexible and comes rolled up, so even a novice would be able to install it without issues.
Another way to install this material is to staple it to the existing drywall ceiling without having to take it off. One thing to note is that the mass-loaded vinyl barrier is available only in black color. And if you want to keep it out of sight, install a drop ceiling with drywall and resilient channels after the MLV is in place.
7. Consider Hanging Acoustic Fabric Panels
All those who want to make their basement a stylish space can opt for acoustic foam panels instead of basic tiles. However, I’ve found that they don’t really block noise, as they are very porous. Instead, they allow sound to enter, and some of it gets absorbed. The rest is reflected from walls, and some amount is transmitted.
Other than hanging them on the walls, you can attach them using L-brackets or Z-clips.
As against the finished ceiling, soundproofing the ceiling of the basement, whose joists, trusses, ductwork, and beams are exposed, is slightly challenging. However, it’s not impossible– here’s how you can soundproof a basement ceiling with exposed mechanical and structural designs.
1. Add Insulation
Unfinished basement ceilings often have empty joists, which allow sound to pass through. So, the first thing to do is to stuff insulation into the joists; otherwise, preventing noise transfer would become impossible.
And if the basement ceiling was completed in a hurry, you'll need to inspect it to figure out if insulation material has been used or not. More often than not, the ceiling of basements is finished for aesthetic purposes. In such cases, you'll need to drill holes in the plasterboard to check whether it is insulated.
If it isn’t insulated, you know the drill– tear down the drywall, insulate it and reinstall it. Batt insulation is a popular pick among homeowners for soundproofing a basement ceiling because it’s easy to install.
2. Use Resilient Channels
The next step is to fix resilient channels to the studs at a right angle. When it comes to soundproofing a basement ceiling, resilient channels are important because they act as a shield between the drywall ceiling and the foundation. Hence, they will separate the foundation from the ceiling, which will prevent sound from transmitting.
You can also use hat channels or sound isolation clips to further soundproof drywall.
3. Install The Drywall
Now that resilient channels are installed, you can move ahead and attach drywall. To avoid last-minute trips to the local store, make sure you decide which type of plasterboard you want to install. Also, order enough drywalls to envelop the entire ceiling.
Another aspect is to make sure that the fasteners pass across the channels, not the joists. Or the process of decoupling would fail.
Throughout the process, keep in mind the ventilation and lighting process. So when installing the drywall, don’t forget to slit around electrical components and vents while making sure you place resilient channels away from lighting fixtures.
4. Use Green Glue To Coat The Plasterboard Before Layering
Green Glue is a substance that works as an adhesive between the layers of plasterboard and is an integral part of the soundproofing process. And while we’re on this topic, remember that applying Green Glue between two drywalls won’t be easy if you don’t have a drywall lifter.
Fasteners can also be used alongside Green Glue to securely join two layers of drywall. Keep in mind that this is a slightly lengthy procedure, so it may take a few days to complete. And in case you cannot spare much time, either you can construct a drop ceiling and/or install mass-loaded vinyl.
5. Use Acoustic Caulk To Seal The Gaps
As previously mentioned, any gaps between the subfloor and the joists will allow noise to pass through the basement. So, sealing gaps is a step you cannot skip, even if your ceiling features double layers of drywall; acoustic caulk is a good option for doing this.
6. Finish Drywall
After applying acoustic caulk, you'll need to smooth it out and add finishing touches, which encompasses a range of things from painting to installing light bulbs. Once you’re done adding everything, your basement will be ready to use.
Benefits Of Soundproofing A Basement Ceiling
Unable to decide if soundproofing a basement ceiling is a good idea? Here I’ve discussed a few benefits of soundproofing a basement ceiling.
1. Reduced Noise Pollution
We live in an overstimulated and sound-saturated environment, so noise pollution is becoming more prevalent.
Long-term exposure to persistent noise has been linked to negative health impacts, especially bass frequencies and acute noises. Soundproofing a basement ceiling will reduce noise pollution and lead to:
Improved focus and concentration
Better sleep
Decreased anxiety
Reduced risk of tinnitus or hearing loss
2. Sleep Or Read Comfortably In Your Basement
If your neighbors love throwing parties every now and then, understandably, the loud music may make it difficult for you to fall asleep or stay asleep. Soundproofing the basement ceiling will allow you to sleep comfortably or study in your basement, no matter the time of the day.
3. Save On Energy Bills
Even the smallest gaps can allow heat to escape and cold air to enter, which would lead to energy loss. Soundproofing the ceiling of your basement can prevent energy loss from your home, eventually reducing energy bills.
What Is The Cheapest Way To Soundproof A Basement Ceiling
Whether you’re running short of money or don’t want to spend too much, insulating the floor above the ceiling of the basement is the cheapest way to soundproof it.
Laying down rugs or carpets would effectively insulate the floor overhead the basement. And if you don’t mind spending a few more dollars, consider installing floor underlayment, which would make the floor denser and thicker. Hence, it would absorb sound and prevent airborne noise from entering the basement.
Tip
Before starting your basement soundproofing project, rent a drywall lifter for a couple of days or weeks so that you’ll be able to install drywall with ease. A drywall lifter is a handy tool that holds the plasterboard sheets, so you’ll be able to screw or glue them in place without hassle when soundproofing the basement ceiling.
Soundproof Basement Ceiling Summing It Up
Basements aren’t only meant for storing things; instead, they can be used to watch movies, record music, or even catch forty winks during the day.
But you can make the space usable by soundproofing its ceiling. Although it may sound like a daunting task, soundproofing a basement ceiling is a lot easier than insulating other areas of your home.
I suggest going for fluffy rugs and acoustic panels when it comes to soundproofing the ceiling of a basement because they are relatively easy on the pockets. And if budget isn’t an issue for you, installing resilient channels would be the best bet.
So, go ahead and try these soundproofing techniques in your basement and turn it into a soundproof oasis!
You can soundproof your floor during installation or after it has been finished. Before installation underlayment, floor joist isolators, or dense acoustic insulation can be used while after installation you can use carpets, rugs, mats, and even proper furniture placement to minimize sound. Another popular method is to remove structural noises by replacing old screws and pins.
Tired of hearing noise complaints from your neighbors living downstairs? Well, it’s time that you make your floor soundproof.
Everyone likes to have peace and solitude at home, so you can’t really blame your neighbors if they complain about noises coming from your room.
Thankfully, by making your floor soundproof, you can avoid such complaints altogether. So, how can you soundproof the floor of your house? That’s what I have discussed here, so dive in!
How to Soundproof Floors
Soundproofing Basics
Before I delve deeper into the topic, let me give you a brief idea about what soundproofing is. Simply put, it is a process that aims to minimize or eliminate sound propagation. If you soundproof a room, you can prevent noises from leaving the room. The opposite is also true, which means that you won’t have to deal with any external noises.
Besides the floor, you can soundproof any part of your room. For instance, if you soundproof the walls, you can prevent noise from propagating through them. This means that people living in the adjacent room will not be bothered by noises coming from your room. Similarly, if you soundproof the ceiling, you won’t have to worry about the upstairs neighbors disturbing your sleep in the middle of the night.
In this regard, soundproofing is done to eliminate two types of noise - impact noise and airborne noise. The former is caused due to impacts, while the latter is caused by ambient sounds. For example, if you hit your walls with a hammer, it will generate impact noise. On the other hand, if you are playing loud music, the sound will travel as airborne noise.
Impact noises are normally more troublesome than airborne noises since the energy of an impact vibration can propagate quicker than ambient noise. Furthermore, the noises generated from impacts are a lot louder and more difficult to manage than the noises generated by a barking dog or talking people. This is because the vibrations from an impact travel directly through the materials of the walls and ceilings.
If it is a bit difficult to understand, then refer to the infographic below. It demonstrates how vibrations travel through the walls and floors to generate noise in adjacent areas.
Why Should You Soundproof Floors?
Soundproofing is essential because it helps to improve the absorption (acoustics) of sound inside a room. Many homeowners understand the necessity of soundproofing their walls and ceiling, but when it comes to the floor, they feel skeptical, especially if they live on the first floor.
Yeah, I admit that If you live on the lowermost floor, then it might not always be necessary to soundproof your floors. However, if there is living space below you, then floor soundproofing is required.
Besides, soundproof flooring is not just meant to reduce the noise nuisance for your neighbors. It is also required to improve the impact insulation class (IIC) rating of the floor. This, in turn, contributes to the sound transmission class (STC) rating, which is a mandatory requirement under the law.
According to the International Building Code 2021, the STC rating of a building needs to be above 50. Therefore, if you want your home to be legally compliant with the regulations, soundproofing floors is a must.
In that context, different types of floors require varying levels of soundproofing based on their sound transmission capabilities. For instance, floors made of stone or ceramic tiles transmit a lot more noise than floors made of hardwood or concrete slabs. Thus, you will need more soundproofing materials for insulating a tile floor than what you will need for soundproofing hardwood flooring.
That said, the overall procedure is more or less the same, regardless of the flooring type. You just need to decide when you want to soundproof your floor. That’s because the methods to soundproof finished floors are different from the methods implemented during floor installations.
How To Soundproof An Existing Floor?
There are many ways in which you can soundproof an existing floor, as you can see below.
1. Laying Carpets And Rugs
The simplest method to soundproof a finished floor is to use wall-to-wall carpeting. If you use a carpet on your tile or stone floor, it can efficiently absorb the sound from impact, thanks to the shag. Besides, it minimizes the force of impact, which prevents the items from breaking when they are dropped, which is an additional advantage.
If you want to reduce the impact noise in certain sections of the floor, you can use rugs, which are usually smaller in size than carpets. As a matter of fact, using rugs below your heavy furniture is an excellent idea, as it minimizes the impact of noise when you move them.
On that note, moving furniture becomes much easier if there is an underlying rug. Instead of carrying or dragging the furniture item across your floor, you can simply pull it with the rug, which requires considerably less effort. So, not only does it reduce unwanted noise, but it also increases convenience, which makes it an excellent pick for finished floors.
Installing carpets or rugs on your floor is pretty straightforward, which is another advantage of this option. All you need to do is roll it over your floor, and you will be good to go.
However, you need to measure the dimensions of your floor beforehand, especially for a wall-to-wall carpet that covers the whole floor. If you don’t, you will end up with uncovered areas on the floor that lack soundproofing.
You need to consider the thickness of the carpet or rug you want as well. A thick carpet can absorb more noise but is relatively expensive to get. On the other hand, a thin carpet is a lot cheaper, but it can absorb less noise by comparison.
2. Using Mats
Using floor mats is another method for soundproofing a finished or new floor. The basic principle is very similar to the one used for the carpets and rugs, as you need to lay them over your existing floor to make it soundproof. Even so, there are certain differences with this option that need to be considered.
The first and most obvious difference is the materials used. Typically, the shags of carpets and rugs are made from wool, cotton, or nylon. In contrast, soundproofing mats are made from rubber, cork, vinyl, plastic, or composite materials.
Natural rubber is an excellent material for sound insulation, which is why it is commonly preferred over other soundproofing materials. You can easily use rubber mats over your floor to minimize impact noise and ambient noise. Likewise, they can be used as carpet padding below your carpets to enhance their soundproofing capabilities.
Composite mats are generally made from a combination of wood, fiber, and plastic. They are pretty thick, which helps to absorb sound efficiently. On the flip side, they are expensive, which reduces their feasibility.
Regardless of the materials, most floor mats are available in two forms - rolls and interlocking tiles. This is another aspect that differentiates them from carpets, which are only available in a single form.
The rolls are similar to a rug, and you need to lay them over your floor. However, a roll of rubber mat is relatively large and heavy, which can make it slightly difficult to handle.
If you do not want to deal with that hassle, you can go with an interlocking floor mat. Installing it is much easier by comparison and feels a lot like solving a jigsaw puzzle. Besides, interlocking floor mats are available in different color options, which helps to improve the floor aesthetic.
3. Install Deck Screws And Nail (Fastener)
This is a method that is primarily used for wooden and hardwood floors. Such floors are generally made from wooden floorboards that are held together with adhesives or fastener nails.
In many cases, the adhesive wears off over time, or the nails become rusty and corroded. Ultimately, they come loose from the floorboards, which causes the floorboards to become squeaky. Squeaking sounds are a result of the floorboards rubbing against each other, and hence they can be considered to be a structure-borne noise.
If you want to eliminate the squeaking sounds (or any other structural sound, for that matter), you should install new deck screws. That will restore the integrity of the wood flooring and get rid of any odd structural noises.
To install the deck screws and nail (fastener), you will first need to remove the old nails and adhesives if they haven’t come off already. You can use a claw hammer to pry out the old rusted nails from the wooden floorboards.
In some situations, the rust may cause the nails to become stuck to the boards. If you come across such nails, you can use rust remover to loosen them up for easier removal.
Likewise, you can remove the old adhesives by scraping them off with a brush or sandpaper. You can also use vegetable oils to remove old adhesives. First, you have to pour the oil over the adhesive and let it soak for a while. Then you have to wash it off with water or wipe it with a clean cloth.
After that is done, you can install the new screws and nails. For the screws, you can install them with a screwdriver, and for the nails, you can use a simple hammer.
4. Furniture Placement
Have you ever wondered why an empty room sounds louder than a filled-up room? It is because objects, such as furniture, are good absorbers of sound. Therefore, you can make the floor (and, by extension, the room) soundproof by placing your furniture items in a specific manner.
Such a system is highly effective for blocking out airborne sounds. And with correct placement, you won’t have to worry about dropping objects on the floor either. For instance, if you have more than one table in the room, then a dropped item will likely fall on them instead of the floor, thereby eliminating impact noise.
As you can guess, there is no installation necessary for this method. All you need to do is move your furniture to the noisiest parts of the room, such as near your TV or music system. That will effectively soundproof your room for listening to music or watching movies loudly.
On that note, you can use this technique to soundproof an existing wall by placing the furniture items close to this wall.
However, one disadvantage of this method is that you will need lots of furniture to get the maximum level of soundproofing. If you have enough furniture in your apartment, it shouldn’t be a problem. But if you don’t, then it would not be feasible to buy furniture just to soundproof the floor. In that situation, you can opt for another soundproofing method.
Tip
I recommend using cushioned furniture items, such as sofas, couches, mattress beds, and so on. The cushioning on these items can absorb sounds better, thereby giving you a quieter experience.
How To Soundproof Floors During Installation?
It is always better to soundproof a floor when it is being installed. You don’t have to take my word for it, though; just ask any construction engineer, and they would suggest doing the same.
There is a good reason for this - the features of a floor under construction can be easily adjusted or modified to accommodate soundproofing measures. You cannot do such modifications with a finished floor unless you want to demolish and rebuild it again.
With that in mind, here are some methods that can be used to soundproof a floor during installation.
1. Use Underlayment
Floor underlayment is a layer of insulating material that is placed either below or just above the flooring material. They are typically used to provide thermal or acoustic insulation. The former helps with regulating room temperatures, while the latter is used for soundproofing.
Acoustic floor underlayment can be made from different materials, as I have listed below.
Vinyl - Usually consists of compounds like polypropylene or polyvinyl chloride (PVC)
Rubber - Uses either natural or synthetic rubber and offers excellent soundproofing
Cork - Works best for tile, stone, cement, or marble flooring
Felt - Most suitable for hardwood, bamboo, or laminate flooring
Foam - Made from polypropylene and works best for an engineered or a floating floor
Rubber is the most effective acoustic underlayment, followed by vinyl, which is comparatively cheaper. And the best part is that they can be used for almost any type of floor, which makes them highly versatile.
If you want to underlay them below the flooring materials, you need to place them right over the subfloor. Most underlayments come in the form of rolling sheets, which means that you will need to lay them out like a carpet over the subfloor surface.
After that, you have to apply adhesives to fix them in place. I recommend using an acoustic caulk or Green Glue due to their innate soundproofing capabilities. If the underlayment roll comes with pre-applied adhesive, though, this step can be skipped.
In any case, once they are secured, you need to fill out any gaps using a sealant. Following that, you can lay down the flooring material to complete the installation. You have to use adhesives to glue these materials in place. However, if you intend to use floor lamination or a floating floor, that won’t be necessary.
2. Use Dense Acoustic Insulation
Below the floor surface lies the sub-floor, and underneath that lies the ceiling drywall of the room below. In this regard, the space between the subfloor and the ceiling drywall can be stuffed with dense insulating materials, such as foam. This is just what you need to do here, and it will muffle most impact and airborne sounds from traveling through the floor.
Most buildings contain some level of sound insulation between these layers. Although, if you want better soundproofing, you can add more insulation. Simply stuff the hollow space with the insulating material, and then you can move on to the rest of the floor installation. But make sure not to use too much stuffing, as it may make it difficult to attach the subfloor.
3. Soundproof The Floor Joists
A floor joist is a structural component that lies below the subfloor. It bears the weight of the whole floor and everything that lies above it. So, it is essentially a load-bearing structure, similar to pillars.
In that context, if you soundproof the joists of your floor, you can eliminate all sound transfer through the floor. The best strategy for this purpose is to use floor joist isolators. They are thick pieces of rubber that are usually placed between the floor joists and the subfloor. This creates a gap between them, which prevents sound from propagating.
As for the installation of these joist isolators, you need to slide them in place over the joist frames carefully. Then, you can nail the subfloor in place and install the rest of the flooring components over it.
The gap created by an isolator also acts as a thermal and vapor barrier which prevents the entry of moisture and keeps the floor temperature under control.
What Is The Cost Of Soundproofing The Floor?
When thinking of getting a soundproofed floor, the cost is possibly the first and foremost thing to pop into mind. And to be honest with you, there is no simple answer to this question.
While the materials used for soundproofing do not cost a lot of money, the procedure for getting it done is a bit costly. This is especially true if you want to get the floor soundproofed during installation. Such processes require skilled labor, which is often expensive.
The costs for soundproofing also depend on the size of your room. If your apartment is a small one, you can get it done without straining your bank account. However, if you have a large apartment or home, you might need to shell out a lot of cash. Personally, I would not suggest going for full soundproofing in that case unless you can bear the costs.
That said, some options, such as buying carpets or mats, are considerably cheaper. So, if you have a tight budget, you can consider these options instead.
Soundproofing Floors Final Words
Soundproofing your floor is not just a matter of convenience - it helps maintain your privacy too. I mean, would you really want your neighbors to hear your private conversations? Of course not!
Thus, to make it easier for your neighbors and yourself, you should make the floor soundproof right away. And if possible, you should get your walls, ceiling, doors, andwindows insulated as well.
Anyways, that brings me to the end of this detailed guide. I hope you find the information here to be helpful.
See you around then!
Soundproofing windows is essential for reducing unwanted external noise—whether from traffic, construction, neighbors, or city streets—that enters through your weakest insulation points. While professional solutions like triple-glazed windows, acoustic-grade laminated glass, or window inserts with sound-dampening spacers offer maximum noise control, DIY alternatives like acoustic caulk, soundproof curtains, window plugs, and weatherstripping provide solid performance for those on a budget. In this guide, we break down 13 proven soundproofing techniques—from affordable hacks to advanced structural upgrades—so you can effectively block sound, improve comfort, and boost your home's energy efficiency.
Why Should You Soundproof Windows?
Before I tell you how to soundproof windows, don’t you want to know why you should soundproof them in the first place? One of the important reasons for installing noise-reduction windows is that they enhance cognitive function.
With greater insulation, your existing windows can block sound up to 90% to create a peaceful home or office space for improved productivity. But that’s not the only reason for using soundproof windows, and here are some other advantages.
1. Safety
Most people think twice before installing large glass windows, but soundproofing a window is safe, especially if you use a durable material like acoustic glass. Moreover, soundproof windows are usually made of laminated glass having multiple panes, like double-pane windows.
2. Installation
You won’t need to replace the existing window to install window soundproofing because it acts as a second window behind the existing window frame. This proves cost-effective and helps avoid unnecessary expenditure during installation while cutting out outside noise.
3. Condensation
When you soundproof a window, it reduces condensation and keeps the interiors comfortable, which isn’t possible with regular single-pane windows. Sometimes with effective soundproofing, you can also enjoy zero moisture build-up that reduces the need for costly window treatments and maintains the window frame in top condition.
This is because most window soundproofing involves dual-pane windows that create a sealed and insulated space between the glass.
4. Energy Efficient
Since soundproof windows act as an extra protective layer, they reduce the need for insulation and make the entire setup energy efficient. This further reduces exposure to UV rays and ensures it’s easier to maintain the internal temperature of most rooms.
Questions To Answer
When I decided to soundproof windows in my home, I came across several techniques with varying efficiency levels. I asked myself the following questions to ensure that soundproofing was done right and I would not have to spend more money on future repairs.
Do I want to block constant noise or absorb sound only during certain times of the day?
Is it a high-pitched or low-pitched sound?
Is the problem persistent and serious enough to merit repairs?
Is the noise unbearable at times?
If you can answer these 4 questions like me, choosing the most suitable method for soundproofing windows will become easier.
Soundproofing Windows In 13 Effective Ways
The first thing I tell people who want to know how to soundproof windows is that they must have an idea about Standard Transmission Class. STC helps experts measure different acoustic surfaces and determine what sounds can be heard at a particular level.
If the STC value of a surface is high, its ability to reduce the impact of the sound waves is also high. So, to ensure you have chosen the best soundproofing windows, check the STC value so that the surface can absorb sound easily.
Single-pane windows usually have an STC rating between 18 and 20, which isn’t very high and allows unwanted noise to pass through. But after installing soundproof windows, the STC value will increase to reduce window noise more readily.
I have highlighted the STC value of some common sounds here.
25 - You can hear and understand soft speech
30 - You can hear and understand normal speech
35 - You can hear and understand loud speech
40 - You can hear loud speech, but won’t be able to understand it
45 - The minimum requirement for having privacy
50 - You can hear loud sounds, but they are very faint
60+ - This is the required level for good soundproofing
Below, I have listed some common techniques for soundproofing windows, and it would be best to layer these options for maximum noise absorption.
1. Acoustic Caulking/Sealants
Closing the windows, shutting the door, or drawing the window blinds can still lead to noise pollution when sound filters into the room through tiny gaps around window frames. Such gaps are most common at the point where the wall and window meet, so you can seal them with an acoustic caulk.
Compared to conventional products, acoustic caulk doesn’t shrink and is soft. So, clean the area around the window frames before filling the caulk gun and cutting the tip off the tube. Make sure to apply a steady bead of caulk around the sides of the window opening, let it settle, and clean the area with water and soap.
2. Window Foam
Window foam doesn’t cost a lot of money and improves the acoustics in a room. You can attach the foam to the windows to also reduce light pollution, especially in office buildings. The best part is that removing and replacing the foam is hassle-free and doesn’t require professional intervention.
But it won’t deliver the best results in a residential space, with the foam even reducing the attractiveness of your windows.
3. Window Inserts
When you don’t want to replace or repair the single-pane window, it would be best to use window inserts. This is an acoustic glass that homeowners can add over the glass panel, with some products even being customizable.
Instead of installing an extra interior window, the inserts blend in and cover the single-pane windows to reduce the noise problem.
4. Storm Windows
If you don’t want to spend much money on soundproofing windows, go with storm windows that reduce the need to replace single-pane windows. A professional can conveniently install these windows outside to cover the existing window opening.
I recommend choosing a quality product made of acoustic glass instead of standard glass, while the glazing methods and soundproofing vary according to specific needs.
5. Double-Pane Windows
Popularly known as double-glazed windows, double-pane windows have two glass panes in each window with air space in between that’s filled with argon or dry air. The greatest benefit of double-paned windows is their energy efficiency, thanks to the insulatedglazing, and you can choose from several thicknesses or glass types.
Although double-glazed windows cost more money than other soundproofing options, you will save more money in the long run, thanks to lower cooling or heating bills. In other words, the insulation offered by double glazing is unparalleled, provided the panels have 12-16mm space between them.
To give you an idea, the STC rating after double glazing is 41, while laminated glass has an STC value of 35. In both cases, soundproofing is higher than single-pane windows with an STC of 30.
Tip
To make the right choice, opt for double-glazed windows having dissimilar glass or a layer of laminated glass on the exterior. This guarantees greater protection against heavy noise pollution.
6. Window Plugs
This Do-It-Yourself technique isn’t a permanent solution, as it covers the entire window, but it certainly helps reduce noise. Window plugs are a type of sound barrier that fits within a window frame, and in most cases, you will need an acoustic mat, a thin board, and acoustic foam.
The shape of the foam should be similar to that of the window. Following which, you will have to attach it to the mat and thin board. Use an adhesive like spray glue to create a tight fit and fix a handle on the other side of the window plug for easy maneuverability.
7. Window Blind
A simple method most people ignore is using a window blind to lower sound transmission and drown out traffic noise. In fact, some high-quality honeycomb shades can absorb 70% of sound energy, but even better is that you have several options to choose from.
This ensures you can amplify the interior décor without affecting the noise absorption capabilities. Choose a heavy textile fabric to minimize echoes and ensure thermal insulation, or use it with a blackout curtain to enjoy the comfort of a quiet home.
8. Curtains To Block Noise
Another easy technique that guarantees maximum sound absorption is blackout curtains, especially since they serve multiple purposes. Most noise-blocking curtains reduce sound vibrations and help manage the internal temperature by preventing heat from escaping in winter.
You can also block sunlight and keep the room cool in summer, so make sure to use asoundproof curtain having multiple layers. The detachable felt liner stops noise coming through the window, supported by extra panels that provide a better surface for absorption.
9. Self-Adhesive Foam
Weatherstripping or self-adhesive foam functions like acoustic caulk to block sound waves, but it’s not a permanent solution. In my opinion, you should use weatherstripping with caulk to enjoy maximum energy efficiency and lower noise pollution by covering the gaps around the window frames.
Use a high-quality product and apply the foam to the bottom of the sash window to quieten most of the outside noise. And when needed, you can remove the tape; however, be careful because sometimes it peels off a portion of the paint or frame timber.
10. Polyvinyl Chloride Sound Barrier
At times, for windows that are out of sight, you can opt for DIY window soundproofing that involves polyvinyl chloride. PVC is a heavy-duty material often used for construction purposes in homes and vehicles and is well-known for its characteristic “flow effect.”
As a result, you can use it to dampen impact sounds or anything that causes vibrations, such as a running engine. That’s why many people install PVC to soundproof the ceiling or floor, which helps block noise when there are loud neighbors in the vicinity.
Or hang it over the windows like a curtain and paint it to blend with the interior décor.
11. Fiberglass Panel
At times, the outside noise can be excessive, and you will have to opt for a denser and thicker product like quilted fiberglass to soundproof a window. But how thick am I talking? Fiberglass panels that are 8 feet tall, 4 feet wide, and 2 inches thick can weigh more than 12 pounds.
Thanks to the added weight, placing the panel flat against the window frame becomes easier when you hang it with hooks. This ensures no room, even at the top or bottom, for sound to pass through.
For further insulation and blocking, it would help to attach a Velcro seal to the exterior of the window. The only downside is it’s not very attractive, so place curtains over the fiberglass to retain the appearance of the room.
12. Carbon Absorption Panel
Carbon panels are a high-tech solution for noise reduction since they absorb low-frequency sounds. They are much like foam panels and go over the window to block light, but the quality of soundproofing is much better, owing to the quality of the material.
On the other hand, it’s one of the costlier options, so most people have second thoughts about it. But if you are sensitive to low rumbling sounds or live near a construction site, I suggest that you soundproof a window with a carbon panel for a permanent solution.
13. Acrylic Sheet
You can add acrylic sheets over the glass panel as an affordable soundproofing solution, but it’s not as effective as some of my other suggestions. This is because the air gap between the two panes is smaller, so the noise insulation isn’t as pronounced.
It would be best to use a thick sheet of plexiglass between ⅜ and ½ inch thick for optimal results. And when choosing a suitable product, you can opt for window-grade acrylic that won’t discolor or fade from sun exposure.
To ensure that the sheets fit properly over the windows, measure the inside of the frame before cutting the panels. You will also need an additional wood or metal frame to create a dead air space while ensuring that this frame is taller and wider than the windows.
Glue the frame and attach the sheets to cover the entire window. Sometimes, people also use magnets to remove the frame if they need to use the window.
Soundproofing Windows Conclusion
To be more productive at the office or enjoy a pleasant time at home after a tiring day, it’s essential to follow proper soundproofing practices.
Most people blame their walls and spend substantial resources soundproofing the drywall. However, walls only play a small part in allowing sound to enter a room, with the main culprit being the windows.
Since walls have multiple layers, including a wood exterior, drywall, and an air gap, they attenuate sound much better than people think. But a single-pane window with a thin glass panel doesn’t have high sound attenuation abilities, which is further compounded by issues like cracks and holes.
After reading my guide, you can choose any soundproofing technique to relax in the comfort of a quiet home or combine multiple methods for a more permanent solution. So, take your pick and cut out the hustle and bustle of the outside world!
The most effective technique for reducing noise is to install an extra layer of acoustic drywall with an acoustic membrane between drywall layers and seal any openings with acoustic sealant. Other popular techniques include resilient channels, blown-in insulation, or covering the walls with soundproof blankets and curtains. All of these options can be used to reduce noise in both new and existing walls but do note that using simple sound absorbers is not enough, as they can’t stop sound waves entirely.
Living amidst noises, albeit a reality, can be inconvenient on more than one occasion. After all, you wouldn’t want to be bothered by unwanted sounds like that of nearby constructions or vehicles honking while watching your favorite TV show or working from home.
The good news is that you can employ different techniques to soundproof a wall, no matter if it’s old or new. Dive in to know how!
Learn How To Soundproof Walls
Why Should You Consider Soundproofing Walls?
Constant exposure to loud noise causes more than ear damage, annoyance, or lack of concentration. According to research, prolonged exposure to loud sounds can increase the risk of developing cardiovascular issues and high cholesterol.
Not only that, but it can also contribute to mental health problems such as depression, anxiety, and stress in adults and children alike. And this problem is especially prevalent in houses or apartments with thin walls that can’t block sounds; rather commonplace in cities today.
Hence, residential and commercial property owners are taking active steps to soundproof existing walls as well as build soundproofing walls.
Types Of Noises In Your Home
Broadly speaking, there are two types of noises in a general household- airborne sound and structure-borne sound.
As the name suggests, airborne sounds refer to sound waves transmitted by the air to reach your areas. Common examples of airborne noise include the sound of people talking or a TV playing in an adjacent room.
Structure-borne noises, on the other hand, result from objects hitting a surface to produce vibration, and these vibrations get transmitted via other surfaces in your home to reach your ears. For example, if you live in a multi-story building and hear the footsteps of a person walking above you, you’re hearing sound vibrations or structure-borne sounds.
In either case, you can deaden sounds or make the room soundproof with two noise-controlling strategies:
A. Absorption
This technique typically employs installing foam and acoustic foam panels on walls, among other things, for sound absorption. It’s usually used to lower sound levels in a room, and will absorb some amount of sound within the room itself. But it’ll not do much to stop transference of sound waves outside the room.
B. Reduction
Oftentimes, sound holes or gaps in the walls between rooms facilitate sound transmission. You may also find air gaps in other areas of the rooms, such as near the electrical outlets, switch boxes, light fixtures, or around the door frames and windows that cause sound leakage.
In such cases, you can use acoustical caulk or a sealant like green glue (not ordinary wall putty) to fill the gaps and solve the problem. The best use of these is behind sockets in walls. An alternative would be to use weatherproofing strips, especially around any door or window, to block sound while increasing the energy efficiency of the room by means of thermal insulation. After all, saving on power bills never hurts anyone!
How To Soundproof An Existing Wall
It’s possible to create a soundproof wall and block unwanted noise without performing any invasive procedures. Some of the most popular non-invasive soundproofing methods include:
1. Hanging Acoustic Panels And Soundproof Curtains
As mentioned above, acoustic panels can help absorb sounds, but they don’t guarantee stopping sounds entirely.
Generally, acoustic panels are made of timber, and these have a layer of mineral wool insulation behind the wood, which works to absorb sound. Besides, you don’t have to worry about these panels spoiling the look of your room, as they come wrapped in decorative fabrics. You may also find acoustic panel wall art pieces that will get the job done while enhancing the interior décor like nothing else.
Alternatively, you can opt for acoustic curtains for soundproofing both windows and walls, as these will help absorb the sound. Remember that the thicker the material and folds on the curtain, the more will be its sound-absorbing capacity.
Well, before anything, let me tell you that by increasing wall mass, I’m not asking you to rebuild a wall! You can soundproof a wall by simply adding a structure to it, such as a cabinet, preferably extending from the ceiling to the floor.
This noise control method can work extremely well for thin walls that facilitate sound transfer between adjacent rooms. Aside from that, consider adding a soundproof drywall made from viscoelastic polymer and gypsum to reduce noise. Or, you can add one or more layers to an existing drywall.
Although standard drywall isn’t as effective as soundproofing drywall, it’s cheaper than the latter. Hence, many people prefer installing multiple layers of the same to block out noise.
You can even install more soundproofing materials, especially something like mass-loaded vinyl (MLV), on any interior wall to reduce sound transfer. This is a popular method used to soundproof shared walls between cubicles or similar structures. Likewise, adding MLVlto the additional layers of drywall can aid in the noise reductionof interior walls.
I’ll talk about installing MLVs on walls in a later section.
Another easy DIY wall soundproofing method involves painting the walls of your room with soundproofing paint. Such paints are generally thicker than the standard wall paints on the market, which make them a suitable sound barrier for blocking out low-frequency noises.
However, you may need to pair this technique with some other method in case there’s more noise.
4. Using White Noise Machines
Now, white noise machines don’t work directly to minimize or block noise transfer, but they make you less sensitive to changing sound frequencies. Simply put, these machines emit “white noise,” or all human-audible sound frequencies ranging between 20 to 20,000 hertz and “mask” unwanted sounds.
Each frequency is distributed equally for sound masking purposes, meaning you won’t hear any more sound entering the room. White noise machines can also help you fall asleep quickly in a noisy room or environment.
Do note that when it comes to soundproofing existing walls, this is just scratching the surface. If you really want to know more about the topic, please read my detailed guide on how tosoundproof existing walls.
How To Install MLV?
As promised, let me now take you through the process of installing mass-loaded vinyl on existing walls. You will need the following materials:
Mass-loaded vinyl rolls
Pencil or chalk
Ruler or measuring tape
Roofing nails or fasteners
Utility knife
Start by detecting the location of the noise leak and mark the wall studs (the columns in the frame to which the wall is attached) in that area with a pencil or chalk. Make sure you mark a perimeter (in any shape) covering the location of the noise leak. Now, measure this area and note down the measurements.
Lay the MLV roll on a flat surface and draw an outline with the measurements taken earlier. Using a utility knife, carefully cut out the material and keep it aside.
For the next step, you’d need someone to help you out. Ask the person to place one end of the vinyl on the stud and secure it with a roofing nail (fastener). From here, hold the vinyl so that it maintains a straight edge and secure it with more roofing nails. Do this for all sides. I’d also suggest sealing the edges with barrier tape to prevent the vinyl from coming off.
Tip
If you end up covering any power outlets or electrical boxes during the process, simply cut the vinyl to expose the fixture behind. You can use an acoustical sealant near the perimeter of these fixtures so that the vinyl doesn’t come off from that area.
How To Stop Sound From Echoing In A Room?
Sometimes, the reason for a noisy room is not faulty wall construction but the echo within the space that can amplify even the slightest noise into a loud sound. This is primarily caused by the absence of adequate objects to absorb or reduce sound. As a result, the sound keeps reverting or bouncing off the walls before it eventually dies down.
In such cases, the best thing to do is introduce more furnishings like a thick carpet and curtains and furniture pieces to the room and place them near the walls. Remember that although this step may not prevent the entry of exterior noises into the room, it can dampen the reverberations to make the room quieter.
If you’re building or renovating your home, it’s the perfect opportunity for you to soundproof the walls from within using decoupling and sound absorption techniques. Although this is a job best left to the professionals, it may still be helpful to have a general idea about these procedures.
1. Decoupling
Simply put, decoupling is the process of separating two walls to restrict the transmission of sound vibrations between them. And this can be achieved by framing the studs in 3 different ways.
A. Double Studs
Double studs involve the construction of two stud frames with some gap between them and attaching drywall to the exterior of either side of the frame. But keep in mind that such a construction will take up extra space and may not be suitable for smaller rooms.
B. Staggered Studs
Builders typically install a wide sill plate at the bottom of the wall to be soundproofed and follow it up by placing narrow studs. While one stud is attached to the right end of the plate, the other one is attached to the left so that there’s some space between them. This way, each stud will be attached to one drywall sheet without reaching the other side.
C. Resilient Channels
A resilient channel is a flexible attachment that can expand to absorb any sound vibration or noise coming through thin walls, existing sheetrock, or new layers of drywall sheets. Resilient channels are compatible with any standard stud framing (construction)- builders generally attach them to one side of the frame, which also makes for a compact structure.
2. Sound Absorption
Insulated rolls and slabs made of minerals or molten rock (or a combination of both) can be installed between studs for effective sound reduction. Another method would be to install standard fiberglass slabs or panels on the stud frame.
A pro tip
keep an eye on the sound transmission class (STC) rating of the sound insulationmaterial you plan to use. STC rating is measured in decibels, and it’s used to gauge the efficacy of the material in minimizing unwanted noise transfer.
For instance, a soundproof wall with an STC rating of 20 dB will facilitate the transfer of even low noises, meaning you may hear someone speaking softly in the next room. However, a soundproofed wall with an STC rating of 60 dB or more can effectively stop noise transfer. Long story short, the more the STC rating, the better the wall soundproofing will be.
How To Soundproof Walls Conclusion
Many factors, such as your budget, the urgency of the situation, the sound quality, and the time you can spare, will determine the right way for you to soundproof walls.
For example, adding furniture or acoustical panels to the wall can be a quick, effective, and budget-friendly solution if you’re bothered by low-frequency noises. However, you may need to rebuild the wall or install a soundproofing drywall if you’re constantly exposed to loud noises.
I’d suggest contacting a professional soundproofing service to locate the exact spot and causes of the sound leak and taking the right steps toward implementing effective wall soundproofing methods.
Installing an additional layer of acoustic drywall over an acoustic membrane between materials and closing all gaps with an acoustic sealant to block cracks and gaps in both new and existing walls is the most efficient noise reduction method but using resilient channels, applying blown-in insulation, or covering the entire wall with soundproof blankets and curtains are other common solutions known to reduce noise.
Whether you’re trying to get some shut-eye or working from home, a constant babble of noises from next door can become a source of frustration and affect your mental well-being. In such situations, the only sensible option is to soundproof existing interior walls through which the sound is heard.
My guide shares some of the best soundproofing methods by which you can do so!
Learn How to Soundproof Existing Wall
Soundproofing Elements To Keep In Mind
To ensure your soundproofing methods work properly, you must know what factors affect their effectiveness. While most materials function independently, they can be used together to deliver the best results when you soundproof existing walls.
1. Blocking Or Reduction
Sound waves function by creating vibrations in objects, which may be solid, liquid, or gas. But how easily they can travel through various objects depends upon the mass. A larger and heavier object will have more mass and it will be more difficult for sound waves to travel through it.
Thus, a solid surface that is dense enough can reduce sound when placed in the path of the sound wave, preventing them from traveling from one spot to another. What’s more, the solid surface needs to be boxed in at either end to prevent diffraction. Further, complete coverage of the target walls is essential to ensure effective soundproofing.
2. Absorption
Certain materials have sound-absorbing properties that help reduce sound and one common example of such a material is the fiberglass insulation used in walls. However, sound-absorbing materials are most useful in blocking mid- and high-frequency sounds that do not have as much energy as low-frequency waves.
To block low-frequency sounds, you will need to use a larger quantity of the material. Absorption efficacy and thickness have a causal relationship as far as the frequency response of a panel is concerned. In case the existing walls are hollow, the air is trapped inside, which vibrates when sound is created from sources like your neighbor talking or from traffic.
You can use insulation materials with sound-absorbing properties, such as low-density cellulose, to prevent this.
3. Mechanical Decoupling
Since sound waves travel through surfaces, it is possible to reduce sound by decoupling them. When two surfaces are not in contact with one another, it makes it more difficult for sound waves to travel through them.
For soundproofing an existing wall, decoupling can be done by using certain materials, such as studs.
4. Sound Damping
Sound damping is the process of eliminating vibrations that are causing the sound and may be done using an external agent. Some of the best items for sound damping are compounds made using a viscoelastic adhesive.
Factors To Consider When Soundproofing Existing Walls
1. Budget
The first thing to consider is how much money you are willing to spend on soundproofing walls. A larger budget will allow more extensive techniques to be utilized, while a limited one will restrict you to more basic methods. That said, the effectiveness of the methods does not depend on their cost.
2. Time
Time is another factor that will determine what methods you can use to soundproof existing walls. Different methods require varying amounts of time, and some may take longer than others to complete.
3. Noise
Which soundproofing method will work best will depend to a large extent on the source and type of noise. It may be a high or low-frequency noise or may be temporary, and such factors will affect how you can approach the problem.
4. Tolerance
The final factor to consider is your tolerance to sound. If the sound does not cause significant disturbance, you can get away with using basic sound masking techniques. On the other hand, if it is hard to ignore, more extensive methods will be required.
Types Of Noises
Before you can start soundproofing walls in your home, it is important to identify the source and type of sound to be blocked. Generally, two types of noise can cause disturbances - structure or impact-based sound and airborne sound.
1. Impact Based Sound
Impact-based sound occurs when an object strikes another object and causes it to vibrate. These vibrations travel through various surfaces in the building, such as the walls, until they reach your ears.
2. Airborne Sound
In the case of airborne sound, you cannot feel the vibrations through various surfaces but can still hear the sound. Some examples include the voices of your neighbor talking next door or the sound of traffic from outside.
Soundproofing An Existing Wall - Best Techniques
1. Using An Acoustic Sealant
If your existing interior walls have cracks or holes, there is enough space for sound to pass through. To prevent that from happening, apply acoustic sealant or caulk in the holes to fill them, creating an airtight seal.
Apart from the cracks, make sure to apply the sealant around the edges of the walls. This will reduce both impact-based and airborne sounds from passing through those walls.
But in most situations, that will not be enough to drown out the noise completely since vibrations can travel through cracks and gaps in other surfaces. That is why you should look for such openings in windows, doors, and other areas of the room to seal them up.
Once the caulk has been applied, you need to seal up the light switches and electric fixtures as well, which will require plate insulation gaskets. These styrofoam pieces can be placed around the outlets to prevent vibrations from traveling through them.
When using caulk, just make sure not to use regular latex caulk since that does not have good sound absorption (acoustics) capabilities.
2. Using Green Glue To Install Another Drywall
Drywalls are easy to install and highly durable, which makes them suitable for construction or remodeling jobs. You can install additional drywall to separate the main wall, allowing sound waves to bounce off against the drywall.
However, before using this method, make sure to use sound insulation materials on the surface of the wall. Green glue is well suited for this purpose since it can be applied easily and is inexpensive. You need to apply it between the drywall layers so it can effectively absorb vibrations of low-frequency, such as construction noise.
Once the compound has been sprayed, attach the drywall and use acoustic caulk to fill up any cracks and gaps. Alternatively, you can use sheets of acoustic drywall that have a better sound transmission class.
3. Using Resilient Channels
This method works on the principle of decoupling and requires isolation clips or metal channels for superior noise reduction. Once installed, you will get a separate space within a room where sound cannot reach. After that, drywall can be installed to isolate this structure from the rest of the room. This makes it much more difficult for sound waves to travel through.
Isolation clips used for this purpose usually come with rubber feet that can absorb sound vibrations. You can even apply some insulation and acoustic caulk in the space to further reduce incoming sound and keep the room quiet.
Using resilient channels can be very effective if you want to soundproof walls, but it is one of the more expensive methods. And it will require a lot of effort since the existing drywall will need to be removed before the channels can be installed.
4. Applying Blown-In Insulation
Another method that utilizes the principle of sound absorption is the application of blown-in insulation. Blown-in insulation is a material similar to foam that can be blown into your wall with the help of a blower machine for noise reduction.
This low-density cellulose insulation traps air pockets in the wall, thus reducing echoes generated from airborne noise. The advantage of using this material is that it is completely non-toxic, is manufactured after recycling, and is fireproof.
On the other hand, if you have limited time, using fiberglass may be a better option since it dries quickly without any heat. Installing blown-in insulation can also be quite complicated, so it is best to get it done through a professional.
5. Hanging Soundproofing Blankets
Soundproof blankets can also be used for noise control since they are good at absorbing sound waves from walls and work just like foam panels.
To put up the blankets, use heavy-duty adhesive hooks or curtain rails. This method is easier than those that require decoupling your walls or using acoustic tiles and is not as invasive.
A soundproof blanket absorbs vibrations rather than reducing them, and its effectiveness depends upon its weight. Heavier blankets work better for soundproofing purposes than lighter ones. Generally, such blankets may not be able to block out noise completely, but their foam can absorb sound waves and prevent them from bouncing off walls.
6. Using Mass Loaded Vinyl
Mass-loaded vinyl is a highly dense material made of polyvinyl chloride similar to natural rubber and is often used for sound masking. The extra mass can be very effective in blocking out sound to create a quiet space. It is also very flexible and environment-friendly and provides an additional layer over the walls for sound reduction.
MLV is a popular option as it prevents sound vibrations and waves from traveling through the walls. To use mass-loaded vinyl, install a double-layer drywall on top of it horizontally or vertically using a screw or nail. Then, apply an acoustical sealant to the seams to seal them and complete the drywall installation.
7. Applying Soundproof Paint
While it is not the most effective method, using sound dampening paint is another option worth trying out. It can add additional mass to dampen the sound waves and reduce noiseeasily. You can even find soundproof paints that contain latex, which offers the additional advantage of preventing sound waves from bouncing around the room.
When using soundproof paint, keep in mind that it is most effective in reducing high-frequency sounds rather than low-frequency ones. This means noises, such as that of an airplane, chainsaw, etc., can be insulated very well.
Also, when using soundproof paint, conducting proper research regarding the brand is recommended since it is not as commonly used as acoustic foam tiles or MLV.
8. Rearranging The Furniture
An empty room can make it easier for sound to travel through walls, so filling it with items can reduce noise without any high-end soundproofing materials. But this method will also not be as effective as mass-loaded vinyl or decoupling.
The easiest way to reduce soundis by adding or rearranging the furniture in the room. Chairs, tables, sofas, and other furniture can help prevent sound waves from reaching the walls, but you need to locate walls that are most exposed to noise.
In most cases, the interior walls require soundproofing since they are thinner than exterior walls. Heavier and thicker furniture, like a bookcase, wardrobe, or armchair, work well to block noise since they have a lot of mass.
Additionally, consider placing a rug or carpet on the floor to reduce the amount of sound that travels through the flooring.
9. Using QuietRock
QuietRock is a relatively new type of drywall developed especially for removing unwanted noise in a room. This method is similar to the one where you install an additional drywall layer but requires the use of QuietRock instead of drywall.
One sheet of QuietRock is as effective as four sheets of regular drywall. You can install QuietRock by screwing it onto the existing drywall, while applying Green glue between the layers will help you get even better results.
10. Installing Acoustic Foam Panels
Acoustic panels made from foam are designed to block noise, which they do by absorbing sound waves. These panels are often used in recording studios to ensure minimal interference from unwanted sounds. Hence, they are available in various thicknesses ranging from one inch to four inches as well as multiple color options.
To install acoustic foam panels, you need to use a special adhesive, which makes the process quick and simple. Aside from preventing sound from traveling through walls, acoustic foam panels can help improve the acoustics of any room.
11. Hanging Acoustic Fabric Panels
Like acoustic foam panels, you can use fabric panels which are great at sound absorption and are also aesthetically attractive. Acoustic panels can absorb vibrations easily, which makes them a good option for improving the acoustics of a room.
You can hang these panels in various arrangements as needed for absorbing ambient noise within a room. They can even be used on top of the wallpaper, along with other sound reducing measures, to keep a room insulated against sound.
12. Using Soundproof Curtains
If you want a quick and easy soundproofing solution, consider using soundproof curtains close to your walls. These curtains are available in various designs and colors, can easily be hung using regular curtain rods without much effort, and keep a room relatively quiet.
Multiple curtains can also be used in a space and you can remove them when needed. Soundproof curtains can be placed in front of glass windows to reduce the sound coming from the other side, or use them as room dividers. And since these textile fabrics are available in various patterns, colors, and prints, you can find one that matches the decor of the room.
Tip
When soundproofing walls, keep in mind that sound energy can enter a space through other areas as well, such as doors, windows, and even the ceiling. You can use solid core doors or a dropped ceiling to ensure silence in a room.
Soundproof Existing Wall Conclusion
These were some of the best Do-It-Yourself soundproofing techniques for existing walls without removing drywall. They do not require a big budget, and most of them can be completed within a short period of time.
However, since houses vary in their design and construction, not every method will prove suitable. But many of the methods in this guide can be adjusted and customized easily depending on the situation.
It is also a good idea to try out multiple methods of soundproofing rather than relying on a single one since the chances of success are higher.
The best way to soundproof a room is to use soundproofing materials and techniques along with sound absorbers like acoustic foam, acoustic panels, wall hangings, and furniture. Here it’s important to note that using sound absorbent materials alone is not enough, as they can’t guarantee actual soundproofing.
Getting time alone with your thoughts is a luxury that most people fail to enjoy because of unwanted outdoor noise. To avoid such situations and make your home a safe space to relax and reenergize, consider soundproofing the rooms in your house.
Today's guide looks at some popular techniques for soundproofing a room to help you live comfortably. Most of these are DIY methods, and you won't need many resources.
Usually, people think that the best way to soundproof a room is to block sound waves, but an effective technique to cut out unwanted noise is to absorb sound. To absorb noise in your apartment, you can implement one or more of the following methods -
Sound-blocking blankets over the bedroom door and other entry points
For the best results, it's important to install the sound-absorbing materials directly in the path of the source to dampen noise. But for a detailed idea of how to soundproof a room from the inside, check out the following points:
When thinking about how to soundproof a room, the most important consideration for absorbing sound waves is location. The reason it's recommended to soundproof a room from the inside is that it's easy.
But you must determine whether you are trying to minimize sound coming from just one source, like a TV, or multiple locations. Once you identify the source, minimizing noise by diluting or muting it will be convenient.
2. Point Of Entry
Knowing the point of entry is essential to stop noise from entering the room in the first place. However, to block noise, you need to determine whether the incoming sound comes from adjacent rooms or through the existing walls. This is usually the case in shared apartments or condos having the same wall.
Note that when the incoming sound enters the room, sound reflection occurs at an angle similar to the point of entry. That's why to cut out sound transmission, people sometimes opt for soundproofing walls at the end of the footboard and the entire wall of the headboard.
When the angle of entry is a straight line, the sound waves will bounce between the headboard and footboard until they dissipate. Therefore, to absorb sound waves effectively, make sure to soundproof a room based on these 3 points.
How To Soundproof Different Parts Of A Room
For maximum sound reduction in your apartment, there's no need to opt for expensive construction work. I have listed some effective Do-It-Yourself techniques to help cut down on outside noise and enhance absorption (acoustics) within the room.
1. Commercial Acoustic Foam
While many people prefer using egg crate foam for sound absorption, it doesn't possess the required mass to do a good job. That's why I suggest using commercial acoustic foam, which looks similar but delivers better results to reduce noise pollution.
In a music recording studio, it's recommended to have a minimum foam thickness of 2 inches. So, anything less or similar to this should prove ideal for normal soundproofing.
Moreover, the pattern of the acoustic foam panels doesn't impact the effectiveness of acoustic treatment. You can shape the foam in multiple ways, such as egg crate, wavy, mushroom, wedges, and scored squares.
To choose the best soundproofing materials, you need to check the Noise Reduction Coefficient(NRC). It’s a scale between 0 and 1, with 1 being the best soundproofing. In some cases though, I’ve seen results showing higher than 1 for some materials.
This effectively says that the material absorbs more than 100% of the sound. However, these results are usually due to anomalies caused by sample size in the reverb chamber during the test (such as edge absorption).
Depending on the purpose, such as soundproofing a room for watching movies or noise control for gaming, you should know that regular carpeting or foam doesn't absorb frequencies below 250 Hz. For such instances, it would be better to opt for a bass trap for lowering bass sounds, or you can install 4-inch foam.
2. Soundproofing Techniques For Windows
When you want to block sound from filtering into a room, I suggest cutting airborne noise by treating the windows first. Thanks to easy and cost-effective solutions, you can create a tight seal around windows to restrict sound coming from outside.
Although there are several options to choose from, thick curtains and drapes are ideal for soundproofing a room. It becomes easier to absorb sound when you hang heavy curtains with noise-canceling properties or opt for a blackout curtain.
Most importantly, heavy curtains make it easier to trap energy and maintain a comfortable room temperature throughout the year. Some consumers further prefer weather-stripping and use adhesive plastic or rubber to form a tight seal around window borders.
The goal is to block gaps or holes, so air and sound do not get through. You can cut soundproof foam into the desired shape and thickness to fit it into the window frame.
3. Soundproofing Interior Doors
The easiest way to cut out the noise and absorb sound coming from adjacent rooms or outside is to install a soundproof door. But for more affordable solutions, there are several DIY methods you can try.
A. Hardwood Door Slab
You can fit the room with a slab door that's durable, thanks to the solid hardwood construction. There are also hollow units available on the market that are highly cost-effective, but they have poor noise reduction ability compared to hardwood, which is denser.
B. Door Sweep
Another popular method to soundproof wood doors is installing a door sweep made of plastic or rubber at the bottom of the door. This serves the dual purpose of reducing sound and providing insulation, or you can fit door jambs to dampen noise while improving energy efficiency.
C. Caulk
For stubborn sound, an extra layer of caulk around the door frame helps seal the crevasses and seams.
D. Door Seal
You can use weather-stripping to seal the edges around the door frame, so be careful to take accurate measurements and angle the edges where they meet the corners. Moreover, the seal won't cause obstructions when closing the door without compromising on the fit.
Check whether you can install the door hardware or trim further
Once you are satisfied, install the hardware
Check if the door opens and closes as usual
4. Soundproofing Floors
Are your downstairs neighbors complaining about a creaky floor or excessive noise? This might be because you have hardwood floors, so a simple technique would be to use commercial floor mats, underlayment, and liners to reduce impact noise.
Carpets and rugs also serve a similar purpose, but a better option is using natural rubber gym flooring, foam tiles, and mats. Such soundproofing methods are most common in home gyms and theaters, lowering disturbance for you and others.
Therefore, it proves convenient to dampen the low frequencies of a sound system or absorb vibration and noise coming from a treadmill. For enhanced soundproofing, you can even add a rug for the second layer of protection against impact noises.
The best part is that rugs and carpeting are budget options that don't require a lot of money or resources. All you need is to use them with a liner, for which soundproofing rug pads and carpet liners come in handy.
But for hard surfaces, installing an underlayment that matches the lamination, hardwood, or foam tiles would be best. However, installing them during a renovation or new construction work would be ideal.
5. Soundproofing Walls
One of the most important things to consider when blocking noise in a room is how to soundproof the existing wall. Compared to other soundproofing methods, absorbing noise through walls is more labor-intensive, especially when you have existing drywall.
But here are some easy methods you should know about -
A. Furniture
Make use of the existing furniture, such as a bookcase or large wardrobe, by pushing them against the wall after locating the source. Since sound absorption increases depending on the mass, using large furniture is ideal.
B. Sealant
A sealant proves useful for tackling minor noise problems, for which you can apply a water-based acoustic sealant to fill the gaps or cracks in walls. You must also use a product with a color similar to the wall to maintain the quality of the interior décor or choose a sealant that permits repainting.
C. Wallpaper
Most people may not be aware, but applying wallpaper is just as good as other soundproofing techniques. Several soundproofing wallpapers are available on the market made from sound-absorbent foam to minimize noise.
You can hang a decorative tapestry or rug on the walls like a thick blanket. This technique has been used since ancient times to soften impact noise, keep the interiors warm, and prevent echoes, it is a sure way to add sound absorption, soundproofing to a room cheaply, probably the only free way to soundproof a room.
E. Acoustic Panels
Acoustic panels and soundproofing go hand-in-hand, and they are easy to install, thanks to impaling clips or adhesives. But there are a few things you need to keep in mind before using wall panels -
Removing acoustic panels often requires repairing the wall
Adhesives can damage the drywall or paint, but the panels won't be affected
Impaling clips take longer to install but don't require much maintenance
I must mention that impaling clips are metal fasteners with a flat shape, accompanied by metal prongs to hold the foam and attach it to the wall. If needed, you can also apply foam to the screws sticking out of the walls.
Usually, using impaling clips means you must only patch holes in the walls. But prior to that, apply packing tape on the panels and walls to remove the foam before applying the adhesive again to the shiny surfaces.
Note that you may still face issues with noise pollution but using this installation technique will allow you to take down the panels hassle-free.
F. Insulation
One of the best ways to make a room soundproof is by adding insulation to the walls, which isn't as difficult as it may seem.
The first step is removing the drywall to expose the wall studs
You can then apply fiberglass insulation, cotton batt, or other material between the studs
When you don't want to remove the drywall and reinstall it, you can add another drywall or wall frame to block the noise. This will make the room smaller but will provide a quality solution.
Fix the wall frame to the studs
You can also add resilient channels or sound clips to the studs
Finally, apply a new layer of drywall over them.
For those who don't know, resilient channels are metal frames, providing greater control over sound absorption.
6. Soundproofing Ceilings
Learning how to soundproof a room would be incomplete if you don't know how to treat the ceiling to reduce sound. But fixing ceilings is easier, thanks to insulation clouds and acoustic ceiling tiles available in multiple designs and colors to enhance the interior décor.
A. Acoustic Tiles
A simple yet highly functional solution for reducing noise is installing thick acoustic panels over the existing ceiling.
B. Cloud
A ceiling cloud is best suited for tall rooms, whereby the acoustic lining or canopy cuts out the excess noise. Moreover, given the shape of the hanging structure, it has the appearance of a cloud.
Given the multiple benefits of ceiling clouds, you will find them installed in recording studios. So, if professionals prefer to use them, you certainly can. However, once again, these will only absorb the sound, and not block it entirely from traveling across the walls.
C. Soundproofing During Construction
Most people don't think about soundproofing until later, but it never hurts to be proactive. Soundproofing during the construction stage is easier and reduces the hassle of making frequent alterations -
Before installing the ceiling, attach soundproofing material over the studs
Apply sealant to the gaps for maximum noise absorption
Install new drywall or patch the existing wall to cover the ceiling
7. Reducing Noise Reflection
Sometimes, the noise level increases in the entire room when you play music because it reflects off hard flooring and other surfaces. When sound bounces inside the room you need an absorbent material for sound masking the floor by reducing reflection. The thumb rule to go by is that for each doubling of absorption, the ambient sound levels will reduce by about 3dB.
So, cover the walls and ceilings with a soft material to muffle the sounds of barks, voices, or noise from a vacuum cleaner. This is where a shag rug for ceilings and rubber textile mats for the walls helps keep decibel levels down inside a room.
Most Affordable Ways To Soundproof A Room
I have highlighted several ways how to soundproof a room, but here are some affordable solutions that you can consider.
1. Window Treatments And Curtains
Curtains provide privacy while blocking outside noise, for which thick drapery and hanging plush prove useful. Moreover, they further absorb ambient noise inside a room for greater comfort.
2. Area Rugs
Area rugs are especially useful in main living rooms and or when there is much noise in an apartment. You can also add a pad under thick rugs to mask the sound further without compromising the available space.
3. Upholstered Furniture
The more upholstered furniture you have, the higher the chances of a quiet room because there are more areas for sound absorption. I have seen that sound doesn't bounce much in such rooms, so make sure to add plush pillows and thick blankets.
4. Background Noise
Even though it may feel counterproductive, there is some logic to this madness. Background noises are highly effective and affordable in making a room soundproof.
If there's something else you can listen to, such as white noise or instrumental music, you can mute or drown out other annoying sounds.
A. Sound Masking
Many people have sound machines that can produce various background noises, like rain, sounds of nature, or white noise; this is known as masking. But this is a temporary fix since such machines don't eliminate the noise entirely.
B. Air Purifier
Air purifiers help remove impurities from the air and produce enough noise to drown out surrounding sounds. You will need a medium-sized unit for the best results so that noise from the other room doesn't filter in.
C. Fans
Box fans, ceiling fans, and modular fans increase airflow and add white noise inside the room to dampen other sounds. Plus, you won't have to choose an expensive or fancy unit since the primary purpose is to generate more background noise.
How To Soundproof A Room Conclusion
After reading my guide, you can choose multiple techniques to soundproof a room effectively.
But based on your living situation, everyone may not enjoy similar results. For instance, if you live in a rented apartment, it might be difficult to get permission for construction or changes to the interior makeup of the room.
You can still use fans or sound machines to cut out unwanted noise. However, if you want a more permanent solution, ask the building contractor to add insulation to the walls before installing the drywall.
So, take your pick and make your home sound free with any of these easy methods!
Tip
When soundproofing a room, don’t forget to install air vents since they guarantee comfort and safety when working for extended periods. To make room for ductwork, you will need to measure a 6-inch hole in the wall for quiet ventilation.
The most effective way of soundproofing a door is to apply soundproofing rubber to the door perimeter or use weatherstripping. Other methods involve installing a door gasket, acoustic panels or solid core doors to absorb sound waves effectively.
When compared to old houses, modern-day apartments are noisier due to faulty construction, open floor designs, and extensive use of entertainment devices. These make soundproofing a necessity in many situations, such as if you have neighbors who create a ruckus or when working from home.
In such cases, soundproofing the door should be the priority since it is the main entrance to the house. So, my guide explains the most effective methods to accomplish that.
How To Soundproof A Door
Best Door Noise Reduction Techniques
1. Installing A Door Gasket
When sound travels through gaps, it gets amplified. Such gaps are usually present around the door frame, which can be blocked using a door gasket. A door gasket is generally made from high-quality neoprene and attaches easily to the top and sides of the door jamb, effectively blocking out sound.
You can find many types of door gaskets on the market to soundproof your door, even vinyl and adjustable ones. These also block moisture, dust, and light and can be used on doors that may not be rectangular or are warped.
2. Applying Soundproofing Materials To The Door Perimeter
Another excellent method you can try is to apply soundproofing materials to the door perimeter. Such materials may be made from highly dense neoprene but will require the removal of any existing molding around the door.
Once the molding has been removed, you can apply the material around the door edges. And to make this technique more effective, apply some insulating sealant or acoustical caulk in various gaps and cracks.
3. Using Weatherstrips
Weatherstripping is one of the most common ways of soundproofing a door. This allows you to fill in the gaps between the door frame and the door through which sound enters, while ensuring the door closes tightly.
When choosing weatherstripping, you should go with higher quality options since they can last for a longer period. To install it, first clean the area properly where it has to be applied and make sure that it is completely dry.
While applying, use a lot of pressure to create an airtight seal to block sound waves. You can also nail it to the door surface, as it will even prevent the door from slamming shut.
4. Installing A Door Sweep
In many cases, the largest gap that exists between a door and the door frame is at the bottom. To block sound from entering through this gap, you can install a door sweep at the base of the door. These are usually constructed using natural rubber, silicone, or dense metal like aluminum available in various sizes.
They are also widely compatible, can be installed under exterior and interior doors, and offer additional benefits besides soundproofing. For instance, a door sweep prevents bugs and insects from entering your home from under the door. And they can help control the temperature by covering the gap from where air can enter and escape.
That being said, keep in mind that installing a door sweep is not very simple. The reason is that most door sweeps have to be installed by drilling screws into the door, so you will need a drill, screws, and a screwdriver.
But finding a door sweep that is the perfect size for your door can take some time. Hence, getting an automatic door sweep is another option you can consider.
5. Getting A Solid Core Door
If you are willing to invest in long-term soundproofing techniques, then getting a solid core door might be the best option. A hollow core door is made using thin wooden sheets and tends to wobble, which is not the case with solid ones. Most interior doors have a hollow core, while exterior ones have a solid core.
You can get a metallic door or solid wood doors that absorb sound more effectively. Remember that wooden doors tend to dampen sound rather than block it completely, while metallic ones can reflect the sound waves back.
6. Applying Mass Loading Vinyl
Vinyl sheets provide additional mass to the door and help prevent sound waves from traveling through. Applying such sheets is also easy; you can get one or more heavy vinyl sheets and cut them to match the door size. These can then be applied to the door using sound-dampening glue or pressure-sensitive adhesive strips.
Alternatively, mass-loaded vinyl sheets can even be installed within the core of the door.
For best results, cover as much surface of the door as possible with the sheet, and you can even apply a double layer, though it can cost more money. These panels are usually available in thicknesses ranging from 1/16 to ¼ inch.
7. Installing Acoustic Panels
If you’re looking to soundproof your door without spending a lot, installing acoustic panels might be the perfect solution. Acoustic or soundproof panels are made from very dense foam or polyvinyl chloride, which provides greater air resistance. When sound waves hit these surfaces, they tend to bounce back rather than travel through.
The biggest advantage of such panels is that they do not cost as much as more expensive soundproofing solutions, like fiberglass soundproofing blankets, and can be used with drywall. Also, acoustic panels are made from many different materials, like wood and foam, and can even be used on the ceiling.
You can use adhesive strips to install soundproofing panels, but some people prefer splitting open the door and installing these panels within. But this is a very complicated process, and it might just be easier to get a customized door with such panels already installed.
8. Filling Cracks Using Gap Foam
Foam sealants are available for filling cracks and gaps in doors through which sound waves travel. These sealants expand as the foam grows, creating an effective barrier against vibration.
However, these tend to be most effective when a highly dense sealant is used since it has a good sound transmission class. In other words, the denser the foam, the better the result.
Gap foam is usually applied in the form of a spray, which should be sprayed from the inside before moving toward the outside of the door. Also, it is a good idea to apply the foam to door knobs that are hollow since these have holes that go right through.
Generally, gap foam is applied after other soundproofing methods have been used, such as acoustic panels and door sweeps. Or you can attach foam flooring tiles to the door using Velcro pads.
9. Using A Soundproof Blanket
Soundproofing blankets are usually made from fiberglass, a material that is excellent for absorbing sound. These are quite easy to install and can be placed or removed on top of the door as needed, but prove quite expensive.
An alternative to a costly soundproof blanket is a moving blanket, which is a textile made using durable fabric. But this usually lacks grommets for attaching and may not be available in the appropriate size. Also, such a blanket can affect the appearance of your door, so it might be ideal for an interior door that is usually hidden.
A soundproof blanket is best for places like a recording studio due to its excellent sound absorption capability. To install a soundproofing blanket, place suction cups on the back of the door from which the blanket can be hung.
10. Installing Soundproofing Composite Material
Composite soundproofing material consists of a noise barrier and a sound absorption material for use inside, outside, or under the door. Such material is available in the form of thick sheets that are quite heavy and can prevent sound transmission through the door.
The composite material can be screwed or glued onto the surface of the door. Soundproofing composite material can also be used as a mat under the door, but when used like that, it should cover the gap between the door and the floor.
Alternatively, you can use a custom-made door that has composite material within it.
11. Applying A Fiberboard
Fiberboards are similar to composite materials since they can be used on the outside and inside of the door. The difference between the two is that composite material is much more malleable and can be bent easily.
To install it, open the door and insert a fiberboard within to ensure proper sound insulation. You can place the fiberboard inside, outside, and around the sides of the door handle and frame to fill in cracks or gaps.
Keep in mind that a denser board will be better for soundproofing than thin ones, like plywood.
12. Using Sound Isolation Padding Tape
You can use sound isolation padding tape, which can create an airtight seal around the door and even serve as an alternative sound barrier similar to door gaskets and weatherstripping. Using sound isolation padding tape is also among the most cost-effective ways if you want to ensure complete silence.
Padding tape is generally used to install wallboards and is self-adhesive. So, it can be applied easily and even be used on windows as a temporary noise reduction measure until you decide on a permanent solution.
13. Getting A Soundproofing Kit
If getting individual soundproofing materials like panels and blankets sound too complex, you can get a premade soundproofing kit. Such kits include all the necessary items required for noise control, such as acoustic panels, door sweeps, weatherstripping, composite material, fiberboard, etc., and are easily available in the United States.
A soundproofing kit usually comes with items like water-based caulk, which can be used to fill up cracks and holes around the door. To do so, apply a bead of caulk into the crack while wiping away excess amounts using a utility knife. Similarly, in case the door has glass installations, you can use silicone to block sound.
14. Using Sound Absorbers
Another way of making a door soundproof is to absorb sound coming from the other side of the door. This is because the level of sound that a door can block will depend on the sound coming from the other side.
Many items usually present in a room can help reduce noise, such as wall pictures, floor rugs, furniture, and more. If the room on the other side of the door does not have many sound absorbers, more sound will reach the door and pass through it.
So, consider adding more furniture or items like rugs to the room on the other side of the door. This will reduce the need for soundproofing the door significantly. You can get an area rug or mat that can prevent sound from bouncing off the floor and creating echoes. Similarly, placing paintings on the walls will make the room much quieter.
15. Installing Meeting Stiles
In rooms with double doors, it may not be possible to soundproof them completely. For that, you can use meeting stiles which ensure a tight seal between the doors when they close. Meeting stiles may be made from various materials, such as composite material and rubber.
Installing meeting stiles is not a very complex process and doesn’t take much time. You just need to select the right-sized stile and screw it in place using bolts to check whether the doors shut tightly.
16. Using Acoustic Door Thresholds
Using an acoustic door threshold is another method you can try if you’re wondering how to soundproof a door. Such thresholds are generally made of neoprene and have rubber protrusions that prevent sound from passing through gaps between the door and frame. However, they have to be attached to the floor instead of the bottom of the door, unlike door sweeps.
This allows the door to be opened or closed without the sweep being dragged across the floor, which can itself become a source of noise. An acoustic threshold is often essential in rooms where the floor is carpeted since door sweeps are not very effective with a carpet.
Thresholds may be available in a flat shape or have an upward-facing extension to create a double seal when used with a door sweep. Here, I’d like to mention that apart from soundproofing door thresholds, it’s important to ensure that all perimeter gaps are sealed properly. Even a small gap can reduce the efficacy of a soundproof door.
17. Applying Soundproof Paint
Few people are aware that you can use soundproofing paint on doors for noise reduction. The reason is that such paints can only block mid-range audio frequencies, such as the sound of people talking. So, higher frequency acoustics, such as that of a flute or a phonograph record, or low-frequency sounds like that of traffic will not be reduced.
Soundproof paint is most effective when used on a large, flat surface but it can make the surface texture uneven. That is why you will need to apply multiple coats to make the coat a bit thick.
But this is an excellent alternative if you’re looking for an inexpensive method to make any space quiet. Just make sure to use other soundproofing methods along with it to get the desired results.
18. Filling The Door With Sand
You can use this method to soundproof a hollow door, but it is extremely complicated and will require a lot of preparation. The door will first have to be cut using a hacksaw so its interior can be filled with sand and sealed properly.
Also, to attach the door back, you will require industrial-strength door hinges since normal ones can be pulled right out due to the weight of the sand-filled door. An industrial-strength hinge will remain connected to the door jamb and support even the heaviest doors.
Once the door is reattached, it will be able to block out all sound completely since the sand will act as a sponge for maximum absorption.
19. Installing A Door Seal Kit
An acoustic door seal kit is an excellent solution for people who want to soundproof a door but have a limited budget. Such kits are used to seal the air gaps around a solid core door and are excellent for noise reduction purposes.
While it is possible to use a door seal kit on hollow doors, it is most useful when used with solid-core ones. When using such a kit on a hollow door, combine it with a soundproof curtain or blanket to enhance its soundproofing ability.
20. With A Soundproofing Curtain
You can use a soundproofing curtain to reduce the noise that passes through a door, but it is not an easy solution. This is because curtains hang in front of the door, with the sides left open, providing gaps through which sound can travel.
That is why when using a soundproofing curtain, you should try to attach them in a manner that creates a tight seal around the door. You can even sew different sides of the curtain to make it thicker but make sure it covers the entire length and width of the door.
Soundproof curtains are generally more affordable than soundproof blankets and serve as great temporary solutions for noise control.
Tip
If you’re looking for a temporary, tool-free solution without wanting to spend anything, use household items to soundproof a door. For instance, the gap at the bottom of the door can be stuffed with rags or towels to prevent noise from filtering through.
The Importance Of Soundproofing Your Door
Since doorways are the largest opening in a room, they are responsible for allowing maximum noise to pass through. This means any soundproofing treatment should make them the priority, so here are a few reasons why soundproofing the door is crucial.
1. Doors Always Allow Sound To Travel Through
Even when a door remains shut, the gaps around it, especially at the bottom, allow noise to leak through. In addition, most interior doors are hollow from the inside, so they do not offer any obstruction to sound waves. Due to these reasons, doors allow more sound inside a room than any other opening.
2. Soundproofing Can Also Provide Temperature Insulation
Many soundproofing materials provide excellent temperature insulation and keep the room temperature at the required level. This happens because these materials prevent air from passing through them, so you don’t have to experience extreme temperatures. And because of this, the thermostat will require less energy and time to make the room cooler or warmer.
3. For Privacy
Soundproofing the door can ensure proper noise controland privacy, preventing others from hearing what is going on inside your home. Alternatively, it can reduce disturbances in various rooms, especially important if you are planning to create a home music studio or have pesky neighbors who like to eavesdrop.
4. To Improve The Value Of The House
Whether you’re planning to sell your house in the future or making renovations and repairs for the long term, soundproofing can help. People will generally pay more for a house that has soundproofed rooms, and such houses are perfect for selling to music production studios.
5. For Fire And Smoke Protection
Soundproofing a door is also essential for protection against smoke and fire. Since door soundproofing essentially involves closing all gaps around a door, the same can be effective in blocking smoke and flames from getting in.
Things To Keep In Mind When Soundproofing A Door
Before you start soundproofing your doors, here are a few things to keep in mind.
1. Begin With The Most Affordable Solution
You can find soundproofing solutions at different price points, ranging from budget options to extremely costly ones. But not every solution is perfect for each home. So, it is a good idea to go with the most affordable option in the beginning before moving on to high-end solutions if that does not work.
Starting small will also offer the advantage that it will likely not require much time and effort. Plus, these are good techniques for people who do not want to make a lot of changes to the door, floor, or surrounding spaces.
2. Find Out Where The Noise Is Coming From
The type of soundproofing treatment which will be most effective will depend on where the sound is coming from. For instance, if the noise is coming from outside, the front and back doors will require more intensive treatment than the interior ones.
Similarly, if you have a noisy neighbor, you may require an effective soundproofing treatment for the door of the room.
3. Hire A Professional If You Find The Project Challenging
A DIY soundproofing and home improvement project may not always be successful, but this does not mean it cannot be done. If you find the project challenging, simply hire a professional to get the job done. Plus, many professionals can complete soundproofing projects at affordable rates.
Some Soundproofing Myths You Should Know About
There are several myths surrounding soundproofing, and knowing about them can be very helpful when undertaking such a project.
1. Glue Or Paint Can Be Used For Soundproofing
Sound waves can be obstructed by materials that have high density and mass. So, materials like glue or paint, which lack these properties, are not very effective for the purpose. That said, applying multiple coats of thick paint specially developed for the purpose can help reduce soundtransmission.
2. Rugs Are Very Effective For Soundproofing Purposes
Rugs can be used for absorbing sound but cannot block out noise completely. The reason is that even the thickest and largest rugs do not have enough mass to absorb all sound in the vicinity. That is why they have to be used along with other soundproofing methods.
3. Insulation, Foam Blocks, And Regular Blankets Can Be Used For Soundproofing
In this case, also, it is possible to reduce the sound but not get rid of it completely for the same reason. Generally, if you’re using such materials for soundproofing, make sure to use heavier and thicker blankets or foam blocks. They have more mass and thus are better at blockingsound.
4. Curtains Are Very Effective For Soundproofing Purposes
As explained above, curtains can help make a door insulated against sound, but they need to be installed properly for that. This means there should not be any gaps around the door or curtain through which sound can travel.
5. Egg Cartons Can Be Used To Soundproof A Door
Egg cartons can be used to reduce echoes in a room. However, they do not offer the same results when used for soundproofing a door.
How To Soundproof A Door Final Thoughts
Soundproofing offers several benefits, such as preventing disturbances and ensuring privacy. Generally, I recommend using more than one method to get better results, especially since not all the techniques are suitable for every house.
But if you are unsure about implementing these methods, the best thing to do is call a professional soundproofing service. Such companies send soundproofing experts to your home for a detailed inspection and help complete soundproofing quickly.
It may cost you between $500 and $10,000 to soundproof your rooms. However, different factors need to be considered for setting the soundproofing budget. These include the room size, the type and number of rooms, materials used, sections of the room that need soundproofing, and labor costs. One of the most important factors is how much sound we need to prevent from entering or leaving.
The levels of sound pollution are on the rise nowadays. Because of this reason, soundproofing your rooms has become a necessity.
In fact, that is the only way you can get some peace at home. Or else you will lose your sleep from all the external noises and keep your privacy at stake!
But the question many people have is - how much does it cost to soundproof a room? That’s what this guide is all about, so read on…
How Much Does It Cost to Soundproof a Room?
The Basics Of Soundproofing A Room
Before I get to the main discussion, let me give you a quick rundown of what soundproofing is. It is essentially a process to minimize or eliminate the propagation of sound. In other words, it blocks all external sounds from entering the room and prevents the sounds inside the room from going out.
You can soundproof any room in your house if you wish. However, it is most common for rooms that are frequently lived in, such as the bedrooms and living areas. On that note, you can soundproof different parts of a room as well, such as the wall, ceiling, floor, door, window, and even the curtain.
As a matter of fact, you will need to insulate these parts individually if you want to make your whole home soundproof. But if you want to make any single component soundproof, you can do that too.
How Does Soundproofing Work?
In order to understand how it works, you will need to delve a little bit into the science of acoustics. Any sound that you hear inside a room is a result of acoustic vibrations of a particular frequency reaching your ears. However, the source of these vibrations may vary, which gives rise to two types of noise - airborne noise and impact noise.
Airborne noise is the one that is generated from ambient sources, such as people talking, dogs barking, watching TV, and listening to music. On the other hand, impact noise is generated when two surfaces or objects strike each other. Some examples of impact noise are the sound of walking, using a drilling machine on the wall (this is a combination of airborne and impact), bouncing a ball off the floor, and so on.
It is a known fact that a sound wave travels faster through solid objects like walls than through the air. Therefore, the sound vibrations from an impact noise can travel directly through the walls. In contrast, the vibration generated from an ambient noise source travels through the air before reaching the walls or floor of your room.
The basic goal of soundproofing is to eliminate both types of noise. And because of that, the process involves using soundproofing materialsto block the propagation of acoustic vibrations. In other words, these materials absorb the noise to give you a quiet experience inside the room. Conversely, it prevents any sound from leaving, meaning that you can listen to your favorite music or reorganize your room without bothering the neighbors.
Why Should You Soundproof Your Room?
Soundproofing your room is necessary because it gives you (and your neighbors) a peaceful environment to live in. Besides, it ensures that your apartment is compliant with the sound transmission class (STC) ratings.
As per the International Building Code 2021, a building needs to have an overall STC rating of 50 to ensure compliance. Thus, if your apartment has an STC rating below that, it is not compliant with soundproofing regulations and can land you in legal trouble. So, if you wish to avoid that, you should make your room soundproof as soon as possible.
Which Parts Of Your Home Need Soundproofing?
I have already stated that you can soundproof different parts of your room, as well as the different rooms of your house. In fact, it is a great idea to soundproof your entire apartment in one go. However, doing so can be an expensive affair, and your bank account might not allow it.
So, it’s a good idea to soundproof some sections first and deal with the remaining parts at a later time when you have the money and resources. That way, you can manage the process better without going broke.
In that context, many homeowners may feel some degree of skepticism about soundproofing their doors, windows, and curtains, considering that they occupy very little area in your home. On that note, people who live on the first floor and on the topmost floor may feel skeptical about soundproofing their floor and ceiling, respectively.
Likewise, some people may think that soundproofing basements, garages, and attics are unnecessary since they are not lived in as much as the other rooms.
To a certain extent, I can understand their skepticism. But if you want to be on the safe side, it is best to soundproof all of them. Each of them contributes to improving the STC rating of your apartment, and the higher the rating, the better it will be for you.
How Much Does It Cost To Soundproof Your Room?
Now that you have some idea about soundproofing, it’s time to get to the business end of the topic. To make your home soundproof, you will need to spend between $500 and $10,000. In this regard, the costs of soundproofing may vary greatly based on different factors. I have listed each of these factors below.
Room size
Acoustic performance requirements
Number of rooms
Materials used
The section of the room
Labor requirements
The first two factors are pretty self-explanatory, and they are the first things to consider when looking to undertake a soundproofing project.
All of these factors are interrelated, and they need to be considered together to determine the cost. In other words, you cannot afford to ignore any of them, as that can drastically impact your budget calculations.
Keeping that in mind, I have discussed the soundproofing costs in greater detail in the subsequent sections.
A. Soundproofing Costs By Size
The cost of soundproofing a room depends on its size, which is usually measured in square feet. For soundproofing a finished room, the standard rate is roughly $10 to $30 per square foot of space. On the other hand, for a room that is under construction, the average cost of soundproofing varies between $12 to $25 per square foot of space.
Therefore, after measuring the dimensions of your room, you can easily calculate how much it will cost you. It goes without saying that you will need to shell out a lot more money for soundproofing a large room than a small one.
Of course, that is not the only factor you need to consider while making the budget. You also need to take into account the overall complexity of the project. For instance, soundproofing one square foot of area on your ceiling requires more effort than soundproofing the same area on your wall. So, the costs for the former will naturally be higher than the costs for the latter.
B. Soundproofing Costs By Rooms
The next factor to take into account is the room type. Some rooms, especially the ones that are lived in more, require greater soundproofing than others. For example, your bedroom needs a lot of soundproofing since you use that room for sleeping. In contrast, soundproofing your attic will cost a lot less since that room is not used as much.
With that in mind, here are the price ranges for soundproofing the different rooms of your house. Note that these are only the average prices, which means that the costs you need to bear might vary depending on the size, complexity, and other factors.
1. Costs For Soundproofing Bedrooms
The bedroom is one of the most common areas that people soundproof in a home, and with good reason. It is a place that is used for sleeping, so it needs to be free from outside noise and disturbance.
For that purpose, you need to soundproof the floor and the ceiling in addition to the walls. Likewise, it is important to soundproof the doors and windows of the bedroom to ensure maximum sound insulation.
Depending on the size and the number of tactics used, soundproofing a typical bedroom may cost between $500 and $5000.
2. Costs For Soundproofing Garage
Another area of a home that is commonly made soundproof is the garage. Besides storing your vehicles, a garage is often used as a utility room for do-it-yourself (DIY) projects. Apart from that, many people use their garages to practice music. All of these activities generate noise that might bother your neighbors, which makes it important to soundproof this room.
Soundproofing a whole garage can be an expensive affair because the garage typically does not have any sound-absorbing materials. This means that you will need to soundproof walls, doors, and the floor of the garage. If there are any windows, you will need to soundproof them too. All in all, if you want to soundproof your garage fully, it might cost you between $1000 and $5000.
3. Costs For Soundproofing Entertainment Rooms
This is the part of your home that you use for entertainment purposes. It generally contains a home theater, a music system, a gaming setup, and other means of entertainment. So, it can get quite noisy inside, which makes soundproof insulation essential for this room.
Usually, the level of soundproofing will depend on how you use the room. If you use it only as a home cinema, the level of soundproofing will be slightly different than what you need for soundproofing a gaming room.
On the contrary, if you want to soundproof the room for music, you will need to consider the acoustics of the room. This way, you can avoid disturbing your neighbors and ensure good sound quality within the room.
In any case, soundproofing your entertainment room can cost anywhere between $1,000 and $10,000.
4. Costs For Soundproofing Bathrooms
Do you consider yourself to be a bathroom singer? If you do, then it might be a good idea to soundproof your bathroom. Now, I am not judging your musical prowess, but your bathroom singing might not be appreciated by the neighbors, especially if they are trying to get some shut-eye.
Thankfully, soundproofing your bathroom shouldn’t be a particularly expensive affair, considering a bathroom is relatively smaller in size than the other rooms. However, to achieve complete sound insulation, you might want to install soundproof windows and a sliding glass door, among other things. Such components are a bit pricey, which can increase the costs.
No need to worry, though, for the prices will not be as high as other living areas in your home. In that context, the cost of soundproofing your bathroom may range between $500 and $3,000.
5. Costs For Soundproofing A Home Gym
If you have a gym at home, then it is a good idea to soundproof that room. A home gym typically contains mechanical equipment that generates a fair bit of noise. Also, many home gym users have sound systems to work out while listening to music, which creates even more noise. Besides, you wouldn’t want your neighbors to hear you huffing and puffing in the gym, believe me!
That is why most soundproofing projects for the gym should focus on the walls, ceiling, and floor. The floor, in particular, needs to have adequate soundproofing, as impact noises from gym equipment like weights will travel directly through it.
With all things considered, soundproofing the gym will cost you between $500 and $7,500, depending on the size and the type of gym activities.
6. Costs For Soundproofing The Kitchen
Cooking and its associated activities make a lot of noise, which makes it essential to soundproof the kitchen. You can stop sounds from entering or exiting the kitchen by installing soundproof drywall, insulated windows, and acoustic panels on the walls and ceiling. Some of these components can be a bit expensive, so you might need to dish out between $1000 and $6000 to make your kitchen soundproof.
C. Soundproofing Costs By Materials
Besides the size and number of rooms, the materials used play a major role in determining the costs. In this regard, I am referring not only to the soundproofing material but also to the materials used in the room. Both of them need to be considered if you are looking to soundproof your whole home.
Each part of your home is made from a different material. The sound waves travel differently through each material, which is why the soundproofing solution needs to be implemented accordingly.
For example, the floor is usually made from wood, tile, or stone, and in some cases, even concrete. The first few materials are not very good at absorbing sounds, and as a result, they will require greater soundproofing.
On the other hand, the walls and ceiling are normally made of concrete slabs or drywall panels. These materials can absorb sound to a greater extent, which means that the level of soundproofing required here will be less.
That is why it is important to consider the material used in the construction of the room, as it can help save a lot of money. With that being said, below are some of the most common materials used in soundproofing projects.
1. Drywall
Drywall is the material that is most commonly used for insulating existing walls and ceilings, as well as floors in some cases. Soundproofing drywall sheets are typically made from specialty materials that are acoustically enhanced and have a high density. Some manufacturers may use multiple layers of insulating materials to reduce sound leaks. In any case, it will cost around $30 to $40 per sheet of drywall.
For homes that have paper-thin walls, it is advisable to use double drywall to eliminate the propagation of sound. In that case, the costs will double, so you need to keep that in mind while preparing the budget.
2. Acoustic Foam Panels
Acoustic foam panels are commonly used for soundproofing walls and, in some cases, the ceiling too. The polypropylene foam materials absorb all airborne noises and minimize the intensity of impact noises traveling through the wall.
Such material is relatively inexpensive, and it will cost you around $2 to $3 per square foot of panel. Thus, it is a great soundproofing method if you are on a limited budget.
3. Acoustic Tiles
Acoustic tiles are generally made from sound-insulating materials like natural rubber or foam, which makes them different from conventional tiles. They can be used for walls, ceilings, and floors and can eliminate most airborne and impact noise.
The tiles are square-shaped since it helps make the installation process easier. There are different tile sizes available today, ranging from 4-inch square tiles to 20-inch square tiles. On that note, a 20-inch square acoustic tile costs around $10 to $20.
4. Mass Loaded Vinyl
Mass-loaded vinyl, or MLV, is a highly effective soundproofing material that is typically installed on the walls and the floor. It is often made from polyvinyl chloride (PVC) and comes in the form of rolled sheets that need to be placed over the wall or the flooring. They can also be placed along the inner linings of the walls and floor, but doing that requires a lot more work.
On average, a single roll of MLV covers 50 square feet of space. Each roll costs between $100 and $200 overall, or $2 to $4 per square foot.
5. Carpets
Carpets are used to soundproof floors, and they are fairly effective at eliminating most airborne and impact noise. They are made from sound-insulating fabric materials arranged in the form of a shag pile, which determines the carpet thickness. The thicker the carpet is, the more sound it can absorb, and vice versa. In any case, using carpets for your floor will cost you $3 to $10 dollars per square foot.
Tip
If the floor is too thin, you can spend a little extra to purchase a soundproof carpet pad. When placed below the carpet, it can enhance the insulating capabilities of a carpet considerably. Such a pad is made from natural rubber or vinyl, which are some of the best sound-insulating materials around.
6. Soundproof Curtains
Sound-dampening curtains are commonly used on the doors and windows of a house. They are made from sound-absorbing fabrics, similar to carpets. Likewise, the thickness of the curtain determines how effectively it can block out sounds.
They are ideal for use in living areas and in the room of a child. As for the costs, they can vary based on the thickness and quality of the fabrics used. But on average, buying a soundproof curtain will set you back by $100 at most.
D. Soundproofing Costs For Different Parts
Now it’s time to discuss the costs of soundproofing based on what part of the room you wish to work on. Such an approach allows you to soundproof the most concerning areas first. What’s more, it is a great strategy for those who have a short budget.
In that context, the key areas that you need to consider are the walls, floor, ceiling, doors, and windows. The soundproofing methods and materials for each section are different, which gives rise to cost differences for each of them.
Some of these methods are only used for a finished room, while others are implemented when the room is under construction. The methods used for the former are usually a lot cheaper but are relatively less effective. On the contrary, the methods used for the latter are a bit more expensive but are highly effective in blocking most sounds from the room.
Anyways, I have discussed the costs for soundproofing different parts of the room below.
1. Wall Soundproofing
The most important area of the room that needs soundproofing is the wall. You can choose to soundproof the walls either during construction or when the room is finished. If you choose the former, you need to use products such as Rockwool sound insulation or mineral wool batts.
These are stuffed between the wall frames, which helps to provide insulation against sound. The first option will cost you $1 to $2 per square foot, while the latter will cost you $2 to $3 per square foot.
You can also opt for acoustical caulk to seal the wall layers. It acts as an adhesive as well as a soundproofing sealant, which means you get multiple uses. That said, you will require roughly 28 to 30 ounces to cover a medium-sized wall, and it will cost you around $15 to $30. Apart from that, you can opt for double drywall during construction, which I have already discussed before.
If you want to insulate a finished wall, you can go with acoustic foam panels and tiles, both of which I have mentioned in the previous section. As an alternative, you can go with soundproof paint, which absorbs sounds much better than regular paint. It costs $30 to $40 per gallon or $2 to $4 per square foot.
Overall, it will cost you anywhere from $100 to $350 to soundproof a single wall.
2. Ceiling Soundproofing
The average cost to soundproof the ceiling of a room is around $200 to $500. It may vary based on the methods chosen, the area, and labor costs.
Similar to the walls, you can choose to soundproof the ceiling either when it is finished or when it is under construction. If you choose the latter, you can follow methods that are similar to soundproofing a wall. In the case of the latter, you can choose between installing acoustic foam panels or mass-loaded vinyl.
Another alternative is to use soundproof fiberglass panels, which will cost you $1 to $4 per square foot. In addition to damping sound, it makes the ceiling look visually attractive, especially if you have a dropped ceiling. That ultimately makes it an appealing choice for many homeowners.
3. Floor Soundproofing
Just like the walls and the ceiling, you can choose to soundproof the floor either during construction or when it is finished. Whichever option you choose, it will cost you between $200 and $2000 to soundproof the floor entirely. Of course, the area, labor costs and the number of rooms need to be considered too, as usual.
If you choose to soundproof the floor during installation, you can opt for a soundproof floor underlayment, which costs less than $1 per square foot. You can insulate the floor joists and subfloor with the underlayment, which eliminates all types of sound.
Conversely, for a finished floor, you can use floor carpets, rugs, or interlocking mats, which offer the best degree of soundproofing at a relatively low price. You can get floor mats and rugs between $1 and $3 per square foot.
4. Door Soundproofing
The average cost of soundproof doors can vary from $50 to $3,000. You can purchase acoustic door thresholds, which cost around $50 to $100 per door. Apart from that, you can use door sweeps or a moving blanket to prevent any sound from getting in or out. Both of these options will cost between $60 and $120 per door.
If you want complete soundproofing and have the funds for it, you can use acoustic panels. It will cost a few hundred bucks, depending on the materials and the number of doors you have.
5. Window Soundproofing
The windows are typically made from glass panels embedded in a wooden or metallic frame. These materials have poor soundproofing capabilities, which means that you will need to make a significant investment to soundproof your windows.
If you are on a budget, though, you can opt to use soundproof curtains, which I have discussed before. Based on your choices, the process may cost you anywhere between $100 and $1500 per window.
E. Labor Costs For Soundproofing
A soundproofing project is not an easy task to undertake. It needs to be done by qualified soundproofing contractors, or else it might not be as effective. Because of this, the costs of labor become a crucial aspect to consider.
In most cases, you will have to pay labor costs by the hour. So, it is in your best interests to get it done as quickly as possible. However, if the soundproofing project requires extensive work, that might not be possible.
Most contractors today charge between $15 and $60 for labor. Based on that, you can prepare a budget for your soundproofing project.
How Much Does It Cost To Sound Proof A Room Final Words
By now, I am guessing you have gained a pretty good idea about soundproofing costs.
In addition to the ones mentioned above, you need to take into account any complex structures you have since these require extra work. For instance, if you have lamination on the floor or wall, it needs to be removed before the actual work can start.
Before I wrap up, let me give you some tips to save money. Try to purchase the building insulation materials in bulk. By doing that, you can avail discounts and offers available only on mass purchases.
Similarly, you should do some research before hiring a contractor. That way, you can get quality service at an affordable cost.
There is more than one method you can use to soundproof your tile floor. You can install acoustic underlayments, vinyl mats, or acoustic floor tiles. If you want a simpler option, you can lay mats and carpets over the tile flooring to reduce airborne and impact noises.
Installing tile floors has become a popular choice among many modern homeowners, thanks to their visual appeal.
However, regular tile flooring is not suitable for reducing noise. So, if you do not want the downstairs neighbors to complain about your spontaneous dancing sessions, you should get the tile flooring soundproofed right away.
But the question is - how can you accomplish this task? That is what I have discussed here, so let’s get going!
Why Should You Soundproof Your Tile Floor?
There are two main types of floor noises - impact noise and airborne noise. The former is caused due to impacts on the floor, while the latter is caused by ambient noises.
For instance, if you drop an object on the floor, it will generate impact noise. On the other hand, the noise generated while listening to loud music or watching TV is airborne noise. The latter is more of a problem since the impact vibration can travel through the floor quicker than ambient noise. Because of that, soundproofing your floor becomes important, no matter the material.
However, a tile floor is not very good at reducing or eliminating either type of noise. In other words, the tiles transmit all types of noises through the floor, and these noises eventually reach the ceiling of the room that lies directly below.
This shouldn’t be a cause for concern if you live on the first floor. But if that’s not the case, then the people living directly below will be able to hear whatever you are doing in your room. And if they don’t have an insulated ceiling, they are not going to be particularly happy about it either.
How To Soundproof A Tile Floor?
To be honest, soundproofing a ceramic tile floor is not that different from soundproofing a floor made of hardwood or concrete slab. There is more than one method you can follow for this purpose, as discussed below.
1. Acoustic Underlayment
Acoustic underlayment is an additional layer of insulation that is placed underneath the tiles. It is often made from rubber, which is possibly one of the best materials for sound insulation. As such, it helps to eliminate both airborne and impact noises.
Installing it is quite easy, for all you need to do is simply roll the underlayment mat on your subfloor and cut it to the correct dimensions. After that, you need to fill out any gaps with acoustical sealant, and then you can lay the tiles over them. If you wish, you can use adhesive on the tiles, but that is not necessary.
2. Vinyl Flooring
Vinyl is more efficient at eliminating noises than conventional ceramic tile. Thus, you can use a vinyl mat on your tile floor to eliminate airborne noises completely. It can also reduce the intensity of impact noises to a great extent.
Moreover, it is incredibly easy to use and can be placed even after your tile floor has been installed. Just roll it out on the floor, and you will be good to go. On that note, you could install it as an underlayment if you wish, which makes it a versatile option.
3. Carpets Or Mats
Another simple method to eliminate sound transmission on a tile floor is to use a carpet or a mat. If you lay out a carpet over the tiles, it will eliminate all airborne noises. Besides, it will provide cushioning on the floor, which reduces the sound generated by dropped objects.
You could also install an anti-vibration mat, which is much more effective at minimizing impact vibrations. With them, you can move your heavy furniture around without making life difficult for your downstairs neighbors.
The installation process is similar to the previous option - simply place the mats or carpets over the tile floor, and you will be done. You need to keep the floor dimensions in mind while purchasing them, or else they will not cover the whole room. In addition to that, you need to consider the thickness of the mat or the carpet too.
4. Acoustic Floor Tiles
Acoustic floor tiles are highly effective at eliminating sounds generated from airborne sources, such as people talking, loud music, and so on. These tiles can even eliminate impact noises, such as those arising from footsteps and dropped objects.
They are often made from sound-deadening substrates like foam, fiberglass, or any other materials recommended by the Tile Council of America. However, foam pads are used more than other materials since they are the most cost-effective.
The procedure to install them is the same as the one used for regular ceramic tiles, and therefore, they do not pose any challenge in this regard.
Tip
For the best results, I recommend using them in conjunction with mats, especially if you move your heavy furniture around a lot. But if you only want to eliminate airborne noises, then using carpets is optional.
Tile Floor Soundproofing Final Words
Let’s face it - everyone likes to enjoy some peace and quiet while at home. This is why soundproofing is essential - not just for your flooring but for other parts of your home as well.
In that context, making your tile floor soundproof is the most socially responsible thing you can do, especially for the people living below you. Besides, it helps to ensure that your flooring meets the impact insulation class rating. A low rating here will mean trouble - both for your neighbors and for you.
So, if you want to avoid compliance risks, you should get your tile floor insulated without any delays. And to do that, you can use any one of the methods I have discussed above.


![Acrylic Pour Painting [All You Need To Know]](https://homesthetics.net/wp-content/uploads/2021/06/Acrylic-Pour-Painting-01.jpg "Acrylic Pour Painting [All You Need To Know]")


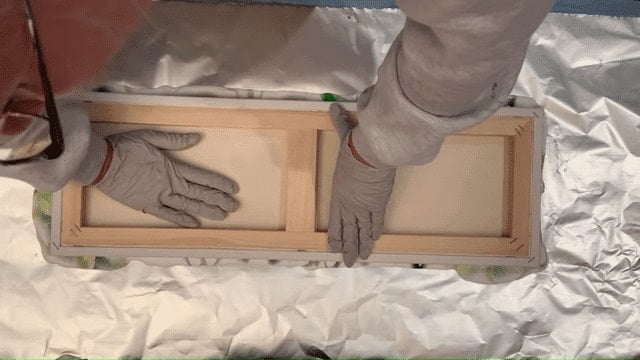


![Acrylic Pouring Medium Guide [All You Need to Know]](https://homesthetics.net/wp-content/uploads/2021/05/Acrylic-Pouring-Medium-Guide-01.jpg "Acrylic Pouring Medium Guide [All You Need to Know]")


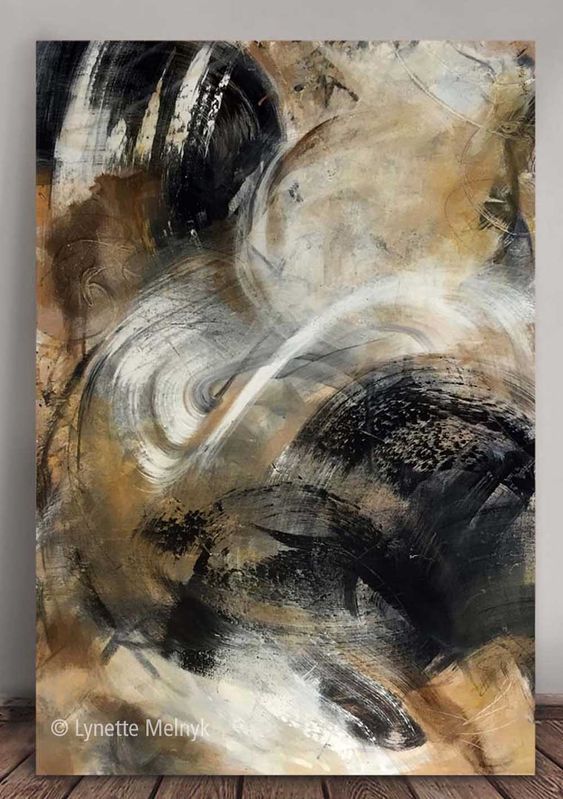


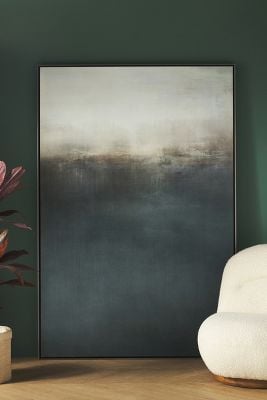


![Can You Bake Modeling Clay [All You Need To Know]](https://homesthetics.net/wp-content/uploads/2022/08/Can-You-Bake-Modeling-Clay-1.jpg "Can You Bake Modeling Clay [All You Need To Know]")


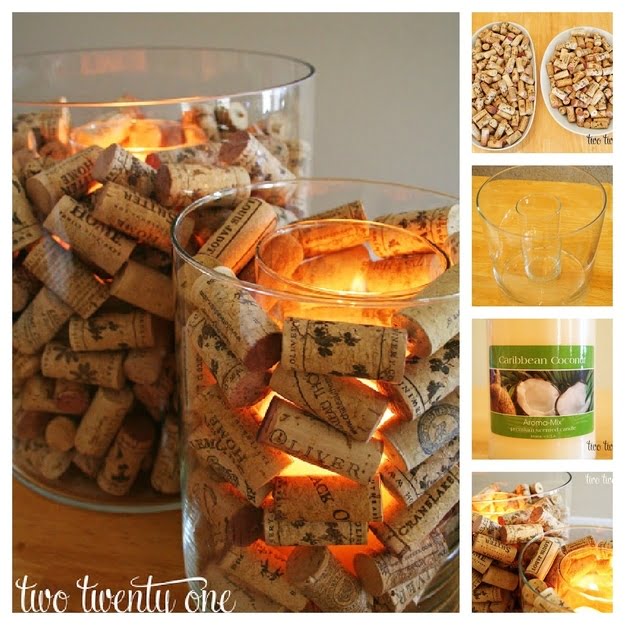
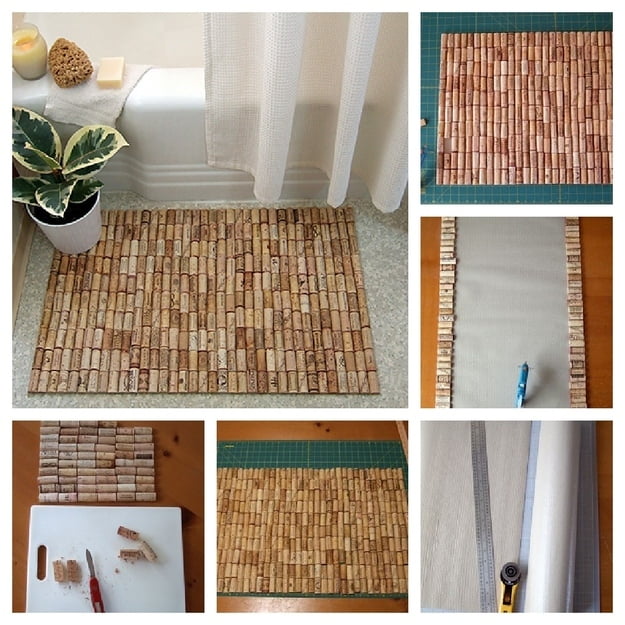


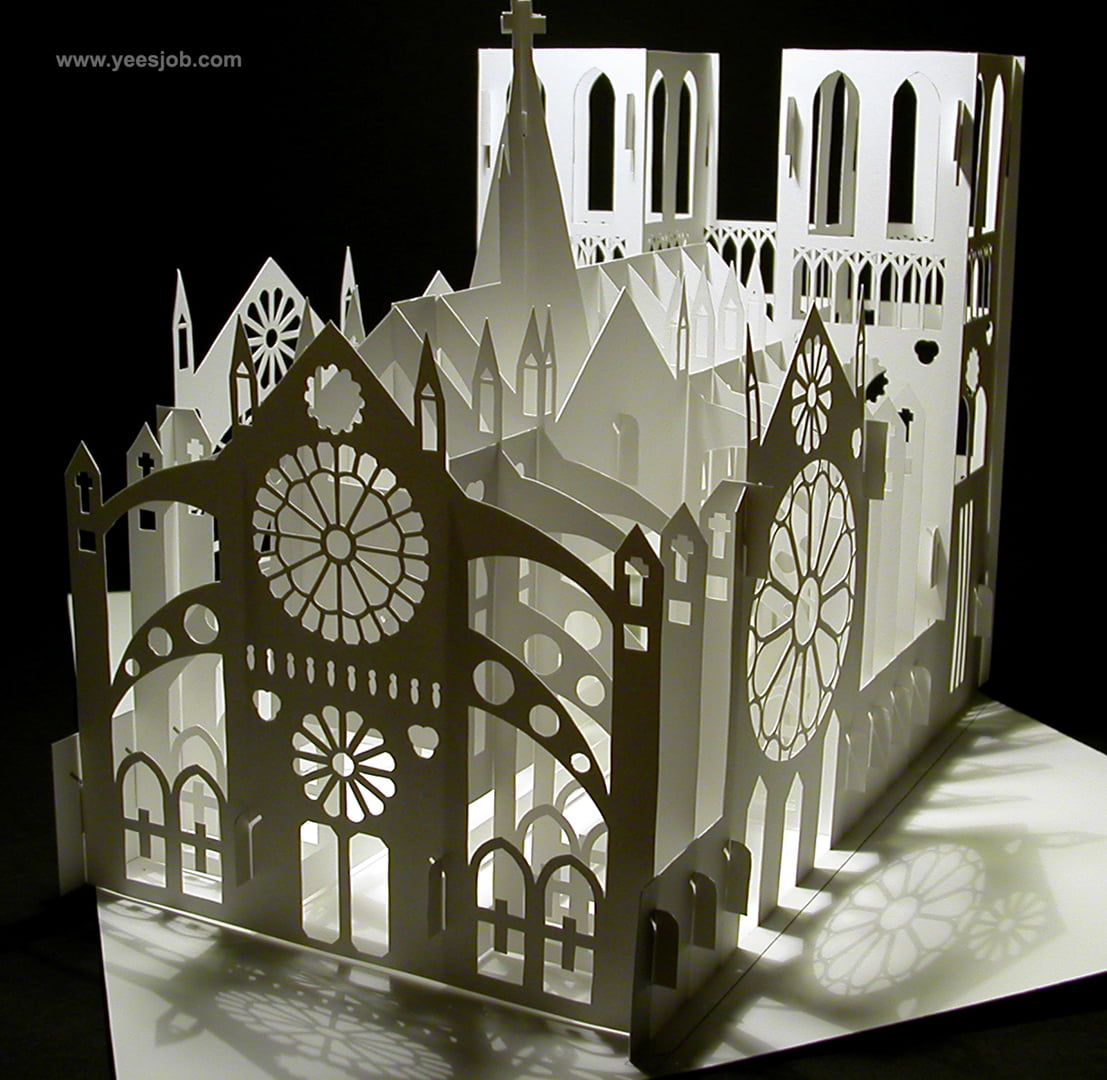
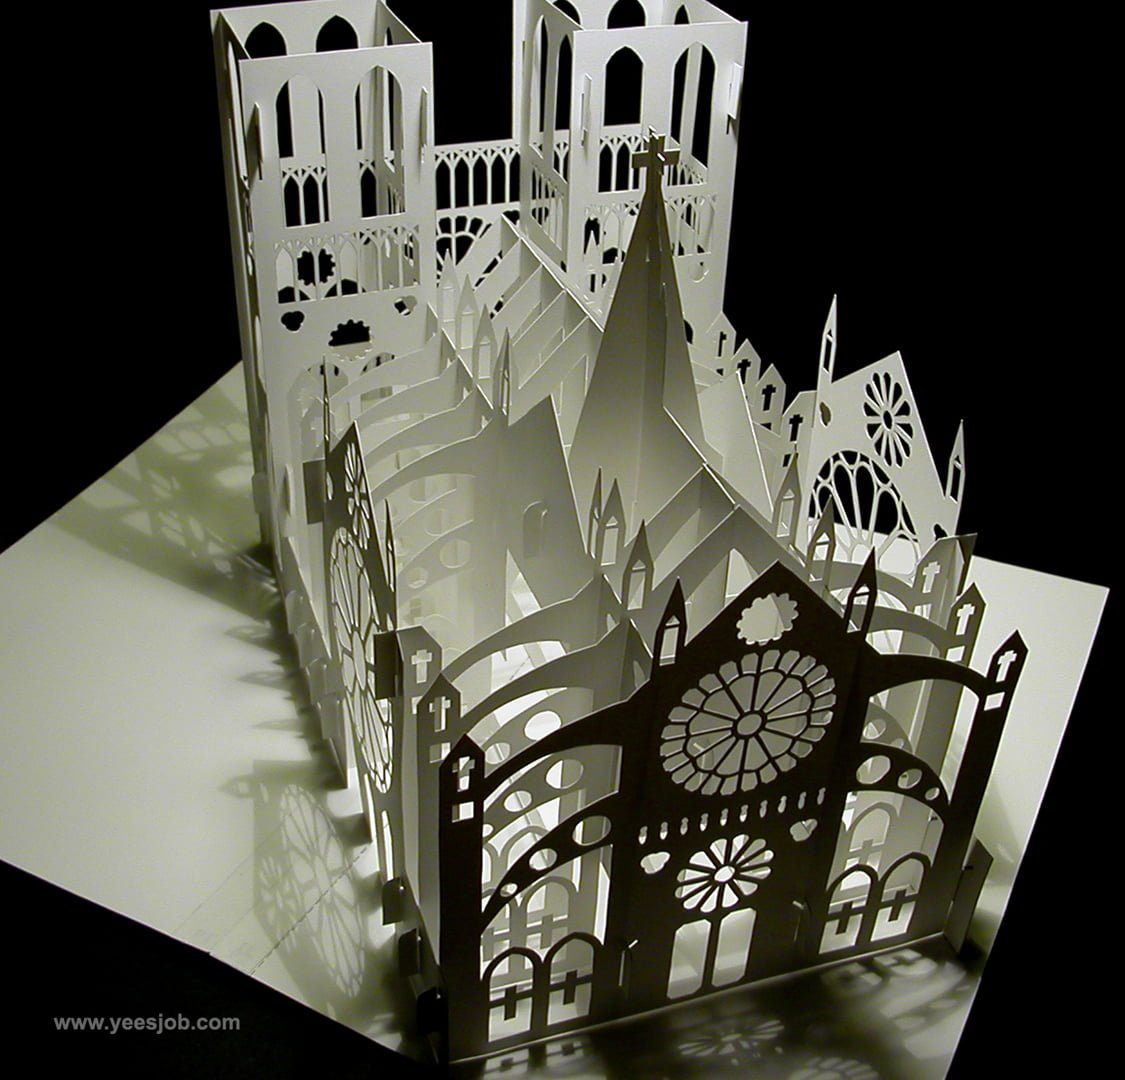
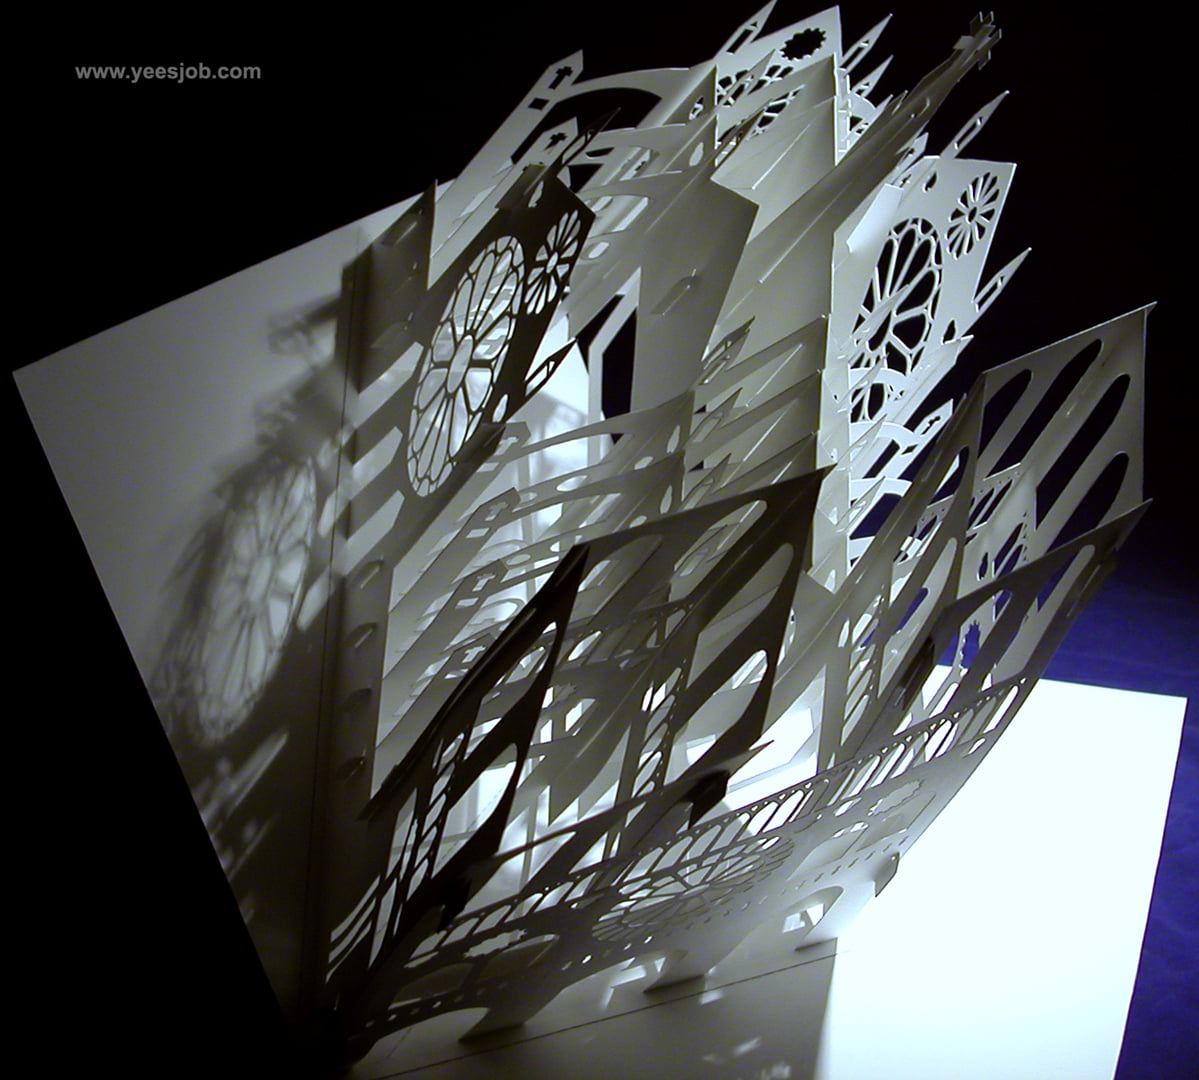
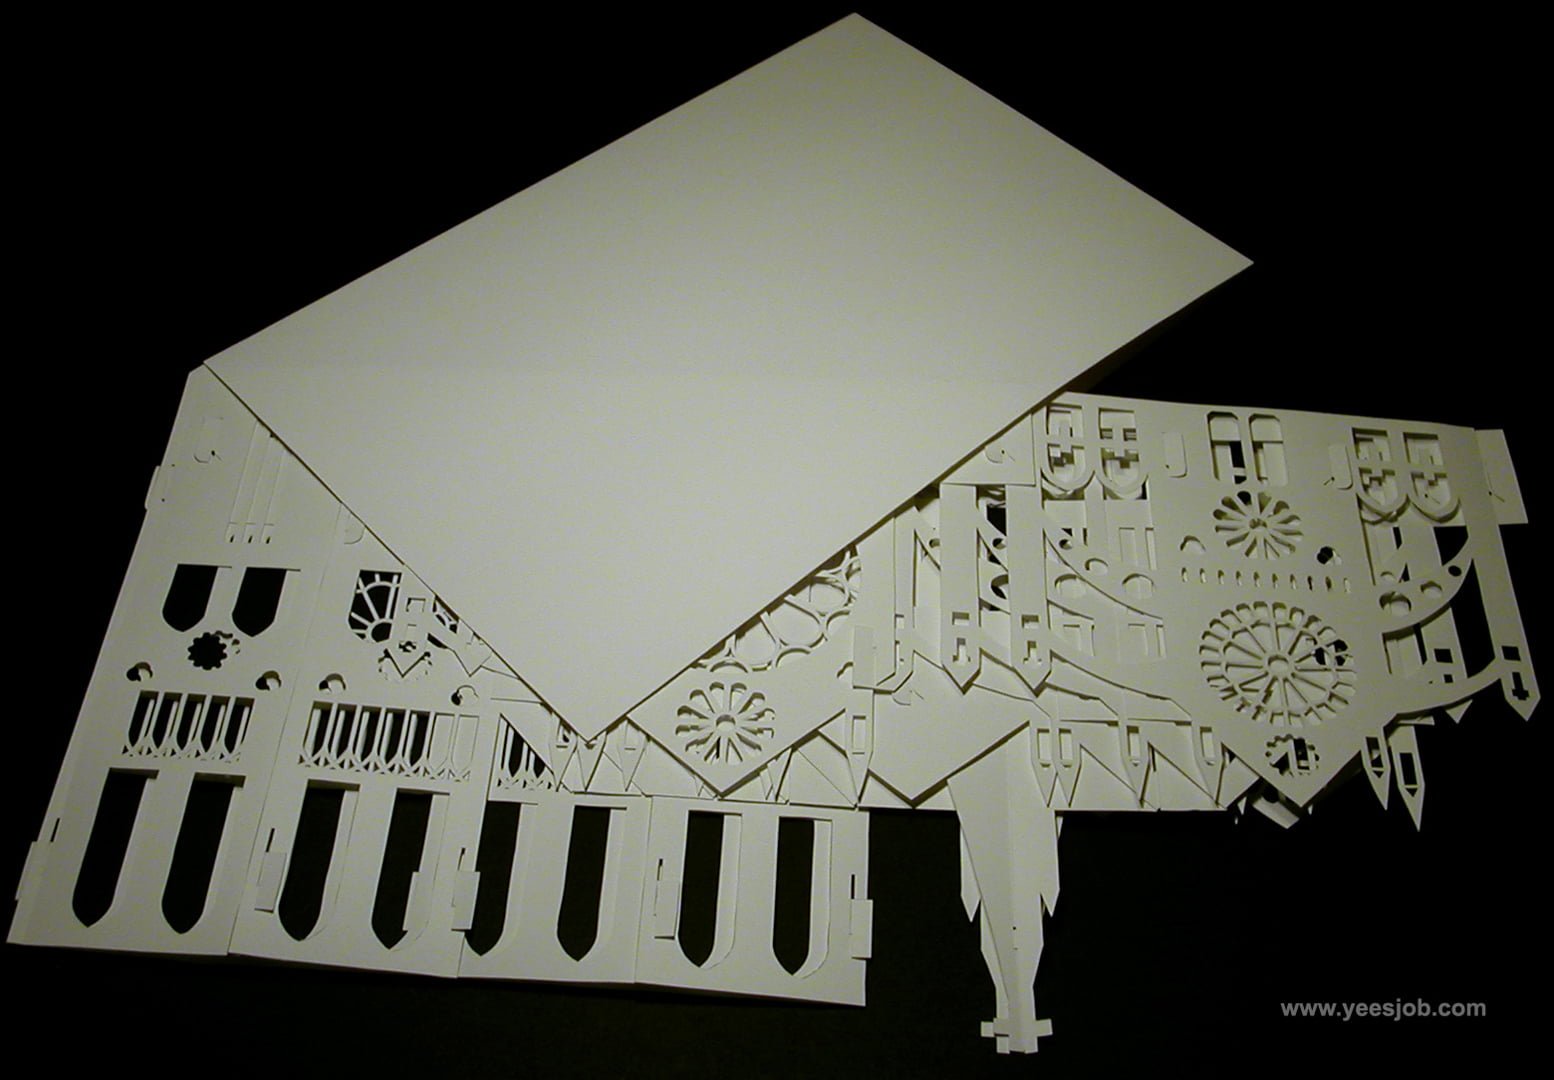


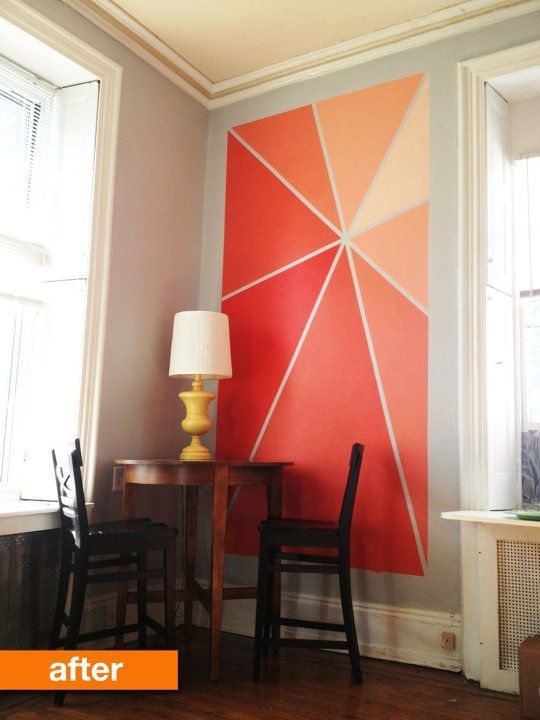


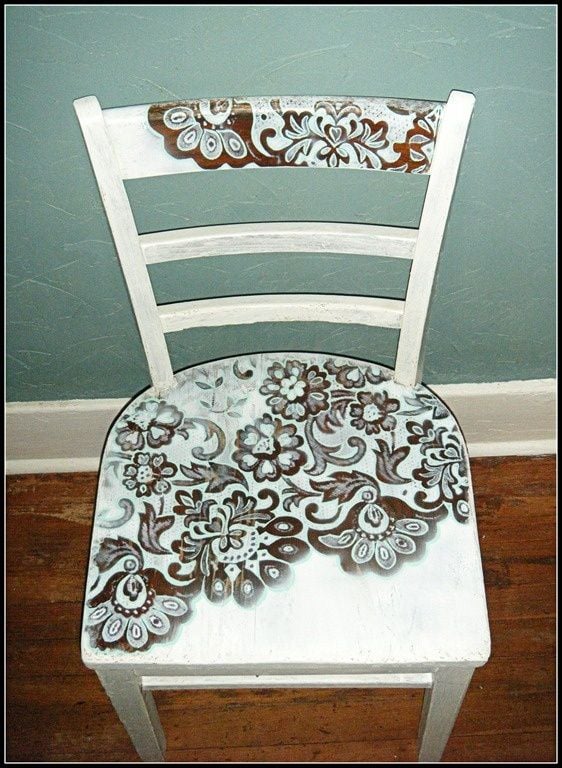


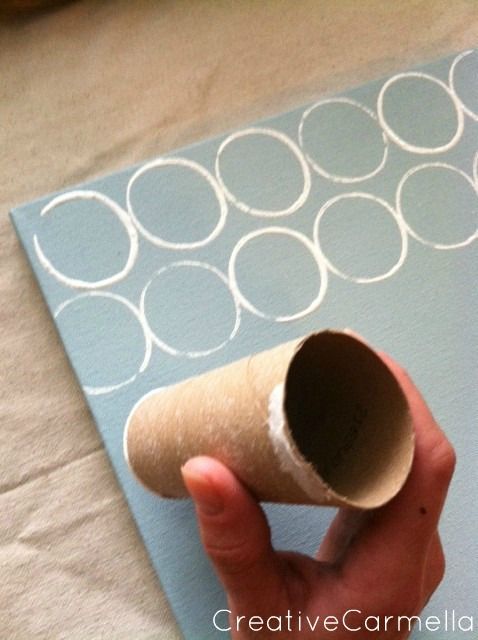

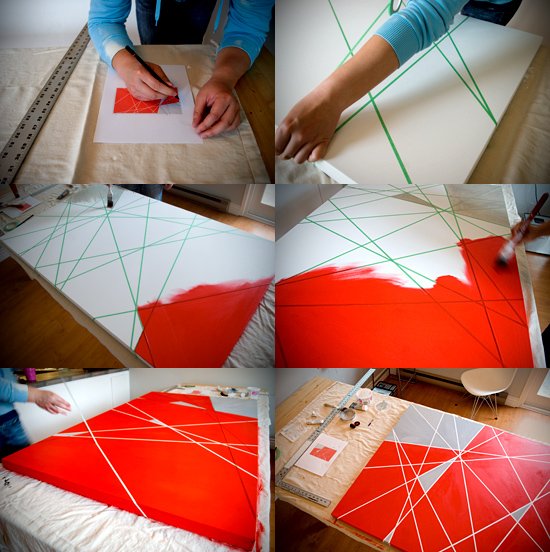

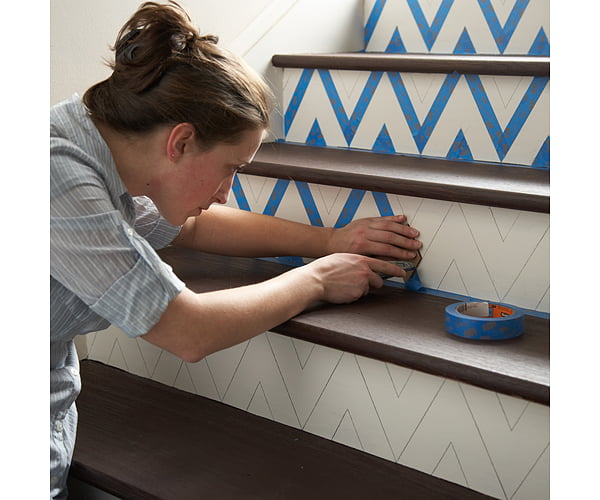


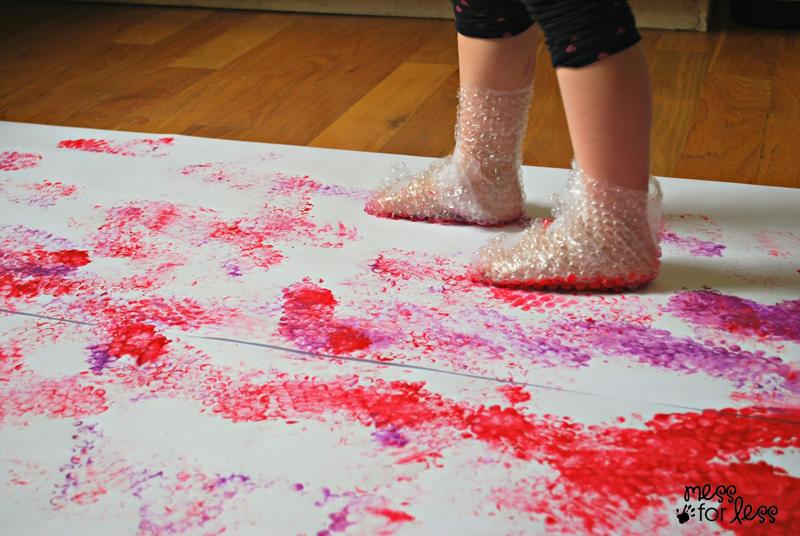


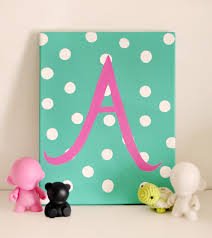
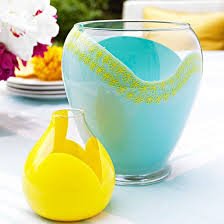


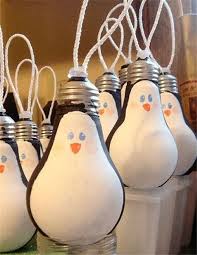


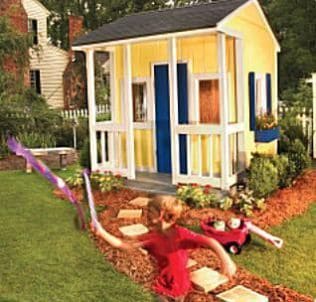
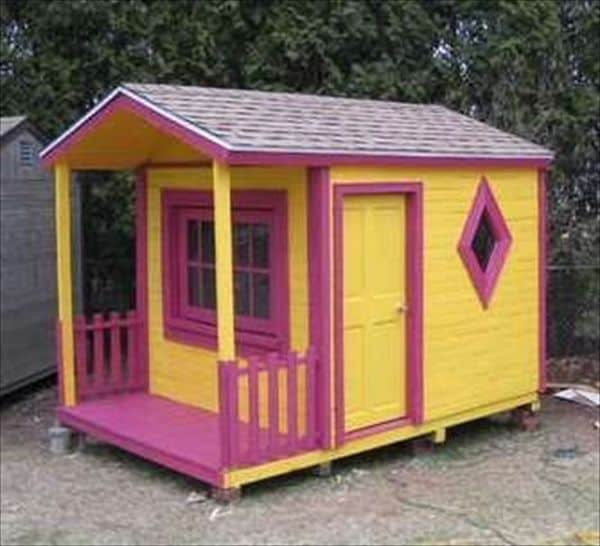


![2 Luminess Silk Reviews [All You Need to Know]](https://homesthetics.net/wp-content/uploads/2021/05/Luminess-Silk-Reviews-01.jpg "2 Luminess Silk Reviews [All You Need to Know]")


![How To Harden Modeling Clay? [All You Need To Know]](https://homesthetics.net/wp-content/uploads/2022/08/How-To-Harden-Modeling-Clay-1.jpg "How To Harden Modeling Clay? [All You Need To Know]")


![How To Make Modeling Clay Soft Again [All You Need To Know]](https://homesthetics.net/wp-content/uploads/2022/08/How-To-Make-Modeling-Clay-Soft-Again-1.jpg "How To Make Modeling Clay Soft Again [All You Need To Know]")


![TrackR vs. Tile [All You Need to Know]](https://homesthetics.net/wp-content/uploads/2021/04/TrackR-vs.-Tile-01.jpg "TrackR vs. Tile [All You Need to Know]")