As an artist, it’s important to be well-versed in the different art mediums. And one of these art mediums is acrylic paint!
It is a standard method of coloring used by numerous artists today. With the correct application and usage, you can create brilliant art pieces with acrylic paints. Many even apply acrylic for body art, though body paints aren't supposed to contain ammonia and formaldehyde. So, acrylic paint is not suitable for putting on your face and can cause irritation to your skin.
However, this paint is a marvel for paintings and provides great results. But if you haven’t used acrylic paints before, or aren’t too savvy with them, then you may wonder about their durability. After all, you wouldn’t want your precious artwork to fade out after a while, would you?
In that context, you will be delighted to know that, unlike many other coloring methods, acrylic paints last for quite a long time. Besides, they require comparatively less maintenance as well. So, if you want to know precisely how long your art will hold out with acrylic paints, we suggest you keep reading.
And do check out our other article on acrylic Halloween paintings to know more on how you can prepare Halloween decorations with acrylic paints.
What Are Acrylic Paints?
Before we get to the primary point of our discussion, let us discuss a bit about acrylic paints first. Acrylic paint is made by mixing color pigments with synthetic polymer emulsions. These acrylic emulsions are known for being quick to dry, which is why acrylic paintings get cured very fast.
It is unlike other painting methods, such as watercolor or oil paint, which require some time to cure. However, you should know that acrylic paints do share some similarities with watercolor painting. Like watercolors, they are water-based too, which means that you need to add water to the paint before you using it.
But despite being water-based, acrylic paints become water-resistant when dry. In fact, the acrylic resin becomes quite durable when it dries, which makes it pretty resistant to scratching or rubbing as well. With that being said, they are not entirely invulnerable, as there are certain elements that can damage or destroy acrylic paints.
How Long Does Acrylic Paint Last?
As we have just said, acrylic paint is pretty durable. If stored correctly, acrylic paint usually has a shelf life of over 10 years. However, that is subject to the conditions in which you store it.
This paint typically comes packaged in an airtight tube or a small plastic container. And if kept unopened, it will last for the above duration, provided the storage temperature is correct.
On the other hand, for an opened acrylic paint, you need to watch out for contaminants, such as bacteria and mold. If it is not stored properly, the shelf life of an opened acrylic paint will be significantly reduced.
The above is applicable for artworks made with acrylic paints as well. Acrylic paint is one of the most durable art materials out there, and its color lasts for a long time on paper or canvas. In this regard, after application, the acrylic resins form cross-links when completely dried. This cross-linking is what increases the durability of the painting.
Now, the cross-links in the acrylic films do wear out over extended periods. But if stored at optimal temperatures and kept free from mold or bacteria, these processes occur slowly.
At this point, we should specify that the type of acrylic paint also plays a part in its durability. There are two types of acrylic paints available on the market today, one for students and casual users and the other for professional artists.
Artist-quality acrylics are made from high-quality resins, due to which they are more resilient than student acrylics. So, for long-term usage, it is better to invest in artist-grade acrylics, even though it is more expensive than student acrylics.
Causes Of Acrylic Paint Degradation And Their Prevention
You may be wondering now as to how exactly acrylic paints degrade despite being claimed as a durable painting method. That is what we have addressed in this section, along with some preventative measures to keep them from degradation.
1. Exposure To Extreme Temperatures
The acrylic resin from which these colors are made is somewhat sensitive to extreme temperatures. If exposed to extreme heat or cold, the chemical composition of the acrylic resins may change, which will affect the paint’s longevity.
Furthermore, as acrylic paint dries quickly, it can become crusty, flaky, and ultimately unusable when exposed to hot or cold temperatures. In such extreme temperatures, its quick drying property, which is its biggest advantage, becomes its greatest weakness. So, it becomes an important factor to consider if you want to store acrylic paint for a long time.
Optimally, you should keep it at normal room temperatures so that the paint doesn’t dry off too quickly. This is usually between 50 and 75 degrees Fahrenheit, both for storage and usage. Also, make sure it is not exposed to direct sunlight, rain, or snow. If you live in a place with extreme climates, it would be best to store it in an area where the temperature is moderate.
2. Too Much Moisture
We have already stated before that acrylic paint is water-based. So, unless you are using it, exposure to water or atmospheric moisture may reduce its lifespan. This is especially applicable for opened acrylic paint since unopened acrylic paint containers are fully airtight.
The water or moisture may trigger the resin to form cross-links, which will eventually cause it to dry up, thereby making it unusable. Furthermore, excess moisture facilitates the growth of organic contaminants, such as mold, which drastically reduces the shelf life of acrylic paint.
To avoid such issues, make sure that you store your acrylic paint in a dry environment. And if you have opened the container already, then you need to make it as airtight as possible while storing it away. This will make the paint last for a long time.
3. Presence Of Foreign Contaminants
The presence of foreign contaminants, such as dust and microbes can reduce the longevity of acrylic paints. Not only that, but they may also make your acrylic painting and colors look dirty.
This issue is more pronounced in the case of organic contaminants, such as bacteria and mold. Since they steadily multiply, they might damage the paint even more. Moreover, if there are bacteria and mold in your acrylic paint, it will start smelling sour and repulsive.
Such an issue is observed mainly for opened cans of acrylic paint, as unopened cans are fully sealed and airtight, which keeps these contaminants away. Opened cans can trap moisture, which provides a favorable environment for bacterial and mold growth.
So, make sure you seal the paint container firmly before putting it in storage. Ensure that the storage area is clean and dry as well. And if possible, try to use it in a dry place without moisture. That way, your paint won’t develop mold, which, in turn, will improve its lifespan.
Can You Use Expired Acrylic Paint
Since acrylic paint is made from synthetic substances, it doesn’t come with a definite expiration date. But over time, it will inevitably degrade and expire, just like any other material. At that point, it might not remain suitable enough for usage.
However, it can take acrylic paint decades to expire, especially if you store it properly. If you don’t, it will expire sooner than expected. In any case, you can try to salvage the paint using some of the techniques we have discussed below.
You should be advised, though, as these techniques are not entirely foolproof. As a result, you may not be able to salvage any paint, or the paint may not have the same quality as before.
On that note, never try to reuse acrylic paint that has been contaminated with mold, mildew, or bacteria, as that poses a serious health hazard. In that case, dispose of the paint like any other toxic waste.
1. Using A Paint Strainer
If you haven’t used your acrylic paint for a while, it may develop bumps or other texture irregularities. In that case, you can get rid of them using a paint strainer. It will filter out these impurities and irregularities so that the paint texture becomes even.
2. Using Paint Thinner
In many cases, the paint may become too sticky and viscous. This is most commonly observed in the leftover paint that lies at the bottom of the container. So, you can use a paint thinner to thin it out.
3. Re-Hydrating The Paint
Often, old acrylic paint has a tendency to become rigid and crusty when dry. One solution to reuse this dried paint is to re-hydrate it with water. For this purpose, you can add tap water at normal temperature, but warm water works best. When mixed in sufficient amounts, the paint will be restored to its normal consistency.
However, we would suggest not storing this wet paint again, as it may develop mold and mildew. The technique is best suited for small amounts of paint that will be used up quickly.
How Long Does Acrylic Paint Last Final Words
Artworks made with acrylic paint can be magnificent and vivid. And thanks to its long lifespan, your painting will keep looking like new for quite a long time.
But there are certain precautions you should take when storing this paint so that it can last for years. That’s why we have provided some storage guidelines that you can follow. In addition, we have provided some techniques that you can implement to try and reuse the old paint.
And that’s all we have to say about this topic. Stay tuned for more informative guides like this one in the future.
Until then, goodbye!
You can easily paint particle board surfaces by choosing the right kind of paint depending on the type of particle board furniture. Just make sure you prep the surface using fine grit sandpaper and applying an oil-based primer. And let the paint dry before applying an additional coat.
Though particle board furniture may not be sturdy enough to stand the test of time, you can easily use screws for particle board to keep it steady. And if you have a bookcase, a bedside table, or a chest of drawers showing signs of wear, you can opt to paint particle board furniture.
A coat or two of paint not only covers the scratches but it can also increase the longevity (both in terms of functionality and appeal) to a certain extent. So, yes you can and should paint particle board furnishings!
And I will help you go about the painting process with this detailed guide on the things to consider before painting and the steps involved.
What Is A Particle Board?
In simple words, particle board is a modern substitute for traditional wood-based furniture. Particle board panels are created by combining wood byproducts, primarily sawdust, with polycarbonate epoxy adhesives and pressing them into large pieces.
In fact, it is one of the least expensive woods available, making it a favorite among individuals looking to save money. However, these panels are typically painted with plastic veneer when used for furniture to make it last for a longer time and prevent any damages.
And plastic veneers can easily get scuffed, flaked, or scratched with excessive use. Moisture may also cause swelling in the core particleboard. Despite all these disadvantages, particle boards are extensively used nowadays to make various furniture pieces.
Particle board is available in several grades to cater to individuals who want enhanced toughness, longevity, pricing, and attractive appearance for DIY projects.
Just make sure you consider the total weight the particle board can hold before you consider purchasing it to make a particular furniture piece. This will help determine the structural integrity of the final product and its overall longevity.
Advantages Of Using Particle Board
Particle board has a number of advantages:
It is less expensive than chipboard or other kinds of wood
Has a higher density and uniformity than other wood furniture
It can be cut and shaped into a wide range of sizes and forms
Simple to work with and is available at any local hardware store
Different Types Of Particle Board
Several particle boards are developed to satisfy the demands of various applications in different industries. Chipboard is made from very small splinters of wood, whereas oriented strand board (OSB) is made from considerably bigger strands or flakes of wood.
Since particle boards may be produced as dense, large, and heavy as you like, the options are unlimited. However, most producers have a few varieties of particle board prepared to go right off the shelf, so let's look at these!
1. Laminated Particle Board
In a laminated particle board, the surface of the board is covered with a laminated sheet to protect it from environmental impacts like water, heat, and other conditions. These types of laminate surfaces are used where robust materials are required, like roofs of auditoriums and internal space of speakers.
Laminated particle boards are easy to clean, sturdy, and require little to no maintenance. Therefore, they are a good choice for commercial environments and work great as a long-term investment.
2. Single Layer Particle Board
Whenever you walk into a local hardware store to buy a particle board, the first thing you'll be offered as an option is a single-layer particle board. This board is the simplest and is made from same-sized wood filings to keep the surface consistent and sturdy.
Single layer particle board is resistant to the consequences of dampness or direct exposure to water due to the addition of veneer and laminate, but it isn't waterproof. As a result, a single-layered particle board is only suitable for internal usage, as prolonged exposure to the weather will cause this board to deteriorate, rot, and crack.
3. Veneered Particle Board
A veneered particle board is any particle board with a veneer coating applied to its surfaces. And for the unversed, veneer is a thin covering of wood bonded to the top of engineered wood to make it look like a solid wood panel.
You can choose from various kinds of veneer available on the market, most of which are derived directly from the source it resembles. For instance, the walnut veneer is directly sourced from walnut wood and is slightly more expensive than oak wood veneer.
That said, keep in mind that wood veneer is cheaper than solid wood.
4. Multi-Layered Particle Board
A multi-layered particle board comprises three layers, and as the name suggests, these boards are strong, durable, and can easily resist damage. Near the surface areas of the board, the wood particles are closely packed to increase smoothness and strength as compared to the interior parts of the board.
The tiny wood particles that make up the board's opposing sides boost resistance to water, temperature, pressure, and scratches. And due to the presence of extra resin and smaller wood particles, these boards are much easier to paint as compared to others.
5. Cement Bonded Particle Board
Cement-bonded particle boards are by far the most unique boards I’ve come across. Made from an extraordinary combination of magnesium-based cement and wood particles, these boards are inexpensive and sturdy. And they are extremely effective as construction materials.
This type of particle board is resistant to moisture, impact, abrasive wear, fire hazards, and insect damage. As such, the flexible and durable product is used to build walls, roofs, carpets, and even furnishings. While sixty percent of this board consists of magnesium-based cement, the other forty percent consists of water and wood-based particles.
6. Graded Density Particle Board
Graded-density particle boards and multi-layered particle boards are the same. However, the only difference is how these two different boards are used. In graded-density particle boards, thick wood shavings are compressed and shaped between two fine boards that form the surface of the particle boards.
Due to the durability and longevity of these boards, they are most used in furnishings like particle board cabinets, spice racks, serving trays and many more utility-oriented objects. These types of boards can be easily sealed and painted without any hassle.
7. Melamine Particle Board
Melamine particle boards are like ready-to-use boards, available in various colors, patterns, shapes, and sizes. These boards have the inherent quality of being scratch and water-resistant.
The particle board features decorative sheets spread over the surface in the same manner as veneer. And the wood granules have been glued using a mixture of melamine-urea, epoxy, wax emulsion, and formaldehyde to guarantee that the board is robust and moisture-resistant.
Can You Paint Particle Board Furniture?
You can easily apply any color to the particle board and change its look according to your preference. However, you must take care of certain things, like choosing the right paint and making the surface smooth so that paint sticks to it properly.
Since particle boards are more porous than other materials, they soak paint a lot faster. Therefore you might have to apply several coats of paint to improve its texture and look.
Tip
Always sand the surface and apply an oil-based primer before painting particle board furniture, so the paint looks as good as new.
Is Painting Particle Board A Good Idea?
Painting particle board furniture is a good idea as the oil-based paint protects it from any environmental damage like rain, heat, abrasion, or other hazards. Moreover, painting particle board gives the furniture a new, improvised look.
However, it’s very important to choose the right kind of paint. Some coatings may not cling properly to the particle board or offer enough protection. So, before undertaking any painting project, it’s always a good idea to contact an expert.
Things To Consider Before Painting A Particle Board
1. Choose The Right Kind Of Paint
Before you begin painting, you must choose the right paint that gives your particle board furniture a smooth and glossy finish. Not all kinds of paints are suitable to paint particleboard furniture. It is essential to choose a paint that easily covers hard surfaces. These paints are more resistant to chipping and scratches and give superior overall coverage.
2. Prepare A Smooth Surface
Before you begin the paint job, it's essential to prepare the entire surface of the particle board. For this, you'll have to use fine grit sandpaper to smoothen the rough edges and uneven surface.
You should then apply a coat of primer to hide any stains or imperfections. I know it can be tempting to skip this step if you plan on using chalk paint. But resist the urge!
3. Use Multiple Coats Of Paint
When painting particle board furniture, it's very important to use multiple coats of paint to make the surface look smooth and even. This way, the paint will last for a longer duration and won't chip off easily.
4. Let It Dry Off Completely
After applying the first coat of paint, let the coat dry completely. Once you feel that the first coat is done, proceed with the second coat. This process might take a long time, so you must be patient.
Tip
Always remember that at least two coats of paint are required to make the particle board look as good as new.
5. Enjoy Your Hard Work
Once you're done with the painting process, sit back and relax. Wait for your oil-based paints to dry off completely, and your particle board furniture will be ready to look all new.
Which Paints May Be Used On A Particle Board?
If you’re looking for paint that will give your particle board furniture a high gloss finish, you should go for latex paints. These kinds of paints will give the best kind of coverage and durability.
You can also use oil-based paint, but it might not stick to the particle board properly, and the final product might not be very satisfactory. In addition, if the particle board is dark in color, you should apply a primer so that your fresh color stands out properly. And you might have to use a bold paint color for painting the particle board.
How To Paint A Particle Board?
1. Start With Repairing The Damage
You will only achieve the best results from painting your particle board when you repair all the damages before coating it with your desired color. There are three kinds of damage that you need to take care of.
A. Water Damages
Some particle board furniture is not laminated but painted. Due to this, when they are constantly exposed to extreme weather conditions, bubbles, and permanent stains might change the look of the particle board furniture. In extreme cases, the particle board might even soften and crack.
To repair such damages, you must scrape out the portion which water logging has affected the most using a sharp razor. Once you're done, you can easily fill up those areas with wood shavings and smoothen them out with grit sandpaper.
B. Chips And Scratches
Particle boards are not very durable or sturdy. They can easily crack, chip, or scratch. So, use putty or wood shavings to fill the area if you see any such damage on the particle board. Then use a putty knife to smoothen out the area. Lastly, sand the surface of the particle board and make it look as good as new.
C. Veneer Damages
The plastic veneer stuck to the particle board with the help of glue eventually loosens, and the edges separate from the board. However, you can easily solve this problem through contact cement. All you need to do is use a putty knife and lift the edges. Then scrape off the dried glue and wood particles.
Apply a small coating of contact cement to the particle board surface and the veneer's bottom surface. Using a roller or a piece of wood, press the plastic veneer into the particleboard core. The veneer should adhere strongly.
2. Smoothen The Surface Of The Particle Board
After you've repaired the particle board, it's time to sand the surface to remove all the unevenness. If the surface of the particle board has a glossy finish laminated surface, then the paint might not stick properly.
However, when you sand a particle board, it can easily absorb the paint. Always remember to do this step properly; otherwise, the paint might start chipping off. To remove any previous finish, lacquer, or gloss, sand the entire object using fine-grit sandpaper or a sanding block. The idea is not to sand away the veneer but rather to scratch the top and give it "teeth" that will aid in the adhesion of the paint layer.
3. Prepare And Apply The Right Primer
If you pick the right kind of primer, then you can save yourself from the hassle of putting in several coats of paint. You can use a gray primer if the particle board is dark in color and a white primer in case the particle board is light in color. The primer helps the particle board to absorb the paint and prevents the chipping of the paint.
Though you may apply the primer with a roller, a thin layer applied with a paintbrush will guarantee that it goes into every crack. Allow the primer to dry for 24 hours and then lightly sand the surface once again.
4. Sand The Primer Layer
Lightly sanding the particle board before painting will ensure that the top coat sticks to the surface. You should then remove any dust and debris with a lint-free cloth after sanding.
5. Start Applying The Paint
Once the primer is completely dry, start painting the particle board furniture. You can use a roller brush to paint the particle board. The advantage of using a roller brush is that it gives a smooth finish, doesn’t show the brush pattern, and, lastly, you can avoid paint drips that might destroy your hard work.
While painting, keep an eye out for paint drips and clean them away with a brush before the paint dries. Depending on the color, one application may be sufficient to meet the surfaces. However, the greatest results are frequently obtained by applying two or three layers of paint in fine, consistent layers.
If you need to apply another layer, wait until the previous one is dried before applying the next. A gentle sanding between applications can improve adherence.
Tip
A gloss or high-gloss texture is frequently preferred when painting furniture. Gloss paints are simpler to clean and prevent staining.
Some Additional Tips And Tricks To Paint Your Particle Board Furniture
If you're repainting over a darker shade, use a white or light-colored primer first
When using a paint sprayer, keep the can upright and spray in a back and forth motion
Begin by applying light layers of paint, allowing each coat to dry thoroughly before adding another
To produce the greatest results, use a high-quality paintbrush or roller developed to use with latex paints
Remove any paint drops or spills as soon as possible, before they dry
Can You Paint Particle Board Final Words
Particle boards make fantastic furniture, especially on a tight budget. And painting particle board surfaces is the best approach to refurbish particleboard furniture. Just keep the procedure in mind and proceed slowly with it.
If you’ve found this article insightful and are interested in knowing about screen printing, then my article on, “Can a circut machine screen print?” may interest you.
Winter is fun till splitting logs for the fireplace makes your back cry for help!
That’s why a lot of homeowners have opted to buy a log splitter for regular residential use. But there’s one problem, most of them don’t come cheap. And if you’re a first-timer, it may be even more challenging to get the right model according to your needs.
So, what can you do? It’s rather simple-rent a log splitter! That way, you have first-hand experience without spending a lot of money. And if you don’t split logs regularly, that’s all the more reason to rent one. Once you’re comfortable with the operation, decide if you’d buy one.
On that note, we’ve listed down the top 13 places to rent a log splitter from. So, let’s begin!
Places To Rent A Log Splitter
Home Depot
Numero uno on our list is Home Depot. It boasts a professional-grade and well-stocked inventory that has a solution for almost all your equipment requirements, be it for indoor or outdoor use. We love the log splitter that’s powered by a Subaru EX27 engine and has a 14-seconds cycle time.
Just specify your location, and you will have the details regarding their nearby stores (from over 1,200 stores) and competitive prices. However, you may need to pay a deposit fee upfront. What’s more, you might also avail same day pickup. Home Depot offers its rental services to users above 18 years of age, so ensure that you carry a valid ID card to the store.
Rental HQ
Although not a rental service per se, Rental HQ is a director-based intuitive website connecting users to rental companies. In this case, you need to enter the equipment you’re looking for and the desired location, after which it will fetch information about nearby rental stores. Select the most convenient option from their exhaustive drop-down list.
Additionally, the website houses articles on various DIY projects, and how-to-use guides for first-time users. So, that’s a bonus!
Sunbelt Rentals
A South Carolina-based company, Sunbelt Rentals is a subsidiary of the Ashtead Group and America’s second-largest rental service. With more than 700 locations, it offers both pickup and delivery services.
We tried our hands on the 26-ton log splitter with 14 seconds cycle time that’s powered by a robust 270cc Honda GX engine. Besides, it has multiple noteworthy features like steel fenders and E to Z lift hinges.
Apart from log splitters, you will also find a host of other equipment for residential, DIY, commercial, and industrial purposes. They also have a 24x7 emergency delivery system consisting of vehicles, dispatchers, and mechanics, who are available on call. The three-decade-long years of operation are a testimony to their quality service.
Herc Rentals
Keeping client convenience in mind, Herc Rentals offers daily, weekly, and monthly rates for their log splitter. The website features a Barreto 920LS 25-inch log splitter that runs on an 8.7 hp gasoline engine. Beyond that, torsion axle suspension reduces bounce, enhances tracking, and improves the low-towing ability of the unit.
While the rubber bump stop shields the splitter during the transition from vertical to horizontal, the two-handed control system takes care of accessibility. And with the cushioned log cradle and spring-loaded cleaning wedge, safety is hardly an issue. It’s the ideal choice for landscaping or tree removal; just enter the location for specific price quotes.
United Rentals
If you’re looking for a hydraulic splitter fuelled by gas without spending a ton of money, then United Rentals will come to the rescue. The website houses a heavy-duty hydraulic splitter, and you can specify the period for which you need it. Not only that, but it also allows you to set the quantity.
That said, the price will depend on the location, and if its location is not serviceable, they advise you to get in touch with their customer service via call.
A Tool Shed Equipment Rentals
A Tool Shed Equipment has a 20-ton vertical log splitter that’s powered by a Honda 8.7hp GX270 engine and has a 20-second long cycle time. Moreover, you can rent the unit on an hourly, daily, weekly, or monthly basis without paying any sales charge. Depending on the location, prices usually start from $30 per hour and go up to $1,050 for a month.
You may also opt for an equipment protection plan that has separate charges. Plus, the monthly rates are levied for a minimum of 28 days or a maximum of 160 hours.
Koopman Lumber
Similar to Rental HQ, Koopman Lumber is a directory-based service that matches users with rental services for various locations across the country. They generally provide information about three main models, namely; the Cadet LS25, Cub Cadet LS27, and Oregon 22-Ton. Each of them is sturdy and offers plenty of power for regular residential wood splitting, be it for a fireplace or renovation purposes.
Simplex Equipment Rental
Simplex is a Quebec-based family business in operation since 1907. It provides a Wallenstein 24-inch gasoline-powered log splitter that has both horizontal and vertical orientation. Their web prices include daily, weekly, and monthly categories. Besides, a 7.9% waiver fee is applicable upon placing the order, and special weekend rates may be available on request.
Rent Equip
As we near the end of the list, Rent Equip finds a deserving mention. It has a 700-ton, 270cc Honda engine, and a hydraulic system-operated heavy-duty wood splitter with a 12-second cycle time. Unfortunately, we couldn’t find a lot of details about the rates, but you should be able to get them for at least 24 hours.
Handy Rents
True to its brand name, this rental service rents out equipment and full-line tools for your different needs. The log splitter on offer is again a 700-ton, 12-second cycle time, and 270cc Honda GX powered model. You can rent it on an hourly, weekly, or monthly basis, but you must have it for a minimum of 4 hours ($64). The monthly prices can reach up to $834.
An exciting thing about this site is the rental reward program, which gives you a 3% discount on every order. You can accumulate the points and use them within 6 months. Furthermore, new users are automatically enrolled in this program!
Battlefield Equipment Rentals
Despite being a Canada-based service, Battlefield Equipment Rentals provide its services in different parts of America. It comprises a directory that can be used to locate log splitter rental services in your location. Moreover, the prices depend on the location and period of use, be it daily, weekly, or monthly requirement.
Rental Village
The rental village offers pocket-friendly prices for those looking to rent log splitters for a few hours as the rate starts from about $45 per hour. However, for monthly requirements, the prices may shoot up to $1,080.
Complete Rent-Alls Orillia
Depending on how long you need to use it, this rental service provides a 20-ton log splitter that can be rented for a few hours, days, or weeks. The prices will mostly depend on the period of use.
For instance, those who plan to rent it for four hours may have to shell out about $45. Similarly, the daily rates hover around $60, and the weekend rates may have to pay up to $90.
Final Words
So, there you have it - our top 13 recommendations for renting a log splitter.
Interestingly, most of our suggested services don’t stop at log splitter renting. Not only do they offer a wide range of indoor and outdoor pools, but they may also provide tents, chairs, tables, etc., for outdoor events. So, go ahead and check them all!
With that, it's time for us to wrap up the guide. But before we do, allow us to stress two important factors. First, make it a point to carefully go through all the terms and conditions of use. The last thing you’d want is to pay extra money for any accidental damage.
Also, we’d suggest going for a service that has quick and responsive customer service. You never when you may run into problems during operation, so it’s better to have professional help easily accessible.
Be it a pro or a beginner, every gardener seeks the best methods to improve plant growth.
Now, there are a ton of products available in the market, promising desired results, but most don’t live up to our expectations. And the others instill in us the fear of chemicals seeping into the garden’s produce.
Understanding your plight, we’re here to introduce you to a safer alternative to these products. Mushroom compost is one of the most widely used types of soil amendments that’s capable of fulfilling every gardener’s needs.
But is it good for tomatoes? Here’s where you’ll find out.
After spending hours on research, we’ve managed to create this informative guide, which provides relevant information about the use of mushroom compost in growing tomatoes. Furthermore, we’ve highlighted the common problems associated with tomato plants followed by the benefits of mushroom compost.
So, without further ado, let’s begin!
What Is Mushroom Compost?
Before coming to the conclusion of whether or not mushroom compost is good for tomatoes, it makes sense to get to know its composition. Let’s start by tackling the common misconception that mushroom compost comprises real mushrooms as its primary ingredient.
It’s rather a combination of organic materials, such as peat moss, hay, hulls, chicken manure, corn cobs, and others. However, the ingredients used to make mushroom compost may vary, depending on the source. And the desired output is obtained after each component is estimated and thoroughly combined.
That said, making this compost is as simple as soaking finely cut straw in water. A mix of the organic materials is combined with the straw and then placed in the hot compost pile for around 30 days. The straw serves as structure and food to bacteria, while the chicken manure, urea, and peat moss provide the required nutrients.
With bacteria thriving, the heat rises to more than 160 degrees, which, in turn, kills any pathogen or weed seed present in the straw. Consequently, after several weeks of moistening and turning, the pile darkens, indicating that the mushroom compost is ready to use.
The compost can then be used as an amendment to enrich the soil, raise its pH value, and retain moisture. It’s also widely used in commercial mushroom facilities to grow crops and later sold to landscaping businesses, agricultural businesses, and farm co-ops for resale.
Is Mushroom Compost Good For Growing Tomatoes?
By now, you’re well aware of mushroom compost, its ingredients, and the chemical process involved in its formation. So, it’s time we answered the most crucial question forming the foundation of this guide - is mushroom compost good for tomatoes?
Without beating around the bush, using this compost type to grow tomatoes can definitely prove to be beneficial. It’s rich in several minerals and nutrients that are crucial for the growth and development of the tricky fruit.
On that note, let’s discuss the common problems associated with growing tomatoes before highlighting the benefits of using mushroom compost to eliminate the issues.
Problems Associated With Growing Tomatoes
It’s not easy to grow tomatoes since they’re prone to diseases. But interestingly, the common problems faced by tomato plants can be addressed by mushroom compost as well.
This section will help you identify the plant disease and its cause so that it’s tackled no later than it appears.
Blossom End Rot
Lack of sufficient water or calcium leads to dark blotches at the end of your tomato plant, commonly known as blossom end rot. It may also be caused by a lack of calcium in the soil, contributing to soil dry-out.
The use of mushroom compost helps retain enough water for the plant. Plus, it adds nutrients and minerals like calcium to the soil to overcome this problem.
Tomato Blight
Most varieties of tomatoes are resistant to tomato blight, but a few variants, commonly grown in regions with wet climates, are susceptible to this problem. So, if you notice the fruits and leaves of your plant rotting prematurely, try spraying liquid mushroom compost. It acts as an excellent aid for protecting the tomato plant.
Mold
Yellow patches on the leaves of the plant are an indicator of leaf mold. It contributes to the loss of tomatoes, so try growing a plant variant that’s naturally mold-resistant and make sure you keep the area ventilated.
Of course, the use of mushroom compost as mulch is another excellent way of addressing this issue. It helps the plant resist mold and kills pathogens in the soil.
Benefits Of Using Mushroom Compost For Growing Tomatoes
As you already know, mushroom compost is a proven type of soil amendment used for mushroom cultivation. It’s rich in nutrients and helps tackle common problems like mold, blossom end rot, and tomato blight, allowing tomato plants to thrive well.
Here we’ll be listing and discussing a few more reasons why using mushroom compost is beneficial for the growth of tomatoes.
Early Growth-Stage Protection
Mushroom compost is not only rich in minerals like calcium, but it also increases the soil’s alkaline content in the early growing stages of your plant. As such, it protects the crop from diseases from the get-go.
Food For Plants
When compost is laid as mulch or mixed with the garden soil, nutrients are slowly released to serve as food for your hungry tomato plants. That’s not all; the soil amendment stimulates beneficial microbes to promote growth.
Natural Anti-Bacterial Protection
If not addressed promptly, pests and pathogens can cause a nuisance by killing plants. But tomato growers can always use liquid compost, which is also referred to as mushroom compost tea, to protect their plants from various bacteria and diseases naturally.
Superior Weed Control
Let’s face it; no one likes having to deal with pesky weeds growing in their vegetable or fruit garden. Luckily, mushroom compost comes to our rescue.
A thick layer of compost blocks weed growth, overcoming the constant struggles gardeners have to deal with during the tomato planting season.
Generates Sufficient Drainage
Often gardeners end up overwatering their tomato plants, which eventually leads to the rotting of roots. And if the soil isn’t compacted with proper drainage, water-logging and root drowning further add to problems.
Remember, tomato plants grow well in moist but well-drained soil. So, give the soil what it needs to promote the growth and development of the fruit by adding mushroom compost. What’s more, the compost can help improve chalky, compact, and clay-based soil.
Organic Soil Amendment
We’ve already explained the process involved in making mushroom compost. As such, you must be aware that it’s organic, comprising all-natural ingredients, including peat moss, hay, and chicken manure.
That said, mushroom compost is safe to use; you need not worry about chemicals seeping into your tomatoes at any point in time. It neutralizes the alkaline content of the soil and adds nutrients as per the tomato plants’ needs.
No Foul Odor
You might presume that since mushroom compost comprises domestic animal manure as one of its primary ingredients, it produces a foul odor. However, that’s not true; it does smell musty, but it doesn’t stink.
Gardeners can use their bare hands to mix this compost in a container bag without throwing up. And once it’s added to the garden soil, the musty smell slowly disappears. So, you need not worry about your tomatoes smelling unpleasant when they’re ready for harvest.
How To Use Mushroom Compost For Tomatoes?
Now that we’ve already concluded that mushroom compost is highly beneficial to the growth of tomatoes, let’s talk about how it should be used.
To answer the question, it can be used just like you’d use any other compost. All you have to do is mix it in with the soil in your tomato plant pots. You may even fill a grow bag with compost and plant tomatoes in that.
Mushroom compost is known for its high water retention rate. So, there’s no need to worry about your plants drying out due to lack of sufficient water in the soil even if you fail to water the soil every day. It always manages to keep the water level constant.
You can also grow tomatoes in your garden using mushroom compost. Create a mulch layer by spreading compost evenly on the top layer of the soil with the help of a rake or hoe. This will help trap moisture and protect your tomato plants.
And for treating diseases like tomato blight and leaf mold, spray compost tea, a dark-colored fluid rich in nutrients and minerals used to fight fungus and bacteria seen in garden vegetables. It’s relatively easy to make from the compost pile; just dump a trowel of compost into a bucket of water and allow it to stay for a day or two.
Does Mushroom Compost Burn Plants?
There’s a common notion surrounding mushroom compost, stating that it can burn plants. Is it true? Well, it is, to a certain extent.
Newly germinating seedlings and tomato plants that are sensitive to alkaline are at a higher risk of burning because of the high soluble salt level in mushroom compost. This is why professional gardeners always suggest mixing compost with garden soil to protect the plant from damage.
However, you may also reduce the risk of burning by allowing the compost to sit for at least a few months before use. Another way to protect your plant is by allowing the freshly applied mushroom compost to stand uncovered during winter for curing.
Final Words
There’s no doubt that mushroom compost can benefit your tomato garden in different ways. And it serves as a smart and affordable choice when it comes to soil amendment.
From retaining moisture in the soil to adding essential nutrients like calcium, this organic produce fulfills all the requirements for promoting the growth of tomatoes. However, it’s important to note that tomatoes grown in compost alone are susceptible to damage due to the high content of soluble salts.
So, make sure you mix the right amount of mushroom compost in garden soil and remove unwanted weeds prior to application. On that note, we come to the end of this informative guide.
Here’s hoping we were able to help you grow healthy tomatoes using mushroom compost. We’ll definitely be back with more useful guides related to gardening.
Till then, you’re welcome to reach out to us in case of any queries related to the topic.
If you’re a fan of smoky grilled meat, love hosting people, and have space around the house, owning a grill is a wise choice.
Think about it: isn’t it fun to grill meat at home for friends and family on a warm Sunday afternoon? However, figuring out which pellet grill is ideal can be quite a task because there are so many factors to consider.
However, it’s no secret that Rec Tec and Taeger are the top two contenders. And as human beings, we are compelled to compare. From superheroes to supercars, there can only be one winner. And a pellet grill is no different.
If you are looking to know which brand is superior, you’re in the right place. In today’s guide, we are comparing Rec Tec and Traeger on various aspects to decide which might be the ideal one.
So without further ado, let’s jump right into it!
Rec Tec vs. Traeger | All You Need to Know
A Brief Overview Of Each Brand
Before we get into comparing the two, let’s talk about the grills they both have to offer. Since both these brands are high-quality, they have produced quite a few grills that have become popular in the market.
Some of the well-known Rec Tec grills are the RT-590 and the RT-700 pellet grills. And when it comes to Traeger, the Ironwood Series 885 and the Traeger Pro Series 575 are just as popular. This brings us back to figuring out which one, out of the variety of options available, is the best.
To begin with, let’s look at a brief overview and history of each brand to understand them better.
Now, while we aren’t comparing on the basis of who got here first, Traeger did set the trend. In 1985, Joe Traeger was the first person to invent pellet grills. He knew from the very start that this invention would change the culinary industry, and hence he patented it in 1986.
As the brand grew, so did its reputation. Traeger was the only trusted name for pellet grills, and it lived up to it. However, the brand gained traction not only because it was the only one making pellet grills but also because of its quality and reliability. But, the patent was only for 20 years.
In 2006, once the patent expired, many more companies began manufacturing pellet grills. This made the market more competitive. Joe Traeger ended up selling the business, and soon Traeger moved overseas for production. But, despite the ever-rising competition, it remained as one of the best and most reliable names.
Plus, as the technology advanced, so did a lot of Traeger grills. The competition in the market has led them to build new and improved grills with hi-tech features and wider cooking areas while maintaining their high-quality and premium status. Some of their newer models are Wi-Fi enabled, which is pretty impressive.
Out of the many brands that took advantage of Traeger’s expired patent, Rec Tec was the most successful. The company came into existence in 2009, which was three years after Traeger’s patent expired. It started with just two friends who loved to grill and were always looking to improve their grilling experience.
What started in a garage is now one of the best pellet grill brands in the market. But this isn’t just because they hopped on board at the right time. Rec Tec (now known as recteq) has always focused on manufacturing high-quality products using new technology. Plus, their grills have bull-horn-shaped handles (who wouldn’t love that!).
Since the company was always about trying to have the best grilling experience, we can see how temperature control can be a big deal. Getting the proper heat and smoke is crucial, and that is why Rec Tec grills focus a lot on temperature control and have digital controllers to reach precise temperatures.
Traeger vs. Rec Tec
As we mentioned earlier, both these brands have made a name for themselves with not just one or two products but many. Each of these has a vast catalog of grills at different price points with varying features.
To make the comparison easier, we have made a list of the most important features when selecting a grill. Whether you are looking online or in a store, making a note of these features will give you a better idea of the grill’s quality. Hence, picking the one that’s more suited to your needs will not be as challenging a task.
Price
Without a doubt, price is one of the essential aspects when selecting a grill. No matter how nice and efficient any product might be, it is always advisable to buy something that will not rob you of your life’s savings. Or at least it should have enough to offer to compensate for the price.
That being said, both Traeger and Rec Tec are high-end brands with expensive grills. They are not unaffordable, but even their basic grills can be considered premium, given their name and quality. So, it would be futile to look at any of these brands if you are looking for cheap and super budget-friendly grills.
However, out of the two, we suggest going for Rec Tec. Not only is it a little less expensive than Traeger, but it also has more value for the price, especially if you want a more advanced grill.
When it comes to pellet grills, it is always better to buy one with a wide temperature range. It makes room for more versatile cooking. With a wide temperature range, you can smoke different kinds of meat and cook it without having to worry about finding the ideal temperature.
When it comes to Rec Tec and Traeger, both offer incredible temperature ranges. However, Rec Tec is a better performer in this regard since the range is wider and it has a “FULL” setting which increases the heat even more. Most Rec Tec models have a range of 200℉ to 500℉, and the FULL setting takes the heat beyond 500.
For most Traegers models, the max temperature is about 450℉ with just a few models going up to 500℉. The minimum temperature it can go down to is 165℉. So clearly, the difference in temperature ranges is not much. It’s just that Rec Tec’s FULL setting gives the brand advantage, especially if you prefer grilling to smoking.
Construction
It goes without saying that both brands only use high-quality materials to construct their grills. They both offer grills that have sturdy built and tight fittings that will last a long time. However, there is a difference between the two since they both use different high-quality materials.
Most of the components in Rec Tec grills are made out of stainless steel, with the exception of the heating rods that are made out of ceramic. On the other hand, Traeger grills are made with powder-coated steel, and only the handles are made with stainless steel.
Some of the high-end Trager models have stainless steel bodies and grates as well as double-wall insulation. In this aspect, the Rec Tec models are a bit more favorable since all models have stainless steel bodies, firepot, grates, and drip pans.
Rec Tec has an advantage when you compare the two since stainless steel is rust-resistant and will last longer than powder-coated steel. Plus, the ceramic heating road also has a long life and might even outlive the other components.
Cooking Space
The amount of space that is enough for cooking is very subjective. If you like to host people and cook in large quantities, then a wider cooking space is necessary. But if you’re new to using grills and are just testing the waters, then maybe getting a smaller one is wiser.
But how do you decide exactly how much cooking space you need? To put it in perspective, a full-size turkey or a dozen burgers will need at least 300 square feet or more. Rec Tec and Traeger offer grills with varying cooking spaces; it all comes down to what is ideal for you.
The only difference is that a larger cooking space is available mainly in Traeger’s premium models, while Rec Tec offers ample cooking space in all models. In addition, Rec Tec’s grills have additional space in every model that extends the area by 200-300 square feet.
Pellet Hopper
People who use the grill multiple times a week know how massively inconvenient it is to refill the hopper constantly. After all, who wants to deal with yet another tedious task more than once after prepping the food.
To avoid dealing with constant refilling of the hopper, especially when you’re smoking something overnight, we suggest looking at hoppers sized at 20 lbs or more. Rec Tec and Traeger both have grills that can meet any requirement.
Most of the Rec Tec Models start at 20 pounds and go all the way to 40 pounds. On the other hand, Traeger’s models start at 18 pounds and go to a maximum of 24. If you are looking for a grill with a smaller hopper size, like 20 or 24 pounds, both brands stand tied for us.
However, since Rec Tec has much larger sizes to offer, it has a wider variety to choose from.
Temperature control is an important aspect of the smoking and grilling process. While Traeger has stepped up in this aspect over the years, Rec Tec always prioritized it. Overall they both perform equally efficiently. However, one is more traditional than the other.
Traeger has a Pro D2 controller that keeps the grill at the desired temperature within a +/- of 15℉. In the premium models, the grills have a feature where the temperature increases at a faster rate in case the lid is opened. This is quite beneficial since opening the lid to check on the meat does affect the cooking process, as it does in baking.
However, if you are looking for something a bit more advanced, Rec Tec is the way to go. Not only does it have a digital temperature screen (as opposed to Traeger’s standard temperature dial), it also Smart Grill Technology. This technology keeps the temperature inside consistent for a long time.
Plus, the temperature stays within a range of +/- 5℉, making it a lot more accurate. It also calculates when the ignitor should be turned on/off and how many pellets it needs to meet the required temperature. And all this is in addition to the auto-shutdown and cool down feature.
In a nutshell, they both have different things to offer. If simple and traditional is your style, then pick Traeger. If not, you have Rec Tec. Functionality-wise, they are both accurate and phenomenal at temperature control.
Warranty
The one thing people check after the price of any device is the warranty period, primarily if they are investing in something expensive. Saving up a fortune and buying something which only lasts for about 3-4 months is everyone’s nightmare.
This logic extends to grills too. It can be pretty expensive, but knowing a company can cover certain damages until a specific time is relieving. When it comes to Rec Tec and Traeger, it is evident that they will last long. However, having a warranty on the models is the cherry on top.
For most of the Rec Tec grills, the brand has a six-year warranty. We have established that it is a sturdy piece of equipment to have in the house. With this kind of warranty, not just you but your kids too be able to use these grills in the future.
Trager, on the other hand, while also offering long-lasting grills, only has a warranty period of three years. And while it is impressive for a brand to provide a warranty for this long, it is no match for the six years by Rec Tec.
Customer Service
Now, this may not be an essential point for a lot of people. But, if you’re looking at the warranty, we know customer service centers and numbers are on your mind.
Needless to say, since both brands have been in the business long enough, they have responsive and support customer service teams. One of the best things about Traeger is that, despite being overseas, they have a knowledgeable team in the US that is always eager to help. This is why people don’t mind the hassle of contacting them.
However, Rec Tec one-ups them here. Not only do they have a supportive team, but each grill includes the number of the company’s two founders. People who have had trouble with the grills have actually called the founders and spoken to them about their issue.
And it is this level of intimate connection that the brand is building with its customers that it is so popular.
Grilling and smoking meat is not something that can only be done in the backyard on a sunny day. Some people love to take their grill into the great outdoors for a cooking session in the middle of the forest. It’s for people like them that grills need to be more portable and mobile.
Whether it’s for tailgating or camping purposes, having a grill that cooks on the go can be very convenient. This is where Trager has gotten an opportunity to shine. Don’t get us wrong; Rec Tec has some fantastic options to choose from. Some of their models have foldable legs, and most of them have wheels.
But Trager has a much more extensive collection of mobile grills. They have prioritized mobility to a point where they have a whole collection of portable grills. Plus, they have a section of grills made for tailgating and one line that effortlessly cooks on tabletops.
Additional Features
Now, coming to the fun bit. No matter what product you want to buy, as soon as there are some bells and whistles, it automatically amplifies its need. You may not need a Wi-Fi controlled fireplace for the winter, but it sure will be fun to have.
Similarly, both these grills have evolved with time. And as technology advances and people expect more from a product, they have successfully delivered. Be it wanting to control the grill remotely or have an indicator that lets you know when the meat is ready; both brands have done it all.
Traeger
Let’s start Traeger. One of the most note-worthy features Trager has added to its grills is the wi-fire technology. Other than being a very smart name, it is also brilliant tech. Wi-fire technology is in-built in all Traeger grills, which allows you to connect the grill via wifi to an app.
The app is quite convenient since it not only allows you to monitor the temperature, but you can monitor food temperature and also add more smoke. And all of this, with just a few taps on your smartphone or tablet. Plus, the high-end models also come with two meat probes.
Speaking of high-end models, those have low pellet sensors, grease management systems, and exhaust systems. Plus, if the grill does not work, the built-in error reporting feature can tell you why it’s not working. And, this is all just the tip of the iceberg.
Rec Tec
Moving on to Rec Tec. Much like Traeger, the Rec Tec grills also have an app that monitors and changes the temperature inside the grill. The app allows you to set timers and alerts that will notify you when the food is done.
However, the cool stuff with Rec Tec is beyond the app. The grill itself allows for extra low and extra hot temperature settings. These can be set based on the amount of smoke requirement for the meat.
In addition, it has hopper lids that can also be used as a warmer. It also has interior lights that allow you to see the meat inside at night without carrying a torch everytime. It’s a small addition, but it’s the little things that count right! Plus, it has two temperature probes.
The best part about all this is that they are in all models, and not just the premium ones (as it is in Traeger). And, you can buy a smoke box that can cold smoke fish, cheese, and even sauces by paying a bit extra.
In the end, it all comes down to what you need when it comes to these extra additions. However, we are partial to Rec Tec in this aspect since the fun features are accessible in all models.
Rec Tec and Traeger: Recommendations
Having read all those features, you might tell that it is a challenging task to pick one true winner.
Both the brands have a lot to offer and are leading in one aspect or another. However, we felt it might make it easy for you to pick one if we list out a few of our recommendations based on the features above.
Both, Rec Tec and Trager, have multiple grills to choose from, but the ones mentioned below are some of the most popular in the market.
The RT-700 is one of the top-line grills by Rec Tec. If you plan to go all out with a grill, this is one of the top contenders. It has a massive 702 square inches cooking area with an additional 352 square inches. All in all, you can have a whopping 1054 square inches of cooking space.
In addition to the massive cooking area, even the pellet hopper size is huge. It has a 40 lbs capacity, which makes it ideal for overnight cooks. The temperature range on this grill is between 200℉ and 500℉. So if you’re looking for a grill that can efficiently slow cook and roast at high temperatures, this is a great option.
Other than that, it is equipped with most of the standard Rec Tec features like stainless steel construction, four wheels, and Smart Grill Technology. The grill even has a small towel ring, which we thought very convenient.
RT-590
This is the mid-range model by Rec Tec that is perfect for families that love to grill. The cooking area is 590 square inches with an ability to expand to 772 square inches. It has a simple-looking body, and the octagonal shape allows more headroom inside so you can place larger pieces of meat like two turkeys!
This one may not be as large as the 700, but it is enough for families that grill occasionally (or eat two turkeys at once). It also has two stainless grates and a generously sized hopper at 30 lbs. With a hopper that size, you can get at least 30 hours of cooking done.
As mentioned, all other features in Rec Tech are uniform. This also comes with two temperature probes, PID, and smart grill technology and has four wheels for each mobility.
RT-340
Finally, we have the low-range grill. It may cost less, but it sure does pack a punch. It has a lot to offer in addition to all the regular features like sturdy construction, dual meat probes, and Smart Grill technology. This one is perfect for people testing the waters with grills or for people that only need them very rarely.
The cooking area on this one is 340 square inches with an additional 171 square inches. It has a 20 lbs hopper capacity, and the temperature range is between 200℉ and 500℉. Much like its big brothers, this one too comes with a six-year warranty. The only difference between this and the bigger models is that this one has two wheels only.
The models in the Timberline series are all considered top-end grills by Trager. These grills have three cooking areas of varying sizes. The smallest in the series has a total cooking area of 850 square inches, while the biggest is around 1300 square inches.
The hopper capacity on all the models in this series is 24 lbs, and the temperature range is between 160℉ and 450℉. The great thing about these grills is that it is double-walled and insulated for better heat retention. It also has adjustable racks.
These grills are all Wi-Fi enabled with Wi-Fire technology and can be controlled by the Traeger app. It also comes with a three-year warranty.
Ironwood
Next in line is the mid-ranged Traeger grills. These are like the mid-ranged Rec Tec models because they are ideal for small families and frequent grilling in small quantities. The lower end of the series has a minimum of 650 square inches in terms of cooking area, while the higher end is around 800 square inches.
They also have double side-wall insulation for better heat retention. It is slightly different from the Timberline series since only the side walls are insulated instead of the whole construction. The hopper capacity is 20 lbs, and it has a temperature range of 160℉ and 450℉. These grills will use a little less than a whole bag of pellets.
Additionally, they can be controlled and monitored via Wi-Fi using the Traeger app and are protected under a three-year warranty.
Pro
Lastly, there is the Traeger Pro series grills which we recommend for new users. It’s a low-budget series from the brand and ideal for people getting used to grilling and smoking.
Since these are entry-level grills, they do not come with double side-walls or adjustable grates, but they have plenty to offer. The smallest has a cooking area of 575 square inches, while the largest is 780 square inches. All these grills have a hopper size of 18 lbs. which is ideal if you don't grill very often.
Like all the other grills by Traeger, these are also Wi-Fi enabled and can be controlled via the app. Plus, it comes with one thermometer probe to check the meat.
Summing It Up
Picking one winner is not easy when it comes to big brands like Rec Tec and Traeger. While both brands have certain advantages over the other, Rec Tec does stand out for us a bit more in terms of value.
To start with, since it is a newer brand, it has features that are more suited to the newer generation of grilling enthusiasts. Plus, they offer a lot more in terms of warranty, price, and customer service than most leading brands do.
However, in terms of grill performance, both brands are exceptional. Traeger has been in the business for a long time, so they know what they are doing. Ultimately, it all boils down to the user’s need, and so the ultimate choice is yours. On that note, we shall take your leave and be back soon with more such comprehensive guides and reviews.
Weber is already well-known for its appliances and the kind of quality and performance that it offers. But which Weber product will you choose?
While they make excellent grills, they offer a variety of options, and it can be confusing to decide on one. Now, the Weber Spirit is the original series released earlier, while the Spirit II is an upgraded and slightly advanced version. The latter comes with a set of new and improved features that were released a few years later.
In the following section, we will explain each of the models of both series in detail. Read carefully to know all about them and then make an informed decision.
Dive in now!
Weber Spirit II E-210 And Weber Spirit E-210 | A Comparison
In this section, we will be comparing both these models and will tell you about the pros and cons of each. They are similar in many aspects, but there is a slight difference which will be discussed.
This is one of the smallest models that are available in the market, and it is very cost-effective. Released in 2013, the E-210 has been very popular among consumers who were looking for a grill for their small flat or dorm room. We will discuss its features in the section below.
Performance
This is a small and basic grill that comes with dual-burners. The burners are protected by heavy grates, and the best part is that they are not prone to catching rust. Plus, the surface is fade-resistant, and the color will stay for years to come.
Moreover, the grates will ensure that the heat spreads well, and you will get proper grill marks on your food. You can cook steaks and patties just like professionals.
Below the grates is something that Weber especially adds to its products. There are porcelain enamel bars that help in diverting the grease from the flames. This will protect your burner and ensure that it lasts long. Grease on the bar gets smoked, and this adds more charcoal-like flavors to a dish.
It also has a built-in thermometer which will help you keep track of the temperature at all times. You can ensure that the food never gets overcooked, thanks to this.
Cooking Surface
We will now move on to the cooking surface of this compact device. It comes with 360 square inches of cooking area with a 90-square-inch warming rack.
Although it is the smallest option, it will still provide you with ample space to cook meat and vegetables together. You can even cook a large turkey of 20 pounds at once on this.
Build
Moving on to the build, it is a small product that is 50 inches in width and 32 inches in length. If you are working with an open lid, this will come to a height of 63 inches. You can use it for small and tight spaces, and it will easily fit in any kitchen.
Next, it is designed like a closed cart and has a small cabinet for the propane tank. There are hooks on the side to hang your cookware. The entire product is placed on 4 wheels which will let you move it around easily. What’s more, the wheels can be locked in place if you only want the body to move from front to back.
Coming to the materials, this is made of excellent quality stainless steel with cast-iron grates. The cooking area has a layer of porcelain, making it sturdy and attractive.
Assembly
The majority of the product is already assembled, and you will not have to spend too much time on it. There are only a few parts that need to be attached after it arrives. You will take half an hour to put them together, and you will need a screwdriver for the job.
Once you put the items in place, it might be a bit heavy. But the wheels will let you move it around easily, and you should not be facing any troubles.
Usability
Controlling this product is very easy, and you can work with the knobs in the front. A simple twist is required to switch on the burner, while another knob will help you control the temperature.
Moreover, it comes with a crossover ignition system that is powered by a battery. The flames are automatic, and this makes it easier to handle the grill. You will find the grill heating up very quickly, and that reduces the overall cooking time.
Also, AA batteries and a fuel gauge are provided with the pack. The batteries will let you begin cooking immediately, while this product’s gauge will help you understand the amount of propane that is left.
Overall, we found this to have a great build, and it was straightforward to use. The only downside was that the burners could not be lit up separately. Both would light up together while cooking.
This model was released way later in 2018, and the company brought it out as a form of upgrade. It is known to be one of the latest products that Weber has to offer. This one has a few similar features, but some stand out. Read on to find out about them.
Performance
So, when it comes to performance, the E210 works with a GS4 grilling system which makes it stand apart from the former option. The GS4 grilling system includes flavored bars, a grease management unit, easy ignition, and burners. There are 2 burners with an output of 26,500 BTU. Again, this is similar to Spirit 1, and the burners are well-spaced to allow for easy and even grilling.
The flavor bars are also similar, and there are 3 of them which prevent grease from falling into the flame. You will be getting a smoky flavor because of this, and you won’t have to worry about flare-ups.
Now the feature that stands out the most here is that it is compatible with iGrill 3. This will allow you to monitor the cooking temperature with your phone. It is a very successful feature that the present generation loves, and you won’t have to bother about undercooking or overcooking your meal.
Cooking Surface
The cooking space provided here is 360 square inches with a 90-square-inch warming rack. This is pretty similar to that of the previous item, and you should have an error-free experience.
Build
While the previous product was known to be the most compact when it was released, this one quickly took up the tag. It measures 48 inches in breadth and 26 inches in length. When the lid is open, the height is 57 inches, and you can easily place it anywhere.
Next, it comes with 2 side tables, but one of them can be folded down. This is entirely designed to look like an open cart which is pretty different from the closed cart design of the former option. This allowed better accessibility to the propane tank. However, it also has hooks on both sides of the table to hang your cookware and accessories.
Moving on to the materials, the Spirit II E-210 is made of stainless steel with cast-iron grates and a porcelain enameled top. 2 giant wheels have replaced the 4-caster design of the previous model. The wheels are accompanied by 2 thick legs that help in placing them on any surface. You can move it on rough surfaces and grass, thanks to this.
Assembly
Like the previous option, the Spirit II E-210 comes partially assembled with a few parts that need to be attached later by you. It is not very difficult, and you can call customer care representatives in case you face any issues.
Usability
This product also has 2 knobs which you can use to control the temperature. The best part is that you can adjust the temperature of both burners separately. That will give you more control. You can cook something on high heat on one side while you can grill another food item on a low flame on the other.
Moreover, the Spirit II E-210 is equipped with an infinity ignition system which works better than the crossover one, which is present in Spirit E-210. This one will ensure that the grill ignites whenever you want it to.
Further, its fuel gauge remains similar, and you will get the same benefits of a propane scale that will help you measure the amount of fuel left.
So, in conclusion, we found that the Spirit II E-210 model is just a fancier version of the Spirit E-210 because of the variety of features that are offered. You will get a few differences, and there is a major change in design too. There have also been some improvements in the process of operation.
But the only issue is that you will not be able to fold one side of the table as we already mentioned. That might make it slightly difficult to store away in case you have to.
What We Like
Large cooking area
Open cart design
2 giant wheels for better support
Quick ignition system
What We Don't Like
One side of the table is not foldable
Weber Spirit II E-310 and Weber Spirit E-310: A Comparison
Just like the Spirit E 210 models, the Weber Spirit II E-310 and E-310 also have certain similarities and differences. The E-310 was released in 2013, and that was followed by the Weber Spirit II E-310 in 2018 with some upgrades. In the next section, we have discussed them individually for your benefit.
This is a model that was initially released as an alternative to the E-210 and has been very successful in the market. We have discussed its features in the section below.
Performance
This product comes with 3 burners instead of 2 like the previous models and boasts 32,000 BTU per hour when it comes to cooking power. You can rest assured that the heat will be evenly distributed and the food will be cooked completely.
Next, there are angled flavorizer bars that prevent the grease from dripping into the flames. The grease then creates a flavorful smoke that adds more taste to the dishes. Also, the excess grease is directed towards a funnel that then leads to a drip tray below. This makes the food healthy, and you can easily clean the grease by taking out this tray.
Moreover, it keeps the burner flames in check and prevents flare-ups. The burners do not clog as the grease does not reach them, and you can expect it to work for a long time.
Cooking Surface
Although it has a compact body, this has one of the largest cooking surfaces. You will be getting 529 square inches of cooking surface. This includes 105 square inches of warming area, and the rest can be used for cooking.
Moving on, you can use this for making meals for 5-6 people easily. There are hooks on both sides where ladles and spoons can be hung so that you can reach out to them quickly while in the process.
Build
This is another compact unit, and it measures 52 inches in breadth, 32 inches in length, and 63 inches in height. Hence, it will not take up too much space, and the best part is that there are 2 foldable side tables. This helps in storage, and you can fold them down when not in use.
Coming to the materials, the item is made of stainless steel with a porcelain-enameled top which is very sturdy. The grills and the flavor bars are made of cast iron and then coated with porcelain. This makes it look attractive, and it can withstand high heat easily.
Now, when talking of storage, the Spirit E-310 has a lot of storage area, and you can keep your cookware easily. There is a steel door which will hide all the kitchen equipment away, giving you a clean look.
Then 4 casters will ensure easy portability. You can move the grill about easily, and the front wheels can be locked too. This will prevent it from moving side to side and provide more stability while using it.
Assembly
This is one area where there is a slight drawback as the device does not come assembled. The manual is not very clear, too, and you might take some time to put this together. This is heavy and weighs 120 pounds, and we will suggest taking the help of a friend or spouse to put it together.
Once it is completely assembled, there is nothing more to be worried about.
Usability
There are knobs placed right at the front, which will let you adjust the temperature of each burner. This is possible with 3 separate knobs. Also, it features an electronic crossover ignition system, and that makes it easier to switch on. All you have to do is push a button, and that will ignite all the 3 burners.
This single button added to the convenience offered, and we did not have to spend much time on it.
Next, we will talk about its fuel gauge, which is built-in and which will help you understand the gas level in the tank. If it depletes, you can immediately refill without disturbing the grilling process.
And that’s not all, you also get a thermometer placed in the hood, and that will measure the temperature. This will let you achieve the perfect temperature while preheating or cooking.
What We Like
Foldable side tables
Grease management system
Well-spaced burners for even cooking
Electronic crossover ignition system
What We Don't Like
The instruction booklet is not clear
Weber Spirit II E-310
This is an improvised version of the previous model that we discussed. We were impressed with the excellent performance, reliability, and quality offered. And now we will be discussing all of it in the following part.
Performance
The Spirit II E-310 has 3 burners but a slightly lesser heat capacity of 30,000 BTU per hour. Now we will not hold this as a drawback as the difference is not much. Moreover, the 3 burners can be operated separately, and you can manage the heat settings differently for each. They are spaced out and allow equal and even heating throughout the surface.
Next, you will find cast-iron grates that have a layer of porcelain. These can be reversed and used and will help the food get those perfect grill marks. It also retains heat and will keep your food warm for a while.
Coming to the flavorizer bars, they remain the same and will provide you with similar protection from grease.
Next, there is another feature that stands out and that is Weber’s iGrill 3 Bluetooth thermometer. This is introduced in the new model, and it will help you monitor the cooking temperature and fuel level via your phone. But yes, you will have to purchase it separately.
Cooking Surface
This provides a large cooking area of 425 square inches with 105 square inches of warming rack. The cooking space is very similar to that of the previous model, and you can expect similar results.
Build
The Spirit II E-310 is slightly more compact than the previous model and takes less space. It measures 52 inches in length, 26 inches in breadth, and 57 inches in height with the lid open. So, now you know that it is smaller when compared to the E-310 original option.
Now moving on to the side tables, this one poses a slight problem as only one of the side tables can be folded. The other one remains in place, and that means in case you want to store it, more space will be required.
Further, the grill is designed like an open cart with enough storage space. You can keep all your accessories and kitchenware in the cabinet. The gas tank here is kept outside this cart and not in a closed place like the previous device. This makes it easier to access the tank. But yes, it is best to keep this away from kids.
The next point of difference is the wheels as this one comes with 2 large wheels and 2 thick legs. The wheels will allow easier movement on rough terrains, while the legs will provide it with more stability.
This is accompanied by a 10-year warranty which makes it a very cost-effective choice.
Assembly
The griller is more compact and lighter than the previous model. However, the installation and assembly process is a bit complicated, and you might require a lot of time to get this in place. We will suggest that you call up customer care in case you face any difficulties. But once you have set it up, it will work out well.
Usability
Like the previous product, this has 3 knobs which will let you control the different burners. This is also similar to the previous option, and then there is a thermometer in its hood which will help you check the temperature.
Further, the igniter has gone through a transformation, and you will be getting an infinity ignition system. This is way better and more reliable than the crossover system.
What We Like
Backed by a 10-year warranty
Works with iGrill 3 technology
Open cart design with more space
Hooks for storing spoons and ladles
What We Don't Like
Difficulty in assembling products
Weber Spirit Grills Specifications
Having extensively reviewed each grill, let's delve into the similarities and differences between these grills. Key similarities include the shared fuel type, the number of side tables, and the type of grates used. Regarding differences, both E-310 models come with an extra burner, and are larger in all dimensions, providing a more expansive cooking area and a larger warming rack. The Spirit II models are slightly smaller in size, albeit with more weight. Listed below is a table of the Weber Spirits Grills compared in BTU per hour, dimensions with the lid open and the lid closed in inches, cooking area in square foot, weight in lbs, number of burners, type of fuel used, side tables and grate provided:
You must have seen that each product comes with several factors, including advantages and disadvantages. We were initially overwhelmed with so much information, and then we decided to break it down into points. This should help you make an informed decision in the long run.
Size And Build
It is essential that you check the amount of space that is available in your home and then purchase a product. If you want to keep your grill outdoors, then look for a convenient space and measure it. Compare the space with the size of this and then only go on to purchase.
Further, decide whether you want to keep the grill in one place or take it around. If you plan to move it from the house to the yard often, then get one with strong and big wheels. The wheels should be able to move on even rocky surfaces too.
Number Of Burners
This will depend on the number of people that you plan to cook for. If you have a family of 2-4, 2 burners should be enough as that will allow you to cook for 2-3 people at one time. On the other hand, a bigger group would need you to purchase one with 3 burners.
Now some products have burners that can be individually controlled, while in some, this feature is missing. Your choice should depend on the kind of requirements that you have.
Next, you should look at how the burners are placed as that will ensure even cooking. In the case of Weber grills, the burners are distributed over the entire area with equal gaps in between. This ensures uniformity in heat distribution, and we were happy with the results.
Grates
Now, grates are an essential part of grilling, and they are responsible for providing proper grill marks on the food. Bad or inefficient grates would lead to the burners clogging up and the food getting burnt. So, always opt for cast-iron grates with porcelain enamel or thick stainless steel ones. These are durable and offer excellent heat retention capacities.
Also, porcelain grates are very easy to clean, and you can simply wipe them. We would recommend this to save you time while cleaning.
Next comes flavorizer bars, which are present along with the grates. These bars prevent grease from entering the burners and clogging them. The grease that collects on it is smoked, and that adds more flavor to the food. Also, it leads excess grease away from the gas and into a drip tray.
Materials Used
If good material is used to make a grill, it will last longer and provide more value for money. We suggest that you choose an option that is made of aluminum as it is pretty sturdy and resistant to rusting. It can also be made of stainless steel, which is a great alternative and provides enough sturdiness.
Since these products will see a lot of moisture and stains, they have to be resistant to both. Hence, it is best to get grates that are coated with porcelain.
Cooking Area
While purchasing a product, you will have to take into consideration the size of the grilling area. If you have a small family, then an area of 250 to 350 square inches should be enough. This is perfect for 2 people, and you can cook at one go.
But if you have a medium-sized family, then you can opt for 450 to 500 square inches of cooking area. And for parties and large gatherings, purchasing one with 500 square inches or more is the best. That way, you can cook in large batches and get done with the process faster.
How Long Do They Last?
Weber grills can easily last for up to 10 years or more if you keep them clean and take care of the parts. Some will come with a 5-year warranty, while others will come with a 10-year warranty.
Where Are These Grills Created?
Most of these grills are made in China or the USA. It mostly depends on which model you choose, and the country will be determined according to that.
What Are The Color Options?
Black is the most common color that people choose, but there are other options too. You can choose among red, ivory, black, sapphire blue, smoke, and crimson red. There are limited pieces in copper color too.
Conclusion
The quality of a grill is the most important thing that you should look for while making a purchase, and Weber provides you with excellent quality. You must have learned about the 4 models in the previous sections, so choose as per your requirements and that should work out well.
Moving on, there are some differences among the Weber models, but all of them will give you a smooth experience. However, the newer and more advanced ones come with a few extra features and can be a bit more efficient than the original ones.
But in case you are looking for a simple grilling device, the older ones will serve you well too. With this, we will take your leave.
Let us know if you have any further queries in the comment section below. Until next time. Happy shopping!
Chickens are fascinating creatures, which is why many homeowners enjoy raising them. If you’re looking for the best floor options for chicken coops, keep reading.
It's relatively simple to breed and raise chickens - all they require is a safe, cozy place to lay fresh eggs and have access to food and water. While most people ponder over the best food and coops for their feathered pets, only a few pay attention to the flooring.
There are dozens of chicken coop floor options on the market. Some are easy to clean, while others are easier to build. Moreover, some floors are excellent barriers that keep predators away.
In this guide, we will tell you about the various floor options for chicken coops. Surely, you want to ensure that they are happy, healthy, and safe, right? Well, getting them the right coop floor can be one of the most vital aspects of their safety and happiness.
So, without further ado, let's explore the various options.
Best Floors For A Chicken Coop
Why Is Flooring Important In A Chicken Coop?
The flooring option you choose can adversely affect your pet chickens' mood, health, and happiness. Typically, one notices that chickens from various regions of the country prefer different kinds of flooring for their coops.
However, certain flooring options are better suited than others. So, you need to consider the weather, climate, and temperature of your region when opting for the most suitable chicken coop flooring.
Moreover, if the area is prone to attacks from predators, you need to consider a flooring option that will be a natural barrier for them. It is also important to consider whether your chicken coop is above ground level or on the ground.
Now, let us tell you about the different options of chicken coop flooring you can consider.
Chicken Coop Flooring Options
Wooden Floor
We begin our list with one of the most common chicken coop flooring materials - wood. There are various reasons for it being so popular, including how readily available it is. Moreover, wooden chicken coop floors are relatively easy to build and maintain.
Below, we will mention the main advantages and disadvantages of using plywood and non-plywood floors for chicken coops.
Plywood Chicken Coop Floors
Plywood floors are one of the most durable and sustainable options for chicken coops. Moreover, they are easy to clean, as long as you remember to use bedding. If not, you may find it slightly challenging to remove chicken droppings, which often get embedded between the cracks of the flooring.
Furthermore, wooden flooring is easier to clean and maintain if you lay a barrier over it. This can be in the form of a rubber mat, a flex seal spray, linoleum, or vinyl.
Another essential point to remember is to install plywood flooring in coops that are not ground level. This is because the plywood may be exposed to moisture and, over time, will begin to damage and rot. As such, plywood flooring is recommended only for chicken coops that are installed above ground level.
Pros
Easy to clean (if bedding is used)
It keeps rodents and predators out
Easy to build
Low cost
Readily available
Cons
It may be tricky to clean if you don’t use bedding
May rot if exposed to moisture
Non-Plywood Chicken Coop Floor
You can always opt for non-plywood chicken coop flooring, as it is low in cost and readily available. However, bear in mind that it is also more challenging to clean.
If laid well, non-plywood wooden flooring can be an effective barrier against rodents and most predators. They find it incredibly challenging to gnaw or burrow their way through the hard wooden surface, which keeps your chickens safe.
Furthermore, these floors are relatively easy to acquire and build. Most buildings already come with small, wooden storehouses that are typically converted into chicken coops.
All said and done, wooden floors are prone to damage and rot, even if they have been protected. Using a seal will enhance the lifespan of wooden chicken coop floors and enable easier cleaning and maintenance. However, they need to be replaced sooner or later.
Pros
Easily available
Low-cost material
Easy to build
Keeps chickens safe from predators and rodents
Cons
Will eventually rot
Difficult to clean
Concrete Chicken Coop Floor
Moving on to the second flooring option, we have concrete chicken coop floors. Concrete is one of the best flooring options you can install for several reasons. However, concrete floors are best installed in places with ground-level coops and a stable, even surface. These floors are easy to clean and sanitize.
However, a significant reason to opt for concrete floors is that it is instrumental in keeping rodents and predators out of the coop. No predator will be able to burrow or gnaw their way through concrete floors, keeping your chickens safe and out of danger.
Keep in mind that this flooring option is permanent - once you lay the concrete flooring, you can only build upwards from there. However, this also gives the floor enhanced stability and durability, making it an excellent, long-lasting option for most.
While you can opt for DIY concrete flooring, it is best to get professional help with this one. Laying the concrete down can be slightly challenging, especially because you have to ensure that it is evenly set. Moreover, it requires some tools and manpower. This can be slightly expensive, but it is a more permanent and stable option for chicken coop floors.
Pros
Easy to clean and low-maintenance
Extremely durable and long-lasting
It keeps rodents and predators out
Suitable for those looking for a permanent flooring option
Convenient to disinfect
It stays cool during warm temperatures
Cons
Expensive installation
May cause injury to the chickens’ legs
Permanent and non-portable
Dirt Chicken Coop Floor
Using dirt as chicken coop flooring can be an obvious option for many. To begin with, there is an abundance of it, so it will be an extremely affordable option (it could even be free if you are resourceful enough). Moreover, chickens might find dirt floors to be a rather natural and safe option.
However, dirt flooring comes with its own set of restrictions and issues. Firstly, you need to ensure that the dirt is safe and hygienic. Since the chickens will be living in, sleeping in, and laying fresh eggs here, acquiring dirt that isn't infested with worms, rodents or diseases is imperative.
Secondly, maintenance and cleaning can be a huge issue. Most people may find themselves overwhelmed with this type of flooring as cleaning it using a vacuum cleaner, broom, or cleaning products is out of the question.
Furthermore, you might need to replace the old dirt with some new ones regularly. Once you lay the dirt flooring, you will also need to level and smoothen it. However, bear in mind that this pristine look will not last for long - the second your chickens enter the coop, they will spread the dirt all over the place. All in all, there will be complete chaos.
Lastly, rodents and predators might find it a comfortable and viable hiding spot. Although most chickens are omnivores and might end up eating the rodents, the diseases they carry may be a cause for concern.
Pros
An inexpensive or affordable option
Abundant and plentiful
Easy to lay
Can place a covering or mat over it
Cons
It may be home to diseases and germs
Will not deter rodents and predators
Tricky to clean and maintain
Wire & Batten Chicken Coop Floor
Using wire and batten flooring in chicken coops is an easy option; however, your chickens might not be very fond of them. Moreover, rodents and predators will find getting through this barrier effortless.
Batten flooring refers to evenly spaced planks of wood laid across a chicken coop. Livestock wire or any other kind of soft wire is laid over this surface. This allows waste products and other residues to fall through the wiring and down, under the batten flooring.
Although most people might opt for chicken wire, it is relatively weak and not something we would recommend. Instead, you can opt for welded wire or hardware cloth. These materials are far more durable and sturdy. Moreover, they are easier to clean and will also keep away predators and rodents.
Overall, however, wire flooring may be detrimental to the chickens' health. They are prone to getting their feet or claws stuck in the wires, causing significant injury over time. Moreover, all droppings or dirt may not fall through the wires easily. You will need to clean this flooring periodically, raising each section of wire, cleaning it, and allowing it to dry.
Over time, this may cause the wood below to rot and damage. Eventually, you will have to replace the entire flooring - which is not as expensive as it is cumbersome.
Pros
Waste and dirt may fall through easily
Inexpensive and easy to install
No bedding may be required
Adds ventilation in the case of raised coop floors
It could be a sanitary option for chickens (as the droppings fall below the wire)
Cons
Can injure the chickens’ feet and legs
Rodents may be able to pass through
Not very easy to clean and maintain
Requires periodic replacing
The coop might become too cold or drafty during certain conditions
Plastic Chicken Coop Floor
Plastic floors are relatively common for chicken coops. However, they may not be the most sustainable option, especially for larger areas. Plastic floors are best suited for smaller coops that have raised floors.
There are several ways to customize plastic chicken coop floors. You may opt for slotted nesting floors that give your chickens a safe, cozy place to lay their eggs. That being said, there is no guarantee on how they will react to this type of flooring, and if they will use the slotted nests or not.
Furthermore, you can also opt for flat plastic lining or slide-out trays. These may be easier to clean and maintain but are not sustainable over time. Moreover, it may not allow proper ventilation. While it can keep predators and rodents away in theory, most of them may be able to burrow their way through the plastic and reach the chickens.
Long story short - plastic floors are surprisingly durable and easy to clean and disinfect. However, they are not very sustainable in the long run. You can always add a soft bedding material over the plastic floor to make it more comfortable and cozy for your chickens.
Pros
Durable and sturdy
Long-lasting
Easy to clean and disinfect
May keep away rodents and predators
It can be used with bedding
Cons
Not a sustainable or eco-friendly option
Not suitable for large coops
Rubber Mat Chicken Coop Floors
To be fair, rubber mats are not a flooring option. Nonetheless, they can be used as excellent cover material for all other kinds of flooring. The most common surface floor that people use under rubber mats is wooden or concrete ones.
This material is such a popular choice because of how convenient they are to clean and maintain. Moreover, they are an extremely accessible and affordable option for most.
Furthermore, rubber mats are easy to cut and fit to size. As such, you can purchase a large rubber mat and cut it to fit any shape and size flooring for your chicken coop. You can also find larger and thicker variants of rubber mats, which may be suitable for large coops with larger flocks.
We recommend using some kind of bedding material with rubber mats. This will protect the surface of the mat and create a more cozy and comfortable living space for the chickens.
Pros
An accessible and affordable option
It can be cut easily to fit different size chicken coops
It sticks to the floor naturally without any glue, tape, or adhesives
It is easy to clean and replace
Very durable and long-lasting material
You can use it as a cover for various coop floors
Not slippery and adds an extra layer of protection to the floor
Cons
The initial cost might be slightly pricey
Rodents may be able to gnaw their way through the mats
Linoleum & Vinyl Chicken Coop Floors
Although most people tend to confuse the two, linoleum and vinyl are different materials. Linoleum is typically made of solidified linseed oil (linoxyn), wood flour, ground cork dust, pine rosin, and mineral fillers (like calcium carbonate).
On the other hand, Vinyl is made of PVC chips that are compiled into thick, dense sheets of varying thickness using heat and pressure. However, it is essential to note that most materials used in vinyl are toxic to chickens. We highly recommend opting for other flooring options, as vinyl can adversely harm your chickens' health.
Tip - Use bedding material with linoleum or vinyl floors. These floors can be too slippery and can cause your chickens' to injure themselves. Using good bedding material can prevent this. Furthermore, it is better to use staples to fix the material rather than glue (as glue may be toxic).
Pros
Easily available
Easy to build
Low in cost
Convenient to clean, disinfect and maintain
May prevent wood rot
Cons
High-quality materials may be expensive
Vinyl is toxic for chickens
It may be slippery and can cause injury
Chicken Coop Flooring Covering Material
Now that you know about the various flooring material you can choose from, certain factors will determine your choice. You need to consider factors like the climate, your flock's size, whether it is an above-ground or ground-level coop and your budget.
However, installing the right flooring material is not enough. The next step to ensure that your chickens are happy, safe, and comfortable is to opt for the most suitable floor covering material. Fortunately, there are several to choose from.
Allow us to discuss the floor covering material choices you have and how you can pick the right one for your chicken coop.
Paint
If you have gone through the section on wooden floors and their advantages, painted plywood has the same advantages. However, one added advantage causes many to opt for paint as a floor covering material - it protects the wooden surface against wood rot.
That being said, if you plan on using bedding material over a wooden chicken coop floor, you may as well skip using paint. There are a couple of cases where we recommend using paint as an additional cover, even if you use bedding material.
Those planning on doing an annual deep cleaning of their chicken coops may use paint as additional protection. This is primarily because you are likely to use a fair amount of water and other chemicals while deep cleaning.
The layer of paint will provide an added protection that will enhance the lifespan of the coop floor and prevent rot and damage. Moreover, those who do not use bedding may find the wooden flooring prone to damage and rot due to persistent exposure to moisture and droppings.
Tip - Always keep a close eye to check whether the layer of paint is peeling off or not. If you notice any paint chipping or peeling, it is best to replace it with new paint or add a seal. Your chickens are very likely to devour the peeling paint, which can be toxic for them.
Pros
Easy to apply
Long-lasting finish
Adds an extra layer of protection to wooden floors
It is easy to clean and disinfect
Cons
The chickens may pick on or eat the peeling paint
Sand
If you talk to other chicken owners, you will come across two distinct views about using sand as a covering material. Some people love it, while others hate it. There is no in-between. However, in your case, you can choose to experiment with this material and check how you and your chickens react to it.
If you opt for sand as a bedding material, make sure you use construction sand. Moreover, you will need to level it before allowing your chickens to enter the coop with their new floor covering material.
Typically, sand provides an eco-friendly and affordable option for most people. Since it doesn't retain much moisture, it provides a dry, comfortable resting and living space for your chickens. Moreover, it allows better draining of their droppings and waste. However, there are several reasons for not using sand as well.
Firstly, it can get extremely cold in winter and prove an uncomfortable resting surface for your chickens. Inversely, it can get too hot during the summer months, burning or injuring their feet. Finally, sand is an excellent breeding ground for bacteria, worms, and other pests that can harm them.
Pros
Provides better drainage and does not retain too much moisture
It dries out bird droppings, causing lesser growth of bacteria and contaminants
It is an eco-friendly and sustainable solution
It is affordable and easy to find
Cons
The surface can get too hot during the summer or too cold during the winter
It is a breeding ground for bacteria and germs
It does not provide adequate insulation
Straw Or Hay
If you live in dry or non-humid climates, you may find straw and hay to be one of your best options. This material is often used as a floor cover because of how easily accessible, affordable, and abundantly it is found.
Moreover, it gives the chickens a relatively natural ecosystem to thrive in. Most chickens seem to love straw and hay beddings. They are also very likely to comfortably lay eggs in this bedding material because of how soft, warm, and natural it feels.
That being said, hay and straw are not suitable for climates with high humidity or are wet. This is primarily because the material tends to absorb and retain moisture, emanating a wet and musty smell over time. This is not only an uncomfortable living space for your chickens, but it can be harder to clean for you.
Pros
Feels natural and safe for chickens
Easily found and very cheap
It can be replaced conveniently
Provides warmth, insulation, and comfort
Cons
It can get wet and musty in places with high humidity
Pine Shavings
Many people often mix pine shavings with hay or straw as it provides a natural and warm bedding material for chickens. However, it is most commonly used because of how easily and abundantly it can be procured. You can purchase bags of pine shavings at any feed store for a reasonable price.
Another excellent and compelling reason to use pine shavings as a floor covering material is how easy it is to clean. You can use any tool, such as a fine-tined pitchfork to remove droppings and dirt from the chicken coop. Moreover, replacing the shavings is extremely easy and convenient.
However, before laying the shavings in your chicken coop, ensure that there are no bits of fine metal pieces in them. This happens all too often, and chickens are prone to devouring anything shiny that catches their eye.
You also need to ensure that the shavings are of an appropriate size for the chickens. Too large, and they will not be absorbent enough. However, if they are too little, they can be easily consumed by the chickens and even cause respiratory issues.
Beware - not all types of wood are suitable for chickens. Black walnut, oak, and cedar can be very dangerous for them, so ensure that you use only the right kind of pine shavings.
Shredded Paper
While you can choose to purchase bags of shredded paper, most people end up making their own. Any paper that you shred in your home or office can be used as an excellent bedding material for chicken coop floors.
There are several advantages to using shredded paper. Firstly, it provides excellent insulation, warmth, and comfort to the chickens. Moreover, it is a highly absorbent material. That being said, it is necessary to clear the old, soiled material and replace it with new ones periodically.
Failing to do this will cause the chicken coop to become dirty, very fast. Moreover, the soiled shredded paper will be wet, causing wood rot and damage. It is extremely dangerous for the chickens as well, as they are likely to trample on their droppings and even lay eggs in the dirty, soiled material.
Pros
Provides excellent warmth, insulation, and comfort
It can be made at home or purchased at a very reasonable price
It is easy to clean and replace
It is absorbent
Cons
It gets dirty quickly and needs regular cleaning and replacing
Pea Gravel
Any kind of rounded gravel similar to pea gravel can be used on the floor of chicken coops. While most chickens enjoy this material as they can scratch and kick it around, it can get a little tricky to clean. However, you can choose to pick the droppings or dirt from the material, but this can be a time-consuming and laborious affair.
Moreover, using water to wash the material can cause the droppings to get stuck underneath the material. Over time, it will decompose and start to smell - which is uncomfortable for you as well as your chickens.
Pros
Easy to lay
Relatively easy cleaning
Conveniently found
Chickens enjoy scratching the material
Cons
Needs periodic replacing
It is not a sustainable option
For most people, choosing the right flooring and covering material is a matter of trial and error. You also need to observe and gauge the reaction of your chickens. Moreover, some materials are easier to clean and maintain than others.
If you are still confused about which material to choose, don't worry. We have curated a guide to help you find the right flooring material for your chicken coop that will keep you and your chickens happy.
How To Choose The Best Floor For A Chicken Coop
The Size Of Your Flock
One of the first and most essential considerations to make is the size of your chicken flock. Typically, each chicken should comfortably have about two to four square feet of area in a coop. Keeping this in mind, you also need to select a flooring material that allows them to thrive comfortably.
Those with smaller flocks can opt for material like sand, wire, and linoleum for their chicken coop floors. Because of the flock's smaller size, you may find it much easier to clean and maintain these flooring materials.
However, those owning larger chicken flocks may need to opt for a more durable and sustainable flooring option. Concrete and plywood are good options. However, you must use the right bedding material to ensure that the chickens are comfortable. In the case of larger flocks, you also need to opt for a material that does not require frequent replacing - like sand.
Permanent VS Temporary
If you don't plan on moving anytime soon, opting for a long-lasting and durable chicken coop floor option might be best. In that case, wood, linoleum, and concrete might be ideal options. Although the initial installation may be time-consuming and slightly expensive, it works out for the best in the long-run.
Moreover, these materials are more durable compared to wire, rubber mats, and sand. In the case of concrete and wood, you can add additional layers of protection that will keep the flooring material safe and provide your chickens with a more comfortable living space.
On the other hand, if you plan to move, it might be best to opt for inexpensive flooring material. Installing wood and concrete may turn out to be a wasteful expenditure, as you will need to go through the entire installation process again for the next chicken coop.
Your Budget
It is essential to consider your budget when installing any addition. It is best if you work out a budget beforehand, so you don't end up exceeding it by a significant amount.
That being said, you should research beforehand to find out the most reasonable prices of flooring material. You will also need to work out the amount of material required for the chicken coop you own.
Keep in mind that some materials may have a higher initial cost, but they are also easier to clean and maintain. Rubber mats, linoleum, vinyl, and wood are some options that might be slightly expensive initially but are an excellent long term investment.
Where You Stay
The place you stay - its weather, climatic conditions, humidity, etc. all play a significant role in deciding the best flooring material. For example, if you live in an area that experiences harsh summers or winters, sand and wires may not be the best choice.
However, plywood, concrete, and rubber mats may be the ideal option for these regions. Rodents and predators lurking around the chicken coop also need to be factored in.
In case you notice a large amount of rodents and predators, opting for a more substantial, durable, and impenetrable material like concrete, plywood, and linoleum may be best. However, if there are not too many predators and rodents to be wary of, you can opt for wire, sand, and other such materials.
Cleaning And Maintenance
Depending on how much time and effort you are willing to put into regular cleaning and maintenance, your options of flooring materials will vary. While sand and wire floors are easy to find, abundant, convenient to install, and even replace, they can be challenging to clean and maintain.
Of course, if you are willing to do it yourself or hire help, you may be able to opt for cost-effective flooring material.
If cleaning and regular maintenance become tricky for you to manage, it might be best to opt for other flooring material. Concrete, plywood, and linoleum floors are relatively easy to clean, maintain, and disinfect. However, the initial cost of these materials may run slightly high.
Durability & Sustainability
As we have discussed earlier, certain flooring materials are more durable than others. As such, concrete, plywood, linoleum, and rubber mats are the most durable and sustainable flooring materials you can opt for.
Sand, wire, and wood, on the other hand, are not as durable. They need to be replaced frequently, and cleaning between the cracks of wooden planks can be extremely challenging. Plastic is another option you can consider, as it is reasonably easy to clean and maintain.
Installation
This is another factor that you may need to consider. Some flooring materials are easy to install, which automatically makes them a popular choice amongst chicken owners. Materials like wood, rubber mats, wire, linoleum, vinyl, and plastic are relatively easy to install compared to concrete.
That being said, concrete will also last much longer than any of the materials mentioned above.
Frequently Asked Questions
Can you use vinyl flooring material for your chicken coops?
We highly recommend avoiding vinyl as a flooring option for your chicken coop. The primary reason is that this material contains lead and other toxic ingredients that are hazardous to chickens. If consumed, it causes massive gastrointestinal and even neurological issues in them.
Moreover, if the chickens or eggs are consumed by you and your family (or anyone else), the issues can easily be passed on. It is best to avoid vinyl; however, if you must use it, ensure that you use proper bedding material to cover it.
How often should you change the bedding for chicken coops?
Well, this depends on the kind of bedding material you choose and the size of your flock. Other factors like the weather and climate and the amount of waste and droppings can also cause the frequency of changing bedding material to vary.
It is best to keep a keen eye on the bedding material regularly. As soon as you notice droppings, dirt, or foul odors, it is best to clean or change the material. This will also make your chickens more comfortable and prevent contamination and the spreading of germs and diseases.
What is the best chicken coop floor liner?
One of the most popular options for chicken coop floor liners is Rubberized Roof Coat Material. You may notice most people recommending this material as an ideal lining or cover for chicken coop floors.
Since it is incredibly affordable and easy to find in most stores, it is a popular choice amongst many. Moreover, this material is designed to protect surfaces like roofs and floors against extreme weather conditions.
It contains a coating of rubber that provides a tight seal of the chicken coop floor. The best part about it is that it becomes adhesive very quickly and does not tear, chip off, or crack.
How do you apply rubberized roof coat material on chicken coop floors?
You will find tins of rubberized roof coat material easily in most stores. To begin with, you need to stir the concoction thoroughly. Apply a generous amount of the material on the floors and spread it using a paint roller. Ensure that you apply a thick coat, as it will eventually spread and thin out.
What is the best flooring material to keep away predators and rodents?
The best flooring material that will deter rodents and predators is concrete. However, wooden floors may also be a good option as long as the spaces or gaps between the wooden planks are not too large. You can also use rubber mats or paint to seal the floors, adding another layer of protection.
How do you fill the gaps between wooden or concrete floors?
You may use rubberized roof coating material to fill the gaps between wood and concrete floors effectively. However, you can also choose to apply bedding materials. Alternatively, you can cut and fit rubber mats to act as a protective barrier over the flooring surface.
Final Words
As you may have noticed, there are many options for flooring and bedding materials for chicken coops. The choice you make will finally depend on various factors like where you live and your flock's size, amongst others.
Those looking for a stable, durable, and long term solution may find concrete and plywood to be their best options. As such, wire and sand may be the least ideal options as they can injure your chickens and be extremely uncomfortable and unsustainable in the long run.
You can opt for straw, hay, or pine shavings as the most suitable options for bedding materials.
Well, we hope you enjoyed going through our comprehensive guide. In case you have any more questions, please feel free to reach out to us in the comments section below. Also, let us know which flooring material you chose for your chicken coops and why.
Are you looking forward to building a suitable chicken coop in your backyard?
Well, the first thing you need to do is to choose a plan that will fit your needs and give your chickens the right room to stay in. A portable coop plan lets you be more flexible in designing your coop and is also a popularly chosen option. So, it will be an ideal style to go for.
But there are a multitude of portable chicken coop plans available across the internet. As such you might get confused while searching for a plan that will fit your requirements.
To make your task simpler, we have selected the 30 best options for you. Also, we have included the details of the materials to be used, the structure, and a few instructions for each coop plan.
Read on to know more.
Portable Chicken Coop Plans
Classic A-Frame
If you want your chicken coop to be easy to manage, you will love this classic coop with an A-Frame shape. It has a whole lot of amenities that you can’t help being impressed with.
First of all, it has a large living area that is fit for breeding lots of chickens. Added to this, durable wheels help easy movement, while convenient handles enable pushing and lifting. Thanks to the sturdy material of the wheels, there is also not much wear and tear during the movement.
Most importantly, the coop can be moved to your grass lawn whenever you feel. In this way, the chickens could have sufficient insects and grass to graze on.
Also, the A-frame helps you to cover the lower portion easily during inclimate weather for added protection. Even placing water and food within the coop is not much of a problem.
Vacation Home
This one truly looks great and seems like it would be perfect for any beachfront. It has a run styled like a porch and a cute ‘upper-story’ living area. Equipped with wheels and handles, it is quite easy to move from one location to another.
Note that this coop is ideal if you have 8 to 10 chickens or a few more. The design is a very simple one and has few angular ends. There are quite a few segments so as to house more chickens than the tractor-shaped ones.
To make the plan a reality you can start by forming the structure through rectangular wooden blocks. Then move on to complete the coop through old treated plywood pieces and discarded vinyl floorings. These can make the walls and floor of the ‘vacation home’ respectively.
Besides, large windows can be made by cutting through the plywoods, but the openings must also be covered by hardware cloth. As such, the ventilation would be perfect for both scorching summers and freezing winters.
On The Go
Being one of the most innovative plans that you will come across, this would let you move the chickens just about anywhere. What does the magic is a combination of supportive and strong frames and large and durable ties.
Interestingly, this coop is made to look like a hutch and consists of an enclosure with both an outdoor and indoor area. Also, an external door lets the chickens free-range and forage prior to returning to the safely built coop.
To construct this coop, you just have to centralize the weight of the hutch so as to balance the gravitational centre of the two-wheels used for movement. Once this is done, your on-the-go chicken coop is all set to be used!
As for the number of chickens that can be housed, it can range from a dozen to more than 30. However, this doesn’t make any difference in the ease of movement, thanks to the balancing of the wheels. Also, the wire mesh windows keep away any predators, thus providing complete safety to your chicken.
Compact Hen House
If minimization of space is a priority for you, this plan would be the perfect option to go for. It is designed to be upright and compact and is meant for keeping a few hens.
Though its size is smaller than other coops, it has sufficient room to provide optimal comfort to the chickens. The structure is such that it provides a lot of vertical space, which is ideal for chickens as they roost in perches above the ground level.
Constructing this coop is simpler to many others and just requires wood pieces, fencings, pallets, wire mesh, a roofing sheet, and other odds and ends. As for the cost involved, it is just that of the PolyCarb sheet used for the roof and the wire mesh for the windows.
However, the process can be a bit time-consuming, since you need to get rid of nails and break down pallets from the fencings and wood pieces. But then, the completed coop will have two doors on the bottom “run” and two at the top, along with medium-sized wheels. So, it’s definitely worth the effort!
PVC Run Framework
Giving your chickens more space for roaming while also keeping them safe might seem tough on the face of it. But with this coop plan using a PVC framework makes this super easy to achieve. All you need for building this one is some fittings, nettings, and PVC pipes.
Ideally, hens should be given the freedom to roam in your backyard and scratch up some insects. In this regard, a coop made primarily from PVC pipes is quite convenient. It provides a protected space that you can move to different areas of the yard.
And the best bit of the story is that the whole thing can be put together in a matter of minutes. It may be done with or without tools, cutting, or glue.
Wrapping the safety netting around the PVC frames and securing the ends with wire ties may seem a bit difficult. However, two people working together on it can make the task much easier.
Cottage Classic
As the name suggests, this coop looks exactly like a mini cottage on wheels and is actually a diy chicken tractor. While turning this plan into a reality, you can make as many modifications as you desire to make it exactly like you want it to be. The result? Your chickens can have a ‘luxurious’ home.
However, the fun fact behind making this coop is that most of the things required are obtained from lay-offs of old structures. Wood pieces can be obtained from garden sheds or fencings, while wheels can be gathered from old mowers. You only need to buy the hinges for doors and the wire-mesh.
Also, as lovely as it looks from outside, it has an unbelievably easy design. While the ‘cottage’ part is meant for the living area and the nesting, the extended part built by pieces of rectangular fencing is the run area.
The rectangular pieces are also extra long to make for handles so that it becomes easy to pick the coop up. Apart from this, a medium sized window and a small hole at the back for ventilation make the coop complete.
Chicken Wagon
You might not have thought about it before, but an old trailer dumped in the backyard can act as a great foundation for your chicken coop. In fact this is the best possible way to reuse a trailer instead of letting it be trashed in a dump. Your coop will have great potential for placement as well as addition of run areas.
For making the living and nesting areas, you can take inspiration from the structure of gypsy caravans. Materials that can be used are odds and ends of rough wooden planks and frames of old windows. Interestingly, T posts can be used to make a sufficiently large portable yard and also to move the coop around easily.
As many as 8 nest boxes can be made inside the coop and you can access those from behind the doors. Storage areas are also present below and above the nest boxes. Also, there are two kinds of doors suitable for use in different climates.
Chicken Barrow
With this chicken coop plan, you can give the home for your chickens a different look altogether. It can be made by following some easy steps and only requires a few basic tools and supplies. Such a coop can also fit well in any backyard and is a quite budget-friendly idea to go ahead with.
This coop plan gets such a name due to its wheel-barrow-like shape. The design is actually referred to as a “hoop-house”. For the base, a rectangular piece of plywood with dimensions of about 8’x3’x3’ has to be used.
For the arched ends of the barrow, jigsaws have to be used to cut out the arch shape. One one end there is a nesting box with a hinged lid while the other end has a door cut out in between.
Ball-bearing wheels must be attached to base, and PVC pipes must be fitted as support for constructing the cover of the barrow coop. Thereafter, both chicken wires as well as welded wires are attached to cover the coop.
House in the Woods
Is building a cabin in the woods for your chickens a long-cherished dream of yours? If so, then this chicken coop plan will let you fulfill this dream in the easiest way possible. A playhouse that the kids may no longer want to use can form the basic structure of this coop. It can be conveniently used for 6-9 chickens that will also help in fertilizing your garden soil.
This playhouse-coop will have one door for the chickens and a human door to the run. Besides, the nesting boxes will be external and hence can be accessed without entering the coop. It will also have a flooring that is easy to clean. As for the transportation, the ‘cabin’ can be built on a low trailer or on skids to enable easy movement.
Ultimately, this chicken coop would keep your birds protected from attacks by predators as well as mosquitos. It would also provide you with maximum convenience, thanks to the doors and nesting boxes which will enable easy feeding and accessibility.
Rolling Coop
Most of the chicken coops seen nowadays are built at at least a slight elevation from the ground to enable more mobility. This is one such plan and allows for 4 wheels which make it easy to push it from one area to another without lifting or straining.
This coop has an inverted-V shape and has one nest box each on both the ends. While the back wall is made solid to keep away critters, a lift door is added to the main entry at the front. To make it further protected from racoons and other predators, the bottom portion is covered with chicken wire.
You can build this coop for housing 4 chickens at most but it needs to be moved often to allow the birds to forage. Once it’s ready for use, it can comfortably fit in average garden beds. Also, to make sure the wooden portions last longer, it would be best to paint those.
Geodesic Home
This plan might require you to get a bit more creative, but it is an ideal option if you need to move the run and coop across seasons. For fresh grass lawns or dorman garden areas, this is hence a perfect coop to go ahead with. Further, as a bonus, you will get free fertilizer for your gardening escapades next year.
This structure is strong enough to house and protect as many as 12 chickens. You can also build it quite conveniently with materials that are readily available. Also, a circular bed makes much more efficient use of the space than the rectangular one.
To build up the structure you require PVC pipes for making the dome and chicken wire to cover it up. As for the amenities, you can put in one nesting box and some perches for roosting. Nesting boxes can be made from the grass-collector of a mower. To ensure durability, you should clad it with scrap chicken wire.
Basic Frame
A-frames are one of the most popularly made forms of chicken coops. And this is another simply designed A-frame option that lets you easily access the nesting and roosting space of your birds. It also makes cleaning much simpler and allows convenient egg collection. You can fit it as per a wide range of flock sizes and can easily connect it to an additional run as well.
This chicken coop consists of a built-in nesting box and a perch. It would be suitable for rearing 2-4 chickens. The bottom run portion is clad with chicken wire, while there is a coop-cum-living space at the top.
With this plan your chickens will get as much as 40 square feet of run space and 10 square feet of coop space. Also, keeping the bottom covered with wire provides the chickens utmost protection. All in all, this plan is a perfect fit for someone who is looking to make a simple but also convenient and protective chicken coop.
Making The Rounds
This is another coop plan that offers you a fancy looking house for your chickens. Though it foregoes the traditional run, you can easily add one if you feel that to be more convenient. Being a compact and mobile henhouse, you can close it up for safety on each night, bring it to a garage or shed and then wheel it back each morning.
This plan will allow your chickens free range while also protecting them for hawks and other predators. It can be placed in a pasture and has beneficial effects on the land, thanks to the free range that the chickens get. There are also no major chores involved for cleaning the coop. What you have to do every couple of days is to push it onto fresh grass.
For building the coop, you must first make a box-shaped structure with dimensions of about 7’x3’. Supporting wooden planks fitted on all sides of the coop frame and the nesting box should be added on the end. As for the door, it is built in an easy-to-operate two-in-one fashion.
Little Egg Factory
This coop basically has an A-shaped design but it gives much more portability than other A-shaped plans. There are easy-grip handles at both ends to facilitate the movement.
As the bulk of the weight lies near the bottom portion, it becomes easier to move the coop. Added to this, there is perfect space-utilization with the run being placed beneath the living-space.
This coop is built by firstly joining thin rectangular wood -pieces just the way a basic A-frame is structured.
Two nest boxes are kept on the two sides, while a space for moving is cut out from the partition separating the living space from the run. Glue as well as screws are used for attaching the pieces, with the holes being pre-drilled.
As for the wheels for the coop, they can be installed on one end or both ends depending upon your preferences. If one end has wheels, then the handle should be on the opposite end.
Barn Inspired
If you would want your chicken coop to have a unique design but also not be too difficult to make, this plan is a great one. Your chickens would have a barn of their own, but it still won’t be too large and hefty in terms of the design. This style is also most suitable for simple customization, such as external access to windows, decor and nesting boxes.
This coop can be built just with the help of leftover building material and pieces of reclaimed wood. While the top part of the barn has the nesting boxes and the coop, the remaining part is entirely devoted to the run. And it is the top part where the doors and the arrangement for ventilation is made.
Most of the barn is covered by good-quality chicken wire to ensure maximum protection. There is also a ‘stair-way’ ramp connecting the top to the run. Easy movement is facilitated by wheels on all four sides.
Traditional Design
PVC pipes are commonly used in making chicken coops as they are lightweight and can be moved easily. This traditionally-styled coop is another hen house which uses PVC pipes as the main building material. It can be moved from season to season or just whenever you feel the chickens need a change of environment.
This coop has such an easy design that you can alone put it together in no time. Basically, it is a box of dimensions 2 mt x 1 mt x 1 mt and is suitable for holding 2-4 chickens. However, you can also accommodate more chickens by adding an extension to the original structure.
For moving the coop, you can just drag it along since it’s really lightweight to move. Thus there is no need to attach wheels either. Two nest boxes can be created with plywood and put within the coop, along with two planks placed above to act as the roosts. Clearing the nest boxes and accessing them for egg collection would also become very easy through this arrangement.
Budget-friendly Design
To make your chickens a coop with the maximum amenities as well as protection, the budget may often become a constraint. But this plan would provide you all that you desire and would yet not involve costs beyond your budget.
This coop is made by attaching pieces of 2x4 wood pieces to make the floors and walls. A firm base is constructed by using pallet wood which is a really cost-effective option. The wall is made sturdy by screwing the 2X4 wood pieces to the base and adding beams to cover it. Also, the floor made by adding the plywoods over the base gives the chicken flock a firm place to rest and stand on.
Even the roofs of this simple tractor are created through such plywood pieces, by attaching them to make 22 degree angles. After that, you would just need a corrugated metal sheet for the roof.
It is also super easy to make the doorway, as you just need to attach the front playwoods to the base at a gap of 16”. This large space is great for the chickens to travel in and out of the coop and also makes the leaning quite easy.
Easy Access Plan
Most people living in urban areas neither have many chickens nor have the space for making an average-sized chicken coop. This plan with an easy-access design will just be the right one for them.
It is also very simple to make and can be easily moved from one place to another. While the nesting and roosting space is in the upper portion, the lower part gives the chickens enough room to roam about. You can also connect a larger run without too much of hassle.
This coop has two nest boxes on both sides at the front, which can be easily accessed for egg collection by using the handles attached. As for the living area, it is divided into three segments and can be opened through hinged doors for feeding the chickens. Once built up, this chicken coop can also be maintained very easily.
The Kerr Center Chicken Tractor
This chicken coop plan is another suitable choice for producing home-grown eggs in urban settings. It is raised slightly above the ground and is actually a portable tractor. This design allows maximum run space for chickens, along with easy egg collection and cleaning of the rear part.
While the nesting boxes and an enclosed shelter are positioned at the backside, the front portion is entirely devoted to the run area. Also, the boxes are placed at a height of 20 inches, which also allows a part of the rear portion to be used for grazing.
A ramp is attached at the front opening of the shelter to let the chickens move out to the run area easily. Besides, the coop also has a door flap at the back that must be raised to access the eggs. It provides complete protection to the birds during the night.
Kevin’s Chicken Tractor
Among the range of portable chicken coop plans available, this one has an unique look and design. It closely resembles a rabbit pen due to the arched shape. You can easily move it from place to place since it is lightweight and has a set of wheels at the backside. And the best part is that no special tools or expensive materials are required to build it up.
As for the structure of the coop, the base is square-shaped and is actually made up of wood pieces. Three arches are made by attaching PVC pipes to the base, and welded wire is used to cover the coop up.
Chicken wire may be used in place of the welded wire, but the former is rather flimsy. Also, the door is made from wood as well, with its upper portion being arched to match the shape of the coop.
At the back is the external nesting box, with a pull-up hinged lid. All in all, if you are looking forward to constructing a light, portable yet well-built pen for your flock, this will be a great plan to go for.
The Mobile Stage Coach
This chicken coop is especially suitable for organic urban landscapes and gardens. It is in effect a chicken tractor, which will allow you to move the birds all over your property.
Note that those of you who are not that confident about building a coop all by yourself will love this option. That’s because you can order a precut version. This will save a lot of the work involved in building it up. It will also have a nesting radiant misting system or heater installed.
This coop has an extended roost area of as much as three feet. You get a plastic-lined roost floor to enable easy cleaning, along with an auto-feeder and auto-waterer. A stainless solar day/night ventilation facility is also made at the back.
Besides, there are plastic nesting insert trays that make cleaning the nesting space much easier. To sum it up, this chicken coop plan is a ‘super-speciality’ unit of your chickens and also ranks high in terms of convenience.
Back to Basics
The A-frame structure can be used for making a lot of simple and easy to maintain chicken coops. This is another such chicken coop plan which is also a cost-effective way to keep the birds in one place. You can even move the coop to any desired spot whenever you feel.
To make this coop, you will require lumber pieces of several dimensions for the A-frame. Both the tent-shaped sides of the frame should be supported by additional wood pieces attached in between. Similarly, the base must also have such supports in the middle.
Importantly, in this design, chicken wire must be used to cover the entire coop instead of plywood pieces. Movement takes place through wheels attached at about 3 feet from each corner of the A-frame. These wheels have to be accompanied by swing-up arms for moving the coop, that can be swung down to allow it to rest on the ground.
Hen Hideout
You can use PVC pipes not only to make the simpler and smaller chicken coops, but also relatively bigger ones. This hen hideout coop is among those great chicken coop plans and also represents fair value for money. You don’t require using any wood pieces to build the frame. For the movement, a large wheel is fixed at each corner.
This coop will provide your chickens with a fairly large protected enclosure to roam about. You can make the structure wholly out of PVC pipes as they won’t rot out or absorb any foul smell from the chickens. It should be made based on your requirement for living and run area. After this, you can cover the coop by attaching ½ ” wire mesh screens to the PVC pipes.
For making the ‘henhouse’, you have to use plywood. The quantity would again depend on the size you would want it to be. A medium henhouse generally requires about 11/32” inches of plywood. At the bottom of this structure, there would be swing-up doors to access the feeder, and for letting chickens out to forage.
The Hyperion
This plan is among the most affordable options in the list. Though it looks fairly basic, it is a truly effective solution to all problems that you might be facing with many smaller coops. Importantly, it has the coop space raised to a two feet height above the base. This gives the chickens a large area to roam about.
While plywood is used to make the coop space, hardware cloth is used to cover the bottom and rear run and perching areas. This coop has a waterer as well as a feeder attached to the wall by electric cables.
A chicken door is set on the wall of the coop. It can be opened or closed from the outside, which ensures that the chickens can’t escape when you do it. At the backside of the coop is a human door with side-hinges. If you have a door with a hinge at the top, when you go inside the chickens can run out through the side opposite to you.
Lane Brooder
Having a unique design, this coop offers two entrances for the chickens, one up to the coop and the other into the run. If you find that the chickens use the coop entrance, you can build a ladder for them. For making the basic structure of the coop, you can either gather a discarded wide wooden box or have to make one with plywoods.
Attaching the legs beneath and a door on the open end will give you the coop space. After this, you need to make the long rectangular run area by fixing pieces of plywood on the sides of the henhouse.
For making the nest box, a 4 x 4 plywood piece is used that keeps the hay piled up properly. As for the wheels, they are attached in the same manner as a wheel-barrow. So when you lift the small end of the run, it should tip up on the wheels.
Meaties Tractor
This a coop plan suitable for keeping meat chickens. Those of you who own a small flock can go for this plan which is simple to transform into reality. There also won’t be any budget problems as all the materials to be used are quite affordable. This coop can be made by using scrap lumber pieces for the coop space. For the run area, thin rectangular plywood pieces and wire mesh can be used.
While the run area is made in the form of a long horizontal extension from the hen house, the coop space is a box with dimensions of about 3’ x 3’. It has a door of medium height at the backside. You can paint the plywood portions of the coop black so that chicks are provided with extra warmth during the spring.
To allow easy access for cleaning the coop, there is a hinged opening on top of the run. As for the wheels, they can be repurposed from an old wagon or mower. Wide handles are also made from wood pieces which make movement very easy.
The Roadhouse
If budget is not a major constraint for you, this coop plan will be quite a nice option to go ahead with. Besides having a sheltered area for roosting, the coop also has a nesting box at one end.
As for the basic structure, it is the same as that of an A-frame coop and is made by using plywood. The coop is slightly raised and has a doorway to the run with a ramp attached for the chickens to move out. Corrugated vinyl sheets are laid on the floor, which makes it easy to clean the coop.
Welded wire is used to cover the run part as well as the lower portion of one side. Your chickens get a run of about 4x10 ft, which is quite a lot of area. They would enjoy this freedom, while also remaining protected, thanks to the strong welded wire. The nest box at the back end can be accessed from the top and is also easy to clean.
Coco Channel
This spacious as well as protected chicken coop is an ideal for anyone who can devote weeks to its construction and has a large budget as well. It is capable of holding more than 12 chickens comfortably. This plan even consists of flower beds for decorating the exterior and would definitely be a high-end coop for you birds.
This coop must be spread across an area of at least 80 square feet. It is basically a long rectangular cottage, with a “house” for the living area at one end. A ramp from the house leads to the long and sufficiently wide run area.
High-quality plywood has to be used for constructing this coop, which has a large nest box at the back. You can use the roofing material of your choice, but there must be a large tent-shaped roof. As for the wheels, they should be placed on all four ends.
The Mini Coop
This is another plan which utilizes available space quite efficiently. It is suitable for 3 to 4 chickens and can provide them pretty much room for roaming about. This coop is shaped like a tent, with the front run area being relatively lower in height and having a roof with a gentler slope.
While the run is covered with welded wire, the walls of the coop space as well as the roof are created by corrugated metal sheets. As for the frame of the henhouse, it is built by joining scrap wood pieces.
Large wheels are attached to the backside of the coop, and can be obtained from a discarded lawnmower. To move the coop, you just have to drag a bit from the front.
Perfectly Portable
This plan is pretty basic but looks quite adorable. Its design is also quite convenient and spacious. Moreover, the design is such that you can readily make it larger if you wish to have more chickens over time. A larger run can also be added when you need it.
But the most amazing thing about this coop is that it can be moved with just one hand. What does the trick is the use of PVC pipes to make a wide handle at the front. While the base is square-shaped and has dimensions of 5 x 10, the height of the coop is 6 feet. This size is perfect for a few home-grown chickens.
Also, the wood pieces used are made by ripping 2 x 6 pieces into two halves instead of the regular 2 x 4s, which reduces the weight of the coop substantially. A large nest box at the back and the front run area makes the coop a complete home with roaming-area for the chickens.
Conclusion
If the idea of having chickens seems exciting to you, you will surely want them to be safe and able to have enough room to roam. Chicken coops are exactly what you need to fulfill that purpose and keep your chickens healthy and happy.
However, for choosing a suitable plan, you must be clear about your priorities when it comes to a chicken coop. For instance, if space is not a constraint for you, plans such as a PVC framework or a perfectly-portable design may be suitable.
That said, if space is not ample but you still cannot compromise on the run, those such as the Little Egg Factory or the compact chicken coop would be ideal.
So, sort out your priorities and go on to choose a plan for making your chicken house. All the best!
One of the most important aspects of taking care of your chickens is to have a stable run plan.
People often focus on numerous aspects to keep chickens healthy and safe, but the problem isn't so complicated. Adding an efficient run plan to your existing coop gives the chickens sufficient space to roam freely and take shelter when needed.
The main difficulty is choosing from the numerous structures that are lining the market. Therefore, we've narrowed down 15 top ideas to help you make an informed decision. In that regard, you'll find run plans that are aesthetically pleasing and provide a comfortable home, while others feature electric fences.
We assure you that you won't have to worry about your birds being harmed by predators with a suitable run plan. So, bring out the notepad, get ready with your tools…
One of our top recommendations is a backyard coop plan, which is ideal for people who want to undertake a DIY project. It's straightforward to implement, and the entire procedure is available in a detailed diagram with a series of easy-to-follow steps. As a result, you can build the structure precisely like it is shown in the diagrams.
Your chickens will have a comfortable, snug home, and you can house ten of your feathery friends at a time. Interestingly, this design features a window ensuring you can keep an eye out for them without any difficulty. First-time users will especially like what it offers and, thanks to the tool list, you will be adequately prepared before starting with the construction.
Moreover, it provides safety tips as well for a smooth experience.
If you're a beginner who is confused with the type of structure you need, we suggest building a chicken run. When you first look at the design, it may appear complicated but rest assured you won't have any problem setting it up. Moreover, it's a free plan meaning it proves to be a pocket-friendly option.
You'll love how it focuses on the details to provide the best possible conditions for your chickens. We like how the step-by-step instructions come in handy, and you won't need many tools to complete the job. Once you're done, you'll have an area that can house 4-5 birds, and it makes for an efficient addition to your existing coop.
For people looking to provide a cozy place for your chickens, you can't go wrong with the Urban Coop Plan. It looks like a house and affords a comfortable home for your livestock throughout the year. The significant addition comes in terms of the large door, which allows you to pass through.
The chickens have a separate door on the left, which they can access by walking up and down the ramp. What we especially liked about it is that the construction prevents water from getting into the coop. Therefore, your chickens will be safe from sudden weather changes.
Now, what if you could add a structure to your existing chicken coop that would allow the birds to roam freely? Sounds exciting, doesn't it, but you also need to be wary of predators. However, by making this extension, the chickens remain protected from all sides while having sufficient freedom.
It comes with a welded wire to ensure nothing can get in or find a way to bite through the mesh. Your chickens will also be healthy, allowing them to engage with the outside world, thanks to the secure construction. Moreover, it doesn't take much time, and you can complete the work quickly.
The two essential factors you need to keep in mind when building a chicken run is that it needs to be safe and secure. Your birds must be well protected against predators as well as changes in the weather. Significantly, depending on the number of chickens you have, you can decide on the size of the run.
Please remember to have a little door on the side that will allow the chickens to pass through. Meanwhile, you'll have to assemble the frame but overall, making a chicken run isn't all that difficult. It provides the perfect solution for taking good care of your chickens.
Another fantastic option to consider is making an A-Frame, which gives the appearance of a triangle. All you need is to create a chicken house with a triangular design, thereby providing enough space for the birds to move around. Besides, they are well-protected, and the slanting structure ensures water can't get through during the monsoon.
All you need is to assemble the frame and sheathing and be patient rather than rushing through it. Once the main structure is complete, please focus on the finishing touches for a reliable experience. Most importantly, it's highly affordable, which makes for a desirable acquisition.
If you're the proud owner of a large chicken flock, then it's only natural you'll be looking to house them in one prominent structure. A large construction may appear tedious, but there's no reason to worry as it also proves cost-effective in the long run. It's certainly more efficient than having to make several small coops.
You can effectively keep a maximum of 16 chickens without any hassle. They will have enough room, thanks to the garden loft open-air design, while the exceptional durability ensures it will last a long time. It's pretty much everything you need, which is the reason for its popularity.
There are few better ways to design the perfect home for your chickens than with the help of a 3D guide. The most significant aspect of the design is that it shows you how the structure is destined to pan out. In that regard, you get all the information, thanks to the detailed steps and graphics.
You also get to know about the cuts you need to make and the dimension of the model based on the available area. Overall, it's an uncomplicated design that features a simple door on the side through which the chickens can pass. Finally, it won't take much time to construct due to the easy assembly and diagrams.
If you've sufficient space in your backyard, then you might consider trying out a backyard coop idea. It features a cute design that looks like something you might see in an animated film, thanks to the red color and contrasting white door. Rest assured, your chickens will love it, and you won't need to spend a substantial amount for setting it up.
The innovative structure comes with two doors – one main entrance for you to enter and a little side door for the birds. The thing to consider is that the completed structure is quite massive, and it's better to get someone to help you.
The custom chicken house offers quite a refined living space for your chickens, making it stand out. Even a cursory glance reveals the elegant yet efficient design which works well for any property. You'll notice that it comes with mesh sides to provide an uninterrupted view of the birds without disturbing them.
Furthermore, the mesh has the added benefit of keeping the birds safe and sheltering them in most situations. You'll see it comes with a little flower box under the window to deliver the feeling of a warm home. Also, the large door provides an easy passage to clean the coop, and you've got the option of matching the color to your home.
For all the things that your chickens need, we bet you never thought flowers would be one of them. But having an aesthetically pleasing chicken house ensures your livestock will have the best living conditions all year round. Besides, it comes with an easy-to-follow instruction manual allowing you to replicate the structure precisely.
What's more, there's a large door for you to enter while the mesh lining keeps the birds safe and prevents them from running out. Finally, the little window complete with the flower box acts as the icing on the cake.
Our next recommendation is called The Palace, and needless to say, you're guaranteed nothing short of the best. Not only does it look good, but your chickens will have enough room to run around. Likewise, you'll be pleased to note that the structure is robust enough to last a long time and can withstand turbulent weather conditions.
The significant upgrade comes in terms of the ventilation system, which permits fantastic airflow. Also, it provides a convenient space for housing close to five chickens.
For starters, you'll immediately notice the curved nature of the structure, which has several benefits. Choosing to construct a hoop coop provides excellent protection against the weather and predators alike. In that regard, the electric fence proves highly useful and makes it stand out in the market.
No surprises then that it's incredibly durable while there's no shortage of space for the chickens. The large door permits you to enter without any difficulty, and you also get a tarp to cover the structure when it starts to rain.
First and foremost, it provides the perfect combination of aesthetic beauty with durability, thereby increasing popularity. It looks great and offers you the chance to invest in something a little more elaborate without things getting complicated.
You'll enjoy the insulated floor while the run delivers additional space for the birds. Interestingly, it comes with four windows, evenly distributed over the front and back so you can check on the birds without disturbing them.
If you're looking for a unique solution to your chicken run plans, then you could watch videos for help. Although following schematic representations aren't tricky, watching videos provides a clear idea of what you need to do. It covers all possible areas and presents a double structure, which is rarely available in other models.
There's a primary blue structure to house chickens, while the attached run area allows the birds to move around freely. Moreover, it isn't costly at all, which is sure to please you, and you won't have any trouble taking care of the birds.
Final Words
We've reached the end of our guide, and hopefully, you've got enough good ideas for chicken coop run plans.
Try to ascertain the dimension of the chicken run and whether it will be sufficient for all your birds. Rest assured, once you're done, your chickens will have the perfect home.
In recent years, composite decking becomes increasingly popular for outdoor structures as the supplies of natural timber are continuously dwindling.
Another factor contributing to the growing popularity of composite decking is that it offers several advantages over traditional wood decking. That said, it is more resistant to damage and provides a much more appealing appearance.
To keep up with the demand, more and more brands are now supplying composite decking material. Therefore, selecting the product that is right for you may be a challenging task.
That is where this in-depth review and guide will help you out. It will provide you with all the information you need to make an informed decision when buying composite decking materials.
Without further ado, let’s get to it.
1. Trex
Most of you who have been looking at various composite decking brands must have come across the name Trex. It is one of the first companies to offer composite decking materials and soon became an industry frontrunner because of its quality products.
Trex offers three categories of decking materials based on quality and pricing. One of the best things about products from this brand is that they all come with a 25-year warranty. What’s more, the company also uses reclaimed plastic and wood materials in its manufacturing process.
Not to mention how the brand is one of the biggest names for sustainability and is particularly known for using polythene and sawdust to create composite planks. Nevertheless, Trex offers a wide range of composite decking boards for various uses, such as surface decking, outdoor furniture, outdoor storage, and so on.
Moreover, Trex products are available in several exciting colors, and the composite boards are highly resistant to termites, moisture, fading, and regular wear and tear. The only thing to note when buying a Trex product is that they are not very easy to install, and you will require the help of professional services.
2. TimberTech
Another excellent option is TimberTech, which offers composite decking in a wide variety of colors and textures, offering a very high level of customization. The manufacturer uses solid PVC compounds for creating its range of composite decking planks. That is why they are highly resistant to scratches, molds, mildew, and splits.
TimberTech products are well known for their very realistic wood appearance and come with a warranty ranging from 25 to 50 years, depending upon which product you select. There are three styles to choose from, and all offer several colors and textures.
Contractors and installers also prefer using TimberTech products as they are straightforward to install and have excellent durability. The boards are resistant to fading, cracking, and weathering and can do well on exposure to the elements.
3. Dura-Life
Dura-Life is another leading company in the composite decking industry, focusing on developing high-quality, durable decking. The products from this manufacturer are some of the easiest to install on the market while also offering excellent durability and style.
Dura-Life offers four options to select from: the affordable MVP plank, the Starter and SwEdge options that are more suitable for finishing, and finally, the high-performance Sierra planks.
The manufacturer uses a combination of polypropylene, recycled wood and plastic, and hardwood floors for maximum durability. All Dura-Life products come with a 25-year warranty which also covers fading and staining.
4. Cali-Bamboo
When you are looking for a brand that offers quality indoor flooring, then Cali-Bamboo is one of the best ones. They manufacture composite wood decking using BamDeck Composite, made from recycled bamboo fibers and recycled plastic.
The products from Cali-Bamboo offer long-lasting durability while also being DIY-friendly. There are two categories to select from - BamDeck and TruOrganics. Both offer weatherproof decking that is also fade-resistant and uses recycled materials.
Composite deck boards from Cali-Bamboo are also LEED-qualified, which means it is one of the best sustainable decking options available on the market. Moreover, there are nine different installation looks with three color and four texture options.
One of the unique features of Cali-Bamboo products is the hidden fastener system, which makes installation a breeze. However, compared to other brands, Cali-Bamboo offers only 15-year warranties, which is a bit on the lighter side.
5. Fiberon
The next brand on the list is Fiberon, which specializes in decking, railing, and fencing products using composite materials. This company offers one of the largest selections of options regarding colors and styles. It has one of the most realistic wooden textures in the segment.
Fiberon uses several composites, but the most common is a PVC Permatek outer and an inner composite wood core. Cellular foam is also a commonly used material in their composite decking boards which can be installed easily with hidden or face-driven fastener systems.
The brand’s decking products are available in Promenade, Good Life Collection, and Collections. Fiberon offers its products at a slightly higher price, but the warranties range from 25 years to a lifetime, depending on the product.
6. Envision
One of the older brands in the composite decking industry, Envision, manufactures decking products using a compression molded process. This process results in dense and heavy decking boards that have deep textures. The company does not use any wood fibers and depends entirely on recycled plastic for its products.
Envision products are highly resistant to rot, insects, and termites and resistant to fading even in direct sunlight. You can install decking boards from Envision either by fastening from the top or by a hidden fastener system. It is also easy to find railings and facings of the same type, style, and color as the decking.
Envision offers a 25-year limited warranty on its entire range of products, which are all stain and damage-resistant and highly durable. The composite boards are generally darker colors and textures due to the high pressure and temperature manufacturing process.
7. Lumberock
As the name indicates, Lumberock is a brand that blends lumber decking materials and other elements to manufacture high-quality composite decking products. Along with lumber, the company may use plastics and minerals in its line of tongue-and-groove products.
Lumberock products are not only highly durable but also provide significant resistance against mold and mildew. Water and salt also have no visible effect on the brand’s decking products.
This brand offers one of the most extensive styling options available on the market. There are different lengths, widths, textures, designs, and color options to choose from. What is more, each plank and board comes with a lifetime warranty.
The only thing to remember is that these decking boards need to be installed by nailing or screwing down through the top faces. There is no hidden fastener system with these boards.
8. MoistureShield
Composite decking products that are most effective in blocking moisture come from MoistureShield. The brand uses a Solid Core to manufacture its products, which involves pressing and molding the planks into a solid piece.
The manufacturer offers warranties against the entry of moisture in its products at any time. MoistureShield products are ideal for creating pool decks even underwater. Furthermore, the zero water absorption property also protects the material from rot, cracking, or warping.
However, this brand offers a limited number of style options, and the planks are also susceptible to fading. The fading depends upon exposure to the sun and will not be visible for several years when the decking is first installed.
9. WearDeck
WearDeck is one of the biggest names in the world of composite decking, focusing on developing commercial-grade products that are highly durable. There are eight categories of products to select from, varying in length and width. WearDeck also offers customization for some of its products.
Products from WearDeck are entirely synthetic and do not contain any wood fibers. The manufacturer uses high-density polyethylene (HDPE) reinforced with fiberglass to create its decking products.
This solid construction makes WearDeck products highly resistant to stains while also being heat-reflective and splinter-free. There are eight different colors to select from, offering versatility for different types of uses. The subtle wood grain patterns provide a realistic texture, which can help mimic the appearance of actual wood.
10. CertainTeed EverNew
EverNew is a subsidiary of the CertainTeed line of composite decking and porch systems. It uses materials that include either a blend of PVC vinyl or wood flour. These materials ensure that the products are lightweight yet durable.
One of the best features about this is that it looks good while also being highly durable. There are some exciting designs and styles to purchase from this brand. It is also one of the most affordable options on the market right now.
CertainTeed EverNew also offers excellent warranties on its range of products, which ensures a worry-free experience. Besides that, the decking materials are split-resistant as well as resistant to mildew and mold.
What Is A Composite Deck?
Before we talk about the best composite decking brands, the first step is to understand what a composite deck is made of.
A composite material consists of a base material that is combined with other substances. All of these are held together by a binding agent. As for a composite deck, it includes a blend of materials such as plastic or PVC, wherein the binding agent is wood.
However, one important thing to note is that composite decking is different from plastic decking, as the latter does not contain wood and is made up of 100% plastic.
Also, there are several different techniques for manufacturing composite decking. These include molding, pressing, or hollowing out. The type of manufacturing process used to produce a decking material determines features, such as its durability and strength.
Now that you know what composite decking is, let us look at why composite decking is becoming so popular.
Advantages Of Composite Decking
1.Low Maintenance
One of the most significant advantages of composite decking is that they are low maintenance, especially compared to traditional wooden decking. While natural wooden decking requires periodic replacement, painting, and finishing of sections, that is not the case with composite materials.
That said, they only require light washing or spot treatment to retain the luster and color. You will also need to replace a wooden deck every ten to fifteen years, whereas composite decking can easily last for years. Simply put, composite decking is the go-to option if you want to install a deck and then forget about it.
2. Offers High Value
While the initial investment for installing composite decking is undoubtedly higher than traditional decking, it leads to more significant savings in the long run. These savings are due to lower maintenance costs, as composite decks do not need frequent replacements, staining, polishing, and so on.
3. A Sustainable Alternative
More and more manufacturers are producing composite decking material using recycled materials. These include recycled wood, plastic, and more. What’s great about using recycled materials is that there is no need to cut down trees for timber.
Similarly, the recycling material itself requires fewer resources and can also help solve waste management and disposal problems.
4. Wide Choice In Aesthetics
Traditional wood decking materials have to undergo different procedures to acquire an appearance suitable for installation. However, these processes can often lead to a change in the structure and quality of the materials. What’s more, the aesthetic value may get sacrificed to retain their shape and integrity.
In the case of composite decking, neither the appearance nor the quality of the material needs to be compromised. Additionally, composite deck boards are available in a variety of colors and styles that are sure to give your deck a makeover.
5. Saves Both Time And Labor
Composite decking can save both effort and time, as it does not require frequent cleaning, scrubbing, staining, and so on. And while the process of getting a composite deck installed is similar to that of traditional wood, the former does not require as much care and maintenance.
6. Resistant To Mold And Mildew
Capped composite decking can be one of the most suitable options for homeowners looking for durable and long-lasting options. On that note, capped decking makes the composite decking materials highly resistant to invasions by mildew and mold.
Protective capping is also highly effective in preventing the entry of moisture, making it superior to traditional wooden decking that is highly susceptible to moisture damage.
7. Evolving Technology
The technology for producing composite materials is constantly evolving, with manufacturers trying out new and innovative materials to offer a better experience. That said, decking materials are becoming more durable, cost-effective, and aesthetically pleasing.
And as the science of manufacturing composite decking develops, new materials are being created to handle the effects of bleaching, erosion, and so on. Additionally, the cost of composite materials also goes down as they become more widespread.
8. Excellent Warranties
Most composite decking manufacturers offer excellent warranties on their products, which is not always the case with traditional wood decking materials. With such a warranty, you do not need to worry about the state of your decking as the manufacturer will get it replaced or repaired if it gets damaged.
Evidently, composite decking offers several advantages over traditional wooden decking. With so many benefits, it doesn’t come as a surprise that composite decking is becoming increasingly popular among homeowners for various uses.
In the next section, we’ll take a look at some of these uses and common applications.
Types Of Composite Decking
1. Commercial Decking
Composite decking is increasingly being used for commercial purposes to increase the amount of usable space and add a style factor. Indeed, offices, retail centers, hotels, and apartment complexes are now opting for composite decking to enhance the appeal of shared spaces with these durable structures.
2. Residential Decking
The most widespread use of composite decking materials has so far been for residential purposes. That said, they are commonly featured in patios, terraces, garden decking, and so on.
In fact, the moisture-resistant property of composite materials makes this type of decking ideal for areas frequently exposed to water, such as outdoor pool areas.
3. Swimming Pool Decking
Composite decking materials, besides being moisture-resistant, also have a low water absorption capacity. As a result, they provide solid slip-resistant surfaces, which are ideal for swimming pool decking. Additionally, this material will not splinter or warp after coming into contact with water.
Composite decking also does not fade over time due to sun exposure and will ensure that your pool area looks new for years to come.
4. Boardwalks And Pathways
Composite decks are perfect for use on boardwalks due to their UV-resistant properties. For the same reason, they can be used as pathways that connect outdoor spaces. Furthermore, the durability of composite materials only adds to their appeal.
5. Terrace And Balcony Decking
You can quickly transform the look and enhance your outdoor spaces, such as balconies, by using composite decking. At the same time, the decking material doubles up as a safe surface for bare feet.
These are just some of the uses that composite decking is suitable for; indeed, these versatile materials are well-loved for much more.
At the same time, there are several products available from different manufacturers on the market. To know which one is the best for you, we need to look at some of the best brands in the industry.
So, let us get straight to it.
With more and more people opting for sustainable alternatives, composite decking has truly taken off. Moreover, composite decking has several advantages over traditional wood decking because of its wide range of applications, excellent durability, aesthetic appeal, and more.
Anyhow, the main advantage remains that composite decking is better for the planet. It results in the felling of fewer trees while also helping get rid of waste.
There is also no shortage of products, as several new brands are entering the market. And if you’re confused about which brand to pick, our guide can help you make an informed choice and get the most suitable decking installed.
A standard size for water volleyball is about 30 ft. x 60 ft., which can be limited based on the players involved. Visual boundaries can be set if the pool size exceeds the play area.
If you’ve ever attended a pool party, then you know how exhilarating a game of water volleyball can be. Slinging a ball over the volleyball pool nets to score a point is probably the best feeling for any water sports enthusiast!
But if you want to play water volleyball at home, knowing the size and shape requirements of the pool is important. So, let’s see how wide your pool needs to be for playing volleyball with family and friends.
Factors Governing The Ideal Water Volleyball Court Size
It goes without saying that a water volleyball court must match the players using it. That is to say if the players can’t play comfortably and have fun on a court, the court size is far from ideal.
So, here are the factors you should consider when sizing a pool up for a game of water volleyball.
1. Swimming Potential
Movement in water is slower and more tiring than on land, which makes it important to consider how well the players can swim. If the players are not experienced swimmers, a shallow pool that isn’t particularly large will do just fine.
At the other end of the spectrum, experienced swimmers may need more room to maneuver in, making a standard water volleyball court ideal.
As for people with moderate swimming experience, like me, they can play in a medium or standard-sized pool. The only point to note is that such people will receive quite the quad workout during play.
2. Player Age
Younger players will need a more shallow water volleyball court than older and taller players. As such, pool safety becomes a much larger point of concern for children than for adults.
Thus, water volleyball courts can be deeper for adults than for children, seeing how the former are typically taller and more experienced with swimming. For children, the upper limit of volleyball depth is around two feet.
3. Player Stamina
Water volleyball is a true test of how well your cardio exercises are working, as I found out during my first game.
People in strong cardiovascular shape will be able to perform well in shallow or deep waters, as well as larger volleyball courts. Such people have built their shape through daily exercises, be it on land or in water. Those who skip cardio exercises? Not quite so.
Those who are not in peak cardio shape will require a smaller or shallower pool for them to have fun with the game.
Water Volleyball Court Size
The standard water volleyball court size is 30 ft. x 60 ft., but it needn’t necessarily match for you to host a game comfortably. These measurements are similar to the sand court, but your pool needn’t be as large since movement is less in water than on sand.
That said, your pool needs to be large enough to accommodate all the players. You don’t need to follow the Olympic guidelines for a simple backyard game, and the court can follow suit. After all, it’s no fun if players don’t have enough room to maneuver around comfortably.
For a 3v3 game, your pool can be about 16 x 24 feet for each player to comfortably move around in. This size is also not so large as to become an issue when switching sides mid-match.
Water Volleyball Court Depth
Water volleyball courts are not particularly deep, being about four or five feet deep at most. Depending on the age and stamina of the players, this depth can be lower, with the shallowest water volleyball courts being about two feet deep.
The Ideal Pool Type For Water Volleyball
You can use in-ground or above-ground pools for water volleyball, so long as they are the right size. The only place where they differ is with the net installation kits, which affix to the pools differently. And if you want, you can make the volleyball net a permanent fixture.
Tip
You may want to note how you keep the pool clean, as certain cleaning compounds can corrode metallic mounting kits. This is particularly the case if you use salt water for pool cleansing, which can seriously damage an in-pool mounting kit.
The Best Size For A Water Volleyball Net
The standard net width for water volleyball is 24 feet, but it doesn’t necessarily have to match or exceed the width of the pool. Feel free to install a net that fits the best with your pool size and game requirements, provided that the net can be installed comfortably.
As for its height, a standard volleyball net stands at 7’11 ⅝” (seven feet, 11 and ⅝ inches) in a typical water volleyball game. You can also customize the net height so that players don’t have a tough time launching the ball over.
Pool Shape
The pool shape can make or break the possibility of being able to play water volleyball comfortably. Rectangular or oval pools face no issues, providing ample room for everyone involved to partake in the activity comfortably.
But dimensions alone don’t make for a good water volleyball court. There must be an equal amount of space on either side of the net, so neither team has their movements restricted. Hence, I do not recommend round pools and other abstract shapes, as they can hinder this equal playing field.
Setting Up Boundaries
If you have a differently-shaped pool with a large enough area to accommodate both teams in an equal capacity, you may want to establish boundaries. Indicators that float on the water can act as said boundaries, and if the ball lands outside, it can be considered out-of-bounds.
In case you don’t have such boundary markers, you can improvise and put chairs, shoes, or spare poles as visual indicators for the boundary.
Where Can I Buy A Pool Volleyball Net?
Sports stores typically have pool volleyball nets available for purchase, with a wide range of net types and sizes. You may also find nets in retail stores like Home Depot and Walmart if you’re looking for a quick purchase without worrying about pro-quality nets.
If you so wish, you can come up with DIY pool volleyball net ideasto serve as a makeshift net. This can be as simple as a pole on either side of the pool to something more elaborate, such as a suspended cloth mesh.
Warning
If you want to use a backyard volleyball net for water volleyball, remember that beach volleyball nets are differently sized. They are larger than what is needed in a typical game of water volleyball, making them unfit for the purpose.
How Wide Does A Pool Need To Be For Volleyball Conclusion
A water volleyball court can be as large as 30 ft x 60 ft, but it can be sized as per player preferences. The court size and depth can be altered to suit everyone involved, and if the pool is larger than the court, you can set visual boundaries.
All you need to remember is to cater to the ability and skill of the players you host. After all, having fun is the priority in a game of water volleyball, and the court should not deter that.
So, set up your own house rules, plant a net smack-dab in the middle of the court, establish boundaries and play away!
Using a backyard volleyball net for water volleyball is not recommended, as there is a vast height difference between the two nets. Additionally, pool volleyball nets are made to withstand water pressure, which is not the case with backyard volleyball ones.
If you’re planning to spend the weekend playing water volleyball, chances are that you’re looking for the best volleyball pool nets.
Alternatively, you may be considering using a regular volleyball net in the absence of a pool volleyball net. Sure, you may do so, but will it be the right decision and contribute to a fun and enjoyable experience?
I’ll answer your question in this informative guide, so let’s dive into the deets!
Can You Use A Backyard Volleyball Net For Water Volleyball?
The first thing you should know is that there isn’t a “one-size-fits” solution when it comes to volleyball nets. Only a few options on the market are designed for use in both pools and yards, but the majority of volleyball nets aren’t interchangeable.
Most volleyball nets available for purchase are designed for use either in the backyard or in the pool. So, before using your volleyball net in the pool, make sure it is constructed with durable materials to withstand water, or it will greatly affect players’ experience.
Water Volleyball Net Vs Backyard Volleyball Net
One of the most important reasons why you should use a volleyball net designed specifically for water volleyball is its height. Generally, the bottom of the pool volleyball net hangs a few inches above the pool.
If you use a backyard volleyball net in the pool, there will be a significant gap between the net and the ground. In that case, passing the ball over the top of the net will be quite difficult, and the game will not be as enjoyable as it should be.
Another reason why it is recommended to use a pool volleyball net is its durability. Your backyard volleyball net won’t last long if used in water. That’s because the materials used in backyard volleyball nets aren’t water-resistant, so prolonged exposure to water will damage the net. In contrast, nets manufactured for use in pools are specially designed to withstand excessive moisture, so you can rest assured they’ll last for years to come.
As for the ball, most balls used in backyard volleyball can be used in the pool without any issues. That said, you will enjoy water volleyball more if you play using a ball designed for water the same because it can take a beating.
Selecting The Right Net For Pool Volleyball
Selecting the right net for your pool isn’t easy because there are certain factors that you need to consider. You need to know how wide does a pool need to be for volleyball, along with its length and depth. The standard dimension of a pool volleyball court is 30 by 60 feet, and such pools ideally require a 24-foot-long net.
But keep in mind that width and height will depend upon the skill level and the age of players. Furthermore, the type of pool in which you wish to play volleyball is important in determining the type of net that can be used. Like, in-ground pools have a wider choice of options than above-ground ones because the latter doesn’t have ground around where the net can be anchored.
And since volleyball nets are available in many sizes, finding options for different types and sizes of pools won’t be much of a challenge. The length of most outdoor volleyball nets is about 32 feet, and their height is about 39 inches. You can even get custom ones made, but keep in mind that the sizes of nets for both men and women are different.
Nets designed for men must be eight feet tall, while those for women should be seven feet four inches tall. Additionally, when playing on permanent standing courts, it is a good idea to get aircraft cables with eye loops to lock the net to poles.
You can also get a steel cable which does not break as easily as a rope one for the net. Pool volleyball nets may be floating or fixed, with the latter offering greater stability.
Tip
When getting a net for pool volleyball, consider investing in one that is unaffected by the elements. Since the net will remain outside, it has to be durable enough to withstand the elements; only then will it last for a long time.
Backyard Volleyball Net For Water Volleyball FAQs ?
How is water volleyball played?
Water or pool volleyball is very similar to beach volleyball, with the main difference being it is played in water. There are two teams, each with six players, and each team tries to score points by grounding the ball on their opponent’s side of the court. They also have to prevent the other team from trying to do the same.
For that purpose, a hand-held ball filled with air is used. You can use a regular beach volleyball, but I recommend using a ball meant to be used in water to have the most enjoyable experience.
People of all ages and skill levels can play the game, and the number of players and size of teams can vary, depending on the type of game being played. Games are usually played for up to 21 points; every time a team manages to ground the ball on the opposite side of the net, it is awarded one point.
The team that gets 21 points first wins the game.
Unlike in beach or indoor volleyball, the net in pool volleyball should be placed just above the water to ensure that the ball can be passed over it. Also, the ball, in such cases, is made from materials that prevent it from sinking and is filled with air to stay afloat in water. Beach balls are best suited for that.
Another thing to keep in mind is that players should ideally wear clothing like swimsuits that cannot absorb water and ensure easy movement.
Is Volleyball An Expensive Sport?
Volleyball is among those sports that require special equipment, all of which come with an expensive price tag. Playing volleyball regularly can also be quite expensive, as you need to keep replacing equipment that gets worn out or damaged.
What Are Some Things To Keep In Mind Regarding Pool Volleyball?
The first and most important thing to remember when playing water volleyball is that the ball will get heavier. So, preventing it from touching the ground will be much more challenging.
Additionally, the surface of the pool is slippery, so the chances of accidents and injuries are higher. So, you need to be more careful when playing in the pool than on the ground. Finally, the depth of the pool determines how easy or difficult the game is; as such, playing volleyball is much easier in shallow pools than in deep ones.
What Are The Materials Used To Make A Beach Volleyball?
A beach volleyball is usually constructed of a synthetic or inflated rubber bladder that has an additional covering of panels made using natural or synthetic leather or other materials. This bladder is filled with air at a pressure of 0.3 to 1.0 pounds per square inch, which gives the ball its shape.
The panels covering the bladder are also stitched together using a nylon thread, and finally, an abrasive-resistant material is used to cover the ball.
How Deep Should Your Pool Be For Water Volleyball?
Pools designed for water volleyball matches should be around 2.5 to 3.0 meters or 8.2 to 9.8 feet deep. But pools meant for recreational water volleyball mustn’t be as deep; as such, they can range from 1.8 to 2.0 meters or 5.9 to 6.6 feet.
Are Beach Volleyballs Bigger Than Regular Ones?
Since a beach volleyball is meant to be used on surfaces like sand, it tends to be larger than others, which makes the game more enjoyable. Also, beach volleyballs are generally inflated to a higher pressure than regular ones, which makes them more resistant to being punctured by sand spikes.
Backyard Volleyball Net For Water Volleyball Final Thoughts
Besides the pool size, using the right net is crucial to be able to have the most enjoyable time while playing water volleyball. With this guide, you now know what dimension for a swimming pool with volleyball net should be used, as well as the type of net.
Also, make sure to use the right size and type of ball, and wear proper clothing which does not become heavy with water, so you can play without any issues. When playing recreational water volleyball, consider the number of players and the depth of the pool as well before starting to play.
On that note, I shall wrap my guide on the topic. Until next time!
Water volleyball is fun, exciting, and safe, so it can be played by people of all ages. Moreover, the rules of this game are straightforward, so beginners won’t have a tough time understanding it, which is why it’s a popular sport among college students.
Is one of the best volleyball pool nets lying in your garage?
Sure, summer is the best month to play water volleyball; after all, jumping into the water and passing a ball between two teams without dropping it sounds fun. And the rules of water volleyball are similar to traditional volleyball, but the risk of injury is low.
Here we’ll walk you through 13 things you wouldn’t find in any volleyball rule book. Keep reading!
Water Volleyball 101: 13 Things You Need to Know
1. The Number Of Players Varies
As against traditional volleyball, each team in water volleyball usually consists of four players– called a four-by-four. If you’re playing in the pool and want to crowd it, you can have a team of six players or six-by-six.
In water volleyball, if players wish to play a co-ed game, they can add two women and two men to each team or three-and-three.
With teams of four players, two are supposed to be in the back, while the other two will be on the net. Even if you play the game with six players, the setup will remain the same.
Are only five people willing to play water volleyball? Well, go ahead because water volleyball is a highly versatile sport.
2. Water Volleyball Rules Are Similar To Regular Volleyball But Has A Few Differences
Water volleyball rules are quite similar to regular volleyball, but there are a few dissimilarities too. They are as follows:
A. Number Of Players
The number of players in water volleyball can be between two and four, depending on the size of the pool. However, court volleyball isn’t as flexible as the former; as such, only six people are allowed in the game, with three on the backline and three on the front.
B. Winning
In water volleyball, the winning score depends on the mutual understanding of players and can either be 11, 15, or 25. Furthermore, the winner must have a two-point lead and win two out of three matches.
On the other hand, the first team who reaches 15 points in the fifth game wins the game in regular volleyball. Moreover, the winning team must lead the game with a lead of two points. Not just that, but it must also win three games out of five to emerge as a winner.
C. Scoring
The scoring rules of water volleyball differ from that of court volleyball.
Such as, in water volleyball, you win points whenever the ball lands in the water after passing through the net on the opponent’s side. You also win a point whenever the ball touches the net but doesn’t pass through.
Meanwhile, you win points in court volleyball whenever the ball strikes the court. But remember, the opponent team will win a point if your team members strike the ball more than thrice in a row. Whenever two players of a team touch the ball simultaneously, it is considered as one hit.
One similarity that both water volleyball and court volleyball share is that the opposing team will win a point if you double-hit the ball.
3. Elderly People Can Play Water Volleyball
Court volleyball can injure your lower back, shoulder, knee, and fingers, taking a toll on a player’s body. Moreover, as people age, their knees and back become less flexible, so they cannot play court volleyball.
For elderly people, water volleyball is an excellent sport because water is easier on the joints. Among older adults, it has become highly popular, and YMCAs and athletic clubs are training teams for water volleyball.
4. Water Volleyball Is A Great Exercise
Court volleyball is an excellent way to keep yourself fit, but there’s a high risk of injury. But playing the same sport in water boosts your strength and muscle toning without exposing you to back or knee injuries.
5. Water Volleyball Has Different Names
Did you know that water volleyball is often called pool volleyball? Most people call it pool volleyball because it’s usually played in swimming pools.
However, you can play it in any water body of the required size and depth as long as you know how to set a net. And if you don’t know how to build a pool volleyball net, look for tutorials online, and you’ll be good to go! You can even make a pool volleyball net by using backyard volleyball net with having to proper tools for the pool.
Another name for water volleyball is splash volleyball because of all the splashing that occurs in water.
Spanish people call it Voleibol Acuatico, while Brazilians refer to it as Aqua-Volei. On the other hand, Italian residents call it Acqua Pallavolo, and it’s known as Wasser Volleyball in Germany.
6. Water Volleyball Is Different From Water Polo And Water Aerobics
Water volleyball, water polo, and water aerobics are water activities, but they are different from each other.
Water aerobics is a fantastic exercise for older adults because the buoyancy makes it easy for them to use their muscles without putting excessive strain on fragile bones and joints. Unlike water aerobics, water polo is a sport similar to basketball or soccer. In water polo, the player’s objective is to throw the ball in the opponent team’s goal.
However, it’s a tough game because it’s played in a deep swimming pool so that players’ feet don’t touch the floor of the swimming pool.
7. Official Court Dimensions Must Be Followed
Even in water volleyball, players must follow official court dimensions if they intend to play “officially.” A 30 x 60 feet court with a net of about 24 feet long is perfect for playing water volleyball. Note that the net must dangle one foot above the water.
And those wondering what size pool for volleyballisideal, let us tell you that a pool of four to five feet is sufficient for enjoying the sport.
The court must be adjusted to accommodate players’ ability level and strength. Like, people whose cardiovascular health isn’t good may enjoy playing in a small space.
While the court can be adjusted, you can’t do much when it comes to the size of the pool. So, if your pool is 20 ft wide, your court will also be the same size.
8. Water Volleyball Isn’t An Olympic Sport
Contrary to what people say, water volleyball isn’t considered an Olympic sport. Certainly, this may invite a lot of mixed reactions from people, but we think that it isn’t regarded as an Olympic sport because it isn’t bound by formal rules.
9. Biribol Sport Originated Before Water Volleyball
Dario Miguel Pedro, a Brazilian professor, developed the Biribol sport in the 1960s, which is similar to water volleyball. As against water volleyball, Biribol is a popular sport in Brazil, with numerous teams in Brazilian towns and a Brazilian National League.
10. Water Volleyball Is Played In Many Colleges
Besides local leagues, YMCAs, and athletic clubs, water volleyball is popular among college students and is played in many colleges. Lenoir-Rhyne University in Hickory, North Carolina, University of San Diego, California, University of South Florida, and Iowa State University, to name a few, are colleges where water volleyball is played.
11. Water Volleyball Is A Great Pick-Up Game
Are you a member of a club that has a swimming pool? If yes, that’s great because finding a couple of people who are fond of playing water volleyball won’t be difficult.
The water of the swimming pool acts as an equalizer, allowing people of varying skill levels to work together as a team. And since the rules of the game aren’t set in stone, you can play it with two or three players on each team.
12. Water Volleyball Is Played With A Ball Specifically Made For The Sport
While you can use soccer or beach balls to play water volleyball, it’s advisable to use a ball made explicitly for the game. Or, to be precise, you need to have a waterproof ball to enjoy water volleyball, which soccer and court volleyballs aren’t.
In this regard, the GoSports Water Volleyball 3 Pack is an excellent option, whose outer layer is soft and is eight-inch in size. And the best part? It’s a three-ball pack, so you can play the game uninterrupted even if your ball flies out of the swimming pool. However, you can use a soccer ball or a beach ball in case you’re in a pinch.
13. Water Volleyball Is A Fun Sport
Water volleyball is boring– said no one ever! After all, you don’t get hurt in the water; the rules of water volleyball are pretty straightforward, and not to forget, every player is in a cheerful mood.
Water Volleyball Wrapping It Up
That’s pretty much it– things about water volleyball that no one told you before!
Like sack races, water volleyball isn’t an official sport, but both are enjoyable. Be it a beach, pool, pond, or lake– water volleyball can be played anywhere, provided the water body is of the appropriate depth and size.
And since it doesn’t exert much pressure on the joints, it makes for an excellent sport for people who no longer play court volleyball. Irrespective of whether your team wins or loses, remember it’s just a game. Have fun, folks!
The length of a water volleyball court should range from three to six meters and two to five meters in width. As for the net, it should run across the width while being centered along the length to provide players with an equal amount of court.
When planning to create a water volleyball court, volleyball pool nets, and mounting hardware are usually the first things people think about.
But they often forget one of the most important things– deciding on the size of the swimming pool. Determining the ideal pool size depends upon several factors, such as the number of players and the size of teams.
And the pool size, in turn, will determine the size of the volleyball net.
The Optimal Size For A Volleyball Pool
A volleyball pool should be at least three meters long but can go up to six meters. Additionally, it should be at least two meters to a maximum of five meters wide. While these are the standard dimensions, some players, especially new ones, may find it challenging to play in larger pools. In such cases, it is better to go with a smaller size pool with a smaller net.
Now, you must be wondering how to build a pool volleyball net- right?This can be done using PVC pipes and bungee cords or straps, which should run across the breadth of the pool and be centered along its length.
Most pools have shallow and deep ends, and placing the net close to the deep end will make the game fun and exciting. It will ensure that both sides have an equal amount of space to play in.
Tip
While volleyball courts on lakes are built with standard dimensions, residential ones can be built according to custom specifications. Therefore, it’s wise to seek advice from a professional player for the best results.
The Difference Between Pool Volleyball And Other Types Of Volleyball
Several differences exist between pool volleyball and other types of volleyball. For instance, indoor volleyball requires a heavy ball that can move faster in a larger space. On the contrary, the ball used in pool volleyball must be large, waterproof, and tear-resistant.
Another key difference is that the court size is smaller in the case of water volleyball compared to other types of volleyball. The reason is that it is quite difficult to run in a pool compared to running in an indoor court.
What Size Pool for Volleyball Final Thoughts
With that, this guide explaining what size pool for volleyball is best has come to an end. Generally, you can purchase pool volleyball kits according to the size of your pool, but in some cases, you may have to take the DIY route.
You can also have an electric awning constructed over your volleyball pool, but make sure to check how to manually retract electric awning before doing so. Also, take proper measurements and use the highest-quality materials.
That’s all for today. Until next time!
A retracting electric awning is an adjustable accessory that can extend either manually or by a power awning switch. They offer shade and comfort when attached to an RV or trailer, especially during extremely hot or rainy days.
I highly recommend a retractable awning if you enjoy holding tea parties outside your house or campsite. Plus, it is fairly easy to find the best retractable awningsthat cater to your individual needs and environment.
However, since retracting awnings can often get stuck, I have explored the procedure that can help with such situations. Although a YouTube video may also help, a detailed step-by-step written manual can offer better hands-on guidance. So, let’s get started…
How To Retract A Power Awning
Awareness of the basics is crucial when using any tool or device. Thorough research helped me identify potential issues and their possible solutions. To share my experience with my readers, here’s a manual or guide I have put together that I found helpful.
Reasons Why A Power Awning Can Stop Working
There are many reasons why a power awning may stop working. However, the three leading causes why an awning retraction system may malfunction are as follows:
Broken mechanical parts
Motor failure
Power problems
I have listed the possible solutions using minimal tools and effort based on each of these issues.
1. Broken Mechanical Parts
Broken or malfunctioning mechanical parts are one of the primary reasons why the power awning of the RV may stop working.
First, initiate a manual override to begin looking for possible broken parts. Most awnings have a hole on top of the motor cover, which you can use to override the power awning. Use a drill and socket to rotate the motor.
Warning
If you find that the motor is grinding and does not slide smoothly, you may have a mechanical problem. You can address it by removing the plastic cover from either side of the awning and looking for broken gears and damaged fuse or wire on the motor.
2. Motor Failure
I bought a replacement motor when I found that my RV awning had a motor failure. If the motor does not respond even after connecting it to a 12 V, there might be a potential motor failure.
Tip
To check the power awning for similar problems, try to see if it is disconnected from the power source.
How To Replace A Motor On A Power Awning
Replacing the broken motor of the electric awning is not as challenging as it sounds. The whole process usually takes 25 to 30 minutes to complete if you can figure out the details. Here’s a step-by-step manual to replace the motor.
Tools Required For Replacement
Screws and screwdriver
A ladder
10 mm wrench
A ratchet
Step 1
The first thing I did was extend the awning up to two feet. If the motor is not moving at all, you will need to override it to make some room for the replacement.
Step 2
Then, tie the awning arms to the bracket that can attach to the side of the RV. Remember to do the same on the other side when done with one end.
Note
Tying the awning arms to the bracket helps to stabilize the awning while removing the motor.
Step 3
Next, you must remove the motor covers from the front and the back. These are usually placed on the right side of the awning.
Step 4
Pull aside any wire that comes in the way and access the plugged motor. Proceed to unplug it.
Step 5
Find the three bolts connected to the motor and remove them using a 10mm wrench. This will loosen up the motor, after which you can gently remove it.
Step 6
Replace the old motor with a new one, align the gears and rotate it back into place. Once the screws are all lined up, tighten the screws and reconnect the wires.
Step 7
Begin operating the motor to see if it is working correctly. If things look good, replace the plastic covers and untie the arms.
Once you have followed these instructions, the motor should be able to retract the awning.
3. Power Problems
Perhaps the most common issue with RV retracting awnings are power problems and electric failures. If the awning motor receives insufficient power, it might be unable to retract the awning. The two possible reasons for such power failure are:
A. Loose wiring
An unstable electrical connection can sufficiently damage the retracting system of the awning and lead to electrical fires.
To test the wiring, you can unplug the fuse and awning motor and connect the battery to a 12 V power source. After connecting, if the awning moves properly, you might have a problem with the switch.
Checking the switch connection is essential to address this problem. I used a small piece of wire to connect it to a 12V power terminal and then retracted the switch. If the awning retracts smoothly after this, the awning switch needs to be replaced.
However, you might damage the awning while looking for loose wires, so it is best to call in a dealer.
B. Low Power
I have discovered that low power in the RV can lead to faulty rolling. This usually happens when the RV battery is low quality, or the 12 V power source is unstable.
The manual way to check for low power is to place a voltmeter on the battery and see the reading. You can also figure out a faulty battery by running the awning with the meter on. If the meter reading drastically drops, a battery change is required.
However, it is essential to remember that different motors have different power limits. Living in an area with strong winds requires a more powerful motor, so consider looking for the best retractable awnings for windy areas.
How To Retract An Awning Manually
If an awning is simply stuck and does not require fixing, retracting it can be pretty easy. Let us look at the retraction manual that works for me:
Step 1
Unlock the travel latch connecting the awning to the side of the RV. Also, an awning that is spring-loaded may have knobs that require loosening. Repeat this for the other side. Then, turn the locking lever to a “roll down” position using the awning rod.
Step 2
Pull and attach the rod to the strap loop. I often walk backward with the rod to help with the pulling. However, two people are sometimes required to be present for this. Since one end of the awning can get stuck, the other person may need to tug the arm.
The arms remain in place even after letting them go on awning models that do not have a spring. Thus, it is essential to know your type of electric awning.
Moreover, spring-loaded awnings may require you to slide the inner arm towards the upper arm and press on the arms until the fabric is taut. After that, tighten the knobs and repeat on the other side.
You can also adjust electric awnings according to your height and angle of comfort by simply pulling the lever or latch on each arm.
Step 3
When this process is complete, remove the strap and secure it to the RV.
Warning
If the strap is allowed to hang loosely, someone might accidentally tug at it, which can collapse the awning. To prevent this, ensure that the strap is secured.
How To Manually Retract Electric Awning Final Thoughts
Retractable awnings can keep our vehicles cooler and more comfortable. Moreover, they are convenient since you can retract the awning with just the touch of a button. Or if things go south, you can quickly fix it using a manual.
In my experience, the outdoor space looks much more attractive after attaching an electric awning to my RV. It also helps when I wish to step out in the dark or the rain without the risk of getting wet.
That ends my manual on how to retract an electric awning. I have published another informational guide titled “What Size Pool For Volleyball?” where I share my insights on pool sizes.
That said, I’ll be signing off now. Until next time, stay safe!
Retractable awnings pare worth investing in as they provide ample shade for your patio or deck and protect it from all the natural elements like rain, sun, wind, and snow. They are easy to use and store away, making them last longer.
While on the lookout for the best retractable awnings, I’ve come to realize that people are still very much unaware of their pros and cons.
Hence, many people aren’t sure if retractable awnings are worth it. But after extensive research and using a couple of them, I have compiled the pros and cons of purchasing a retractable awning. Here is a summarized list of all of them.
Pros Of Retractable Awnings
1. Retractable Awnings Can Cut Down On Energy Costs
The main reason I purchased a retractable patio awning is for providing shade to my deck from natural sunlight. This made the outdoor space more comfortable. Besides, the initial cost to purchase and install retractable awnings is less when compared to the cost incurred for other backyard amenities.
The retractable patio awnings helped me save significant energy in the long run. Aside from the outdoors, the shade can cool down the inside of your house, meaning air conditioners don’t have to run for long to keep you cool.
Besides, an awning can help make the cooling of your AC more effective, helping you save money on your power pills.
Tip
Make sure to get your retractable awning installed by a professional who knows his way around it. Doing it the DIY way can result in errors and the retractable function of the awning not working properly.
2. They Have A Longer Lifespan
Non-retractable awnings do fall on the cheaper side of the spectrum, but they do not last as long because they are more likely to be damaged by bad weather conditions like rain, high winds, or heavy snowfall. You can easily fold them and store away to keep them from getting damaged.
Besides, sun exposure affects everything just like it does affect humans. When the fabric on the awnings is exposed to the direct sunlight for extended periods of time, it can end up being bleached and faded. Non-retractable awnings cannot be retracted, so the chances of the fabric being ruined due to sunlight are much higher.
3. They Protect Indoor And Outdoor Furnishings
Purchasing retractable awnings helped significantly in protecting my outdoor furniture. But that’s not all, as they also shielded the furniture inside the house from the elements, especially sunlight.
Since the shade will also extend to the interior of your home, the furniture near the door and windows won’t be exposed to excess heat and sunlight. This, in turn, will protect all indoor and outdoor patio furniture from getting bleached due to sun exposure, fading over time, or getting cracked.
Some Other Things To Keep In Mind
1. Retractable Awnings Are More Expensive
Retractable awnings are expensive compared to other awnings like the manually operated ones. Hence, make sure you factor in features like durability and water-resistant fabric to make the most out of them. You may even go for remote control operation for ease of use.
I’d recommend getting retractable awnings only from a reputed company so that you have greater peace of mind about its quality.
2. Cleaning And Maintaining A Retractable Awning
All types of awnings require cleaning and maintenance on a regular basis. Since retractable awnings have many foldable joints, the probability of dust and grime accumulating in the corners is high. This means you will have to clean the retractable awning frequently to help it function optimally.
Furthermore, water from rain can accumulate on the roof fabric of, which, in turn promotes unhealthy mold growth. You will also need to clean the metal parts of the awnings to ensure they stay free of moisture and debris and function efficiently.
3. Replacing The Electric Sensor Can Be Pricey
There are two main kinds of retractable awnings: manual and motorized. Motorized retractable awnings cost quite a lot, but they are more convenient to use. A lot of motorized awnings come with their own remote controls that make it easy to operate them, while others have sensors that cause them to retract automatically when it rains.
Certain electrical awning sensors can be obsolete, so you may need to manually retract the electric awning. To make sure that the electric awning works efficiently, its sensors have to be replaced periodically, which ends up adding to the expense.
Retractable Awnings Conclusion
Given the utility and durability of an retractable awning, I’d say it can be a worthy addition to your outdoor setup. These models also come in various colors and sizes so that you can choose the right one for your preference.
Have you ever considered building your outdoor pizza oven? It something extraordinary, the taste of a pizza cooked in a natural oven is unmistakable, superior to the regular gas oven. The DIY Cob Oven Project ahead will aid you in this endeavour, step by step, in this simple and extremely rewardful project. You can use a cob oven project to make bread, pizza or different cookies, the taste is extraordinary, unique and definitely worth experiencing.
Every project of course starts with a little planning. Think everything through and find the best place in your backyard to position the cob oven. Take in consideration that you will entertain a lot around it and that it can look extremely well if realized with passion and determination. By positioning it nearby a outdoor fireplace you will have whole lot to earn, the warmth and coziness of a fireplace and the taste of a naturally cooked dinner will surely create a special atmosphere.
The base of the oven can be realized with wooden logs, upcycled bricks or local rocks such as flagstones, as showcased below. This base will give you the comfort of working on a decent height, without hurting your back. Moreover the base protects the oven from rain and snow, allowing it to maintain the heat for much longer and giving it extended usability during the unfriendly season.
After determining the area covered by the base it is time to work on height. Overlap the materials up to the desired height. Fill the center that would isolate the base of the future even from the earth further more. You can use sand, empty glass bottles or basalt rocks. This layer should be stable so if you choose to use empty glass bottles, which are highly effective thanks to the air that they will contain, make sure that you have used some earth to fix them into place.
Carefully flatten and level the top of the base now. It is time to lay the foundation of your future cob oven with firebricks. Make sure that you have the right set of bricks or the effort will be in vain. Fire bricks retain heat, allowing your oven to release it onto your food goods.
After positioning the bricks in the center it is time draw the future center of the cob oven and imagine how it will look. Here your pizza will be baked . It should be round to ensure that the heat is retained evenly by all sides.Make sure that the front door, the three bricks below, is being protected by fire brick as well.It would be useful to ensure that walls are making contact with fire bricks in the interior and not with base directly, in this manner you will keep the heat in the oven far longer.
If you have the time and will, sift the sand that will go into the making of the cob mixture. This will ensure a better quality and a longer life.
Shape the negative, the mould with wet sand, on which you will stick the cob mixture. This is basically the shape of the cavity inside the oven. Mark the center to keep track of the desired height. In this case 16".
Bellow showcased the finished mould in wet sands resides. It will be covered in cob mix on the nest step but give it some time to dry.
Cover the mould with some wet newspaper to keep the mould`s shape still while you slap the wet cob on top of it.
Mixing the cob is no easy job. 2 parts sand, one part clayish soil, some chopped straw as a binder and water, these materials have been used. If you want to spice things up use some premium horse manure, it will help the mixture bind even more.
Work on DIY projects with love or do not work at all.
"Work is Love made visible. And if you cannot work with love, but only with distaste, it is better that you leave your work and sit at the temple and take alms of those who work with joy. For if you bake your bread with indifference, you bake a bitter bread that feeds but half our hunger."
Kahlil Gibran, The Prophet
It is time. Starting from the bottom up it`s time to lay the first layer, do your best to keep it at an even thickness. Wait the first layer to dry up a little, not entirely, before you go on with the next layers.
Take note that the height of the top inside of the oven, basically the highest point of the dome, needs to be x 1.6 the height of the door opening. In this project the door opening was 10" and as a result the highest point of the dme was at 16". This ensures optimal air and heat circulation when the oven is being heated up with fire inside.
Adding the last layer.
In the end, the whole thing looked a lot like a giant frog so we've decided to ensure that the oven is perceived that way. This act made our cob oven far far more graphic and appealing.
The finished Frog Horno with the wooden door in place
You are done. Start by making a 15 minute fire, everyday, for a week. These daily heat injections will make the cob oven more durable. Cooking comes next. Get creative and enjoy the results of your extraordinary cob oven.
What do you think about DIY Cob Oven Project? Would you be interested in using one outdoors for your special pizza recipe? Please take note that these can be realized indoors as well, in a shed or similar establishment. All you have to do is to ensure that the furnace has another air to function and allow you to breathe as well.
If you were told that you can build an inexpensive fully home-made solar panels instructed by a diy solar panel guide right in your backyard would you believe it? If you actually take the time to study the ingenious solar thermal systems today you will get to the conclusion that you actually can and is not as hard as you would have probably imagined, neither as expensive as you`ve imagined. Basically the simple solar system proposed uses indoor air directly to supplement home heating and the most extraordinary part is that this home build solar collector is realized out of empty recycled aluminium cans.
Today the renewable ecological energy sources are starting to spread yet non-ecological conventional ones are still producing enough electricity to set the tone of the entire world as the most important factor is directly related to profit. High profits are obtained by controlling strategic crude-oil reserves and as a result alternative energy will always come second until these will actually ran out.
By using this diy solar panel you will obtain the best results when it is sunny regardless of the outdoor temperature as the pop cans will gain heat rapidly. The fans will drive warm from the interior of the cans back into the room and if you want to achieve full autonomy or to auto-sustain yourself in remote locations you can simply add a PV solar panels or a wind generator and connect them to power the air blower.
Needless to say that if you are going to make the effort and gain your heat of a solar panels you should perform a few studies to make sure that your home insulation is able to withhold heat and that the loses are as small as possible. You can actually use a smaller solar system to heat up your home if the insulation is performing well.
DIY Solar Panel Assembling
The case that will nestle the solar panels will be realized out of wood of 0.6 in /15 mm while in the front a 0.12in / 3mm poly-carbonate or Plexiglas sheet or tempered glass can be used. The back of the solar panel will be insulated properly with a rock wool or styrodur of 20mm / 0.8 inch. You can use aluminium cans absorbs from different sources, whether they`re soda cans or beer cans it's irrelevant but all of them will be painted in matte black with a paint resistant to high temperatures. The top and bottom of each can will be pierced and bent in a special manner to ensure a highly efficient exchange between cans for the air flow.
Building the DIY Solar Panel Step by Step Guide
You should start by collecting the empty aluminium cans for the upcoming solar panel assembly. Do your best to wash them thoroughly because they will spread odors very quickly if you fail to do so. Make sure you use cans made out of aluminium, there are a few out there made of iron as well, make sure you have the right ones with a magnet.
Be insanely careful when you cut and shape the small fins at the top of each can as the whole point of this process it to induce turbulent airflow inside the pop cans so the the air passing through the tubes will collect as much heat as possible from the warm pop-can wall. It is recommended to cut the top of the can in the form of a start and distort three parts by using pliers as displayed in picture 1. Make sure all pop cans have received this treatment before you glue them together. Mark three holes on each one with a nail and drill the bottom by using tool similar to the ones showcased in the picture number 2 and 3.
Picture 1 Picture 2 Picture 3
Please execute these with caution as the procedure is extremely dangerous thanks to the thin wall of a tin can that cause injuries to your hands with ease. After the drilling is complete you can remove the excess parts with pliers.
It is recommended not to remove debris or sheets of metal with the bare hands and do your best to remove grease inside the cans as much as possible; using synthetic degrease agent will do the job with ease. All these steps should be realized either outdoors or in a very well ventilated room.
Keep in mind and be aware that procedure is flammable as well. Do not smoke or use any open flames near the work area.
In the next part you will start to glue all the cans together by using a silicone adhesive resistant to high temperatures of at least 200°C/400°F. On the market today you can find multiple solutions that can withstand temperature up to 300°C/570°F with ease. Top and bottom of all pop cans should be compatible and fit perfectly one onto another to ensure the air flow. Place just a little glue or silicone on the edges of the can and press it against the next one, this will ensure a great bonding without allowing the glue to run from the edge. In the Picture 4 below you can see the section of two pop cans glued together while an entire series of finished cans has been showcased in Picture 5.
Picture 4 Picture 5 Picture 6
Picture 7 Picture 8 Picture 9
Picture 10
It is time to create a template for stacking cans as the L profile shown in the Picture number 6. Two simple wooden planks nailed together can do the trick. You need this template to ensure the support for a solar pipe during the drying process. Moreover, you can secure the cans onto a template by using any ordinary jar rubber.
Pictures 7, 8 and 9 are displaying the gluing process. Picture 10 presents the pipe fixed in motionless position until the glue gets completely dry.
Picture 11 Picture 12 Picture 13
The exhaust boxes and intake for the solar panel will be realized out of either aluminium or wood of 1mm/0.04 in thickness as showcased in figures 11 and 12. The gaps around the edges should be secured with adhesive tap or heat resistant silicone. In the next step 55mm /2.6 in diameter cut outs will be drilled on one side of the intake/exhaust box as you can see in the Pictures 12 and 13, here the first rows of cans will be glued to the air exhaust/intake boxes. You can see all the parts already assembled awaiting the painting process in figure 13.
Keep in mind that the adhesive is drying very slowly and it should be let to rest at least 24 hours.
Solar absorbers will fit in the casing made out of wood in the Picture 14 and the back side of the diy solar panel will be made out of plywood. The insulation can be seen in Figure 15 and it will be realized out of either rock wool or styrodur. Be careful when you insulate around the openings for the solar collector air inlet/outlet.
Preparations, protection and painting of the box comes next. Special hooks can be attached in all the four corners to ensure that the solar collector can be mounted easily on the wall as in Image 16 but using 10mm/0.4in screws, Figure 17. The empty box is positioned for marking and drilling for air inlet/exhaust.
Picture 14 Picture 15 Picture 16 Picture 17
Picture 18 Picture 19 Picture 20
In the end the solar absorbers will be painted in matte black and be positioned inside the housing. Covering the solar panel with plexiglas secured through silicone comes next. Keep in mid that polycarbonate and plexiglass is slightly convex and will offer the construction additional strength. In the Figure 18 you can see the solar absorber without plexiglass while the complete solar colector is shown in Picture 19 and finally the installed element is showcased in Picture 20.
Take as example the pop-can diy solar panels on YouTube. Video shows how solar panel operates on a bright day. After first 20 minutes, panel raised the air temperature inside living room to 50°C/122°F.
Keep in mind that this solar thermal system will not be able to retain thermal energy after it produces it. When it`s sunny outside the solar collector will produce heat yet it is necessary to use it immediately to heat the room. In the same manner if the sun does not shine you should intrerrup the air supply as it will slowly cool off the room. You can install a shut off valve will which can reduce unnecessary heat loss to avoid this incident.
You can also improve this installation with different electronic components bought from various stores. A differential thermostat can help you reglate the temperatures if you need more comfort. Keep in mind that if the on/off temperatures will be calculated carefully this diy solar panel is able to produce an average of 2 kW of energy for home heating.
Important note: This solar thermal system is not able to accumulate thermal energy after producing it. When it’s sunny, solar collector produces heat, but it is necessary to use it immediately for heating the room. If the sun does not shine, it is necessary to interrupt the air supply to the solar collector, otherwise the room will begin to slowly cool off. This can be solved by installing shut-off valve, which will reduce unnecessary heat loss.
Differential thermostat (snap disc) controls the fan. This thermostat can be bought in better-equipped electronic component stores. Thermostat has two sensors. One placed inside the top opening for warm air, the other inside the lower opening for the supply of cold air in the solar collector.
If on/off temperatures are set carefully, diy solar panels are able to produce an average 2 kW of energy for home heating. This generally depends on how much sun do we have during the day.
Solar Panel Test Drive
The solar collector dress rehearsal can be conducted in the backyard before installing the system on the house. Do the procedure in a sunny day without clouds. The air blower used in this project has actually been a PC cooler salvaged from a faulty power source of a personal computer so do not spend to much on these components. After 10 minutes in the sun from the solar collector is out hot air temperatures of 70°C/158°F! Needless to say that test results have pushed us to install solar heaters on the house as soon as possible.
Soon after the installation of the collector has been finished the outside temperature was -3°C/26°F and the element was blowing 3 m3/min (3 cubic meters per minute) of warm air. For the end result a more powerful fan has been used. Heated air temperature went up to a staggering +72°C/162°F and the temperature has been registered with a digital thermometer. To calculate total heating power of the collector, the calculation of the air flow and average air temperature on output. Calculated power which DIY solar panels produced, was almost 1950 W watts which is almost 3 HP
In conclusion the results have been extremely rewardful and we would dare to say that these DIY solar panels are definitely worth making. The collector at least can be used to complement your power source in order to save a huge amount of money.
Despite being extremely loved people all around the world aquariums are not that present in home landscapes and small gardens in general. If you throw a look at the effect that these ensembles can have when nestled in greenery you will freeze, mesmerized by the amount of vibe, life and calm infused. Along small ponds, swimming pools, water fountains, waterfalls and lush vegetation a small backyard aquarium can really put the cherry on the cake in a glance.
Aquariums will also bring tranquility along with color and sound into your backyard beautifying your small garden from all possible directions with no disadvantage. All you need to worry about is occasional systems maintenance, for all the rest there are automated systems today. Sit back and enjoy your drop of heaven.
1.Small Fish Pool With Transparent Wall Spreading Color
We would love to hear your valuable feedback on these small garden ideas containing improvised backyard aquariums. We have found them different, simple and easy to realize yet sublime and extremely powerful.
A selection of items in our household do carry substance even after becoming unusable, futile. These items can be appreciated for their looks, for their age or for the good materials contained. They`re different, rare, maybe even unique. Tool boxes are such an item and so are chicken feeders, rain gutters and galvanized buckets can be helpful too, our backyard contains such items, items that at some point we are to repurpose for the better.
In the following rows we have curated a list that encapsulates diy chicken feeder re-purposing ideas to realize, they`re all creative and graphic and we would love to hear your thoughts on the subject in the comment section below.
Cleanse the bird-feeder and use it to proudly display family photos, it might become the most beautiful display thanks to its vintage vibe.
via lifemadelovely.com
Use a bird-feeder to organize kitchen utensils swiftly and free of costs.
Use various recipients to obtain a new focal point in your garden, chicken feeders make great flower pots.
via fresheggsdaily.com
Your new backyard bar can reside on an old chicken feeder. The epic ensemble will now bust a really cozy, rustic vibe that can be further embellished with greenery, vegetation.
Source Unknown.
A metal centerpiece can be realized from chicken feeders, caring an immense amount of flowers, immense beauty.
A really beautiful way to store your indispensable cooking supplies. Find the balance between beautiful vintage and rustic vintage and obtain just the right look.
Simple elements should never be dismissed or discarded. If the item doesn`t fit your decor, ask around, family and friends might have a use for the item. Recycling and up-cycling are utterly important and having an item with memory reused in your household is special, beautiful.
What do you think? We would love hear your opinion on the subject in the comment section below.
If you've found this article you`ve at least thought of raising chickens one day and as any experimented householder would recommend, you need to build a chicken coop before actually purchasing the little creatures; you are here because you have realized that a pre-fabricated coop might not be something that suits your needs and you've made the right decision, you need to build an easy simple chicken coop tailored to your needs, the following article contains spectaculous diy chicken coop plans in easy to build tutorials, 100% free of charge.
Don`t be a chicken, building your own coop is far easier than you think !
It is easy indeed, and it is immense fun, yet to build a coop, you need a plan or a tutorial from an experienced individual, one who has built something like this before, encountered problems, wrote them down, and is passing the information now on. You are in the right place. The internet`s infinity can easily surface thousands of plans for sale or for free, yet not all of them are easy to follow, and not all of them are worth following; most of them are experiences, nothing more.
Here`s where this carefully curated list comes into play.
The world`s most creative, best-looking, and easiest to build 55 chicken coop plans are available below, free of charge for you to build them in the comfort of your home. These are really simple designs in principle, cheap chicken coop designs that you can realize alone in a weekend with the right set of tools.
The thing you are about to materialize is not just a shelter that protects chickens from the elements, it`s a place in which they'll live and as you`ve surely found out by now their happiness is reflected in the eggs quality and therefore the eggs are influenced by the coop, so there are a few things worth mentioning before you start building one from scratch, cast a glance:
1. Chicken Coop Size
The simple general rule states that one chicken needs 4 square feet of coop space so if you aim for three chickens, you`ll need a 12 square foot coop; 3x4; 6x2 or above. If the chickens are cooped all the time, things change; they will need at least 10 feet each.
Insufficient space will not only alter the eggs' quality and the chicken`s happiness but will also bring an unnatural smell fast, as stressed chickens behave oddly, and they can even get aggressive with each other, pecking each other. Insufficient space can also invite diseases.
If your space cannot allow at least 4 square feet per chicken, you can attempt 2.5-3 square feet with the sole condition of allowing chickens to be outdoors at all times.
Smaller bantam breeds naturally need space; they can enjoy two square feet.
2. Chicken Coop Location
Consider these factors when choosing a location for your chicken coop:
Shade and sunlight; your livestock needs sunlight throughout the day, but they also require a shaded area.
Natural ventilation; a nice wind flow to change the air would be extraordinary but avoid places with strong wind, usually positioning the coop under a tree checks multiple boxes.
Easy access; usually at least two times per day you`ll be around your flock, make the place easy accessible.
Noise and smell; consider these two things, and they`ll prevent you from positioning the chicken coop close to your house or close to your neighbors.
PRO TIP
You don`t have to pin the coop into place directly, monitor an area for a week, make a trial run if possible, and ensure there are no major impediments.
3. Coop Planning
To protect your things you don`t need a wall and a roof only; the shelter needs to contain things that make your flock healthy and happy. Here are a few things worth considering in the planning process.
MUST HAVE AMENITIES
Chicken coop nesting box; this is the place where each chicken will eventually lay an egg, and you need at least one for two hens; the box ought to measure 12x12x12 inches and be elevated 10-20 inches above ground.
Ventilation and windows are naturally required to ensure the proper environment, as chickens can get sick easily; light is also required for their happiness.
Feeder and waterer"; they need no introduction, simply ensure they`re scaled to your flock correctly.
OPTIONAL AMENITIES
Perch area; it is known that chickens love to sleep on a perch, which makes them happy.
The run, an outdoor fenced area in which they can wander about happily, is important; it improves a chicken`s life.
Dust bath container; chickens use dust or sand to clean themselves and stay healthy; this earthy mixture is part of their life.
Poop boards, usually positioned beneath the perching area, this board can save you a lot of time when it comes to cleaning.
Artificial lighting, in the winter, especially warm lights, can emphasize egg production; they also create a comforting ambiance.
Basic information about the chicken coop lies above, yet for detailed information, we highly recommend that you consult a specialist. In the following rows, we will present our carefully curated list of the world's best chicken coop designs. We invite you to check each design and draw inspiration. We would love to hear your opinion and experience in the comment section below.
57 Free Chicken Coop Plans
1. A-Frame Red and White
An A-Frame chicken coop in white uses a small red door to create a fairy-tale setting for little chickens.
Dimensions (feet)
8 x 6 footprint
Capacity
2 chickens
Difficulty
3/10
BUILD THIS COOP !
2. Build a Cape-Cod Chicken Coop Design
The dwelling is certainly a bit more beautiful than certain homes; stark white, black joints, wooden shingles, a splendid combination. The cape cod inspired chicken coop is nestled in greenery and it has its potted plans to emphasize it.
A really happy state, a tiny chicken coop beautifully decorated with everything from greenery to house sigil the ensemble is here to stay, emphasizing the world through both design and naturalness. The extraordinary design has been discovered via Pinterest and the source is unknown yet the design is simple enough to follow, powerful enough to inspire.
Dimensions (feet)
4 x 4
Capacity
4 chickens
Difficulty
4/10
4. The Luxuriant Chicken "Fresh Eggs" Suite
Ana White has changed the DIY community, it is known. The vintage armoire re-purposed above into an exemplary chicken coop that has been vouched by time, it offers fresh eggs and great design everyday now.
It is a chicken coop in disguise, it features a beautiful porch and a chandelier meant to satisfy even the most exquisite chicken in the world. The shabby chic of the dwelling simply cannot be overlooked.
Dimensions (feet)
Unknown
Capacity
Unknown
Difficulty
10/10
BUILD THIS COOP !
6. Blue Chicken Chalet
This is the extraordinary result of a family intrigued by a 600 dollars price tag on a small chicken coop for home use. A price can lead people towards extraordinary things and the construction is a living proof !
Greenery, vegetation, immense beauty in a setting that could be the ideal model for the dream home of many chickens. The design uses exemplary views as the home itself is elevated allowing chickens to enjoy great views towards the green heaven.
If you`re looking for your first chicken dwelling the dog house might be the ideal place to start, build an extra door and a simple extension with chicken wire on a wooden structure; alternatively you can use PVC.
Dimensions (feet)
3 x 3
Capacity
2 chickens
Difficulty
1/10
BUILD THIS COOP !
9. Red Little Barn
Red with white accents barn shelters chickens in a beautiful and comfortable shape boosting country charm.
A beautiful colorful chicken coop mansion that spreads joy. When we first saw it, we simply asked when we could move in; the stylish chicken coop can nestle some really happy chickens in there !
You can use the modular pieces of PVC to create numerous chicken coops yet the one above has a great advantage, it can be moved easily thus offering your live stock the chance to change scenery quite often; this also helps you in maintenance !
The beautiful design can be built by amateurs with ease thanks to a highly detailed guide envisioned by Lynda. The scale can be adapted yet for small ensembles it works beautifully, working that charming cottage look in its favor.
To care for your chicken can mean more than building a shelter, feeding and cleaning after them. Decorations can help. One extraordinary installation that wears the name " On the farm" has been tailored by the Scotts` and it looks surreal, cast a glance !
Love in DIY at a small scale to the chicken`s advantage. A really splendid example worth following.
Dimensions (feet)
5 x 5
Capacity
6 chickens
Difficulty
6/10
BUILD THIS COOP !
15. Tailor a Cute Mini-Chicken Ranch
One playhouse can be creatively re-purposed and whether you already have it or you start looking for an used one re-design simple chicken wire on a wooden frame will help you shape a beautiful mini-chicken ranch for your live stock.
This is a design in the top ranks, it is not that graphic nor is it really easy to build yet the author, Natalie has mentioned every nail in used in the process along with 3D imagery from a Google SketchUp file and as a result the building process becomes far easier to handle. This is the result of experience, a design that simply works.
The coop itself is large enough for 6 chickens yet the extensive run-yard describes the dream world of every chicken on earth. This design has been built by two individuals, they`re not design professionals. What do you think? Are you ready to take on a cool diy project?
The author of this beauty, Rick, states that this is his first building project, a fact hard to believe as the result is simply extraordinary. It is entitled South City Coop and the main attribute is the volume here, beautifully integrated into the home design. Windows allow great ventilation and natural light in.
According to the guys over at BarnGeek this exact design is being sold for 2,000 dollars on the market yet they`ve built it using leftover lumbers from another project; the big advantage of the design is its ease of access to eggs and feeders.
This adorable little chicken coop has an extraordinary design alone but it also includes an additional heater for rough winters to further emphasize the comfort of the little creatures. The elevated position also translates into extra protection from predators and the elements.
Rustic, pretty and functional yet spiced with certain amenities the palace above enjoys the shade of a tree and a green field all around yet privacy curtains have been installed if the little creatures cannot withstand the sun`s heat during those long summer days.
From small to large you can find four chicken coop plans below along with one automatic waterer, one feeder and one plan for nesting boxes. These plans have been provided by Universities apparently, University of Tennessee and North Dakota Agricultural College, and they`re the result of certified studies so they`re by default: good.
Door sweep, removable roosts, electricity for heated water feeder, lights, infrared chick-camera, good ventilation, everything that one could need in a chicken coop. Attach this to a run and you have something extraordinary. The complete plans are not included yet the design itself is a resource on its own.
Pallets are some sort of treasure, they contain great wood with little to no costs, the can help you shape something extraordinary like the coop design above with 0 costs, you can actually shelter 32 chickens with no costs at all. The Pallet Palace above is an immense establishment but you can always scale this design to your needs.
Green mind and wood`s naturalness make an extraordinary combination and here they were sculpted in something that resembles a really small chicken home, the little ones can even enjoy lounge chairs in bright colors.
It uses reclaimed wood yet it boosts a powerful colorful red with great windows , a cut-out door allows easy access and shapes the vertical component of ensemble.
The phrase " be all you can be " has got a little twist on this old swing set now A-Frame high end chicken resort; chicken of all kinds can enjoy sunny and shaded areas emphasized by exotic potted greenery in full comfort.
The wood salvaged from wooden pallets is worth 1000 dollars according to Judy, the extraordinary artist behind it ! All that wood, free of charge and the chicken coop looks exemplary as the wooden pallets have been disassembled in the process, a highly rewardful process.
A super unique shape, a super unique shelter that looks extraordinary whilst being super easy to realize. The coop takes little space as it has has been developed vertically unlike other chicken coops in this list. Salvage two three wire spools and you can sculpt a super cool chicken for little breeds. Needless to say that the process can be easily scaled.
Home Depot invested time and resources into creating a small chicken coop ready to shelter three chickens and they`ve listed every materials used in the process. Videos have been produced too to help you in your DIY endeavors, throw an eye !
Dimensions (feet)
4 x 3
Capacity
3 chickens
Difficulty
3/10
BUILD THIS COOP !
33. Elegance in Red Re-purposed
The right route in DIY is born from creativity and the individual`s imagination; it builds something unique, beautiful, extraordinary. The small red cottage above has a rustic charm that seems surreal, splendid, suited for people and chickens alike.
A chicken coop that you can truly build in hours is here for you, it has been envisioned by Farmer Kitty, that is her username on BYC. She build inexpensive solutions as an alternative to complex expensive kits that fail to impress chickens despite their price tag.
Ana designed this for a friend that built it in 30 hours only with three people working on it over the course of four days. Every tool, every material used has been provided and the tutorial also contains detailed 3D SketchUp pictures that will aid you in the building process.
Wooden pallets can be the ideal materials, they`re inexpensive, durable, resilient natural materials that will pair well with the little animals. The cottage project can be scaled to fit your live-stock needs with ease.
A curvy roof can function better than a flat roof as it receives sun rays more efficiently and captures more warmth, it is also significantly sturdier and more resilient when it comes to strong winds; it is far more beautiful too. If you are careful enough in the planning process the design is extraordinarily practical in installation too making this a really intriguing solution.
Dimensions (feet)
8 x 8*
Capacity
16 chickens
Difficulty
5/10
* Dimension for the shelter, the complete footprint with the run included measures 8 x 16.
An architect would use the small scale to his advantage to experiment with the geometric environment in the chicken`s favor. Create the right design and embrace it.
Dimensions (feet)
5 x 5
Capacity
4 chickens
Difficulty
9/10
BUILD THIS COOP !
39. Modular PVC Chicken Coop
Inexpensive, durable, easy to assemble and most importantly : modular and scalable PVC is, an extraordinary alternative to wood when it comes to chicken coops. You can build a chicken coop with no nail, no hammer. In the section below you can find the complete details for your next coop.
Dimensions (feet)
4 x 4*
Capacity
4 chickens
Difficulty
4/10
* Dimension for the shelter, the complete footprint with the run included measures 10 x 9.
The smallest place in your yard can shelter a beautiful home for your chickens, create something that you truly like they`ll surely love it. In the design above the roof has been used as a raised planter and it now grows natural organic food for home use. How do you see the extraordinary combination above?
This is not a free option, indeed yet it is here because its price to quality and size average is very good, it is a ready to use chicken coop with all the right items that one might need to provide your flock full comfort. For the amateur diy enthusiast that misses certain tools the fair price of the ensemble above might end up far cheaper than purchasing all the right tools.
Karl Caden has shared to the world`s benefit no less than 100 chicken coop plans options for sale yet his best sample is sharing free of charge. It is a great design that certainly deserves your attention, cast a glance !
Dimensions (feet)
12 x 3
Capacity
9 chickens
Difficulty
6/10
BUILD THIS COOP !
43. Elegant Circular Chicken Coop
A chicken tractor basically means a portable chicken coop that you can move around your yard and it has two immense benefits : it naturally fertilizes your garden as you move it along and it allows your flock to remove pests and weeds in the process. This solution is also considered convenient when it comes to maintenance.
Dimensions (feet)
8 x 4
Capacity
4 chickens
Difficulty
4/10
BUILD THIS COOP !
44. Wooden Chicken Tractor
The chicken tractor plan above has been envisioned by The Kerr Center and it has sufficient room for three chickens.
Dimensions (feet)
5 x 2.5*
Capacity
3 chickens
Difficulty
5/10
*Dimension of the shelter; footprint with run included measures 10 x 5.
This chicken coop plan has been uploaded on Instructables and today it has no less than 600 favorites and almost 800,000 views that confirm its epicness. The creator, Robb describes the design as being inspired by certain barns in Kansas and with costs that average 40 dollars it is definitely something worth considering. Find out about Robb`s experience and thought process behind the design in the tutorial below.
The design might not stand out yet the project above is the result of a highly experienced DIY`er that builds in a matter of minutes anything you might need. The design showcased functions brilliantly and had little to no costs. Above the roof can be opened for easy maintenance.
The dwelling above can comfortable shelter 10 heavy layers in full comfort and you can see the head space is immense, a dream world for a chicken.
Dimensions (feet)
8x4*
Capacity
8 chickens
Difficulty
8/10
*Dimension for the shelter; the footprint of the ensemble, run included, measures 12 x 8.
BUILD THIS COOP !
48. Swift Small Chicken Coop
If you are just starting out and need two three chickens to save some money on eggs daily no large, complicated and expensive coop is needed. You simply need something strong, weather-proof to provide comfort to your little creatures, the simple ensemble above can be realized with nails, salvaged wood,a saw and a hammer without sacrificing on the chicken`s experience.
Immense, beautiful and secure the coop above checks all the boxes for a certain price yet it will guarantee years of exploitation with little maintenance. The scale can be adapted and in the design process the ensemble has already been optimized in terms of materials and efficiency.
Dimensions (feet)
4x5*
Capacity
5 chickens
Difficulty
7/10
* Dimension for the shelter; the footprint of the ensemble, run included, measures 10 x 5.
It is small yet it is a house entirely, a coop bigger than most items on our list ready to shelter chickens indoors only if need be. Ventilation has been solved naturally through windows and while keeping chickens indoors at all time is possible this is not recommended.
Dimensions (feet)
8x8
Capacity
16 chickens
Difficulty
7/10
BUILD THIS COOP !
51. Green in Greenery Farm Chicken Coop
This is a great one, it is super simple and super functional, it can be used with little to no costs if you use salvaged wood. The rectangle footprint of the coop is also extraordinary space-efficient even though in this chickens have sufficient space outdoors to wonder about.
Ana White has shared with the world extraordinary plans numerous times and the portable chicken tractor above is no exception as it has an extraordinary weight-space ratio and little costs of production. Chickens would be comfortable with head space yet the coop can be move rapidly if need be. Needless to say that the project can be scaled to your needs.
It is known that log cabins have always been graphic, warm and cozy spreading a rustic ambiance. In movies and photographs we see this design language used on alpine chalets usually yet a log house scaled down can be used to shelter chickens too, the solution is definitely resilient and graphic.
To buy a prefabricated solution for 10 chickens would cost around one thousand dollars for the coop alone yet numerous DIY enthusiasts have designed extraordinary coops with lesser budgets, cast a glance and surge inspiration.
Dimensions (feet)
8x5
Capacity
10 chickens
Difficulty
5/10
BUILD THIS COOP !
55. Shelter For a Happy Flock
The design above has history, it includes the grandparents of Joy Tarter, the individual that today owns a company in the United States entitled Tarter Farm & Ranch. Joy`s parents have built this chicken house in Kentucky back 1985 and it was super durable, easy on maintenance and so comfortable for chickens that the family decided to share the complete project with the world. You can now build this immense shelter for your flock, time vouched for it.
A small chicken coop that can be realized with ease, in a couple of hours you might be ready to grow two chickens comfortable. The tutorial contains an extensive two-part video guide that explains in detail how one could achieve the result above. Feel free to scale this design if you intend to use it for more than two chickens.
A comfortable volume that can hold up to 30 heavy breeds without issue; the dwelling has been constructed by a an amateur yet the result is highly professional and while the design might look plain it looks elegant in its simplicity.
Are you ready to start your first coop? Were these diy chicken coop plans useful? We would love to hear your valuable feedback in the comment section below!
In the absence of a testing kit, the amount of chlorine present in pool water can be tested using distilled water and red cabbage. Testing strips, liquid test kits, and digital testers are other reliable methods for testing chlorine levels in pool water.
Having the best pool test kits at your disposal allows pool owners to test chlorine levels of swimming pool water.
Besides, these kits are useful for testing total alkalinity, pool salt, calcium, bacteria, and other contaminants. But how would you test pool water when these kits aren’t available? – That’s what this guide is all about.
We’ll walk you through some DIY ways to test your pool water without a kit. Let’s dive in, then!
Why Should You Test Your Pool Water?
Testing the pool water regularly will help you maintain its water chemistry, but that isn’t the only reason you should conduct a pool test. By testing your pool water on a regular basis, you can prevent the growth of algae and bacteria in the water. And since our skin is highly sensitive, swimming in pools with low pH or high chlorine levels and bacteria can cause irritation.
Additionally, if the water contains a high amount of chlorine or is acidic, it can damage the pool walls and corrode its metal parts, like ladders and rails. The high acidity of water is especially problematic if you have a heated pool because it erodes the copper element of the heater very quickly.
How Frequently Should You Test Your Pool Water?
Several factors determine how frequently you should test your pool water, but ideally, the initiative should be undertaken at least once a week. But in seasons when the swimming pool is used more frequently, such as in summer, it’s advisable to test the pool water twice a week.
You must also consider testing your pool water after rain and heavy storms since such phenomena can alter its chemical balance. As a pool owner, you must test the water whenever you notice muddiness or a color change.
The frequency of pool water testing also depends upon the types of tests you conduct. For instance, pH and chlorine tests must be conducted twice or thrice a week, whereas testing alkalinity once a week is enough. Furthermore, cyanuric acid must be tested no more than once a month, and acidity testing should be done whenever you need to adjust pH levels.
Testing Your Pool Water Without A Kit
Want to test the chlorine levels of your pool water but unsure how to do without a kit? Well, don’t worry, for we have mentioned some of the most effective ways that you can adopt to test pool water in the absence of a testing kit.
1. Distilled Water And Cabbage Method
To test chlorine levels in pool water with this DIY method, you’ll have to have red cabbage and distilled water, which can easily be purchased from the market. You will also need a strainer, pot, clear container, and knife, all of which are household items.
The first thing to do is to cut the cabbage leaves into small pieces and pour the distilled water into a pot to boil. Once it starts boiling, immerse the cabbage in the water and let it boil for at least 30 minutes. Keep stirring the solution with a spoon or ladle every now and then; after 30 minutes, the crystal-clear water will turn purple.
Then, strain the purple water to remove the cabbage leaves from the solution and get some water from your pool in a container to conduct the test. Next, add just a few drops of purple water to the pool water container.
After a few minutes, you’ll notice the water changing its color depending on the pH level of the water, helping you determine the amount of liquid chlorine present in it. Higher amounts of chlorine can reduce pH levels and make the water acidic.
If the water becomes slightly red, it is acidic, but if it turns light green, it is alkaline. In case the water remains purple, it is neutral. If you have any doubts, use a pH test chart to understand what the color changes indicate.
DIY Tip
To make things easier, you can make your own DIY pH indicator using filter paper as a testing strip. The process will involve soaking the paper in the cabbage water and letting it dry. Once it dries, put a small amount of water onto the strip, which will change its color depending on the pH levels of your pool water.
2. pH Testing Strips
Strip testing is among the easiest and most cost-effective methods of testing your pool water and provides quick and accurate results. Basic test strips test pH, chlorine, and alkaline levels, but others can test copper, iron, salt, and more. Some testing strips can test as many as seven chemicals.
To test the chlorine level, take a sample of the pool water and simply dip the testing strip into it. The test strip will change color depending on the pH level, and the color can be compared to the indicators on the pH chart. These indicators are also mentioned on the back of the bottle of the testing strip.
For those wondering, are pool testing strips accurate, let us tell you that they are highly reliable and can eliminate human errors effectively. Hence, you can use them to test chlorine in the absence of a pool testing kit.
3. Liquid Test Kits
Another method of testing pool water is to use a liquid test kit, which offers even more accurate results than testing strips. To use such kits, you need to add certain reagents to the sample of pool water, which may include phenol red and orthotolidine (OTO).
For testing the pool water using a liquid test kit, collect samples of the water in vials included in the kit, ensuring you fill them up to the fill line. Once the vials are filled, add a few drops of the required reagent to the water sample.
Make sure to check the instructions that come with the kit to know how many drops need to be added for testing different chemicals. After the reagents have been added, shake the vials to mix them with water, and then compare the color of the resulting mixture with the provided color chart. You may repeat the process if need be and use different reagents for testing various chemicals.
And if you’re wondering, “do pool test kits expire,” let us tell you that most come with a shelf life of more than two years.
4. Digital Testers
Pool owners can use a digital water tester to test pool water and check the free chlorine or pH levels present. While such testers tend to be more expensive than other types, they offer certain advantages over other testing techniques.
Digital testers offer an accurate reading of the chlorine levels, so you won’t have to depend on the pH scale to determine the pH levels. One advantage of digital testers is that you won’t have to refill them, which adds to their user-friendliness. Though expensive, they are reusable, making them a cost-effective option compared to liquid test kits and testing strips.
There are different types of digital testers– some need to be dipped into the water sample, while others come with testing strips. In the latter case, a testing strip is dipped into the pool water and later inserted into the tester to get a reading of the chlorine present in your pool.
How To Test Chlorine In Pool Without Kit Final Thoughts
Whether you have stone, PVC, or concrete pools, regularly testing pool water is crucial to make sure it is safe for swimming. In the absence of a pool test kit, you can try using these methods for testing chlorine and pH levels.
These simple DIY methods will help you maintain proper pool chemistry, prevent bacteria and other microorganisms from thriving, and keep it safe from corrosion. And if testing pool water every week or so seems like a challenge, it’s best to hire professional pool maintenance service providers for the same.
With that, it’s time to call curtains for the day. No matter which testing method you opt for, you can rest assured that the results will be accurate.
See you later!
You do not always have to spend a lot on pool volleyball nets. If you can get hold of PVC pipes, an old net, nylon strings, and spray paint, you can make a pool volleyball net at home.
Summer means pool party fun and pool games, and with the best pool volleyball nets, you can have a gala time with friends.
However, you may have a ground pool in a unique size, and you may not be able to find the correct pool volleyball set for it. Well, there is nothing to worry about, as you can make your own net with PVC pipes.
So, let’s start with the things you’ll need for this fun DIY project...
Items Required
PVC
Three ten feet 0.5 inch PVC pipe
Ten 0.5-inch slip caps
Four 0.5-inch threaded male adapter
Two 0.5-inch 4-way cross
0.5-inch top threaded tee
Two 0.5-inch three-way tee
Tools Required
Face mask
PVC cutter
PVC cement
Acetone
Sandpaper or Dremel
Other Essentials
Two foam noodles
Nylon string (50’)
Net (you can use an old basketball net as well)
Spray paint
Beach ball
How To Make A Swimming Pool Volleyball Net
Step 1: Design Your Pool Volleyball Net
To begin with, you will need to design the net and make accurate measurements. If you want to make the swimming pool volleyball net light, then use half-inch PVC pipes as recommended. Thicker pipes may be needed in windy areas to hold the pool volleyball net in place.
Also, the pipe needs to be a little smaller than the width of the pool. For example, if the pool is 11 feet wide, then you can opt for the ten-foot variant of this pipe after attaching the tees.
Step 2: PVC Pipe Cutting
With the help of a blueprint, you can begin cutting the PVC pipe to the required length.
Before you seal the cut ends with PVC glue, you'll need to deburr them. You can make use of good-quality sandpaper or even a Dremel. Put on a mask while you're doing this, as the particles can be dangerous to your health.
Cut the noodles to the desired size, and be sure that they're somewhat longer than your pipe. You can cut more of the noodles as you're working if needed.
Also, clean any text and barcode from the PVC pipes with the help of acetone. You will have to wear a mask while doing this step.
Step 3: Assemble The Parts
Next, you can proceed to put the frame together. To do so, you have to ensure that all the pieces are in place. Then put together everything but do not fix them just yet. Once you have an idea, disassemble it and begin the process of permanently fixing them.
For this, you will have to wear a mask and then use PVC cement. This needs to be applied to the tee’s inner ring. Then you can connect the PVC pipe immediately. Just remember not to apply cement to the threaded ends.
Warning
Be quick with this process, as cement has a tendency to dry quickly, and that can make it difficult to position the pipe.
After everything is in place, you can use a spray paint of your choice to color the different parts of the small pool volleyball net. Use a color that matches the pool so that it looks good. Then do not touch it for a day, and ensure your kids and pets do not go near it.
Step 4: Making The Net
Once you have a proper frame, you will need to attach the net. But let the frame rest for an ample amount of time, so the cement dries well. Then you can take a net and cut it according to the frame size. You can use any old badminton net as your water volleyball net.
Moving on, take a nylon string and tie it to the volleyball net. You can use cable ties to make sure the string and the net stay connected. Then drill a hole in the PVC cap on the top and make your string run through that.
The best part here is that these top PVC caps are not pasted in the pool volleyball set frame. So, you can remove it in case that is needed.
Step 5: Adding The Final Touch
After the cement and paint have dried, it is time to attach the net to the frame. Also, put the foam in place of the legs as well. Once you have mounted the pool volleyball net, you will have to tighten it to prevent it from floating away. It is best to tie the strings to the sides, filter trap, or the main pipe in the pool.
Check if it is stable enough, and you are done. Now since this is a DIY floating pool volleyball set, there is a chance it might tip over while playing. But you can easily put it back in place and continue with your game.
Tips To Remember
There is a tendency for the pool net to float in the pool if it is not fixed in place properly. As such, you can make a device that fits the side of the pool walls with the help of a spring. This should be able to hold the net better.
Also, water volleyball is typically played with a depth that is dependent on the height of your players. The recommended height for a pool volleyball net is 2.5 to 3 feet. This will allow kids and adults to play in the pool. It's also good for pools with a depth of 3.5-4 feet, giving an overall height of 7 feet once the net is in place.
However, if kids are going to play, it's best to keep the net a little lower so they can easily throw the ball into it. Ideally, the water should not be deeper than the person playing.
Diy Pool Volleyball Net Ideas FAQs ?
How to play volleyball in the pool?
The game of pool volleyball is usually played between two teams, each consisting of one to four players. The team choosing the service will never be allowed to serve more than twice in a row, alternating with the other team. The first team to score eleven points is the winner.
Is a repair kit necessary for pool volleyball nets?
Yes, it is best to keep a repair kit handy in case the net tears or snags in places. You might also need to tighten the strings that hold the frame in place at times. Also, for inflatable pool nets, it is best to keep patches handy in case a hole develops on the surface.
What material is best for pool volleyball nets?
For making pool volleyball, there are a number of materials that you can use, like nylon ropes, vinyl ropes, or polyester.
However, when making the material selection, we would advise that you keep in mind that the net is going to get wet during your volleyball sessions. So, it is best to use materials that are resistant to water that would not get damaged easily. Doing so will ensure that the nets last longer, and you don’t need to change them frequently.
What is the ideal width for a pool volleyball net?
For the best experience, we suggest that you keep the width of the pool volleyball net the same as the width of the swimming pool. This will help keep the net in place as you will be able to secure it better and also help you demarcate the playing area properly.
If you are in for a serious weekend sport in the pool, we suggest you do this.
How deep should a volleyball pool be?
Water volleyball is no doubt a favorite among kids of all age groups. But it is important to ensure that they have fun and are completely safe during their playing sessions. And to achieve both these goals, it is important that the pool they are playing in has the right depth. For that, you will need to know how to install a pool volleyball net in a way that all the players are safe.
Ideally, for pool volleyball, the depth should be good enough for the kids to be able to stand up but also swim when needed. So, a depth of three to four feet is the optimum mark.
If you are planning to create a “sports pool” for kids, you can keep the depth on the two sides to 3-4 feet and keep a depth of 5 feet at the center. That’s a configuration people generally opt for when constructing sports pools.
How to maintain safety when playing pool volleyball?
If there are kids in the pool playing volleyball, it is essential that you assign an adult water watcher. Make sure this person knows how to swim and, in case of any emergency, can come to the kids’ rescue. Using fences and nets around the pool can also help ensure that no pets or children fall into the pool unintentionally.
Diy Pool Volleyball Net Ideas Final Words
That’s all we have for you today!
Pool volleyball might not be as well-recognized as a game like water polo in the Olympics. But it can be a fun and energizing game for the little ones. As you must have understood, the rules of aquatic volleyball are pretty similar to regular volleyball, and there are no new rules to learn.
However, there is definitely a learning curve. Kids who are new will have to learn how to balance themselves in water and tackle the ball at the same time. The learning process is fun, and once they ace it, they will refuse to get out of the pool for hours! Know more on how wide a pool need to be to for volleyball with our exclusive article.
We hope that you found our DIY pool volleyball net ideas useful. If so, you can also check out our other reads like “insulated vs. non-insulated smoker.”
Until next time, take care!
It can be challenging to get water everywhere in your yard, where it might be needed, especially if you have more than one faucet to work with.
If you have to cover a large area, where gardens, livestock tanks, and yards are located in different parts of the property, then watering might be a tough task. Many have found it to be quite painful if they have to drag a heavy hose to the required areas each day.
Instead, it is much smarter to bury various hoses for their individual purposes. It makes the task more efficient, and you can wrap up quickly too.
So, taking your needs into account, we have highlighted how you can bury your garden hose. At the same time, we will also tackle whether it is advisable to bury your garden hose and the various factors you need to consider for the same.
Without further ado, let us get to all the details.
Steps for Burying a Garden Hose
Gather the Necessary Tools
First, you have to get the materials and tools needed to bury the garden hose. So, of course, apart from the garden hose you choose, you’ll also need a hose bib, a combination tee for the water to flow out, clamps for pipes to be fitted. You’ll also need hydrant caps, concrete tiles, rake, shovel, heavy-duty hoe, screwdriver, tools for clamping, hacksaw, and a propane torch.
After assembling the tools, you are left with two choices. Either you can dig the trench and then fit the pipe, or you can tackle it in sections. While we normally recommend choosing the method which works best for you, it is necessary to take the sectional approach if you need to use the hose before the entire process of burying it is complete.
Dig the Trench
You have to use your tools to dig the trench, but you must also make sure that you have leveled off the bottom. This will help you achieve uniform depth. Since hydrants are nearly a foot high, this should be your average depth when it comes to digging.
Install the Fittings and Pipes
Once your trenches are dug, you have to unroll the pipe and put it inside. If you feel the pipe is rolling up again, you should use some items to weigh it down. After that, you have to install the faucets and valves along this pipe when you feel the need.
Wherever you want a hydrant, you have to put in a combination tee. Sometimes, you’ll find it rather difficult to get this tee in the pipe. But, applying soap in the area of the connection will make it easier.
You also have to screw in your hose bib while ensuring that the orientation of the hose is maintained all through the trench.
Closing the Hydrant and Filling the Trench
Now, you have to make a hole in the cover for the hydrant. This is essential for the hose to move in and out. When you keep the hose open, it is best to be careful that it doesn’t interfere with mowing, gardening, or movement in general.
You’ll find that filling trenches is a lot easier if you have soft soil with little-to-no rocks. It is best to use the front end of a loader or a back-hoe for the job. You should avoid putting rocks back since this might apply undue pressure on the hose. Understandably, you’ll be losing soil, so try to find more in order to compensate for this loss.
After you find that the trench has reached ground level, try to put back the turf. Be sure to pay attention to the areas around your hydrant. You don’t want to fill in the hydrant spaces because it’ll be more difficult to attach a garden hose.
Tips for Burying Garden Hose
Avoiding Underground Connections
When burying the hose underground, you should keep some things in mind. First and foremost, you have to avoid connections underground. So, try getting a hose that’s a little longer than the length you want it to run for.
We understand that getting shorter hoses might seem more practical, as they’re easier to store, but making connections only works fine above the ground. Since most of these connections are made of metal, there’s a good chance of rust due to damp soil conditions.
There’s nothing worse than discovering that the pipe might have sprung a leak, only to dig up the ground to see that a connection has actually come loose. To avoid such situations, we recommend doing away with connections for underground hoses.
Get the Right Length
There’s nothing worse than when your hose pipe falls short of expectations. You wouldn’t want to dig up a trench only to find out that the hose is too short. We recommend measuring it beforehand and acquiring one accordingly. If you still have doubts, it is best to err on the side of more, in this case.
Quality Matters
As with most things, you will see that quality matters here as well. Get a hose which has a thicker wall. This will help you if you plan on burying it. After all, the dirt has an amount of weight. The deeper the trench, the more the weight on the hose.
If you buy a cheaper one, the risks of it collapsing are much more. On the other hand, a thick-walled hose is likely to have better insulation against cold weather, and it won’t get bent out of shape either.
Check if Laying a Pipe Makes More Sense
While burying a hose is an easier option, it doesn’t mean it is the right one. PVC pipes are more readily available as well as economical options to get water from one point to another.
Understandably, the hassle involved with PVC pipes is more, from making the joints to digging below the frost line. But, it is a superior long-term solution. You can bury a garden hose when you have a temporary need to transport water or if you want to work on a larger project at a later time.
Functionality and Connections
When you bury the hose, you have to know what the use is. This is because you can regulate the water flow accordingly. It is not fun to have to do so at the starting point each time there is an overflow problem. Instead, it is advisable to install a regulating attachment at the endpoint to ensure you get the desired flow of water.
What to Keep in Mind While Burying Garden Hoses
Now that you know what to do if you have to bury a garden hose, there are a few factors to be considered. We understand that you might want to bury the hose because you want the water to reach a difficult spot or don’t like dragging the hose to different areas. It might also be that you just dislike looking at the exposed hose.
Whatever the reason, you should consider fluctuations in temperature, the type of ground, as well as the digging and burrowing animals in the area. Let us look at the factors in greater detail.
Climate Considerations
While a garden hose that is buried does not freeze as quickly as one which is exposed, there is still a risk if the ground freezes to significant depths. You’ll find that sturdy hoses are quite able to handle the freezing temperatures well enough. But, if they freeze too often with water still inside, then there’s a good chance of quickly breaking down over time.
Furthermore, if an underground hose freezes, and you haven’t managed to blow it out for winter, then you won’t be able to use it until the ground thaws fully. Ultimately, a buried hose is great for seasonal use, but it depends on where you reside.
Ground Conditions
The conditions of the ground also play an essential role in influencing the decision to bury a hose. Even if you’re extremely motivated, you’ll have a tough time digging compacted, rocky, or caliche soils.
Of course, there are specialized tools and pickaxes that are designed specifically for the job. But, when you consider that the trench has to be the same length as the hose, this could seem like a daunting task.
Critter Troubles
This is mostly specific to an area. Rodents tend to be attracted to water. Their burrowing and digging activities usually cause problems because these animals might just decide to gnaw through the hose at a certain point. If you’re dealing with a serious rodent situation, then you should properly reconsider the plan to bury the garden hose.
Where to Bury the Garden Hose
The best bit about burying a garden hose, rather than any other item, is that it can curve around objects. Normally, these could impede the flow of water to the garden bed or other areas that need it. But, a garden hose can work around these to ensure that the water is transported without any hurdles.
Basically, this means that you can bury the garden hose anywhere. In fact, you might even do so under the driveway, making use of a PVC pipe and some water pressure.
What Kind of Garden Hose to Bury
Firstly, the kind of hose you’re burying depends on why you’ve decided to bury it. Neither your most expensive choice nor the cheapest hose will serve you too well if they are buried underground for a duration. Here are some of the types of hoses you might bury.
Rubber Hoses
You can stick to the classic by opting for an old-fashioned polyurethane or rubber hose to get the water from one place to another. Not only are they sturdy, but they are also equipped to handle fluctuations in weather very easily. These pipes can’t be crushed underneath the weight of the soil, either.
But, the best bit is that they won’t kink, accidentally, when you bury or lay them. We recommend getting a pipe with a larger diameter so that the maximum amount of water flows easily when the pipe’s being used.
Drip or Soaker
If you want to water areas that the hose runs through, then you should bury a soaker or a drip hose. In fact, you can even make one from a leaky and old hose if you have the right set of tools lying around. These pipes can work wonderfully if you set them up well.
Final Words
If you have been on the fence about burying your hose, we genuinely hope this guide will help clear the air. Speaking from personal experience, it is incredibly beneficial to have a buried hose, even where the ground tends to freeze.
The added mobility and lack of obstructions are factors that clearly work in favor of this decision. You’ll find that digging the trench and burying the hose isn’t too complex either. Of course, be mindful of your surroundings before making the decision.
Don’t forget to let us know your experiences with burying a garden hose to transport water.
Does your backyard need some protection? Installing a horizontal wood fence might be a good idea in that case.
Whether you want a little privacy from sneaky neighbors or just want to set some chill vibes on your lawn, horizontal fencing is a great choice. But the question is, how to go about it?
If you want to save on a few bucks, we have an informative step-by-step guide to walk you through the entire process of constructing a horizontal wood fence yourself. Not only will it be easy on your wallet, but you’ll also experience a unique sense of achieving something on seeing the final product.
Let’s get right into the details then!
What Is A Horizontal Fence?
A horizontal fence is a wooden boundary made using wooden boards that run along the length of an area instead of the regular vertical up and down manner. It typically comprises 4x4 posts that are strongly anchored to the ground using a concrete paste.
Moreover, these fences provide privacy from passersby and make your outdoor spaces a little more secure.
Materials Needed For Horizontal Fencing
Much to everybody’s surprise, the materials required to build a fence are pretty basic and very conveniently available in local hardware stores. The methodology that we’ll be following can be finessed using the following equipment:
Wooden stakes
String lines for alignment reference
Landscape paint for marking
Wood posts (two or eight, depending on the layout of your fencing)
Horizontal boards (preferable sizes - 8 meters x 6 inches, 6 metres x 6 inches, 4 metres x 6 inches)
Trim boards
Screws, nails, and fence clips
Tools like saw, hammer, level, and shovel
Concrete (60 pounds)
Paint, paintbrush or sprayer, stain
Try to use only pressure-treated wood if you want the best results. It is durable and doesn’t react much to adverse weather.
How To Build A Horizontal Wood Fence?
Building a horizontal wood fence is no rocket science. Once you get your hands clean on the saw and carpentering strategy straight, the whole process will become pretty straightforward. You will definitely agree by the end of our extensive step-by-step guide. So read on!
1. Plan It Out
The first step is to get all the materials in line and plan stuff out. Typically horizontal fences are composed of uniformly spaced boards fixed into place with the help of nails. This design is a classic and works out well, but we’d ask you not to hesitate from being innovative. You can use fence boards of varying widths in different patterns; just make sure that it is practical.
In our guide, we’ll be using 4x4s in a basic pattern for building our fence. In case you’re a beginner, it’s best to stick to the basics, but if you are confident enough, then feel free to experiment.
2. Mark The ground
Marking the ground can be tricky as it could invite disputes with the neighbors if not done within your property area. Typically backyard soil has been long grown over, hiding the property demarcating line, so you can use metal detectors to get clarity on the area owned by you. Do have a quick chat with your neighbors regarding the matter.
Once you are completely sure about your property boundaries, insert two stakes in the soil on opposite sides of your desired fencing line. Running a string along the stakes to get a straight line is a good idea.
Since the midpoint of every 4x4 is at the length of six meters, you’ll need to measure the same and mark the ground using landscape paint. These paints are easily available at hardware stores.
3. Set The Four Primary Posts
Now, this is the most time-taking and exhausting step because you’ll have to wait for the concrete base to dry completely. Each hole should preferably be 20 inches deep and filled with water up to two-thirds of its depth while erecting the fence post in it.
After that, fill the hole with about 40 pounds of dry concrete along with a little more water, thereby creating a thick paste-like consistency. It’s important to keep stirring the solution with a shovel while pouring the concrete to avoid the formation of lumps. After all, lumps are nasty and do not go away entirely once formed, so pay attention while stirring.
Once the posts are rightly placed, you’ll need to check if they are all at the same level. If yes, then well and good, but if not, make adjustments accordingly to ensure that they are at the same height.
4. Level The Fence Boards
The next step is leveling the fence boards so that you have an even horizontal fencing line in your yard. The best way to make it functional is to work towards the top after starting at the bottom. Place the bottom-most board slightly above the ground and align it with the fence post. Keep in mind that straight fencing can be achieved only if your base is leveled properly.
Then, nail the bottom board in place while ensuring that all the boards are centrally in line with the 4x4 posts. Use a wooden spacer to maintain the same gap between consecutive boards. However, if the boards you are using aren’t completely dry, there will automatically be a little gap.
5. Decide And Mark The Position Of The Topmost Rail
Rails are meant to give support to the fence sections, and that’s why they are positioned between the posts. If your rail is hidden at the back of the topmost board, you can fix it right beneath the first board.
6. Cut The Rails
After measuring the distance between your 4x4 posts, you can cut the rails accordingly. They should be equal to the fence boards in length. The only thing is that it is slightly difficult to cut them as they are cuboidal in shape and are thicker as compared to flat boards. Therefore, be very careful while chopping them.
7. Fasten The Topmost Rail
This bit is pretty important because it will affect how the rest of the wooden boards will be spaced out. If this is somehow messed up, the overall look of your horizontal fence will suffer. But no worries; we’ll tell you how to go about it.
Pick up the rail and connect it with the posts using fence clips, nails, or screws. In case you’re planning to use nails, you can drive them in with the help of a fastener that attaches the rail to the post perpendicularly.
However, the easy way out is by using the fence clips. These clips are basically brackets made out of metal and are primarily mounted on the post to keep the rail in a stable position. It makes the whole rail fastening procedure much simpler.
8. Fix The Fence Boards
When the rails are in place, you can go ahead and follow the same methodology to drive in the fence boards. You know the drill now.
Furthermore, you can either alternate the boards with rails or create your own unique pattern. The main function of rails is to support the vertical pickets and ensure maximum privacy. Again, you can be creative here if you have some experience.
Criss-cross rails, open rails, parallel rails, etc., are a few common choices. But if you want a little cottage core or a 70s touch in your backyard, we suggest trying the white picket fence pattern.
9. Chop The Posts
Moving on, when all your boards are nicely screwed or nailed, you can chop off the extra protruding sections of the posts. But if you’re aiming to have a decorative look with post caps, you should leave a little extra length while lopping it off. A little sanding down of the sharp and freshly chopped edges will do good for everybody.
10. Add Some Support
If you feel like your fence boards are dangling down and are in need of some extra support, you can add vertical beams to keep them in place. Measure them in a way that they perfectly fit between the top and bottom rail. This will give a smooth and elegant finish to your fence.
11. Post Caps Are Important
You may think that post caps are merely decorative accessories, but we’re afraid that’s not the case. These caps are installed to cover the sharp edges of the support beams in case you decide to keep them higher than the top rail.
Nonetheless, post caps add a finishing touch to the structure, making it presentable. They also serve as gripping points in case you feel like resting your arms. No matter what design you aim for, you’ll find a post cap in every style. Some popular options are wood, glass, copper, metals, and even solar-powered light bulbs. You can choose whatever defines your aesthetic the best.
12. Finishing Touches
Once you have the structure up and about, the last step is to add the finishing touches and make it match the vibe of your yard or house. Either you can let it age by itself and get that old-school cottage-like feel or give it some color.
For coloring, you have two options - staining and painting. We recommend using a paint sprayer for best results. That’ll help you get the job done swiftly within a couple of hours. An Interesting fact worth noting - among all designs, the white picket fence style is the most loved in US homes.
What Are The Benefits Of Horizontal Fences?
A. Easy Installation
The best part about horizontal wood fences is that they are super easy to construct. It is one of those few wooden structures that can be aced by even beginners. You can build it in no time with a little bit of hand saw skills and accurate measurements.
What’s more, no bulky and complicated equipment is required to get this fence going. Give it a few hours and a little bit of sweat, and you’ll be able to enjoy full privacy in your outdoor space.
B. Multiple Styles And Variations
Who doesn’t love variety? Apart from a few indecisive people, everyone loves having enough options to select from. That’s where the horizontal wood fence shines as it provides a wide scope to experiment with styles and designs.
We all know that wood is a versatile material that can be molded and assembled in lots of different ways. There are multiple types of wooden fences which you can install on your deck.
If you want complete seclusion, setting up a fully covered fence is a good option, but if you wish to have some ventilation space, then spaced fence boards are the way to go. In any case, the options are truly endless.
C. Eco-Friendly
This one might confuse you because how can a fence that requires chopping of trees be environmentally-friendly. Your question is absolutely valid, and we have a logical answer to clear the air.
The deal is, unlike vinyl or any other material, wood is much more durable and strong in the long run. Nowadays, options are available to minimize the weather-induced swelling in wood boards so that they last for long.
Additionally, this type of fencing is quite easy to dispose of and recycle. Stabilizing agents are available to keep it safe from termites and rot. Moreover, it is economically sound and hands down one of the best options available out there.
Final Words
Horizontal fences are a sure and sorted way of enlivening your outdoor space. A backyard that was once open and exposed can transform into a protected chilling spot with the help of some pressure-treated wood boards and menial tools.
Hiring professional carpenters for setting up your fences can burn a hole in your pocket. And spending so much money on something this basic can be a little disappointing for a few. But having read our guide, hopefully, you might be feeling a little confident in going ahead and taking on the task yourself.
That said, we’ll sign off for the day. Until next time! Happy woodworking.
Do you love enjoying some “me-time” with your family in the backyard? Well, it’s time you install a fence in your backyard.
Having a fence installed on your property can enhance its aesthetics and protect it at the same time. It prevents the neighbors from peeking into your property and also keeps your yard safe from brutal weather. Also, it keeps pets safe from accidents.
While installing a fence on level ground is an easy task, it is quite complicated when it comes to sloped yards. And that’s why most homeowners avoid installing a fence in their backyards.
But, luckily, there are some great fences designed exclusively for homes having a sloped yard. On top of it, you can get fences installed in the yards without costing a fortune.
With that being said, we are letting out some of the great fencing ideas for sloped yards that homeowners can consider and build the yards of their dreams.
Looking for fences that are easy to install on sloped yards? Well, racked fences might be the one for your yard. With rails matching the slope of the ground, this fence doesn’t leave any gaps at the bottom surface.
What’s great is that these fences consist of posts that are identical in height which makes them easy to install on sloped yards.
On top of it, it comes in premade panels which makes this an excellent option for homeowners willing to install fences all by themselves. Mostly, it is prefabricated in polyvinyl chloride (PVC) or aluminum. However, the rackable panels can be custom-built in any material you want. Thus, you get the freedom to use racked fences as you wish.
That said, racked fencing is one of the most popular options among homeowners who own a house on the hills.
If you’re looking for fences that you can position alongside raised planters, stepped fences are the best bet. Since it goes down the slope in a sequence of steps, it accommodates every section of the slope.
The pickets used in stepped fencing are either taller or shorter than those next to it. Thus, this arrangement makes it look like the steps of the staircase.
Most people have observed that stepped fences have gaps underneath them which means small animals can creep into the yard. On top of it, your beloved pets can also sneak out from the gaps.
Luckily, you can fix this by positioning raised planters next to the fences. Apart from filling the gaps, the planted flowers and shrubs will make your yard aesthetically pleasing.
Or, you can trim the foot of each fence to match the ground as precisely as possible. However, if this seems much of a task, you can use chicken wire and cover it using a row of bushes.
If you’re looking for DIY fencing options, you can never go wrong with straight fences. So, whether you have a flat yard or a sloped one, this is your go-to pick for fencing yards.
However, if you’re planning to install this fence in the sloped yards, keep in mind that it leaves large gaps on significant slopes. So, those having kids and pets must make sure to plant raised beds of shrubs or flowers next to the fences. This will make sure your kids and pets are safe in the yards. Though an excellent option for sloped yards, it might not be ideal for yards with a higher gradient.
If you’re looking to add style, class, and elegance to the yards of your home, wood fences are the best bet.
Besides adding elegance to your property, they cover the space well, adding to the privacy. Thus, you can enjoy barbeque dinners and Sunday brunches without worrying about anyone trespassing or invading your privacy.
However, you must keep in mind that wooden fences require maintenance to keep them in perfect condition. That’s because the elements may damage the wood or change its appearance.
That said, we suggest painting or staining the fences as it would prevent the wood from getting damaged. Also, make sure you invest in high-quality wood as it will last for the coming years.
Wrought iron fences are great for fencing both commercial and residential properties. That’s because they add elegance and sophistication to the yards.
Though they are usually available in black, you can get them customized in black or white color as per your liking. Thanks to the traditional-looking design of this fence, they mark boundaries perfectly well.
Thin and tall, they have intricate details and medium gaps that make them perfect for all kinds of properties. Though they are an excellent option for security, it doesn’t provide as much privacy as wood fences.
Looking for fencing options for your sloping yard without burning a hole in your pocket? Well, vinyl fences might be the one for you. Because it is available in a wide variety of designs and styles, rest assured you’ll get one that will fit the style of your backyard.
Vinyl fences have become popular because they require minimal maintenance. Thus, this makes it a perfect alternative for wood fencing. Also, if you are a pro at DIYs, you can install it without any help from professionals.
However, before you order vinyl fences, keep in mind that they mustn’t be installed during winters as they become fragile during cold weather. Also, they cannot withstand any heavy impact, so they will get damaged easily.
Trendy and unique, metal fences don’t require much maintenance, and that is why it is one of the most popular options among property owners who want to install fences on their sloped yard.
Also, they are tough and long-lasting, which means that they will be able to withstand the ravages of nature.
And if you think corrugated metal roofing is the only option for metal fencing, think again. That’s because you can also get metal posts and panels exclusively designed for fencing sloping yards.
Thanks to the variety of styling options, you can get your hands on one that will add to the elegance and privacy of the yard.
Lightweight and sustainable, bamboo fences are available in a variety of styles and textures. Mostly, they are used to make barriers in yards and fields.
Regardless of whether you’re looking for sheet rolls or prefabricated panels, bamboo fences have them all. So, rest assured, you wouldn’t have any issues while finding one for your yards. Those looking for easy to install bamboo fences must go for prefabricated panels of bamboo fences.
Like other fencing options, bamboo fences also require slight care and maintenance. That said, if you install bamboo fences, make sure they don’t get drenched with water, or they will rot. However, you can increase its longevity by painting it with transparent or black tar.
Thus, if you want to add a rustic tinge to the yards, then bamboo fences are the right ones for you.
If you are scouring for fencing options that work well on uneven ground, a chain link fence might be an excellent option that you can consider. Not only is it attractive, but it is highly functional.
Installing a chain link fence yourself isn’t an easy task, so we suggest you hire a professional to get the job done accurately. Thanks to its durability and strength, it is perfect for homes that have pets and children who play in the yard.
Though made out of metal, it is powder-coated, so you need not worry much about its maintenance. Also, it will last for the coming years as it is resistant to the elements. This makes it an affordable option for all the property owners out there.
Have a traditional-style home? Then a traditional privacy fence will seamlessly blend with the design of your space. With dozens of timeless styles and designs, the traditional privacy fence is available in a wide variety, so property owners can choose the one they want.
So, if you’re choosing fences for your sloped yards, going for fences that have round curves will be the best bet. Also, you can go for scalloped or arched fence designs because they have smooth curves.
Though you can DIY this fencing option, we suggest going for prefabricated panels. This will not only save time but will also be easy to install.
If you’re a property owner looking for a highly durable fencing option for sloping yards, the stone or brick fence will be an excellent option that you can consider.
Thanks to the zillion colors, designs, and styles available, you can easily get one customized to suit your needs. Apart from durability, it adds to the beauty of your yard, and that is why it isn’t budget-friendly.
Thus, it isn’t an ideal pick for those on a budget. However, if you can spend a tad more, this might be one of the best fencing options for your safe haven.
Are you bored of traditional fencing ideas and looking for something unique for your yards? Then we suggest using trees and shrubs for fencing sloped yards.
Unlike other fencing options, trees and shrubs are easy to use. All you need to do is use some shrubs in clumps, and you’ll be done. Thus, we suggest using cypress, juniper, boxwood shrub, to name a few.
Moreover, this type of fencing is virtually free from maintenance. Apart from regular pruning and taking care of plants, you need not do anything.
In search of fences that will let you enjoy “me-time” in the backyard without any interruption from strangers? Then you must consider installing a horizontal plank fence in the yards.
Since it is available in a wide variety of styles, you can easily choose the one that allures you the most. On top of it, you can even get the fence panels customized to your liking.
What’s great is that installation isn’t a challenging task. As such, you can have it installed quickly without any hassle. Also, those owning large areas are in for a treat as it is one of the most affordable options available on the market.
But that’s not all; it is relatively easy to maintain and can last for about 10 to 50 years. You can also stain it to blend it with other furniture of your yard. All in all, this is one of the most cost-effective options that you can use for the sloping yard of your property.
Final Words
Phew! That was a lengthy guide on fences that you can install on slopes.
To be precise, the basic purpose of installing a fence is privacy. However, fences also come in handy for keeping your pets and kids safe from accidents.
With that, we come to the end of our informative guide. We hope you enjoyed reading this guide as much as we enjoyed writing it for you. However, when you’re selecting a fence, make sure you go for durable material so that it will last for the coming years.
Be sure to let us know which fencing option you went ahead with. Till then, stay safe and take care!
If you're new to raising goats, you must learn how to keep these beautiful creatures safe. And goat fences can be a great help.
Goats are inquisitive by nature, so they tend to wander off anywhere and everywhere. Although they are peaceful creatures, leaving them to loiter around your backyard might not be such a good idea for the plants in your garden. They can cause a rampage on your flower and garden beds and ruin all the plants.
Fencing is the best option to confine goats and prevent them from running away. However, choosing the right fence could leave you in a pickle if you're inexperienced.
And that's why we're here to help you.This article will provide a detailed list of some of the best fence for goats that you can use.
So, without wasting any more time, let us get on with it!
Why Do Goats Escape From Fences?
How many times have your goats attempted to escape their fencing? More times than you can count, we're sure. Goats are curious animals, and they don't hesitate to jump over a fence or chew on the wires.
However, at times, they might escape the fence purely by mistake. Goats are itchy animals as insects often get into their coats when they feed on bushes. So, they tend to scratch themselves against the fence, which can easily break the fence wires and rip apart the staples and nails. And with a broken fence, it becomes that much easier for goats to wander off anywhere.
That said, including makeshift playsets, such as old tires, can help you get their attention away from the fence. Furthermore, goats are herd animals and are happier in groups. So, a goat in a herd is much less likely to test your fences than a goat living alone.
Best Fence For Goats
When you are breeding goats, it is best to choose the fence depending on the size of your breed. You'll need taller fences if you have a large breed, such as a Boer. But if you have a smaller breed, like a Pygmy goat, you'll need a fence with a durable bottom so that the goats can't squeeze under the fence and escape.
Furthermore, to make it even easier for you, we've compiled a list of the best goat fencing options for confining your goats. So, let's take a look!
Cattle herding and rearing can be a huge challenge even for the best farmers. So, if you're planning to start breeding goats, we'll suggest you start small. And if you're new to herding or breeding, it is best to start with basic equipment and slowly climb your way up.
That said, a woven wire fence can be a good option if you're breeding goats within a small area. The woven wire fence, also famously known as the square wire fence, is ideal for heavy-duty uses in a goat farm.
However, the woven wire fencing style can be expensive. It can cost you a small fortune to install this style of fence in a widely spread area. So, it might not be the best choice if you're planning to raise goats over a large farm area.
On the other hand, if you're planning to add a small expansion to your existing farm area to breed goats, a woven wire fence can be handy.
Furthermore, the sturdiness of this fence ensures that it doesn't rip away even when the goats start rubbing themselves against it. Also, if you have horned goats, it won't fall apart when the goats constantly test it with their horns.
However, this style of goat fence might not be suitable for confining small goats. The goat kids might get their heads stuck in the large square heads of the woven face. Or perhaps, they may slip through these large square grids. So, it is best to consider all these factors if you finally decide to install this fence style for your goat farm.
The welded wire fence is similar to the woven wire fence, but it is less durable than the latter. It also costs much less as compared to a woven wire fence. So, if you are planning to breed goats across a large and wide pasture area, welded wire fencing will be a much more affordable option.
Furthermore, the square grids in welded wire fencing are small, so you don't risk losing smaller goats. That said, the goat kids won't be able to pass through or get their heads stuck in the small square grids.
However, the fencing materials are not very sturdy, so this style of fence cannot hold up well when the goats rub themselves against the fence or push it with their horns. Additionally, you'll need to secure the bottom of the fence so that the goats cannot squeeze under it and escape. Most goat owners often use large slabs to hold the fence to the ground.
Overall, this fence style can be a good choice if you're planning to raise a small breed over a widespread area.
And if you're looking for a good welded wire fence, you may like the YARDGARD 308302B by Midwest Air Technologies Inc. It is a galvanized welded wire fence model available in various lengths. It comes in 25-inch, 50-inch, and 100-inch rolls.
You can also choose between different heights, ranging between two and six inches. Moreover, the fencing comes with a galvanized zinc coating that makes it resistant to rusting.
Chain-link fences are quite easy to install and can be used as a multipurpose fence to confine goats, sheep, cattle, and even poultry. A chain-link fence comes with fence attachments that you can easily install without hiring professional help. It comes with vertical, upright poles made of either iron, steel, or concrete, in addition to the steel chain-fence attached to these poles.
Additionally, chain-link fencing is highly durable and requires almost no maintenance. So, it can easily withstand the goats rubbing themselves against the fence or racking their horns on it. This fence style is also very well-grounded, so the goats can't squeeze under it and escape.
Moreover, this fencing style also prevents goats from slipping through the chained grids as the grids are very small. Also, the smaller goats do not risk getting their heads stuck in the fence. Hence, chain-link fencing can be suitable for breeding both young and adult goats and keeping them safe within a confined space.
And that's not all; chain-link fences are highly affordable. So, you won't have to break the bank even if you want to install this fence style across a large farm area. It works perfectly for both small and large spaces.
If you're planning to breed and raise your goats in a small and flat area, installing feedlot wired panels might be a good idea. This fencing material is exceptionally sturdy and ideal for heavy-duty uses. Indeed, you need not worry about the wire panels bending or collapsing when the goats rub themselves against it or decide to test their horns on it.
Moreover, if you decide to breed more than one animal within a single pen, this goat panel can work beautifully to separate goats from other animals and cattle. This cattle panel style also comes with grids that can be either 4" x 3" and 4" x 4". So, rest assured, smaller goats won't slip through the panels or get their heads stuck in the panel grids.
The fence panels are also well-grounded, and you won't be needing any additional slabs to hold them to the ground like in welded wire fences. At the same time, the goats won't be able to squeeze under this feedlot panel because of the sturdy and well-grounded bottom.
The cattle panels are also low-maintenance as they come with a one-piece welded construction having a four gauge wire. Hence, you need not worry about any maintenance cost if you decide to install these goat panels in your pen.
They are also available in different sizes. But, we suggest you go for those cattle panels that are at least 4-feet tall and 16-feet long. It is a pretty standard size for safely confining your goats in the breeding area.
If we are being honest here, the combination of welded wire fencing with wooden boards is the most durable and effective style offense when dealing with goats. But, it can be pretty expensive. So, we don't recommend this fencing style if you are planning to breed goats over a huge farm area.
However, installing this fence style can be a good option if you want to separate your goats from other farm animals. Additionally, you can easily prevent the goats from getting their horns caught in the fence by choosing the welded wire fencing having smaller square grids of around 2-by-4 inches. Furthermore, the welded wire fencing also ensures that the goats won't slip through the wooden slats.
You can also save a lot of money if you decide to install this fencing combination, as it does not require the more expensive woven wire fence. As the wooden boards offer all the added protection, installing a welded wire fence will do the job. Hence, you need not go for the costlier option of installing a woven wire fence with wooden boards.
Moreover, the welded wires also work exceptionally well with the wooden boards. They lay flat and straight against the slats without causing any bends in the fencing. Thus, it can be a great and effective solution in keeping your goats safe within a small farm area.
Electric fencing is the most effective and inexpensive style of fencing when it comes to confining goats.Here, the only expense comes while purchasing the charger. You can either go for a traditional electric charger or solar electric fence chargers.
It is worth noting that high-voltage electric chargers that produce 7,000 to 10,000 volts of electricity can easily keep the goats from escaping. Furthermore, electric fences are also effective in keeping predatory animals away from the breeding area and ensuring your goats' safety. Also, these fences are fairly affordable and available in different models.
For instance, you can go for the Premier Electronet 20100 netting fence for sheep and goats. It comes with PVC posts with six-inch metal spikes. You can purchase a Premier Solar or an AC/DC charger for optimum results. The Petween Electric Fence Netting can also be suitable for confining both goats and large poultry. However, in the case of this product, the electric fence for chickens differs from that for goats.
Alternatively, the Trident Electric Netting can be a good option for confining goats and sheep. It has a height of 35 inches, which can be ideal for raiding larger breeds. Additionally, the eight conductive lines ensure that the goats can't slip through the wires without getting shocked.
The Starkline All-Purpose Electric Utility Netting is also a good electric fence for goats. The galvanized spikes and nine fiberglass posts ensure the durability of the fence. It is best to pair it with a high-voltage charger or energizer to get the best results.
Fencing To Prevent Goat Kids From Escaping
Dealing with adult goats is one thing, but if you're trying to confine baby goats, you have to go the extra mile to ensure their safety. If they are not contained within the fenced area, they can get into a lot of trouble as they are easy prey for the predatory animals. So, it is best to select a fencing style that can't slip through easily.
A woven wire fence can be a good option as they usually come with small square grids that won't allow the young goats to slip through the fencing. But, you need to carefully ground the fence so that the baby goats can't squeeze under it and escape.
In contrast, an electric fence might not have any effect on baby goats, and they can easily slip through the wires as they cannot feel the sensation of any electric shock. But as they grow older and start to feel the effects of the electric shocks, they'll naturally stop testing the fence.
As the kids grow bigger, you must lower the fences to the ground so they can't slip through the wires without getting shocked. It is better to keep these tricks and tips in mind when you're fencing the breeding area to prevent the baby goats from wandering off anywhere.
Final Words
Choosing the right fencing option to prevent goats from escaping a safe breeding area can be an overwhelming task. You have to consider what's best for the animals. And we hope you're feeling a little more confident about installing the right fence for your goats after going through our article.
We suggest that you consider the breeding area and your available budget before finally selecting a fencing style. However, an electric fence is always an affordable option suitable for large and small farm areas.
You can also try the combination of welded wire fencing with wooden boards if you have a small breeding area as it is very sturdy. Anyhow, we think it is best to have multiple options available while installing the best fence for your goats.
So don't sit on the fence anymore, and buy the best fence for your goats today.
Choosing the best fence for cattle is one of the most important decisions for any livestock operation—impacting animal safety, pasture management, and long-term farm costs. With options ranging from high-tensile electric fences to woven wire, barbed wire, and wooden post systems, each fencing type offers unique advantages depending on terrain, herd size, and budget. An effective cattle fence must combine security, durability, and cost-efficiency to withstand pressure from large animals while requiring minimal maintenance over time. In this guide, we've analyzed six top fencing solutions for cattle—highlighting their strengths, limitations, and use cases—to help you make an informed investment that supports both livestock containment and operational efficiency.
High-tensile electric fences are one of the most popular fences available for cattle. As the name suggests, this type of fence has an electric charge running through it, which acts as a deterrent to the cattle inside.
Generally, an electric fence charger delivers between 2000 to 3000 volts to the fence. You can use a minimum of two strands. However, if the animals are more densely confined, up to six strands can be used, along with other types of fencing.
Electric fencing is also one of the trickiest types to install and is generally used along with other types of fencing, such as high-tensile or farm fences. But, for the most part, electric fences are usually installed on traditional barbed wire cattle fencing and used as temporary solutions.
Understanding the basic grounding of the line can be critical for installing an effective fence. Additionally, such fencing requires a charger that may be battery or solar-powered, as per requirements. In the case of solar-powered fences, you also need an AC outlet or a spot that receives direct sunlight.
High-tensile electric fencing generally has low-temperature contraction and does not lose elasticity quickly. This property makes it ideal for use in all weather conditions. However, the upkeep is highly time-consuming as the entire fencing may suffer from short circuits if anything touches it.
The Baygard 027201227 is one of the best products if you are looking for an electric fence. It has high tensile strength and is ideal for cattle pastures.
Barbed-wire fencing is one of the most popular types of fencing for cattle pastures. Every barb on such fencing acts as a deterrent, even though visually, it does not appear to be one of the most formidable types of fences.
A barbed-wire fence comprises two twisted wires with sharp barbs attached every few centimeters. This type of fencing is generally available as a 1320-foot roll. Installation requires posts made of wood or metal, the wire fencing material, and staples or wire clips.
It is a common practice to use four to five strands when working with barbed-wire fencing. However, this depends on how many animals are kept in the enclosure. You can also opt for a more secure setup if there is a problem regarding the number of strands. And while cattle can tear down most types of fencing easily, this barbed wire acts as an excellent deterrent.
Despite being a popular choice, barbed wire fences are not one of the aesthetically attractive options on the market. Also, the maintenance costs involved are on the higher side. However, they are highly versatile and easier to install than other fences.
Today, most cattle owners use barbed-wire fencing in combination with other types of fencing materials for better results. Usually, a single strand of barbed wire is used on top of high-tensile or hinge-joint fencing. Doing so may also reduce the risk of cattle injury.
Another thing to keep in mind regarding barbed-wire fencing is that they may be banned in certain areas, such as California and Montana, unless they meet the specified requirements.
If you want to install barbed wire fencing, the Tapix Barbed Wire Roll is a great option. It can easily be used in farms, gardens, and yards, and is perfect for cattle pastures.
In terms of performance, woven wire fencing is one of the best fencing products available on the market. It offers the perfect combination of a strong barrier and an excellent visual barrier.
This type of fencing is also called fixed-knot fencing and is highly effective because there is a greater amount of fencing per foot. It also has high tensile strength and is incredibly durable, thus offering the best value for money. Woven wire fencing also has a short life cycle and low maintenance costs, making it an excellent choice for most people.
This type of fencing is available in rolls of 330 or 660 feet, and can be easily used with wooden posts, metallic posts, or PVC pipes. After fixing the posts into the ground, unroll the wire and attach it to the posts.
The woven wire fence incorporates horizontal and vertical designs using interconnected wires to create rectangles or squares about two inches wide. These fences are usually coupled with high-tensile electric fences for the best results. Fixed-knot fencing is generally considered superior to barbed wire and hinge-joint fences when it comes to flexibility and durability.
This type of fencing is made of high-tensile wires of varying gauges, which allows it to be bent to adapt to corners. However, one thing to note here is that cattle and other livestock can get their hooves caught in the openings if proper care is not taken.
The Silver Steel Woven Wire Farm Woven Wire Rolled Fencing from Red Brand is one of the best woven wire fences you can get right now. It is specially made for corralling large animals, such as cattle, and has excellent flexibility to withstand temperature changes.
Welded wire fencing provides an excellent visual barrier for animals and is relatively easy to work with. This lightweight wire fencing also tends to have smaller openings, reducing the chances of the animals getting their feet stuck in it.
For holding cattle, durability is one of the most significant factors to consider. And, rest assured, welded wire fences are stable and secure. They have strong cross points and narrow rectangular or square openings which can withstand a substantial amount of stress.
Welded wires that you find on the market typically have a coating of zinc that keeps them protected from rust and helps them last longer. The MTB Galvanized Welded Wire Meshis one of the best-welded wire fencing options available. It is a multi-purpose fence that can be used for cattle pastures, livestock panels, gardens, and more.
A hinge-joint fence is one of the most affordable fencing options that offer flexibility and adaptability. It is ideal for various animals, such as cattle, sheep, goats, etc. This type of fencing is also known as a farm fence and comprises a four-wrap knot.
When pressure is applied, this knot acts as a hinge joint. This hinge joint is made up of two vertical wires wrapped together. Once the pressure is removed, the hinged joint fencing springs back into shape. There are graduated spaces within a hinge-joint, and the narrow spacings at the bottom of the fencing help deter small animals.
The hinge makes the installation of this type of cattle fencing simple, as it is flexible but retains its full height for adequate protection. The vertical wires are cut individually and wrapped to ensure maximum flexibility and strength.
Hinge-joint fencing is an excellent choice for setting up a cattle fence and is easier to maintain than barbed wire fencing. Additionally, it is less likely to break down and reduces the chances of your animals getting injured.
What makes hinge joint fencing the best fence for cattle is that it is available in different height options for various animals. There is horizontal and vertical wire spacing for different growth periods and tensile strength, respectively.
Hinged joint fencing is beneficial for jumping animals, such as cattle, goats, and horses. The hinge joint allows proper stretching of the fence and is generally made of galvanized wire.
The OKBrand Hinge Joint Field Fence CL1 0212-5 is one of the options if you are looking for an excellent product in this segment. The fence expands and contracts according to the weather conditions and comes with a zinc coating to prevent rust.
One of the fencing solutions that also offers an aesthetically pleasing appearance is wooden post fencing. It is more suitable in situations where the number of animals is fewer. However, compared to other fencing options, it is costlier and requires more maintenance.
On the positive side, the wooden posts blend perfectly with other natural elements and are available in different shapes and sizes. To prevent the wood from rotting, they are also usually treated with chemicals. Wood is also warmer and softer than wire fencing, making it more suitable for cattle and other animals.
Wooden posts offer the advantage of high strength and resistance to bending. They also provide a visible barrier to the animals. When appropriately treated with the right chemicals, wooden posts can also deter the animals from chewing on the posts, which cattle tend to do.
Compared to other types of livestock fencing options, wooden post fencing requires a greater level of maintenance. It is because wood, a temperamental material, can split and crack under different conditions. Also, repairing such fences is more labor-intensive, and the wood quality in recent years has also deteriorated considerably.
The installation process for wooden post fencesis different from other types of fencing. It involves manually digging holes in the ground where the posts will be put. Additionally, the clips that hold the fencing to the wooden posts and can become loose as the wood ages. However, using barbed staples can reduce the chances of such incidents.
If you are looking for an excellent wooden post option, then the Treated Wood Post N0400802 from the Tractor Supply Company makes a compelling choice. The treated wood is perfect for repelling insects and offers heavy-duty use at an affordable price.
Final Words
Selecting the best fence for cattle isn’t easy, but it can save you a lot of hassle later. After all, the right fence can prevent your cattle from escaping while also keeping them safe from predators.
While there is no single solution that can meet everyone’s requirements, it is possible to use different types of fencing together for the best results. You can select the one that best meets your specific needs and various other factors, such as durability, versatility, budget, etc.
We hope this guide will be helpful to you in discovering the right product. And if you have any additional recommendations, be sure to mention them in the comments. Until next time!
Garden fences can make your home front look very attractive as well as protect your gardens. And we have some of the best types right here.
While looking for the best garden fence, we came across a variety of styles. Some will give you a classic look, while others might work better with modern houses. If you live near a forest or on the hillside, then you might need to keep your plants protected from deer and other wild animals. Aluminum fences can then be a great option.
On the other hand, in cities, you may need to keep your pets safe or prevent people from entering your property without permission. You can choose a suitable height depending upon the requirement. In this guide, we will discuss the different styles of fences that work the best for gardens.
If you want a traditional picket fence that will bring the charm of the old countryside to your home, then this can be the perfect deal. It will not only improve the curb appeal in the house but also provide one with better visibility. You will be able to use this type of fence for front gardens as well as ponds and swimming pools.
Some even use this to keep their flower gardens on display. In this case, you will just find a picket fence measuring 2-3 feet, which adds to the charm of the entire garden.
Moving on, picket fences can be made with both wood and PVC, and you can choose one depending on the amount of money you would want to spend. PVC can be a beautiful addition to the home as it needs very less maintenance. But it may not be able to survive very cold winters or hot summers, and it could become brittle and break over time.
Furthermore, wood is not prone to get damaged while it offers a lot of protection to plants. It also offers spacing in between, and that could decrease the chances of wind damage.
Moreover, the Worth Garden Wooden Short Fence is a great example of a modern picket fence. It has a low height and can be used around trees and lawns. This will give your home a very rustic vibe.
One of the top kinds of garden fences is the French gothic fence. It would generally be made of wood, and you will find it in the countryside. The top of such fences have an arrowhead or are shaped like a spade. If you have a traditional bungalow or a cottage, then the French gothic fence will fit in very well.
Gothic fences will provide your home with a beautiful ornate boundary that will stand out. It is usually made of wrought iron or powder-coated aluminum, which looks exactly like wrought iron. You will find a variety of designs today, and the Gothic fence is much sought after.
It was a very popular garden fence during the middle ages where it was mostly used for vegetable garden beds. You might like this fencing solution as it is easy to make and doesn’t take a lot of time to get constructed. Plus, it will deter rabbits and large animals.
Convex fences are those which have a solid or a fenced body with a convex shape on top. These are often used for high fences and offer a traditional and rustic design. Sometimes, a tall fence can also have a convex shape. This makes it all the more attractive and will ensure some amount of visibility.
Some people believe in keeping very small gaps in between the pickets, and that would only allow limited vision. You can always opt for one that fits the best for you.
If you are looking for a modern convex design garden fence that can be moved from one place to another, then the Amagabeli Decorative Garden Fencewill serve you well. It is rustproof and is easy to set up. You will not need any professional help, and you can transfer it to other places when needed.
The UMIEN Decorative Garden Fence is another example if you are looking for a different design. Here there are convex shapes paired with horizontal lines, and they look good together. It has a good height, which will be able to keep wild animals away from your garden.
Next, the WOLUNWO Decorative Garden Fencing has a length of 65 inches and is a portable option. It will protect your flowers, keeping your garden safe from outside intruders.
This is pretty similar to the convex fence with a slight difference. The top is carved down like the shape of a half-moon. It looks good and can add to the aesthetics of the place. If you are looking for a rustic fence, then this can be a brilliant option. The Zippity Outdoor Products WF29002is an excellent example, and it is powder-coated to prevent any form of rusting. You can put the stakes into the ground up to a few inches so that you have sturdy posts. It can be moved when needed and installed in other places.
This is a type of garden fence, which provides no visibility keeping an area safe from the eyes of the public. It needs very low maintenance and can be an affordable option for many. This is one of the traditional looks that would be used in America way back. The architectural style dates back to the modern and the classic colonial age.
If you are looking for a cheaper option for garden fencing, then the wire fence will serve you well. It comes in various shapes giving you the option to choose from mesh or barbed wires. Electric fencing is a type of wire fence for properties that need a lot of protection. Now, if you have dogs or pets, it is best not to get an electric fence.
That is because an electric fence can be dangerous, and it can harm your pet in a fatal manner. Electric fences work well for banks or other houses where you have a lot of valuables, or someone needs to be protected.
It will use electric shocks to keep people and other animals away from the house. These are often used for agricultural properties, prisons, as well as for keeping livestock safe.
Also, there is the chicken wire mesh, which looks a lot like diamond-shaped wire mesh. The chicken wire is generally used to keep the garden area protected. It can be cut and installed in different sizes as needed.
The Yaheetech Decorative Garden Fence is a kind of wire fence, which is portable and can be stored easily. You can use it temporarily in case your family members bring a pet home for some time. The minimalist look, along with the modern design, surely looks beautiful.
For those who are afraid of large and small animals entering their property, the chain link fence is a great idea. It will not block the view but will ensure that nothing gets in. This option is pretty similar to the wire fence but you can install and remove it in an easier manner.
Furthermore, it will be a great fencing solution for domestic animals. If you live beside a forest and want to deter deer from coming in, then it will act as the perfect guard. While constructing, just ensure that you build it up to a certain height so that no animal can jump over.
The Greenes Fence RCCG4PK is a modern example of a wire mesh garden fence. It comes in a pack of 4, which will provide you with ample protection from rodents and rabbits. The mesh opening is around 1x 2 inches, ensuring that larger or medium-sized animals cannot get in.
Special mentions
Sometimes, you will find decorative fences, which do not really fall into a specific category. The MTB Decorative Garden Fence is a great example of that. It has ornate floral designs and is powder-coated. This fence looks beautiful with intricate detailing and can be used to protect raised beds and plants.
Another great example is the Amagabeli Metal Garden Fence, which is a tall fence that can protect you from animals outside. It also has beautiful leaf designs on top and will provide one with complete visibility. You can see the outdoor space making it the perfect option for houses near ponds or forests.
Things To Consider
Before you purchase fences for a garden, please remember to check a few points. First off, pay attention to the purpose of the garden fence. If you need to protect a very risky area, then electric fences can be a great option. For chickens, wire mesh fences, pallet fences or chicken wire can work out well.
However, remember not to use any electric wire if pets are going to roam about in the garden. Simple wire fencing will work out great in this case, and you can use concave or convex fences for this purpose.
Next, if you plan to opt for a traditional look, then picket fences can work out well. Tall picket fences will keep most dogs inside the boundary, and you can safely use them. These will also work in keeping deer along with other wild animals away.
Final Words
While most fences look very similar, you will find subtle differences in the installation process or in height. Some fences will not fall perfectly in specific categories considering the huge number of new designs that are coming up. However, you will be able to see the major shapes and styles, and we have added examples for the same.
We always recommend making a practical choice as the fence can add to the security of the place. While aesthetics are important, you should also build it up to a certain height for safety.
With this, we’ll wrap up, and you can tell us about your favorite kind of fence in the comment section below.
Are you tired of looking for the best fence for sheep? If so, don't worry, as it's a common search.
Whether you have just started sheep rearing or are seasoned at it, the task of finding the perfect fence can be tedious. On top of that, you need to remember the rules and regulations laid down by the state while fencing an area.
Irrespective of everything, the main concern while purchasing the fence is to get something long-lasting. More often than not, some fences fall short when it comes to protecting your sheep from predators. For keeping your flock safe, you will need to think about getting the best product, even for temporary fencing.
Having said that, the task of choosing an appropriate product can quickly get confusing due to the sheer number of choices. Hence, we thought of helping you out by suggesting some of the best fences we have tried.
One of the most common and robust options has to be welded wire fencing. By the name, you can understand that the metal mesh has been welded to provide extra protection against bending. And, when you take proper care of this fencing, it can last for up to fifteen years.
You will need to stretch it between the posts using a tractor or a stretcher after attaching the wire on a side post to install this fence. Furthermore, some people like to add strips of barbed wire to the top and bottom of this fencing to keep predators away.
While installing it on a sloped area, you should keep in mind the height of the fence. Try to go for a high fence to deter predators from entering the area. This type of fencing is available in different options depending on the height and even styles. So, make sure to check out various options before choosing one for your flock.
Besides, you should remember that repairing welded wire fencing can take some time, especially when trees or other heavy objects fall on it. Moreover, during snowy months, pushing too much snow towards the fence might cause warping, which may lead to requiring re-stretching.
Having said that, you don't need much to install the welded wire fence except for some posts, cable ties, the wire mesh and a couple of people.
We found the Wire Cloth Man vinyl coated welded wire to be a favorite of many because of its premium quality. The product is available in a variety of heights and lengths to let you customize it according to your farm. And, because it’s lightweight, you wouldn’t need to struggle with it during the process of installation.
On viewing the woven wire fence, you might get a bit confused as it looks similar to the welded wire mesh. However, there is a subtle difference in the design as the wires in this fence are woven together for more stability. These fences usually have a distinct zigzag diamond shape.
Furthermore, the woven wire fencing is available in several finishes, including galvanized before weld, galvanized after weld, and vinyl coated. The openings on the mesh are uniform to provide equal protection throughout the perimeter.
Installing the woven wire fencing is just as easy as the welded wire mesh, and it even works well for uneven grounds. Having said that, if you are going for the chain-link woven wire, try to avoid cutting through any chains as it may dismantle the whole fencing. You can even add electric offset wires along with electric fence chargers to electrify this perimeter fencing.
This is another option in our list that has been popular for use in all kinds of farms. The popularity of all kinds of electric fences comes from their ability to keep the predators away at all costs. In this fence, five to seven galvanized wires are installed parallelly.
However, if your budget allows it, there is always an option to install more strands to increase the height of the fence.
The high tensile electric fencing works well for creating a boundary in large pastures, and it can also be used to section small areas for individual flocks. Apart from keeping the predators away, this kind of fencing lets your sheep learn to remain in their designated area.
One of the things to know about high tensile wire electric fencing is that it doesn't come cheap. On top of that, you'll need to arrange to attach the fence to a source of electricity to get it working. Even though it can take a while to put up this fence, it does last a long time without much maintenance.
To work with high tensile electric fencing, you will need a number of things, including high tensile wire, t-posts, fence wire de-reeler, wire tensioner, tensile wire crimper, and a post driver. If you don't have any idea about installing fencing, it's best to leave it to a professional.
A side note - the ground wire is usually not attached to electricity to avoid its close contact with the land which might be hazardous for your sheep.
When it comes to keeping sheep or, for that matter, any livestock, there are many farmers who want temporary fencing for temporary paddocks or rotational grazing. In that case, going for costly permanent fencing like high tensile fencing might not be the best option.
However, the option of going for plastic mesh fencing is always there as it's easy to install, and you can take it out according to your preference. The plastic fencing usually comes with plastic stakes that make driving them into the soil easier.
Additionally, if you have a small flock, then plastic fencing can help contain the sheep within a particular area of the farm or pasture. On top of that, these meshes are much more flexible compared to wire fencing.
Having said that, because it's made of plastic, the mesh does have a tendency to get tangled. But if you are a bit careful, these temporary fences can be installed without getting into any trouble. To install this perimeter fencing you will need heavy duty zip ties, the plastic mesh and t-posts.
Along with different colors, the plastic mesh temporary fencing is available in a variety of sizes and styles. One thing you need to check is the holes or wire spacing present in the mesh to ensure that it isn't too large to let in predators.
If you are looking for the convenience of an electric fence but aren't ready to pay the price, the next best option can be electric poly rope fencing. Rather than coming in the usual mesh design, these come in the form of a rope, and you will need to arrange for the fence posts for installation.
Because these come in the form of ropes, it's on you to decide on the post spacing and fence line spacing. The electric poly rope is often used to divide farmland or separate livestock based on flock size.
One thing to remember is that these ropes aren't as strong as the steel wire fence. Hence, even the slightest disturbance or bad weather may end up disrupting the setup.
Nevertheless, the use of electrified poly rope can be an excellent way to teach your sheep to obey physical barriers. And, it does make good semi-permanent fences, particularly for rotational grazing.
While buying the electric poly rope, you need to ensure that it has been made for the specific livestock. Usually, for a sheep farm, you need to get a poly rope that has been specified for sheep, goats, or similar-sized animals.
Another thing you will require to set up the fence is galvanized steel connectors. They work the best in holding the rope together while ensuring easy conduction of electricity. Do check the size of the connectors so that they can easily fit with the ropes.
Even though we have already mentioned options that can be used as an electric fence, electric netting has become a popular option, especially for temporary fences. These are usually available in rolls of plastic mesh that are intertwined with thin metal wires for conducting electricity.
Moreover, installing these nettings is pretty easy as they already come with spikes to set them on all kinds of territories. Most brands claim that you can set it up within a few minutes and even take it down just as quickly.
The selling point of these electric fence wires is to provide adequate fencing while cutting down on the costs. Nonetheless, it's essential to find suitable electric netting that would work for your flock. And, while buying the electric fence system, you will also need to get an AC/DC or solar energizer of the recommended capacity to power the electric netting.
On top of that, your electric fence will most probably come with pre-installed fence posts, so you will need to drive them into the soil with plastic struts. Make sure that the openings are small enough to deter predators found nearby.
Electric Netting Options
Among the different products available on the market, the Premier ElectroNet sheep and goat netting fence is a well-made product that's easy to install and durable. It also has a pretty good length to cover a large area.
Other than that, there's also theTrident electric sheep/goat netting, another highly recommended sheep fence with eight conductive lines. The dark green color also keeps it visible for humans to stay away from the electric fence.
While going through the various options for electric fences, we also found thePetween electric fence netting that works with diverse livestock animals, including sheep. This perimeter fence is made of UV-resistant plastic to increase its durability even when you use it under bright sunlight.
Next, there's the Starkline All-Purpose electric utility netting that works well to build interior fencing for sheep or goats. It even contains fiberglass posts to keep electrified wire steady. Similar to the prior product, this electric wire netting comes 100% pre-assembled to avoid confusion while installing.
If you have been searching options for sheep fencing for a while, there's a chance of coming across barbed wire fencing. It's one of the most common techniques used in livestock fencing to deter predators. Along with being cheap, barbed wire fences are widely available compared to other fencing options.
Installing barbed wire fences is pretty similar to putting up any fence line. You will need to secure the barbed wires on several fence posts to keep them in place. The material of the posts will depend on you, but earlier wood posts were the primary option. These days, everything from fiberglass posts to steel posts and even concrete posts are available for enhanced durability.
When purchasing the barbed wire, the essential factors are the length of the wire and the gauge. Barbed wires are often wrapped around posts, so consider that before deciding on the length.
Another deciding factor is the style of barbed wire that you want to get, and the high tensile barbed wire is made of high-quality materials.
Now, if you have decided on creating your sheep fence with barbed wire, it's crucial to care for your safety. Hence, buy some protective gloves and work from the bottom up to getting hurt by the wires.
You do need to know that many people are against the fence style of barbed wires as it can harm both the predators and your livestock if they come too close to the fence. However, to avoid that, many people have opted to use barbed wires with other fence wires to minimize the chance of anyone getting hurt.
To be honest, when it comes to semi-permanent fencing for sheep, nothing can beat the traditional sheep fencing option like using wood panels. The wooden fence panels can be joined together to create a strong barrier to deter predators and protect your sheep from wandering out of the grazing ground.
There was a time when almost all livestock farmers used to use wood fences, but times have surely changed. One of the key reasons behind this is the highest cost margin of wood that doesn't allow you to cover many areas. On top of that, wood fences can easily get damaged due to rain or snow and require pretty hefty costs to repair.
But, if you are looking for interior fences to divide your farm or garden into smaller sections, then wood fencing options can still work. Remember to apply weather protection paints on the wood fence to increase its durability.
Furthermore, there are options available where the wooden fence has been combined with welded wire for extra protection. However, these are only meant for a relatively small space. Whatever be your choice, try to calculate the approximate number of wood fence panels you will need.
Usually, a lot of digging is involved in installing the wooden fence as you want the picket or wood posts to sit in the ground firmly. Even though a single person can do the job, it's always better to consult a professional.
Apart from the sheep fencing options that we have mentioned till now, there are a couple of other ways to deter predators from your farm. One of the most effective methods is using bright lights as they do a great job of scaring away all kinds of animals. Something like solar lights can also do the task pretty well when you position it at the right place near the fence.
Additionally, if your budget is higher, think about installing surveillance cameras around your farm. Along with keeping an eye on the predators, cameras work well to keep track of free-range animals and protect you from losing livestock.
Final Thoughts
That's all the options of fencing for sheep that we had in stock for you. We would like to say that every farm may have a different requirement based on the size of a flock or even the type of sheep you are keeping.
Hence, before choosing any particular fencing option, make sure to do your thorough research. Besides, we have tried to keep a balance of various fencing options present across the budget. If you are new to rearing sheep, it might be a good idea to consult a professional who has experience in fencing areas for livestock.
With that, we have reached the end of this topic. Don't forget to tell us about the fence you prefer for your sheep.
The official arrival of fall means winter is near, and that calls for the dreaded task of removing fallen leaves and dead grass from your garden.
Now, if your lawn is small, a little bit of manual labor would be sufficient to rake and sweep it clean. But the same leaf disposal method can be quite exhausting and inefficient for those with larger lawns.
That’s why it’s important to invest in outdoor power tools like the leaf vacuum. However, finding the best vacuum from a vast list of options is easier said than done. And most lawn owners are often confused between the Dr. Leaf Vacuum and the Cyclone Rake.
Are you in a similar situation? Don’t worry, we’re here to help. Through this guide, we’ll be comparing the two leaf vacuums to help you decide the obvious winner.
So, without further ado, let’s get going!
Why Do You Need The Rake Leaves From Your Lawn?
Before we begin comparing Dr. Leaf Vacuum and Cyclone Rake, let’s understand why it’s important to rake the leaves from your lawn prior to the onset of winter. You might think it’s crucial for maintaining the physical appearance of your backyard. This is definitely one of the reasons, but it’s not the whole story.
The thicker coverage of leaves on your lawn may smother the grass from UV rays and the oxygen required to make it through the winter. As a result, the leaves will ultimately prevent grass from continuing to grow, paving the way for a healthy comeback once the frozen grounds wake up in spring.
This is when you’ll need to use a rake or leaf vacuum to remove the fallen leaves and grass blades that didn’t survive winter. Raking also loosens matted grass clumps caused by snow mold, which may smother new growth.
Seeing the importance of raking leaves, we’ve decided to take a closer look at the two lawn power tools that ensure top-quality performance and show promising results - Dr. Leaf Vacuum and Cyclone Rake.
We’ll be highlighting the key features, which make them differ from each other to find out the obvious winner.
Dr. Leaf Vacuum Vs. Cyclone Rake
Since 1985, Dr. Power Equipment has been a leading manufacturer of durable, simple, and useful tools and power equipment with a mission of making outdoor work enjoyable. And the Dr. Leaf Vacuum from the brand is definitely no exception! Their line of engine-powered leaf vacuums is designed to suit every customer’s individual needs.
On the other hand, the Cyclone Rake is a line of premiere ride-on leaf and lawn vacuums in America. Every vacuum under this line is hand-built and relentlessly supported by an amazing customer support team. As such, it stands out among the top lawn and power equipment brands in the US.
So, which one is the better choice? Let’s differentiate between the two based on the following factors.
Type & Engine
Dr. Leaf Vacuum offers a wide range of engine-powered leaf and lawn vacuums that can help remove leaves and debris from your lawn within no time. The product comes with a long hose, similar to that of a household vacuum, to suck up the leaf and glass blade coverage.
Finally, the debris is deposited into a holding tank from where it’s offloaded into your waste disposal system. Just open the tank and dispose of the yard waste in a compost pile or a biodegradable waste bag for your curbside waste collection.
Cyclone Rake is a ride-on leaf and lawn vacuum designed to meet all your needs. Its line includes vacuums ranging from smaller models perfect for homes in the suburbs to larger models for your lawn maintenance business.
What’s more, all Cyclone Rake leaf and lawn vacuums come with powerful Briggs and Stratton engines, which are capable of mulching leaves precisely into a smaller size. This makes the product perfect for completing the compost pile that you may have been working on. It also allows you to power through the toughest property cleaning job for years to come.
Design & Construction
The Cyclone Rake leaf vacuum is constructed using premium-quality nylon mesh to last for a long time. It can be easily folded flat(just 5 inches thick) in less than 5 minutes, without any tool to save space when not in use. You may also hang it on the walls of your garage or shed.
On the other hand, Dr. Leaf is made using poly plastic, which may warp or deform over time because of the sun. But the best part about its design is that it comes with a large collector bin that collects a significant amount of lawn waste in one go.
Pricing
Depending on your location, the price of the Dr. Leaf Vacuum may differ. But it’s usually priced somewhere around $2000.
The cost of the Cyclone Rake might also vary depending on when and where you buy it. However, the standard models are cheaper than Dr. Leaf Vacuum, costing around $1000. And you get a lot more features for its price, which makes the leaf and lawn vacuum a value for money option.
Trial Period & Warranty
Dr. Leaf Vacuum comes with free shipping and a one year trial period during which you can use as many times as you want. This will help you decide if the leaf and lawn vacuum from the brand Dr. Power Equipment is the right product for maintaining your lawn.
If not, you can request to opt for its return policy without any hassle. This is why people are now turning to Dr. Leaf Vacuum for their lawn maintenance needs.
On the contrary, Cyclone Rake not only offers a one year free trial period but it also comes with a 3-year warranty. You may purchase this leaf and lawn vacuum with utmost confidence and use it at home for a year. If you’re not completely satisfied, request a refund.
Cyclone Rake will refund 100% of your money, including the shipping charges. It’s also covered with a free warranty against defects against material and craftsmanship. So, in case anything goes wrong in an unlikely event, the brand has got your back!
Dr. Leaf Vacuum - Standout Features
One year free trial with free shipping
Larger collecting capacity
Wide range of models
Priced at $2000
Cyclone Rake - Standout Features
One year free trial and 3-year warranty
Ride-on models
Folds up flat for easy storage
Priced at $1000
The Obvious Winner?
Now that we’ve gone through our detailed comparison of both the leaf and lawn vacuums, it’s time we introduced you to the obvious winner. So, which is the best option - Dr. Leaf Vacuum or Cyclone Rake? The answer is self-explanatory; Cyclone Rake wins hands down!
It comes with a powerful engine from Briggs and Stratton or Vanguard and better features, allowing you to clear your lawn without any hassle. The brand is confident about its range of ride-on lawn vacuums, which are available at a comparatively reasonable price.
To sum up, those with larger lawns will find it beneficial to invest in the Cyclone Rake leaf and lawn vacuum. But that doesn’t mean the Dr. Leaf Vacuum is a letdown.
It’s available in a wide range of options, including both large and small models to meet all your requirements. Plus, the vacuum can collect a considerable amount of debris in its collector bin in a single go, making it another perfect option for larger lawns.
Conclusion
You don’t need to invest in the Cyclone Rake just because it’s the clear winner when compared with Dr. Leaf Vacuum. We’d suggest taking time to consider all factors before deciding on the leaf and lawn vacuum that best meets your requirements.
This includes the number of walkways and quantity of leaves on your lawn, size of your lawn, and the number of trees surrounding it. Also, don’t forget to go through user reviews and keep your options open.
On that note, we have reached the end of this guide. Here’s hoping we were able to help you make the right decision.
Your garden is supposed to be your little oasis where you can relax and forget everything about the daily stress, disconnect and just enjoy the time spent with your loved ones. Many backyard designs though lack that sense of coziness and personality a garden made by yourself offers. Ideas on how to improve your backyard landscape are endless but even small, easy, one day projects can do the trick and really make a difference. Small ponds, bird feeders, organic paths, swings all add up to that perfect scenario you can dare to dream to. The following 25 Easy DIY Garden Projects offer you some creative ideas that should not be difficult to realize for anyone.
1. Use a bird cage as a plant holder as well
2. DIY unusual planters
3. Teach your kid to make bumblebees for your flower garden
4. Make a wooden path in your garden
5. Plant flowers in old tree trunks
6. Use old bricks and glass to make small solarium for your greens
19. Make a checkered pattern with pavement and grass
20. DIY different unusual garden paths
21. Make a small pond for your porch
22. Or a stone garden
23. Concrete a boot as a flower pot
24. Fill the air with wind chimes sounds
25. Make a bird house
Have your reel mower blades gotten blunt lately? Hate it when that happens. But what if instead of tossing it away, you could sharpen its blades?
Well, as busy home homeowners, we like our tools being ready for use at all times, and when it fails to work, we either replace or try to fix it. Not all appliances can be repaired, but you can definitely fix things when your reel mower’s blades hit a snag.
Even though these blades are designed to retain their sharpness for a long time, they eventually wear and stop working altogether. While that's unavoidable, there are several effective ways to sharpen a reel mower's blades. And you can do it yourself by following a few simple steps and taking some precautions beforehand.
Without further ado, let's get down to business.
How to Sharpen Reel Mower Blades?
Safety Measures Before The Job
You don't need to hire a handyman or a technician to get the job done, but you need to follow certain safety procedures. So, before we discuss the sharpening methods, we want to elaborate on the precautions. Here we go...
Make sure that the reel is secure.
Do not, at any point, place your hands on the cutting edge.
Avoid all distractions while going through the process.
While sharpening the blades, wear well-fitted clothes and take off all jewelry. This is necessary as with loose-fitting clothes and jewelry, there's a risk of the mower parts getting hooked on to them.
Wear resistant and non-slip footwear as well as full-length pants to keep your legs covered and protected at all times. While sharpening the blades, it's essential not to wear slippers, sandals, or any type of shoe that will leave your feet exposed.
Wear a face shield and safety glasses. While sharpening the blades, a lot of tiny metal particles, sand, stone bits, and other small matter will fly around and may reach your face. Hence, you must cover your face, especially the eyes, properly to avoid any injury.
All these measures are ways to ensure a safe experience and prevent any mishap or injury. So, it's best that you follow this basic routine before getting started.
File As a Sharpening Tool
This is by far the most cost-effective method of sharpening reel mower blades. It's pretty easy and helps you hone the edges of the blades until they regain sharpness.
Get rid of the debris
Before using the files, scrape off the stone chips, sand and other debris stuck on the blades. For this task, you can use a wire brush or a coarse sandpaper. After you finish cleaning, put the mower on a workbench or tabletop and chock the wheels with a piece of wood so that they don't move.
Secure the blades and file
Lock the blades in position by inserting a broom handle through the mower's blades. Thereafter, press the toothed end of the metal file on the bevel edge of the first blade. Angle the file and simply scrape on the blade between 3 to 6 times, dragging it down towards the end of the beveled edge.
Work till the midpoint and beyond
Continue filing your way down the blade until you reach the midpoint, repeating the brushing motion. Since the blades twist, you'll have to stop near the midpoint, remove the broom handle and reposition the reel to work on the rest of the first blade. Continue filing the blade applying the same motion but now start from the other end of the tool.
Repeat on all blades
Once the entire blade is sharpened, reposition the reel so you can perform the same course of action on the second blade, third blade, and so on, until all of them have been sharpened.
Finish with a lubricant - Once you're done with the blades, lubricate them so that they resist rust. You can either spray lubricant directly on the edges of the blades or apply some on a rag and then wipe it down the edges.
How to Sharpen Reel Mowers Blades Using A Sharpening Compound
Using a back-lapping sharpening kit is yet another quick and productive way to sharpen dull mower blades. The kits usually come with a handle and the sharpening compound. That being said, sharpening compounds are grainy substances which when applied to the mower's cutting edges sharpen them as the blades rub against each other.
This procedure involves attaching the handle to the driving gear of your reel mower, then using a paintbrush to apply the sharpening compound on each blade. Coat the blades generously and make sure to apply on all the blades. After that, push the reel mower backwards so that the blades rub against each other and regain their sharpness.
The reel can be driven back manually, but it is somewhat a tedious process, requiring a lot of effort. However, you always have the option of using a power drill to crank the reel more quickly, which speeds up the process, making it less stressful.
How to Adjust the Blades of a Reel Mower
We often mistakenly assume that the blades of our reel mowers have become dull, and need sharpening. But this may not be the case always as misalignment of the blades can also hinder the smooth operation of the mower. Fortunately, with these simple steps, you can realign the blades and resume work in a snap.
Below are some tips on how to adjust the blades of your reel mower:
Step 1
Lay your mower on a flat surface like a tabletop or a workbench. Wedge the wheels to prevent any movement.
Step 2
Spin the reel to determine the type of adjustment necessary (they are not the same always). While spinning, if you hear a screeching noise, it's an indication that you have to reposition the blades away from the cutting edge. However, if it spins loosely, then you must move the blades nearer to the cutting bar.
Step 3
After ensuring the type of adjustment needed, if the blades need to be moved nearer, place a flathead screwdriver in the screw hole and tighten the screws. Conversely, if the blades need to be positioned farther away, unscrew the bolts a little until the desired distance is achieved.
Step 4
While tightening or loosening the screws, make sure it is done a little bit at a time. If it's too much, the blades may be over-adjusted.
Step 5
Turn the screws of the cutting edge in the direction opposite of the reel screws. This should also be done slowly, bit by bit, to prevent over-adjustment.
Step 6
Continue spinning to find out other adjustments needed.
If this procedure is followed correctly, you can quickly fix any misaligned blade. If the blades are still blunt, then you should sharpen them employing any of the methods explained above, to get the mower working once again.
Conclusion
It is totally unnecessary to pay a professional for a job that you can complete yourself in the comfort of your home. That being the case, reel mowers are bound to get blunt with use over time, so it's best that you master the skill to undo the damage.
However, before we leave, we once again advise caution as sharpening any tool should be done carefully by following all the safety measures. If, at any point in time, you feel uncomfortable handling sharp parts, it's best to ask for help.
On that note, we've come to the end of this guide, and we hope we can answer all your queries.
Let us know in the comments section below if you have more tips to share.
However, if the finish on your acrylic painting looks uneven, it won't attract viewers or garner positive reviews. That's why you have varnishes to add that extra professional touch to your painting and make it shine.
Varnishing can help in increasing the vibrancy and depth of acrylic paintings and help achieve a glossy sheen, making your painting instantly more attractive. But the question that might be running through your head is - how to varnish an acrylic painting?
There's no one way to varnish an acrylic painting because different artists prefer using different techniques. And today, we're here to talk about varnishing acrylic paintings using various techniques and varnishes.
So, without further ado, let's get our canvasses ready!
How To Varnish An Acrylic Painting
What Is A Varnish?
First, let's learn what acrylic paint is for and its downsides. Acrylic paintings are not equipped to withstand external elements on their own without proper protection. Varnish acts as an additional protective layer to shield your painting from dirt and debris to avoid fading or dulling over time. It must be colorless, transparent, and bond well with your acrylic paints without causing any chemical reactions.
Other than this, the varnish layer needs to be removable so that you can strip it off if needed without ruining the color of your painting. Varnishes are essentially a resin solution containing a chemically inert solvent that won't damage the acrylic paint.
You can apply the varnish layer once your painting is completely dry, but make sure to apply only an acrylic varnish for an acrylic painting. Do not use varnishes for oil paintings for acrylic paintings and vice versa because the chemical composition of different varnishes varies significantly.
Usually, acrylic paints take around 24 hours to dry completely, and it's best to add the protective varnish layer after a day or so. However, if your painting dries early, you can easily apply the varnish layer before the 24-hour mark.
What Are The Different Types Of Varnish?
There are mainly three types of varnishes that you can use. In this section, we'll discuss the qualities and characters of these varnishes, so let’s dig in!
1. Matte Varnish
Light saturation and color contrasts play a vital role in making any painting stand out in the crowd. Matte varnish plays with the color contrasts and brightness of your painting by managing its darkest layers.
A matte varnish contains solid matting agents in the varnish layer that scatter light at the painting surface. You can avoid light reflection and showcase the soft colors of your painting much more prominently.
On the downside, without the high-sheen finish, your painting might look a bit dull and hazy if you choose to use this varnish.
2. Gloss Varnish
When it comes to gloss varnishes, Dammar varnish is the most popular among artists because of its high-gloss finish. Even though the traditional Dammar varnish often turns yellow and darkens over time, it's much more efficient in protecting the color of your paintings compared to modern acrylic resin varnishes.
Gloss varnishes, like Liquitex gloss varnish, reflect light on the painting surface due to their high-sheen finish, instantly attracting viewers and increasing the value of your painting. Moreover, they are excellent for highlighting darker values and enhancing the vibrancy and color saturation of paintings.
But, if you are working with a glossy varnish, you need to be careful about the lighting because of its light-reflecting quality. Your painting might reflect too much light and lose its depth of color. We would suggest considering the lighting of the room before deciding to apply a gloss varnish to your paintings.
3. Satin Varnish
If you want to create the perfect mid-sheen finish for your painting, the satin varnish is an ideal choice. It will help you achieve a finish somewhere between gloss and matte without being too dull or vibrant.
You get to play with both gloss and matte finish if you choose a satin varnish. It will help you bring out the depths of colors in your painting, just like a matte varnish. At the same time, it'll also provide a luxurious sheen to the painting like a gloss varnish.
We found that it creates the perfect balance between the dark and light values of your painting that can have a powerful and unique impact on viewers.
What Are The Necessary Varnishing Supplies?
Now that you know about different types of varnishes, it's time to learn about the basic supplies you'll need to varnish your painting. First and foremost, you'll need a varnishing brush to apply the varnish layer to the dried acrylic paint. A large, flat brush works best for varnishing because it helps cover the entire painting in a few brush strokes.
You can choose an old, worn-out brush or buy a new one from the store for varnishing purposes. Also, make sure it has soft bristles that won't come off while varnishing the finished painting. Keep this brush separate from your regular paint brushes to avoid contamination and mixing of paints or varnishes.
Other than this, you'll need some distilled water, a jar to mix the varnish, and some paper towels or old rags to avoid creating a mess. A palette knife can come in handy for stirring the varnish, and also place some plastic bags below your painting to protect the floor.
Why Does Your Acrylic Painting Need A Varnish?
Before we go into the details of different varnishing techniques, you need to know why acrylic paintings need varnishing. As the acrylic paints dry, the acrylic polymer binders join together, forming a mass that offers a soft texture to your painting.
These acrylic polymers leave small micropores that gather dust over time, causing the paints to fade. Applying a polymer varnish protects and covers the painting, helping it withstand humidity and temperature differences while providing adequate UV protection. It also becomes easier to clean a varnished painting instead of struggling to remove dust particles deposited within the paint layers.
Make sure to apply a removable varnish layer so that it can remove all the dirt and dust if you ever need to replace it with a new coat of varnish. In that way, you can simply change the varnish layer without disturbing or damaging the acrylic paint. And to do that, you need to apply an isolation coat before working with acrylic varnishes.
What Is An Isolation Coat?
A transparent layer of isolation coat is applied that physically separates the underlying acrylic layer from the varnish for easy varnish removal. If you use a solvent-based varnish, the isolation coat will stop the varnish from reaching the paints, thereby preventing damage to your painting.
The golden soft gel gloss is an ideal example of an isolation coat. Once you thin it down with water, it offers adequate foam release to protect your painting. It simply sits on top of the paint surface, acting as a barrier between the varnish and the paint layer without disturbing the paint.
Moreover, applying an isolation coat is essential if you choose to do a matte varnish over an absorbent surface to avoid making the painting frosted or cloudy. The frosted appearance occurs when the varnish and solvent get absorbed into the substrate, but the matting agent rests on the surface, looking like a white solid mass.
How To Prepare Your Acrylic Painting For Varnishing?
Before varnishing the painting, you need to consider a few things to protect the painting. Firstly, make sure that the painting is dry before you even think of applying the varnish to avoid any smudging of colors. Next, gently wipe the canvas surface to remove any dust or debris that can ruin the varnishing process.
We recommend placing your painting on a flat and even surface like a workbench or table. By laying the painting on a flat surface, you can ensure that no drips of varnish appear on the painting. Start by pouring a small amount of varnish in thin layers over your painting; otherwise, the varnish might accumulate in different areas, making the painting look uneven.
If you're using spray varnishes, make sure to maintain a distance of 6 to 12 inches from your artwork while applying the varnish. Pick a side of the painting for spraying the varnish and gently spread it over the entire surface as evenly as possible.
How To Apply Varnish With A Brush?
We've covered the basics of varnishes, and it's time to look into some popular varnishing techniques. Depending on the requirements of their paintings and their preferences, artists can choose different techniques for varnishing.
Some prefer to apply liquid varnish using a brush, while others are more comfortable using a spray varnish. In this section, we've discussed the technique of applying natural varnishes with a brush in a few easy steps.
Step 1: Apply Isolation Coat
If you want to make the varnish easily removable, apply an isolation coat to your painting. Even though applying the isolation layer is optional, it helps protect the paint if you ever need to replace the varnish.
Step 2: Clean The Painting
Wipe off the surface using a lint-free cloth to remove dirt or dust particles. Also, make sure that the painting is dry and clean to avoid any contamination or smudging when applying the varnish.
Step 3: Place The Painting
After you've cleaned the painting, it's time to place it horizontally on a flat and even surface in a dust-free room. Raise the sides of the canvas using a small wooden piece to keep the painting slightly elevated from the surface. In this way, it'll become easier to varnish the sides of your canvas.
Step 4: Get Your Varnish Supplies
Once your painting is all set and cleaned, gather your varnishing supplies. Get a clean and flat brush, a container for mixing, and a stick or palette knife for stirring the varnish. Be careful to avoid stirring or shaking the varnish too much while mixing it because that can create bubbles or foam.
Step 5: Start Varnishing
Dip your clean brush in the varnish and carefully apply it from one side of the canvas to the other in long and even strokes. It's best to apply a first thin coat of the varnish so that it doesn't pool in different areas, as that will make your painting look dull and clouded.
Remember to check your work from time to time to avoid missing any areas. Once the first coat is completely dry, you can apply a second coat for better results. It's best to apply the first thin coat horizontally and the second coat vertically to cover the entire painting without missing any spots.
Step 6: Safely Store The Painting
After you've completed varnishing the painting, let it rest so that the wet surface can dry properly without any disturbance. To create an even varnish finish, you need to keep your painting in a fixed position for one to two hours. So, leave the painting as it is and try not to move it.
How Can You Apply A Spray Varnish?
Artists usually apply high-quality spray varnishes, like the Grumbacher spray varnish, to avoid the pooling of varnish in different areas. If your painting has an impasto surface, a liquid varnish can easily accumulate in small nooks and corners; hence it's best to use a spray varnish under these circumstances.
Step 1: Basic Preparations
The basic preparation steps are the same for both spray and liquid varnishes. You need to clean the painting and make sure it's dry before applying any varnish. However, it's best to place the painting vertically while applying a spray varnish to avoid being heavy-handed with the varnish.
Step 2: Shake It Well Before Spraying
When it's time to spray the varnish on your painting, read the instructions on the spray can carefully. Then, shake the can for around two minutes, and spray away. Always make sure to shake it well from time to time while applying the layers to create an even finish.
Step 3: Maintain The Distance
While applying the spray varnish, maintain a distance of around 30 cm or 6 to 12 inches from the canvas to achieve the perfect finish. Even though it's a natural tendency to get closer to the canvas as you spray, be mindful about maintaining this distance.
Step 4: Pick A Side
Start spraying from one side of the canvas and spread it evenly throughout the surface. You can pick any side and remember to overspray the edges so that you have enough varnish to spread over the entire painting in a single stroke.
Remember to spray the varnish in thin layers to get the best finish. Two to three coats of spray varnish are usually enough to protect your painting, but you can always add more coats.
Step 5: Keep It Clean
After spraying continuously for a while, clean the spray nozzle as spray varnishes tend to block the can's nozzle quite easily. Keep a rag close by for the purpose, and check the flow of your spray varnish on an empty canvas before you start applying it to the painting.
Step 6: Let It Dry
Once you've covered every inch of your painting with the spray varnish, it's time to let it dry. Spray varnishes dry pretty quickly, but you can wait for one or two weeks to be on the safe side.
How To Varnish An Acrylic Painting Final Thoughts
With that, we come to the end of our extensive guide on how to varnish your acrylic paintings. After going through our article, we hope you have a better idea of different varnishes and how they work to protect your paintings.
But, be careful while choosing the varnish because the wrong varnish can ruin your painting. In this context, never use an oil varnish for your acrylic painting or vice versa, but always look for varnishes that work well with acrylic mediums. You can also check our other article on acrylic paint vs oil paint to get an idea comparing these two.
And on that note, we will sign off. Take care and stay creative!
Admit it or not, the shades on a window are one of the things that make a house look like home sweet home.
Apart from adding a comfortable and charming appeal to your home interiors, window shades provide two very important things: privacy and sun protection.
However, not all window shades are the same. There are several types of shades for windows that come with a lot of distinct features, specifically designed to cater to various needs.
This makes it a tad bit difficult for us to pick just the ideal window shades for our homes.
So, if you are looking for the perfect window blinds for your house, here’s a guide from us that will explain to you all the different types you can get right now!
Types of Windows Shades
Roman Shades
Roman shades make one of the most elegantly designed blinds that you can get for your windows. A major benefit of the Roman window shades is that they can work well with heavy-set window frames.
Roman shades are generally made of one long piece of thick fabric which features beautiful patterns and designs. It makes for a very sophisticated touch and feels. Moreover, the horizontal folds that these shades feature along the entire length make it easier for you to lift or lower them.
When you pull the Roman shades down, they hang entirely flat. But once you put them up, the blinds reveal their lovely pleats, accentuating the window. Therefore it can be said that these bring in an ideal combination of a classic look and functional layout together in a beautiful blend. These add a unique touch to the overall interior decor, which reflects a refined taste.
One of the smartest ways you could use these blinds is by adding them to a modern interior decor scenario. These create a charming look in such decor scenarios by bringing a balance that highlights all the essential elements of both modern and vintage styles.
Price-wise, you could indeed get a lot of options for Roman window shades. However, they generally tend to incline more on the expensive side, so you must manage your budget accordingly for a quality set of Roman shades. And, if you want to look for more affordable options, do make sure to avoid lighter textures, as they may wear out too soon.
Balloon Shades
Balloon shades are greatly admired for their delicate beauty and are mainly used for decor purposes. These are usually made of silky, sheer, or semi-sheer fabrics that add a sparkling touch to the overall design of the room.
Balloon shades feature rings on the back that have cords running through them. When you pull the shades open, they somewhat puff up like a balloon, making small tufts of fabric. This gives off a charming, vintage vibe; evoking a classic atmosphere of the yesteryears.
The fabric of the balloon shades is usually fragile and needs some high-maintenance and careful cleaning procedures. This can pile up on the cost of these shades, which already may be a bit on the steeper side.
Balloon shades are mostly ornamental window blinds that are primarily used for their undeniable aesthetic appeal. However, these could be a very sensible option for places that need a good bit of sunlight or that have a sweet little indoor garden.
Tie-up Shades
Tie-ups make for another widely popular ornamental window shades style that looks lovely in any room of the house. These tie-up designs are not very complicated and could be easily maintained.
These simple fabric tie-up shades can be easily installed on your window frame, using a standard curtain rod. At times, people also use a mounting board to hang the tie-up shades instead of a standard hanging rod. These can look very elegant, complementing the rest of the decor.
But the main highlight of these shades is the little ribbons and other decorative fasteners that are attached to them. Since these do not come with any roller tracks or cords, you will have to manually tie these blinds up to let the light in.
But these may take some time and effort to get right during the first few tries, and may not be convenient for everyone. Some may find this to be a tedious task, and would much prefer a simple roller option, shifting panels, or cords for this reason.
However, tie-ups look absolutely beautiful with any sort of interior design. It adds a little bit of vintage drama to spice up an otherwise boring look in the room. And that will definitely turn some heads toward it!
Roller Shades
Roller window shades are known for their versatile designs that offer complete ease of use. These come in a wide range of fabric and color options, and can beautifully adorn almost all kinds of modern window designs.
Brands such as Smith & Noble and Hunter Douglas can offer you some of the most brilliant designs for roller shades. These shades usually employ the mechanisms of both drapes and mechanical window panels.
One of the main benefits of roller shades is that the thick fabric on it effectively protects your interiors by filtering and blocking the harsh rays of the sun. This makes it a functional and essential element to have in the house.
Roller shades are very easy to use. These work on a smooth track and pulley system, allowing you to effortlessly roll them up by pulling on the string. An excellent way to allow natural light in your home, roller shades could be a great choice for living rooms, playrooms, and nurseries. As you may want to keep it comfortably lit and cozily warm, especially in these rooms.
Some innovative designs in roller shades involve push-button mechanisms, making them even easier for you to work with. With these, all you have to do is push a button on the panel to roll up or pull down the shades. Many people find it a more convenient option than manual designs, while the latter is preferred by all who are looking to add a dated look to their home decor.
Roller shades are usually available in a wide range of colors, designs, and fabrics. A great thing about these blinds is that they are mostly affordable, coming at very reasonable price tags.
You can even add different elements such as tassels and trims, to customize your blinds. Additionally, you can also paint on them to add a personal touch!
Roller shades can undoubtedly bring you a wide range of benefits at a pretty affordable price. Moreover, certain latest designs such as the blackout roller shades with sheers can get you the best of all three of these styles, giving you a grand deal for your money!
Skylight Window Shades
These shades are specifically designed for the skylights in your house. Skylights can give you a beautiful view of the sky at night or of the fluffy clouds during the day. But, they mostly fail to keep the strong rays of the sun at bay. And this is why these types of shades can work well with that arrangement.
Skylight shades can beautifully accentuate your skylight windows, adding a charming touch to your room and ceiling. These are not too difficult to install on the skylight frame or operate. These filter out natural light, keeping the atmosphere cool and comfortable, allowing you to have a peaceful time in the room.
You do get a few different styles of skylight window shades at different prices. Interestingly, typical roller window shades are sometimes modified to work with a skylight, and they do a good job of it. This is one of the more affordable options to have an efficient shade for your window.
Additionally, you can also find skylight window shades that are completely motorized, much like cellular shades. These are especially suited for skylights set on high ceilings. Those who have vaulted ceilings frequently reach out for these as they make a considerably convenient option.
Cellular Window Shades
Cellular window shades are some of the most energy-efficient solutions for your house. Apart from protecting your house’s interiors from sun and wind, and providing privacy, cellular windows create an insulated barrier for your rooms.
They are made of a fabric that’s designed into a cellular or honeycomb structure that traps the air between the window and the room. These cellular shades create a balance between indoor and outdoor temperatures, maintaining a comfortable atmosphere in the house all year round.
Cellular windows could also be used as blackout panels to block away from the sun's rays, which helps you catch those precious moments of sleep in the morning. The best part about these windows is that they aren’t all that expensive, and still offer you a smart way of cutting the cost of your heating or cooling bills.
Cellular window shades look pretty stylish and add a brilliant edge to the overall decor situation. These are also some of the most common kinds of window shades, which are a great, and, in fact, better alternative to the standard blackout curtains out there. Cellular shades come in a variety of styles which we will explore in the next few points.
Single Cell Window Shades
Single-cell window shades are a common type of window blind that you can find in many houses. They are a type of cellular window shade with just a single layer of fabric cells. These are a pretty versatile option for all types of windows, fitting well with almost any kind of modern home decor plan.
Single-cell window shades are significantly functional and convenient for everyone to use, which is why it is such a popular shade option for windows. One of the major benefits that these window shades offer is complete privacy for your home. The thick fabric of these blinds blocks out the harsh sunlight and makes sure no one can look into your room.
In fact, the fabric of these window shades is heavier than most other common blinds. This makes them comparatively much more durable and easier for you to clean. These don’t easily crease or lint, and thus need no high-maintenance care, for that matter.
Single-cell window shades are also pretty easy to use, which lets you enjoy a good deal of sunlight whenever you want, by letting the natural light flow into space.
These window shades also score pretty high on saving energy. They can maintain a comfortable temperature indoors by creating an insulating screen that keeps the atmosphere comfortable in summers and winters alike. This way, these shades can cut down on your energy bills, without costing much themselves.
Double Cell Window Shades
Another popular variant of cellular window shades is the double-cell window shades that work pretty much like the single-cell ones.
However, the major difference between the two is that the double-cell window shades come with an extra heavy layer of protection. This ensures better insulation for your place, trapping the heat inside to provide thermal comfort during winters and cooling off well to keep it pleasant during summers. These shades block away a significant amount of sun rays and UV light that damage not only your furniture but also your skin and overall health.
These could also be reliably used as blackout shades as they provide a comfortably dimmed or darkened environment when you pull them down. Thus, these double-cell blinds could be easily used in nurseries, reading rooms, or bedrooms.
These do provide you with all the privacy you need in your room. And the shades are made of a durable material and can be easily cleaned without much of a hassle.
These shades are available in a wide range of colors and styles, so you can mix and match them with your room decor and designs. A big advantage is that these double-cell shades do not cost much. So, you do get to have a beautiful blend of charming designs and high functionality at a reasonable cost!
Cordless Cellular Window Shades
The cordless type of cellular window shade is all about maximum convenience and functionality. Well, we all know that cords can be a big hassle at times. They dangle all the way down, which doesn’t really look nice, and get caught up in things toppling them over. Also, the cord can even break if they get caught up in the track. Additionally, cords can also be risky in houses that have pets or infants.
So, if you are looking for cordless alternatives for your windows, these could be some of the best ones for precisely the purpose. The cordless cellular windows come with an easy auto-mechanism that will lift the shades for you whenever you need them and put them back down as required. It doesn’t involve any cord, rope, or strings as such that could hinder the efficiency of these blinds.
Fabric-wise, these shades are pretty durable and can be cleaned easily. These can be installed on almost all modern frames. The shades will filter and block the harsh rays of the sun and UV light, protecting you and your home from their damaging effects.
Cordless cellular window shades also provide maximum thermal insulation during colder weather, by trapping the heat inside. But, in summer, these reflect back heat outside and keep the interiors cool and comfortable for you.
As blackout blinds, they work decently, allowing a cozy atmosphere for you to rest. Additionally, these blinds also take complete care of your privacy by providing absolute coverage against prying eyes.
However, these shades can be considerably more expensive than most other ones. So, that may require you to stretch your budget a bit.
Bamboo Window Shades
Window shades made out of bamboo are greatly admired for their beauty. These shades are usually done in the Roman style, having delicate panels or pleats, much like a large sushi mat. You can find these mostly in houses that are located in tropical or coastal regions.
These delicate bamboo shades fall like any normal window blind but can give you more of a pleated look when you hang them up. The bamboo shades keep the interiors from being too bright and look amazing against natural light. The natural elements in the shade whisk up a peaceful look and feel about them.
A significant advantage of these window shades is that they pose no risk of allergies to people who are sensitive to the synthetic weaves of common blinds as they are made of natural and non-toxic materials. This is undeniably a huge pro about these bamboo shades.
Quality-wise, these shades are pretty sturdy, holding up against regular wear and tear and the sun. However, there are no ways to clean them in the usual way. So, you would have to clean them manually with care.
Bamboo shades are primarily used for decorative purposes and look gorgeous when paired up with Asian or tribal decor elements. These are also more affordable, unlike other exotic woods.
But, if you are looking for insulative properties or privacy, these shades may not be the ideal ones for you.
Remote Control Motorized Window Shades
Well, in this era of hi-tech consumer devices, there aren’t many things left that still need manual operations. And remote control motorized shades are definitely one of them.
These motorized shades offer maximum convenience and are highly demanded precisely. These involve no hassles of cords or other things, allowing you to operate it with just a simple push of the button.
Some more advanced models come with several features and remote control settings. These allow you to control your shades in a number of ways, including managing the tilts at precise angles.
The auto-shades come with a powerful motor that manages the movement of the shades. And although some may think that the motors will break after a point of time, modern mechanisms are designed to last. So you can rest assured that these motors will last you for a very long time.
And there are so many different styles that are available on the market right now. This makes it even easier for you to mix and match them with the rest of your room design.
These shades also come with a hand-held remote control, which you can use from the comfort of your bed or couch. These will open the window shades for you and duly close it without needing you to get off your comfortable spot. This way, you can manage the natural lights in your living space from any part of the house
Houses that have very high windows can make it difficult for the owners to manage them daily, pretty much like the skylights we discussed earlier. In such cases, it would be the wisest thing to opt for motorized window shades that make it absolutely effortless to deal with them.
Pleated Shades
Pleated shades or blinds for windows are made from pleated fabric that sits flat on top of a window frame when pulled up. These are made of a single piece of fabric, but they look like slats due to their many horizontal folds.
These are some of the best options for bedrooms as they ensure complete privacy. The pleated fabric of these shades adds more depth to the room decor, complementing its overall design.
Cellular shades or honeycomb pleated blinds are very similar to other pleated designs. But cellular pleated shades are actually made up of two or more layers that are joined at the pleats, forming the “cells” in the structure. This cellular design traps in the air, providing incredible insulation for the interiors.
Owing to their cellular construction, these pleated blinds save a lot of energy that otherwise goes into powering the air conditioners, coolers or heaters in your house. By maintaining an ideal temperature balance, these shades cut energy bills to a great extent. Pleated shades and curtains can also efficiently absorb noise, ensuring a peaceful and quiet environment. These also do a decent job of filtering out sun rays and keeping the room comfortably darkened.
The cellular pleated shades come in a wide range of sizes, styles, and colors. You can also opt for single, double, and triple-celled varieties that could give you a number of benefits.
Solar Window Shades
Solar window shades are the ones that are specifically designed to filter and reduce the harsh rays of the sun coming into the house. Such shades are a pretty good option for houses in tropical regions where you get a lot of sunlight.
These significantly help protect everything in the house from the harmful UV rays of the sun, which can cause severe health complications. The fabric on solar window shades is usually woven polyethylene, which does a good job of blocking sun rays out despite being lightweight.
These create a cool and cozy atmosphere, keeping the interiors comfortably dark. This is what makes solar shades an ideal choice for bedrooms, nurseries, TV rooms, playrooms, and so on.
These shades are also pretty durable as they hold on for a substantial period of time without wearing out. This also makes it easier for you to clean and maintain it, as it doesn’t need expensive procedures to keep it in good condition.
However, the only downside to these is they aren’t very versatile when it comes to designs. Solar window shades won’t give you many styles or colors to choose from. These are focused mainly on their functional aspects.
Panel Track Shades
There has always been this undeniable charm about vertical blinds that seem to accentuate every other element in the room. And this is what makes the panel track window shades some of the most attractive curtain elements that you can add to your house.
Panel track shades consist of many panels that are entirely covered with fabric. You can effortlessly slide these panels to unveil or cover your windows.
Very functional design in every way, panel track shades can be installed on any modern window frame. These are a very popular option for larger frames and are presently a trending look.
Panel tracks also score pretty high when it comes to privacy and light control. With the sturdy panels and durable fabric, you would hardly need to worry about anyone looking into your rooms.
The materials and structure of the shades block out a substantial amount of sun rays and UV light. These also work considerably well as blackout blinds, keeping your room cozily dark and cool.
You can easily put these blinds in your living room, bedroom, dining room, or nursery. Brands such as Levolor, American Blinds, and Century Shade & Blind Co., offer some of the best quality and designs in panel track shades.
These shades are available in many different options ranging from wooden panels to solar shade materials. So, it’s easy to customize your home interiors by getting the ideal style of panel tracks for yourself.
Options such as custom cornices and stack placements allow you to customize the panels in splits, or side-pull layouts to cover up the center.
Natural Woven Shades
Bringing an organic element into your living space brightens it up in a way that can seldom be achieved by artificial materials. And that’s why natural woven shades really make a grand statement in any room.
These shades are usually made of grasses, reeds, or sustainable materials that have a charm of their own. Natural woven shades are really effective when it comes to keeping your rooms cool. These do not absorb much heat but can efficiently filter the strong sun rays. There is a wide range of styles and colors available for these shades.
But, the major advantage that these shades provide is that of safety from allergens. Many people could be sensitive to synthetic materials that can cause allergic reactions, such as rashes, eruptions, and irritation of the sensitive lining in our body.
Naturally, woven shades are highly demanded by people who have a difficult time being around synthetic and artificial substances. These shades are made entirely of natural materials that pose no risk of such reactions.
However, these curtains do not offer much insulation, so it is not the best option for winter. Additionally, such shades are usually high-maintenance, as they are pretty delicate.
Sheers and semi-sheers
Sheer or semi-sheer shades are used purely for decorative purposes. These look gorgeous and can add a stunning appeal to any type of decor: be it modern or traditional. Sheer shades help to filter natural light, softening the strong effects, and creating a beautifully lit aura inside.
One of the biggest benefits of these shades is that the fabric is extremely breathable. These provide higher cooling effects, absorbing less heat in the fabric while keeping the interiors cool.
Sheer shade designs can complement most modern window frames. Yet these look best on smaller windows and with minimalist designs for the room interiors. These window shades typically highlight the rest of the elements in the room, along with making a definite personal statement. Semi-sheer shades offer a bit more resistance against the sun. These are also decent options for living or dining rooms, providing a tad bit more privacy than the entirely sheer ones.
Vertical sheer blinds combine the elegant beauty of soft sheer drapery with conventional vertical blinds that look beautiful on larger windows, such as sliding patio doors. Many companies also provide customizable designs for sheer horizontal shades that offer options for color, opacity, vane size, or even lift controls.
However, sheer or semi-sheer shades can be pretty expensive and require considerable maintenance, such as spot and dry cleaning. Also, such shades will not help with insulation or privacy.
Quick Windows Shades Buyer’s Guide
Given the wide range of styles and designs, it can be really confusing when it comes to getting the perfect ones for your home. Factors such as quality, type, versatility, and price are essential to consider while choosing the ideal window shades.
And that is why we are attaching this brief guide here, which will help you make a well-informed decision while buying the most suitable shades for home windows.
Insulation and Acoustics
Window shades can significantly influence the insulation and acoustics of your home. When selecting shades, consider materials and designs that help in regulating temperature, conserve energy, and minimize noise. Shades with cellular or honeycomb structures, for instance, provide excellent insulation and sound absorption properties. However, the addition of thermal and soundproofing curtains can further enhance these qualities.
Thermal curtains are designed for temperature regulation and energy conservation, featuring multiple layers including a high-density foam layer, a reflective vapor barrier, and a decorative outer layer. These features contribute to retaining heat during colder months and keeping rooms cool during warm weather, helping to reduce energy costs.
Soundproofing curtains, also known as acoustical curtains, focus on minimizing noise transmission through windows. They are typically constructed with heavy, dense materials such as mass-loaded vinyl (MLV) or tightly woven fabrics that absorb and block sound waves. Together, window shades and curtains significantly improve insulation and acoustics for enhanced comfort and privacy in your home.
Ready-made or Custom-made?
This is truly an age-old debate that is never simple to solve in any situation. Buying ready-made shades can save a lot of effort and money. Ready-made models also offer you a greater range of styles and designs to choose from. But, on the downside, these may not always fit your window frames.
If your windows are smaller or larger than the standard size, then it will be wise to consider going for custom-made blinds. These will ensure a secure fit for your windows. Moreover, these also give you a bigger scope for customizing your window with additional trims or designs.
Quality
This is the most important factor to take into account while purchasing your window shades. Windows shades directly take all the harsh rays of the sun as well as the onslaughts of fluctuating temperatures. If the shades on your windows are not of good quality, then they will get sun-bleached, faded, and worn out in no time at all.
This is why considering high-quality material for your blinds while buying them is pretty essential always.
Types of Shades
Getting suitable window shades for a room will obviously depend on what kind of room it is. Different rooms in the house will need varying degrees of light control. Moreover, privacy is another essential factor in everything. So, if you want to put up some sheer window shades in your bedroom, you may need to think twice before making that decision.
Bedrooms and playrooms or nurseries should have more textured blinds that provide maximum insulation and privacy. While semi-sheers, woven, or balloon shades can go on living room windows or in dining rooms and kitchens since they filter a lot of natural light.
Versatility
A versatile pair of window shades can be installed on most window frames without hassles and bring you all the benefits of quality blinds. These should also adequately match up to the rest of the room decor so that they don’t look out of place.
Although it may be difficult for you to be able to find the right fit for your windows all the time, you can always get them custom fit. However, benefits, including insulation, privacy, sun-blocking, and ease of use, should be available in any standard window shade.
Price
The prices for window shades vary considerably from one brand to another, and most importantly, as per different types. Some of the standard shades, such as pleated blinds, roller shades, and cellular ones come at a pretty affordable price tag. These are available in many different styles and could be effortlessly installed on any window frame.
On the other hand, some of the most expensive ones include motorized or remote-control window blinds, but they bring you a bunch of additional benefits. You can control these from anywhere in the house without having to move from your place of comfort, set automation and scheduling, and more.
Conclusion
And that was it for our extensive guide on all types of window shades that you can get for your home right now!
We hope we were able to provide you with all the important insight into the mechanisms of these window shades, and that you liked what you read.
A wall mural, or mural in short, is one of the few design moves that changes a room’s “architecture” without moving a wall. A strong mural sets the tone, makes a first impression, and determines where the eye rests—so the space feels intentional even before furniture, lighting, and objects do their work.
The images in this roundup are worth more than inspiration. Each one shows a repeatable design tactic that can be lifted into a normal home. Some murals stretch space by borrowing perspective from landscapes, skies, and long sightlines. Some calm a room by behaving like a large textile—pattern, rhythm, restraint. Some act like a statement wall in the old sense: they give the room a subject, and everything else becomes supporting cast.
Most mural mistakes are practical, not aesthetic. Scale is the first trap: details that look sharp on a pin often dissolve when you stand too close, and an image that relies on distance can feel chaotic in a narrow room. Placement is the second trap: a face, horizon line, or focal object cut by a headboard or shelving reads like an accident, even if the artwork is good. Light is the third trap: downlights and glossy finishes create glare, and a mural that feels balanced at midday can turn heavy at night.
Use this gallery like a designer would. Read each image for (1) the room role—depth, calm, or character; (2) the viewing distance—close-up or across the room; (3) the “collision points”—doors, windows, radiators, tall furniture; and (4) the finish—washable for busy areas, flatter for quiet rooms where wall imperfections would otherwise show. That lens turns scrolling into decision-making.
A mural does not need to be hand-painted to work. Wallpaper murals solve rental limits and make replacement realistic. Painted murals solve odd wall sizes, textured surfaces, and compositions that need to wrap corners cleanly. In both cases, the goal stays the same: the wall stops being leftover space and starts participating in the room.
One of the most sought-after units available out there is the DeLonghi America PACAN120EW air conditioner. Although, this is a discontinued product, no longer available on the market.
But is the hype surrounding this unit justified? This is one of the many questions we'll answer today, ensuring that you have all the facts to decide for yourself.
It's true that the designers have added several quality functions, making this model a top choice for most people. For instance, it comes with an innovative whisper mode for noise reduction, a user-friendly interface, and a powerful filter for removing impurities.
However, that's not to say it doesn't need improvement. So, we've tried to highlight all these aspects in our guide, discussing why it's popular, while highlighting the areas that could be concerning for potential buyers.
We've also broken down this guide into different sections; all you need to do is note these points for future reference. Without further ado, let's begin.
POWERFUL YET QUIET: Cool rooms up to 450 square feet in...
SAVE ENERGY, COOL THE ROOM YOU’RE IN: By cooling only the...
Why Buy This Product?
We'll begin by discussing the positive features of this model, making it stand out in the market. For your benefit, we've narrowed down the essential attributes in a point format to ensure a better understanding.
Powerful Cooling Capacity
The most striking aspect of this unit is its powerful cooling capacity, giving it an edge over other models. You'll see it has a total capacity of 12,000 BTU, one of the highest going around. So, let's take a closer look at how it manages to cool the air.
We found that this device captures moisture from the air and recirculates it back to cool your office or home. To do so, it dehumidifies and cools the air simultaneously by removing 54.95 pints of moisture daily. As a result, this air conditioner is suitable for places with humid climates.
Dehumidifier
Now, users may choose to operate only the dehumidifier, having several benefits. When used without air-cooling, this machine removes more moisture, around 86.65 pints of moisture-laden air daily. Hence, it makes your home more inhabitable throughout the changing seasons, making you feel comfortable.
BioSilver Air Filter
Another fantastic upgrade is the inclusion of a BioSilver air filter. This ensures that the DeLonghi America PACAN120EW removes bacteria, dust and traps pollen along with moisture. As a result, the air inside your home will be cool and clean, meaning it's perfect for users who have dust allergies and breathing issues.
User-friendly
The designers have included a remote control for managing its different functions. This proves particularly useful for both youngsters and older people, meaning they won't have to walk to the unit. Instead, they can operate the air conditioner by adjusting the temperature, power, and dust removal function from any convenient spot.
Portable
We loved the inclusion of castor wheels, meaning you can position it in any suitable spot. In that regard, its lightweight design proves useful as you don't need to use much energy to push it around. Plus, these castor wheels are durable and they won't wear out after regular use.
Energy-Efficient
A significant advantage of using the DeLonghi America PACAN120EW is its energy efficiency. You can control the power without compromising on performance, thereby keeping electricity consumption to a minimum. Hence, it delivers a longer runtime without any hassle.
Window Venting Kit
Other than that, the engineers have also included a window venting kit for easy installation in most standard windows. It comes with the necessary instructions, allowing you to assemble the components in the correct order. Once fitted, you can consistently maintain the indoor conditions of your room.
Additionally, you can make customizations, which highlights its efficiency, making this unit suitable for most homes.
Whisper Mode
Now, it's well-established that most air conditioners produce a sound when turned on. So, the engineers of the DeLonghi America PACAN120EW have developed a whisper mode, ensuring that there's no irritating sound.
Overall, even when used at full blast, this model has a low decibel rating of 53. Additionally, the whisper mode reduces noise emission by half. But how exactly does it work?
You can activate the whisper mode at the touch of a button, which changes the fan's settings for more efficient output. In spite of that, this air condition manages to remove a large amount of air, comparable to a high-fan setting, with reduced noise emission.
We must mention that you shouldn't start the device in this mode. Instead, for the best results, allow it to cool the room to the desired temperature before switching to the whisper mode.
Temperature Indicator
Users will love its display screen as the designers have used three colors to highlight the different settings. Apart from looking attractive, all colors have a specific purpose, delivering the best user experience. Therefore, when you set the desired room temperature, it displays the setting in one color.
As the room temperature comes down, approaching the desired value, a second light pops up, highlighting its progress. Finally, when your room is at the correct temperature, a third light helps display the results. In this way, you remain informed about the performance while it ensures easy viewing from across the room.
Real Feel
We must now discuss its real feel function, delivering the best indoor conditions. It helps balance the ideal humidity level with your desired temperature setting, meaning you won't feel uncomfortable in any room.
This feature comes in handy throughout the year and helps first-time users find the right setting. Long story short, if you're unsure about the cooling capacity value for any room, enable the real feel function for the ideal atmospheric conditions.
Sturdiness
Finally, this is a durable unit capable of delivering long-lasting performance. We assure you it will be worth the investment, allowing users to enjoy its reliable output in all conditions.
What Could've Been Better?
Now, it's time to look at the areas which need improvement. Firstly, some users have felt that the price of the DeLonghi America PACAN120EW is a bit steep, leading to second thoughts about the purchase. Having said that, you must realize that this is a quality unit, and you need to have a flexible budget for buying top products.
Other than that, it's slightly bulky, which is an inconvenience. While you won't face difficulty moving it across the floor, it can be tiring to take this air conditioner upstairs or downstairs. Therefore, if you're looking for a lightweight model, it would be best to consider other options.
Moreover, if you have horizontal windows, it might be difficult to install this unit; you’ll need to talk to the supplier before making a decision. While it fits into vertical windows without any hassle, modifications are a must to mount it on horizontal windows.
Pros
Cooling capacity of 12,000 BTU
Whisper mode for greater comfort
User-friendly interface complete with remote control
BioSilver air filter for removing impurities
Temperature indicator with triple color display
Cons
May not fit in vertical windows
Slightly pricey
DeLonghi America PACAN120EW Buyer's Guide
It's time to progress to our buyer's guide, where we'll be discussing other important factors you need to consider before making the purchase. Although we've covered most of the attributes in the previous two sections, you can note the following points for better understanding.
Versatility
Before buying an air conditioner, you need to look at its versatility. Due to rising temperatures and global warming, the best models no longer focus on just cooling but improve the quality of life. Be it summer, winter, or monsoon, your air conditioner must be capable of dealing with the changing seasons while proving eco-friendly.
Price
Another essential factor for buyers is the price, and you need to be flexible with your budget to make the correct purchase. Premium-quality units usually cost more due to their all-round coverage and better functions.
It would be best to spend a few extra bucks and not compromise on performance. Buying an air conditioner is an investment and choosing a slightly pricey yet reliable model ensures that it delivers consistent output for a long time.
Ease Of Use
Modern air conditioners must be user-friendly for older people and youngsters to understand the functions. We've seen how the DeLonghi America PACAN120EW has an uncomplicated interface to help users manage its different features.
Moreover, the designers must detail all the instructions clearly with the help of diagrams so that you can operate it without any hassle.
Durability
Lastly, irrespective of your choice, an air conditioner must be durable to withstand regular use. It takes time to lower indoor temperatures in extreme heat while the components must hold up well for long-lasting performance. In that regard, the designers need to remember that air conditioners must be capable of consistent cooling.
Fortunately, the DeLonghi America PACAN120EW has the necessary sturdiness, guaranteeing reliable output. It won't wear out easily, plus its innovative filter mechanism helps lower maintenance.
DeLonghi America PACAN120EW Verdict
That's all there is to know about the DeLonghi America PACAN120EW; hopefully, you can now reach a decision.
Given its many exciting features, you'll have a fantastic experience using this model. It's modern, stylish, and comes with all the relevant functions for the best results.
Although you'll need to spend slightly more, its quality performance makes it worth the purchase. It's time now to take your leave, but we'll be back with more exciting product reviews.
Until then, enjoy the coolness and fresh air produced by this powerful air conditioner!
More and more people today prefer the suburbs to the hustle and bustle of the big cities.
If you are working in New York, you might be tired of the fast-paced life that the city offers. In case you are planning to move to greener pastures, New Jersey is the best place for you to consider. It is great for families as it has excellent public schools and a family-friendly atmosphere.
But New Jersey is no small space and is made up of numerous neighborhoods. So, to help you make a great choice, we have rounded up the best options starting from Princeton to Bridgewater. After reading this guide, you will not have difficulty selecting a place to create your next abode.
So, without delay, let’s dive right in!
Top Places To Live In New Jersey
1. Madison, New Jersey
Madison is the place to be if you are looking for a location in New Jersey that exudes a charming storybook vibe. People who like city life but not the regular monotony of it would really love this place.
Here, you will find a pretty downtown area filled with cozy cafes, restaurants, boutiques, and art galleries. The place is charming throughout the year!
However, during summer, it turns extremely beautiful with parks filled with happy kids and the aroma of hamburgers in the air. Other than that, every year during Memorial Day, you will see plenty of antique cars and can dance to the live music performances that take place.
This suburban Morris County borough is not idyllic, however. If you are looking to relocate, it would be a great idea to consider this place as there is almost a non-existent crime rate, great schools, and reasonable taxes.
All this topped with a small-town vibe is perfect for the ones who love the solitary calm of nature.
2. Chatham
Chatham is a top-notch school district in New Jersey. Most of the adult population in this area holds a college degree, so you can understand that education in this place is pretty good.
In this town, the children get the best of the public school systems and have the top educational tools at their disposal. Because of great education, the per capita income is pretty high and outperforms other places in New Jersey.
However, amenities like nightlife are not its USP but the advantages generally negate this problem. The crime rate is also pretty low, and you can engage in a range of outdoor activities of your liking.
3. Princeton, New Jersey
In the last year, home sales in Princeton have gone up pretty high. This is because Princeton’s current influx for people from Brooklyn and Jersey City has driven up the demand and Princeton may soon become the next place to be!
The population of this place is pretty diverse, with a mix of affluent professionals and some of the brightest minds in the country. Yes, brownie points for guessing we were going to talk about the IVY League university.
Students and young professionals from all across the world come to study at Princeton University, making it a melting pot of different cultures.
Not just that, the town even has excellent schools, which draw a lot of young families with kids. You will find plenty of restaurants, cafes, and bookstores in the area to spend quality time with your family. It's the best bet if you want to replicate city life but also want to enjoy the solitary calm of a suburban setting.
4. Montclair
One of the most premier locations where you can stay in New Jersey is Montclair. This area is quite popular among affluent city buyers and it will take around 30 minutes to reach Montclair from Penn Station.
It is not just true that it is very close to New York City but also flaunts a livability score of 86 out of 100. If you are planning to start a new family or planning to move with your kids, this place is ideal as it has excellent private and public schools. Apart from that, there are big green parks where you can engage in a range of outdoor activities in your free time.
Also, if you are an art-lover, you are in for a treat because Montclair has some of the best hip art galleries, poetry clubs, and theaters. You are sure to find something that you like here. And when in Montclair, do not miss out on the yearly film festival that showcases some of the most notable works in the field.
The median home value hovers is pretty steep, and unless you have a big budget, owning a property in Montclair can be quite difficult. But if you have the budget, owning a space in this glamorous suburban town will be worth it. Who knows, you may even end up being neighbors with Stephen Colbert!
Many people are shifting from New York to Montclair and you will see that most of the residents' cars have a New York license plate.
5. Ridgewood
To fulfill your suburban dream, Ridgewood is the place to be. This place offers a feeling of a tight-knit community to its residents, and that impresses the out-of-towners massively. It is the best neighborhood to arrange weekend family barbeque parties outdoors.
Moreover, it is important to note that you can arrange for some of the best education for your children here as there are many excellent schools. What further drives up the livability score is the fact that there are hardly any crimes in the town.
The only problem with the area is the fact that nightlife is almost non-existent in this area. Even the restaurants in this area aren’t that many, and you might not have plenty of options when planning dinner with your family.
But do not for a moment think that you will get bored here! There are beautiful trails and massive playgrounds to explore or spend time with your pet. You can even decide on dropping by the Schoolhouse Museum for a quick historical tour. There’s plenty of scope for outdoor recreation and it is a good space to raise children!
6. Manalapan
The Jersey shore area has witnessed a large influx of New York City buyers as commuting to New York City has become pretty convenient. In August 2022, the average sales price jumped quite high in Manalapan because of that.
Manalapan is located around 45 miles from New York City and 15 miles from New Jersey beaches. So, you can understand why the real estate market exploded in Manalapan once the transport facilities got better!
The other reason you should consider moving to Manalapan is that the taxes here are relatively low compared to New Jersey. Even the interest rates on home mortgages are significantly lower.
7. Closter Bergen County
New Jersey Realtors has seen that the closed sales in Closter have gone up pretty high in the last few years. The sale has multiplied in terms of both increased sales prices and volume. If you are wondering why Closter has witnessed this influx of people, let us break it down for you.
Over the years, transportation has become better, and this location has become pretty desirable because it is pretty easy to commute from Manhattan. Other than that, Closter has come up with charming downtown areas and now is a shopping district. In short, it has everything that a New Yorker wishes for!
8. Sparta Sussex County
Local real estate agents have seen a recent spike in the influx of people to rural Sussex County. And honestly, we are not at all surprised. To combat the work pressure, more and more people are opting for places to stay where there is a little calm, and they are closer to nature.
When in Sussex, you can enjoy and be a part of the 11 private lake communities. Furthermore, there is the historic Lake Mohawk boardwalk and plaza where you can spend quality time with your family away from the hustle-bustle of the city.
Sparta is just 45 miles from Manhattan and provides excellent commute options.
9. Bridgewater Somerset County
Coldwell Banker realty noted that many homes in Somerset got sold the moment they entered the market. There has been a considerable increase in the number of under-contract homes in the last few years!
A particular real estate company stated that there had been an increase in buyers in Bridgewater. People are moving from northern New Jersey counties and even from New York City. People want to be away from the busy life in New York but also want to stay close enough to take advantage of all the facilities that Bridgewater puts on the table.
Things To Know When Moving To New Jersey
If you are on the lookout for properties in New Jersey, there are quite a few exciting things to note! And in this section, we are going to take a look at some of the factors that you should keep in mind before moving to New Jersey.
Let’s take a quick look!
1. The Jersey Shore Is More Than What Is Portrayed On Television
Unlike how it is portrayed on TV shows, the shore area is much more family-friendly. That said, you will also find some towns that cater to the demands of a much rowdier crowd. But most of the areas are pretty serene, and you can have a pleasant time with your family.
Going down the shore during the summer months is almost a mandatory summer tradition for people living in the state. With a 130-mile long beachline and beautiful boardwalks, we are not surprised why!
2. Cost Of Living Is Considerably High
Some people complain that everything in New Jersey seems to be a bit expensive. And honestly, they aren’t wrong!
Taxes on consumer goods and insurance charges seem to be pretty high in New Jersey. So, we were not really surprised to find out that the cost of living index sits at a whopping 127 when the national average is at 100.
Living in New Jersey is by no means cheap, but then again, the state boasts the highest median income in the country.
3. Get Familiar With Some Strange Traffic Laws
In New Jersey, traffic circles are pretty popular, and you need to ensure that you learn to navigate them well before starting to drive here. What’s really interesting is that they have a thing called the Jersey Jughandle.
This is basically a ramp that is made on the right-hand side of the road that can be used to make left-hand turns when a route is super busy. This indeed enhances the driving efficiency manifold. But if you are from outside the state, it might take some time before you get familiar with the process.
Final Words
That’s all we have for you today!
Hope you had a great time learning about the top 9 places that you can consider when moving to New Jersey. Honestly, New Jersey is pretty enormous, and there are many neighborhoods that you can consider for setting down.
While there are some that will provide you with a luxury location and lifestyle, there are others that offer the serene calm of the suburbs. The public school system is well-established all throughout the state, and you can easily find a good school for your kids.
If you have any other tips that we have missed out on, feel free to write in the comments section below.
DIY Room Dividers are simply an extraordinary craft for your household, these simple elements of design are able to reshape your space in a perishable manner that can be undone at any given time. By realizing them in DIY projects they will cost you little to no money and offer you the chance to tailor them to your needs specifically; you will be able to control the finish, the texture and the transparency of the divider .
Just imagine how easier it would be if your desk had a filter, a small neat room divider that will help you concentrate and work far more efficiently. There are multiple living areas that require a small space divided through discrete elements and in the following rows you will find the answer to your questions.
Cast a glance and feed your imagination !
#1 use upright branches as a beautiful organic living space divider
#24 you can suspend artist's canvases from the ceiling
What do you think about the gallery showcased above? We would love to hear your opinion in the comment section below.
Are your pet rabbits wreaking havoc on your vegetable garden? Well, it’s a common problem for all those who own these furry pets.
Rabbits are voracious eaters and will eat any and every plant within their sight. So, if you are hell-bent on owning a garden rabbit, installing a suitable fence for rabbits may help keep them under control.
However, rabbits can be tough to contain as they are avid jumpers and can easily dig their way out of almost everything.
Fortunately, some garden fences can work effectively to keep your rabbits out of your garden. Before choosing the right rabbit fence for containing your pet rabbits within a safe area, you must do some research.
And that’s where we come in. We have compiled a list of the best fences that prevent rabbits from escaping. So, without further ado, let’s get started!
Purpose Of Fencing For Rabbits
As we mentioned earlier, rabbits are excellent jumpers by nature. So, they can jump over any ordinary garden fence with a short height. Once they are out of their confined area, garden rabbits can ruin your vegetable patches and all the flower and garden beds.
Indeed, rabbits can devour almost anything and everything. Furthermore, rabbits love digging holes in the ground to bury food. Thus, they can easily dig under an ordinary wooden garden fence. And if they escape from their confined pen, they can dig away the soil in your entire garden.
In short, if you let the pet rabbits wander off in the garden, they’ll make a complete mess of your entire backyard. So, the primary purpose of proper rabbit fencing is to keep the rabbits out of your garden.
Moreover, installing a rabbit fence is effective in keeping the rabbits safe from being attacked by other pets, such as dogs or cats. After all, rabbits are peaceful, herbivorous animals and can become easy prey for dogs and cats.
List Of Best Rabbit Fences
While choosing the best rabbit fences, you need to consider several factors, like the species of the rabbits and their number. And since rabbits multiply easily, making this decision can be a pretty daunting task.
But, we’re here to help you with all of it. We’ve prepared a list of the best garden fences to contain rabbits within a safely confined area. Let’s take a look.
Wire mesh garden nets have often proved to be effective in containing rabbits and keeping them away from plants and flowers. They are easy to install, and the wire nets help prevent rabbits from entering the vegetable gardens.
That said, garden rabbits cannot slip in through the fine mesh wire. Also, this fence type is over four feet tall. So, even though rabbits are avid jumpers, they can’t jump over this four-foot-tall fencing.
Furthermore, the plastic nets are multipurpose and can be used as poultry netting. If you’re planning to install wire net fencing, you can use the E&K Outdoor Fence Screen mesh net fence barrier.
Plastic fencing rolls are becoming widely popular among rabbit owners in recent times. These fencing rolls are available in a wide variety, including different lengths and sizes. Their length can range between 25 and 50 feet. So, you can use them to cover vast areas.
Furthermore, as they are available in different sizes, you can use them to contain rabbit species that are avid jumpers. Additionally, these plastic fence rolls come with small openings to allow ventilation. The small spaces also allow you to access the animals, which can be of great help while feeding them.
However, the openings are small enough that your garden rabbit can’t squeeze through the fencing and escape outside. Also, these plastic fencing rolls are effortless to install and highly affordable.
The only downside to this fence is that it is pretty lightweight, and heavy-chewers can easily cut through the plastic wire mesh.
Metal fencing rolls, such as the chain-linked fence, can be the most reliable and durable fencing type if you want to keep rabbits out of your gardens. These mesh wires are heavier than the wire plastic rabbit fences. Even the largest rabbit cannot chew off the wires.
The metal fencing rolls also form small holes that allow easy ventilation and air circulation, but they do not let the small animals slip through the fence. These fences are the best option for keeping your pets confined and protecting the plants in your vegetable and flower gardens, thus solving your rabbit problem.
However, these metal fences are pretty heavy and relatively difficult to use, unlike the lightweight plastic fencing rolls. But, if you do decide to install these metal fences, you can go for the Origin Point 22450 Green Garden Fence that comes with galvanized 16-gauge metal wires. The fence comes with three two-inch openings so that you can easily access the animals to feed them.
You can also choose the YARDGARD 308371B Garden Rabbit Fence that is 50 feet long and an ideal fence to protect your gardens from small farm animals. What’s more, the YARDGARD garden rabbit fence is among the best-quality galvanized rabbit fences and can work well in any garden landscape.
When it comes to rabbit fencing, roofless cages and metal playpens can help keep the rabbit in a safely confined area both outdoors and indoors. Any guinea pig cage design can also work beautifully for your pet rabbit. So, you easily purchase these playpens and roofless cages in any pet shop or even online.
For instance, you can choose the Yaheetech Heavy-Duty Pet Playpen that can be used to keep both your dogs, rabbits and other small animals. It is also well over 2 feet, so you can safely contain the rabbit within the confined space.
You can also go for the BestPet 24 Tall Foldable Pet Playpen, easily portable. Thus, this type of rabbit fencing is ideal for watching over your pet rabbit indoors and outdoors.
Similarly, the Zeny Pet Playpen can also be ideal for a rabbit fence to keep the animals safe. It has a sturdy design with a height of around 3 feet that can prevent your pet rabbit from jumping outside.
A pallet fence can be a good rabbit fence as it is very sturdy, and your pet rabbit can’t chew off the wooden slats used to prepare the pallet fence. Compared to other rabbit fences, it is much more well-grounded and forms permanent confinement for your rabbit.
Additionally, as the wooden slats have a sturdy bottom, the animals can’t dig the ground and slip under the fence. However, setting up a pallet fence can be more troublesome than all other rabbit fences.
Hexagonal rabbit fences are best to keep your bunnies confined in a safe place. The fence has a small mesh dimension so that the bunnies can’t slip through the holes.
Moreover, the hexagonal shape also offers sturdiness to the rabbit fence so that it can resist the constant chewing and gnawing of your pet bunnies. These fences are also available with a PVC coating, which adds to their durability.
Choosing The Right Rabbit Fence
When choosing suitable rabbit fences, it is best to consider the rabbit species. Most pet bunnies wouldn’t usually jump more than four feet unless other animals chase them.
Furthermore, smaller rabbit varieties do not jump more than two to three feet. So, we’ll suggest you install fences that are around three to four feet tall. It should be enough to contain your pet rabbit safely.
Final Words
Installing the right rabbit fence can help you keep both your gardens and pet rabbit safe. And after going through our list, we hope you have a better idea of the best rabbit fences.
Anyhow, we suggest you consider the rabbit varieties and their characters before choosing any fence type. Accordingly, you can go for sturdy and galvanized metal fence tools or playpens if they are avid jumpers or heavy chewers.
However, if you own smaller rabbit varieties, you can choose the plastic fencing rolls that are more affordable and easier to install.
And on that note, we’ll be signing off. Until next time!
Dog owners are always looking out for ways to keep their pets safe. And a good fence can help out in such cases.
There are numerous fencing options available today, and some are portable too. These can keep an active dog away from entering busy streets. A dog can be a great escape artist, and that’s why you will need to consider tall fences which they cannot jump over.
Also, there needs to be ample space in the fenced-in area so that they can easily run and play around. However, if you are looking for fences inside the house, you would want an adjustable option. There are options that will allow you to adjust the shape and size of the pen as and when needed.
In this guide, we will tell you about the best fence for dogs and the factors that you need to consider before installing them. We have also written about the pros and cons for your benefit.
So, let’s dive in!
Best Dog Fences
While we are considering dog fences, you can also check out the different kinds of house fences that would protect the house as well as your pet.
Kinds Of Dog Fences
Large and small dogs will have different needs, and that should be kept in mind before you purchase a fence.
Now you can choose among a wood fence, vinyl fence, metal, or a plastic one for that matter. While this is a personal decision to make, ensure that the dog is safely contained and happy. You would not want your pet friend to sulk in a corner, and no pens should make them feel that way.
Read on to know about the different options available. We have also added in a few examples here and there to help you out.
Individuals who prefer to maintain a good looking lawn do not want a fenced-in yard at all times. Portable dog fences will ensure that you can provide them with a similar environment no matter where you go.
You can replace your old existing fence with this as this is an easier option to take around and maintain. It will always keep other animals away, preventing them from reaching your pet.
Let us take the Amazon Basics Foldable Metal Dog and Pet Exercise Playpen as an example. This type of fence is suitable for dogs up to 20 inches tall. They are made of rust-proof and coated metal, and you can set it up in seconds. Also, it can be shaped in multiple ways depending on your needs.
Also, check out the New World Pet Metal Pen, which is very similar to the previous model that we discussed. You will not need tools to put the pen together, and you will simply have to unfold it and start using it.
This will work out very well for your puppies and will ensure that they stay in a protected environment at all times. Plus, the coating is prevented from getting rusted, and you can rest assured that it will not harm your pet.
Now, if you are looking for an option that connects directly with a crate, then the MidWest 552-30DR Metal Penis a great choice. It keeps intruders out and will provide your pets with enough area to move around and rest. You can place the bed in the crate, and they can have their mini sleeping area.
Things To Consider
One of the first things to consider is the space that big dogs will need. These dogs need a larger area to run and play around, and the BestPet Dog Fence will provide them with it. It contains 16 panels that can be connected together in multiple ways, and you can enclose a large area at one time.
It is made of heavy-duty and thick material that is known for its durability and efficiency. Rest assured that your pet will stay safe inside it.
Another example of a 16-panel pen is the Nova Microdermabrasion Dog Pen. This is also versatile and can be set up in many different shapes depending on the place. You can use it for your small dogs and cats, and they will always get their own space without disruption.
Moving on, some might not want metal pens, and for them, there are transparent plastic playpens too. The Tespo Pet Playpen is a great example, and it is pretty sturdy. You can keep your dogs, pet rabbits, guinea pigs, and hamsters here, and they will stay safe. Plus, you can assemble it yourself without taking any additional help.
A physical fence may not always be an option to keep your dog safe, and hence virtual dog fences are often used by many dog owners. These do not have any physical privacy fences, but you will be downloading an app and connecting it to the collar.
Most virtual dog fence apps can memorize up to 10 different areas, and your pet will be warned when they go close to the boundaries.
Moving on, if you have a large yard, then using a GPS fence will always save you from having to spend loads of money on purchasing physical fences. However, if you have a small yard, then you will probably not need a GPS fence. Please check the homeowners association rules of your area before making a purchase, as many societies might not allow this.
We believe that physical fences are better on humane grounds as the dog will receive a warning from virtual fences every time they try to leave the area. That can have detrimental effects on their behavior pattern, and they may become afraid to get out of the marked area.
Things To Consider
The virtual dog fence will not prevent other animals from irritating or bullying your dog, and hence you need to be very careful. Do not expect the safety of a fenced yard, as anybody can come in to feed your dog, and children can come as near as they want.
Also, some pet owners may not be okay with using virtual fences in the case of large families living together. Someone might want to take the dog out for a run without realizing that they are in a virtual pen, and that could be harmful to the dog.
Some people do not like adding a barbed-wire fence or a solid one to guard their gardens. However, they look for ways to prevent their dogs from leaving the property, and they use electric fences to do that.
While an electric fence will not give you the feeling of a fenced-in yard, it will prevent dogs from leaving. Pets, in this case, will have a device in their collar that will be connected to the invisible fence.
There is also a variant of this that involves in-ground wiring. A trencher is used to put the wire in place, and the dog needs to be trained in this case.
Things to Consider
This is a convenient method, according to a lot of people, but we believe that it may not be a humane choice. Also, dogs may develop behavioral issues over time as they may be afraid of the area outside the fence.
Be it small or big dogs, it can affect them both equally, and they can become moody or annoyed at strangers when you are taking them for walks or going to a local dog park.
Moreover, an invisible fence does not prevent other dogs from entering the garden, and it can always cause disruption in the yard. Other dogs and humans can disturb your pet, which is again not wanted.
If you are looking for an affordable solution to keep your dog protected from the outside world, chain link fences will serve you well. They are one of the cheapest ways of creating a fence and will ensure that nobody from outside can come in.
Plus, chain link fencing will allow your dog to view everything outside easily. There will be no visual barriers, and they can enjoy the outdoor sights the entire day.
Moving on, a chain link fence is very easy to install, and you can call a professional to do so. The person will be able to install it within a few hours, and you can enjoy the benefits on the same day.
Things To Consider
Chain link fences are not completely safe, and large dogs can jump over them. Hence, make sure that you build them higher. If you are purchasing fences, first take the measurement and then purchase accordingly.
Additionally, these fences work best in places with friendly neighbors and small towns. Remember that people will be able to feed your dog from outside, and kids will be able to put their hands in. You should know the neighborhood and its people well before getting a chain link fence made.
Certain dog breeds love to stay indoors, and this is especially true for puppies who are a few months old. On the other hand, some dogs prefer going out for long walks and staying inside the house at other times.
Dog owners, in this case, can get indoor dog fences that will provide them with their own area to run about. Now, you would not want to keep them in the pen all day, but it might be needed to restrict their movement when guests arrive. Also, it can teach them to spend some time by themselves each day.
For example, if you check out the Yaheetech Play Pen, you will see how it can be used inside the house. There are panels that need to be connected together, and you can always create different shapes like rectangles, octagons, and small squares. You can also use a divider fence to separate 2 pets.
And if you have a small house, then the MYPET North States Petyard Passage may be exactly what you want. There is a small door on one side through which your pet can come in and out at any time. This will allow them to go in whenever they want, and you will not be restricting their movement.
Things To Consider
One of the major things to consider in this case is the empty space that is available inside your house. An indoor fence will require a certain amount of space, and it is important that you measure the area beforehand. Then you can tally it with the fence and go on to purchase it.
This is a type of fence that can be moved into different areas when needed. You can take it to different rooms, and you can store it too. We will recommend not using this at all times and letting your pets wander.
If your dog gets easily distracted by the things that it sees around, then this solid fence would suit your purpose a lot. It can be made of vinyl, metal, wood, and other kinds of solid materials, and the entire area will have to be covered.
These fences are made of solid surfaces with no gaps or holes in between. It will provide the animal with complete privacy and protection. This option will also keep your dog away from distractions and from being irritated by kids playing around.
But remember that solid wood fences or vinyl fences are the most expensive option on the market, and you will have to spend a lot if you go for professional installation. In case you are good at building stuff or engaging in DIY projects, then this will turn out to be a fun project to take on.
Also, if you have a big dog who tends to dig through or jump over fences, then you can apply repellant sprays around the edges. These are usually made of very safe materials like vinegar and pepper, which will keep the dogs from digging or coming too near the fence.
To prevent them from jumping over the fence, build a tall fence that is high enough so that they are unable to jump. An average height of 4 to 6 feet will be great, and the top could be made at a 45-degree angle.
Things To Consider
If you are building a tall solid fence with wood, PVC, or vinyl, then it will not be possible for the dog to see anything beyond it. This might be frustrating, and you would not want your dog to feel lonely. To prevent this from happening, you can install a viewing window made of plexiglass right on the fence through which the dog can view the outside world.
In addition, you can build an elevated platform near the center of the area, which will allow the dog to look at the world outside the fences. However, they will not be able to jump out from there as the wall will be farther away.
Another reason why building solid fences may be necessary is if the house is present on a busy street or near a highway. These pose a great risk for dogs as accidents are very common on such streets.
Picket fences are a perfect addition to beautiful gardens, and these also prevent dogs from jumping outside. They can be made of wood or metal and then painted over for an added effect. These fences work well with cottage-style houses with a pet inside.
You can also adjust the height of the fences for dogs of different sizes. Estimate the maximum size that your dog can grow up to, and then make the fence accordingly. Some people use latticeto build attractive fences around the yard, and you check it out too.
Moreover, a picket fence is a good idea for quaint streets or streets which are off the main road. That is because people can interact with your dog easily, and the neighborhood needs to be safe.
Things To Consider
This is a traditional fence design that has been around for ages. It will not need too much maintenance, but people may be able to cross it and enter the space.
Also, it might not prevent your dog from digging a hole and escaping through it. Keep your dog on a leash for some time if there are kids around who are afraid of the dog. This is applicable to ferocious dogs who have not been trained yet. They can jump over picket fences or use the horizontal bars to elevate themselves and then jump.
If you do not want to restrict pets inside a pen, but you want to prevent them from falling off the stairs, then accordion fences are going to be perfect. These form a boundary wall between 2 areas and can be used for doorways and stairs.
It can be used for room doors to prevent your pet from leaving a certain space. However, since it is not in the form of a pen, the dog will have a larger area to move around.
The PETMAKER Pet Gateis a great example of an accordion fence, and you can use it for doorways and staircases. It contains 4 panels and can easily separate broad stairways too. Plus, unlike traditional fences, it is freestanding and will not need any additional support.
Things To Remember
Accordion fences can be moved by large dogs who can push them away. Since they are generally freestanding, they will fall over if a lot of pressure is applied to them.
If you have a German shepherd or other big dogs who are good escape artists, then you can provide for additional protection. Bind the accordion gates on 2 sides with a rope, and that will prevent the gate from moving out of place.
Pros
Protects dogs from stairs
Allows for a lot of free space
Compact and easy to store
Cons
Can move out of place
Tips To Remember While Purchasing
Remember that there are other styles of fencestoo for the house, and it is on you to make the right choice. Read on to know some of the factors that you can keep in mind while purchasing.
Spaces Between Rails
Please check the spaces between the rails well before purchasing metal or picket fences. If you have a small dog and the gaps are large, then the dog may escape through the wires. This can especially happen if they go to chase squirrels that they have located outside the fenced area.
If you are unsure about the gap, then call up customer care for information regarding this.
Size
When installing a backyard fence, you will need to take into consideration the height of your pet. Larger pets can jump over if the fence is not high enough. Also, if they find horizontal bars to support their weight, then they could use that to go up higher and then jump.
We will recommend keeping a watch for some time after installing the dog fence too. That way, you will be able to understand your dog’s actions and take precautions. Spend some time in the yard with your dog and get them used to the closed area.
In the case of small dogs, you will have to ensure that there is no space left below the fence. This would give them ample area to escape, and you would not want that.
You can also use a dog repellernear the boundaries to help them practice not going near the edge of the fence.
Conclusion
Both smaller dogs and larger dogs need some form of training if you are going to use low ones or electric and invisible fences. When it comes to the electric and GPS-operated ones, the dogs receive a warning through loud sounds or a static vibration.
They can act as negative stimuli if your pet is not trained well. But then you do not have to purchase fence materials, and it will be about half the cost when compared to solid fences.
However, if you have a small yard, getting a portable or metal fence is going to be your best bet. You can also indulge in craft projects and build them a nice house.
Dogs do not need training for this, and you will be able to use it safely. Let us know about any further queries that you may have in the comment section below.
Guinea pigs might be cute and cuddly, but housing them is no easy feat. Sure, you can keep them locked away in a cage with the occasional outing time, but that is no way to treat a pet. Regular Guinea pig cages can not only prove to be too small, but have other potentially adverse drawbacks that may harm your fluffy friend.
So, what do you do? You can always build a custom cage on your own, and that too without spending a lot of money. These cages will have solid floors and also have enough space for them to move around and play. Today, we’re going to give you 23 helpful plans to build your own guinea pig cage at home. So, keep on reading
One of the cheapest guinea pig cage you can construct if from an old dresser. Instructables provides a free DIY plan in which you can turn a dresser into your guinea pig’s house. The process of building this cage is straightforward, and the site provides a step by step approach that you can easily follow if you the list of materials and tools required for the construction.
If you already have an old dresser, you can easily start with removing each drawer. This project does not need you to buy too many materials, which should save you a lot of money.
The Cubes and Coroplast, commonly known as the C&C cages are the most popular DIY guinea pig cages. Most importantly, you can build a sizeable C&C cage providing ample space for your guinea pigs to roam around at a very low price. If you are looking for a cage from the readily available cages in the market, you will spend much more for a smaller cage than your smallest designed C&C cage. Another best thing about this C&C cage is that you have endless possibilities to make a design of your own like an L-shaped cage, a cage with cube stands, a cage with tops, etc.
With all the materials listed and step by step instructions provided by PetHelpful to follow, you can easily make this cage. Moreover, after the completion of the project, there will be a lot of unused pieces leftover. With these, you can use in creating some other areas to make a rack or some other useful things.
If you want to make a house for your two guinea pigs, consider this DIY plan from Instructables. You only need cardboards, non-toxic glue, and an X-Acto knife to make this wonderful project. You can easily understand the extremely low cost required to accomplish the project from the requirements of the materials. A detailed instruction is provided with a lot of illustrations to make them follow easily.
One of the most strong and durable cages you can make is from the PVC pipes. It might look difficult to make initially from the very look of the cage, but it is indeed a very easy process. Moreover, as per your needs and space, you can modify the shapes and sizes to make the cage. The cage can sit on a platform or the floor, but for cleaning purposes, the platform makes it easy to move.
You can use 3/8 painted strand board with plastic pebble finish for bottom and shelves to prevent warping which is cheaper than using plywood or plas-tex. Sahja provides a detailed list of the materials required and all the instructions to construct this beautiful cage for your guinea pigs.
With mostly ugly looking guinea pig cages available in the market, Instructables have come up with a special DIY guinea pig house plan which makes it look amazing. If you want to showcase your cute little pets, this plan will be ideal for you which you can also boast of in presence of guests. The accessories including a fence, mini-disco ball, and Christmas ornaments make this project look even more incredible. Simply, follow the step by step illustrated instructions to complete this task.
If you have a very low budget but need to make an enclosure for your guinea pig, this DIY plan will be perfect for you. With minimal woodworking skills, you can easily follow the detailed instructions provided with illustrations to make this project within a day. The best portion of this project is that you can expand the enclosure and it is very lightweight.
If you have a good space and want to make a grand home for your guinea pigs, consider this DIY plan. This design is not only gorgeous but also extremely durable which will serve you for many years. This design can be easily made with a budget of approximately $70 in about 5 days. The illustrated step by step instructions provided by Instructables are very easy to follow to make a dream gift for your beautiful pets.
If you have some expertise in carpentry, you can quickly build this guinea pig house from plywood. This project is also very cheap and a fantastic addition to your home if you can make this. If you have excellent carpentry skills, you can even complete this within a day. Also, if this is your first woodworking project, you can build this guinea pig house by following the instructions carefully.
This is another easy-to-build DIY plan from Instructables. Also, it costs very less to make this cage. It is also shaped as an enclosure which is very sturdy because of the wooden frames that are used to make it. Cleaning is an important factor while taking care of your guinea pigs and this model makes it very easy to clean for maintaining hygiene. Just follow the steps to make this guinea pig shed and it also has many other tips to consider while constructing this design.
With a budget of around $20, you can easily make this beautiful guinea pig house with the free DIY plan provided by Instructables if you already have the tools required. If you have little carpentry skills, you can easily accomplish the task within 2 hours. This model is sturdy and the wooden structure gives a sophisticated look to keep your pets.
This design is one of the most sophisticated models you can make. However, this process requires some expertise in carpentry. If you are a beginner, follow the instructions very carefully and then consider giving this project a try. The supplies for your guinea pigs including bedding, hay, and other stuff can be kept in the shelves below the penthouse made for the guinea pigs and you can close the doors to keep a neat look.
This design looks like a proper furniture. The list of tools and materials with the detailed instructions are provided which are easy to follow.
This is another simple design which you can easily make for your guinea pigs, and if you are a novice at carpentry, this project is the ideal to start. The entire projects costs around $20 which is around 1/4th of the price of similar types of models that are available in the market. With few wooden frames, wire netting and screws, construct this large enclosure for your guinea pigs. The pictures and instructions provided are extremely easy to follow.
If you are checking for a guinea pig cage with an enclosure and also have a low budget, this is the ideal plan for you provided by Instructables. If you are already skilled in woodworking, it will only take a couple of hours for you to complete this project. However, if this is your first woodworking project, you can definitely try this project as it is easy-to-build and also the instructions are easy-to-follow.
If you want to make a large cage to keep all your guinea pigs and also keep all the pet supplies in the same unit, consider this DIY plan. With basic lumber and wire screen, you can easily build the cage and the storage space below the cage, allows you to stack all the pet supplies. This makes the model very functional and also the guinea pigs get a large space to move around freely. The project is also designed to make the cleaning process to be easy.
If you already have a playhouse in your home and your children are done playing with it, modify this one to create a mansion for your cute little-loved ones. It costs very less to make a few modifications and will look extremely beautiful. You can also boast of this redesigning of the model in front of your guests. Follow the easy step by step instructions provided with pictures to make this unique piece.
If you are not able to afford the very expensive cages or if you are unable to find a proper cage for your guinea pigs in your area, consider this DIY plan. The project is very much affordable with the bin costing around $10-$12 and the other materials required include grid style mesh, zip ties, duct tape, and other materials which cost very less. You can also make a double-decker bin cage if you want. Hammy Happenings provide the detailed instructions to make this guinea pig cage.
If you have a high budget and want to make a large guinea pig house that will look extremely sophisticated, this DIY plan is sure to make you interested. This DIY plan has been provided by IKEA Hackers. This guinea pig house can be made from 5 coffee tables from the LACK series. This beautiful project is fascinating and requires some woodworking skills which will add character to your space once completed.
Rogue Engineer provides this free DIY double story cage plan along with the entire list of materials required to make this beautiful cage. This plan was actually designed to be a rabbit hutch which can also be used for guinea pigs as well. It provides ample space for the pets to move around and is a great shelter for them. Moreover, it is extremely sturdy and durable which is sure to serve for several years.
You will always love your guinea pigs to see them play freely around and not cramped for space. If you have a good space in your room, this DIY plan is an ideal choice for you because it is exquisite in looks and also costs less with great functionality. The pet supplies can be stored below the lofted area. With only coroplast and poster boards, you can make this beautiful model.
This is another C&C cage plan you can consider to make. This plan with detailed instructions and diagrams have been provided by Guinea Pig Cages. This plan is one of the most popular models as it is easy to make and also because it can be cleaned easily.
If you are fond of wooden cages, consider making this design. It is very simple to make yet beautiful to look. Your guinea pig will have a huge space to move freely, and if you are an expert at carpentry, this project will take very less time for you to complete.
This is a luxurious cage for guinea pigs which sports an elegant appeal. You need to be a great craftsman to build this splendid model. The Plexiglas plates used for adorning the second floor are removable which assists the cleaning of the cage.
This is another beautiful model with a huge space with a loft for your guinea pigs to play around. However, this model is not as functional as it does not that the space for storage of pet supplies. Also, it is comparatively smaller than the previously mentioned one, but undoubtedly, this can also be built very easily at a low cost of around $40 with coroplast and boards.
Now, you have the information required to make your homemade guinea pig cages. From the entire list of DIY designs, choose your favorite one and start building. They are all more or less easy-to-build plans requiring less expertise and money. However, apart from your desired style of the cage, you also need to consider the space you have for doing the right project.
Apart from the above-mentioned DIY plans, you can also check for other plans online or may see videos on how to make a guinea pig's cage. You can also gain a lot of knowledge from your research, but these are the simplest easy-to-make designs with a touch of style. Just shop for the materials and start with your tools to construct your favorite guinea pig's cage.
Solar lights are the perfect alternatives to electrical lights, candles, or even kerosene lamps.
They’re affordable, energy-efficient, and environment-friendly, but like any other appliance or gadget, they do come with a few drawbacks. Well, nothing too significant, to be honest, yet worth mentioning.
Unfortunately, there are times when solar lights fail us. They stop working altogether when needed the most, i.e., during the night. Why does this happen? There are many reasons that may affect the basic working mechanism of the solar panel and light. And in order to fix the issue, it’s crucial to find the root cause.
Are you in a similar situation? Don’t panic; you don’t need to invest in a new one, at least not right away.
Today, we’re here with this informative guide on why solar lights stop working; along with this, we’ve provided a few quick solutions that will help you get them to work within no time. But before that, we’ll highlight the working principle of a solar light.
So, without further ado, let’s get going!
How Do Solar Lights Work?
Before jumping to the problems and fixes of non-functional solar lights, it makes sense to understand their basic working principle. That being said, solar lights usually work differently and more uniquely compared to other light sources.
They use the photovoltaic effect to work. The photovoltaic, aka solar cell, is an essential part of the light, which helps change sunlight into direct electric current.
Ideally, the solar cell comes in the form of a dark panel and is installed above the solar light. It’s made of multiple layers of crystalline silicon and chemicals that generate layers of positively-charged particles and electrically-charged electrons.
When the panel absorbs the sunlight, the negatively-charged electrons move to the positively-charged particles. Later, the electrons move through the wires to the rechargeable batteries and electricity is stored in them till the light is ready for use.
After dusk, when the sun goes down, the solar cell converts the stored electric energy into light. Consequently, the solar cell turns on as soon as the photoreceptor detects darkness. And again, when the sun rises, the receptor stops working, allowing the panel to resume converting the sunlight into electricity.
Why Aren’t Your Solar Lights Working
Solar lights are energy-efficient and cost-effective, but they often tend to cause trouble and eventually stop working. This can happen due to several reasons, so if you’re struggling with getting them to work, here are a few tips to consider.
Check If The Solar Light’s On
First things first, ensure that the solar lights are turned on, provided they come with a switch. You’d be surprised to know how often people tend to forget to turn on the on/off switch.
Replace The Batteries
Ideally, solar lights come with Li-ion or NiMH rechargeable batteries inside them that charge by the day and discharge by night while the lights are on. So, it’s quite natural for batteries to lose their charging capability with time.
A common sign to tell if the batteries require replacement is the reduced runtime of the lights in the evening, even after a bright sunny day. That said, a good battery should last for up to 2 years or more before needing replacement.
Cover The Solar Panel
Solar lights remain off during the day as they’re busy converting the sunlight into energy to be stored in their rechargeable batteries. And at night, the energy is then used to power the lights.
But if your light doesn’t come on well after dusk, there might be some other light source hitting the panel, tricking it into thinking it’s still daylight. Try covering the panel to trick the light into thinking it’s night; if it comes on, you know the problem.
Dodging The Shadows
It’s best to avoid shadows falling on the solar panel, especially during midday when the sun is at its strongest. So, make sure you take a look at the panel every 3 to 4 months around midday to see how shaded your panel is.
Positioning The Solar Panel
Did you know a solar panel is like a satellite dish? It has to be positioned facing the right direction to work effectively. As the sun rises in the east and sets in the west, a south-facing panel is bound to harvest sunlight to its full potential from dawn to dusk.
That said, even though solar lights still work when they’re not facing south, they won’t be working to their full potential.
Check The Panel Angle
The angle of the solar panel can affect the light’s runtime, especially during winter, when the sun is very low in the sky. But if your solar light’s panel that’s easily adjustable, you’re in luck. Getting it up to a 45-degree angle when winter is at its peak will help in harvesting sunlight to its optimum potential.
Tackling Water Ingress Issues
Solar lights may suffer from issues due to design flaws and water ingress. That’s why we strongly recommend keeping an eye on their IP ratings to know more about the safety features.
Well-designed and manufactured lights allow water to drain away without causing harm to any of their sensitive electrical wiring or parts. However, if water or moisture is the reason for your light to stop working, there are a few tricks you can try.
Firstly, remove any cover that might be holding the moisture in place. Once that’s done, store the light in a cupboard for a few days to dry it out. You can then reassemble the light while double-checking to make sure the batteries are seated well. Give it a day or two before turning on the light at night.
Also, don’t forget to check with the manufacturer to ensure whether the warranty of the solar light covers issues related to water ingress. If yes, email them a picture and expect a replacement within no time.
Dealing With Snapped Wiring
The wiring of the solar panel can snap due to a number of reasons; squirrels and other wildlife chewing on it is one. Usually, the damage can be repaired with patience and some electric tape. But if this isn’t possible, check with the manufacturer to see whether they have spare parts to save the product, instead of having it entirely disposed of.
It’s also important to note that wires are always subjected to tension so try to leave sufficient slack between branches during installation. Even strong winds put undue pressure on the cables causing damage that’s hard to fix.
Passive Infra-Red (PIR) Dials
Advanced solar lights feature adjustable dials to fine-tune motion detection sensitivity, preventing the movements of cats, birds, and other wildlife from triggering the light unnecessarily. Usually, the dial should be set after taking three factors into consideration:
i) The height at which you install the solar
ii) Motion across the PIR’s field
iii) Distance of the light from the motion you wish to detect
So, if your light isn’t activating when needed, a bit of trial and error to provide the required motion will help in getting it to work.
Lux Sensor Dial
Apart from the PIR dial, advanced solar lights include lux sensor dials to determine how dark it has to be before the light activates. This feature comes in handy if there are other sources of light tricking the solar lights into thinking it’s still daylight - a common reason why they stop working.
However, at times, they might be installed in relatively shaded areas while their remote panels are installed in a bright and sunny spot. In such cases, setting the light to activate in darker ambient lighting can prevent it from working when not required.
Check If The Lights Are Plugged In
Believe it or not, we often forget to plug in the light to the dedicated power source, which is a common reason why it doesn’t work. If your remote solar panel is separate from the lamp, make sure you check whether the cable is firmly plugged in with tightened waterproof connectors.
Ideally, solar lights come with batteries stored inside their panels, but at times, the batteries might be stored in the light head itself. So, if the panel fails to charge them or the charge is unable to reach the lamp, you’ll end up getting disappointed.
Plug-In The Main Charger
Plugging a mains charger into your solar light or removing the batteries to charge them separately can be a great idea. Just make sure the charger is compatible.
Now, solar panels output specific voltage compatible with the battery voltage and circuit componentry. If you use the wrong mains charger, it may fry the circuit or even overcharge the battery. Ultimately, you’ll end up spending money on buying a new one.
You can expect your solar light to perform for a night or two, provided the batteries are easily removable, clearly labeled, and the charger is compatible. But it’s also important to find a solar-friendly location to charge the lights. And in case of any doubt, you can always follow the instructions or seek assistance from the company or manufacturer you purchased them from.
Soldering Can Help
Consider firing up a soldering iron to tackle wiring issues so that you don’t have to get rid of your light just because of loose wires. But make sure you contact the solar light company before beginning the soldering process. You wouldn’t want to invalidate the warranty now, right? Of course, it’s fine if you’ve already had a chat with the company.
Clean The Solar Panel
The performance of your solar panel might dip over time because of dust and dirt buildup on its surface. This is a common problem for those living near busy roads, and their panel is installed in a dusty spot.
A dirty panel can also impact the amount of charge received by the solar light batteries. To make sure it works to its full potential, give the panel a quick wipe using a damp cloth every now and then.
We suggest cleaning your panel at least twice four times a week to increase its efficiency. It’s also essential to keep your solar light in a safe place when not in use so that it lasts for an extended period.
Avoid Charging Behind The Glass
We can easily feel the sun’s warmth even while sitting behind glass windows and doors, but it’s not the same for solar panels. Double and triple-glazed windows are commonly used these days. And if you notice, they render the sun’s rays hitting the panel useless.
That’s why it’s best to place the panel outdoors when charging in a spot, which receives the maximum amount of sunlight. Also, ensure that the number of obstructions between the solar panel and the sun is minimal for it to charge more efficiently.
Check The Battery Seating
Don’t forget to check whether the batteries are properly seated or not. If they’re loose or not touching the terminal contacts, the panel won’t be getting charged by the day, preventing the solar lights from working at night.
So, in case you detect loose batteries, give them a day or two to charge before they allow the lamp to work. Be patient as the battery may have been flat, to begin with. It would help if you did this regularly with your solar lights for them to keep operating at night.
Check The Pull Button
Solar lights come with one or more buttons to help you operate the system without any kind of hassle. Newly bought lights may feature a pull button that needs to be removed before turning on the switch.
However, first-time users often forget to take the pull button off, preventing the solar light from working to its full potential. So, if your new light suddenly stops working, make sure you check whether or not the button is removed.
Final Words
With this, we come to the end of our informative guide on solar lights. And we’re hopeful that this article has managed to provide you with the relevant information on what can cause solar lights to stop working.
But if you take the right measures and maintain them on a regular basis, the chances of this happening are minimal, if not zero. Replacing its batteries, checking the wiring, and positioning the panel in the right direction are just a few of the many things you can do to make the lights work.
We have explained everything in detail, so you need not worry. Just follow the steps, and you’ll be good to go.
Floodlights are hardly the latest invention in the electricals industry, and yet they have only become more relevant over time.
These extensive lighting systems are commonly found in football grounds, amphitheaters, and other outdoor locations. But it's no longer limited to commercial use only. With more homeowners opting for higher security, floodlights are also used for backyard or fence lighting.
Furthermore, these high-intensity lights have also ventured indoors and are often used to create uniformly lit space. Nevertheless, when it comes to the different types of floodlight bulbs, you have quite a few options to choose from. So, if you want to learn a little more about your choices, you have arrived at the right place.
Without further ado, let's begin.
Different Types Of Floodlight Bulbs
LED
The LED light is one of the most path-breaking inventions of the 20th century and, as such, has gained huge momentum in the electronics industry. These lights are suitable for both indoor and outdoor use, providing users with a range of advantages. The following are some of the best qualities of LED bulbs.
Advantages Of LED Bulbs
Longer Lifespan
Hands down, LED bulbs have a longer service life compared to most options on the market. To explain further, a single diode can run for up to 50,000 hours, consistently producing the same amount of light.
Besides, an extended lifespan translates into money-saving in the long run. Therefore, if you want a reliable floodlight, especially for security reasons, LED will not disappoint. Also, you'll end up saving a lot on replacement expenditure.
Energy Efficiency
When it comes to LED lights, energy efficiency and a longer lifespan are two sides of the same coin. Long story short, the reduced energy consumption of these bulbs makes them more viable as floodlights.
Moreover, you can numerically determine a bulb's efficiency by calculating the ratio of lumens to watts. In short, LED units can have the same light output as other bulbs; however, they can do so with much lower power consumption.
Reduced Emissions
Back in the day, bulbs would tend to heat up and, more often than not, burn out. But we longer belong to such 'dark' ages, especially with the advent of bright, low-emission LED lights.
This is a major consideration that you cannot overlook while buying floodlights. When LED lights are turned on, they emanate very little heat, indicating zero waste of energy. They are the 'cooler' lighting options, which immediately puts them miles ahead of traditional bulbs.
Eco-Friendly Lights
As environmentally-conscious individuals, each of us should do our bit to reduce carbon footprint. Therefore, when you choose LED over other options, you're taking a significant step towards sustainable living.
For starters, they do not contain toxic substances like mercury, which is otherwise present in CFL bulbs. Also, the lights can be recycled when out of use. So, if you aim to live a greener life, LED is undoubtedly the right choice.
Goes Off With A Warning
Unlike other light bulbs, LEDs go off with a warning. If you notice carefully, the lights get a little dimmer towards the end of their service life. This indicates that they have run their course and it's time you arranged for a replacement.
Now, that's much better than being caught off-guard, especially if you don't want your floodlights to go off in the middle of the night. On the contrary, other bulb varieties just instantly fizzle out.
Other Perks Of Having LED Lights
Besides these primary advantages, LED lights also offer several other perks as floodlight fixtures.
The lights are dimmable
They turn on instantly and do not need to warm-up
There are plenty of color options to choose from
They are much smaller than other light bulb varieties
These lights are far more durable and less prone to breaking
Disadvantages Of LED Lights
That said, LED lights also come with their own set of shortcomings. If you're considering them for floodlights, it's best to know both sides of the story so you can make an informed choice.
High Upfront Cost
LED lights often get a bad rap for their high upfront cost. While these bulbs are cost-effective in the long run, the initial investment could leave you digging deep into your pocket. They are easily among the most expensive options on the market, so the hefty price tag can be a deal-breaker for some buyers.
Besides, you'd need multiple LEDs with a higher output for a floodlight. So, you might as well calculate the total cost before getting on board.
Heat Sinking System
As we already said, if you want a large, high-capacity floodlight, you'll need several LEDs to produce the desired illumination. And hence, even though LED lights are low on emission, using multiple bulbs on one fixture leads to a higher heat generation. Therefore, your floodlight set up should have a built-in heat sinking system to curb emissions.
Halogen
Halogen bulbs are the next best choice for floodlights after LEDs, and as such many still prefer them for their reasonable price. While halogen is a more traditional option, they have lost the race to LED when it comes to energy efficiency. However, let's leave the comparison for sometime later and learn a little more about halogen lights.
Halogens are commonly used for outdoor lighting fixtures primarily for their higher illumination capacity. So, if you are considering this option, here are some of the advantages.
Advantages Of Halogens
Low Cost
Halogen bulbs are dirt cheap compared to LED lights. To give you a clear picture, an LED diode can cost 10 times higher than a halogen bulb, while a CFL may be listed at double. Therefore, price-wise, you have a lot to gain when opting for these lights.
High CRI
Bulbs are rated according to CRI (color rendering index). This is a technical term wherein a higher CRI value indicates increased brightness and illumination. Halogen bulbs have a higher CRI and thus can produce a significant amount of bright light. Now that's excellent news for users looking for floodlight options.
Small-Sized Bulb
Another plus point that puts halogen ahead of most competitors is the small size of the bulb. Despite its small size, it's really powerful, and that's what most users want. On the contrary, large-sized lights look very imposing and do not go well with a modern setup.
Turns On Instantly
A halogen light turns on instantly, optimizing the light output in seconds. Whereas a CFL bulb takes some time to reach full brightness.
Other Perks Of Using Halogen
That's not all; halogens also provide the following advantages.
The bulbs are dimmable
The lights do not contain mercury, and hence are safer for the environment
They work well with motion-activated lights
Disadvantages Of Halogen Lights
Just like LEDs, halogen lights also have their cons. So, read up before deciding on something.
Low Energy Efficiency
Halogen lights lack energy efficiency as opposed to other bulb varieties. This is primarily due to their massive heat output, which essentially indicates higher and wasteful power consumption. In fact, you should avoid changing a bulb with bare hands when it's really hot and fuming.
Oils Can Destroy The Bulb
Halogen bulbs are vulnerable to oils, and hence you should never touch them with bare hands. Our skin contains natural oils which can transfer to the bulb upon direct contact. More often than not, it can permanently damage the light.
Harsh On The Eyes
Halogen lights are supreme when it comes to brightness levels, and even though that's a good thing, they can be really harsh on the eyes. Therefore, it's best to avoid looking directly into the light as it can leave you disoriented or briefly impair vision.
CFL
CFL (compact fluorescent light) bulbs are not as popular as LED or halogen lights when it comes to outdoor fixtures. However, this does not come as a surprise since CFL has its own downsides, which outweigh the advantages. Regardless, here are some reasons why they can be considered as a floodlight option.
Advantages Of CFL
Affordable Price
CFLs are priced at a much affordable rate, especially if you want to compare the cost with LEDs. Therefore, many homeowners prefer this option to keep their expenses low.
Reduced Energy Consumption
Now, we're not saying that CFL bulbs are as energy-efficient as LED lights, but they do a much better job than incandescent bulbs. Basically, CFLs run on 75% less energy than incandescent bulbs, and that's a good number for many users.
Long Lasting Bulbs
Again, this is not with respect to LEDs, but CFL lights have a relatively extensive service life. A standard CFL bulb can last for up to 15,000 hours, which is significant compared to other bulb options. While that's not even remotely close to 50,000 hours, given the price tag, it sure sounds like a good deal.
Disadvantages Of CFL Lights
Despite the advantages, CFL bulbs are not suitable for outdoor floodlights. Therefore, it's best to be aware of the drawbacks, so you can make a well-informed choice.
Contains mercury
By now, you already know that CFL lights contain mercury and hence are labeled toxic. Needless to say, mercury is hazardous for you as well as the environment. Therefore, the manufacturing of CFL bulbs itself is a harmful procedure.
Moreover, due to their toxic nature, these bulbs are not suitable for recycling. While it's more or less safe to handle these bulbs, make sure that the spiral tube remains intact to avoid releasing mercury.
Takes Time To Turn On
CFL bulbs take their own sweet time to turn on, which is a major drawback for a floodlight. Simply put, they take almost 3 minutes to optimize the brightness level. While this may not be a problem for indoor fixtures, it's not acceptable in an outdoor setup.
Many homeowners equip their floodlights with motion sensors to beef up security. That said, CFL lights could end up comprising your safety by wasting precious seconds.
Susceptible To Temperature Changes
CFL lights are largely affected by temperature, meaning a nip in the air could leave the lights dimmer. Therefore, they're not as effective in the winters as the drastic drop in temperature impacts the brightness level. Also, turning them on and off regularly can significantly shorten their service life.
HID
HID (High-Intensity Discharge) lights are another option you might want to look into.
Advantages Of HID
These lights have a longer service life (last 3 times longer than halogen lights) and are more energy-efficient than incandescent and CFL bulbs. This also makes them much more cost effective.
Disadvantages Of HID
Most lights generate UV radiation and hence require UV-blocking filters to avoid damaging fixture parts. Moreover, exposure to broken HID lights can induce health hazards in humans and animals. Lastly, HID lamps contain mercury, which is toxic to the environment.
Different Types Of HID Lights
HID lights are manufactured using different chemicals, and thus you can choose among the following options.
Mercury vapor lamps
Metal halide lamps (ceramic MH)
Xenon short-arc lamps
Sodium vapor lamps
LED vs. Halogen vs. CFL
LEDs lead the race when it comes to floodlight systems, primarily for their energy efficiency and durability. Besides, they're not as fragile compared to other bulb varieties and can function consistently in all weather conditions.
On the flip side, they're more expensive, and that's where halogens and CFLs come into the picture. Now, halogens have been a floodlight option for the longest time, and they cost a lot less than LED bulbs.
However, they tend to heat up and consume more electricity to provide the same amount of brightness as LED systems. Your power bill could shoot through the roof, and that's not something you'd want in the long run.
As for CFL bulbs, they are the least functional as floodlights and can end up doing more harm than good. Basically, they don't win a lot of points for efficiency, and to top it all, they contain harmful substances like mercury.
Buying Considerations For Floodlights
If you have never bought a floodlight before, the different options available on the market might leave you all confused and overwhelmed. Besides, it's not as simple as buying a bulb since several factors come into play.
Therefore, before you go ahead and browse through your options, it's best to be sure about what you're looking for, both in terms of performance and features. For starters, you should be clear about why you need a floodlight in the first place.
After that, you can move on to the other considerations listed below.
Location
Floodlights are meant for uniform illumination across a large area, and as such, the location is of prime importance. While it's typically used for outdoor lighting, it's not entirely uncommon to find one in an indoor site.
Determine the preferred area or object you want to cast your light on and make sure to position the fixture at an optimum angle. At the same time, it should be mounted in a way, so that the light is comfortable on the eye and does not disturb others in the vicinity.
The best way to do so is by installing the light unit at a downward angle of around 22°. Also, depending on the bulb type, some floodlight systems can heat up rather quickly, and so it's advisable to set it up at least 9 ft off the ground. This way, you can keep the heat from reaching someone directly underneath the light.
Type Of Bulb
Now, this is what our entire discussion is centered upon. The type of bulb you choose for your floodlight will significantly impact its performance and longevity. We have already talked about the different options available and what you can expect from each of them.
Dusk-To-Dawn Lights
Floodlights are reliable security solutions that can keep your home exterior well lit while discouraging intruders. Therefore, it makes complete sense to get one system installed instead of buying separate units to cover the entire property.
That said, if beefing up security is your primary objective, you might want to invest in something with a dusk-to-dawn feature. These smart lights automatically turn on at dusk and turn off in the morning. Honestly, it's really convenient and ultimately time-saving.
Motion Sensors
If you want to avoid keeping your floodlight light on for an extended period, we suggest equipping it with motion sensors. This way, the light turns on only when someone is moving towards your house. Also, to increase security, you can get sensors with a longer and wider range.
Where Are Floodlights Used?
Floodlights are quite versatile in their application and used for both indoor and outdoor illumination. However, the majority of these lighting systems are designed for exterior use, where small light bulbs fail to produce the required brightness level.
On that note, floodlights are meant for home as well as commercial purposes. Therefore, these systems not only provide backyard security but also much-needed lighting in outdoor events. In the case of the latter, these fixtures are used as key lighting sources in concerts, playgrounds, pool facilities, etc.
In fact, the massive lights found in football grounds or stadiums are highly resilient, as they can hold up to external elements like wind or rain. Besides, you wouldn't be able to enjoy the evening broadcast if these lights failed to work.
As for indoor use, floodlights are used in sports arenas, offices, conference rooms, studios, indoor pools, etc. However, these systems are not as extensive or as powerful as their outdoor counterparts. The brightness level is much more subdued, and they consume less power than the exterior ones.
Final Words
With this, we hope we could shed enough light on the subject, so you can go ahead and find the ideal bulb option.
However, before deciding on a type of bulb, make sure to know about its brightness level and lifespan. The wattage and the lumen count will provide you with this necessary information. Also, learn about the installation cost and other expenses involved in setting up the floodlight system.
In fact, we suggest getting in touch with a technician, so they can give you an estimate, including the price of bulbs. On that note, we'd like to take your leave.
The kitchen is one of the essential rooms in the house! No home is complete without a kitchen, and no kitchen is complete without the necessary equipment.
As times have progressed, people are looking for faster, cleaner and more efficient cooktops. Induction cookers have gained popularity in the last few years because of their efficiency and eco-friendly attributes. However, they can get a little complicated to use. So, understanding the different settings and what it takes to make it work is essential.
That is why, we are here today with a short guide on induction cooktops that will talk about the power consumption, usage, voltage, and temperature settings. After reading this, we hope you find it easier to use and manage that new induction cooktop that’s waiting in the kitchen.
Time is of the essence, so let’s get right to it!
Induction Power Consumption, Usage, Voltage, Temperature Settings
A lot of people prefer induction cooktops because of the variety of temperature settings they offer. Plus, shifting from one temperature to another is effortless. This is because the induction cooktop is faster and more responsive to any changes. It is also an excellent option for all those clumsy cooks that suffer a burn or two every time they cook a meal.
Now, let’s go into a few specifics regarding these cooktops.
Power Consumption
In terms of power consumption, induction cooktops are known for being energy-efficient. These cooktops can also maintain the temperature that has been set more precisely than other cooktops. Additionally, a lot of high-end inductions cook food twice as fast as regular cooktops.
When it comes to energy efficiency, nothing beats an induction cooktop. Not only are they eco-friendly, but induction cooktops also have a higher energy delivery rate of 84%, which is a lot more compared to gas and electric cooktops. A gas cooktop converts around 44% of energy and an electric cooktop can only deliver around 74%.
Usage
Induction cooktops really change the whole cooking experience. One of the best things about using one is that it is very responsive. So, if there is a need to change temperatures or any other setting quickly, it can be done without spoiling the food.
Another great thing about induction cooktops is that they are safe to use around kids and pets, and are easy to clean. Since the cooktop uses electromagnetic heat and not actual fire, it will be relatively cooler than regular cooktops. Pots and pans still become hot and need to be handled with caution, but they cool down rather quickly once the cooktop is off.
Induction cooktops usually have a very smooth surface that does not get too hot so anything that spills will not stick. This makes it easier to clean with just a wipe.
Mostly all induction cooktops are compatible with a common standard voltage supply, making them easy to use in any country. Most countries have a voltage supply of 230V ± 10% and are classified as their standard supply. However, in certain countries like the US, Canada, Japan etc., the standard is 100-120 V.
Since varying countries have varied common standard voltages, the induction cookers are rated 120V or between 200-240V, giving it more flexibility in usage.
It will be beneficial to remember that the more burners an induction cooker has, the higher amps circuit will be required to plug it. Induction cooktops with single burners usually need a 15 amps circuit, while something a little bigger like four burners will require at least 40-50 amps.
Temperature Settings
The variety in temperature settings is what sets induction cooktops apart from the rest. The range of temperature is not fixed for every cooktop as it depends on the brand. However, it is vital to ensure that it meets your requirements; so, check the temperatures available before buying it.
Usually, these cooktops offer cooking temperatures that are as high as 4,000 watts and as low as 500 watts, thereby making it easier to cater to everyone. Moreover, the fact that the temperatures can be changed at a rapid speed ensures precise cooking.
Cookware For Induction
This is a pressing concern for a lot of potential buyers. If someone has been using gas cooktops for a long time, they hesitate to shift to induction. After all, who wants to buy a whole new set of cookware, especially if they already have a ton of it?
It is possible to use some of your old cookware with induction cooktops. If there are any pots and pans with magnetic bottoms, i.e., made up of steel or iron, those will work just fine. There is no need to buy new cookware unless of course, you want to!
We recommend having a look at new cookware for the induction cooktop with an open mind. It may not be necessary to purchase, but it is quite beneficial to have. Induction cookware can also be used on gas cooktops, and in fact, will cook the food better and more evenly.
Final Words
And there you have it! That’s everything you need to know about induction cooktops to get started. We hope this short guide has made it a bit more clear and will allow you to take the first step towards using an induction cooktop.
We shall be back soon with more such informative guides. Until then, keep cookin’!
Don't you love a delicious smoothie, shake, or healthy soup to start your day? Having the right blender can help you enjoy them regularly.
Most fitness freaks around the world may already be acquainted with the family-owned brand known as Vitamix. However, for those who don't know about it, let us tell you all you need to know.
Vitamix blenders have been around for almost 100 years. This goes to show how reliable and loved their products are amongst customers. However, with several options to choose from, finding a suitable one for your needs may become tricky.
Fortunately, we have created an in-depth comparison and review of the Vitamix 5200 and Vitamix 5300. Hopefully, it will help you make an informed choice about the right blender for your needs.
So without further delay, let's get straight to the deets!
Let us begin this guide by introducing the evergreen Vitamix 5200.
The Vitamix 5200 blender came out in October 2007. Initially, it was set out to replace the flagship model of the same brand - the Vitamix 5000.
This superb blender features a large 64 oz. glass pitcher that effortlessly blends juices, smoothies, shakes, soups, ice creams, and a multitude of other creamy, soupy edibles. The large-capacity pitcher provides adequate quantity for a family of four to five, so you don't need to worry about frequenting the blender during busy days.
An expert eye will observe that the shape of the pitcher is strategically designed to help push food more easily towards the blades. This ensures an even texture during the blending process so you can achieve professional-quality, creamy foods and drinks within minutes.
Most users appreciate the color options provided by the manufacturer. Those who are picky about purchasing matching or complementary items will love the color options, as you can pick and choose a product color that best fits into your decor.
A major selling point of the Vitamix 5200 is its ease of use. No customer wants to spend hours trying to figure out how to use a blender, and Vitamix 5200 makes it convenient for you with its super easy controls.
The sturdy build quality, reliability, and ease of use are the primary reasons why it has become so popular amongst customers.
All said and done, there were a few minor drawbacks with the 5200 which customers pointed out after using the product extensively. Fortunately, none of them were significant enough to affect its sales, and it remained a top-rated product in the market.
The next release, which is the Vitamix 5300 blender, came out in November 2016. It was nearly a decade later that the manufacturers released the new model.
The first noticeable difference in the Vitamix 5300 is its size. This model is around 3 inches shorter than its predecessor, which you may think is a disadvantage, but it's not. We will delve into the details of its size and functionality in just a bit.
The Vitamix 5300 is visibly different from the 5200, which is a direct result of the manufacturers' taking specific steps to address customer issues. This model addresses most of the complaints with aplomb, which gives credit to the manufacturers' listening skills.
Most customer complaints were addressed and required changes were made.
With a full-body plastic construction and a visibly smaller base and pitcher, the Vitamix 5300 soon began entering customers' homes. Furthermore, both models come with a 7-year warranty, which is excellent news for most users as it eliminates the need for costly repairs and replacements.
Another well-placed strategy employed by the manufacturers is the modification in the width of the pitcher and the size of the blades. Since the Vitamix 5300 is 3 inches shorter than its predecessor, many customers are worried about its blending abilities compared to the 5200.
Fortunately, this concern was quickly addressed by the implementation of a slightly wider pitcher base. Alongside this change, they also made the blades slightly longer so they could reach the ends of the pitcher with ease.
Comparison Of Vitamix 5200 Vs. Vitamix 5300
Now that you know a little bit about both blenders, it's time to dive into their comparison. We have divided each section according to its features and how they stand against one another. This detailed comparison should help you choose the right blender for your requirements.
Container Size
The first noticeable difference between the Vitamix 5200 and 5300 is its size and build.
Vitamix 5200
The Vitamix 5200 measures 7.25 inches wide, 20 inches long, and 8.75 inches deep. As you may well imagine, it is relatively bulky and takes up quite a bit of counter space. That being said, the 64 oz. the pitcher itself is not very heavy or bulky. You will be able to carry it easily or even hold it for extended periods without arm fatigue.
Furthermore, the cord wrap feature ensures that annoying cords and wires don't unnecessarily take up extra counter space.
Keep in mind that with the lid on, the 5200 measures 20.5 inches. Most customers reported being able to fit the blender into their shelves after removing the lid. Although it wasn't an ideal fit, it seemed to work better for most people.
The pitcher is relatively narrow and allows you to add a number of ingredients without running out of space. Moreover, the blades run smoothly and effectively to blend everything into a creamy consistency.
Vitamix 5300
Moving on to the Vitamix 5300, the first thing that comes to mind is its noticeably smaller size. The pitcher capacity has been kept the same - 64 oz. However, 3 inches have been shaved off the top to make it shorter and easier to fit into cabinets and shelves.
This change was made after continual customer reports and complaints about the blender not fitting comfortably into most cabinets. The skyscraper-like 5200 was efficient but too large for most kitchens. Its bulky appearance was not a favorite amongst most customers.
The manufacturer heard of these complaints and decided to take action, creating a shorter and wider 5300. This model fits far more comfortably into most kitchen spaces and cabinets. Furthermore, its noticeably sleeker design was a welcome addition into most customers’ homes.
Those worried about how this change affected its blending capacity - don't fret. Although the size was reduced, its pitcher capacity remained the same. To top it off, it became slightly wider to accommodate the same amount of ingredients (or more) in the pitcher.
The best part - the blades were also minutely changed so that the new model could blend perfectly without complaints.
Durability
For all intents and purposes, the Vitamix 5300 is marketed as a better and newer version of the 5200. In many areas, this account is accurate. However, when comparing the durability of both models, we found some surprising results.
Vitamix 5200
The Vitamix 5200 not only looks stronger and sturdier but quite arguably, it actually is. With a strong, polycarbonate construction and sturdy design, this blender has been known for its capacity to take a beating. In fact, the 5200 is the perfect blender for daily use - even if you accidentally knock it around a few times, it won't sustain much damage.
Another noticeable feature is the tamper. This model features a 12.5-inch tamper that is visibly larger and thicker compared to the one on the 5300. Not just that, it is also sturdier and easier to use, thanks to its significant size.
An interesting characteristic to note about the container is that it is completely heat-resistant and BPA-free. Also, the shape of the pitcher is strategic, enabling it to push the ingredients toward the blades organically, creating a smoother, finer blend.
Vitamix 5300
The Vitamix 5300 features an all-plastic construction that is robust and sturdy, but not as much as you might expect. The comparison is even starker when you place it beside the older 5200.
Although the 5300 is quite durable on its own, we noticed that its plastic body is prone to cracking. Of course, this is not something you need to constantly worry about if you purchase the blender, but it is something worth mentioning nonetheless.
Moving on to the tamper, the 5300 features a shorter and thinner one - 9.76 inches. Furthermore, its design has been changed entirely, giving it a unique shape and structure.
An observation we made while using both blenders was that we had to use the tamper more often for the 5300 than the 5200. This might be because of the shape of the pitcher or the power of the motor. Either way, we noticed that food particles tend to float around the 5300 more often than its predecessor.
Motor Power
One of the most vital aspects of a blender is the power of its motor.
Vitamix 5200
The 5200 does not fall short of our expectations. Not just ours, customers who have reviewed the product have generally been happy with its blending power.
Getting down to technical details, let's talk about the actual power of its motor. The 5200 features a 2-peak horsepower motor that has been both designed and manufactured by a Swedish company.
Its powerful motor enables the razor-sharp stainless steel blades to spin at an astonishing speed of 37,000 rpm. The 3-inch blades are excellent for blending, pureeing, grinding, and breaking down all kinds of food.
Vitamix 5300
Comparing the 5200 and the 5300, there isn't a significant difference between the motors - at least on paper. The 5300 features a slightly better 2.2-peak horsepower motor and 4-inch laser-cut stainless-steel blades. These blades are powerful and have adequate friction to help you make hot soup without the need for a stove.
You may be wondering why the 5300 has blades that are an inch longer than the 5200 when the total size of the container is smaller. Well, keep in mind that although the 5300 is shorter, it is slightly wider than the 5200.
To compensate for its additional width and enable the blades to reach the edges of the pitcher, the powerful blades have had an inch added to them.
Now, you may be wondering if the .2 horsepower makes any difference to the new model. To be honest, the difference is not significant. You may notice some differences when blending harder substances like ice, which is noticeably easier on the 5300. However, for other blending purposes, both models work as well as each other.
Noise Levels
Have you ever faced the issue of cranking up your blender early in the morning only to wake the entire household up? It can get pretty distressing, especially when all you want to do is make your morning smoothie.
Well, let's compare the noise levels of both blenders and see which one is quieter, thus, better.
Vitamix 5200
The variable speed control feature is one of the best aspects of a blender - at least most users seem to think so. The range of speed offered is from 1 to 10, with 1 being the slowest and 10 being the highest.
At the lowest speeds, the blender is relatively quiet, so you won't risk waking your family up early in the morning. However, it can get pretty loud at the highest speed setting and is sure to disturb people around you.
Vitamix 5300
Although it may sound odd, the Vitamix 5300, even with its more powerful motor, is quieter than the 5300. That being said, it is definitely loud enough to create some disturbance, especially in a quiet environment. However, what surprised us was that it was relatively quieter than its less powerful counterpart.
Those who prioritize low noise levels might find peace with the 5300, especially comparing it to the 5200. Keep in mind that it is virtually noiseless at its lowest settings (1, 2, and 3), which is excellent.
Controls
What is a good blender without easy controls? Well, both models of Vitamix are known for their superb controls, which are intuitive and easy to use. However, here is a detailed comparison of both, so you understand each machine better.
Vitamix 5200
The controls on the Vitamix 5200 are minimalistic and intuitive. Right in the middle of the base, you will see a speed dial that enables you to control the speed of the motor easily. It is an old-school dial with numbers featured around it. They are relatively easy to spot and don't require a deep understanding of the machine.
This speed dial allows you to control the speed levels from 1 to 10, depending on what you're blending and what consistency it should be.
On the left of the speed dial is the high/variable speed switch. Turning it to the "high" position enables the motor to run at its most powerful speed - which is 10. You will not be able to control or change the speed once it is in this setting. It works excellently when you want to blend something without having to watch over it constantly.
However, switching it to the "variable" speed option allows you to control the speed manually. This option is fantastic when you want to blend large chunks of food or reach a specific consistency.
Furthermore, you don't need to stop the machine to add more ingredients. The handy tamper allows you to add them effortlessly without having to turn off the motor constantly.
Lastly, you will find the power switch on the right side of the speed dial.
All said and done, Vitamix failed to include the "Pulse" setting on this model, which several customers complained about. To achieve the same effect, customers had to turn the on and off the machine repeatedly, which can get annoying after a certain point.
Fortunately, the manufacturers paid attention to customer reviews and complaints and integrated this into the next model.
Vitamix 5300
One of the aspects which most customers, including us, were excited to test was the "pulse" feature. This small but significant addition has completely changed the way we experience the blender - and it is a welcome change.
Instead of the high/variable speed control switch on the left-hand side of the speed dial, you now have the "pulse" switch.
This feature will change how you blend your food items and drinks, turning them into a thick, creamy consistency instead of a thin, watery liquid.
The “Pulse” feature essentially produces short bursts of power that automatically turn on and off without your intervention. This helps you achieve a certain creamy consistency which can be otherwise hard to achieve.
Without this excellent feature, customers were forced to manually turn on and off the power to replicate a "pulsing effect." Although it was effective, it cannot be compared to the convenience of the "pulse" button on the 5300.
Moving on, the rest of the controls are pretty much the same on the 5300 as it was on its predecessor. On the right side of the speed dial, you will find the power button. Of course, you can control the speed of the motor using the dial in the middle, which is exceptionally effective when you want more control over the blender.
Cooling System
As you may remember, we mentioned how it is possible to make hot soups in a blender without the requirement of a stove. Moreover, the powerful motor and blades often create enough energy and friction to heat the inside machinery of the blender.
It is vital to place an effective cooling system that ensures that your blender works seamlessly without overheating. Well, here is what we found about the cooling systems in both blenders. Check it out below.
Vitamix 5200
The Vitamix 5200 features an efficient radial cooling system that uses cooling fans to prevent the motor and blades from overheating. This feature is crucial, without which the blender and its motor can significantly overheat and experience burnout.
Furthermore, overheating can cause a ton of other issues for the machine. By the end of it, customers will be forced to make costly repairs and replacements.
Fortunately, most of these overheating issues are eliminated thanks to the cooling fans. The heat-resistant material of the container is also conducive to this process, allowing you to blend hot, creamy foods with ease.
An important point to note here is that although the cooling fans are excellent, they do not completely protect the machine from overheating. For this, the manufacturers should have added a type of thermal protection system, which is, unfortunately, missing from this model.
Vitamix 5300
Similar to the 5200, the Vitamix 5300 also features built-in radial cooling fans that prevent overwork and overheating of the motor. This reduces the strain produced by the machine, thus, increasing its service life and ensuring that it works at its optimal condition for years.
Fortunately, the manufacturer provides an excellent 7-year warranty which covers most of these essential items - like the motor. So, if you face any issues with the motor or blades, be sure to turn to customer support for assistance.
Moving on, the 5300 features an additional system that further enhances its functionality and longevity. This feature is the built-in thermal protection system. Again, this is a new feature that has been added only to the 5300 and is missing from its predecessor.
The thermal protection system enhances the durability and power of the blender, enabling you to make hot, creamy foods like soups right from the blender. It can be difficult for most people to imagine making soup without a stove. However, the powerful motor and blades make this possible, which is why having an overheating protection system is imperative.
Cleanup
What good is using a blender daily if cleanup is a nightmare? Imagine if you had to manually wash your blender after every use. Most people might be dissuaded from using the machine daily if that were the case.
Well, let's talk about the cleanup process of both blender models to see if they are convenient for daily use or not.
Vitamix 5200
One of the great things about the Vitamix 5200 is that it is dishwasher-friendly. Every time you blend, puree, or grind something, you can place it in a dishwasher and forget about it till the next time it's required.
Moreover, you can also choose to manually clean it using most commercial cleaners and soaps. Of course, make sure that you use the right dishwasher soap that will remove food residue, food stains, and odors.
The tamper provided also helps you clean the stuck, stubborn pieces of food residue from the blender with ease.
However, the best part about cleaning this blender is the self-cleaning mode it comes with. This patented "Easy Cleaning" system is virtually effortless and helps you clean the blender without hassle each time.
Add some water and a few drops of dish soap into the blender. Then, run it on its highest speed setting for 60 seconds. If needed, repeat the process, dump out the contents, and allow the blender to try. Cleanup has never been easier!
Vitamix 5300
Similar to the 5200, the Vitamix 5300 also features a handy tamper that enables you to reach the edges and corners of your blender. Use this tool to manually clean any bits and residue of food that are visible.
Then, you can pop it into your dishwasher and allow it to clean automatically.
If not, you can also use the "Easy Cleaning" feature, which you will find on both models. Using this feature is the same as the 5200. It makes cleanup extremely easy, convenient, and hassle-free for daily use.
Which Blender Is Right For You?
There are several factors to consider when picking the best blender for your needs. As you may have realized from our detailed comparison, both blenders have strong and weak points. However, depending on your requirements, the "best" blender may vary from person to person.
So, what are the factors to consider when picking the right blender? Let's have a look.
Durability
If you are looking for durability, there is one clear winner here. In our opinion, the Vitamix 5200 wins hands down. Its strong polycarbonate material with heat-resistant characteristics makes it an extremely robust blender for daily use. You don't need to worry much about knocking it around accidentally during use.
Compared to the 5200, the Vitamix 5300 scored slightly lower because of its all-plastic body. Although the body is heat-resistant as well, it doesn't match up to the same standards as the 5200 in this regard.
Space
Those who don't mind the additional counter space of shelf space taken by the 5200 may find it the best option. That being said, most customers faced an issue with storage and complained about it.
After hearing these complaints, the manufacturers decided to design a slightly shorter model that would fit into most storage spaces easily.
However, keep in mind that the 5200 may be ideal for those who want to blend smaller amounts of ingredients at a time. The large-capacity pitcher of the 5300 is excellent for big families but may cause wastage for smaller ones.
Moreover, you may be required to store the excess food you make as it isn't possible to consume the entire contents of the pitcher in one go.
If storage space is of utmost importance to you, then go for the 5300. Furthermore, if you don't mind blending a lot of ingredients and ending up with excess food, this may be the best option.
Pulse Feature
One of the most significant drawbacks of the 5200 is the absence of the "Pulse" feature. If this is important for you, the 5300 is, without a shadow of a doubt, the clear winner.
Container
The Vitamix 5200 features a classic container that is large, and slightly bulky but does not have a large capacity. On the other hand, the Vitamix 5300 has a low-profile container with a wide base. This enables you to add more ingredients compared to the 5200.
Depending on which aspect matters more to you, the choice between the two is clear.
Budget
The Vitamix 5200 is almost $100 cheaper than the 5300. If budgetary constraints are a concern for you while choosing the best blender, we recommend the Vitamix 5200.
However, if you are willing to spend about $100 more to enjoy the advanced features and low-profile design of the 5300, this might be a better option for you.
Summing It Up
And with that, it's a wrap.
In our opinion, if you are looking for a budget blender and don't necessarily mind the extra space it takes in the cabinet or shelf, opt for the Vitamix 5200. But, if storage space is important to you, and you want to try out the features offered by the newer model of the same brand, consider the Vitamix 5300.
Leave a comment below to let us and our fellow readers know which Vitamix model you prefer and why. Stay tuned for more reviews and guides.
Buying the perfect cookware set can often be quite tricky as there are so many options out there on the market.
However, in this article, we have focused only on Mauviel and All-Clad. Both these brands produce some of the top-notch cookware on the market. Mauviel is a premium French cookware brand, whereas All-Clad is the biggest cookware producer in the US.
Apart from this one fundamental difference, there are several others that you need to be aware of before making your buying decision. Both Mauviel and All-Clad are very premium brands, so you must know all the nitty-gritty before you think of investing in one.
We are pretty confident that this informational guide will make it a lot easier for you.
So, without wasting any further time, let us dive right into it!
Mauviel vs. All-Clad | All You Need to Know
Mauviel Cookware
Mauviel is one of the best brands that manufactures copper cookware. It was founded by a French artisan, Charles Mauviel, in 1830. Famous chefs from all over the world strongly recommend this brand of cookware, and since it is French, it is highly classy as well.
Not only are Mauviel products beautiful, but they are handmade too. So, when you are buying Mauviel cookware, you are buying a piece of art, in a way.
Some of the famous Mauviel products are M'Heritage, M'Minis, M'Tradition, and M'Passion.
Advantages Of Using Mauviel Cookware
In this section, we will look at two of the biggest advantages that Mauviel cookware offers.
Made Of Copper
The biggest advantage of using cookware by Mauviel is that they are made of copper. Copper conducts electricity and heat better, and therefore, it becomes the number one choice for chefs and cooking enthusiasts.
Copper heats up and cools down very quickly but it does not have the ability to retain heat, unlike stainless steel or iron. Hence, giving you the power to control the temperature. However, copper is very useful while cooking on one-pans as they require heat changes very quickly.
Overall copper is a very good conductor of heat, but it is also a very malleable material, which is why you need to take extra care of it.
Super Elegant
Besides being very productive, Mauviel's products are also famous for their elegance; they are like showpieces for your kitchen. However, keep in mind that the exterior of these cookware demands regular polishing to maintain the shine.
M'Heritage is Mauviel's most popular series of copper collections. Note that Mauviel M'Heritage cookware is not totally made of copper. The exterior is made of copper, whereas the cooking surface and the handles are made of stainless steel.
As you know, copper is a highly reactive material that is why the cooking surface is made of stainless steel.
All-Clad Cookware
All-Clad is a famous American brand of cookware that was founded by metallurgist John Ullam. It specializes in producing stainless steel cookware.
Moreover, it is not like most American brands that get their products manufactured in China; instead, it produces all its products right here in the United States.
It does not matter if you are a newbie or a full-time chef; All-Clad ensures that all your cooking needs are met. Some of its famous products include Copper Core, D3, and D5. All these cookware sets are made of highly durable stainless steel.
If you do not want stainless steel, we recommend you check out their C4 Copper collection. They feature a copper exterior and a steel handle; the combination of durability and heat conduction takes your cooking experience to the next level.
Advantages Of Using All-Clad Cookware
Here, we discuss two of the most significant advantages that All-Clad Cookware has to offer.
Stainless Steel Makes Them Highly Durable
All-Clad cookware is made of stainless steel, which makes them highly durable. But, do keep in mind that the core is either made up of aluminum or copper because stainless steel is not a good conductor of heat. All-Clad ensures that the exterior is made of stainless steel to offer durability, whereas the interior is made of a layer of either aluminum or copper.
Another advantage of stainless steel is that it is non-reactive, which is why you can cook acidic food on it like tomatoes. Unlike copper, the little fragments of metal do not stick to your food.
Furthermore, stainless steel does not require high maintenance or regular polishing to prevent rusting. It also does not require extensive cleaning; just water and dish soap do the job.
Ability To Switch
One of the biggest advantages of using All-Clad cookware is its ability to switch from stove to oven. A few recipes require this kind of treatment, and All-Clad makes sure that this happens without any problem. You can easily use them with a temperature up to 600 degrees Fahrenheit.
Similarities Between Mauviel and All-Clad
Even though both these brands are a lot different from each other, they have certain similarities. In this section, we are going to take a look at the top three similarities between these products.
Warranty
Both these brands offer a limited lifetime warranty on all their products. This warranty safeguards you from any fault on the manufacturer's end.
Durability
Both Mauviel and All-Clad offer extremely high-quality material for their products that ensure they last a very long time. This makes it very easy for us to handle them on a day-to-day basis.
Mauviel and All-Clad are famous for copper material and stainless material, respectively, that are bound to last you for a lifetime. Products of these brands are often passed onto the next generation in families.
Cleaning
Even though both Mauviel and All-Clad promise to be dishwasher safe, we strongly recommend that you wash them with your hands to avoid scratching or causing any harm. Dishwashers usually generate a lot of heat which may tarnish your cookware.
Comparison
Below we have compared some of the key features of Mauviel and All-Clad cookware. This will give you comprehensive knowledge of both brands.
Design
Mauviel and All-Clad are poles apart when it comes to design. The most noticeable part is the exterior; All-Clad flaunts brush steel or polished exterior; on the other hand, Mauviel's exterior is made of copper.
The stainless steel used in manufacturing All-Clad cookware is eye-catching and sophisticated, making it perfect for most kitchens. Mauvile's cookware looks more like a showpiece as the eye-catching copper takes its visual appeal to the next level. However, they may not match well with a conventional kitchen.
The Mauviel M'Tradition lineup presents some of the most prepossessing cookware with a special kind of hammered finish, whereas all cookware by All-Clad features smooth finishes and not any hammered finish.
However, the popular D3 collection by All-Clad offers flared edges to secure dip-free pouring. The mini D3 design is perfect for apartment kitchens. Besides maximizing space, it helps in the organization of the kitchen as well.
Mauviel does not offer flared pouring rims in any product. Flared rims are prone to spills, but they do a fantastic job in transferring food to the plate. They also provide the option to choose from a wide variety of handles like bronze, iron, and steel, whereas in All-Clad products, handle options are limited to stainless steel only.
While some prefer the bright stainless steel look of All-Clad, others may prefer the hammered copper polish of Mauviel cookware more.
Overall, it does not matter which brand you choose as both of them are capable of offering functional yet prepossessing designs.
Price
Both Mauviel and All-Clad are premium cookware brands. So, do not expect budget-friendly options from them. You do not buy cookware every month so consider it as a long-term investment. The cookware that these brands provide are some of the best in the business, and they will last you a lifetime.
One of the main reasons both these brands are so expensive is their production houses in the United States and France. Labour is not cheap in these countries, unlike China, and also the materials used for production are of top-notch quality, so you pay a premium price.
Normally, Mauviel cookware costs more than All-Clad's, but it mostly boils down to the model that you are comparing.
Frying Pan Shape
The pan shape affects the cooking a lot, in fact the shape of a pan decides the cooking surface area, ease of use, and liquid evaporation. As far as Mauviel is considered, it looks a lot like a conventional french skillet. The cooking surface area is 7.25 inches wide, but it does not come with a pouring lip.
Coming to the pan shape of All-Clad, it is one of the best. The lip of the pan is rounded, which lets you pour pan juices quite easily. Furthermore, the cooking area is 7 inches wide, which allows you to cook big amounts of food.
Weight And Thickness
The thickness of cookware mostly depends on the number of layers it comes with. Mauviel uses only two layers, one is of stainless steel, and the other one is of copper, whereas All-Clad uses several layers of 3 layers of metal.
Mauviel frying pans weigh around 1851 g and are between 2.40mm and 2.45 mm thick. Mauviel frying pans are slightly heavier than All-Clad because of the copper build quality. Copper ensures that your food is less prone to steaming.
On the other hand, All-Clad frying pans weigh just around 1253 grams and are thick by 1.66mm. It features three layers of metal which include aluminum, stainless steel, and copper and is relatively thinner than Mauviel, which means it heats up pretty quickly. All-Clad pans are great for making sauces.
Cleaning
Cleaning is an important factor while choosing the perfect cookware for your kitchen. However, most premium cookware sets are not dishwasher safe, so, we strongly recommend washing the cookware with your hands.
Since Mauviel is made of copper, it is not at all dishwasher safe. The copper polish is bound to become dull with the passage of time. To bring back the mirror-like finish, you need to polish it on a regular basis. All in all, Mauviel cookware requires high maintenance.
All-Clad cookware is dishwasher safe, and the stainless steel does not lose its gloss. However, we recommend you wash it with your hands since it may get scratches in the dishwasher.
Mauviel vs. All-Clad: Top Cookware Sets Compared
In this section, we have compared some of the best models of both Mauviel and All-Chad. We strongly advise you to read this part thoroughly to have a better understanding.
M'Cook 5-Ply vs. D3
The M'Cook by Mauviel features a 5-ply construction. More the layers, the better it is for increased warp resistance and efficient heat distribution.
The All-Clad D3 does not fall behind either; in fact, it is one of the best stainless steel cookware available on the market. It features a 3-ply construction, consisting of a layer of aluminum which is sandwiched among layers of stainless steel.
The bonding and cladding technology of this cookware ups the game by providing better heat distribution. The heat flows evenly throughout the cooking surface, which eliminates the chances of the bottom portion getting deformed.
Both models feature drip-free rims to keep your sides clean. The handles are made of stainless steel, which makes them extremely durable. Talking about the D3 model by All-Clad, it can stand a temperature of up to 600 degrees Fahrenheit whereas M'Cook By Mauviel can withstand temperatures up to 680 degrees Fahrenheit.
We have decided to go with Mauviel's M'cook as it sports a superior built quality and can withstand higher temperatures in the oven.
M'Heritage Copper Vs. Copper Core
These two models are for people who take a keen interest in design and are also more than willing to pay for it. Mauviel's M'Heritage and All-Clad's Copper Core are two of the most expensive sets of cookware on the market. Both M'Heritage and Copper Core offer a lifetime warranty.
Both Mauviel and All-Clad took different ways to make use of copper in their cookware. The M'Heritage copper features a 2-ply construction that includes 10% stainless steel on the interior surface and 90% copper on the exterior.
All-Clad decided to do things a little differently by sandwiching a layer of copper between stainless steel and aluminum.
The copper line gives it a very modern look, but Mauviel wins the race when it comes to looks. Both these models are oven-safe. However, the copper body of Mauviel only lets it work on induction cooktops.
We have decided to go with All-Clad's Copper Core because it works on all stove tops.
M'Cook 10-Piece Vs. D5 10-Piece
Both these cookware sets deliver superb performance and are two of the most popular cookware sets available on the market.
Mauviel's M'Cook has a slight edge over All-Clad D5 as it can withstand temperature up to 680 degrees Fahrenheit, whereas D5 can stand up to 600 degrees Fahrenheit.
Both cookware sets feature drip-free pouring rims and are suitable for all cooktops. However, the difference lies in the contents of each set. Mauviel is kind enough to include a non-stick pan which comes in really handy when cooking fishes or eggs.
All in all, both cookware sets do a decent job. We have decided to go with Mauviel's M'Cook as they provide a non-stick pan with its set.
The Winner
Both Mauviel and All-Clad offer some of the best cookware sets in the whole world. So, choosing a single brand is really quite a task. Both these brands belong to the premium category, and hence they offer exceptional design and quality. If you purchase either of them, you have already made a good choice.
However, the perfect brand totally depends on the budget, the cooking style, and the design expectations. If you prefer the look of copper and want your frying pans to be able to heat up and cool down quickly, we suggest going with Mauviel.
If you are more into conventional-looking cookware sets that require very little maintenance and last a lifetime, go with All-Clad.
Our group of experts has used both these brands for a few days, and according to them, All-Clad beats Mauviel cookware. The reasons are pretty clear and simple. Firstly, All-Clad cookware is way more durable than Mauviel cookware; the stainless steel does not disappoint one bit. If you can maintain it properly, it will serve you a lifetime without any doubt.
Even though Mauviel's products look elegant, our experts did not like that these cookware sets need to be maintained daily. You need to polish them almost every day to keep their shine intact and most home cooks do not have the time to do all that.
Furthermore, All-Clad is the world's leading brand in producing stainless steel cookware sets. While All-Clad's products are expensive, they are also very cost-effective. So, we recommend you buy All-Clad cookware sets.
Frequently Asked Questions (FAQ)
Below are some of the frequently asked questions regarding Mauviel and All-Clad that needed answering. We suggest you go through these questions and answers to further clarify all the doubts.
Are both these cookware oven-safe?
Yes, both these brands are oven-safe. Most All-Clad products can withstand temperatures up to 600 degrees Fahrenheit, whereas Mauviel products can withstand temperatures up to 680 degrees Fahrenheit.
Should you use copper for cooking?
Copper is known as one of the best conductive metals on the face of the Earth. They require a very short time to heat up, and the heat distribution is very even. However, keep in mind that they react with food that has a high acidic concentration.
Does the thickness of the copper pan affect cooking?
Yes, the thickness of the pan does affect cooking; in fact, the thicker your copper pan is, the better it is. For best results, a copper pan should be at least 2 mm thick. We do not recommend thin copper pans as they may heat up quickly but will leave spots. Thicker copper pans tend to distribute heat in an even manner.
Another advantage of using thick copper pans is that they have good thermal capacity. Thicker copper pans take time to heat up, but they have the ability to store more heat than thinner copper pans.
Why are Mauviel cookware sets so expensive?
There are several reasons why Mauviel cookware sets are so expensive. Firstly, they are manufactured in France instead of China; the manufacturers ensure that the highest production standards are maintained.
And moreover, Mauviel cookware sets are like pieces of art; the sheer beauty of these products will take your breath away. Mauviel values tradition and heritage, which is apparent in the craftsmanship of its M'Heritage cookware sets.
Why are All-Clad cookware sets so expensive?
All-Clad is one of the leading manufacturers of cookware sets in The United States. They are popular for their clean stainless-steel aesthetic. The Copper Core line up of this brand features a five-ply construction.
Coming to the cooking surface, it is made of 18/10 stainless steel. The exterior is made of 18/0 stainless steel, whereas the core is made of aluminum with copper sandwiched in between. All these factors make All-Clad cookware set one of the most expensive cookware sets in the world.
What factors determine the price of cookware sets?
You must know by now that not all cookware sets are priced evenly. Some are affordable, whereas some belong to the premium segment. There are certain factors that determine the prices of brands. They are:
Construction quality
The construction quality of cookware sets hugely impacts the prices. In general, multi-clad cookware is priced higher since multiple layers of metal are involved in the construction.
Material used
Cookware sets made of expensive materials such as copper and stainless steel tend to be more expensive than cookware sets made of economical materials.
Brand value
The brand's goodwill plays its part in determining the price of a product; it is no different when it comes to cookware. Brands like Mauviel and All-Clad have a long history and tradition of serving top-notch cookware. As a result, they come at a premium price.
Country of manufacture
Brands that are manufactured in Europe and The United States are more expensive because the cost of labor in these countries is higher than in China. And, also the materials used in these countries are of better quality.
Where can you buy them?
You can buy both brands of cookware sets from their respective websites. They are also available on e-commerce stores such as Amazon, Williams Sonoma, Wayfair, and Macy's.
What is the process of cleaning a Mauviel pan?
Cleaning a Mauviel pan is very simple; you have to soak it in soapy water for at least 15 minutes and then use a sponge to rub it. Keep doing it until the copper pan becomes shiny. We strongly advise you against using a dishwasher as Mauviel products are not dishwasher safe.
Conclusion
There you have it! That was all you needed to know about Mauvielvs. All-Clad. Both these brands offer some of the best cookware sets in the world.
However, do note that being more expensive does not mean better quality. You need to take into account other factors before making the buying decision, such as the construction quality and durability.
We hope this guide has given you some valuable information regarding Mauviel and All-Clad cookware. For further queries or feedback, kindly leave a comment down below.
With that, we wish to take your leave. Until next time!
Wusthof knives are a perfectly dependable tool in the kitchen. Go through our incisive informational review of the two ranges to make the right decision!
The brand is known for its diverse range and different categories of knives, so there is plenty of excellent kitchenware for you to choose from. Sometimes, however, it can be challenging to select your choice of kitchen knives from the plethora of product lines available under Wusthof.
But you can decide from either the Wusthof Classic or Gourmet ranges to keep it simple. These are the most sought-after categories by customers. Read on to know everything about these two Wusthof knives’ collections.
Go ahead and compare their advantages and disadvantages in terms of features like durability, performance, design, etc. We will even suggest the best out of the two, so stick on till the very end!
Wusthof Classic & Gourmet Compared
Let us first understand how the two Wusthof categories we are talking about are similar to each other. That will prepare you to identify the different characteristics more clearly and know their distinct features much better.
As you know, an in-depth understanding of any product can make a massive difference to the purchase and its long-term use. The better you know these kitchen knives before you decide to buy them, the greater your satisfaction will be.
Let’s see what is similar between the Wusthof Classic and the Wusthof Gourmet to ensure that great buy brings joy to the kitchen!
Both the Wusthof Classic and Gourmet lines are similar in design. It is a significant aspect of the two kinds of kitchen knives that cannot be ignored for various reasons. The brand gives you complete assurance that each blade is strong and has a good finish.
Moreover, the knives have a high-carbon metal design in both the ranges. The stainless steel material of the two kinds of knives is rust-resistant. You can imagine how durable and efficient the kitchenware is for the kitchen just from the initial features discussed here.
There are more similarities between the Wusthof Classic and Gourmet besides the body and durability of the kitchen knives. For instance, the handles' material, the product options, and the instructions for cleaning the knives are pretty similar.
Not only that, even some of the warranties available in the two categories are the same. Let’s look at these similarities one by one and understand these two Wusthof brands a lot better.
The Material Of The Handles
As we know, both Wusthof Classic and Gourmet knives are made of the same material. The stainless steel body ensures that both knife categories are durable and great for long-term use. The handles, too, are made of a durable material known as polyoxymethylene (POM).
POM is specially manufactured for the durability of many products, e.g., it is used on frames of eyeglasses, ski-bindings, etc. You could say that POM on Wusthof knife handles assures that longevity is a feature that will improve the kitchen.
In other words, the knives are high-quality, which you can go on using far more than some other knife products. They are also unyielding to fading and discoloration. POM is a material that is engineered to give great features and results, which is apparent in the Wusthof Classic and Gourmet knives.
The Materials Of The Blades
The blades of Wusthof Classic and Gourmet knives are made of several materials. Stainless steel, carbon, chromium, molybdenum, and vanadium combine in precise ratios to give the characteristics to the blades that make them so well-known.
Stainless steel is the base material as it is ideal for kitchen knives
0.5% of carbon adds hardness to the blade
Chromium is blended to increase resistance to stains on the blade
Molybdenum is also used to increase the hardness of the blade - it is a chemical element that prevents corrosion
Vanadium increases the durability of the blade
This particular mixture of chemicals, alloys, and minerals gives the Wusthof blade an edge over other kitchen knife blades on the market. Especially in the Wusthof Classic and Gourmet categories, these alloys and elements ensure that the blades are durable and resistant to corrosion.
The Design Features Of The Blades and Handles
When you see the Wusthof Classic and Gourmet knives, you might be surprised at how similar they are in appearance to each other. The blades have the same design and shape. And not just the blades, but the handles and also similar in shape.
They are black in color and have a sleek design. However, if you look closely, you will see that the Wusthof Classic has a bolster and a tang that is fully exposed in the handles. This feature is absent from the Wusthof Gourmet knife.
Cleaning Of The Knives
Both the Wusthof Classic and Gourmet knives can be cleaned in the same way. Even the cleaning instructions provided for both sets are the same.They have to be washed immediately once used to prevent early damage and corrosion that could result from spices and food sticking to the blades.
Also, the Wusthof knives function best when they are hand-washed. It is not that the knives cannot be put in a dishwasher. Technically, yes, that can be done. But one could end up damaging the blades if they rub against each other in the motored wash.
All you have to do is dip a cloth or sponge in liquid soap and warm water to clean your Wusthof knives. Dry them after cleaning, and you’ll have a set of Wusthof knives as good as new in the kitchen.
Warranty
The same limited lifetime warranty is offered on all Wusthof knives. Wusthof also guarantees knives that are perfectly manufactured without any defects. Their warranties do not engage with normal Wusthof ranges, or mishandling of the knives leading to product damage.
Do check the warranty terms and conditions in detail before actually buying these knives.
Differences between Wusthof Classic & Gourmet
You need the best Wusthof knives for your kitchen, be it the Classic range or the Gourmet line. While there are many similarities between the two ranges, there are several differences that make each knife stand apart.
When you choose the best knives from the two ranges, it is equally important to know the differences between them to understand the similarities. Now that we know something about the materials, handles, and durability of the Wusthof knives in the discussion, let us see how they are different.
Manufacturing Process
You would be thinking why we have brought up the issue of understanding how the Wusthof Classic and Gourmet are made. Would it help to know the manufacturing process to make the best buy for your home and kitchen?
You are correct in thinking that, but in the case of the Wusthof knife ranges, it becomes essential to know the brand well because knowing the manufacturing process reveals a lot about the cut of the knives.
And naturally, as you might have guessed by now, it is the cut of the knives that determine the kitchen knives’ abilities and the diversity of the Wusthof products.
The look and feel of the Wusthof Classic are maintained by running it through what knife manufacturers know as the forging technique. It is an old and durable way of making knives that gives them a unique character.
Whoever is familiar with the forging technique knows that it is a detailed process with around 40-steps that is comprehensive and requires thorough attention to detail. The beauty of the forging technique comes through in the authenticity of the Wusthof Classic.
This knife is far more popular than most knives in the market due to the look and feel of its body. Also, the blade is hard, thick, and durable because of the care taken for every step of the forging process of the Wusthof Classic knife. This precision makes it a classic in the kitchen, a must-have for everyone.
The forging process includes molding a steel bolster for the Wusthof knife. The bolster acts as a safety device when you are using the knife for cutting in the kitchen. It prevents the hand from slipping and causing injury.
While the forging technique is a more traditional approach to making knives in the Wusthof ranges, there are more straightforward approaches to knife manufacturing. For instance, the Wusthof Gourmet is a laser-cut stamped knife, a modern technique used to manufacture knives.
The technique is easier to use, even though it is as meticulous as the forging technique. The knives are stamped out of a metal sheet through a 14-step process that may not give the Wusthof Classic an authentic look after forging.
Nevertheless, this is a more contemporary knife, and the laser-cut stamped technique has its benefits on the cut of the knives.
Edge Angle
It is always good to factor in the role of the edge angle in the use of knives for cutting and peeling food and spices. The edge angle determines the sharpness of the blade, so go for a knife once you have examined the edge angle.
Thus, we see that the Wusthof Classic knives are sharper than their counterparts simply by observing the edge angle of the knives in the two ranges. They also utilize technologies like the PrecisionEdge technology that contribute significantly to such features of the knives.
Technically speaking, the Wusthof Classic has a 14-degree angle on both sides of the knife. On the other hand, the Gourmet has an 18-degree angle, which makes it less ideal than the Classic.
You can be pretty sure of getting a good, sharp knife in the Wusthof Classic range. The Gourmet may seem like it is falling short of the ideal edge angle, but it can manage a balance between durability and performance.
Any edge angle between 14 and 20 degrees can give you the features you are looking for in the two Wusthof ranges.
Rockwell Hardness Rating
While choosing a knife, you have to be sure of its performance and durability. The blade's hardness is another factor that you have to consider before buying either the Wusthof Classic or Gourmet knives.
The Rockwell Hardness Rating, also known as the Rockwell scale, is used to measure the hardness of a blade. The standard range is usually between 50 on the lower end of the scale and 60 on the upper end.
However, other brands use a different measure from time to time. While talking about the Wusthof Classic and Gourmet brands, it is safe to assume that the Classic usually has a hardness of 58, and the Gourmet measures around 56.
The hardness measurement on the Classic knife is an indication of its ability to hold a sharper blade.
Full-Tang
When you come across the term full-tang to research the best Wusthof Classic or Gourmet knives, you have to know two things - first, that the full-tang adds weight to the knife that you are considering as an option to buy for the kitchen.
Second, the weight is used to bring balance to the knife. The full-tang is just like the bolster on the Wusthof Classic knives. It will also have three rivets to enhance the look of the knife. Having a full-tang usually means that the knife you are looking to purchase is a top-quality product.
It is a great way to know the knife instantly like you would see when you come across the Wusthof Classic knives. All Wusthof Classic knives have the full-tang, while the Gourmet has many knives with the same feature.
However, the full-tang does not run across the entire width of the Gourmet knife. Running across the width of the knife is necessary for the full-tang to expose the knife fully. Gourmet knives also carry the distinction of having blades that are smaller than 4.5”.
It is significant to note that these blades do not carry a full-tang. They do have half-tang, though, and two rivets instead of three.
Weight
The Classic knives are heavier than their Gourmet counterparts. They have a bolster, a forged blade that is thicker, and a full-tang. These parts naturally make the Classic knives heavy; the only question remaining is whether they are as light to use as the Gourmet knives.
So, when it comes to the heaviness of a knife, there are different perceptions depending upon the person using the knife. A chef might deliberately want to use a heavy one, while a household with a regular kitchen might not prefer the Classic for the same reason.
Let us take the example of the 8-inch knife in both the Classic and Gourmet ranges to understand the difference between the weight of the two kinds of knives. This 8-inch knife is known as the cook knife, which, in the case of the Gourmet, weighs 8-ounces.
The Classic 8-inch knife is more than an ounce heavier at 9.1-ounces. As you can see, this one-ounce difference can influence your decision to buy the Classic 8-inch and use it for everyday utility.
Bolster
Bolsters are situated between the handles and the blades to give knives balance by adding weight to the entire length. They also make knives secure to use by preventing your hand from slipping when there is a lot of chopping or cutting to do.
Wusthof Classic knives owe their bolsters to the forging technique, but the Gourmet range cannot have them so easily, as it is stamped out of the laser technique. Thus, though the Gourmet knife may be more lightweight, you must be careful about your hand slipping if you are using the knife.
Price
The features of the Wusthof Classic make it an outstanding product to have in your kitchen. Naturally, the quality, durability, performance, and the materials that make the Wusthof Classic will factor into the price that the range will carry.
For example, if you compare the Classic 8-inch chef knife with the Gourmet 8-inch knife in the same category, you will notice a substantial price difference. That might seem surprising because both the chef knives are meant to do the same things and are even the same size.
But after going through the details of the manufacturing processes, the weight, parts, features, etc., we realize how this is possible while comparing the two ranges. The Wusthof Classic knife range outdoes the Gourmet range simply because of its manufacturing process and features.
Overall, expect to pay 30% more on average for a Wusthof Classic. Sometimes, this could go up to 150%, depending upon the size and category of the knife you want. Both the Wusthof Classic and Gourmet are good knives, but which is better suited for your kitchen?
Product Options
Any category of knives that you choose will offer a range of options, keeping in mind your cooking requirements. The Wusthof Classic gives 39 knife sets to pick from that are entirely different from each other.
Whereas, the Wusthof Gourmet knives have a range of 37 knife sets that are not only distinct, but also have unique features. A product from each knife set is described briefly below.
Wusthof Classic Starter Knife Set - 7 pieces
With the Classic set, there is a knife for any event that needs cooking. However, please don’t be startled when you receive only four knives instead of seven. The utility knife, paring knife, chef’s knife and bread knife are all that are required for chopping meat and vegetables.
Also, shears, a woodblock and honing steel make up the three other pieces of the whole knife set. Made of rust-resistant, stainless steel, the knives will last for a long time, and are also versatile in the kitchen. Even the grip is comfortable and you would find it quite easy to cut with them.
That said, you might want to mix up between the paring and utility knives. It is perfectly alright to use one instead of the other on a particular food item. Although the size of the two knives is the same, there won’t be a problem while cutting, or chopping.
Wusthof Gourmet Starter Knife Set - 7 pieces
The Gourmet knife setis quite different from the Classic. You will get a utility knife, a 6” serrated utility knife, a paring knife and a cook’s knife in this seven piece set. The other included tools are shears, honing steel and a block with nine slots.
Also, the knives are affordable, but do not have a full tang like the Classic ones. You may not get the same quality and longevity that is guaranteed with the Classic block set. However, in terms of the look and finish, both knife sets are almost the same.
Lastly, this product does not include a bread knife that can be very useful for daily use.
Wusthof Classic Or Gourmet Knives?
Wusthof knives have been made in Solingen, The City of Blades in Germany, since 1814. The two ranges Wusthof Classic and Gourmet, are high-quality products designed for professional and home cooking.
In fact, the Classic range is meant primarily for professionals or those who love cooking and do it seriously. It is sought by people who care more about the output and the knives' performance and less about the price of the knives.
The Gourmet range is meant for people who love the quality and design that Wusthof knives have to offer but use them for everyday cutting and chopping. In other words, the Gourmet knives are suitable for general and long-term use.
Finally, the Classic has an excellent forging technique, excellent design, and full-tang. It is generally safer to use, has a well-balanced feel to it, and is stain-proof. In comparison, the Wusthof Gourmet is a laser-stamped knife.
The design of the Gourmet is more straightforward than its counterpart, and it is half-tang in most cases. It has to be used with caution since it does not have a full-tang. It may be a lightweight knife, but there are chances of the knife slipping out of your hand for long-term use.
If we look at the pros and cons of the two kinds of knives, in a nutshell, we will quickly know our winner from just a glance at the listings. We figured sharing them here with you would make it clear why we choose one Wusthof brand over the other.
Pros and Cons Of Wusthof Classic And Gourmet
Wusthof Classic Pros
Manufactured by forging technique
Sharper blades
Great look and feel
Excellent design
Durable
Wusthof Classic Cons
Heavy
Expensive
Wusthof Gourmet Pros
Easy laser-stamp manufacturing technique
Lightweight
High-quality
Reasonably priced
Wusthof Gourmet Cons
No full-tang design
Less performance relative to Wusthof Classic
And The Winner Is...
The Wusthof Classic range easily wins over the Gourmet range of knives. This is because Classic knives have a distinct set of features due to their manufacturing process, making them sharp and durable.
This range would also appeal to many customers because it gives outstanding performance with an excellent look and feel. We would suggest the Wusthof Classic knives for cooking experts and lovers.
On the contrary, the high-quality Wusthof Gourmet range is durable as well. But it does not perform as well as the Classic. Just mix and match the blades from the ranges to create your own knife set.
Also, we suggest that you buy the Chef’s knife and Santoku knife from the Wusthof Classic for daily use. The bread knife or the carving knife can be added to the knife collection at home from the Gourmet collection.
An exhaust fan is an affordable appliance for removing smoke and odors from the kitchen. But it often falls short when compared to a kitchen chimney since it can remove grease and soot in addition to smoke and odors.
If you spend a lot of time in the kitchen, you’ll know how annoying it can be to cook in a thick cloud of smoke and soot. Thankfully, you can get rid of this with the help of an exhaustblower fan or kitchen chimney.
However, many people get confused when choosing between these two since they are not so well-versed with their differences. That is why we have compared them both in this guide. So, if you are curious, jump in!
How Does An Exhaust Fan Work?
In order to perform a comparative analysis between an exhaust fan and a chimney, you should have an idea about how they actually work. We’ll be starting off with the exhaust fan, followed by the kitchen chimney in a later section.
An exhaust fan is a special type of ventilation fan that helps to remove smoke and odor from the kitchen. Usually, it is installed on a ventilation duct or over the kitchen window. The airflow is directed outwards so that the kitchen smoke and odor can be sucked in by the fan blades.
Eliminating the excess smoke allows for fresh air to cycle inside the kitchen, which will allow you to keep cooking in peace. In some fans, there may be a switch to reverse the direction of airflow so that fresh air from outside can be sucked inside the kitchen more quickly.
Pros Of Using Exhaust Fans
There are several advantages to using an exhaust fan in your kitchen. We have discussed them below, so keep reading.
1. Cost-Effective
The biggest advantage of an exhaust fan is its cost-effectiveness. As you can guess from the discussion above, its design and mode of operation are as simple as a traditional ceiling fan. As such, it comes with an incredibly low price tag, which makes it a highly feasible option if you have a low budget.
2. Energy Efficient
A typical exhaust fan does not have any additional features that can consume excess electricity. Due to this fact, its overall power consumption is considerably lower than a kitchen chimney. This makes it an energy-efficient ventilation option for your kitchen.
Furthermore, a lower energy consumption essentially means that it will have little to no impact on your monthly electricity bill. Thus, it will help to enhance long-term cost-effectiveness, which is a bonus.
3. Easy To Install
Thanks to its simplistic design, an exhaust fan is pretty easy to install. You just need to make sure that there is an accessible power outlet and a ventilation opening on the wall.
The installation becomes even easier if you plan to mount it on your kitchen window. You won’t need a separate ventilation opening for such an installation, as the open window will do that job instead.
4. User-Friendly
If you want to use kitchen exhaust fans, then all you need to do is flip the switch, and the fan will start doing its job. You won’t have to go through detailed user manuals and instructions beforehand. Because of this aspect, exhaust fans are highly convenient to use.
Cons Of Using Exhaust Fans
There are certain disadvantages of using an exhaust fan, as we have discussed below.
1. Does Not Remove Grease, Oil, And Soot
An exhaust fan cannot remove soot, oil fumes, and grease particles from the kitchen air. These are considerably tougher than smoke and odors, and removing them requires powerful suction motors that exhaust fans lack.
2. Requires Extensive Maintenance
While the usage of an exhaust fan is easy, the same cannot be said about its maintenance. Over time, greasy particles may accumulate on the fan blades, which will not only make the fan dirty but will also affect its performance. And in order to restore its normal functionality, you will need to conduct extensive clean-up and maintenance, which will require some serious elbow grease.
Besides, the inability of an exhaust fan to remove grease and oil will also make the kitchen environment unhygienic. So, the kitchen cleaning effort will increase simultaneously, which can be somewhat of an inconvenience for users.
How Does A Kitchen Chimney Work?
Now that you know about exhaust fans, it is time to discuss kitchen chimneys. A typical kitchen chimney is equipped with several filters and suction motors to remove any type of particles from the air, which helps to maintain a clean cooking environment.
When turned on, the powerful suction motor sucks in the polluted air from the kitchen. Inside, the filters remove all the grease and oil particles, along with any smoke, soot, or odors. Subsequently, the contaminated air is expelled through a duct.
Pros Of Using Kitchen Chimneys
Below we have discussed the several advantages of using a kitchen chimney.
1. Removes All Types Of Particles
Thanks to the suction motors and filters, a chimney is able to remove all types of particles to give you clean air inside the kitchen. Therefore, with a good chimney, you get a kitchen space that is entirely hygienic and free from all types of contaminants.
2. Easy To Maintain
If you have a chimney installed, you can say goodbye to maintenance concerns. Since it removes all types of soot, grease, and oily particles, it indirectly helps to keep your kitchen clean. On top of that, most chimneys come with auto-clean features. This means that in addition to keeping your cooking area oil and grease free, it can keep the motors and filters inside the appliance clean as well.
3. Quick Action
Once you turn on the chimney, it clears out the kitchen air relatively quickly, thanks to the excellent suction power of the motors. This ensures ease of use, especially if you are in a hurry.
Cons Of Using Kitchen Chimneys
Despite its usefulness, there are certain disadvantages to using a kitchen chimney, as we have discussed below.
1. Expensive
The biggest complaint that consumers have about using a kitchen chimney is the cost. Even the most basic model of kitchen chimney is considerably more expensive than an exhaust fan. And if the chimney includes other features, it can further drive up the costs.
2. Consumes More Electricity
Running the powerful motors and filters of an electric chimney requires a lot of power, due to which its electricity consumption increases. This, in turn, can increase your electricity bills, which reduces its long-term feasibility.
3. Difficult To Install
Normally, a chimney is installed on the kitchen wall so that it is directly above the gas stove. It consists of several components, such as the shade, the exhaust duct, and others, all of which need to be installed separately. Because of this, the effort required to get it up and running is considerably more than an exhaust fan.
Fan Vs Chimney FAQs
Is a blower exhaust fan the same as a regular exhaust fan?
When it comes to the issue of a blower fan vs. fan, you should know that they are not the same thing, contrary to what most people believe. A blower fan is a mechanical device, while a regular fan is an electrical device.
Despite having similar functionalities, a blower fan is much more powerful and offers better airflow than a regular fan. This is because the impellers used in such fans are way more efficient than the conventional blades used in a standard fan.
What does it mean when the exhaust fan blows hot air?
If you are wondering, “why is my fan blowing hot air” then you might have installed the fan too low in your kitchen. In such a situation, the fan cycles the hot air generated from your cooking back inside the kitchen instead of expelling it outwards. Fortunately, such a problem can be resolved if you install the fan high enough near the ceiling.
Can you install a ductless chimney?
You can opt for a ductless chimney if you don’t want to go through the hassle of installing a conventional duct chimney. Such a chimney takes up relatively less space on your walls and is slightly more affordable. However, they are not as effective in removing dust and moisture from your kitchen, so do keep this in mind when going for this option.
Exhaust Fan Vs Chimney Final Verdict
So, now you know about the differences between an exhaust fan and a chimney. We hope that you have been able to come to a decision based on this knowledge.
An exhaust fan is a much better option for a small kitchen, considering that it takes up little space compared to a chimney. However, if you have a large kitchen, it is better to get the latter, as you can fully utilize its features without having to worry about space constraints.
That’s all we had to say in this brief guide. Until next time, folks!
Seahorses are something unbelievable; part of the water environment the delicate creatures are unique for multiple reasons but their unique body shape makes them easy recognizable, today their presence in cartoons dedicated to the sea world being mandatory as it beautifully highlights the immense marine diversity of the seas and oceans. A cartoon drawing tutorial portraying the special connection between one male seahorses and one female horse in a cartoon shape follows, full of color and joy follows. The "Learn How to Draw a Seahorse" cartoon scene step by step tutorial is part of the Cool Things to Draw Collection that we highly encourage you to visit if you`re interested in sketching and drawing. More information on seahorses after the break.
Fun facts about seahorses for children and parents alike follow, ready to enhance the educative process of drawing and coloring.
In our world no less than 40 seahorse species have been discovered so far.
The seahorse prefers to swim in pairs with their tails linked together, they also swim upright and avoid predators by simulating the color of underwater plants.
There are few marine predators for the seahorse aside from crabs. The petite creatures are avoided because they are full of bone and indigestible.
A small fin on the back of the seahorse propels him forward, the fin can flutter up to 35 times per second. Even smaller pectoral fins positioned on the back of the head are used for steering.
The eating technique is rather special, they anchor themselves with prehensile tails on nearby corals and marine vegetation to use their elongated snouts to suck small crustaceans and plankton that passes by. They can eat things that are as far as 3cm away through this method.
Tiny fish and plankton are on the usual dinner menu of a seahorse. The eyes of a seahorse can move independently to survey its surroundings, not giving his presence away.
The seahorse has no stomach or teeth and as a result they have to eat almost non-stop to stay alive; as a result, seahorses can consume over 3000 brine shrimps per day .
The seahorses mate for life and they`re monogamous.
In our world only a few handful of species are known to have male pregnancy and seahorses are among them. The male carries the unborn , freeing the female to make more eggs straight away,the specie thus reproducing faster.
The seahorses engage in eight hour courtship dance rituals that can include spinning around, changing colors or swimming side by side.
The eggs released by the female seahorse are inserted in a special pouch on the male`s abdomen, around 50 eggs are involved in mating.
A male seahorse will carry the eggs until they hatch to release fully formed, miniature seahorses when the time is right. One mating can bring into water anywhere from 5 to 1500 young seahorses.
Learn How to Draw a Seahorse
STEP 1 - drawing circles and axes
A pair of seahorses are to appear on our blank piece of paper and we`re starting with two pairs of circles and their axes. Notice that our horizontal axes are not on the same line nor are the circles equal in size.
STEP 2 - shaping the body
The sculptural body of the seahorse ought to be materialized by starting with a line that describes it. We`ve used the tails to determine this line and we have linked the tails together from the very beginning.
STEP 3 - drawing faces
The snout has been customized for the sex of the seahorse and the female received a chic hairstyle. The eyes simply exude cuteness.
STEP 4 - Adding fins and hairstyles
Get creative with the hairstyles, anything can be designed. Fins on the backs have also been added here with ease.
STEP 5 - Detail the body and construct the tail
The little creatures receive new little fins that work as arms, the tail has also been constructed along the previously drawn line.
STEP 6 - erase the construction lines
The tiny creatures look even more adorable at this point. Detailing follows.
STEP 7 - Adding details and shadow
The little creatures receive details such as hearts on their belly and new lines on their fins. Shadows have also been added for depth and contrast.
STEP 8 - Drawing the marine setting
The marine world is versatile and infinitely beautiful. You can draw absolutely everything, we`ve chosen to draw a set of simple creatures that would support the love between the two.
STEP 9 - Start Coloring
The white piece of paper awaits your color. Have fun and make sure you ave this memory.
What do you think? Are your little ones fascinated by marine life? We would love to hear from you in the comment section below on drawing and coloring with your loved ones !
This feature is part of the “Things to Draw”Collection of drawings realized by Homesthetics Magazine in partnership with Designaissance Studio. The contents of the tutorial are copyright protected as it is the collection itself; if you are interested on sharing the drawings on your website or magazine please contact the magazine. Feel free to print or share the page for educative purposes as this is the definitory purpose of our mission with this collection.
A fairy tale forest scene that includes an owl, a tree, butterflies and a tiny Red Ridding Hood follows and yet the extraordinary main focus of the scene are the colorful iconic mushrooms contained. The magic setting will help you create miniature worlds in which everything is possible, there are no limits. The items portrayed are simple to draw yet the color enhances them a great deal making the scene vivid, full of life. The tutorial "Learn How to Draw a Mushroom" is a magical snapshot that can work as an educative instrument in drawing and coloring with your children, your family; it is the 10th tutorial in the Cool Things to Draw Collection that we highly encourage you to visit if you`re interested in sketching and drawing. More information on mushrooms and the step by step cartoon tutorial itself, after the break.
Forests are separate universes in which wildlife flourishes, natural biomes are being created with simply extraordinary relations between the elements. In the following rows fun facts about mushrooms are listed as a bonus in the educative process of drawing. Please note that mushrooms are just one element from thousands, millions in a forest. Mother Earth is unique to say the least.
Mushrooms are also entitled toadstools, they`re part of the fungus family and unlike usual plants mushrooms produce energy for themselves regardless of sun conditions, they require no sunlight.
Traditional mushrooms are a highly nutritious food source, most species contain a great source of B vitamins as well as minerals like copper and potassium, they contain little fat, carbohydrates and salt content, they`re quite unique.
The medicinal properties of mushrooms have been put to good use by Traditional Chinese medicine for centuries.
Numerous modern studies have proven that mushrooms are resourceful in medicine, they`re used in antibacterial, anti-inflammatory and antioxidant solutions. Mushroom are also used to reduce blood pressure, moderate blood sugar, reduce cholesterol, enhance the immune system as well as to reduce stress and help with the fight of numerous types of cancer.
Mushrooms contain up to 90% water.
In certain cuisines the mushroom is considered the meat of the vegetable world.
Most mushrooms grown for human consumption come from controlled, sterilized environments and the most popular mushroom type represents no less than 90% of the mushrooms consumed in the US, it`s entitled the White Button Mushroom. Portobellow and the brown version Agaricus Bisporus entitled Crimini are also popular edible mushrooms.
The world largest producer of mushrooms is China, the country produces more than half of all cultivated mushrooms in this world.
The term used for people that collect mushrooms with the purpose of eating them, in the wild, is Mycophagist. The act of collection can be referred to as "mushrooming" and "mushroom hunting".
In the world there are multiple highly poisonous mushrooms and some of them do look like edible species thus making the "sport" of "mushrooming" risky without proper knowledge.
In the world there are no less than 30 species of mushrooms that actually grow in the dark thanks to a chemical reaction called bio-luminescence that produce a glowing light similar to a foxfire. For centuries certain cultures have used these fungi species to light their path through the woods.
A colony of Armillaria solidipes that resides in the Blue Mountains of Oregon is believed to be the world`s largest organism, the fungus spreads over 2,200 acres (8.9 km2) and it is over 2,400 years old. A small portion the organism lives above ground as short-lived honey mushrooms but the mycelium, branch like vegetation, lives on.
Before synthetic dyes mushrooms were widely used to dye wool and various other natural fibers.The mushroom dyes are organic compounds known to produce powerful, vivid colors.
Learn How to Draw a Mushroom
STEP 1 - start small
Simple lines can easily shape the scene, we`ve started with two mushrooms and one tree. The simple lines are undulated one towards the other creating a feeling of coziness from the very beginning. The reverence lean is simple to make and from our point of view changes things a great deal. Needless to say that from step one things can and should look different on your piece of paper, thousands of shapes of mushrooms can be found in the world, be creative, natural.
STEP 2 - start the owl and position flowers
To give life to the scene early on the position of complementary elements has been drawn. Notice how the circles and their construction lines already reside in a simple composition that seems tied.
STEP 3 - draw a path and the red ridding hood
In step three we give our elements a scale by inserting human-inspired elements from fairy tales to which one can relate. The Red Ridding Hood walking on a path of small dimensions makes the setup huge, a fairy-tale setting. Flowers bloom here.
STEP 4 - detailing the owl and inviting a butterfly
Simple small step to make things cozier.
STEP 5 - Vegetation Flourishes
The tree now gains leaves and the grass surfaces underneath the mushrooms.
STEP 6 - Construction lines are being erased and mushrooms are being detailed
Certain details appear at this step, the flowers gain some leaves, the eyes of the owl are shaped yet the most important accomplishment is the mushroom level as these get a new shape and adorable spots.
STEP 7 - More adorable spots and details
Lines appear on the tree, leaves, flowers. Spots appear on the mushrooms and butterfly and adorable owl.
STEP 8 - Adding Shades
Contrast and depth through simple shades is now earned by our piece of paper.
STEP 9 - Coloring the scene
Everything gains color, everything becomes vivid and positive. In this step the most you are to have fun and enjoy the process as it simply brings joy.
A fairy tale scene drawing tutorial is something that each one constructs out of his imagination, there are no limits and we hope that you have found our setting interesting, educative, positive. We would love to hear your opinion on drawing and coloring with the family in the comment section below.
This feature is part of the “Things to Draw”Collection of drawings realized by Homesthetics Magazine in partnership with Designaissance Studio. The contents of the tutorial are copyright protected as it is the collection itself; if you are interested on sharing the drawings on your website or magazine please contact the magazine. Feel free to print or share the page for educative purposes as this is the definitory purpose of our mission with this collection.
Winter is definitely one of the best parts of the year and the most beloved. All the white snow, cold breeze and days spent inside calls for relaxing activities designated to this specific period of time in the form of winter art projects to leisurely work on. As it is the time for celebrating and decorating our homes, creating your own decorations and art pieces seems like the right activity to cast away the overall laziness imposed on us by the cold weather.
creating lovely canvas paintings for winter
Canvas painting is one way of getting the artistic side of a person to emerge on lazy winter days. Choose a Christmas theme appropriate topic for your next easy canvas painting idea.
No one is ever too old for a paper mosaic winter art project. The black background and stained glass effect of this project makes it quite fun and exciting to try. The combination of hues reflct the winter mood.
Children love keeping busy, especially during winter and will always say yes to cute little penguins. Combining these into a winter art project will fill the little ones with excitement.The project is quite simple to make and can be displayed all over the house. Every guest will surely find this form of art simply adorable.
When winter comes, pine-cones become abundant in decorations. And while some think this is a nuisance, these sweet little things can be used for winter art projects and decors. The natural earthy tone can become a lovely background for more colorful materials, like these tiny pompoms.
Art projects should not always be expensive. Getting materials for lovely crafts can be as easy as grabbing a roll of tissue paper. This tissue bleeding paper snowflake art can be displayed on the side table to welcome guests and the idea will surely be a hit.
winter art wood ornaments that bring that rustic feel
There are some things that are discarded by many without realizing that these items can actually look great when turned into art. This winter art project made from wood trimmings is an example of it. Whether the images are carved or attached on the trimmings, the end result is still stunning.
Mr. Snowman is iconic and has been a common figure during winter. Kids adore snowmen and will gladly make their own art projects that have anything to do with a snowman. This snowman mask is a craft that kids can do on their own and be as personalized as possible for those kiddie winter parties.
Watercolor and oil pastel are common art materials that create lovely works of art. Using both merged together for a wintry art snowflake can create a stunning design. The simple colors of winter used in this art project are truly refreshing for the eyes and suitable for winter.
Snowmen are usually placed outside in the yard, but when snow is not present a little creativity can compensate. This craft is perfect for recycling materials into winter art projects and it can be displayed inside or outside the home and still amaze guests of all ages.
Kids love making things with their own hands, and using their fingerprint can light up their day for sure. This creative idea can encapsulate the memories of the kids' fingerprint and add color to the room. Amongst many winter decors, this will surely stand out because of how personalized and colorful it is.
Winter art projects are not only about painting, cutting or building snowmen- making lovely winter accessories are considered art, too. This plaid crochet bonnet is perfect for keeping the heads of loved ones' warm on winter days. The colors of Christmas used also fit the season well.
Candy canes come out usually during Christmas season and winter. There are candy cane ornaments that can be bought, but this winter art project can be a better option. These melted beads candy canes are cute and can surely make the winter and Christmas decorations look livelier. Just a few more things, like a ribbon or glitter, and you have a perfect addition to your winter decors collection.
Pallet wood can never go out of season when it comes to art projects. The use of simple colors and decors can bring the best out of pallet wood.This snowman pallet is a perfect project to welcome guests, add an initial and you have a personalized snowman that won't melt even when winter has passed.
Using salt for a winter art project is unusual but will definitely amaze guests. The effect of salt on the colors is lovely and allows the color to have a blotched effect in a natural way. Using lively colors will also make the winter gloom go away.
Hot cocoa is surely a big thing during the cold winter days and nights. Drinking one is great, but making art inspired by it is fun. The colors that can be used for this winter art projects can be as random as anyone would want and materials that can be used may even be spare items from around the house.
While snow is common in some countries, snow less winters are also very common for others, and winter without snow is just not satisfying. This snowy gooey slime can be a fun winter art project for people who want to create things with snow. There are just so many fun ways in using this slime, whether for display or for keeping kids busy during winter days.
Winter will often entice almost anyone to just lay around because of the gloomy weather. Having colorful designs around the house will help lessen this gloomy feeling and this can be achieved by hanging around colorful paper snowflakes. The different colors will surely create a difference inside the home and can even become the center of attraction.
What can be cuter than a snowman looking up? This art piece can be a great activity for kids in a winter party, making their own little touches on how the snowman will look like. This will surely make the active little tykes busy while the parents are also having a great time.


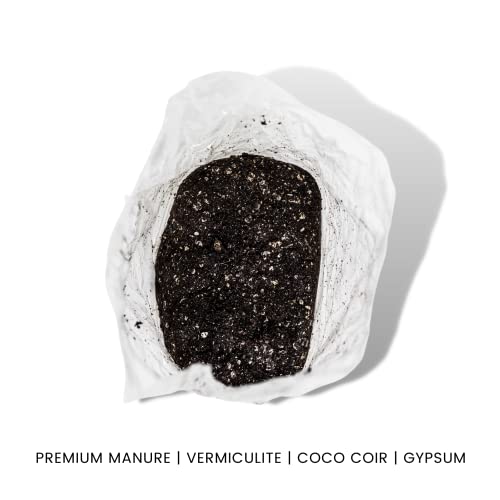

![Rec Tec vs. Traeger [All You Need To Know & Winner]](https://homesthetics.net/wp-content/uploads/2021/04/Rec-Tec-vs.-Traeger-01.jpg "Rec Tec vs. Traeger [All You Need To Know & Winner]")


![Weber Spirit vs. Spirit II [All You Need to Know]](https://homesthetics.net/wp-content/uploads/2021/07/Weber-Spirit-II-E-210-And-Weber-Spirit-E-210.jpg "Weber Spirit vs. Spirit II [All You Need to Know]")
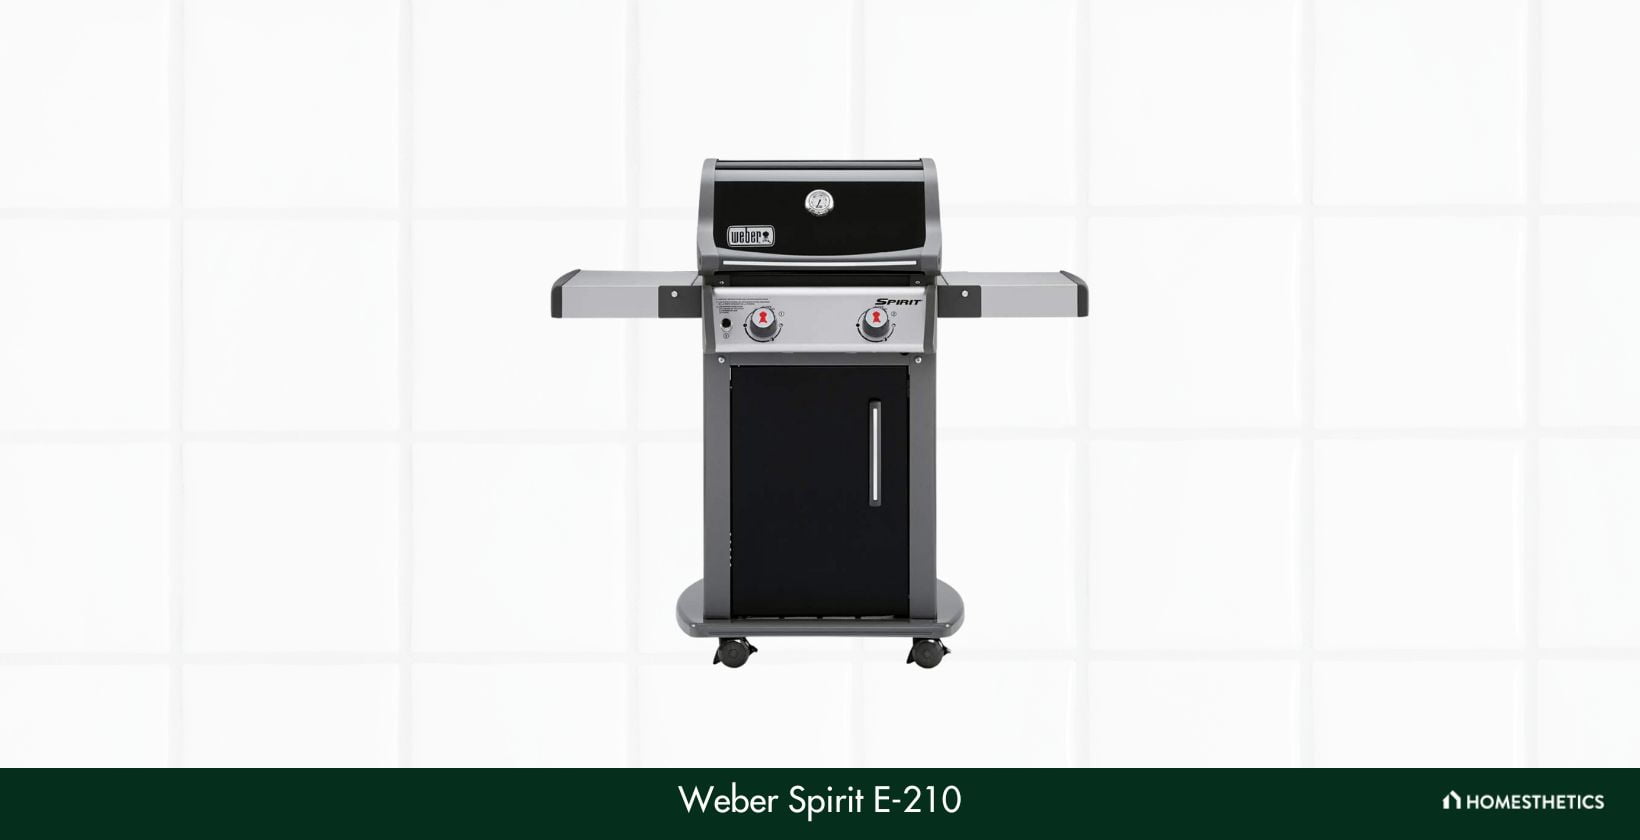
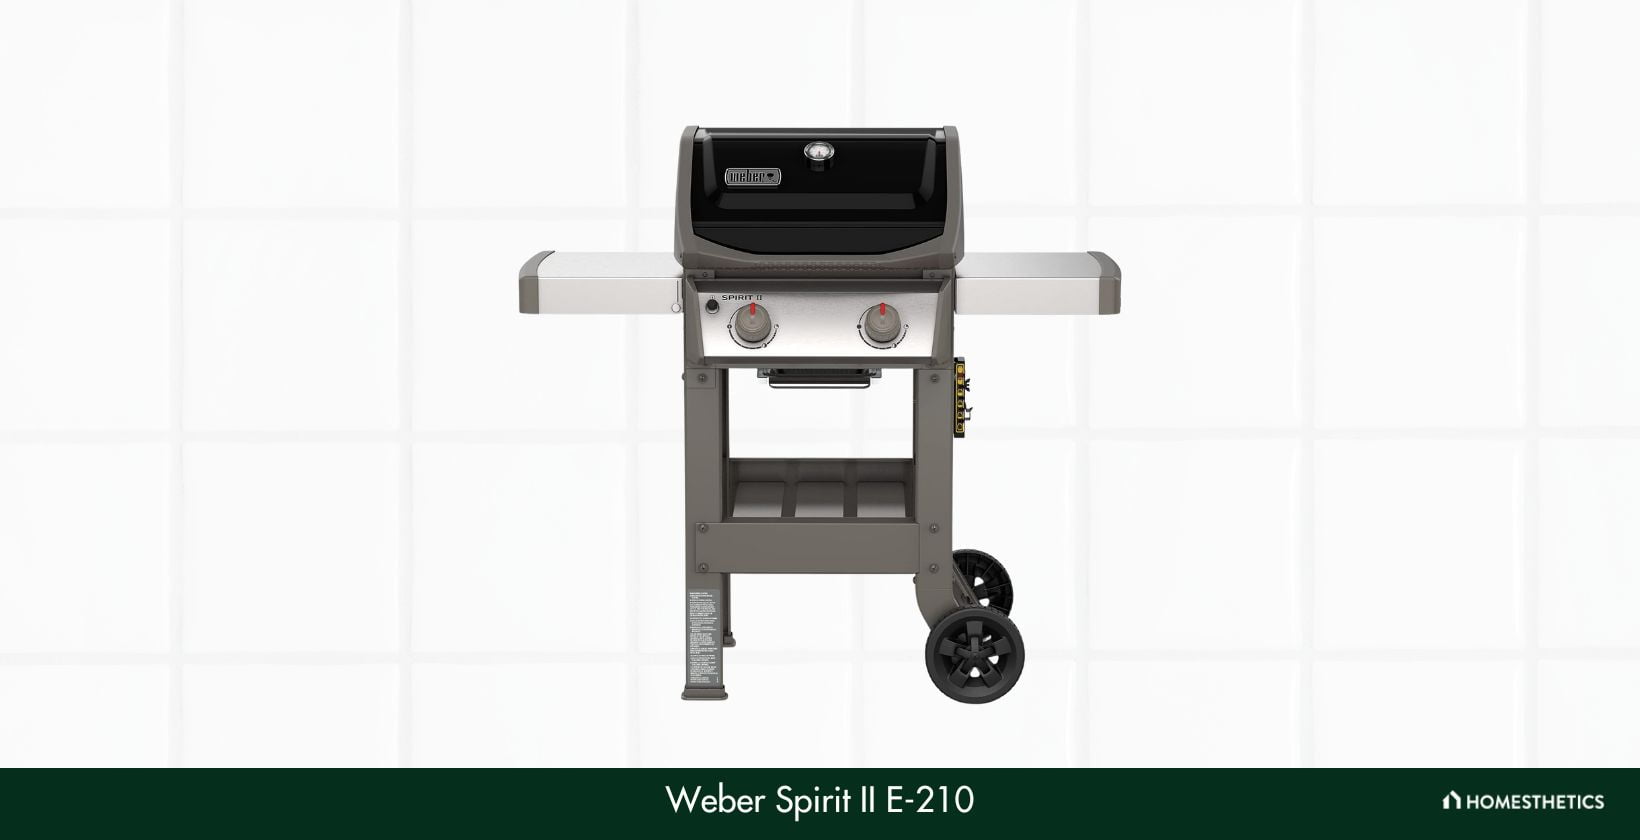
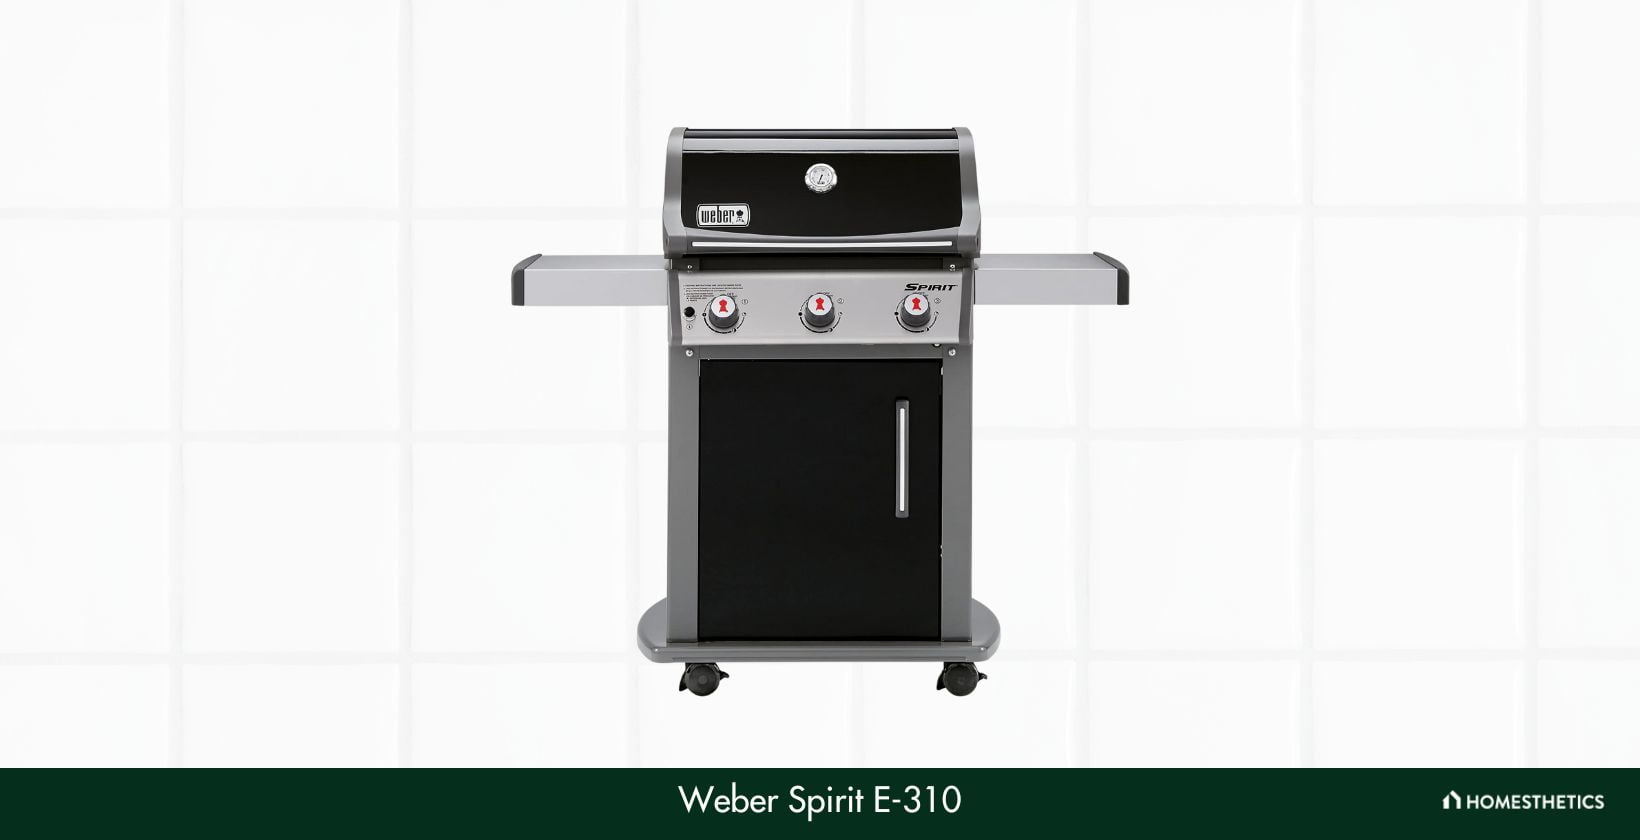

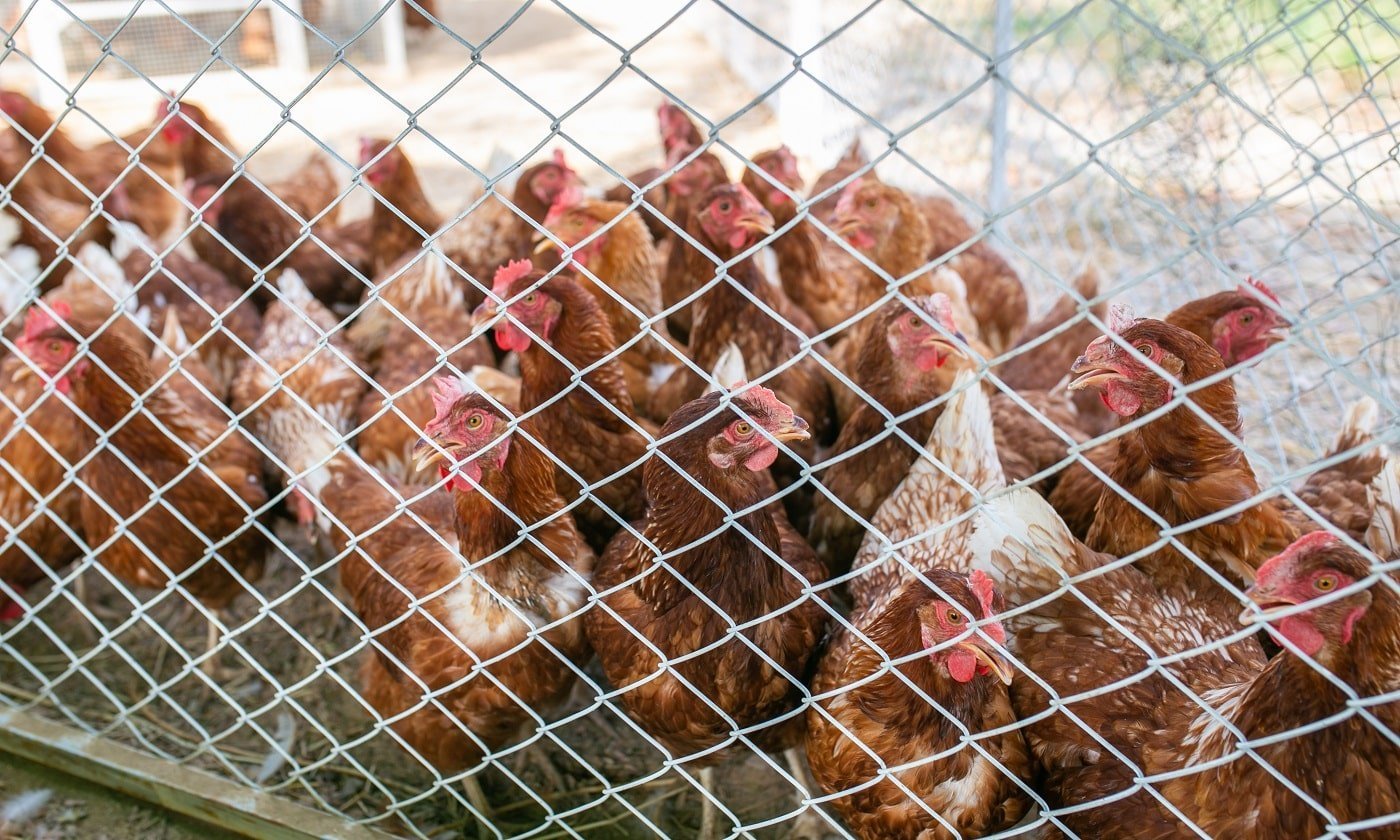
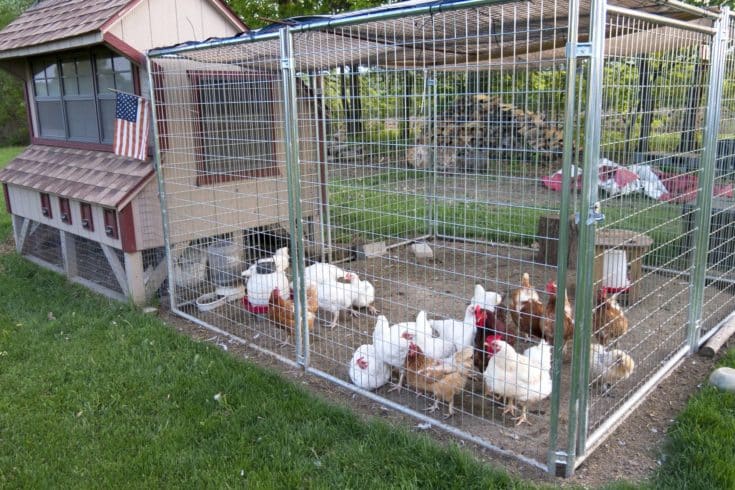
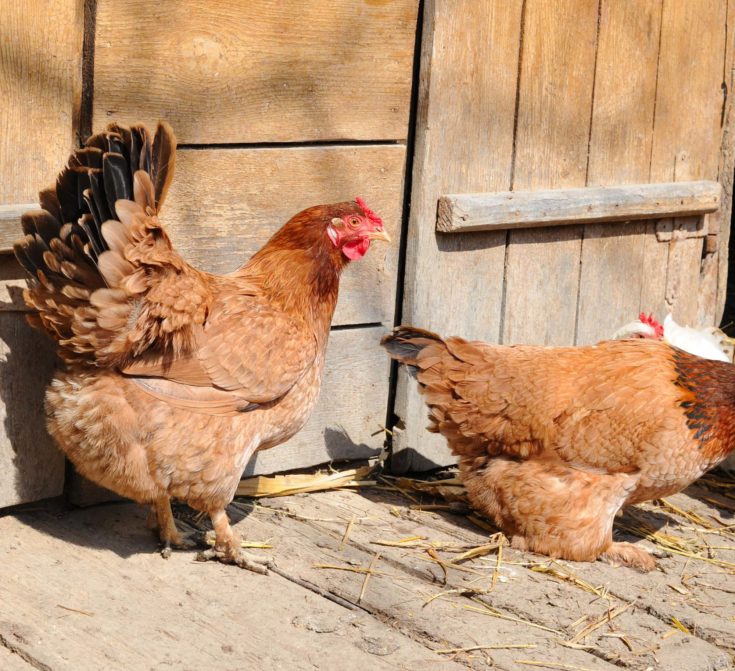
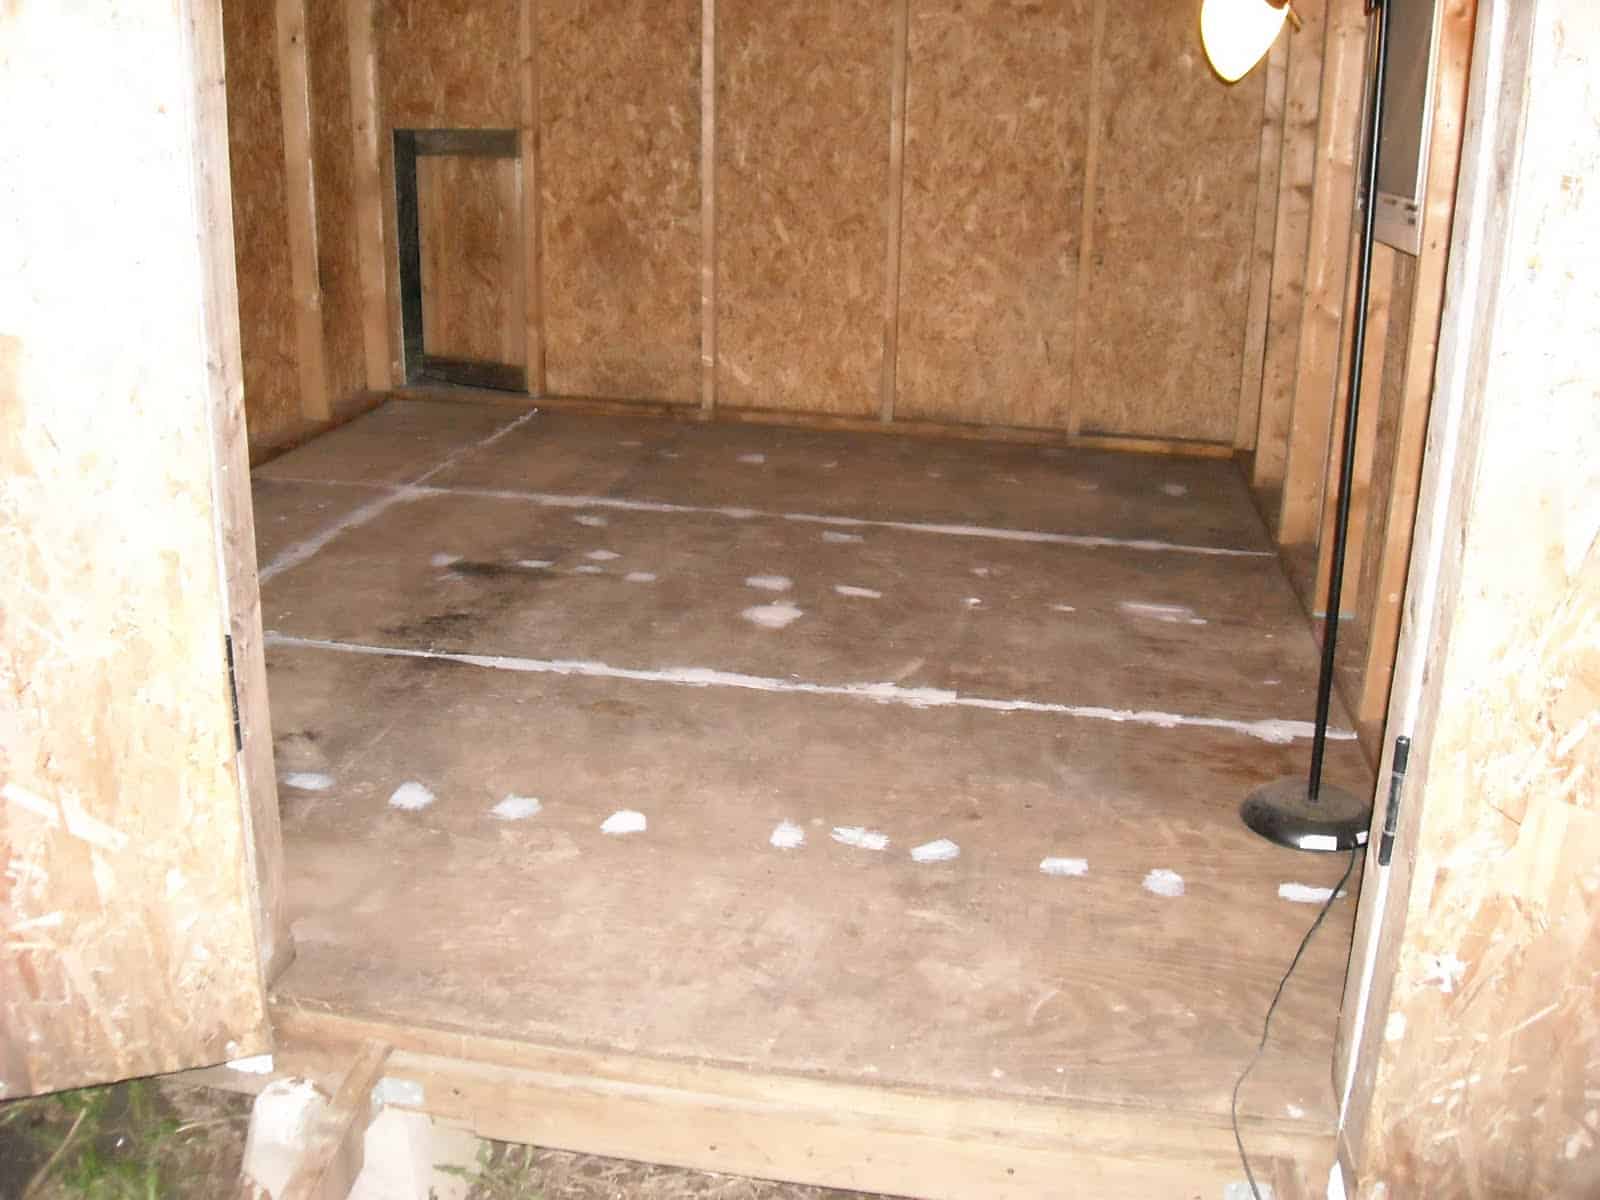


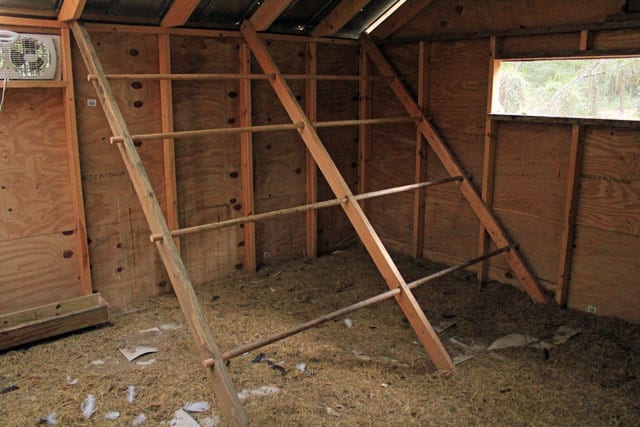


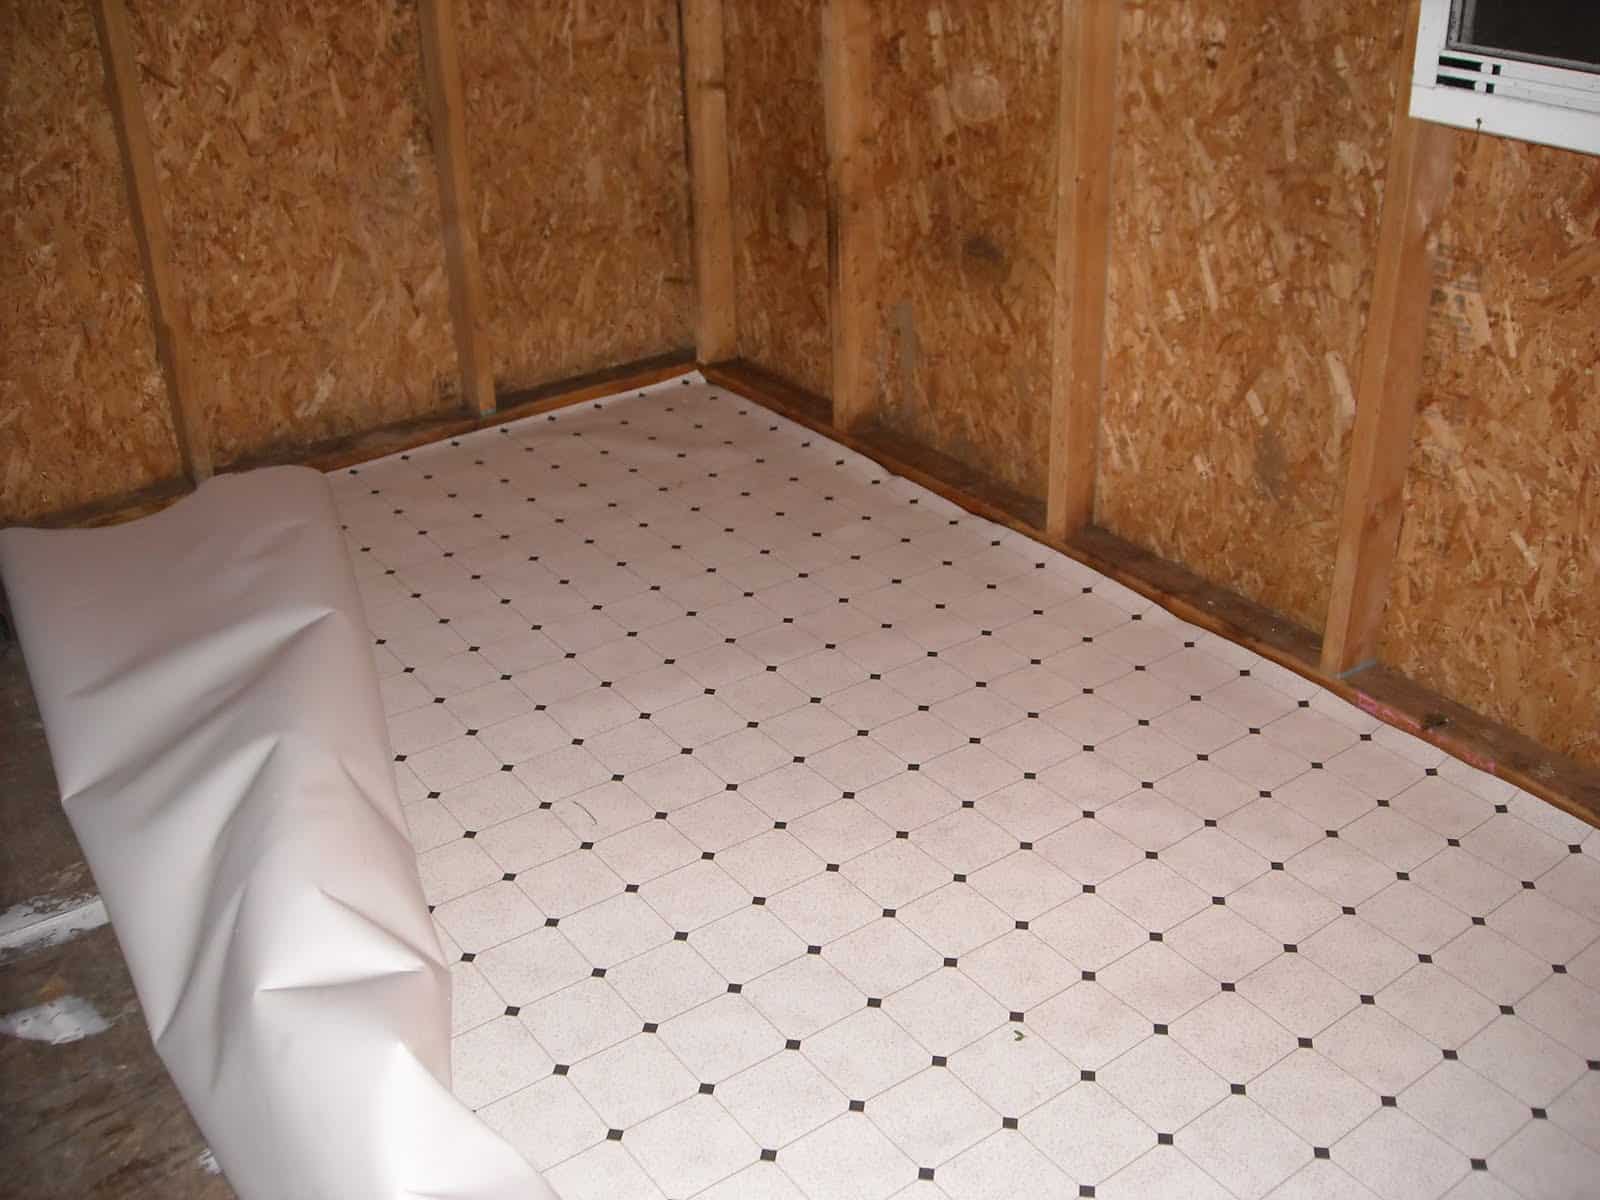
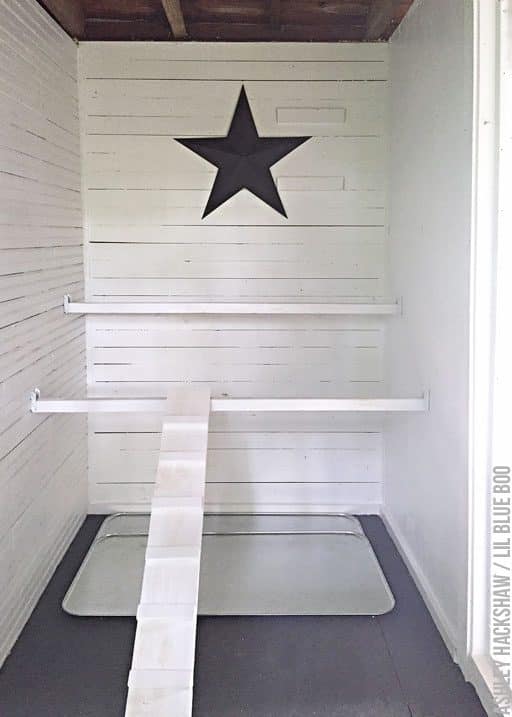

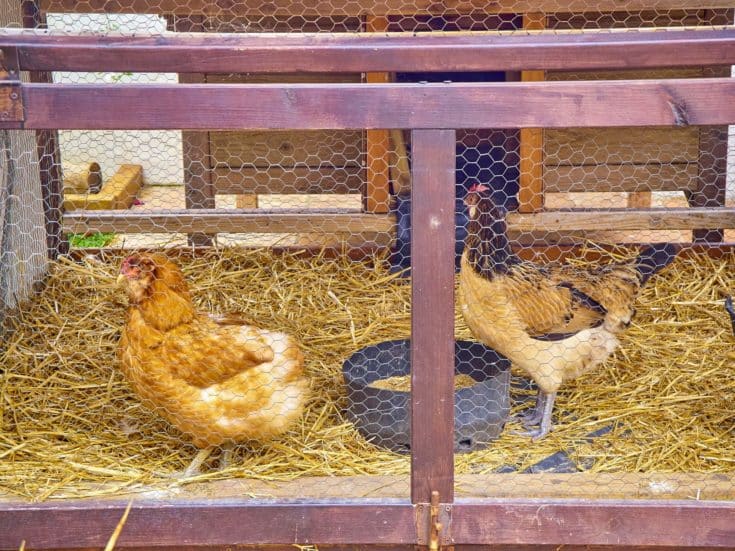
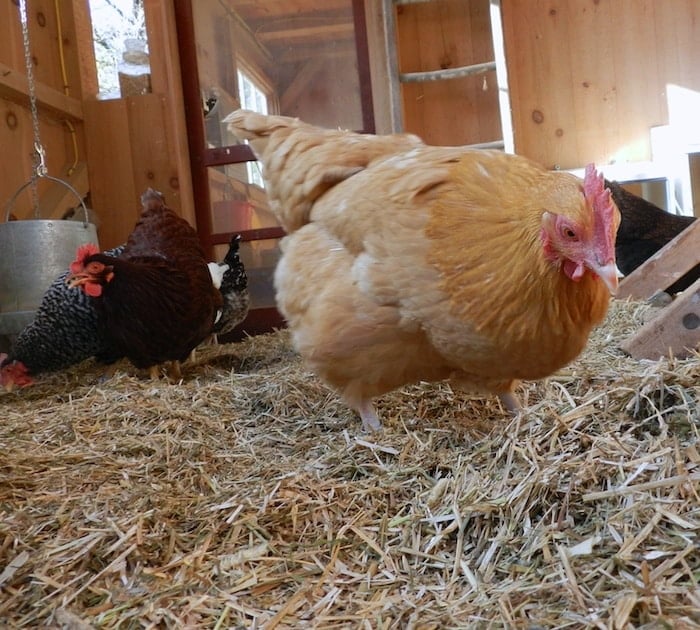
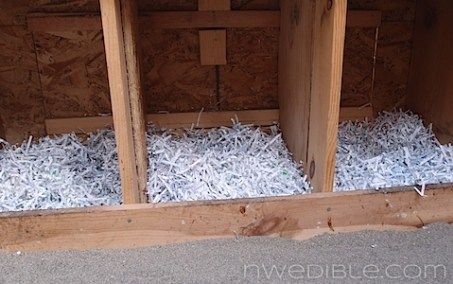
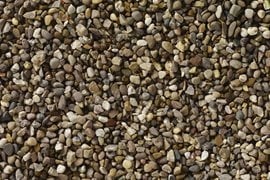


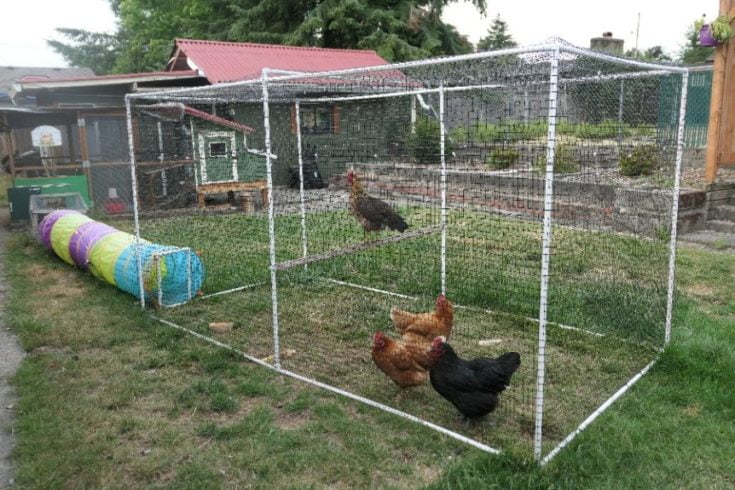
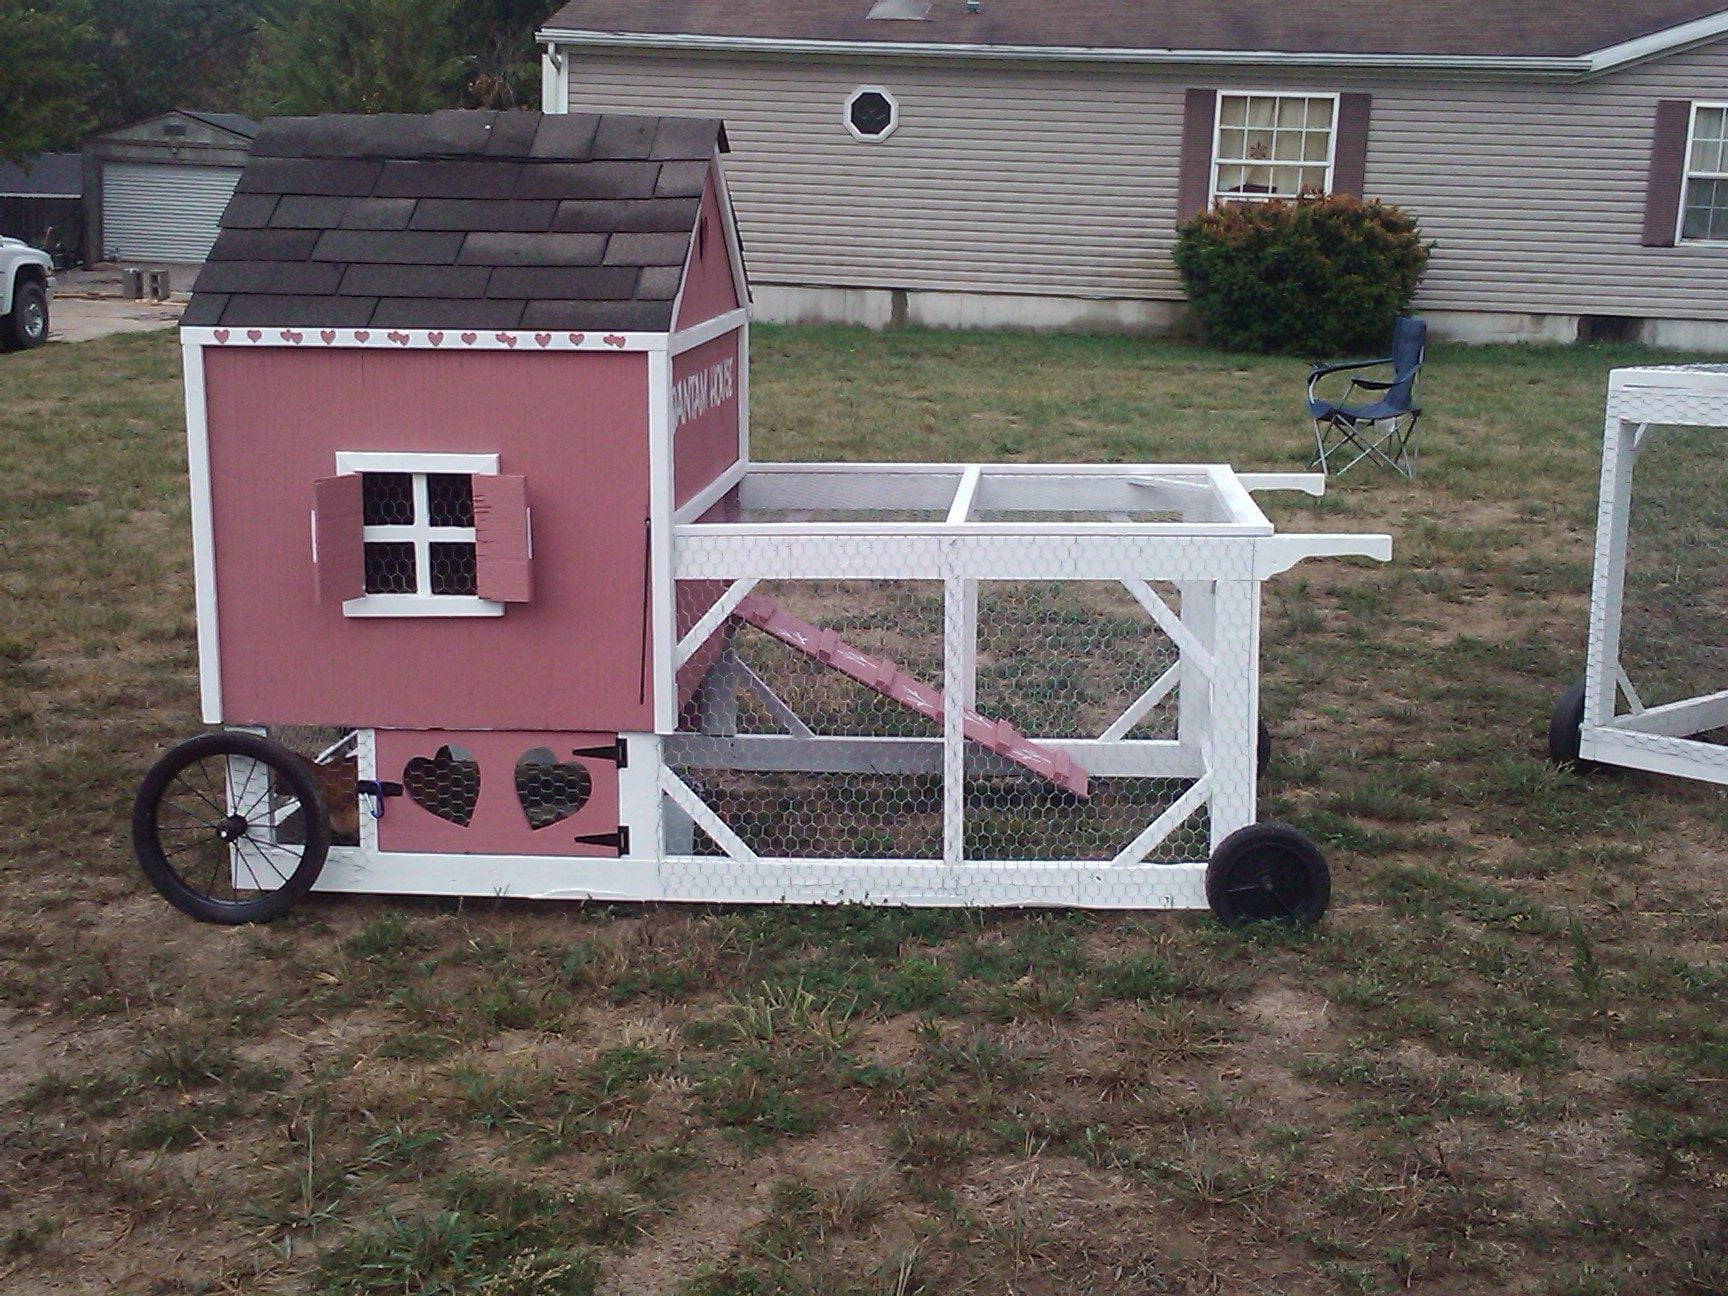
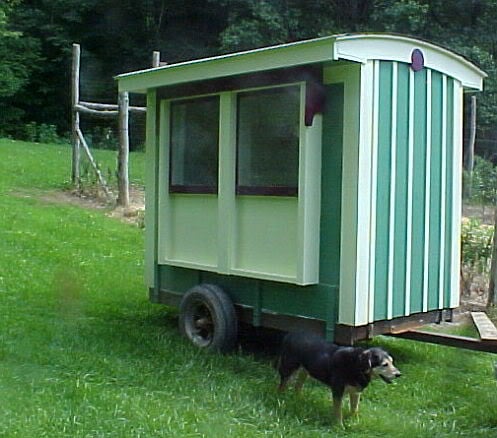
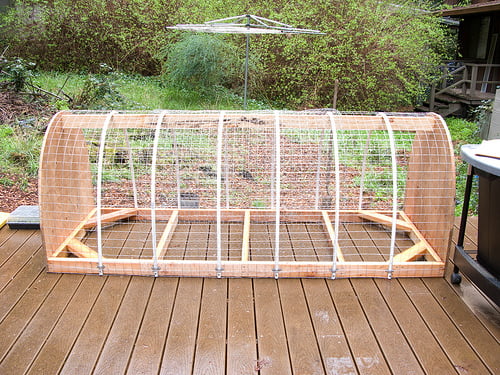
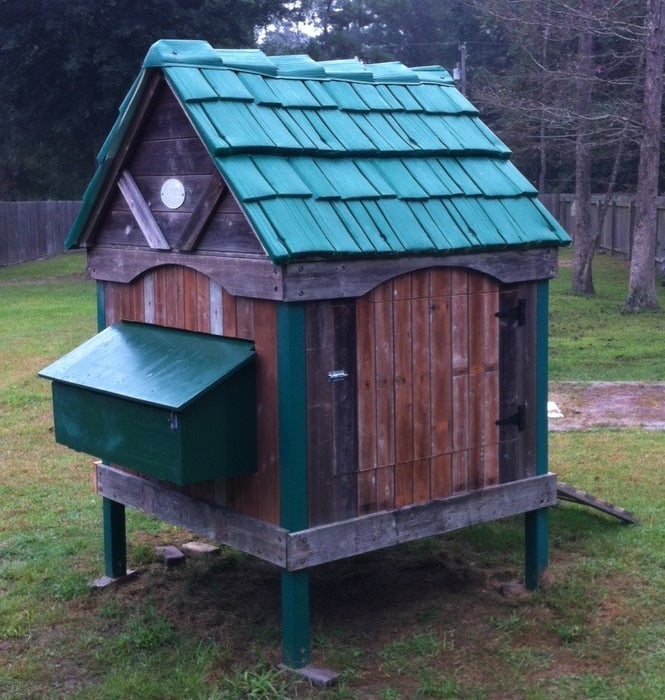
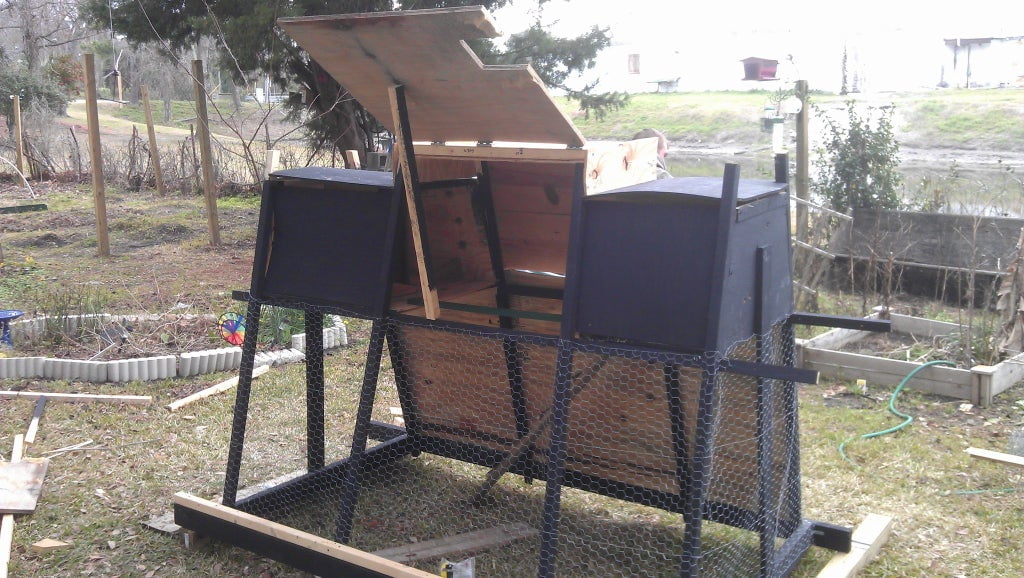

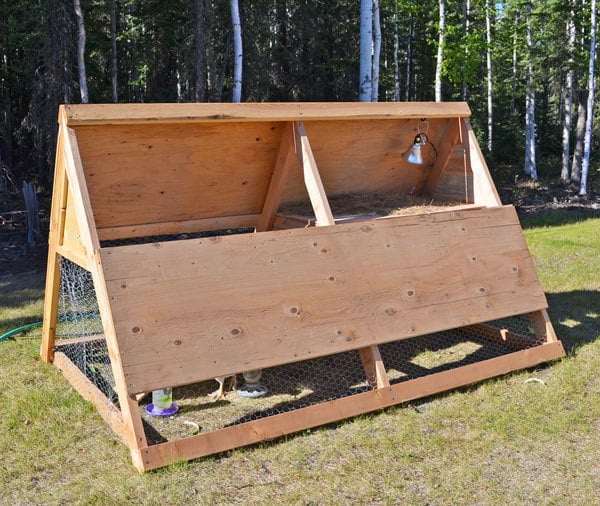
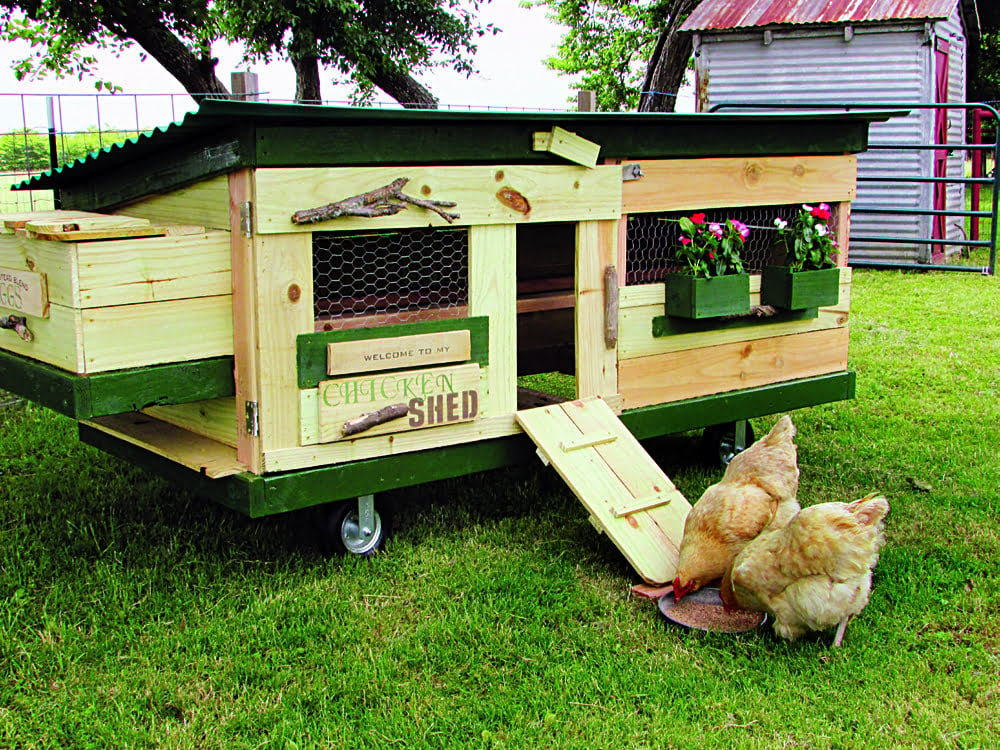
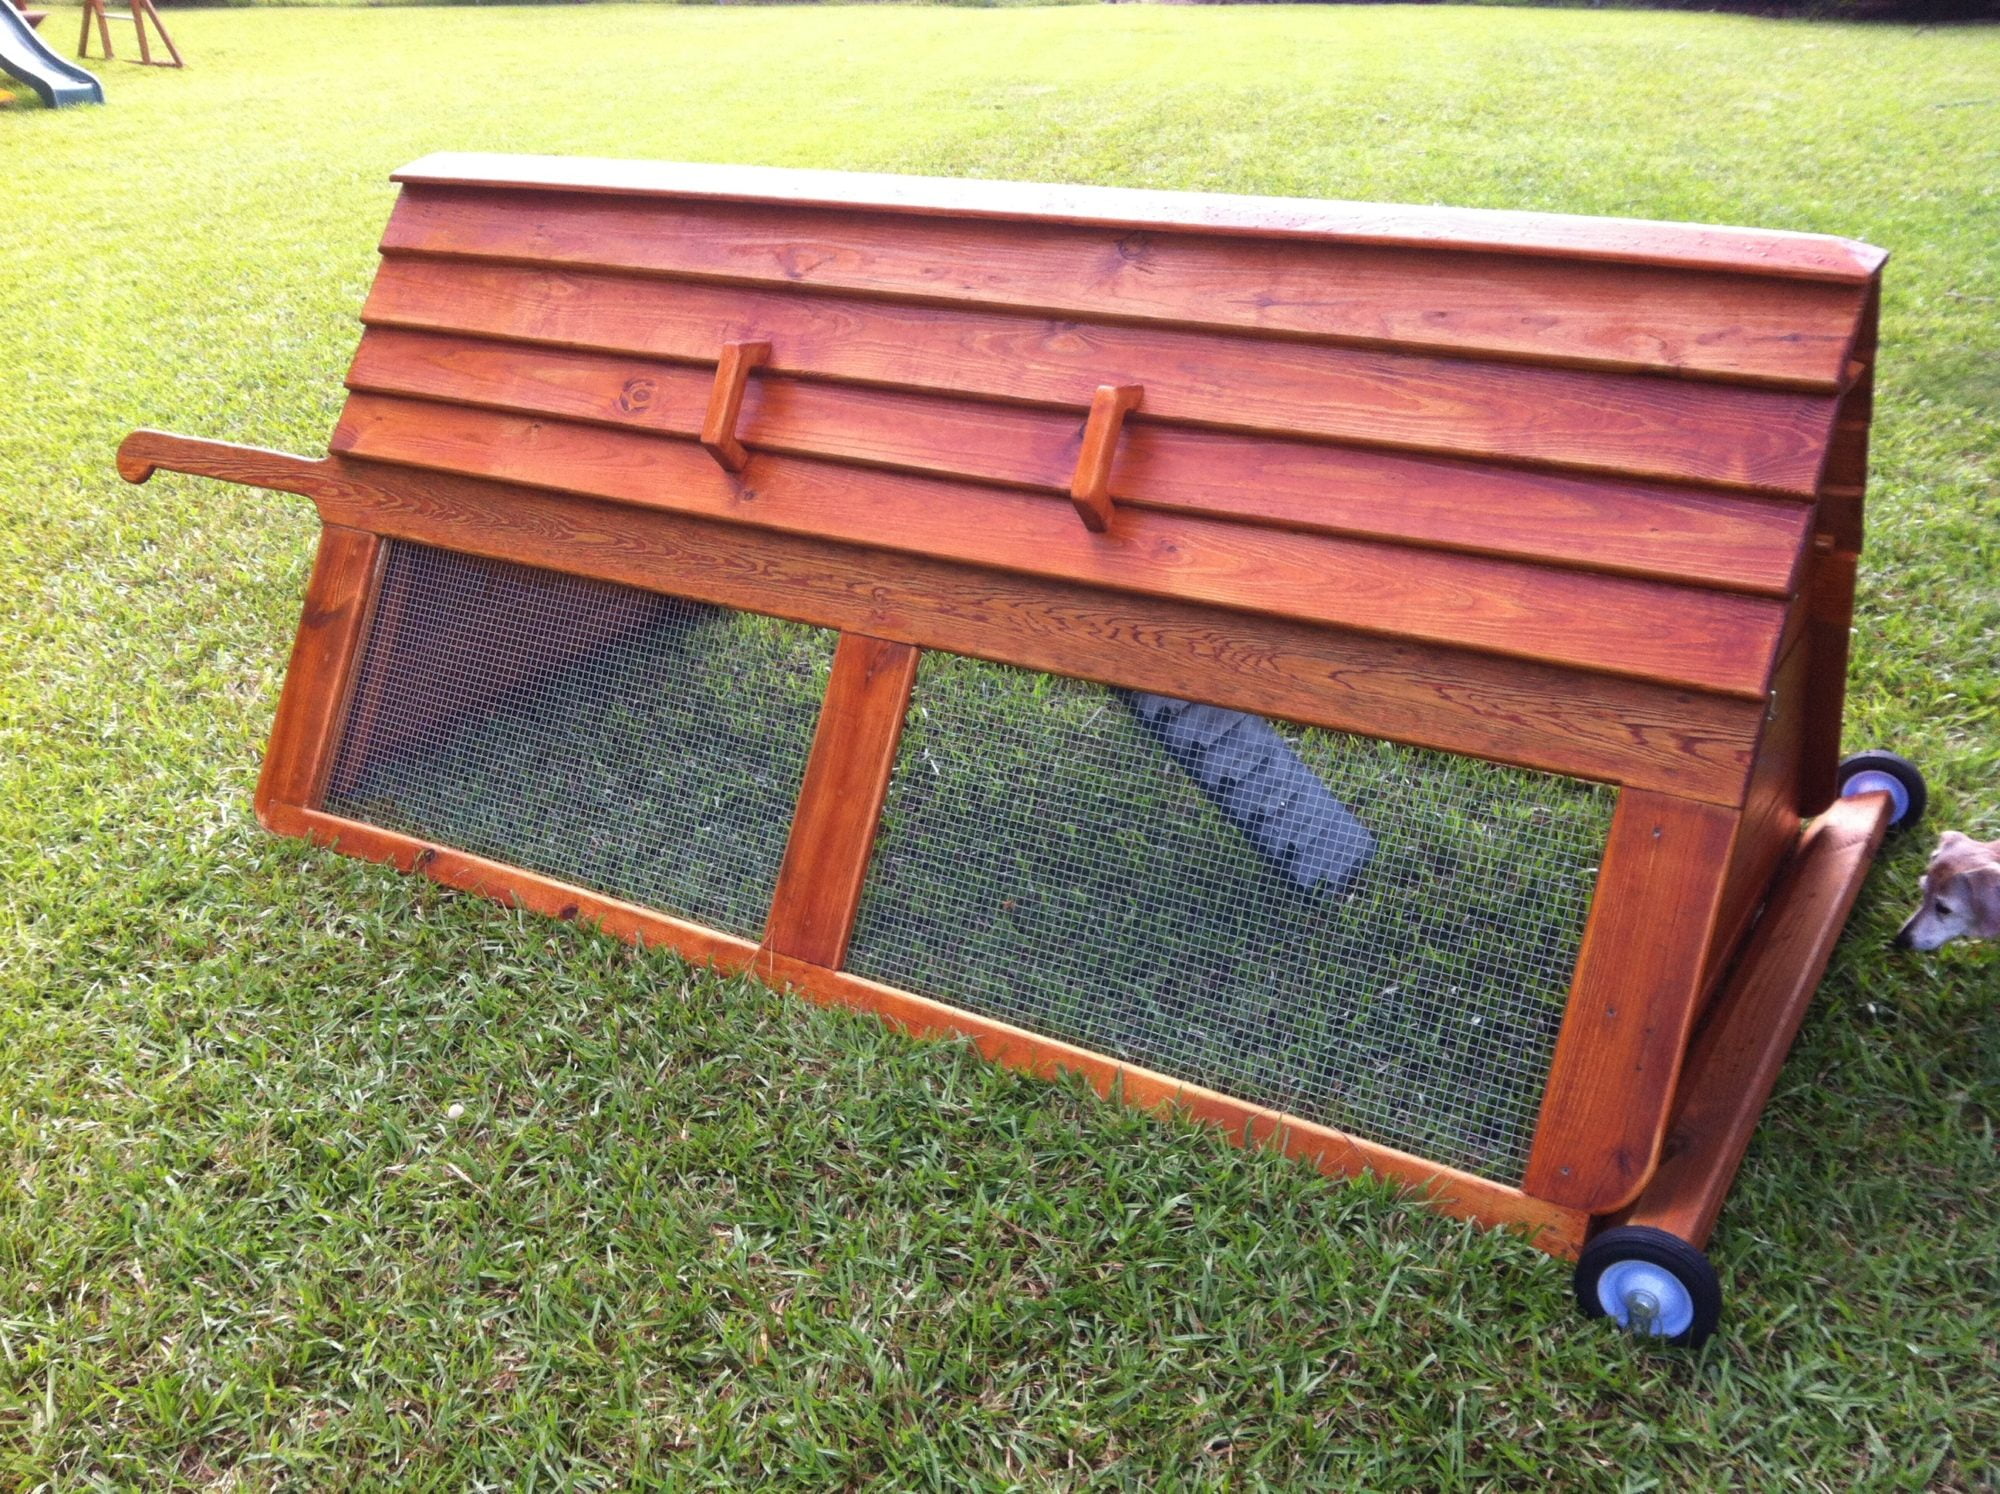
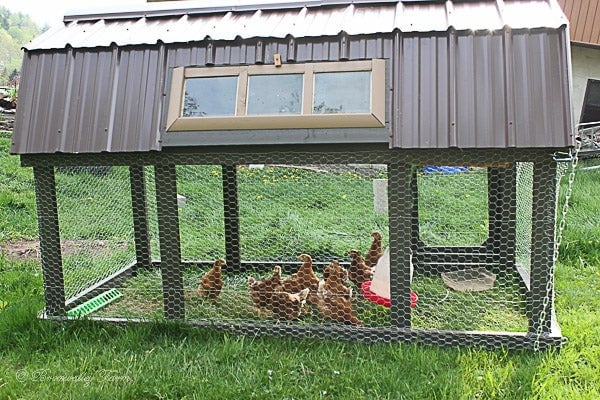
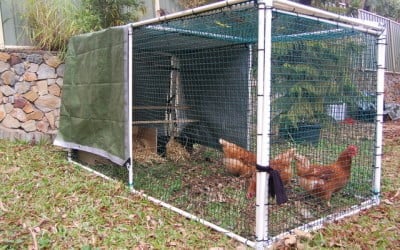

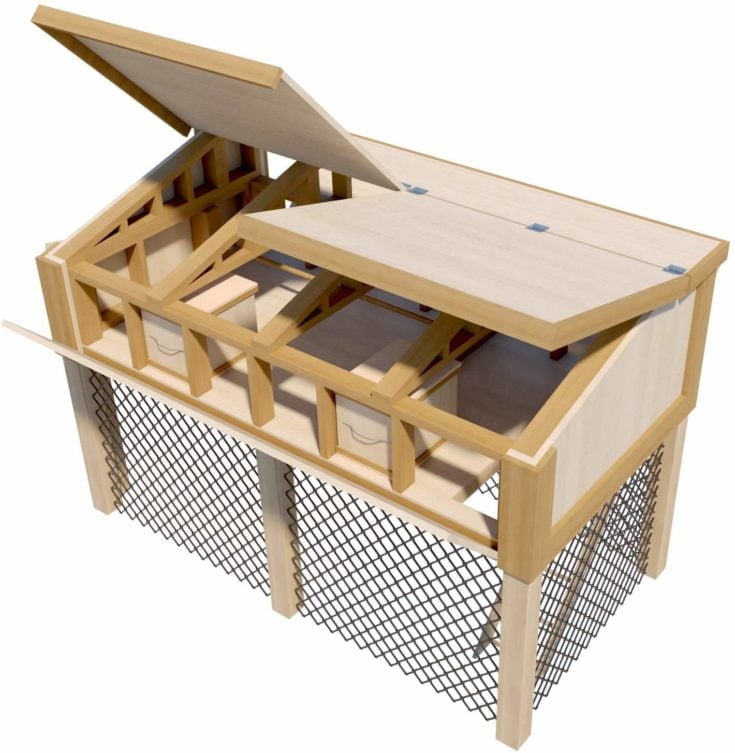


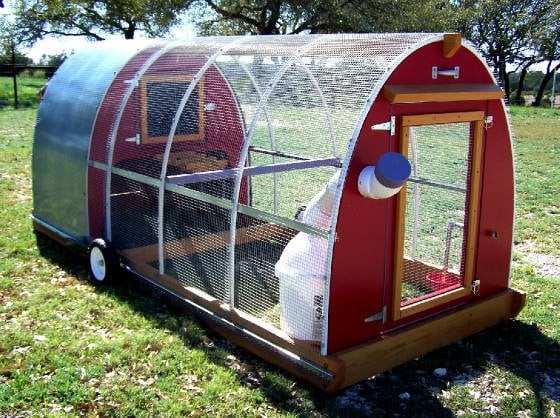
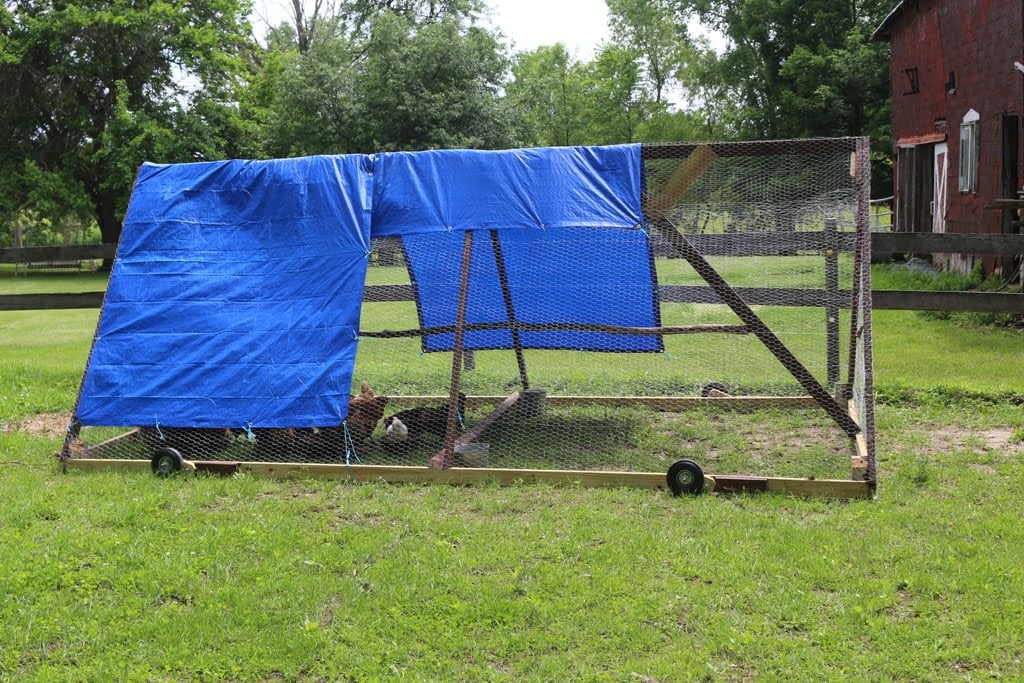

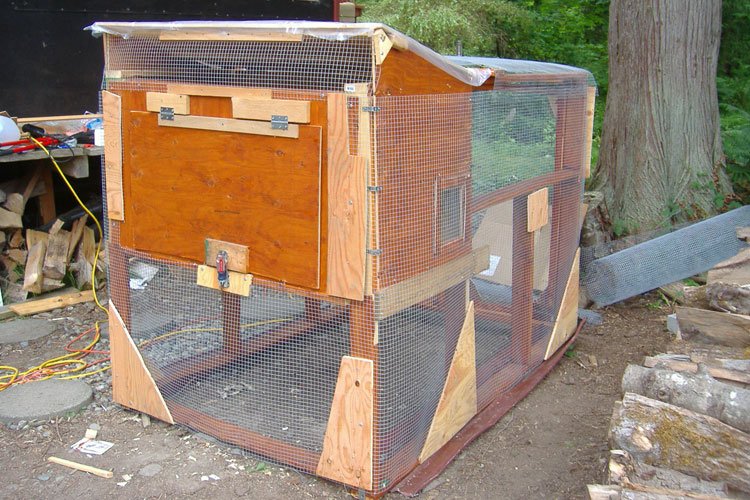
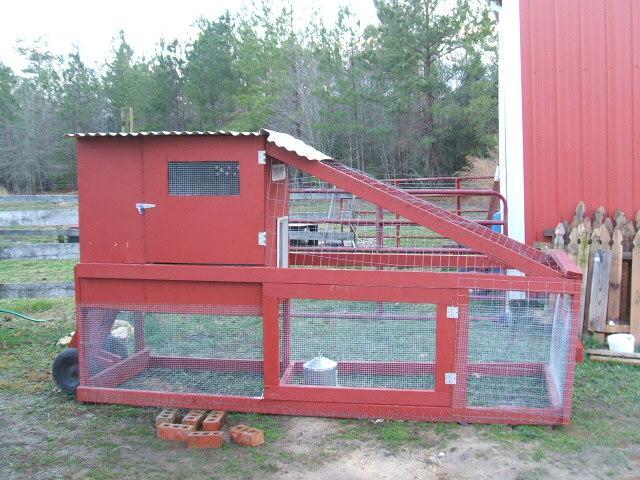
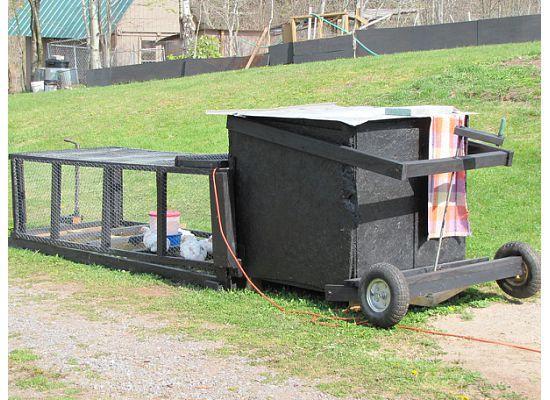
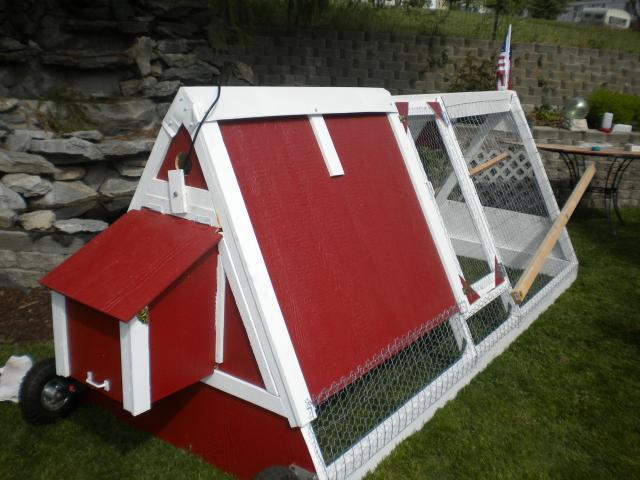
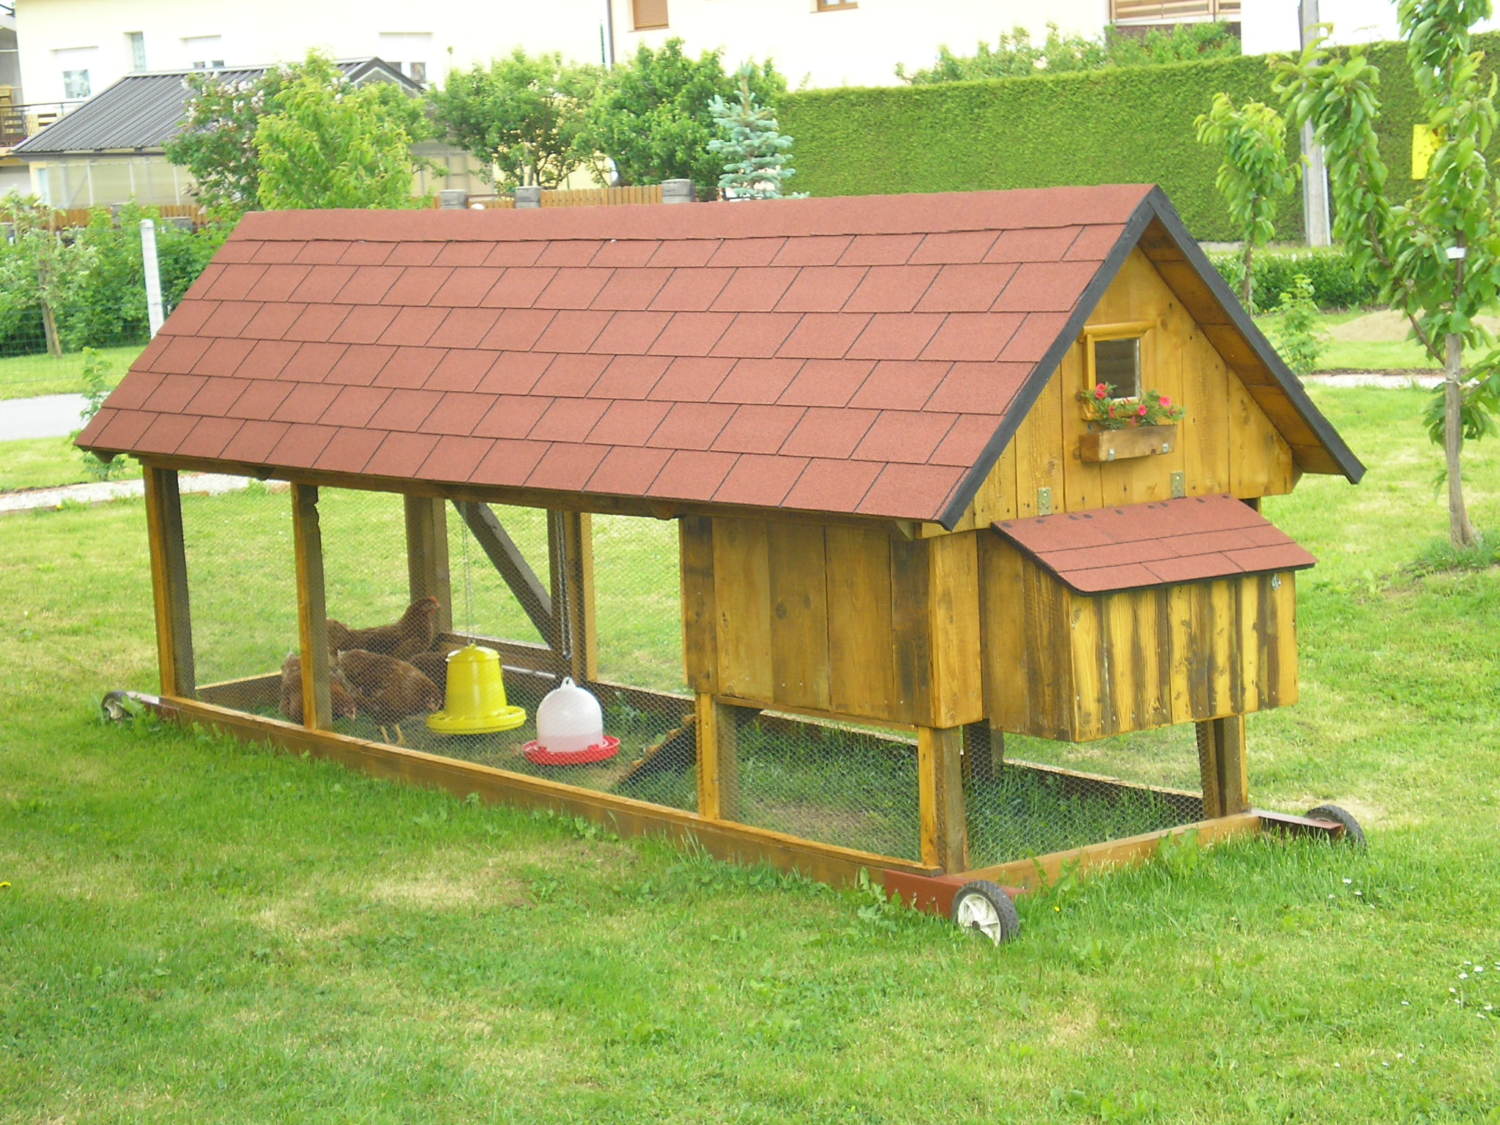
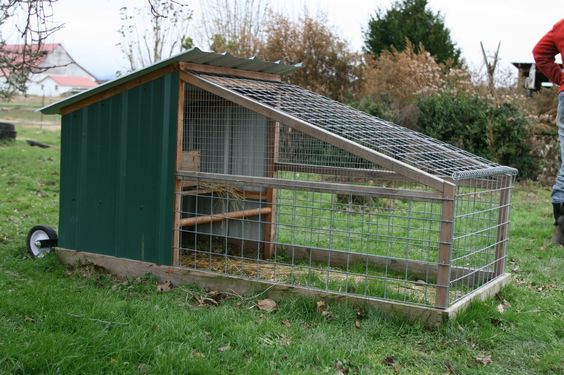
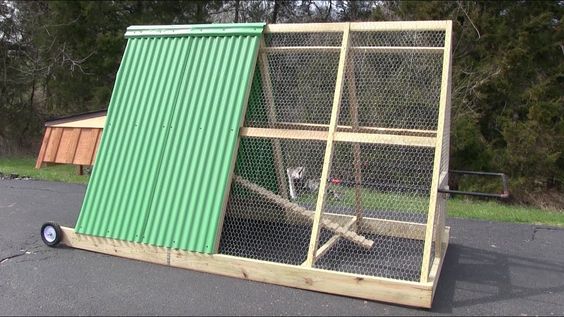


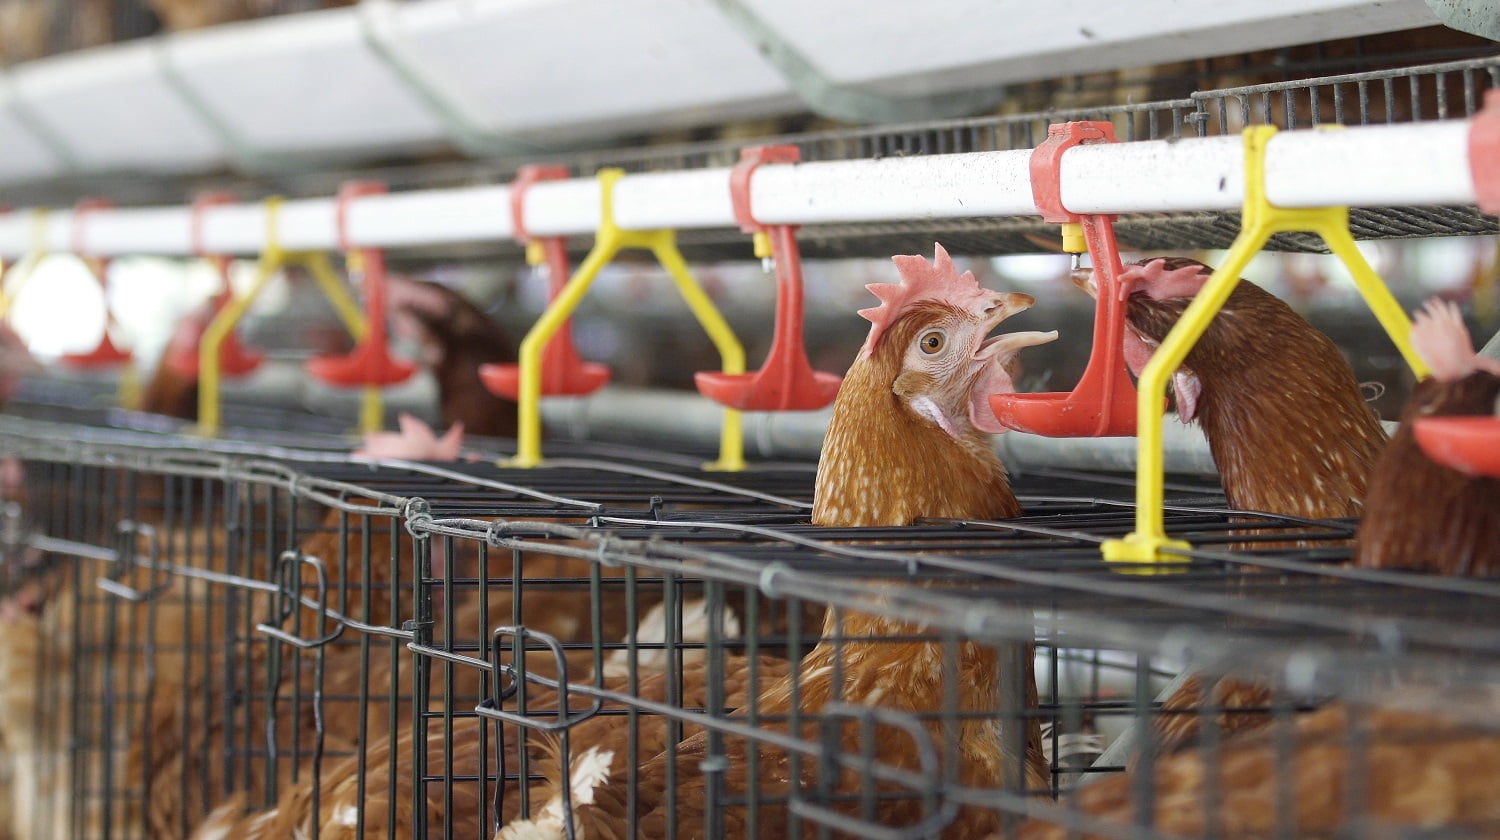
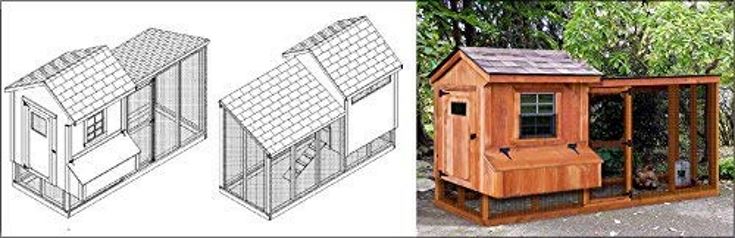
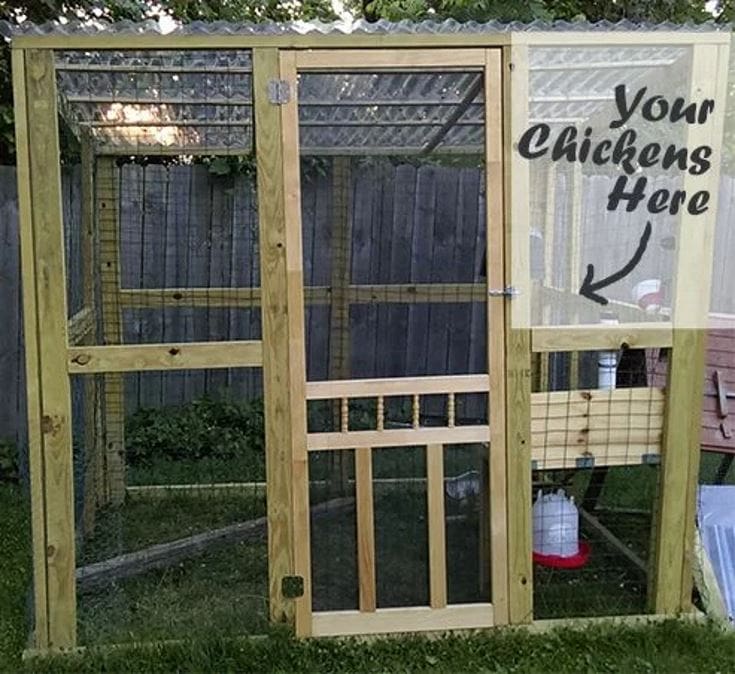
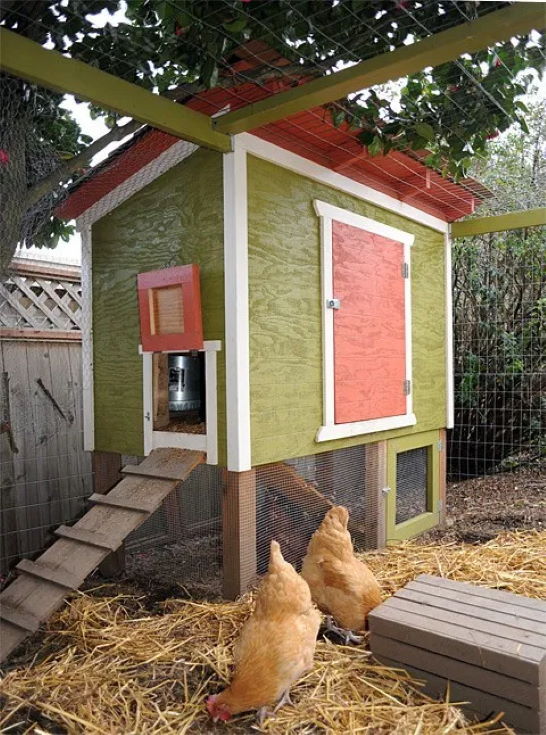
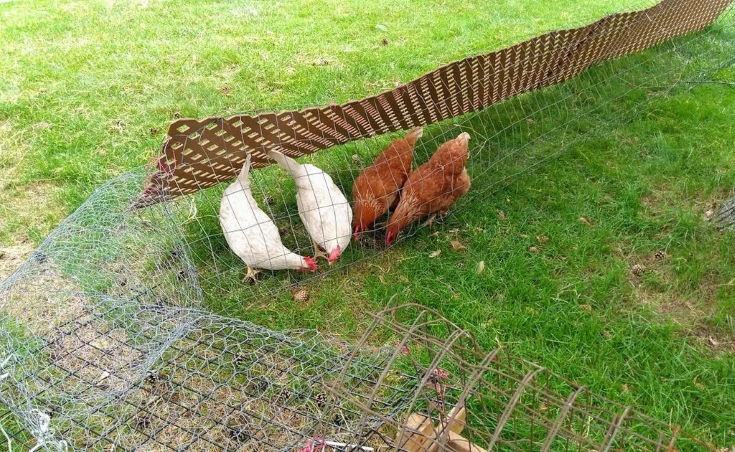
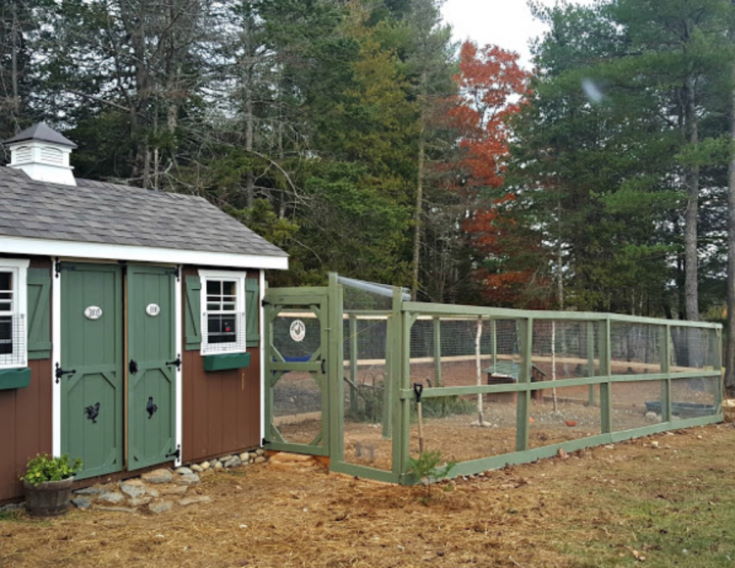

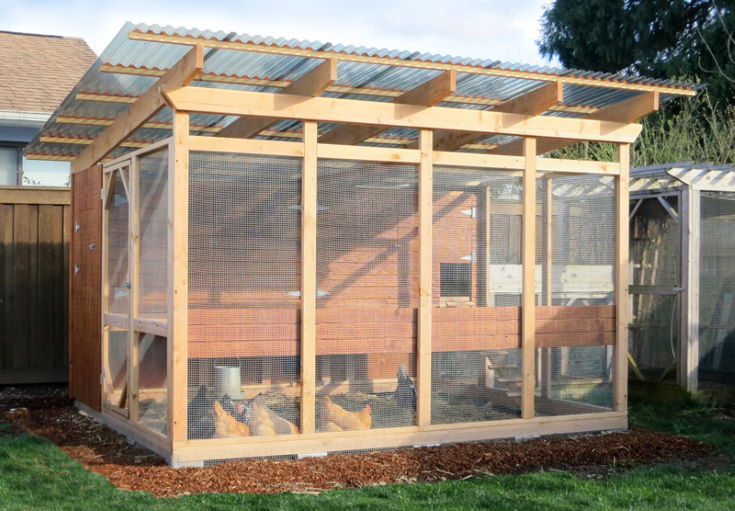
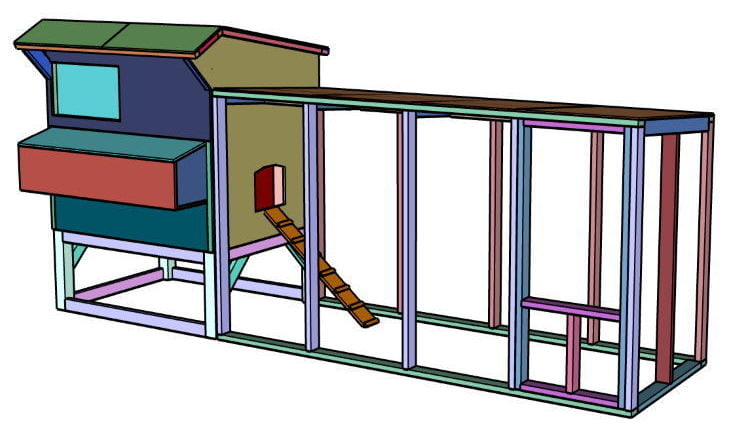
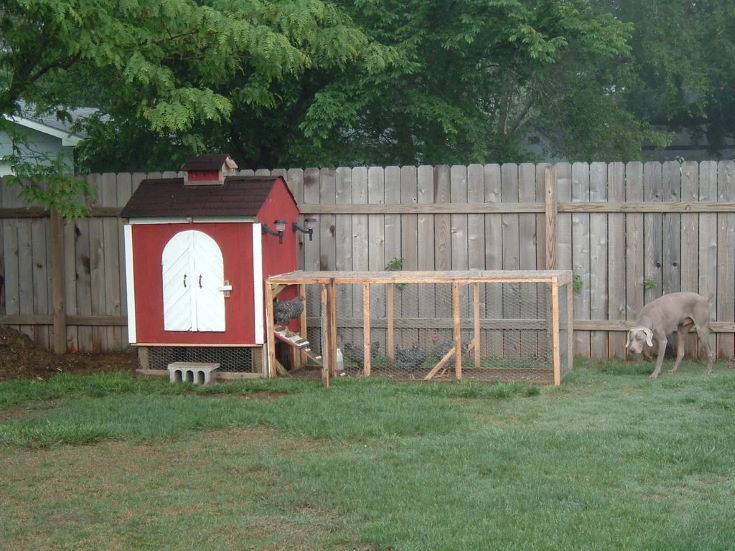
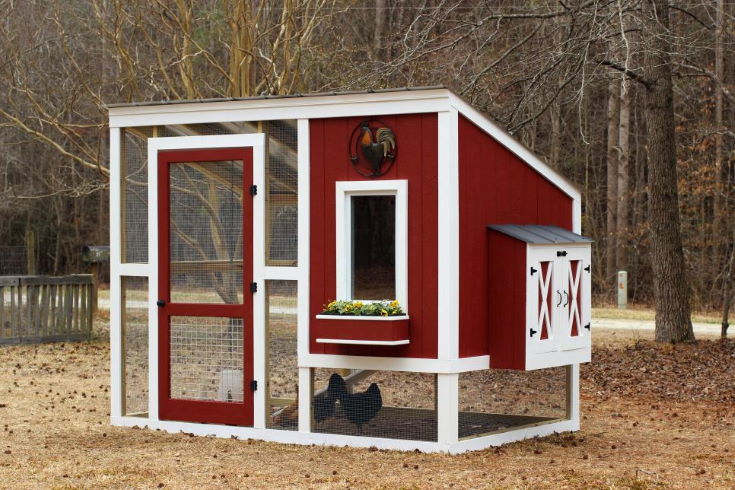
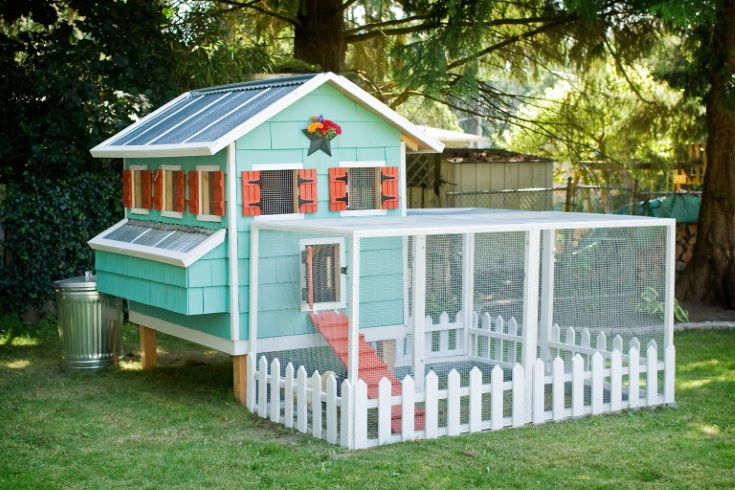

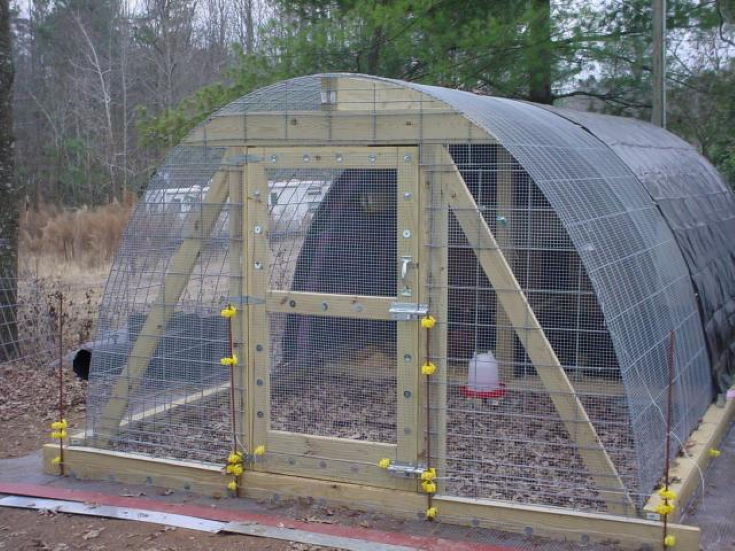
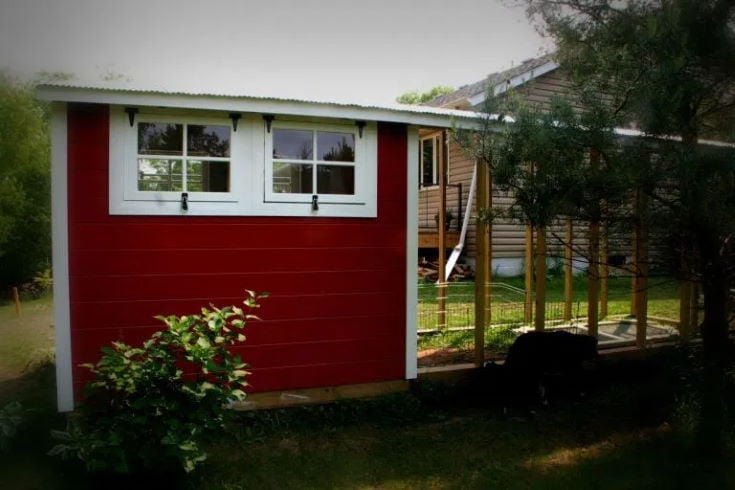
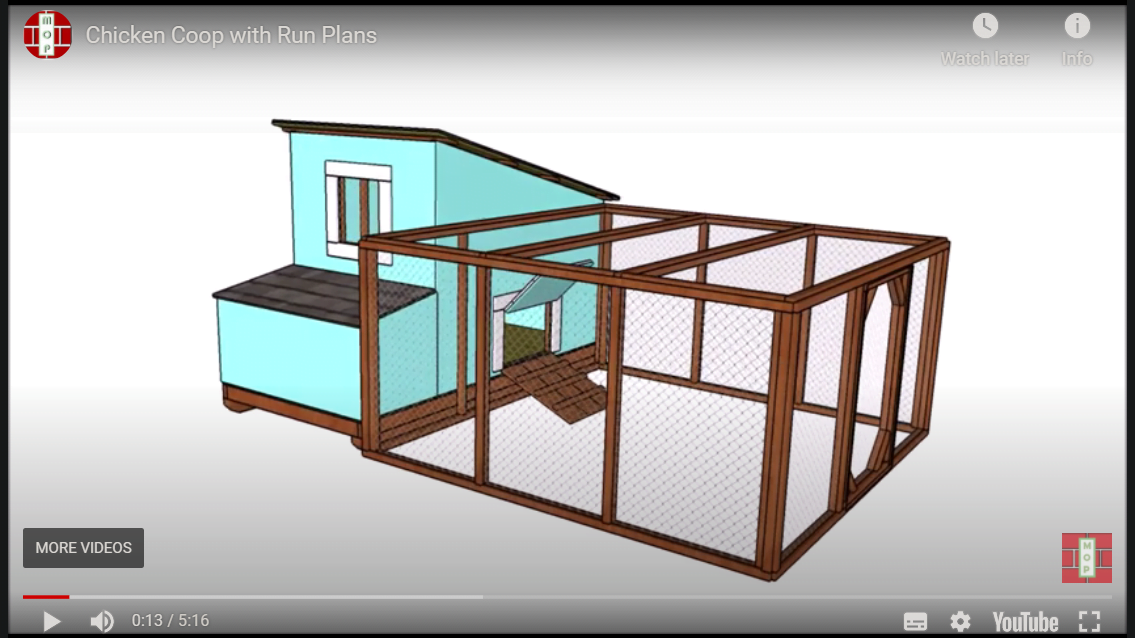


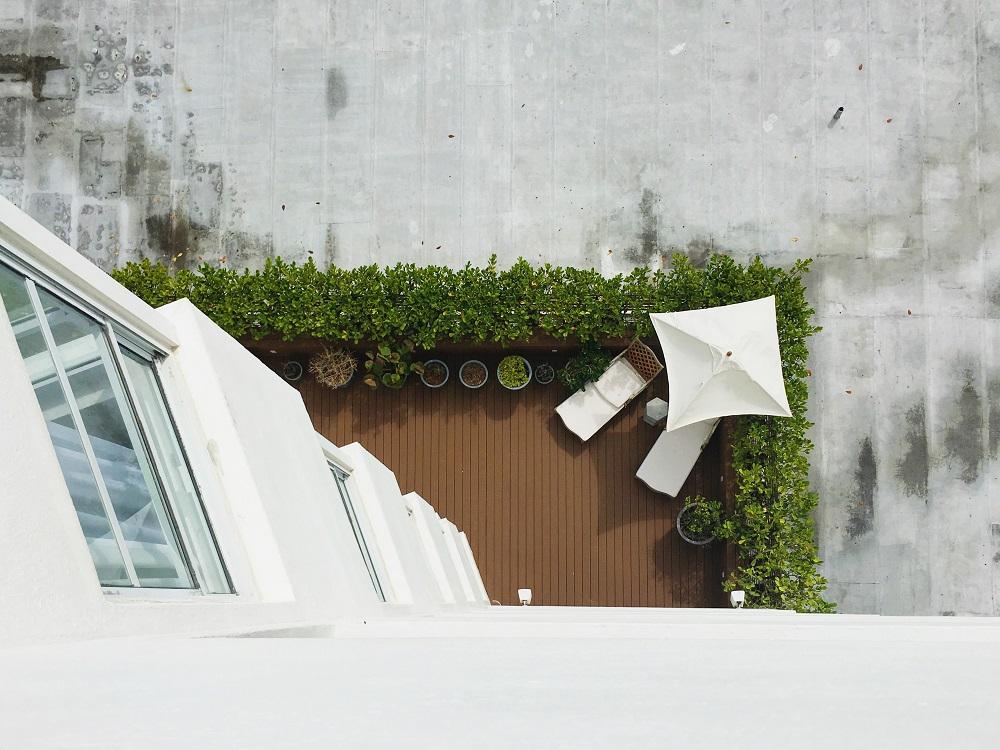
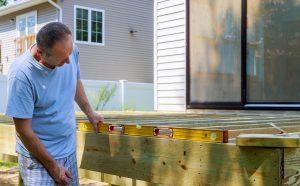


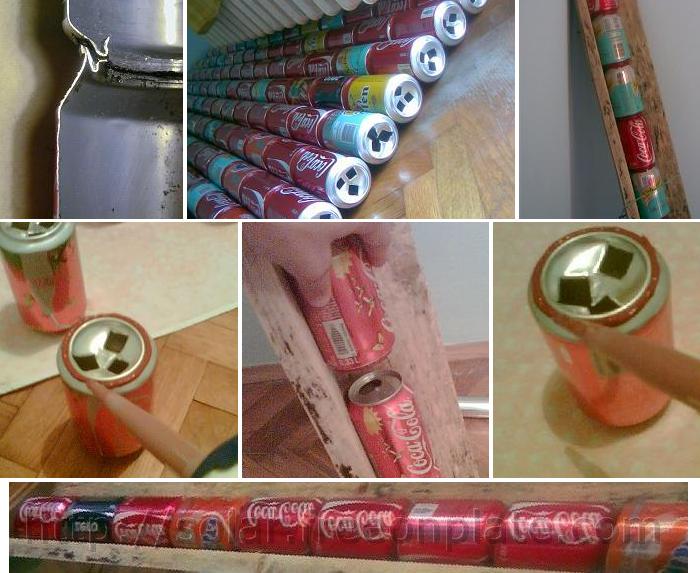
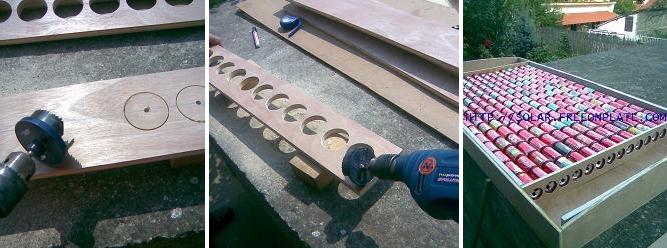

![21+ Small Garden Ideas That Will Beautify Your Green World [Backyard Aquariums Included]outdoor fish ponds homesthetics (2)](https://homesthetics.net/wp-content/uploads/2015/04/21-Small-Garden-Ideas-That-Will-Beautify-Your-Green-World-Backyard-Aquariums-Includedoutdoor-fish-ponds-homesthetics-2.jpg)
![21+ Small Garden Ideas That Will Beautify Your Green World [Backyard Aquariums Included]outdoor fish ponds homesthetics (1)](https://homesthetics.net/wp-content/uploads/2015/04/21-Small-Garden-Ideas-That-Will-Beautify-Your-Green-World-Backyard-Aquariums-Includedoutdoor-fish-ponds-homesthetics-1.jpg)
![21+ Small Garden Ideas That Will Beautify Your Green World [Backyard Aquariums Included]outdoor fish ponds homesthetics (3)](https://homesthetics.net/wp-content/uploads/2015/04/21-Small-Garden-Ideas-That-Will-Beautify-Your-Green-World-Backyard-Aquariums-Includedoutdoor-fish-ponds-homesthetics-3.jpg)
![21+ Small Garden Ideas That Will Beautify Your Green World [Backyard Aquariums Included]outdoor fish ponds homesthetics (4)](https://homesthetics.net/wp-content/uploads/2015/04/21-Small-Garden-Ideas-That-Will-Beautify-Your-Green-World-Backyard-Aquariums-Includedoutdoor-fish-ponds-homesthetics-4.jpg)
![21+ Small Garden Ideas That Will Beautify Your Green World [Backyard Aquariums Included]outdoor fish ponds homesthetics (5)](https://homesthetics.net/wp-content/uploads/2015/04/21-Small-Garden-Ideas-That-Will-Beautify-Your-Green-World-Backyard-Aquariums-Includedoutdoor-fish-ponds-homesthetics-5.jpg)
![21+ Small Garden Ideas That Will Beautify Your Green World [Backyard Aquariums Included]outdoor fish ponds homesthetics (6)](https://homesthetics.net/wp-content/uploads/2015/04/21-Small-Garden-Ideas-That-Will-Beautify-Your-Green-World-Backyard-Aquariums-Includedoutdoor-fish-ponds-homesthetics-6.jpg)
![21+ Small Garden Ideas That Will Beautify Your Green World [Backyard Aquariums Included]outdoor fish ponds homesthetics (7)](https://homesthetics.net/wp-content/uploads/2015/04/21-Small-Garden-Ideas-That-Will-Beautify-Your-Green-World-Backyard-Aquariums-Includedoutdoor-fish-ponds-homesthetics-7.jpg)
![21+ Small Garden Ideas That Will Beautify Your Green World [Backyard Aquariums Included]outdoor fish ponds homesthetics (8)](https://homesthetics.net/wp-content/uploads/2015/04/21-Small-Garden-Ideas-That-Will-Beautify-Your-Green-World-Backyard-Aquariums-Includedoutdoor-fish-ponds-homesthetics-8.jpg)
![21+ Small Garden Ideas That Will Beautify Your Green World [Backyard Aquariums Included]outdoor fish ponds homesthetics (9)](https://homesthetics.net/wp-content/uploads/2015/04/21-Small-Garden-Ideas-That-Will-Beautify-Your-Green-World-Backyard-Aquariums-Includedoutdoor-fish-ponds-homesthetics-9.jpg)
![21+ Small Garden Ideas That Will Beautify Your Green World [Backyard Aquariums Included]outdoor fish ponds homesthetics (10)](https://homesthetics.net/wp-content/uploads/2015/04/21-Small-Garden-Ideas-That-Will-Beautify-Your-Green-World-Backyard-Aquariums-Includedoutdoor-fish-ponds-homesthetics-10.jpg)
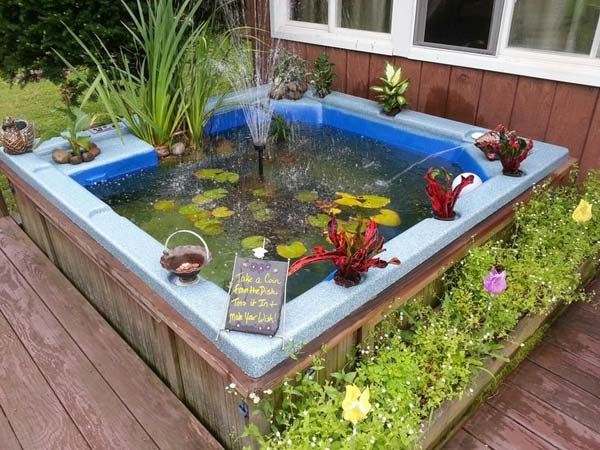
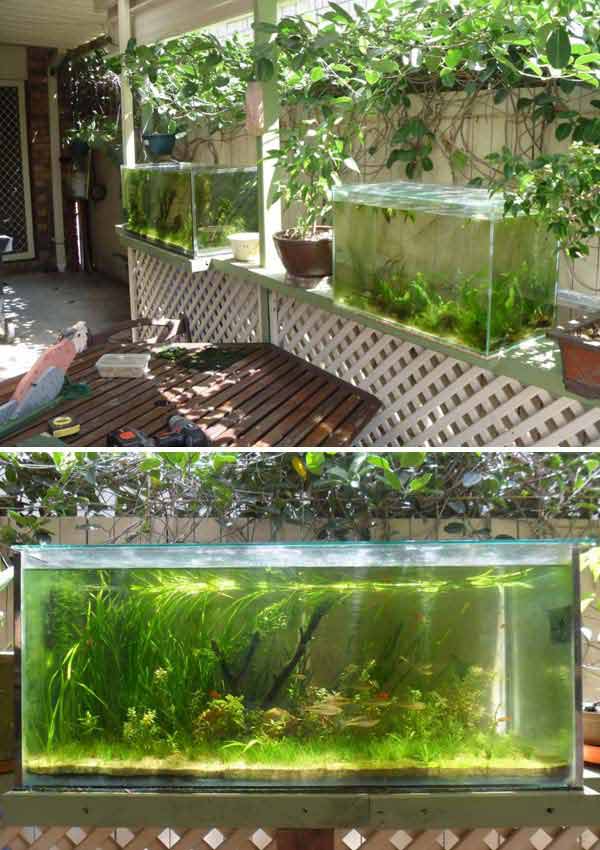
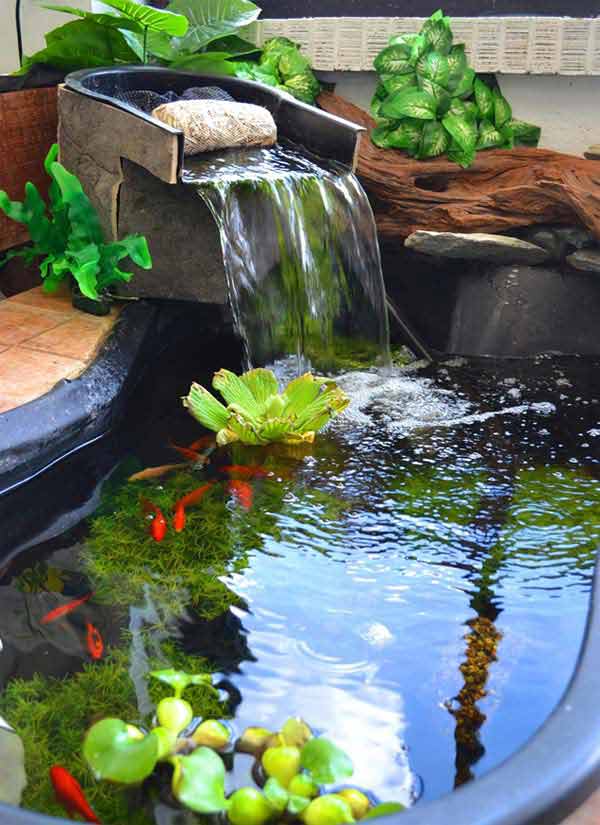
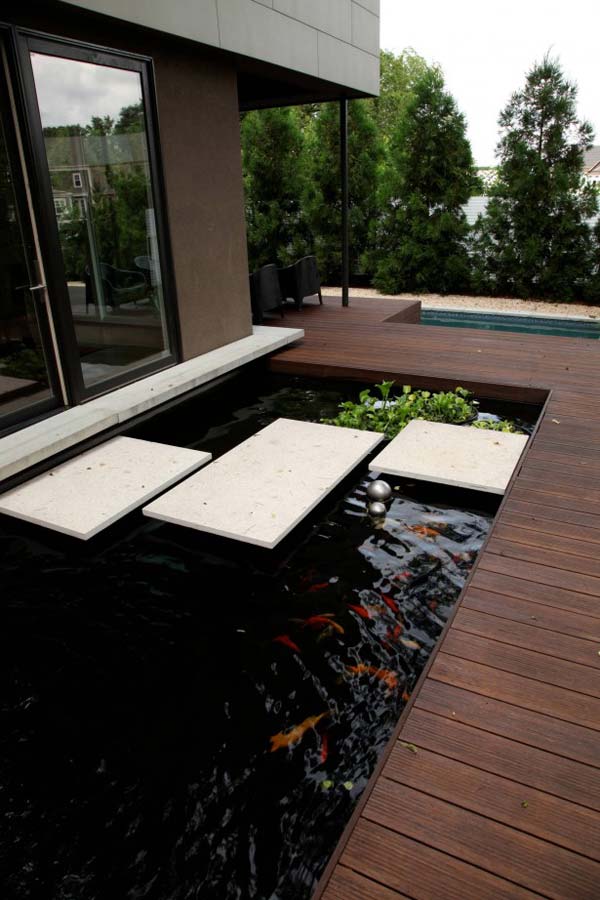
![21+ Small Garden Ideas That Will Beautify Your Green World [Backyard Aquariums Included]outdoor fish ponds homesthetics (15)](https://homesthetics.net/wp-content/uploads/2015/04/21-Small-Garden-Ideas-That-Will-Beautify-Your-Green-World-Backyard-Aquariums-Includedoutdoor-fish-ponds-homesthetics-15.jpg)
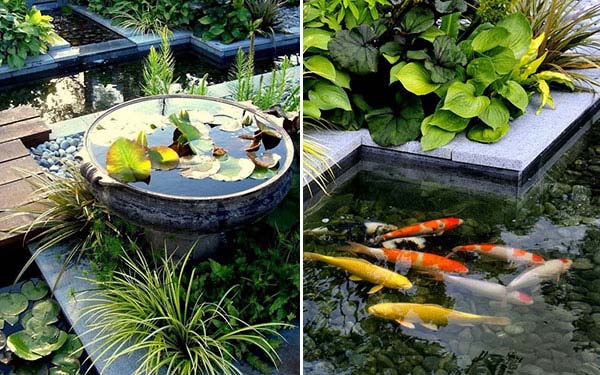

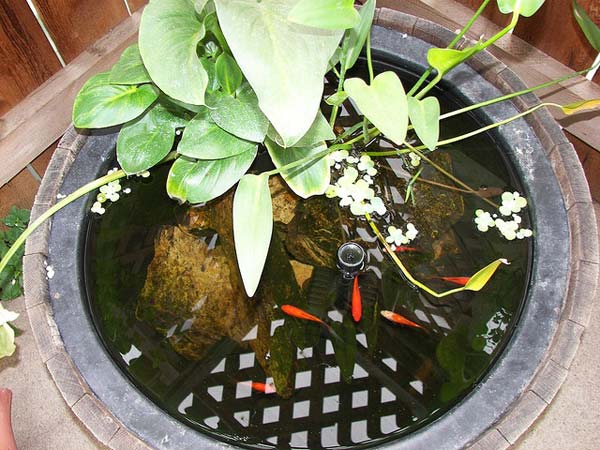

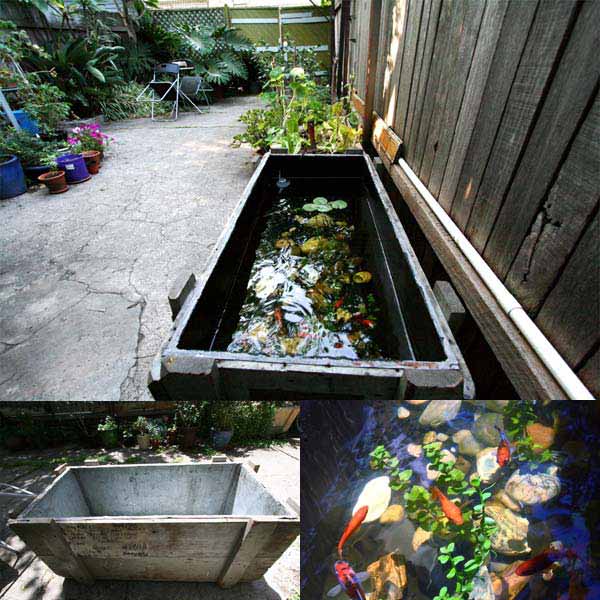
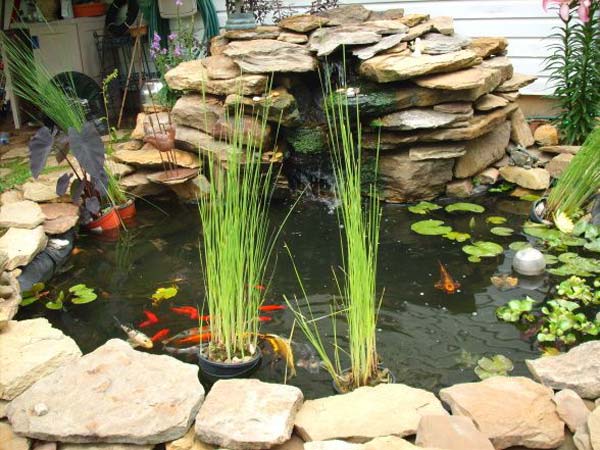
![21+ Small Garden Ideas That Will Beautify Your Green World [Backyard Aquariums Included]outdoor fish ponds homesthetics (22)](https://homesthetics.net/wp-content/uploads/2015/04/21-Small-Garden-Ideas-That-Will-Beautify-Your-Green-World-Backyard-Aquariums-Includedoutdoor-fish-ponds-homesthetics-22.jpg)

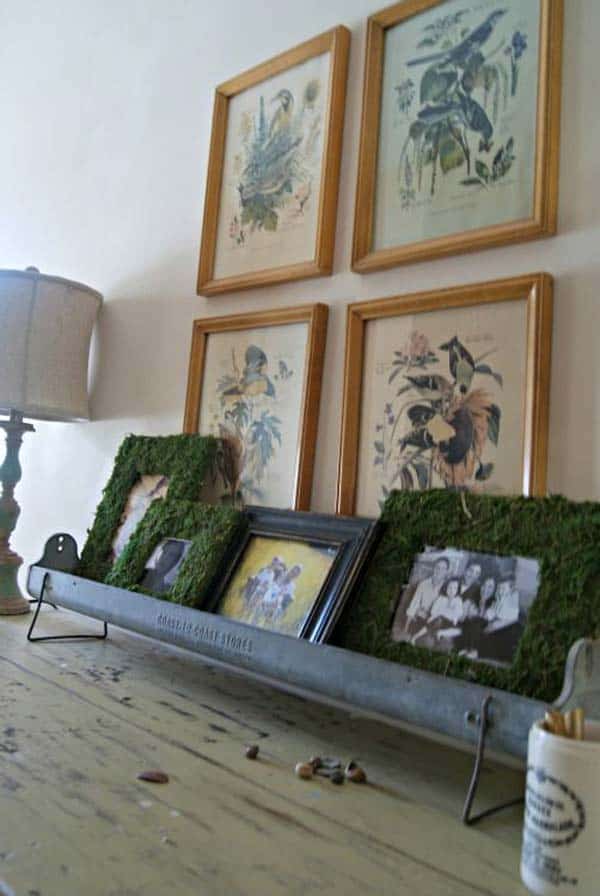
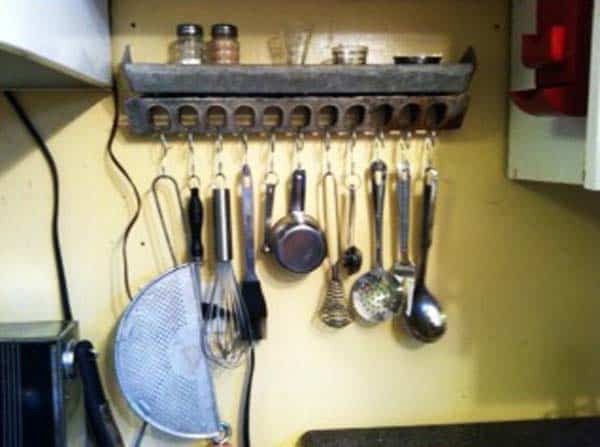


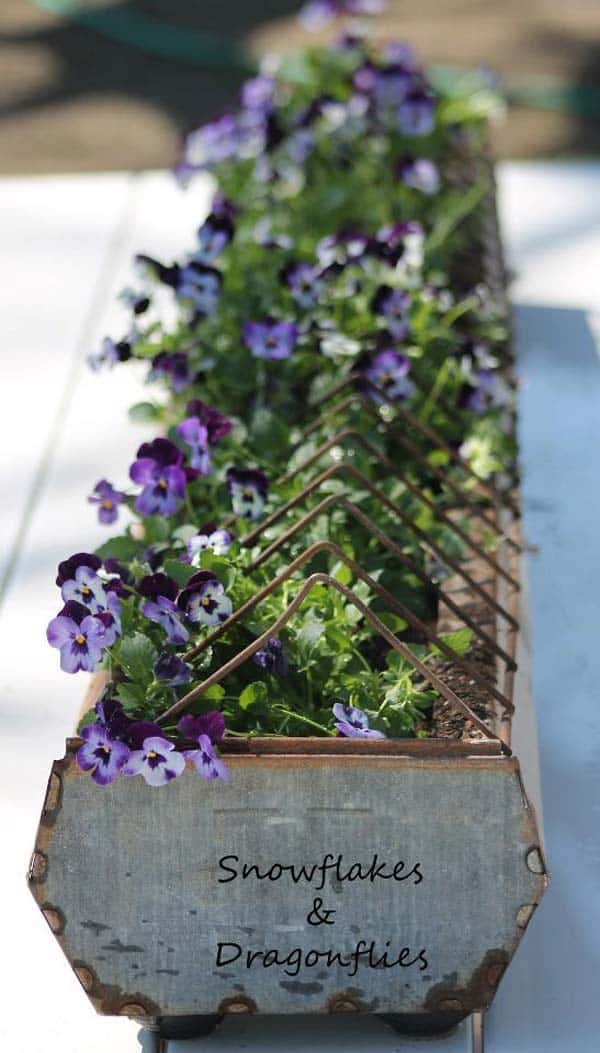
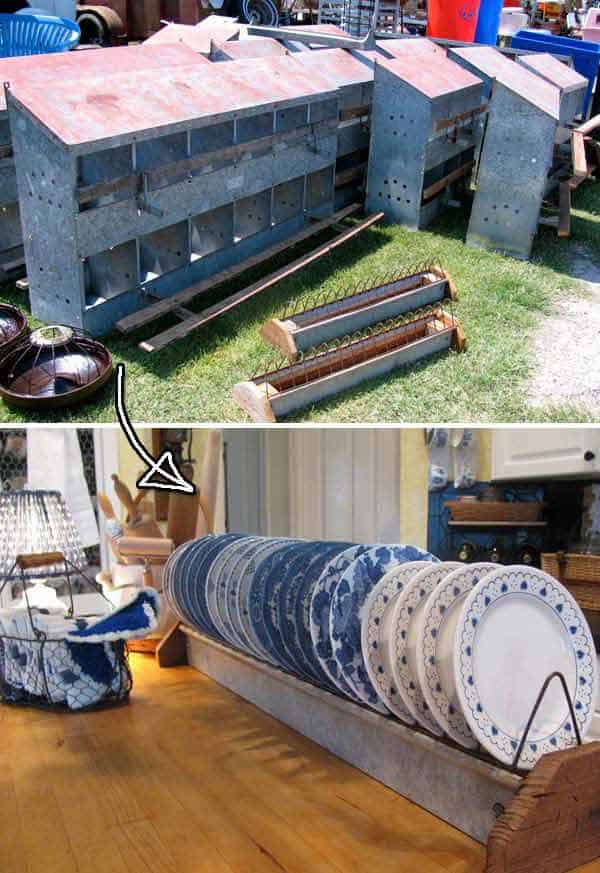
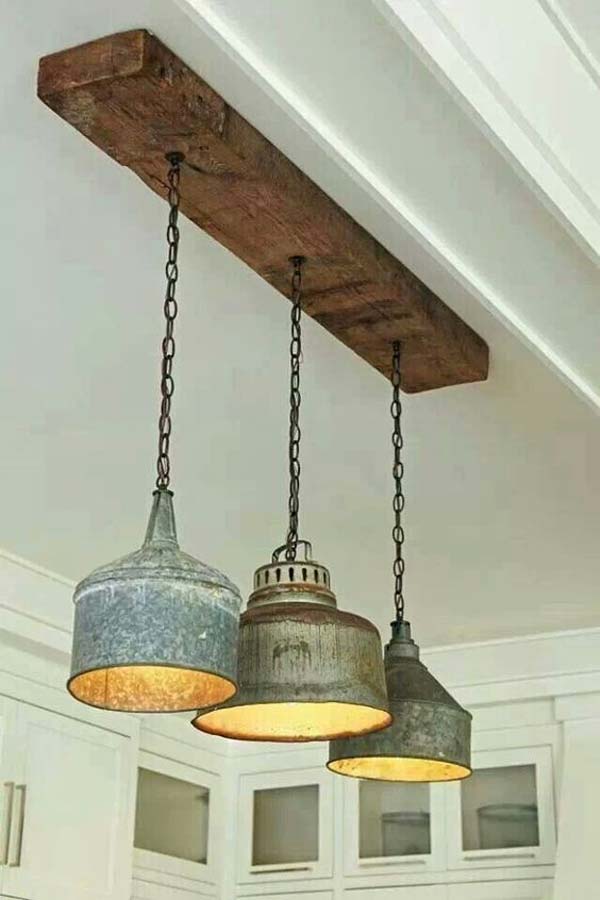
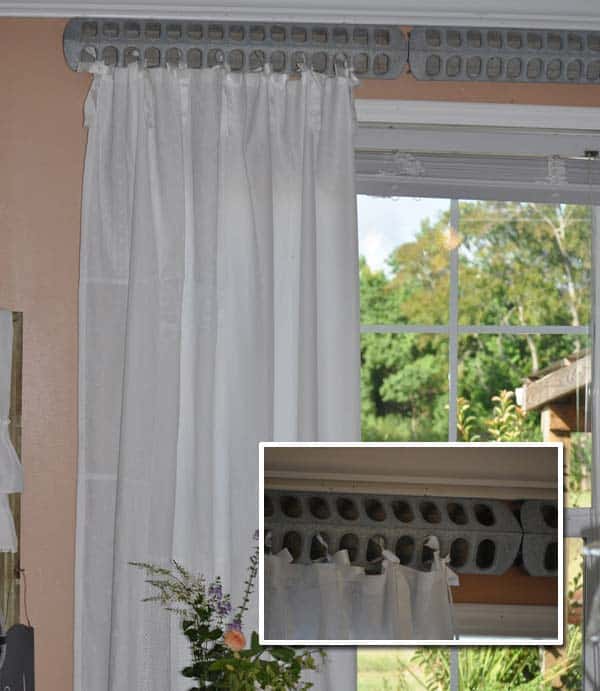
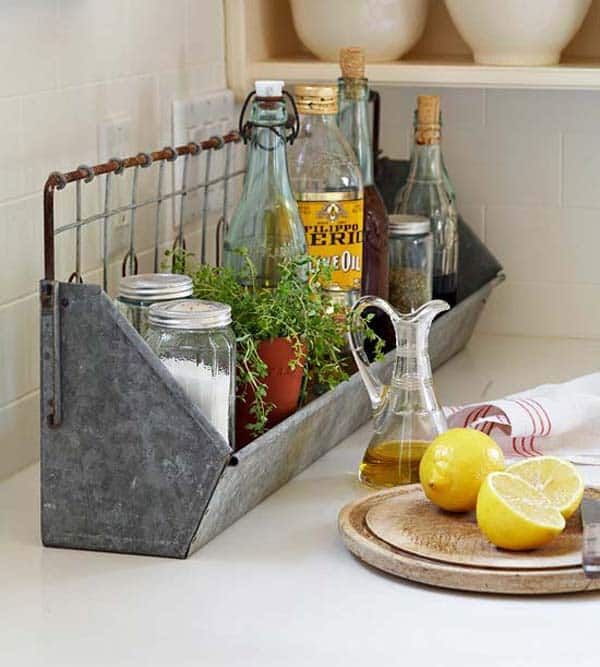
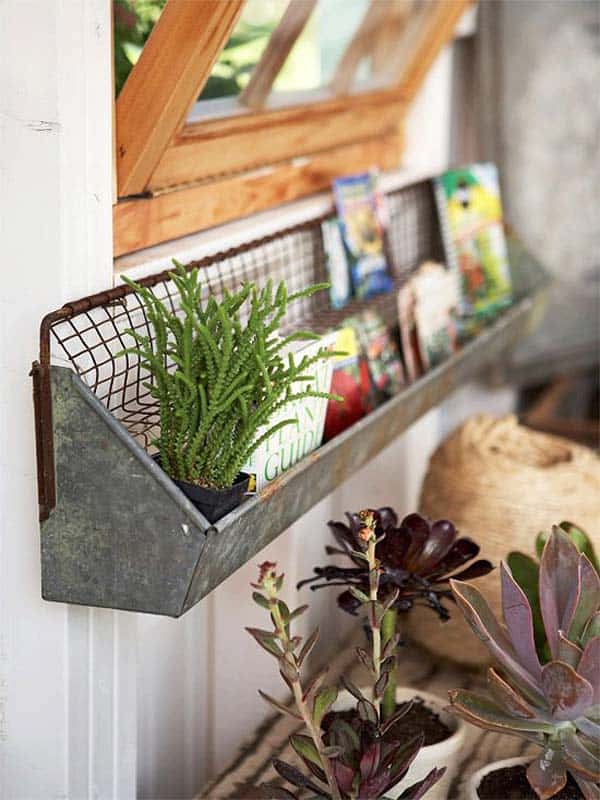
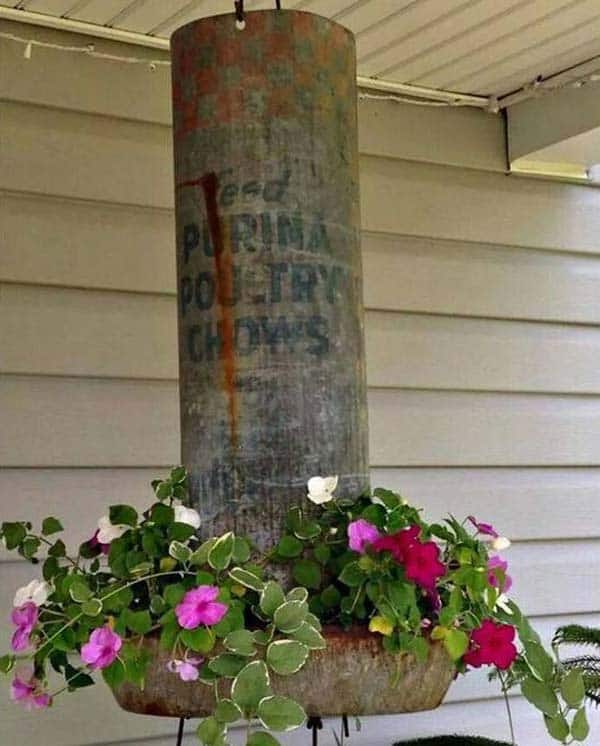

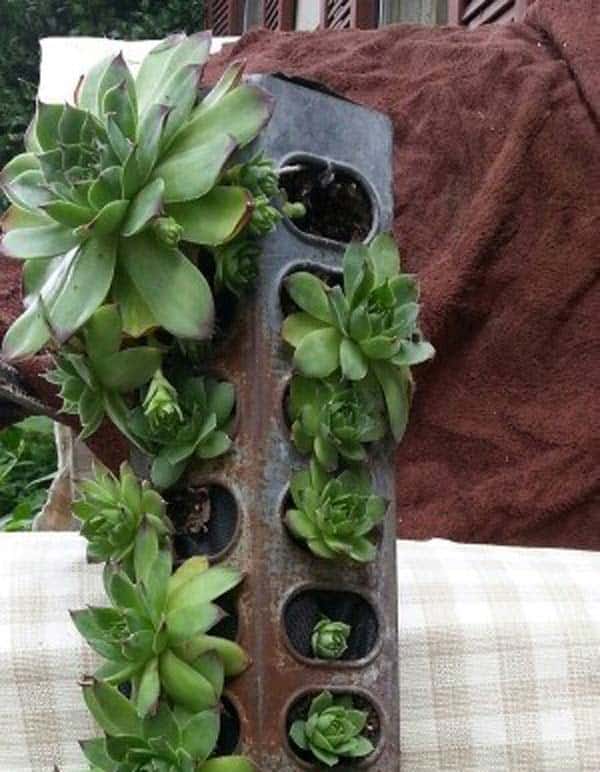
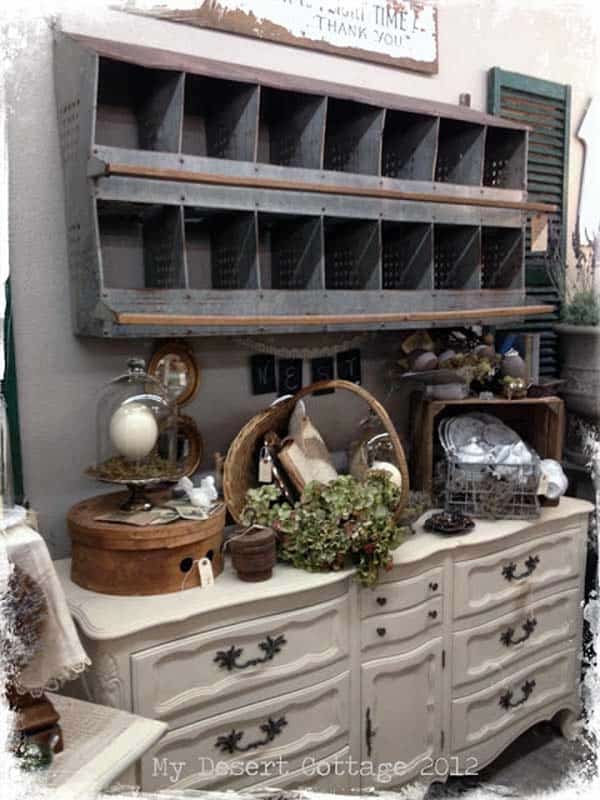
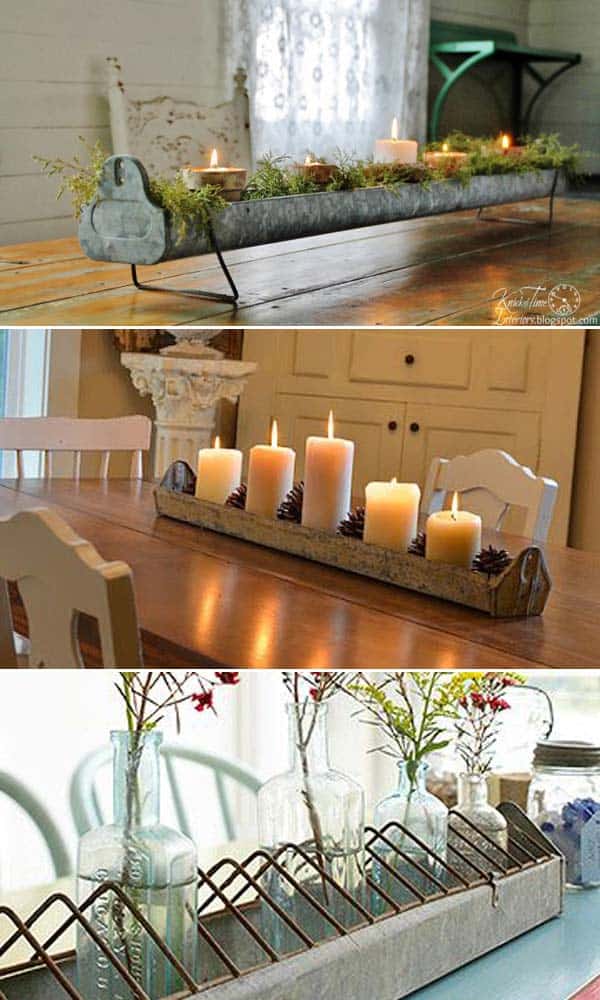
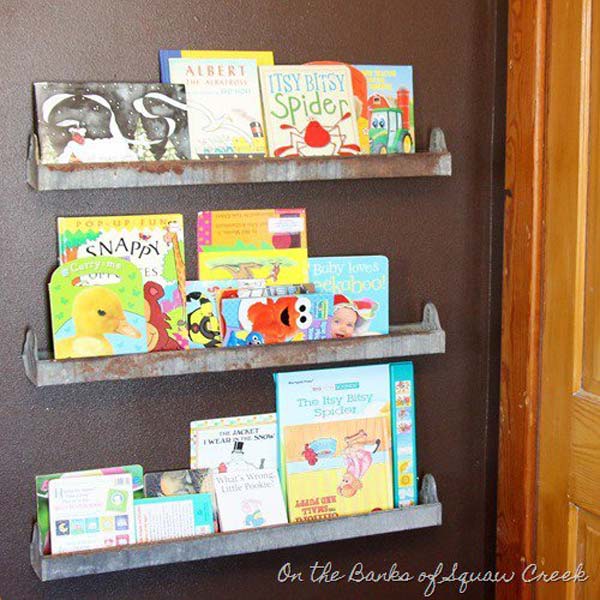
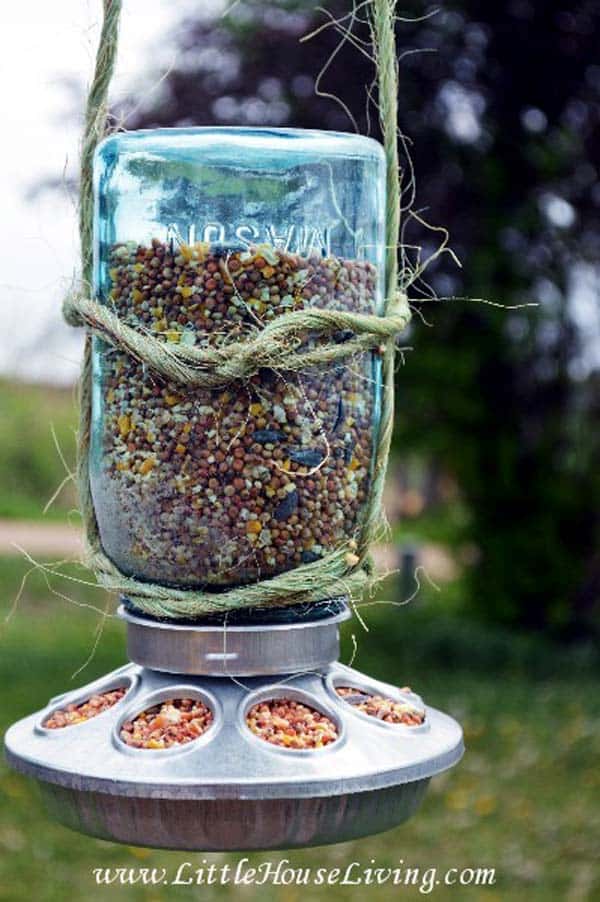
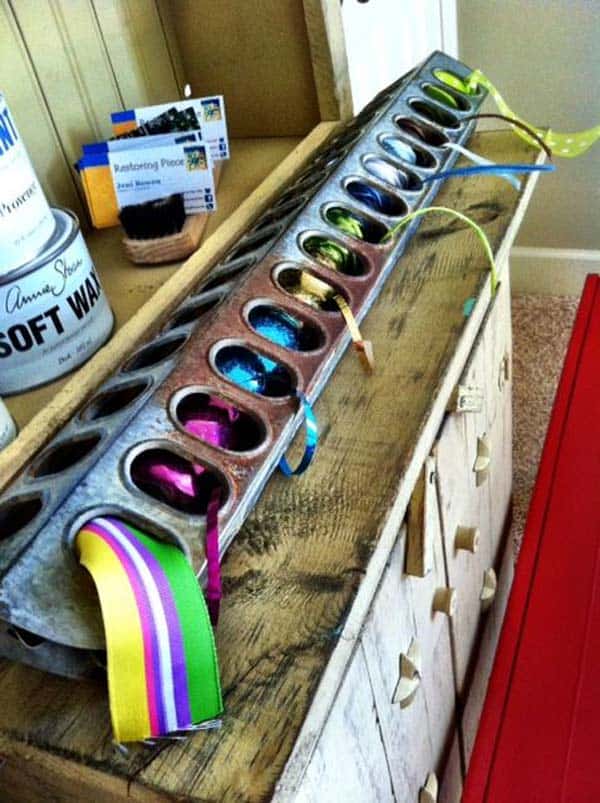
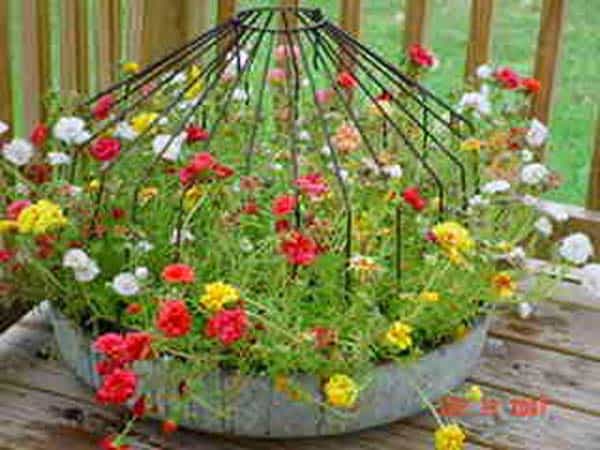
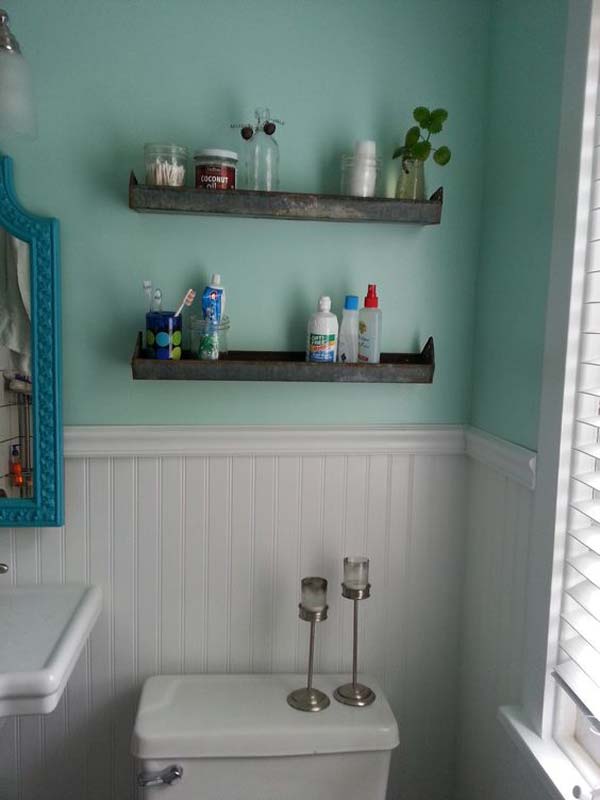
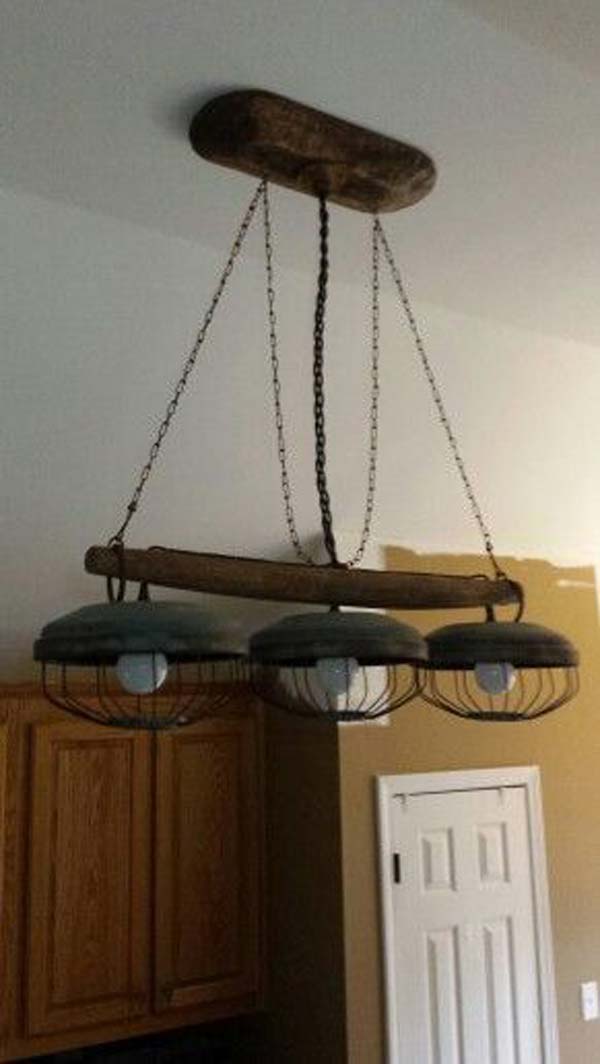
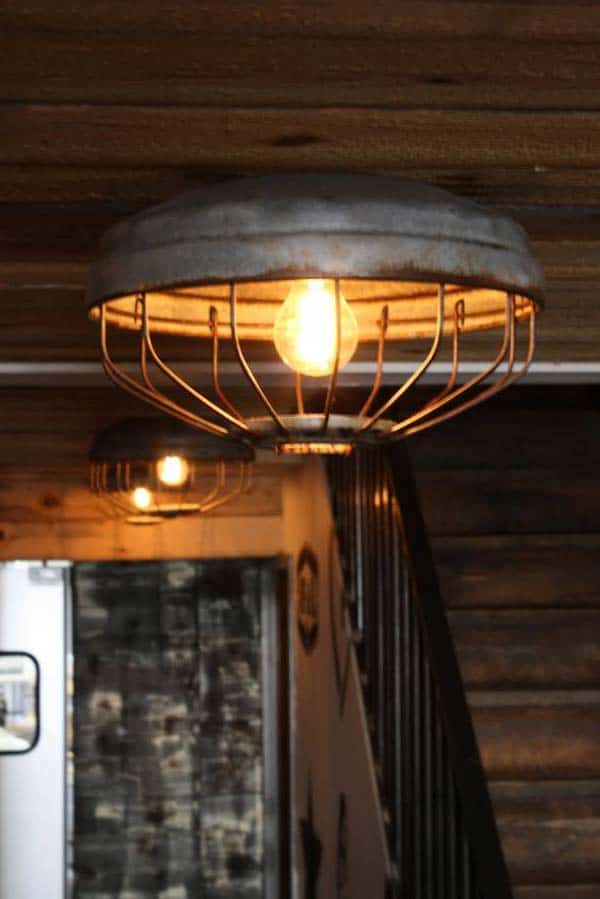
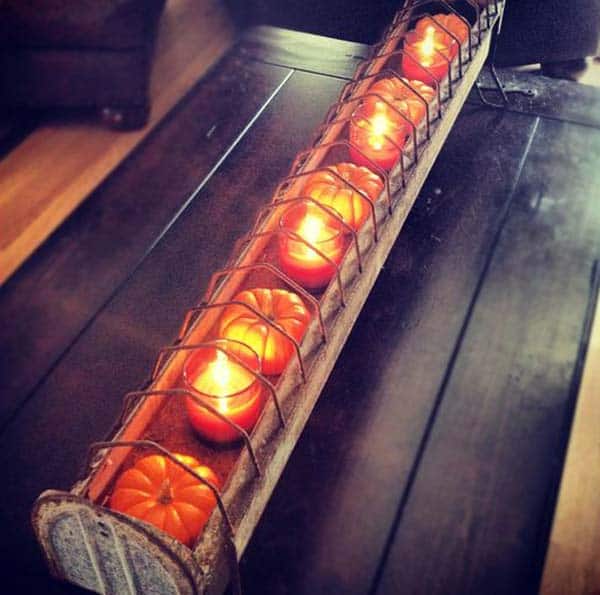
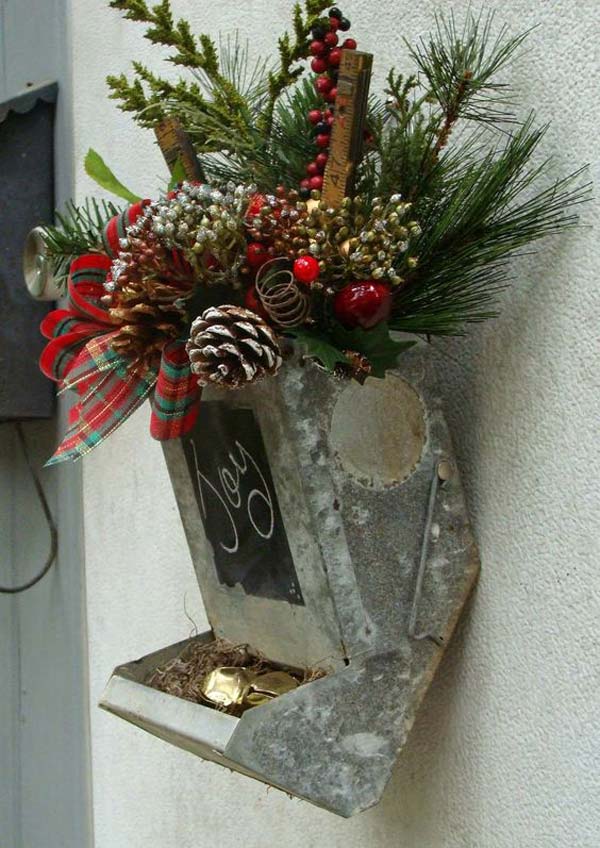


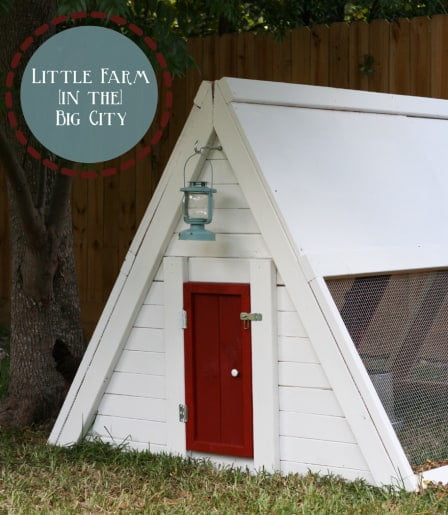
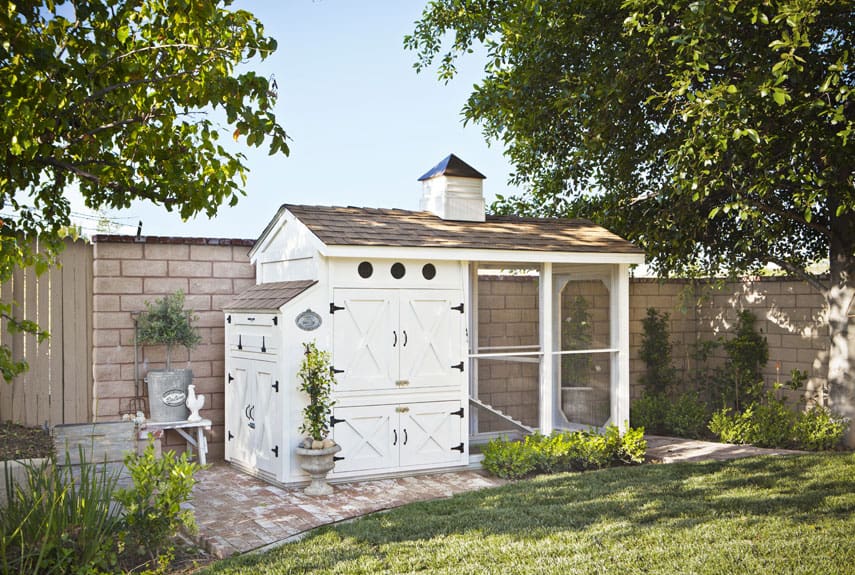
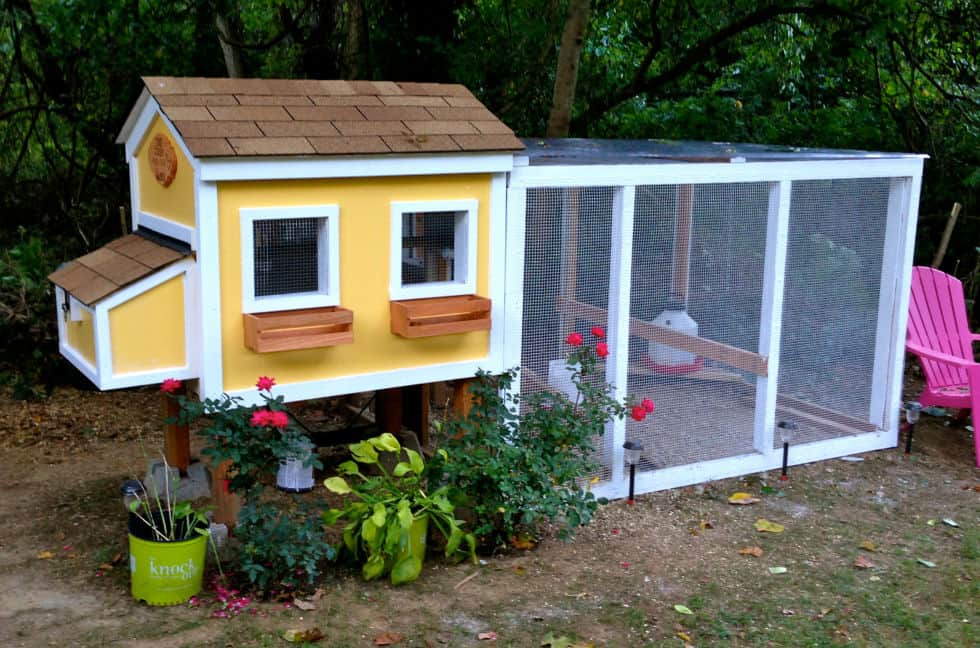
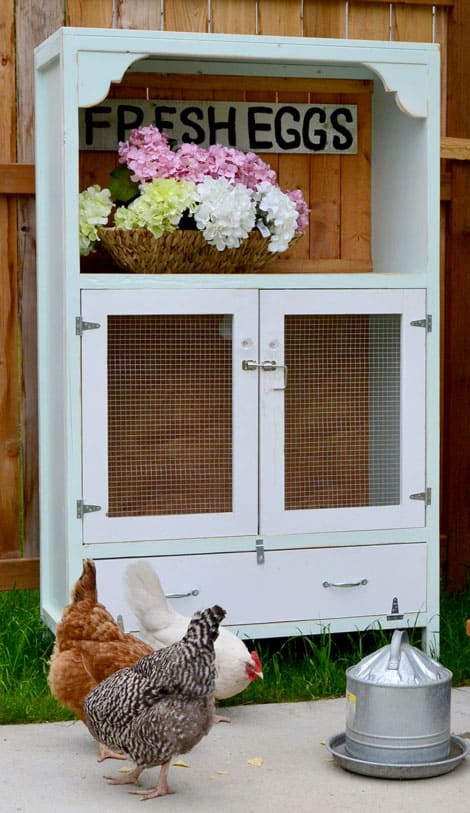
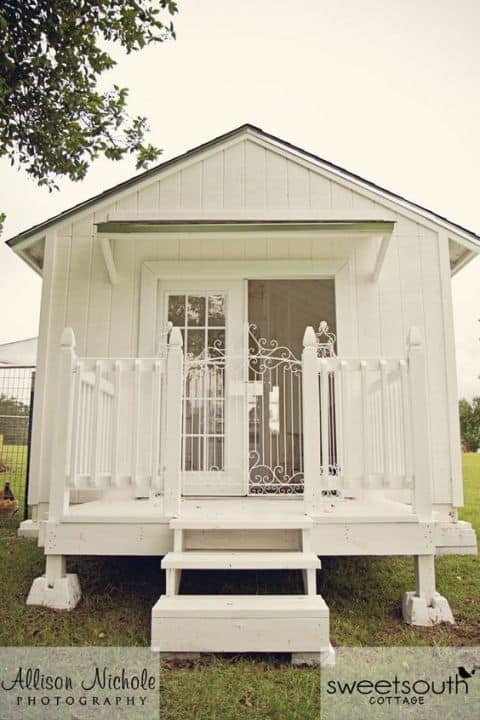
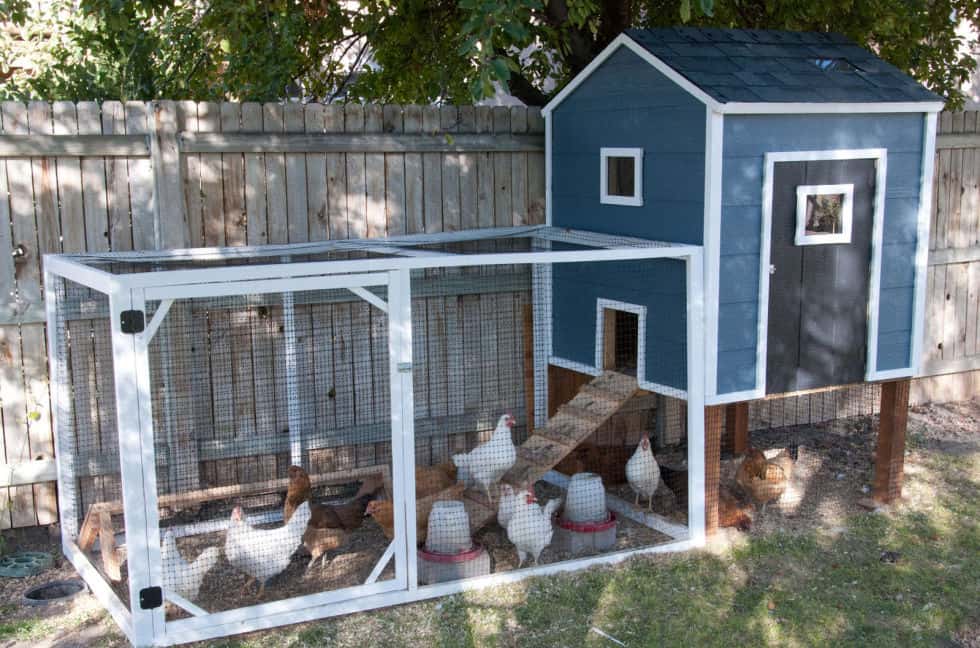
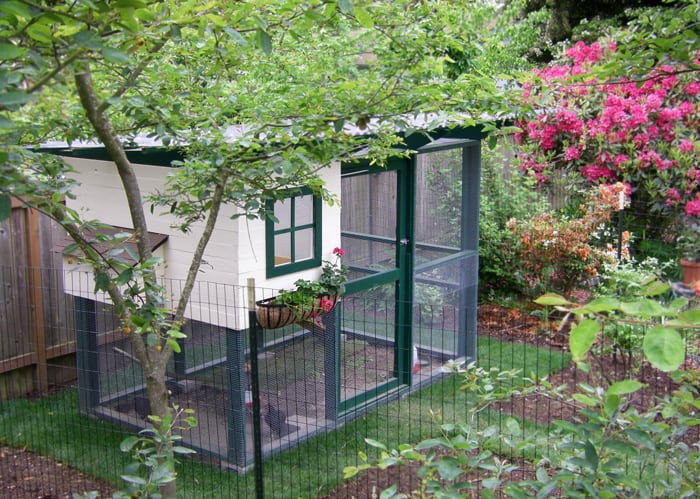
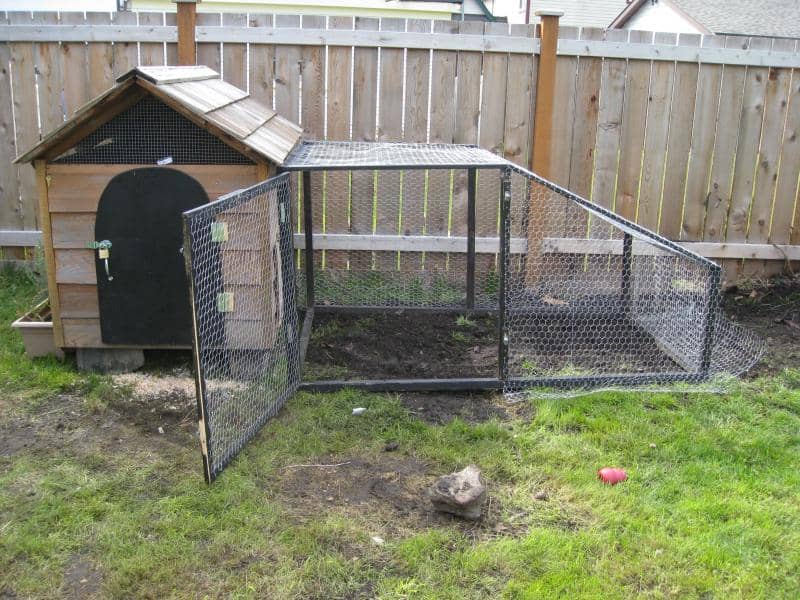


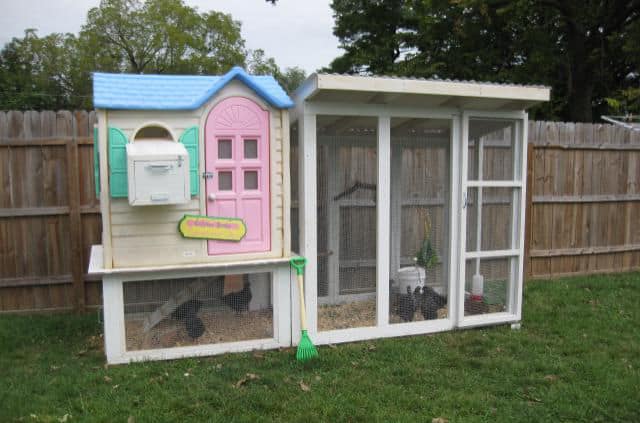
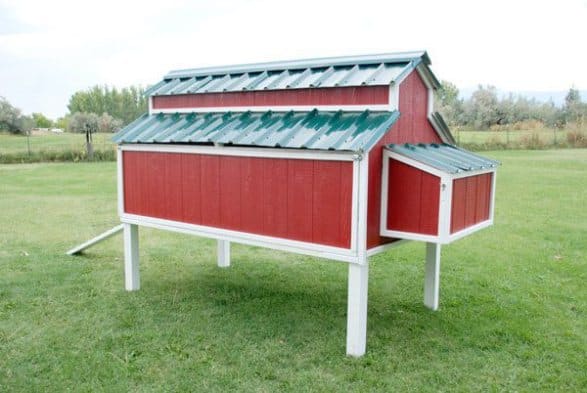
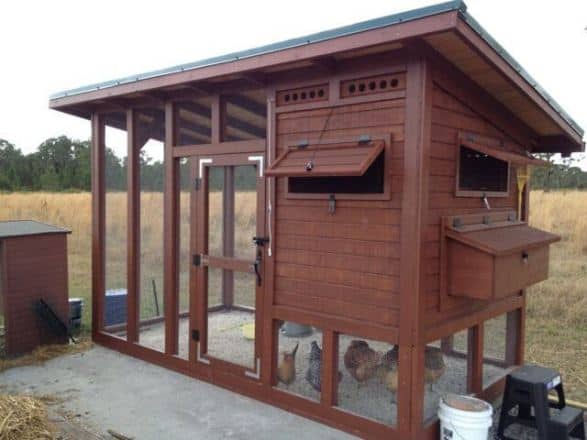
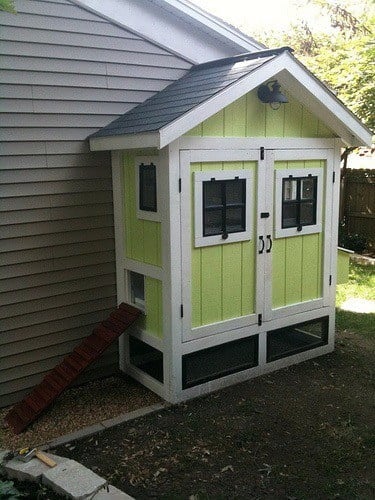
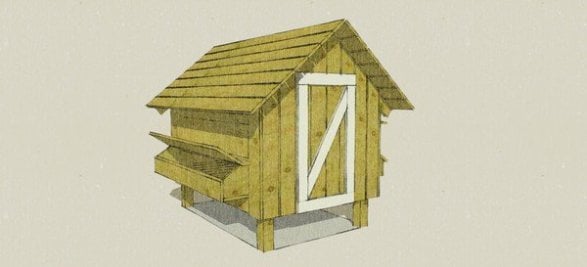
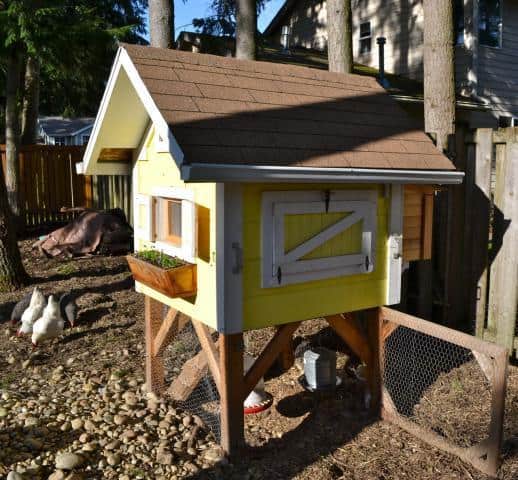
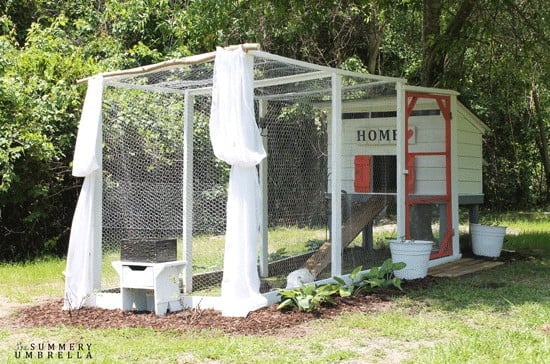
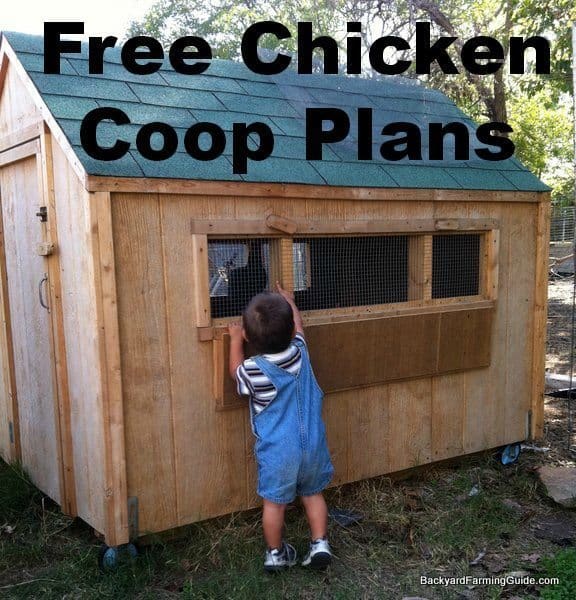
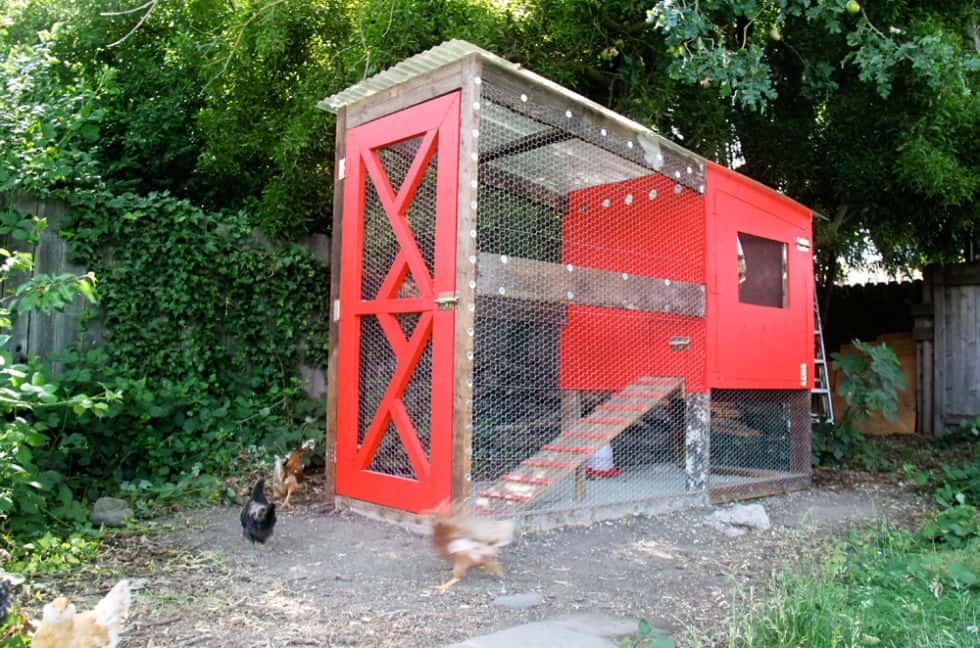
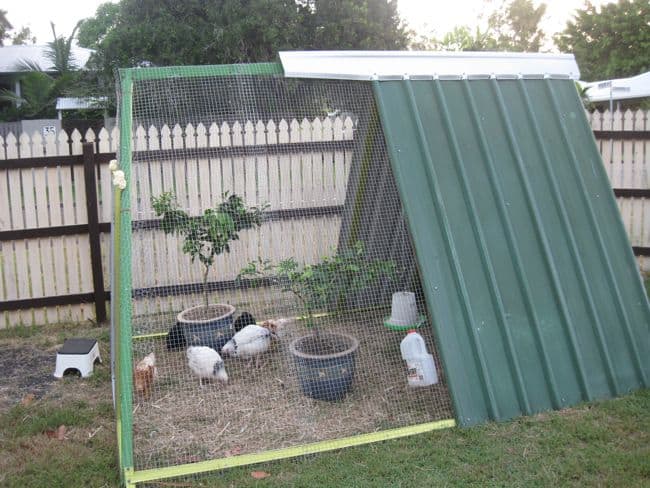

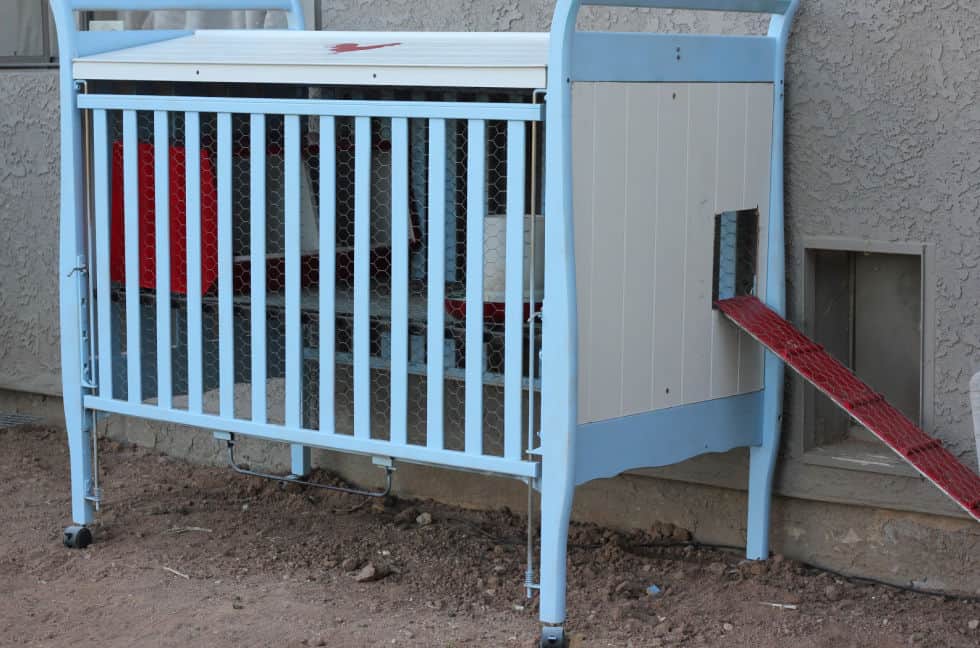
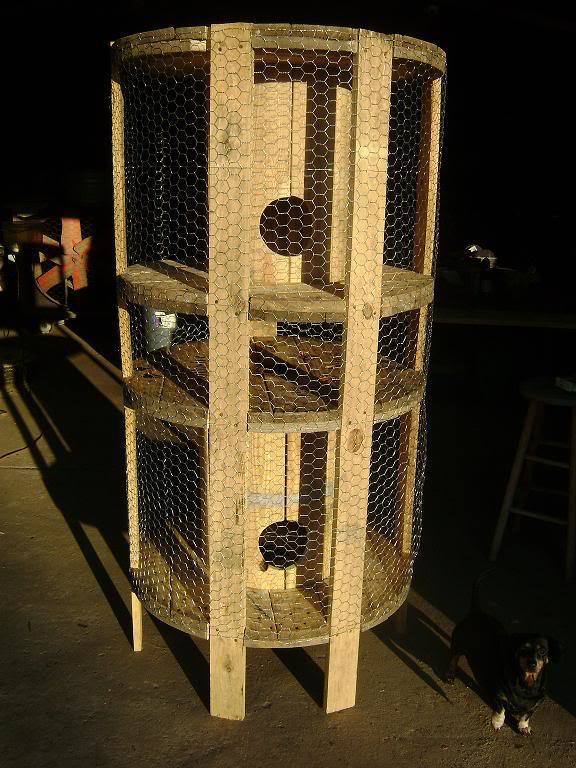
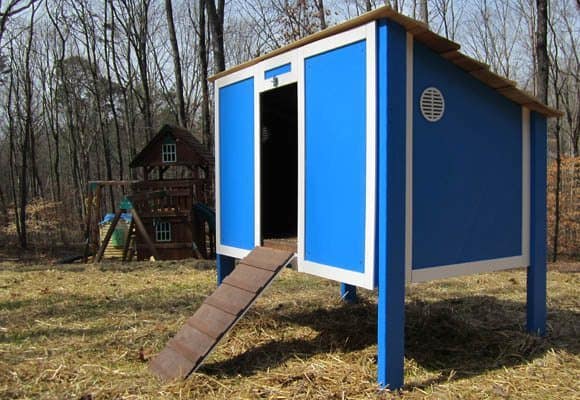
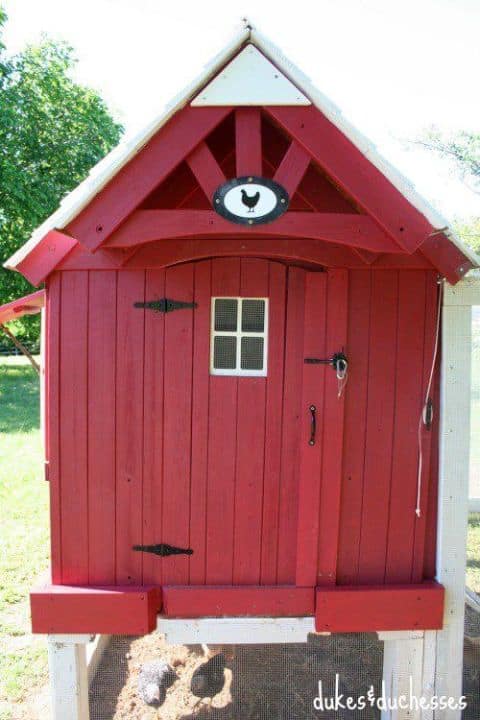
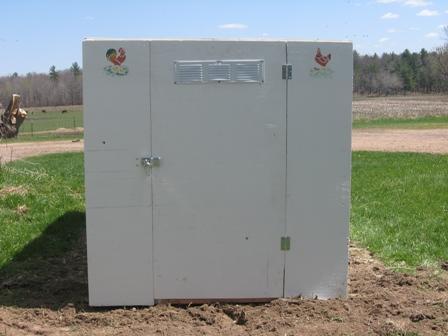
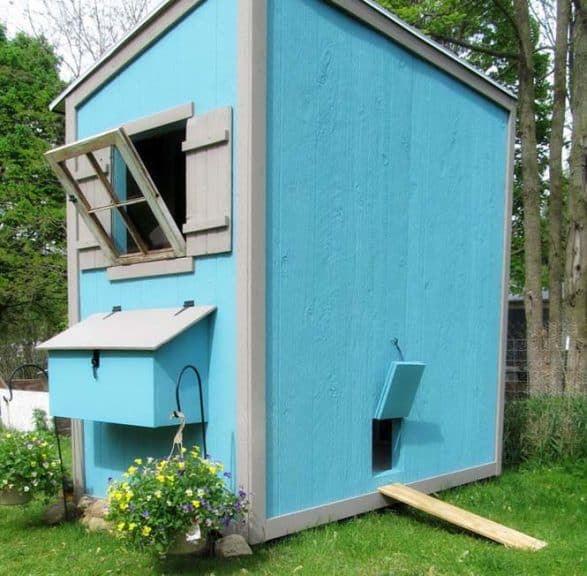
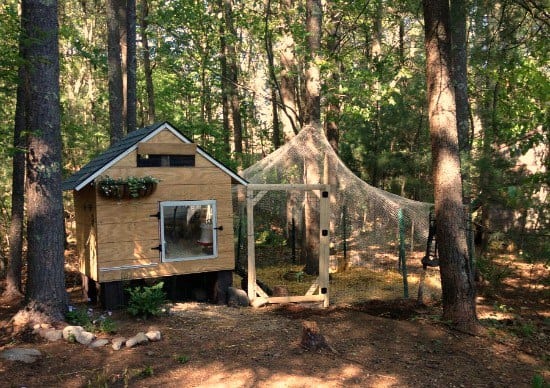

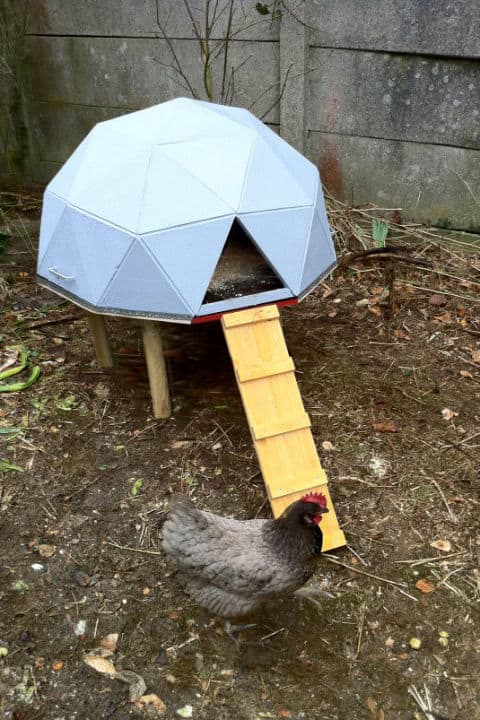
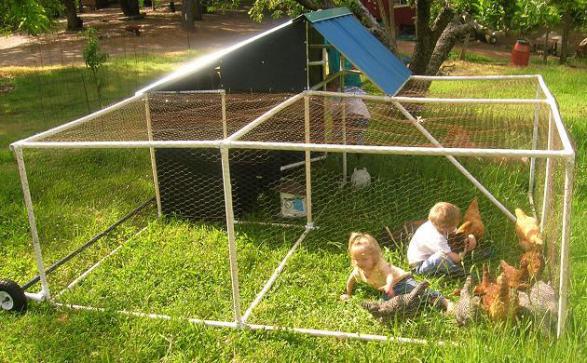
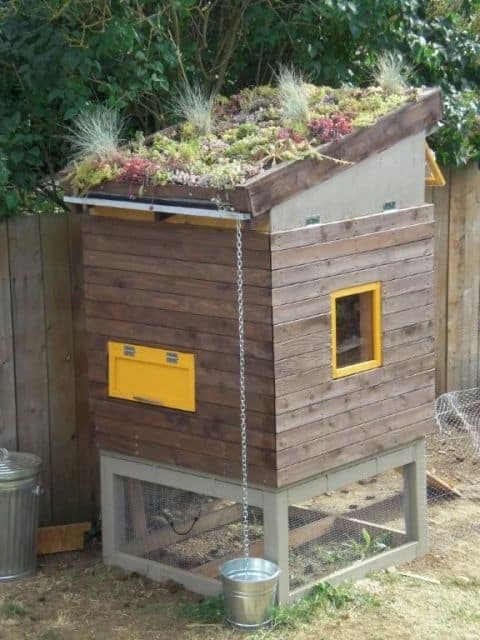


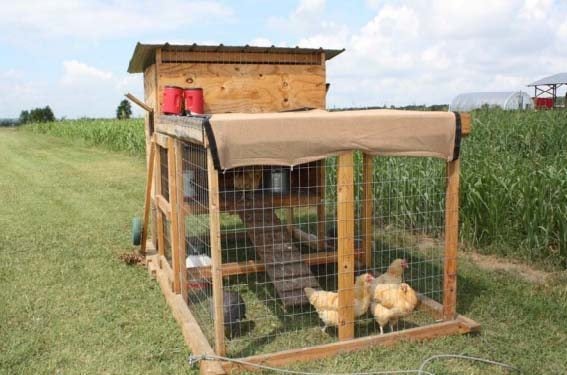

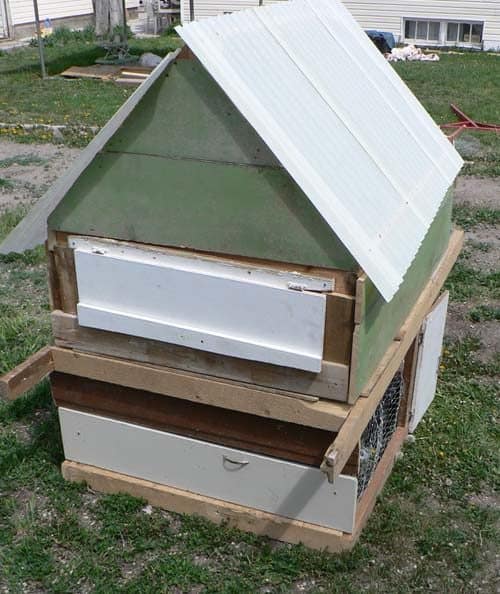


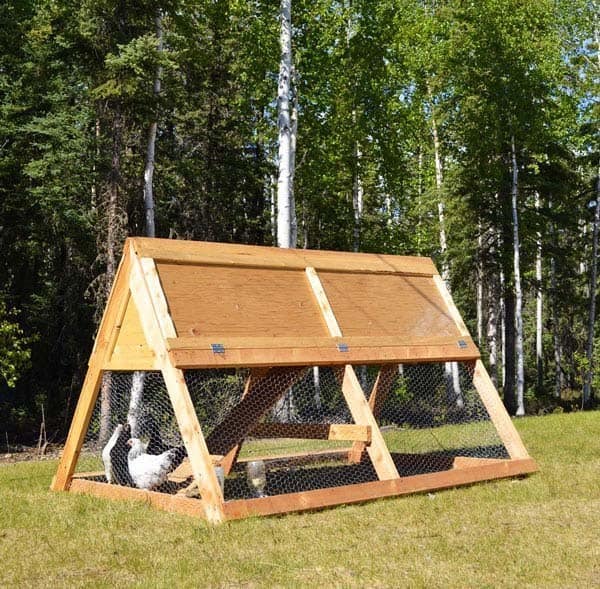
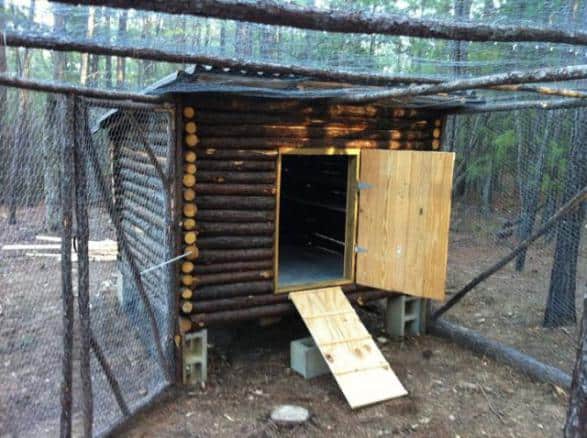
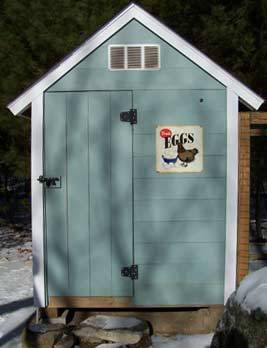

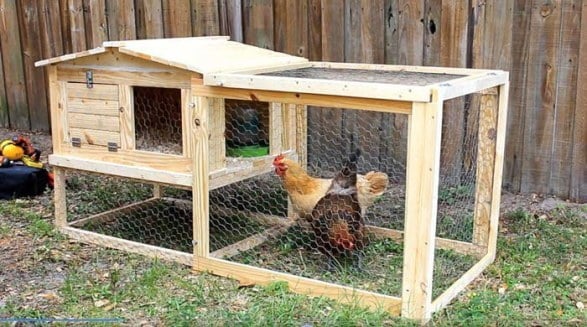
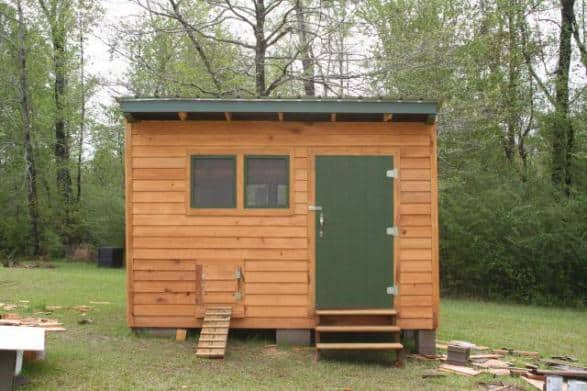

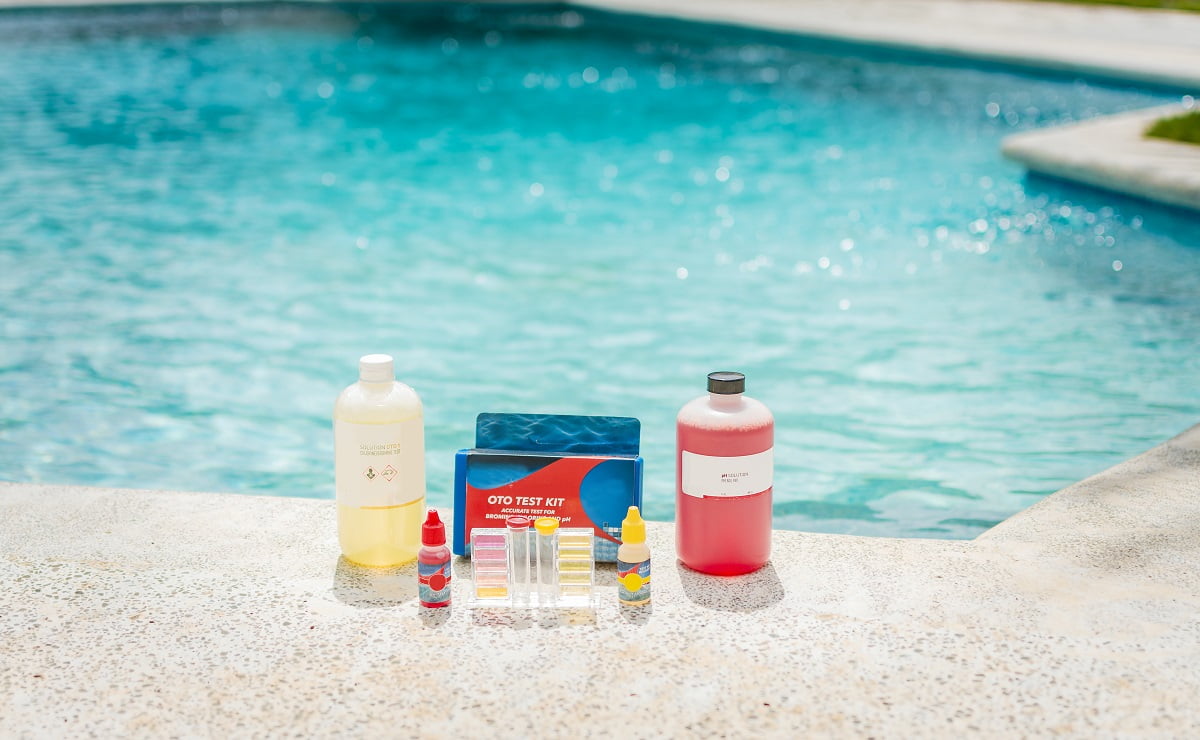
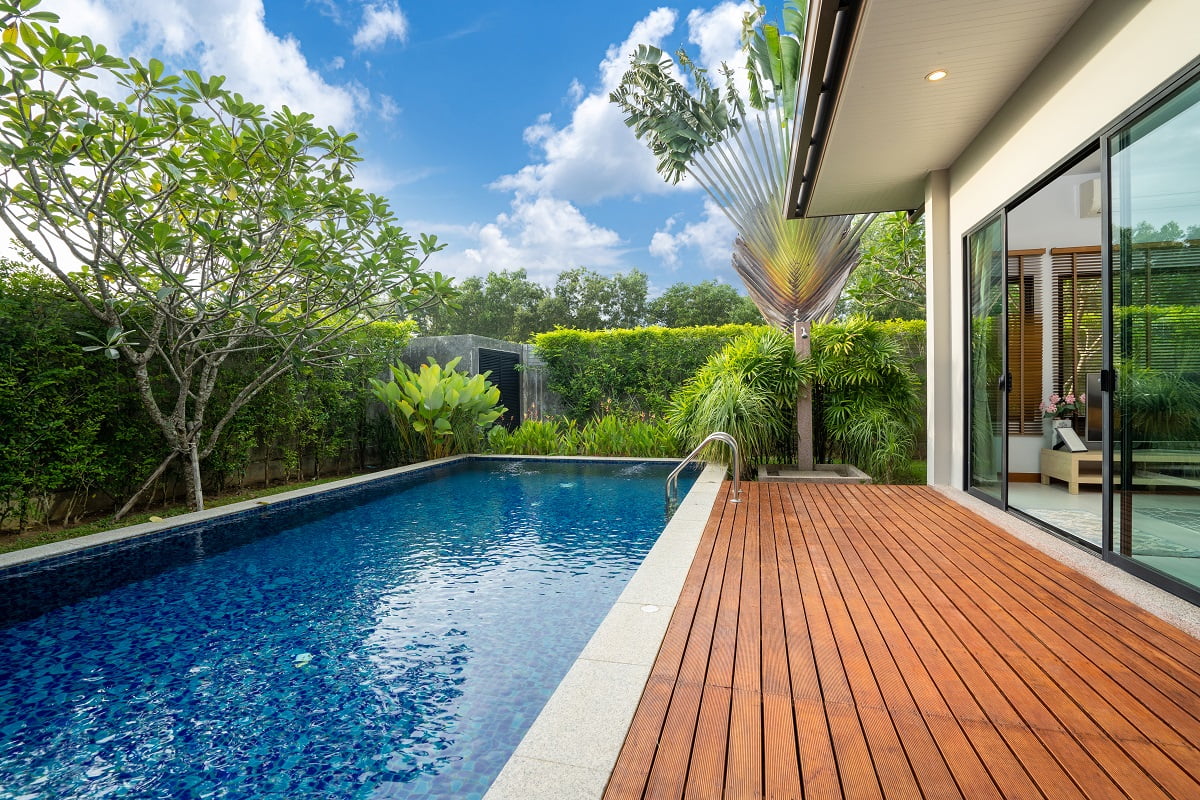


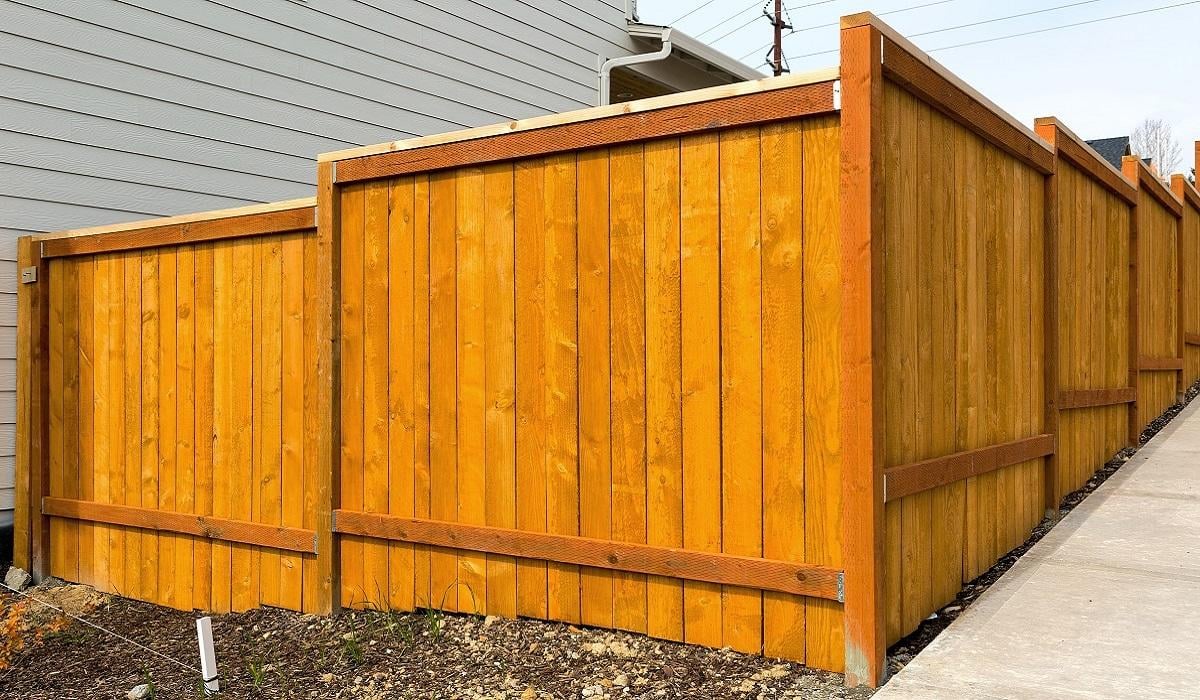
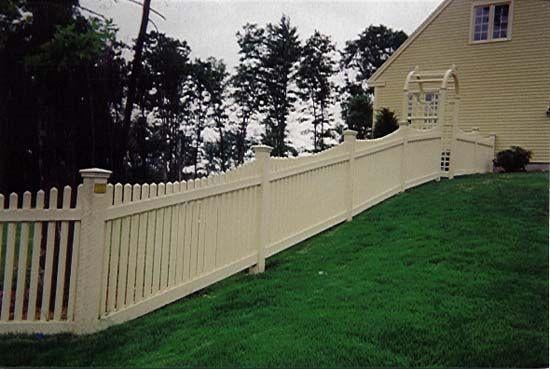
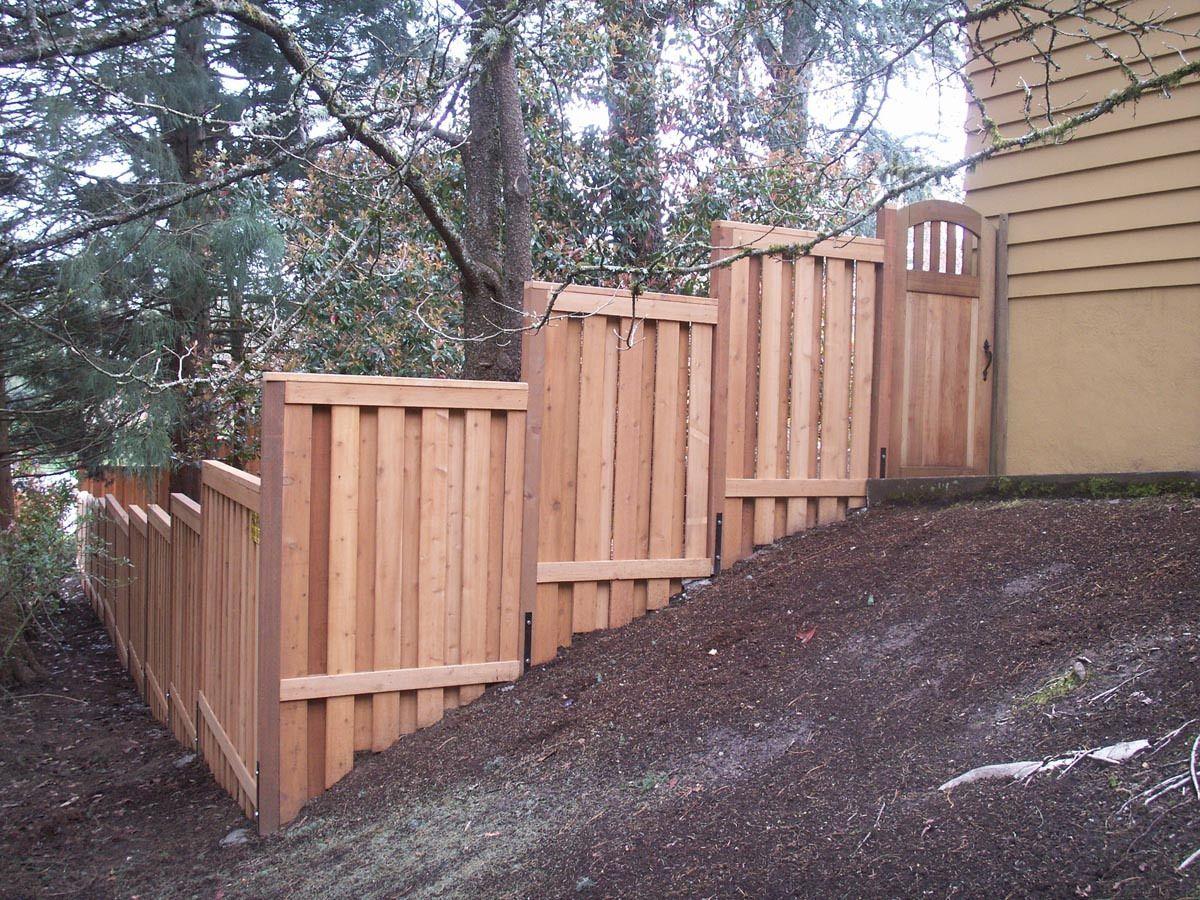
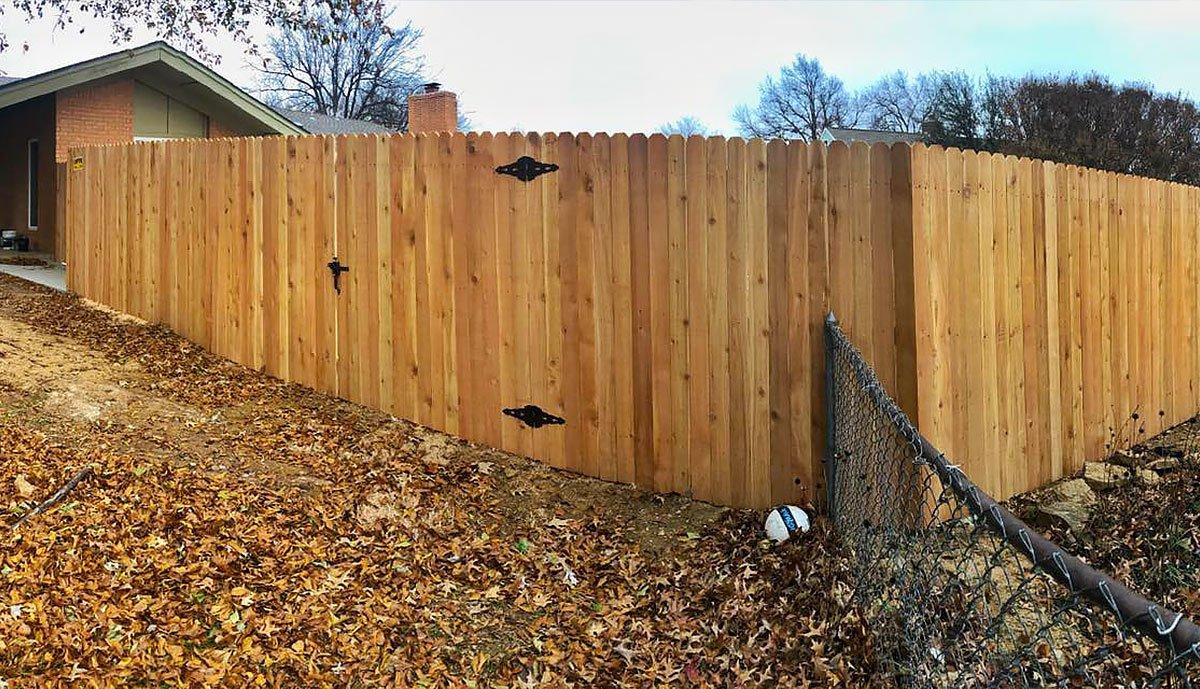
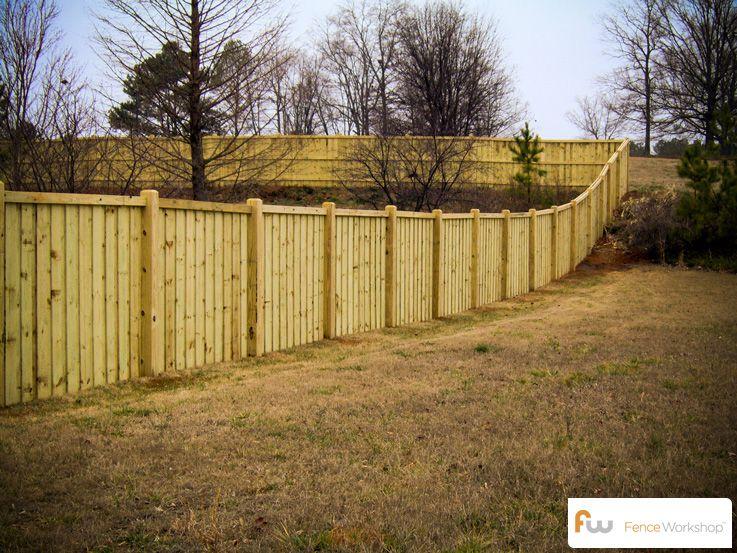

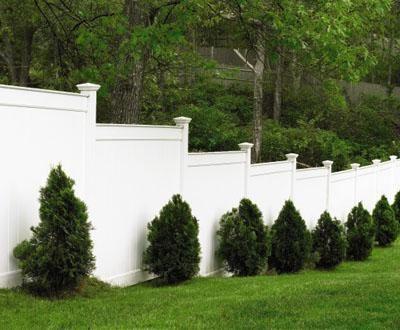
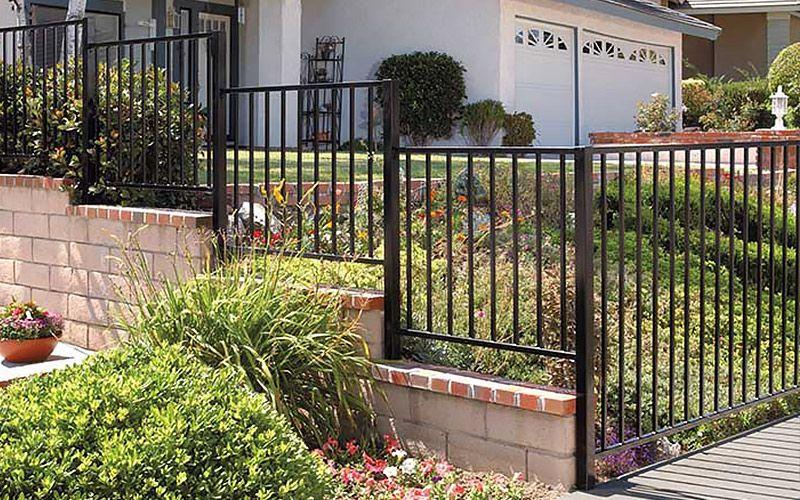
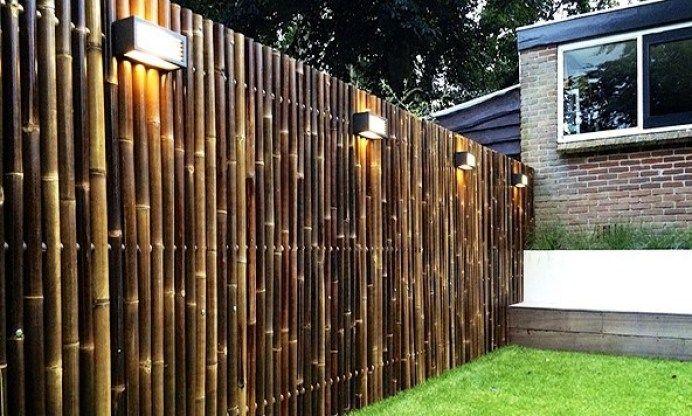
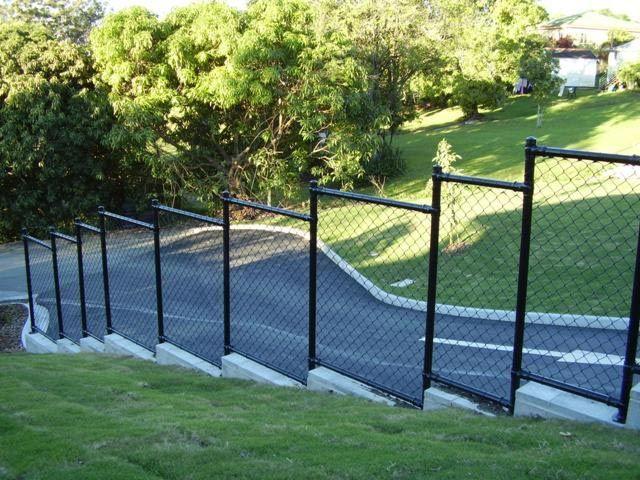
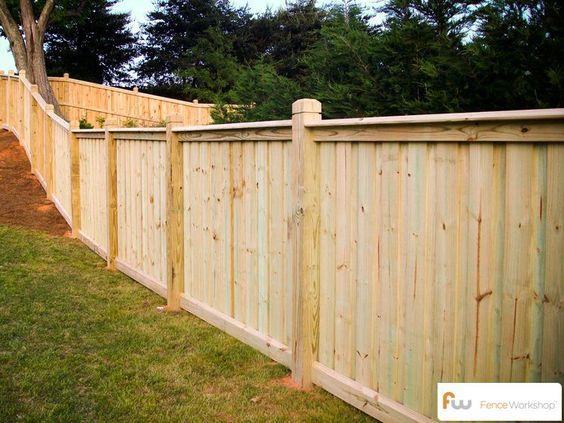


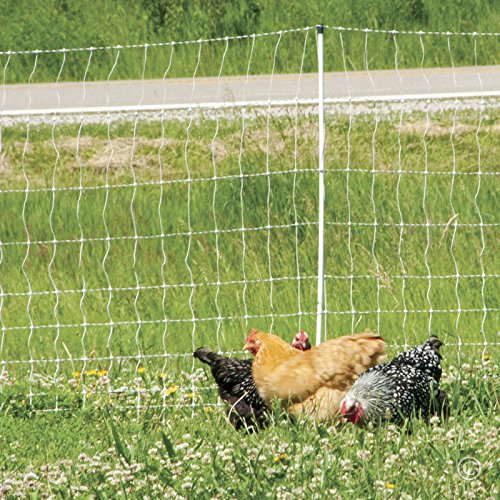


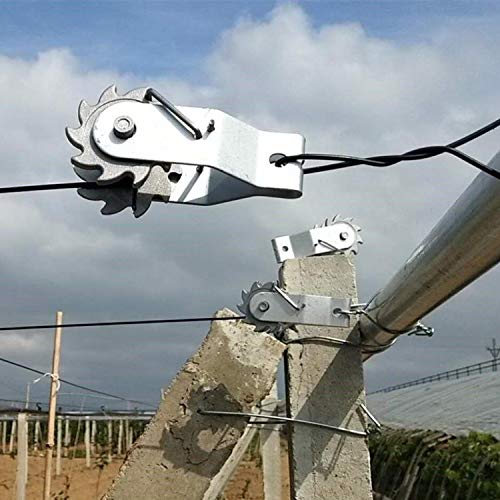

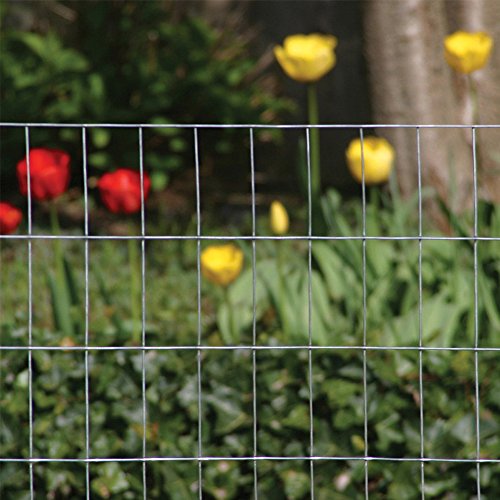
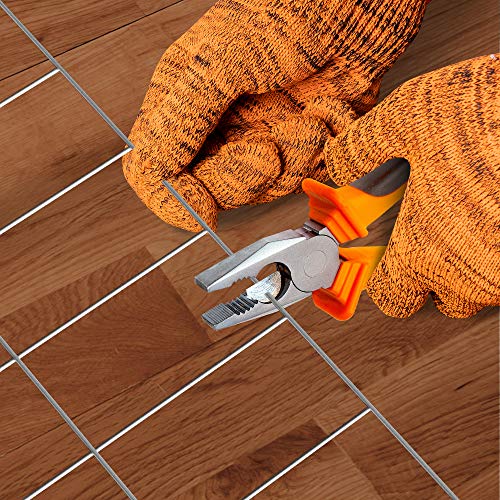
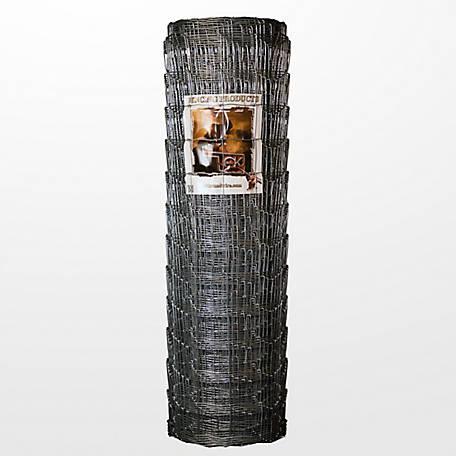
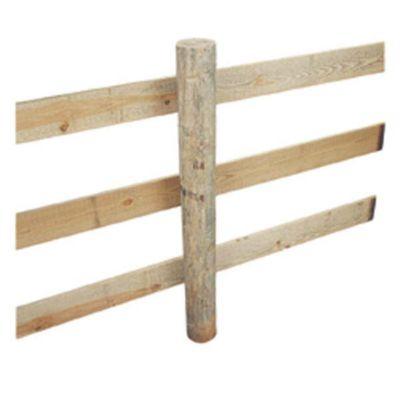


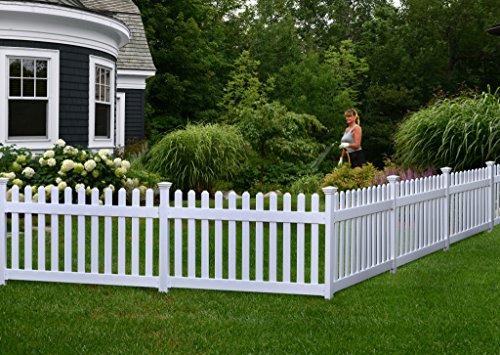
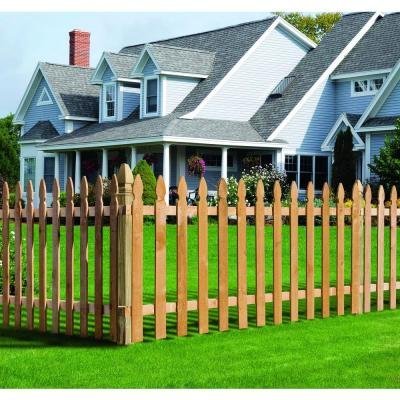
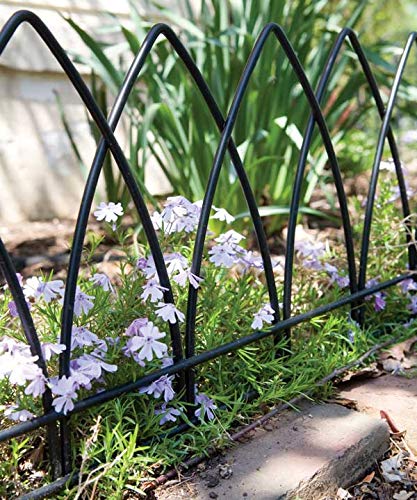
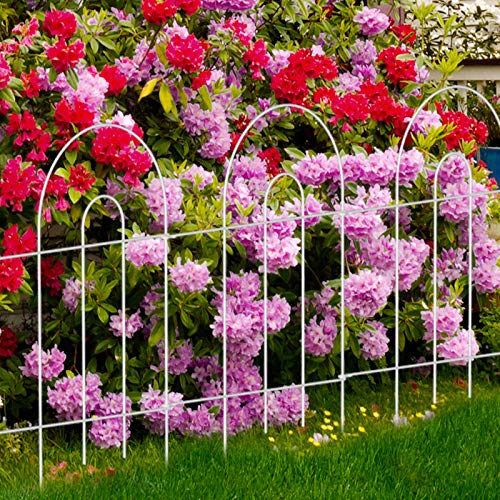

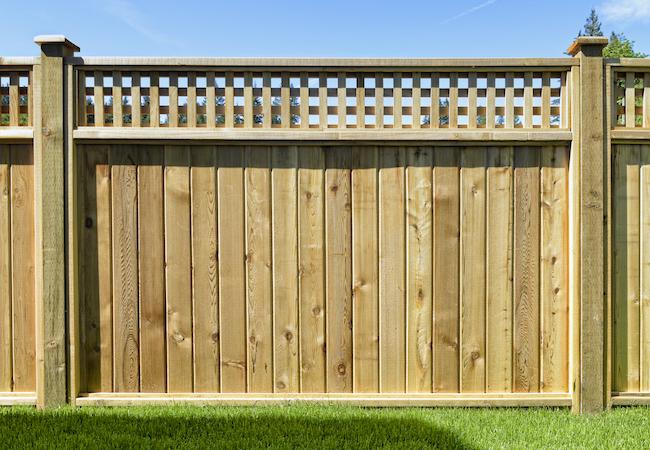
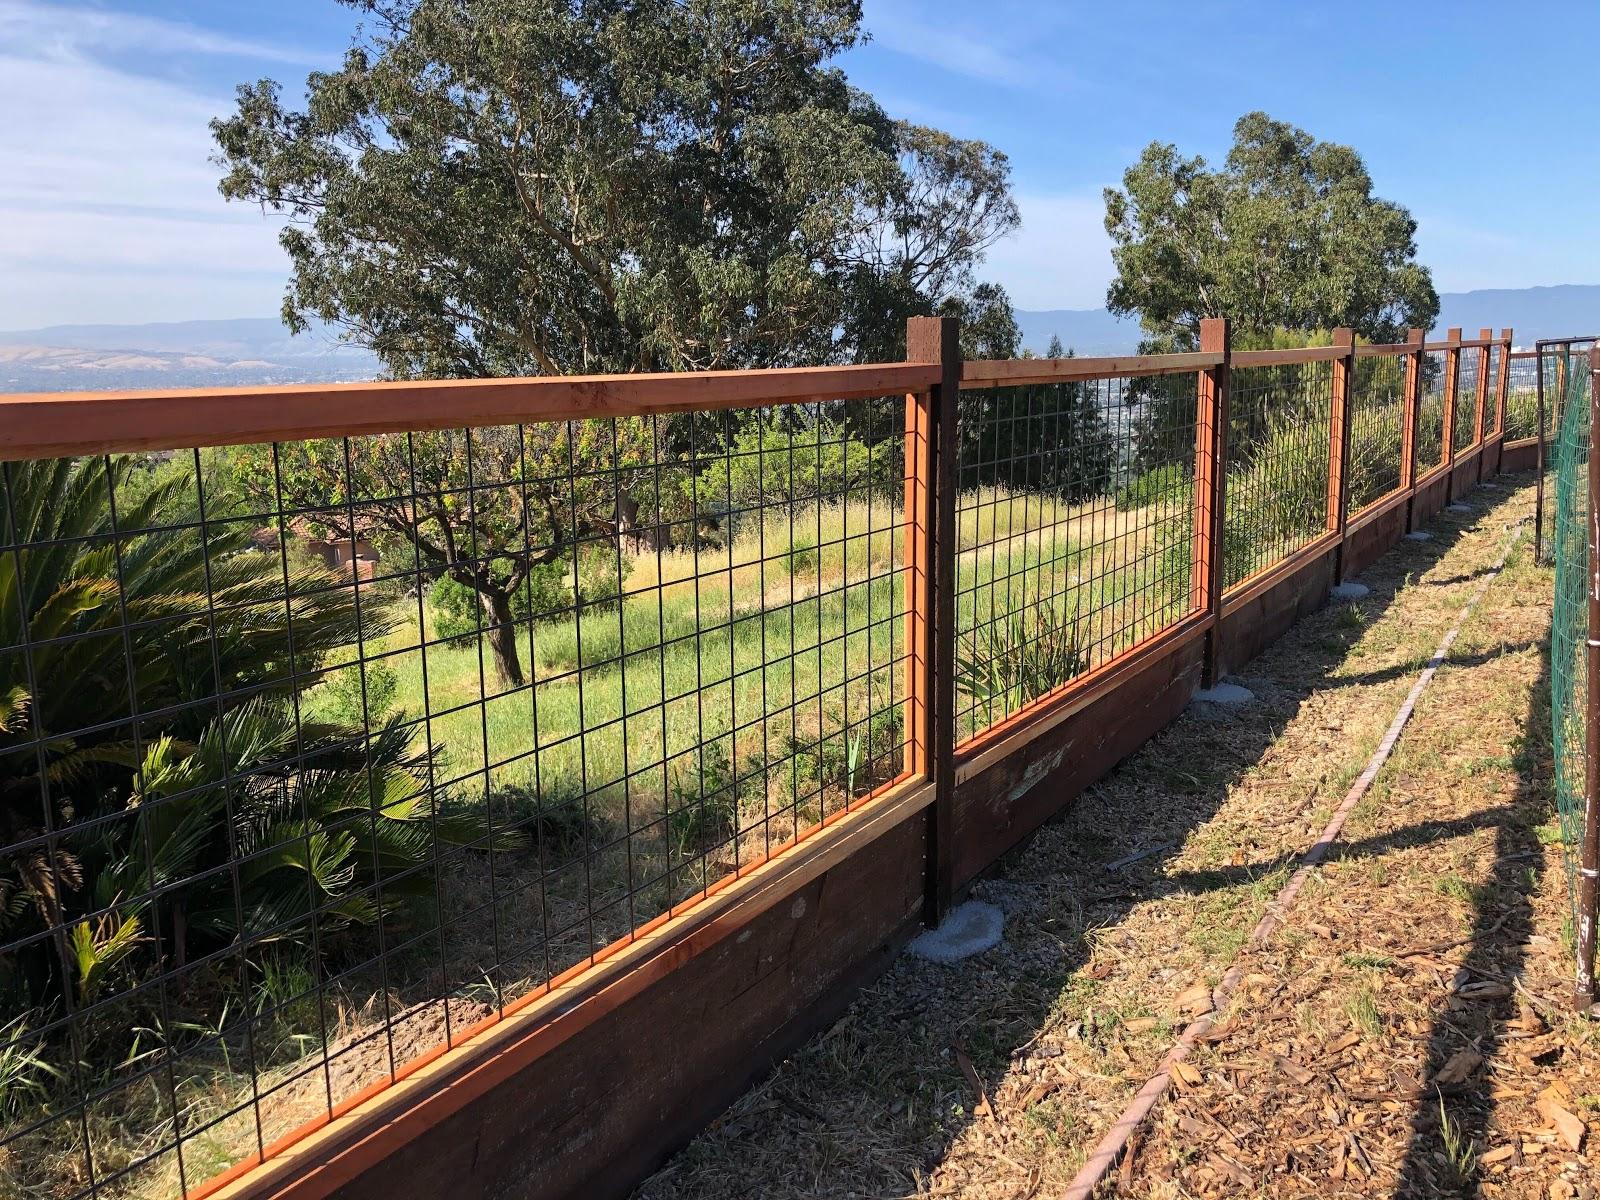


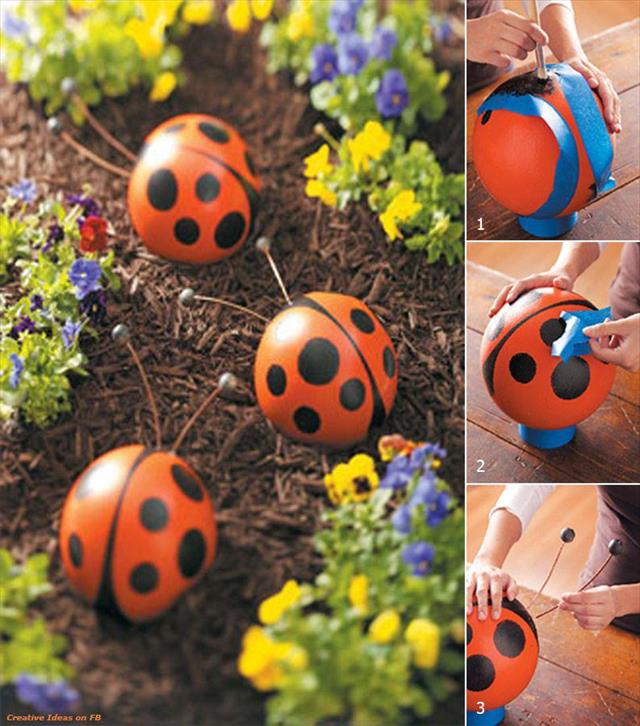


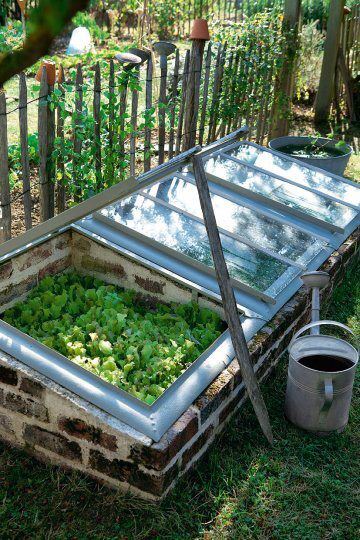
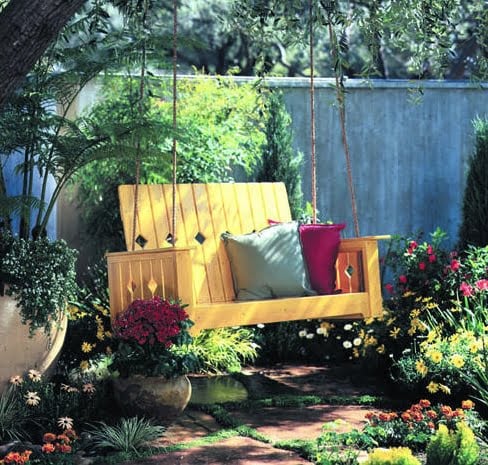
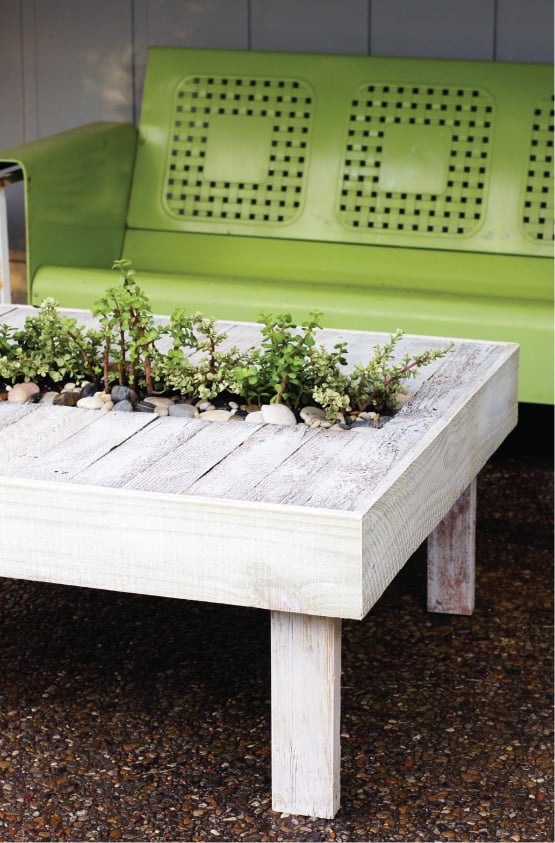
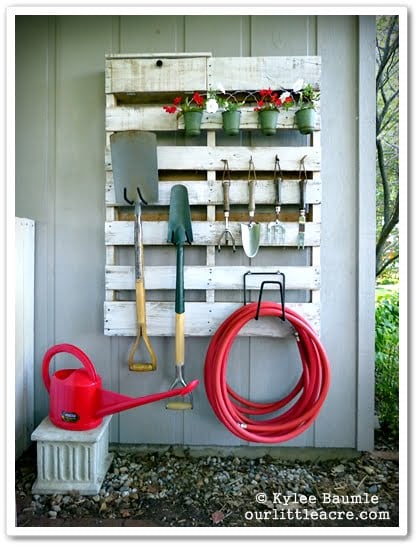


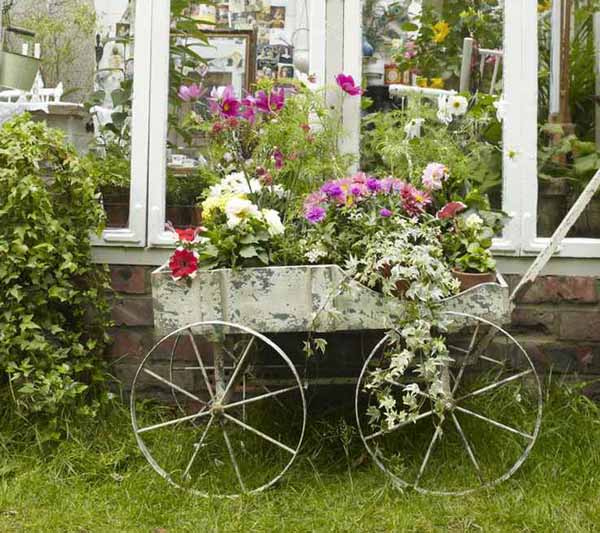
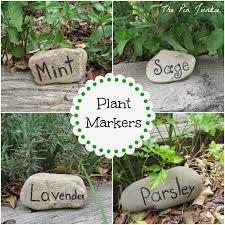


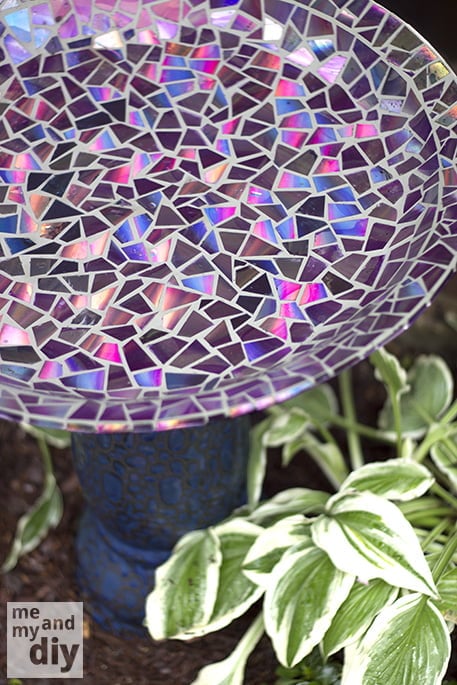


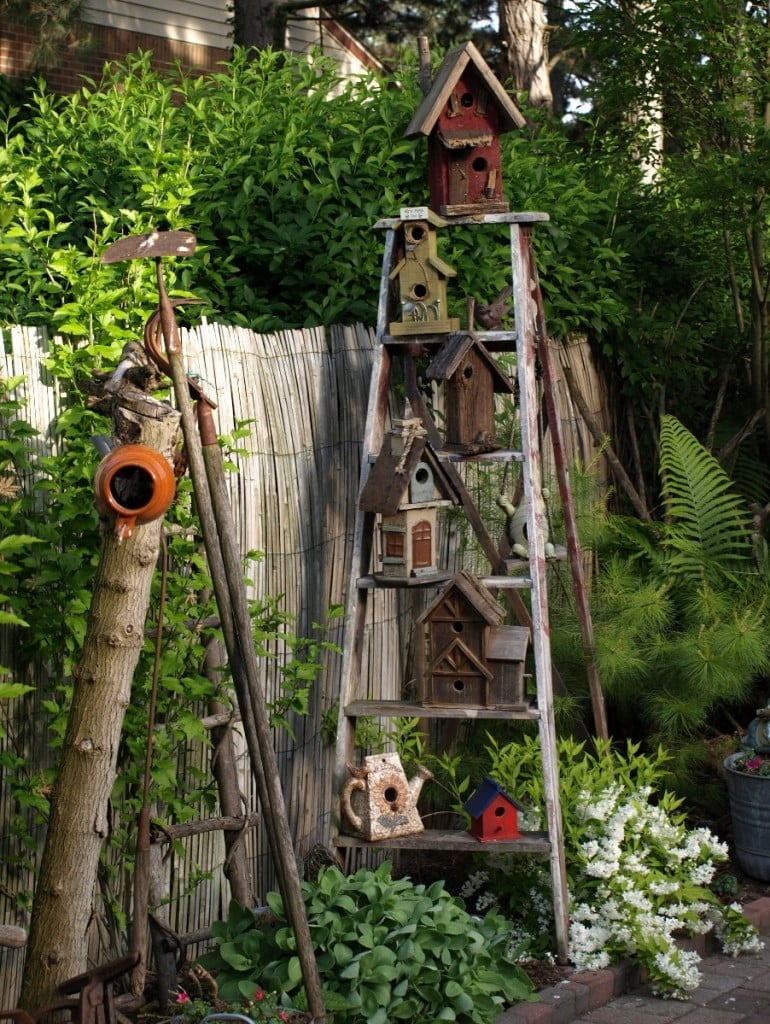


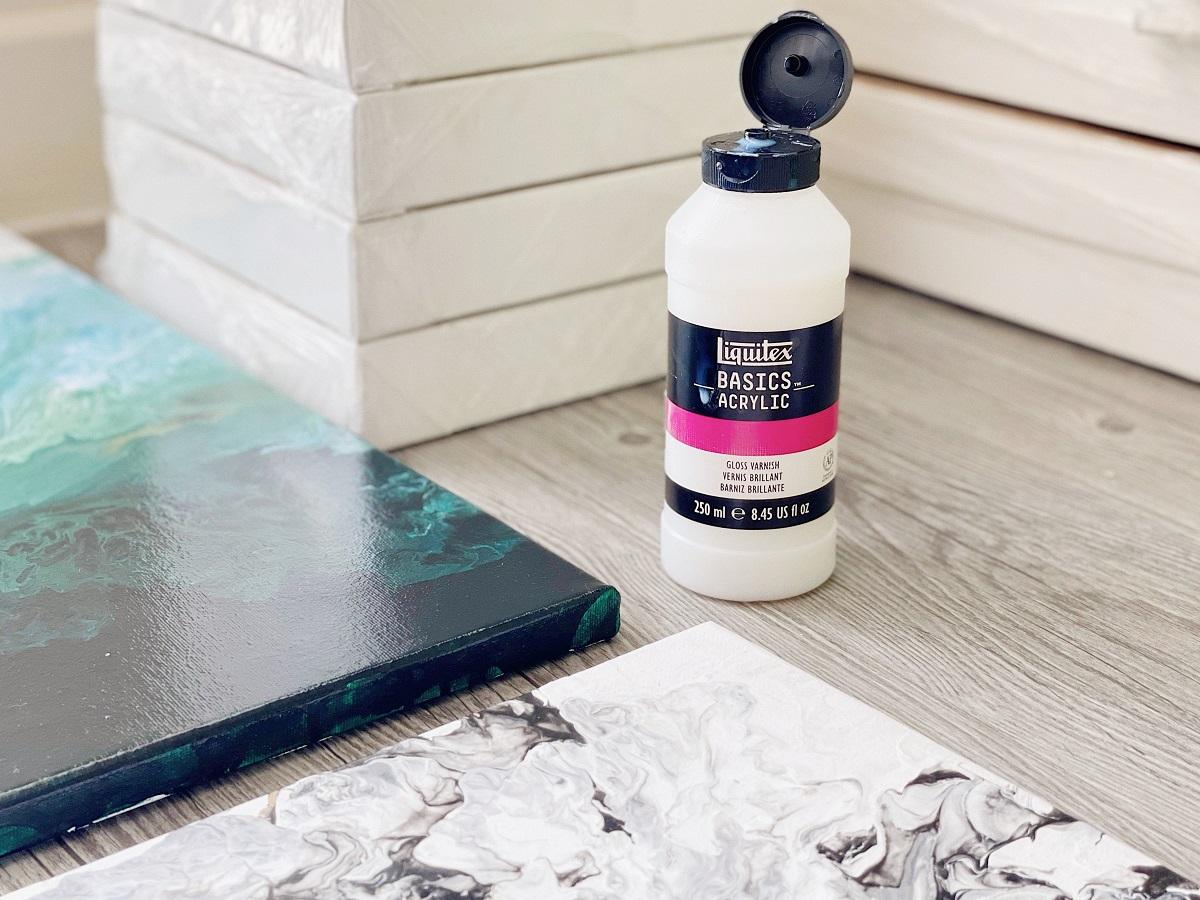


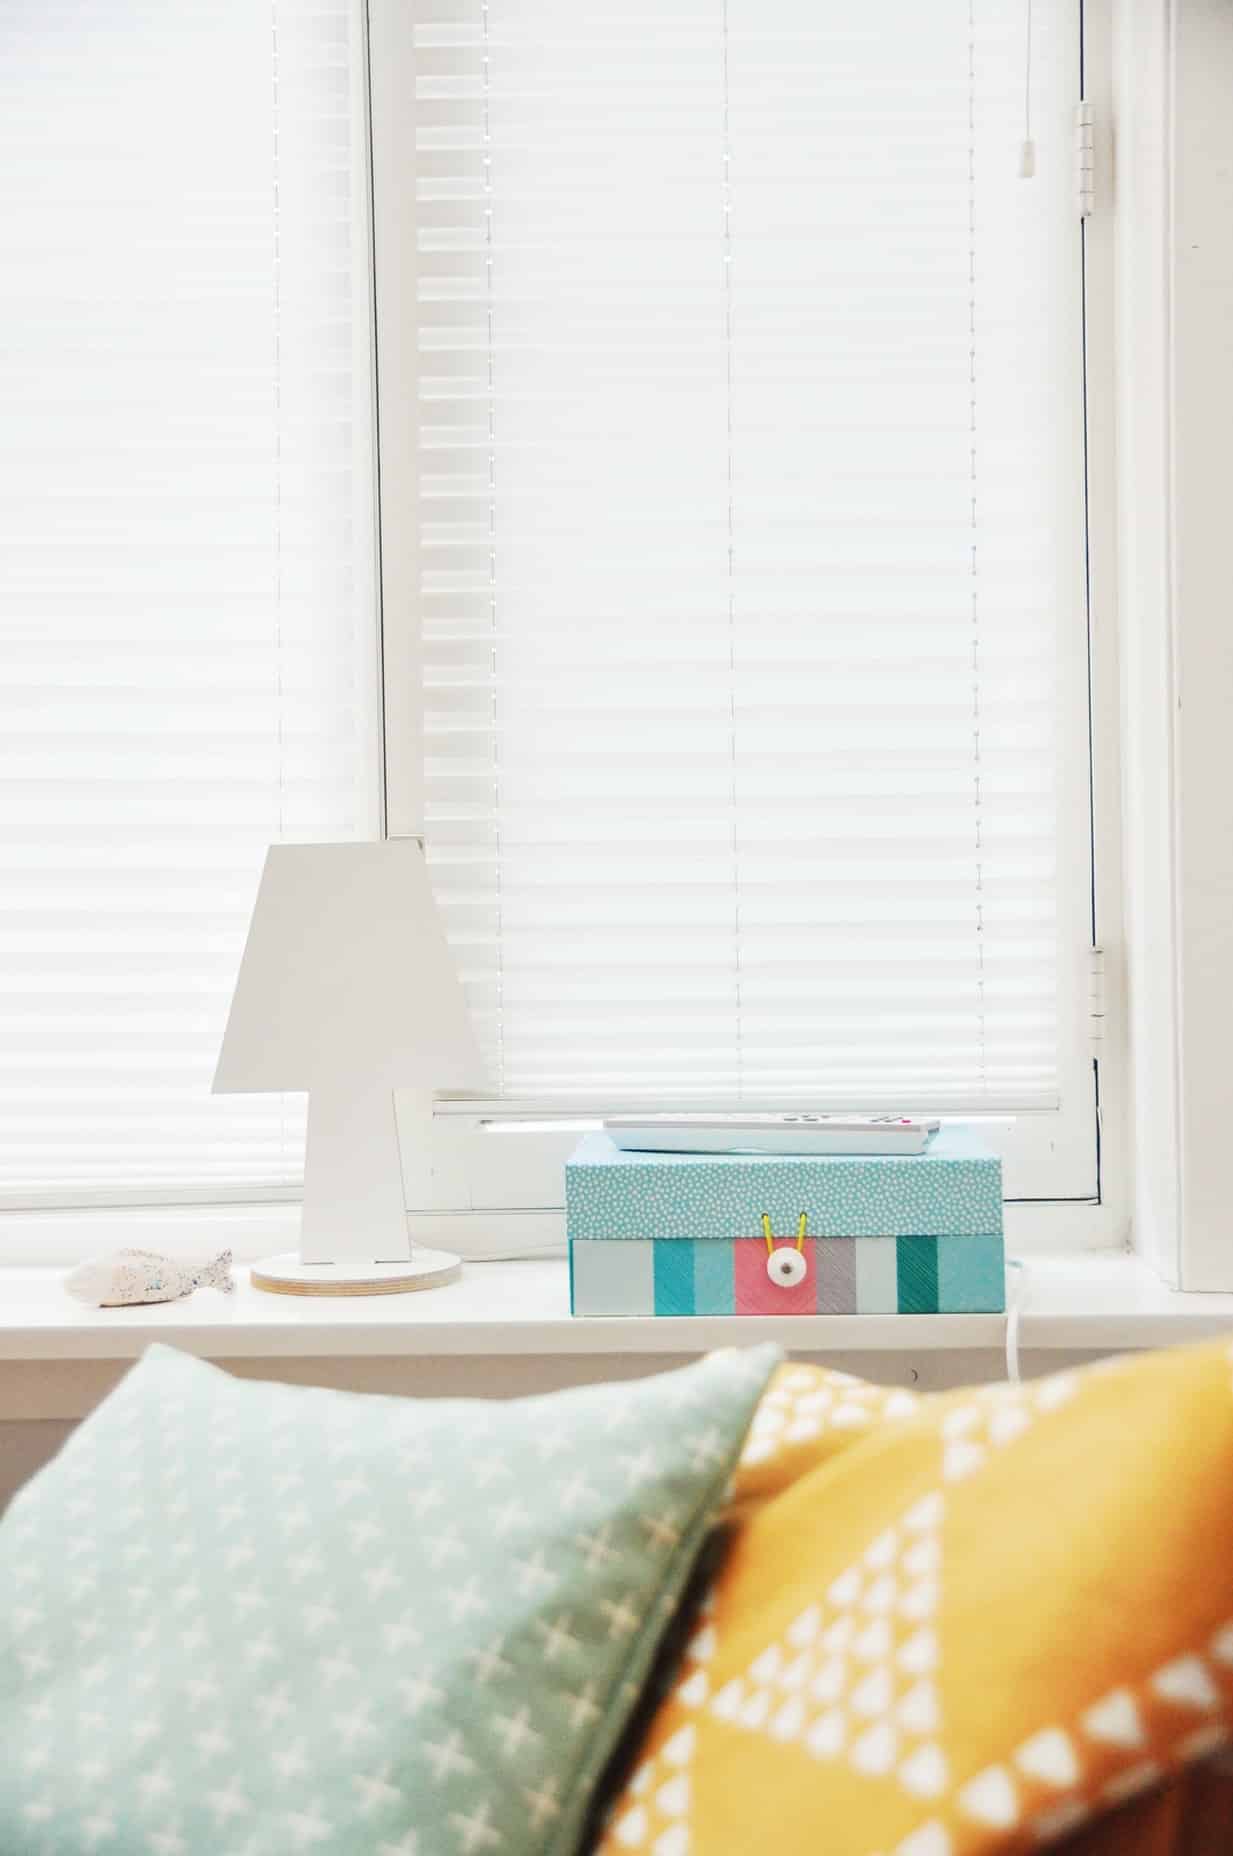
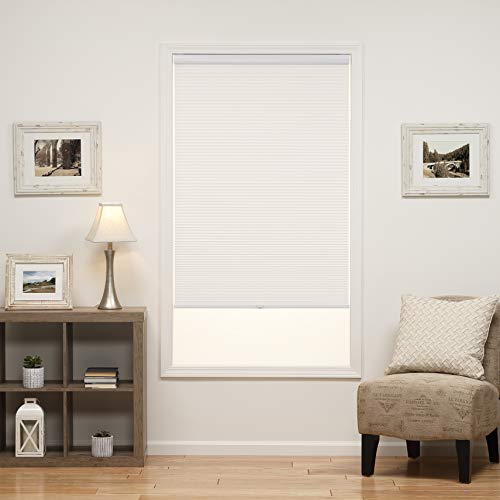


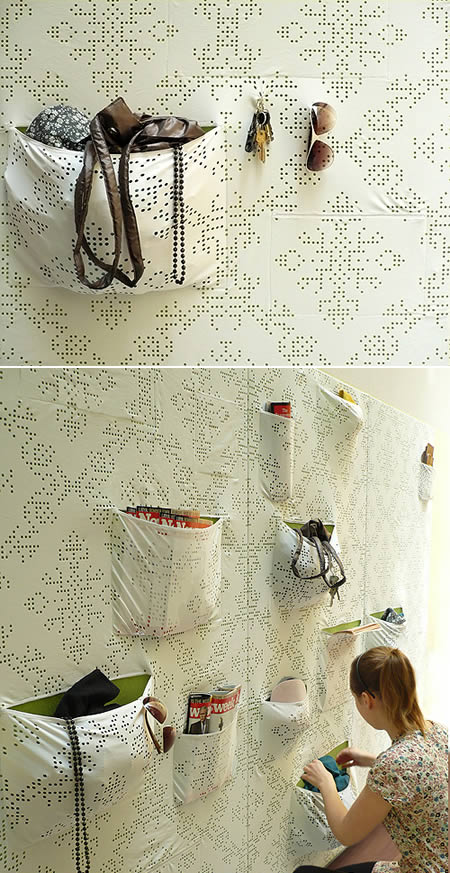
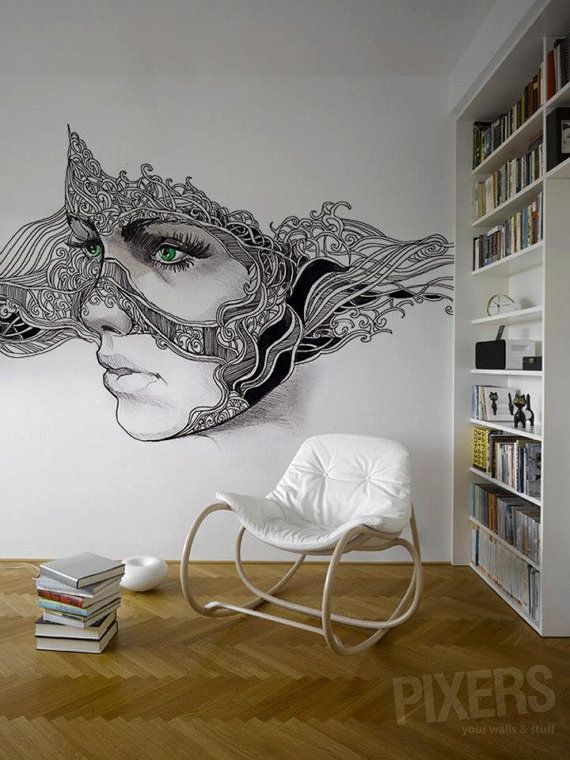
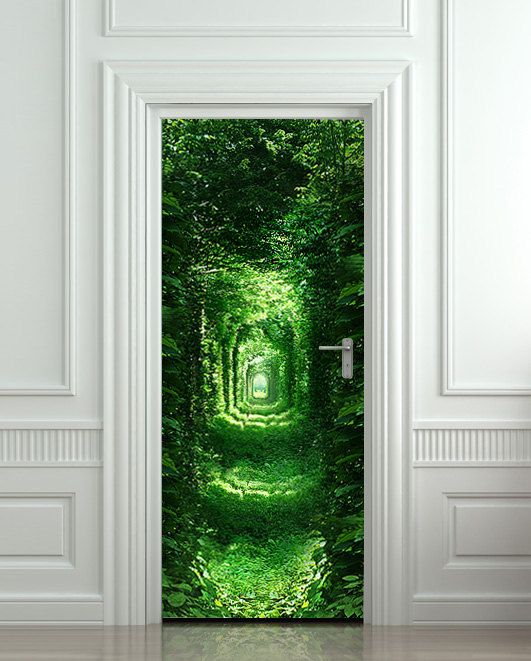
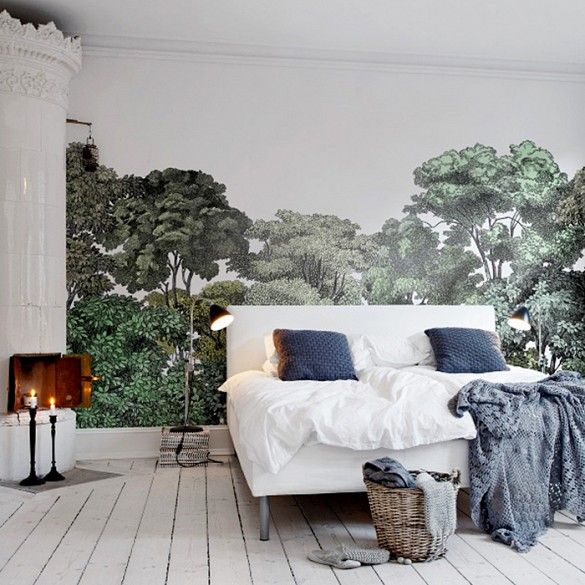


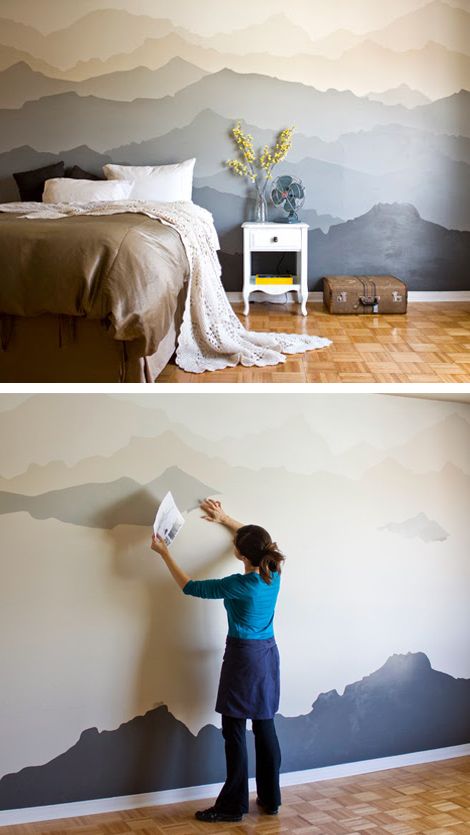
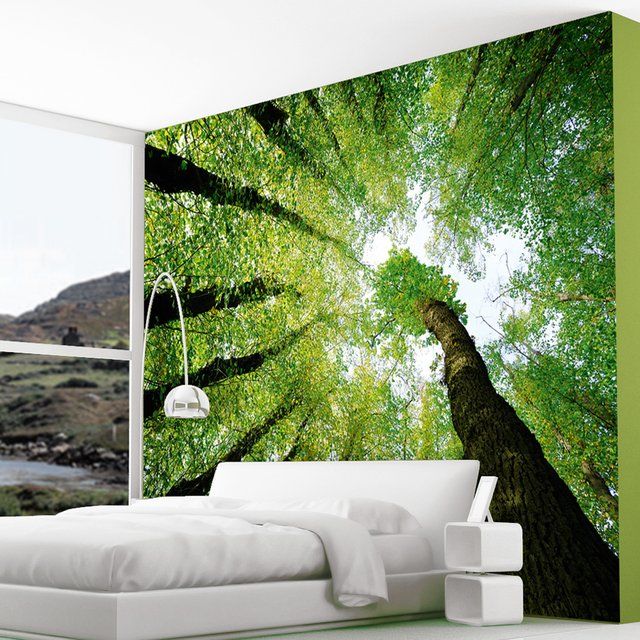

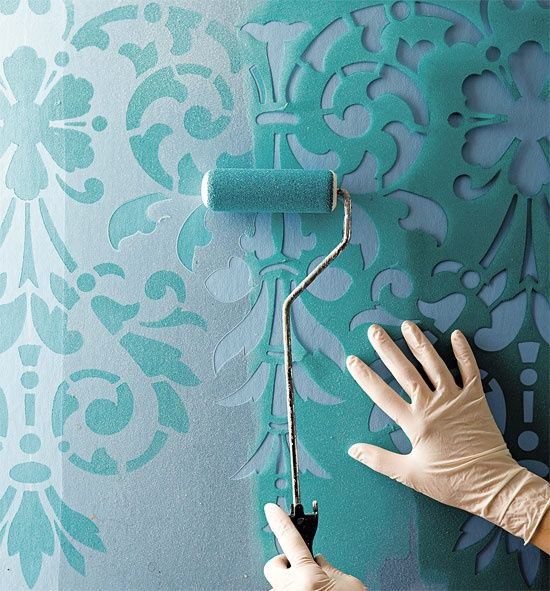


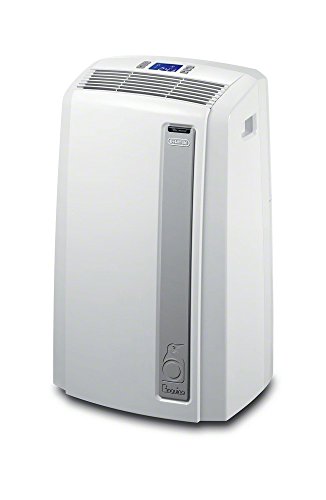


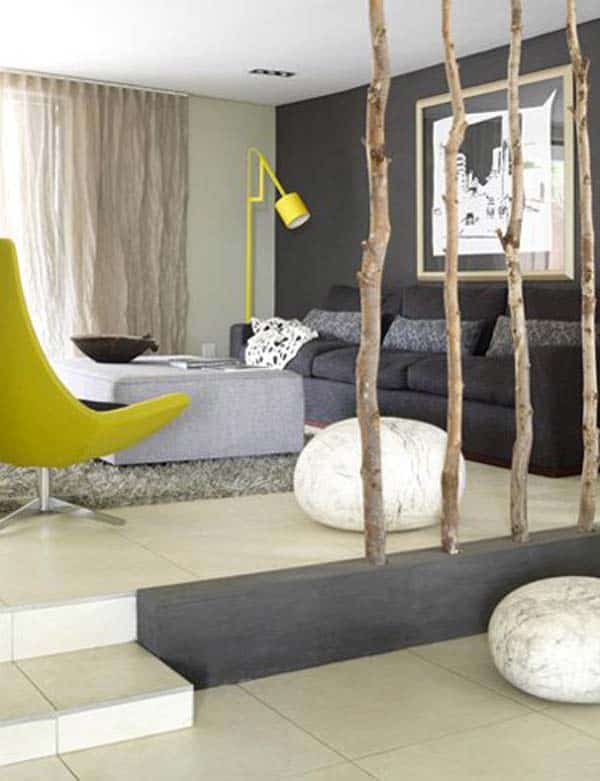
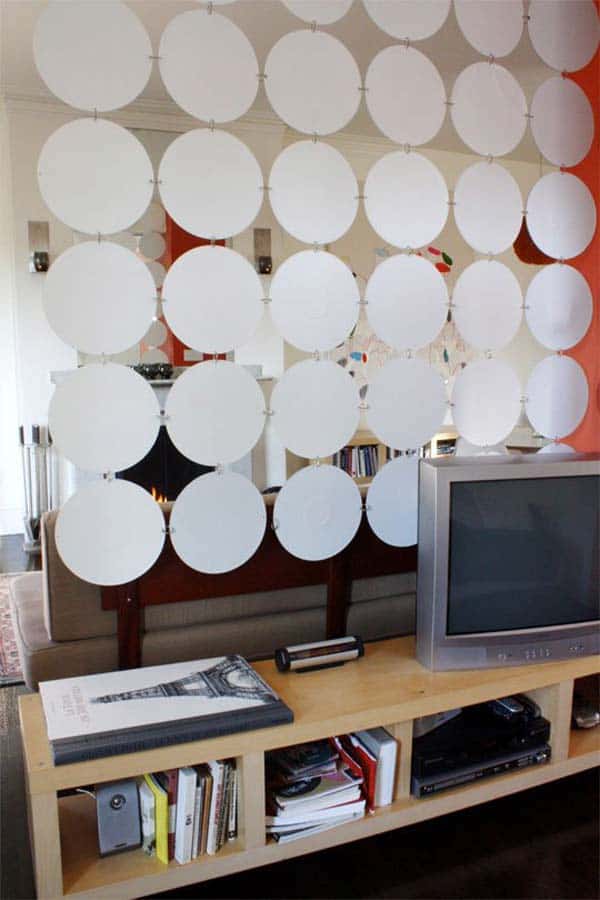
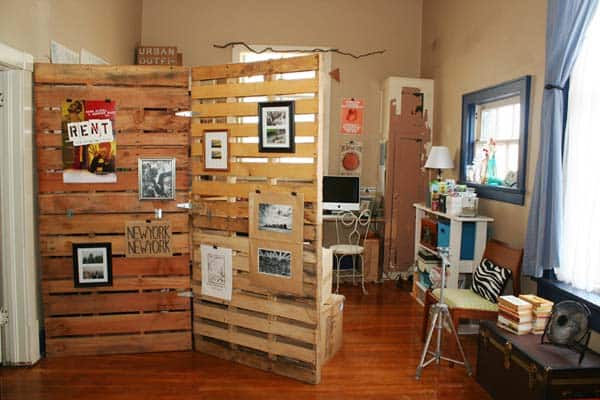
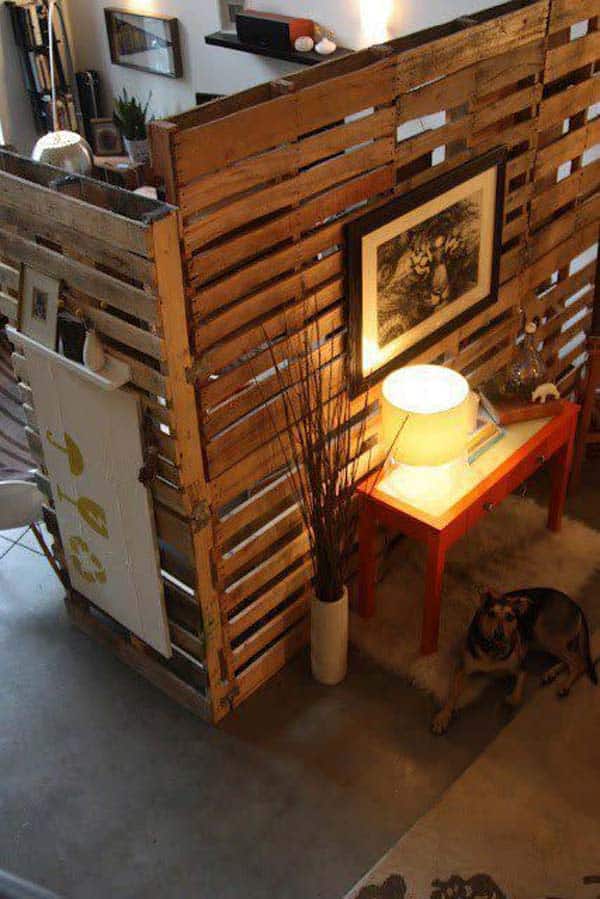
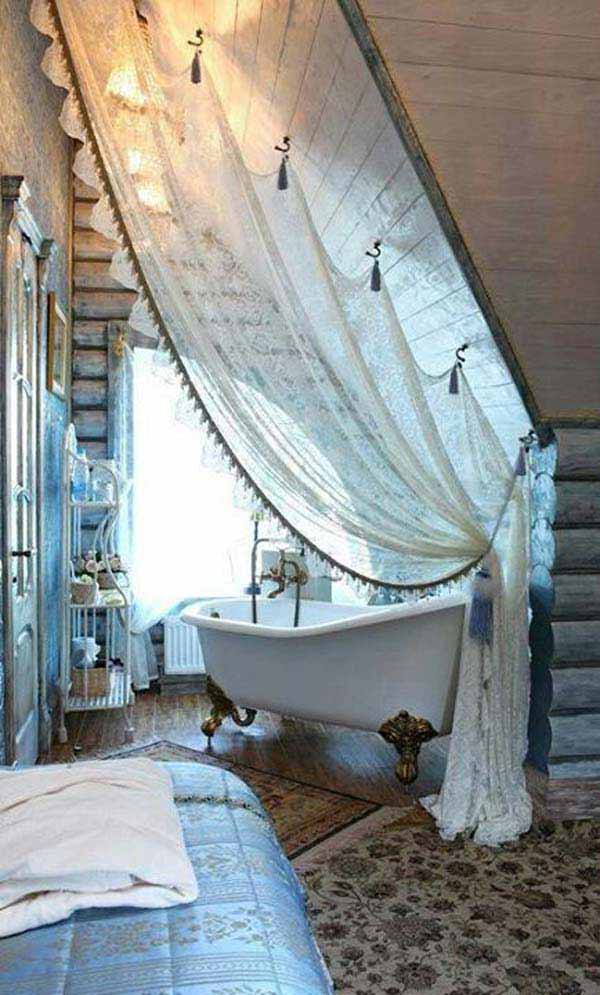
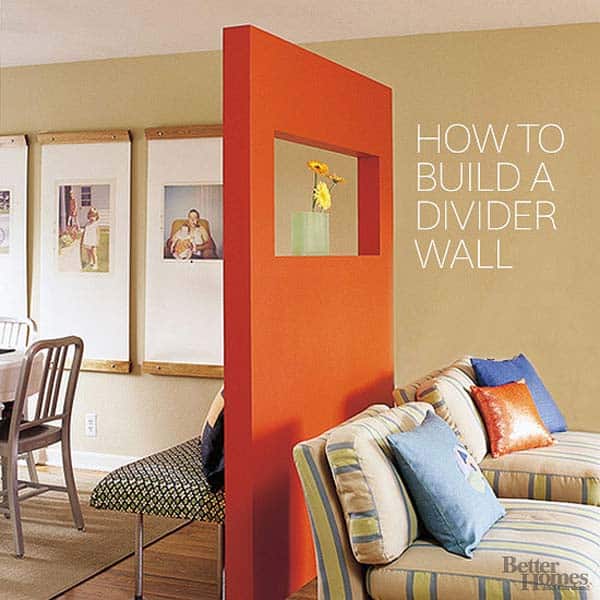
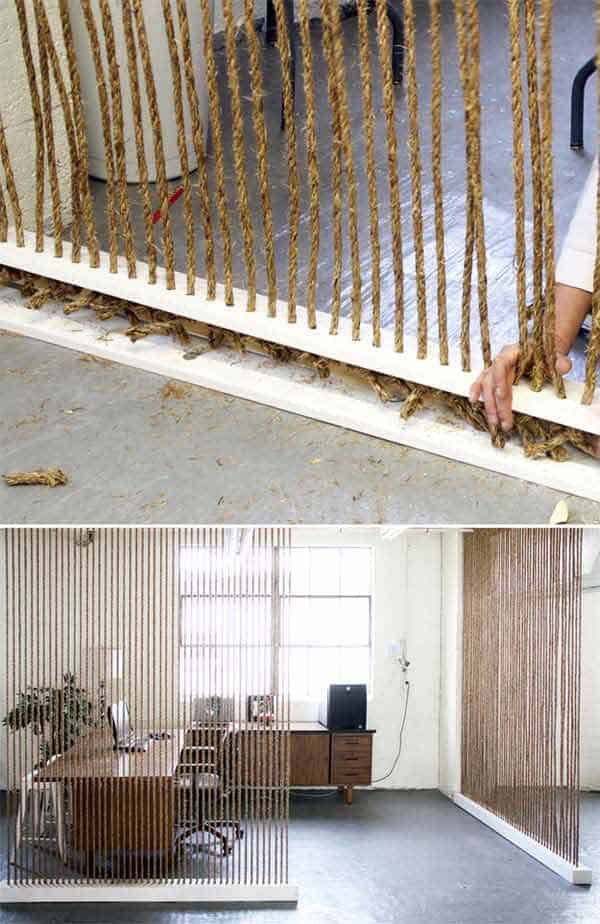
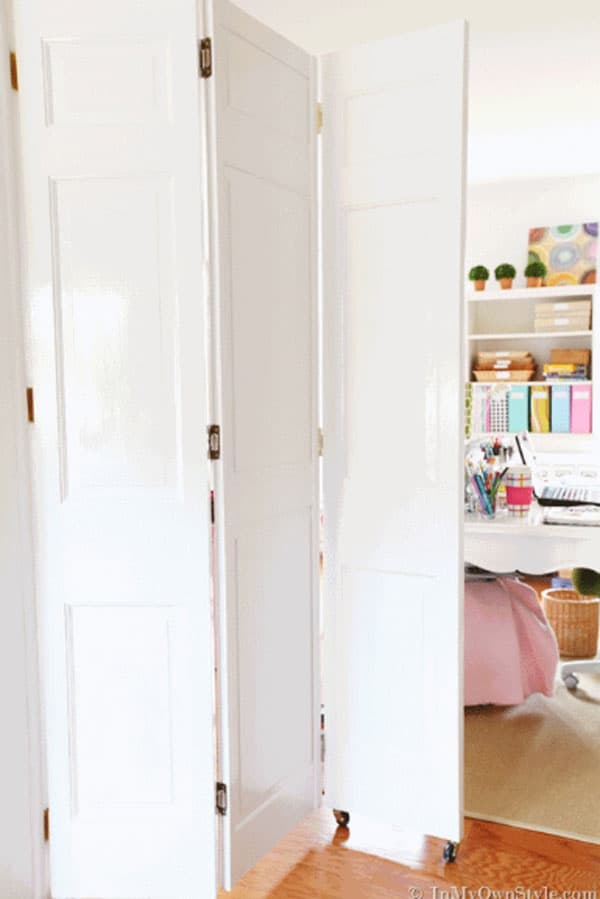
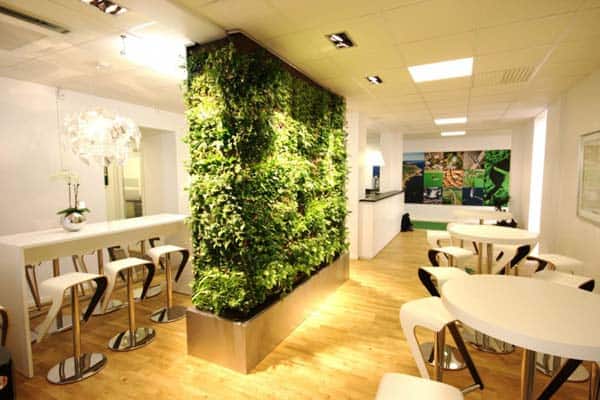

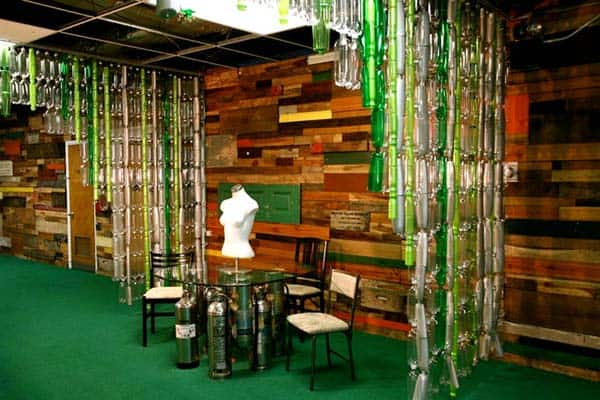

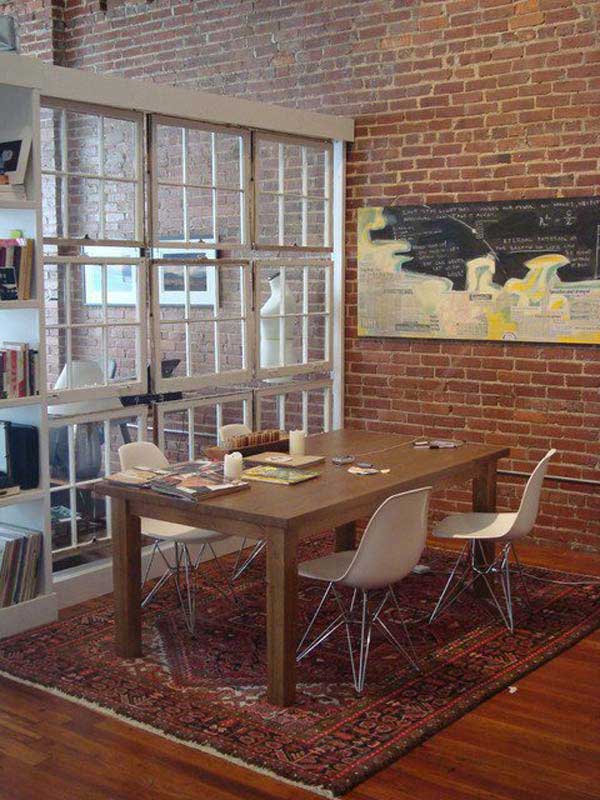
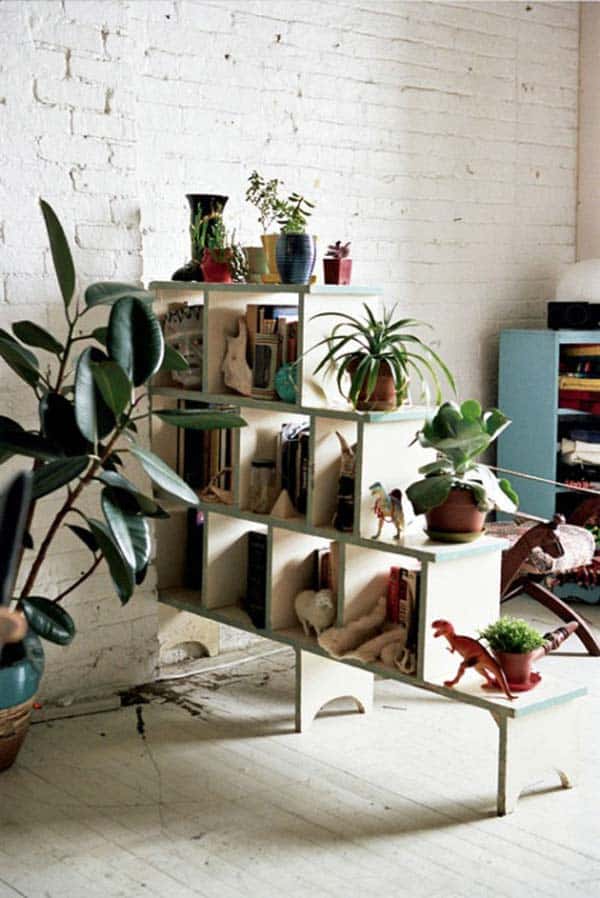
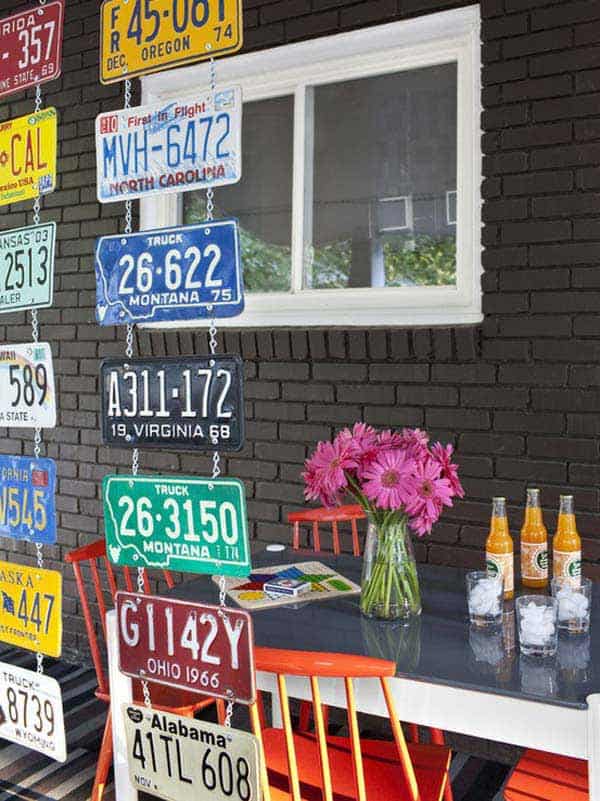
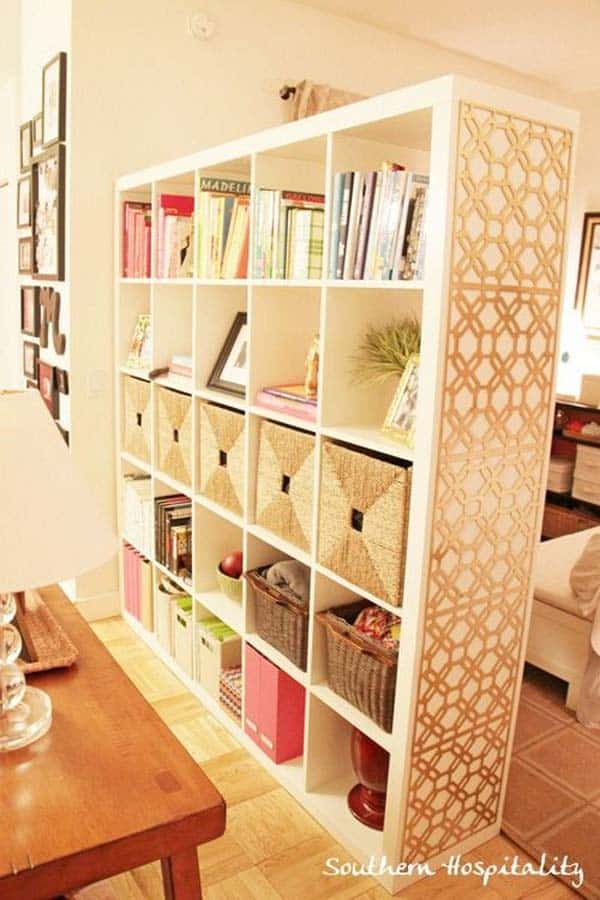
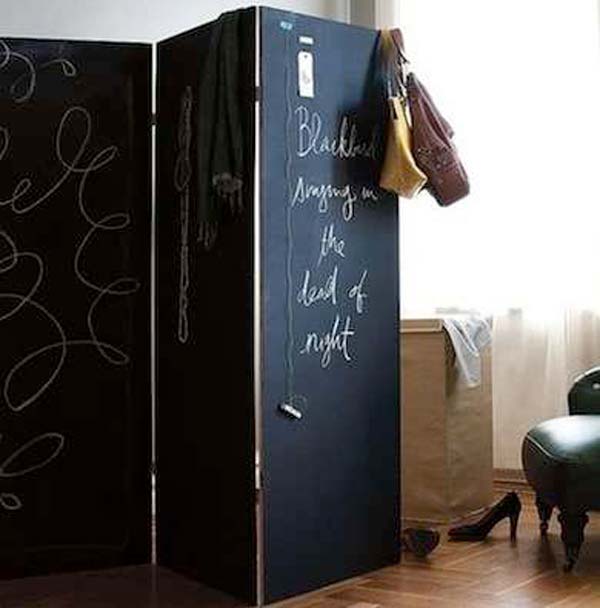
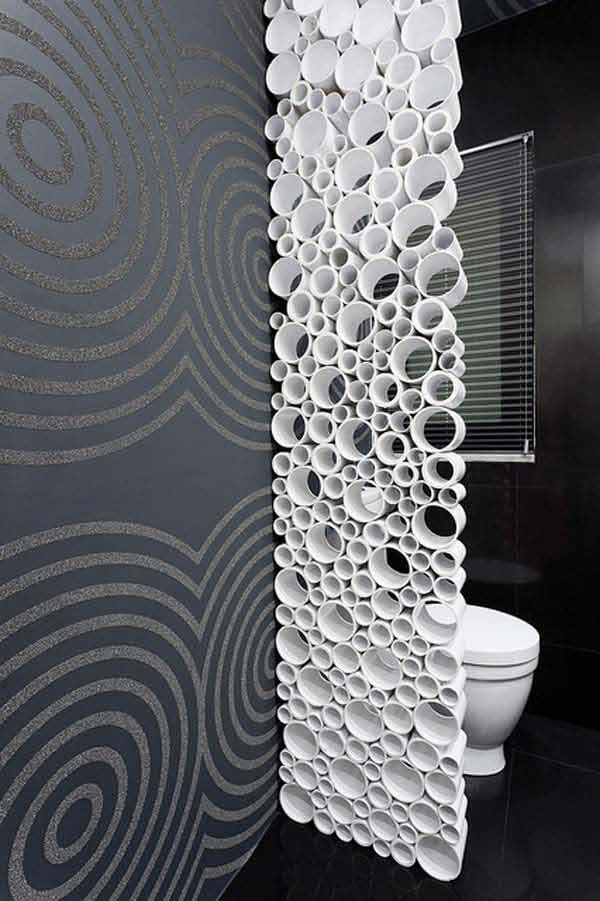

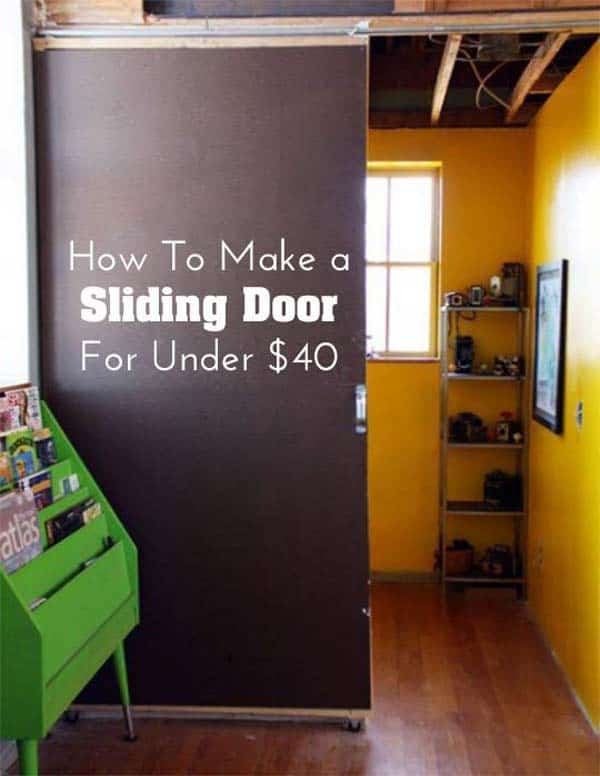
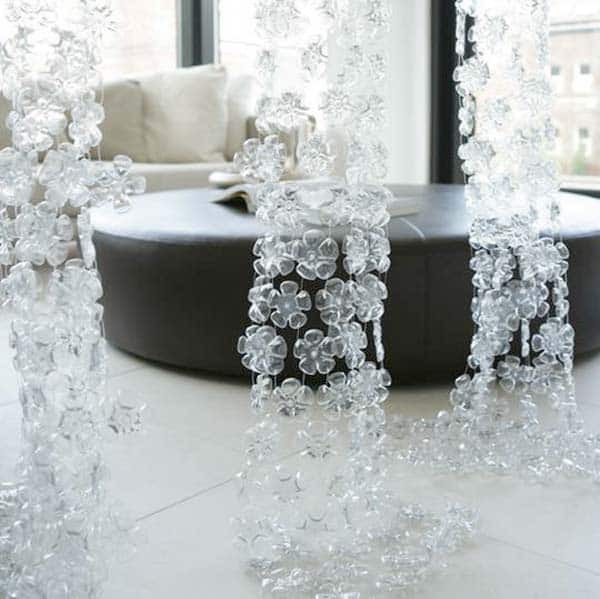
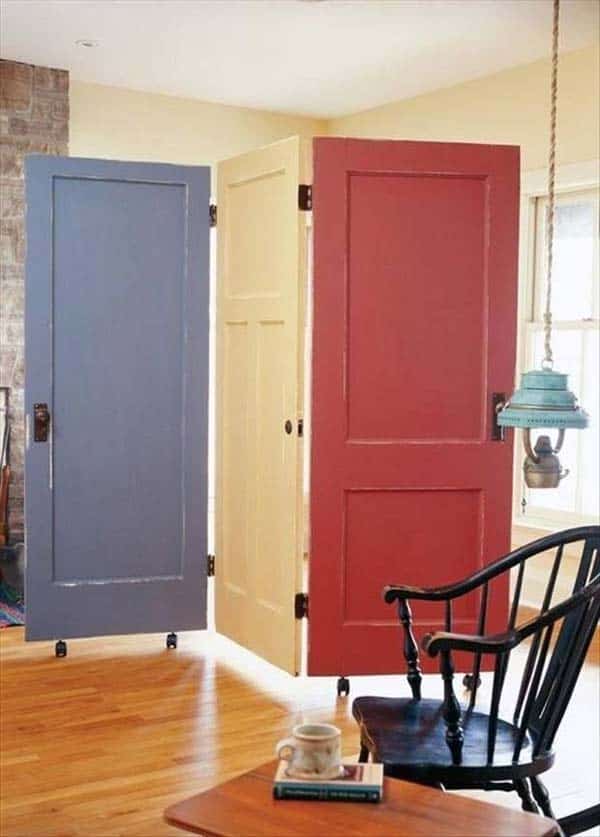
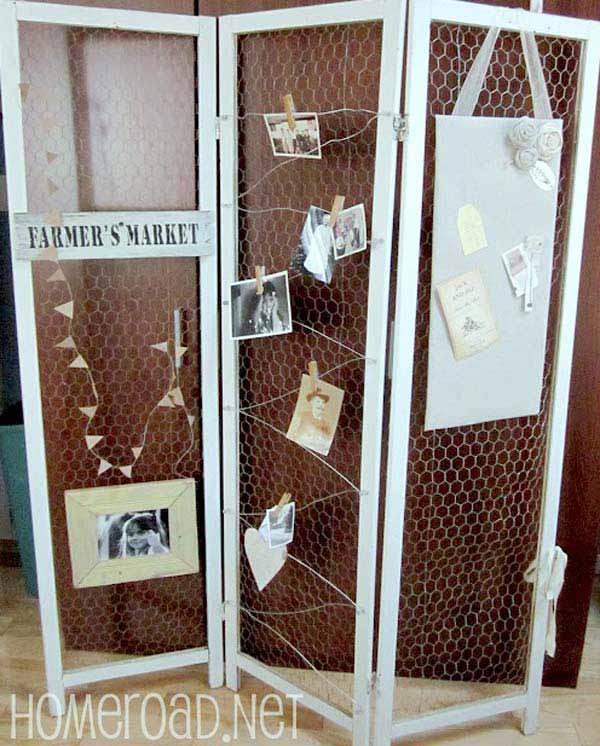
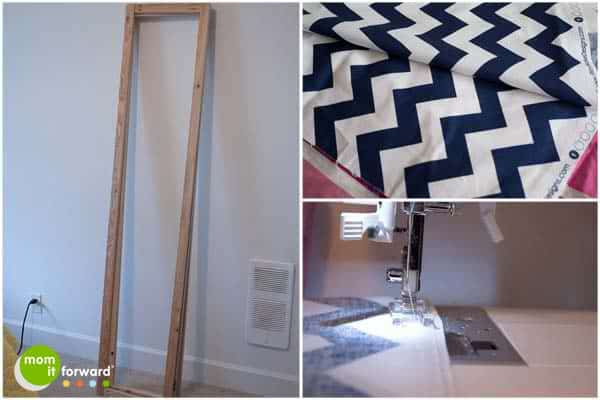
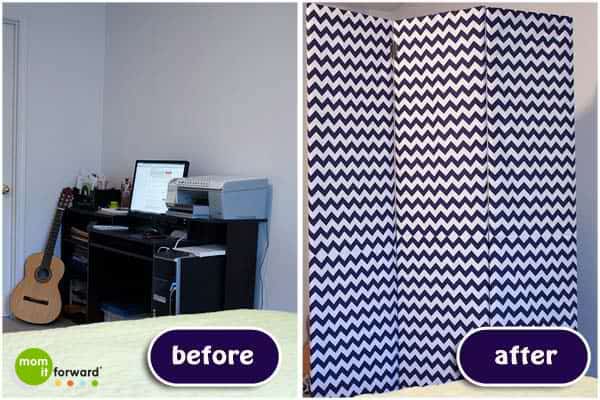 x
x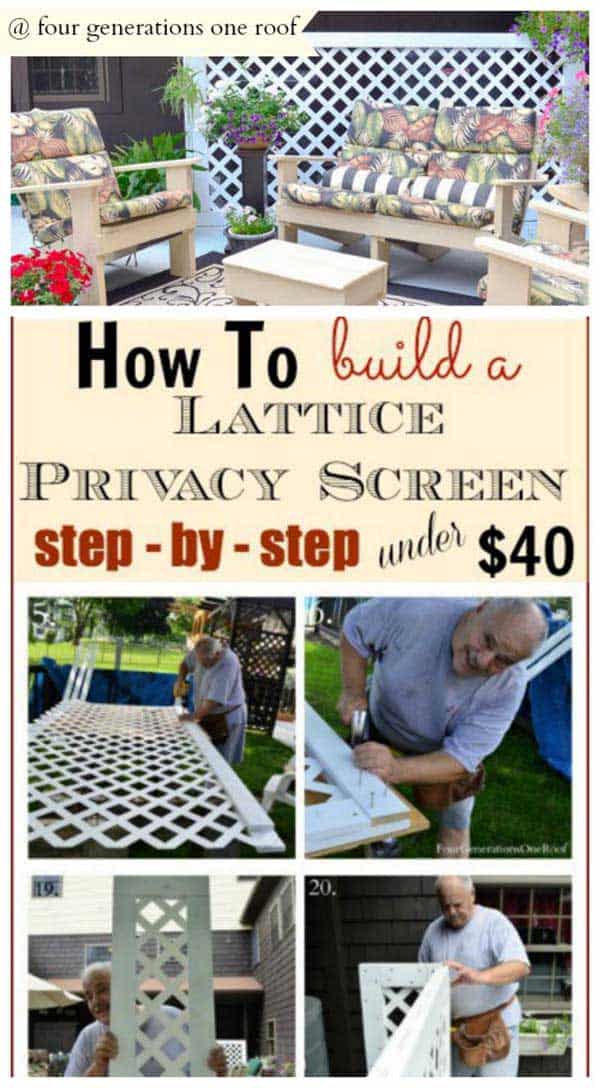
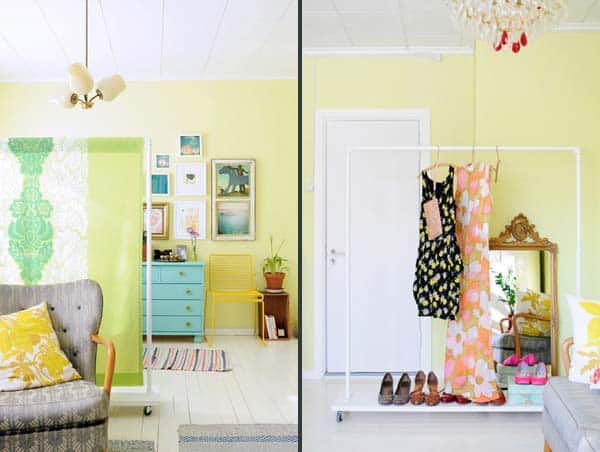
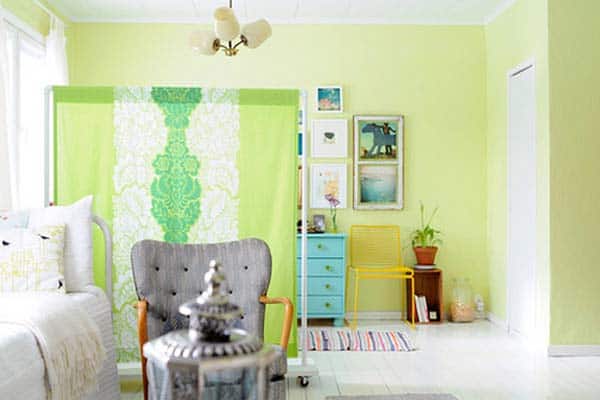
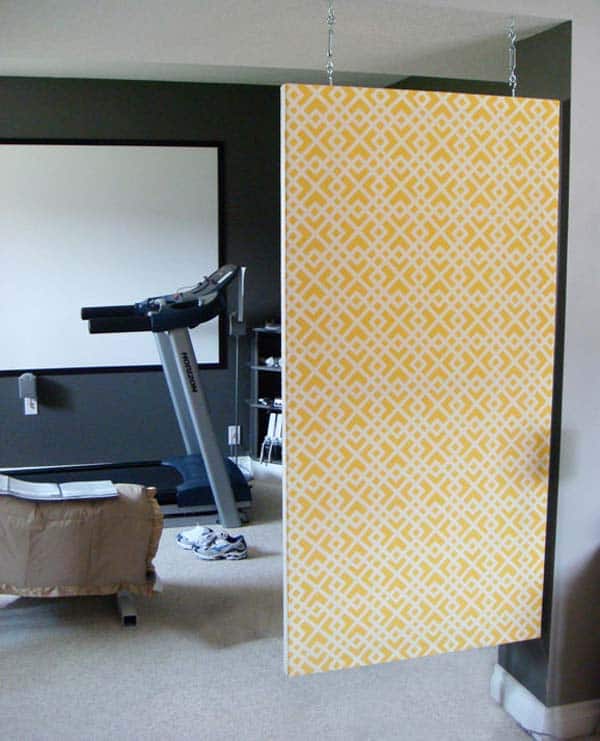


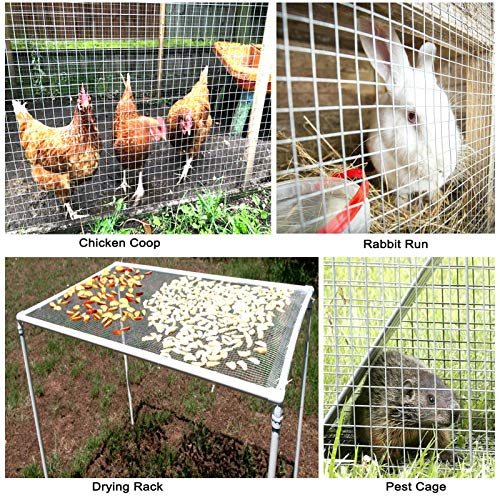
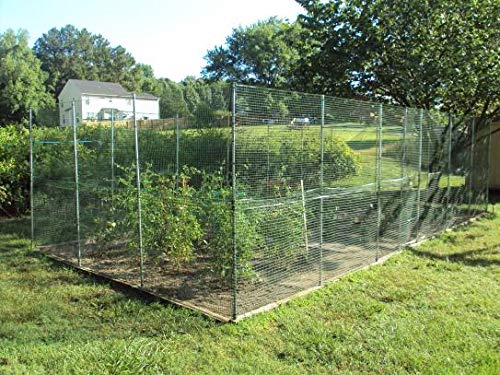

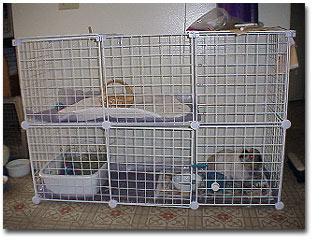
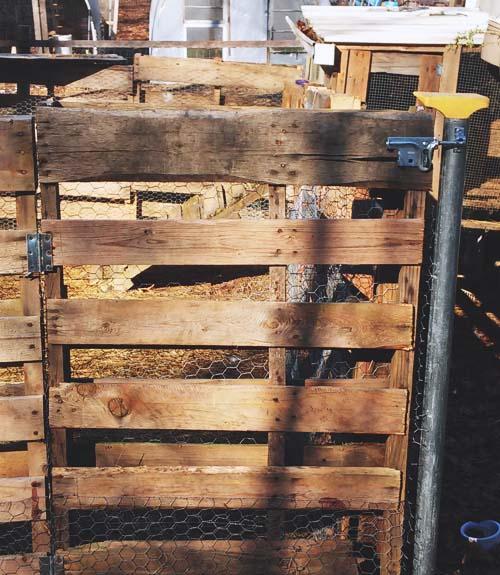
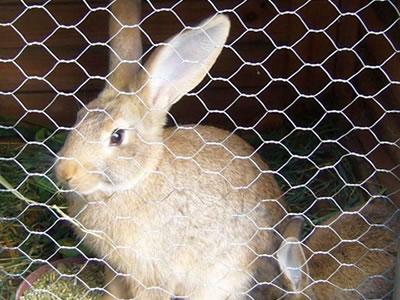


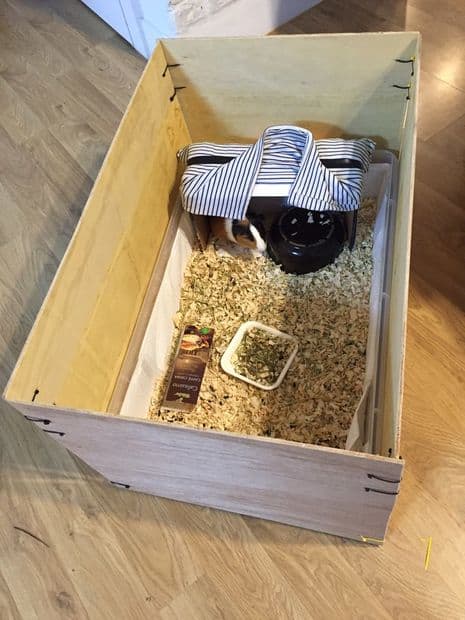
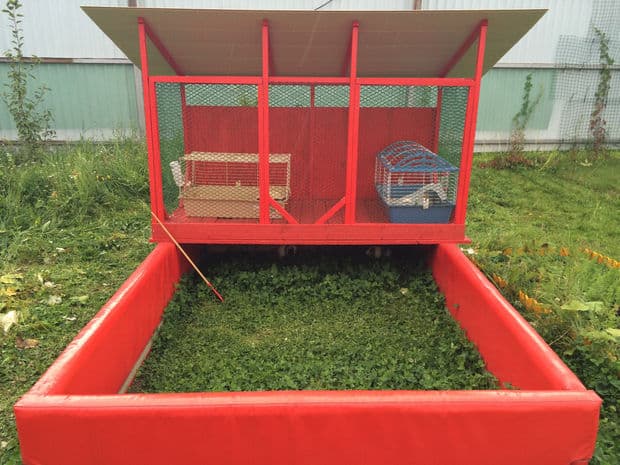
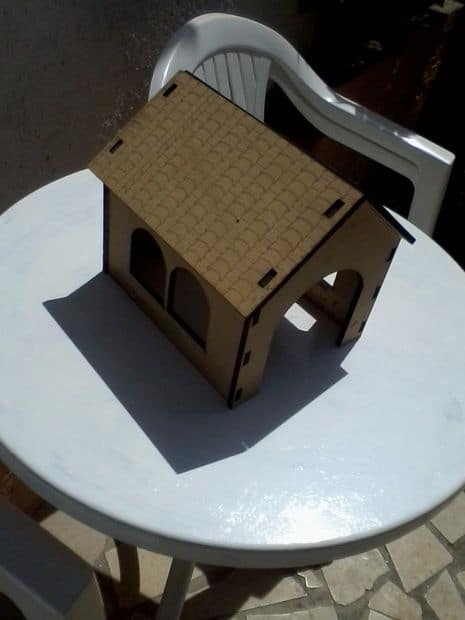
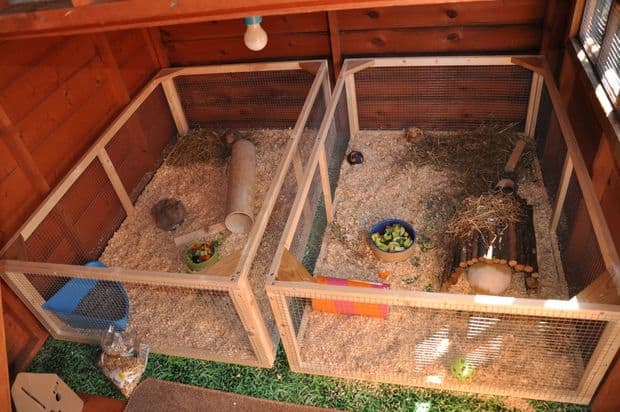
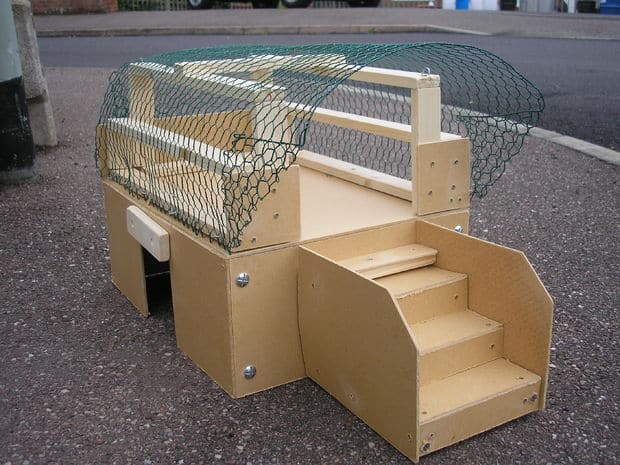
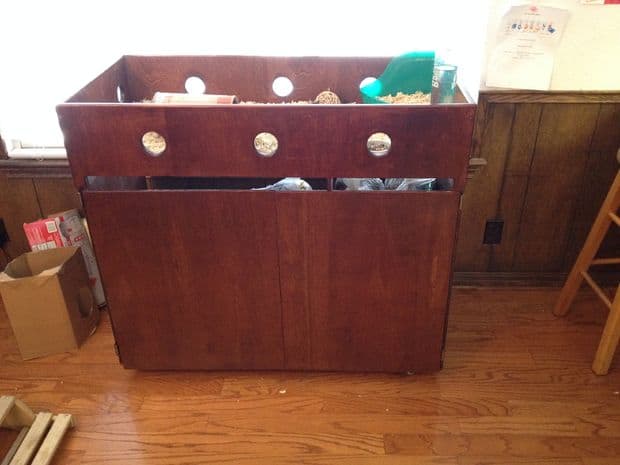
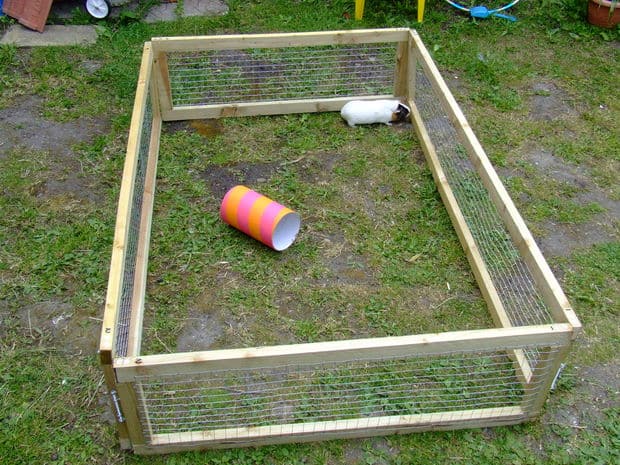
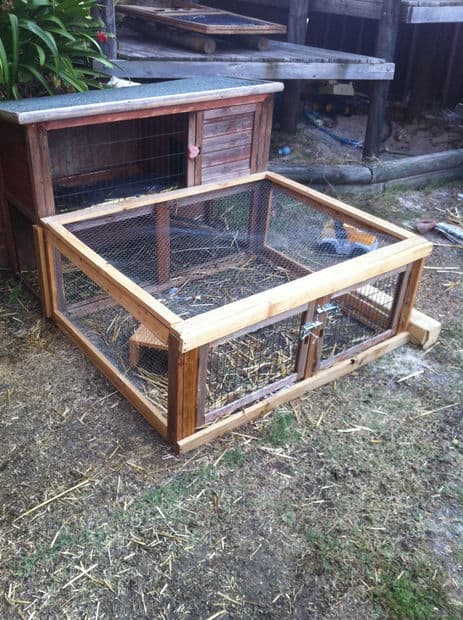
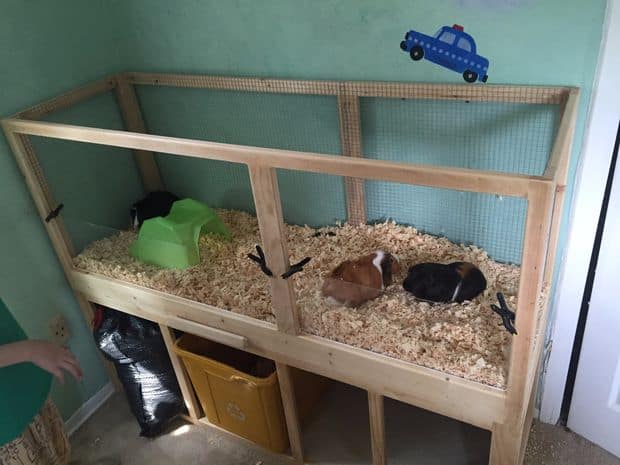
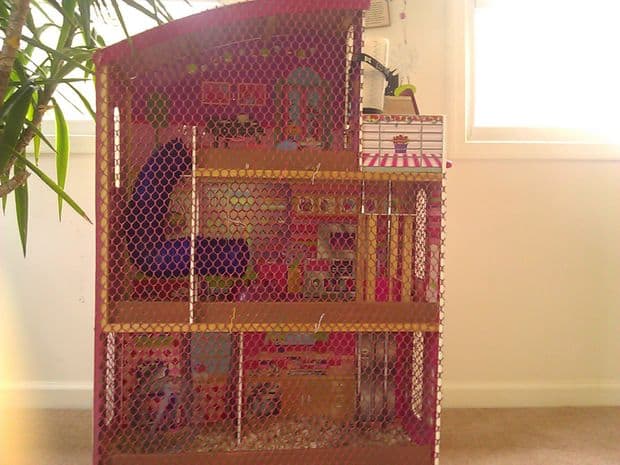
![DIY HAMSTER CAGE [ IKEA BIN CAGE]](https://homesthetics.net/wp-content/uploads/2017/12/16-5-1024x681.jpg)
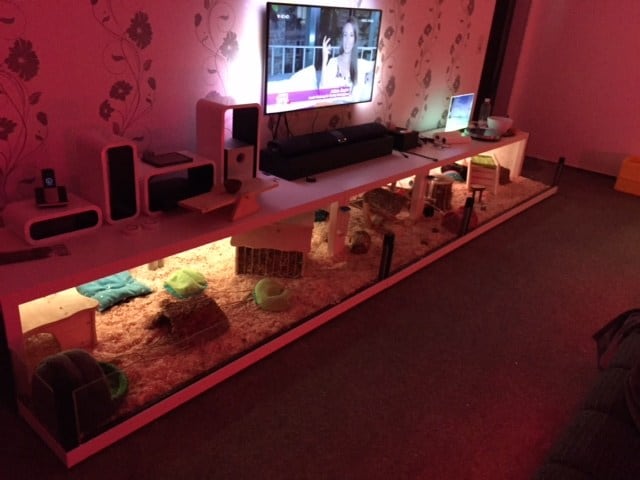
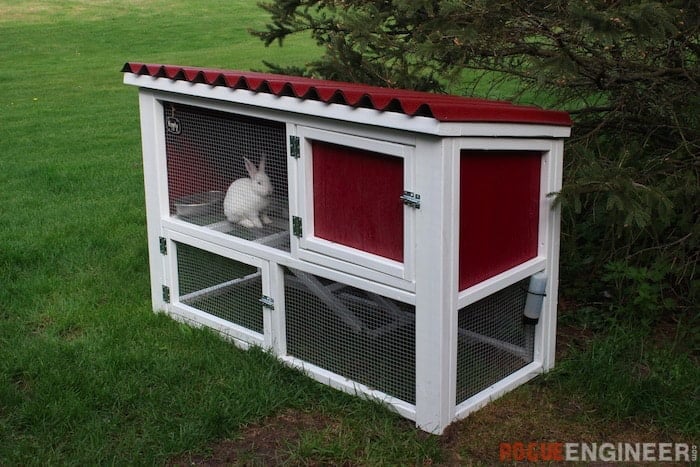
![Why Are My Solar Lights Not Working? [Answers & Solutions]](https://homesthetics.net/wp-content/uploads/2021/01/Why-Are-My-Solar-Lights-Not-Working-01.jpg "Why Are My Solar Lights Not Working? [Answers & Solutions]")


![Vitamix 5200 vs Vitamix 5300 [All You Need to Know]](https://homesthetics.net/wp-content/uploads/2021/04/Vitamix-5200-vs-Vitamix-5300-01.jpg "Vitamix 5200 vs Vitamix 5300 [All You Need to Know]")


![Mauviel vs. All-Clad [All You Need to Know & Winner]](https://homesthetics.net/wp-content/uploads/2021/06/Mauviel-vs.-All-Clad-01.jpg "Mauviel vs. All-Clad [All You Need to Know & Winner]")
![2 Wusthof Classic vs. Gourmet [All You Need to Know & Winner]](https://homesthetics.net/wp-content/uploads/2021/07/Wusthof-Classic-vs.-Gourmet-01.jpg "2 Wusthof Classic vs. Gourmet [All You Need to Know & Winner]")


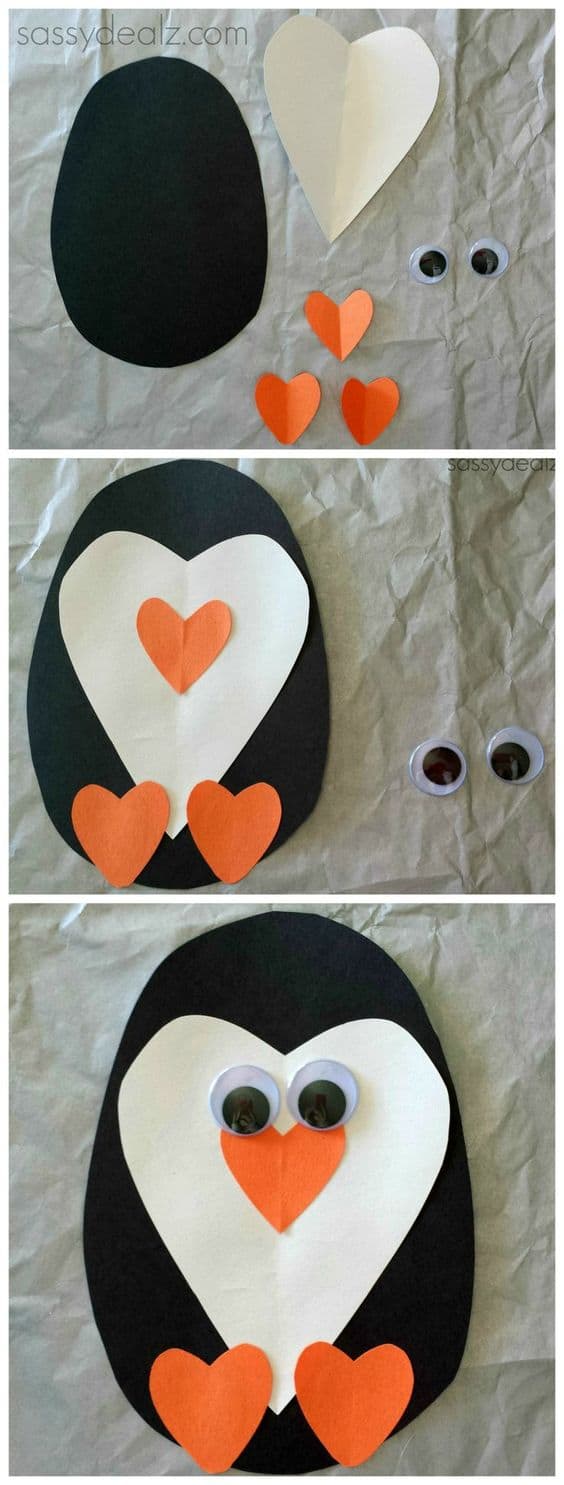


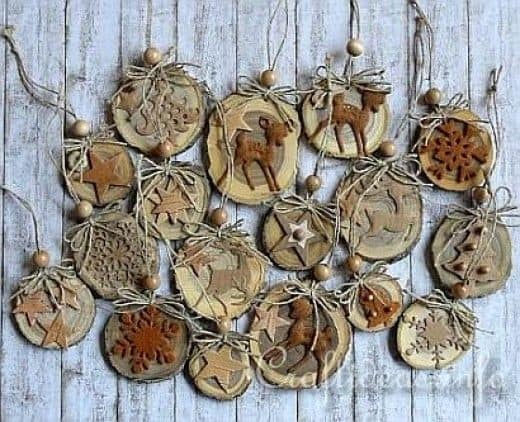

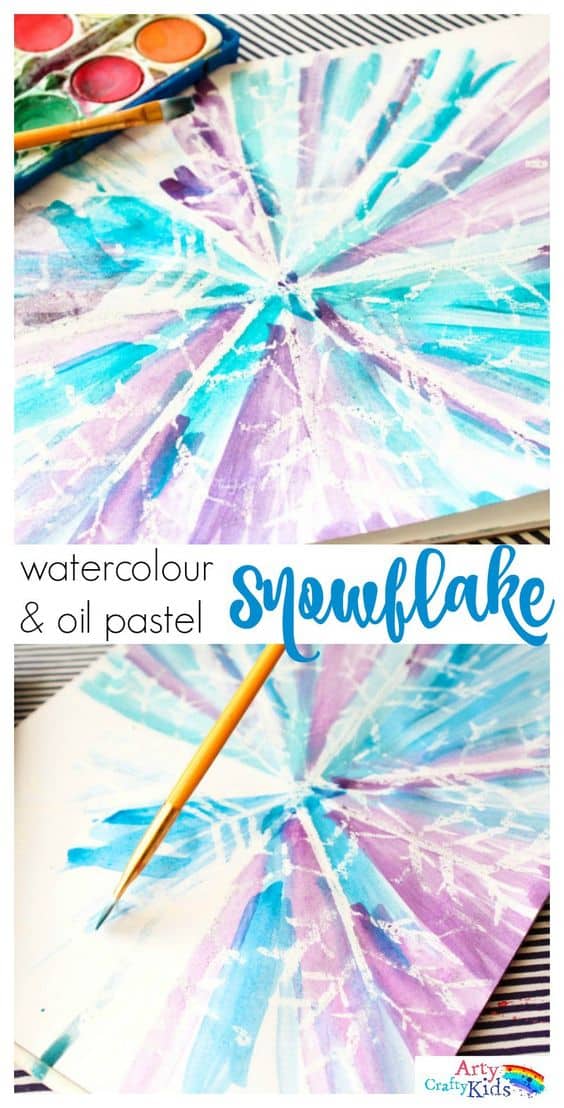
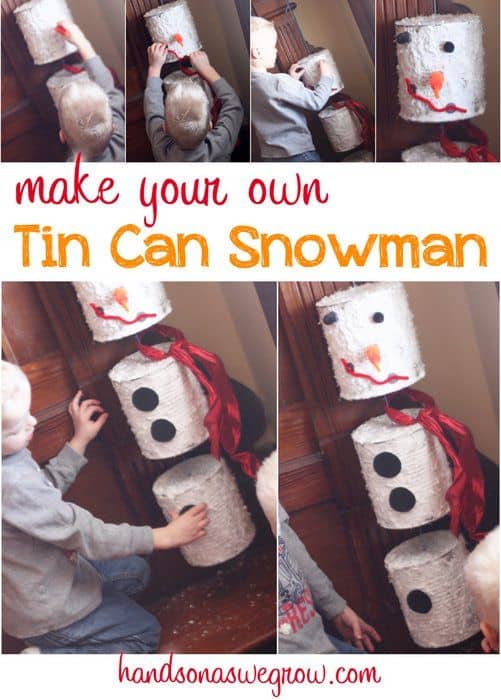


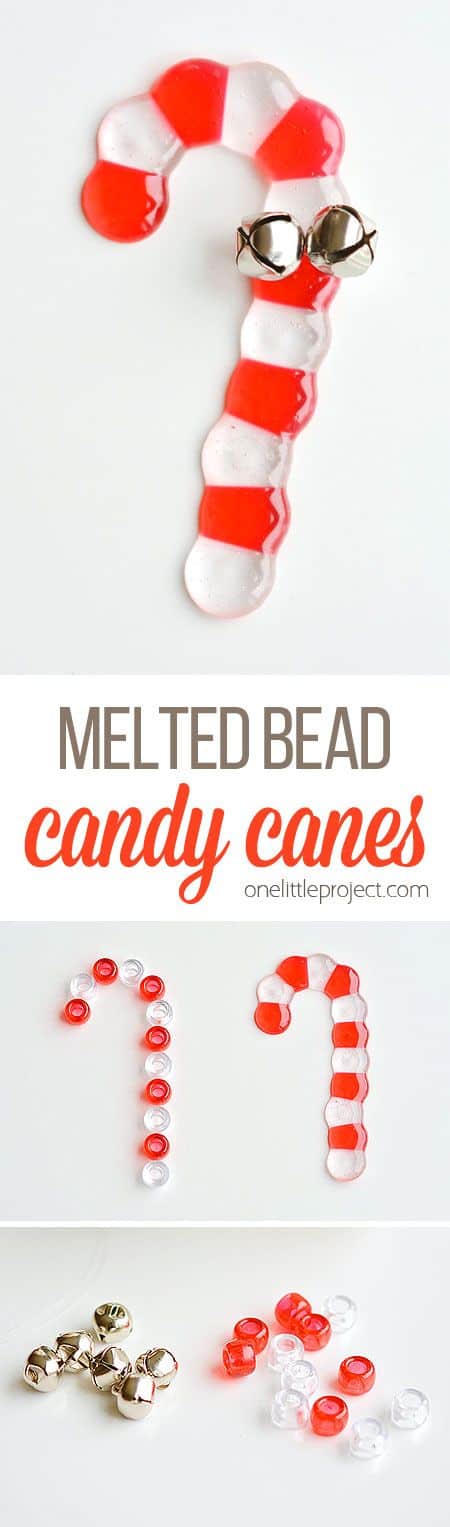
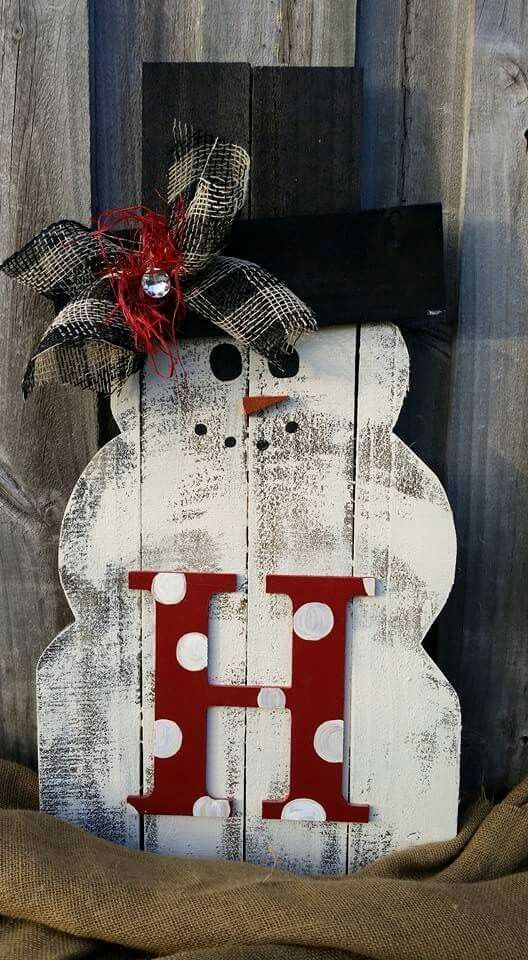


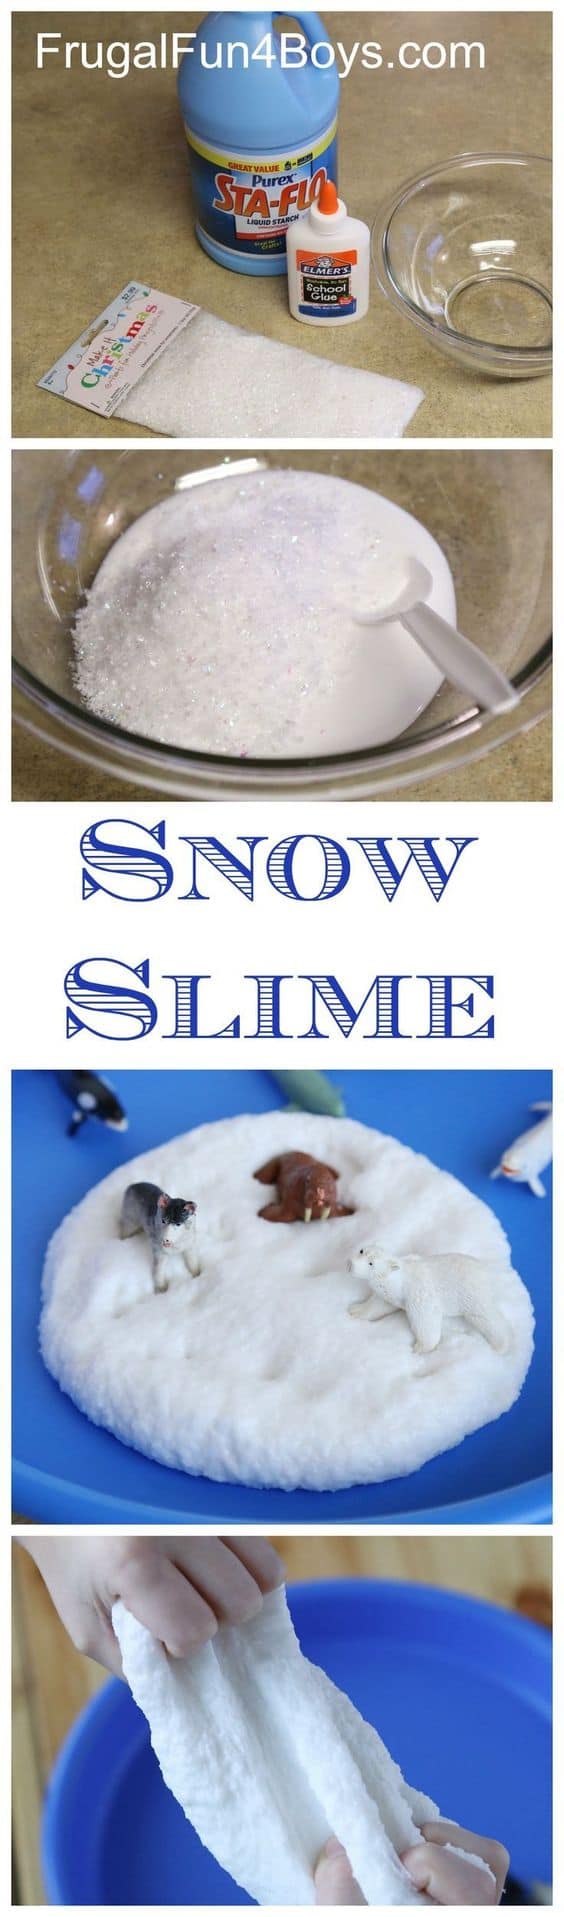

