The CR123A is a lithium-based battery with a nominal voltage of three volts and a high capacity. Used in a variety of military, industrial, medical, and consumer applications, it has ample power and life span to satisfy the power requirements of your device.
Batteries have revolutionized the way electrically-operated appliances work, enabling us to carry our small devices everywhere. Unfortunately, there is no such thing as ‘one size fits all’ when it comes to batteries. For instance, the CR123A batteriesfit the niche of providing power to small devices with high output, such as high tech LED torches.
They can provide impressive power output for their size and thus, they have made a significant impact in the segment. Let’s take a deep dive and explore how the CR123A batteries found their place in every household in the world!
All About The CR123A Batteries
The CR123A is a cylindrical lithium battery designed for devices like digital cameras, smart home devices, medical and tactical equipment, to name a few. Its range of applications is broad enough for it to find a place in many aspects of our lives, making it quite popular.
Think of the CR123A as the C-cell battery, but smaller in size. At 33.4 mm long and with a 17 mm diameter, the CR123A is just small enough to be easily portable. But that’s not to say that it lacks in power! The battery packs a punch and is used in high-tech devices as a result.
1. Longevity
It’s not out of the ordinary for a battery type to have a wide range of life spans. The longevity of a CR123A 3v lithium battery depends on the device it’s used in and the battery’s manufacturer. An unused, newly-purchased CR123A battery has a shelf-life of 10 years when stored at 60 degrees Fahrenheit. When used in low-powered devices like security alarm systems, it can last upwards of a year, while a high-powered torch can drain it within a month.
2. Rechargeability
Being lithium-based, CR123A batteries are not rechargeable, and they must be disposed of once they run dry. The lithium chemistry involved in the creation of these batteries is different from rechargeable ones and thus, you must never attempt to recharge them. If you try to recharge a CR123A battery, it can catch fire and potentially cause serious damage to its surroundings.
However, you can find rechargeable variants of CR123A batteries on the market like the RCR123A battery. Or opt for batteries that are of the same dimensions such as a 16340-sized battery.
3. Technical Specs
Now, let’s discuss the technical aspects of the CR123A battery. These are 3-volt lithium batteries with a discharge rate of 1.5 to 3 Amperes. Depending on the manufacturer, its nominal capacity can range from 700mAh to 1700mAh, meaning that these batteries can power a 100mAh device for 17 hours or more.
The CR123A batteries can operate in a wide range of temperatures, from -40 degrees F to a smoldering 158 degrees F. Their capability to discharge a high electric current pulse, maintain a high voltage level, high energy density, and safety features are why they’re popular.
4. Variants Of The CR123A
There are several variants of CR123A batteries that have prefixes designating the battery’s make and brand, such as the DL123A from Duracell. Some variations have a different chemical system altogether, making their applications somewhat different from a regular CR123A battery.
A notable variation of the CR123A battery is the CR123, a slightly longer and thinner version of the former that has the same basic capabilities. The difference between CR123 and CR123A batteries comes in the manufacturer’s designation of the product and nothing more.
5. Availability
The CR123A battery is one of the most common lithium battery types available on the market, with a vast number of manufacturers and distributors selling it. Though the battery type is the same across all manufacturers, the reliable performance is not. Depending on its maker, you’ll encounter several CR123A batteries that perform well or poorly, so pick your battery brand carefully.
Comparing CR123A Battery With A CR2 Battery
The CR2 is a more compact battery when compared next to a CR123A battery, being about half as large as an AA battery. Similar to the CR123A, it was first used in digital cameras and photographic equipment while being more portable.
There are a few key similarities between CR123A and CR2 batteries, namely their nominal voltage, lithium chemistry, and non-rechargeable nature. They are both 3-volt lithium batteries that have a shelf-life of 10 years and are used widely.
But the similarities end there, and despite appearing similar at first glance, the differences between the two are quite stark. Let’s examine all the differences between these batteries and find out which one is the better option.
1. Comparing Their Sizes
At 26.7mm long and with a diameter of 15.1mm, the CR2 is smaller than the CR123A battery, which is slightly thicker and longer. Its compact nature makes the CR2 slightly more portable, saving battery space for camera manufacturers. The varied battery length makes it so one cannot replace the other.
2. Measuring Their Capacities
A typical CR2 battery has a capacity ranging from 600 to 900mAh, which is significantly lower than that of a CR123A battery. Contrast with the latter’s 700 to 1,700mAh capacity, which makes it the better option to power a high-output device for longer than the former in most cases.
That said, each battery type is equally as effective as the last, with the differences being limited to their life span.
3. Difference In Applications
Since they are of different sizes, the CR2 and CR123A fulfill different use cases and cannot be used interchangeably. The CR2 is used in military, medical, consumer, and industrial fields, with high performance LED torches and optics being its most prominent military equipment uses. In other fields, it’s used in lamps, cameras, alarms, and other security-related devices.
In similar fields of applications, people often use the CR123A battery for smoke detectors, high-output LED lights, flashlights, weapon lights and portable lighting systems. Being better than the CR2 batteries in most areas, CR123A batteries are used more widely in the same fields.
So, devices in the fields mentioned above have battery compartments dedicated to CR123A batteries more often.
CR123A Vs CR2 Batteries: The Winner
There are a number of reasons why you would pick the CR123A battery over CR2, being among the larger and more powerful batteries. For starters, the CR123 has a leg up on the CR2 in sheer performance alone, being 60% more powerful than the latter.
It also draws more current and gives a greater degree of oomph to your device in comparison to the CR2. Because of this, a flashlight powered by CR123A batteries will be brighter than the ones powered by CR2 batteries.
The only reason you would ever want to use CR2 over CR123A is if the device requires smaller batteries.
Can Rechargeable And Non-Rechargeable CR123A Batteries Be Used Interchangeably
Technically, you can use rechargeable CR123A batteries in place of their non-rechargeable counterparts without damaging your device. That said, there is a chance that each type of battery performs at different voltages and capacities, which can harm your device.
If you must use a rechargeable battery in place of a non-rechargeable one, do so only in case of emergencies. Check your device specifications to know more about their compatibility with either battery type.
CR123A Batteries Conclusion
Batteries are a single-use resource and one that can run out very quickly, depending on your device. It’s only natural that you’d want them to last as long as possible, eliminating the need to change them out frequently. The CR123A batteries serve as a solution to this concern, as they last longer, are quite powerful and can be used in many appliances.
You won’t have to look up where to buy CR123A batterieswhen scouring the market for them. Nearly every battery manufacturer makes these, and most retailers sell them as well, making them a convenient purchase if needed urgently.
It’s important to note that gadget specs play a large part in what battery type you use. The CR123A can be too powerful for your device even if it fits the dedicated battery slot, so check what kinds of batteries the tool is compatible with.
CR123A batteries, which are among the most versatile batteries on the market, can be bought both online and offline from stores like Amazon and Homedepot. However, you must only buy them from reputed dealers to avoid encountering quality issues.
We get it- buying electronic accessories, like CR123A batteries, can be difficult. Unless you’re buying them from a reliable source, there’s a high chance of ending up with counterfeit or low-quality products.
That’s why we are here to tell you where to get them from.
Where Can You Find Cr123a Batteries?
Now, some of our readers may be wondering, “what are CR123A batteries?” Well, these are essentially high-capacity and highly-durable lithium-ion batteries used for a variety of applications. From powering medical devices to military-grade equipment, they can do it all.
Aside from that, they are a popular choice for home security alarms and systems. In fact, most PIR (passive infrared) sensor manufacturers recommend these batteries for wireless systems, as they are more powerful and durable. CR123A batteries are also used in high-power flashlights and cameras.
These versatile batteries are manufactured by brands like Energizer, Panasonic, and Duracell, to name a few. However, they can often become out of stock due to their popularity.
When available, you may find these batteries on e-commerce sites as well as in physical retail stores. Retail stores like Homedepot (which have both online and offline stores) can facilitate online ordering and in-store pickup. However, you can simply opt for home delivery to make the bing process more convenient. Alternatively, you can head to the official websites of the manufacturers or Amazon to buy them.
How To Choose The Right CR123A Battery?
There are a few important factors to consider before purchasing CR123A batteries. And the first important thing is to check whether your device needs a rechargeable or non-rechargeable battery.
The former will arrive completely read-to-use and can retain full or almost full charge for up to a decade before use. Hence, these batteries are more suitable for emergency devices that aren’t used often but need to be powered immediately when required.
Rechargeable CR123A batteries, on the other hand, are ideal choices for devices that are used frequently and need a lot of power. They are also known as 16340 or RCR123A batteries.
But they may not be compatible with all devices using CR123A batteries, so check the owner manual to ensure you get the right ones.
At this point, some people may be asking, “how to test CR123A lithium batteries?” And the answer to that will be by connecting a 3.3-ohm resistor to its terminals. Most CR123A batteries have a standard voltage of 2.5 volts, but if the reading is below 1.5 volts, it’s time to get new batteries.
Or, you can use a voltmeter or battery tester to gauge the remaining capacity.
Where To Buy CR123A Batteries Conclusion
That’s all we had for today!
But before saying goodbye, here’s another crucial piece of information. CR123A batteries are also abbreviated according to the manufacturing brand. For example, DL123A is the name for Duracell batteries, while EL123A refers to Energizer batteries. Apart from that, they can be named 123, 123A, or CR23, so don’t get confused.
There are several ways to test and find reliable CR123A batteries. For instance, you can use a multimeter to check the internal resistance and voltage fluctuations of the battery. Voltage drops are usually an indicator of poor-quality CR123A batteries.
Nowadays, CR123A batterieshave become a popular source of power for operating home appliances and devices.
However, the quality of a battery can differ from one brand to another, which makes it hard to determine which battery is ideal for your home appliances. Moreover, several factors, such as internal resistances, voltage, and others, determine the quality of a good battery.
Hence, we have compiled this guide to help you test and find high-quality and reliable batteries.
What Is A CR123A Battery?
In simple terms, a CR123A battery is a cylindrical cell that relies on lithium chemistry to produce energy for home appliances. When it comes to shape, it shares the same resemblance to a C-cell battery since it is small and compact.
Moreover, these batteries can be used for all types of applications. For example, you can use them to power both military-grade technology as well as medical appliances. Since these batteries are so widely in demand, they are usually hard to stock due to their limited availability.
Some of the top brands that manufacture these batteries are Duracell, Panasonic, and Energizer. In fact, some brands offer a charger with a rechargeable battery which makes it convenient since you can use the battery for a long period.
However, you must be very careful while storing non-rechargeable batteries since they discharge quickly. Ideally, you should avoid hot places since they damage the cell and cause the battery to discharge faster.
Most manufacturers provide clear instructions regarding storing the excess batteries in a cool and dry space since it prevents the batteries from discharging quickly. As such, the batteries can last for a long period. You canbuy CR123A batteries from a local hardware store or a nearby convenience store.
How To Test CR123A Lithium Batteries?
When it comes to checking the quality of CR123A batteries, there are several ways of testing them. In this section, we shall explore some of the common methods of testing CR123A batteries:
1. Capacity And Shelf Life
Basically, one of the best ways to check the quality of CR123A lithium-ion batteries is by checking the capacity. Batteries with high capacities are usually a good indicator of high battery performance since they have a slow discharge rate. This makes them last longer than other batteries that have low capacities.
Batteries with a good shelf life are another way of checking the quality and performance. If a battery has a short shelf life, it clearly indicates that it discharges faster. As such, it wouldn’t be helpful if you store batteries with short shelf life.
2. The Torch Test
Another way of testing the quality of different CR123A batteries is by performing a torch test. Simply take three batteries from different brands and place them in three individual torches. If a torch shines more brightly than the other two, it clearly suggests that the battery within the brighter torch delivers higher performance.
Also, if certain torches experience flickering during the test, then there is a high chance that the batteries are discharging quickly or experiencing higher voltage fluctuations. Sometimes, you might notice the torch reaching a high temperature since the battery is overheating. In such a situation, we recommend turning off the torch to prevent further increase in temperature, or else it can cause an explosion.
If the torch refuses to turn on after multiple attempts to switch it on, it signifies that the battery is dead. Consequently, the cell doesn’t have any charge to power the device.
3. Multimeter Test
This test is mostly used by professionals in the electrical and engineering field since they use this device for various purposes. However, you can easily find this device in a local hardware store, and they are affordable.
For this test, you need to take a fully recharged battery and place it between the two ends of the two receptors of the multimeter. If the battery doesn’t display any power while not being in load, it indicates that the battery is dead. On the other hand, if you notice readings on the multimeter, the battery is in optimum working condition.
But you should be careful since the battery can display higher voltages sometimes. This usually happens when the battery provides power without any load. Once you place the battery in a home appliance, it will display normal voltage reading. You can also use the multimeter to check if the internal resistance of the battery is performing the task optimally by preventing short circuits.
Are All CR123A Batteries Rechargeable?
In general, cr123 batteries are primary batteries that are designed to be disposed of once they have died out completely. As such, attempting to recharge a CR123A battery can be dangerous since it can explode and cause severe damage to your property and yourself.
On the contrary, some brands design CR123A batteries with different chemistries. This allows the users to recharge the batteries and use them repeatedly. However, only a few brands can design such batteries, and the stock is very limited. Thus, you should always check the packaging to see ifyou can recharge CR123A lithium batteries or not.
How To Test CR123A Lithium Batteries Conclusion
Like any perishable good, batteries have a limited life span, and the quality of the cell decreases over the years. Nevertheless, you can always opt for rechargeable CR123A batteries since they last much longer.
On the other hand, you can preserve the quality of the battery by following the storage instructions given by the manufacturer. For instance, fresh batteries should be stored in a cool and dry place since extreme heat can damage the cells and cause the batteries to discharge faster.
If you are storing fully charged rechargeable batteries, you should check them once in a while to see if there are any voltage drops. Besides, you can purchase a multimeter to test the quality of the batteries from time to time.
With that, we have reached the end of this guide, and we hope you found it informative. Stay safe, and see you next time!
There are significant dangers associated with recharging a CR123A lithium battery, which include gas leaks, fire, and explosion. However, RCR123A batteries are an alternative to the ordinary CR123A, which can be recharged with none of these risks.
CR123A batteries are among the most popular battery types and though they last quite a while, having to replace them can lighten your pockets quite a bit. Recharging your batteries is one way to keep using them without spending more money on replacements.
But the trouble is, CR123A batteries are typically not rechargeable. So, let's dive into the specifications of these batteries and see if we can find an alternative!
Are CR123A Batteries Rechargeable?
'CR123A' typically refers to lithium-based batteries that are made with primary cells, meaning that they are single-use batteries. However, that's not to say that all CR123A batteries are non-rechargeable.
The battery type comes in two distinct varieties: Rechargeable CR123A, aka RCR123A, and Non-Rechargeable CR123A. Let's look at both battery types and learn why one of them can be reused while the other can't.
Rechargeable CR123A Batteries
Rechargeable CR123A are Lithium-ion batteries which can be recharged and reused over and over again. These primary batteries have a nominal voltage in the range of 3.6 to 3.7 volts, with a capacity of 500 to 800mAh. This means that these batteries can power a 100mAh device for up to 8 hours.
Since these can be reused, you'll be using your rechargeable battery for far longer than a typical CR123A battery. It comes half-charged and must be fully charged before you use it for the first time. If left unused, RCR123A batteries will eventually begin to lose charge and deplete within three to four years of disuse.
Additionally, these rechargeable batteries come with safety features to protect them from short circuits, current surges, and other electrical hazards while in a battery compartment. These features affect the batteries' capacity, but it's a relatively small tradeoff for the safety they provide.
And lastly, a good-quality RCR123A battery can last over 1,000 charging cycles, leading to a longer life than its non-rechargeable counterpart. RCR123A battery chargers are relatively inexpensive as well.
Non-Rechargeable CR123A Batteries
Non-rechargeable CR123A batteries are lithium-based batteries which were made with a construction method that makes it impossible for them to be recharged again. With a nominal voltage of 3.0 volts and a capacity of up to 1,700mAh, these batteries are more powerful and hold more charge than the RCR123A batteries.
The lack of reusability is compensated by their large capacity and high run time, which can power a 100mAh device for up to 17 hours. Once you purchase them, you won’t have to test your CR123A lithium batteriesand can begin using them immediately out of the box.
Once depleted, you must discard your set of CR123A batteries properly and replace them with a fresh set. You can rack up high costs in battery replacements if you use your CR123A-powered devices very often.
Before diving in further, we’d suggest you to check out our article titled ‘How To Fix A Wireless Doorbell’ if you like content related to batteries and battery-powered devices.
Why Can RCR123A Be Recharged But CR123A Cannot
It all comes down to the way each of these battery types are made. The key between lithium-based batteries and Li-ion batteries is that the former uses primary cell construction, while the latter uses secondary cell construction.
To put it simply, Lithium-batteries are made with high-charge density and cannot hold any more power once depleted. Thus, a lithium battery will last longer than a lithium-ion battery with full charge.
Can You Recharge Non-Rechargeable CR123A Batteries Anyways?
Some swear by using a slow charger to recharge a non-rechargeable battery, but that doesn’t come without its share of hazards. Both primary and secondary cell battery types can ignite without any external influence, but the tendency is especially higher in the former. An energetic venting reaction can occur when a CR123A battery heats up while charging. This can create plumes of smoke, flammable gas, spray flammable electrolytes around and, in turn, cause a fire.
So, as a general rule of thumb, you should never attempt to recharge lithium batteries, including CR123A batteries.
Can You Recharge CR123A Lithium Batteries Conclusion
CR123A are used to power high-output equipment and so, they store a lot more charge to provide the required energy. While completely safe in normal use, they can become very dangerous if tampered with in a manner not intended by the manufacturer.
If the CR123A you're looking to recharge is labeled non-rechargeable by the manufacturer, you mustn't attempt to plug it into a charge in any circumstances. The hazards are too great to ignore, resulting in needless damages to your property and maybe even your health.
That said, rechargeable CR123A can provide you with a longer lifespan than a typical CR123A. You can safely recharge them thousands of times without any issues, and they are readily available in most stores.
Utility pumps are multipurpose water pumps for removing standing water from swimming pools, basements, or aquariums. They are mostly available as gas-powered or electric units, having an intake hose and operating at a higher output than sump pumps.
A utility pump is essential for residential and commercial applications, with the best utility pumps helping resolve plumbing issues quickly. But to get the most out of a utility pump, it's important to know how they work, which is the purpose of my guide today.
In this article, I talk about the various water pumps on the market to show how do utility pumps works and how pumps are different and explain their mechanism.
What Are Utility Pumps?
Utility pumps are categorized under transfer pumps that move water quickly between two locations, such as for gardening applications. You can use these submersible pumps to irrigate the garden or lawn or drain excess water from washrooms and swimming pools.
The main advantage of utility pumps is their affordability, which is why they find use in large-scale plumbing projects and help drain standing water from a specific area. Now, the basic principle behind how these pumps work is the same despite the different models…but more on that in the next section.
How Do Utility Pumps Work?
Utility pumps are connected to big tanks while the hose is connected to the drain, which makes it easier to pump water from the tank into the drain. But for more high-end models, the cost of operations is high, and you might need specialized skills to use it.
The main purpose of utility pumps is that they are great for repairing purposes and prove useful for fixing leaks, preventing fires, and replacing burst pipes. To understand how utility pumps work, I have listed the top submersible pumps below, along with utility pumps powered by gas and electricity.
A. Submersible Utility Pumps
Thanks to their greater portability, a submersible pump helps remove standing water, fix drain wells, or empty clogged sinks. These submersible pumps fit even in tight spots, like crawl spaces or window wells, and remove standing water by pumping it outside.
But the speed at which such utility pumps operate depends on the inlet size, which determines whether it is suitable for quickly moving large amounts of water. Also, you can use submersible pumps equipped with a float switch since they automatically turn the unit off/on when the water level changes.
The only thing to remember is that the water must not contain solid items because it will cause utility pumps to malfunction. This is why they aren't used for sewage cleaning purposes.
B. Utility Pumps With A Power Source
Based on the type of task, several utility pumps run on a power source to remove water.
1. Direct Current
A direct current utility pump is predominantly used in boats for pumping water from the bilge. Although they are available in multiple sizes, the power supply varies between 12 and 24 volts.
2. Alternating Current
The utility pump found in your home possibly runs on a 120V AC and comes in handy to discharge water from swimming pools, draining ponds, or de-watering low spots. But you should be careful about electric shocks when using these utility pumps, so always plug them into a GFCI outlet.
3. Gasoline Pump
A gasoline-powered utility pump is more powerful than a portable pump and removes 4 times the amount of water than many utility pumps. That's why they are used for commercial purposes and even pass small solids due to their large discharge hoses and reinforced solids.
To use these water pumps for removing water, place the unit close to the water body before attaching the suction hose, discharge hose, and suction lines. I also recommend attaching a check valve and suction strainer when the water contains a lot of debris.
The trick is to ensure that the various hoses or pipes are straight and short to pull water effectively. Then add high-quality fuel and fill the priming port of the pump with water prior to starting the engine.
4. Hydraulic Utility Pump
A hydraulic utility pump proves useful in areas where electricity is unavailable, so you use the hydraulic take-off from a tractor or vehicle for removing water.
5. Transfer Pump
A transfer pump can be gasoline or electric-powered and help resolve drainage issues by moving water from one location to the next. But for this utility pump to deliver the best results, I suggest attaching a foot valve accessory for filtering debris while placing the pump on a sturdy foundation.
After that, install the discharge pipe and suction hose to the pump before attaching a garden hose adapter. Ensure all the connections are secure and direct the discharge hose away from the pump before turning it on.
What Are Sump Pumps?
There is another type of pump known as a sump pump which is also quite popular for residential purposes, especially to prevent flooding. In this section, I will provide an overview of a sump pump which usually lies below the ground level and runs on electricity.
The primary purpose of a sump pump is to prevent water levels from increasing beyond safe limits inside your home. You can keep these pumps in the basement while connecting them to the drainage system to expel water using the drain pipe and a large piston.
They are mostly of two types - surface pumps and submersible pumps, with the latter proving useful in winter regions prone to torrential downpours.
A common type of submersible sump pump is the trash pump, especially useful when the water contains debris like sand or leaves, rendering a utility pump ineffective. All you need to do is attach the hose and place it away from the pump to remove water from basements.
These sump pumps have a high-quality impeller that uses centrifugal force to push water out through the large outlet, inlet, or hose along with the debris. They are, however, costlier than a utility pump, but the additional expense is worth it to remove dirty water.
The best part is that you can use a sump pump continuously for greater efficiency in removing water.
The basic difference between a sump and a utility pump is a sump pump can prevent flooding in the basement to keep you safe. But for all other water-related issues, it would be best to use a utility pump, given their affordability.
Thanks to its small size and multiple outlets, you can place a utility pump anywhere around the house. This means instead of one hose expelling high water pressure, there are several outlets to make the task easier.
I believe that a utility pump has more use in a residential space and is easier to install while being more energy-efficient.
In comparison, sump pumps can be used in homes and commercial spaces like construction sites, but they are more challenging to install due to their larger size. It would be best to install sump pumps beneath the foundation of a home or office space for the best results.
But sump pumps are suitable for heavy-duty tasks, such as extracting water from sump pits that are several feet high. They are also more reliable and can quickly remove water from a large area.
How Do Utility Pumps Work Conclusion
It makes sense to have a utility pump at home, considering you can't use it interchangeably with transfer pumps or sump pumps.
These low-cost units are ideal for upgrading your home through DIY means while ensuring your family's safety. Since it's not easy to constantly watch the pump, you can opt for electric-powered units with an auto shut-off function.
So, whenever the water heater or other in-house appliances malfunction leading to plumbing issues, use the utility pump to resolve the problems quickly. And if you liked reading this guide, check out another article where I answer the question - do you need a permit for a retractable awning?
Tip
Despite submersible utility pumps being available on the market they can't tackle water more than a few feet deep. You can use sump pumps in such situations to pump out flood water or for more deep-seated applications.
A utility pump is used to pull water from one location to another. Additionally, it is versatile enough to be used for a variety of applications, including draining pools, construction sites, ponds, and hot tubs.
Be it transferring water from one place to another or draining water pools - utility pumps can come to your rescue.
You can use them for moving water from basements and crawl spaces; and transferring water between tanks. In this blog post, you will discover why you need utility pumps, how to select the best utility pumps, and what the difference is between utility pumps vs. sump pumps.
Why Do We Need Utility Pumps?
Utility pumps are versatile tools that can be used in different ways. Whether it is a pond, a pool, a blocked sink, or any other enclosed place, a utility pump can come in handy.
Water pressure can be increased with the use of utility pumps, and water can be transported at a greater pressure than with merely gravity feed. This is especially true if a utility pump is connected to a rain collection system or water storage cistern.
In many cases, the groundwater around a home is not a problem. However, if the water table is high or there is poor drainage, water can accumulate in places like stairwells or window wells. This can lead to several problems, including mold growth and foundation damage. A utility submersible pump can be used to remove water from these areas, and you should also know some pumps are designed for depths of several feet.
How To Choose The Right Utility Pump For Your Needs
Are you having drainage issues on your property and looking for the best utility pump to solve the problem?
Choosing the right utility pump can be daunting, but we are here to help. There are many factors to consider when choosing a utility pump, including the type of water you're dealing with, the size of your property, the motor selection, and your budget.
A submersible utility pump is a good option if you are dealing with clean water. Submersible pumps are designed to be submerged in water and are ideal for draining swimming pools, ponds, or other small bodies of water.
The size of your property is also an important consideration. You may need more than one pump if you have a large property with extensive drainage issues. Conversely, if you have a small property with minimal drainage problems, a less powerful pump may suffice.
Finally, consider your budget when choosing a utility pump. Choose the best pump for your needs and budget to ensure that your drainage problems are solved once and for all.
Tip
If you're dealing with dirty or sewage water, you'll need a sewage or trash pump. These pumps are designed to handle solids and other debris, and they are ideal for removing water from basements or other flooded areas.
Sump Pump Vs Utility Pump
Basically, a sump pump is placed in a pit or sump at the lowest point of your house. There is a float switch in the sump to prevent flooding. The sump pumps are triggered whenever there is excessive water in the sump. Utility pumps remove standing water from low spots and fill ponds.
Moving on, you should know that a sump pump is one type of submersible utility pump. In order to pump water and stop it from destroying the framework, flooring, and furniture, builders set up sump pits and drains. Water enters the sump via the subfloor drains and is immediately pumped through the sump pump and into the sewage system.
As a rule, sump pumps are installed vertically, with the intake hole situated as close to the ground as practicable. This ensures that the pump can draw large amounts of water from the sump. The water in a sump pit can be lowered to within an eighth of an inch with the help of sump pumps.
2. Standard Switch
The float switch is a standard component of sump pumps. As the water level rises, the float switch will move upwards and activate the sump pump. The switch will remain on until the water level of the sump pit has dropped to an acceptable level. In more advanced models, this is handled automatically by an inbuilt sensor.
3. Output Connector
Most sump pumps include a one-inch or larger diameter output connector that is threaded for simple connection to the tubes that lead to the sewage system. Some models of sump pumps have an adapter that lets you use it to drain water from pools and ponds by connecting it to a garden hose.
4. Lift
The lift of the sump pump should be high enough to send the water several feet upwards to the drain. Since a traditional utility pump can only raise water a few feet, this is crucial.
Which One To Pick?
Sump pumps are typically used to get rid of standing water from the sump basin, which one can find in the basement of their property. The water is pumped out of the home and away from the foundation to avoid flooding.
Utility pumps, on the other hand, are versatile tools that can be used for a variety of tasks around the home. You can drain pools and spas, remove water from ponds and aquariums, empty clogged sinks, and even irrigate garden hoses.
There are several ways to power a utility pump. Direct and alternating currents are the two main types of electricity, and utility pumps can be powered by either type. Gasoline-powered utility pumps are also available, and these are typically used for outdoor applications.
Hydraulic utility pumps are powered by fluid pressure, and these are often used in industrial settings. When choosing a utility pump, it is important to consider the application and select a pump that will be able to meet the specific needs of the job.
Which Switch Type Should You Select?
Submersible pumps often have a switch that activates the pump whenever the level of water in the sump pit reaches a specific level. There are three typical types of submersible utility pump switches.
1. Float Switches
The majority of submersible utility pumps include a float switch. Typically, the float is linked to the pump's housing by a pivoting arm. As the water level of the sump pit increases, the float will rise and start the pump.
At the predetermined level, the swing arm deactivates the pump as the water level decreases. The swing arm deactivates the pump at the predetermined level as the water level decreases.
2. Diaphragm Switches
Some submersible utility pumps are equipped with an internal diaphragm switch. The pump is turned on because of the increased air pressure that pushes on the diaphragm when the water content in the sump pit rises. As the level of water falls, the air pressure reduces, and the switch opens, shutting off the pump.
3. Mercury Switches
Mercury switches utilize a small amount of mercury contained within a glass vial to function. At the vial's end are two wires. The pump functions when mercury is in connection with the wires.
Typically, the mercury switch is encased in a float ball located at the end of a brief electrical connection. When the water increases, the float ball rises, and mercury within the switch finishes the circuit to activate the pump.
These switch systems are all dependable. However, as with any mechanical device, all three switches are susceptible to failure. Routine inspection, testing, and maintenance are required to maintain the dependability of your sump pump.
Final Words On What Is A Utility Pump
A utility pump is an important piece of equipment for many homes and businesses. By understanding the different types of pumps available, you can select the right one for your needs. Keep in mind the centrifugal force, flow rate, power source, and inlet size of the pumps while choosing an option.
Also, if you want to know more about these water pumps, read our blog on “Who makes utility pumps?” We hope this guide has helped make the process a little easier.
Until next time!
Various brands like Superior Pumps, Wayne, and Simer are known for producing quality and user-friendly utility pumps. So, you can choose between them depending on your engine preferences and water removal capacity.
Utility pumps are perhaps among the most important devices that aid water removal during a sudden pipe leak or burst. Hence, it doesn’t surprise me that many households are opting for them today.
But with so many brands out there, how do you choose the right one? Let me help you make that decision.
Why Do You Need A Utility Pump?
Some people may think that utility pumps are only used for industrial or commercial purposes. However, this isn’t exactly true. So, what is a utility pump, after all, and who needs it?
A utility pump is a portable device that’s typically used to transfer or pump water from one place to another in case of a leak or flood. As such, these pumps are used for residential, industrial, and commercial spaces to drain excess water should the need arise.
Homeowners, in particular, may use a utility pump to drain away water from their basement or garden in case of a major plumbing leak. Aside from that, it can help them remove water accumulated over pool covers or similar surfaces.
Utility pumps can also be used as pressure washers, as they can increase the outgoing water pressure up to 40 PSI. Just connect them to a nozzle-equipped hose, and you’re all set!
Tip
Utility pumps generally shouldn’t be operated for more than 24 hours at one go, and some models might have a lower operating time. Always ensure that you stick to the time provided in the manufacturer’s instructions, as overrunning the pump can damage it permanently.
Who Makes Utility Pumps?
There are many brands manufacturing these pumps, the top names being:
1. Superior Pump
True to its brand name, Superior Pump has been one of the top utility pump manufacturers in the US for over a century now. It uses high-quality materials like copper wiring and thermally protected split capacitor motors that last a long time without burning a hole in your pocket. Moreover, each utility pump has a removable intake screen to facilitate easy cleaning.
You will find a variety of utility pumps on the brand website with different engine power and housing material (thermoplastic and steel). Plus, all pumps are certified for safety by the UL.
2. Wayne
Wayne is another brand that I came across while searching for the best submersible utility pump. As such, its utility pumps have a durable corrosion-resistant construction and feature the brand’s Multi-Flo technology for facilitating side or top discharge, as required.
The Wayne WaterBug utility pump is one model that can be used in both residential and commercial spaces, thanks to its high water removal capacity.
3. Simer
In my personal opinion, Simer caters to the section of buyers looking for affordable utility pumps for emergency water removal. Most of the models feature a housing made of thermoplastic and metal for optimum durability. Not only that, but they are also compatible with most garden houses and are highly portable.
Who Makes Utility Pumps Conclusion
You will find different types of utility pumps on the market depending on their power source.
For instance, there are centrifugal pumps that use centrifugal force to generate the required velocity and rotating impellers to suck in and force liquid out of a valve. Then, there are magnetic pumps that employ a magnetic or electromagnetic drive to move liquid.
So, do your research before choosing the best one for your needs. And check out my guide on “can I use a utility pump as a sump pump?” to learn more about the application of these devices.
Programming a sliding gate remote involves turning on the programming mode, selecting radio channels on the gate operator, and pressing desired buttons on the remote. Multiple remote controls can be programmed at once, and some transmitters allow the copying of the code between identical models.
Electric sliding gate operatorscan be a convenient addition to your home, removing the hassle of pushing the gate open when you need to leave.
I believe that a programmable remote control makes automated sliding gates even better. Most gate operators can be controlled using a programmable handheld transmitter, allowing you to remotely use the sliding gate opener.
Here is my guide to program your sliding gate remote control and make your gate-opening experience even smoother.
3 Steps To Program Sliding Gate Remote Control
Before you program a handheld controller to control the sliding gate, you need to provide it with access to the gate operator. Fortunately, the process is quite easy and can be done within minutes.
1. Turn On The Programming Mode On The Gate Operator
Sliding gate operators often come with a built-in radio receiver, which can provide direct access to the controller. You can activate the programming mode by pressing the programming button located inside the casing of the gate operator. This button is also known as the ‘learn’ button in some brands.
Certain gate operators include a light to indicate the successful activation of the programming mode. If your gate operator includes one, it will light up once you’ve pressed the button.
2. Pick Radio Channel On The Gate Operator
You can press the programming button to choose the desired radio channel on the operator. It’s worth noting that you need to provide the operator with a transmission command within about half a minute of pressing the button. If the operator doesn’t receive one, it will switch back to normal mode.
Tip
Radio channels determine what action your gate operators perform. Some channels define the opening, stopping, and closing actions in what is known as a ‘pulse’ mode, while others signal any one of the three.
3. Programme The Button On Your Remote Controller
This step involves assigning functions described in the previous step to the desired buttons on your controller. Press the chosen button on the controller until the light indicating the specified radio channel blinks.
If successful, your remote controller will now be able to perform the specified function with the press of a button. But if it has failed for any reason, you can repeat the process to make sure that the remote has been successfully programmed.
You can repeat this process to assign more functions to your remote controller. Once you’ve programmed the remote control, don’t forget to try opening the gate with it and make use of the amps in the sliding gate opener.
Adding Extra Remote Control
Sliding gates often support multiple remote controllers to maximize the ease of operation from a distance. Some operators allow up to 25 remote controllers to be programmed for remote operation.
The steps to add an extra remote control are broadly the same as listed above. That said, you can copy the programming of one remote to another through the radio if you don’t want to go through the aforementioned steps again.
To copy the code of your gate remote, hold down a button on the already-programmed remote and press a chosen button on the new control. You will see an LED light flash on the new remote, and once it stops flashing, the programming has been copied successfully.
Continue to repeat the process until you’ve copied all the buttons onto the new remote, and that is about all there is to it.
Tip
There are a couple of conditions to copy remote programming successfully. First, you must place both controllers in the immediate vicinity of each other. And second, both remote controller models must be identical, meaning that the programming process cannot be universally copied.
While it doesn’t happen too often, there will be times when the sliding gate remote control simply doesn’t work. If this occurs, you can try a few things before looking into replacing the remote controller.
1. Drained or Defective Batteries
The first thing to check for when your remote control stops working is the battery compartment. Chances are, the batteries are either defective or drained completely, causing the remote to not function. The fix is typically as simple as replacing them.
2. Programming Issues
Another possibility for your remote control not working properly is that it was either not programmed properly or facing an issue with it. Regardless, you can fix the problem by reprogramming the remote and ensuring that you didn’t miss any steps during the process.
3. Signal Interference
Signal interference is one of the most common culprits causing your remote control to not work. This can be caused by nearby electrical appliances or faulty electrical devices.
Should you encounter such an event, try turning off any appliances that may be close by and check if the remote works. And if the remote starts working again, consider contacting an electrician or a serviceperson to check on the faulty appliance.
Another potential cause for signal interference may be caused by strong radio signals in your area. This is particularly prevalent in areas close to a radio station, airport, military base, or a flight path. If you live in such an area, consider looking into a special antenna and receiver to fix the problem.
4. Check The Gate
The remote being faulty is a higher possibility than the gate facing issues, but the latter remains a possibility nonetheless. Check if your sliding gate works properly with the operator or not through manual operation. If it doesn’t, then it may be time to contact a professional to fix the problem.
How To Program Sliding Gate Remote Conclusion
Using a remote to operate the sliding gate adds a layer of convenience to the way you move in and out of your home. And since sliding gates are not bound to any model-specific controller, you can use multiple remotes of different brands to operate them.
Something worth noting is that, if needed, you can remove a programmed remote control from the memory of your gate operator. This can be useful if your gate operator doesn’t support many controllers at once and you need to make room for a new one.
And that’s about all there is to programming sliding gate remote controls. Be sure to refer to the manufacturer’s instructions if you face a hiccup, and the programming process will go smoothly.
A sliding gate opener is a specially designed motor that automatically enables the user to operate sliding gates. It can be operated electrically via a switch or any other control system. Typically, a sliding gate opener uses around 10 amps to function.
Thebest electric sliding gate openerscan add convenience and security to any property, from individual family homes and gated communities to commercial settings.
However, each type of gate opener requires a specific amount of AMP in order to function without any issues. I have compiled a summarized article that takes a look at the right amount of AMP a sliding gate opener would need. Let's dive in.
How Does An Electric Gate Work?
As the name suggests, an electric gate works on a motor, possibly AC or DC. This motor rotates through an oil-cooled reduction gearbox, thus giving energy to the cog, which in turn moves the gate on a steel rack. The gear rotates onto a shaft attached to the drive, which pulls the arm that is attached to the sliding gate via a joint.
How Are Electric Gates Powered?
Electric gates usually have gate motors that are powered with either 24V DC or 230 V DC. They require a mains power supply that is suitable as well as a safe wiring system into the gates control panel.
The factors determining which gate motor system is ideal for a particular installation depend heavily on the scale as well as the usage of the system. Typically, automated gates use the 230V AC mains supply in a residential environment.
On average, an electric gate can open and close at least 15 to 20 times a day. This is why gate motor systems require a power of at least 24V and a transformer which helps eliminate the pressure of providing excess power from the mains.
Most low-voltage systems are much safer in terms of daily use and come along with the option for a battery backup. The battery backup enables the gate motor systems to work efficiently for a couple of cycles in the event of a mains supply failure.
These gate systems are also an ideal option for any commercial setting where consumers come and go on a daily basis.
How Much Amp Does A Sliding Gate Motor Use?
Sliding electric gates on standby will consume up to 100 watts of electricity a day on average. While they're active, these gates can use up to 700 watts of electricity. However, the number of times these gates will consume higher electricity while being used is limited.
This is because, on average, the gate opening and closing cycle will only last about 20 seconds in every direction. Though average domestic electric gates open and close around 15 times a day, homeowners that go for a holiday or are away from their homes use the gates less.
All in all, I have noticed that electric gates will not be an expensive addition to your power bill. You are highly unlikely to experience an increase in your electricity bill by installing these gates.
What Wire Size Is Required For A Gate Opener?
I recommend using 16 gauge, multi-stranded, direct burial low voltage, dual conductor wires for an electric gate opener. They can connect with either the AC-powered transformer or the solar panel that is further connected to the control board of the gate opener.
How To Manually Open A Swinging Electric Gate?
To manually open a swinging electric gate, the following steps are to be done:
Start by undoing the bolt that is located underneath the gate motors and loosen it up with the spanner provided. This will place the motor in a neutral setting. To open the gate without electricity, you will have to push the arm at the joints down after loosening the bolt. Now, you will be able to open the electric gate manually without using any electricity.
Tip
To use the electric gate as you normally would, place the de-positioned arm back into its original position and tighten the loose bolts.
How To Manually Operate A Sliding Electric Gate Motor?
If there is no electricity, all you have to do is enter the key that is provided and open the door on the gate motor. This will enable you to operate your sliding electric gate manually. To open or close the gate, simply slide it in the desired direction. In order to place the gate back in its original composition, close the door on the gate motor.
This will allow the user to make use of the gate as intended once the electricity is back on and the gates have access to the power supply. Manually operating an electric gate is also needed when the remote doesn't work. So, learning how to program sliding gate remotecan be beneficial.
Can A 15 Amp Breaker Be Used Instead Of A 20 Amp Breaker For The Sliding Door?
Typically, the size of the breaker used depends heavily on the size of the wire used to connect the electric gates to the power supply. If the gate requirements call for a 20 AMP minimum, it is better that you follow the instructions.
This is because failing to heed the instructions can cause a voltage drop within your gate. A 15 AMP circuit is typically made of a smaller wire than a 20 AMP circuit. The smaller wire can cause severe voltage drop under heavy loads, which can then lead to the gate motors overheating.
In case of unspecified breakers, you can install any AMP that works for your gate. However, if specific numbers are mentioned in the instructions, it is best to follow them. For example; for a 20A circuit, you would need to use a 12-gauge wire. If the gates are meant to be used for longer periods of time, you may even have to go up to a 10-gauge or an 8-gauge wire.
How Many Amps For A Sliding Gate Opener Conclusion
Having a reliable sliding electric gate motor is important. But knowing the specifics about your gate opener andhow to increase the efficiency of a sliding gateis equally crucial. This will help you prevent any voltage or overheating problems from arising in the future.
I hope this article helped you better understand your gate opener and how much power or AMP it uses. Though it may seem complicated at first to figure out exactly how much power your electric gate opener uses, it is pretty easy once you get the hang of it.
Until next time!
Sliding gates provide the required security to your house. However, the efficiency of sliding gates can take a hit if proper lubrication is not done. In addition, adding an antenna and improving the battery backup system will enable the gate to function smoothly.
The automatic gate mechanism undoubtedly improves security and safeguards the property from intruders, thieves, or crooks. Therefore, it’s important to do everything possible to maximize its performance.
This article will explain how you can increase the efficiency of your automated gate system. I will further help you increase the security of your sliding gate with a few additional tips. So, scroll down!
Some Tips To Increase The Efficiency Of A Sliding Gate
1. Maintain Proper Lubrication
Most gate specialists recommend that the automated gate system should be properly lubricated every six months.
Moreover, debris, branches, rain, or harsh weather conditions may cause damage to sections of the automatic gate system. These factors can impair their functionality and lead to serious mishaps. That said, there aren't many moving components to lubricate, so the process is simple.
Tip
Inspect the chain, pulley, hinges, and screws every few months, and apply a few drops of oil to keep everything functioning smoothly and effectively. A properly lubricated automatic gate system operates flawlessly, with no unpleasant noises or flaws.
2. Consider Adding A Better Antenna
An average antenna of an automated gate system comes with a range of 100 to 150 feet. But you could opt for a high-gain antenna that can help you increase the range of your automatic gate technology. This will help you open or close the gate as and when required, even from a greater distance.
It is especially useful for homeowners that have longer roads on their property. Furthermore, an upgraded antenna improves the performance and lifespan of the gate system, especially when dealing with lower signals in your location.
3. Consider Installing A Backup Battery
Coping with an automatic gate mechanism during a power outage may give any homeowner nightmares. Many experienced specialists advise using a backup battery to avoid any unpleasant scenarios.
This ensures that the gate will continue to work even if the power goes out. Most replacement batteries provide a few hundred open-shut cycles, which are generally sufficient to carry you through until the power comes back.
4. Consider Incorporating A High-Speed Motor
High-speed motors, a relatively new addition to the market, may considerably improve the effectiveness of your gate, making shutting and reopening much faster. The longer it is open, the more vulnerable the property becomes. Just make sure you considerhow many amps are required for the sliding gate opener - the higher the amp rating, the higher the efficiency of the gate.
5. Controls For Internal Gates
Depending on how electric sliding gates work, many automatic gate solutions have an extra interior gate control - another useful addition. It allows you to improve the operation and administration of the gate for the privacy of your home.
For example, you may update to a smart gate and illumination controller. The technology will allow you to alter the configurations from inside and establish automated timers for specific times and days for simpler network access. You will also receive warnings of potential system failures.
Some Tips To Increase The Security Of A Sliding Gate
1. Remote Control
Choose remote access technology to get all the benefits of an automatic sliding gate. Remote access transforms automatic gates by allowing you to operate them from the convenience of your automobile or home. You are not required to expose yourself when closing or opening the gate. A smartphone with a remote access function improves security by allowing remote property surveillance.
2. Surveillance Using A Video Camera
Surveillance cameras are quite effective for increasing home security. With a surveillance camera installed, you can observe all that happens around your home's main entrance. The most popular automated gates on the market are adaptable to integrate security cameras for continuous property monitoring.
3. System Of Advanced Locking
An innovative electronic lock system is useful for improving house security. You might use an electronic key scanner for your automatic gate to allow seamless admission while maintaining strict security requirements.
How To Increase The Efficiency Of A Sliding Gate Final Words
There is no question that automated gates have several advantages. They are practical, may add a sense of elegance to your house, and can help boost security. So, if security is your primary concern, I’d definitely say that an automated sliding gateway may be worth the expense.
It may also come with additional security features like cameras and alarms to dissuade robbers. All you have to do is follow the suggestions mentioned above to ensure that the automatic gates operate efficiently.
Electric sliding gates are operated with the help of remote controls. When you press the button on the remote control, the access control system initiates the gate opener motor to open or close the gates. These gates usually operate over a track, but the design of the track may change based on the type.
Homeowners these days prefer electric sliding gate openers over conventional driveway gates. And with the benefits they offer, it is clear to see why that is the case.
Despite their surging popularity, though, a large number of users do not know how sliding gates work. This makes it difficult to troubleshoot any problem (related to their working mechanism) that one might encounter.
That’s why I have made this guide for all those curious folks out there. If you are one of them, then dive in!
How Does An Electric Sliding Gate Work?
As you can guess from the name, an electric sliding gate comes with an in-built electric motor that helps to operate the gate. It does not require any manual effort, which is why it is also known as an automatic gate. All you need to do is press the button on the remote control, and the sliding gate motor will open or close the gate accordingly.
That was, of course, the simplest explanation of how automatic gates work. Now, I’ll explain their operation in greater detail for those who want to know more. These gates come with an access control system that is programmed into the gate motors. This is the primary element that helps with gate automation. When you press the button on the remote, it signals the motor to open or close the gate.
Conventionally, the gates are placed on top of a sliding track. A set of roller guides or wheels are placed on the bottom of each gate, which helps to slide it along the track when the motor is activated.
That said, the mode of operation may change slightly with the gate’s design, but the fundamental principle remains the same.
On that note, modern automated gates come with a range of additional convenience and security features. For instance, they may come with motion sensors, Wi-Fi connectivity, or voice controls so that you can operate them with little effort.
They can also be programmed to provide pedestrian access, which means that you can use them as the main gate instead of a driveway gate. Apart from that, they may come with cameras and alarms to enhance security.
What Are The Different Types Of Electric Sliding Gates?
Broadly speaking, there are three primary types of sliding gates available today. I have discussed each of them below:
1. Tracked Sliding Gates
Tracked sliding gates are the simplest and most common type of automatic gate system used on properties. It runs over a single metal track embedded in the ground. Now, the motor is generally placed beside the gate post. However, many homeowners today are opting for underground motors to save space and keep it protected from rain and storms.
Warning
In case you plan to install an underground motor, make sure that it comes with a powerful remote control or good Wi-Fi connectivity. If it doesn’t, you will not be able to operate the motor under the ground.
2. Telescopic Sliding Gates
Telescoping gates consist of multiple segments that stack in front of each other when the gate opens. Such a design is well-suited for homes that do not have a lot of space for a conventional sliding gate. They can be operated by standard electric motors, similar to tracked sliding gates.
With that being said, the installation process is a bit complicated since you need to lay a separate track for each segment. Likewise, the drive cables from the motor need to be separately installed on every gate segment.
3. Cantilever Sliding Gates
Cantilever gates operate a bit differently compared to tracked or telescopic sliding gates. This type of gate comes with no embedded tracks on the ground, which means that Cantilever sliding gates remain suspended in the air. Instead, there is a tubular track fitted on the lower side of the gate, which slides over mounted roller wheels on the gate posts.
The cantilever system is worth considering if the ground below the gate is uneven for laying tracks. Additionally, these gates are relatively longer than the previous two types due to the added counterbalance mechanism. This makes them an ideal choice for industrial or commercial buildings.
However, the caveat is that the posts need to be much stronger, or else the gates might fall. That’s because the posts hold the entire weight of the gate, as well as the post-mounted rollers.
Benefits Of Using Automated Sliding Gates
Compared to traditional gates, automated sliding gates are a lot more convenient to use. Besides that, there are several other benefits to these gates, as I have outlined below.
1. Relatively Durable
Automated sliding gates are designed to be highly durable. Therefore, they can withstand most weather conditions or impact damages without any issues. Also, the materials used for building the gate and the motors are resistant to rust and corrosion, which further enhances durability.
2. Added Security
Most automatic sliding gates these days come with advanced features, such as motion sensors, alarms, and other anti-tamper mechanisms. This will discourage trespassers and burglars from manipulating or tampering with the gate, which will improve the security of your home and make your life easier.
3. Increased Safety
As I have already mentioned, a typical automated sliding gate comes with motion sensors. These sensors can detect the proximity, speed, and distance of incoming objects. On top of that, there are strong brakes on the roller guides. So, if any person or vehicle comes too close or touches the gate, it will stop moving immediately to avoid any accidents.
4. Energy-Efficient
The motors that are used in these automated sliding gates are designed to be highly energy-efficient. That way, you won’t have to worry about increased energy bills from using your gate.
As a matter of fact, the gate opener system operates entirely on battery. This means that it won’t have any major impact on your electricity usage, except for when you will need to charge the battery. And if the gate has solar charging capabilities, it will charge on its own when the sun is out, which makes it even more convenient.
In that context, you might ask - “can I use a standard car battery for gate openers?” Well, you absolutely can! Of course, you need to ensure that the car battery has enough energy left in it to power the opener mechanism. After all, you wouldn’t want the battery to run out when the gate is only partially open.
How Do Electric Sliding Gates Work Final Words
Electric sliding gates are definitely worth it, especially if you want the added security and convenience they offer. That is why they have become so popular these days.
You can get an automatic swing gate for your driveway, too, as it operates using a similar system. The only difference is that the gates swing open instead of sliding to the sides.
Whichever you choose, you can get the new gates installed with the help of a professional. That will ensure you do not encounter any issues related to the gate after a few days of usage.
A standard 12-volt marine or car battery is good for most gate-opening systems. However, depending on components like solar panels or a motion detector, many people use a deep-cycle battery for higher power.
Installing a gate opener requires adding an energy source. In fact, the best electric sliding gate openers can fully function with a standard 12-volt rechargeable car or marine-type battery with six regular cells.
However, before choosing your battery, consider which connection or energy outlet you wish to use. A standard AC outlet or solar applications can help charge the gate opener and the motion sensor, if any.
Potential Problems Of Using A Standard 12-Volt Battery
Standard battery-operated gate openers like the Mighty Mule gate opener function pretty well on an average car or large marine battery. It works especially well if the solar panel receives enough sunlight during the day. However, adding a motion sensor flood light to my opener has disrupted its energy source.
Although my battery seemed to have enough juice, adding just a small light led to a large drop in voltage. Hence, I resorted to checking the water level in each battery cell to see if there is adequate power. Next, I checked whether the solar charger was producing the required energy by observing the voltmeter.
However, both the water level and the solar panel were functioning properly. After some online research, I found that many people face this problem. Some even report audible beeping when they add lighting, and I believe the problem lies in the low energy capacity of the battery.
What Battery Should You Use For A Remote Gate Opener?
Getting a new battery and a larger panel is fine and all, but how do electric sliding gates work? Electric sliding gates are automatic swing gates that utilize a battery-operated system and/or solar panel to produce energy for mobility. This energy then helps the gates pull the wheels on the fixed track.
Using a standard 12-volt battery is often sufficient, but there’s always a chance that you may face the above problems. Or, your sun panel may not receive enough sunshine on cloudy days. Either way, a failed battery in the sliding gate may cause substantial security threats.
In this case, I think the best idea is to replace your standard battery with a marine deep-cycle battery. This is because, unlike regular ones, deep-cycle batteries draw down the charge evenly without causing any drop in surface charge.
Tip
After replacing the battery, hook it up with an AC battery charger that connects to 12-volt LED lights and a digital voltmeter. Also, I recommend buying a sliding gate with a built-in shunt relay or charging control to prevent a high-voltage drop.
Standard Car Battery For Gate Opener Final Thoughts
From my experience, deep-cycle batteries are much more beneficial in providing energy to gate openers. They can sufficiently power automatic electric sliding gates and utilize higher levels of solar energy.
For gate openers that do not have too many features, a standard starting battery is adequate. Moreover, an average starting battery can work wonders if you have a larger solar cell with connected regulators that receive regular sunshine.
However, you should carefully consider your requirements before choosing a battery. I hope this discussion helps you tackle problems regarding sliding gate openers.
Building or setting up vehicle sensors for automatic gate openers is easier than it seems. With various accessories available with the sensor kit, all you need are some PVC pipes, a shovel, or an auger, and you’re good to go! Proper placement of the sensor and transmitter is also crucial to the building process.
Investing in the best sliding gate openersadds a lot of convenience to your property, along with a touch of extravagant elegance. And in today’s tech-driven lifestyle, many homeowners are making the most of it by installing sensors on both single and dual gates.
That said, a driveway vehicle sensor forms the core of an automatic gate. So, in today’s guide, I’ll be explaining my foolproof method of building a sensor to open your gate automatically.
Types Of Automatic Gate Sensors
Before getting to the method, you must invest in a high-quality wireless vehicle sensor for your gate. Depending on the design of your gate, you can choose from below:
1. Optical Sensors/Motion Detectors
These are the most common types of sensors, as they detect motion using an antenna. Although they are highly effective and convenient, the only gripe I have is that these sensors detect motion only. So, if you have a visitor standing still outside, the gate may not open.
2. Active Infrared Sensors
This type of sensor consists of a transmitter and two or more receiver chips featuring high-performance optics. As such, these sensors are ideal for protection against cutting or crushing edges in different types of doors.
3. Passive Infrared Movement Sensors
These sensors recognize the infrared image within the set range. And when the image changes, the sensor triggers the gate to automatically open. Notably, these automatic sensors are highly precise and compact.
4. Pressure Sensors
Despite being the first sensors developed for automatic entry, the sensors are widely used to date. They detect changes in pressure (weight) around a specific area around the gate.
When the set weight limit is increased, the sensor triggers the gate opener and keeps the gate open until the person or vehicle passes through. Hence, these gate sensors are excellent for allowing guests to move swiftly without accidents (like “closing in” on a person).
5. Radar Movement Sensors
Radar movement sensors can detect individuals in a specific area. They can even sense through materials like plastic, plaster, wood, and more. However, they cannot identify stationary objects.
Considering all of these types of sensors, I recommend trying out the Mighty Mule FM138 or FM130 Driveway Vehicle Sensor to open your gate automatically. Both of these devices are easy to install and can be used on both single and dual gates. You even get to choose from wired and wireless options of the same product. Plus, the brand offers a 12-month warranty to back your purchase.
How To Install A Sensor For Automatic Gate Openers
Now that you have chosen the right wired or wireless vehicle sensor for your gate opener, it’s time to install it. So, let’s get started with the easy DIY installation process:
Step 1
Start by finding the right placement for the sensor and transmitter module. The distance of both these devices from the gate will depend on the product you choose. However, the Mighty Mule driveway vehicle sensor recommended above will require the sensor to be placed within a range of 2 ft. and the transmitter within 100 ft.
Tip
Ensure that you install the sensor away from general moving traffic (not directed toward your property), power transformers, power lines, underground gas lines, and telephone lines.
Step 2
Now, dig a 1-ft deep hole for the sensor. It should measure at least 2 feet lengthwise and almost parallel to the driveway. Follow up by digging a trench for the sensor cable all the way to where you plan to install the transmitter module. Note that the trench should be at least 6 feet deep to prevent damage from lawn aerators and other similar equipment.
Step 3
Next, place the sensor in the hole and the cable in the trench. If you’re left with extra cable, you can coil it up the mounting post. Then assemble the post by connecting the two long pieces with a coupler.
Tip
Do not bury anything before testing the transmitter module.
Step 4
Run the sensor cable through the mounting post and plug it into the transmitter module. I recommend leaving two inches of the cable to avoid damage if the transmitter is removed.
Step 5
Attach the mounting pole and transmitter module. Thereafter, you may or may not require a “receiver,” depending on the product you choose. Hence, I recommend checking the manufacturer’s instructions for further pairings.
Lastly, test the driveway vehicle sensor and if everything works correctly, bury all the parts.
Vehicle Sensor For Automatic Gate Opener Final Words
Before I sign off, here’s another piece of advice - for convenience, you can use standard car batteries for gate openers. However, the batteries should not be less than 50 volts, as they may not be strong enough to trigger the sensors.
An outward-swinging electric gate is not a common sight. However, electric gates can open outwards under limited conditions. Keeping that in mind, a driveway gate is an excellent way to add value and style to a property.
Electric sliding gate openersgive the home a luxurious look. However, when starting with a driveway gate, many people have questions about its installation.
One such question is, can the automatic gate open outwards? Though a rare occurrence, the answer is yes. Some driveway swing gates can open outwards in specific conditions.
Let’s take a look at a few of these conditions.
When Can Gates Swing Outwards
There are various reasons why people may opt for an outward swinging gate, or maybe it’s just sheer curiosity about all the available options. Irrespective of what the reason can be, mentioned below are the instances where it is acceptable, or even necessary, to have the gate swinging outward.
1. Length Of The Driveway
If a homeowner prefers to have a gate that swings outward and they have a driveway that is long enough, there will not be any issue in doing so. To measure if my driveway was long enough for an outward swinging gate, I ensured the gate had enough room to swing without being blocked by any roads.
Tip
Do consider the length of the driveway, so cars can give the gate space to open without any hassle.
2. Barriers
A gate that swings inward requires a lot of space. It should be able to open fully without being blocked by or colliding with any necessities in the yard. For homes that lack the space inside to have gates open inwards, installing an outward swinging gate might be more of a necessity.
3. Upwards Sloping Driveway
I have noticed that some homeowners have driveways that slope upwards. Though not a common sight in developed cities, upwards-sloping driveways are more functional in mountainous regions. If the driveway is slanting upwards within the property, an automatic gate that opens inward will end up colliding with the ground and will only open partially.
Considering the slope is not as intense, a gate with a slight rise on taller hinges can be opted for. This will not necessarily pose an issue to any cars or vehicles. However, it will not be efficient in keeping small pets or even curious children in since they can easily crawl beneath the taller gate.
A commonly used fix to this issue is to use a sliding gate instead of a swinging one though sliding gates require more room to move around within the fence.
4. Oddly Shaped Boundary
If an area has a boundary fence angled at 45 degrees inwards, a gate that swings inwards can be blocked by the fence. This is another event where an outwards swinging gate is acceptable if not necessary.
5. A Curved Driveway
Some homeowners have a driveway that swerves inwards right inside the gate. When this curved driveway is paired with an inward swinging gate, it can cut across the entirety of the driveway. An outward swinging gate will be ideal for such situations.
An Alternative Option
If neither an inward nor an outward swinging gate is feasible, a good alternative that can be considered is the gate doors that slide open rather than swing open. A sliding gate can significantly decrease the amount of space that needs to be left out to accommodate the gate. This is because slide gates move along a fixed section of track in your fence.
Though much more expensive than traditional swing gates, it offers more security for the home and looks visually pleasing on the property.
Factors To Consider For An Outward Swinging Gate
I was surprised to know that you couldn’t just walk to a store and purchase an outward swinging gate to install on the property. However, there were several factors that needed to be considered. The factors are as follows:
1. The City Council
Prior to installing the outdoor opening gate, I had to ensure that I checked all the council rules in my locality pertaining to property boundaries and swing gates that open onto public land.
I was able to find some information online. However, a call or an in-person meeting may be necessary to get hold of more information or a clearer picture.
2. The Actuator And Arm
An actuator is a mechanical device used to open the swing gates remotely. It makes use of power to push the swing arm so that it can open the gate by pulling and pushing it close when necessary.
Typically, the actuators and arms are located inside the swing gate to eliminate tampering or unauthorized access. In most cases, if the electric gates open outward, the actuator and arm can be exposed. There is also a major risk of the device scraping the vehicle as it passes through.
The most crucial factor that I had to consider when installing an outward-opening swing gate is the potential foot traffic outside the gate. It would be impractical to have an outward opening gate if there is no extra space between the footwalk and the gate.
If pedestrians walking through will experience difficulties when the gate opens, it can be quite troublesome for both parties. It is best to have a professional inspect the driveway and install an outward opening gate if necessary space is available.
Can Electric Gates Open Outwards Conclusion
Ultimately, an inward swinging gate or an outward one is nothing but a matter of preference. These gates are a great option if there are no laws pertaining to outward opening gates or if the driveway is large enough. However, it is imperative that the homeowner take necessary measures before installing an outward swinging gate to avoid any trouble later on.
If you enjoyed this informative guide, I suggest checking out my other articles, like my recent piece, “How to apply polymeric sand.”
Construction equipment, also called heavy construction equipment, is heavy-duty vehicles designed to perform various tasks. Drilling, paving, excavating, lifting, transporting, etc are tasks that are made easier with the help of these machines.
Most, if not all, construction sites have some sort of heavy equipment to help with the construction process.
Since these machines add to the overall efficiency and quality of the work done, choosing the right equipment for your project is essential. But before you do, learning about the common types of heavy construction equipment can help you make the right choice.
To make things easier, I have compiled an extensive list of the same.
30 Types Of Heavy Construction Equipment
1. Articulated Trucks
Articulated trucks are a type of heavy-duty dump truck, adaptable to various conditions while proving versatile. These trucks comprise two components; a narrow trailer, also known as a dump box, and a cab. To connect these two components, a pivoting hinge is used.
These dump trucks are best used in worksites for more complicated or challenging tasks and sites without paved roads. Additionally, areas with highly steep terrain, sandy or slippery areas and low ceilings are where an articulated dump truck functions best.
Ideally, these trucks can be used for:
Recycling
Scrapping
Utility construction
Material Hauling
Aggregate hauling
Mining
Make sure to opt for an articulated truck that can accommodate the load you require it to haul.
2. Asphalt Pavers
Asphalt pavers are used along with a dump truck carrying asphalt, before transferring it to the paver. When the paver is filled with asphalt, it uses dispersion augers to lay asphalt on a flat surface. After scattering it, the asphalt paver rolls over the dispersed material and flattens it using a hydraulic cylinder, creating a stable and smooth surface.
An Asphalt paver is used in areas like:
Roads, both public and private
Bridge decks
Parking spaces
Industrial areas and sites
Driveways
Recreation courts
Building construction
These pavers usually come in various sizes, widths, and speed levels.
3. Backhoe Loaders
Backhoe loaders are a type of heavy equipment, similar to a compact track loader, that are pretty versatile as they can act as a tractor, loader, or backhoe. Typically, the backhoe is situated at the back of the truck, whereas the front part comprises the loading mechanism.
The middle or central areas of the backhoe loader consist of the tractor. Since these machines are designed to handle numerous tasks, they can be used for the following:
Excavation
Digging
Hauling
Construction
Farming
4. Cold Planners
Cold planners are heavy construction equipment mainly used for rotating carbide cutters, drums, asphalt, and mill pavements. They can be used for either in-depth removal or just a minimal removal process. Since asphalt and pavement milling/rotating results in a lot of dust, workers usually use a water system to maintain a safe workspace.
Cold planners can be used for various reasons, including:
Creating rumble strips
Smoothing land before paving
Minimizing or preventing possible potholes
Recycling asphalt for various projects
Similar to most heavy construction equipment, cold planners come in various sizes.
5. Compactors
Plate compactors make a surface into a compact, leveled, and flat area. They use vertically vibrating, heavy plates to break down the debris on the surface with repetitive or quick movements. Apart from industrial substances, these compactors can also level or flatten soil, gravel, and sand.
There are three types of plate compactors - single, reversible, and heavy-duty. They can be used based on your project requirements, such as -
Single plate: used for small-scale asphalt projects
Reversible plate: used for more versatile projects
Heavy-duty plate: used for larger industrial projects for construction or roadway.
6. Bulldozers
Bulldozers, generally known as dozers, are a heavy-duty tractor used for moving larger objects like demolition debris, rocks, and other materials in a construction area.
These machines have a large metal plate, also known as the dozer blade, attached to its front. This metal plate, usually made of sheet metal, helps move the materials, while a ripper is attached to the back of the construction machine to loosen materials that are compressed tightly.
Bulldozers are a tractor with a four-wheel drive. However, the wheels can be mounted on a loop of metal threads to move easily even in rough terrain.
7. Motor Graders
A Motor grader is the most popular and commonly used heavy construction equipment and these machines lay out a leveled, flat surface for asphalt scattering. There are two types of motor graders based on their frame arrangements - rigid frame grader and articulated frame grader.
The former comprises an individual axle and cannot turn left or right about a point. On the other hand, an articulated motor grader has a hinge in the middle of the front and rear axle, enabling it to move in smaller spaces without any problem.
8. Draglines
Draglines are wheel excavators used for large-scale projects which enable you to reach impressive depths. They are typically used in mining areas, ground excavation sites, etc., and function with a boom arm consisting of a wire-based drag and ropes for hoisting.
These hoist ropes have a digging bucket attached to them and move in unison to push the bucket down from the starting point. A dragline operator then controls the ropes and the bucket to collect debris and other objects.
Since they are heavy and tall, they are usually assembled in the respective workspace instead of being transported from one place to another. However, if you need to use these excavators for a small-scale project, there are smaller models available.
9. Drills
Rotary or Blasthole drills are heavy construction equipment used for drilling in mining areas. A common question people have is if it is any similar to a rotary tool. Well, not really because rotary tools focus on sanding, polishing, etc. whereas rotary drills focus on drilling.
These devices are gaining popularity among many heavy equipment handlers and construction workers due to their user-friendly built-in features. These features allow you to finish your construction project safely and quickly.
Some of the features of these machines are:
Built-in cameras
Depth tracking
Automatic drilling
Retracting and leveling
HVAC systems that limit exposure to dust
Most non-automated drilling devices offer similar results, but the above-mentioned features make automated drills a safer and more productive option on a construction site.
10. Dump Truck
Dump trucks, also called damper or tipper trucks, are heavy construction machines used to collect and mix dumps from one place to another. Gravel, sand, or any demolition waste/debris can be transported easily with the help of a dump truck.
A dump truck comprises an open-box bed, located at the rear of the machine, that uses hydraulic rams to raise and lower the bed.
11. Road Rollers
A road roller, also called a roller-compactor, is a machine typically used to compact soil, concrete, asphalt, or gravel when constructing foundations or roads.
They can consist of rubber tire smooth rollers or a double-drum asphalt roller. Some rollers have a combination of both, and the most suitable type of rough or smooth rollers can be determined based on the mixture used for the project.
12. Excavators
An excavator is a common sight in any construction site or workplace. Since they are adaptable and robust, they are used often in most small and large-scale projects. The excavator's cabin is a rotating platform that can rotate at 360 degrees and is connected to a bucket with a long arm. These machines are typically used for demolishing, excavating, brush removal, hauling, and forestry operations with their respective attachments.
There are three different sizing options for excavators. These include:
Mini excavator: used to navigate hard-to-reach places in construction areas for small-scale projects.
Medium excavator: used to handle larger projects, but not as big as a large excavator
Large excavator: used for more large-scale and high volume construction work
13. Forklifts
Forklifts are commonly found on a construction site, as they are generally used to move objects from one place to another safely. However, they only travel short distances and are used for moving items from worksites to warehouses.
These machines come in several types, with the primary four being:
Counterweight: consists of a built-in counterweight system which keeps it stable
Side loaders: used in smaller warehouses to transport items from storage to rack
Pallet jack: designed to transport pallets within a warehouse and is easy to use
Warehouse: ideally used in warehouses to move supplied shipments and products
Before you opt for a forklift, ensure that you choose the one that aligns with your needs, like the size, volume, and weight of the items.
14. Electric Rope Shovels
Electric rope shovels are generally used only in mining sites since they can withstand harsh working conditions. Because they use electricity for running, there is much less risk of wear and tear developing over time. So, this machine's maintenance and replacement costs aren’t as high with proper care. Most modern machines have energy-efficient features that make them long-lasting and easy to use.
15. Off-highway Trucks
Off-highway trucks are similar to dump trucks that offer hauling lowers for heavy-duty work. Due to this, they are often used in mining sites, quarries, and other similar industrial projects that need proper transportation of bulk construction materials.
These trucks can transport twice the number of loose materials, like stone, soil, etc. compared to a conventional truck. Based on your project, you can invest in an off-highway truck with more than one dump bucket for increased efficiency.
16. Scissor Lifts
An aerial scissor lift is an elevated, mobile construction platform that can be used as a safer and more robust alternative to a conventional ladder. Since they comprise steel, struts, and several cross beams, they are sturdier and can support the weight of more than one worker. They can also be used to carry professional and DIY tools, paint cans, materials, etc.
They are ideally used for:
Warehouse storage
Material handling
Stockroom storage
Commercial building maintenance
Construction projects
Investing in a scissor lift will be beneficial if your workspace consists of any hard-to-reach places.
17. Truck Crane
A truck crane is a truck with a self-propelled crane attached to it for lifting and moving debris, sand, and other loose materials from one place to another. They comprise two parts - the lower component, which consists of the chassis or the undercarriage, and the upper component, consisting of the crane.
These components are attached to a turntable that allows the crane to move 180 degrees or 360 degrees.
18. Pile Driving Machine
A pile driving machine, also called a pile driver, is generally used in the construction industry to install a pile into the ground and is similar to a pile boring machine. Pile drivers can install precast piles into the ground without excavating the area first.
It lifts the pile, places it in the correct position, and forces it into the ground up to the desired depth. Additional weights can also be placed on top of the piles to help go deeper into the ground.
When these weights are raised to the highest point with the help of diesel or hydraulics, they are released quickly. This results in the weight hitting the pile and pushing it deeper into the ground.
19. Skid Steer Loaders
Skid steer loaders are versatile machines that can be used for various small-scale and large-scale jobs. They are commonly found in most construction sites as they are compatible with various attachments. Additionally, a skid steer loader helps complete the construction or demolition work safely and quickly.
Some of the uses of a skid steer loader include -
Land clearing
Forestry
Site cleaning
Demolition
Road work
Landscaping
Farming
Excavation
Like most heavy construction equipment, these machines are available in three sizes; small, medium, and large.
20. Wheel Tractor Scraper
A wheel tractor scraper is used mainly for construction, mining, or as earth-moving equipment. The back of the machine consists of a vertical moving hopper along with a sharp horizontal front edge. This hopper can be raised or lowered using a hydraulic lift system.
When you lower the hopper, its sharp edge digs into the ground and fills it with soil. Once filled, the hopper is lifted and closed with a vertical blade, also known as an apron.
Wheel tractor scrapers help move the contents to the delivery or constitution site. To unload the contents, the apron is lifted, and the rear panel of the hopper is moved forward, thus dropping the soil.
21. Feller Bunchers
Though rarely talked about when it comes to heavy equipment, the feller bunchers make harvesting and gathering load materials effortless. Additionally, they make transporting logs from one place to another much more manageable.
These machines are equipped with blades that can cut through multiple trees quickly and arrange them in an orderly fashion for easy pickup. The logs are then transported to a construction site for further processing.
22. Concrete Mixer
As the name suggests, a concrete mixer is a specially designed truck that allows for mixing and transporting concrete to the construction site. Initially, these trucks are filled with several dry materials and water, after which the mixing begins and continues until the delivery is complete.
Apart from mixing on the way, these trucks can be loaded with concrete that has already been mixed at a plant. Since concrete can dry up and harden, maintaining its watery consistency is essential. This is where concrete mixers come into play, keeping the concrete runny until it’s delivered.
23. Utility Vehicles
Utility vehicles, also known as UTVs, are small, motorized vehicles that can transport and haul materials. In terms of function, they are similar to standard trucks and look like sports vehicles. However, despite their smaller sizes, these machines are a staple in most, if not all, construction sites.
They are helpful for various purposes, including:
Hauling materials from one place to another
Farming projects
Landscaping projects
Safe and enclosed transportation
Easy hauling through narrow work areas
Since these machines are an essential component of several construction projects, it is necessary to ensure your machine is both durable and comfortable. Modern-day UTVs have several advantages, such as ergonomic seats, quiet operation, more space, adjustable steering columns, etc.
24. Trenchers
Trenchers, also known as trenching machines, are used to excavate ground trenches for laying cables, pipelines, drainage systems, etc.
These machines come in two different types; chain trenchers and wheeled trenchers. The former consists of a long arm fixed to the machine, where you can find a digging chain. Wheeled trenchers, on the other hand, consist of a metal wheel and digging teeth around it, and the metal wheel can be polished with the help of an angle grinder.
Both options are available in tracked as well as wheeled forms but a wheeled trencher is more practical for excavating hard soil ground.
25. Tower Cranes
Tower cranes are a pretty common sight in construction projects and demolitions. They are fixed cranes used to hoist materials and people, especially when constructing tall buildings.
Heavy objects such as steel trusses, pre-stressed concrete blocks, frames, etc., can be lifted easily to impressive heights with a tower crane. Tower cranes have four components; mast, jib, counter job, and operator cabin. The mast is the vertical supporting tower that can lift heavy materials, and the jib is the operating arm.
A counter jib is an opposite arm that carries counterweights on the back of the crane, while the operator cabin is for controlling the crane.
26. Boom Lifts
A boom lift, also known as a cherry picker or a basket crane, is a heavy machinery used mainly as an aerial lift. Boom lifts are commonly used to enable workers to access areas that are otherwise unreachable and higher up.
Though they are often used in construction sites and industrial settings, they are not limited to these areas. Due to its versatility, a boom lift can be used in several fields including:
Construction
Painting
Forestry
Fire fighting
Farming
Harvesting
Window cleaning
Boom lifts come in various types, the two main options being articulating and telescoping. Depending on the size of the machine and the platform, these lifts can accommodate more than one worker at a time.
27. Towable Light Towers
These are the perfect solution for construction workers who have had to race with the sun to finish an outdoor project. Light towers comprise a group of powerful lights connected to the top of a vertical beam.
Solar panels or power generators often power these lights. Additionally, they are pretty portable, so you can move them from one site to another without having to worry about working without lights.
Most importantly, they keep workers at the site safe and increase the work hours in a day for an important project.
28. Wheel Loaders
Wheel loaders generally comprise a front-loading bucket that can be used to transport dirt and debris from the construction site. Compared to a compact track loader, these machines have much more durable wheels, making navigating and driving across the workplace effortless.
Several wheel loader attachments can make the machine more adaptable to your needs. These include:
Snowblowers
Cold planers
Asphalt cutters
Trenchers
Stump grinders
29. Carry Deck Crane
Carry deck cranes are a smaller and mobile version of a crane with a platform that can rotate 360 degrees. The deck, or operating platform, lies on top of four wheels, with a control panel and steering wheel to control and move the crane.
Since a carry deck crane cannot travel significant distances, it is commonly used for lifting or transporting heavy materials within proximity of a worksite.
30. Telescopic Cranes
Telescopic cranes are heavy construction equipment that work like regular cranes but are more compact. They have a boom in which multiple hydraulic cylinders are attached, all placed inside each other. This allows the boom to expand and contract the crane's length, similar to a telescope.
Most of these cranes are attached to tracks that allow them to move from one place to another, which makes them ideal for short-term jobs.
Types Of Heavy Construction Equipment Final Words
All types of heavy construction equipment make the job a lot easier for engineers and construction workers. However, it is not necessary that one project will require all thirty of these machines.
The best thing to do is to identify the demands of your project and use heavy equipment that aligns with your needs. Keep in mind that your focus should be on heavy-duty finding machines that make the work easier, are durable, and safe to use in the workplace.
A high or low thermostat setting prevents the room temperature from matching the device setting. Other reasons include dirt and debris buildup, improper location, inadequate capacity or number of thermostats, wiring and calibration issues, and loss of power.
When it comes to beating the summer heat or the winter chill, nothing comes close to an efficient HVAC system.
But sometimes, it may happen that your air conditioner is not performing as well as it should. And the room does not cool or heat properly even after adjusting the thermostat to the lowest or highest settings.
This guide aims to help you know why this problem occurs and how it can be resolved.
Thermostat And Room Temperature
You may think there is something wrong with your thermostat if it's blowing air warmer or cooler than the set temperature. But in reality, it may be working just as it should.
Contrary to what many people believe, an HVAC system does not work by producing cool air. For cooling purposes, it removes heat from the air, making it cooler, and circulates this cooler air throughout the room.
Depending on the size of the area to be cooled, this process can usually take a while. So, it may be some time before the temperature within the room matches the thermostat setting. Aside from that, there is a limit on the cooling capabilities of air conditioners, and in almost all cases, they can only bring down the temperature by 20 degrees.
That means cooling will remain ineffective if there is a difference of more than 20 degrees between the current temperature and your thermostat setting. Then, there might be a few other issues preventing your HVAC system from bringing down the temperature to match the thermostat setting, so let's look at them in detail.
Issues That Can Prevent Your Room Temperature From Matching The Thermostat Setting
1. An Extremely High Or Low Thermostat Setting
People often set the thermostat too high or low to speed up the cooling or heating process. As I explained above, setting the temperature value at an unrealistic level will not help.
If there is a big difference between outdoor and indoor temperatures, your HVAC system may not be powerful enough to provide effective results. Moreover, a very high or low setting will cause it to work harder and longer, which can cause damage and lead to higher power bills.
2. Dirt Or Debris Inside The Thermostat
Another common issue that can prevent your thermostat from functioning properly is dirt or debris, which can collect over time on the interior. When dust, dirt, and debris build up inside the thermostat, they can block its temperature sensor, preventing it from getting an accurate reading of the temperature.
Thus, the thermostat will heat or cool the area depending on its inaccurate temperature readings, which may not make much difference.
3. Improper Thermostat Location
Your thermostat may be located somewhere where it is exposed to certain factors that can affect its working. For instance, if it is located close to doors or windows or near the ground, its temperature sensor may not function properly, and the thermostat readings will be inaccurate.
Similarly, placing the thermostat near appliances that tend to generate heat or where it is exposed to direct sunlight can have the same effect.
4. Number Or Size Of Thermostats
A thermostat should suit the size of the house to function optimally; otherwise, achieving the desired temperature will not be possible. For example, in the case of a very large house, a small thermostat will not be powerful enough to provide proper cooling or heating.
In such instances, the temperature of areas further away from the thermostat may remain unchanged even if the HVAC system has been running for a long time. Alternatively, a single thermostat might not be enough to meet your air conditioning requirements.
5. Faulty Thermostat Wiring
Wiring issues can be another cause of why your thermostat temperature setting does not meet the room temperature. Such issues can occur if the thermostat wiring is considerably old, but they may even occur with a newly installed thermostat.
In the former case, the wires may have worn out, leading to incorrect readings. On the other hand, if a new thermostat has the same problem, it might not be installed properly.
6. Calibration Issues
Sometimes, thermostat calibration problems can prevent a thermostat from sensing the room temperature correctly. It can happen with a device that was installed incorrectly or because of electrical issues, or even if the batteries have died. If you have a non-programmable digital thermostat, factors like sunlight or heat can also cause calibration issues.
7. Problems With The Sensor
A faulty sensor can affect your home’s temperature adversely. You can find out whether this is the case by using a manual thermometer to check whether it shows the same temperature as the thermostat. This will make it easy to know whether the inbuilt temperature sensor is functioning properly or needs repairs.
8. Loss Of Power
Several types of power-related problems can affect the functioning of your thermostat. For instance, the power supply may not be adequate, which can happen if the batteries are dying. This can easily be noticed as the thermostat display will start fading, the sensor may not function properly, or connectivity issues may arise in the case of a smart thermostat.
Power issues can also occur because of faulty wiring, regular wear and tear, or corrosion. These can cause the thermostat to function abnormally, resulting in short cycling or battery notifications.
9. Unlevel Thermostat
This problem can take place if you have an older mechanical thermostat that relies on a mercury switch. Such switches should always be leveled properly for the thermostat to function normally. Otherwise, the mercury will flow towards one end, causing the air conditioner to turn on and off randomly.
Bimetal springs are another component of mechanical thermostats that should be perfectly horizontal to ensure accuracy.
10. Air Leaks
Since HVAC systems are not completely sealed, the possibility of air leaks is extremely high. This means warm air from outside can enter easily, usually through ventilation or filtration systems, reducing the effectiveness of the thermostat. Locating such leaks can also be quite difficult.
11. HVAC Equipment Issues
At times, problems with your air conditioning equipment can prevent the HVAC unit from functioning to its full capacity. Such issues usually include debris buildup around the heat pump or a clogged air filter.
These can affect the functioning of the system, causing ineffective heating and cooling. The same problem can also occur with filters, pipes, and fan ducts.
Solutions
For all of the above problems, taking the help of a professional HVAC technician is generally the easiest and safest option. But there are a few things that you can try out that might help resolve the issues.
1. Adjusting The Thermostat Settings
If your thermostat setting is too high or too low, it won't be very effective. But this issue is pretty easy to deal with, and you just need to adjust the temperature setting to ensure it is not extremely high or low. Doing so will also help the HVAC system last longer.
2. Cleaning The Thermostat
If the problem is caused by a dirty thermostat, all you need to do is clean it. To do so, first, remove the front panel or thermostat cover, then use a dry cloth to gently wipe the interior parts. If you are unsure about how to remove the panel, check the owner's manual, which should contain instructions.
You can also use compressed air to blow away the dust, but avoid using water or a damp cloth as that may cause electrical damage. Once all the debris and dirt have been removed, put the panel back and turn on the system to check if it runs properly.
3. Relocating The Device
In case your thermostat is located near other appliances, a door, window, or floor, relocating it might solve the problem. However, this requires some expertise, which is why I strongly recommend going through your owner's manual to learn how to do so.
If you're unsure, getting an HVAC professional to reposition the thermostat might be best. Just make sure it is located in a central place, away from any openings.
4. Replacing The Thermostat
A single thermostat with a small capacity may not be very effective for a large house. You can check the capacity by determining the BTUs (British Thermal Units) of the cooling and heating system. Then, check whether this capacity is enough depending on the square footage of your home.
An air conditioner requires 20 BTUs for one square foot of space. If your HVAC system lacks the capacity required for proper cooling and heating, consider replacing it with an appropriately sized unit or installing additional systems. For a smart thermostat, you can install more sensors throughout the house before connecting them with it.
5. Check For Wiring Issues
In the case of an old thermostat, wiring problems tend to be the most likely cause preventing it from working properly. Alternatively, a new thermostat may be installed incorrectly, leading to this thermostat problem.
To verify the cause, you will need to remove the cover as instructed in the user manual and check for damaged or loose wires. Make sure that all wires are securely attached to the terminals, but working with damaged or faulty wires can be a bit risky.
Many times thermostat problems can be fixed simply by recalibrating, and I suggest doing so at least once a year. Electrical problems and old batteries can result in a thermostat’s calibration issues, but they may even occur with new thermostats. This is because it takes time for the device to adjust according to the surrounding temperature.
The recalibration process of HVAC systems can vary depending on the brand and model, so check the user manual to learn about it. Follow the instructions provided to calibrate your thermostat, or alternatively, try replacing the thermostat batteries. You can also upgrade from a mechanical thermostat to a digital one that does not need to be calibrated.
7. Replacing The Sensor
Use a room thermometer to check whether the thermostat sensor works properly and shows the correct temperature. If there is a difference between the temperatures displayed by the room thermometer and the thermostat, you may need to replace the sensor.
Here, I would like to point out that sometimes replacing the sensor may not be possible, and you will need to invest in a new thermostat. Consult the manufacturer of your unit to find out whether this is the case.
8. Changing The Batteries
Your heating and cooling system may be losing power due to various reasons, like worn-out wiring, corrosion, or dying batteries. I've already explained how to deal with damaged wires.
Similarly, you can get rid of corrosion by cleaning the affected parts, while with smart thermostats, dying batteries are a more common cause. In such instances, replace the batteries and check whether the room temp matches the set temperature.
But if these measures remain ineffective, replacing the thermostat might be your only option.
9. Leveling The Thermostat
When the room temperature does not match the setting on a mechanical thermostat because of an uneven mercury switch, it will need to be leveled and straightened. To level the thermostat, remove the cover of the device and check that the sub-base is attached to the wall correctly.
Look for flat or notched sections designed to ensure a correct level, and make sure that the sub-base is completely horizontal. If this does not solve the problem, consider upgrading to a smart programmable thermostat.
10. Detecting And Sealing Leaks
Leaks allow air to enter the room, forcing your air conditioner to work harder without effective results. To detect them, check the ventilation system, and if you discover any leaks, use foil-faced tape to seal them up. In cases where detecting air leaks is very difficult, devices like fog machines can help.
But hiring an HVAC professional is a much easier process to locate and seal leaks.
11. Cleaning And Replacing Faulty Equipment
Air filters, fans, and pipes that have become dirty and clogged with dust or debris should be properly cleaned. But even that may not result in your room's temperature matching the thermostat setting. This may indicate that the system might have broken components that need replacing.
When replacing them, make sure to use components compatible with your HVAC system. You can consult the manufacturer of the HVAC system or an HVAC technician when searching for the right replacements.
12. Resetting Your Thermostat
Many times thermostat issues can be solved by resetting the device, which restores the default settings of the unit. However, keep in mind that there are different reset procedures for thermostats from different manufacturers, so you should check the manual before proceeding.
Programmable thermostats need to be turned off before they can be reset, which requires removing the batteries from the device. You may need to remove the thermostat from the wall to access the battery panel. After removing the batteries, reinsert them backward, aligning the positive with the negative terminals and keeping them in that position for a few minutes.
Then, remove and reinsert them the right way. Check that the display turns on, which will indicate that the system has been reset.
As for low-voltage electronic thermostats, these lack digital displays and can also be reset by removing the cover. After removing the cover, clean the inside with a soft brush and adjust the setting to the lowest cooling level before cleaning with the brush again. Repeat the process after adjusting the setting to the highest heating level, then turn it on.
Then there are mechanical thermostats, which do not have a battery. You just need to remove the cover and check that all wires and components are working properly. After that, turn off the power source connected to the device before turning it back on after 30 seconds.
Finally, there are non-programmable digital thermostats, which are the easiest to reset; you just need to remove the face cover and press the reset button for five seconds. Or you can remove the batteries for five seconds before reinstalling them.
Conclusion
The problems preventing your HVAC system from providing the desired level of heating or cooling depend on several factors. These can include the age of the thermostat, the installation process, the size of your home, etc.
Knowledge of these factors can be very helpful in dealing with these problems, but it is always better to focus on preventing them from occurring in the first place. That is why proper maintenance is crucial, but there are several additional benefits of aircon upkeep.
Apart from preventing heating and cooling issues, regular maintenance helps improve the energy efficiency of the system leading to lower heating and cooling costs. In addition, it can ensure that the components last longer while performing better. So, make sure to get your HVAC system serviced at least once a year.
Starting from kitchenware to vehicles, HDPE is everywhere. And if you are thinking of bonding HDPE surfaces, here’s what you need to know.
HDPE or high-density polyethylene is used for a range of objects, starting from fuel tanks to milk cartons. And sometimes, you may need to join two pieces of HDPE plastic or simply join one with another material such as steel or fiberglass. But if you have worked with this material before, you would know that it is quite challenging.
For a very long time, the only option for bonding HDPE plastic was welding. But with time, technology has advanced quite a lot, and there are superglues and epoxy adhesives that make the job much easier. So, in this guide, we will take you through all that you need to know about HDPE glues.
Listed below are the best HDPE adhesives:
J-B Weld Professional Steel-reinforced Epoxy: J-B Weld epoxy's prominent feature is its resistance against various chemicals, making it superior to Loctite heavy-duty epoxy in terms of durability. It sets slower, which may be inconvenient for quick projects.
Loctite Heavy-duty Five-minute Epoxy: A heavy-duty epoxy that provides robust bonds in less time, setting in just 5 minutes, unlike the J-B Weld which takes 4 to 6 hours. For a more enduring hold akin to J-B Weld, it might need to be used with a fiberglass cloth.
Loctite Instant Mix Five-minute Epoxy: The Loctite instant mix epoxy is best suited for precision jobs, and it excels in ease of application, which is an advantage. Its small volume of 0.47 fl oz poses a disadvantage for larger projects compared to the J-B Weld.
By now, you must have understood that working with HDPE glue can be quite challenging at times. And all the products that you find on the market that promise to glue HDPE are not effective. Some products are better than the rest, and here, we will talk about our favorite few in this section.
1. J-B Weld Professional Steel-reinforced Epoxy Twin Pack - Best for Large Projects
What stands out about this item is the remarkable strength and versatility that it puts on the table. And if you have a large project in hand, this item is more suitable for that purpose. The quantity in the pack is pretty good, and you would be able to handle massive projects with much ease. You can use this for both indoor and outdoor projects.
Like any good epoxy glue, this one can be sanded, drilled, and even filled as per your needs. And you can rest assured that it is completely weather-proof and resistant to other chemicals and acids. So, even if it comes in contact with other items, the bond will not get damaged.
Moreover, just like the manufacturer promises, this glue will deliver a bond that is equivalent to that of steel. We have tested this product and can vouch for this. But we also have to say that it takes longer than other brands to get cured. So, if you have an urgency to finish your project, this might be a bit problematic.
Quantity: 2 Tubes | Volume: 5 fl oz Each | Set Time: 4 to 6 Hours | Cure Time: 15 to 24 Hours | Dry Color: Dark Gray | Resistance: Waterproof, Withstands Up to 550°F, Resists Petroleum, Chemical, Acid
2. Loctite Heavy-duty Five-minute Epoxy - Best for Quick Bonding
If you are looking for a robust bond in a short time span, it is best that you give this adhesive a try. This item is well-suited for heavy-duty projects. But the best part is that it comes at a very reasonable price.
So, even if you take up massive projects like stonework, fencing, or laminating, this glue will come to your rescue. You can understand that it not only helps to glue HDPE plastic but is also excellent for other materials such as wood, tiles, fiberglass, and ceramics. And the best part about this is that it can easily handle shrinkage and drilling like a pro.
However, if you are looking for a more durable hold, consider combining it with fiberglass cloth.
3. Loctite Instant Mix Five-minute Epoxy - Best for Precision Tasks
Just like the name suggests, this glue will help you get your work done in under 5 minutes. And you will not have a hard time using this item, as the application process is super simple. You do not have to do anything manually. Even for mixing the resin and the hardener, you will find a mixing nozzle included in the package. You do not have to get your hands dirty in the process.
But you need to keep in mind that it is best suited for smaller projects as the amount of glue included in the package is not much. So, it is best that you put it to use on smaller projects that demand a high amount of precision.
Because of the narrow nozzle tip, the application becomes quite simple, and it gets easy to reach difficult areas. And once the glue dries up, you can sand it or paint it as per your requirements. You don’t have to worry about it shrinking!
If you want to identify the best HDPE adhesive, listed below is a table specifying quantity per package in units, volume measured in fluid ounces, set time in hours and minutes, cure time in hours, dry color, and resistance features.
High-density polyethylene (HDPE) is a popular material known for its durability, strength, and resistance to most common chemicals. However, these qualities can make it challenging to bond with other types of materials using conventional adhesives. In this comprehensive buying guide, we will cover important factors to consider when purchasing the best adhesives for HDPE, ensuring you find the best product for your needs.
Type of Adhesive
There are various types of adhesives that work well with HDPE. Some of the most common include:
Cyanoacrylates (CAs): Also known as super glue, CA adhesives offer a strong and quick bond. They work best for small-scale applications and can be difficult to remove.
Epoxy Resins: Epoxy adhesives provide a strong bond and are known for their durability, resistance to chemicals, and ability to withstand moisture. They often require heat and/or pressure to cure.
Polyurethane Adhesives: These adhesives are flexible and resistant to chemicals, moisture, and impact. They can be used for both porous and non-porous surfaces; however, they may require a longer curing time.
Plastic Welding Adhesives: Plastic welding adhesives use solvents and heat to chemically bond the two surfaces together. They offer a strong bond but may require specialized equipment to apply.
Application Method
Consider the application method of the adhesive, which can vary based on the size and complexity of the project:
Brush-On Adhesives: Useful for spreading the adhesive evenly on large surface areas.
Spray Adhesives: Provide coverage for large areas quickly and can be used for both temporary and permanent bonds.
Gel Adhesives: Ideal for vertical applications or uneven surfaces due to their non-drip consistency.
Dual-Cartridge Dispensing Systems: Allow for precise, controlled application of adhesives with mixing nozzles, and are often used for industrial purposes.
Curing Time & Temperature
Consider the curing time and the required temperature for the HDPE adhesive you choose, since these factors can determine the strength and longevity of the bond:
Fast-Curing Adhesives: Ideal for projects requiring quick results (bonding in seconds or minutes). However, they may be less durable than slower-curing options.
Slow-Curing Adhesives: Generally provide a stronger bond but will require more time for the adhesive to set and fully cure.
Temperature Requirements: Some adhesives have specific temperature requirements to ensure a strong bond. Choose one suited to your working environment.
Bond Strength & Durability
Pay attention to the bond strength and durability of the adhesive:
Tensile Strength: Measured in psi (pounds per square inch), this indicates how well the adhesive can resist a force applied in the same plane as the bond.
Shear Strength: Also measured in psi, it refers to the adhesive's ability to resist a force applied perpendicularly to the bond.
Higher values indicate a stronger bond. Choose an adhesive with adequate strength for your specific application.
Chemical Resistance
HDPE is known for its chemical resistance, so it's important to choose an adhesive with similar resistance properties. Make sure to select an adhesive that will withstand the chemicals and environmental conditions your bonded HDPE will be exposed.
Price & Quantity
Consider the price and the quantity of adhesive needed for your project. Higher quality adhesives may cost more, but they can provide better overall performance and durability. Balance the need for quality with budget constraints.
Important Tip
Surface preparation is critical when bonding HDPE materials. Follow the manufacturer's instructions on how to prepare the surfaces, which may include roughening, cleaning, or using a primer. Proper surface preparation can significantly improve the success of bonding HDPE materials.
In conclusion, to find the best HDPE adhesive for your needs, consider factors such as adhesive type, application method, curing time and temperature, bond strength, chemical resistance, and price. Most importantly, properly prepare the HDPE surface for optimal adhesion. Finding the right adhesive will ensure your project is successful and long-lasting.
Bonding HDPE 101
HDPE is one of the trickiest plastics to glue. If you are wondering why that is the case, then let us break it down for you.
This material has high abrasion resistance, and as a result, it has minimum surface energy and a very robust surface. Because of this feature, most standard and even superglues cannot work their charms on HDPE. And in case the glues are not effective, you can always screw the HDPE pieces together with nails.
But remember that when you do this, they will get a more industrial effect that may not always be visually appealing. Likewise, welding may leave the joined surfaces with an uneven look, especially if not done the right way.
Although you will find many adhesives on the market that claim to glue HDPE, you should not get easily fooled and maintain proper caution to choose the right product that can really do the job..
How to Glue HDPE
Irrespective of the type of glue that you are planning to use, remember that it is mandatory to prepare the HDPE surface first. So, it does not matter if you are applying super glue or epoxy; the surface needs to be clean for the glue to work.
The easiest method to get the surfaces prepped is by sanding them. But keep in mind that the process is likely to generate a lot of dust. So, we will recommend vacuuming the surfaces thoroughly post-sanding to ensure there’s no dust on them. If you fail to clean them properly, then the adhesive may lose its strength when applied.
Moreover, you should always follow the instructions provided by the brand for the best results. All products come with a set of instructions, and in case they don’t just call their customer support team and ask for help. In case you choose to work with superglue, you might also need to get a good primer to use with it.
You would be required to apply a coat of this primer and give it some time to dry up and cure. Only when that happens should you proceed with the next step of applying the glue? The manufacturer of the glue and primer will definitely mention the time needed for them to dry out completely, so don’t miss out on reading them.
On the other hand, if you opt for epoxy adhesives, you will require an additional hardener to mix with the resin. You either have to do the mixing manually, or the product will come as a pre-prepared mixture.
Take the Necessary Precautions
Without proper preparation, not only will using HDPE glue become too expensive, but it can also be hazardous. So, in this section, we will take a look at some of the things that you can do to ensure that you do not have to face either of the problems.
In order to ensure a mess-free application, you can take special care to prevent any glue from oozing. And for this, you need to be careful about applying only the recommended amount and nothing more than that. The idea that more is better does not work here.
Other than that, we will always recommend working with the surface and glue in an area with good ventilation and ample amount of sunlight. Some of the adhesives that you might use are pungent and even have hazardous chemicals in them. So, you can even consider working outdoors.
Moreover, it is best that you arrange all that you need before starting with the project. Some of the glues may dry very quickly and won’t give you much time to fix things. So, it is best that the work does not get interrupted when you begin.
Apart from that, we recommend that you opt for clear adhesives that won’t leave any seams on the HDPE. Even if the glue oozes out a little, it won’t cause too much trouble. And when you are using the glue, stay very careful and do not let it come in contact with any part of your hands or clothes. In case that happens, you will have to face a hard time trying to get it off.
Get to the Grind
So, how do you get the actual job done? Let’s take a look.
Sanding
In case you are planning to glue two pieces of HDPE together, you would need to sand both surfaces and not just one. For this, it is best to take 120-grit sandpaper and use that to make the smooth surface of the HDPE rough. And as we have mentioned before, use a vacuum cleaner to drive off the resultant dust.
After that, all you need to do is follow the user manual closely. If you are using an epoxy adhesive, make sure that you mix a quality hardening agent to help form a good bond. You might have to do it manually, or you can use an ejection gun for the process.
Once you are done with that, apply a thick coating of this HDPE surface mixture. Let it dry for a few minutes, then attach this glued surface to the one you want to combine with the HDPE.
Make sure that you keep these two pieces clamped together until the adhesive gets cured. It might take you a day or two to get done with this step. If you read the user instructions carefully, you will have a fair idea about how long it can take.
Melting
After you are done with the sanding process, you will need to get hold of a propane torch. Adjust the flame to make sure it is blue and lightly melt the HDPE surface. Make sure that the flame is not blue or red, as that will damage the surface completely.
Do this for around 2 to 5 seconds. In case you are working with a piece that is round in shape, it is best that you keep turning it around to ensure that all areas get heated evenly.
Once you are done doing that, test if it is done properly by putting a water droplet on the surface. If it spreads out, rest assured that it has been breached properly. And in case you see that there are beads of water in certain parts, you would have to redo the process.
When you are sure that the surface is well prepared, go ahead and apply the epoxy according to the user manual. We would suggest that you apply a generous coat to ensure that the surfaces stick well.
Keep the surfaces glued together until they get completely cured.
What types of glues work best on HDPE?
The types of glues that work best on HDPE are two-part epoxies or specialized polyurethane glue. Other alternatives include hot melt adhesives or certain types of superglues designed for use with plastics. It's always essential to follow the manufacturer's instructions for the best results.
Is it possible to glue HDPE together?
Yes, it is possible to glue HDPE together, although it can be challenging due to HDPE's low surface energy and resistance to adhesion. It typically involves a specific preparation process that could include flame or plasma treatment of the surfaces. Specialized adhesives like two-part epoxy or certain polyurethane adhesives are used following the manufacturer's guidelines.
How to glue HDPE panels?
To glue HDPE panels, there's a two-step process that is typically employed. First, the HDPE surface is treated with a flame or plasma treatment to improve adhesion. Then, a specialized adhesive such as a two-part epoxy, hot melt adhesive, or polyurethane adhesive capable of bonding HDPE is applied as per the manufacturer's instructions.
With that, we have reached the end of this informative guide.
We hope that you have been able to learn a thing or two about how to glue HDPE properly. Also, we hope that our recommendation of effective adhesives comes to your aid.
Although you started out with this guide with the thought that HDPE is difficult to handle, by now, you must have understood that this is not the case. With the right products, you can handle them easily.
But for that to happen, you need to understand the material and adhesive well. Unless you do that, you are most likely to fail. In case you have any more questions, feel free to write to us in the comments section below. And keep a watch on this space for more exciting reads.
Until next time, goodbye!
Adjusting an electric planer can be done in a few simple steps that involve checking and adjusting the positions of the blade. Through regular cleaning and maintenance, the planar can become a precise and reliable woodworking tool.
When smoothing a wooden surface with an electric planer, it’s important to keep the blades set correctly.
The blade alignment, cutting depth, and blade depth have a significant impact on the quality of your project. Adjusting them is the key to achieving a clean and seamless finish.
Here’s a complete guide on adjusting an electric hand planerto keep your woodwork smooth and prevent the planer blades from wearing out.
A poorly aligned electric hand planer can lead to a host of issues with your woodwork that can set your work back significantly. While these issues are solvable, it’s better not to encounter them entirely. After all, fixing any defects in your woodwork is a time sink of its own.
If the blades of your electric planer are not aligned properly, you can encounter the following issues:
Poor finish quality
Snipes
Uneven cuts
Reduced blade lifespan
Unwanted gouges and ridges
A properly aligned blade will not run into such issues, giving you the desired result with minimal effort. An efficient tool is what precise woodwork needs, and a well-adjusted electric planer can fulfill the role well.
8 Easy steps to adjust electric planer
Step 1: Put on protective gear
Even if you consider blade adjustment the safest possible thing, it’s still better to be cautious. Planer blades can be fragile, and they can snap off under pressure, which can lead to unfortunate injuries. Accidents do happen while in the workshop, so it’s always best to put on some protective clothing as you work.
At the very least, you should put on safety glasses and earplugs to protect your eyes and ears while working with an electric planer.
Step 2: Unplug the planer
Let’s start the adjustment process by unplugging the device from the power socket to ensure there are no electricity-related accidents as you adjust the blade. After all, an electric shock or the blades turning on while working is far from an ideal circumstance.
Once you pull the plug from the power socket, you can safely begin the blade adjustment process.
Step 3: Check and adjust the blade depth
Before proceeding to blade adjustment, you should check the length that requires adjustment. You can do this by checking if the blades are below the rear parking shoe and if they need to come out even further.
Use the blade depth knob to check its length. As you move the front knob to its highest blade depth setting, look how far the blade comes out. If the blades don’t come out at all or only protrude slightly, they need to be adjusted further until they are at the correct setting.
You can also check the condition of the blade during this step, as it forms an important part of smoothening a piece of lumber. Dull blades lead to wood surfaces being full of defects like rough grains and ripples as they tear through wood fiber instead of slicing through.
Step 4: Prepare the working surface
The working surface of the planer helps you set the blade depth properly, be it a table or a working station. Set the blades slightly above the rear of the planer, which is where the out-feed table is usually positioned. Ensure that the blades are parallel and at the same height as the working station or planer jig.
If the blades are too low or too high, they can cause the planer to gouge more wood out of a lumber plank.
Step 5: Clean and dust the blades
Next, clean the blades and the area around them using a brush or compressed air. This can help remove any chips and debris that may be present around the blades, taking care of the clogged blades problem in the process.
Additionally, clearing the area around the blade holders before you begin working can help reduce the likelihood of the planer jamming.
Step 6: Align the blades
A well-aligned planer is crucial to its success, as it can outright prevent issues like lines or unsightly marks from occurring altogether. This can be done by understanding how your planer cuts and the angle it works.
You will need a feeler gauge to align the blades properly. Use a wrench or screwdriver that works with your planer and use it to adjust the planer blades one by one. Take care not to misalign them, as even minute inaccuracies can lead to the tool becoming unbalanced.
Use the feeler gauge again to see if the planer blades have aligned well or not.
Step 7: Adjust the blades
After aligning the blades, use the tool-specific screwdriver to undo the screws in the blade holders. You’ll need to turn the screws anticlockwise to the point where they come in contact with the end of the notches.
You can loosen or tighten the plates that clamp the blade holders in place to adjust the blade space. Be careful while doing so, as a poorly adjusted plate can make working with the planer difficult. Once you’re done, use the screwdriver to fit the gauge plate back in place with the screws.
Next, use a pencil and a ruler to set the blade correctly. Reset the planer blade depth to 1 mm and set the ruler to zero, after which you can mark the distance needed for precise cuts. Try to ensure that you don’t end up with the same length measurement on all edges.
Step 8: Test the planer
Once everything’s been fitted back into place, it’s time to test the electric planer. Plug the machine into the power socket, feed the machine a plank of wood, and power it on.
For each pass that you make over the timber, check for any defects or unusual deformities left behind. If you spot a groove, snipe, line, or grains, you may need to repeat the steps listed above to fix the issue.
After all the adjustments are made, your electric planer is ready to be used again.
Electric planer maintenance
No matter how frequently you use an electric planer, you will need to maintain it periodically. Even when not in use, the device can lose its effectiveness over time because of aging.
Periodic maintenance can add years to the life of a power tool, making it more efficient and saving you money in the process. And while the nitty-gritty of electric planer maintenance may vary from one model or planer typeto the next, the overall maintenance steps remain the same.
Here are a few tips you may use to maintain and extend the life of your power planer.
1. Store in a safe place
While storing a power planer, you must ensure that it receives no undue damage when not in use. If possible, try not to store it in a high place or on a thin shelf to minimize the risk of injury.
Additionally, ensure that the tool doesn’t come in contact with moisture at all. Not only can it cause the planer to rust over time, but it can also make it fragile and unfit for use. So, picking the right place to store is the only way to prevent the wood planer machine from rusting.
2. Lubricate well
Friction is an issue that can lead to several undesirable outcomes when working with an electric hand planer. Too much friction can produce a lot of heat, which can damage the planer blades, blade holders, motors, cables, and electrical systems. Additionally, the more friction the blades encounter, the more power the tool consumes.
So, it’s important to lubricate the hand planer well before using it. While it’s not strictly necessary to lubricate the tool each time before use, it’s still a good practice to do so. This is particularly the case if you use the power planer frequently.
3. Sharpen the blades
A good way to prevent rough cuts is to check the sharpness of the cutting edge before using the planer. Dull blades can be spotted easily with their rounded corners and smooth appearance.
You can sharpen your planer blades by using a sharpening stone. Simply swipe the stone against the straight edge several times until you see the cutting edge reaching the appropriate sharpness level.
Tip
Make sure that the pressure you apply with the stone remains consistent with each swipe on both sides. Such a way of applying pressure will allow the planer to perform as if it were fitted with new blades.
4. Replace planer parts
At some point, your planer parts will require replacement, which may include motor parts and blades. For this, you will need to find spare parts compatible with the model, as incompatible parts will either not fit well or work poorly.
Try to ensure that the planer parts you choose are the ones recommended by the manufacturer. This will help the device function as close to its previous performance after the replacement.
You can purchase electric planer spare parts directly from the manufacturer’s website or offline and online hardware stores.
Tip
If you’re replacing a crucial component like the motor, it’s best to leave its installation to a specialist. A specialist can ensure that your device doesn’t run into unexpected problems through proper installation techniques.
Are there any safety tips related to electric planer operation?
Here are several tips related to electric planer operation:
You must wear safety glasses and hearing protection
Do not wear rings, ties, watches, loose clothing, gloves, and jewelry
When the stock is fed into the planer, refrain from raising or lowering the table
Run dirt and dust collection using the planer after operation
Keep your fingers at least four inches away from the in-feed area
Perform cuts at a slow and steady speed
Don’t use the planer on lumber that is less than 0.25 inches thick
The lumber should be at least 10 inches long to be planed
Clean the workpiece before using the planer on it
Follow the wood grain when you hand plane a wood surface
Check for loose knots, splits, chips, and wooden defects in the lumber
Remove metallic elements from the lumber before planing
You can find other safety tips that can help your working space be as free of accidents as possible on the manufacturer’s instructions. These are model-specific tips that can help you cut lumber without risking injuries.
What is the cutting angle of an electric planer?
The cutting angle of an electric planer commonly lies between 45 to 60 degrees, although this can vary depending on the make and model of the tool. This angle is the orientation of the cutting blade relative to the workpiece.
A lower angle is preferable for softwoods while a higher angle performs better with hardwoods. Check the user manual for precise specifications for your particular model.
How can I avoid uneven cuts or cracks while using a planer machine?
You can avoid uneven cuts or cracks while using a planer machine by considering a few factors. Firstly, adjusting the cutting depth to a lower setting is recommended for most surfaces, especially for achieving a smooth finish.
Secondly, be mindful of the pressure applied against the wood and ensure it is low and applied towards the front of the plane, while also moving in the direction of the wood grain.
Lastly, regularly check the condition of the planer blades and replace or sharpen them as needed to ensure optimal performance.
Adjusting an electric planer is a fairly straightforward process. With some vigilance and a little elbow grease, you can have the planer ready to work within a few minutes.
Of course, it’s worth mentioning that prioritizing your safety is the most important thing in the process. It’s always risky to work with dull or chipped blades, after all. Drawing from experience, a few safety precautions and operation tips can go a long way in keeping you and your planer safe from any mishaps.
If you run into any issues with the planner, you needn’t panic. The solutions to many troubles with these tools are usually fairly simple to DIY-solve, so keep calm and get to troubleshooting!
Electric hand planers may leave lines because of blade defects, poor alignment, or a blocked blade. These can be resolved by sharpening or replacing the blade, adjusting its position, and cleaning it regularly.
An electric hand planer can be a great tool to shave off small amounts of wood for fine sculpting or final smoothing purposes.
This tool can be versatile when used for shaping doors, cutting grooves, chamfering edges, and more. Based on my observations, the hand planer may showcase issues like leaving lines on the wood, thereby leaving an unsightly mark on the woodwork.
Let’s look at the reasons why this happens, as well as ways to prevent and fix it for a better finish on your wood projects.
In principle, an electric hand planer operates in the same way as a manual one. The purpose of this tool is to flatten the edges and corners of wood while smoothing out irregularities through force. And both kinds of tools feature a thin steel blade to perform the task.
An electric hand planer features a rotating blade that can cut off more material quicker than a manual model. This blade sits between two metal plates that can be adjusted to move up and down, which dictates how much wood the blade will cut off. The depth of the cuts that this blade makes is usually limited to a little less than a tenth of an inch.
Typically, the RPM of the rotating blade sits between 10,000 and 20,000, which makes its cut edges smooth.
Due to its precise nature, an electric hand planer can be used in the refinement stages of any woodwork project. Here is a brief list of the projects it can be used on:
Reshaping swollen doors to fit the door frame better
Straightening the framing of the house by cutting some wood off studs, joists or rafters
Giving a project a hand-scraped look by removing the oxidized top layer
Campher edges by keeping the tool at a stable angle
Cutting rebates into doors, cabinets, or other smaller pieces of furniture
The reasons for electric hand planer leaving lines
When working with an electric hand planer, it’s only natural to expect clean results during usage. Any small perfections can be sanded off, should they be minor and few. But that may not always be the case, particularly if your device or its blades are a little older.
There are three primary reasons why your electric hand planer might be leaving lines. Let’s explore each to see how they affect the performance of the hand planer.
1. Dull blades
Like most woodworking tools, if the blades of an electric hand planer become too dull, the device won’t function properly. You will be left with jagged cuts or unsightly lines, which is far from the desirable outcome.
Consider checking your blades to see if they have a sharp and straight edge. Dull blades appear smooth and somewhat rounded, which will necessitate the usage of a sharpening stone.
To sharpen your dull hand planer blade, place the stone against it and swipe it against the blade several times. You will see the blade slowly reach the appropriate levels of sharpness as you continue to move it against the stone.
Tip
Try to ensure that you maintain an equal amount of pressure on the stone while sharpening the blades. This will make sure that the blade is evenly sharp across its circumference.
2. Poorly adjusted blade
An incorrectly adjusted blade can spell trouble for your wood projects that stretch beyond just lines. It can result in an uneven finish or, in severe cases, messy ridges and gouges on the wooden surface.
This can be fixed rather quickly through a blade adjustment technique. The key is to understand the angle at which your planer cuts and make adjustments accordingly.
Start by ensuring that the blades of your planer are aligned properly by using a feeler gauge. Next, use the planer model-specific wrench or screwdriver to adjust the planerblades one at a time. You must be careful while doing so, as any errors can affect the balance of the tool, necessitating even more work on blade adjustment.
Finish by checking the alignment with the feeler gauge and seeing whether the blades have aligned properly or not.
3. Blocked or damaged blade
The blades of electric hand planersbeing blocked is an issue that will present itself every once in a while. Should the blade of your hand planer end up being blocked, it can end up overworking or burning the motor out.
While working, this may be observed as your planer ends up creating lines in the woodwork because of the inconsistent blade rotation. This can be resolved fairly easily by clearing out the clogs and repositioning the blade appropriately.
Prevent electric hand planer from leaving lines
Fortunately, you can prevent your electric hand planer from leaving lines quite easily through a few preventive measures. These measures only require vigilance on the user’s part, so prevention is a simple matter of checking the tool every once in a while.
Here are the ways you can prevent the planer from creating lines on your wood surface.
1. Check the planer blade regularly
If you spot any blade-related issues before they cause major trouble, you can fix them before they occur at all. For dull blades, you may sharpen them before ever needing to replace them. And to prevent the blade from being misaligned, check its alignment before and after you use the tool.
2. Adjust blade depth properly
Much like the blade-related issues, preventing the planer from cutting too deeply or not deeply enough can be fixed by checking the tool beforehand.
Simply rotate the adjustable knob to raise or lower the cutting depth. While the depth range may vary from one model to the next, it typically ranges between 0 and 3 mm.
A low cutting depth means your wood project will receive a smoother finish.
3. Keep the blade clean and free of debris
Keeping the blade clean and free of debris can stop it from clogging up, so be sure to clean the blade periodically.
To do so, you must turn the power off first and unplug the tool. Use a small brush to remove the debris clogging the blade from within the guard fence and around the blades and feed rollers. Try to make sure you’ve removed all the debris before using the tool again.
Tip
Consider using compressed air to force any large debris out of the tool if you face issues with a brush.
Removing the lines left by an electric hand planer
Fortunately, hand planer defects like lines are fairly straightforward to fix. There is a simple solution to each type of machining defect through the use of other manual and power tools.
Here’s how you can remove the lines left behind after performing a hand plane with the tool.
1. Using an orbital sander or a belt sander
The easiest way of removing fine lines on your woodwork is to sand it down. While you can work manually using sandpaper, a random orbit sander or a belt sander is quicker and does a better job.
These machines are easy to find and are affordable to boot, which can make them a mainstay in your woodworking toolkit. Simply attach the belt sander to a power drill and move it over the wooden surface in slow circular motions. Within a few minutes, you’ll begin to see the beginning stages of a smooth finish.
Be sure to use very little force as you move the belt sander to scrub plane marks.
2. Using a jointer
If you have it in your toolkit, a jointer can smoothen the hand plane marks left behind by the tool quite well. Jointers are also electrically-powered but are faster and require less effort to make a cut.
The blade in a jointer can closely shave the wooden surface smooth, effectively flattening and eliminating the lines made by the planer. You can also use it to create a beveled or straight edge and chamfering over a planer, if you need to.
That said, it’s worth noting that the control over jointer plane thickness is not as precise as that of a thickness planer. If you’re not careful, you may be left with a bigger machining defect than a simple line.
3. Adjusting the blade depth
When using an electric hand planer, it’s imperative to be careful with the cut depth. You can always make multiple passes over the wood surface to remove more, after all.
If your planer has left lines in the woodwork, you can readjust the blade depth to even the surface out. Checking it after making one pass can help you keep the surface consistently smooth. Additionally, you can ensure that the blade sits in the middle of the floor plate and isn’t angled.
You can also use a different type of planer, like a table-top power planer, if you need such tools frequently. These machines ensure that wood surfaces remain smooth and accurate, requiring very little effort on your part.
What are the machining defects that can be left by an electric hand planer?
The machining defects that can be left by an electric hand planer include lines, ripples, grains, or snipes which can put a damper on your woodworking spirit. Fortunately, similar to lines, they are easy to remove.
A snipe occurs when the ends of a piece of wood are cut thinner than the rest of the flat board. It can happen if the lumber isn’t secured well enough on the planer jig. To solve this, you can use multiple rollers to secure wider boards, after which you can start using the planer.
Sometimes, you may find that a piece of wood has developed ripples instead of being smooth. This can happen due to the planer blade being defective or misaligned, which can be solved using the methods listed earlier.
Lastly, the lumber may be riddled with grains instead, which can happen with woods with a large difference in density within individual annual growth rings. You can see it happening if the planer blade pushes the hard latewood into the soft earlywood instead of slashing through the wood fibers. This can be fixed through sanding or by making smaller cuts with sharp knives.
How much should a planer blade be sharpened?
A planer blade should be sharpened to about 600 grit, which strikes a balance between sharpness and durability. Any sharper, and the blade will grow dull within a few uses. And any less sharp, and the blade will not be sharp enough to perform a lighter cut through rough lumber.
Is a manual hand planer better than an electric hand planer?
A manual hand planer is not generally considered better than an electric hand planer as it has a smaller working area and can be prone to producing more defects. Thus, hand planing with a manual planer is not preferable over an electric one with the results in mind.
Like most tools, electric hand planers have the potential to leave a few defects on your working surface. Defects like lines, grains, and ripples can occur, but they can be solved just as easily too.
Removing the possibility of a power planer leaving lines is a matter of taking care of the device and being mindful of the working surface. Often, the issues that may crop up can be resolved by sharpening or changing blades, adjusting the blade depth, or declogging the blade.
It’s best to approach any defects left by the hand planer with a calm mind and the right tool set. After all, they’re rarely complex and require very little effort to be eliminated entirely.
Electric hand planer jigs are tools that make it easy to use electric planers by ensuring consistency and precision in the planing process. The most common types of planer jigs include standard planing jigs, tapering jigs, beveling jigs, thickness planing jigs, and rabbet jigs.
An electric hand planer is a must-have tool that allows you to plane wooden surfaces by shaving off small amounts of the material. It generally has two or three blades and can remove up to ⅛” of wood when used in a single pass. The main difference between manual hand planers and electric hand planes is that the latter have blades that operate at high speed with the help of a powerful motor. Electric hand planers also tend to be more versatile and easier to use, especially if you have no experience with woodworking tools. They are generally used with jigs, which reduce the effort involved in the woodworking process while ensuring accuracy.
A jig can be defined as a woodworking accessory that attaches to a planer and guides it along a specific path. Since the effort involved is reduced, the user does not experience as much fatigue as when using a planer directly. Using a hand planer jig means your hands and fingers are away from the cutting edges, which ensures greater safety. Depth control mechanisms or adjustable stops are also often present on jigs and can be used to control the depth of cut. Finally, there are clamps that allow securing the workpiece to the jig so that it does not move or shift during the planing process.
A hand planer jig provides a stable platform on which the planer can rest or connect to. Depending on the type of jig you use, the manner in which it connects to the planer can vary, as indicated by our tests. It may have a secure platform where the hand planer can be inserted and locked into place with clamps. Alternatively, it may have tracks or guide rails that align with the hand planer.
1. Electric hand planer planing jig
Hand planer jigs, often called planing jigs or hand plane jigs, are tools in the woodworking industry that make it easy to use hand planers. They help guide the hand planer across the surface along a specific path to remove the material uniformly, both on smaller and bigger projects.
A standard electric hand planer planing jig is designed to help you achieve straight and even planing results. It is the most common type of planing jig and can be used for different purposes, such as creating straight edges on lumber, leveling uneven boards, and smoothing surfaces.
Before you can use an electric hand power planer, it is crucial to follow certain safety precautions. This involves putting on safety gear, including safety goggles, a dust mask, and ear protection. These can help protect you from wood chips, dust, and noise while using the planer.
The wooden piece you are working on must be placed on a flat surface, such as a workbench. Ensure that it is stable and will not move during the planing process. Clamps can be used to secure it and are usually required for irregularly shaped or larger workpieces.
Connect the electric hand planer to the jig, which may have clamps, brackets, or other features for connecting to the planer. Once you’ve properly inserted your electric planer inside the jig, it should be positioned over the wooden surface that has to be shaped.
To start shaping the wood, turn on the electric planer and place it on top of the lumber. Push it forward slowly so that the blade can precisely remove the required amount of material. Ensure the pressure is even and consistent while moving the planer across the surface.
2. Tapering jig
A tapering jig is different from a regular planing jig and is most suitable for creating tapered cuts. It is used when one end of a cut has to be kept narrower than the other.
As such, tapering jigs are used for chair legs, table legs, or other old furniture pieces with tapering components. This type of jig ensures tapers are highly precise and uniform, which is impossible with freehand procedures.
Like when using a planing jig, it is advisable to wear proper safety clothing when using a tapering jig. You first need to decide on the length and degree of the taper to be created. This is important as the manner in which the tapering jig will be set up and positioned will depend on this.
Select the taper length and angle before positioning the tapering jig accordingly. Tapering jigs generally have markings or a scale that can make aligning it with the surface easy and are often used with a table saw. They have to be secured to the rip fence of the table saw.
The wooden board you will be working on has to be placed on the platform of the tapering jig. Make sure that it does not wobble and is supported properly. This may require the use of clamps or other fixtures. The workpiece should be aligned with the fence or guide of the tapering jig.
And the end of the lumber that needs to be tapered has to be positioned close to the narrow end of the tapering jig. The wider end of the piece aligns with the wider section of the jig, and the height of the saw blade should be adjusted according to the depth of the taper. Finally, turn on the jig to start shaping the wood.
3. Chamfering or beveling jig
The chamfering or beveling jig is commonly used to create consistent and precise bevels of chamfers on the corners of the workpiece edges. Bevels and chamfers are angled cuts created by removing material from the edges. They can either be used for functional or decorative purposes.
Generally, chamfers or bevels are created using hand power planers to soften sharp edges, providing the workpiece with joinery features or adding aesthetic details. Such jigs have a base on which you can rest the wooden board and a guide fence against which the board is rested and positioned.
They also have adjustable angle mechanisms, which are used to set the required bevel or chamfer angle, and a clamp to secure the workpiece while cutting. Some beveling jigs have a depth adjustment mechanism that allows controlling the depth of the bevel or chamfer cut.
To use a beveling jig, you first need to determine the angle at which the bevel or chamfer has to be created and adjust the angle mechanism accordingly. Then, place the workpiece on the base of the jig while aligning it with the fence. The portion to be cut should extend beyond the jig edge.
If present, the depth adjustment mechanism can be used to control the amount of material to be removed. To secure the wooden piece, hold the clamp before turning on the electric planer and pushing it along the edge of the workpiece. Multiple passes may be required to get the right bevel or chamfer depth.
4. Thickness planing jig
A thickness planing jig is used with thickness planers to achieve a consistent level of thickness when planing wood surfaces. It is most useful when thicknessing or planing irregularly shaped wooden pieces or rough lumber. Like other types of jigs used with manual planers or electric planers, a thickness planing jig has a base.
This is the platform on which you place the workpiece while working on it. It also has brackets and blocks on the underside that elevate the wooden board slightly above the base. This allows the cutting head or blade of the planer to remove the material uniformly and evenly. Clamps and other mechanisms are also usually present to secure the workpiece to the base and prevent it from moving.
Using the thickness planer jig is not very different from using jigs commonly used with cordless hand planers or bench planers. First, you need to place the jig on a flat surface, such as a workbench, ensuring it does not move. Then, you need to adjust the height of the supports on the underside of the jig depending on the thickness of the piece and the amount of material to be removed.
The workpiece has to be placed on the base of the jig while ensuring that it is in contact with the supports to ensure consistency regarding the thickness level. It should be aligned in the direction you intend to use the planer. In this case also, the segment to be planed should extend beyond the edge of the jig.
Secure the workpiece using the clamps, and adjust the thickness planer as per the required thickness. Turn on the planer and feed the workpiece and the jig through the tool. After each pass, inspect the material until it achieves the desired level of thickness.
5. Rabbet or cut-out jig
A cut-out or rabbet jig, also known as a router rabbet jig, is used to create consistent and precise rabbet cuts. These are open-sided or recessed channels used for fitting or joining purposes, including inset panels, creating strong joints, or using other materials like glass in woodworking projects.
Because of this, this type of jig is generally used with routers, which are heavy-duty power tools used for woodworking, rather than planers be it molding planers, joinery planers, or block planers. A rabbet or cut-out jig has a base where the workpiece can be placed and guide rails that help the planer make straight and precise cuts.
Adjustable stops are also present in this jig, which help control the depth and width of the rabbet cut and clamps help securing the workpiece to the jig. Different types of rabbet jigs are available, so putting enough time and effort into selecting the right jig is crucial.
The wooden block should be of the right shape and size for making the rabbet cut and it should be clean and flat to get accurate results. Then, the rabbet jig has to be placed on a flat surface before using the adjustable stops to set the desired depth and width of the cut-out. When placing the workpiece on the jig base, ensure it aligns with these stops.
Use the clamps to secure it to the base so it does not move during the process, and then install the right router for the cut-out to be created. You can adjust the depth setting of the router as needed to get the desired cutting depth. Finally, turn on the power tool and pass over the surface as many times as needed to get the rabbet.
How to adjust an electric planer?
Adjusting an electric planer is vital to achieve the desired thickness of the material to be removed and to ensure precision and smoothness during the planing process.
The best electric hand planers generally have adjustment mechanisms that allow you to control the cutting depth of the blade, to get the desired level of thickness. That said, safety is of utmost importance when making any adjustments to power tools. As such, it is strongly recommended to disconnect the planer from the power source before you make any adjustments.
A dial or front knob is usually present on electric planers that allows altering the cutting depth. The condition of the blades is another factor that affects the performance of the planer. Undamaged and sharp blades can make the shaping and cutting process faster, cleaner, and more efficient. Some planers may have an adjustable sole plate or shoe for beveling or chamfering.
Fences or edge guides are also common on electric planers and help ensure a straight edge and control the width of the cut. Besides these, there may be additional features that further simplify the ease of use of electric planers. This can include a dust extraction port, and drawing from experience, we can say that great care should be taken to ensure it remains free of obstructions at all times.
Depending on the make, model, and type of the planer, it may be possible to switch the sides from which shavings are removed during the planing process. You can even use a vacuum hose or attach a dust bag to collect and remove the debris.
Tip
Before using a planer on the work surface, make sure to test the settings and always plane in the direction of the wood grain.
Even with top-notch modern electric hand planers, achieving smoothness, flatness, and straightness in woodwork can be challenging. Electric hand planer jigs simplify the process by providing stability and guidance, reducing fatigue during prolonged use.
The best jigs offer features like adjustable stops, dust collection ports, and a built-in kickstand for safety, efficiency, and a better user experience. Choosing the right electric planer jig is crucial, as it depends on the project, wood type, and size, among other factors, to achieve optimal results.
In order to use an electric hand planer, you’ll need to set it up first. Following that, you can use the machine to smoothen wood surfaces. You have to pay attention to the start and stop of the tool, as well as the pressure, speed, and handling at the edges. After you are done, you have to clean and store it away safely.
An electric hand planer is a nifty power tool that is carried by almost every veteran woodworker.
After all, this device can help in shaping uneven wood surfaces to make them smooth and clean. However, if you want the best results from this device, you have to know how to use it properly.
That is what I have covered in this guide today. So, if you are an amateur woodworker who wants to know how this device works, then keep reading!
First, let’s discuss what an electric hand planer actually is and how this machine really works. Simply put, a hand planer is a woodworking tool that is used to smoothen the surface of the wood and get rid of any warps or imperfections.
This machine shaves the surface of the wood in increments, where it takes off small amounts of wood at each pass. That ultimately helps to shape the wood so that it appears clean and uniform.
The tool consists of at least two or three blades to shave the wood surface. With each pass on the wood, the planer blade can shave off a maximum of 1/8 inches of material.
Hand planers can be of different types based on the size or the use case. In terms of size, there are three main types of planers, which are block plane, jointing plane, and smoothing plane. There are some other types of specialty planers, such as router planes, chisel planes, and bullnose planes, to name a few. All of these planers have specific usage scenarios in woodworking.
On that note, using a conventional hand planer can be a fairly tedious task, as it requires a lot of time and effort to shape the wood. This is where electric hand planers come into the picture.
Also known as a power planer, the electric hand planer consists of an electrical motor that rotates the blades. This distinguishes it from a traditional hand planer, and as such, the tool can shave off large amounts of wood in a single pass. Apart from this aspect, an electric planer follows a similar working principle to a regular plane (tool).
How to set up an electric hand planer?
Now that you have a basic idea of an electric hand planer let’s talk about how to use it correctly, beginning with the setup. For this purpose, you have to perform the following activities:
1. Adjusting the fence
The first thing you need to do is adjust the fence. But before that, you have to select the proper working area. Make sure that the workspace is clean, organized, and uniform so that you can operate the planer without issues.
When that is taken care of, you have to place the adjustable fence on the surface and secure it in place. The fence is the primary working platform where you will shape the wood. So, it is crucial that you adjust it according to your specifications. The fence should be evenly placed, and it should not wobble or move around while you are working on it.
2. Setting up the blade alignment
Next, you will need to align the blade so that it can shape the wood properly. For this purpose, you’ll have to place the front edge of the planer over the workpiece without the blades touching the surface. In other words, you’ll have to keep the blades just above the workpiece at the correct angle, as that will give you more control once the machine is turned on.
3. Adjusting the cutting depth
Here, you will need to adjust the depth of the front shoe, which will allow the blade to shave the lumber piece properly. You can use the depth adjustment knob provided on the machine to set the planer blade at the desired depth. Subsequently, you should adjust the depth of the chip ports if they are present on the sides of the planer.
Warning: Do not set the blade too deep, as that can scrape large chunks of wood from the surface. Likewise, you should avoid keeping the blade at a shallow depth, as that will not have the desired effect on the wood surface.
4. Setting the desired speed
Now, you will need to adjust the speed settings of the planer using the speed adjustment knob. If you wish to plane hardwood or other rigid surfaces, the blade should be set at a higher speed. But if you wish to shape soft lumber pieces, you can use a low-speed setting.
Using the electric planer
In order to make the electric planer work, you can follow the steps below.
1. Starting and stopping the hand plane
Press the start button or pull the trigger on the planer to spin up the blades. Here, you should let the blades spin for a while to get them up to full speed. Then, you need to ease the cutter head into contact with the wood surface.
Conversely, to stop using the tool, simply let go of the trigger or press the stop button and allow the blades to spin down.
2. Maintaining speed and pressure
For the best results, you will need to apply steady and consistent pressure on the wood surface. In the initial phase, though, you will need to apply more pressure toward the front to avoid any blade tilting or gouging issues. Similarly, you should try to maintain a steady pace while shaping the wood. If you move the blade too quickly or slowly, the likelihood of errors will increase.
Based on my first-hand experience, I suggest moving along the direction of the grain. If you do that, you will need to apply only a little pressure to get the job done. Planing against the direction of the grain will require higher pressure and is often difficult to control. If you wish, you can use an electric planer jig to control the direction and flow of the tool.
3. Handling edges and corners
Once you reach the end of the lumber piece, you will need to shift most of the pressure toward the rear handle. This will give you more control near the edges and corners and prevent the front shoe from dipping down and shaving off a large chunk of material.
Maintaining and storing the electric planer
Proper maintenance and storage are absolutely essential for keeping such power tools in optimal working condition. So, if you want your electric planer to last for a long time, you should follow the strategies below.
1. Post-usage clean-up
After you are done shaping the wood, you will need to clean the planer. You can wipe the exterior surface of the planer and the blades with a soft, clean cloth, or you can wash it with water. In the case of the latter, you have to make sure that the water does not get inside the machine.
2. Blade maintenance
The blade is possibly the most crucial component in this power tool, which is why you will need to take good care of it. Drawing from experience, I can say for a fact that a planer with blunt blades will do you more harm than good. So, if you notice the blades have lost their sharpness, you will need to resharpened them with a whetstone.
However, if the blades have become nicked or worn out due to usage, it is a better idea to replace them with new ones.
3. Storage
When you are not using the planer, you should keep it stored away in a safe place, which will prevent the machine from gathering dust. I recommend wrapping the tool with a plastic or fabric cover and storing it away from direct sunlight or extremely cold temperatures.
Safety precautions
If you want to use industrial tools like power planers, you will need to observe certain safety precautions, as I have listed below.
Thoroughly go through the instruction manual before using the machine
Protect your eyes, ears, and face by wearing goggles, earmuffs, and masks
Cover the surrounding area with sheets to prevent the accumulation of dust and debris
Secure the tool on the working surface firmly
Install the blade correctly and check it once before use
Keep the workspace clutter-free
When should I use an electric planer?
An electric planer should be used when you need to shape furniture or lumber pieces and create a smooth surface. It is a fairly versatile tool that can handle different kinds of tasks, such as scraping a wooden countertop or cabinet, tapering wood trim, and so on. And with the proper accessories, you can also use it for finesse work like beveling door and window frames.
Can I use an electric planer on metal?
Using an electric planer on metal such as plane iron, steel, or other metallic surfaces can be tempting, considering that the blade of a planer is made from stainless steel. I would strongly suggest against doing that since this tool is not designed to be used on metals. Giving it a try showed me that the blades can become easily damaged or worn when used against such tough surfaces.
Can I use an electric planer to scrape paint?
Yes, you can use a planer to scrape off paint from a wooden surface. Keep in mind that the paint material can dull the blade quickly. Besides, you will have to clean the paint from the blade after you are done, which can be an inconvenience for many users.
What is the difference between a planer and a jointer?
The difference between a planer and a jointer is that the former is used to make the wood surface smooth and uniform while the latter is used to make the sides of a wooden board or lumber piece flat so that it can be joined to another similar piece. A jointer is slightly more versatile but is not as effective as a planer when it comes to shaping wood.
That brings me to the end of this discussion about how to use electric hand planers. As you can see, using this tool is not that complicated at all.
First, you’ll need to set it up, and then, you can use the machine to make wooden surfaces smooth. Naturally, it is important to store and maintain the machine to ensure its longevity. And for your safety, you should follow all the precautions I have mentioned here.
Of course, the more you use it, the better you will be able to handle it. And eventually, you will be able to create professional-quality woodwork with it.
When comparing a hand planer vs. an electric planer, the key difference lies in precision versus speed. Hand planers offer tactile control and are ideal for fine detailing, shaving swollen doors, or creating radius edges with manual accuracy—perfect for finish carpenters and those who value traditional craftsmanship. On the other hand, electric planers deliver speed and consistency across large surfaces, making them indispensable for heavy-duty stock removal, flattening panels, and prepping rough lumber. Both tools serve essential roles in woodworking, but choosing between them depends on your project scope, material type, and desired finish. This guide breaks down the pros and cons of each tool to help you make the right investment. For expert insights into high-performance powered options, don’t miss our guide to the best electric hand planers.
Hand planer: Overview
Hand planers are manual tools to flatten the edges of wood surfaces. Most woodworkers also use hand planers to pare off small wood pieces that are twisted.
Much like a metal planer, using a hand planer is easy, but it requires slight effort. To plane small wood pieces, you’ll have to hold the tote or the handle with one hand and the knob with the other. Once the grip is firm, you can move it back and forth to smoothen wood surfaces.
Advantages of using a hand planer
Besides the handy design, there are several advantages of a hand planer, and I’ve discussed them in this section.
1. Portability
One of the significant advantages of a hand planer is that it’s portable, thanks to its lightweight design. Because of its portable nature, woodworkers can carry it with them wherever they go without any difficulty.
2. Versatility
Hand planers are highly versatile and powerful tools because they can smoothen and flatten narrow edges or broad wooden surfaces. In addition to that, hand planers can help you shave down the edges of doors that protrude from their frame.
Planing down baseboards, window trim, door trim, and crown molding that do not fit are also possible using a hand planer. All in all, a hand planer can be used for all sorts of DIY projects, especially smaller woodwork projects, which could include shaping cedar shingle siding, dimensioning rough lumber, and furniture making.
3. Control
A manual hand planer requires physical effort to plane wooden surfaces. And that’s why it allows for precision woodworking, allowing users to have full control over the power tool.
As such, you can start and stop the tool whenever you want. And because hand planers are lightweight, you can maneuver them in whichever direction you want to get the desired result.
Disadvantages of using a hand planer
Sure, a hand planer is a worthwhile tool, but it has its own share of disadvantages. A few cons of using a hand planer are as follows:
1. Time-consuming
While this table planer is considered excellent for smoothening and flattening small wooden surfaces, it isn’t ideal for large pieces. And even if you use it for planing large wooden surfaces, it will consume a lot of time.
2. Requires physical effort
Unlike electric hand planers which run on electricity, hand planers require manual effort to plane wooden surfaces. Therefore, planing large surfaces or multiple small pieces would require a lot of physical effort and pressure.
3. Limited capacity
Owing to their small size and the amount of manual labor involved, the capacity of hand planers is limited. That means they can remove only small amounts of material at any given time.
Electric hand planer: Overview
An electric hand planer is quite similar to a manual hand planer except that it utilizes electricity to plane wooden surfaces. Because its steel blades are powered by electricity, the outcome is a smooth lumber surface.
Also known as a surface planer, power planer, or bench planer, an electric hand planer is well-suited for smoothening bulky pieces of hardwood, making them even and flat without much effort.
Bench planer is available in various sizes, ranging from 9-inch to 22-inch. However, each of them comes with sharp blades that slant at an angle of 45 degrees.
Advantages of using an electric or a bench planer
Electric planers are quite popular among professional woodworkers, and, In this section, I’ll walk you through the advantages of using an electric planer for woodworking projects.
1. Speed and efficiency
When it comes to planing large surfaces, manual hand planers cannot match the speed of electric bench planers since their blades rotate at high speed. Thanks to their high speed and rpm (revolutions per minute), they are able to plane large surfaces of wood in relatively less time. For this reason, an electric planer eliminates hand fatigue that you would otherwise experience with a hand plane.
2. Consistent finish
An electric planer produces a more consistent finish on large surfaces than a manual planer, which is the biggest advantage of this power tool. This is why many woodworkers prefer using it on wood with rough edges.
Disadvantages of using an electric planer
Some of the drawbacks of using an electric planer are as follows:
1. Lack of control
As against hand planes, one biggest drawback of electric planers is that they aren't easy to control. Of course, that’s because it runs on electrical power to plane any wooden workpiece. Hence, controlling the depth and cut is more of a challenge with an electric planer, so they wouldn’t be the right choice for beginners or DIY enthusiasts.
2. Loud noise
Generally, an electric planer produces a loud noise in comparison to a hand planer.
Electric planers are noisy because of the volume of air that the blades move around to plane wooden surfaces. This might be a problem if you’re working on your DIY project in a residential area, as this loud noise would disturb the neighbors.
Also, due to their noisy nature, you cannot use electric planers too early in the morning or too late at night.
3. Higher cost
It’s a no-brainer that electric planers come with a steep price tag compared to hand planers. Now there are many reasons that justify their high price tag, like they plane wooden surfaces without requiring any physical effort, resulting in an overly smooth and flat surface.
Similarly, they plane huge chunks of uneven wood within minutes, which is surely an advantage for those working on large projects.
Factors to consider for choosing the right planner
Now that I’ve walked you through the basics of both hand and electric planers, were you able to decide which of the 2 devices you should go for? If not, don’t worry because even professionals get stuck when deciding, let alone beginners.
So, if you are still confused between the 2 planers, here’s a quick rundown of factors that will help you decide.
1. Project size
The size of your project will help you figure out whether you should go for a hand planer or an electric planer. Generally, experts recommend hand tools for small-size projects, whereas power tools are best suited for large projects.
Considering that, I’d suggest going for a hand planer for small or DIY furniture-making projects. That’s because small or DIY projects are usually carried out using small wood pieces, and hand planers work well for removing small amounts of material from wooden surfaces.
On the flip side, electric planers work well for large projects, such as building furniture for a home. This is due to the fact that they are able to smoothen large panels or chunks of wood, which will allow you to complete your projects in a breeze.
2. Experience level
In deciding between the 2 planers, your experience level plays a crucial role.
I wouldn’t recommend an electric planer to anyone who’s just ventured into woodworking because it may lead to accidents if you don’t use it in the correct way. Even the slightest mistake or unintended moves can ruin wooden pieces, resulting in hefty damages.
But hand planers are manually operated, meaning you move them back and forth multiple times to smoothen wooden surfaces. This offers control and the chances of committing mistakes are relatively low. All you need is basic planing skills and patience to use a hand planer.
Therefore, hand planers are best for beginners, but you must opt for electric planers if you’re a professional woodworker.
3. Price
As I’ve already discussed, electric planers are more expensive than manual hand planers. The primary reason why electric planers cost more is that the motor equipped in them costs more than the simple parts used in hand planers.
However, considering the features they bring to the table and the amount of time they save, electric planers are worth the extra bucks. They also have a longer life than hand planers, meaning they won’t wear out quickly.
If you’re looking for planers that will last for a good number of years, electric planers will be the best bet. Otherwise, hand planers are well-suited for short-term projects.
Hand planer vs electric planer - A comparison chart
Planer
Weight
Power Source
Suitability
Thickness Measurement
Affordability
Hand Planer
Easy to carry from one job site to another
Requires manual labor to plane wood pieces
Ideal for small wood pieces that require high accuracy or are to be planed in thin layers
Gauges and measures thickness manually
Relatively affordable
Electric Planer
Heavy-weight makes it difficult to transport
Requires electricity to plane wood
Perfect for planing chunky lumber pieces or longer boards with rough edges
Comes with depth adjustment gauge that allows users to choose desired thickness
Expensive
When would you suggest using a hand planer rather than an electric planer?
It's suggested to use a hand planer rather than an electric planer in the following situations:
The wood piece requires extra attention while planing
You need to smoothen uneven wooden surfaces
You need to trim the swollen corners or edges of a stuck door
You have to make radius cuts or symmetrical sloping plane.
In such situations, using a hand planer will give you the finish you need to complete your projects.
How to use an electric planer on a tabletop?
Here’s how to use an electric planer on a tabletop:
Prep the workspace by decluttering it
Make sure that the tabletop is stable so that it doesn’t shift while planing
Put on the correct personal protective equipment before starting planing
Start planing from one end of the tabletop towards the other in a straight line
Repeat the process until the wooden surface is smooth
Examine the wooden board for gaps
Sand the wooden board, either by machine or hand, to smoothen the surface.
Which tool is best for removing large amounts of material from wooden surfaces?
The best tool for removing large amounts of material from wooden surfaces is the electric planer because its motors are designed to work quickly and efficiently. Within a matter of a few minutes, an electric planer runs over large areas and smoothens them. This way, a lot of time is saved that would have been wasted if a hand planer were used.
Which of the two tools is portable?
Of the two tools, the hand planer is generally considered more portable though both are designed to be lightweight. The absence of motors or other moving parts contributes to their lightweight design, which is why most woodworkers prefer hand planers when on the go.
Tip
When choosing a planer, go for longer-bodied models if you intend to make wooden pieces flat and straight. Alternately, opt for shorter-bodied planers if you wish to refine and smoothen small areas of wood.
When it comes to woodworking projects, having the right planer can make a world of difference.
While it’s true that hand planers are compact tools that offer better control over the surface than electric planers, planing or smoothening lumber pieces will be a time-intensive task. Those handling large projects like professionals will benefit from the high torque motor found in the latter.
But keep in mind that electric planers are noisy and pretty unforgiving. That’s why you should only go for them if you’re an experienced power tool user.
Hopefully, after reading this informative guide, you’ll be able to pick the right planer for your projects. As a piece of advice, beginners must start planing wood with hand planers, whereas electric planers would be the best bet for professionals.
Planers are essential woodworking tools used to flatten, smooth, and reduce the thickness of wood surfaces with precision. They come in a variety of forms, each suited for a specific application, ranging from manual hand planers with static blades for fine surface shaving to electric hand planers for faster stock removal, and benchtop thickness planers for uniform thickness across large boards. Other common types include jointer planers, which flatten edges for seamless glue-ups, and scraper planers, which require pulling rather than pushing, ideal for delicate surface correction. In woodworking, where precision and surface quality are non-negotiable, selecting the right planer enhances both productivity and finish quality. As woodcraft is often regarded as both a trade and an art, knowing the purpose and mechanics of each planer type can significantly elevate your results. This visual guide breaks down 21 different types of planers, complete with illustrations and use cases—helping professionals and enthusiasts alike choose the right tool for their woodworking needs.
1. Basic hand planer
A basic hand planer involves physical effort using the hand to shape the wood as required. The force applied by hand moves the blade of the planer over the wood to give it the desired shape. Hand planers have a sturdy body, a static or non-moving blade, and a short metal strip that ensures consistency while trimming the wood.
The angle on such a planer is always constant to the blade or cutting edge, which helps make the wood smooth after trimming it.
2. Hand scraper
If you’re dealing with coarse-grained wood, a hand scraper might be the best tool to use, as my findings show. The primary difference between this and a basic hand planer is that the former involves a pulling motion for shaping the wood, while the latter involves a pushing motion.
Also, a hand scraper does not make noise and can help you avoid the dust produced when shaping or sanding lumber. The blade can be held at the same angle for long periods without any inconvenience, and you can use this type of wood planer on large pieces effortlessly.
With a hand scraper, it is possible to avoid marks on the wood since the ends can be rounded. It even has screws that can be used to adjust the angle.
3. Two-handed spokeshave
Earlier versions of the two-handed spokeshave were designed like a drawknife, with two wooden handles that had tangs and a metal blade for shaping wood. While the current design of this type of manual planer is quite similar, the blade can be removed for adjustments or sharpening.
Unlike drawknives, a two-handed spokeshave has a sole plate for adjusting the angle of the blade to the wood that needs to be shaped. And depending on how this sole and the blade are designed, you can find this planer in various configurations.
There are convex-set spokeshaves, flat-bottom and round-bottom ones, concave spokeshaves, and combination ones for various purposes. Thus, these types of wood planers are highly versatile and can be used for different projects.
4. Kanna or Japanese planer
Based on my first-hand experience, I can say that the Japanese planer, also called Kanna, is among the unique wood planers available. It is usually constructed using hardwood, such as Japanese white or red oak trees. The blade is made of strong iron and laminated steel that is highly polished, resulting in a fine finish.
There is a chip breaker made of a single nail and a wedge, both securing the blade in place. Unlike most other manual planers, this one is pulled toward the operator rather than being pushed away.
5. Surform planer
A surform planer, often known as a combination rasp planer, has a fixed handle, and its blade is replaced by a metal sheet with several holes. This makes it easy to identify, as the surform planer looks and functions similar to a cheese grater but with sharp-edged holes for shaving the wood.
These sharp edges on the holes of the metal sheet are responsible for trimming the wood, and you can even find small surform planers for one-handed use. Surform planers offer several advantages, such as being easy to use, leaving behind little dust, and not getting clogged up.
Also, they can be used on curved and flat surfaces, and on soft aluminum or fiberglass, besides wood.
6. Flat planer bottom-edged
A flat planer is one of the smallest types of wood planers available and is best suited for DIY projects. It comprises a wooden block and a sharp blade, while the center of the block contains rectangular holes that are used for shaving the wood.
You can use the tool for polishing and deburring surfaces, as indicated by my tests, even though a bottom-edged planer has no handles. Due to its small size, it is possible to go under this type of planer to check your progress while using it. But its biggest advantage is that it is available at a very low price and is great for those with a limited budget.
7. Block planer
Block planers are quite small and can be as short as 3 inches and go up to 7 inches long. This type of planer differs from others because its blade is attached at a lower angle, making it easy to remove extremely thin wooden shavings.
A block plane is used for angling edges, trimming wood grain, and eliminating glue lines. You can even find standard-angled planers whose blades are attached at an angle of 20 degrees. In contrast, the blade of low-angled block planers is angled at 12 degrees.
8. Jointer planer
While a block planer is most suitable for intricate woodworking, a jointer planer is ideal when you are working with a large workpiece. It is designed to make it easy to remove a large amount of material from such surfaces quickly. My research indicates that you can use it to straighten rough edges and corners or smoothen and flatten wooden surfaces.
The length of a jointer planer usually ranges from 20 to 24 inches, which makes it much longer than most other options. This planer can move very quickly over uneven wooden surfaces, leveling them out so they become flatter and smoother.
9. Scrub planer
Like a jointer planer, a scrub planer can help you remove a large amount of material from the surface quickly. It is the best option in situations when the thickness of a board needs to be reduced. The sole of a scrub planer is quite small and is coupled with a narrow but thick blade and a deep cutting edge.
This construction makes it the complete opposite of a jointer planer and allows the tool to make gouging, deep cuts. Besides being used for smoothing uneven or curved surfaces, scrub planers can be used to eliminate faults or defects like twists and knots from the surface.
10. Smoothing planer
As the name indicates, a smoothing planer is used to smoothen the surface after it has been flattened and brought into the desired shape. It is the smallest of all planers and ranges from 7 to 10 inches long. You can use this type of planer to remove marks from the wooden surface left behind by various machinery during the woodworking process.
A smoothing planer can be used to get rid of shavings that are even less than 0.051 mm in size. And despite its small size, you can hold it in both hands for greater convenience.
11. Jack planer
The length of a jack plane can range from 12 to 18 inches, while its width ranges from 2.5 to 3 inches. This makes it smaller than a jointer plane, but it is a versatile tool that can be used for most types of woodworking. A jack planer is usually the first type of planning tool used when a wooden surface requires planning.
Its blades are slightly cambered for removing a larger quantity of material from the surface without leaving any marks. And like a smoothing planer, the blades of a jack planer can be sharpened on a grinding wheel for better performance.
Jack planers are most suitable for truing or edge jointing but are not meant for wood finishing. They should be used diagonal to the grain for leveling purposes before moving in the direction of the grain. You may need a sander or another planer to get a smooth finish after using a jack plane.
12. Chamfer planer
A chamfer planer, better known as a chisel planer, can be used for various tasks for which other types of planers are not suited. This is because it offers the advantages of both a chisel and a planer, such as providing excellent control despite lacking support for the blade.
In a chisel plane, the cutting edge is located at the front, which comes in handy when you need to remove adhesive from the surface and the space is limited. You can even use this type of planer to trim dovetail joints and plugs, shave dowels, and reduce the material from corners.
13. Fore planer
To prepare surfaces for various types of planers, you first need to use a fore plane. A fore plane is often referred to as a roughing plane. It helps flatten the surface, such as that of roughly cut timber and level it properly before other tools, such as a jack plane, can be used.
14. Compass planer
If you need to level curved surfaces and smoothen out concave and convex curves, a compass plane is the most suitable tool. It features a curved design and, in earlier versions, consisted of two separate instruments for working on convex and concave curves.
However, the compass planers available today have a flexible sole that can be easily adjusted, making it easy to use the same tool for different types of curved surfaces.
15. Rabbet planer
The primary purpose of a rabbet plane is to create a rabbet joint on the surface. This requires cutting grooves shaped like the steps of a staircase into the edge of the surface. Besides being used to cut clean grooves, a rabbet plane can be used to smoothen and refine existing joints.
Also, the blade of a rabbet plane extends beyond the face and the sides of the body, allowing it to reach the wooden surface easily. Sometimes a rabbet planer is called a rebate plane, and rabbets are known as rebates.
16. Router planer
Designed for cleaning up tenon cheeks and shaving dadoes, the router plane has a sturdy but thin blade and can be used when creating mortise and tenon joints. It can help smoothen the surface by blending depressions and removing material from the sides or the bottom.
A router planer is most effective in ensuring that the bottoms of recesses are uniform and can even help smoothen depressed panels.
17. Shoulder planer
The shoulder plane has a blade angled at 20 degrees and is constructed to make cross-grain planning easier. It can be used for finishing mortise-tenon joints, rabbets, and dadoes by trimming the cheeks and shoulders of such joints.
Another name for the shoulder planer is bullnose planer, and this tool is somewhat similar to a rabbet planer. However, a rabbet plane is designed specifically for cutting rabbets, while a shoulder planer is more versatile, and its cutting angle is much lower.
18. Electric planer
I determined through my tests that the major limitation of manual planers is that they are a bit slow. This means they require considerable effort to ensure mistakes do not occur. That is why many people prefer electric planers since they can cut through the wood quickly without damaging the surface.
One of the key features of an electric planer is its depth adjustment gauge, which allows you to adjust the thickness required when planning a surface. Various types of electric planers are available, and some of the most common ones include benchtop planers, stationary planers, molding planers, and handheld electric planers.
19. Benchtop planer
A benchtop or bench planer is a type of thickness planer, which means it is designed to trim wooden surfaces with uniform thickness throughout. It can have two or three blades, similar to a handheld planer used for fine woodworking since it can remove thin layers from the rough stock.
You can make adjustments to the cutting height when using a bench plane for removing thin shavings as required, and it can also be used to cut small pieces. This type of electric planer is most commonly used for making smooth tabletops since it can help ensure uniform thickness and enhance the appearance of the grain.
20. Stationary planer
Based on my observations, I can say that a stationary planer is the best tool for large-scale, heavy-duty woodworking projects. These electric planers are designed for highly skilled professionals and are very expensive. They can hold extremely large boards and come with more advanced features than benchtop planers.
The name stationary planer comes from the fact that this type of planer is used as a workstation that remains at one location in the workshop.
21. Molding planer
Molding planers are similar to stationary electric planers since they are designed for large projects and are meant to be used by professionals. They cannot be moved, but they can be used for various types of woodworking projects.
The primary difference between a molding planer and a stationary planer is that the former can also be used as a dimensioner to measure three-dimensional objects. A molding planer can be used for creating frames, baseboards, crown moldings, etc.
What is a handheld electric planer?
A handheld electric planer is a portable woodworking tool that features a high-speed rotating blade for cutting through wood rapidly and smoothly. It is designed with a shaped grip for comfortable handheld use, offering excellent control during the woodworking process. This type of electric planer is highly popular due to its convenience and efficiency.
Are there any advantages of using a manual wood planer?
The advantages of using a manual wood planer include its ability to collect and remove wood dust efficiently using a dust collector. Operating noticeably quieter than their electric counterparts, they are also more cost-friendly. In addition, manual planers are often preferable for beginners due to their simplicity and easy control.
What are the benefits of an electric planer?
The benefits of using an electric planer primarily revolve around its ability to perform tasks with speed and efficiency. Compared to manual planers, electric planers can trim and shave wood much faster, significantly reducing the time spent on the task. They are also capable of handling heavy-duty woodworking tasks, demonstrating their versatility and power.
Which types of woodworking machinery are used for trimming and shaving wood?
Three types of woodworking machines are used for planing wood - open side planer machine, pit planer machine, and double housing planer machine. In the case of an open-side machine, the housing is attached to one side, while a pit planer machine features extensive construction. The double-housing planer machine has a heavy base and vertical housings for carrying the tool heads.
What is an infill planer?
An infill planer has wooden parts and a metal body, and four types of this planer are available. These include a panel planer, smoother planer, miter planer, and shoulder planer. An infill planer has a lot of mass and operates similarly to cast planers but it provides great results when used for smoothing wood grains.
Whether you’re an amateur interested in woodworking techniques or a professional, knowing about the various types of planters can be highly advantageous. This is because different types of projects require specific types of planers that are specially designed to provide the best results.
Using a planer that is not meant for a certain task can damage the wood and lead to unwanted results. That being said, many types of planers are highly versatile and can be used for different projects. But if you’re doubtful about using a particular planer for a certain project, I strongly recommend asking a professional for advice.
Bosch routers are versatile tools used for various woodworking tasks, while DeWalt routers are powerful and ideal for heavy-duty work, both brands are known to produce highly precise routers for professional woodworking.
Bosch, a subsidiary of Robert Bosch GmbH, and DeWalt are the two most popular brands in the power tool industry. These routers typesare equipped with state-of-the-art technology, such as electronic speed control and soft start technology. If you are in the market for a new wood router but can’t decide between the Bosch and the DeWalt read on to know which router comes out on top regarding usability, accuracy, and precision.
Bosch vs DeWalt routers compared
Now, let’s take a ride through the world of power tools, where the mighty Bosch and the sturdy DeWalt routers collide, and compare them to learn about their unique features.
1. Power and technology
Both Bosch and DeWalt routers come equipped with powerful electric motors that pack a punch, but it’s the technology that sets them apart. Bosch routers have a unique soft motor starter that reduces start-up torque, ensuring smooth and efficient cutting every time.
On the other hand, DeWalt routers come with full feedback control and electronic speed control that maintains constant speed throughout the cutting process, ensuring the most accurate and precise cuts.
2. Ergonomics and comfort
Regarding usability, both brands have stepped up their game with comfortable, user-friendly designs. Bosch routers have rounded hardwood handles that fit perfectly in hand, while DeWalt routers have dual ergonomic wooden handles that offer optimal grip and comfort.
These routers also have a plunge base router feature that makes them easy to handle, especially for beginners.
3. Dust collection system
Drawing from experience, Bosch routers come with a dust collection system integrated into the router, ensuring that all the dust and debris are collected for a clean work environment. Meanwhile, dust adapters can be used with DeWalt routers to capture dust and debris, reducing the need for a cleanup.
4. Depth adjustment
This feature allows for accurate and precise depth adjustments, making it easy to achieve the desired cutting line.
Precision is the key when it comes to woodworking, and Bosch routers take it to another level with their precise depth adjustment rings. DeWalt routers also have a depth adjustment rod for precise bit plunging and depth adjustments.
5. Material and construction
Bosch and DeWalt routers are built to last, but the materials and construction used differ.
Bosch routers are mostly made with aluminum construction, making them lightweight and durable. Meanwhile, DeWalt routers mostly have a steel and brass construction, making them strong and sturdy.
The materials also impact the weight, making Bosch routers more comfortable to handle and use for extended periods.
6. Speed and torque
Bosch routers have variable speed dial that allows for a broad range of speeds, while DeWalt routers have variable speeds that allow user control.
Regarding torque, Bosch routers offer a constant response circuitry that maintains torque throughout the cutting process. Meanwhile, DeWalt routers boast maximum motor horsepower for an extra power boost.
7. Kits and accessories
Both Bosch and DeWalt offer a range of router kits and accessories that cater to different needs. Bosch offers the 1617EVSPK router kit, which includes plunge and fixed bases, while DeWalt has the DW618PK combo kit, which also includes a fixed base and plunge router.
Bosch also has an edge tool guide that makes edge forming easy, while DeWalt has a slot-cutting feature that allows for efficient and precise cutting. No matter what you choose, both Bosh and DeWalt offer the best features, accessories, and router kits in the market, making them the go-to choice for both professionals and hobbyists.
Bosch vs DeWalt router product comparison
A. Bosch combination router vs DeWalt router
1. Power and performance
The Bosch MRC23EVSK Combination Router has a 15-amp motor with a 2.3 horsepower rating, which provides ample power for most routing tasks. On the other hand, the DeWalt DW618B3 has a 12-amp motor with a 2.25 horsepower rating, making it slightly less powerful.
2. Versatility
The Bosch MRC23EVSK Combination Router is a combination of plunge and fixed-base router kits. That means it can be used for a wide range of applications, including laminate trimming, dovetail joint routing, and template routing. The DeWalt DW618B3 also offers the same versatility as it comes with a fixed and plunge base, allowing for a variety of routing operations.
3. Collet and diameter
The Bosch MRC23EVSK Combination Router has a ¼ inch and ½ inch collet that accommodates a variety of router bits with different diameters. The DeWalt DW618B3 also has a ¼ inch and ½ inch collet that can accept a wide range of bit sizes.
4. Motor soft starter
The Bosch MRC23EVSK has a soft-start motor feature that provides a smooth and gradual start-up, which is beneficial in preventing unexpected potential jerks, reducing torque, and improving control. The DeWalt DW618B3 also has a soft-start feature that allows for better control and precision during routing.
5. Case and accessories
The Bosch MRC23EVSK comes with a hard case for storage and transport, as well as a range of accessories, including a plunge base, fixed base, vacuum adapter, and a wrench. The DeWalt DW618B3 also includes a hard case, plunge and fixed-bases, wrench, and dust extraction adapter.
6. Price
The Bosch MRC23EVSK Combination Router is typically priced higher than the DeWalt DW618B3. The price difference may be due to the higher horsepower, motor soft-starter feature, and natural rubber grips on the Bosch model.
7. Weight
The DeWalt DW618B3 weighs around 27.2 pounds, making it a bit heavier than the Bosch MRC23EVSK, which weighs around 25.8 pounds. This weight difference may impact user comfort during prolonged use.
8. Angle and lever
Both the Bosch MRC23EVSK and the DeWalt DW618B3 have a variety of features that allow for angle adjustments and lever controls, making them both highly customizable and easy to use.
9. Metal and aluminum
Both the Bosch MRC23EVSK and the DeWalt618B3 are made of durable materials, including metal and aluminum, ensuring long-lasting performance and durability.
B. Bosch wood router vs DeWalt router
1. Power and speed
The Bosch 1617EVSPK Wood Router Tool Combo is powered by a 2.25 horsepower motor, while the DeWalt DWP611PK Router has a 1.25 horsepower motor. The Bosch router also has a speed range of 8,000 to 25,000 RPM, which is slightly higher than the DeWalt’s range of 16,000 to 27,000 RPM.
2. Base types
The Bosch 1617EVSPK router combination kit includes both a fixed and plunge base, while the DeWalt DWP611PK router kit also includes both bases.
3. Ergonomics and comfort
The Bosch 1617EVSPK router has a comfortable grip made of natural rubber, while the DeWalt DWP611PK has a molded handle for enhanced control. The Bosch’s plunge base also has a dual-handle design with trigger control, whereas the DeWalt’s plunge base has a single-handle design with a lock button.
4. Depth adjustment
The Bosch 1617EVSPK router has a microfine depth adjustment system that allows for precise and accurate adjustments. Meanwhile, the DeWalt DWP611PK has a coarse adjustment system that requires the user to reset the depth every time making an adjustment.
5. Collet size
The Bosch 1617EVSPK router accepts both ¼ inch and ½ inch shank bits, while the DeWalt DWP611PK accepts only ¼ inch shank bits.
6. Machine body
The Bosch 1617EVSPK router is made of aluminum, while the DeWalt DWP611PK has a machine body made of metal.
7. Lamination capability
The Bosch 1617EVSPK router has a lamination capability with a special attachment, while the DeWalt DWP611PK does not offer this feature.
8. Dust collection
The Bosch 1617EVSPK router has a vacuum adapter for dust collection, while the DeWalt DWP611PK comes with a dust-sealed switch and vacuum adapter.
9. Dovetail joint capability
The DeWalt DWP611PK has a dovetail joint capability with a template guide, while the Bosch 1617EVSPK router combo kit does not offer this feature.
10. Price
The DeWalt DWP611PK router kit is generally more affordable than the Bosch 1617EVSPK router combo kit. Ultimately, choosing the best router between Bosch and DeWalt models depends on personal preference, the specific requirements of your woodworking projects, and the amount of money you’re willing to invest.
Warning: Some Bosch and DeWalt routers may emit harmful electromagnetic radiation that could interfere with pacemakers and other medical devices.
Can a Bosch router be used as a hand-held planer?
No, a Bosch router is not intended to be used as a hand-held planer. While both tools share some similarities in functionality, they are designed for different purposes.
A hand-held planer is primarily used to quickly remove large amounts of material, whereas a router is used for precision cuts and shaping edges. Attempting to use a Bosch router as a hand-held planer can damage the tool and create an unsafe working environment.
Using the right tool for the job is essential to ensure efficiency, safety, and quality results.
How does the depth adjustment system work in a DeWalt router?
The depth adjustment system that comes with DeWalt routers works by allowing you to adjust the cutting depth quickly and accurately.
The depth adjustment system works by adjusting the position of the motor relative to the base. The motor housing is attached to a threaded rod that moves the motor up and down as the adjustment knob is turned. As the motor moves, the distance between the bit and the base changes, controlling the cutting depth.
DeWalt routers come with clear markings and detents to make precise depth adjustments easier. Additionally, some DeWalt routers feature a micro-adjustment ring that provides even greater precision for fine-tuning your cutting depth.
Can I use a Bosch router with a DeWalt router table?
Yes, you can use a Bosch router with a DeWalt router table but ensure the router is compatible with the table before making any adjustments.
The most important thing is to ensure that your router is securely mounted to the table and that the bit is centered correctly. Most router tablescome with a variety of adjustment plates that can be used to fit different router models. Alternatively, you can make your adapter plate to fit your Bosch router.
With the right adjustments and precautions, you can use a Bosh router with a DeWalt router table to achieve professional-grade cuts and finishes.
Choosing the right router is like picking the perfect paintbrush for an artist - it can make or break the masterpiece.
After careful consideration and evaluation, it is clear that the Bosch MRC23EVSK takes the crown as the ultimate router kit. Its 15-amp, 2.3 horsepower motor provides an impressive speed control range, making it versatile enough to handle all woodworking projects impeccably.
The combination of plunge and fixed-base design allows for more flexibility, providing the freedom to switch between tasks without missing a beat. And with the bonus of a durable hard case, it’s a no-brainer for serious woodworkers who demand the best.
While the Bosch 1617EVSPK and the DeWalt DW618B3 come close in terms of power and versatility, the DeWalt DWP611PK falls short with its lower horsepower and torque. In conclusion, if you want the ultimate routing experience, the Bosch MRC23EVSK is the one you should go for.
Essential woodworking tools are integral to woodworking projects, they include saws, chisels, planes, and more, enabling precise shaping and crafting of wood. These tools are fundamental in various woodworking tasks, from carving to joinery, and play a pivotal role in woodworking and carpentry.
Even with essential woodworking tools, woodworking is labor intensive, and without the right tools or components, it will be challenging to complete your projects. Moreover, to leave a mark and design unique furniture or effectively attach different materials, you must create a sturdy construction.
For that, you need to know about the best tools, and this guide shortlists 35 essential woodworking tools you should have in the workspace. With these, you can undertake and complete any task without difficulty.
Listed below are essential woodworking tools:
Circular saw: The circular saw is a versatile tool that cuts diverse materials like wood and metal, making it suitable for DIY or professional use. The dependency on sharp round metal blades may require frequent maintenance.
Table saws: Table saws are known for precise cross or rip cuts, with adjustable blade angle and height. It may be intimidating for beginners compared to other woodworking tools due to their multiple adjustable features.
Electric drill: The electric drill is widely used across industries and is perfect for making holes for screws or other fasteners. It's a simple tool but mastering high-torque impact-driver configuration drills requires practice.
Tape measure: A tape measure provides accurate sizes and distances in inches and centimeters. The simplicity of a tape measure isn't enough for the intricate measurements that some woodworking tasks may require.
Clamps: Clamps secure panel glue-ups and wood for various tasks. While key for precision, their usage in tasks like welding, carpentry, or metalworking often requires additional types of clamps.
1. Circular saw
From experience, I can tell you that using different power tools for various woodworking projects is challenging. So, if you need to cut wood, plastic, masonry, metal, or other materials, it would be best to use a circular saw.
While a circular saw refers mostly to hand tools, even a table or chop saw is categorized under circular saws. This is one of the most common woodworking tools, ideal for DIY purposes and professional use, thanks to the sharp teeth supported by a round metal blade edge.
2. Table saws
Another woodworking tool that most people use is the table saw to make cross or rip cuts. Cross-cuts involve cutting across the wood grain, while rip cuts ensure you cut with the wood grain.
Unlike basic woodworking tools with no adjustable features, you can change the angle and height of the blade to cut by pushing the stock into the blade. These units also have a guide called a fence, helping you get a straight cut by staying parallel to the blade.
3. Miter saw
Miter saws are one the essential power tools for a woodworking project since you can make angled cuts for several purposes, including trim work, molding, or rafters. You can even make straight cross-cuts, but to get the most out of this tool, attaching the right blade is critical.
It’s the perfect tool for DIYers and professional carpenters, given that it is highly accurate. Apart from cross and angle cuts, you can make angled compound cuts, which makes them an indispensable tool.
4. Tape measure
A simple yet necessary addition to your woodworking shop is a tape measure. It’s a handy tool that helps measure size and distance for accurate cutting to help a professional or a beginner woodworker.
Most units comprise a case, blade/tape, thumb lock, hook, or belt clip and are made of cloth, fiberglass, plastic, strip, and metal ribbon. Usually, the measurements are available in inches and centimeters for greater precision on multiple projects.
5. Random orbital sander
Drawing from experience and having worked on plastic, wood, and metal, I can assure you that the orbital sander is the go-to option for getting an ultra-smooth texture on any surface. But more than a smooth finish, you can use an orbital sander for removing varnish, polyurethane, stain, and paint.
You can use it to get several types of refinishing on a wood surface, with the option of using a random orbital sander. The only difference is that a random sander has a random orbit action, running in irregular but overlapping circles.
6. Hand saws
The best tool to cut wood pieces into various shapes is a hand saw, also called a panel saw. You can attach wood joints and pieces with a hand saw or carve a wooden object.
A hand saw offers more control and greater precision while working than corded tools. Best of all, while trying it out in person, I found that a hand saw guaranteed improved coordination that isn’t possible with other tools.
Most professionals prefer a hand saw because it’s inexpensive, easily portable, and good for use on delicate materials.
7. Electric drill
There is no rocket science behind using an electric drill, as this power tool is used for drilling holes in the material, which helps insert screws or other threaded fasteners into the surface. You can get an electric drill in impact-driver configuration, ensuring the high-torque tool will help tighten nuts or drive screws.
It is one of the only hand tools widely applied in multiple industries, like metallurgy, manufacturing, masonry, woodworking, and construction. Moreover, you can employ an electric drill for countersinking, tapping wood joints, reaming, spot facing, or counter boring.
8. Power drills
If you need something more efficient for woodworking projects, try using a power drill instead of a screwdriver. You can use a power drill with a drill bit to increase the effectiveness of this rotating cutting tool and make holes.
The best part is these tools can also rotate counterclockwise, which allows you to remove tight screws. Most power drills come with a high-output electric battery and are available as corded and cordless power drills.
I prefer using cordless drills because there are no wires, so they are easily portable and maneuverable. Meanwhile, a corded power drill must be plugged into a 110V outlet, proving lighter and more compact.
9. Marking knife
Whether you are a professional or a beginning woodworker, it’s vital to make accurate measurements for all woodworking projects. This is where a marking knife, also referred to as a striking knife, comes in handy since it acts as a layout tool for making pieces of wood.
In other words, the marking knife is used to cut/draw a line on the surface of the material, over which you can run the hand saw, plane, or chisel. Thus, it’s especially useful for woodworking beginners and comes with a single bevel.
10. Sliding miter
A sliding compound miter saw or sliding miter helps cut moldings, wood trim, plastic, metal, and masonry. The trick is using the right blade to ensure you can make angled or straight cross-cuts.
Having used it myself, I was able to make 90-degree cross-cuts, which makes it one of the most handy tools for beginners. Modern units are equipped to tilt and deliver compound angle cuts with utmost precision.
They are much like chop saws, moving forwards and backward to slice up to 15 inches in one stroke.
11. Bench chisels
Given their multipurpose features, these are one of the most essential woodworking tools. Bench chisels sit on top of the bench and are used for paring or chopping wood.
I found several bench chisels available in varying shapes, including registered, firm, and bevel-edged. For using the chisel, you must also have a universal woodworking hammer to push the sharp edge of the metal blade onto the surface, which helps cut or shape the wood.
12. Router table
One of the most sought-after cutting tools is the handheld router, which you can use with a router table to cut straight lines. In other words, router tables enhance versatility and guarantee stability, especially when working with wooden pieces of different sizes.
Depending on your specific needs, you can choose from a freestanding router table or a benchtop model. Moreover, it is the go-to tool for beginner woodworkers since it’s safer and easier to use.
13. Belt sanders
If you are looking for a multipurpose woodworking hand tool, I suggest using a belt sander. These fantastic tools are ideal for trimming along a scribed line, leveling surfaces such as a replacement board over a hardwood floor, sanding rough surfaces, shaping, and freehand rounding.
The best part about belt sanders is that they are highly powerful, helping remove wood quickly and dealing with coarse grits. Such units are fitted with an electric motor and turn 2 drums fitted with sandpaper to get the desired finish on a wooden surface.
14. Dust collection system
This is one of the more simple tools and helps reduce the dust in the workshop. Depending on the project and the type of power tools you are using, it would be best to get an appropriate dust collection system.
You can use a shop vac dust collection system with small power tools, such as orbital sanders or table routers. But for larger tools, you must use a larger dust collector for safety, cleanliness, and maintaining the workspace and equipment in top condition.
15. Compound miter
You can make accurate bevel cuts, miter cuts, or both simultaneously with a compound miter saw. Moreover, with a compound miter, you can square cut the edges of boards to ensure the wood pieces are of uniform length.
In most cases, a compound miter is suitable for crown molding and ensures you can cut the width and length of the board at angles other than 90 degrees. Some of the common applications of a compound miter are -
Customizing picture frames
Wainscoting walls
Building wooden planters
Trimming plain cabinets
Building a serving tray
16. Rabbet planes
You can trim or cut rabbets in a step-like design with rabbet planes. Thanks to these planes, you can cut step-like grooves into the surface of the wooden material, specifically the edge, to build a rabbet joint.
After spending time with the product, I assure you it forms a clean groove within the wood, even helping you get a clean and gap-free fit by smoothing or trimming existing rabbet joints. These are simple but quality tools and usually come with an 18mm blade.
17. Combination square
Among its many uses, a combination square can be used as a straight edge, marking device, try square, miter square, rule, plumb, and for measuring outside or inside angles. I use a combination square to measure the depth and length or check 45-degree and square angles.
Moreover, the best units come with a bubble level that helps determine the level and plumb of the surface. Thanks to its multipurpose application, beginner woodworkers and professionals can use it in metalworking and stonemasonry projects.
18. Clamps
Clamps are another essential woodworking tool, as they help secure panel glue-ups and wood. Most woodworkers use them since they are available in multiple sizes and help deal with different types of tasks.
Because clamps securely hold the wood in place, you can use them to achieve greater precision when welding, carpentry, metalworking, construction, or making your furniture. The most common of all the clamps are parallel jaw clamps to achieve a flat surface when working on doors or panels.
19. Mallet
The mallet is an important tool to drive different wood pieces together for carpentry and woodworking projects. More specifically, I use a wooden mallet for working with chisels, hammering dowels, or assembling a dovetail joint.
You will find that a mallet looks like a hammer. Instead, the head is made of materials like wood, leather, lead, copper, etc. Sometimes, working with a metal hammer will damage chisel ends or wood surfaces, but using a wood mallet protects the surface and other tools.
20. Sharpening stones
Sharpening stones, also called whetstones, are man-made tools that keep other tools sharp. You can use a sharpening stone to sharpen knives and tools with sharp edges by honing and grinding.
For woodworking, you must polish the sharpened edge, which makes it suitable to use a finer stone or 4000-grit finish stone. In most cases, you can use 2 stones for regular tool sharpening, choosing from 800, 1,000, 1,200, 6,000, or 8,000 grit stones.
You can use a 150 or 250-grit stone to repair damaged edges when it comes to aggressive sharpening.
21. Smoothing plane
An innovation of the bench plane is a smoothing plane, which requires manual effort to push the blade over the surface of the wood. It’s a type of hand plane, with the cutting blade reducing the thickness of the material to deliver a well-shaped and smooth piece.
The smoothing plane is used last on a wood surface, helping remove the fine shavings to achieve a smooth texture. Once you learn how to use it with precision, the final finish is similar to sandpaper or even better.
22. Files
Other than a smoothing plane, you can use a file tool to remove fine material from the surface of the wood. Apart from woodworking, files prove their worth on metalworking projects or simply hobby tasks.
You can choose from different types of hand files, including single-cut, flat, double-cut, round, bent-cut, square, three-sided, and grate files. Note that files are highly versatile tools, useful for grinding and sawing during material removal, which makes them ideal for deburring.
23. Hammer
Much like any other hammer, a woodworking hammer drives nails and chisels into a wooden surface. Framing and claw hammers are mostly used as woodworking tools and come with a round head.
But the versatile part is the claw head that allows you to split wood, pry stuff from the surface, perform demolition tasks, and tear drywall. The claw art is curved or straight for claw hammers and frame hammers, respectively.
I have also used these hammers for driving or adjusting different parts.
24. Screw gun
The next tool is a screw gun, which is a handheld power tool that drives screws into different materials, like metal or wood. Apart from woodworking, you can use a screw gun for DIY tasks and construction projects.
You can equip the screw gun with an extension to secure the decking and subflooring if needed. This will allow you to build drywalls, permit metal-to-metal work, and create concrete structures.
Best of all, the screws for the screw guns are available as collated strips for easy loading, thanks to their self-feeding nature.
25. Workbench
A workbench is a special bench that woodworkers use for stability and getting the desired cut on wooden materials. You get a smooth and flat surface for holding the material, and it’s available in several styles.
After closely examining the product, I know it’s possible to choose a workbench of the correct size based on the project type and material length. In most cases, woodworkers prefer to use a large bench since it can withstand the weight of heavy materials, unlike a small product.
26. Jointer
When working with a lumber board, it can be challenging to flatten, square, or smoothen the edges of the material. In such instances, it would be best to use a jointer, which can perform the same tasks with greater precision and reduced effort.
This machine corrects defects on the surface of the material, like cupping or warping. It has great application in cabinetry and furniture projects, readying the edges of the board for fastening or gluing.
You can use manual or mechanical jointers, depending on your convenience.
27. Sandpaper
Sandpaper is mostly used for honing and shaping different materials, like sharpening woodworking tools, such as gouges, chisels, knives, block planers, and planer blades. You can also sandpaper on painted surfaces to smooth the surface between 2 coats.
Usually, the lower the grit value of a sandpaper, the coarser the particles are likely to be. Professionals mostly use sandpaper on tough surfaces for stripping, heavy sanding, and cutting to prepare the material.
Depending on the wood, you can use very fine grain, fine grain, or medium grain sandpaper for most tasks.
28. Marking gauge
A marking gauge or scratch gauge is primarily used in metal or woodworking tasks to establish clear lines on the surface. This makes it easier to achieve the desired cut for various types of projects.
With a gauge, you can mark a line that’s parallel to the surface or reference edge, which makes it ideal for joinery and sheet metal projects. The best part is that the marking line doesn’t damage the surface or broaden for accurate results.
It’s a fine line that reduces the chances of splintering when using chisels or applying saw cuts.
29. Lathe
When you need to shape wooden materials into a cylinder, use wood-turning lathes. You can make furniture legs, baseball bats, lamp posts, bowls, and several other ornaments with a lathe.
Along with woodworking, lathes find application in metalworking, thermal spraying, metal spinning, glassworking, and reclamation, which shows their versatility. While trying it out in person, I have seen 2 types of lathes - manual-feed and automatic-feed products.
You can also choose the material of the lathe, be it oak, riven lathe, chestnut, or hand-split timber. Among these, the hand-split timer has a large surface area and greater durability.
30. Drill and driver combo
For effective woodworking, you can sometimes use 2 tools together, like a combination of a drill and a driver. Drills help drill the holes into the surface, while a driver drives the screws into the newly formed hole.
Apart from wood, you can work on laminates, plastic, concrete, masonry, and steel. So, why should you use a combination instead of the two units separately? It offers greater convenience and increased efficiency when working on maintenance, home repairs, or building projects involving wood, metal, or ceramics.
31. Steel or folding rule
Instead of using 2 rulers, you can use a folding or steel ruler to measure large and small spaces. The best part is that the folding units are highly portable, and you can fold them after completing the project to put them in your toolbox.
After giving it a go, I found the sleek design of a folding or steel ruler ideal for taking measurements of points in hard-to-reach spaces. But apart from accurate measurements, you can use the rulers for drawing lines and making cuts if they are sturdy.
Moreover, thin and flexible rulers are ideal for measuring cambered and rounded surfaces.
32. Wood glue
A highly underrated woodworking tool for various projects is the wood glue that helps join different pieces of wood. You can save money by using wood glue rather than an expensive adhesive, especially since it allows you to attach multiple boards when constructing furniture, like tabletops.
However, for plastic joints, you must reinforce the structure with a nail or screws to prevent it from falling apart. You can use 5 different types of wood glue for most woodworking tasks, including -
PVA glue
Cyanoacrylate glue
Polyurethane glue
Hide glue
Epoxy
33. Mineral spirits
A handy woodworking tool that people often forget about is mineral spirits. After working with power tools, like miter saws or table saws, you will likely end up with a dirty workstation.
Mineral spirits are great for removing tough stains from the surface, preparing the wood for staining, revealing the natural grain of the wood, and helping shine dull wood. This helps you get the desired finish on most materials and is easy to use.
Just dab the cloth with the mineral spirit and gently scrub over the stained portion of the wood to get a clean finish.
34. Hearing protection
The last 2 options on this list don’t specifically come under essential woodworking tools, but they are essential accessories nonetheless. You must wear protective equipment while woodworking to avoid injuries since the external sound of the equipment is quite high.
This helps keep the ears safe and reduces the chances of hearing loss due to excessive noise. With proper hearing protection, you can reduce the decibel levels reaching the inner ear, for which earplugs and earmuffs prove the most effective.
After getting a feel for hearing protection equipment, I found that there are 5 types -
Canal caps
Expandable foam plugs
Reusable and pre-molded plugs
Miscellaneous devices
Earmuffs
35. Dust mask
Just like ear protection, you must wear a dust mask in the workshop. As I have experienced first-hand, using woodworking tools creates a lot of debris and dust, which can go into your eyes, resulting in injuries.
Also, people with dust allergies will struggle in the workshop to get anything done, but with a mask, you can protect the lungs by preventing the inhalation of dust. Modern masks even come with goggles to protect your eyes and work by allowing clean your pass-through while trapping debris on the outside.
For a dust mask to be effective, it must sit on the face properly to form a tight fit.
How can I maintain my woodworking tools in good condition?
To maintain your woodworking tools so that they are always in good condition, you should do the following:
Regular cleaning
Proper storage
Prevent rusting
Use the right tools depending on the job
Disassemble the tools after working
Sharpen the blades
How do I clean woodworking tools?
To clean woodworking tools, you can start by wiping away any sawdust or debris using a clean cloth. For stubborn residue, use a mild solution of dish soap and warm water to gently scrub the surfaces. Make sure to dry the tools thoroughly before storing them to prevent rusting.
What are the risks associated with woodworking?
Several risks associated with woodworking are:
Wood dust can cause asthma
Debris can get in the eye
Loud noise can affect your hearing
Skin damage from sap and wood lichens
Respiratory tract infection
What are the safety precautions to take while woodworking?
Several safety precautions to take while woodworking include:
Wearing proper clothing
Using PPE (Personal Protective Equipment)
Keeping the work area clean and tidy
Learning about new safety precautions
Sharpening the blades and bits
Never hesitate to ask for help
Minimize distractions in the workshop
Using compatible power outlets
Use just one extension cord at a time
What is the highest designation in woodworking?
The highest designation in woodworking or carpentry is that of a master carpenter. This is bestowed on someone with the necessary skills, experience, and training to handle various carpentry tasks. They must also be adept at using modern tools, following proper guidelines, and completing projects on time.
There you have it! A detailed list of the essential woodworking tools you can’t do without, whether performing DIY tasks or working on professional projects. Many of these tools are handheld and require manual force to achieve the desired results, while other models are electric-powered and easy to use.
But whatever the task, you must wear protective gear and carry our proper maintenance to keep the tools in good condition. And if you don’t get the desired results initially, don’t be disheartened. It took me some time to master the skill of using different tools, so keep learning and experimenting until you succeed!
In the search for the best home design and improvement websites, homeowners and DIY enthusiasts can turn to a diverse array of platforms for inspiration and guidance. Platforms include architecture and interior design magazines, renovation and remodeling blogs, step-by-step DIY project hubs, tool and material review sites, online marketplaces with design integration, and sustainability-focused resources. Content spans structural upgrades, room makeovers, outdoor landscaping, storage optimization, finish selection, and construction techniques. Leading entities in this space—such as Homesthetics, Houzz, The Spruce, Architectural Digest, Dwell, and This Old House—combine visual inspiration with practical advice. Others, including Remodelista, Fine Homebuilding, and Hometalk, offer specialized knowledge ranging from aesthetic curation to building science. Community-driven platforms provide peer-generated solutions, while professional publications share expert insight and design standards. The following guide identifies what each site offers, who it serves, and how it contributes to the wider ecosystem of home design and renovation. Whether planning a kitchen overhaul, building a backyard deck, or researching energy-efficient materials, these platforms deliver credible, high-quality content for every stage of the process.
01. Houzz
Houzz is a comprehensive platform for home remodeling, building, and design. It connects homeowners with professional designers, architects, and contractors, offering a vast library of high-resolution project photos. Users can save images to idea books, read articles on design trends, compare products in the integrated marketplace, and hire professionals via detailed directory listings. With a mission to provide the best experience for home renovation and design, Houzz is valued for its rich inspiration galleries, interactive community forums, and tools that turn ideas into actionable renovation plans.
02. The Spruce
The Spruce offers practical, real-life tips and inspiration for improving the home. Covering decorating, renovation, cleaning, gardening, and entertaining, it focuses on everyday projects. The site includes step-by-step how-to guides and expert advice on topics from DIY repairs to landscape design, along with shopping recommendations and trend stories. The Spruce’s clear, actionable articles and comprehensive sections make it a go-to resource for homeowners seeking hands-on guidance and inspiration across all areas of home life.
03. Homesthetics
Homesthetics is an online magazine and community dedicated to high-quality architecture, design, and DIY projects. It offers a blend of creative inspiration and practical advice, covering topics like interior design, crafts, outdoor projects, and home improvement. The platform emphasizes simplicity and functionality, providing readers with innovative ideas and detailed tutorials to enhance their living spaces. Homesthetics is a valuable resource for those looking to combine aesthetic appeal with practical solutions in their home projects.
04. Architectural Digest
Architectural Digest is renowned for covering high-end interiors and global design. Its website showcases influential architects, designers, and luxury homes, featuring in-depth home tours, profiles of top designers, product round-ups, and trend reports across interiors, architecture, and lifestyle. Aimed at both design enthusiasts and industry professionals, Architectural Digest offers rich editorial content that combines aspirational inspiration with usable ideas for sophisticated home projects.
05. Apartment Therapy
Apartment Therapy is a lifestyle and interior design community focused on making homes beautiful and livable. It shares design lessons, DIY how-tos, shopping guides, and expert advice for creating a happy, beautiful home. The site’s content ranges from compact space solutions and budget-friendly makeovers to organizing hacks and personal home tours. By connecting people with creative, often simple solutions for everyday home issues, Apartment Therapy empowers DIY enthusiasts to make practical improvements.
06. The Family Handyman
The Family Handyman is a classic DIY home-improvement resource that delivers clear, step-by-step guidance. It provides complete instructions, expert tips from industry pros, and time and money-saving hints to help get the job done right. Covering everything from basic repairs and tool usage to larger renovation projects, its content includes how-to guides on carpentry, plumbing, electrical work, and outdoor projects, as well as reviews of tools and materials.
07. This Old House
This Old House is a well-known brand dedicated to home renovation and repair. Its site and magazine feature step-by-step instructions for home improvement projects, stunning before-and-after photos of home makeovers, solutions for every style and budget, and the latest tools and products. From foundation repair to finish carpentry, This Old House offers detailed project guides led by expert hosts, providing trustworthy, time-tested advice and inspiration for tackling renovation and restoration work.
08. Better Homes & Gardens (BHG)
Better Homes & Gardens is a flagship home-and-garden lifestyle brand with a century-long reputation. Its site covers home decor, gardening, cooking, and family wellness. Recognized within the home improvement and gardening industry for original and immersive editorials on home decoration, food recipes, and family well-being, BHG features DIY projects, decorating ideas, organizational tips, and garden guidance, offering inspiring ideas and practical tips for every part of the home and garden.
09. Dwell
Dwell is a modern design publication and community centered on contemporary architecture and interiors. It showcases a curated collection of home tours, architecture projects, and renovation case studies from around the world. Professionals and design enthusiasts share photos and plans of their homes on Dwell for inspiration. In addition to tours, Dwell publishes articles on prefab housing, remodeling, urban living, and product design, focusing on clean, modern aesthetics and innovative solutions.
10. House Beautiful
House Beautiful is a long-running home decor magazine aimed at everyday design and DIY enthusiasts. Its mission is to bring the best in home inspiration and design education to readers. The site covers room-by-room decorating ideas, paint and color guides, gardening tips, and simple renovation projects. Whether planning a full remodel or a small weekend project, House Beautiful offers smart tips and designer-tested ideas for every skill level.
11. HGTV
HGTV (Home & Garden Television) is a major lifestyle brand whose website extends its popular home improvement programming into an online resource. HGTV.com shares inspiration and advice for your home and garden, along with content tied to its television shows. The site offers photo galleries and how-to articles on decorating, remodeling, landscaping, and DIY crafts, blending entertainment with education.
12. Fine Homebuilding
Fine Homebuilding is a specialized publication for serious residential construction and renovation, targeting both skilled DIYers and professional builders. The magazine and website provide practical hands-on advice, tool reviews, design inspiration, and more. Articles cover advanced carpentry techniques, structural methods, and material choices, with detailed illustrations. Fine Homebuilding also publishes project plans and guides from the pros on topics like kitchen and bathroom builds.
13. Bob Vila
Bob Vila’s website brings the authoritative voice of the famous home improvement TV host to online DIY advice. It offers inspirational ideas and expert advice from Bob Vila, the most trusted name in home improvement, home renovation, home repair, and DIY. The site is organized into categories covering projects of all kinds, emphasizing clear, concise instructions on common jobs like kitchen upgrades, landscaping, painting, and more.
14. ArchDaily
ArchDaily is an architecture news site widely used by design professionals and enthusiasts. It calls itself the world’s most visited architecture platform, publishing daily articles on global architecture projects—from residential designs to public landmarks—along with architectural trends and competition news. Readers find extensive photo documentation of contemporary homes and buildings, technical descriptions, and commentary.
15. Hometalk
Hometalk is an online community and content site built by and for DIYers in the home and garden space. It markets itself as the world’s largest online DIY community, where users share ideas and tutorials. Hometalk’s focus is peer-to-peer: members post user-generated how-to guides on projects like painting techniques, furniture upcycling, gardening, and crafts. The site aggregates thousands of easy-to-follow project ideas, tips, and Q&A threads.
16. Remodelista
Remodelista is a design site often called the sourcebook for the considered home. It caters to readers interested in refined, thoughtful renovations and decorating, publishing curated home tours, product recommendations, and trend analyses focused on architecture, interiors, and restoration. Remodelista emphasizes timeless style and smart design decisions—how to renovate or furnish a space elegantly and sensibly.
17. Gardenista
Gardenista is a dedicated gardening and outdoor-living offshoot of Remodelista, billed as the definitive guide to stylish outdoor spaces. It focuses entirely on yards, gardens, and landscape design, including garden tours, plant-care primers, hardscape tutorials, and furniture/equipment round-ups. By zeroing in on outdoor style, Gardenista helps homeowners bring the same level of attention and creativity to their yards as they do to interior decor.
18. Design Milk
Design Milk is an online magazine dedicated to modern design across multiple disciplines, covering contemporary architecture, interior design, art, and technology. The site is dedicated to modern design and prides itself on discovering and sharing innovative projects. Design Milk’s articles feature cutting-edge home interiors, futuristic furniture, lighting, gadgets, and creative installations.
19. Architecture Lab
Architecture Lab is a global online magazine and design community that champions creativity, accessibility, and architectural innovation. Since its founding in 2008, it has connected architects, students, and design enthusiasts through a curated mix of thought-provoking projects, practical insights, and forward-looking commentary. What sets it apart is the Architecture Lab Magazine—an open-access publication that serves as a truly democratic platform, offering a space where emerging voices and established figures can share ideas freely. By blending academic depth with real-world relevance, Architecture Lab acts as a scaffold for new visions, making it a vital destination for anyone invested in the evolving dialogue of design.
20. Dezeen
Dezeen is a London-based online architecture, interiors, and design magazine, often cited as the world’s most influential architecture, design, and interiors magazine. It publishes the latest architecture projects, interior design stories, product launches, and creative innovation from around the globe. Known for its breadth—from major building projects to avant-garde furniture—and its up-to-the-minute industry news, Dezeen offers high-level inspiration and trend coverage.
21. Architecture Art Designs
Architecture Art Designs is a platform that explores the world's best architectural designs and home ideas. It serves as a daily source for inspiration and fresh ideas on architecture, art, and design. The site features a wide array of content, including innovative architectural projects, interior design trends, DIY crafts, and artistic installations, catering to a diverse audience interested in the intersection of architecture and art.
22. Wallpaper*
Wallpaper* is a global design magazine and website that blends architecture, interior, and product design with fashion and art. The site describes itself as a global design authority, including sophisticated home and office interior tours, cutting-edge architecture features, and articles on luxury design trends. Wallpaper* often highlights how design intersects with lifestyle, offering a wide view of contemporary design culture.
23. Inhabitat
Inhabitat is a website dedicated to sustainable and eco-friendly design, specializing in green design, innovation, and the future of clean technology. It publishes news and features on energy-efficient homes, recycled and natural materials, urban farming, and other environmentally conscious topics. Inhabitat’s focus on innovation and sustainability makes it valuable for readers who want their home improvements to be both stylish and eco-responsible.
24. Arquitectura Red
Arquitectura Red is a Spanish-language platform dedicated to the thoughtful exploration of architectural ideas and design practices. Bridging theory and practice, it offers a space for critical reflection and exchange among architects, scholars, and enthusiasts. The site features in-depth articles on architectural history, emerging technologies, and contemporary projects, often presented with an academic lens. Readers can expect detailed insights into typologies, profiles of influential architects, and conceptual essays. By linking abstract architectural thought to built form, Arquitectura Red inspires Spanish-speaking audiences to approach home and design projects with greater depth and intentionality.
25. Architecture Réseau
Architecture Réseau is a French-language architecture site that brings together innovative visions and the realities of constructed space. It serves as a platform for dialogue and discovery, showcasing forward-thinking projects and critical evaluations of architectural trends. With a strong editorial focus on contemporary residential and public architecture, the site highlights design practices that reshape environments and challenge conventions. Architecture Réseau invites its readers—whether professionals or passionate homeowners—to think deeply about how architecture tells stories, shapes experience, and fuels creative engagement.
Are you the type to start panicking the minute you see a crack on concrete slabs?
Well, good news for you - it’s not always that serious! In fact, not all concrete cracks result in structural damage. This is because most of these concrete cracks appear during construction or may be caused due to external factors.
But before you get started, you need to learn about the different types of cracks in concrete. This way, you’ll be able to fix the issue more effectively and prevent more cracks and damage in the future.
So, without further ado, let’s get into the deets…
Different Types Of Concrete Cracks
1. Plastic Shrinkage Cracks
Before hardening, concrete is said to be in “plastic” condition when it is full of water. Gradually, the water fully evaporates, thereby leaving huge holes on the concrete surface. As you may have guessed, these holes weaken the structure of the concrete, making it more prone to damage. Hence, these are known as plastic shrinkage concrete cracks.
Notably, these types of cracks are very common and can emerge on walls and slabs. However, you must watch out for these cracks on the corners and center of the concrete slab affixed with plumbing fixtures.
2. Horizontal Concrete Cracks
Horizontal cracks are usually spotted around areas of high tensile strength, such as column faces, column junctions, and beams. They are usually caused by improperly reinforced concrete, incorrect placement of installed reinforcement, uniaxial bending, insufficient moment resistance capacity, etc.
Note that horizontal concrete cracks call for immediate attention as they can degrade structural integrity.
3. Diagonal Cracks
If you’ve got a reinforced concrete slab, diagonal cracks are bound to appear along the concrete column face. These types of cracks may be caused due to inefficient load-carrying abilities, weak cross-section, insufficient reinforcement steel, and more. But unlike some minor cracks on concrete surfaces, diagonal cracks must be repaired immediately to prevent any damage to the entire structure.
4. Expansion Concrete Cracks
The nature of concrete is such that it expands when heated, further pushing anything that gets in its way. And as concrete does not bend or flex, such expansion causes it to break, creating concrete cracks.
Interestingly, expansion joints are used as points of isolation against static objects. This reduces the chances of concrete cracking in the future.
Moreover, expansion joints are used as shock absorbers as they are made of a compressible material like rubber, timber, or asphalt.
5. Splitting Cracks
If you spot short vertical cracks of varying widths along the concrete slab, they are most likely caused by a lack of load-bearing capacity, improper cross-section and steel reinforcing. You must also ensure that the concrete used is of top-notch quality to avoid splitting cracks in the future.
6. Settling Concrete Cracks
If the ground beneath the concrete slab settles and creates a void, you may notice settling cracks. For instance, when a large tree is chopped/uprooted and the hole is not refilled with soil, settling cracks can occur on the concrete surface. Another suitable example is when a utility company digs around for its services and leaves the surface bare.
7. Concrete Cracks As a Result of Premature Drying
When the concrete dries too soon, you may notice two types of surface cracks - crazing cracks and crusting cracks.
Crazing cracks look like spider webs and form when the concrete slab loses moisture soon after application. While these surface cracks may be an eyesore, they do not pose any structural damage.
On the other hand, crusting cracks usually occur during the concrete stamping process. Again, this happens when the concrete surface dries up too quickly due to sunny or windy days. Plus, the stamp getting pressed on the concrete creates more texture and minute fissures. These types of cracks are also not a major concern, so you need not stress about them.
8. Concrete Fissures Induced By Slab Overload
We are well aware of concrete’s strength and durability. But like every other material out there, it has its fair share of flaws. As such, excessive weight can cause cracks in concrete columns.
Although overloading of the actual concrete slab is highly unlikely in residential areas, heavy rain or snow can make things worse. This is because the excess weight presses down the concrete slab into the moist earth, thereby resulting in cracks.
9. Corrosion Cracks
These cracks start off at the same width but end up getting larger with time. You’ll mostly find such corrosion cracks on concrete column reinforcements.
Like most of the concrete cracks described above, these are also caused by improper bonding between concrete and steel bars. Another reason could be reinforcement corrosion.
Heaving Concrete Cracks
Sometimes it’s not just the carelessness or mistakes during construction but also natural factors that cause concrete cracks. For instance, the ground rises a few inches while freezing and goes back to its original size when thawed. Hence, if the concrete slab does not move with the ground, it will end up cracking.
The same thing happens when tree roots, both large and small, shift and shatter the surface if they’re too close to the slab. So, you must keep these factors in mind while laying a concrete slab.
How To Repair Narrow Concrete Cracks
You get a wide variety of options for repairing narrow cracks - all you need is a caulking gun for the process. Not to forget, many concrete fixing products are available in bottles with a convenient applicator tip.
In case of hairline cracks, you can use a vinyl concrete patching compound and smooth out the surface with a trowel or putty knife. The smoothening process is especially important because the concrete caulk tends to peel off after a few months.
Also, note that sometimes narrow cracks can be deep enough to extend throughout the width of the concrete column. Thus, we recommend starting off by using a foam backer rod to stuff the crack and hold the concrete crack filler.
In case you’re wondering about the size of the back rod, let us tell you that they are available in a wide variety of diameters. Just ensure that you pick one which is slightly larger than the width of the concrete crack, and you’re good to go.
Finally, you can screw in the backer rod with a screwdriver and then fill the crack with the concrete crack filler.
How To Repair Wide Concrete Cracks
Before learning how to repair cracks in concrete, it is important to understand the main aim, i.e., to create an inverted “V” with the sides of the crack. Doing so will allow the repair material to get absorbed into the crack and create a mechanical bond along with the chemical bond. Now, let’s check out the steps involved:
Step 1
Use a masonry chisel and hammer to widen the crack and chisel it. Make sure that you remove any loose material from the old concrete with the help of a wire brush.
Step 2
You can even use a pressure washer or a garden hose to spray the crack with high pressure water and remove debris. Then take a brush or wet/dry shop vacuum to remove the water as well. Remember that it’s okay to leave the surface damp/wet, but there shouldn’t be any pools of water.
Step 3
Now follow the manufacturer’s instructions and prepare the concrete patching compound. Scoop the mixture into the concrete crack, ensuring no air pockets are left. Also, use some of the compound on the surrounding concrete surface for better adhesion.
Step 4
Use a trowel to smoothen the surface and level it along the surrounding concrete. You can even use a brush to create patterns or textures.
Step 5
Leave the concrete compound to dry and cure. Here, you must check the manufacturer’s instructions and follow them to the T!
Finally, if required, you can paint or seal the entire surface.
Types Of Cracks In Concrete Slabs Frequently Asked Questions ?
How to choose the best concrete crack filler?
Concrete crack fillers are available in various forms; namely, sealants/caulks, quick-setting cement, hydraulic cement, patching compounds, epoxy, and concrete resurfacer. Depending on the width of the crack, your level of expertise, time at hand, prevailing weather conditions, etc., you can choose a suitable sealer for cracks in concrete.
How to remove concrete crack filler?
You can use an angle grinder and scrape off the concrete crack filler from the desired surface.
How to prevent cracks in concrete surfaces?
While concrete crack fillers can fix present cracks, they cannot guarantee any prevention from future damage. Hence, it is important to maintain the structural integrity of concrete columns.
You can do so by adding sealants every few years to protect the surface from top-layer damage. A good-quality sealant can harden the surface and prevent scratches, oil stains, and more.
Other than that, you can invest in routine power-washing, wherein all the dirt and grime are removed with high-pressure water. If you have already used concrete crack fillers, then rest assured that the surface will remain protected with no water seeping into small gaps.
Types Of Cracks In Concrete Slabs Final Words
Though not all types of concrete cracks spell trouble, it is always wise to repair them early on to prevent any possible damage to the entire structure. And while it is difficult to find the root cause of the crack, possible reinforcement corrosion, improper jointing, and inefficient load-carrying abilities are usually the ones to blame.
Hence, good concrete finishing techniques and proper site preparation must be ensured to avoid structural concern in the future.
25Our home is our retreat from the hectic daily busy crazy life we have created all around us. Thus it is our job to assure a perfect environment where stress has no place and everything works according to plan. For today we have searched for fun, interesting, innovating gadgets and ideas that can improve our existence and make our home a better place. Having fun is an important aspect of a sane healthy life so try and think outside the box, see the inventiveness in simple ideas and make the most of them. DIY home projects have the advantage of offering besides the creative, fun part a practical side as well, helping you improve your home by adding storage, decorating in unusual ways and simply getting things done around the house easier, cheaper and faster. So sit back relax and enjoy our Top 40 DIY Home Projects Gadgets And Ideas collection.
1. Find and bend into love and joy everything
2. Easy way to get your nails done
3. Every hard working person deserves such a treat
4. Never get your headphones tangled again
5. Easy invisible method of hanging books
6. Find easy expandable beds with extra storage
7. Adaptable furniture is the best choice
8. Inventive method of getting rid of that residual water
9. Great idea for those long trips
10. Have a slumber party going on? Make it interesting with these hanging sleeping bags
11. Turn an old tire into an ottoman ( for your porch)
12. Easy fast way of cutting down a melon
13. Perfect for those summer ice teas
14. Make candles using balloons and candle wax
15. Revive your old plates
16. Keep your rubber bands in place
17. Add texture to your walls
18. Use egg shells to create floral decorations
19. Corks as a decorative candle
20. Rope lighting around your garden for a romantic effect
21. DIY shelf for your accessories
22. Add a pet fountain to your garden
23. Stamp the date
24. Make concrete candle holders
25. Cardboard tablet support
26. Refresh old dishes with bright spray paint
27. Fordable garden furniture is a great option that saves up space
28. For the adventurous part of you
29. Practical for the technology addicts
30. Self-supported cleaning brushes
31. Organize your electric cords
32. Solar lamps save you energy
33. Bathroom paper storage idea
34. Fordable basket easy to store
35. Keep your spices organized
36. Never have things rolling on the car floor again
37. Treat your family with homemade ice cream waffles
38. Everything can be foldable
39. Great hair accessories storage idea
40. Never pour sugar or flour the same again
41. Think green and use solar power
42. Sleep in any situation
43. Perfect idea for your little family
44. Find furniture that saves you some space
45. Wash vegetables the right way
46. Fold a grill in one piece
47. Cut cakes perfectly every time
48. Hold your cords in place
49. Make the most out of anything
50. Hold your towel in place on the beach
51. Buy a solar cell phone charger
52. Be creative and use almost anything to create art
Doors don't come cheap, especially sliding ones. But it is a good method of separating two different spaces without the problem of the space a door would need to get opened. Sliding doors seem like the logical solution thus. But if you are on a low budget, the possibilities for buying a sliding door are near to nothing. So why not try and make one by yourself? Don't worry, it is not as difficult as it might seem. The projects featured below cost around the $35 price point (depending on finishing accessories like handles and such) which makes it an easy cheap fast DIY project.
How To Make a Sliding Door For Your Home For Under $40
1. Materials required
-2 plumbing flanges
-1 (possibly 2) plumbing angle brackets
-plumbing pipe
-3 "hinged loops"
-2 full sheets of masonite
-1 bundle of 2x2s
-2 small wheels
-assorted nails/brads
-20 wood screws
2. Tools
-Nail gun or hammer
-Screwdriver
-Level
Steps to follow:
1. First thing first-building the frameof the door
You will require the aid of a screwdriver. Measure your masonite and make a wooden frame that is the same dimension, using the diagram above to assemble your 2x2 boards (with one screw joining each board). Do not worry if the structure is not quite sturdy.
2. Cover It Up
You can use nails to attach your masonite to the wooden frame or to fix them with brads. You can even glue it, but be careful to let it dry sufficiently.
3. Add the Right Wheels
Decide which direction your door will go and find the right kind of wheels.
4. Find and Add Hinged Loops
Hinged loops are cheap but might seem difficult to find. But once you have found them, attach them to the top of the door with wood screws.
5. Add Pipe
Cut the pipe at the required length at the hardware store and then slide it through the hinged loops added to the door.
6. Add Angles & Flanges
At the end of the pipe where you will fix it to the wall add the necessary angled pieces and flanges.
7. Level and Mark
Call your friends and try to level the plumbing hardware. Use the level on the top of the door and mark the holes for your required screws to fix the plumbing pieces to your wall. The pipe must be just under the loops when they're fully extended up.
8. Screw
Now you can attach the hardware plumbing to the wall in the right position.
9. Try your hard-work
Try sliding the door to make sure everything works smoothly and that everything is leveled.
10. Soundproof the Door
To enhance the acoustic properties of your sliding door, you can incorporate soundproofing measures during construction. Refer to our how-to soundproof a door guide for specific techniques and materials to efficiently reduce noise transmission through your newly built door. Following these steps will help improve the overall comfort and privacy of your home.
Instead of a door knob add a small loop to open and slide the door.
So what do you think? Is it an option for you? Would you try and make your own sliding door from scratch? Share your thoughts in the comment section below.
Probably the fastest way to improve your interior design in a superb timeless manner is by introducing new textures. Simple and magnificent ways to beautify your house hold have been showcased below, all based on the legendary natural wooden texture. Wooden textures add coziness and warmth along with depth in any decor, easily complementing plane simple interiors.
Wood DIY Projects can include wood and mason jars lamps, salvaged wood diy headboard, industrial wooden chandeliers or vintage benches. It is worth mentioning that from branches, twigs and stumps up to salvaged wood and wooden beams the wooden textures are transforming interior design lines throughout the world.
#1 Sculptural Wooden Roots and Monumental Wooden Beam DIY Headboard
#2 Simple Glass Bottle Industrial Chandelier Near a Wooden Wall
#3 Simple Industrial Wooden Chandelier
#4 Barn Wood in Metal Frame Composing a Beautiful Industrial Bench
#5 Mason Jar Vintage Industrial Lighting
#6 Sculptural Barn Wood Dinning Table
#7 Vintage Attic Space Sculpted and Enhanced by Wood
#8 Steampunk Industrial Barn Wood Desk
#9 Beautiful Wooden Beams Bar and Salvaged Wood Ceiling
#14 Intimate Vintage Touch in a Simple Interior Design
#15 Salvaged Wood Used in an Industrial Chandelier
#16 Wooden Stump Carved to Shelter Wine Bottles
#17 Eclectic Industrial Interior Design Beautified by Diversity
What do you think about the selection showcased above? We would love to hear your opinion in the comment section below on the effects of wood in interior design. How do you use wood in your interior design?
A smart inexpensive craft is often called brilliant. A selection of such items follows, creative Do It Yourself Cinder Block Projects for your home, crafts that will help you solve problems in a beautiful manner. Simple, rectangular shape that can beautifully complement wooden textures, the cinder block can be introduced in multiple, stable compositions.
Water features, sitting and storage options alike have been showcased below, we invite you to cast a glance and start using cinder blocks in your DIY projects as soon as possible. We would to hear from you in the comment section below.
#1 Enhance your Garden with a simple water feature
What do you think about these creative Do It Yourself Cinder Block Projects? We would love to hear your opinion on the subject in the comment section below.
While it is not child’s play, wiring an outlet is not impossible either!
Wiring a 220-volt outlet can be a tad bit risky if you do not know how to go about it. Since you are dealing with electrical points, you must go by the book.
But on the bright side, once you master this process, you will be saving so much money that would otherwise have to be paid to an electrician.
We have detailed the process in the form of steps to make it easier for you to follow.
Read on to know the process of wiring a 220 outlet!
How to Wire a 220 Outlet For a Welder
Step 1
It is essential to first switch off the circuit breaker. The breaker must be powered off, and the handle needs to be locked. After all, the primary circuit cannot be functioning during the process. Once you have made sure that this is done, move on to the next step.
Step 2
Firstly, remove the metal cover. This is important to get access to the breakers. After making sure that the circuit breaker is dead, plug in a 50 amp two-pole breaker into the box. The box should be able to support a two-pole breaker. Check beforehand if there are two spaces available to put in the two.
Once you are done determining, you can go ahead and hit the hardware or the electrical supply store. You need to purchase a breaker, some electrical wire, and an outlet.
Step 3
It is time to attach the flush mount to two gang boxes on the wall surface. Make sure that it is adequately fixed and cannot be moved (use screws for this purpose). After you are sure the gang boxes are in place, proceed.
Step 4
This is a crucial step - it is time to fix the wires. You must have a minimum of 6 inches of wire already inside the receptacle box. Some sheathing should remain exposed in both boxes. This includes the circuit breaker box and 2-gang box.
Now using that same cable ripper, you need to slowly pull out about 6 inches of the plastic sheath off the wire. The wire is the same one that is used inside our 2 gang box. Once you have achieved this, move on.
Step 5
It is time to pull out 12 inches of the plastic sheath of the wire used. Use the same cable ripper to do that. This part of the wire will go inside the circuit breaker box. Please maintain the exact measurements while conducting the process.
Step 6
Here you would need to strip off 1 inch of the sheath with the wire stripper. Be careful not to strip off any more than that.
Step 7
It is time to fix the wires. Bring one end of the wire inside the circuit box and connect the other end inside the 2-gang box.
Step 8
The next step involves implementing the wire connection. First, concentrate on the wire inside the 2-gang box to provide a connection with your outlet. To make this happen, you will require 3 wires - a black, red, and a bare one.
The bare one is the ground. There will also be a fourth white wire, but it is neutral, and you need to skip using that. To prevent any mistakes, wrap the white wire with electrical tape and seal it securely inside the 2-gang box.
Step 9
After the wires are in place, put some non-corrosive agent at the tip of all those wires. This will keep the connection from corroding.
Step 10
Now take the black, red, and bare wire and connect them to a receptacle. Hook up each colored wire against the correct screw. The black and red wire should be attached to the two-prong terminal, while the bare one needs to be connected to the ground terminal.
Place it with the screw facing up and now put the cover back on. You need to fix the cover properly to ensure that the job looks professional.
Step 11
After you are done, connect the three wires to the breaker. Here you will again have the white wire which you need to fold and keep securely inside the box. These wires need to be stripped, and the non-corrosive stuff has to be attached to the end.
Step 12
It is time to hook up the ground wire. Also, hook up the black and red wire in accordance with the breaker manual, and you are done.
Conclusion
When you go over to a hardware shop to buy the required products, make a note of the quality of the specified products you are purchasing. An overloaded circuit can be extremely hazardous and can cause a fire to erupt, or someone could get electrocuted. The whole equipment could also be damaged in one go.
Always choose a breaker rated at or above the required amperage for your welder. The gauge wire for the circuit size should also be perfect. Also, choose an appropriate outlet to match your welder’s plug. If you are not sure which one to go with, ask the dealer for help.
And with that, you are good to go - you can now proceed to set up your outlet.
Wondering how to work that clamp meter? We're here to help you with the ultimate guide, specially drafted keeping beginners in mind.
Let's just start by saying that operating a clamp meter is pretty simple once you figure out all the subtle mechanisms. Also, you're already halfway there if you know how to use a general-purpose multimeter.
But, then again, it's essential to know the minor differences between the two, which will help you decide better while testing and troubleshooting.
Furthermore, this nifty gadget benefits users in numerous ways and is the least complicated when it comes to handheld tools. So if you're a serious DIY-er or tech enthusiast, it's time you learned all about this super cool gadget.
Now without further ado, let's begin.
What Is A Clamp Meter?
Long story short, a clamp meter is an advanced variation of a digital multimeter, but the primary points of difference between them are the design and capabilities.
The former has a jaw-like structure on the business end that enables contactless measurement of current and voltage. So basically, you can 'clamp' this top part around conductors (like a wire) to detect the current flowing through it.
That being the primary working principle, new age clamp meters perform multiple functions for measuring several quantities and come with features that simplify troubleshooting and analysis. But most importantly, they are equipped with safety measures for convenient use.
Since you neither have to plug testing probes to live circuits manually nor disconnect the system to record a measurement, clamp meters truly ensure safe applications overall. And that's why it's no surprise that they have become one of the indispensable tools in a technician's kit.
Chief Differences Between A Clamp Meter And A DMM
Before you begin using a clamp meter, it's critical to understand how it's different from a digital multimeter (DMM). Following are the key notable dissimilarities...
Firstly, a digital multimeter mainly measures voltage, but it has some current measuring capabilities. On the other hand, a clamp meter does just the opposite, meaning it's ideal for measuring current, but falls short when it comes to voltage.
Secondly, DMMs are high-resolution devices, calculating in units like millivolts and milliamps, whereas clamp meters only measure to the nearest tenth or hundredth. The latter usually works fine for electrical work, but don't expect minute measurements.
Lastly, DMMs are far more accurate and provide users with direct readings, but they're comparatively much slower and not that safe.
Therefore, it's wise to have both the tools at your disposal, though for certain situations, clamp meters are crucial.
Basic Components And Structure Of A Clamp Meter
Before we get into the nitty-gritty of using a clamp meter, it's essential to learn about the basic components of the unit. Following is a list of major components commonly found on most clamp meters.
The clamp – the jaw-like appendage on the top, which is wound around conductors to detect and measure current (and other parameters)
Tactile barrier – A prominently visible zone that protects your fingers and hands from electric shocks
Hold – A switch on the side that freezes display reading until pressed again
Dial – Turned for changing quantity and resolution
Display screen – Usually LCD
Backlight button (optional)
Min-max button – Measure the highest, lowest, and average magnitudes of specific quantities (generally available in most models)
Inrush current button – Negates inrush current from any measurement (optional)
Shift button – Enables users to select multiple functions on the dial
Lever – Used for releasing the jaw
Alignment marks – The conductor ideally should be positioned between these two marks
Input jacks – Most models usually feature three jacks
These are the components that you will usually find in most digital clamp meters. However, based on the model that you buy, the elements and functions may vary.
How To Use A Clamp Meter?
Since analog models are mostly out of use, we suggest investing in a digital model with multiple features and improved user safety.
Also, in the following guide, the steps elucidated are for measuring DC amps or AC amps only. For all other quantities, the procedure is similar, but you'll have to select the respective function on the dial.
Steps to Follow While Using a Clamp Meter to Measure Current
Step 1: Turn ON the meter and remove the probes (if connected)
Step 2: Select the AC or DC function using the dial. At this point, the display should show a jaw sign, which confirms that the measurement is being recorded through the clamp (read the manual to see how your unit indicates this)
Step 3: Open the jaws using the side lever and insert the conductor through which the current is to be measured. Usually, technicians do this one-handed while they note the measurements with the other one.
Step 4: Close the jaws and level the conductor between the alignment signs inscribed on the top structure. However, If these signs are missing on your model, try to adjust the conductor to the center of the clamp.
Step 5: The display will now generate the appropriate reading. Users may modify the resolution as per requirements, but most meters do so automatically.
We recommend taking measurements from conductors that are adequately insulated. Do not measure around live wires as that could result in a fire hazard.
A Side Note For Clamp Meters With Flexible Current Probe
Some models also come included with a flexible current probe, which is used to measure current and voltage of conductors in tighter places that are inaccessible to the rigid clamp.
So first, connect the other end of the probe to the unit and then proceed.
The process after that is similar, with the only change being that you have to ensure the probe is correctly wound and then attached back to the meter.
Select the appropriate function (meters with this accessory usually have a separate feature on the dial). The display will then instantly show the corresponding data.
Few Useful Tips While Measuring with a Clamp Meter
We want to ensure that you have a smooth experience using the tool from the get-go. That's why here a few tips for the first-time users that will come in handy while working on your initial projects.
While measuring current, do not clamp around two conductors simultaneously as the current flowing through them will cancel each other (if they are passing in opposite directions). So make sure always to use the tool on a single conductor
Always put on industry-standard safety gloves while operating a clamp meter
Disconnect the test leads/probes before using the clamp meter to measure current deploying the jaws
Make sure to keep your fingers behind the tactile barrier at all times
In most models, the reader will indicate if the current measured is below 0.5 A
We recommended using the "zero" function while measuring direct current, which removes DC offset from the measurement, providing accurate results
When results seem inaccurate, always check the selected function first before checking anything else
Maintaining The Clamp Meter
Let's be real — clamp meters will pinch your pocket. Naturally, you'd want to ensure that yours lasts as long as possible.
How do you do that? First off, start by storing the unit in a secure place. It can be inside a drawer, toolkit, or car compartment. Also, you should keep the meter in a clean, dry area to avoid the risk of rust. Besides, ensuring the meter itself is clean is equally essential as dirt and grease will affect the accuracy of readings.
Furthermore, it's best not to put anything on top of the meter that would push the jaws out of alignment. In case they're not appropriately aligned, the magnetic circuit won't close. Although most digital clamp meters have self-aligning properties, it's better to be safe than sorry.
Do not, at any point, start using your meter to pry things apart. That self-aligning mechanism will only fix so much.
Conclusion
Clamp meters have become popular tools among professionals and DIY enthusiasts, primarily for two reasons - safety and convenience. That being said, clamp meters enable electricians to bypass the traditional method of cutting into a wire, and inserting test leads into the circuit to record in-line measurements.
Those jaws of the meter not only provide contactless functions but also allow users to work without compromising on safety. And the best part - it is not mandatory to shut off the circuit carrying current, which was otherwise necessary while applying old techniques.
On that note, we've come to the end of this comprehensive guide, and we hope you have all the information you need to get cracking with your new gadget.
So, take out your new tool and measure away. But if you get stuck with something, just refer to this guide for a quick fix.
Till next time!
There aren’t many of us who haven’t wondered at the marvelous material that is wood. Undoubtedly, this is one of nature’s greatest gifts.
Wood has been helping humans since time immemorial. Whether it’s the fundamental operation of lighting a fire or the more luxurious function of acting as furniture, wood has a permanent presence in our lives.
Naturally, woodworking is a craft that is much in demand, and woodworking professionals often conjure up images of saw-wielding workmen. But the truth is, using a saw is just one of the many ways in which wood can be cut.
Don’t believe us? Well, to clear all your doubts, we’ve brought a list of the different ways by which you can cut wood without using a saw. Once you go through the following, you’ll know that when it comes to woodcutting, a saw isn’t the only option.
But before going into that detail, let’s take a quick look at how a saw works.
The Secret Of The Saw
Saws come in various shapes and sizes, but broadly they can be divided into the manual and motorized varieties. Motorized saws are exactly what they sound like, i.e., they make use of a motor to rotate the saw blade.
Manual saws, on the other hand, rely on human skill and muscle power to get the job done. While both types of saws have their own features and utilities, the one thing that is common among them is the blade.
The saw blade is the most essential part of the device. Usually made of durable metal such as iron or steel, this consists of a serrated edge that is teethed to make cuts. The shape, size, and closeness of the teeth change depending on the saw type.
And it’s using these teeth that the saw achieves its woodcutting magic. The process is rather simple if you put some thought into it. And for both motorized and manual saws, the process is the same; only the power source differs.
A saw mainly works by a continued abrasive motion of the toothed edge against the wood. Through vigorous action, the serrated and sharp edge of the saw bites into the wood material, thus making cuts.
These cuts are intensified with the application of manual or mechanical force. Eventually, the wood material gives way to the razor-sharp edges, and the wood is cut.
Other Tools To Cut Wood
From the above, it can be easily understood that cutting wood is not rocket science. With the right sharp edge and proper force, many tools can achieve the same results. And that’s what we’re going to take a look at now. Following are some tools that can cut wood with as good results as a saw.
This is the first, and undoubtedly the most straightforward device that can be used for cutting wood. Knives are one of the oldest tools known to humankind, and woodcutting is one of the many uses that this device can be put to.
But remember, not every knife is suitable for cutting wood. For a knife to cut wood, it needs to be very sharp. So the first thing that you must do before setting out to cut wood with a knife is to sharpen it to the fullest. This can be easily achieved using a file.
Once you’re sure that the knife is sharp enough, now you need to set the wood for cutting. It’s usually seen that wood cannot be cut with a knife at straight positions. So you’ll need to hold the wood at an angle, and then come in with the knife for sharp, swift cuts.
Another method that you can use to cut the wood with a knife is to use the sharp end of the blade to score into the wood surface. Once the scoring is deep enough, you can snap the wood in two. Either way, remember to trim the cut once you’re done to ensure a smooth finish.
Who would’ve thought, eh? But it’s true: you really can use a drilling machine to cut wood. All it takes is a bit of ingenuity, common sense, and a whole lot of precision.
The first step to cutting wood with a drilling machine is to understand how a drilling machine works. A drill is a device for making holes, not straight cuts. So you shouldn’t expect to take the direct route and cut through the wooden piece.
Instead, what you need to do is first draw a straight line in the wood along the length that you want the wood to be cut. This straight line is going to act as a reference line for the operation.
Next, make very close perforations on the line using the drill. Once you start doing this, the wood will get weakened along that line. And as closely made holes essentially act as a single, straight line cut, this gives similar results to sawing.
Finally, once the wood is weak enough, you can simply break it using your hands. However, remember to trim the edges using a sharp knife for that perfect finish.
Nope, we’re not talking about the fictional movie character (though he’d do well too, we guess!), but a real machete blade. Think of it as a knife but on a larger scale. Using a machete, you can easily cut any type of wood, and with better style than a saw will ever achieve.
Even easier, since with a machete, you have the advantage of momentum. Many of the same principles apply to cutting wood with a machete as with a knife. First, you’d have to sharpen the blade as well as you can. Use a file for this purpose, or a whetstone if you have one.
Once your blade is sharp enough, mark the wood along the line where you want to make the cut. Make sure to use a vice to hold the wood at a slanted angle, as you’d do when cutting it with a knife.
Now, you need to make deep enough cuts in the wood along the preferred line. For rough cuts, you can even use a hacking motion as with an ax (coming up next). Once you’ve made a cut deep enough, the wood will break along the cut. Then it’s simply a matter of smoothening the edges with the blade.
This is one of the oldest and most ideal methods of cutting wood. And although it requires significant labor, the results can be quite satisfying.
The first step that you have to take, as usual, is to sharpen the ax blade. Using an ax, you can easily go for cutting larger pieces of wood. But you need to take certain precautions before going for the initial swing.
First, you need to ensure that the wood is on a firm base, such as a tree stump. Also, the wood should be positioned at such a height that you don’t have to bend over to make the cuts. That’ll help you to deliver even swings that cut equally well on each blow.
Remember, if you’re using an ax for the first time, it might take some getting used to; so be sure to practice well. For best results, try to make a V-shaped notch on each strike, as this allows the blade a larger striking area.
Finally, once you’re down to the last strip holding the wood together, deliver the final blow, and separate the pieces. If you are an experienced ax-wielder, you can even snap the two pieces apart by hand.
A hatchet is, essentially, a smaller ax. Equipped with a shorter shaft and blade than a regular ax, this tool is meant to be used one-handed. Hatchets are excellent for chopping up smaller wood pieces.
Besides making kindling sized cuts, hatchets can make small tinder savings, and even work well to cut down small trees. And though they are nowhere near as powerful as an ax, they still get the job done rather well.
There’s not much difference between using an ax and a hatchet. Both must be carefully sharpened before commencing the operation, and both require the wood to be held at a comfortable height.
For best results, make sure to practice a few swings of the tool before setting out to cut the actual wooden piece. And if possible, make a marking to indicate the line along which you’d like the cut to be made.
This is yet another centuries-old technique for cutting wood. And though it’s not meant to give you elegant, precise cuts, still, it gets the job done rather well. Also, this combination ensures that you don’t take a larger chunk from the wooden piece than you intended.
With the chisel also, you need to first sharpen the blade using a file or whetstone. Once done, you then need to secure the wood on a firm surface. Ensure that it doesn’t slip, or else this might lead to accidents.
Now, hold the chisel at an angle of about 20-degrees from the wood surface. While doing so, make sure that the bevelled side faces up, and the flat side is pressed against the wood.
Now, hit the chisel with the hammer to cut into the wood. This is going to be like striking a pretty large nail. For best results, make a mark along the wood where you want the cut to be made.
You’ll need to repeat the process and follow up with multiple strikes of the hammer for the wood to be cut. When it’s done, you’ll get a wood chip which you can easily lever-up with the chisel. Finally, use the sharp edge of the chisel to smoothen the rough edges once you’ve separated the cut piece.
A word of caution: this is an expert level process, so make sure you practice a bit before setting out on the final cut.
A router is an electric tool that can be used for a wide variety of woodworking tasks, including the cutting of wood. For this purpose, make sure you select a quality device with the right bits; this is essential for the operation to succeed.
The process is pretty simple. First, you need to attach the router bit that has the right gauge for making the required cut. The gauge of the bit you select is usually determined by the depth of the cut needed, so choose carefully.
Then, pull the router trigger up, set the device into the wood, and push down the trigger to begin the cutting process. With steady hands, move the trigger carefully in the direction of the cut.
And once you’re done, release the trigger and remove the device! It’s that easy. However, to get the required depth, you might need to make several passes. This is necessary as cutting too deeply on a single pass may damage the router and break the bit.
What’s more, you can even use a finer gauge bit to smoothen the cut edges. Just be prepared to handle a lot of wood chips along the way.
Surprised you again, have we? Although a lathe is mostly known for working on metal, it can work on wood with equal efficacy. Using a lathe, you can shape and cut wood, create intricate patterns, and make attractive wooden pieces for a variety of applications.
To shape and cut wood with a lathe, you need first to prepare the wood. This is essential to ensure that it doesn’t come off the lathe while paring down. In case you’re starting work on a rough piece of wood, clean it thoroughly before commencing.
Now, lay the piece in place and firmly fasten the faceplate. Take care not to place the screws along the grain, as this may split the wood unevenly. Finally, mark the center of the wood piece, and place it between the lathe centers.
After this, you need to select the right chisel for the job. It’s best to go with one that’ll give you the required depth of indentation. You need to place the chisel on the tool, and slowly advance it towards the turning wood. Over multiple passes, push the tool more deeply into the wood.
Towards the final stage of cutting, increase the lathe speed, and take greater care not to make mistakes. Once done, remove the cut pieces carefully.
The final tool on our list, this is a device that you’re sure to have seen in any carpenter’s workshop. A plane is used to cut wood in long strokes that shave off thin strips from the wood. Here also, the primary requirement is a sharp-edged blade.
While sharpening, take care to stick to an angle of 25-degrees for most wood types. For certain soft varieties of wood, you may use a 20 to 23-degree sharpening angle. Also, adjust the depth wheel based on the depth of the cut required.
Finally, plane through the whole length of the wood for making the cut. While doing so, make sure you go in the direction of the grain. This is essential so that you get a smooth surface and don’t damage the wood.
Plane the wood from one side to the other. Typically, cutting wood with a plane requires multiple passes, and the job can be a strenuous one. So be confident that you’re up for it before starting on the task.
Conclusion
And there you have it, folks! The top tools that you can use to cut wood without a saw. Now, that wasn’t too difficult, was it?
Cutting wood is one of the basic operations that any DIY enthusiast or woodwork professional needs to carry out in the course of a project. And while a saw is always the primary choice for cutting wood, it may not always be available.
But able professionals are not daunted by the lack of a tool. Instead, they improvise and make do with what they have. The above were just examples of the many ways in which tools, which we usually associate with other tasks, can be used to cut wood.
A word of advice for those just starting, however. All the tools described here are sharp instruments and need careful handling. So before you set out to cut wood, make sure that you take the required precautions for your safety.
And if you can think of any other tool that can be used to cut wood, then don’t hesitate to let us know. We’re always happy to hear what you have to say.
Till then, cut away! And don’t forget to improvise.
Choosing the right nail size for framing is critical to ensuring structural integrity, fastening strength, and long-term durability in any wood-framing project. Whether you're working on wall studs, floor joists, or roof trusses, using appropriately sized nails—commonly 16d, 10d, 8d, or 6d—is essential to comply with building codes and prevent splitting, weak joints, or nail pops. For example, 16d nails, which are typically 3.5 inches long, are the most widely used for general framing tasks like joining two 2x4s. However, shorter nails like 10d or 8d may be used in specific applications such as sheathing or blocking. In this guide, we break down the most common nail sizes used in framing, their exact measurements, and when to use each type—whether you’re driving by hand or using a framing nailer. We also include a helpful buyer’s guide for choosing framing nails based on your tools and material type.
Nail Sizes For Framing
To begin with, building roofs, walls, and sub-flooring are some areas where framing nails are used, and it's essential to select the appropriate nail lengths for the job. The nail lengths or sizes that are most commonly used include 6d, 8d, 10d, or 16d.
Here, the letter 'd' denotes a penny. This is a part of an age-old system where nails were specified by their lengths and diameters. Naturally, the ‘d’ or penny's diameter gets bigger with the length. So, the next question is which size should be used and where?
If you want to finish the job correctly, it's imperative to choose the perfect nail length. The following are the different sizes that will come in handy while framing.
16d Nail Size
16d is the most commonly used nail size for framing applications. Also known as 16-penny nails, these are 3.5 inches long, but their diameter varies depending on the type of nail.
To explain further, there are two variants of 16d nails - sinkers and commons. The sinkers sport textured heads and have a diameter of 0.148 inches. Whereas, the commons feature flat heads with a diameter of 0.162 inches.
Applications
Both varieties of 16d nails are used in projects related to framing, like fastening wall plates or rim joints. The sinkers come with vinyl, cement, and epoxy coating, which make them more reliable for framing than their counterparts.
These framing nails are all about convenience, mainly because they can easily slide into the wood. And that convenience factor is more crucial when you have to drive in a large number of nails. Besides, their textured head prevents nail guns and hammers from slipping, thereby ensuring user safety.
On the contrary, the commons are not coated and, as such, should not be used in high moisture areas or places that are prone to rust. While framing interior walls, you will need framing nails that are not too long or wide, so that you don't face any difficulty pushing them in.
That's the reason why 16d sinkers are the perfect option in this case. On the other hand, for exterior framing, you'll require galvanized nails to prevent rust. Other than that, the 16d is also the most suitable nail size for 2×4 framing tasks and installing joist hangers.
10d Nail Size
The 10d galvanized nails are exactly 3 inches in nail length and have a diameter of about 0.148 inches. That being said, this size is ideal for fastening two board faces that are flat, since the nails do not penetrate deeper into the boards.
The rule of thumb while using 10d nails, is that the area should always be three times the diameter of the nail. Also, do not replace the 10d with nails having a lesser diameter. However, you should install these nails in a way that no nail edge is less than 0.75-inch.
Applications
If you are looking for the appropriate nail size for framing roof truss, or trimming doors then 10d nails are the best choice. Furthermore, they are also used in framing studs, for instance when you are doubling wall studs or floor joists that are overlapping.
8d Nail Size
To state simply, 8d nail size for framing is used where larger nails are not necessary. These are generally 2.5 inches long, while their shank and the head diameter is about 0.134inches and 9/32 inches, respectively.
Also, like 16d nails, the 8ds come in vinyl-coated sinkers and uncoated commons varieties. Moreover, the sinkers are marginally narrower and often the better of the two choices.
Applications
8d nails are appropriate for all kinds of siding materials. These nails are used to attach sheathing, furring strips, subfloors, and any other material which does not require bigger nails.
Apart from that, they are also used for toenailing as well as joining wall plates. However, when using them, make sure that the nails are arranged in a way that they will penetrate the stud.
6d Nail Size
Last and also the least, 6d nails are shorter in nail length and have a smaller diameter compared to other framing nails, making them suitable for small interior projects only.
These nails are only 2 inches long with a 0.12 inches shank and 17/64 inches head diameter. You can find two kinds of 6d nails on the market and these categories include box and common. So, pick the type as per your requirements.
Applications
The 6d nails are primarily used for joining flat woods and nailing the subfloor and finish floor. Also, you can use this for small-scale wood projects as their small size and diameter ensure less chances of surface damage.
Framing nails are typically arranged in a row to load into the magazine of a given nail gun, usually specified by the length of the nails. As such, it is always necessary to make sure that the nail gun is compatible with the nail size for framing. You can do that by buying from the same brand so that the nails can seamlessly fit into the magazine.
Even though most types of nailers support all of the above nail sizes, you should always check the manufacturer's specifications before purchasing one. That said, framing nailers come in two different varieties - clipped head and round head, to meet different project requirements.
Also, some of them have magazines with a steep angle towards the striking tip, enabling it to fit in tight spaces, depending on framing and structural applications.
Conclusion
Now that you have a fair understanding of the correct sizes that can be used for framing, we hope you can apply this new-found knowledge accordingly. Also, always remember that nail sizes for framing must go hand in hand with the materials you will be using on a project.
Ideally, the nail should penetrate the board and attach it to the other board, and as such, you should consider the thickness of the materials used. Often, you may have to buy more than one size so you can apply the correct nail required for a specific purpose in the framing projects.
On that note, we have come to the end of our guide, and we hope you can confidently get on with your work.
Let us know in the comments section if you have some tips to share. And stay tuned for more such informative pieces.
But you also need another important thing - a fuel to run the power steering system of the car. This is where the power steering fluid comes in. It is a hydraulic liquid, which allows for the easy transmission of power from the wheel to the steering mechanism of the car.
Another key function of this fluid is to ensure and maintain the smooth working of the mechanism by protecting and lubricating all parts of the system. Long story short, this fluid moves your car.
In its absence, not only does your car face serious operational problems, but the entire steering mechanism is also compromised.
But what color is this fluid? And how do you recognize what it indicates?
If you are left wondering, read on to learn all about the colors of power steering fluid and put your doubts to rest!
What should the ideal color of a power steering fluid be?
As a defining characteristic, color plays a major role in understanding power steering fluids.
They come in a variety of hues that differ greatly from model to model, or brand to brand. You may have a number of questions: is your steering fluid of the color it is supposed to be? Has it changed since the time you bought it?
These are questions that befuddle the consumer while handling a new vehicle. A simplified answer would be: even though the color of the fluid varies from one manufacturer to the next, the most common ones are pink, red, or clear.
However, an important point must be kept in mind in order to avoid problems in the functioning of your car. The color is prone to change, and this is the indication that you must pay attention to.
A change of color from red, pink, or clear to black or brown is a surefire sign of contamination. It means that the fluid may have become dirty and unfit for use. This usually happens due to prolonged use, and it must be replaced immediately to mitigate the damage.
What does a leaking power steering fluid look like?
Leakage in the car is a serious matter and can leave you utterly frustrated and confused. How do you fix a problem if you can’t tell the source? The fluid could be anything: your auto-transmission fluid, or instead, your power steering fluid!
Most manufactured options are dyed pink or red, so as to be distinguishable from other fluids in the vehicle. Others dye it clear, which usually turns yellow upon long-term use. And the former is likely to change into dark brown or black.
So in case you see a yellow, reddish, pink, brown, or black-ish liquid flowing out, there is a high possibility that it is from the power steering system of your car.
Different colors point to different conditions. Knowing the various indications of each color is a smart step towards identifying the underlying issue, and thus, fixing it.
Let’s take a look at the shades.
Light Brown to Black
This particular shade does not mean trouble for your power steering system every time. Such liquids are found even elsewhere in your car. It may be motor oil, which is normally seen around the center of the car. It could also be lube oil if it’s light brown with a stench similar to that of a rotten egg. These leaks are again found in the center or the rear axle.
Light Yellow to Dark Brown
A yellowish fluid is likely to be the brake fluid more than anything else. So while a leaking yellow liquid means all is well with your steering system, you should probably take a good look at your brakes!
However, brown can be super confusing as it could mean any one of the two: brake fluids or motor oil. The trick is to touch and feel the texture. If it’s slippery, it is the brake fluid; motor oil is much thicker.
Whatever its source, a leak is a serious issue especially when it comes to brakes. Not a matter to be taken lightly, a leaking brake system can wreak havoc on your driving and must be addressed immediately.
Red or Reddish
A reddish shade is possibly the surest sign that your power steering fluid is leaking. They are dyed red or pink precisely to stand apart from the other fluids. But how can you be sure?
To correctly identify the problem, first inspect the location of the leak. A leaking power steering fluid is usually to be found under the front portion of the car.
Secondly, in case of leakage, the fluid may also be smeared across the power steering pump, or below the reservoir. If it feels runny and slippery to touch, you may definitively conclude that it is indeed the power steering liquid.
Orange
A leaking orange fluid could be the transmission fluid, one that is likely to be found around the center of your car. The color is between light orange and dark orange, and may also be reddish-brown.
Sometimes, antifreeze leaks mixed with rust may produce a similar color leading to further confusion. However, that mixture is of a thin consistency and does not have a specific location of leakage.
Yellow, Green, or Pink
Bright colors like these are predominantly used in the water-cooling system. Pink can point to both, the power steering fluid as well as a coolant. You can use the location to guide you, as the latter is found around water-pump bearings and the pump gasket.
Your car’s age is an important factor in deciding whether a coolant leak should be a concern or not. An old vehicle is prone to such leakages and it’s only normal. However, if your car is new and faces such problems, then it’s time to consult an expert.
Clear
A clear liquid could be either the power steering fluid or plain water. Excess condensation can lead your air conditioner to expel some amount of water. But this is not something to worry about.
However, if it indeed is the power steering liquid, that could pose problems. To be sure, do the simplest test and touch it. If it does not feel like water but is slightly sticky, it’s a leakage of the power steering fluid.
Top Three Power Steering Fluids
With that, we have covered the essential information on the color of your power steering fluid. And also for your convenience, we have picked out the top three power steering fluids available in the market. Take a look!
Unique friction-free technology for noise-free operation
Advanced formula for exceptional performance and protection in severe work conditions
Excellent low-temperature performance for protection against cavitation
Frequently Asked Questions (FAQs)
What color is the Honda Power Steering Fluid?
Although most power steering fluids are dyed red, pink, or clear, the Honda Power Steering Fluid is of a bright golden hue.
What color should a power steering fluid be?
They vary in color, and have a wide variety of hues ranging from brown and red to pink and clear. Black and dark brown are usually indicators of contaminants.
Are there other ways to detect if the fluid is still clean and safe for use?
Apart from color, the smell is the best indicator. A burnt smell usually means there might be a problem with the fluid.
What color is Maxlife Valvoline Power Steering Fluid?
Most fluids from this brand are dyed an amber hue and are not suitable for Honda vehicles. However, they have a stop-leak feature that prevents leakage from the reservoir.
What color is Dexron II Power Steering Fluid?
Power steering fluids from Dexron also double up as auto transmission fluids and are red in color.
Lastly
Like all the best things in life, a good power steering fluid requires maintenance and care on your part.
To ensure that your car is up and running and that there are no squeaks that go unaccounted for, the power steering fluid must be checked and replaced regularly. Ideally, you should change it every four to five years. Another way would be to switch it up after having driven the car for 50,000 miles.
If you notice a change in color, don’t let it fester. If the fluid turns dirty, brown or black, then it’s probably time to replace it. Keep in mind the brands you use; they make all the difference to efficiency. Reputed brands come with a feature to prevent leakages, thus providing greater safety for both you as well as your car.
DeWalt DW735X is one of the best planers available on the market. But the question is - is it the right option for you?
Honestly, it is not a simple question, and you do have to dig deep to know the nuances of this device to understand if it is a good fit for you. Depending on the kinds of wood that you plane, the level of proficiency, and workshop size, you have to take a call.
The following review will give you a detailed run-through of the best features that this device has to offer. It will also enable you to have a better understanding and help you make an informed choice. We have even included a buyer’s guide at the end, and answered some of your common questions.
Electric planer for wood has powerful 15 amp, 20,000 rpm...
Three knife cutter head delivers 30% longer knife life and...
Why Buy This Product?
DeWalt is a very popular name on the market, and its brand reputation definitely makes this product a safe bet. However, let us tell you that the DeWalt DW735X Planer has a lot more to offer and in this section, we’ll give you a look at some of its best features.
Feed Speed
Well, for everyone who works with planers, we understand how crucial the feed speed is. This item provides 2 options when it comes to feed speed.
The first variant enables you to have a fast thickness planing, and if you need a more detailed and intricate finishing, there’s the second option. One option completely slows down the feed, and the workpiece gets cut 179 times/inch. This leads to creating a very smooth finish.
The second option increases the feed speed, which lowers the cuts to 96 times/inch. This does not create an intricate finish but helps to shape lumber very quickly.
You might wonder if you are going to use the finishing speed much; we thought the same. However, after using it for more than a week, we realized we were using it more often than we expected.
We often found ourselves using it during the last pass of the board to make it more smooth. This helped us cut down on our sanding time.
Dust Cleaning
If you have used planers before, you know how much dust the shavings generate.
To tackle that, this device has come up with an excellent solution. It comes with an in-built blower that is functional in cleaning the wood shavings that get collected on the blades. The blower has a strong airflow, and coupled with an efficient dust collector, it performs a brilliant job of keeping your workshop free of wood shavings.
This blower is very helpful, as it prevents dust and any unnecessary byproducts from accumulating on the blades.
Change Of Blade
Changing the blade seems quite a task, but not if you have the right set of tools!
You get an Allen wrench with this unit, which is useful in loosening the screws, for the blade and the cover of the cutter head. We had to talk about this particular feature because we found it extremely convenient and easy to change the blades.
Once you remove the cutter head, you will find ample space inside it, which makes changing the blade very easy. But what makes this workshop tool stand out is the magnetic attachment on the wrench’s side. It is extremely helpful in making blade removal smoother than usual.
Power
After trying out the product for a couple of weeks, we can say that it is pretty simple to use. But besides ease, the power and accuracy of planers are quite crucial when you decide on buying one.
It is important to ensure that your device has enough power so that you do not end up tripping the breaker because of overloading or face a thermal shutdown. To run tests on it, we tried a variety of hardwood like mahogany, oak, and ash.
After thorough testing, we can say that this planer works quite well. And right at 15 amps, it displayed enough capacity to pull through and plane each and every hardwood with ease. We were able to plane almost 75 feet of 2.5 inches mahogany to 1.5 inches without facing any trouble.
Accuracy is another aspect that we were concerned about since it is a very crucial part of the planing process. If the board is not flat after you are done planing it, what's the point?
This product is brilliant when it comes to accuracy. It allows you to very easily make small changes of depth with the oversized hand wheel.
For every revolution of the wheel, you will see an added 1/16th inches of depth. If you keep moving the wheel, it can give you a maximum of 1/64th of an inch of depth.
Also, the cutter head is put on a four-threaded post, thereby balancing the movement well. There's hardly any snipe that you will notice with this model. The 3 blade cutter spins at 10,000 RPM, and because of this, you can easily achieve a good cut.
And if you opt for a lower finishing speed, the wood gets a look that is so smooth that you can totally skip the sanding process.
Gear Box
The gearbox allows you to enjoy 2-speed levels. You can choose to go for the 96 CPI (Cuts Per Inch) option or the 179 CPI setting.
The first setting allows you to cut the hardwood fast but remember that in this setting, the wood will have a rough surface. However, if you put the planner on 179 CPI, it will take a long time to plane the surface, but it will leave your board with a very smooth finish.
The option to adjust the speed is a great thing as it enables you to enjoy some versatility. However, if you keep it in the higher CPI setting, it will lead to more wear and tear on the blades.
What Could’ve Been Better?
Despite the brilliant performance of this device, there are a few issues that need to be addressed as well.
Firstly, we noticed that the noise level of the planer is quite high, and some people might actually find that sound pretty bothering. We measured the noise level, and it was 126 decibels.
If you do not have much idea about decibels, let us tell you that, in general, a rock concert generates about 120 decibels of sound.
That being said, the box comes with a clear set of instructions about the high noise level. It also comes with the suggestion of using ear protection when the machine is in use. Also we have to mention that it is a little on the pricier end.
However, we have to say that even if the price is steep for the performance it delivers, it is quite a good bargain.
Now that you know about the features of this product, we will delve a little into a few other considerations that you should have before buying a planer. It is important that you look into these aspects before you decide whether you should go for this item.
Let’s take a look.
Durability
Durability is one of the major considerations when you are choosing a planer. We always suggest that when you are investing in a product, it is better to go for one that lasts longer, even if the price is a little high.
Choose one that has a strong base and a heavy-duty body structure. A durable product is one that you can rely on when you have to plane hardwood. Then you will have to spend minimal money and effort to keep it in good shape.
So, the extra amount that you invest in getting your hands on the product gets compensated with the low expenditure on maintenance. Also, you can concentrate better on your work without having to worry about the machine breaking down or similar mishaps.
Type of Knife
When buying planers, be careful with the kind of knife that your unit comes with. Mostly, these devices have either spiral-shaped, segmented or straight knives.
If you are a frequent user, we would suggest that you go for one that comes with a disposable knife. This way, even if the current one loses its sharpness, you can always replace it with a new one.
Each type comes with its own set of pros and cons and you should select one that suits your planing needs.
DeWalt DW735X Planer
Are There Any Accessories Included In The Kit?
With this device, you get an extra pair of blades and also 2 support wings. You can attach these wings either to the front or the rear portion to add some extra support to it.
Honestly, these two sets of accessories are great to add on. Moreover, if you feel like adding some more support accessories to your planing kit, even that can be done. Their mobile thickness planer stand is also a great addition that you can purchase.
The quality of this stand is better than the others that are available on the market.
Can It Be Installed By Beginners?
Honestly, it is so simple that even a beginner can set it up very easily and can start using it in a matter of a few minutes. All the blades are already pre-installed in the device when the package arrives. So, you hardly have many installations to do by yourself.
To start the product, you simply have to put about an inch of the board into the end of the planer and just lower the cutter head. All you need to do to get the best results is to just start it! It will reveal its magic right after.
Is The Product Easy To Use?
When it comes to usage, it scores very high because it is extremely simple to use. This item comes with 2 gauges, and both of them are very easy to work with. The gauge is put in place to act as a visual reminder of how thick your board is finally going to turn.
The removal gauge that it comes with shows the exact amount of thickness that it will remove. It also shows the maximum amount that the device can remove without the board breaking. The gauge also reveals the final thickness that your hardwood board will reach once you pass it through the planer.
However, if you feel that you do not need the readings, the gauge can also be very easily removed. All you have to do is loosen the screws and remove them along with the gauge marker.
DeWalt DW735X Planer Verdict
Despite a few drawbacks, we felt that the device was pretty stellar on multiple fronts. If you are not a pro at planing woods, this can be an ideal option for you as it is very easy to get it installed.
Moreover, because it is extremely easy to clean, we can safely say that it will not give you a hard time. Now that you have gone through the review, go ahead and try it out.
What did you like the most about the DeWalt DW735X Planer? Let us know in the comments section below.
Have you just stumbled on the idea of waterproofing surfaces through epoxy?
Recently, the popularity of using epoxy for covering materials has resurfaced. Hence, we thought about sharing some information about working with it.
When it comes to epoxy, most people think of it as only an adhesive. Apart from its brilliant gluing capacities, epoxy is also an excellent coating material. It can be an overlay on anything from a bathtub to your kitchen floor to reduce corrosion and damage.
However, its quality as a waterproofing material remains lesser-known. And, with proper techniques, epoxy can become an instant favorite for the job.
If you are one of those people who have questions about the water resistance of epoxy, hop on to get your answers. Also, check out the new project ideas to start one as soon as possible.
On that note, let us begin unraveling the queries on epoxy!
All You Need To Know About Waterproof Epoxy
Is Epoxy Waterproof?
Let's start by answering the burning question. Yes, when used properly, epoxy can make a surface water-resistant. Moreover, using a layer of epoxy can create a barrier against corrosive chemicals.
Because of its waterproofing capabilities, epoxy is often used as a coating on floors of commercial buildings. Even swimming pools have an added layer of it as a beneficial sealant.
However, you need to be very careful to buy the correct epoxy. Generally, the claim of being a waterproof epoxy is mentioned on the label of a bottle. Hence, picking up an already tested epoxy would give you much better results.
Try to look for a water-based epoxy or waterproofing epoxy for your intended job. If possible, it's always good to consult with an expert present at the store to get their opinion about the product.
Having said that, we do think that epoxy is seriously underrated when it comes to waterproofing surfaces. Sure, you might have to experiment a bit, but it will be a worthy project.
How To Properly Use Epoxy For Waterproofing?
To ensure appropriate waterproofing with epoxy, here are some points that you should note:
Clean The Surface Properly
People often end up blaming the waterproofing capabilities of epoxy due to improper application. Before you start the application, it's essential to clean the surface thoroughly. This includes getting rid of dust, oil, and water.
Moreover, it's necessary to let the surface be absolutely dry. Many people try to waterproof a wet surface, but we would suggest against it. Also, as you will need to apply multiple layers of epoxy, make sure not to get dirt between them.
Health Of The Base Material
Even though epoxy is a strong sealant, the health of the base layer plays a vital role in lasting capabilities. You cannot expect a cracked wooden floor to maintain the same level of integrity as a brand new surface. Hence, you may want to fix the base material before applying the epoxy.
This is especially important for wooden surfaces, as they tend to get damaged sooner. Besides, you may want to look for more flexible epoxy options to make the process easier.
Proper Application Of Epoxy
One of the most common mistakes committed while waterproofing with epoxy is the application of a thin layer. Every epoxy comes with instructions about the adequate amount that needs to be used. In the case of waterproofing, this is usually a thick layer to make the seal extra tight.
Additionally, you may need to apply multiple layers of epoxy to make it fully effective. Hence, make sure to check the application instructions before buying the materials.
Moreover, choosing the correct application tool is also quite vital as it may affect the amount of epoxy that ends up on the surface. So, be sure to lay it on thick for better water resistance.
Choice Of Epoxy
On your visit to the hardware store, you will be greeted with numerous types of epoxy resins. All of them might look tempting, but you will need to find the one that will work best for you. Hence, a handy tip from our side is to know more about the base material.
We suggest you pick up an epoxy that is either water-based or is meant for waterproofing. Manufacturers often mention it on the bottle. Additionally, you may also look for the features stated on the packaging. Also, make sure to check the type of surface that works for the particular epoxy.
Proper Curing Time And Environment
Usually, most epoxy resins take around seven days to cure. However, it will depend on the type of epoxy that you are buying. After the application is over, it needs to receive a proper environment for curing. Adhering to the instructions gives anticipated results, and you wouldn't need to reapply epoxy for a long time.
Advantages Of Using Epoxy For Waterproofing
If you are new to using epoxy, you are at the right place to know about its advantages as a waterproofing material. Here are some of the strongest points about epoxy that you should know about:
Works With Various Substances
Are you tired of buying different sealants for various base surfaces? Epoxy comes as a miracle since it can work with numerous materials. It works well on wood, metal, plastic, and even fiberglass. Some even use it on bare concrete or outer walls of their houses as a waterproofing layer, and it seems to do the job.
You may need to experiment with the thickness of the coating and the application technique to get it right. But, it will most likely be a long-lasting sealant on most surfaces.
Easy To Use
Epoxy is a fuss-free substance, and it is easy to use even for a DIY beginner. It can be applied with a brush, roller, or any tool you may find comfortable. Besides the usual protection measures needed to work with it, there aren't many requirements.
Most manufacturers clearly state the instructions. However, the only thing that needs to be perfect is the curing time and temperature. But that’s pretty easy to follow, so you don’t really need to worry about anything.
Corrosion Resistant
An epoxy wouldn't just give you a waterproof surface. Alongside, you will also get the benefit of corrosion resistance. This feature prevents damage-causing chemicals from getting to the base material, and is especially helpful for things like wood which are easily affected by harsh substances.
Moreover, epoxy also helps to delay the usual wear and tear seen on a surface. This is particularly true for waterproofing outdoor surfaces like swimming pools or lawn furniture, as they may get easily damaged from heat and rain.
Durability
A prominent feature of epoxy resin is its durability. With proper curing time and environment, you practically create a long-lasting hard layer. Also, epoxy doesn't require frequent reapplications. Even busy flooring may only need a touch up every 3-4 years. Hence, the lasting protection of epoxy makes it a perfect choice for those who detest a yearly chore.
Projects For Epoxy Waterproofing
If you are a DIY-er, then you must always need a new project. Hence, to get you started, here are some items that benefit from epoxy waterproofing.
Swimming Pools
Swimming pool surfaces always need waterproofing as the treatment chemicals and heat can cause lasting damage. So, covering it with an epoxy layer will prevent most of the probable damage. Also, frequent reapplications after 3-4 years will keep the pool healthy and good-looking.
Commercial Or Personal Flooring
Floors tend to get damaged due to many things, and serious ones can cost you a lot. Hence, applying a thick layer of epoxy can protect against damage, especially from water or other liquids. Moreover, it's great for wooden floors as the thick layer also prevents damage caused by excessive pressure or sharp objects.
Kitchen Countertop And Floor
When it comes to household damage, the kitchen is one of the most common places to drop things. Most of us have experienced our hearts stopping when the fork drops on the beloved wood flooring. But a proper application of epoxy can put an end to it. Moreover, it will keep your surfaces stain-free even if you mistakenly drop a bowl of tomato soup.
Epoxy Resin Frequently Asked Questions
Here are answers to some further questions that you may have in mind while waterproofing with epoxy.
How Waterproof Is Epoxy Resin?
Even though we cannot tell you the exact waterproofing capacity of epoxy, the substance is definitely resistant to water. On application of an adequate layer of it, the surface wouldn't be affected by moisture or liquid. Moreover, epoxy also prevents chemicals and corrosives from seeping into the surface.
Will Epoxy Resin Waterproof Plywood?
Yes, epoxy is one of the best ways to waterproof plywood. However, while buying the epoxy, make sure to check if you can use it with wood. The epoxy works as a laminate on wooden surfaces and helps to deter water for a long time. Also, it provides one of the smoothest surfaces by filling out any holes or cracks.
Is Epoxy Resin Suitable For Outside?
You can use epoxy to waterproof outdoor surfaces. As most epoxy is UV stable, the coating does last long. Nevertheless, you will have to ensure that the epoxy layer gets cured properly for the waterproofing to work.
Final Words: Should You Go For Epoxy Waterproofing?
To give you a simple answer, yes, we would definitely recommend going for waterproofing by epoxy. This great substance has surprised us with its capabilities. As more people come to learn about its versatility, we’re sure you’d love to test it out on new projects.
Moreover, we appreciate the fact that it's a readily available substance. Most hardware stores contain one or more variants, and the salesperson will surely guide you to find the right one. Also, it leaves a pleasing glossy surface that looks wonderful!
However, you must remember that working with epoxy requires some precautions. This includes wearing a pair of thick gloves, goggles, and a respiratory mask. You can also check the packaging for more specialized instructions.
Now, it's time for you to go and find a surface that you would love to waterproof. In case of any queries, come back to us, and we will surely help you out.
A cordless drill is undoubtedly one of the most important tools in a DIYer’s arsenal. As such, it becomes crucial to choose a top-quality model.
Over the years, cordless drills have become significantly popular because of their versatility and high efficiency. Meaning, most DIYers prefer using them to conventional corded models. However, choosing a suitable unit that is durable and compactly designed is not all that simple.
There are quite a few essential things to consider, and with the availability of numerous options on the market, the selection process can get a tad complicated. So, to help you in the quest of purchasing a quality cordless drill, we have compared two exceptional models from two best-selling brands on the market: Makita and Dewalt.
These two brands have established solid goodwill with their wide range of power tools; hence, they are the top choice for DIYers. Without any further ado, let’s find out which one is better.
Makita vs Dewalt Drill
Before diving into the differences, let us take a brief look at the history of both brands so that we can understand how they have attained popularity.
Makita-built motor delivers 250 in. Lbs. Of max torque
Matika is a very popular Japanese power tool brand that has been operating since 1915. It was founded by Mosaburo Makita in Nagoya City in Japan.
During that time, it specialized in the manufacture and repair of motors. However, as time passed, it started taking an interest in other areas and designed its first power tool in 1958, a portable electric planer.
Soon after that, it started producing other power tools such as circular saws, groove cutters, and electric drills. Finally, in 1978, it released its first cordless drill, which was considered one of the best in the early 80s.
Then, by 1985, it set its foot in the US by opening an assembly and manufacturing plant in Georgia. And as of 2022, Makita has its manufacturing hubs in over 50 countries all across the globe.
Its high-quality products and top-notch after-sales service have made it one of the leading brands in the power tool industry. This is why to compare the best models we have included a drill from this brand.
High performance motor delivers 300 unit watts out (UWO) of...
As far as Dewalt is concerned, it was founded in 1924 in the US by Raymond Dewalt.
The first product from the brand was a saw called wonder worker, which could be configured in 9 ways. Apart from this, the brand also dealt with the manufacture of jointers and mortisers.
In 1992, a series of portable power tools were launched by the brand with the aim to target professional woodworkers and residential contractors. And after 2 years, they introduced cordless tools, which included the two most powerful models at that time.
Naturally, the 5 3/8” cordless saw and the 14.4-volt cordless drill/driver were extremely popular.
Fast forward to 2000, it bought two companies, the Emglo Compressor Company and the Momentum Laser to further increase production. Unsurprisingly, in 2001, it became one of the best-selling brands of power tools and other accessories.
Since then, it has embarked on a new journey by introducing its first lithium-ion tools while the brushless motor was added to the lineup later in 2013.
Different Types of Drills
These are the most common types of drills available on the market.
Drill Press
A drill press falls under the most powerful category of drills. It is stationary and used to make numerous holes in one go.
The biggest advantage of using this drill is that it can create accurate holes, making it suitable for several projects. So, you will find that it is mainly used in factories and workshops.
Hammer Drill
This kind of drill functions quite like a jackhammer. It utilizes punch motions in order to drill through tougher materials, like metal, concrete, or stone, which a conventional drill can’t get through.
Drill Drivers
As far as drill drivers are concerned, they are the most commonly used ones, and they are highly versatile in their operation. Not only can they drill holes, but they also work as a driver to loosen and tighten screws.
These drills are ideal for being used at homes for a wide range of purposes, including setting up furniture and drilling walls. With drill drivers, you can easily change the screwdrivers and the drill bits as per the requirements of the material you are working on.
In this section, we will review and compare both models to find out which one performs better and which brand has more credibility. We decided to choose these two models because they are considered highly functional and versatile, and appropriate for renovating homes.
So, without wasting any more time, let’s jump right in!
Mechanical 2-speed transmission (0-500 and 0-1,900 RPM) for...
BL Brushless motor delivers 440 in.lbs. of Max Torque
Accurate, versatile, and equipped with a slew of important features, the Makita XFD061 is an affordable option suitable for nailing DIY projects easily. Boasting a top-grade brushless motor, this model is perfect for those looking for a drill with a flawless power-to-weight ratio. So, let’s dig a little deeper.
Key Features
Speed: 1,550 RPM
Weighs 3.8 pounds
Extreme protection technology
Built-in LED lights
Metal gears and gear housing
Brushless motor
Why Did We Like It?
According to us, the main highlight of this product is its Extreme Protection Technology. This helps the product resist dust and water when used in tough job site conditions, thereby ensuring its longevity.
It weighs under 4 pounds and is one of the lightest models on the market; hence, you can use it for extended periods without any hand fatigue. Not to mention its soft rubberized grip handle, which further adds to the comfort and ergonomics of using this unit.
Apart from this, it features a 2-speed transmission, allowing you to use it for a wide variety of applications. Coupled with this is a 530-inch-pound of maximum torque, ensuring that it offers up to 50% more speed and power and work per charge.
As far as the battery is concerned, it is highly efficient and comes with overload protection, which protects the battery from overloading and overheating. It comes with built-in LED lights with afterglow for illuminating the job site when there is no other form of lighting available. Lastly, it is backed by a 3-year warranty.
What We Didn’t Like About It
During our usage period, we found out that the battery takes an hour to charge, which is a little longer than other options in this price range. We were also a bit disappointed that it comes with a bag and not a hard case. Apart from these two issues, the product works perfectly.
Now, we will be taking a look at the Dewalt DCD777C2. This brand is one of the most popular brands of power tools globally; hence it doesn’t need any sort of introduction. As far as this product is considered, it is a true testament to the brand’s quality. It features a lightweight and compact design and is suitable for working in tight areas for extended periods.
DEWALT drill with brushless motor delivers more run time...
This power drill is compact (7.52" front to back)....
Key Features
Weighs 2.6 pounds
Measures 12.5” x 3.75” x 9.81”
Torque: 500-inch pound
Speed: 1,750 RPM
Why Did We Like It?
We were quite impressed with the various practical features of this product. It sports a brushless motor, for starters, which means you can expect it to offer a longer run time than those with conventional motors. It weighs under 3 pounds and is lightweight, so you can use this model for working in tight corners for extended periods hassle-free.
What’s more, it features an ergonomic grip handle, which is comfortable to hold and offers optimal tool control and ideal balance. Hence, you can use it for longer hours at a stretch without experiencing any hand fatigue. Like the Matika XFD061, this one, too, comes with built-in LED lights, which come in handy while working in lower light conditions.
As far as the power is concerned, it is equipped with a robust motor that can deliver up to 340 watts out. This ensures that it can easily complete a wide range of applications without breaking a sweat. Finally, it comes at an affordable price, which ensures that it delivers excellent value for money.
What We Didn’t Like About It
While testing this product, we noticed that it drains the battery comparatively quicker than the Makita model. Also, it doesn’t feature a battery-level indicator, which is again disappointing. But, other than that, we were mostly satisfied with its results.
Pros
Backed by a 3-year warranty
Lightweight
Sports an ergonomic construction
It comes with an affordable price tag
Supports fast charging
Powered by a robust motor
Cons
Doesn’t come with a battery level indicator
Consumes battery quickly
How To Choose A Cordless Drill?
While purchasing a power drill, you need to keep a few important factors in mind so that you can choose the right model. In this section, we will be taking a look at these features in detail.
Speed
Speed, measured in RPM, is one of the most important factors that you should consider while buying a cordless drill. Less speed is required for drilling holes into softer surfaces and for driving screws, whereas high speed is required for drilling holes into tougher surfaces.
If you are a professional woodworker, you would want to choose a model that features a 2-speed switch and a trigger with changeable speed control. This would allow you to tweak the speed from 0 RPM to the full range as per your needs.
Power
As far as the power is concerned, it is measured in torque. It is nothing but the force that makes the drill rotate. Hence, the higher the torque, the faster the rotation. On that note, we recommend going with a higher torque setting if you have tougher materials for drilling through, like bricks.
On the other hand, if you have delicate materials to drill through, choosing a lower torque setting would be more appropriate. It would minimize the amount of damage done on the surface.
Battery
Another crucial aspect that should be kept in consideration is the battery of the drill. In this day and age, most cordless drills feature nickel-metal-hydride batteries, also known as NiMH batteries. They are small in size but last longer than the traditional Nicad batteries.
NiMH batteries are also known for being less hazardous at the time of disposal than the Nicad variant, as they don’t feature the highly toxic cadmium. Both Makita and Dewalt drills come with NiMH batteries, and they have set the trend for other manufacturers to adopt this technology as well.
Handles
When buying a drill, you should always go with a model that comes with a ruggedly built and easy-to-hold T-handle. Before the invention of cordless drills, most drills would have pistol grips, which were not that comfortable to use.
A T-handle, on the other hand, provides optimal balance and prevents hand slippage from the drill. Plus, they are popular for reaching tight corners, as your hand is in the center, thereby not creating an obstruction.
However, when it comes to driving large screws and heavy-duty drilling, a pistol grip would be more appropriate, as it allows you to apply more pressure.
Tips To Drill Safely
Without a doubt, cordless drills help accomplish projects smoothly and efficiently, but if you are not careful enough and don’t take the required safety measures, accidents can happen. Here, we shall be looking at a few essential tips that you can follow to drill safely.
Wear Eye Protection And Safety Clothing
You must always wear eye protection and safety clothing while drilling. Ensure that you are not wearing heavy jewelry or baggy clothes, as they could come in contact with the drill when you lean over, thereby leading to accidents. And don’t forget to wear safety glasses or goggles to ensure that your eye is protected from flying debris.
Ear Protection Is A Must
If you are a professional woodworker who has to drill daily, then you should probably wear ear protection. An electric drill works at 90 dB, which is sufficient for causing hearing damage. When it comes to cordless drills, wearing ear protection is not mandatory as they are generally very quiet.
Wear Masks
Don’t forget to wear masks, as they are crucial for protecting your lungs. While drilling, you are exposed to high amounts of crystalline silica, which ends up causing respiratory diseases like silicosis. Wearing a dust mask prevents your mouth and nose from getting in contact with the dust, thereby minimizing the chances of catching respiratory diseases.
Having said that, if you work for prolonged periods, then we would suggest using a respirator, as it would provide the ultimate protection against various dust-related diseases.
Select The Correct Drill Bit
In order to drill safely, you must be well acquainted with the process of drill operation. Using a bit that is made of the wrong material can seriously damage the surface you are drilling. If you are drilling a wooden surface, a general-purpose bit would be appropriate.
Similarly, if you are drilling materials made of concrete, brick, or stone, then using a masonry bit would be the way to go. For drilling surfaces like glass, porcelain, or glazed tiles, you would have to choose a diamond or carbide-tipped drill.
Therefore, you should have in-depth knowledge of the various types of drill bits available on the market and the materials they drill.
Pilot Holes
Making pilot holes are essential for getting better results. It prevents the drill bit from slipping off the surfaces and thereby minimizes the chances of damage to the surface.
Apply Steady Pressure
While drilling, you must ensure that the drill is stable and then push it slowly into the surface. However, if you need to apply excessive pressure, that means you have chosen the wrong bit for drilling the hole.
Prevent Overheating
Drilling causes a certain amount of heat due to friction, but you must ensure that it must not get your drill overheated. To avoid overheating your drill, start with a lower speed and then gradually increase it. While drilling harder materials, ensure that you use low speed and keep pausing from time to time to allow it to cool down.
Tips For Maintaining Cordless Drills
Here are a few cordless drills maintenance tips that you can follow to ensure that it lasts for a very long time.
Consider Using Sharp Bits
Try using sharp bits whenever possible, as it drills through the surface of the material easier and faster. Plus, it doesn’t put much strain on the drill as well.
Store Your Drill In A Dry Place
You must ensure that your drill doesn’t come in contact with water, as it can easily rust the motor and the chucks. So, you should always keep your drills in a cool and dry place, like a shelf, where it is safe from moisture.
Clean Your Drill After Using It For Prolonged Periods
Make a habit of cleaning your drill from time to time in order to avoid clogging.
Let It Cool Down
When you are drilling holes through tougher surfaces, make sure that you take small breaks in between to avoid overheating the drill.
Never Keep It On The Ground
You should refrain from keeping your drill on the ground while working on a site project; otherwise, grass, sand, or dirt may enter it, thereby damaging the internal parts. Plus, we strongly recommend reading the instruction manual that comes along with the drill, as it will help you gain clear insights on the maintenance of your product.
Makita vs Dewalt Drill
Does the DCD777C2 from Dewalt come with driver inserts or drill bits?
No, they don’t. Driver insert and drill bits for this model are sold separately; hence we suggest buying a separate screwdriving set and drill bit sets for meeting your requirements.
Does the battery of Makita XFD061 drain when not used for prolonged periods?
No, the batteries don’t drain when not used for prolonged periods, as they are made of lithium-ion. These types of batteries are popular for holding charge longer than older cell technologies. According to some users, they were able to use the drill right away after storing it for months.
Can the Makita XFD061 be used with other Makita used?
Yes, it can be used with other 18 V Makita batteries.
Verdict: Makita vs Dewalt Drill - The Winner
With that, we have come to the end of our informative guide. Both the Dewalt DCD777C2 and the Makita XFD131 are exceptional cordless drill drivers, especially because of their high performance, ease of use, and affordable price range.
Either one would be an ideal choice for those who want to renovate their homes. However, after reviewing and comparing both models in detail, we have decided to go with the Dewalt DCD777C2. It is more compactly sized and lightweight than the Makita, without compromising on performance.
Furthermore, the DCD777C2 features two batteries, which means you don’t have to wait too long for it to charge. Considering all these facts, we have named Dewalt DCD777C2 the winner, even though it was a very close call.
Glues are an essential ingredient to the recipe for perfect DIY projects.
And so, if you’ve been on the lookout for glue for all your quick fixes and DIY crafts, polyurethane glue is the perfect choice without burning a hole in your pocket. As such, crafters love polyurethane glue for its unique formula.
Crafters love polyurethane glues for their versatility and durability. From fixing your wooden cabinets of the living room to mending the fences of your backyard, polyurethane glues work exceptionally well in bonding anything and everything.
Due to the increasing popularity of polyurethane glues, we decided to give it a shot. And so, having used it for a few months, we decided to pen down this guide just for you. Plus, to make things easy-breezy, we’ve also added a buyer’s guide to help you even further.
Without any further ado, let’s dive straight into the deets!
Polyurethane Glue
Polyurethane is composed of polymer compounds that are close kin of epoxies. Also known as PU Adhesive, Polyurethane glues are an excellent alternative for PVA glues.
Having said that, polyurethane glues form exceptionally strong bonds when exposed to moisture. They feature a water-resistant formula, which makes them highly resistant to all elements. As such, they are ideal for outdoor applications.
What we absolutely love about polyurethane glues is their versatility. Unlike wood glues, you can apply this to almost anything you want. From wood, metal to ceramics and foam, you can use polyurethane to create the toughest bonds. For the last 20 years, because of its compatibility with a variety of materials, polyurethane glue has become the go-to glue for contractors.
Not only are these glues shrink-free, but are also sandable and paintable. This glue is perfect for filling challenging cracks and gaps as its formula perfectly wicks in the surfaces to create the toughest bonds that will last for years to come.
As such, these glues are pretty user-friendly. Much like cyanoacrylates, polyurethane glue is cured by moisture. You just need to dampen the surface slightly before applying the glue to ensure efficient bonding.
Moreover, polyurethane glues are available in two varieties, one-part and two-part. The one-part polyurethane adhesive is ready to use as everything is mixed together. Meanwhile, the two-part adhesive requires mixing the formula in precise quantities.
Having said that, the one-part polyurethane is perfect for beginners, DIYers, and crafters, while the two-part one is ideal if you’re a constructor or a professional.
Also, if you notice a light-colored foam appearing at the glue line; don’t fret, as you can easily scrape it away after the glue dries. All in all, these glues are perfect for all the DIYers, crafters, enthusiasts, and even novices.
Features Of Polyurethane Glue
By now, you have a brief idea of what polyurethane glues are. So now, let us hop on to features that make polyurethane glues worth considering.
High Versatility
Polyurethane glues are crafter’s and professional’s favorite because of their high versatility. As such, their unique formula is formulated to get along with a variety of materials. Whether you’ve accidentally dropped a porcelain bowl or somebody broke a wooden stool, polyurethane glue will perfectly mend whatever you throw at it.
Not only is it compatible with ceramics and wood, but also versatile enough to fix metals, rubber, wood, and even plastics. Besides, what we particularly love about polyurethane glues is their custom formulations. As such, you can customize them to meet different requirements.
Extremely Flexible
When it comes to glues, their flexible nature is of utmost importance. Polyurethane glues are perfect for application on those surfaces or areas which demand flexibility because once cured, they become highly flexible. Therefore, they can withstand thumps and vibrations efficiently.
And so, if you’re looking for glues to bond two dissimilar materials, polyurethane glues are an excellent choice because of their high flexibility.
Incredibly Strong Adhesion
Whether you have to assemble your DIY project or mend minor cracks and gaps in the furniture, a strong adhesive is the need of the hour. And, an appealing aspect of this glue is its adhesive strength. Unlike other glues, polyurethane glues form a tough bond even before the drying and curing of the glue.
Not only that, but it also doesn’t require clamping, thanks to its initial bond. As such, manufacturing processes are made easy-breezy. As such, these robust and durable bonds make polyurethane glues perfectly for challenging applications. Furthermore, it also acts as a sealant to seal porous surfaces excellently.
Resistant To Elements
If you have to fix the metal gates or the benches of the backyard, you need glues with excellent resistance. That being said, polyurethane glues are not only great for indoor purposes but also excellent for outdoor uses because of their excellent resistant power.
You can use this to mend whatever surface you want. And because they feature a waterproof formula, you can repair all the outdoor surfaces without worrying about the elements damaging the bonds.
Therefore, polyurethane glues are excellent for outdoor applications because of their ability to withstand heavy rains and high temperatures.
Endless Design Freedom
Looking for a strong adhesive to bond complex materials? Go for polyurethane glues, as they bond anything and everything effortlessly. Whether you have to bond complex objects or join dissimilar materials, polyurethane glues will perfectly bond whatever you throw at them.
That’s not all, even manufacturers use these glues for their lightweight applications. Plus, the bonds are seamless and smooth, which is what we absolutely love about glues. As such, they preserve the aesthetic appeal of your objects and surfaces, which is impressive. All in all, they are an excellent option for all your DIY craftworks and projects.
Pros
Highly durable bonds
Quick setting time
Resistant to water
Compatible with a variety of surfaces
Sandable and paintable
Cons
Toxic formula
Doesn’t cure properly in the absence of moisture
Uses Of Polyurethane Glue
For novices, crafters, and enthusiasts, polyurethane glue is an excellent choice for all DIY crafts and projects because of the incredible adhesive strength it offers. Because it doesn’t require clamping, it is used in construction projects, thanks to its strength.
That’s not all, these glues adhere excellently to even porous surfaces, thanks to their waterproof formula. As such, these glues are an excellent choice for all your crafts and projects because of their versatility and flexibility.
From wood, metal, fiberglass to masonry, ceramics, carpets, polyurethane glue will bond anything you want. Also, no matter what task you have at hand, the diverse variety of polyurethane glues are there to help you out.
That’s not all, they are available in both thick and thin viscosities. As such, the thick ones are perfect for all the large projects as they won’t mess up your surface or projects by running all over them. Moreover, it will also allow the novices to work at their own pace.
Meanwhile, the thin viscosity glue will be perfect for bonding minor challenges and cracks that call for immediate repairs. That being said, it is ideal for enthusiasts and professionals who can work at a quick pace.
Examples Of Application
The excellent adhesion of polyurethane glue makes it perfect for automobiles, as well. Because it is used in the automotive industry to bond a variety of materials, you can use it to quick-fix any damage in your car.
Looking for ways to fix the broken windshield? Polyurethane glue has got you covered with its excellent bonding strength.
Another appealing aspect of this glue is that it can be used to create MDF boards. Too good to be true, isn’t it? Mix wood dust and saw chips with polyurethane adhesive and create an MDF board for your next DIY project.
What’s more, you can use this in place of wood glue because it forms a strong bond and can withstand elements. Plus, you can use this glue to fix broken dishware in your home without worrying about a thing as they are rated food safe.
When it comes to polyurethane glues, Gorilla Original Polyurethane Glue is an excellent choice because it is incredibly strong and versatile. Moreover, the waterproof formula makes it ideal for both interior and exterior surfaces. Plus, it is highly versatile and can withstand extreme temperatures.
Standout Features:
Waterproof formula
Expands 3 times to bond to materials
Usable on both interior and exterior surfaces
Why Did We Like It?
Among all the polyurethane glue available on the market, the Gorilla Original Polyurethane Glue sits atop our list because of its excellent adhesive strength. Its waterproof formula makes it perfect for all minor cracks and fractures.
The versatility of this glue is almost endless. From ceramics, wood to glass and concrete, this glue excellently bonds anything and everything. What we loved about this glue is its easy application. Plus, it is sandable, and so you can sand off any extra glue peeking out from the cracks.
As such, it will withstand anything nature throws at it. Moreover, this 8-ounce glue is long-lasting and will surely last you for years to come. Plus, you need not worry in case of accidental spillings, as this glue is easy to clean. With a dry cloth or paint thinner, you can easily wipe off the wet glue.
Putting it bluntly, the Gorilla Original Polyurethane Glue is a dependable option for all your bonding needs.
What Could’ve Been Better?
All in all, we loved the Gorilla Original Polyurethane Glue for bonding surfaces because of its incredible strength and versatility. Having said that, this glue takes slightly longer to dry.
Although it might be a drawback for those looking for a quick fix, it is an excellent option for those working on large-scale projects. Other than that, this performs exceptionally well.
If you’ve been on the lookout for fast curing polyurethane glue, then Loctite 1390595 Premium Polyurethane Construction Adhesive is a perfect choice for you to consider. Moreover, it is environmentally-safe and usable on a variety of surfaces. Plus, it is waterproof and even cures in cold temperatures.
Standout Features:
High-performance adhesive
Curable even in cold temperatures
Contains no chlorinated solvents or water
Why Did We Like It?
There are a lot of things we loved about this glue; however, the thing that hooked us right was the fact that it is curable in even cold temperatures. That being said, you can use this for sub-floor installation without worrying about a thing.
Another appealing aspect of this product is its excellent adhesive strength which makes it compatible with even construction materials. Not only that, but it is highly versatile, as it can be used on multiple surfaces and objects. From cement-based products, ceramics, drywall to concrete, treated wood, and metal, this glue bonds almost everything excellently.
That’s not all, this polyurethane adhesive can withstand heavy rains, thanks to its waterproof formula. As such, you can use this to fix the cracks of the fences and gates without any worries. Plus, you can also paint this if you wish to.
What’s more, the formula of this glue does not contain any chlorinated solvents or water and is VOC compliant, which is pretty impressive. All in all, it is an excellent option for all your bonding needs.
What Could’ve Been Better?
The Loctite 1390595 Premium Polyurethane Construction Adhesive is an outstanding option, mainly because of its versatile application. However, unlike the previous product, it is messy to apply.
We strongly recommend you use a caulk gun to avoid the mess. Apart from that, it is a good choice for all your bonding needs.
Here is another polyurethane glue that you can use on any surface you want. This multi-purpose glue is perfect for all your minor repairs and DIY projects. Its long working time, along with short clamping time, is matchless. Plus, it features a waterproof formula which makes it ideal for outdoor applications.
Standout Features:
Epoxy-like strength
No-run no-drip formula
100% waterproof
Why Did We Like It?
If you’re a novice looking for a glue that provides ample working time, then this Titebond Polyurethane Glue is your best bet any day. With its long working hours of 20 minutes, you can work at your own pace without worrying. Plus, its clamp time of 45 minutes is a bonus.
Moreover, because this polyurethane formula is waterproof, you can use this to mend exterior surfaces without worrying about nature marring the bond. Not only that, but this glue is compatible with several other surfaces and materials, thanks to its versatile nature.
Whether you have to mend broken stools or fix a porcelain bowl, this glue is an excellent choice for all your needs. Also, its epoxy-like strength seals porous surfaces without difficulty.
What’s particularly impressive is the spout of this glue which makes application smooth and hassle-free. Plus, you can always sand off the excess glue peeking out from the surface. Lastly, such handy features are coupled with an affordable price tag, making it a go-to option for all professionals, DIYers, and crafters.
What Could’ve Been Better?
Although this product does stand out in terms of affordability and versatility, we suggest wearing a pair of gloves while working with this glue. This is because many users have complained about the glue bonding to the skin. Apart from this minor issue, it is an excellent choice for all your DIY projects.
Pros
Provides long working time
Compatible with various surfaces
Easy application
Easy on pockets
Cons
Bonds skin
Polyurethane Glue Buying Guide
Moving on, we’ve curated a buyer’s guide to help you pick the right polyurethane glues for all your tasks. While having a brief idea about polyurethane glue helps to a great degree, choosing the best polyurethane glue is still a daunting task.
Not only is the nature of your task important, but you must also consider certain factors before making a decision. Don’t worry, we’ve gone into the ins and outs and compiled a list of factors that you must keep in mind while buying polyurethane glue.
Adhesive Strength
To choose the perfect polyurethane glue for your projects, you need to consider its adhesive strength. And so, the nature of your task is of utmost importance to determine the kind of glue you need. For all your heavy-duty tasks, glues offering incredibly strong adhesion would be an excellent choice.
Thus, we strongly recommend you choose only those polyurethane glues that offer excellent adhesion to prevent chipping or flaking. As such, they’ll also create strong and durable bonds that will last for years.
Viscosity
While choosing polyurethane glues, you must also consider their viscosity or consistency along with the adhesive strength. For filling minor gaps and challenging cracks, a thin water-like viscosity glue will be excellent.
Meanwhile, if you have to bond large pieces together, a thick viscosity glue would be ideal. The thin viscosity glues are runny, so they aren’t suitable for vertical surfaces, while the thick viscosity glues are perfect for all kinds of surfaces because of their no-run no-drip formula.
The bonding process does not give you any second chances, so we strongly recommend you go for thick viscosity glues.
Curing Time
Not all polyurethane glues are formulated with a short curing time. And so, you must keep the curing time in mind while buying polyurethane glue. The glues with a long curing time will not be a perfect choice for woodworking professionals or constructors. So, a quick curing glue is what they must opt for.
Although this might not be a major factor if you’re a novice who loves experimenting, this certainly is important for professional woodworkers and constructors.
Ease of Use
Before you pick polyurethane glue for any DIY crafts and projects, you must consider its user-friendly aspect. Of course, this factor might not be a priority for professionals but is certainly crucial for beginners.
That being said, we strongly recommend you go for the glues, which are relatively easy to use. As such, they will give you the freedom to work at your own pace.
Shelf Life
Not to forget, shelf life is extremely important. As such, before buying polyurethane glue, you must consider the shelf life of the product. Irrespective of your needs, the glues with a longer shelf life are a better bet any day.
Plus, we strongly recommend you go for those featuring air-tight lids to prevent the air from sneaking into the bottle. This will ensure your product lasts long.
Summing It Up
It’s finally time to wrap up our guide.
To sum it up, polyurethane glues come with a number of perks. From bonding metals to assembling DIY projects, polyurethane glues are essential for all your bonding needs. Not only that, but they are excellent for all your DIY projects and challenging repairs.
That being said, they are one of the best options available on the market. And so, you must make sure to invest in good quality polyurethane glue as it will allow you to carry out all bonding and repairing tasks in a breeze.
With that, we shall take your leave. Hopefully, you’ll be able to pick the best polyurethane glue for your tasks. If not, you can always consider the buyer’s guide for making an informed decision.
Have you recently started working with fiberglass?
Fiberglass is one of the most commonly used materials these days because of its versatility. However, as it often comes in long sheets, you will need to cut or sand it down.
During this process, fiberglass dust is produced, and it's essential to use the right gears to avoid coming in contact with it. As fiberglass is made of fine pieces of glass, exposure to the shards can be pretty painful.
Hence, if you regularly work with the material, it's vital to know about safely removing it from your skin. So, we thought of coming up with this simple guide to help you avoid any serious encounters with fiberglass.
We hope that it will help you out the next time you may accidentally get the shards on your skin. But, to ensure safety, always wear protective gear while working.
Now, without further delay, let's get into it!
How To Remove Fiberglass Safely From Your Skin?
Without wasting any time, let us directly get into the topic. Fiberglass dust is often a pesky problem as it may stick to your clothes from which it might transfer to your skin. But, in most cases, the dust ends up on the skin when protective gear isn't used correctly.
Mostly the fiberglass shards may get to your hands and arms. So, you should always make sure to remove these as soon as possible before the shards come into contact with the face, nose, or eyes.
Let's learn about the right things to do when your skin has been exposed to fiberglass.
What Should You Do To Remove The Fiberglass Dust?
Here are the steps to follow when you have fiberglass on your skin:
Step 1
Immediately leave your work area as soon as you notice the exposure and avoid scratching the place.
Step 2
Use a combination of running water and mild soap to wash the area gently. Also, remember not to scrub it vigorously, as this may irritate your skin. Make sure to remove the dust as soon as possible because prolonged contact can irritate the skin and cause rashes.
Sometimes it’s better to use a washcloth to clean the area to minimize the pressure applied on the skin.
Step 3
If you notice bigger fiberglass shards on your skin, use adhesive tape to remove the pieces until the skin is clear. Additionally, you may dip the body part in a bucket of warm soapy water to loosen the fiberglass shards before cleaning the area with a washcloth.
Some people also suggest applying a gentle hair conditioner on the skin to remove the shards easily.
Step 4
If you suspect that fiberglass dust has entered your eyeballs, flush the eyes with water for 10-15 minutes. Additionally, you may use a cleaning solution meant to remove glass or dust particles from the eyes.
Step 5
As soon as you are finished cleaning, change your clothes. Also, be very careful while doing this to avoid getting any remaining dust onto your body.
Step 6
If irritation or itching persists, seek immediate medical help.
What Should You Avoid Doing While Removing Fiberglass?
As humans, we are prone to making mistakes. So, there are some things that you should never do while removing fiberglass dust from your skin. To start off, it’s quite tempting to rub the exposed area while cleaning the shards. But, this should be avoided as it leads to skin irritation and rashes.
Another thing that you should avoid is scratching your skin when it has been exposed to fiberglass dust, as it might get the shards further lodged into the area. Also, a word of caution, don’t try to use compressed air to remove the dust as it may irritate the skin.
Problems Caused By Exposure To Fiberglass
You may have removed most fiberglass shards from your skin, but some health risks might still arise. Most of these problems are easily solved by a visit to the doctor. However, multiple exposures to the material can turn into serious issues.
Hence, if you face any of these problems, make sure to get immediate help.
Contact Dermatitis
This is one of the most common issues seen in people exposed to fiberglass dust. Rashes and persistent itching are the symptoms of this problem. If not treated in time, the exposed area can often form blisters, or even the skin may peel.
Respiratory Issues
If you aren't careful about working with fiberglass, the dust may get inside your body. Apart from breathing in the dust, touching your face with a hand that has been exposed to the dust may also cause problems. This may lead to respiratory issues and even stomach aches.
Common symptoms include excessive coughing, sneezing, and asthma-like problems. So, if you suspect such an exposure, make sure to visit a doctor immediately.
Tips To Avoid Exposure With Fiberglass Dust
If you work with fiberglass regularly, there are some suggestions that you can follow. Ensuring these protections are in place will drastically reduce the chance of getting exposed to the sharp material.
Here are some tips to reduce exposure to fiberglass:
Dress Up For The Task
Most people get exposed to fiberglass dust as they aren’t appropriately dressed for the job. As sanding or cutting fiberglass releases a lot of dust, you have to make sure to wear the right gear.
Moreover, you should cover your whole body with loose-fitting clothes. Your arms and legs shouldn't be bare. Also, stay away from wearing sandals while working with fiberglass, as if you get it on your feet, it will hurt a lot.
You should also wear a face cover, such as protective goggles and a mask to avoid getting the dust inside your body. In this respect, particulate respirator works well while working with materials like fiberglass. Also, make sure to wear leather gloves to protect your hands.
Prepare For Better Airflow
You must have heard a million times that ventilation is key when it comes to working with certain materials. And, it's quite true for working with fiberglass. Just cracking a window open wouldn't do anything. You should work in a space that has proper airflow.
When you keep the doors and windows open, the dust can travel away rather than sticking to your body or skin. Hence, you should make sure to make the place as airy as possible. Moreover, this would ensure that you are able to breathe better when you are wearing a mask.
Vacuum Carefully
Once you are done working, it's time to clean up all the mess. Using a vacuum is the best idea as it sucks in the dust entirely and makes disposal easy.
A handy trick used by many is to wet the surface before running the vacuum. This is a much better way than sweeping a dry surface that has fiberglass dust. Use a vacuum with a HEPA filter if that's available to you.
However, if a vacuum isn't available, the next best option is a wet mop. Also, it's better to clean up the space before you take off all the protective gear.
Keep Edibles Away
We know that working with fiberglass takes time, and it can be tempting to have your lunch at the workshop. But, you shouldn't make this mistake, as ingesting fiberglass is the last thing you would want to experience. Hence, make sure to keep edibles out of the area while working with this material.
Similarly, smoking should also be avoided while working with fiberglass. The dust may accidentally transfer into your body through the cigarette butt or your fingers, leading to health issues. So, it's best to finish your work, clean up, and then enjoy your food and drinks.
Clean Up Properly
After you have finished working and cleaning up the space, it's time to get yourself tidy. Start by removing your work clothes and protective gear. We suggest you place a towel or a sheet and then put the used clothes on it.
Now, get into the shower and clean your body with a mild soap. Make sure to be gentle on your skin as some fiberglass dust might still be present on it. Also, spend some time flushing your eyes to ensure that they’re absolutely clean.
When it comes to cleaning your work-clothes, it's always better to use a different washing machine than the one used for your other clothes. However, as this isn't always viable, the next best option is to thoroughly clean your washing machine after each time you use it to clean work-clothes.
Removing Fiberglass FAQ
We found some essential questions about removing fiberglass, so here are the answers to those queries.
1. Does Vinegar Remove Fiberglass From Skin?
Yes, vinegar does help in removing fiberglass from your skin. However, we would still recommend you to wash your skin with water before following it up with vinegar. So, start by taking a warm shower or gently rinsing the area exposed to fiberglass.
When you feel that almost all the dust is gone, use the vinegar to re-rinse the area. It's best to use natural vinegar like apple cider vinegar to do this job.
2. Can Exposure To Fiberglass Cause Cancer?
No, there's no evidence that exposure to fiberglass dust will give you cancer. You may get health problems like contact dermatitis or a rash flare, but these problems are easily curable. However, we are yet to know about the consequences of prolonged exposure to fiberglass, so it's always better to have proper protection while working with the material.
Final Words
With that, we have come to the end of this brief guide about correctly removing fiberglass out of your skin. Always make sure to remain calm while doing the job as it helps to avoid irritating the skin. Also, if you are removing fiberglass from someone else's skin, try to be as gentle as possible.
Moreover, if there's a situation where you or someone else have breathed or ingested the material, visit the emergency room without any delay. Just remember that fiberglass isn't life-threatening; with proper care, you should be okay in no time. And do let us know if you have any further concerns regarding removing fiberglass from the skin.
Do you have some old pieces of leather lying around? You can repair these old leather pieces to make them look as good as new.
Or, you might be working on an exciting new project where gluing leather pieces can make it easier to sew them together. You can also glue two leather pieces to create a unique and attractive design. If you know the right method to glue leather, the entire leather project becomes much easier.
All you need is a clean workspace, suitable leather glue, and the right equipment to get started with gluing leather. You have to prepare the adhesive or glue, apply it uniformly to the leather, and hammer it down to let it dry. Depending on the glue, the drying time can vary from a few minutes to a few hours.
You can check out our other article on super glue being used on leather to know about other types of leather patching options. Or, check out another article on super glue working on metal, another application of super glue other than leather.
Now that we've covered the basic steps let's dig deeper to explain how do you glue two pieces of leather together!
An Overview On Gluing Leather
Simply speaking, gluing leather is basically joining two pieces of leather using a smooth adhesive layer. The essential parts of the process include choosing the right leather glues like suede glue, the right tools, applying the adhesive, and perfecting the execution of the project.
It might take some time to get used to the gluing process if you are a beginner. But once you get acquainted with it, gluing leather is quite easy and can be a new skill to add to your leathercraft.
In fact, gluing leather pieces can prove useful before sewing. Or, you can also create new and finished leather products by gluing them to make them flexible and strong.
Gluing Leather: Joining Material Vs. Sewing
You can glue leather for different reasons depending on the requirements of your leather projects. For instance, you can use it as a temporary bond to initially organize where every leather piece will fit before finalizing a design.
Under such circumstances, you can choose light leather glues or adhesives that you can remove easily from leather fibers after the initial planning stage. A common PVA glue will work just fine in this case.
The right glue can also hold the leather pieces in place if you're trying to sew them together to create a new design for your project. Although you might not need a super-glue, make sure to choose strong glue so that the leather pieces won't move once they are put under the sewing machine. You can use an adhesive like the Gorilla Glue for this job.
If you are trying to create a more permanent bond between the leather pieces using glue, contact cement might be your best option. It's flexible, strong, water-resistant, and can permanently hold the materials together. The Barge All-Purpose Cement works well in such leather projects.
Steps To Glue Leather
Step 1: Prepare Your Work Space
You'll need a flat, large, and open workspace, such as a table or a workbench, to glue leather pieces. It might be a good idea to put down some old newspaper on the work surface to prevent any excess glue from falling and ruining it. In that way, you can keep your workstation clean for future projects.
Also, make sure you have enough space on the work table to accommodate all the necessary materials and tools that you'll need for the gluing process. It's best to move the table or desk to the center of the room, which will allow you to move around the table throughout the project without any obstruction.
Once you've made enough room around the desk to work effortlessly, you'll be good to go.
Step 2: Gather The Tools
You'll need some specific tools while working on a leather project that can determine the outcome. Let's take a look at these tools and how to use them!
A. Adhesive And Leather Glue
When it comes to working with leather, you have different types of glues and adhesives available on the market. Some glues are for temporary use, and you can remove them easily and reapply them when needed. At the same time, there are other glues that are more permanent and difficult to remove.
Some of these leather glues expand into a leather material when they dry, while others form a permanent and flexible bond. If you are working with a super-glue, try not to remove it after applying it because forcefully removing it can ruin the leather material.
B. Glue Pot
Even though glue can be an excellent addition to your project, it tends to dry off pretty quickly if you keep it in the open while working with it. That's why you have glue pots that are airtight plastic containers to hold glues and adhesives. So, keep your leather glues inside a glue pot to store them for a long time.
When you want to use the glue, unscrew the airtight cap of the pot, and you can dip the brush inside the glue to apply it to the leather material. Once you're done, screw the cap, and the glue will stay in perfect condition for future use.
When you are used to working on multiple leather projects, a glue pot can be a great tool to prevent your leather glue from expiring anytime soon.
C. Glue Spreaders
When you apply glue to a leather material, you have to be careful to keep the layer as even and uniform as possible. Glue spreaders are flat-edged plastic tools that can make the work of evenly applying the glue much easier for you.
They allow you to apply the glue in a thin layer over the flat leather surface to prevent the glue from pooling on the leather. You need to wash these glue spreaders before reusing them because you need clean edges to spread the glue evenly.
You can also use glue brushes for spreading the glue if you want to apply large volumes of the adhesive quickly on the leather. However, glue brushes are not as precise as glue spreaders and won't help in evenly applying the exact volume of glue on the leather surface.
D. Leather Rougher
Glues adhere better to leather materials and create a stronger bond if they have a rough surface. You can use a leather rougher to scratch up the smooth surface of the finished leather to make it suitable for gluing. The glue will have a better chance of setting into the newly roughed-up leather surface and binding the leather pieces together once it's dry.
E. Edge Clamp
Edge clamps are special tools mostly made from steel with rubber clamp jaws. These jaws are super smooth to protect the leather from damage, and the rubber coating makes sure that the jaws don't leave any marks on the leather surface.
The rubber coating helps to grip the leather tightly and hold the glued leather pieces together without creating a mess while the glue is left to dry.
Some edge clamps can also help in flattening leather and you might find a soft leather layer on the flat jaws of edge clamps instead of rubber. This leather layer prevents any damage to the leather goods.
F. Leather Weights
Leather weights are small devices made of metal that can keep leather pieces in place while cutting, gluing, stamping, or punching them. They are usually made of steel or brass and have smooth surfaces to prevent leaving any mark on the leather if kept on top of it.
If you are gluing or cutting thin leather pieces, they can move quite easily while working. Placing metal weights can help to hold these leather pieces in place so that you can get a stable and more precise cut.
Furthermore, leather weights can help flatten the thick leather pieces so that you can work on an even surface. Depending on your requirements, you can choose leather weights of different sizes that usually range between a few ounces and a few pounds.
You can also use different objects as leather weighs, as long as they have a smooth surface that won't scratch or ruin the leather material. But when you want a well-balanced and highly polished weight, you can try out dedicated leather weights. They might be a useful addition to the tool kit of your leather projects.
G. Leather Shoe Hammer
Leather shoe hammers are mostly applied to hammer down the leather pieces before stitching and even out the sharp folds, while keeping the glued leather materials together. They come with a wide and heavy head made of steel to produce a steady impact on the leather.
These hammers are used quite often while making leather shoes in the shoemaking industry. They are also a popular tool in luggage making, saddlery, and making leather bags.
H. Leather Roller
Leather metal rollers can be effective in smoothing out different layers of leather materials that are joined together using glues. These metal rollers help to manage the thick leather pieces that come with a finished and smooth surface without damaging them.
If you work with glue frequently, you'll see air bubbles and gaps form quite easily within the adhesive layer, leading to tacky results. That's why leather rollers help to smooth out the leather pieces to remove any bubbles or gaps to deliver a fine-looking and finished leather design.
The solid metal roller has a heavy metal cylinder that comes with an easy-to-use handle. When you pull or push the roller, it starts to roll over the surface to smoothen out the leather uniformly.
By applying pressure on the roller, you can ensure that the leather layers adhere tightly to one another while gluing them.
I. Rags And Wire Brush
As you know, working with glue can get messy and old rags always come in handy to keep your workstation spick and span. It's best to use lint-free rags, like worn-out cotton t-shirts or microfiber cloths. They can wipe out any excess glue and help to smoothen your work surface.
A wire brush is a common hardware tool that has sturdy metal bristles and a wooden handle. It is excellent for heavy-duty uses, and you can also use it to roughen up the leather surface while gluing the leather pieces.
Once the surface is more uneven and porous, it becomes easier for the glue to adhere tightly to the material. So, the wire brush basically works as a leather rougher and can be a great alternative to it for your leather work.
Step 3: Prepare Your Leather Surface
As we mentioned earlier, it's easier to apply glue on rougher surfaces because they offer more area to which the glue can stick. When it comes to gluing leather, it's better if you rough up the flesh side to expose all the leather fibers. In that way, glues, like contact cement, can adhere quite nicely to the leather materials.
When you want to stitch the pieces together or want the leather to have a high tolerance, you might want to leave the surfaces smooth. But, generally speaking, roughing up the leather using a leather rougher or a wire brush can make the gluing process much more effective.
Other than this, you need to clean the leather thoroughly to make sure it doesn't contain any dirt or debris. If you are working with unfinished leather, applying a deglazer on it, like the Fiebing's leather deglazer, might help remove any grime or impurities from it.
You can also opt for a gentler approach by using a damp, lint-free cloth to get rid of dirt and debris from the leather surface. This method of cleaning the leather is particularly effective for smooth and finished leather materials. Once you've thoroughly cleaned and prepped the leather surface, it's time to get your glue ready.
Step 4: Prepare The Adhesive Or Leather Glue
A. Preparing The Glue
Some leather glues can be quite thick and highly viscous, so you might need to thin them out a little to make them more liquid and free-flowing. Thinning them out won't hamper their strength; instead, it will prevent the formation of a bulky mess once they completely dry up.
You can get commercial thinners made of special thinning glue to thin out contact cement and leather glues for your leather projects. Glues from multiple manufacturers usually have different material compositions, so many brands often sell specially formulated thinners that work with their glues. Try not to mix glues and thinners from different manufacturers because it won't give you the best results.
If you are using contact cement, the general rule is to mix ⅔ of the cement with ⅓ of the thinner to get the most effective results. However, depending on the manufacturer, the recommendations might vary, so it's always best to carefully read the instructions provided on the containers of the cement and the thinner.
B. Storing The Prepared Glue
Once the glue is thinned out evenly, it is ready to be used on leather. If you are using unthinned glue, you can store it in its original tube and apply it directly. But, if you've thinned out the glue or cement, storing it inside a plastic glue pot is a better option.
You can prevent the prepared glue from drying out and enhance its shelf life by storing it in an airtight glue pot. Many glue pots also come with an integrated brush, making it much easier to apply the glue as required.
After you have prepared a large amount of thin glue and want to store it for future projects, glass containers can be a good choice. Glass works better than plastic in maintaining the texture of the glue for a long time. So, properly storing the thinned-out glue in a glass container will allow you to easily use it for upcoming projects.
Step 5: Apply The Adhesive Or Glue
Once you've prepared the glue, it's time to get down to business and start gluing the leather pieces. Applying glue on leather is pretty straightforward and requires minimum effort. First and foremost, you need to apply the glue to the center of your leather piece and slowly and evenly spread it over the entire surface.
If the majority of the glue stays in the middle, it becomes much easier to spread it uniformly to the edges of the leather material. On the contrary, If you start from the edge, it might become more difficult to spread the glue across the entire leather surface.
Also, applying glue directly on the edges might result in excess glue dripping on the tabletop, creating an untidy and messy effect.
You can use a glue spreader to spread the glue in uniform and thin layers from the center to all the edges of the leather piece. If you don't have a glue spreader, a glue brush will work just fine.
Normal paint brushes or the leather glue brush that comes with the glue pot can be good enough for this purpose. If you have a glue container that comes with an integrated glue brush, applying the glue directly from the container becomes quite easy.
No matter which method you use, try to apply the glue on the leather surface as evenly and smoothly as possible. If you are using leather glue, you need to apply it only on one surface of the leather piece.
But, for contact cement, you must apply it on both the surfaces of the leather material. Follow the next step only when you are working with contact cement.
Step 6: Leave The Contact Cement To Dry
When applying contact cement, the adhesive must partially dry out for about 20 minutes before you can join the leather materials. You need to apply the contact on both sides of the leather and allow it to dry to join the surfaces together.
When working with heavy leather pieces that are quite rough and porous, it's best to apply a single coat of cement to establish a strong bond. Let it dry for about 20 minutes before applying a second coat.
The first coat of the contact cement will strongly adhere to the leather, filling the air gaps and pores on the leather surface. Then, applying the second coat will help to create a more even and flat layer to firmly bond the leather materials together. Even though applying a second coat isn't mandatory, it helps to create a more permanent bond while joining the leather pieces.
Waiting for 20 minutes for the contact cement to dry can be a bit of a hassle, so you can use a hair dryer or get the fan running if you are in a hurry. It will effectively speed up the whole drying process, and you might save some time.
Step 7: Bring The Pieces Of Leather Together
Once you've applied the contact cement or glue and left it to dry, you can move forward to joining the leather pieces together. It's essential that you keep the bond as even, tight, and smooth as possible to get the best results and make the leather look aesthetically appealing. You can even use some special tools to get the job done perfectly.
First, you need to hand press the leather pieces together to ensure they line up the way you want. Use all your strength and press down hard on the leather materials. You can use a leather roller to join the flat pieces by rolling it across the leather surface.
It'll help smoothen the leather, remove air bubbles, and push the excess glue towards the edges. With a leather roller, you'll get consistent results with minimum effort.
Furthermore, you can use a shoe hammer with a wide head to hammer down the uneven leather surfaces and join them together. It can also help in getting rid of all the excess air and glue. You can place a discarded piece of leather between the hammer and the leather surface to prevent the tool from leaving any marks on your leather material.
The hammer can help spread the glue or adhesive to the tight corners and curves. It's quite useful in shoemaking and can make the gluing process much more effective.
Step 8: Secure The Leather And Keep It In Place
After you've glued the leather pieces together and evened out all the corners, it's time to secure the whole thing and let it dry. Make sure to keep the glued leather surfaces in place as they dry to create a tight bond.
You can use a leather clamp to hold the glued leather surfaces securely without disturbing them to keep them in place, so they join together beautifully. Or, you can put some leather weights on top of the leather pieces for securing them and preventing them from shifting.
It's not necessary to buy a fancy leather weight to keep the leather secure. Any heavy object, such as books or utensils, will work quite well to hold the leather pieces in place. So, let them dry completely without disturbing them. Just make sure that the object has a smooth surface and it doesn't mar or damage the leather.
You can also try placing a scrap leather piece between the weight and the freshly glued leather to prevent leaving any scratch marks on the surface. And make sure that the weight isn't too heavy to keep the leather well-protected.
Alternatively, you can use a vise to hold the glued leather pieces together while they dry. A vise comes with teeth having an additional leather layer and can certainly be used as a leather clamp. However, be careful while applying pressure on the vise so that it doesn't ruin the leather underneath or alter the position of the glued surfaces.
For consistent results, using a clamp or leather weight can be your best option to secure the glued leather materials.
Step 9: Clean The Excess Glue
Now that your leather pieces are glued together, you need to clean off the excess glue from the workspace before it dries. A lint-free cloth works best to clean glue from your work desk without ruining the surface. If the glue has already started to dry up, it might be best to use a damp cloth to remove it.
In addition to this, you can rub off some of the contact cement and glue using an eraser. Make sure to rub off the excess adhesive gently with the eraser, so it doesn't damage or mar the freshly glued leather. If you've been using a paintbrush to apply the glue, wash it thoroughly with some soap and water before storing it.
On the other hand, if you use a glue pot, make sure there's no excess glue dripping along the sides of the pot. Clean the screw cap of the glue pot to remove all the excess glue so that you can easily unscrew it for future use.
Step 10: Store The Remaining Glue
Once you've cleaned all the excess glue from your workstation and washed the tools, it's time to store the remaining glue safely. If you use pots and cans with built-in brushes, keep the contact cement upside down so that all the content stays at the top of the container. In that way, you can prevent the adhesive from drying out when you unscrew the container.
Most often, the adhesives dry around the top of the container, making it almost impossible to unscrew the airtight cap. By keeping them upside down, you can enhance their shelf life and use them for a long time. You can also place the container inside a sealed zip-lock bag, so the adhesive won't spread all over your work desk, even if there's a leak.
If you're storing prepared or thinned-out glues, it's better to use a glass container instead of a plastic glue pot. It helps retain the moisture for a longer time and maintains the right texture of the glue. You can use small airtight mason jars for safely storing the glue.
Step 11: Give It Time To Dry
Finally, the hard part is over, and now it's time to relax as the leather pieces are left to dry. Depending on your choice of glue, it can take a few minutes to a couple of hours to dry completely.
Some contact cement and heavier glues can even take up to 20 to 48 hours to become completely dry. So, whatever you do, try not to move the leather pieces and let the glue do its work.
You can use various methods to join leather pieces other than gluing, such as riveting, snapping, stitching, and eyeletting. But gluing is the most cost-effective method that has been proven time and again to produce excellent results.
How Do You Glue Two Pieces Of Leather Together Final Thoughts
We come to the end of our guide on how to glue leather pieces together. As you can see from our article, you can glue leather materials before sewing them or creating a brand-new design. Whatever you choose to do, you can achieve excellent results by using the right gluing technique.
Anyone can glue two leather pieces together, but it takes the correct technique and tools to create a durable bond between the leather materials. You have to choose the best glue or contact cement to get the most effective results, so follow the steps that we've mentioned above, and you'll be good to go.
Make sure to keep your workstation clean at all times to avoid creating a mess or ruining the leather materials. Stick to the basics of gluing leather and you’ll have nothing to worry about.
On that note, we’ll sign off. Until next time!
You will need all the right tools to drill holes and a back mount bracket to install the battery-operated push button unit at an accessible-height outside the main door. Follow the instruction manual further to place the doorbell chime receiver and connect the transmitter within the compatible wireless range.
Without doorbells, how would your guest announce their arrival? If your electrical system is already in place, you might want to avoid hardwiring a manual doorbell to it. And to eliminate this problem, you can choose to get wireless doorbells.
On purchasing a wireless doorbell, you will also have to learn how to install it. And to help you with that, we have come up with this guide.
Let’s take a look!
Three Things To Remember During Wireless Doorbell Installation
1. The Receiver Must Be Within Hearing Range
The point of a wireless door chime is to hear it when it rings. And to ensure that happens, you must place the receiver at a place where the wireless doorbell can be audible. It should be audible from your lawn or backyard as well.
In case the door chimes are not audible, consider purchasing extenders, and you will be able to hear the chime from anywhere on your property.
2. Receiver Should Be In The Range Of The Transmitter
If you do not have experience working with electronics, you might not know what doorbell transmitters are. Well, there’s nothing too complicated about them. A transmitter is what carries the signal from the doorbell button to the receiver. To make things easier, you might install a number of doorbell transmitters that can be easily accessed from anywhere in the house.
But, as we have mentioned before, wherever you install the transmitters, make sure that the receiver is within range of the wireless doorbells you are installing.
3. Install Extenders If Needed
For people who are trying to install a wireless doorbell system for their big mansion or large office space, a doorbell extender can be of great help. It can easily increase the range of the wireless doorbell.
If you are wondering how that works, let us explain it to you. An additional transmitter will carry the signals from the doorbell to the receiver, even from a long distance. So, even if the receiver is far from the door, the chime unit will function as effectively.
Steps To Installing A Wireless Doorbell System
Step 1: Plugging In Wireless Doorbell Chime Units
To begin with, you will need to locate a 120V outlet which needs to be near the door. You might need a higher or lower outlet capacity as well. To know the perfect requirements, read the instruction manual that comes with your wireless doorbell.
Also, when installing wireless doorbell chime units, it is essential that you place them strategically to make sure that the ringing can be heard from all areas. If you take our suggestion, go for the front hallway, as that provides a direct line of sight to the front door.
Step 2: Putting The Battery In The Push Button Compartment
For this step, you will first have to get your hands on a flathead screwdriver. Once you have it, put it to use and open the battery door casing on the push button unit. Then proceed to insert the batteries that come with it.
While at it, take proper caution and check twice if the battery has been placed correctly and is facing the right direction. Once done, it’s time to put back the battery door casing.
Step 3: Choosing The Right Location For the Push Button Unit
During a wired doorbell installation, it is an absolute must that you choose the right height. In general, you cannot go wrong if you keep the height between 44 and 48 inches for the doorbell push button. This will make accessing the doorbell easier for your guests.
To make the process more smooth, try placing the push button on the doorframe side and not on the hinge side.
Step 4: Time To Put The Push Button To The Test
Once you are done placing the push button near the door, it is time for you to test if it’s functioning properly. To confirm that the placement is right and the transmitter is catching the signal properly, press the push button.
If you hear an audible ring, you have done a good job so far!
Step 5: Mark The Screw Locations
To finally put the push buttons in place, you will need a back mounting plate, which comes with the package itself. Follow the steps mentioned in the doorbell instructions manual to make sure that you mark the drill hole locations correctly.
Not to mention, you might come across a push-button unit that makes use of the back of the housing as a plate. In that case, use the flathead screwdriver to open the unit and then proceed to mark the drill hole locations.
Final Step: Installing The Push Button Unit
The last step is to drill pilot holes in the wall that are not more than half the diameter of the actual mounting screws. Then proceed to attach the mounting plate and ensure that the mounting screws holding the plate are properly tightened.
Once the screws are tightened, the push button will be properly installed, and you can start using it.
What Are The Common Problems With Wireless Doorbell Installation?
1. Poor Signal Transmission From Push Button To Chimes
With a bit of research, you will know that unplasticized polyvinyl chloride (uPVC) or metal can hinder the transmission of radio signals. Because of this, your signal range might get limited, and the connection between the push button and the chime box might be affected.
So, if you have a uPVC or metal door, or window, it is best that you place the push button far from it. This might get really difficult if you have metal studs on the walls of your house. If you have installed the push button in front of the metal studs, there is no option but to relocate the button somewhere else to improve transmission.
2. Ineffective Chime Ring
You might find yourself in a pickle when the doorbell stops chiming or might be left wondering “why does my wireless doorbell keep ringing?”. This mostly happens when the push button unit has run out of power or when the chime’s outlet is malfunctioning.
To fix this problem, you will have to start by removing the chime unit from the electrical outlet. Once you are done doing that, put another device in place to check if the outlet is getting power. If this device is not functioning as well, you will have to check the circuit breaker and fix the power outlet.
Another common problem that users face while installing is placing the battery incorrectly. Wireless doorbell batteries are quite small in size, and people often confuse them with another type. So, before you insert batteries, take some time to ensure that you are using the right ones.
Also, before coming to the conclusion that something might be wrong with the chime control button, double-check your battery placement. It’s not uncommon for users to install it backward. If you have done the same thing, flip it and put it in its right orientation.
3. Low Chime Volume
To make it convenient for users, most wireless doorbells now come with a volume control option. So, according to your requirements, you can turn the volume up or down. And when away from home, you can even consider turning the sound off completely.
To know how to make these adjustments, make sure you read the manual carefully.
Tip
Many times, people change the security codes on their wireless doorbell system by mistake. Make sure to enter the right security code; otherwise, your doorbell will fail to chime.
4. Battery Needing Frequent Replacement
The lifespan of a doorbell battery depends on the surrounding temperature of the area in which the device is placed. For example, if you stay in a cold climate and the temperature falls below 41 degrees Fahrenheit, the batteries are likely to degrade sooner. This is especially true for the small push batteries that go in doorbells.
To sort out this issue, there is no other option but to replace the batteries from time to time. As you cannot adjust the weather conditions, we suggest you plan on changing the batteries in the doorbell more frequently during winter.
Warning
Take special care to ensure that the battery unit is always dry and in no way collects moisture. If the unit gets wet due to snow or rain, there is a high chance that the battery terminals in the doorbell unit will rust faster.
In that case, replacing the batteries won’t be enough; you will have to consider changing the push button unit. In the worst-case scenario, you might have to replace the entire doorbell system.
How To Install A Wireless Doorbell Final Words
Installing a doorbell is no difficult feat and can be done quite efficiently if you follow all the steps that we have mentioned above.
Once you are done installing it, play around and select a chime tone of your choice. If you have two receivers, make sure you select different sounds for both. This will help you understand when to answer which door.
If there are issues that you run into after the installation is over, troubleshoot them at the earliest. In case you face any difficulty fixing them on your own, we suggest calling a professional for help. And if things still don’t get better, check if the electrical outlet is functioning properly.
Airless paint sprayers have significantly improved the process of painting large areas over the years. As such, it is imperative to choose the right model.
Unlike traditional rollers, using a paint sprayer offers a ton of benefits. For starters, it creates less mess during painting while it helps in achieving an even application without much hassle.
However, with the availability of a ton of options on the market, choosing the right model that is durable and delivers precise results might not be that easy. So, to make things easier, we bring you two exceptional models from Graco, one of the leading manufacturers of top-quality paint sprayers.
According to DIYers and professional painters, the X5 and the X7 paint sprayers from the brand are the best-selling options currently available on the market. For this reason, we have provided a detailed comparison between these two so that you can finally decide which one to purchase.
Firstly, Graco is the leading manufacturer of paint sprayers in the United States. It is a billion-dollar company that makes paint sprayers from the consumer level to advanced spraying equipment.
Now, coming to these two products, they are under the consumer brand, Magnum. We found that they are made in the US and have 770 service centers spread across the country. Both are highly functional and help achieve even finishes with minimum overspray, which is why they are popular among DIYers and professional painters.
Magnum X5 vs Graco X7 Differences
Despite being products of the same brand, both these models are different from each other in terms of functionalities and other important features. In this section, we will be looking at some of the major differences between these two products so that it helps you choose one over the other.
The Graco X5 can spray up to 0.27 gallons of paint in a minute, whereas its counterpart can spray 0.31 gallons in a minute. This clearly shows that the X7 model is slightly ahead of the former in terms of spraying capacity and coverage.
Below is a comparison chart that will help you understand the differences between the two models better.
Graco Magnum X7 Graco Magnum X5
Maximum tip size: 0.017”Maximum tip size: 0.015”
Flow rate: 0.31 GPMFlow rate: 0.27 GPM
Hose: 100 feet longHose: 75 feet long
Weight: 26 pounds Weight: 19 pounds
Dimensions: 19” x 15” x 37”Dimensions: 14.5” x 12.75” x 19”
As you can see, there are quite a lot of differences between the two models. Even though the differences might not seem significant, it can drastically affect the results.
You will find that the Graco Magnum X7 is much bigger than the Graco Magnum X5 in size, making it an ideal choice for professional painters working on heavy-duty projects. Naturally, it is a bit heavier than the Graco X5, but you can move it around your project hassle-free, thanks to the built-in wheels.
While the Graco X5 supports a maximum hose length of 75 feet, the Graco X7 supports a maximum hose length of 100 feet. This means that the Graco X7 is a notch ahead in terms of mobility as well. However, as far as the power is concerned, both models deliver a similar output.
That said, to make things easier for you, we have reviewed both the Graco X5 and the X7 in detail in the next segment. You would be pleased to know that it was only after extensive research and testing that we have provided detailed reviews.
Just right for DIY Homeowners and Remodelers looking for...
Ideal for projects up to 10 gallons in size, allowing you...
It comes with fully adjustable pressure, which gives you the liberty to control the paint flow as per the project's requirements. This makes the product highly efficient, keeping the overspray to a bare minimum.
We should also mention the robust stainless steel piston pump, as it lets you spray unthinned paint at high pressure. Meaning, unlike most paint sprayers on the market, you don’t have to go through the hassle of diluting the paint with water before spraying.
Another advantageous feature of the product is its suction tube, which directly sprays from the paint bucket. It comes in handy when painting large projects but as far as the usage is concerned, Graco guarantees that it can spray up to 125 gallons per year.
Apart from this, it features a flush adapter, which you can easily connect to a garden hose for easy and quick cleaning in case of clogging issues. Hence, you can efficiently use its 0.38 mm nozzle, which is good enough for nailing medium to light painting projects.
Moving on, it supports a hose length of up to 75 feet. So, it is ideal for both outdoor and indoor projects, as it gives you the extra reach needed sometimes. Plus, with a flow rate of 0.27 GPM, it offers a stable operation, maintaining optimal painting speeds during your painting sessions.
Now, users worried about durability will love its stainless steel construction, which makes the product less susceptible to daily wear and tear. Hence, it stands the test of time with ease.
Lastly, coupled with the durable build quality is a 1-year warranty, ensuring that you no longer have to worry about leaks and defects; Graco has you covered!
Featuring a 0.43mm-nozzle, it can deliver smooth and precise finishes. This means it is suitable for painting a wide range of surfaces, including fences, decks, and home interior.
It sports a wheeled cart design, making it highly mobile, and allowing you to move it around effortlessly as per the project requirements. Also, it has a pressure capacity of 3,000 PSI, which in our opinion, is sufficient enough to handle the most complicated projects.
With a flow rate of 0.31 GPM, it can paint large surface areas easily. Now, this is something that professional painters will truly appreciate about this product. As far as the build quality is concerned, it is made of stainless steel, making it durable and long-lasting, just like the Graco X5.
What’s more, it can spray up to 125 gallons of paint per year like its smaller brother, thereby being consistent in its performance. Apart from this, it comes with pail hooks, letting you store paint cans on the apparatus of the product itself. This practical feature comes in handy when you need to refill the paint can when working on a large project.
Moving on, one of the best parts about this product is the PushPrime technology, which provides reliable and fast start-up with just a push of a button. This unique technology lets you start painting without any delay or unnecessary hassle. Coupled with this is an adjustable pressure control knob, which allows you to tweak the amount of paint being sprayed.
Lastly, it is backed by a 1-year warranty, which ensures that you don’t have to incur additional expenses for replacement or repairs.
Pros
Backed by a 1-year warranty
Can cover large areas with ease
Delivers precise and smooth finishes
Easy and fast start-up
Durable and long-lasting
Cons
May not be appropriate for painting small areas
Graco Magnum X5 vs Graco Magnum X7 Detail Comparison
Now that we have reviewed both the products in detail let us make a side-by-side comparison, so that you can decide which option would be perfect for you. We strongly recommend reading this part very carefully; otherwise, you might miss a thing or two.
Precision
When it comes to precision, both models deliver satisfying results. Both can cover a wide variety of indoor and outdoor surfaces. However, the Graco X5 is more precise than the Graco X7 because of its compact and lightweight design.
The tip of Graco X7 measures 0.17” in diameter, whereas the Graco X5 has a slightly smaller tip, measuring 0.15” in diameter. Having a larger tip ensures that it can spray more paint on large areas. So, in this regard, the Graco X7 is better than the Graco X5.
Power
Both the paint sprayers feature a maximum PSI rating of 3,000 PSI as far as power is concerned. Hence, both are capable of handling large painting projects that demand precision.
While the Graco X5 has a flow rate of around 0.27 GPM, the Graco X7 has a flow rate of 0.31 GPM. A slightly better flow rate of the Graco X7 helps it paint larger areas within a shorter period of time.
So, if you usually paint big, time-consuming projects, the Graco X7 paint sprayer would be a better choice for you than the Graco X5. Similarly, the X5 would be the ideal choice if you get small projects that aren’t that time-consuming.
Size
The Graco X5 is smaller than the Graco X7 in size. The Graco X5 sports a stand underneath, whereas the Graco X7 is mounted on a wheeled cart, which makes it easier to move around at convenience. Nevertheless, both the models are easily portable, allowing you to take them to the worksite without any hassle.
You should consider the requirements of your project and the importance of mobility while working on that project and then make your decision.
Durability
Talking about durability, both models are made using top-grade stainless steel. This means that you can expect both of them to last a very long time despite consistent usage. Also, one of the best things about stainless steel is that it is anti-corrosive in nature, which means you don’t have to worry about rust formation.
Overall, both the X5 and X7 from Graco can be used for prolonged periods, which is why both the models are highly sought-after by professionals as well as DIYers.
Usability
In terms of usability, both paint sprayers perform smoothly. They are easy to handle and feature the special PushPrime button, which allows for a faster start-up than most other options out there. Also, they are engineered very well to prevent clogging and to reduce overspray.
It does not matter if you are a seasoned pro or a novice venturing on your first painting project; using both the paint sprayers is easy. Overall, both the Graco X5 and the Graco X7 are highly comprehensive, which is why they are such popular paint sprayers in the paint industry.
Let’s face it; choosing the right airless paint sprayer that meets all your project requirements is not all that simple. In this section, we have mentioned a few important points that you should keep in mind in order to make an informed purchase.
Easy Clean-Up
You should always go with a model that is quick and easy to clean.
Usually, painting tools are quite difficult to clean, mainly because they come in contact with a wide variety of compounds that can affect the color and create clogging inside. This is why you have to factor in your cleaning equipment and the frequency of the product’s use. In the case of an airless paint sprayer, the nozzle requires the most attention.
So, if you are a professional painter, you may want to go with a model that allows for an easy and faster clean-up.
Project’s Location
The location of the project is an important factor that you should consider when buying an airless paint sprayer. This is because some paint sprayers are just not appropriate for indoor use.
Since spraying paint involves letting out paint particles into the air, it possesses various health risks. Furthermore, certain models may not be rated for being operated inside the house. Hence, it's best to keep a check on the product listings in order to be sure.
Likewise, you should know the type of power outlets you might have access to in the worksite. Airless paint sprayers need some form of power source to work. Some models have extended reach than others, so you need to keep these factors in mind to ensure that you can paint the project without any difficulty.
Compounds Used
Another crucial factor that will be determining your purchase is the kind of compounds you want to use since not all sprayers have the potential to function with every compound. That said, you should always go with a model that supports almost all the compounds, including thin latex paints and residential paints.
We would strongly advise you to read the airless paint sprayer's operational guidelines before purchasing to confirm whether your compound works with it or not. Also, you might need to dilute your compound a bit to bring down the viscosity level so that it can be sprayed smoothly through the paint sprayer.
Control
Painting projects require broad coverage, when painting fences and walls, or fine precision detailing, when painting cars or staining a cabinet. As such, you should always consider the kind of project in hand, and then purchase a model that lets you finish them effectively.
Nowadays, most airless paint sprayers feature variable settings that let you alter the spray fan’s size to a large width for greater coverage or a narrow width for detailing. So, you should check the maximum and minimum width of the model you intend to purchase to ensure that it meets the project's requirements.
Ease of Use
Ease of use is always a vital factor when you are purchasing any type of tool. And an airless paint sprayer is no exception. Not only does it influence your safety, but also your ability to finish the task efficiently.
When it comes to airless paint sprayers, you should always choose a model that fits in your hand properly. You should be able to work with it for longer periods at a stretch without discomfort or hand fatigue. Therefore, consider the product’s weight and build quality before buying.
Plus, you should avoid going with models that come with a paint container attached to the gun as they are generally very heavy and can hinder your work. It is always best to go with a model that pulls paint directly from the paint tub, as they are a lot comfortable to hold and help in delivering precise results.
Portability
Portability might not be the first feature that comes to your mind when talking about airless paint sprayers; however, it is just as essential as the other features. In airless paint sprayers, portability does not work the same way as it does in other cordless tools, as they need to be connected to a power source to function.
So, for airless paint sprayers, portability generally comes down to their power cords and the paint hoses they feature.
If you are moving a lot while painting the project, consider going with a model that supports over 20 feet long hoses. This will allow you to move around while working without moving the base from one place to the other.
Added Features
Like any other tool, airless paint sprayers also come with some added features that enhance their performance. Most of the models let you tweak the flow of the spray in circular, vertical and horizontal shapes, and the spray fan’s size as well. Plus, with some models, you even switch out the nozzles to produce different effects.
Since buying a paint sprayer requires quite a bit of investment, it is imperative that you learn how to maintain it. Maintaining your paint sprayer will not only make it last longer but also keep its efficiency levels and performance high. In this section, we have shared some tips that will help you maintain your product.
Strain The Paint
You must strain your paint in order to prevent debris from clogging the nozzle and the spraying tips. You can do it by simply pouring paint through the stainers to the paint bucket before spraying.
Look Out For The Valves
Taking care of the valves is a must when it comes to maintaining an airless paint sprayer. A polished valve keeps the sprayer in a better working condition, and aids in priming. Make sure that you clean the valve assembly thoroughly with water and a bristle brush.
However, if you notice the paint sprayer dripping after cleaning it, it is time to replace the valves.
Ensure The Paint Doesn’t Come In Contact With The Motor
While painting, ensure that the paint doesn’t come in contact with the sprayer’s motor. If there are some accidental spills and splatters, clean them up immediately. This is because any paint that accumulates on the exterior surface of the motor starts acting as an insulating cover and can cause the product to overheat.
So, to prevent this from happening, you can use a motor cover while you are working. It will protect the exterior of the motor from paint that might come in contact with it.
Keep The Filters Clean
Ensure that you clean the filter screen of your paint sprayer from time to time. You can use a light bristle brush to get rid of the debris from the screen. Also, there is a filter that prevents debris from entering the gun’s tip; make sure you clean that as well if you see the spray patterns getting distorted.
Don’t Forget To Use Fluids
If you are not going to be using your airless paint sprayer for more than a couple of days, ensure that there is no water inside the pump. Since most of the product’s components are made of corrosive materials like steel, they can easily rust if kept in contact with water for prolonged periods.
Furthermore, make sure that the water does not freeze in the pump; otherwise, it may cause irreparable damage to the paint sprayer. This is why you should use industry-grade and manufacturer-recommended fluids before storing your paint sprayer to avoid these issues from taking place and confirm that it is in good shape.
How To Use A Paint Sprayer Efficiently
Here are some tips on how you can use a paint sprayer efficiently.
Mix The Paint
Mixing the paint allows for a smoother experience when using a paint sprayer. So, ensure that you stir the paint well before spraying. Not only does it prevent clogging, but it also helps in delivering a smooth finish to your project.
Wear Protective Clothing
Make sure that you wear protective clothing so that the paint doesn’t come in contact with your skin. Also, wear face masks to prevent inhaling the toxic fumes from the paint. We also strongly recommend wearing eye protection, as you would not want to expose your eyes to dangerous fumes.
Mind The Weather
You should never paint while it is raining outside, as the water can ruin your project. We would suggest that you keep a check on the weather updates, so that you can plan the painting session accordingly.
Keep A Close A Watch On The Settings
Change the nozzle settings to suit the requirements of the project. A broader setting covers a larger surface, whereas a narrow setting is required for a precise finish. To achieve a superior effect, make sure that you keep the sprayer’s tip 6 to 12 inches away from your project’s surface.
Clean-Up
Nobody wants to leave a mess behind when they are done painting, so clean-up is a must. We strongly recommend you go through the sprayer’s instruction manual in order to clean it up nice and easy. Furthermore, ensure that there is no clogging inside your sprayer; otherwise, you will face problems spraying paint the next time.
Practice
This is important for people who are starting new. The best way to practice is to paint old walls. If you think the results are sloppy, keep trying until you get good at it. This will help you master your skills greatly.
How To Minimize Overspray
For any airless paint sprayer, overspray is a major problem that needs to be solved with ingenuity. Here are tips on how you can minimize or control overspray.
Proper Arrangement
It doesn’t matter if you are a professional or an occasional DIYer; some mistakes are bound to happen because of lack of attention. As such, it is mandatory to cover your furniture and other essential items with tapes, newspapers, or plastic sheets before starting the spray painting process.
Method
Ensure that you keep the spray gun at a distance of at least 25 cm away from the project’s surface. Also, try to hold the tip at a perpendicular angle towards the surface. Keep in mind that in order to achieve a better finish, you need to pull the trigger and move the spray gun from side to side simultaneously.
Size Of The Nozzle
Consider the project’s size and then select the nozzle size accordingly. For example, if you are painting a room, a medium-sized nozzle would do just fine. However, if you are painting the exterior of a home, you will need a larger nozzle in order to complete your task quickly and efficiently.
Selecting the right nozzle for the right job can reduce the overspray to a great extent.
Pressure
You must never apply excessive pressure, as it is one of the major causes of overspray. Always ensure that you are using a device that has an ideal pressure setting; the spray fan pattern should have constant coverage of the project’s surface. To perform this, you can raise the pressure slowly until you get an even surface coverage.
Create Your Own Spray Booth
This is one of the most effective ways in which you can reduce overspray. Creating your own backdrop or a spray booth helps in preventing paint from spreading all over the project. To create a spray booth, you have to tape numerous sections of cardboard together and keep it behind the project you are working on.
Note that the size of the paint booth will vary from one project to the other. Hence, the bigger the project, the larger the paint booth.
Graco X5 vs X7 Comparison
What type of extension cord should You use with the Graco Magnum paint sprayers?
We strongly recommend going with a 12-gauge extension cord that is under 100 feet long.
What are the types of compounds that can be used with the Graco Magnum paint sprayers?
Both the Graco Magnum X5 and X7 can spray a wide variety of compounds, including primers, stains, solvent-based and water-based paint. Basically, all the compounds that can be easily cleaned with mineral spirits are compatible with the two models. Now, as far as the compounds that don’t work are concerned, they include elastomeric, texture-based materials, and solvent-based lacquers.
What is the price of the Graco X5 and the Graco X7?
Both the models are available on the market at under $500.
How to know if a tip is worn out?
In the initial days of purchase, spray tips provide an oval spray pattern. However, with time, the tip starts to wear out, and the oval shape slowly transforms into a circle, spraying more paint into a smaller area.
Another way to know if your tip is worn out or not is if you start observing the effects of tails or fingers. Usually, a RAC V tip, like the one that comes with the Graco X5 and the Graco X7, will last for approximately 125 gallons per year.
However, it greatly varies on the type of paint that is being sprayed by the painter and the pressure at which they are spraying.
What is Graco X5’s and X7’s country of origin?
Graco is an American brand that takes immense pride in manufacturing all its products in the US. In fact, you are going to find logos of the American flag on both these devices.
What are some other popular brands of airless paint sprayers?
Apart from Graco, some of the other popular brands of airless paint sprayers are : –
Wagner
HomeRight
Dusichin
Why does my airless paint sprayer’s motor keep turning off automatically?
When you release the trigger, the motor will turn off. Again, when you pull the trigger to spray, the motor will turn on. This is how airless paint sprayers function; it eliminates the loud constant noise generated by the motor and increases the longevity of the device.
However, if the motor runs when you release the trigger, that means it is not primed.
How often is it required to clean my airless paint sprayer?
With that, we have come to the end of our informative guide. Now, coming to the main question - which model is the clear winner? Well, we would have to say it is the Graco Magnum X5.
There are many reasons why the Graco X5 is a better option than the Graco X7. For starters, the Graco X5 is more lightweight, precise, and affordable than its upgraded version. Not to mention, its 75-feet long hose gives it enough mobility and is sufficiently long for reaching all the surfaces of your project.
Even though the Graco X7 looks like a better option, it is not. The 100 feet long hose does not seem important as it already sports a wheeled-cart design, which makes it easy to move around anyway. Overall, we feel that the Graco X5 is a notch higher than the Graco X7 in most aspects.
So, that’s all for now. Until next time, take care!
The best way to protect your wooden surface is to apply a coating of polyurethane.
Many people like to add a layer of polyurethane to their floors and admire its shiny glossy look. How does that help the floor, you ask? Polyurethane is a water and chemical-resistant product and forms a strong protective layer, preventing any damage to your hardwood floor and furniture.
If you are looking to apply polyurethane to wooden items but have no idea how to proceed, you’ve reached the right place. No need to look any further for queries regarding polyurethane types, coating, drying, and application. We’ve got you covered in this comprehensive guide.
Let’s find out all the aspects related to polyurethane, beginning with its types.
Polyurethane Coating
So, what is polyurethane, and why do people use it for coating surfaces in the first place? Polyurethane is essentially a type of varnish which is applied over wood to make it sturdier and maintain the outer layer. Adding a few layers of polyurethane makes the surface waterproof, heat, and scratch-resistant.
Along with its protective properties, it is shiny and smooth to look at, which improves the beauty of your wooden furniture. If you plan to add a finishing layer at home, applying a coat of polyurethane makes the most sense. Even though there are a few essential methods you should learn about, it is by far the easiest product for DIYers to work with.
Although we think of polyurethane as oil-based, that is not always the case. There are two types of coatings- water-based and oil-based; and their different properties are something that would be useful to know.
Types Of Polyurethane Coating
Oil-Based Polyurethane
Oil-based polyurethane is the more common type of coating used for furnishings. The substance is created by adding polyurethane resin to varnish, which gives it its resistant properties after curing. Also, it has been around for much longer than water-based polyurethane.
Compared to other finishes and varnishes, these have a thicker and oilier consistency. But of course, this depends on the number of coats you choose to add. After application, it leaves an amber-colored hue which adds warmth to woods with lighter shades. These coatings can also be easily cleaned using mineral spirits.
Using this type of polyurethane comes with its pros and cons. While you get a super strong finish that looks beautiful, these dry slower. As a general rule, oil-based paints or varnishes take longer to dry than water-based ones.
And, if you add three or more coats, the process can take you much longer to complete. Also, these contain high levels of VOCs, which is why some people prefer water-based coatings nowadays.
Water-Based Polyurethane
A more environment-friendly option for your surfaces is water-based polyurethane. These are a safer option because of a lower amount of VOCs, which is why people switch from oil-based polyurethane to water-based ones.
Also, if you do not want to wait around for every layer to dry, the water-based polyurethane would be better suited to your needs. It levels easily and dries quickly, allowing you to complete the floor or table varnish in a few days instead of weeks.
Furthermore, you can apply more coats since it dries off quickly. However, even though some aspects of this type of polyurethane coating are great, it has a few drawbacks. For example, the final finish is not as durable as oil-based ones, and it may get damaged by water.
Also, the application of water-based polyurethane raises the wood grain; thus, a few extra layers will be essential to get a smooth finish. And since the consistency is rather thin, you’ll require more layers of coating to get a final glossy finish.
How Many Coats Of Polyurethane Should You Apply?
The number of coats you apply will alter the appearance of the surface and also change the strength of the wood. But how will you know if one, two, or three coats are ideal? One thing is for sure- if the underlying wood has to be adequately protected, multiple layers are necessary.
Another general rule is that water-based polyurethane coats will require more layers than oil-based varnish. But, ultimately, the number of coats will be determined by the surface type, how frequently the surface is used, and the level of protection required.
Hardwood Floors
When it comes to deciding the number of polyurethane coats for hardwood floors, the first thing to consider is the type of varnish. As mentioned before, water-based and oil-based varnishes are very different and will need a different number of coats. But it is also essential to consider the condition of the wooden floor and how often the floor is in use.
If you are applying water-based polyurethane on the floors, at least three thin coats are a must. Because the varnish is thin, note that it will raise the grain of the floor. Three coats should be enough for forming a protective layer, but if you want to go the extra mile, you could add a fourth layer.
It’s recommended to add the layers and buff the uneven parts so that the end result is a smooth and almost reflective floor. If you select an oil-based polyurethane, you could opt for two coats on the hardwood floor. A new and well-maintained surface should not need more than two layers, one for sealing and the second for finishing.
Hardwood floors that need a fresh look after many years of use might need a third coat; however, this is not necessary. Now, for those of you who are confused between selecting water-based and oil-based products, we recommend water-based polyurethane for hardwood floors.
This is because water-based varnishes are much more manageable and can be covered with a new coat if the existing one is messed up. But oil-based varnish can chip, peel and form dents if not handled with care and might ruin the final look of the floor.
Furniture
If you are looking to apply a layer of polyurethane on wooden tables or chairs, there are a few things you should consider. You already know that oil-based and water-based varnishes will have different drying times, but there’s another factor to look into.
When an oil-based varnish is applied, it dries off to become a rich amber-hued color which transforms the furniture giving it overall warm tones. Water-based varnish doesn’t have any color of its own and merely provides a smooth sheen, retaining the color of the table underneath.
Here the decision lies with you to choose based on color differences. The warm hues make wooden tables look richer and beautiful, but it is possible that the shade might not match your room or house decor. If the extra warmth adds interest to your room, the oil-based varnish is a great option. But if you’d rather not hide the natural color of surfaces, the water-based varnish is better.
Applying Polyurethane To Surfaces
There are several ways to apply a polyurethane finish. You can choose to brush it on, spray all over the surface or wipe it into the wood. If the varnish is applied using a brush, there are chances of the brush strokes remaining on the surface, giving an uneven look. This is why many DIYers prefer to spray the varnish on, which is similar to spraying paint on walls.
Spraying is the best method, especially if the surface is not flat. And while it’s easier this way, you get thin layers of varnish; thus, 5 or 6 coats are required. While spraying, it is crucial to work with a steady hand to prevent any drips and spills.
If you hold the spray in one place for a long time, the liquid polyurethane will drip and need immediate cleaning. One drawback of spray painting is the release of harmful fumes, which might not suit people with sensitive skin. If you plan on applying the varnish on a flat surface like the wooden floor or table, using brushes would be the best option.
Stepwise Guide To Applying Polyurethane
Applying polyurethane to surfaces is not a difficult task if you follow the correct method. If you are beginning the coating process, going through this section will help get a beautiful finish for your floor effortlessly.
Check Your Workspace
Before working with polyurethane, the first thing to check is the area and location of the application. Is it a spacious room or a small basement? How well-lit is the room, and does it have windows for ventilation? These questions are imperative for safety reasons and will also affect the drying time of the varnish.
Since most varnishes, mainly oil-based ones, emit VOCs, it is necessary to have good ventilation in the room. To improve ventilation, leave the windows and doors open for fresh air to pass through.
For safety reasons, make sure to wear protective gear while applying polyurethane. Prepare for clear safety goggles, gloves, and a respiratory mask to protect against VOCs and fumes arising from the varnish. Lastly, ensure the work area is well lit with ample sunlight or artificial light. If the light is dim, it will not be possible to spot minor imperfections and brush marks.
Prepare The Floor/Surface
The surface must be well-prepped before applying any varnish. Clear out the room/ area to remove any obstacles for a continuous spray or paint job. If objects or wall decorations are not removed, they may get damaged by the spray or the volatile fumes. Thus remove the room of all wall paintings and light bulbs.
Now that other objects are out of the way, you can focus on the actual area of work- the hardwood floor. The first step is to sand the floor with coarse sandpaper thoroughly. This needs to be done all over the floor at least once. Unfortunately, there is no easy way out of this step, and the results do not look good if this step is skipped.
After the coarse sandpaper, gently rub the surface with finer sandpaper until it is smooth and even to touch. Clear up the dust and bits of wood using a regular vacuum cleaner and wipe the area till it is clear of any remaining dust.
Some people like to mop the floor with a slightly damp cloth, but this is not recommended because the floor will take time to dry. Besides, if some moisture remains in the floor and the varnish is applied on top, there are chances of the wood rotting from within.
This is especially true for oil-based varnishes because they are completely water-resistant and will trap the water with no way to get out and evaporate. But there is no need for concern while using water-based polyurethane. In fact, wetting the surface beforehand will raise the grain of the surface, which can then be sanded down to perfection.
In any case, the floor must be clear of dirt and moisture; otherwise, the polyurethane might not stick properly to the wooden panels.
Seal The Upper Layer Of The Floor
Now, the first layer of polyurethane can be applied to the clean hardwood floor. The first layer is called the sealant because it acts as a barrier between the wood and the following layers of varnish. This layer is always thinner than the rest and can be achieved by thinning the product you’ve already bought for varnishing.
Wood is usually porous, and direct application of thick polyurethane can form bubbles. A sealant covers up the pores on the wood and prevents bubble formation. There are special sealants available on the market which are meant to be applied on their own; however, they are expensive.
And, the same task can be accomplished by creating your own sealant layer, so buying an additional sealant product is not necessary. So how do you make polyurethane sealant? It’s simple, mix two parts of the oil-based product with one part of mineral spirits. Mix it well to get a fluid consistency that flows and spreads easily.
If you are using water-based polyurethane, use the same ratio, but replace the alcohol with pure water. Now that the mixture is ready use a large brush to apply the sealant on the floor using long brush strokes. Try to cover the entire floor without drips.
A good tool for this is a natural bristle brush which leaves fewer brush marks and gives a smoother finish than synthetic brushes. In some cases, the sealant will not adhere to the wood because the stain might be oil-based.
An oil-based sealant shouldn’t have this problem, but a water-based one will need extra preparation. To roughen the floor, you can use steel wool instead of sandpaper to help the varnish bond better.
Apply The First Coat
Technically, the sealant is the first layer that goes on the floor, but the first viscous layer is called the first coat. After the sealant is applied, wait for 24 hours before adding this first coat of polyurethane. After 24 hours or so, the sealant should be dried entirely if the room has access to fresh air.
This is when you can go ahead and apply the first coat. Remember not to create very thin layers with this first coat because this will cause gaps in random places. If you are spraying on this layer, the layers might be slightly thin so take your time to cover each section sufficiently.
And if you prefer using a brush, try to connect the brush strokes and allow them to overlap. This will prevent streaky lines after the brush is lifted. Also, try to smoothen the drips and spills as you go along the floor instead of waiting till the end to fix them.
Depending on the polyurethane base, you will have to follow different steps to complete the remaining steps.
A. Method To Apply Oil-Based Polyurethane
For oil-based polyurethane, the best tools for application are foam rollers or brushes, natural bristle brushes, or soft bristle brushes. Stay away from rough or synthetic brushes, which often leave streaks and do not allow the polyurethane to settle evenly.
Firstly, dip the foam roller or brush in the polyurethane can or tin and remove it, allowing the excess to drip into the can. Do not wipe the brush against the side of the can to remove bubbles or extra product. Doing so will leave gaps on the hardwood floor while applying.
Instead, tap the brush a few times into the center of the tin. Remember that oil-based polyurethane coats are typically thicker, and trying to force them into thinner layers will not give the much sought-after smooth finish.
The number of coats required will vary depending on the purpose and floor type. But two or three coat applications are the norm. Sanding is another step that you cannot miss out on when applying oil-based polyurethane.
B. Method To Apply Water-Based Polyurethane
The first thing you should know is that this type of varnish is much thinner, so there are more chances of dripping and spilling. The best tool for water-based polyurethane would be a foam roller, but you can also use a soft brush or cloth brush. The application method is slightly different from oil-based varnish.
Make sure you apply thin coats of this varnish because heavy layers of moisture-laden product can raise the wood grain. With oil-based coats, it is essential to sand down the first layer, but this is not required when working with water-based polyurethane. For best results, three coats of this varnish should suffice in lesser-used areas of the floor.
If the floor is in constant use, upto four layers would be required. Since the drying time is much faster, the entire project will take a shorter time as compared to oil-based polyurethane.
Sand The First Layer
After the sealant and first coat application, the hardwood floor needs a round of sanding to polish the uneven parts left by the first coat. But the sanding process can only begin after 24 hours have passed after the varnish application. The layer should be dry by this time.
Begin sanding with fine-grit sandpaper using the wet sanding technique until the surface is smooth again. To protect the varnish from chipping off, dip the sandpaper in water often while sanding. Finish by wiping the whole surface with a wet cloth and remove any dust and chipped-off pieces. The surface must be completely dry before applying the next coat of polyurethane.
Add The Remaining Coats
Generally speaking, you can apply more layers of polyurethane than recommended if you think the floor or furniture needs it. But remember to apply the next layer only when the previous one has completely dried up. Also, do not skip on sanding between two layers, especially when using oil-based varnish.
The only case where you can avoid this step is when the layers look visibly smoother and even. Lastly, the final coat needs to be polished, not sanded. This last step will give the surface the shiny polish that polyurethane coatings are known for.
Polish The Final Layer
Sanding the coatings makes them adhere to the next layer and flattens and levels them. But the final layer should be polished to give a shiny and almost slippery look to them. After the previous layer of varnishing, the surface should be left alone, untouched for at least 48 hours.
Use a good quality polishing product that is suitable for applying over polyurethane. It’s better to select a polishing product with fine-grit particles that remove the scratches caused by sandpaper. Dampen a soft cloth, apply some polishing cream over it, and rub the floor in a circular motion.
This should give a smooth and shiny look all over the surface. After the floor has dried, buff it with a dry cloth to finish the process. If the surface appears cloudy, repeat the process until it turns transparent and mirror-like.
Tips For Applying Polyurethane On A Table
While most of the instruction will remain the same as finishing hardwood floors, there are some other things to mention. First of all, try to work indoors as much as possible. Unlike floor varnishing, tables can be moved around the house, and some people like to work in the backyard.
But the problem with varnishing outdoors is that there is increased exposure to dust, smoke, and other contaminants. Even small bugs can stick to the wet varnishing and ruin the finish. That’s why working indoors in a ventilated place like a garage would be better for varnishing furniture.
The best results are achieved on a perfectly flat surface. So, if the table is uneven, you can sand it down using prickly sandpaper. The flatter the surface, the better is the leveling, and the coats glide easily without dripping.
How Long Should You Stay Off The Floors?
Freshly varnished furniture can be stored in the garage or an empty room where no one is likely to touch it. But what about floors? How long before you can actually walk on them? To understand the time required, remember that after drying, the varnish needs a long time to cure. Only then can we say that the entire process is complete.
However, you must have heard that complete curing of wood can take weeks or even a month. The question is- At what time is it safe to walk across the floor and start placing heavy furniture without spoiling the varnish? Let’s find out about both the stages - drying and curing.
Drying
Usually, it takes a minimum of 24 hours for the hardwood floor to dry. At this point, the uppermost layer has hardened, but the layers within are still processing. So, this floor cannot be used for walking and standing and definitely not for dragging furniture across the floor.
It is advisable to keep the room ventilated, so you keep the windows and door open. But if you have small children or pets who might suddenly run into this room, it is better to lock the door. In fact, no one should be allowed to walk on the hardwood floor for at least 48 hours after the varnish.
After 48 hours, you can walk on the floor wearing a pair of soft socks but refrain from moving in furniture just yet. If you walk in wearing shoes or boots or even barefoot, the pressure might leave marks that can not be removed once formed.
Curing
Curing is the process of molecules of polyurethane resin forming irreversible bonds and becoming extremely tough and resistant to change. Curing takes a much longer time than drying; until then, the bonds are not completely hard enough for everyday use.
On average, water-based polyurethane varnish takes two weeks to cure, while oil-based one takes 3 to 4 weeks to cure the same number of coats. Walking on the floor before the curing is complete is a big no-no. The best thing to do is lock the room or avoid it for the entire curing time.
As we mentioned, walking with soft socks should be tolerable for a week-old varnished floor. But walking with boots should be allowed only after the curing time is complete. The same goes for moving in cupboards, tables, and all other heavy furniture.
Working with oil-based polyurethane is a bit tricky. Not only does it take twice as long to cure, but it also dries in two stages instead of just one like the water-based one. In the first step, the light and water-soluble thinners evaporate in the air and leave a tack-free surface behind.
Over the next couple of weeks, the oils in the varnish react with the oxygen in the air and help it harden with time. After all the oil molecules have reacted, a hard protective layer is formed, which is the final stage of the curing process. Note that environmental factors play a role in the speed of curing time.
If the room is moist and humid, the varnish will take much longer to dry and cure. One easy way to know that the curing is complete is when the floor stops emitting odor. As long as you can smell the fumes, the curing process is not yet complete.
How Many Coats Of Polyurethane FAQ
1. How To Sand The Surface Between Polyurethane Coats?
Usually, fine-grit sandpaper should be good enough for sanding after each layer. Dip the sandpaper in water after each scrub so that the polyurethane doesn’t get damaged. When you are done with one layer, make sure the surface is dry before applying the next layer.
The grit of the sandpaper might need to be increased if the wood has a glossy finish. This is because it is difficult for polyurethane to adhere to glossy wooden panels. So, some extra sanding might be necessary before applying the first layer.
2. What Is The Best Temperature For Drying Polyurethane Coatings?
On average, it was found that polyurethane dries best at 77 degrees Fahrenheit. This is approximate and is not the only factor for drying. The room ventilation and humidity have an impact on drying time too. A room temperature of 77 degrees Fahrenheit and humidity of around 50 % are ideal for drying polyurethane coatings.
3. How To Remove Brush Marks From Polyurethane Coating?
Brush marks can be removed by the wet sanding method mentioned in the Stepwise guide. Use fine dry sandpaper and rub on only the parts which need to be leveled out. If the sanding is too intense, it will leave scratch marks of its own. Brush marks could result from applying thick coats, so you could opt for thinner coats to prevent them.
4. How To Remove Air Bubbles From The Coating?
Bubbles on the topmost layer can be removed with the help of mineral spirits. Dip a cloth with the chemical and rub the surface for about 20 minutes. This should get rid of the bubbles on the topmost layer. If this doesn’t work, the layer will need to be sanded and revarnished instead.
Final Words
Here we come to the end of our all-inclusive guide about polyurethane coatings. When using polyurethane, the main thing to remember is that even two coats protect the wood against water, dust, and insects. But getting a beautiful mirror-like sheen requires more than two coats, whether it be water-based or oil-based.
Finally, if you are looking to prevent wooden floor panels or furniture from spoiling due to humidity, oil-based polyurethane is your best bet. But, if you require a quick freshening up of older wood, water-based polyurethane should do the trick.
We hope this guide answers your queries related to polyurethane coatings and their application. For further questions, please ask away in the comments below.
The HVLP and the LVLP spray guns are two of the most popular spray guns available on the market in 2022.
However, a ton of people do not know the differences between these two spray guns. If you are not an expert, we do not expect you to know all the subtle differences since both these guns look quite similar.
So, in this guide, we are going to take a close look at both these spray guns so that you do not end up making the wrong choice while buying one. Our team of experts has extensively tested both these spray guns and have shared the details with us.
After reading this article, we are confident that you are going to know all the nitty-gritty of both these spray guns.
So, without any further ado, let us get right into it.
HVLP vs. LVLP Spray Guns
HVLP Explained
An HVLP is one of the most commonly used spray guns out there. HVLP means “high-pressure-low-volume.” In simple words, these spray guns are capable of producing high volume output using very low pressure.
What this actually signifies is that you basically spend less material while maintaining high color quality. HVLP spray guns are known to produce around 100 CFM at 3-8 PSI.
However, their pricing is a little higher than LVLP guns since they use a lot more compressed air. HVLP spray guns come in handy for people who are inexperienced and for DIY purposes.
Keep in mind - they are not the best choice when it comes to professional purposes as they perform a lot slower than LVLP spray guns. Furthermore, they use larger compressors and often do not work well with thicker paints.
HVLP spray guns save a lot of materials and avoid wastage because of their high volume, which allows the paint to end up only on the surface. Also, they are ideal for projects that demand immediate solutions. Since it is one of the most commonly used spray guns, it means tech support and training are readily available.
Advantages Of HVLP
It is great for beginners and DIY projects
High-quality finish
Less material waste
Appropriate for being used on metallic surfaces
Disadvantages Of HVLP
Requires larger air compressors
It does not work well with thicker paints
Works slower than LVLP spray guns
LVLP Explained
LVLP spray gunsare some of the premium options on the market. LVLP means “low-volume-low-pressure.” This type of spray gun is popular for delivering top-notch transfer rates, which means premium finishes and less waste. Additionally, it demands just about 10 PSI, which essentially means that you are free to use any kind of air compressor with this spray gun.
LVLP spray guns perform best with thinner paints. So, if you intend to apply metallic paints or work on surfaces that are sticky, we suggest going with HVLP spray guns. When it comes to design, finding out the differences can be quite challenging since there is not much. If you have a keen eye, however, you will definitely be able to spot the subtle differences.
Both HVLP spray guns and LVLP spray guns are built ergonomically in order to reduce fatigue levels.
Advantages Of LVLP
More affordable than HVLP spray guns
Uses lower PSI
Works perfectly with waterborne paints
Sprays a lot faster
Does not need a very big air compressor
Disadvantages Of LVLP
Its pattern size is very small
It does not work well on sticky surfaces
HVLP vs. LVLP - The Differences!
In this section, we will delve a little deeper and find out the exact points of differences between these two popular spray guns. You will have complete knowledge of both HVLP and LVLP spray guns after you go through this section.
Transfer Efficiency Rate
The transfer efficiency rate of spray guns varies from model to model; it also greatly depends on the kind of spray gun you are using - HVLP or LVLP.
Talking about transfer rates, LVLP spray guns do a better job as they can transfer up to 80%, which essentially means that there will be less paint wasted. Hence, it makes LVLP spray guns a more environment-friendly option.
As far as HVLP guns are concerned, the transfer efficiency rate is expected to linger around 65% to 70%. Since the transfer rate is lower than LVLP spray guns, it is a less efficient option. A lower transfer efficiency rate basically means more paint is wasted.
However, both LVLP and HVLP are a lot better than traditional spray guns that provide a transfer rate of barely 35%.
Width Of The Fan Patterns
The width of the fan patterns is yet another major difference between HVLP spray guns and LVLP spray. Not only does it affect its overall performance, but it also affects our comfort of using these products.
When it comes to the width of fan patterns, HVLP spray guns are the clear winners as they offer a larger pattern width than what LVLP spray guns have to offer. An LVLP spray gun usually offers a width between 8 and 10 inches which is deemed small.
Even though this might not be the biggest issue for most people, it is worth keeping in mind, less pattern width means more painting time. It becomes particularly more important for people who are starting new, smaller width fan patterns that affect the quality.
Usability
Usability is more of a subjective thing. What seems easy to use for you may not necessarily be easy to use for somebody else. It all boils down to the experiences you have of using a spray gun.
That being said, HVLP spray guns have been on the market for a long time. As we have already mentioned, you are likely to find better training and tech support while using HVLP spray guns simply because they have been around longer.
On the other hand, LVLP guns are quite new in the business, and there is a high possibility that a lot of people have not used this variant. So, when you buy this spray gun, keep in mind that you are not going to find tech support and training that easily.
We would strongly advise you to buy spray guns from a reputed brand as they provide detailed instructions, be it HVLP or LVLP spray guns.
Pressure
The pressure needed to operate both these spray guns is a very prominent difference between them. As the names suggest, HVLP spray guns provide a high volume but a low pressure which means it requires a big air compressor to do the job.
The lion’s share of HVLP spray guns works at around 20 CFM and 50PSI, which implies that you would need nearly an 80-gallon tank. On the other hand, LVLP guns will work between a range of 10 and 25 PSI and 5 CFM, and this is where LVLP spray guns beat HVLP spray guns.
With an LVLP spray gun, you are free to use any air compressor, making them the more suitable option.
Cost
Both HVLP and LVLP spray guns come in different brands and models, so the prices keep varying. You can expect to get the lower-end models of both these products for under a hundred bucks. However, if you are looking for a brand that offers better specifications and advanced features, then you will have to spend more money on HVLP spray guns than LVLP.
The price of a quality HVLP spray gun can go above $500, whereas top-notch LVLP guns barely hit beyond $400. Also, keep in mind that while buying an HVLP spray gun, you will need to buy a larger air compressor as well, which makes it all the more expensive.
HVLP Spray Guns Are Best For:
Both HVLP and LVLP spray guns are some of the best spray guns out there. Not only do they perform a fantastic spray-painting job, but they are also quite efficient. However, both these guns work on different mechanisms, and hence they are perfect for different scenarios.
HVLP spray guns are perfect for people who do not have much experience in spray painting. Since their spraying rate is on the lower side, it is ideal for DIY projects. HVLP guns tend to waste materials, and hence they are not recommended for professional purposes as they increase the cost of the overall project by a lot.
Furthermore, HVLP spray guns require larger air compressors which makes them less mobile. So, it is better to use HVLP spray guns at home rather than on-site.
LVLP Spray Guns Are Best For:
Since LVLP spray guns are not that common, learning how to use them can be quite a hassle. This is why they are not ideal for DIY projects and people who have very little knowledge of spray painting.
LVLP spray guns, however, are perfect for professionals since they require small air compressors and waste a lot fewer materials. Not only are they portable, but they spray super fast as well. All these factors make them the absolute choice for professionals.
The transfer efficiency is like the cherry on top as it makes them the ultimate cost-saving spray gun option for professionals.
Frequently Asked Questions
What are the safety tips I should keep in mind while using a spray gun?
Safety should be your prime concern! It does not matter what kind of paint you are using, you must always go through the instructional manual first. Most of the elements in the paint are toxic, so you need to ensure that they do not make their way up to your lungs, eyes, or skin. Here are a few points to keep in mind.
Wear safety glasses
Wear oversized clothes to fully cover your legs and arms
Wear nitrile gloves
Most importantly, wear respirators
Ensure that you do your spray-painting job in an open area or at least in an area that is sufficiently ventilated.
What should I mix with the material?
You need to thin down the material before using it so that it can easily go through the spray gun. You can mix fluids like lacquer thinner water or acetone with it to make it thinner. Ensure that your material is neither too diluted nor less diluted.
How can I increase the lifespan of my spray gun?
Increasing the lifespan of your spray gun is very easy; you need to clean it daily. Do not jerk the trigger as it may lead to trigger jams. You also have to ensure that you use good quality nozzles and needles.
Furthermore, if you are a user of coarse materials like Carc, then we would suggest you get a spray gun that has a metal body.
How many years does a spray gun last?
If you have bought a good quality spray gun, it should last for at least a decade, provided you take proper care of it. We would suggest you buy a spray gun with corrosion-resistant materials.
What are some of the best spray gun brands?
Some of the best spray gun brands are
Astro Pneumatic Tool
Spray It Up
Campbell Hausfeld
Final Thoughts
There you have it! We hope you know everything about HVLP and LVLP spray guns now. As we have already mentioned earlier, both these spray guns are for different purposes, so there is not really a winner.
If you are looking for a spray gun for DIY projects, go with an HVLP and if you are looking to use it professionally, go with the LVLP. But before we sign off, we would like to share a couple of pro tips with you.
When it comes to paint spray tools, irrespective of the one you choose to use, you need to keep safety as the topmost priority. Long story short, always wear protective gear while undertaking all your paint projects.
Also, any tool will only last long if you maintain it properly. And HVLP or LVLP spray guns are no exceptions. So, regular cleaning and upkeep will help you make the most of your purchase.
We really hope you found this article helpful. With this, we wish to take your leave; see you soon!
Sometimes, a sail on the boat is all you need to uplift the mood after a long day at work, especially with your loved ones.
If you are a boat owner, it is essential to take care of the boat so that it is able to steer through the sea for a long time.
But did you know that the paint of the hull of a boat does a lot more than giving it a fancy look? In fact, it is responsible for keeping away weed, slime, and other organisms that grow under your boat.
However, effectively painting the hull involves a decent amount of expenditure and is certainly time-consuming. So, we thought of helping you out in this process by providing an informative guide, explaining all the nitty-gritty concerning bottom painting a boat.
That said, what are we waiting for? Let's get down to business, shall we?
Is Bottom Painting Really Necessary?
Bottom painting is not mandatory if you take the boat out every once in a while. For instance, if it's kept in a warehouse most of the time and only hits the sea occasionally. You can effectively maintain its bottom by applying a wax coat and cleaning it periodically in such scenarios.
However, if you take the boat out every now and then, you’d dock it in the sea most of the time. In these cases, bottom/hull painting becomes absolutely mandatory.
That being said, painting the bottom is not enough; you must clean it on a daily basis, remove the paint and repaint it with antifouling paint. Doing this not only protects the hull but also makes the boat highly functional.
Antifouling Paint 101
Antifouling paint plays a very important role in saving the boat from all types of water-based damages. It is applied all over the hull from the water line to the bottom. Furthermore, antifouling paint helps in keeping away all water-based lives like weed and barnacles that tend to leach onto the bottom of the boat.
Plus, antifouling paint comes in a wide range of brands, colors, and styles, just like normal paint. However, there are mainly three types of antifouling paint: ablative, hard, and hybrid. The right type of antifouling paint for you depends on the boat and your budget.
What Are The Types Of Hull Paint?
As mentioned in the previous section, there are mainly 3 types of antifouling paints. Let us take a closer look at the functions of these paints.
Ablative Paint
Ablative paints are perfect for boats that are taken out on the sea occasionally or that move very slowly. This type of antifouling paint tends to wear away with the passage of time. Also, it releases a lot of biocides while sailing through the sea.
An ablative paint is also called “self-polishing” paint since it sits very thin on the hull. Overall, painting the hull with ablative paint is relatively easier, less time-consuming, and affordable since there will be less paint to remove.
Hard Bottom
On the other hand, hard bottom paints are suitable for all types of boats that move very fast. They contain a very thick layer of biocide, making their coating very hard and long-lasting. However, with time, this paint too wears away but lasts a lot longer than ablative paint.
Hybrid Paint
As the name suggests, hybrid paint is a mixture of ablative and hard bottom paint. The best part about this paint is that it can be used on the hull of all types of boats.
How Much Does It Cost To Bottom Paint A Boat?
We hope, by now, you are aware of the three different types of antifouling paint and why bottom painting is so important. So, let us now focus on the main question: how much is it going to cost?
The best thing about bottom painting is that you can either choose to do it yourself or hire a professional. That said, like most projects, going DIY will help save money while hiring a professional would be rather expensive but less time-consuming and deliver guaranteed results.
DIY Bottom Painting
Going DIY makes you take charge of the boat. Before starting, plan it all out and note that it will take a lot of time. Also, be careful while painting, as you cannot afford to make too many mistakes. The cost of DIY bottom painting varies widely, but it mostly comes down to the quantity and type of paint you use.
In general, bottom paint is available in one-gallon drums, which usually cost between $20 and $200 per gallon. That being said, the brand and the type of paint also play important roles in deciding the price.
You will require a handful of painting supplies as well, such as goggles, rollers, paintbrushes, breathing masks, gloves, masking tapes, sandpaper, and drop cloths.
The bigger the boat, the more paint you will need. The amount needed per linear foot would be clearly mentioned on the drums of paint. In general, most ablative bottom paints require two coats, whereas customized epoxy bottom paints need just a single coat. Keep these in mind to have a clear estimate of the cost.
Double coating boats measuring 20 feet to 35 feet would require 3 gallons of hull paint.
Single coating boats measuring 20 feet to 35 feet would require 1.5 gallons of hull paint.
Double coating boats measuring 36 feet to 51 feet would require 6 gallons of hull paint.
Single coating boats measuring 36 feet to 51 feet would require 3.5 gallons of hull paint.
Double coating boats measuring 53 feet to 63 feet would require 9 gallons of hull paint.
Single coating boats measuring 53 feet to 63 feet would require 4.5 gallons of hull paint.
Professional Bottom Painting
When it comes to professional bottom painting, it usually starts with a base cost. The professionals determine the base coat after they check the size of the boat. In this day and age, the cost per linear foot is about $25 on average.
However, this is just the price of basic selection; if you want to opt for premium selection, the price may shoot up to $125. If you want to make some additional repairs, then it is going to cost even more.
In general, professionals charge less for larger boats than small boats. The cost further depends on the place where the boat will be painted. Also, painting older boats costs a lot more than new ones, as the professional will need to repair the damages prior to bottom painting.
You are in luck if your boat has never been painted before because it is going to cost the least as the professionals will not need to remove any paint.
Keeping the location and the boat size in mind, these are the estimates that you may end up paying.
60-feet and larger boat: $56 per linear feet + $555 for a premium selection
55-feet to 59-feet boat: $49 per linear feet + $490 for premium selection
50-feet to 54-feet boat: $43 per linear feet + $400 for a premium selection
44-feet to 49-feet boat: $38 per linear feet + $330 for a premium selection
37-feet to 43-feet boat: $34 per linear feet + $250 for a premium selection
30-feet to 36-feet boat: $29 per linear feet + $190 for a premium selection
29-feet boat: $25 per linear feet + $155 for premium selection
Frequently Asked Questions
In this section, we have answered some of the frequently asked questions regarding hull painting a boat. We strongly recommend you read this part carefully.
How often should I paint my boat?
Like we mentioned earlier, if the boat hits the water daily, get it checked every year to know if it needs bottom painting or not. In most cases, it will be required. Plus, if you use the boat for commercial reasons, you would have to get its bottom painted at the end of each season. And finally, if it mostly stays ashore and you take it out occasionally, it will require bottom painting every other year.
What are some of the popular brands of bottom paint?
Yes, it can; however, it is mostly negligible. It depends largely on the paint job; if it's smooth, there should be no problem. Having said that, if there are multiple coatings of antifouling bottom paint on the hull of your boat, then the loss of speed will be noticeable.
Furthermore, ablative bottom paints are meant to shed their coatings over time, so the coating may wear off over time, and weed may begin to grow underneath the hull. In that case, too, the boat will experience noticeable speed loss.
Final Thoughts
Bottom painting the boat is a must if you take it out in the water quite frequently. It protects the boat and also makes it look attractive.
However, when it comes to the cost of bottom painting, it is quite affordable if you know what you are doing, given the wide range of options available out there. Taking proper care of the boat, especially the hull, will make it last a very long time.
On that note, we have come to the end of this informative article. We hope we could provide some clear insights on the cost to bottom paint a boat. For further queries, kindly drop a comment down below.
Are you new to the DIY floor varnish club? Here you'll get information on all things related to polyurethane coatings and varnishes.
Whether you are a seasoned woodworker or just starting a home improvement journey, you are sure to stumble upon polyurethane coating solutions more than once. This is because polyurethane is a perfect finishing product for wooden surfaces.
If you have questions like, "How long does it take to dry?" read this piece till the end, and you'll have many similar queries resolved. We will talk about types of polyurethane, kinds of finishes, drying and curing time, along with valuable tips for getting the best out of polyurethane.
So, let's begin.
How Long Does Polyurethane Take To Dry?
In short, polyurethane takes 24 to 48 hours to dry and 25 to 30 days to cure completely.
Types Of Polyurethane Sealers
All polyurethane coatings or varnish are made of fine polyurethane resins, which can be dissolved in a liquid. You can think of it as a liquid plastic that can be spread on flat surfaces to protect from water, heat, dust and microbes.
There are various types of polyurethane coatings available nowadays, but we can generally classify them into two types - water-based and oil-based polyurethane. Even though both of them provide the same functions, they vary in drying and curing time.
So before discussing the drying time, let's take a look into the characteristics of the two main categories.
Water-Based Polyurethane
Water-based polyurethane is considered to be the safer option between the two since it does not contain any VOCs. Since they don't produce strong, headache-causing odors, they are much easier to work with. Generally, the solution is much thinner; thus, the coatings are paper thin too. Due to the lightweight solution, it doesn't take long to dry and cure.
Another factor that increases the drying time is the presence of water in the mix. As the water evaporates, it leaves only the polyurethane resin on the surface. However, to get an even finish, this type of sealer requires more layers as compared to oil-based polyurethane. Moreover, water-based polyurethane dries off clear and tends to fare better in the long run.
Oil-Based Polyurethane
On the opposite end of the spectrum is oil-based polyurethane. These provide comparatively thicker coatings due to their robust formula. The downside of this dense and oily formula is that it doesn't dry off easily. When it comes to safety and toxicity, they are safe to use for floorings and furniture; however, they do contain VOCs.
Volatile organic compounds in large quantities can be harmful to human health. It can cause respiratory symptoms like runny nose, itching in the throat, sneezing, and skin rashes if precaution isn't taken. These compounds and the oily solution combine to produce a strong odor which is unpleasant to be around and can even cause headaches.
Also, after a few years, you will notice the varnish change to a darker yellowish color which is not the case with water-based polyurethane. We will discuss in detail about the two types of polyurethane and their drying and curing time in the following sections. So make sure you read till the end.
Type Of Finish
Apart from the base of the polyurethane product, features like types of finishes are a contributing factor to the drying time. There are 3 different types of finishes available - high gloss, semi-gloss, and satin finish. Take a look at the 3 types because all of them have a different drying time.
High Gloss
This finish gives a sleek and shiny look to floors. It's suitable for hardwood floors and is resistant to scratches and water damage. They are often used in living rooms or even on wooden surfaces outdoors for their glossy look. Often you will find that these finishes stay longer and retain their gloss for a significant time.
Semi-Gloss
Semi-gloss polyurethane is quite versatile and durable. This is why it is often found on furniture, cabinets, doors and intricate wooden artwork. One benefit of semi-gloss is that it dries faster than high gloss polyurethane. This type of finish does provide some shine, but it doesn't match the slick look of high gloss options.
Satin
Satin finishes in polyurethane products do not provide any sheen or gloss to surfaces. In fact, they look almost like matte-finish most of the time. The little shine they have is subtle, making it look fresh, but otherwise, they have a unique appeal. These types of finishes are the fastest drying polyurethanes available.
Polyurethane Drying Time
Now the question arises, how does one know when polyurethane has dried? Take a look at this table to get a fair idea of the difference between water and oil-based polyurethane drying times.
Water-Based Polyurethane
Oil-Based Polyurethane
Time for next coat
7 hours
24 hours
Dried enough to touch
24 hours
48 hours
Add furniture
2 days
4 days
Add rugs and mats
1 week
2 weeks
Completely cured
25 days
30 days
Drying Time For Water-Based Polyurethane
Water-based polyurethane coating dries up quickly; in fact, they need merely 5 to 6 hours to dry. After 7 hours of applying the first coat, you can walk on the sealed floor without causing any damage. But remember to wear socks while walking because friction and dust from your bare feet might ruin the finish.
If you want to add the next layer or a finishing topcoat, you can do that after 7 hours of drying. After the 24-hour mark, you walk on the varnished floors with shoes as well. As far as moving furnishings into the room is concerned, keep a gap of 48 hours after the last coat to shift anything bulky in.
Pets and children should not be allowed in the room for at least 3 days. There are two reasons for this - one is for their safety, and the other is to ensure the varnish is maintained without scratches and marks.
Drying Time For Oil-Based Polyurethane
As we mentioned earlier, oil-based polyurethane takes longer to dry and cure. After application, it is recommended to keep the surface off-limits for at least a good 24 hours. If you have varnished a hardwood floor, you can attempt to step on it after 24 - 48 hours, but don't walk in with shoes or barefoot. Instead, wear a clean, dry pair of socks for inspection.
It goes without saying that you should keep children and pets away from the freshly varnished surface to prevent any interference in drying. After the 48-hour mark has crossed, the coating should be completely set, and you can take a walk on the floors with your shoes. Wait for another day to add the furniture back since dragging heavy things might damage the finish.
After two weeks or so, it is safe to bring in rugs and floor coverings. However, these are ideal recommendations that might not be necessary for all projects like wall or furniture coatings.
Note - These estimates are primarily valid for a moderate climate. If the humidity of the room is high or there is dampness and moisture accumulation, the drying time will significantly increase. Turning on an air conditioner or dehumidifier of increased ventilation may be required to speed up the process.
How Long Does Polyurethane Dry In Layers
Generally, no one applies only one coat of polyurethane. Even the thickest oil-based varnishes need two or three layers to settle in and show any kind of long term effect. Now, the first layer is the simplest, you just have to ensure the surface is sanded and bits of dust are thoroughly removed by vacuuming.
Next, apply the first layer in a thin coat and wait for it to dry. Once the coating is dry to touch without any stickiness or wetness, it is ready for the second coat. The surface does not need to be cured entirely for the next coat; surface-level drying is enough for the second and third coats.
Difference Between Drying And Curing
Now, there is a difference between drying and curing polyurethane coatings, even though these terms are often used interchangeably. While we discuss drying time, it is essential to understand the definition of drying and curing when it comes to polyurethane.
A coating is said to be dry when the external polyurethane hardens. At this stage, the varnish is no longer wet, sticky or tacky. However, the surface is not ready for use yet because the coating is prone to wrinkling, imprinting, and forming scars even at this stage. If too much pressure is applied, the smooth finish can be ruined easily.
And for curing, we call a surface wholly cured when the polyurethane resins have completely hardened (not just the surface). This happens when varnish has been exposed to oxygen, creating a chemical reaction that causes the hardening of the resins in the coating.
This is the final stage of any application process, and the floor is ready to use after curing. Often, it can take up to a month to completely cure a floor.
Curing Time
Now that we understand what curing is, you might be wondering how long it will take to cure floors and walls.
As we discussed earlier, we know the time required to dry and cure. However, there are certain aspects that we cannot ignore when it comes to a complicated process like drying polyurethane. Take a look at some of the factors that influence curing time.
Factors Affecting Curing Time
Type Of Polyurethane
Since water-based polyurethane solutions tend to be thinner as compared to oil-based ones, they are sure to dry much sooner. If the project needs to be completed within a time limit, water-based ones are your best bet as you can get many layers in little time.
Humidity
A room humidity percent of 50 - 70 is good enough for drying and curing usually. If the moisture happens to be too high, the varnish may not dry easily and will end up damaging the result. If your room suffers from high humidity levels, there are a few actions you can take to counter the effects.
Firstly, you can opt for oil-based polyurethane since water-based ones are more prone to damage by moisture. Secondly, you can install a dehumidifier in the room to help the coating dry quickly.
Temperature
External temperature is one of the most critical factors which can change the drying and curing time. Ideally, a room temperature of 70 degrees Fahrenheit is perfect for optimal curing. If the temperature drops too low or near the freezing point, the polyurethane coating will take far too long to dry.
Also, if drying at a cold temperature, you will notice a thin whitish layer will develop on the surface, which needs to be avoided. And if the room temperature is too high, it shouldn't have a problem curing, but the smooth finish might be compromised due to extra heat.
Number Of Layers
Before starting the application, you'll need to calculate how many layers are required for your flooring. Of course, if you opt for a water-based polyurethane, the number of layers needed will go up. Besides this, the thickness of coats will heavily influence the drying time.
If you use a brush to apply the varnish, the layers tend to be thicker than foam rollers. So, if you want to keep the layers thin, opt for rollers or sprays, which will save a lot of drying time.
Wood Type
This factor might be overlooked often because not many people are aware of the type of flooring. Essentially, if you have hardwood floors, then there can be a variation in drying and curing time depending on the type of wood.
Certain wood types like cedar and rosewood have chemicals that do not allow the complete chemical reaction required for layering. Any kind of interference in the chemical process will increase the time necessary to dry.
Cleanliness
The starting surface needs to be spotless. The first step is to sand the floor to remove unwanted bumps, to create an even canvas for applying varnish. An adequately sanded wooden surface can absorb the polyurethane solution quickly and thus allows for quick drying and curing.
Tips For Drying Polyurethane Coatings Faster
There might be occasions when you are running short on time or don't have the patience to wait for weeks for the coatings to dry. In such circumstances, there are a few methods that can help to increase the rate of drying. Let's see what these tips and tricks are -
Add A Thinner
A simple solution for thick polyurethane coating is to thin it down using solvents. You can add naphtha to the polyurethane solution because it helps the coating to dry faster. Naphtha has a higher evaporation rate than spirit or turpentine, making it an excellent choice for thinning varnishes.
Once you add the thinner, mix it well and pour it from a height to understand the consistency. It should be fluid and run efficiently. This lighter solution will not hold well on brushes, so a foam or sponge roller will be required to spread it across the surface. Try this method and see for yourself how much quicker the coating tends to dry.
Apply Heat
Polyurethane does not handle cold temperatures very well. It's not like the coating will get damaged by low temperature, but the drying time will become prolonged. This is especially true in frigid climates without a heating system or coating the floor during the winter season.
To overcome this issue, people use artificial heat to warm up the room to assist in drying the polyurethane quickly. While some people use powerful hairdryers, others use portable heating devices or heating lamps.
Do note that these methods are effective for drying the varnish speedily but not for curing it. The speed at which the floors cure cannot be increased even with artificial heat assistance.
Decrease Humidity
Similar to low temperatures, humidity also increases the hours required for drying. One of the many solutions to this issue is to use a dehumidifier in the room. After the coating for the entire floor is complete, you can bring in a dehumidifier and suspend it from the ceiling. It could even be attached to the walls to work overnight and remove the excess moisture from the air.
Even an air conditioner can do the same job. Set it at low humidity adjustment at room temperature, and it works just as well. If you know the humidity in the home is always on the higher side, you might want to consider the oil-based options. This is because they do not get affected by moisture in the environment the way water-based ones do.
Apply Thinner Layers
Applying thin layers will definitely save you a few extra hours of waiting for the floors to dry. It would help if you used a larger roller that can be dipped in the pan holding the varnish. This kind of tool will ensure you cover a large area at once. Apart from that, you can also remove the excess coating by running a dry roller over the floor.
Prepare The Surface
Even before you open the polyurethane can, the floor should be sanded and vacuumed. You can use any kind of sandpaper to flatten the uneven pieces of wood which might be sticking out. Then grab a vacuum and remove all the dust and debris. Once this is done, your surface is ready for the first coat of polyurethane.
Taking these efforts are essential because smooth and clean wooden panels allow the polyurethane to adhere readily. And this step will noticeably reduce the drying time.
Conclusion
The drying of polyurethane was one topic we really wanted to address because so many people seem to be confused about how to use them. Many people new to DIY home improvements also had requested for drying times of different types of polyurethane.
We hope we were able to resolve all your questions related to drying and curing polyurethane. If you have any further queries or would like to give a few suggestions of your own, the comment section is always open.
That being said, coating and varnishing your own home should not be a daunting task. Just skim through this article whenever you get stuck with applying polyurethane to the floors, and you'll get all needed for the next project.
Whether building a new house or fixing existing furnishing, we try to make sure that flooring and walls last a long time.
The question arises - how does one look after a wooden flooring or furniture and make the most of it? Well, a few obvious ways are to keep the wood clean, avoid spills, vacuuming often, and repairing whenever required.
However, there is another simple solution called epoxy paint which might be one of the best ways to maintain a wooden floor. Essentially, epoxy paint has two parts of coating - one part resin and the other part catalyst, which combine to form a hard and durable layer. This Paint can be used on concrete as well as all kinds of wooden surfaces like floors and tables.
In this article, we will tell you how to select the right kind of epoxy paint. We will also guide you on the correct way to apply it to your floors.
So, without further ado, let's get started.
Epoxy Paint For Wooden Surfaces
Commonly, people choose epoxy paints as an additional coating because it allows the grains of wood to shine underneath the durable coating. It also acts as a protective covering and keeps wooden furniture and floor free of pests, dust, and moisture.
Types Of Epoxy Paint
Epoxy paint is available in two varieties - oil-based and acrylic. Both of them have similar functionality and are chemically resistant and durable. They are also known to withstand temperature changes and extreme weather, making them an excellent option for coating outdoor surfaces.
That being said, there are a few differences between these two which we will discuss further.
Oil-Based Epoxy Paint
One of the biggest benefits of using oil-based epoxy is its ability to leave behind a film of layer, which creates an even surface. After you finish applying the coat and leave it to dry, a layer remains behind that can be sanded down easily compared to acrylics.
You know how wood develops small cracks and becomes porous over time? Well, this can cause moisture to seep into the wood and damage it from the inside. That's a perfect example of why you would use an oil-based epoxy coating. Since it stops moisture from entering the surface, it finds many uses in commercial and residential buildings.
Apart from that, it's perfect for covering roofs and floors to repel water and insects which ruin wood over time. Many people prefer to use oil-based epoxy to cover the flooring of places that are known to dampen over time. An example of this is industrial flooring that generates large amounts of vapor or steam or a bathroom with a constant flow of water.
Besides, you can use it on smooth or rough surfaces like plastics, metal, sheet metal, concrete, and wood. If you have a textured surface, a covering of oil-based epoxy paint evens out the surface without hiding the appearance.
Acrylic-Based Epoxy Paint
Acrylic epoxy paints are not often used because people prefer the qualities of oil-based ones. Nonetheless, these paints provide a smooth finish and contribute to the fresh and clean look of the surface.
The significant difference between acrylic and oil-based epoxy is that while the oil-based ones are resistant to water and chemicals, acrylics are not. That is why, even though they leave a smooth finish that is worth admiring, the surface will remain prone to water seepage. Not just moisture, but dust and termites can also penetrate the surface of the wood and damage it from within.
Another reason why oil-based epoxy paint is preferred is because acrylics tend to catch stains that cannot be removed easily. Also, applying it on uneven and textured surfaces does not give it a smooth touch since it gets absorbed into the top layer of wood.
On the other hand, oil-based ones sit on top of the surface instead, which gives many protective benefits.
However, if you are looking for a glossy and aesthetically pleasing finish for your wooden floors and tables, acrylic epoxy would be the best choice. Furthermore, it costs significantly less than its oil-based counterparts.
Epoxy Primer
Even though epoxy paints are durable and last for a long time, they might not stick to the surface properly under some circumstances. Sanding and cleaning might not be enough, and this is why a primer is commonly used before applying paint. A layer of acrylic latex primer evens out the surface, making it easier for the paint to stick to the surface.
Also, epoxy primers are available in several colors, so you can select one which matches the color of your wooden surface. While there isn't any issue with applying epoxy paint directly on wood, it is highly recommended to begin with a coat of primer first.
Benefits Of Epoxy Paint On Wood
Durable
If you are looking for a sturdy choice for coating your wooden floors and furniture, it doesn't get better than epoxy paint. Epoxy is a highly durable material that can be compared to the sturdiness of stone and concrete.
One or two coats of epoxy paint are enough to prevent minor scratches and cracks which might appear from rough use, like dragging heavy furniture. Even if you drop objects on the floor, the epoxy surface endures minor damages, and due to this, it is commonly used outdoors or for garage flooring.
Long Lasting
Epoxy paints make for a long-lasting option when it comes to wooden or any other floors and walls. They can last for decades without needing a retouch and extra finishing.
Often we find wooden planks peeling off at certain rugged places which are frequently in use. Also, concrete floors and walls can chip and crack over time leading small pieces to fall off. All of these issues can be comfortably solved with layering epoxy paint, leaving the walls and floors as good as new for years.
Protects Surfaces
It is quite resistant to most chemicals like gasoline, oil, making it quite useful in garage floors in residences and automotive factories. Furthermore, they prevent surfaces from developing stains from sudden spills, whether it is a chemical spill like bleach or a food spill like wine.
Epoxy paints are perfect for those who do not want to spend too much time and effort on maintaining floors and walls.
Appearance
One of the main reasons to get an epoxy coating is its attractive, glossy appearance. Just one coat gives the wood a shiny and smooth finish which is great to look at. This is why it is often used to provide a final finishing to wooden tables, cabinets, desks, bed frames, stools, working benches, among others.
Other Benefits
Since epoxy coatings are pretty durable, they do not require much upkeep and replacement for years to come. This ends up saving a lot of money in the long run, so in a way, they are pretty cost-effective.
Also, do not think for a minute that using epoxy means sacrificing your taste and creativity. These paints are available in a range of lovely colors, which can be bright and eye-catching or understated if you wish. If your surface is wooden, a suitable color can be chosen to enhance the natural look of the wood surface.
Disadvantages Of Epoxy Paint On Wood
As with any kind of paint, epoxy paint, too, has a few disadvantages to it. These are a few things you should know about before finalizing epoxy coating on your wooden floors and furniture.
Preparation And Application Time
Preparing and applying epoxy paint is a time-consuming process. Even before you start the application process, there are a few steps that must be accomplished. Whether the surface is wood, concrete, or metal, it needs to be clean and free of dirt, grime, and oil. If the solvents or grease are not removed, then the application will appear patchy.
As far as the application is concerned, epoxy paint takes the same time to apply as any other paint. But mainly, it is the drying time that is long and tedious. If you are planning to cover the room of one floor, know that you won't be able to use that room for a couple of days.
This is because it is essential to allow the first coat to dry completely before moving onto the next layer. It shouldn't come as a surprise if the painting job takes up to a week to complete.
Slippery
Even though epoxy paints deliver a high gloss and durable finish, they are known to be a bit on the slippery side. And, this is especially true of the oil-based ones who become prone to skidding and slipping when the floor gets wet.
The thing is, usually, epoxy paints are applied in kitchens or bathrooms where there is always a chance of water spilling. So, to combat this, textured flooring is placed before applying epoxy so as to reduce slippery floors.
Strong Smell
Epoxy paint emits an undeniably strong and pungent smell which might be difficult for some to inhale during the application process. Mixing and applying wet epoxy releases a lot of fumes that smell like strong ammonia. This is primarily found in the darker shades of epoxy, which tend to have more hardeners.
Difficult To Remove
We already discussed in a previous point that the application is tedious, and epoxy paint takes a very long time to dry. However, what's more difficult is to remove epoxy paint. Even though epoxy does not spoil easily, removing epoxy isn't easy for a layperson if you decide to change the flooring.
You might need to consider your options or hire a professional to remove the wooden floor of epoxy paint properly.
Best Epoxy Paints For Wood
Valspar Premium Clear Coating
This is an epoxy paint by Valspar, which is perfect for protecting your wooden or concrete floors with a smooth finish. Since this product is clear, it can be applied to any color surface under the sun and still look amazing. Sometimes, this option can be used on top of an existing older epoxy for an additional layer of protection.
Furthermore, this product claims to be two times stronger than an untreated floor and has bonding agents which stick to the surface with ease.
Pros
Oil and chemical resistant
Advanced bonding technology
No color
Cons
It might be difficult to apply
Rust-Oleum EpoxySheild
This brand is well known for creating durable paints for ships and shipping parts. However, the "EpoxyShield" is engineered especially for floorings and garages. Along with drying faster than other epoxy paints, this option also makes for a thick and protective layer after drying.
Moreover, it has an advanced gloss formula that leaves a light grey sheen on the floor. One container is enough to cover 500 sq feet of your wooden floor or garage.
Pros
Durable material
Dries comparatively fast
Doesn’t peel
Cons
Tedious preparation
Supercoat Epoxy Liquid Floor Coating
The following high-quality option for coating a floor or wall is the Liquid Floor Coating epoxy by Supercoat. This is one of the most affordable epoxy paints on the market. As with all epoxy, this also has two containers with resin and catalyst, which must be mixed manually before painting.
On the plus side, this product comes in various colors, making it easy to match with your floors.
Pros
Long-lasting product
Multiple color options are available
Easy to work with
Cons
Limited area coverage
How To Apply Epoxy Paint
In this section, we will lay out the four simple steps to apply paint to your wooden floors or furniture. But before we proceed, we recommend preparing a safety kit to stay safe while painting.
We mentioned earlier that while painting, wet epoxy emits ammonia-like toxic fumes which can cause trouble in breathing and create skin allergies. To prevent such occurrences, stay on the safe side by wearing a respirator mask, protective eye goggles, and rubber gloves. As an added measure, keep the windows and doors of the room open to improve ventilation.
Once you are prepared, begin with the following steps.
Sand The Surface
Wooden surfaces as they are do not pick up the epoxy paint easily, especially if they already have a varnish or finishing. So, the first step is to sand the entire surface with 120 - 200 grit sandpaper. This process should even out the surface and remove the unnecessary grains to create a smooth surface.
Next, vacuum the remaining dust particles that arise from sanding the wood. Some woods release oils upon sanding. So, you can also use a mop or damp microfiber cloth to clean the surface of any remaining dust and debris. Some oily woods like teak will need cleaning with a more potent solvent like acetone.
This step itself is long and tiresome, but it must be done to get a surface clear of bumps, blisters, and tears. Before you move on to priming and painting, make sure to tape the surface that you don't want to paint.
For this, a simple painter's tape should suffice to keep the paint in the designated area and avoid spills. If you are working with pieces of wood at your workstation, be careful to protect all other items at the table.
Apply Primer
As you already know, bare wooden surfaces are not the best at holding epoxy paint. We recommend applying a coat of acrylic latex primer before bringing out the epoxy. Use a roller to dip in the primer and evenly cover the entire surface from end to end. Although many people do not see the value of this step, it is definitely unwise to overlook it.
One coat of primer takes around 3 hours to dry, after which you can proceed with the second coat of primer. Applying 2 - 3 coats of primer should be more than enough to produce the best results. Agreed, there are extra hours spent waiting to paint, then drying. However, you aren't going to paint the surface every day.
So, it's worth spending a few extra hours to get a result that will last for years to come. Apart from that, remember that primers come in different colors, so select one that will complement the wooden surface.
Mix Epoxy Paint
Measure the resin and catalyst in two disposable containers, a plastic one with numerals to read the ratio will work just fine. Mix the two components in the correct ratio and stir for at least 5 minutes. If it isn't stirred well enough, the mixture will remain uneven and become a strange sticky texture.
To remove sticky parts, you can use a small piece of wood to turn around the edges of the container and continue mixing till it becomes a homogeneous mixture. It does not matter which component is added first as long as it is adequately stirred.
Also, if you do not have a piece of wood, just use any regular stirring divide made of plastic or any other stick. While mixing, if you begin to see bubbles forming in the mixture, it is an indicator of mixing the solution too quickly. Don't worry; this can be removed by heating the epoxy for a few minutes.
A quick note - do not mix the epoxy at a temperature below 65 degrees Fahrenheit since it won't mix properly.
Apply To Wooden Floor
There are a few different methods to paint epoxy on wooden surfaces. If your surface is a floor, the most effective tool to use is a roller attached to a rolling pole. But, before you get the roller, check if it has a shed-resistant nap cover.
The best way to go about after mixing epoxy is to use it immediately. So, once your batch is prepared, cover the entire floor area in one go because epoxy hardens quickly. Make sure to avoid covering paint in portions because they will dry unevenly.
However, if you are working with individual pieces of wood or parts of furniture, then you will need a slightly modified method. Firstly, you'll need to pour the well-mixed epoxy onto the wooden surface. Again, this needs to be quickly worked into a thin layer before it hardens.
Then, take the help of a foam brush to spread the epoxy mixture towards all edges. If air bubbles appear on the epoxy layer, they can be removed by applying heat through a heat gun or hair dryer. Finally, allow the first coat to dry thoroughly for at least 4 hours before applying the next coat of epoxy paint.
Tips For Applying Epoxy Wood
For Floors
Begin in one corner, making your way towards the center, and end at the exit near the door. This will help you to leave the room and allow the epoxy to dry without stepping over it.
Also, don't apply the second layer before the first layer is dry. Doing so will not deliver the desired finish, and the epoxy layer might peel out or erode. So, to prevent scraping over and starting the tedious process again, it's best to give the room plenty of time to settle and dry.
Furthermore, do not order the exact amount of paint required for the floor. It will help you to keep a buffer in case of any spills.
Application Process
Apply immediately after mixing because the epoxy starts to set in one or two hours. If the resin and hardener mix is left exposed to air for a couple of hours, it will lose the sticky fluidity. Then, it will become impossible to pour and apply.
For painting with foam or sponge rollers, make sure to apply at least 3 coats of paint. One coat or two would be too thin since rollers efficiently spread out the epoxy into a fine layer.
For Painting Outdoors
If you are planning to paint the fences, roofs, or anything outdoors, consider applying a UV-resistant clear coating over the epoxy layer. This is necessary because epoxy can sometimes erode and get damaged in extreme temperatures. The harsh sunlight might ruin the layer and won't last as long.
Epoxy Paint For Wood Buying Guide
After following these steps, you can get a better idea of how to apply epoxy paint on your wooden floors or furniture. However, there are various things you must consider before moving to the painting part. Here we list a few pointers which we recommend you look through.
Factors To Consider Before Buying Epoxy Paints
Oil-Based Or Acrylic Epoxy
More often than not, when discussing epoxy coating for floors and walls, it is assumed that we are talking about the oil-based ones. They are the more popular ones out of the two for their numerous water and dust resistance properties and spectacular glossy floors as a result.
Projects which require a durable and foolproof option can opt for oil-based epoxy paints. However, they have a long drying time, and you won't be able to use the area for at least a few weeks.
If you want to stick to a lower budget, acrylic epoxy paints are the next best option. With acrylics, you do get the same sheen and finish, but they take more coats for the best effect. Moreover, if you decide to use water-based epoxy for concrete walls, there is a risk of concrete showing through.
This will lead to a finish that looks rather pale and lackluster. The reason for this lies in the composition of the water-based epoxy. Once the water evaporates during the drying process, it leaves behind a thin layer of paint that doesn't have much coverage or durability.
Surface To Paint
The surface which needs to be painted needs to undergo careful analysis before applying any kind of epoxy. The first thing to check is the texture of the floor. If the floor area is an uneven concrete garage floor, then evening it out will be necessary. The same goes for wooden floors, for that matter.
Freshly installed wooden panels and furnishings won't need much preparation, so you can simply vacuum and mop before applying the epoxy.
However, one factor which is often overlooked is the humidity in the floors. If there is moisture already in walls and floors, it must be removed before coating with primer and paint. If this measure is not taken, the surface will start blistering after a while.
Cost
The cost for paints varies across brands and epoxy types, but overall, good quality epoxy does not come cheap. The cheaper ones tend to be water-based epoxies which need extra coats to give a complete finish. You also need to include primer in your budget for almost the same quantity as the paint itself.
Also, you must note that specific colors are more expensive. For example, bright red epoxy paint is quite costly when compared to others. This is mainly due to additional pigments added to the paint for vibrant color. Another thing to note is that lighter colors will need more coats; thus, the cost will automatically increase.
Color
First of all, a basic rule of coloring floors and walls is that lighter colors do not cover as well as darker ones. Thus, the color you select will dictate the number of coats required. Also, the primer selection needs to be done along with the paint so that both of them form a harmonious layer over each other.
Skipping primer when using light colors like beige and off-white is not recommended. The reason for using a similar colored primer is to allow the color to shine without becoming muddled by the original grey or dark grey of the concrete.
Frequently Asked Questions
Is Epoxy Paint Waterproof?
Yes, it is entirely water and moisture-proof, which is why it is often used in traditionally wet areas like kitchens and bathrooms.
Does Wood Need To Be Sealed Before Applying Epoxy?
Yes, it's highly recommended to seal the wood before applying any kind of epoxy. Wooden floors are porous, prone to chipping over time and develop splinters sometimes. If you pour or apply epoxy on this uneven surface, it won't spread well and might form bubbles. So, the best solution is to apply a sealing coat to allow the epoxy to pour evenly.
Primers also do a great job of preparing the surface and making it easier to hold the epoxy.
Will The Epoxy Coating Be Slippery?
In the past, this used to be one of the major drawbacks of using epoxy on floors. Even today, there are many brands that tend to slip. Thankfully, there are slip-resistant options available in recent times. These paints have an added bumpy texture which creates a bit of friction to prevent slipping and falling.
How Do You Avoid Epoxy Floors Peeling and Splintering?
If there is any incidence of peeling and blistering, it's essential to discover how old the epoxy floor is. If the epoxy paint was applied within one year, there is sure to be a mistake in one of the application steps.
Firstly, it comes down to the basics of sanding and cleaning. If these steps are not followed, and oil or solvents are remaining on the floor, then epoxy is prone to develop blisters in those areas. Also, checking the humidity levels of the floor is essential because even after cleaning and sanding, trapped moisture can damage the wooden surface.
Final Words
So, here was an all-encompassing guide about epoxy paints for all kinds of wooden surfaces. From the different types of epoxy paints, benefits, and disadvantages of epoxies to the various helpful tips, all the questions you might have, are answered.
We especially hope the buyer's guide helps you get a better idea about what to look for before purchasing any kind of epoxy paint. Feel free to come back to the steps of "How to apply epoxy on wood" for preparation before you start painting.
On that note, we take your leave. See you next time with another informative article. Bye!
It's a bright sunny day, so what's better than sitting outside to draw an exquisite landscape while listening to the birds chirping?
You take your canvas, brush, easel, and your fine grade acrylic paints outside and apply the basic shades. But the moment you start blending the colors, you shockingly find that the paint has already dried.
No wonder there, as several factors determine how acrylic paints behave, and the final finish on the canvas. You can learn how to varnish acrylic painting to get a smoother surface rather than a dried one. It’s also worth noting that acrylic paint can be used on metals and numerous other materials so the base you paint on heavily influences the paint's quick drying properties. If you plan to create custom graphics on your old bike or simply want to beautify your garden gate do note drying times and paint behavior will change. If you didn't know about this earlier, today's guide explains everything on how long do acrylic paints take to dry.
FUN FACT | Did you know starting with oil is much tougher than with acrylic while painting?
If you are keen to know how to start with oil paints, we have an excellent article on oil paints to curb your interest.
So, without further ado, lets begin!
How Long Does It Take For Acrylic Paint To Dry?
Although acrylic paint dries faster than other types of paint, as we mentioned above the drying time depends on several factors, including the brand and composition of the paint. To determine how long it will take for an acrylic painting to be ready, you need to consider the following points:
Brand value
Thickness
Humidity
Air circulation
Temperature
Paint type
Surface material
Painting technique
Usually, fast-drying acrylic paint dries between 20 and 30 minutes, while some brands dry to touch even sooner, within 10-20 minutes. But if you want to let the acrylic painting rest, it would be best to use slow-drying acrylic paint as it remains wet far longer. This proves useful for painters who want to achieve a smooth finish with soft edges.
Professional acrylic painters often add retarders to the color before painting to increase drying time for more flexibility while working. But even more important is the curing time because it affects the finish if the paint doesn't cure well.
Based on the number of layers and their thickness, it could take anywhere between a few days and a couple of weeks for the painting to be ready.
Is Acrylic Paint Drying Time Different For Various Brands?
We mentioned that one of the key factors that impact the drying process of acrylic paints is the type of the brand. To help you, we have narrowed down the top brands and mentioned their drying time.
1. Golden
It has two types of acrylic paint - Golden open acrylics and heavy-body paints. The latter takes 30 minutes to dry to touch, while the Golden artist colors in open acrylics have a lockdown period of over 3 days.
2. Arteza
Arteza is known for its artist-quality and fast-drying acrylic paints that dry between 15 and 60 minutes.
3. Atelier Interactive
This brand uses a unique unlocking formula to ensure that it takes 20 minutes on average for the acrylic paint to dry.
4. Daler-Rowney
It uses Cryla Artists' acrylic fast-drying paints and offers one of the fastest drying times on the market: 5-10 minutes.
5. Grumbacher
If you're new to acrylic paintings, you're better off starting with student-grade paints from this brand that dry within 3-5 days.
6. Utrecht
Another fast-drying acrylic paint brand is Utrecht, but it depends on the thickness of the paint layers. Thin layers will dry within 10-20 minutes, but thick layers will take longer, about an hour to 3 days.
7. Holbein Acrylic
If you're looking for professional-grade heavy body paints, try Holbein Acrylic's products as they dry in 20-30 minutes.
8. Tri-Art
Tri-Art is one of the top brands for fast-drying paints, provided you use a thin layer, which can dry in 5 minutes. But when you need to apply thicker layers, it will take several hours for the painting to dry.
9. Blick Studio
Blick Studio manufactures professional-grade products so that your preferred acrylic paint dries faster in 20-30 minutes. But applying thick layers can increase the drying time by a couple of hours.
10. Sennelier
This brand produces fast-drying paints with thin layers taking 10-20 minutes and thick layers taking 1 hour or several days to dry.
11. Winsor & Newton
Consumers looking for professional acrylic paint will love what Winsor & Newton offers. You can expect the thin layers to dry under 30 minutes, but slightly thicker layers will take 1-2 hours. It also has another variant, the Galeria Acrylic fast-drying paint, which can dry in 10-20 minutes when the layers are thin and 1 hour when you're using heavier shades.
12. Matisse
To make acrylic paint dry faster, it would help if you apply a thin layer of Matisse's products that are set in 10-20 minutes. A thick layer takes longer, roughly around 1 hour to several days.
13. Amsterdam
No, we aren't talking about the popular holiday destination (forgive us for this bad joke). But Amsterdam is a popular brand with fast-drying paints that are set in 10-20 minutes. And if you apply thicker layers, it may take upto several days.
14. Maimeri
Maimeri offers results similar to Amsterdam, with thin layers drying under 20 minutes while thicker films take several days to set completely.
15. Castle Art Supplies
One of the most well-known brands among artists is Castle Art Supplies, and it has fast-drying acrylic paints that require 10-20 minutes to dry. But an extra layer of paint will take between 1 hour and 3 days to set.
16. M Graham Acrylic
These paints don't take more than 30 minutes to dry, which makes them suitable when you're facing a time crunch.
17. Liquitex
Liquitex produces fast-drying paints with thin layers drying in 10-20 minutes and thick layers taking longer, around 1 hour to a few days.
18. Crafts 4 All
Consumers who don't mind fast-drying paints should opt for paint colors from this brand that are set within 10-20 minutes.
From the above list, it's clear that acrylics dry to touch quickly, so your painting should be ready without much hassle. Professional painters even know about certain tricks to increase or decrease the drying time.
Before we delve into this in greater detail, let us discuss an open secret involving retarders. They help prolong the drying process, something Golden has used in its Open Acrylics paint line so that its paints stay wet for at least 24 hours.
On the flip side, you'll have to compromise on the opacity when using retarders because they dilute the pigments in the paint. Most people choose heavy body acrylics for this reason, as they retain their vibrancy despite the presence of retarders.
What's The Difference Between Fully Cured And Drying To Touch
When working with an acrylic gel or paint, you'll often hear the terms curing and drying to touch, so what do they mean? To understand this, you should know how acrylic paints dry, which usually happens when the water-based formula in the paint evaporates to leave behind a thin but solid paint film.
As a rule, acrylic paint dries to touch faster but takes longer to cure. Sometimes paints that dry to touch could still be in the middle of the drying process, so you should be careful to prevent damage. Otherwise, you might accidentally remove the top paint layer.
And due to the presence of retarders in slow-drying acrylics, you might have to wait for a month to varnish or seal the paint. This 30-day period is the curing phase.
If you refer to the drying time of the different brands that we have mentioned, it corresponds to the time it takes for them to dry to touch. It's generally between 10 and 30 minutes, while it takes upto a day for them to fully cure.
There are different parts of acrylic paint that you should know about:
Pigments give the paint color
A polymer binder that guarantees waterproof, glossy, and even finishes
Water combines with the binder to create a thin film
Additional agents for durability
How Do External Elements Affect Acrylic Paint Drying Time?
To break things down further, acrylic paint goes through two drying stages. In the fast-drying stage, the paint has dried to an extent, whereby the soft film on the top is no longer susceptible to dilution by water.
But since it's not fully dried, the paint can succumb to external pressure. Some painters leave the paint to dry completely so that the entire mixture under the thin film dries to an even mass. This ensures that all the water evaporates from the formula and leaves behind the true color of the paint.
Here we have shortlisted the essential factors that impact the drying time of any acrylic gel.
1. Absorbent Surface
Do you know the difference between primed and unprimed canvas? Note that when painters apply gesso primer to a paper, they prime the canvas to increase the absorption properties of the surface. It's natural to find that the first paint layer will dry quickly compared to when you're coloring on existing layers of paint.
But unprimed paper is better at absorbing the paint than a canvas, and it's much like coloring over a paper towel. You'll find that the moisture from the paint will seep into the paper, which will leave you with less time for blending the colors.
There are special papers on the market suited for acrylic painting; however, professional painters add a solid layer of paint, to begin with. This ensures that the paper will absorb the moisture from the first layer, while all subsequent layers will appear more vibrant to deliver a unique finish.
2. Low Humidity
A large part of an acrylic paint's drying time will depend on the moisture content in the air, as high humidity will increase the drying time. This means you can expect your painting to dry faster on a less humid day.
If you live in an arid climate, we recommend painting indoors unless you like the challenge of racing against the clock. It would help to add retarders in such instances or use a wet palette to prevent the paint from drying fast.
When working inside, you'll be able to control the humidity by managing the temperature settings with heaters or air conditioners. While the air conditioning vents may remove humidity from the air, the former often comes with a humidifier to add moisture.
Also, different parts of the house have varying degrees of humidity, such as the basement, which is more humid than other rooms. Depending on your painting technique, you can try changing rooms, but remember that higher humidity may promote mold growth despite allowing a better blending of colors.
Acrylic artists even use a dehumidifier to lower the humidity in these moments.
3. Thickness
It's not rocket science that thicker layers take longer to dry than thin paint layers, and it all comes down to blending. Don't hold back while applying the different paint layers when you want to focus more on blending.
With a thicker coat, the water takes longer to evaporate, and you can choose between both open and heavy body acrylics to achieve a vibrant color gradient. On that note, we should mention that the size of the canvas determines if you can blend the paints in time.
This is because it's challenging to manage the colors on a bigger canvas, and some portions may dry before you know it. Professional painters use a blocking technique and allow the first paint layer to dry fast.
They can then conveniently paint over it by focusing on the finer details and ironing out the errors. So, the first layer should be thinner, and you can start painting the second layer without waiting for the former to dry completely, thanks to the gesso primer.
4. Temperature
When the temperature rises, the water in the paints evaporates quickly, and they dry out faster. That's why you shouldn't be painting outdoors, especially when it's hot, but if you have no other choice, use wet palettes. They keep the paint wet for longer and prevent cracks, and you can choose between large and small palettes depending on your requirements.
5. Application And Acrylic Paint Type
People wondering, "how long does acrylic paint take to dry?" should think about the paint type and their preferred application method. By type, we mean whether it's a thick or thin paint and if it has fast or slow drying mediums.
To apply these paints, you can use a brush, roller, or spray bottle, with the latter delivering an even coat to dry in under 30 minutes. You can apply another coat after an hour when rolling or brushing as they are much heavier techniques. In this case, it will take the paint longer to dry between two coats, and you need to wait for the previous layer to dry completely.
6. Circulation
We suggest working in areas with no draft to prevent acrylic paint from drying quickly. You can paint near an open window or sit near the air conditioning or heater. And if possible, try to keep the canvas away from the air circulated by ceiling fans.
Also, before venturing outdoors, check whether it's a windy day because you'll need to use wind blockers or sit behind an obstruction. We have found painting in the wind particularly tough since the canvas wobbles a lot, but we were able to paint in peace when sitting behind a wall.
In some cases, you may want the paint to dry faster, so use a glazing technique whereby it's possible to add transparent colors to previous paint layers. You can even use a hairdryer to dry the paint faster to add extra layers of glaze.
How Long Does Acrylic Paint Take To Dry On Different Surfaces?
To further help in your painting projects, we have narrowed down the drying time of acrylic paint on various surfaces.
1. Wood
When painting on wood, acrylic paint can dry to the touch within 20-30 minutes, but it takes between 6 and 12 hours for the paint to be fully cured. In humid weather, wood retains moisture longer, which increases the drying time, especially if you use more paint layers.
2. Metal
Metal takes longer to dry than wood, approximately 2 days, but you'll have to sand the surface to achieve a smooth texture before that. You may also need to apply a sealer and primer to waterproof outdoor paints.
3. Canvas
Canvas is the most common painting surface, and acrylic paint can dry to the touch in 10-20 minutes. These are for fast-drying formulas, while slow-drying paints on an unprimed canvas can remain wet for several hours.
4. Cardboard
Another surface that allows acrylic paint to dry quickly is cardboard, and the painting can be ready within a day. When fully dry, the cardboard will be flat, and for that, you should prime the material to seal the paint and prevent the water molecules from warping the surface.
5. Plastic
We have seen that acrylic paint takes 15-20 minutes to dry when you're painting on plastic. You'll have to apply varnish to seal the paint as it's difficult for the paint molecules to adhere to the smooth surface.
6. Fabric
It takes longer to paint on fabric, as acrylics require 3-4 days of drying time. It would be best to wash the fabric and dry it before you start painting so that the fast-drying formulas are set in 24 hours.
7. Glass
You'll have to be patient when painting on glass since the paint will require between 1 and 3 days to dry. Also, make sure to cure the glass and apply a primer for the best results.
How Long Do Acrylic Paints Take To Dry Conclusion
That's all there is to know about using acrylic paint for your painting projects.
Hopefully, now you have a better idea of the drying time to plan accordingly. We have also highlighted how various external factors impact the quality of acrylic paint, so go over this guide whenever you fail to achieve the desired finish.
Maybe you forgot to factor in the temperature or humidity before painting outside or used the humidifier far longer than needed when working indoors. Thankfully, our guide will help you make all the right decisions going forward.
For today's artists, there’s no dearth of painting mediums for expressing their ideas on canvas.
One such medium is acrylic paints, which has attracted art enthusiasts owing to its intriguing composition and range of shades. Look around you or search the web— you’ll find a multitude of acrylic paintings by artists who can’t get enough of this exciting variety of paint.
So, if you’re yet to try it out for your paintings or have limited knowledge regarding its applications, now is the time to take the leap.
But we know there are many considerations to make and essential factors to be aware of if you wish to work with acrylic paints. So, we’ve tried to help you out by curating this comprehensive guide on the various ways to enhance your artwork using high grade acrylic paints.
Let’s find what is acrylic paint for artwork here together.
What Is Acrylic Paint For?
Before we move on to discuss the various applications of acrylic, such as whether acrylic paints can be used on metals or not, we’ll help you develop a clear idea about this paint type and other vital aspects associated with it.
Let’s get started.
About Acrylic Paint And Its Main Ingredients
Introduced in 1934, acrylic paint is formed primarily using three ingredients: an acrylic resin suspension, pigment particles, and water. The best part about this paint is that it possesses qualities of both watercolor and oil paints, which is why artists began applying it as an alternative to those in the 1950s.
Also, you can dilute it with water easily, which implies you can use it to create lighter shades for any specialized artwork. This paint can’t be regarded as a complex variety since the components mentioned above make up most of its composition. So, let’s briefly learn about the significance of each of them in the formulation:
1. Acrylic Pigments
These pigments are responsible for providing color to all acrylic paints and are generally obtained from a natural source. But you can get synthetic varieties of these pigments as well. These minute pigment particles are immersed in the paints and are not similar in any way to the surface that they’re used on. That’s why you’ll need other components when applying the pigments to your canvas.
2. Acrylic Binder
As the pigments won’t stick to any surface on their own, you’ll need something to ensure they stay on your canvas. And that’s where acrylic binders come into the picture. After the water has evaporated, the binder and acrylic polymer combine to form a coat that clings firmly to the surface or paper.
3. Water
In acrylic paints, the water actually works as a vehicle to transport the pigment and the binder to the area where you wish to add the paint. When combined with the acrylic binder, it creates an acrylic polymer emulsion. Upon evaporation of the water, the paint dries to a clear film of polymers containing colored pigment particles.
Other Components Of Acrylic Paint
Apart from the basic ingredients of acrylic paint, there is more to its composition. To ensure the pigments don’t float on the water surface, a paint dispersant is added to the formulation as it provides better consistency. Paint brands also often include other components to enhance the effectiveness of these paints.
Why Are They So Popular?
Back in the 70s and in successive periods, artists began to use acrylic paints extensively, and since then, they have only become more popular over time. In this section, we’ve discussed the main reasons behind this immense popularity.
1. Elastic and Flexible
This implies acrylic paints will contract and expand as temperatures fall and rise, without cracking or flaking in the artwork. And even after they’ve dried fully, they’ll remain equally flexible.
2. Non-Toxic And Non-Flammable
Standard acrylic paints don’t come with inferior-quality pigments or binders, which is why they aren’t flammable or toxic at all and don’t emit any kind of fumes. This makes sure that these paints are completely safe for kids and pets.
3. Fast Drying And Permanent
Want to know how long do acrylic paints take to dry? The short answer is: fast. But acrylics also keep the colors intact over time, especially if you are using artist-grade quality. Another great benefit, they’ll never turn yellow in the long term, which often happens with oil paints.
Remember that some cheaper acrylics might lose their saturation with time, though they will not fade entirely.
4. Highly Water-Soluble
The high water solubility of acrylic paints makes it easy to wash palettes and brushes, plus your hands using water and soap. That’s why you won’t need turpentine or paint thinners for the cleanup, unlike some other paints.
5. Water-Resistant Upon Drying
Last but not least, they become completely waterproof upon drying, so rest assured your finished acrylic painting won’t be affected if it accidentally comes in contact with water.
The Types Of Acrylic Paint
Acrylic paints are available to artists in a number of types, which actually signifies they come in different thicknesses. But the paint consistency is independent of its pigment content or quality. The difference lies in the binders applied in the paints — they might be semi-gloss, matte, or gloss.
Applying a gloss binder can make the paint transparent. On the other hand, matte and semi-gloss finishes are slightly milky and translucent when you lay down the paint.
1. Soft Body Paints
Akin to their name, these acrylic paints are very smooth and thin in terms of texture, almost like yogurt. They facilitate smooth application and are perfect for combining with different acrylic mediums like flow improvers, retarding mediums, and texture gels, to name a few.
2. Heavy Body Paints
These are the thickest and heaviest among all the types of acrylic paints and are also the most popular variety. Heavy body paints are similar to acrylics in that they retain brush strokes and marks and provide a feel of soft butter. Note that such paints also work well on rough canvases.
3. Fluid Paints
These paints are available in bottles rather than tubes and come with the consistency of double cream. They’re ideal for painting fine details, staining, and glazing and might even be applied using airbrushes or sprayed onto your canvas.
4. Acrylic Gouache
You shouldn’t confuse this variety with the regular gouache as they’re a lot different. Acrylic gouaches are efficient choices in case you wish to paint a large space with a single color. That’s why illustrators find these paints to be really useful for their projects. As they dry, they level out brush marks and dry to velvety matte finishes.
5. Spray Paints
By applying acrylic spray paints, you can cover larger areas with thin paint layers while also controlling the amount of paint to lay down. This lets you paint either fine lines of paint or a lot in one go. Note that this type can also be used efficiently with other acrylics.
6. Open Acrylic Paints
This is another variety resembling oil paint in that it dries slowly; hence you would be able to apply the same techniques as used for the latter type. Notably, some of these techniques include color blending on the canvas or surface and wet-on-wet paintings.
7. Interactive Acrylics
Up next is a unique type of acrylic paint that you can wet again once dried, though it dries up at the same pace as the other types. Thus, you can slow down the drying time of these paints just by adding a little bit of the unlocking solution.
Note here that unlocking solutions are specialized chemicals that can help you modify or retouch a dry painting as per your needs. You may apply this solution using a spray bottle or brush.
8. Acrylic Ink
Here’s another, more fluid variety of acrylic paint that’s used by grinding the pigment to a super-fine powder and suspending it in an emulsion. Note that this emulsion is just as viscous as water, which implies it can be used with pens, airbrushes, and normal brushes quite smoothly.
Also, acrylic ink colors are quite intense and ultimately provide a highly glossy look to an artwork.
Different Grades Of Acrylic Paint
The various acrylic paints can also be combined to provide artists with better control over their application. After all, they might want to use these paints in their own way. Such applications and techniques are quite vast, which is why different grades of acrylic paint can be created using its different types.
Student Acrylic Paints
This grade of paint contains binders in higher proportions than pigments, while mediums and fillers are also added to create more bulk. However, these ingredients might affect the saturation and opacity of the paints. Note that some may find them to be more chalky owing to the filler content.
Student grade paints are suited for those who prefer a more budget-friendly option, such as beginners or amateur artists.
Artist-Grade Paints
Artist-grade acrylics are prepared using more of the binder and many other components that help enhance their quality. A point worth noting is the low color shift of these paints, meaning that they are less likely to turn darker with time, unlike the cheaper varieties. Plus, the greater binder content makes them quite affordable.
Professional-Grade Paints
The professional-grade varieties undoubtedly have the highest quality and utilize superior pigments in their formulation. Note that even the other ingredients included are of the best quality, and the proportion of binder added is much lesser than the other paint grades.
The resultant paint is quite vibrant and offers numerous options to artists.
However, a point of caution is that they’re much more expensive than other grades of paint, though the price might vary from one brand to another. And based on the ingredients and pigments applied, the texture, opacity, drying time, and other qualities of professional-grade acrylics might vary.
Buying The Right Type Of Acrylic Paint
First, you should know that choosing a particular brand or type of acrylic paint depends on various factors, including your preferred style, techniques, and surfaces. There are also some general considerations, which are as follows:
1. Quality
The quality of paint you’ll need for your projects is a key factor, as it will determine how your artwork will ultimately turn out to be. First of all, it’s essential to consider how you want it to be — whether a low pigment content will suffice or you want the acrylic painting to be more vibrant.
The greater vibrancy and consistency of professional-grade paints make them suitable for seasoned artists who are looking to create masterpieces. Note that such paints will be easier to layer and blend, which implies they also offer greater versatility. Likewise, getting some student-grade and artist-grade paints will suffice if you’re a beginner in the field.
We’d recommend using artist-grade paints when you start creating paintings that you want to preserve in the long term.
Another alternative is to use the student-grade paints for just the earth colors, but make sure to use superior varieties for the more intense colors. On a side note, a few artists also use student colors for underpainting and apply professional-quality paints on top.
2. Viscosity
Viscosity can also be referred to as the thickness or consistency of acrylic paint. That’s why it’s important to figure out the consistency you’ll need for the project at hand. Side by side, you should be clear about your personal preferences in this regard.
If you want the brushstrokes to be retained in the artwork, it’s best to go for heavy body paints. On the other hand, the fluid varieties are thinner though they come with a similar pigment concentration. And in case you want consistency somewhere in between, you’ll also find different mediums to combine with the paint to yield the desired outcome.
3. Lightfastness
This quality tells you how well the pigment can resist fading on exposure to light. The varieties that fade gradually are often termed fugitive colors. Note that most acrylics have much higher permanence ratings compared to watercolor or oil paints.
While selecting the right paint for your projects, you should take into account some lightfastness standards. The ASTM International, formerly called American Society For Testing Materials, categorizes colors based on an assessment that simulates two decades of exposure to the gallery.
ASTM I - Excellent permanence
ASTM II - Efficient lightfastness
ASTM III - Lightfastness not sufficient
Except for when you’re experimenting, I’d suggest using paints with very good or excellent lightfastness. Remember that the ASTM rating will be mentioned on the jar or tube containing the paints.
4. Brands
Certain brands might be better compared to others. However, with regard to the top-notch manufacturers in the business, it’s mostly about personal preferences.
5. Drying Times
While acrylic paints are loved for their ability to dry very quickly, this property becomes a hassle in case the paint on the palette or brush dries out before you’ve finished the artwork.
Additionally, if you’re willing to combine paint and create a blending effect, it’s more convenient if the paint remains wet for a longer time. This is possible with retarding mediums or by using interactive acrylics, a newer type containing retardants that we discussed earlier in our guide. Such paints and mediums can slow down the drying time to a couple of weeks.
Notably, open acrylic paints are also convenient for those willing to replicate the look of an oil painting with acrylics.
6. Container Type
Acrylic paints come in either jars or tubes, with the former option being more cost-effective as you get more paint with every purchase. However, the paint tubes are smaller and easier to carry.
Even the consistency of the two varieties differs slightly — while tubes contain paste-like paints, those coming in jars are thicker though they will flatten when kept on the color palette.
A Guide On Using Acrylic Paints
1. Choosing The Colors You’ll Need
As there’s a vast range of acrylic colors to choose from, any beginner may find it difficult to figure out those they need. Additionally, some colors are costlier than others, irrespective of their grade. That’s because a few pigments are more difficult to obtain compared to others.
But in most cases, you’ll find that earth hues are the most cost-effective options, while cadmium hues are the costliest. In case you’ve just started out with acrylic colors, we’d recommend going for a set of acrylic paints or only the following colors:
Burnt Sienna
Alizarin Crimson
Cadmium Red
Cadmium Orange
Dioxazine Purple
Cadmium Yellow
Phthalo Green
Phthalo Blue
Titanium White
Ivory Black
2. Selecting The Tools
Unlike the paraphernalia required for creating oil paintings, you’ll need just a couple of budget-friendly tools for working with acrylics, which are as follows:
Brushes
The most suitable brushes for acrylics are synthetic as they work well with such paints. Notably, you’ll need two round and two flat brushes for painting with acrylics, a large and a small one for each type.
Acrylic Paint Set
Make sure that the set you’re getting contains all the shades of paint that we’ve listed above.
Palette Knife
You’ll need a tool to mix the paints properly, and a palette knife will be most suitable for the purpose. That’s because it won’t get clogged with paint, which might happen with brushes and damage their bristles.
The Painting Surface
Your painting surface should be clean and free of wax or oil, as well as small particles and dust that might stick to it.
Plate Or Palette
You’ll have to mix the color or put down color dabs on such an additional surface.
Water
You will have to rinse the brushes at certain points during your painting sessions. So, make sure to keep a cup of water by your side.
3. Some Essentials Of The Process
Once you’ve gathered all the tools and equipment, you can start with an acrylic painting project. But in case you’re a beginner, it might take time to get accustomed to how quickly acrylic paints dry.
Fortunately, as we've discussed earlier, you can alter the drying time for some specialized acrylic paints. Make sure to extend the time to as long as you require by adding the retarding medium to the paint.
Increasing the drying time will let you work on the finer details in your painting for longer. You’ll also be able to blend various colors on the palette or canvas while the colors are still wet.
4. The Finishing Touch
Some artists might want to varnish their painting once it has dried completely. Note that varnishing will seal an artwork and make sure that the colors retain their sheen.
Acrylic varnishes are the fastest drying variety and are made using polymer resins dissolved in an emulsion. Some solvent-based varnishes are also available, though they dry relatively slower.
Irrespective of the chosen varnish, you should ensure the painting is dust-free and clean before varnishing it. And once it’s completely dry, you will be able to wipe it down using a damp cloth before you begin the varnishing. On a side note, there are specialized brushes that you can use to carry out the varnishing and make sure you layer the varnish uniformly.
A semi-dry varnish can feel tacky, so propping up the artwork against the wall and facing it inwards will ensure small particles and dust don’t get stuck onto the surface.
What Is Acrylic Paint For Frequently Asked Questions ?
Can you use acrylic paint on surfaces other than canvas?
Yes, acrylic paints are suitable for painting on other surfaces, including cardboard, paper, glass, metal, wood, leather, and fabric. You’ll just need to clean the surface and remove oil, wax, and dust from wherever possible.
Since acrylic paints dry quickly, are they only fit for painting wet on dry?
No, rather, you can use acrylic paints for impasto paintings which are actually thin paint layers that add texture. You should work fast, though, since the paint will dry quickly. Alternatively, the drying period can be slowed down, or open acrylics can be used.
What is the average shelf life of acrylic paints?
Unused water-based and latex paints can last up to 10 years, while oil-based and alkyd paints have a longer shelf life of up to 15 years. Note here that since unopened paints haven’t been exposed to the surroundings, they will have semi-solids and liquids in the same ratio, though these components might separate over time.
What Is Acrylic Paint For Final Thoughts
That was all about the different applications of acrylic paints and other essentials of using them the right way for your paintings.
Hopefully, you enjoyed this colorful journey just as we enjoyed researching all about this interesting variety of paint. Our guide will help you apply the different types and grades of acrylic paints to bring the desired effects to your artwork. So, go ahead and create your dream painting today!
But before we sign off, we’d like to remind you about an important requirement for working with any type of paint. Working knowledge of color theory, as well as the result of mixing different colors, is essential if you wish to apply a variety of acrylic colors to your paintings. So, make it a point to spend some time on this.
We’ll wrap things up for now. See you soon with another intriguing guide on painting. Take care!
No one likes to have rusted metal furniture lying around the house, as worn-out metal furniture can ruin the aesthetic appearance of your property.
So, what's the easiest way to spruce up your old patio furniture or garage doors without replacing them? The most obvious solution is to paint them since a fresh coat of paint can change the whole appearance of old metal items. Arrange some newly painted metal furniture on your patio and it’ll look so much more welcoming and appealing.
You can choose any ordinary or top notch acrylic paint for painting a metal surface as long as you know the basics of painting metal. The requirements and painting techniques can vary depending on the metal painting project. But don't get frazzled because today, we'll discuss whether acrylic paint can be used on metal surfaces. If you want to know more about paint types comparisons, check our previous article acrylic paint vs oil paint.
If you are looking for something DIY today but painting metal is not up your alley, our next article discusses how to repair a leather sofa. If the most comfortable place in your home needs your attention, do consider giving that article a quick read!
Without any more dilly-dallying, let's get those paintbrushes ready!
What Type Of Paints Are Suitable For Metal?
When it comes to painting metal surfaces, you mainly get three paint choices that we've highlighted below:
1. Oil Paints
If you don't want to use a primer while painting metal surfaces for outdoor and indoor use, oil paints are your best option. They work beautifully with metal without using a sealing agent. However, oil-based paints are much more expensive compared to water-based paints, so consider your budget when using oil paints to paint metal.
2. Acrylic Paints
Ordinary water-based acrylic paints are excellent for painting metal indoors because they dry quicker compared to other paints. But you will need to use a primer and seal the acrylic paints if you want them to last longer on the metal surface.
There are also special varieties of acrylic paint that are perfect for outdoor metal painting projects. In fact, you can apply different types of acrylic paints for both indoor and outdoor use for a metal painting project.
3. Spray Paints
If you are a beginner, using spray paint might be your easiest option for painting metal without any hassle. Using spray paints is also the fastest way to paint metal because you won't need any priming or sealing. But, spray paints don't last very long, and you might need to apply a fresh coat of paint from time to time.
Can You Apply Acrylic Paint Without A Primer?
Even though oil paints can be used without any primer, you need to apply a primer to the metal surface before painting it with regular acrylic paint. The main reason is to protect the metal from rusting due to moisture. Priming also helps the acrylic paint to adhere to the slippery surface easily.
Acrylic paints are porous and might come with certain water-resistant qualities, but they're generally not waterproof. As a water-based paint, acrylic offers a higher risk of rusting with time than oil paints. Exposure to water and moisture can damage the paint which results in corrosion quite frequently if you don't use a primer on the metal.
You need not apply a primer with some metals, such as stainless steel, as it’s naturally resistant to rusting and oxidation. But it would be best to prime the traditional metals because they are highly prone to rust and moisture, and require extra care.
How Can You Seal Acrylic Paint On A Metal Surface?
As we mentioned, regular acrylic paints are not naturally waterproof, so by sealing the paint, you can make sure that it becomes water-resistant after painting the metal surface. You can use varnishes or commercial paint sealers, available in any local hardware store, to maintain the water-resistant quality of the paint. There are many ways to know how to varnish acrylic painting for a smooth and satin finish.
Furthermore, sealing the paint can help prevent scratching the newly painted surface and protect it for several years. Depending on the type of acrylic paint you are using for painting metal, you may or may not need a sealer.
If you use exterior acrylic paint, there's no need to apply a sealer separately as the exterior paint comes with a built-in sealer. But, you need to seal acrylic paint if you are using an ordinary water-based acrylic paint variety.
Can You Paint On Metal Using Acrylic Paints?
Now that you know the basics of using acrylic paint on metal, let's look into the steps you need to follow to finish an acrylic painted metal project successfully.
Step 1: Gather The Materials
The first thing you need to do is gather all the necessary supplies and set up your work area for the metal painting project. Here's a list of materials you'll need for the project and why they are essential.
A. Drop Cloth
Preparing the work area is the initial step as you get started with the project. Keeping your work area clean can ensure that the equipment doesn't get ruined due to dust, debris, and paint.
If you have a small work area, you can place a small plastic bag or old piece of cloth on the surface. In that way, you can prevent acrylic paint or worn-out metal pieces from damaging the surface.
For larger work areas, you can use big transparent plastic bags or canvas drop cloths to effectively protect the surface on which you are working.
B. Cleaning Rags
When you are working on acrylic painting projects, it's bound to get messy, and that's why cleaning rags come in handy during an art project. It's best to keep a few cleaning rags close by so that you can complete the project smoothly and avoid wasting extra paints or smudging the colors unnecessarily.
Furthermore, cleaning rags help remove dust and debris to create an even finish. You can use cleaning rags made from microfiber materials for gathering and cleaning off dust. Alcohol wipes can also be effective in keeping your work area clean and tidy by wiping spilled paints.
C. Masking Tape
Even though using a painter's tape might seem unnecessary, it can greatly help you stay within the borders and prevent you from painting the wrong areas. Thus, it might be effective in saving a lot of extra time on your metal projects.
But, how does a painter's tape work? By putting painters' tape on the metal surface, you can ensure not to paint the areas that don't require coloring while applying paint to adjacent areas. It helps you get a clear idea about which areas need paint and help you stick to those areas specifically while painting.
Moreover, by using painters' tape, you can prevent damage to the metal surfaces as it doesn't leave behind a sticky residue once you take it off.
D. Cleaner
You can't apply paint on metal without cleaning the dust and debris from the surface first. Hence, proper cleaning is an essential step in the preparation process.
You can use an old but clean rag soaked in warm soapy water to clean dust or debris from the metal after scraping off the rust. However, using soap, water, and a damp cloth might not be enough to clean stubborn residues, and you will need to use a stronger cleaning solvent under these circumstances.
Commercial cleaning solvents are specially formulated to cut through persistent grease build-up to help you clean the entire metal surface in a jiffy.
E. Gloves
When you're working on metal in acrylic paint projects, always remember to use protective clothing to avoid injuries and accidents. For instance, wearing latex gloves can protect your hands from paint and scrap metal residues.
You can also try putting on some protective goggles while cleaning the metal surface to avoid getting tiny metal pieces in your eyes. Furthermore, if you are using acrylic spray paint for the project, don't forget to wear a face mask to avoid inhaling the paint fumes from the spray cans.
F. Wire Brush
If you want to paint some old metal furniture, you need to scrape off the rust and old paint first, which can be labor-intensive. But, a wire brush with stiff and durable bristles can be sturdy enough to scrape off impurities and paint residues, making the task a lot easier.
You can use different-sized wire brushes based on your art projects. For instance, a small wire brush can be useful in cleaning the nooks and corners of your relatively small and delicate furniture quite effectively.
G. Sandpaper
When it comes to scraping off rust and debris from a metal surface, using fine-grit sandpaper is always a good idea. After scraping with a wire brush, you can use sandpaper to remove any old leftover paint or rust and completely smoothen out the freshly scraped surface before painting.
H. Primer
Once you have sanded the metal surface, you need to apply primer to prevent it from rusting over time. It acts as a protective coating on the metal to cover old rust and shield it from water and moisture.
Prime also works as a cohesive binding agent to help the paint stick to the metal surface. You can use a spray primer instead of a traditional primer paint to coat the metal evenly without any hassle. Using spray primer can even reduce the drying time significantly to help you quickly apply acrylic paint.
I. Paint
You can find versatile acrylic paint in different varieties to paint on various surfaces. An acrylic spray paint can be the perfect choice for painting any metal surface, and you can use different acrylic paints for outdoor and indoor purposes.
Say you want to paint screen doors in the living room; you can use any regular quick-drying acrylic paint. But, for painting your backyard metal fence, use outdoor or exterior paints for better and more durable results.
J. Paintbrush
If you want to use traditional acrylic paint on metal instead of using spray paint, you'll need to buy some paint brushes to apply acrylic paint. You might need to buy different-sized brushes to cover the entire area of your project.
A large, flat brush might be good for painting open and wide areas on the metal surface. But, you might need a smaller brush to add finer details and cover all the corners successfully.
K. Sealer
Apply sealers to protect your project from moisture and scratching, as they offer a finished look to your metal painting project. For traditional acrylic paints, you need to buy an acrylic paint sealer that can offer long-lasting protection to the paint. However, as mentioned before, if you use exterior paint for painting outdoor metal surfaces, you won't need a sealer.
Step 2: Scrape Off Rust And Old Paint
After you have gathered the necessary materials, it's time to start preparing the metal surface before you can apply the first coat of acrylic paint. If the metal has some old paint or shows any sign of rusting, you need to scrape it off using a wire brush.
No matter what size wire brush you choose, make sure to cover all the crooks and crevices of the entire metal surface. In that way, you can get rid of even the last particle of rust, old paint, and debris using the wire brush.
Step 3: Sanding It Down
Once you've scraped the entire metal surface using the wire brush, it's time to smoothen the surface with a fine-grit sandpaper. 150-grit sandpaper can be effective in removing any persistent rust or old paint, and you can clean it quickly.
You can also use a cordless electric drill instead of sandpaper and brush to remove rust and paint. If you are well-experienced in using power tools, attach a wire brush to the drill and scrape off the old paint from large metal surfaces in much less time. But remember to wear your headphones while using a power drill.
Step 4: Cleaning It
Next, it’s time for cleaning the metal to remove all the rust and paint residues after you’ve scraped and sanded the surface. You can simply use some soap and water to clean thoroughly and for a freshly scraped surface, using a clean, dry rag will be sufficient. And once you've cleaned the metal with soapy water, let it rest so that it can become completely dry.
Alcohol wipes also work quite well for cleaning metals, or you can apply a commercial cleaning agent to remove persistent grease and tiny dirt particles. You must ensure that the metal surface is spotlessly clean before you paint it.
If the metal is not cleaned correctly, the paint job can look lousy and peel off easily. So, try not to skip the cleaning process even if the metal looks clean to your naked eyes.
Cleaning the surface becomes even more essential if you use galvanized metal for your painting project. Galvanized metals tend to attract oil and grease that you often overlook for which you can use a strong detergent to completely remove them from the surface.
Step 5: Priming It
After the metal surface is dry and clean, it's time to prime it. You can either use a spray primer or a traditional liquid primer paint for this process. Whichever primer you choose, carefully read and follow the instructions provided on the primer container before applying them to the metal.
If you are using spray primer, remember to shake the spray cans for around two minutes to apply the primer evenly throughout the metal surface. Also, only use primers designed for acrylic paint that are suitable for metals.
Any oil-based primer usually works well with acrylic paints, and if the primer is specially formulated for metal, it'll give you the best results. Apply two thin primer coats uniformly and allow the first primer coat to dry for 2 hours before applying the second coat.
By applying two coats, you can offer better protection from oxidation, rusting, and corrosion over time. The primer will help the paint adhere to the metal surface and ensure that it lasts longer without peeling off soon.
On top of this, when the metal is quite old and heavily corroded, coat it with a layer of zinc-chromate primer, and then apply any acrylic paint primer. Apply the acrylic paint primer on the entire metal surface immediately after working with the zinc-chromate primer. It acts as the first layer so that the regular primer can stick to the surface conveniently.
Step 6: Paint Away
Once the metal is ready after priming, you can start applying the acrylic paint. Any ordinary acrylic paint will be enough if you want to paint inside, but you'll need exterior paint for painting outdoors.
You can choose acrylic spray paint or liquid paint for the painting process. For liquid acrylic paints, you'll need to buy some paint brushes to apply paint to the metal surface uniformly.
Whichever type of acrylic paint you choose, always apply two coats of the shade and allow each coat to dry up completely before going forward with the second coat. You might need to apply as many as seven thin and uniform coats while using spray paint.
If you're applying different colors, you can even work with painter's tape to prevent painting over the wrong areas. Let your imaginations run wild and experiment with various color combinations while painting the metal surface.
And once you've completed the painting, set the project in a secure place and leave it to dry. It can take up to 48 hours for the acrylic paint to dry completely.
Step 7: Sealing The Deal
If you are using regular acrylic paint, you need to add a sealer that ensures the longevity and durability of the paint. You can even apply an acrylic gloss finish to the metal painting project by sealing the paint. However, you can skip this step if you use exterior paints, as they come with a built-in sealer.
Can Acrylic Paint Be Used On Metal Final Thoughts
And with that, we come to the end of our guide about painting metals with acrylic paints. After going through our article, we hope you have gained a better perspective on how acrylic paints work on metal surfaces.
Even though it might sound like a lot of work if you follow the steps that we've mentioned above, taking up a new metal painting project can be a fun job. No matter what the project is, don't shy away from playing around and experimenting with different colors while painting. And always remember to put on your protective gear because safety comes first.


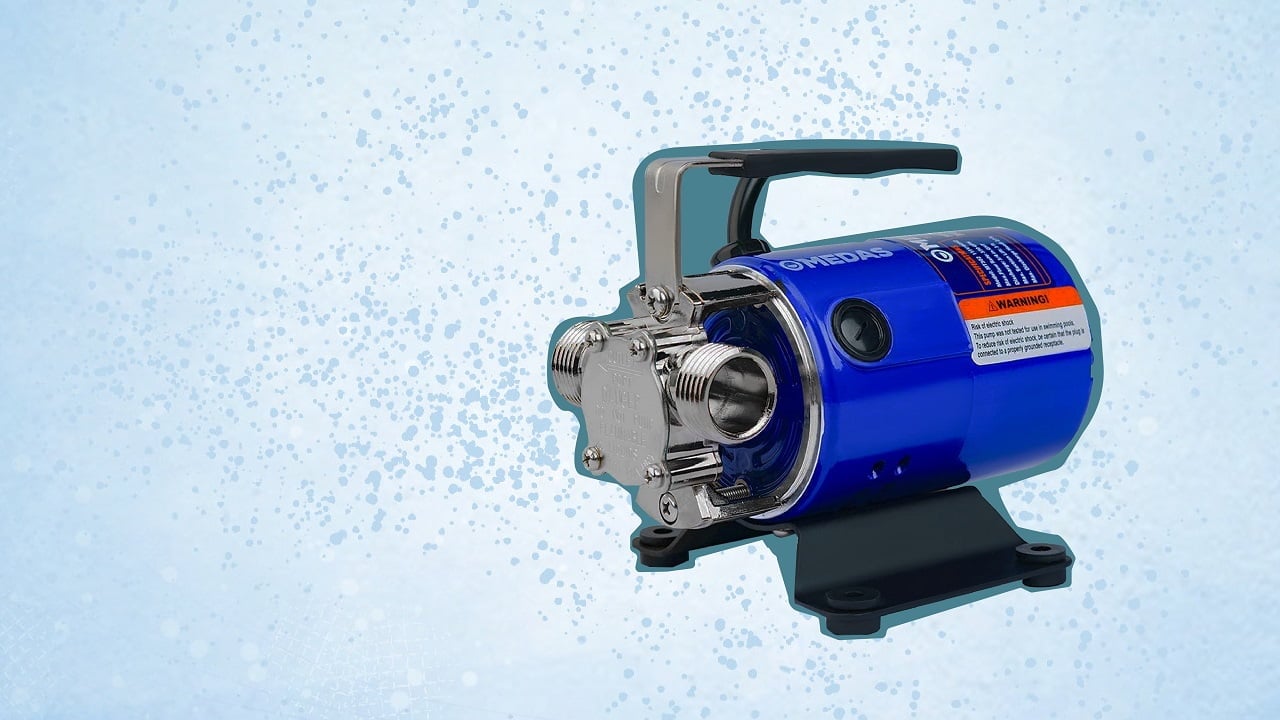


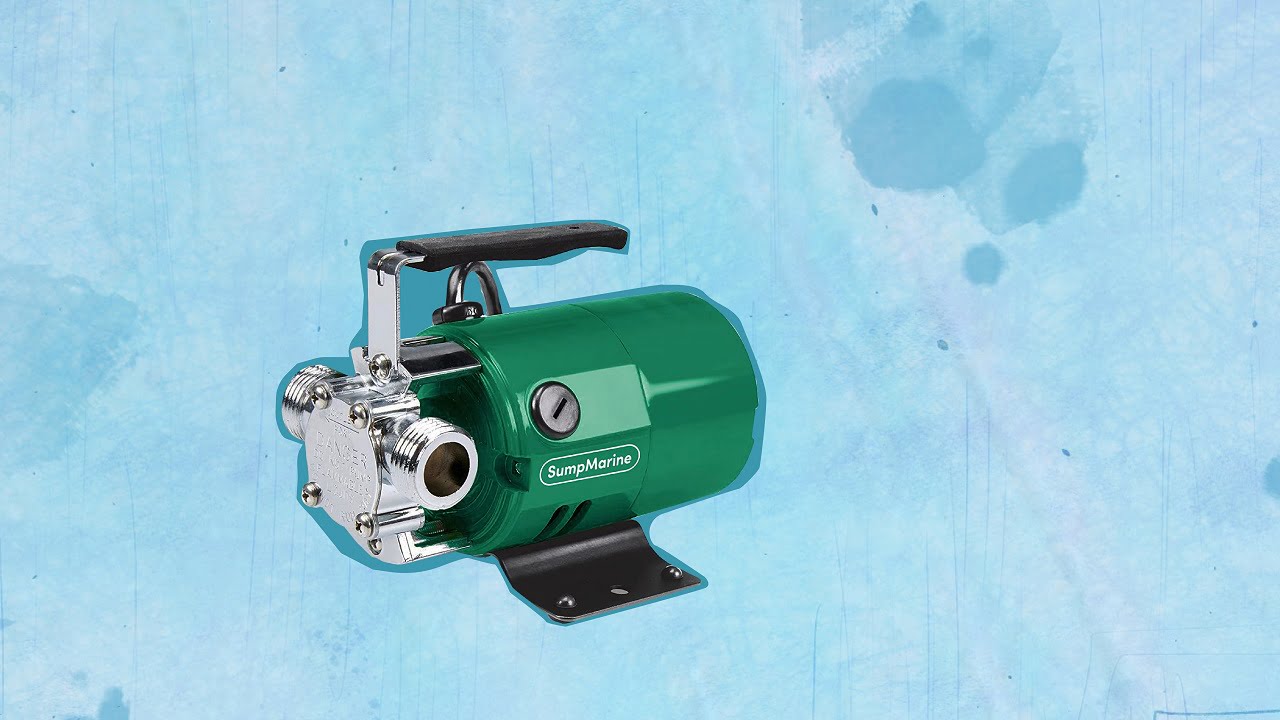

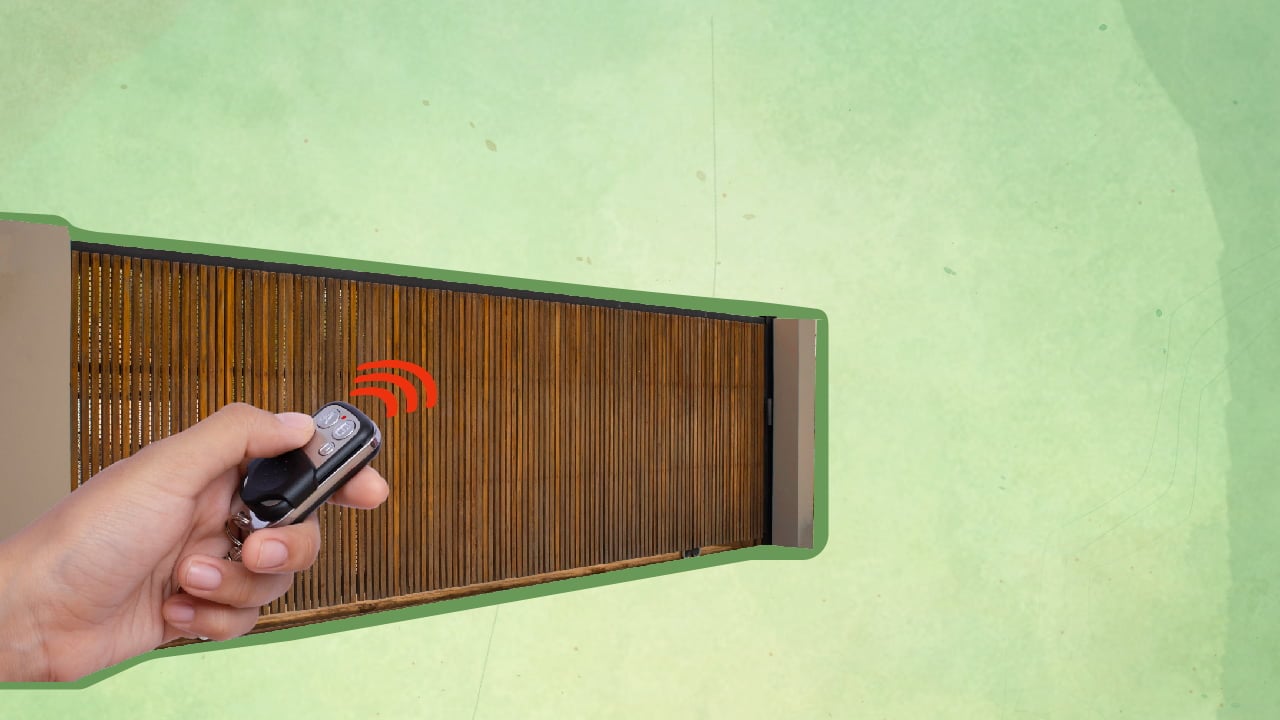


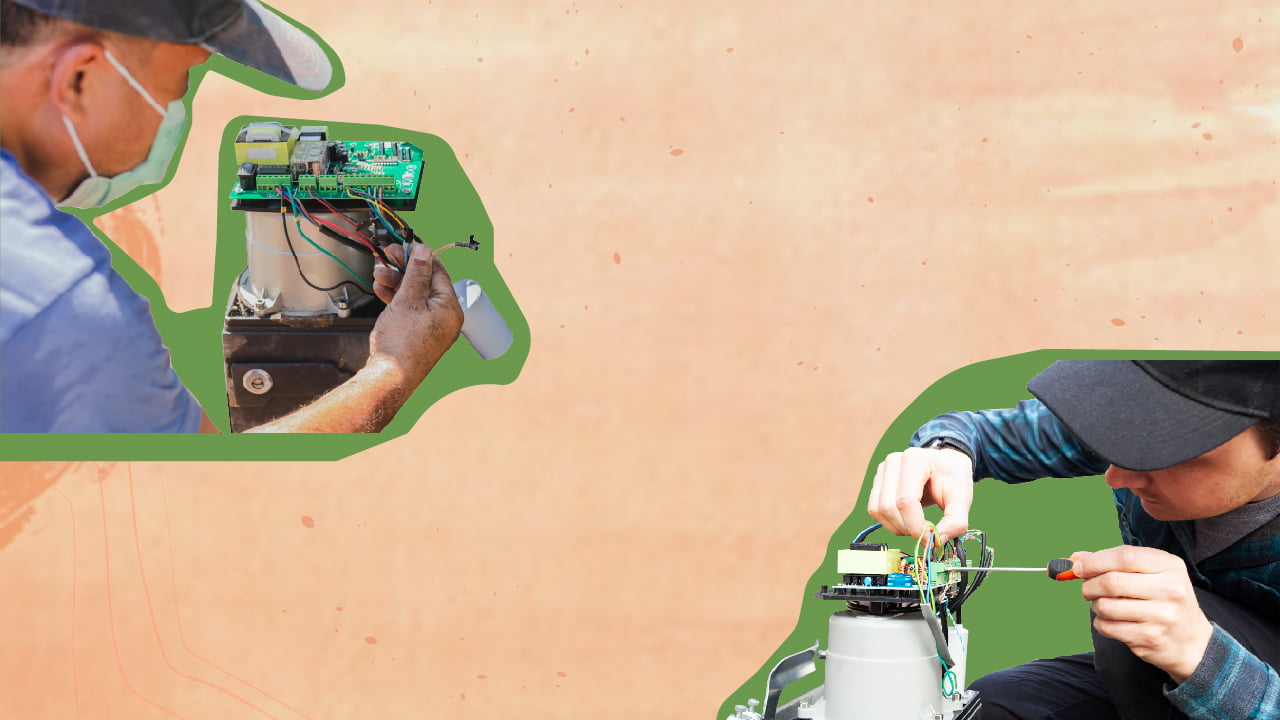
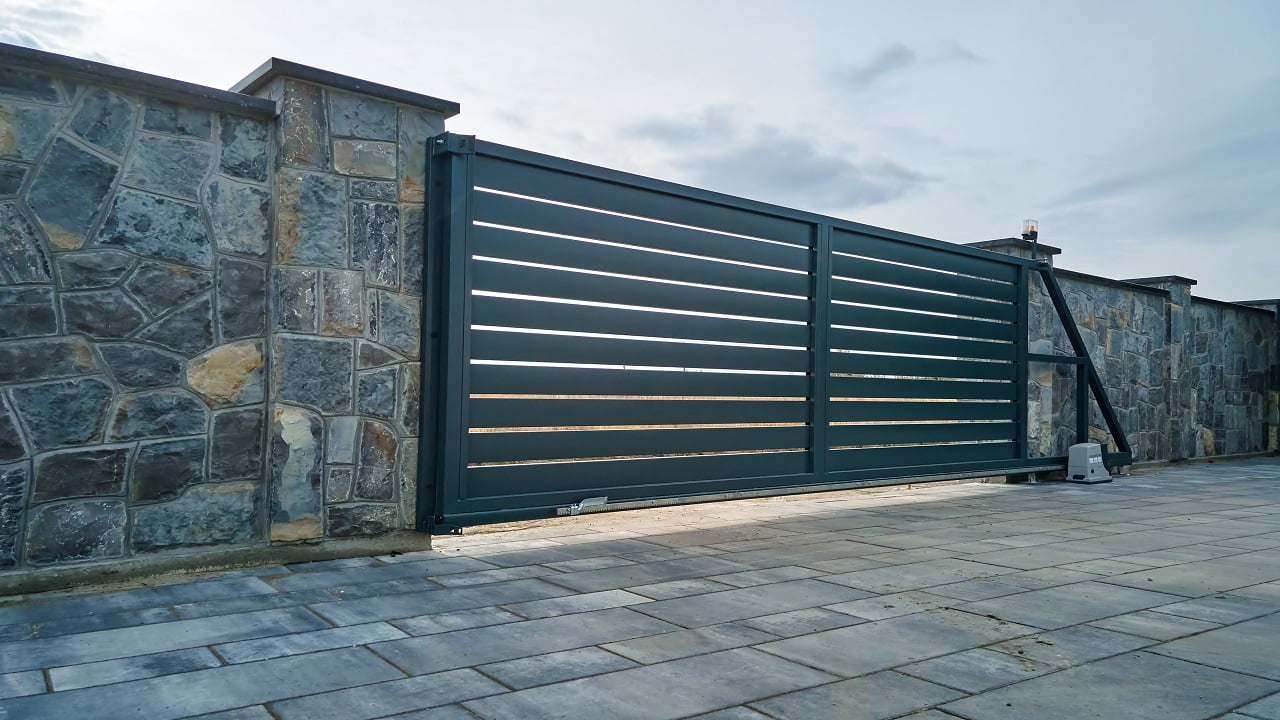

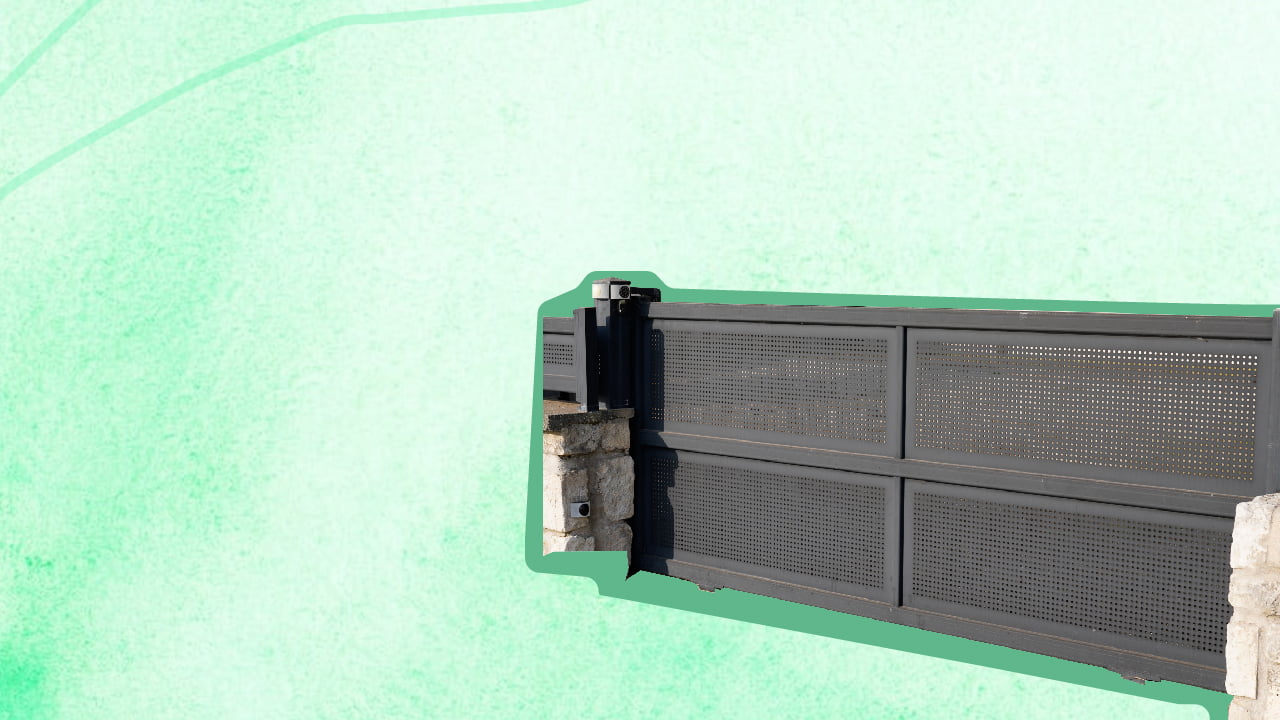


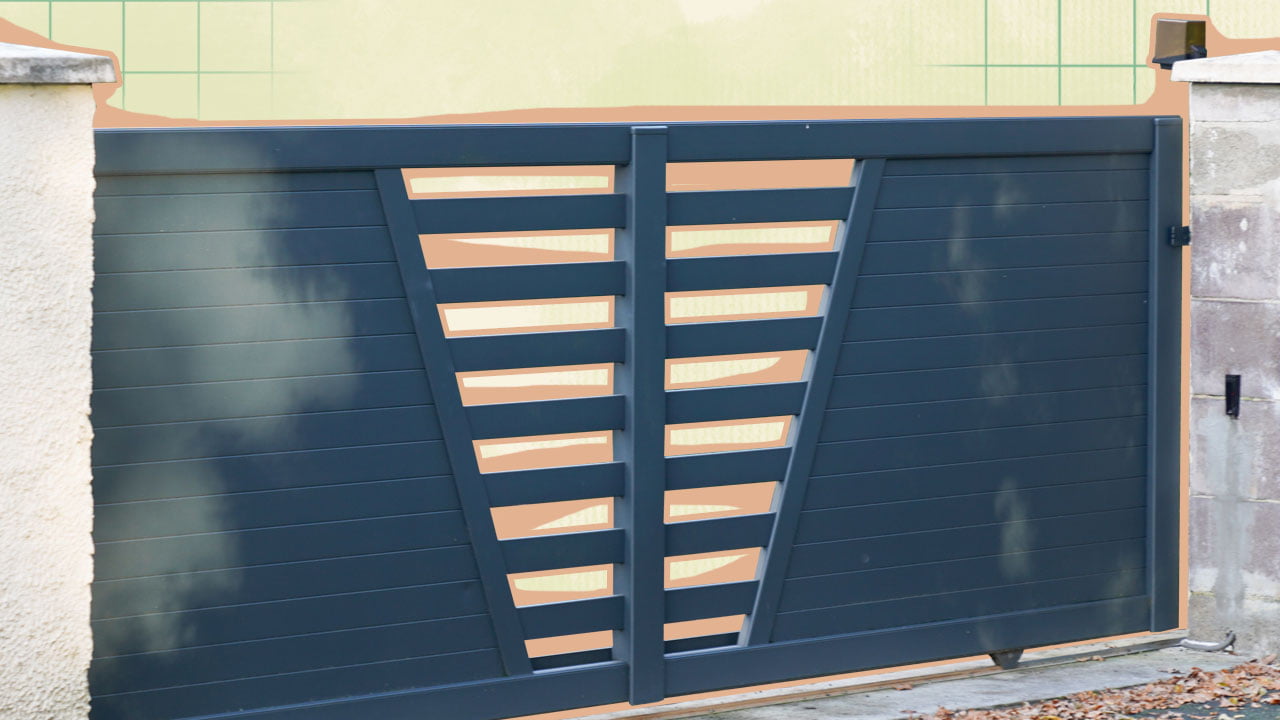

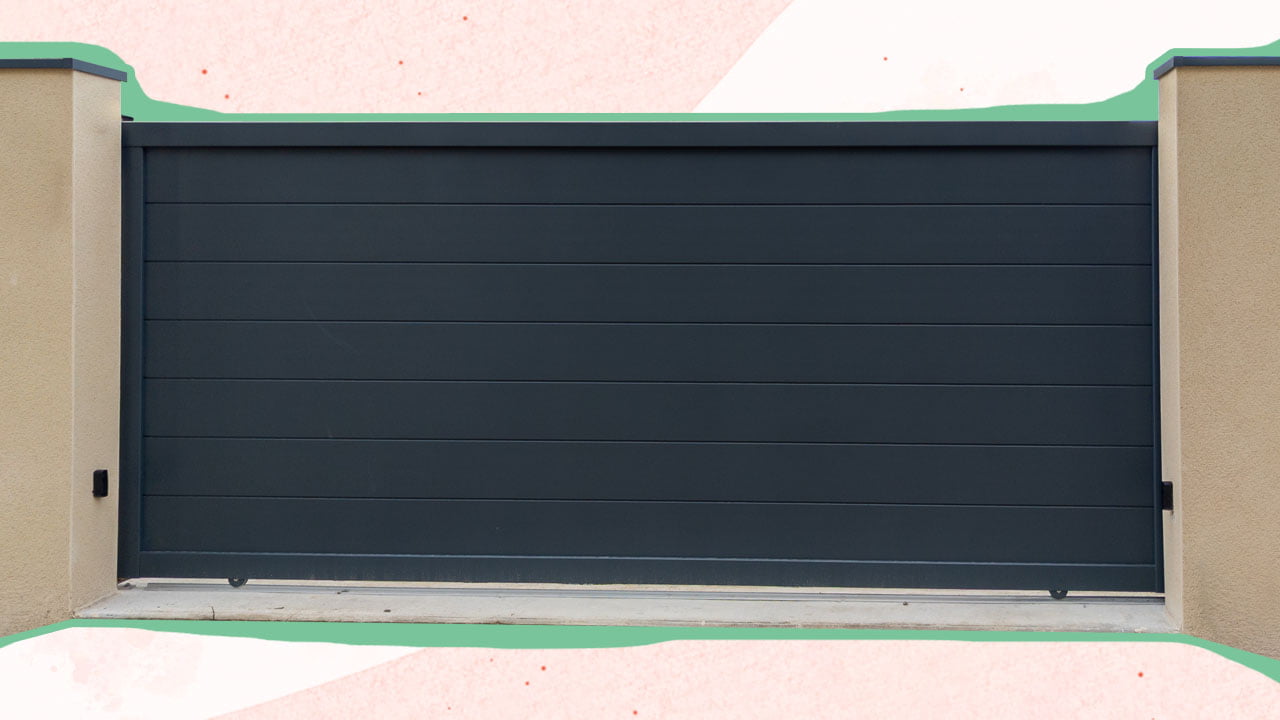
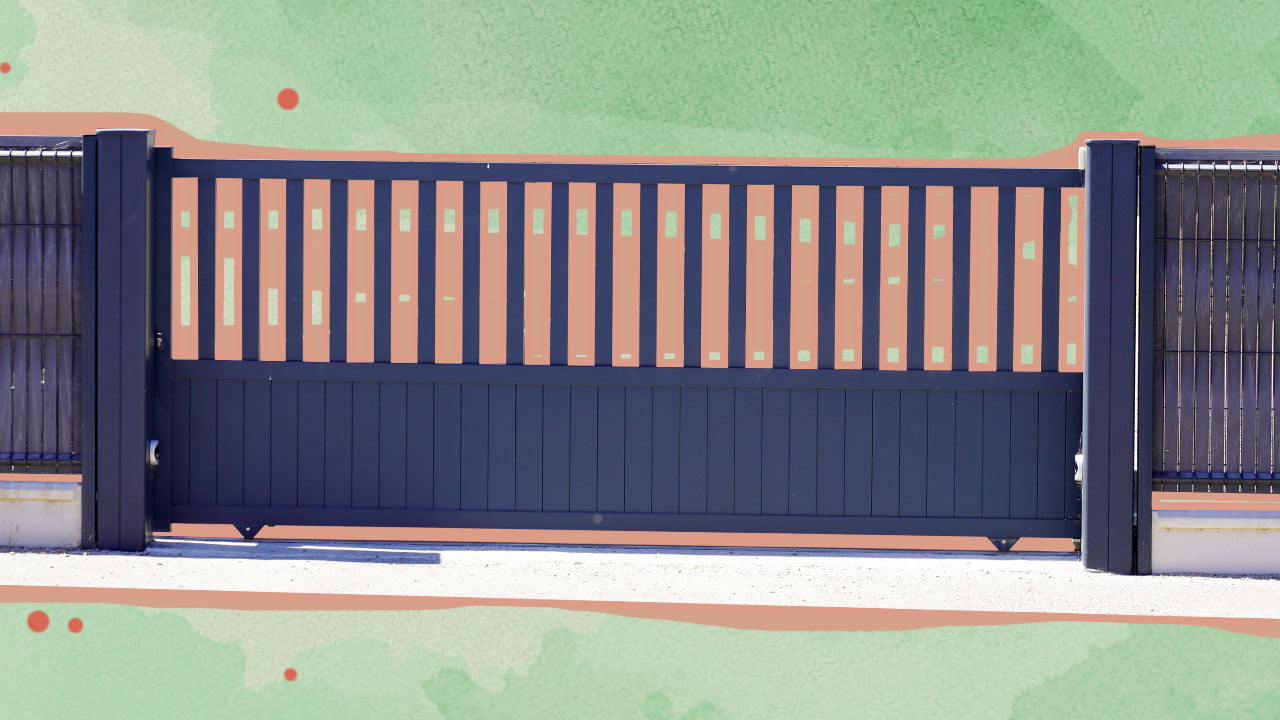

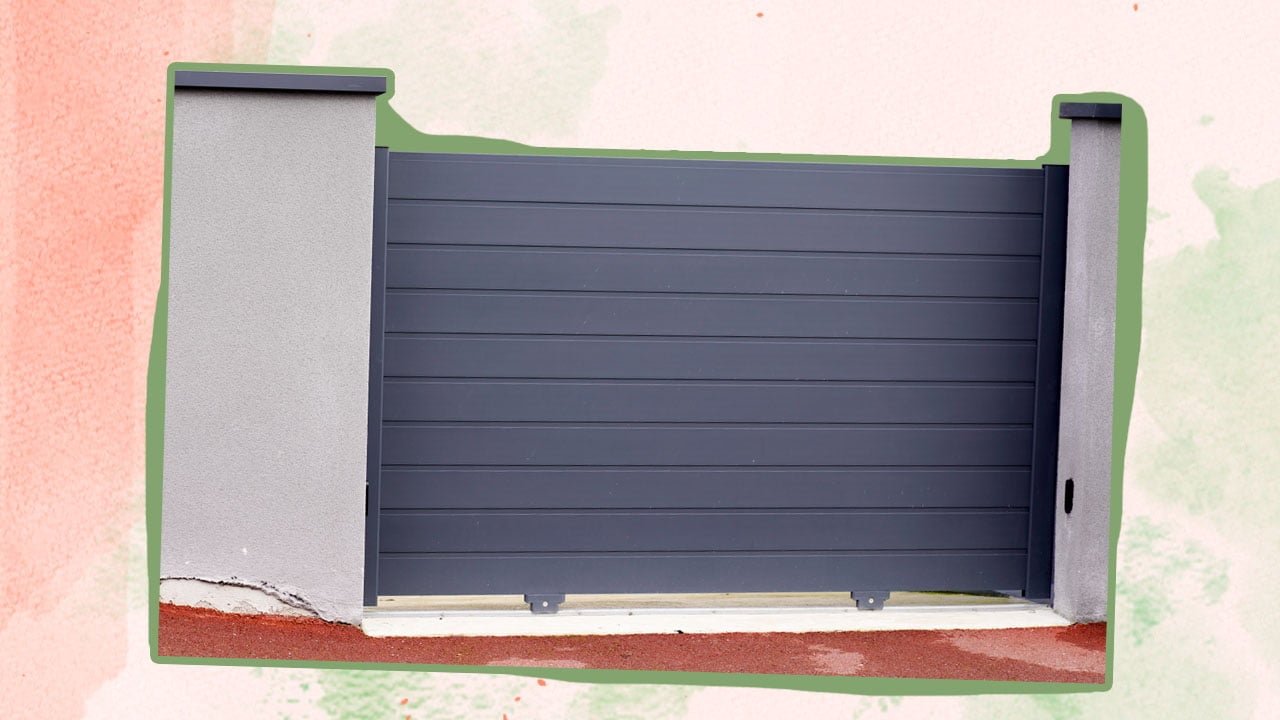
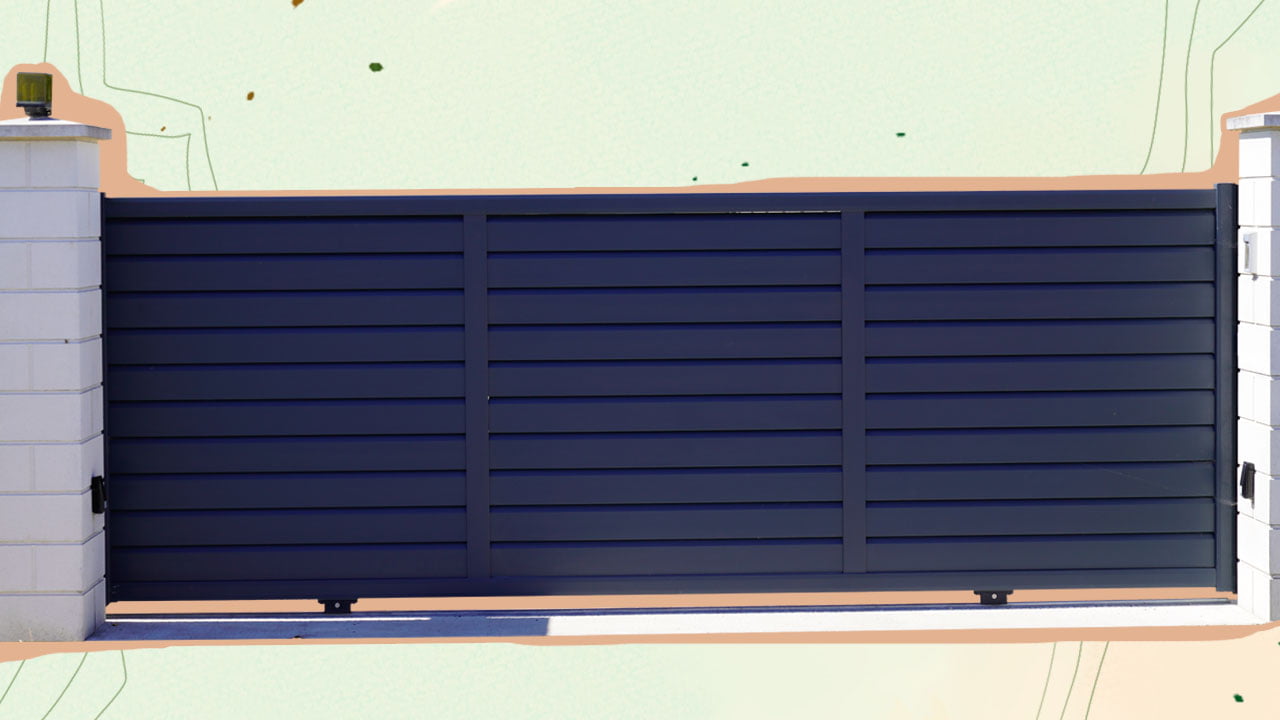


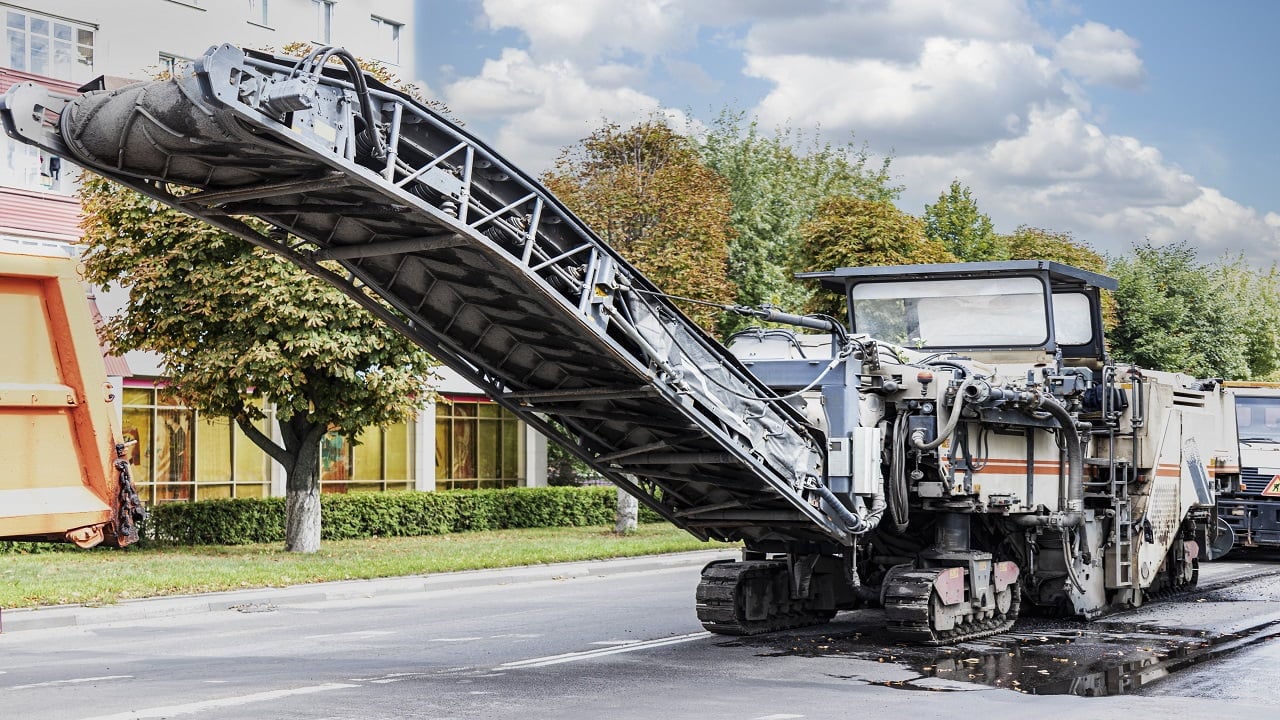


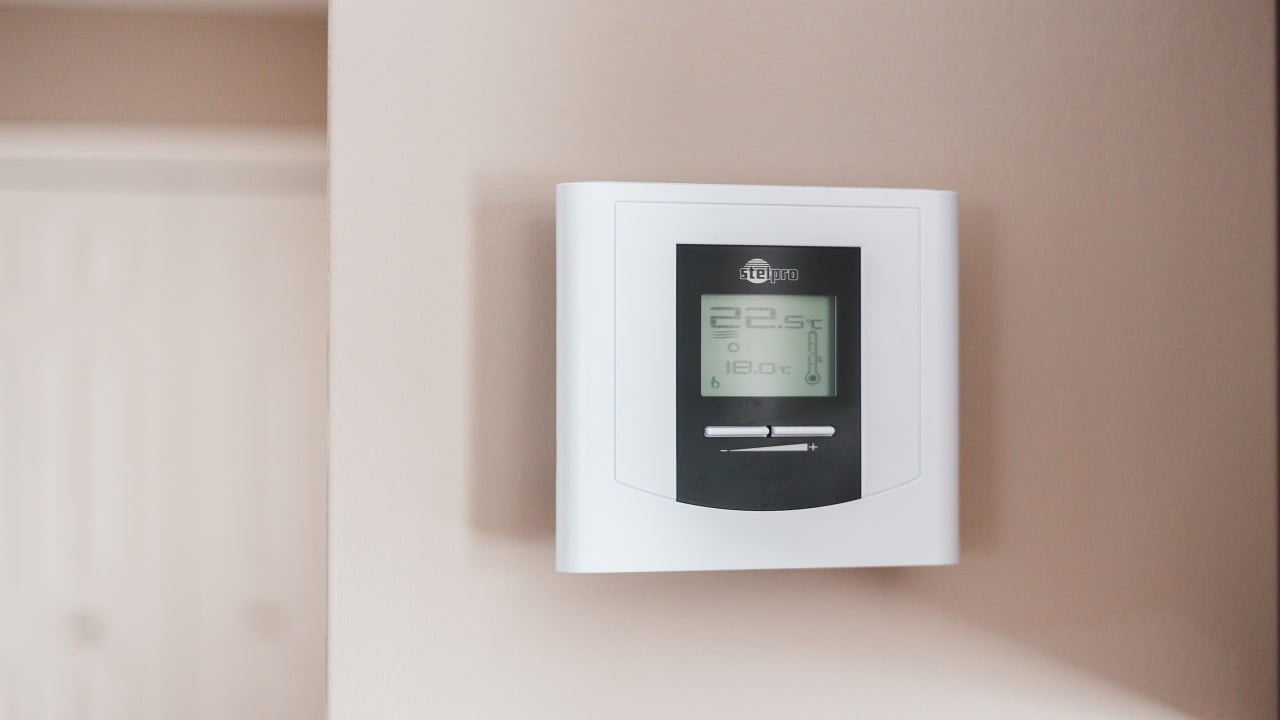


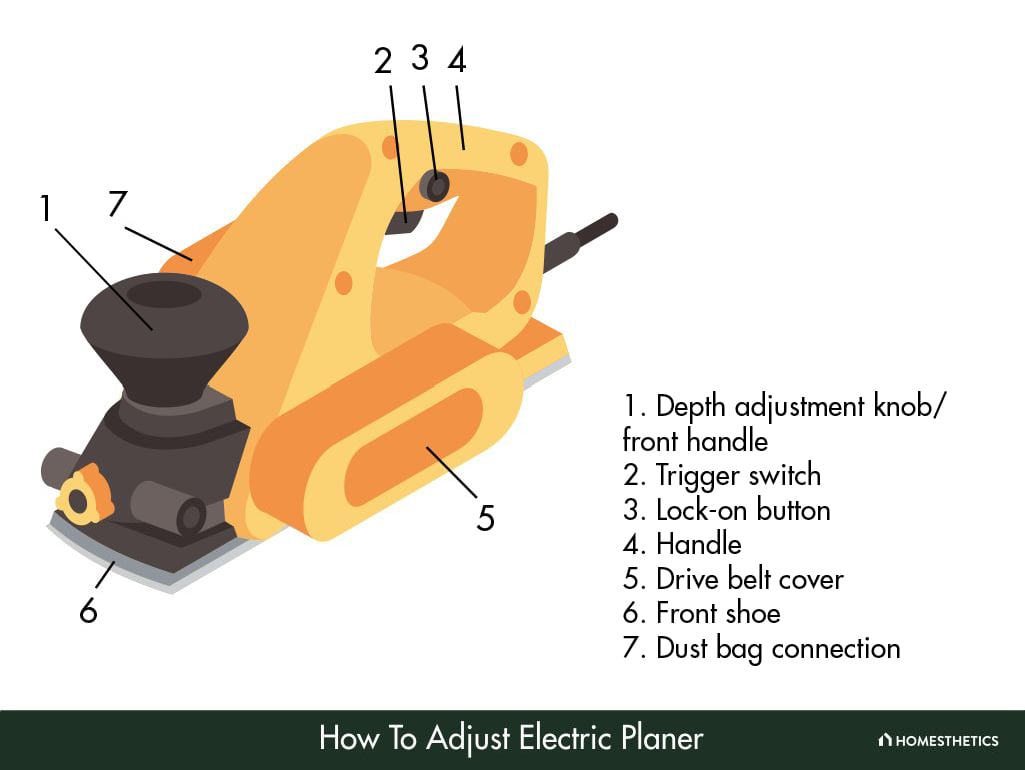
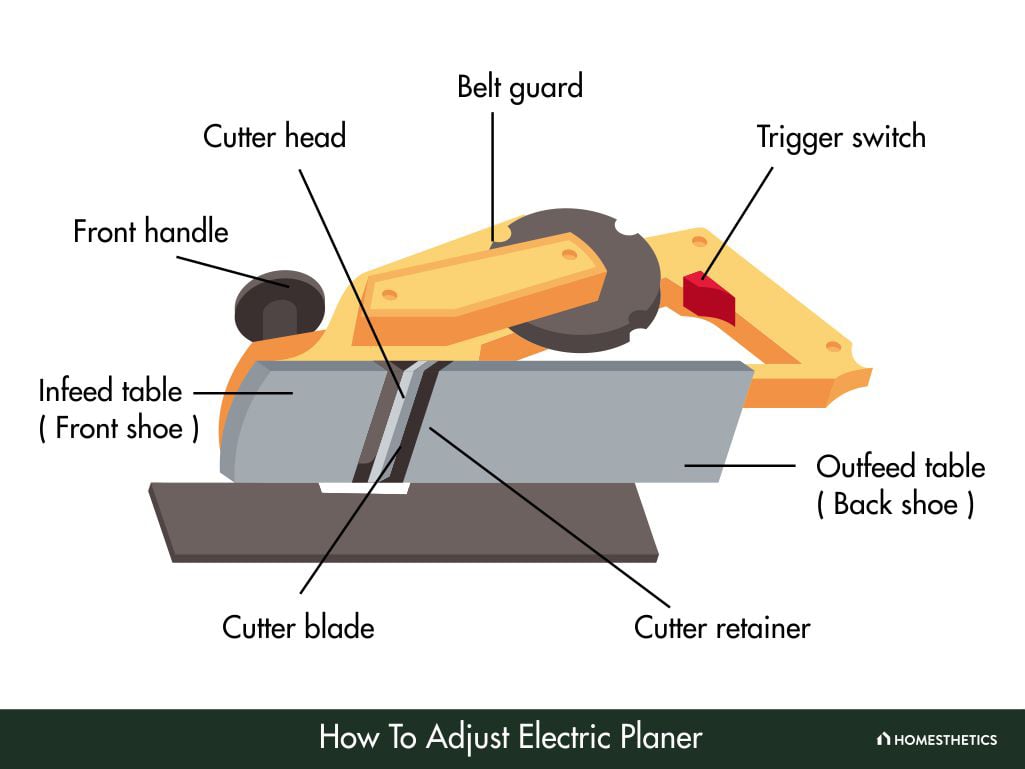

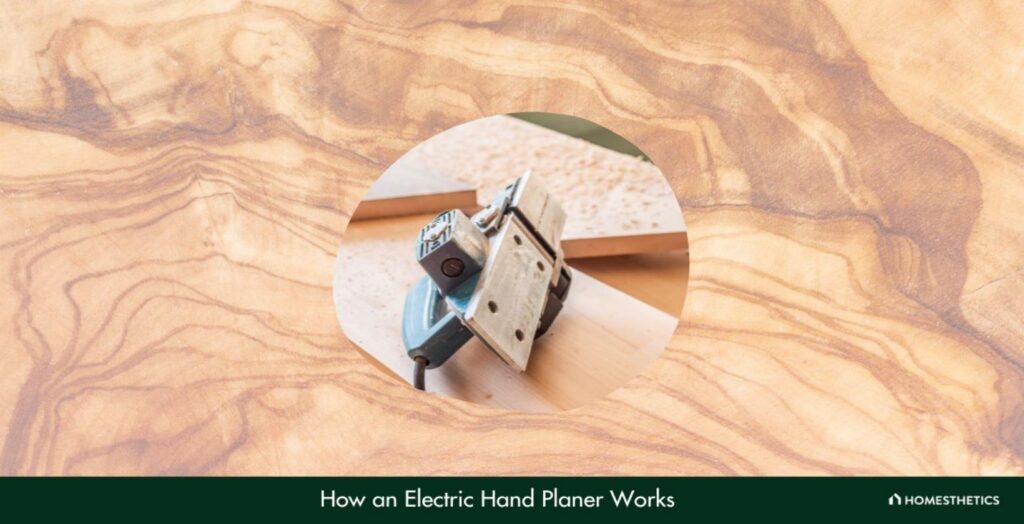
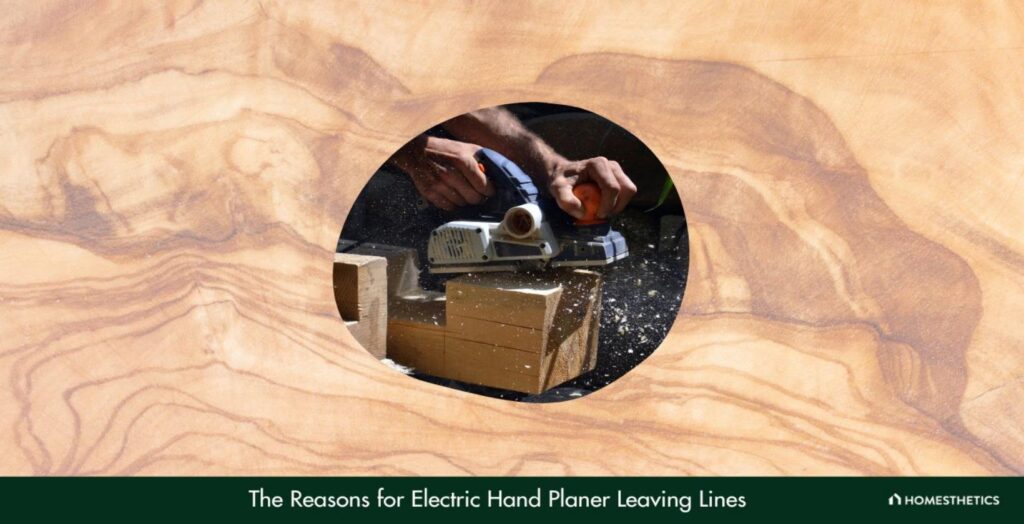

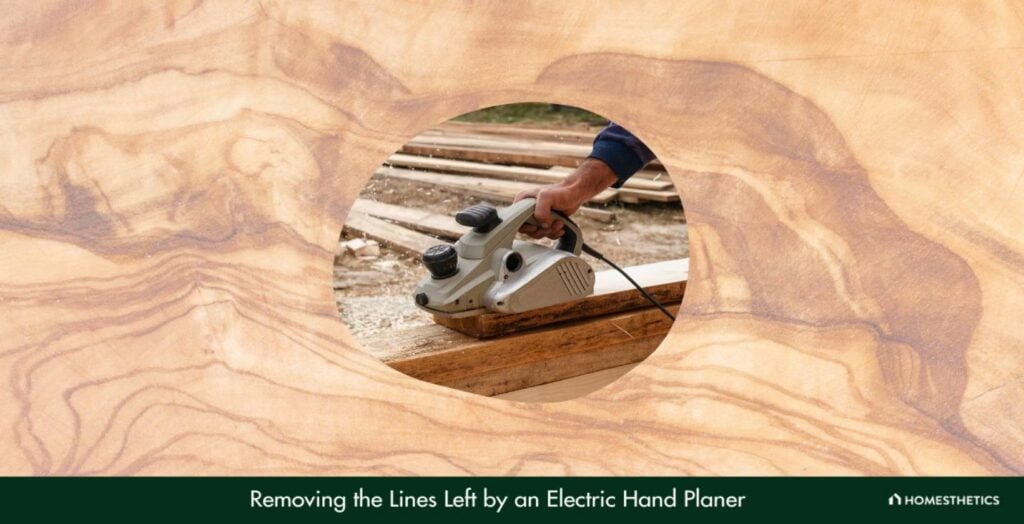

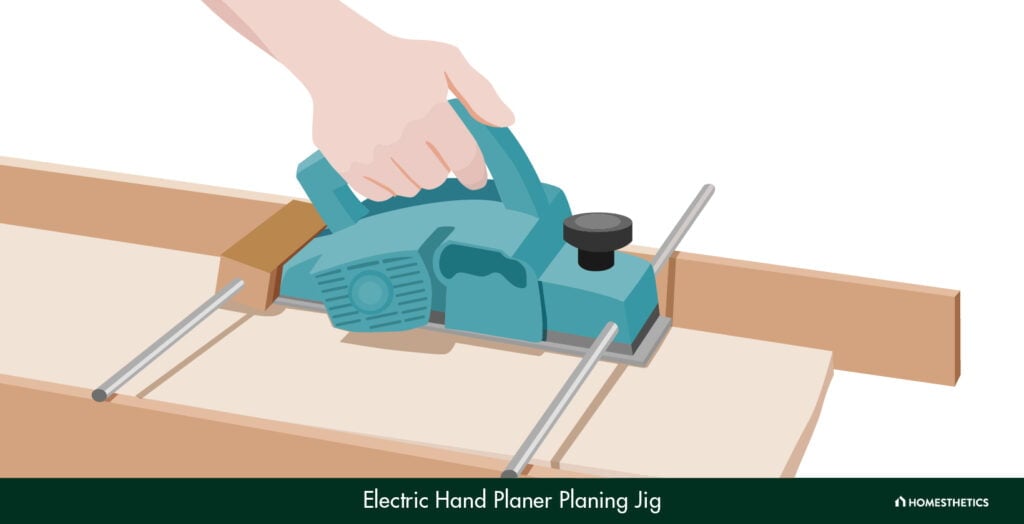
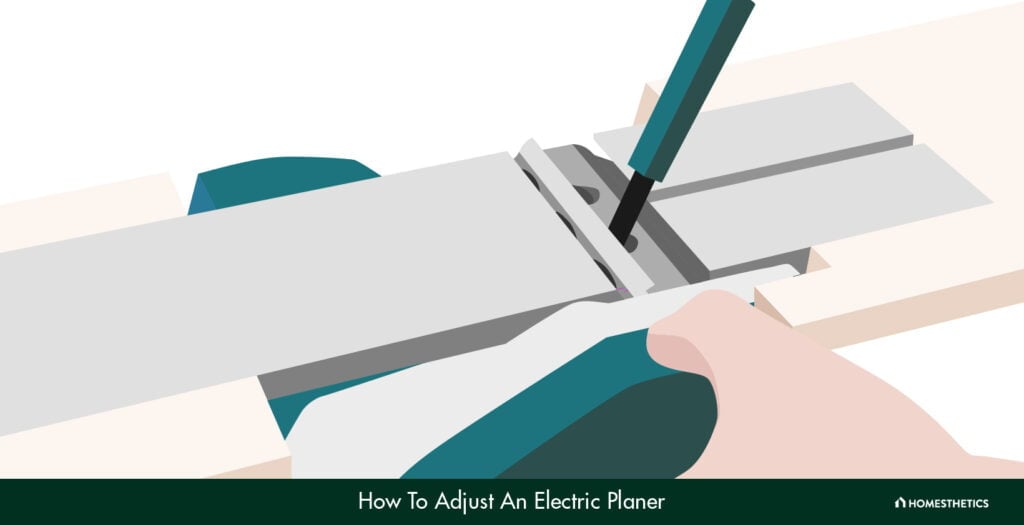

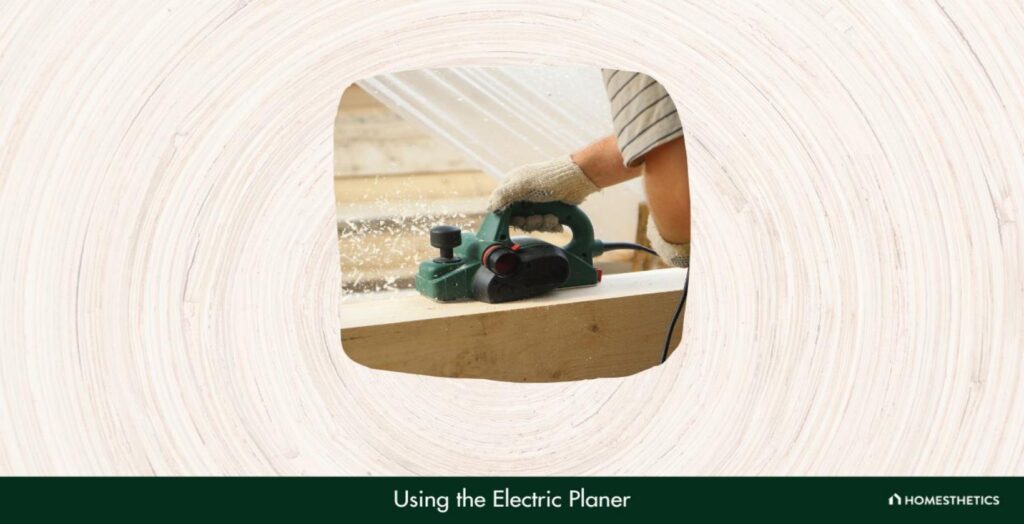


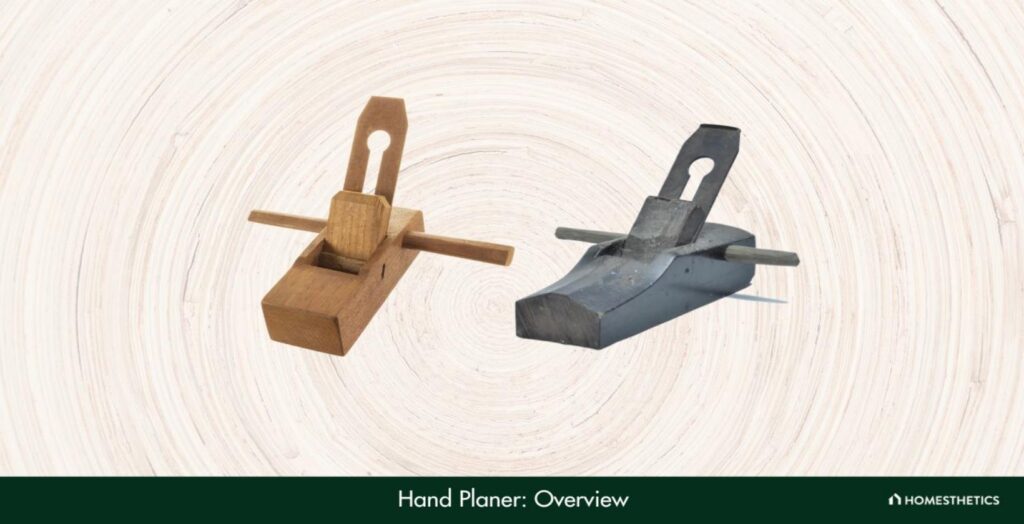
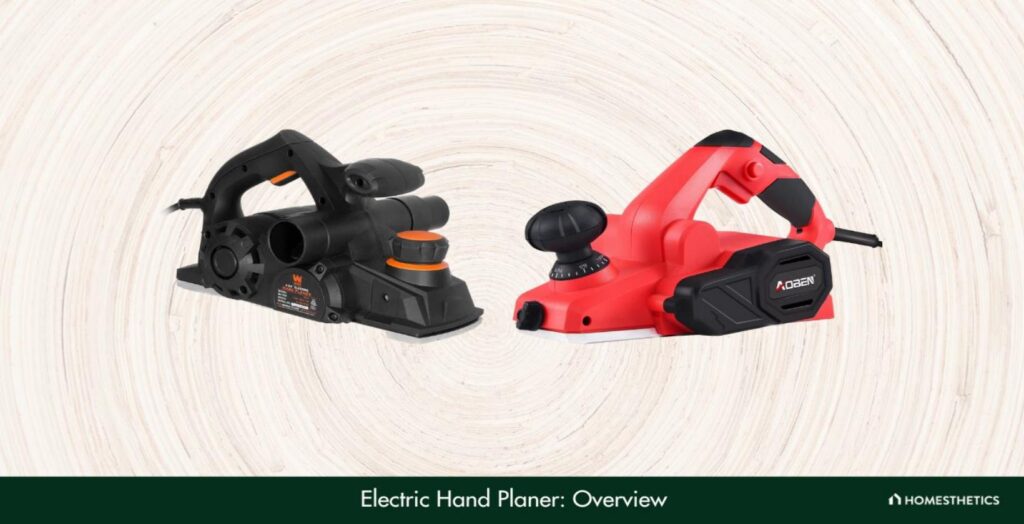

![21 Types of Planers and Their Different Uses [with Pictures]](https://homesthetics.net/wp-content/uploads/2023/11/Types-of-Planers.jpeg "21 Types of Planers and Their Different Uses [with Pictures]")
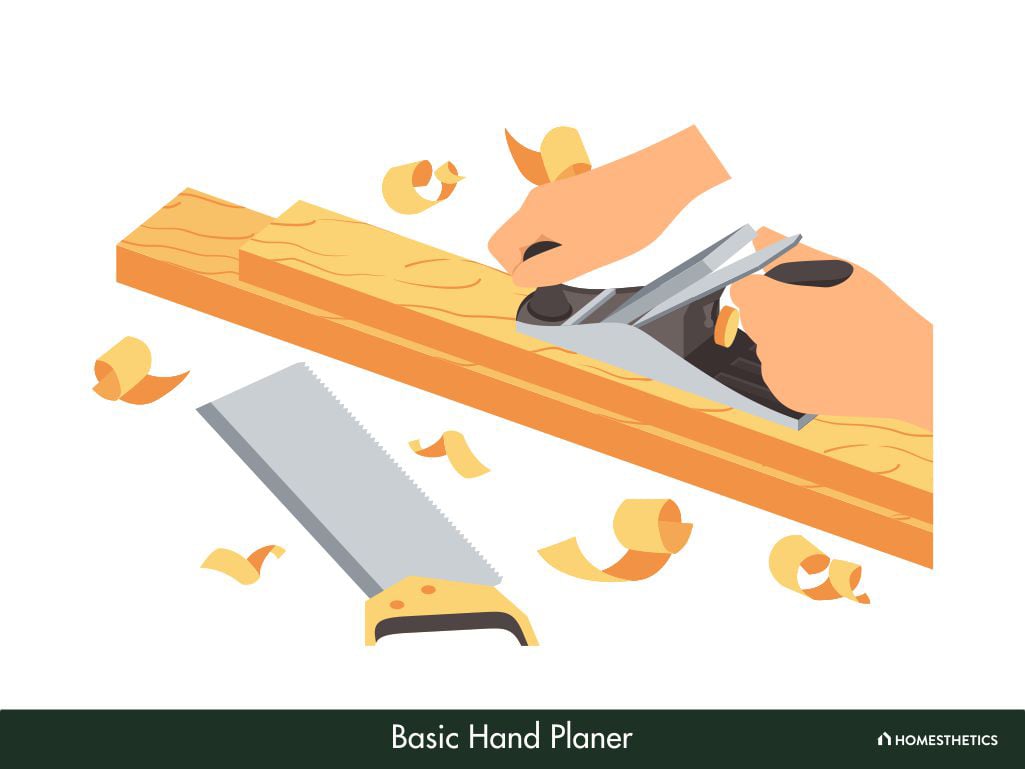
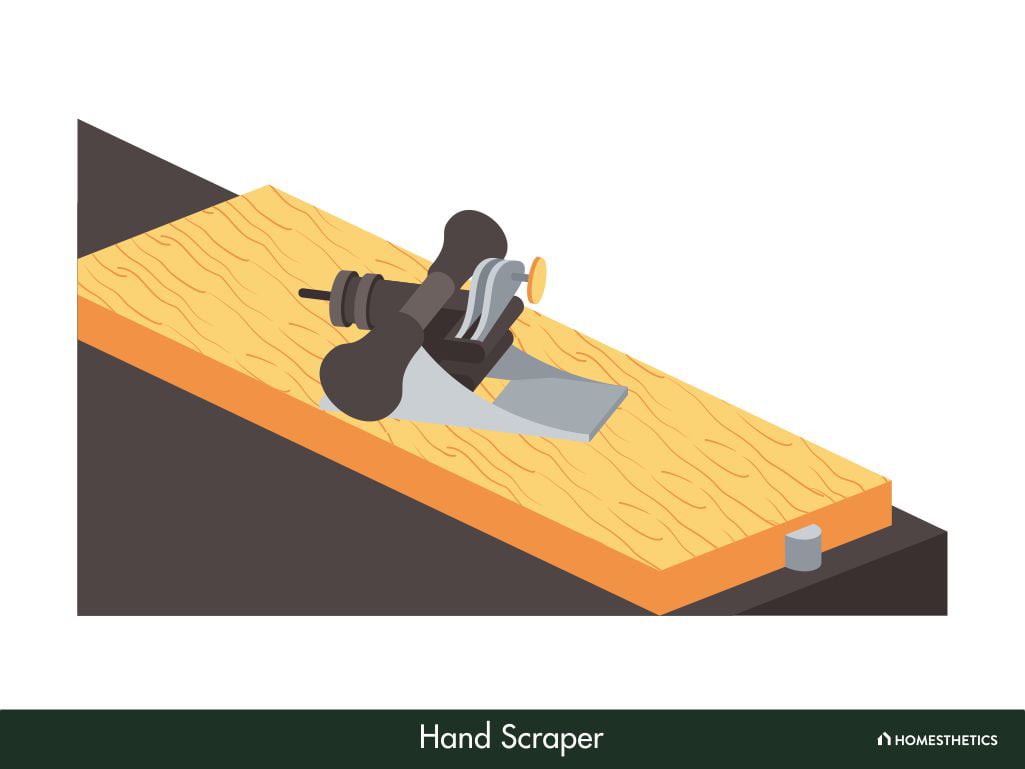
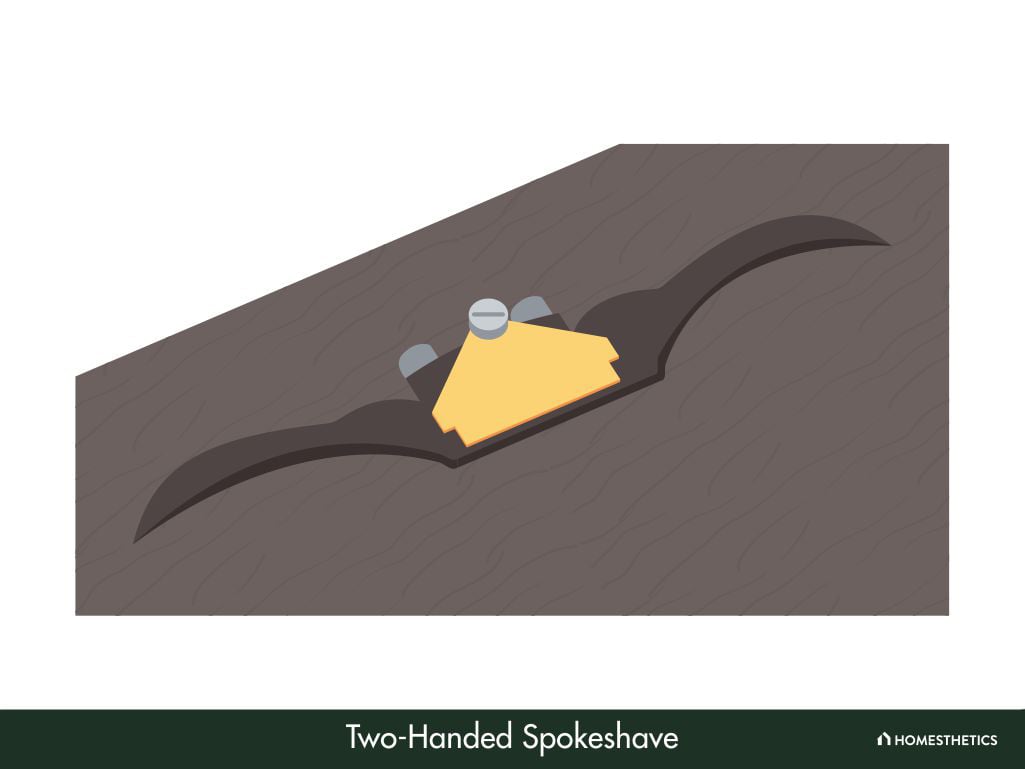


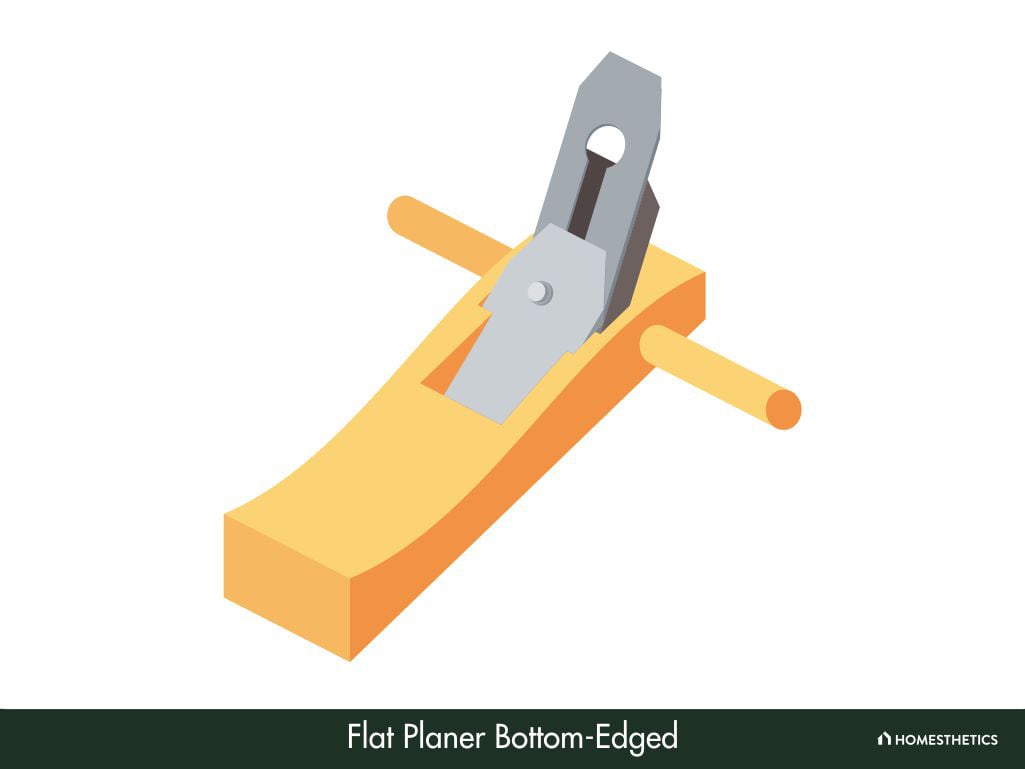
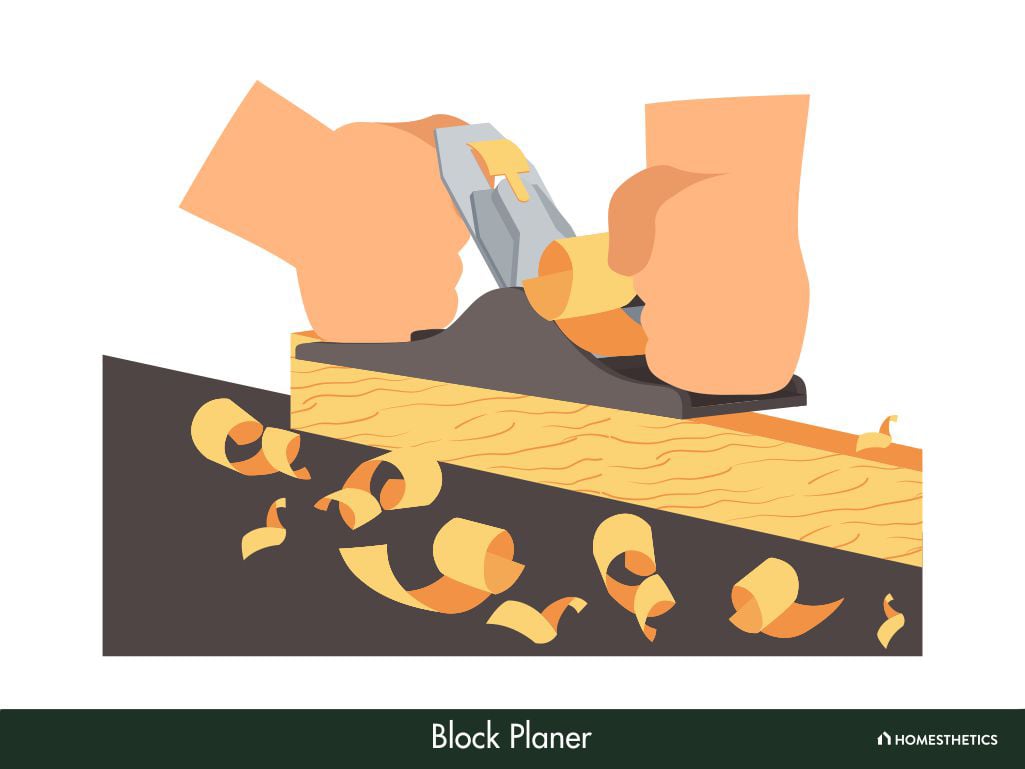
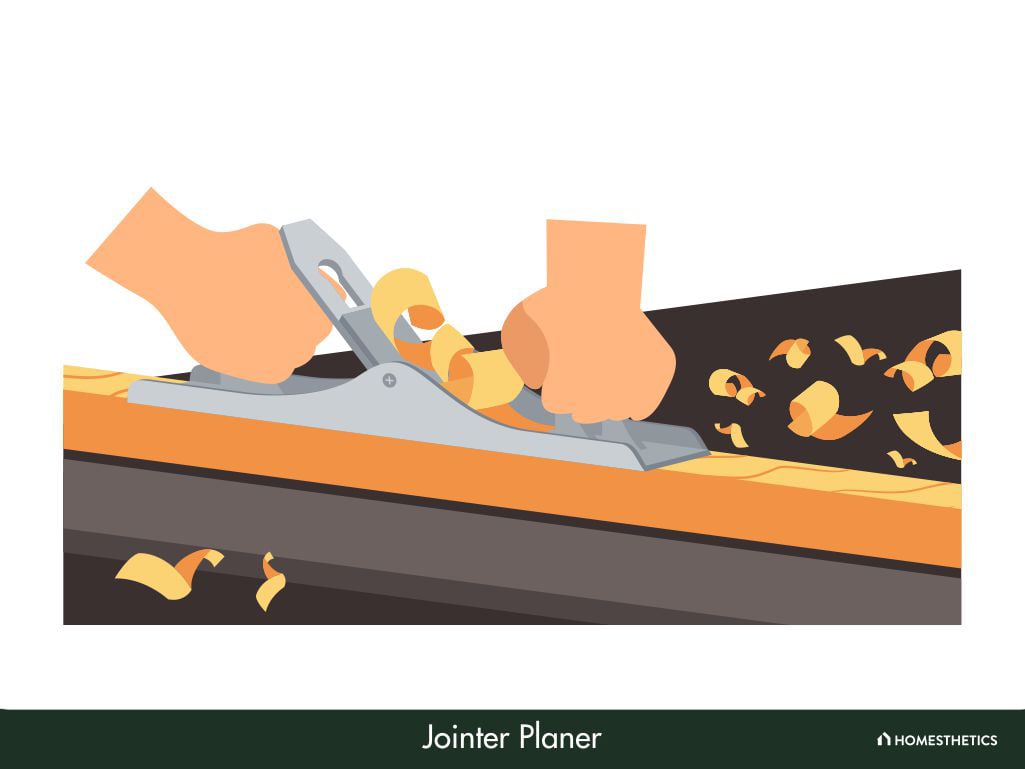

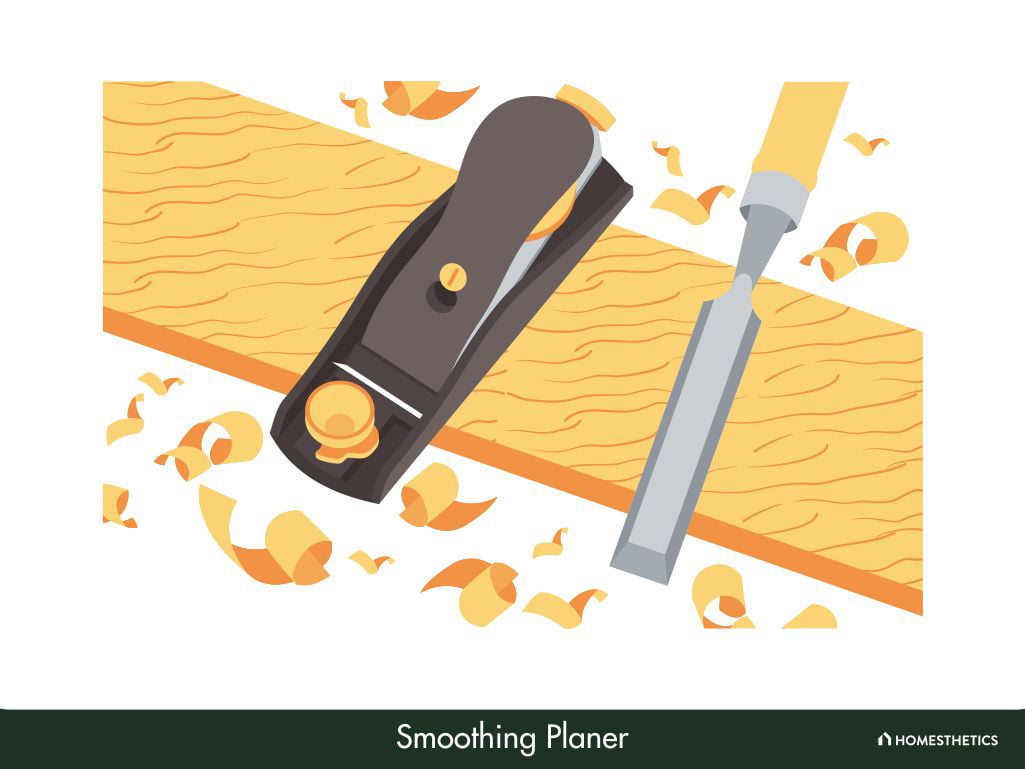
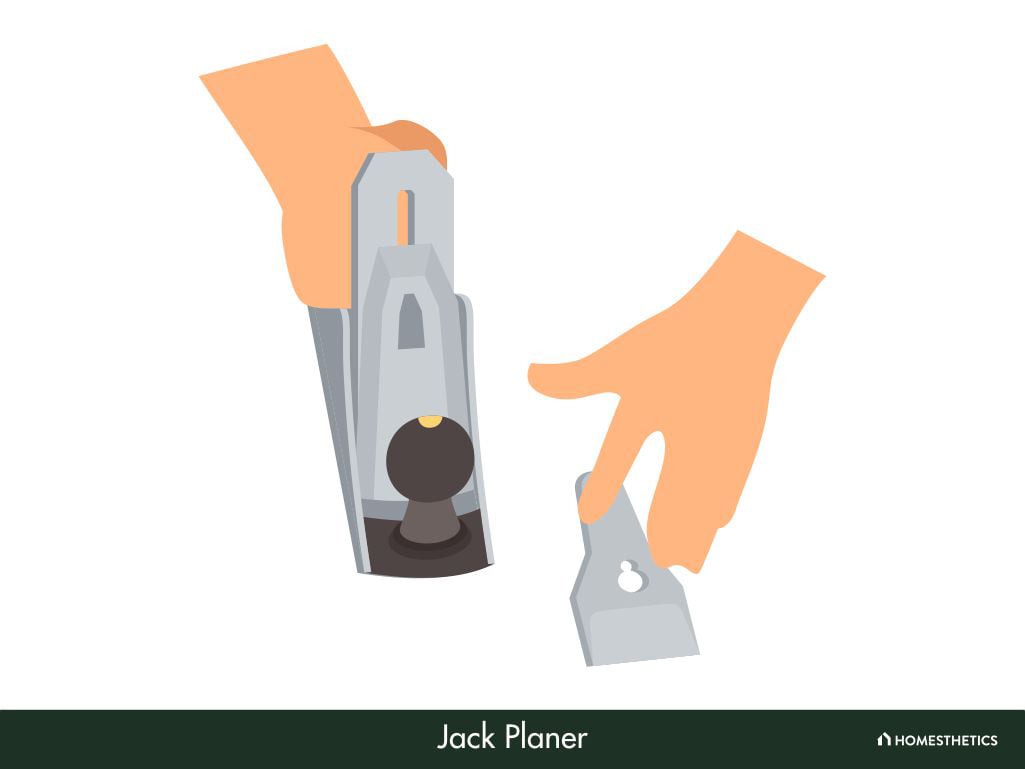
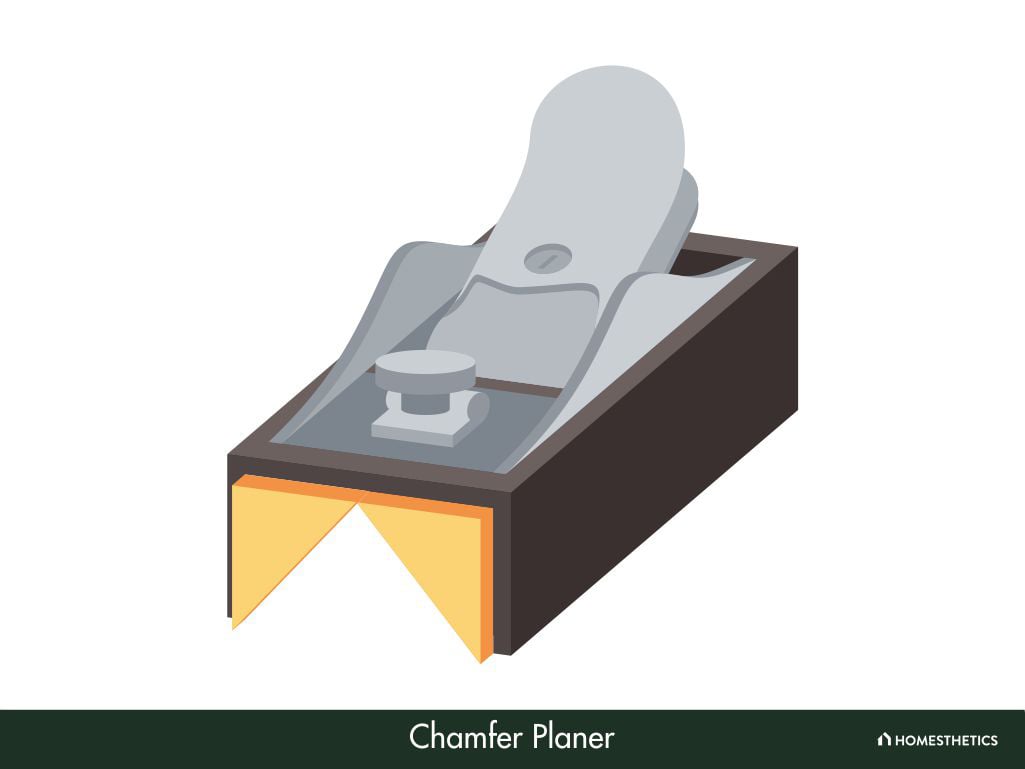
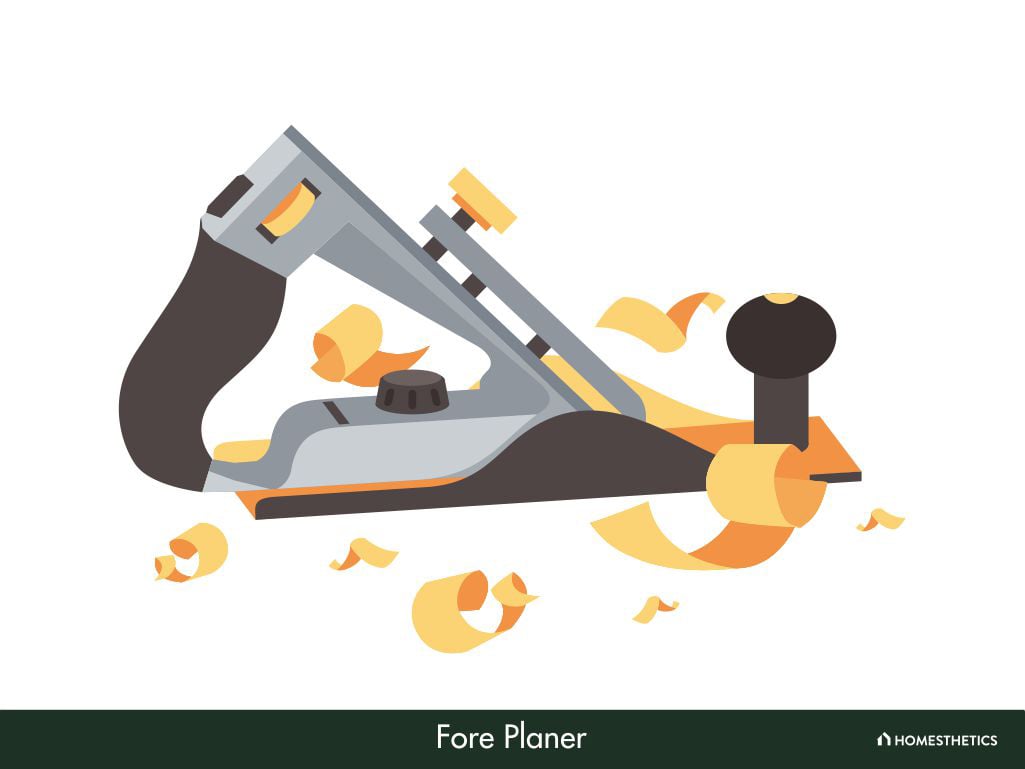

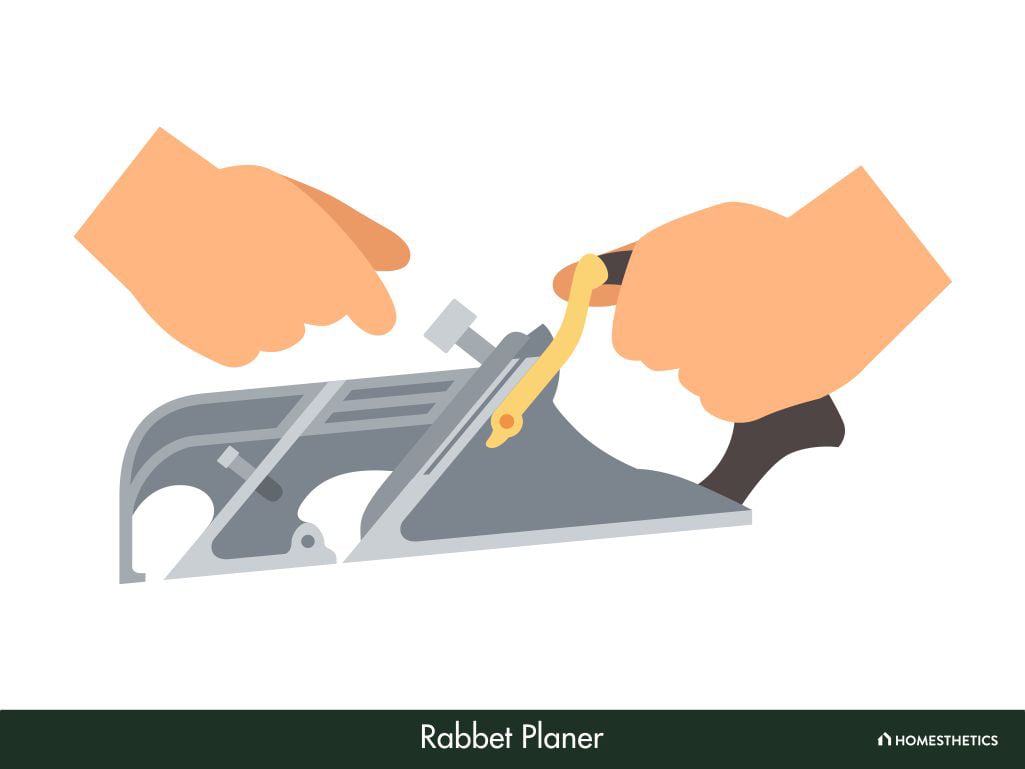
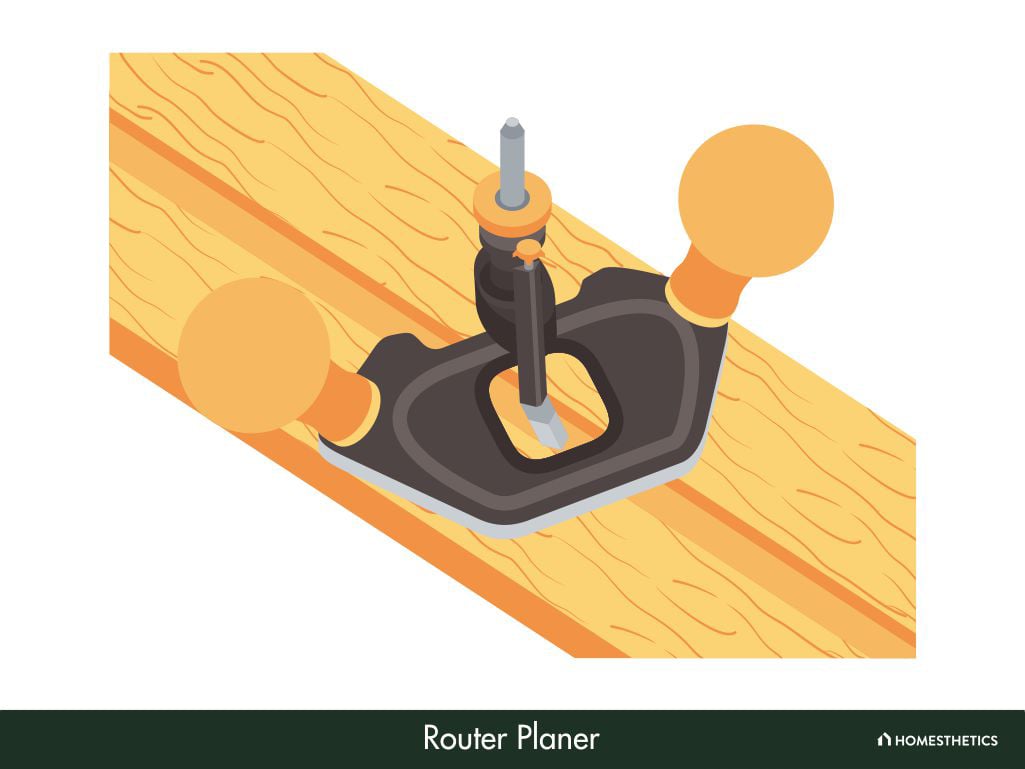
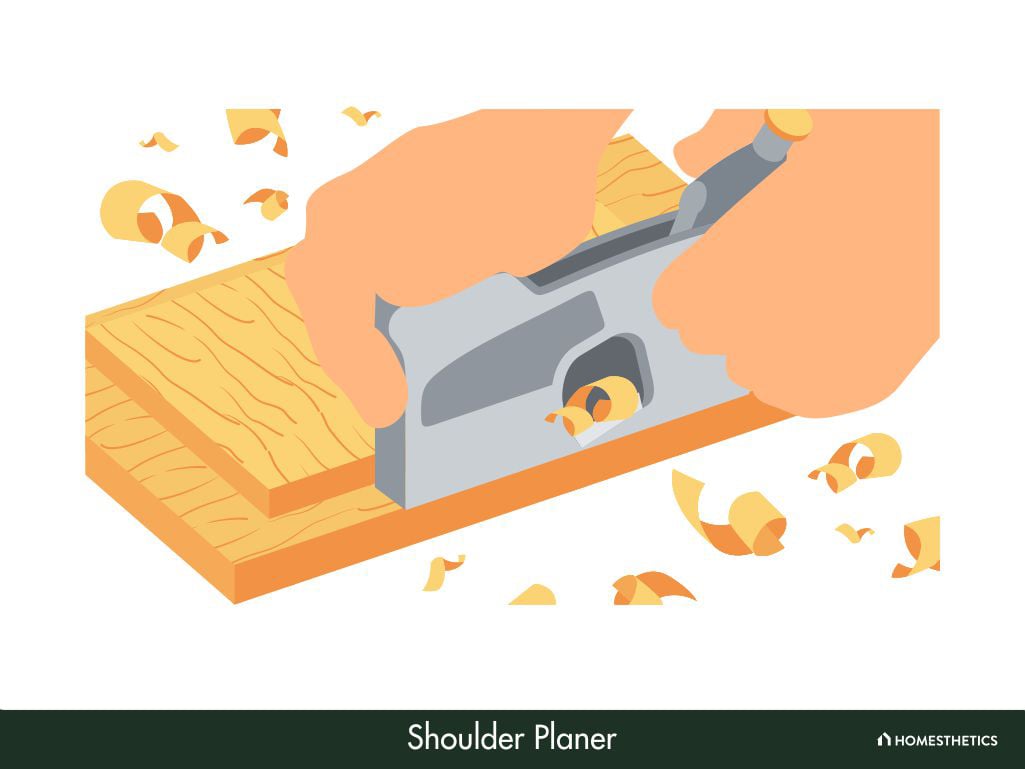
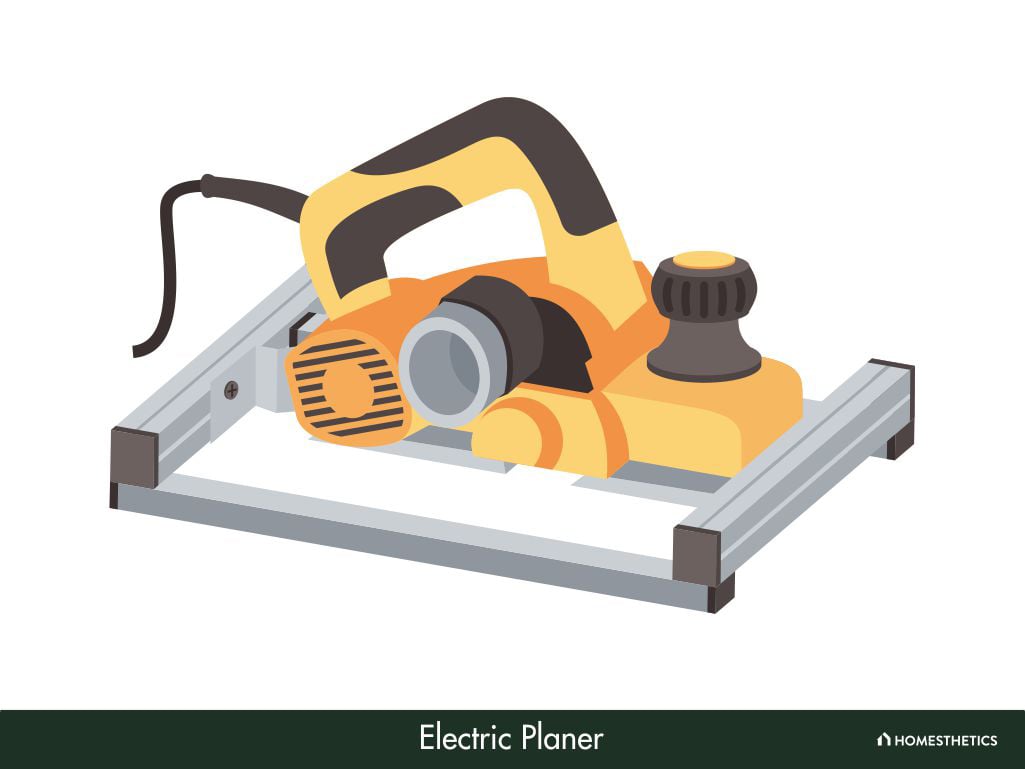
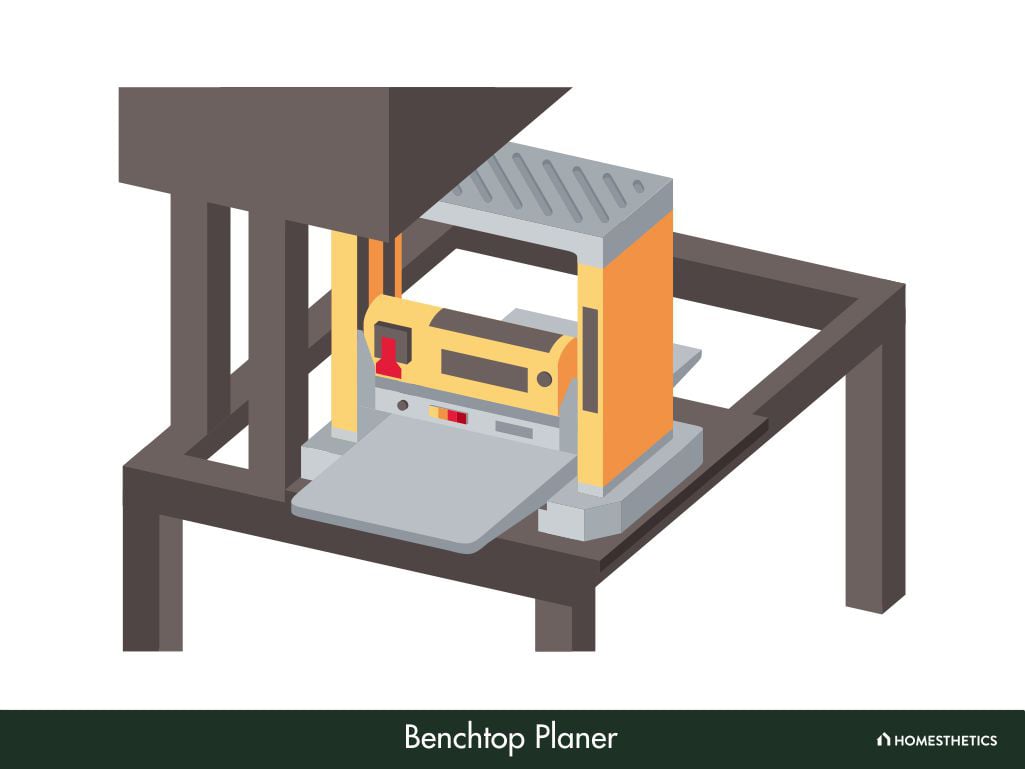
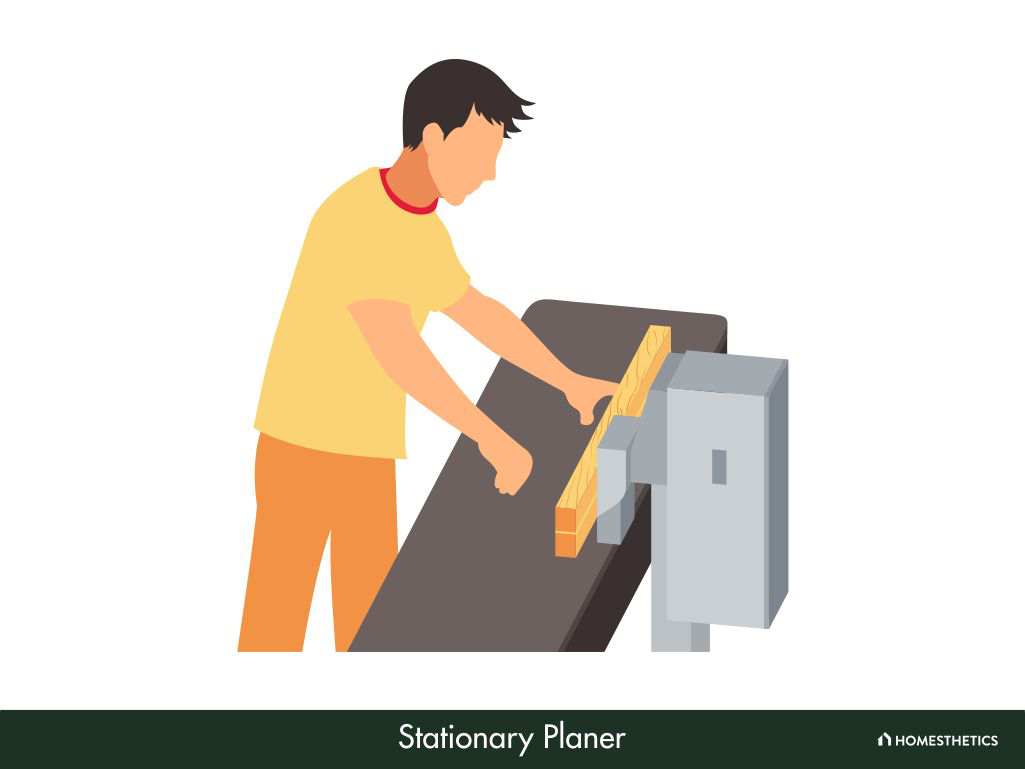
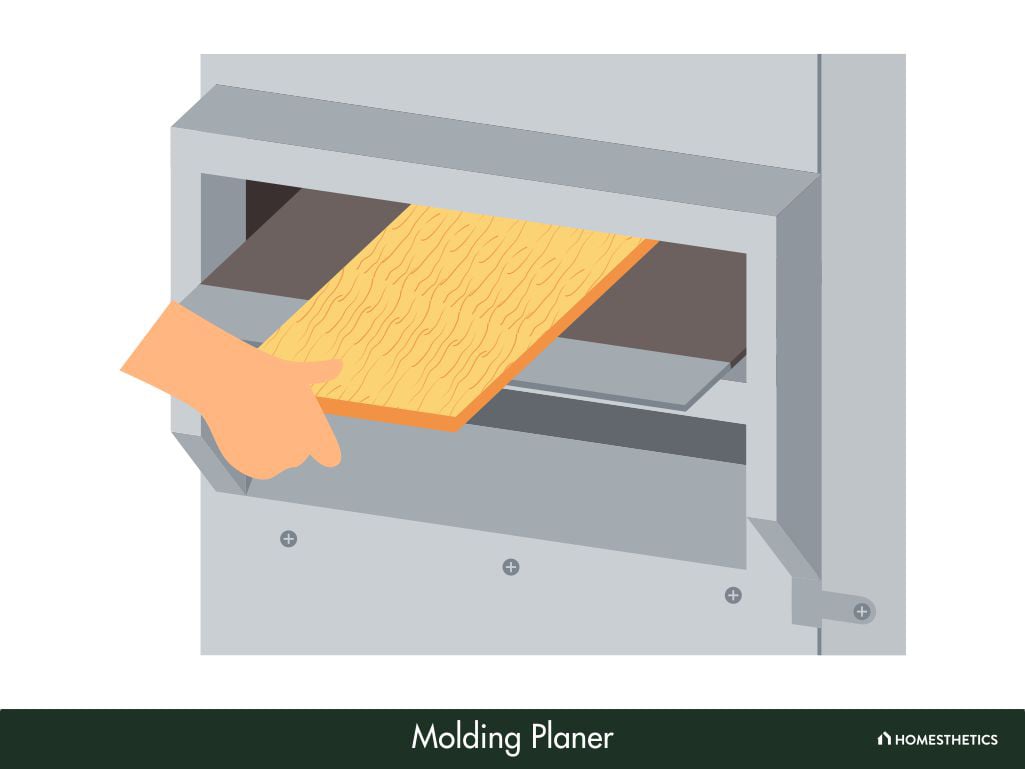


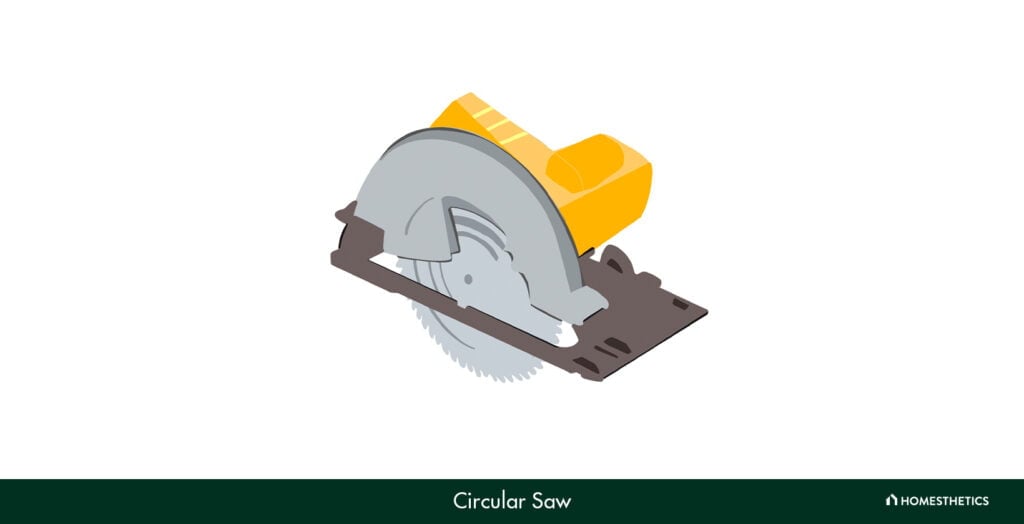
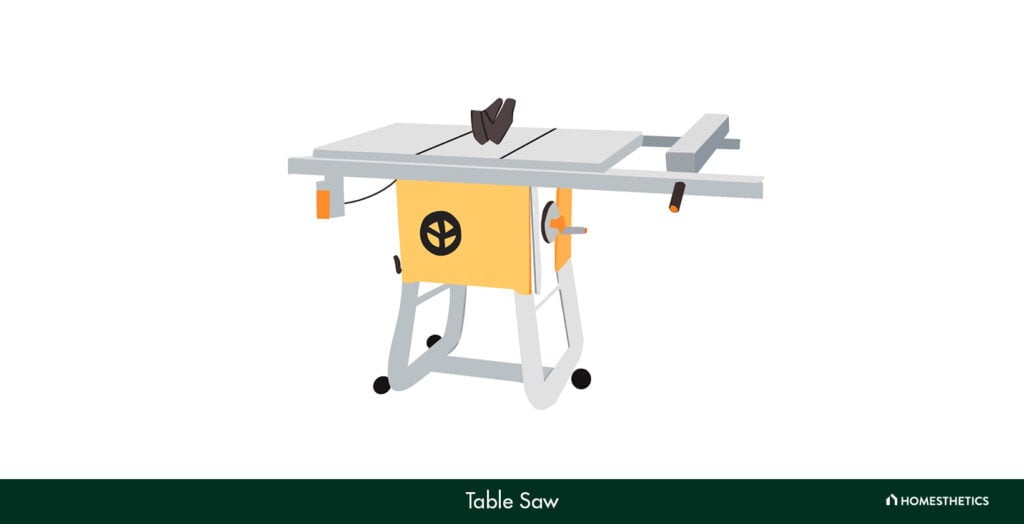
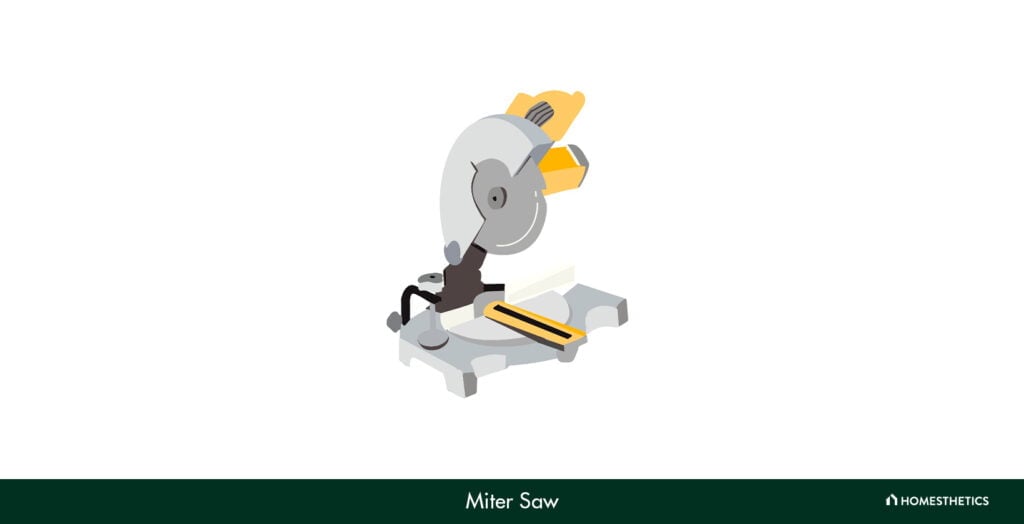
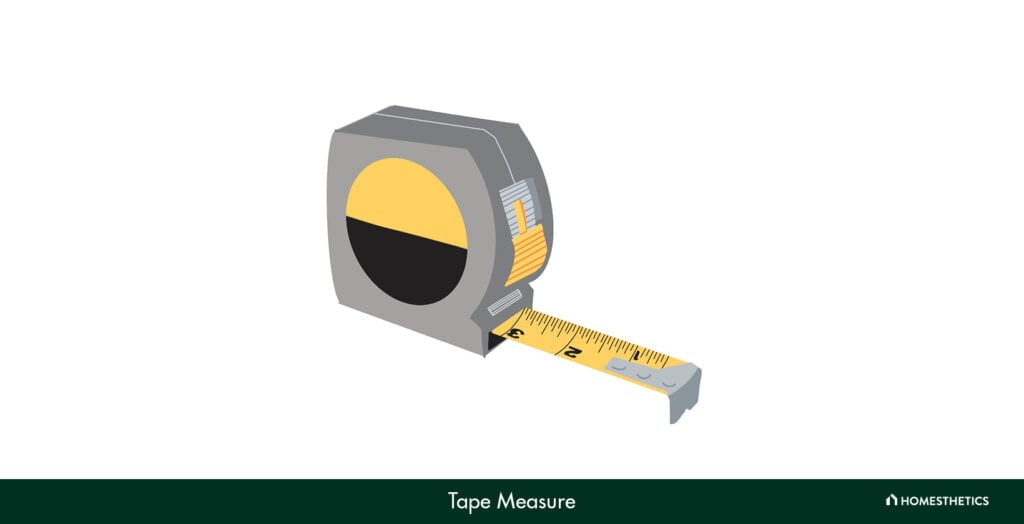

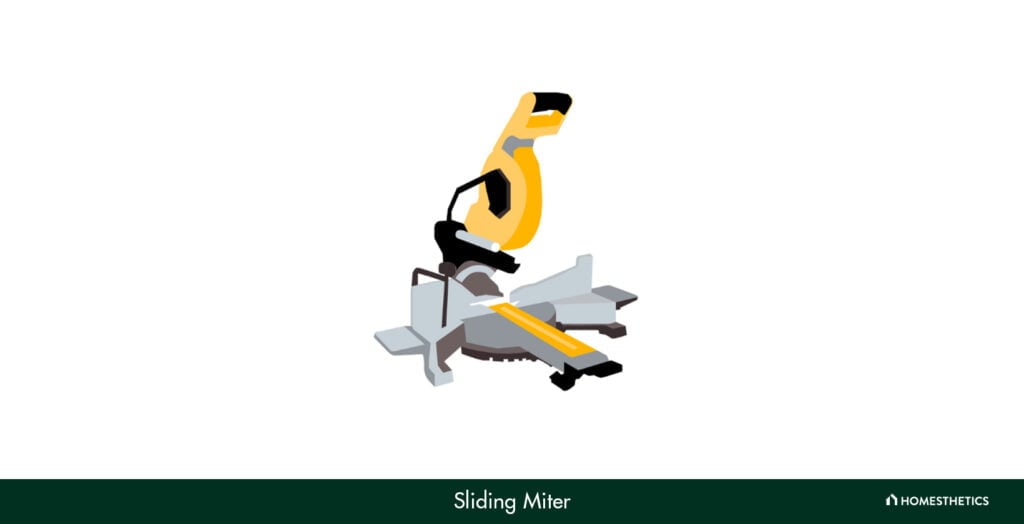
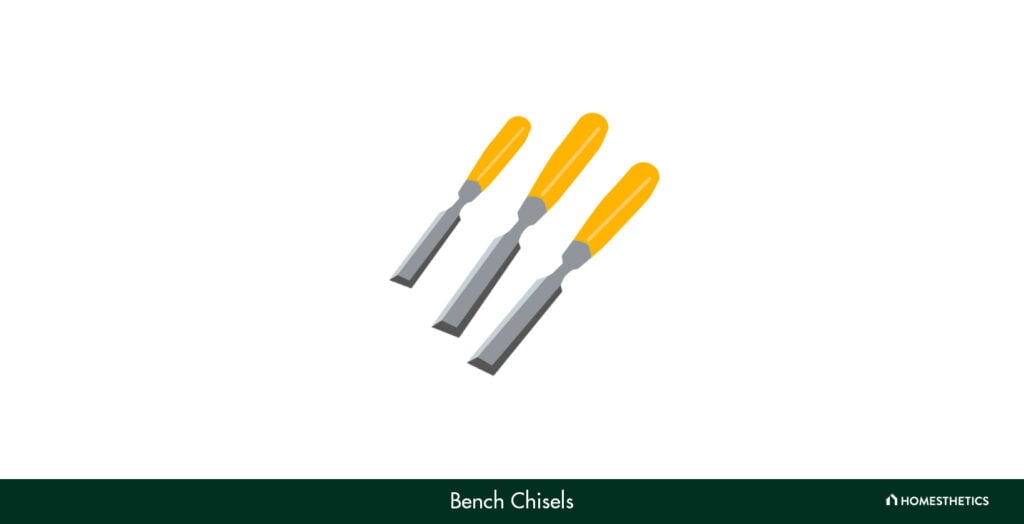
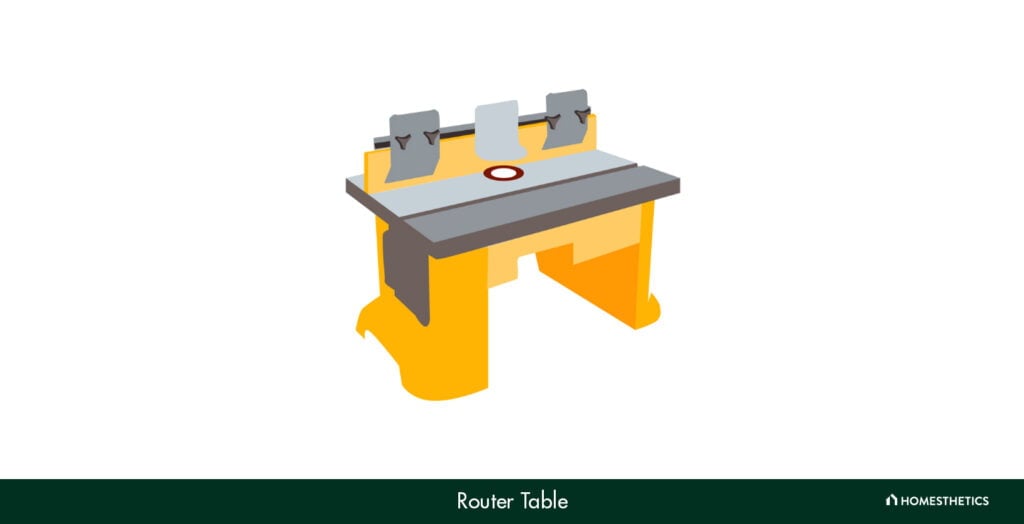
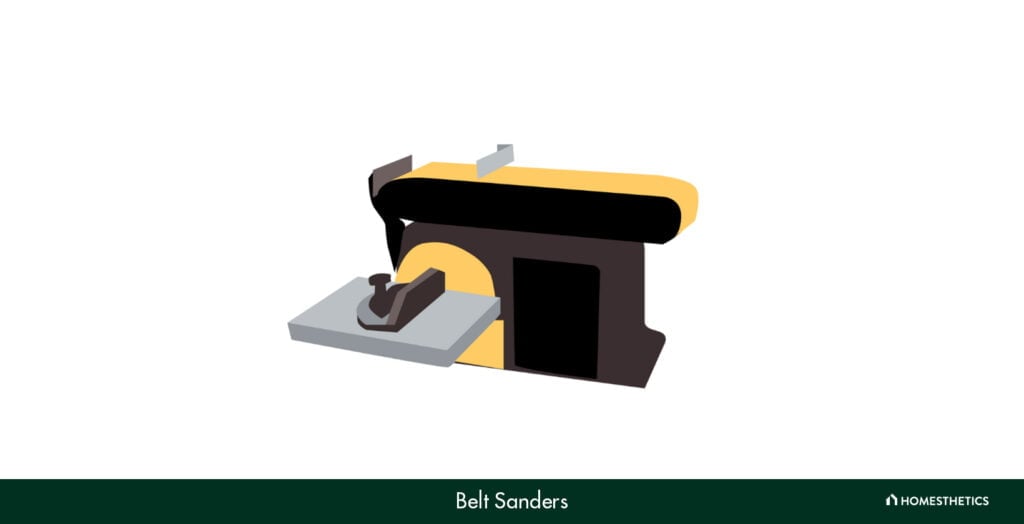

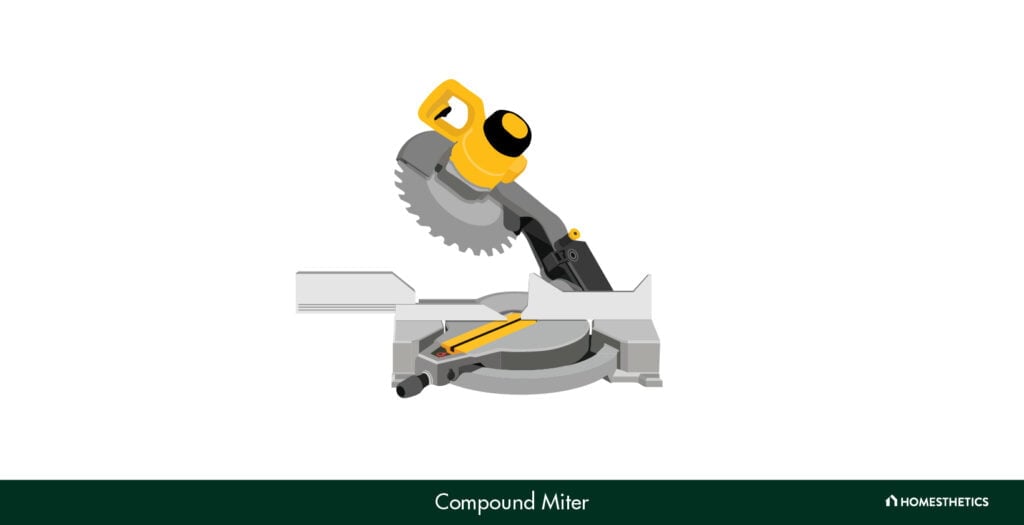

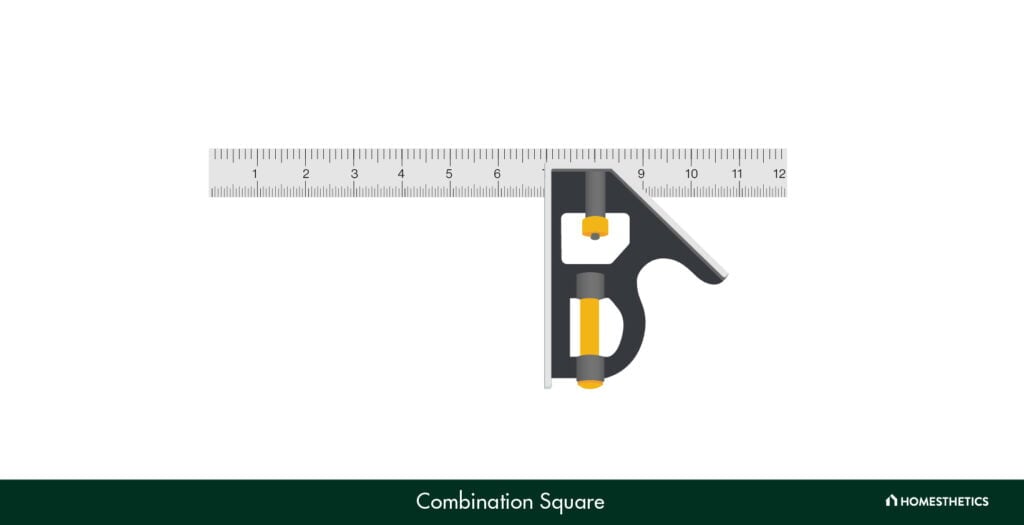
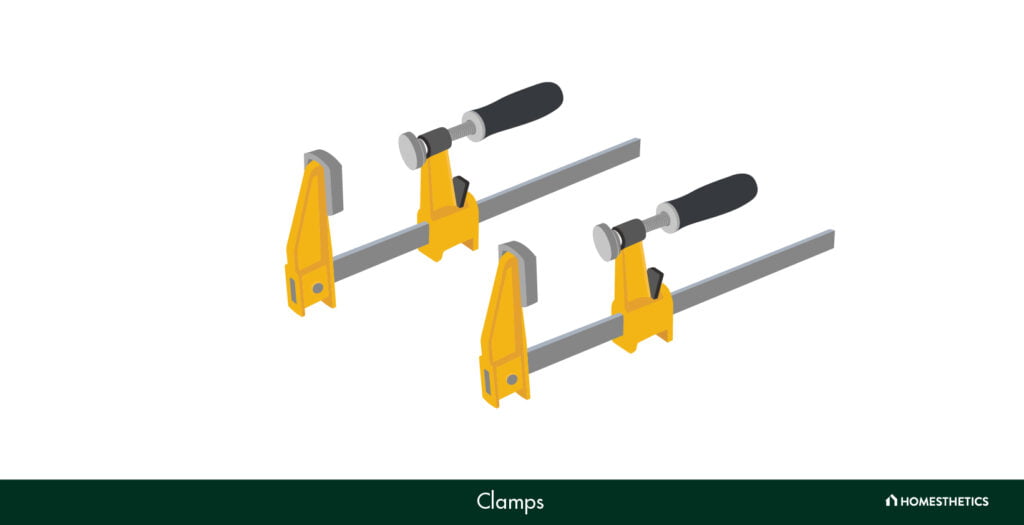
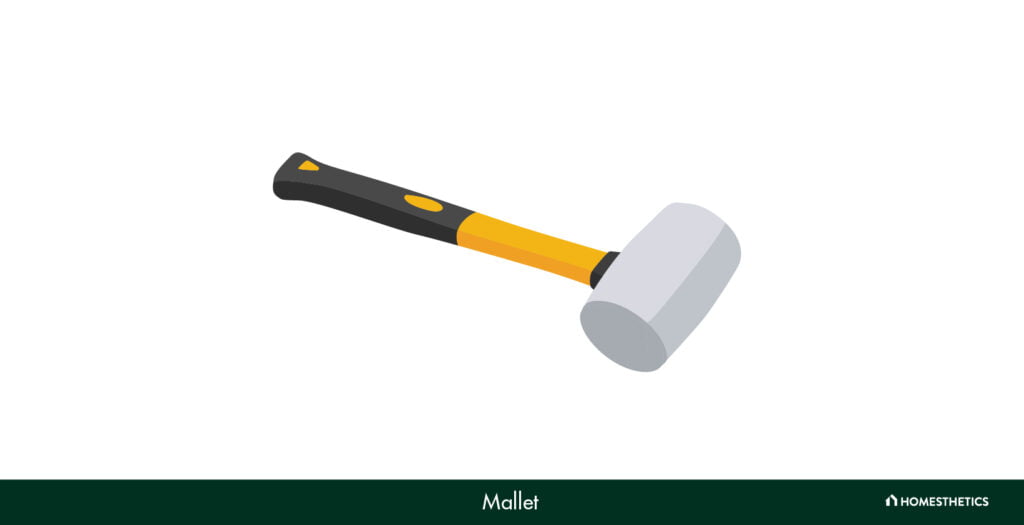

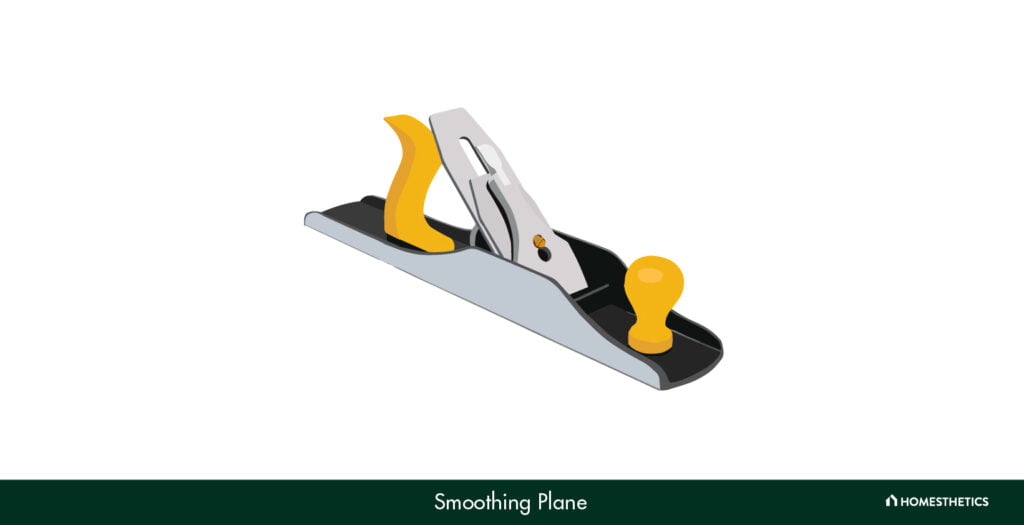
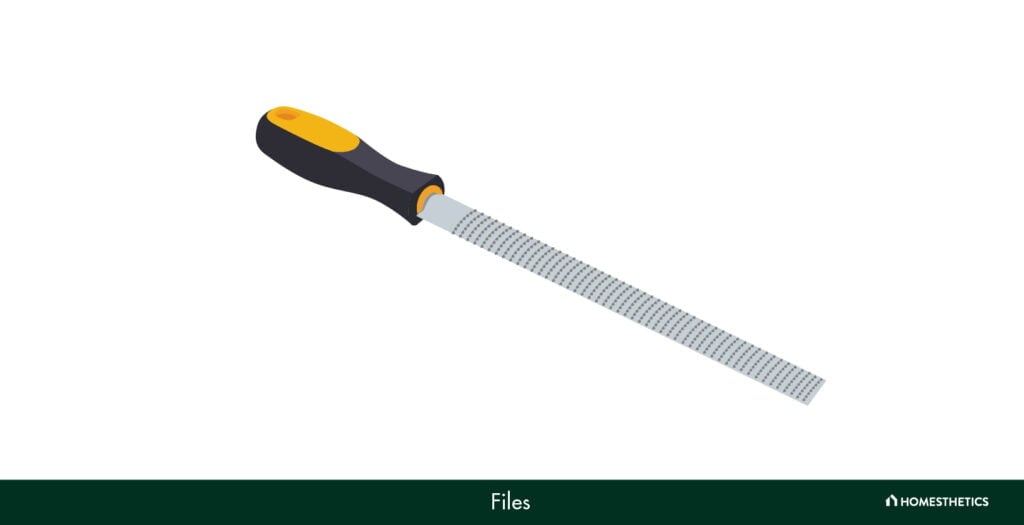
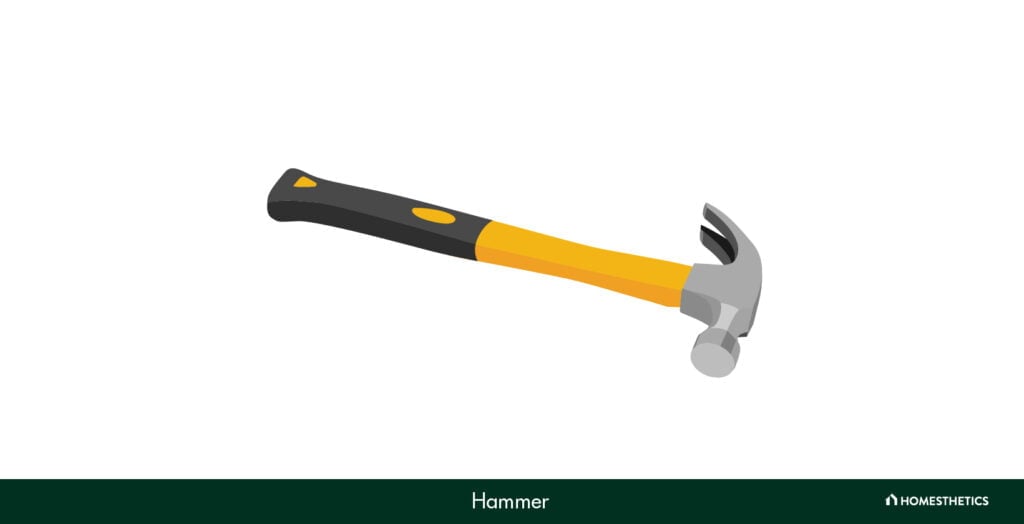
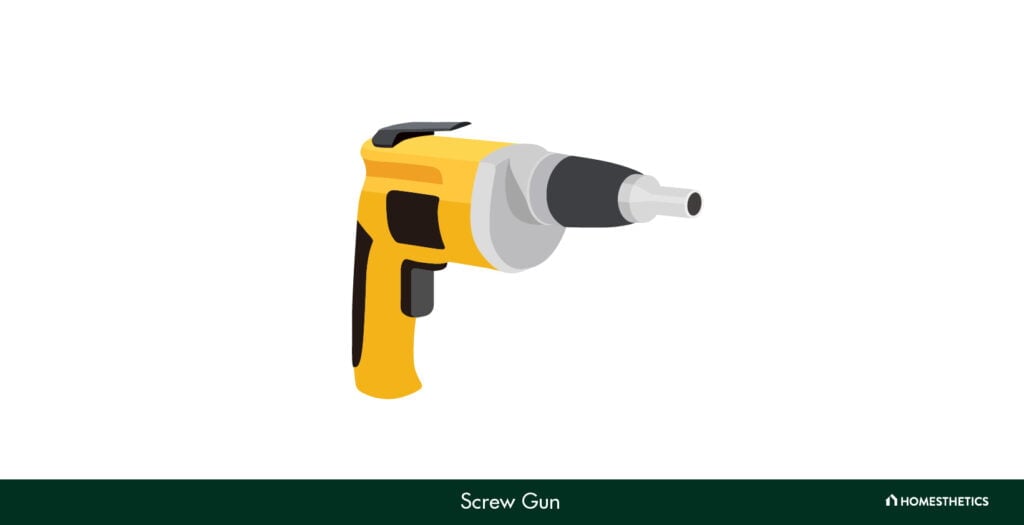
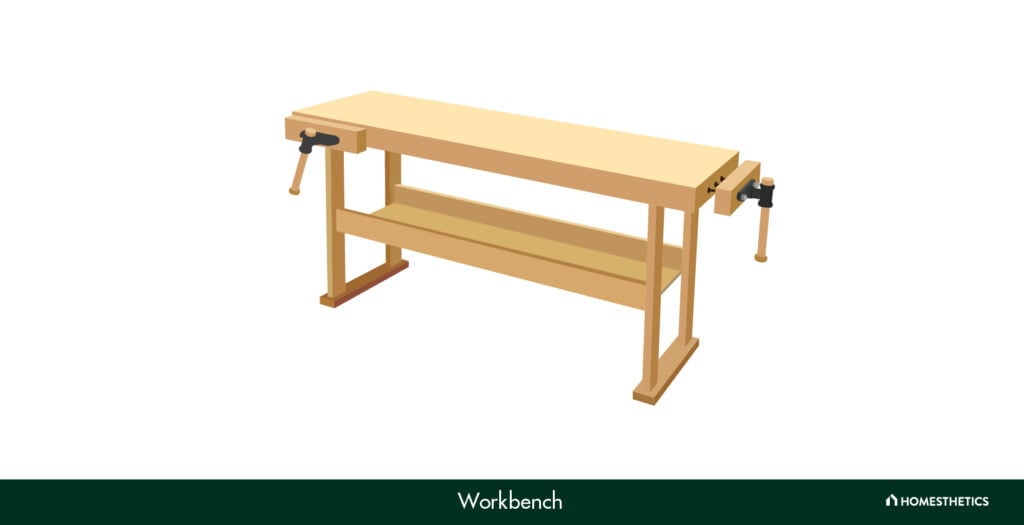
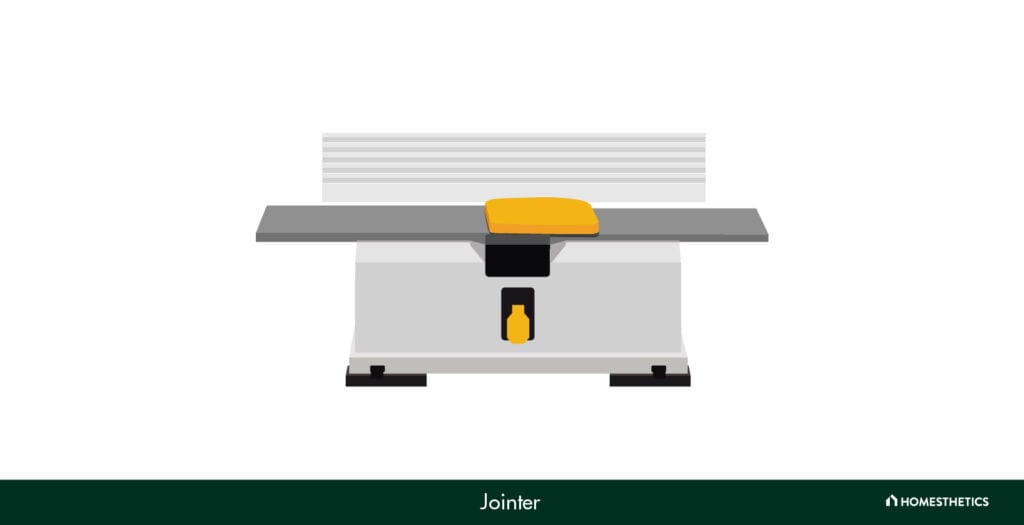
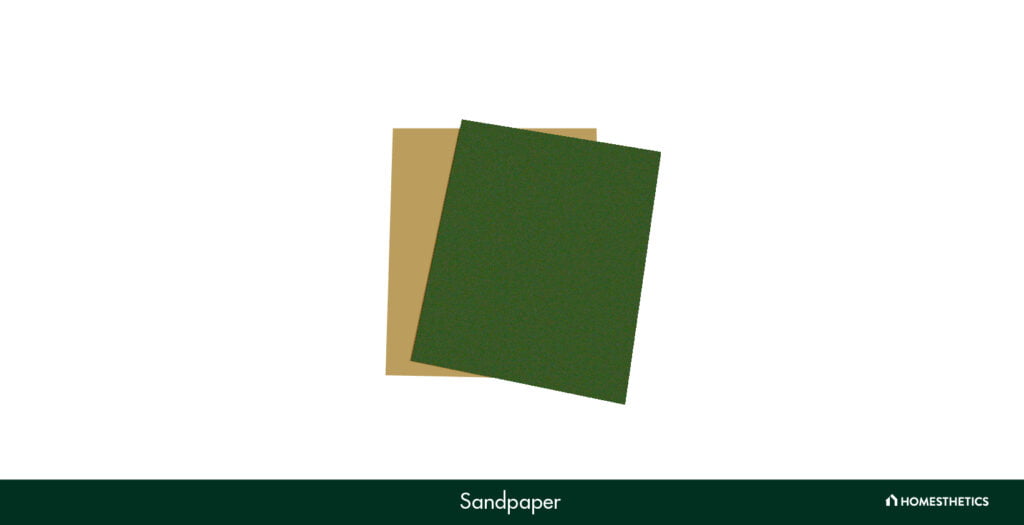

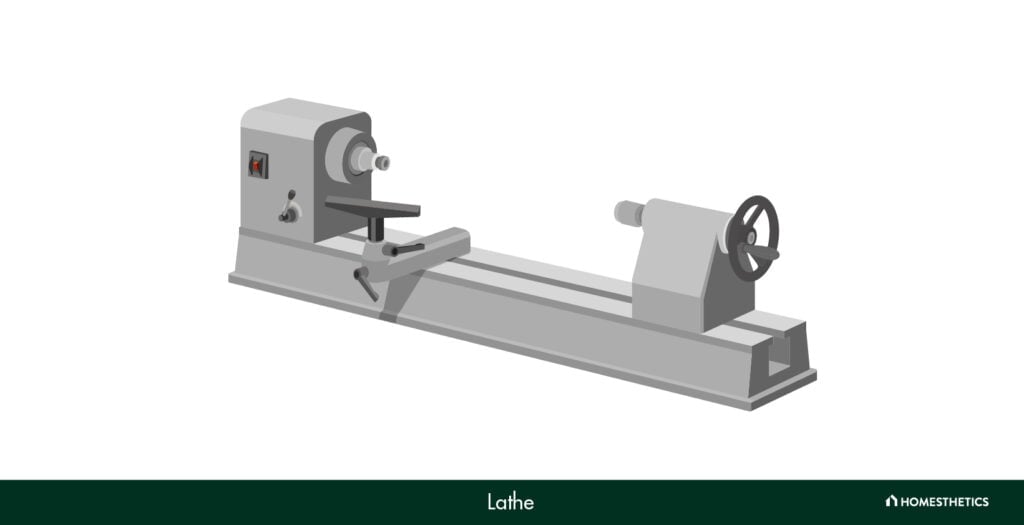


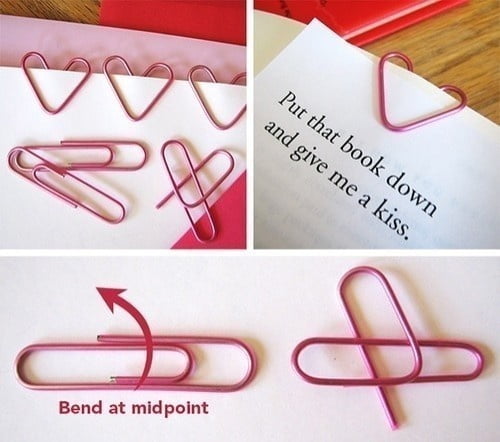
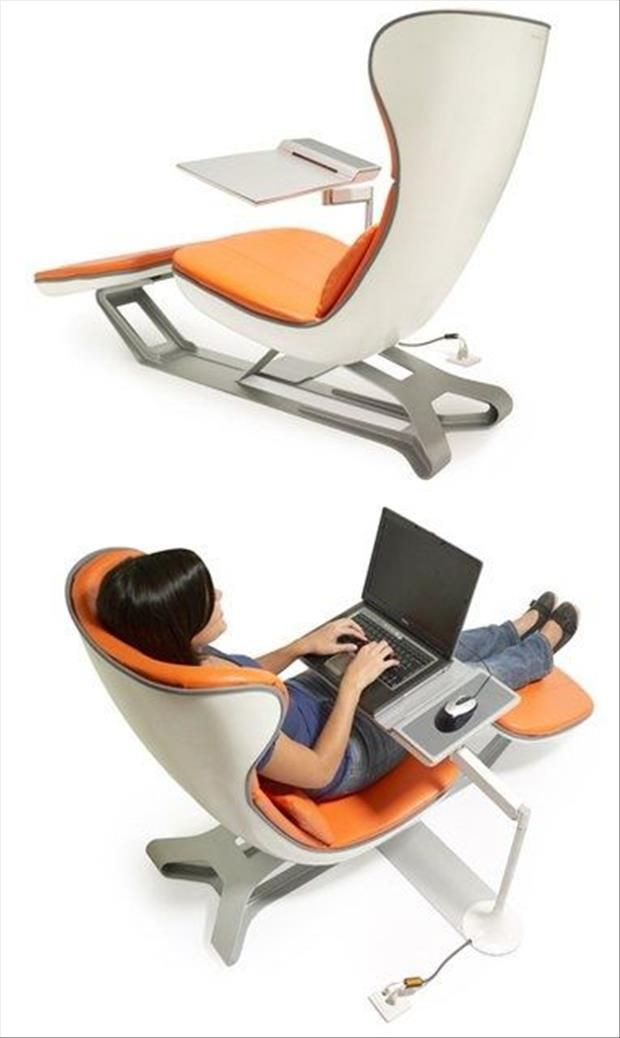
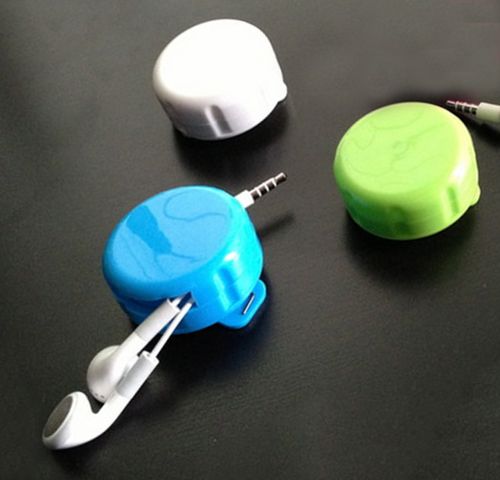
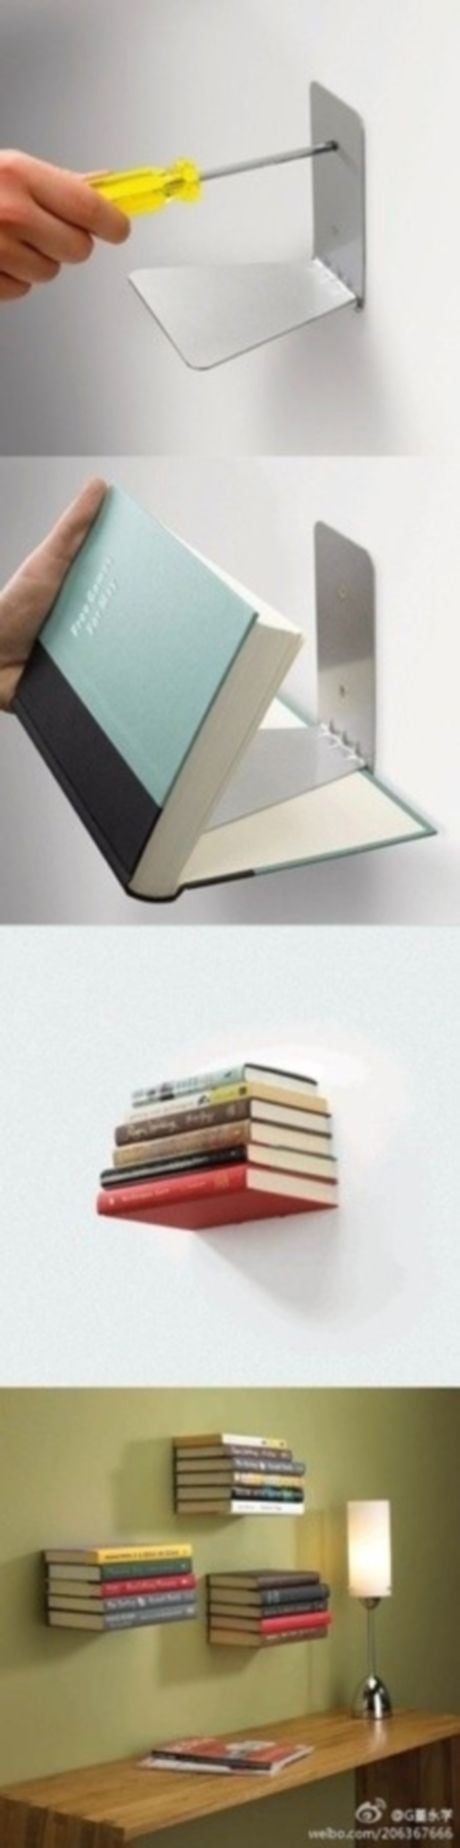

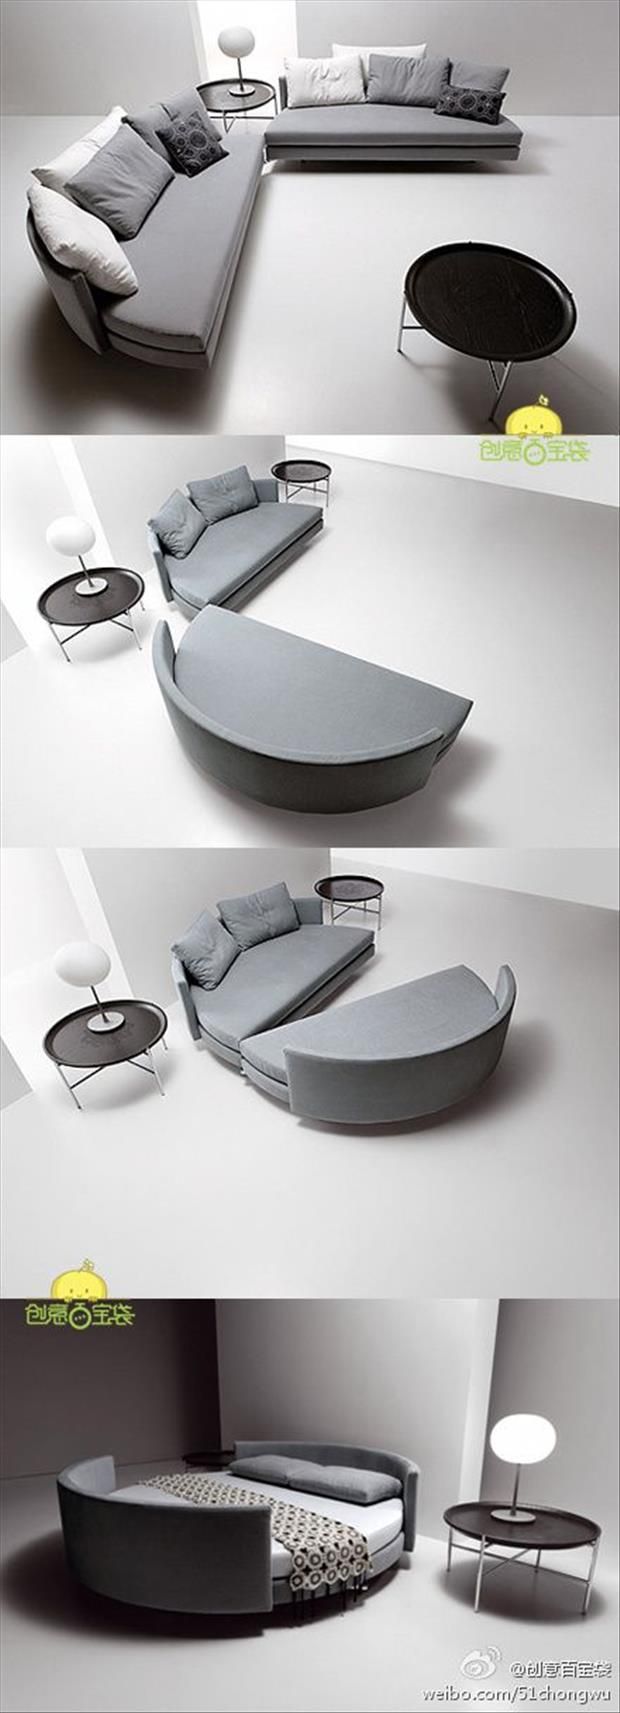


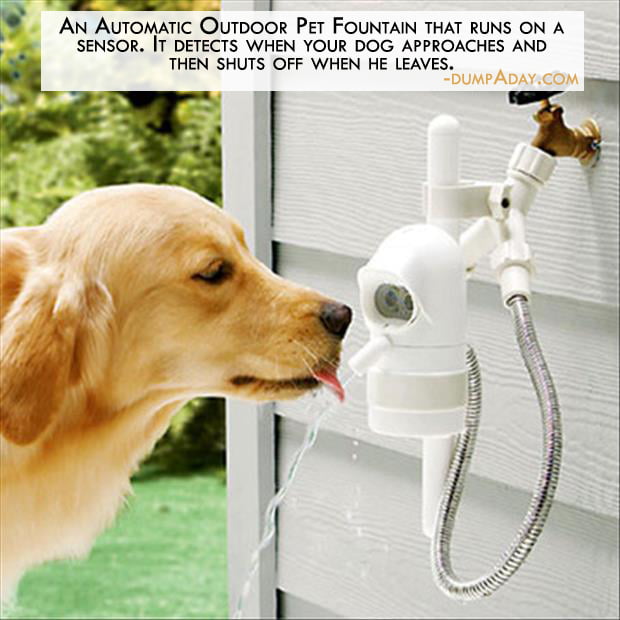
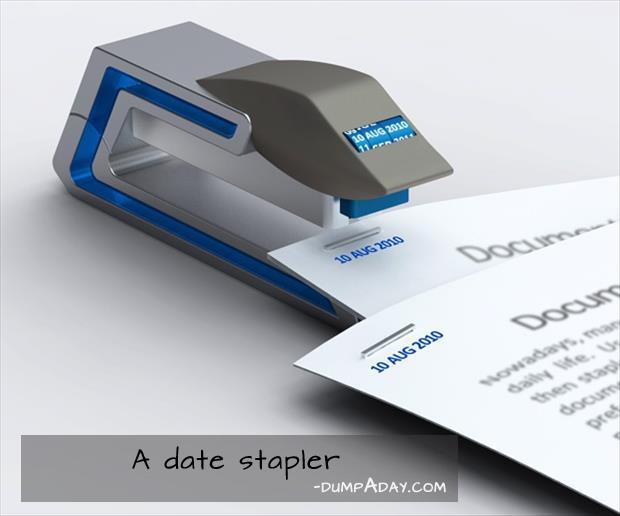

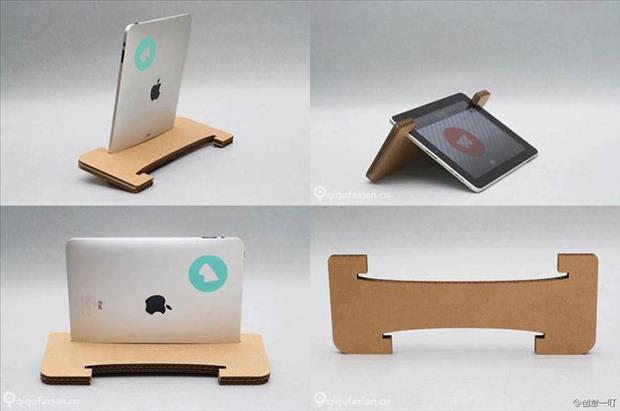

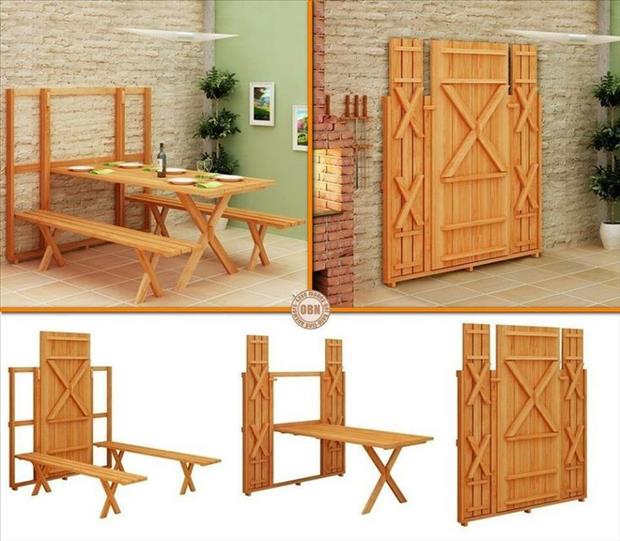


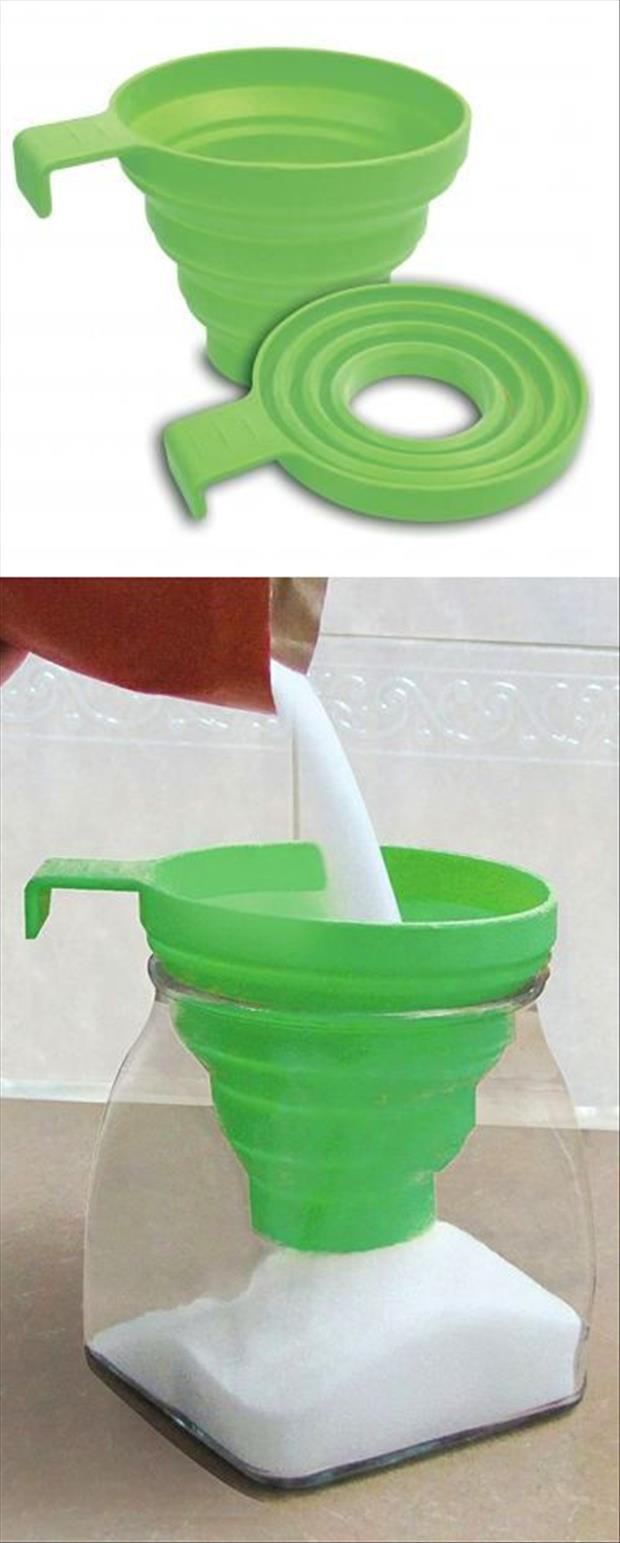


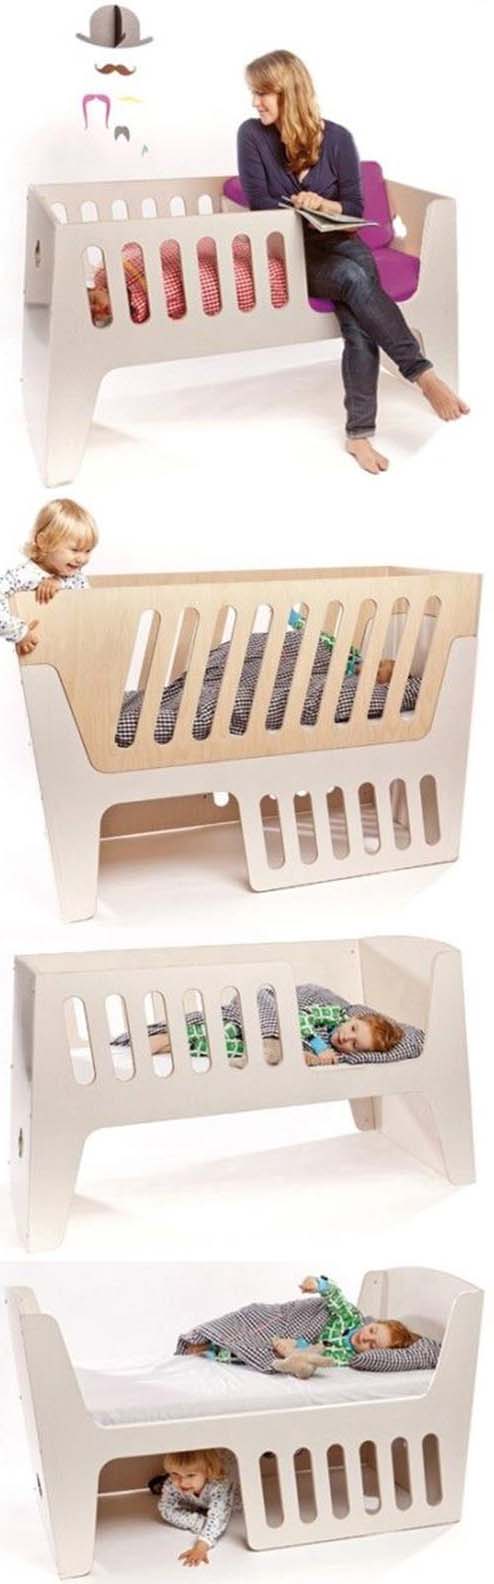
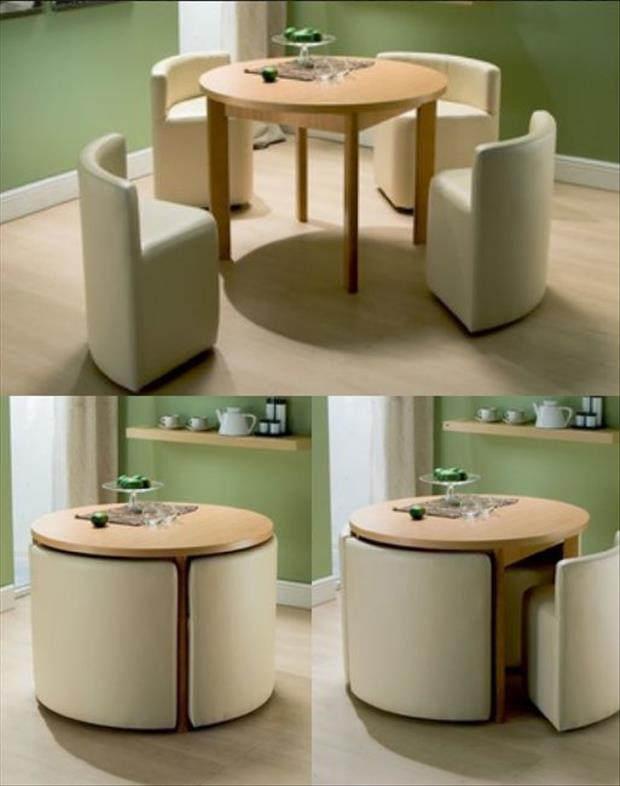
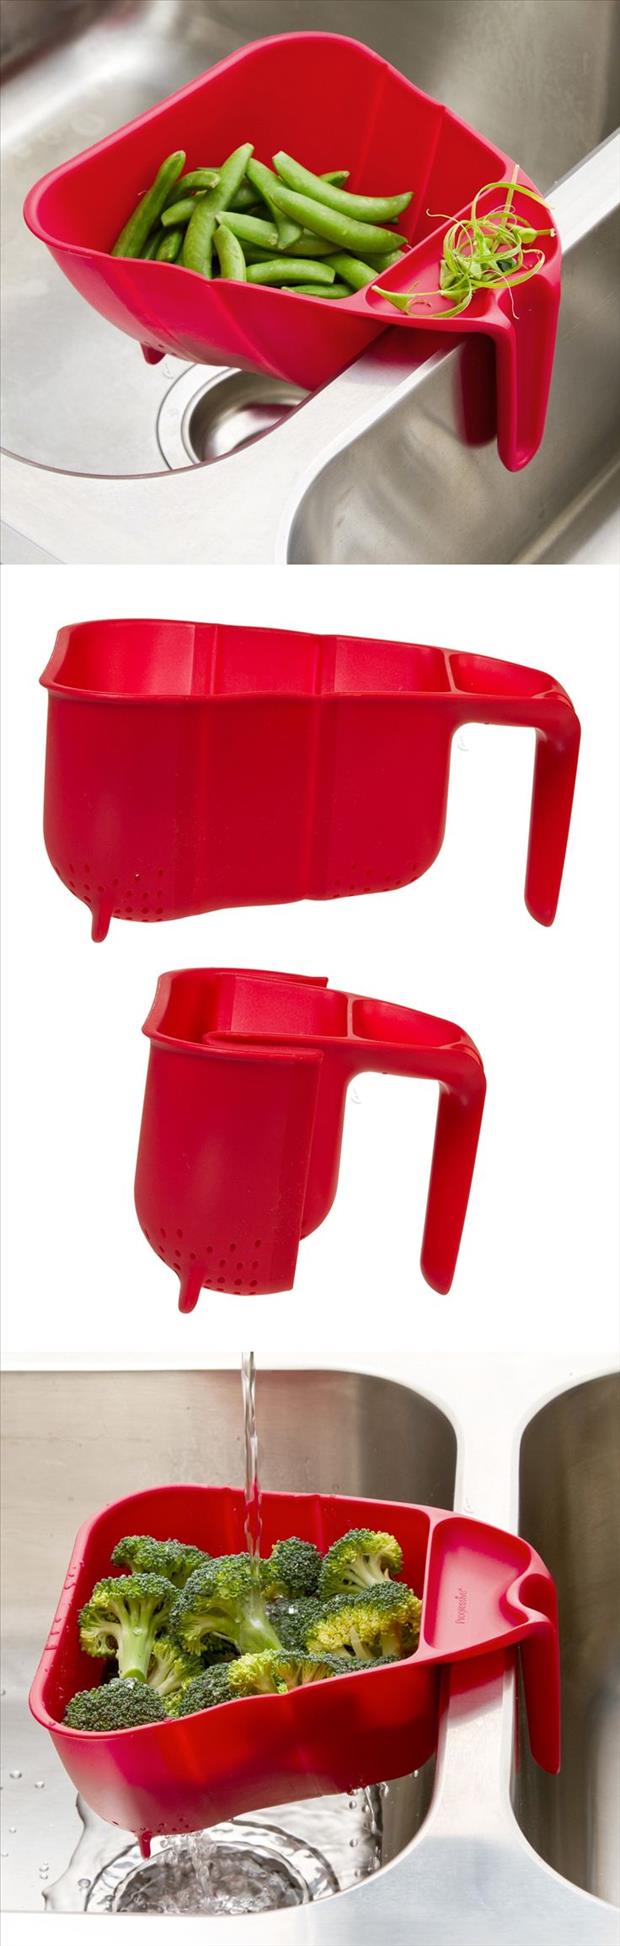


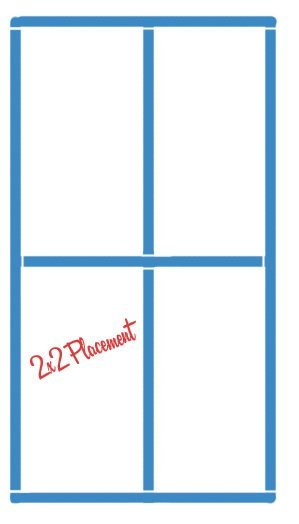
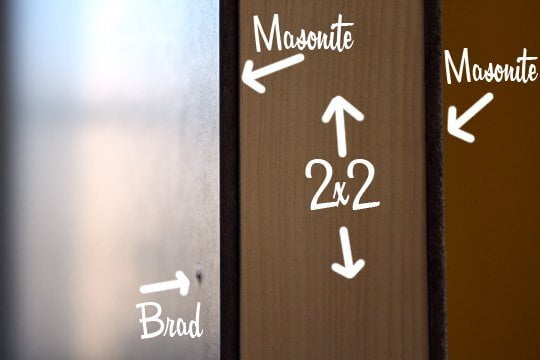


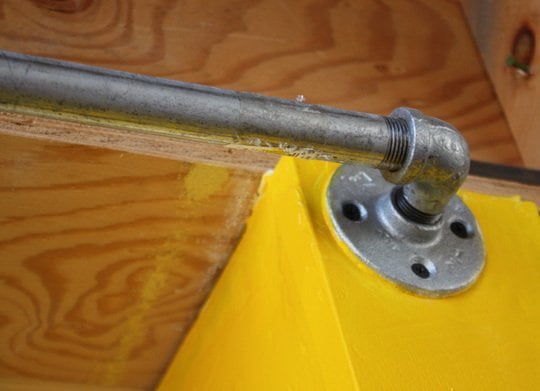
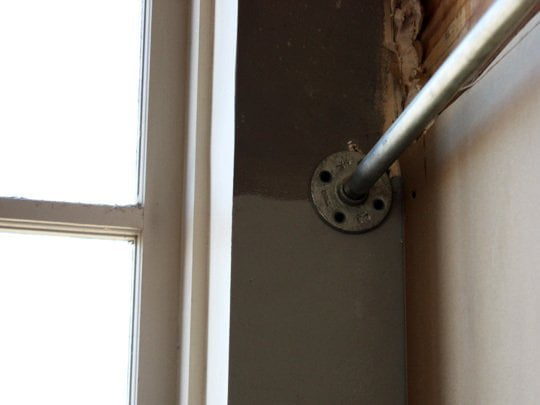
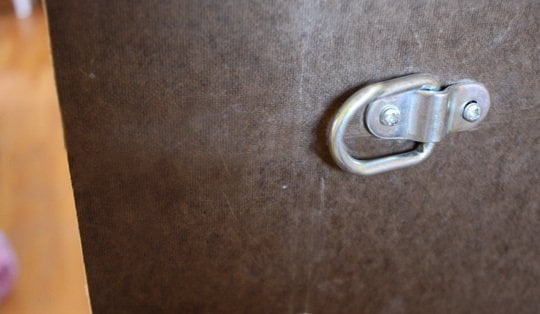


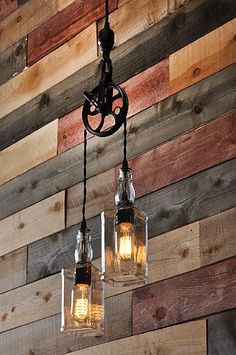
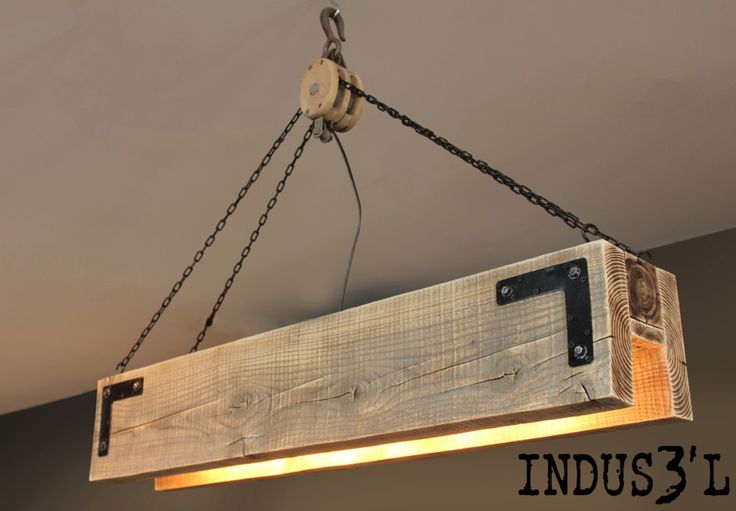
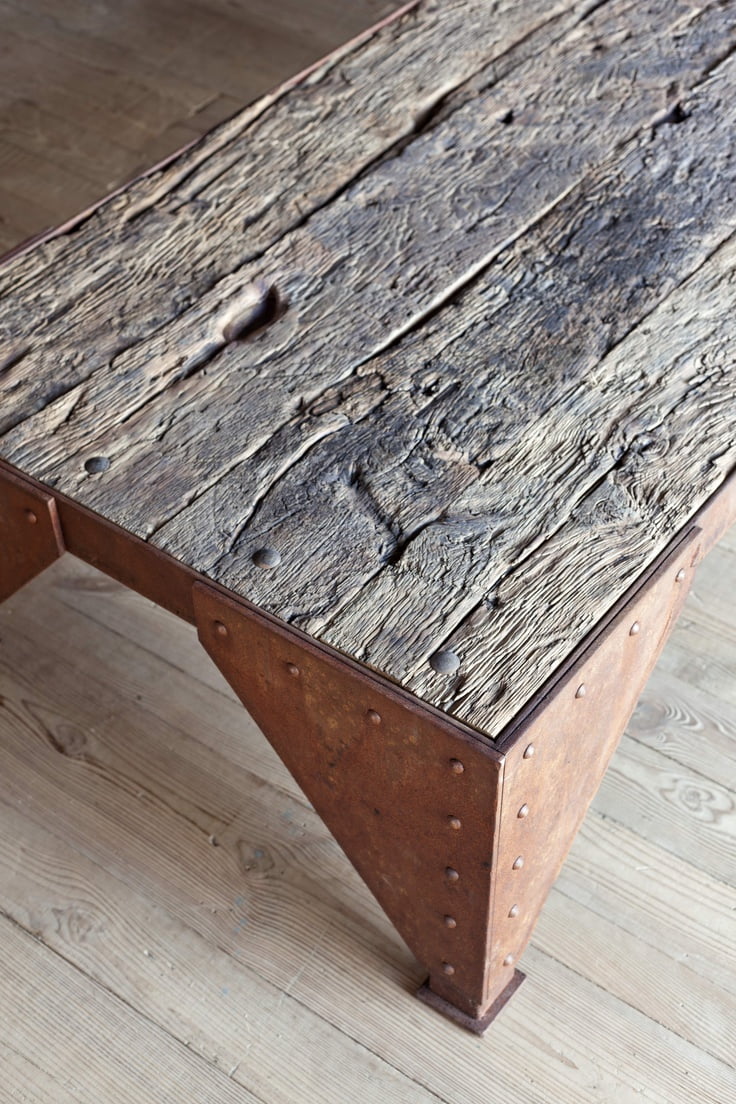

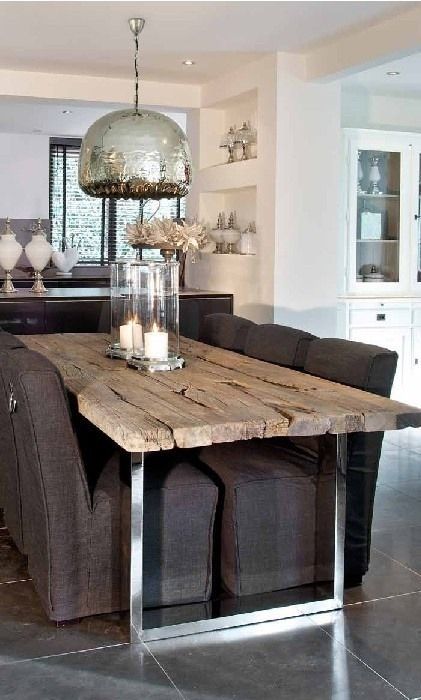


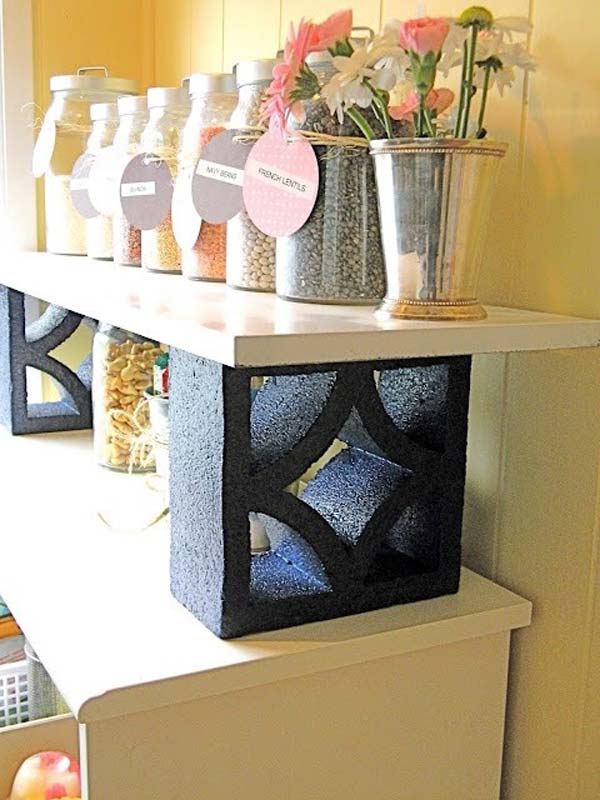


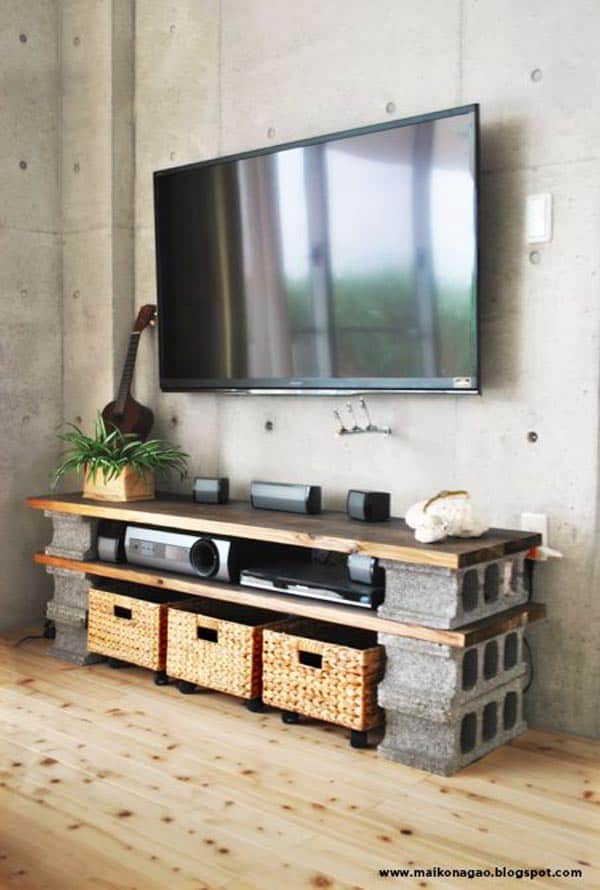


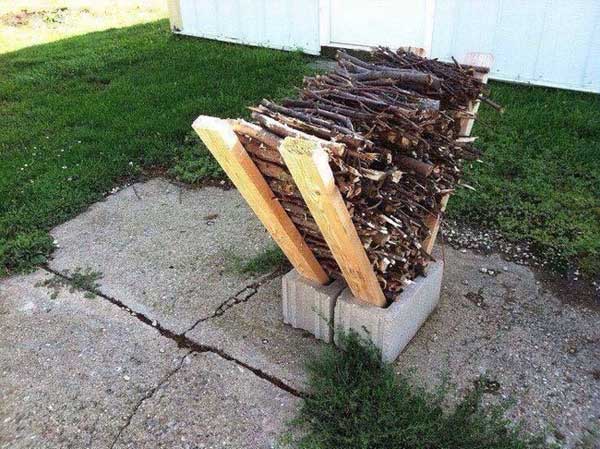


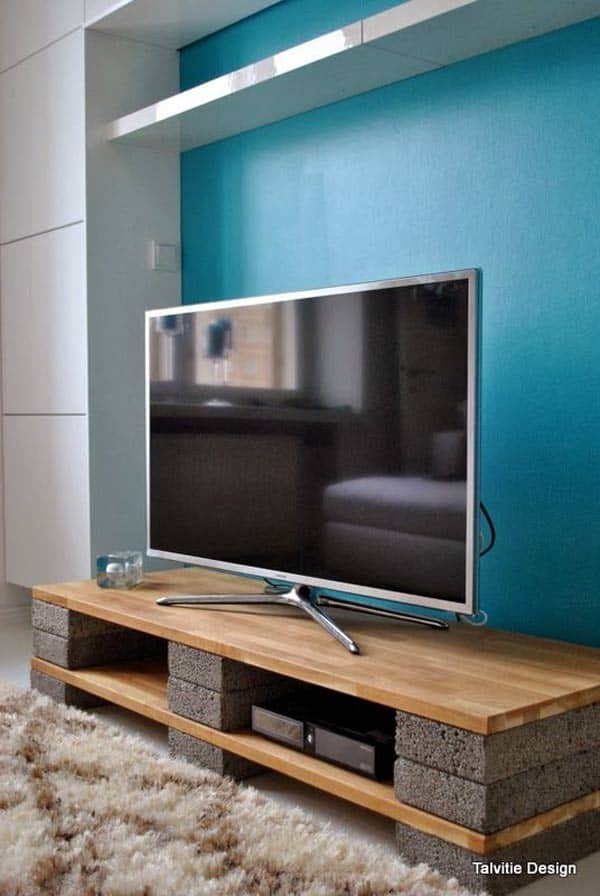
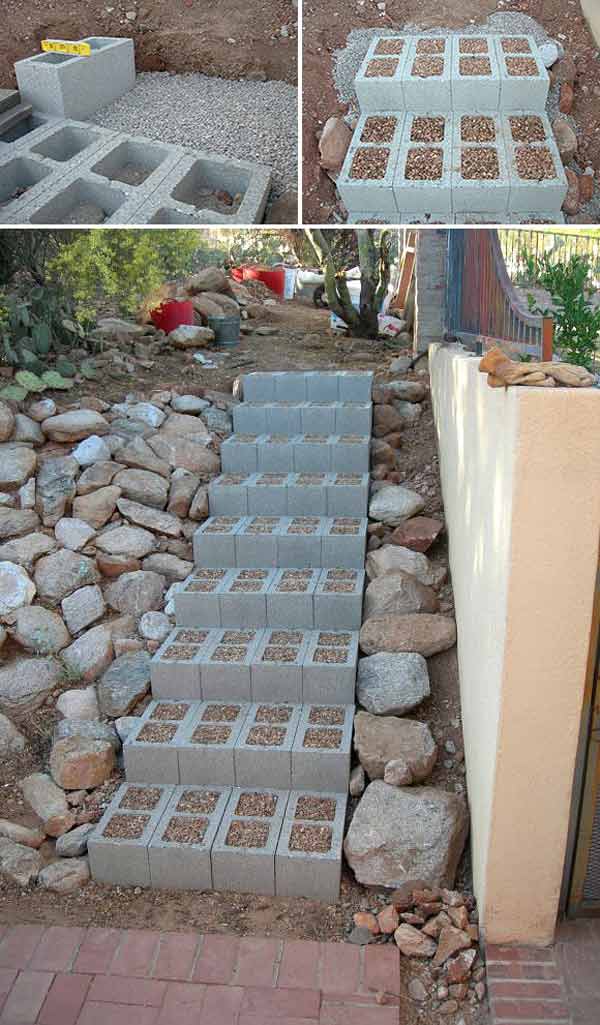

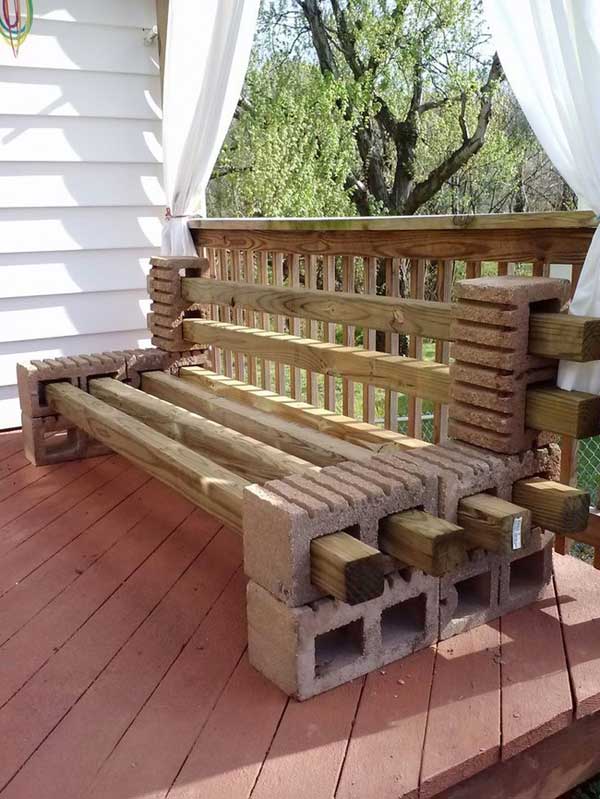

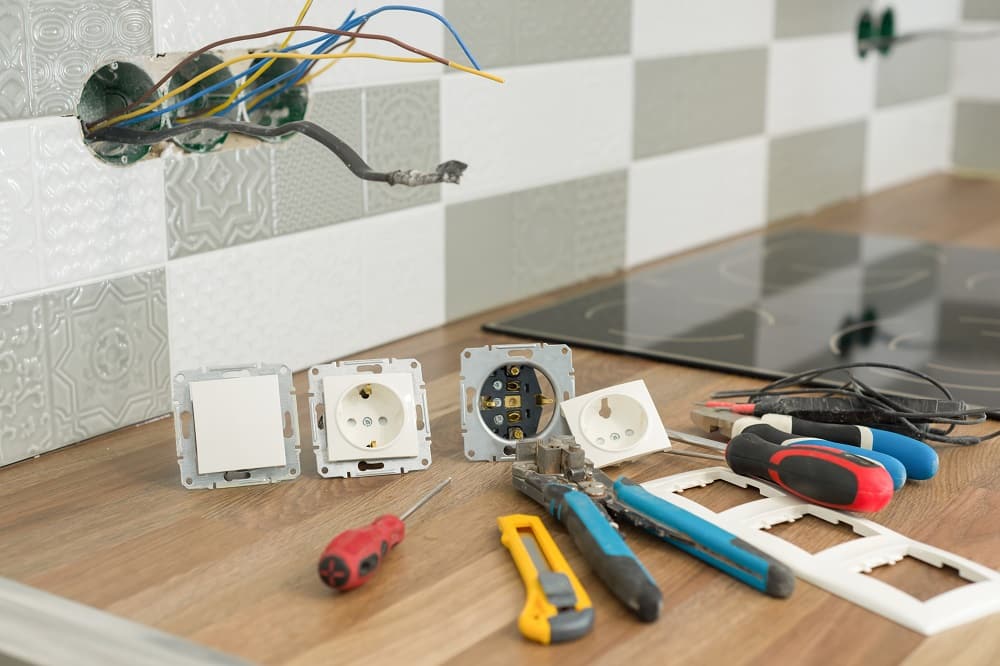
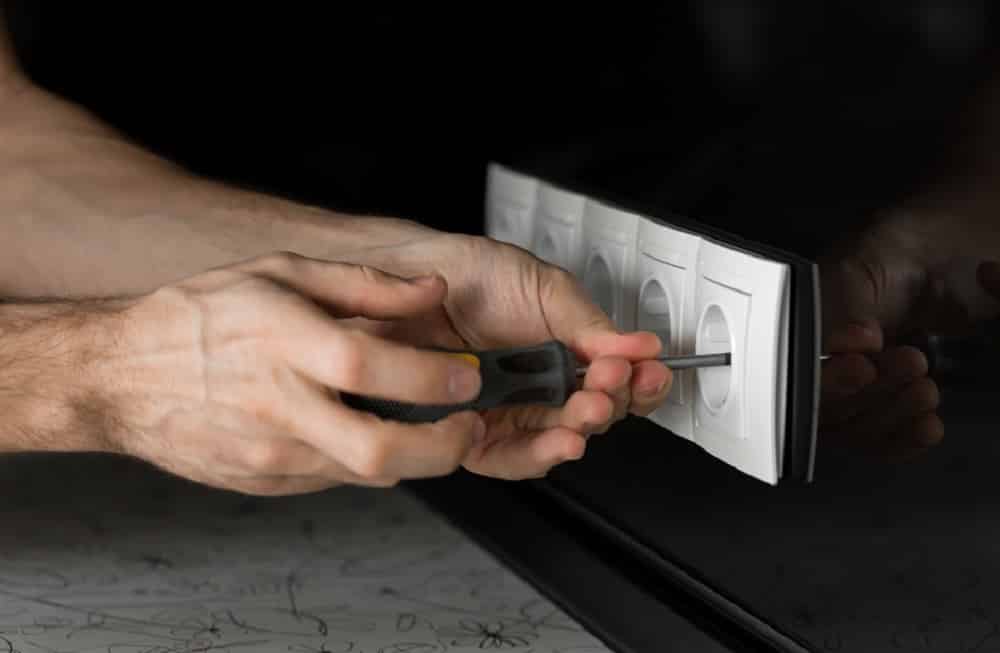


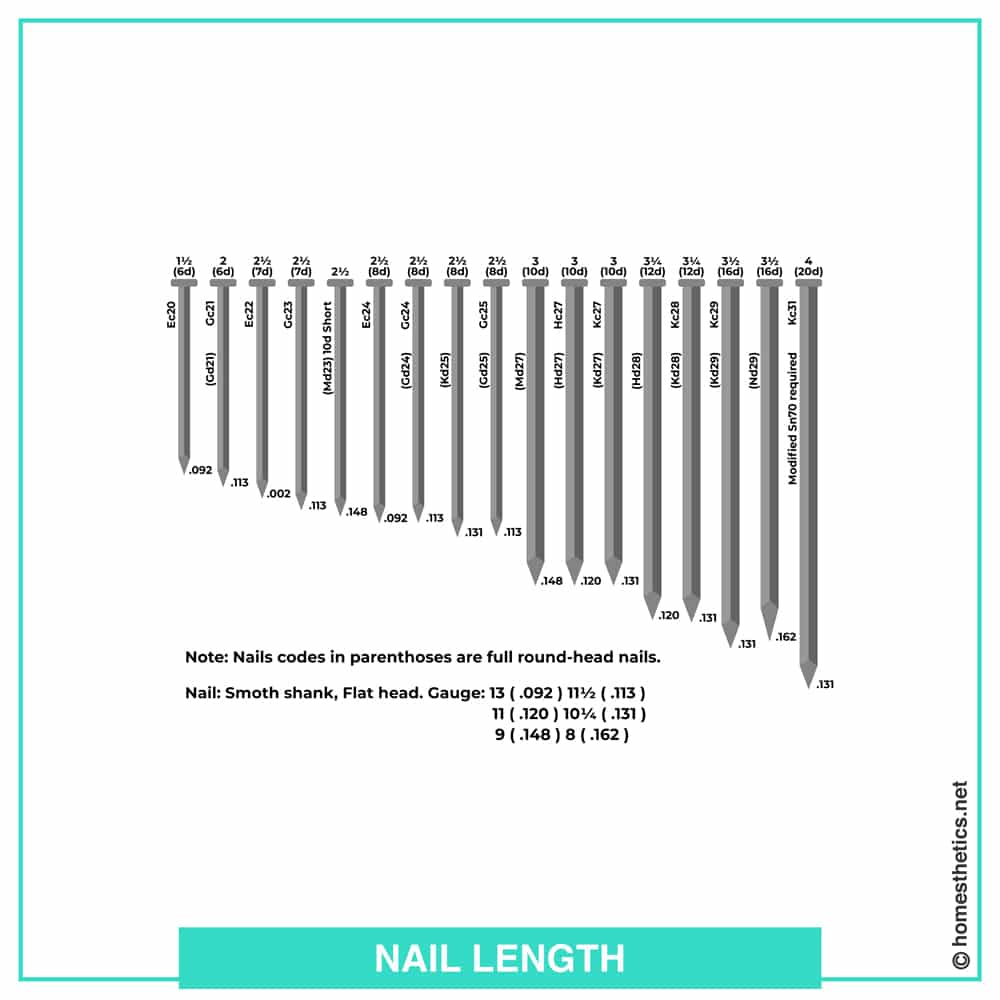
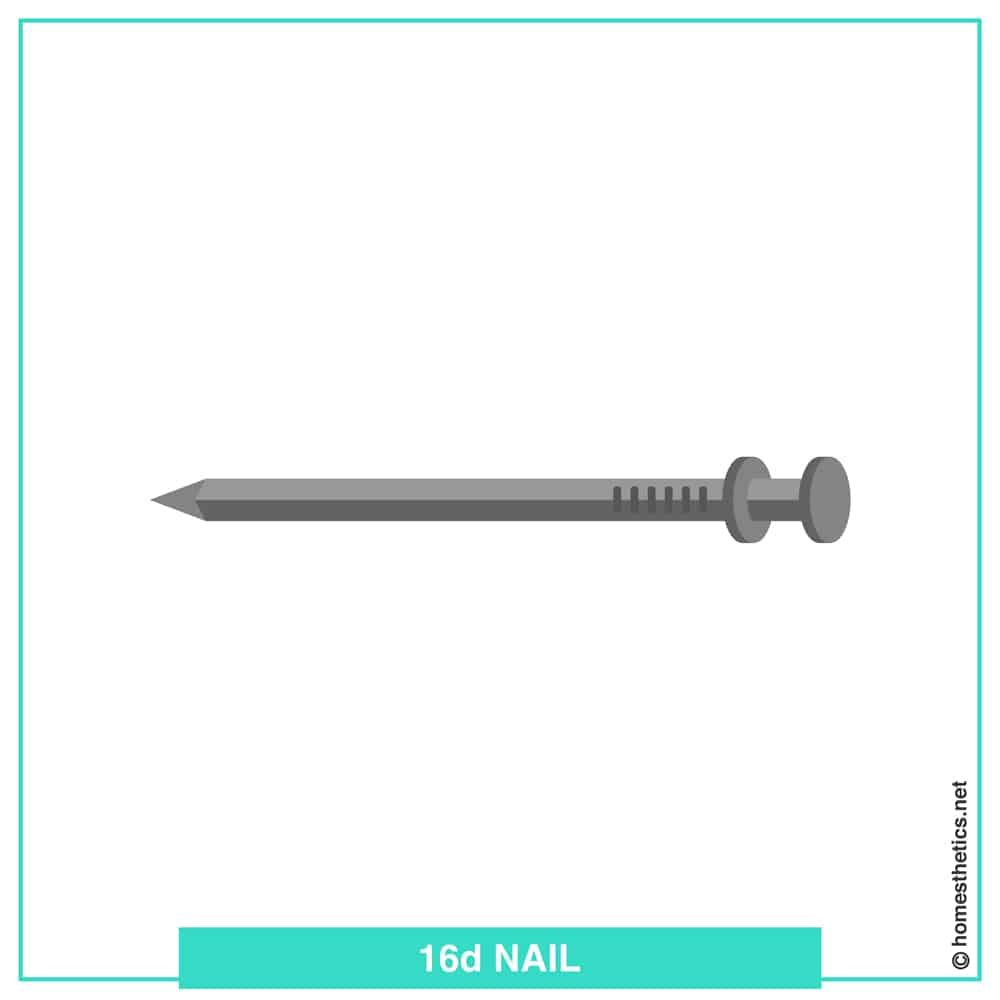
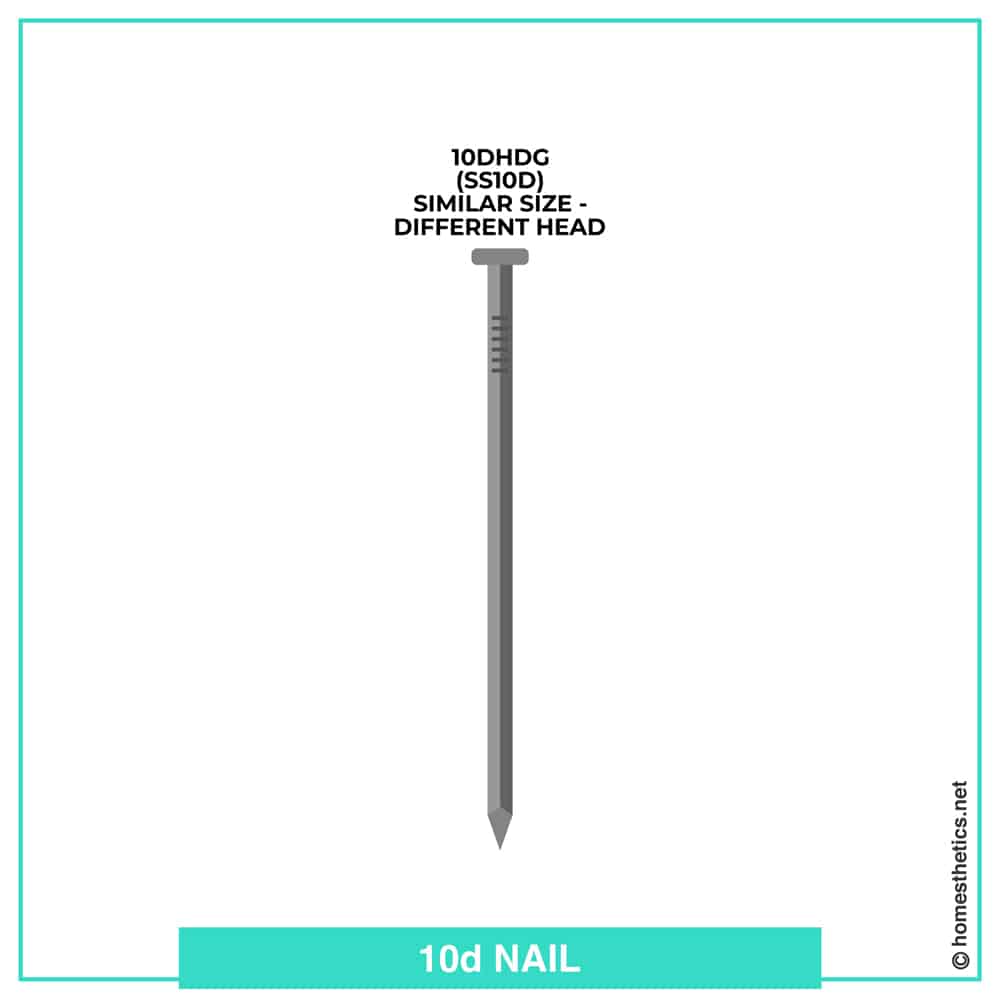
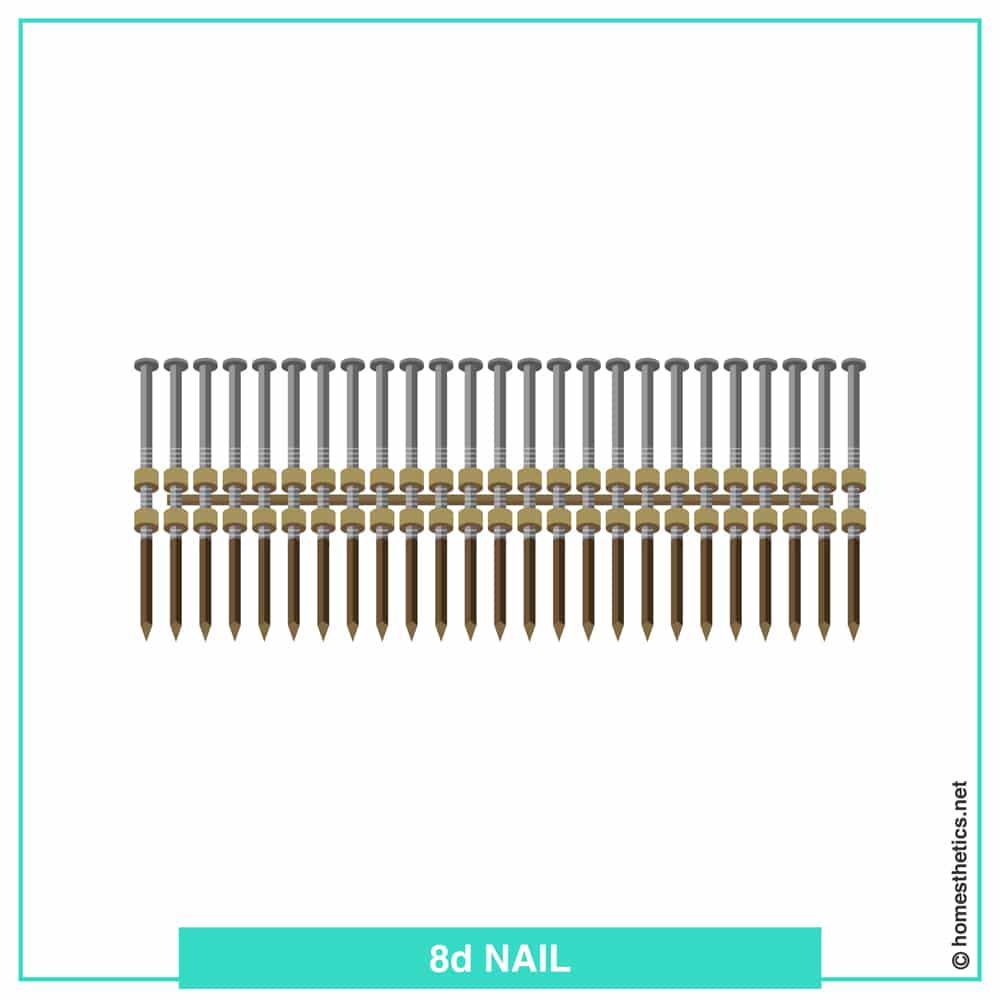
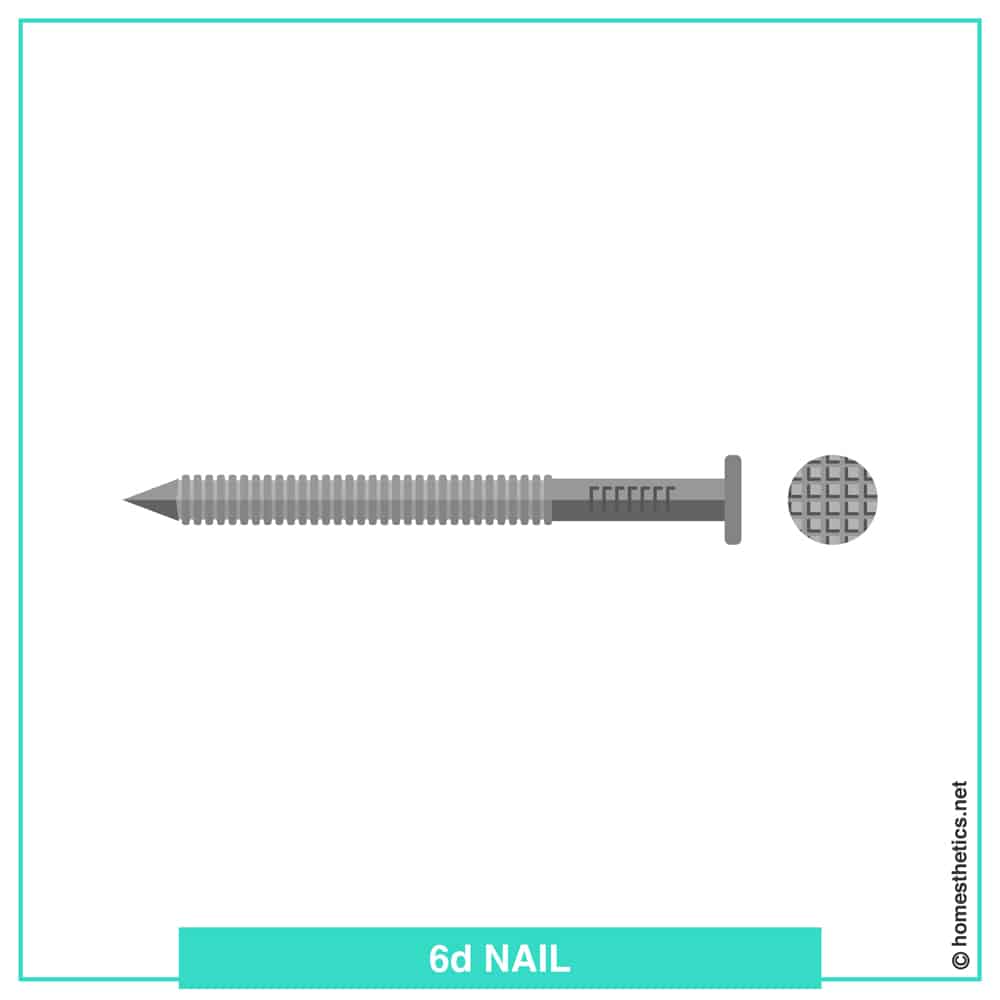
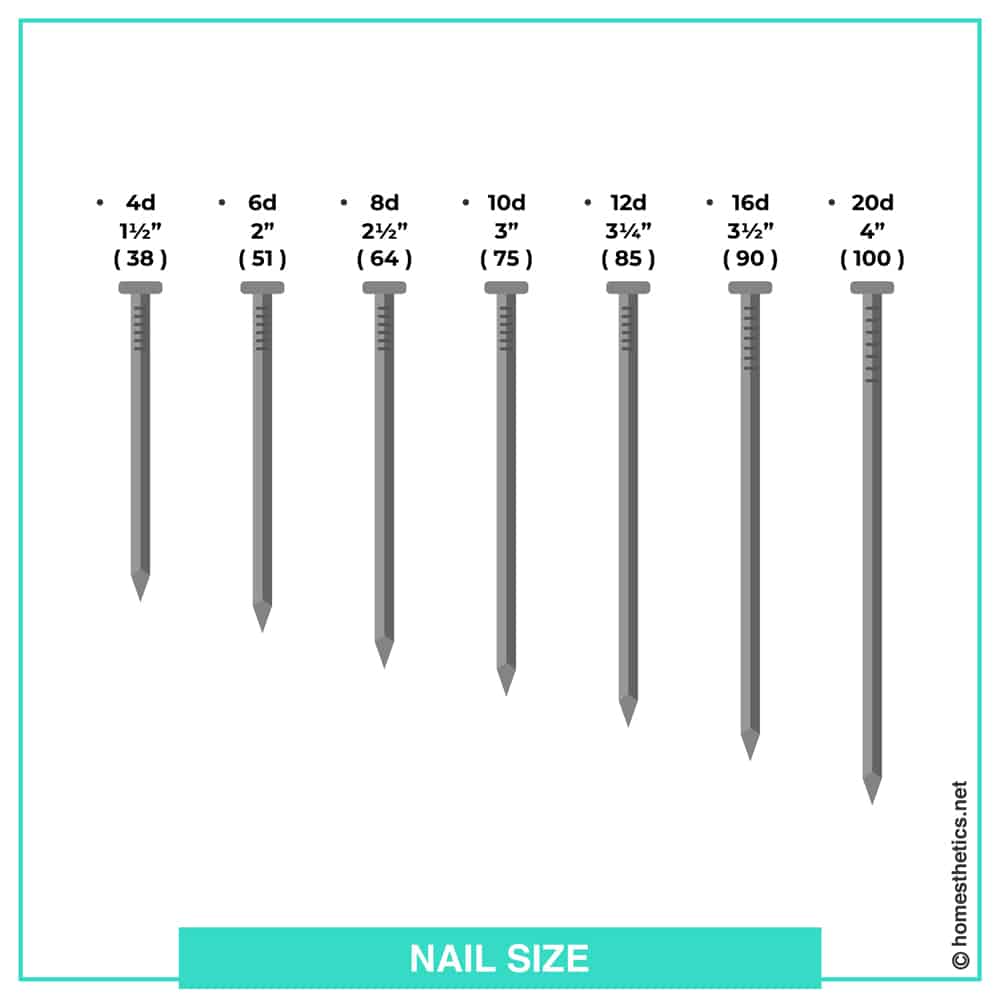
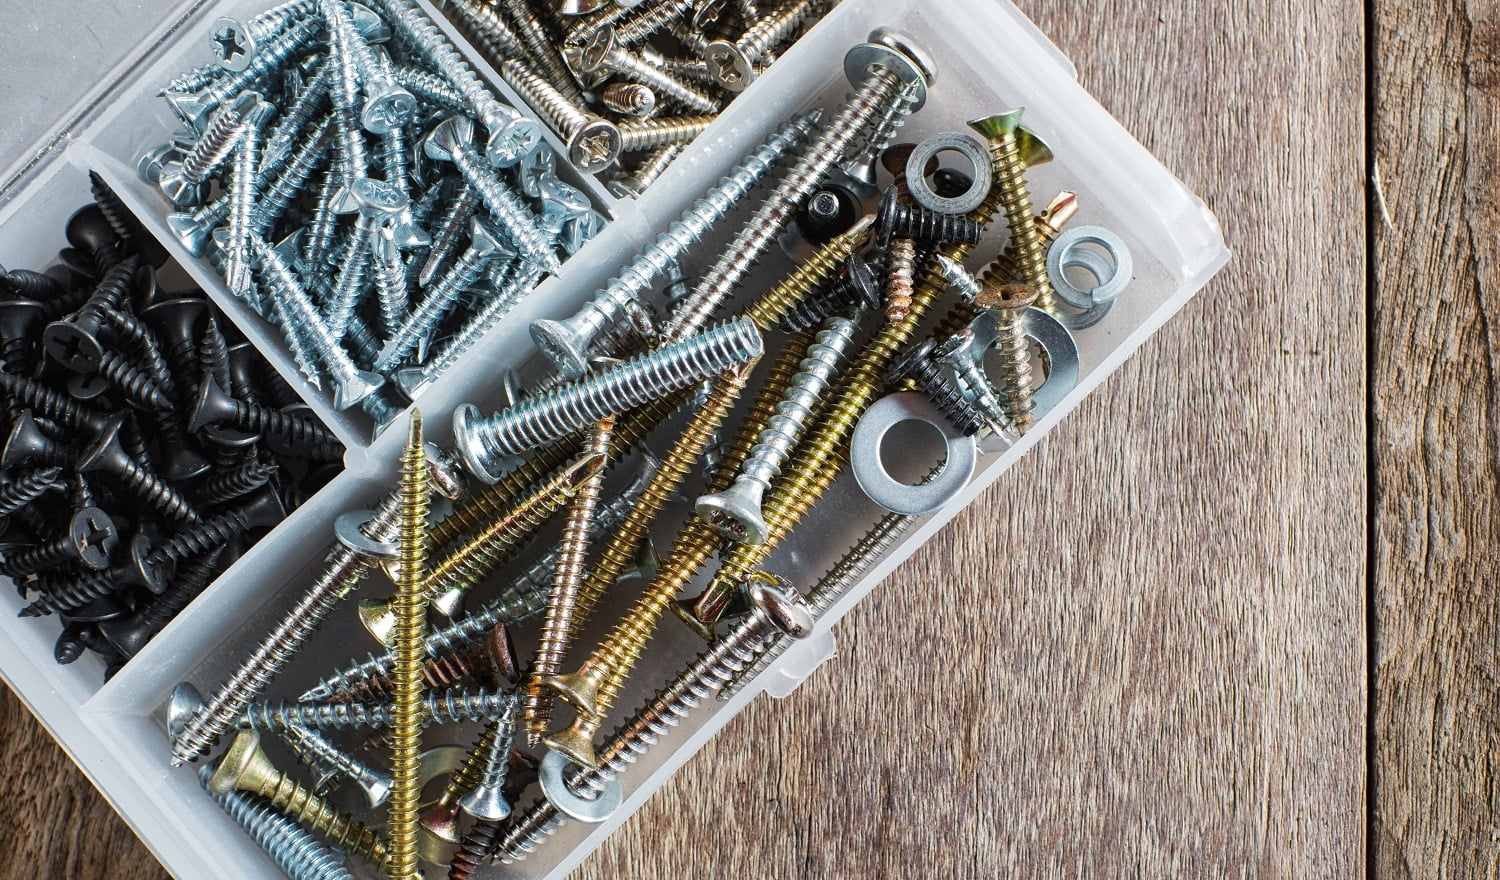


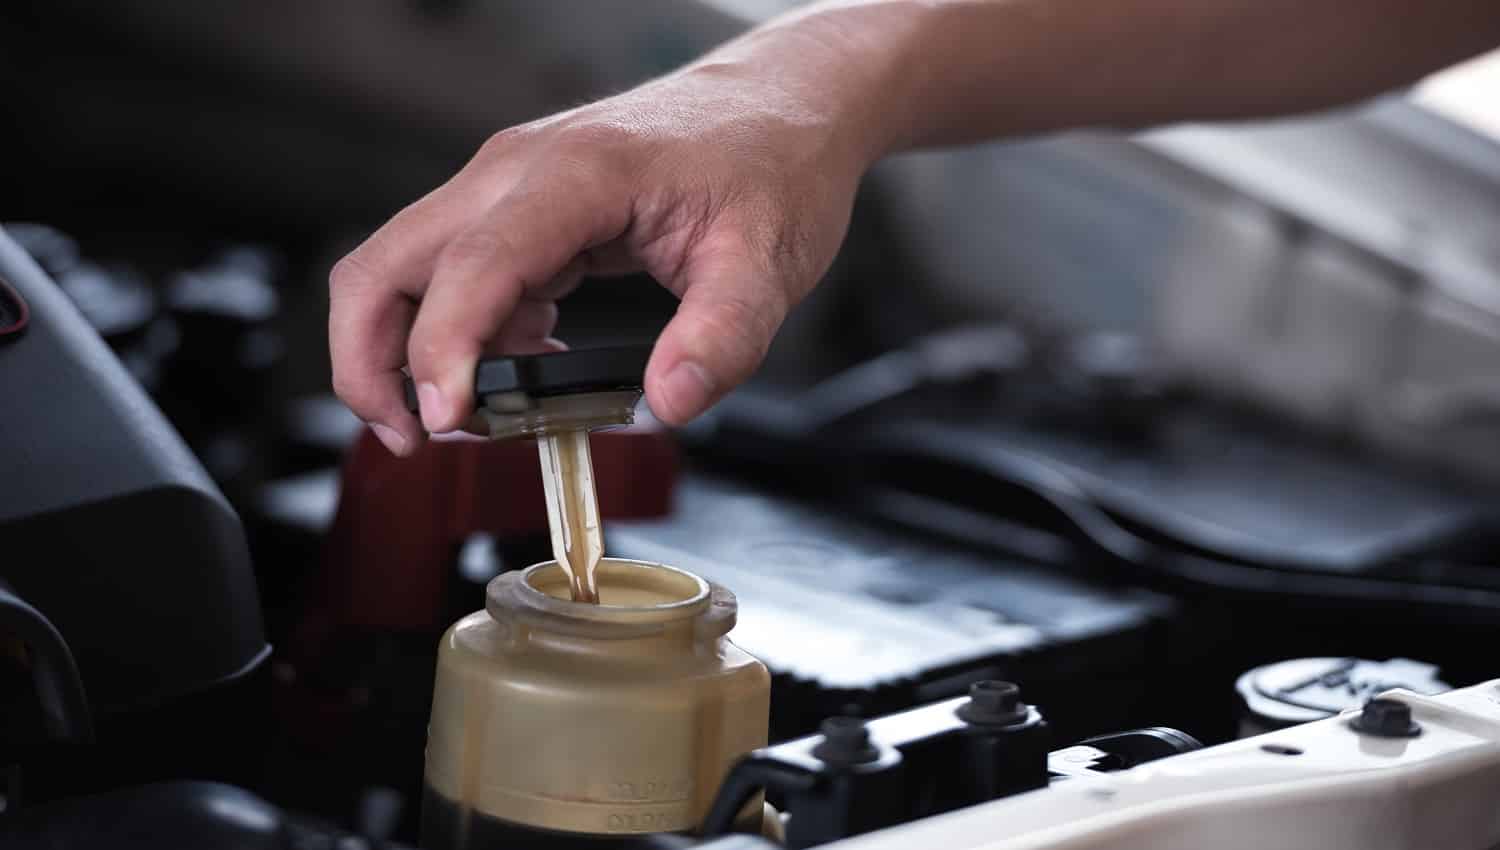

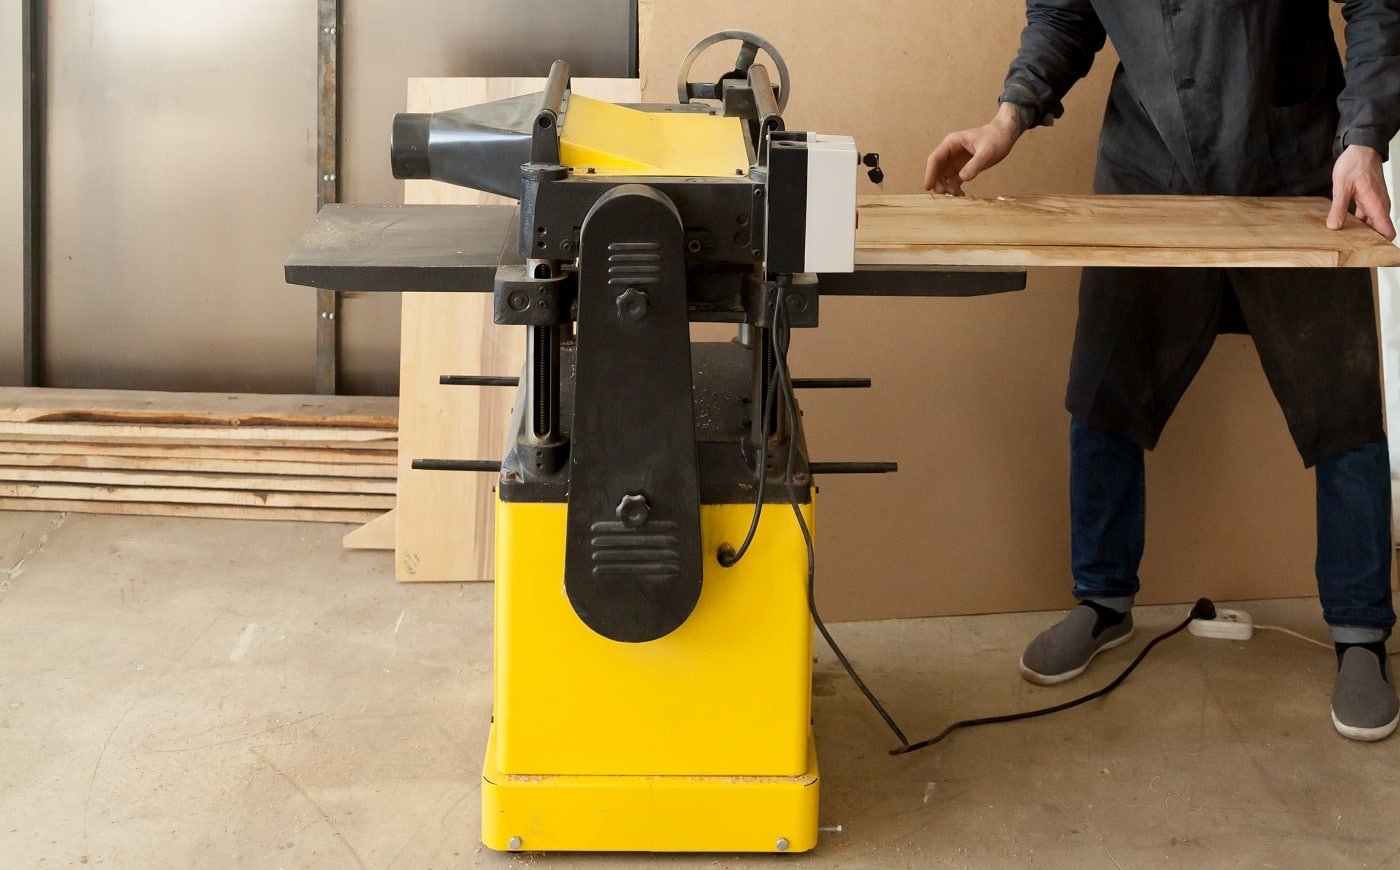

![Waterproof Epoxy 101 [Is Epoxy Waterproof?]](https://homesthetics.net/wp-content/uploads/2021/09/Waterproof-Epoxy-101-01.jpg "Waterproof Epoxy 101 [Is Epoxy Waterproof?]")


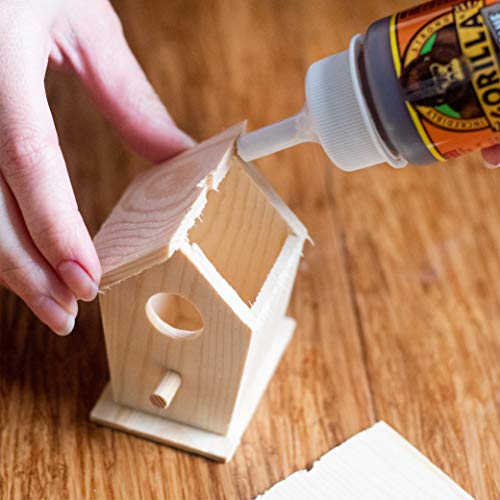
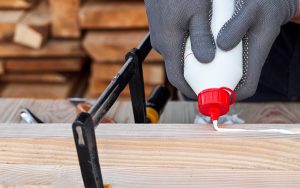

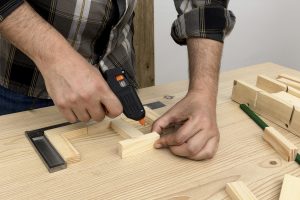

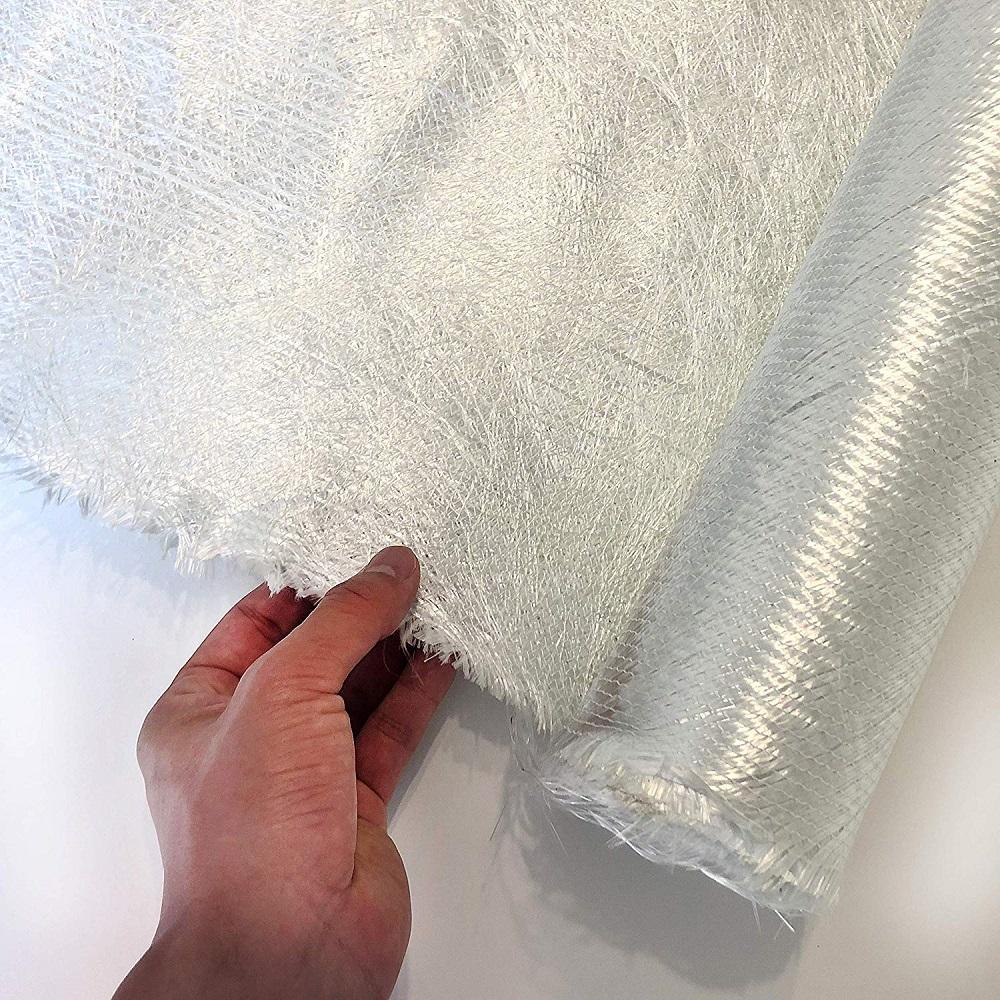
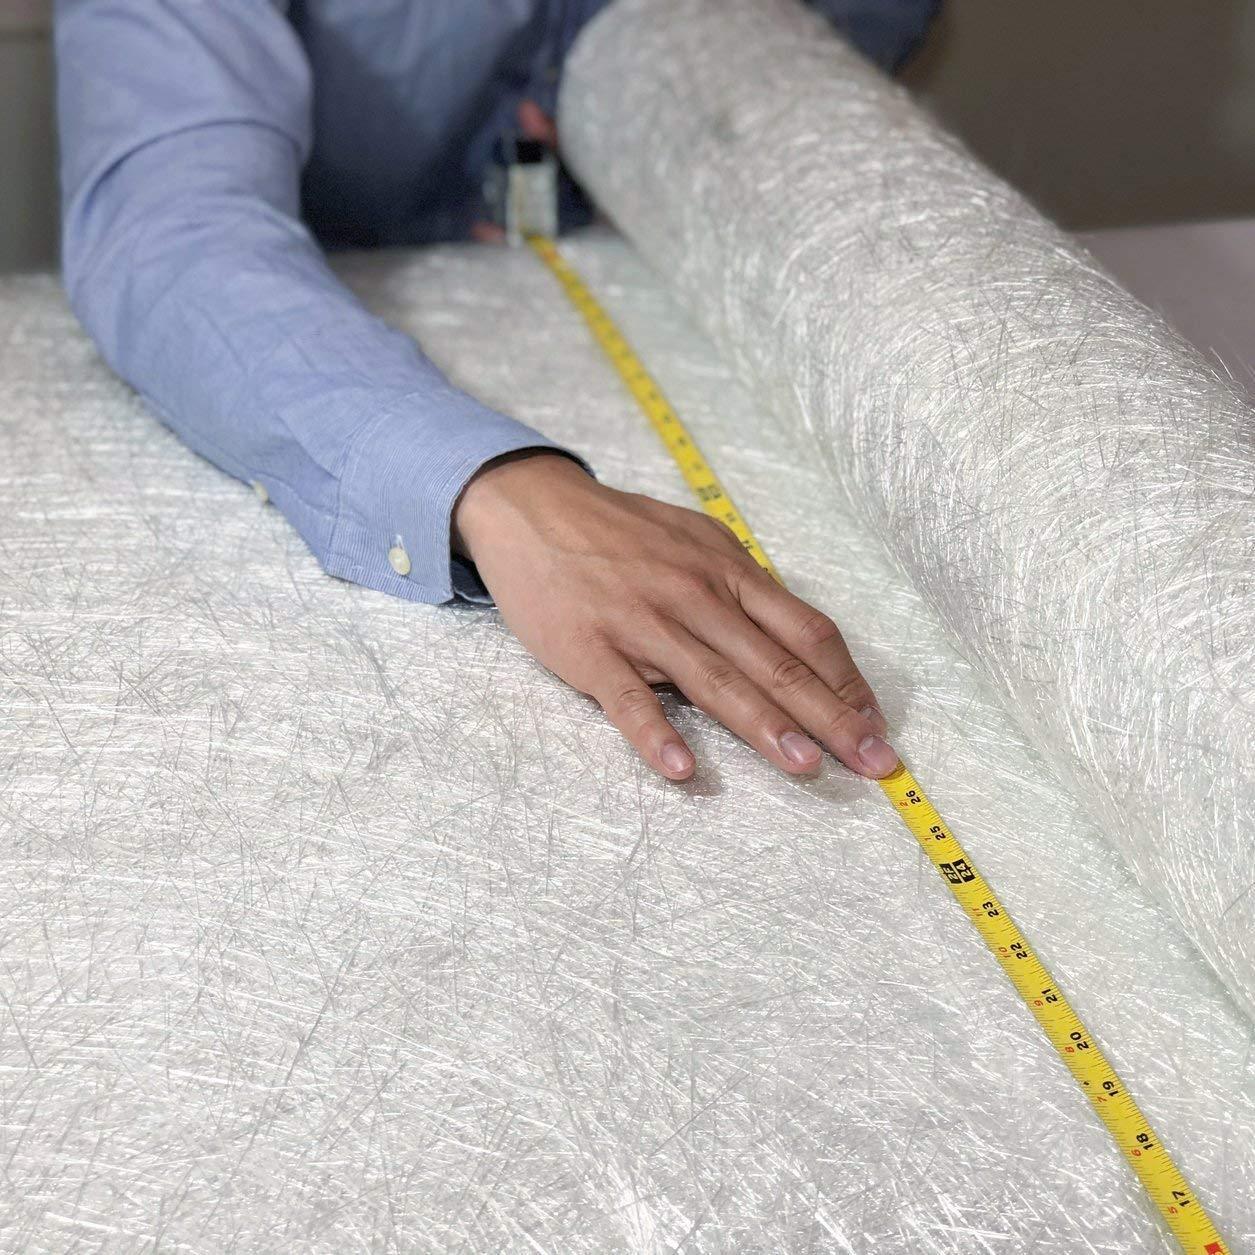
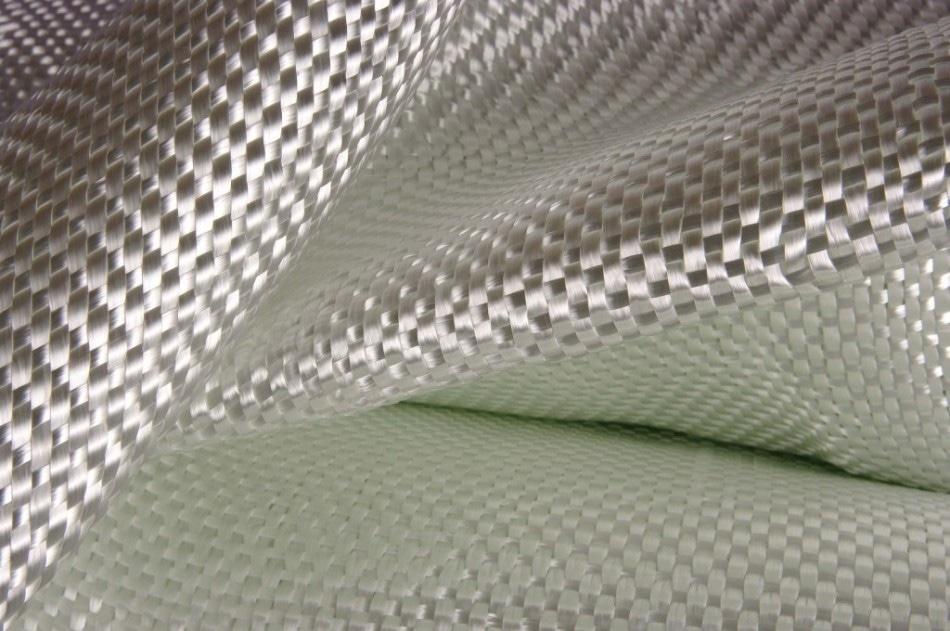


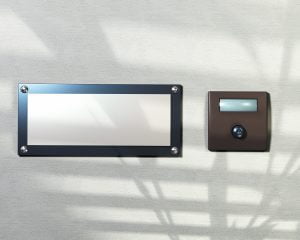

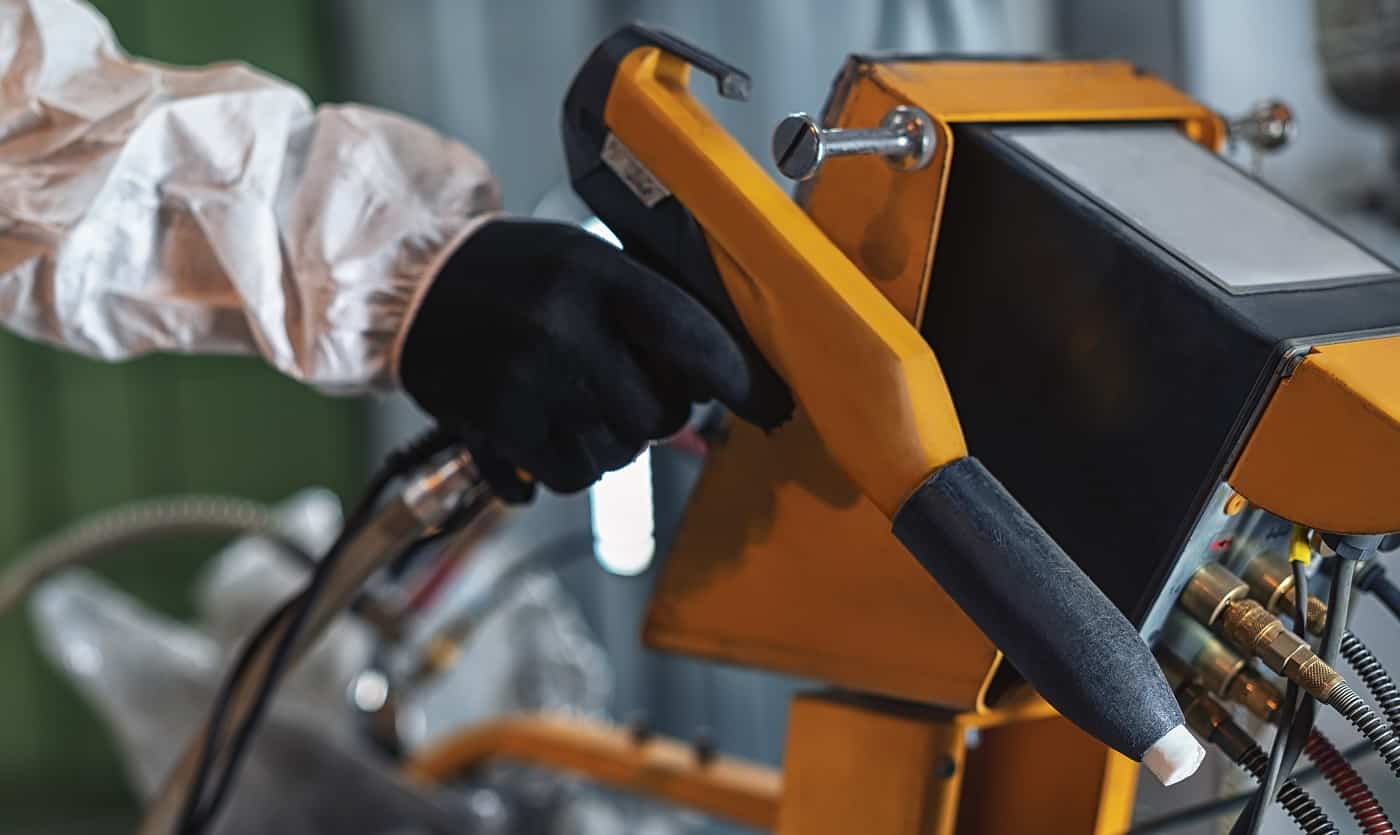


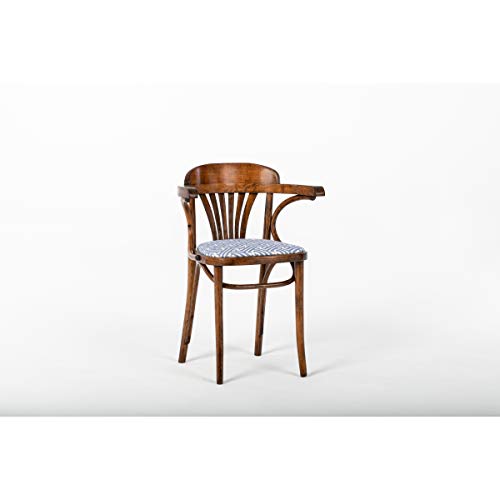

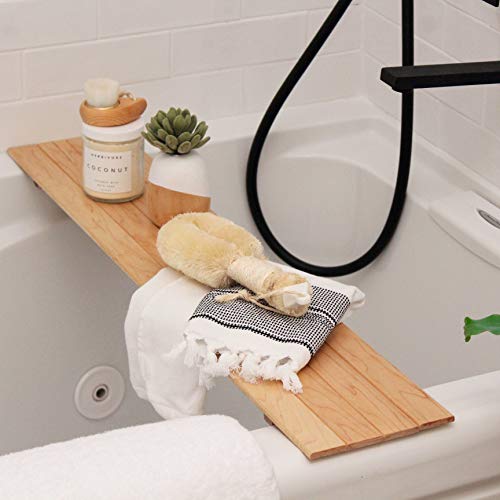
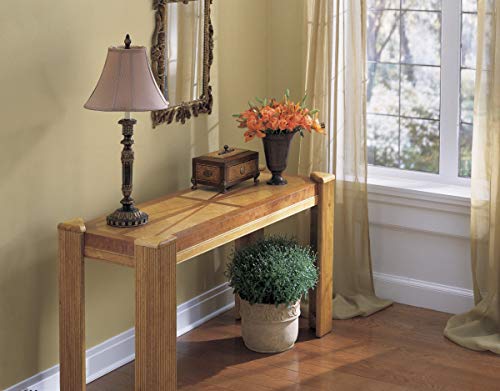

![HVLP vs. LVLP [All You Need to Know & Winner]](https://homesthetics.net/wp-content/uploads/2021/06/HVLP-vs.-LVLP-01.jpg "HVLP vs. LVLP [All You Need to Know & Winner]")
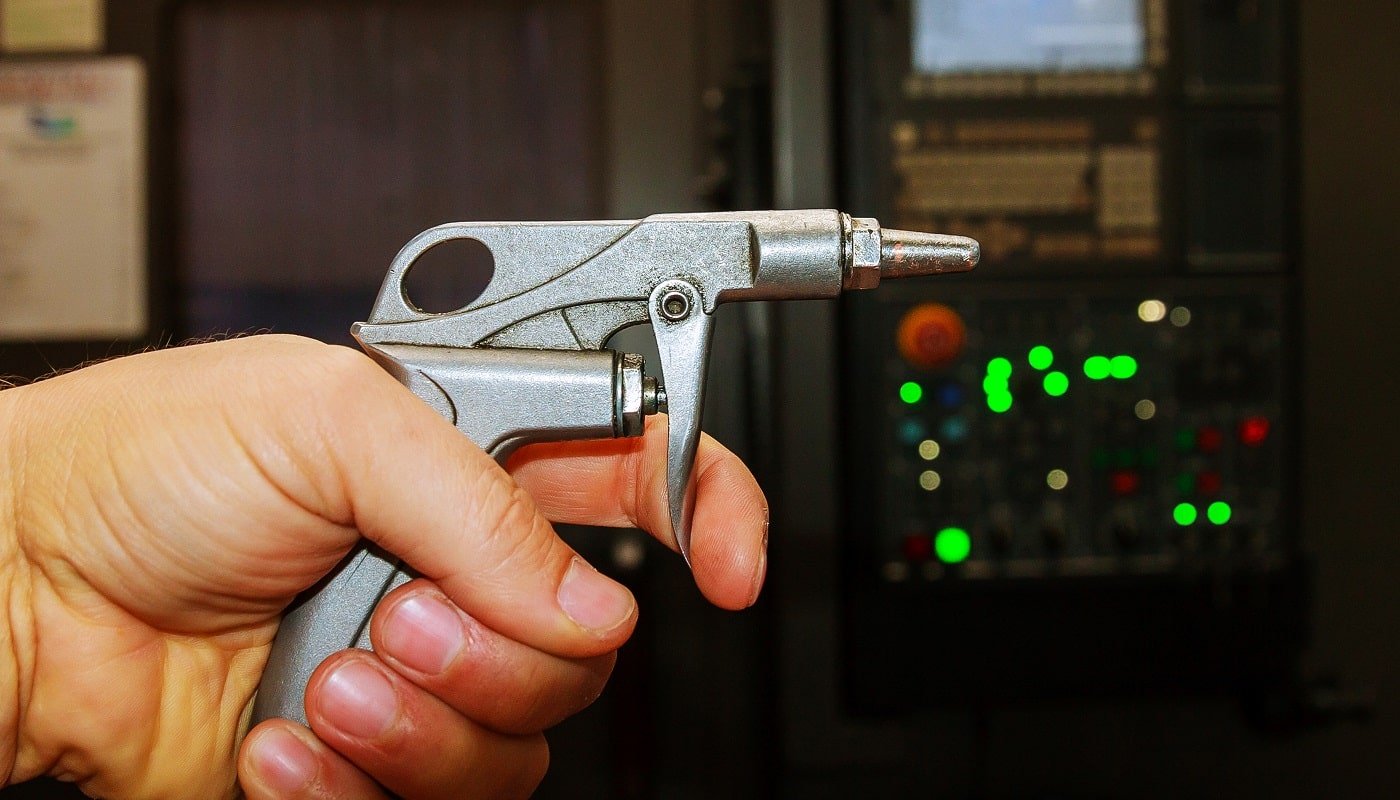


![How Long Does Polyurethane Take to Dry [All You Need to Know]](https://homesthetics.net/wp-content/uploads/2021/12/polyurethane-4.jpg "How Long Does Polyurethane Take to Dry [All You Need to Know]")


![Epoxy Paint For Wood 101 [All You Need To Know & Buyer’s Guide]](https://homesthetics.net/wp-content/uploads/2021/12/Epoxy-Paint-For-Wood-1.jpg "Epoxy Paint For Wood 101 [All You Need To Know & Buyer's Guide]")


![What Is Acrylic Paint For? [Uses & Ideas]](https://homesthetics.net/wp-content/uploads/2022/06/What-Is-Acrylic-Paint-For-1.jpg "What Is Acrylic Paint For? [Uses & Ideas]")