This iconic glass skyscraper’s official name is 731 Lexington Avenue and houses business, commercial and residential spaces in the heart of one of the most beautiful cities of America, New York. The 731 Lexington Avenue tower is divided in two main functions: a six-story base that serves as an entrance to the Bloomberg Company and access to all the public spaces among which New Yorker’s can find shops, banks and restaurants; the rest of the ensemble is dedicated to residential areas like luxury condominiums( beyond the 31st floor) and offices. The Bloomberg Tower Ensemble is in fact composed of three buildings: on Lexington Avenue-a 55 story structure, on Third Avenue- a 11-story building and the 7-story One Beacon Court that links the first two volumes and merges the entire structure into a one of a kind single building.
This iconic glass skyscraper reaches 245,62m / 806ft which make it the 14th highest structure in New York and the 42nd in America. It was designed by César Pelli & Associates and developed by Vornado Realty Trust. This massive structure was constructed entirely of glass and steel, which allow it to integrate perfectly in New York’s environment and architectural style. It simple rectangular shape resembles the encircling neighborhood and the entire city as well. It’s not unique or revolutionary in any way but it adds value to the appeal of New York through its high rise and illuminated top. The living areas are located as high as possible to offer the maximum amount of privacy and the best view toward Central Park, whilst the public spaces like offices and shops were placed below to provide easy access. The massive building structural systems include a tuned mass damper that reduces swaying, especially due to powerful winds.
The crown jewel of this iconic glass skyscraper is the One Beacon Court, built in the shape of a horseshoe, was inspired by other public buildings of New York, like Grand Central Station and the skating rink at Rockefeller Center. It’s curious yet imposing shape has a powerful effect on the visitors, creating an enclosed, welcoming and protected intermediate space, between the city and the privacy of the structure. Its elliptical space is ideal for vehicular drop-offs because it offers the proper in and out route. The dramatic, enveloping shape can be taken as a giant atrium, a one of a kind way to meet the public and allow them to enter the ensemble. Vlad Leto is a New York City photographer who specializes in surprise proposals, engagements, weddings, music, parties, fashion & other types of photography.
Type: Offices / residential
Location: 731 Lexington Ave, New York City, NY 10022, USA
Construction started: 2001
Completed: 2004
Management: Vornado Realty Trust
Antenna spire: 286 m (938 ft)
Roof: 246 m (807 ft)
Floor count: 55
Floor area: 1,400,000 sq ft (130,000 m2)
Architect: César Pelli & Associates
Developer: Vornado Realty Trust
Structural engineer: Thornton Tomasetti
While Trane offers some of the most expensive yet reliable models that may last for more than 15 years, Carrier is known for its brand reputation and noise-efficient HVAC systems. Likewise, Lennox models have high SEER ratings for better energy efficiency.
Choosing the right HVAC system can get a tad bit difficult, considering the vast number of brands available out there.
However, Carrier, Trane, and Lennox are the most popular and reputable ones in the HVAC industry. All three brands offer top-notch quality, innovation, and reliability, along with prompt customer service. But which of the three is the right pick for your air conditioning and heating requirements?
Let’s find out!
What Is An HVAC System?
An HVAC (heating, ventilation, and air conditioning) system is designed to regulate the temperature, humidity, and air quality in buildings, homes, and other enclosed spaces. The system consists of multiple components that work in synergy to offer efficient heating, cooling, and ventilation, hence, the name!
Typically, HVAC systems feature a furnace or heat pump, a thermostat, vents, ductwork, and an air conditioning unit. As you may already guess, the heat pump heats the air while the air conditioner cools the air. Similarly, the ductwork allows the cool/warm air to pass through, while the vents let the air enter the rooms.
The ventilating component of an HVAC system circulates fresh air while eliminating stale air. This, in turn, regulates humidity levels and prevents the buildup of bacteria, mold, and dust. Notably, the ventilation unit may include a heat recovery ventilator or energy recovery ventilator, which helps boost the energy efficiency of the system.
Other parts of an HVAC unit include the compressor, filer, blower, exhaust outlets, air return, and coils.
Trane At A Glance
Boasting a seasonal energy efficiency ratio (SEER) of 14.5-22, Trane is the international leader in the HVAC industry. The brand started off in 1885 by producing low-pressure heating systems and later tried its hand at selling air conditioners.
Today, I must say that Trane offers some of the most expensive systems. However, considering the consistent standard of quality and durability against harsh climates, the brand’s AC units are worth the splurge. Notably, Trane HVAC units last over the industry average of 15 years.
Trane State Availability
Trane HVAC systems are available worldwide, as the brand operates through dealers across the United States. Besides the units, you can find spare parts in supplies in over 360 stores in the US.
Trane Warranties
Optional Extended Warranty: covers manufacturer’s defects and cost of labor to fix them, but you will have to purchase this warranty separately
Registered Limited Liability: covers manufacturer’s defects for products registered within two months of installation and lasts for ten years
Base Limited Liability: covers manufacturer’s defects for products not registered within the aforementioned period and lasts for five years
Carrier At A Glance
Incepted in 1902, Carrier boasts a lineup of 16 HVAC unit systems, some of which are the most energy-efficient and quietest units on the market. Carrier central air conditioners are also priced on the steeper end, but the brand’s reputation and quality make up for it.
Typically, a Carrier unit features single-stage, two-stage, or variable-speed compressors and must be installed by North American Technician Excellence (NATE)-certified technicians. As such, you can rest assured that the unit will be installed properly. Plus, you can reap the benefits of the 10-to-15-year warranty from a qualified technician.
Carrier State Availability
Although Carrier central air conditioners are available all over the country, you must find a brand expert and authorized dealers to validate the warranty.
Fine Print
Unfortunately, Carrier’s warranty is not very favorable as it is relatively short and only backs the functional parts of the unit. Another bummer is the fact that the 10-year warranty does not include normal wear and tear and labor. And if you fail to register the product within three months of installation, the period comes down to five years.
Lennox At A Glance
Lennox International was founded in 1895 and has continued to woo homeowners with its energy-efficient HVAC systems. Most Lennox models boast the ENERGY STAR rating, and some were tagged as ENERGY STAR Most Efficient in 2022.
Besides the durable, high-end Lennox air conditioners, the brand offers various lower-end models, too, all of which are just as efficient. As such, the high upfront cost of Lennox AC units turns into a valuable investment for many.
Lennox State Availability
You can find a certified Lennox International dealer in all 50 states, so accessibility is never an issue. I suggest checking out the brand website to find a dealer or contractor near you.
Fine Print
Dave Lennox Signature Collection: comes with a 20-year warranty/limited lifetime on the heat exchanger, and a 10-year warranty each on the AC compressor and covered parts
Lennox Elite Series: comes with a 20-year warranty/limited lifetime on the heat exchanger, 10-year warranty on the compressor, and 5-year warranty on covered parts
Lennox Merit Series: comes with a 20-year warranty/limited lifetime on the heat exchanger, 5-year warranty on the compressor, and 5-year warranty on covered parts
What Do These Three Brands Have In Common?
Albeit unique, all of these brands have a fair share of similarities. Some of them are as follows:
Most of their AC units feature a noise-minimizing insulation
All of their units use R-410A refrigerant
All three brands offer certified installers for quality installation
All units feature variable fans
All AC cabinets boast a corrosion-resistant enamel layer
All three brands divide their products into three pricing tiers
All of their AC units come with a standard limited warranty
All three brands offer single-stage, dual-stage, and variable-stage compressors
All ACs are compatible with digital assistants and smart thermostats
Trane vs Carrier vs Lennox - A Comparative Study
1. Energy Efficiency
The energy efficiency of an AC unit is determined with the SEER (Seasonal Energy Efficiency Ratio or Rating) scale. This measure takes an entire season into account, precisely speaking, from April 15 to October 15.
The SEER of an air conditioning system is calculated by dividing the cooling output by the total energy consumption of the system during the same period. As such, a higher SEER rating implies better efficiency.
The SEER range of each brand according to the different price tiers are as follows:
Brand
Model
SEER
Trane
XR
14.5-16
XL
17-18
XV
18-22
Carrier
Performance
13-17
Comfort
13-17
Infinity
16-26
Lennox
Merit
13-17
Elite
15.5-21
Signature
20-28
As you can see, a Lennox air conditioner is likely to offer more energy efficiency than any model from the other two brands. In fact, Lennox’s SL28XCV air conditioner boasts the highest rating of 28.
That said, other factors like insulation quality, regular maintenance, and more can affect the energy efficiency of the HVAC system. But if the SEER range is your utmost priority, go for Lennox.
2. Compressors
The compressor is the most vital part of your central air conditioner. It allows the refrigerant to move through the entire system to absorb warm air from the room and expel cool air through the ducts. The types of compressors offered by all three brands are as follows:
A. Variable Stage
This compressor type delivers the best performance and energy efficiency. Plus, it consists of at least three different settings, allowing it to operate at as low as 25-30% of its maximum capacity.
During hotter months, these compressors can function throughout the day while changing between low and high settings as and when required. Because of these favorable factors, these highly energy-efficient compressors are the priciest in the lot.
B. Double Stage
Also known as dual-stage compressors, this variety can run in both low and high-speed settings. Besides operating at its maximum capacity, a double-stage compressor can run just as well at 60-70% capacity.
Although double-stage compressors operate more often than single-stage compressors, they are more energy-efficient and hence, more cost-efficient. This is because the unit mainly uses the lower speed setting.
C. Single Stage
This type of compressor gets triggered as soon as the room temperature exceeds the thermostat setting. For instance, if the room is set at 70 degrees, the compressor will start operating when the room temperature hits 71 degrees.
Single-stage compressors are only capable of running at their maximum power, which means they start at 100%. Then they turn on and off frequently throughout the day. So, these compressors are quite affordable but also the least energy-efficient.
Trane vs Carrier vs Lennox Compressors
Trane
Trane air conditioners feature Climatuff compressors, and most of them use single or double-stage options. However, two of the premium tier models contain a variable-stage compressor. Notably, Climatuff compressors are well known for their quality and noiseless operation.
Carrier
Carrier air conditioners feature Copeland compressors, and most of the basic and middle-tier units employ a single-stage compressor. But Performance 17 is an exception here with a dual-stage compressor. The brand’s premium tier uses single and double-stage compressors, and only one air conditioning system offers variable capacity.
Lennox
This brand uses Copeland compressors. While the premium tier of AC systems features variable and dual-stage options, the basic tier consists of single and dual options. That said, the middle tier consists of variable-stage and single-stage compressors.
Now, choosing between a single or dual-stage compressor and a variable-stage compressor depends upon your budget, climate, and energy consumption. Overall, in my opinion, Lennox offers the best compressor types across its various models, as both Trane and Carrier offer limited-capacity compressors.
3. Digital Assistant Compatibility
In today’s fast-paced world, when an average person has the attention span of a goldfish, convenience is a must. And what’s better than having your smartphone linked to your AC and other smart home appliances with the help of digital assistant compatibility?
That said, all three brands offer this feature, with Trane’s Nexia, Carrier’s Cor Smart Home, and Lennox’s iComfort technology. Whereas Trane’s technology is compatible with Amazon Alexa or Google Home, you can connect your Carrier AC with Alexa. Lastly, Lennox’s digital assistant can be paired with all of the above as well as Siri.
Smart Thermostat
With a smart thermostat, you can operate your air conditioner from your phone, allowing you to regulate the temperature and check the energy consumption of the system. You can also stay updated about the overall state of your AC, thereby preventing issues from lingering or being overlooked.
Tip
Different brands offer different types of smart thermostats. So, if you upgrade your HVAC system, I recommend calling the same HVAC technician to install the smart thermostat as well. This is because the wireless system performs best when matched with the right HVAC unit.
Trane vs Carrier vs Lennox Smart Thermostats
Trane
Trane offers four types of smart thermostats, with the priciest options employing ComfortLink II technology. On the brand website, the thermostats have received ratings between 3.6-4.8 stars. The Nexia app also boasts a 4.8-star rating from almost 67,000 Apple app store users, indicating their user satisfaction with its quality.
Carrier
Carrier comes with six types of smart thermostats, which may enable you to control up to three or more separate zones in your house. As such, the brand may be a better choice for those living with loved ones who might have different preferences when it comes to comfortable temperatures.
The high-end models use the brand’s Infinite technology to operate. But it’s important to note that the Carrier Cor Thermostat app is not as highly rated as Trane’s Nexia app. In fact, users have complained about the app crashing and not being user-friendly.
Lennox
Lennox offers only three types of smart thermostats that employ its proprietary iComfort technology. Each has received mixed reviews from consumers, with ratings ranging between 2.2 and 3.5 stars.
To sum up, while Carrier offers more in terms of variety, both Carrier and Lennox somehow fail to meet the expectations of their customers. In my opinion, Trane emerges as the winner with its user-friendly app and the ability to integrate easily with other smart home equipment.
4. Warranty
Reliability should be at the top of your priority list when choosing an AC system for your home. After all, HVAC systems are a significant investment, so it makes sense to consider the brand warranty on offer before making a decision. Warranties serve as safety nets, allowing you to trust that the new central air conditioner you invest in will last for years to come.
That said, all three air conditioner brands offer limited warranties for each of their AC models. Just remember that the warranties don’t cover the labor costs to repair any of the faulty parts.
Brand
Models
Compressor Warranty
Parts Warranty
Trane
XI and XV
12 years
10 years
XL
10 years
10 years
Carrier
All Models
10 years
10 years
Lennox
Elite and Signature
10 years
5 years
Merit
5 years
5 years
While both Trane and Carrier offer similar warranties, Trane’s 12-year warranty on XL and XV models gives it an edge over Carrier. A few Trane models also come with a 20-year heat exchanger warranty, which beats what many other brands offer.
It’s also important to note that the 10-year warranty offered by Carrier is only applicable if you register the AC unit within 90 days of installation. Failing to do so will reduce the warranty to 5 years.
On the other hand, you’ll have to invest in a high-end Lennox air conditioner if you want a 10-year warranty on Lennox parts. So, if you ask me, I’d say purchasing an AC unit from the Trane brand would be a better option in the long run.
Tip
If required, you can purchase extended warranties for all three brands from third-party HVAC companies.
5. Price
There’s no way to pinpoint the exact pricing for AC units from Trane, Carrier, or Lennox since there are many factors that determine the final cost. For instance, the installation cost of a model may vary based on the weather and location. Other factors, such as additional efficient equipment, installing more than one HVAC system, and pre-installed ductwork, influence the final pricing.
Moreover, all three brands partner with HVAC companies, acting as service providers between customers and the brand. The authorized dealers tend to set their own prices when it comes to materials and labor.
That said, the total price range (installation fee + unit price) for Trane AC models is the highest compared to Lennox and Carrier, with the cost mentioned on its website. On the contrary, Carrier and Lennox models are comparatively lower (mid-range). But Carrier doesn’t list its pricing stating the influence of varying factors on the total cost of the air conditioner.
Choosing The Right HVAC Technician
It’s not just about choosing the right AC brand and model. Finding the right HVAC tech is equally crucial. After all, poor AC installation can lead to problems, such as leaking ducts, which in turn, may lower the energy efficiency of the unit by 30% or even more. Consequently, the SEER rating will fall, and your energy bills will soar.
The best way to find the right tech to install the air conditioning system is by getting quotes from local HVAC contractors. And cross-check the quotes with two or more contractors from the neighborhood. It’s also important to remember that a very low quote might be too good to be true. They might not be thorough or experienced enough for the job at hand.
Make sure that the HVAC contractor you hire provides proof of being licensed and insured to carry out AC installations.
HVAC Related FAQs
What are the different types of HVAC systems?
There are several types of HVAC systems, including central air conditioning systems, heat pumps, furnaces, boilers, and ductless mini-split systems. ‘
How can I improve the energy efficiency of my HVAC system?
Besides upgrading to a more energy-efficient system, you can try sealing air leaks, improving insulation, and regularly maintaining and cleaning your HVAC system. Using a programmable thermostat and adjusting your temperature settings can also help save energy and lower your utility bills.
How often should I have my HVAC serviced?
It is best to have your HVAC unit serviced by a professional at least once a year, ideally before the start of the heating or cooling season.
Final Words - Trane Vs Carrier Vs Lennox - The Clear Winner?
Only you can decide on the clear winner in this comparative guide based on your cooling needs. For instance, a Trane air conditioner model may be your best bet if you don’t plan on shifting in the next decade. The brand offers a lengthy warranty of 12 years on certain models, and its highly-rated Nexia app is hard to beat.
On the contrary, a Lennox system will ensure better energy efficiency, allowing you to save money on energy bills. It’s a more affordable investment in the long run.
Likewise, Carrier, known as an industry leader for a long time, offers some of the most noise-efficient AC units. Moreover, its parts are easily available, making repairs inexpensive and more convenient. And, of course, make sure you find a qualified and licensed HVAC technician to get your AC unit properly installed.
The average cost of air duct cleaning is $377, but it can range from $268 to $490, depending on various factors. These factors generally include the duct type, size, number of vents, the labor involved, and geographical location.
One of the most effective ways by which you can improve indoor air quality is air duct cleaning.
These ducts prevent impurities from entering your home, ensuring proper air circulation. But with time, they can get clogged up with dirt and debris, affecting their functioning. In such cases, you will need to get them professionally cleaned.
And this guide will let you know how much air duct cleaning costs.
Why Do Air Ducts Require Cleaning?
Most modern homes rely on an air duct system, which is a network of air ducts connecting to the heating, ventilation, and air conditioning systems. These ducts work with the air handler to allow the passage of air to heat up or cool down the room as required while filtering impurities like dust and dirt.
But over time, these dirt and dust particles can adhere to the sides of the ducts, restricting the airflow. This can lead to problems like mold growth, which is why getting your air ducts cleaned regularly is essential to prevent dirt buildup.
According to the United States Environmental Protection Agency, air duct cleaning should be undertaken when there is visible mold growth in various areas of the heating and cooling system. Such cleaning also becomes crucial if there are signs of a rodent, like a mouse or an insect infestation, or if the ducts have become clogged.
Similarly, they may need to be cleaned if the ducts release the particulates in an area where people can inhale them. Cleaning them during a home improvement project can also help eliminate house dust mites and harmful bacteria. As for the actual air duct cleaning cost, this depends on various factors, like ductwork size and the number of vents, which I've discussed below.
Factors That Affect Air Duct Cleaning Cost
1. Ductwork Size
The cost of air duct cleaning depends upon the size of the ductwork, which can be determined by the layout of your home. Houses with a larger ductwork size require more cleaning, resulting in a higher cost. That is why some air duct cleaning services charge according to the size of the property. The cost of cleaning air ducts per square foot ranges from $0.14 to $0.25.
Alternatively, the air duct cleaning service can charge by the vent. These vents connect different rooms to the HVAC system, and the charges can range between $25 and $50 per vent. To get an idea about the air duct cleaning cost, you can count the number of vents and multiply them by $35.
Thus, for a 1500-square-foot house, the cost of air duct cleaning can range between $225 and $375. Some cleaning services also base their prices on the system, where the average cost is from $200 to $1000.
2. Number Of Vents
Another factor that affects air duct cleaning prices is the number of vents that make up the air duct system. Generally, the cost of cleaning a system with more vents will be higher, and it can lie between $25 and $50.
However, different air duct cleaning professionals use different pricing methodologies. An air duct cleaning company can charge a flat rate with extra vents, a trip fee for overhead costs, and additional charges for additional vents.
3. Ductwork Type
Different types of ducts require different cleaning methods and tools. For instance, fiberglass and foam board ducts require power brushing, air washing, or vacuuming. In contrast, flex ducts require specialized equipment, so I would recommend speaking with a professional air duct cleaner beforehand.
Also, due to its more complicated nature, you may not find many air duct cleaning professionals offering flex duct cleaning services. On the other hand, rigid duct cleaning is easier, and most companies offer such services.
4. Accessibility
The size and layout of your home will determine how accessible the air duct system is. Some homes provide access to the system through entry points in the utility room, attic, or basement. But if such access points are not present and getting to the system is difficult, the air duct cleaning cost can rise.
That being said, the price will often depend upon the air duct cleaning service, project scope, and location.
5. Labor Costs
Many air duct cleaning companies charge by the number of vents or the square footage while also considering factors like the air duct type and accessibility. Generally, it takes around three to eight hours of labor to get your air ducts cleaned.
6. Geographical Location
The location will affect the air duct cleaning cost since cleaning services in different areas charge different prices. For instance, cleaners in New York charge between $268 and $488, while those in New Hampshire charge between $312 and $538.
Similarly, those in California charge between $222 and $452, while those in Florida charge between $258 and $518, and the charges in Michigan range from $290 to $429. In Texas, air duct cleaning can cost between $263 and $712.
Costs Of Additional Services
Besides the cost of cleaning the air ducts, you may also need to pay professional cleaners for other services. These can include:
1. Inspection
Getting your air ducts inspected by professionals can help you know about the level of contamination. Generally, a video inspection can cost between $75 and $125, or it can be bundled with an annual inspection of the HVAC system.
A video camera inspection can help provide the cleaners with information about debris, damage, pests, dust buildup, insulation problems, mold, etc. I strongly recommend getting your air ducts inspected at least once a year.
2. Removal Of Pests
Rodents like rats and other pests can enter your air vents and the ductwork by chewing through the material. Besides damaging the system, they leave behind droppings, which can lead to respiratory disease.
If there is a rodent or insect infestation in the air duct system, pest control services will need to be hired. Removing vermin like a rat or other pests can cost between $150 and $500 and will add to the total cost of the cleaning.
3. Removing Mildew And Mold
Over time, mold and mildew can gather in the air ducts, especially if your home has suffered water damage or is located in a humid environment. Apart from being unpleasant to look at, mold spores can pose health risks. Mold spores are an allergen and can act just like pollen, which is why they should be removed as soon as possible.
Removing mildew and mold requires special equipment, chemicals, and considerable time. And mold and mildew remediation can cost between $600 and $2000. Air duct sanitizing may also be required, in which an antibacterial disinfectant is sprayed into the ductwork to prevent bacteria, mildew, and mold growth.
4. Removal Of Asbestos
Asbestos, a manufacturing material used in the construction of building materials, is an incredibly dangerous chemical substance known to cause air pollution and requires quick removal. Air duct cleaning services generally determine the presence of this hazardous material by inspecting the HVAC system.
Like mold, asbestos removal requires specialized cleaning procedures, which should only be performed by professionals. Any air duct cleaning process cannot be undertaken until asbestos abatement is complete. The cost of this removal can range from $5 to $20 per square foot.
5. Cleaning The Dryer Vent
The clothes dryer vent is among the most heavily used components, and it can get clogged with dust and gunk. Clogged vents can reduce the energy efficiency of your home and may also pose a fire hazard. In fact, many house fires are often caused due to dryer vents that have become clogged.
Dryer vent cleaning can cost between $100 and $170 when performed as a standalone service, but it can also be bundled with the annual air duct cleaning.
6. Cleaning Of Custom Air Ducts
If your home utilizes custom air ducts, the charges for cleaning it will be about 25 to 30 percent higher than for cleaning standard ones. The reason is that air duct cleaners require more time on such projects and often need to use specialized tools and techniques.
7. Coating Of Air Ducts
Air duct coating can help prevent the entry of dirt, dust, and other particulate matter into your home, ensuring your home’s air quality remains good. The process involves the application of a protective sealant onto the inner surfaces of the air ducts, which helps keep the air ducts clean.
However, tests conducted by the EPA show that the sealant fails to cover the duct surface completely and can adversely affect the fire-retardant and acoustic properties of fiberglass ducts. In some cases, applying such a coating may also void the manufacturer's warranty. But for those who require such coating on their air ducts, the cost ranges from $180 to $625.
8. AC Or Furnace Repairs
If the air duct cleaning professional detects some damage to your AC or furnace, it may need to be repaired before the dirty air ducts can be cleaned. Timely repairs help you save money and can improve the temperature regulation properties of the air conditioner.
The cost of furnace repairs or tune-ups can range from $130 to $500, while AC repairs can cost between $160 and $500.
Air Duct Cleaning - Difference In Costs
Residential Vs. Commercial Cleaning
Air duct cleaning costs I've mentioned so far can help you get an idea of the charges in the case of a residential structure. For commercial buildings, the charges for air duct cleaning will be significantly higher because they are generally much larger than residential ones.
If you require air duct cleaning at your office or other commercial workplaces, it can cost between $30 and $50 per hour.
Cleaning Yourself Vs Hiring Air Duct Cleaners
You can clean air ducts using do-it-yourself methods, but these will require a good knowledge of the HVAC ducts and the right cleaning supplies. The most important among these will be a vacuum and a ladder, which can range from $100 to $400.
Additionally, the air duct cleaning process will require a power drill, an extension hose, and a vent cleaning brush with an extendable handle, which can all be a bit pricey. Other items, like rags, masks, a bristle brush, and goggles, will cost between $10 and $30.
That said when compared to the cost of hiring an air duct cleaning company, undertaking the duct cleaning project yourself will be more cost-effective. But I would still suggest hiring professionals for air duct cleaning since they already have the required tools, proper training, and years of experience.
Additionally, in the case of custom options, you may not have an idea about how to get the air ducts cleaned by yourself.
Tip
When hiring professional air duct cleaners, it is a good idea to check the Better Business Bureau page and customer reviews. Get quotes from at least three companies and avoid hiring one that charges significantly less than the competition.
Also, I would recommend looking for companies that comply with National Air Duct Cleaners Association (NADCA) cleaning standards.
Saving Money On Air Duct Cleaning
Hiring a professional air duct cleaning service is a better choice, though it can be costly. Fortunately, there are a few ways by which you can save on air duct cleaning costs, which I've mentioned here.
1. Proper Maintenance Of The Air Conditioning And Heating System
The best way to reduce your air duct cleaning cost is to ensure proper air conditioning and heating systems maintenance. Regular maintenance will keep the system functioning optimally, improving indoor air quality and ensuring efficient energy use. And it will reduce the amount of debris and dust entering the ducts, keeping them relatively clean.
2. Timely Changing Of The Air Filter
All HVAC systems need their air filters to be changed at specific intervals, and this period depends on the type of filter. I would recommend consulting the manufacturer of your air filter to know how frequently the filter should be changed. Generally, this can vary between 30, 60, and 90 days.
High-quality filters, like HEPA ones, last longer, but if you notice clogged filters, consider changing them more frequently. Similarly, change the filter of your air purifier timely.
3. Regular Vacuuming
Vacuuming around the various vent grills, duct openings, furnaces, and registers can go a long way in preventing dust accumulation. And when using a vacuum cleaner, make sure to use a compatible filter bag that has the highest rating.
4. Preventing The Entry Of Moisture
If water damage or leaks are detected in your home, dealing with them quickly is vital. Doing so can help avoid the growth of mold and mildew, so you won't have to spend money on mold remediation. Also, check that the air ducts are properly insulated and sealed
5. Regular Cleaning Of AC Coils
Keeping the air conditioner evaporator coils clean will keep the heat exchanger free of dirt and allow it to function efficiently. This will result in reduced energy consumption and lower air duct cleaning costs.
Types Of Air Ducts
As I mentioned, the type of air ducts in your home will play a major role in determining air duct cleaning costs. Here are the most common types of air ducts found in homes:
1. Flex Ducts
These are flexible ducts similar to dryer vents and can be installed around tight corners and plumbing more easily than regular ducts. While it is possible to clean such ducts, the process requires greater care since these can get damaged easily, even with little pressure.
2. Rigid Ducts
Rigid ducts are the most common type and are prone to indoor mold and moisture accumulation. Installing rigid ductwork is costlier than flex ones, but it is sturdier and does not get damaged as easily while cleaning.
3. Fiberglass Ducts
Fiberglass ductwork is usually more common in commercial buildings since it can provide better noise reduction and insulation. But such ducts can break down, adversely affecting the air quality and posing a health risk. Professionals can be hired to power brush or vacuum them regularly to prevent such problems.
Air Ducts Cleaning Related FAQs
How often should your air ducts be cleaned?
According to experts, getting your air ducts cleaned once every two to three years is a good idea. Doing so can prevent a lot of maintenance problems and help avoid a range of health issues. However, if you have children or pets at home, it is better to get the ducts cleaned more frequently.
What are some signs that can indicate your air ducts need cleaning?
In most cases, it can be pretty easy to determine that your air ducts require cleaning. Signs such as mold growth, the presence of vermin and pests like rats, poor airflow, and higher power bills can all indicate that the ducts require cleaning.
How long does it take to get your air ducts cleaned properly?
The time taken to get your air ducts cleaned properly depends on factors such as the size of your home and the ductwork layout. Generally, it will take about three to five hours to get the ducts cleaned in the case of an average-sized home. But larger homes with more extensive networks will require more time.
When is the best time to clean your air ducts?
Ideally, spring is the best time to undertake an air duct cleaning project. The reason for that is that the weather starts becoming warmer, so it is easier to inspect the ductwork. Also, the amount of moisture in the air increases, which can lead to mold growth. Additionally, insects and rodents that may have taken refuge in the ductwork during the winter can be removed more easily.
How much noise does an air duct cleaning process make?
Duct cleaning is not a very noisy process, and you won’t experience too much disturbance. In most cases, the sound produced will be similar to that of a vacuum cleaner. However, your heating and cooling unit will need to be turned off, which can actually make the room quieter.
Final Thoughts
Depending on the factors I've mentioned in this guide, the cost of air duct cleaning can vary considerably in different regions of the United States. That said, you will need to shell out a considerable amount if the ductwork hasn't been cleaned in a long time.
This is the reason why regular maintenance is crucial and can help reduce the overall cost. And when it comes to selecting the right service for the job, make sure to check the website and go through the FAQ section. If you have a question regarding any aspect, contact the company to clear them up.
Doing so will help you avoid air duct cleaning scams and ensure a good experience.
The best way to strike a balance between outdoor home décor and comfort is to conceal the AC unit in a creative way. Common methods to achieve functional beauty without blocking airflow, include building wooden AC covers, gardens, tool sheds, door screens, or planting tall shrubs.
The outdoor unit of your air conditioner can be a real eyesore in your garden, patio, and outdoor space. It would not be very appealing if you were to throw a barbeque or outdoor party with a chunky outdoor AC unit hanging around smack in the middle of your landscaping. But you can’t do away with it either since the outdoor air conditioning unit facilitates heating, ventilation and air conditioning to maintain indoor temperatures.
Here are some ready-made and do-it-yourself options to help you choose a method that best suits your home aesthetics.
Perhaps the easiest way to hide your air conditioner unit is to build a wooden box around it with simple wood planks. These can easily be made as a DIY project since it just requires nailing the planks in place. However, you must ensure that the wooden box is larger than the AC unit for instances when you might need to add Freon and for proper air circulation.
If you’re unsure how to make one, you can hire a professional and convey the preferred design, and material. To spruce up the simple wood box, you can add a paint coat and some plants and elevate your décor.
What better way to hide your AC unit than using some additional plants in your garden intuitively? Simply make a wooden box like the one mentioned above, but this time with some leading-edge slat. Within these slats, you can plant vines or flower stems. If you find planting your garden within the slats difficult, consider hanging tall planter boxes using the wooden slats as leverage. You can also build a picket fence and plant climbing plants around it.
This is quite a unique and modern way of partially hiding your air conditioning units. Building a miniature house as an air conditioner cover is also a great way of improving your garden or landscaping. You can use the traditional slanting roof style to help slide off the snow and act as a sun shield as well. What’s more, you can paint it any color and even add decorative items to the surface!
Before installing a house-like structure, ensure that the lid is removable or at least can be partially lifted to provide access to the air conditioner’s outside unit. This method is ideal for hiding window conditioning systems that often come with a big, ugly AC unit for air circulation.
You can make your AC unit cover double up as storage space for your garden tools. You can do this by constructing a mini shed around your outdoor HVAC unit and adding a small tool shed on top. This way, you will have enough space to store tools on top, while you can also store miscellaneous items along with the outdoor air conditioning unit.
Moreover, you can make the tool shed using simple wood planks, but if you want something more durable, opt for an iron trellis. Just ensure that the items or garden tools don’t get in the way of proper airflow.
An organic way of hiding air conditioning units is growing a tall shrub or bush on each side until it is fully covered. For an intense camouflage, plant various shrubs, including vines, ornamental trees, and flowers like hydrangea, rose, clematis, English ivy, etc. However, you must leave a little space between each shrub for air flow and easy access to the air conditioner unit. Also, remember to prune your shrubs regularly so their growth doesn’t get out of hand and there’s enough space for the outdoor AC unit to work properly.
A great idea that can protect your outdoor AC unit and conceal it from guests is by building a picket fence. Making or installing a picket fence is relatively easy and doesn’t require professional help because all you need to do is string together multiple wood planks. You can also level up your fence game by attaching bird houses along the picket fence to provide a safe space for birds to perch and eat.
This is a more efficient take on the wooden box method of hiding the AC unit in the outdoor space. Here, instead of removing the entire box for monthly or yearly maintenance, you can simply open the door with a latch. The building process is the same as the wooden box, the only difference being attaching a separate door with a few hinges and a latch, which you can find in any hardware store.
If you want it to serve a decorative purpose, you can add lattice work designs or wood carvings to enhance the overall aesthetic of the AC cover and the outdoor space.
Beautifully designed iron trellis has always been a great décor option for the backyard or patio due to its weather-proof and aesthetic features. An iron trellis can prevent large animals and garbage from entering and damaging your outdoor AC unit, so it also helps with maintenance. Let some vines or English ivy grow along the trellis to create natural and organic backyard landscaping. Also, you can use an iron trellis as an AC cover and a privacy screen!
If the weather conditions allow flower plants to grow all year, you can install large planters to camouflage the AC units. Make sure to use large planters big enough to cover the entirety of the outdoor AC unit. An important thing to remember is to use plants that can withstand the heat emitted from the AC unit. You can also add colorful pots that complement your garden or landscaping!
If you have regular backyard parties and family gatherings, you may need more storage space for umbrellas, folding tables, barbeque units, etc. Installing a large aluminum structure with well-ventilated slates can hold all of these, plus your outdoor AC unit.
Aluminum is a preferable material in this instance since it is heat-resistant and extremely durable. That means it can withstand the hot air coming from the condenser and also hot weather conditions without being damaged. Add a couple of removable shelves into the AC cover for other storage solutions and store all your backyard essentials, including garden tools!
Placing a lattice screen in front of the air conditioner unit is the easiest way to conceal it without putting in much effort. Simply fix the screen on the ground, or use multiple screens to create an enclosed box. Avoid plain wooden ones since they aren’t visually appealing, and plant-based screens are too difficult to maintain. Instead, opt for a decorative or designer lattice screen made from durable materials and designated slats for adding vines or large planters.
12. Create A Whole Shed
Source Unknown
Building an entire shed to hide your AC unit can be quite intimidating, but hold up! If you have an existing tool shed or backyard room, you can repurpose it as an AC cover. However, if you don’t have one, you can simply have it professionally made from scratch in a few days. A shed can also double up as a storage unit where you can store hardware equipment, garden tools, and even farm produce!
13. Build A Cement Or Stone Wall
Source Unknown
Want an AC cover that will last for a long time? Consider getting a stone or cement wall to cover your condenser and add a luxurious look to your landscaping. Usually, cement walls for this purpose have small breeze blocks that provide proper ventilation to vent the heat from the unit. You can also utilize these breeze blocks by attaching planters or other decorative pieces within the gaps to enhance the aesthetic.
Another great idea to jazz up your outdoor space is painting each individual block with different vibrant colors to add a pop to your otherwise dull yard.
14. Add A Bamboo Fence
Source Unknown
A climate-conscious way of adding a more oriental look to your garden or backyard is installing a high-quality bamboo fence. It is a popular option for people who want a natural way of hiding the AC unit. However, you will not be able to DIY it since bamboo can be really heavy, so hire a professional to find the right bamboo color for your space.
Moreover, you can also add a wood stain on top if you have a wooden house or other outdoor furnishings that may clash with the natural bamboo finish.
Hiding AC FAQ
What Are The Benefits Of Hiding Your Outdoor AC Unit?
Hiding or covering your outdoor AC units is highly beneficial, especially during fall or winter season. Here are the benefits:
Clean internal coils
Hiding and covering the outdoor unit helps keep the evaporator coils clean and efficient since lower amounts of dust, debris, leaves, sticks, etc. can now settle on them.
Prevent Freezing
Hiding the unit with foliage or solid wooden boxes can reduce the amount of water that settles on the coils to form ice particles. This helps maintain an optimal temperature for the unit during winter, preventing pesky AC freezes.
Better Visuals
One of the main reasons why people decide to cover their outdoor units to alleviate the overall visual aesthetic of their patio or backyard.
Can Hiding Your AC Unit With Wooden Boxes Or Sheds Detrimental?
Full-length covers, such as wooden covers or sheds can harm your AC unit, especially if you live in warm and humid climates. Such hiding methods can lead to molds, mildew, rust, and lack of proper airflow. However, using methods with better airflow and more surface area can prevent this.
Does Hiding And Covering Your Outdoor AC Unit Save Money?
No, it doesn’t save money or energy – rather, it helps with landscaping and improving the aesthetics of your outdoor area. Many people also resort to covering their units to keep the internal coils clean and prevent freezing.
Can You Do Landscaping Projects Around The Outdoor Unit?
It is possible to do some landscaping around your outdoor unit, given the unit is properly enclosed. Ensure there’s at least two to three feet of space between the enclosed unit and the boundary of your landscaping project. If you don’t keep enough space between the unit and the plants for your landscaping, it can obstruct airflow and cause severe cases of energy inefficiency.
How To Hide Your Ac Unit Without Lowering Energy Efficiency?
Undoubtedly, hiding the outdoor unit by enclosing it or putting foliage and rails around it improves the appearance of your patio or backyard. It’s quite an easy project to execute, but you need to keep some considerations in mind while hiding the unit. For example, keeping enough space around and above the unit for proper air circulation can prevent lowering the energy efficiency of your AC. This way, you can improve the outdoor aesthetic of your home while keeping the utility bills under budget.
Final Thoughts
An air conditioner unit ruining your outdoor landscape is a common problem for many homeowners. However, nowadays, there are many options you can opt for to conceal the outdoor AC unit while simultaneously enhancing the beauty of your yard or garden. But if you’re big on landscaping and don’t want to obstruct the natural look of your garden, consider purchasing ducted air conditioning instead of a regular window or split ACs.
You can also hire reliable landscaping professionals or designers to help you find a suitable method if you’re still confused.
That said, I’ll be signing off for now. Stick around if you want to read similar guides and informational pieces to help you improve your home and lifestyle.
Both heating and cooling units have a system of ducts, known as ductwork that carry cool air to your room. Varying room sizes require different duct sizes, proving crucial for proper ventilation and functioning of HVAC systems.
Ductwork can be quite tricky to get the hang of, especially if you're not well-versed with HVAC systems. However, these metal tubes are critical for adequately heating and cooling your home, optimizing airflow in any space.
Once I familiarize you with some common duct-related terms, let's look at what size ducts are required for a 12 x 12 room.
Where To Start The Ductwork Revolution?
Some rooms in your home are always too cold or hot, irrespective of what you do to balance out the temperature. This is mainly because several homes may have aging heating and cooling systems, for which you must refurbish the existing size of ductwork.
Determining duct size for every room in your home is generally the bestsolution for issues regarding:
Heating
Air conditioner (HVAC system), and
Ventilation
But for enhanced functionality of these units, let's find out how you can take the right measurements.
Important Terminology
Firstly, what is ductwork? Ductwork is the system of ducts that carry air from heating, ventilation, and air conditioning (HVAC system) units throughout the house. For well-functioning equipment, correctly installed and maintained ductwork is an absolute necessity.
But what do you mean by ducts, and how do they differ from ductwork? A duct can be classified as an individual synthetic or metal pipe, passage, conduit or tube used in ventilation, heating ducts, and air conditioning systems to remove or deliver air. These tubes promote air flow, exhaust air and form part of air return ducts.
To measure airflow volume, I generally use CFM or cubic foot per minute. This measures the air flow velocity each minute the air moves. For instance, if the air compressor has an output rating of 30 CFM, it indicates 30 cubic feet of air flow through the system each minute.
Generally, you will need at least 400 CFM for a 1 ton air conditioner.
Yet another term that you must know is BTU or British Thermal Units. BTU is an international energy measurement that indicates heat required to raise the temperature of one pound of water by one degree Fahrenheit. For residential air conditioning systems, BTU calculates how much heat the device can push out of the room each hour.
How To Calculate Duct Sizing For A Room
To accurately calculate the HVAC duct sizing needed for a room, you would need to know the rate of air flow as well as the overall size of the room. Additionally, knowing the square footage of your entire house can be beneficial since it what air conditioning unityou need.
To determine the airflow volume, you must know its Cubic Feet per Minute measurement. Airflow volume refers to the amount of air flowing through in a minute. An ideal way to measure it is by calculating the square footage since every square feet generally requires 1 CFM of airflow.
For a room with 400 CFM, you may only require a 4-inch duct but it is possible to go with a larger product if required. However, a large duct can be quite impractical, unless the room has a CFM that is over 400 but under 600. Most importantly, a lack of proper-sized ducts can make the airflow extremely loud and disturbing.
How Many CFM Is A 12 x 12 Duct?
For a room that measures 12 x 12, you will need a CFM of at least 144. This also calls for a supply duct size of 4 x 8 regardless of whether the CFM is 1 or 1 ¼ per square foot. For a room that is sized 144 square feet, this is the ideal size to ensure adequate airflow, be it for a cooling or heating system.
If you get a HVAC duct that is too large, it can affect the heating and cooling efficiency of the HVAC system. This is because larger ducts take longer to supply air for a relatively small room. On the contrary, opting for a duct smaller than the required size can result in a lack of proper airflow.
For instance, with a 3 x 6 size duct, airflow will be loud, while affecting circulation throughout the room. When the duct is too small, the air within has trouble leaving the HVAC unit.
On average, the installation charge for a 4 x 8 duct is $3,225. However, costs may vary depending on your home's square footage, the HVAC equipment layout, and how easily it can be accessed.
What Size Duct Do I Need For A 200 Sq. Ft Room
For a room that is 200 square feet, you would need a HVAC duct size of 8 inches for proper airflow. In addition to 200 square feet, an 8-inch duct would also be ideal for rooms between 180 and 244 square feet. This ensures there is optimal airflow regardless of whether the room has windows.
At certain times, a room that has way too many windows can negatively affect the CFM and make calculations more difficult. Windows usually allow air to escape from the room, especially if they are not sealed properly or left open.
The general rule of 1 CFM (cubic feet per minute) per square footage can't apply to a room with several windows or poorly sealed windows. In this scenario, you may switch the rule to 1 ¼ CFM per square foot.
However, this issue would not be as prominent in a 200 square feet room and adding an 8-inch duct to these rooms can improve the airflow for greater comfort.
Factors To Consider Before Calculating Duct Size
Before you begin calculating the right size duct needed for your room, you will have to take these factors into consideration. They are:
1. Size Of The Room
The first and foremost thing to consider is the overall square footage of the area in your home. This allows you to understand how big or smallyour air conditioner has to be.
To calculate the total square footage of your home, measure the width and length of all the rooms and add it all together. Having an idea about the total square feet of each separate room in your home can also be useful in understanding the ductwork required for each room.
2. CFM Velocity
Each room in your home will have a particular velocity at which the air needs to be delivered from the ducts in order to cool or heat the space.
To better understand this concept, let me take it step by step. As you know, every room has a maximum velocity CFM measurement which directly corresponds to the required duct size. You also know, as a rule of thumb, that it takes around 1 CFM of air in order to cool down a floor area of 1 square foot.
But how can you calculate the maximum velocity for each room? An easy way to do this is using the 1 CFM per square foot method. If you have more than one window in the room, take the measurement as 2 CFM or 1 ¼ CFM per square foot.
With this in mind, if you want to calculate the cubic feet per min (CFM) velocity for a 100-square-foot space, the CFM required will be 100.
3. Duct Friction Loss
A duct, much like other materials, has some amount of duct friction, which causes the air moving through it to lose its speed and energy. The longer the path the air has to move through, and the more turns it takes, the slower it comes out of the vent. It is recommended that you call an experienced HVAC contractor to deal with this situation and provide a quick solution.
How Many Ducts Are Needed Per Room?
The answer to this question is entirely subjective, as there is no strict rule regarding the right ductwork sizing for a room. However, having more than one duct certainly results in improved airflow velocity throughout the room. As long as the duct is sized appropriately and has the right CFM requirements, extra ventilation is never bad.
Having multiple ducts unnecessarily can result in your HVAC system being damaged, which then results in expensive repairs. The coils within your air conditioner can also end up freezing if there are too many air ducts. Frozen coils, in turn, damage the unit's compressor and is usually quite expensive to repair.
Tip
A room that is sized 100 square feet or slightly bigger can find it useful to have around 2-3 ducts for optimized airflow. However, if the room is smaller than 100 square feet, installing multiple ducts can be an overkill, which makes the extra airflow uncomfortable.
Final Words
To summarize the aforementioned points, a 12 x 12 room would need a duct size of 4 x 8 for optimal airflow. This allows the air to move freely within the AC or heater without causing too much noise or affecting airflow quality.
Since a smaller duct can be harmful to the air conditioning HVAC unit and a larger duct can make airflow less efficient, getting the proper duct size for your room is crucial. Keep in mind to maintain your duct regularly to ensure they function properly and use a duct calculator to find the proper size. On average, air ducts need to be cleaned every four years to prevent duct damage as well as respiratory problems due to duct runs.
Ductless mini split systems offer more features, better control, and cool a larger area. They can also release both cool and warm air, so you can use them all around the year. Meanwhile, portable ACs are energy efficient, easy to move, and cost-effective.
Not sure whether to install a ductless mini split system or a portable one?
It could be confusing to make a decision, especially if you are not well-versed in their features. Both types of air conditioners have their own pros and cons.
If you are looking for a versatile unit, a mini-split would be better. But if you want something easier to maintain, portable ACs are what you need. Need more pointers like these?
Keep on reading!
Features Of A Mini Split Unit
A mini-split is an air conditioning system that lets you adjust the temperature in separate rooms or spaces. It has two main components - an indoor air handling unit (also called an evaporator) and an outdoor condenser or compressor.
These units are very easy to install, as they require only a 3-inch wide hole in a wall for the conduit. It houses communication and power cables, a copper tube or duct, and a condensation drain line, which connects the indoor unit to the outdoor one.
Mini Splits are a great fit for homes that have non-ducted heating or cooling systems. They are also perfect if you make a room addition in your house and installing or extending ductwork is not possible.
Features Of Portable Air Conditioners
A portable air conditioner is a self-contained cooling device that can be set up anywhere in the house. It primarily sucks in the hot air from the room, extracts the heat from it, conditions it to your preferred temperature, and releases it.
These four basic components enable a portable AC to cool the space efficiently - an evaporator coil along with the refrigerant, compressor, condenser coil, and fan. It removes moisture from the air through self-evaporation, gravity drain, and its internal bucket.
The best part is these units are very simple to install and won’t even require any professional help. They are lightweight and generally come with attached wheels, so you can move them from one room to another conveniently.
Differences Between Mini Split And Portable Air Conditioners
Now that I have told you about the basic features of mini-split systems and portable air conditioners, let’s understand the differences between the two. This will give you some idea about which option is better and why.
1. Appearance
Mini split and portable air conditioners vary a great deal in terms of appearance. The former is perched high on your ceiling or wall. It also comes with streamlined and sleek jackets that usually blend with the room décor. And for aesthetic installation, the outdoor unit can be installed up to 50 feet away from the indoor one.
Portable air conditioners, on the other hand, can be an eyesore in your home. Not only do they take up space, but they also need a flexible hose to function, which can disturb the décor and stand out from the rest of the room. So, in terms of appearance, a mini-split is definitely a better choice than a portable AC unit.
2. Functions
Mini-splits are essentially mini heat pumps that can both cool and heat your home. They are quite versatile when it comes to functionality and can be used year-round. These systems are also equipped with multiple fan settings, timers, and wireless remote control for optimum comfort and ease of use.
Window air conditioners and portable AC units can only be used in hot months for cooling the home. And as soon as the temperature drops, you will have to invest in a different system for heating purposes.
Not to forget, they are very loud and will produce a lot of noise during operation. But on the upside, a portable air conditioner can function as a dehumidifier and keep you safe from air pollution.
3. Convenience
Speaking of movability, portable air conditioners outshine mini splits as they can be moved easily and don’t need to be installed in a fixed place. However, mini splits are stationary, and it’s a hassle to change their position around the home. But they are more convenient in adjusting temperature and fan speed, which is not the case for portable units.
4. Cost
Mini-splits offer much more features, better functionality, and operation than portable air conditioners. So, inevitably they come with a much steeper price tag and lie in the range of $1,500 to $5,000. Meanwhile, you can buy the latter for $200 to $600.
So, if you have budget constraints, then a portable ac unit would be a better choice. But if you can shell out some cash, then I recommend opting for a mini-split, as it would be an excellent one-time investment.
Why Choose A Mini Split System?
A ductless mini-split would be an excellent fit for you for the following reasons:
1. All-around Control
Mini split systems offer all-around control during operation, which a portable air conditioner often fails to do. They come with remote control technology, and you can adjust the temperature of each room owing to the sensors. A mini split also has more speed settings and adjustment levels to provide you with comfortable heating and cooling.
And if you are a deep sleeper who doesn’t want to wake up in the middle of the night to turn off the air conditioning, these systems are equipped with timers. So, all you need to do is set the time, and it will turn off automatically. This feature is generally unavailable in portable air conditioners.
2. Versatile Functioning
Another great thing about a mini split is that it can be used in both summer and winter, as it has a heat pump. Even though it is pricier than a portable air conditioner, you won’t have to buy a separate AC and a heater, so it would save you more money in the long run.
3. Scalable
Unlike a portable air conditioner, a mini-split is scalable and can be used to cool one room to the whole house. Many models have i-see sensor technology that directly points the airflow to the source of the heat. So, you get the best of both worlds with mini splits, while portable units are best suited for spot cooling.
4. Whisper-quiet Technology
While a portable air conditioner is noisy, a mini-split is quite the opposite. It has whisper-quiet technology, and for the most part, you won’t even realize that the system is running. This makes it perfect for light sleepers who prefer a quiet environment while snoozing.
Why Choose Portable AC Units?
1. Easy Setup Without Permanent Installation
The best thing about a portable air conditioner is that it doesn’t require professional installation. All you need to do is place it in your preferred spot, ensuring that it is near a window for plugging the flexible exhaust hose, and you’d be good to go. Not only does it save installation costs, but you also won’t have to commit to a particular part of your home.
Furthermore, it is perfect if you have multiple guest rooms and people keep coming over, as you can roll it from one room to another.
2. Cools And Dehumidifies: Constant Air Quality Control
While a portable AC unit isn’t as versatile as a mini-split, it can still be used for two purposes. Not only does it release cool air, but it also dries it. Meaning you can also use this system as a dehumidifier. If you live in a humid area, you know how bad it can get during peak summers.
Cooling alone cannot give you relief in such weather, so it’s important to have a system that sucks out the moisture from the air and enhances indoor air quality. And a portable air conditioner can help you out with that.
3. Cut Back On Your Energy Bills
Lastly, a portable air conditioner is more energy-efficient than a ductless air conditioner. That’s because it spot cools a particular part of the room instead of the whole house. Because honestly, what is even the point of firing up the central thermostat if you are going to hang out in one part of the house all day long?
With a portable air conditioner, you can simply cool a particular room. The required temperature will be attained quickly, so you will naturally use the unit for shorter durations. And trust me, this will help you cut back on your energy bills quite a bit.
Tip
I have an important tip for you that can help you make an informed decision. When buying an air conditioner, ask yourself these three questions for more clarity:
What is the area I need to cover?
Do I need a permanent installation or a temporary one?
Do I need something cheap, or can I shell out some extra bucks?
This will help you decide whether a ductless air conditioner (a mini-split system) is better suited for you or a portable one.
Things To Consider When Buying An Air Conditioning Unit
Doesn’t matter if you choose ductless systems or portable; pay attention to these features to make a better choice:
Electricity consumption
Seasonal energy efficiency ratio
Refrigerant requirement
Portable Vs Mini-Split AC FAQs
Portable AC vs. mini split AC– which among the two lasts the longest?
Portable air conditioners usually have an average lifespan of between 5 and 10 years. However, if you take care of them, they will last up to 15 years.
Much like portable air conditioners, mini-split air conditioning systems last for about 10 to 20 years.
Nevertheless, only air conditioners purchased from reliable manufacturers will last this long. Otherwise, units built using inferior materials won’t last long, meaning they’ll keep breaking down every now and then.
Between portable air conditioners and mini-split air conditioners, mini-split air conditioners last long. So, if longevity tops your list, I’d suggest going for mini-split systems.
Also, remember that the lifespan of air conditioners generally depends on how well the unit is maintained. With proper maintenance, your unit can last up to 15 to 20 years.
Are mini split systems more energy efficient than portable air conditioners?
Both portable air conditioners and mini-split systems consume an equal amount of energy to cool a room.
However, mini-split air conditioners with zoning systems are more energy-efficient than regular split systems and portable air conditioning units, as stated by the United States Department of Energy. Precisely, mini-split units with zoning systems consume 30 percent less energy. Less energy consumption means less energy bills– so you’ll save a generous amount every month.
Are portable air conditioners cheaper than mini split systems?
Yes, portable air conditioners are cheaper than mini-split systems. Not only mini split systems, but they are also cheaper than central air conditioning units. Even the most advanced portable air conditioner can be purchased within $1,000. That means you can purchase 2 or more portable air conditioners without spending a fortune.
Portable AC or mini split system: which is ideal for cooling small spaces?
For cooling small spaces, portable air conditioners are excellent because they cool small spaces efficiently. At the same time, they won’t be the right choice for cooling large rooms because they would consume a lot of energy, skyrocketing your utility bills.
However, you can go for mini-split systems to cool a small room because they cool a space relatively quicker than portable air conditioners. Of course, your budget and needs will help you decide which system to go for, so take them into consideration.
Are mini split air conditioning units easy to install?
Yes, mini split air conditioners, like portable air conditioning systems, are easy to install, and seasoned DIYers will be able to pull off the task with ease. Just make sure to go through the instructions in the manual, and I’m sure you’ll be able to complete it without hassle.
Conclusion
That said, I have reached the end of my informative guide on mini split vs. portable air conditioners. Let me do a quick rundown to put things in perspective.
Mini split systems are a good option if you want to cool a larger area while maintaining the aesthetic of your room. They provide better control and more comfortable temperature adjustments and are ductless air conditioners with easy installation.
A portable air conditioner, on the other hand, lags behind in terms of functionality and scalability. But it provides easy setup, optimum ventilation, and air conditioning, offering efficient energy use. It also takes up less space and can be moved around easily.
Tower air conditioners deliver a performance comparable to that of split and central air conditioning systems. These units feature a sleek and vertical design, with multiple vents to cool the outside air and disperse it within a room.
Sometimes when you host friends for a party, too many people in the room render the air conditioner ineffective. Moreover, people sitting near the corners hardly receive any air, leaving guests uncomfortable and you struggling to provide enough cold water for everyone.
I faced a similar situation until I installed a tower AC in the room. Today I will explain its advantages and disadvantages for your benefit.
What Are Tower Air Conditioners?
Tower air conditioners are a type of split air conditioner, referred to as vertical models, that dehumidifies and cools indoor air using a refrigerant. They are smaller, taller, and occupy less space than a traditional split air conditioner.
Since there's no need to install the unit on the wall, you can move this slightly portable air conditioner to a suitable spot within the room. This makes them more affordable, despite having an external unit much like other air conditioners.
But what makes people hesitant about using these air conditioning systems is they fail to cool all corners of a room and can be noisy. However, installation tends to be easy, and overall, a tower air conditioner only uses a little electricity while proving low maintenance, as they are simple to clean.
Are Tower Air Conditioners Effective?
These portable air conditioners are quite effective in cooling large spaces, even though the cold air may not reach every nook and cranny. However, the tall and narrow design of Tower ACs ensures they can disperse cold air throughout the room efficiently.
Thanks to the multiple vent design of these split systems, cool air filters into the room from several angles, which helps eliminate stagnant air or hot air pockets. Best of all is their energy-efficient nature, reducing electricity costs and harmful emissions to lower environmental impact.
I often use mytower air conditioner in a large indoor space when the outside temperature is especially high.
Tower AC Advantages And Disadvantages
While installing a tower air conditioner may not be your first choice, there is no doubting its effectiveness in keeping your home cool. The good thing is that such portable air conditioners function almost as well as regular air conditioners and don't cost as much.
That said, in terms of high-quality cooling, a traditional split AC or window air conditioner is still better and more powerful. But having used a tower AC myself, I can tell you that their cooling capacity can withstand even hot summers.
To know more about what makes a tower AC worth installing and what are some downsides of this portable AC, read the following section.
Advantages Of A Tower AC
Here are some of the significant advantages of tower air conditioners -
1. Low Cost
The most attractive aspect of a tower portable AC is that they are extremely affordable. Although you won't get an AC for a dime - it's an air conditioner, after all - the cost of using, installing, and managing electricity bills is much lower. While traditional air conditioners cost a lot, tower AC units are more suitable for people on a budget.
2. Versatile And Portable
Another attractive aspect of tower air conditioners is they are portable and highly versatile. While you can't shift a traditional air conditioner from one position to another, tower air conditioners reduce the need for installing multiple window units or central systems.
But there is a catch! They aren't versatile like a fully portable air conditioner because these units come with a duct. In other words, you can move the air conditioner as much as the duct allows, provided it remains connected.
When installing a tower air conditioner, consider the duct's position and keep space to move the unit to enjoy optimum cooling.
3. Easy Installation
While you will require professional help to install a split system or window AC, installing and using a tower AC is easier. There are no over-the-top installation requirements or complicated procedures that will leave you stumped. You can and should take professional help if needed, but most DIY enthusiasts will be able to install these split ACs themselves.
4. Energy-Efficient
The energy-efficient properties of a tower AC are undeniable, and such units don't consume much electricity even in extreme heat. A high-quality indoor unit will keep the air inside the room cool and lower the temperature of the outside air before it filters inside.
You will experience little difference in the cooling capacity for a small room, as a tower AC effectively disperses cold air in smaller spaces. But when the room size is large, it might fail to live up to the performance of traditional air conditioning units.
On the flip side, a tower AC doesn't cause much environmental damage and is more eco-friendly.
5. Additional Benefits
There are some extra features of a tower AC should know about, including modern upgrades that you will find in medium or high-end models. Some of these features are -
A quality dehumidifier
Smooth temperature controls
Indoor air filters that help remove dust and allergens to create a healthy environment
Disadvantages Of A Tower AC
Despite the many good things about a tower AC, there are some disadvantages of using these models that I have highlighted in this section.
1. Noisy
The major issue with a tower AC is the noisy operation, and they are louder than other air conditioning systems. Some models feature noise dampeners, but even then, using such portable air conditioners at optimum capacity generates more noise.
People who want to install a tower AC in their bedroom or office space should opt for units with noise-reduction technology. Note that these models are pricier than regular tower ACs, but you will get value for money and more peace of mind.
2. Room Modifications
Sometimes it's essential to modify a room so that tower air conditioners can deliver the best results. They are not portable air conditioners per se, but people tend to get confused because a tower AC is movable upto a certain distance.
It's important to remember that like most split AC units or window ACs, a tower AC also has an outdoor unit. You must ensure the duct hose is connected between the indoor and outdoor system at all times so it doesn't lose power.
Connecting the hose entails making necessary changes to the area; hence, hiring a professional installer would be best if you need help installing a tower AC.
3. Need Sufficient Space
Since tower ACs are floor units, unlike window ACs, they require more indoor space despite featuring a sleek design. This is especially problematic for people with small rooms packed with furniture, even though such an indoor unit features a vertical and narrow design.
Moreover, there needs to be sufficient space for connecting the duct and moving the tower AC as far as possible. So, you might have to compromise on the available space in such instances.
Pros Of Tower Air Conditioners
Fairly portable and can be moved conveniently
Easy installation
Efficient energy use
Affordable, especially in the long run
Works well when the outside temperature is high
Cooling capacity is pretty good
Cons Of Tower Air Conditioners
Has two units - an indoor and an outside unit
Requires more space indoors
Less powerful than a traditional air conditioner
Noisy
Tip
A common misconception among people is they can move the tower AC to another room. This is not the case since they are not single units, and there is no way you can switch rooms without disconnecting the duct pipe.
Tower Air Conditioner FAQs
What is the cooling range of tower ACs?
Tower air conditioners are designed for cooling a large room and have a higher cooling capacity ranging between 24,000 and 48,000 BTU/hour.
What is the lowest temperature a cooling tower should reach?
The lowest temperature a cooling tower should reach is 32 degrees Fahrenheit but it’s not possible to maintain this level of cooling for a sustained period. In many places with cold climates, a cooling tower can achieve a temperature of 5-degree Fahrenheit.
What factors affect tower AC efficiency?
The efficiency of tower ACs depends on 4 factors –
Heat load
Range
Relative humidity
Ambient wet-bulb temperature
For those who don’t know, range refers to the difference in temperature between the cold water outlet and hot water inlet of the tower.
Do cooling towers need water?
For tower ACs to perform at optimum capacity, it’s essential for the cooling tower system to have a proper water treatment system. This will reduce the chances scaling, corrosion, and microbial buildup for a pure air supply. A tower AC that is affected by such issues will suffer from –
Low output
Prolonged and unplanned downtime
So, you will have no choice but to opt for costly repairs or replacements.
What is the fan speed of a cooling tower?
While the motor speed of a cooling tower is around 1,800 RPM the fan speed is much slower. It is determined by the diameter of the blades, which are usually 14-28 feet in diameter, resulting in a fan speed of 90-230 RPM.
Conclusion
For home use, a tower AC, split AC, or window AC prove equally convenient, so which model you opt for comes down to personal preference.
When the cooling capacity on a budget is your priority, opt for a tower AC since you can also move the unit slightly. But a split or window unit would be better if you want high cooling and choose to install the AC in a large room.
The crucial point is that the potential advantages of a tower AC far outweigh the benefits offered by other air conditioners, which makes them a worthwhile investment. These include greater energy efficiency, easy installation, and a sustainable option, among other things.
I have sufficient indoor space, so getting a tower AC from the best brand to lower energy consumption made sense in my case.
Tower air conditioners work by sucking warm air from outside and passing it through condenser coils to cool it before blowing it into the room. Some tower units cool the air by extracting moisture whereas others use water pipes.
The best way to stay cool all summer is to invest in an efficient air conditioner that can cool your home without consuming much energy. Due to their energy efficiency and compact design, tower AC units have been gaining immense traction lately. They are ideal to cool most large spaces, commercial or residential.
However, a common question people have with these units is how they function. So, let's look at how tower air conditioning works.
What Is A Tower AC?
A floor-standing air conditioner, also known as a tower AC, is a dual-hose system that is slightly similar to portable air conditioners. It comprises an indoor and outdoor exhaust hose, where the indoor unit can be placed in any area of the room, whereas the outdoor unit has to be installed outside.
This is because outdoor dual-hose systems will eject hot air, which, if blown inside, can cause overheating within your house. The main advantage of a dual-hose tower AC over a conventional single-hose AC or portable air conditioneris that it takes up significantly less floor space. However, tower air conditioners do not have any wheels attached to them, so moving them around might be cumbersome since they have to be lifted.
How Tower AC Works
The tower air conditioning systems comprise closed loops that are housed within the device, through which the refrigerant is circulated. This refrigerant then absorbs heat when it travels through different components of the AC.
Hot air is released and heat transfer takes place from the evaporator coil when the refrigerant passes through the condenser coil located at the top of the device. A fan performs fresh air intake from the outside environment into the unit and pumps the same over the condenser coils. This manages to cool down both the exterior and the interior of the entire air conditioning unit.
Apart from proper cooling, tower air conditioners make use of powerful filters that ensure the indoor air is free of dust, pollen, mites, and other harmful substances. All in all, a tower air conditioning system is an essential component for keeping the temperature regulated in any environment, be it a home or office space.
How Is A Tower Air Conditioner Different From Window ACs
A traditional air conditioner draws air into your home and cools it down as it passes through several condenser coils. This cooled air is then dispersed back into the room as indoor air.
On the other hand, a cooling tower work differently. Unlike other air conditioners where the condenser coils are housed within the system, the tower air conditioning unit has its coils located on top of the central unit. This forms something similar to a miniature tower.
To cool the area effectively, the tower comprises a cold refrigerant that lies open to the outside atmosphere. When warm air passes through the condenser coils at the top of the cooling tower ac, it turns cold and cool air is blown into your room.
The indoor temperature can also be controlled using the climate control system. So, if you are on the lookout for a unit that cools your home efficiently, a tower air conditioner is the way to go.
Are Tower ACs Better Than Traditional ACs?
Some homeowners tend to opt for a cooling tower air conditioner over traditional air conditioners because they are much more efficient, easy to use, and a lot quieter. Though these factors are valid to some extent, there are other points you'd want to consider when using a new tower air conditioning unit.
Some people believe that a conventional air conditioner offers consistent temperature control throughout the day, and tower units may not be able to do the same. However, tower units maintain air consistency, even during unpredictable weather conditions or prolonged periods of use making it as functional as standard or portable air conditioners.
It is critical to plan how rooms with minimal ventilation and limited sunlight can be cooled before you install a tower AC. The choice between traditional ACs, portable air conditioners, and tower air conditioners is entirely subjective and depends on your preference.
If you require more efficiency in terms of the cooling process, tower ACs might be the better option. Furthermore, tower air conditioners are ideal to have a regulated, pleasant temperature within the room air.
Tower Air conditioners are designed for larger areas and are often used by businesses that need a more extensive range, such as warehouses, commercial facilities, or factories.
Unlike portable air conditioning units, these cooling units can effortlessly cool even larger spaces since they are incredibly high-powered yet energy-efficient. This ensures that all the inhabitants of the space, in both commercial and residential settings, stay comfortable and happy.
So, to answer the question, tower ACs are ideal for people who own large or medium-sized rooms and need consistent cooling throughout.
Power Consumption Of A Tower AC
Tower air conditioners are powerful, energy-efficient units that are a popular choice for keeping homes and other commercial places cool. These air conditioner units are widely known for their sizable circulatory fan blades that enable them to absorb a higher volume of air and push it out rapidly throughout the room air. Not only does this cool air extremely quickly, but it also helps limit the total amount of power consumed by the AC unit.
The design of tower air conditioners makes them much more efficient than split air conditioners or portable air conditioners. This also enables them to function without lowering the overall cooling capacity or compromising on efficiency and performance. Due to this factor, tower ACs are a popular choice among most people to keep their room cool throughout the summer without paying high energy bills.
Things To Consider Before Using A Tower AC
There are several things one should take into consideration before installing a new tower AC, and I have listed the important points below.
1. The Cooling Capacity
The first and foremost thing you have to consider is the cooling tower air conditioners deliver. Along with that, you must determine the overall size of the room in which you plan on installing the new device.
Unlike a portable air conditioner, tower units are usually meant for larger rooms with wide spaces. So, if you have a large living room or commercial space, this option is ideal for you.
2. Power Consumption
Higher energy efficiency in air conditioners will prove to be helpful, especially on those extra hot days when you run the device for long stretches. Since an AC unit can take up a lot of power and add to the overall cost of your energy bill, an energy-efficient cooling option is needed.
Tower ACs are designed to use as little power as possible, so you won't have to worry about unnecessary expenses or power usage.
3. Air Filter And Dehumidifier
With the increase in the number of commercial and personal vehicles on the roads, pollution is increasing at an alarming rate. Additionally, room air can contain several substances like dust and other impurities.
To avoid this, investing in an AC unit with an inbuilt air purifier can help. It will filter the air in your home and purify the air, thus allowing you to breathe clean and fresh air. These filters, apart from creating fresh air, can also be detached and washed for better functioning.
Furthermore, a dehumidifier within the AC unit can help reduce the amount of humidity present in the air. This way, the temperature within your house will stay regulated at all times.
4. All Weather Options
A tower air conditioner is not just a cooling system. It has heating, ventilation, and air conditioning capabilities that can keep you comfortable throughout the seasons. For people with budget constraints, a tower air conditioner can be a cost-effective option, especially in the long run.
5. Cost Of The Device
Since a tower air conditioner can be pretty expensive, looking through all the options available is necessary. Make sure you browse all brands and models, comparing them to find the best fit for your home.
Some branded tower ACs may be cheaper than the rest while offering the same features and functionality. Based on your needs and long-term requirements, you can set a budget accordingly.
Tip
When using a new tower AC, ensure that it has some additional features. These can include accessories like remote control or inbuilt features such as auto mode, air purifier, antibacterial filter, fan mode, self-diagnose mode, auto start, etc. This will improve the overall experience of using a tower air conditioner.
7. Warranty Period
When I use pricy gadgets, I tend to be highly cautious about the warranty period of the same. Similarly, it is necessary that you look at the warranty of the new air conditioner. Aside from the unit as a whole, look at the warranty options for the compressor of your AC unit.
This way, if you encounter any problems with your device, you can always claim a warranty and get it fixed. The last thing anybody would want is to spend a good amount of money on a product and spend even more on its repairs.
You can also take customer service into consideration when installing a new product, such as options for home delivery.
Pros And Cons Of Tower ACs
Pros:
1. Cooling
Tower air conditioners are great in terms of energy-efficient cooling. Generally, standard and portable air conditioners can result in a pricey power bill, which is why options such as this with minimal power usage can be useful. The limited power consumption does not necessarily equate to insufficient cooling. In fact, tower ACs have impressive cooling capabilities and can effortlessly lower the temperature in a large space in no time.
2. Easy Installation And Affordable
Unlike other traditional systems, tower air conditioners do not require further installation, and you can simply unbox them to begin using the AC. These air conditioners are also much cheaper than conventional AC units and are a cost-effective way to keep your home cool, even in harsh summer conditions.
Cons:
1. Unsuitable For Small Rooms
As impressive as they are, tower ACs come with their fair share of disadvantages. The major one is the inability to be used in smaller rooms, as tower ACs are designed to cool down larger areas, be it a home or a commercial space. When used in a smaller area, it can be overpowering and unnecessary.
2. Bulky And Oversized
Additionally, though these devices are known for their efficiency, they are quite bulky and oversized. Agreed, you can move it around without any problems, but the weight of the device can make this more challenging than it should be.
3. Lack Of Portability
Portable room air conditioners can be quite helpful if you're always on the move. However, it is not necessary that all tower units can be moved around like a portable AC unit. Some portable air conditioning units can be pretty lightweight that makes moving them around comparatively easier. If portability is a factor for you, refrain from opting for a heavier tower air conditioner or and go for portable room air conditioners instead.
Tower AC Related FAQs
How effective are tower ACs?
Tower air conditioners have a higher capacity compared to other ACs and are also portable. Moreover, they are considered by many as the best electronic units for climatic control. Instead of a central cooling system, you can use a tower AC because such units deliver better cooling in large spaces.
What are the benefits of a Tower AC?
he top benefits of a tower AC includes –
Easy to use
Affordable
Saves energy
Versatile units
Which are the top 5 brands for tower ACs?
The top 5 tower AC brands are –
Kenstar
Crompton
Blue Star
Symphony
Honeywell
On which wall should you install the AC?
You know that hot air rises to the top while cold air sinks to the bottom. That’s why, it would be best to install a tower AC at least 2 metres from the ground and high on the wall, so that cold air circulates around the room well.
How do tower ACs work?
Tower ACs have a cooling tower, responsible for creating a stream of cold water as it passes through the heat exchanger. This helps cool the hot condenser coils, while the tower uses a stream of water to blow cool air because the water stream evaporates and lowers the temperature of the air.
You have to keep filling the tower AC with water to make up for water lost due to evaporation. Moreover, relative humidity and barometric pressure determines how much cooling a tower AC can deliver.
Final Words
After a long summer day, the last thing you would want is to come back to humid air and an uncomfortable environment in your home. If you've been pushing aside investing in an AC system all this while, tower air conditioners might be worth looking into.
Not only are they affordable when compared to a traditional or portable air conditioners, but they also consume much less power. With a lower power bill, along with a cool and comfortable home, what more could you ask for?
Read my guide to clear all your doubts andI hope you have a cool summer!
Lego architecture has always appealed to everyone, be it the young or the old population.
If you think Lego form is not for you, it is best to at least give Lego architecture sets a try. In this guide, we have compiled a list so that you can select the best Lego architecture set out of the lot. With these products, you will be able to create miniatures of famous buildings and even recreate the beautiful New York City skyline or the Eiffel Tower!
While creating your very own architectural wonders of the world, you will be left amazed by the versatility these Lego architecture sets offer. As such, they can be widely used by architects.
If you want to explore the endless creative possibilities of a Lego architecture set, it is best to try your hands on the Lego 21009 Farnsworth House Collectible. It comes with a proper booklet that will guide you on how to make architectural creations. So, the inner architect in you will have a gala time using this easy-to-use Lego version!
Also, this collectible can help you recreate the most iconic buildings and comes with 546 pieces of Lego to satiate your curiosity. With this, you can even try to create a real-world replica of the famous Farnworth House.
You should try the LEGO 4643329 Architecture Fallingwater if you and the kids share a penchant for recreating real-world architectural landmarks. It is known that world-renowned architects release design and history guides. And you will be surprised to know that this option comes with an inspirational guidebook filled with hundreds of design and historical references.
The building instructions involved are pretty simple, and you can recreate the replicas of the most unique buildings in the world with much ease. It is even used by leading design houses for imaginative displays of their architectural prototypes. There are 811 pieces of Lego that you will find in this Lego architecture set, and that will give you enough scope for creativity!
Release your inner architect and explore a world of endless...
Includes 1210 white and transparent LEGO bricks, sorting...
When you are on the lookout for a Lego set that offers you the fun of working with free-form Legos, it is best to give the LEGO Architecture Studio 6097683 a try. This set contains transparent Lego bricks and can help the child in you to explore architectural wonders. It includes a 272-page long guidebook that allows you to recreate a model of the most iconic buildings in the world.
Be it about recreating the Chicago skyline or the London skyline, with the guidance of leading architects like Christopher Turner, it wouldn’t be a problem anymore. Hence, it is no surprise that the Lego Architecture Studio is endorsed by REX architecture, Mad Architects, and many more.
Build a detailed model of the famous Burj Khalifa in Dubai!
Includes collectible booklet containing information about...
Wondering how to recreate the modern architectural marvel Burj Khalifa, Dubai? With the Lego 6135666 Architecture Burj Khalifa Dubai, it is not only possible but also pretty simple. This is one of the Lego architecture sets on the market that is designed by architects, and you can use this to build the tallest tower in the world.
With this Lego form, you will be able to enjoy exceptional design features and will be able to learn new architectural strategies. Once constructed, this model measures 15 inches in height and has a width and depth of 3 inches. It also comes with an informational booklet that will make the construction work easier for you.
Features statue-adorned pillars, sculptural reliefs and...
The Lego 6174069 Arc De Triomphe is the perfect pick for you if you are a history buff. After unpacking this Lego architecture set, you will be astonished by the structural details and the statue-adorned pillar that it comes with. The best thing about this Lego architecture set is the subtle colorings on the sculptures and pillars.
This thought-provoking Lego set will allow you to experiment with different building techniques. Additionally, the colorful and monochromatic bricks together will help you create a neoclassical marvel.
You will find 386 bricks in the box, which will help you capture the intricate details of the architectural beauty.
Features advanced building techniques for complex...
It goes without saying that with the Lego 6024481 Sydney Opera House, it is now possible for you to recreate the Australian masterpiece. The product offers advanced building techniques, and you will be able to create complex forms with the bricks. And rest assured, the construction will be pretty sturdy, and you will be able to move it with much ease.
The dark-tanned bricks of this Sydney Opera House Lego architecture set have managed to win the hearts of many. And the best part is that it comes with a sturdy base plate that replicates the sea and adds a natural touch to your formation.
This Lego architecture lets you replicate history and recreate the beautiful design of the Leaning Tower Of Pisa. Kids and adults can enjoy working with this Lego together. And in the package, you will find a booklet that will enable you to learn about the historical monument.
What makes this item stand out is the fact that it is crafted in a manner that you can easily shift the structure once it is completed. When placed correctly, this amazing set will add to the beauty of your bookshelf and living room.
Build a detailed model of the Eiffel Tower in Paris, France!
Includes collectible booklet containing information about...
Were you ever fascinated about visiting Paris? With the Lego 21019 The Eiffel Tower set, you can recreate a miniature version of the monument and feel the experience of walking on the streets of Paris. Not to mention, it comes with a collectible booklet that will help you dive right into the history of the structure.
We like how you can make use of this unique logo set as a keepsake and admire the view of the tower every time you wish to. Instead of a 2D photo, this Lego set can help you develop a 3D model of this historical structure of the city and recreate the stunning Paris skyline.
Interpretation of real-world architectural icon Robie House.
Booklet included with details on design and history (English...
Are you interested to learn about the Prairie School of architecture? You can recreate a Frank Lloyd Wright creation and make the Lego building process more educational. With the help of special building techniques and intricate designs that this item offers, it will become possible for you to explore your favorite architecture marvel closely.
You will also find a collectible booklet in the package that will give you details about the fascinating history of architecture. There are as many as 2276 unique pieces of Lego bricks in the package. So, you can unleash your creativity and try recreating the famous architectural icon: the Robie house.
Recreate the Villa Savoye within a building set featuring...
Booklet included with details on design and history (English...
If you are someone who loves architectural structures that blend with nature, you should give the Lego 4654649 Villa Savoye Collectible a try. With the help of this Lego set, you can recreate the Villa Savoye and marvel at the beauty of the art piece. You will find a booklet that has all the information that you can gather about the structure.
Apart from that, it is important to note that the lower level of the Lego structure is designed in a manner that closely resembles the original. What gives this product an edge over others is the fact that it is designed by leading architects.
Build a detailed LEGO Architecture model interpretation of...
The model building kit for adults and kids aged 12+ features...
With the help of this Lego building model, it will become possible for you to recreate the London Bridge and the London skyline too. Kids and adults can enjoy it equally and can use these bricks to build famous sites of London with the help of cool buildings and models.
This is one of the skyline-based Lego architecture sets that will enable you to use the architectural design to recreate the famous historic landmarks of London. There are 468 pieces of bricks that will enable you to create some of the most iconic landmarks. It is quite a challenging build that will keep you hooked for hours.
Features the rialto bridge, st. Marks basilica, st. Mark's...
Venice's rivers and canals are represented by blue tiles in...
When you wish to take a tour through Venice without actually being there, you can give the Lego 6135677 Venice Skyline a try. This set includes customized architecture bricks that have been designed by real architects. There are 212 bricks in the package, and those will help you construct multiple landmarks of your choice.
You can even recreate the famous canals and rivers using the beautiful blue tiles that are present on the baseplate. Additionally, you will find a booklet that has all the information about the designer and the history of each architectural structure.
Includes Willis Tower, John Hancock Center, Cloud Gate,...
To recreate a model of the Chicago skyline, it is best that you purchase the Lego 6174056 Chicago. This is a good architecture series to try if you like fusing the historical and the modern. With this Lego set, you can build the most popular buildings in Chicago. There are 444 Lego bricks in the set, which will surely keep you busy for a while.
You will find miniatures of the Wrigley Building, Cloud Gate, Willis Tower, John Hancock Center, DuSable Bridge, and many more. Not to mention, there is a detailed guidebook including shedding light on the architectural marvels of Chicago.
Features the Reichstag, Victory Column, Deutsche Bahn Tower,...
Features 3 sections of the Berlin Wall with graffiti deco
Berlin has some of the best architectural wonders of the world, and you can use the Lego 6135675 Berlin Skyline to create your very own experience. History and architecture buffs love Berlin as it has often been considered central to modern history. With the booklet that you find in the package, you will be able to appreciate the beauty and history of Berlin architecture better.
There are around 289 pieces of Lego in the box, and you can rest assured that you will be occupied for quite some time. The highlight of this Lego architecture set is that it comes with three sections of the famous Berlin wall with interesting graffiti on them.
Build the famous London Tower Bridge with a real working...
Includes 4 miniature vehicles: a black taxi, a red...
For recreating the magnificent London Bridge, there is nothing better than the Lego 6038577 Tower Bridge. This Lego architecture set has been designed by real architects and designers. There are around 4000 pieces of Lego blocks, and that would easily keep you engaged for days.
Moreover, people love how magnificent and intricate the structure is. It is almost 40-inch in length, and that adds to the beauty of the product. What makes this item stand out is the fact that the package contains four miniature vehicles. So, you can use these components to make your miniature bridge look more lively.
Build a highly detailed model of the world’s best-known...
Includes Elizabeth Tower, Palace of Westminster, sidewalk,...
If you are fascinated with The Big Ben Tower, this product can help you build a miniature model of it with ease. It gives you the chance to even access the Big Ben bell if you wish by simply removing the top of the tower. You will get around 4000 Lego blocks in the package, and that will keep you busy for a while.
It is safe to say that this item is best suited for people over the age of 16 years and above. Note that the structures and components are built in a way that is more suitable for adults than kids.
To create the perfect rendition of the magnificent Willis Tower, it is best that you experiment with the Lego 4643338 Willis Tower. It does not have too many Lego bricks, and there are only 69 pieces that you would have to arrange to get the structure in place. If you are fascinated by architecture sets, this product can be a good addition to your collection.
Added to the package is a collectible booklet that can help you explore the history and architectural beauty of the Willis Tower better. You can construct this with ease, and this can be a stellar addition to your showcase.
Replicate the home to the nation's Head of State using 560...
Based on the James Hoban design chosen by President George...
Use the Lego 21006 White House if you want to recreate the home of the Nation’s Head of State. You will find around 560 Lego pieces in this pack, and that will surely keep you occupied for a long time. Once you assemble the entire structure, the model will look magnificent, with a total width of 22 cm.
And the base on which you will install the structure also has a printed name label on it. If you are interested to know more about the construction and history of the building, you can find all the information in the booklet that is included.
Build a detailed model of the incredible United States...
Includes collectible booklet containing information about...
You must be well acquainted with Capitol Hill if you are a pop-culture buff. With the Lego 21030 United States Capitol Building Blocks, you can now create a replica of it for your home. It is designed thoughtfully by real architects to bear a close resemblance to Capitol Hill.
The package contains around 1000 Lego bricks, and with their help, you can create an intricate replica of the structure. What gives the product an edge is the fact that it includes miniatures of the famous lawns and steps that add beauty to the building.
For people who have a penchant for art deco structures, the Lego 21007 Rockefeller Center can be the best bet. With the help of this product, you can easily revisit American history and recreate a replica of the Rockefeller Center. Along with the Lego blocks, you will also find an informational booklet that will give you a glimpse of the history of this unique structure.
This Lego architecture set is designed by real architects, and you can rest assured that the structure is pretty detailed. It is quite quick and fun to build and can be done with little expertise.
Replica of real-world architectural landmark Empire State...
Booklet included with details on design and history
You can make use of the Lego 4643312 Empire State Building to create a replica of the famous pop-culture architectural structure. This is part of the Lego architecture series that helps you create a real-world model of one of the most famous buildings in the world.
To create this replica, you will find tan bricks that you have to simply assemble.
Whether you are a tourist, a resident of New York, or an architecture enthusiast, there’s no way you will not like this product. Once constructed, it is 188 mm in height and 80 mm in width.
Interpretation of real-world architectural landmark, the...
Booklet included with details on the design, architecture...
The Flatiron Building is the true amalgamation of Renaissance architecture with the modern form. And if you like that, consider going for the Lego 6101026 Flatiron Building, as it would help you easily recreate the architectural marvel. There are 450 pieces of Lego bricks in the package, and you can use them to make sure that the structure is detailed and intricate.
To know more about the architectural pattern and the history of the building, you can refer to the booklet that is included in the pack. You will even find a nameplate that adds to the beauty of the replica.
Build a LEGO interpretation of the Shanghai Skyline...
This Shanghai city LEGO skyline model includes the...
Go for the Lego 21039 Shanghai 21039 Building Kit if you are a world traveler who has an inclination for the beautiful Shanghai skyline. The different structures present in this amazing set can be used to learn architecture in a fun way. You can play with these Lego blocks for hours and stay occupied.
There are 597 pieces included in the box, and they are suitable for use by both boys and girls over the age of twelve. Every component is scaled to give the right representation of the comparative size and is doused in realistic colors.
Interpretation of real-world architectural landmark, the...
Booklet included with details on the design, architecture...
With the Lego 21020 Trevi Fountain, you will be able to bring Rome home! You can make use of this lego architecture set to display a model of the largest fountain of Rome on your tabletop. This product is designed after taking expert advice from trained architects. So, your experience of using this will be completely unique.
There are 700 Lego pieces that will keep you engaged for hours. With the help of these blocks, you can recreate a replica of the marvelous Baroque monument. And if you are interested to know more about the history of the monument, check the booklet that comes with the pack.
Build a detailed model of New York City’s architectural...
Includes Frank Lloyd Wright’s famous rotunda, the 8-story...
Of all the Frank Lloyd Wright creations, the Guggenheim Museum is one of the most exceptional works. In the package, you will find the exquisite and intricately designed Rotunda and replicas of the nearby streets. You will even find two yellow cabs in the pack that would add to the beauty of your miniature set.
With 740 pieces of Legos, you will be occupied for a while and will be able to create an intricate design. You can also take the help of the informative booklet that it includes to make architecture fun and engaging.
Whether you are a resident of Seattle or a tourist visiting the city, there’s no way you would miss visiting the Seattle Space Needle. And if you want to keep a replica of this masterpiece in the middle of your living room, it is best to give the Lego Seattle Space Needle a try. There are only 50 pieces in the pack, but rest assured that it will keep you occupied for hours.
All the Lego bricks that come in the pack are gray in color and closely resemble the original color tone of the structure. You will find an instructions booklet that will also help you take a deep dive into the history and architecture of the building.
Introduce kids to the fun of LEGO bricks with this awesome...
Simple instructions for 6 homes lets kids start building and...
This is a very special entry on our list as this helps you create a replica of a unique building called the Lego House. The original Lego House is situated in Denmark, covers are 12,000 square feet, and is made of 25 million blocks of Lego.
It is true that there are not so many blocks in this pack, but with a humble 750 pieces, you will be able to create an honest representation. Getting your hands on this Lego architecture set is, however, not quite easy. There are very few limited options on Amazon, and you might have to visit the real Lego House to get your hands on one.
Lady Liberty Statue - Features a Lady Liberty statue with...
Iconic Statue Elements - Includes broken shackles, 7-ray...
It is true that bigger always does not mean better. However, that is not the case when it comes to the Statue Of Liberty! The Lego 6213419 Statue Of Liberty is a truly unique piece that makes use of some of the most intricate displays and incorporates some of the best building techniques.
Now, if you are new to using Lego, it might be a bit difficult for you to handle this. But that should not stop you from trying your hands on this set. It comes with 1685 pieces and is suitable for use by both kids and adults.
Interpretation of real-world architectural landmark, the...
English/French/Spanish booklet included with details on the...
No one can contest that the Louvre is one of the unique architectural wonders of the world. And with the Lego 6101021 Louvre Building Kit, you can create a miniature of the real structure and display it in your living room. The bricks are mostly flat tiles, and that offers a smooth finish to the replica.
The instruction booklet is available in English, Spanish, and French and throws light on the design and the history of the building. This will be a great gift for anyone who is fascinated with traveling. If you are above 12 years of age, you can use it without any problem.
Build a detailed model of London's official royal residence!
Includes the east wing, forecourt and palace gates, with the...
The Lego 6135671 Buckingham Palace can help you create a detailed miniature of London’s official royal residence. To add to the beauty, there is a red double-decker bus and black taxicab that you can include in the replica. Plus, you even get miniature structures of the east wing, forecourt, and palace gates. So, you can rest assured that it will bear a close resemblance to the original structure.
You will find a collectible booklet in the package that will give you all the information about the history and the architecture of the building. There are 780 pieces of Lego bricks that will help you make an intricate structure.
This San Francisco building set captures the essence of the...
Architecture building kit includes “painted ladies”...
If you want to recreate the beauty of the West coast, you cannot miss out on trying the Lego 6250897 San Francisco. This is a part of the Lego skyline sets and is the perfect piece of display once you assemble the blocks. The package includes miniatures of the famous Golden Gate Bridge, Salesforce Tower, Coit Tower, Fort Point, and many more.
On completion, the model stands 16 cm high, 28 cm in width, and has a depth of 7 cm. With this option, you and your kids can enjoy one of the best Lego architecture sets. In short, it can be enjoyed by kids and adults alike.
Take your architectural admiration of the Taj Mahal to the...
Includes over 10,000 LEGO pieces. The building blocks to...
This is one of the newest additions to the Lego architecture set and, to date, is one of the most challenging ones to construct. The bricks are pint-sized, and with the 2000 pieces that you find in the package, you will be able to create a detailed structure of one of the seven wonders of the world: The Taj Mahal.
Unlike the earlier Taj Mahal Kit, it won’t drive a hole in your pocket and is pretty cost-effective. But as we have mentioned, it is a bit difficult to assemble for first-time Lego users. Kids might even require the help of parents.
The striking LEGO Architecture model of Tokyo's distinctive...
This collectible build-and-display set features buildable...
We have to say that the Lego 6288696 Tokyo Building Kit is one of the most difficult ones to construct in the Lego architecture series. But without any doubt, it will help you recreate a very authentic miniature of Tokyo.
In this package, you will find structures that represent both the modern and traditional architectural beauties of the Japanese metropolis. If you are fascinated with colors, you should totally give this architecture set a try. Unlike the sober renderings of the New York and Paris skyline sets, this one is pretty colorful and vibrant.
This spectacular LEGO Architecture building set for adults...
The Burj Khalifa, Jumeirah Emirates Towers Hotel, Burj Al...
The Lego 6288698 Dubai skyline architecture set offers a beautiful rendition of some of the fascinating modern architecture and skyscrapers of Dubai. You will see that the Lego blocks perfectly capture the beauty and the intricacies of the architecture.
In the package, you will find miniatures of the Dubai Fountain, Burj Khalifa, Dubai Frame, and many other unique structures. As such, it would make for a great gift for anyone who is interested in the landscape of Dubai and is easy to assemble. To be honest, it is suitable for adults who are above 16 years of age and can be a great souvenir for anyone who is interested in Dubai.
Build and display this highly detailed LEGO Architecture...
Features the National Gallery with detailed interior,...
If you are a resident of London or plan to visit there, you must know that Trafalgar Square is one of the major attractions of the city. With the Lego 6250904 Trafalgar Square, you can have a miniature version of it sitting right in your living room. It is one of the iconic landmarks of London and can be easily replicated with this Lego architecture set.
In the pack, you will find a couple of miniature double-decker buses, which adds to the beauty of your formation. Other than that, the model includes miniatures of the National Gallery, Nelson’s Column with two magnificent lions, sculpture plinths, fountains, and many other intricate fixtures.
For a Manchester United football fan, there can be no better gift than the Lego 10272 Old Trafford. With this Lego football stadium, one can display their undying love for Old Trafford. You can use the Lego blocks included in this set to relive your cherished memories of the stadium by creating a detained miniature of it.
There are 3898 bricks in the package, so there’s no doubt that you will be able to create an intricate model. Because of the large number of blocks, the project will take some time to complete but will be satisfying.
This 587-piece LEGO Disney building toy features Mirabel's...
The LEGO Disney's The Madrigal doll house toy for girls and...
If you are a Disney enthusiast, do not wait anymore to try the Lego 6365774 Disney Madrigal House. In the pack, there are 587 bricks, and with their help, you can create three levels and include a miniature flipping bed, waving shutters, and a number of other accessories that tell fascinating stories.
It can be used by anyone above six years of age and includes a range of fun features that your kids can play with. There are multiple rooms that you can build in the set, and it will surely keep you occupied for a while.
Hogwarts Castle Model - Buildable microscale Hogwarts...
Detailed Decor - Hogwarts Castle features the Great Hall...
There’s hardly anyone who is not enchanted with the magical world of Harry Potter. With the Lego 6212631 Hogwarts Castle, you can now create a replica of the most interesting place of the wizarding world.
The set includes four figures, the famous Chamber Of Secrets, the Whomping Willow, and many more attractions of Hogwarts. This set is a perfect collectible for kids and adults alike. The intricate towers and buildings never fail to capture the beauty of the magical world. It is perfect for imaginative play and helps you get transported to the world of magic.
Welcome to Manor Von Barron – a thrilling, detailed...
Includes a free-fall ride, haunted doors, a cursed painting...
If you are on the lookout for a Lego project to unwind after a long day at work, the Lego 6303666 Haunted House can be the best bet. With this set, you can create your own miniature spooky horror building with detailed and intricate features that will surely draw everyone’s attention.
This set is built mainly for adults but has a range of fun, playful features that can be used to decorate the haunted house model. There’s a cursed painting, a free-fall ride, all of which will attract the thrill-seekers in you. It makes for a great Halloween gift.
Up next, we have a pick for the ones who are fascinated with the real-world landmark: the Brandenburg Gate. It is a part of the Lego architecture series and has managed to stir the curiosity of many architects, designers, and engineers alike. After you are done assembling the structure, it will stand 9.2 cm tall, 22.4 cm in width, and will have a depth of 9.6 cm.
You will even find an informational booklet included in the package, which will give you detailed information about the history and architecture of the building. The printed booklet only comes in English. However, you can download it in other languages.
One of the eight gates of the famous Seoul’s Fortress Wall is the Namdaemun Gate, also known as the Sungnyemun. With the help of the Lego bricks, you can spend some hours creating this esteemed structure. You can spend some time with your family and use the Lego blocks to create one of Korea’s most treasured monuments.
It is a perfect option for creative play and is suitable both for adults and kids. The package contains 325 blocks and will surely inspire some creative thinking in you. We feel that you can make the most of this set if you are above 12 years of age.
Includes a booklet that gives design and historical details...
Collect all of the models in the LEGO Landmark and Architect...
Standing on the banks of New York’s East River is the United Nations Headquarters, which is recognized as one of the most iconic buildings in the world. With no less than 597 Lego blocks, you can now recreate this beautiful tribute to modern architecture.
This is a part of the Lego series that celebrates the iconic buildings of the world. Enclosed in the package is a booklet in English and French that will give you the details about the history and architecture of the building.
So, if you want a replica of the magnificent UN headquarters on your desk, look no further!
Final Words
Lego can not only be used for artistic display, but many companies are also using Lego to unlock talent in their employees as it allows intuitive hands on exercises. So, if you think Lego is just for kids, think again!
At the end of the day, your preference for a place and style of architecture will determine which one you go for. Before purchasing, it is important that you take into consideration what age group a set is suitable for. Also, check how many pieces the box contains and the level of difficulty involved.
With that, we have reached the end of this informative guide. We hope that you will be able to pick one out of the wide range of Lego architecture sets that we discussed.
Keep a watch on this space for more exciting reads. Until next time, adios!
Humankind proved itself to be the true masters of all races when it first invented animation.
Millions of artists all over the world were thrilled to express traditional painting through a digital platform which transformed art itself.
Not only did this open up one of the most defining prospects of art ever in the field, but it also provided these millions of talented artists to create absolute visual magic on the screen!
Well, the all-father of animation, Walt Disney, might have cried tears of pride and joy on beholding the evolution of animation. However, artists know the real grind of behind every single picture that they put out there. And the most important part of creating the motion picture is to set it on a definite background.
The background of every picture is the foundation that defines, and in animation, it gets all the more important to achieve the statistics right while creating the background.
Background painting books are a complete life-saver in this regard and a must for every aspiring animator or whoever wants to learn a thing or two about creating backgrounds.
So, if you’re looking to get your hands on some really useful books for painting stunning backgrounds for animation, this is going to be just the read for you!
Best Layout and Background Painting Books for Animation
And it’s only fair to start off with something for the ardent Disney fans and their love for creating spectacular Disney-like animated marvels. So, if you want to get some precious insight into work-in-progress projects and a depiction of some of the coolest and famous Disney themes ever!
This book contains more than 300 pieces of absolutely unique artwork that will cover of a classic range of notable Disney project, dating as early back to Snow White and up to favorites such as Tangled!
Not only do you get some brilliant tip and tricks alongside the brilliant artworks and their mechanisms that this book is going to decode, but it consists of suggestions and advice from some that iconic background painters along with their works that are featured in this book.
And only a few would know that this but this book is the first of a series of books that were released by Disney’s archive collection. This makes it a rare gem of its kind and incredibly valued amongst people who do know about it.
The quality of the print is undoubtedly awesome, and the directions are pretty easy to follow. The page material of the book is thick enough to prevent the colors from seeping or bleeding through to its edges or sides.
This is, however, not a “how to” book and wouldn't give much practical advice.
This is known to be one of the best animation books that come loaded with rare facts and background paintings from decades of animated films.
The entire book almost consists of 300 pages illustrated magnificently with background paintings and production work.
However, the single most fascinating thing about this huge book is that it contains a ton of the unpublished artwork from studios such as those from Warner Bros, Disney, and Pixar! Yes, you read that right!
This massive book also comes with scribbled ideas and interviews of some of the absolute legends of the industry. The book discusses the brilliant talent of such artists and decodes their techniques and approaches towards background art.
You could find numerous tips and tricks shared by these absolute geniuses and their take on an all-around approach towards animation as a whole explaining the essential elements that constitute it. This covers crucial topics such as setting the scene, the fundamentals of animation (how to animate) and painting a layout that fits appropriately with the rest of the elements.
This book takes you out on an extensive voyage down the ethereally lit waters of the animation realm, enlightening you about its history and the layout structures of different films. It offers some of the most awesome tips on the craft that could help any aspiring artist immensely!
“Setting the Scene” is an incredibly useful and equally captivating read for all budding animators.
So if you’re a budding animator or a nerd in this department, there’s absolutely no way in any world that you didn’t know about Maurice Noble. He is unquestionably one of the legends who belongs to the generation of old-school painters who had worked with Warner Bros and MGM cartoons. Noble’s career that stretched over the span of 60 years in animation has yielded some of the best works on background the world has ever witnessed in his wake.
The Noble Approach is a book consisting of 170 pages replete with dozens of classic cartoons created by Maurice Noble himself!
And this includes none other than the Lord of Mischief: Bugs Bunny himself and the lightning-fast Roadrunner hoodwinking the Wile E. Coyote and so much more from this lot! The book provides you with a detailed insight into his styles and approaches to developing his definitive layouts for such characters.
Apart from a ton of such incredible pictures, the book also offers several excerpts from Maurice’s writings which were once meant to be published as a memoir.
This book educates you on everything from Maurice’s approach to animation and his concept layouts and designs to the final frame of every picture.
The original designs contained in this book include Maurice’s sketches, work in progress and production concepts that meticulously details the process from start to finish.
The Layout and Composition in Animation is a beautiful book that discusses the constituent elements of animation and the creation of foundations or backgrounds that supports the entire structure of animation. However, more than being a hands-on, practical book, this is more of an inspirational read which would give you a valuable idea about how to lay scene and get all of the vital aspects to fit in accordance with the rest of things in the frame.
This is an exceedingly uncomplicated book to read and to understand. It does provide you with you a lot of production art and background paintings along with several other pieces from some classic animated movies.
This book gives you a detailed insight into the procedures of sequential storytelling, serving as a referential handbook that educates you all about the creation of animated stories.
One of the things that this guide provides is a comparative study between the correct formats of the steps to creating animation and the usual mistake that amateurs make when they start out with the process. This gives you an incredibly useful idea to avoid making these common errors as well as a genius way to rectify them.
This book also goes in depth with spotting the problems that usually crop up while arranging a particular scene. It tutors on how to manage and rectify these problems by adapting to creative solutions for your projects.
It presents famous examples such as that of the Beauty and the Beast and the Simpsons for you to learn how to draw character layouts as well as background layouts and finally, how to coordinate them in perfect balance.
So here we have a book that covers backgrounds of literally everything from animation to games, graphic novels and comics. Set the Action!, with its 240 pages of richly illustrated examples, discussion slots, and exercises come forth as a brilliant book for all aspiring layouts designers everywhere.
This book focuses on the structural development of the character and its association with the background, teaching you how to create a cohesive, vital link between them which brings them together, making a spectacular, definitive scene.
The book is huge and contains a ton of well-explained examples. This book is especially useful for understanding the story behind each scene that comes together to create a unified visual plot-line.
You also get to learn a lot on the props that are used in the scene and about techniques and texturization. It discusses some of the crucial aspects regarding perspective and shading along with some immensely useful tips and tricks which helps you to develop your personal style regarding composition and layout design. This exceptionally helpful for storyboard artists.
Authored by Elvin A. Hernandez, Set the Action!, establishes itself as an incredible practical guidebook for intermediate and professional artists alike who could have some really great tips to create backgrounds and develop characters.
So what we have next up is considered to be a Bible for all animators who are ardent fans of Disney. Composed by Ollie Johnston and Frank Thomas, The Illusion of Life: Disney Animation is what through and through, magnificently illustrated and detailed practical guide-book that goes to the deepest depths of the universe of animation to teach you all about vital aspects of the craft.
It takes a good look at some of the crucial elements that go into creating the foundation of an animated scene that includes a concrete study of forming the background and the overall layout of the tiniest sequence in a story.
The book goes into greater detail about some of the most loved and celebrated Disney characters and how things work in the animated world of Disney. It consists of about 600 pages that tells you all about the history of Disney: both creator and his bewitching world of a thousand different wonders. Apart from that, the book opens up a plethora of amazing anecdotes on characters, sounds, story development, voice recording, and, essentially, the creation of backgrounds.
Ollie Johnston and Frank Thomas are two of the legends out of the “nine old men” of Disney, who are known to be some of the most incredibly talented animators in history!
The creation of background is one subject that the book attaches prime importance to. It discusses the creation of layers, the merging of all key factors, and the compatibility of a character with the elements that form the rest of his surroundings. It makes an in-depth study of the creation of every sequence that constitutes the bigger picture on the screen.
Apart from learning a lot about how exactly to animate, the book provides you with the scope of developing your own artistic techniques for the procedure by giving you all the tips and tricks used by popular animators. You get to pick these up from each and every chapter that comes with an extensive history and personal writings of such celebrated artists.
Written by Francis Glebas, The Animator’s Eye is, in all fairness, could be called the ultimate guide to the basics of animation. The topics discussed extensively by the book literally covers everything from animatics, sound, and coloring, to thumbnails, storyboards, backgrounds, timing, and so much more!
This is a fantastic book that teaches you the fundamentals of creating a character and the background of the story-line and remains to be an incredibly useful read for all story-board artists.
The author discussed the importance and essential role of animation and the numerous different ways it applies to the traditional term of the word “story-telling.” He goes at length discussing what exactly is required to create a single sequence in animation, how is it actually created and, most importantly, how it could be perfected and mastered.
Written by John Canemaker, the Magic Color Flair: The World of Mary Blair provides you with detailed insight into the life and works of Mary Blair: one of the most exalted and celebrated concept designers and background painter who worked for Walt Disney.
She was a significant figure in the creative head of the empire and was involved in their busiest days, creating sheer magic for classics such as Peter Pan and Alice in Wonderland.
The book not only celebrates her works that have given us all memories of a lifetime but also gives you a number of essential tips and advice from the professional animators at Disney.
John Canemaker, the author of this book, is himself an award-winning animation director who becomes Mary Blair’s mouthpiece and autobiographer, sharing her life’s story both professional and personal, in his own words.
This is again, more of a guide on the subject rather than being a practical workbook. Nevertheless, you do get an in-depth analysis on what was the beginning of an era in animation and the sheer genius of the woman behind it.
We all have a spot for Disney, and when it comes to background painting, you know there could be but little competition with Disney. And this is what the book strives to explain through its marvelous content.
Hands-down, one of the absolute diamonds in the rough, Dream Worlds: Production Design for Animation whirls up a deluge of Disney’s magical characters and settings for you to know how they are actually created.
The book provides dozens of examples from the legendary movies such as Lion King, Aladdin, Mulan and Hercules amongst so many others. The book consists of a total of 220 pages that is replete with information about layout design and the development of backgrounds as well as a detailed study of all the sequences that go into the development of production designs.
The book is a beautiful combination between an inspirational production art compendium and a resourceful guide for all budding artists and aspiring layout designers and animators.
It primarily concentrates on the different aspects of animation that comes together to create the magical animated universe. This includes factors like composition, the fundamental rules of handling the camera for beginners, laying out a background to create a sequence and tips on staging and composition.
These all affect the resultant outcome of background paintings and are crucial for all sorts of layout design animation.
The Nine Old Men is one book that documents and celebrates the works of those nine animators that brought the science and craft of animation into existence and wrote a new page in the history of art.
Although Disney started out slow in its initial days, it is today known as The Empire that created animation on screen and that which is unparalleled when it comes to the degree and details on animation.
And this was made possible by the unending hard work and sheer genius of these nine animators who made Disney (both owner and his studio) what it is today. And they are:
Les Clark
Eric Larson
Milt Kahl
Ward Kimball
Wolfgang Reitherman
Marc Davis
John Lounsbery
Ollie Johnston
Frank Thomas
The book holds the deepest discourses regarding the works of these absolute legends in each of its chapters that dedicate 20-25 pages to their history, the contributions they made during their careers to take Disney to the ultimate heights of success and fame, and their utter creative genius. This book offers you a metric ton of their original drafts and artworks that span around 400 pages in total.
These are immensely inspirational in spirit and content probing into the historical events and milestones achieved by the world of Disney, tracing right back to the early days when Disney was just a fledgling, struggling enterprise which the world knows nothing about.
However, this isn’t a guide book, but it does teach you a lot about how the most important things in animation work.
Best Layout and Background Painting Books Conclusion
Books on animations are still difficult to find, especially if one doesn’t know where to look and what to buy. We hope we were able to provide you with some useful recommendations and wish for your endeavors to be a success!
Aren't we all astonished whenever we see a fabulous piece of artwork?
May it be an art gallery or just friend's sketchbook, the feeling of dumbfoundedness is familiar.
We all loved colored pencils when we were kids but hardly do we ever look back to them while drawing.
The rainbow-colored set holds the key to a plethora of drawing techniques, some for beginners and some kept aside for the professionals only.
People who have discovered the magic of colored pencils find it hard to look back. From knowing how to sharpen the pencils correctly, to grasping the tens of techniques involved in drawing, there's a lot to digest.
We present to you 12 brilliant beginner techniques on using colored pencils and scaling up your art skills.
Don't worry, as we'll cover every topic in bite-sized pieces. There's no good in biting more than what we can chew.
Let us get down to understand the basics of colored pencils, and then talk about some techniques so that anyone can also draw brilliantly with colored pencils.
Knowing Your Toolkit
The Pencil
Ok, now we’re down to drawing. Wait! Which colored pencils should I be using?
Well, a blade made from cheap steel can’t cut through armor. Similarly, the quality of the colored pencil you’ll be using has a significant difference in the outcome of the drawing.
No, we’re not suggesting that you spent a fortune on the set of pencils, rather reminding you to steer away from the glossy cheap ones. They would do you no good. Using a lower quality pencil will produce lower quality results.
Although lower quality pencils are much cheaper, try to avoid them. They just won't behave in the same manner as higher quality pencils. Save yourself the time and frustration by investing a little in a nice set of pencils.
Choosing a surface for colored pencil doesn’t have as many particularities as we have while using other color mediums like acrylic, pastels, watercolors, etc.
We look for a surface that has sufficient ‘tooth’ for the pigment and the wax to lock on to.
If you’re aiming to use techniques such as Scratching, Scraping or Incising, or if you would like the drawing to possess rich texture, paperweight comes into play.
It is highly suggested that you refrain from using standard copy paper. The surface of this paper is very smooth and doesn’t have a sizable tooth. Not only will it not hold the color correctly, but you also won’t be able to practice techniques like layering and blending.
The standard copy papers are processed with bleaching agents and acids which change the color to yellow over time. That would destroy the drawing.
Therefore it is suggested that you only use paper that is suitable for drawing.
Beginner Techniques Using Colored Pencils
It's probably the right time to remember that there's more to drawing with colored pencils than just a few simple strokes on the drawing sheet.
It's easy to walk into a battle with an arsenal full of unique weapons. In a similar way, knowing the beginner techniques of using colored pencils allows you to create beautiful art without too much of a hustle.
The following beginner colored pencil techniques form the foundation for any type of colored pencil art that one wishes to create.
Scumbling
All of us have been using this particular technique since we were kids, without even knowing that it had a name.
This is the easiest and one of the neatest way to fill color in an area. We start with making continuous concentric circles on the paper, without lifting the pencil. Any area can also be filled with several colors to give it a great appearance.
Hatching
Hatching is a straightforward technique which finds its application in several styles of drawing such as using graphite, charcoal, and obviously, with colored pencils.
All that is required to do is to draw many parallel straight lines close to each other. These lines may be vertical, horizontal or at an angle; they shouldn't touch.
Doesn't sound tough, does it? Hatching is very useful while filing color in a block. It may be regarded as the minimalist approach.
Hatching can be used to introduce the notion of depth in an image, giving it a three-dimensional perspective.
As a beginner artist, mastering strokes is essential. Hatching serves as an excellent method to boost your confidence in your stroke-work.
Once we're confident in our ability to stroke parallel lines while ensuring that they won't touch, it's time to proceed further.
Cross Hatching
Cross-hatching is a scaled up version of hatching. As you might have thought, this time we'll be drawing two sets of parallel lines instead of just one.
The second set of parallel lines essential creates a grid or a mesh-like structure. These lines are drawn over the first set of lines at an angle.
Cross-hatching is a brilliant way to introduce shading and create tonal effects in your drawing without trying to perform blending.
If you're doodling on the back pages of your notebook during a boring lecture, cross-hatching is an effective way of getting good results rather quickly.
It is an easy yet effective method. It's time to create some interesting textures using the technique we just learned. Sharpen your pencil before attempting cross-hatching as it’ll appear clean and precisely drawn.
Burnishing
Colored pencil art is known for its smooth, waxy, and glossy finish.
Burnishing is the difference between a colored pencil drawing and a colored pencil painting.
It's relatively simple. We apply a colorless blender on a specific region in a fashion similar to applying a layer of polish over wood. A colorless blender is a colored pencil without any pigment.
By applying thin layers of this colorless blender in a back-and-forth manner, a waxy buildup occurs giving us the desired result. Apart from this, burning lightens the color tone of the drawing while giving it the polished look.
Stroke Pressure
Just like calligraphy, drawing strokes in varying fashion will help you add character to your drawing.
You can create a variety of effects in your drawing without trying any sophisticated technique or using additional tools.
Similar to a paintbrush, you can tilt your colored pencil to get broad strokes or fine lines.
You may want some areas of the drawing to represent a darker, saturated hue while the other to be very subtle and light in color. This is where pencil pressure plays a significant role.
Practice by moving your wrist around and tilting the pencil a little. You'll be amazed by the variations that you create.
This technique required patience and practice. If you're having a hard time, you can try some Chinese calligraphy. As difficult as it is, it might give you a lot of insight towards the application of pressure.
Scraping
Of course, toned and colored sheets will create slightly different effects – so if you plan on using this technique in your next colored pencil drawing, take a minute to think about paper selection before starting.
Scrapping is a technique to create a significant amount of texture, such as drawing leaves, hair, animal fur, grass etc. Using this method we can achieve an astounding level of detail in our drawing.
It is not as simple as it sounds. We’ll need the help of an X-ACTO knife or any similar sharp blade as the technique requires us to create extremely thin lines.
While there are a lot of use cases of it, we need to be careful with the type of paper we’re using. Using a toned or colored sheet may produce different effects than your usual expectation.
Incising
Imagine you’re drawing a leaf and you want to emphasize the pattern formed by the veins of the leaf and give it a realistic feel. Details can be overwhelming - but only if you let them be.
Incising is closely related to the scraping technique we just covered.
Incising deals with creating deep impressions on the paper before we draw with the colored pencils, unlike incising where we scratch after we’ve drawn on the surface.
How do we do it? Well, the easiest way is to first obtain a piece of translucent sheet like a wax paper, tracing paper, or a parchment paper.
Then, using a pen or a graphite pencil (as we need a more rigid tip), press down on the paper and draw incision line, hard enough to make an indent on the paper below.
This will introduce indent lines on the surface of the drawing sheet, and we can now continue our work with colored pencils. Remove the transparent sheet.
Now when we draw using a colored pencil, it will go over these indent ‘valleys’ and leave a white (or the color of the sheet) line behind.
Layering
Often, you may feel that just using one color for some area isn't adequate to construct a representational effect. Here, you would like to use multiple layers of wash.
We employ the layering technique in which we combine colors with different hue and value. Layering embodies depth in the shade, and the outcome is significantly better; it appears more realistic.
Choosing the right color for layering isn't tricky at all. You may select similar colors, or even one with entirely different contrast, as long as it gives the appropriate result.
Rubbing
Rubbing is a very interesting technique and a variation of incising. It can be regarded as one of the most effective ways to add texture to a drawing.
This is one of those tricks which we have used as kids without formal knowledge. We start by taking a textured surface like a leaf or anything else with bumps and ridges and place it underneath our drawing sheet.
We rub our colored pencil(s) over the surface. The texture starts to appear on our drawing. A thicker sheet of drawing paper would not give as good a result as a thinner one. Nevertheless, this technique remains highly effective.
Tortillon
Tortillions, which are similar to and sometimes referred to as blending stumps, is an excellent tool for mixing colors in your drawing.
Drawing made using charcoal and graphite primarily use tortillons to give a blending effect, but provide equally good results with colored pencils.
They are a great tool if we're looking to push the color around physically. Tortillions are used to create effects such as smudging, shading, blending and smoothening of the image.
Mixed Media
The next technique that we’ll learn is using mixed media with the colored pencils, viz, watercolors.
Every elementary school kid who paid ample attention during the science lecture knows that oil and water don’t mix. Also, our colored pencils are simply either paraffin wax or oil mixed with pigment. I think you can see where this is going.
After drawing a few strokes using the colored pencils, we add a wash with watercolors. Some fascinating details and patterns are formed as the wax separates from the watercolors. This is something unique usually not found in other drawings made from colored pencils.
Stippling
Polka dots are surprisingly simple yet appealing to the eyes. Stippling is somewhat similar, just scaled down a little.
We draw a lot of tiny dots on the paper. A lot! They can be in the proximity of each other, far apart, or basically anywhere.
Here, the sharpness of the tip of the pencil plays a crucial role. A blunt or dull tip will give a different appearance than a sharpened tip. Stippling is a fancy way of adding texture. Try out several variations yourself and find which you like the most!
Making The Most Out Of These Techniques
Knowledge is of no value if you don’t put it into practice.
We have covered quite a many techniques using colored pencils. When you begin, you may not be impressed with your first attempts. They probably look nowhere near your expectations.
The key is to remember that it takes hours of practice before we can become an expert in any skill. While natural talent is definitely a thing, the artists have spent countless hours honing their skills before they presented their work to the world.
So don’t worry if you’re not able to bring to life your drawing in the first few attempts. Irrespective of the technique, focus on it, experiment with it and add your personal touch. Art is very fluid, nothing is ever written in stone.
We have covered over 12 techniques ranging from first-timers to the ones for those with some experience. While there are several other tricks, a beginner should firstly stick to these.
Confidence develops over time. If you believe you have mastered these techniques and have several drawing under the belt, consider yourself ready for the next level!
It is a computer graphics technique that allows you to develop a digital 3D representation of any object, living or inanimate. This representation is called a 3D model. You may choose to create a physical representation of the model using a 3D printer.
You would need specialized software to create 3D models of objects. These 3D models can be used for various purposes like illustration, architecture, movies, engineering, video games, commercial advertising, and so on. We use a 3D rendering process to view a 2D image of a 3D model.
To get a better understanding of 3D modeling, let’s talk about 3D models and the modeling process, followed by their uses.
First of all, it is imperative that you gain a comprehensive understanding of 3D modeling. To give you an in-depth analysis, we have divided this section into two parts – Representation and Modeling Process.
Representation
How are 3D models represented? All 3D models can be broadly classified into two groups:
1. Shell or Boundary
When a model represents only the surface or the boundary but not the volume of the object, it is a shell model. Almost all of the visual models in films and games are shell models. For a shell model to be a meaningful object, it must not have any cracks or holes.
2. Solid
When a model represents the volume of the object, it is called a solid model. Solid models are generally built using constructive solid geometry. These models prove to be useful in medical and engineering simulations.
You can use either of the two model types to create almost identical objects. Although the two objects created using each of these models will have no difference in terms of functionality, the following differences may be observed:
Differences in the conventions of use in several fields.
Differences in the way the models are created and edited.
Differences in approximation types between reality and the model.
You can choose from three ways of representing a 3D model:
Curve Modeling
You use curves to define surfaces. Weighted control points influence each trajectory to make it fall into shape – the more weight you put on a point, the closer the curve moves to it. There are various curve types, including splines, geometric primitives, patches, and non-uniform rational B-spline (NURBS).
Polygonal Modeling
You create a polygon mesh by using line segments to connect vertices (points in 3D space). It is one of the most widely used methods to represent 3D models because it has the following benefits:
It provides exceptional flexibility to the 3D artist.
It can be rendered very quickly by computer.
As good as textured polygon models are, they suffer from the limited scope of being planar and are capable of merely approximating curved surfaces.
Digital Sculpting
Digital sculpting is a relatively new way of representing 3D models. It has become popular among artists because they get avenues to explore their creative side. You can choose from three methods of digital sculpting:
An in-depth understanding of 3D modeling is possible only if you know the process that goes into each modeling task. Without further ado, let’s dive into all the details of the 3D modeling process.
We can list the steps of 3D modeling as:
Generate a primitive (plane, cube, or sphere) to get a starting shape.
Use various modeling tools to manipulate the primitive – start simple and build upon complexity.
You may have to place individual vertices to get accurate contouring of the object.
If you are animating the 3D model, divide the polygons in the mesh into smaller shapes. For instance, to animate a character’s elbow or knee to bend.
If you are creating a character design, you can use mirroring options in 3D modeling software to apply symmetrical changes to each half or quarter of the object.
If you are working on a complex project that involves experimental modeling, you should use a surface subdivision tool for simulating a higher polygon count, thereby preserving your original work.
You can use various tools to quickly deform your model’s surface if it goes wrong.
Paint and texture are applied to the surface of the completed model.
How is 3D Modeling Used?
Now that you know what 3D Modeling is, it is time to explore all the different ways it can be used. To get a better understanding of its uses, we have divided this section into two parts – Applications and Software – each of which is equally important to make the most out of 3D modeling.
Applications of 3D Modeling
3D modeling is used in various fields nowadays. With the advent of digitalization, 3D models are becoming increasingly popular and useful in many spheres of life. Some of the most common applications of 3D modeling include:
1. 3D Printing
3D Printing has seen exponential growth in recent years. Many companies offer personalized 3D models of objects that are designed in CAD software. Some of the industries where 3D printed models are being used off late include:
Jewelry and mold making
Customizable gifts
Consumable art
3D printing essentially creates a three-dimensional object by using successive layers of material. Some of the benefits of 3D printing are:
You can create objects without first creating their molds.
You can edit a 3D-printed part by editing its model.
It is a great way to test an idea by getting its physical form without incurring considerable costs.
2. 3D Model Markets
3D modeling is also frequently used in a wide array of creative fields by professionals. Individuals who create original 3D models can sell them online on websites like CGTRader, TurboSquid, and Sketchfab.
On the flip side, numerous on-demand 3D printing services have emerged to cater to the rising demand for 3D models.
3. Other Uses
Some of the creative fields and industries where 3D modeling is most commonly used are:
Animators and game developers use it to get a realistic look at their ideas and assess their viability.
Architects, interior designers, and engineers use it for planning and designing.
Films and television shows use it for special effects, speeding up production, and reducing costs. For instance, the top-rated HBO show, Game of Thrones used 3D modeling with animation before filming each episode.
It is used in the medical industry to represent human anatomy in interactive ways.
Industrial products are modeled using it to run tests before commercial production or client presentations.
It is used in a set or stage design in media shows and events.
It is used by fashion designers and artists to create dynamic 3D clothing for virtual catalogs.
3D Modeling Software
Irrespective of the 3D modeling project you wish to undertake, you can find software that will do it for you. There is a wide range of software available in the market for 3D modeling, but we have shortlisted the best software that you should consider. Each of these options is known to have highly efficient 3D modeling features and tools.
3DS MAX
Possibly the best well know modeling software out there, 3DS Max is a jack of all trades serving a wide array of industries from animation to architecture, product design, and advanced prototyping.
Blender
Blender offers a free, open-source animation and 3D modeling framework. It comes equipped with a diverse set of tools, which are good enough to produce top-notch animations and almost professional assets. The best part is that you can avail of these features for free with Blender.
Blender has a steep learning curve, and beginners may face severe challenges while using it initially.
SketchUp
SketchUp is the go-to software for landscape designers and architects. If you are studying architecture and need 3D modeling software that is easy to use, SketchUp is the ideal option for you. Its interface is thoughtfully designed for beginners who want to get started with 3D modeling.
SketchUp is also used for other drawing applications like video games and film design, and mechanical and civil engineering.
Maya
Maya is the benchmark for animation and 3D modeling software. It is one of the most popular 3D modeling software out there. It is also used in a majority of the universities that provide 3D modeling courses. If you have not used Maya before, you should put in the effort to learn it and gain some experience.
Cinema4D
If you want to use 3D modeling for motion graphics, you should try Cinema4D. It is one of the most popular software because of its streamlined and integrated interface that works with standard tools like Adobe After Effects. Beginners and students can breathe easily – the learning curve here is not as steep as in Maya.
Needless to say that a dozen more 3d Modelling and Rendering Software out there and each industry has a favorite.
Summing It Up
3D modeling is not one of those things that you can suddenly start and expect to master. It requires a decent understanding of fundamental art skills. So, if you are a beginner in 3D modeling, know that it will take time to get it right. Irrespective of what you use them for, creating the first few 3D models will require significant effort and patience.
With that in mind, keep practicing and keep learning. Use the software or tools that work best for you and give you optimal results.
Wondering if there’s a way where you won’t need a log or mix-up sand and cement to build a house? Guess what, there is!
Using the traditional method to build a house is tiresome, and opting for Quonset hut homes is a better solution. These uniquely-styled homeswere first built during World War I as camps providing prehab facilities to soldiers. But who would have thought that they will become a popular solution for modern housing?
A Quonset home is known for its durability against extreme weather conditions, and you don’t need to be a professional builder to build it. As long as you know the rules, you’re fine.
That’s why we have curated this guide to help you understand all about its types and advantages in detail. Plus, we’ll answer some of the common questions that most people have regarding a Quonset home.
So, without further ado, dive in!
What Is A Quonset Hut Home?
Quonset homes are lightweight homes featuring semicircular designs and are made of galvanized steel. They generally cost less and stand out aesthetically.
Although the design was first introduced during WWI, it was produced in bulk during World War II (in 1941) when the United States Navy needed a lightweight building that could easily be transported and assembled. And these structures still hold relevance in modern times due to their easy construction and appealing looks.
You will find these prefabricated metal buildings serving various living and storage purposes. Plus, the characteristics make them suitable for functioning as garages, houses, workshops, or even barns.
Types Of Quonset Hut Home
Quonset hut homes can be designed differently depending on the climate and the builder’s aesthetic preferences. These include:
A. Q Model
The Q model is an entirely arch-shaped and military-style Quonset building that is designed in a way to enhance its structural integrity. Provided its simple geometric shape, you won’t have much scope to make any further modifications. However, it’s the cheapest among the other options that we will discuss later.
B. S Model
In this particular model, you’ll see straight and high sidewalls with a domed roof. This design allows heavy snow and rain to slide off easily, making it a viable option for people to live in areas that receive a lot of snow or rain.
Apart from that, its straight sidewalls provide greater access to the interior space than the Q model. The combination of extra space and added durability has made it a common choice amongst Quonset hut home builders.
C. P Model
The next one comes with high sidewalls and a peaked roof and comes close to a traditional house in terms of looks. Its roof is arched enough to effectively shed snow and rain while delivering the look of a gable roof. Its only downside is that you have to spend more on this model than the previous two.
D. A Model
A model looks quite similar to the P model, so they’re often grouped together. In fact, many construction companies offer P/A models. Its roof is arched with a slight peak, as seen in a P model, ensuring easy fall for snow or rain.
The only thing that sets it apart is that its largely straight exterior walls are angled slightly inward, creating an arched shape, which is not the case with the Q and S models.
Pros And Cons Of A Quonset Hut Home
Since Quonset homes have been around for some time, their designs have evolved quite a lot, and you’ll find many options in terms of design and looks. However, you must know about the basic advantages and disadvantages on offer, which will help decide if this arched house will be the right fit for you.
Pros
Efficient Build
Quonset homes are highly efficient and generate very little waste. Plus, they are very flexible and are a great option for small warehouses, retail shops, and storage.
Long Lifespan
Galvanized steel is used to build these homes, which makes them rust and corrosion-resistant. It means there are very less chance that these homes will wear down due to snow and rain. Also, you won’t have to spend much on maintaining them, which is a bonus!
Easy To Build
Building Quonset hut homes are much more straightforward than traditional homes. Only a few people (maximum 4 to 5) are needed to build one such structure and that too within a few days. Besides, only a few standard construction tools are required for the purpose.
Spacious
These huts span up to a maximum of 80 feet. Although it's not ideal for multi-story Quonset buildings, having a bigger span like this means less hassle. And compared to other homes with straight walls, they are much easier to build and maintain.
Cheaper
Quonset homes generally come with many hidden costs, the prominent one being insulation. But even after considering that, they are usually cheaper than others.
Cons
Less Space
Constructing an arched-shaped building means less usable square footage. Also, due to the pitched roof, these homes have less headspace, and you may not have enough space to accommodate all your furniture and fixtures.
In that sense, they are more suited for small warehouses or people requiring smaller spaces.
Less Versatile
Although Quonset homes have a greater span, it’s much lesser when compared to a rigid frame structure, with a clear span of around 300 ft. Also, the latter offers much more headspace compared to these arched-style homes.
So, make sure to go through these pros and cons when thinking of building a Quonset hut home. It's clear that despite offering so many benefits, it has certain limitations. And if these are not a problem for you, we would definitely recommend building one.
Design Ideas For A Quonset Hut Home
A. Traditional Quonset Hut Homes
Photography by Jenny Gorman
For people who prefer living in a vintage-style house and love its aesthetic, this particularly-styled home can be the ideal option for them. Its old-school exterior has a gorgeous interior, which is an absolute delight for people living in it. Moreover, you can equip the house with almost all modern amenities and enjoy a relaxed and comfortable living space.
B. Modern Quonset Hut Homes
Source: showyourvote.org
Unlike traditional hut homes, the interior and exterior walls of this home are designed in a contemporary style. Sporting a simple yet unique design, it delivers an aesthetic look to the home.
These houses employ high-quality materials so that you can stay warm and cozy. And the premium glass windows have a sleek look while allowing the circulation of fresh air and natural light.
Although these houses are expensive compared to the previous type, the cost is surely justified for the features it delivers.
C. Desert-Themed Quonset Homes
Photography by Matt Kisiday
As the name suggests, these homes are great for living in desert areas or other regions also. Being made of metal, these structures are different in design compared to other models.
Their ability to handle excruciating heat stemming from their unique designs is what makes them stand out and makes them work even in the desert.
D. Wood-Based Quonset Huts
Source: southernliving.com
Most Quonset homes are made of prefabricated steel, but you’ll also find some made of wood, especially in the countryside.
As compared to steel, these huts have some unique benefits and you can change their look and design according to your preferences without breaking the bank. Furthermore, you can decorate your house with creative items and pieces to get the best visuals and a completely contrasting experience.
However, the design is not completely free from limitations. Although the building cost is generally less, the maintenance costs can become overwhelming in the long run. Aside from that, these are more difficult to build than their steel counterparts.
E. Backyard Quonset Huts
Source: European Property
If you want to build a small Quonset home in the backyard where you can spend some alone time, then consider this design. These backyard Quonset huts come in several attractive and stylish color options.
For example, the red and maroon combinations have been trending in recent years, or you can select any color combination that blends well with your main house or building.
F. Simplistic Quonset Homes
Source: manual10.biz
Simplistic homes are cute-looking homes boasting a simple design with little or no major exterior decor. The only feature that sets it apart from others is its huge glass windows in the front.
According to the designers, the main motive behind these large windows installed right in the middle is for the entire house to receive quality lighting. You should definitely go for it if you have a knack for simplistic or minimalist-designed homes.
Some Quonset huts don’t have to be fancy-looking or boast extravagant designs to look good. Like this Military-style Quonset home, a simple design delivers an old-school look and works wonders here.
The primary idea behind building a home is to live a relaxing and comfortable life, so for many, interior design and comfort surpass exterior designs. In terms of comfort, this design stays by leaps and bounds compared to others. This Quonset hut offers a great deal of interior space to work with and allows you to accommodate your things effortlessly.
The stunning Quonset home does not have a simple design, but it is not overly complicated. This house is distinguished by the use of a distinct palette of colors. It can be more subdued or bold and bright, and you can paint it to suit your taste and style.
I. Nature-Like Quonset Huts
Photos by Arched Cabins
You will find a wide array of designs under nature-like Quonset huts, and the most common one amongst them is the swamp-themed one that blends well with nature. These huts boast a unique lighting system along with delivering an aesthetic look.
Quonset Home Floor Plans
Like any other home, these Quonset huts also come with a specific structure. And, its floor plan ideas should fit perfectly with the size of the room. Here are some popular floor plans to help you segregate the rooms well.
A. 24’x24’ (about 576 square feet)
Generally fits with a Q and S-model Quonset hut, this small space has been a popular choice and is utilized primarily like a double car garage. Apart from that, it’s suitable to accommodate a single person, fitting a bathroom, a bedroom, a dining room, a kitchen, and a living room. Due to its smaller size, it's a practical and cheaper option to consider.
B. 40’x30’ (about 800 square feet)
This floor plan provides adequate living space for a family of three people. You can easily build a smaller bedroom, a master bedroom, a kitchen, and two bathrooms. Plus, you can add a dining room and a living room to make your hut more functional.
C. 30’x40’ (about 1200 square feet)
The largest among the three, this floor space is ideal for large Quonset homes, where you can build a mezzanine to double up the storage capacity. Its size is enough to accommodate two masters and two smaller bedrooms to give a family of six a comfortable living experience.
Add to that a dining room, a kitchen, and a multipurpose room to make it a livable space.
Establishing a floor plan before building or purchasing a Quonset hut is crucial to get a better result. You'll get different sizes of floors from various brands, and need to discuss your plans with them and seek expert advice.
Quonset Homes Vs. Steel Buildings
Although both building types are similar in nature, there’s a striking difference in their architectural styles. Quonset buildings have arch-type frames, while there are rigid frames in corrugated steel buildings. The interior walls of the former building type are generally much taller, which provides more significant space to store your things.
On the other hand, being easily accessible and DIY-friendly, Quonset homes are much cheaper compared to its counterpart. These structures are pre-made and self-supporting, making them easier to assemble for a person without any prior building experience. And, you won’t need any columns either. As you’re building a Quonset home by yourself, it saves a lot on construction costs.
Steel buildings, however, have complicated designs and require skilled labor to build. Depending on its location and property, these cost much more than the Quonsets.
Quonset Hut Home Frequently Asked Questions
Q1. How to build a Quonset hut home?
Constructing a Quonset hut is very simple, but it can get complicated if you don’t know where to start. So, here we’re discussing some factors to be kept in mind before you begin constructing.
1. Material
Traditionally, these huts used to be made of aluminum with interlocking arches for storing baggage and used as shelters. After the war, other Quonset hut home kits included metal panels, steel frames, and paper insulation. And, after not that long, wooden arches also became available.
Modern Quonset homes are generally made of prefabricated steel, making them durable and long-lasting. Plus, they are also not that heavy and easy to carry around.
2. Quonset Hut Insulation
Insulation is probably the most important process in building an arch-shaped home. Ideally, the metal sheet is designed to be weather-proof, watertight, and free of moisture. But, even the most well-planned project can go through dire situations. If these metal sheets aren’t stacked well, heat waves during summer, and cold chills during winter enter through these holes and make your lives miserable.
We’d recommend insulating the house with double-sided tape, and super metal sealant rounded all over the sheets. Also, a closed-cell spray can be a great option to insulate your hut from external weather conditions.
3. Interior Design
You don’t need any fancy stuff to make your interior stand out. Just select the right furnishings that blend well with the color. You can always find inspiration for these designs out there or can contact a designer to get it done for you.
4. End Walls
Custom or steel end walls are a great option for an open-ended building, whether you’re planning for a sectional or sliding door. It’s important to add adequate ventilation and windows to enhance the airflow or install a skylight that acts as a light panel.
Q2. Do Quonset huts make good houses?
Quonset huts are durable, distinctive, and affordable and have gained popularity amongst DIY and eco-friendly crowds. Despite being originated as drafty military structures, these huts have evolved over the period to deliver first-rate comfort once integrated with modern amenities and creatively decorated.
Q3. Are Quonset hut homes cheaper?
Although Quonset homes are cheaper than most traditional homes, the costs add up quickly once you start building these. If you’re considering building one of these, take note of all materials required and the steps involved to establish an appropriate budget.
Q4. Is it legal to live in a Quonset hut?
Yes, these homes are now permitted to be built for commercial purposes, and you have full freedom to live in these. You won’t have to worry about getting inflicted by any legal issues. And the interior and exterior of the hut can be painted with complete creative freedom.
Q5. How much does it cost to build a Quonset hut house?
The cost involved in building such a home varies from the kind of materials you’re using and the designs. But, here are the average prices you’ll find on the market.
Small hut building kits generally come in the range of $1500 to $2000, and with appointing interior designers and workers, it might go up to $3000 to $25000.
The costs fall in the range of $5000 to $35000 for medium-sized homes and depending on its size, location, accessories, and workers, the costs go as high as $10000 to $50000. At the same time, a fully built and complete hut costs around $40000, and an 80-inch x 400-inch hut goes up to a maximum of $10000.
Final Words
So, this is all we have to share about a Quonset hut home. These unique-style homes are much simpler in design but don’t lack in terms of functionality.
High-quality corrugated galvanized steel and other materials are used for its construction, making it durable and long-lasting. Apart from living, this multi-purpose space is useful as a garage, store, or storage building.
Preliminary, these huts were developed to withstand extreme weather conditions, but nowadays, these are explicitly manufactured as residential homes. You can build anything that suits your personality, from traditional and straightforward huts to desert-themed ones. Many companies offer prefabricated Quonset hut home kits that are super easy to assemble and decorate in recent times.
We hope you loved our informative guide about Quonset homes and will continue to bring such unique and informative content to this space, so keep an eye on it.
Do you remember all those places that you have visited?
That café down the road, that coffee house where you sip that favorite cappuccino, that restaurant where you eat those delicious tacos...Oh, How mesmerizing those places are!
But if you imagine those places without all the art, they certainly will not be the same again. These places are beautiful and captivating because of the art pieces that are displayed. Otherwise, they would have been dreary, dull, and monotonous.
That art plays quite a significant role in the décor of a space cannot be denied. So, you must add a sense of flair even to your home to enhance the beauty of the space.
With myriad varieties of art, we know how challenging it is to lay your hands on that perfect piece that will complement your space. To make it easy, we are discussing the different types of art which you can consider to add color to your home today.
Different Types Of Art
Categories Of Art
The decor of your living space would look dull and boring without art. And, the arena of art is vast, and so there is quite a variety to choose from. So, let us take a look at the different types of art.
Fine Art
Fine Art is basically creative art. To put it in a nutshell, this art form is recognized for its aesthetic design and elegance. Illustrations and visualizations such as paintings, sculptures, and the like are the heart of fine art. Creating works of art through printing also comes under the arena of fine art. Fine art is that Bumbershoot which envelopes a wide range of artistic disciplines.
Applied Art
Applied art implies decorating your objects of everyday use to make them aesthetically appealing. This kind of art generally beautifies useful things by designing them artistically. The art items are constructed imaginatively, keeping beauty and function in mind, unlike fine art, which just focuses on the aesthetic appeal of the object.
Visual Art
Visual Art encompasses a variety of artistic works that are visually appealing. Painting, sculpture, printmaking, drawing, architecture, crafts, and ceramics fall under the category of visual art. Visual art also includes all the artworks that fall within the category of applied art, such as graphic art, illustration, calligraphy, printmaking, drawing, and others similar to them.
Decorative Art
Decorative art involves those artworks in which objects of daily use are designed creatively, and are valued for their functional quality. Basketry, pottery, and ceramics are some examples of such art forms.
Plastic Art
To put it concisely, any art which requires molding or modeling into any form is referred to as plastic art. Sculpting, Ceramic pottery, Chinese porcelain, and Origami paper folding are some examples of plastic art.
Types Of Art
Are you planning to spruce up your living space with works of art? Then you need to ensure that the piece is both useful and appealing to the eyes. Among all artworks, the most popular type is paintings, followed by sculptures, the second most popular artwork type.
So, we have curated a list of the different types of art which you can consider to enhance your living space.
Based On Style
Abstract Artwork
Do you remember those paintings you've come across countless times at museums or art galleries with prints and designs? They are what we call abstract artworks. People have been using abstract artworks for decades to enhance the atmosphere of their living spaces.
What is beautiful about this form of artwork is that everyone is free to interpret it in their own way. With abstract pieces of art, your imagination is limitless, and you can reach any conclusion without any barriers.
Want your space to look complete without cluttering? Then abstract art is an excellent choice. They not only add aesthetic value to your space but also jazz up its décor.
Contemporary Art
If you want to decorate your walls with something fresh and innovative, then contemporary art is best. Contemporary art has been gaining popularity because it is unique and aesthetically appealing.
Contemporary art gives birth to new perspectives through its vibrant colors, shapes, outlines, and forms. With its strong designs and bold colors, it can breathe new life into any space of your home. So, if you want to improve the atmosphere of your room, add some pieces of contemporary artwork with ample spacing between them.
Graffiti Art
Since the 1960s, Graffiti art has been highly popular. Often referred to as street art, this art had its origin in the cities of Philadelphia and New York. Spray paint, stencils, acrylics, and markers were used to color up the walls of the buildings, subways, billboards, and public spaces.
This form of art was basically used by people to express their dissatisfaction with life. Since most countries view this form of art as vandalism, you can use it to decorate the walls of your home. Because they are kaleidoscopic, Graffiti arts are captivating.
If you want to transform the dull and monotonous atmosphere of your home into a cheerful one, then Graffiti art is the way to go. You can hang the canvases of Graffiti art and spruce up the décor of your living room. Their vibrant hues will make your spaces look welcoming and joyful.
Mosaic Art
If you are in quest of an art piece that is unique and exquisite, then Mosaic Art is an excellent option. Mosaic art entails arraying a bunch of bite-sized tiles of varying colors to create a masterpiece for your place.
Mosaic arts can be used in numerous ways. You can decorate the living space with ornamental pieces made of mosaic, and you can also design an entire wall with mosaic pieces. Because these art pieces produce incredibly beautiful effects, they are ideal for sparking life into your home.
Because of their high versatility, you may use them to design your nameplate or place pots of mosaic on the windowsill. Their vibrant hues are perfect for transforming your dull space into a lively one, and guess what - you'll love them!
Cubism
In the 20th Century, Cubism which began as an art movement later came to be recognized as an art form. The artists of contemporary times draw inspiration from this it. In this art form, the object is painted in a way that can be viewed from multiple angles.
Cubism art has become one of the most popular artworks among those who love to decorate their dwelling place with sophisticated pieces. Because of their sober colors, they add a simple, minimalist, and very elegant touch to any living area.
Sculpture Art
Art is highly versatile as it can be in any form and not just confined to the walls. One such example is Sculpture art. If you want to add a tinge of classiness and sophistication to your dwelling space, then adding a few sculptures will help with that.
Though they are slightly on the expensive side, they impart a lavish look to your space. Such pieces are sure to capture people's attention.
Calligraphy Art
If you have plain walls and want them to look elegant without adding vibrant colors, then calligraphy art is your go-to option. Initially sighted in Chinese arts, words are so skillfully fashioned into evocative pictures that it nearly seems like a pictograph.
This form of art is predominantly practiced in the Far East. Because of its intricacy and elegance, it beautifies an otherwise uninteresting wall too.
Chinese Art
Chinese artwork is unique and creative and can transform your living space in unimaginable ways. Chinese ceramics, calligraphy, metalworking, jade carvings, terracotta sculptures, crafts like lacquer, and jewelry art are all myriad forms of art that you can incorporate into your home.
If you are fond of Chinese art, then you'll love ink art painting done on silk paper. You can hang them on the wall of your living room, and let their subtlety transform it. This artwork is perfect for the minimalist who would love to incorporate a simple yet elegant piece in their home décor.
Stained Glass Art
If you are one who loves beautifying their space and constantly looking for something with an aesthetic appeal, then stained glass art is the one for you. This artwork is highly versatile, and it works with almost any style, complementing any window or aperture.
You can enhance the aesthetic appeal of your space by replacing regular glass panels with this stained glass. Be it the window of your bathroom, kitchen, or living room, you can transform its décor with this art form.
Also, stained glass pieces can be used on ceilings as well - surprising, isn't it? Your room will look breathtakingly beautiful with sunlight falling upon this glass art. Though they are available in numerous colors and designs, they can even be customized to your liking.
Japanese Art
Japanese art will furnish your home décor with elegance because it is gentle, simple, and peaceful. If you are looking to add life to the wall of your living room, then hanging canvases of Japanese art will be an ideal option. You will be stunned by its phenomenal beauty.
Ceramics, textiles, lacquer, and woodblock prints are some forms of Japanese art that you can incorporate into your home and enhance its aesthetic appeal. In case you are looking for one for your bedroom, then a cherry blossom design would be perfect.
Along with that, the art exhibiting the ancient battle prints would perfectly complement your space. So, without waiting any further, get one for your dwelling place.
African Art
African art was recognized as an art form only after the 20th Century. The pieces of this art form are breathtakingly beautiful and will leave you in awe of their beauty. Because they are created with such intrinsic details, every piece of this art form seems to convey a story.
If you are planning to transform the décor of your home and make them alluring and captivating, then you must definitely try African artworks, for their spirits will furnish your home with a rich appearance. You can use them in any way you want and transform the atmosphere of your home.
Sculptures of African artworks will perfectly complement that dull corner of your living room. And, their paintings are sure to spruce up your blank walls.
Aboriginal Art
This art form had its origin in Australia around 60,000 years ago. Primarily, rocks, and grounds were used for this art form, but in contemporary times, canvases are used for Aboriginal arts. Dot painting is the most well-known Aboriginal art.
Because the aboriginal people lacked a language, they relied on drawings and symbols to communicate, which has now become a prominent kind of art. Earthy tones and colors of the sea are primarily used for this art form. At times, vibrant hues are also used.
You can use this art form to jazz up the plain décor of your space, and it would be ideal for the hallways and living rooms.
Based On Design
Metal
Metallic artwork would complement the décor of your home in a wonderful manner. They are perfect for adding sparkle to your space. Metal wall art is highly versatile. You can easily get a sculpture or a canvas for your home.
If your wall is plain white, then you can accentuate your space with canvases of metal art. Because of the sparkling and glittering metallic colors, metal wall arts brighten up your dwelling spaces.
Textured
If you have a fetish for unique things and want something that would stand out, then you must take a look at the textured wall art. It will add life to your home décor. You can invest in decoupaged antlers, wall hangings, dishes, and similar things to make your walls attractive.
So, you must choose artfully to match the texture of the art to the theme of your space. In case you prefer boho, then you must choose tapestries and ancient keys if your theme is industrial. But, plates would be ideal if your setup is modern.
Retro-inspired
Do you wish to preserve the essence of the past in your modern dwelling? People are increasingly using vintage or retro-inspired pieces in the decor of their homes.
If you are somebody who is fond of traditional and classic designs, then retro-inspired art would perfectly complement your personality. You can give your space a complete makeover by using antique art pieces in your space.
Because of their subdued hues and bold lines, the vintage art creates an evocative atmosphere. So, adding vintage wall art to the blank walls of your living space will perfectly accentuate your home décor.
Map
Are you a person filled with wanderlust? Then you must consider a world map mural for your dwelling space. It will gracefully accentuate the explorer within you and will perfectly complement your personality.
Not only will they be a great conversation starters, but they will also bring sophistication and culture to your home. You can customize them according to your taste and, of course, space! They are unique, and their vibrant aesthetic features will add life to whichever space you wish.
Coastal
Coastal artwork might be a fantastic addition to a room that is tiny and cramped or one without a window. The coastal scenery will make your compact room appear to be capacious.
When you return home after a long and exhausting day at work, you can immerse yourself in the coastal art beauty and escape from the hustle-bustle of life. It will help you to soothe your mind. The clear water of the sea, the turbulent surf, and the white sand beaches will calm your mind.
The coastal artwork is perfect if you are on the lookout for an aesthetically pleasing piece for your living space. If you are planning to get coastal art for your living room, the multi-panel coastal art would be excellent.
Watercolor Art
Watercolor art makes a perfect piece for almost any living space because of the marvelous colors used to create it. They can make any space look charming and elegant. The watercolor wall hanging can spruce up the atmosphere of your living space.
If you have plain white walls in your living room, consider hanging three-panel wall art, and see how your living space is brightened up due to the vibrant hues.
The arena of watercolor art is really diverse, and you may choose any size, and any color tone you wish to have. You may even use more than one canvas on the walls. Make sure to have ample spaces between the hangings so that the vibrant hues of every canvas are clearly seen.
Animal Art
Have you ever heard of animal art? If not, then we have something for the animal lover that you are. If you are an animal lover or a pet owner, then you can adorn your home with art pieces of animals.
These art pieces are not just limited to wall hangings. You can buy sculptures and place them in any corner of your living room and let the art do its magic. If you do not really prefer sculptures, then you may even opt for 3D paintings.
3D art hanging on the central wall of your living room will arrest the attention of every guest that walks in and will jazz up the atmosphere of your space.
Prints
For decades the most popular form of art has been print. With this form of art, you can get anything for your walls.
Want to frame that exquisite picture of the sea you took while vacationing in the Maldives? Or, the breathtakingly beautiful mountains which you clicked during your visit to the Alaska Range? You can get anything printed in frames and hang them on the walls of any space you wish to.
You can enhance the aesthetic appeal of your room with such exquisite pictures and grab the attention of anybody visiting your home.
Based On Features
Personalized
If you are fond of collecting things out of the ordinary to decorate your space, then consider getting personalized wall art. Personalized art is something that you will not come across in anybody's home. It will not only be unique but a special one for you.
For personalized wall art, you can get your name or your initials framed. There are people who also use their wedding anniversary date to get the personalized wall art. These names, initials, and dates are only yours and would really make up great art for your home décor.
You can customize them in any shape and size that you want. The personalized wall art will not only accentuate the walls of your space but will also honor your special moments.
Hand Painted Murals
You can revive those empty walls of your home by adding hand-painted art to them. One thing that you will surely love about hand-painted art is that they are unique.
The hand-painted pieces you will get to decorate your living rooms will only be yours, and nowhere else to find. And so they might cost slightly on the expensive side. But because they are unique in essence, they are worth every buck that you spend.
In this way, you even get to support and boost the confidence of the artist whose hand-painted art you consider worthy enough to adorn your space. Such pieces also furnish your walls with a soul and enhance the aesthetic appeal of your space.
Collection Of Artwork
Are you looking for a unique artwork that will sweep people off their feet? Then you must consider adorning just one wall of your space with a collection of artwork. People usually use this type of artwork for the wall going down the staircase.
Apart from the staircase, the wall right or left of your couch will be perfect for this type of artwork. It will be aesthetically appealing and will also spark a conversation among the people sitting in the living room.
Moreover, you don't need to worry about matching pieces. Just keep in mind that you need to incorporate the pieces of the same elements to produce a stunning effect. You can adorn your space with a collection of artwork without much hassle.
Framed Art
The market is saturated with pieces of artwork, both framed and non-framed. If you buy non-framed ones, you will have to get them framed, which will again take a day or two.
You can also customize the type of frame you want. Customized frames accentuate the artwork and also add life to the décor of your home. Those visiting your home will love this and definitely talk about it. And, surely your artwork will last you longer than you can imagine.
Interior Or Exterior Artwork
Did you know that art pieces can be used not only indoors but outdoors too? Those designed for outdoor purposes are highly durable, for they can withstand all the elements. But, there are also art pieces that are explicitly designed indoors. These are delicate and require handling with care.
You can use art pieces to adorn your verandah, balcony, or walkway. Bright and vibrant hues will liven and brighten up your walkways, creating a welcoming atmosphere for your guests.
Based On Different Materials
Canvas
It is an undeniable fact that canvas art is captivating. You can use printed images and posters to decorate your walls, but they wouldn't create the aesthetic appeal that canvases will. Moreover, you don't have to worry about the details being lost on canvases, thanks to their large size.
Bright color canvases can drastically improve the décor of your home and will also spruce up the atmosphere of your space. Canvases are ideal for living rooms where all your guests are honored. They will brighten up your space, thereby enhancing the décor. Also, you can customize the style and the size as per your preference.
Wood
For decades wood has been used to enhance the décor of the home. If you are looking for stunning art for decorating your living room or dining area, then wood art pieces will be an excellent option.
It isn't just a simple artwork, but much more than that. Because of its versatility, you can use this anywhere you want. You can customize wooden art by adding quotes and placing them in your dining area. You are sure to receive compliments from your guests.
Different Type Of Art Based On Rooms
Art is highly diverse because it is a vast arena. The art that will enhance the bedroom décor will be unfit for decorating your living area. Incorporating art in the décor of your home will add beauty and warmth to the space, thereby enhancing the atmosphere of your home.
Living Room Art Idea
Without a doubt, the living room is that space of the home where families spend the majority of their time, and so it is of utmost importance. Your living room is a reflection of your personal style, décor, and home environment. It is also the place where the guests are welcomed. So, the atmosphere of the living room should be a warm and welcoming one.
No matter how good the furniture is, or how beautiful the walls are painted, if you don't decorate the walls of the living space, they will appear to be dull and dreary. So, the need of the hour is a good artwork that can add life to your space. So, let us explore some of the artworks which you can incorporate in your living room and jazz up the appearance.
Postcard Art
For those whose hobby has been collecting postcards, then decorating their living space with postcards is an excellent idea. Postcards really make up for stunning décor. The bold and vibrant hues of the postcard art will liven up your space. You can either frame it to furnish your space with a refined look or keep it non-framed.
Coral Art
The décor of the living room should be warm and welcoming, and so adding coral artwork in the space will enhance its appearance. Because of its bold and vibrant colors, the coral artwork brightens up the room no matter how dull or boring it appears to be.
Squirt Art
Wondering what kind of décor will be suitable for the white walls of your living room? Try Squirt Art, for you wouldn't be disappointed. The kaleidoscopic painting is so incredibly beautiful that you can not help but stare. Place it against a white wall and let the artwork do its magic. It will transform the bleak atmosphere into a bright and cheery one.
Contemporary Wall Art In Black And White
For the minimalist in you who loves to keep things classy, then contemporary wall art is an ideal option. It will add a touch of classiness to your living room while also keeping it easy on the eye. Not every time do you need to make use of colors to make your space attractive and alluring. Black and white will also make your space aesthetically appealing only if you use it correctly.
Contemporary black-and-white art has an undeniable allure and beauty that will quickly change the ambiance of your living room into a classy one.
Metallic Sculpture Art
You can transform your living room by adding metallic sculpture art and making it look more sophisticated and graceful. You can fix them on any wall that you want. Be it above the couch, opposite to it, or place it above the furnace. If you're going to give the décor of your living room a complete makeover, then Metallic Sculpture is perfect. It will provide an elegant yet fashionable appearance to your space.
Dining Room Art Ideas
Not to forget, the dining room is the second most important area where dinner is served to the guests. As such, the decor of the dining room should be inviting and pleasant. It is also a place where the whole family meets after a long, exhausting day to eat supper together. Hence, the decor must be lively and, as such, a brightening one.
So, let us explore some artworks which you can use to spruce up your dining room.
Wooden Wall Art
The decor of the dining room should be minimalistic. And, one of the ways to make your dining room classy is by adding wooden wall art to your decor. The wooden wall art goes with almost everything and never looks excessive.
So, if you are on a quest for something which is easy on the pocketbook but also furnishes an elegant look to the dining room, then wooden art is what you must go for.
Monotone Art
We asked a few interior designers about the best art for the dining room, and monotone art is what they said. A monotone art is sure to attract the attention of your guests. So, if you are someone who is known for class, elegance, and style, then monotone art is what you should head to buy.
3D Art
Spruce up the dull and boring walls of your dining room by adding 3D Art. Presumably, all the people that come over to your place will be having dinner as well. You must attempt to make your dining room as pleasing as you can. So, by adding 3D Art, you are sure to give their eyes something to feast on.
Realistic Style Wall Mural
The dining room is that space of your home where during dinner, your family shares the details of their day with each other, and the place where you host your guest for lunch or high tea. So, this demands a calm and tranquil atmosphere which at the same time must be aesthetically appealing.
Installing coastal or nature scenery will not only be aesthetically appealing but also create a tranquil atmosphere for your friends and family to dine in.
Kids Bedroom Art
The bedroom of your child is equally important when it comes to furnishing it with art pieces. After school, that is the only place where he spends the majority of his day. So, don't you think that space must also be decorated with art pieces? You must attempt to make your child's bedroom as attractive as you can.
You can never go wrong with large canvases. So, try to include large canvases of nature, seashores, and other similar canvases because children love nature. You can also get sculptures for them. Sculptures of animals fascinate kids, and so your kid will also love that.
Children are captivated by colors, and so squirt art will also allure them. Whatever you decide to incorporate in the decor of your child's space, just make sure they are in accordance with his liking.
Bathroom Art Ideas
You can transform your bathroom using artwork without costing a fortune. Art has a significant impact on the appearance of your bathroom. Choosing a good artwork will modify the décor of your bathroom, turning it capacious and illuminated, while a bad one will make it look cramped.
Tile Art
Since tile is the most common material used in the bathroom, how about using it creatively to make art out of it? Tile art transforms your bathroom, giving it a refreshing look. Your bathroom décor will get a whole lot better if you use innovative patterns to create tile art. Tile art will breathe life into your otherwise dull bathroom and will create soothing décor.
Contemporary Art Canvas
You can jazz up the décor of your bathroom by simply hanging a canvas with contemporary art. You must choose a canvas that is in consonance with the theme of your bathroom. An appropriate canvas is going to spruce up the look of your bedroom.
Nature's Touch
If you want to give your bathroom a sense of vitality and freshness, then you must spruce up the decor with natural artwork. Nature has a significant impact on the human mind, and with its vibrant hues, it is sure to furnish your bathroom with positivity. And, that's what you need the most in the morning, isn't it?
As such, you can get real flowers pressed and framed, or hang paintings of flowers, plants, or sceneries.
Seashell Art
If you want to include something unique in the décor of your bathroom, then seashell art is excellent. You may create any pattern that you wish to with the seashells and stick it on any bathroom wall that you want to. You can design any pattern you want on the canvas and hang it on the walls of the bathroom. Seashell art can spruce up your bathroom décor by being easy on your pocket.
How To Choose The Perfect Art For Your Space
Artwork enhances the aesthetic appeal of your already beautiful home. It is like the icing on the cake. Along with pulling your living space together, the artwork also catches your eyes and also adds warmth to your space.
But with tons of art pieces available in the market, how do you know which one will be an ideal pick for your space? Finding, buying, and installing an appropriate piece of art is quite a challenge.
Art not only enhances the appearance of your space but also adds individuality to it. Though there are no hard and fast rules for sprucing up the décor of your home, keeping in mind certain rules will help you choose the ideal art piece to complement the home's individuality. The possibilities are endless when it comes to theme, inspiration, color, size, style, and floor layout.
Choose What You Love
When you decide to buy any piece of art, remember that you are going to look at it every time you enter that space. Be it the living room, dining room, bedroom, or any other space; you must go for only those pieces which you love. Because art is meant to be loved, so your piece must be a feast for the eyes.
It must make you happy. Just follow a straightforward rule while choosing art for your personal space - if you don't like it, don't hang it on your wall. Choose a piece that will make you happy, calm your mind and evoke positive feelings when you stare at it after a long, hectic day.
Style Matters
Every home has a style, and so does yours, isn't it? So while choosing an artwork, you must go for a piece that will complement the style of your home. No matter what your home style is, with such diversity in art, there is a piece for complementing your space.
Be it classic, simple Scandi, or coastal chic- the art piece that you choose for your space will help you define and enhance the style of your home. So, make sure you choose with all your wits. You can choose beach art if you want your art to reflect positivity. After a strenuous day, when you return home, the beach art will be your escape from the mundane life.
Black and white contemporary art perfectly complements the modern space. And, if you feel the art piece isn't adding much to your space, customize the frame and see the difference.
Theme
Not to forget the theme of your space while selecting an art piece. You must spruce up your décor only with art pieces that go in accordance with the theme of your living space. If the theme of your home is a mid-century modern one, then artwork with bursts of blue, green, red, and whimsical geometry would perfectly complement the theme of your space.
But none of these colors would work if your house is on the shoreside, then artwork of light colors combined with blue and green colors would be perfect to spruce up your décor. So, choose your artwork according to the theme to spruce up the décor of your space perfectly.
Size
Artworks accentuate the décor only when they are placed according to the size available on the wall. Not only that, but you must also take into consideration the size of the piece while buying one. You must also consider whether you want to place the pieces on top of the desk, buffet, or coffee table or hang them on a wall.
If you want to place the piece above the sofa, then more prominent pieces of sculptures would perfectly grab the attention of your visitors. And in case you want to adorn the entire space with multiple artworks, then proceed from large pieces to small ones.
Color Schemes
Colors play a huge role in accentuating the décor of your space. They can either brighten up your space or make it look like a disaster; there's no in-between.
You can use accent colors and trifles with different tones and hues of the existing color palette to intensify the décor of the space. This will give you a sophisticated finish. Or, if you want, you may even use bold colors and create a powerful impact that will leave your visitors in awe.
Through art pieces, you can go bold, too, without being excessive. But keep in mind the existing color tones.
Summing It Up
There is no denying the fact that artworks are the perfect option to spruce up the décor of your living space. Moreover, the impact of an appropriate art piece can not be ignored, for it reflects your style, accentuates the décor, and brightens up your dwelling.
Buying the correct piece isn't much of a challenge if you love that art piece, and it complements your living space. Brighten up your house with unique and amazing art pieces available on the market. And, let us know what's your favorite art piece.
The Homestead Act first came into effect in 1862 when President Abraham Lincoln signed the bill to promote homesteading where a homesteader would be provided with a land to build a home, farm the land for a minimum of 5 years and make some improvements. This Act provided 160 acres of land to the people willing to homestead in exchange for a small filing fee and the amendments that followed increased the allotments further promoting homesteading in the US. This is now no longer in effect and ended in 1976 with the introduction of Federal Land Policy and Management Act. However, homesteading was allowed until 1986 only in Alaska.
US Places Where You Can Find Free Land
So, you might think that homesteading can be difficult and incur huge costs in today's times. To some extent this is true, but there are still free land available in the US in this 21st century providing the opportunity for homesteading though limited in number.
1. Lincoln, Kansas
With 3500 total population and no serious reports of any crime, this is a picturesque 720 square mile county with farm animals, buffaloes, and beautiful hillsides. The website of Lincoln states that it has broadband internet, nine miles of Interstate 70 and local medical care.
You will need to apply for free land which is also qualified for their ten-year property tax rebate program to homestead in a suburban setting. The plot sizes vary from 12000 square feet to 36000 square feet where you need to build your house within 18 months from the date of receiving your free land.
This city has a population of approximately 2000 with major city conveniences at a short distance. The lots are 155 feet wide by 93 feet deep where you have to build your new home with a permanent foundation within 18 months, and the construction should start within 12 months. The buyer needs to deposit $500 which is refundable after the end of the deed and must enter into a contract with a building contractor within six months. The lands are also exempt from at least 50% of property tax over a ten year period.
This is a small town with approximately 900 people where the major industries are agriculture, fishing, outdoor hunting, and healthcare. If you comply with all the terms, you will get free lands for homesteading. As of now, there are 26 lots available where the new home needs to be built in a minimum of 1200 square feet excluding the garage, basement, and porch.
The other building requirements are that it should have an overhang of minimum 18 inches and 5-12 pitch roof, two car garages, and three bedrooms. An agreement needs to be signed with a building contractor, and the building should be completed within two years after getting the possession of the designated lot. Also, at this time there are no assessments against these lots.
Interested individuals can find more details about the free lands here.
4. Marquette, Kansas
This beautiful small town is quite popular for the outdoor activities it offers. Free lands are on offer for homesteading requiring you to apply the same. Once you are allotted a designated lot, you need to start building your home within 120 days and completing it within 12 months. You also need to live in the home for at least a year. The home must be built on a basement or crawl space foundation with residential design standards and a minimum of 5-12 pitch roof.
If you`re interested in applying for Marquette homesteading land, click here.
5. Osborne, Kansas
This city is providing free land for both commercial and residential purposes. However, you need to deposit $500 to get the land which is refunded after the completion of your home. The city also provides with low-interest loans and business incentives.
You have to complete the home within 12 months from the date the land is allotted to you and needs to move in within 24 months. Also, your home needs to be minimum 1400 square feet on the ground level with a basement or crawl space foundation.
This city offers two separate sub-division offers with free lands for applicants who qualify for homesteading. All the available lots vary in size with all utilities and are on paved streets.
Reaping benefits from the original Homestead Act of 1862, this city has incorporated the Homestead Act of 2010 to promote homesteading so that the neglected properties can be put to use and also generate utility fees and taxes. Free lots are provided on a first-come-first-serve basis where the applicant needs to stay for at least five years. The population is around 12500, and the city is very accessible.
You can find more information here.
8. Loup City, Nebraska
This city offers lots that are completely free in two different options which are Market Rate Homes and Workforce Homes. The lots under the Market Rate Homes are provided on a first-come-first-serve basis with a deposit of $1000 which is refunded after the home is built. The lots are provided to the homeowners with limited income and assets that meet a set standard for the Workforce housing. They are also eligible for a loan of up to $20000 in down payment to build their home at extremely low-interest rates.
This beautiful village has ten free lots available as of now and to apply for the same; you need to contact or visit the village office. The homes need to be on a foundation but no specific details are mentioned, and so, it is better to drop in at the office to get all the necessary details of the lots.
This small town has a housing subdivision offering free lots. With all the basic amenities available for living, you can apply for homesteading in the free available lots. The cost of living here is also very low. To know more about the details of the lots and requirements, you need to get in touch with the City Office.
This small town has very little population with around 150 people and has many free lots available for an approximate average size of 80 x 120 feet. Your home needs to be completed within 18 months from the date the lot is provided to you and should be at least 1200 square feet. With no specific requirements, you can avail the free lands by applying with a proposed floor plan of the house intended to be built.
However, you are not allowed to do poultry farming or breed livestock or other animals for commercial purposes. Marne has all the requirements for living, and also, you can enjoy low crime rate and tax rate.
The information you will need to apply can be found right here.
12. New Richland, Minnesota
This town has a population of about 1200 and offers free lots of 86 x 133 feet with the requirement to build your home within one year. Though the land is free, assessments will be conducted for the cost of developing your property with sewer, gutter, streets, and water. This fee is around $25000 that can be reduced to $14000 through Tax Increment Financing (TIF) for candidates who qualify. This amount is to be paid semi-annually over a 15 year period with real estate taxes.
Though the lands are not free nor will you become the owner, this is mentioned because it is extremely cheap. The Government has begun this initiative to offer cheap farmlands with a lease for 60 years. The farmlands are protected along with a house already built, and the average rent is between $500 and $1000 per month.
This town is on Interstate 70 with great connectivity and has an approximate population of 650. The town has 480 acres of land which is on offer for free to set up business or industry which will provide employment as well. You need to check out the requirements as it might suit well to set up your homesteading business.
The town has all the basic services that are required to fulfill your necessities. It has excellent schools, services from high-speed internet providers, medical stores and clinic, restaurants, clothing stores, etc. The acquisition of 3 water wells recently by the Town of Flagler has boosted the water supply that will be ideal for irrigation in agriculture.
You will find all the information you need about their free land initiative right here.
15. Muskegon, Michigan
This city has a population of nearly 39000 is looking to attract energy providers, suppliers for industries and food processing industry so that it can employ many people. The lands are provided for free, and your homesteading business can fit in their requirements. You will be granted industrial park property, and they are also in low tax "Michigan Renaissance Zones."
If you can provide 25 jobs, you will be granted 5 acres of land. Similarly, 12 acres for 50 jobs, 20 acres for 75 jobs and 30 acres for 100 or more jobs. The city also provides tax benefits, incentives, and state business credits.
This town in the coastal region of Maine has a population of approximately 4000 and offering 3.5 acres of land for businesses that can provide at least 24 jobs. The town has all the necessities to run a business smoothly and for living like water supply, power supply, internet services, parking, etc. Camden is looking to attract sustainable businesses and industries like food processing, biotech, medical labs, financial services and information technology. Sustainable agriculture is more preferred as it is eco-friendly.
More details about the development program in Camden here.
17. Anderson, Alaska
This is a very small town in Alaska's interior that has no grocery stores, traffic lights or gas stations. The weather is very pleasant and is a picturesque place with the view of Mount McKinsey and Northern Lights. The population of this place is less than 300 but has plenty of free lands on offer an d ideal for homesteading (source: https://www.landcentury.com/).
Currently, 26 lots of 1.3 acres are provided to the people who are willing to apply. There is a refundable deposit of $500 that needs to be submitted for applying, and you can enjoy the benefits of no sales tax, property tax, state tax and apparently no crime and traffic.
You'd be surprised to know that there are more than 35 different types of houses, each having unique architectural features.
While most of us are familiar with the apartment and single housing style, there are several other types of residential properties that may seem like equally viable options. Whether you're buying or building a dream home, it's best to know all about the various structures used for housing.
That way, if you want to incorporate a particular architectural style, you'll have an authentic reference to fall back upon. So, here's a complete gallery of houses that will give you all the insight you need.
Without further ado, let the house hunt begin.
Different Types of Houses
Single-Family
This is the most common residential structure, given that about 70% of Americans live in single-family houses. These establishments are typically stand-alone and not attached to any other structures. That said, they're quite popular, especially in the suburbs of North America.
The main reason these houses saw a massive boom is the mass migration post-WWII. Thousands of families settled in the suburbs and the single housing style rapidly took over. The scenario was hardly the same before the war, given that only 13% of the population lived in the suburbs.
However, by 2010, about half of the US population was based out in the suburbs. Nevertheless, with the turn of the decade, downsizing became a reality due to increased property prices. Since then, there has been a rising demand for single-family home alternatives (condos, apartments, etc.)
Apartment
As mentioned earlier, apartments have become quite popular, primarily for their affordability and low maintenance requirements. These are essentially a group of housing units in a single building, owned by one entity.
More often than not, these units are leased or rented out to tenants. However, apartments are not the same as condos. The key difference between the two lies in ownership. Simply put, condos are owned by individual entities, whereas all apartments in a building are owned by one entity.
Condominium
By definition, a condominium is a building complex comprising several units, which belong to different owners. It's a home among many other similar homes, either in one building or multiple buildings, on a single plot.
Each owner has a title to their respective unit(s). Furthermore, the building or complex is governed by an elected body (HOA in the US and strata council in Canada) that frames regulations and passes decisions on behalf of all owners. Long story short, the members of this body make rules about maintenance, common areas, etc.
Condos can be further divided into the following categories.
Duplex - A duplex condo is a two-story unit, often the result of joining two buildings while renovating them or being built that way from the start.
Triplex - Same as a duplex but with three levels.
The terms duplex and triplex, while referring to condos, go back to its use in New York City. However, in other places, these words mean two and three-unit buildings, side-by-side. Therefore, the technical and literal meanings are frequently in conflict, and as such, it depends on where it's used.
In fact, some establishments that look like townhouses (houses in a row) can also be called condos, since the owners only possess the unit and not the shared space.
Townhome
A townhome is one among a series of houses, arranged in a row, sharing one or two walls. Usually, they have 2-3 stories, but you can also find taller structures. A townhome is different from a condo, as, in the case of the former, owners have legal rights over both the interior and exterior of the unit.
Therefore, they are financially responsible for the maintenance of the exteriors. On the contrary, with condominiums, the maintenance of shared areas is entrusted to the HOA or strata council.
So, a townhome is similar to a single-family house, only attached to another building either on one side or both.
Co-op
While it does appear similar to an apartment and condo, a co-op differs from them both, in terms of the legal and financial clauses. To explain further, in a co-op, individual entities that buy in on a certain segment of the building; instead of a whole unit. The owners are much like property stakeholders, who lease their parts in this setup.
Do the owners have a say in who can buy in? Yes, the co-op association can collectively decide and even reject a potential buyer from purchasing a part of the building. However, the co-op members may only turn down buyers based on financial reasons and reluctance to follow the rules framed by the governing body.
On the other hand, an HOA/strata council is not vested with powers to deny a potential buyer on such a basis, but they do have age restrictions with regard to property ownership.
Bungalow
The bungalow is an Indian word that essentially means 'belonging to Bengal'. These are typically small, single-story houses with front porch. These were initially built in India as an alternative to cottage-style homes with thick walls. However, their popularity soon spread to the rest of the world.
These single-floor establishments generally have steps on the front, which lead to the porch. Also, they often include a single dormer window integrated into the pitched roof. The USA saw the first bungalows in the early 1900s, and as of now, they're found all over the country.
That said, the demand for bungalows has declined of late, as more and more buyers want spacious options. Besides, with the advantage of computer-aided design, one no longer has to opt for simple styles to lower costs.
Cottage
The cottage is a housing type that originated in England. Although in the present context, it describes a vacation home, earlier it was a small, thatch-roofed house, including a single thick-walled room.
Ironically, even luxurious vacation retreats are called 'cottages' now, when historically, these establishments belonged to the low-income, rural populace. Take the example of the grand Newport, RI mansions, a Robber Barons project, often termed as 'cottages'. Needless to say, the buildings bear no resemblance to a traditional cottage.
Since the word 'cottage' is now associated with different types of structures, we've included a few photographic examples.
Historic English cottage
Grand Newport, Rhode Island cottage
Small vacation cottage
Ranch-Style
A ranch-style house (or rancher) is another single-story building, with a considerably bigger footprint than a bungalow. These houses became wildly popular in the 1950s, as large expanses of land were turned into suburbs, comprising bigger plots than urban housing spaces. Usually, these buildings are surrounded by plenty of open spaces, unlike apartments or condos.
Cabin
Let's just right away clarify that there's no distinctive feature that differentiates a cabin from a cottage. While a cabin implies a minimalist and rustic setup, a cottage, on the other hand, also refers to an upscale vacation dwelling (although, not historically).
However, if we go by commonly accepted meanings, cabins are less sophisticated than cottages. In fact, cottages are aesthetically enhanced with a proper finish. Furthermore, cabins are known to be rural, but cottages can be both rural and urban. Traditionally, cabins are log-built structures with a pastoral look.
Multi-Family
A multi-family residential building consists of two or more housing units. It's a broadly used term for a detached house with an in-law suite, townhouse development, apartment building, condo, etc.
In-law Suite (Or Basement Suite)
With the steep increase in real-estate prices, in-law suites are far more common than you can imagine. Most new developments come with them, and several older properties have added them. Since homeowners are finding it difficult to pay off their property loans, many rent a portion of their houses to supplement income.
Basically, an in-law suite is a separate unit found in single-family homes. They're, however, not detached from the main building. In case you're wondering what a separate structure for a similar purpose is called, you should look up the terms - carriage or laneway house.
Carriage/Coach House
Carriage or coach houses are structures built to shelter horse-drawn carriages. However, they are no longer used for the same purpose, and since then, have been transformed into living quarters made available for guests.
Presently, these buildings are used by owners to generate additional income through tenant or guest accommodation. While these structures no longer serve the original purpose, they have grown in importance commercially.
Chalet
Chalet is an old French word for a farmstead. These structures were originally built to provide housing to goats and sheepherders in Switzerland. But in the present scenario, it refers to a quaint vacation home in the mountains. Also, a chalet is usually a vacation retreat close to a skiing location.
Nevertheless, not all stand-alone structures on the mountain are chalets. These have some very specific design features, including a steep roof and long overhangs. As you can already guess, the roof is specially designed to withstand heavy snowfall.
Barndominiums
Barndominiums, as the name suggests, are a combination of a barn and a condominium. This integration creates a living area and sufficient space for housing livestock or other shelter needs. However, barns that are fully converted into housing spaces also fall under this category.
Tiny Home
If you're going through a cash crunch and need a detached living arrangement, a tiny home is a way to go. These structures can be stationary or mobile and range from 100 to 400 sq ft in size.
They are sought after for their efficient design and layout, and as such, many buyers favor them to avoid mortgage payments. They come as cheap as $10,000, but you can find more expensive options made of premium quality materials.
Mobile Home
A mobile home is a building that can be towed. But that does not mean that it can be moved around like a recreational vehicle. These structures are designed in factories and moved to the lot, where they remain in place. That said, mobile homes are inexpensive housing options that have become quite popular of late.
In fact, you can find mobile home parks where a large lot comprising multiple units is rented out or available for sale. These factory-manufactured houses are usually built on a steel frame fitted with wheels. Here's a modern example of a mobile home.
Mansion
A mansion is vaguely defined as a large, majestic house, but there's no legal information on how big a home has to be, so it's deemed a mansion. Besides, there's no consensus in the real estate industry either.
Since the size is not set in stone, 'mansion' is a term often used to distinguish a massive and luxurious house from average home.
Historic mansion
Contemporary Mansion
McMansion
McMansion is an uncomplimentary term for a shoddily designed, large house. Usually, you can find these in the suburbs, and are more often not built by a single developer. These detached structures are quite chaotic when it comes to incorporating architectural styles.
They include silly-looking parts and features that hardly contribute to the functionality of the house. It's not really an official category, but the word has gained momentum in the present parlance.
Yurt
You'd be surprised to know that yurts are the primary housing structure in Mongolia, among the nomadic Mongols. This is mainly because they can be transported from one location to another.
Typically, a yurt is round, with a roof and wall made of waterproof fabric. While the traditional varieties are pretty bare-bones, you can get yourself a custom-built yurt with all the amenities of a proper house. Some people live in yurts around the year in North America, while others use such buildings as vacation homes.
Floating on Water Residence
There are 5 types of water residences found in different US cities, including Vancouver, Seattle, Portland, and San Francisco. Each of these 5 floating options has its own unique features, distinguishing one from another.
Furthermore, they have different moorage arrangements that fall under strict regulations. If you want to learn more about such homes, get in touch with a real estate agent who has experience in handling such properties.
Castle
Castles are historic structures associated with royalty. However, presently most such castles are turned into museums and are maintained by the state. If you're a history or architecture buff, you will enjoy visiting these monumental buildings that once housed notable people.
Even with castles, there are multiple types, ranging from structures built in medieval times to those as recent as the 19th century. These were primarily designed to house and defend. However, the architectural style changed and was further enhanced in the preceding century.
Palace
While the word palace is often interchanged with the word castle, the former is different in the sense that it's a royal housing structure only. Long story short, palaces were not meant to defend royalty from enemies.
They were imposing and luxurious structures, specially built for the monarch and his/her governing council. As of now, most palaces are maintained by the state and accessible to the common public.
Chateau
Chateau is a french word for a manor house or a fortress built during the 13th and 14th centuries. These structures were usually located on the hills to have a strategic advantage over enemy factions.
Usually, they had thick walls, small windows, and crenelated parapets to resist any attack or invasion. With the decline of the feudal system, these structures were no longer built for the original purpose, and now chateaus simply resemble large, grand-looking residences.
Villa
A villa is the Italian counterpart of a chateau, which initially housed the Roman nobility. In the present context, these are large, impressive residences found in urban and semi-urban locations.
Manor
A manor is the English variety of a chateau. These originally were large country estates, housing feudal lords who owned and controlled the surrounding land.
Fort
A fort is a military stronghold, designed to defend and provide accommodation to the royal army. These structures include features that ensure strategic advantage over enemies and are constructed to resist any attack or infiltration.
Underground House
While a 'bunker' refers to a bomb shelter or any form of a protective hideout, some people actually live in underground homes. These are usually found on the hills and are parts of a larger property.
Cave
Caves are easily one of the oldest, naturally available forms of shelter. They're pretty much turnkey, albeit in a primitive way. And the reasoning behind them is - why build a home when nature is gifting you with one?
While these structures are considered crude and unfinished, in certain places, you can find whole cities comprising beautiful cave homes.
Dome/Round Houses
While not so popular, Geodesic dome houses or roundhouses are unique residential structures with a distinctive charm of their own. In fact, these round establishments are very intrinsic to certain cultures. For instance, yurts, tipis, huts, and fortress towers have their own cultural and regional significance.
Container Home
This is a recent trend in home construction, wherein existing containers are converted and used as residential structures. The smaller versions use a single container while the larger ones are designed out of two or more containers.
There are set rules in terms of configuration, and you may customize them as per budget and requirements. If you're interested in such housing, contact companies that specialize in designing container homes.
Treehouse
Very few people live in a treehouse, and they exist more like fun vacation retreats. These structures are built-in and supported by trees. Therefore, they're usually lightweight and have limited accommodation. However, you can also find larger structures, which are built around a tree and elevated.
Farmhouse
Technically, a farmhouse is a residential building in an agricultural or rural setting. Historically, these houses were attached to a barn and surrounded by vast open spaces. While farmhouses continue to serve the same purpose, many such properties are remodeled to include modern amenities with a rustic farmhouse look.
Hut
A hut refers to a small, humble dwelling, usually found in rural areas. These are built using naturally available materials such as wood, stone, palm leaves, hides, and mud. They are single-storied constructions with a simple roof and one or two rooms.
Huts are typical in most nomadic cultures, and some of them can even be transported from one place to another.
Igloo
An igloo is a dome-shaped, snow hut, associated with the Inuits and Eskimos. These are built using bricks of snow and are found in Canada's Central Arctic and Greenland's Thule region. The air pockets trapped in the snow provide insulation to keep the occupants warm.
The logistics of making and maintaining an igloo in any other place are almost impossible to achieve. Therefore, they're not practical anywhere else in the world.
Tent
A tent is a portable shelter, generally used while camping, fishing, hiking, or doing other outdoor activities. These are made with sheets of fabric, supported on a frame of poles, and secured by tight ropes.
The fabric is stretched and held in place by pegs driven into the ground. You can find tents for individual occupants as well as large circus tents that can accommodate hundreds of people. Therefore, the size mostly depends on the purpose and number of occupants.
Camper Van
A camper van is a motor home that can be driven around and includes amenities found in regular homes. These usually come with built-in toilets and showers, and some units even have separate living and cab areas.
They also include a small kitchen with a refrigerator, so you can literally live life on the road. Moreover, some of these vans have provisions for water and space heating, ensuring maximum comfort on the go. If you enjoy long road trips, then this house on wheels will surely charm you.
Dormitory
A dormitory (or dorm) is a building that primarily provides residential and sleeping accommodations to a large number of occupants, especially in schools, colleges, and universities. However, in certain countries, a dormitorium refers to a room with many beds that provide cheap accommodation to visitors and guests.
That said, dormitories in educational institutes usually have same-sex occupancy. However, some establishments (other than schools and colleges) allow mixed occupancy, although that's rare.
Construction Method
Houses are also classified based on the construction method. You can now choose from several options and decide how your home will be built. The following are some common methods.
Site-Built Home
Site-built homes, as you can already guess, are erected on location. This is undoubtedly the most construction process worldwide.
Modular Home
A modular home is a form of prefab housing, manufactured in a factory. These structures feature a cluster of modules or pods, connected together to build the entire residence on-site.
Prefab Home
A prefab home is a generic term used to describe a factory-built house. Generally, the individual segments are shipped and assembled on location. While units come with finished interiors and exteriors, others require touch-ups on-site.
Panel Home
These houses are made of panels, which are designed off-site and put together on location. Furthermore, you can select something from a range of panel materials, depending on your budget and the look you want to achieve.
Manufactured Home
As the name suggests, these structures are factory produced on a large scale. Built on a steel frame, manufactured homes are either transported in its entirety or in segments to the housing location. They're similar to mobile homes in terms of operation but closer in resemblance to regular houses than traditional mobile homes.
Frequently Asked Questions
When it comes to houses, all of us have our own set of queries. That's why we've put together this FAQ section to resolve most of them.
Take a look now.
How are houses classified?
The definition of a house is no longer limited to a structure featuring four walls and a roof. While the core idea still sticks, the meaning has evolved and now encompasses a variety of establishments, each with its own unique characteristics.
However, there are two ways of classifying houses, namely, based on architectural styles and by different types of residential buildings. In this guide, we've thoroughly discussed the latter.
How big is the average house in the USA?
From data gathered by NAHB and Census Quarterly Starts and Completions by Purpose and Design, as of 2022, the average single-family home has an area of 2,584 sq ft.
However, the average size has varied from time to time. For instance, in 1983, the average house was about 1,725 sq ft, while in 2003, it increased to 2,330 sq ft.
Can a house be moved?
Yes, a house can be moved, but it is no way simple or inexpensive. Moving a house means to completely lift the unit from its foundation, and transporting it, sometimes several miles away, before reestablishing it somewhere else.
Therefore, it's not something that's done on a whim. Only in extreme situations, such as imminent natural calamities or when a structure comes in the way of a development project, houses may be moved to a different location.
What materials are houses built from?
Homes are made using a variety of materials, including wood, concrete, brick, cement & mortar, and clay. Moreover, many units are built with steel frames, and strengthened with bolts and rivets.
Can a house sink?
Even though this rarely happens, if a house is constructed on poor-quality soil or on a place where water can damage and weaken the foundation, the structure may sink. While homeowners have little control over the soil underneath their houses, they can minimize water damage by installing mechanisms that deflect water away from the foundation.
Can a house withstand an earthquake?
Since every house is unique in the way it's built, the structural integrity of individual establishments depends on the age of the building, the materials used, and the design.
Generally, houses built after 1958 are considered more secure due to sufficient anchoring and bolting. However, this is just an observation and does not apply to all houses. However, some modern apartments and condos are made earthquake-resistant, thanks to the latest construction technology.
These buildings are usually constructed on top of flexible pads or have shock absorbers that reduce the impact.
Can a house get struck by lightning?
Yes, they indeed can, but most houses have a built-in lightning protection system that safeguards the structure from fire hazards and other damages. However, if the system fails or the unit does not have any lightning protection, the roof becomes the most vulnerable part.
Sometimes, the electric current that transpired through lightning can course through metal piping and the circuitry within the house. In fact, anything electrical and metal, including window frames and gutters, can act as conductors, inflicting damage.
Occupants in the house can be affected by lightning if they come in contact with any plugged-in electrical device or plumbing.
Can tornadoes lift a house?
Brick and concrete houses are considerably more stable and usually remain unmoved when hit by a tornado. Nevertheless, these super strong, rotating winds have the destructive force to rip off a house from its foundation and send it spiraling miles away.
In this case, mobile homes are especially at risk since they do not have a permanent foundation. While a tornado may not always end up lifting houses, it can cause severe damage and reduce properties to rubble.
How can a house be financed?
Not all buyers have disposable funds to purchase a house upfront. However, you can get it financed by taking out a mortgage. A mortgage is a secured loan, which is provided by a bank or credit union to the buyer.
Once you have figured out your total budget, which should include the interest amount, you can apply for a mortgage. That said, ideally, you should have a credit score of over 600 and a favorable debt-to-income ratio, so you borrow the necessary amount and pay it back on time.
Can houses lose value?
By losing value, we mean depreciation. While land prices may skyrocket, the saleability of a house diminishes over time. Usually, there are multiple factors that contribute to the overall loss in value.
For instance, physical damage, lack of maintenance, disturbed neighborhoods, and unfavorable economic climate can depreciate property prices.
Who appraises houses?
Houses are appraised by licensed and highly skilled professionals who have the necessary insight and training to carry out the process. In fact, many appraisers undergo training for years to gain an in-depth understanding of the housing market and the changing economic situation.
They're entrusted with the task of objectively determining the value of an establishment, without any bias stemming from its location. Appraisers have to justify their claims regarding anything inside or outside the house that could affect its value. Thus the entire process is strictly monitored to eliminate any personal biases.
Can squirrels climb houses?
Of course, they can. Squirrels can effortlessly scale walls, chimneys, and piping on the house exterior. They take shelter in nooks within walls, attics, and ceilings.
Can raccoons climb houses?
Much like squirrels, raccoons are excellent climbers, and they usually forage for food and shelter inside small hideouts. They can scale walls and use the gutters and downspouts for movement. Raccoons have a far more destructive nature, unlike squirrels, so make sure not to leave unattended garbage outside your home.
Also, keep your disposal bins closed at all times, as you do not want a family of raccoons to create mayhem in your front porch.
Can possums climb houses?
Possums can climb too, but they usually cannot scale high walls. Generally, they use tree branches to access an opening into the house. So if you have trees on your property, make sure they're a few feet away from the house.
Final Words
That's all, folks!
We hope you have sufficient information on different types of homes. However, buying or building a house involves a lot of decision-making, and we suggest taking every aspect into consideration.
In any case, your dream home should not wipe out your savings, so make sure to find a property well within your budget. Also, you'd want the house to have a high resale value in the future. And for that to happen, you should pay attention to the neighborhood, location, nearby facilities, and other factors that contribute to its overall value.
On that note, we would like to take your leave. Till next time!
It cannot be denied that construction is quite a difficult job, but with an excellent tool to measure distance, you can make it a whole lot easier.
While you may have known about a ruler and tape since you were kids, there are some other standard tools which help in finding out the length. We will tell you the key to achieve immaculate precision. Simply use the right device for the right length! While some are good with one unit, others can help you measure in multiple units.
You might be confused at this point about which tool will fit your needs? To deal with this, we have listed down the top 5 common ones which will help you in all kinds of construction and renovation jobs. You can sit back with a cup of coffee and read through our unbiased opinion with all the pros and cons listed.
We will begin with one of the most common tools in the market - the ruler. Also called a straight edge rule, it is used widely by professionals and students alike. Imagine trying to attempt architectural designs or drawing layouts without a tool to draw a straight line? Seems impossible, right?
Typically, the length of this equipment ranges from 30 cm to 240 cm and its body has markings at specific intervals, which helps you note down the length.
This tool is mostly used to measure small distances and symmetry of a plain. Students learn to use this for mathematical measurement and to check for straightness. On the other hand, you would find this on the table of almost every engineer, architecture, builder, interior designer as well as fashion designer, to name a few.
The measurement units that are engraved on each ruler differ, and there are some with centimeter, millimeter, and inches. While a few may have all of these units, others may be more specific with just inch or centimeter divisions.
What are the two types of markings?
We have already spoken about linear markings, and that is the most common use of a ruler. But there is another version of the tool with zero marking. These are used for finding the middle point of any item that is being considered and they are called center finding rulers.
There is a zero point in the center with numbers on both ends. It will help you find the midpoint of anything. The only limitation is that the item needs to be flat.
What is the preferred form of a ruler?
We can divide straight-edged rules into three common kinds - wooden, metal, and plastic. The most preferred one for accuracy and durability is the metal option. This is because the metal version is sleek and easy to use, while the sharp edges provide more precision in measurement.
Also, it lasts longer, the printed unit marks do not fade easily, and it would not break into two. It would be a Herculean job to break a metal ruler!
Moving a step further, the measuring tape is a very useful tool that measures medium distances. It is widely used for construction and renovation purposes. While a metal straight-edge ruler is a straight device with limited length, this one has a metal ruler too, but it is rolled inside a plastic body.
Since it can be rolled, the length is way longer and can extend from 6 feet up to 33 feet. While it can be folded inside, once you extend the ruler, it becomes stiff and would not lose shape when held against a wall or any vertical surface.
How to use it?
The product comes with a metal hook on the edge. This can be used to hold on to one end of the surface that is being measured while you stretch your metal scale to reach the other end. Note down the results once you’ve properly adjusted the tool.
To add to the convenience, there is a hole on the hook, through which a screw can pass easily. You can use it to attach one end, providing you with a safer way of measuring. With this feature, one can aim to handle the whole project by oneself without help.
Pros
Easily portable
Extendable and can be used to measure longer distances
While the ruler helped measure shorter distances, this one is made to measure very long stretches. Known as a distance calculation wheel, it needs to be rolled from point A to point B to find the exact distance between both of them.
The measurement will show on the counter, which is fixed on top of this device. It consists of handles with a wheel attached to it. The distance traveled by the wheel is what can be measured.
What is its purpose?
This is an essential tool for people designing or renovating a place. For example, if you are working on building a house, this tool will help measure the perimeter of your backyard, garden area, front porch, and maybe the fence too. These measurements will further be needed to add tiles, pave a path, grow seeds, or build fences.
Now, if you are wondering how it is different from a tape, let us explain. Straight lines can be measured by a tape easily, but if the concerned area is crooked, you will need help. For such spaces, you would have to divide the area into parts and measure separately. In the end, the sum of all parts will give you a total.
This is time-consuming, to say the least. However, with a wheel, you will face no such problem. Just roll it around the border of a space and note down the measurement.
What are the types available?
There are different versions of the base model itself so as to make this device fit for the terrain it is going to be used in. Your area of work defines the type you would want to purchase.
There are variations in the size of the tire. If it is a rough terrain that you are aiming to work on, we would suggest using bigger wheels. They have a lesser chance of skidding across. While on the other hand, if the area is flat with no obstacles, a smaller version can be used.
Coming to counters, there are three types, manual, automatic, and electrical. Manual counters work well with one type of unit and are less expensive while the electronic ones are more advanced and are suitable for multiple unit measurements.
This is a tool that falls between the regular measuring tape and a wheel. It can cover a distance of more than 100 feet and is a very commonly used product by professionals. This has been carried on since old times and has survived the test of time. The body simply has a long tape rolled up in a plastic frame.
What is its purpose?
While a metal tape is easier to carry, this one stands out for measuring longer distances. If you are trying to renovate a large space or construct a house, a long version is essential, and you would not find a single builder without it.
Also, it works brilliantly well with rough terrains. It is not made of metal and thus can accommodate any kind of space easily, but yes, two people are needed in this case. Most reels are made of nylon or fiberglass and have units printed on both sides. One has to hold on to one end while the other takes note and stretches the tape.
There are two types of reel tapes in the market, and you should purchase based on the distance that you need to measure. Open reel tapes are those which are suitable for longer stretches extending up to 300 feet.
These are big rolls and are not covered by plastic. Instead, they have a pointed stake, which allows one to attach it to the work surface. A handle is also included to make it easier for you to hold while fixing it in place.
This one usually needs two people where one has to hold the handle and keep the device straight in place while another one stretches its tape out.
Closed case tapes are those which are used to measure a shorter distance of up to 100 feet. They come with a plastic body.
Both types have a hook at the end, which can be used to keep it firm. Also, they boast of fractional/decimal units printed on both sides for easier calculation.
Are you looking to measure the height or width of a room easily? The laser tape is an exceptional option to achieve your goal. It is a new addition to the list and makes it super easy to measure anything up to 300 feet.
While the tape has been serving well for long, this is a new technology that has come up and works as a great alternative. It is much more accurate, and you do not have to worry about the type of surface that you are dealing with. Be it rough or smooth; the laser beam does not care! It will provide you with precision, no matter what.
How does it operate?
All you need to do is keep the device at the beginning point and then direct its laser beam towards your endpoint. Once you do so, a button needs to be pressed on the body, and the result will show on display. It is that easy!
In case you do not have anything to mark your endpoint and to define the edge, place an object, or put a tiny tape. This will define the point and you can then proceed to aim at it.
There are different types of laser tapes available, and they differ in specifications and price. The basic models measure only in single units while more expensive ones show double or multiple units.
There are some products which allow you to measure separate distances and then make a total of them and present the result. The summation is done automatically without any extra effort.
Also, you do not have to remember the measurements. The gadget will do it for you. With an internal memory which makes notes, you can store and recall previous measurements. What more could you have asked for!
Pros
Rubber grip makes it easier to hold
Compact and portable
Works for first-timers
Measures distance up to 300 feet
No rewinding required
Cons
It does not work well on shiny or porous surfaces
Conclusion
Every tool listed here has its own sets of advantages and disadvantages. We will suggest that before you choose one, pay attention to what you exactly need it for. If you want to simply measure a short object or a flat surface, a ruler will be the cheapest and most viable option.
Only in case of buildings and fences, should you opt for a wheel. A wheel would work great to measure the perimeter but will not work with measuring objects as you cannot wheel over it.
A laser beam is the most expensive device here. So, please consider your needs before buying one. It works for all surfaces except shiny or transparent ones, as the laser will not be able to detect the endpoint in such a case.
Let us know if you have any further queries in the comments section below.
Till next time!
Related Articles
Do you want an accent wall that would build up the ambiance? Canvases are becoming the most popular addition to creating this statement wall.
And that brings us to canvas printing services, which will help you choose and create art pieces that can liven up any room. You can cover the entire wall with art, thanks to various sized canvases available.
From offering a collection of pictures by famous artists and photographers to allowing you to use your photographs, there is a wide range of options. You can pick and choose among different materials too.
But when we set out to find out the best canvas printing service, we found multiple choices, and choosing one was rather challenging.
To save you from that hassle, this detailed and unbiased list of 15 top options has been curated. We have also included an FAQ section to help you choose the right one for your needs.
So, without further ado, let's get down to business!
If you are looking for great print quality and ease of use, CanvasPop is an excellent option to go with. They provide one of the best services in terms of efficiency as well as cost. The Canvas website says, "It's as easy as 1-2-3," and we don't disagree at all.
Why Did We Like It?
First of all, the website is not at all complicated, and we loved the user-friendliness offered. You can upload images easily from your computer or social media, including Instagram and Facebook. In case the image has a very low resolution, you will get a warning which will tell you that the image is unsuitable for use.
Now, most times, we are worried about the print quality. But CanvasPop thought of that too, and you can ask for a proof of print before finalizing. A person will review it beforehand and tell you about it. Once you are satisfied, you can place an order.
Although the prints might seem to be too expensive at first, we were happy to see that there were regular deals on them. You can easily buy one at 50% off, and that makes it a great deal.
Moving on, every photo is hand-stretched to ensure the best quality. The name of the craftsman is added in the frame on a removable sticker.
What Could've Been Better?
The website tells you that the product will reach in 2-3 days. The problem is that you cannot get it delivered earlier or choose the exact delivery date. This was slightly disappointing; you cannot set the date even by paying extra. So, we would recommend that you order well ahead of when you need it.
As the name suggests, they have a massive stock of images, and you will be able to find one that fits your needs perfectly. Known to be very popular among hotels, galleries, and office spaces, this company provides absolute professional results. You will truly be impressed by their exquisite work.
Why Did We Like It?
To begin with, ElephantStock uses high-resolution Giclee printing processes on the poly-cotton blend canvas. Every image is stretched to perfection to meet your size needs and North American pine frames are used.
Furthermore, the laminate is made to be resistant to UV rays and is waterproof and scratch-proof. It keeps the photos in mint condition for years to come. The frames do not lose their color, making them very efficient.
Also, the customer care representatives are very friendly and will help you throughout the process. You can reach out to them about any information required, and they will be guiding you well.
Besides, sizes range from 9×6″ to 48×32″, which makes it suitable for any space, be it a poster for a conference room or a hotel room. You can customize orders according to preferences, and you will be warned if the resolution of a picture is too low.
Lastly, this one also has great offers that keep popping up multiple times a year. The offers bring down the price to a great extent, making it quite affordable.
What Could've Been Better?
Although you will be getting free shipping if you shop above a certain limit for the USA and Canada, there is a considerable charge for shipping to other countries. So, we would recommend you to check the shipping charges first before you proceed. They range from $9.95 and can go up to $100 or more.
Pros
Resistant to UV rays and water
Efficient customer service
High-resolution Giclee printing
Cons
High international shipping costs
CanvasDiscount
If you are hunting for good offers and discounts, you have finally reached the right place. CanvasDiscount is known to have the lowest prices ever, and that is accompanied by flawless quality. In fact, they offer a 110% discount guarantee in case you find a lower priced product anywhere.
Why Did We Like It?
We were very surprised to see that the prices could go down to even $5 for some products, and we could not find a bargain similar to this anywhere. But rest assured, even if they seem unbelievable, the quality is superb. The canvas has a great texture, and every piece is strengthened to make them more durable.
Besides, they go the extra way to ensure that you do not have pixelated canvases. Whenever you upload an image, they will give you sizing options based on the JPEG image's quality and size.
Plus, it offers a great variety of products. While most of you will be familiar with the traditional canvas, this one allows you to get metal or PVC forex prints. You can also invest in accessories, including mugs, pillows, and blankets. Jigsaw puzzles can be printed with personal pictures too.
To top it all, it provides super-fast delivery in North America. You can get the product in a day or 2 if you live in this area.
What Could've Been Better?
The website is not very popular and does not have a big audience. So, most people around you might not know of it. But once you purchase from them, you will realize that it is indeed a hidden gem. Order something from their large range of options and see it for yourself!
Pros
Boasts of super-fast delivery
Wide range of items
Lowest price in the market
User-friendly website
Cons
Not very popular
iCanvas
One of our top recommendations is iCanvas, which is known for its easy service. They have made it their motto to make exquisite art affordable for everyone. If you are an art lover, this can help get the perfect prints for your home. Read on to know more about it.
Why Did We Like It?
The process of getting your personalized canvas prints is very easy. All you need to do is upload images and wait for them to send you edited versions of it. Once you approve the pictures, they are finalized and sent to print. It takes around 15 business days for the canvas to be delivered to your house.
Another great advantage is that they have thousands of options to choose from, and you can easily turn a room into the art space that you always craved for. Choose from among animals, abstract, floral, street art, modern, pop art, to name a few of the popular styles.
Besides, this offers a great service for those who are not confident about color palettes and patterns. There are segregations based on color palettes and rooms. So, you can select the room you want to keep the canvas in and then find prints based on it. Overall, we found this to be very beneficial, and the prices were reasonable too.
What Could've Been Better?
The only issue with this is that it does not accept images below 500 KB if you want a high-resolution canvas. So, you will probably not be able to get copies of the original work printed in high resolution. But again, if the quality of the images is good, then there is nothing more to worry about.
Pros
A great option for novices
Variety of art forms and styles
Easy consumer-friendly process
Cons
Prints only high-res pictures
Inktuitive
If you are looking for unique pieces of artwork and illustrations to print, Intuitive will prove to be an excellent forum. They are geared towards creating art that you would love to be surrounded with. Your environment determines your performance and mindset, and this brand will help create that positive space.
Why Did We Like It?
Every artwork has to meet strict quality requirements before they can be put up on the website. Hence you will get high resolution and flawless prints every time. They use top-shelf archival-quality ink, which will help print pictures with great depth and clarity. We loved the bright colors that emitted a very positive vibe to the surroundings.
Another great benefit is that you can avail free standard shipping. One can order from anywhere in the world, and standard shipping costs will not be applied. This is indeed a unique quality that sets it apart from its peers.
Plus, they offer complete satisfaction, and in case it does not add value to your life, the company will give you a full refund. This is something that most companies do not offer, and hence we were truly awed.
Also, the customer care is at your service at any time of the day, and you can call them regarding any issue.
What Could've Been Better?
The return process may take a little longer than you expect. It took us 10 days to get through as it involves a few steps. Also, you will have to ship the product back yourself. Once the company receives it, it will take another 5-7 days to begin the refund process.
Pros
Meets strict art quality measures
Free standard shipping
Eligible for a full refund if not satisfied
Cons
The return process takes time
Mixbook
If you want easy customization, Mixbook will provide you with it. The editors give the space to indulge in a variety of customizations, and you can design your own canvas in any way. With a set of preset themes, you can create artistic wonders right on their website.
Why Did We Like It?
To begin with, there are a number of designers on board who have specialized themes and designs for you to use. You can play around with stickers, graphics, and backgrounds to create wonders. Whether it is collaborating with family and loved ones or you just want to tell a story, this site is geared to make your prints memorable.
They also have a community of creators, and you can see their stories using the hashtag #mixbook. Once you buy one of their products, you can also join the community and share ideas and inspirations with others.
Further, the brand specializes in canvas, metal, acrylic, and poster prints along with photo books and calendars. You will get a wide array of products to print your preferred pictures on.
Besides, they have a clear pricing chart with the products and budgets mentioned depending on the kind of shipping and size that you choose. This will help you compare before purchasing it.
What Could've Been Better?
The production takes a few days, and then it is shipped. So, expect the whole process to take at least 10 days, which is longer than many of its peers. We would recommend that you keep ample time in your hands and then order. In case you have a party at your place, order at least 15 days before to make sure it reaches in time.
Pros
Special themes and templates
Community of creators on Instagram
Clear pricing chart
Cons
Lengthy production time
Social Print Studio
Up next is a company that has been in the printing business for more than a decade now. Social Print Studio is the hub of professional-quality prints that will cater to your needs well and give you high-quality canvases. We were very impressed with the flawless finish.
Why Did We Like It?
The company offers a museum-quality canvas finish using ink that is permanent and will not fade with time. This not only adds more depth to the photo but also extends its durability. The ink is resistant to light, water, heat and has no impurities in it. You can also opt for a glossy finish that looks very attractive.
Besides, it is an in-built photo editing software which we found to be very easy to use. All you need to do is upload pictures, and then there will be clear instructions guiding you throughout.
The company also makes it easy for you to get clear prints. To maintain clarity, minimum size requirements are put in place so that the pictures are not pixelated.
Further, we loved the customer service, and they were very supportive throughout the process. Our delivery was slightly delayed, but they made it a point to keep us updated about it.
What Could've Been Better?
Although high quality is something that it focuses on, the brand has a limited range of canvas sizes to choose from. It does not provide customized sizes, and we were slightly disappointed with the fact. We would recommend first checking the sizes before you proceed to decide the print.
Pros
Supportive customer service
Easy to use software
Professional-quality prints
Cons
Canvas sizes are limited
Walmart
You must already know how Walmart has almost anything that you can think of. With tons of images to choose from, this is one of the most versatile options. If you have a tight budget, this is the place to search for the best deal.
Why Did We Like It?
We cannot stress the variety of choices. Be it a hotel room, home space, boutique, or offices, the range of options is huge, and you are bound to find something nice. It will brighten up any studio or home and will leave your guests wondering where you got it from.
Plus, you have the liberty to choose a size that fits well in your room. Other than the theme and size, you can get it printed with no frame, floating frames, contemporary or traditional frames.
If it is the first time that you are sitting to make a choice, Walmart will prove to be beneficial. They have a very easy-to-use site, and you will be able to search easily.
Besides, they will not print low-resolution images. If the image that you have uploaded does not meet the criteria, they will warn you immediately.
What Could've Been Better?
Since Walmart has a huge range of pictures, you will have to be careful while choosing. This is because there can be some prints that may not meet your requirements in terms of clarity and resolution. We would suggest that you check the user ratings and reviews before proceeding.
Do you want a floating frame for your living room? Great Big Canvas is the perfect portal for that. It offers readymade prints that give your space a modern and classic look. Create a unique atmosphere with your favorite prints or self-made illustrations.
Why Did We Like It?
First of all, the company specializes in readymade prints and has a wide range of choices. From beaches to beautiful architectural structures, there are multiple options to choose from. Also, choose between prints ranging from 8 x 10" to 36 x 36" in size, which covers a large range indeed.
Besides, they use artist's grade canvas and archival inks, which add clarity and depth to the picture. Every canvas has UVB protection, which keeps it protected from moisture and fading.
Plus, the company has divided its products into various categories, and you can shop by subject, color, artist, style, room, and trend. You can choose between art, photography, and abstract.
Every piece that they are offering can be printed in various sizes and with numerous frame options. Choose among poster prints, wall arts, floating frames, and canvases. To help you further, there are different artworks recommended on the basis of the kind of room they are going to be put up in.
What Could've Been Better?
Although you will find a number of prints, they are going to be expensive and may not be affordable for everyone. But we will tell you that there are offers which keep popping up often. So, keep a watch on the site, and you can grab great deals.
Pros
UVB protection from moisture
Multitude of choices
Fast shipping
Cons
Expensive side
Easy Canvas Prints
If you have a very low budget and you still want something pretty, Easy Canvas Prints is going to turn your dreams into reality. They specialize in custom print and will provide you with ready to hang images with a sawtooth on the backside. From large canvases to small ones, you can buy it all from here!
Why Did We Like It?
To begin with, this company has amazing discounts. You can find sales with up to 97% discount on a variety of products. So, if you are a bargain hunter, this is the place that you need to be. With a budget of around $30, you could end up with a 30 x 40" canvas print.
Yes, the print quality will not be as great as expensive art pieces, but they are absolutely good for the price you will be paying. The company uses cheaper materials to ensure that you get a great deal. They work with polyester and semi-gloss surfaces instead of expensive alternatives.
To top it all, they also offer image enhancement services at an extra cost. This may include red-eye removal, oil painting effects, and teeth whitening. You can mail them regarding the changes, and they will make it happen. We were even able to restore old photographs, thanks to this website.
What Could've Been Better?
The only problem that we found here is that they will not warn you in case there are issues with the image quality. The site accepts low-resolution images too, and hence you need to be careful while uploading. Make a note of the properties of the image before going forward to print it.
Pros
Helps restore old photographs
Extremely budget-friendly
Responsive customer service team
Cons
No image quality warning
Canvas HQ
Up next is a family-owned company that makes ordering prints extremely easy. Canvas HQ will provide you with high-quality art that is authentic and can build up the ambiance of a room. They aim for quick delivery and will deliver the product to your doorstep in the shortest time possible.
Why Did We Like It?
We loved the fact they touch up the picture without any additional costs. If it has blemishes or spots, an artist on their end will remove them to provide you with the best version of your image.
Another great benefit is the 30 days return policy. If you are not satisfied with the product, you can return it within 30 days, and a full refund will be initiated. This made it a very trusted service, and we had no complaints with the print.
It is also very popular among photographers who are very particular about their image quality. This website promises clear images, and every picture is checked individually to ensure that there are no low-quality prints that get shipped.
Lastly, you can avail free shipping in all of the USA. This is very beneficial, and not many companies offer it. You will need to pay a nominal fee to ship outside the States, but it is not a hefty amount.
What Could've Been Better?
We would have preferred if there were more printing options. While you can get a great quality canvas and framed images, the options are limited, and you cannot get accessories printed. Make a note of this before you choose a print.
Pros
Free shipping in the USA
30 days return policy
Free touch up options
Cons
Limited print options
Walgreens
If you want a print very fast, Walgreens is a great choice to make. It has one of the fastest delivery services and will get the product to you in no time. It can even be available to collect within 24 hours of ordering. Read on to know more about its benefits.
Why Did We Like It?
The chances are that you have already been to a Walgreens store many times before. They have hundreds of stores across the US, and if you have one in the neighborhood or vicinity, you can actually get prints within 24 hours.
Pick it up from the store, and you have it within a day. Since the canvases are being printed at separate locations on the basis of your address, it is better off than its peers who generally have a central printing hub.
Other than that, Walgreens has a huge range of prints and ensures that your images are bright. They will work with the image exposure and brightness if needed to provide you with the best wall decor.
Additionally, they have the hanging hardware attached behind so that you can immediately hang it. Begin enjoying the artwork instantly with this service!
What Could've Been Better?
Although they have a fast and efficient service, the image print will not be of the same quality as that of museums. They work well for homes, but a professional artist or photographer will be able to notice the difference in quality. We would recommend that you check and give them only high-resolution images in case you want a customized print.
Pros
Perfect for decoration or gifting
24-hour delivery option
Printed at local locations
Cons
Image quality is slightly lower
CanvasChamp
Do you want to ship a portrait outside the US? CanvasChamp will do it for you easily and at nominal rates. It is known to provide great prints at wholesale prices, making it stand out among its peers. We were impressed with its bells and whistles, and you should check them out too.
Why Did We Like It?
This is a common choice for those who want to buy a number of products together instead of 1. If you are setting up an office or a co-working space, this will allow you to ship a number of paintings at once with the lowest delivery charges.
Also, images can be printed on a variety of surfaces like metal, rolled canvases, thick and thin wrap, and photo boards. The site is very user-friendly, and you should have any difficulties making a choice.
Plus, if you want customized canvases, they will make sure that the image quality is good enough for them to print. If the image does not meet the requirements, they will stop you immediately.
Next, the customer service is very responsive and will tend to all your queries immediately. If you face any issues with the ordering or deciding process, you can call them up for help.
What Could've Been Better?
The material that is used looks nice but is not durable and will not last beyond a few years. This is a letdown, but again for the price that it comes in, it is worth every penny. If the images are not going to be subjected to direct sunlight or moisture, then it will last for longer.
Pros
Perfect for bulk ordering
Efficient customer service
Multiple surfaces to print on
Cons
Not very durable
Snapfish
If you are looking for a service that will provide premium high-quality prints, Snapfish is a great option. It produces one of the finest photo canvases and is a preferred choice for artists and photographers. If you want a smooth experience, this is the one to choose.
Why Did We Like It?
We were very impressed with the website. It has a minimalist design and is simple to use. You will be able to order a print easily, even if you are a novice. There is also a wide range of personalization and embellishment options provided so that you can get the exact size and shape that you have in mind.
Secondly, the color and the vibrance is something we truly appreciated. The images are very lively and crisp. Bleeding on the sides is avoided, and edges are generally softened a bit for the perfect finish.
Lastly, the frames are also well built and designed to stay on your walls for years. They are resistant to discoloration of damage by moisture. They also provide extra support and make hanging very easy.
Overall we loved their service, and although the products are expensive, sometimes it is best to choose quality over price.
What Could've Been Better?
While the quality is impeccable, shipping might take some time, and you may have to wait. Hence keep ample time in your hands before ordering and expect it to take 10 days or more to arrive. We can only say that the product will be worth the wait.
If you are looking for exquisite wall art, Pictorem is the site to choose! With a huge collection of museum-quality canvases, you can showcase your love for art in a grand fashion. It has great customizing options and works well with large spaces.
Why Did We Like It?
One of its unique features is that it has amazing panoramic paintings. These consist of 4-5 canvases placed side by side with an image split among them. You will find these in multiple sizes and combinations.
Also, these can be used to cover entire wall surfaces. The canvases can be customized to be big or small depending on the wall. It is printed on 1.5-inch thick wood and is known to be very durable.
Customers choose to cover their wall with it, and hence they need it to last for long. Since it is printed on 410g/m2 premium matte canvas, there will be no discoloration or fading.
Furthermore, the company uses Giclee printing, which ensures that they are of high resolution, and you can rest assured that the quality is extremely good. This is because the paint is of superior quality and is used for art galleries to print their work. It is known to survive for 200 years without any signs of wear and tear.
What Could've Been Better?
Since this is a specialty printing service, you can expect the rates to be high. The prints may be unaffordable for the average homeowner. But if you want a statement wall in your house, this will offer a multitude of options. Plus, in comparison to its peers, it does not offer discounts very frequently.
Pros
Uses Giclee printing
Multi-panel split canvases available
Prints on acrylic, metal, and canvases
Cons
Expensive
Canvas Printing Service FAQs
Now that you have gone through the 15 top services, you will know that each one is unique in its way. There are variations in printing speeds, delivery, quality, and stock of images.
To help you out, we have put together a list of frequently asked questions. You can glance upon them to get a clear understanding of the types of services and what to look for in it. Take a look now. We hope this guides you towards buying the one that fits the best.
What Are The Kind Of Print Styles Available?
What kind of print style do you want? While some sites will only offer single image prints, others will offer to make collages. Single images can also be of various shapes, including square, rectangular, portrait, and landscape styles.
Make it a point to decide upon what kind of a frame will suit your room and then go on to purchase. If you are unsure, you could ask the company representatives for help.
What Happens If The Image Is Of Lower Quality?
Image quality is the most important part of selecting canvases. The image has to be of high resolution, and most websites will not let you proceed if your image does not meet the minimum requirements. Lower resolution images can get pixelated easily and hence will be very difficult to print.
How To Check If The Image Is Suitable?
If the website that you are ordering from does not have a system to already warn you of lower quality, it is best to mail them with the picture. Ask them if the quality is good enough before you proceed. Be very careful with this as a bad print may cost you money and spoil the entire decor of your room.
What Are The Kinds Of Canvases Available?
There are two main types of canvases to choose from. One has a matte finish and will not shine even when it comes under the light. The other type has a glossy or semi-glossy finish. These look good, but the surface may reflect or colors may seem distorted if placed under the light.
What Is The General Delivery Speed?
This varies a lot among companies. For those who have one central printing hub, the delivery speed will depend on how far the hub is from you. If it is in the vicinity, you could get a quick delivery, but otherwise, it may take a lot of time. We have had to wait for 10-15 days in some cases.
On the other hand, if a company has multiple printing stores across the country, you will be able to get your canvas faster. Some companies also allow you to go and pick up the order from the nearest store.
Also, some companies offer different delivery speeds at various prices. You can choose priority shipping and pay extra for it.
What To Do If The Canvas Has Fold Marks?
A good canvas will have no folds when it arrives. In case it does, send it back immediately. You do not want folded sides or lumpy corners. They look bad, and guests perceive it as cheap products. A good canvas will have bright colors and will be free of flaws.
Is There A Big Gap Between Normal And Premium Quality?
If you are an artist or photographer, you will know the difference between a good print and a premium quality one. There are some websites that will offer you museum-quality prints that look extremely good but are going to be expensive. On the other hand, you will get cheaper prints which will look decent but will cost you less.
If you want premium quality prints but you do not have the budget for it, wait for discounts and offers. Most of these sites give a lot of discounts, and one just needs to keep a watch.
Do Companies Help With Design Enhancements And Editing?
If you are going to customize your canvases with personalised pictures, make sure that they are not blurred or dark. It is best to opt for such services that have designers or editors on board who will fix minor faults with the picture. It should not cost extra, and your picture will come out to be flawless once printed if it has been edited.
Verdict
Let's face it; with the advancement of technology today, printing canvases is not a difficult job anymore. All you need to do is provide a picture, and the company will take care of the rest. Most of the websites are easy to use, and there are representatives to help you out in case you face any issues.
With this, we come to the end of this detailed guide about the 15 best canvas printing services today. But before we take our leave, let's go for a quick recap of our favorites. CanvasPop is our favorite overall for its excellent quality and easy-to-use website.
On the other hand, if you are looking for a massive stock of images, ElephantStock is going to be a wonderful choice. At the same time, if you are looking for the best offers, turn to CanvasDiscount.
A pendant of the latest design and make can never compare with a rare pendant from the Victorian era. Those of you who love everything antique will definitely agree!
Before online shopping came into being, you had to hunt several stores to chance upon an authentic vintage object. But those days are long gone! Now, you can access exclusive online antique stores as well as e-commerce platforms from your comfort zone.
Each website has a whole lot of categories of antique items to cater to antique lovers with different preferences. So, there are just plenty of places to search for antique and vintage stuff.
We bring this comprehensive list to help you find the right store from among innumerable options out there. Read on to find a suitable online store for you.
Ruby Lane is a great online platform where you can find some of the best collectibles. What sets it apart from other websites such as Craigslist, eBay and Amazon is that it exclusively deals in antique items. Despite being much smaller in scale than the e-commerce giants, Ruby Lane is a significant niche platform, and hence, is one of our top recommendations.
Founded in 1998, it is also one of the earliest online vintage platforms to be launched. The website features more than half a million antique products of different kinds. With so many options to choose from, we doubt if you won't find what you are looking for.
Currently, some of the featured products on Ruby Lane include a neck ring from Masriera, a vintage Chinese stone chop with exquisite carvings, and many others.
Ask fellow antique lovers, and they would surely vouch for this platform, which is another exclusive destination for vintage items. Etsy has carved its own world in the form of a marketplace dedicated to the sale of handmade and vintage products.
The two categories featured on the website include Art & Collectibles and Vintage. The former section has items such as beautiful vintage sculptures and fiber artworks. Furthermore, you will also find some amazing vintage furniture in this category.
But if you prefer something even more classic, the Vintage section would lead you to just what you want. You can add on to your collection of exclusive antiques with items such as classic jewelry and vintage floor rags from this section.
The next in line is this online platform, which we would highly recommend for antique lovers. The website lists all antique items under six separate categories, like jewelry, tools and craft supplies, art pieces, and entertainment. The wide variety of vintage items is something you would get in very few stores.
A relatively newer platform, Artfire is an ideal place for those who love classic handmade vintage jewelry pieces and other similar collectibles. For instance, the website had once featured a pendant of diamond glass with a design akin to the Victorian era.
Also, if you want your living room to be adorned with a century-old painting, then there isn't a better place than this. You will find a whole lot of options to choose from, and all of this is a few clicks away.
This well-known e-commerce giant is an excellent place to start if you are new to the world of antique items. Among the range of vintage products the website offers, you could come across some of the most intriguing antique pieces.
A HALONA bronze pendant from the Victorian times and an exquisite flower carved jewelry box are some examples of the amazing items featured on Amazon. With such products added to your collection, it does attain a priceless value!
Like every other category on the website, there are just plenty of antique objects, so many that it is impossible to exhaust. Overall, Amazon is surely one of the best platforms available for antique lovers to explore!
Similar to Amazon and other e-commerce platforms, vintage items feature on eBay's website along with electronic equipment, cars, and other categories. Nevertheless, vintage is among the most popular categories on the website.
The items featured include a variety of coins, notes, and artwork pieces. Vintage furniture needs a special mention, as you can browse through a vast collection. Just click on the furniture category, and you can browse by the room you want it for- living room, dining room, office, and so on.
Interestingly, at eBay, you will also find an unending collection of sports memorabilia dating back to several decades. This is something you will rarely find on other platforms and would definitely add a unique touch to your vintage collection. There are lots of other incredible items as well, including pendulum clocks, classic tables, and vintage stamps.
Our next pick, though tiny in comparison to its competitors, provides a pleasant consumer experience. Zibbet has an interface similar to Etsy, focusing on vintage and handmade products but is more minimalist in its approach.
The platform emphasizes showcasing smaller products, such as vintage accessories and jewelry, rather than bulky furniture. So, for vintage enthusiasts who love to add smaller items to their collections, Zibbet is just perfect. Also, a vintage section consisting of as many as 15 categories of products makes it all the more convenient for antique lovers to make their search.
Some stunning vintage items featured on the website include a pair of gold-plated artist's brushes and a beautiful Limoges porcelain container. So make sure to go through this interesting platform for an ideal antique piece.
This platform featuring lots of amazing antiques, vintage items, and collectibles, among other products, is considered quite reliable. The website is definitely among the most popular online destinations to search for products from several decades back.
In fact, a separate category under antiques lets you find rare currency notes and coins, furniture, and paintings from the olden times. Thus, if you want to give a unique touch to your vintage collection, do search for an exclusive item on Craigslist.
Among the items featured on the website is a chalk ware plate from 1962 with an inscription of the Seattle World's Fair. This is just one instance of the interesting products you will find here, so go ahead and check them all out!
An online marketplace majorly focussing on newer second-hand products, Bonanza is known to have a praiseworthy collection of artwork and collectibles. The items in these two categories would give tough competition to sites such Etsy and Amazon.
Talking about collectibles, won't you love to add a rare 1 dollar coin to your classic collection? Well, you are sure to get such enviable vintage items at Bonanza. Moreover, the website often has several products listed at incredibly cheap rates compared to other platforms.
Added to this, the website offers a very user-friendly interface to its customers, and a mobile-optimized version as well. Each shop at Bonanza also includes a built-in chat system, which is supplied for free. To round it up, this platform definitely has a lot to offer to antique lovers.
Selency is one of the first online marketplaces of Europe, specializing in vintage furniture and accessories for interior design. It was originally launched as Brocante Lab in 2014. The platform has each and every item hand-picked by its own team of professionals, vintage connoisseurs, and shoppers.
As such, the seller of the product, its genuineness, and its authenticity are all verified to ensure a perfect user experience. This also rules out any possibility of any product having a dubious origin and imperfect quality. Besides, the stock of vintage items at Selency is replenished each day.
The website has over 100000 items curated by its moderators, which include unique furniture pieces and room decor for every home. Selency also ensures all-around satisfaction of the customers by providing a secure payment system and excellent door-to-door delivery solutions.
Are you fascinated by furniture styles from the mid-century modern times? If so, then be sure to check out this online platform at the earliest. Being one of USA's leading dealers in mid-century furniture, this site offers your dream furniture from the '50s and '60s.
The items available in the collection are hand-selected through regular buying trips to Europe and Scandinavian countries and imported thereafter. Just think about it! Would you often find such an exclusive collection of vintage furniture online?
Besides, the site also offers efficient delivery solutions, ensuring swift delivery within a reasonable period of time. So if you are in search of some rare mid-century furniture, don't forget to log on to this online store.
Formerly called Dealfish, the site primarily listed job opportunities for aspirants. Over the years, it has evolved into a popular marketplace for products as well as services. The site currently has a wide range of antiques and vintage items as well. It is thus a great place to log on to for antique lovers.
Moreover, the platform can also hold surprises for such enthusiasts of vintage items. Sometimes, that one exquisite art piece or rare coin that you can't find on several websites may be there on OLX.
Many buyers are yet to discover the classic, vintage, and antique sections on this marketplace. So don't forget to browse through OLX when you search for a marvelous antique to include among your prized possessions.
Although not one of those big names in the world of antiques, this is a quite fascinating store to look for vintage art. You can primarily access the online platform through Facebook since there does not seem to be a website as of yet.
Nevertheless, this store has an impressive list of industrial, mid-century, and vintage items to offer. Ethereal paintings and eye-catching vintage furniture are available in plenty at Red Line. Some beautiful Japanese woodblock print paintings are an instance.
Thus, if you are a serious shopper of vintage objects, checking this online store is surely worth your time. Don't leave it out just because it doesn't have a website of its own yet. Sometimes, smaller places do have the most interesting antiques you will ever come across!
Similar to eBay, Amazon or other sites, this online auction store includes many categories of products besides vintage objects. It is a flourishing marketplace for buyers as well as sellers.
The site works like any other auction, wherein the highest bidder for an antique item takes it home. As easy as it can be! Believe this when we say, it is a great place for obtaining some of the most priceless antiques available.
Some currently listed antique objects on Webstore are a '50s Rhinestone ring with 5 ring bands and a Lubitel-2 vintage reflex camera from the '70s. So be sure to visit this online store at least one before moving on to other options. You never know, the search might end over there!
To those of you who have an eye for exceptionally crafted interior decor and artwork, this is the place! With more than 85,000 results in the vintage and used furniture section, you are sure to find not one but many favorite options.
Added to this, there are quite a few filters to narrow your search- price, style, and items available for local pickup. The style filter lets you choose between rare categories such as Hollywood Regency, Mid-Century, Art-Deco, and much more.
All such features have made this online furniture store a favorite among lovers of vintage furniture. on to the website and have a virtual tour through the world of vintage interior decor!
Another exclusive place for antique objects, this online store offers an unending list of such items. The categories are also diverse, ranging from jewelry pieces and furniture to lighting accessories and kitchenware.
Examples of some vintage items featured on this site include an oil painting from the 18th Century and Faberge cross pendant with a Victorian design. For women who love antique jewelry, the collection has the most exquisitely designed pieces to go with different outfits.
All in all, there are just so many antique and vintage objects on this online store that you will hardly miss what you are searching for. So, when buying an antique is on your mind, make it a point to visit Antiques and Chatchkes.
The site is one of the most amazing online stores dealing in classic antique items. It offers a list of vintage kitchenware, animal sculptures, and furniture that is quite well-curated. Besides, it also lists other fascinating home decor items such as vintage pottery, mirrors, and candle holders.
Each and every vintage object in the store has an authentic old-world charm that never fails to impress. Furthermore, this is the right place for those who are on the lookout for greater product variety.
The broad list of classic items available on the website goes on and on, and is impossible to exhaust! Hence, buyers of vintage objects must not miss out on this website by any means.
This unique online furniture store with exclusive pieces from different regions of Europe is our next pick. It is the ideal store to log on to for someone who has a fascination for the continent's cultural history.
The antique furniture that this site offers will take you back to the times when famous empires reigned throughout Europe. Examples of some rare pieces featured on the website are an 18th-century Bombe chest belonging to Louis XVI and an Italian Chandelier from the same period.
The list of classic European items that this online platform offers is prepared very efficiently and is surely one of the best you will find. So remember to check the site out before you move on to the others.
If you cannot find the antique piece you are looking for even after searching the popular platforms, we would recommend visiting this website. This online marketplace has different categories of products and services, including an exciting antique collection.
There is an endless range of objects from earlier times, including mid-century furniture pieces, rare sculptures, and other such vintage items. Interestingly, Shopify charges a much lesser procurement fee from buyers compared to other online marketplaces.
Though antiques is just one category of products that the platform offers, you can be confident that checking it out won't be disappointing. So go ahead and have a look.
This store in the USA began with just a couple of antique furniture pieces but gradually developed into a leading destination for rare vintage furniture. The owners of this venture have an 'obsession' for collecting the best antiques, so much so that they have made several trips to Europe.
Hence, while browsing their website, you might come across some stunning furniture from the Italian countryside or the English Midlands. The collection of cabinets needs a special mention, as you would find some of the best of those here.
Also, each and every furniture piece is very well curated and its authenticity is verified by a team of professionals. This ensures the utmost customer satisfaction for every purchase. There is a custom furniture collection as well, with hundreds of options to choose from.
Specializing in mid-century objects, the store is a great place with some timeless furniture, accessories, and lighting fixtures. The items in the collection date back to the 1950s and even earlier.
The most intriguing items featured till now are a Meridian Line George Nelson clock and an antique geographical drawing by Sir Staley Spencer, a legendary painter.
The platform offers an infinite catalogue of stunning classic objects which are definitely worth adding to any antique collection. So do take some time out to browse through the site. You won't be disappointed at all.
As the name suggests, this online store primarily offers a great collection of vintage furniture. It also features some amazing classic glass and ceramic objects that are rare to be found.
A general fireproof desk from the 1920s and a 1960's Steelcase steno chair are some instances of antique furniture featured on the site. You will also come across several classic paintings by legendary painters such as Vincent Van Gogh.
This online store has developed into one of the favorite sites for furniture and other exquisite antiques for interior decoration. So make sure you check out the website for getting home a perfect decor item.
Well, we all know that this is technically not a store, but it's actually better than many antique stores! Vintage enthusiasts regard it as a great place for finding authentic items. You can also find amazing deals from some solid dealers on this social media platform.
Browsing through any dealer's page on Instagram lets you understand much about their clients and their reputation as well as their expertise in the field. Once you have made a decision, search for them on the internet to see if they sell items on vetted websites or read some consumer reviews.
Through such research, you can make sure that you are comfortable buying from a particular dealer. For buying the product, you can even directly contact the dealers through the direct message option. Hence, Instagram is definitely one of the most convenient platforms you can use for buying vintage items.
Conclusion
Vintage objects have always appealed to people across all generations, and hence, shall never cease to be in demand. In a world that is increasingly homogenized with products of the latest design, some unique and old-world charm is much refreshing.
Online stores have simplified the search for antique items manifold and have opened up multiple forums for engaging buyers and sellers of antiques. We have gone through a plethora of such online platforms and their offerings to come up with the best ones for you.
All these platforms cater to either some particular niche of antiques or to a much wider range. Thus, you can easily go for the most suitable one according to your preferences.
So, what are you waiting for? Go on and browse through the websites that appeal to you the most.
Are the various permutations and combinations involved in deck design giving you sleepless nights?
Most people who are confused about how to design their decks ideally can do so with the latest deck design software. No longer will you have to wonder how a particular aspect will look or if the structure will fit in the required area.
You can use the software to get an exact estimate of how the structure will pan out. But the question is, how do you choose from the numerous available software options? For starters, it depends on the individual and whether they are willing to spend or prefer free tools for the purpose.
To avoid confusion, we've listed 17 top products, which include both free and paid options. It'll help you make an informed decision regarding which tools to use. At the same time, we’ve also added an FAQ section to answer some of your most common questions.
One of our top recommendations is the software from decks.com. The best part is that the developers have managed to make it free despite having numerous functions, so it's a highly convenient tool for your design needs. Moreover, it has cool graphics, and you can play around with your imagination to incorporate various facets.
Why Did We Like It?
First and foremost, decks.com comes with multiple deck designs ensuring you've got a wide variety of choices at your disposal. We loved the attention to detail, highlighted by the terrific graphics to give you a real-life description of what the deck will look like.
Moreover, you'll notice that the software allows you to work around furniture and other components of your home. It comes in handy to know how the project will look with everything in place rather than having to scratch your head later. Meanwhile, you can work with various shapes and create stairways to make your deck stand out.
It allows you to view the structure from various angles, so you get a clear idea that you're on the right track. Furthermore, thanks to the 3D viewings, you get accurate knowledge regarding the height and base diameter. You'll therefore know what's needed to make the construction stable and long-lasting.
What Could've Been Better?
When we used it, we realized it was a tad slow, which may not seem like a significant issue, but it's inconvenient. We suggest you sit down with time on your hands should you choose to use it. There's no let-up in performance, and all you need is to have a little patience. It's something the developers should've looked into, but we hope it won't cause too many problems.
The Fiberon Discovery Deck Designer is one of the most sought-after tools given its fantastic user-friendliness. Even first-time users won't have any difficulty navigating it, while seasoned users are assured to love all it offers. It has excellent functions like 3D plans to give you a comprehensive idea of the most suitable design.
Why Did We Like It?
If you thought our earlier recommendation was excellent, wait till you get a load of this one. Not only will you get the ideal deck design, but it will also help you decide what components of your outdoor setting work well together. Since it's free, you've got the option of using different types of templates and styles to produce a unique pattern.
It's easy to use, and you need to start by choosing the scene that most closely resembles the type of deck you want. Plus, the products you can design the deck with are present in the left-hand corner for convenience and needless to say, you won't find the work tiresome.
You can operate on various components like style, color, railing, and fascia. Similarly, you'll love that it gives you the chance to work on the exterior, ensuring the deck is in sync with the rest of your property.
What Could've Been Better?
While it offers many good things, you may not like to register with your details to save your project. It isn't too much of an issue, but many people may not enjoy sharing their details. Some of the other software allows you to save your work without any such requirement, which you may prefer, but we assure you you can't go wrong with this tool.
The JLC Professional Deck Builder is quite a favorite among the masses and with valid reasons. Of the many functions, what particularly stands out is the real-life descriptions that give you an accurate idea of the possible construction. You can then send it via email or take printouts of your project.
Why Did We Like It?
The software is highly adjustable and offers you the chance to design everything from the deck to your outdoor surroundings. Even first-time users who may take a while to find their feet will enjoy working with the JLC Professional deck builder, thanks to the standard rectangular design. You can stretch the deck from the sides or upwards to get the desired results.
Furthermore, you've got the option of adding steps to raise the deck to a second or third level. You'll especially enjoy that the 3D design presents a comprehensive idea due to furniture inclusion. It enables you to move them around, which will allow you to work with various shapes to make the project stand out.
Apart from that, it has regular features ensuring you can tinker with various colors for the best results. Once completed, you get to save the project in a suitable format.
What Could've Been Better?
Although it's highly user-friendly, it takes some time for you to get used to it. Even if you've used deck design software previously, you'll need to adjust to the different functions. On the other hand, first-time users will need to understand the dynamics of the tool, and it may be a while before you start getting the desired results. But it's not a significant problem.
If you're looking for an all-around tool, we suggest you give the Trex software a try. It helps you pick out the type of design you need and analyzes the various elements required for construction. No surprise that it has most bases covered, and we assure you it'll be worth your time.
Why Did We Like It?
What you'll notice right away is that you get to use the software on your mobile and computer. It's a highly suitable tool to work with and offers you the chance to have your project with you at all times. The significant addition is that the system allows you to choose the size of your deck and subsequently estimates the cost.
Moreover, newcomers will love working with various materials, and the strongest among them is a triple-coated layer of steel. But for a more refined look, you can opt for wood construction, but irrespective of your choice, you're guaranteed to get much-needed longevity.
Meanwhile, for customers who already have a deck, Trex allows users to build a dual or triple-layer construction on top of it. All you need is to select the shape and then choose the colors or combine different shades for the best output.
What Could've Been Better?
While it doesn't happen all the time, we've noticed that there are occasions when the software takes time to load. It's compatible with various applications, but users have complained that it tends to slow down on chrome or safari browsers. We suggest you continue to save your work at regular intervals and have a little patience. Whatever happens, we can safely say that it doesn't crash.
The Mitek Deck Designer is another versatile tool that professionals and amateurs will find easy to use. It's an interactive software that provides relevant information depending on the area in which the construction is to take place. It has numerous quality functions that aren't seen in other models, and you'll love all it has to offer.
Why Did We Like It?
While working with the Mitek designer, we loved how the software gives you the chance to start working for free. If you like what you see, you can pay the required amount to unlock more fascinating features and construct your suitable deck. It ensures you get to customize different deck aspects, such as the plank, size, and color.
Interestingly, as you design the project, the system generates all the materials you'll need. What's more, it presents cut lists and the necessary permits you should acquire, thereby allowing you to get professional help and various points of view. Likewise, even if you aren't tech-savvy, you won't face any problems using it.
You can efficiently save the project and then print out the results or email it to clients if you're a professional contractor. Thanks to the realistic portrayals, you have the option of importing images of your home to ensure the deck is in sync with your property.
What Could've Been Better?
To use the tool, you'll need to have the latest upgrades, which could make it inaccessible to certain people. We can understand that to use the numerous functions and match up to modern standards, the developers have made it compatible with the latest devices. So, you'll need to make sure that the application runs smoothly on your device, and if not, you may have to opt for some other option.
The SmartDraw Deck Designer is one of the best tools for you to consider, thanks to its ability to generate quick yet precise results. You won't have to spend much time on the computer, and the detailed results will allow you to get to work quickly. You're guaranteed to love the simple but efficient design.
Why Did We Like It?
Straight off the bat, the stunning accuracy is on full display, thanks to the numerous graphics for elevation posts, hot tubs, and plants. It presents a highly realistic view of your surroundings to help you decide the shape and the placement of various components. So, you can choose from the many preloaded templates on the website.
It saves valuable time and ensures you can work on an existing professionally designed template. You won't have to start from scratch, and you'll get a better idea of how to approach the project. Moreover, the software comes with a detailed library to deliver incredible accuracy, but you can also create custom symbols if you want.
It enables you to upload pictures of your area while the system automatically generates the dimensions. However, the most attractive part is the drag-and-drop function, which proves to be highly effective for all types of users.
What Could've Been Better?
Like some of the other tools, it also takes time to load, given the multiple features. You can opt for a faster internet connection to try and correct the issue. But in case you're wondering, we guarantee the slow loading speed won't lead you to miss out on any functions. All you need is to be patient and not lose your cool because it'll deliver the necessary output irrespective of the speed.
The Lowe's Deck Design Tool gives you multiple options to choose from. Apart from the usual 3D templates, you can custom make your designs to create the structure just as you want. It delivers a clear idea of the area and determines what plan of action is best suited to it.
Why Did We Like It?
If you can get Lowe's deck design up and running, then you'll also love its functions. It has several resources as part of the software to present an array of choices for your benefit. You can start working with a pre-loaded template for convenience, but you can design a custom template for more variety.
Furthermore, the 3D renderings ensure you can customize different deck aspects, like railings and posts. You get to choose what materials work best, and in case you're worried about the cost, the software has got you covered. All you need to do is pick the materials, and the system will provide an estimate.
Additionally, you can opt for professional help to make the correct choices, while the building plan enables you to start work quickly. It also provides tips to ensure you can maintain the structure in top shape.
What Could've Been Better?
For all that's good, it does have a couple of downsides. Despite having excellent compatibility with most browsers, you'll notice that it's not supported on chrome, which wasn't something we were expecting.
And since it can even run on Internet Explorer, we feel the developers could've made the necessary additions to make it usable with most of the leading applications. So, if you don't use the accepted browsers, you'll have to get them installed.
It's supported on numerous devices and applications making the TimberTech Deck Design Tool extremely versatile. You'll need to set up your account, which doesn't take much time. Plus, you've got the option to choose from the available templates, making it highly efficient.
Why Did We Like It?
Firstly, it's compatible with numerous browsers and multiple devices to deliver the best results at your fingertips. Therefore, you can view the many plans and color options in high resolution to make designing easier. All soon as you create an account, it opens the door for some exclusive functions.
You can save your project and also download a list of materials that you're likely to need. The plan is generated from the software based on your inputs, and once the estimate arrives, you can share the project professionals to get their perspectives.
Meanwhile, it allows you to work with different shapes to get the ideal fit for your area. And the designers have added an undo option, meaning you won't have to worry about making mistakes. Finally, the gallery delivers a comprehensive idea of the project needs while touch-ups of various aspects become easier with the 3D renderings.
What Could've Been Better?
Once you start using it, you'll realize it takes time before you get fully accustomed to the functioning. You can take help from someone who has used similar software before or contact a professional service. In case you're a DIY person, you would want to take your time to understand the components. Similarly, it's important to note that you might not get the desired result straight away.
We're at the halfway point of our list, but there are several quality options we're yet to review. Our next recommendation is the Azek Deck Designer, turning quite a few heads among prospective customers. It's incredibly fast while also being easy to use to make your projects stand out.
Why Did We Like It?
What immediately strikes you about this software is the excellent compatibility on offer. You can use it on your desktop or tablet to get 3D renderings of your deck design, making it an exceptional tool. The bonus is that it's free, which means all you need to worry about are the materials required for construction.
In that regard, the software generates accurate results while providing a fantastic range of options for you to choose from. You can effectively create an elevated deck with stairs and arrange the digital furniture, which presents a realistic perspective. It allows you to see how much room you've to work with and choose the materials accordingly.
Furthermore, you get to view your project from various angles and create railings or adjust the height. Most of the options are available on your right-hand side, from which you can decorate the walls and use shaping tools to work with multiple designs.
What Could've Been Better?
You need to ensure your device is compatible with the latest software; otherwise, it'll fail to load. It comes with detailed descriptions of the desk for which you'll have to upgrade your device or make the necessary installations. We understand that it might not present a feasible option for some users, and unless you're willing to buy a new model, you can choose from the range of available software.
If you're looking for a tool with exceptional versatility, then we suggest you use the BHG Deck Designer. It has over 25 different template options for you to choose from, and the easy-to-use interface makes it ideal for users of all age groups. Moreover, you'll enjoy the various color options and multiple shapes.
Why Did We Like It?
We're sure you can't wait to try out this tool, and that's because it offers 25 choices for your benefit. But that doesn't mean you'll be overwhelmed as you can effectively choose the deck that's most suitable to your area. In case you stumble across multiple options for the same space, you can try out the different combinations and pick the best result.
The software will ask for the yard size and then display the result based on your preference. There's also an option called extras, which allows you to work on an existing deck without compromising any aspect. Meanwhile, the drag and drop function makes it convenient to get fast output.
After completing the design, you can easily save your work and share it with professionals before shoring up the details. We loved the attention to minute aspects, and you get to pick the walls and doors to ensure everything is in sync.
What Could've Been Better?
It would be best if you were patient because it's highly unlikely you'll instantly see noticeable results. They're usually one or two characteristics on which one software varies from another, so you'll have to bide your time before you can come to grips with it. What you can do, however, is ask around and see if you can find someone who has some expertise in operating such software. It'll provide a better idea of what you need to do.
The SketchUp software is remarkable, given that its affordable nature hasn't played any part in diminishing the unit's quality. We loved the smooth controls and the various angles from which you can look at the deck you're building. Therefore, you can ensure that it matches the surroundings of your home.
Why Did We Like It?
Being one of the top players in deck designing, SketchUp delivers nothing short of the best. Initially, you get to work with the free version to get a feel for the tool, and if you like what you see, you can upgrade to the paid software. It offers advanced functions through which your 3D model starts to take shape.
Furthermore, all the options are available at the top of the page, and you don't have to waste time searching for them. As you progress along, the tool's versatility is on full display, and you get to experiment with various shapes.
The most exciting aspect is the 360-degree coverage, which allows you to examine the height and ground clearance. You get a comprehensive idea of how to take care of the structure and withstand the elements. Similarly, thanks to the many color options, you can create a striking design.
What Could've Been Better?
It takes time for the functions to load, which may prove to be a little frustrating. At the end of the process, it does deliver accurate results, as we've seen for ourselves. But if you're in a rush, then it's probably not the right tool for you, and you can choose from the other available options. However, if you choose to be patient and don't mind the slow build-up, you'll enjoy working with it.
Big Hammer has been around for a long time and has built a reputation for being trustworthy. In that regard, this state-of-the-art software is no different and delivers excellent efficiency in your tasks. You can select from the many templates available online or make one from scratch without any hassle.
Why Did We Like It?
Straight off the bat, remember to ensure you've internet explorer because that's all you'll need for optimum utilization of the software. It generates several fantastic designs for you to consider, thereby allowing you to make an informed decision. You can adjust the height and the width, but the most significant addition is the modifications in depth.
The tool asks you to input the specifications to produce accurate results. You can then decide the type of materials you need to make the structure long-lasting. Furthermore, thanks to the 3D renderings, you can work from various angles for greater convenience.
We suggest you play with your imagination to pick the shape most suitable for your needs. Then proceed to apply different hues of colors to make the construction a striking addition to your property. Finally, it ensures you can easily save the project and share it with others to get their input.
What Could've Been Better?
You've to make sure you've an internet explorer for it to be compatible with your device. It's understandable that despite having modern technology, the developers have asked customers to use the browser to cater to a broader audience. But if you can't make the required changes, it's best to opt for some other option. We suggest you ask for help, perhaps even a professional, to understand the intricacies of the tool.
The Punch Landscape Design is an all-around unit that offers you the chance to design your deck and home. So, you get to ensure that everything is in sync and, therefore, we assure you you'll enjoy all that it offers. Moreover, the developers have added the necessary tutorials to help you out.
Why Did We Like It?
For starters, it comes with many templates that allow you to get to work quickly. While the pre-loaded designs help you understand what shape is ideal for your needs, it also ensures you can come to grips with the software. Meanwhile, it offers both 2D and 3D viewings, and you get to see the changes in realistically detailed diagrams.
You're sure to love the terrific library, which is almost like leaving a kid in a candy shop. Due to the availability of furniture and other outdoor elements like plants, you can easily select one and drop them onto your project. Besides, it also generates the cost of different factors, meaning you can keep a tab on your expenses.
And the various options provide versatility in your 3D viewings, which isn't usually seen in other tools. Likewise, the developers have included short video tutorials that will come in handy for first-time users.
What Could've Been Better?
As seen with some of the other models, it takes some time before you can get the best performance out of it. If you're a first-time user, you can use the online tutorials to grasp the tool better. You may also ask someone to provide tips, but the key is to remain patient because it doesn't take long to figure it out. We suggest you sit down with time in your hands.
The Home Designer Landscaping Software delivers fantastic value for money to make your projects stand out. Like some of the other software, it allows you to work on all aspects of your home, which comes in handy to get the required finish. We loved the realistic descriptions, which show the attention to detail.
Why Did We Like It?
For those who are willing to shell out a couple of extra bucks, you won't go wrong with it. Not only can you design the deck but also take care of other housing activities. Thanks to the latest technology, the designers have taken the tool to an advanced level of realistic viewing.
You have the option of adding stairs to construct the deck on an elevated level, while for more refined living, you can incorporate a swimming pool or jacuzzi. Moreover, like some of the other models, you have the chance to integrate different flowers and plants for your landscaping needs.
We've also found that if you don't want to change your home's existing structure, then the software allows you to create a double or triple-layer deck. It's highly convenient to work with, and you can change the angles from which you're viewing the structure for the best results.
What Could've Been Better?
One of the first things that customers look at is the price, and this is one aspect where the software falls behind. It's one of the costlier tools, and we understand if prospective designers would be unwilling to dish out the big bucks. For one, we believe you can't compromise with quality, but if you've to adhere to a tight budget, there's not much you can do.
The Idea Spectrum comes in various versions, and you can pick one based on your preference to start working. It comes with highly professional options for you to take care of multiple aspects, and if you're an amateur, then the other versions will suit you well. We assure you that the easy-to-use functions make it worth the effort.
Why Did We Like It?
Straight off the bat, you'll notice that it comes with three versions meaning if you like working with it, then you can pay extra to unlock the advanced options. It's a highly versatile tool making it useful for amateurs and professionals alike. Additionally, the developers have included a function called deck wizard to assist you during work.
Among the numerous functions, you can create a 3D landscape, but you can also upload an image and design over it. As a result, it's incredibly useful and generates accurate results, which allows you to add landscaping options like a pool or waterfall. It's a complete package, so you don't have to look elsewhere.
Once the work is done, you get to save your project and share it with others to get their opinion. Moreover, if needed, you can create multi-story decks with the tool, which suggests different materials to produce long-lasting results.
What Could've Been Better?
You'll need to download the latest upgrades, and if you're not adept at using technology, you can ask someone to do it for you. Without the upgraded version on your device, you can't enjoy the state-of-the-art functions that make designing easier. However, if you're unable to accommodate the upgrades on your device, it's better to choose some other option, or if you're feeling a little adventurous, a new model.
The SketchUp Pro includes several quality functions, which makes it ideal for your DIY needs. You can focus on other areas of your home to get a complete performance along with deck designing. We found that it delivers fast results, thereby ensuring you can quickly complete your work, meaning it'll be money well spent.
Why Did We Like It?
We know you're itching to know about the unit, and given the response from users, we can understand why. Initially, the price may throw you off, but once you start exploring the functions, we're sure you'll realize that the developers were justified. It delivers excellent results, thanks to the multiple choices at your disposal.
You can mix and match various shades to complement the unique shape of your deck. It allows you to upload your images, and then you can modify it. But the most significant inclusion is that of the Geo-location tool, which recreates the actual image to help you decide the best way to proceed with the construction.
Furthermore, thanks to the attention to detail, you don't have to waste time making everything from scratch. You can download the file and add numerous elements to prepare a detailed blueprint for your work. Lastly, it allows you to share your project with others for feedback.
What Could've Been Better?
It's more expensive than the other tools that customers have used, which could deter potential users. We understand that the range of functions has contributed to the higher price, and you may not have the budget to use it. It's best to look at some other option in such a scenario, but we assure you won't be disappointed if you can be a little flexible.
The MiTek Deck Designer software features some of the latest technology, which makes it an excellent option. However, your device needs to be upgraded for you to use it, but you'll love its fantastic functions once you do. What's more, you can work from various angles to get the required precision.
Why Did We Like It?
First and foremost, you'll have to register yourself, and once that's done, you can get to work with your design. You need to start by choosing the shape, and in this regard, it's essential to have in mind the type of area you've. Once that's done, you can move onto the more nuanced aspects, such as the height and width.
It's relatively easy to use, and you've got the option of rotating the 3D image to opt for the best angle for your work. Significantly, however, the software allows you to set your preferences based on which it'll generate the results. You won't have to worry about the materials as the tool does all of that for you.
Moreover, you get to choose various colors to ensure it matches the exterior of your house. You can also select particular spots on the deck to place your furniture, so you don't encounter any problems later.
What Could've Been Better?
We found that although it's compatible with most devices, it won't work unless you've installed a specific plug-in. Therefore, we suggest you conduct a thorough check to see the installations you need, and if at all, if you can equip your device with it. If the answer is no, you can opt for some other options or ask someone to help you who has an idea regarding this type of software.
Pros
3D design
Numerous colors
Various shapes
Has options for using furniture
You can work from multiple angles
Cons
Requires a plugin
Online Deck Design Software FAQs
Does the price vary once work starts?
Since you're using deck design software, you'll get an estimate of the price beforehand. Considering the material and other aspects remain the same, the price doesn't vary. However, if you decide to opt for some other material or incorporate additional features, there's bound to be some difference.
Who provides the permit?
If you're hiring a contractor, then it's the person's responsibility to gather the necessary permit. But if you're a DIY professional, then you'll have to do it yourself. It's best to ask for help, so you don't miss out on any requirements.
Are composite and vinyl materials suitable?
Many people prefer using composite and vinyl materials because they don't need much maintenance. You're saved from the trouble of having to treat cracks that may occur in other materials. But the initial cost is a bit high, and it doesn't resemble wood meaning it's not a suitable replacement.
Should I go for vinyl railings?
While some people don't like the look of vinyl railings, the advantage is that it doesn't deteriorate. As a result, you get a clean finish while the cost doesn't vary compared to composite railings and may even be less on occasion. If you're looking to contrast the barrier with the rest of your deck, the vinyl will work well.
How often do I have to clean the deck?
Regular maintenance goes a long way in maintaining longevity, but certain materials require less time to clean. The best thing to do is wash it like you would wash your car or if you find that it has gathered too much dust. Similarly, after the monsoon, it's good to give the deck a once over and free the mud, but overall the maintenance needed is significantly less.
Final Words
We've reached the end of our guide, and hopefully, you've got a better idea regarding deck designing software.
It takes away the trouble of having to guess, thereby allowing you and the contractor to develop a definitive plan of action. You won't have to waste time in a trial-and-error method, and it saves valuable resources to reduce the overall cost of the project.
But before signing off, we've decided to assist you a bit more by narrowing down the top products in various categories. Our top recommendation would be the software from decks.com for its overall performance and easy-to-use functions.
Apart from that, the Fiberon Discovery Deck Designer provides excellent ideas, thanks to the 3D visuals. Finally, we must mention the JLC Professional Deck Builder, which delivers detailed descriptions to offer an all-inclusive idea of the construction.
Barns are a staple of the average homestead or farm. You need a barn for multiple purposes. Either it is to store your produce of grain, or to keep the livestock fodder dry and safe. Or you need space to keep the livestock itself, if not the tractor that you use on your farm. Barns are large enough for storage yet small enough to not take up too much land space.
What is also great about barns, and especially pole barns, is that they aren’t too difficult to make. Unlike other structures, they do not require elaborate planning or understanding of architectural techniques. It also helps that most of the barn on the inside is pretty empty.
But, what is required for building a barn is the know-how, both while constructing and before constructing. This is why following detailed architectural plans for building pole barns is important. Thankfully, there are 163 plans included here for you to choose from. From books to videos, pdfs to articles, there is enough research material to get going with.
Free DIY Pole Barn Plans and Designs That You Can Build Easily
Pole Barn Building Series
If you’re someone who prefers a more audio-visual tutorial and think it will be easy to grasp the concepts by observing them in real-time, then this series of videos on how to construct a pole barn will be the perfect fit for you. It also helps that the person who made the video is someone who has done it before and works on a homestead.
Iowa State University has been a great resource for architectural plans that people can procure on the internet. Whether you’re looking for plans to build a mansion, or plans to build a cabin, or in this case plans to build a barn, the ISU database has enough information for you to get started. Their website has fifteen plans for building pole barns, with a lot of pictorial references attached.
Iowa State University Barn Plans 16-29
As mentioned earlier, Iowa State University has a plethora of architectural plans at its disposal, freely available for perusal by the public. So, they provide fourteen plans for big grain storage containment complexes for large homesteads.
Comprehensive Barn Plans 68-85
Sometimes, a pole barn isn’t used just for storage of supplies or for vehicles. Sometimes, you need a barn large enough to turn it into a stead for your livestock, with its own elaborate inner mechanism and partitions. For this very purpose, this guide has eight plans to choose from.
The Detailed Barn Building How-To Guide
It can be quite a strenuous exercise, building something from scratch. There is just so much to consider when doing something of this sort all on your own. What if you make a mistake here or a mistake there? Will the entire thing collapse? Will you have to redo it? This guide answers all your queries and calms your qualms by covering all such worries. Moreover, the pictorial aid only adds to the effectiveness.
Homesteads are all about self-sufficiency, and a big part of being self-sufficient is cost management. What is great about this how-to article is the fact that it details how it can be really economical to build your own pole barn for storage if you make some smart decisions while constructing it.
This is a how-to guide that eases beginners through the process of the pole building. This book is great also because it focuses on low-cost construction. Once you read the book, you’ll be ready to build your own pole barn in no time and on a budget.
The University of Tennessee has a very comprehensive pole barn building guide for free usage. Providing the do-it-yourself enthusiast with twenty-three options, it ensures that you don’t have to stick to just one design and can mix and match and experiment to your heart’s delight. Aesthetics matter, after all.
Canadian Storage Barn Plans 100-109
There are some really lovely pole barn plans in here, both traditional and non-traditional. These Canadian building plans are for both animal steading and for grain storage, and even for tractor and other machinery storage. They have some lovely designs with ample details for you to start building.
The Pretty Barn Guide
These plans for a traditional yet very appealing pole barn are a little too complicated for novices and intermediate barn builders. They have a few bemusing details that will baffle the reader. But, an experienced eye will understand these plans better and if you aren’t the latter, you might want to ask someone who is and get to the job of building the plan.
These plans for making a pole barn a little elaborate and cover designs and needs. Dealing with both equestrian and livestock barns and also vehicle and grain storage, the options are comprehensive and the drop-down menu on the website will take you through the process in a very simple way. These plans are great for both small-scale farmers and homesteaders and for ambitious professionals with an eye for a large barn area.
The Cosy Pole Barn Plans
This is a pretty-looking barn that is sufficiently large enough for most users. It comes with a free-to-use plan which is comprehensible for builders of all skill levels. Lovely to look at and easy to make, this is worth considering as your option.
This plan is for a beautiful garage barn build. It is large enough to fit vehicles and naturally spacious enough for storing your produce. It is sturdy and has multiple doors and looks neat while doing what it is meant to. Plus, the plans are detailed enough and simple to follow.
The How-To Barn Build Tutorial
Building a structure is just not about the wood and brick and the shape of it. It is also about the preparation before you get to the actual building part. It is about the soil it will stand on, and the very foundation that will ensure it remains intact. This guide helps you through all that with thirty-one steps that make sure you are absolutely prepared to build a barn on your own.
Monte Bunch’s Barn and Outbuilding Guide
Monte Burch’s How To Build Small Barns & Outbuildings is a comprehensive guide. With twenty plans detailed in the simplest of instructions, this professional guide is a wholesome read.
This particular guide does not offer you a variety of plans, but where it lacks in diversity, it makes up for meticulously gathered information. The plans for building this pole barn are very finely drawn and the barn itself can be custom used for several purposes.
The Small Barn Shed Plan
There is enough detail for you to go with when building this particular 12 by 16 barn. The plans provided take into consideration different storage ideas, such as livestock steading and grain storage. They are free to use and come with a list of materials you will require to build this pretty-looking barn on a budget and in a small amount of time.
This list of plans is not free to access, but with a minimal purchase fee paid, you can peruse a hundred comprehensive pole barn plans that cover everything from barn sheds to garages, and workshops. If you think you are willing to spend a little extra cash on procuring these plans, then you should definitely go ahead and buy them.
The LSU AgCenter is most gracious in its efforts to help people build barns on their own. The list of plans is very detailed and covers barn usage of all types. What more would you need from this guide? Well, for one, it provides thirty-eight plans, and that number is enough for you to choose from.
North Dakota State University has a number of elaborate plans for all sorts of house building. They are comprehensive and simple to follow and cover everything that needs to be covered before you get onto the task of actually building something. Pole barn plans are a natural inclusion herein and the university provides seven plans for your perusal.
The State of Oregon is very generous in providing free-to-use barn-building plans for the common man. From six plans for traditional pole barn designs to more modern-looking and size-varying designs, the State of Oregon free barn building plans are sufficient and detailed.
The Garage, Livestock, and Grain Barn Plans 96-99
DIY pole barns come in all shapes and sizes, and sometimes they aren’t all too traditional in their make. This particular barn is more of a large house type than a standard pole barn. But, it is as effective as any barn with the additional advantage of looking great.
It’s a beautiful shed with a very spacious design. Adding to its functionality of it are motifs that bring a more aesthetic appeal to the barn. The storage areas are sufficient for grain and hay storage but can also be used for other purposes. Plus, the plans for it are pretty simplistic.
So, are you ready to take on your own DIY pole barn project? Do you have any new designs that have come to your mind poring through these plans? Perhaps you have a hybrid in mind. These plans are inspirational and educational at the same time and I believe they will be more than sufficient for you to embark on this endeavor.
There is, after all, a beautiful sense of satisfaction in making things on your own, right from scratch. The experience is rewarding and you get to master a skill that you had never thought of even trying before. It helps you in building more things and keeping your mind busy and productive, and maybe teaches others how to do it too.
So, whatever your purpose in building a pole barn, I hope you succeed in it and succeed fashionably.
Pastels are utterly beautiful things. They are some of the easiest and most malleable mediums of paint that deliver great textures and highly concentrated pigments that result in vibrant colors and marvelous textures for your artwork.
There are several kinds of pastels: soft pastels, oil pastels, pan pastels, pastel pencils, etc. Although all four are practically the same grade and type of paint, they slightly differ from one another on the basis of the texture they each provide.
The essential ingredients in all four types of pastels make all the difference in their texture and color deliverance. This is the crucial point to understand about pastels. And right now if you’re keen to know literally all about these kinds of pastels, then the following extensive read has got you entirely covered on that!
Soft Pastels Vs. Oil Pastels Vs. Pan Pastels vs. Pastel Pencils
And, if you’ve been asking which kind of pastels deliver the best effects, you might want to go through this guide we have prepared just for you!
So, sit back and enjoy all the information about pastels that we have brought just for you!
So what are pastels basically?
Pastels are essentially an art medium or a kind of paint that consists of pure pigment powder and a binder. The pigments that are used to make pastels are the same as those used in all kinds of art mediums. This includes oil paints as well. The binder that is used for making pastels have low saturation and are of a neutral hue.
Pastels have been used since the Renaissance with a significant degree of popularity, especially in the 18th century which saw numerous prominent and acclaimed artists use them as a predominant medium for their artworks.
This form of coloring or drawing using a pastel color medium is known as pastel painting or pastel drawing, or simply called a pastel. The word “pastel” can alternatively be used as a verb that means to produce an artwork using pastel colors or even as an adjective, meaning “pale in color.”
The difference between [easyazon_link keywords="oil pastels" locale="US" tag="homesthetics0a-20" type="link" link_id="273652"]oil pastels[/easyazon_link]and [easyazon_link keywords="soft pastels" locale="US" tag="homesthetics0a-20" type="link" link_id="273653"]soft pastels[/easyazon_link]
Well, it’s easy enough to start using pastels - be it any kind, for drawing and texturizing any sketch. These can be easily maneuvered over any kind of surface, providing bright, vibrant imprints.
To start off with our explanations of the difference between the kinds of the different kinds of pastels, we have decided to go with the comparisons between oil pastels and soft pastels.
What are [easyazon_link keywords="oil pastels" locale="US" tag="homesthetics0a-20" type="link" link_id="273654"]oil pastels[/easyazon_link]?
Oil Pastels are composed of a non-drying oil and wax binder, having a buttery and creamy texture, with an intense color deliverance. These are pretty dense in consistency but have a more delicate hue than that provided by soft pastels. You don’t need a fixative to work these colors as these tend to be pretty waxy.
However, these can be a tad bit more difficult to blend than soft pastels. You are required to use a primer such as gesso so that the waxy binders are not soaked up by the paper strands, for that matter. This actually keeps the brightness of the oil pastels from dulling down.
One of the best things about oil pastels is that they don’t dry out or harden out entirely. Similar to oil paints, oil pastels could be spread across any kind of work surface (paper) that you’re using for your project by using a thinner. You could use a turpentine thinner for this purpose.
What are [easyazon_link keywords="soft pastels" locale="US" tag="homesthetics0a-20" type="link" link_id="273655"]soft pastels[/easyazon_link]?
Soft pastels are basically made using a combination consisting of pigment, gum arabic, and white chalk. This delivers more of a matte finish than that of oil pastels. Soft pastels have a higher amount of pigment with a lesser amount of binder, giving off a stronger color effect.
As these colors give off more off a chalky, dusty consistency, they can be smudged and blended to a greater extent than other pastels. They don’t stick to the surface, and the excess can be easily brushed off. This is why it is extensively used way more than other kinds of pastels.
However, the finished works made with soft pastels do require for you to protect the surface from smudging or getting damaged by using fixatives. Hairspray could also work as one but do use fixatives carefully as they may affect the colors of the pastels. You could also get your sketches framed for that matter.
In some instances, a filler agent such as white chalk could be used for producing pale, bright tones and hues, possessing a higher luminosity.
So, which one should you go for?
Well, this honestly is a very subjective thing for all. Both oil and soft pastels possess quite distinctive effects and whatever you choose to use will solely depend on your preference and requirements.
A few fundamental points of difference between the two are:
Texture
While soft pastels will provide you with the scope of blending the shades in better than oil pastels, these can crumble quite easily due to the lesser amount of gum binder present in them. While in the case of oil pastels, you could easily maneuver them to the required spots and have great effects, without having to take extra care in holding them firmly.
Oil paints can also create impasto effects, or you could acquire a glazed effect if you thinned these down with turpentine. On the other hand, soft pastels can be just the thing for you if you need to layer on colors and create other effects on your artwork.
Blendability
Oil pastels will give you a very creamy and buttery texture that you could use to create stunningly bright effects for your artwork. You could also thin it out for creating more effects and covering a greater surface area. While on the other hand, the powdery texture of soft pastels delivers strong colors that will not stick to the surface all that much.
However, due to this precise reason, soft pastels could be blended far more easily than oil pastels.
So, if you want to have a bright, creamy yet bright effect, then you could go for oil pastels, otherwise opt for soft pastels if you want a powerful, inky effect that is greatly blendable with other colors as well as offers a texture that could be manipulated to bring about different kinds of effects.
Assortment of colors
One of the things about soft pastels is that it always comes in a vast assortment of colors. This is twice as much as what you would get in oil pastels. The extensive range of colors that you do get in soft pastels could be especially advantageous for a beginner. This eliminates the need to brainstorm about effects and colors.
Oil pastels work great for those who are good with oil paints and know how the shades work.
So, if you’re looking to start out with a great set of pastels, then it’s better you go for soft ones, whereas, if you are looking to complete a specific project and know about what shades and textures would work well, then, all means, settle on oil pastels.
Affordability
Well, the cost for both oil and soft pastels will vary from brand to brand. And also, the cost will depend on where you buy from. You may get a hefty discount on an online shopping portal at a local store.
Or the reverse may happen if you’re having an especially lucky day. The quality and texture of the colors will also vary a bit from one brand to another, and this is where the price shoots up or falls in most instances.
However, oil pastels could be just a tad bit more expensive than soft pastels. But, you can get good brands at lower prices as well for the same amount of oil pastels as you would get in a standard set of soft pastels. So, the critical factor over here is to settle for one that you think is a good deal and helps you get great effects in your artwork.
Also, if you’re settling for soft pastels, you do get the option of getting them individually and in all kinds of shapes and sizes such as in half or full sticks or thicker sticks. This may help you create your own palette and could also be a great way to cut down on the cost if you decide to mix brands.
Note. You could also opt for water-soluble pastels if you’re looking for such a thing. This comes in both soft and oil pastel variants and could be thinned or blended together will water. These will give you a stunning watercolor-ish wash effect with vibrant hues. However, these may be more expensive than traditional pastels and will require a deft hand that knows how to manage it.
So now that we are done with thoroughly explaining the differences between oil pastels and soft pastels, let’s get moving on to our next segment that deals with Pan Pastels, and how they might be different from the two that we have already discussed above.
So what are [easyazon_link keywords="Pan Pastels" locale="US" tag="homesthetics0a-20" type="link" link_id="273656"]Pan Pastels[/easyazon_link] exactly?
Pan pastels could basically be called another version of soft pastels that are formulated with the least bit of binder contained in flat compact pans, such as those that contain makeup. These are applied to the surface using unique micropore soft sponge tools.
Although there’s no liquid involved in this, these come in a very creamy consistency. These could be used alone for completing a whole painting or could be used in combination with other pastel media such as soft or hard pastel sticks.
Due to the minimum binder amount, pan pastels provide the highest concentration of colors. The texture the least amount of dust that does not mess up your work area in any way. Pan pastels can also come in larger containers like standard paint pots and bigger jars. The packaging is such that it protects the pigments and prevents wastage of the paints.
One of the best things about these is that they are incredibly travel-friendly allowing you to carry them wherever you want. These can also be easily stored anywhere you want and don’t mess out on other objects with scratches and marks, which sometimes happen with soft or oil pastel sticks.
Advantages of [easyazon_link keywords="Pan Pastels" locale="US" tag="homesthetics0a-20" type="link" link_id="273657"]Using Pan Pastels[/easyazon_link]
Pan pastels are comparatively a much newer format the traditional pastels. But, they have made quite a massive fan following since their launch into the art market. One of the reasons that it is favored is the fun way of applying it. Art enthusiasts find it pretty interesting to lift them with brushes, sponges, or other tools similar to what is required for other paints as well.
Here the only difference that it makes is delivering a stunningly vivid and rich texture which is distinctly different from conventional paints or even other pastels, for that matter.
Also, there is an entire range of tools, in fact, applicators for pan pastels known as “Soft Tools” which you can easily get from the market for this purpose. These tools also allow you to manipulate the texture of the pastels to create details in varying degrees and other effects as well.
Blendability
Pan pastels are pretty easy to blend and, surprisingly, they can be erased entirely. These can also be used with different art mediums and on a variety of surfaces. Pan pastels are also a cleaner medium than most and don’t create as much dust as soft pastels often do. You can either buy these in a wide range of assortments in sets or individually from different brands.
Are these really better than [easyazon_link keywords="oil pastels" locale="US" tag="homesthetics0a-20" type="link" link_id="273658"]oil pastels[/easyazon_link] or [easyazon_link keywords="soft pastel sticks" locale="US" tag="homesthetics0a-20" type="link" link_id="273659"]soft pastel sticks[/easyazon_link]?
The disadvantages of working with pan pastels are that it might not be the best art medium for beginners who are just starting out with pastel. The colors and the texture might just be a tad bit too much for amateurs to handle. We suggest that you get accustomed to using soft pastels and oil pastels first before moving on to pan pastels.
The definite structure of oil pastels or soft pastel sticks could provide you with an idea as to how to maneuver the colors on the surface, to layer and blend, or when it comes to understanding the shades and textures that pastels, in general, can produce.
Textures
Also, pan pastels may not be the very best options for doing detail works for that matter. It does work wonderfully for fillers or flat bases which you can detail upon, but not so much that you can use to detail intricate spaces. This is where oil pastels or soft pastels will provide you with a wider scope to easily detail your project than pan pastels would.
Affordability
Pan pastels are actually more expensive than traditional pastel pigments and can really go up there in price with more reputed brand names. This is because pan pastels are relatively a newer development in the pastel game and whatever company brings it out earlier will automatically be known as the first manufacturer and seller of the product.
This gives them the power to name their price while enabling the other brands to do the same as well.
In this case, you do have to consider how much you exactly require to use them, the exact quantity that you require or if you do require it at all for that matter.
Again, if you’re just a beginner, we’ll always recommend getting used to traditional pastel sticks first before starting with pan pastels. Pan pastels are ideal mediums for professional artists who know how to modulate the textures to get the best hues and tones out of them.
But, in any case, do not let us keep you from enjoying a fantastic kit of pan-pastels if you do want to invest in them. Although we would advise you to always go for a good brand that would provide you with value for your money!
So, by now you would have probably understood how the basic pastel pigments work and what pan pastels can bring to your art table! With that, it’s time to discuss one last product in the pastel category that we have on our list and how is that different from the rest of the three kinds of pastel pigments we have explained already. And that is Pastel Pencils!
So let’s get right down to it!
What are [easyazon_link keywords="pastel pencils" locale="US" tag="homesthetics0a-20" type="link" link_id="273660"]pastel pencils[/easyazon_link]?
Pastel pencils are just like the standard color pencils that have a pastel lead. These are ideal for working on finer details, allowing you to exercise immense control over your art piece. The consistency of these can range anywhere from hard to soft textures.
Pastel pencils are the most versatile when it comes to pastel pigments. These can be used with other art media and in combination with other pastel mediums as well such as oil pastels or soft pastel sticks.
The best thing about using pastel pencils is that they can be blended like other pastels and could be used wet or dry! This provides excellent scope for experimenting with the texture of these pigments. And when you have to create super intricate details all you have to do is sharpen these pencils to a point to work up the finer lines. You can easily create smudge and shaded textures with a blunt point or create soft, hazy lines.
Advantages of Using Pencil Pastels
These pencils work exceptionally well for layering on colors and creating textures like the basic color pencils do. Also, many artists use pastel pencils for preliminary sketches and doodles as these come in handier than conventional graphite pencils. This is because graphite leads aren’t really that compatible with pastels.
One of the coolest things about pastel pencils is that they aren’t messy like conventional soft pastel sticks and cause no dust at all! These enable you to be pretty quick and spontaneous with your creativity, needing no cleaning after and letting you enjoy the joy of using pastel pigments.
These are mostly water-soluble pigments that can be blended with a bit of water to get a flatter, more textured surface than the chalky texture it may give off when applied dry. The wooden case keeps your hands clean, providing immense ease of usability and lets you maneuver the pencils gracefully. Also, the colors in these pencils could be easily blended using a brush, a color shaper or even your finger.
All of these make pastel pencils a perfect alternative for outdoor purposes, such as those involving en Plein art sessions.
Pastel Pencils are the most easily workable mediums in the pastel category. These provide enough scope for you to etch out your design or an image exactly how you want it.
Textures and Blendability
Texture-wise, it doesn’t differ much from the traditional soft pastels. But you can also go for the hard pastel variants for the pencils as well, which will give you finer lines and greater scope for creating intricate details.
However, we feel that the pencils would do just great as any other color pencil would when it comes to coverage. Meaning- these can be used for covering and texturizing small to medium areas. While on the other hand, the other three kinds of pastels can create brilliant layers, covering larger areas in an instant, which could be worked upon with ease.
Some artists don’t like using pastel pencils as these lack in providing the raw appeal of the beautiful smudges delivered by soft pastel or oil pastel sticks with much greater grains that could be worked up with bare hands. If you’re one of them, we wouldn’t suggest this product to you.
Assortments
Assortment-wise, pastel pencils are but a limited range of colors, with the largest set providing only up to a maximum of 80 colors. Although you can get these colors in a full set or even buy them individually, the range is still pretty small to provide a lot of color options.
We’d recommend you buy a smaller set if you’re just starting out with pastel pencils to understand the color and textures these provide and experiment extensively with them to master the art. If you like working with them, then you can invest in larger sets to create many wonderful projects with them.
Affordability
And like each of these media, the quality will differ with brands for pastel pencils as well. But the best thing about these is that they come at a really reasonable price tag that will allow you to get these pencils from all sorts of brands. This way you can create your palette of colors and decide which brand you like best.
One of the best brands for beginners and professional alike regarding pastel pencils are Stabilo CarbOthello which is considered to be one of the finest by artists all around the globe.
So which one amongst the four actually wins?
Well, in the battle of art, we simply don’t think that there could be a loser for something else to be the winner! And that is actually fair, isn’t it? Because no kind of art supply can be so bad as not to produce beautiful artwork for you.
So whatever you choose between these four pastel products- soft pastels, oil pastels, pan pastels, or pastel pencils, you would still get visually stunning results in every way. However, your selection of the kind of pastels you should go for will depend on factors such as- ease of use provided by each product, the individual texture each produces, affordability, assortment of colors, and the nature of the projects you require them for.
Hence, as long as you know which one out of these will suit your requirement the best, you’d always end up with the winning product, no matter what you choose!
A Guide for Pastel Painting
And since we’re on discussing extensively pastel pigments, we decided to include a guide on everything you require for pastel art in this segment, so that you could master the art of pastel-ing in no time at all!
And here’s everything you need to produce stunning artwork using pastels!
Set Of Pastels
While working with pastels, you would want to have a wide assortment of shades to create brilliant effects and textures for your drawings.
However, if you’re a beginner at this, we would duly recommend you start with a lesser number of shades in just the primary colors to see if you like the substance or not. This also provides you with all the scope of experimenting with the tones and textures of the colors and to see for yourself how they pan out for your project.
The best way of creating your palette would be to get individual shades from different brands. This will give you all the required shades from the very best ones in the market while at the same time costing less than a single set from a particular brand.
Similar to watercolor, pastel pigments, too, require certain specific types of paper that help them to adhere to it. The “tooth” or “texture” of the paper is the key factor that receives these pigments beautifully, helping them to stick well to them and last very long.
Certain brands such as Canson and Strathmore provide a fine line of pastel papers.
And if you’re using ordinary paper, make sure to prime them with gesso or other binding agents to create the appropriate surface for pastels.
A fixative is an essential protective agent for pastel artwork, especially if you’re using soft pastels or oil pastels. This prevents the pigments from scattering, smudging, or falling off the surface. This helps set the chalk and the pigment of the pastels in place. A layer or two of a nice fixative can provide the paper with an appropriate texture for pastel pigments, making it easy for you to blend and develop beautiful colors and effects.
Your pastel artwork depends entirely on how your color blends and communicates with each other on the paper. And although you could use your hands to blend pastel colors, specific blending tools such as the tortillon, a blending brush or stump can make the job considerably easier for you, keeping no room for mistakes or flaws at all!
These tools cost just a few bucks and would be great additions to your studio or worktop in every way!
Tape is always an essential art supply to have around your workstation. If you’re looking to fix a sheet of pastel paper to your artboard or desk, then you would need art tape to hold it securely in place while you work on it. This prevents the paper from moving or sliding as you put your coloring strokes on it.
The only thing to remember while getting these tapes is that they should be acid-free so that they don’t ruin the artwork.
An ideal alternative to fixative can be glassine. This is a sheet of glossy, translucent paper that you can gently press against your art piece to keep the pastel pigments in place. You can actually get certain pastel drawing art pads that offer both glassine papers and the usual pastel papers as a fixative option for you.
Art desks or drawing boards
A proper art desk or board is always an excellent thing to add to your studio or workstation as it provides all the comfort of peacefully creating incredible masterpieces along with offering a smooth and spacious, multifunctional worktop for all your projects.
However, if you like to keep it casual or do not have sufficient space to bring in a desk or large board, then a simple, medium-sized, portable drawing board will work just as fine!
Safety Tip
Remember that soft pastels can release fine dust particles into the air that you can just as easily inhale into your lungs, causing respiratory diseases and allergies. Due to this reason, it is crucial for you to select only non-toxic pigments to avoid inhaling pastel dust. You could also wear a comfortable breathing mask or could work outside if the weather’s fine enough.
Another way you can curb the problem is to install an efficient air purifier that could filter the particulate matter out of your working space, maintaining a consistent supply of fresh and clean air at all times.
Conclusion
Pastel pigments can create some of the most spectacular effects thanks to its beautiful delicate textures. It only requires for one to know the tip, tricks, and techniques of the trade and exactly which kind of pastel products to go for!
We hope you liked our efforts in creating this read for you and that you found it to be useful.
We’ll be back with more such stuff soon!
Till next time!
Swing sets are quickly becoming relics of the past, which is quite depressing. There was a time when kids stayed outdoors right from the moment they were done with school for the day until it was pitch dark at the night. From tree forts to play sets, kids loved getting muddy and sweaty in the sun, but that has declined ever since technology took over. So, if you’re looking to change the course of this tide and make your kids proactive, healthy, and in love with the outdoors, then you should definitely make them a personalized swing set.
And choosing to DIY it all also gives you the chance to take the help of your kids and make them realize the importance of teamwork and also inculcate in them the skills of making stuff on their own. So, if you choose to go with even one of the following 47 DIY Swing Set Plans and play swing ideas, you will have contributed a great deal towards the mental and physical well-being of your kids!
I really love this playset. It is unique in spite of following the basic swing plus slide set designs for its core. On the left side, there is a small clubhouse made out of the A-frame itself, and this set has four A-frames with equal spacing. There is a slide installed on one end and two swings on the other. Pallets and planks are used to striate the A-frames on the slide side while the frames on the swing side are left bare. This set would look even more amazing if it were painted with some peppy colors.
This is a gorgeous swing set on the list, and it is not just restricted to kids. This is a special swing set designed for adults to recall their childhood and relax. Its color scheme is simply beautiful, and it is impressively aesthetic to look at.
Instead of adhering to traditional swing set or play set designs, this play set has built a mini-fort for kids. With a gabled roof and a small vaulted ceiling and high-walled fencing around the clubhouse, this play fort provides kids with a slide to get back to the ground while having fun and has a ladder in the back. It is covered enough to shield itself from the sun, and its vaulted ceiling beam protrudes outside to work as a support for a tire swing. Painting this play fort is a good idea.
This is a window-shaped swing frame that makes use of just four beams and four hoisters to hang the swings from. It does not take any great effort to build this swing frame and you can either buy readymade swings or make them on your own using a sturdy material for the seats, some hooks and hoops, and a whole lot of rope. What you can add to this swing to give it a personal touch is the color and patterns to be painted on the frame. The devil is in the details, and you can have a lot of fun making them.
This playset has all the essential components of a standard playset. It has a sandbox at the bottom of a moderately spacious clubhouse, with a slide attached to the clubhouse entrance. There is a ladder to get to the clubhouse, and the A-frame supports the swings. But, it is the swings that are different here and unorthodox though traditional. Instead of using the usual wooden plank or plastic seat swing, this playset chooses to have a pair of tire swings. Tire swings might not be popular today but they were all the rage back in the day, and there is no better way to reintroduce that nostalgia than to use them as the centerpieces of this playhouse.
This pretty playground doesn’t take much space but does offer a lot more in the same area. It has a trapeze bar installed on the outer side of the single A-frame which can also be used as a makeshift swing. On the inner side of the A-frame, there are two swings, while a baby swing is installed on a post connected to the clubhouse. The clubhouse itself has five platforms, a dizzying slide, and a swing connected to a beam on its far end. This packed yet sufficient playset is also quite easy to make on your own.
A simple swingset design with a slide and a ladder installed in the clubhouse can be made with a few days of hard work and with a thorough understanding of the plans. It is enough for more than a couple of kids to play in and has a trapeze bar for the ones with an adventurous flair. You can add more life to this playset by coloring it or asking the kids to color it instead. That’s surely a fun activity to partake in.
This swing set uses a basic design but upends it with a whole lot of style. The frames are accentuated, and so are the railings and the steps. The top area is spacious enough for kids or even adults to sit inside and have a meal or sleep or read books. The color scheme is very appealing, and I love how there are various shades of blue used in a striated form to make this play area stand out. Everything about this set is lovely and worth making.
A-frames look magical. There is something about A-frames that is grand, be it an A-frame used for vaulted ceilings or a swing set, and these A-frames are a real standout. Firstly, the color of this swingset is vibrant and very cool on the eyes. This shade of blue is a warm and soothing hue that goes well with its surroundings. Secondly, the horizontal wooden bars juxtaposed against a single vertical beam give a unique appeal to this swing set. I also love how the swings are so petite, plain yet so charming with their striking yellow color contrasting the blue of the swing set. Easy to make yet great to look at, you could give this one a shot.
More details athgtv.com
The Club House Swing Set
Every kid loves a clubhouse. Clubhouses are really cool and very special. They are like actual houses, yet much smaller but with all the coziness and prettiness required, in abundance! This particular clubhouse looks lovely and very charming, but it also has something that makes it a standout. This two-story clubhouse has an elaborate swing and slide set. On its right, it has an A-frame swing set with three sets of swings which are purchasable, and on the left, it has a great yellow slide that twists and turns enough to give kids a thrill and do it all over again, again, and again! And you can make it all by yourself!
More details atryobitools.com
The Homemade Playset
Parts of this playset resemble an outpost of a fort. I like how the terrace area of the playset that you need to access to get to the slide has large wooden boards for easily climbable steps. I like the wooden grills and the arrangement of them which makes them not only functional for security reasons but also aesthetically pleasing. The slide is premade and can be purchased. Besides this structure, the swingset stands freely, with a couple of swings hoisted on an A-frame structure for kids to swing on.
You don’t always need a full-fledged playset in your backyard. And it is not always a requirement to build swings just for the kids. You reserve the right to swing your tensions away and relish the experience, and you can do just that on a budget! This simple swing set comprises a lovely frame and thin planks for swings. I love the accentuated ends of the frame which are very oriental in design. This does not take much space and can be made with an elementary knowledge of carpentry.
Supported by two very large A-frames, this playground has nearly everything in it that other playsets do, but with the added twist of a refreshing new design. Between the frames is a huge sandbox and above it is a pretty big clubhouse space with a slide attached to get down quickly. A beam protrudes on either end of the clubhouse and has a swing hoisted on each end. This sturdy, well grilled, and expansive swingset is a great option goes to with if you want to DIY a playset for your kids.
Another amazing way to combine fun and productivity in the best manner possible. This swing and play set uses the extra space it has on the gabled roof of the clubhouse to install solar panels. As swing sets are set up in the backyard with a lot of sunlight on offer, attaching solar panels to the clubhouse helps you generate renewable electricity for your house and save on a lot of electricity expenditure. Moreover, it has a ladder and bridge that takes you directly to the clubhouse and helps you access the solar panels if you want.
I love how this particular swingset and playhouse design looks like. Firstly, this is way bigger than usual playhouses. Secondly, it has a clubhouse with a porch that looks like a fully furnished exterior of a real house. The A-frame is big enough to fit a few swings and a monkey bar. The area in the bottom can be used as a big sandbox. You can include a slide and perhaps even a small pool to relax in. Paint the clubhouse in any color you like and et voila! You have a brilliant playhouse set for your kids!
There isn’t a shortage of do-it-yourself material on the internet for just about anything and everything. IT is one of the prime advantages of taking the how-to business from print to digital. Easy access to information is a boon. So, having a lot of basic swing set design plans for your perusal is never a bad thing. Rummage through these plans to choose a swing set of your liking and get onto the task of building a swing set for your kids or for yourself or both.
The A-frame is the only part of a swingset to be in the spotlight for this DIY manual. Even though there are manuals that show you how to make big playsets, this particular one only focuses on making an A-frame swing and nothing more. In fact, it is simple in its concept and doable by those who haven’t really ventured into this before. This A-frame swing building guide helps you make just a swing and nothing else, and sometimes you don’t ask for more.
Jungle gyms are not just for those who want to join the forces in the future or be part of a boy or girl scout club. They are neat designs that encourage one to push beyond the limits and accustom the body to react to different physically demanding situations with reflex muscle memory. These jungle gyms are, hence, a great way to get your kids to exercise and be outdoors playing. This particular one has a few swings, a slide, a ladder, and a monkey bar.
This A-frame swing set is large. It has three swings hanging by the beam. Two swings are simple seater swings while the third one on the extreme left-hand side is netted and square and has a big standing area. It is great for the kids to swing in, with the rush of swinging experienced while standing instead of sitting. If you extend the beam on both sides beyond the A-frames, you can include more swings or if you want you can create more space between the frames too.
Here’s something unusual, but not unpleasant. Take away the elaborate swingsets, playsets, and slide sets and replace them with a space-saving, money-saving, and incredibly unique airplane swing. Great for toddlers when made in a small size, but also for kids of older ages with a bigger size, this airplane swing is easy to make and is extremely fun. With enough momentum, you can swing this airplane to create a magical feeling of flying a plane, and you don’t need a hanger to store it when you land!
I want this playset in my backyard, and yes I’m not a child anymore. It’s just such a stunning installation piece to have. I can imagine the sparks of imagination it creates for the children who play in this. It has two small rooms, one porch, one set of stairs, a fenced bridge, two terraces, and a winding swing. It looks neat and has two swings hanging under the bridge. It seems almost necessary to build and education for any child’s formative grasp of adventure. To top it off, it looks like a small fortress, and that is bound to inspire them to draw perhaps and write stories of grand designs!
A playset design that looks pretty standard but has the option of being customized, it can be made with the help of this very detailed playset-building guide. The instructions are easy to follow and comprehensive and will help you complete building this amazing playset in a short time. It is multipurpose and has a trapeze bar, along with a swing and a slide. The pictures included in this fantastic how-to guide make your task easier because the visual reference is simple to follow and understand the process much better.
An A-frame, sandbox, clubhouse, slide, and swing set, this is comprehensive and satisfactory. I like the small vaulted ceiling on the top of the clubhouse area and the stairs on the side. There are a total of five swings, with one double-seater swing and a backrest swing on either side of the A-frame. The sandbox is big enough for a few kids to fit in and the clubhouse above has a bench to sit on. The slide is big and looks perfectly wonky to have fun sliding on it.
More details at hot4cad.com
The Electric Swing Set
This is genius. Swing sets are all fun and games until someone decides to elevate them to a new level of greatness. This man decided to do just that with this otherwise simple, A-frame, metal swing set. Using an elaborate yet simple mechanism to generate electricity just by swinging in the swing, this man has figured out a healthy and easy way to renew your electricity and power stuff in the house. So, if you have kids who are obsessed with swings, have them swing on this particular electricity-generating swing and earn bonus cookie points for their efforts.
What if you don’t want to follow visual cues, references, and how-to blog posts to make your swing set? What if you want to make the swing set from scratch with minute attention to detail and a professional hand in the process of making it? For this purpose, these swing set plans come really handy. These blueprints are more than enough for you to get going with your swing set construction project. They are clear and to the point and with a little focus are pretty much comprehensible.
These adorable-looking plywood swings are made out of simple plywood boards, cut and shaped into lovely-looking swings, and painted to resemble flowers, planes, and other stuff that your kids will really like.
More details at dailyfix.co.za
The Swing Set Plans
I love detailed plans. They are extremely precise and give me a neat idea of what I need to do. Plus, the plans are lovely to look at. Somehow, architectural elements and furniture look great on paper and have a charm of their own. I found that this do-it-yourself swing set plans are just what I needed to build a sturdy swing set for my backyard. Though they are a tad complex for the inexperienced maker, with enough time spent in understanding and with a couple of helping hands, you can build the swing sets shown in these plans.
More details at playground-equipment.co.nz
The Big Tire Swing Playset
Apart from having two tire swings in this otherwise standard playset, the A-frame beam is extended a little to accommodate an additional pallet swing. What this playhouse also has is a single-sloping roof for the clubhouse instead of a standard gabled roof. There are always variations for any design and swingsets, of course, are no strangers to this rule. You can add more elements to it if you are looking for something a little more unique than usual. After all, it’s all about the imagination.
I love this swing. It is not just a swing that is installed to provide what it is meant to; it also is very aesthetically appealing. This petite swing has a single and simply carved white seat but two sets of A-frame ropes for the support that have a beautiful golden sheen interrupted yet linked by two metallic links and hoisted by two sets of ropes that go all the way up to the tree, with a slim, rectangular plank attached for support. It stands out and can be used by both kids and adults. It is a pretty piece to include in your outdoor furniture.
Simplicity does not always equate to blandness, because simplicity works wonders sometimes. This swing is for people who do not want or cannot have an elaborate swing set installed in their backyard. It is basic and doesn’t even require too many instructions to make it. It has two poles planted in the ground for the frame and a top piece for the swings to hang from. There is enough mud dug up and free of rocks and stones for kids to swing and fall on without getting hurt. The shocking red color is a real standout and is a welcome sight. The swings are made out of two wooden boards and ropes attached to them on either side and then hoisted to the top end of the frame.
More details at hgtv.com
The DIY Ultimate Swing Set
I like how architecture can sometimes look like installation art, and be breathtaking in the process. This particular swing set is one such piece that though appears simple in its make, is stunning to look at. It is a fully functional swing set with a rope bridge, a couple of swings, climbing sets, and slides. What’s great is that this swing set can be easily made by you! Just follow these instructions and get your kids to help you out and it will make for a rewarding family experience.
More details at blackanddecker.com
The DIY Swing Set
This is a neat swingset. It has a slide section with a ramp instead of stairs to climb. The roof area of the slide set is pretty enclosed apart from the ramp and the slide openings. It is amply high and supports the swingset beside it. The swing set is supported by a single A-frame, apart from the slide section supporting the beam. There are two swings installed in the larger area of the swingset and a third one on the other side of the A-frame partition. Here is also a bench and a seating area below the slide platform for the kids to rest.
Sometimes, less is more, and the least that you can invest in making a swing is by using an old car tire and turning it into a swing for the kids to have amazing fun with. I like tire swings. They are so easy to make and cost you practically nothing. They were really popular back in the day due to the ease with which they can be made and perhaps children today deserve a chance to discover just how fun tire swings are and make the kind of memories you did growing up.
More details at diynetwork.com
The Rock Wall Swing Set
Here is a playset that offers something new for you and your kids to try your hand at. Accompanying a single-seater swing set is a rock climbing board. Taking advantage of the A-frame and the angle it provides, this rock climbing board makes it really fun for kids to rock climb. The height is low enough to offer a safe landing in case someone slips or loses balance and falls on the ground and the rock knobs are easy to hold. You could add a small mattress at the bottom for extra security, and yes you can make this set on your own.
More details at diynetwork.com
The DIY Friendly Swing Set
I really love what this swing set looks like. The A-frame resembles a hut and is very stylish though simple. The swing set it is equipped with multiple options for children to choose from, and of course, try out one by one. There is a trapeze bar in the middle, which is always really fun though giddying sometimes. Flanking it is a seesaw and a swing on either side. Of course, you will need to buy the swing, trapeze bar, and seesaw, but everything else can be easily made by you.
A basic swingset design but one that is smaller than most, this swingset has two swings and one trapeze bar on either side of the A-frame. The clubhouse area is really small and has a small ladder and a slide to climb up to it and get down from it. You can add your own touch to this DIY swing set and perhaps color it to make it stand out from the rest. The sandbox in the bottom can be retrofitted to include something more unique. As for what that could be, the choice rests entirely in your hands.
Apart from elaborate swing sets, there are also small swings for kids that are pretty creative and easy and inexpensive to make, and also save a lot of space. Here are some really cool and simple designs for you to choose from.
Low-Height Swing Set
This is an extremely simple swing set designed for toddlers. Having a near ground-level height, it is safe for toddlers to swing in, all the while making them feel happy with this colorful and green fabric. A pretty simple DIY that won’t take too much of your time, it is also pretty cheap.
A skateboard swing sounds like a really super cool idea. Remove the wheels, and it looks like a miniature surfboard. So, your kids will be surfing, but on air! The how-to of it is pretty simple, and you can build it in no time.
Bucket Swing
Turning a bucket into a swing seems like a simple job, but this particular bucket swing has a very professional seeming shape that has been very neatly cut. So, following the tutorial is a bit essential if you want to make this one for your kids.
Turning an old and broken chair into a swing sounds like a pretty cool idea. It looks lovely and light and can be made in absolutely no time! Just follow these simple pictorial images.
More details at rustaupp.blogg.se
Quick To Make Tire Swing
This is as simple as it gets. All you need is a car tire with its other components still attached and then fix a rope to it which will then be hoisted on a tree. Extremely affordable, time-saving, and simple to make, and once you follow this heavy visual guide, you’ll be ready with this swing in no time.
This is one of the best-looking swings out there. It looks pretty complex at first but gets simpler as you read through it. Though this particular one is readymade and not really a DIY, you can make a similar one on your own once you compartmentalize the parts you need to make. It does require a little craftsmanship, but hey, a challenge isn’t a bad thing, is it?
More details at [easyazon_link identifier="B008VEYJJ0" locale="US" tag="homesthetics0a-20" link_id="190686" type="link"]Amazon[/easyazon_link]
The Handsome Husband Tire Swing
This tire twister swing made by Handsome Husband is pretty simple, yet the result is extremely fun. There isn’t much that you need to do, apart from some linking and drilling and hoisting, but the instructions cover the part of doing the job for you.
This tire swing was given a very charming makeover. Instead of looking drab and dull and not at all outstanding, this tire swing was painted like a ladybug and turned attractive for the kids and at the same time doesn’t give the appearance of a tire. You can paint other things on the tire instead of a ladybug, and you’ll have vibrant swings for the kids in no time.
Source Unknown
Multiple Tire Swings
Multiple tire swings are awesome and fun. They look unique and are packed from all sides, while also giving your children and their friends enough standing space that more than one person can swing at a single time. They also have a balanced weight and pretty easy to make.
This tire swing was made to look like a seat, and it is pretty cool! It isn't rocket science, and you can set up this swing in no time. Even though the site that shows you how to make this swing is in German, you can make out the process with the visual references provided in the guide.
There is a whole lot of tire DIY Swing Set Plans featured on this blog. You wouldn’t have known there could be so many different types of swings you could make from tires. And none of them look any more difficult than an elementary buildings.
More details at plus.google.com
So, which DIY Swing Set Plans do you think you can go for? There are a lot of them to choose from! Some are really beautiful, and some are very practical and cheap to make. In the end, it depends on the space, time, and budget you have to create a play area for your kids.
If you have ever dreamt of building and living in your own tiny home then this article might just make your dream come true. It is not hard to see why Tiny Houses are a thing these days. Not only does it let you avoid huge sums of debt, they also let you embrace life in the serenity of nature. So in this article, we have a list of 37 DIY Tiny House Plans that are pretty easy to build without incurring too much expense.
The Homestead Cabin is among the most popular tiny house plans thanks to the gorgeous exteriors and a decently spacious interior that will ensure a life of peace and tranquility. The house itself is a 12’x24’ one with a 12/12 roof and a loft. The lower level of the house has enough space to fit in a living room, a small kitchen, a bathroom, and even a laundry closet. The loft, which spans about half the house, can either be left as it is or utilized to construct a second floor for even more space.
Complete instructions at tinyhousedesign.com
2. The 8x12 Tiny House
This tiny house plan is for all those folks who want to stick with a basic design that provides a high level of utility. While this house, measuring 8’x12’, is significantly smaller than the previous one – its primary advantage lies in the simplicity of the design. This is definitely a great choice for those of you guys that are somewhat apprehensive about the idea of building your own home. The design is easy to implement and, with a little creativity, this home can really be turned into a show place.
If you happen to own a small, mobile business that requires you to move your mobile stall around a lot, then this is the plan for you. This isn’t exactly suitable for living but serves great as a mobile market. You can easily set this house up at different farmer’s markets or other vending areas where you can conduct your business. The Market House itself is a very compact 5’x8’ house and features a glass window in the front, next to the door.
This tiny house is perfect if you plan on living solo or maybe even as a couple. The tiny 8’x8’ house cannot hold a family but will surely suffice for two persons. The house itself is extremely minimalistic and is pretty easy to build as it does not have any complex structures. It has just enough space for the basic amenities such as a bathroom, a small kitchen and a sleeping loft which is accessed above the main living area.
This one’s for all those who love to live life without having to depend on any agencies for basic needs. Self-sufficiency is what this house offers you as its design has been based on the idea of being run on solar power. This is especially great if you’re looking to live off the grid in a place that does not have access to electricity. So if you’re a person who loves the idea of living in solitude in a self-sufficient manner, this is just the house for you.
Yet another solar-powered tiny house for those of you who prefer living self-sufficiently in a far-off place. This house is significantly bigger that the previous one, measuring about 8’x20’ and designed to run strictly on solar power. While the design may be a little more on the complicated side as compared to a lot of others in the article, it does offer you quite a lot of facilities for a house this small. Besides the plan has been prepared to show you how the home would look in both 2D and 3D which will ensure you know exactly what you’re going for.
Complete instructions at tinyhousedesign.com
7. The Writer’s Cottage
As the name suggests, The Writer’s Cottage is a safe haven for all those aspiring writers that dream of living in a state of blissful solitude and expressing their thoughts and beliefs on paper, undisturbed by the bustle of the city. This is almost like a tiny little paradise for people that dream of becoming a writer someday. The house itself looks very warm and welcoming, featuring all the basic amenities such as a small kitchen, a Sun-Mar composting toilet system, ample space for books and even a small folding writer’s desk.
Complete instructions at thesmallhousecatalog.com
8. The Sago Plan
The Sago Plan shows the house is a whopping 670 sq. feet which are quite big for a tiny house. This is perfect for those that plan on moving into a tiny home with their family and living in a cozy little home that has everything you need to live a wonderful life. The house even comes with its own little porch apart from a few other luxuries such as a basement with a cold cellar, a fireplace, and a full-sized kitchen. If you wish to live big in a tiny house, this is what you should be looking for.
9. The Ash House
The Ash house is a tad smaller than the previous house, coming in at an impressive 480 sq. feet of living space. The design itself is quite basic but pretty to look at and it is very easy to build without incurring many costs. This is great for singles, couples, and retirees that wish to live a minimalistic lifestyle. However, you do get everything you need in this house - a decently sized kitchen, a bathroom, a bedroom, and even a basement.
10. The Backyard Bungalow
As you might already have figured out from the pictures itself, the plan of this tiny house is very similar to the previous one and offers you pretty much the same amenities as the last one. The primary difference between the two homes is in its design which has been tweaked and modified to make it more suitable as a guest home in your backyard. The house features a crawlspace instead of a basement and is perfect if you plan to put up a small bungalow in your backyard for guests.
The Cascadia Cottage is probably one of the most adorable designs on the whole list and offers you more room than most other houses in the list. It has around 560 sq. feet of living space where you can comfortably spend your life. The house is designed to have only a single floor which comes with just one bathroom and a bedroom. If you are a true believer in living simply and have downsized your possessions to the tiniest extent, then you should definitely check out this plan.
If you are someone that loves to be on the move constantly and don’t want to restrict your home to just one piece of land, this is the home for you. The Bohemian-style home is on a trailer which will allow you to move it around as you, please. The house itself is quite spacious and cozy for a tiny house and has an organic flair to it thanks to the cedar shingle siding and a curved roof.
If you’re someone who loves to go against the norm and prefers unique designs over the same old boring stuff, then the Texas Round House should be your ideal choice. Round houses aren’t just unique but they also hold up better against the elements of nature as compared to traditional designs. The design of the house looks super cool and has a commendable 616 sq. feet of living space inside.
This is yet another unique design that serves great as a tiny house. The ladder house features two stories which equate to an impressive 531 sq. feet of finished space. Additionally, this house also comes with a basement underneath the building which can serve as a root cellar. So if the idea of owning a two-story tiny house that also comes with a root cellar excites you, you should definitely check out this design.
This is yet another house that is on wheels and is perfect for anyone that is on the move constantly. If you love traveling or your job requires you to move around a lot, you can easily take this house along with you and not have to worry about checking in to a hotel every time. This way you can cut down on your traveling expenses and also cut down on your living expenses as a tiny home requires a far lower monthly expenditure compared to a regular house.
The Hydrangea Tiny House is definitely one of the biggest houses in our list of the best tiny house designs. This house has a whopping 908 sq. feet of finished space which is definitely enough for a small family. The house comes with 3 bedrooms and 2 bathrooms and is perfect if you plan on moving to a tiny home along with your entire family. It also comes with a full-sized kitchen and high 8 feet ceiling.
Not all people have the luxury of taking their house along with them wherever they go. But you definitely can do so with this amazing design that is engineered to be mobile. You may have your own reasons to not lead a traditional settled lifestyle and hence this house has been designed keeping people like you in mind. The house itself is fully featured and comes with a bathroom, kitchen and a sleeping loft apart from a few other amenities.
18. The Forest Rose Tiny House
The forest rose house is, in my opinion, the most adorable design on the whole list. Being a tiny home does not stop this house from being as charming and aesthetically pleasing as a luxurious mansion. While the house may appear tall, it actually only has 440 sq. feet of living space with just one bedroom and one bathroom. This house will perfectly assure you a comfortable life if you plan on staying solo or as a couple.
Yet another tiny house that is on a trailer and designed to be on the go constantly. The design of the house is quite adorable and measures 24 feet in length while having a width of about 8’6”. That is an impressive amount of space for a house that is on a trailer. The real beauty of the house lies in its interiors which is beautifully designed to provide you with all kinds of convenience.
The Lookout Cabin is one of my favorite designs on the list simply because of the second-story balcony that comes with it. With just around 460 sq. feet of space, this cabin conveniently fits in two bathrooms, one bedroom, an all-purpose room, and a balcony. Besides, the cabin comes with a stairwell which is rarely seen in a tiny home. This can serve as an amazing vacation home for up to a couple of people.
Among all the unique and even bizarre designs that we have come across, this house is one of its own kind. The tiny home is actually a fully working amplifier and you can plug in any musical instrument of your choice into it. The best part is that the deck of the house itself can serve as a stage. The main part of the L-Shaped house is a 400 sq. foot stationary one while the “amplified” side can be attached to a trailer and taken on an adventure.
This is definitely one of the most amazing houses that I’ve ever laid my eyes upon. This tiny home comes with its own little greenhouse and the entire house can be moved around by attaching it to a trailer. The design itself is nothing short of a masterpiece and the house can easily accommodate a couple for a comfortable lifestyle. It has a total of 323 sq. feet of living space.
This tiny house, known as the Nugget, is definitely the most livable 12-foot home that you’ve ever seen. It is complete with full off-grid capabilities and you can easily use this as a weekend gateway or a travel companion and even live in it comfortably as long as you are alone. The house comes with a full bathroom, a lovely bedroom, and a huge kitchen sink.
This cottage is one of the coziest-looking houses that I’ve seen in my life. Living in this adorable little home, which you can also move around on wheels, must be a sweet experience. The size of this little home is enough for a couple to live comfortably and it also comes with all the basic amenities that you’d expect out of a tiny house.
The Cheddar Mountain Tiny House might look small when observed from the outside. However, a little peek into the house will reveal a big and grand farmhouse-style design that is bound to impress you. This house features repurposed accessories, subway tiles, rich hardwood floors, and shiplap walls, all of which combine to give it the perfect balance between a rustic-chic and modern convenience.
This design has been engineered by a Dallas-based designer named Paige Morse who renovated two century-old sheds in her backyard to create this comfy little home. This can serve as an excellent little guest house, in case you lack one in your own home. It has two rooms and 250 sq. feet of space which is sufficient for a single person to live comfortably.
As a child, did you ever dream of living in a tree house? Observing nature from the midst of the wilderness and living a life of full freedom. Well, the day has come when you can finally make that dream come true. This amazing tree house looks like something straight out of my childhood dreams and boasts of an impressive living room, an office and a comfy little bedroom.
This definitely is one of the sleekest and most unique tiny house ideas on the list and if you are someone who loves to travel, then you are bound to love it. The house is attached to a trailer and comes with 200 sq. Ft of living space. The tiny home features a farmhouse sink, shiplap, and subway tile all crammed into the tiny house. However, the most defining feature of this house is the sliding glass garage door that has a deck that pops out and can be used as a porch.
The Bestie Row was created by four couples in Texas it basically is a mini neighborhood that consists of four houses. The houses are all very basic and minimalistic consisting of just one bedroom, a bathroom, and a living room.
More details at countryliving.com
30. The Cabin by the Woods
This one is a dreamy little house nestled in the midst of the quaint wilderness, undisturbed by the chaos of civilization. The design of the house revolves around self-sufficiency and hence comes with solar panels on the South-East facing porch. The house looks warm and cozy and boasts an impressive 550 sq. Ft of space which is ample for a couple to live comfortably.
Named after the ship from Moby Dick, The Pequod is a prime example of creative living. It features some of the basic modern amenities and has upscale materials and looks nothing short of a work of art. The Pequod is 26 feet in length and weighs around 11,500 pounds and is perfect for all those artists that wish to live life off the grid.
Two mobile trailers were cleverly turned into one 400 sq. foot home by the owner of this Austin tiny home. Just one look at the house will reveal all the artistic details and vibrant colors that speak a ton about the owner of the house. The two trailers are connected only by a deck and look like an excellent little place to lay back and relax during the weekends.
A warm and cozy wave of sweet country characters greets you as soon as you step inside the 250 sq. Ft tiny home. The design is one of the neatest and most organized ones that I have seen in the hundreds of tiny house ideas that I have scoured through. The house features farmhouse-inspired wooden accents and is always teeming with natural light throughout the daylight hours.
This is certainly one of the most vibrant tiny houses featured on the list. Known as the “Savannah” this unique little house is one of the many such masterpieces in Oregon’s Mt. Hood Tiny House Village. The house features yellow cedar planks that are accentuated by the red shutters and white rim.
The Indigo tiny home by Driftwood Homes USA boasts of bold and contrasting interiors that lend a sleek and modern feel to it. Careful choice of colors and smart utilization of space sets this tiny 280 sq. Ft home apart from the rest of the crowd. The house is definitely an amazing place to lay back and take a break from the hectic life in the city.
This tiny home is a true minimalist’s paradise which is clad in a siding that is made of recycled pallet wood. The 196 sq. ft home feels spacious despite it being one of the smallest in the entire list. It is beautifully lit in bright incandescent lighting and comes with all the basic amenities required to live a cozy life.
Ending our list with one of the most unique and environment-friendly designs is this beautiful little home designed by Broadhurst Architects. The design of this tiny home is inspired by American Corn Cribs which were used for storing corn. This 250 sq. foot tiny home includes a sleeping loft, a fully functional bathroom an expandable kitchen wall, and even a living room. The entire house is constructed of sustainable and recyclable materials which can be dismantled and relocated elsewhere.
More details at www.thecrib.info
What do you think about our tiny house plans collection? We would love to hear your thoughts in the comment section below!
It's that time of the year again. It's time to go out into the pumpkin patch and look for the best pumpkin to work with. After all, pumpkin carving is a big part of Halloween fun.
But when adding Halloween décor to our homes, why stick to a classic jack-o-lantern when you can be creative with your designs? That's where this article comes in.
These are the best drawing ideas for pumpkins to help you carve the spookiest, most creative pumpkins in your neighborhood.
The 50 Best Pumpkin Drawing Ideas for Your Halloween Pumpkin
The sky's the limit when it comes to pumpkin carving. However, before you can start drawing and carving, it's best to look for inspiration online to help you.
These 50 designs should give you the perfect pumpkin carving idea to work on.
Carving a pumpkin head is a classic way to make a jack-o-lantern. However, you can easily step it up by adding the skeleton's torso to complete the spooky look. Others would even use three pumpkins to form a whole scary skeleton pumpkin.
Turning a pumpkin into a vase is one of this list's easy pumpkin carving ideas. Whether you're using this to decorate your front porch or dining area, this carved pumpkin will be a great way to display your fresh flowers this season.
Tip
You can use a plastic cup to keep the stems in place.
If you're into astrology, astronomy, or anything to do with the stars, why not add them to your lawn? This pumpkin carving design is sure to bring the cosmos closer to you. Making it with a hollowed-out pumpkin will also help those stars shine bright at night.
What can be more spooky than a haunted house? Instead of having the ghosts haunt your home, you can easily carve one out for them to live in. You can carve the place onto one pumpkin or carve it onto three pumpkins to make a whole mansion or tower.
This creative way of decorating your pumpkin doesn't require you to carve too much. You can hollow it out and create holes for your flower stems or hot glue the flowers onto the pumpkin shell. Either way, you'll have elegant pumpkin décor for your house.
Witches are a Halloween staple. If you can't find a green heirloom pumpkin for this project, you can use spray paint to turn your pumpkin green. Add a parsnip nose and witch hat, and your witch pumpkin will be ready to hex anyone that walks by your domicile.
Tinker Bell is a beloved classic for kids. This pumpkin can help you capture some of her magic. This type of carving may just attract pixies and fairies to sprinkle their dust around your home. Some of the trick-or-treaters might even match their costume with your pumpkin design.
This spooky pumpkin design is probably not for the faint of heart. You can use a linoleum cutter to carve out the face. Then, settle its victim made of a smaller gourd into the pumpkin's mouth to add to the fear factor. This pumpkin design is sure to scare some trick-or-treaters.
Add a little joy to this spooky time by creating a rainbow on your lawn. You can use mini pumpkins as the clouds for your design. If you don't have mini white pumpkins, you can simply paint over the pumpkin shell.
If you're looking for a more rustic vibe for your pumpkin, you can check out the different hen and chicks templates available online.
A large pumpkin would be the perfect mom for the chicks made of mini pumpkins. You can also attach chicken wire using hot glue to add a rustic vibe to your pumpkin design.
This pumpkin carving idea can end in one of two ways. It can be considered aesthetic, or it can induce intense trypophobia (fear of small holes). Either way, as one of the easy pumpkin carving ideas, it's also one of the most common designs you can work with.
This jack-o-lantern carving idea will have you singing, "Ba-ba-ba-ba-ba-nana!" Carving a Minion pumpkin has become a trend since the Despicable Me franchise took off, giving these adorable characters another way to appear in Halloween events.
This pumpkin design will surely be a Killer Queen with all the Freddie Mercury fans. While it won't give you a Sheer Heart Attack like the other scary carved pumpkins, at least you'll be sure to Keep Yourself Alive with a harmless pumpkin design.
If you're a Spider-Man fan, this pumpkin design should be great décor for your lawn. It only requires basic pumpkin carving for the eyes and the web shape, making it easy for anyone to make.
This pumpkin design should be a great reminder during Halloween that with great power comes great responsibility.
You would not believe your eyes if you saw this pumpkin design. It's perfect if you want more whimsical pumpkin carving ideas. Adding fireflies to the pumpkin shell is relatively easy to do, given its sheer size. Make sure your pumpkin is hollowed out so you can place a candle or tea light to make your fireflies glow.
Your pumpkins can even serve as the perfect bean bag toss game for fall-themed parties and events. All you have to do for this pumpkin design is carve out a deep hole for the bean bag.
Then, you can add any additional labels and accessories using hot glue to keep them securely in place during the game.
A white pumpkin can easily look like a friendly ghost if you follow this pumpkin design. You can effortlessly carve out its facial features to create adorable and friendly ghosts for your house.
You can also use butternut squash to have ghosts of different heights for this pumpkin carving idea.
Safety Tip
Be careful with the edges of your ghost because they can be a bit pointy. Sand them down to make them safer for anyone wanting to touch them.
Unleash your cottage-core aesthetic by creating an adorable cottage. It can be difficult compared to the other pumpkin carving ideas, but the end product will surely blow anyone away.
We recommend using a white pumpkin to help the small details stand out and fit the whole aesthetic.
Tip
You can hot glue rhinestones for the more minor details.
Give your pumpkin a tropical twist by carving a pineapple onto it! The vibe will make you feel like you're spending Halloween on a warm tropical island.
You can add the top of an actual pineapple in place of the stem to make it more realistic.
If you're looking for something to match the witch pumpkin, why not try out the different pumpkin carving ideas for their familiars?
The most common familiar would be a cat, which is an easy pumpkin design to work with. This adorable design would make a great companion for your witchy friend.
You can use this Mickey Mouse design if you're looking for more Disney-inspired pumpkin carving ideas. It can be a bit tricky with all the curves of the design, but they'd look amazing once you light your pumpkin up.
There are many fall-themed cookie cutters available everywhere. If you don't have enough carving tools, they can be used as an easy kitchen hack for pumpkin carving. Some of those designs can easily fit the season without you having to do the difficult carving.
There are many pumpkin carving ideas related to bees and their honey. If you're looking into adding a little sweetness to your Halloween décor, you can try following this pumpkin design related to them. You could even create your own hive with a collection of these pumpkins.
If you're a fan of vintage arcade games, try out this Pac-Man pumpkin design. You can customize the maze your Pac-Man can run through and even the ghosts' appearance.
It's best to work with a large pumpkin for this project so you can have a great map on your pumpkin surface. You're sure to unleash your inner child with this pumpkin design.
Medusa is one of the scariest Greek mythological figures, turning anyone to stone with a simple look.
Luckily, this pumpkin design won't freeze the trick-or-treaters on your street. However, it's sure to catch anyone's attention, especially with her intricate details and beauty.
If you're looking for other witchy pumpkin carving ideas, you can add this pentagram pumpkin design. This simple design only requires a 5-pointed star in a circle, making it easy to carve out. You can also try out other witchy symbols for your jack-o-lantern.
If you're a fan of Nickelodeon's Avatar franchise, you can check out the different pumpkin carving ideas about the show.
The easiest out of their designs would have to be the symbols of the 4 elements, which focus on simple lines and curves. Carve out all the symbols of four nations and bring balance to the world with this pumpkin design.
While we're back on the subject of pumpkin carving ideas involving other plants, why not try a cute cactus? There are plenty of stencils online for cacti and other succulents to give tribute to our desert friends.
You can use a green pumpkin to match the hollowed-out design and make the green color shine at night.
Another witchy familiar is the owl. This design can easily be drawn and carved out onto your pumpkin. However, small parts can be tricky to carve out, especially around the eye area.
However, it's sure to give a spooky vibe once you light it up. Imagine seeing this kind of pumpkin perched up a tree.
Bring this scary Jurassic animal back to life by carving it onto your Halloween pumpkin.
Carving dinosaurs onto a pumpkin is a great way to get the kids excited about decorating pumpkins. Be sure to help them cut it out, especially for the smaller and sharper details.
If you're looking for more beautiful pumpkin carving ideas, carving out a butterfly can be a great choice.
Their designs usually involve intricate and symmetrical features, especially on the wings. They'd go well with a garden or other pumpkins with flower designs.
A scarecrow could be a great option if you're looking for more spooky pumpkin carving ideas. It's fitting, as pumpkins are usually used as heads for these types of mannequins.
However, you can also carve out its creepy figure onto a pumpkin. The light from the inside will make it look scarier than a scarecrow in a field.
Out of all the pumpkin carving ideas on this list, we haven't discussed the creatures of the sea. The octopus is well-feared, especially with legends about giant versions of these creatures.
Carve it onto a pumpkin and light it up. Its tentacles are sure to give you goosebumps.
Try this zombie hand design if you're looking for pumpkin carving ideas about the undead. It can be easily patterned using your hand, making it easy to draw as well.
Bringing it back to life should be easy, and its design will give you the creeps.
You would need a big pumpkin and black chalk paint for this project. You can easily leave a unique pumpkin bowl on the front porch for trick-or-treaters visiting your house. You can also opt for a fake pumpkin for this project.
Safety Tip
If you're using a fake pumpkin, sand down the sharp edges to keep it safe for trick-or-treaters.
Who says you can only use your melon baller on a hot summer day? You can create any wacky design you want using this trusty tool to carve out the different parts of your pumpkin.
You can come up with numerous pumpkin carving ideas with this tool, and it'll be a great use of the pumpkin's guts.
This design is a twist on the classic pumpkin carving ideas for the jack-o-lantern. You can use a linoleum cutter to help carve out its facial features. Then, use hot glue to attach a zipper to the space for the mouth. It's a quirky and unique way to give your pumpkin friend a mouth.
If you're looking for extra challenging pumpkin carving ideas, you can create a whole graveyard inside your pumpkin.
This design will require you to use the entire pumpkin and a rotary tool to carve it out. This scary pumpkin design will surely set a little light on some of the spookiest places during Halloween.
Keep your lawn safe from villains by creating these pumpkin Avengers. Plenty of stencils and designs can help you with these superhero-themed pumpkin carving ideas.
They usually focus on the hero's logos. However, if you're feeling extra creative, you can try working on the heroes themselves.
There are many ways to show the world what goes on in space. You can use butternut squash as your rocket ship blasting off to space. A large pumpkin would be an excellent UFO for little white pumpkin aliens to use. It's all up to your creativity to create your little pumpkin solar system.
With this pumpkin design, the king of rock can easily make you dance to Jailhouse Rock. Its small details would have to be made with Burning Love to get it right. You Can't Help Falling In Love with this creative way of commemorating a legend.
This pumpkin design is excellent for having a spooky side of Wonderland on your lawn. The carving of the teeth can be a little tricky because of how intricate and uneven they are. However, it provides some freedom regarding how you carve them out.
Instead of carving out an ol' jack-o-lantern, why not raise the bar and let the skull stand out from the pumpkin? This design creates a more spooky effect, especially showing off its hollow insides. It would look even scarier with a light inside.
To close this off, here's another one for those creepy pumpkin carving ideas. You can use large pumpkins to create eyes. While it would require a lot of painting, it's sure to give the creeps to anyone passing by your house.
Tips for Turning Your Pumpkin Carving Ideas Into Reality
There are many ways to work on a pumpkin. However, there are times when you might not know where to start.
Here are a few tips to help you turn your pumpkin design into a reality.
Pick the Perfect Pumpkin and Materials
The first step to any pumpkin project is finding the perfect pumpkin. You must ensure that your pumpkin has no damaged areas or soft spots. These can make it difficult to carve your pumpkin, as it might not hold its shape.
Pumpkins tend to have wax on them, which helps preserve their quality. It can help make the markers easily erasable on pumpkins.
Ensure that your pumpkin is at room temperature. It helps make the pumpkin carving process easier, especially since the insides won't be too hard.
Some might opt for a faux pumpkin. If you're working with this, you must sand the edges to keep people from getting injured.
You would also need to gather a craft knife, a hot glue gun, and other materials to help you cut through a pumpkin. You can easily find a pumpkin carving set in local or online stores.
It's also best to start gathering your decorating materials before starting.
Look For Halloween Pumpkin Carving Ideas
Before drawing on your pumpkin, it's important to prepare your design to lessen the chances of wasting a good pumpkin.
It cannot be easy to think of great pumpkin carving ideas, especially with the many ways you can design a pumpkin.
Luckily, many inspirations online can help you find the perfect pumpkin design for your front porch.
You can use a stencil from an online site or create your own based on the pumpkin carving ideas online listed above.
Draw on the Pumpkin
Before cutting your pumpkin, it's important to know where to cut it. You can't undo something once you've cut it off the pumpkin shell.
Draw or print out your pumpkin carving ideas onto a piece of paper. Be as detailed as possible, and note where the negative spaces will be on your pumpkin.
Then, use the drawing or printed template as your guide when you draw on the pumpkin itself. Use a marker to keep your marks on the pumpkin shell.
You can also mark out the spaces that you should cut off the pumpkin. It will help lessen your carving mistakes later on.
You can use duct tape to keep the stencil in place while you trace your template. Edit the drawing depending on your changes in design.
Tip
Try using a dry-erase marker so you can easily get rid of mistakes.
Use the Entire Pumpkin
The best way to work on a pumpkin project is to use the whole pumpkin. It lessens waste and gives you a chance to be creative.
Cut your pumpkin on top or at the bottom to clean it out. It would depend on the design you're going for. The hole is where you'll gut the pumpkin and wash out the contents.
Depending on your design, you can use pumpkin guts or removed pumpkin shells to decorate your jack-o-lantern.
Be creative with how you use them, especially since this is 90% of your pumpkin.
If you have any remaining carved pumpkin guts and seeds left, save them. You can turn them into a great Halloween feast after all that hard work.
Light It Up!
Most jack-o-lanterns are hollow for two reasons. The first is to clean it out depending on your design. The second is to let it light up your porch on those dark Halloween nights.
You can use a candle or tea light to light up your pumpkin. However, it can be quite messy, especially with all the melted wax inside. They also happen to be a potential fire hazard.
You can also use a battery-powered light if you don't want to constantly clean candle wax.
Other options include Christmas lights and flashlights, depending on what would fit your pumpkin's aesthetic.
No-carve pumpkins don't have to follow this, especially since their designs don't allow you to put a light inside them.
However, you can set your pumpkin in brighter places where its unique design can be seen.
Pumpkin Drawing Ideas FAQs
You might have more questions about pumpkin carving and how to create the spookiest one.
We’ve gathered the most common questions you might ask before you start designing and carving.
What Can I Use to Draw on a Pumpkin?
A trusty marker is the most common tool to help bring your drawing and pumpkin carving ideas to life.
It’s best to use washable markers, especially if you have kids working on the designs. They’re easier to erase, especially with the pumpkin rind’s naturally waxy surface.
You can also use white or black chalk, depending on your pumpkin’s surface. However, it won’t be as long-lasting as a marker, which can be difficult for complicated designs.
How Do You Use a Sharpie on a Pumpkin Instead of Carving?
Sharpies are usually used for no-carve projects or if you’re a seasoned artist. It’s more difficult to erase compared to a dry-erase marker.
No-carve projects usually rely on your drawing skills when decorating a pumpkin. You can create patterns and symbols on the surface using different colored markers.
If using this, ensure you’ve cleaned your pumpkin surface from all the wax. This step will ensure that the marks stay longer even when the pumpkin is outdoors.
You can also play with flowers and other things from nature to complement any marks made by your marker.
Unless your project involves sticking lights onto the pumpkin, working with a Sharpie means your jack-o-lantern will lose its lantern element because of its lack of light from the inside.
These are better displayed indoors or on porches with bright lights to help your design be seen more clearly.
What are Some Easy Ways to Decorate a Pumpkin?
Many simple pumpkin carving ideas are available online, with carving being the traditional way of decorating a pumpkin.
You can follow simple stencils for carving or create a simple design. Usually, if you can draw it on paper, you can easily work on it once it’s on the pumpkin.
However, there are also many ways to decorate a pumpkin without carving it. The most common methods are painting or sticking other ornaments onto the pumpkin surface.
These methods can require additional materials, like a hot glue gun or black spray paint. Using metallic spray paint can also add a little shine to your carved pumpkin.
Don’t be afraid to use flowers and little gems to make your pumpkin stand out. They can add flare to your pumpkin without worrying about intricate details to carve.
You can use hot glue to stick these elements onto the surface.
Be creative when matching the season or simply expressing yourself.
Can I Erase Permanent Marker From a Pumpkin?
Despite the name, there are actually a few ways you can get rid of permanent markers from a pumpkin. It’s important to know these tips when you make mistakes on your project.
Fresh new marks can usually be removed using a mild adhesive on your pumpkin. It should go with the tape when you pull it off.
You can use a paste made from water and baking soda for older marks. Just mix the two ingredients and place them on the marks. Wait for a few minutes before wiping it off.
If these don’t work, you can use something stronger, like rubbing alcohol or nail polish remover.
What Is the Best Way to Gut a Pumpkin?
For some people, gutting a pumpkin might not be the best part of the carving.
However, using the right tools can help you get this done quickly with it, especially if you get squeamish.
One of the most common ways to gut a pumpkin is to use a measuring cup. You can scoop out the insides and save them for your pumpkin dishes.
However, to make the process faster, you can buy a pumpkin gutter and a clay loop tool to gut and thin out the insides.
You can also use these tools for other vegetables or crafting projects.
Using a measuring cup could take some time. Using a gutter would have your pumpkin clean and ready for washing in a matter of minutes, but it would cost extra for the tools.
Why Do Pumpkins Rot Fast After Carving?
Carved pumpkins usually start to rot within days of carving.
As mentioned before, more than 90% of the pumpkin gets carved off for these pumpkin projects. These parts also contain the pumpkin’s moisture.
You can try rubbing petroleum jelly to help prevent molding and decay. However, it could make marker-based designs easily erasable compared to a shell that doesn’t have jelly.
Pumpkin Drawing Ideas Conclusion
Whether it's to welcome trick-or-treaters in their Halloween costumes or to add a spooky flare on your front porch, having jack-o-lanterns is a great way to spread the Halloween spirit.
Which pumpkin design are you going for this spooky season?
The Christmas season calls for different activities for kids and kids-at-heart, including Christmas-themed drawing sessions for your Christmas cards, decorations, or just pure holiday fun.
We made this article to help you grasp different easy Christmas drawing ideas for you and the kids to practice over the holidays. Read through!
45 Easy Christmas Drawing Ideas
Here are 45 easy Christmas drawing ideas for your children's playdate or your next family gathering. Now, let's get the Christmas drawing ideas flowing!
Ho ho ho! This easy-to-draw Santa Claus can elevate the design of your personalized cards for your Christmas presents, thanks to the simplicity of the overall drawing.
It emphasizes clear lines and shapes, allowing anyone to quickly recognize Jolly-old Saint Nick. To make this Santa Claus drawing idea come to life, put on some Christmas colors of green, red, blue, and white.
While not shown in the drawing, you can always put on some dashes of yellow to embellish your Santa drawing idea.
You can't forget to take the snow globe motif when you decorate your cards or use it as a hanging banner on your main doors.
Similar to the drawing idea above, a snow globe is an easy-peasy drawing task that your preschoolers can make. It's also fun, especially when you draw a cute Christmas snowman inside.
Speaking of a cute snowman, a beginner skill-level-friendly sketch you or your kids can do is a snowman. You can't go wrong with a few circles, stick arms, and a triangular carrot nose.
To give it even more of a Christmas vibe, throw on a red scarf with a combination of curved and straight lines and a simple yet appealing hat on top.
A Christmas tree drawing completes your Christmas celebration and can even replace an actual tree if you have enough of them. To do this, you have to sketch simple lines with little precision.
After that, sprinkle in some green, brown, and yellow to create a Christmas-time feeling. You can add some red for the Christmas lights if you want.
A Reindeer is so dear in a Christmas-themed party because it reminds us that Santa Claus' giftings are coming through, so make it a part of your classic Christmas drawings.
You can even draw these on edible paper as toppers for your cookies and cupcakes as part of your Christmas morning activities.
What's the Christmas season without Christmas ornaments? These drawing ideas for Christmas ornaments can be used to design gift wrapping paper for a more festive holiday celebration.
Besides wrapping paper, it can also serve as the background for your Christmas cards and reflects authenticity and genuine love for family and friends.
A Christmas wreath tells us about the spirit of Christmas and the eternal life with Jesus Christ. Aside from its religious symbolism, it has also been widely used as door ornaments to establish the holiday spirit.
You can always give this wreath a fresh look through the drawing idea above, including simple red bows and gold highlights. After drawing, you can paste it on your kids' door rooms for some leveled-up Christmas decorations.
A candy cane a day takes your Christmas and holiday blues away! A candy cane is simple to draw; you can even pencil sketch it or add some colors if you like.
The best candy cane colors are green, blue, red, yellow, white, and shades of pink for some accenting.
This gingerbread house is a Christmas drawing that is easy to do but has a lot of cute little details that you can incorporate to make it more eye-catching, such as cupcakes, candy canes, snowflakes, and other shapes.
But, always remember to establish the brown house before drawing in the other ideas and their particular colors.
If you have a gingerbread house, make sure to add the gingerbread man for a classic Christmas treat.
A gingerbread man is a simple drawing idea that only needs an irregular-shaped human figure and some added-on details, like the red bow, buttons, sleeves, and pants.
With winter comes snow and beautiful snowflakes. A snowflake is usually complicated to draw, but with the drawing idea we have for you above, you can surely ace it even with your eyes closed.
Just blend it in with your favorite shade of blue, highlight it with white, and add black borders.
Sled your worries away as you integrate sled drawing ideas with your presents. You can even add Santa Claus to this drawing to make it more Christmas-y.
But if you don't want that, stick with this drawing and choose the best shades of brown.
Santa Claus will surely come to town when you draw him in his entire body suit while carrying his treats for everybody. You can even add a bell detail to make your drawings more festive.
What makes this Santa drawing a lot cooler is the integration of his cute eyes by drawing an upside-down C.
A Christmas stocking is an essential ornament to draw on your Christmas decorations. You can also draw a Christmas stocking in whichever size you want, big or small.
You can also write your name or friends over the Christmas stocking to make it more personal.
The five-pointed star makes its way up your trees and onto your drawing sheet this holiday season. It's one of the uncomplicated patterns to draw from this list.
To make it more appealing, color it with a fun red tone or other holiday colors that you love drawing!
A Christmas angel is an excellent ornament to match your tree drawing. You can make it as small or as big as possible, whichever drawing size you prefer.
But what's important is to draw some stars and trumpets and color the angel with light and vibrant tones.
If you want your drawing to stand out, combine your sleigh and sled drawing ideas with the north pole sign.
A north pole sign can be as easy to draw, similar to the sketch above, or as intricate as possible when you add colors and other Christmas drawing designs.
To draw poinsettias along with the other ornaments is something very fun to do. Most importantly, it's a joy to have once you put it as designs for your presents.
When you draw poinsettias, make sure that you vary their sizes and alternate the leaves to create the illusion of volume.
If the one you're giving your holiday gift is a cat parent, drawing a cat in a Christmas outfit can give it a nice touch of thoughtfulness and creativity.
As you draw the cat, make it more in-tune with the season by adding snowflakes in the background!
A little boy to pair with your little girl will benefit your overall Christmas-themed drawing because of how adorable and matching they are.
As you draw this little boy, don't forget his cane, bag, hat, and five-pointed star to complete his look.
Drawing Supplies You Need
To draw your Christmas-themed art, you need to have these drawing supplies beside you:
Art paper or sketchbook
Brushes, if you'll use watercolor or paint
Colored pencils
Eraser
Highlighters
Pencil
Ruler (optional)
What To Do With Your Finished Artwork
Once you finished your artwork, you can do these things:
Use it as a wrapper for your gift
Paste it on your doors and walls to add to the Christmas-y feel
Put it in a frame to commemorate this year's holidays
Use it as a greeting card for your holiday gifts
You can punch small holes in each drawing and make a banner
Christmas Drawing Ideas FAQs
We know you have some questions in mind, and we’re more than willing to answer some in this section.
What Are Popular Christmas Items?
Some of the most popular Christmas items are:
Trees
Balls
Lights
Santa Claus outfits
Gingerbread man treats
Candy canes
What Are Easy Christmas Drawing Ideas?
The easy drawing ideas for Christmas are all the 45 items listed in this article, such as stars, reindeer, candy cane, Santa Claus, wreath, snow globe, and more.
Christmas Drawing Ideas Conclusion
Now that you have all these simple Christmas drawing ideas for beginner artists to incorporate into your gifting, cards, and house decorations, you'll surely feel the Christmas spirit now more than ever.
Ho ho ho! Enjoy and draw to your heart's desire, and look back to this article for more inspiration.
Easter is a festive holiday for many people. From painting chocolate bunnies to hunting for Easter eggs, it's no wonder kids love it!
Aside from decorating eggs, making Easter-themed drawings is another excellent way to celebrate Easter.
We compiled this list of 45 Easter drawing ideas that both kids and adults can enjoy. Prepare your drawing materials, and let's get crafting!
45 DIY Easter Drawing Ideas
You don't need to be a master artist to draw Easter craft projects. With simple supplies you have at home, you can absolutely create DIY Easter drawings!
Let's look at 45 Easter drawing ideas to get your creativity going:
Let your kids join in on the fun by coloring this Easter bunny!
This illustration includes an Easter greeting with a cute rabbit surrounded by Easter eggs. Kids can fill it in with different colors or add decorations like glitter.
When the drawing is complete, it can make for a cute Easter-themed decoration around the house.
Encourage your kids to get creative with this beginner-friendly sketch.
They can easily color the Easter eggs in any way they want. They can even add glitter or special effects to the decorated eggs for a truly vibrant illustration.
Like decorating Easter eggs, Easter drawings are another fun way for kids to express their creativity.
Memorialize your family's Easter bonding time with this cartoon drawing!
It includes a mom and two children painting a basket of Easter eggs together on a table. Drawing is MORE fun with the whole family, so this print is something you don't want to miss.
This adorable drawing is a great way to inspire your kid to explore their artistic skills.
Your little girl can draw herselfdrawing a decorated Easter egg. Armed with just a pen, she can easily follow the lines to create a fun Easter-themed cartoon.
This print can also be colored in for better results!
You can scribble these Easter doodles on your sketch pad if you want a simple drawing idea.
You can draw a little Easter bunny and Easter eggs with flowers framing the illustration. This drawing doesn't require too much thought, so it's worth considering if you have free time.
It also includes more religious items like Jesus' cross and an angel to commemorate the true spirit of Easter.
Chocolate rabbits are an essential part of Easter (for your kids, at least). After all, the Easter bunny is known to leave treats and candy for good kids.
This Easter-themed drawing includes a chocolate bunny in a pile of Easter eggs inside a basket.
It's a colorful illustration that would undoubtedly excite your children for Easter!
Unleash your creative side with this customizable Easter egg spread!
If you want to keep your Easter eggs organized before painting, this print can help you visualize them.
It's also a great art exercise for children to design their own Easter eggs. The illustration also comes with pre-set patterns to make decorating easier.
At its core, Easter Sunday is about the resurrection of Jesus Christ after his crucifixion.
Easter drawings can be a way to teach religious topics to children. This illustration combines Easter eggs and Christian themes to emphasize the importance of Easter.
You can also draw different patterns on the Easter eggs if you want to personalize your art.
If you want a unique way to draw an Easter decoration, this drawing idea has great potential.
This illustration features a holy cross with flowers inside a decorated Easter egg. It's another Easter-inspired drawing that uses popular culture to emphasize religious themes.
You can create this quaint Easter-inspired drawing with a pencil and paper.
Hanging colorful Easter eggs on a tree branch was originally a German Easter tradition. Although the custom may seem mysterious, decorated eggs make for great ornaments!
Feel free to color this drawing however you like for a more vibrant Easter illustration.
For those who want more complex drawings, this floral Easter egg-shaped drawing gives you free rein to design what you want.
You can start with the rabbit in the middle and work from there to create your own floral pattern. Add bees and other little critters for that touch of springtime!
Color your work, and you've got a lovely Easter decoration.
Celebrate the coming of spring with this festive Easter artwork.
With a vivid floral background and a white banner, you can wish your loved ones a happy Easter! Feel free to spice up the colors and design it however you want.
This piece is easily one of the PRETTIEST drawing templates on this list.
Crafting Easter decorations can go beyond simple illustrations.
You can recreate this stunning Easter-themed artwork with colored paper, scissors, and glue!
If you want to bring your A-game this spring, you can't go wrong with this option. You can find a tutorial online to find out how to make this cut-out Easter rabbit.
Get crafty and get your supplies out with this pretty Easter collage!
You can use various paper crafts, magazine clippings, and stickers to create this patchwork Easter illustration. Add another drawing on the top half of this work to complete it.
Consider this one if you're looking for a fun project for you and your kids this Easter.
If you want to personalize your Easter design, this wreath illustration is a great choice to do just that.
It comes with typical Easter motifs like decorated Easter eggs and greenery, but it leaves a space at the center you can use to draw other decorations.
You can easily add rabbits or a cross to truly make the design yours!
This lovely Easter illustration is an easy drawing idea that anyone can do.
It has a charming blue bird on top of a brightly-colored floral decoration. Even with colored pencils and a pen, you can make your own Easter greeting card.
It looks simple, but it adds character to your Easter décor.
This Easter surprise can be an enjoyable drawing exercise for your kids this holiday!
It features a newly-hatched chick with a patterned Easter greeting. The drawing is big enough for your kids to add their own touch.
You can encourage them to use oil pastels to create the same textured design.
Easter Drawing Ideas FAQ
Below are related questions about Easter drawings that might be helpful to you:
What Drawing Materials Will You Need?
The materials you’ll need will depend on what type of art project you’ll be working on. This list includes different ideas you can try.
That said, there are essential art materials that are useful for most projects:
Paper
Graphite pencils
Eraser
Sharpener
Blending stumps
When working with color, you might also need various coloring materials, such as colored pencils, pastels, and watercolors.
How Do You Celebrate Easter?
Many Christians consider Easter the most significant religious holiday of the year, which celebrates the resurrection of Jesus Christ.
It is considered a celebration of hope and eternal life.
Easter also used to be a pagan festival to mark the coming of spring, explaining the association with rabbits.
In many cultures around the world, decorating hard-boiled eggs is a popular Easter custom.
Children participate in an Easter egg hunt where they look for hidden decorated eggs throughout the home.
Easter Drawing Ideas Conclusion
Painting eggs is not the only family bonding activity you can do this Easter Sunday.
Drawing is another way to hone your creative skills and encourage your kids to do the same too!
Even without a step-by-step guide, this list includes easy Easter drawings that kids and adults can enjoy.
This Easter, bust out your art materials and create your own Easter crafts!
Why not get inspired by outer space if you're looking for your next drawing project?
Much like art, there are endless possibilities when it comes to space drawing ideas. Many space drawings are simply out of this world, from the moon to the sun.
Space drawings are perfect for art projects or as a fun pastime for the whole family!
We look into 45 easy space drawing ideas that kids and adults alike can try their hands at.
45 Awesome Space Drawing Ideas
Aim for the stars and let your creativity shine with these fantastic space drawing ideas!
You can choose from different space objects to create your own illustration worth framing. Let's look at 45 space drawing ideas you can choose from for your next art project or sketch:
For space lovers (pun intended) who want a cute space drawing, this idea might be for you. It's an illustration of two astronauts making a heart with little stars.
It's simple enough that you can color it and add as many details as you want! Afterward, you can hang it up or give it as a gift to your special someone.
One subject that we can't miss is obviously aliens!
Add some whimsy to any art project with this fun alien illustration. It has everything you'd want, from funky aliens in UFO rockets to other space objects.
You can let your imagination run wild in designing the background and coloring each character.
Explore the vastness of outer space with this rocket ship drawing.
Complete with a ringed planet and a rocky landscape, it's a full-fledged illustration all on its own! This doodle is great for kids who want to get creative with their art projects.
What's fun about this rocket drawing is that you can even add details based on previous images.
Create a picture as pretty as the moon with this painting.
Aspiring painters can try to create this cute moon drawing with black watercolor. You can also add shooting stars and comets if you have gold and silver pens!
Simple but stunning, this illustration is a frame-worthy art project.
Blast off to a galaxy far, far away with this fun cartoon!
This drawing features a rocket ship cruising through outer space filled with planets and stars. It's a cool coloring page that will surely entertain your kids.
They'll have a blast adding more details, like astronauts and aliens.
This outer space-themed illustration is perfect for your little astronomer.
It is an easy-to-follow drawing with minor planets and stars to create added perspective. You can unleash your creativity by coloring the backdrop however you want.
It's a cute drawing idea that kids of any age will love to color in!
Let your kids create their own self-portraits with this project inspired by Georgia O'Keeffe's 1958 art piece Ladder to the Moon.
Your kids can use any art material or surface with this one!
It is a bit more complex than your average illustration, so you may want to help them get it right. That said, it's an absolutely stunning project you'd want to display.
Continuing with the astronaut illustrations, this drawing idea is another fun alternative for kids!
It includes an astronaut riding on a rocket as they journey through outer space. With cute clouds and planets, there's no shortage of details to doodle.
Add a little whimsy to your kid's room with this awesome space illustration.
Make learning fun with this watercolor illustration of the Solar System.
This drawing focuses on the planets, including Mercury, Earth, and ringed Saturn.
If you want to encourage your kids to try out watercolor, you can give this space-themed drawing a try! It's a simple but endearing rendition of our Solar System.
Among the whimsical drawing ideas we've listed, this illustration definitely takes the cake (or pizza).
Kids will definitely get a kick out of this astronaut sleeping on a galactic pizza. They can use glitter and sprinkle it on the surface for extra detail.
It's a fun drawing idea that would definitely get a chuckle out of anyone.
This drawing features a balloon of planets that playfully carries an astronaut into outer space. The best part is you're free to color it however you want.
It's one of the quirky drawing ideas you can try out for your next sketch.
Our galaxy is filled with many wonderful objects. Who wouldn't want to put it in a jar?
This space-themed illustration is a cute idea to admire our beautiful world! Shrink the planets into this galactic bottle and draw a little astronaut on the side.
Overall, it's a whimsical drawing idea you can try.
Even with pens and markers, you can create stunning space art!
This Saturn illustration features an entire galaxy inside its planetary body. Speckled with stardust and comets, it's a stylish sketch of the ringed planet.
For more advanced artists, this illustration is a great way to flex your skills.
It involves a precise hand to draw a symmetrical hourglass shape and make a stippling pattern. That being said, it gives beautiful results when done right.
To round up the illustration, draw an astronaut and add planets to create a fascinating galaxy artwork.
For colorful illustrations, this cosmic girl drawing is a great choice.
Her hair is transformed into a starry galaxy filled with planets and starbursts. This is a vivid, frame-worthy illustration you can create to brighten up your home!
Are you fond of stargazing? You can try and draw this cozy illustration.
You can try to paint it with watercolor to get that gradient effect. With a white gel pen, you can create a starry night with all the constellations in the sky!
It brings warm memories of stargazing during a clear night with a loved one.
When the night gets darker, thebrighter the stars shine.
To round out this list of drawing ideas, you can draw this dreamy illustration with your little one to remind them that magical dreams await.
You can use gold glitter and coloring materials to truly make this drawing sparkle!
Space Drawing Ideas FAQ
Below are commonly asked questions about space drawings that many people ask:
How to Create a Galaxy Background With Colored Pencils?
Creating a galaxy illustration is a great way to hone your artistic skills.
To get started, you’ll need printer paper, a white gel pen, a blending stump, and the following colored pencils (from lightest to darkest):
White
Deep red-purple
Violet
Violet blue
Indigo blue
Black
Whether you’re following a coloring page or making your own art, below is a general guideline on how you can draw a galaxy background:
Step 1: Use the side of the lightest colored pencil (deep red-purple) to create curved lines throughout the page. Apply light pressure as you shade.
Step 2: Use the second, lightest colored pencil (violet). Shade the edges of the previous color and overlay them slightly. Do the same with the next color (violet-blue).
Step 3: With the darkest color (indigo blue), fill in the remaining gaps. Use the same pressure and overlay the colors slightly.
Step 4: Use the black pencil to color the edges of the page.
Step 5: To layer and blend the colors, go from the darkest to the lightest color. Using the indigo-blue pencil, blend it into the next color.
Step 6: Go to the next lighter color (violet-blue) and do the same. Repeat until you reach the lightest shade (deep red-purple).
Step 7: With the white pencil, apply firm pressure to blend all the colors on the page. Start with the lighter parts and move to the darker areas.
Step 8: Add thick, curvy lines using the black pencil.
Step 9: Use a blending stump to blend all the details and conceal any hard edges.
Step 10: Lastly, use the white gel pen to add starbursts and small and big dots to create a galaxy effect.
Congrats! You’ve made your own galaxy illustration!
What Is the Difference Between 2D and 3D Art?
Visual art can be divided into two forms, two-dimensional and three-dimensional art. Let’s find out what makes them different:
2D Art: Two-dimensional art only has two surfaces, length and width. It includes everything drawn flat, like drawings, paintings, prints, and pictures.
3D Art: Three-dimensional art has three surfaces, length, width, and height. 3D art includes sculptures, installations, and 3D paintings.
Space Drawing Ideas Conclusion
Like the vast universe, there is a near-endless number of space-themed drawing ideas worth trying out!
Whether you're a parent, teacher, or budding artist, this list includes various sci-fi illustrations that will surely get you inspired.
With all the possibilities, which one of these ideas do you want to try out?
Crochet is a wonderful form of textile art, and crochet hooks are widely used around the world and the 8 best ergonomic crochet hooks sets are here, they`re extraordinarily fit for carpal tunnel and arthritis!
However, crochet does have some very specific requirements as far as the tool-set goes.
In particular, among the huge variety of crochet sets, there are a few which stand out among the crowd.
This guide intends to introduce eight of the best products on the market today, as well as detail our experience of using those best ergonomic crochet hooks.
So, without further ado, let’s begin with the product reviews!
Best Ergonomic Crochet Hooks for Carpal Tunnel, Arthritis
Material: Aluminum, size: 15cm ( 5.9" ), color: Multi color...
The 14 pieces set by BCMRUN is rather unique, in that it gives you 14 hooks made completely out of aluminium from top to bottom. This is best for those who have difficulty holding regular, plastic/rubber grip crochet hooks. These are Boyle type hooks, rounded and tapered rather than the inline hooks which are narrow.
Experience
The BCMRUN 14 piece set gives you a wonderful experience, which come in some non standard sizes - but they measure up approximately equal to standard sizes. They are priced more than affordably, hence, the fact that you get almost every size which you can think of - and then some - is absolutely unbelievable.
The only snag here is that the crochet hooks do not exactly match up to letter sizes, but a small workaround is to label the approximate sizes on the hooks.
The aluminium feel, fit and finish mirrors that of much more expensive name brand items, and the experience is pretty similar to those as well. Also, the hooks come in a variety of colors, which again makes it less difficult to find the right hook.
The hooks come in a gradation of 0.5mm from 3.0mm to 10.0mm. Some of the sizes are very difficult to come across, so if you’re keen on a certain size, get this set for just that purpose.
Pros
Brilliant design and finishing at miniscule cost
Boyle styled hooks are hard to come by
The sizes on offer are pretty unique and rare themselves
Cons
The thin handles may be uncomfortable for some some
INTERCHANGEABLE NEEDLES: The ultimate in knitting...
INCLUDED: Set includes 9 pairs of 4.75" long interchangeable...
The Knit Picks Caspian Crochet set is finished completely in wood, making it a good addition to those looking for antique crochet hooks. The finish in Caspian is inspired from sea waves, and thus is finished in a mixture of green, blue and teal. This set comes with eight hooks, all finished in high quality wood.
Experience
These hooks evoke a lot of confidence from within, in that these hooks are incredibly comfortable and easy to hold. These have a deep groove which helps you grab the loops properly, which is a common complaint with aluminum tipped hooks.
These sit somewhere between the Boyle and the Bates styles of crochet hooks, which is a wonderful yet unexpected compromise. Your hooks are neatly kept and organised in a vinyl case which ships with the set.
The hooks themselves are fabricated out of birch, and that too with multiple layers of birch. This gives it another level of heft and strength, which is unique since traditionally wood-based crochet hooks are considered fragile and not at all long lasting.
Hence, this is a set of crochet hooks which you should keep if you’re missing any of the regular sizes - you will not be disappointed.
Pros
Incredible wood finish with Caspian color
Standard sizes, most regularly used
The vinyl case is a welcome addition since handling these hooks becomes a problem
✅100% ACCURATE USA STANDARD LETTER SIZING. This CROCHET...
✅SMOOTH CROCHET NEEDLES AND HOOKS makes crocheting with...
These are a slightly different variant of the crochet hooks that are offered by Athena’s Elements, which have been reviewed above. These hooks come with an extra ergonomic handle which makes it much easier to hold the hooks while crocheting. Also, the lengths of the metal hooks is long enough to go through 7 or 8 loops without any problems whatsoever.
Experience
What surprised us the most the length of the hooks. The lengths of the hooks’ metal ends is 2 inches for the wider hooks and 1.75 inches for the smaller ones, which gives it enough of a leeway to keep on performing without any problems whatsoever. The sizes of the hooks are always present on the hooks, with stamping of the letter sizes and the lengths written clearly and lucidly.
The hold of the hooks is strong enough to not give problems during use, but are comfortable enough to use for hours before any problems begin to show. The specialty is that people who are coming back to using crochet hooks after years of use, or suffer from medical conditions, are likely to face very little problems in adapting back to these hooks.
Another wonderful product from Athena’s Elements!
Pros
Lengths of the hooks are admirable and class leading
Letter size indication will definitely save time over use
Another contender finished in wood, the Knitters Pride Crochet Hooks set comes in a wonderful Simfonie Wood finishing which is conducive to long term crocheting. The set of hooks is available in 8 sizes, right from size E to size L (3.5mm to 8.0mm in metric sizes). These are handcrafted specifically by people who are experts are crocheting themselves.
Experience
The experience of using these crochet hooks was incredibly smooth and easy. These hooks are not at all hard to the touch, and the hooks are equipped with grooves which prevent slippage. Another plus point of these hooks is that they come in a variety of colors, which is a unique trait among wood-fabricated crochet hooks.
It also comes with a handy, clear vinyl case where you can store your crochet hooks rather easily. They are incredibly lightweight to boot.
The lightweight nature of these hooks ensures long hours of using this set of crochet hooks without any problems. Further, there is ample variety in the sizes which ensures that you can work on your projects without any hurdles.
Pros
Wide variety of colors in the set
Wood based hooks with protection against slipping
Wonderful experience of use
Cons
The variety in sizes may be less compared to competitors
The TRUSTYIWEN set of 12 bamboo based crochet hooks offers serious competition to other bamboo products reviewed as above, by offering 12 crochet hooks from size 2.5 US to size 15 (roughly 3mm to 10mm), they are comfortable and lightweight.
They are extremely well priced and easy to handle. In spite of the bamboo feeling a little brittle because of the low weight, be assured that the hooks are strong enough to use at all times.
Experience
Such is the nature of competition, that markets tend to bring prices down to almost unbelievable levels. This set of 12 crochet hooks is a perfect example of such a market condition, which makes it incredibly affordable to have all the sizes that you intend to have. The wide variety of crochet hooks make it easy to have multiple projects running at the same time.
The hold and finish of the hooks is as good as you could expect from a budget edition, but it doesn’t disappoint. The price is actually the really surprising point here - 12 crochet hooks, fabricated out of bamboo and then subjected to a carbonization process hence, at this cost - unbelievable.
Pros
Unbelievably low cost
Wonderful user experience
Cons
The wood finish is rather brittle, and you may feel it’s about to break at some point though actually it doesn’t.
This completes our review of the best ergonomic crochet hooks sets in 2023.
Before going out there and making your year end purchase, we recommend you to have a long hard look over the reviews above to find out which specific crochet hooks set meets your requirements.
Happy Hunting!
There are a lot of Digital Painting platforms out there which allow artists to paint out their ideas and concepts amazingly well.
Krita being one of the most popular among them.
From being incredibly versatile, to amazingly user-friendly, this platform provides something unique for every user.
So, when it comes to Krita paint brush sets, there is a lot to choose from.
As more and more tool developers and artists are making their very own brush packs every day, it can be rather hard to pick the ones that you need for your project.
So, to help you out, we have comprised a list of some of the best brush packs for the Krita platform, which are sure to appeal to both professionals and amateurs alike.
In the Digital Designing world, the GDquest team has done some amazing work with the Krita software. From Making unique and helpful video tutorials to a variety of paintbrush and blending tools, GDquest has for some time now, inspired beginner and adept designers in creating their dream projects.
GDquest Krita brush set is the ‘freemium alternative’ to their more exclusive game art brush pack, which does cost a hefty sum. However, for the more amateur users, this free brush set is going to be more than enough in helping them achieve exactly what they are looking for.
Their more recent bundle is in v7.0, and you can very easily download it for free from their page.
One amazing thing about GDquest, which we absolutely love is that they update all their tools and features periodically. They hotfix bugs and feature crash as well, and are constantly aware of user feedback, as they try to make their applications some of the more convenient Krita tools out there.
Moreover, this brush set comes with its very own tutorial video and guide. Hence, if you’re quite new to Krita and don’t have a proper grasp of its brush stroke techniques, then this set can come rather handy.
This a fantastic brush pack made by Radian 1 and released in DeviantArt for the wider community to view and download.
The pack is a bit unique in comparison to some of the other free brush sets out there, as it comes with a lot of customizable options which are more of a characteristic trait for paid brush packs.
With this pack, you will gain access to a variety of custom patterns, as well as gradients and workspaces to get you fully equipped for your next art project.
As this, brush pack is mostly geared towards painting, it might not be a convenient pick for you, if you’re looking to do more with them like blending and surface detailing.
But do keep in mind that you will not be able to directly download the brushes form the DeviantArt itself. Instead, Radian 1 has the pack hosted on Google Drive, and all you need to do is visit that link and download the brushes.
Moreover, it’s also important to update your Krita application before downloading and using these brushes. They require a Krita v3.2 or higher to function, so do try and be up to date on it.
The 4th volume of the Modular Brush set series from Grind God is going to be one of the most versatile and varied brush pack set on the list.
It has over 120 brush presets with over a dozen custom styles that will allow you to make those final touches on your artwork to make it a very unique one.
Now, with so many presets and options available, it’s really not all that surprising that the download file size is much bigger than average. The 34 MB size doesn’t just contain the brushes but some convenient demos as well, to help orient you with the color textures as well as the brush strokes.
The reason why we list this brush set as a very varied one is because it contains a little bit of everything. From containing ‘fountain pen styles,’ to ‘loose worn-out paint brush marks,’ this brush set comes very highly recommended from our end for amateurs and professionals alike.
A new V5 version is out now; however, even though it’s a significant improvement in quality than the V4, it doesn’t have all the brushes that are available in the previous version.
This brush pack is from the Mumbai based illustrator Raghavendra Kamath, which has been there on several art sites for some time now. It supports Krita versions all the way back to 2.0 and is absolutely free to use and download.
You might be thinking that these brushes might just be too old and lacking in quality when compared to newer alternatives, but you will be quite surprised to find how consistent and versatile they are.
The pack contains a handful of some traditional brush styles like sponge brushes, custom pens, as well as some stamp-styled brushes, which are incredibly high in stroke quality.
Additionally, even though this brush set is up for grabs on so many art sites, it’s best to download it from GitHub where it was originally published.
But it’s important to note here that this brush set is quite old and the features have not been updated or patched with the latest Krito versions
Hence, some of the applications might be a bit buggy, and you may not be able to get what you want as a result. These are just some of the things to keep in mind when using this brush kit.
Jackpack’s Krita brush bundle is the newer design set which we have recently had the opportunity of using.
The presets and the features are pathed with the latest Krita 4.0 version and work seamlessly with the program to help artists have an amazing drawing experience.
However, just because these high-quality features are patched to the latest version doesn’t mean that they will not be supported in the older Krita models.
It will effortlessly run without a problem till V2.8, but for anything below that, it’s better to test out the compatibility first.
Now, in terms of the advantages: all of the brushes present in this brush kit are designed with ‘pixel-perfect’ strokes in mind. Hence, it will allow you to customize and resize the brushes in whichever way suits your art and style.
But, not all the brush features will support the same level of mirror symmetry, and you will have to experiment with it a lot to see which ones will work the way you want it to and which ones wouldn't.
The whole pack comes free of cost in the Gumroad main website; and if you do want to make a donation to them, there is an option in the website which will allow you to do just that.
These Hushcoil Brushes are a relatively newer set to the Krita 4 version and pretty unique in how it goes about its brush stroke use and the range of features it houses.
These brushes are quite detailed, to say the least, and contains about 280 different formatting features, allowing one to be very versatile with their art styles and designs.
Primarily, the brush kit has four bundle packs, each representing a different type of classification from Concept to Paintbrush, to the Pen and Pencil and the Basic work set.
Where the Concept and the Paintbrush category appeals more to the more adept professional users, the Basic brush kit, on the other hand, is just perfect for beginners as well as amateur Krita users.
Combining these different categories together, you will be able to create some very unique and different brush strokes and have access to a wider range of art styles which you otherwise wouldn’t.
If you want to download these brush sets, then you will find them hosted on Gumroad for free. Gumroad is an amazing site for marketing such brilliant digital painting tools, and it showcases a lot of the sets made by this particular creator.
Making cartoons and anime pages on Krita is incredibly fun and easy. So if you’re inner mangaka is itching to make its very own webtoon serial then this brush set is a must-have.
Now, this brush kit is pretty exciting to use. As it mimics the traditional cartooning tools like pens and brushes, it will allow any artist to make those classic comic designs and graphic novel sketches very easily.
However, even though they might mimic the traditional sets, don’t for one moment think that they lack any sort of stroke quality. Every brush in the set works at 300 DPI, and you will be able to design artworks in high-def quality and make unique designs for digital screens.
And if you’re not all that sure if you want to use these brushes at all or not, then the Deviant Art main page has a small sample of the brushes which you can use and get an idea about them.
So, do feel free to try out this amazing brush set whichever way you want, and experiment with different styles and stroke settings, to see which of those will match your tastes and which ones wouldn’t.
David Revoy is a superstar in the digital designing world. Apart from making high-quality graphic designing tool and brush kits for the Krita platform, he also has a YouTube channel where he teaches newer Krita artists various applications and features that the platform allows.
He helps to inspire them to try out new styles and stroke and also encourages them to learn as they experiment.
This brush set from him focuses more on the charcoal shades and strokes. However, these tools are primarily designed as custom brushes, and not every user will have much use for them, especially the ones who are much more experienced with actual charcoal work.
The brush kit comes with three separate brushes, each catering to a particular art style and art genre.
They are very easy to install and patches rather well with the latest Krita versions and has a set of convenient features as well
In terms of variety, the brushes range from super thin to very thick and painterly. So, if your art needs more detailed strokes or broader outlines, you can rest assured that you will be able to achieve both with this brush kit.
The second version of Nylnook’s brush pack series is, without a doubt one of the best sets geared towards the traditional pen and paper style.
This pack is not all that well known and has slipped through the notice of many professional users. It has about 36 brushes and stroke styles available, which may not be much, but the sheer quality of these strokes is just astounding.
Moreover, we believe that these brushes might just be exactly what a beginner needs to get a better grasp of Krita and all of its various features. The pack also comes with full details about the brushes, as well as the techniques, along with the installation instructions on both the Faramagit page and the original blog post.
The brush tool is well patched by the creator and is regularly updated to fix bugs and compatibility issues which may occur with the improving Krita versions.
However, with the limited amount of brushes and stroke styles, this pack might feel insufficient by the more adept users. But these 36 brushes are ideal for the beginner who is still getting the hang of Krita.
The Krita V2 Brushpack is the more user-friendly brush pack set from David Revoy which a lot of beginners tend to opt into when getting into the Krita platform.
So, what makes the David Revoy beginner set one of the best?
Now, the popularity of this brush set has a lot to do with the variety and versatility of the brushes that are present in them. They are also very easy to use, comes with their own instructions, as well as a tutorial guide to help get you up and going.
From light sketch pencils to digital inking pen to even eraser styles and paint brush sets, this brush pack comes with a lot of amazing tools and features.
It has around 64 brush styles and is going to be our recommendation if you are new to Krita and want to master the platform as efficiently as possible.
If you want an example of what this brush set is capable of, then you can take a look at David’s work on Patreon.
He does the whole work with the brushes available on the set and goes about manifesting the art in such a way that it’s going to be rather easy for anyone to mimic and follow.
Though made initially for the Krita 2.9, you will still be able to use the David Revoy Painterly Brushes on any version of the painting platform.
This set of primary brushes are more catered towards the needs of more adept Krita users than beginners really. But the newer users can still try out this set as the brushes here are very easy to use and install, and is very rich in stroke quality as well.
These painterly brushes are modeled after the real bristle brushes and mimic most of their stylistic patterns and strokes.
The pack comes with a handful of brushes that David often uses and showcases on a lot of his Krita tutorial videos. He basically uses them to paint certain art tropes like backgrounds and stock images.
These are also the brushes which he uses in his webcomic series called ‘Pepper&Carrot.’
In many of his tutorials, he teaches how one can use these brushes to make a lot of unique color blends. The blending styles is where the real magic of these brushes lie; being able to work with opaque colors as well as lighter ones to create new blends is what makes this set so very fun.
The quite popular digital artist Vasco Alexander Basque has created a very special set of custom watercolor brushes just for Krita users.
The brush set has a varied collection of brushes and stroke styles, with features that support dabbing as well as splattering. Dabbed and Splatter brushes can help you get a wider style range with your strokes, and make certain works like bricolages and abstracts that can truly refine your skills with the Krita platform.
However, these two are not the only brush styles that come in this set; there are other such tools which offer a much-refined stroke for detailed works, which can be easily controlled and used.
If you’re fairly new to water coloring in Krita, you can try your hand at small projects with this set. They are free to download from GitHub and is compatible with all the versions of Krita above 2.8.
But, do keep in mind that the strokes of these brushes are designed to be fairly small with a size range of 30px to 100px. They might be a bit low in quality, but the amount of things you can achieve with them is just amazing.
The minimalist brush pack by Aliciane is another brush set which is just fantastic for the newer Krita users.
Elésiane Huve (aka Aliciane) is a freelance illustrator and digital painter who uses Krita as her main digital platform for all her works.
He has made this brush set for the newer users, derived from the David Revoy amateur brush sets, with some changes here and there. She has tried to make this a very basic set which will help the newcomer get an idea of how Krita works and how he/she can go about the platform to make whatever they want.
When compared to David’s set, the brushes here have altered line widths, a different line cleanliness, and opacity sensitivity, especially while making marks with more pressure.
It comes with a few unique brush types as well, such as the smudge brushes as well as a custom move tool to add the much-needed versatility to this otherwise simple and minimalist set.
The pack comes with 8 brushes in total, which is pretty small, but considering these are aimed to aid beginners, one can hardly complain. They are also free to download and work flawlessly with Krita 2.8 and higher.
Aldys Brush Pack has been around in Krita for a very long time now, and may just be the oldest on our list today, even older than the Raghavendra set.
Now, what makes them such a popular choice for a brush pack tool in Krita, is how beginner-friendly these brushes are. The brushes are incredibly basic and consist of a little bit of everything, and is just fantastic if you ever feel like flexing your artistic skills and trying out something new once in a while.
From containing airbrushes to oil brushes to smudge graphite as well as some pattern brushes, they have a lot of versatility amongst them.
However, these brushes are quite outdated, and we would not recommend that you do any form of commercial work with them as there might be some compatibility issues with the latest Krita versions.
The DPI is also not all that high, and it may disappoint in certain aspects of your professional work, and you may not be ultimately able to achieve what you set out to.
Final Thoughts
For digital painting, concept creation, or even for making your very own webtoon, Krita is an amazing platform to have. And we hope that our list of brush sets today was able to help you in understanding this platform a bit more.
The structure of a home is an important element which defines the outward look but also the interior spaces which will be used. Since the inception of a plan , a structure may define the future living experience , a variety of materials can be used and time again new materials appear , at first they are quickly dismissed but in time they gain momentum and their use is widespread. Today , the choice in materials and structural components is greater then ever , and materials tend to take into account not just the immediate issues of weight flexibility but also the larger economical context , its easy use etc. Containers fall into a specific category of structures , because through their shape they can be easily adapted into a living space and as far as structure goes they are more or less a complete metal box . Their wide use makes them easy to come by and their geometry creates an opportunity to create a comfortable home while at the same time repurposing materials and making a great conversion from transport/cargo to a more enduring role suitable to their metallic components.
Architects offer a wide range of solutions , both stylish and contemporary , proving that design can go a long way when it comes to conversions , but also the fact that the metal box-like structure and its basic layout can easily be adapted . The material itself has many uses , but in this installment it doesn't just justify costs but also provides an adequate use for a material so precious and enduring such as metal , thus offering houses with a sturdy flexible structure.
Shipping Container Homes
#1 Maison Container Project by Patrick Partouche
Maison Container Home Realized by Patrick Partouche
First is the House designed by Patrick Partouche-called the Maison container project. The containers create here an interesting volume through their position in relation to each other, creating an interesting and simple facade . Located on a 2,240 square feet area near the river Lille in France , it cost some € 221,000 to build this lovely house.
The interiors make full use of the container structure and their ability to join and create wide spaces , thus a comfortable interior is located inside with a grand opening toward the garden . This container home is perfectly balanced both in its outward looks and in its interiors.
Shipping Containers Left Intact to Enhance Privacy
Lovely Hammock in the Living Area Providing a Comfortable and Care Free Seating Option
Spiral Staircase Leading to the Top Floor of the Container Home
Bright and Bold Shades Adding a Vibrant Touch to the Furniture
Contemporary Kitchen Featuring a Stainless Steel Countertop
#2 Old Lady House by Adam Kalkins
Adam Kalkins-Old Lady Home
Made almost entirely out of shipping containers , Adam Kalkin proves that a great solution that takes into account landscape and textures can transform the containers into a genuine living space.Taking terrain into account and having a central court/garden the house offers many wonderful perspectives and views and with its carefully selected interior textures , sliding glass windows and doors and eco-friendly materials creates a warm cozy home.
Container Home Lit Beautifully
.
Snapshot Inside a Container Home
Colorful and Bright Bedroom in the Old Lady House
Massive Use of Glass Allowing Natural Light and Ventilation
#3 Containers of Hope by Benjamin Garcia Saxe Architecture
Bright and Bold Design in a Bold Color
Benjamin Garcia Saxe Architecture and his "Containers of Hope " provide quite a high standard of living and an inexpensive option available to wide range of people. They are designed using just 2 containers , and giving a total area of just 1000 feet of living space , however coupled together with a minimal interior design and the way windows are positioned within the volume according to the function of a room , a spacious area can be simulated . They can easily provide an alternative for an apartment , and at just 40 000$ they can be a viable option for either a home , or a vacation retreat for the entire family . This specific design can be found outside San Jose, Costa Rica.
Access Into an Elevated Container Home
Containers of Hope Warmly and Cozy Lit Through Lighting Fixtures
Container Home Using a Glass for Transparency and Extensive Viewsa
Superb Interiors in Muted Tones
Bath Area Separated Through a Glass Partition
Striking Pendant Lamp Steal the Show in a Cordell Shipping Container
Cordell Shipping Container House with a Smart Use of Flowing Space
#4 Crossbox House by CG Architects
Green Shipping Container Home
Nest up is Cossbox House designed by CG Architects. Made out of shipping containers , it creates a playful and stylish image , one that can easily be integrated into the look of contemporary architecture . With carefully selected textures and colors an interesting outward image is projected on to the viewer . But this is not all because the interior is just as chic as the exterior and relates in an interesting way with the surrounding landscape. Its an intelligent design with refined look and use of lavish wooden tones , simple finishing of the walls in white coupled with wide space impression given by the simple geometrical shapes of the containers .
CrossBox Shipping Container Home With a Modern Look
Green Shipping Container Home
CrossBox Shipping Container Home Sheltering Exquisite and Extravagant Interiors
CrossBox Container with a Lovely Warmly Lighting and Expansive View
#5 Private Cabins at the Alterra Beach Resort
Container Cabins at the Alterra Beach Resort
Alterra Glamping on the Pinamar beach in Argentina is a wonderful colorful resort and with the help of architect Clorindo Testa an eco-friendly touch was added by using old re-purposed shipping containers as private cabins on the beach for tourist and guests . The cabins offer all contemporary luxuries in this resort hidden from the noise and hustle of the modern world . The design is based on the relation of the cabin with the surround natural background , thus ensuring a serene and peaceful atmosphere for the occasional guest/tourist.
Lovely Patio Area in Permanent Connection with the Exterior
Shipping Container Cabins Located at the Alterra Beach Resort
#6 Shipping Container Guest Houses by Poteet Architects
Poteet Architects bring you an alternative to the tradition guest house with this cheap and minimal design that couples the simple geometry and looks of a container with a warm interior design using wooden finishings for the wall and floor . The design even provides a patio space on which you can enjoy the surrounding landscape . The patio and giant glass sliding doors create an interesting connection with the exterior landscape and add up to a very crafty idea . This way you can easily incorporate the design into any any housing plan easily!
Elevated Platform Offers A Stable Base for the Container Home
Vivid Decor Nestled in a Compact Interior Design
Glass Windows Connecting the Exterior With the Interior in Magnificent Manner
Natural Vegetation on the Rooftop Regulating the Temperature Inside
#7 Vivacious Shipping Container Homes by Marcio Kogan
Marcio Kogan creates and interesting experience through the use of painted shipping containers , but the trick is they are just the main part of his composition that uses shipping containers to play with color and texture. Unlike previous examples he does not utilize exclusively just containers but rather they are an important element in the entire house as a whole . The space is carefully crafted around the idea of a more traditional house but every space complements the other so that together with the containers create an interesting living experience.Its colorful design is natural for the brazilian lifestyle , creating an interesting volume that is exciting and enticing .
Brilliantly Colorful Painted Shipping Container Home
Modern Interiors with Cool Pendant Lights
#8 Casa El Tiamblo by James & Mau Arquitectura and Infiniski
Casa El Tiamblo Realized Out of a Shipping Container
Designed by James & Mau Arquitectura and Infiniski, Casa El Tiamblo brings a new option to the table , using blue shipping containers , they create a metallic rough exterior that opens up the interior spaces towards the garden. Other than the standard shape of a container that gives the rooms a specific geometry , the interiors can fool anyone into thinking that containers are not part of the house design. This project showcases the fact that comfortable living conditions can be achieved using minimal and cheap structures such as shipping containers, with a clever and extravagant interior design much can be achieved in the way of atmosphere and feel.
Luxurious Bedroom Inside the Casa El Tiamblo
Open Modern Kitchen a Container Home
#9 Shipping Container Home in Colorado by Studio H: T
Designed by Studio H: T, the volume of this house is made by wedging together 2 shipping containers , but coupled with the context of the landscape it creates an unique solution , that shows how containers can be used to create high standard home. While the intersection of two simple geometrical figures may not sound like much ( since shipping containers are used) , what they manage to achieve with this in the interior is truly remarkable. Passive cooling technology, water recycling units and solar energyensure that the house is autonomous and independent, especially given its location in wild landscape of Colorado.
Colorado Rocky Terrain Carrying a Shipping Container Animated by Life
Interior Design in Dark Hues
#10 Take a Break with Starbucks Crafted from Shipping Containers
Innovative Starbucks Design in Washington Crafted from Shipping Containers
The Starbucks drive-thru in Tukwila, Washington has been created using 4 shipping containers , the same used by the company . The idea to use the shipping containers that are used by Starbucks belonged to Tony Gale , the company architect. The idea suits well the purpose , and conveys very well the feeling of mobility that a drive-thru should have. While not exactly a house or a home it proves the infinite possibilities of shipping containers , and how a high quality architecture can be achieved and at the same time a great conversion of older , long serving shipping containers is achieved.
Four Starbucks Containers Used as a Structure
Starbucks Drive Through
Innovative Starbucks Design in Washington Crafted from Shipping Containers
#11 Green Frame House by Studio Astori De Ponti Associati
Minimalist Look Inside the Minimalist House
This modern home design by Studio Astori De Ponti Associati presents itself as minimalist stylish and even futuristic option. while it does use the conventional structure of a shipping container it communicates with the exterior far more then other designs based on shipping, thus relying more on intelligent interior design to create a pleasant and stylish living space both inside and outside . Through its large windows the interior communicates and transmits the interior image to the exterior , so its transparence helps make up for shortcomings in exterior geometry and texture. A truly smart design indeed !
Green Frame House
Minimalist Design Showcased in Shipping Container House
Container Home Exuding Italian Flair
#12 Prefab Shipping Container Home from Home Contained
Prefab Container Home
However you try , the original look of a container will always be industrial and rugged, and while some may like it , it wont fit anywhere and everywhere and in every context .The prefabricated container homes designed by ‘Home Contained’ tries to create home , but using the cheap structure of a container, adding to this structure not just by changing the color but also by using more elaborate interior textures co cover up the original appearance of the container. This includes numerous other additions such as glass curtains , concrete patios and anything that can be added to alter the image of "life in a shipping container". Home Contained creates in this way viable alternative for more traditional homes.
Elegant Flowing interiors Nestled in a Shipping Container Home
Lovely Patio Area in Permanent Connection with the Exterior
Cool Blue Hues Enhancing a Refreshing Bath Area
Colorful Decor Giving the Home a Vibrant Look
Lavish Bedroom Interior Design in Calm Relaxing Tones
Neat Organized Shelf Space and Floating Cabinets Enhancing the Feel of Space
#13 Shipping Container Office Space by Lab Inc.
Shipping Container Office Space by Lab Inc
After a coffee shop , we can't ignore a more traditional use for shipping containers such as offices. The solution is based on the idea of creating a pleasant comfy work place using a cheap structure close to home . This option offers an interesting solution , the design coupling two of the main uses of shipping containers , the office has an ergonomic , minimalistic design that is pleasing and comfortable for the every day work , from 9 to 5 !
Office Area Nestled in a Beautiful Natural Setting
Beautifully Organized Ergonomic Interior Design
Patio Area Meant to Break The Routine
#14 Fascinating Shipping Container House in California by Leger Wanaselja Architects
Container Home in California With Superb Aesthetic Values
Container homes don't come in just one floor , this option gives its user not just the first floor , but also the look of normal house . Incorporating two shipping containers , it manages to create a traditional house image , without any difficulty . Using shipping containers and not being able to tell is a great achievement , and this design looks every bit like the house "next door ", but also using a cheap , fast structure that is enduring and durable. Leger Wanaselja Architects created this house by stacking 2 container , one upon the other and then intelligently arranging the interior to create a large living space and comfy bedrooms. Having 1,350 square feet and a two-floor living room , coupled with the solar powered energy this is a very attractive option.
California Container Home Wearing a Traditional Structure Apparel
Regular Interior and Exterior Design In a Container Home
Living Room Area in a Stacked Shipping Container House
#15 Colorful Cordell Shipping Container House by Numen Development
Home Realized out of Cordell Shipping Container
Architect Christopher Robertson from Numen Development brings another home from a container , that looks and feels both spacious and complete . Through use of various other materials and clever interior design , the classic image of a container home is completely covered . Robertson's design creates some of the most interesting spaces and images , rivaling those found in a conventional home , with a much more expensive structure. Using 4 containers , 2 40 foot for the living room and bed rooms , another container 20 feet long for the kitchen and the final one as a guest-room , a complete comfortable home for any standards was achieved.
Cordel Shipping Container Home With Impeccable Interior Design
Cordell Shipping Container Home Seamlessly
Cordell Shipping Container Home Sheltering a Contemporary Kitchen with an Ergonomic Form
Cordell Shipping Container House with a Smart Use of Flowing Space
Striking Pendant Lamp Steal the Show in a Cordell Shipping Container
#16 -2+ Weekend House by Jure Kotnik Arhitekt
Crafted from ConHouse container units, the 2+ Weekend House from Jure Kotnik Arhitekt this house is the embodiment of fast easy and chic . Although these shipping containers were crafted for this specific purpose , it is proof the ever growing popularity of containers as homes. Emphasizing mobility and ease of access and construction , its a cheap fast solution that provides some architectural quality for people who want either a cheap solution or tend to move a lot.
2 Plus Weekend Retreat in Black and PInk by Jure Kotnik
Narrow Creative Staircase Leading to the Top Floor
#17 Jean Nouvel’s Les Grandes Tables
The Les Grandes Tables of Seguin Island in France is a perfect example of how using basic recycled shipping containers as a structure , with enough additions a completely different image can be achieved , opposite to the basic geometry of the containers. It embodies the idea that with minimal resources architecture can achieve a maximum effect . Located inside the structure is a restaurant for 120 guests and greenhouse for more exotic plants , which are uncommon on the island. This a shining example of how modern architecture can achieve a spectacular result using minimal means and resources.
The Jean Nouvels Les Grandes Tables Restaurant in France
A Shipping Container Restaurant in Paris
Audacious Design Combining Creativity With Low Costs
#18 Boxpark Shoreditch: London’s First Shopping Mall Made Out of Shipping Containers
Containers as a high-quality shopping space (akin to a mall ) is a new idea and concept and the Boxpark Shoreditch is the first in this line , crafted using 61 containers, it appeared after several small business owners could not buy or rent any shops in the urban area of London . Hence came this idea that would solve this problem . More interesting through its use rather then design it uses 41 containers on the lower part and 20 on the upper floor. The flexibility and adaptability of the design makes up for the more rugged design providing a solution for customer and owner alike.
A Mall Realized Out of Containers Wearing Black
Shoppers Delight with Ample Choices in Black and White
The Boxpark Shoreditch Has Been Assembled Out of 61 Containers
London`s First Shipping Container Mall Interior Design
#19 Quebec Container Home by Maison IDEKIT
Shipping Container in Quebec
Bernard Morin and Joyce Labelle took the idea of a homes as shipping containers to a whole new level. Several designs often strive to either make a point out of living in a container and flaunt its exterior rugged and industrial looks , or try to cover it up as much as possible and make it look like a usual home as much as possible . This design answers the question "what if you only use the structure of containers and invest the same amount of money as you would in a normal house ? , how would the end result look ?", so here it is , a good looking villa . Though at its 3000 square feet and five bedrooms , costing a whopping 175, 000 $ it can no longer make a case for cheap fast and easy .
#20 WingHouse Unravels its Magic
WingHouse is truly unique in the way it adapts to the surrounding space and how it is built to generate spaces. The first odd thing about it is the fact that everything is cramped around in the same space. But here is where the design truly shines , using extendable wings ( extended through the use of a crane) the house can extend and create additional space for all your requirements. A great option for both a home but also for an office or business place , that can extend and expand to accommodate new offices .
#21 Redondo Beach House by DeMaria Design
DeMaria Design Envisioned Redondo Beach House
DeMaria Design brings us another design that integrates the containers both within the landscape and creates a nice exterior image without using the industrial look so often found in other container homes. Located in Redondo Beach California , the house's main attraction is the way in which it communicates with the exterior by way of access through the two containers which generate a hallway . The interior is thus quite introverted , da use of other materials like concrete to mold a beautiful modern exterior facade also helps bring this home to a higher standard than its original intended structure may have permitted.
Redondo Beach Home
A Sneak Peak Into the Interior Design of the Redondo Beach House
#22 Tommy Hilfiger’s Berlin Shipping Container by Artdepartment-Berlin
Apearing at the Bread & Butter Fashion Trade Show for internationally renowned Tommy Hilfiger brand, this idea takes shipping containers and turns them into an exhibition space , for Tommy Hilfiger. The interior is in this case WAY more interesting than the exterior , with a mix of containers placed in a witty way , some large spaces have been created inside this structure. The true nature of this container-museum is revealed inside , a place that showcases Icons in style and and fashion and the changing world trends . On the outside , the containers a direct aproach with painted on images , while on the inside entire rooms , streets and spaces of varying volume and atmosphere are recreated !
The Brand Hilfiger and Its Essence Is Carried Through
Fascinating Art Work in Vibrant Hues Splattered on the Facade
Fashionable Interior Design Flooded by Natural Light Enjoying Expansive Views
#23 Ergonomic Container Home in Mojave Desert by Ecotech Design
Container House in the Heart of the Mojave Desert
It seams we have another great design made entirely out of container units. Ecotech Design comes with this house employing 6 shipping containers , creating a modern looking villa with a single bedroom in the mojave desert. The design is all the more inspiring since it creates a modern looking home , without covering up the containers or using additional materials for better textures. Instead it uses white and grey for the volumes of the house , which against the background of the Mojave give it a very good contrast. The project emphasizes high-energy efficient design and low cost , making it a viable option for any place not just the Mojave Desert.
Container Home Located in the Mojave Desert
Mojave Desert Shipping Container House -Entrance View
Mojave Desert Shipping Container House Meant To Keep Away the Heat
Mojave Desert Shipping Container Home with a Lavish Design That Replaced the Traditional Residence
Bedroom Offering Expansive Views
Wooden Hues Giving the Home a Natural Touch
Ample Living Space Inside a Container Home
#24 Del Popolo Mobile Pizzeria provides a Great Idea for Budding Businesses
Del Popolo Mobile Pizzeria Truck
Homes are not just the only final means of the shipping containers , so if you are interested in a going into business venture that involves a mobile platform for serving and cooking food we have the thing for ! This is the Del Popolo mobile pizzeria and its a marvel to behold since this is a mobile italian traditional style pizzeria with an old wood heated oven to make the classic italian pizza recipes come true anywhere and anyhow . Jon Darsky spent about 180 000 $ to convert this container , but now he bring to anyone anywhere a classic italian pizza parlor , so tis worth the money!
Mobile Pizzeria Forged From a Re-purposed Shipping Container
#25 Danze & Davis Give an Extreme Shipping Container Makeover to a Texas Home
Extreme Transformation of Some Shipping Containers Into a Home
Finally we have this lovely home in Bastrop Texas , that proves once and for all that given enough containers you can achieve any final effect , in this case the end result being a warm comfy cozy house that offers a living experience of a very high standard. Despite using containers , this house is not constrained either in the interior space or the exterior look. This house makes the list for the fact that a great effect was achieved with few resources , not many exterior materials are used beside the containers to give it a modern and yet rustic and traditional look. Inside a comfy and cozy home awaits us . Danze & Davis have managed to create a genuine home that feels like so much more then the temporary industrial look of shipping containers. For its functionality and simplicity , but also for achieving a rustic traditional and overall pleasant outward look without using a lot of material other then the containers themselves , this design showcases the flexibility and adaptability of containers as a structure for our homes!
Inside the Container Home With Exposed Steel Surfaces
What do you think about these shipping container homes?
We would love to hear from you in the comment section below!
Located in the center of Prague, Czech Republic, the small apartment ahead is an oasis of inspiration, calm and equilibrium, sheltering breathtaking materials welded together with great refinement. The small tiny loft apartment has been envisioned by Radka Valova and Pavla Dolezalova of OOOOX Studio with a minimalist interior, black and white interior design completed by neutral shades of light grey and light wood textures. The small spaces generated are of an attic loft and happily the authors have used these shapes and volumes to their advantage, the work and dinning area being located directly under direct light. The storage is covered in mirrors which are emphasizing the feel of space, and the general color of the walls and ceilings is stark white enlarging the small spaces, making them brighter fresher and healthier for the eye.
The breathtaking small bedroom designshelters great ideas as well, the small reading nook under the window can work as a mini bed, which also has storage underneath, to use the space as much as possible. The entire apartment uses the black and white color scheme with little accents here and there, the interior images created being very dense and filled with bold accents of personality . This is an interior that`s very different from others, surfaces being enhanced with unique textures and unusual items.
As you can see despite the airy attitude the whole interior has a clear focus on artificial lighting, everywhere lighting appliances having their own role clearly defined. Even though we don`t have any pictures of the apartment in the evening animated by the sunset light and completed with artificial one we`re sure the atmosphere is rather scenographic and dramatic, such atmosphere and vibe should be the default asset of any black and white interior design in our opinion.
If you like blending colors and playing with different gradients, you will love pastel colors. They tend to color very easily, and you can find distinct shades too.
Being very easy to smudge, you can use them on smooth as well as rough surfaces. That’s not all! Play with different colored papers too, and you can create wonders on it. The white, lemon yellow and the grey color looks amazing on a black paper.
What’s more, simple items like cotton and rough paper can be used to blend the colors. But before you can get started, we have a list of 61 pastel drawing ideas to inspire you.
So, without further ado, let’s start exploring.
Pastel Drawing Ideas
Day And Night
This is a beautiful way of representing day and night in the same frame. Divide your paper into two and color each side differently. You can stick a paper tape in the middle to ensure the colors do not overlap. Once you are done, take the tape off, and you will have clear boundaries.
The Doorway
We love the lovely summer hues in this picture, and you can paint this style with any door. Draw a door that you relate with and pair it up with orange branches and colors of the day.
Birds On A Branch
If you like this design, draw the birds and branches beforehand and then color the background. You can use tools to blend it properly. Once done, use a black marker or sketch pens to draw the birds and branches.
Parrot
Bird lovers can opt for this beautiful picture of a parrot’s head. It is colored in shades of green and yellow, and we loved the detailing. Add some white to the eye for the shine, and you will have a masterpiece.
Sunflower
Painted on handmade paper, this is a simple and beautiful drawing of a sunflower. The rough texture adds to the beauty, and you can use yellow and peach with brown to color it.
Story Of A Dusk
This is a beautiful picture of dusk with the sun setting behind a pond and the light reflecting on it. It is not very difficult to draw and you should remember to color the trees and stars in the end.
Burning Candle
A burning candle against a dark backdrop is something that is easy to draw and looks beautiful. Pay attention to the shadows here and the color gradient that has been used.
Green Valleys
How many of you love open valleys and blue skies? This is a very appealing drawing of the countryside with a lot of green and blue.
Woman Potrait
If you like contemporary art, this is something that will please you. It is a picture of a woman which is painted in a very unconventional way. Look at all the colors that have been used to paint her skin while she stands against a red background.
Snowfall
Do you love winters? Then you will love this scenery of a snowy winter night. The moon shines bright behind and it looks mystical. Shades of blue and white have been mostly used for this drawing.
Vibrant Face
We have another drawing of a face here where the colors stand out. Use different color shades to color the face while using a grey and black pastel to make the eyebrows, lips, and nose.
Pastel Lines
If you want to paint something unique, this is an idea which you can try out. This picture has been drawn only with multi-colored lines that bring out the beauty of it.
Donut Oil Pastel
What about drawing your favorite dessert? Here is a plate of donuts that have been painted. One even has pink cream oozing out of it. We love the detailed work that the artist has created.
Girl In The Moonlight
This is a beautiful picture of a girl standing in front of a moon with a bird on top. The blue hues are beautifully blended and this giant moon takes a lot of the attention.
Owl And The Moon
We have another picture with the moon but here, there is an owl in front and the sky is painted purple. This looks mystical and you can easily create it with shades of purple and black.
Girl In Blue
Up next is a beautiful image of a girl colored in shades of blue. Her skin stands out and matches very well with the contrasting red and brown shades of her hair. The shadow effect is truly commendable.
Oil Pastel Portrait
Have you ever thought of painting a picture with lines? The artist has done a brilliant work in representing an entire figure with the help of blue, orange and red lines. We would recommend first drawing it out with a pencil.
Man In Bed
What stands out in this picture is the play with lights. Look at how the light falls and the shading that has been done on this man’s face. Also, the bright colors used make this drawing very vibrant.
Fairy In The Night
This is another mystical image of a fairy against the night sky. You can only see a silhouette which stands against the big moon and the tree beside adds to this enchanting scenery. Add some white stars in the blue background and you will have a masterpiece.
Morning Coffee
Here we have a girl holding a cup of coffee. The entire picture has a reddish tone and you will see that a lot of warm colors have been used. The placement of the face and her hair is something to notice.
Lazy Afternoon
Paint a picture of a lazy afternoon without actually showing the sun. This girl has her legs up on the wall with a pretty wallpaper behind. The pink and purple pillows compliment the blue wall and her pants.
Girl With The Book
This is a picture of a spring morning with a girl whose face is hidden by a book. The strategic placement of the bird makes this picture prettier to look at.
Modern Art
How about a minimalist art piece like this one which only shows two pairs of legs with a few wine bottles and a vinyl tape. This is very attractive and will work as a framed image that you can put up in your room.
Greenery
Remember the green meadows and countrysides where your favorite bunch of kids from Enid Blyton books would be roaming around? This is a picture that you can draw in remembrance of those happy times.
White Flowers
These white flowers look very pretty and neat against the green background. The flowers have been colored with white and blue to show the light and shadow effect. We love the orange in the middle which is highlighted in this picture well.
Candle Against Painted Glass
If you want an idea to get your kids started with oil pastels, then this can be a great source of inspiration. You will find a simple candle with boxes behind. It will help them learn to color within boundary lines and decide on which color fits with what.
Morning Scenery
This is a scenery that will immediately lift up your mood. It has a beautiful red roofed house with colorful plants all around .The brook adds to the ambiance and makes it prettier. You can give your kids this piece to recreate.
Desert and Camel
A sunset in the desert is already something beautiful. Imagine coloring that along with a silhouette of a camel in front. Pay attention to the color blending and tones that have been used.
Electric Wire Line Drawing
We have chosen this picture especially because of the beautiful backdrop that it has. The black silhouettes of these electric lines go very well with the blue, pink and yellow sky.
Magical Moonlight
Up next is an enchanting image of a girl performing magic. The sparkling fog with a pink undertone stands in contrast with the dark blue sky.
Flamenco Dancer Art
This is a drawing that represents a girl dancing. You can see her in motion and that has been shown with the help of vertical lines. The yellow and blue lines look beautiful and enhance the red saree that this woman is wearing.
A Mystic Poster
Here is another artwork of a woman. The entire face is not visible and the attention is caught not by her face but by her blue veil. The shades are beautiful and are complemented by Afghani earrings that are drawn in a detailed manner.
Girl’s Face
If you want to learn how to draw a basic human face, this could help you out. The texture of the hair and skin is something to notice and learn from.
Wine And Fruits
Do you want to practise shadow effects? This one will help you do so. The cloth behind along with the edibles on it are colored with proper shadows behind them. Learn about how the light reflects on opaque and semi-transparent surfaces.
Sundae School Ice Cream
This is a beautiful picture that will make you remember your childhood days. The brick house with large windows has been colored to perfection. This picture shows how you can add tiny details with pastel colors.
Eastern Bluebird - Giclee Print
If you are a bird watcher, this is something that will please you. The Eastern Bluebird is drawn on a white background and colored to perfection.
The Most Beautiful Place On Earth
What are the few things that can please anyone? A bright sky, the ocean ahead with mountains behind. Yes, it sounds perfect and now you can draw it too. This picture will be very inspiring in this case.
Original Pastel Painting Of The Lowcountry River By Kellie Jacobs
This countryside image with a river flowing in between can be extremely inspiring to draw. Check out the subtle shades that have used to give the painting a very autumn vibe.
Postman Joseph Roulin, After Van Gogh
Have you been interested in caricature drawing? This could be a great inspiration to begin with but you have to pay attention to the details .The beard plays a major role in making it look out of the box.
Sunset Drawing
What about a drawing with the typical sunset and silhouettes of trees in front? Yes, it looks breathtaking and you can recreate it yourself. Use a cloth or a sponge to blend the background and you should have a great picture.
Brown Dog
If you have a pet, you can create a picture of it. Draw your own dog and then color it taking inspiration from this picture. Look at how the shadows fall and how the fur stands out.
Landscape Marine Pastel Drawing
Up next we have a blurry image of the sea with a bright sky and people. The image was not meant to be clear and hence here, details are not important. What you need to focus on are the colors and you got to get the color and their positioning right.
Wine Country Oregon Wineries
This is a drawing of a winery that spreads over a large area. It is more drawn in an abstract form and is not very detailed. This will be easy to follow for beginners.
Do What- From Artist Wendy Leedy's Mule Collection
Here, we have a horse going to war.Notice these color tones that have been used which signifies that the picture is of the past.
Daenerys
If you are a fan of Game of Thrones, you will know the dragon queen, Daenerys. We love how white pastels have been used to make the hair. It is best to take an off white or a grey sheet to draw this.
Girl With An Umbrella
Here, we have a beautiful image of a girl walking her dog with an umbrella. You can see the silhouette against the brilliant bright sky. The background needs to be painted well to achieve the effect.
Vintage Abstract Expressionist Pastel Portrait
Next is a portrait of a woman who seems to be exhausted. It is a vintage picture and you will have to use subdued tones to achieve the effect.
Charleston SC City Scene Downtown
A balmy day in the middle of summer, that is what this picture reminds us of. Look at the brightly colored building and the cycles in front. This could be a great inspiration for beginners.
Sunflower Oil Pastel Drawing
Do you want a floral pattern that can be put up in your room? This bunch of sunflowers and white flowers look pretty and will add to the ambiance of any room.
Dumbo Pink Elephants
This is a unique piece that is made on black paper. Use bright colors to draw the elephants and color it up with strokes instead of blending.
Custom Pastel Cat Drawing
Next we have another realistic drawing of a cat. Look at how realistic it looks with its eye painted to perfection. You can use oil paints and pastels to achieve this effect.
Abstract Wildflowers
If abstract art pleases you, this is something that you can use as an inspiration. You will be able to see a number of colorful wildflowers growing and a faint view of a water body behind. The sky is beautifully colored and blended to achieve the shades of dusk.
Fruit Still Life Pastel Drawing
A palate of fruits is a great place to begin learning the light and shadow effect. Observe carefully how the shadow effect has been incorporated. The background cloth also has folds that have been highlighted.
Pet Drawing
How would you like a parrot painted in different shades. Pay attention to the feathers and make sure they are distinct. Using dark and lighter shades of the same color, you can achieve the perfect effect.
Alpine Painting Austrian Mountain Art
This is a beautiful example of a winter landscape with snow and trees. Since you are working with white, make sure that you get the shadows correct. Otherwise the snow slopes wouldn’t be distinguishable.
Expressive Portrait Art
This piece is focused on the face and the expression on it. Blue has been used instead of the typical black to draw the face and hair.
Pink Roses Soft Pastels Painting
This is a beautiful picture of a bunch of flowers. Pink, yellow, and blue are the dominating shades that stand in contrast with the dark background. Black has been used to provide proper shadows.
Vintage Artist Pastel Drawing of Laguna Beach California
How pretty is this view of houses by the mountain on a cliff. This is a vintage picture of a day with subtle shades being used to preserve the vintage effect.
Women Selling Fish Art
This is yet another vibrant picture of women with colorful saris selling fish. It is drawn against a midnight blue background and the yellow and bright green stands out.
Prima Ballerina
Made on Velour art paper, this is an oil pastel portrait to inspire. We love the expression and the use of various colors to highlight the face. The colors match the aqua green of her dress.
Bamboo Landscape Drawing
This is a closeup drawing of some bamboo plants growing together. If you want to keep a view of nature in your homes, this is going to be a great addition. The shades of green will go with almost all decor.
Final Words
Now that you have a set of 61 pastel drawing ideas for inspiration, you can finally sit with pastels and paper and begin coloring. Remember to add shadows and shades of the same color wherever needed. Blend well and use a rough cloth or cotton piece for it.
Some prefer to use textured paper, and that brings out a different kind of effect all together. We feel that you should try out different textures and shades before finding the ones you like. And please remember to let us know your favorites in the comment section below.
Using a planer in a workshop does not require the latest and greatest innovations to do a job well.
However, there comes a point where a little more power or functionality is needed when moving onto more advanced projects. Enter the WEN 6552 planer, a slight upgrade from its previous model with more features, packing a bit more power.
It should be noted that this unit is more suitable for those who have more experience with using power tools. For beginners or casual users, the model will serve its purpose well.
On the other hand, quality and efficiency are what it brings to the table. With several useful features, this benchtop planer is able to adjust and perform well, no matter what the project is.
Read on to find out what the WEN 6552 has to offer and what makes it such a good pick-up.
Onboard material removal gauge informs users about the...
Plane boards up to 6 in. T and 13 in. W
Why Buy This Product?
There are a few unique qualities that make the 6552 planer a standout above other average benchtop models. Some of these features are designed for specific purposes that can make completing a particular task that much easier.
If you are on the fence about this planer, here are a few areas where it shines. Who knows, perhaps it is the upgrade you have been looking for all along.
Increased Power And Three-Blade Design
There comes a point in woodworking where a power tool is unable to complete a cut or begins overheating due to the strain on the motor. More common in regular users and heavy-duty projects, this problem arises from time to time.
To overcome this, the benchtop planer shines in its upgraded power thanks to the 15 amp motor powering it. It is by no means a light performer and can handle heavy-duty tasks with ease.
Capable of reaching up to 8,500 RPM, it can give you the result you need in no time at all. To provide a specific benchmark on its speed, it can attain an astonishing 25,500 cuts per minute!
Taking full advantage of this increase in power, there is also an upgrade to the carbide blade system. Now packing three blades, the resulting cuts made by the unit are smooth to the point of making after-sanding an obsolete task.
What’s more, the number of blades has not only been increased, but the design of the carbide blade itself has changed. Now with a double cutting edge, these blades can be reused once it becomes dull on one side.
Simply flipping the carbide blade to the opposite side will give you a fresh set of blades with performance on par with a new set. This can extend the life of the planer blades immensely, saving you money, time, and energy in replacing an old set.
Precision And Performance
A feature on this model that more experienced woodworkers may appreciate is its built-in depth gauge. By controlling how much the planer cuts away from the material, you can achieve incredibly precise results.
With the dial and measurement tool included on the planer itself, a number of cutting depths ranging from zero inches to 3/32” are possible. With such a variety of options to choose from, it is able to perform even the most precise cuts. Complete control and precision are the key benefits to using a more advanced planer, such as the 6552.
Additionally, the tool is self-feeding, which means it is able to pull the boards into it automatically. The double rollers within the planer will align the board and minimize the snipe. As a result, these rollers extend not only the life of the board but the planer itself.
Another helpful feature that improves the performance and efficiency of this unit is the upgraded support tables that make the most space on the planer. Located in the center of the worktable under the cutter head, they can fold away for a smaller footprint.
Alternatively, these tables can be adjusted to accommodate larger pieces of wood. The table’s surface has been improved to have a smoother transition when feeding wood into the planer.
Build Quality And Portability
With a cast-iron casing, the WEN 6552 is built to withstand many uses over a long time. The protection of the inner mechanics by this housing allows it to last longer while maintaining its efficiency.
Furthermore, the cast-iron shell is less prone to becoming brittle due to exposure than a plastic shell. This allows the planer to remain durable even if left exposed to certain elements.
As far as benchtop planers go, this option lies more on the heftier side. However, it is by no means cumbersome to work with, but it may cause some difficulty in portability.
Besides being a bit more challenging to carry around, the extra weight of the planer works to its advantage. Having extra weight brings more stability to the tool when being used.
Coming in at 66 pounds, the WEN planer is quite heavy for a benchtop model. To compensate for this hefty weight, there are a few features to help make it as easily portable as possible.
Carrying handles are placed on the sides of the planer for a solid grip to hoist it around. Additionally, the tables on the infeed and outfeed can fold into the planer itself for a smaller footprint.
While these features may not lighten the load, it does help in making it more compact and manageable when on the move. Additionally, these features can be taken advantage of by those with smaller workshop spaces.
Useful Features
WEN has included a few extra features that can make using this product a more convenient experience. These features add value in functionality and efficiency.
An especially helpful feature is the built-in dust port. Having a dust port can make cleanup so much easier by having all your dust and debris collected in one place for easier disposal.
However, a dust port on a planer is not a unique feature; there are many other models which make use of a dust port. The model differs by having a fan to blow the dust into the collection port.
By blowing the debris into the collection system, there is minimal clogging of the machine’s ports and internals. Overall, the dust collection system is top-notch and makes maintenance and cleanup a breeze.
Another helpful feature is the mounting holes on the base for increased stability. For heavier tasks, these holes can add more security with little to no effort.
While the WEN planer may have a durable cast-iron casing, the internal mechanism is not so sturdily built. Within the planer, the choice of materials used does not inspire the most confidence.
Perhaps done to minimize the cost of the planer, WEN has used plastic molds to make up some gears. These gears are an integral part of the planer’s mechanism and can handicap the entire machine if broken.
Being made of plastic, the gears are more susceptible to breaking or being damaged. Of course, the brand compromises this by providing a two-year warranty. Additionally, it should be noted that the occurrence of the plastic gears breaking is not universal but rather a more case-by-case scenario.
Another potential drawback to using this model is the loud noise level while using it. It is not to the point of being deafening, but it can become uncomfortable if operated for an extended period of time.
Pros
Three-blade design for greater efficiency and quality results
Precise thickness adjustment
15 amp motor capable of up to 8,500 RPM
Cast-iron housing for stability and durability
Adjustable tables for infeed and outfeed
Cons
It can be uncomfortably loud when used extensively
Before fully settling on whether or not to pick up the WEN 6552T planer, keep in mind a few points that can sway your decision. Choosing the most suitable planer model for you can help increase your efficiency and quality of work, so make sure your decision is a well-informed one.
Motor
Benchtop planers do not have the most outstanding stability as they are designed to be portable and compact. As such, the motor that powers the blades can determine how efficiently it is able to cut through different types of wood.
A weak motor can struggle with hardwood by not providing enough torque to the blades to make a clean cut. Similarly, the quality of the resulting cut may not be as smooth as that of a powerful motor.
In order to have the best result in a planer, look for one that is capable of at least 8,000 revolutions per minute (RPM). This speed is sufficient to handle most hardwoods with satisfying results.
Additionally, having a more robust motor in any power tool helps cut down on heat production. The motor can handle denser and tougher materials easier, so the strain on it is less. On the other hand, weaker motors are prone to heating up more when working with these same rigid materials.
Experience And Use Case
As is the case with any woodworking tool, every purchase is an investment. Choosing a power tool based on how experienced you are can help you to get the most out of it.
It may be tempting to go straight for the most advanced models available, but these do not come at a cheap price. Additionally, you may not have the expertise or knowledge to take full advantage of the features a more complicated model provides and use it to its full extent.
Furthermore, depending on what task you have in mind for the tool, it can vary the options available to choose from. Light and straightforward tasks can be taken care of by a similarly simple tool. For complex and heavy-duty users, a more complex model may be necessary.
Build Quality
Planers are subject to a high level of wear and tear while being used. Debris and wood chips flying about can damage sensitive parts and bring functionality to a stop.
To ensure your planer has the best performance possible, it should be made of quality materials. Especially important in benchtop planers, the machine’s build material can determine how well it holds up over time.
Sturdiness can be a hit or miss with benchtop planers as they need to remain portable enough to fit on a workbench or table. Furthermore, the planer must also be able to support itself when being used. A shaky planer can only result in a low-quality result and potentially damage the machine or yourself.
Blades
Typically, benchtop planers come with a two-blade system. It can be said that the more blades a planer has, the smoother the resulting cut will be.
Having more blades is not just a marketing scheme to up the price of a planer. By having more surface area to cut away the material, the planer is able to make a cleaner cut with minimal strain.
Additionally, more blades prevent wearing away to a certain extent. Instead of having two blades take the full brunt of the chipping and blunting brought on by usage, multiple blades can distribute the breakdown across the blades.
Your blades will last longer while providing a higher quality finish. If possible, investing in a model with multiple blades can be an excellent investment.
Cutter Head
Besides the number of blades a planer has, the type of cutter head can give differing results. There are two variants of cutter heads available-the straight knife cutter head and the helical cutter head.
A straight knife cutter head is the more common head type of the two. This type is built to handle most daily use cases.
However, for a more heavy-duty capable head, the helical cutter head is a better option. While this option is more expensive, it is also more durable and, as such, can handle tougher woods.
What sets these two apart is the positioning of the sharp bits on the surface of the wood. Straight knife cutter heads have a more direct approach which can be susceptible to breaking and chip away faster when dealing with more challenging surfaces.
On the other hand, the helical cutter has a slight spiral that allows it to pierce the wood at an angle. This gives the cutter head a sharper point for cutting into more robust surfaces.
A quality planer will be capable of accommodating either cutter head type. Using these interchangeably is the way to go to maximise the efficiency of your planer.
Maintenance
Keeping your woodworking tools clean is an important preventive measure to take to maintain the performance of your planer. Dust and dirt accumulation within the mechanism or on the body of the planer can cause malfunctions, decrease efficiency, and even cause health problems.
How easily a planer can be cleaned is another factor to keep in mind before making a purchase. You should be able to access and clean the planer easily as and when it is needed.
Some models of planers have a dust collection bag system where most of the residue is collected by the planer itself. This waste is stored in a bag until it is full, making it only necessary to empty it out when full.
Additionally, there are more advanced maintenance options available such as a fan to blow the dust into the collection system. This keeps all the dust flowing into the collection system with no refuse left behind.
This collection system is more efficient than a regular dust collection system as it makes sure there is no blockage in the piping of the system.
What’s more, a regular collection system will not be able to collect every single piece of dust. There are still some small traces that need to be manually cleaned up. A fan attached to the dust collection system removes this extra step of maintenance.
Warranty
Purchasing a quality tool can be expensive, so selecting one with insurance against any potential mishap can save you a costly repair job. While not a requisite, it is still a good safety net should anything go wrong.
Now that you know what makes the WEN 6552 planer so unique, is it a good idea to invest in? For those who are working with a large number of projects or need commercial-grade power, this model may not be the right one for you.
However, if you are a moderately experienced woodworker and need an improvement from your old planer, it is a great investment. The useful features can help add a new level of quality and efficiency to your projects.
Investing in this model gives you incredible performance and power for an affordable price.
When it comes to design, going simple is always a good choice. You don't want to be the one who overcrowds a space and goes overboard with details, textiles, textures, colours and materials. The following dream home has surrounded itself with nature and went along that very one suggestion: pure concrete, in raw form, transformed and molded in different shapes and sizes, creating in the end the perfect modern dream home. Dark wood was been used as accent to warm the atmosphere, giving it a more elegant touch and fines.
Huge glass walls offer a beautiful view of the surrounding environment, lighting beautifully the clean smooth surfaces and connecting the exterior with the interior design and life.At night, the shimmering lights transform the entire property, reflecting in the long turquoise swimming pool and emanating a luxurious feel. Minimalism defines the created spaces and keep the atmosphere light and fresh, without being cold and unwelcoming, a truly modern dream home for the ones who appreciate the simple things in life.
When a budding painter squeezes out a dab of acrylic paint from the tube for the very first time, more often than not, he/she is quite taken aback by the sheer thickness of the paint.
This is what puts off a lot of acrylic beginner painters from trying out this paint medium in the first place.
Even if you’re itching to represent a piece and looking to use the color depth of acrylic to put your ideas to canvas, things might not go as you may have imagined it.
Before using acrylic, it needs to be thinned and prepared, and this, by all means, is the hardest part of the process. A lot of things can go wrong at the same time, and without the proper knowledge and know how it will be very difficult to get the shade and viscosity that you desire.
However, to help you out with all your acrylic thinning needs we have brought a guide that not only covers the basics behind the process but some of the more advanced steps as well.
There are a lot of ways to thin acrylic paints, but we shall be going over the more common ones: like water, and additional mediums.
So sit back, and read along.
Acrylic Paint Thinner 101 | How to Thin Your Acrylic Paints
What Exactly are Acrylic Paints and Why Do They Need Thinning?
Before we get into the entire acrylic thinning process, let us first go over some of the basics of acrylic paint; primarily their construction and their very form and nature.
Any artist worth his/her salt will be able to tell you the importance of certain solvents such as odorless mineral spirits and turpentine. However, the more adept and professional painters know the characteristics and the composition of the products they use inside and out.
And acrylic, though might seem daunting at first, once you get to know its very nature and characteristics; the entire process of dealing with it becomes significantly easier.
So what exactly is the nature and characteristics of acrylic paint?
If gone by a simpler definition, it can be said that acrylic by its very nature is a water-soluble paint medium. When added to water it will slowly start to dissolve and become thinner in as a result.
Herein lies the contrast between acrylic and the more oil-based paints. Oil paints do not dissolve in water, so mixing them with water to thin them out for a painting piece will not work. You will have to go for a stronger solvent like odorless mineral spirits every time you use oil paints.
Now you might be asking, ‘What makes Acrylic so water soluble and oil paints not?’
Well, it all comes down to the binding agent present in the paint. Acrylic paints exclusively rely on ‘acrylic polymer emulsion’ which is a binding agent that is highly soluble in water, and thus grants the paint that very property.
Additionally, this polymer also comes with a coloring pigment [which grants the paint its color] which again is a great water-soluble agent.
Hence, it’s not surprising that acrylic breaks down so quickly and thins out when water or any other medium is added it. Thinning the thick and extremely viscous acrylic paint even out its consistency and makes it quite akin to that of watercolor or even gouache paint.
Water - The Primary Acrylic Thinner
Water is perhaps one of the most effective and pocket-friendly thinning mediums that you will ever come across. Needless to say, it’s practically free and a much cheaper alternative to the more expensive mediums that you will find in the online market and retail stores.
But, before you jump the gun here and immediately start adding water to your paint, it’s important to keep in mind that when it comes to acrylic, you can’t just blindly add water to it.
This is one mistake that a lot of amateur artists make, and this is also where the importance of a complete knowledge of acrylic’s composition comes in.
When it comes to adding water to acrylic, you will need to be extremely cautious. And in our experience, it’s best to not mix more than 1:2 (50%) ratio, or it won’t turn out like the way that you want it to.
Adding too much water and over-saturating the paint can cause the paint to peel and flake from the canvass after it dries. The chances of chipping are even greater especially if the surface that you’re adding it to is a primed one.
But to get the ratios completely right, one trick that we can suggest you try, is to moderate the thinning process. You can do this by either mixing the acrylic with water on separate palettes or in a small cup.
This will prevent a lot of the water seepage, and help you get the viscosity that you’re looking for.
Finally, you might feel that a palette knife can be the best tool for mixing the two. Well, this might have been true for other paint mediums, but not acrylic.
Palette knives have a tendency to make the acrylic mixture too thin. So, you’re better off using a cheap spare brush for the mixing process, which you can easily rinse off later on.
Other Acrylic Thinning Mediums
Often advertised as ‘flow improver’ these mediums are specifically made to thin acrylic paint. However, they are quite expensive, and we will be recommending them more for professional use than domestic and practice artworks.
These mediums have the unique ability of getting your acrylic paint to the level of a stain which is even thinner than a wash. This opens up a whole new field of options and techniques that you can use and explore with your acrylic paint.
Additionally, they are much easier to apply than water, you don’t have to constantly keep in mind the ratios, and best of all there is no need to worry about flaking and peeling as well.
The flow improvers come equipped with acrylic polymer emulsions, which as we have mentioned before is the same binding agent present in acrylic paint itself.
This is what will allow you to add as much flow improver to the polymer as you want, till you get your desired consistency. You will not have to worry about the paint peeling nor keep a firm lookout for any sort of a mixing ratio.
If you are about to embark on painting a piece which you want to preserve for a very long time, then it’s best to go for those mediums which has the same binding ingredients as acrylic themselves.
However, one point of note. It would be rather unwise if you wish to use such flow improvers for oil-based paints. The results will never turn out to how you expect them to be.
Still not getting the particular shade or result that you want?
When it comes to feverishly stroking out an inspired piece on a canvass, a lot of artists make the mistake of getting too wrapped up with the painting and not paying close attention to the process of work at hand.
What this does is, it will not ultimately provide you with the result that you’re looking for.
Well, that might be ok for casual work, but on professional jobs where time is a factor, one doesn’t have much leisure for mistakes.
It’s always wise to take a step back and access your working process a bit before going into the art piece any further. This will, in the long run, prevent you from recklessly mixing countless mediums to thin the acrylic, which would have otherwise done more harm than good.
So, if you’re not getting the right shade, we suggest that you employ mixing different colors together than just pouring in thinning mediums. Under such situations, it’s always better to give into your artistic instincts and find creative solutions for the problem at hand.
Also, here are some tricks you can use to get your acrylic viscosity and shade just right:
Using a Primed Layer to Help with Results
If perhaps you make your own canvas or just want to try out your thinned acrylic on certain non-traditional surfaces like wood or even metal, then we would advise that you prime the canvas surface before using it.
And when it comes to primers, the most effective one we can think of is gesso. It’s quite a staple in any artist’s studio and can be found in any art supply store [try not to get gesso from a hardware store; the ones there are stronger and used primarily for outdoor purposes].
Gesso attaches itself very easily to most of the non-traditional canvas surfaces and provides a fantastic base for any acrylic based work. And a primer like gesso comes extremely handy if you’re thinning your acrylic to a wash or even a stain.
This will help you get the shade just right, and naturally, bring out the color depth that acrylic paint can provide over watercolors and oil paints.
A non-primed, non-traditional surface often tends to suck up all the paint and will not be able to give you the result that you want. Additionally, a primer will allow your paint to last long as well, for it will prevent flaking and the paint will not peel off anytime soon.
This will depend more on where you’re in the process of making your current painting more than anything else.
Though this point might seem elementary to many, however, we thought it’s better to point out the importance of this step for those who are still quite new to the method of acrylic painting.
So, if you prefer using the more standard #6 brush to lay down the initial steps of your painting, then we would recommend that you rethink your approach.
For the very first wash for any acrylic art piece, it’s wiser to opt for a much wider brush, at least a couple of inches wider than a standard #6.
You can get a relatively cheaper brush model for this part, preferably from a hardware store, as all you will be doing with it is applying a wash. However, if you’re planning to go for a multi-layered painted surface, then it’s better to go for a more expensive option from an art store.
One alternative that you can consider is a foam brush. Its working function is much opposed to that of a bristle brush; however, it’s significantly cheaper and will be able to apply a much more even coat of thinned out acrylic paint onto any surface, may it be traditional or even a non-traditional one.
This will save you a lot of time in the long run, and you will not have to constantly try to brush out the imperfections from the surface with the aid of a smaller detail brush. It will provide much better results in terms of color contrast for your painting as well.
The Fat Over Lean Method for Painting Longevity
So what exactly is the fat over lean method?
The thorough process of painting in layers is called the fat over lean method. It’s a trick used by a lot of adept painters where they apply a fat over lean, which means that every layer that you put down on the surface should be thicker than the previous layer.
The fat over lean method is one of the ‘cornerstones to proper painting techniques.’
This type of layered painting is a lot like making a cake, where you will have to dress and structure the layers in such a way that you’re able to bring the best out of your colors.
However, you might be thinking now, that if it’s more of a painting thing that deals with color layering, then what does it have to do with acrylic thinning?
Where herein lies a little secret. If you constantly put in thin paint on the surface of the painting, i.e., go for lean over fat and not fat over lean, then you significantly increase the chances of your artwork flaking and cracking.
No matter how well you’re able to apply your flow additives your painting will not be as durable as you like if you go for the lean over fat option.
Considering the fluctuations in its natural state that the paint goes through throughout its drying process, along with the various environmental conditions; for the lean over fat method, any drastic contraction in the state of the acrylic paint will lead to immediate cracking.
And we know how tempting it can get to add a little light wash to bring out the contrast of a beautiful landscape painting and give it an ochre like tint. But giving into that desire can ultimately lead to your piece to flake especially when using acrylic paint.
Is that all to thinning acrylic paint?
Although we might like to say that we have covered everything, all methods of acrylic thinning for you today, but that’s simply not the case. We have mentioned the two most popular methods along with some of the problems that you may have when thinning.
There are a lot of different methods of acrylic thinning emerging in recent trend, so feel free to give them a try whenever you feel like.
No matter what medium you happen to use as an artist, shading will always be a quintessential part of the artwork.
Shading enables you to create depth in your paintings - and besides perspective, it makes them more lifelike and attractive.
Mastering any medium through this art technique requires you to understand the essence of shading and how to do it effectively using that medium.
But as all artists have experienced, shading can be a more difficult ordeal than it might seem at first glance.
So, today, in this piece we are going to discuss the various tips, tricks and methods to master the art of shading with colored pencils.
Let’s get on with it, shall we?
How to Shade With Colored Pencils
Different types of strokes
Before we discuss the nuances of shading, we need to first get familiar with the medium itself.
So, in this section, we are going to learn the basic kinds of strokes that you can apply using colored pencils. Of course, this is a very basic and brief study of the various ways of application.
Hence, we recommend you to get a better grip on these strokes before you start focussing on more complicated methods and factors.
Side-to-Side Shading
The simplest and the most basic stroke that you can do with a colored pencil is this side-to-side shading.
Even though it’s the simplest stroke of all, one shouldn’t skip it. Mastering this simple stroke will ensure that you have a more fluid arm and finger control.
The goal is simple. You’ll have to keep the lines straight and smooth while going from side to side. And as a bonus lesson, you can also decrease the pressure as you gradually traverse in the vertical direction.
Many novice artists would swing by their wrist instead of maneuvering using their fingers, causing a curved line instead of a flat one. You can also use your elbows to pivot instead of your wrist to make a straighter line.
You need to master this stroke enough so that you can draw straight lines and make a smooth gradient.
Side Shading and Tip Shading
One alternate version of side-to-side shading is tip shading. The only difference between the two is that in this case, you use the tip of the colored pencil.
With this method, you get a smoother, richer and broadly toned shading. Of course, the colors are a lot denser too because the pencil sheds more pigment on the paper.
The grains of the pencil is a lot finer and seem to fit into the crevices of the paper giving a smoother appearance and broad tone range.
It may seem that tip shading is far more superior and the “correct” way to do shading. But that is not the case.
Both methods of shading are unique and cater to the different needs of an artwork. Side shading is a better option when you want a softer, more coarse and even shading.
Master both of these techniques by drawing straight lines and getting a smooth gradient. If you happen to get well acquainted with these techniques, then you are now way better at controlling your hand movement.
You should then move on to more stylistic and nuanced methods of application.
Hatching
Hatching is a unique method using which you can give direction, volume, and texture to your artwork.
It’s a simple method that can add style and depth in your subject. If you apply hatching lines along the contour of the subject, then it gains form and volume.
The goal of this technique is simple. You have to keep your lines bolder, uniformly directed and evenly spaced. There should be adequate space for the paper or the color underneath to show.
The lines should be of equal length and shouldn’t look uneven. You can also keep a slight pressure variance over the application of the line to achieve a more graded effect.
Obviously, to perfectly execute this technique your pencil should be sharp and your hand movement should be swift and short.
Above all, only practice and dedication will make your art perfect.
Crosshatching
When you apply two layers of hatching perpendicular to each other, you get crosshatching. The technique can be used to make darker areas within hatching or to make a unique visual blending effect of two different colors.
You can also play around and create more interesting textures by placing the second layer of hatching at a slight angle to the first layer, instead of being perpendicular to the first layer.
But no matter what, the lines should be the same in length and evenly distributed.
It is also now that you should experiment and tinker with the many variables of hatching and get a hold of all the sub-styles. Play around with pressure, spacing, sharpness, and hues.
Try to get acquainted with the different styles and understand their purposes.
Of course, this small section can’t do justice to this style of pencil sketching. So, read and follow other guides and tutorials as well. The knowledge will surely help you in achieving your goal.
Scumbling
Scumbling or ‘Brillo pad’ technique is a very unique and rare form of stroke. You can already guess that this style results in patterns that resemble the texture of the brand’s steel-wire scourer.
A more articulate description of this style will point out that the shading is done with clean circular lines of one color that intertwine with similar lines of another color.
The use of more than one color is not necessary either. You can do this stroke well even if you use only one color instead of two or three.
The size of the circle and the pressure used to draw determines the nature of the end result. You can make it look smoother with smaller and lighter circles while you can also make it rougher with larger and darker circles.
The desired result should represent a random and more organic surface. So, we recommend you to move the pencil in a more figure-8, daisy or spidery motion rather than a circular one.
This will create more random darker patches that will look more raw and authentic.
Directional Mark Making
The function of directional marks is to suggest the direction of the elements on a surface in an extremely subtle fashion.
These lines follow along the contour or represent the direction of individual elements on a surface like grass or hair.
The nature of these lines and their distribution is not fixed. You can make them sparse and uneven to emulate fluid surfaces or make them dense by overlaying to produce a more solid and rich texture.
But ultimately, the craft in this technique is all about the subtlety. Often it is used along with shading and is blended softly to not harshly grab attention.
It rather intends to just softly suggest the texture.
Shading With Colored Pencils Tips & Tricks
Now that we have discussed the various kinds of strokes that you can make with colored pencils, we shall talk about the many tricks that you can use to achieve various effects of shading.
These tricks are not about the fundamental aspects of shading with pencils but are more about the different overall styles and approaches of shading.
The following are some tips & tricks that you should adopt if you want to refine your craft of shading with colored pencils.
Pressure Shading
The simplest way to do shading is by manipulating the pressure of your application. It also looks the most natural and true to the effect of colored pencils.
The process is simple. You have to start putting the color with as less pressure as you can put on the lighter section of the solid. Then gradually increase the pressure as you move towards the darker sections of the solid.
Do this slowly and evenly until you fill up the solid.
The science of pressure shading is simple. The more pressure you apply, the more pigments are shredded by the tip of the pencil.
You can also do this in layers where you fill up the entirety of the solid with an initial light shade. And then you can redo the darker regions of the solid by adding more layers and putting more pressure.
This technique helps in getting a wider range of hues from your pencils than intended. A single color in a basic colored pencils kit will at least produce two or three different shades at different pressure points.
Practice this technique before you plan to move on to more nuanced tricks because you will only use them in conjunction with this method.
Burnishing
Using pressure shading often leaves white spots in the shaded region. This can often be an undesirable effect especially when you need your artwork to be smooth.
One unique way to tackle this problem is by using colorless blenders to mix the shades together. This is called burnishing or colorless blending.
These unique blenders are just regular colored pencils without the pigments. They often come accompanied in pencil sets that are meant for semi-pro and pro artists.
If the quality of the result is incredibly important to you, then it is highly advised that you should use the colorless blenders of the same brand as the pencils.
They contain the same wax and oil that is used in making the colored pencils. This will result in smoother and more even blends.
To do this correctly, one should start from the lighter regions of the solid. Move the blender in an overlapping circular fashion. Then, gradually, shift to the darker regions of the solid.
This way, the end result will have intensified colors and the white specks will vanish.
Using dark colors to do shading
The most contributing factor to shading is contrast. And what better way is there to increase contrast other than using a darker shade of the same color?
But you should be careful while shading with this technique because any error in estimating the behavior of the color will result in unwanted streaks and spots that will require a lot of fixing.
Often, you can apply darker colors in the second layer with medium to high pressure over an even spread of a lighter shade.
It is recommended to pick the darkest shade first and then gradually use lighter and intermediate shade to blend the gradient in the solid.
You can also use colorless blenders to make the transition look more even and smooth.
But many times artists get carried away and put too much pressure on the paper that makes it worse. So you have to get acquainted with the colors and their behavior well enough to plan out your shading beforehand.
Otherwise, you’ll commit a lot of errors and the end result will not be desirable. Of course, practice is the key here as well.
Blending light on dark colors
In this technique, you start with the darkest spot of the solid with the darkest color rather than the lightest one. And instead of reducing the pressure to vary the gradient, you shift to another shade of the same family.
You can use this relatively lighter shade to also create a blend between the two regions. This way you have no need for a colorless blender. And you repeat this step until you fill up the entirety of the solid.
Of course, this technique has a lot more careful planning than the ones mentioned before. And any error is much harder to fix as it’s harder to put an impression on darker shades with lighter colors.
You have to carefully craft a mental picture of the final piece to correctly control the regions of the various shades. Along with that, you’ll also need to softly blend the various shades.
There is no alternative to learning this technique than to practice it repeatedly. This needs a lot of intuition and visualization to perfectly execute but the result will be worth it.
Shading with solvents
To achieve even smoother and watercolor-like blend, you can, of course, use watercolor pencils. These pencils behave like ordinary colored pencils but also blend with water.
Of course, to the more careful eyes, the two variants perform differently enough to make not interchangeable.
But there are still many other solvents to consider. The colored pencils may not have to be just water soluble to achieve this smooth blending.
Ronson or Zippo lighter fluids also work for colored pencils. Besides that, you can also use rubber cement thinner and Turpenoid to blend the pigments of colored pencils.
The purpose of these solvents is to achieve a very smooth and natural blend between different regions of shade. Of course, no two solvents are bound to behave exactly the same.
The key to mastering his technique is, obviously, practice but in this case of practice, you should focus on understanding the key features of different solvents and how they can be used to achieve different results.
Conclusion
With that, we are done!
We have laid out all the fundamentals of shading with colored pencils. We have also sprinkled some nuanced methods and tips in the guide to help you get further in your goal.
These pieces of advice and the knowledge will surely help you in shading with colored pencils correctly and swiftly.
But of course, all of this will bear no fruit if you are not diligent in your practice. So, dedicate yourself to the art and you shall master the craft.
Finally, we wish you well and thank you for reading!
Colored pencils are a versatile and capable medium of producing some of the most tantalizing, attractive and creative artworks.
Many people underestimate its capabilities because of the simplicity of its design and the method of its application.
But, as friendly as colored pencils might seem, there are many artists who have proved that these pencils can be used for some marvelous and outstanding works of art.
And if you happen to be looking for techniques and tricks that will enrich your skills using colored pencils, then you have come to the right place.
Because today, we are going to discuss the 10 effective colored pencil techniques that will seriously enhance your drawings.
So, what are we waiting for? Let’s take a look!
Colored Pencil Techniques
Hatching
Hatching is one of the simplest techniques you can adopt with pencils that will make your artworks look amazing.
But even if the trick may seem simple in its implementation, both application and implication of this technique have serious depth.
If all that you have been doing with colored pencils is back and forth filling, then hatching will incredibly improve your results. It is a wonderful technique to emphasize shade and define the form, depth, and volume of the subject.
It is also incredibly effective in providing a sense of direction in terms of lighting and gives the artwork a menacing and unique look.
The core idea of hatching is very simple. All you have to do is draw consecutive lines that are evenly spaced and are uniform in terms of size and direction. But the execution has to be mastered.
First, make sure that the pencil that is being used for hatching is sharp and is of a darker shade. Otherwise, then the lines will be thick and irregular.
Second, do it fast. The core of this technique is that you draw fast by using muscle memory instead of conscious thought.
If every line is put down measured and carefully, then it’ll be uneven and look odd. Only with regular practice, the lines will be even, smooth and will look natural.
Cross Hatching
An advanced version of the previous technique is cross-hatching.
In this technique, you basically do two layers of hatching. In a more traditional version of cross-hatching, you use the same color and keep the lines of the two layers perpendicular to each other.
A more nuanced version of this trick include a variance of colors and drawing the layers at arbitrary angles instead of making them perpendicular to each other.
Of course, to get the desired result from this technique, you’ll not only need to master hatching but will also require you to have a good understanding of what colors and angles work the best with your piece.
While the choice in the latter part remains to be your artistic choice, the right way to do it remains to be the same as hatching.
That is, do it quickly so that the lines are even, crisp and uniform.
Scumbling
Scumbling is an incredibly unique and kind of a strange technique. It is done by drawing circular figures in a seemingly random way.
It can be done using one layer or only one color but mostly it used in multiple layers at a time; sometimes, with different colors.
The goal of this technique is to achieve specific kinds of texture that is otherwise not achieved. Now, what you use this for specifically depends on what you deem it fit for.
But the crux of the technique lies in drawing an evenly shaped circle that travel in an apparently random way.
The trick is a simple one overall but the craft of it lies in how genuine this “randomness” seems. The success of the technique purely depends on how aesthetic the texture is, or whatever is your visualized end result.
All and all, it is a very unique, simple and interesting way to add more depth to your work.
Directional Lines
Directional lines are exactly what they are called, directional lines.
Often, like hatching, you do it around the contours of an object. But instead of going against the direction of the contour, you go along with it.
Now, you can vary this technique by altering the density of the lines and the combination of colors you use.
You can even vary how long each line is because not all lines have to be of equal length like hatching.
Overall, the method itself is not very complicated. However, the choice of its use can be.
This technique is often used to make voluminous textures like grass, fur or hair. The idea is to represent each element of texture to produce an overall volume.
It can be also be used to draw things like flame and gust of air. Anything that has volume and direction of movement can be better represented with directional lines.
The right way to implement this technique will be to start with less dense lines and increase the density and number of colors as it best suits the desired texture. Just make them of the same thickness.
Stippling
Besides scumbling and directional lines, stipping is also a great way to make some interesting textures.
But often artists use this technique to create unique art pieces made entirely from stippling.
In stippling, you make dots. How dense and what color depends on the region you are trying to cover.
Often a denser stippling represents a darker part of the solid while a blank or low-density stippling is used to represent the lighter region.
The choice of color is simple and only depends on what the object is supposed to look like. You can use two colors in the same region if you are trying to represent a blend or a mix of hues.
There is not a lot of complexity to it but there is one thing to remember, always keep the dots separated from each other.
Ultimately, this technique is incredibly rare and tedious one to execute. But when executed correctly and aptly, it can have a strong and unique result.
Incising
Incising is a method in which you create white line indents on the paper using wax, parchment paper or butter paper and a hard pencil.
When we paint over these crevices the pigments don’t settle inside the valleys which leaves fine white lines behind.
Overall, there isn’t much to this trick. It’s a quite innovative and simple trick that can come in handy when you least expect it.
Even if it takes some extra equipment and deviation from the conventional use of colored pencils, when smartly used this trick might prove to be worth it.
Rubbing
Rubbing also performs a very similar function of incising, i.e., create depressions on the paper that leave white spaces around.
But while you make fine valleys of white lines using incising, in rubbing different textured surfaces are put underneath the paper to translate it on the paper.
Light strokes on the paper with a textured surface underneath will only produce colors on the top of the texture. All the crevices will result in blank white space.
Of course, this technique doesn’t have widespread usage in this art form. It’s either you find very specific cases to use this for or dedicate the whole piece to this technique.
But some common uses, of course, include copying patterns and imitating coarse textures.
Overall, it’s a non-conventional but innovative and fun way to use your pencils. But, if you use this method wisely, you might be able to save a significant amount of time and produce excellent results.
Scraping
Unlike incising and rubbing, scraping manipulates to colors after application rather than before it.
In incising, we used translucent paper and a hard pencil to make the crevices for producing white lines.
But for this method to work out, you’ll need a knife. Many artists prefer [easyazon_link keywords="X-ACTO knives" locale="US" tag="homesthetics0a-20" link_id="194561" type="link" ref="misen"]X-ACTO knives[/easyazon_link] to make this work but you can use any other sharp blade.
The trick is to just scrape out the color from where you need to make the white line. Of course, this technique is much more imprecise than incising where you can trace the lines with the help of butter paper.
On the other hand, this technique requires you to meticulously scrape off the color to create white regions.
It may seem that this technique is overly complicated, but that’s not the case. Scraping is much better than incising or rubbing when you need to create a gradient of white space.
Since you control how much color remains on the paper, you can create softer whites and more stark white regions.
But overall, this technique does need a lot of practice to do perfectly. And also, to make sure that you don’t tear the paper, try to use a thicker paper if you are planning to use this technique.
Burnishing
In burnishing, you use a colorless blender or a tortillion to create a smooth blend that looks incredibly realistic.
It’s one of the most widely used techniques with colored pencils because it brings out the full potential of the medium.
To execute this trick correctly, you need to first decide the colors of the various regions and many layers you may want to put on top of it.
If you don’t do that correctly, then there’s no point to this technique because it acts as more of a touch up rather than the main work.
After filling up the complete region with different colors and/or in layers, it’s time to slowly blend the pigments from the lighter to the darker side.
The reason behind this is that it creates a more intense color contrast than the other way around. So, do this very slowly and methodically as you don’t want to create a blend that looks unnatural.
And as always, practice is the key. Try different colors, textures, and shades, and practice blending them. You’ll, then, get a hint of what works and what doesn’t.
Watercolor Pencils
Working with colored pencils doesn’t mean you can’t use other mediums to enhance its appeal.
There are many ways to use other mediums to enhance the work of colored pencils but there’s nothing better than watercolors for this case.
The most ideal scenario for the mixed-use will be by using watercolors to fill out larger regions and working the details with colored pencils.
You can also use watercolors in an incognito fashion to give more volume to your subject. For example, you can use watercolors to fill out the hair while using colored pencils to shine each strand of hair.
You can also use watercolors primarily and use colored pencils for hatching and contours.
Obviously, the possibilities are many. But there’s no denying that watercolors and colored pencils can be used together to effortlessly give birth some incredibly attractive works of art.
Conclusion
So, that’ll be all for this piece.
We hope that these techniques helped you finding new ways to advance your skills. Of course, these tricks will aid you to draw more swiftly and also provide your work with some uniqueness.
With that, we wish you well in your creative endeavors and thank you for reading!
Looking back, we never thought these familiar, common colored pencils used on coloring books to have the capability of producing exceptional masterpieces as well.
Colored pencils give the artist power to manipulate the outcome of a drawing in the easiest ways other mediums would since they are very easy to erase and work with.
Unlike other mediums, colored pencils do not require any preparation besides sharpening. They are also portable, which is ideal for artists who love to travel and work simultaneously.
While using them is easy, they can actually be very hard to master without both practice and tricks.
In this article, we divided the tips and tricks into two parts: the basics and the techniques. We suggest going through each section because they correlate with each other. But most importantly, they will come in very handy on your journey to mastering colored pencils art.
So without any further delays, let’s dive in!
Color Pencil Tips & Tricks to Enhance Your Skill
Part 1 | The Basics
While many beginners overlook the kind of color pencils and papers for drawing, these materials actually play a very crucial part in producing a great piece of artwork.
Prepare Good Color Pencils
When purchasing colored pencils, the first feature you need to look for besides the price is the quality. The result of your drawing heavily relies on the quality of the pencils you use.
We all have seen that using inferior quality pencils results in low-quality artworks most of the time. So it is only obvious that working with higher quality pencils, we get amazing outcomes.
However, high-quality colored pencils do not necessarily have to be expensive. Of course, most cheap pencils are terrible when it comes to quality but what we’re saying is you should look for a good-quality set that comes at a decent price.
In order to find a good set of colored pencils, check for the grade that they normally use on most art supplies. You will see it’s either student or artist grade.
If you are a beginner, student grade pencils will do you just fine, even though the quality is compromised to an extent. But if you are an intermediate artist, we would suggest going for the latter option to improve your artworks.
The difference between the two grades goes beyond quality in the sense that they differ in price and purpose as well. While student grade pencils are made to fit the budget of students, artist grades are way more expensive. Moreover, artist quality pencils offer you more flexibility while working due to their soft composition.
When you compare low and high-quality colored pencils, you’ll also see that the texture is completely different from each other.
Within the range of professional or artist grade, you’ll find that there are pencils which deliver great layering results while there are others which provide desirable coverage.
Although many high-quality pencils have most of the features that we need, it is likely that they always excel more in one single aspect. Therefore, when buying a pack of colored pencils, you might want to look for the one that best meets your requirements.
There are also pencils which are oil-based but these can be difficult to start with if you’re a beginner.
But keep in mind that these are much vibrant than regular colored pencils because of the oil or wax composition. You can also blend them pretty easily without any hassle, which makes them highly desirable for creating a magnificent piece.
If you face difficulty finding the right set for your work, the good news is that good colored pencils are available for purchasing individually too. So, you can try out the same shade from different brands and find the most suitable one.
Keep the Pencils Sharpened
It is important to always keep a sharpener beside the colored pencils.
You may be wondering why we’re stressing on keeping the pencils sharp and what difference does it make.
The main reason is they produce better drawings! A sharp tip lets you work on the drawing very precisely, hence, giving you more control over the outcome of each stroke. The best example for this benefit is when working with outlines and filling in the little details.
On the other hand, a dull tip leaves messy trails beside the actual lines and requires you to apply pressure which can ruin the tooth of the surface.
Although we mentioned using a sharpener, there is also another more convenient way to sharpen your pencils - a blade.
While using a mechanical sharpener is faster, it also can waste more pencils that you may realize. But with a blade or a knife, you have control over sharpening the tips to prevent unnecessary wastage.
We know high-quality pencils are not cheap at all so if you want to preserve them from getting chewed off quickly, we suggest using a knife/blade instead of a mechanical sharpener.
However, if you’re drawing with soft pencils, using a blade for sharpening can easily break them. This is when using a sharpener will help keep them pointed without damage.
Choose Your Colors
On the way to becoming a great artist, it is important to understand and learn about different colors.
It’s alright to admit that we judge the color from the outer shell color most of the time. However, there is always a difference between the real colors and the ones depicted. Even with the help of a color chart, there’s still a tendency of slight changes in the shades.
What you can do when looking for the right shade is to actually swatch some of the colors you already own and title them. Some shades will be very similar to each other, hence, by naming them you can find the exact intended shades.
Another way to find the exact shades is to get yourself familiar with the shades from a single brand. It can be tough for beginners to memorize the names of each color so that’s when you can use the same trick of swatching colors on a piece of paper before heading out to look for those tones.
And if you want the colors to produce amazing results, go with the brand names which have high ratings from other previous users. It is likely you’ll always find vibrant and rich pigmented colors most of the time.
If you want to preserve the sheets, work on them efficiently and get them laminated so that they will come in useful for future references. Keep a separate sheet for every color and their immediate shades, then store them in a file.
The Right Surface
It’s no surprise when we catch ourselves overlooking the paper surface sometimes, especially when we’re just very excited to get started already. But if we pause for a moment to think about the outcome, we might want to reconsider the rush.
While using any kind of surface is encouraged for artistic creations, finding the right one for a specific medium is also crucial, especially when you’re learning.
The same way artists choose papers for watercolors, colored pencils also require the right surface to produce an archival quality piece.
Whether they are oil or wax-based, working on the right paper helps highlight the best performance of those colored pencils.
Although testing different papers is a must to find the desired surfaces, however, we do not recommend shifting from one brand to another too soon. Doing so can only interrupt the flow of learning about a particular surface.
On the other end, if you stick with one brand, you get used to it and can easily tell how your piece is going to turn out, therefore, giving you more control over the final results.
We would also suggest having different types of papers that you can practice every now and then while at the same time, keep the ones you can work on better for display purposes.
Also remember that choosing a surface for colored pencils mostly depends on these two aspects: tone and tooth.
The tooth or texture is responsible for creating effects on the surface of the paper. If you take a smoother pick, the final result will also appear smooth. It even allows you to work on it very easily.
However, this does not mean that papers with a rougher tooth are bad, but both have their own benefits. For instance, if you want to have more control while working, the latter would be a good option as it can accept more pigment.
Sometimes techniques can be very complicated but the following are both simple and easy to follow.
Pressure
The pressure you apply on the colored pencil decides how your painting will look like in the end. And the problem usually comes up while layering - not all layers need the same amount of pressure to be used.
To get the desired intensity, the artist must learn to apply the right pressure. If you are new to this concept or have issues with it, don’t worry because all it takes is practice.
Get yourself familiar with applying the right pressure by experimenting with swatches. We recommend trying to create a piece while practicing since then, you’ll be able to tell where and when to use the right pressure in order to achieve the intended results.
Layering
There are times when you’ll notice that a single color does not give full coverage to the area in the artwork because it can either be too thin or too dull. In such cases, applying more layers is necessary.
Layering can help the artist get satisfying outcomes as it provides the piece with more depth, hence, making it appear more real.
To get the best layering results, choose colors which are close representatives of each other or those which are of similar shades. You can also use colors which are total opposites to each other.
Following this technique, you will witness amazing enhanced color combination which cannot be achieved when using a single shade throughout.
Strokes Direction
This is a technique which most beginners usually do not pay close attention to.
No doubt, it is fun to move the pencil in whichever direction you want to while coloring. But when it comes to creating commissioned or archival quality art, following a stroke technique becomes necessary.
The same way brush strokes are important to monitor while painting with liquid mediums, so are colored pencils with every stroke.
The direction of the strokes will decide how the texture of the drawing will be. If they go in every direction possible, that will leave the piece look uneven and messy.
In order to get this technique right, it’s important to first decide where the strokes should face, especially when working with realistic pieces.
However, if you do not know how to put the right strokes for the right effects, try following the cross contouring trick. Cross contour means filling in the colors by going with the shape of the subject slowly and precisely. Although it may take some time in the initial stage, it will eventually pay off when the drawing is finished.
Mix the Colors
The benefit we get from mixing colors is that they appear to be more natural.
With wet medium, we can always blend two colors together and create a totally different tone. But in the case of dry mediums such as colored pencils, we are required to layer the colors.
Mixing colors is a technique which produces exceptional results, yet, working with it does not come very easy.
For example, if we want to produce a natural shade of red, we can try mixing the colors yellow and purple by layering them.
But since good layering is hard with colored pencils, there is a trick called ‘optical mixing’ where you progressively mix the right shades by dotting them in the area where you want to. On a closer look, you can tell the different shades used while the big picture reflects the intended look.
Create Your Own Shade of Black
Similar to the previous point of creating your own shades, we shall also focus on how you can produce a unique shade of black which can meet unique preferences as well.
Finding a natural black or white can be pretty hard in the world of many options.
We cannot deny the fact that black is an extremely strong color which when mixed with any other color, it can turn them dark every time. This is one of the reasons why black as a color is used for mixing only when required because it can make the drawing look flat.
So instead of using the ready-made black, you can try mixing dark colors such as brown and dark blue to achieve a completely different shade of black which can also be used for mixing with other colors easily. Moreover, it will appear looking less synthetic as the normal black would.
The process of mixing dark colors to create black requires layering and burnishing directing on the surface of the paper.
We also encourage experimenting with other colors to achieve different shades of black for your masterpiece.
Edges and Details
It can be pressuring at times when having to work on small details but we’re gonna tell you to have fun with it. Think of it as the moment you put your brilliant judgment to work.
The best thing about details is that you can assign a different time to work on it - and that’s when you’re coming to the end of the drawing.
Moreover, it is an easier task when done with colored pencils since they allow the artist to have more control over the outcome. Also, the amount of time required for creating details is shorter if compared to wet medium paintings.
Having high-quality colored pencils is a bonus since they do not require pressure to work with. A light application is all it takes to highlights the pigments.
The idea is to first work on putting the color underneath, then when it’s sufficient, start working with the edges and details on top of it.
However, it does require preparation and planning beforehand on where to put the details since lighter areas can give you a hard time to highlight.
Heavy Application
As a cautious action, we sometimes tend to apply the colors gently over the surface so that it does not look too harsh. This can work if the concept is to produce a light drawing.
But for a realistic value, it will need more work to be put in since the light effect only shows off the white bit of the paper which is definitely not ideal for this purpose.
In order to achieve a more natural look, the artist has to use heavy application of colors. But then again, applying colors heavily does not mean dumping all the pigments at once. Instead, it’s about using multiple light application over and over again.
One must work through the application by progressively layering the shades until there is visible full coverage, and this is how the drawing will become more appealing to the eye. Keep in mind to burnish those layers for achieving that compact look.
Position of the Pencil
While there are many ways to use the pencil and create different effects, we will recommend one of the tips which always work for layering.
For layering, do not hold the pencil too close to the tip. Instead, place your hand a little higher from the tip and start with light, thin strokes.
The direction of the strokes should be uniform and light. When one light layer is done, move on to the other. Using this trick will prevent visible lines and make the drawing appear smoother.
We do not recommend rubbing the colors if you’re trying to mix them together because it can damage the painting. Colored pencils tightly hold on to the surface of the paper and this is what makes the pigments hard to rub off, especially if they are oil-based.
If you make a mistake and want to erase it, use a kneaded eraser which can be peeled off afterward.
Blending
Since blending is a major part with colored pencils, there are many ways to get it right.
First of all, there are solvents to help smoothen out the texture of the colored pencils. We suggest mixing the colors with odorless mineral spirits because they work best when used with oil or wax-based pencils.
The trick is to finish the drawing, then brush it up with the solvent so that the pigments will deeply sink into the tooth of the surface, making the paints look more subtle. When the harsh edges disappear, your work will look more realistic and natural.
In case you’re not aware, there are manufacturers which offer solvents in the form of markers, making it easier for us artists. However, after using markers, do not forget to wipe off the remaining stain on the tip after use so that it does not dry along with the marker.
Use tissues for blending because they are great for creating a smooth feel over the surface. Do not use too much pressure as the tissues can take off most of the pigments. Instead, gently and carefully pat over the area you want to blend.
But if you’re not ready for solvents, try using the white colored pencil instead. Gently going over the other colors with the white pencil helps smoothen them and cover the empty areas.
And it is obvious the white pencil will make the colors lighter than how you want them to be. This is the reason why manufacturers come up with the idea of a colorless pencil to meet the blending requirements.
Burnishing
Burnishing is what makes a drawing turn into a painting through colored pencils. What it does is letting the colors seep into the surface’s texture to help make the drawing appear more compact.
When using either wax or oil-based colored pencils, the process of burnishing automatically happens because the composition starts to build up.
If you want to learn the process of burnishing with colored pencils, keep in mind that it’s very easy. All you need to do is use a light-colored pencil and apply it on the spot using pressure. The best colors to perform burnishing with are cream, white, and similar light colors.
Acknowledge that the actual intended pigments will be compromised in that the appearance will be lighter.
But as it is with blending, there are colorless blenders, such as a marker or a pencil, which can be used for this purpose as well. We do recommend going for the pencil because it suits the process better since they are made to meet this need.
Another way to burnish your drawing is to use Turpentine of rubbing alcohol over it with a brush after the drawing process is done. This will take more effort but the results are pretty much similar to when using manufactured blenders.
Tooth of the Surface
The trick to a beautiful piece is finding the right tooth for layering your colors perfectly.
If you are new to the term, ‘tooth’ means the texture and depth of the paper’s surface which influences the overall outlook of the drawing/painting. Think of it as the grain of the paper and the intensity needed to hold the paints firmly so that they don’t flake.
Since oil or wax-based colored pencils are not meant to work on a smooth surface, it becomes crucial to first look for a rougher platform with a deep tooth.
Although selecting a surface with a nice tooth isn’t a tough job, but mastering the art of working on it actually is.
An important aspect to consider while working on the tooth is the way you hold a pencil. However, it’s not as complicated as one might think since you can hold it the usual way holding a pen for writing - vertically. That is how you’ll get to sink deeply into the tooth.
The second immediate trick is to go with circular strokes because they can be blended easily at the end without leaving any harsh visible lines. But if the concept is different, in that you want to create a crosshatch effect, circular strokes are not required.
The pressure applied to the paper will determine how deep the pigments go under the tooth. But it’s important to start off with a light application and proceed to adding more layers than just giving it all at once.
Finally, keep in mind not to press on the tooth too hard because that will make it go completely flat, hence, you won’t be able to create further textures anymore.
Tortillons
Tortillons are very similar to those colorless blenders used for burnishing. These are made from paper which is rolled tightly in order to form a tip at the end.
The tips are used for blending colors in areas which are difficult to blend with tissues or blenders, especially around the edges.
The main benefit of using tortillon is that they cost lesser than blenders and they are also indispensable.
Other Considerations
In order to improve your master skills, we would recommend going to several art communities which are specialized in guiding upcoming artists in the area of using colored pencils.
Examples of such communities include WetCanvas, DevianArt, and the like.
Lastly, the only path to becoming a master in any artwork is to embrace both practice and patience as all great artists do. Give yourself the time required for learning the art.
With that, we will wrap up today’s article and we hope it has been helpful for your progress.
Imagination has no limits, it wonders freely, it roams our world feeding on everything deemed "interesting" to creatively grow and feed us. Imagination and creativity nurture our minds and souls, they invite us to step into a world without boundaries where everything is possible an artist would say. In here we can change Dracula's castle to our pleasing, we can imagine Orc villages and towns a tad different than the Warcraft universe depicted it, we can change Stormwind or Darnassus or we can surge inspiration from both to create our own city.
In these times, the possibilities of digital arts are pushing boundaries more than ever, challenging us with each Game of Thrones episode or World of Warcraft expansion to see castle concept art and medieval buildings or whole towns concept art depictions differently, we are challenged to re-imagine imagined worlds, our creativity is fed with steroids and we cannot get enough of it.
Every now and then, we take a step back, we gaze at all the castle prints, disconnect the internet and start sketching, we often fail, we rarely succeed, we always grow though; creative experiences for us are nothing short of a great victory. Thus, in the following gallery, we have curated no less than 67 simply breathtaking creating efforts of artist we love, cherish and surge inspiration from. Every art piece links back to the source with a byline credit to the artist.
Without further ado, we invite you to browse our gallery and begin your creative journey!
Medieval Buildings, Towns, Cities and Castles Concept Art Illustrations Follow
Talking about castles, we can’t help but list down the first one that comes to mind - the one from the animated movie Hotel Transylvania.
Yes, we’re drawing inspiration from Drac’s crib! It’s hard to ignore the haunted ruins of this giant castle. Take a look at the picture and see for yourself!
Who wouldn’t want to paint this famous imaginary and isolated tower?
How about a castle with a lot of scenery complementing its beauty? You can barely see the castle but the point is to make it stand out and be the focus of the painting.
It also looks like a tower from a magical land which exists in an unknown realm, which makes us more interested in doing a painting of it.
If you want to create a dynamic painting of a castle, this is one of the options. Keep your audience in awe with another imaginary castle that looks more like a huge fort in a fantasy kingdom.
Notice that it has the touch of animation to it, but you can actually modify your piece however you want to.
Let’s now take a look at a castle that’s large enough to form a small town. The structure of the building here makes it look haunting and desirable at the same time.
If this idea doesn’t bring you a sense of longing, or perhaps nostalgia, then we don’t know what does. However, there are more ideas coming up so there’s no need to worry about what catches your attention. Overall, we assure this one will keep your audience’s eye locked on it.
Source Unknown
Create a fictional world with a fictional castle of your own. Look at the picture and tell us if that does not take you to another universe - one which is probably imagined and depicted only in movies.
There are a lot of us who are drawn towards something that doesn’t exist as a form of exploring the possibilities, so choosing this will draw their attention.
Here, the painting has a lot of minor details which in case you’re a seasoned artist, you can try to pull off something similar of your own by using unique tricks.
This one here looks like a castle in a kingdom that’s doomed, or perhaps ruled by a tyrant. You can see there’s no sunlight shining through and everything else seems dead.
One look at this painting, we would think the land is barren and not a single soul has experienced true happiness in a very long time; waiting for a kind of redemption to come soon.
The point is you can create something which triggers people’s imagination such as this one.
This one portrays an astounding palace standing on a rock in the middle of a waterfall.
We think the best form of art is one which is open to interpretation, allowing people’s minds to also get creative while analyzing the piece. And the same thing applies to painting.
If you’re wondering what kind of painting ideas will intrigue your viewers, we would suggest going for something that’s pretty much similar to this.
From all the ideas listed down, we personally think this one is the quickest to grab our interest. And you might know why.
Yes, it has a scene in it which can mean anything. In this case, our interpretation would be that these soldiers and monks are rushing towards the castle hastily.
In this example, each and every part of the painting gets the focus of the audience, yet, the focus is still directed towards the main subject - the castle.
Take a look at this painting and you’ll see how the castle seems to be standing alone in the midst of a new era.
It appears as if there was a point in time when it was glorious in a prosperous kingdom but as time passed, it had fallen to ruins. And in the painting, only a part of it is visible, as if to hint its abandonment.
There is also another subject facing the castle and the meaning behind it is, again, open to interpretation.
For this one, we’ll focus more on the details. From the way those clouds are portrayed to every single cut on the rocks, this painting is so far the most realistic.
To achieve a realistic painting as this requires putting in a lot of time and energy.
We also have to put it out there: a lifelike piece with a lot of details will really test your patience in the painting process. Therefore, it’s important to take this point into consideration if you are ready to tread on this path.
If you desire to paint a beautiful haunted fairy tale castle, focus on the effects of this one. Notice how there are a lot of colors used in the painting to make it appear magical and spooky.
However, remember to always give a touch of originality to any painting that you’re doing but just be sure to learn from experts while you’re still practicing.
We will take some time to analyze and describe the meaning behind this painting.
The first thing we noticed about this piece is that it displays a castle whose structure differs from a normal one. Yes, this might be another idea of a castle in another universe.
What grabs our attention is the human figure which is staring at the castle’s direction, hence, leaving us wondering about the storyline behind it.
Our personal interpretation would be that this being has come a long way to reach his destination (being the castle, in this case).
Then we have here a palace which is covered in ruins - one of the best ideas to keep for display, right?
There are many of us who admire something else besides the usual. And in this case, it is an imaginary palace which may have had a long history behind it.
Tell a story through the strokes of your brush like this painting does.
As it is with one of the paintings we mentioned before, you’ll see that these soldiers are marching towards the castle, which is the main subject of the painting.
We also cannot leave aside the effects which this painting carries - bold, detailed, and precise.
Alright, this one reminds us of some castles we’ve seen in movies. The Witch’s castle from Narnia and Elsa’s ice castle from Frozen are a few to name some.
What do you see when looking at it? We would say that it seems unwelcoming because of the pointed rocks covered in snow. Not only that but it also appears to be very intimidating.
We don’t know about you but this one reminds us of the Van Helsing movie. If you have seen it, you will know what we mean. The stunning similarities include a small dark town with rugged buildings.
The castle in this picture is like the church where everything takes place in the movie.
It’s something that will leave the audience in a state of excitement, don’t you think?
What we like about this is that it portrays a brilliant castle standing in the valley of death and decay. It can be a symbol of finding hope during trying times or it simply tells a tale of what is going on in the painting.
Yes, we have a lot of abandoned castles on our list - each very different from one another and bewitching too.
If you observe the painting, you’ll see two human figures heading towards the castle. What does this mean? We can only guess.
It looks as if something terrible had happened and destroyed the whole place while a firm castle stands alone, providing shelter to the ones who need it.
If you are looking to surprise your observers with a unique castle painting, why not try something like this?
Yes, anybody will be drawn to a piece that shows strength in the midst of tough situations just like this castle is standing still in the middle of a waterfall.
Let’s not also forget that it looks very appealing to the eyes with its fantasy theme.
So, let’s focus on the style of painting with this one. From what we have analyzed, this can either be a digital or a traditional acrylic painting.
We find this to be very pleasing with its outlook as a whole. Moreover, the different usage of colors makes it look like a dreamlike palace from a fairy tale.
For a more realistic painting which looks as if it stands somewhere on earth, take a look at this one.
What you can do is look up existing castles and study their features. At the same time, don’t forget to add a little bit of your own original touch to the painting.
We very much wish to see something like this exist. A castle that’s attached to a town shows how prosperous and united the kingdom is.
The location of the castle is what catches our attention first. So, we would suggest planning your painting carefully if you want to achieve something similar.
As it is with other suspense paintings that have a meaning behind, you’ll see on the left corner a man is standing and staring at the town’s direction.
An abode in the clouds along with marvelous structures - what else can make you feel more royal and divine than that? Talk about the homes of gods and demigods, right?
Our thoughts on the meaning behind this would be somewhere in the lines of power, glory, and responsibility of whoever are looking after the whole kingdom in order to protect them.
We have here another dark castle painting that hints a story of a person who as walked miles to get to this specific castle. To us, he looks likea hero who has unfinished business to be dealt with.
We love the effects used for the rain and the mist because even if they go unnoticed through the conscious mind, they still create a great impact on our subconscious one, which will make anybody say that this is a great painting.
Bear with us because we will keep giving references as they can be exciting when they’re mutual. And this one here looks so similar to that castle from the movie Jack The Giant Slayer.
If you want to paint something similar, look up castles during ancient times, especially from the medieval period, and you’ll find many similar results.
Completely different from what we have looked at lately, this one drew inspiration from East Asian architecture. It is from a game Age of Conan and is known as the Kithai Warmonk Monastery.
We added it on this list of castle ideas because of the fact that we found it to be rather amusing and close enough to be called a castle.
Here is a castle painting with many textures and colors. With this one, you can actually experiment many kinds of effects in order to achieve different concepts.
We love the beautiful sunset textures as well as those of the rocky mountains. You’ll notice that the only subject with a completely different texture is the castle, which is also the main focus in this painting.
If you want your audience to get intrigued by what they see, here is a sample painting you can follow. It portrays a castle burning in flames which can actually mean anything.
Our take on this would be that there was a war or an attack going on in the painting. There had been countless similar situations to this in the past.
Go for an actual event that happened if you want to paint history.
Let’s take a moment to appreciate the beauty of this painting. If you know about the Kizkalesi Castle in Turkey, then you’ll know that these two have a lot of resemblance.
We love this one because of its serene and peaceful atmosphere.
This is one way to attract audience who has a desire for quiet places. But it only works if you have the same desire towards such places too.
The details in this piece of art are spectacular. Although the focus is on the castle, somehow it’s hard to not notice every single detail about this painting.
It comes in a full package because it tells a story about a journey and contains amazing textures, along with various effects. Overall, the painting required a lot of time and patience.
Just one look at this piece and it takes us straight to Wonderland. There is a scene from Alice Through The Looking Glass (2016) which portrayed a castle with its surroundings and it looks exactly like this one.
No, the tale is not overrated and you can create paintings about Wonderland with your own imagination.
Are you looking for some painting ideas to excite the audience and keep them on the edge of their seats? Well, we feel the same way looking at this painting.
It is not hard to create something that will give your viewers that rush. If you observe very closely, you’ll see that there’s a lot of action and motion in this painting. From the flowing lava to the flying dragon - that’s how this piece of art extracts excitement.
Keep aside all the fancy castles for now and have a look at this one. It reflects a kingdom that has gone through a lot of pain and struggle. However, this looks pretty amazing, given the concept and the effects.
Also, notice how the artist uses only very few colors in this painting and gives it a serious appeal.
How about adding another magical castle to the list?
This one is a dreamy castle with a lot of designs and structures. It’s a great idea for artists who like to create non-traditional designs and have fun with their paintings every once in a while.
We love how spooky and beautiful this appears to be at the same time.
Image via wangrays.com
Do you want to paint an imaginary castle and make it seem as if it’s somewhere here on earth?
Great! Because this one is a perfect sample of such painting. You’ll see there is some activity going on as well, which makes it come to life.
You probably have seen a lot of castle paintings such as this one. There’s always a giant fortress with someone heading towards it.
However, trust your instincts and add personal style to your piece. It may appear simple but it never goes out of style once you learn to make each piece a unique one.
What do you think of a castle which is located in the same place where the town is? Yes, we have mentioned it before but for this one, we are focusing more on unity and community.
If the concept is representing the strength of a kingdom, then you have found your idea right in this artwork.
Ah, here’s another painting that will keep your viewers excited and intrigued.
If you remember that we already talked about motion and action, you’ll instantly know this is another sample of those paintings. Also, see how the focus revolves around the main subject with all the dragons and those knights.
How about a painting of a castle which stands alone, separated from the kingdom? It may not seem like a practical concept but it probably has a meaning behind it.
You can come up with any meaning for a painting like this. For instance, we personally would associate it with power that breeds loneliness.
Speaking of 3D animations, this painting also has a digitally-designed feel to it.
We like the view from this angle so we would recommend taking this sample and create something similar with oil paints. The result will vary largely, in the sense that yours can actually look much better.
As a total opposite to our previous castle, this one signifies the reign of terror. If the purpose is to instill fear and excitement in the minds of the audience, then you would look forward to settling for this idea.
We have to admit the textures and the sharp rocks did take away our peace of mind while glancing at this.
Keeping aside castles fancy and terrifying castles, here is a sample of an average-looking one. Painting something like this can actually work when you’re trying to hint historical events.
We admire the details done by the artist, whom we’re sure to have spent a lot of time and energy on this painting.
What comes to your mind seeing this castle? We’re not sure about you but this takes us straight to Dracula’s lair. Does it provoke as much morbid curiosity in you as it does in us?
The best feature we love about this painting is the scary mood that it evokes.
In an alien civilization, this is what the artist imagines the castle would be. If you do a similar painting, it will gain the audience’s appraisal about your creative imagination. It definitely captured our undivided attention as well.
However, we recommend using multiple other colors if you’re going to create a colorful concept.
We find this one to be a paradoxical painting. We like that there is a touch simplicity and a few complications at the same time.
What’s simple about this is that there is only one subject in the big picture - which is the castle. On the other hand, the subject contains a lot of tiny details and textures as well.
We have here a castle which looks like it just came straight from a comic book.
What makes this different from the other paintings we’ve discussed is that the castle here stands at the background and does not have many details to it. But still, the soldiers symbolize that they belong to the royal palace, which again makes it the main subject.
Whether this painting is of a real or imagined castle, it pretty much represents the normal ones which we would find back in the old times.
And this artwork contains a fair amount of effects, yet a lot of details. We admire the effort put in by the artist to create every single detail to finally come up with this finished look.
If you are an advanced artist, we would recommend taking this idea for the upcoming project.
Within this painting, there are many visible textures which add to the whole theme. The idea is to make the surface pop up by creating different multiple patterns on it.
You might even enjoy this kind of technique once you get the hang of it.
Finally, we’ll wrap up the list with this last castle painting.
Both the castle and the landscape remind us of a few after-doomsday movies, which we are sure you have some in mind too.
What’s interesting about this piece is that it has a story to it, judging by the figure who is facing towards the castle. Similar concepts to this will never lose the observer’s curiosity.
Why spend time and money heating an entire room when you can get your blanket to reach an optimum temperature?
Yes, with wireless heating and cooling devices, you now have the luxury of turning the bed toasty warm or breezy cold, any way you want. These devices even let you and your partner enjoy personal temperature preferences when sleeping on the same bed.
Today, we are reviewing the BedJet V3 Wireless, a device that has gained popularity soon after its release. It has received a significant upgrade since the V2 model, and in this guide we are talking about all the pros (and cons) that this product puts on the table.
We have included a buyer’s guide at the end of the review to help you understand the functioning of the device better. There’s also an FAQ section that’s sure to clear any doubts you might feel while reading the review.
So, without any further delay, let’s dive right in!
Sleep better with on-demand cooling, warming and sweat...
Powered ventilation cooling rapidly wicks body heat and...
Why Buy This Product?
BedJet V3 Wireless has garnered an extensive customer base over a very short time, and honestly, we are not surprised. With the kind of features and facilities it provides, it is no wonder that it has impressed many.
However, if you are new to this or heard about it from a friend, let us take you through the best of this product. Under this section, we will take a look at its bright sides, starting with…
Base Unit
Unlike other standard products, this one will not give you a hard time when it comes to the base unit. It is less than 6 inches and compatible with all types of beds. The only thing required here is a 3.5-inch rail clearance for it to function optimally.
Moreover, cleaning the unit is super simple. If you have pets, you will often find their hair and other dust particles accumulating near the device. All you have to do is vacuum the unit regularly, and there will be no clogging to disrupt the airflow.
Additionally, it is also very easy to plug the unit into the wall as the power cord is significantly long. You would not require an extension cord for this. However, in case the power outlet is far from your bed, you can buy a hose extension separately.
Flexible Mount
What's best about the brace is that it is foam-padded, which means fewer chances of slippage. Once you install it between the bed platform and the box spring, there will be no chance of it slipping out of place.
Honestly, even after we changed the sheets a few times and slept on the bed for consecutive nights, it did not move or shift at all. Also, to add more comfort, there are adjustable clips that allow you to modify the height in order to direct the air nozzle in the desired location.
Sheet Security
What good is a bed warmer if it gets displaced every time you turn around? With this item, you will have to face no such worries.
The nozzle is designed in a way that even when the sheet moves with you, the functioning is not rendered useless. Now, you may think, how is that possible!
Well, it is the clamping system that keeps everything in place. It holds the air hose grip perfectly to ensure that your sheets stay in the correct position, irrespective of how you move when sleeping.
The clamp is not extremely tight but makes sure that your sheet is in place and does not come off easily.
Remote And App
For this device, you do not have to take the pain of connecting to Bluetooth every time you want to manage something. With the help of a simple remote control, you can manage all your operations.
The remote is very quick to connect to the control panel, and you will also find it very easy to set it up as it comes with a clear set of instructions. The remote allows you to adjust the blower's strength, set a timer, enhance or decrease the cooling, and so on.
The best thing is that the settings are customizable and save your favorite features so that you do not have to keep waking up throughout the night.
Moreover, you can install the V3 app on your cell phone in case you do not want to use the remote. Your folks can also have it installed on their phones and access the controls as and when needed. The best part? It works on both Android and iOS platforms.
Strength Control Feature
The remote allows you to control the fan strength and temperature of the device completely. The remote's display clearly shows the temperature, and you can adjust it according to your convenience.
One word of advice: this item works best with temperature settings that are below 80 degrees Fahrenheit. So, it is a good idea that you set the temperature within this range to make sure that you enjoy the best cooling and heating effect.
Also, the remote shows an ideal temperature that would work best with the ambient surroundings.
Aromatherapy
We were very impressed by this thoughtful addition! You get a bag full of small foam rectangles attached with wire clips.
These foams are extremely beneficial and used for aromatherapy. What you need to do is sprinkle a few drops of your preferred essential oil on the foam squares, secure it to the nozzle and let the beauty of diffusion work its wonders.
It's an excellent opportunity to personalize your sleeping experience and relax as you unwind after a long day.
Dual Temperature
When sleeping with your partner on the same bed, it is not always the case that both of you find the same temperature comforting. Many couples have varied preferences when it comes to the heating and cooling experience.
This device gives you the opportunity of enjoying different temperatures on the same bed with its Dual Zone feature. However, you would have to buy an additional AirComforter sheet to enjoy this facility.
It comes with a kit that includes 2 base units, 2 sets of hoses and nozzles, and even 2 remote controls! In short, you get to enjoy the benefits of 2 devices in 1. You have to hook the 2 systems to the base unit and switch on the Dual Zone switch. This will reduce the power consumption so that the circuit does not get overloaded.
A point of caution, this feature is only limited to king and queen-sized beds. So, make sure that you measure the bed size correctly before you decide to invest in this product.
Sound Level
Unlike most heating and cooling devices, this one hardly makes any sound.
Right after installation, when switching it on for the first time, you will experience some noise because the fan is set to turbo mode by default. At this point, the fan speed is set to the highest when it comes from the factory.
Most of the time, you won't need the fan speed to be that high. When you do, you just have to endure the noise for a little while. At a standard cooling level, the units make about 38 decibels of sound, which is slightly louder than a mellow whisper.
Put simply, the noise at any point is not unbearable or enough to disrupt your sleep. It is a very typical white noise often produced by machines. And some people find the soft buzz quite relaxing.
Sleeping Experience
Honestly, this unit has something for every user. The experience is completely customizable, and all you need to do is just adjust the controls on the remote or on your smartphone to have an enjoyable experience.
It offers great versatility when it comes to the modes and settings. This enables you to tailor the temperature controls to feel as comfortable as possible when you retire for the night.
For example, some users do not like the fan speed so high that it makes the air flow directly over their body. If that's the case with you, consider reducing the fan speed. This would decrease the airflow speed and also eliminate the white noise that's generally present at a higher speed.
Be it a cold crisp bed or a warm cozy one that you crave, BedJet V3 Wireless can make all of it possible!
Trial Period, Warranty, And Returns
When buying a product, knowing about the warranty and return policies are very crucial. A good after-sales service is always a big plus.
With this product, you get a 2 year warranty and can get it replaced in case you face quality issues or the device has some manufacturing defect. You can also avail the easy 60-day trial period. And in case the cooling does not feel efficient to you, all you have to do is return it.
No questions asked! The company fills in for your return shipping cost, and you also get a full refund against the product. Given all this, even if you have some doubts, there's no reason not to try it!
Although BedJet V3 Wireless has significantly improved our sleep quality and put our sleeping cycle on track, like every other thing, it is not devoid of some shortcomings.
Though electricity consumption is quite moderate, the device itself is quite heavy on the pocket. You might have to budget and plan properly to manage money in order to buy this device. It becomes more of a pocket pinch if opting for the dual-zone feature for you and your partner.
It is true that it is a great feature, almost like having two units in one device. However, the price goes up considerably higher, and that might feel like a problem to some.
Furthermore, some people complain about the plugs and the long hose. The device needs to be plugged into the power source, and if you are lucky and have the socket near to your bed, it gets wholly concealed.
However, if your power source is far from the bed, you have to use an extension cord. And the chances are high that the cord will be visible, running across the floor.
This might dampen the beauty of your room and is also a little dangerous if you have kids or pets in the house. The chances of them tripping and falling will be high.
Now that you know a little better about the features of BedJet V3 Wireless, were you able to decide if it's going to be a good buy?
Well, we understand that reaching this conclusion is a little challenging. Knowing just about the goods and bad is not enough to decide.
So, we have designed this buyer's guide to help you understand the things that you should look out for when buying wireless heating/cooling climate controls for the bed. This consideration will help you make a wiser and better choice!
Let's take a look at what they are.
Safety
It goes without saying that, like any other electronic appliance, this also calls for some safety measures from your end.
In the same manner, you would not drop a cellphone in a bathtub; avoid getting water to touch the live wires of the heating/cooling device on your bed. This will prevent you from facing potential shock hazards.
There's always a user manual waiting for you to read it! We suggest that you go through the safety measures carefully, especially if there’s a young one at home. This will ensure that you and your kids are entirely safe.
Easy To Use
Unless you are a tech-wizard, we recommend that you go for products that are easy to set up and simple to use.
Setting up Bluetooth connections, for example, might seem difficult to some. In that case, go for a unit that has both Bluetooth and a wireless remote control facility. Remote controllers are comparatively simpler to use and do not require any prior technical knowledge.
Also, we recommend that you talk to the seller or watch tutorial videos to figure out if the installation process is too difficult for you. If that's the case, you can always call a technician for help. This effectively cuts down the amount of time needed to set up the system.
Controls
Different homes have different needs! So, it is very crucial that you identify your needs before deciding which system to go for.
Some families might not need both heating or cooling, and some may require a dual temperature regulation system. At the same time, some may prefer timer settings in order to have an undisrupted sleep at night.
The requirements are often quite different, and depending on your family setup and preferences, decide on a device that can fulfil those purposes. All these specifications are clearly mentioned in the packages. So, make sure that you read the details carefully before buying.
Advanced Technology
We are living in a time when technology has achieved remarkable feats. So, why not make the most of it?
As we mentioned before, wireless heating and cooling devices mostly come with Bluetooth and remote controls. However, it is you who has to set the modes and the functions to the optimum level.
Now, that's okay during the day when you are indulging in a quick nap or lazing in bed watching your favorite TV show. But, we do not think it's a good idea at night to constantly keep waking up to make your bed comfortable.
To avoid such sticky situations, we recommend that you opt for devices that let you customize the temperature settings beforehand. This would enable you to schedule sleep and make temperature adjustments prior to calling it a night.
BedJet V3 wireless has a Biorhythm Technology that makes it possible to set different heating and cooling profiles throughout the night!
Maintenance
Keeping your device in the best shape is very important, and to ensure that you must go for one that can be maintained with ease.
Some devices can be emptied and cleaned every alternate month to remove moldy water. We recommend that you use distilled water for the process if you choose such a device. There are a few other devices that come with self-cleaning features.
While others, like the BedJet controller, come with a washable air filter. This catches all the dust and animal fur and is very easy to clean. All that you need to do is pop the filter out of the device and wash it under the sink.
Controllers, Hoses, And Other Add-Ons
Note that most controllers are around 10 to 15 lbs. in weight and can be easily stored under your bed if the height is sufficient. This saves you from storing troubles. However, if you are using a bed that is low in height, your controller might be visible.
If you are an aesthete, it would be helpful to know that BedJet V3 wireless has a long hose that joins the controller and the bed. In case you want to conceal the hose, you can make arrangements before buying.
Coming to add-ons, one of the most popular ones is the cloud sheet that you can buy separately for BedJet. This sheet holds the air and makes circulation better. It is best suited for couples who want different temperature controls on different sides of the bed.
If you are thinking of utilizing the Dual Zone feature, this is a must-buy.
BedJet V3 FAQ
How Does The BedJet System Work?
BedJet is best known for its healing and cooling climate control system that makes sleeping in your bed extremely comfortable by making the temperature optimum. The machine blows a gentle gust of air onto your bedding to provide instant heating and cooling comfort.
The best part about it is that it works with all sizes of beds and with all types of mattresses. So, you do not have to change the existing bedding if you want to install this item. The item is designed in a way to be installed under your bed or at the foot of the couch.
This ensures that all electrical controls are safely kept out of your bed to prevent any form of shock hazards. Also, you can wirelessly connect multiple devices to operate the item through Bluetooth or simply use the remote control to adjust the controls.
Is BedJet Safe For Pets?
If your furry friends have a habit of sleeping with you on the bed, there’s no problem. BedJet is absolutely safe in terms of temperature controls. Just as it keeps you comfortable while sleeping at night, it will keep your pets comfortable too.
However, a little word of caution, just make sure that they do not block the air nozzle while sleeping as that would block the smooth functioning of the device. Also, try and avoid using essential oils for aromatherapy because some pets might be allergic to them.
We advise that you speak with your vet to get better clarity on that.
Will The Device Work With Adjustable Beds?
Definitely it will!
But for that, you might have to tweak a few things here and there during installation. To start with, you will need to put the base unit a little far from the nozzle. This is because it will give enough space to the air hose to expand and contract as needed.
There’s also higher flexibility for the hose to keep the nozzle in the right place as the foot of your bed becomes adjustable and keeps changing in size.
The manufacturer suggests that you keep an eye under the bed when you are adjusting the size to make sure that the device is functioning properly. In case you cannot make it work, you can always use the 60-days guarantee and return the item.
Does Bedjet Help Save On Bills?
Absolutely! Why spend electricity on turning the whole house hot or cold when all you care about is the temperature of your sheets?
BedJet allows you to save a considerable amount of power that you would have otherwise spent on setting the whole house to a desirable temperature. It allows you to moderate how the bed feels and helps customize it to the perfect temperature that you find right for sleeping.
Going by the data shared by the Department of Energy, we can assure that every time you reduce the temperature on the thermostat, you save an extra 4% on the utility bills.
What Is The Power requirement Of The System?
When using the device in cooling mode, every unit draws around 50 watts. In the heating mode, it draws energy ranging from 150 – 1500 watts depending on what degree you set it on.
At the highest power, the turbo setting gets switched on but can run only for 10 minutes. This is to ensure that too much electricity is not consumed at a go. However, the heat is more than sufficient within 5 minutes, you will find your bed toasty warm! It would feel like your bedding is right out of the dryer.
In general, if you want to reduce the power consumption, you can always set it on ‘Low Power’ mode and limit the turbo heating capacity to 800 watts. This wattage can be easily handled by a regular 15A AC circuit.
In case you are using a dual-zone system, make sure that you switch the ‘Low Power’ mode for both the units to make sure that the combined energy consumption does not cross 1500 watts.
For a simple calculation, we can say that if you use the cooling mode every night, you won’t end up spending more than one dollar a month on electricity for this. And for heating mode, you would have to spend a few more dollars.
That's all for today, folks! Now we have reached the end of this comprehensive guide on BedJet V3 Wireless.
We hope you had as much fun going through the guide as we did while compiling all the little details about this item. The BedJet is a great consideration if you want to save on electricity and smartly heat/cool your bed at night instead of moderating the temperature of the entire house.
It allows you to enjoy customization to a great degree and enjoy uninterrupted sleep during the night. Also, it is an excellent choice if you have a partner and require different temperature settings for each.
With that, it's a wrap! We promise to be back soon with more such exciting reads. Let us know what you liked best about the BedJet 3 Wireless in the comments section below.
The studio is like a place of worship for an artist. It is the home of an artist’s creative prowess. What are the essential materials that complete a studio?
As painting materials can differ slightly based on the type of paint in question, we want to list out all the acrylic painting materials needed in the studio. Acrylic paint is being used extensively by artists – beginners as well as professionals.
We have included ten of the most important materials that you would want to have in your studio. We have also explained the importance, uses, and benefits of each of these materials to give you a complete picture of an ideal studio, complete with acrylic painting materials.
Acrylic Painting Materials
We wanted to list out not only the commonly used elements that are essential for the very act of painting but also some other things that can make your life in the studio much more comfortable and hassle-free. Read on to know what we think are necessary materials for acrylic painting:
As a general rule of thumb, it is vital that you first understand what your short-term goal is.
People who are experts or experienced professionals in the field will want to display their paintings at exhibitions or local galleries to sell them. People who are new to the field or casual hobbyists will not have their paintings displayed before a large audience and will not be making money from it.
How is that important? Your studio will differ substantially depending on whether you are a beginner or a professional. Likewise, the materials you need in the studio will also vary.
A list of essential materials for acrylic painting will include paint! But what kind of paint should you keep in your studio? There are hundreds of varieties of acrylic paint with different prices available in the market.
While it is preferable to buy top-notch artist-grade paint, it is not the ideal option for everyone.
It does not require rocket science to understand that any professional or expert artist will not want to compromise on any of their painting materials. If you idolize Picasso or have an audience that scrutinizes every brush stroke, every dash of color that you put on a canvas, then you should not go for anything less than best-in-industry artist-grade acrylic paints.
Go for Inexpensive Brushes Initially
Paints and paintbrushes are like bread and butter for artists. No matter what type of an artist you are, how much experience you have in the art, what kind of art you create – you will need paint and brushes. Having addressed the first half of those prerequisites already, it is time to talk about paintbrushes.
All types of brushes are available in the market – varying thickness, bristle softness, length and more. And depending on the effect you are trying to achieve on the canvas, you will likely be using a wide range of paintbrushes over time. But how do you stock up brushes in your studio? How much should you ideally spend on this material?
Everything has its pros and cons. The quick-dry characteristic of acrylic paints makes it appealing to a lot of new and young artists as it saves substantial time. However, the same wreaks havoc on paintbrushes. Unlike oil paint which can take multiple days to dry completely, acrylic paint dries in less than an hour.
Buying starter packs of brushes and reasonable yet efficient alternatives to high priced premium paintbrushes will save you a lot of money. If your favorite brush gets ruined and you know you did not spend a fortune on it, it gets easier to throw it away. When you get used to acrylic paint, you can switch to costlier brushes without a frown.
Keep Rugs or Blankets
Not only does acrylic paint dry fast, but it is also nearly permanent. It will not take a lot of effort to find a lot of videos of artists trying to remove hardened acrylic paint from their clothes or studio carpet. You might face a situation where you have spilled some paint accidentally, and it just won’t go away.
This one is more of a precautionary material, and though you do not need it to be able to carry out your painting work, it is an effective way of maintaining your studio. You should have a rug or a blanket on the studio floor at all times. It is all about protecting your surroundings.
We are not saying that it is impossible to get rid of acrylic paint stains from your studio floor, but it is rewarding to have preventive measures that ultimately allow you to focus on painting rather than cleaning.
Another benefit you can derive from having rugs or blankets on the floor is the added comfort when you have to work through a time-taking, detailed painting. We would recommend you to cover other surrounding surfaces as well with blankets and not just the studio floor. It takes only one slip of your wrist to spill paint away from the canvas and on to some other surface.
Using old papers on the floor is an alternative approach that solves the said concern if you are comfortable with the occasional crunch when you walk around the studio.
Gone are the days when paintings were restricted to paper. If anything, modern art has taught us to have an open mind. Artists use all kinds of surfaces today to bring their paintings to life. That’s where acrylic paint is an artist’s go-to option – it can adhere to nearly any surface.
Whether you are painting on metal, wood, plastic, cardboard, glass, or any other unconventional surface, you can safely use acrylic paints. Of course, you can use acrylic paint on the conventional cotton and linen canvases as well.
An important point we ought to mention is that no matter what surface you plan to use and stock up in your studio, you would want to get some acrylic gesso get some acrylic gesso too. One of the most common problems artists face is that the paint surface absorbs acrylic paint way too quickly.
Adding many layers of paint is often detrimental to the final piece of art and creating a complete masterpiece becomes a daunting challenge if the paint surface has absorption and tooth issues. Gesso works as a primer and applying coats of it to the surface improves the absorption and overall texture.
So, you need to choose the right paint surface for your short-term painting endeavors and have a considerable amount of acrylic gesso in your studio. Do not be miserly when applying gesso, as two to three layers are frequently used.
If you do a survey and ask artists to name the top three must-have materials in a studio, you will probably hear paint palette more than once. A proper paint palette is needed to be able to mix different acrylic paint colors. Any artist can vouch for the fact that improperly mixed paints often lead to disastrous results on the canvas.
How do you selectthe perfect paint palette to go with acrylic paints? There is a ton of different palettes available in the market. Unlike watercolor that can be easily mixed on nearly all types of palettes, acrylic colors blend best on a specific kind of palette.
We recommend you to opt for a flat-surface glass palette. We have learned from experience that acrylic paint mixes seamlessly on a glass surface and gives you the texture and color that you are looking for. Save yourself the trouble of mixing paints repeatedly to get that perfect finish by trying a glass palette.
Along with a glass palette, we recommend the use of palette knives instead of paintbrushes for mixing colors. Paintbrush bristles are capable of holding a significant amount of paint and mixing two colors with a brush needs expert hands. A safer and more convenient option for any artist is to use palette knives to get the exact color they are looking for.
One of the perks of using a glass palette and palette knives for mixing acrylic paints is the easy clean-up. You can scrape the palette surface with a razor to get rid of all the color, clean it with a damp cloth, and you are ready to go again!
Cleaning Tools
Cleanliness inspires creativity! Who likes working with dirty, paint-stained materials? A list of important acrylic painting materials that you need in the studio will be incomplete without some cleaning tools to help keep the studio and other materials in pristine condition.
When it comes to cleaning a mess or removing a wrong stroke of the brush, using acrylic paints proves to be a blessing in disguise. You do not have to use harsh materials like turpentine or mineral spirits. A simple cloth rag is enough to clean acrylic paint.
The high absorption of cloth or other natural fabrics allows them to be effective cleaning tools for removing acrylic paint from any surface. We would recommend using any fabric instead of paper towels or spirits.
A recurring and significant challenge faced by artists in the studio is cleaning and maintenance of paintbrushes. We mentioned earlier that you would end up ruining a few paintbrushes initially. But to ensure that it does not happen in the long run, you need to have a plan of action for preserving the useful life of fine paintbrushes.
We recommend keeping a couple of jars of water in the studio to employ what we call the “Double Rinse System.” Water is the best cleaning medium for acrylic paints, and you should have two jars of water to give your paintbrushes an initial rinse and a second rinse. It ensures that there is no dried up paint at the base of the bristles.
It is imperative that you use these cleaning techniques regularly to prolong the life of your painting materials and keep your studio looking neat. Your paintbrushes will thank you for the better care and serve you for a long time!
Easel
One of the essential tools used by artists all over the world is an easel. Every artist likely started with painting on a flat surface like a table. As artists got better at their art and their paintings got more intricate, a table was just not enough to get the job done. Painting on a flat surface can skew your perspective, and if you sit for long hours with your head bent down, it gets highly uncomfortable.
That is where an easel comes into the picture. It is the perfect alternative to flat-surface painting, allowing for greater convenience and accuracy. There is an easel that will perfectly meet your requirements – whether you prefer to stand or sit while painting.
If you are buying your first easel, you need to choose one of three broad classifications:
Frame Easel
Table Top Easel
Portable Easel
Tabletop easels work great for artists who want to sit down and paint. If you are working on a detailed piece of art that will take hours to finish, you would want to be seated through the entire process and use a tabletop easel for best results.
The majority of artists prefers frame easels due to their versatile utility. Some of the options have a collapsible design, which is perfect for artists painting in a small space. Frame easels can be adjusted to fit surfaces of varying size and have a sturdy base.
Portable easels are ideal for artists who appreciate the design of frame easels but like to paint outdoors or travel and paint.
Painting without an easel is like boxing without gloves – inconvenient and unprofessional!
Underdrawings Materials
A painting takes much more effort than we realize. There are more layers to a work of art than meets the eye. Most people who have never painted only perceive the final look. Artists know and understand that there is much more to any painting than the finishing touch of colors.
Keeping that in mind, the studio needs to have some underdrawings materials. Underdrawing is the preliminary sketch or outline made as a guide. It gets covered with layers of paint, so it is not visible to the spectator. It is an indispensable part of the entire process, especially for beginners.
Some experienced artists do not rely on underdrawings while painting. Some artists prefer to first have an initial sketch, given the opaque and permanent nature of acrylic paints. You would not want to skip underdrawing only to find that you made an error and wasted the surface.
So what are the best underdrawing materials to be used with acrylic paint? We strongly recommend using either graphite or charcoal. Both these materials have their pros and cons but serve as useful underdrawing materials.
In case you decide to go for charcoal, do not forget to use a fixative before applying the first layer of paint or wash. A fixative, as the name suggests, fixes the charcoal on the surface and prevents it from mixing with the acrylic colors and adding a dark tone to your painting.
Just because the underdrawing is not visible in the finished painting does not mean that it is not a vital part of the art creation process. Keeping underwriting materials in the studio is always a good idea!
Flow Improvers
Like everything, the quick-dry feature of acrylic paint has its positive as well as negative traits. While some artists use acrylic only for its rapid dry time, it is not always desirable. If you are working on a medium or large scale art piece, you may want the paint to be wet for a longer time.
Flow improvers come in handy when you want to alter the quick-dry feature of acrylics. As the name suggests, they improve the flow of paint on the surface and help it glide smoothly. If you were to use raw paint, it would dry too soon. Using a flow improver lets you catch your breath instead of feeling rushed.
Flow improvers work with acrylic paints just the way linseed oil works with oil paints. Some flow improvers available in the market come in a concentrated form, and you need to mix it with water in a 1:1 ratio.
It would be inaccurate to say that a flow improver is of use to every artist. Anybody working on small scale paintings can efficiently finish them with raw acrylic paints. But it will not hurt to keep it in the studio and give it a try. In our opinion, flow improvers make the entire process of using acrylic paints more relaxed.
There are a few products that work as flow improvers and retarders for acrylic paint. Retarders slow the drying time and help in blending colors or layering highlights in a painting.
Varnish
At the end of the list is a material that you will need when you have completed a painting. Creating a masterpiece is commendable, but you must do the needful to preserve it. Varnishing your painting is like the final seal to complete the process.
There is a wide array of varnishes available in the market for acrylics. Irrespective of the finish you are looking for – full gloss, matte, or a combination of the two – you can find a varnish that will add the finishing touch to your painting.
Again, this is not one of those materials needed by every artist. If you are a hobbyist or a beginner whose painting will not be seen by people at large, you do not need to preserve it by applying coats of varnish. However, if you will be displaying your painting before an audience, you should varnish it.
As you venture further into the journey of becoming a professional artist, you will find materials like flow improvers and varnishes to be advantageous in adding a certain X-factor to your work. Although varnish is not likely to be found in every studio, keeping it handy and experimenting with it will only help you learn and grow as an artist.
Most of the varnishes available in the market form durable, transparent films on your painting when dry. They are known to have resistance to water, abrasion, chemicals, and ultraviolet radiation. You should use a high-quality varnish to provide long-lasting protection to your piece of art.
Final Thoughts
It is important to mention that any form of creative art is time-taking and challenging to master. When it comes to painting, there is a learning curve. Only consistent practice and experience help an artist go from amateur to expert.
The materials play a vital role in providing tools for the creation of awe-inspiring art. Choosing the wrong materials or not having the required elements in your studio may render the entire art creation process unproductive.
The materials you keep in the studio undoubtedly make a difference in the long run.
I recently found myself in a dilemma when I had to paint a couple of t-shirts as gifts for my friends.
I usually paint with acrylic paints, and I had a lot of different colors stacked in my cupboard. But to paint on t-shirts, I had to buy brand new fabric paints and in huge numbers as well for a punctual job.
I was wondering that if in any way I would be able to re-use my acrylic paints for the job. The goal was to minimize the number of fabric paints I’d have to buy for the job.
Luckily, there’s a way to do it. And today, I am going to show you how.
Can You Use Acrylic Paint on T-Shirts and Fabric?
The short answer is yes. The trick is simple. You’ll have to prepare a mix to use acrylic paint on fabric.
In the medium the key is a special fabric medium, you need the fabric medium, a solution by Martha Stewart, honestly, a solution that simply works.
To prepare the solution, mix 1-part fabric medium with ]2-parts of the acrylic paint of the color you want.
The fabric medium mixes with the paint with ease. The solution may be a little thinner, but it doesn’t dilute the paint in any way.
Now, there are certain caveats of the trick that you have to keep in mind.
First, the solution will be of a thinner consistency than before. So, if the job is on a thin piece of cloth, then you’ll have to cautious about the surface you want to paint on. The color may seep through and get on the surface below it. Use some old newspapers for the purpose for an easy fix.
Obviously, wash the piece of cloth and dry it before painting. The solution doesn’t sit well with dirt and stains.
Now after the painting job is done, let it dry. You’ll have to put the t-shirt under the heating process to make the color permanent. One easy way is to use an iron for the job.
Once the paint is dry, put a stray piece of cloth on the painted section. Make sure that it’s clean and dry. Now iron over that piece of fabric. It’s necessary because otherwise, the paint may chip and get on the hot iron.
Another way to do it is to turn the t-shirt inside out and then iron it. But be cautious of what you are using as the ironing board. The paint may get on the surface if you are not careful enough.
When ironing, make sure that the iron is continuously moving and not stuck in one place. Also, if you want to avoid the hassle, you can also just put the fabric in the dryer for an hour. It should do the trick as well.
Final Words
That’ll be all. The trick is laid out, and now it’s time for you to get crafty!
Remember that it’s 1:2 ratios. The paint will be thinner so be careful while painting and make sure it doesn’t seep through.
Also, be careful while ironing and drying up the cloth.
And with that, I hope this guide was helpful to you and happy painting!
Out of all surfaces, paper is one of them. Painting on paper with acrylics has always been the most preferred method by artists to produce great and elegant paintings.
But not just any paper will do. There are specific things about paper you need to consider for using acrylic paints. Let’s take a quick look at those!
Painting on Paper with Acrylics
How do I know which is a good paper for painting with acrylic?
First of all, the quality of paper can be either high or low. Mostly, you can tell which paper is of good quality by looking at its price. However, that isn’t enough if you want paper to paint on.
What makes the paper good for painting with acrylics depends on the following characteristics:
Durability. Before purchasing that paper, get to know if it is durable or not. The durability of the paper relies on whether it can handle a few things - applying a lot of watery paint, scraping, erasing and other harsher methods.
To know this, you can either raise queries about it or find out what the paper is made of. Wood-based papers lack durability while papers made of linen and cotton are stronger and can endure so much more work. Check out the label to know this.
Acid-free papers. A paper that contains no acid tends to last longer than that which is not acid-free. Not only that, but acid-free papers do not turn yellow or get discolored easily. The quality of the paper stays the same for years to come.
On the labeling, they will likely mention that the paper is acid-free. If not, check for one that is pH neutral.
Heavyweight. Paper which is thick and heavyweight does not wrinkle easily when you use a lot of acrylic paint. Normally, regular papers will start to crumble at the touch of liquid. On the other hand, high-quality papers are made to be thick enough to absorb paint and inks without wrinkling.
The thickness of a paper is indicated by gsm [grams per square meter]. The best paper thickness for water-based painting should be either 300 gsm or more.
Enough tooth. The tooth of the paper means its texture. Smooth-surfaced papers have lesser tooth while rough-surfaced papers have more tooth.
There is a common misconception that smoother papers provide a better painting surface. That is true when you have to work with fine details.
But we are talking about water-based acrylic paints which work better on absorbent papers. And rough-surfaced papers do just that.
Therefore, you will require papers with more tooth to produce great paintings.
Prime those papers. Papers which are acid-free are already primed for protection against degradation. In that case, you can go ahead and paint directly on the paper without further concerns.
However, if the paper is not primed, we recommend you use a primer first to apply on the surface that you will be working on.
Some primers have chemicals and acids in them so you have to make sure that you get one which does not contain any acid for the sake of the paper’s durability.
What we would suggest is to use primers such as gesso which is specifically made for acrylic paints.
And that is it! Those are all the main characteristics of a good paper for acrylic painting that you need to know.
Paper Recommendations for Acrylic
If you’re having a hard time finding the right paper for acrylic painting, we are more than glad to take this time and help out with that.
Below are few of the best high-quality papers artists must discover for using acrylic paints:
Prized Paper - The long fibers in Arches natural white 100%...
This paper which is made of 100% cotton pulps makes really sound support for acrylic painting.
It is also very versatile in the sense that you can get a bundle of these and use them for other artworks as well. It’s ideal for artists who produce diverse artworks. You can get them in three different preferences: hot press, cold press and rough. So really, there’s no doubt you’ll find one that suits your requirements perfectly.
Another good thing about this paper is that you can choose the thickness according to your requirements.
What we love about this paper is that it can hold a high amount of paint application without bleeding.
Moreover, the texture is just about right to reveal the beauty of the painting.
Heavyweight, textured paper that stays flat and will not...
Sized to provide the ideal level of absorbency for aqueous...
This heavyweight paper is originally made by the French company known as Canson. It comes in a very thick format, which is 400 gsm. And it’s perfect for acrylic painting.
It truly holds and shows detailed work done with acrylic paint that is mixed with a thickening medium.
For this, many artists are starting to prefer acrylic papers for using acrylic paints specifically.
The best part about this paper is that it holds acrylic paint successfully without bleeding or any other generic paint issues.
A Heavy-Weight paper with a linin finish ideal for mastering...
Another paper that is pretty thick (400 gsm) is the Strathmore 400 Series Acrylic Pad. it is a heavyweight paper that receives paints beautifully and securely.
The finishing is done using linen while the cream color sets it apart from the white-colored papers.
It works pretty well with freestyle paintings and even with fine details art.
The paper has a rough-textured surface with more than enough tooth that’s suitable for any type of acrylic painting.
Since it is a pad, it becomes very easy to take care of and carrying around. You can either use it as a practicing paper or a surface for professional paintings. The sheets can also be torn off separately for framing or adding to an art-collecting book.
This paper pad is ideal for artists who are on the go.
A much thinner and lightweight paper is the Strathmore 300 series. This paper is 187 gsm and what it does is imitate the same texture as that of a canvas.
This one comes in a pad too. And you get to choose different sizes of pads.
It does accept any form of paint but because this is a lightweight painting paper, you will need to apply a coat of gesso primer before you start working on it. This will instantly make the paper sturdy and suitable for acrylic and watercolor painting.
However, this is more convenient for artists who like to travel and for those who are practicing and making their way to betterment.
Ideal for Pen, Ink and Marker Art: Experience the smooth...
2-Ply Bristol Weight: This Bristol paper features a sturdy...
Again, this is another paper that comes in a pad of 15 sheets. It is also ideal for traveling artists.
The paper is quite thick and is considered to be a heavyweight painting paper.
Its distinct feature is that it has a smooth painting surface.
So if you are looking for a thick paper that you can work with great details, this paper is best for you.
It accepts any kind of paint and color variants but it really produces great results when used with acrylic paints.
The pages are also tearable so if you have to keep them or sell them, this will serve you right.
5 Paper-Like Surfaces to Consider
While using high-quality paper is good for acrylic painting, there are times when paper cannot handle everything. There is only a certain limit of how much a paper can take in.
When the paint becomes too watery or when you have to mix a thickening medium to your acrylic paints, that’s when you have to realize that it’s too much for your paper to bear.
Besides that, there are those times in an artist’s world where creativity takes over and they want to experiment painting on other similar surfaces, apart from the paper itself.
This is why today, we’ll also be showing you 5 paper-like surfaces and paper alternatives that you can work on.
Paper-like surfaces are one of the top choices because they provide more texture, hence, adding more sophistication and value to the painting.
Also, painting on paper-like surfaces consumes lesser amount of both time and color; unlike working on surfaces such as wood, canvas, etc. Simply put, acrylic paint works wonders on such surfaces!
Drawing or cartridge papers are those textured papers which are rough. They are commonly used for painting/drawing/sketching and also for making sturdy envelopes.
So you get the picture; these are tough papers, ideal for rougher projects.
Of course, these fall within the ‘standard papers’ category but you can get them at different gsms or lbs. The more the gsm or thickness is, the more the paper will endure acrylic paints.
So, we recommend you get the ones that are higher than 400 gsm because otherwise, you will have to prime them first.
Most drawing/cartridge papers are age-resistant due to the fact that they are acid-free and are pH neutral. They also make your drawings appear very vibrant. This makes drawing papers suitable to use for paintings that you want to last for a very long time.
Synthetic Paper
This one is generally made to be a watercolor paper but it works like magic with acrylic paints as well.
It is called ‘synthetic paper’ because it is totally made of polypropylene. However, it holds similar traits to that of other high-quality papers made from cotton and linen fibers.
Somehow, the price is not very wallet-friendly. It can cost around $5 per paper. This can work for some artists who want to sell high-quality paintings while it may not be ideal for artists who are on a budget.
However, what’s good about it is that it does not buckle nor tear easily like any regular paper would, especially at the touch of liquid. So this makes it ideal for watercolor and acrylic paintings.
Moreover, this paper is acid-free. And that prevents it from yellowing or aging too soon, therefore, longevity and durability are assured.
Some synthetic papers come in a roll while some come in the form of sheets and pads. If you are a beginner, you might want to use the ones that come in sheets or pads because it’s easier for you to work on them than on those which come in rolls.
Cardboard
Now, we have this next option that costs almost no money at all while still expanding creativity levels for amazing paintings. And that is using the cardboard!
First of all, since cardboard is not made for painting purposes, you have to prep your cardboard before you go ahead with the painting.
What you can do is select a fresh cardboard from any packaging and trim it down to your preferred frame size.
To make sure your painting comes out beautifully, you would need to prime both the surfaces of the cardboard with gesso in order to make it stay firm and sturdy like a hardboard.
This is because cardboard does not accept paint as well as papers do. It is bare with no coating. The way you work on a cardboard is similar to the way you would work with wood. So priming is a must. Leave it till it’s dry and then start the painting process!
Being free of cost also means being flexible for any experiment. So, as we have mentioned, you are free to use your creativity as you like to work on this surface.
Heavy Watercolor Paper
Heavy watercolor papers are specially designed to endure a lot of watercolor works. And since acrylic paints are also water-based, they will come out really well on these types of papers.
This one is another paper that comes in different gsms and lbs. Of course, you have to select the thickness of the paper according to the type of painting you will be working on. Heavier the color works, thicker the paper.
Without question, this paper’s absorbency is extraordinary. This is because of the texture of the surface alone.
It has got a lot of tooth on its surface which makes the paper highly capable of holding paint in its place.
What is much more remarkable is that even with so much absorbency, it still does not bleed on the other side like a regular paper would do. That too, not a single coat of primer is needed. Your paint will spread throughout the surface fluently.
Watercolor papers can come in two different qualities: for artists and for students.
An artist’s quality paper or an archival paper can accept any paint very well and the price is a bit higher. But it gives out exceptional results.
Meanwhile, a beginner’s quality paper is good for practice and comes at a much lower price. It does not, however, hold paints for long.
That is why we would recommend you aim for the artist’s quality paper if you are planning to sell your work or if you just want your painting to last. Otherwise, the student’s paper will be of really good help if you’re still learning.
Acrylic Paper
Finally, there are the acrylic papers that only a few people know, as of yet.
That’s because they are hard to find at local stores and are available only on certain online selling platforms.
These have been specifically made for artists who are fond of using acrylic paints. And since acrylic paints are the most popular paints (as we can say) for paintings, these papers are also currently on the rise for artists globally, aiming to fulfill acrylic painting purposes.
Most acrylic papers are made to be acid-free but just in case they are not, you can always prime them first before using. Either way, acrylic papers accept acrylic paints more successfully because they are specifically designed for these paints.
They come at really affordable prices to target every artist. And not only that, they include all the necessary features of a high-quality paper for using acrylic paints.
The most common acrylic papers right now that artists are talking about on online art communities are the Canson Acrylic Paper Pads which you can get from online art suppliers.
A final word
Remember that selecting the right paper will make your work look very professional and extraordinary. It all depends on the quality and features of the paper you choose.
So we have now come to the end of this post and we sincerely hope that you’ve found this article helpful in finding the right paper support for painting with acrylic colors.
We also hope to see you again next time. All the best!
Having an air purifier at home can keep your family and yourself safe from all the allergens and germs in the air, which can lead to various diseases and health conditions. For those of you who have started searching for and comparing air purifiers to choose the best one for your needs, you might have come across the name GermGuardian.
Manufactured by Guardian Technologies, GermGuardian’s top-of-the-line air purifiers are known for their incredible performance and durability.
Guardian Technologies is a company based in Euclid, Ohio. The company has received several awards over the years from Weatherhead School of Management, Ernst & Young Global and EDGE for its innovative approach to providing its customers with solutions for their everyday needs.
The manufacturer is one of the most renowned producers of ingenious and high quality appliances that deal with health and wellness. Among the most popular products made by Guardian Technologies is the air purifier.
While there are plenty of air purifiers out there with different features, their basic function remains the same. An air purifying unit comes with a one-speed or multi-speed fan. This fan is responsible for drawing in dirty air from the room it is in through the inlet on the machine.
As air passes through the air purifier’s filters, its particles and contaminants get trapped inside the machine. Thereafter, clean air is redistributed into the air through the outlet on the machine.
Some air purifiers offer various kinds of particle-destroying technologies like ionizers or UV-C lights that help clean air particles more rigorously as they pass through the machine before they are redistributed.
HEPA Filter Air Purifier: Equipped with a protective HEPA...
Clean, Fresh Air: A must-have air cleaner for homes,...
One basic thing to understand is that the larger a room is, the more difficult it is to control the air quality circulating in the room. Luckily, that is something you do not need to worry about if you have either the GermGuardian Elite 4-in-1 (AC5350W) or the GermGuardian 3-in-1 (AC5250PT). Both of these air purifiers are tall units, but they have manageable weights, which makes them easy to move around whenever you need to.
Both these GermGuardian models have decent clean air delivery rates and feature variable fan speeds. The GermGuardian Elite 4-in-1 AC5350W and the GermGuardian 3-in-1 AC5250PT are able to handle the workload required for cleaning large indoor spaces. At the same time, their ability to distribute clean air in spacious settings does not make them wasteful in terms of energy consumption. They require very little electrical energy to operate.
Each of the two models relies on a triple-filter system that removes harmful and irritating contaminants from the air. The 3-in1 model contains a special Pet Pure HEPA filter for animal fur. The Elite 4-in-1 and the 3-in-1 contain UV-C light bulbs, which give them extra germ-killing ability.
It is incredibly easy to control the UV-C light, the timer, the fan speed and everything else regarding the operations of both these models because of the digital control panels on the top of the units. The long lifespan of the filters in both of these models is also an attractive factor. The cherry on top is that Guardian Technologies also gives a generous manufacturer’s warranty on both these products.
Size and Placement
The major difference that you will find between the GermGuardian Elite 4-in-1and the GermGuardian 3-in-1 is in their color and shape. Of course, there are minor differences between the units other than their physical appearances. The Elite model has a rectangular shape, which is more like a white tower. In stark contrast, the 3-in-1 is a tower but black in color with a more oval-like shape embellished with a chrome chevron.
Both the GermGuardian Elite 4-in-1and the GermGuardian 3-in-1models are 28 inches tall. The Elite 4-in-1 has a length and depth of 6.7 inches by 9 inches while the 3-in-1 model measures at 6.1 inches by 9.5 inches. The Elite 4-in-1 is heavier than the 3-in-1, but it is only a minor difference with their weight being 11.25 pounds and 10.5 pounds, respectively.
You can use both of these comfortably in large rooms. They have 6 foot long power cords, which allow you plenty of room to move them around, based on their relative distance from the wall outlet. Moving both of the machines around is easy due to their light weight.
Filters
Guardian Technologies went all out with both the GermGuardian Elite 4-in-1and the GermGuardian 3-in-1 . Both units have three major air filters. The purifiers contain a pre-filter responsible for keeping large dust, coarse particles and hair from even entering the machine and disrupting its operations. The filter is covered with a layer of activated carbon that eliminates smoke, food and pet odor as well.
Both of these filters also contain the HEPA filter. This filter traps 99.97% of germs and allergens in the air, which are as small as 0.3 microns. The HEPA filter in the 3-in-1 unit is a Pet Pure HEPA filter that is infused with an antimicrobial material. This stops mildew, bacteria and mold from accumulating on the filter.
As effective and lasting as the air filters on both these purifiers are, their owners should make it a point to replace the product filters after every 6 to 9 months to make sure that they keep performing at their best. Each of the purifiers has a filter change indicator that can alert you to replace the filters.
Replacing filters is a simple matter of removing the back panel with a push of a button and accessing the filters to swap them out. It is as simple as that.
Extras
While the air filters in both the air purifier models by Guardian Technologies will clear the air properly for you, the company went a step beyond by introducing some bonus features for both of the air purifiers.
Both the GermGuardian Elite 4-in-1 and the GermGuardian 3-in-1 have 5-watt UV-C light bulbs. These UV-C lights interact with a titanium dioxide photocatalyst in the machines to break down the viruses and bacteria right down to the molecular level, so that they are completely destroyed as they enter the air purifier.
The timers on both the purifiers allow you to limit the use of the UV-C light filters to 8 hours per day so that you can cut down on the energy consumed. Setting timing for the UV-C light filter or simply turning it on and off is a simple matter of pressing the appropriate option right next to the digital display screen on top of the air purifiers.
Fan and Efficiency
The thing that makes the filtration and purification system of both the GermGuardian Elite 4-in-1 and the GermGuardian 3-in-1 so efficient is the five-speed fan you will find in both models.
The fan in the Elite 4-in-1 model uses just 56 watts of power while the 3-in-1 one uses 62 watts. Their low energy consumption means your energy bill will never spike up because of the air purifiers. In order to give you more peace of mind for their longevity, Guardian Technologies gives you a 5-year limited warranty on both the models.
If you have taken a look at the CADR numbers for both the GermGuardian Elite 4-in-1 (AC5350W) and the GermGuardian 3-in-1 (AC5250PT), you might have noticed that the 4-in-1 has lower CARD numbers than the 3-in-1 model.
For the 3-in-1 model, the dust CADR is 139 cfm [cubic feet per minute], the pollen CADR is 149 cfm and the smoke CADR is 125 cfm. For the Elite 4-in-1 model, the dust is 122 cfm, pollen is at 130cfm and smoke is at 111 cfm.
Picking between these two brilliant products can be a nearly impossible task, considering how similar the two of them are. Both of them have an activated carbon-layered pre-filter and a UV-C light.
The GermGuardian Elite 4-in-1 and 3-in-1 have lengthy warranty periods, programmable timers and five-speed fan settings. They have long cords and digital displays, which makes them look a lot more expensive than they are.
Both the GermGuardian Elites are similar in size. The Elite 4-in-1 model has a rectangular shape and it comes in both black and white colors. The 3-in-1 model comes only in black. That being said, when it comes to long-term consumption, the Elite 4-in-1 uses slightly less energy than the 3-in-1 model.
Regardless of which GermGuardian air purifier model you choose, your investment will be quite rewarding for you and your family.
Located in New Mexico, Country Club Residence sits heavily on its own private golf. Heavily because this particular modern mansion overlooks the surroundings with a bold attitude claimed by the tough marble used to cover itself, the bold angles and height at which it resides.
We like to call it a dream home with attitude, the L-shaped, common shape for such mansions, is used here to take advantage of the light and ambiance of a south orientation, giving the inner home warmth and animating the interiors through the huge glazed windows with shadows and light.
This project has been envisioned by Migdal Arquitectos and despite the bold bulky silhouette, the interior tries to be as breezy and as transparent as possible in order to focus the viewers attention to the breathtaking surroundings, the cliff view mansion with a golf course behind it uses big glass surfaces to create smooth transition between interior -exterior and public - private . Even though the house does not claim any sustainable features the focus towards the surroundings and natural light is much appreciated and we would like to hear your opinion about it.
READ NEXT Water Cleaning Station Converted in a Striking Modern Mansion
How would you like to add a sleek and elegant kitchen faucet to your kitchen? Sounds good, right! The K-596-VS will give you just that.
It is one of the latest offerings by Kohler and can enhance the look and aesthetics of your space immediately. That’s not all; this one ranks high when it comes to convenience and durability. Once you have it placed in the house, rest assured that it will serve you for years to come.
Moreover, you can move the faucet head easily, clearing up space for larger utensils in the sink. We were very impressed by the kind of value that is added along with the impeccable design.
Moving on, we will talk about its features and the pros and cons in the following sections. This is then followed by a buyer’s guide, which will help you in making a decision. So, get your favorite beverage and read on to know all about them.
Effortless reach: a high-arch spout rotates a full 360...
Three ways to wash: switch between a steady stream, the wide...
We have listed the features here for your benefit. Read on to know them all!
Durability
We had no questions about the durability of this product after having seen it for the first time. It is constructed entirely out of premium metal, so it will be able to survive for years without corroding, even after being in constant contact with liquids all day.
Next, it has a valve that is made of ceramic, and it prevents cases of corrosion inside. Now, corrosion is a problem that is related mainly to faucets, but rest assured that you will not be bothered by it.
Moreover, it has a very protective finish and will resist corrosion. You do not have to worry about rusting, too, thanks to this layer. The brand claims that it will look new for years to come.
What we would recommend here is to keep cleaning the surface to enhance its durability and prevent minerals from building up. It is equipped with the MasterClean™ technology, which will aid you in the process.
Convenience
One of the most important features here is the convenience that is offered. This is a pull-down faucet that can be handled easily. You can work with one hand and use the other to hold kitchen utensils and work with them.
Next, the neck can be rotated in all directions, and you can move it at 360 degrees while working. This way, you can use the entire sink space when needed. It will also help you keep large utensils or cookware without the faucet interfering.
Moreover, we were impressed with its excellent ergonomics, and its implemented ProMotion® technology. It has a braided hose and a swiveling ball joint, which makes it flexible, allowing continuous smooth movement.
Another feature that increases convenience is the DockNetik® magnetic docking system. This will lock the position of the spray head after you have set it. So, the position stays even when you are not using it till you make an effort to change it.
Moving on, it has a temperature memory feature to ensure that the faucet remembers your preferred temperature. This will let you turn it on later to get water of the same temperature that you had obtained earlier.
You will love its 3-function spray head that helps in making its cleaning and entire operation process versatile. There is a sweep-spray option that will leave a powerful stream to help in handling a large amount of grease or resist stains on plates.
Then there is the stream option, which is slower and works with less force. This is perfect for easy and moderate cleaning needs. If you want to shift to a stronger flow, there is a button that needs to be pressed. The water force is then increased by 30 percent. We also loved the ease of access, and you can easily shift among modes.
What’s more, this even comes with sculpted buttons that can be used with soapy and wet hands. You do not have to wash your hands every time before touching the buttons.
Finish
This is indeed a very elegant and beautiful product that has 3 premium finishes to choose from. You can choose among matte black, vibrant stainless, and polished chrome. None of them tarnishes easily, and the sophisticated finish lasts for years to come.
Simply select one on the basis of your kitchen décor, and you will easily add to the overall ambiance. For example, if most of your cookware is made of stainless steel, go for the polished chrome, and it will fit into the kitchen just right.
Moving on, it does not take up too much space, thanks to its design. We were very happy about its compact size, which allows it to fit into narrow spaces.
On the other hand, if you have a minimalist kitchen, then the matte black finish will look good. It is stylish and will fit right in with solid colors.
Installation
When it comes to installation, there are generally 3 ways of doing it. Thankfully this supports both 3-hole and single-hole configurations. It will easily blend well with most kitchens, and the pack comes with all the supplies needed.
There are rings and lines already provided in the pack, so you can hope for a smooth process without the need for professional help. If you have prior experience, choose the DIY route!
Some customers report that they have faced issues with leakage over time. However, this item is backed by a limited lifetime warranty and comes with excellent customer support. So, if you face any issues, rest assured that the brand will help you solve them.
Next, the product is not fit for low spaces as it has a considerable height. Measure the space that is available first and compare it with the size; if it fits, only then proceed to purchasing it.
In case the space is low, and you are using the sweep-spray mode, water might get spilled as it is very strong. This happens, especially if you have a small basin, but don't worry; you will get the hang of it over time. Once you do, this same feature will help you clean dishes quickly.
In this section, we will discuss some of the requirements that you should check for before purchasing. Make a note of this before proceeding, and you should face no issues.
Flexibility
Kitchens will see utensils and cookware of different sizes. And sometimes, the faucet may act as a hindrance and reduce space. Now, if you can turn the faucet head up to 360 degrees, then it can be moved out of the way when needed. This will allow you more flexibility, and you can work with ease.
Temperature
Gone are the days when you would only get cold water from your kitchen tap. Now in most cases, the water will be temperature controlled. Check if the faucet remembers the temperature and water flows at this same temperature even when turned on later.
Resistance
Since faucets are going to see a lot of water, it is important that the material used should be resistant to rust and corrosion. If that is not the case, you can get contaminated water that touches the rusted interiors before falling out.
The outer surface could also look old and dull. But with a proper metal finish and ceramic valve, you can get clean water at all times. Remember to check the description carefully before purchasing.
Spray Patterns
Some utensils can be delicate and would need a moderate or light flow of water, while some stains might require a lot of water force. A good product should be able to offer you both at the same time. You should have an option to shift between them when needed. Also, the shifting process should be easy. A simple button works great in this case.
Kohler K-596-VS Verdict
If you were looking for the ultimate faucet that ranks high in style, durability, and convenience, then you have finally found a match. The Kohler K-596-VS offers the perfect combination of features and will look beautiful.
Just ensure that it is installed well. If you have no experience with installation, it is best to get professionals for the task. But if you have worked with faucets before, you may immediately start the process as all the parts are provided.
With this, we will take your leave. Let us know if you have any further queries in the comment section below.
Owls are majestic creatures with a mystic allure and today these odd creatures are one of the most loved wild animals, slowly becoming a symbol for peace, calm and intelligence alike. The short adorable tutorial “Learn How to Draw an Owl “that follows is the fifth part of our Cool Things to Draw Collection that we highly encourage you to visit if you`re interested in sketching and drawing. More information on owls and the tutorial itself, after the break.
To further emphasize the educative process, fun owl facts for kids have been presented below, the points will cover various features from the way they hunt up to the title of a group of owls, cast a glance below.
More than 200 different owl species have been discovered to date.
Owls are active at night, nocturnal animals.
Interesting enough, a group of owls is entitled a parliament.
Most owl species are known to hung insects but a select group hunts small mammals and other birds as well, several owl species do hunt fish as well.
Owls use a set of powerful talons, their claws, to hunt, catch and kill prey.
A flat face and immense eyes are characterizing the face of the owl and to make things even more interesting, owls can turn their head 270 degrees.
Owls are farsighted, this basically means that they can`t see things close to their eyes properly.
Compared to other birds of prey, owls are very quiet in flight.
The owl uses the coloring of its feathers to help itself blend into their environment, camouflaging.
Barn owls are easy-recognizable by their heart shaped face.
Learn How to Draw an Owl
STEP 1 - one circle and one ELLIPSE
Easily enough the tutorial starts with one circled placed on one ellipse, both placed on the same vertical axis, each one with its horizontal axis.
STEP 2 - start shaping the body and draw the eyes
The body will now receive the bird's wings in different positions, its eyes will also be shaped.
STEP 3 - Start detailing the head of the owl
The owl`s head is not simply round. To bring forward the charm of the owl in this step preparatory lines for the head of the owl are being shaped.
STEP 4 - Detailing the head and the body
Our little owl now receives details on its wings and belly, the head receives here details as well.
STEP 5 - Beak eyes and more details
Things are getting there, detailing the eyes and placing the beak are now shaping the face. The body also receives additional detailing here.
STEP 6 - erase the construction lines and add more details
The construction lines are now gone, our little owl received its talons, claws and a cute hairstyle.
STEP 7 - place a branch under the owl and detail the eyes
Creating a little context is key. Pay attention to little details in order to humanize the petite creature. Here the eyes receive depth and a branch becomes the first background piece.
STEP 8 - add shades
The shading step is as always optional yet this helps one contour its drawing beautifully, providing depth, transforming a 2D volume into a 3D one.
STEP 9 - CREATE A BACKGROUND
Here creativity steps in. The entourage of your owl can be constituted of petite bird friends or simply a beautiful tree with a dense foliage. In the same manner flowers can be placed here and there.
STEP 10- Color The scene
Do not leave one spot untouched and make your drawing, your own. Drawing is a very beautiful process and so is coloring, do your best to mix the two in a phenomenal scene.
The owl is a little animal that will surely raise the interest of your little one and hopefully the drawing and coloring process of this petite mystical creature will be both creative and educative for all parties involved. What do you think? We would love to hear your opinion on the subject in the comment section below.
This feature is part of the "Things to Draw"Collection of drawings realized by Homesthetics Magazine in partnership with Designaissance Studio. The contents of the tutorial are copyright protected as it is the collection itself; if you are interested on sharing the drawings on your website or magazine please contact the magazine. Feel free to print or share the page for educative purposes as this is the definitory purpose of our mission with this collection.
A petite baby octopus constitutes the focal element in our next tutorial “Learn How to Draw an Octopus “, illustrated as a very positive, fun character with a really cute look; this tiny octopus is part seven of our Cool Things to Draw Collection that we highly encourage you to visit if you`re interested in sketching and drawing. More information on octopus and the tutorial itself, after the break.
Five educative interesting fun facts about the octopus have been presented below to complete the educational component of drawing and sketching, cast a glance:
The octopus is a marine animal that enters the mollusk category. The mollusk category includes soft bodied animals only.
The body of the octopus has no less than eight arms, each one bearing two rows of suckers, the rest of body is soft and its brain is highly developed.
The octopus spends a great deal of time hidden, camouflaged.
Most octopus reach 1 meter in length, about three feet long.
The octopus is known to be the most intelligent creature of the invertebrates, animals without a backbone.
Learn How to Draw an Octopus
STEP 1 - draw a circle
A simple circle and its two axes are the first simple step towards a cartoon octopus.
STEP 2 - completing the circle
The hat like shape that now appeared on the octopus is characteristic to the octopus and squid`s shape.
STEP 3- drawing its eyes
To highlight the circular attribute of the animal`s head the big, about to become, cute eyes, have been drawn on the edges of the head. A new set of axes highlights the slightly tilted head of the octopus.
STEP 4 - details to humanize the character
Octopus have no regular mouths nor do they have noses but in order to humanize our little character a bit we have drawn a mix between the two. The simple lines almost looks like a smile, a positive look.
STEP 5 - setting a direction for the arms
Simple lines will set the position and direction of the new arms. Short tentacles make a great fit with a big head, notice the cartoonist relation between the two.
STEP 6 - draw the tentacles
Simple cylinders constitute the tentacles now.
STEP 7 - detail the eyes with cuteness
STEP 8 - erase construction lines add shading and details
The octopus receives details on its tentacles and face, construction lines are erased and simple shades offer the drawing depth.
STEP 9 - create a context
The drawing is now ready to receive context and you have full liberty in this dimension. Get creative with simple elements and imagine a realm in which everything is possible.
STEP 10 - color the scene
Gaze for a moment at your drawing in black and white and prepare for coloring, you`ll enjoy every minute of it.
The process of drawing and coloring should be enjoyed by parents and children alike at the same table, numerous studies have proven that going through this process together can be highly beneficial for both parties. What do you think? How do you see drawing and coloring? We would love to hear from you in the comment section below.
This tutorial is part of the "Things to Draw"Collection of drawings realized by Homesthetics Magazine in partnership with Designaissance Studio. The contents of the tutorial are copyright protected as it is the collection itself; if you are interested on sharing the drawings on your website or magazine pleas contact the magazine. Feel free to print or share the page for educative purposes as this is the definitory purpose of our mission with this collection.
Zebras are animals known by any child, animals that help us define the letter Z in the alphabet, animals that have helped us tittle our pedestrian crossings today. They represent so much, they`re a powerful icon for the entire humanity thanks to their playful clothes. In a short adorable tutorial “Learn How to Draw a Zebra “ we will present this special character in a fun, educative light, this is the sixth part of our Cool Things to Draw Collection that we highly encourage you to visit if you`re interested in sketching and drawing. More information on zebras and the tutorial itself, after the break.
To enhance the drawing and coloring process, to highlight the educative component of the artistic environment, we have curated a list of fun facts about zebras that could come in handy, complementing the act with interesting knowledge.
Part of the equidae family, zebras are basically relatives with donkeys and horses.
Numerous theories have attempted to explain the zebras clothes and more are relating it to camouflage.
The wild zebra lives in Africa.
The common zebras are equipped with tails of around half a meter or 18 inches.
The pedestrian crossing wears the name of the black and white animal today.
To escape a predator a zebra would run from site do side when chased.
The eyesight and hearing of a zebra is highly developed, an evolutionary adaptation to its environment.
A zebra does not stand down to sleep, they sleep standing up.
A zebra`s diet consists mainly of grass.
One could find out the zebra`s mood based on its ears.
In 2005 in the animated film Madagascar a zebra entitled Marty stole the show.
Learn How to Draw a Zebra
Step 1 - one ellipse like shape and half a circle
The head of a zebra will be formed roughly in our first step with one ellipse like shape and one circle that would position the nose roughly. .
STEP 2 - detailing the head in perspective
To add the perspective dimension considering the axes built previously a nose detail an eye and two years have been drawn.
STEP 3 - shaping the body and highlighting directions
The zebra shaped here will be resting by a tree, this is how we`ve envisioned it and, as result, it resides under the horizon line. We will use the horizon line to roughly position the limbs of the zebra.
STEP 4 - shaping the limbs -drawing a book
Simple cylinders will form the limbs of our zebra, it will hold a book, it`s probably the Things to Draw Collection in which it was featured.
STEP 5 - detailing the zebra`s head
To highlight the great eyesight of the zebra and its attention to the wild things in nature we have equipped our zebra with glasses and curious eyes.
STEP 6 - erasing construction lines and drawing the mane
A zebra too has a mane and here it has been drawn proudly. The construction lines are gone, the cute allure of the animal surfacing.
STEP 7 - detailing the stripes tail teeth and EARRINGS
In the last step prior context and shading we have added the magic of the zebra, the stripes. The zebra`s glimmer in its eyes has been highlighted, an earring has been drawn for coolness and a tiny tail is now present.
STEP 8 - drawing the context and basic shading
The zebra is resting under a tree, reading happily in a green meadow, pretty far away from its natural habitat. Get creative in this step and create your own context, your own setting.
STEP 9 - coloring
It goes without saying that the sky is rarely purple and zebras are never blue but the realm of imagination and creativity is, happily, far away from our reality. Zebras do not wear earrings by choice nor are they allowed to read. Color your way through happiness and go wild with colors. There are no rules here.
A zebra is a character that our children have to meet in one form of another, the simple act of drawing can introduce in their life the concept of pedestrian crossing as a parallel, tying connections, helping them associate different things, helping them understand a little part of our world. What do you think? We would love to hear your take on the educational role of drawing and coloring and how you use it today.
This feature is part of the “Things to Draw”Collection of drawings realized by Homesthetics Magazine in partnership with Designaissance Studio. The contents of the tutorial are copyright protected as it is the collection itself; if you are interested on sharing the drawings on your website or magazine please contact the magazine. Feel free to print or share the page for educative purposes as this is the definitory purpose of our mission with this collection.
A splendid illustration containing one snail and sunflower depicts the natural environment in all its beauty. The tutorial "Learn How to Draw a Sunflower and a Snail "that follows is the fourth part of our Cool Things to Draw Collection that we highly encourage you to visit if you`re interested in sketching and drawing. More information about sunflowers, snails and the tutorial itself, after the break.
A few fun snail facts for kids and a few interesting facts about the sunflower have been featured below, these are here to sustain the drawing educative process. Cast a glance.
Snails are part of the gastropod mollusks, the family also includes sea snails, freshwater snails along land snails.
Snails can have either lungs or gills depending on habitat and species.
Snails without a shell are called slugs.
The giant African land snail reaches about 38 cm, about 15 inches. It can weight 1 kilogram, the equivalent of 2 lb.
The largest living snail species is entitled Syrinx aruanus and it can reach 90 cm, 35 in in length. The spectacular snail can weight 18 kg, 40 lbs.
The common garden snail averages 45 meters an hour making the snail one of the slowest creatures on our planet.
The mucus left behind is produced by the snail to reduce friction and advance faster. This element also helps the snail move upside down.
Snails live 5 to 25 years depending on the species.
In agriculture and garden snails are consider pests as they eat the leaves and stems of various plants.
The expression "a snail`s pace" describes a very slow and inefficient process where "snail snail" is commonly used when sending regular mail rather then electronic mail.
A few interesting facts about sunflower follow, stay tuned !
The flower head of the sunflower is actually made of tiny flowers called florets, this makes a large inflorescence. The central florets look like the center of a regular flower yet the outer florets look like simple yellow petals this forming the ensemble of the false flower. The whole act is brought on to help insects and birds see the sunflower easier, after pollination every tiny flower will produce the seed that we all know.
A sunflower can reach 3m in height, 10 ft and the head 30 cm, 11.8 in, in width.
The Guinness World Record for the tallest sunflower has been recorded in Germany for a Sunflower of 8.23 m, 27 ft.
A series of Sunflowers became famous after famous dutch painter Vincent Van Gogh painted them.
The flowers in the sunflower head are cluttered and each floret is oriented to the neighboring floret at the golden angle of 137.5 ° thus creating interconnecting spirals. The numbers of left and right numbers are consecutive Fibonacci numbers. Usually 34 spirals in one direction and 55 in the other are shaped, the largest sunflowers can create 89 in one directions and 144 in the other.
The sunflower is native to the Americans and Native American Indians were known to use it for food, oil, bread, medical ointments and dyes. Today Kansas is known as the Sunflower state. The sunflower is the national flower of Kansas and Ukraine alike.
Sunflowers are used to extract toxins like arsenic, uranium, lead from contaminated soil. Sunflowers were used to remove toxins from a pond after the Chernobyl disaster, similar projects were instated after the Fukushima disaster.
The sunflower head is not actually tracking the sun across the sky during the day, it is a misconception. The young flower buds do have a movement similar in behaviors and the process is called heliotropism but the mature flower points into a fix direction, commonly an easterly one.
Learn How to Draw a Sunflower and a Snail
STEP 1 - one ellipse and one circle
Draw one circle at the ground level and an ellipse that will become the sunflower gazing at the snail. The body of the sunflower can also be fixed here with a simple line.
STEP 2 - more circles and one more ellipse divided
Add two more circles for the snail, these will help you represent his body. The ellipses on the sunflower should be divided at this step to form the petals further on.
STEP 3 - shape the petals and detail the snail with eyes and a body
The petals have arrived and so did the rest of the sunflower. The snail now has a body constituted from the previously drawn circles. Two new circles will now look at the sunflower, about to form the eyes.
STEP 4 - humanize the drawing with faces
To form a three dimensional sunflower expression use construction lines aimed to articulate the round surface on which the eyes and mouth will reside. On the snail things are a little easier as his mouth is more or less in the same plane. His eyes should be now shaped with concentric circles in the spheres, circles earlier drawn. In this tutorial they kindly salute each other through a smile. Two leaves have also been added to the sunflower`s body.
STEP 5 - Erase construction lines and add details
In this step things become clearer. The eyes of the snail are being detailed along with the sunflower`s petal. The construction lines can disappear making things crystal clear.
STEP 6 - detail the scene
The beautiful meeting between the two happened in nature, we are to showcase this by adding additional elements into our composition. One more flower in the background, a bee and grass that grounds the scene joined the scene beautifully. Get creative and shape something unique.
STEP 7 - Add Shades
This step is optional yet the whole compositions gains depth and a bit of contrast when simple shades are added. The sunflower`s shade over the flower in the background makes the biggest difference here.
STEP 8 - color the scene
It is time to make things positive, colorful and cheerful. Take the brightest and happiest colors you have and color the piece and have fun in the process. Needless to say that the new artwork should at-least go up on the fridge if it`s not to be framed for the living room.
The beautiful scene is done and hopefully this process has been productive and educative for you and the little one alike. What do you think? We would love to hear from you in the comment section below.
This feature is part of the "Things to Draw"Collection of drawings realized by Homesthetics Magazine in partnership with Designaissance Studio. The contents of the tutorial are copyright protected as it is the collection itself; if you are interested on sharing the drawings on your website or magazine please contact the magazine. Feel free to print or share the page for educative purposes as this is the definitory purpose of our mission with this collection.
Mickey Mouse is a celebrity today, the character changed the world, it made the mouse an entity that can now receive adjectives like cute and adorable from children, a group that might have never seen the animal in such a manner if it wasn`t for the cartoon character. The black and white show was followed by Tom and Jerry, a distinctive approach with a phenomenal success. These shows date back decades and yet they remain relevant, they are timeless, here to stay. The drawing tutorial that follows brings our own twist on a cute mouse in a scene that can be interpreted through numerous means as it portrays a mouse in a cat costume eating its cheese happily. The short adorable tutorial " Learn How to Draw a Mouse" is a fun twist meant to represent the mouse and cat under an educative light, it is the 8th tutorial in the Cool Things to Draw Collection that we highly encourage you to visit if you`re interested in sketching and drawing. More information on cats and mice after the break.
To further emphasize the educational role of the drawing tutorial fun facts about cats and fun facts about mice have been curated, learn more about these animals in the following rows.
Mice
The plural of the mouse is mice, the animal is part of the rodent order and it is a small mammal widely spread around the world.
Characteristic features for the mouse are the pointed snout, petite round ears and long tails with little to no hair.
In the world there are more than 30 species of mice.
The house mouse is the most common species that one can encounter, other common species that can be found near the house are the American white-footed mouse, the field house and the deer mouse.
The mouse is a nocturnal creature with poor eyes-sight to which they make up with good hearing and smell.
Numerous predators target mice, a few common ones are cats, wild dogs, foxes, birds of prey and snakes.
In the wild, the mouse is a herbivore that feeds on fruit and grains from various plants.
The tail of the mouse can grow as long as the body.
The whiskers of the mouse can sense changes in temperature, with the whiskers a mouse can also map its path with ease.
A complex burrow nestles the mouse, this always features a long escape route and long entrances. The petite rodent is very clean and tidy being known to have separate areas for food, sleeping and toilet.
A mouse eats at least 15-20 times a day and their home is always built close to a food source to avoid travelling long distance. Their food source is always 8 meters away or closer.
Mice and rats are the most used animals for experiments.
In Zambia and northern Malawi the mouse is a delicacy and they`re often consumed as good protein source.
In the wild a mouse lives up to six months due to the immense number of predators. In laboratories or grown indoors as a pet the mouse can live up to two years.
1928 brought to us the Micky Mouse of Walt Disney as the first mouse character in children cartoons, multiple popular mice followed such as Speedy Gonzales, Jerry from Tom and Jerry and Stuart Little.
Cats
Cats are by far the most popular pet in the world, at least 500 million domestic cats being recorded so far.
The connection between human and cats is at least 10000 years old.
To conserve energy cats sleep 13-14 hours a day and they`re adapted to hunt small mice and rats, being equipped with claws and teeth adapted to the practice.
One group of cats is entitled a clowder, the male cat is called a tom where the female cast is called a molly or a queen, petite, young cats are widely known as kittens.
Domestic cats weight from 4 kilograms (8 lb 13 oz) to 5 kilograms (11 lb 0 oz) yet the record for the heaviest domestic cat is recorded at 21.297 kilograms (46 lb 15.2 oz).
Known to be lethal hunters, cats walk their back paws in almost the exactly same place as the front paws in movement thus keeping noise and visible track to a minimum, sneaky predators.
Cats unlike mice have powerful night vision that allows them to see at level of lights six time lower than humans, this feature works extraordinary with the excellent sense of smell and powerful hearing.
The older cats are known to be aggressive towards kittens.
Domestic cats and especially kittens adore to play, chase toys and play fight. In their play kittens also practice their skills for hunting and fighting.
The average cat lives 12 to 15 years and they spend a large amount of this time licking their coats to keep themselves clean.
The feral cat is seen as a pest and a natural threat to native animals.
Learn How to Draw a Mouse
STEP 1 - draw a circle
Start small, draw a simple circle along with its horizontal and vertical axes.
STEP 2 - add new axes
These will help you determine one ellipse that is about to border the cat costume on the petite mouse.
STEP 3 - start drawing the costume
The ellipse is now here along with the teeth of the cat costume and its eyes.
STEP 4 - the snout surfaces
Mice are known thanks to their adorable snout, so differently portrayed by each legendary mouse character in cartoons. The snout of our mouse is cute and short.
STEP 5 - Draw the eyes
In cartoons the eyes are highly relevant, we`ve drawn them big here and they are to become very cute, soon.
STEP 6 - Add ears
The cat costume now receives ears.
STEP 7 - Drawing the Body
On the vertical axis now a second circle appears to determine the belly of the cat costume.
STEP 8 - draw the tail hands and feet
The petite mouse will have his hand happily positioned on the belly, grasping the cheese triangle with immense delight.
STEP 9 - Erase the construction lines and draw the cheese
The cheese surfaces after the construction lines have been erased, the eyes are detailed, stitching appears as well as a patch that makes the costume more humane.
STEP 10 - shadowing and detailing
Ears are now more detailed along with the cheese and tail. Shadows have also been added here and there to offer depth.
STEP 11 - Add more shades and detail the body
The eyes of both presences have been detailed along with the body, more shadows have been added.
STEP 11 - create a background
An epic illustration set the scene for the petite mouse portraying the set from which he chose his food. Be creative, feel free to improvise your own background.
STEP 12 - color the scene
It is time to have some fun, color the entire scene with as much color as possible. Don`t leave a spot blank, have fun in the process.
The mouse is and will remain a big presence in cartoons and your setting is surely worthy of being part of this movement. Feel free to add you drawing in the comment section below or email it towards us and we will add it in this article proudly. We would love to hear from you in the comment section below.
This feature is part of the “Things to Draw”Collection of drawings realized by Homesthetics Magazine in partnership with Designaissance Studio. The contents of the tutorial are copyright protected as it is the collection itself; if you are interested on sharing the drawings on your website or magazine please contact the magazine. Feel free to print or share the page for educative purposes as this is the definitory purpose of our mission with this collection.


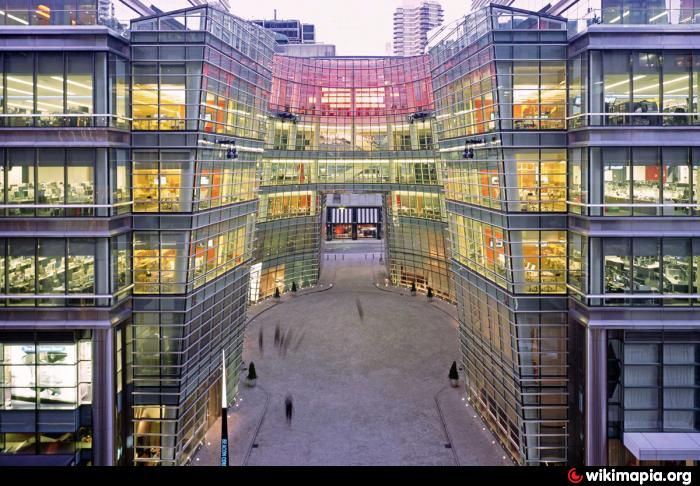


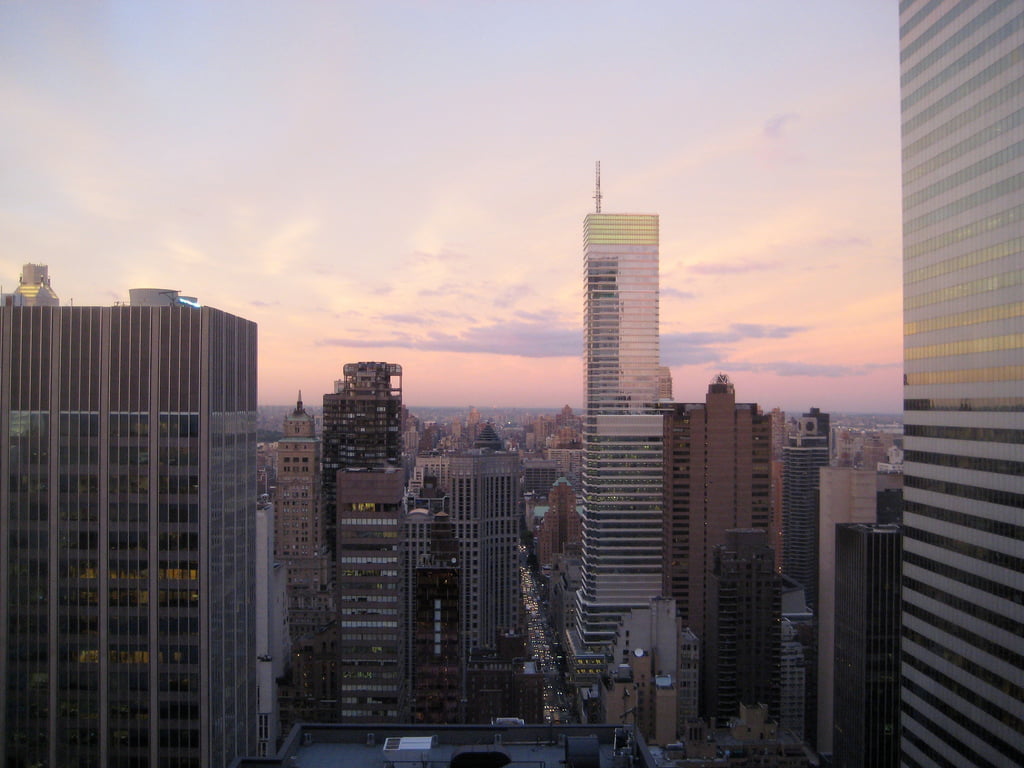


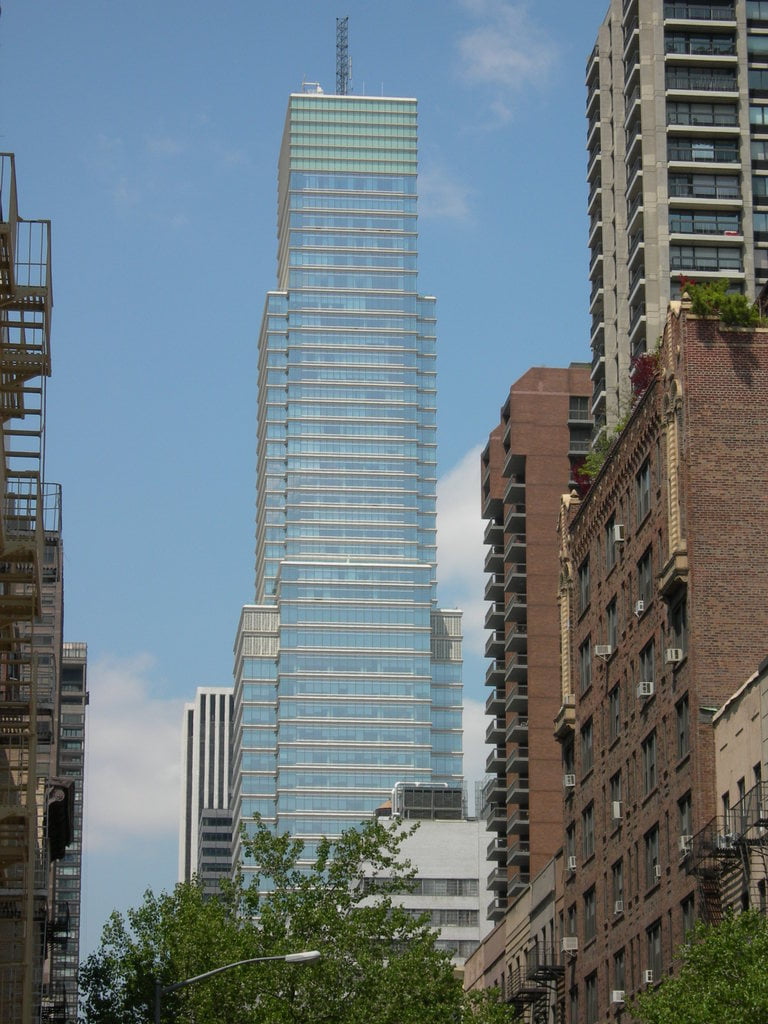

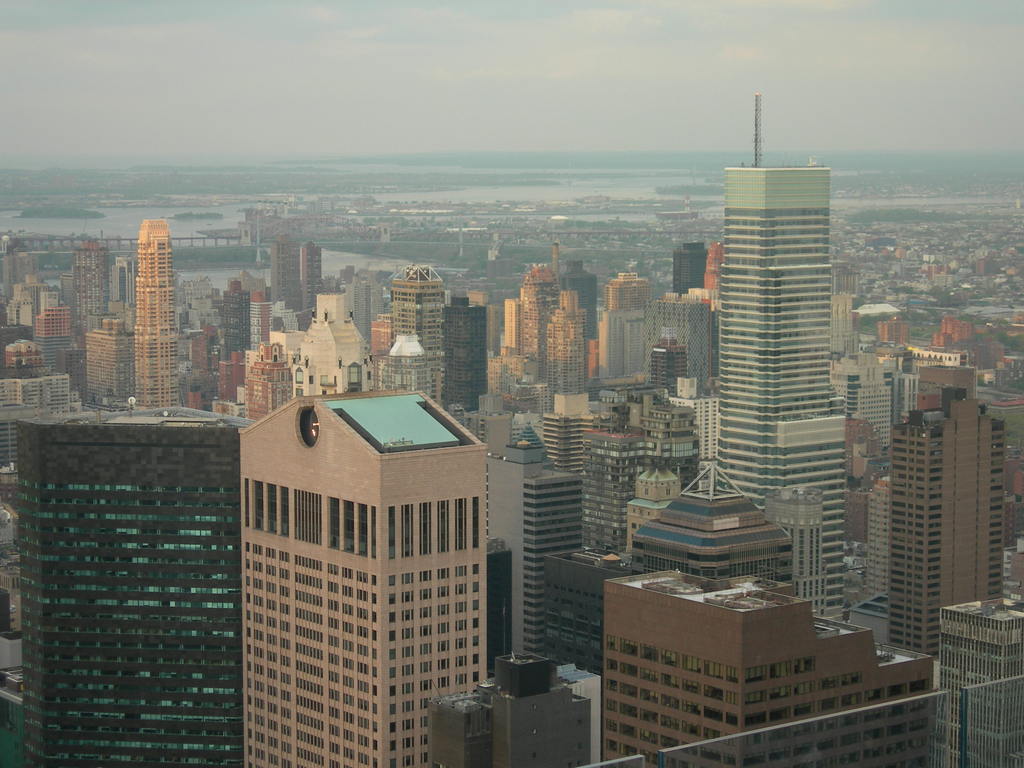


![How To Hide Your AC [Air Conditioner]](https://homesthetics.net/wp-content/uploads/2020/03/How-To-Hide-Your-AC-001.jpg "How To Hide Your AC [Air Conditioner]")


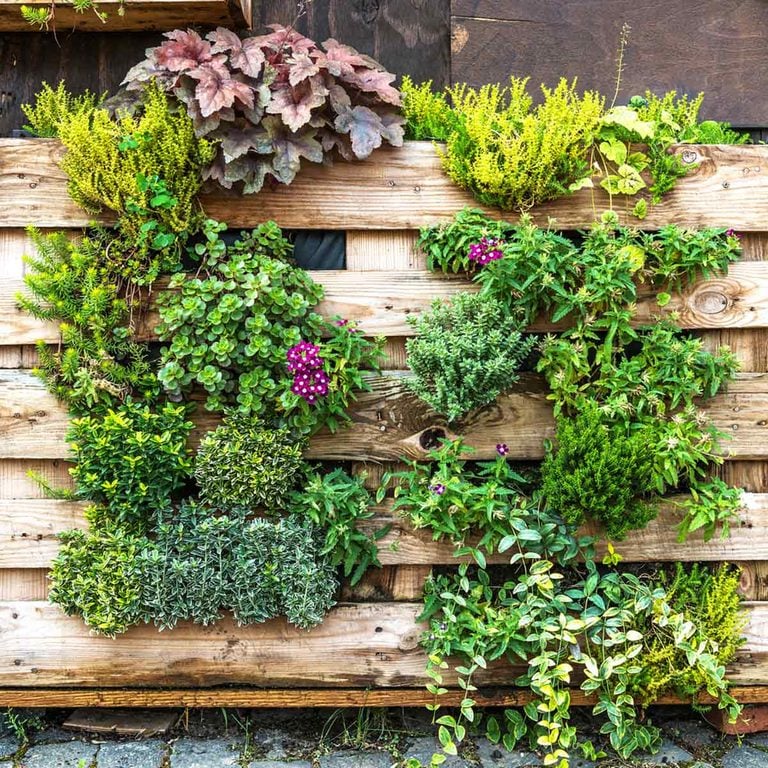


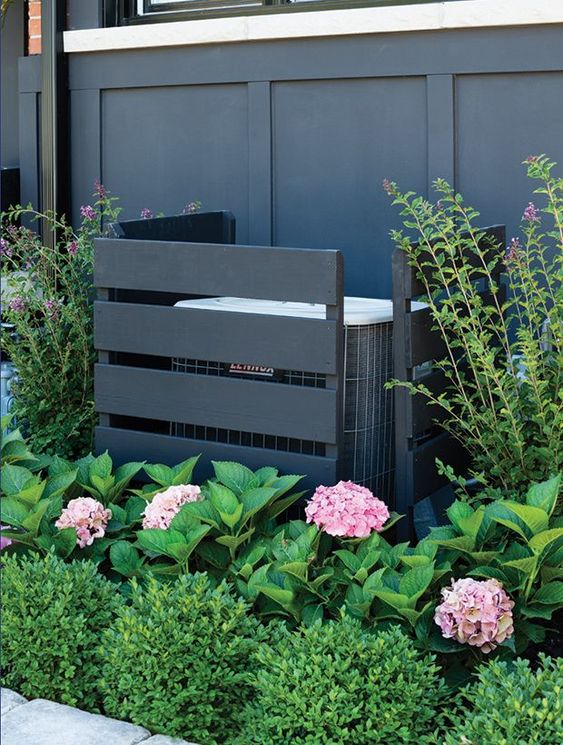

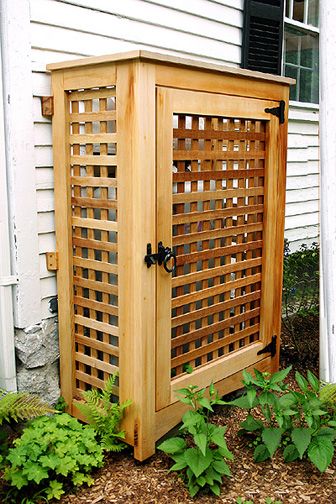

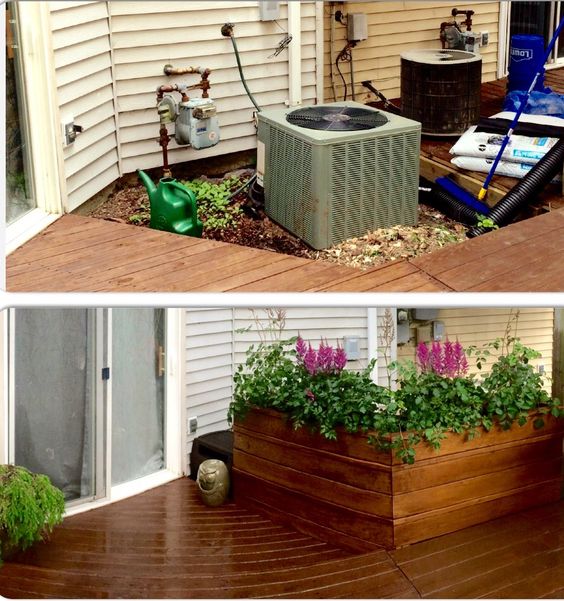
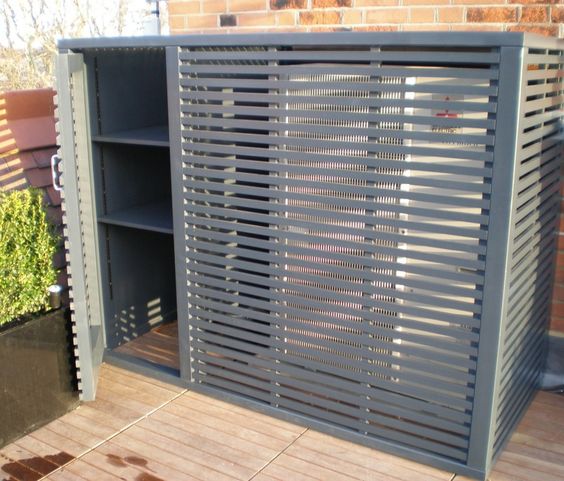
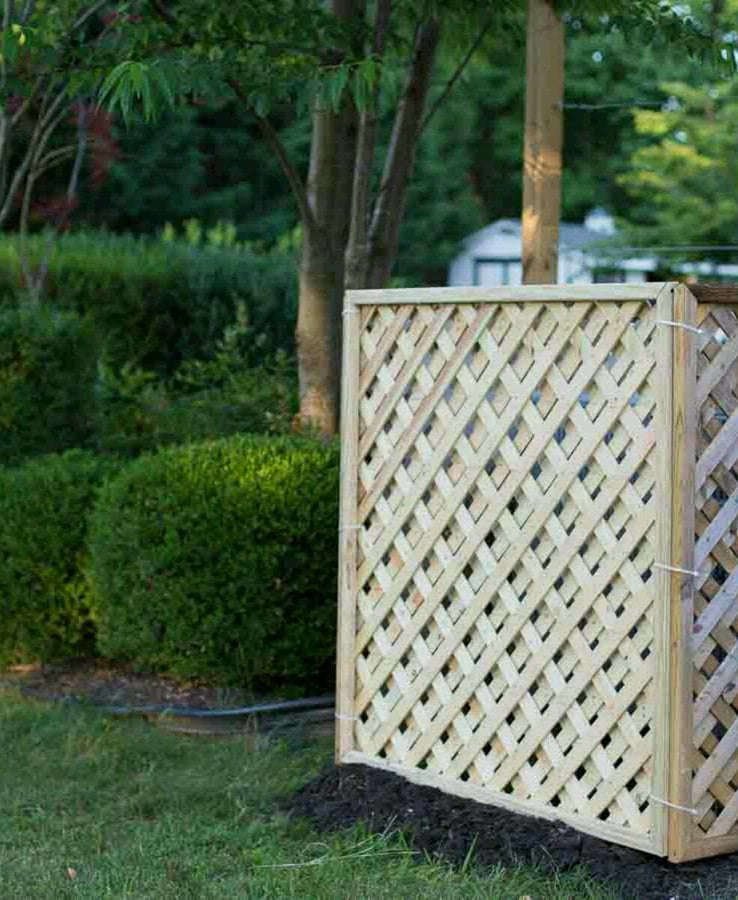

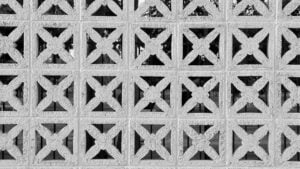


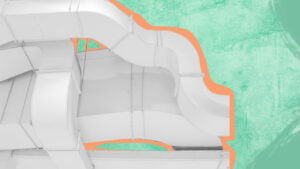


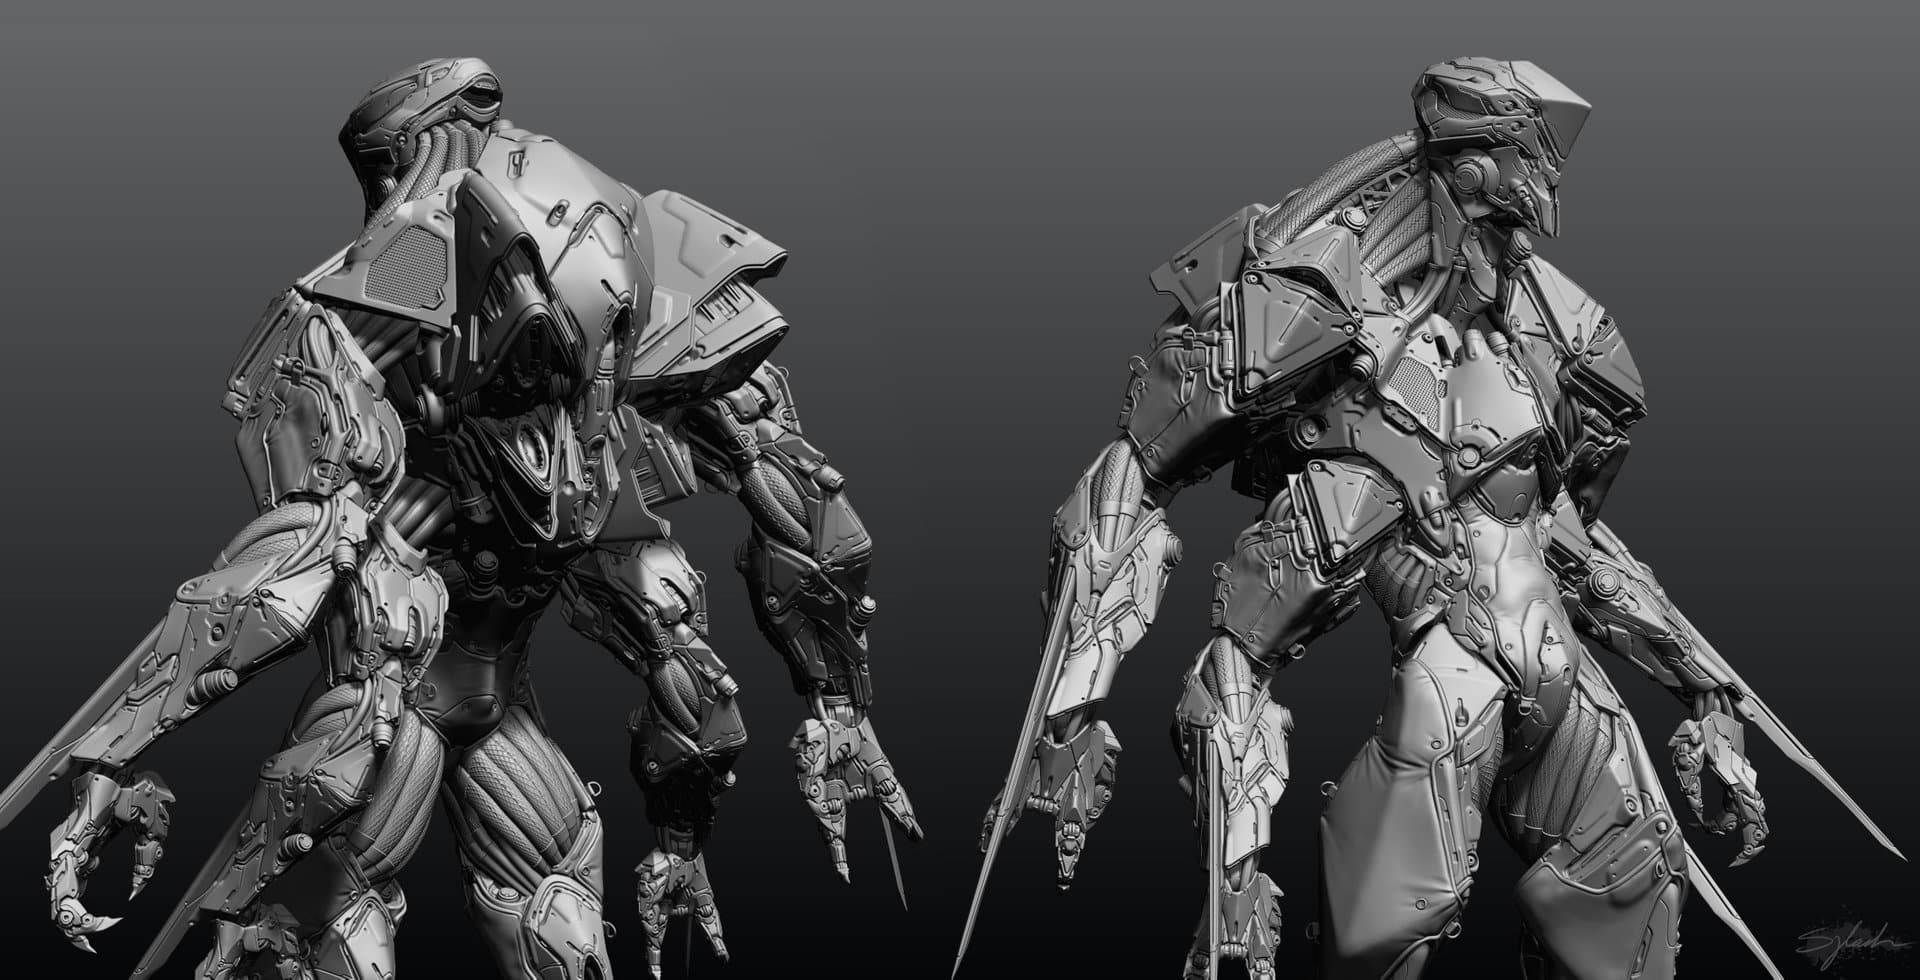
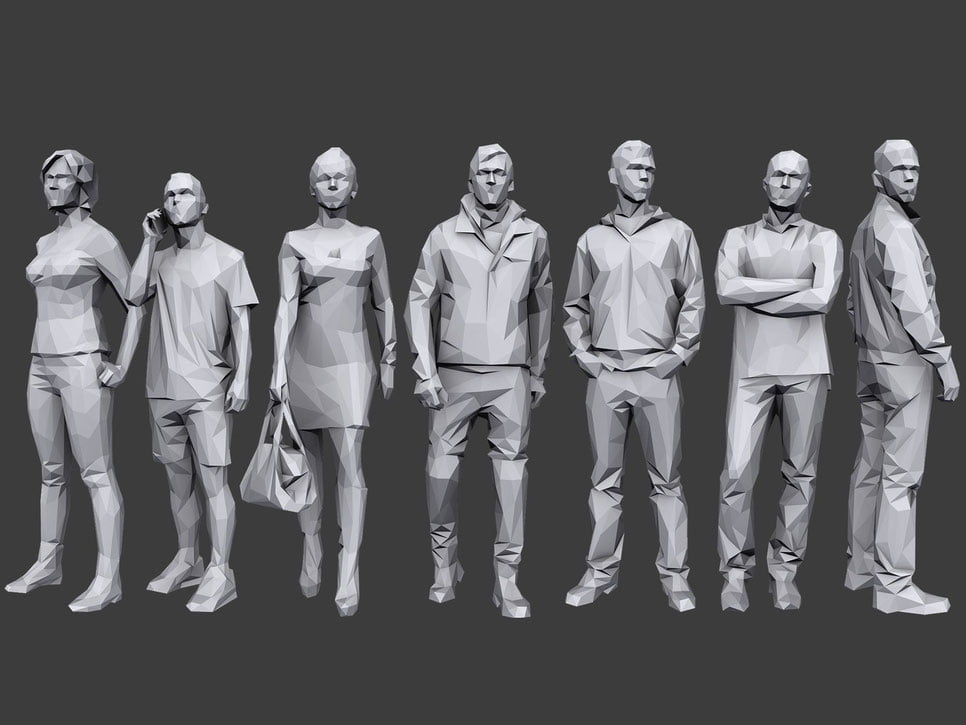


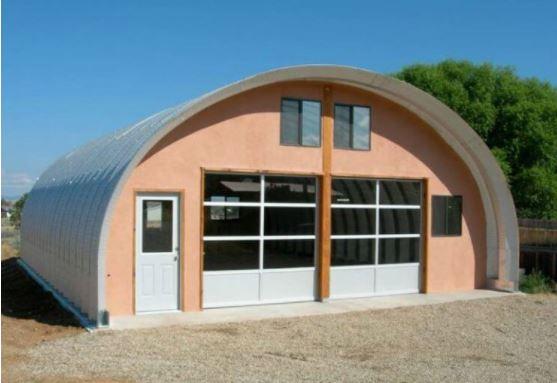
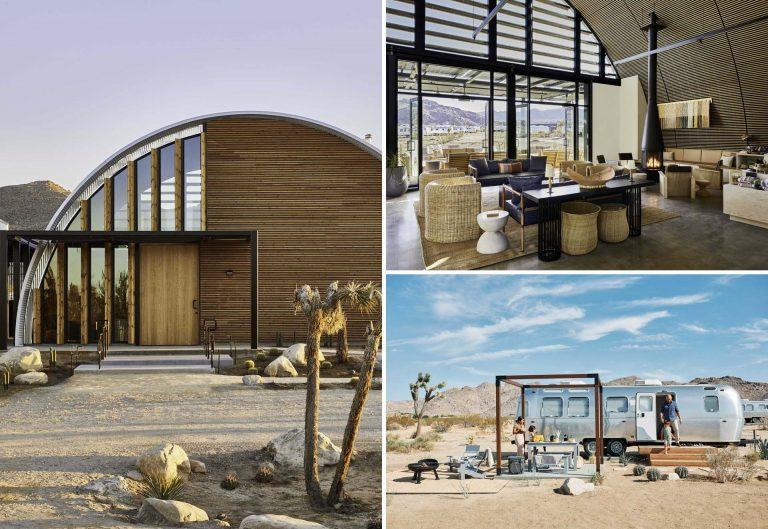

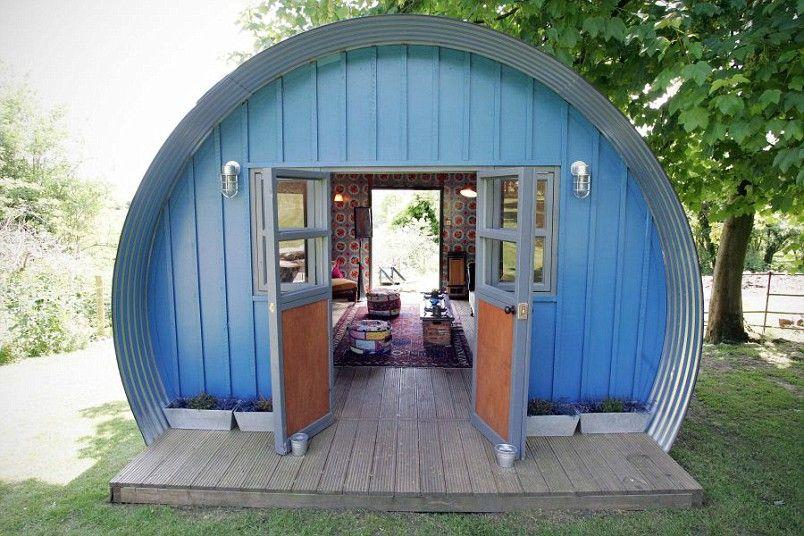
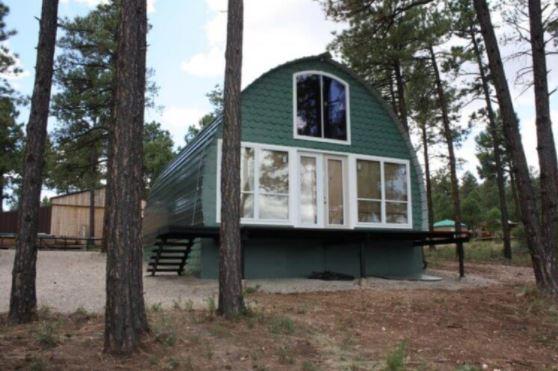


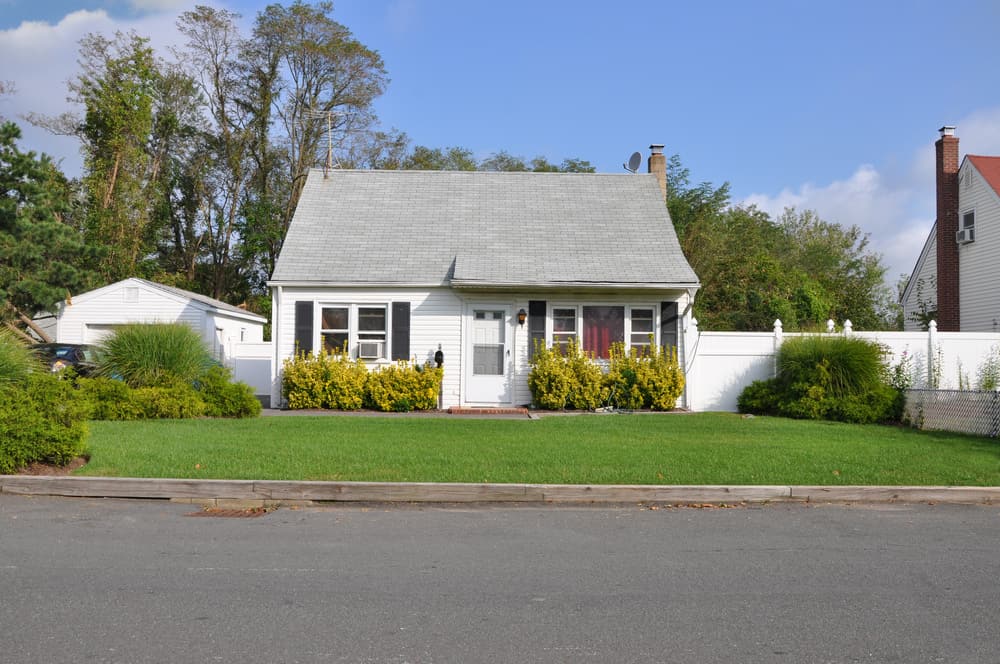
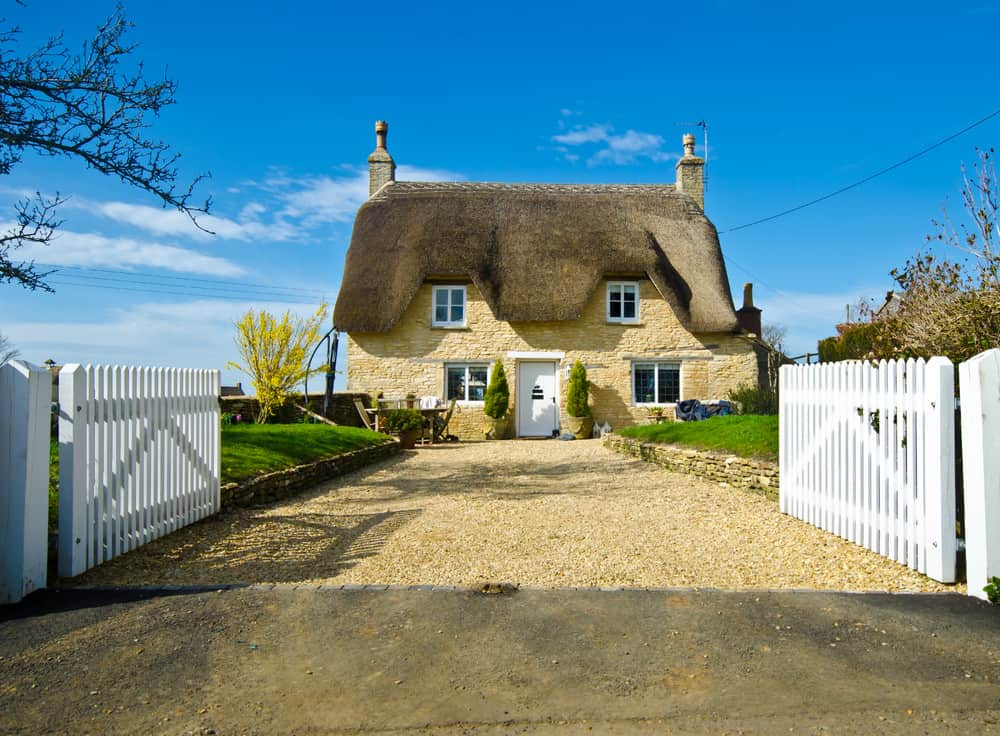


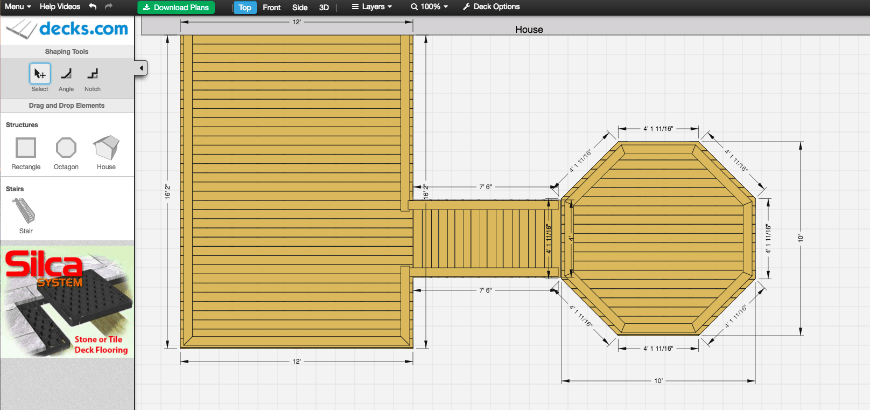
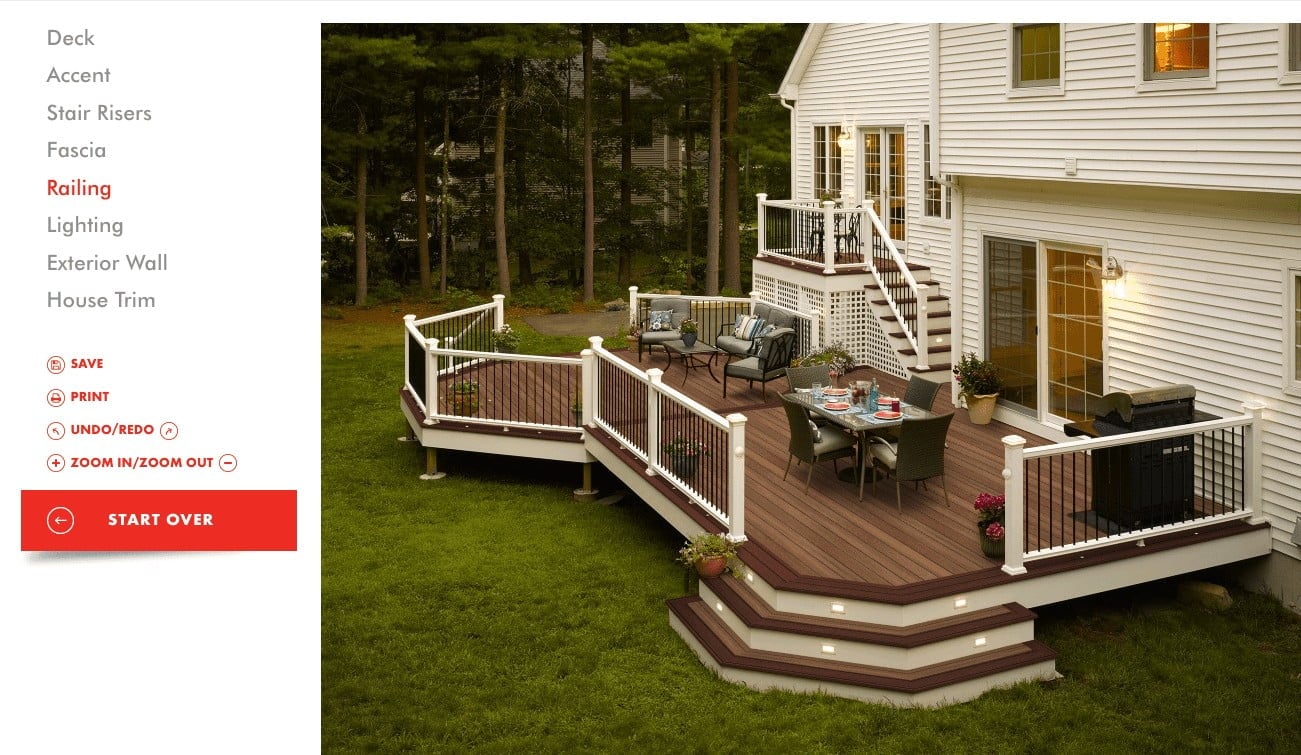

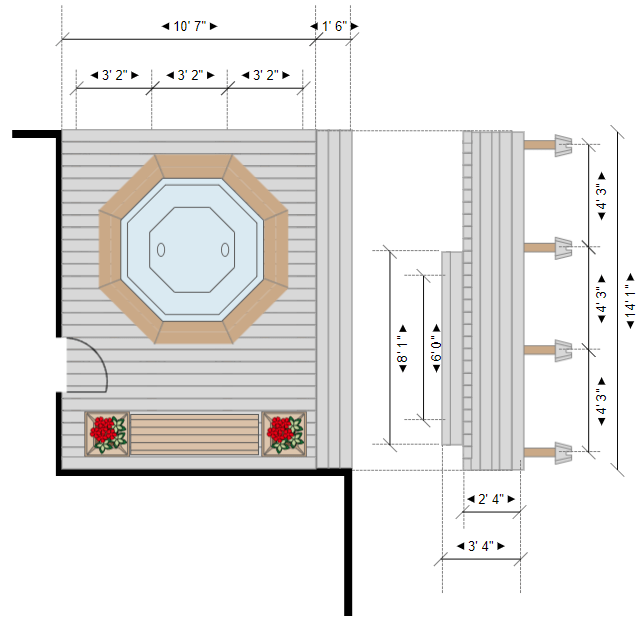
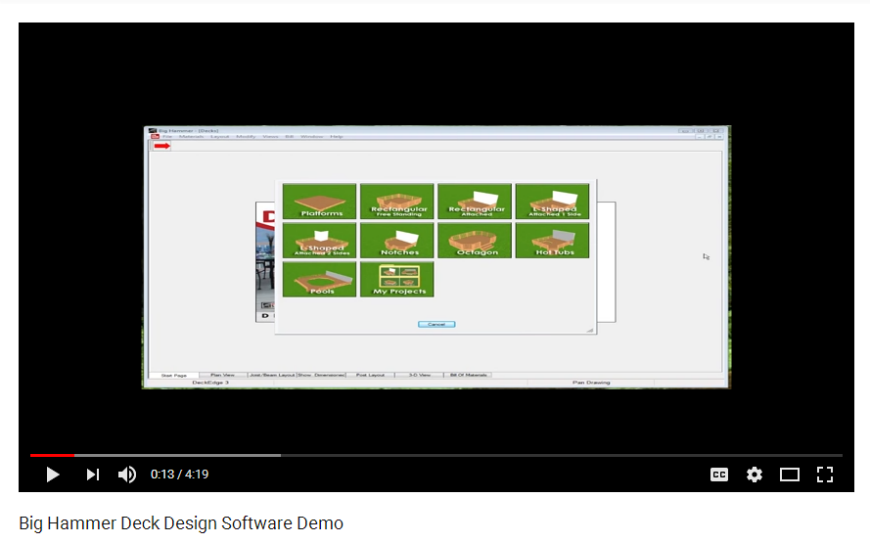


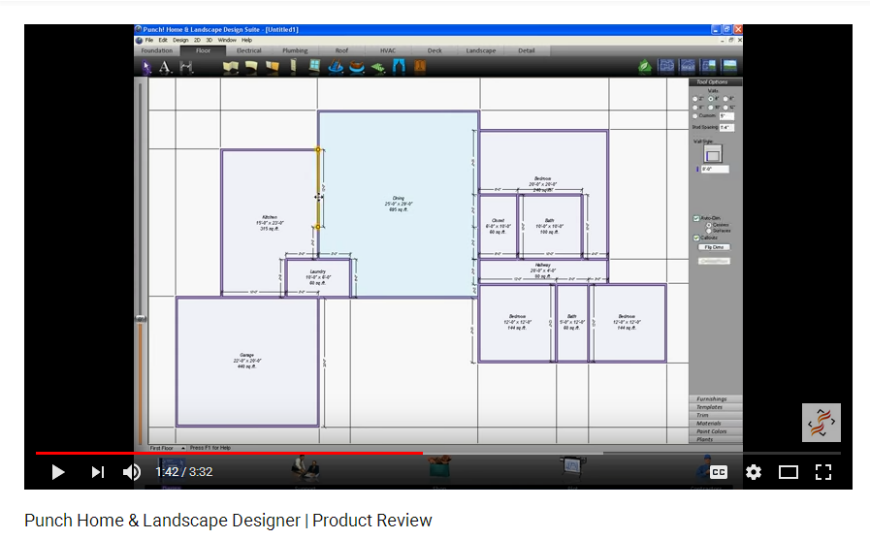

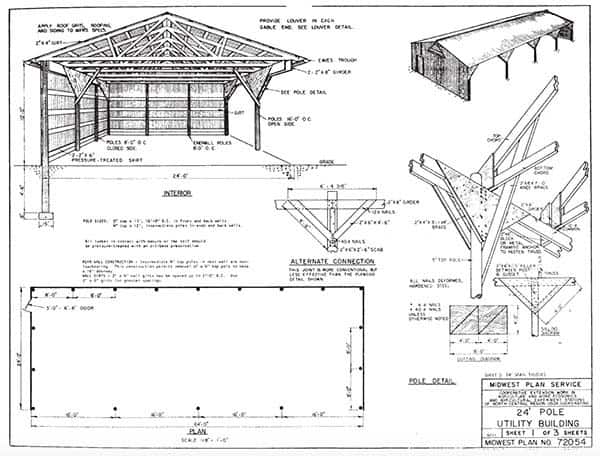
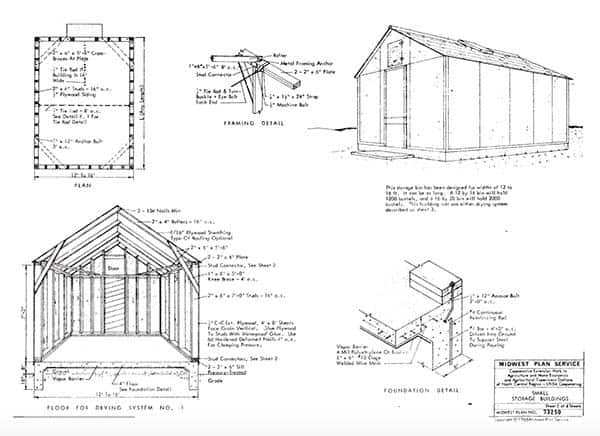
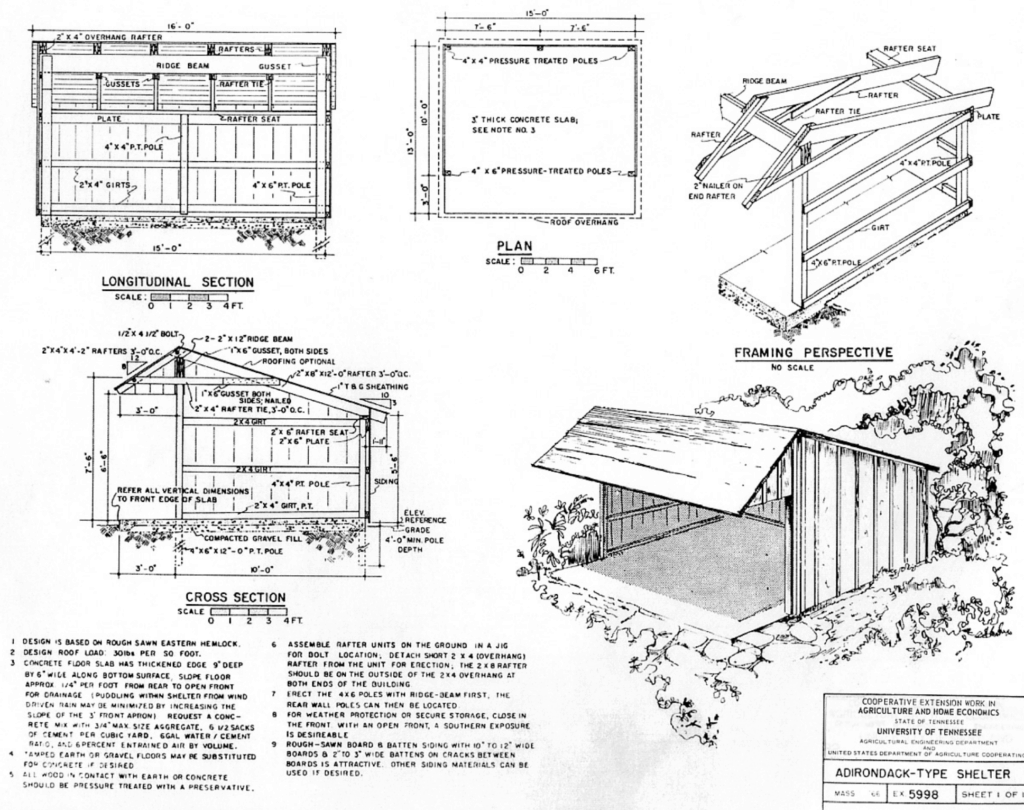
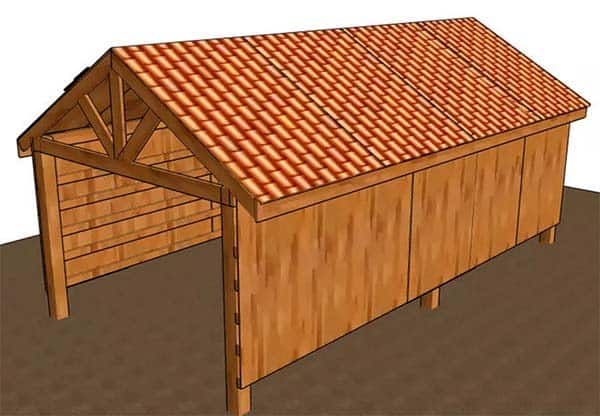
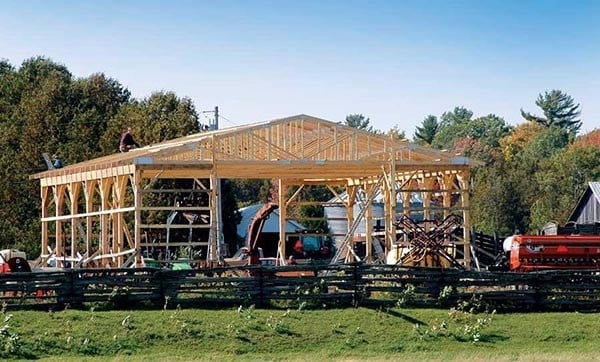
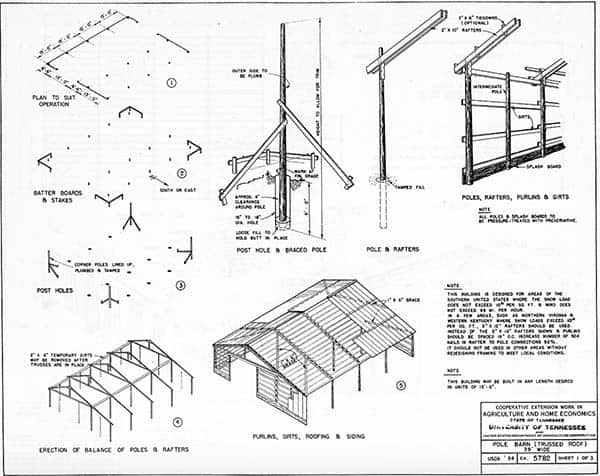
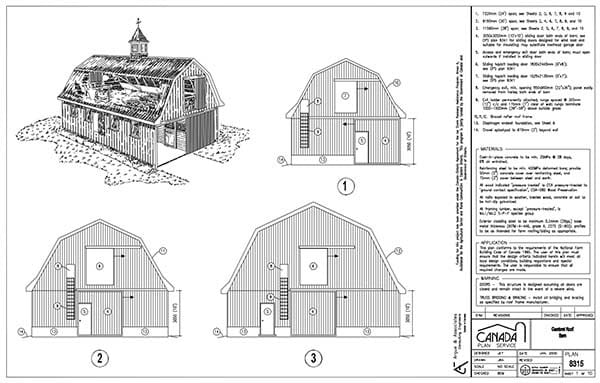
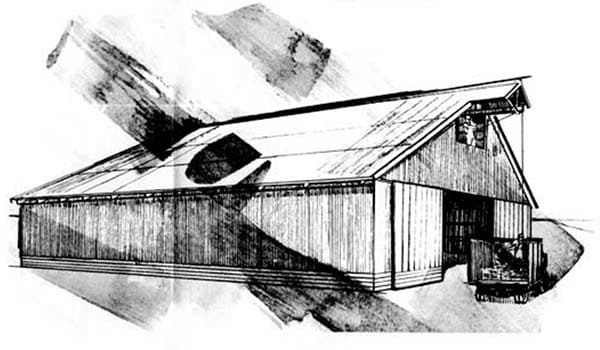
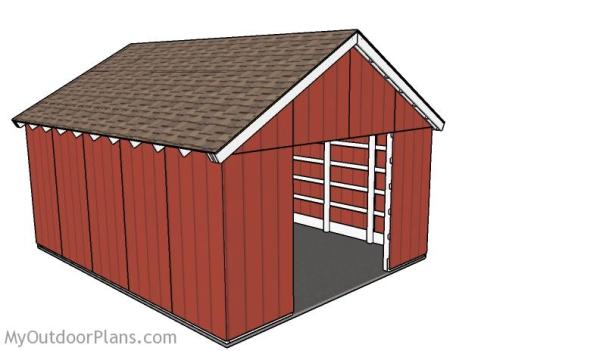
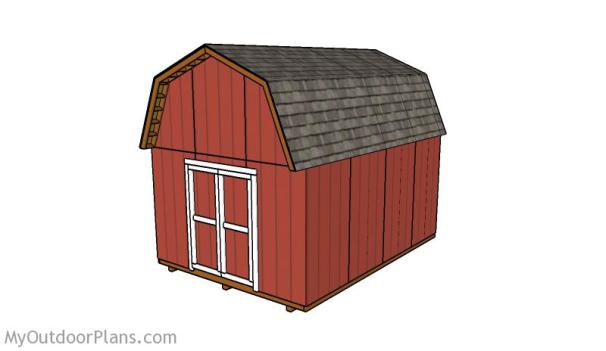
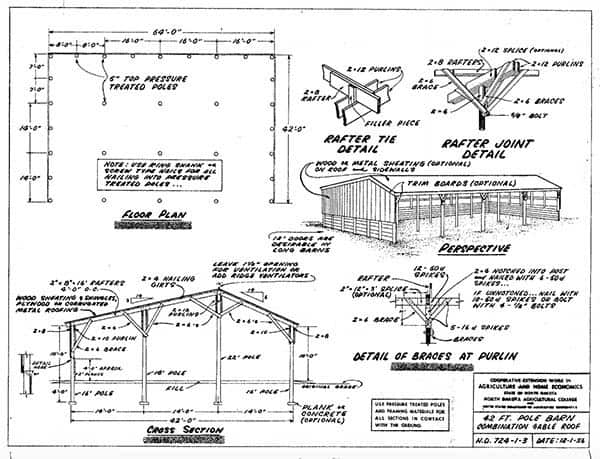
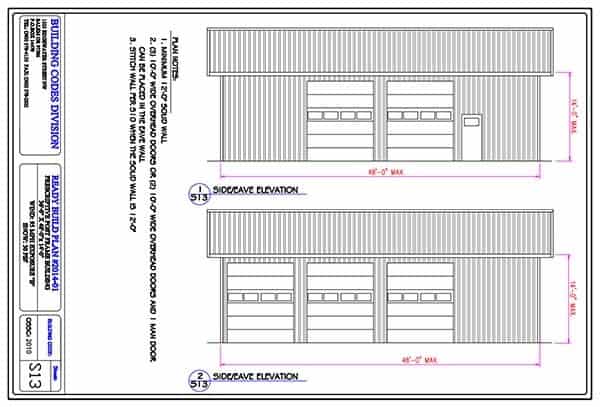
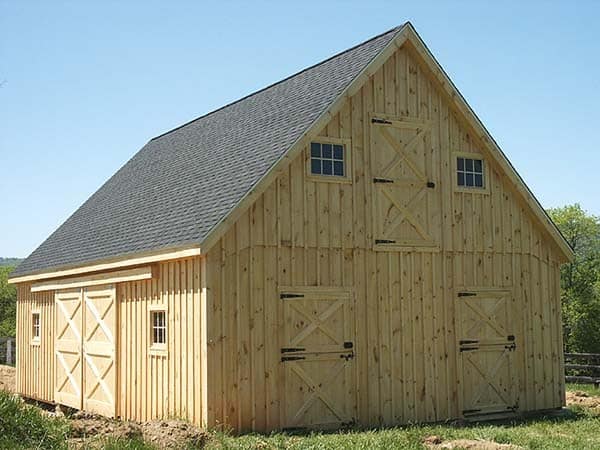

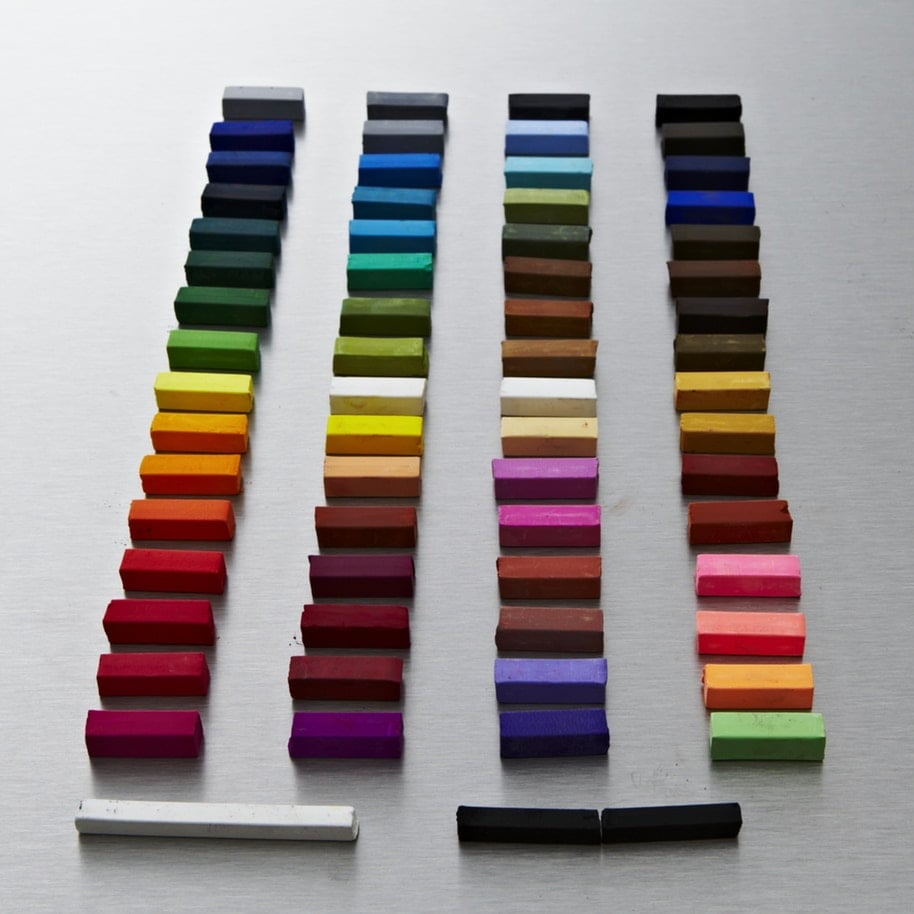


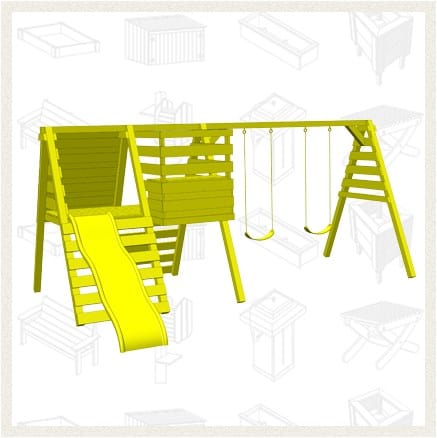
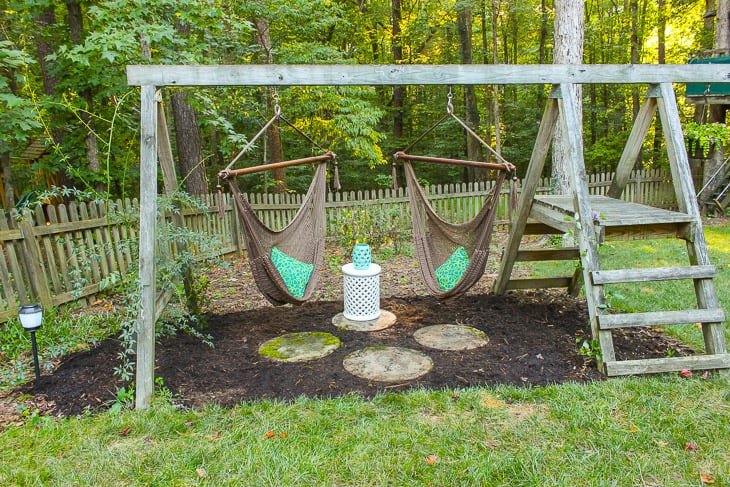

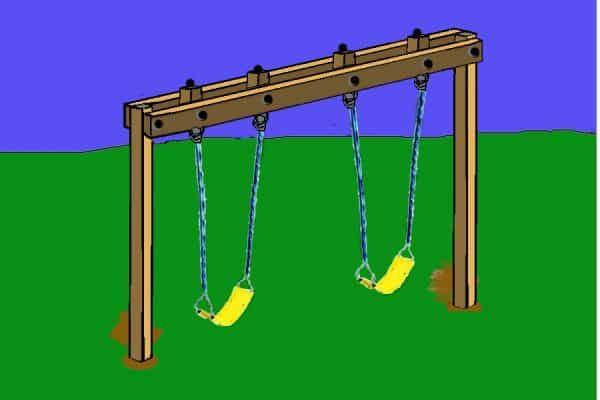
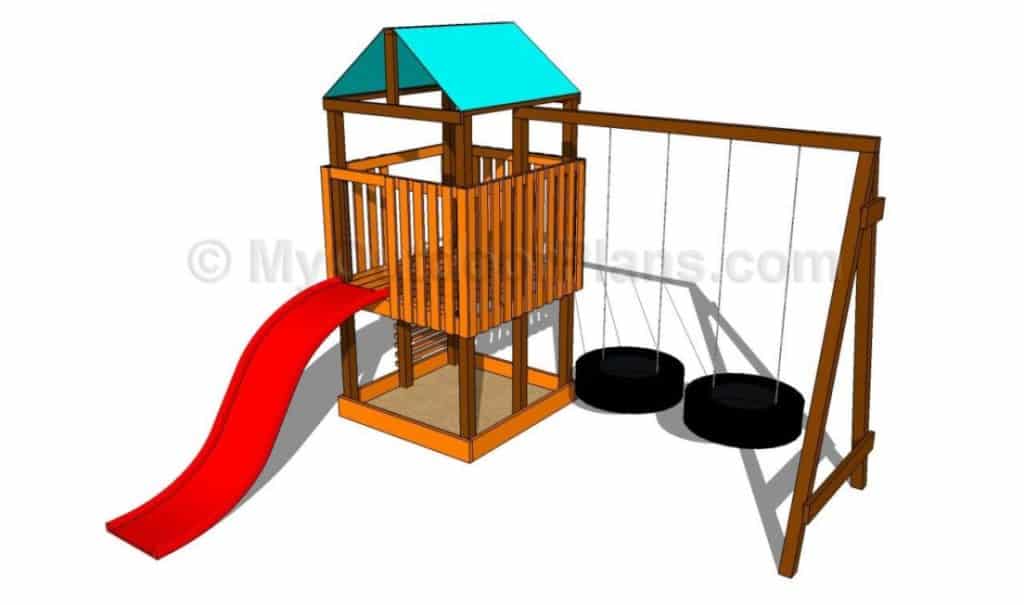


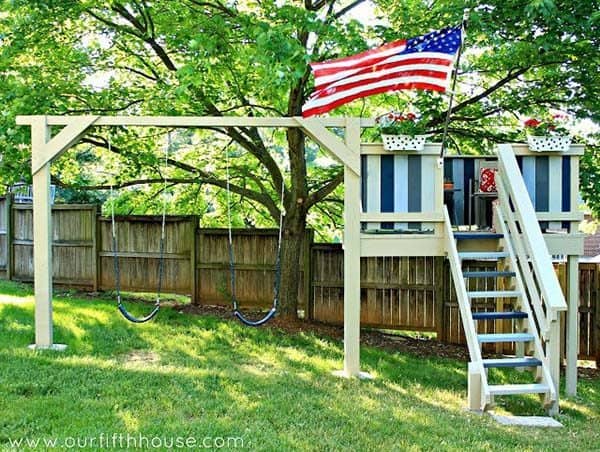
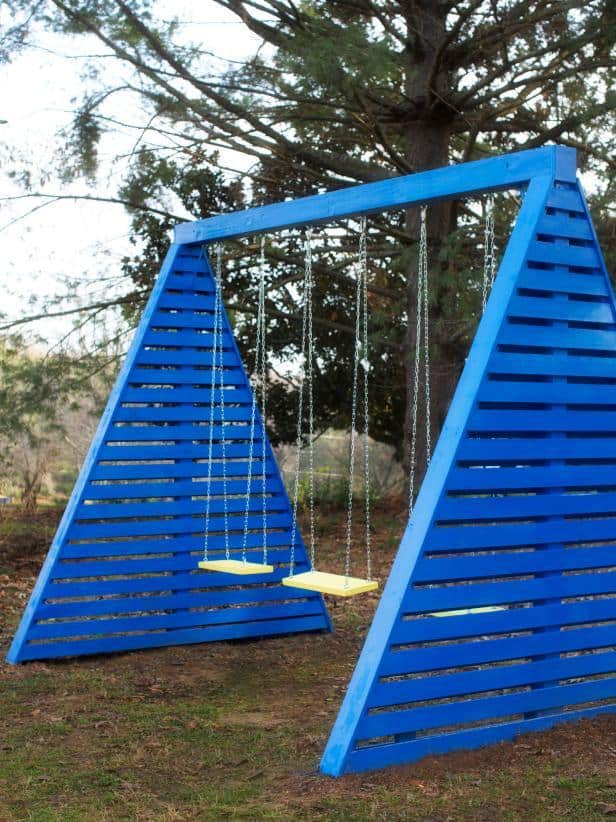
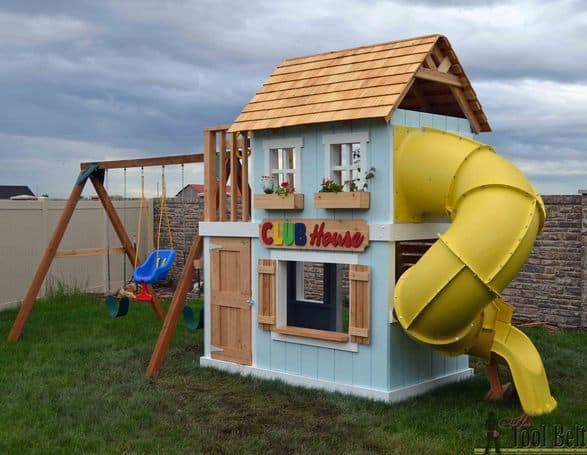
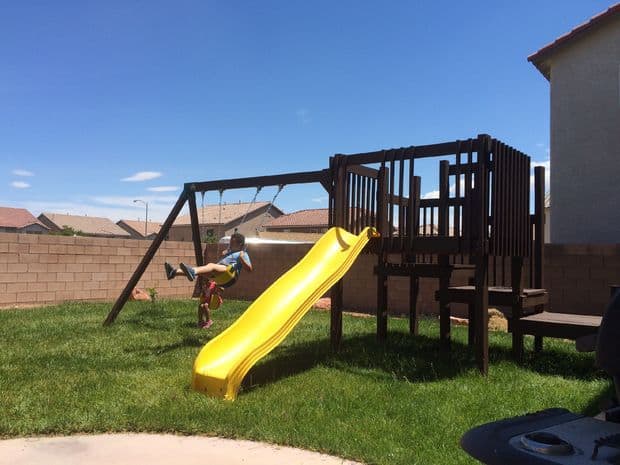

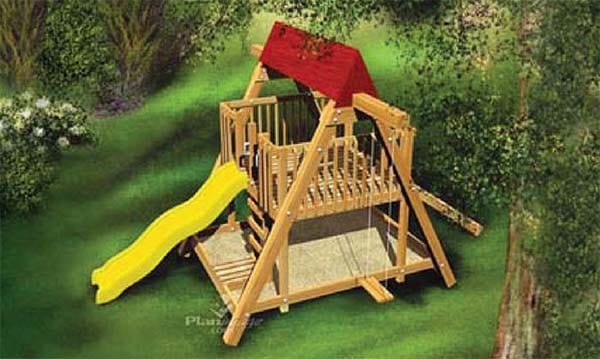

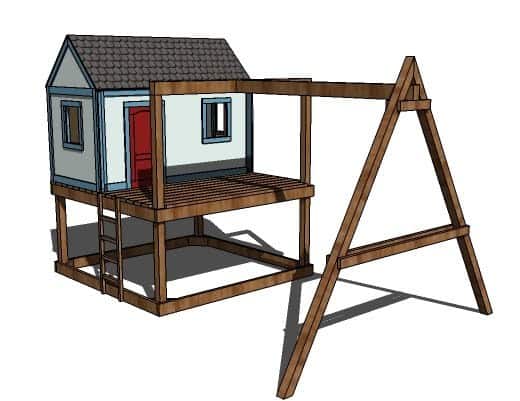
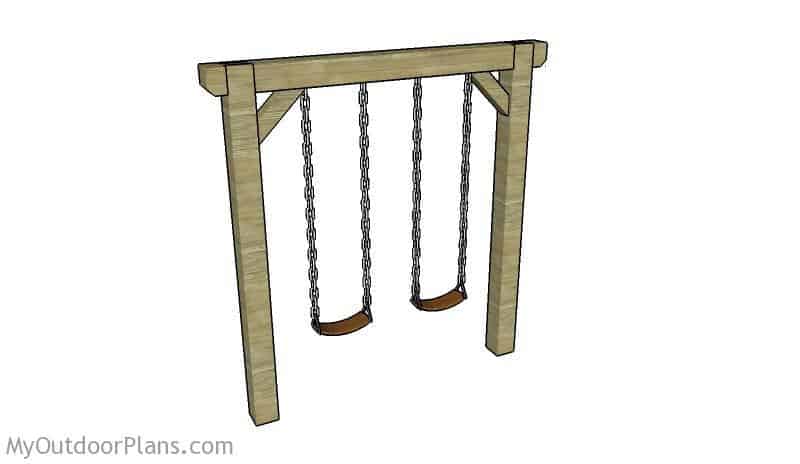


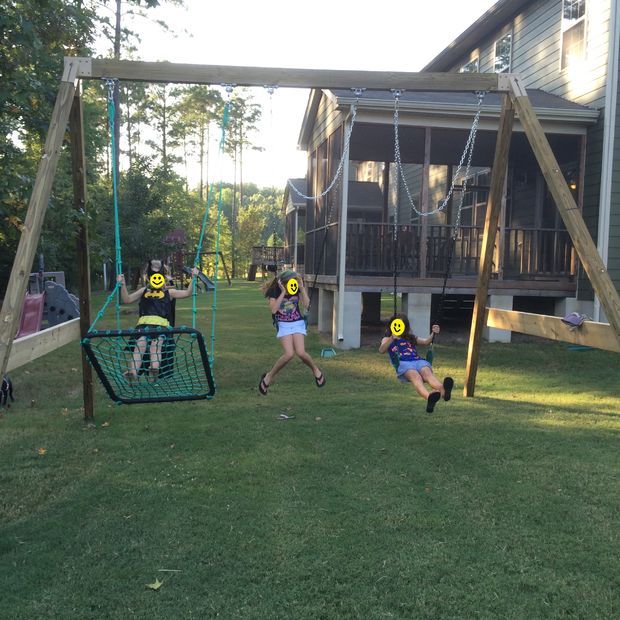
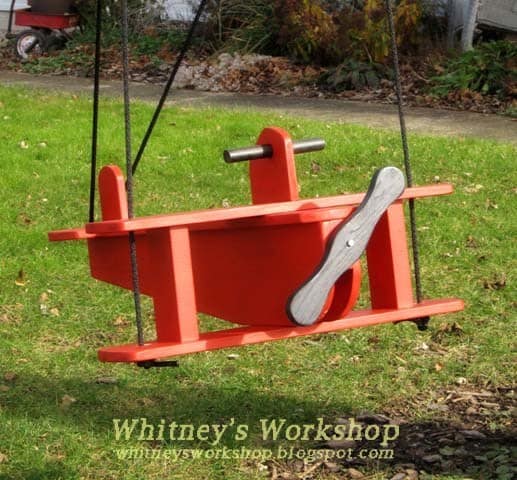
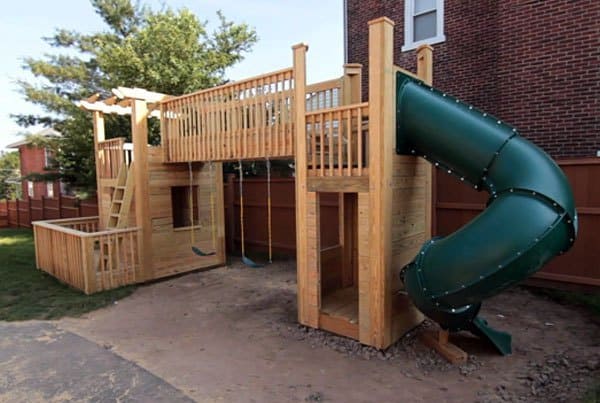
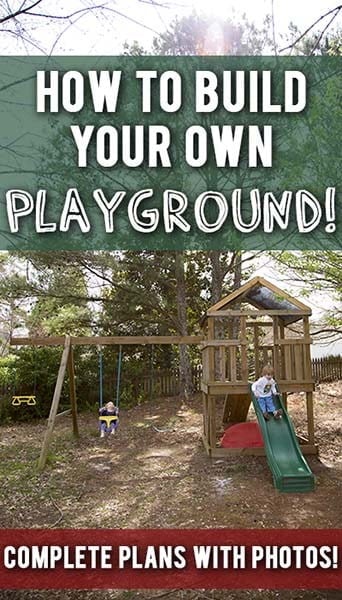
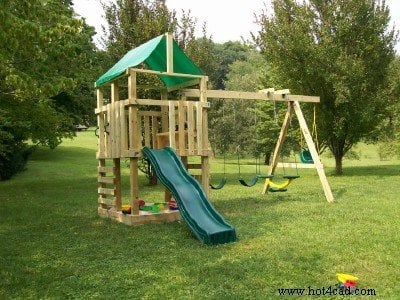
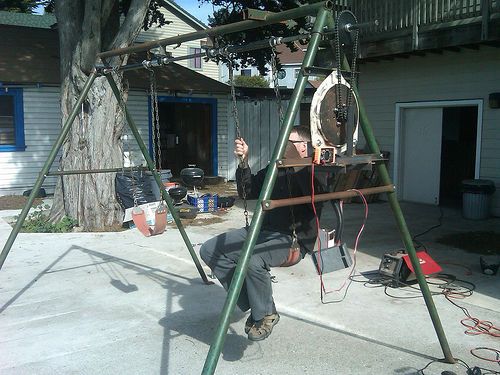
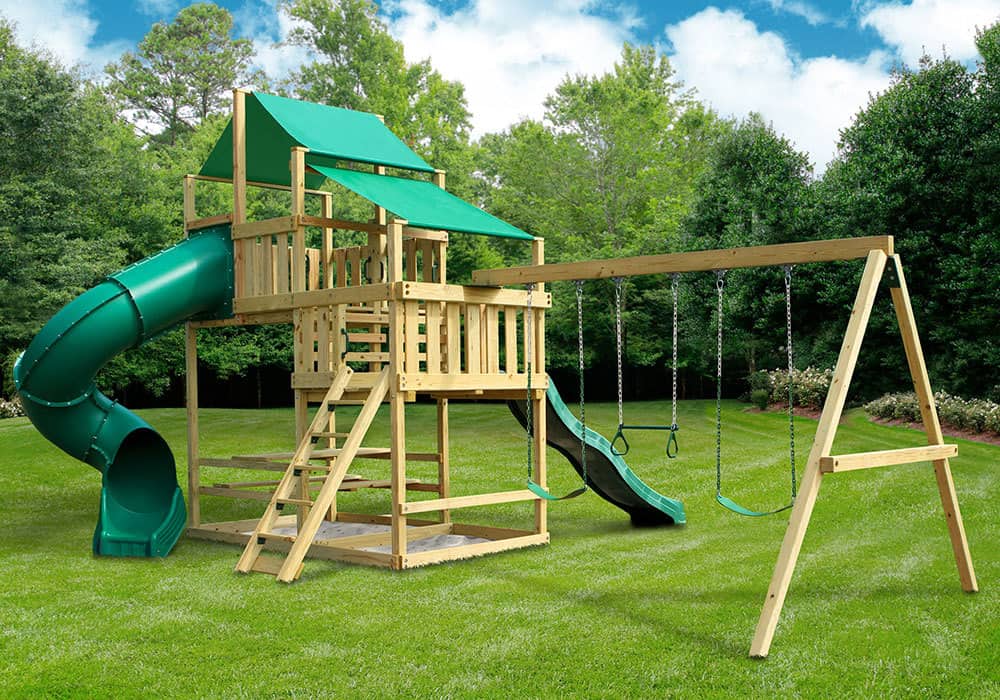
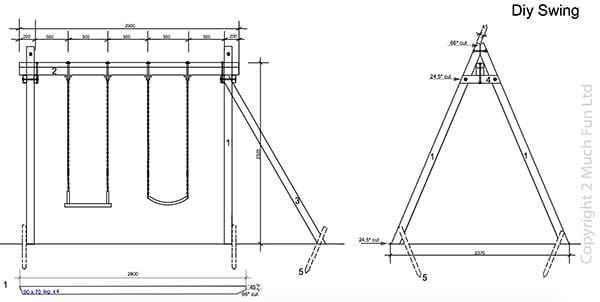
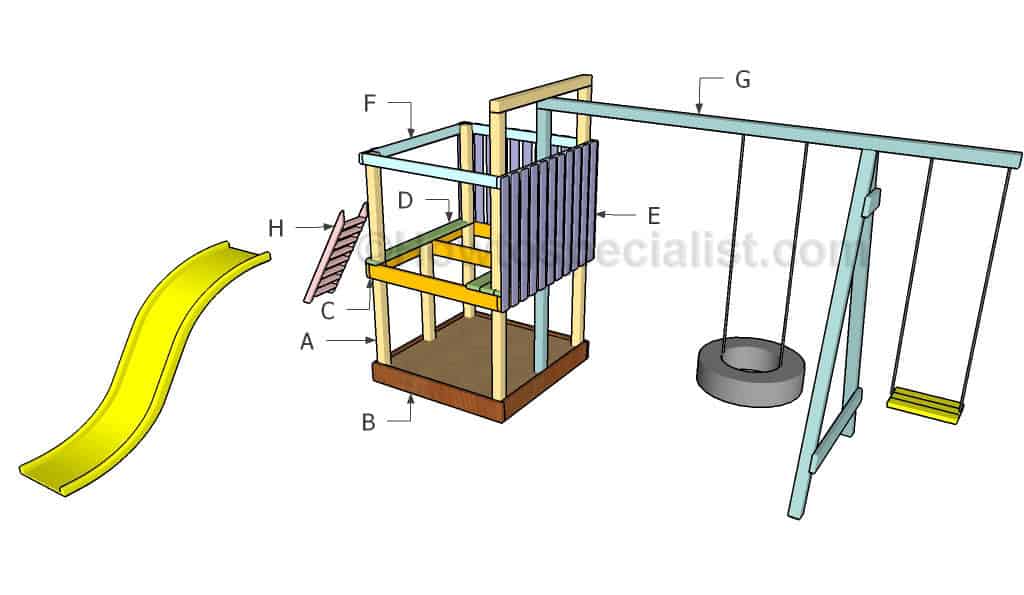

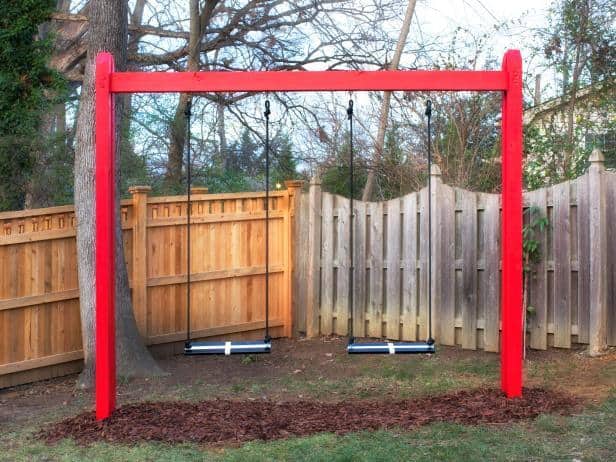

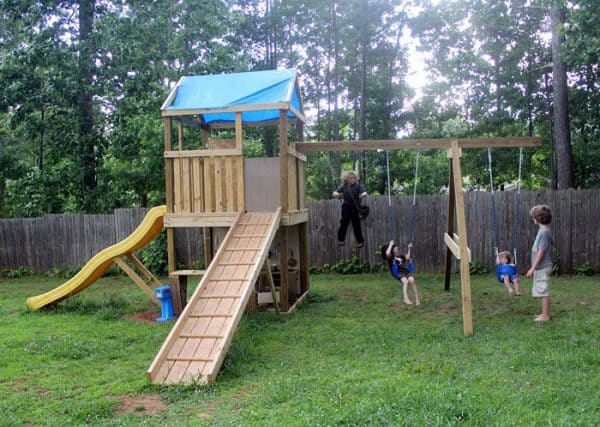

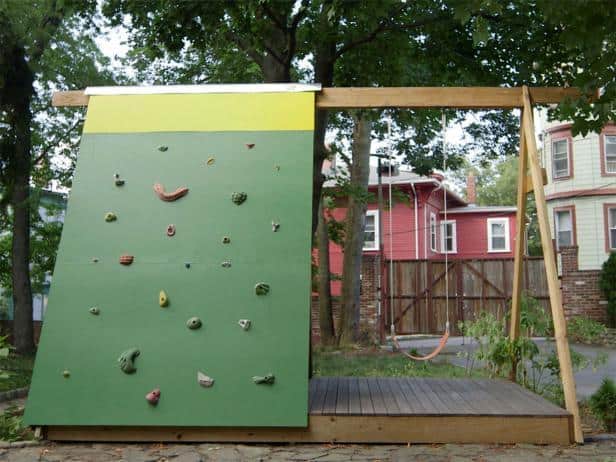
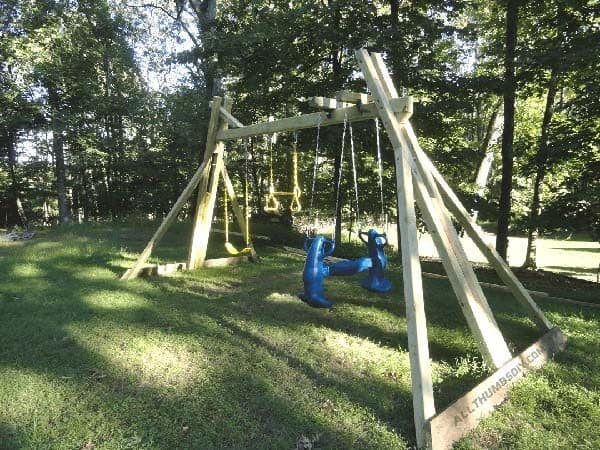
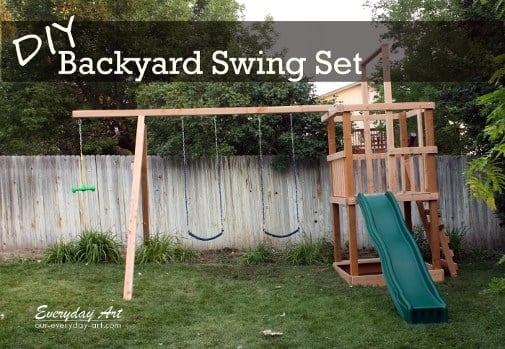
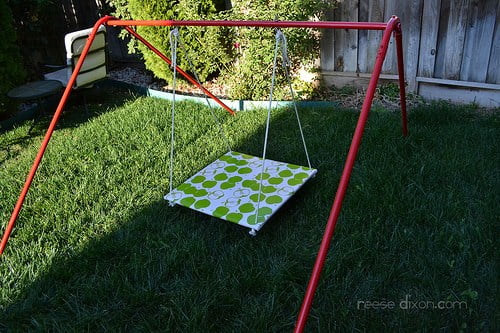

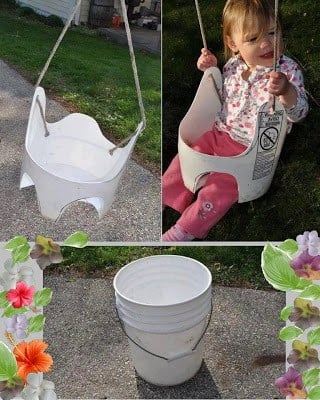
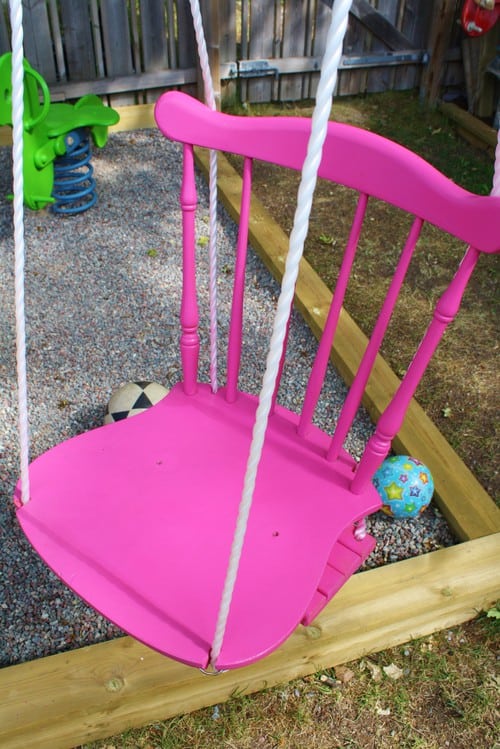
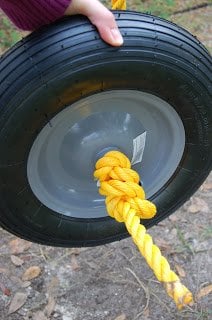
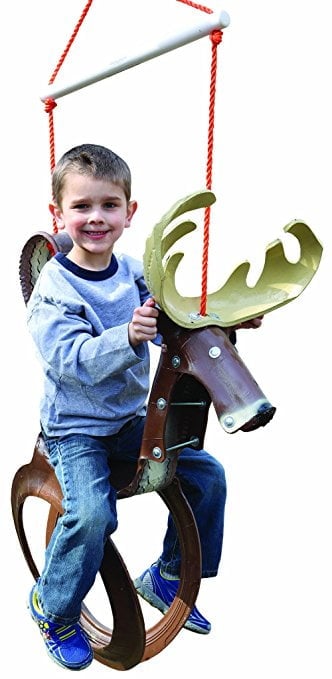

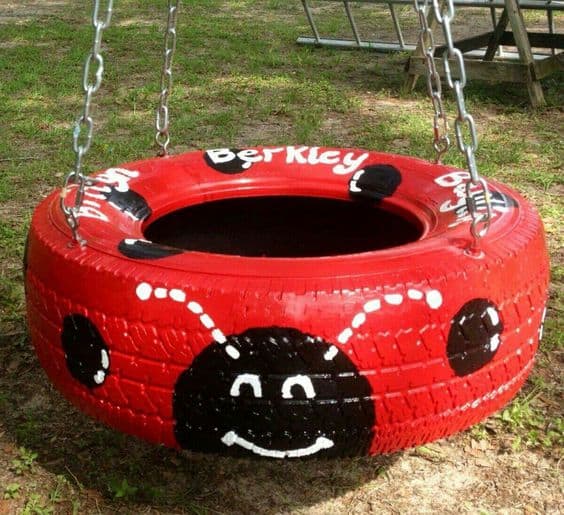

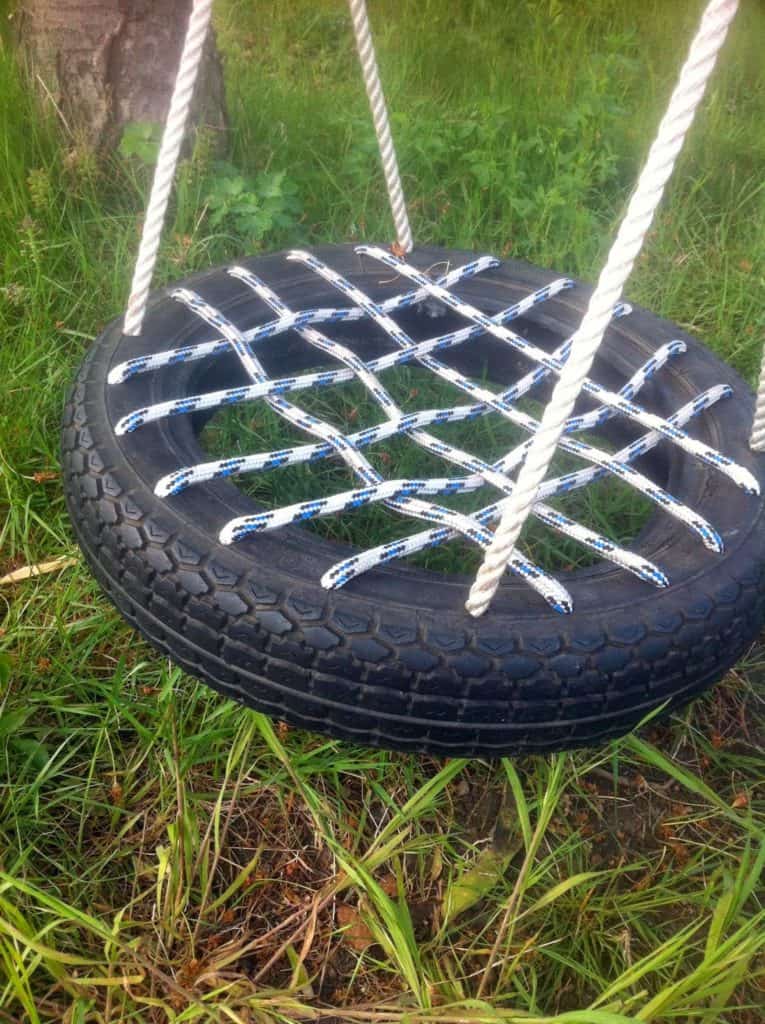
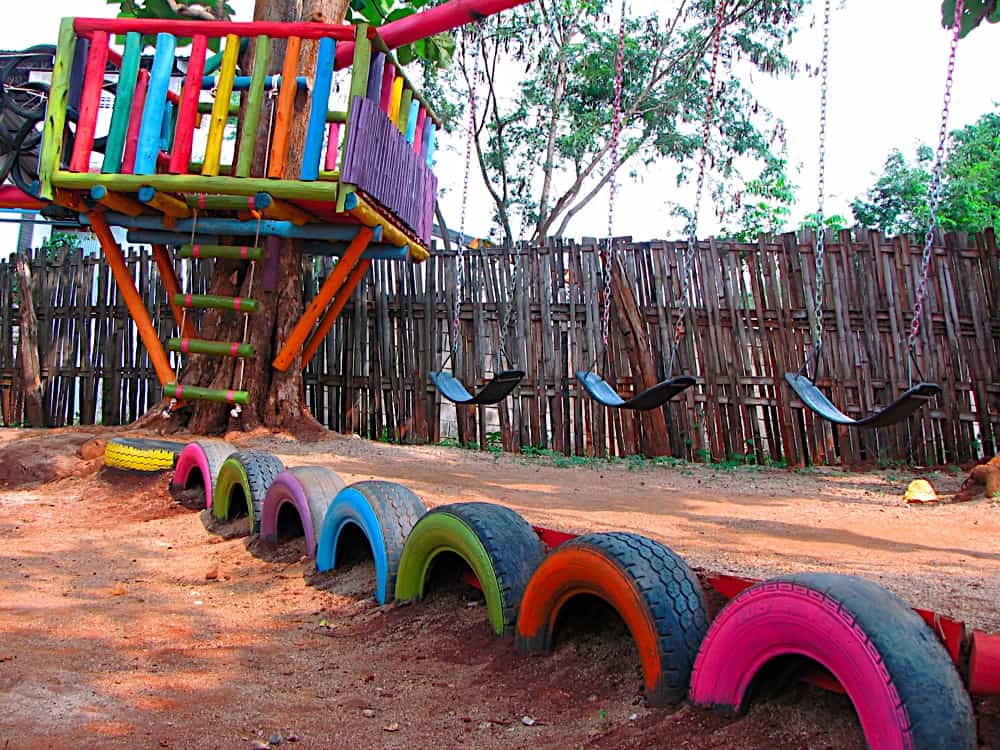


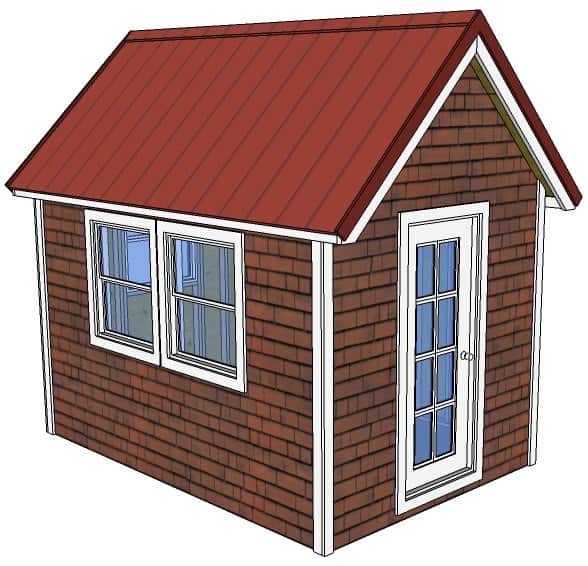


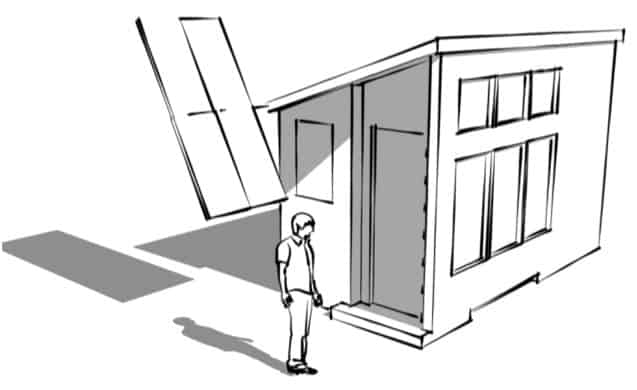
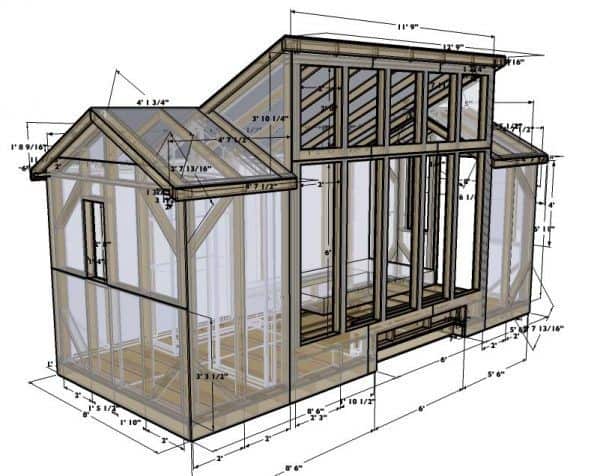
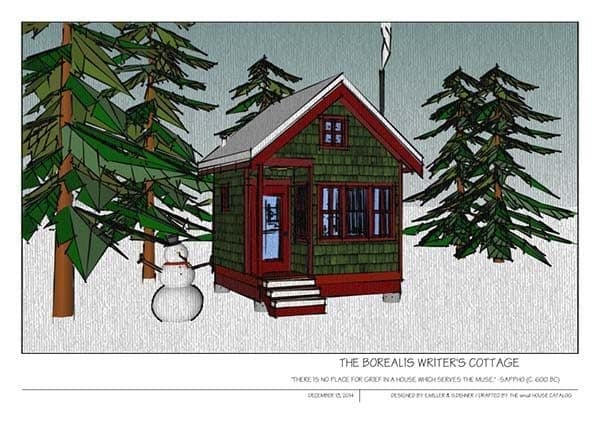
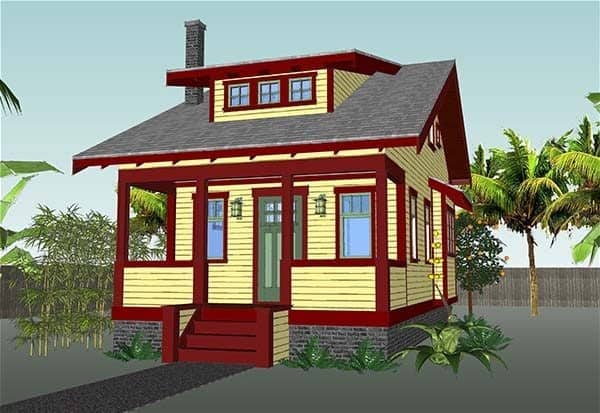


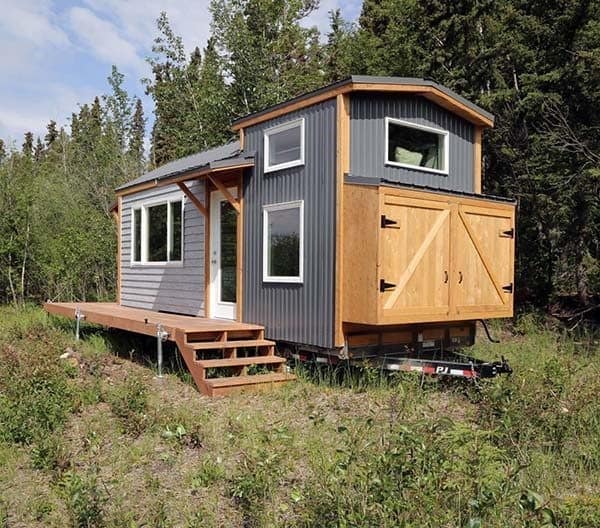
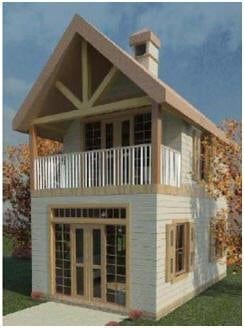


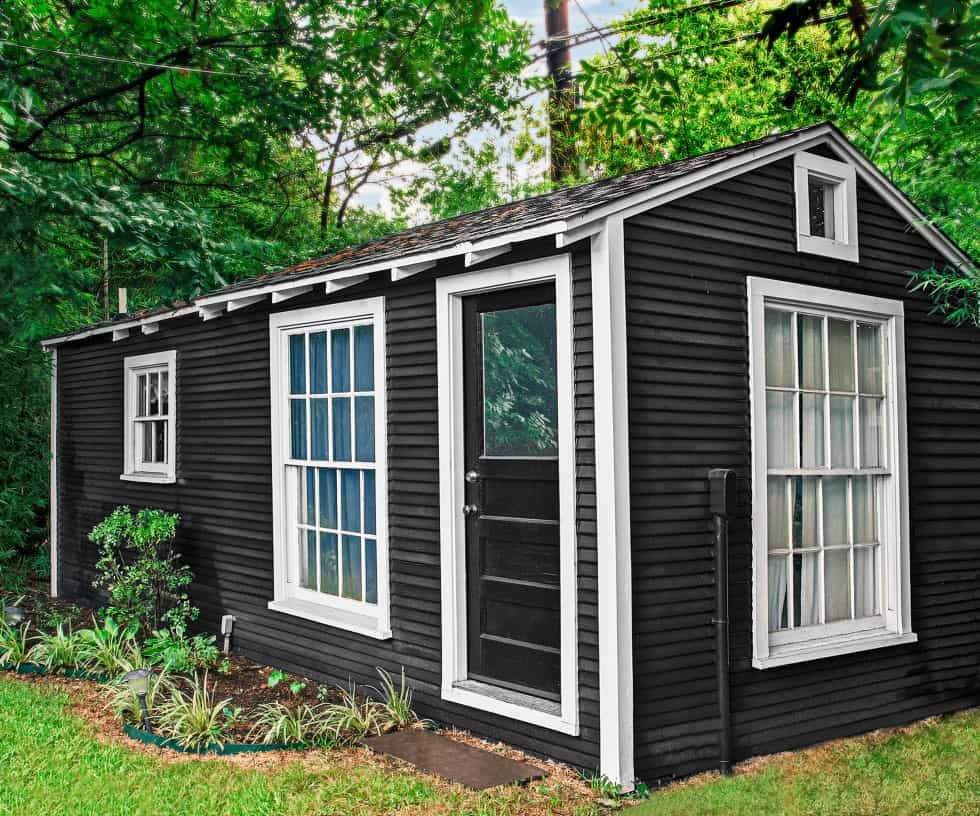
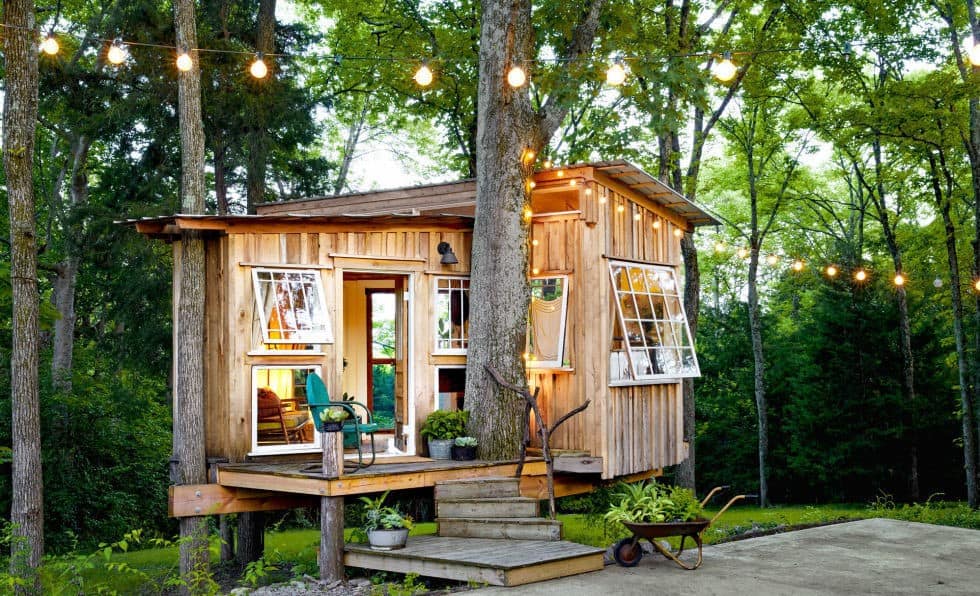


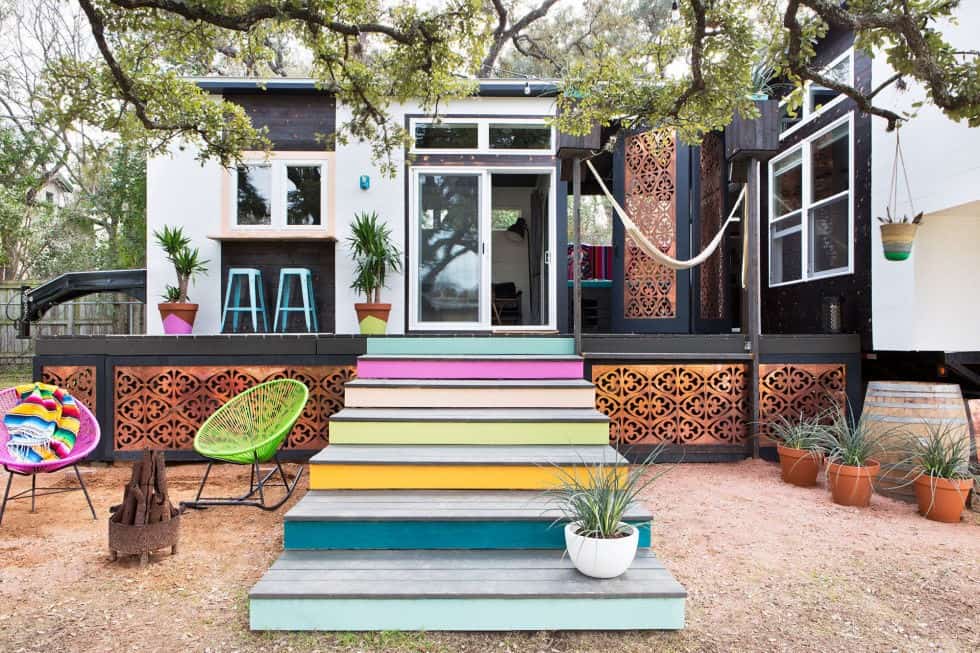
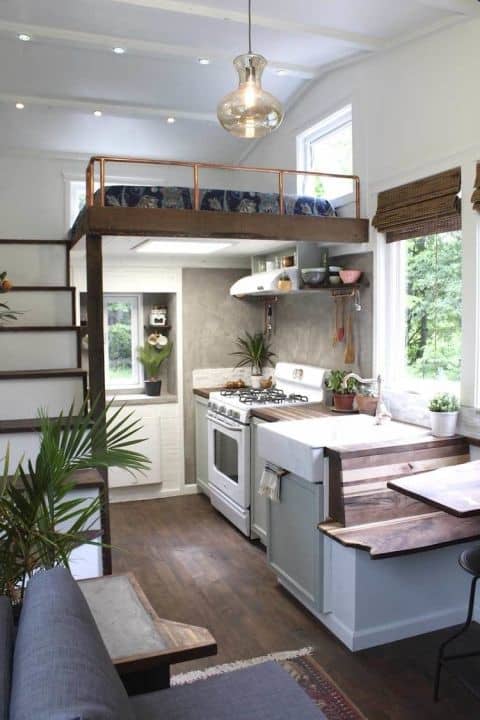
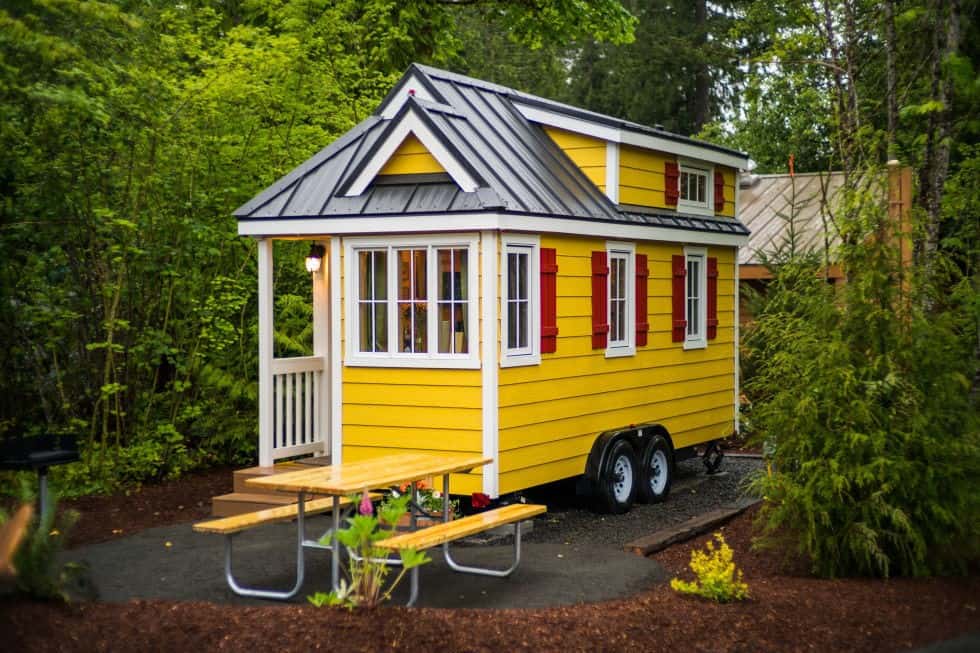

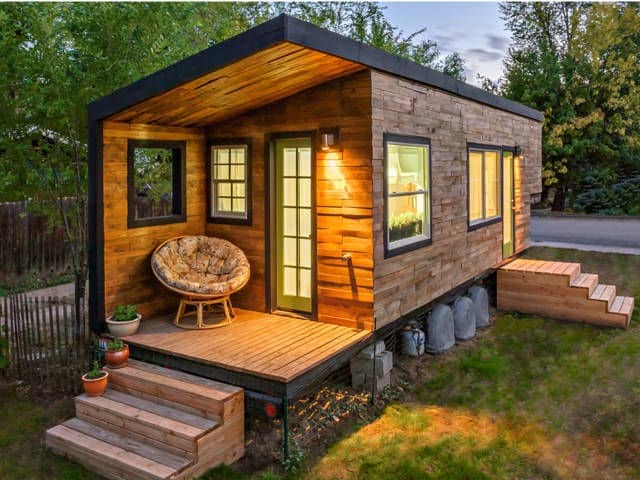


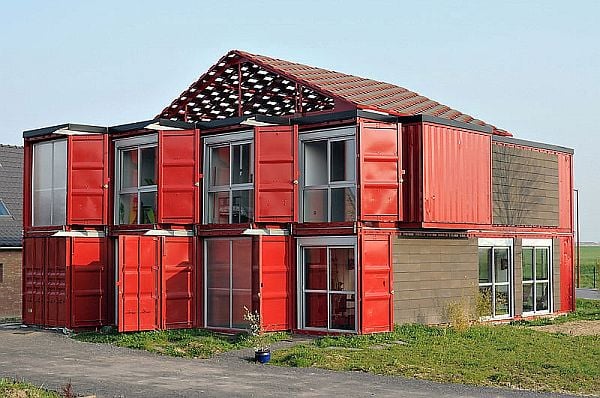
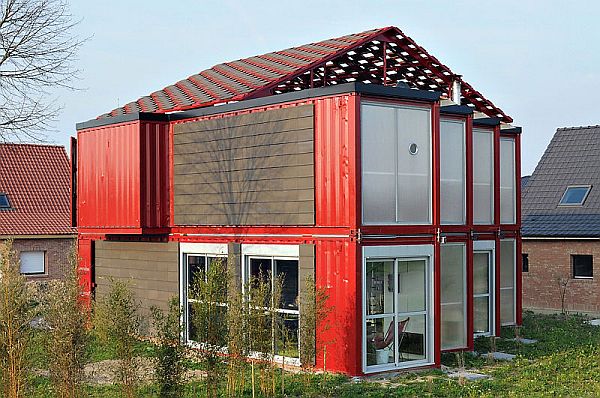
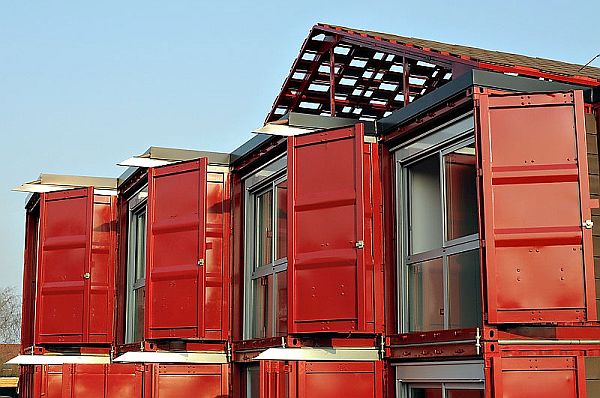
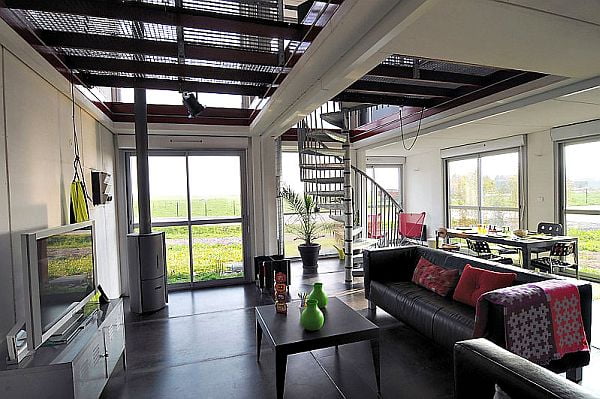
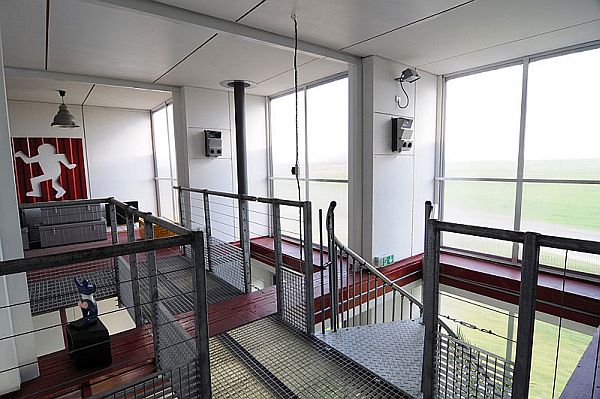
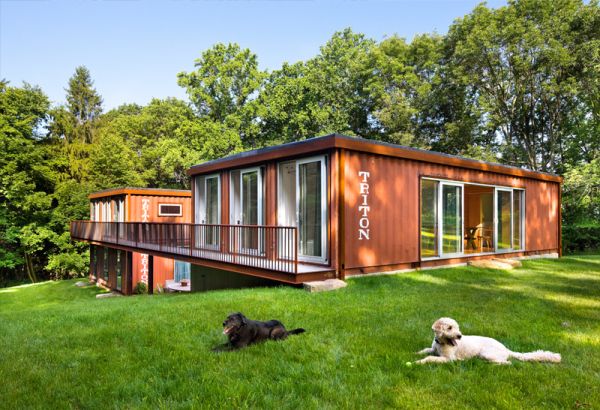
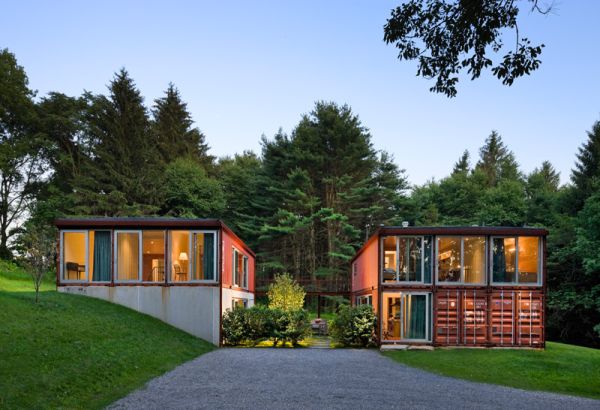
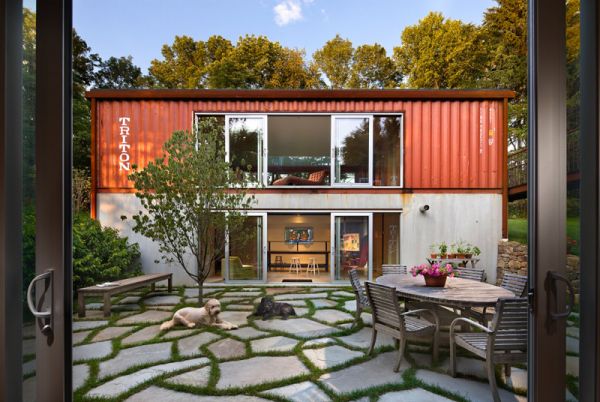
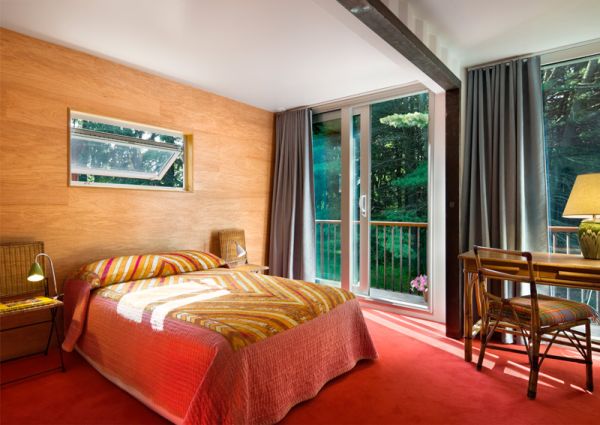


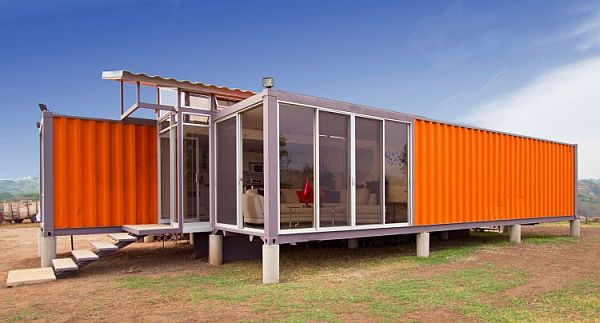
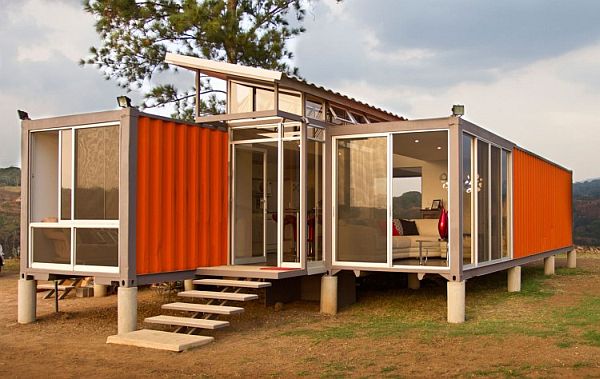
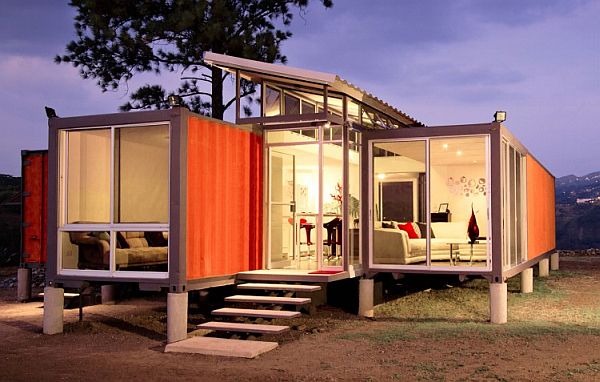
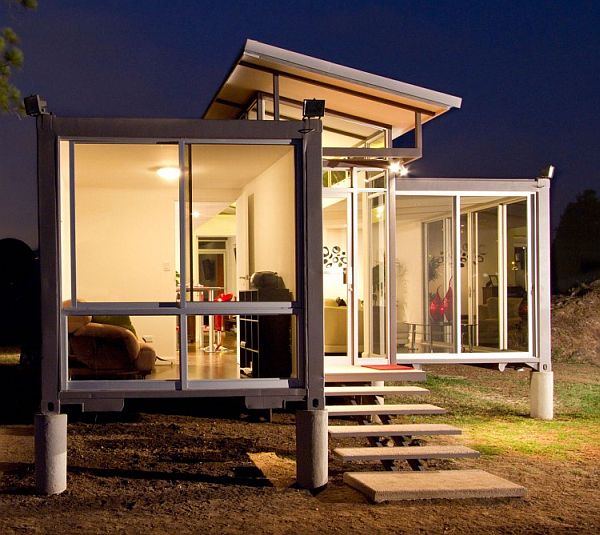
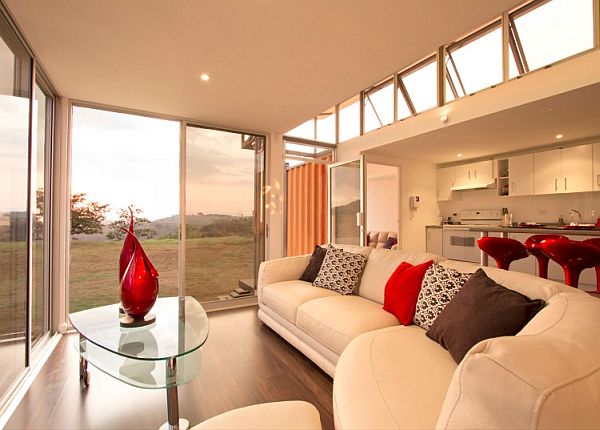
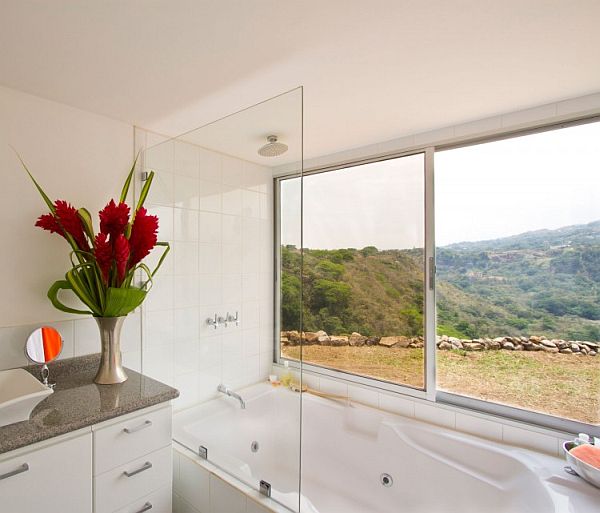
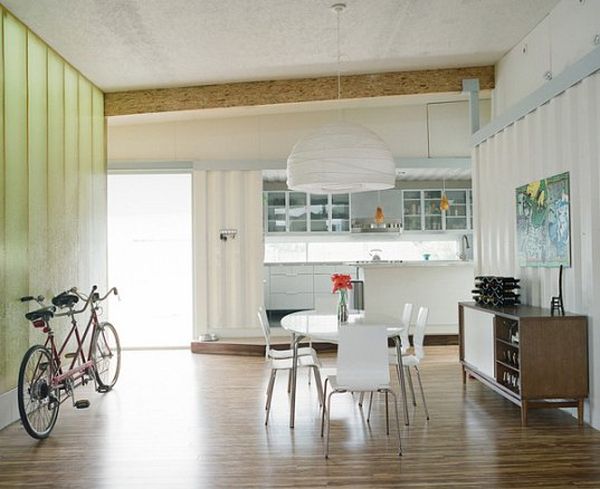
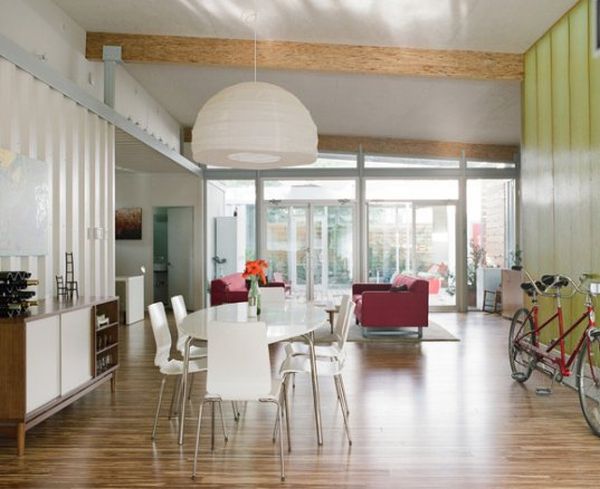
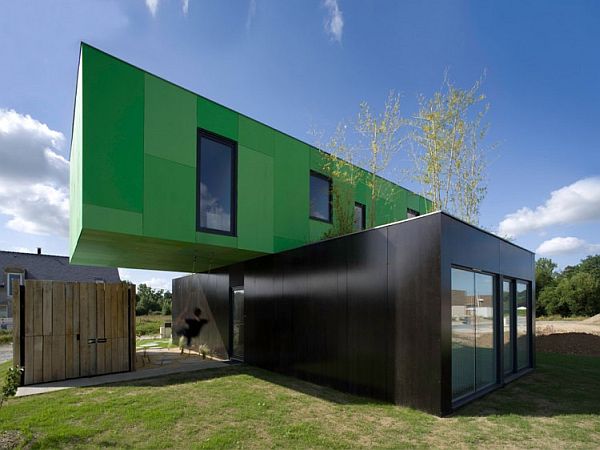
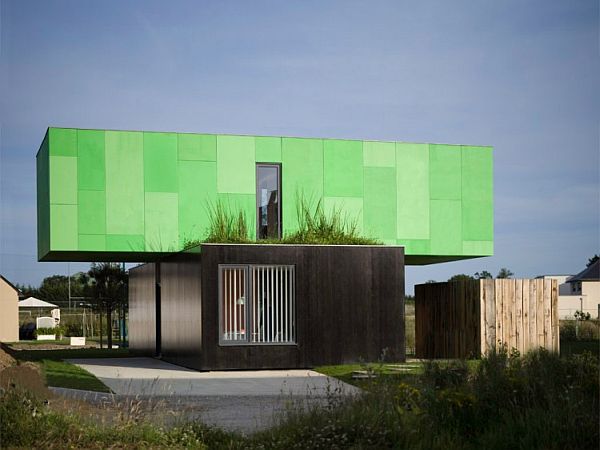
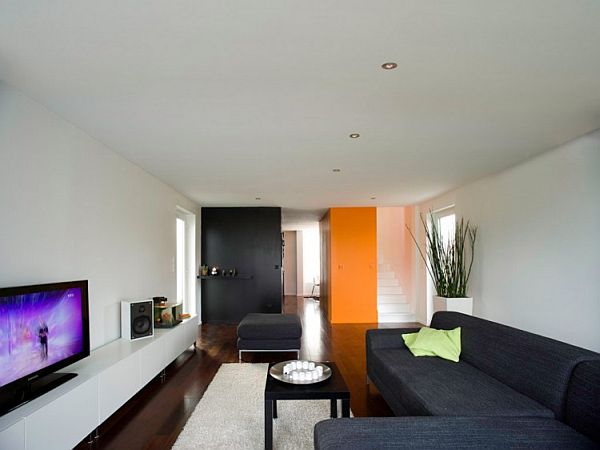

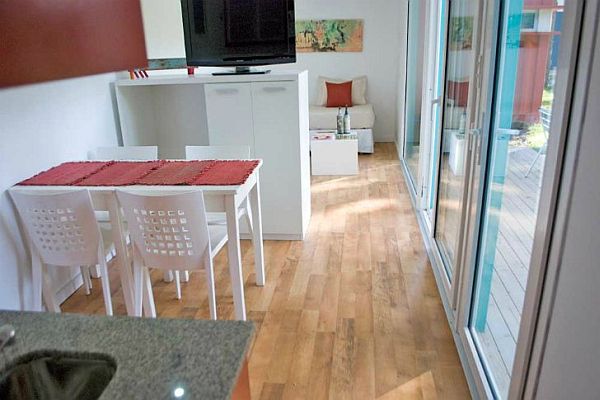
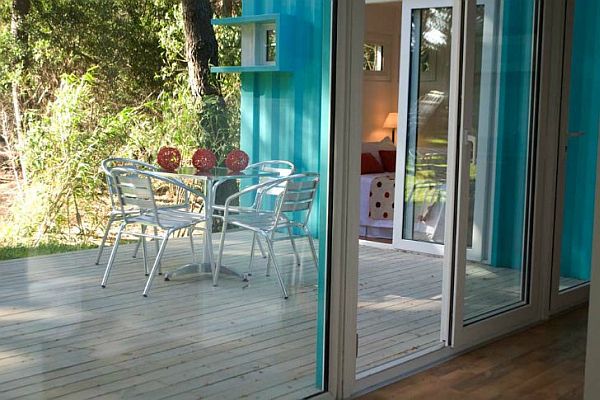
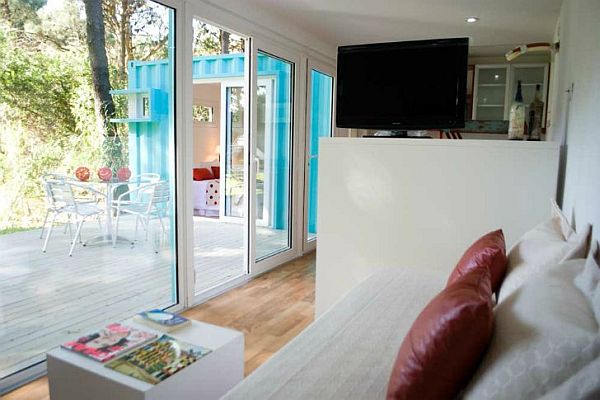
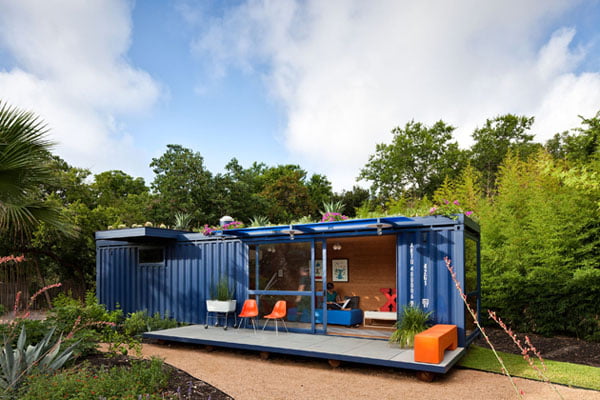
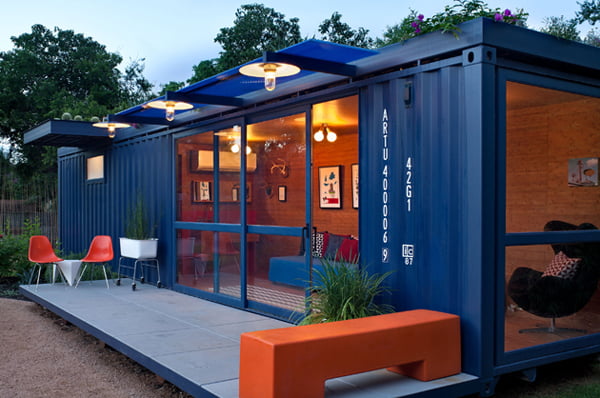

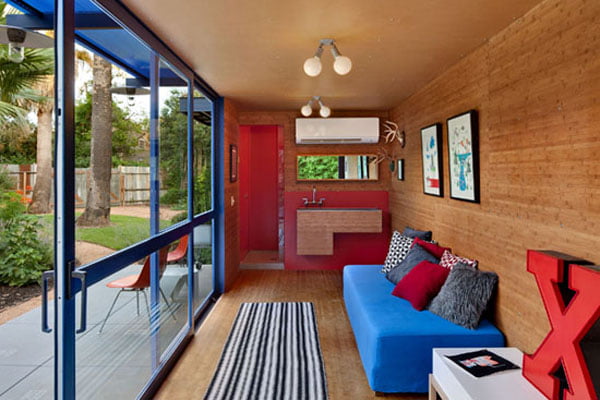
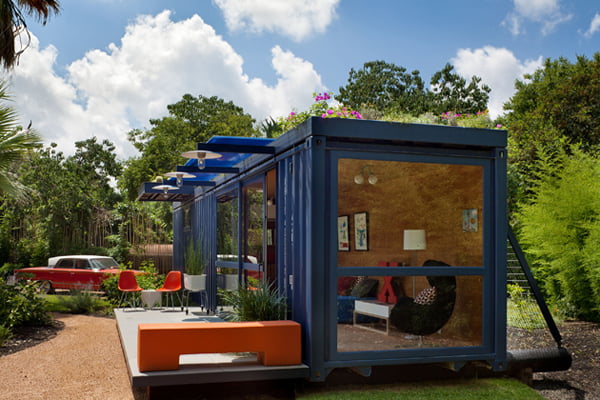

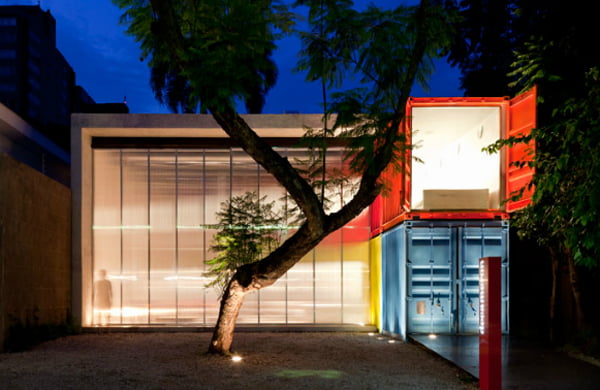
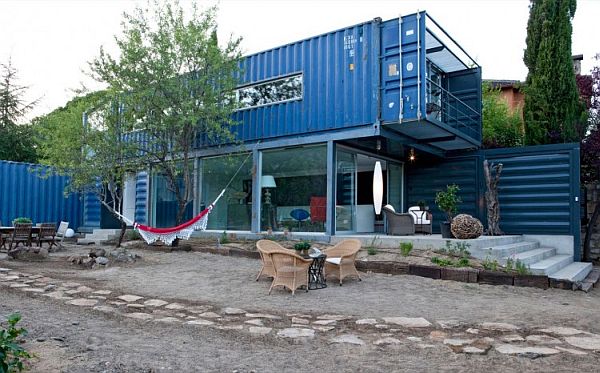
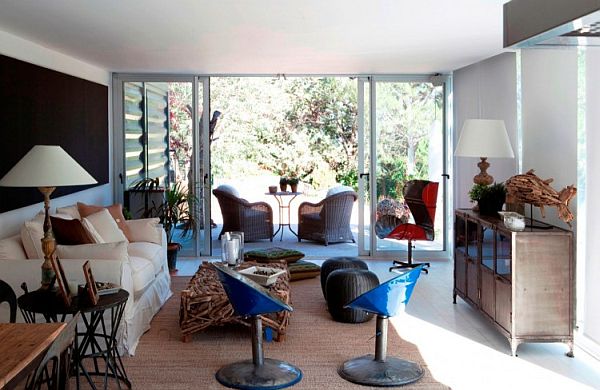
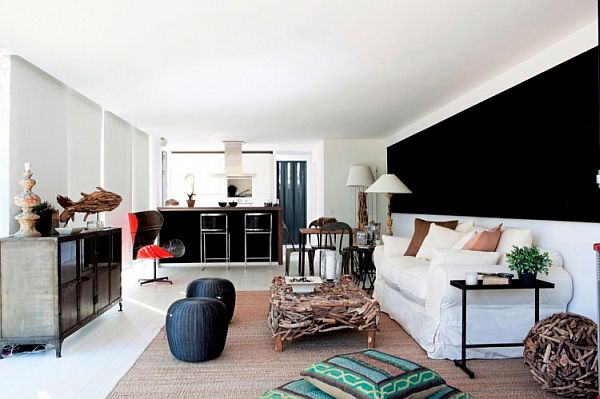


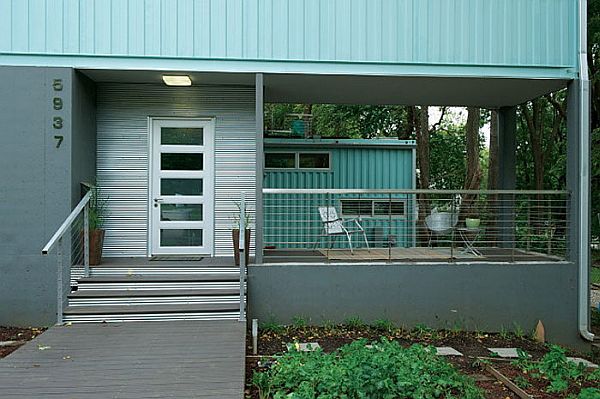


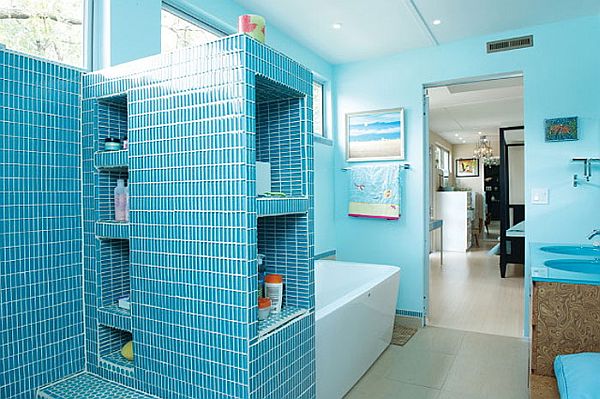
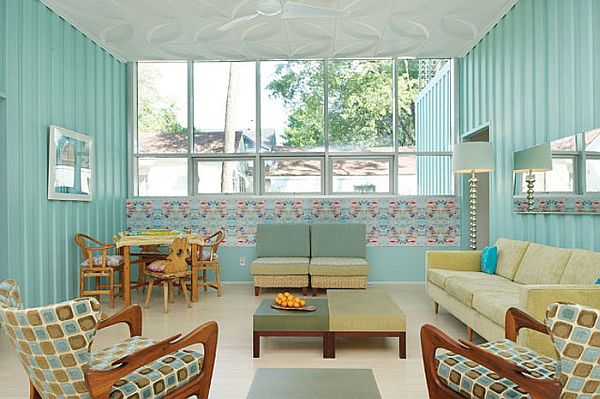
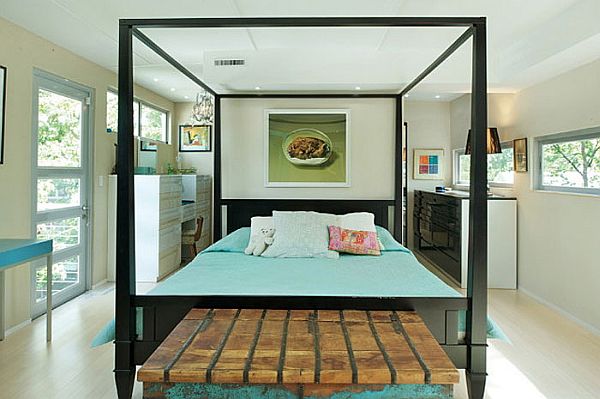
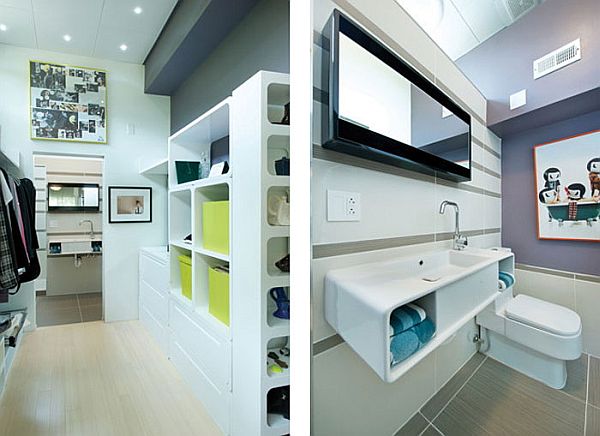
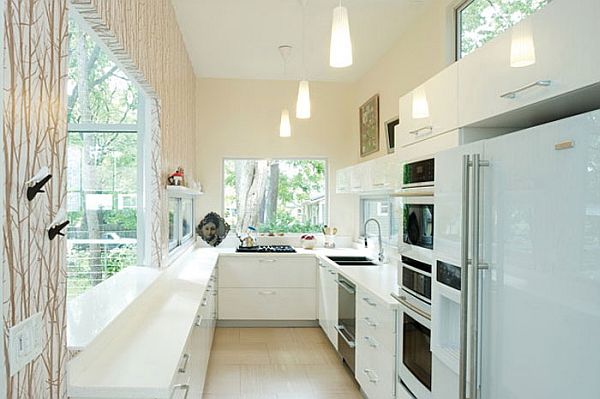
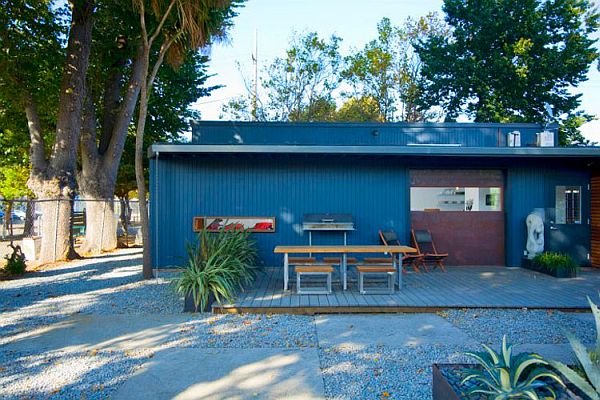

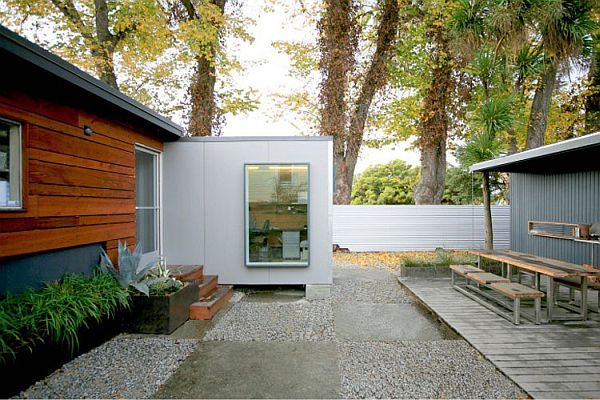
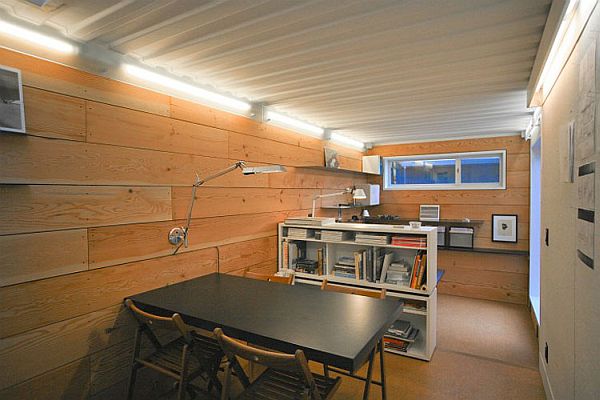
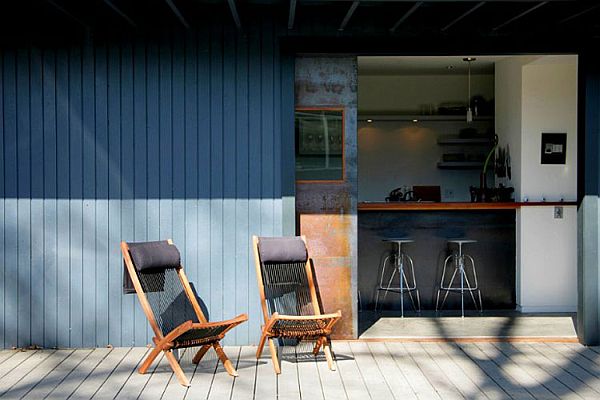
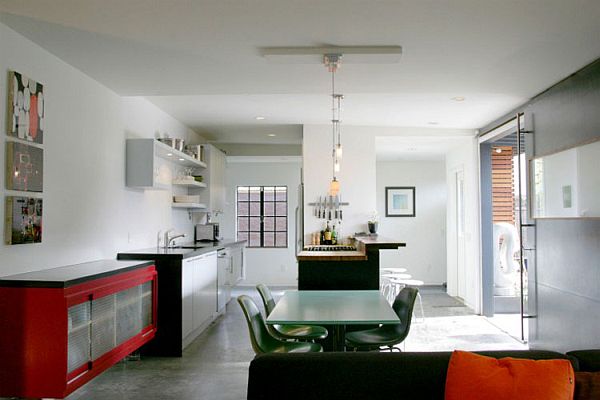
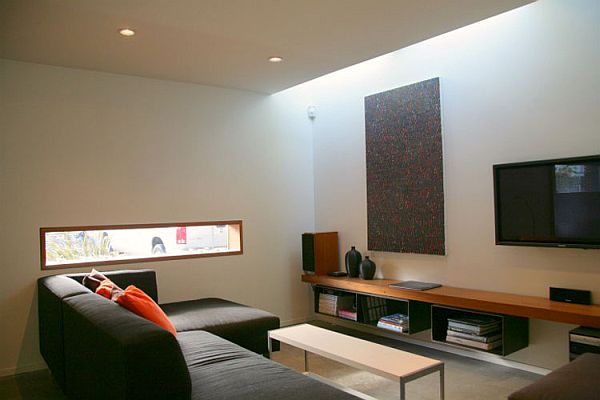

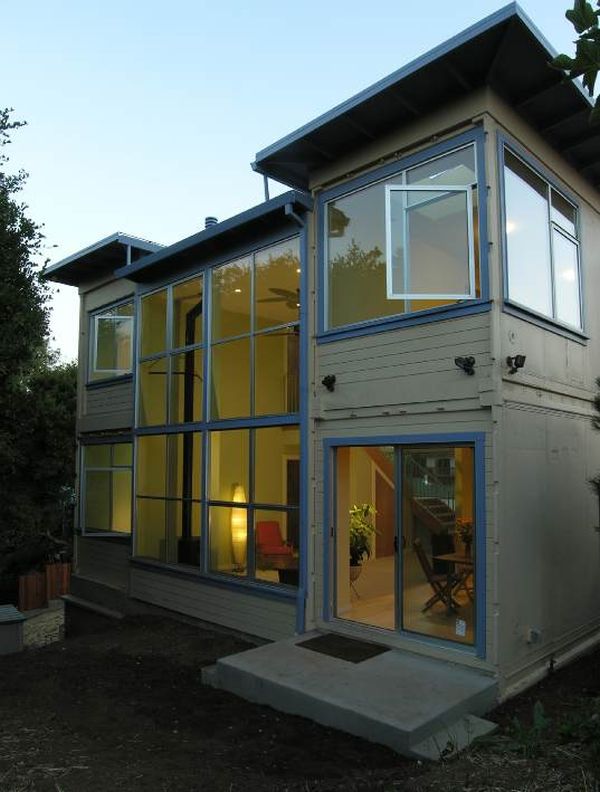
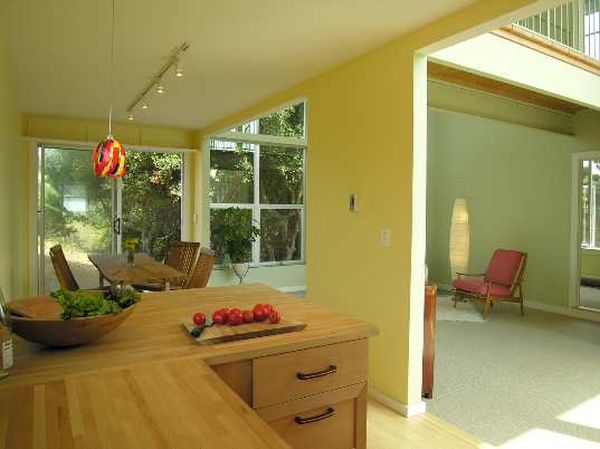
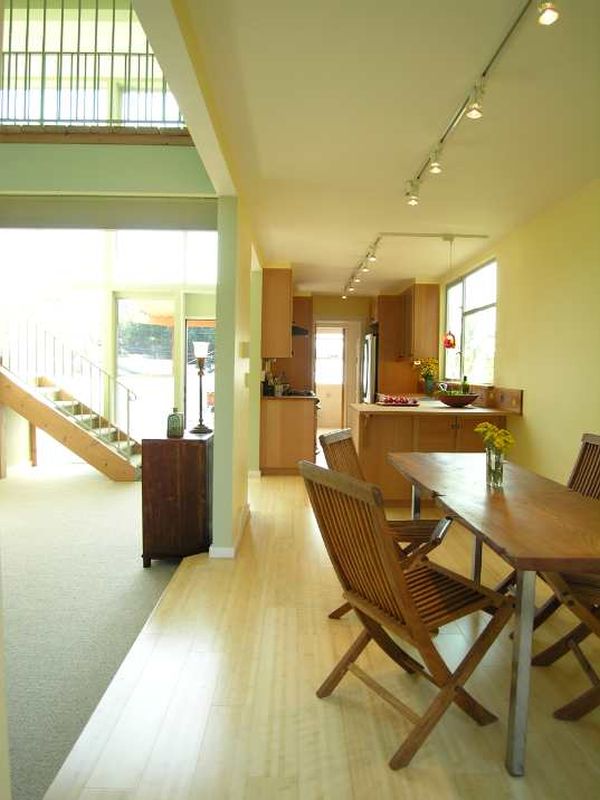


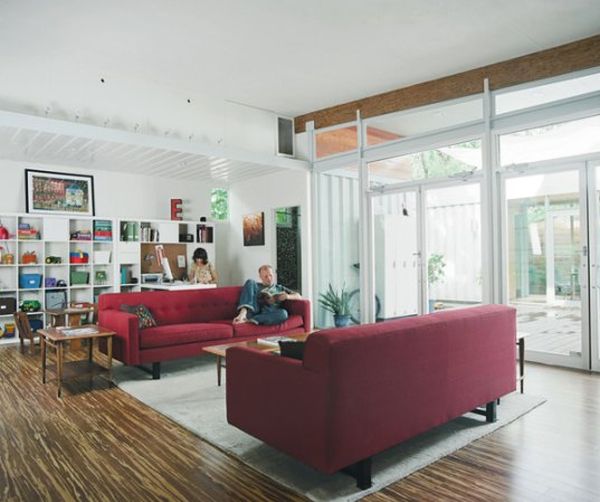
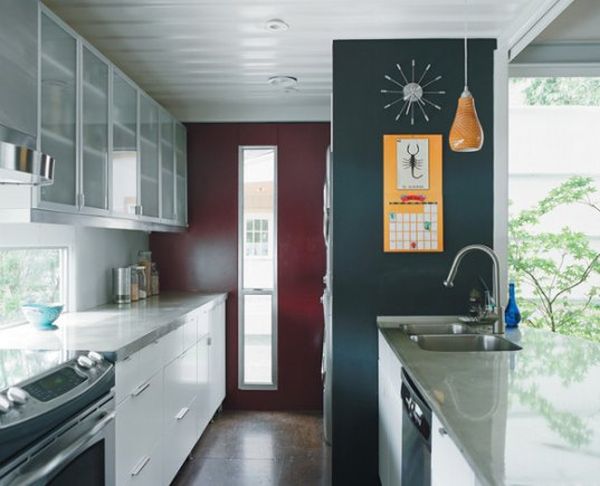

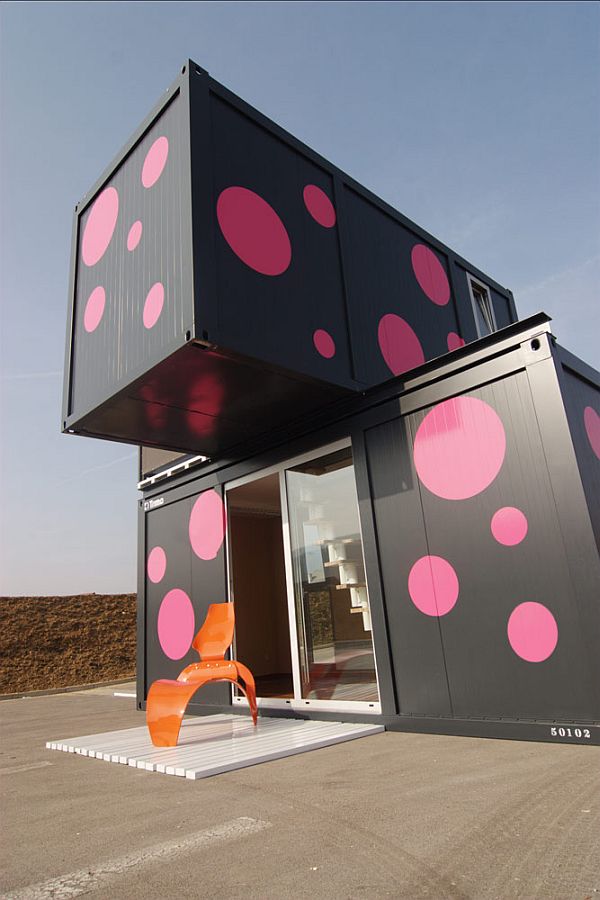
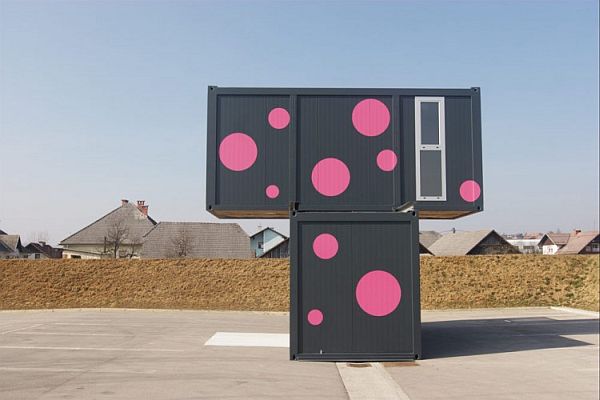
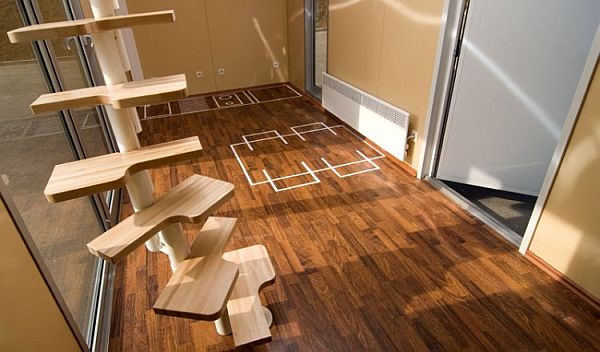


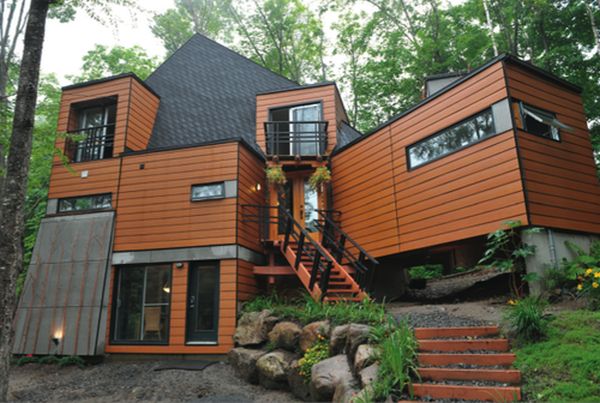
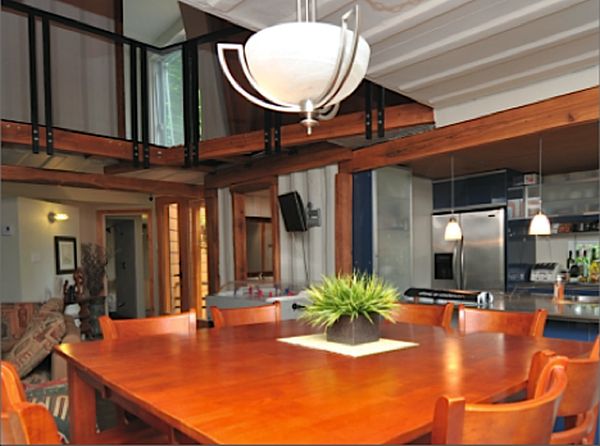


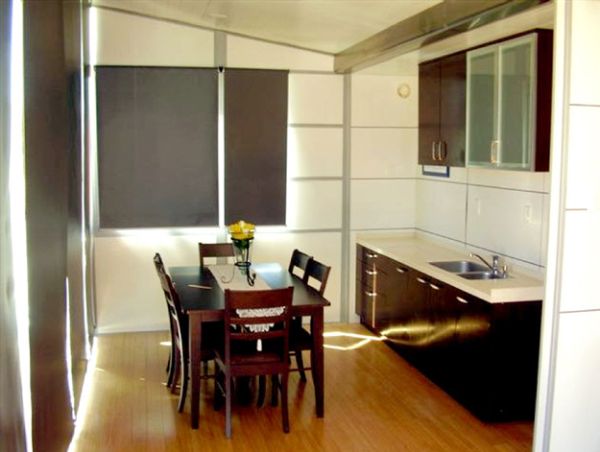


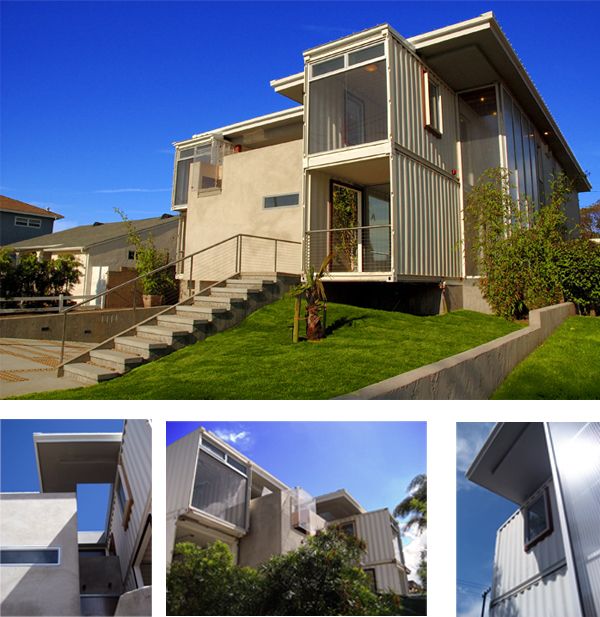
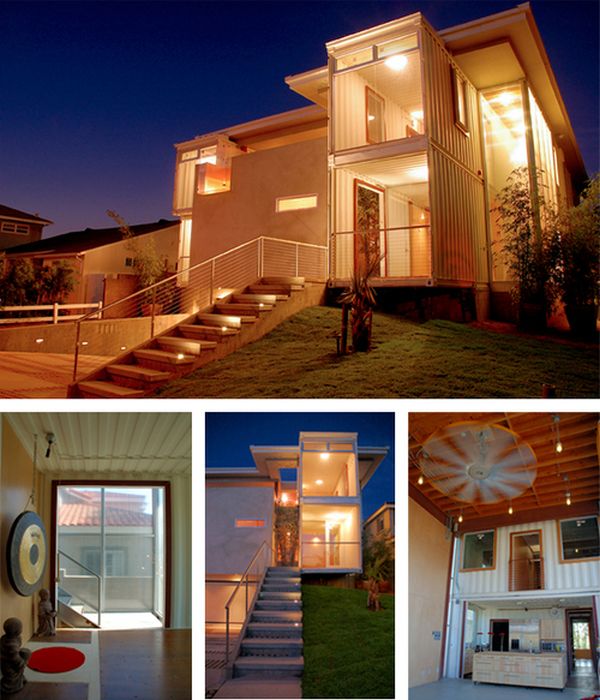
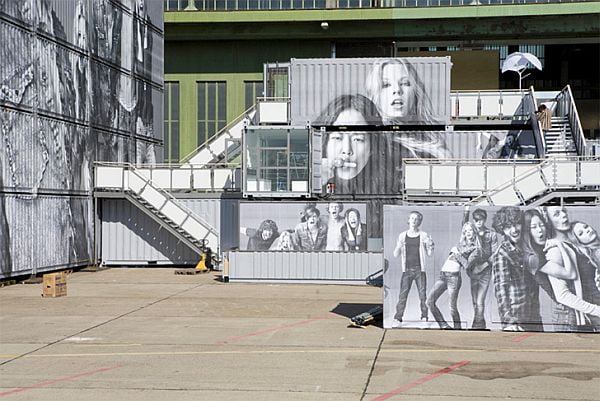

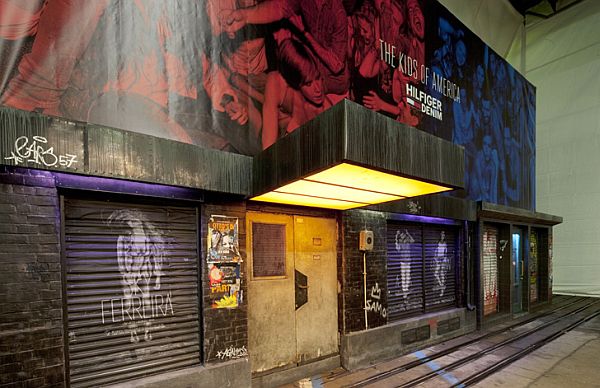


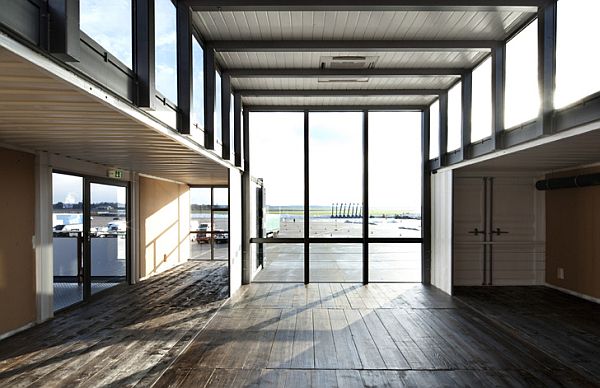

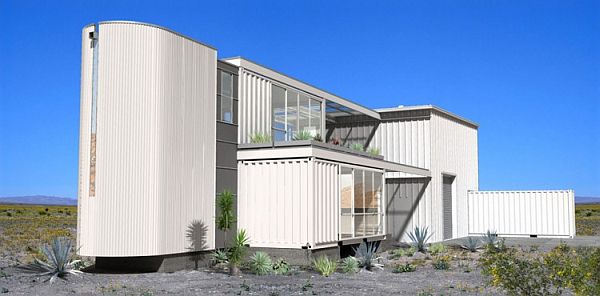

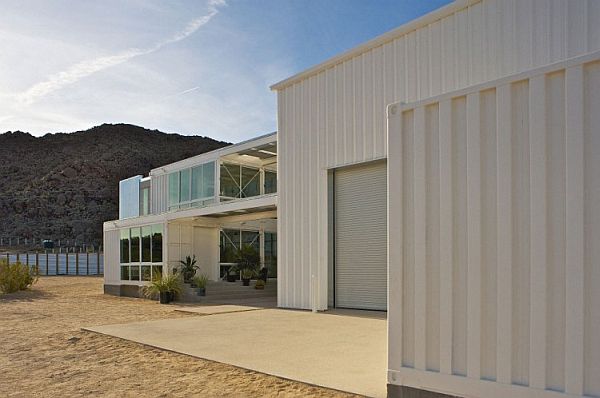


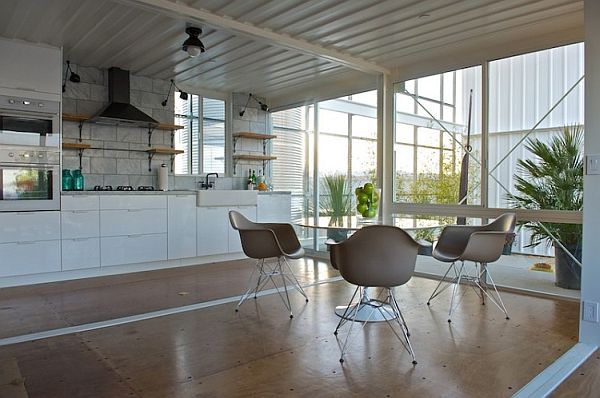

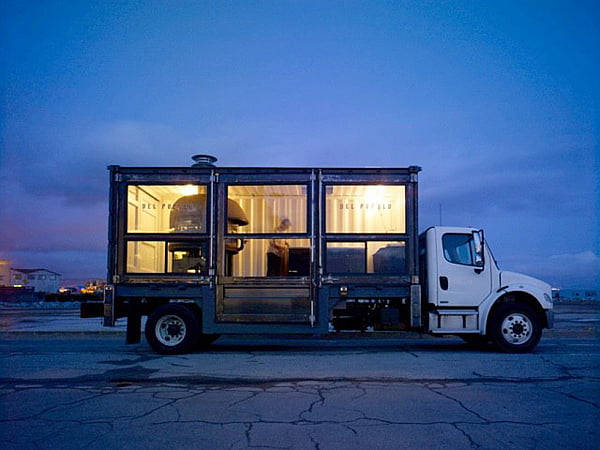


![61 Best Pastel Drawing Ideas [Reviewed]](https://homesthetics.net/wp-content/uploads/2022/01/Best-Pastel-Drawing-Ideas-2.jpg "61 Best Pastel Drawing Ideas [Reviewed]")


![WEN 6552 Planer Review [A Clear Winner?]](https://homesthetics.net/wp-content/uploads/2022/01/planer-1.jpg "WEN 6552 Planer Review [A Clear Winner?]")


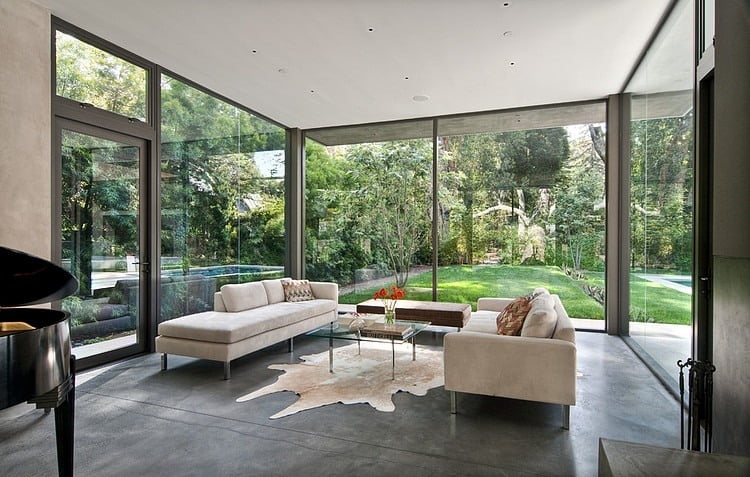
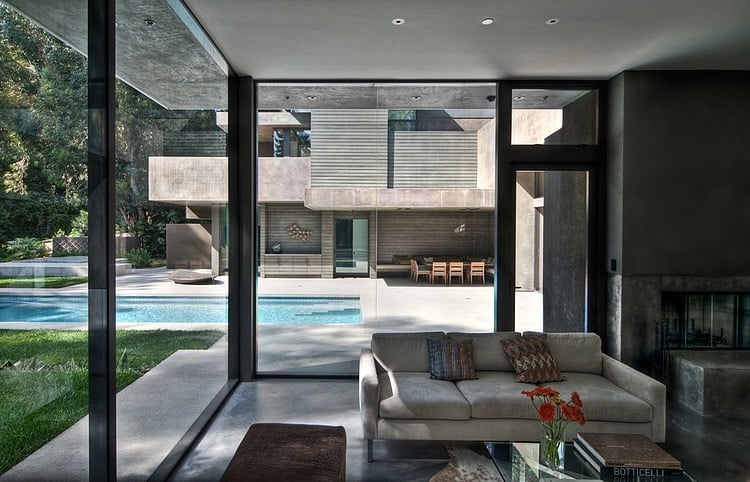
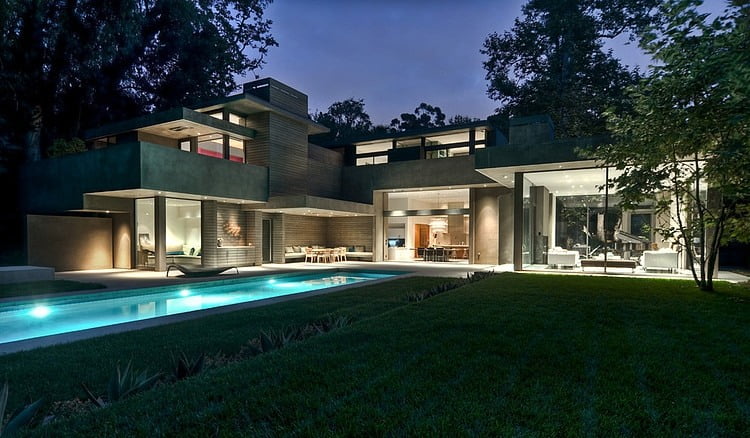

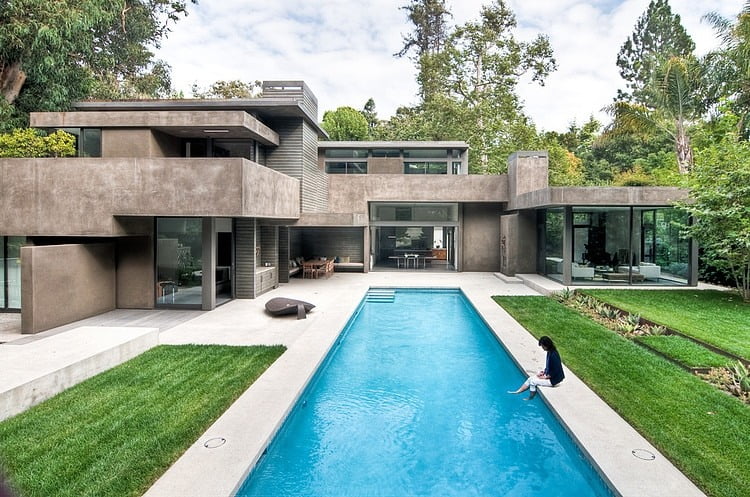
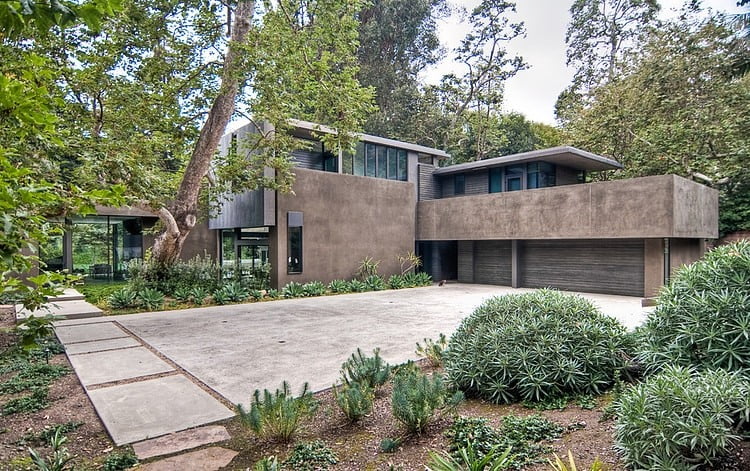
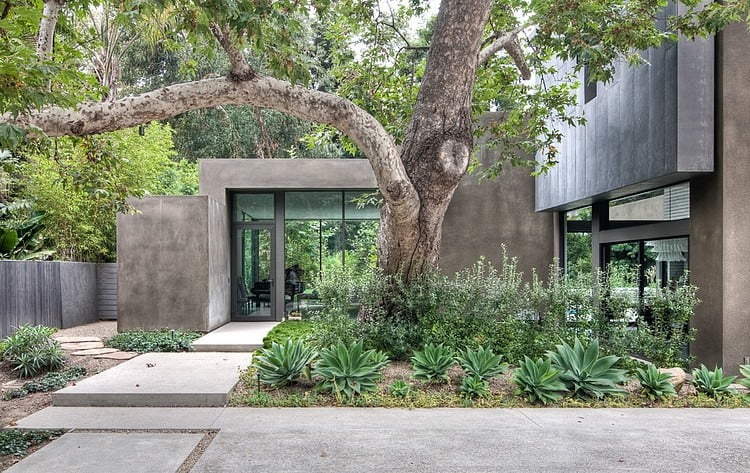
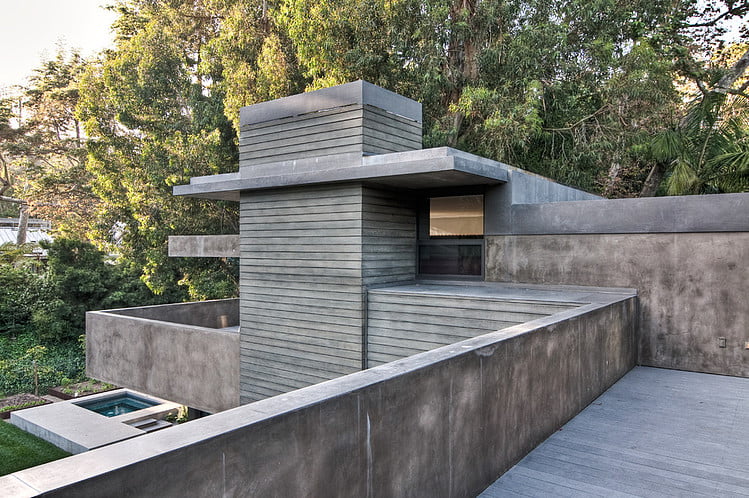
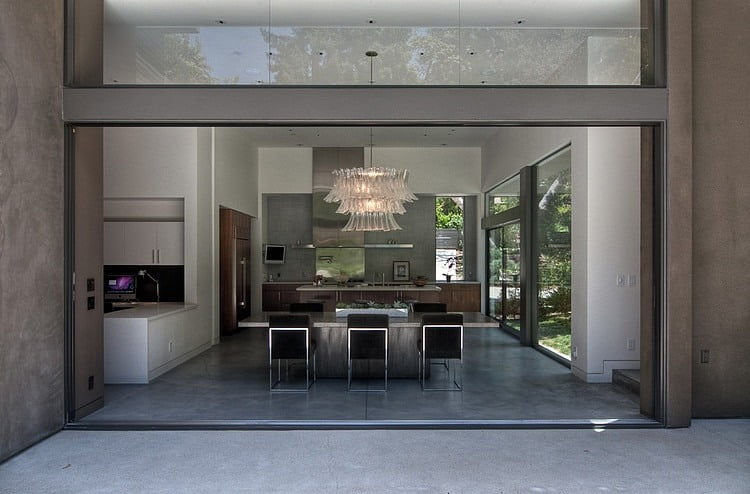
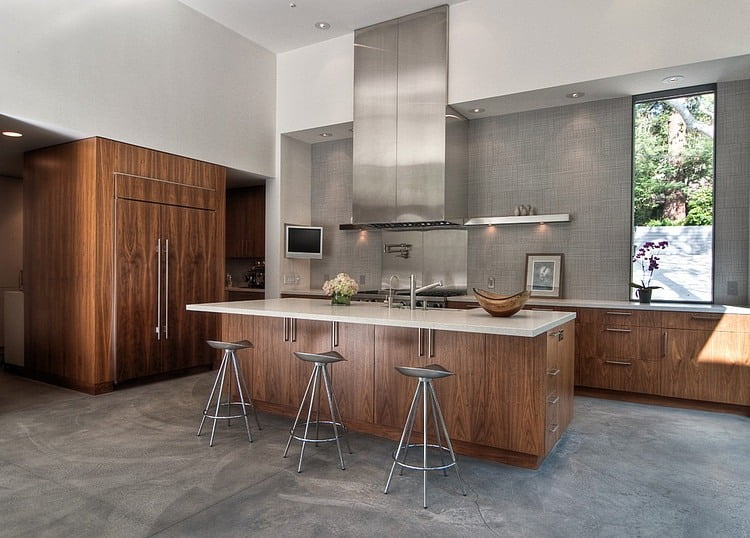
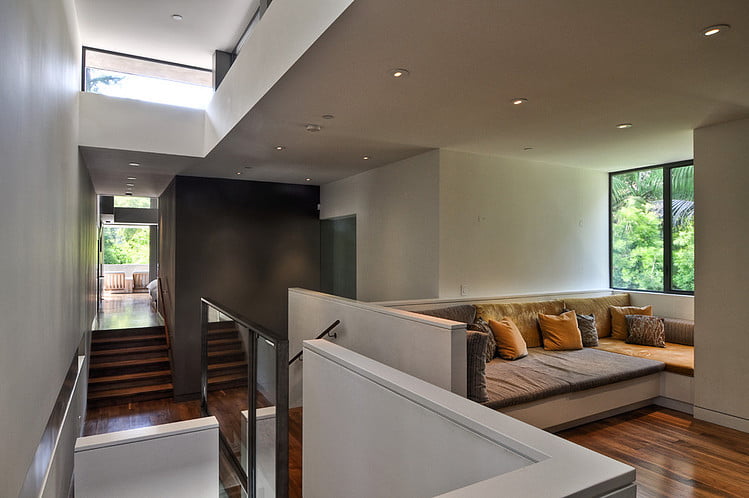
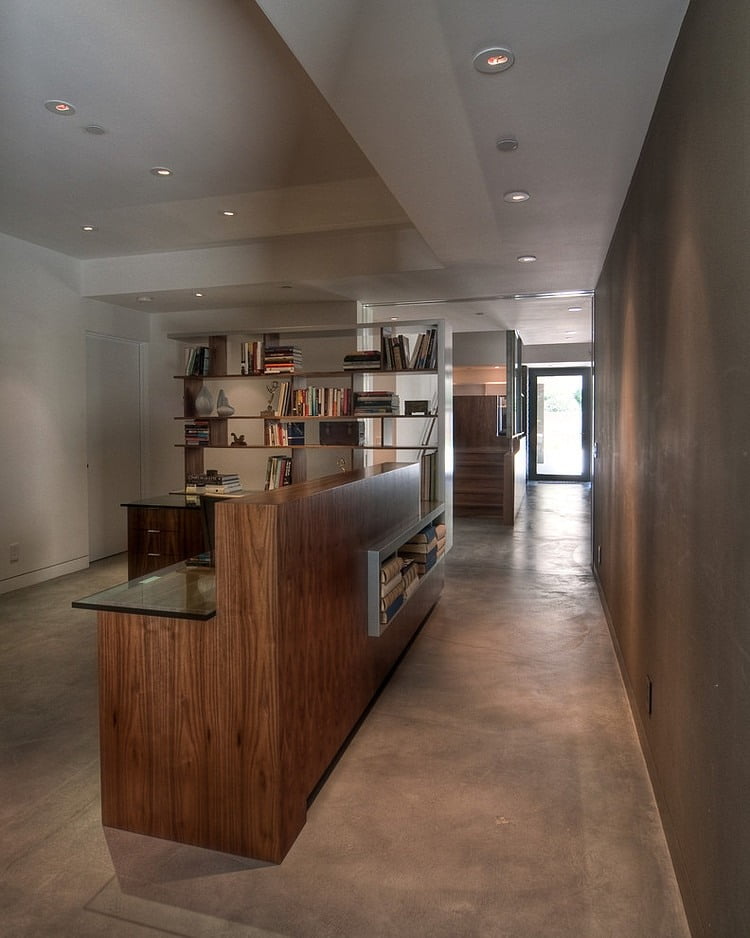


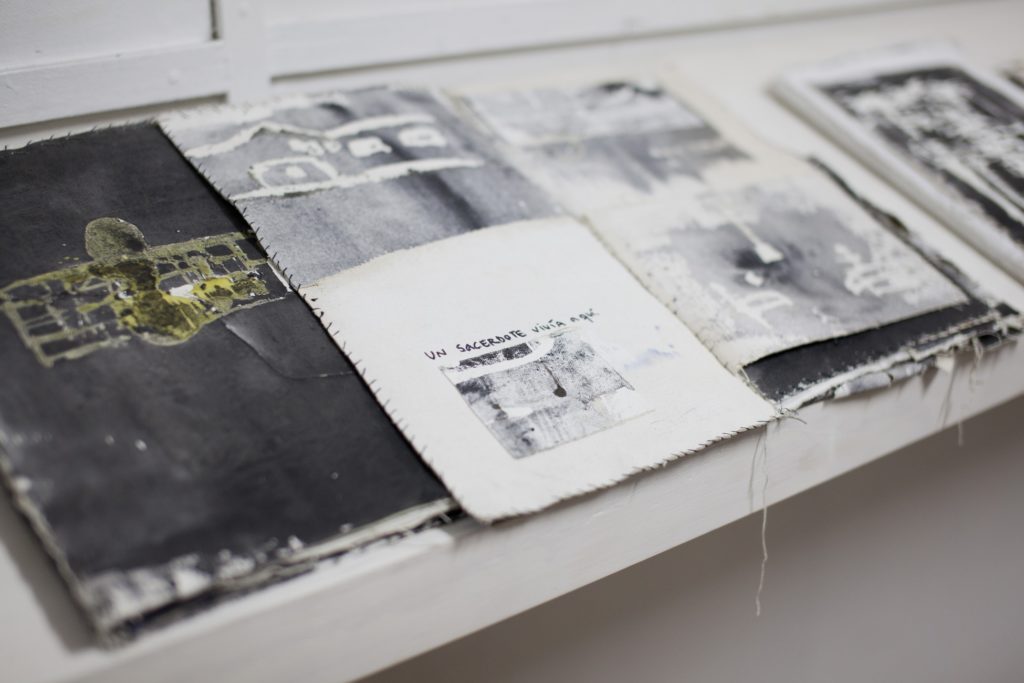


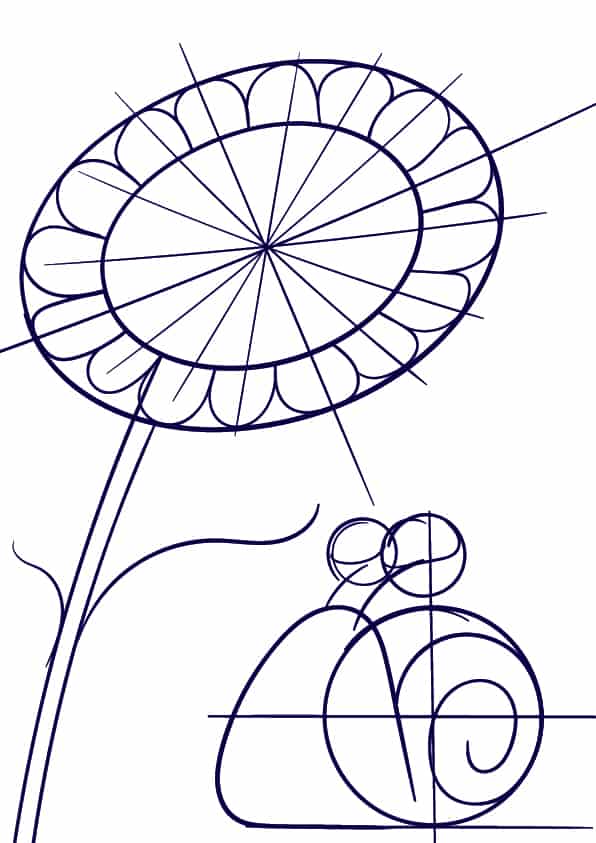
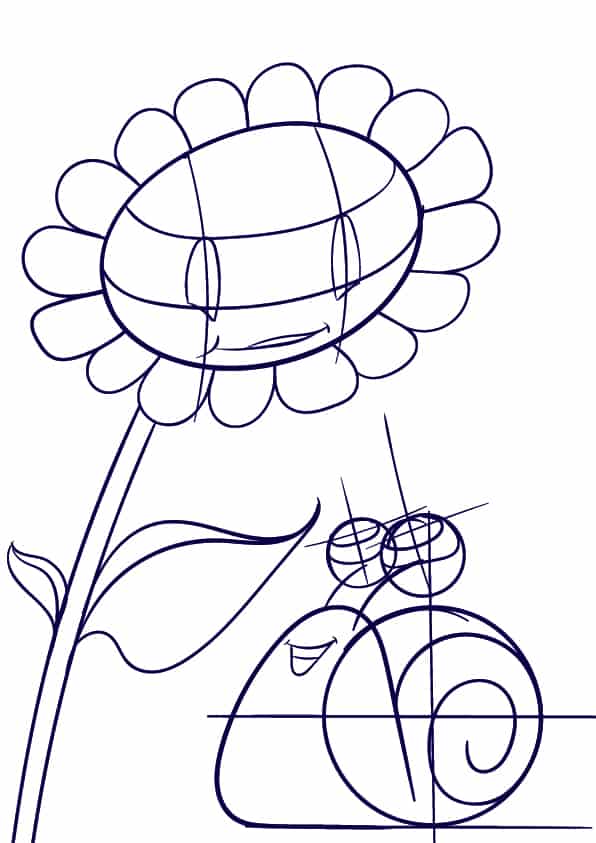


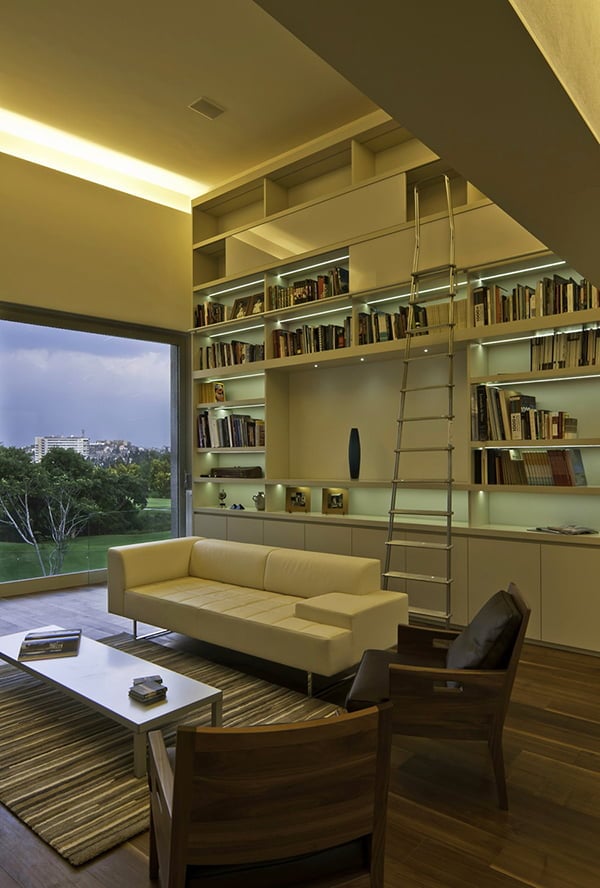