To be honest, leather is one of the most high-maintenance materials that you may have in your closet or around the house.
Be it your favorite leather jacket or a new pair of suede shoes, you always need to keep an eye on them to prevent damage. That's especially true for instances where you may accidentally spill something like glue on leather. This mostly happens when people try to fix leather items or glue leather to something like a shoe.
Worry not, as removing glue from leather isn’t as hard as it seems. In fact, the easiest way to remove glue from leather is by gently cleaning the hardened glue stain with a cotton soaked in acetone-based nail polish remover. Most of the time, good quality leather glue comes out very easily rather than other adhesives.
But there are other methods to get the job done as well. So, we thought of coming up with this guide to make removing glue from leather a tad easier for you. Glue spills might happen whether you are repairing your leather couch or fixing your leather car seat tear, so we’ve listed all the possible ways to remove glue from leather.
Without further ado, let's get started with how to remove glue from leather!
Simple Methods To Remove Glue From Leather
As we said already, cleaning glue from leather is easier than it seems. You only require some household items to remove something like super glue without damaging the leather. We have tried to mention some of the most simple ways used by leather enthusiasts. Just make sure to be gentle to the leather, particularly with suede items, to give them a long life.
1. Using Acetone-Based Nail Polish Remover
One of the easiest ways to remove super glue from leather is by using an acetone-based nail polish remover readily available on the market. Just be sure to test it on a less visible area of the leather to avoid the possibility of discoloration.
Let the super glue harden to form a stain
Saturate a cotton swab or cotton pad with the nail polish remover and rub it on the glue stain till it loosens
Once the stain has loosened, gently dab it using a folded dry paper towel or tissue to remove the glue
Soak a sponge in a mixture of warm water and mild soap to wipe the area where the glue stain had been sitting
You may apply a bit of leather conditioner to prevent the surface from becoming dry or brittle
Observe the leather surface after the water has evaporated to ensure that there's no glue residue
Repeat the process until the leather is free from all traces of glue
2. Using Sandpaper And Emery Board
At times, it can be pretty hard to get the glue off leather if the super glue stains are too thick or rigid. In that case, you may need something abrasive like sandpaper to wear away the super glue. This method is beneficial for suede as it tends to hold on to glue more than other leather surfaces.
Use a fine sandpaper or emery board to file away the hardened super glue from the leather gently
Removal of the stain may take a while, so try not to use a technique that might be damaging
Stop filing once you reach the bare leather surface
Vacuum or brush away the glue dust resulting from the glue removal
Check if any further glue is left on the leather
Use the acetone-based nail polish removal process to dilute and take off the remnant glue
You can wipe the surface with a leather cleaner to preserve its health and look as a final step
3. Using Soapy Water
Have you just spilled some super glue on your leather couch? Don't panic; take a soft cloth or sponge and a bowl of warm water mixed with dish soap to remove glue from the leather item. This technique specifically works for minor, fresh glue stains. You can also use the soapy water method with other glue removal techniques to clear away the final traces of dried glue from leather.
Pour some dish soap into a bowl of warm water and agitate the mixture until it lathers
Dip a soft clean cloth into the soapy mixture and lay it over the affected area
Let the soaked cloth sit on the leather furniture or other leather items for at least an hour so that the glue can loosen up
After an hour, carefully use a circular motion to remove the adhesive
Next, rinse the soft cloth with warm water to wipe away any glue residue present on the leather surface
Then, use a dry cloth to remove excess moisture from the leather
Finish off by applying a small amount of leather conditioner to the location once it's dry to keep it nourished
4. Using White Vinegar
Another recommended method to remove glue from leather is using white vinegar, which is usually present in our kitchens. You can use a toothbrush with vinegar to gently wear away the strong adhesive from most leather surfaces, including leather shoes.
Make a mixture of one part white vinegar and one part warm water in a bowl
Dip a soft-bristled toothbrush into the mixture and gently scrub the glue spot in a circular motion
Use a clean fabric to dab the excess moisture and wipe away the glue residue
Check for any leftover glue and repeat the process if necessary
Once the surface is dry, use a leather conditioner to make it shiny and prevent cracking
5. Using Lemon Oil
It may come as a surprise, but lemon oil works as an excellent super glue remover. The essential oil doesn't cause any discoloration, so you can safely use it on suede leather shoes or your leather wearables. Plus, the oil leaves your leather items with a refreshing scent.
Take a bit of lemon oil on a cotton ball and place it at the location of the glue stain
Let the cotton ball sit for five to ten minutes for the glue to loosen
Then, you may use the edge of a nail file to lift the glue from the leather surface
If the adhesive is too stubborn, reapply a bit more lemon oil and leave it on the stain for five more minutes
Once all the glue has been removed, dip a towel in warm soapy water and clean the leather surface to remove glue and oil residue
Finally, use a dry towel to absorb any moisture and apply some fabric conditioner to protect the leather from drying or cracking
How To Remove Glue From Leather Final Words
That's everything we had to tell you about how to remove glue from leather. We hope that this guide will help you to retain the health of your leather items even if it accidentally gets in touch with super glue.
Other than the above-mentioned methods, some chemical-based super glue removers are available on the market. But, you have to be careful while using them as some can damage and discolor leather products.
Having said that, at times, you may find it extremely difficult to remove glue from leather. We suggest seeking help from a professional leather cleaning service in such situations.
Until next time, goodbye, and take care!
You can remove the wheel from your angle grinder by hand or using simple tools like a hammer and chisel. But you must be very careful to ensure there are no injuries or damages caused to the angle grinder.
So, you want to change the wheel of your angle grinder, but have lost the key or wrench to unlock the blade? Or, have you misplaced the factory spanner that came in the package. We get it- it can be downright frustrating to lose things when you need them the most!
But did you know that it’s actually possible to remove the wheel even when you don’t have the right tool handy? Yes- you heard that right! Dive in to know how to remove the angle grinder disc without a tool.
What Are Angle Grinders?
For people who may be new angle grinders, let us just quickly introduce them.
These are essentially handheld power tools that use rotating angle grinder discs or wheels for cutting, grinding, polishing, or deburring metal, concrete, porcelain, and other materials.
You will usually find two types of angle grinders- one that needs to be bolted down so it won't move while being used; and the portable cordless models. The cordless angle grinder is one of the most convenient tools as it can be used anywhere. But both cordless and corded angle grinder come with a locking nut to ensure the wheel doesn’t get displaced.
Furthermore, an angle grinder has a housing around its motor shaft with openings for different accessories such as an angle grinder disk and cut-off wheels, as well as a guard over these openings to protect users from injury caused by sparks flying off during operation.
Why Use An Angle Grinder?
As mentioned above, an angle grinder is a powerful hand tool that can be used to cut, shape, and polish metal. The high-speed rotary action of the grinder nut makes it ideal for completing many tasks including removing rust from tools or household items like the fridge door handle.
In hindsight, the efficiency of the grinder depends largely on the type of blade being used. For instance, a diamond-tipped blade may be more suitable for cutting tiles. Likewise, a serrated blade may be a better choice for making curved cuts.
Is An Angle Grinder The Same As A Polisher?
You can attach a polishing pad to the grinder and use it at a low speed in case a polisher isn’t available. However, you must not confuse an angle grinder with a polisher.
Now, some readers may be asking “what’s the difference between an angle grinder and a polisher?” Well, the grinding process of an angle grinder is used to reduce the thickness of the material without damaging it. Polishing, on the other hand, is about smoothing the surface.
Remember that a grinder may be used as a polisher, but it doesn’t happen the other way round.
Another thing to keep in mind is that you may use the tool without its guard in some circumstances, such as when you are grinding down metal on a workbench. However, this is a dangerous practice and should only be done if necessary.
To ensure safety, always check that the guards are in place before using the grinder. If any guard is broken, refrain from using the tool until it is replaced with one that fits properly and is securely in place.
On that note, you can replace a damaged or missing guard by first unplugging the tool. Then, remove any existing guards by loosening them with an Allen wrench (the type of wrench that has handles on either side).
Finally, replace the damaged or missing guards with new ones by sliding them into place and tightening them down firmly so they stay secure during operation.
Steps To Remove Angle Grinder Wheel Without A Tool
Step 1- Unplug the Power Cord From The Power Outlet
First and foremost, always unplug the power cord of the angle grinder from the wall outlet. This step should be followed whenever you’re replacing parts or cleaning it.
Step-2 Remove The Locking Nut
As you may have already figured out, the lock nut holds the disc in place and needs to be taken off so that you can replace it. It has a lock button located on the disc guard, which sits between the body of the angle grinder and the wheel.
However, if this button gets stuck, then you will have to do it manually. And there are a few ways to do so.
Option 1
Firstly, grab two bolts that exactly fit the two holes of the locking nut. However, make sure you lock the position of the wheel by pressing on the lock button located behind it (on the top of the grinder body). You need to keep the button pressed to prevent the wheel from coming off. So, it may be a good idea to call someone for help.
Next, use a pair of pliers to get a grip on the bolts and start rotating them counterclockwise. You can also use an adjustable wrench for this step, depending on what you have handly. Or, secure a pair of vice grips around the bolts and rotate them in the opposite (counterclockwise) direction.
Option 2
If you don’t have the above-mentioned tools handy, then you can try removing the locking nut with the hammer and chisel method.
Insert the chisel with an angle into one of the holes of locking the nut, one by one. Then, tap it with the hammer so that the chisel rotates to mimic the action of a wrench. Do it on the other side if required.
This method has a high chance of damaging the wheel and the nut holes, so ensure you don’t apply too much pressure.
Option 3
If nothing else is available, put on a pair of work gloves and hit the disc with your palm in a direction opposite to the wheel’s rotation. Again, be very careful while using this procedure as you may injure yourself and damage the disc.
A pro tip: you can pour a few drops of oil on the locking nut to help loosen it easily. However, don’t put too much; otherwise, you won’t be able to grip it properly.
Alternatively, you can try turning it in the same direction (clockwise) some more, which may help create some pressure. But don’t tighten it too much, as it may mess the alignment of the nut. Then, rotate it in the opposite direction.
Option 4
Another option to remove the nut without any tool (or your gloved hands) is to use a long iron rod that comfortably fits the locking nut hole. Once you do that, hit the top of the rod with a hammer or your palm until it starts moving the nut in the opposite direction.
If this doesn’t work, use two iron rods and insert them in the locking nut holes. Tie them with a rope and hit the “tied top” the same way. This should do the job.
Step-3 Press And Hold The Spindle Lock Button
If your angle grinder has a standard spindle lock button or a spindle shaft, simply press and hold the lock button located in its center. This will allow you to rotate the drive bolt of the disc in the opposite direction of its rotation, which will loosen it from its socket without damaging the retaining nut.
How To Replace The Wheel?
Once the angle grinder nut comes off, you can easily remove the wheel and insert a new one according to the needs of the project.
In older angle grinders, the wheel may become too stuck to be removed, so you may have to break them completely. Do this carefully as you wouldn’t want to damage any other parts on the tool.
After inserting the wheel in the drive bolt, rotate the locking nut in the opposite direction (i.e. clockwise this time). You can do this with your hands, as tightening the lock is easier than removing it. Continue doing this until the wheel is firmly in place.
If you have trouble doing this, start by turning it slightly counterclockwise until you can get some leverage before continuing clockwise.
When Should You Change The Grinder Wheel?
“Obviously, when the current wheel doesn’t meet the needs of the task at hand,” is what you may think is the answer to this question. However, let us tell you that it’s not the only time when changing the wheel should be your priority.
Your angle grinder may give you subtle signals about the “expiry” of the wheel, so look out for:
A sudden drop in the cutting speed
Unusual noises when the tool is switched on or while working with it
Strong vibrations with squeaky noises
Some Other Tips
To use your grinder safely, we’d recommend using both hands, which will facilitate better control and precision. However, do not keep your hands or fingers anywhere near the disc, as it can lead to disastrous consequences. And don’t operate the grinder without wearing gloves.
Aside from that, you should pay attention to the maintenance needs of the grinder.
One of the first and most important things to do in this regard is keeping it clean by removing any dust or debris.
Ideally, you should wipe it thoroughly with a clean cloth or use a soft bristle brush to eliminate dust after every use. Give the tool some time to cool down after being switched off, and don’t touch the wheel with bare hands.
Furthermore, you should keep the tool properly greased to reduce the chances of friction, making it perform optimally. And run a visual check to detect any cracks or loose guards before working with it.
How To Remove Angle Grinder Wheel Without Tool Conclusion
With that, we hope we’re leaving you well equipped to change the wheel of your angle grinder the DIY way.
But here’s one piece of advice. If you aren’t confident about your DIY skills or you think breaking the wheel can damage the rest of the tool, contact the brand. If the device is covered under the brand warranty, getting it serviced will be hassle-free.
And while attempting the job on your own, make sure you wear the required protective gear to prevent the risk of injuries. This includes putting on work gloves and an eye protector.
If the swimming pool was a living organism, the pool pump would be its heart. A pool pump needs to function properly for the water in the swimming pool to remain clean and safe.
While many of the pool pumps that are available today self-prime, which means they can generate water flow after turning on automatically, some pumps require manual priming before they can be turned on.
Therein lies the rub. In manual pool pumps air tends to enter the piping of the pool. Whenever that happens, the pool pump is said to “lose prime.”
How to Prime a Pool Pump
Importance of Keeping the Pump Fully Primed
The pump of the swimming pool is going to dictate its entire function. Needless to say, the learning system of the swimming pool is not able to operate at an optimal level if the main pump isn’t functioning properly.
Apart from that, without the main pump, the pool water is unable to get filtered, which can result in unclean and dangerously unhealthy water in the swimming pool. This is why it is important to ensure that the pool pump is functioning efficiently and has been primed properly.
When the pump of the pool’s filtration system has been properly primed, all of the components of the filtration system such as the piping, filter and the pump itself are filled with water. The pool pump is then able to suck the water from the pool, which is then pushed back into the pool via the pool returns.
To prime a pool pump, one needs to first purge all of the air from the pool’s pumping system before filling both the piping and the pump with water.
The number of steps that are required to prime a pump is mainly going to depend on the amount of water that’s needed in the suction side of the lines, as in, the water that’s entering from the pool to the pumping system.
Priming the Pool Pump
When it comes to swimming pools, the word ‘prime’ means the state where all of the air has been removed from the water filtration pump of the swimming pool, which allows the pump to circulate water through the pool’s filtration system. When a swimming pool’s pump is no longer able to pump water, it is said to lose its “prime.”
The following procedure of priming a swimming pool water filter pump assumes that there’s no water at all present in the pump or the pipes at the time. So, let’s get started.
Switch Off the Swimming Pool Pump
This might seem like the obvious first step that needs to be taken to prime a pool pump, but you’d be surprised how many people make the mistake of skipping this process, which results in unnecessary expense to repair the damage.
The reason you have to turn off the swimming pool filtration pump is that the pump is an electrical system, which is why you need to maintain safety at all times. Besides, you wouldn’t do any other electric repairing work without turning off the switch first, would you?
So, now we have cleared why you need to exercise caution when it comes time to prime the swimming pool filtration pump, here are the steps you will need to take during the process.
STEP 1 –After you’ve switched off the pump you will need to close all of the valves that are located on the suction side of the filtration pump. This is also going to include the valves for the vacuum lines, the skimmer, and the main drain.
STEP 2 –If your swimming pool filtration pump already has an air relief valve built into it you will need to open it to release any pressure that has built up in the pump and the piping system.
STEP 3 –Open the strainer lid of the filtration pump. Be careful to do this slowly.
STEP 4 –If the swimming pool filtration pump does not have an air relief valve then you will have to open up the lid of the strainer just a little bit to release any built-up pressure.
Inspection/Replacement of Broke or Damaged Parts
STEP 1 –First you will have to inspect the hair strainer basket and make sure it is clean. Also, make sure that the basket is not damaged in any way. If the basket does look damaged, then inspect the impeller of the pump for any debris. To avoid damaging the pump its best to replace the basket.
STEP 2 –After that, you will need to thoroughly inspect the gasket or the O-ring of the strainer top to make sure that it’s clean and not damaged. This is so it can maintain its seal, which is crucial for the efficient functioning of the pool pump.
STEP 3 – If necessary, use this opportunity to replace the basket and fill up the strainer with water with the help of a garden hose. When filling the basket with water, it is important to do it slowly to ensure that the water can reach the piping. What you want is the piping that goes from the skimmer into the filtration pump to be filled with water so that it can create a proper suction.
STEP 4 – Once you have thoroughly inspected the basket and the strainer it is time to put back the lid of the strainer and make sure that it is tightly sealed.
Switch the Pump On
STEP 1 – If there are any knobs, they need to be tightened properly by hand. It is important not to use a wrench or some other tool to tighten these knobs so that it is not overtightened, which can result in the premature damage of the knobs.
STEP 2 –Now you can turn on the pump and then slowly open only one of the valves that are present on the suction side.
STEP 3 – You will need to wait for a good flow of water going to prime the pump.
What If the Pump Does Not Prime?
While the steps mentioned above should be enough to prime a pool pump and get your swimming pool’s filtration pump running again, if you find that the pump does not prime then you should let it sit for a few minutes before trying again.
STEP 1 –Reopen the strainer of the pump to relieve any pressure on the filter. You can also do this by slowly opening the lid of the strainer so that any built-in pressure has a way to escape.
STEP 2 –Now that you’ve bled out any pressure from the system, refill it with water via the strainer and close the lid.
STEP 3 – Now, switch on the swimming pool filtration pump and open the same valve slowly.
STEP 4 – You may have to repeat these steps several times before the pump begins to prime again. It is important to note that you will have to purge all of the built-up air in the system to get the water moving again.
Open the Other Valve
Once you have found that the pump is prime, it is time to open up the other valve that is located on the suction side of the swimming pool filtration system. To do that you must:
STEP 1 – Pay attention by listening closely to the air that’s being pulled out of the line.
STEP 2 – If you notice that the filtration pump is starting to lose its prime you must close the valve immediately.
STEP 3 – Take as much time you need to bleed all of the air out of the lines.
STEP 4 – You will have to repeat the same process with all of the other lines as well.
PRO TIP #1
If you have been noticing that the pump loses its prime whenever you turn off the pump, then you should try to release the air that’s present in the filter first. This is especially the case if there is an air relief valve present in the filter system. It is important to remember that this should be done before the pump has been turned on.
To make sure it works, close the valves that are present on the suction-side of the filtration system before you open the lid of the strainer. This is going to help in holding the water up to the valve, which will make re-priming the pump a lot easier.
PRO TIP #2
It is not unheard of for there to be leaks in the pipe that leads to the filtration pump. To find out if there is, in fact, a leak in the piping that goes into the pump, all you have to do is grab a can of shaving cream and spray it all over the pipe that’s leading into the filtration pump. If you notice that the shaving cream is being sucked into the pipe from a particular area after the pumps’ been turned on, you’re probably dealing with a leakage.
If all else fails, it is never too late to call in an expert who can help find the problem for you. More often than not, repairs in a swimming pool filtration system can only be done by a professional, especially if you can’t seem to find the problem yourself.
How to Prime a Pool Pump Conclusion
The aforementioned information should help you prime a pool pump and get the water flowing through the swimming pool pump and filtration system again.
It is important to note that if you are going to install a new pool system in your home, then there is obviously not going to be any water present in the piping, in which case, you will have to use some of these steps either once or several times to prime the pool pump before it can be turned on.
Has the fear of dripping paint over your carpet stopped you from painting trims? Well, there are ways to paint trims, even with carpets installed.
You might be wondering how to paint the trim if you have a new and fluffy carpet installed on the floors. Rest assured, a tidy and leak-proof paint job is possible for all types of flooring!
Painting the trim or baseboard completes the fresh and finished look of the room. And usually, with wooden flooring, painting is relatively easy. But with carpet flooring, it becomes a little more complicated.
Although it might not be the easiest thing to do, it's possible. Don't let the carpet get in the way of your trim painting process. Just put on your DIY hat and follow this guide.
These steps will help you navigate even in the trickiest of carpet situations, so read on!
What You Need to Know Before Painting Trims
There are a few basic things to consider before we get into the stepwise process of painting. You need to know the type of trim and carpet on the floor, which painting method to follow, and the supplies required. Let's get into the details of each aspect.
Type Of Trim And Carpet
It's essential to know and understand the space you are working with when you are painting trims. Consider the type of flooring; which type of carpet is it?
If the carpet is thin with short threads, processes like taping it will make the job easier. If it is a very fluffy carpet, the regular tape might not be enough to cover the edges. In that case, alternative options like thicker tape or tapes with low adhesive strength will be required.
The kind of paint used will differ according to the trim material. Most trims are made of wood, but trims/baseboards can also be made of other materials such as PVC. So, the kind of paint applied will also differ.
Method Of Painting
Some methods involve removing the trim or baseboards entirely and then painting them. Then, they are dried and reattached to the walls. It sounds like a tedious job that will take days to complete.
Another option is to lift the carpet, finish painting, and then put it back in place. Again, removing the embedded carpet consists of a lot of manual work. Also, if you have just installed a new carpet, you might not want to remove it just for painting trims.
Yet others prefer the skill of freehand painting. This method is acceptable if you are a seasoned and confident painter. However, for most people, the taping method may be ideal. A painter’s tape is stuck on the trim, after which it is painted. We will discuss the method in this guide.
Supplies Required
DIY painters cannot beautify trims without the necessary equipment. Here is a list of things you will need -
So, are you wondering how to paint the trims flawlessly without damaging your carpet? Don’t worry; take a look at these steps that may help prevent it.
Clean The Area
First of all, clean the area thoroughly before picking up your paintbrushes. Make sure you scrub the dirt and dust away with a microfiber cloth or sandpaper. Removing tough stains and grime is essential for the fresh coat of paint to spread evenly on the trim.
If there are any loose bits of old paint or an uneven surface, it can be leveled and smoothened with a few scrubs. Don't leave dust, old pieces of color, and wood chippings on the carpet. Vacuum carefully to clean it up before moving to the next step.
Caulk The Trim
Caulking the trim is not essential, but it will give an even and polished finish. Molding caulk also fills up the uneven surface and seals the cracks and gaps in the wall and trim. It helps paint to spread quickly without creating any displeasing bumps and fissures.
In general, it works well on wooden trims. But there shouldn't be any problem, even if your baseboard is made of PVC. Apply the caulk with your finger throughout the surface of the trim and wipe it out with a clean cloth. You can also use a wet sponge to apply it and wipe off the excess caulk.
Select A Brush
There are a couple of options for painting trims, the most common being a regular nylon paintbrush. Bristle brushes, foam brushes, roller pads, and roller brushes are also commonly used. Some people prefer foam brushes since they are easy for beginners to use, but this is entirely a personal preference.
If you have no prior experience with painting, a bristle brush might be challenging to operate. The fibers might cause uneven lines across the trim and end up looking unpleasant. In such cases, it is recommended to use a smaller size brush or a foam roller - because a bulky brush isn't for everyone. A 2 to 3-inch wide brush is good enough for painting trims.
Paint The Trim Near Carpet In 3 Steps
Let's begin with the three-step guide on how to paint trims near the carpet area.
Step 1: Tape The Area and Carpet
Firstly, make sure to select a painter's tape which leaves no residue on the carpet. It's important to use tape that protects your carpet from paint and does not damage it when you peel it off. A masking tape or painter's duct tape should be fine for protecting the edges of the trim and the flooring.
If you want to avoid a sticky mess, use small pieces of tape. Create sections of the area or wall to trim and apply the painter's duct tape in 3 or 4-inch sections. Then, lay the painter's tape firmly on the floor, flat at the edge.
A small portion of the tape should be on the trim, and the remaining should be on the carpet. At this point, check if the tape is completely covering the carpet at the edge near the trim.
Now use a putty knife or butter knife to push the edge of the tape into the carpet. The bottom of the trim can be exposed but make sure the edges of the carpet are entirely covered with the tape.
If you are worried about spilling beyond the tape, place an old cloth beneath the area you are about to paint. This will catch any stray drops and splashes while you are painting.
Step 2: Correctly Dipping The Brush
Once that is done, make sure to prime the trim before painting, as any previously used paint might have some oily residue. If not removed, the new paint color will not stick easily to the surface.
Ideally, select a primer that will easily stick on oil paint. There are paints specifically designed for trim painting. If you choose this option, keep in mind that they can be more expensive than regular paint.
Firstly, dip the brush in paint and wipe off one side of the excess paint. This is a pretty important step when it comes to painting as you should try and avoid having excess paint on your brush. It is likely to drop all over the trim and even beyond the tape, which you have carefully placed.
So, ensure that you must wipe the brush and remove any excess paint before you move toward the surface of the trim. Be careful not to soak the roller sponge or brush excessively in paint, or else it will drip all over your carpet.
Step 3: Paint
Now apply paint to the trim using smooth brush strokes. Move your brush from left to right (or right to left) in one stroke instead of many tiny strokes. This uninterrupted stroke will give a smoother finish to the surface.
After a few strokes, you may better understand how much paint you should pick up on the brush to get good coverage without spilling. A quick tip - before painting the entire trim, create an outline that separates it from the wall for better control while painting.
By doing this, you are ensuring that there is no leakage of paint above the trim. Once the outline is made, paint the entire base of the trim. One section can be covered using two or three even strokes.
Again keep a rag close in case there is a splatter of paint. Ensure that you wait until the first coat is dry before applying the second or even third coat. If you're wondering how many coats of paint are required on the trim - usually two or three coats should be good enough to get a neat finish.
Care After Painting
Once the paint is dry, pull off the tape. Moreover, check that fresh paint is not peeled off in the process. Also, ensure that there is no leakage of color (which is possible if the paint is still wet.)
If you want to make sure that there is no paint leakage, wait for the paint to dry overnight or for two days before removing the painter's duct tape. Once the paint is dry, remove the duct tape and clean it with a clean brush if there is any dried residue.
Conclusion
That was our detailed DIY guide on how to paint trims if you have carpets on the floors. Following these steps will indeed get you fresh trims with unspoiled carpets in a matter of hours.
With the method mentioned here, it should take 2 to 4 hours to paint, depending on the size of the room. And what's more, there is no need to spend hundreds of dollars on hiring a professional to paint the trims of your house.
The type of carpet won’t be an issue anymore to neglect painting the trims in your house! So, when are you picking up that paintbrush to freshen those trims?
Paris is a city renowned for its beauty and charm, and one of the most iconic landmarks that capture its essence is Le Consulat café.
The quaint establishment, located in the charming neighborhood of Montmartre, has been popular among artists, writers, and intellectuals for over a century. Want to grab breakfast with friends? Head over to Le Consulat. Looking for a subject for your next art project? Grab a seat outside the café and recreate the Parisian gem on paper!
It’s adorned with vibrant red and green hues, the color combo that screams “Pa-ree!” As such, capturing the beauty of Le Consulat in watercolor will surely be a rewarding process, even for beginners. With the right materials and techniques, you can create a stunning painting that pays homage to this iconic café and the city of Paris itself.
So, without further ado, let’s get started…
Painting Paris Le Consulat In Watercolor
The right tools can make all the difference when it comes to creating a successful work of art. So, I suggest using a comfortable paintbrush that offers durability and versatility. You should also consider investing in good-quality watercolor paints that offer a consistent texture and high pigmentation, you can read more about the types of watercolor paints here.
That said, here’s what I’ll be using for painting the legendary café:
Paint: Kuretake Gansai Tambi Watercolors 12 color | Paper: Saunders Waterford Watercolor Paper - White, 300gsm | Brush: Raphael Kolinsky Sable Fine Point Round Brush 8404
First off, sketch a basic outline of the Le Consulat building on your paper. Although I’m using watercolor paper, you can use your sketchbook or just any paper that’s thick enough to hold watercolors.
As for the pencil, I’m sticking to my “holy grail” - a light-colored pencil! The soft tip of colored pencils helps me create a light sketch, visible enough to act as a guide while I paint. On the contrary, if you use a regular pencil, you may end up with harsh lines, which may be difficult to hide beneath sheer watercolors.
Slowly, I’ll add some details while sketching. I don’t do this often and simply draw a rough sketch. However, considering the various intricate elements of this café, I think it’s best to create a detailed sketch to avoid mistakes while painting.
After all, you wouldn’t want to mess up painting Vincent Van Gogh’s favorite café!
Next, use just a tad bit of yellow mixed with a lot of water for the first layer. Remember to keep it very light and add more color gradually - not all at once.
I’ll use the same consistency for the second and third floors of the café. I recommend leaving out the windows and other details right now and focusing on the walls only.
Perhaps the most iconic part of Le Consulat is its canopy. The vibrant red and green combination makes the tiny café visible from miles away, allowing everyone to flock to its door every morning! I especially like how this bright canopy creates a striking contrast against the neutral color scheme of this house-turned-café.
Once the canopy is painted using vibrant shades of red and green, paint the first layer of the ground floor. Here, I’ll use brown, while keeping it as light as possible.
Once the first layer is dry, proceed to add some details, like windows, plants on the balcony, cracks on the walls, the name board, etc.
Note that I’m only painting according to my memory from the last time I visited Paris and the pictures I managed to click amidst the crowd. But if you’ve been lucky to drop by the café recently, feel free to add new details to the building.
After painting the windows and doors, you can add a second flush of color to the painting. I’ll start with the canopy, as that should be the focal point of the scene. Notice how I’m gradually adding a thicker consistency of paint on each part of the canopy. As I’m adding more reds and greens, the café is slowly coming to life - I can already sniff the freshly prepared crepes!
Let the painting dry completely before making any final touches.
Finally, I’ll add more details and sharpness to the artwork by painting the outlines of the door and windows. Use a small brush, just as I am, to make precise strokes. While I may not remember the intricacies of Parisian architecture very well, simply outlining basic structures can make a world of difference.
I’ll further paint the cute little chairs outside the café, which are usually occupied throughout the day. But that didn’t stop me from grabbing a treat whenever I craved something sweet!
And just like that, with a few more details, my rendition of the cozy café at the heart of Montmartre is ready. What do you think?
Besides painting on watercolor paper to be framed and propped up on your wall, I suggest turning it into a postcard and sending it to a friend. Or, you could make a birthday card with this warm and inviting painting of Le Consulat in the front and gift it to someone who loves Paris!
For a more personalized touch, consider writing a message explaining why you chose the painting or what it means to you. Regardless, I guarantee any art enthusiast or travel junkie will appreciate such a thoughtful gift.
Other than that, you can experiment with the composition - maybe paint the sky or add more trees surrounding the café. Your imagination is the limit!
So, take your time and experiment with different colors and techniques to create your unique masterpiece.
Watercolor is a unique medium that allows seamless blending for stunning effects on paper. And with an iconic subject like Le Consulat, you can express your creativity in capturing the beautiful heritage of Paris.
With this step-by-step guide, I’m sure you’ll be able to create a painting that showcases your artistic skills. And if you’re a beginner, I hope this article inspires you to try your hand at watercolor painting and explore your creative side.
Just remember to take your time and enjoy the relaxing and rewarding process, and if you enjoy this one do cast a glance over our next tutorials on How to Paint Berlin with Watercolor and How to Paint Trees with Watercolor, they're both beginner-friendly watercolor tutorials that you'll surely enjoy!
Happy painting!
Painting has been for a long time an incredible expression of the most inner feelings, a personalized display of the multiple ways we can perceive the world surrounding us through our eyes, with multiple deductible and traceable overall lines and topics present at the same time all over the world.
Techniques and basic materials have evolved over time, offering us endless possibilities to allow our creativity to run free and voice about our personalities and taste but the basic principles set by our ancestors from Greek and Roman times have remained as key rules in creating, transposing and elaborating a sketch or painting and we are talking here about perspective, human body proportions, depth, representation of the static and of movement and so on.
This unique set of rules is applicable indifferently of the basic material, no matter if we are talking aboutcanvas painting ideas or watercolor paintings on special types of paper and of the chosen technique-oil, acrylic, textile, watercolor or glass painting.
Today we are going to focus our attention to the first basic steps one must take in learning how to paint glass.
By Designer : Richard Morris Hunt (1827-1895)maker : Eugène Stanislas Oudinot (1827-1889) - Self-photographed / PierreSelim, CC0
"Colored glass has been produced since ancient times. Both the Egyptians and the Romans excelled at the manufacture of small colored glass objects. Phoenicia was important in glass manufacture with its chief centres Sidon, Tyre and Antioch. The British Museum holds two of the finest Roman pieces, the Lycurgus Cup, which is a murky mustard color but glows purple-red to transmitted light, and the Portland vase which is midnight blue, with a carved white overlay. In early Christian churches of the 4th and 5th centuries, there are many remaining windows which are filled with ornate patterns of thinly-sliced alabaster set into wooden frames, giving a stained-glass like effect.Evidence of stained glass windows in churches and monasteries in Britain can be found as early as the 7th century. The earliest known reference dates from 675 AD when Benedict Biscop imported workmen from France to glaze the windows of the monastery of St Peter which he was building at Monkwearmouth. Hundreds of pieces of colored glass and lead, dating back to the late 7th century, have been discovered here and at Jarrow." [Wikipedia]
The South Transept windows from Chartres Cathedral By Ludwig Schneider - Own work, CC BY-SA 3.0
Even though this beautiful technique has had its significant origin in the stained glass of churches and monasteries, nowadays many contemporary artists dedicate their passion to expressing creativity on glass in impressive manners.But we know for a fact that you do not have to be a professional to learn some basic tricks and tips and start painting your own designs at home as a wonderful method of relaxing and exploiting one's latent creativity.You can apply a set of principles and steps to any chosen glass item you wish to transform and embellish. Learn how to paint wine glasses, how to paint glass bottles and how to use spray paint for efficient fast results.
Tips and tricks on how to paint glass
What type of paint should i choose?
This is the first question one should ask himself before starting a diy glass painting project, because the paint type will determine the possibilities you could have in designing an item and actually being able to achieve exactly what you were looking for without struggling too much. from what we have found, glass paints can be divided under 5 big categories based on their consistency, inner structure and finished appeal.
Acrylic enamel paint or enamel paint designed for glass and other shiny surfaces
Acrylic glass paints
Acrylic paints that require a medium added
Solvent based paints
Special markers
1. Acrylic Enamel Paint
Acrylic enamel paints fall under the "easy to use" category and do not require heat to set. Their composition is based on water which will help the paint to dry and harden rather quickly, offering a very glossy end result. They come in a variety of hues and some types an actually be use don ceramics too, being dishwasher safe after having cured.We recommend the Plaid Folk Art Enamel Beginner Set for the basic tones you will need in the beginning, as it is usable on ceramics, wood, Styrofoam, plaster, terra cotta and tin as well and provide easy cleanup with soap and water.
2. Acrylic Glass Paints
The acrylic glass paints contain a formula specially designed to adhere to plastic, glazed ceramics and glass, with a transparent hue that might come in handy in the case of stained glass projects. Depending on the manufacturer, this type of glass paint can be let to air dry or will require heat setting in the oven. For a professional looking aspect we recommend the Pebeo Vitrea 160 Glossy Glass Paint Set applicable on glass, crystal, porcelain, china, glazed earthenware, terracotta, metal, enameled sheet steel, and copper. This specific glass paint type needs to be set in the oven and according to the bottle instructions, the colors are permanent, microwave safe, UV resistant and have remarkable resistance to dish-washing and to normal detergent.
3. Acrylic Paints That Require a Medium Added
Folk Art 869 2-Ounce Glass and Tile Medium by Plaid Enterprises is a medium used to allow the paint to adhere to the glass surface. This particular product confers the glass a frosty, sandblasted appeal that will allow regular acrylic paints to adhere perfectly to the surface.
4. Solvent Based Paints
Pebeo Vitrail Stained Glass Effect Glass Paint is a solvent based paint that will not require heat to set and will air dry in about 8 hours.Its appeal is a transparent one, suitable for stained glass projects and applicable on glass, polyester, acetate, canvas and metal; we recommend using pebeo cobra deco or iris brushes.You can thin the paint by adding mineral spirit or white spirit. Unfortunately, you cannot use this type of paint on items you consider using everyday as the paint itself bears only a light wash without soaking.
5. Special Markers
There is a variety of glass painting markers available that can even guarantee dish-washing safe items. Markers are perfect for glass painting beginners as they are very easy to control. The downside is that a consistent flow is not always possible because you will have to pump the actual paint from time to time for it to reach the tip of the marker. The Pebeo Vitrea 160 Assorted Glossy Markers are applicable on glass, crystal, porcelain, china, glazed earthenware, terracotta, metal, enamelled sheet steel, and copper and will fully dry after a minimum of 24 hours. They require baking which will add incredible resistance to dish-washing and to normal detergents.
Should I Prepare the Glass Before Applying the Paint?
When we usually start a canvas painting project we prepare the canvas and apply a ground color as the prime background for the rest of our colorful layers. The same principle applies to glass too. You have to make sure the surface is perfectly clean and grease free in order to obtain a uniform stained glass appeal.
Start by washing it thoroughly sing warm water and soap. Another method involves using water and vinegar and a final wipe with an alcohol damped paper towel. Remember our hands have natural oils that can smudge the glass surface, so we recommend you to use latex or surgical gloves.
Let the glass air dry or use a clean porous paper cloth to remove water. If your project involves applying a basic uniform color to a wine bottle for example, keep in mind that the transparency of the glass will complicate the process of obtaining a good even coverage. Apply several coats for an opaque effect and let the paint layers set before applying another by respecting the paint manufacturer's instructions in the bottle.
What are the recommended brush types for glass painting?
There is no specific brush type required. Some manufacturers prefer and recommend their own brush that can come along with a specific paint, but both natural and synthetic brushes will work well. As for the size and shape of the actual brush, it all depends on the design you are trying to achieve. As a beginner, if you are looking for an intricate model, choose a rather small pointy paint brush that will allow you to be more precise and fallow your guidelines properly, as well as to distribute the glass paint evenly on the surface.The Martha Stewart Crafts Glass Brush Set contains 5 special angled brushes that will help you in painting wine bottles for example and are made from Nylon bristles, ideal for glass painting and fine detailing.
Another useful item that should have a place in your painter tool box is the Craft Martha Stewart Crafts Glass Scraper And Pick Setwhich will definitely come in handy in glass painting projects, allowing you to correct mistakes, clean the paint from your glass surface and remove bubbles from it as well.
How should I heat-set my glass painted item?
When it comes to paint types that require heat setting in the oven, the exact temperature required for the paint layer to dry perfectly is usually dictated by the paint's manufacturer so we highly encourage you to read them carefully before tying to heat dry your glass product.
Check your oven's temperature and never, ever insert the glass into a preheated oven. This will lead to the glass shattering under the huge temperature difference. Insert the glass into the oven, set the right temperature and timer, let it dry and allow the glass to cool to the room's temperature before taking it out of the oven.
We again advise you to fallow the instructions written on your paint product in order not to ruin your work of art at the very end. Just be patient and take it one step at a time.
Are glass paints safe to use on food or fluid containers?
Here again the concern issue depends on the paint's composition and chemical structure. Check and double check the instructions before applying glass paint on the interior side of your wine glasses. Non toxic is not the same thing as food safe so take precautions and do not paint the areas that can come in contact with food or liquids. From our knowledge such a product does not exist yet but if you know different we would very much like it if you could share it with us.
How to Paint Glass Step by Step
1. Set your basic materials within reach
When starting a painting project it always indicated to prepare in advance and set all your required materials within reach. Some types of paint can set very fast and won't allow you much flexibility so arrange all your utensils on the working table. For this particular project we have used an A4 sized glass piece, a set of Idea glass paints that will air dry in about 8 hours and an erasable black liner to set the basic design lines on the glass surface.
2. Prepare and clean the glass surface
As mentioned on the above tips and tricks, it is very important to clean and prepare the glass surface before starting applying layers of paint and unraveling the beuatiful design you have envisioned.We have used a glass cleaner product that contains alcohol and wiped the glass thoroughly. Afterwards we have let it air dry, naturally, to avoid unwanted marks that a cloth might have left. Remember to use gloves to prevent the natural oils of your skin from smudging the surface.
3. Sketch the basic design lines of your art work
For a simpler approach we have drawn our simple iris design on a piece of paper before starting the actual work on the glass piece. This might come in handy if you are not sure of the precise form of your future creation. Now you have the chance to think about the hues you will use and the positioning of the design on your glass canvas.
4. Reproduce the design on the glass surface
Place the piece of paper underneath the glass piece and start drawing by using a black liner. You can use a permanent marker if you have a steady hand. Otherwise, opt for a removable one and keep an alcohol damped cloth nearby to remove unwanted smudges that will definitely happen. Once the lines have been set you can start adding your hue layers.
5. Start applying the layers of glass paint
As a glass painter beginner it is not recommended to buy a variety of pain tones from the very start. Choose the basic primary colors and learn to mix and match them to obtain the right tones you desire for your creation. Do not forget about the pain thinner which will definitely ease the process. be careful though to not overuse it or you might end up with a dripping set of paints on your glass which will never set right.
6. Mix and match hues to obtain the right tones
Once the primary design is done you can focus on your background.For this basic simple design we have chosen a yellow and white combination color ground that could accentuate the iris flower. We have used a flat brush to apply in large strokes the paint layer and obtain a more artistic stroke.
7. Let the glass painting air dry or heat set it depending on the paint's specifications
The particular paint type we have used air dries in about 8 hours and does not require heat setting. Make sure to read the instructions and we highly advise you to respect them accordingly in order to really profit from your investment in glass painting materials.
How to Paint Glass Bottles Ideas
Single Snowflake on a Transparent Wine Bottle
A Mosaic of Colors
A Solid Tone Versus a Transparent Base
Paint a Colorful Dream-catcher
Wine Bottles Transformed Into Candle Holders
Limit Yourself to One Tone and Enhance the Bottle With String Lights
In the end imagination, creativity and dedication will define your work. Keep the basic rules in mind and simply have fun with any glass painting project. We would love to complete our collection with your own work so feel free to share your creations along with opinions and ideas in the comment section below.
Although aluminum looks sleek in its natural silvery form, people often want to paint aluminum surfaces to complement their home decor.
As such, all DIYers and painting enthusiasts should know how to paint this popular metal. However, if you don’t know how to go about it, there’s absolutely nothing to worry about as it’s hardly as tough as you think.
There are a ton of ways to paint aluminum surfaces that will allow you to achieve a fantastic paint job. In this informative guide, we will be learning all the nitty-gritty about painting aluminum so that you get the desired results each time.
Without any further delay, let’s get straight to the good stuff, shall we?
Things You Should Know About Painting Aluminum
For the best results, painting aluminum requires some extra steps in the preparation stages. For example, first, you will need to sand your aluminum surface to ensure that the paint adheres well to it. You can do this with medium-grit sandpaper that’ll help scrape the surface.
Then, you’ll have to apply an etch primer to provide a solid base coat, which will allow the paint to stick to the surface. In this way, you will be able to achieve a top-quality paint job that’ll truly stand the test of time.
That said, if you want to make it more durable, we suggest finishing it off with a topcoat or a sealer and letting it dry for 24 hours. Fortunately, all these supplies are easily obtainable at hardware stores, and they are reasonably easy to apply.
What You’ll Require To Paint Aluminum
Before starting, you will need a few supplies to deliver a top-quality finish. To begin with, you will require a respirator and gloves if you are using topcoats, self-etching primers, and spray paints. If you come in direct contact with these materials, they can prove to be harmful to your health.
So, you need to make sure that you take proper safety measures. Furthermore, we strongly advise against using these primers or spray paints indoors as they release harmful chemicals that can put you at risk of developing breathing issues.
Lastly, ensure that you have some of the basic items near you, such as an old piece of cloth and sandpaper, in order to prep the aluminum surfaces before painting.
How To Paint Aluminum
Follow these steps to successfully paint aluminum
Sand The Aluminum Surface
First, you need to sand the surface properly before getting started with the spray paint. This will ensure that the surface is sufficiently rough for the spray paint to adhere well to it. You need not put extra effort into this step; just add some texture to make the next steps easier.
Rub Off Excess Dirt And Dust Using A Cloth
Next, you’ll have to use an old rag or a cloth to get rid of all the dirt and dust created from sanding the aluminum surface. The idea is to get the surface free from all the debris to allow the scuffs to absorb the paint.
Apply Multiple Coats Of Self-Etching Primers
Now, you’ll have to apply the self-etching primer to create a durable surface for the spray paint. You will need to apply 3-4 coats for optimal results. On that note, make sure you do this outside or in a paint booth to prevent the paint from sticking onto other surfaces.
Apply Multiple Layers Of Spray Paint
This is the part where you apply spray paint. It doesn’t matter which brand you are using; just ensure that you have worn a respirator for protection. Ideally, you should apply 4-5 coats to deliver a top-notch finish and make the paint less susceptible to flaking due to wear and tear.
Let The Spray Paint Cure
Once done with spray paint, keep the object in a dry and safe place for a minimum of 24 hours. This will ensure that the paint gets sufficient time to adhere itself completely to the surface.
Apply A Few Layers Of Clear Coat
If you intend on using the painted object outdoors, we highly suggest applying a few layers of clear coat to properly seal in the paint. This will ensure that the color remains intact for a long time.
Top 3 Coatings For Aluminum Surfaces
If you are painting aluminum for the first time, you may not be aware of the top aluminum primers and paints. For this reason, we have listed 3 products that we consider to be the best in their respective departments, and that may help you achieve the desired results.
This product from Rust-Oleum is both a paint and a primer. Made using an oil-based formula, it ensures long-lasting protection for your aluminum surface. Let’s move on to the next section to know more about this product in detail.
Why Did We Like It?
Honestly, we were quite impressed with what this product has to bring to the table. It has a drying time of just 20 minutes, which is relatively lower than most options you’ll find on the market. Plus, a can of this product can cover up to 12 square feet, which is pretty decent, given the size of the container.
The main issue with aluminum paint and primers is that they have an offensive odor that makes them very difficult to apply. But you don’t have to worry about that while using this, as it's an oil-based formula, having exceptionally low odor.
On top of that, it is available in a wide variety of color options, enabling users to choose a color that would suit their requirements. Apart from aluminum, this item can be used on various other surfaces, including plaster, plastic, ceramic, and a lot more.
Overall, it is one of the top-rated paint cum primers available on the market.
What Could’ve Been Better?
Without a doubt, it is an exceptional paint cum primer, especially given its low drying time and various color options. But, unfortunately, that same cannot be said about the can that it comes in. We noticed that its lid is rather hard to pull, which might be an issue for many users. Other than this minor inconvenience, the product works perfectly fine.
Pros
Low odor
Available in various color options
Decent coverage
Apart from aluminum, it can be applied on a range of other surfaces
Our next pick is a paint from Rust-Oleum that works out amazingly well on aluminum surfaces. It is popular among DIYers and professionals for providing a hoard of benefits. So, let’s dig a little deeper.
Why Did We Like It?
If you are looking to protect aluminum objects from corrosion, besides providing an eye-catching finish, then this product could be your best bet. The paint’s oil-based formula helps you deliver a durable protective coating that offers top-notch rust prevention.
Furthermore, it is resistant to chipping, fading and abrasion, and UV rays, which means once you spray it, you can expect this paint to stay unflawed for a long time. Not to mention, it provides a glossy finish, making your aluminum surfaces look fresh and brand new.
Plus, you would be pleased to know that it dries in just 4 hours, unlike most paints that take an entire day. Beyond that, it features an economical price tag, making the product ideal for DIYers and people who have recently gotten into painting. Lastly, a quart of it can provide a coverage of up to 90 square feet.
What Could’ve Been Better?
We didn’t come across any considerable downsides to this aluminum paint from Rust-Oleum. However, if we had to nit-pick, we would say that it has a strong odor. But that said, you can easily tackle it by wearing a respirator.
Next, let us introduce you to a latex aluminum primer that’ll work to protect your aluminum surface from various harsh weather elements. Keep reading to know more.
Why Did We Like It?
Perhaps, the most advantageous feature of this primer is its excellent adhesion, which helps the product to bond tightly on a range of interior and exterior aluminum surfaces with ease. Plus, its oil-based acrylic formula ensures a durable protective coating that makes the surfaces less susceptible to rusting.
Beyond that, it dries within 2 hours, which is a bonus, if you ask us. And not only that, a pack of 17 fluid ounces of this item can cover surfaces of up to 90 square feet, which is great.
Once applied, it creates a flat aluminum finish that can be easily covered with a range of topcoats. Overall, it is one of the best primers for aluminum surfaces that any DIYer can hope to get their hands on.
What Could’ve Been Better?
The only gripe we have against this primer is that the packaging material used is not durable enough. When it came to us, the can was dented, which was a bit disappointing
Pros
Offers a durable coating
Has a low drying time
Bonds tightly
Provides a decent coverage
Cons
Packaging material used is not good
Aluminum Surface Paint Buyer's Guide
Here are a few factors that you must consider when buying aluminum paint to ensure optimal results.
Consistency
Consistency is one of the most important factors you should consider when buying paint, specifically designed for aluminum surfaces. On that note, always go with a paint that has a thicker consistency as they are known to work better on metal surfaces, especially aluminum.
Easy Application
You should always go with a paint that allows you to paint surfaces without breaking a sweat. When it comes to painting aluminum, spray paints are considered to be a popular choice. This is because they are pretty quick and easy to apply.
Water And Weather-Resistance
Last but not least, you will want to ensure that your paint provides a durable and long-lasting coating that can withstand weather elements. So, when buying paint, check if it is resistant to water, UV rays, etc. This factor is especially crucial if you will be painting things that will be outside all year.
How To Paint Aluminum Frequently Asked Questions (FAQs)
Here are some of the most frequently asked questions that we have tried answering to the best of our ability. We are confident that after reading this part, all your doubts regarding painting aluminum will be cleared.
1. What type of paint sticks best to aluminum surfaces?
Oil-based paints work the best on aluminum surfaces simply because they offer more durability and stronger adhesion than water-based paints.
2. Do aluminum surfaces require a special kind of paint?
Yes, there are special paints that are specifically designed to be used on aluminum surfaces. So, make sure that you check the packaging before buying as it will have the materials appropriate for use labeled on it.
3. What are some of the top brands of aluminum paints?
Some of the top-brands of aluminum paints are:
Krylon
Rust-Oleum
Seymour Of Sycamore
4. What are the other ways of protecting aluminum objects?
Apart from applying a coat of paint, you can protect your aluminum objects by anodizing them or by simply applying a coat of primer. It mostly depends on the intended use of the object.
Final Thoughts
Not only does painting aluminum objects protect them from rust and various weather elements, but it also makes them visually appealing.
With that, we have come to the end of our informative guide; hopefully, it has helped you gain extensive knowledge on painting aluminum. Just make sure that you prep the surface well before painting, as it’ll help the paint adhere properly to the surface.
Also, keep in mind that oil-based paints work best for painting aluminum surfaces, so make sure you choose the same.
On that note, it’s a wrap for today. Hope to see you soon!
Epoxy resin floors have been in buzz lately. But the material isn’t just limited to this; you can do several other projects using it.
If you’ve taken up the mighty task of doing a DIY epoxy resin project, it’s only natural to feel stuck at certain points. One such point is the measuring and mixing of resin and hardeners. Getting that ratio right can indeed be a challenging task, even for experienced builders.
That’s why we’ve put together an elaborate step-by-step guide to assist you with the mixing process. We’ll also give you details about the preparation and application part so you can go ahead and ace that epoxy project.
Let’s get started right away!
Guide To Mixing Epoxy Resin
A. Prepping up
Before getting to the mixing and measuring of epoxy resin, a little prepping up is needed. We’ll cover that bit in this section.
Choose A High-Quality Epoxy Product
Choosing a good resin product that suits all your needs is the first step in the right direction, and you need to do your homework while choosing. Know what you’re going to do with the epoxy, read up articles, and research which one will suit your purpose the best.
Are you going to use it for coating a surface, or do you just need to fill up some holes in an old wooden piece? There are different epoxies for different purposes, and we suggest getting a specialized one instead of their all-purpose counterparts.
Check the product description carefully and go for top-quality and reliable brands only. An epoxy resin is something you cannot take many risks with, as there are many products on the market that are just a waste of money. Some do not harden at all, while others are already yellow, even before application.
Gather The Equipment
The next step is to get all your supplies and gear in place. Here’s a list of equipment you’ll need:
Mixing cups (avoid containers that contain oils or fats if you’re using recycled cups)
Mixing sticks
Eye protection
Latex or rubber gloves (reusable or disposable)
Mini digital scale or measuring cylinders
B. Mixing
Once you’re ready with all the products and equipment, you can move on to the next part, measuring the epoxy resin and mixing it in correct proportions. We advise covering the spot where you’ll be working with newspapers or rags, so you don’t spoil your floor while working.
Get The Ratio Right
Each product has a different resin to hardener mixing ratio, which majorly determines its effectiveness and utility. The easiest and the most basic ones are mixed in a 1:1 ratio, which is a no-brainer, and if you’ve managed to pick one that follows this scheme, count yourself lucky.
There are others that require two parts or three parts of resin for each part of the hardener, and they are attainable as well. But problems arise with the complicated ones that demand a proportion of 100:45 or 100:47, so you might need a little extra assistance in such cases.
You can usually find the fractional details on the package, but in case this information is discrete, you can refer to an online epoxy resin calculator. The mixing ratio has to be precise to the point, else it won’t harden properly, and all your hard work will go down the drain.
The calculator will ask you to feed various dimensions like length, width, and thickness of the project, the volume of epoxy, and other details. Fill in all this data carefully, and you’ll find out the accurate mixing ratio.
Measuring By Volume Vs. Measuring By Weight
Some people suggest, like all other products, resin and hardeners should be measured in terms of weight too. But the fact that the density of both of these solutions differs must not be overlooked.
Therefore, it is better to measure the products in terms of volume instead of weight. But we’ll leave the choice to you and explain both methods one by one.
A. By Weight
First and foremost, power on your digital weighing scale and choose the desired units. Scales mostly measure in ounces or grams, so pick a unit that gives you the freedom to determine 0.1 gram or ounce.
Once you get the units straight, place the mixing cup on the scale and set it as the zero balance by pressing the zero selection or “tare” button. Now pour the resin and note the amount, let’s say ten ounces, for instance.
Next, measure the amount of hardener required as per the instructed proportions. If your product says 2:1, then your hardener should be five ounces. Pour the hardener from the container directly into the mixing cup, and if by chance the weighing machine resets because of inactivity, you’ll need to weigh only the hardener.
However, we don’t recommend following this method as you’ll have to keep a note of the differences in the weight of epoxy and hardener. You can use measuring charts for quick reference, but that is too much hassle.
B. By Volume
Assess the amount of material needed for the application as closely as possible, and if you don’t get enough on the first go, you can always mix up another batch. Since epoxy resin is an expensive commodity, try and minimize the wastage as much as you can.
Start off by pouring the resin into the measuring cylinder or graduated cup and ensure that the lower meniscus meets the quantitative mark you are aiming for. Fun fact: while measuring solutions, mostly those that are colorless are measured by looking at the lower meniscus, while colored ones are assessed using the upper meniscus or the flat surface.
However, the warm resin lays flat, so you should give it enough time to settle down. When you’re done with the epoxy, you can proceed by pouring the hardener as per the ratio. Fortunately, the volume doesn’t take the density differences into account, and that makes the whole process significantly convenient.
Mix The Epoxy Resin
Mix both the solutions thoroughly for three to four minutes using a mixing stick, and you can continue whisking for even longer if the quantities are large. Scrape off the bottom and the sides of your mixing cup while doing this, so there aren’t any lumps.
Don’t stop until you’re absolutely sure that both the solutions are completely mixed and have the desired consistency. One sure sign of attaining success is that your formula will be uniform and stop streaking.
Dispense The Epoxy Resin
Moving on, we have a few tips for dispensing the mixed epoxy:
Most importantly, epoxy resins are very sensitive to temperature, and humidity changes; that’s why you shouldn’t use them outside when it’s freezing or moist and chances of condensation are extremely high.
Next, don’t let the mixture sit in the pot for too long and start working as soon as you can, and that is directly proportional to its quantity. Meaning, the more is the quantity, the faster you should apply it because the consistency gets affected if you leave it unattended.
Start the application process by evenly spreading a thin layer of the resin using a squeegee and smoothing it out with a brush instead of pouring a thick layer directly from the container. Wait for the resin to tack and then proceed to apply a second layer or fill in the left-out spots.
Furthermore, pump two strokes of epoxy for each stroke of the hardener by pressing the head entirely and allowing it to retract fully. Partial strokes will mess up your ratio, and you wouldn’t want that. Lastly, we advise you to calibrate your dispenser carefully for accurate proportions before you begin pumping.
C. Aftermath
Get The Surface Ready
Preparing your surface for adhesion is important before you start applying the epoxy resin. For effective mechanical adherence, the surface should ideally be clean, moisture-free, and properly sanded.
A. Chemical Bonds
These bonds, also known as primary bonds, are formed when partially cured epoxy is covered with a fresh coat of epoxy. Primary bonding depends on the molecules of the previous layer for chemical reactions.
B. Mechanical Bonds
Mechanical bonds are secondary bonds that resemble the previous category, except they are applied on a fully cured layer. When the first layer is completely dried out, the window for chemical reactions closes. Hence mechanical bonds are formed when the molecules of the second layer key into the pores of the previous one.
Curing And Cleaning Epoxy Resin
The time taken by the epoxy resin liquid mixture to solidify is known as the curing period. The formula first transforms into a gel and then finally into solid to give the final finish.
Always try to stay near your project or keep checking up on it frequently during the curing period. Curing occurs best at room temperature, so you won’t need any external agents to alter the temperature (like oven or blow dryer).
Furthermore, if you feel the need for trimming, try to pull out the tape an hour or two after the resin has started setting. It is easier to do when the epoxy is three-fourths cured as opposed to completely cured.
Top Coats And Finishing
The final and most important step in the process is applying a top coat on your brand new epoxy resin surface and making it durable against moisture and sunlight.
The glossy white coatings last the longest on epoxy as they reflect most of the light hitting its surface. Dull surfaces aren’t capable of doing that and absorb the light, weakening and turning the epoxy yellow as a result.
Since completely cured epoxy resin is an inert and tough plastic, it doesn’t react and is compatible with most coatings. It also doesn’t swell or soften in contact with paint solvents. Elevate the temperature once your epoxy sets, allowing it to cure thoroughly.
Here are a few types of finish coatings that work best on epoxy resin:
A. Epoxy Paints
Available in one-part and two-part versions, these paints are chemical resistant and durable. However, they aren’t the best when it comes to UV protection.
B. Alkyd Finishes
These finishes are low-cost, easily available, easy to apply, and low in toxicity. But, just like epoxy paints, alkyd finishes also have low abrasion and UV resistance.
C. One-Part Polyurethanes
One-Part Polyurethanes offer much UV protection than the previous two options and are easy to apply and clean.
D. Two-Part Linear Polyurethane Paints
These paints are the most durable and offer top-quality protection to the epoxy. They are available in clear or pigmented options with abrasion and gloss retention. But they are comparatively expensive than the others and are a little difficult to apply.
Things To Consider While Mixing
The Effect Of Ambient Temperature
As we’ve already told you, temperature has a huge impact on epoxy surfaces, so you need to consider the weather while applying the resin.
A. Temperature below 68 degrees Fahrenheit:
Resin curing slows down significantly in this range. More amine reddening is also probable in such conditions, which takes quite a bit of effort for removal. Epoxy resin can also crystallize if the temperature drops lower than this.
B. Temperature higher than 68 degrees Fahrenheit:
The mixture of hardener and resin reacts faster in this range. It also shortens the pot life as well as the curing period. Therefore, if you live in hot conditions, you should opt for epoxies with longer working periods.
Humidity During The Processing
Hardeners are sensitive to humid air, and hence, you must avoid opening the can if atmospheric moisture exceeds 65%. They will surely suffer qualitative damage if they aren’t used up immediately because more and more oxygen enters the container on frequent opening and closing.
Temperature Of The Epoxy Resin
Using cold epoxy can lead to bubbles or milky streaks in your final mixture, making your formula inconsistent. You won’t get your desired finish on the project if you use an inconsistent solution.
For dealing with this situation, make sure that you store your resin at room temperature for at least twenty-four hours before use. If you’re in a hurry, then you can place it in a warm water bath too to bring the temperature up.
Heating makes the resin flow easy but reduces the open time, and you’ll have to work quickly. A significant rise can even half the curing time and pot life of your mixture, so be careful about that.
Using Colors
Only a select few colors are compatible with epoxy resins, and you should not use any pigment that you find in your mix. Look for mica pigments, coloring dye, and concentrated formulas that are compatible with your resin, and introduce it only when you’re sure about it.
Tool For Mixing Epoxy Resin
Correct tools can make the whole mixing process easy and quick without having to strain your hands in the whisking. A flat spatula, similar to a paint stirrer, is the most effective tool for this purpose.
A wooden spatula is a cheaper variant, but it is available only for smaller quantities, so mixing sticks is the best alternative for medium quantities. It doesn’t allow the air bubbles to enter and can be used multiple times. Another thing worth noting is that the mixing tool should be straight to scrape off material from the sides of the container thoroughly.
Mixing DIfferent Epoxy Products
Resins and hardeners are specially formulated to adjust with each other and make a final epoxy resin of uniform consistency. Hence, different solutions, no matter if they are from the same brand or manufacturers, should not be mixed.
Duly follow the mixing instructions and ratio while making the resin solution using the right tools for best results.
Heat Generation
Blending epoxy resin and hardener is an exothermic reaction, and the process produces a lot of heat. To avoid any accidents, you must take the following precautions:
Do not exceed the upper limit of the maximum mixing amount
Mix the components in large containers rather than higher ones to reduce heat build-up
Use less reactive epoxy resins
Final Words
Mixing epoxy resin sounds so easy, right? But it isn’t that easy when you bring in all the details.
After covering all the nuances and implications of the process, we’ve now reached the end of our guide on mixing epoxy resin. Did you find it helpful? We hope that you did! Creating a resin mixture can be a daunting task, but with our tips and tricks, you’ll get the hang of it.
That’s it for this guide, guys. We’ll see you next time! Take care.
Epoxy is a versatile substance that can be molded into various forms. You can create unique pieces to wear, thanks to this.
Besides decorative pieces, DIY enthusiasts and local designers create pendants, bracelets, earrings, cufflinks, finger rings, tie pins, brooches, and key rings.
You can get beautiful crystal-like surfaces, but the best part is that you can also add color. Add a dose of your favorite shade and create fake crystals, which can then be used with a chain. Many also work with wood and create beautiful additions to it with the help of epoxy resin.
Now, we know that the entire process can be a little confusing. To prevent any dilemma, we have curated this informative guide about how to make resin jewelry. You will get all the information needed, including information about the different types available in our market and every other step involved.
So, dive in!
How to Make Resin Jewelry?
You must have seen a lot of solid and transparent resin craft being available in both local and jewelry stores. Many make crystals and gems with this, and they look absolutely similar to real gemstones and crystals.
If you are wondering what resin really is, let us tell you about it. It is an artificial blend made of very viscous plastic or polymer. The blend is first available in liquid form, which, when mixed with a hardener, turns into a solid layer.
It can take around 24 hours to a few days for the curing process, and once the layer has solidified, it does not crack or break easily. This will look like clear glass but will not break on dropping.
Plus, the resin is pretty easy to work with once you get the hang of it. You will need the right mold and a few other items, which we have mentioned below. Once they are all in place, you can easily begin the process.
Moving on, before you begin with the jewelry making process, we will tell you a little about the preparations. If you are a novice and this is your first time working with this option, it is best to get acquainted with the process before working on the final pieces. Follow the steps mentioned below and only then move on to the actual process.
Understanding Resin
We will recommend that you first learn to measure and mix the resin. You can combine and make small objects with it just to get the hang of it. That said, it probably would be best to start with epoxy as it is the easiest to work with. It takes a little while to dry, and you can mix and cast it before that easily.
The process of mixing is extremely important, and you should have the essentials before beginning. A measuring cup along with syringes and medicine cups will help you get the right amount. Also, ensure that you have a hardener along with the fluid. Only UV resin does not need an additional hardener as it is already mixed.
Next, you will have to learn about the specifics that involve the mixing ratio, time taken to pot and cure, and every safety measure that needs to be taken. The resin has to be measured in cups, and the pack will tell you how much of it needs to be mixed with a hardener.
Generally, the common rule to follow is the 1:1 ratio. That means equal quantities of the liquid and hardener has to be mixed.
However, we will advise you to read the back of the pack carefully before proceeding.
Picking An Area
Another important factor is the place where you will be working. Always be prepared for the mess that might occur during the process, and remember that resin is very difficult to remove. It can scar surfaces permanently; something you wouldn't want.
So, use enough wax paper while working and keep the surrounding areas covered. Also, keep tissues handy during the process. If any of the material gets in your hand, then rub it off immediately.
Moving on, we will recommend using it as the only variable, especially if you are working with it for the first time. Use jewelry bezels where you do not need to remove the mold after the drying process. This way, if anything goes wrong, you can immediately understand the reason. Once you have mastered the use of this fluid, then move on to adding items to it.
Adding Objects To Resin
Adding items to resin look beautiful and will help you create various unique pieces of jewelry. However, if you put anything porous in the mix, then it might not look good. In this case, you will have to first seal the porous object and then only move on to adding it.
The next question to ask yourself is if you are confident about sealing porous objects. If you are not, first imagine how it would look like if water was added to it.
Now, if you can predict a change in the appearance, then it has to be sealed. Once you have sealed it, it can be added to the middle of your resin mold over a layer of hardened liquid.
Further, begin with easy items like metal or glitter beads and shells. These do not have to be sealed but they look beautiful inside jewelry. When you place them in the mold, position them well, and you can add a little amount of resin to fix their position.
This will also teach you about trapping bubbles and how to remove them. Furthermore, keep a dryer handy to remove bubbles when needed.
Next comes colors, and you can try adding them with the resin. It generally does not work well with moisture, and you will need more time for mixing. This might take a while to get used to, but you will get the hang of it in some time.
Creating A Dome
So, resins can create that perfect dome, but you will need some practice for it. The amount of fluid should be just right so that it does not fall off the edges. This is generally a little tricky at first, but once you get the hang of it, the process will be super easy. Practice and patience are key and will help you go a long way in this case.
Once you have mastered this, you are prepared to make resin jewelry from scratch. You will now understand the texture and curing method better, and that makes you prepared for the next step. Get surfing on the internet and curate a collection of pictures that you plan to use for inspiration.
Working On Different Surfaces
There are a number of surfaces that you can work on. You might want to add to wood to create beautiful wooden jewelry. On the other hand, you can also use it to coat tables and furniture and prevent them from discoloration over time.
Materials Required
So, now you already know how to work with resin, and it's time to take you through the items needed before beginning the final process of making jewelry. We have listed the important materials needed for the process. They are:
Crafting Epoxy
Jewelry molds of your choice
Latex gloves
Blow dryer
Wax paper
Fine-grained sandpaper
Polishing paste
Gloss varnish
Measurement Cups
Squeeze bottle
Popsicle sticks
Resin Fillers including jewelry, dried flowers, glitter, studs, and feathers
Tissues
Selecting The Right Mold
There are different kinds of molds available, and you can get one according to your needs. You will find perfect pieces for creating brooches, pendants, earrings, key rings, and finger rings. Browse through all the options and pick one that fits the best.
Remember that if the mold is ill-fitting, then you will have to spend more time in the sanding process to get your desired shape.
Process Of Making Resin Jewelry
Now that you know about the different materials that are needed let us begin with the steps. Follow them carefully for a flawless experience. Also, remember to place the hardener and resin fluid bottles in hot water before the process.
It will help you get them ready and will prevent air bubbles from forming. This is specially important if the surrounding temperature is very low.
Step 1| Preparation
At first, you will have to decide the jewelry that needs to be cast or the kind of jewelry that you want to make. It is best to have a reference image in case you are making it from scratch.
Once you have decided, bring all the materials to one place and lay them out. This includes the colors and silicon molds too. We will advise keeping fine-grained sandpaper near along with gloss varnish and the polishing paste. Fill a glass with water and keep it along with absorbent tissues and a sanding block. These are not extremely important but will make the process less messy.
Moving on, if you plan to use UV resin, then you will need a UV lamp for the curing process. Keep it ready beforehand so as to save time.
Remember, while some people do not take adequate protection, we will always recommend being cautious. Wear gloves, safety glasses, and a mask to prevent the chemicals from going into your system.
Place plastic sheets around if you are working in your bedroom to prevent the chemicals from spreading around. You can also use wax papers for this step as it is easier to remove hardened resin from wax paper. .
Step 2| Mixing
Next, you will need your measuring cups for this part of the process. Ensure that there are millimeter markings on the cup and, if possible, keep a kitchen scale handy. Pour the epoxy and polyester resin along with the hardener in an equal ratio. This is extremely crucial, and you have to get a 1:1 ratio exactly.
If you are planning to add colors or glitters to products, then you have to mix them with resin. Pour a small amount and see the change in color. This generally depends on the preference of people.
On the other side, if you are using UV resin, then you will not need a hardener. This usually comes mixed with a hardener, and you can use it straight out of the pack. The only condition is that UV light will be needed for the process.
Step 3| Pouring
Once you have the mix ready, pour it into the mold and cover half of it. Now you will want to put in any light materials that would go well. You can choose among feathers, leaves, glitter, or any other substance that you think fits well. This should be positioned well in the liquid and then left to settle.
You will have to leave it for up to 24 hours and watch the first layer harden. Once it happens, put in any of the heavier objects like pearls, stones, or shells that you want to add to the jewelry. To help in positioning them properly, pour a little amount of resin along with it.
After this has hardened, you can now pour the remaining amount of resin and fill the mold completely. A very important tip here is to check for air bubbles immediately after pouring. If air bubbles have formed, use a hot air dryer or a Bunsen burner to remove them.
Then let it harden completely, and we will recommend leaving it for another day and then checking again.
Step 4| Removing the Mold
The time taken to dry varies with different substances and thicknesses. While UV resin dries the fastest and will only take a few minutes under UV light, the classic version can take up to 48 hours or a few days to do it.
This also depends on the type of weather and the brand. Read the back of the pack that you buy to ensure that you provide enough time to dry.
Once it has dried completely, take it out of the mold. Now you might see sharp corners, or it might be a little dull. But do not worry, as this is pretty common. It will be taken care of in the next step.
Step 5| Polishing And Sanding
Once you have taken it out of the mold, it is best to begin with the sanding process. Use your fine-grained sandpaper for this job and remove all sharp edges from the sides. Once you have done so and there are no visible protrusions, move on to the polishing stage.
Here, if you have used a polished mold, the product should already have a shine to it. These are better options as these will save you from having to polish the jewelry again.
If the mold was not polished, then you can either apply the polishing paste, or you can use a varnish to make it glossy. If you plan to use epoxy resin for this step, then you will have to ensure that the surface is absolutely smooth.
Otherwise, you might see unattractive marks inside the jewelry. Once you have used sandpaper, water, and a cloth to clean it, cover it with a layer of resin. This should be very thin, and you can use a brush to spread it. After it has a smooth thin layer surrounding it, let it harden.
Step 6| Drilling
The last step involves drilling a hole into your jewelry. Once you have made the pendant or keyring, you will need a hole to put the chain in. This has to be tiny, and we will recommend using a twist drill. This will enable you to drill a small hole with precision.
Remember that it is best to try on a sample item before using it on the jewelry. This will give you a feel of the material and speed, and you can work with precision on the actual piece.
Also, remember that the hole to be made will be dull, and you can use a tiny amount of epoxy resin and apply it there with a toothpick.
Further, when you are working with a drill, keep it at the lowest speed so that you can control the amount of heat. Too much heat can melt the entire jewelry and spoil it. Also, keep a thick board underneath the product so that the heat or your drill does not lead to scratches on any surface in your house.
Moreover, for bracelets and necklaces, you will need to attach a metal loop. This involves a thin piece of a pin that has to be heated and twisted into a loop. You can simply hold it with the help of pliers over a gas stove for a few seconds. Then poke it directly into the resin. Since it will be very hot, it will melt the layers and go inside easily.
Helpful Tips
If you are planning to make rings or pins, you can simply paste the resin jewelry onto a metal pin or a ring. There is no need to drill or make a hole, and this makes it less time consuming. Also, it is safer and will not destroy jewelry in any way.
Moreover, if you want to quicken up the drying process, you can place it in the freezer for 10 minutes or so. Then the process of taking it out of the mold will be very easy as it pops right out like ice pieces.
Working With Wooden Jewelry
When you are working with wood, the process is slightly different. But wood in combination with epoxy resin really stands out and looks beautiful. You can even use colored resin to make it more attractive.
To begin with, get a rectangular mold and then keep the wooden piece inside. Fill it up completely with epoxy resin and allow it to dry. Check after a day and begin working on it only after it has dried completely.
Once it has dried up, take it out of the mold and then begin shaping and polishing it. The sides need to be sanded and polished with gloss varnish or a layer of resin to ensure perfection.
Types Of Jewelry Resin
Now we will tell you about the different types of resin available in the market. If you are a DIY enthusiast looking to make jewelry, you should know about the 4 common types. These can be bought from a hardware store or a craft shop.
The major difference among the resin types is with their composition. When the composition is different, the drying and curing time will also vary. So, it is essential that you know about the types and then choose one according to your convenience.
Countertop Resin
This is a very popular type that is used by a number of artists to preserve their work. Known as laminating resin, it can also be used for resin art and small-format castings. It is very viscous and hence provides a thin layer.
Now since it dries quickly during the curing process, you will have to ensure that the layer on top is not thick. Thick layers can often become foggy and will not work well if you are using in on jewelry. If you want a thick coating, then go for multiple thin layers. This will prevent fogginess and will promote clear vision.
We will recommend using this with flowers or glitters as it does not let objects sink easily. You can make flower jewelry with this, which will look different and refreshing.
Casting Resin
This is the most common type of resin that is used to make jewelry but is also more expensive than the other options. However, you can rest assured that you will be getting a 100% non-toxic layer once it has dried up well.
But remember that it does take some time to dry up, and you might have to leave it for a few days. The formula is odorless and will provide a crystal clear layer on your jewelry.
Further, it is a low-viscosity liquid and hence takes more time in curing. You will be getting a thin layer that makes it perfect for small jewelry. In case you want a thicker one, create multiple layers with it. Other than jewelry, this is largely used for making epoxy tables and other furniture.
UV Resin
UV resin is a great replacement for the classic epoxy option. This takes just a few minutes to cure, and you will need UV light for it. It will offer you a crystal clear layer with no odor at all.
Moving on, the only downside to this is that it can form thin layers of a maximum of 4 mm. Now this will not be a problem when it comes to small jewelry, as you will be looking to create thin layers. But if you want to make a thick surface, create a number of thin layers, and that should work well. They will dry very fast, and you can finish the work in half an hour.
Polyester Resin
This is the cheapest type of resin which is known to harden quickly and will form a very tough layer. However, it has a strong smell and will form a clouded surface.
You can use it for jewelry to a limited extent. This is because you will not be getting a crystal clear surface which casting resin will offer.
Advantages Of Using Resin
While there are different materials that DIY enthusiasts might use to make jewelry, many are choosing resin over everything else. This is because it helps in creating unique pieces, which have a sense of authenticity. We have listed down some of the benefits of using this particular substance.
Difficult To Break
Resin jewelry is generally difficult to break, and you will have to apply intentional force to do so. If you keep twisting it till it snaps, it will break for sure. But that would mean you wanted to destroy it.
Otherwise, this is highly resistant to external force and will not get damaged in case it falls on the ground. You do not have to worry about dropping and breaking them, which is the case with clay pieces. Although they are strong, they can break if you drop them.
Non-porous And Water-resistant
Are you planning to use resin to make some parts of your costume for a theatre or a play? You can easily do so if you have the right mold. The substance will easily harden in place and will create a water-resistant layer.
You can then wear it in the rain or take part in a scene with water involved in case you are into theatrical acting.
Moreover, it is non-porous, so you need not worry about it melting in the rain. You can also wear it in broad sunlight, and the heat will not affect it. Overall, this is very resistant to nature and its forces.
No Maintenance Needed
Resin jewelry needs no maintenance whatsoever; you will just need the right mold and have to give it enough time to dry. Once it has dried and you have polished it, the job ends. You can then flaunt your new pieces wherever you go, and they can be kept anywhere too. You don't have to worry about rust, scratches, or breakage.
Also, these craft pieces can be modified whenever you need to, but they do not have to be cleaned at all. The surface will remain shiny, and you would not need to recolor. This is because the color is already added to the resin and is present inside it, so it cannot fade over time.
Final Words
We have finally reached the end of this guide, and we will give you a moment to take it all in. Once you are well-versed with the process, you can easily begin making resin jewelry professionally and create a business out of it.
This type of jewelry is in trend, and if you have great ideas, you can bring them to reality. Having said that, remember to pay attention to the minute details.
Since this is a very versatile transparent liquid, it will highlight any object that is placed inside. Remember this while you are creating the piece. You can use colors of different shades and create gradients that will make the pieces look beautiful.
No matter what design you have in your mind, anything can be made with the right kind of mold. Just be patient and enjoy the process.
With this, we will take your leave. Let us know about your experience in the comment section below. Until next time!
Did you just bring out your favorite board game, only to find the dice missing from the box?
We know how annoying that can be, given that several tabletop role-playing games like “13th Age” need quite a few dice to be played correctly. But there’s a way you can end this inconvenience once and for all. And that’s by making your own dice with patterns and designs of your choice.
Plus, playing the game with your own DIY dice will definitely make it more exciting and cherishable for you.
Speaking of the procedures involved, there are quite a few factors you need to be aware of and several techniques that you need to understand. That’s why we’ve compiled all the essential information for you in a way that will be most easy for you to understand.
So, without further ado, let’s start this exciting ride!
How To Make Resin Dice 101
To understand the art of making resin dice, you first need to be acquainted with several vital aspects of these colorful, intriguing objects. And that’s what we’ll discuss in the beginning before delving into the details of the procedure.
The Different Types Of Dice
You can obtain many different dice using dice-casting procedures, with each of these being suitable for playing a specific game. Note here that dice can differ in the number of sides, colors, and the images or inscriptions used for decorating each side. Here are the different types of dice you can create:
Colorful dice which have a different hue on each face
Dice with both negative and positive numbers on each face
Standard dice, which have a particular number of dots or digit on each face
Dice with different pictures on each face
Poker dice, which carry pictures of car characters on the faces
The Types Of Resin Dice Molds
There can be at most seven variations in the molds for casting standard dice made of resin. You can use these molds to make polyhedral dice, implying that the shape will have several straight edges, sharp corners, and flat faces.
The seven kinds of dice together constitute a set and are generally used for the popular role-playing game “Dungeons and Dragons.” While the dice types from D4 to D12 must be used for measuring weapon damage, spell, healing values, and attack, the D20 type is for checking whether your action has been successful.
So, let’s take a look at each of these molds briefly.
D8 Or Octahedron Dice
Coming with eight sides, this dice mold has a triangular shape and looks like two pyramids attached to one another at their bases. Every face of the dice is numbered from 1 to 8, with each pair of opposite sides adding to nine. During the Dungeons and Dragons game, such dice can be used to find out the damage caused due to large weapons.
D6 Or Cube Dice
Having six sides, this dice is the most familiar type and the type used in the majority of board games. It is shaped in the form of a cube, and each face is assigned one number from 1 to 6. Note that the numbers on each pair of opposite sides add up to seven in this case. Lastly, the dice are useful for assigning character attributes in “Dungeons and Dragons.”
D4 Or Tetrahedron Dice
This pyramid-shaped dice has four sides, with numbers 1 to 4 displayed on its faces. Each face has three of these numbers arranged on each vertex, and the number on a particular point is the same for all the faces.
While you roll this die, the number which stays upright on all the faces or the number on the top-most corner is the result that you will have to use. Indeed, this isn’t the easiest die to roll and is rather tossed into the air.
D00 Or Percentile Dice
Among all the types of dice, two that are always used together during a game are the percentile die, and the pentagonal trapezohedron die. Now, the former is named so, since the result you obtain by rolling it is always a percentage of 100.
Notably, the dice consists of 10 sides, with each face having a value between 00 to 90 in tens. You’ll have no problems differentiating between this one and the second die with ten sides as they have different colors. And remember that the resultant value after rolling both the dice together is obtained by adding their values. But if the number comes to two zeros, the resultant value will be 100.
Pentagonal Trapezohedron Dice Or D10
Rolled together with percentile dice, this type also comes with ten sides and is shaped like a kite. Its two end corners are the points where the top and bottom corners of the kite-shaped mold meet. This type has numbers between 0 to 9 on each side, with each pair of opposite faces adding to nine.
D100 or Zocchihedron Dice
Though this type doesn’t fit into standard seven-piece dice sets, it finds popular use as a novelty dice. Note that it comes with 100 faces and is near about the size of golf balls. This type is also suitable for a percentile roll in any role-playing game.
D20 Or Icosahedron Dice
Being the most well-recognized and popular type of dice used in “Dungeons And Dragons,” this type comes with as many as 20 faces. It also has a larger structure compared to its other counterparts having lesser sizes.
Every face of this dice is shaped in the form of an equilateral triangle, with the numbers 1 to 20 or 0 to 9 twice mentioned on it. And keep in mind that the sum of the values on the two opposite faces of this die should be 21.
Now that we’ve looked at the basics of dice, let’s move on to the different procedures of making dice from resin. First of all, you should keep in mind that the process will vary slightly based on whether pre-made molds are being used or not.
Making Resin Dice Using Premade Molds
For the time being, we focus on creating resin dice with the help of pre-made silicone molds.
All That You’ll Need
You will need a number of materials and tools for making dice using resin and pre-made molds. Apart from a silicone mold of the dice of your choice and a casting resin of high quality, you’ll need the following items:
Toothpicks to remove resin bubbles and to poke holes into the mold
Three disposable mixing and measuring cups
Decorations and items to embed as per your choice
Plastic or wooden sticks for preparing the mixtures
A clean work surface, preferably of plastic
Mica powders, alcohol inks, other resin colorants
Choosing The Best Casting Resin
The resin used for casting has a slightly lower viscosity than other varieties and is always prepared by mixing two components, viz., the resin in liquid form and a suitable hardener. After these ingredients are mixed, there’s a chemical reaction that releases heat and lets the mixture harden after some time.
While buying casting resin for your dice-making project, you must have these two factors in mind:
Make Sure The viscosity Isn’t Too Low
A resin with very low viscosity will take longer to harden. So, ensure that the viscosity of the product you’re purchasing is not too low.
Check The Information On Its Consistency
The casting resin you’re going for must also have a thin consistency so that it can penetrate the smallest of cavities and gaps. Hence, make sure you check the product information and the customer reviews to ascertain whether it has the right consistency.
We found the Pourable Plastic Clear Casting Resin from Incredible Solutions to be a great choice, as it comes with the ideal consistency and a highly effective formulation.
The Procedure
A. Preparations
There are a few preparatory steps you’ll have to take before beginning the procedure. The first and foremost requirement will be to make sure the workspace is clear and clean since working with resin can be a messy affair.
Also, see to it that the molds chosen are dry and clean and have all the materials and tools within close reach. That’s because once you start working, you will have to complete the procedure in a short span of time so that the dice can begin to set soon.
B. Mixing The Resin And Pouring It
Now is the time to measure and mix the resin, which is the most important part of the procedure. For this part, you need to follow the instructions laid down by the manufacturer on the required quantities of the constituents and the mixing time. That’s because precise amounts of the resin must be added to ensure it cures properly.
Here are the steps you need to follow while preparing the mixture:
Step 1
Check the mixing ratio of the hardener and resin recommended by the manufacturer. Then pour the measured amounts as per this ratio into two different containers.
Step 2
Follow this by pouring the two separate components into another measuring cup. Make sure you pour them as uniformly as you can.
Step 3
Stir these two liquid components thoroughly using a wooden or plastic stick. Scrape the bottom and sides of the measuring cup properly while stirring. The ideal duration for this step, as suggested by most manufacturers, is about 3-5 minutes.
Step 4
In case you want the resin to be of a particular color, you’ll also need to include a little bit of alcohol ink or mica powder. Be careful not to add an excessive amount as that will lead to an inappropriate mixing ratio of the resin solution.
Step 5
Finally, the size of the hole in your mold will have to be adjusted, after which you can pour the resin into it. Use the toothpick to guide the liquid in the opening of the mold.
On a side note, you must take care to pour the resin in a way that there’s no air trapped in any depressions or corners of the dice mold since that can cause bubbles.
C. Embedding Items And Adding Decorations
Before you pour the resin into the mold, you will need to decide whether to keep the die clear or to make it colored and decorated. After you’ve made up your mind, mix the additional items and decorations with the resin so that they set in properly to create the desired look.
Here are some suggestions for the decorative items you can add to the resin.
A dye made from alcohol or a mica pigment can be used to add rich colors to the dice. Note that you’ll need a small amount as these dyes and powders are available in a highly concentrated form.
For clear dice, you may add glitter to the colorless resin or some confetti to make it ideal for a certain theme. Even a small figure can be added to the resin depending on the final outcome as per your needs.
After you’ve decided on the objects to embed, pour some resin into the mold and circle it to cover its sides with resin. Now, see to it that the mold is filled halfway, and position the object in it using a toothpick.
Note that the object should fit in the mold properly and still leave some space to be covered with resin. Finally, you’ll have to fill the mold entirely to ensure the objects are embedded properly.
D. Curing
Now, let the resin dice cure for at least 24 hours prior to handling the mold for the next steps. A light tap on the exposed portion of the resin will help you know whether the mold has cured the right way. Remember that the part should feel dry, hard, and smooth to the touch. However, if it still feels wet or tacky, you have to let it cure for a longer time.
You can expect the waiting period to be between 24 and 72 hours based on the surrounding temperature of the resin and the surroundings. Plus, incorrect measurements or mixing may result in improper curing.
Here’s the best way you can solve this issue. Place the uncured resin dice in a freezer overnight so that it solidifies properly. You can then pop the resin out of its mold and place it in your oven on low heat settings. This will surely help activate the procedure of curing.
E. Demolding
When the dice casting is completely cured, you can start with the demolding procedure, whereby the dice are removed from the silicone molds.
Here are some things to keep in mind during this step:
Take extra care while removing a mold as if it tears, it would become unusable.
There will also be some material along the sides and edges of the mold, which is commonly called sprue. It’s very useful in making up for any unexpected shrinkage in the shape of the dice while it’s curing.
Unless a polished mold is used, the dice might appear cloudy and matte. But don’t worry, you can fix this in the final step.
Finishing Touches
At this point, the procedure is almost complete, and what remains is providing a few finishing touches to the die. And for that, you must proceed as follows:
Step 1
Firstly, you’ll have to remove the extra material or sprue as, despite its usefulness in curing, it can make rolling the die difficult. You can do this using any small sharp tool such as a knife.
Step 2
After you’ve removed the sprue, the surface of the dice would still be slightly rough. To make it smoother, you can wipe it with sandpaper. Initially, using a 150-grit sandpaper piece will be ideal for the smoothening process, but make sure you don’t remove too much resin than required.
Step 3
Continue this process with a 180-grit and then a 220-grit sandpaper piece, and continue increasing the fineness till you’re satisfied with the smoothness. Generally, the sandpaper grit has to be increased to 3000 as that will create a uniform final finish.
A wise precaution to take would be to use water on the surface between every sanding to ensure minimum dust production during the process.
Step 4
The next step would be to polish the dice using resin polish, as that will make the surface smooth and glossy. You can also add some fine details to the dice using acrylic paint, draw borders on its edges, or paint the numbers that you’ve engraved on it.
Another way you can make the numbers prominent is by filling them with ultra-fine point markers. Do it by following the engraved grooves carefully, and you’re good to go.
Making Resin Dice Molds
Once you’re conversant with the basics of making resin dice, you may even try making dice molds. It’s always better to make the molds on your own using silicone, as this would let you come up with dice of multiple looks and designs. So, there won’t be any limit to how creative you can get!
Knowing the different types of molds that can be made is important in this regard. While open-faced molds have one side open to facilitate easy pouring, squish molds are slightly difficult to use since they are divided into two parts.
Try making molds of different shapes and designs to see which one is most suited for you.
All That You Will Need
Silicone resin
Clay or plasticine
A master or original dice
Goggles and gloves
Containers and cups to mix the silicone
Container for the dice
Mixing tool or spoon
Why Is Silicone Rubber The Best For Making Die Molds?
The most noteworthy feature of silicone is that it doesn’t adhere to materials like resin, which makes it the most suitable base for making molds. This makes it effortless to take out the resin piece from the mold. Other advantages of this material include:
It’s highly durable
The molds prepared are reusable
Molds are pliable and soft
It’s safe for use
Choosing A Quality Silicone Rubber Kit
Since you will always want your molds to be perfect, it’s important to choose a good-quality silicone for the purpose. Here are some points to consider while choosing a silicone mold-making kit.
Ease Of Use
The silicone in the kit should be easy to pour and mix and should ideally have a mixing ratio of 1:1 by weight. This will help you prepare the mixture within minutes just by stirring it a little. Plus, the silicone should be able to eliminate all bubbles in a few hours so that no degassing chamber is needed.
And after the silicone cures, it will turn soft, transparent, and flexible, just what you need for making the perfect dice.
Safe For Use
The market is overflowing with silicone products for mold-making that come with toxic substances and may emit suffocating fumes and odors. So, it’s a must to ensure that the silicone you’re going for is totally safe for use.
Versatile
Ideally, the silicone should be usable for all types of dice molds, and along with different decorative items such as mica pigments and glitters. This will ensure you’re able to create just the design and shape that you desire.
In our opinion, the Silicone Mold-Making Kit from LET’S RESIN is an ideal choice for making dice molds quickly and effectively as it meets all the above requirements perfectly.
The Procedure
A. Preparatory Steps
While you’re working with silicone, you must be careful to ensure nothing comes in the way as that might disrupt the procedure and give rise to partially effective results. This is why it’s essential to prepare the working area in the right way, keeping just the things that you need within close reach and removing all other extra items.
Also, you’ll need to be clear about the type of mold that you’ll make, that is, whether it’ll be a one-part or a two-part mold. In this article, we’ll mainly deal with one-part molds that are totally sealed except for a small opening for pouring resin.
B. The Mixing And The Pouring
Prior to mixing the silicone, you must prepare the original dice. After that’s done, heat the tip of a pin and push the heated end into a corner of the dice. Follow this by taking some plasticine and sticking it to the bottom of a container. Then place the pinned corner of the dice into the plasticine while ensuring that the dice is upright and balanced.
Be careful not to use a very big container for the purpose as that will lead you to waste a lot of silicone. Here are the next steps that you need to follow.
Step 1
For mixing the silicone, go through the instructions on the package of the product carefully. Keep in mind silicones from all brands may not have the same curing time or mixing ratio. After you have a clear idea about the mixing ratio and the other essentials, mix both the parts in the silicone kit thoroughly in the mixing cups you’re using.
Step 2
Now it’s time to pour the properly mixed silicone into the container which has the original die. See to it that you cover the die the right way but be careful not to dislodge it. Continue to pour the mixture till it’s around 5 mm above the top of the dice.
Step 3
At this point, you’ll have to do away with the few air bubbles that might persist in the silicone mixture. Tap lightly on the sides of the container, and the bubbles will be released.
Step 4
Finally, you must allow the silicone to cure for the duration mentioned on the packaging or the manual coming with the kit. The majority of products take nearly a day to dry entirely.
Creating the other type, that is, the open-faced dice mold, might seem easier to you if you’re making molds for the first time.
For this procedure, you’ll have to use some plasticine to cover just one face of the dice. This would provide the piece with enough thickness and height to stand upright on its own. Note that half an inch is the perfect height for such a mold.
Now, you must place the piece in the container and pour the silicone into it. After giving it some time to cure, the mold will be ready for use.
Some Interesting Resin Dice Ideas
Mica Shimmer Dice
As mentioned earlier, mica powder is an ideal colorant for resin. And a unique way of using this colorant would be to create an elegant iridescent and shimmer look. You can obtain dice with a white and black marbled texture or that with some metal leaf chunks and pink mica powder.
Here’s how you can get this look in your dice:
Step 1
Mix some mica with the liquid resin and stir until there’s an even distribution of the powder over the resin. Begin the procedure with ⅛ tsp and continue adding more in increasing amounts till you get the color that you want.
To bring in more variation in the color, you can combine alcohol ink with mica powder.
Step 2
Next, pour the resin into the mold and wait for the dice to cure. The resin will be thickened by the mica powder, which will speed up the curing phase.
Using Gold Leaf On The Dice
You can get an eye-catching sparkle effect on your dice using gold leaf. Notably, metal leaf comes in various colors and is basically an ultralight colored foil. It remains suspended in a resin mixture while the glitter sinks to the bottom of a mold.
You can create this effect in your dice in the following steps:
Step 1
Add one metal leaf to the liquid resin to be used for making the dice.
Step 2
Mix it properly with the resin using a stirrer, breaking up any larger piece therein. Repeated stirring will help break up the metal into smaller pieces.
Step 3
Now, pour the mixture into the resin dice mold, pushing the larger pieces in place using a cocktail stick or toothpick.
Step 4
Let the dice cure for the duration advised in the packaging or manual coming with the resin product.
Transparent Dice
Transparent dice have a distinct appeal to them, with light shining through the clear faces of the dice. This ultimately creates an effect similar to that of colored glass or gemstones.
You can choose contrasting colors to create a variety of beautiful effects in such dice. To make such transparent dice, start off by adding a drop of alcohol ink to the resin and stir till there are no streaks of color left in it.
Notably, since alcohol ink is extremely potent, a drop of it is enough to create a light color in the dice. Adding 2 to 3 drops will make the shade medium, and the resin will turn opaque if you include more than four drops. Also, a white colorant can turn it opaque.
After the mixture is ready, continue as per the procedure we’ve described for making dice with pre-made molds.
Safety Precautions While Working With Casting Resin
Although the majority of synthetic resins are harmless after they have been cured completely, there are some health risks associated with their processing. So, here are the precautions you must take while handling resin before it’s cured.
Wearing Gloves
Remember that you should never let liquid resin or either of its components come in contact with the skin, as it can give rise to painful rashes, irritation, and other allergic reactions. And the best way to prevent any such situation is to wear a pair of nitrile gloves to shield the skin.
Wearing Goggles And A Mask
The eyes should always be protected while you’re working with the resin. So, make sure you wear safety goggles during work. Plus, to prevent toxic fumes from entering your body, it’s best to wear a respirator mask.
Maintain Proper Ventilation
Ensure that the room where you’re working is properly ventilated, as the fumes released by the resin will then move away easily. You can use a fan or open one window in the room if necessary.
How To Make Resin Dice Frequently Asked Questions
How To Remove Bubbles That Persist In The Resin Even After Tapping It?
Removing bubbles from the resin mixture after it’s added to the mold can be difficult. Using a toothpick to pop the bubbles directly is a way out. But you’ll have to be very careful as the toothpick must not touch any other part of the surface.
Another method is to heat the mixture slightly using a lighter, as that will make the bubbles rise to the surface and ultimately burst.
Can Resin Dice Be Called Balanced?
A die is regarded as well-balanced if it lands on a variety of random numbers every time, while unbalanced ones land on the same set each time. You can place resin dice in water and spin them around to test whether they are balanced. In case the same number shows on the top after every spin in the water, the die isn’t balanced and vice versa.
How Is Casting Resin Different From Epoxy Resin?
Epoxy resin is much more viscous than casting resin, which is why it dries faster. However, thin layers of paint can be slightly difficult to pour, and you should ensure that the layers are not more than 2 cm thick. On the other hand, several layers of paint can be mixed quickly in casting resin.
How Much Resin Do You Need To Fill An Entire Set Of Dice Molds?
Most of the dice molds for role-playing board games need approximately 147ml or 4.97 oz. of resin.
Final Words
Now that you’ve given our guide a read, we’re sure that you’ve got a grip on the techniques of making resin dice. So, decide on the procedure you want to attempt, gather all that’s needed, and get the ball rolling!
You must also consider the board game for which you’re making the dice, as the design and number of sides will vary based on that. Or else, you might even want to use the dice as a décor item for your home or as a part of jewelry, so add the dice embeds and colors accordingly.
If you have any other queries about making resin dice, write them down in the comments section below, and we’ll try our best to clear your doubts.
With that, we’ll wrap up for now, but there’s more fun content on your way, so watch out for this space. Till then, keep exploring your creativity!
Purifying distilled water involves the process known as "distillation," which eliminates all the nasty bacteria, minerals, and other contaminants, giving you water in its purest form.
Distilled water is ideal for machinery, health and medical devices, watering plants, and other applications requiring clean water.
While you can buy distilled water in the market, making your own distilled water at home would still be ideal and COST-EFFECTIVE.
Homemade distilled water is fairly easy to make. And if you're worried about the science behind it — don't be! We'll give you a step-by-step guide to distilling your own water at home.
How to Make Distilled Water at Home: Step-By-Step Distillation Process
We don't know if these concepts still reside in your mind: liquid water, water vapor, evaporation, and condensation process. These are the concepts you'll encounter when distilling water.
Not that we're always excited by all the science stuff, but we think this will interest you as much as it did us.
What excites us the most is that we can finally cut the cost of buying distilled water. It will be a lot cheaper, plus you can ensure a FULL STOCK since you can make it anytime at home.
Tools Needed to Distill Water
Before anything else, you must first prepare the following materials for this project:
Round baking rack
5-gallon stainless steel pot with lid
Glass bowl
Oven mitts
Ice cubes
Tap water
Once you've gathered all the necessary materials, you're ready to make distilled water at home.
There are only five easy steps to perform water distillation, and we promise this guide will easily teach you the home distillation process.
Step 1: Put the Baking Rack Inside the Pot and Pour the Water
Put the baking rack inside the 5-gallon stainless steel pot, and pour the tap water. You can add up to 2.5 gallons of water.
Basically, you're pouring water into the large pot until it reaches its middle. So, if you're planning to use a smaller pot, remember this rule of thumb.
Step 2: Place the Glass Bowl on Top of the Water
Once you've placed the baking rack inside the stainless steel pot and filled it with water, place the glass bowl on top. Essentially, the glass bowl should stay afloat on the water's surface.
The rack will keep the bowl from touching the base. This ensures enough space for air to circulate around the sides and on top of the bowl.
Step 3: Cover the Pot with the Lid and Fill it with Ice Cubes
Flip the lid UPSIDE DOWN and cover the pot — it should look concave if you're looking at it from the bottom.
After which, fill the inverted lid with ice cubes or an ice pack. Ice is essential in making distilled water. They cause water vapor to quickly condense at the side of the lid facing the inside of the pot.
When water boils, it produces steam. As steam contacts the cold lid, it will turn back into the water, and the droplets will fall into the container.
Step 4: Boil Water
On your stovetop burner, start boiling water between medium to medium-high heat. You want the pot to be hot enough to allow the pot water to simmer but NOT completely boil (around 180 to 200 degrees Fahrenheit).
Keep the water simmering for 45 minutes. Check the ice time and again and REFILL it as necessary. Dump the melted ice on the sink by lifting the lid. Use oven mitts to protect your hands from the hot cookware.
Step 5: Cool and Store
After 45 minutes of distilling water or until all the tap water has evaporated, condensed, and dropped in your bowl, it's time to turn the burner off. The water you collected is already distilled water.
Let the distilledwater cool down completely before storing it in a glass bottle or any clean container. Ensuring the cleanliness of the container ensures that you're storing clean water, which constitutes LONG-TERM storage.
We highly suggest you store distilled water in a cool and dry place away from direct sunlight.
What is Distilled Water?
This physical process of distillation involves changing the state of water from liquid form to water vapor through condensation. Hence, the product of this process is called distilled water.
So basically, distilled water is purified water you get from condensing water vapor or steam out of impure water.
What Distillation Removes from Water
This process eliminates minerals, salt, harmful bacteria, heavy metals, and other contaminants. Hence, it's also known as one of the water purification methods that remove impurities in water.
When purifying water using the distillation method, unwanted nasties are left behind while pure water vapor rises into thin air and re-condenses.
What Types of Water Can You Distill?
There are many types of water you can purify and turn into distilled water. These include:
Tap water
Water from streams
Well water
Snow
Rainwater
Sea water
Plants and damp soil
Methods of Distilling Water
Aside from the distillation method we taught you in the previous sections, other ways exist to make distilled water.
Here are other methods you can try:
Collect water from an outside container - this is quite similar to the pot and bowl method we taught you earlier. But instead of placing the container inside the pot, you use an outside container to collect the distilled water. In this method, you can use a funnel over a boiling water container connected to the collection bottle with aquarium tubing. You must ensure that the tubing is lower than the funnel to successfully drain the distilled water into your collection bottle and secure it tightly with duct tape. This is advantageous, as it minimizes the risk of contamination which is essential if you intend to make drinking water.
Distilled rainwater or snow - rain and snow are also called naturally distilled water. If you remember, in the water cycle, the sea, lake, land, and river water evaporates and condenses in the atmosphere to fall as precipitation. You can collect rainwater or snow with a large container. Keep the water at rest to let the sediments fall at the bottom. If you don't live in highly polluted areas, this pure water is definitely safe to drink. But you can also include filtration procedures using a coffee filter or boiling water.
Home distillation kits - a home distillation kit is also a cheap way to make distilled water, compared to those whose heat source requires fuel or electricity to operate and heat water. The cost of home distillation kits starts at $100. If you intend to purify water for drinking, cheaper kits are already good enough. Expensive kits are primarily used in labs or in making distilled water in large volumes to supply an entire house.
Note
Alternatively, you can also install a water line into your refrigerator for ready access to clean water.
Distill water from plants and mud - you can also make distilled water from basically any water source. One example is by extracting water from desert plants. You only need to:
Dig a hole in the ground,
Place a container at the bottom to collect the distilled water,
Fill in damp plants around the container inside the hole,
Cover the hole with plastic and secure it with rocks or dirt to ensure that no moisture escapes,
Place a pebble at the center of the plastic wrap to make a small depression. When the water evaporates, the water vapor condenses on the plastic, and droplets drip from the depression into your container.
What are the Uses of Distilled Water?
There are different uses for distilled water. While others use it as drinking water, others utilize distilled water for:
Hydrating house plants
Filling humidifiers
Steam ironing clothes
Cleaning wounds
Sterilizing bottles
Home aquariums and fish tanks
Filling CPAP machines
Car maintenance
What are the Benefits of Drinking Distilled Water Over Tap Water
As mentioned, some people prefer or can only drink purified water. That's why they opt to distill water at home, as it costs less than purchasing bottled water in stores.
Compared to tap water, distilled water doesn't contain any impurities. Distilling water removes waterborne pathogens, thus reducing the risk of diseases.
Distilled water is even PURER than filtered water and boiled water. Hence, if you're unsure of the water source, it's better to distill water before drinking.
Distilled Water FAQs
Let’s answer more questions for you!
How Long Does it Take to Distill Water?
The pot and bowl method takes about 45 minutes to distill water. But, if you’re using a larger pot with twice the volume of our indicated measurement, it will likely take longer to finish.
How Long Does Distilled Water Last?
If you store distilled water properly, it will surely last INDEFINITELY. We suggest using an airtight glass container and storing it in a cool and dry place to prevent contamination and bacteria build-up.
Is Distilled Water Safe to Drink?
Yes, you can definitely drink distilled water. But it has a flat taste and has already lost beneficial minerals, like calcium and magnesium, during distillation.
However, if the water contains impurities with a lower boiling point, it might contaminate the vapor, as well as the distilled water.
With its bland taste, dissolved minerals, and possible contamination, it MAY NOT BE THE BEST OPTION for drinking, though it is potable.
What is Another Way to Purify Water?
Reverse osmosis is another purifying technique. But, unlike in distillation, it doesn’t turn water into its purest form.
There you have it; a step-by-step guide to making distilled water, plus all the things you must know about it! Now that you know how to distill water from any water source, you no longer have to rely on store-bought distilled water.
We hope this article was able to help you. Feel free to revisit 'til you master the science behind distilled water!
A soaker hose makes an indispensable part of the gardening arsenal for most homeowners.
Who wouldn’t love having such an efficient watering system handy? You’ll love the virtually hands-free and consistent water supply, while your plants will love the targeted moisture. Win-win, we say!
But if you aren’t looking to spend a lot, you’ve come to the right place. We’ve curated a quick DIY guide that’ll help you make one from the comfort of your backyard. After all, hand-made care for your greens is the best expression of love.
So, without further ado, let’s begin!
What Do I Need To Make A Soaker Hose?
Making a soaker hose may sound like a lot of work, but it’s a fairly simple job. Moreover, you’ll find most materials in your garage. And even if you don’t, buying them won’t make you break the bank! On that note, here’s a list of the things you’ll need:
Charged drill
3/64 or similar drill bit
Electrical tape or hose cap
Garden hose
Garden hose splitter (optional)
A few things to note: while we opted for a charged drill to save time, you can also use a hammer and 20d nail. Look for any discarded hose (like the leaky one you forgot to throw out) before buying one.
Depending on the area to be covered, you might need a couple of those. Whatever be the case, you don’t need to buy a high-quality hose. Going for a cheaper option will also do the job just fine!
Now, let’s look at the steps involved.
Step 1
Lay the hose flat and make evenly spaced holes on one side using the drill or hammer. For best results, make the first hole about 18 inches away from the female end and maintain a distance of 2.5 to 3 inches.
If you want a sprinkler effect, drill the holes on multiple faces but make sure they don’t go all the way through to the opposite side. As the water flows through the hose, it’ll seep out of the holes and directly reach the roots with minimum evaporation.
Step 2
Once you’re done drilling the last hole, grab the end, fold and crimp it off by wrapping with electrical tape. Alternatively, you can screw in a hose cap to create a tight seal. If the leftover portion is too long, trim it before crimping. However, ensure that the length doesn’t become too short. Sealing one end of the hose forces the water to flow out gently from the holes.
Step 3
Leaving enough of the female end loose to connect it to the water source, place the hose in the desired area. If the area is too big, you might need to make another soaker and join the two using electrical tape. Don’t try to stretch a single hose to cover a large area as too much tautness can damage it.
Furthermore, you can also decide if the soaker system should be kept permanent or movable. For the former, we suggest burying the hose around 2 inches deep underground. This is especially beneficial for more water-hungry plants or areas that experience severe drought. Other than that, setting the hose in the soil will also come in handy if you plan to double it for covering multiple rows of plants.
In case you want to keep the soaker hose moveable, it'd be a good idea to secure its position. Use some heavy objects like stones or sticks at every turn to provide adequate support. Make sure that the stone or stick is placed in a way that doesn't damage the hose.
Step 4
With everything done, it’s now time to switch on the water supply. But before that, there’s one small thing that should be taken care of. If the hose isn't compatible with a spigot, it may be challenging to fit it to a tap. In that case, we’d recommend buying a good garden splitter to have an unhindered water flow.
Some General Tips
So that your soaker hose covers all the bases, here are some handy tips to follow:
If the air in your area is too dry, consider burying the hose under a few inches of mulch to minimize evaporation.
In an ideal scenario, it’s advisable to run the soaker hose for a maximum of 30 minutes, twice a week. That said, you may adjust the soaking according to the watering requirements. Apart from that, don’t engage the tap or spigot to its maximum capacity.
Since soaking is essentially a high-precision task, you’d want to keep the water flow nice and slow. We’d recommend opening the tap just enough to allow the water to seep through the holes.
You may get a water hose timer for optimum water conservation. Simply set it up to have a regular reminder about the watering schedule. Moreover, the ones with a built-in rain sensor automatically skip watering if the soil is too moist.
Buried soaker hose should be cleaned regularly. In case of hose cap seals, take out the cap and flush the pipe at least once in two weeks to prevent clogs. And for the ones with an electrical-tape sealing, replace the tape after every wash to keep the pipe usable for long.
Lastly, don’t throw out your old garden hose just because the color has worn off! If it doesn’t have any significant wear and tear, preserve it for future use. Besides, keep an eye on the curb on the trash day for old hoses being thrown out, especially during early spring.
Final Words
So, there you have it - an efficient DIY soaker hose!
Not only does a soaker hose make your job easy, but it also makes you less guilty about bothering your neighbors when you’re on vacation. Trust us; they will be delighted to know that all they have to do is turn on the spigot for a few minutes twice a day.
With that, it’s time for us to bid goodbye. But before we leave, let us share a pro tip: clean the pipe thoroughly before converting it into a soaker hose. This way, you’ll have unobstructed water flow.
It’s true that geodes are one of the most beautiful geological creations. And what if we tell you that you can create one at home?
These rock formations have intrigued geologists and laymen alike because of the beauty that they present. There’s no doubt that they are one of the most enigmatic rock formations that you can come across. But it’s not easy to procure one for use as a decorative item in your living room.
However, you can make a resin geode, which, when done right, looks almost the same as a natural one. But in order to achieve the best results, you need to know how to make resin geodes the right way.
That’s why we have designed this guide with all that you need to know about making resin geodes. With our guidance and your creative instincts, you will be able to create a masterpiece in no time.
So, without any further delay, let’s check it out!
How To Make A Resin Geode
Resin Geodes | The Basics
It goes without saying that resin geodes are not natural, but you can make them look like one with some effort. Natural geodes are rock formations that reveal enchanting forms once they are cracked open.
Resin geodes are artistic alternatives to natural ones. Because the resin is pretty soft when molten, it allows you to play with the patterns and experiment as much as you want. And when it dries up, it hardens to deliver a finished look.
Besides, you can consider putting acrylic gems, crystals, and glass globules to make the resin geodes look even better. And it will surely become one of the centerpieces in your drawing room and a conversation starter at every party. You can consider making it any shape and size that you want. It can be as small as a coaster or as big as a magnificent sculpture!
Making A Resin Geode
Unless you have worked with resin before, the material may seem a little intimidating.
But trust us- it is not very difficult to work with, and once you read this guide, you will have a fair idea about how to finish the job without much hassle. All that you need to do is remember a few important things and remain patient throughout the process.
On that note, here are the steps to make a resin geode.
Step 1
Before you can go into the intricacies of making a resin geode, it is crucial that you be well-prepared. By this, we mean that you should keep all the required materials handy and prepare the workspace properly.
Things That You Will Need
Resins
Masking tape
Decorative items
Wet wipes and cleaning alcohol
Acrylic paints
Spatula and sticks
Wooden panel and non-stretched canvas
Safety gloves, apron, glasses, drop cloths, and a respirator
Once you have all the materials, it is time you begin with the process. The first step is to start mixing the resin and make sure that you strictly adhere to the instructions printed on the package.
Your safety and protection are also important, so make sure that you wear some protective gloves and an apron before working. Likewise, use a respirator and put on safety glasses to protect your face.
Other than that, we’d suggest laying a protective drop cloth on the work surface to ensure that it does not incur any damage. An additional pro tip: tape up all the sides of the canvas properly to ensure that there is no damage in case the resin starts to drip. Even if you see a few drips, just remove the tapes, and cleaning the surface will become super simple.
Moreover, ensure that the surface you are working on is completely stable and straight. If it is slanted, then chances are that the resin will eventually become lopsided.
Step 2
Like most other DIY projects, making a resin geode also requires a good amount of planning. Before beginning with the work, we would suggest that you keep good images and designs of resin geodes as references.
Once you decide on the design, you can simply draw lines accordingly on the canvas to recreate the look. You will find fascinating images of resin geodes on the internet and can choose any that you like.
When you are taking the reference, ensure that you draw the lines and note which color to place next to the other. If this idea does not appeal to you, simply take the line reference and choose to put the colors more spontaneously.
Step 3
After you are done creating designs outlines, you can simply use some acrylic colors to start painting on the canvas. We would suggest that you try sticking to the reference lines to ensure that the design is up to the mark.
During painting, you can choose to make some additions too. Consider putting metallic foils or trendy glitters into the mix.
Step 4
Apart from foils and glitters, you can make other additions too. Some people like adding glass and crystals to their geode designs. If you plan on doing the same, remember that you make the additions only after the paint has dried up.
To make sure that the attachments are secure, use good quality craft glue. This will help the embellishments to stick to their place even after you add a layer of resin.
Step 5
As we have already mentioned before, in order to mix the resin properly, it is an absolute must to read the instructions carefully. We would also recommend that you mix the resin in small bottles so that you can have more color variations and less wastage. You can either add paint or powder in these bottles to get the resin colored according to your choice.
Unless you want the colors to mix spontaneously, you have to follow some procedures. For that, make sure that you put the colors in different containers and apply them one after the other, only when the previous one has dried up.
But we know that there are some people who like the resin mixing naturally and love the unconstrained flow better. It is completely up to you about which method you want to go for. Just keep a wooden stick handy so that you can adjust the resin according to your requirement.
Step 6
For making your resin geode even more beautiful, consider putting glitter-embedded layers in different parts of your canvas. You might be wondering why you should do it so late in the process. So, let us break it down for you.
If you do it earlier, the chances are that the sparkles will settle and not remain significantly visible. In order to keep the resin near the surface, it is best that you add sparkles and glitters in different batches and keep adding them in succession.
Step 7
Besides making great designs, it is crucial to make sure that you maintain your work well. And for that, it is an absolute must to put a clear coat on your resin geode.
Apart from protecting your artwork, it also helps to add an amazing gloss to it. But keep in mind that if you have added a lot of glitters to the resin, adding a clear coat might diminish the texture of the geode. Keep this in mind, and decide accordingly! But rest assured that an effective application of a clear coat will help your artwork look even better.
In case you are making a piece of resin furniture like a table or a wardrobe, make sure that you apply a thick topcoat. This is essential for making the surface smooth and will help you prevent scratches from forming.
How To Make The Best Use Of Resin Geodes?
As John Keats had said, ‘a thing of beauty is a joy forever.’ This holds true for resin geodes as they can be turned into exquisite artworks that will add immense beauty to your home décor. You can try to imitate natural geodes with the help of resins, as we have already discussed, and add a dash of glitter and sequins to make them look better.
Get as creative as possible, and do not be scared of experimenting. Once you do that, you will see that the artwork is turning into something very similar to the natural geodes. And you can use the resin geodes to make tabletops or coasters, anything that you desire. As we said, let your creativity run wild!
A Glow Up With Crystals
After you are done practicing a few times, you can start experimenting with crystals. It is not a difficult process once you get the hang of it. There are 2 main ways of doing it.
Working With Big Crystals
Some crystals are big in size, almost as large as broken glass pieces. When you are dealing with big crystals, we would suggest that you put them on the surface first and hold them in place with the help of craft glue.
Once you are done fixing the crystals on the surface, pour the resin carefully to secure them properly.
Working With Small Crystals
On the other hand, if you decide to use smaller pieces of crystals, it is best to mix them with the resin instead of applying them separately. They will get fixed to the spots as the resin hardens over time. In this case, you can skip a step and get done with the artwork within a short span.
Final Words
That’s all for today, friends!
Hope you had a great time learning about how to make beautiful resin geodes. We also hope that you will be able to implement the methods we have shared for the best results. Also, we wish you loads of good luck and that you have fun times with creating the resin geode.
Keep in mind that creativity is at its peak when you are enjoying the process. So, try to channel your energy to ensure that the beauty comes through. In case you have any more queries, reach out to us in the comments section below. And keep a watch on this space for more interesting reads.
One thing every house improvement enthusiast, DIY geek or interior decorator needs is a dedicated crafting table. A craft table where they can work on the ideas they have and the ideas they have collected from the web. In addition, they need a table that does not interfere with their work-flow, to say the least, but what they hope for is to find or build a craft table that can help them get things done quickly. This article shows a light of hope to DIY enthusiasts who do not know how to make a crafting table that will help them streamline their workflow and organize everything related to the work at hand.
A word of caution, before we begin, the ideas presented here are not definitive, by any means, but then DIY enthusiasts just need a direction and a map. They can figure out the rest on their own. Imagination plays the creator role in this equation and it will set the rules of the game as you play.
5 key considerations when making a crafting table
Space to move around
One of the key considerations when making a craft table is related to space on and around the table. A design of the table should be such that there is enough space on the table to work on the project and there should be enough room around the table to move freely from one place to another when working on a DIY project.
Often people find their movement constrained because of the shape and size of the table, which reduces their productivity. In addition, due to the lack of space on the crafting table, a person needs to shift parts of the project from one place to another in order to make space. Constant toing and froing irritates, to say the least and moving things from one place to another seriously slows down the project.
Another feature that one should keep in mind when making a craft table is storage space. It is important that there is plenty of storage space in the crafting table. It will help in keeping things organized and finding them when needed. When building storage space beneath or above the crafting table, one should always keep in mind that craft items come in various shapes and sizes and there is absolutely no way to know what kind of items you will need to store in the future. Therefore, one should make some removable dividers between the shelves, to make the storage in the table useful in the future as well.
Regardless of what kinds of projects the crafter undertakes, a power source is always required. One should have an electrical board with more than one 6A, 16A and 32A AC power sockets and switches installed in the crafting area. This will save the time that gets wasted in removing one plug and attaching another, this significantly slows down the process. In the absence of a permanent solution, one can at least have a power strip extension board around the craft table, like the one shown below.
One has to be on its feet to complete certain DIY activities, but there are some DIY projects that require the person to sit comfortably to do the task at hand. It is, therefore, important to have a comfortable and preferably height-adjusting chair in the craft room, if the chair has wheels it will be even better. The wheels will be helpful in moving around without getting up from the chair, every time the project demands it.
Ideally one should have a lot of natural light in the crafting room, but if that is not possible than proper artificial lighting should be used. Proper lighting is as important for a good crafting table as anything else discussed above. It is hard to focus on your work in a poorly lit area. In the absence of proper lighting, it would be hard to see the exact output produced at any given point. It holds true for the most of the projects. Although there would be some projects that may not need such a close monitoring, but still it is better to have proper lighting on the craft table. Generally speaking, one needs to constantly check the development of the project in order to rectify the error if and when it happens. This will minimize the wastage. When installing overhead lights, it is recommended to also install table lamps to focus on the project area.
Like proper lighting, proper music is an essential item to have in a crafting room. A music source installed near the crafting table with a good supply of music to keep you engaged is recommended. Music will keep the motivation at the optimum level, which will let the creative juice flow freely.
Bonus Tip - Get inspired
Inspiration boosts creativity. In truly inspired moments creative juices flow like torrents and when it comes to inspiring people nothing works better than written words. It is, therefore, important that one has an inspiration wall made in a prominent place around the crafts table.
The inspiration wall in the craft room should have some inspiring quotes and there should be space to hang things that the person has worked on in the past. As the saying goes, nothing inspires more than success. Nothing inspires more than successfully completed projects.
How to make a perfect all-purpose crafting table
Step one: List down the activities
In almost everything that one does, the first step is always involves knowing one's objective. This holds true for making a craft table as well. The first should be to make a list of kinds of projects you will undertake. This will work as a basic building block for an all-purpose craft table design.
All DIY activities may not need separate setup, but some of them do, so you need to know what kind of space you require to do what. As discussed above, you will also need to build a storage space to keep different kinds of items in or around the crafting table. Make a list of shapes and sizes things that you may want to store.
Material and tools required to make a craft table will almost be the same irrespective of the crafting table you are going to make. However, there could be some specific tools and material that you may need. You should make a list of those as well.
Plywood would be the best material for a craft table, but you can also go for MDF. Both have their own advantages and disadvantages. Along with the plywood or MDF, you will also need nails, industrial strength adhesives, laminates, various sizes of screws, measuring tape, wood cutting tools, hammer, drill machine and safety gear to make a crafting table.
Step 3: Measure it and build it
The final step is about execution. The time has come to begin working on your first DIY project, which will work as a platform on which you will bring all your DIY ideas to life. Caution and meticulousness are two important traits at this level. These will help you build the crafting table without wasting your resources.
After all the details have been laid, it is time to get inspired. And we cannot think of a better way to inspire a DIY geek than showing them examples of some exciting yet functional craft tables.
By showing how to make a crafting table that can help you organize everything in one place, the article has tried to emphasize that like any DIY project, making a craft table is also tamable. Like any other project making a crafting table should also be taken as a DIY initiative. The end result will not only produce a wonderful table but also give you immense satisfaction, the importance of which can never be overstated.
What’s worse than knowing there’s a mosquito around you? The inability to locate it!
That irritating buzzing, combined with occasional wing flaps and the thought of them carrying some disease - don’t even get us started on the frustration! You set out on a desperate search for their hideout, but all in vain.
If you’re yet to face this, we assure you the day is closer than you think. But that’s only till you find an effective way to prevent it. And that’s why, we have come with a dozen DIY methods to help you in luring a mosquito out of hiding.
From natural ingredients to market-bought tools and even your body, we have covered it all for you to take a pick.
To get the ball rolling, let’s talk about one of the most reliable DIY methods - the yeast trap. These pests have a natural liking for CO2 (carbon dioxide), and its high content in yeast acts as the bait for them.
To set up this trap, here are the things you will need:
Active yeast
Brown sugar
1 cup boiling water
Plastic soda bottle
Duct tape
Spray paint/black construction paper
Setting The Trap
To begin with, carefully cut the empty soda bottle just below the neck area (where it flares out to meet the main section). Remove the cap from the resultant ‘neckpiece,’ and insert it into the bottom cylinder in an inverted manner, resembling a funnel.
While at it, don’t push the neck all the way down to the bottom of the cylinder. Ensure that you leave enough room to accommodate a cup of liquid and some air space. Using duct tape, secure the funnel with the bottle.
Not only does the tape hold the funnel in place, but it also seals the edges through which the mosquitoes might escape. Once done, cover the bottle using spray paint or construction paper. Leave it to dry.
Next, add about ¼ cup of brown sugar to 1 cup of boiling water. Stir thoroughly until the sugar is completely dissolved. Then, leave this solution to cool until you can comfortably stick your finger into it.
If the solution is too hot, it will kill the yeast. On the other hand, if it’s too cold, the yeast will not activate fully. So ideally, the temperature should be between 120 and 130 degrees Fahrenheit. Hence we’d recommend using a cooking thermometer to keep the temperature in check.
When the solution reaches the correct temperature, gently mix in a packet of yeast and pour it down the funnel. Your yeast trap is ready! Since the trap is meant to attract mosquitoes, don’t keep it too close to your sofa or bed. Instead, place it near the outer perimeter of the rooms.
How Does It Work?
Yeast reacts with sugar to release CO2 in a process known as fermentation. The mosquitoes follow the trail of CO2 to enter the bottle and get trapped due to the sealed edges. After some time, they get fatigued and drown into the solution. If you see too many mosquitoes getting trapped, change the solution frequently to keep it effective.
Likewise, you may adjust the quantity of yeast and sugar according to your requirement.
High velocity fans can be converted into an excellent mosquito trap with a little work. While you may also use a box fan, we prefer high-velocity fans as they produce a large volume of air.
Here are the things you will need:
High-velocity fan
Mesh screen
Strong magnets/plastic zip ties
Rubbing alcohol
Water
Paper towel
Spray bottle
Scissors
Setting The Trap
Firstly, place the fan near an area that you think houses the most mosquitoes (the rear side should face that area). If there’s no power outlet there, get hold of an extension cord. Once you’re happy with the placement, take the mesh screen and cut it to match the size of the fan’s face (round metal frame).
Make sure that the holes aren’t too small for the mosquitoes to pass through. Then, wrap it tightly around the fan so that the edges of the screen overlap with the frame’s sides. Secure it firmly using magnets. If your fan doesn’t have a flat metal frame, use plastic zip ties.
On the side, add equal parts of rubbing alcohol and water in the spray bottle.
How Does It Work?
Switch on the fan at a moderate speed. As it draws air to blow out from the front, the mosquitoes also get sucked (like a vacuum cleaner) to get trapped in the mesh screen. Let the fan run for some time.
Next, turn off the fan and spray the diluted alcohol on the screen with focus on the trapped mosquitoes. The rubbing alcohol will kill them. Ensure that you don’t get anything into the motor. At the same time, drench the paper towel with the same solution and place it directly below the fan.
Very carefully, take off the mesh screen and tap it lightly, so that the mosquitoes fall on the towel. Dispose of both and wipe the fan clean with a dry cloth.
The Beer Trap
You can also substitute the yeast and sugar solution for half a can of old beer. Several studies have shown that although mosquitoes don’t like the taste, they have a natural inclination towards the smell of alcohol.
Increase CO2
If you are too impatient to wait for the yeast trap to work, spraying a bike inflator will get the job done rather quickly. However, you need to be extremely careful while working with it, as increased CO2 levels can cause dizziness, nausea, headaches, faster heartbeats and a lot of other health complications.
Thus, we’d not recommend employing this method in very closed spaces. Furthermore, use a mask and ventilate the area thoroughly once you get rid of the mosquitoes.
A safer method to do this would be to purchase a mosquito magnet. Modern mosquito magnets use a catalyst, which is practically a set of ceramic beads or a ceramic grid coated with platinum. This catalyst directly converts the propane to release heat and CO2 without requiring a flame.
Moreover, the octanol (a chemical that attracts mosquitoes) cartridge also intensifies the appeal. The resultant combination of gases and chemicals draws mosquitoes, who then come near the source. As they get closer, a vacuum-like fan sucks them into a net bag, where they dehydrate and die.
The biggest advantage of using a mosquito trap is that it doesn’t release any harmful byproducts, like carbon monoxide or nitrogen oxides. Besides, the lack of flame reduces the risk of fire accidents.
The Flower Method
Besides amping up the ambiance of your room, flowers also lure mosquitoes out of their hiding. Since they love feeding on the nectar, you will notice quite a few mosquitoes around the flowers, especially at night. Buy yourself a bouquet or keep an assortment of your favorite flowers in rooms most affected by these pests.
And as we were not very confident about our ability to kill them with our bare hands, we fell back to a zapper.
Although this method may not show speedy results like the yeast trap, it’s effective nonetheless. Make sure to keep the flowers fresh or replace them as soon as they start drying out.
Using Fragrance
Colognes and perfumes that have a floral fragrance are said to attract mosquitoes. Additionally, skincare products that contain lactic acid (which is also produced naturally by humans with sweat) are incredibly enticing for them. Pour a few drops of any such product on every nook and corner of the house to make the mosquitoes come out.
Alternatively, you can also wear your favorite perfume or put on some lotion and then walk around the areas which tend to house the most mosquitoes. In that case, remain cautious to prevent those annoying mosquito bites!
An important thing to note here is that not all fragrances are likable for mosquitoes. So, using products that smell like the following may not serve the purpose of bringing them out:
Garlic
Basil
Lemongrass
Peppermint
Neem (also known as Azadirachta Indica, nimtree, or Indian Lilac)
Systematic Searching
The systematic searching technique is most useful for finding (and killing) mosquitoes in confined spaces. Plus, you don’t need any fancy gadgets to accomplish the task. A flashlight, zapper, and some concentration will do the job!
In case you plan to use this method for a larger space, here’s how you can do it. Start with confining the place as much as possible. You can use moveable furniture or large cardboard boxes to do this (but keep sufficient space for you to move around). Once done, close all doors and windows, and dim the lights.
Using a flashlight, scan every inch of the wall, floor and ceiling. Blow slightly near the corners for the CO2 effect; this should bring the mosquitoes out from their hiding. Be careful not to lose focus and zap quickly as soon as you spot them.
Light Trap
You can also implement this plan with a little alteration and without confining the space. Turn on a small light source and keep it stationary. Keep the flashlight turned off for the time being. After some time, the mosquitoes are likely to follow the light and settle on a nearby surface.
Now, slowly move the flashlight to that position while keeping focus on the mosquito. This will cast a bigger and better shadow for you to zap it away.
The Technology Trap
The technology trap works pretty much the same way as systematic searching, where you don’t even have to get out of your bed.
Switch off the lights in your room and get cozy under the blanket. Then, increase the brightness of your phone or tablet to the maximum. Here, you can continue holding the device, or you can place it on your chest (over the blanket). The mosquitoes will definitely follow the light, come near you, or even sit on the screen.
Again, don’t lose vision on them. Keep your zapper ready and reflexes sharp to deliver that killer strike, but make sure you don’t damage the device.
Stagnant Water
It’s a no-brainer that stagnant water is a preferable breeding ground for mosquitoes. But what if we told you that you could also use it to trap them? By adding household items to stagnant water, you can turn them into virtually death traps.
Oil
A thin layer of oil can effectively trap mosquitoes, along with suffocating the larvae. For this, you can use any natural oil like vegetable, olive, or cinnamon oil. Moreover, you don’t need more than 1 teaspoon per gallon of water. However, don’t use it for water bodies that have fish.
Soap
Adding a few drops of any soap to a body of stagnant water reduces its surface tension, which in turn, drowns the mosquitoes.
Apple Cider Vinegar
Sure, this all-organic substance doesn’t kill adult mosquitoes, but is potent enough to wipe off larvae when used in higher concentration.
Bleach
Much like apple cider vinegar, bleach can be used to kill the larvae. And since it’s essentially a toxic substance, make sure that the diluted water doesn’t mix with drinking water or feed plants and animals.
Till now, we’ve seen the use of everyday objects to lure mosquitoes out of their hidings. But to be honest-nothing attracts them more than a human body. So, in the following sections, we discuss how you can use your body to form that ideal bait.
Using Pore Secretions
Upon eating certain food, our pores secrete certain substances like salt, potassium and lactic acid that attract thirsty female mosquitoes looking for blood like no other. Crisps, salty potato snacks and soups are a few things that increase the level of salt in our body.
Similarly, sugary treats mimic the nectar-like sweetness of flowers. On the other hand, fruits like avocado and bananas are a rich source of potassium. And if you enjoy a glass of beer or two in the day, the job is already done.
If you want to employ this method, be extra cautious to avoid food that can affect your health.
Using Body Heat
It may come as surprising for many that mosquitoes can pick up thermal sensory information even from a distance. Simply put, they are naturally fond of warmed body animals because of their blood-producing abilities. This is one of the reasons why people who feel hot to touch are more prone to mosquito bites.
Hence, increasing body temperature can effectively lure mosquitoes, and there are several ways to do that.
Working Out
The heat, sweat and odor that your body produces after a good workout is simply irresistible for mosquitoes. But if working out per se is not quite your thing, you may even go for a run or do some heavy duty cleaning.
After you’re done, walk around the room to bring out as many mosquitoes as possible before your body temperature and breathing become normal.
Take A Hot Shower
While taking a hot (not lukewarm) shower may not make you sweat or breathe profusely, the resultant body temperature is still good for mosquitoes to hang around. Apart from that, sitting by a fireplace or getting snuggly under a blanket will also have the same effect.
The only thing to keep in mind for this technique is that you need to bear the heat for long enough to sweat considerably. Otherwise, it won’t show any significant results.
Assistance From A Mom-To-Be
Okay, this is us going over the top, but pregnant women are more susceptible to mosquito bites. As you may already know, frequent hot flashes are a common pregnancy symptom, thereby making them more attractive to these pests. In addition, the extra body weight during this time causes intensive breathing that makes them exhale more CO2 than usual.
So, if you have a pregnant friend or family member, it may not be a bad idea to ask them for help. However, this is a risky attempt, as mosquitoes are active carriers of many diseases. Ensure that you kill them before they can bite her to prevent any mishap.
Wait For A Full Moon Night
Aligning your mosquito hunt with a full moon night may not sound very romantic, but will get your job done more effectively nonetheless. Several studies have proven that for unknown reasons, mosquitoes become 500% more active during a full moon than on any other day.
So, grab your zapper or mosquito magnet to pull off a (not so) fun all-nighter!
Final Words
The list was long because we didn’t want to leave out any trick from the book!
From their buzzing to the carrying of diseases, mosquitoes are every bit annoying. That’s why, it’s important to get them out of their hiding and get rid of them.
But it’s still advisable to keep them away in the first place. And the best way to achieve this is by keeping your surroundings clean. Additionally, use natural mosquito repellents and carry out regular mosquito control drives with the help of professionals. Prevention is better than cure for a reason!
On that note, it’s time for us to wrap up today’s guide. We hope that by now, you have decided on a method for your next weekend's activity. Do let us know about it in the comments down below.
Outdoor Christmas trees can be stopped from blowing over through various means, like planning the tree’s location to securing it in its position. Keeping the tree as stationary as possible without it toppling over will help it remain pristine and gorgeous throughout the holiday season.
Artificial or natural, Christmas trees tend to fall over during strong winds, which can become frustrating very quickly.
And Christmas celebrations are smack-dab in the middle of the winter season, which means that you will see your tree topple very frequently. Of course, stopping this from happening will keep your tree looking just as good as it did the day you set it up.
So, here’s a guide to preventing trees from blowing over and sustaining unnecessary damage.
How to Keep Outdoor Christmas Trees From Falling Over
Winter winds can be very strong, and depending on where you live, they can be downright tempestuous. This makes the problem of fallen Christmas trees a difficult one to solve, particularly since it can damage both the tree and the Christmas decoration. After all, replacing broken ornaments and mending damaged tree branches can become a nightmare to deal with throughout the holidays.
If you’ve had prior experience with this issue, you may have already figured out what has to be done to solve it. The gist of it is to keep the tree stationary so no gust of wind is strong enough to knock your tree down. Of course, the difficulty of the problem lies with the approach rather than the immediate solution.
So, here’s what you can do to keep your outside Christmas tree from falling over in the winter winds:
Position your tree in the right spot
Use wires and stakes to secure the tree
Make use of heavy outdoor Christmas décor and tree ornaments
Get the right tree stand with a wide base
1. Picking The Right Location
Positioning your tree well can very well be the difference between a gorgeous, fully intact Christmas tree and a damaged, unsightly one.
One of the best ways to keep the tree from toppling over is to keep it in a sheltered location. By doing so, you will be limiting the chances of it facing strong gusts of wind, keeping it safe from any potential damage. Additionally, there will be no need to move it for the remainder of the Christmas and holiday season, making the decorative process a one-time task.
Places like the front porch or the patio provide ample shelter for the tree while making it the focal point of your home. The aesthetics of your home will be preserved while the tree remains safe from the elements.
Another great place to set up a Christmas tree for holiday-themed aesthetics is the yard. Of course, most yards are open and lack any surrounding structures to shield the tree, creating a few problems for the Christmas décor. That said, this can be worked around without any issues.
You can look at the weather forecasts and keep track of the wind direction using wind devices. Consider placing the tree next to your backyard shed or the house itself, based on the wind direction. That way, you will be able to shield the house quite easily without having to worry about the tree falling over constantly.
Thus, it all comes down to the wind direction and how you position the tree in relation to the nearby buildings and sheds.
2. Use Stakes Or Guy Wires To Secure The Tree
Unfortunately, there is a chance that the wind direction is simply not favorable for your Christmas tree. And if there are no surrounding structures to block the wind, the tree being knocked over by strong wind seems inevitable.
In such an event, you can use the simplest of all solutions: tie the tree down. While this can be somewhat difficult to hide, especially if your tree is large, it is a solution that won’t make an unsightly mess.
Securing the tree with stakes or guy wires is simple. To do so, you’ll only need a set of guy wires or ropes, stakes or tent spikes, and a large hammer. Simply follow the steps detailed below to wire your tree easily.
Step 1: Fasten A Guy Wire Or Rope Around The Tree Trunk
After sizing the tree properly, fasten a guy wire around the trunk as tightly as you can. Ensure that the knot doesn’t come off by tugging on it lightly, after which you may proceed to tie the wire to a stake.
Step 2: Tie The Rope To A Tent Spike, Stake, Or A Baluster
Tie the wire or rope to a stake, tent spike, or porch baluster based on what you have available close to the tree. If you’re using either of the first two, note that you must ensure the tent spike has been driven far enough into the ground. You’ll want the spike or stake to act as the anchor for the duration of the holiday season, after all.
An important thing to note with regard to balusters is that they need to be strong enough to hold the weight of your tree. There have been a few cases where the balusters snapped in half under duress, which can be a headache to mend. While not the best solution, balusters can be a decent option if tent spikes or stakes aren’t available.
Step 3: Repeat The Steps For Several Stakes Or Tent Spikes
Set up a few other tying spots to make sure the weight of the tree is distributed among multiple tent pegs or balusters. Additionally, it’s usually best to arrange the tying spots in a circular pattern. That way, your tree will have enough support not to topple over in any direction.
And lastly, ensure that the stake-and-guy-wire setup isn’t a tripping hazard in your front lawn or backyard. An accidental tripping can easily undo all your hard work with the tree, which can put a damper on your festivities very quickly. So, it’s for the best not to space the stakes out more than a foot from the tree.
3. Use Heavier Christmas Decorations And Ornaments
If you’re looking to immobilize your tree, why not weigh it down to the point that it cannot move freely at all?
Using heavy ornaments and larger decorations can achieve just that, with their addition increasing the overall weight of the tree. And with an appropriate amount of Christmas decorations fastened to the tree branches, the tree will have enough mass to withstand strong gusts.
Advise
This only applies to larger trees since the branches of smaller trees would simply break under the weight. At most, you can hang a couple of baubles and garlands on the smaller trees before they deform or snap.
So, once you’ve gathered your hanging decorations and ornaments, try to make sure that the tree branches are thick enough not to be easily damaged. Natural trees like white spruce and Fraser Firs can easily handle heavy items, while you will require a wide and large artificial Christmas treefor the same purpose.
Tip
Try not to crush the short needles of white spruce, as it can spread an unpleasant odor around the environment. It’s better to be cautious when decorating this tree.
Baubles can be affixed to an outdoor tree using twist cable ties that allow you to attach each ornament to the branches. Tie them well enough, and they will not budge in the winter winds. And make sure you place several of these spherical ornaments all around the outdoor tree to spread the weight around equally.
Pair these with inflatable decorations, decorations made with paper and ribbons and string lights for a complete Christmassy feel. Do note that Christmas inflatables might not withstand a windy night, so feel free to take them down before you call it a night.
4. Pick A Tree With A Wide Base
The wider the tree base, the more difficult it will be for anything to knock it over. That includes wind as well.
By increasing the surface area of the tree base, you can effectively give the tree a solid foundation that keeps it still no matter what. The increased stability is good, but the wider base can practically make the natural or artificial tree immovable if you add weights to it.
Wondering how? It’s as simple as filling up small plastic store bags with rocks or sand and placing them over the base. That is all there is to improve the stability of your Christmas tree.
For smaller trees, even an outdoor umbrella stand can work well enough as a Christmas tree base. All you need to do is make sure that the pipe diameter of the umbrella stand is wide enough to accommodate the tree trunk. Once that is done, you can weigh it down using a sandbag or tie straps to reinforce its stability further.
What if you had a larger tree? If so, you can use a metal fence post base instead that is functionally the same as an umbrella stand. The only extra step with a metal fence post base is that you will need to affix the base to the location of your Christmas tree. For decking and patio, you may need to drill holes into the deck or the concrete floor to secure the base as well.
Lastly, if you live in a particularly windy area, you can combine all the methods listed here to make your Christmas tree immune to wind. Your tree will stand tall when faced with anything that isn’t a heavy storm.
Can I use a regular tree stand for an outdoor Christmas tree?
You may be able to do so, provided that you remain vigilant of certain factors. To use a regular tree stand for an outside Christmas tree, you must abide by one of the following conditions:
Live in an area that doesn’t face high-speed winds
Shelter the natural or artificial tree well
Use guy wires or tie straps to secure the tree completely
Use heavy ornaments to weigh the tree down
A wider tree stand is better than a regular one in almost all scenarios, so consider switching to one as it is a convenient solution.
How do I maintain an outdoor Christmas tree during windy weather?
Caring for a Christmas tree can be challenging, especially if your tree is a natural one. A natural tree needs up to a gallon of water every day to appear fresh and vibrant, something artificial trees don’t need at all.
Here are a few tips to take care of your tree during bad weather conditions:
Before decorating, keep the tree sheltered in a cool porch or patio
Cut cleanly across the bottom of its trunk
Use LED lights for both artificial and natural trees for low heat exposure
Consider recycling the tree after the holidays are over
Check the water level of your tree every day
An evergreen tree can last several weeks with proper care and can be recycled for further use. Usually, this can be done through local Christmas tree recycling programs.
But if it dries up completely, or if your fake tree can’t be repaired, you may want to dispose of the Christmas tree.
Can I use a fake tree outdoors?
Artificial trees can be used outside safely, provided that they are designed for it. Some material types, like textiles and plastics, can’t withstand direct solar, rain, and wind exposure, causing them to fade over time. On the other hand, even prelit trees can be used outdoors, depending on the make.
Consider the manufacturer’s recommendations before purchasing an artificial Christmas tree for outdoor use.
As a temporary solution, you can make your tree fade-resistant by using a UV-resistant spray. You can find these on the market based on the materials used to make the plant.
Final Words
Outdoor Christmas trees can be prone to blowing over in windy weather, which is why you should provide them with ample support. After all, there’s no better way to ensure that your festive spirits remain high all holiday long than a vibrant Christmas tree standing tall.
No matter what kind of Christmas tree you choose, it’s always good to take precautionary measures to keep it upright. The methods listed in this guide, along with DIY methods like weight bags, will help prevent the tree from falling over.
And lastly, don’t forget to take good care of your natural Christmas tree! It needs as much care as any other plant, requiring plenty of water and gardening care before it’s ready for you to decorate. With that, your tree will be the brightest beacon of your home throughout the Christmas season, bar none.
Installing a wire brush on an angle grinder is similar to installing any other blade attachments. You need to dismantle the blade guard and arbor nuts to take the old blade out and install the new wire brush. After re-attaching the parts, you can use the grinder again.
An angle grinder is one of those tools that you will always find in the toolshed of a DIYer. Thanks to its versatility, it can be used for a wide range of household tasks.
In fact, if you use a wire wheel, you can use the angle grinder to clean grime and debris off of a surface as well. But from our experience, many users do not know how to install one, which keeps them from fully utilizing this functionality.
That is why we have addressed it in this brief guide. So, if you are curious, dive in!
What Are Angle Grinder Wire Wheels?
Before we proceed to the meat of this article, let us discuss a little bit about what wire wheels are. If, by any chance, you haven’t heard of the term before, then this will give you a good idea.
Wire wheels are a specialized attachment that you can use on angle grinders to clean and deburr a surface. In some cases, it can also be used to scrub paint off surfaces. Such a feat is made possible owing to the design of this attachment.
Unlike other angle grinder blades, wire-based attachments come with numerous metallic bristles attached to the edges. These bristles are generally made from hard and springy steel, which makes them tough enough to scrape off materials from a surface. Some manufacturers may use brass, copper, or even stainless steel, which improves the durability of the bristles.
On that note, there are two different types of wire-based angle grinder attachments available today - wire wheel and wire cup brush. Despite being used interchangeably, there are certain differences between these two, as we have discussed below.
1. Wire Wheel
Typically, the wire wheel is shaped like most other angle grinder discs. The wire bristles are attached along the edge of the disc, while the base or the center of the disc is attached to the angle grinder.
Out of the two wire-based attachments, this is more popular among users. It is due to this reason that people refer to all wire-based attachments as wire wheels. In terms of utility, this attachment is beneficial for clearing out edges, crevices, and cracks.
2. Wire Cup Brush
As the name suggests, the wire cup brush is an attachment that is shaped like a concave cup. Here, the bristles are attached at the edges, and they are situated perpendicularly to the base of the cup.
The bristles of this attachment are made of the same materials as the ones used in wire wheels. Because of the design, wire brushes are commonly used to scrape and polish flat surfaces.
How To Install Wire Wheels/Wire Brushes On Angle Grinders?
Even though wire wheels and wire brushes are quite different in design compared to conventional angle grinder blades, the procedure for their installation remains almost similar.
Now, many models today come with convenient mechanisms that allow you to remove the angle grinder blade without a tool. But if you have an older model, you can remove and install the wire brushes just like any other angle grinder attachment using the process we have described below.
Step 1: Remove The Blade Guard
First, you need to unplug the grinder and remove any batteries just to be safe. Then dismantle the blade guard by removing the screws that hold it in place. In some models, the blade guard may be attached with a latch, so make sure to dislodge it before proceeding further.
Step 2: Dismantle The Old Blade
You need to carefully remove the arbor nut that attaches the blade to the machine. Next, pull the blade out of the angle grinder spindle gently. Before you do that, though, make sure that you lock the blade by pressing the blade lock button. It is usually located near the switch, and it stops the blade from spinning unnecessarily while you remove it.
Step 3: Attach The Wire Wheel
After removing the old disc, place the new wire wheel over the spindle. Make sure to align it properly with the grinder so that you can seamlessly attach the arbor nut. In case of wire cup brushes, however, you can directly attach or thread the brush wheel to the spindle. This means that the previous steps might not be necessary in that situation.
Step 4: Reassemble The Grinder
Once the wheel is in place, carefully reattach the arbor nut with a wrench. Make sure not to tighten it too much, as it can damage the nut. Then reattach the blade guard, and put the battery back in the machine. After that is done, you will be good to go!
Using Your Angle Grinder
Knowing how to install a wire brush or wire wheel isn’t enough - you also need to know how to use an angle grinder. That’s what we have discussed in this section, so we suggest that you keep reading.
When operating an angle grinder, you need to use the correct technique, or else you won’t be able to do a good job with it. This is especially true in the case of wire wheels.
Make sure to set the correct spinning speed while using the angle grinder. Using an angle grinder at high speeds makes it very difficult to control, and unless you are an experienced user, we would not recommend it. That said, the speed shouldn’t be too low either so that you can get the job done effectively.
You should also consider the angle and pressure at which you hold the angle grinder to the surface. And be careful and attentive while using it as this is a pretty powerful tool, and even the slightest mistake might lead to a serious accident.
Keeping that in mind, here are some safety tips you should follow when using angle grinders.
Wear protective gear like a face shield, goggles, and gloves
Keep your workplace clutter-free
Do not work on wet surfaces
Keep all flammable materials away from the grinder
Ensure you have a fire extinguisher nearby
Make sure the power outlet isn’t faulty
How To Install Wire Brush On Angle Grinder Final Words
Installing and using a wire brush on an angle grinder is a better strategy than scrubbing and polishing surfaces manually. Not only do you save a lot of time and effort, but you can also do a better job.
However, using a heavy-duty power tool like an angle grinder comes with its fair share of risks, which is why people may tend to avoid it. But if you follow the safety tips we have discussed, you will be completely safe.
And once you get the hang of it, you won’t want to go back to manual scrubbing and polishing ever again!
You will need all the right tools to drill holes and a back mount bracket to install the battery-operated push button unit at an accessible-height outside the main door. Follow the instruction manual further to place the doorbell chime receiver and connect the transmitter within the compatible wireless range.
Without doorbells, how would your guest announce their arrival? If your electrical system is already in place, you might want to avoid hardwiring a manual doorbell to it. And to eliminate this problem, you can choose to get wireless doorbells.
On purchasing a wireless doorbell, you will also have to learn how to install it. And to help you with that, we have come up with this guide.
Let’s take a look!
Three Things To Remember During Wireless Doorbell Installation
1. The Receiver Must Be Within Hearing Range
The point of a wireless door chime is to hear it when it rings. And to ensure that happens, you must place the receiver at a place where the wireless doorbell can be audible. It should be audible from your lawn or backyard as well.
In case the door chimes are not audible, consider purchasing extenders, and you will be able to hear the chime from anywhere on your property.
2. Receiver Should Be In The Range Of The Transmitter
If you do not have experience working with electronics, you might not know what doorbell transmitters are. Well, there’s nothing too complicated about them. A transmitter is what carries the signal from the doorbell button to the receiver. To make things easier, you might install a number of doorbell transmitters that can be easily accessed from anywhere in the house.
But, as we have mentioned before, wherever you install the transmitters, make sure that the receiver is within range of the wireless doorbells you are installing.
3. Install Extenders If Needed
For people who are trying to install a wireless doorbell system for their big mansion or large office space, a doorbell extender can be of great help. It can easily increase the range of the wireless doorbell.
If you are wondering how that works, let us explain it to you. An additional transmitter will carry the signals from the doorbell to the receiver, even from a long distance. So, even if the receiver is far from the door, the chime unit will function as effectively.
Steps To Installing A Wireless Doorbell System
Step 1: Plugging In Wireless Doorbell Chime Units
To begin with, you will need to locate a 120V outlet which needs to be near the door. You might need a higher or lower outlet capacity as well. To know the perfect requirements, read the instruction manual that comes with your wireless doorbell.
Also, when installing wireless doorbell chime units, it is essential that you place them strategically to make sure that the ringing can be heard from all areas. If you take our suggestion, go for the front hallway, as that provides a direct line of sight to the front door.
Step 2: Putting The Battery In The Push Button Compartment
For this step, you will first have to get your hands on a flathead screwdriver. Once you have it, put it to use and open the battery door casing on the push button unit. Then proceed to insert the batteries that come with it.
While at it, take proper caution and check twice if the battery has been placed correctly and is facing the right direction. Once done, it’s time to put back the battery door casing.
Step 3: Choosing The Right Location For the Push Button Unit
During a wired doorbell installation, it is an absolute must that you choose the right height. In general, you cannot go wrong if you keep the height between 44 and 48 inches for the doorbell push button. This will make accessing the doorbell easier for your guests.
To make the process more smooth, try placing the push button on the doorframe side and not on the hinge side.
Step 4: Time To Put The Push Button To The Test
Once you are done placing the push button near the door, it is time for you to test if it’s functioning properly. To confirm that the placement is right and the transmitter is catching the signal properly, press the push button.
If you hear an audible ring, you have done a good job so far!
Step 5: Mark The Screw Locations
To finally put the push buttons in place, you will need a back mounting plate, which comes with the package itself. Follow the steps mentioned in the doorbell instructions manual to make sure that you mark the drill hole locations correctly.
Not to mention, you might come across a push-button unit that makes use of the back of the housing as a plate. In that case, use the flathead screwdriver to open the unit and then proceed to mark the drill hole locations.
Final Step: Installing The Push Button Unit
The last step is to drill pilot holes in the wall that are not more than half the diameter of the actual mounting screws. Then proceed to attach the mounting plate and ensure that the mounting screws holding the plate are properly tightened.
Once the screws are tightened, the push button will be properly installed, and you can start using it.
What Are The Common Problems With Wireless Doorbell Installation?
1. Poor Signal Transmission From Push Button To Chimes
With a bit of research, you will know that unplasticized polyvinyl chloride (uPVC) or metal can hinder the transmission of radio signals. Because of this, your signal range might get limited, and the connection between the push button and the chime box might be affected.
So, if you have a uPVC or metal door, or window, it is best that you place the push button far from it. This might get really difficult if you have metal studs on the walls of your house. If you have installed the push button in front of the metal studs, there is no option but to relocate the button somewhere else to improve transmission.
2. Ineffective Chime Ring
You might find yourself in a pickle when the doorbell stops chiming or might be left wondering “why does my wireless doorbell keep ringing?”. This mostly happens when the push button unit has run out of power or when the chime’s outlet is malfunctioning.
To fix this problem, you will have to start by removing the chime unit from the electrical outlet. Once you are done doing that, put another device in place to check if the outlet is getting power. If this device is not functioning as well, you will have to check the circuit breaker and fix the power outlet.
Another common problem that users face while installing is placing the battery incorrectly. Wireless doorbell batteries are quite small in size, and people often confuse them with another type. So, before you insert batteries, take some time to ensure that you are using the right ones.
Also, before coming to the conclusion that something might be wrong with the chime control button, double-check your battery placement. It’s not uncommon for users to install it backward. If you have done the same thing, flip it and put it in its right orientation.
3. Low Chime Volume
To make it convenient for users, most wireless doorbells now come with a volume control option. So, according to your requirements, you can turn the volume up or down. And when away from home, you can even consider turning the sound off completely.
To know how to make these adjustments, make sure you read the manual carefully.
Tip
Many times, people change the security codes on their wireless doorbell system by mistake. Make sure to enter the right security code; otherwise, your doorbell will fail to chime.
4. Battery Needing Frequent Replacement
The lifespan of a doorbell battery depends on the surrounding temperature of the area in which the device is placed. For example, if you stay in a cold climate and the temperature falls below 41 degrees Fahrenheit, the batteries are likely to degrade sooner. This is especially true for the small push batteries that go in doorbells.
To sort out this issue, there is no other option but to replace the batteries from time to time. As you cannot adjust the weather conditions, we suggest you plan on changing the batteries in the doorbell more frequently during winter.
Warning
Take special care to ensure that the battery unit is always dry and in no way collects moisture. If the unit gets wet due to snow or rain, there is a high chance that the battery terminals in the doorbell unit will rust faster.
In that case, replacing the batteries won’t be enough; you will have to consider changing the push button unit. In the worst-case scenario, you might have to replace the entire doorbell system.
How To Install A Wireless Doorbell Final Words
Installing a doorbell is no difficult feat and can be done quite efficiently if you follow all the steps that we have mentioned above.
Once you are done installing it, play around and select a chime tone of your choice. If you have two receivers, make sure you select different sounds for both. This will help you understand when to answer which door.
If there are issues that you run into after the installation is over, troubleshoot them at the earliest. In case you face any difficulty fixing them on your own, we suggest calling a professional for help. And if things still don’t get better, check if the electrical outlet is functioning properly.
We all know that even the idea of installing a spa cover lifter yourself sounds like a scary one. However, all of this is a myth as the installation process is much easier than you think. The installation process is not too long, it takes about an hour at most and does not require any power tools.
Before we discuss the process of installing a cover lifter, here is a brief introduction summing up the need for a spa cover lifter.
How to Install a Spa Cover Lifter
Why Do You Need a Spa Cover Lifter?
You might think that you can move the cover of a brand new hot tub by hand. One look at the size and shape of the hot tub cover is enough to make you rethink the need for a hot tub cover.
The enormous size and shape of the hot tub cover make removing and stowing the cover a challenge for most people. Additionally, you are also at risk of facing serious back injuries if you lift the heavy object without any support.
Given the challenge ahead, it makes complete sense to opt for a spa cover lifter. Even the simplest of the models allow the user to cover the spa with little effort.
The frequent use of a spa cover means that, after a time, the cover will absorb water vapor from the spa. After absorbing the vapor from the barrier, the weight of the cover will start to move upwards, as the evaporation process continues. It is not until the cover becomes waterlogged that you should consider replacing it. Till the cover becomes completely waterlogged, a little mechanical help will make your life considerably more comfortable.
The use of a spa cover lifter means that you have the help of an extra pair of hands for opening and closing the spa. With the help of a spa cover lifter, you can use the spa to carry out quick water checks without hassle. The use of a lifter also eases the cleaning process because you don't stand the chance of hurting yourself in the process.
The life and performance of the hot tub are influenced by the maintenance routine you follow. The maintenance routine becomes more comfortable if you install the spa lifter following the procedures mentioned below.
Step-By-Step Installation Process
The first part of the procedure is to figure out whether the lifter comes with a mounting system or bracket. Follow the instructions mentioned in the instruction manual regarding the nature of the lifter. Given the nature of the product, you may be required to drill holes to screw the lifter in. Use a drill bit that is narrow for the purpose and ensure that you don't drill holes too far as it can damage the tub.
Once you are done drilling the holes, you will not face many problems in attaching the mounting bracket. You can use a drillor screwdriver to assist you during the process.
The package that comes with the cover lifter includes support arms that are responsible for connecting the two pivoting arms. You can then attach the pivoting arms with the brackets that are placed on the free pivots. Hydraulics are also available with some packages, especially if you order a powerlifter.
The next step is to ensure that the cover lifter is attached to the cover of your spa. Before you go about carrying out this step, it is imperative to discuss the issue with the manufacturer. Different lifters specified for various models have contrasting ways of finishing the act.
Most cover lifters also come with handgrips. You can slide the handgrips to whichever position suits you. You should look for convenience in this matter as the hand grips need to function effectively for you and work in a manner that is best for you. Additionally, if the package comes with any other components, be careful when attaching them. In the case of electrical components, avoid contact with water.
If, for one reason or the other, the spa cover lifter is not working, go through the directions, and rectify the mistake.
Required Materials
Here is a list of materials that you should possess if you are willing to install the cover by yourself. If you are looking to install a hot tub cover lifter, we advise you to purchase an entire cover lift package.
These are some of the essential elements that are required to aid the smooth operation.
Precautions
Before you set out installing the spa cover lifter, take note of the following precautionary methods.
Use all the appropriate tools
Before following the instruction manual, ensure that it offers the right advice
Don’t forget to wear protective gear
Be cautious throughout the process to prevent damage.
The installation of a hot tub cover lifter will ease the process of removing the cover. The installation will simplify the process by making it faster and easier. Keeping the lifter clean does not require much work.
The process of installing a spa lifter is not as challenging as it sounds. Once you start the process of installation, you’ll realize that it’s not as tough as it seems!
The dream of having a kitchen does not end with its design and usability; you must also consider the air quality.
Something that will help us have better air circulation around the kitchen, especially during meal preparation and cooking, is a range hood.
If you decide to buy one and struggle to understand how to install a range hood, whether you're doing a DIY or hiring a pro, we have a full installation guide in this article.
Let's get started!
Range Hood Installation: Step-By-Step Instructions
Before knowing how to install a range hood (photo above), it is essential to understand what this kitchen appliance is and what it offers.
A range hood is an appliance designed to suck, filter, and vent gasses through its exit point.
These hoods can filter the air, odor, smoke, steam, and excess heat produced within your cooking area, whether you're preparing Gordon Ramsey's Beef Wellington or simple scrambled eggs.
Now that you know what it is, it's time to learn what you'll need and the specific steps to install a range hood through the following section.
What You'll Need
To efficiently install a range hood, the first thing you need to do is prepare the specific materials and tools, like the following:
Caulk gun, Chisel (optional), Drill
Drill bits, Ducting, Hammer (optional)
Hole saw, HVAC foil/aluminum tape
Oscillating tool, Pencil, Range hood
Screw, Screwdriver, Tape measure
Wall cap, Wire stripper, Wire nuts
After gathering the aforementioned materials, you must follow this step-by-step guide:
Step 1: Take Down the Old Range Hood if There Is One
The first step involves removing the old range hood and its embedded components if your goal is to upgrade it
However, if you do not have an existing range hood or you will be installing it in other parts of your kitchen, then you can skip this step and proceed with the second one.
Step 2: For Safety, Shut off the Electricity
Before drilling and doing other steps to install a range hood on the wall, you must first switch off the electrical power from the breaker box.
Turning the electricity off will keep you or an expert from the dangers of electrocution, especially when dealing with old or faulty electrical wiring.
Step 3: Hire Electricians for the Electrical Wiring Setup if There is None
The next step you need to do is to settle the electrical lines that will run the range hood by letting an electrician set it up.
However, if you have existing wirings from your old vented range hood and there are no existing problems, pull the electrical cable, separate, and remove the protective paper to prepare it for connection in the later steps. Then, you can proceed to the next step.
Step 4: Measure and Mark the Vent Holes
After performing the first two steps, you must measure and mark the wall area where you will need to drill locator holes and set up the hoods.
Remember that this is only applicable for a ducted range hood (which is what most range hoods are) and not for the ductless range hood.
Nevertheless, you can do this by placing the round or rectangular duct at the chosen wall where you plan on mounting it and marking its diameter or area based on size.
Step 5: Drill or Cut Space for the Vent
When you have gotten the exact measurements of the range hood and the vent hole, it is time to drill or cut through the wall to make space for the vent.
In this process, you will need appropriate tools, such as the drill and drill bits. After preparation, follow these steps:
For circular vents, use a hole saw to drill a hole for the ductwork inside
For rectangles and other shapes, drill a hole through the wall using drill and drill bits
You can also use the oscillating saw or a cold chisel and hammer to perfect the hole
Check the wall entry points of the duct (flow)
If there are obstructions, relocate the holes in the wall
If there are none, proceed with drilling through the exterior wall
However, if you have ductless range hoods, it will not be necessary as they use a unique charcoal filter system to circulate clean air back into the kitchen.
Tip
If the obstruction includes pipes, plumbing, and wires, you can ask the help of professionals to relocate pipes accordingly.
Step 6: Install the Ductwork
The sixth step you must do is the process of installing ductwork. The duct is the pathway through which the air suctioned by range hood fans passes until it reaches the exit point.
In doing this, you must first put a mounting bracket (architecture) at the exterior hole using adhesive and mounting screws. After that, proceed with these steps:
Connect the metal wall cap or duct cap with the end length of the ductwork (duct extension) using aluminum tape and screws.
Then, install the connected ductwork into mounting brackets.
Using mounting screws, secure the ductwork into the mounting brackets.
Now that you are done with the exterior wall, proceed by finishing the route (ductwork) on the interior by connecting the remaining duct length.
This is done by inserting it in the interior wall's hole using aluminum tape.
Step 7: Run the Electrical Wiring
After you install ductwork, it is time to connect and run the electrical wiring for your hood.
Using wire nuts, connect the electrical wires in the electrical box; this means black to black wire, white wire to white fixture lead, and green grounding wire to green lead.
Once all the wires are connected and in their proper places in the electrical box, cover the ductwork and electrical wire with the duct cover.
Remember
A duct cover or an electrical cover is essential to protect the internal electrical work, duct connector, and other materials from damage.
Step 8: Mount the Range Hood
When the ductwork has been settled, it is time to mount the range hood into your wall. In doing this, the following actions must be performed:
Drill the mounting brackets into the wall, where the range hood will be attached based on the manufacturer's instructions, and fix them with mounting screws
Secure the hood on the wall with screws driven at its intended spots on the top
Cover the rest of the ductwork installed (seams) with a duct tape
Step 9: Turn on the Power and Test the Range Hood
When you have finished the first up to the eighth steps, you can proceed with the last (and most crucial step): turn on the electric power and range hood.
To check if the new appliance is working, here are the things you must watch intently:
If the hood runs when turned on (e.g., after plugging through an outlet nearby)
If the lights are working properly
If the vented range hoods suction air
If the air passes swiftly out through the exterior wall exit point
Remember
Aside from the light of the kitchen hood, you can also elevate the lighting of your space using the best under-cabinet lighting listed in the article.
In installing a range hood, there are essential factors that you need to consider and things you must prioritize. Well, don't worry because we have your back!
Based on our firsthand experience and knowledge of appliances, here are some of our tips that will surely make your installation smooth sailing:
Always check your local building codes before installing a new hood.
Always remove the old hood when it is not needed or when it is where you will place the new hood.
Choose and find range hoods based on functionality and aesthetics (i.e., your cooking needs and kitchen design). You can check out the best range hoods on the market through this article.
Don't forget to buy a range hood similar to the size of the space you will place it in.
Prioritize safety when installing a range hood.
Check your vent holes.
Range Hood Use and Maintenance Tips
After installing your kitchen hood, the best way to keep it nice and running is to use it cautiously and take good care of your range hoods.
To preserve the pristine condition of your wall-mounted range hoods, as experts in the field, here are our use and maintenance tips for you:
Regularly clean the vent hood where the air passes through to prevent grease buildup, which can be a fire hazard.
Regularly clean the exposed parts of the hood.
Regularly clean the fan blades and air filters to prevent the accumulation of dirt and debris that can damage the range hood.
You must remember that in conducting the maintenance tips mentioned above, you must have the wall-mounted range hood shut off to prevent electrocution.
Also, you can use a degreasing solution, cleaning spray, soap, and hot water for the filters and other parts.
Nonetheless, when using the new range hood, always follow the instructions and safety protocols laid out by the manufacturers in the guide given along with the appliance.
Tip
If you want to delve more and find the answer to the question 'Do I need a range hood?', check out this article!
Install a Range Hood DIY Vs Hiring a Pro: Which is Better?
Nowadays, a do-it-yourself (DIY) remedy has been at the heart of most appliance installations because of the recent pandemic and the availability of online tutorials.
Yet, it is still undeniable that pros in the appliances field are there for a reason. So, which is truly better, a DIY job or hiring a pro?
On the one hand, you can do DIY for a range hood, especially when you know how to measure and drill holes and accurately follow the steps in this article. However, lifting heavy hoods would still require someone to help you out.
Nevertheless, a DIY can help you save some money, as hiring a pro can cost between $100 and $600, depending on the specifications of your appliance.
On the other hand, hiring a professional Heating, Ventilation, and Air Conditioning (HVAC) contractor will assure you of the following:
Faster installation
Preventing electrical wiring mishaps
At the end of the day, it will still be up to you whether you do the installation yourself or ask for the help of professionals.
Range Hood Installation FAQs
Learning how to install range hoods undoubtedly sparked some questions in your mind. Do not worry because we are here to answer some of your FAQs through this section.
Do Range Hoods Have to Be Vented Outside?
No, hoods do not have to be vented outside (wall, ceiling, or roof) all the time because there are ductless range hoods.
How High Should a Range Hood Be?
A range hood must be 20 inches to 30 inches above the heat source. Specifically, if you have an electric cooktop, ensure the range hood installation is 20 inches to 24 inches above.
On the other hand, if you use a gas stove as a cooking surface, ensure you install the range hood at least 24 inches to 30 inches above.
Remember
You can always refer to the article on how to buy a gas range for specific measures, tips, and reminders.
How far should cabinets be from the range hood?
The hood mounted on the wall should have a 1/2-inch space from the existing cabinetry.
A range hood in your kitchen (or wall) is an essential appliance that provides proper ventilation, particularly within your kitchen area, whether it be a ducted range hood or a ductless model.
The key to properly installing a range hood on your wall is to follow the steps above with caution and accuracy (double-check).
Now that you have all the necessary steps, use, and maintenance tips, you can indeed install your range hood yourself or have the installation done by professionals!
How do you feel when your epoxy resin remains sticky even after the curing time is over? For sure, not good.
But there’s nothing to worry about, as this problem is more common than you think. People who work with resin often face issues that delay their projects. This happens because of some anomalies in the chemical reaction between the resin and the hardener.
You need to understand that not all problems related to resins are the same. And because of that, they require different solutions. So, in this guide, we will take you through the most common problems that resin users face and tell you how to overcome them. After reading this, we can assure you that you will be better equipped to handle this material.
Without any further delay, let’s dive right in!
How To Harden Sticky Resin
Dealing With Runny Resin
When working with resin, you might be in a situation where the resin looks uncured even after you give it the required curing time. In fact, it might remain a little gooey even after drying for an entire day. And there can be multiple reasons behind this.
For example, if you end up mixing more colorant than required while preparing the resin, then chances are that it will have a hard time solidifying. To give you an estimate, it is best to mix around 5-6 % colorant of the total amount of the hardener and resin.
Moreover, we have come across people making the mistake of adding two hardeners to resin. But it’s always better to add one, as otherwise, the outcome might remain gooey.
And the most common mistake that people commit is that they do not keep the proportion of the hardener and the resin right. That’s why we’d strongly recommend reading the mixing instructions thoroughly beforehand. In case you face any difficulty in understanding, you can contact the seller to resolve any queries.
How To Fix It?
If you are trying to fix runny resin, the most important thing to do is to scrape it off the surface. This is an essential step, and unless you do it correctly, then chances are that it will start leaking the moment you apply a fresh coat.
After you are done taking it off, apply a fresh coat. But make sure that you keep the proportions correct and apply them following all the instructions. Unless you do that, the resin layer will turn out runny again, and you would have to redo the entire process.
Problem Of Soft Spots
Once the resin is cured, you might be surprised to find a few stubborn spots that refuse to get dried. This leaves a few patches that remain wet for a long time. There is no pattern to soft spots, and they can appear anywhere.
It mainly happens when you fail to mix the hardener with the resin thoroughly. Or, you may even face this problem if the hardener gets stuck to the sides. So, we would recommend that you scrape the sides well when you are mixing and pouring. Without proper mixing, soft spots are highly likely to appear once the resin starts to dry.
How To Fix It?
In order to fix this issue, you would need to get hold of an 80-grit sanding paper. With this, you can sand it and clean off the dust from the surface. While sanding it, if you find specific parts to be gooey, do your best to remove them.
And only when you are sure that there is no more runny resin left on the surface can you start pouring a fresh batch.
Difficulty In Hardening Sticky Resin
Sometimes you will find the resin to remain a little sticky even after mixing a hardener in it. In situations like this, the resin hardens but still remains a little sticky. What do you do in such a situation?
This may happen because of multiple reasons. Many people are impatient and do not mix the resin well before they start with the work. We would recommend that you mix at least for a good 3-5 minutes.
This way, the resin and the hardener will mix adequately, and there will be no lumps in the mixture. And while you are at it, scrape the sides and the corners too to ensure that there are no lumps.
Other than that, you need to stay very cautious about the resin to hardener ratio. Read the instructions very carefully or watch some tutorial videos on the internet for help. Unless you keep the ratio right, the chances are that the resin will remain a little sticky.
We have also seen that resin tends to be a bit gooey and sticky when the ambient temperature of your workshop is not correct. If it is too high or too low, the resin will not be able to harden properly. For the first day of curing, ensure that the temperature is between 75 and 85 degrees Fahrenheit.
How To Fix It?
Unlike all the problems that we have discussed so far, this one is relatively easy to fix. In case you see that the resin is still sticky even after the curing time, you need to make a fresh batch and then pour it over the existing surface.
After doing this, give it the proper time to cure. If you have already identified a problem with the previous batch, make sure that you do not repeat the same mistake. Sometimes the temperature is an issue. If the ambient temperature was too low the previous time, ensure that you move it to a warmer place.
Apart from pouring a fresh layer, you can also try wet sanding the first layer. We would suggest that you continue to sand until you reach a solid surface. Once you are done sanding, you can pour a new layer.
And this time, do not forget to use a resin or acrylic-based sealer to make sure that the surface layer is effectively sealed.
Tricks To Harden Sticky Resin Easily
If you are new to working with resin, the chances are that you are not too familiar with the medium. When that’s the case, you will likely face a lot of problems. In this section, we will throw light on some of the things that you can do to avoid these problems.
Get Acquainted With The Instructions
Whether you are new to working with resin or not, always make sure that you do not miss out on the instructions. Resins of different brands work differently, and you must keep yourself well-versed with their functioning.
Moreover, in case you plan on working on a big project, we would recommend that you do a test round first. This will help you get acquainted with the resin better and reduce your chances of committing mistakes.
Learn How To Handle Sticky Resin
Handling sticky resin is not an easy thing to do, and to make your job easy, you can consider using Modge Podge. All you have to do is cover the sticky parts and leave them to dry. Other than that, you can also use triple-thick polyurethane.
Even after a day’s time, if you still find the resin to be a little sticky, just spray the surface with this. Then let it sit for 40 minutes before coating it again with another layer.
Pay Attention To Detail
In order to avoid resin-related problems, it is essential that you understand the material well. We would recommend that you choose to work in warmer areas as cold temperatures tend to delay the curing process.
And when mixing the resin, hardener, and color, make sure that you mix it well and there are no lumps or air bubbles present in the mixture. You need to be more careful if you are mixing colors to the mix and take proper care to mix them in the correct ratio.
Final Words
On that note, we have come to the end of this comprehensive guide.
We hope you have learnt a thing or two about hardening sticky resins and will be able to handle the material better. Before you start working, it is essential that you understand the basics in order to not commit the mistakes that we have discussed.
However, even after being careful, sometimes the resins do not act as they should. They do not cure properly and leave your project in a mess. But once you apply the techniques that we have discussed in this guide, we are sure you will be able to fix the problems in no time.
In case you have any further doubts, feel free to reach out to us in the comments section below. And keep a watch on this space for more compelling reads.
The distinctive aroma and powerful yet subtle flavor of cilantro make it a popular culinary herb.
It’s also one of the easiest plants to cultivate and harvest at home. In fact, growing these herbs indoors can be as successful as growing them in a garden, provided you give the plants extra care.
However, it’s quite natural for first-timers to make mistakes while planting cilantro in a pot. The most common mistake being - transplanting plants from the garden, which is a strict no!
To help you out, we’ve come forth with this guide on how to grow cilantro indoors easily.
Furthermore, we’ve provided a few tips for growing and harvesting cilantro and coriander seeds at home. But before that, we’ll address the popular debate on cilantro vs. coriander.
So, without further ado, let’s begin.
Cilantro Vs. Coriander
Cilantro is commonly used for cooking in Mexico, India, Spain, Africa, Russia, China, and other areas of Asia for many centuries now. Apart from its culinary uses, cilantro seeds are also known for their medicinal properties, especially for aiding in digestion and sleep.
But often, people tend to get confused between cilantro and coriander. Are they both the same?
Throughout North America, the stalks and leaves of the Coriandrum sativum plant are referred to as cilantro, while its dried seeds are known as coriander. However, in different parts of the world, the plant itself is called coriander, and the seeds are known as coriander seeds.
Should You Plant Cilantro Seeds or Plants?
The best way to grow cilantro indoors is by directly sowing the seeds in your garden as they germinate in about 7 to 10 days. You won’t need a headstart as it grows within no time. It’s also important to note that since cilantro develops a taproot, it doesn’t transplant well.
But if you can’t wait to harvest fresh cilantro leaves in late spring, start planting cilantro in peat pots so that they can be directly transplanted into your garden. Just make sure the plants are 3 to 4 inches apart.
Cultivating Cilantro Seeds & Plants
Before you begin cultivating cilantro, make sure you prepare the soil by adding compost and other organic matter to the planting area. Work it into the soil to a depth of at least 18 inches and rake the area to make it smooth.
Once that’s done, sow the cilantro seeds 6 to 8 inches apart in rows spaced about 1 foot apart and water the area. When the plants grow about 2 inches in height, feed them water-soluble fertilizers to enhance their overall growth.
And if you wish to get a steady supply of fresh leaves throughout the summer, sow the cilantro seeds successively every 2 to 3 weeks from the beginning of spring.
Tips To Grow Cilantro Indoors
Growing cilantro indoors is relatively easy, provided you know how to go about its cultivation process. On that note, we’ve come forth with a compiled list of tips and tricks to follow while sowing, cultivating, and growing cilantro or coriander indoors.
Use An Unglazed Terracotta Container
Unglazed terracotta containers allow moisture and air to pass through the plant roots, thereby facilitating their overall growth. Just make sure the container you use comes with plenty of drainage holes for the water to drain out.
Provide Additional Nutrients
It’s important to note that cilantro herbs, when planted indoors, require more nutrition since they come with limited root system ranges without access to sufficient soil nutrients. That’s why when planting cilantro indoors, ensure that the soil you use is a mixture of potting soil and sand to allow the free movement of water.
You may also add additional nutrients by using half concentrations of the fertilizers of liquid fish emulsion or any chemical formulation twice a week during its active growth period.
Water Your Cilantro Thoroughly
When growing cilantro indoors, thorough watering is more important than frequent watering. Always check the soil and only water the plants when the soil is dry to touch.
Furthermore, irrigate the cilantro herbs till the water comes out of the drainage holes of your terracotta container. You may use this technique as a guide to ensure that they’re being watered thoroughly.
Maximize Foliage
Your ultimate aim when growing cilantro indoors should be to maximize foliage. For this, pinch back the young plants up to an inch and snip off the top part of the main stem when you notice the development of flower buds or seed pods. This will redirect their energy back into leaf production, ensuring a fuller and bushier foliage.
Access To Sunlight
In order to grow cilantro indoors, you’ll have to make sure your plants have access to direct sunlight for at least four to five hours a day. However, you may also consider using a growing light to speed-up the overall growth process.
Prevent Plants Diseases
Cilantro is considered an insect repellent because of its strong scent, so it rarely has problems with insects or diseases. However, powdery mildew and leaf spot are the two diseases that may cause issues.
Small yellow spots on cilantro leaves occur due to excessive moisture and poor air circulation. To prevent them from turning into larger brown spots, make sure you grow them in well-drained soil that’s not overwatered. The soil should also be thinned out to ensure proper air circulation.
On the other hand, powdery mildew usually appears as a white powdery coating on the foliage, especially during hot and dry periods. You can prevent this from happening by ensuring adequate moisture to your cilantro plants. Also, make sure you avoid overcrowding.
Harvesting Cilantro Indoors
If you’re growing cilantro herbs at home, you also need to harvest them with utmost care. You may cut them at any time and use the upper and finely chopped leaves in cooking. But avoid using the mature, lower ferny-type leaves for the purpose.
You must also refrain from saving and drying them like other culinary herbs, as this will make the leaves lose their flavor. On the contrary, coriander seeds are easy to harvest on any dry day.
When you notice the seed pods turn brown or crack if pressed, cut the top of the stem. And make sure the pods are harvested before they begin releasing the seeds into your garden.
Once you’ve cut the stems, place the seed pods in a paper bag to prevent this. You may then finish the ripening process in a cool, dark, and ventilated place.
That said, we’d suggest not fertilizing your plants if you’re growing them for seeds as the added nutrients may delay flowering and the overall seed production.
Final Words
When planted indoors in a container with drainage holes, cilantro herbs will grow less abundantly than when planted outdoors in a garden. That’s why added attention and utmost care is crucial to enhance their overall growth.
And with a little bit of time and effort, you can rest assured that you’ll be rewarded with this aromatic and flavorful culinary herb all year round. All you need to do is make sure the plants get the right amount of sun exposure, nutrients, and moisture.
On that note, we have reached the end of our informative guide on growing cilantro indoors. Here’s hoping we were able to provide you with all the relevant information related to the topic.
Starting from kitchenware to vehicles, HDPE is everywhere. And if you are thinking of bonding HDPE surfaces, here’s what you need to know.
HDPE or high-density polyethylene is used for a range of objects, starting from fuel tanks to milk cartons. And sometimes, you may need to join two pieces of HDPE plastic or simply join one with another material such as steel or fiberglass. But if you have worked with this material before, you would know that it is quite challenging.
For a very long time, the only option for bonding HDPE plastic was welding. But with time, technology has advanced quite a lot, and there are superglues and epoxy adhesives that make the job much easier. So, in this guide, we will take you through all that you need to know about HDPE glues.
Listed below are the best HDPE adhesives:
J-B Weld Professional Steel-reinforced Epoxy: J-B Weld epoxy's prominent feature is its resistance against various chemicals, making it superior to Loctite heavy-duty epoxy in terms of durability. It sets slower, which may be inconvenient for quick projects.
Loctite Heavy-duty Five-minute Epoxy: A heavy-duty epoxy that provides robust bonds in less time, setting in just 5 minutes, unlike the J-B Weld which takes 4 to 6 hours. For a more enduring hold akin to J-B Weld, it might need to be used with a fiberglass cloth.
Loctite Instant Mix Five-minute Epoxy: The Loctite instant mix epoxy is best suited for precision jobs, and it excels in ease of application, which is an advantage. Its small volume of 0.47 fl oz poses a disadvantage for larger projects compared to the J-B Weld.
By now, you must have understood that working with HDPE glue can be quite challenging at times. And all the products that you find on the market that promise to glue HDPE are not effective. Some products are better than the rest, and here, we will talk about our favorite few in this section.
1. J-B Weld Professional Steel-reinforced Epoxy Twin Pack - Best for Large Projects
What stands out about this item is the remarkable strength and versatility that it puts on the table. And if you have a large project in hand, this item is more suitable for that purpose. The quantity in the pack is pretty good, and you would be able to handle massive projects with much ease. You can use this for both indoor and outdoor projects.
Like any good epoxy glue, this one can be sanded, drilled, and even filled as per your needs. And you can rest assured that it is completely weather-proof and resistant to other chemicals and acids. So, even if it comes in contact with other items, the bond will not get damaged.
Moreover, just like the manufacturer promises, this glue will deliver a bond that is equivalent to that of steel. We have tested this product and can vouch for this. But we also have to say that it takes longer than other brands to get cured. So, if you have an urgency to finish your project, this might be a bit problematic.
Quantity: 2 Tubes | Volume: 5 fl oz Each | Set Time: 4 to 6 Hours | Cure Time: 15 to 24 Hours | Dry Color: Dark Gray | Resistance: Waterproof, Withstands Up to 550°F, Resists Petroleum, Chemical, Acid
2. Loctite Heavy-duty Five-minute Epoxy - Best for Quick Bonding
If you are looking for a robust bond in a short time span, it is best that you give this adhesive a try. This item is well-suited for heavy-duty projects. But the best part is that it comes at a very reasonable price.
So, even if you take up massive projects like stonework, fencing, or laminating, this glue will come to your rescue. You can understand that it not only helps to glue HDPE plastic but is also excellent for other materials such as wood, tiles, fiberglass, and ceramics. And the best part about this is that it can easily handle shrinkage and drilling like a pro.
However, if you are looking for a more durable hold, consider combining it with fiberglass cloth.
3. Loctite Instant Mix Five-minute Epoxy - Best for Precision Tasks
Just like the name suggests, this glue will help you get your work done in under 5 minutes. And you will not have a hard time using this item, as the application process is super simple. You do not have to do anything manually. Even for mixing the resin and the hardener, you will find a mixing nozzle included in the package. You do not have to get your hands dirty in the process.
But you need to keep in mind that it is best suited for smaller projects as the amount of glue included in the package is not much. So, it is best that you put it to use on smaller projects that demand a high amount of precision.
Because of the narrow nozzle tip, the application becomes quite simple, and it gets easy to reach difficult areas. And once the glue dries up, you can sand it or paint it as per your requirements. You don’t have to worry about it shrinking!
If you want to identify the best HDPE adhesive, listed below is a table specifying quantity per package in units, volume measured in fluid ounces, set time in hours and minutes, cure time in hours, dry color, and resistance features.
High-density polyethylene (HDPE) is a popular material known for its durability, strength, and resistance to most common chemicals. However, these qualities can make it challenging to bond with other types of materials using conventional adhesives. In this comprehensive buying guide, we will cover important factors to consider when purchasing the best adhesives for HDPE, ensuring you find the best product for your needs.
Type of Adhesive
There are various types of adhesives that work well with HDPE. Some of the most common include:
Cyanoacrylates (CAs): Also known as super glue, CA adhesives offer a strong and quick bond. They work best for small-scale applications and can be difficult to remove.
Epoxy Resins: Epoxy adhesives provide a strong bond and are known for their durability, resistance to chemicals, and ability to withstand moisture. They often require heat and/or pressure to cure.
Polyurethane Adhesives: These adhesives are flexible and resistant to chemicals, moisture, and impact. They can be used for both porous and non-porous surfaces; however, they may require a longer curing time.
Plastic Welding Adhesives: Plastic welding adhesives use solvents and heat to chemically bond the two surfaces together. They offer a strong bond but may require specialized equipment to apply.
Application Method
Consider the application method of the adhesive, which can vary based on the size and complexity of the project:
Brush-On Adhesives: Useful for spreading the adhesive evenly on large surface areas.
Spray Adhesives: Provide coverage for large areas quickly and can be used for both temporary and permanent bonds.
Gel Adhesives: Ideal for vertical applications or uneven surfaces due to their non-drip consistency.
Dual-Cartridge Dispensing Systems: Allow for precise, controlled application of adhesives with mixing nozzles, and are often used for industrial purposes.
Curing Time & Temperature
Consider the curing time and the required temperature for the HDPE adhesive you choose, since these factors can determine the strength and longevity of the bond:
Fast-Curing Adhesives: Ideal for projects requiring quick results (bonding in seconds or minutes). However, they may be less durable than slower-curing options.
Slow-Curing Adhesives: Generally provide a stronger bond but will require more time for the adhesive to set and fully cure.
Temperature Requirements: Some adhesives have specific temperature requirements to ensure a strong bond. Choose one suited to your working environment.
Bond Strength & Durability
Pay attention to the bond strength and durability of the adhesive:
Tensile Strength: Measured in psi (pounds per square inch), this indicates how well the adhesive can resist a force applied in the same plane as the bond.
Shear Strength: Also measured in psi, it refers to the adhesive's ability to resist a force applied perpendicularly to the bond.
Higher values indicate a stronger bond. Choose an adhesive with adequate strength for your specific application.
Chemical Resistance
HDPE is known for its chemical resistance, so it's important to choose an adhesive with similar resistance properties. Make sure to select an adhesive that will withstand the chemicals and environmental conditions your bonded HDPE will be exposed.
Price & Quantity
Consider the price and the quantity of adhesive needed for your project. Higher quality adhesives may cost more, but they can provide better overall performance and durability. Balance the need for quality with budget constraints.
Important Tip
Surface preparation is critical when bonding HDPE materials. Follow the manufacturer's instructions on how to prepare the surfaces, which may include roughening, cleaning, or using a primer. Proper surface preparation can significantly improve the success of bonding HDPE materials.
In conclusion, to find the best HDPE adhesive for your needs, consider factors such as adhesive type, application method, curing time and temperature, bond strength, chemical resistance, and price. Most importantly, properly prepare the HDPE surface for optimal adhesion. Finding the right adhesive will ensure your project is successful and long-lasting.
Bonding HDPE 101
HDPE is one of the trickiest plastics to glue. If you are wondering why that is the case, then let us break it down for you.
This material has high abrasion resistance, and as a result, it has minimum surface energy and a very robust surface. Because of this feature, most standard and even superglues cannot work their charms on HDPE. And in case the glues are not effective, you can always screw the HDPE pieces together with nails.
But remember that when you do this, they will get a more industrial effect that may not always be visually appealing. Likewise, welding may leave the joined surfaces with an uneven look, especially if not done the right way.
Although you will find many adhesives on the market that claim to glue HDPE, you should not get easily fooled and maintain proper caution to choose the right product that can really do the job..
How to Glue HDPE
Irrespective of the type of glue that you are planning to use, remember that it is mandatory to prepare the HDPE surface first. So, it does not matter if you are applying super glue or epoxy; the surface needs to be clean for the glue to work.
The easiest method to get the surfaces prepped is by sanding them. But keep in mind that the process is likely to generate a lot of dust. So, we will recommend vacuuming the surfaces thoroughly post-sanding to ensure there’s no dust on them. If you fail to clean them properly, then the adhesive may lose its strength when applied.
Moreover, you should always follow the instructions provided by the brand for the best results. All products come with a set of instructions, and in case they don’t just call their customer support team and ask for help. In case you choose to work with superglue, you might also need to get a good primer to use with it.
You would be required to apply a coat of this primer and give it some time to dry up and cure. Only when that happens should you proceed with the next step of applying the glue? The manufacturer of the glue and primer will definitely mention the time needed for them to dry out completely, so don’t miss out on reading them.
On the other hand, if you opt for epoxy adhesives, you will require an additional hardener to mix with the resin. You either have to do the mixing manually, or the product will come as a pre-prepared mixture.
Take the Necessary Precautions
Without proper preparation, not only will using HDPE glue become too expensive, but it can also be hazardous. So, in this section, we will take a look at some of the things that you can do to ensure that you do not have to face either of the problems.
In order to ensure a mess-free application, you can take special care to prevent any glue from oozing. And for this, you need to be careful about applying only the recommended amount and nothing more than that. The idea that more is better does not work here.
Other than that, we will always recommend working with the surface and glue in an area with good ventilation and ample amount of sunlight. Some of the adhesives that you might use are pungent and even have hazardous chemicals in them. So, you can even consider working outdoors.
Moreover, it is best that you arrange all that you need before starting with the project. Some of the glues may dry very quickly and won’t give you much time to fix things. So, it is best that the work does not get interrupted when you begin.
Apart from that, we recommend that you opt for clear adhesives that won’t leave any seams on the HDPE. Even if the glue oozes out a little, it won’t cause too much trouble. And when you are using the glue, stay very careful and do not let it come in contact with any part of your hands or clothes. In case that happens, you will have to face a hard time trying to get it off.
Get to the Grind
So, how do you get the actual job done? Let’s take a look.
Sanding
In case you are planning to glue two pieces of HDPE together, you would need to sand both surfaces and not just one. For this, it is best to take 120-grit sandpaper and use that to make the smooth surface of the HDPE rough. And as we have mentioned before, use a vacuum cleaner to drive off the resultant dust.
After that, all you need to do is follow the user manual closely. If you are using an epoxy adhesive, make sure that you mix a quality hardening agent to help form a good bond. You might have to do it manually, or you can use an ejection gun for the process.
Once you are done with that, apply a thick coating of this HDPE surface mixture. Let it dry for a few minutes, then attach this glued surface to the one you want to combine with the HDPE.
Make sure that you keep these two pieces clamped together until the adhesive gets cured. It might take you a day or two to get done with this step. If you read the user instructions carefully, you will have a fair idea about how long it can take.
Melting
After you are done with the sanding process, you will need to get hold of a propane torch. Adjust the flame to make sure it is blue and lightly melt the HDPE surface. Make sure that the flame is not blue or red, as that will damage the surface completely.
Do this for around 2 to 5 seconds. In case you are working with a piece that is round in shape, it is best that you keep turning it around to ensure that all areas get heated evenly.
Once you are done doing that, test if it is done properly by putting a water droplet on the surface. If it spreads out, rest assured that it has been breached properly. And in case you see that there are beads of water in certain parts, you would have to redo the process.
When you are sure that the surface is well prepared, go ahead and apply the epoxy according to the user manual. We would suggest that you apply a generous coat to ensure that the surfaces stick well.
Keep the surfaces glued together until they get completely cured.
What types of glues work best on HDPE?
The types of glues that work best on HDPE are two-part epoxies or specialized polyurethane glue. Other alternatives include hot melt adhesives or certain types of superglues designed for use with plastics. It's always essential to follow the manufacturer's instructions for the best results.
Is it possible to glue HDPE together?
Yes, it is possible to glue HDPE together, although it can be challenging due to HDPE's low surface energy and resistance to adhesion. It typically involves a specific preparation process that could include flame or plasma treatment of the surfaces. Specialized adhesives like two-part epoxy or certain polyurethane adhesives are used following the manufacturer's guidelines.
How to glue HDPE panels?
To glue HDPE panels, there's a two-step process that is typically employed. First, the HDPE surface is treated with a flame or plasma treatment to improve adhesion. Then, a specialized adhesive such as a two-part epoxy, hot melt adhesive, or polyurethane adhesive capable of bonding HDPE is applied as per the manufacturer's instructions.
With that, we have reached the end of this informative guide.
We hope that you have been able to learn a thing or two about how to glue HDPE properly. Also, we hope that our recommendation of effective adhesives comes to your aid.
Although you started out with this guide with the thought that HDPE is difficult to handle, by now, you must have understood that this is not the case. With the right products, you can handle them easily.
But for that to happen, you need to understand the material and adhesive well. Unless you do that, you are most likely to fail. In case you have any more questions, feel free to write to us in the comments section below. And keep a watch on this space for more exciting reads.
Until next time, goodbye!
Radiator leaks are messy and dangerous, so it's not surprising that people rush to the mechanic as soon as they spot a green puddle.
Whether your car is high mileage or not, the radiator wears out and breaks with time. Repairing a broken radiator can be an expensive affair if you consult a professional. But fixing a radiator leak at home is possible if you know the correct method.
There are many ways to fix a radiator leak, and we've selected a temporary quick fix for you. In this guide, we're going to show you how to fix a car radiator leak using epoxy.
Fixing A Broken Radiator With Epoxy
If the radiator leak is severe, you have no choice but to make a trip to the mechanic to get it professionally repaired. But say you spotted a minor leak or a small puddle, taking quick action on your own can work just fine, too. Although it might not be a permanent fix, it's better than nothing for the time being.
Don't ignore the leak and continue to drive your vehicle because the car is prone to overheating since it lost coolant from the leakage. In the long run, driving with a broken radiator damages the engine and could be dangerous.
But a simple fix with epoxy can prevent further damage. This DIY method will help you save the cost of the radiator parts and the mechanic fee as well. At the very least, there won't be any leaks when you are ready to get the radiator professionally fixed.
How To Fix Radiator Leak With Epoxy
In this guide, you will learn how to find the source of the problem- the crack in the radiator. Along with that, you'll see the correct way to clean the radiator before sealing it with epoxy.
Identify The Problem
When you notice leaks and puddles forming beneath the car, it's best to check the issue as soon as you can. Firstly, check if the puddle is made up of water or coolants. This can be identified by the color. In the case of a clear puddle, it is water, and if the puddle looks suspiciously green or any other color, it could be a coolant leak. Remember that coolant leaks indicate damage or cracks in the radiator.
Cool The Engine
Now that you have figured out that the leak is indeed a coolant from a broken radiator, turn off the car engine. This is to make sure the engine cools down before you can inspect the parts. It also helps to reduce the pressure off the radiator and engine and is a general safety practice we recommend.
After the engine has cooled down, try to remove the radiator from the car. Modern vehicles have a different system that does not make the radiator accessible, and it takes an experienced hand to remove it.
But if your car is an older model, the radiator should be easy to remove without professional help. If the radiator does not come out, take other parts out of the way so you can get to the radiator.
Drain The Radiator
Once the radiator is in clear view, look around to find the cracked or broken area. Next, you'll have to remove the rest of the coolant if you want to apply epoxy. So, drain the radiator either completely or up till the part where the crack is visible.
After this, clean all sides of the radiator to remove the chemicals. A brake cleaner should be sufficient to do this job. Take your time while doing this step because the epoxy will not bond correctly unless the surface is completely clean. An additional step would be sanding the surface, although it is not mandatory.
But sanding the surrounding surface will allow the epoxy to form stronger bonds that will last for a slightly longer time. Also, before you apply the epoxy, allow the surface to dry completely. This is because moisture or dampness can interfere in the epoxy bonding process.
Seal The Radiator With Epoxy
Now you get to choose which epoxy you'd like to use for fixing the radiator leak. We've listed out a few of our favorites later in the article, so be sure to check that out. Upon opening the packaging, you'll see that the epoxy comes in strips, and you can break off as much is required for the repair.
Take a piece of the epoxy, press and rub with your hands till the warmth from your fingers makes it soft and pliable. The more you work with it, the warmer it gets, and you get a flexible piece of epoxy for repair.
Now, spread the epoxy all over the crack or broken area of the radiator. It's essential to cover the entire area so that it seals nicely, and the excess can always be removed before it dries up. It's alright if this process takes some time, but don't skimp on it.
The layering needs to be correct for the epoxy to be able to handle the pressure of the radiator. After the epoxy is applied correctly, allow it to dry and cure completely. It takes around an hour to dry, but the curing process takes 24 hours.
Check If It Works
The next day, check the radiator and the epoxy. The epoxy patch should be fully cured and solid by now, but you can also check it once to see if it is secure. Next, replace the radiator and the other parts back in the car and see if there is enough antifreeze. Start the car engine and take a look at the now repaired radiator.
Let the engine run for a while so that the pressure builds up in the radiator. Then take a look at the epoxy repair if it is still firmly in place. The patch should be able to withstand the pressure without any leaks. Finally, clean up any messes caused by antifreeze, if any, and the car is ready to use.
How To Fix A Plastic Radiator
The method which we stated earlier was applicable for the standard metal radiator, which most cars have. But what do you do when your radiator is made of plastic? In that case, repairing it takes a totally different method which we will elaborate on in this section.
Even though the process is different, fixing a plastic radiator at home is possible if you know basic welding. Besides, you are better off repairing it at home because professionals usually do not fix plastic radiators. They will probably suggest you throw the broken one out and get a brand new one that can dig deep in your pockets.
We'd suggest you try to fix the plastic radiator on your own and if there is an issue after a few weeks, get it replaced. One thing you should know before fixing the plastic radiator is that it can handle high temperatures of 94 degrees Fahrenheit and above.
So don't worry about exposing the radiator to heat, thinking it might melt. Secondly, after you finish the repair, the radiator should be able to hold hot and pressurized coolant without damaging the parts- that's when you know that the job is done well.
Method For Repairing A Plastic Radiator-
Again, cool the engine down so you can work with the radiator, then drain any water or solution till empty or beneath the break line. If the fluids from the radiator are not removed, they might spill while working. Next, clean and prep the area so that it is ready for repair work.
Now, use a heat gun to soften the plastic. As you apply high heat to the cracked edges, you'll notice that they begin to change the texture and look glossy. If the break line is too large, divide your work into 2-inch sections for easy welding. This way, you can finish one section of welding before tackling the next one.
During the welding process, try to create a V-shaped channel throughout the break line. Next, melt a nylon rod into this portion using a plastic welder. Essentially, we want the rod to melt into the hollow area completely.
We want to give you a heads-up about the fumes plastic welding creates. It can get a bit suffocating if you're not wearing the correct protective gear or there isn't enough ventilation. So, be sure to prepare these beforehand.
After the nylon rod melts into the gap in the plastic, remove the extra bits on the edges. Next, use the tip of the welder to join the nylon with the plastic radiator. You'll know it has been blended when they begin to blend into each other.
Once this is done, leave the radiator to cool for a few hours. Alternatively, if you prefer to work with epoxy instead of welding, plastic-specific products are available on the market. The method to fix the plastic radiator with epoxy will remain the same as mentioned for metal radiators.
Best Epoxy Products For Radiator Leaks
Now that the method for fixing radiator leaks with epoxy is clear, it's time to look at some of the epoxy products available. Some of the epoxy products are specially designed for radiator repair, and many of them work equally well on metal and plastic. Here are a few brands we recommend-
Radiator Weld by J-B Weld is one of the strongest epoxies for repairing leaks in radiators. It comes in a complete kit with all the items you will need for mixing and applying on surfaces. The kit comes with epoxy putty, fiberglass cloth, sandpaper, and an epoxy applicator.
J-B Weld is also one of the oldest brands with over 40 years of reputation backing it up. Their quick seal product is sure to help beginners who are unsure about using epoxies on radiators. The good thing about this product is that there is no need to remove the tank or radiator from its sitting place.
This means the epoxy can be mixed and applied even if it is not removed from the car. Impressively, this epoxy can fix 4-inch long breaks or cracks perfectly. JB-Weld epoxy is durable and resistant to chemicals and heat and can easily handle temperatures upto 250 degrees Fahrenheit.
Moreover, this product is versatile and can bond plenty of other broken items like washer fluid tanks, water tanks, storage tanks, plastic radiators, composites, and PVC.
Next, we have another radiator repair kit which is a pretty good option by the brand Versachem. This product is versatile enough to work on both metal and plastic radiators. We appreciated that it could be applied to the tank or radiator without having to remove it in any way.
If the crack or break in the radiator is visible, you can apply this product directly after cooling the engine. Furthermore, this option can withstand a decent range of temperature- from 40 to 200 degrees Fahrenheit. So, you can rest assured that high temperatures will not damage your repair work.
When we read the back of the packaging, the product description mentions that it repairs gasoline and fuel tank leaks in 20 minutes. Also, there is no draining of coolant required with this product. All in all, this kit makes a good option when it comes to radiator repairs.
Finally, we have a flexible sealant called Optimum Black Gasket Maker by Permatex. This product comes in a tube packaging of 4 ounces and can be squeezed out through a nozzle. Actually, this option comes with two different nozzles so you can adjust the amount of product you need for the project.
What's different about this option is that it has a fluid-like consistency instead of a solid stick putty. So there is no need to warm up the product in your hands. It is ready to apply as soon as the tube is opened.
We like that this sealant is resistant to auto and shop fluids and vibration, making it the perfect choice for fixing a radiator leak. Not only that, but it also retains a lot of its flexibility after drying and is an oil-resistant adhesive. This indicates that it is strong enough to withstand the pressure build-up in the radiator.
Also, it can handle high amounts of heat, with a comfortable working range of -65 to 500 degrees Fahrenheit. Additionally, the product is sensor-safe, has low odor, and is non-corrosive, making it a great choice for fixing a leaking radiator.
Final Words
So, that was our short guide on fixing a radiator leak using epoxy. Most of the aspects which people struggle with have been mentioned in the stepwise guide. Also, we know that not all car radiators are made of metal, so we decided to include a section about plastic radiators as well.
Along with the methods for repairing a radiator leak, this article also mentions a few popular epoxy brands. Although we think all of them are up to the mark, our go-to option is the Radiator repair kit by J-B Weld. We hope this informative guide helps you the next time you need to repair a radiator with epoxy.
When it comes to epoxy, we all make mistakes sometimes, don't we?
Mixing, pouring, and applying epoxy is not something you can experiment with. It is an exact technique using measured components, and anything slightly off can ruin the epoxy mixture. Each step needs care and precision because even a tiny flaw in mixing, ratios, or contamination in the tools can ruin the mix.
Today we decided to figure out all the common mistakes beginners make and compile them in one place. Along with highlighting the errors you need to avoid, we'll also be sharing a few easy methods to tackle them. So, the next time you face any of these issues, you'll be well prepared.
Without further ado, let's get started.
How To Fix Epoxy Mistakes
What Are The Most Common Epoxy Mistakes?
Incorrect Mixing Ratio
Most often, epoxies come in two parts in the kit and need proper mixing just before application. The mixing ratio is vital if you want an epoxy of the correct consistency. This is why companies mention the exact proportion in weight or volume on the packaging, which needs to be followed precisely.
Failing to mix the two components in the correct ratio results in the epoxy hardening too fast or slow, even sometimes not hardening at all.
Over Or Under Mixing The Epoxy
Overmixing the epoxy leaves a thick sludge that barely pours over and would need to be thrown out. And if you undermix the epoxy components, the slurry will leave cracks and melted bits which are far from ideal. The mixture could also become hazy and opaque, so in order to prevent this, make sure you follow the instructions to the T.
Working With The Wrong Product
We understand why so many people struggle with selecting the correct type of epoxy for their project. After all, there are so many types of epoxies available, all of which have entirely different purposes.
There are epoxy adhesives and bonding agents, casting compounds, fillers, molds, and many others. So, it’s better to read about the product before purchasing to avoid ending up with the wrong type of epoxy.
Weather And Temperature Issues
One thing we often ignore is taking the weather and temperature into consideration before beginning an epoxy-based project. Beginners might not know that epoxy is sensitive to extreme temperatures. So if you are in the middle of a frigid winter, chances are the epoxy will have trouble setting correctly.
The same is true for hot temperatures, too- the epoxy will either dry too quickly, forming bubbles or will develop cracks after drying. The best solution is to adhere to the temperature guidelines recommended by the company. You could either wait for a pleasant season or control the room temperature to match the guidelines.
Intentionally Or Unintentionally Adding Moisture
Newbies might make the mistake of adding water to thin out the solution, but let us warn you before you make the same mistake. Make it a point to stay away from moisture when working with epoxy.
If you want to save the epoxy mixture, you need to treat water and epoxy as sworn enemies. It is also possible to have water lying in the container or mixing bucket, and that's something you have to check every time.
Use Of Dirty Tools
As we mentioned earlier, epoxy is pretty sensitive to all external factors, including dirt and dust sitting on your tools. Any of the grime or dust that you mix with the epoxy will show in the final product, and no one wants that! If possible, use fresh mixing buckets, containers, and stirrers. And if you already have these tools, clean them with acetone just before using them.
Mixing Brands
Needless to say, don't mix two different brands of epoxies, assuming they are all the same. All brands and solutions have their unique mixing ratio and composition. So, you will not get an even mixture if you add a different brand to the existing mixture. Not only that, it is not recommended to mix two different solutions from the same brand either.
Improper Storage Of Epoxy
You may already know that epoxies react with molecules in the air and harden to form strong bonds. So it goes without saying that when storing, nothing less than an airtight container will do. Also, epoxies have a shelf life; make a note of the expiry date before storing them.
It's possible to keep them at the back of storage shelves and remove them way after the expiry date. In such cases, you won't be able to use the epoxy anyway. And if you do, the solution won't mix properly because it would be partially hardened.
Solutions To Epoxy Mistakes
Sticky Film On The Surface
Sometimes after hardening, a sticky layer is visible on top of the epoxy. This isn't an irreversible problem and can be fixed quickly. Take some hot water and dip a soft sponge to soak. Wipe the sticky surface with the sponge and hot water, and the sticky layer should visibly reduce.
Working indoors will protect the epoxy from external dust and dirt. It will also help in reducing the sudden changes in temperature and humidity. Also, try to work in a moisture-free zone to prevent the formation of this sticky film.
Epoxy Is Not Leveling Evenly
Almost all epoxies are self-leveling and do not need manual assistance to set in place. But if you face a situation in which the epoxy is not leveling, the resin in the mixture is probably too little.
To fix this after the epoxy has cured, you'll need to sand down the uneven areas and add a second coat. And, if the epoxy is not yet cured, you can directly apply the second coat to the previous one.
Epoxy Cures Too Quickly
If the epoxy is hardening and curing too quickly, that's not a good sign. Drying and curing are very precise, and quick curing means the polymerization of the epoxy is occurring way too fast. This happens when the temperature is too high, which leaves a substandard epoxy with cracks and haze.
To prevent this, keep the temperature constant between 68-77 degrees Fahrenheit (ideally).
Air Bubbles Have Appeared
One of the most common issues people face is the appearance of bubbles in the epoxy. These bubbles appear as a result of air trapped in the resin due to improper mixing. If the epoxy components are mixed too quickly, the air gets incorporated into the resin, forming visible bubbles.
If you notice these bubbles before the curing process is complete, you can get rid of them easily. Move a heat gun quickly over the bubbles in intervals of 10 minutes. Once fully cured, the bubbles are difficult to remove, so try to identify and remove them before it is cured.
Epoxy Does Not Stick Properly
A porous surface will absorb the epoxy easily, so the second layer of epoxy might be required to get correct results. Also, make sure that the wooden surface is dry, smooth, and clean. And ensure the solution is distributed evenly across the surface.
Ripples And Waves On Epoxy
Sometimes ripples and waves might appear while working with epoxy. If this problem arises, you'll need more than one coat of epoxy solution to fix it. Begin the process by applying a thin sealing coat. This layer should be thin enough to avoid and bubble or ripple formation, yet it must coat the surface all around.
The second step is to add the epoxy layer, which is essentially the same substance but in a thicker coat.
Epoxy Has An Orange Peel Effect
Imagine the outer layer of an orange peel. It has marks and dents all across the surface, and the orange peel effect on the epoxy layer looks very similar to that. This is definitely not the result one would expect since the ideal epoxy layer should be free of all marks, dents, ripples, or smudges.
This effect is the result of sudden temperature fluctuations; thus, the only way to prevent this is to work in a closed environment. If you find this effect when the epoxy is still wet, use a roller tool to even the upper surface.
If the epoxy has already been catalyzed and cured, you will need to scrub the imperfections using abrasive paper. To finish with a glossy look, spray a thin layer of epoxy on the surface.
Epoxy Fails To Bond
Sometimes epoxy doesn't set, and you may scratch your head wondering what went wrong. Well, it could be one of several reasons. It could be an issue of incorrect curing, which we will discuss in detail in a separate section of this article.
Another reason could be working on a contaminated surface area. That is why it is essential to clean the work area and tools before mixing and pouring your epoxy solution.
Epoxy Is Opaque
The distinct feature of export coating is a shiny, transparent, and sometimes reflective surface that it leaves behind. A fully cured epoxy coat that looks dull and opaque indicates that something in the process has gone wrong. Most often, this happens due to changes in temperature and the conditions at your workstation. Increased humidity also causes this cloudy and greying effect.
Epoxy Changed Color Due To Storage
Ever managed to safely store epoxy in a safe airtight container for later use, only to open it to find the color has changed? What does the color change mean? A few chemical reactions occur in the epoxy over time which creates a reddish-brown color.
It should be fine to use as long as the solution was sealed in an airtight container and the consistency is fluid enough to pour. The color change will reflect in the final product, so if that doesn't bother you, then it is good enough to use.
Tackling An Epoxy Mixture That Failed To Cure
You might face a situation in which the time required for the epoxy to cure has passed, but the resin hasn't hardened yet. Why did this happen? Here are a few things you can do to avoid this issue-
Epoxy Mixing Ratio
The most common error that causes the epoxy to remain wet is the incorrect mixing ratio. This means that one or the other component was too much or too little. The perfect epoxy needs to have a balanced amount of both resin and hardener to set as per the instruction manual. This is why the drying and curing time goes haywire if one or both are messed up.
The only sure-fire way to fix this is to remove the epoxy layer altogether and begin the process again. We know it sounds tedious, and it is. But there is no going back once the batch is prepared and laid out.
Using Wrong Products
Beginners often make the mistake of using a completely different type of product which doesn't cure even after the recommended time has passed. Care needs to be taken when selecting the products for applying on a table of the countertop. If you are unsure, try asking someone who is familiar with epoxy DIY or check a few products online.
The good thing about checking online is that you get reviews from fellow epoxy DIYers, and you can learn from their mistakes. Another mistake people make is mixing products from two brands together. No matter how similar they may seem, it is never recommended to mix different brands since it almost never ends up well.
If the wrong products have been used, the only thing to do is remove them immediately. Do not wait to hope that the epoxy might cure if you give it a few more hours because it most likely won't. Also, it's no use adding a correct epoxy mixture over an incorrect one. Since the incorrect layer won't be set, you'll have to redo the process from scratch.
Temperature
We've mentioned this before, but temperature plays a huge role in the correct setting of epoxy. If the season is cold or the room is set to a lower temperature, the epoxy takes a much longer time to cure. So, check for the climate. Are you in the middle of freezing winter? We can't argue with nature, but what we can control is the room temperature.
The best solution is to apply additional heat to quicken the curing process. Also, there are curing hardeners available on the market that are specifically designed to speed up the process for lower temperatures. Or you could just allow the surface more time to cure if none of the other methods are possible.
Fixing Glaze Coat Epoxy
There is another issue DIYers complain about - glazed coat epoxy. Glazed coat epoxy is the cloudy, muddy, or opaque appearance of the final product, which can be disheartening to see. The epoxy glaze is incomplete without its transparent and shiny finished look, so many users try their best to avoid it.
The glazed coat look can occur due to a number of reasons, like humidity in the air or the formation of too many air bubbles. Most of the time, when the surface looks opaque and glazed, the curing is also compromised. Since the epoxy does not cure properly, the surface has a tacky finish that does not harden.
Moisture And Humidity
If the epoxy is exposed to some moisture or the workplace has a high humidity level, it directly impacts the curing and finishing. Small molecules of condensation react with the epoxy before it cures and creates a muddy, glazed look which we want to avoid.
In some cases, this cloudy appearance is irreversible, but there is a simple method that works most of the time. Try using a heat gun to melt the glazed surface and allow it to resettle naturally. A few applications of the heat gun should be enough to remove all the moisture from a thin layer.
Air Trapped In The Epoxy
Trapped air is another causal factor for cloudy epoxy. But it can be prevented by applying the epoxy coats in thinner layers. Also, you can use the same heat gun method to remove the trapped air. If there is no rush, wait for a warmer climate to apply the epoxy since thinner layers are easily formed in higher temperatures.
Tacky Epoxy
A glazed epoxy will not harden even if you give it extra time to cure. Sadly, the only thing you can do with tacky or sticky epoxy is to remove it entirely. Adding another layer in the hopes that it will be better won't work. So, remove the epoxy sand and clean the surface, and then start the process once again.
How To Repair An Epoxy Resin Table Or Countertop
Over time, tables and countertops wear out and start peeling. Due to daily use and the action of placing pots, pans, or cutlery, they develop deep scratches. All of these issues can be fixed by adding a durable new layer of epoxy coating. Instead of throwing out that table or countertop, simply follow these easy instructions and get a shiny new surface.
Fixing A Table/Countertop With Epoxy
Begin with removing the peeled-out wooden pieces and the deep scratches from the surface. A fine to medium grit sandpaper or abrasive sheet should do the trick. Work your way into the scratches and the peeled-off surface to create a smooth and even layer.
You can use the wet sanding technique, which includes dipping the sandpaper in water before scrubbing. This method removes the scratches without creating additional marks by rubbing the sandpaper. During the process, make sure you sand parallel to the imperfections since going against them might create deeper scratches.
After this, remember to clean the surface so that there are no dust particles left behind. The next step is essential, so do not skip it out of the process. Prepare a cleaning solution containing half part of the cleaner and half part water. Use this cleansing mixture to clean out any remaining particles that might be stuck to the surface.
After that, wipe the area to remove the last bits of the cleansing solution and leave the surface to dry. Once the tabletop is dry, give it a final polish and add a thin layer of epoxy to the top. This layer acts as a sealant and ends up drying to form a clear glass-like reflective surface.
Drying this layer completely will take no less than 24 hours, and you can check to see if it is still sticky. If it is still sticky, give it a few more hours before applying the next epoxy coat.
Fixing Mistakes On A Wet Surface
Most mistakes are easier to fix when the epoxy is still in the wet stage. If there is a visible ripple, bubble, or any other imperfection, it can be smoothened out with a roller tool.
The same is true of uneven layers- tools can be used to correct the level so that no areas are left too thin or thick. If there is any dust sitting on top, removing it in the wet stage is much easier.
Final Words
Here we conclude our guide about epoxy mistakes and how to deal with them. Some errors like air bubbles on the surface and small ripples can be fixed fairly easily using heat. However, other issues like sticky and tacky epoxy need to be scrapped out and redone.
We made the same mistakes when we started out, so we know the struggle of getting it right! Keep a close watch for any of these mistakes for your next project and try to fix most of them before the epoxy cures.
Which of these mistakes did you face the most? Feel free to share in the comments below.
You can fix your wireless doorbell at home by performing several checks and narrowing down the source of the problem. These may involve battery checks, proper positioning, rebooting the device and the app, and weather damage checks, to name a few.
Wireless doorbellsare more convenient and accessible than wired ones, but like most electronics, they can sometimes malfunction. A wireless doorbell not working can become a nuisance very rapidly as you miss out on visitors standing on your doorstep.
So, to help you solve any issues with your wireless doorbell and keep it safe from future problems, we’ve created a troubleshooting guide for you to follow. The pertinent information is just a scroll away!
How Does A Wireless Doorbell Work?
A wired doorbell is simple enough: the visitor presses the doorbell button that completes an active circuit, creating a ringing sound. On the other hand, wireless doorbells are quite different since the doorbell isn’t physically connected to a speaker for the sounds to be emitted.
Most wireless doorbells work on radio wave frequencies, sending radio signals to a receiver that picks up the signal when the doorbell button is pressed. The receiver could be a dedicated remote control for the doorbell, or it could even be your smartphone. This is then followed by a sound, light or a combination of both to alert you of potential visitors.
The complexities involved in executing this process makes troubleshooting a wireless doorbell more challenging than a wired one. A wireless doorbell involves intricate circuitry, fixing any problem with which is usually left best in the hands of a professional.
That said, you can follow some of our DIY troubleshooting tips to prevent or solve some issues with the doorbell.
Troubleshoot Your Wireless Doorbells
The intricacies involved in a wireless doorbell’s workings mean that several small things could go wrong to stop it from functioning. So, we will now help you to find what’s wrong with your device and how you can fix it. You’ll only need a screwdriver and a few spare batteries.
1. Doorbell Button Not Working
When you press the button on a wireless doorbell for uPVC doors (or any other door, for that matter), it usually emits a sound from the chime unit.
Now, there are a number of issues that could lead to wireless doorbell buttons not working, with the most obvious of them being drained batteries. So, it’s recommended to check the doorbell and the door chime unit batteries before moving on to the other parts.
As for other issues like a damaged button or chime unit, you can spot them when you install a wireless doorbellfor the first time.
Solving The Issue
Use a screwdriver to remove the battery compartment of your devices and replace the batteries in your doorbell and chime units one by one. You can pinpoint which unit has the faulty batteries by checking each battery in a different device.
Once you’ve done so, try turning your units on again and see if they function normally. If they do, good job! If not, let’s move on to the next step.
Tip
Sometimes, the issue may not be with the battery but with the battery connectors. You can use cotton swabs dipped in vinegar to clean the terminals and dry the compartment with a clean cloth afterward. There’s no need to throw away fresh batteries, is there?
Since wireless doorbells work on radio wave frequencies, there’s a chance that the signal emitted by the doorbell unit no longer reaches the receiver. This can occur due to a number of factors, such as the number of walls between the unit and the receiver. In some cases, other electronics may interfere with the signal sent by the doorbell transmitter, resulting in the receiver not detecting it.
Usually, the signal range is quite liberal, with some devices ranging up to 100m, making the receiver placement the actual culprit.
Solving The Issue
Relocate the receiver so that it’s closer to the doorbell transmitter. If possible, try to limit the number of walls between the two units as well. There’s a good chance this fixes the issue, but if it doesn’t, let’s explore more options.
Tip
There’s a greater chance that your doorbell system isn’t functioning properly because of interference caused by other wireless devices. This may also result in your doorbell going off randomly, even when there is no visitor at your door. Try to relocate your receiver to a place where there are few electrical devices in its vicinity.
3. Weather Problems
Environmental factors are often overlooked when purchasing a new wireless doorbell. For example, if you live in a place where it just won’t stop raining, there’s a chance that your doorbell system simply weathered under the weather.
Likewise, too much temperature fluctuation can damage the doorbell, thereby affecting its functioning.
Most doorbells come with a protection rating that will inform you of their resistance to the weather and their capability to resist water. You can check your manual to see if this issue has occurred with your doorbell.
Solving The Issue
There are only a few things that you can try with your doorbells if the weather damage is extensive. Use a screwdriver to open the panel and check how badly the unit has been damaged. In some cases, cleaning the unit alone can solve all your doorbell woes, otherwise you may need to have it looked at by a technician.
In the worst cases, you’ll see extensive rusting in the metallic parts of the unit, or wires that have seen better days in such cases. As a result, you may have to replace the broken doorbell, but it all depends on how bad the damage is.
4. Wireless Doorbell Chime Not Loud Enough
Your doorbell may not be loud enough for you to hear from another room, or even in its vicinity. This issue occurs primarily due to two reasons: the positioning of the speaker and volume control.
If the doorbell is positioned in a way that blocks its chime box, its sound may become muffled, unable to be audible from across the house. This is an easy problem to fix in most cases.
Alternatively, your doorbell volume may not be high enough, which you can check in the bell’s instruction manual.
Solving The Problem
All you need to do if your doorbell chime box is blocked is to reposition it and give the speaker ample room. Some models have the counterintuitive design of having the speaker on the same side as the bell. In such cases, place your doorbell on a flat surface, such as a shelf, from where it can be heard easily.
As for the volume control, follow the instructions listed on the owner’s manual. Some doorbell models come with built-in volume control that you can adjust using the unit itself or with a mobile app.
5. Security Code Swap
If your doorbell was disconnected from the receiver unit, it could lead to the device not functioning at all. This is due to the security codes on both units not matching properly, resulting in the doorbell unit being unable to signal the receiver.
Solving The Problem
This issue can usually be fixed by resetting both the doorbell and the receiver units. The units should sync up once you’ve reset the consoles and input a new security code, and the doorbell should function once again. Refer to the owner’s manual for instructions specific to your doorbell, as this process may vary between different models.
6. Video Doorbell Troubles
Automated doorbell units operate using a stable internet connection and so, the issues you’ll face are likely associated with the WiFi connection or the power. A poor WiFi connection may cause the doorbell to freeze, which is when you should check if the internet services are down in your area.
Solving The Problem
If you own an automated doorbell, try turning it off and then back on again. Sometimes, a fresh reboot is all it takes to get your automated doorbell going again.
In case the issues persist, consider clearing the cache of your doorbell app to see if it resolves the issue. And lastly, reinstall the app if nothing else works.
What To Do If These Tips Don’t Work
The user’s manual is your best friend in the event of your wireless doorbell not working. Sift through every piece of information you can find in the manual pertaining to the problem and see if that solves it. If not, contact the manufacturer for help with your device-specific problem.
How To Fix A Wireless Doorbell Conclusion
Wireless doorbells, much like most wireless devices in modern times, are a boon for our daily lives. And when their convenience is interrupted by an untimely fault, they can usually be fixed without requiring professional help.
However, they are fragile and prone to failure once they have aged sufficiently. Wireless doorbells can also become non-functional when dropped, making handling it with care all the more important.
With regular maintenance and proper care, the devices will continue to serve you for a good while.
On that note, we will now wrap up today's proceedings. Until next time!
Well, who does not like vibrant-colored merchandise? No one that we know of! Today we will discuss how to separate colors for screen printers in the most effective manner.
Color printing is easy but to create the best of effects, you need to know how to separate colors. If you learn the skill, you can make the coolest of merchandise at the most affordable cost. But before you start with the process, there are a number of things that you need to know.
Today, we are discussing the techniques that you can implement to separate colors for screen printers. We are also going to share some very interesting and essential tips that will save you time, money, and potential hazards.
So, without any further ado, let’s begin!
Methods to Separate Colors For Screen Printing
Before we delve into how to separate colors, we will give you a brief idea about the various techniques that screen printers use to separate colors. Understanding the process in-depth would help you execute the separation more effectively.
Let’s take a look at the standard color separation techniques that are used.
Spot Color
This is one of the most common kinds of color separation techniques that are in vogue. It has been quite popular for decades now, especially when vector images are concerned.
The reasons behind its popularity are the ease of the technique and the excellent results that it delivers. Most design software allows you to spot or pick the color. However, with software like CorelDRAW and Adobe Illustrator, you should always ensure that the color is right before you decide on printing.
Keep in mind that this technique of color separation works best on solid tones. But if you are looking to create more shaded colors, you should opt for halftone dots in the process. If you do this, the design will get printed in the exact form as you envision it.
Four-Color Process
This technique has gained popularity in recent years and has also contributed towards the popularity that photoshop enjoys today.
If you are an artist who’s looking to create photorealistic images on a t-shirt, you can use this technique to implement halftone dots in cyan, magenta, yellow, and black. It is one of the most commonly used techniques in re-creating photorealistic images as per the industry standards.
However, it is better to be safe than sorry. So, ensure that you always double-check before it goes for printing. This way, you can make sure that the colors come out perfectly.
If you are careful, you can prevent costly mistakes from happening. After a print is done, if the colors do not come out right, it is rather costly to correct it and send it for re-printing.
Index Color
If you are new to color separation, you need to give this a try because it is the easiest of all the processes. But before you choose to go with this process, remember that the designs that you can make with it are a tad limited.
Why? Because the square pixels it uses are all of the same dimension. It does not use halftone dots that are instrumental in creating shading effects. So, with this method, the colors are a little flat.
You should opt for this process if you are looking to create simple images in high-quality prints. To be honest, it is not very suitable for realistic pictures.
Mostly, it is compatible with Photoshop, but if you want to work on it a bit more before printing, you can always transfer it to CorelDRAW or Illustrator.
Simulated-Process Color
Well, at first, this method might seem quite similar to the four-color process, but on a closer inspection, you will notice that there are significant differences.
The first difference is that this process uses halftone dots instead of solid dots that are more commonly used in the four-color process. However, the major difference becomes visible in the kind of ink colors that are used in this simulated-process color technique. And this selection has a major influence on the design once it is printed.
Once the prints are prepared, you will find that the colors are a lot more vivid as compared to the other techniques.
Also, you can use this to your advantage and make use of this process when printing on materials of darker shades. However, that in no way means that the color vividness is absent when it comes to lighter colors.
Tips To Create The Best Color Separation
Honestly, you can create perfect color separations quite simply if you follow a proper process. If that is done, you can very easily ensure that you create a good quality color separation that is quite accurate. It is true that different screen printers have different modes of working, and you have to find a good balance and understand your preference when choosing one.
In this section, we will take a look at how to smartly separate colors. Let’s check them out.
Quality Of The Artwork
When it comes to color separation, the quality of the artwork that you are using is very crucial. It has to be high-quality because if it is of lower resolution, the final print will not come out as nice.
So, if your clients send images of poor quality, ask for better images before you commence with the work. This will help you save both time and money that you would otherwise have to spend on corrections.
Knowing The Colors
Before you start with the work, it is always advisable that you check what kind of colors will be involved in the process. Make sure that you understand whether you will need to extract flat tones or shaded ones.
Once you are clear on this, color separation becomes a lot simpler. Depending on the output you desire, you can choose the color separation process more wisely. You would have to choose certain methods for unusual hues and gradations, and for flat colors, you would have to choose other options.
Take Note Of Potential Problems
Well, like any other work, this one also comes with its own set of problems. However, if you make note of the possible problems before beginning work, chances are that you will be able to tackle them better.
Depending on the color separation process that you are using, you will find different drawbacks. Conduct some research and keep the solutions handy in case you have to face similar problems. For example, if you decide to go for a four-color technique, you might have to face the trouble of color pollution when deciding to separate the colors.
So, depending on the foreseeable nature of the trouble, think about all possible solutions.
Final Words
And with that, we have reached the end of our guide!
We hope that everything we have shared about effectively separating colors for screen printing has been of help to you.
To sum it up, we have to say that it is not a difficult process once you understand its intricacies. With a little research and skill, you will be able to weave wonders with all the processes that we have mentioned.
Our one last suggestion is that you understand that it is a costly process, and you try to reduce the errors to a minimum. If you have any further questions, please feel free to reach out to us in the comments section below.
We hope you find the color separation technique that works best for you. Until next time!
When dealing with small spaces, each available corner needs to be put to good use and maximized. A sofa table represents that versatile piece of furniture that can play both a decorative, aesthetically pleasing role as well as a vital functional one. You can use it as a dinning table if your kitchen space does not permit you otherwise, as a small working desk facing your kitchen or TV, a wonderful bar that provides additional seating space at a larger party gathering, allowing you to be a part of the conversation, facing the living space or simply place it on the back of a sofa as a narrow long storage surface, filled with decorations, picture frames, flower vases, candles and so on.
Colorful, vibrant for a fresh pop modern decor, wooden, simple, basic for Scandinavian touches, or intricate, complex pieces of furniture exuding elegance and grace, sofa tables truly do come in all shapes, sizes and styles, available for each style and taste.We have gathered 17 such sofa tables to illustrate their simple beauty and functionality in an interior design. If you feel that your living room is not complete, opt for such a piece and add complexity to your vision.
Gorgeous Sofa Tables
1. a touch of complementary color to add contrast
image via sarahmdorseydesigns.blogspot.com
2. white hues and natural fibers add warmth to any interior décor
16. notice the delicate contrast between the subtle grey sofa and the oak sofa table
image source Heather Hilliard Design
17. modernity meets the old in elegance sublime composition
image source Desire to Inspire
What do you think about the idea of using a sofa table in your living space? We would love to hear your thoughts on the subject in the comment section below.
Are buzzing yellow jackets making it impossible for you to relax in the garden even for a while?
We understand your concern. Finding loads of yellow jackets foraging now and then can be a headache indeed. And when you have children and pets at home, this can be all the more worrisome since these insects leave really painful stings.
Hence, controlling these yellow jackets becomes essential. In this guide, we have compiled all the various ways in which you can tackle these insects. We have also included some essential information that you need to know about yellow jackets and their habits.
So, without further ado, let’s get started.
How to Deal With Yellow Jackets
Yellow Jacket - The Insect
The insect, which is known to people around the world as a “wasp” is also referred to by the name yellow jacket. Native to North America, this insect got such a nickname due to its striking yellow color with black stripes.
In fact, this is why you might mistake it for a bee, which is much gentler in nature and is a more endangered insect. The hornet is another similar looking wasp which is often mistaken to be the yellow jacket.
These insects have a slightly smaller size than the regular bee or wasp and are only around 12 mm long. However, queen yellow jackets can grow to a length of 19 mm.
What makes them dangerous is the fact that they can repeatedly sting without being affected, unlike the bee which will die as the stinger is attached to its heart. They generally tend to build nests in protected areas in a garden which are not directly exposed to rain, sunlight or wind.
What Do They Feed On?
Yellow jackets also have similarities with wasps in their food habits, since they prey on several other insects and arthropods. As such, if these insects are present in small numbers and keep away from any human activity, they can be useful in controlling other pests.
Yellow jackets also look out for food items which are rich in carbohydrates and sugar. You will often spot them around flowers, on tree barks, and on fruits. Also, the larvae require protein to grow, for which the larger worker insects search for fish and meat to feed them.
Life Cycle and Habits Of The Yellow Jacket
These insects have a similar life cycle as that of other bugs. Starting off as an egg, they gradually become a larva, then change to pupa, and ultimately develop into the adult wasp. A queen yellow jacket finds a nest site and makes a small nest from paper where it lays the eggs.
The queen insects can generally lay upto 50 eggs at once. When the eggs hatch, the tiny insects are fed up to 20 days until they develop into small versions of the fully matured wasp.
These insects eventually take over from the queen and keep on feeding the rest of the larva. You would usually find them maturing into adults during the summer.
Habits
Yellow Jackets are social wasps and belong to the Vespula genus. A surprising as well as worrisome fact is that a season is enough for these insects to produce several thousand workers.
The genus has a total of 18 species, which consists of several types of yellow jackets. These differ according to their growth habits and are identified by the area they are found growing in. Identifying them is important so that you are able to deal with the insects properly and effectively. In the next section, we have categorized yellow jackets according to the place where they build their nests.
Types of Yellow Jackets and Yellow Jacket Nests
The German Yellow Jacket
Yellow Jackets Found in Structures
The German yellow jacket, which has its origins in Europe, is located across the midwestern and northeastern regions of the United States. These are widely distributed throughout many temperate areas of the country. They are usually found in wall voids, attics, cracks and crevices in a building surface, and crawl spaces.
The Southern Yellow Jacket
Found in Both the Ground and Structures
The yellow jacket found most commonly is Vespula vularis and occurs in many states in the USA. Their nests are found both below and above the ground level. Eastern yellow jackets or Vespula maculifrons is another type that has ground nests mostly but can also have aerial nests. Vespula squamosa or southern yellow jackets also have terrestrial as well as aerial nests.
The Western Yellow Jacket
Found in the Ground
The Eastern yellow jackets or vespula maculifrons and the western yellow jackets or vespula pensylvanica make nests in the ground. They are commonly referred to as “meat bees”. Such yellow jackets also make their nests in rodent burrows and enlarge the cavity as the colonies grow.
Aerial Habitat
A few yellow jackets, like the D. maculata and D. areanara build nests that are attached to the eaves of structures or hang from a tree. These are not as aggressive as other types.
Dealing With Yellow Jackets
When these insects forage in large numbers in areas of human activity or even are nesting nearby, they can create a lot of problems. Most types of yellow jackets become quite aggressive if their colony is disturbed and may sting anyone they find nearby.
In such circumstances it becomes necessary to control the infestation. There are several ways of dealing with yellow jackets, depending on the severity of the situation. These include some preventive control measures that can be taken beforehand.
Sanitation
You must keep in mind that if yellow jackets find food in an area, they would continue foraging that area at intervals. You can face this even after the original food source is dealt with. Hence it is important to maintain some sanitation practices even prior to noticing yellow jackets in any area. This will also help in dealing with the problem without having to kill them. Here are some methods:
Keep Garbage Cans Sealed
Make sure you have no food sources kept outside for yellow jackets to live off from them. Un-emptied cans, animal food or leftover food lying outside can attract these insects and their larva. So, keep the garbage in sealed cans and put your pet food inside instead of the backyard.
Keep Sugary Foods and Drinks Inside
You must not forget that these insects feed on anything sugary. So, in case you are having dinner on an outside table and are thinking of bringing dessert along, dump that idea. You can have it to your heart’s content indoors.
Keep Sliced Cucumber Pieces
It might seem surprising, but cucumbers can indeed be helpful in keeping away yellow jackets. This vegetable contains an acid which yellow jackets don’t like, so you can slice some and scatter them all around your garden before any outdoor gathering.
Killing the Nest
If you are tired of the frequent foraging of yellow jackets and may even have been stung sometimes, you can consider removing the nest itself. But this should be carried out carefully and slowly.
You should also be aware of the nesting habits of these insects which we have discussed earlier in this article. Remember that though all wasps would defend their nests, hornets and yellow jackets turn specifically aggressive for protecting the queen.
If you disturb the nest, these bugs may swarm out from the colony and attack what they consider to be the disturbance. So, you need to take the necessary protective measures and proceed in the right way. Here is a guide for how you should proceed to kill a nest of yellow jackets:
Locate the Nests
You should do this during the daytime, so that you can identify the worker insects entering and leaving the points of entry. Search for multiple entry points and make sure you mark them.
Treatment
Treat the nest only when it is dark. Yellow jackets don’t have a strong vision, which reduces the chance of getting stung. Besides, at night the entire colony will be there in the nest which would make the treatment most effective.
Use a Pyrethrum Aerosol
You should treat the nest with pyrethrum aerosols such as CV-80D, Stryker 54 Contact Aerosol and PT 565. It is the pyrethrum that forms a gas and fills the cavities in the nest to kill these insects on contact. Use a good-quality sprayer to spray the aerosol in areas hard to reach.
Apply Insecticide Dusts
Wait for about 10-15 minutes for the aerosol to become dry and then dust the opening with insecticide dusts like Tempo Dust. This dust will stop any future hatch outs. You must also dust the entrance, the whole nest and surrounding areas.
Check the Nests
After a day, you must go and check the nest to see if the insects are dead. This can be verified by the lack of any activity in and near the spot. Repeat the process if you find some of them are still alive.
Use of Baits
Baits for yellow jackets can either be made using available resources at home or may be purchased from the market or online shopping sites. Here are two such baits that can effectively control yellow jackets:
DIY Protein Bait
Using this innovative method often helps to keep away yellow jackets. Fill some 5-gallon buckets with soapy water. Then use a string of some length to secure a protein food as bait such as a small piece of ham.
In this way, the bait will dangle a few inches above the water. Finally, cover the bucket with a wide mesh that allows the jacket to enter. The insects which want to take the bait will fly within the water and drown. Also, make sure that the traps are well away from any patio or picnic areas.
Alpine Yellow Jacket Bait Stations
These bait stations can be purchased online and are designed for use with Onslaught Insecticide. First, you have to supply the station with fresh meat along with the Onslaught. This lures the insects into the bait station, after which they ingest the mixture of meat with insecticides. It kills the yellow and black bugs then and there.
This bait is widely used during the summer and spring months to kill the most common yellow jackets which consume meat and protein.
These include the German yellow jackets and western yellow jackets. Remember that during the months of fall, yellow jackets prefer carbohydrates to meat, so this bait may not be effective.
Trapping
You will find yellow jacket traps useful if you cannot locate the nest. Using a lure such as meat or fruit juice with a trap like the Advantage Yellow Jacket Trap works perfectly in such cases.
You can put up such traps by some simple steps mentioned in a guide along with the pack or on the product label itself. This trap is really beneficial during cookouts and picnics, as it draws the insects away from you. Keep in mind these points while you put up the trap:
Ensure the trap is placed away from where you will be. It is then that they will be lured into it.
Meat works well as a lure during early season, while fruit juice works better in the fall months and summer.
The Winter Months
In case some of the bugs enter into the walls when it is cold, some reproductive yellow jackets may survive in the walls. In the spring, they would come out to venture outside.
The reproductive insects won't sting, so there is nothing to worry about that. However, if the nest is located in a warm place, then it may survive the winter in its entirety. To kill the nests you can use the Stryker 54 on the entrance during the dark.
Treating Yellow Jacket Stings
Usually, you will know straight away when a yellow jacket has stung. The symptoms of such a sting are really unpleasant but can be treated. First of all, you will feel the pain, and within a while, the area will redden and start swelling.
To treat a sting at home, you can mix one spoonful of baking soda in water and apply on the sting with a cotton ball. This would help in neutralizing the venom of yellow jackets. To reduce itching, put a little vinegar on cotton and pat on the area.
However, for a small section of people who are more allergic, the sting has life risks. This is known as anaphylaxis and leads to dangerous symptoms such as itchiness, swelling of tongue and skin rashes. Immediate medical consultation and treatment are needed in such cases.
Conclusion
So, if you have been struggling to get rid of these aggressive insects from your garden, we hope this article has been of some help to you.
You may have assumed earlier that it would be a herculean task, but it’s not so difficult after all. You just need to be careful at every step and make sure you are protected when going near the nests.
Wearing gloves and boots, shirts with long sleeves, and trousers with sealed cuffs would help to prevent stings and disturbances.
So, now that you know all about it, go ahead and bring your garden back to its old glory!
There aren’t many of us who haven’t wondered at the marvelous material that is wood. Undoubtedly, this is one of nature’s greatest gifts.
Wood has been helping humans since time immemorial. Whether it’s the fundamental operation of lighting a fire or the more luxurious function of acting as furniture, wood has a permanent presence in our lives.
Naturally, woodworking is a craft that is much in demand, and woodworking professionals often conjure up images of saw-wielding workmen. But the truth is, using a saw is just one of the many ways in which wood can be cut.
Don’t believe us? Well, to clear all your doubts, we’ve brought a list of the different ways by which you can cut wood without using a saw. Once you go through the following, you’ll know that when it comes to woodcutting, a saw isn’t the only option.
But before going into that detail, let’s take a quick look at how a saw works.
The Secret Of The Saw
Saws come in various shapes and sizes, but broadly they can be divided into the manual and motorized varieties. Motorized saws are exactly what they sound like, i.e., they make use of a motor to rotate the saw blade.
Manual saws, on the other hand, rely on human skill and muscle power to get the job done. While both types of saws have their own features and utilities, the one thing that is common among them is the blade.
The saw blade is the most essential part of the device. Usually made of durable metal such as iron or steel, this consists of a serrated edge that is teethed to make cuts. The shape, size, and closeness of the teeth change depending on the saw type.
And it’s using these teeth that the saw achieves its woodcutting magic. The process is rather simple if you put some thought into it. And for both motorized and manual saws, the process is the same; only the power source differs.
A saw mainly works by a continued abrasive motion of the toothed edge against the wood. Through vigorous action, the serrated and sharp edge of the saw bites into the wood material, thus making cuts.
These cuts are intensified with the application of manual or mechanical force. Eventually, the wood material gives way to the razor-sharp edges, and the wood is cut.
Other Tools To Cut Wood
From the above, it can be easily understood that cutting wood is not rocket science. With the right sharp edge and proper force, many tools can achieve the same results. And that’s what we’re going to take a look at now. Following are some tools that can cut wood with as good results as a saw.
This is the first, and undoubtedly the most straightforward device that can be used for cutting wood. Knives are one of the oldest tools known to humankind, and woodcutting is one of the many uses that this device can be put to.
But remember, not every knife is suitable for cutting wood. For a knife to cut wood, it needs to be very sharp. So the first thing that you must do before setting out to cut wood with a knife is to sharpen it to the fullest. This can be easily achieved using a file.
Once you’re sure that the knife is sharp enough, now you need to set the wood for cutting. It’s usually seen that wood cannot be cut with a knife at straight positions. So you’ll need to hold the wood at an angle, and then come in with the knife for sharp, swift cuts.
Another method that you can use to cut the wood with a knife is to use the sharp end of the blade to score into the wood surface. Once the scoring is deep enough, you can snap the wood in two. Either way, remember to trim the cut once you’re done to ensure a smooth finish.
Who would’ve thought, eh? But it’s true: you really can use a drilling machine to cut wood. All it takes is a bit of ingenuity, common sense, and a whole lot of precision.
The first step to cutting wood with a drilling machine is to understand how a drilling machine works. A drill is a device for making holes, not straight cuts. So you shouldn’t expect to take the direct route and cut through the wooden piece.
Instead, what you need to do is first draw a straight line in the wood along the length that you want the wood to be cut. This straight line is going to act as a reference line for the operation.
Next, make very close perforations on the line using the drill. Once you start doing this, the wood will get weakened along that line. And as closely made holes essentially act as a single, straight line cut, this gives similar results to sawing.
Finally, once the wood is weak enough, you can simply break it using your hands. However, remember to trim the edges using a sharp knife for that perfect finish.
Nope, we’re not talking about the fictional movie character (though he’d do well too, we guess!), but a real machete blade. Think of it as a knife but on a larger scale. Using a machete, you can easily cut any type of wood, and with better style than a saw will ever achieve.
Even easier, since with a machete, you have the advantage of momentum. Many of the same principles apply to cutting wood with a machete as with a knife. First, you’d have to sharpen the blade as well as you can. Use a file for this purpose, or a whetstone if you have one.
Once your blade is sharp enough, mark the wood along the line where you want to make the cut. Make sure to use a vice to hold the wood at a slanted angle, as you’d do when cutting it with a knife.
Now, you need to make deep enough cuts in the wood along the preferred line. For rough cuts, you can even use a hacking motion as with an ax (coming up next). Once you’ve made a cut deep enough, the wood will break along the cut. Then it’s simply a matter of smoothening the edges with the blade.
This is one of the oldest and most ideal methods of cutting wood. And although it requires significant labor, the results can be quite satisfying.
The first step that you have to take, as usual, is to sharpen the ax blade. Using an ax, you can easily go for cutting larger pieces of wood. But you need to take certain precautions before going for the initial swing.
First, you need to ensure that the wood is on a firm base, such as a tree stump. Also, the wood should be positioned at such a height that you don’t have to bend over to make the cuts. That’ll help you to deliver even swings that cut equally well on each blow.
Remember, if you’re using an ax for the first time, it might take some getting used to; so be sure to practice well. For best results, try to make a V-shaped notch on each strike, as this allows the blade a larger striking area.
Finally, once you’re down to the last strip holding the wood together, deliver the final blow, and separate the pieces. If you are an experienced ax-wielder, you can even snap the two pieces apart by hand.
A hatchet is, essentially, a smaller ax. Equipped with a shorter shaft and blade than a regular ax, this tool is meant to be used one-handed. Hatchets are excellent for chopping up smaller wood pieces.
Besides making kindling sized cuts, hatchets can make small tinder savings, and even work well to cut down small trees. And though they are nowhere near as powerful as an ax, they still get the job done rather well.
There’s not much difference between using an ax and a hatchet. Both must be carefully sharpened before commencing the operation, and both require the wood to be held at a comfortable height.
For best results, make sure to practice a few swings of the tool before setting out to cut the actual wooden piece. And if possible, make a marking to indicate the line along which you’d like the cut to be made.
This is yet another centuries-old technique for cutting wood. And though it’s not meant to give you elegant, precise cuts, still, it gets the job done rather well. Also, this combination ensures that you don’t take a larger chunk from the wooden piece than you intended.
With the chisel also, you need to first sharpen the blade using a file or whetstone. Once done, you then need to secure the wood on a firm surface. Ensure that it doesn’t slip, or else this might lead to accidents.
Now, hold the chisel at an angle of about 20-degrees from the wood surface. While doing so, make sure that the bevelled side faces up, and the flat side is pressed against the wood.
Now, hit the chisel with the hammer to cut into the wood. This is going to be like striking a pretty large nail. For best results, make a mark along the wood where you want the cut to be made.
You’ll need to repeat the process and follow up with multiple strikes of the hammer for the wood to be cut. When it’s done, you’ll get a wood chip which you can easily lever-up with the chisel. Finally, use the sharp edge of the chisel to smoothen the rough edges once you’ve separated the cut piece.
A word of caution: this is an expert level process, so make sure you practice a bit before setting out on the final cut.
A router is an electric tool that can be used for a wide variety of woodworking tasks, including the cutting of wood. For this purpose, make sure you select a quality device with the right bits; this is essential for the operation to succeed.
The process is pretty simple. First, you need to attach the router bit that has the right gauge for making the required cut. The gauge of the bit you select is usually determined by the depth of the cut needed, so choose carefully.
Then, pull the router trigger up, set the device into the wood, and push down the trigger to begin the cutting process. With steady hands, move the trigger carefully in the direction of the cut.
And once you’re done, release the trigger and remove the device! It’s that easy. However, to get the required depth, you might need to make several passes. This is necessary as cutting too deeply on a single pass may damage the router and break the bit.
What’s more, you can even use a finer gauge bit to smoothen the cut edges. Just be prepared to handle a lot of wood chips along the way.
Surprised you again, have we? Although a lathe is mostly known for working on metal, it can work on wood with equal efficacy. Using a lathe, you can shape and cut wood, create intricate patterns, and make attractive wooden pieces for a variety of applications.
To shape and cut wood with a lathe, you need first to prepare the wood. This is essential to ensure that it doesn’t come off the lathe while paring down. In case you’re starting work on a rough piece of wood, clean it thoroughly before commencing.
Now, lay the piece in place and firmly fasten the faceplate. Take care not to place the screws along the grain, as this may split the wood unevenly. Finally, mark the center of the wood piece, and place it between the lathe centers.
After this, you need to select the right chisel for the job. It’s best to go with one that’ll give you the required depth of indentation. You need to place the chisel on the tool, and slowly advance it towards the turning wood. Over multiple passes, push the tool more deeply into the wood.
Towards the final stage of cutting, increase the lathe speed, and take greater care not to make mistakes. Once done, remove the cut pieces carefully.
The final tool on our list, this is a device that you’re sure to have seen in any carpenter’s workshop. A plane is used to cut wood in long strokes that shave off thin strips from the wood. Here also, the primary requirement is a sharp-edged blade.
While sharpening, take care to stick to an angle of 25-degrees for most wood types. For certain soft varieties of wood, you may use a 20 to 23-degree sharpening angle. Also, adjust the depth wheel based on the depth of the cut required.
Finally, plane through the whole length of the wood for making the cut. While doing so, make sure you go in the direction of the grain. This is essential so that you get a smooth surface and don’t damage the wood.
Plane the wood from one side to the other. Typically, cutting wood with a plane requires multiple passes, and the job can be a strenuous one. So be confident that you’re up for it before starting on the task.
Conclusion
And there you have it, folks! The top tools that you can use to cut wood without a saw. Now, that wasn’t too difficult, was it?
Cutting wood is one of the basic operations that any DIY enthusiast or woodwork professional needs to carry out in the course of a project. And while a saw is always the primary choice for cutting wood, it may not always be available.
But able professionals are not daunted by the lack of a tool. Instead, they improvise and make do with what they have. The above were just examples of the many ways in which tools, which we usually associate with other tasks, can be used to cut wood.
A word of advice for those just starting, however. All the tools described here are sharp instruments and need careful handling. So before you set out to cut wood, make sure that you take the required precautions for your safety.
And if you can think of any other tool that can be used to cut wood, then don’t hesitate to let us know. We’re always happy to hear what you have to say.
Till then, cut away! And don’t forget to improvise.
Cleaning a carburetor is not as difficult as you may perceive. If it looks and sounds dangerous, read on.
Are you under the impression that lawnmowers need to be taken to garages or a repair store every time you need to get it cleaned? Let us break the bubble. With a few essential pieces of equipment, you can do the job at home itself.
But again, you must take specific precautionary measures beforehand. If there are problems with the mower, it is best to let an expert handle the job. But if the mower is working fine, then you can do the job yourself.
Let’s proceed to the tools that are required for this process, and we will also be giving you tips along the way so as to not go wrong. The engines will be purring perfectly by the end of this guide.
How to Clean the Lawn Mower Carburetor Without Removing It?
Required Tools for Cleaning
Now that you have decided to clean the machine instead of taking it apart, you will need the following sets of equipment for partial cleaning.
Air compressor gun
First, before using any other tool, an air compressor gun needs to be used to remove any visible dirt from the machine. There are chances that lumps of grass or soil may be stuck with grease in some areas of the machine. Use this device to blow off the dirt, and then rags can be used to clean it further.
Screwdriver
A screwdriver is essential in any place where screws need to be removed. Here you can choose a Philips product for opening the filter. It can also be used for opening snapped on parts of the machine. Again, if you feel you do not know how to go about using a screwdriver, opt for a plastic card, which is a safer choice and will help in the process.
Aerosol cleaner
For those who do not know what an aerosol cleaner is, it is a liquid solution that is generally used to clean electrical equipment. It can be used on all the parts as well as any other device which runs on fuel. This solution works wonders for machines and keeps them free from rust and other forms of discharge.
Rags
Cotton rags are a must while working with machinery and machine parts. You will be soiling your hands multiple times, and would not want the grease to remain on the fingers for long. So, make sure that you carry a piece of cloth to clean your hands as well as to clean the carburetor.
Flashlight or headlamps
It is essential to have the inner parts of the carburetor visible to the naked eye. So, make sure that you have a flashlight or headlamp while working because even if the room is well lit, the parts may not be visible. A headlamp is a better choice, as this will keep both your hands from being occupied.
Kinds of Lawn Mowers
There are mainly three types of lawn mowers presently available.
Traditional
The traditional lawnmower is one that is devoid of any engine. It works on kinetic energy that is produced when the blades of the wheels inside keep turning. It is a pretty basic machine and cannot be expected to run very efficiently.
Walk-behind
The walk-behind lawn mowers work very smoothly, and you only have to push it where you want the grass to be cut. It slices off the grass and leaves a neat looking lawn. Blades below this machine, which is powered with the help of a carburetor, are the main tools that cut through your lawn.
Ride-on
The last type is the ride-on lawnmower, and yes, it is fun to operate. One just has to sit on it and steer it in the right direction. This is essential for larger fields where walking would be very tiresome. In such cases, this machine cuts off grass efficiently and quickly.
Steps to Have a Clean Carburetor
Before starting this process, you need to assess the condition of the mower. If you are using it on a daily basis and it is maintained well, then we are assuming it is in good condition.
Have you left your gadget in the garage for long, and there is rust on its body, or the mower has seen a lot of rain and is filled with dirt? If that is the case, this process will not work. The mower would be needing professional servicing and has to be taken down to the repair shop to be deep cleansed.
We will now begin with the steps to take care of a machine that is in good working condition.
Step 1
Firstly, to prevent any kind of mishap or injury, make sure the device is switched off. We will require you to switch it on in the middle, but it has to be shut down to begin with.
Step 2
Your second work would be to analyze every part of the unit that is visible to you. This is a required step before proceeding further. For instance, if you see a wire which has been torn off, it may have been a rodent’s doing.
If you see any parts which are rusted, there is a chance that the machine was damp and did not dry up instantly. This led to rusting inside the device. Making a note of these points is important because it will help you decide if you want to go forward with partial clean up or if disassembly is required.
We would advise you here to take some pictures of how the carburetor looks presently. This will help you in the end when you are trying to put everything back in place.
Step 3
We will begin with the air filter. Remember that this can be partially dirty or extremely dirty, depending on your usage. All the air that is pulled in passes through the filter, and thus there is a high chance that it would be very dirty. You could use a rag to clean this, or you may choose to do it with a vacuum cleaner.
See if the air filter is removable as it can be better to remove and clean both sides of it.
Step 4
Focus on all the internal parts of the cleaner with a flashlight or headlamp. There can be an exposed wire, and you do not want to be touching it or having any other wire touch the end. Also, a slight pull may tear a wire. So be very careful while working with the parts.
Any exposed wire should not come in contact with another wire or lumps of grass. This could cause a fire as the grass is inflammable.
Also, since carburetors have dark paint, it may be difficult to see rust, discoloration, or grass stuck inside. A light source will guide you to find these.
This is actually an excellent habit to pursue if you want to become a DIY mechanic or an expert at fixing/cleaning parts. This helps you gain knowledge about the parts.
Step 5
This is where the air compressor gun comes into use. The machine must have seen a lot of grass and dirt throughout its lifetime, and there will be specks of it in the inside of your device.
There are parts which you can only reach with a lot of difficulties, and we would suggest not to do so with your bare hands. It could turn out to be a dangerous endeavor. Use an air compressor gun to clean out the dirt and debris from inside.
A word of caution here. Do not use the highest setting to do this activity. It may end up dislodging a part of a wire. Use it on medium mode for best performance.
Step 6
Now it's time to take out the aerosol cleaner. Do not use water or spray water on the parts. This may cause some portions to rust, and the machine would break down completely. Aerosol cans have a solution which tends to stick to parts and are made to be used explicitly with electrical devices.
Turn on the machine now as every component inside has been cleaned. The cleaner has to move inside the engine completely, and so it is essential to be turned on.
Spray aerosol liquid in the middle of the carburetor in 10 -15 pulses. It is time to let the machine work for another minute. This ensures that the liquid spreads throughout the device, and we can attain full coverage.
After a minute, turn it off and spray the liquid on to the throat of your machine properly. This ensures that you cover the lower plate, which may also have accumulated grime and moss. Make sure it is absolutely clean before proceeding.
Step 7
Now that you have allowed the air compressor gun and aerosol liquid to work their magic on the device, it is time to use your rag for complete cleaning. First, dampen the rug and then use it to wipe off leftover grime.
The rug should be damp and not dripping, as that may lead to damaging parts. Keep rinsing the cloth once in a while, so dirt does not get transferred from one region to another. Continue doing this until every part is visibly clean.
Step 8
After you have completed the job, inspect every part using a light source. View the pictures that you had initially taken of your machine to compare and see if the parts are in order.
To test if the product is working alright, start the engine and keep it running for a few minutes. It should start smoothly without much sound. If it is vibrating less or you hear no chugging, kudos! The job is done.
Why does a carburetor stop working?
The engine can face blockages because of the constant dirt and grass it collects. Also, it may so happen that the machine accumulates a lot of dust and dirt if kept idle for an extended period.
Gasoline deposits, varnishes, and oil deposit may be other materials which can lead to the formation of blockages inside the machine. This directly affects the functioning, and the machine works slower or makes a lot of sounds while it operates.
Tips
If your machine is under warranty, first call up customer care and see if the device can be cleaned up for free. If that is the case, it is best to send it off for professional cleaning.
It is vital that you keep cleaning every part once in a while. This will keep the device running and in good condition, and you would not have to take it to the store for deep cleaning often.
You must know the exact problem that your device is facing before taking the gadget to a store for deep cleansing. Shops tend to make money out of it as they are not expecting someone to know a lot about the working of the device.
The aerosol cleaner has to be of the right variety. If you get a wrong type of cleaner, it may lead to malfunctioning. The bathroom’s disinfectant cleaner is not the right choice and cannot be used as an alternative. You will find a specific product dedicated to lawnmowers.
Final Words
We will again want to reiterate the fact that deep cleansing is not replaceable. You will have to take the mower for deep cleansing once in a while. But partial cleaning at home can be done once a week or once in two weeks, depending on your usage. This will keep the mower working well and the interiors free from rust.
We are sure that you are now ready to clean your own lawn mower. For added help, you can also look up some YouTube tutorials regarding this topic. Let us know how it worked out for you in the comments section below.
Are you fascinated by the waterfall river table that you just watched on YouTube?
It’s time you create such a masterpiece all by yourself using epoxy resins. Epoxy resins are fun to work with but are tricky to handle. They can either create exquisitely beautiful pieces or lead to a terrifying mess.
However, if you’re a DIY lover just like us, then epoxy resins must be your favorite too. They add life to your otherwise dull surfaces and make them bright and shiny. Unfortunately, epoxies turn yellow over time. Thus, what once was bright and shiny is now unpleasant and ugly.
Therefore, colored epoxies are the best for all your DIY work. We decided to pen down a complete guide on “how to color clear epoxy resin” for all the newbies out there. Read on to know how you can create stunning artwork by adding colors to clear epoxy resins and start your own DIY business.
How to Color Clear Epoxy Resin – Coloring Resin 101
Coloring Resin
If you’re a DIY enthusiast going with the trend, we bet you know how intimidating it is working with resins. However, once you get the hang of it, you’ll find it easy to work with it. Clear and colorless epoxy resins are versatile and offer a plethora of applications.
Nevertheless, adding a dash of color to your clear and colorless epoxy resin will let your creativity flow. You can create stunning artwork such as jewelry, keychain charms, pendants, coasters, and much more.
Whether filling cracks on an old table or designing a river tabletop, colored epoxies can help you create stunning DIY artwork that you can sell online for thousands of dollars.
Now, there are a variety of pigments available on the market that you can use to add colors to clear epoxy resin. But, not all of them get along well with epoxy resins. So, which epoxy resin will work best for you? We’ve got all the answers for you in this section.
If you want to give a unique look to your DIY artwork, adding pigment powders to clear epoxy resins will transform the look of every project. Pigment powders’ bright, vivid hues are perfect for jewelry making.
When mixed with epoxy resin, they produce subtle color changes that enhance the aesthetic appeal of the finished product. Simply add a pinch of pigment powder to your epoxy resin, and stir well to make sure no lumps are formed. This is it. You’re done! Now pour it onto the jewelry molds or the canvas for geode art.
While searching for ways to color your clear epoxy resins, you might have stumbled upon resin dyes. Haven’t you? If you don’t know yet, let me tell you that resin dyes are compatible with almost all kinds of resins.
After mixing Part A and Part B epoxy resins, add a few drops of resin dyes to the measuring cup. Also, make sure to stir the mixture properly until you’re confident that the dye has mixed evenly with the epoxy resin.
They are most popular among DIY enthusiasts, mainly because they are easy to mix with epoxy resins. Moreover, they are available in both paste and liquid forms. Also, you can find both transparent and opaque pigments according to your needs.
While light can pass through the casting, transparent dyes add color to your epoxy resins. Hence, you may use them for making pendants, jewelry, coasters, or charms. Meanwhile, the opaque ones do not let the lights pass through them. Therefore, they’re perfect for geode canvas, wall clocks, river tabletops, and the list goes on!
If you’re a newbie with epoxy resins, resin dyes will be the perfect pick for you, mainly because they are easy to mix and work with. However, if you’re looking for more options, then keep reading, for the list goes on!
For all your DIY countertops, tabletops, or waterfall river table, mica resin powder is a must-have in your DIY resin kit.To be honest, this is one of our favorites, too. Mica resin powders add an exquisite and subtle shine to your projects.
Whether you want to create riverbed tables or fill the cracks of your old coffee table, mica resin powders will be a perfect choice for creating stunning masterpieces. Also, it mixes easily with resin without forming lumps into the mixture.
While working with molds, you can even brush the corners of the molds with mica powders to coat the borders. However, you must keep in mind to swirl the mixture with a toothpick after pouring it into the molds. That will surely yield amazing results. But, remember this is slightly more expensive than others.
Another popular resin colorant is alcohol ink. Its beautiful, rich saturation makes it a perfect pick for creating resin petri dish art. After mixing part A and part B resin, add a few drops of ink in the mixture and stir well.
However, you can also add a few drops of alcohol ink after pouring the resin on the molds. Alcohol inks also work best for designing tumblers. Simply cover the tumbler with epoxy resin, and pour a few drops of ink on the tumbler. And your gorgeous marbled cup is ready for use.
Ever thought of pairing acrylic paints with epoxy resins? If not, now is the time to try it. Because of their wide variety of colors, acrylic paints are best to enhance the aesthetic appeal of your objects.
It is an excellent colorant choice because of its abrasion and water-resistant properties. Plus, they are highly durable. However, you must mix acrylic paint and epoxy resin together with great care. It’s best to stick to a ratio of 1:10.
We recommend going for acrylic paints only if you’re a pro at handling epoxy resins. Otherwise, it’s futile to choose acrylic paint as a colorant for epoxy resins. For all newbies, we suggest sticking to other colorants.
If you’re a DIY enthusiast who loves to add a dramatic effect to DIY projects, it’s time you lay hands on glitter powders. From holographic to classic metallic, there are limitless varieties to let your creative juices flow.
Although they don’t really add colors to epoxy resin, they add stunning effects to your pieces. With just a pinch of glitter, you can transform your dull object into a bright, eye-catching one.
How To Color Clear Epoxy Resin
While you know which colorants go along well with epoxy resins, adding colors perfectly to clear epoxy resins still remains a challenging task. When you add any colorant to epoxy resin, the mixing ratio between the hardener and resin is altered. Therefore, it is important you work carefully to avoid creating any mess.
So, herein, we’ve laid down the steps on how to color clear epoxy resin just for you! Take a look -
Step 1| Keep Things Handy
We all are aware of the fact that resin cures pretty quickly. Therefore, keep things handy to avoid any last-minute rush. Resin, hardener, mixing cups, ice cream sticks, blow torch, and everything you may need.
Step 2| Mix Hardener And Resin
Whether you’re about to create a stunning countertop or a beautiful two-tier cake stand, the first thing you need to do is to prepare the epoxy resin mixture. Therefore, the most important step to creating your masterpiece is to mix the hardener and resin in the proportion recommended by the manufacturer.
Most epoxy resins mix at a ratio of 3:1 or 2:1. However, we recommend you follow the instructions given by the manufacturer for an error-free experience. To ensure you mix accurate proportions, you should use a resin calculator and a weighing machine.
Step 3| Add Colorant To The Mixture
After mixing hardener and resin in equal proportion, it’s time to add colorants to them. If you’re using pigment powder or glitters, add no more than a pinch to the mixture. Stir it well to mix the pigment evenly with the resin. Also, make sure lumps aren’t formed.
However, if you go for the liquid pigments or resin dyes, you need to pour just a few drops. Stir it well to mix the color evenly. Alternatively, follow the 1:10 ratio with acrylic paints. As a rule of thumb, add no more than 5% colorant to your epoxy resins because adding more will hamper its functionality. Also, you must use only high-quality branded colorants for epoxy resins because they yield better results.
Coloring Epoxy Resin| Tips And Tricks
Working with epoxy resin is quite a challenge. Hence, you must work with utmost caution to avoid making artsy-craftsy a messy affair. Therefore, we’ve mentioned a few tips and tricks for you. Check them out.
Opt for highly pigmented colors because they do not tamper much with the mixing ratio of epoxy resin.
Always mix the colorant with epoxy resin in a small batch to see whether it is compatible with it or not.
Add colorants to only those epoxy resins that you’ve handled in the past, as it will be easier for you to control the reaction - if any occurs.
Using water-based colorants with epoxy resins is a big no-no!
Choose only colorants that are sufficiently lightfast because this will ensure the longevity of your project.
Remember, resins dislike moisture, so avoid adding more than what is necessary.
Safety Measures To Take While Coloring Epoxy Resin
A Well-Ventilated Space
First off, a well-ventilated space is important for working with epoxy resins. Its fumes are carcinogenic, and of course, you wouldn’t want to inhale them. Therefore, work outdoors.
However, if you work indoors, make sure you work near the windows. Switch on the ceiling fan to ensure proper ventilation.
Wear Safety Glasses
Resins don’t splash because of their thick viscosity. However, it’s better to wear safety glasses to protect your eyes while working with epoxy resins.
Put On A Plastic Apron
Spills and drips are inevitable while working with epoxy resin. And let’s be honest, who would want to ruin their beautiful shirt with epoxy resin stains? Of course, no one! That’s why we recommend you wear a plastic apron while working on your masterpiece. You can either clean it after work or toss it in the bin.
Wear Gloves
Epoxy resins are chemicals, and you need to protect yourself from them. Therefore, you must wear a pair of gloves to keep your hands safe. We recommend you use nitrile gloves against latex ones that obstruct curing.
But, what should you do if resin accidentally gets on your hands? Baby wipes are great for wiping resin from your skin, so keep that handy.
Next, wash your hands with soap and water. Pumice soap works great for sticky resins. Also, keep acetone or alcohol handy to avert the reaction of resin on your skin.
Use A Respirator
After following every safety measure, don’t forget to put on a respirator. To be precise, you’re dealing with chemicals. And so, it’s better to be safe than sorry. If you think fumeless resin isn’t dangerous just because they don’t smell, you’re wrong. All epoxy resins are harmful and so put on a respirator while working.
Use Epoxy Resin Formulated For Art Purposes
You must buy only those epoxy resins that conform to ASTM D-4236 because they are safe for DIY use. However, this does not mean they are non-toxic, location-safe, or food-safe. We recommend you read the instructions along with the do’s and don’ts of the product you’ll be using to understand the product better. Also, don’t forget to use protective gear.
What Can You Do With Colored Epoxy Resin
Adding colors to epoxy resin allows you to turn your imagination into reality. One of the best things that you can create with epoxy resin is river tabletops. Adding them to your living room is sure to enhance the aesthetic appeal of your home.
Moreover, if you’re into DIYs, you’ll love creating this masterpiece. Also, you can open up your DIY crafts store and make hundreds of bucks by selling these online. Simply add a few drops of blue pigment to the resin mixture and pour it on the wooden tabletop.
From pouring colored epoxy in the center coupled with wood planks on the sides to a live edge table with irregular pieces of wood with colored epoxies, you can create anything you want. Not only do the colored epoxies add aesthetic beauty to the table, but they also act as an adhesive to bond the wood strongly.
Also, you can use them to design countertops, tabletops, geode artwork, wall clocks, and decorating tumblers. They are best for all your DIY projects. One of the benefits of using colored epoxy is that they don’t turn yellow over time, unlike clear epoxy resins. As such, your objects and surfaces remain bright and shiny for years. Thus, they age much better than clear epoxies.
How to Color Clear Epoxy Resin FAQ
1. Is Painting Epoxy Resin In Color Possible?
Yes, it is possible to paint epoxy resin in color. However, we recommend you use premium-quality two-component paint or car paints. However, adding color directly to the mixture during the casting process will yield a better result than painting it afterward.
2. What Doesn’t Work To Color Resin?
Epoxy resin is challenging to deal with. Therefore, you must avoid using nail polish, oil paints, and latex paints.
Nail polish will turn your epoxy resin into a hideous amber. Oil paints will form lumps and create a mess. To be honest, we’ve tried latex paint and found that it makes resin stringy. So, make sure you never make the mistake of adding these to your epoxy resin.
3. Are Colored Epoxy Resins Heat-Resistant?
Yes, they are heat-resistant up to 100 degrees celsius. However, it also depends upon the brand, the colorants, and the products used. Therefore, we recommend you layer the colored resin tabletops with a layer of transparent resin to add extra protection.
4. Are Protective Gears Necessary While Working With Epoxy Resin?
Of course, it is necessary for you to wear a respirator and safety glasses while working with epoxy resin. Epoxy resins are no doubt chemicals, and are therefore toxic. To keep yourself safe from health hazards, you must always use a respirator.
Final Words
From aesthetically pleasing countertops to pendants and tumblers, colored epoxy resin lets you create whatever you want. Add colors to epoxy resins and create all that you want. Live edge and waterfall table tops are fun to create but don’t forget to follow safety measures.
However, handling epoxy resin is no child’s play. Therefore, if you’re a newbie, we recommend you experiment with epoxy resin crafts under the guidance of an expert because epoxy resins aren’t forgiving.
With that, we come to the end of our informative guide. We hope we were able to answer your questions regarding coloring epoxy resins. In case you have any queries, reach out to us. We’ll be glad to help you.
Hope you have a fun time experimenting with epoxy resin!
To clean a screen printing machine, a few tools like a pressure washer, emulsion remover, and spray tank are essential. The cleaning process includes three key steps - removing ink, reclaiming, and degreasing or you can also use a dip tank.
A screen printing machine is an amazing tool for creating cool prints and merchandise, especially if you run a screen printing shop, but cleaning it is a daunting task.
However, over time I have found a few hacks to get the job done easily, so today, I am going to share those helpful tips with you in this handy guide. Keep reading to find out how to clean screen printing screens effortlessly!
How To Clean Screen Printing Machines
Let’s discuss what you will need to clean your screen printing machine and how to go about it.
Pressure washer
Emulsion remover
Wax paper
Paper towels
Spray tank
Scrubbing brush
Dip tank (optional)
Gloves
Protective goggles
Cleaning solution
Cleaning Screen Printing Screens
Wear your protective gear before following the steps mentioned in this section -
1. Remove The Tape
Remove any plastic or tape from the surface or sides of the screen to make sure that all the ink is removed. Remember to be thorough because leftover tape can prevent some of the ink from washing out.
2. Remove Excess Ink
Next, you have to remove the excess ink deposited on the screen using a squeegee. You can also use wax paper for ink removal, as it is a straightforward method that doesn’t involve any chemicals. So, wipe off as much ink as possible using a tool of your choice.
A lot of ink will come out during this step and since I don’t like wasting the leftover ink, I usually scrape it off in a container to use later.
3. Reclaim Screens
Reclaiming screens is the most crucial step and needs to be carried out very carefully. If not done properly, you might need to repeat the whole process, as the dirty screen won’t get cleaned entirely.
Lay the screen on a horizontal surface with the print side facing upwards, then spray a generous amount of reclaimer on it and let the screen sit for 2 minutes. Note that the waiting time can vary for different screen reclaimers, so refer to the manufacturer’s instructions for an accurate estimate.
But your screen printing screens can get damaged if the cleaner is left on for too long, so do pay attention to the sitting time.
If you don’t want to use a reclaiming spray, you can also get the job done by soaking the screen in isopropyl alcohol. To do that, soak paper towels or a rag in alcohol, wrap them around the screen and let them sit for a couple of minutes. There are fewer chances of damaging your screen through this method, but on the other hand, it is slower and not as effective.
4. Scrub The Screen
After letting the reclaimer sit for a while, you will have to break the emulsion by scrubbing the screen printing screens using a brush or emulsion remover. Once that’s done, use a pressure washer (preferably ranging between 1,500 and 2,000 PSI) to wash off the reclaimer and residue.
5. Increase The Tension Of The Mesh
If the ink buildup isn’t cleaned even after using a power washer, you will need to check the tension of your screen. Screen prints with loose tension collect ink very quickly and unnecessarily, so, for retensionable screens, you can increase the mesh tension to make cleaning easier.
6. Degrease
Repeat the previous steps on both sides of the screen before finally degreasing it. When all the ink is out, apply a degreaser on the screen to remove any leftover stains. If you miss this step, the emulsion might not stick to the screen printing frames, and also remember to pressure wash the degreaser after 3-5 minutes.
7. Get Rid Of Any Ghost Image
Lastly, keep your screens near a window or at a spot where there is plenty of sunlight to let them dry quickly. Here’s a simple hack to avoid stencil damage of pinholes - do not dry your screens in a humid room. And if you see any ghost images, get rid of them using a haze remover.
How To Clean Screen Printing Machine FAQs
Can a Cricut machine screen print?
If you are wondering can a Cricut machine screen print, let me tell you that it can efficiently screen print. But it is a little tricky to use, and you will need special supplies for it. However, the good part is these supplies are fairly cheap, and the outcome is much more beautiful than regular screen prints.
If you plan to use a Cricut machine, be sure to keep the following items handy:
Speedball screen and ink
Permanent vinyl
Masking and transfer tape
Squeegee
Weeding tools
What are dip tanks?
Dip tanks are handy little containers that allow you to reclaim your screens. You can simply leave your screen in the tank to loosen up the stencil, as they make the cleaning process hassle-free and prove efficient alternatives to manual cleaning.
But if you are worried about the chemicals, I have good news. Dip tanks are made from polyethylene as opposed to heavy plastic containers sold at craft stores, which makes screens resistant to the chemicals present in the dip tank solution.
Your screen printer can automatically insert the used screen in the tank and after about 5 minutes, the ink will wash off from the screen into the solution. It is then sprayed with a power sprayer to get rid of residual ink and emulsion.
What is a screen printing machine used for?
For people wondering what is a screen printing machine used for, it’s one of the most versatile printing techniques used to design goodies and merchandise of all shapes and sizes. Some of its applications are:
Designing clothes
Producing stickers and decals
Printing product labels
For textiles and fabric designs
Printing logos on merchandise, sports products, medical equipment
How To Clean Screen Printing Machine Final words
Now that you know how to clean screens, your next print job might be easier than you think. With the help of the right tools, accurate timing, and a little patience, cleaning screens becomes more manageable.
First, remove the tape and wipe off the extra ink before you use a screen reclaimer to remove the image stain. Once that’s done, pressure wash it, scrub it, and degrease it to make the printing screen spotlessly clean.
Tip
If you want to save money on your future prints, invest in a dip tank, as you will need only a dip tank solution rather than different reclamation chemicals. The solution can be used multiple times in the tank, so overall it’s a very cost-effective option.
It can be irritating to get paint off your brush. However, there is a way to avoid this tedious process, and we have the solution.
If you are into DIY painting projects, you must have dealt with many hardened brush sets. While you might buy a quality brush, you may not be able to maintain it well.
Whether you are using polyurethane, house, or oil paints, the bristles need to be taken care of. They should not be exposed to strong chemicals directly without proper consultation. Also, if the bristles are made of natural hair, then they have a higher chance of breaking off or getting diluted in chemicals.
We were facing the same problem when we decided to do our research on it. After that, we decided to create our own guide about how to clean polyurethane brush kits.
So, dive in!
How To Clean Polyurethane Brush Kits
What Are The Supplies Needed For Cleaning Polyurethane From A Brush?
Before you can get the paint off, you will need to keep all the required materials in one place. Remember that just washing the brush with hot water along with soap is not enough. Dried polyurethane can be quite tough to remove, and you will require a set of supplies for it.
Moving on, you might find some of the ingredients in your house while others need to be bought. You will be needing:
Paper towels
Brush cleaner
Mineral spirits
Plastic containers or glasses
Plastic Bag
Some people use fabric softeners for cleaning dried paint, but you cannot fully trust it. If you have used water-based paints, then soap will not be able to remove it. Plus, you cannot wash it in a basin as all those chemicals could damage your drainage system.
Moreover, if the chemicals reach the sewer system, it could cause more damage. Hence, try purchasing mineral spirits and consult your local hardware store to learn about how to dispose of the chemicals.
Cleaning Process
Step 1| Cleaning With Paper Towels
To begin with, you will need mineral spirits in a container for dipping the towel. In case you cannot get it, use lacquer or paint thinner for this job. These thinners can remove polyurethane and oil paints. But be careful if you are using anything other than mineral spirits as they might remove the paint from good quality brushes as well as damage them.
Next, take the mineral spirit and dip a paper towel in it. Then the brushes can be cleaned with a paper towel soaked in mineral spirits. It should work well with the brush bristles and release some of the polyurethane from a brush. However, you will still have paint on the brush after soaking.
It will only make the process easier and ensure that the paintbrush has less paint on it. Please remember to wear gloves while working to prevent mineral spirits from touching your skin. Additionally, ensure that all windows are open and the area is very well ventilated because the fumes need to leave the room as fast as possible.
Step 2| Using Mineral Spirits
Next, take a good amount of mineral spirits in a container. Again, you can use a paint thinner but be very careful with it. Then dip your paintbrush in the solution so that all the bristles are in the spirit solution. You can get it for both a natural brush and a synthetic brush.
Typically, the brush bristles that are covered with polyurethane paint need to completely emerge, while the upper part of the ferrule needs to be kept away from the paint thinner.
Step 3| Keeping It Soaked
Once some of the polyurethane has come off, you can fill another container with mineral spirits and put your polyurethane brush in it. The dried polyurethane will slowly come off as you swirl the hard paintbrush inside the container. You can then leave the brush in the fluid overnight. Do not wash polyurethane brushes at this time.
Take it out of the liquid to check before you dip it again. This is based on your judgment, and you can handle it accordingly.
Step 4| Taking Out Dirty Mineral Spirits
Remember that harsh chemicals like mineral spirits cannot be thrown in the sink or on the ground outside your house. You will need to take the dirty mineral spirits and ensure that it reaches a hazardous recycling plant. The spirit, paint thinner, or oil paint mixed with the remaining polyurethane can be caustic and harmful for drain pipes.
Step 5| Repeat The Process
Cleaning polyurethane brush sets can be a difficult job, and the bristles deserve to be completely free from it. Now, you might want to repeat the entire process as the polyurethane coating may not disappear completely.
So, go forward and take some mineral spirits to repeat the entire process. Swirl the cleaning brushes in the formula before you leave it for a few hours. Then clean again to see if the paint has been more or less removed. The second attempt should ensure maximum cleaning power and should make your brush cleaner.
Also, please avoid vigorous scrubbing as that could lead to the breakage of natural hair bristles.
Step 6| Rinse well
Once you have removed most of the polyurethane from the brush, it is time to bring out hot water. Keep your brushes in hot water for a while to loosen excess paint. You can also use dish soap along with water to create a soapy water mixture. This should make it easier to wash polyurethane brush kits.
Your brush bristles deserve proper care, and hence, you need to be very gentle with the brushes. After washing it thoroughly, you will need to use a brush comb. A brush comb will slowly clean polyurethane off the bristles.
Step 7| Dry The Brushes Well
Next, you will need to clean the brushes well with paper towels and check if all the dried polyurethane has been removed. Make sure that you do not tear the bristles while you are taking out the polyurethane from a brush. You might also end up loosening the bristles, which will create further problems. Gently wipe with a towel and then keep them dry.
Once the brushes are dry, you will need to store them. If you have used natural brushes, then you will need to keep them wrapped in paper. Use old newspapers for this purpose. However, if synthetic brushes need to be taken care of, you can wrap them up in a plastic sheet. Both the materials will keep brush bristles dry and prevent them from breaking or bending in time.
How To Clean Oil-Based Polyurethane Brush: An Alternative Method
If you are using oil-based polyurethane, then you can try working with water, dish soap, and paint thinner. It is best if you wear gloves as well as well-ventilated masks before starting work. Keep the area well-ventilated so that all the toxic fumes can leave the house immediately.
Using A Thinner
First of all, you will need to get hold of paint thinners. This can be bought from any local store. Once you have it, pour some into a cup. Ensure that there is enough fluid in the bowl to cover the hard paintbrush bristles. There is no need to fill it to the top.
Next, you will need to dip the paintbrush in the paint thinner and keep it in the same way for the next 20 minutes or so. This will help the paint in loosening up slowly.
After 20 minutes or half an hour, start bending and moving the brush from one side to another. It should be bent in such a way that the thinner touches the metal area of the brush. This will keep it from drying or hardening up.
Then it is time to take the brush out. Wring it gently so that the remaining paint thinner leaves the brush along with the paint. You can repeat the process till the paint comes off well, and you have a clean polyurethane brush.
Cleaning The Paint Brush
Wear your gloves before beginning the process. You will need clean gloves to keep your skin safe while washing the brush. Then put some dishwashing soap on the brush and work it well. Ensure that the natural or synthetic bristles are covered with it before rinsing them out.
We will recommend rubbing it well to get all the dried or dissolved paint out. Then rinse and wash out the soap. Wash for some time to make sure that all the soap has left the bristles. If any of it remains, it will only harden up, and you might face difficulty in cleaning it.
Drying The Brush
Now, it is time to dry the brush well without letting it harden up. You can take a microfiber brush to clean the bristles well. Do it until no water drips from the body. Once it is done, you can let the brush rest for a while.
If you want to paint with oil paint, then there are ways to clean a brush without paint thinner.
Storage And Care Guide
Now that you know how to clean polyurethane brush kits, there are a few things that you must keep in mind when it comes to brush care. Be very careful with the brushes and ensure that bristles do not come out of the metal part. Permanent breakage would lead to damage of the entire brush, which is not needed.
Short Breaks
If you are painting a large space, you might need to take breaks in between. Generally, one would keep the brush on a newspaper, paper towel, or an old rag while they take a break. Remember that even if you leave it for half an hour, the brush could be spoiled. There are more efficient ways to store the brush, and you can try them out.
In case of a short break, it is best to leave the brush in the paint tub itself. Ensure that one-third of the bristles are inside the paint can. Then the paintbrush will not dry up at all, and you can begin painting as soon as you return.
Short Breaks
If you are going to take a longer break, then leaving the brush inside the paint may not be a good idea. Some would want to wrap the brush in a sheet of plastic and store it. But again, if you leave it in this way for a long period, then the plastic may stick to the brush as the paint dries.
The plastic wrap will contain air inside, and that aids in the process of drying up the extra paint. Also, plastic will let moisture get inside, hardening it up.
A good alternative to plastic is aluminum foil. This foil will keep the brush dipped in polyurethane paint safe and prevent it from drying up fast. However, remember that you need to wrap the brush well with aluminum leaving no space in between. Then you can cut off the remaining foil bits. This should prevent hardened bristles, and you can go on long breaks.
Water-based and Oil-Based Polyurethane
If you are using oil-based polyurethane, then it is best to choose natural brushes. Natural bristles are better suited, and the oil-based paint will be applied evenly. Also, it is easier to clean oil-based polyurethane from natural bristles.
However, if you are working with water-based polyurethane, then synthetic brushes will fit the bill. Synthetic bristles will not hold on to the water-based paint and will help you remove the hardened polyurethane easily.
Moving on, you should know that both oil-based and water-based polyurethane is used for floor finishing. It provides a lovely shine, and now, you can clean the brushes well too.
Conclusion
Once you learn a good clean-up technique, it should save you a lot of money in the long run. You should be able to make a brush last longer, and you do not have to pay for a new one. Some people even use a fabric softener to keep the brushes clean.
Also, do not try to scrub the hard paint from brushes as that might have a detrimental effect. Just follow all the instructions above carefully. That should make the paint leave the bristles by itself.
It is finally time to wrap up, and you can let us know how you clean brushes in the comment section below. We will come back soon with another comprehensive guide for you.
Although having clean gutters sounds easy, it is not quite a simple task. Some might believe that installing gutter guards takes care of the problem once and for all.
However, the truth is that even the best gutter guards need cleaning. But, if the system is better, it doesn’t have to be cleaned as frequently. The job of the gutter guard is to protect gutters from twigs, leaves, and other debris, all the while allowing water to pass through them unhindered.
But, over time, debris does start accumulating in the gutters and needs to be hosed out. Although it is an easy task, it should not be left unattended if you wish to avoid damage to the house.
So, the important question here is - how should you effectively clean gutter guards? Let us get into the details without any further delay.
Why Do We Need Gutter Guards?
Although we’ve touched upon it briefly, a gutter guard can be defined as something which protects our gutters from debris and dirt. It could become problematic if these accumulated too much. Most gutter guards work in the same way; they catch small leaves and the castoffs of trees, allowing us to blow them away once they’re dry. Further, they allow the rainfall to pass down the roof before going into the gutter.
There are various designs when it comes to these guards, and homeowners can easily install them too. Alternatively, you can hire professionals to take care of the installation. Apart from keeping gutters clean, these guards also help in various other ways.
Firstly, gutter guards prevent animals from making nests or homes. There’s no need to frequently climb up a ladder to clean the gutter, making it safer. The guards can easily be attached to existing gutters, and they prevent water from getting pooled. In turn, this stops too many bugs from accumulating around stagnant water.
Not only do the guards protect the gutters and keep them functional for a longer time, but they also help in rainwater harvesting, for those interested.
How to Clean Gutter Guards?
First off, you should do away with the notion that gutter guards eliminate the need to clean gutters at all. Several products might claim to do so, but it merely means that you don’t have to constantly clean them out after every storm or when leaves fall in autumn. That aside, it is recommended that you check them annually and clean them as needed.
Now, before we get to the steps of cleaning the gutter guard, here’s what you’ll need. Grab a drop cloth, a ladder to reach the higher places, hand protection, and a hose if you have someone assisting you.
Finally, this brings us to the step by step cleaning process.
Place the Drop Cloth
Placing the drop cloth should be the first thing to do since it serves as a safety net of sorts. It should ideally be under the area where you’ll be working. This way, the cloth can catch the debris that might fall during the cleaning process.
It saves you from the hassle of having to clean out your lawn or garden bed just to remove the debris from cleaning your gutter guard. Moreover, it protects the bushes or shrubs that might be in the way of the falling debris.
Securing the Ladder
In order to clean the gutter guard, you’ll be on your ladder for a long time. Usually, these guards run along the roof, which means the altitude is rather high, and a fall from that height is most likely to hurt you.
Therefore, it is best to take all possible precautions. Secure the ladder before using it, and take any other additional safety measures that you see fit. If possible, have someone hold the base of the ladder for an additional degree of safety and stability.
Using Hand Protection
Since cleaning the gutter guard requires you to work with your hands, it is best to use protection. We recommend wearing gardening gloves so that you don’t accidentally stab yourself in the hand with a twig or something sharp while cleaning out the gutter.
We recommend keeping the gloves on before climbing the ladder so that you can use both hands for the cleaning process.
Remove Materials Off Guards
Once you’ve put on the gloves and climbed up the ladder, it is time to get to work. First, you should remove all the debris that the guard has caught. Normally, this is a simple enough task. The leaves, twigs, or branches can be swept off with a single stroke of the hand. If something feels stuck, then it is advisable to pull at it gently until the object becomes loose.
Remove the Guard
Notably, this step is only applicable to those who have hinged guards or removable ones. After everything on top of the guard has been cleaned off, you can open it up completely. In the event that you feel the openings are blocked, or if it is a brush style guard, then you might choose to rinse it off.
This opens things up. Further, you can look inside the gutter to see if there are things accumulated that the rainwater hasn’t rinsed. It is ideal for removing anything that can be grasped and keeps the gutter clean too.
Hose Down the Guard
If you see that your gutter guard is not removable, we recommend using a hose. Let the water flow freely through the openings and then go through the gutter. This clears out any possible blockages by removing the dirt that might have accumulated there.
Replace the Guards and Secure Them
In the event that you might have removed the guards, be sure to secure them and put them back in the correct manner. After that, perform a quick check to see if anything is caught in them or blocking them, despite the rinsing or hose down. If everything looks fine, then clean up the site.
Kinds of Gutter Guards and How to Maintain Them
Though there are different kinds of gutter guards, maintaining them and keeping them clean and debris free is rather similar. All the guards are designed to keep debris from getting into the gutter itself. So, occasionally, a branch, twig, or leaf might need removal.
These usually work with your pre-existing gutters. They are very budget-friendly and are easy to install, as well. The bristled brushes almost appear as a large brush that might be used for bottle cleaning. It fits directly into the gutter and allows the water to pass through while catching the larger debris.
To maintain this, you have to clean out some of the debris that might get stuck and also check for the dirt that hasn’t been completely washed through.
These are made of metal, and they fit over the gutter. Thus, water can pass through, but understandably, the perforations stop the debris from doing the same. Here, the debris is accumulated on top, so it is extremely easy to sweep them clean once they are dried up.
These are actually quite similar to the perforated variants. Here, a super fine mesh is placed over the gutter. Thus, the water can flow through easily, thanks to the many open spaces. At the same time, no debris is allowed into the gutters.
Here too, debris might get accumulated at the top. At this time, it would be easy to clean the screen by wiping the top of the gutter guard completely clean.
One might choose to set these into the gutters to allow the water to flow through easily. Although the foam is well equipped to prevent debris from entering, the dense nature of these guards ensures that you have to rinse them from time to time.
Sometimes, you also have to remove some bits that get stuck to the surface, like twigs or a pine needle. This is one of the more inexpensive guards, which is also simple to maintain.
These designs often fit over existing gutters through attachments to the roof. Sometimes, they serve as an entire gutter system, which allows rainwater curving down the gutter and washing the debris away at the same time. Overall, this is considered to be extremely effective, and if installed in the right manner, little to no maintenance is needed for this system.
Final Words
At the end of the day, you have to remember that a clogged gutter can turn into a nightmare for homeowners. The roofs might get damaged as well, so it would be smart to clean the gutters occasionally.
Here, we have shown the different kinds of gutter guards you can install to minimize the hassle of cleaning the gutter itself. But, each of these has to be maintained too. Routine inspections work best, especially after storms or during times when you know the gutters might be exposed to debris.
Hopefully, following the guide here, you will have an easy time cleaning out your gutters. It is best to follow the safety measures we’ve recommended. As an additional tip, we should mention getting a bucket during the cleaning process to keep the debris for later disposal.
If you have any other questions about keeping the gutters and the gutter guards clean, feel free to reach out to us. Adios!
While Gas Stoves definitely have plenty of advantages over electric cook-tops, they fall short when it comes to maintenance.
Gas Stoves have a tendency to get quite greasy and dirty, thanks to all the food spills and high-heat, and getting them cleaned thoroughly can be a really tough job!
Just wiping your stove down and making it shiny is not enough. In order to get your stove really cleaned, you need to take things apart and clean out all the nasty stuff that accumulates in the interiors.
Not only is a clogged gas burner unsanitary, but it can also ruin your burner's efficiency by giving off a weak flame, and hence cause you to incur more costs.
So, if you're struggling to clean your gas burner or have no idea where to start, we are here to help you out! This article will guide you through the entire process of cleaning your gas burner, and give you tips on how to better maintain your gas stove burners.
So let's get started!
Gas Stove Cookware
Before we get started with the actual cleaning process, naturally, you have to declutter first but before that let's first discuss an elementary thing that you can do to ensure your stove doesn't get as messy.
One of the most important but overlooked things that you can do not to create a mess is getting good cookware for cooking On the Gas ! This is not only necessary to maintain better hygiene, but also has a great deal of impact on the quality of your cooking.
You can have the most high-tech kitchen with all the fancy attachments and equipment, but if you don't have good cookware, all that is pretty much useless!
Bad quality pots and pans can entirely ruin the cooking experience for you by causing uneven heat distribution, and often causing your food to burn! Plus, they are much more prone to food spills which are one of the biggest contributing factors towards clogged burners.
So, do yourself a favor, and buy some good quality pots and pans for your kitchen if you haven't already. We promise it will prove to be a great investment!
How to Clean Gas Stove Burners
Cleaning your Gas Stove Burner can be a complicated process, and I have no shame in admitting that I myself struggle with it sometimes. But, by following the steps described below, this chore can become a hell lot easier.
1. Read the Instruction Manual Provided by the Manufacturer
This is the first thing that you need to do before you get started. It helps a lot to know what kind of care is best for your stove and also things that you should avoid.
Different manufacturers have somewhat different mechanics when it comes to Gas Stoves, and knowing which parts are safe to remove and which are not can help you avoid causing serious damage to your gas burner.
If you are confused about how to start your cleaning process, the product manual is a good starting point. They usually come with pretty detailed instructions, and sometimes even recommendations about which cleaning products to use.
2. Assemble the Cleaning Materials
After you have read through the manual and have an idea regarding the process, go ahead and gather all the products and materials that you'd need to get started. Make sure you keep all of them handy and readily available. You don't want to be fumbling around all over your kitchen looking for your cleaning cloths.
You'll need the following items -
Dish Soap
Baking Soda
Cleaning Cloths
Paper Clip or a Straight Pin
Lots of Water
3. Prepare your Stove for Cleaning
Before you start with cleaning, make sure your stove is cool. Turn off all the burners on your oven and give it some time to cool off properly before you start removing the parts. Cleaning a hot stove can result in your hands getting burnt, and that's not good!
Once your burners are cooled down, you can start removing the parts of the stove that can be removed. This includes the burner grates and the caps, along with any other part that can be removed as per the product manual.
Next, you need to fill up your sink with hot water and add a few drops of dish soap into it. If a sink is not available, you can also use a large bucket or a wash basin.
You then need to place your burners and other removable parts into your sink and make sure they are fully submerged. Let them stay there while you clean up the other parts of the stove.
If there is a lot of grease buildup, simply submerging these parts will not be sufficient. To clean up excessively greasy burners, prepare a paste of one part water and one part baking soda. Use a brush to gently scrub the parts to remove the grease and then proceed to rinse them up thoroughly.
4. Unclogging the Burners
This is a task that you need to be very careful with. High heat and food residues often cause the buildup of grease and other nasty stuff inside the tiny little holes on your burner from where the flame comes out. The burners need to be cleared out in order for your stove to function optimally.
For this purpose, use a small straight pin or a paper clip and gently unclog each small hole on your gas burner. In case you own an older cooktop that has a standing pilot light, make sure you shut off the gas valve before you being.
Removing blockages will substantially restore the function of your stove burner. However, you need to exercise caution while performing this procedure. First of all, you need to make sure you do not clean the ports using toothpicks! This is a very common mistake that people make, and end up further adding to their problem.
It very often happens that the wooden pick breaks while trying to unclog the pores and gets stuck inside the hole, clogging it further. You also do not want to dig too deep inside the little holes.
5. Use a damp cloth to clean the gas burners
While cleaning up the gas burners, you need to ensure that no water seeps inside the little holes of your burner. Use a slightly damp cloth that is not wet to wipe the burners. Also, never spray any type of cleaning product directly onto the burners as that can be really dangerous.
To clean around the burners, using a brush is a good idea as it is hard to reach these places with rags. Use a toothbrush to get into the small openings and crooks around the burners, and then finally wipe the entire stove clean with a clean cloth.
6. Turn on the Pilot Lights
Once you're done with cleaning up the burners and placing all the parts in their respective places, give your stove one final shine by cleaning it up with a cloth. Now follow the instructions provided on your product manual to turn the pilot lights back on, and that's it!
You're done cleaning up your Gas Stove Burner, and can now proceed to cook some delicious meals!
Conclusion
There is nothing better than a nice and clean gas stove to cook on! Plenty of experienced chefs swear by gas stoves and refuse to cook on anything other than gas burners. Thus, taking good care of your gas stove is essential, and it's not that hard to achieve.
We hope our little guide on how to clean Gas Stove Burners has been helpful to you!
The most frustrating thing to see when cleaning an electric kettle is mineral buildup or kettle furring. While it is annoying, it's not something to be too worried about.
In this comprehensive guide, we will go through the steps and how you should clean your kettle using household items, as well as how to prevent large amounts of mineral deposits from forming.
We will go through a few easy steps you can take to make sure that you can keep your trusty electric kettle clean. Here are the materials, equipment, and steps you need to take.
What You'll Need To Clean Your Electric Kettle
Here are the equipment and materials you'll need to perform the steps we'll be running through.
Equipment
A non-abrasive sponge or a bottle brush
A good quality microfiber cloth
Materials
Dish soap or dishwashing liquid
Distilled white vinegar, lemon juice, baking soda, or citric acid powder
Using a 3:1 ratio of water and vinegar, fill it to the half-full level. Don't put too much, or it might overflow when boiling.
If you don't have white vinegar, you can substitute it for either lemon juice or citric acid powder. We'll explain how to use these substitutes properly in a later section.
Then, quickly boil water inside the kettle. You can either start by putting the vinegar and water mixture in and then boiling, or bringing cold water to a boil and then adding vinegar.
Once you see confirmation of boiling water, turn it off if your electric kettle doesn't have an automatic shutdown function.
Before you spend more energy cleaning, you should unplug and disassemble the electric kettle from the other electrical components that might get damaged by the leftover water.
Check out the manufacturer's directions in the owner's manual of your kettle to find out how to safely disassemble the kettle.
First, you'll want to clean the water filter. Most are metal and can be cleaned in a solution of hot water and vinegar, similar to the one used for the kettle itself.
Next, you'll want to get a non-abrasive, soft sponge or a soft-bristled brush to scrub the inside of the kettle. This will dispel the mineral buildup left inside, which should come off quickly.
Tip
If you're struggling with a tough limescale buildup, you might want to use a vinegar and water solution to help break it down.
When you're done scrubbing, the next step is to rinse the kettle. First, you'll want to fill the kettle with hot water to remove any remaining scrubbed-off mineral build-up.
Next, you should rinse the kettle using cold, fresh water or soapy water to clean it further. While there's dish soap inside, you should also thoroughly scrub it.
Finally, you should clean the electronic and non-washable parts of the electric tea kettle using a damp cloth. This includes parts like the heating element.
You can even use olive oil and a microfiber cloth to wipe the exterior of the kettle and keep it looking shiny and clean.
Why is it Important to Descale a Kettle?
Here are two reasons why you should always keep your electric kettle clean. The first reason is to prevent a decrease in heating performance.
The limescale buildup can cause electric kettles to be less effective. It may take longer to heat water, which can be annoying if you need to make a cup of coffee or tea quickly.
The mineral build-up can also affect how your coffee or tea tastes. While it isn't hazardous to your health, seeing sediments floating around your tea cup can be annoying.
How Often Should You Descale Your Electric Kettle?
You should be descaling your electric kettle at least once a month if you use it every day, or more if you notice build-up already happening.
If you don't use your electric kettle as much, you can get it by giving it a rinse once every two or three months, which is very low maintenance.
If you live in an area with hard water, you should wash and boil to clean your kettle more often.
Methods for Cleaning Your Electric Kettle
If you don't have white vinegar in your cabinet, then there are a few alternative methods for cleaning your kettle.
Baking Soda
First, fill up a kettle with enough water to reach 3/4 full. Add a heaping tablespoon of baking soda to your clean water, then follow the same instructions as mentioned previously.
However, the difference is that you should boil the kettle again with fresh water to ensure no excess baking soda is left afterward.
Lemon Juice
The second alternative is using a 1 to 1 ratio of water and lemon juice, filling the kettle with the same amount, and then heating it to a boil.
Citric Acid
The last alternative cleaning solution that you can use is citric acid. Use the same amount of water but two tablespoons of citric acid powder and heat that to a boil.
One consistent process between these alternative methods is letting it sit before you rinse, wipe, and perform the rest of the cleaning process.
Tips for Keeping Your Electric Kettles Clean
To prevent any limescale buildup from happening too often, you can do a few things to keep your kettle clean.
Don’t Let Water Sit For Too Long in the Kettle
If you always fill the kettle and let the water stay inside overnight after using it, the minerals will have a faster build-up as they have more time to settle.
Whether you have an electric or stovetop kettle, you should always rinse the kettle after use, as it can affect both kettle types.
Wipe and Rinse the Kettle After Every Use
Another thing that applies to both electric and stovetop tea kettles is cleaning them after each use.
This will remove any buildup that has already formed without you needing to boil water.
Use Distilled Water Instead of Tap Water
You should use distilled water if you live in an area with heavy water. This is because your tap water may have more minerals that can cause build-up in the first place.
Boil to Clean Regularly
If you don't want to do the whole cleaning process over and over again, you should consider boiling water in the kettle, even when not making coffee or tea.
This heat will help remove any vinegar taste from previous cleaning or mineral residue.
Cleaning Electric Kettle FAQs
What is the Best Way to Clean an Electric Kettle?
The best way to clean an electric kettle is by using a solution with water and vinegar for the inside and using a soft cloth and olive oil to wipe the outside and heating element.
What Is a Limescale Catcher?
A limescale catcher is a metal ring that you place inside of the kettle that absorbs and catches any minerals that would have caused build-up.
What Are the Common Issues of Electric Kettles?
The two most significant issues aside from mineral buildup are leaking and the heating element malfunctioning. This could be because the electric kettle switch doesn’t work.
If you have any of these issues, you should contact the manufacturer of your electric kettle. Most cover these factory defects under warranty.
Hopefully, our article has helped you clear any build-up of minerals from your electric kettle or stovetop model. Whichever method you use should work well.
However, if you really want to have low maintenance, you should not leave any water in the kettle and clean it after each use to prevent any buildup from actually happening.
Owing to their distinct looks, Calathea plants are popular houseplants. If you're considering getting one, here are some care tips that can help them thrive.
This plant goes by several intriguing names - the Prayer Plant, Peacock Plant, Zebra Plant, and even Cathedral Plant. The Calathea plant is easy to spot - with its distinct green, red, and cream leaves dissected by white veins.
It’s a compact-sized indoor plant that thrives with indirect sunlight and periodic watering. Calathea can be slightly fussy and tricky to care for, but don't let that dissuade you. Once you know more about this plant and understand its needs, caring for it will be effortless.
With their beautiful, aesthetic appeal and ability to purify indoor air, these plants make the perfect plant pets for most people. Typically, they grow slowly, reaching just about 3 feet in height. So, if you're ready to know more about these wonderful plants, go through this detailed guide thoroughly.
Let us begin!
Calathea Plant Care 101
Caring For A Calathea Plant
Caring for these beautiful plants can give you a sense of fulfillment and richness. Keeping just a few essential factors in mind, you will be able to care for and raise these beautiful plants with striking looks and enrich the environment of your home. Here are a few important things to keep in mind when dealing with Calatheas.
Sunlight
The Zebra plant ideally thrives in a space that receives bright but indirect sunlight. This is one of the primary reasons why it makes such a good houseplant. You can decorate the Calathea in the bedroom, bathroom, living room, and it will do just fine, as long as it gets light.
That being said, this plant can also survive in low, indirect light. A shaded spot in a sunny room is the perfect environment for it.
Another important thing to keep in mind is that the Calathea thrives in medium to bright (and even low) sunlight; however, it doesn't do well in direct sunlight. Keeping your plant under direct sunlight will cause it to lose its wonderful coloring and slowly wilt.
Humidity
A Calathea plant prefers high humidity. There are several ingenious ways in which you can provide humidity to your water-hungry plant. However, if you live in a place that already has a high level of humidity, don't bother.
Place a humidifier in the room where you keep the Calathea - it will thank you for this! An alternative to buying a humidifier is to place the potted plant on top of a saucer filled with water and pebbles. The functionality of the pebbles is to provide a stable and slow flow of water to the plant through the pot.
Another cheap and easy alternative is to lightly mist the plant once every few days. You can change the frequency of doing this according to how much humidity you are facing and the plant's needs.
Temperature
The ideal temperature range for your beautiful Peacock plant is 65°F to 85°F or 18°C to 30°C. In case the temperature dips below 60°F, or 15°C, you will observe the plant reacting visibly to this change.
To maintain a stable temperature for it, try and keep the windows shut in cooler climates. Avoid allowing cold drafts to enter your home, or at least the room in which you keep the plant.
Water
Although this plant loves humidity, it isn't a huge fan of overwatering. The best rule to keep in mind is to keep the plant's soil moist but not soggy.
Ideally, you should water the plant once every 1 to 2 weeks. Allow the soil to half-dry in between watering sessions. You might have to water it with variable frequency depending on the situation (brighter light, less humidity, high temperatures, etc.)
To understand whether to water or not, insert your finger into the soil about 2.5cm down, and test the dryness of it. If the soil is moist, avoid watering the Calathea, as it will react negatively. However, if the soil is dry, feed it at room temperature, preferably with distilled water.
That being said, if feeding it distilled water is problematic, tap water will work just fine. Remember to let the water sit out overnight before feeding it. This small trick will ensure that the chlorine content in the water dissipates naturally and doesn't harm your plant.
If you are ever in doubt about how much you should water this plant, just remember one thing: It is better to underwater Calathea than overwater it.
Fertilizer
When it comes to using fertilizer for the Calathea, it isn't too fussy. You can opt for a liquid fertilizer diluted to just ½ strength. Feeding it this additional nourishment is only required during the growing season. You can entirely skip doing this during the fall and winter seasons.
An important tip - Water the plant well before fertilizing, diluting the strength of the fertilizer thoroughly. Otherwise, you risk burning the roots of the delicate Calathea.
You can opt for a multi-use marine fertilizer for the Calathea. These fertilizers are completely safe for the plant and pets, children, and your family. Moreover, it doesn't create unnecessary mineral buildup in the soil, which is vital for a plant.
This fertilizer is also eco-friendly, which makes it an ideal option for the environmentally conscious. However, you can also opt for other fertilizers. Ensure that you research them thoroughly, so it doesn't end up harming the Calathea.
Container & Soil
Coming to the soil type for this plant, you need to be mindful of what you use. Here, the Calathea can be slightly fussy again. It prefers well-draining soil that also has the inherent ability to retain water.
Look for a well-draining but the light potting mix for it. This ensures that the plant's roots remain moist, and it can seep water as and when it requires.
As for the container, it is best to get one with adequate draining holes. It ensures that the soil doesn't get too soggy or have stagnant water collecting in it. Furthermore, it encourages air circulation and ventilation for the plant.
You can also opt for a terrarium, as they add an aesthetic value to the room while acting as the ideal environment for a Calathea. If you are creative enough, you can try a DIY project to cut up a bottle or paint it. Place your Calathea plant in the DIY bottle for a perfect home.
Pruning
The maintenance of this plant is relatively straightforward and effortless. Since it is a slow-growing plant, it doesn't require excessive amounts of pruning. Simply trimming the stems and doing away with the dead and wilted leaves is enough.
When pruning the leaves, ensure to cut the leaf at its base, where the plant joins with the stalk. This gives the leaf a clean cut, adding aesthetic value. It makes the plant look more presentable, which is fantastic.
If you notice that there are yellowing or brown bits only on the leaf's edges, don't worry. You shouldn't cut the entire leaf away in this case. Simply trim the leaf with scissors or a small pruning tool along its natural edges and curves.
Another essential tool to keeping this plant looking fresh and healthy is to dust it regularly. Every once in a while, use a damp cloth to wipe the beautiful Zebra plant's leaves. It removes the fine layer of dust and pollution from its surface, allowing the plant to breathe easily.
Repotting
Not many people are aware of the fact that Calathea plants propagate through division. In fact, propagating the plant during its repotting is one of the best and most convenient ways of growing it.
Once every few years, repot your Calathea at the beginning of its growing season. Remember, you can use a diluted fertilizer during this time to ensure that it grows and matures well.
The compelling reason why you should divide and propagate the plant during repotting is that the process puts the plant under high stress. The more times you repot or divide the plant, the more stressed out it becomes, eventually refusing to grow well.
By dividing the plant during its repotting sessions, you put less stress on it in the long run. Observe the plant's roots, looking for the natural separation in them. Gently split the plant and repot it in its appropriate soil mix and container.
Why Should You Get A Calathea Plant?
Calathea plants are one of the most unique and aesthetic looking houseplants. They are immensely popular due to their peculiar looks. Moreover, they are relatively easy to care for - as long as you know their needs.
Aside from the apparent beauty that the plant adds to your home, there are several other benefits of choosing one for your home. A Calathea plant instantly brightens up any room it is kept in, owing to its bright, beautiful leaves with unique textures and patterns.
They don't require too much sunlight and can tolerate medium to low levels of light. This makes them apt for growing in almost any room of your home. Furthermore, they don't require too much watering or maintenance as well.
Moving over to the health benefits, this plant is known for its ability to purify indoor air. The leaves efficiently filter out pollutants, all the while increasing the level of oxygen in the house. They also boost the humidity content of a room.
Caring for plants and watching them grow is exceptionally fulfilling, even for the new plant parents. People experience a boost in serotonin levels with these wonderful plants around their homes.
Common Problems, Causes & How To Fix Them
In general, the Calathea plant is known for being low-maintenance. It doesn't beg for excessive amounts of attention and care, unlike many other houseplants. That being said, there are a few common signs and symptoms that let you know how the plant is feeling.
Here are the most common problems it faces, how to recognize them and fix them:
Wilting & Curling Leaves, Dry Potting Mix
Ideally, this plant has bright leaves with white veins running through its surface. The leaves can be found in various beautiful shades of red, green, and even pale shades. If you notice your plant's leaves starting to wilt or curl, it is a clear symptom of something. Observe the potting mix as well, whether it is dry or moist.
This is a common issue with Calathea plants, and it is caused due to underwatering it. We recommend watering the plant once every week for the next couple of weeks, or until you see the plant recover its coloring.
The dry potting mix is also a clear symptom of underwatering. Fortunately, this problem has an easy solution, so don't worry about it too much.
A Black Base & Yellow Leaves
The base of your Calathea plant should be bright green. Any other shade can be worrisome and must be looked into at the earliest. The same goes for its leaves. Although these plants are known to have pale leaves, if the majority of the plant is green and some leaves start to turn yellow, it is a symptom of overwatering.
Yellowing and wilting leaves can also be a symptom of excessive sunlight. However, it is relatively easy to fix this problem, with a little patience and effort.
Consider watering your plant just once in 2 weeks, or even lesser, depending on its requirements. If you keep the plant in a room where it receives too much bright, direct sunlight, move the plant to a shaded spot.
Remember that even though this plant likes sunlight, it only likes indirect light.
Leaf Spots
Another symptom to look out for is leaf spots. You may notice peculiar colored spots - pale shades of yellow or white, or even darker shades of brown and black. These leaf spots indicate a fungal infection. However, it may also indicate mineral buildup.
To remedy this problem, water your plant with distilled water only. Using tap water can be one of the primary issues that lead to mineral buildup. If you have no way of using distilled water, keep a glass of tap water out overnight, so the chlorine content dissipates naturally.
Feed water directly into the surrounding soil area to bring the natural, beautiful coloring back. It is best to keep the plant out of reach from children or pets.
Varieties Of Calathea Plants
If you have ever Googled "Calathea Plants," you would have been stunned to find several varieties of this plant. As a matter of fact, each variety comes with its unique textures, shape, designs, size, and color.
Curious to know a little more about this eye-catching plant? Here are some of its most popular varieties:
Pinstripe Calathea
One of the most popular Calathea varieties, this plant has stunning leaves that grow at least a foot long. However, the plant itself never grows beyond 2 feet, making it an ideal indoor houseplant.
The leaf features a beautiful deep shade of green, with white, pink, and emerald swirls forming a feather-like pattern on its surface.
Peacock Calathea
As the name suggests, this Calathea variety has foliage that looks as stunning as a peacock feather. With a reddish-purple or maroon underside, the leaves feature dark green and white patterns on their edges, top, and sides. This contrasting color scheme gives it a particularly striking appeal.
Each leaf is oval-shaped and grows up to 12-inches in length. The plant itself, however, reaches just 2 feet in total.
Rattlesnake Calathea
This variety of Calathea has massive leaves that can grow over 2 feet long. The plant doesn't grow beyond 2 feet, just like its other varieties. The excessively long leaves with the smaller body of the plant give it the appearance of rattlesnakes.
The leaves of this plant have intricate designs over its body. You will find them sporting various shades of green that overlap each other. The leaves are spotted with their iconic green dots all over.
With a unique, red underside and wavy-shaped leaves, this variety of Calathea is immensely popular. Proper care and maintenance will ensure that the plant retains its stunning color and patterns.
White Fusion Calathea
This particular variety of Calathea is slightly more finicky than its green counterparts. Due to its white coloring, it is unable to photosynthesize light as well as the others. If you decide to get one of these rare species in your home, you will need to provide it with adequate water, sunlight, and care to keep it thriving.
The White Fusion Calathea reaches only about 12-inches in height. It can be an excellent option for those looking for a more compact species to keep on their desks or in their offices.
Although this species requires more effort than the others, eventually, the effort is worth it. The White Fusion is one of the most popular and aesthetically striking species of Calathea.
Zebra Plant
Its name makes it quite clear to us how this variety of Calathea looks. With a dark green body and lighter, emerald-colored stripes, the plant species resembles a zebra. This evergreen perennial is one of the few species of Calatheas that reach 3 feet in height. The leaves, however, measure just 1 foot.
Conclusion
If you have been contemplating getting a houseplant, the Calathea might be the best one to start with.
With minimal effort and supervision, these plants can grow to look stunning, adding value to any room they are placed in. We hope this detailed guide helped you understand the specific needs of this plant better.
And with that, we are finally at the end of our guide. Wishing you all the best on your plant parenting journey.
It can be challenging to get water everywhere in your yard, where it might be needed, especially if you have more than one faucet to work with.
If you have to cover a large area, where gardens, livestock tanks, and yards are located in different parts of the property, then watering might be a tough task. Many have found it to be quite painful if they have to drag a heavy hose to the required areas each day.
Instead, it is much smarter to bury various hoses for their individual purposes. It makes the task more efficient, and you can wrap up quickly too.
So, taking your needs into account, we have highlighted how you can bury your garden hose. At the same time, we will also tackle whether it is advisable to bury your garden hose and the various factors you need to consider for the same.
Without further ado, let us get to all the details.
Steps for Burying a Garden Hose
Gather the Necessary Tools
First, you have to get the materials and tools needed to bury the garden hose. So, of course, apart from the garden hose you choose, you’ll also need a hose bib, a combination tee for the water to flow out, clamps for pipes to be fitted. You’ll also need hydrant caps, concrete tiles, rake, shovel, heavy-duty hoe, screwdriver, tools for clamping, hacksaw, and a propane torch.
After assembling the tools, you are left with two choices. Either you can dig the trench and then fit the pipe, or you can tackle it in sections. While we normally recommend choosing the method which works best for you, it is necessary to take the sectional approach if you need to use the hose before the entire process of burying it is complete.
Dig the Trench
You have to use your tools to dig the trench, but you must also make sure that you have leveled off the bottom. This will help you achieve uniform depth. Since hydrants are nearly a foot high, this should be your average depth when it comes to digging.
Install the Fittings and Pipes
Once your trenches are dug, you have to unroll the pipe and put it inside. If you feel the pipe is rolling up again, you should use some items to weigh it down. After that, you have to install the faucets and valves along this pipe when you feel the need.
Wherever you want a hydrant, you have to put in a combination tee. Sometimes, you’ll find it rather difficult to get this tee in the pipe. But, applying soap in the area of the connection will make it easier.
You also have to screw in your hose bib while ensuring that the orientation of the hose is maintained all through the trench.
Closing the Hydrant and Filling the Trench
Now, you have to make a hole in the cover for the hydrant. This is essential for the hose to move in and out. When you keep the hose open, it is best to be careful that it doesn’t interfere with mowing, gardening, or movement in general.
You’ll find that filling trenches is a lot easier if you have soft soil with little-to-no rocks. It is best to use the front end of a loader or a back-hoe for the job. You should avoid putting rocks back since this might apply undue pressure on the hose. Understandably, you’ll be losing soil, so try to find more in order to compensate for this loss.
After you find that the trench has reached ground level, try to put back the turf. Be sure to pay attention to the areas around your hydrant. You don’t want to fill in the hydrant spaces because it’ll be more difficult to attach a garden hose.
Tips for Burying Garden Hose
Avoiding Underground Connections
When burying the hose underground, you should keep some things in mind. First and foremost, you have to avoid connections underground. So, try getting a hose that’s a little longer than the length you want it to run for.
We understand that getting shorter hoses might seem more practical, as they’re easier to store, but making connections only works fine above the ground. Since most of these connections are made of metal, there’s a good chance of rust due to damp soil conditions.
There’s nothing worse than discovering that the pipe might have sprung a leak, only to dig up the ground to see that a connection has actually come loose. To avoid such situations, we recommend doing away with connections for underground hoses.
Get the Right Length
There’s nothing worse than when your hose pipe falls short of expectations. You wouldn’t want to dig up a trench only to find out that the hose is too short. We recommend measuring it beforehand and acquiring one accordingly. If you still have doubts, it is best to err on the side of more, in this case.
Quality Matters
As with most things, you will see that quality matters here as well. Get a hose which has a thicker wall. This will help you if you plan on burying it. After all, the dirt has an amount of weight. The deeper the trench, the more the weight on the hose.
If you buy a cheaper one, the risks of it collapsing are much more. On the other hand, a thick-walled hose is likely to have better insulation against cold weather, and it won’t get bent out of shape either.
Check if Laying a Pipe Makes More Sense
While burying a hose is an easier option, it doesn’t mean it is the right one. PVC pipes are more readily available as well as economical options to get water from one point to another.
Understandably, the hassle involved with PVC pipes is more, from making the joints to digging below the frost line. But, it is a superior long-term solution. You can bury a garden hose when you have a temporary need to transport water or if you want to work on a larger project at a later time.
Functionality and Connections
When you bury the hose, you have to know what the use is. This is because you can regulate the water flow accordingly. It is not fun to have to do so at the starting point each time there is an overflow problem. Instead, it is advisable to install a regulating attachment at the endpoint to ensure you get the desired flow of water.
What to Keep in Mind While Burying Garden Hoses
Now that you know what to do if you have to bury a garden hose, there are a few factors to be considered. We understand that you might want to bury the hose because you want the water to reach a difficult spot or don’t like dragging the hose to different areas. It might also be that you just dislike looking at the exposed hose.
Whatever the reason, you should consider fluctuations in temperature, the type of ground, as well as the digging and burrowing animals in the area. Let us look at the factors in greater detail.
Climate Considerations
While a garden hose that is buried does not freeze as quickly as one which is exposed, there is still a risk if the ground freezes to significant depths. You’ll find that sturdy hoses are quite able to handle the freezing temperatures well enough. But, if they freeze too often with water still inside, then there’s a good chance of quickly breaking down over time.
Furthermore, if an underground hose freezes, and you haven’t managed to blow it out for winter, then you won’t be able to use it until the ground thaws fully. Ultimately, a buried hose is great for seasonal use, but it depends on where you reside.
Ground Conditions
The conditions of the ground also play an essential role in influencing the decision to bury a hose. Even if you’re extremely motivated, you’ll have a tough time digging compacted, rocky, or caliche soils.
Of course, there are specialized tools and pickaxes that are designed specifically for the job. But, when you consider that the trench has to be the same length as the hose, this could seem like a daunting task.
Critter Troubles
This is mostly specific to an area. Rodents tend to be attracted to water. Their burrowing and digging activities usually cause problems because these animals might just decide to gnaw through the hose at a certain point. If you’re dealing with a serious rodent situation, then you should properly reconsider the plan to bury the garden hose.
Where to Bury the Garden Hose
The best bit about burying a garden hose, rather than any other item, is that it can curve around objects. Normally, these could impede the flow of water to the garden bed or other areas that need it. But, a garden hose can work around these to ensure that the water is transported without any hurdles.
Basically, this means that you can bury the garden hose anywhere. In fact, you might even do so under the driveway, making use of a PVC pipe and some water pressure.
What Kind of Garden Hose to Bury
Firstly, the kind of hose you’re burying depends on why you’ve decided to bury it. Neither your most expensive choice nor the cheapest hose will serve you too well if they are buried underground for a duration. Here are some of the types of hoses you might bury.
Rubber Hoses
You can stick to the classic by opting for an old-fashioned polyurethane or rubber hose to get the water from one place to another. Not only are they sturdy, but they are also equipped to handle fluctuations in weather very easily. These pipes can’t be crushed underneath the weight of the soil, either.
But, the best bit is that they won’t kink, accidentally, when you bury or lay them. We recommend getting a pipe with a larger diameter so that the maximum amount of water flows easily when the pipe’s being used.
Drip or Soaker
If you want to water areas that the hose runs through, then you should bury a soaker or a drip hose. In fact, you can even make one from a leaky and old hose if you have the right set of tools lying around. These pipes can work wonderfully if you set them up well.
Final Words
If you have been on the fence about burying your hose, we genuinely hope this guide will help clear the air. Speaking from personal experience, it is incredibly beneficial to have a buried hose, even where the ground tends to freeze.
The added mobility and lack of obstructions are factors that clearly work in favor of this decision. You’ll find that digging the trench and burying the hose isn’t too complex either. Of course, be mindful of your surroundings before making the decision.
Don’t forget to let us know your experiences with burying a garden hose to transport water.
Does your backyard need some protection? Installing a horizontal wood fence might be a good idea in that case.
Whether you want a little privacy from sneaky neighbors or just want to set some chill vibes on your lawn, horizontal fencing is a great choice. But the question is, how to go about it?
If you want to save on a few bucks, we have an informative step-by-step guide to walk you through the entire process of constructing a horizontal wood fence yourself. Not only will it be easy on your wallet, but you’ll also experience a unique sense of achieving something on seeing the final product.
Let’s get right into the details then!
What Is A Horizontal Fence?
A horizontal fence is a wooden boundary made using wooden boards that run along the length of an area instead of the regular vertical up and down manner. It typically comprises 4x4 posts that are strongly anchored to the ground using a concrete paste.
Moreover, these fences provide privacy from passersby and make your outdoor spaces a little more secure.
Materials Needed For Horizontal Fencing
Much to everybody’s surprise, the materials required to build a fence are pretty basic and very conveniently available in local hardware stores. The methodology that we’ll be following can be finessed using the following equipment:
Wooden stakes
String lines for alignment reference
Landscape paint for marking
Wood posts (two or eight, depending on the layout of your fencing)
Horizontal boards (preferable sizes - 8 meters x 6 inches, 6 metres x 6 inches, 4 metres x 6 inches)
Trim boards
Screws, nails, and fence clips
Tools like saw, hammer, level, and shovel
Concrete (60 pounds)
Paint, paintbrush or sprayer, stain
Try to use only pressure-treated wood if you want the best results. It is durable and doesn’t react much to adverse weather.
How To Build A Horizontal Wood Fence?
Building a horizontal wood fence is no rocket science. Once you get your hands clean on the saw and carpentering strategy straight, the whole process will become pretty straightforward. You will definitely agree by the end of our extensive step-by-step guide. So read on!
1. Plan It Out
The first step is to get all the materials in line and plan stuff out. Typically horizontal fences are composed of uniformly spaced boards fixed into place with the help of nails. This design is a classic and works out well, but we’d ask you not to hesitate from being innovative. You can use fence boards of varying widths in different patterns; just make sure that it is practical.
In our guide, we’ll be using 4x4s in a basic pattern for building our fence. In case you’re a beginner, it’s best to stick to the basics, but if you are confident enough, then feel free to experiment.
2. Mark The ground
Marking the ground can be tricky as it could invite disputes with the neighbors if not done within your property area. Typically backyard soil has been long grown over, hiding the property demarcating line, so you can use metal detectors to get clarity on the area owned by you. Do have a quick chat with your neighbors regarding the matter.
Once you are completely sure about your property boundaries, insert two stakes in the soil on opposite sides of your desired fencing line. Running a string along the stakes to get a straight line is a good idea.
Since the midpoint of every 4x4 is at the length of six meters, you’ll need to measure the same and mark the ground using landscape paint. These paints are easily available at hardware stores.
3. Set The Four Primary Posts
Now, this is the most time-taking and exhausting step because you’ll have to wait for the concrete base to dry completely. Each hole should preferably be 20 inches deep and filled with water up to two-thirds of its depth while erecting the fence post in it.
After that, fill the hole with about 40 pounds of dry concrete along with a little more water, thereby creating a thick paste-like consistency. It’s important to keep stirring the solution with a shovel while pouring the concrete to avoid the formation of lumps. After all, lumps are nasty and do not go away entirely once formed, so pay attention while stirring.
Once the posts are rightly placed, you’ll need to check if they are all at the same level. If yes, then well and good, but if not, make adjustments accordingly to ensure that they are at the same height.
4. Level The Fence Boards
The next step is leveling the fence boards so that you have an even horizontal fencing line in your yard. The best way to make it functional is to work towards the top after starting at the bottom. Place the bottom-most board slightly above the ground and align it with the fence post. Keep in mind that straight fencing can be achieved only if your base is leveled properly.
Then, nail the bottom board in place while ensuring that all the boards are centrally in line with the 4x4 posts. Use a wooden spacer to maintain the same gap between consecutive boards. However, if the boards you are using aren’t completely dry, there will automatically be a little gap.
5. Decide And Mark The Position Of The Topmost Rail
Rails are meant to give support to the fence sections, and that’s why they are positioned between the posts. If your rail is hidden at the back of the topmost board, you can fix it right beneath the first board.
6. Cut The Rails
After measuring the distance between your 4x4 posts, you can cut the rails accordingly. They should be equal to the fence boards in length. The only thing is that it is slightly difficult to cut them as they are cuboidal in shape and are thicker as compared to flat boards. Therefore, be very careful while chopping them.
7. Fasten The Topmost Rail
This bit is pretty important because it will affect how the rest of the wooden boards will be spaced out. If this is somehow messed up, the overall look of your horizontal fence will suffer. But no worries; we’ll tell you how to go about it.
Pick up the rail and connect it with the posts using fence clips, nails, or screws. In case you’re planning to use nails, you can drive them in with the help of a fastener that attaches the rail to the post perpendicularly.
However, the easy way out is by using the fence clips. These clips are basically brackets made out of metal and are primarily mounted on the post to keep the rail in a stable position. It makes the whole rail fastening procedure much simpler.
8. Fix The Fence Boards
When the rails are in place, you can go ahead and follow the same methodology to drive in the fence boards. You know the drill now.
Furthermore, you can either alternate the boards with rails or create your own unique pattern. The main function of rails is to support the vertical pickets and ensure maximum privacy. Again, you can be creative here if you have some experience.
Criss-cross rails, open rails, parallel rails, etc., are a few common choices. But if you want a little cottage core or a 70s touch in your backyard, we suggest trying the white picket fence pattern.
9. Chop The Posts
Moving on, when all your boards are nicely screwed or nailed, you can chop off the extra protruding sections of the posts. But if you’re aiming to have a decorative look with post caps, you should leave a little extra length while lopping it off. A little sanding down of the sharp and freshly chopped edges will do good for everybody.
10. Add Some Support
If you feel like your fence boards are dangling down and are in need of some extra support, you can add vertical beams to keep them in place. Measure them in a way that they perfectly fit between the top and bottom rail. This will give a smooth and elegant finish to your fence.
11. Post Caps Are Important
You may think that post caps are merely decorative accessories, but we’re afraid that’s not the case. These caps are installed to cover the sharp edges of the support beams in case you decide to keep them higher than the top rail.
Nonetheless, post caps add a finishing touch to the structure, making it presentable. They also serve as gripping points in case you feel like resting your arms. No matter what design you aim for, you’ll find a post cap in every style. Some popular options are wood, glass, copper, metals, and even solar-powered light bulbs. You can choose whatever defines your aesthetic the best.
12. Finishing Touches
Once you have the structure up and about, the last step is to add the finishing touches and make it match the vibe of your yard or house. Either you can let it age by itself and get that old-school cottage-like feel or give it some color.
For coloring, you have two options - staining and painting. We recommend using a paint sprayer for best results. That’ll help you get the job done swiftly within a couple of hours. An Interesting fact worth noting - among all designs, the white picket fence style is the most loved in US homes.
What Are The Benefits Of Horizontal Fences?
A. Easy Installation
The best part about horizontal wood fences is that they are super easy to construct. It is one of those few wooden structures that can be aced by even beginners. You can build it in no time with a little bit of hand saw skills and accurate measurements.
What’s more, no bulky and complicated equipment is required to get this fence going. Give it a few hours and a little bit of sweat, and you’ll be able to enjoy full privacy in your outdoor space.
B. Multiple Styles And Variations
Who doesn’t love variety? Apart from a few indecisive people, everyone loves having enough options to select from. That’s where the horizontal wood fence shines as it provides a wide scope to experiment with styles and designs.
We all know that wood is a versatile material that can be molded and assembled in lots of different ways. There are multiple types of wooden fences which you can install on your deck.
If you want complete seclusion, setting up a fully covered fence is a good option, but if you wish to have some ventilation space, then spaced fence boards are the way to go. In any case, the options are truly endless.
C. Eco-Friendly
This one might confuse you because how can a fence that requires chopping of trees be environmentally-friendly. Your question is absolutely valid, and we have a logical answer to clear the air.
The deal is, unlike vinyl or any other material, wood is much more durable and strong in the long run. Nowadays, options are available to minimize the weather-induced swelling in wood boards so that they last for long.
Additionally, this type of fencing is quite easy to dispose of and recycle. Stabilizing agents are available to keep it safe from termites and rot. Moreover, it is economically sound and hands down one of the best options available out there.
Final Words
Horizontal fences are a sure and sorted way of enlivening your outdoor space. A backyard that was once open and exposed can transform into a protected chilling spot with the help of some pressure-treated wood boards and menial tools.
Hiring professional carpenters for setting up your fences can burn a hole in your pocket. And spending so much money on something this basic can be a little disappointing for a few. But having read our guide, hopefully, you might be feeling a little confident in going ahead and taking on the task yourself.
That said, we’ll sign off for the day. Until next time! Happy woodworking.
Whether you're lighting up a fire pit or building a bonfire, you will definitely need firewood.
Buying firewood is essential, but buying the correct amount is key.
For most people, learning about firewood measurements can be challenging. After all, the firewood business includes seemingly nonsensical jargon like a "face cord" or a "rick of wood."
In this guide, we walk you through everything you need to know about how much firewood is in a cord and additional tips on how to store it.
In a nutshell, a cord of wood is a unit measurement of firewood. It's calculated by volume, multiplying the length by width by depth.
In the U.S. and Canada, a full cord of wood is 128 cubic feet with 600 to 800 logs.
The standard length of an individual log is 16 inches. That's a 4 feet deep, 4 feet tall, and 8 feet long stack of wood.
Note
A full cord may also be called a bush cord.
Most residential users can get by without using a full cord of firewood. A full cord can last a few months, even for commercial customers.
As such, firewood companies offer smaller sizes. Measuring cords can vary by State, so vendors may have different measurements.
Ask your vendor for specific measurements in cubic feet to know more.
What Is a Half Cord?
A half cord or a one-third cord of wood tends to be made from shorter lengths of firewood.
Half-cord and one-third-cord logs measure 32 to 48 inches compared to full cords, which are much longer.
These consist of three rows of logs in 4-foot-long, 4-foot-high, and 4-foot-deep piles.
On the other hand, a one-third cord can be two rows in a pile that is 4 feet high, 4 feet wide, and 32 inches deep.
What Are the Other Types of Cords?
Although a full cord of wood is usually 8 feet long by 4 feet wide by 4 feet high, there are other measurements of firewood.
Take note of the following terms to stay informed when buying cords of wood:
Sheldon Cord
Generally, a Sheldon cord refers to any set of firewood that measures MORE than 128 cubic feet or a full cord.
A Sheldon cord does not have an official measurement and can vary between vendors.
It can be tricky to find vendors selling firewood in this quantity, so buying a larger amount of smaller bundles is best.
Face Cords or Rick Cord
If a full cord consists of three stacks 4 feet high and 8 feet long, a face cord consists of only one stack of wood.
It measures 4 feet in height and 8 feet in length with 16-inch long logs.
If the logs are only 12 inches long, then it means it has less wood than the standard face cord. Ensure that the price is equivalent to the amount you're getting.
It's also known as a rick of wood. A rick refers to the way materials are stacked, like hay.
Running Cord
You might hear this term used by some people.
A running cord simply means a full cord of firewood that is NOT divided into three stacks. All logs are stacked parallel to each other.
Stove Cord
People may use the term "stove cord" when buying firewood for stoves.
Firewood cut 12 inches long is ideal to use in stoves. It measures roughly the same as a full cord but only 12 inches deep.
The exact measurements of a stove cord can vary between sellers. The bottom line is that this cord of wood is small enough to fit in a stove.
Truckload of Wood
It literally means a pile of firewood that fits in a pickup truck. The amount of firewood varies depending on the size of the truck.
Ask your vendor for the exact measurements in cubic feet for more accuracy.
Will Fresh Wood Do?
You might benefit from using fresh wood, especially if you want to buy it in bulk.
Since many vendors sell fresh wood as a cheaper alternative, it can work if you're in a pinch.
You can season fresh wood by simply storing wood cords in a dry place. You'll have enough supply for a full winter when they're all seasoned and dry.
How to Measure Firewood
Knowing how wood is measured is vital because vendors typically sell wood by the cord.
To measure firewood, all logs must run parallel to each other and should be stacked tightly. A wood stack that runs parallel is also called a running cord.
After stacking the wood, calculate the total volume.
A fullcord is generally considered to be 128 cubic feet of firewood in the U.S. and Canada. However, it can still differ between States and regions.
Firewood Measurements
Not all wood gets chopped in the same sizes, so you can expect variations in measurements.
The standard length is 16 inches. A full cord is 4 feet deep with three stacks of 16-inch logs.
Sellers may stack 12-inch logs in four rows instead of three. Others sell firewood as long as 24 inches in two rows.
Getting the right size is CRUCIAL, so check with your vendor to see how they chop their wood to get an accurate measurement.
Stack the Wood Yourself
When stacking, watch out for sellers who might stack the firewood loosely. There are also vendors that won't allow you to stack the wood yourself.
If you suspect some questionable business practices, it's best to steer clear of these sellers and do more research into more upstanding sellers.
It's common for customers to stack wood themselves, so any reputable vendor should allow for self-stacking.
Now that we've gone through the numbers, how much firewood do you really need?
Below are some recommendations on how much wood you need depending on the situation:
For Winter
How much firewood you need in the winter depends on several factors, such as geographical location, heating space, and insulation.
A cord of wood can last up to 3 months, so 1 to 2 cords of firewood should be enough to burn through the cold months.
However, the extended winters of colder states may require more. Around 3 to 4 cords are needed for extra warmth.
Make sure to stock up on firewood during late summer or early fallto get a head start and avoid the rush when prices go up.
For Your Fireplace
The amount of firewood you'll need depends on how often you use your fireplace. A fireplace can burn 2 to 3 logs at a time.
If you only use it once a week, a face cord should be enough to last for a few months.
In contrast, if you use it often to heat your house, a full cord is necessary to keep your home warm.
Camping and Bonfires
If you're planning on a weekend trip out in the great outdoors, you need to consider how long you want the fire going.
A good rule of thumb is to get firewood bundles. A bundle usually consists of 5 to 7 logs.
A couple of bundles is enough to sustain a 2-hour campfire. Try to pack at least five bundles for fires lasting more than 6 hours.
Adjust the amount as you see fit, like if you're going to make multiple campfires or use it to roast.
How to Store Cords
Once you've gotten your cord, the next step is to store your logs.
Whether you buy a face cord or a full cord, the storage methods remain the same. The difference lies in whether your firewood is unseasoned or seasoned.
Unseasoned Wood
Unseasoned firewood is still green and wet, which means it doesn't burn as efficiently, is more challenging to light, and produces more smoke.
You must first split them into manageable pieces that you can easily stack and carry. Look for a place with good air circulation to let it air dry.
The drying process can take anywhere between 6 and 9 months, depending on how you stack the pieces.
You can use bricks or pallets to elevate the stack above the ground. Stack the pieces in a row and ensure enough space for airflow.
This arrangement can help keep out moisture. Too much moisture makes it difficult to start a fire. It also invites rot and mold.
Do NOT store wet firewood indoors, as it can bring pests, mold, and excess humidity into your home.
Seasoned Wood
Unlike green or unseasoned firewood, this type is already split and dried, so it's ready to use.
That being said, seasoned firewood should still be stored properly.
Because dry wood burns the best, keep your driest piece at the top of the stack for better accessibility.
To maximize your supply, use the older pieces first to prevent rot and decay.
Lastly, make sure to protect the stack from the elements by covering it when you store it.
How to Store Firewood FAQs
Below are commonly asked questions about firewood:
How Long Will One Cord of Wood Last?
A full cord can last up to 3 monthsor more for most residential users. On the other hand, a face cord may only last up to 2 months.
How Much Firewood is 3 Cords?
A full cord contains roughly 600 to 800 logs per order. If the median is 700, you can expect around 2,100 pieces with three full cords.
What are the Best Types of Firewood?
Hardwoods like oak, maple, and birch are the best type of firewood because of their density. They have more heat energy per volume, burning hotter for longer.
Knowing the common terminology when it comes to firewood is essential to ensure you're getting your money's worth of wood.
A full cord is a standard measurement of firewood that everyone should know.
Whether you're buying a face cord or a truckload of logs, you can find the right amount that works for you.
If wooden logs are too much of a hassle, you might be interested in tabletop and floor-standing patio heaters that work with pellets instead.
Sometimes, a sail on the boat is all you need to uplift the mood after a long day at work, especially with your loved ones.
If you are a boat owner, it is essential to take care of the boat so that it is able to steer through the sea for a long time.
But did you know that the paint of the hull of a boat does a lot more than giving it a fancy look? In fact, it is responsible for keeping away weed, slime, and other organisms that grow under your boat.
However, effectively painting the hull involves a decent amount of expenditure and is certainly time-consuming. So, we thought of helping you out in this process by providing an informative guide, explaining all the nitty-gritty concerning bottom painting a boat.
That said, what are we waiting for? Let's get down to business, shall we?
Is Bottom Painting Really Necessary?
Bottom painting is not mandatory if you take the boat out every once in a while. For instance, if it's kept in a warehouse most of the time and only hits the sea occasionally. You can effectively maintain its bottom by applying a wax coat and cleaning it periodically in such scenarios.
However, if you take the boat out every now and then, you’d dock it in the sea most of the time. In these cases, bottom/hull painting becomes absolutely mandatory.
That being said, painting the bottom is not enough; you must clean it on a daily basis, remove the paint and repaint it with antifouling paint. Doing this not only protects the hull but also makes the boat highly functional.
Antifouling Paint 101
Antifouling paint plays a very important role in saving the boat from all types of water-based damages. It is applied all over the hull from the water line to the bottom. Furthermore, antifouling paint helps in keeping away all water-based lives like weed and barnacles that tend to leach onto the bottom of the boat.
Plus, antifouling paint comes in a wide range of brands, colors, and styles, just like normal paint. However, there are mainly three types of antifouling paint: ablative, hard, and hybrid. The right type of antifouling paint for you depends on the boat and your budget.
What Are The Types Of Hull Paint?
As mentioned in the previous section, there are mainly 3 types of antifouling paints. Let us take a closer look at the functions of these paints.
Ablative Paint
Ablative paints are perfect for boats that are taken out on the sea occasionally or that move very slowly. This type of antifouling paint tends to wear away with the passage of time. Also, it releases a lot of biocides while sailing through the sea.
An ablative paint is also called “self-polishing” paint since it sits very thin on the hull. Overall, painting the hull with ablative paint is relatively easier, less time-consuming, and affordable since there will be less paint to remove.
Hard Bottom
On the other hand, hard bottom paints are suitable for all types of boats that move very fast. They contain a very thick layer of biocide, making their coating very hard and long-lasting. However, with time, this paint too wears away but lasts a lot longer than ablative paint.
Hybrid Paint
As the name suggests, hybrid paint is a mixture of ablative and hard bottom paint. The best part about this paint is that it can be used on the hull of all types of boats.
How Much Does It Cost To Bottom Paint A Boat?
We hope, by now, you are aware of the three different types of antifouling paint and why bottom painting is so important. So, let us now focus on the main question: how much is it going to cost?
The best thing about bottom painting is that you can either choose to do it yourself or hire a professional. That said, like most projects, going DIY will help save money while hiring a professional would be rather expensive but less time-consuming and deliver guaranteed results.
DIY Bottom Painting
Going DIY makes you take charge of the boat. Before starting, plan it all out and note that it will take a lot of time. Also, be careful while painting, as you cannot afford to make too many mistakes. The cost of DIY bottom painting varies widely, but it mostly comes down to the quantity and type of paint you use.
In general, bottom paint is available in one-gallon drums, which usually cost between $20 and $200 per gallon. That being said, the brand and the type of paint also play important roles in deciding the price.
You will require a handful of painting supplies as well, such as goggles, rollers, paintbrushes, breathing masks, gloves, masking tapes, sandpaper, and drop cloths.
The bigger the boat, the more paint you will need. The amount needed per linear foot would be clearly mentioned on the drums of paint. In general, most ablative bottom paints require two coats, whereas customized epoxy bottom paints need just a single coat. Keep these in mind to have a clear estimate of the cost.
Double coating boats measuring 20 feet to 35 feet would require 3 gallons of hull paint.
Single coating boats measuring 20 feet to 35 feet would require 1.5 gallons of hull paint.
Double coating boats measuring 36 feet to 51 feet would require 6 gallons of hull paint.
Single coating boats measuring 36 feet to 51 feet would require 3.5 gallons of hull paint.
Double coating boats measuring 53 feet to 63 feet would require 9 gallons of hull paint.
Single coating boats measuring 53 feet to 63 feet would require 4.5 gallons of hull paint.
Professional Bottom Painting
When it comes to professional bottom painting, it usually starts with a base cost. The professionals determine the base coat after they check the size of the boat. In this day and age, the cost per linear foot is about $25 on average.
However, this is just the price of basic selection; if you want to opt for premium selection, the price may shoot up to $125. If you want to make some additional repairs, then it is going to cost even more.
In general, professionals charge less for larger boats than small boats. The cost further depends on the place where the boat will be painted. Also, painting older boats costs a lot more than new ones, as the professional will need to repair the damages prior to bottom painting.
You are in luck if your boat has never been painted before because it is going to cost the least as the professionals will not need to remove any paint.
Keeping the location and the boat size in mind, these are the estimates that you may end up paying.
60-feet and larger boat: $56 per linear feet + $555 for a premium selection
55-feet to 59-feet boat: $49 per linear feet + $490 for premium selection
50-feet to 54-feet boat: $43 per linear feet + $400 for a premium selection
44-feet to 49-feet boat: $38 per linear feet + $330 for a premium selection
37-feet to 43-feet boat: $34 per linear feet + $250 for a premium selection
30-feet to 36-feet boat: $29 per linear feet + $190 for a premium selection
29-feet boat: $25 per linear feet + $155 for premium selection
Frequently Asked Questions
In this section, we have answered some of the frequently asked questions regarding hull painting a boat. We strongly recommend you read this part carefully.
How often should I paint my boat?
Like we mentioned earlier, if the boat hits the water daily, get it checked every year to know if it needs bottom painting or not. In most cases, it will be required. Plus, if you use the boat for commercial reasons, you would have to get its bottom painted at the end of each season. And finally, if it mostly stays ashore and you take it out occasionally, it will require bottom painting every other year.
What are some of the popular brands of bottom paint?
Yes, it can; however, it is mostly negligible. It depends largely on the paint job; if it's smooth, there should be no problem. Having said that, if there are multiple coatings of antifouling bottom paint on the hull of your boat, then the loss of speed will be noticeable.
Furthermore, ablative bottom paints are meant to shed their coatings over time, so the coating may wear off over time, and weed may begin to grow underneath the hull. In that case, too, the boat will experience noticeable speed loss.
Final Thoughts
Bottom painting the boat is a must if you take it out in the water quite frequently. It protects the boat and also makes it look attractive.
However, when it comes to the cost of bottom painting, it is quite affordable if you know what you are doing, given the wide range of options available out there. Taking proper care of the boat, especially the hull, will make it last a very long time.
On that note, we have come to the end of this informative article. We hope we could provide some clear insights on the cost to bottom paint a boat. For further queries, kindly drop a comment down below.
A fresh coat of paint can add pizzazz to any room. From rich hues to earthy tones - there’s nothing a splash of color can’t fix!
If you don’t have time or money for a full-blown renovation project, then a quick paint job is the best way to hide stains, deformities, and design flaws in your house or commercial property. However, you need premium quality paint for the project, and Benjamin Moore is one of the top brands that come to our mind.
With an interesting history, a prolific range of top-quality products, and 3500+ color options, you couldn’t have asked for a better alternative.
If you are wondering about the paint costs, we will answer that question and much more. In this guide, we have compiled the different products from Benjamin Moore and elaborated on their features and price.
So, without further ado, let’s begin!
Brand Overview
Before we delve into details, here’s a quick overview of Benjamin Moore and what makes it one of the most sought-after paint brands available today.
Started in 1883, with the aim of selling premium quality paints and stains, Benjamin Moore has expanded its portfolio and strived to become one of the leading market brands. What makes it unique is its tie-up with thousands of independent retailers spread across North America and its focus on using innovative technology to produce excellent paints and finishes.
In 2000, this brand was acquired by Berkshire Hathaway and since then has taken long strides to produce a sustainable range of paint coatings.
What Determines The Cost Of Benjamin Moore Paint?
Benjamin Moore offers a wide variety of high-quality paint products, and although the prices are on the higher side, the brand also has some budget-friendly options. Having said that, we believe it is better to make a one-time investment and choose an expensive option that will provide a premium finish and look stellar for years to come.
Before discussing specific product prices, we think it’s best to look at the factors determining these prices. For instance, a paint that offers excellent coverage and can cover both interior and exterior surfaces is naturally going to cost more than one that can work only on interior surfaces.
So, in this section, we will be looking at the factors that determine the cost of Benjamin Moore’s paints. Let’s get started.
Finish Type
The foremost factor that determines the price of the paint is the sheen or finish type. Benjamin Moore offers the following finish types:
Flat Finish
If your wall is uneven or has other imperfections, there’s no better way to hide these than by opting for a flat finish. It provides excellent coverage and is not as reflective as some other finish types.
Eggshell Finish
This finish type is usually recommended for high-traffic areas such as the kitchen or family rooms as it is easy to clean. In addition, it provides a subdued polished glow that makes the area look elegant and sophisticated.
Matte Finish
Matte finish is shine-free and can successfully hide surface imperfections. Besides, it is pretty long-lasting and is recommended for bedrooms, ceilings, and study areas.
Satin Finish
Satin finish lies midway between matte and high-gloss finish types. It has a velvety luster and is usually used in dining halls to give it a rich look. Since it can be washed easily, you don’t have to break your back to maintain it.
Semi-Gloss Finish
A semi-gloss finish provides a highly reflective surface and can work on doors, window frames, and cabinets. Besides, it has an easy-to-clean surface and can be used in high-traffic areas too.
Sustainability
Different product lines from the brand, such as Regal, Ben, and Eco Spec, meet all safety standards and are formulated to release a low amount of VOCs (volatile organic compounds).
The Natura range from the brand, in particular, was considered to be the benchmark in environmentally feasible paints and was certified asthma and allergy-friendly. Eco Spec, which received the Green Seal Certification, later replaced it.
Given the growing emphasis on using sustainable paint products, Benjamin Moore has started focusing on manufacturing “greener” options that do not release any harsh fumes or emissions. As a result, the price of these products is higher owing to their advantages.
Mildew Resistance
Certain additional qualities such as mildew resistance, weatherproof properties, and durability affect the price of paint.
If you are looking to paint the kitchen, bathroom, or other moisture-prone areas, then you’ll have to shell out a more significant sum for mildew-resistant paints. Similarly, if you wish to paint exterior surfaces such as sheds, then you need durable and weatherproof paint. So, these additional features increase the price of paint per gallon but improve its functionality and longevity.
How Much Does Benjamin Moore Paint Cost?
Now that we have analyzed the factors that determine paint cost, it is time to delve into the specifics. Having a comprehensive idea about the cost of different product lines from Benjamin Moore will help you get a ballpark estimate for your paint job. It will also help you decide what paint best suits your needs. So, let’s look at all the deets!
Interior Paints
Benjamin Moore has a vibrant line of interior paint products that are fade-resistant and easy to work with. Besides, they remain smooth and are hard-wearing. So, there are no chances of chipping or cracking. Out here, we have listed the diverse range of interior paint products from the brand with their features and prices.
Aura
Formulated using Color Lock Technology, Aura stands out because of its color vitality and durability. The colors are thick and vivid and can endure regular washing without fading.
Besides, the paint retains color consistency over time and produces vibrant, accurate hues because of the Gennex Color Technology engineered to improve paint longevity and resist fading. This makes it stand out among its competitors, who use surfactants (chemicals) to disperse the pigments evenly. Although the colors are rich initially, they fade over time because of the presence of chemicals.
Apart from durability, this color technology also has excellent ‘hide’ potential, and the paint itself is self-priming. So, you don’t have to apply more than two coats to get a gorgeous finish. In addition, it is mildew resistant and can cover up to 400 sq ft per gallon, depending on the wall type.
Coming to the finishes, we have this range available in matte, satin, eggshell, and semi-gloss finishes.
Wait...there’s more! The Aura Bath And Spa series is a subdivision of this range and comes with a matte finish for easy cleaning. Also, it is ideal for moisture-prone areas such as kitchen, bathroom, and other high-humidity areas.
At last, we come to the price. Aura paints will cost you a tidy sum of $80 per gallon. Although this is by no means humble, we’d argue its features far outweigh the price.
Regal Select
The Regal Select line from Benjamin Moore is acrylic-based and comparatively less expensive than the Aura range. It is spatter-resistant, blends seamlessly into corners without creasing, and is easy to work with, even for DIY enthusiasts or first-time painters.
This paint-primer is available in innumerable color options and provides excellent coverage. So, it can effectively hide previous stains, and you don’t need to apply several coats to get a striking color. Moreover, the painted wall doesn’t require active scrubbing and is easy to clean with a simple soap and water solution.
This line is also formulated using the Gennex Colorant Technology. The absence of harsh chemicals makes it safe and sustainable, as does the low VOC concentration. Besides, it emits less odor, so you don’t have to worry about pungent paint odor engulfing your house.
The Regal Select line is mildew resistant and available in all five finishes - flat, matte, satin, semi-gloss, and eggshell. Thus, it can be your top pick for all home-improvement projects and can be applied to several surfaces such as ceilings, walls, drywall, wood, and plaster.
Priced at $59 per gallon, the Regal Select range is worth every penny you spend on them. It provides an elegant, uniform finish, and one gallon can cover up to 450 sq ft without compromising on paint thickness or coverage. So, you get what you pay for!
ben Interior Paint
ben Interior Paints should be the ultimate choice when trying your hands at a paint job for the first time. It is much more affordable than the Aura and Regal Select line and formulated with the specific goal to provide an easy painting experience.
This premium-quality painter-primer gives a flawless finish to your hallway, dining room, cabinets, and other surfaces that require regular cleaning. In addition, the flat finish type is ideal for ceilings and other low-traffic areas.
Apart from flat, it comes in two other finishes - eggshell and semi-gloss. Thus, you can rely on ben Interior Paints for your home improvement projects if the more expensive options go beyond your budget.
It is spatter-resistant, contains low VOCs, and is formulated with Gennex Color Technology to get gorgeous and rich hues at nominal prices. What’s more, it is washable and priced reasonably at $42 per gallon.
Since you can cover roughly 400 sq ft per gallon, we can safely state that this is one of the most affordable paint solutions you can get from this brand.
ADVANCE Interior Paint
If you are looking for waterborne-alkyd hybrid paint specifically formulated for cabinets, wood surfaces, trim, or doors, then you’ll be pretty impressed with the efficacy of ADVANCE Interior paint.
It has a separate paint primer that can improve adhesion, block stains, and provide a level surface for your painting job.
The paint line is spatter-resistant, easy to apply, and clean. Besides, it is durable and contains low volatile organic compounds. So, you can get a furniture-like finish on a wide variety of indoor surfaces without worrying about the paint chipping or cracking over time.
Moreover, the paints can be tinted with waterborne colorants from Benjamin Moore to get different colohttp://homesthetics.net/best-ceiling-paint/rs and excellent coverage. It is available in several finishes, including matte, semi-gloss, high-gloss, and satin, and is priced a little over $50 per gallon.
Muresco Ceiling Paint
We’ll end our list of interior paint products from Benjamin Moore by talking about this Muresco Ceiling Paint. As you already understand, this paint is specifically formulated to hide imperfections, level, and coat ceilings. It is a paint-primer combination, so you wouldn’t need multiple re-coats to get a flawless finish.
Besides, it is only available in a flat finish type to eliminate chances of glare and goes over easily without splattering. It is priced at $42 per gallon, which is pretty reasonable given its fantastic quality.
Exterior Paint
Exterior paint should be tougher, with the ability to withstand harsh weather conditions. Besides, it should be resistant to water damage and mildew formation, all the while providing excellent coverage for your outdoor surfaces. Benjamin Moore delivers on all these grounds and much more. Let us tell you more about its line of exterior paints!
Regal Select
Formulated using advanced alkyd technology, the Regal Select range provides superb adhesion, even to grained, chalky surfaces and other hard-to-coat surfaces like wood and vinyl. Since it has sufficient open time and superior flow, it is ideal for detailing jobs.
Moving on, the paint can be applied and cured in temperatures as low as 35℉ and gives a durable finish that isn’t prone to cracking, chipping, or peeling over time. So, your painted exteriors will look fresh for years to come. In addition, the colors are vibrant, mildew-resistant, and fade-resistant, thanks to the Gennex Color Technology.
Benjamin Moore offers three finishes for its Regal Select exterior range - flat, soft gloss, and low luster. Also, the products come with a lifetime warranty. Given its numerous advantages and versatility, this range is priced at a pretty price of $64 per gallon.
An exciting addition to this line was the Regal Select High-Build Paint, an acrylic-based formula for hiding small cracks and providing outstanding coverage.
Available in three finishes, the high-build exterior range has excellent flow and can be applied to several surfaces to cover imperfections and get a smooth surface without several coats. This is priced at around $56 per gallon.
Aura
Engineered with Proprietary Color Lock and Gennex Colorant Technology, the Aura line of Benjamin Moore’s exterior paints provides rich, radiant colors that retain their vibrancy over time.
Moreover, it provides superior coverage and fantastic durability against varying weather patterns. It dries quickly and can be cured in lower temperatures besides being mildew-resistant.
Also, it provides brilliant adhesion and can double as a primer in most instances unless the surface has major deformities. Available in four finishes, semi-gloss, low luster, satin, and flat, it is priced similarly to the interior paint range at $80 per gallon.
The Aura Grand Entrance range of exterior paints is explicitly meant for doorways and trim and is available in two finishes - high-gloss and satin.
ben Exterior Paint
If you are looking for sustainable and affordable exterior paint, then Benjamin Moore’s ben Exterior line is for you. There are several impressive features of this range. For starters, it offers brilliant coverage and has a superior flow for consistent application. Besides, it comes with a 25-year limited warranty - so your walls are likely to remain intact for years to come.
The 100% acrylic resin formulation delivers unrivaled adhesion, mildew resistance, and fade resistance. The quick-drying formula makes wooden, primed, and previously painted surfaces weatherproof within two hours of application.
In addition, it can dry in temperatures as low as 35℉, so you don’t have to wait till summer to complete your paint job. It is available in three finishes, flat, low luster, and soft gloss, to fulfill all your exterior painting needs.
The best part? It is reasonably priced at $48 per gallon, making it the least expensive product from the Benjamin Moore paint range.
Coronado Rust Scat
If you are looking for rust-preventative coatings for your metallic outdoor surfaces, then the Coronado Rust Scat is a perfect choice. Easy to apply, even over painted surfaces, you can use this paint line over ferrous and non-ferrous metals.
It provides excellent adhesion and is available in several attractive finishes, including gloss, semi-gloss, and satin. In addition, it is available in both water-based and alkyd-based forms and is priced at $55 per gallon.
Exterior Stains
While we are on the topic of Benjamin Moore paints, we cannot miss out on its fantastic line of exterior stains that are specifically formulated for wooden surfaces.
Arborcoat Stain
The Arborcoat stain line is available in different color options and can provide a durable and attractive finish to all wood types. In addition, it prevents blistering, stains, scuffs, and peeling. Its mildew-resistant and UV-resistant properties protect the wood while also enhancing its texture.
Besides, this self-priming stain is formulated with Gennex Color Technology to retain the original vitality and sheen. It is priced at $42.99 per gallon.
Coronado Maxum
Another excellent wood stain, the Coronado Maxum Stains and Primer range, provides mildew resistance and a durable coating that will accentuate the beauty of your wooden surfaces.
Available in waterborne-alkyd, acrylic, and alkyd forms, this line has fantastic color retention and is resistant to scuffs and fading. Besides, it is available in solid color, semi-transparent, and translucent choices. The price varies according to the type but is usually around $30 to $35 per gallon.
How Much Of Benjamin Moore Paint Is Needed To Paint A Room?
Before commencing with any paint job, you need to determine the amount of paint needed for your ceiling, windows, doors, and walls. Besides, you need to look into other essential items like rollers, brushes, tape, roller trays, etc., for the project. This helps you get a comprehensive idea about the tools you’ll be needing and plan a budget accordingly.
Now that you know the prices of all the different paint lines from Benjamin Moore, it is time to do some calculations and understand how much paint will be needed for the room.
Several factors determine the quantity of paint needed for a room. For instance, a drywall that is being painted for the first time will absorb a lot of paint, whereas a room that has been painted before and has no prominent stains will require fewer coats. So, there can be no one-size-fits-all answer to this question.
However, you can measure the length, width, and height of your room after subtracting the area of the door and windows to get a ballpark estimate of the room surface area. This will help determine the quantity of paint needed. As we have mentioned earlier, one gallon of Benjamin Moore paint can cover anywhere between 300 to 400 sq ft.
There are no two ways about the fact that Benjamin Moore is one of the high-end paint brands on the market. However, its efficacy and features justify the expense, and its longevity makes it cost-effective. But, if you want to economize and reduce the paint cost, we have some tips out here that’ll come in handy.
Bulk Purchase
That’s right! You can choose to purchase 5-gallon paint buckets that are available at a lower cost than one-quart or one-gallon variants. If you are remodeling and repainting the house, you’ll undoubtedly be requiring over one gallon. So, it is advisable to purchase the paint in bulk to get discounts and lower the cost per gallon.
Reduce The Number Of Coats
While it might seem like you are compromising on color vitality and coverage by reducing the number of coats, that’s far from the truth. Hear us out!
A well-primed surface requires a lesser number of coats, and although the paint lines from Benjamin Moore are said to be “self-priming,” there’s no harm in applying a primer underneath. This improves the coverage, accentuates the paint color, and increases the paint’s adhesion to the wall surface. As such, you’ll be minimizing the quantity of paint used.
This can particularly work wonders if you are painting on drywall or any other porous surface, especially for the first time.
Shop From Local Stores
Local stores are more likely to offer discounts and slash prices from time to time. Besides, they sometimes have dented boxes that are kept at the back of the store. As long as the paint inside is good, you can use them for your renovation project. Also, you don’t have to pay shipping costs on store-bought products, so that’s a bonus.
In addition, several hardware stores offer paint swatches that’ll make color selection much more effortless.
How Does Benjamin Moore Fare Against Its Competitors?
If you have done ample research on Benjamin Moore paints, you might have inadvertently come across Sherwin Williams. Both of these brands have a prolific range of high-quality products for your interior and exterior painting needs.
But, what makes Benjamin Moore stand out is that it delivers the same performance (arguably better) at a lower cost. For example, let’s take the most expensive products from both brands. The Aura line from Benjamin Moore is priced at $80 per gallon, whereas the Emerald line from Sherwin Williams is priced at $90 per gallon.
The same goes for exterior paints. The Regal Select line from Benjamin Moore is priced at $64 per gallon, whereas the Superpaint Exterior Latex line from Shermin Williams is costlier at $70 per gallon.
So, if you’re wondering if there’s any other brand that can offer the same characteristics at a lower price, the answer is no. Benjamin Moore, although expensive, manages to deliver quality products that pack a punch and justify the cost.
What Is The Best Way To Paint Walls?
If you are a person who loves DIY jobs, then taking up the task of painting your house is the best way to save quite a few bucks. So, instead of hiring a contractor and shelling out the extra cash, you can save up and invest in high-quality Benjamin Moore paints.
One of the best features of this brand is that it’s pretty easy to work with. All you need is a few good rollers, brushes, and other items required for painting, and you’re good to go. In this brief guide, we’ll tell you how to go about painting your interior walls. Let’s take a look!
Step 1: Choose The Right Tools
For any paint job to be successful, you need the right tools. So, look for high-quality rollers, brushes, an extension pole, and a pan. You can find them online or at your local hardware store. You mustn’t compromise on their quality since it can directly hamper your home improvement project.
In addition, you can choose between Aura or ben interior paint line, depending on your requirements and budget. Both these lines have spatter-resistant paint that offers quick touch-ups and a smooth finish.
Step 2: Prepare The Wall
The next step involves properly cleaning the wall to remove any grease, soot, grime, mildew, or other stains. Although most of the paints in the Benjamin Moore range are self-priming and do an excellent job of providing adequate coverage, you can save on the number of coats by priming the wall in advance.
In addition, you can opt for a deep-colored or tinted primer if you are working with darker hues.
Step 3: Cut Into The Room
“Cutting in” the room signifies painting along the edges, the ceiling line, switches, door, windows, etc. This can get quite tricky since it demands precision, and we’d advise you to be careful and choose an appropriate brush for it.
Step 4: Start Rolling On The Walls
Pour the paint on the well-lined tray and load the roller by moving it back and forth on the pan till it’s completely saturated. Then work on the walls with it, following the top-down approach. However, do not apply too much pressure because it might lead to the paint running down or dripping. Allow the roller and paint to do the job.
Step 5: Avoid Streaks
One of the most challenging tasks you will be faced with while painting walls is avoiding streaks. This usually happens when you try to paint a large area in one go.
So, paint smaller areas and keep the roller wet. In addition, every time you reload it, start by working on a fresh row and then merge it with the painted area. This minimizes the chances of lap marks and produces a uniform surface.
Step 6: Let It Dry
It is advisable to apply at least two coats of paint to ensure sufficient coverage and hide previous stains. Besides, it improves the paint vibrancy.
So, apply two coats and leave sufficient time in between them. Also, let the paint cure properly before you place the wall fixtures or frames back.
Benjamin Moore Paint Cost FAQ
Can I Get Paint Samples From The Brand?
Yes! Benjamin Moore offers a wide selection of color swatches and paint samples for interior and exterior surfaces. You can order these online, and they are available in standard one-pint sizes that cost $10.99. So, before committing to any one color, you can try out multiple color samples.
Where Can I Find Benjamin Moore Paints?
As some of you might already know, you wouldn’t be able to find Benjamin Moore paints at Target or Home Depot. This is because the brand has a longstanding commitment to local paint and stain dealers and sells its products exclusively to them.
So, you can find them at your local hardware shop in the US or Canada.
What Makes Benjamin Moore Products Eco-Friendly?
Benjamin Moore strives to produce environment-friendly products and has taken significant strides in this direction. It has a range of products with zero or low VOCs. Besides, the Gennex Color Technology is a waterborne tinting system that doesn’t use any surfactants or chemicals to retain color consistency and quality.
In addition, you can easily access the Safety Data Sheet that elaborates on the toxicity of each paint type. All these factors, combined with the low odor emission, make it one of the most eco-friendly paint brands on the market.
Which Is The Most Eco-Friendly Paint From The Brand?
The Eco Spec range that replaced the Natura line is the greenest paint from the brand. It has minimal odor, adheres to stringent environmental safety policies, emits zero odor and VOCs, and has received several third-party certifications that hail it as one of the most sustainable paint options.
How Long Does The Paint Take To Dry?
There’s no fixed answer to this question. As a rule of thumb, the paint dries quickly in a dry environment, and latex-based paints dry faster than alkyd ones. So, it is best to refer to the technical data sheet that the brand provides for its products. It has specific details about the paint-dry time.
Final Words
Benjamin Moore has become a favorite among interior designers and coveted among homeowners for its carefully formulated product line with breathtaking colors, high coverage, and fade resistance.
Even though the paints from this brand cost more, they prove to be quite economical in the long run, as you wouldn’t have to re-paint the house for a very long time. In addition, the paint is immune to mildew formation and weather damage. So, even though its price is a pocket pinch, you will not regret it.
If you are willing to splurge, the Aura range of interior and exterior paints will be your best bet. However, if you want something on a modest budget, the ben interior and exterior line should be your go-to choice.
With that, we will take our leave. Do let us know what you think in the comments below.
Have you ever browsed through cooktops, eyed that fancy one which claims to have 30,000 BTU, and secretly wished to buy it?
It is okay if that sounds like you because we get it; those high-powered fancy and professional stoves are quite attractive. Which begs the question: is it really necessary at home? Let us answer that - not unless you plan to open a restaurant that only serves during rush hour.
Having a stove with that kind of power is not needed even if you entertain many people or have a big family with an even bigger appetite. Which makes way for another question: how much BTU in a stove is suitable for residential use? That is precisely the question we are going to answer today.
We have put together this short guide on how much BTU you need and how you can potentially save money by buying the right stove with the right cooking power.
So, without further ado, let’s get right into it!
How Much BTU You Need to Save Money on Cooking
What Is A BTU?
A British Thermal Unit, aka BTU, is a measurement unit used to measure how much heat the stove is delivering. Whether you are buying a stove, boiler, burner, or an oven, its BTU measurement will always be mentioned. It is a great way to compare the different heating capacities of products.
From a technical standpoint, 1 BTU of a stove can be described as the energy the stove needs to get 1 pound of water to 1 degree Fahrenheit (-17 degrees Celsius). To put it in perspective, the energy released in one BTU can be placed at an equal footing as one lit matchstick.
If you go through the manual for stoves or look at the label in a store, BTU will be mentioned in a range. One end is the maximum output and the other end is the lowest it can go after which the flame goes out.
Bigger Is Not Always Better!
A stove’s power is dependent on the BTU, and a higher BTU does not always mean it is the ideal stove to buy. A stove with a higher BTU means considering more things like a higher price point, higher gas consumption, higher ventilation, and so on.
When you buy a commercial stove with high BTU, it can be quite a hassle because these stoves cannot remain consistent on very low power. This leads to an inability to slow cook or simmer the food.
Additionally, with high BTU stoves, it is essential to have the right-sized pans. If the pan is not correctly sized, the stove’s heat will heat the room instead of what’s inside the pan. This is also why a lot of high BTU stoves are made to direct the heat upwards and not in every direction.
BTU Recommendation For Residential Kitchens
Commercial cooktops usually have high BTU as that’s needed for high-speed cooking in large volumes. But, this is not the case at home where one can cook at a regular pace and in small-to-moderate quantities. This is why it is essential to be practical about the required BTU of a stove at home.
At home, having one strong burner with a combination of two or three medium to low burners is the sweet spot for most users. And a mix of different BTUs on the stove allows more flexibility while cooking. Stoves of this kind are usually around 19,000 BTU or higher, with the strongest burner being around 12,000 BTU.
Final Words
High-end gas stoves are great to have but are often unnecessary for home setups and cost a lot. Investing in a practical cooktop for the house is better, cost-effective, and offers a broader range while cooking.
We hope this short guide has shed some light on the topic and will help you make the right choice. We will be back soon with more such informative guides.
Let's face it; being a good host is not an easy job. You will have to pay attention to every detail and ensure that there’s sufficient food for everybody.
With a big group of 30 people, the task is not going to get easier. But it does not mean that you cannot pull it off like a pro! To help you out, we have curated this detailed guide that will help you determine the amount of BBQ needed.
The first part will tell you about the things you should consider, followed by estimating the total amount of meat. We have also mentioned the dishes that work well for such parties and how much raw ingredients are needed.
So, without further ado, let's get down to business.
How Much BBQ Do You Need for 30 + Guests?
Things To Consider
We have listed down the main factors to consider while deciding the amount of BBQ. Read on to know all about them.
Age Of Your Guests
Age is an important consideration when it comes to serving food. If your guest list involves kids below the age of 12, then you can count on them not to eat much. ⅓ of a pound of meat should be sufficient for them.
For the average adult who is 21 or more, you should consider ¾ pound of meat per person. Now, some may eat more, while others, less. An average of ¾ pound of meat should account for everybody.
There are going to be some teenagers and adults who would keep gorging on the food. If it is your family, you will already know who they are. Assign 1 pound of meat for them, and we would advise not to go over this limit.
Keep several side dishes and make sure some of them are very heavy. Also, include fun drinks and some crisps to go along that will keep your guests sipping and chatting throughout.
Importance Of Side Dishes
We all have varied eating capacities, and while planning a BBQ event, you should ideally consider that. That also means planning the sides that will fill up some of your guest's appetites.
This is essential to save money as well as provide people with interspaces between different meat preparations. There are 2 kinds of side dishes that you could aim for:
Potatoes And Egg Salads
This is a heavy side dish option that is tasty and will fill up the guest's appetites. If you have a budget to conform to, make sure that there are large portions of mashed potatoes and egg salads on the side.
Coming to teenagers who might have a big appetite, they would love both these dishes, and it will, in turn, limit the meat consumption. Not only that, but it also is a brilliant addition to the plate and will give your taste buds a break while you try out different kinds of barbequed meat.
Vegetables And Fruit Salads
If you want the evening's focus to be the variety of meat that you serve, boiled vegetables and fruit salads can complement it perfectly. Pair it up with some cheese, and you are in for a classy barbeque evening.
This also goes well with meat tasting sessions where you might have several meat dishes to taste. You will have to make sure that people do not fill themselves up with heavy side dishes in such a case.
No matter what you choose, if you plan a barbeque dinner, estimate ¾ pound of meat per person so that there is no chance of food falling short. It might seem like a lot of meat, but when the music is good, and the alcohol keeps flowing, people tend to eat a lot!
If you plan to have extensive sides, you could reduce the amount of meat to half of the ¾ pound per person. That would fill up your guests well.
Determining The Time
People have different appetites at different points of the day, and hence, this is another point that you need to consider. If you are planning a lunch gathering, you can expect the appetites to be lower, and hence, ½ pound of meat per person should work well.
That should be enough, and paired with a side dish or two; you might have some meat remaining at the end of your party too.
But if you are planning a barbeque night under the stars, then you can expect the appetites to be much more. Expect half the guests to consume 1 pound of meat easily. If that is difficult to provide, ensure there are a good amount of side dishes.
Also, prepare crisps and bite-sized snacks that can be passed around with the drinks. This will fill people up and limit meat consumption too.
If you have planned an outing and the grill is the only source of food, people may end up eating more than a pound. That could be unhealthy, so keep fruits or veggies on the side for them to balance it out. You could also add burgers and hotdogs, which are filling options.
Plan For The Event
Who are you planning to invite? If you plan to invite your friends and colleagues from work for an informal night, they are going to end up eating a lot. Plus, if there are beers along with the meat, you should definitely count a pound of meat per person. The beer-meat combo is well-known and is almost irresistible.
In case of a family gathering, consider the age group and then plan on the meat. Here, you can stick to the general meat portions.
If you have a more formal setting where you are expecting a business meeting, or it is a church gathering or service, less meat is going to be consumed. This is because people generally do not fill themselves up and will not hog on food in front of unknown people.
Lastly, a party with a few of your close friends or family for a duration of 3-4 hours should mean a limited consumption of meat. Since time is limited, nobody gets the chance to gorge on food, and you can easily plan for half a pound per person.
Essential Tip
A piece of important advice that we should pass on to you from our side is to keep a note of the allergens. People may be allergic to certain ingredients, and it is best if you have complete knowledge about it. If the group that is going to be invited could be asked beforehand to mention any allergies that they have, it would make it easier.
Estimating The Total Amount Of Meat
By now, you must have gotten a fair understanding of the different quantities of meat that a person can consume in various events. This will now help you understand the total amount of it that needs to be purchased.
If you know that the group you are inviting are true carnivores who will not touch any salad or side dishes, get 30 pounds of meat in total. This should serve everybody well, and you could keep one light side dish along with it.
Besides, increasing the number of side dishes will reduce the amount of meat consumed. Plan for 3-4 salads, potatoes, or burgers, and you could reduce the meat consumed by half. We would suggest getting 17-18 pounds of meat, and that will work out well. Pair it up with hotdogs and good beverages, and your party is bound to be a success.
How Many Types Of Meat Is Ideally Needed?
This is an important question, especially since you will have invited a decent number of people over. We would suggest 3-5 variants of meat. Try keeping at least 3 types so that people can enjoy the variation in the meal.
The next question that arises is how to divide the meat between different preparations. We would suggest not to pay much attention to measuring portion sizes. Instead, focus on dividing the entire raw meat into 3 parts.
Then cut down each portion with a large professional knife to get equal portions. First, divide it into 10 parts. If they are big, cut each into 2 halves. Once you have divided the meat well, you can proceed to marinating and cooking it.
Moving on, in the next section, we will tell you about the popular types of meat preparations that you can consider. There are some crucial details that you should pay attention to while choosing.
Types Of Meat
The 3 standard options are ribs, briskets, and pulled pork. Read on to know how much of each item you would be needing.
Ribs
Barbequed ribs are one of the most popular treats and are loved by everybody. But it is also the trickiest to measure as there is less meat on each piece. We would suggest an average of 6 baby back ribs per person. This is the easiest to get, and 6 should fill people well.
If you are purchasing larger spare ribs, then 4 should do the trick. That will be enough as there will be 2 more types of meat along with this. For beef lovers, 2 giant beef back ribs should be more than enough. For kids below 12 years, keep half the quantity as they usually do not overeat.
Pulled Pork
Pulled pork is a delicacy that people love, and it is going to be the star of the party. Now, there is a specific way of calculating the amount of pulled pork that you would need. The meat yield is going to be 40%, and the rest of it consists of bones that cannot be eaten. We would recommend 5 pounds of pork, and to get that, you will have to purchase 8 pounds of raw pork for 30 people. If you want to buy more, remember the ratio and buy accordingly.
It is important to stock up sufficiently because this is going to be a favorite among people, and you do not want to fall short.
Brisket
Considering that there will be 3 types of meat and ample side dishes to go along with it, 5 pounds of the brisket should serve you well. But remember, we are talking about 5 pounds of cooked meat and not raw. The meat loses its weight while grilling, and 40% of the weight is reduced. So, prepare accordingly and buy at least 7 -8 pounds of meat for 5 pounds of brisket.
When preparing for the event, keep in mind that the amounts of meat that we just spoke about will suffice if you have proper side dishes and drinks along with it. For an average BBQ lunch or dinner, this is the right capacity but if you are planning to only focus on meat, then increase the amounts by 50%. That should be enough for the whole group.
How Much BBQ Sauce Is Needed?
Typically you will need a gallon of sauce for a group of 30 people, the BBQ sauce is often not given much attention to but turns out to be an important part of the meal. It is best not to buy 1 gallon of the same sauce. Buy 2-3 variants or make them yourselves beforehand. That will provide the guests with different flavors to experiment with.
Burgers On The Side
The best part about burgers is that they are filling and will appeal to carnivores as well as those who are picky about eating. They are really flavorful and will be a great addition to the meal.
For a group of 30 people, you should have 60 burgers or 30 burgers and 30 hot dogs. That is the ideal count but you should prepare for those with larger appetites. Keep 10 extra for these people, and you should not fall short.
Now, coming to the amount of meat required, you will need around ⅕ pound of meat for each patty. That will allow you to make 5 burgers per pound. If you want to make them meatier, make 4 patties from 1 pound of meat.
Here you do not need to calculate the weight loss of meat, and you can buy just the amount needed. Another suggestion from our side is that you can make the patties instead of buying them readymade. While readymade options will save you time, you will end up spending much more money. Make your patties the previous day and grill them on the day of your event.
Final Words
Imagine having everything in place, and then you end up with less salt or seasoning! While you are paying attention to the amount of meat, it is also important that you consider the smaller details. Buy ample amounts of sauce, salt, pepper, chili flakes, and napkins. These would be the basics that could make or break the event.
So, finally, you are prepared to send out invites for your upcoming BBQ party. If you plan to invite more than 30 people, follow the food ratio and increase it accordingly.
With this, we have come to the end of our guide. We hope you are prepared to deal with the party. Keep a few extra burgers or hotdogs just to be safe.
Let us know about your experience in the comments section below.
With winter around the corner, you know that snow will be a problem soon. Thus, this might be the right time to invest in a snow blower.
There are several notable brands with excellent offerings that get the job done. But, before you make the purchase, it is best to know the right prices of the products. Nobody wants to overpay and ultimately be stuck with a model that doesn’t get the job done.
Luckily, we have got you covered. Here, we’ve listed the various kinds of snow blowers, depending on their prices and functionalities. Usually, there are several factors to be considered when buying a snow blower, including where you live and the kind of snow that area gets. We also realize that the expenses of maintaining such machines is an important consideration for many.
So, without much ado, let us get into the details of the matter.
Cost of Snow Blowers by Type
The average price of a snow blower is around $400, but depending on the extensivity of use, the price might go up to several hundred dollars. For example, for those living in places where winters don’t see heavy snowfall, an electric snow blower would be ideal. It is compact and can get the job done without any hassle.
On the other hand, for those who live in areas of denser snowfall, a heavy-duty option is recommended. Gas-powered snow blowers come in handy here. We’ve categorized the snow blowers by type and how much they might end up costing, as well.
Electric Powered Blowers
These usually belong to the lower end of the cost scale and are intended to be much more compact. The electric-powered blowers are simpler but less powerful. Hence, they come in handy when one has to clear relatively lighter amounts of snowfall throughout the season.
Some might find these snow blowers limited by the length of the extension cord. Even while operating, you have to be careful not to run over it. In spite of this slight problem, these machines are extremely dependable, can be stored easily, and start-up quickly as well.
If you need to keep your deck or patio clear of light to medium snow during winters, this is the right choice. The snow blower is extremely lightweight and can reach the trickier areas too. Most of these machines easily fall below the average $400 price tag.
Battery Powered Cordless Blowers
As you can understand, a cordless snow blower is designed to be more maneuverable than its corded counterpart. These machines are also built to be more powerful, so they can handle a little heavier duty cleaning, as well. Naturally, with these overt advantages, this variant is also priced slightly higher in the market.
Gas Powered Blowers
These snow blowers usually have two designs, single or two-stage models. Since there are more variants here than for the electric-powered ones, these snow blowers cover a whole spectrum of prices.
The gas-powered blowers come equipped with 4-cycle engines. They need both oil and gas, and other measures have to be taken for maintenance too. For example, you have to drain fluids, clean the carburetor, replace the belt occasionally, and check the spark plug. However, these are all relatively inexpensive and simple tasks.
On average, you’re likely to find that a gas snow blower will be 20% more expensive than an electric one. Among the gas-powered blowers are single-stage blowers and dual-stage blowers.
Single Stage Blowers
These blowers mostly come in handy for residential users and operate on a system which is auger driven. This pushes the machine forward as it takes up the snow, throwing it through a chute. Despite being a powerful piece of machinery, these blowers are somewhat limited.
Their capabilities are hindered since only one auger happens to do all the work. Even the size becomes somewhat of a constraint. These machines can clear three to eight inches of snow in one pass. Thus, if you need to clear out your walk or driveway, this snow blower is the right choice.
Of course, it is on the affordable side and is, therefore, popular with the majority of homeowners.
Dual Stage Blowers
As the name suggests, these blowers have everything one might expect in the single-stage variant, apart from a few other additions. Since the machines are driven by both an auger and impeller, they are equipped to handle heavier and deeper snow than the single-stage counterparts.
They have a wide range of sizes, which also determine their capabilities. If you’re looking for ones apt for residential use, you can find them. There are also options to obtain the larger, tracked variants, capable of handling large amounts of snow at any given time.
These machines often come with additional comforts, like heated handles, the drive systems to go in forward and reverse, as well as the chance to hook on cabs for protection from harsh weather.
Heavy-duty blowers without such amenities can cost you from $400 to $600, but if you want one with the bells and whistles, then be prepared to spend north of $600, sometimes even thousands, for a professional blower capable of handling larger areas.
What Maintenance Do Blowers Need?
Now that you know the prices of the different kinds of blowers in the market, the next thing you need to understand is how much you might end up spending on maintenance.
When it comes to electric blowers, almost no maintenance is needed. Very rarely, you might have to replace some worn out parts. These are mostly good to go once you plug them in.
In the case of cordless snow blowers, regular maintenance is not needed either. But, you have to replace the batteries if they drain out.
Finally, as we have seen, the gas-powered blowers require some changes, which are mostly inexpensive.
Maintenance for Gas Snow Blowers
Several components of gas snow blowers need maintenance and constant observation. These include the following.
Changing Oil
Although oil has to be changed soon after the first five hours of using the blower, it doesn’t need to be altered again until the end of the year. However, you might need to change it if you’ve used it for around 50 hours. At the same time, we recommend checking the oil after five hours of use to see if it has become too dirty, warranting a change.
Spark Plug
Normally, it is best to change a spark plug once in a particular season. Alternatively, you should change it after 100 hours of use. But, it is best to clean the spark plug in an interval of 20 to 30 hours and to check the gap. This is how it remains clean, and you know if it needs to be changed sooner than usual.
Skid Shoe
These prevent the augers on two-step blowers from picking up rocks or scraping the ground. As a result, skid shoes get worn out and need to be replaced as and when needed.
Fuel Stabilizer
It has to be added to the tank after every season to preserve the gas left in it. Obviously, it makes it easier to start the blower the next season if this simple step is followed.
Shear Pins or Shear Bolts
These don’t cost much but are nifty additions, ensuring the longevity of the blower. They are built to break if there’s a lot of torque on the augers. Ultimately, these pins prevent costly damage to the blower. The pins should be replaced as needed.
Cost of Maintaining Gas Blowers
The cost of maintaining these blowers stem from the parts that require care. Firstly, we have spark plugs, which costs around $22.74. They’re needed at least once a year and can be found in maintenance kits.
The fuel stabilizer is $9.87 and is also needed only before prepping the blower for the off-season. Shear pins set you back by $8.78. Considering they’re only needed if they break or get lost, one cannot possibly need more than a few pins each year, making this rather inexpensive as well.
Finally, we have the skid shoes, which cost $30.99. But, these don’t have to be replaced each year.
Final Words
As you can see, electric snow blowers are the cheapest overall. Not only is the market price lower, but there is almost no additional cost in maintaining these machines. But, at the same time, they are completely unsuited for heavy-duty tasks.
The gas-operated blower, on the other hand, can be rather expensive. It all depends on what make and model you’re buying. There are further maintenance costs as well, but these are quite affordable. After all, when it comes to functionality, they are unparalleled.
We hope the guide helps you decide what type of snow blower will suit you the best. As usual, we look forward to hearing about your experience.
The best way to protect your wooden surface is to apply a coating of polyurethane.
Many people like to add a layer of polyurethane to their floors and admire its shiny glossy look. How does that help the floor, you ask? Polyurethane is a water and chemical-resistant product and forms a strong protective layer, preventing any damage to your hardwood floor and furniture.
If you are looking to apply polyurethane to wooden items but have no idea how to proceed, you’ve reached the right place. No need to look any further for queries regarding polyurethane types, coating, drying, and application. We’ve got you covered in this comprehensive guide.
Let’s find out all the aspects related to polyurethane, beginning with its types.
Polyurethane Coating
So, what is polyurethane, and why do people use it for coating surfaces in the first place? Polyurethane is essentially a type of varnish which is applied over wood to make it sturdier and maintain the outer layer. Adding a few layers of polyurethane makes the surface waterproof, heat, and scratch-resistant.
Along with its protective properties, it is shiny and smooth to look at, which improves the beauty of your wooden furniture. If you plan to add a finishing layer at home, applying a coat of polyurethane makes the most sense. Even though there are a few essential methods you should learn about, it is by far the easiest product for DIYers to work with.
Although we think of polyurethane as oil-based, that is not always the case. There are two types of coatings- water-based and oil-based; and their different properties are something that would be useful to know.
Types Of Polyurethane Coating
Oil-Based Polyurethane
Oil-based polyurethane is the more common type of coating used for furnishings. The substance is created by adding polyurethane resin to varnish, which gives it its resistant properties after curing. Also, it has been around for much longer than water-based polyurethane.
Compared to other finishes and varnishes, these have a thicker and oilier consistency. But of course, this depends on the number of coats you choose to add. After application, it leaves an amber-colored hue which adds warmth to woods with lighter shades. These coatings can also be easily cleaned using mineral spirits.
Using this type of polyurethane comes with its pros and cons. While you get a super strong finish that looks beautiful, these dry slower. As a general rule, oil-based paints or varnishes take longer to dry than water-based ones.
And, if you add three or more coats, the process can take you much longer to complete. Also, these contain high levels of VOCs, which is why some people prefer water-based coatings nowadays.
Water-Based Polyurethane
A more environment-friendly option for your surfaces is water-based polyurethane. These are a safer option because of a lower amount of VOCs, which is why people switch from oil-based polyurethane to water-based ones.
Also, if you do not want to wait around for every layer to dry, the water-based polyurethane would be better suited to your needs. It levels easily and dries quickly, allowing you to complete the floor or table varnish in a few days instead of weeks.
Furthermore, you can apply more coats since it dries off quickly. However, even though some aspects of this type of polyurethane coating are great, it has a few drawbacks. For example, the final finish is not as durable as oil-based ones, and it may get damaged by water.
Also, the application of water-based polyurethane raises the wood grain; thus, a few extra layers will be essential to get a smooth finish. And since the consistency is rather thin, you’ll require more layers of coating to get a final glossy finish.
How Many Coats Of Polyurethane Should You Apply?
The number of coats you apply will alter the appearance of the surface and also change the strength of the wood. But how will you know if one, two, or three coats are ideal? One thing is for sure- if the underlying wood has to be adequately protected, multiple layers are necessary.
Another general rule is that water-based polyurethane coats will require more layers than oil-based varnish. But, ultimately, the number of coats will be determined by the surface type, how frequently the surface is used, and the level of protection required.
Hardwood Floors
When it comes to deciding the number of polyurethane coats for hardwood floors, the first thing to consider is the type of varnish. As mentioned before, water-based and oil-based varnishes are very different and will need a different number of coats. But it is also essential to consider the condition of the wooden floor and how often the floor is in use.
If you are applying water-based polyurethane on the floors, at least three thin coats are a must. Because the varnish is thin, note that it will raise the grain of the floor. Three coats should be enough for forming a protective layer, but if you want to go the extra mile, you could add a fourth layer.
It’s recommended to add the layers and buff the uneven parts so that the end result is a smooth and almost reflective floor. If you select an oil-based polyurethane, you could opt for two coats on the hardwood floor. A new and well-maintained surface should not need more than two layers, one for sealing and the second for finishing.
Hardwood floors that need a fresh look after many years of use might need a third coat; however, this is not necessary. Now, for those of you who are confused between selecting water-based and oil-based products, we recommend water-based polyurethane for hardwood floors.
This is because water-based varnishes are much more manageable and can be covered with a new coat if the existing one is messed up. But oil-based varnish can chip, peel and form dents if not handled with care and might ruin the final look of the floor.
Furniture
If you are looking to apply a layer of polyurethane on wooden tables or chairs, there are a few things you should consider. You already know that oil-based and water-based varnishes will have different drying times, but there’s another factor to look into.
When an oil-based varnish is applied, it dries off to become a rich amber-hued color which transforms the furniture giving it overall warm tones. Water-based varnish doesn’t have any color of its own and merely provides a smooth sheen, retaining the color of the table underneath.
Here the decision lies with you to choose based on color differences. The warm hues make wooden tables look richer and beautiful, but it is possible that the shade might not match your room or house decor. If the extra warmth adds interest to your room, the oil-based varnish is a great option. But if you’d rather not hide the natural color of surfaces, the water-based varnish is better.
Applying Polyurethane To Surfaces
There are several ways to apply a polyurethane finish. You can choose to brush it on, spray all over the surface or wipe it into the wood. If the varnish is applied using a brush, there are chances of the brush strokes remaining on the surface, giving an uneven look. This is why many DIYers prefer to spray the varnish on, which is similar to spraying paint on walls.
Spraying is the best method, especially if the surface is not flat. And while it’s easier this way, you get thin layers of varnish; thus, 5 or 6 coats are required. While spraying, it is crucial to work with a steady hand to prevent any drips and spills.
If you hold the spray in one place for a long time, the liquid polyurethane will drip and need immediate cleaning. One drawback of spray painting is the release of harmful fumes, which might not suit people with sensitive skin. If you plan on applying the varnish on a flat surface like the wooden floor or table, using brushes would be the best option.
Stepwise Guide To Applying Polyurethane
Applying polyurethane to surfaces is not a difficult task if you follow the correct method. If you are beginning the coating process, going through this section will help get a beautiful finish for your floor effortlessly.
Check Your Workspace
Before working with polyurethane, the first thing to check is the area and location of the application. Is it a spacious room or a small basement? How well-lit is the room, and does it have windows for ventilation? These questions are imperative for safety reasons and will also affect the drying time of the varnish.
Since most varnishes, mainly oil-based ones, emit VOCs, it is necessary to have good ventilation in the room. To improve ventilation, leave the windows and doors open for fresh air to pass through.
For safety reasons, make sure to wear protective gear while applying polyurethane. Prepare for clear safety goggles, gloves, and a respiratory mask to protect against VOCs and fumes arising from the varnish. Lastly, ensure the work area is well lit with ample sunlight or artificial light. If the light is dim, it will not be possible to spot minor imperfections and brush marks.
Prepare The Floor/Surface
The surface must be well-prepped before applying any varnish. Clear out the room/ area to remove any obstacles for a continuous spray or paint job. If objects or wall decorations are not removed, they may get damaged by the spray or the volatile fumes. Thus remove the room of all wall paintings and light bulbs.
Now that other objects are out of the way, you can focus on the actual area of work- the hardwood floor. The first step is to sand the floor with coarse sandpaper thoroughly. This needs to be done all over the floor at least once. Unfortunately, there is no easy way out of this step, and the results do not look good if this step is skipped.
After the coarse sandpaper, gently rub the surface with finer sandpaper until it is smooth and even to touch. Clear up the dust and bits of wood using a regular vacuum cleaner and wipe the area till it is clear of any remaining dust.
Some people like to mop the floor with a slightly damp cloth, but this is not recommended because the floor will take time to dry. Besides, if some moisture remains in the floor and the varnish is applied on top, there are chances of the wood rotting from within.
This is especially true for oil-based varnishes because they are completely water-resistant and will trap the water with no way to get out and evaporate. But there is no need for concern while using water-based polyurethane. In fact, wetting the surface beforehand will raise the grain of the surface, which can then be sanded down to perfection.
In any case, the floor must be clear of dirt and moisture; otherwise, the polyurethane might not stick properly to the wooden panels.
Seal The Upper Layer Of The Floor
Now, the first layer of polyurethane can be applied to the clean hardwood floor. The first layer is called the sealant because it acts as a barrier between the wood and the following layers of varnish. This layer is always thinner than the rest and can be achieved by thinning the product you’ve already bought for varnishing.
Wood is usually porous, and direct application of thick polyurethane can form bubbles. A sealant covers up the pores on the wood and prevents bubble formation. There are special sealants available on the market which are meant to be applied on their own; however, they are expensive.
And, the same task can be accomplished by creating your own sealant layer, so buying an additional sealant product is not necessary. So how do you make polyurethane sealant? It’s simple, mix two parts of the oil-based product with one part of mineral spirits. Mix it well to get a fluid consistency that flows and spreads easily.
If you are using water-based polyurethane, use the same ratio, but replace the alcohol with pure water. Now that the mixture is ready use a large brush to apply the sealant on the floor using long brush strokes. Try to cover the entire floor without drips.
A good tool for this is a natural bristle brush which leaves fewer brush marks and gives a smoother finish than synthetic brushes. In some cases, the sealant will not adhere to the wood because the stain might be oil-based.
An oil-based sealant shouldn’t have this problem, but a water-based one will need extra preparation. To roughen the floor, you can use steel wool instead of sandpaper to help the varnish bond better.
Apply The First Coat
Technically, the sealant is the first layer that goes on the floor, but the first viscous layer is called the first coat. After the sealant is applied, wait for 24 hours before adding this first coat of polyurethane. After 24 hours or so, the sealant should be dried entirely if the room has access to fresh air.
This is when you can go ahead and apply the first coat. Remember not to create very thin layers with this first coat because this will cause gaps in random places. If you are spraying on this layer, the layers might be slightly thin so take your time to cover each section sufficiently.
And if you prefer using a brush, try to connect the brush strokes and allow them to overlap. This will prevent streaky lines after the brush is lifted. Also, try to smoothen the drips and spills as you go along the floor instead of waiting till the end to fix them.
Depending on the polyurethane base, you will have to follow different steps to complete the remaining steps.
A. Method To Apply Oil-Based Polyurethane
For oil-based polyurethane, the best tools for application are foam rollers or brushes, natural bristle brushes, or soft bristle brushes. Stay away from rough or synthetic brushes, which often leave streaks and do not allow the polyurethane to settle evenly.
Firstly, dip the foam roller or brush in the polyurethane can or tin and remove it, allowing the excess to drip into the can. Do not wipe the brush against the side of the can to remove bubbles or extra product. Doing so will leave gaps on the hardwood floor while applying.
Instead, tap the brush a few times into the center of the tin. Remember that oil-based polyurethane coats are typically thicker, and trying to force them into thinner layers will not give the much sought-after smooth finish.
The number of coats required will vary depending on the purpose and floor type. But two or three coat applications are the norm. Sanding is another step that you cannot miss out on when applying oil-based polyurethane.
B. Method To Apply Water-Based Polyurethane
The first thing you should know is that this type of varnish is much thinner, so there are more chances of dripping and spilling. The best tool for water-based polyurethane would be a foam roller, but you can also use a soft brush or cloth brush. The application method is slightly different from oil-based varnish.
Make sure you apply thin coats of this varnish because heavy layers of moisture-laden product can raise the wood grain. With oil-based coats, it is essential to sand down the first layer, but this is not required when working with water-based polyurethane. For best results, three coats of this varnish should suffice in lesser-used areas of the floor.
If the floor is in constant use, upto four layers would be required. Since the drying time is much faster, the entire project will take a shorter time as compared to oil-based polyurethane.
Sand The First Layer
After the sealant and first coat application, the hardwood floor needs a round of sanding to polish the uneven parts left by the first coat. But the sanding process can only begin after 24 hours have passed after the varnish application. The layer should be dry by this time.
Begin sanding with fine-grit sandpaper using the wet sanding technique until the surface is smooth again. To protect the varnish from chipping off, dip the sandpaper in water often while sanding. Finish by wiping the whole surface with a wet cloth and remove any dust and chipped-off pieces. The surface must be completely dry before applying the next coat of polyurethane.
Add The Remaining Coats
Generally speaking, you can apply more layers of polyurethane than recommended if you think the floor or furniture needs it. But remember to apply the next layer only when the previous one has completely dried up. Also, do not skip on sanding between two layers, especially when using oil-based varnish.
The only case where you can avoid this step is when the layers look visibly smoother and even. Lastly, the final coat needs to be polished, not sanded. This last step will give the surface the shiny polish that polyurethane coatings are known for.
Polish The Final Layer
Sanding the coatings makes them adhere to the next layer and flattens and levels them. But the final layer should be polished to give a shiny and almost slippery look to them. After the previous layer of varnishing, the surface should be left alone, untouched for at least 48 hours.
Use a good quality polishing product that is suitable for applying over polyurethane. It’s better to select a polishing product with fine-grit particles that remove the scratches caused by sandpaper. Dampen a soft cloth, apply some polishing cream over it, and rub the floor in a circular motion.
This should give a smooth and shiny look all over the surface. After the floor has dried, buff it with a dry cloth to finish the process. If the surface appears cloudy, repeat the process until it turns transparent and mirror-like.
Tips For Applying Polyurethane On A Table
While most of the instruction will remain the same as finishing hardwood floors, there are some other things to mention. First of all, try to work indoors as much as possible. Unlike floor varnishing, tables can be moved around the house, and some people like to work in the backyard.
But the problem with varnishing outdoors is that there is increased exposure to dust, smoke, and other contaminants. Even small bugs can stick to the wet varnishing and ruin the finish. That’s why working indoors in a ventilated place like a garage would be better for varnishing furniture.
The best results are achieved on a perfectly flat surface. So, if the table is uneven, you can sand it down using prickly sandpaper. The flatter the surface, the better is the leveling, and the coats glide easily without dripping.
How Long Should You Stay Off The Floors?
Freshly varnished furniture can be stored in the garage or an empty room where no one is likely to touch it. But what about floors? How long before you can actually walk on them? To understand the time required, remember that after drying, the varnish needs a long time to cure. Only then can we say that the entire process is complete.
However, you must have heard that complete curing of wood can take weeks or even a month. The question is- At what time is it safe to walk across the floor and start placing heavy furniture without spoiling the varnish? Let’s find out about both the stages - drying and curing.
Drying
Usually, it takes a minimum of 24 hours for the hardwood floor to dry. At this point, the uppermost layer has hardened, but the layers within are still processing. So, this floor cannot be used for walking and standing and definitely not for dragging furniture across the floor.
It is advisable to keep the room ventilated, so you keep the windows and door open. But if you have small children or pets who might suddenly run into this room, it is better to lock the door. In fact, no one should be allowed to walk on the hardwood floor for at least 48 hours after the varnish.
After 48 hours, you can walk on the floor wearing a pair of soft socks but refrain from moving in furniture just yet. If you walk in wearing shoes or boots or even barefoot, the pressure might leave marks that can not be removed once formed.
Curing
Curing is the process of molecules of polyurethane resin forming irreversible bonds and becoming extremely tough and resistant to change. Curing takes a much longer time than drying; until then, the bonds are not completely hard enough for everyday use.
On average, water-based polyurethane varnish takes two weeks to cure, while oil-based one takes 3 to 4 weeks to cure the same number of coats. Walking on the floor before the curing is complete is a big no-no. The best thing to do is lock the room or avoid it for the entire curing time.
As we mentioned, walking with soft socks should be tolerable for a week-old varnished floor. But walking with boots should be allowed only after the curing time is complete. The same goes for moving in cupboards, tables, and all other heavy furniture.
Working with oil-based polyurethane is a bit tricky. Not only does it take twice as long to cure, but it also dries in two stages instead of just one like the water-based one. In the first step, the light and water-soluble thinners evaporate in the air and leave a tack-free surface behind.
Over the next couple of weeks, the oils in the varnish react with the oxygen in the air and help it harden with time. After all the oil molecules have reacted, a hard protective layer is formed, which is the final stage of the curing process. Note that environmental factors play a role in the speed of curing time.
If the room is moist and humid, the varnish will take much longer to dry and cure. One easy way to know that the curing is complete is when the floor stops emitting odor. As long as you can smell the fumes, the curing process is not yet complete.
How Many Coats Of Polyurethane FAQ
1. How To Sand The Surface Between Polyurethane Coats?
Usually, fine-grit sandpaper should be good enough for sanding after each layer. Dip the sandpaper in water after each scrub so that the polyurethane doesn’t get damaged. When you are done with one layer, make sure the surface is dry before applying the next layer.
The grit of the sandpaper might need to be increased if the wood has a glossy finish. This is because it is difficult for polyurethane to adhere to glossy wooden panels. So, some extra sanding might be necessary before applying the first layer.
2. What Is The Best Temperature For Drying Polyurethane Coatings?
On average, it was found that polyurethane dries best at 77 degrees Fahrenheit. This is approximate and is not the only factor for drying. The room ventilation and humidity have an impact on drying time too. A room temperature of 77 degrees Fahrenheit and humidity of around 50 % are ideal for drying polyurethane coatings.
3. How To Remove Brush Marks From Polyurethane Coating?
Brush marks can be removed by the wet sanding method mentioned in the Stepwise guide. Use fine dry sandpaper and rub on only the parts which need to be leveled out. If the sanding is too intense, it will leave scratch marks of its own. Brush marks could result from applying thick coats, so you could opt for thinner coats to prevent them.
4. How To Remove Air Bubbles From The Coating?
Bubbles on the topmost layer can be removed with the help of mineral spirits. Dip a cloth with the chemical and rub the surface for about 20 minutes. This should get rid of the bubbles on the topmost layer. If this doesn’t work, the layer will need to be sanded and revarnished instead.
Final Words
Here we come to the end of our all-inclusive guide about polyurethane coatings. When using polyurethane, the main thing to remember is that even two coats protect the wood against water, dust, and insects. But getting a beautiful mirror-like sheen requires more than two coats, whether it be water-based or oil-based.
Finally, if you are looking to prevent wooden floor panels or furniture from spoiling due to humidity, oil-based polyurethane is your best bet. But, if you require a quick freshening up of older wood, water-based polyurethane should do the trick.
We hope this guide answers your queries related to polyurethane coatings and their application. For further questions, please ask away in the comments below.
Are you new to the DIY floor varnish club? Here you'll get information on all things related to polyurethane coatings and varnishes.
Whether you are a seasoned woodworker or just starting a home improvement journey, you are sure to stumble upon polyurethane coating solutions more than once. This is because polyurethane is a perfect finishing product for wooden surfaces.
If you have questions like, "How long does it take to dry?" read this piece till the end, and you'll have many similar queries resolved. We will talk about types of polyurethane, kinds of finishes, drying and curing time, along with valuable tips for getting the best out of polyurethane.
So, let's begin.
How Long Does Polyurethane Take To Dry?
In short, polyurethane takes 24 to 48 hours to dry and 25 to 30 days to cure completely.
Types Of Polyurethane Sealers
All polyurethane coatings or varnish are made of fine polyurethane resins, which can be dissolved in a liquid. You can think of it as a liquid plastic that can be spread on flat surfaces to protect from water, heat, dust and microbes.
There are various types of polyurethane coatings available nowadays, but we can generally classify them into two types - water-based and oil-based polyurethane. Even though both of them provide the same functions, they vary in drying and curing time.
So before discussing the drying time, let's take a look into the characteristics of the two main categories.
Water-Based Polyurethane
Water-based polyurethane is considered to be the safer option between the two since it does not contain any VOCs. Since they don't produce strong, headache-causing odors, they are much easier to work with. Generally, the solution is much thinner; thus, the coatings are paper thin too. Due to the lightweight solution, it doesn't take long to dry and cure.
Another factor that increases the drying time is the presence of water in the mix. As the water evaporates, it leaves only the polyurethane resin on the surface. However, to get an even finish, this type of sealer requires more layers as compared to oil-based polyurethane. Moreover, water-based polyurethane dries off clear and tends to fare better in the long run.
Oil-Based Polyurethane
On the opposite end of the spectrum is oil-based polyurethane. These provide comparatively thicker coatings due to their robust formula. The downside of this dense and oily formula is that it doesn't dry off easily. When it comes to safety and toxicity, they are safe to use for floorings and furniture; however, they do contain VOCs.
Volatile organic compounds in large quantities can be harmful to human health. It can cause respiratory symptoms like runny nose, itching in the throat, sneezing, and skin rashes if precaution isn't taken. These compounds and the oily solution combine to produce a strong odor which is unpleasant to be around and can even cause headaches.
Also, after a few years, you will notice the varnish change to a darker yellowish color which is not the case with water-based polyurethane. We will discuss in detail about the two types of polyurethane and their drying and curing time in the following sections. So make sure you read till the end.
Type Of Finish
Apart from the base of the polyurethane product, features like types of finishes are a contributing factor to the drying time. There are 3 different types of finishes available - high gloss, semi-gloss, and satin finish. Take a look at the 3 types because all of them have a different drying time.
High Gloss
This finish gives a sleek and shiny look to floors. It's suitable for hardwood floors and is resistant to scratches and water damage. They are often used in living rooms or even on wooden surfaces outdoors for their glossy look. Often you will find that these finishes stay longer and retain their gloss for a significant time.
Semi-Gloss
Semi-gloss polyurethane is quite versatile and durable. This is why it is often found on furniture, cabinets, doors and intricate wooden artwork. One benefit of semi-gloss is that it dries faster than high gloss polyurethane. This type of finish does provide some shine, but it doesn't match the slick look of high gloss options.
Satin
Satin finishes in polyurethane products do not provide any sheen or gloss to surfaces. In fact, they look almost like matte-finish most of the time. The little shine they have is subtle, making it look fresh, but otherwise, they have a unique appeal. These types of finishes are the fastest drying polyurethanes available.
Polyurethane Drying Time
Now the question arises, how does one know when polyurethane has dried? Take a look at this table to get a fair idea of the difference between water and oil-based polyurethane drying times.
Water-Based Polyurethane
Oil-Based Polyurethane
Time for next coat
7 hours
24 hours
Dried enough to touch
24 hours
48 hours
Add furniture
2 days
4 days
Add rugs and mats
1 week
2 weeks
Completely cured
25 days
30 days
Drying Time For Water-Based Polyurethane
Water-based polyurethane coating dries up quickly; in fact, they need merely 5 to 6 hours to dry. After 7 hours of applying the first coat, you can walk on the sealed floor without causing any damage. But remember to wear socks while walking because friction and dust from your bare feet might ruin the finish.
If you want to add the next layer or a finishing topcoat, you can do that after 7 hours of drying. After the 24-hour mark, you walk on the varnished floors with shoes as well. As far as moving furnishings into the room is concerned, keep a gap of 48 hours after the last coat to shift anything bulky in.
Pets and children should not be allowed in the room for at least 3 days. There are two reasons for this - one is for their safety, and the other is to ensure the varnish is maintained without scratches and marks.
Drying Time For Oil-Based Polyurethane
As we mentioned earlier, oil-based polyurethane takes longer to dry and cure. After application, it is recommended to keep the surface off-limits for at least a good 24 hours. If you have varnished a hardwood floor, you can attempt to step on it after 24 - 48 hours, but don't walk in with shoes or barefoot. Instead, wear a clean, dry pair of socks for inspection.
It goes without saying that you should keep children and pets away from the freshly varnished surface to prevent any interference in drying. After the 48-hour mark has crossed, the coating should be completely set, and you can take a walk on the floors with your shoes. Wait for another day to add the furniture back since dragging heavy things might damage the finish.
After two weeks or so, it is safe to bring in rugs and floor coverings. However, these are ideal recommendations that might not be necessary for all projects like wall or furniture coatings.
Note - These estimates are primarily valid for a moderate climate. If the humidity of the room is high or there is dampness and moisture accumulation, the drying time will significantly increase. Turning on an air conditioner or dehumidifier of increased ventilation may be required to speed up the process.
How Long Does Polyurethane Dry In Layers
Generally, no one applies only one coat of polyurethane. Even the thickest oil-based varnishes need two or three layers to settle in and show any kind of long term effect. Now, the first layer is the simplest, you just have to ensure the surface is sanded and bits of dust are thoroughly removed by vacuuming.
Next, apply the first layer in a thin coat and wait for it to dry. Once the coating is dry to touch without any stickiness or wetness, it is ready for the second coat. The surface does not need to be cured entirely for the next coat; surface-level drying is enough for the second and third coats.
Difference Between Drying And Curing
Now, there is a difference between drying and curing polyurethane coatings, even though these terms are often used interchangeably. While we discuss drying time, it is essential to understand the definition of drying and curing when it comes to polyurethane.
A coating is said to be dry when the external polyurethane hardens. At this stage, the varnish is no longer wet, sticky or tacky. However, the surface is not ready for use yet because the coating is prone to wrinkling, imprinting, and forming scars even at this stage. If too much pressure is applied, the smooth finish can be ruined easily.
And for curing, we call a surface wholly cured when the polyurethane resins have completely hardened (not just the surface). This happens when varnish has been exposed to oxygen, creating a chemical reaction that causes the hardening of the resins in the coating.
This is the final stage of any application process, and the floor is ready to use after curing. Often, it can take up to a month to completely cure a floor.
Curing Time
Now that we understand what curing is, you might be wondering how long it will take to cure floors and walls.
As we discussed earlier, we know the time required to dry and cure. However, there are certain aspects that we cannot ignore when it comes to a complicated process like drying polyurethane. Take a look at some of the factors that influence curing time.
Factors Affecting Curing Time
Type Of Polyurethane
Since water-based polyurethane solutions tend to be thinner as compared to oil-based ones, they are sure to dry much sooner. If the project needs to be completed within a time limit, water-based ones are your best bet as you can get many layers in little time.
Humidity
A room humidity percent of 50 - 70 is good enough for drying and curing usually. If the moisture happens to be too high, the varnish may not dry easily and will end up damaging the result. If your room suffers from high humidity levels, there are a few actions you can take to counter the effects.
Firstly, you can opt for oil-based polyurethane since water-based ones are more prone to damage by moisture. Secondly, you can install a dehumidifier in the room to help the coating dry quickly.
Temperature
External temperature is one of the most critical factors which can change the drying and curing time. Ideally, a room temperature of 70 degrees Fahrenheit is perfect for optimal curing. If the temperature drops too low or near the freezing point, the polyurethane coating will take far too long to dry.
Also, if drying at a cold temperature, you will notice a thin whitish layer will develop on the surface, which needs to be avoided. And if the room temperature is too high, it shouldn't have a problem curing, but the smooth finish might be compromised due to extra heat.
Number Of Layers
Before starting the application, you'll need to calculate how many layers are required for your flooring. Of course, if you opt for a water-based polyurethane, the number of layers needed will go up. Besides this, the thickness of coats will heavily influence the drying time.
If you use a brush to apply the varnish, the layers tend to be thicker than foam rollers. So, if you want to keep the layers thin, opt for rollers or sprays, which will save a lot of drying time.
Wood Type
This factor might be overlooked often because not many people are aware of the type of flooring. Essentially, if you have hardwood floors, then there can be a variation in drying and curing time depending on the type of wood.
Certain wood types like cedar and rosewood have chemicals that do not allow the complete chemical reaction required for layering. Any kind of interference in the chemical process will increase the time necessary to dry.
Cleanliness
The starting surface needs to be spotless. The first step is to sand the floor to remove unwanted bumps, to create an even canvas for applying varnish. An adequately sanded wooden surface can absorb the polyurethane solution quickly and thus allows for quick drying and curing.
Tips For Drying Polyurethane Coatings Faster
There might be occasions when you are running short on time or don't have the patience to wait for weeks for the coatings to dry. In such circumstances, there are a few methods that can help to increase the rate of drying. Let's see what these tips and tricks are -
Add A Thinner
A simple solution for thick polyurethane coating is to thin it down using solvents. You can add naphtha to the polyurethane solution because it helps the coating to dry faster. Naphtha has a higher evaporation rate than spirit or turpentine, making it an excellent choice for thinning varnishes.
Once you add the thinner, mix it well and pour it from a height to understand the consistency. It should be fluid and run efficiently. This lighter solution will not hold well on brushes, so a foam or sponge roller will be required to spread it across the surface. Try this method and see for yourself how much quicker the coating tends to dry.
Apply Heat
Polyurethane does not handle cold temperatures very well. It's not like the coating will get damaged by low temperature, but the drying time will become prolonged. This is especially true in frigid climates without a heating system or coating the floor during the winter season.
To overcome this issue, people use artificial heat to warm up the room to assist in drying the polyurethane quickly. While some people use powerful hairdryers, others use portable heating devices or heating lamps.
Do note that these methods are effective for drying the varnish speedily but not for curing it. The speed at which the floors cure cannot be increased even with artificial heat assistance.
Decrease Humidity
Similar to low temperatures, humidity also increases the hours required for drying. One of the many solutions to this issue is to use a dehumidifier in the room. After the coating for the entire floor is complete, you can bring in a dehumidifier and suspend it from the ceiling. It could even be attached to the walls to work overnight and remove the excess moisture from the air.
Even an air conditioner can do the same job. Set it at low humidity adjustment at room temperature, and it works just as well. If you know the humidity in the home is always on the higher side, you might want to consider the oil-based options. This is because they do not get affected by moisture in the environment the way water-based ones do.
Apply Thinner Layers
Applying thin layers will definitely save you a few extra hours of waiting for the floors to dry. It would help if you used a larger roller that can be dipped in the pan holding the varnish. This kind of tool will ensure you cover a large area at once. Apart from that, you can also remove the excess coating by running a dry roller over the floor.
Prepare The Surface
Even before you open the polyurethane can, the floor should be sanded and vacuumed. You can use any kind of sandpaper to flatten the uneven pieces of wood which might be sticking out. Then grab a vacuum and remove all the dust and debris. Once this is done, your surface is ready for the first coat of polyurethane.
Taking these efforts are essential because smooth and clean wooden panels allow the polyurethane to adhere readily. And this step will noticeably reduce the drying time.
Conclusion
The drying of polyurethane was one topic we really wanted to address because so many people seem to be confused about how to use them. Many people new to DIY home improvements also had requested for drying times of different types of polyurethane.
We hope we were able to resolve all your questions related to drying and curing polyurethane. If you have any further queries or would like to give a few suggestions of your own, the comment section is always open.
That being said, coating and varnishing your own home should not be a daunting task. Just skim through this article whenever you get stuck with applying polyurethane to the floors, and you'll get all needed for the next project.
Mowing the lawn seems like a straightforward task, right? But did you know that there is a right and a wrong time to do it?
Whether you consider yourself a lawn expert or not, growing grass isn’t entirely child’s play. If you have recently planted seeds or installed a new turf, you might be worried about the slow growth rate. But, if properly cared for, grass can begin to grow very quickly.
In fact, it can be tempting to bring out the lawn mower and start trimming immediately. However, this could do more damage than good.
It is essential to wait for some time before you begin trimming, as it can damage seedlings. So, if you’re wondering how long you should wait before mowing your new lawn, don’t fret! We have curated a detailed guide to help you understand this and more.
So, without further ado, let’s get straight to the deets!
How Long Should You Wait Before Mowing Grass?
Well, there is no universal correct answer to this. Depending on the kind of seed you use, it might take anywhere between 5 to 30 days before any grass starts growing. Of course, you should not bring out your lawn mower right away!
To encourage healthy grass growth, you need to water, feed, and provide adequate sunlight. However, allowing the grass to grow until a certain point is also beneficial to its health.
How Long Should You Wait Before Mowing Seeded Grass?
Let’s say that you decided to grow the grass on your lawn from scratch. Once you buy the right kind of seeds and plant them, it could be a long wait before you begin to see any growth. In fact, seeded grass can take the longest time to grow.
If planted during the active growing season, you should be able to see some growth within eight weeks. By this time, the grass blades should be around 3 to 3.5 inches tall. However, don’t get started with the mower just yet.
The first time you mow grass on the new lawn, make sure to tread carefully through the turf. Applying excess pressure or pulling on the blades violently can cause the seedlings to be forced out of the soil. This harms the grass as well as the soil, and it can be challenging to replant in the same area.
So, how do you mow the new lawn properly? Well, it helps to maneuver the lawn mower gently at first, without applying too much pressure or going too fast. Move the mower in one direction slowly, and then the opposite direction (to get smooth, even trimming).
It will also ensure that the roots of the grass remain protected and don’t suffer damage.
How Long Should You Wait Before Mowing Sod & Sprig Installations?
In contrast to seeded grass, sod takes a relatively shorter period to grow. Once the germination process begins, you can mow your lawn after about two weeks. That being said, heavy mowing can damage the grass, and we recommend that you wait for a few weeks.
Ideally, waiting for a month before mowing your new turf will ensure that the grass grows well, is healthy, and doesn’t go through unnecessary trauma.
When it comes to sprig installations, we recommend waiting for three to six weeks. Carefully observe the growth of grass - typically, sprig installations require more space to spread out and grow horizontally.
Even so, it is possible that the turf is still not wholly established. So, how can you know for sure?
Well, an easy way to check is to tug lightly at the corner edge of the installation. If the grass remains tightly bound to the soil, you can proceed with mowing. However, if you notice the blades coming off too easily or they seem loose in the soil, it is best to wait a few more weeks before mowing.
Why Do You Need To Wait Before Mowing?
You might be wondering why we recommend waiting for a few weeks before mowing the lawn. After all, no one likes a shabby looking garden, right?
We understand! However, if you mow too quickly, the grass does not get enough time to grow properly. Once the grass reaches about 2 inches in height, it automatically provides a shade or a sun and dirt barrier to the lower portion of the grass and soil.
Moreover, the taller grass blades protect the topsoil from losing excessive moisture. To keep the moisture locked into the topsoil and protect germinating seeds, it is imperative to allow grass to grow a few inches.
Another issue that can occur by over-mowing the lawn - drought stress. When grass is trimmed excessively, it can lead to shallow root systems. This, in turn, causes drought stress. With the top blades of the grass perpetually missing, the process of photosynthesis is compromised.
This leads to grass being in a perpetual state of distress and encourages pest infestations and pathogens. Ideally, you should allow your turf to grow (and stay) at least 2 inches in height.
The Proper Way To Mow Grass
Did you know there is a proper way to mow grass? Well, it turns out there is, and doing it may help you have a lush, healthy lawn.
Ideally, you should allow the grass to grow at least 3 inches tall, but not more than 4 inches. Before mowing, it will enable the grass blades to dry completely, as it will provide a healthy environment and ensure a neat, clean cut.
Stop irrigation for at least 48 hours - this is adequate time for the grass blades to dry. Furthermore, it enables you to trim the blades without causing them to tangle or get torn.
If you feel that the height of the grass is still too long, you can trim it in the opposite direction the next morning. It is best to allow the grass to rest for a day, as over-mowing can cause distress.
Ideally, you should remove only one-third of the length at a time. This leaves enough room for the grass blades to photosynthesize.
Pro Tip - Leave the grass clippings behind (instead of raking them up and disposing of them). These clippings will leave behind nutrients that are important for the soil and roots. Moreover, they help the soil retain moisture without adding excessive water to it.
In case you notice seeding weeds, it is advisable to bag up the clippings and dispose of them. You should also dispose of the trimmings if they are too long, as it will cause a mess rather than provide adequate nutrition).
The Right Way To Water Grass For Best Growth
If there is a proper way to mow a lawn, there must be an appropriate way to water it, too, right? Well, there is! The correct watering technique is one of the most critical factors that ensure proper, healthy grass growth.
When you plant seeds or seedlings, it is important to keep them moist, but not entirely wet. This moisture is what allows the seeds to develop and germinate into healthy grass blades. The topsoil (or the top 1-inch) of soil should be kept moist at all times.
We recommend watering your new lawn twice a day until you mow it. Seed hulls require an adequate amount of water to germinate into healthy plants. This new growth is unable to survive under certain conditions, like dry roots. Ensure that you keep a strict watering schedule to prevent roots from drying.
Once the seedlings have grown into taller grass and their roots have developed, you can reduce the frequency of watering. That being said, keeping a consistent watering schedule will ensure that your turf is perpetually lush, green, and healthy.
Final Words
Even those who consider themselves gardening lovers often forget that there is a right and wrong time to mow grass.
We hope this guide helped you understand more about healthy grass growth and when you should trim it. Be sure to familiarize yourself with the type of seeds you plant and the right conditions required to thrive.
With that, we have come to the end of our guide. Like any other plant, your turf requires a little attention, care, and maintenance to thrive and stay lush.
A wireless doorbell system consists of a transmitter and receiver. When someone presses the transmitter button on your door, it sends a signal to the indoor receiver, which then triggers the doorbell to ring.
Are you still using a traditional wired doorbell for your front door? Well, it’s about time you upgraded to wireless doorbells.
Let’s state the obvious - won’t need to worry about wires. Besides, when compared to a regular doorbell, a wireless doorbell offers convenience - both in features and usage.
However, you might be wondering - if it doesn’t have any wires, then how does it work? That is just what we have addressed in this guide. So, if you want to satisfy your curiosity, then keep reading!
What Is A Wireless Doorbell?
If you are not very well-versed in wireless doorbells, then allow us to give you a brief idea about what they are in this section. The information here will help you to understand the discussions presented in the later sections better.
In the old days, people used to knock on the doors to announce their arrival. Eventually, doorbells were developed, which provided a more efficient method for doing the same. And today, we have wireless doorbells that have the same principle as a wired doorbell, albeit without any wires.
Essentially, it is an alarm system for your front door that can be used without connecting to your household wiring system. These doorbells are usually battery-powered, which means they need to be charged from time to time.
Wireless doorbells also come with additional features to improve your home security. And they are much more versatile than conventional doorbell systems due to their wireless design.
How Do Wireless Doorbells Work?
Compared to a traditional wired doorbell, the mode of operation for a wireless doorbell is entirely different. A regular doorbell uses a series of wires to connect the switch with an electromagnet, which is its core component. When you press the switch, the circuit with the electromagnet is completed, which produces the sound that alerts you.
In contrast, a standard wireless doorbell contains no electromagnets since there are no wires to speak of. Instead, these doorbells use radio signals to generate audio or visual alerts when the button is pressed.
That is why the primary components of a wireless doorbell are a transmitter and a receiver. The transmitter is attached to the button, which you place outside your front door. Likewise, the receiver is placed on the electronic chime box inside the house.
When the doorbell transmitter button is pressed, it sends out a radio signal. The chime box receiver picks up this signal and subsequently triggers an audible alert that you can hear.
Another thing to note is that the transmitter and receiver use variable frequencies, which prevents interference with other similar devices nearby. In a way, you can say that their method of operation is more similar to radios than regular doorbells.
As for the power supply, there is no need for any electrical wiring with these devices. They are powered by batteries, which makes them highly convenient to use. That said, you do need to recharge the batteries through an electrical outlet once they run out. Thankfully, most wireless doorbell models can be easily recharged, thereby reducing downtime and increasing convenience.
Benefits Of Wireless Doorbells
Due to their wire-free interface, they have numerous advantages over wired doorbells. We have discussed these benefits below, read on.
1. Easy To Install
One of the many complaints about regular doorbells that we have heard over the years is that they are quite complex to install. And that is true because connecting a device to the main electrical system of your house always comes with risks, especially if you are not as experienced. Not connecting electrical wiring properly to the doorbell prevents it from functioning, and it increases the chances of electrical hazards.
This is where wireless doorbells come in handy since you do not need to worry about potential safety risks. Owing to their wire-free design, you can install them without breaking a sweat. Simply install the doorbell button on a wall outside the front door, and then do the same for the receiver indoors.
In addition to that, you can place the doorbell anywhere you want, which makes it even more convenient to set up. This is unlike wired doorbells, which need to be placed along existing power lines, thereby reducing their overall flexibility.
2. Highly Versatile
A typical wireless doorbell is much more versatile than a traditional doorbell. The transmitter and receivers have a fairly long range, which means that you can install them anywhere in the house. On the contrary, a wired doorbell has to be installed as per the length of the wire.
What’s more, you can install multiple receivers on a wireless doorbell. For instance, if you have a large house, you can install two or more receivers across different rooms. That way, you can hear the bell no matter where you are.
You can also choose the alert type of a wireless doorbell, which can help if you have hearing problems. For example, if you are hard of hearing in one or both ears, you can use a bright light alert instead of a buzz or a chime on the receiver. Wired doorbells are not very user-friendly in this regard since they mostly come with audible chimes.
3. Customizable
Another aspect that users may find appealing about wireless doorbells is their customizability. You can conveniently adjust the volume of the chime bars according to your preferences. It also enables you to change the alert sound entirely. There are different chimes pre-loaded on the chime bar, which means that you can pick whichever you like the most.
You can do the same with the visual alerts as well. Its brightness, color, and pattern can be modified according to your liking, which gives your doorbell a personal touch. Such customizations cannot be done on regular wired doorbells, which is why many users might find them boring.
4. Come With Smart Features
Most wireless doorbells these days come with a host of smart features that improve overall user-friendliness. These features are unavailable on most traditional doorbells since their wired design can be a major hindrance to implementing digital systems.
That said, one such smart feature used in wireless doorbells is Wi-Fi connectivity. It can help sync the doorbell unit with smart home systems. Apart from that, it allows you to use the doorbell with mobile apps for greater security and convenience.
Another feature used in a smart doorbell is video and audio recording capabilities. Most wireless variants come with built-in cameras and microphones, which allow you to see and communicate with the visitor at your door.
5. Provide Improved Security
Compared to traditional doorbells, wireless variants are much more secure and safe. This is due to the different smart features that come with these doorbells.
With the audio and video recording features, you can see everyone who comes up to your door. The doorbell cameras come with wide viewing angles and motion detection. Thus, if anyone decides to snoop around your home, you can also see them on your phone, laptop, or PC. Moreover, these video doorbells allow you to record and store the video footage for you to check out later.
Likewise, the microphones come with a sound and tone sensor, which alerts you when anyone gets near the door. Besides, they can be seamlessly connected to your home security system, which keeps your household safe from unwanted people.
Warning
The smart security features mentioned here consume considerable amounts of battery power, which can reduce the lifespan of your doorbell. So, make sure to use them judiciously to avoid any issues.
Drawbacks Of Wireless Doorbells
While a wireless doorbell works as a better alert system than a traditional doorbell, it comes with its fair share of limitations, as discussed below.
1. Expensive
The biggest drawback of wireless doorbells is that they are considerably expensive. This shouldn’t come as a surprise, considering the features and convenience they provide to the user.
However, the higher price tag might act as a deterrent for consumers, especially if they have a limited budget. Even the most basic wireless doorbell model is considerably pricier than a wired doorbell, due to which many might prefer to buy the latter.
2. Difficult To Troubleshoot
While most wireless doorbells are designed to be durable, they are, after all, machines. And like any other machine, they can encounter issues from time to time. Troubleshooting these issues might be challenging for most users, considering how sophisticated they are than their wired counterparts.
You might often encounter issues such as constant ringing or no ringing at all. These problems can occur in both wired and wireless doorbells. But if your wireless doorbell keeps ringing, you’ll have to go through a lot more trouble to fix it than a wired doorbell.
More About The Working Of A Wireless Doorbell System
The best wireless doorbell for your home should come with the following functionalities:
A. Operating Range And Efficiency
Since these doorbells use radio waves instead of wires, the operating range becomes a crucial factor to consider. A wireless doorbell features a large operating range to allow the transmitter and receiver to communicate with each other over a longer distance.
The operating efficiency needs to be taken into account as well. If your doorbell transmitter is strong enough, it can transmit signals through thick walls without degradation. Conversely, a sensitive receiver can pick up the faintest signals with greater efficiency to give you a clear alert.
B. Battery Life
For a wireless, battery-operated doorbell to work efficiently, battery life obviously plays a crucial role. Most wireless doorbell systems come with a high enough battery capacity of approximately six to twelve months so that they can be used for a long time between charges.
Similarly, the charging process is quick enough so that you can reduce downtime. There are options that can be used even when charging, which in turn, eliminates the downtime entirely.
C. Durable Build
Wireless doorbells (especially the outdoor transmitter button) are built to withstand the weather elements like dust, rain, snow, or heat. So, your doorbell will function at all times, regardless of the environmental circumstances.
How Do Wireless Doorbell Systems Work Final Words
A wireless doorbell is one of those appliances that might seem relatively insignificant but can make a notable difference in your home’s security. With the number of features and conveniences it comes with, it’s a worthy upgrade of a traditional doorbell.
Now that you know how wireless doorbell systems work, you can operate them a bit more easily. And we hope that the information provided here has been able to clear away most doubts about this device.
It’s now time for us to wrap up. If you found this guide insightful, then you may also check out our guide on how to use pool test kits.
Adios!
Very few things can be as depressing as seeing dirt on your carpeted floors.
Such a sight will surely make you think about the best possible way to clean up the mess. Hiring carpet cleaners is often quite expensive, so like most other people, you will look up DIY methods. But, those hacks can actually be quite damaging to your floorings.
Instead, a better choice is to get a specialized carpet cleaner to keep the carpets mess-free. Hoover is one such well-known brand that has been producing great vacuum cleaners meant for cleaning carpets.
The Hoover Power Scrub Deluxe and the Hoover Turbo Scrub are the best upright carpet cleaners currently available on the market. As the appliances may seem very similar, we came up with this informative guide to steer you towards making the right choice.
So, without further ado, let's begin!
Hoover Power Scrub Deluxe Vs Hoover Turbo Scrub
Before we move on to compare the two carpet cleaners, let's check out both appliances individually. Hoover has been producing great vacuum cleaners for many years, and these models have to be the best performing appliances from the brand.
And a great thing about these products is the similarity, which lets you get away with purchasing the lower-priced model, as both are equally powerful. So, let's take a peek at what makes these carpet cleaning devices excellent.
THE COMPLETE CLEAN COMBO: The Hoover PowerScrub Deluxe...
VERSATILE TOOLS: Deep cleaning goes beyond just the floor....
When you have a look at the current product catalog of Hoover, you'll surely find the Hoover Power Scrub Deluxe at the top of the list. It has been specially designed for cleaning carpets, and the 360° SpinScrub brush helps in getting rid of all the dirt present in the fabric.
Moreover, for faster cleaning, Hoover has equipped this appliance with a DualV nozzle which makes sure to suck up all the dirt uniformly from a surface. So, it will get rid of the common problem of uneven cleaning in carpets.
As this vacuum also comes along with a water tank, you won't have any problem deep cleaning the carpets all by yourself. While vacuuming, the device also produces hot air to quickly dry a surface, so the floor can be used instantly after cleaning.
One of the best features of the Hoover Power Scrub Deluxe model has to be the 20 ft. cord that doesn't get in your way. This vacuum includes many necessary accessories, including the stair tool and the upholstery tool.
It also comes with the ability to mix the detergent automatically with water, so you wouldn't need to worry about getting the proportions wrong. You can fill up to 16 oz. of detergent at a time, which is enough for cleaning multiple rooms.
The Hoover Turbo Scrub is one of the top-performing models of the brand. It looks similar to the other upright vacuum cleaners from Hoover and has a lightweight design, making it great for everyday use.
This vacuum also comes with the SpinScrub brush that lets you clean carpeted or hardwood floors from all angles. Additionally, there's a water level indicator in the tinted tank of this model which enables you to keep an eye on it while cleaning. And, it even has the quick-drying technology to suck out all the moisture as soon as you're done cleaning.
We really like the strategically placed handles on this vacuum that makes carrying it up the stairs easier. And, because the handle is D-shaped, it's comfortable to maintain a grip while cleaning or during transportation.
Along with a sample of cleaning solution, the Hoover Turbo Scrub carpet cleaner comes with an upholstery tool to clean other fabric surfaces like your bed or couch. And, the eight-foot accessory hose lets you extend the vacuum for cleaning hard-to-reach crevices and corners.
Of Hoover Power Scrub Deluxe Vs Hoover Turbo Scrub
1. Cleaning And Drying
As we are looking at vacuum cleaners, it's important to note the cleaning efficiency of the products. And, it's great to see that both these Hoover carpet cleaners prove to be excellent at their job.
If this is your first vacuum cleaner, you can choose any one of them as there aren't many differences. Both products come with 360° SpinScrub brushes that let you clean the carpet from all angles. The brush rotates to pick up dust particles present in the pile of carpets or area rugs.
You can use water and detergent with these vacuum cleaners, so keeping your carpeted floors clean throughout the year won't be a problem. Moreover, cleaning on the heated mode gives professional quality results, especially while removing stains.
When it comes to cleaning, the Hoover Power Scrub Deluxe is one step ahead of the other model because of its DualV nozzle. The nozzle, along with the rotating brush, makes cleaning quick and easy by sucking up all the dust particles. So, the Hoover Power Scrub Deluxe is great for those who don't want to spend much time cleaning chores.
However, if you have pets, the Hoover Power Scrub Deluxe upright carpet cleaner would be a good choice as it's great at removing pet hair from carpets due to the special nozzle.
Besides, both these Hoover vacuums have the ability to blow hot air while you are cleaning the carpet. So, there's no need to wait for the carpet to dry, and you can use it again immediately. Along with added convenience, the quick-drying features helps to extend the longevity of your carpets.
2. Accessories
One of the mistakes that people often make is to not pay attention to the accessories or attachments that come with a vacuum cleaner. Rather than being freebies, attachments like the accessory hose and the crevice tool make cleaning easier.
If you're someone who is looking for an all-in-one vacuum cleaner that you can use on multiple fabric surfaces, then it's better to go for the Hoover Power Scrub Deluxe carpet cleaner. It comes along with a lot of accessories, including an eight-foot hose, a crevice tool, an upholstery tool, a stair tool, a mesh tool storage bag, and even a sample of cleaning solution from Hoover.
On the other hand, the Hoover Turbo Scrub carpet cleaner comes with the same eight-foot hose, an upholstery tool, a tool storage bag, and the cleaning solution. So, even though there aren’t many differences, the extra attachments provided with the Hoover Power Scrub Deluxe come in handy while cleaning the whole house.
3. Tank System
The dual tank system present in both Hoover carpet cleaners is quite impressive because there are dedicated tanks for dirty and clean water. Hence, there isn't a possibility of the dirt getting mixed up with the clean water.
Moreover, both vacuums come with detachable tanks, so filling and discarding the dirty water is straightforward. And, unlike earlier models of vacuum cleaners, there's no need to spend on dust collecting bags. The tank also has a water capacity of one gallon, so you can clean a large area without the need for stopping to discard the waste.
Even though the tank systems are pretty similar in both models, the Hoover Power Scrub Deluxe carpet cleaner has a transparent tank, so it's easier to look at the water level. But, even the tinted tank of the Hoover Turbo Scrub carpet cleaner features a water level indicator, so it won't be a problem to detect when the tank is empty.
4. User Friendliness
One of the things we like about Hoover is that the brand believes in making the products user-friendly. Both of these carpet cleaners have a simple design making them useful for beginners. Hoover even provides extensive instructions with each upright carpet cleaner.
We also like the 20 ft. cord present in the carpet cleaners as it lets you move between rooms without repeating the cycle of plugging and unplugging the appliance. With a weight of just 18 lbs., both items are easy to pick up without breaking into a sweat.
Hoover Power Scrub Deluxe Vs Hoover Turbo Scrub Final Words
You might have guessed by now that there's no clear winner, as both these Hoover carpet cleaners have their unique advantages when it comes to cleaning carpets. And, both appliances are equally adept at letting you clean carpets and bare floors to get professional-looking results.
Having said that, we would recommend the Hoover Power Scrub Deluxe carpet cleaner to those who want to get done with their chores quickly. We especially like how easy it is to clean floors with this appliance.
On the other hand, the Hoover Turbo Scrub is equally efficient at cleaning and comes at an affordable price point. However, as it's an older model, you will need to find sellers who still have it in stock.
Do let us know if you have any further queries about these multi-surface floor cleaner models. Till then, goodbye, and take care!
With all that noise around the Honeywell True HEPA HPA300 Air Purifier, we just couldn’t keep our hands off it!
Widely regarded as a good player in the HEPA filtration technology category, we wanted to test the features that have contributed to its popularity. Plus, an affordable air purifier should never be off the charts!
Although it isn't entirely free from flaws, we found the benefits to be way more intriguing. So, after using it for a significant period of time, here we are with our in-depth review to help you out.
EXTRA LARGE ROOM AIR PURIFIER - Honeywell HPA300 HEPA Air...
HELPS REDUCE ALLERGENS - This HEPA air purifier has 3 air...
Why Buy This Product?
Before taking you through the details, allow us to introduce you to the brand. As most of our readers may already know, Honeywell is a world-renowned manufacturer of home-based appliances like fans, ACs, coolers, and air purifiers. Likewise, the HEPA HPA300 Air Purifier upholds that reputation with its sleek design, robust filtration system, and seamless touch controls.
On that note, let’s dive into the positives one by one…
Design
Starting with the design aspect, the Honeywell HEPA HPA300 is a classic black ribbed purifier, which looks like, well, a majority of the brand’s purifiers. Weighing around 17 pounds and measuring 10.8 x 20.8 x 22.4 inches, it’s one of the most lightweight units from the brand. In tandem with the sleek structure and integrated grips, users can safely tick portability from their must-have list!
Talking about the material, it has an ABS plastic body for efficient heat and impact resistance. The other advantages include shock absorption and scratch resistance without costing a fortune. So, that’s a bonus!
Aside from the strength, what also impressed us was the lack of gaps in the overall design of the body. As you may be aware, such openings tend to allow the unfiltered air to escape into the room, thereby contaminating the area even further. The front and rear pretty much have an identical appearance with a front air intake, behind which lies the filtration system.
Likewise, the outlet is located near the touch controls at the top of the unit. On that note, the control panel comprises functions like power on/off, check filter indicator, check pre-filter, turbo power cleaning, lights dimmer, and auto-off. The controls are clearly labeled for optimum user-convenience, and you need to use the related control only once to activate the function.
Filtration System
Now, coming to the most important aspect of it all, the unit is actually named after its powerful HEPA (High Efficiency Particulate Air) Filter. In addition, it has the Honeywell A and A+ pre-filters, responsible for the first stage of filtration.
These filters are integrated with activated-carbon particles to capture large particles more than 0.3 microns in size, like fibers, dust, pet dander, lint, and hair. Aside from that, they play a crucial role in eliminating gases, odors, and VOCs (Volatile Organic Compounds).
One important thing to know here is that the filters have a lifespan of approximately three months. The check filter indicator will keep you notified about the replacement time, and we’d recommend getting genuine, certified Honeywell filters to ensure high performance.
The second stage of filtration is dominated by the R-certified true HEPA filters for efficiently removing up to 99.7% of microscopic allergens, measuring as small as 0.3 microns. As a result, you can get rid of several contaminants, including dust mite debris, fine dust, pollen, bacteria, mold spores, viruses, etc.
We are decently happy with how these filters reduce airborne germs with utmost efficiency. Besides, the true HEPA filtration has zero ozone emission (certified by the California Air Resources Board), making it completely safe for use for prolonged periods. This is largely due to the absence of an ionizer that can often produce small amounts of ozone, which may irritate the lungs.
In fact, this two-stage, powerful filtration system equips the unit with a CADR (Clean Air Delivery Rate) of 300 for smoke, 320 for dust, and 300 for pollen. In terms of coverage, it can clean up to 465 square feet five times per hour, meaning the air will get filtered every 12 minutes. We’d advise replacing the HEPA filters every 12 months for best results.
Turbo Cleaning Function
An out-and-out highlight of the HPA300 Air Purifier is the turbo cleaning function that integrates four cleaning levels: general, allergen, germ, and turbo. After you have switched on the unit, tap the power symbol again to switch between the cleaning modes.
For starters, you have the allergen mode that optimizes the unit to filter allergen particles such as dust, pollen, mold spores, dust mite debris, and others. This feature will be especially beneficial during the peak allergy seasons of spring and summer.
Then you have the general cleaning mode that’s suitable for everyday air purification. Many users prefer using it while they are away for a vacation to remove large particles and microscopic allergens from the air indoors. Similarly, the germ cleaning mode enhances the germ capturing ability of the purifier.
Lastly, there’s the powerful turbo cleaning mode that speeds up the entire contaminant removal process from the air. Upon selecting this mode, the fan begins operating at its highest speed to suck in maximum air from the front intake system, which then passes to the filters.
We liked how the design has integrated the reference guide into the body of the purifier. It contains a list of instructions that will help users, especially first-timers, to get the hang of things better. You can find it in the small tab near the touch control panel.
Noise Level
Considering its speed and high CADR count, we aren’t mad about the 63 dB noise level that it produces operating at the highest fan speed. To give you an idea, normal human conversation produces around 60 dB noise. Sure, it may be slightly difficult to hear other people in turbo mode, but it’s nothing that will hammer your ears.
Since you’re likely to operate it in the low to medium fan speed (producing 40 to 60 dB sound) for the majority of the time, rest assured about minimal sound interference.
Power Consumption
The HEPA HPA300 has an Energy Star Certification, meaning it saves on your utility bill. Considering that it doesn’t have the lowest power consumption, we don’t mind saving some bucks!
Additional Features
Among the noteworthy additional features are the auto-timer mode and auto-dimmer mode. While the former allows you to automatically operate the unit for durations of 2, 4, or 8 hours, the latter keeps the light level to a minimum for nighttime use. Apart from that, it has three fan modes, namely, allergen, general clean, and germ.
And as we’ve already mentioned, the electronic check filter indicators will inform you in advance about pending filter replacements so that you can keep track of the dates.
Finally, it comes with a 5-year long warranty against all defects, which is one of the longest for models in its price range.
Customer Reviews
This unit has been showered with rave reviews by both existing and new customers. While most of them have praised it for its simple yet effective operation, others have talked highly about the user-friendly control panel design. The ability to turn the blue light off for use in the dark has been the cherry on the cake!
What Could’ve Been Better?
Despite scoring highly on most fronts, there are a number of things that we feel potential customers should be wary about.
One of the first things that can be a constraint is the high energy consumption. Depending on the fan speed and duration of use, it can consume electricity anywhere between 40 and 130 watts, resulting in elevated power bills.
Secondly, some users have lamented the absence of automatic mode change. But if you ask us, we aren’t really mad about it, considering that the HEPA HPA300 has a reasonable price tag. However, one area where we’d like to see the brand make improvements is the customer service, or rather the lack of it. It doesn’t offer a free shipping policy like some other competitor brands.
Not only that, but you are also required to notify them of any damages within one business day in case of shipping through third-party services. Otherwise, they won’t take any responsibility for it. In case of returns and exchanges, customers have to pay for the shipping charge, and should also pay a 10 to 30% restocking fee if the company finds no manufacturing or shipping defects.
Pros
Sleek design and easy touch controls
High CDRA rating
Dual filtration with activated carbon and advanced HEPA technology
Certified for no ozone emission
Four cleaning levels and three fan speeds
Cons
Slightly high power consumption
Customer service is not very customer-friendly
Honeywell True HEPA HPA300 Buyer’s Guide
To speak the truth, choosing the correct air purifier requires something more than merely checking out product reviews. Unless you know about your requirements to the tee, it’s highly likely that your preferred unit won’t serve the purpose, no matter the price tag or range of advanced features.
As such, we have listed some crucial points to keep in mind before making that all-important purchase decision. So, hang in tight!
Room Size
No surprises here that perhaps the most important thing to consider before you can shortest models is measuring the room size. In other words, it’s about filtering out (no pun intended) how much space you want to be purified. While desktop units won’t certainly be sufficient for large spaces, a large unit may be a bit too much for your baby’s nursery or the kid’s room.
A good way to figure out the ideal match for your desired space is to check the unit’s air changes per hour count, which is nothing but a measure of the filtering air per hour.
For example, a small purifier that turns over the air for a 250 square feet area eight times per hour will do so only four times in a 500 square feet room. Hence, you’d want something with more filtering capacity for the latter.
And if you still can’t decide the area to clean, we’d suggest going for a slightly larger capacity than what you think should be needed to make room for extra space.
Types Of Pollutants Filtered Out
The market is full of specialized air purifiers! So, that’s something you might want to consider before buying one. While some units are adept at filtering out smoke and dust, others are designed to catch pet hair, allergens, and germs. If you are looking to subside allergies, then we’d highly recommend opting for an air purifier that does so.
Similarly, asthma patients should look out for units that remove odor, chemicals, and dust. That’s why air purifiers are mostly rated on how well they filter out contaminants. And in case of no specific requirements per se, we’d advise opting for a general air-quality improvement purifier.
CADR Rating
With regards to efficiency, air purifiers have a CADR number to help customers understand the filtering ability even better. And there’s no rocket science here; the larger the number, the more contaminants it can filter out. So, if your preferred purifier has a 300 CADR for pollen, it means the unit can reduce pollen concentration while adding the equivalent purified air.
This rating should especially be considered for general air purifiers, with a count of at least 200 for all the categories. However, since the numbers are for best-case scenarios and recorded in controlled conditions, the efficiency may be affected in different environments. Therefore, it won’t be a bad idea to opt for higher numbers as long as your budget permits.
Types Of Air Filters
A lot of air purifiers use mechanical filtration, meaning the air, along with its contaminants, is physically trapped as it passes by the filters. As such, most air purifiers use a dual filtration process, where the first stage catches large particles and the second layer removes the smaller variants.
Pre-filters are mostly washable, vacuumable, or disposable. They are usually made of foam or non-woven polyester and may have activated-carbon elements for absorbing gases, odors, and chemicals.
But what really matters is the main filter that forms the second layer. We are heavily inclined towards true HEPA filters that can clean allergens, pollen, animal skin, mold spores, dust, and a lot more. With an efficiency rate of over 90%, these are a popular choice for air purifiers across brands.
Irrespective of the type, it’s always advisable to keep an eye on the replacement time and use only certified, branded filters as replacements.
Power Consumption
The power consumption of an air purifier will largely depend on the filtering capacity. Simply put, the more filtering it does, the more will be the power consumption. That said, units with Energy Star certifications can take some load off the power bills.
Noise Level
For anything that runs on a continuous basis, sound level becomes a vital consideration. Hence, most air purifiers come with low noise operation to minimize user-inconvenience. That said, the sound level can change from one mode to another, so make sure it isn't too loud at the highest setting.
Its dual-filtration mechanism with HEPA technology and different cleaning modes make it an all-rounder. On top of that, the touch control panel aids user-friendliness. It doesn’t produce too much noise either, making it a fit for almost any room or office space.
Although it could have employed more automatic features and low energy consumption operation, we are pretty satisfied with how it performs for the price. So, go ahead and give it a try if you want to get a good air purifier without breaking the bank.

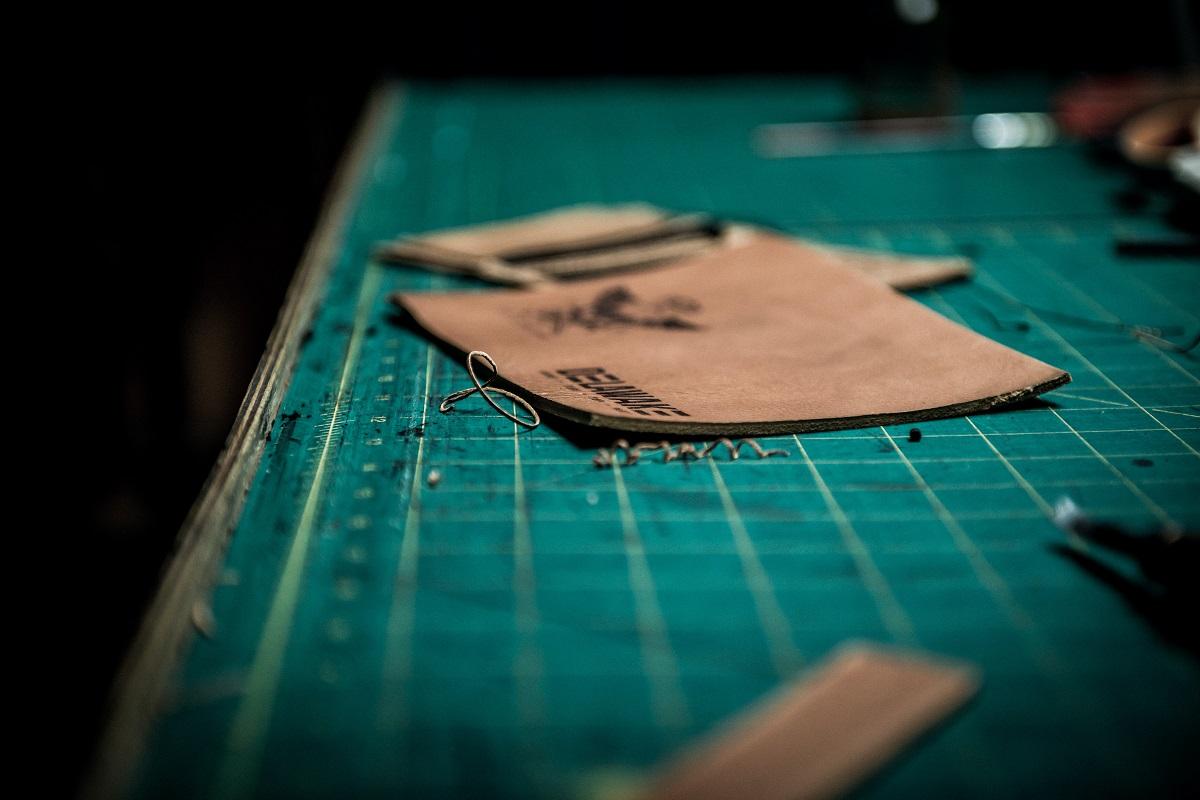

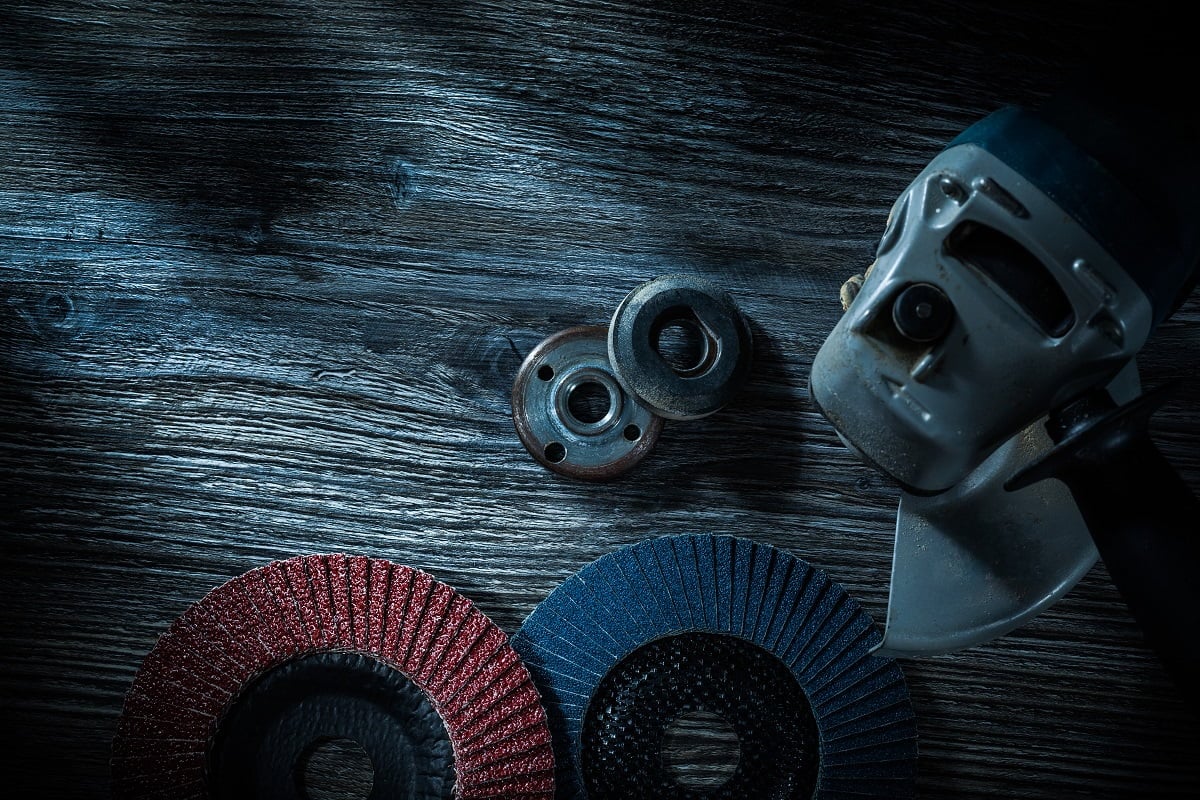

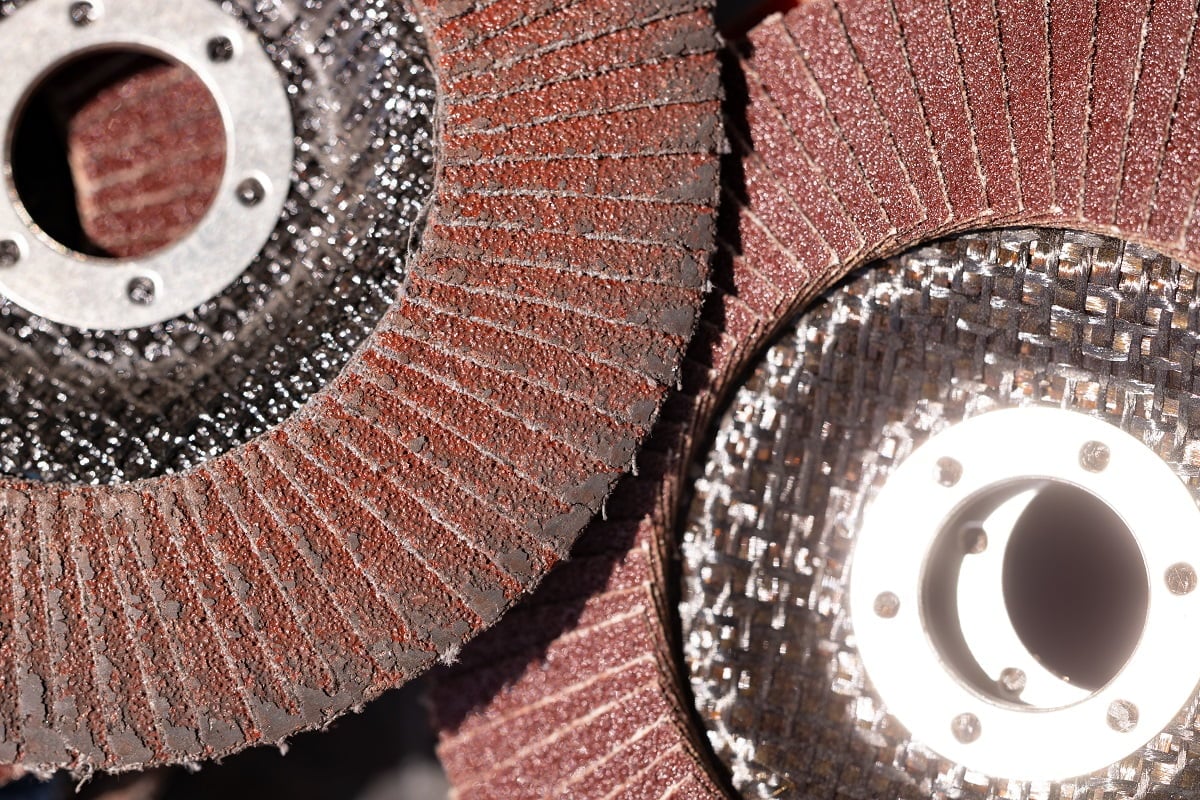

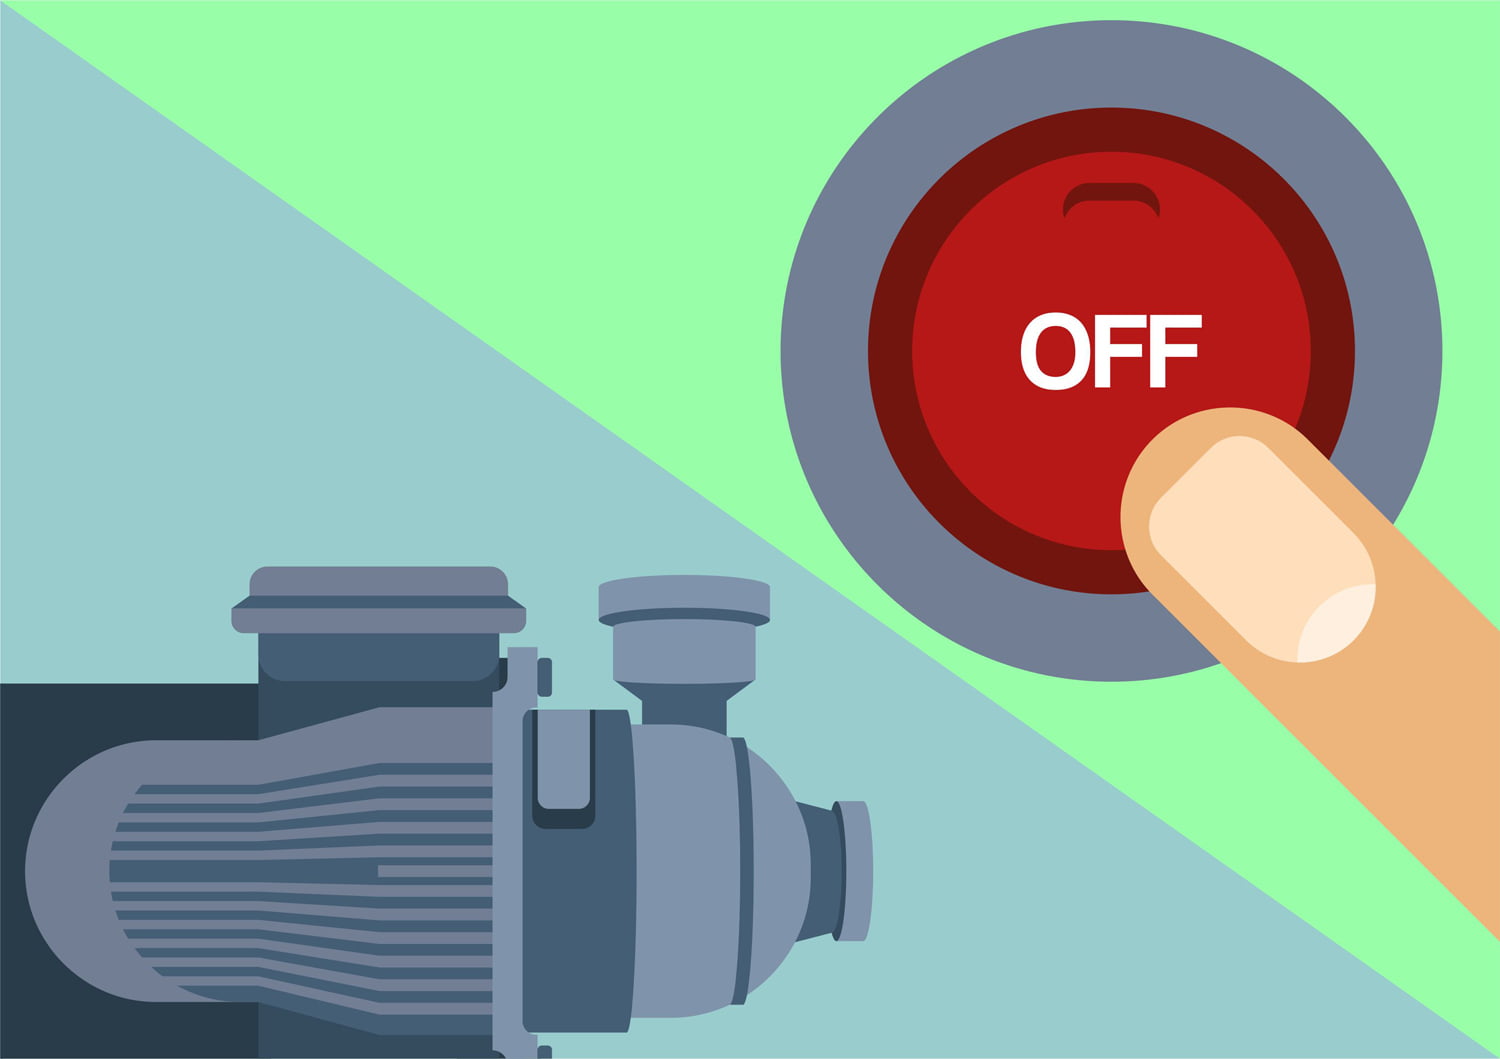
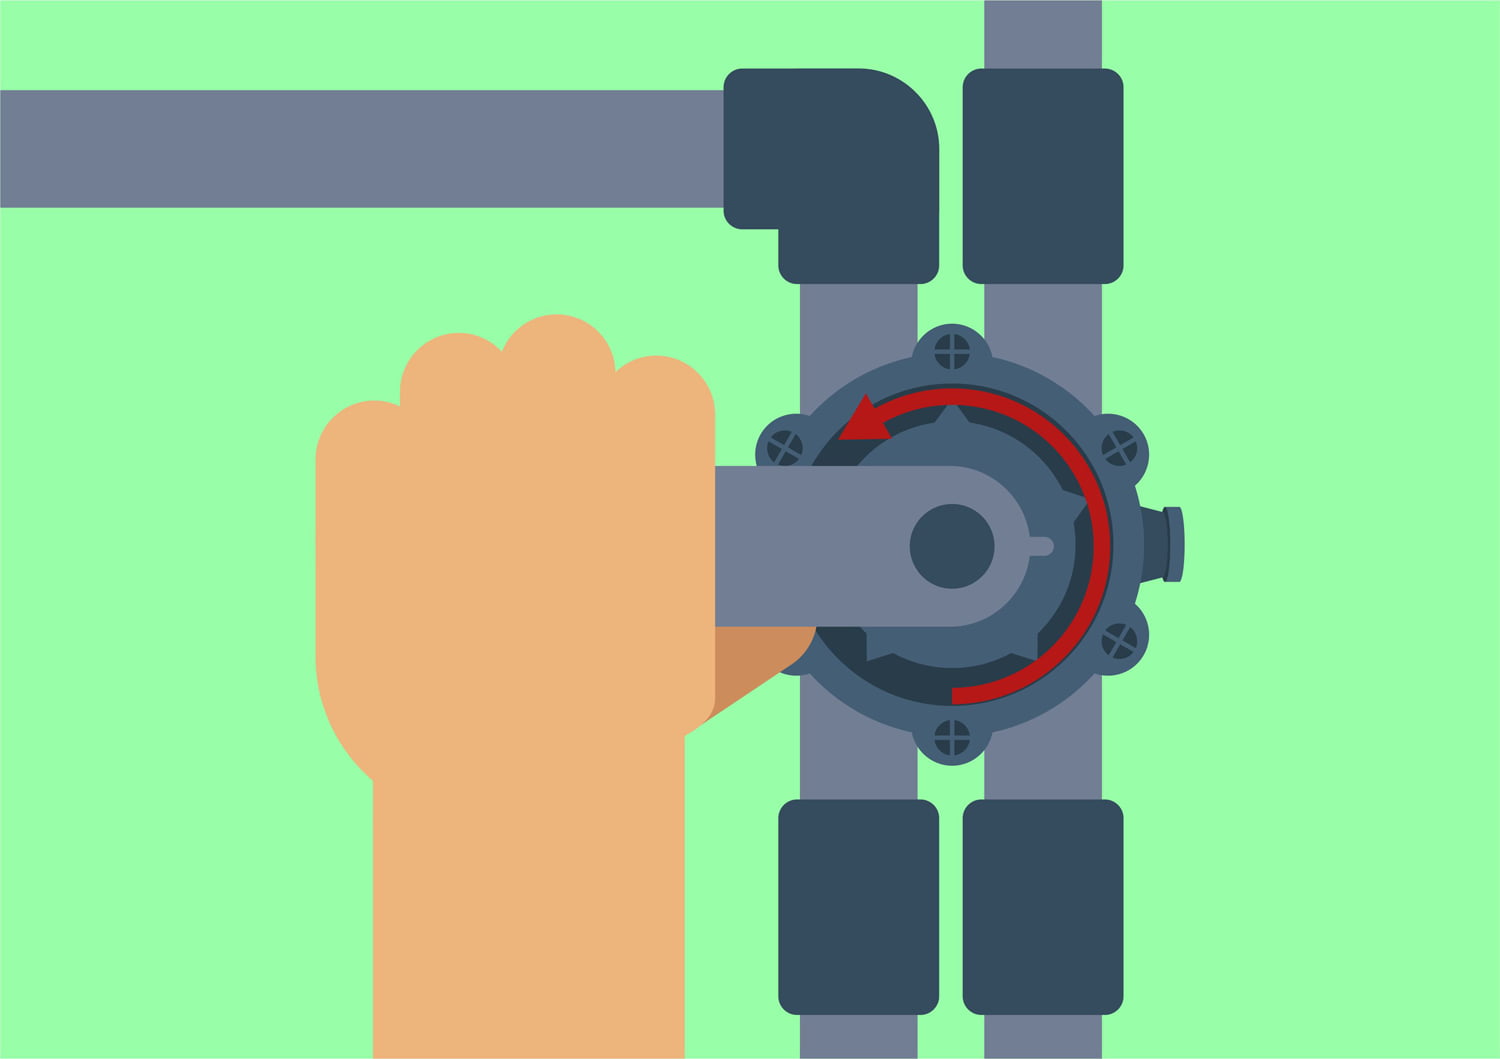


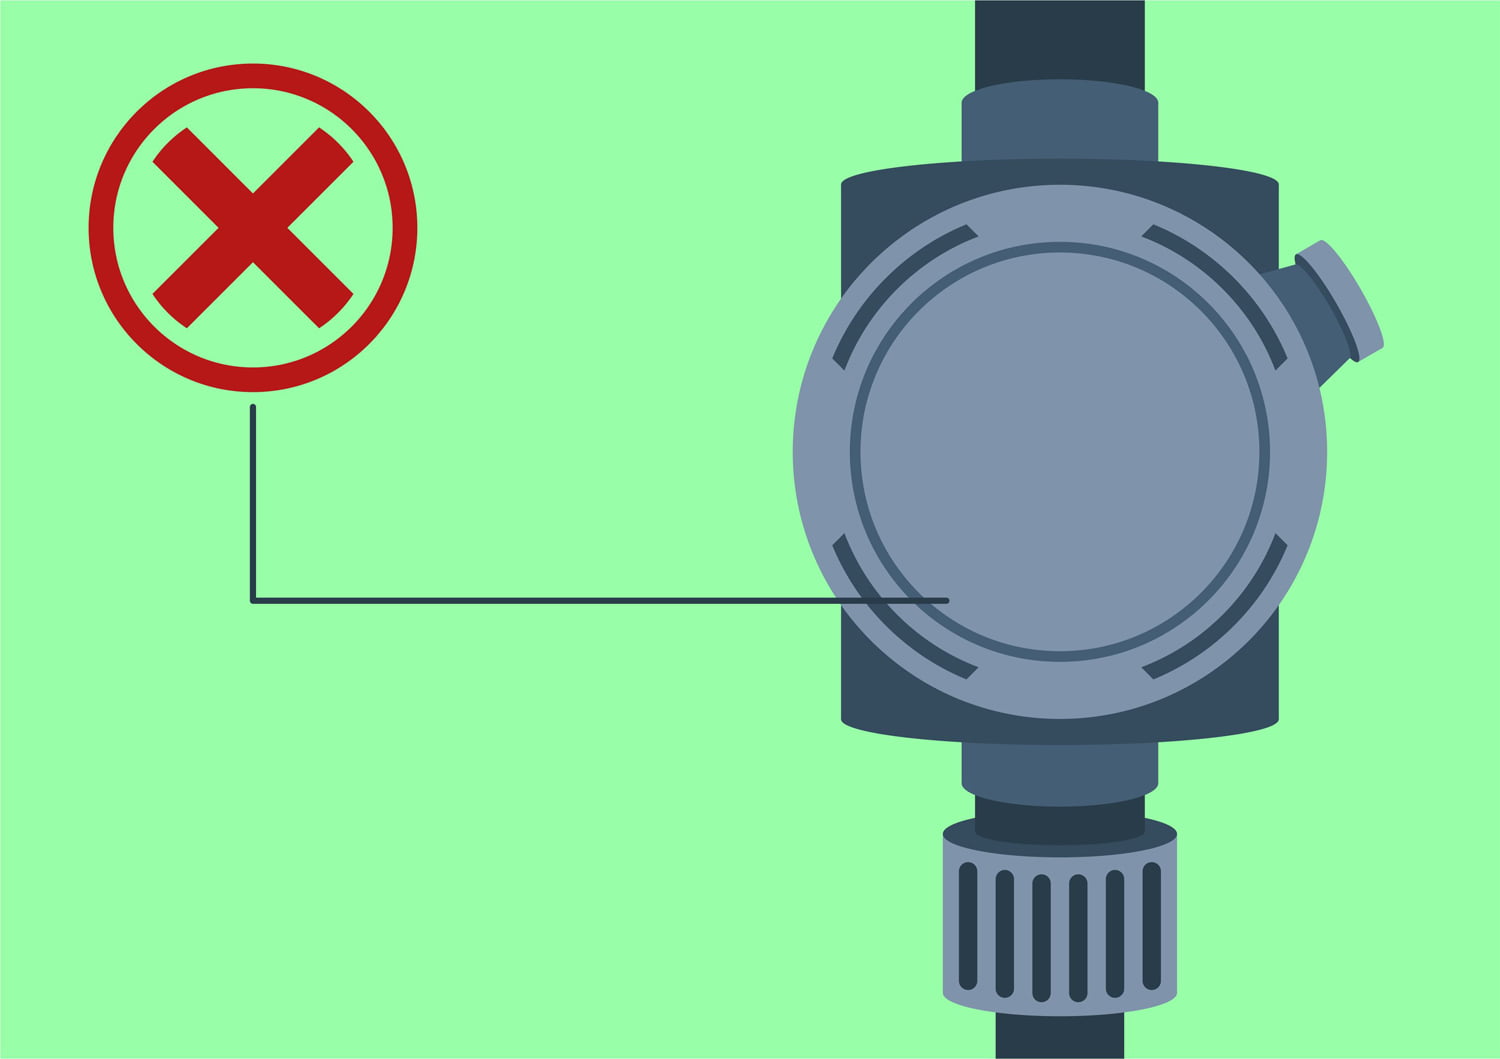

![How To Paint Trim Near Carpet [2024] [Buyer’s Guide]](https://homesthetics.net/wp-content/uploads/2021/07/How-To-Paint-Trim-Near-Carpet-03.jpg "How To Paint Trim Near Carpet [2024] [Buyer's Guide]")


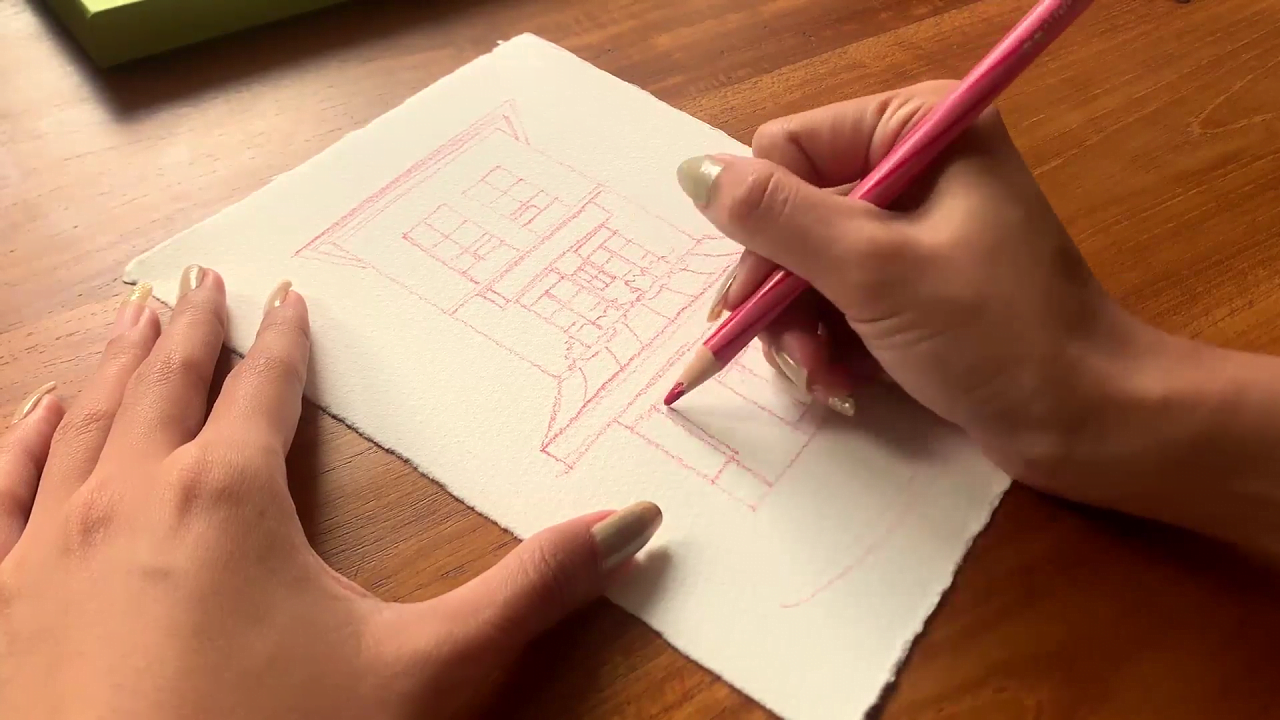
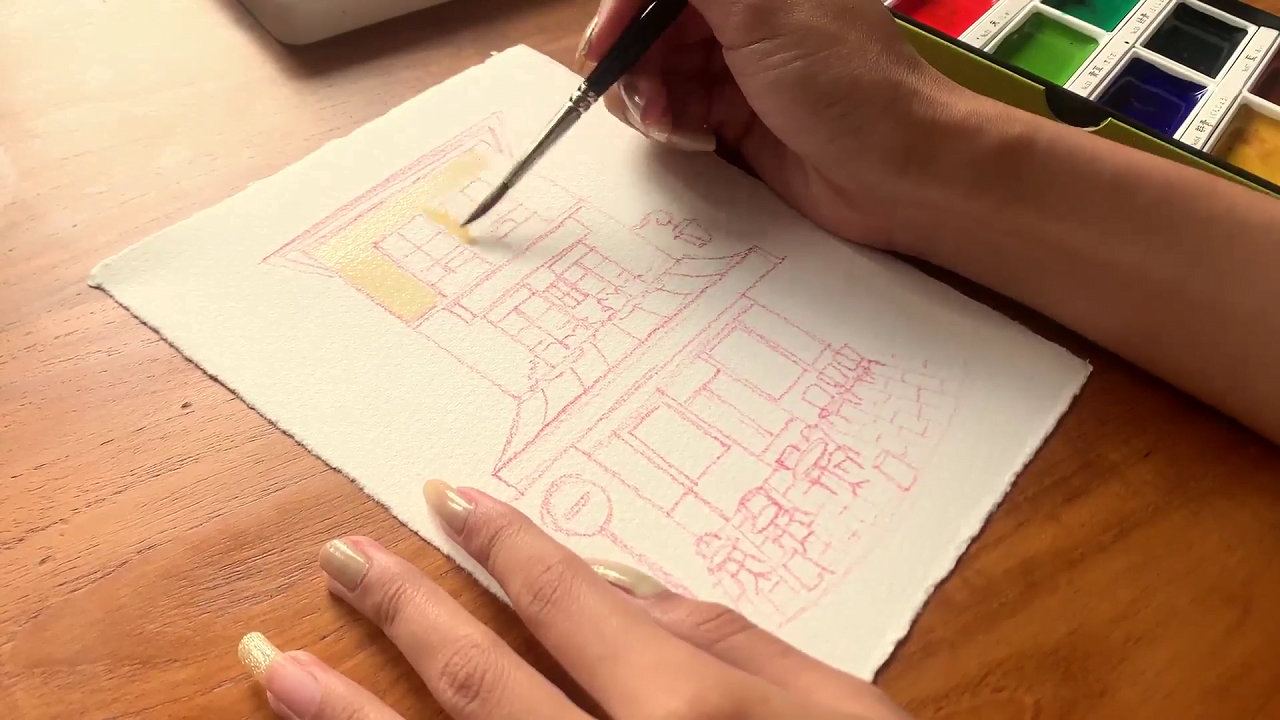
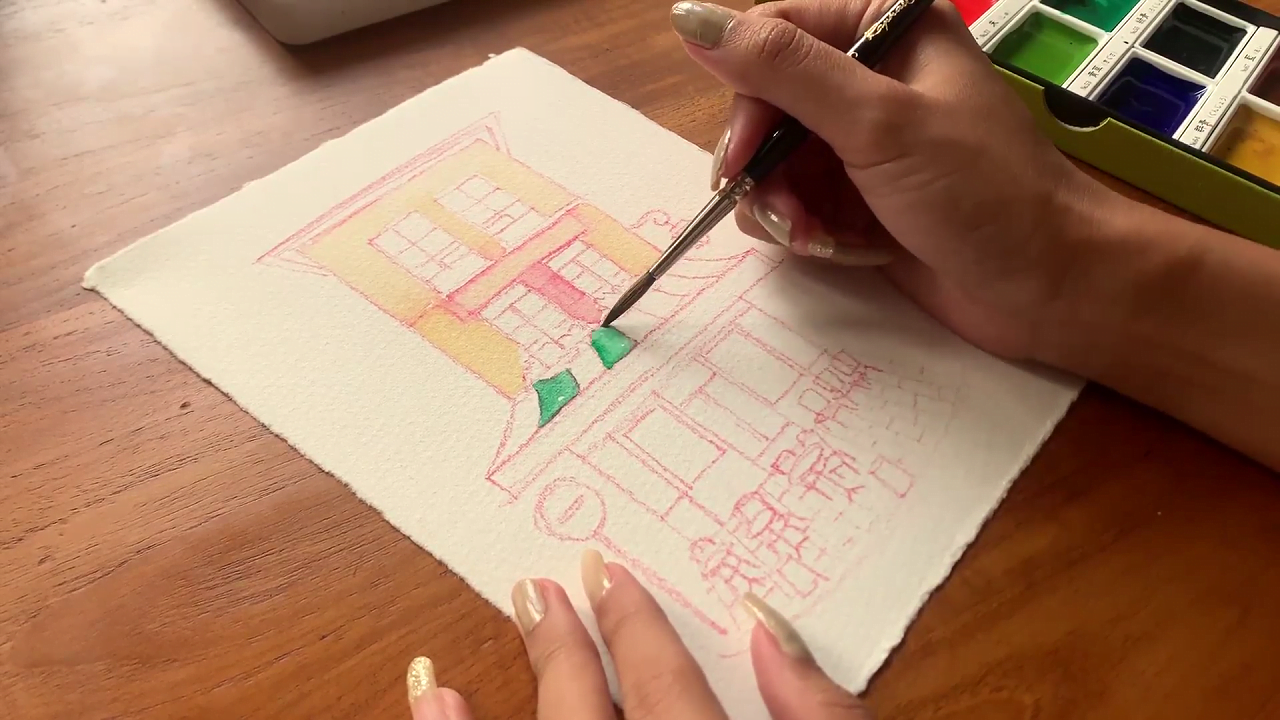
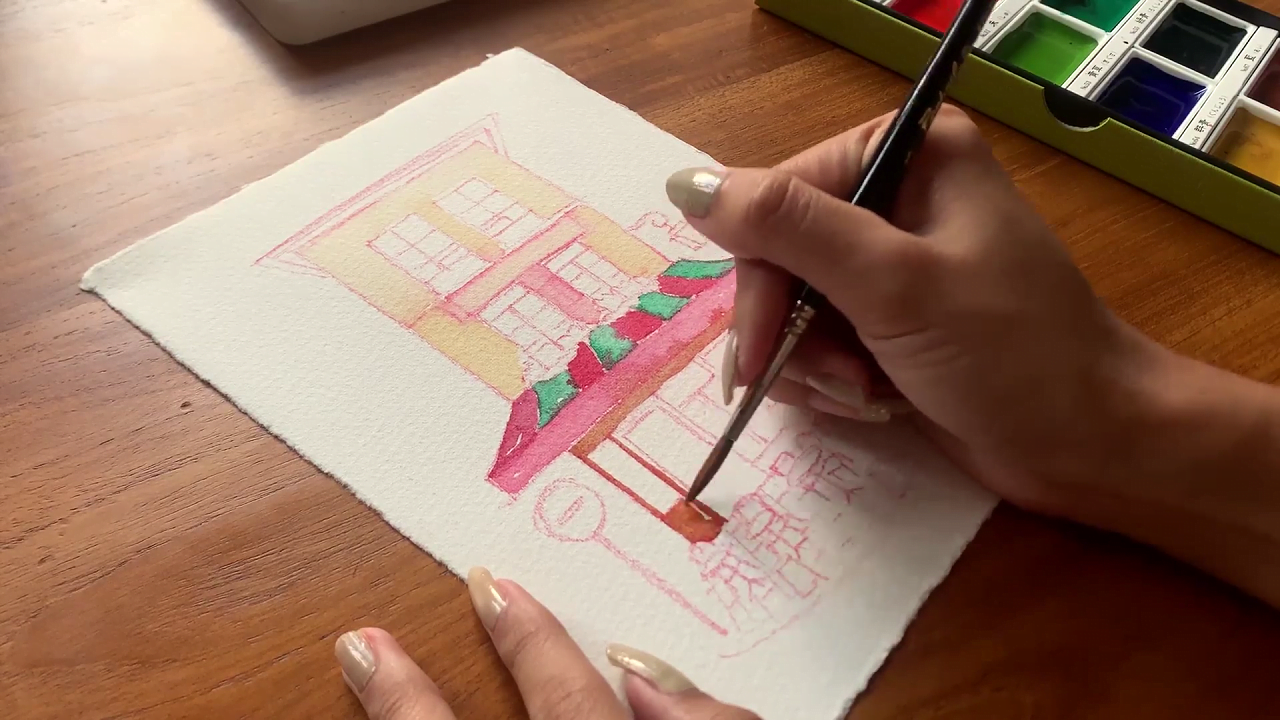
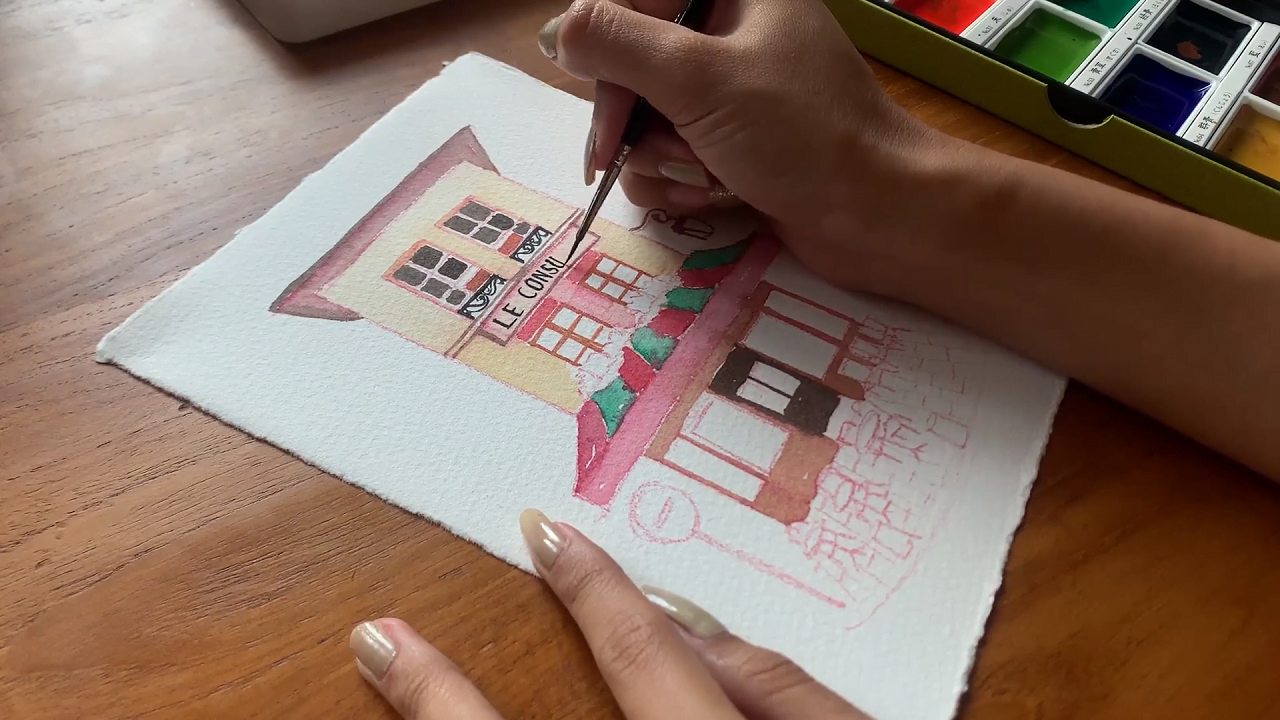

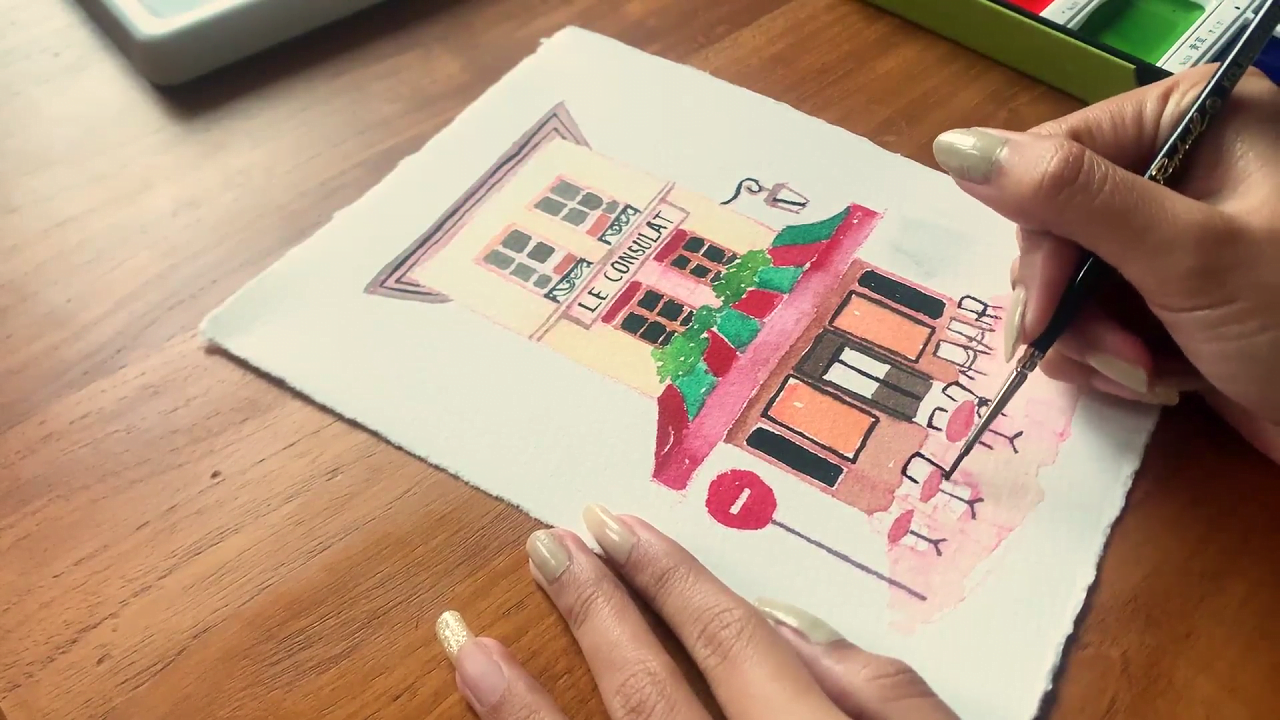

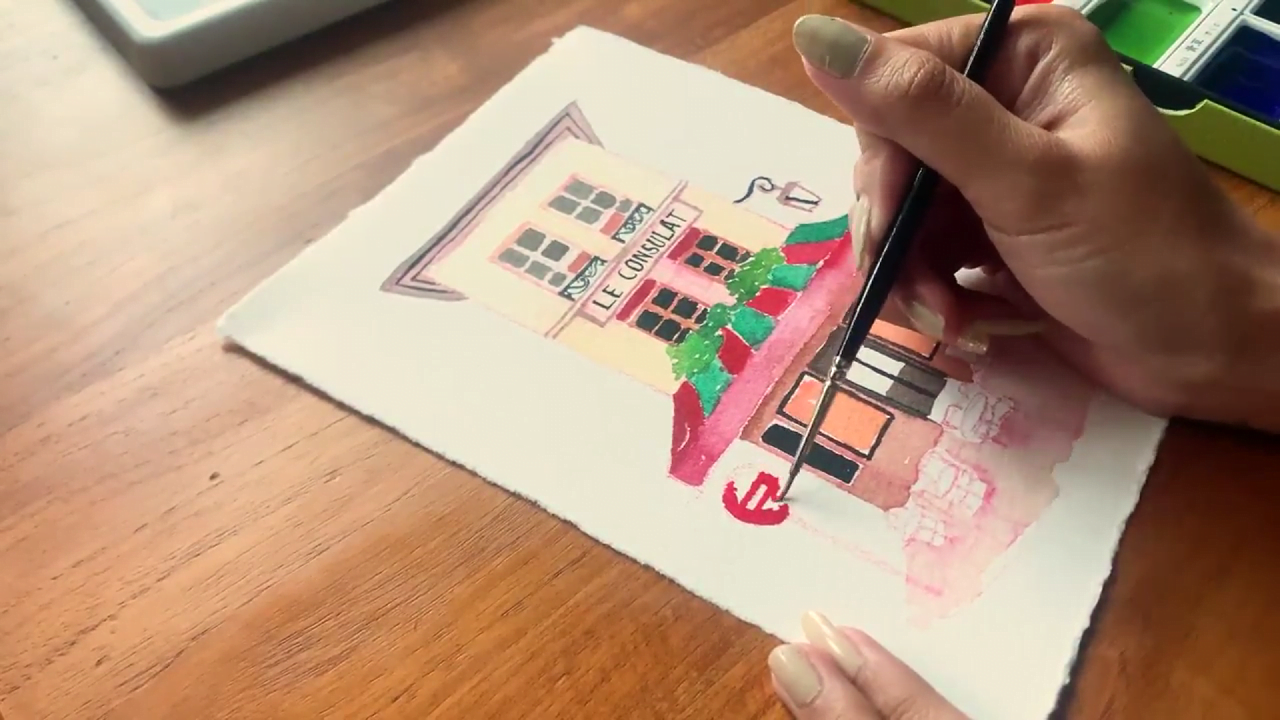


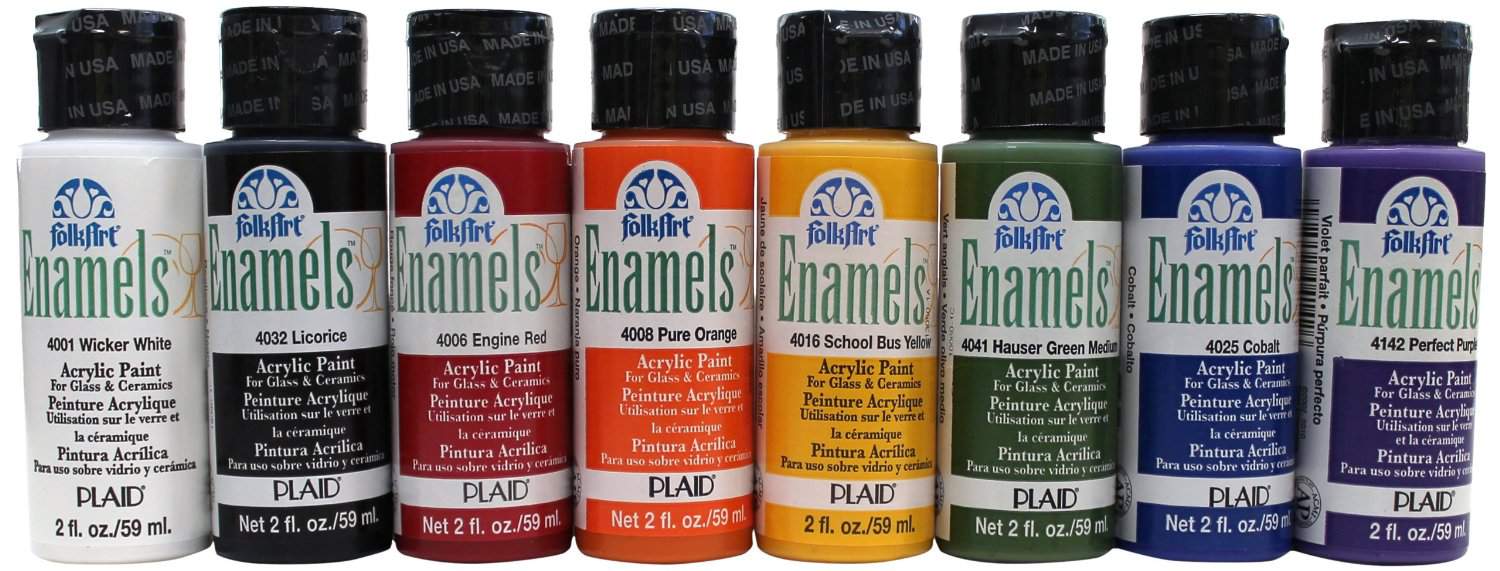
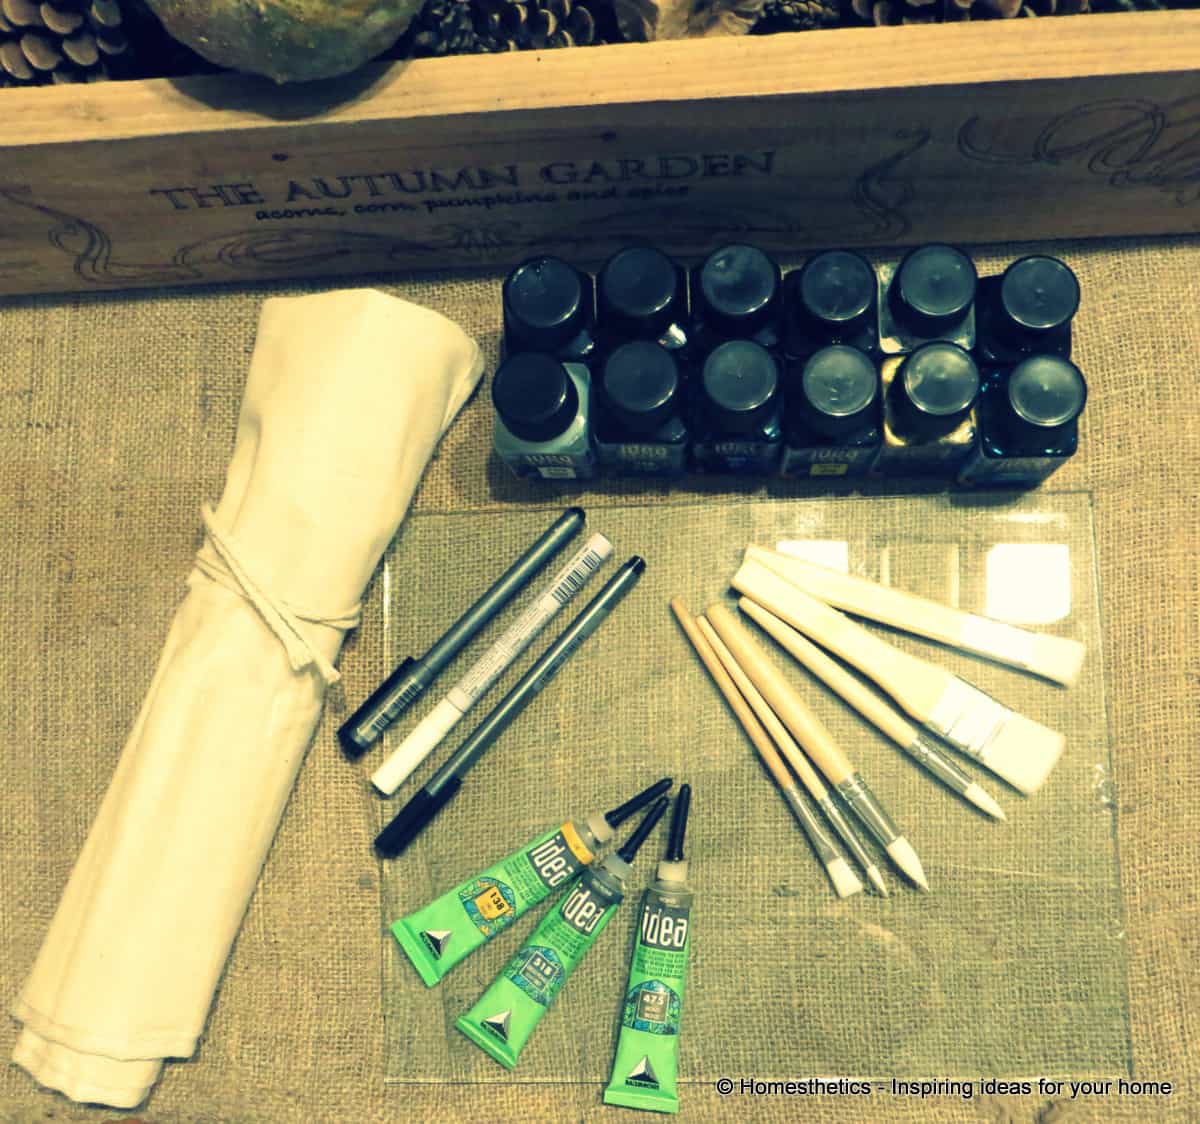
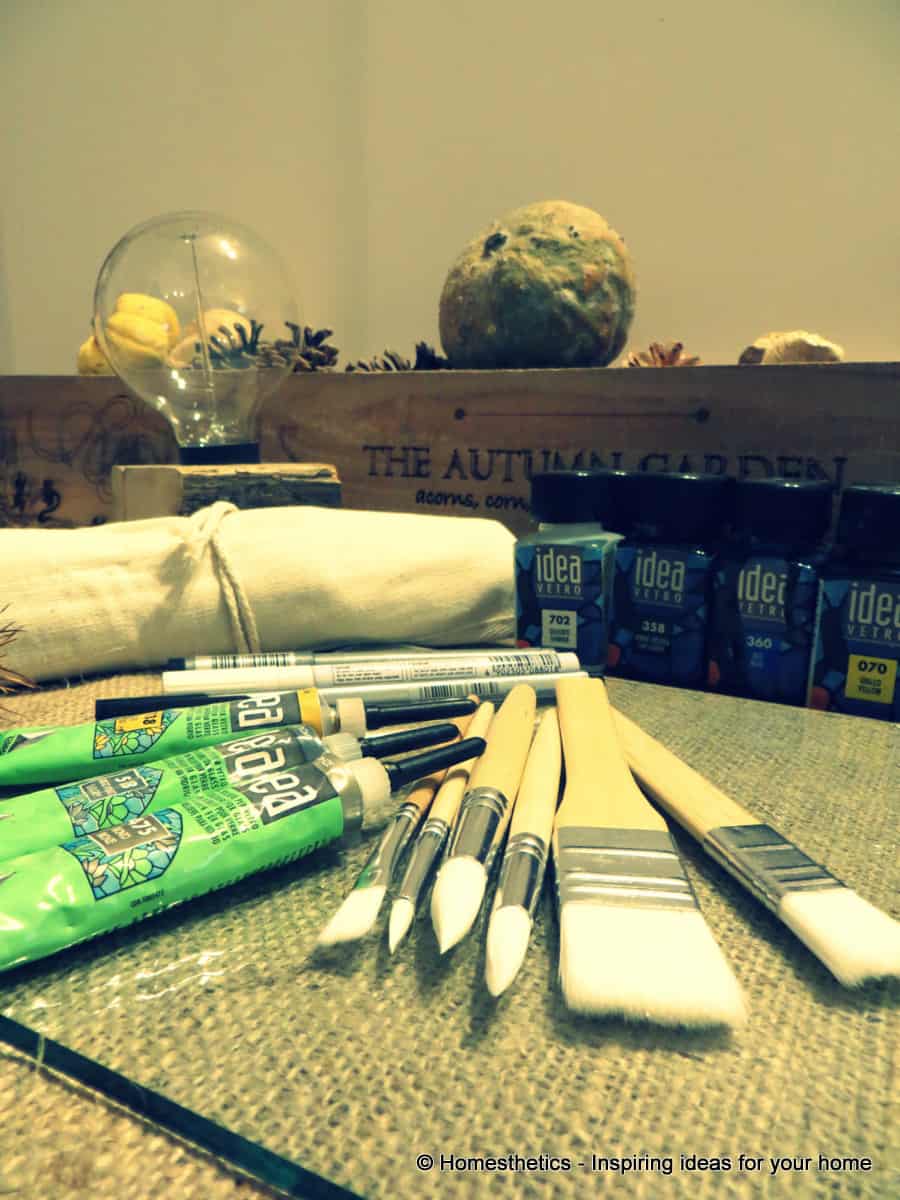
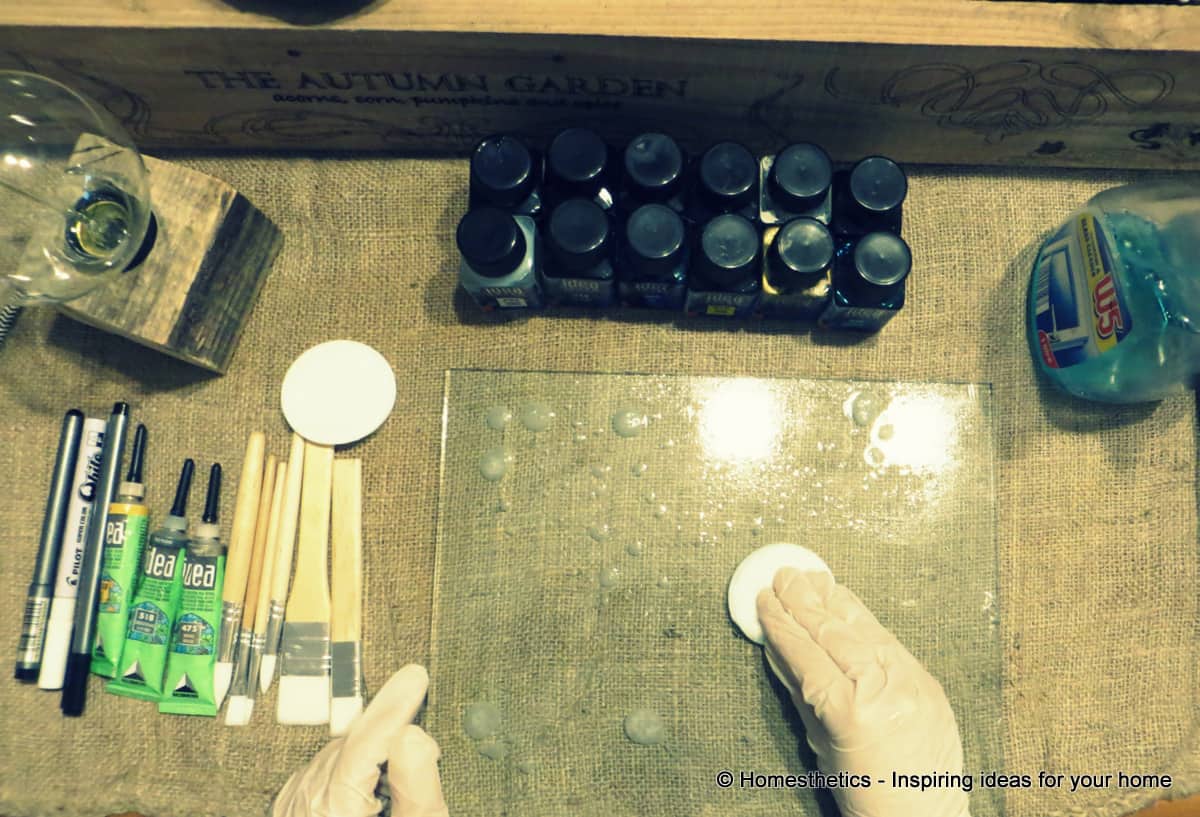
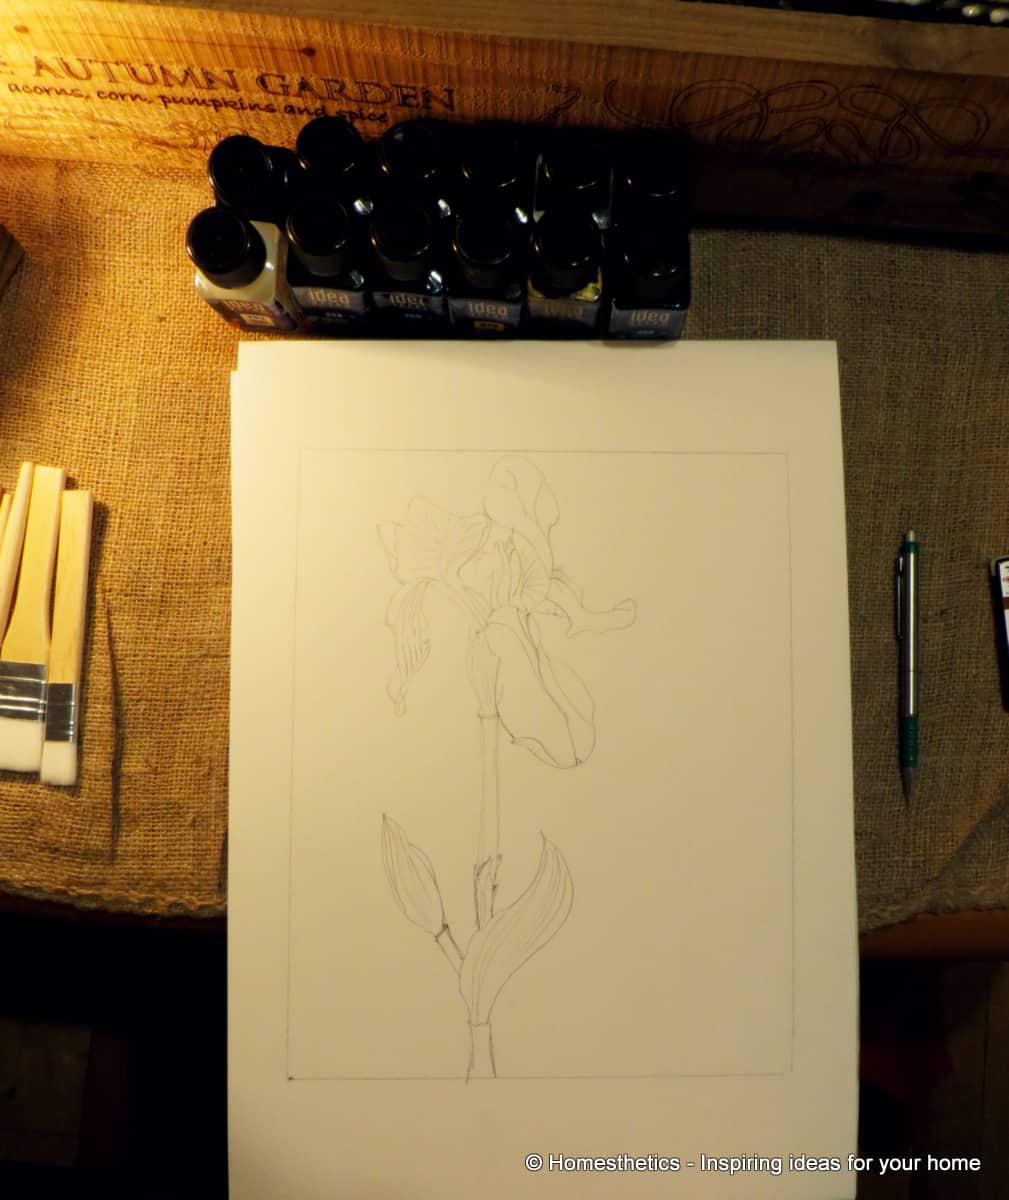
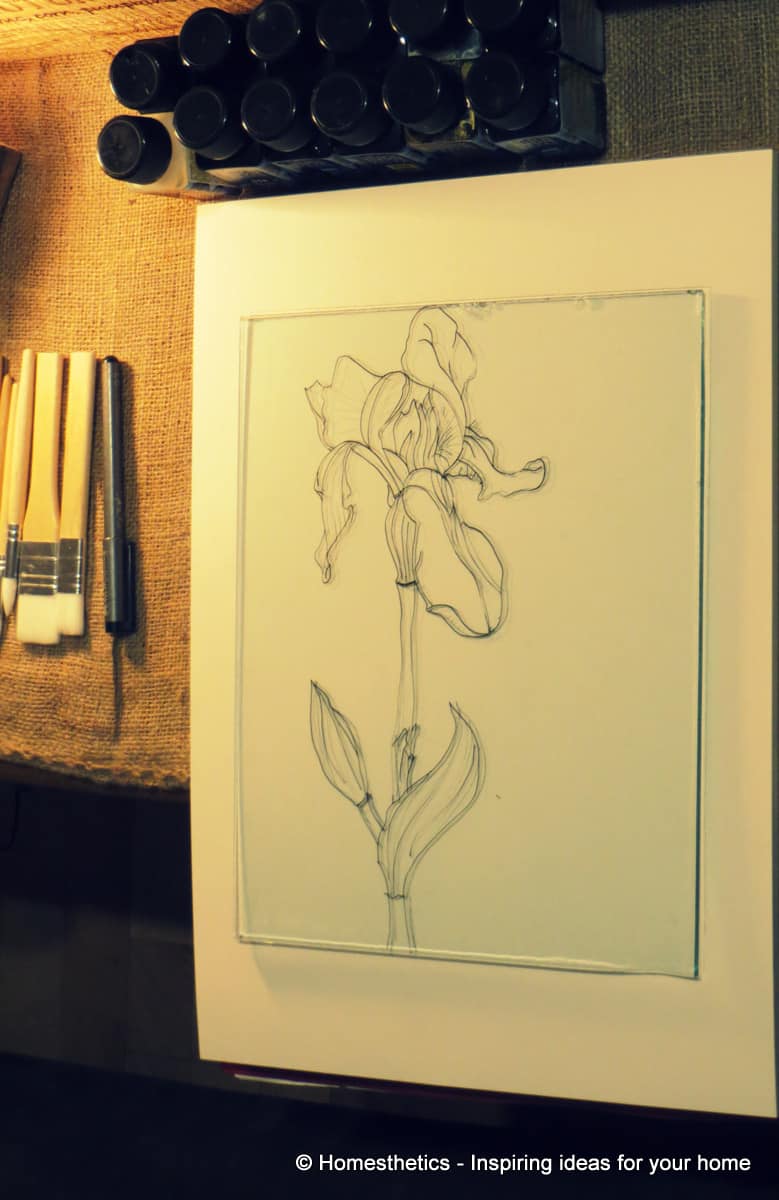
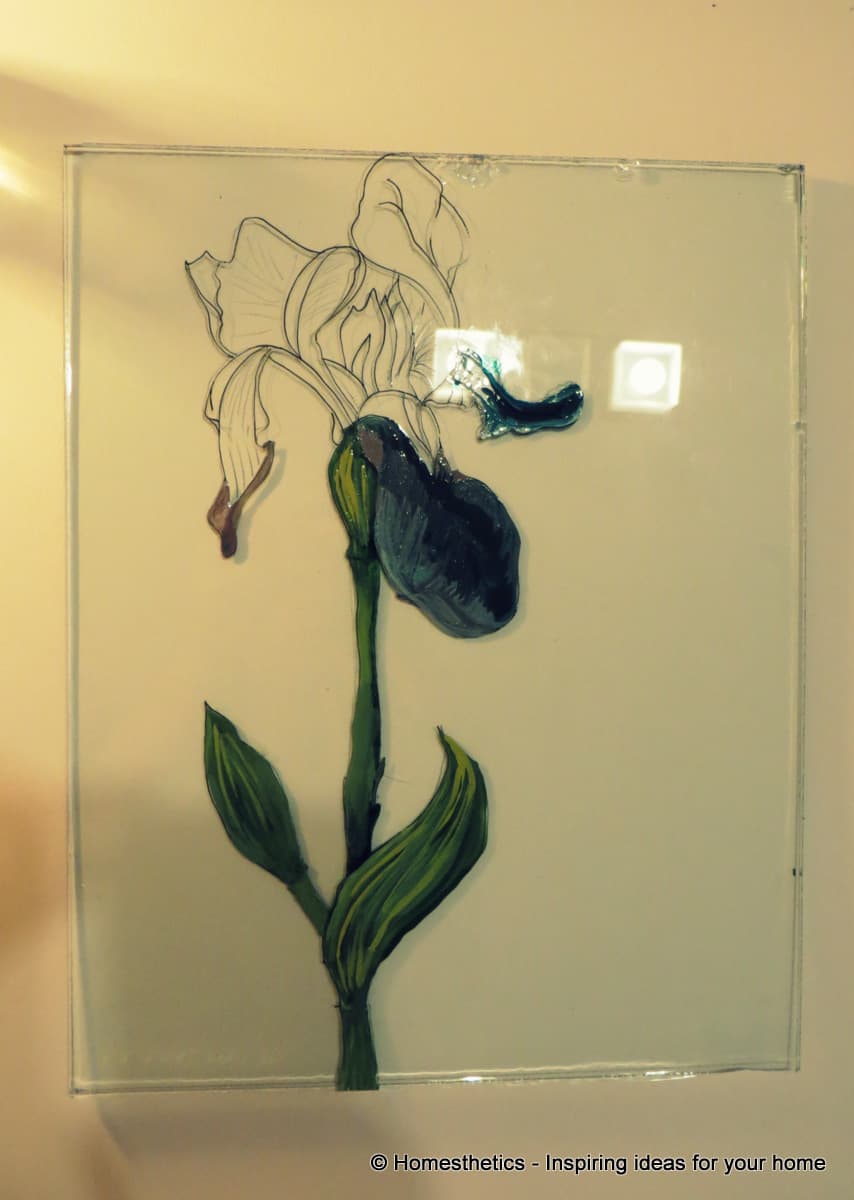
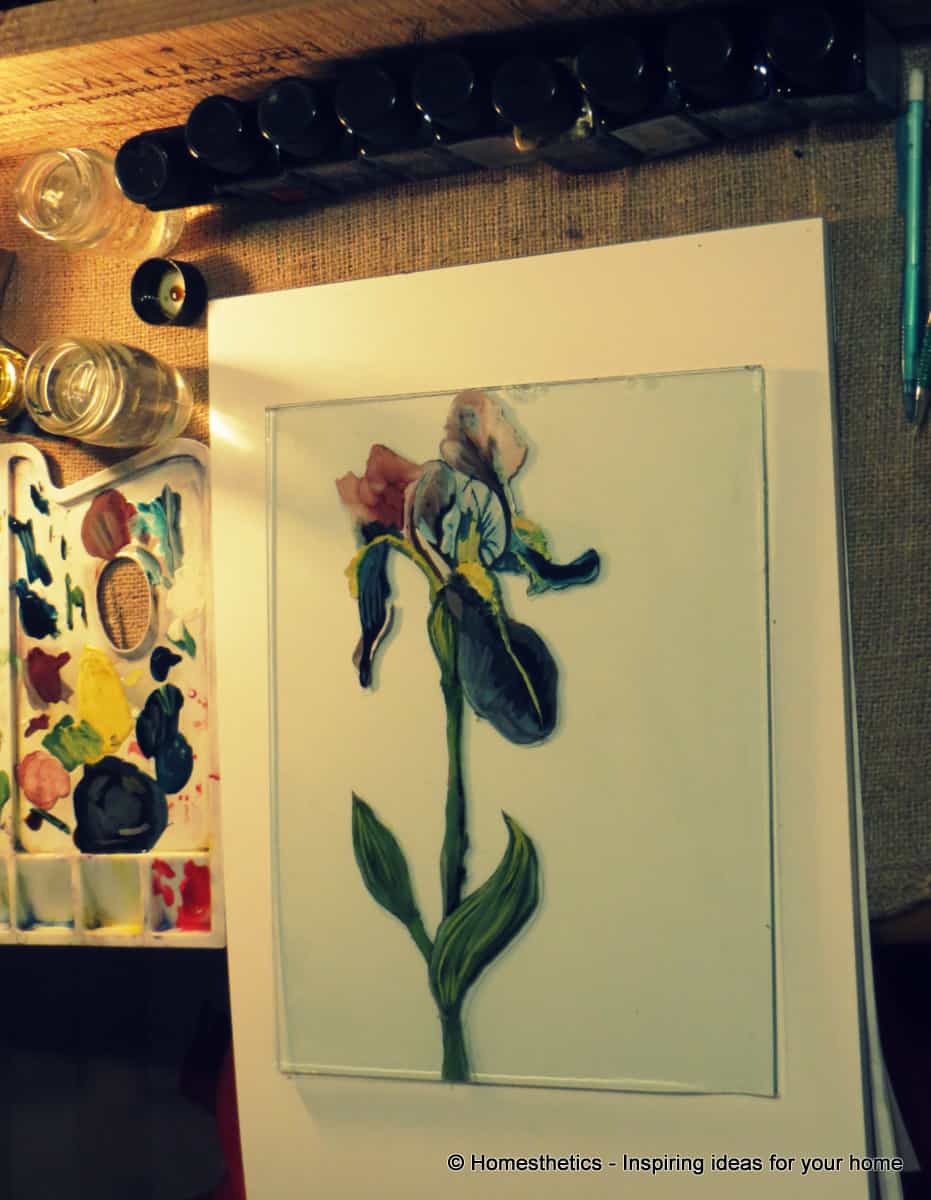

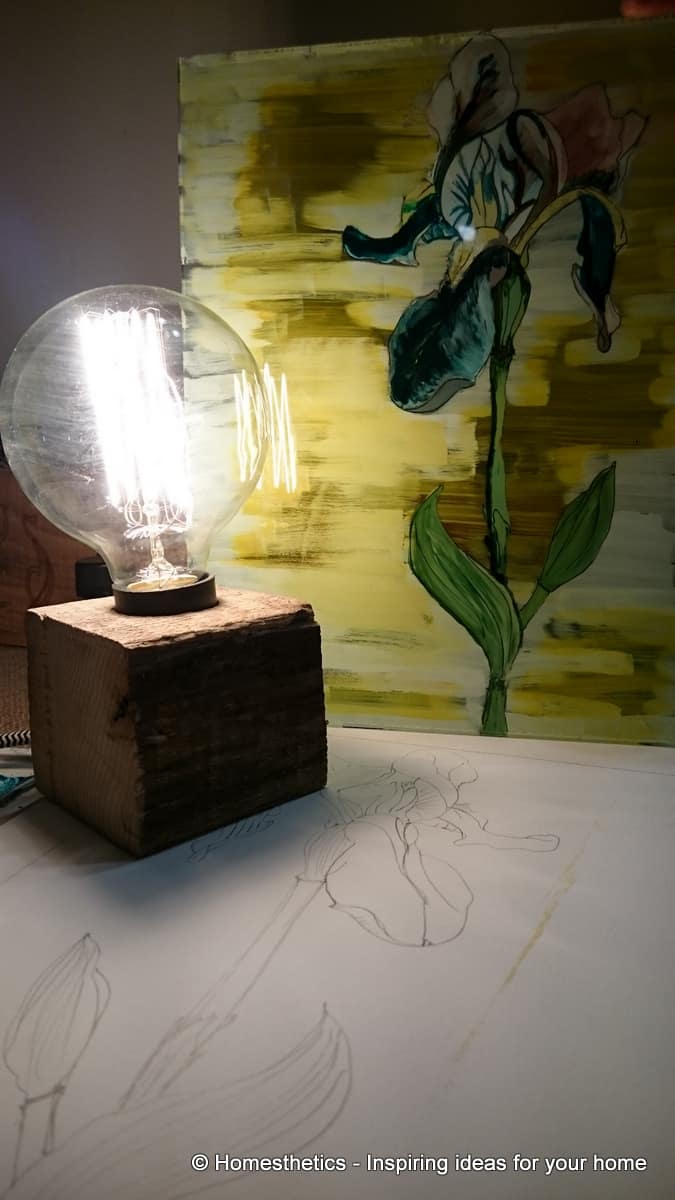


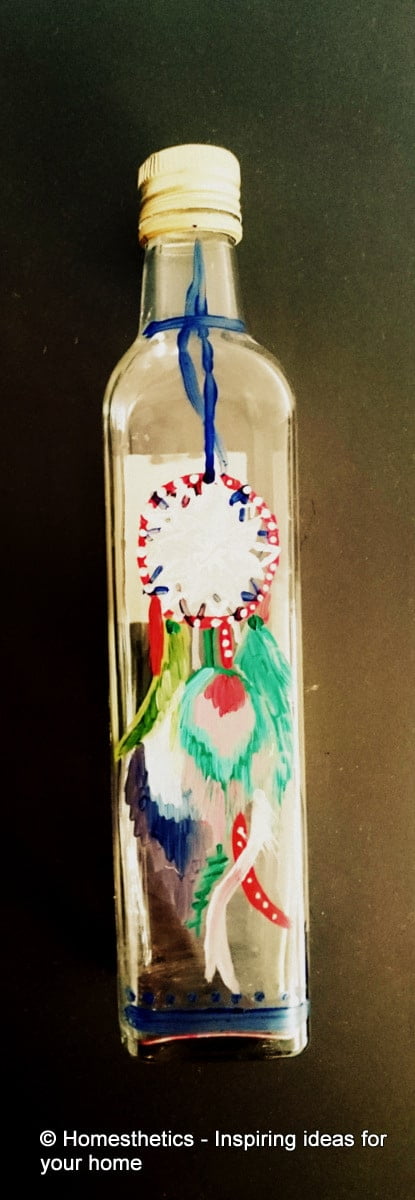


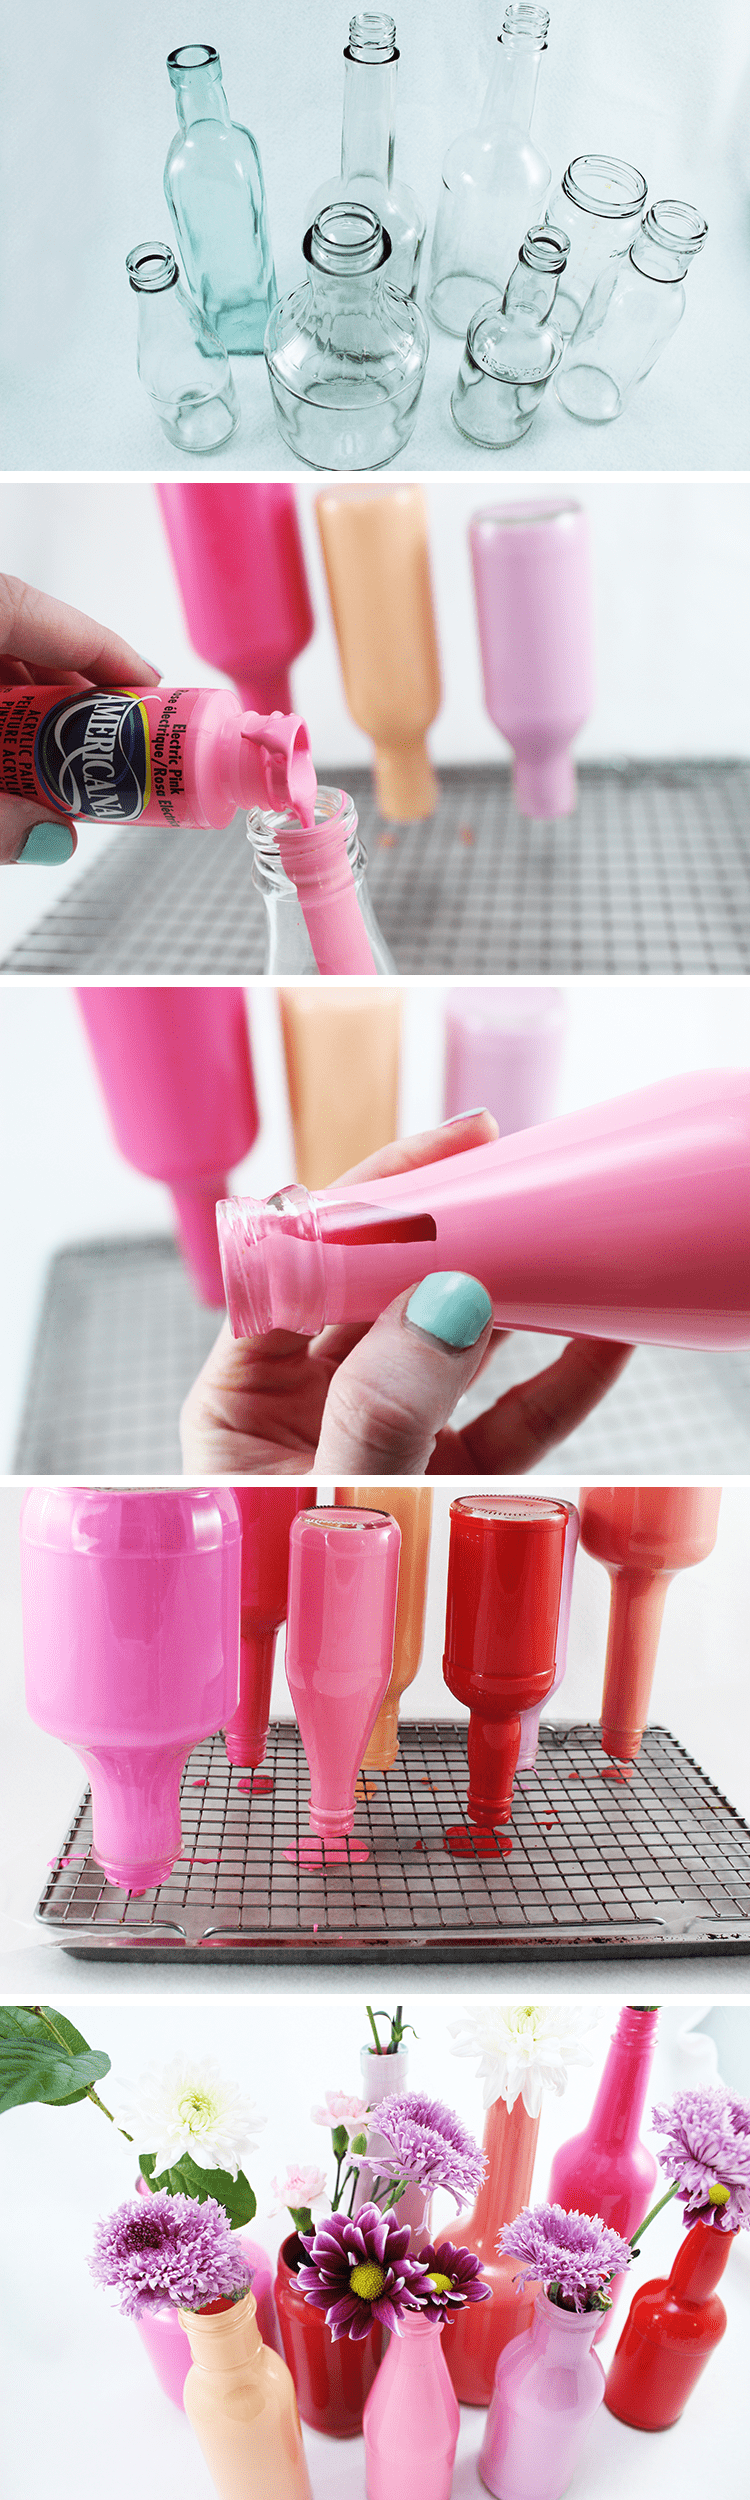


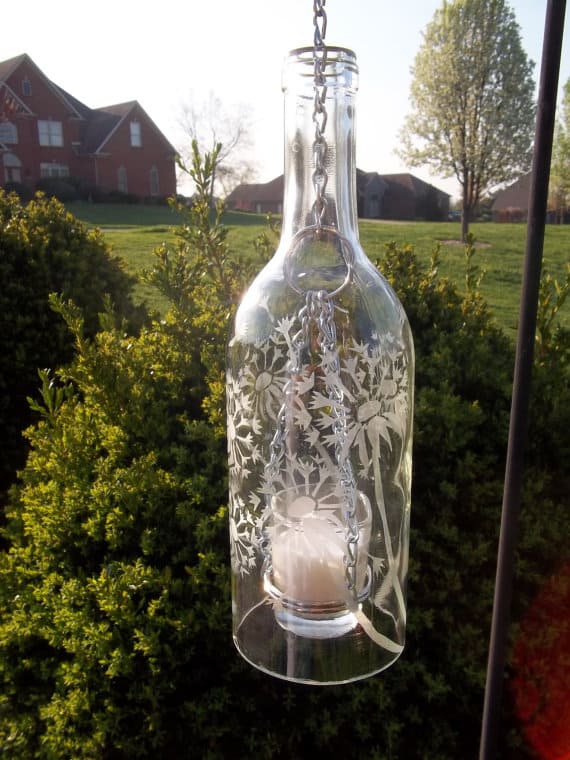


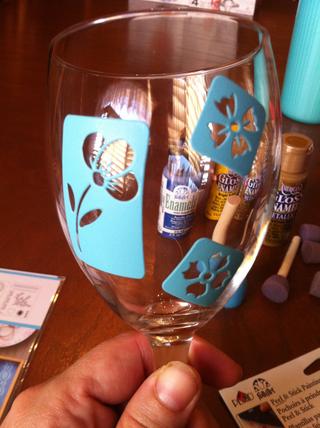


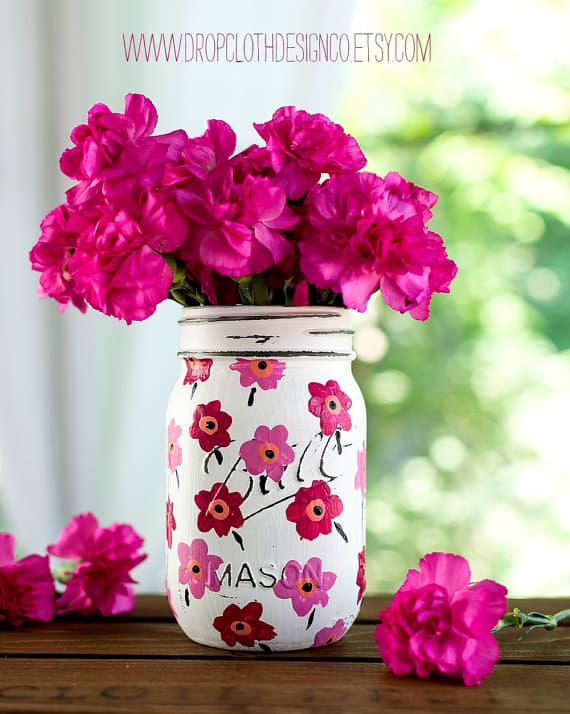
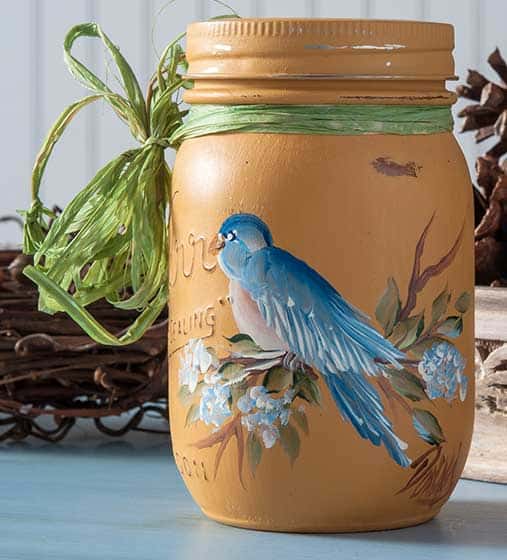
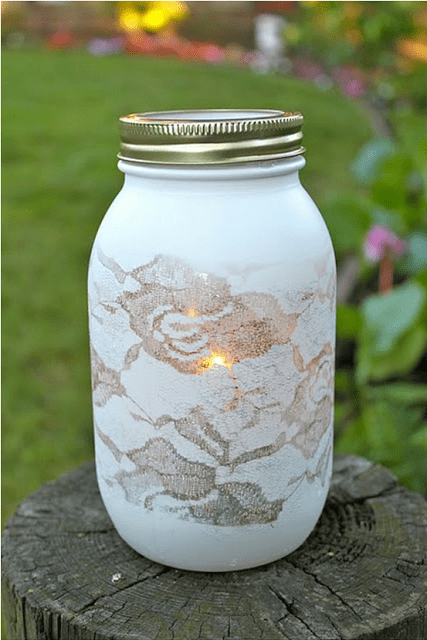


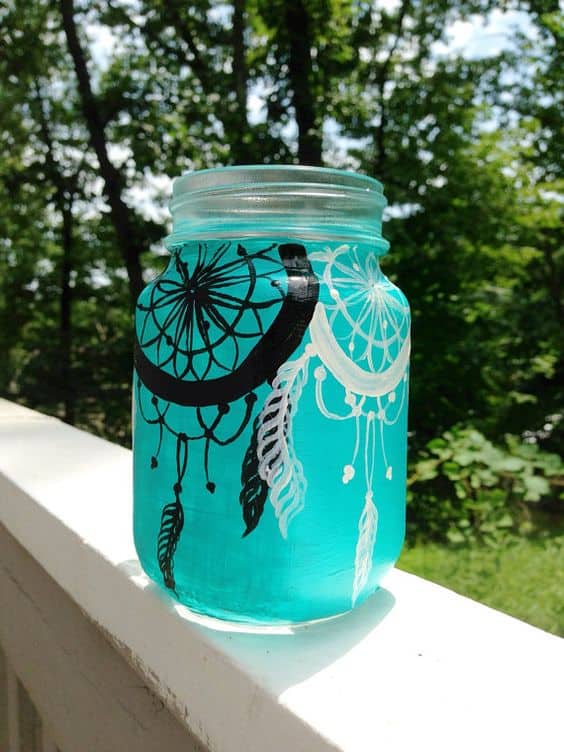
![How To Paint Aluminum 101 [All You Need to Know]](https://homesthetics.net/wp-content/uploads/2022/01/How-to-Paint-Aluminum-1.jpg "How To Paint Aluminum 101 [All You Need to Know]")


![How To Mix Epoxy 101 [Measuring & Mixing Epoxy Resin Guide]](https://homesthetics.net/wp-content/uploads/2022/01/How-to-mix-epoxy-1.jpg "How To Mix Epoxy 101 [Measuring & Mixing Epoxy Resin Guide]")

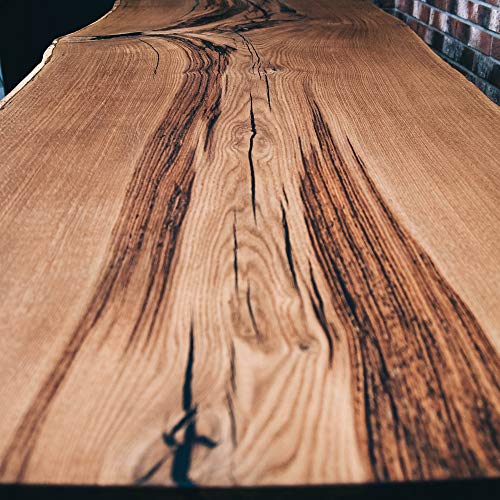
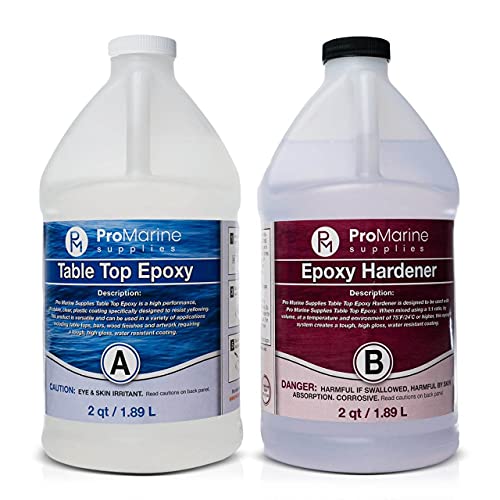
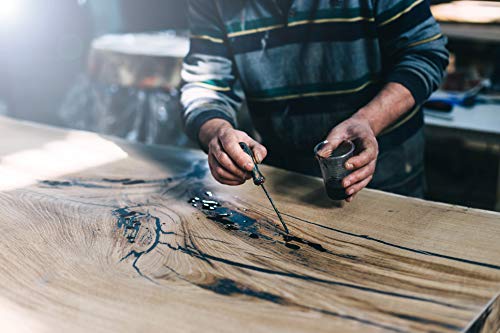


![How to Make Resin Jewelry 101 [All You Need to Know]](https://homesthetics.net/wp-content/uploads/2021/04/How-to-Make-Resin-Jewelry-101-02.jpg "How to Make Resin Jewelry 101 [All You Need to Know]")


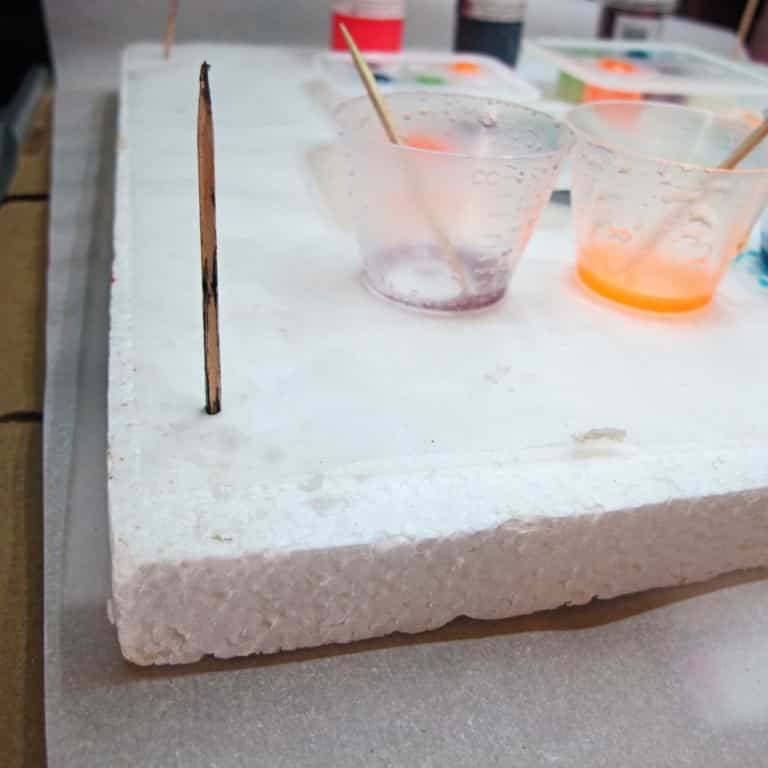

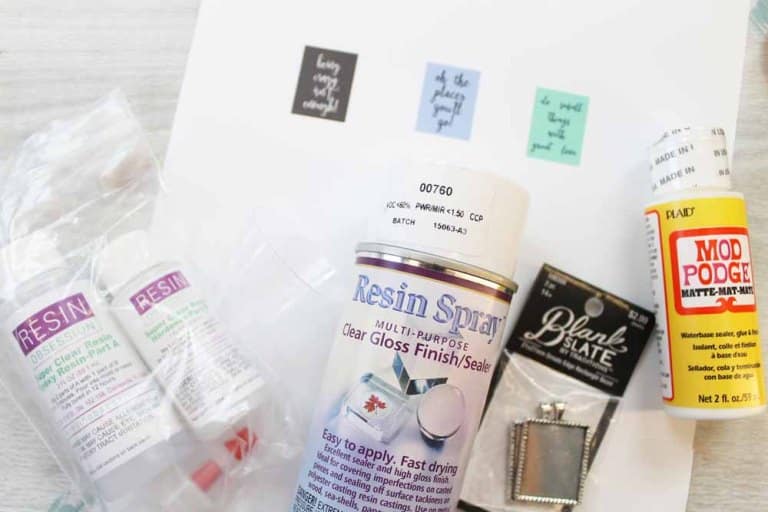
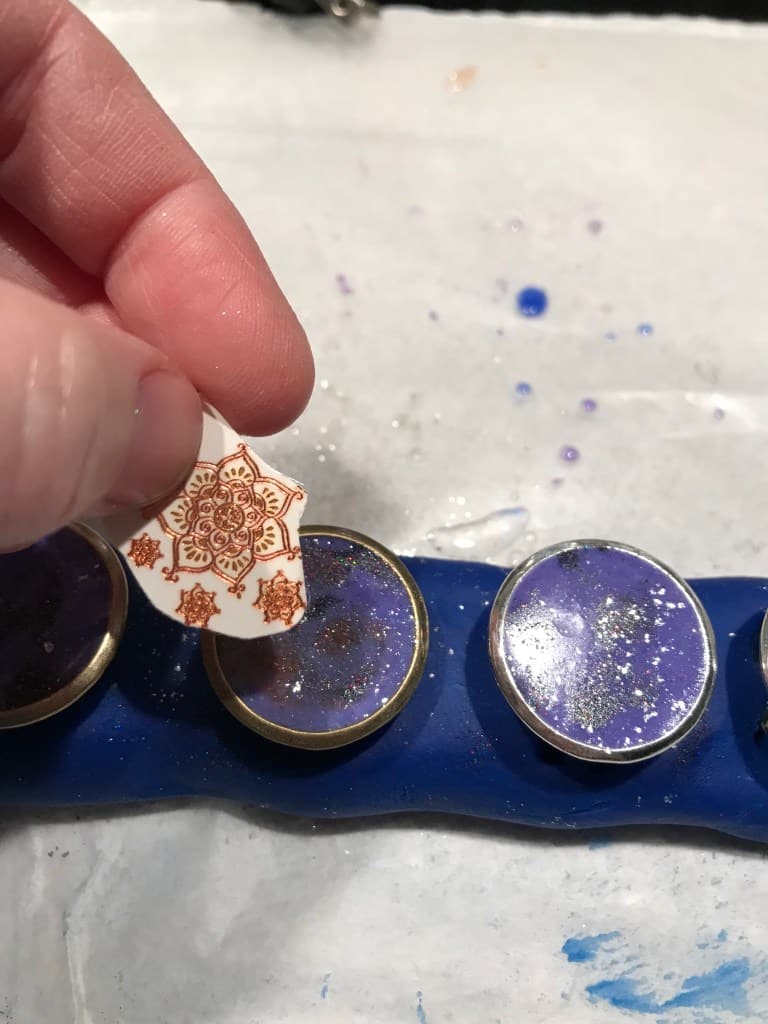

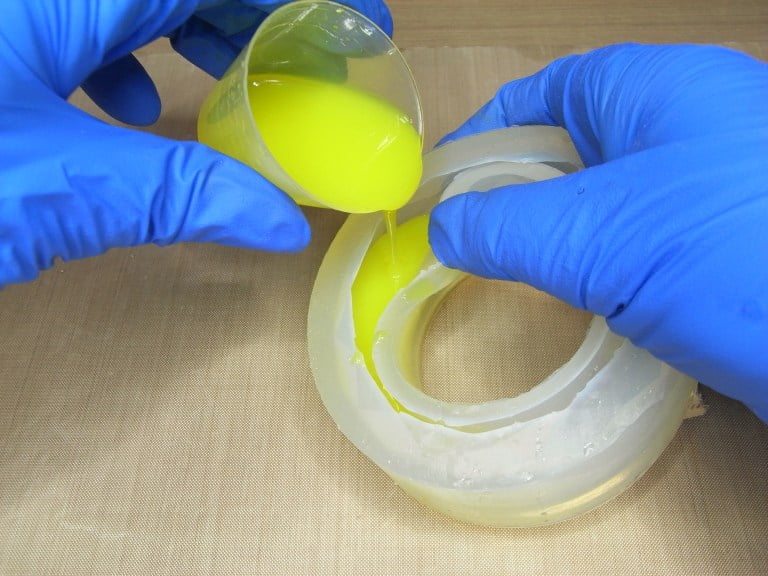
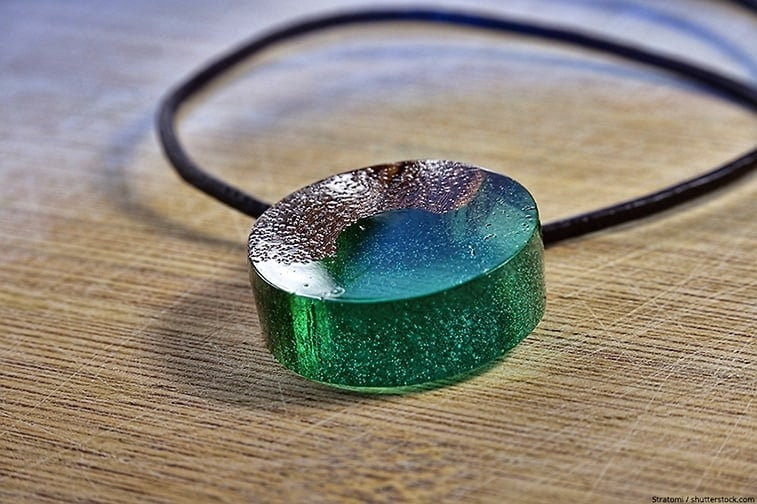
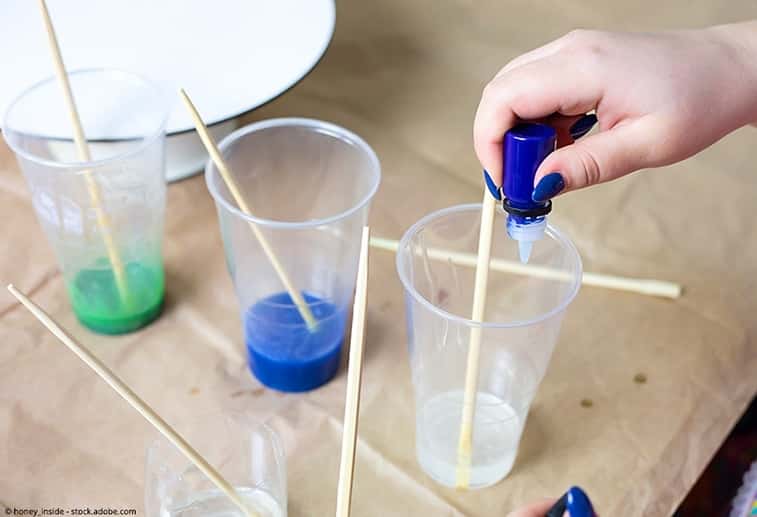
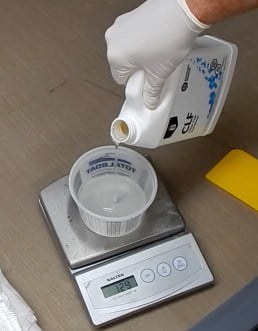
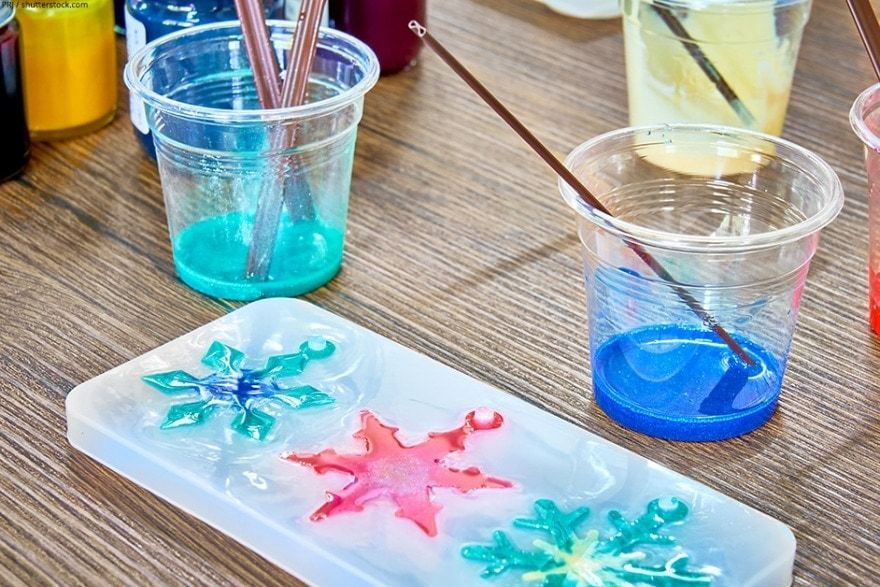
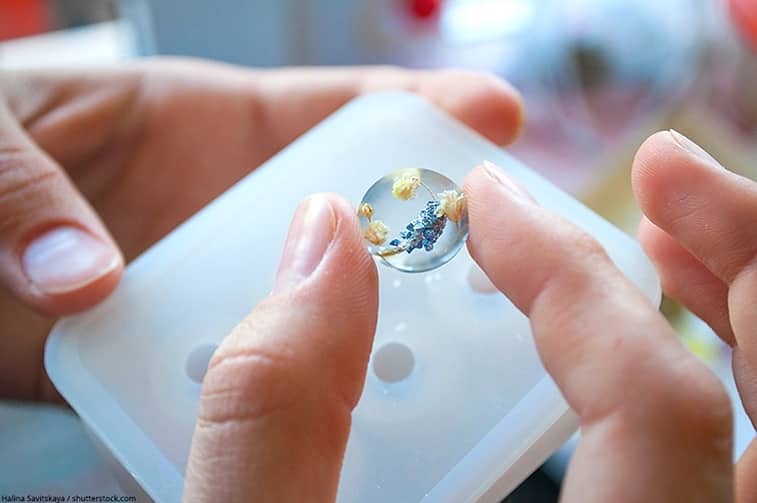
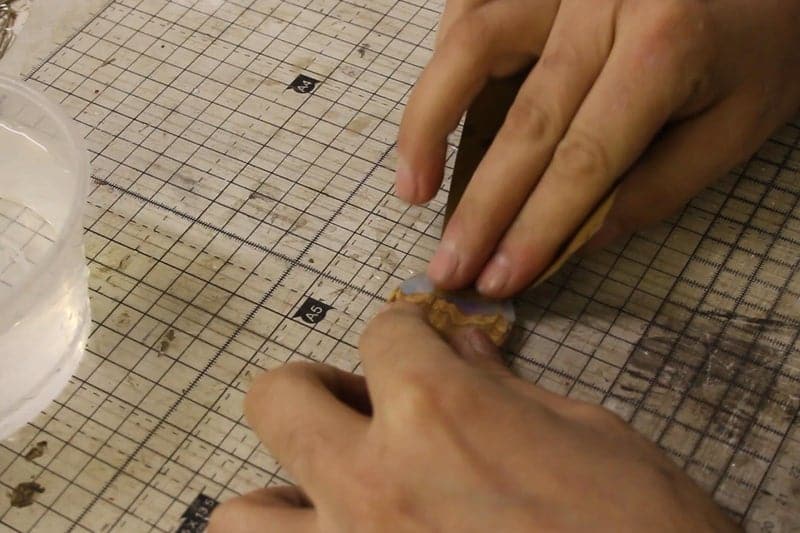
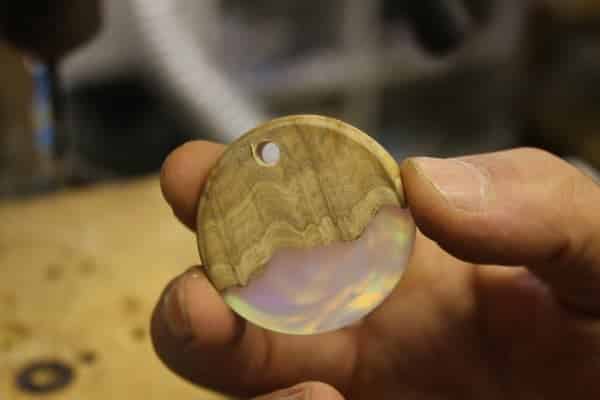
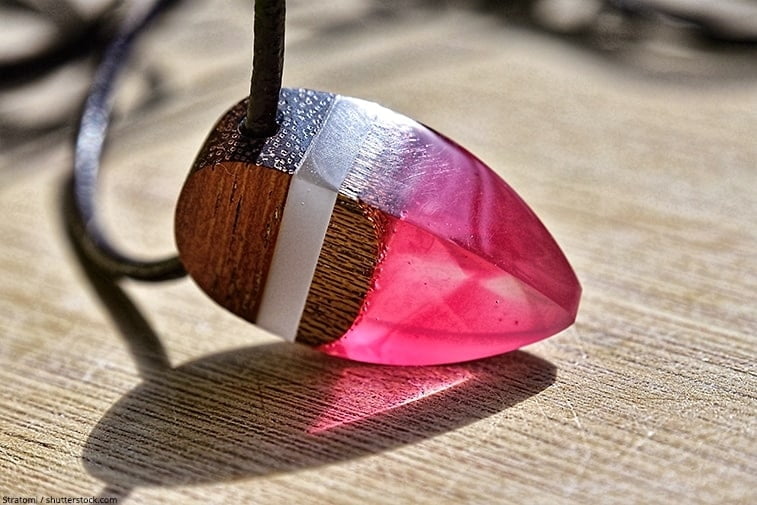
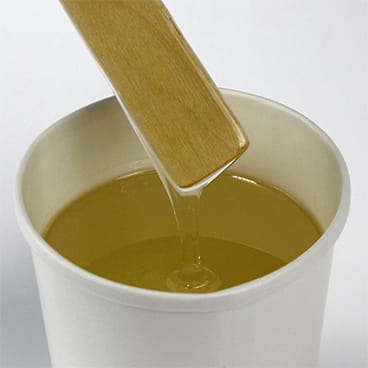
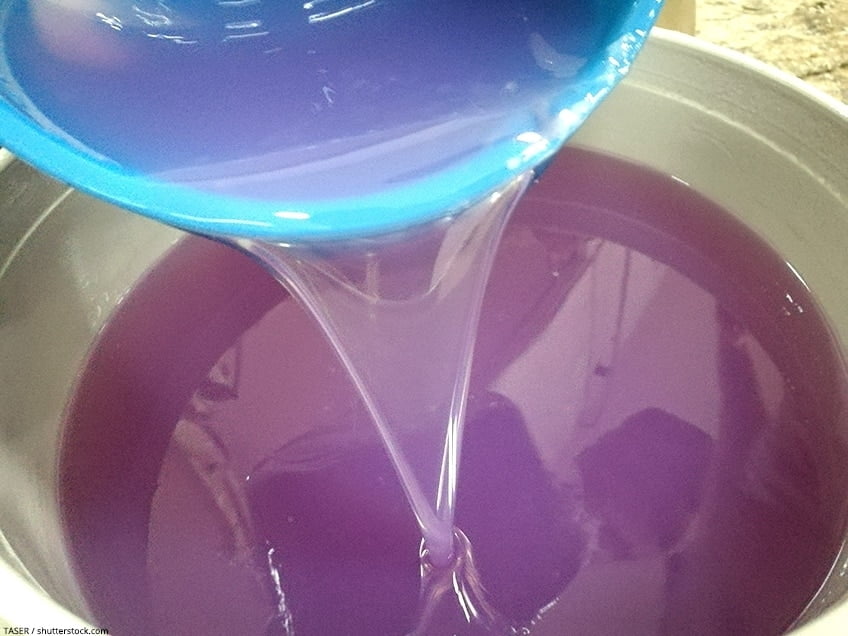
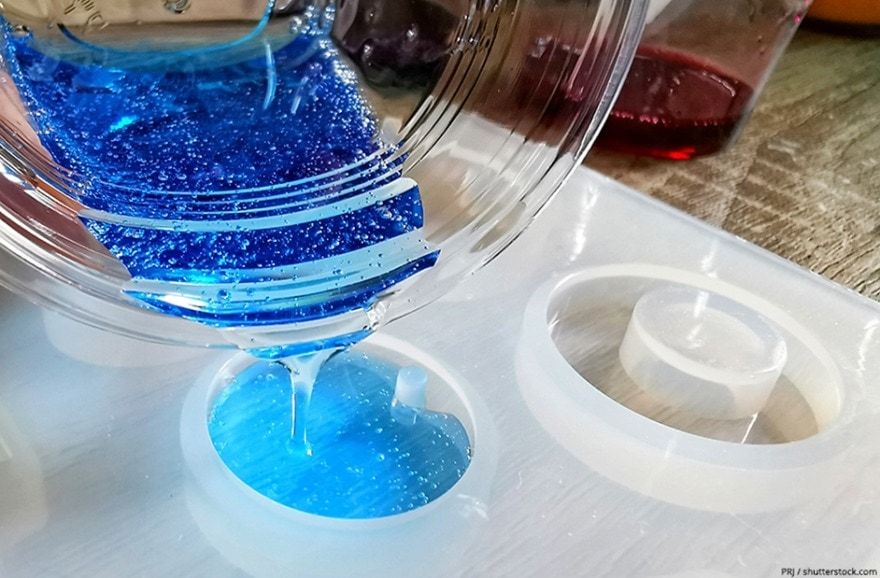

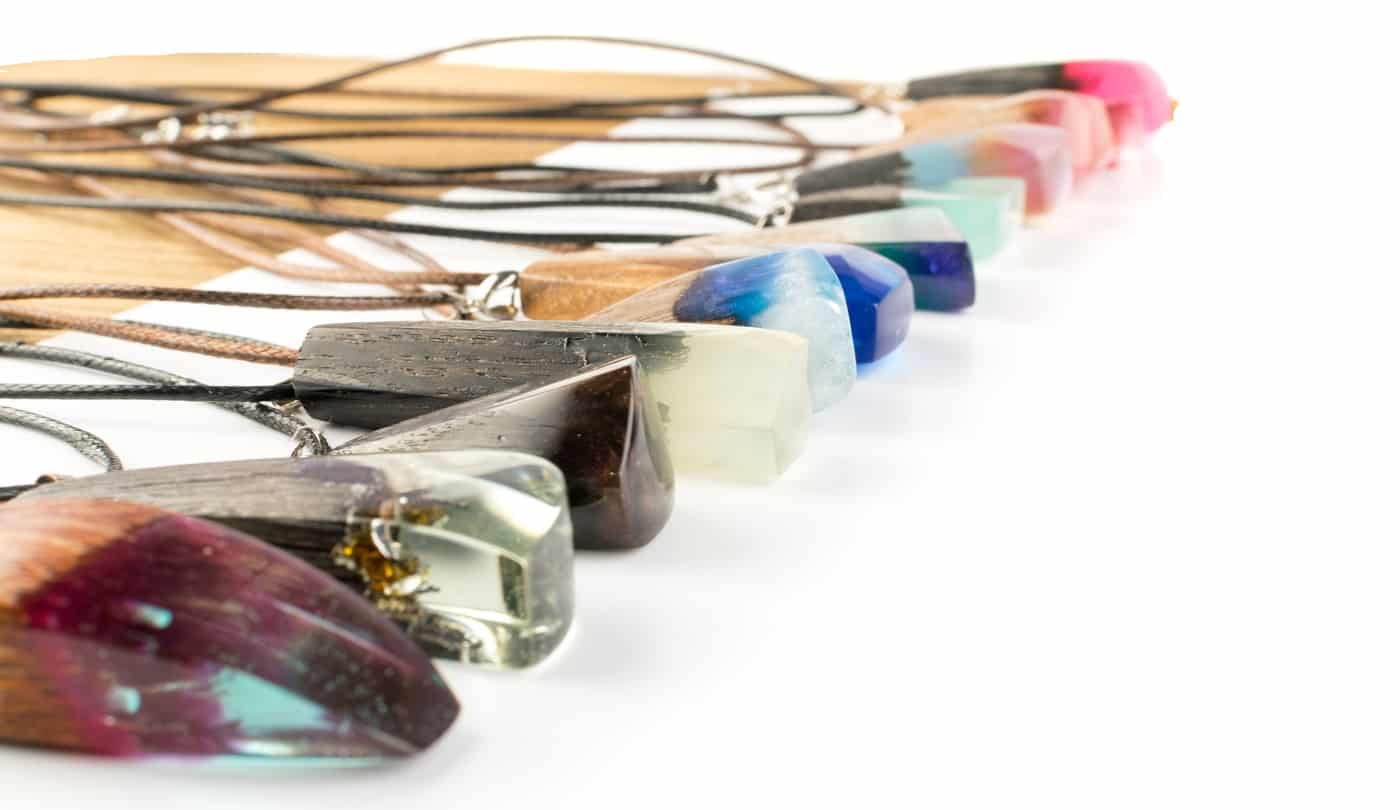

![How To Make Resin Dice 101 [All You Need to Know]](https://homesthetics.net/wp-content/uploads/2022/01/resin-dice-1.jpg "How To Make Resin Dice 101 [All You Need to Know]")


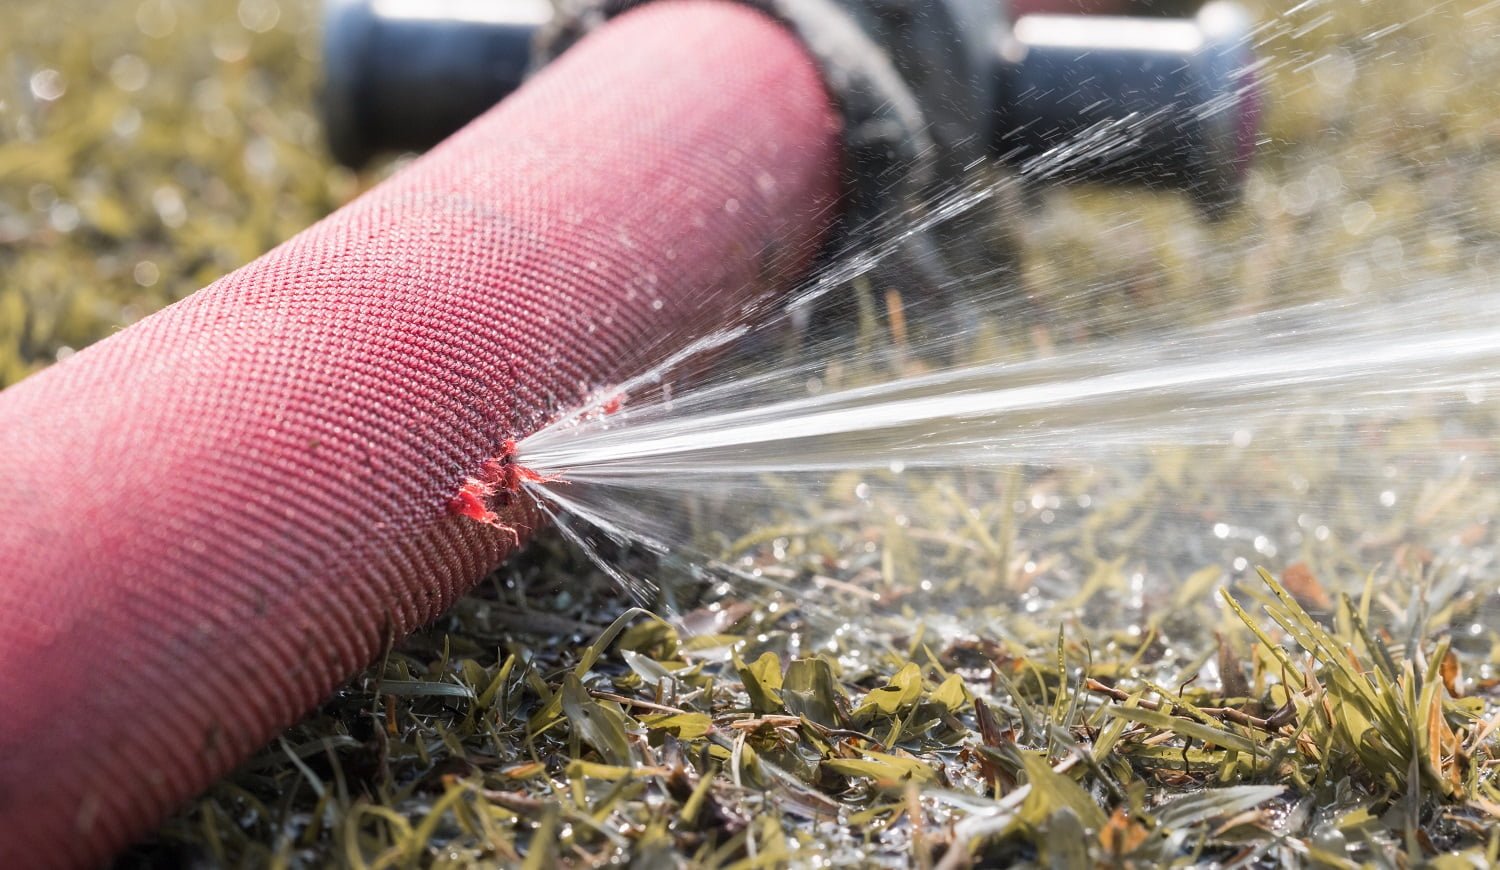
![How To Make A Resin Geode [Complete Guide]](https://homesthetics.net/wp-content/uploads/2022/01/resin-geode-1.jpg "How To Make A Resin Geode [Complete Guide]")


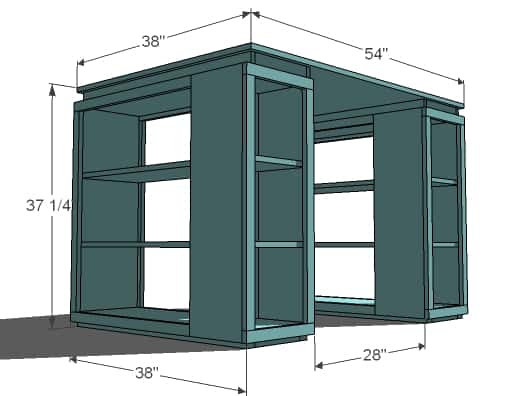


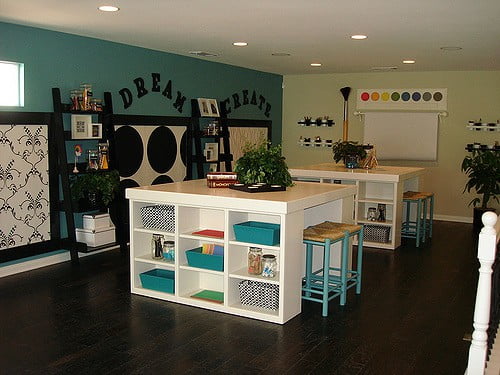

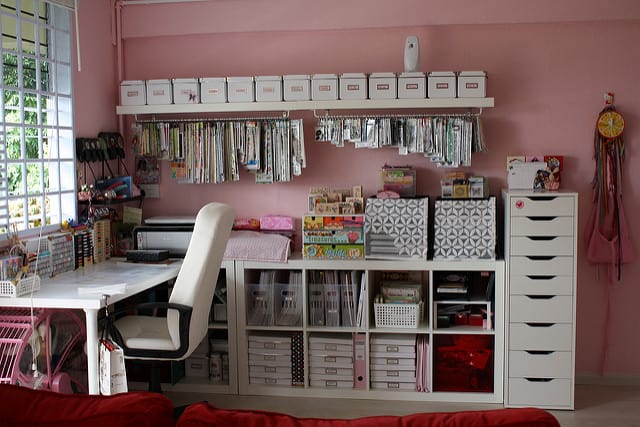
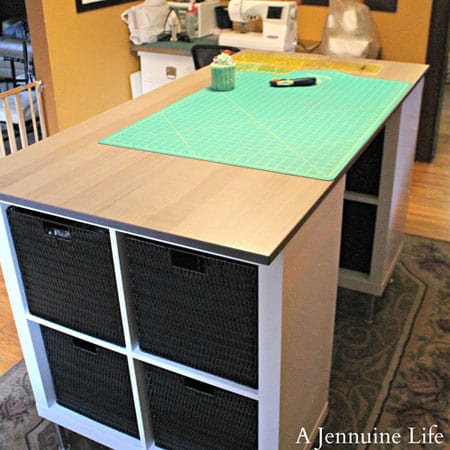

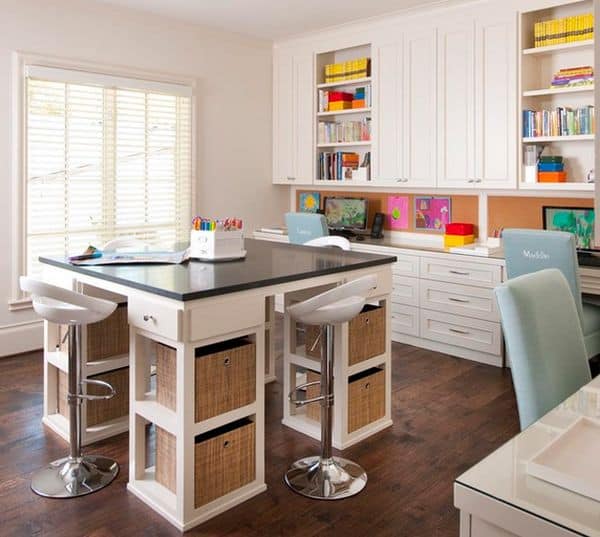


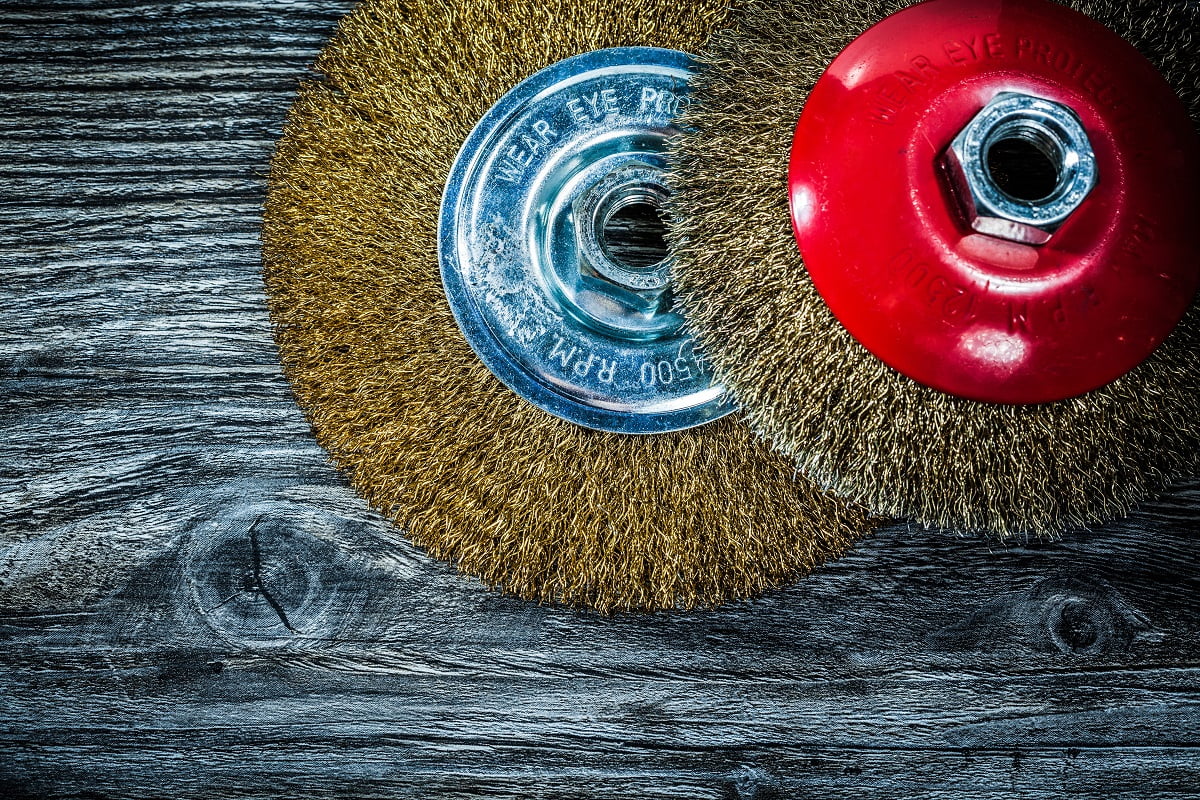
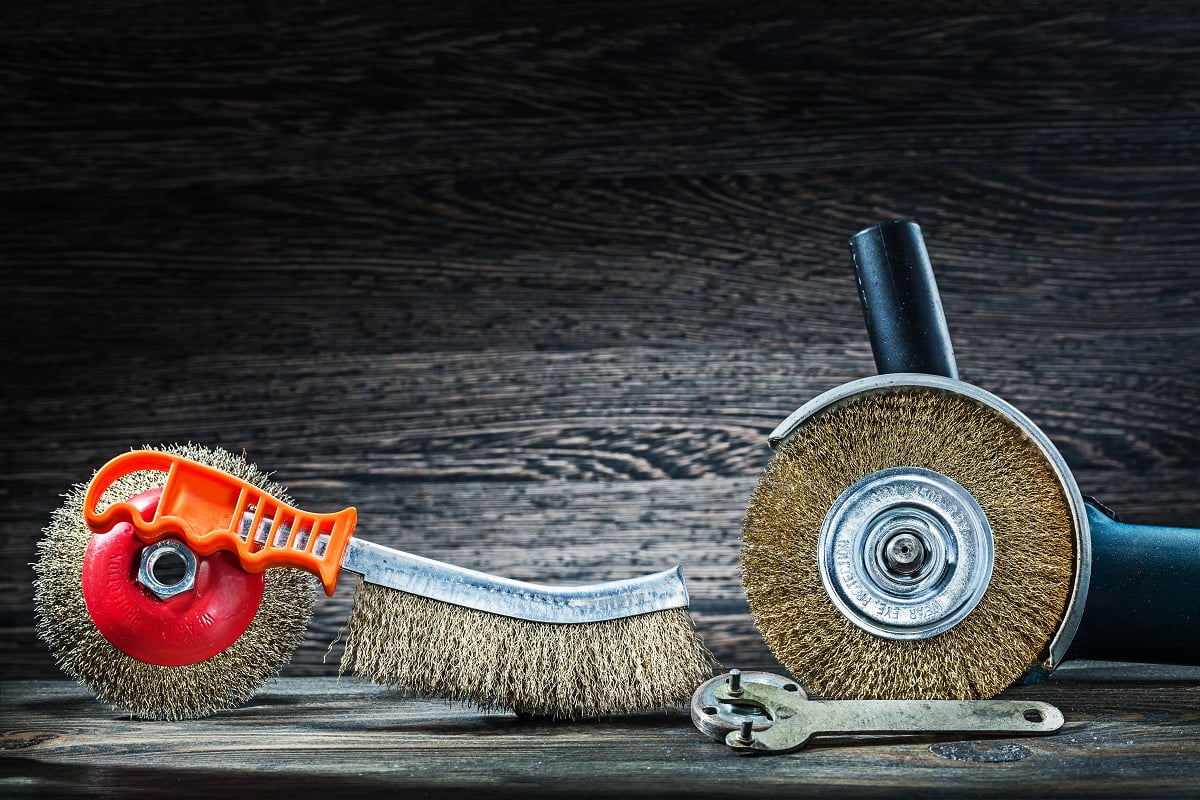


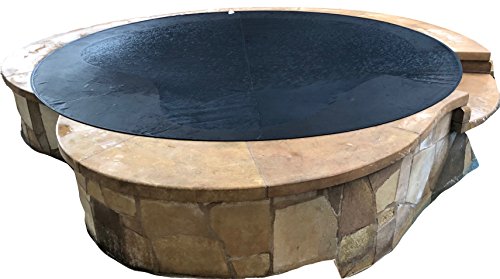


![How To Harden Sticky Resin [Uncured Epoxy Solutions]](https://homesthetics.net/wp-content/uploads/2022/01/How-to-harden-sticky-resin-1.jpg "How To Harden Sticky Resin [Uncured Epoxy Solutions]")


![How to Grow Cilantro Indoors Easily [Buyer’s Guide]](https://homesthetics.net/wp-content/uploads/2020/12/How-to-Grow-Cilantro-Indoors-Easily-1.jpg "How to Grow Cilantro Indoors Easily [Buyer’s Guide]")


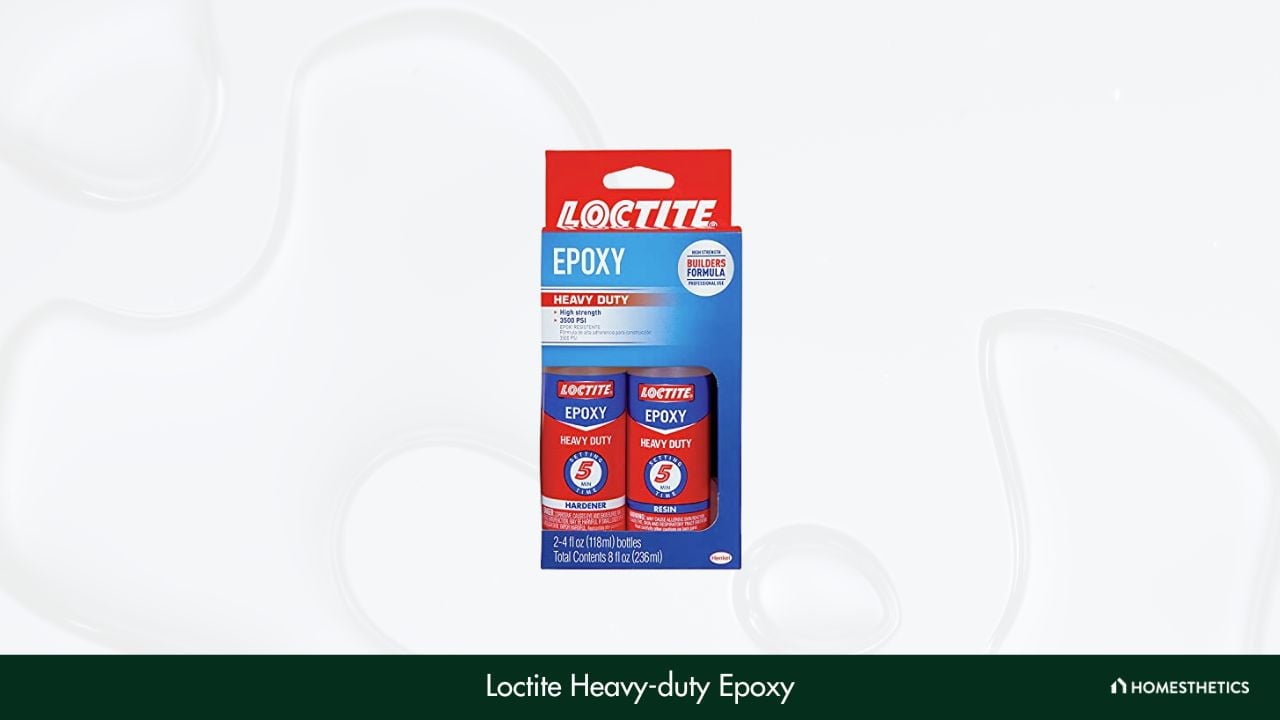
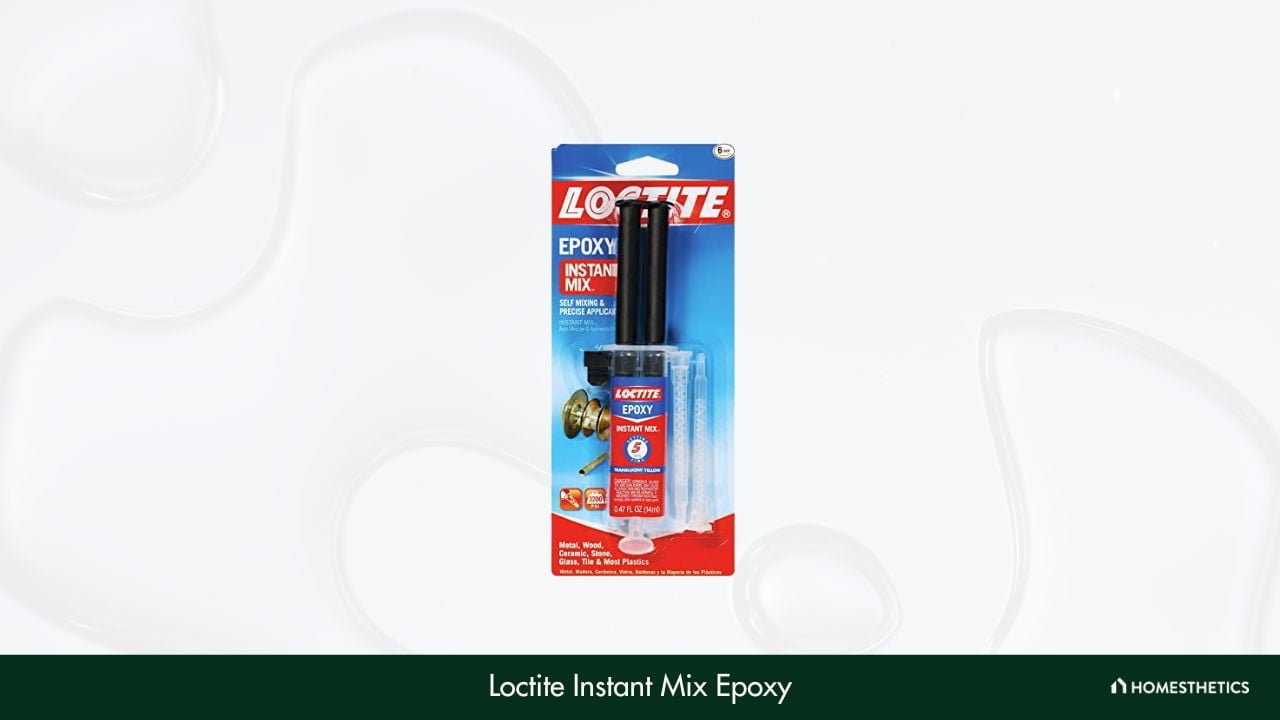

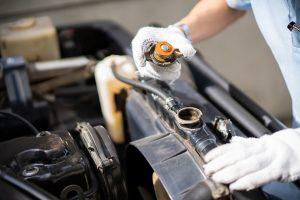


![How To Fix Epoxy Mistakes [Tackling Common Epoxy Problems]](https://homesthetics.net/wp-content/uploads/2022/01/How-to-fix-epoxy-mistakes-1.jpg "How To Fix Epoxy Mistakes [Tackling Common Epoxy Problems]")
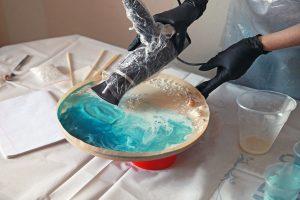


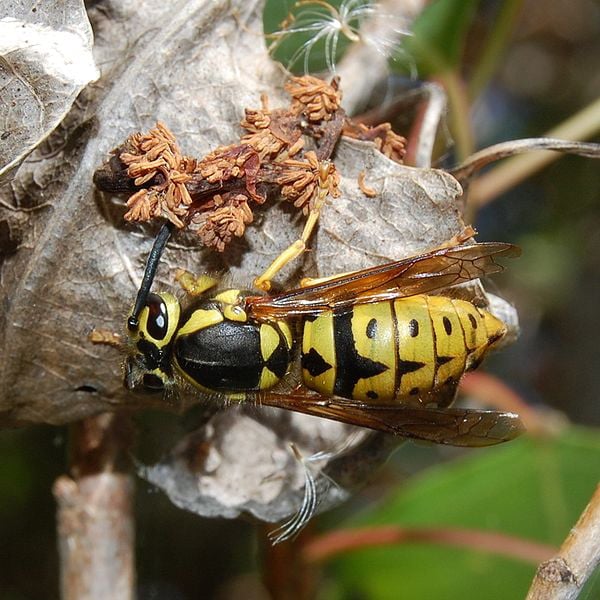


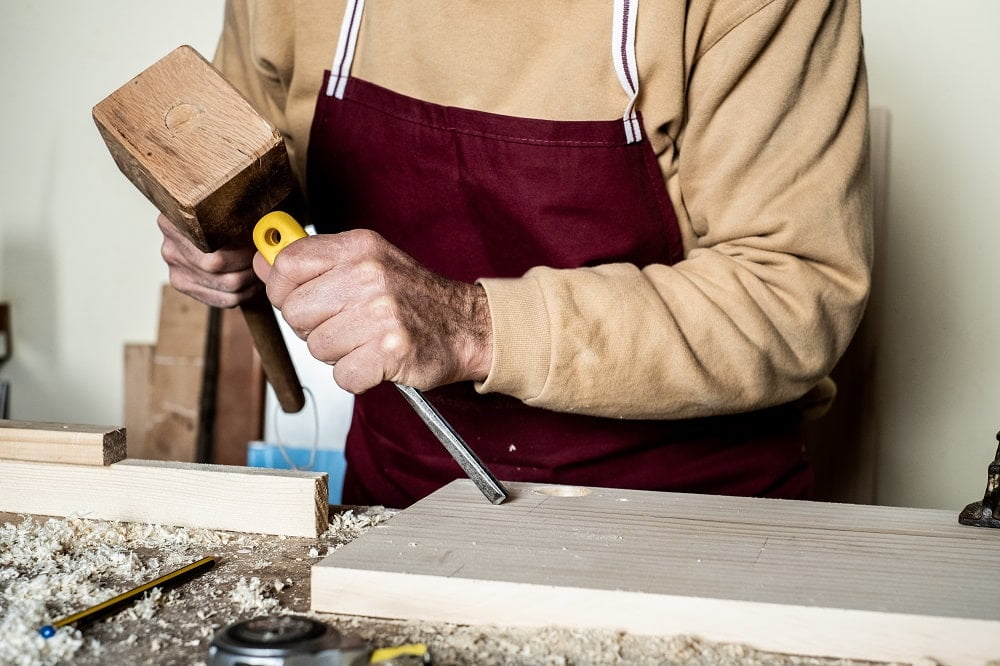

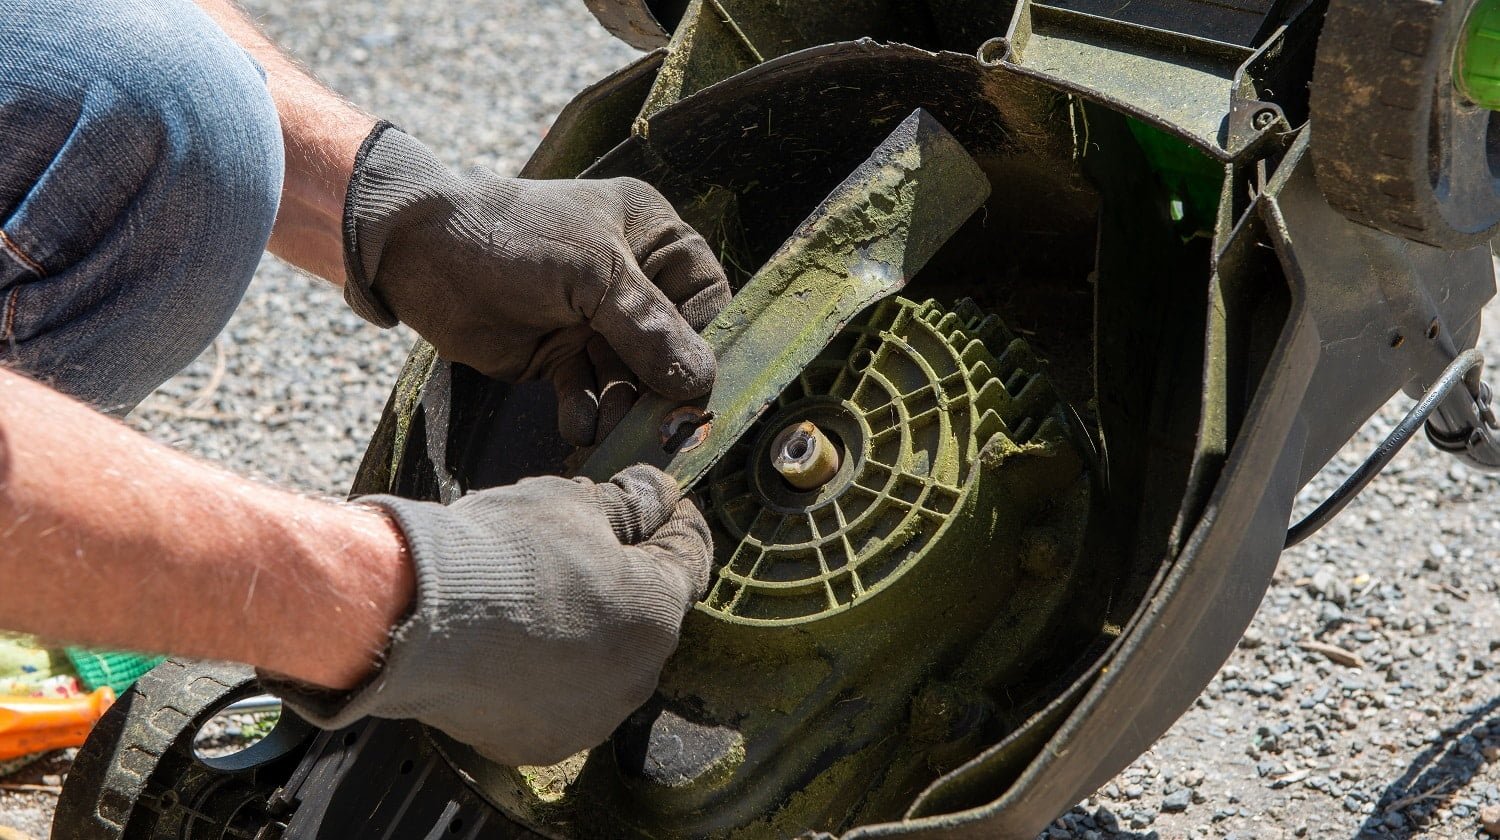
![How to Color Clear Epoxy Resin [Coloring Resin 101]](https://homesthetics.net/wp-content/uploads/2022/01/How-to-Color-Clear-Epoxy-Resin-1.jpg "How to Color Clear Epoxy Resin [Coloring Resin 101]")


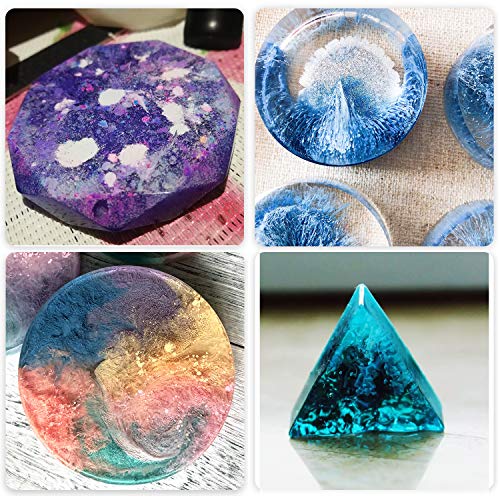


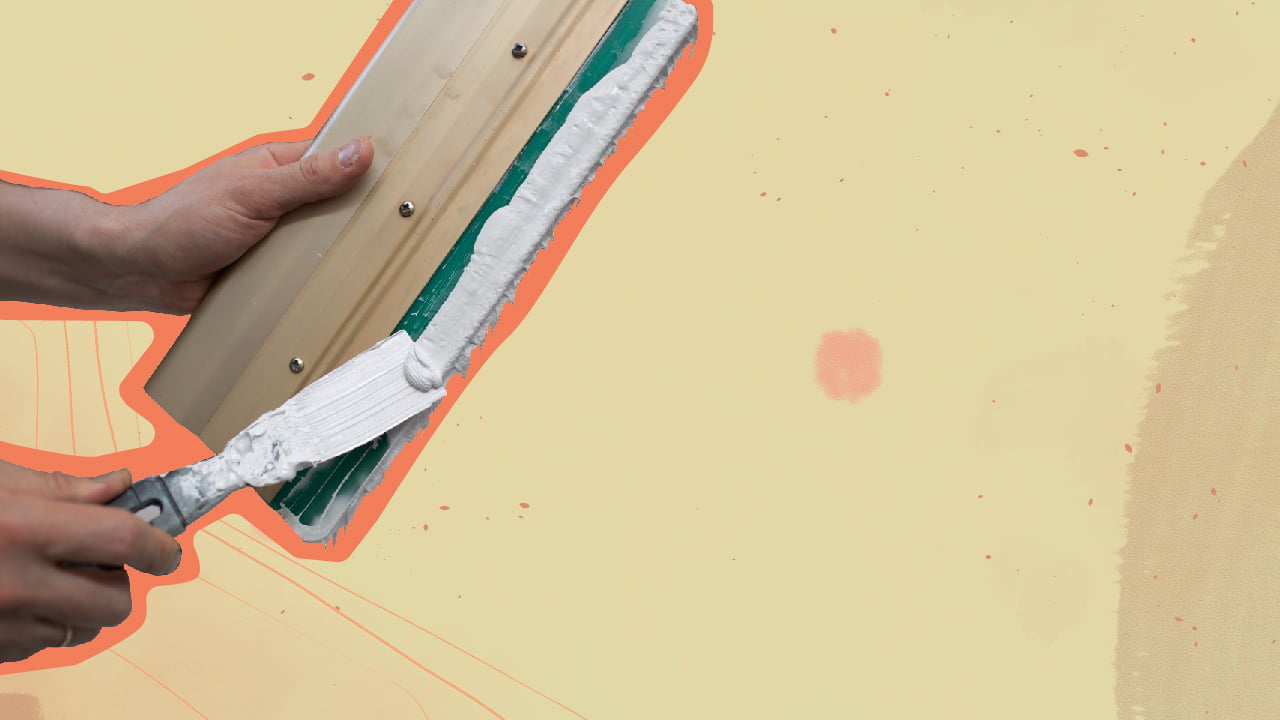

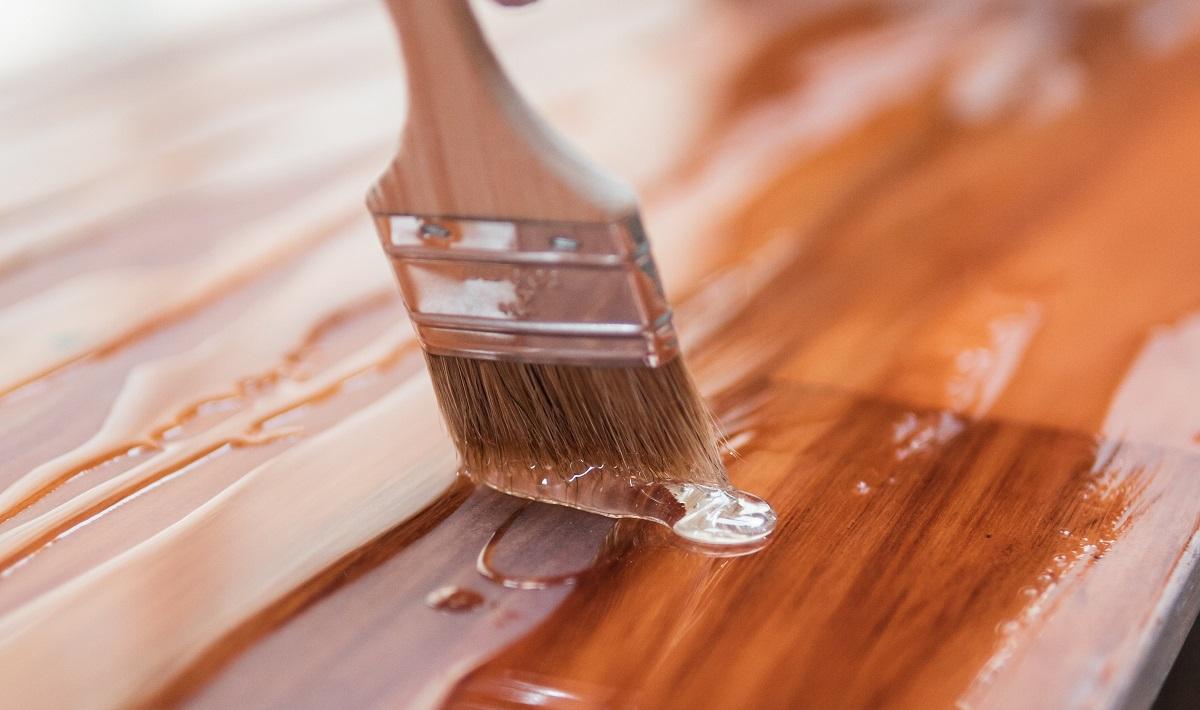
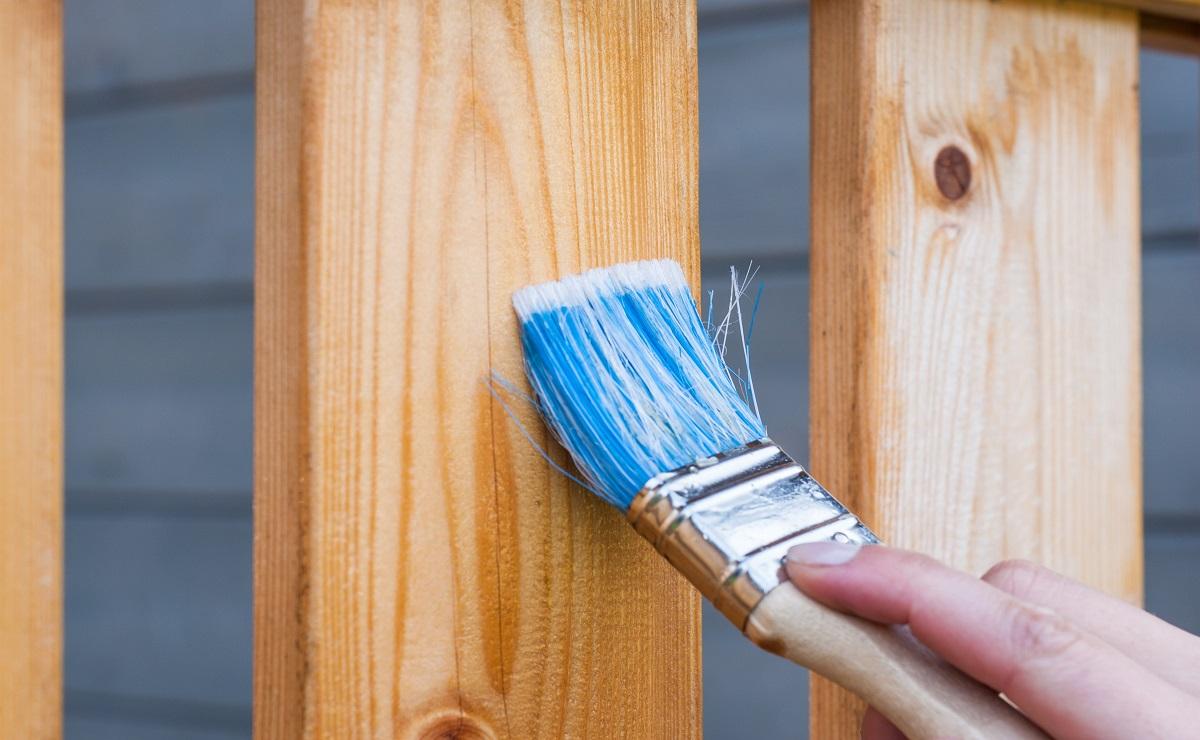


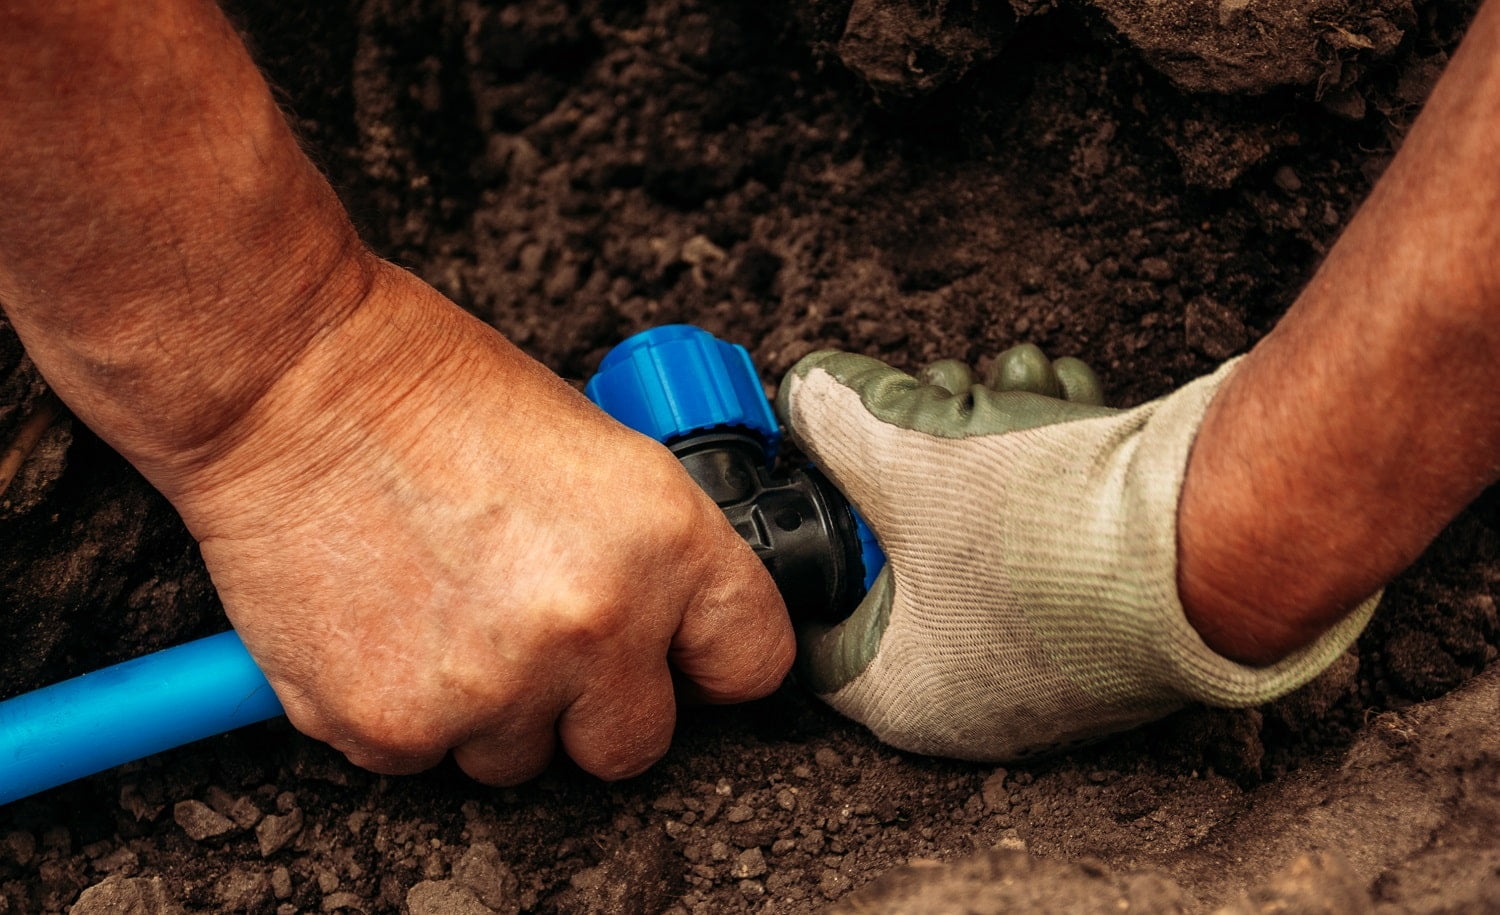


![How Much Does Benjamin Moore Paint Cost? [Guide]](https://homesthetics.net/wp-content/uploads/2021/06/How-Much-Does-Benjamin-Moore-Paint-Cost-02.jpg "How Much Does Benjamin Moore Paint Cost? [Guide]")
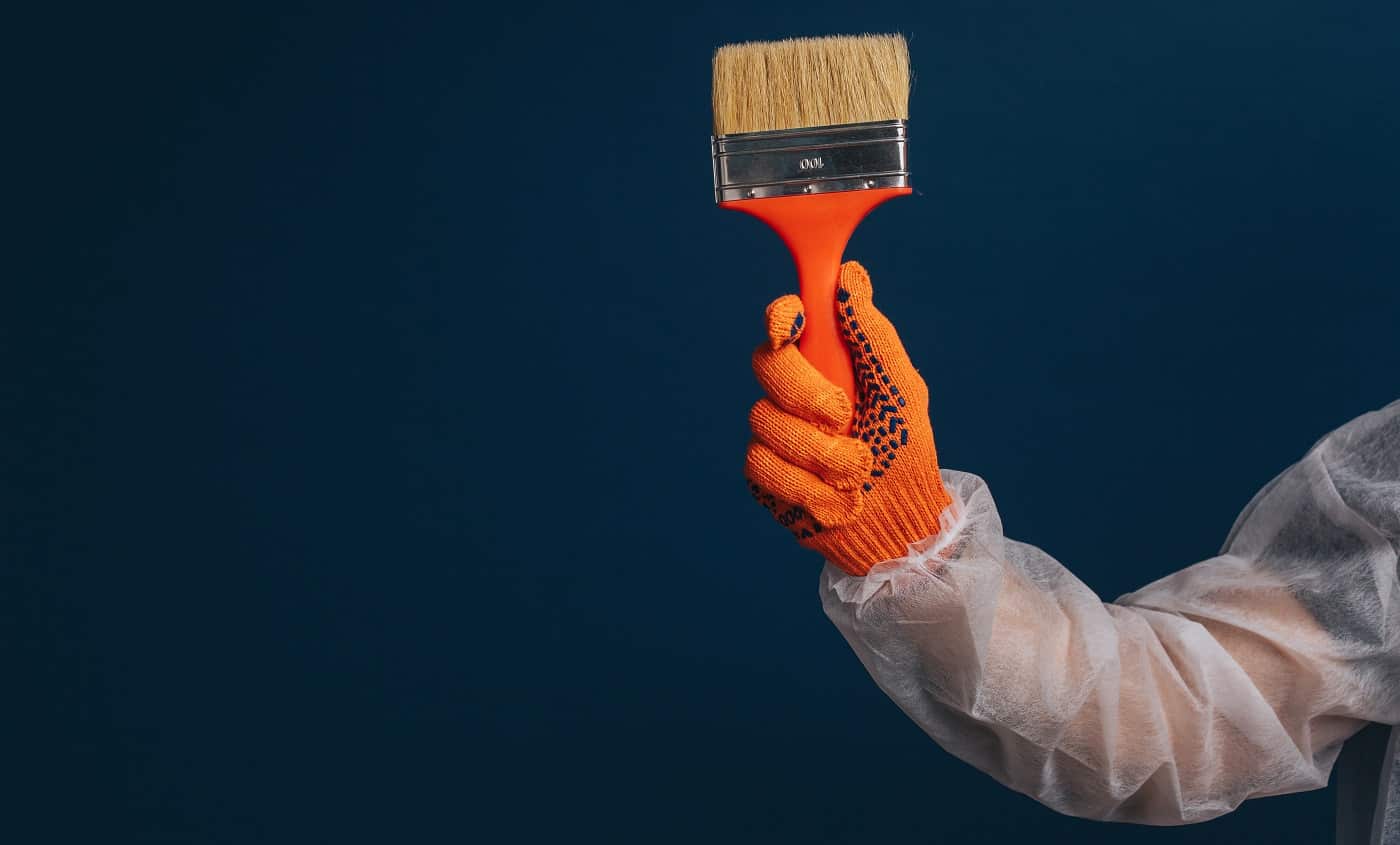


![How Much are Snow Blowers? [Costs & Maintenance]](https://homesthetics.net/wp-content/uploads/2021/01/Best-Snowjoe-Electric-Snow-Blowers-of-2020-02.jpg "How Much are Snow Blowers? [Costs & Maintenance]")


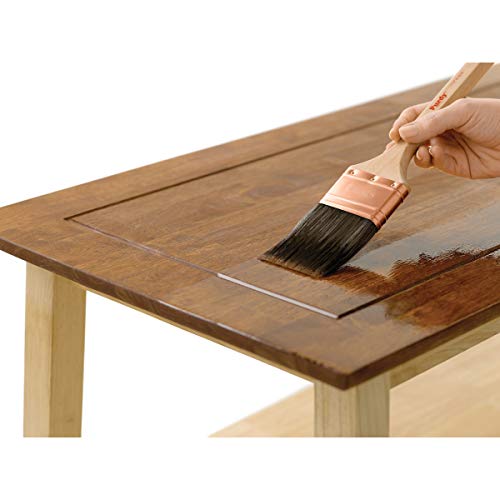


![How Long Does Polyurethane Take to Dry [All You Need to Know]](https://homesthetics.net/wp-content/uploads/2021/12/polyurethane-4.jpg "How Long Does Polyurethane Take to Dry [All You Need to Know]")


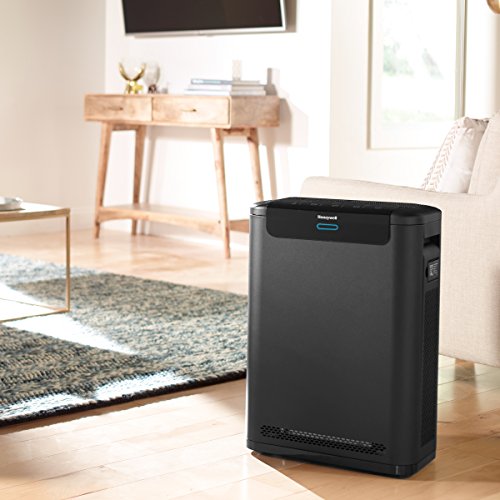
