The LeafGuard gutter system has been highly appreciated by customers from far and wide. But will it be the ideal one for you?
To answer this, there are quite a few things that need to be discussed. Thanks to the advanced design and make of the product, it has a lot of features that are worth the discussion. However, this makes it an expensive choice too.
In this article, we shall look at all the product’s facets, which includes a few of its disadvantages too, though those are not dealbreakers. After all, which product doesn’t have any negatives? In fact, we feel the host of benefits make up for the faults and would not fail to impress you.
So, without any more delay, let’s go ahead..
LeafGuard Review
Why Buy This Product?
If you didn’t know, LeafGuard is a subsidiary of Englert, Inc, a popular brand since 1966 that’s especially known for its on-site custom fit varieties. So, when you opt for this one, you can’t deny that you are getting a tried and tested brand.
This one-piece gutter and gutter guard combination is just one of the great products of the brand. Now, let us look at some of its positive features in detail…
Long Lasting Performance
Well, durability is perhaps the most important criterion when it comes to gutter systems. Removal of almost all maintenance hassles will be something that anyone will prefer, even if it requires spending more.
Thanks to the 20% thicker aluminum metal than most other products, this is exactly what you get with the LeafGuard gutter system. Also, the system is installed with non-corrosive hangers onto the fascia board, which prevents damage to your roofing materials.
As for the covering, a patented ScratchGuard finish paint ensures that the product doesn't crack, peel or chip. This eco-friendly paint also has built-in dirt retention ability.
At this point, you may be wondering that it’s heavy on the pocket. The thing is, it’s true that you might have to spend more. But installing standard, affordable gutters is sure to require a whole lot of maintenance sooner than you’d like. These include repairing foundational and landscaping damages, fixing leaks between seams or damages to the roof.
If you think all this sounds exaggerating, then you should think of the higher cost as an investment. Also, if you know anyone who has used the product, ask for their feedback. They will likely be singing praises for the product! In fact, LeafGuard has been a hugely popular choice for many customers who have used the product for more than a decade.
Single-Piece Gutter System
In most of the currently available gutter cleaning systems, you will have a separate guard attached to your already existing gutter. However, unlike that usual design, LeafGuard provides you with a complete gutter cleaning system. What you get is a one-piece product that is a combination of a gutter and a guard.
Although you might think that it is no big deal, it does make a lot of difference. An addition to your gutter would mean risking gaps or leaks. So, what happens is that your ultimate purpose of installing a gutter is not served. A one-piece system perpetually rules out any such possibility.
Besides, if you go for one of those additional gutter guards, the designs might require adherence to the roof by use of screws or nails. This may void your roof warranty in some cases.
Most of such guards are also quite bulky and give rise to issues in matching with the existing gutters. After this, it is needless to say that by getting an efficient gutter system like LeafGuard, you can do away with all such headaches.
Protection From Clogging
Clogging is something most customers are concerned about, while deciding which gutter would be suitable for them. Indeed, this is a point worth the concern and tells a lot about how a gutter system performs.
For LeafGuard systems, you will be surprised to know that there is not much to worry about. After you order one for your home, the design is customized on site. You get a shape that is specialized to ensure that there is no clogging. The result? Your gutter will have no pine and fir needles, leaves, or other debris stuck inside it.
Using the simple yet powerful principle of liquid adhesion, the system allows rainwater to move down and around a curved hood to finally drop into the gutter.
This also deflects the leaves and other debris to prevent any clog. Note that it is capable of handling 32 inches of rain within an hour which is largely above the average rainfall in an area.
Sometimes, this also not might not seem enough to you. If you stay in one of those areas which experience much heavier rainfall, the concern is natural. But with the lifetime clog-free guarantee included in the limited warranty, be rest assured that such a problem can be solved as well!
Warranty
Though mScratany customers often tend to take it casually, the warranty of any product is another crucial point to check before you go on to buy it. Some feel that with a superior quality product, the warranty is not much of an important factor.
But the truth is, even then it does matter. After all you can never tell when you would need some adjustment or cleaning, can you?
LeafGuard also fares quite well in terms of its warranty terms. You get a limited lifetime warranty that includes free repair and replacement of any part along with a repaint guarantee. So in the chance of any debris build up or faded paint, which is rare, the installation contractor will do it for free.
This warranty lasts throughout the life of the property and is also transferable from one owner to the next. In case of the latter, the warranty is valid for a period of 50 years. That’s quite a long time, isn’t it?
Installation Service and Customization
A home-safety product may be capable of delivering a great performance, but for that the installation must be done in the right way.
LeafGuard’s team of professional installers ensure the product is installed to suit the exact specifications of your home. Hence, you don’t need to worry about any misfit or mismatch with the design.
Most customers are more than satisfied with the installation procedure, and have said that the team works in a very timely manner. They have also appreciated how the professional cooperated with them and were very cordial and understanding. As for the duration, your gutter system will be installed within one day, which means there is no hassle of follow-up sessions either.
What Could’ve Been Better?
Although this gutter system is one of the finest products you will come across, it does have a few negatives. But none of them are major faults. One would be of icicles accumulating in the gutter. We noticed that whenever the climate turned cold, the LeafGuard system causes ice buildup to occur, and ultimately creates a shelf of icicles.
Often, you can’t figure out the size of the icicles, since quite a lot of variables act during every snowfall. These might damage your gutters and even the roof. A solution for this would be to find a suitable gutter heater but that can be expensive.
Also, for homes having a roof valley, the water may form streams to travel down the valley at a faster velocity towards the gutter. It can also be more than an inch deep and might cause to overshoot the gutter. To prevent this, you can install special accessories such as a bigger mesh, grates or diverters.
Pros
On-site customization as per home specifications
20 percent thicker aluminum material
Prevents damage to roofing materials
ScratchGuard Patented paint finish
Prevents clogging through liquid adhesion
Cons
Icicles may accumulate in the gutter
May overshoot with high velocity-water flow
LeafGuard Buyer’s Guide
Gutters can be called the first line of defence when it comes to dealing with rainwater. They help in diverting water away from your home, thereby protecting your cement foundations, landscaping and preventing erosion.
Besides, they also collect a lot of other stuff that happens to be on the roof including dirt, leaves, twigs and even asphalt shingles. They are hence quite essential for any home and are something you shouldn’t neglect at all. As such, purchase of a LeafGuard, or for that matter any other gutter system, should not be carried out hastily. Here are some points that you need to consider:
Costs
It is the attention to detail, professional installation procedure and the customization that make the product a bit more expensive than other systems. You should be aware of this from beforehand and as such contact the company a free estimate of the cost. It will be useful for you since they will break it down for a better perspective.
Your Needs
You must know what you need before you move on to the process of purchase. This will help you to be sure about whether you are headed in the right direction. After all, choosing the right product for the issue you are facing is important.
If you are having to clean gutters by climbing ladders or are facing water leakages, this LeafGuard system will be fit for you. There are also other LeafGuard products you can go for according to your priorities.
LeafGuard Verdict
With this, we come to the end of our discussion. Despite having a few flaws, the LeafGuard gutter cleaning system is an ideal buy for getting rid of maintenance hassles and ensuring longevity. You can also completely forget about the gutter-cleaning ordeal!
Besides, you get effective customization facilities and quality installation services provided by the company. In short, with this product installed at your home, you can become entirely worry-free with respect to the gutter!
So, go ahead and try the product. And do let us know about your experience in the comments section below.
In the building process of home, most of us envision its looks, the overall design, the charming living room, bedrooms and the rustic backyard. No one argues that those are the truly relevant ones but one should never overlook the the apparently unimportant, secondary spaces. Your living quality can be improved big time by the size of the storage space, the height of the basement, the space in the garage, and last but certainly, not least the laundry room. After all, this is where you do the work. Why not make it much easier by putting some thought into these space? A well designed room can mean less time spent doing your chores, it can mean easier tasks, especially if you have a big family.
Today we are going to take a look at a few examples of laundry cabinets that will hopefully give you an insight on how to organize the space available.
“Benjamin Moore CC-690 Piedmont Gray”.
via Cranberry Hill Kitchens
The secret to having a comfortable living environment is in the details. The way the door shuts without making a big noise and how smoothly it rolls on the rail, the depth of the sink or how reachable are the shelves. If these functional aspects have been taken care of, you can start thinking about the looks. When it comes to doing the laundry, one could argue that a front loading washing machine is more suitable for a cramped room as it allows you to build o folding space on top. The two pictures below will show you the difference.
Source Unknown
Source Unknown
Wall mounted cabinets are the best way to install storage space in the vertical plane. Keep in mind that humidity is an important factor in laundry rooms and ensuring ventilation in the room itself and cabinets alike is an important matter.
Going for a combination of cabinets, baskets and clothes hangers is perhaps the best choice. Cabinets are great for keeping the looks nice and tidy and dust free but stuff is easier to reach when there's no door to open. The composition also looks more diverse. The colors are a pretty important aspect as well. You might think that "it's just a laundry room, it doesn't need to look fancy". And you might be right. But I believe washing, folding and ironing might be done with a little more pleasure when done in a welcoming and good looking room.
Think of this space as a multipurpose room. You do the washing, drying and ironing but is that all? Could you use this space for anything else to make it more efficient? Of course you can. It can be a great storage space for extra clothes and shoes and all those things that you almost never use. And, if you have a baby, it can become the best and most fitted space in the house for changing the diapers. Moreover, you could also make use of the utility sink for washing your pets; you are the only one who knows what you're greatest needs are so use your imagination.
They`re relevant, they are able to make our lives a whole of a lot easier through simple, practical means, these spaces are able to declutter our homes. How`s your laundry room? We would love to hear from you !
The Lasko High Velocity Floor fan is space-saving and versatile. It can be mounted on a wall as well as placed on the floor for use. The fan has a durable construction, powerful air circulation, and adjustable speed settings.
Lasko High Velocity Floor Fan
If you are looking for a practical-sized high velocity fan that is convenient to move around the house, then Lasko might fit the bill.
It is a portable and handy fan with multiple nifty features. On top of having a rugged metal body and blades, the fan is highly user-friendly. And the best part is, you won’t have to burn a hole in your pocket while buying it.
Want to know more about Lasko High Velocity Floor Fan? Keep reading to find out!
Key Features
1. Steel Construction
To begin with, Lasko has a durable tubular steel construction, which gives it an edge over other plastic options on the market. Its stainless steel body makes it rugged and minimizes the chances of rusting.
Additionally, this fan is an ultimate space saver with a width of 7 inches and a height of 20 inches. Simply put, it is roughly the size of a standard wood cabinet, so you can replace your old fan with Lasko if your house looks too cluttered.
2. Metal Fan Blades
Another feature that makes the Lasko High Velocity fan durable is its metal fan blades. Unlike other cheaper plastic options, Lasko is safer and doesn’t pose the risk of blades breaking off over time.
The metal fan blades also have a better shape that cuts the air more efficiently to deliver maximum air movement.
3. Direct Air Flow
Having spoken of blades, let’s now discuss the air flow provided by the Lasko fan. It has a pivoting head that lets you direct the air flow wherever you want. So, instead of waiting for the fan to cool the entire room, you can simply pivot its blower to the spot you are sitting in.
4. Adjustable Speed
If you live in a place where the weather fluctuates too much, Lasko’s adjustable speed settings may save the day for you. When the sun is too bright outside, use the fan at its maximum speed and keep the heat at bay. But if only a few days are left before the fall season and a little breeze is all that you need, adjust the fan speed to low and enjoy.
However, note that the noise produced by the fan also changes with the speed settings. While it will create a pleasant environment in your room, it may also cause a little disturbance with its whirring.
5. QuickMount® System
Isn’t it restricting when you can either get the fan fitted on your wall or place it on the floor? But with Lasko, you won’t have to choose.
The fan has a QuickMount® System, which lets it convert from a wall fan to a floor fan in a jiffy. It saves the hassle of gathering all your tools and permanently installing the fan on the wall. What’s more, it also gives you the option to take it off the floor when the room feels too cluttered.
6. Blue Plug™
Another impressive quality of the Lasko High Velocity fan is that while delivering top-notch quality, it doesn’t cut corners on safety. It is equipped with patented, 3-prong ground safety plugs. This means, despite its steel body, the fan runs no risk of giving you an electric shock.
7. Built-in Carry Handle
Lastly, Lasko comes with a built-in carry handle which makes transporting it hassle-free. You can easily move it from one room to another or even take it out on your deck. Simply prop out the handle to carry it and prop it back in when done.
What Makes the Lasko Fans Standout?
The following features make the Lasko fan stand out from others:
QuickMount® system
Ultra safe Blue Plug™
Pivoted air circulation
What We Like
Here are a few qualities that give the Lasko High Velocity fan an edge over other options on the market:
1. Durability
The Lasko fan is a good investment owing to its durable tubular steel construction. Its robust build ensures that it stays in your house or office for a long time. And the best part is its steel body won’t rust, or the polish won’t peel off over time, maintaining the ambiance of your room.
2. Air Flow
As discussed earlier, the Lasko fan provides direct air flow, which makes it a fantastic option in peak summers and amid heat waves. Additionally, its pivots let you adjust the blower head in the preferred direction, giving you instant relief from the heat.
Standing true to its name, Lasko delivers maximum air movement and high velocity air, which makes it ideal for large spaces like garages, workshops, basements, etc.
3. Versatility
Lasko is versatile because you can easily convert it from a floor fan to a wall one. This makes it unique because not many fans offer such convertibility. It comes with a QuickMount® bracket which can easily be fitted on the wall to mount the fan.
4. Ease Of Use
Another key feature that we liked is you don’t have to be a tech-guru to use the Lasko High Velocity fan. It comes with user-friendly manual control located on the front of the fan so that you can adjust the setting even if the fan is mounted on a wall. The fan has a dial to toggle between the speed settings and tweak the air flow as required.
5. Portability
The Lasko fan is space-saving and portable, so you won’t have to buy one for every room separately. It is a practical option if you live alone or have a small family, as you can move it to different rooms. Furthermore, the fan is lightweight and has a built-in carry handle, making it easier to transport.
6. No-Tools Assembly
Lastly, the Lasko fan has a simple no-tools assembly. So, except for mounting a bracket on a wall, you won’t need any equipment or handymen skills to install it.
What We Don’t Like
While the Lasko fan had an array of impressive qualities, it also had a few features that could be improved. Take a look:
1. Fan Control
Although Lasko offers a user-friendly dial to adjust speed, it doesn’t have a remote control. Therefore, every time you feel like increasing or decreasing the speed of the fan, you’ll have to get up and manually do it. That’s why we thought having a remote control could have been more convenient.
2. Sound
The major downside of installing a fan is that it always generates noise because of its motor. Lasko also makes a whirring noise when in use.
However, the sound isn’t that disturbing when the fan is on low or medium speed. It’s just the high-speed setting that makes the most noise, and you might find it distracting.
3. Color Options
Another thing is that the fan comes in just two color options, and you can choose between metallic and black. While it's not exactly a con, we would have appreciated more color options to suit different aesthetics and ambiance.
Value For Money
The Lasko High Velocity fan packs a powerful punch with its durability and versatility. Considering all its features, we can safely say that the product has a good value for money. While some might find it a little pricier, we’d like to reassure you that it is worth every dime. That’s because it will last longer than other cheap options on the market.
Lasko High Velocity Floor Fan Buying Guide
It goes without saying that a little research is required while buying a fan for your home or working space. Here we will briefly talk about general features that you should look out for when shopping for a new fan:
1. Construction
First and foremost, check the construction of the fan. See if it has a metal build or is made of plastic. Preferably, opt for a fan with steel construction and blades as it would be durable and won’t break after some time. Some blades can be really fragile and crack while in use, posing a risk of injury to the user.
2. Air Flow
Keep a rough idea in your mind of the area of the room where you want to install the fan. All fans aren’t powerful enough to cool large spaces like garages and the basement. So, if you just want a fan for your kitchen or bathroom, a small one would be enough. But if you want to mount it in your workshop, then a high velocity fan like Lasko would be a better choice.
3. Speed Settings
Moving on, pay attention to the speed settings of the fan you are purchasing. The more speed levels, the merrier, as you will have better control over the temperature of your room. While most fans offer three basic settings - slow, medium, and fast, some offer 5. So, choose according to your budget and convenience.
4. Portability
Size and portability matter a lot if you are opting for a floor fan, as you might need to change its position frequently. However, it doesn’t matter much if you just want a wall mount fan. But our suggestion is that a convertible fan offers more options of placement and ease of use.
5. Value For Money
Lastly, we suggest buying a durable fan even if you have to shell out extra cash, as that would be more cost-effective in the long run. So, don’t stay limited to cheaper models and compare the features of the fan to its cost. Chances are, you’ll find a practical option.
Lasko High Velocity Floor Fan Final Verdict
The Lasko High Velocity fan is loaded with all the excellent features that one may need. It is robustly built, delivers maximum air movement, and comes with a built-in carry handle.
Lasko’s QuickMount® System lets you install it on a wall or use it on the floor, and the patented Blue Plug™ keeps you safe from electric shocks. Overall, it is a reasonably-priced fan, made to last long in your home.
Whether you are experiencing a meltdown in the summer heat or just feeling really hot in the room, you can always do better with tower fans.
Tower fans are one of the few devices that can make the sweltering heat bearable by helping the users in combating the rising temperature. Tower fans are responsible for circulating air around the room while filling it with a cool pleasant breeze to make the long summer days bearable.
In the world of air conditioners and superior technology, tower fans steal the show with their cost-effective performance. In comparison to other cooling devices, tower fans consume much less energy.
This article takes a detailed look at three of Lasko's best tower fans– The Lasko 2554, 2551, and 2511. Although the three models have more similarities, the differences do play a critical role in the performance of each model. Although very few, differences in the fans’ features leave a considerable impact on their overall performance and appearance.
Since you are now aware of the basic functions of a tower fan, here are some of the differences found in the Lasko models.
People living indoors often complain of bad odors and lack of fresh air. The air ionizer deals with this issue by blasting millions of negatively-charged ions in the air. The ions are supposed to recreate the smell and feeling of being outdoors.
Both the 2554 and 2551 have an ionizer in their ranks, helping the tower fans in adding a sense of fresh air inside the home.
WHISPER QUIET SPEEDS: Enjoy whisper-quiet speeds with this...
WIDESPREAD OSCILLATION: The oscillating fan with remote...
The 2511, however, is not built with an air ionizer. The absence of the air ionizer does not make the 2511 a bad model, as it is not designed to give the user the experience of the freshness outdoors.
Conclusion
The lack of an air ionizer in the 2511 makes the other two models a clear favorite with respect to the purification of air. The absence of an ionizer is not a deal-breaker but it is a significant aspect worth paying attention to when choosing an air ionizer.
Like most fans, tower fans also come with different speed settings that are able to produce stronger or weaker gusts of cool air.
The three models mentioned in this review are equipped with different speed settings that enable the user to combat the scorching heat.
Another quality of these speed settings is that regardless of which one the user activates, the unit does not produce much sound.
Even the high-speed setting produces a noise level of under 50 decibels. Customers often complain of fans that produce a sound louder than TV or Computer. Thankfully, none of the three Lesko models do this.
Tower fans are designed to be thin and tall resembling a tower. Since users want to place their fans and air conditioners higher, the height of the tower fans provides the luxury of altitude.
The height allows the cold air to replace the floating warm air, changing the temperature indoors. The 2554 and 2551 models are 42-inch taller, whereas the 2511 model is 36-inches tall. Theoretically, a 42-inch model is bound to provide more cooling than a 36-inch model.
Although the model is shorter than the other two, the difference is not significant. A height of 36-inch is still decent enough to provide cooling in an entire room.
Conclusion
In reality, the difference of 6 inches does not make a difference to the performance of the models. When choosing a tower fan, ensure that the model blends into your home’s interior perfectly.
【POWER YOU CAN FEEL】The 42" Lasko Wind Curve Tower Fan...
【ICONIC BLADELESS DESIGN】With a category defining, slim,...
One significant difference between the three models is the appearance. While all the fans serve the same purpose in more or less the same manner, the difference makes them recognizable.
The Lasko 2554 comes with a woodgrain design that surrounds the vents of the model responsible for delivering cooling blasts of wind.
Although the design is beautiful, it fails to blend in well with the interior designs of many homes.
POWERFUL COOLING: Experience exceptional airflow with the...
SLEEK DESIGN: The sleek design of this standing fan for...
The Lasko 2551 is built similarly to the 2554. However, it is made of plastic with a silver coating of paint. In comparison to the 2554, this design is more neutral and does not contradict the colors and schemes of many living rooms.
However, many experts and homeowners consider the design to be rather boring.
2511
The Lasko 2511 is another model that is made of pure plastic. However, the vents are made of silver and the body surrounding the vents is coated black. The design that incorporates shades of silver and black is rather neutral; however, it also adds a dimension of style that fits perfectly with many homes. The design has a futuristic look to it that many homeowners wish to achieve.
Conclusion
Keeping all the designs in perspective there is no clear way to determine which model is the best. There are no set criteria or standards to match the designs of the model; therefore, you can choose a design that suits your needs the best.
5. Remote Control
Tower fans are futuristic versions of the traditional pedestal and wall-mounted fans. However, one feature that you will not find in the classic fans is the lack of control from a distance. The absence of a remote control can make using traditional fans rather annoying.
In comparison to their traditional counterparts, the Lasko models have the luxury of remote controls in their armory. You can use the models without having to touch the machine. The control over the speed makes the experience of using the Lasko tower fans a convenient one. The fans also come with additional storage space where the user can keep the remote control away from toddlers and pets.
Lasko 2554 Vs 2551 Vs 2511 Conclusion
Tower fans are great for keeping the inside of our homes cool during the hot summer months. As discussed earlier, the three models have more in common than in contrast. The only significant aspect that affects the performance of the fans is the air ionizer which is not available in the 35-inch 2511 model.
The one area that the Lasko models reign supreme is the modern design of the fans which blends perfectly with almost any design and color scheme.
Therefore, these Lasko fans work brilliantly in ensuring that the summer heat stays away from your home. Regardless of which model you choose, you will not end up regretting it.
Out of the many options of Kreg jigs, which one is right for you?
The pocket hole jig by Kreg Tools is massively popular for its reliability. After all, if you are building a wooden project, you will need a tool that keeps both the material and the machine in place.
If you are not familiar with jigs, they are essentially a device with an open frame or plate which holds wood or other materials in place. But, that's not the only function; jigs also provide direction for operating and cutting objects.
Kreg jigs are one of the most trusted brands when it comes to pocket hole jigs. Today, we will look at the differences between two of the most popular jigs Kreg K4 and K5. Let's attempt to find if one is better than the other.
So without further ado, let's get to know about each brand:
Kreg K4 vs K5 Compared
Kreg Brand
Kreg is a well-known brand in the woodworking industry and has built a well-grounded reputation for itself for the past 30 years. They are the front runners in America for providing quality tools and equipment and solutions for joining, cutting, clamping, routing, and hardware installation.
When it comes to pocket hole jigs and other tools like clamps and cutting tools, they have top-notch accessories that are used all over the world. There is a story about the conception of this company - it all started with one kitchen cabinet which was built in 1989. This was when Craig Sommerfeld, the founder of Kreg, was busy working on a personal project.
The First Kreg Jig
Craig had developed a U-shaped jig (single-hole) to hide kitchen cabinet holes, which he built for Kathie Sommerfeld. Soon after that, they saw the potential of this invention and began selling this new jig in stores.
The immensely positive response of customers to this product led to the foundation of the company "Kreg Tool." Craig and his son Todd would work to create patented products that became a massive success over the years.
Expansion Into A Company
In the early 90s, Craig first patented the Kreg Jig and shifted work from the basement, expanding the company in Huxley, Iowa. Over the years, Kreg Tools made new and improved models like the K2000 jig, which was a game-changer in the industry.
This model was different because it was made from injection-molded plastic instead of metal, making it a low-cost and durable option for woodworkers. Since then, Kreg products have been used by woodworkers of all skill levels globally. The tools are widely available in stores across the USA, UK, Canada, and Australia.
Now that we know how this brand started let's find out more about the jigs they make and about jigs in general.
What Are Jigs?
A jig is essentially a device that is used to hold and support a workpiece. It is also used to navigate other tools to perform specific functions. Mainly, jigs come in handy to provide accuracy in cuts along with the ability to repeat an action many times over. This is especially useful when there is a need to create consistent and even-sized wood panels.
Often used in tapping, drilling, and reaming work, they are quite light, making them easy to use. Usually, jigs will not be attached to a machine table unless you have a larger project to finish. Also, gauge blocks are not required for these jigs.
Essentially, woodworkers use these accessories to ensure the material is stable and positioned correctly before cutting any pieces. Without appropriate tools like jigs, a material might move from the position, making wrong cuts due to insufficient support.
Also, there isn't one design that is the best when it comes to jigs. You can find various designs and features for all types of users.
Moreover, jigs are usually more complex in design than fixtures that merely keep wood in place without guiding any direction of movement. However, jigs cost more than fixtures due to their longer manufacturing process.
Types Of Jigs
There are numerous jigs available on the market, depending on your purpose. Some of the common ones are -
Plate jig
Template jig
Ring jig
Diameter jig
Angle plate jig
Pocket hole jig
Kreg Jigs
Kreg makes a variety of jigs for all purposes. They come up with various models to help DIYers and professionals with the right tools they need. The earliest jig they patented was the K3 model, which had many new features making them easy to use.
The Kreg pocket hole jig 520 pro model is the latest design in a long list of accessories and jigs. This newer model is much more versatile and is designed to build any kind of configuration with ease.
Kreg K4 And K5
Kreg products are known for their high quality and user-friendly build. And, if we talk about overall features, both provide intuitive and sturdy abilities which come integrated into both K4 and K5 models.
The primary thing which differs is how you apply it with its individual machining functions for specific uses. But one thing is clear, some types of fabricators and woodworkers would benefit more from one model than the other.
In this section, we will take a comprehensive look into both Kreg K4 and K5 jigs, so you have a better idea of individual features. We recommend taking a look at the overview so that you can figure out if either one matches your requirements.
Kreg K4 is built with the primary purpose of drilling pocket holes with unmatched precision and reliability. You may think that such a high-quality product would not be the best for students or novices. Actually, we'd be glad to tell you - this is absolutely not true.
In fact, it is quite commendable that woodworkers of all experience levels can use a product as sophisticated as this. That is why it should come as no surprise that this model contains many design elements that make operating the jig effortless.
K4 Uses
Kreg K4 can handle smaller materials or pieces of wood and guide them for precise and even cuts every single time. This prominent feature makes it one of the most capable and dependable jig options in its price range. Since the model is originally designed specifically for cutting and shaping smaller materials, you'll find many uses for this jig for regular wood jobs.
Whether you are making kitchen or tool cabinets, rolling storage crates, garden or balcony benches, work desk, small sliding wardrobe, the K4 won't disappoint. The jig can be adjusted according to the material thickness, enabling you to experiment with the settings and finding a comfortable fit for your projects.
K4 Benefits
Apart from that, this K4 jig also has a fast clamping system that makes sure the device is secure while cutting or shaping materials. Furthermore, this model is 100% compatible with other Kreg accessories and attachments, making work more straightforward, so you don't have to worry before buying.
In other words, you can easily expand the abilities of this jig by adding more valuable accessories from the same brand.
Not only that, the Kreg K4 model has an integrated drill guide that helps with making the same types of cuts repeatedly. If you have no use for this feature, you can easily remove the accessory for additional mobility and experiment with lengths and styles of cuts.
But if you choose to use the 3-hole drill guide, you'll find it is one of the best of its kind for precise incisions.
Overall, the K4 is a superb option for people who are getting started and interested in DIY projects in and around the house. This device makes it easy to make home improvements without hiring expensive professionals and also to hone your skills as a woodworker.
Even though the K4 is not the most recent model by Kreg Tools, this jig variant is still relevant today for various building purposes.
Now, coming to Kreg K5 - we can call it an upgraded version of the previous models, including the K4 jig. They have substantially increased the range and power of this jig which helps improve its functionality. Professional woodworkers will find many uses for this model because it has many new beneficial integrations which will come in handy for various projects.
K5 Uses
One of the most distinctive features of the Kreg K5 is its front-mounted handle, making it easier to draw different angles. This makes it more versatile and gives the most accurate cuts making it a favorite option among seasoned woodworkers. Apart from that, the K5 also has a unique in-built clamping system which is absent in the previous model.
This clamping mechanism is much sturdier than a separate clamp which might move upon manual pressure. But, that is not the case with this clamp; it has a better design that holds the material in place with zero movements. The advantage of this clamp is that it is more ergonomically designed and isn't too expensive either.
Another good thing about this mechanism is that it contains a ratcheting function so you can independently move around the jig as per your requirement.
K5 Benefits
The Kreg K4 did not provide an additional wing for measurement and support, but the K5 comes with an onboard storage wing. This improvement/addition makes it easier for users to access tools and keep away all of the required accessories without needing extra attachments. Another thing to note is the size; the Kreg K5 is visibly larger than K4 and other models, which must be considered.
If you are used to carrying equipment around, then there is a chance that you might not prefer the K5 because of its limited portability. On the other hand, consider if you are going to build larger pieces of wooden furniture like outdoor garden dining tables or wall-length bookshelves. If yes, there isn't a better option than Kreg K5.
We say this because K5 is designed to support larger pieces of wood, and working with K5 will help you tremendously with cutting larger panels. Another new feature of the K5 is the new swiveling dust extraction system which allows for more movement of the dust vacuum pipes.
This extra maneuverability may not seem like much, but it can prevent your pipes from tearing in case they are bent in the wrong direction. You can't find the same benefit in the Kreg K4, which has a locked dust extraction that does not allow any movement.
Lastly, K5 also comes with a small block that can be used to adjust thickness for cutting and incisions. It is portable, so you can move it around to conduct repairs and building work.
Who Can Use Kreg K4 and Kreg K5?
K4 and K5 indeed have similar features and provide almost the same functions for woodworking. But there are a few things that users might want to know about before purchasing.
Both of these models can be used by professional woodworkers as well as people who are developing carpentry as a hobby or part-time work. However, each model gives different benefits for contrasting uses, and people might find one more suitable for specific tasks.
Who Can Use K4?
When it comes to the K4 model, this model was heavily designed for beginners and DIYers to make their tasks seem less daunting. The evidence for this can be found in its easy-to-use interface, which doesn't require prior experience or reading of extensive manuals. Even a novice can complete tasks like pocket joinery without the help of a professional.
If you are looking to work with a straightforward machine that assists you well in all basic woodworking tasks, K4 might be the perfect design. It has intuitive features like a sturdy toggle clamp along with regular add ons like drill bits.
Who Can Use K5?
What's different about the Kreg K5 is that it was built with a specific purpose in mind. The makers wanted to create a product that would excel at enhanced pocket joinery machining, which professional carpenters can make the best use of. It is easy to see that K5 is the more sophisticated and upgraded jig option when you compare them next to each other.
The thing is, K5 provides many features which are not found in K4 and older models, so it becomes a good choice for specific reasons. One of the things you might like to note is the swiveling dust collector, which is exclusively available in the K5 model.
So, if you are someone who cannot do without vacuuming large piles of dust while working, you definitely need to opt for K5. Also, the swivel is not available in K4; instead, the dust collector stays fixed in one place.
In short, if we have to summarize who can make the best use of K5 - they make a perfect choice for a professional fabrication worker. We say this because even though many design elements overlap with K4, the K5 model is superior and better suited for bigger builds.
Kreg K4 and Kreg K5 Compared
Now that we have seen Kreg K4 and K5 individually with their features, let's find out how they compare to each other. In this section, we will highlight the features of both models and see them one at a time to understand which one stands out.
The primary purpose of this comparison is to explore all the details within both jigs and assist you in making an informed decision before purchasing.
Similarities
Both Kreg K4 and K5 have a 3-hole drill guide included. This features various settings for the width of materials which can be found on the main base of both jigs. In both devices, the main base has a clamping recess which allows you to clamp the tools to your workstation. Both of them also have dust collectors, but the design is vastly different.
Feature Comparison Between Kreg K4 And K5
Clamping System
Let's start with the K4 clamping system. The K4 features a large clamping mechanism, and the main purpose for this aspect is to secure any materials or tools you are working with. This feature makes sure that the wood you need to cut is firmly in place so that the cuts are even and error-free.
Also, it's easy to secure to the workbench, so that is one less thing to worry about.
But let's compare K4 to the clamping system of K5. Unlike K4, which has a separate clamp that needs to be adjusted, the K5 has an in-built clamping system which is far more superior.
Attaching the tool and material to the table or workstation is pretty easy and cost-effective in the long run. We say it is cost-effective because of two reasons. The first being its sturdy nature which does not rust or spoil, thus lasting for years to come. Secondly, there is no need to purchase any extra accessories or attachments to fix the jib to your workstation.
Which one is superior? - Kreg K5
Collection Of Dust
Any woodwork requires a lot of drilling, and creating pocket holes using jigs involves even more drilling leaving large quantities of sand dust. Ideally, you will need a jig system that can efficiently remove most of the dust as you work.
K4 and K5 both have a dust port which allows for seamless collection of dust, saving your surroundings from sawing and cutting messes. However, one of the drawbacks of K4 is that it does not come with a method of integrated dust collection features.
There is a port that you can attach to the shop vac and remove the dust, but it does not have much movability. This can result in dust falling to the ground if not used correctly and then sweeping it off, making it time-consuming. If you think this will be too much of a hassle, maybe you should steer clear of the K4 and check out the Kreg K5 instead.
K5 has a swiveling dust collector that can be attached to the vacuum to remove dust simultaneously while cutting materials. Since it moves from side to side, the added movement gives the hose/pipe more leeway to move around. This feature makes it easier to attach the shop vac and protects the hose from tearing overuse.
So, even though both the jigs come with a dust collection feature, the K5 is definitely one step ahead.
Which one is superior? - Kreg K5
Portability
The K5 is physically larger in size and slightly heavier than the K4 model. The weight might not seem much at first, but it might get tedious when you need to carry it from one workplace to the other. Most users prefer to own a tool that fits in the truck and can be driven around to different locations.
This is all the more important for professionals who need to carry their gear to a client's house. We think that both are well designed to carry and can easily be placed at the back of your truck. But, if we compare the two, the K4 model is lighter and gives better portability.
Which one is superior? - Kreg K4
Storage
When it comes to K5, this pocket hole jig is clearly superior because it fulfills all the needs of a jig while providing a storage area. The design has support extension wings on two sides which are absent in the K4 model.
The second benefit of these wings is that they double up to make storage containers. This makes the woodworker's packing and storing job much easier, and there isn't any need to find a separate container to keep the jig in.
Which one is superior? - Kreg K5
Other Features
In the K5 master system, there is a recess that makes a place for the clamping tool to fit. The tool can be secured to your work table, and this is the same for both K4 and K5. However, the difference in the K5 jig is that it has a front mounting clamping system that includes an ergonomically designed handle.
To use this, you have to apply a little pressure and move the handle downwards, away from the jib and the table. This is an update to the older model and allows for a firm grip of the material, which does not move while cutting.
Functional Differences Between Kreg K4 And Kreg K5
Usage
Kreg K4 is designed keeping in mind newer woodworkers, so they are pretty easy to use and don't need elaborate instructions. Since it is made for beginners and DIYers, the parts aren't too complex either. On the other hand, if we compare this to the Kreg K5, it is pretty clear that this model is more advanced than the K4.
There is nothing surprising about this because most companies like to release new and improved models from time to time. In the same way, you can consider the K5 as a better and improved version of K4 and other previous models.
However, there is one specific function for which K5 is designed. Kreg K5 is pretty much the best jig when it comes to enhanced pocket joinery machining. So, if this purpose is essential for your builds, it doesn't get much better than K5.
Clamp And Dust Collector
Kreg K5 has a new feature that was not previously available with the K4 model. It has a swiveling dust collector port to allow the user to attach pipes for efficiently removing dust while working. Since this dust port can swivel, it gives a wider range of movement. They don't provide any other kit for dust collecting, so you'll have to purchase that separately.
K4 does not have this feature, but it does come with a toggle clamp. This toggle clamp is pretty durable and can be used to secure wood components in position securely. The clamp provided with the K4 model can hold thicker materials firmly and are overall reliable.
Project Size
Those of you who are going to build elaborate wooden pieces, the Kreg K5 would be preferable. The overall features of K5 are more than enough to support large-scale projects and fulfill all the needs for evenly cutting larger wood panels.
However, for smaller projects like wooden tables, kitchen cabinets, garden benches, crates, small dining tables, the Kreg K4 model would be good enough.
Price
If we compare the price, the K5 is priced a bit higher compared to the K4. However, if you think about it, K5 significantly improves almost all the aspects of the previous models. It even comes with extra features providing much more versatility than the K4. This is why it also costs more than other models, including the K4.
The Major Differences - Summary
Forward Facing Clamp Lever in K5 allows for smoother operation
Storage Wings in K5 help with storage
In-built clamp In K5 makes for easier and faster woodworking
Our Verdict - Is There A Winner?
Without a doubt, the better jig is the Kreg K5. It has more features than the previous models and was a pleasant improvement to the K4.
Not that K4 is a subpar product. In fact, K4 has plenty of valuable features, which make it a great product to start woodwork for newbies. Besides, not everyone needs an overly powerful and advanced system, especially not those invested in house repairs and DIY.
Which One Should You Buy?
Making a selection of the best model will depend on your needs and purpose. Although one model is far better than the other in some ways, it might not be the right choice for you.
If you are a woodworker or love to DIY for home improvement, the K4 would be enough to take care of all your needs. The older but functional model would be a reliable choice for repairs and building smaller objects in your garage or backyard.
Since the K4 is priced on the lower end, you can keep that in mind if you are working within a budget. The best part is when selecting this option; you are not compromising on quality; thus, you get a low-cost yet good-quality product.
Alternatively, if you are a professional material fabricator or woodworker, you might need a robust system that can last many hours of heavy work. If that is the case, then the K5 would be better suited to your work since you might need to use it for long hours.
Final Words
So, here was our comprehensive comparison between two of Kreg jigs - the K4 and the K5.
We hope the information in this guide helps you to make the best decision based on your woodworking needs. As we already mentioned, we did find that Kreg K5 was the better choice out of the two.
However, your work experience, the scale of work, and the frequency of work will decide which model you finally purchase.
All you need to know about K4 and K5 jigs are listed in this article. So, feel free to come back if you want to check on some info again. If you already have either of these jigs, do you agree with our comparison? Tell us about your experiences in the comments below.
According to DIYers, a pocket hole jig is an essential component in their toolbox. In fact, most people don't leave for work without carrying one.
When it comes to choosing a suitable pocket hole jig, the first brand that comes to mind is the Kreg Jig. Believe it or not, it has made woodworking a lot easier and the best part is that even first-timers can build projects without learning any special skills.
However, its high prices have got many DIYers looking for alternatives. So, in this article, we have compiled a list of the 11 best alternatives to the Kreg Jig. These options are just as good and some of them may even surprise you with their performance.
General Tools is one of the world's leading manufacturers of high-quality and innovative precision tools. And the 850 Pocket Hole Jig from the brand is certainly no exception. Backed by a lifetime warranty, this product offers everything that you would need to successfully complete all your woodworking projects.
ANGLED DRILL GUIDE: The drilling kit includes a pocket hole...
Why Did We Like It?
Coming from a brand with over 100 years of experience, this unit left us impressed with its accurate output. You can use it for a wide variety of applications, such as nailing screws in tight spaces, constructing face frame cabinets, and more.
Weighing just under 2 pounds, it is highly portable and you can even mount it on a bench, thanks to its high-quality camping system. Plus, it is super easy to use, which makes it the perfect companion for both professionals and DIYers alike.
Apart from this, it is compliant with the FSC standard, meaning it is made of ethically sourced wood. It is also backed by a lifetime warranty from the manufacturer, so the brand has got you covered and helps solve any defects.
What Could've Been Better?
We believe that it can be a good alternative to the Kreg Jig in most respects. However, while testing it, we noticed that the height of the holes could not be adjusted according to the thickness of the material, which was slightly disappointing.
Founded in 2002, Milescraft is one brand that consistently delivers innovative and user-friendly products that stand out on the market. Understandably, the 1325 pocket jig is an alternative you wouldn't want to miss out on, mainly because of its four-board thickness setting.
Spring-loaded sled adjust button allows the jig to be set to...
Built-in imperial & metric scales allow you to easily...
Why Did We Like It?
We were thoroughly impressed with what this product offers. For starters, we loved the built-in metric and imperial scales that let you track the thickness of the workpiece. Speaking of thickness, it comes with 4 different board thickness settings ranging between 1/2" and 1-1/2", making your work a lot easier.
Furthermore, the hardened steel creates a dense tolerance between the drill bit and the bushing. This allows you to make a precise and clean pocket hole while also minimizing tear-out. Also, the 3/8" stop collar sports a split design that prevents the set screw from slipping when secured.
We love its heavy-duty plastic storage case, allowing you to keep all the important components in an organized manner. What’s more, the price is affordable, and it is backed by a 3-year warranty, which makes it worth the investment.
What Could've Been Better?
Without a doubt, this product is an affordable alternative to the Kreg Jig. It supports light-duty work and is a suitable choice for occasional DIYers and beginners. So, it may not be the best option for those who are looking to use it professionally or for large-scale tasks.
Our next recommendation is yet another quality addition from the house of MulWark, a brand that is committed to delivering affordable and durable DIY tools. On that note, allow us to introduce you to the Premium Pocket Hole Jig System Kit, an all-in-one set and a robust alternative to the Kreg Jig.
Right from the get-go, its premium-quality construction caught our eye; made using re-sulphurized hardened steel, this product is one of the most durable options on our list. Also, it comes with a magnetic spot that enables you to easily adjust the position of the jig.
Moving on, you can easily measure the thickness of your workpiece and place the jig accordingly, thanks to its adjustable thickness settings. In addition, the guide hole is positioned at 15 degrees, thereby reducing the size of the pocket hole for efficient output.
That’s not all and you will find that it has a lifetime warranty, which shows that the manufacturers have faith in their products. Overall, this set is everything you need to get started with your very first pocket hole assignment.
What Could've Been Better?
We didn't come across any significant drawbacks while testing this product. But, we feel that the instructions could have been a lot better; it was unclear, and the booklet was quite small, which could be an issue for first-timers. Other than that, it works perfectly.
For over 70 years, Wolfcraft has dedicated itself to designing high-quality products that users can rely on for a long time. And the latest 3751405 model is a true testament to the brand's quality and reliability. Moreover, it features extremely durable and lightweight construction, making it a tough competitor to Kreg Jig’s products.
Produces uniform hole spacing to create professional corner,...
Works with materials from 1/2 in to 1-1/4 in thick
Why Did We Like It?
In our opinion, the main USP of this product has got to be its 9-hole guide, which saves you from the hassle of marking and measuring holes. Additionally, each guide has a bushing made of hardened steel, delivering much-needed durability.
Now, its unique clamp system deserves mention, as it lets you join boards for simultaneous drilling. What’s more, it features a doweling jig made of cast aluminum which is perfect for creating edge-to-corner, edge-to-edge, and T-joints.
Impressive, right? Well, there's more and we were delighted to find that it works perfectly with materials having thickness between 1/2" and 1-1/4". Plus, with the brand's limited lifetime warranty and affordable price tag, you can rest assured that it promises to be a valuable investment.
What Could've Been Better?
For the most part, it does a pretty decent job. Having said that, the guide bushings are a bit oversized, which prevents them from delivering accurate results. This was quite disappointing given all the exceptional features this unit comes with.
Next up, we have another outstanding alternative to the Kreg Jig from Massca, a brand that manufactures top-quality products and is popular among DIYers. Hence, it should come as no surprise that the AluminumPocket Hole Jig System Set is one of our top recommendations.
Adjustable Depth Setting – Each pocket hole jig kit...
Why Did We Like It?
To begin with, we really liked that every jig sports a depth knob, which helps in adjusting to the wood's thickness to avoid splinters and damage. Plus, its top-notch hole precision lets you repair wood joints and create accurate woodworking holes with ease.
As far as the build quality is concerned, it is made of heavy-duty aluminum, which offers a sturdy and reliable support base while working. We also found that it comes with a lot of carpentry accessories, including drill bits, screws, and a stop collar to assist with your DIY project.
On top of that, the built-in dust collector does a great job in collecting all the dust particles and debris, hence keeping the workspace clean. Naturally, it is one of the highest-rated options on the market.
What Could've Been Better?
Despite testing it rigorously for hours, we couldn't find any significant flaws with this product. But, it is not for those who are on a humble budget, as it is one of the most expensive alternatives to the Kreg jig. That being said, the quality of this model totally justifies its price tag.
We are halfway through with our recommendations, and here is a product from VINWOX that you can't ignore. Featuring sturdy steel drill guides, the pocket hole jig system allows you to achieve optimal accuracy by laying down ideal pocket holes for clean wood joints.
✅Pocket hole jig kit creates pocket holes at variable...
✅Hardened steel drill guides achieve maximum precision for...
Why Did We Like It?
To be honest, the VINWOX Pocket Hole Jig System is not just any other conventional jig system. And the main reason behind this is the fact that it can create pocket holes at various center distances for a wide range of materials. In addition, the super sturdy drill guides further deliver clean pocket holes.
Now, it is made of sleek and highly-durable anodized aluminum, which helps it stand the test of time. Added to that, consumers will find a ton of woodworking accessories in the kit, including bezels, wrenches, drills, and screws for a hassle-free DIY experience.
Moreover it is priced quite reasonably, and can handle large-scale projects quite conveniently. So, it’s safe to say that it is one of the best Kreg Jig alternatives that any DIYer can hope to get their hands on.
What Could've Been Better?
It is a noteworthy alternative to the Kreg jig, mainly because of its durable aluminum body and its compatibility with materials of varying thickness. Having said that, the markings on the bushing are all backwards, which may confuse first-time users.
Armor Tool doesn't need any introduction as it is a trustworthy brand in the DIYer community. On that note, we bring you one of its finest innovations, the APJ1400 Auto-Jig Pocket Hole System. It is a must-have for all DIYers and woodworkers looking to create clean pocket holes.
REVOLUTIONIZE YOUR JOINERY - Say goodbye to manual...
EFFORTLESS CLAMPING - The Auto-Adjust clamp adapts to...
Why Did We Like It?
It is safe to say that this model is one of the top performers in all aspects. Its self-adjusting feature makes it suitable for heavy-duty projects while the auto-adjust clamp enables you to secure woods of various thicknesses. No wonder, it acts as a suitable replacement to the Kreg jig.
Another thing that we really liked was its color-coded screw system, which makes it super convenient to match the size of the screw to the dimensions of the pocket hole. Plus, it is rust-resistant, thereby ensuring a longer tool life.
It also comes with a detailed instruction manual, so that you can easily mount it on any worktable. Moreover, its built-in dust collection does a pretty decent job in keeping the workstation clean.
What Could've Been Better?
Despite being a premium-quality product, it has a couple of downsides. Firstly, the holes tend to clog which makes it challenging to get the desired output. It also features an expensive price tag, which could be beyond the buying capacity of most DIYers.
Pros
Suitable for heavy-duty use
Rust-resistant screw system
Suitable for working on woods of varying thickness
The Rockler Universal Drawer Slide Jig has been designed for a spectacular performance. Whether you are an occasional DIYer or a seasoned pro, this product may help you achieve the desired results. Featuring a sturdy locking wedge, it is the ideal option for inserting various drawer slides.
Works For Most Drawer Slides: The Rockler cabinet hardware...
Why Did We Like It?
With the right balance of smoothness and precision, it is one of the top alternatives to the Kreg Jig. It features a sturdy locking wedge to securely hold the slide in place to prevent slippage. In addition, you can clamp the jig further for more stability.
Now, for any jigs, drawer installation is a major headache, but this product handles it with ingenuity. It can easily accommodate drawer side heights up to 1-3/4," and the adjustable index foot enables top-notch accuracy.
Also, it doesn't matter if you are a first-timer or a professional because using this jig is super easy. Not to mention, all its outstanding features are coupled with an affordable price tag, making this product one of the best options on the market.
What Could've Been Better?
The performance of this product is undoubtedly flawless, but unfortunately, the same cannot be said when it comes to the build quality. It was made of flimsy material, therefore it was not at all sturdy. Other than that, it works perfectly.
Now that we are nearing the end of our list, here's another product that you should seriously consider. It’s time now to introduce you to the WA1527 Metal Pocket Hole Jig Kit from WEN. This product is one of the most durable alternatives to the Kreg Jig as it’s made using heavy-duty anodized aluminum.
Drill quick and accurate pocket hole joints; perfect for...
Adjustable toggle clamp accepts a range of thicknesses,...
Why Did We Like It?
According to us, one of the key highlights of this product is its adjustable toggle clamps which are capable of accommodating woods of varying thickness. Plus, the hardened steel drill lets you drill precise and clean pocket holes, making it a suitable choice for woodworkers and carpenters alike.
Furthermore, it is built using top-grade anodized steel, which ensures durability and long tool life. But despite its incredible durability, it weighs just under 5 pounds and you can easily carry it from one jobsite to another.
We also liked that it contains 100 screws of sizes between 1" and 2", ensuring that you never run out of screws while working. Moreover, the mounting holes help you place it on a benchtop very easily and you can use its L-base to drill holes in tight corners.
Lastly, like most WEN products, this pocket hole jig is also backed by a 2-year warranty.
What Could've Been Better?
This product is undoubtedly an outstanding choice for professionals as well as DIYers because of its clean results and durable build quality. But, we noticed that its instructions are unclear and difficult to read. Meaning first-timers and occasional DIYers may view this as a significant drawback.
The T&A Jig Joinery Kit deserves a spot on this list mainly because of its multipurpose nature. Featuring 3 different drill bits, it lets you nail a wide variety of DIY as well as commercial projects with ease. But there's a lot more to this product, so keep reading.
To begin with, we were impressed by its versatility and affordable pricing but that doesn’t mean it compromises on performance. You can use it for constructing a wide range of things, including dressing and train tables.
Featuring dual pockets at an angle of 15 degrees, this product allows you to make accurate screw connections to increase work efficiency. Furthermore, its knife head enhances the overall performance, thanks to its 3 drill sizes, meaning it is suitable for working on any wooden surface.
Moving on, its metal construction offers durability, and you can work for extended periods without any difficulty. On top of that, it contains multiple stoppers and sleeves for a smooth experience, so that you can handle various projects.
What Could've Been Better?
We found a couple of drawbacks while testing it. Firstly, it tends to jump around, and you will have to clamp it down. What’s more, the drill bits that came along were not to our liking as they were slightly shorter.
Frankly speaking, this list would have been incomplete without this product from Big Horn, a popular brand that sells and manufactures top-grade hand tools and accessories. Added to that, the 12600 pocket jig is an option that can give tough competition to the Kreg JIG.
Ideal wood joining jig kit to create flush, corner, and...
Steel toggle clamp with micro-adjust clamp-head ensures...
Why Did We Like It?
This brand is merely 20 years old, but we have to admit that the Big Horn 12600 exceeds our expectations. It is everything that consumers would need to drill clean pocket holes with ease.
The adjustable drill guides help control the angle of the drill while the stop collar does a pretty decent job managing the depth. Unsurprisingly, it is a go-to option for professional woodworkers.
Apart from this, it is made from premium-quality materials, delivering a highly durable and sturdy design. Speaking of design, the yellow and black color combination makes it trendy and eye-catching.
Other than that, it weighs well under 2 pounds, making it extremely lightweight and highly portable. Needless to say, consumers will have a great time working with it.
What Could've Been Better?
Firstly, it doesn't come with a carrying case, which is quite disappointing as a case allows you to store all its important accessories. Also, it is only adjustable up to 3" which is a letdown. Apart from that it is a top-notch alternative available at a reasonable price.
Pros
Durable
Portable
Eye-catching color
Clean and precise results
Cons
No carrying case
Kreg Jig Alternatives Buyer's Guide
So, were you able to make a choice after going through all our recommendations? Even if you weren’t there’s no reason to worry because knowing just the product names isn’t enough when looking for the best Kreg Jig alternative.
In fact, there are several other factors that you need to keep in mind to make the purchase. For this reason, we have discussed all the essential points in detail, in this buyer's guide section, to help you make an informed decision.
We strongly recommend reading till the end; otherwise, you might miss out on a thing or two.
Durability
Durability is one of the most important factors that you must consider while buying the best Kreg Jig alternative. As such, we strongly recommend going with a model that features a metal construction as it provides durability, thereby increasing the tool-life.
Also, choosing a durable jig becomes all the more important if you intend to use it professionally.
Adjustable Settings
The product should have adjustable settings, meaning the size and the angles should be changeable as per your convenience. That said, models that are slightly expensive usually come with all the relevant features and adhere to materials of varying thickness without requiring additional effort.
Accessories
Most jigs come with accessories such as screws, bits, clamps, etc., to enhance your working experience in this day and age. However, not all of them are important. Ensure that you go through the instruction manual properly, as it will provide a clear idea of the accessories that you actually need.
Intended Use
You should be honest about how you are going to use the product. Opting for expensive models may not be the best idea if you intend to use it for light-duty tasks and occasional DIY projects. Having said that, you still need to ensure that the product is durable and long-lasting.
Another thing to consider is the thickness of the materials that you want to drill using the jig pocket hole. Your unit would turn out useless if it failed to expand while fitting different materials.
Warranty
Since pocket jigs require a substantial amount of investment, it is always best to go with a model that is backed by a warranty. Usually, the top brands offer a warranty of several years, but you should always check that yourself before buying.
Verdict
Hopefully, this review-based guide will help you choose the right alternative to the Kreg Jig. Before wrapping up, we would like to let you in on our favorites from this list.
The overall best on this list is the General Tools 850 Pocket Hole Jig because it is very easy to use and is backed by a lifetime warranty. Apart from that, the Milescraft 1325 is easy to use and helps create precise pocket holes.
But, if you are looking for a pocket jig that will last a long time, we certainly recommend going with the MulWark Premium Pocket Hole Jig System Kit. So, that's all for now but we will be back with more exciting product reviews.
As far as toilets are concerned, you can never go wrong with Kohler. But is its latest Santa Rosa series worth the hype? Let’s find out!
With its comfortable, one-piece design and modern features, the Kohler Santa Rosa Toilet range has taken the market by storm and has become a favorite among buyers. In addition, its water-saving technology, sturdy construction, and variegated color options make it even more appealing.
If you are wondering whether this toilet will be the best fit for your space, go through our detailed review to know the answer. To make things simpler, we’ve summarized its pros and cons and included a buyer’s guide.
So, without further ado, let’s begin!
Kohler Santa Rosa Toilet Review
With its solid market reputation and unrivaled ergonomics, Kohler is one of the leading toilet manufacturers. If you are looking for a highly efficient toilet with a durable frame, then the Santa Rosa Toilet range from the brand will be your best bet.
In this section, we’ll discuss all the reasons you should consider buying this product. Let’s get started!
Advanced Flushing System
Kohler Santa Rosa Toilets uses AquaPiston Technology that releases water from the canister in a powerful stream with each push of the button. As a result, water flows downwards at a swift pace and cleans the entire bowl in one go.
Replacing the outdated flapper design that leads to clogs, we have the 360-degree valve that allows the water to shoot out from all directions. This will clean the bowl completely, leaving no residue behind.
With this toilet, you can put your plunger aside, as the chances of clogging or leakage are minimized.
Ergonomically Designed
While looking for new toilets, people often forget to take ergonomics into account, prioritizing low water consumption and a powerful flushing system instead. Although these features are essential, the ergonomics of the product also adds tremendous value to it.
Unlike traditional toilets with a height of 15 inches, Kohler goes not one but two steps further and has a 17-inch height. It is therefore ideal for taller people who are tired of uncomfortably bending their knees or people with back problems.
In addition, the elongated bowl is comfortable while being compact and can fit into small bathroom spaces with ease. Besides, all toilets from this range are ADA-compliant and can be installed in homes, offices, and public places for people with mobility issues.
One-Piece Toilet
Single-piece toilets are sleek and simplistic, adding a very contemporary look to the bathroom. Besides, they are pretty easy to install, even for an amateur. In addition, there are no hidden nooks or crevices where dust might accumulate, and a simple wipe down will keep it clean.
Also, since it’s a one-piece system, the tank and bowl are fused, minimizing the chances of any seal leak or breakage. This adds to the durability of the unit and saves you from frequent repairs in the future.
Water-Conservation Technology
If mounting electricity bills are a concern in your household, then the Kohler Santa Rosa range will prove to be a massive boon. Traditional toilets consume a lot of water, with some models guzzling 4 gallons per flush. However, Kohler focuses on designing sustainable toilet models that aim at water conservation.
The Santa Rosa belongs to a group of high-efficiency toilets and consumes merely 1.6 gallons of water per flush. However, this doesn’t mean that the bowl won’t be adequately cleaned. The advanced flushing technology ensures that all the debris is thoroughly removed while keeping the water consumption minimal.
Lastly, we’d like to point out that this toilet is EPA WaterSense certified, making you eligible for tax rebates on water bills. Although the gallons of water used per year depend from user to user, on average, the toilet saves over 16 gallons of water annually.
Sturdy Construction
Another prominent aspect of this toilet is its durable construction. Made of vitreous china, it can withstand regular wear and tear and is not susceptible to cracks or stains. It comes with proper mounting holes that firmly ground the unit to prevent wobbling.
Moreover, the neat, well-rounded corners enhance the overall appearance of the toilet. And the flushing lever on the side with a chrome finish seamlessly blends with other bathroom fixtures.
Additional Features
Certain additional features add to the overall efficiency of the model. Let’s see what they are.
Large Surface Area
A large surface area is desirable as it doesn’t let waste stick to the bowl. In addition, the water level remains sufficiently high, thus preventing odors from lingering around the bowl.
Glazed Trapway
The toilet features a glazed trapway with a diameter of 2 ⅛-inches. As a result, water flow is efficiently streamlined and exerts sufficient pressure for the waste to go down with ease.
Moreover, since the surface is glazed, there is a remarkable reduction in friction, and water can pass through smoothly and in full force without getting absorbed into the ceramic surface.
Quiet-Close Feature
Some models in this range have a quiet-close feature that allows you to shut the toilet seat without disturbing anyone in the house.
Color Options
If you are bored of the standard white color, then we’ve good news for you. Kohler Santa Rosa comes with different and attractive color options - from stylish black to subtle beige options.
What Could’ve Been Better?
Now that we have spoken at length about the functionality and efficiency of Kohler Santa Rosa, it’s time to highlight some of its drawbacks. To begin with, the interconnected tank and bowl make the product heavier in comparison to two-piece sets. Besides, you’ll have to replace the entire toilet set in case of damage to the parts.
Moreover, even though the flushing system is quite powerful, you might need to flush the toilet more than once to completely eliminate solid waste and tissue paper. This usually happens when the tank is not filled to its full capacity. So, allow the tank to fill to the brim before flushing.
We’d also like to point out that the range doesn’t produce low-noise toilets. Although the flush is quieter compared to traditional toilet models, it is not soundless by any means.
Lastly, even though the 17-inch height is quite an advantage for taller people, it might be difficult for children to hop over the toilet seat.
Pros
Ergonomically designed, ADA-compliant toilet
EPA certified, water-saving technology
One-piece set facilitates easy installation
Different color options
Sturdy, vitreous china construction prevents cracking
Cons
Toilet set needs to be replaced if one part is damaged
Seating height is inconvenient for people with short stature
Kohler Santa Rosa Buyer’s Guide
Buying toilets is not as easy as it seems. There are a few factors that you must consider. To simplify things for you, we’ve curated this buyer’s guide. Keep on reading to know more.
Bowl Shape
Usually, toilets come in three shapes: elongated, square, and round.
Round toilets are smaller and can easily fit into narrow spaces. Elongated models are relatively bigger and more comfortable. You’ll also find pretty stylish square bowls.
You can choose any of the shapes, depending on the availability of space and your preference.
Water Consumption
While purchasing new toilets, people often look for models that minimize water wastage. The Federal Standard is 1.6 gallons per flush, and models that abide by this limit are classified as High-Efficiency Toilets (HET).
In addition, the WaterSense certification can also vouch for the sustainability of the product.
Flush Efficiency
A powerful flush system ensures rigorous cleaning and keeps the bowl in top-notch condition. Some models come with a large surface area and a glazed trapway that allows water to accelerate downwards in full force.
It is essential to pick a flushing system that prevents clogs, efficiently flushes down waste, and uses less water.
Appearance
Homeowners often look for a suitable toilet set that blends with their bathroom decor. While the standard white color has been around for ages, today, you also get several color options - from beige to black.
So, if you wish to add a spark of color to the bathroom, you wouldn’t have to look very far.
Conclusion
That’s all, folks!
With its sleek design, sturdy construction, and powerful flushing technology, Kohler Santa Rosa has become one of the leading toilets on the market.
There are multiple color options available, but they are more expensive than the standard white variant. So, if you don’t mind shelling out a few extra dollars, you can get a stylish toilet set for the bathroom.
Equipped with contemporary features and a scratch-proof design, this model will last for years to come. What’s more, if you are a DIY enthusiast, the installation will be a breeze, and if not, you can always hire a plumber.
Do let us know what you think in the comments below. Until next time, take care!
Winston Churchill was likely not talking about Husky Tools when he said that, but it holds. You see, if you have a set of Husky tools at your disposal, finishing the job will become that much easier.
We have been fans of the Husky brand ever since we used its tools for the first time over a decade ago. And to this day, we have always used Husky tools without any significant complaints.
So, we decided to curate this guide and tell you why Husky is such an exceptional brand. We've carefully handpicked nine of the best Husky tools you will find out there. Some more information about the brand follows this.
Without further ado, here it goes...
Best Husky Tools
You will be pleased to know that we have used each of these products extensively to gain un unbiased understanding of their pros and cons. The recommendations have been ranked based on two factors primarily - value for money and ease of use.
The numero uno spot on our list goes to one of the most comprehensive tool sets Husky has to offer - the H268MTS. This mechanics' tool set has a whopping 268 pieces and comes at a fairly reasonable price point - talk about getting the most bang for your buck!
Brand New in box. The product ships with all relevant...
Why Did We Like It?
Straight off the bat, we were highly impressed by the overall positive customer reviews for this tool set. When it was delivered to our doorstep, we knew exactly why our peers liked it so much. It undoubtedly is one of the most versatile and complete sets you can find out there today.
The set includes 168 sockets, 30 wrenches, 67 accessories, and 3 ratchets. Furthermore, there is an equal distribution of metric and SAE tools. Whether you measure in inches or millimeters, it has enough tools for you to get the job done.
We are always very pleased with a product that offers sheer value for money. So, it should be no surprise that this toolset took the coveted top spot on our list. It comes at an affordable price, and a lifetime warranty also backs it. Overall, it's safe to say that Husky hit the bull's eye with this set.
What Could've Been Better?
Although there is a lot to praise about this exceptional Husky tool set for mechanics, we found its case to be a bit of a problem. It is not as sturdy as we expected, and the drawers don't always latch close. So, it may not be best to carry all the tools around, and you may have to purchase a more durable case.
Taking the third spot on this list is a Husky product that doesn't strictly qualify as a tool; instead, it's more a means of carrying your tools from one place to another. The Rolling Tote Bag with Telescopic Handle is the best tool bag you will find on the market.
No products found.
Why Did We Like It?
First and foremost, let's take a moment to appreciate the durability of this bag from Husky's reputed brand. Thanks to the 600 Denier water-resistant material that it's made from, you won't have to worry about replacing it anytime soon.
What makes it even better is its impressive capacity of 80 pounds. Honestly, given its compact size, we were not expecting that. After all, it measures only 14 inches long, 9 inches wide, and 13 inches high.
Husky left no stone unturned to make sure that users derive the most value from this bag. The thoughtful inclusion of a plate-reinforced telescoping handle allows you to stack additional baggage and lug it.
Moving on to its ergonomic design, you won't run out of space because it comes equipped with 13 storage pockets. Long story short, it can comfortably accommodate most of the standard tools you'd need to use.
What Could've Been Better?
Despite having an array of nifty features, we couldn't help but notice a flaw in this bag. The wheels on its base are tucked behind a bit of plastic molding, which won't allow you to roll it up stairs or rocky terrain. So, you'd have to carry it in those cases.
Now that the coveted top three spots on this list are taken care of, let's talk about another top-notch wrench and socket set. If the first two recommendations on this list were too much or too little for your liking, this one is in the middle ground with 46 pieces. Read on to know all the deets.
SAE AND METRIC: There are 23 Standard American an 23 Metric...
ORGANIZATION: An included carrying case has molded sections...
Why Did We Like It?
First things first, we were quite impressed with the positive customer reviews for this set. And when we got it and used it a couple of times, we knew why it was so popular among users. It is perfect for small repair jobs that keep cropping up in and around the house.
The set includes a screwdriver with 20 replaceable bits and a ratchet set with 22 replaceable sockets. That's not all; you also get one extra driving head. What's more? You get it all in a sturdy plastic carrying case, so you need not worry about losing any of the pieces.
Having said that, it's not just the number of pieces that's impressive. This set takes your convenience to a whole new level with its ratchet extending from 5 to 7 inches. If you want, you may even attach it to a pegboard using the mounting brackets on the handle.
What Could've Been Better?
Honestly, there's nothing wrong with this set when it comes to its performance. But we think it is somewhat overpriced for the utility it offers because it can only be used for very trivial day-to-day tasks that pop up once in a while. So, we would have preferred it to be a bit more affordable.
We are halfway through with our set of Husky tool recommendations, and it is time to introduce the 1006 3-piece high-leverage pliers set. You don't need to be an expert at using tools to know how useful a good set of pliers can be. And this set does not fail to impress, read on to know how...
7 INCH DIAGONAL PLIERS: These are primarily for cutting...
8 INCH LONG NOSE PLIERS: These are ideal for grabbing,...
Why Did We Like It?
Before we talk about anything else, we must tell you about the unparalleled durability of these pliers. Made from a heat-treated steel alloy, they can easily resist corrosion and impacts. Furthermore, thanks to the heat treatment, the cutting edges remain sharp for longer.
But that's not the only thing about its build that you will appreciate. The handles have a rubberized overmold that enables you to always keep a firm grip, even when you're working in slippery conditions. No wonder it comes with a lifetime warranty!
Now, coming to the three pliers - you get a 7-inch diagonal plier, an 8-inch long nose plier, and a 9-inch linesman plier. The diagonal plier is perfect for cutting thick-gauge wire. The long nose plier works well to grab, cut, twist, loop, or thread wires in tight spaces. And the linesman plier is ideal for crimping, pulling, and cutting wires through conduits.
What Could've Been Better?
Although these pliers work well, we would've liked them more if they were a tad less heavy. Don't get us wrong; it's not like you can't use them at all, but they take a toll on your forearms when you have to use them for a long time. But then again, that's not a dealbreaker.
The next recommendation we have for you is a lot different from everything you've seen on this list. Instead of having a set of multiple tools, how about getting one that can be used for several purposes? That's precisely what you get with this 14-in-1 painter's tool from Husky.
Gives you the functions of a painter's tool box in 1 design
Spreader, chisel scraper, paint can opener and a roller...
Why Did We Like It?
If you're a painter who is tired of carrying the toolbox for every job, Husky has the perfect solution for you with its 14-in-1 tool. What makes it even more impressive is its extremely affordable price range. Let's just say that you'll rarely find a better deal than this!
It works as a spreader, a chisel, a crack opener, a paint can opener, a nail puller, a hammer end, and a bottle opener. And that's not all; it's also a concave scraper, a convex scraper, a roller cleaner, a ¼" nut wrench, a ⅜" nut wrench, an 8-10 slotted screw bit, and a Philips NO 2 bit.
Thanks to its heavy-duty steel construction, you need not worry about its longevity at all. But if you need reassurance, Husky backs this tool with its unmatched lifetime warranty.
What Could've Been Better?
Honestly, we have used it for over six months, and we didn't find any flaws. Perhaps the only thing that can be improved is its availability. Right now, it is available only in these states - Alaska, Guam, Hawaii, Puerto Rico, and the Virgin Islands.
For the penultimate spot on this list of Husky tools, we have picked the 28CW002NC wrench set. You get all the standard wrenches in both Metric and SAE sizes. So, you can tackle all the tasks in your home or garage - from tightening a nut on your bike to doing repair work under the kitchen sink.
SAE SIZES (Measured in Inches): (Stubby: 3/8, 7/16, 1/2,...
METRIC SIZES (Measured in Millimeters): (Stubby: 15, 14, 13,...
Why Did We Like It?
Husky rarely fails to impress when it comes to its tool sets, and this one is no exception. It is touted as an all-in-one set, and after using it extensively for over six months, we agree. You get 28 pieces in this set, including 14 Metric and 14 SAE sizes.
Furthermore, the stainless steel construction of each tool ensures unmatched longevity. Add to that the chrome finish, and you've got tools that are resistant to corrosion and can be cleaned easily. No wonder it is backed by the brand's popular lifetime warranty!
But that's not all; the 15-degree offset design gives you enhanced leverage when using these tools in tight spaces. So, you need not worry about getting into awkward positions or putting too much stress on your wrist to tackle seemingly tricky tasks.
Last but not least, we are fans of the labeled sections and mounting brackets on the carrying case. But the carrying case isn't perfect; read on to know more about that.
What Could've Been Better?
We like that the carrying case is divided into two separate sections for Metric and SAE tools. However, the design itself of the case needs improvement as we couldn't stop a couple of tools from falling out. It's not a dealbreaker, but something Husky should surely look into.
We're down to the final product on this comprehensive list. Honestly, it didn't feel right to include just one tool bag, so we found another one for you. Unlike its counterpart, this rolling tote bag comes with a couple of bonus bags. So, if you own a comprehensive set like our topmost recommendation, this bag will be perfect for you.
No products found.
Why Did We Like It?
If the rolling bag we included in the top three recommendations on this list wasn't enough to carry all the tools you have, this might do the trick. You essentially get three bags - an 18-inch length main bag with two bonus bags of 16-inch and 14-inch lengths.
Combining all three bags, you get a whopping 35 storage compartments - 12 inside and 23 outside pockets. So, it is safe to say that you won't have to leave any essential tools behind when you're traveling for a repair job.
Moving on to the bags themselves, they are made from a highly durable and water-resistant 600 denier material that will last for a long time to come. Also, the heavy-duty telescoping handle is sturdy enough for you to stack the bonus bags on top of the main bag and lug all three.
What Could've Been Better?
As good as this rolling tote bag combo is, it is not perfect. The three bags weigh over 40 pounds combined, and that's without any tools in them. And to make matters worse, the bottom bag (with the telescoping handle) has tiny wheels that won't be able to take all that weight on uneven terrain.
Pros
A 3-year limited warranty backs it
600 denier water-resistant material
Heavy-duty telescoping handle
Two bonus bags included
Cons
A tad heavy
Small wheels on the bottom bag
Everything You Need To Know About Husky Tools
Now that you know about 9 of the best tools Husky has to offer, let's take some time to understand what the brand is all about. With a history of nearly a hundred years, it should be no surprise that Husky has evolved into a household name in America.
The brand likes to claim that it is "the toughest name in tools!" From our all-star selection of products, it is safe to say that it backs up that claim quite well. Husky tools stand out from their competing brands by focusing on three things more than everything else - functional design, high quality, and durability.
What makes it even better is its commitment to continuous innovation and its unmatched lifetime warranty. So, if you put all of that together, you can see why Husky is a brand you can trust with your eyes closed.
But if you're still not convinced, how about we pit Husky against two other popular brands for a comparative analysis?
Husky Vs Kobalt
First up, entering the ring is Kobalt - another brand with immense popularity. Kobalt is a sister concern of Lowes, while Home Depot owns husky.
Although Kobalt was launched in 1998, it has managed to make a strong name for itself in the power tools and hand tools industries. But of course, Husky has the upper hand, thanks to its experience.
Kobalt's idea was to allow Lowes to compete with large tools production companies like Sears and Home Depot. It seems like Kobalt is heading in the right direction, but Husky is a better, more reliable brand when it comes to tools.
Husky Vs Craftsman
Kobalt's relative lack of experience led to its knockout, but the next contender is only three years shy of Husky's impressive history. Craftsman is as popular as Husky across American homes, so this promises to be a much more interesting comparison.
Looking at the range of products, it is impossible to say which of these two brands has the upper hand. They both deal with a wide range of power tools, hand tools, accessories, essentials, etc.
Moreover, in terms of warranty and brand value, you'll find that the vast majority of homeowners can't choose between the two brands. Long story short, Husky and Craftsman are head-to-head, and you won't regret getting a tool that bears the name of either of these two brands.
Husky Tools Verdict
That's all from us, folks!
For non-mechanics out there, having the perfect tool set handy may not seem like a big deal every day. It can be a major blessing in disguise when there is a sudden need for some repair work to be done.
And when it comes to professionals who earn their livelihood with the help of various tools, the perfect tool set is an absolute necessity. So, the importance of a good and reliable tool set cannot be overstated.
On that note, we hope that you found this guide helpful. And if you've never used a Husky tool before, you should give it a try. Based on our experience with the brand's products, we're confident that you won't be disappointed.
Let us know what you think about the Husky brand in the comments section below. We'll see you soon with more interesting guides.
People say that the heart of a house is the kitchen, where the family comes together for meals.
Hence, the kitchen design should be cozy and perfectly spaced for everybody to fit in well. If you are looking at a kitchen remodel project, then there are several factors that should be considered beforehand.
They include storage, appliances, and their placements, swing direction of the door, backsplash, and counter space, to name a few. In this guide, we will tell you all about the kitchen renovation dos, and don'ts so that you can create a beautiful and functional kitchen space.
And here it goes!
Kitchen Renovation Dos
Here we will discuss the few things that you must do before undertaking kitchen remodeling. We have broken down this section into points to make it easier to understand.
1. Extensive Research
Once you have planned a kitchen renovation, you will have to research well on how to go about it. It is best not to begin with the project immediately. Instead, spend some time going through the design available on the internet. Begin by considering how much space you have in your kitchen.
You can then look for specific designs meant for large, small, or medium-sized kitchens online. After you have a few designs that you like, visit the local design showrooms, home equipment, and décor stores. Check the tiles, marbles, wallpapers, colors, and furniture prices. Then look at kitchen sink designs and lighting fixtures that can be used while remodeling the space.
Next, you will have to check for project managers or professional kitchen designers who can help with the plan. Look at the different top websites that provide these services and ask your friends and neighbors as well.
Remember to read reviews left by previous customers to understand their work better. You can then call up the teams that you like for an interview. They can design a remodel plan, and you can try to understand if that will fit your space.
2. Decide On The Budget
First of all, you will have to decide on the budget for the kitchen renovation. Remember that the costs can shoot up to a large amount if you do not keep them in check. Hence, always consider it beforehand and fix a budget.
Now, you may look at magazines, Pinterest, or other websites for design inspiration, and you will find many remodeling project pictures. There are hundreds of cabinet and appliance doors to choose from; then there is the lighting, upholstery, and other furniture. While a lot of these kitchen renovation pictures can be beautiful to look at, they may not be possible within your budget.
However, there is nothing to worry about as a lot of things can be done on a low budget. For example, you may like a certain type of backsplash with stones on it. While purchasing real stones can be expensive, you can always opt for a wallpaper with a similar look. If you have the idea and a good interior designer, you can make anything possible.
3. Hidden Costs Have To Be Considered
Kitchen remodels extra costs can pop up any time while you are in the middle of remodeling. You may find problem areas on the walls after you have torn down the cabinets. So, keep a contingency fund in place, which can be used in case you have to go over your budget.
If the work takes longer, the labor costs may also increase as the laborers are paid daily. The taxes, material costs, delivery, and shipping costs that had not been considered previously can be add-ons as well. So, make a note of these and ask the kitchen design expert to help with the calculation.
4. Planning The Kitchen Layout
Before you remove all the old kitchen cabinets, you need to have a proper layout of the new design. There are timeless ideas on the internet that you can refer to beforehand. Ensure there is enough space to move about for one to two people at least.
Also, the entire kitchen remodel has to be planned, keeping the space in mind. You can opt for L-shaped cabinets along the wall to save space in small kitchens. Some even opt for U-shapedkitchens in small houses. The kitchen’s busiest areas have to be left decluttered so that work can be done.
You can also ask professionals to help you with a sketch of the entire area. They can create 3D models for you to understand better.
5. Differentiate Between Needs And Wants
You must be looking through inspirations for kitchen remodels, and we agree that there are hundreds of ideas online. However, be careful about choosing the things that you may not need in your kitchen. While the idea of adding new décor is exciting, too much of it can take over usable space.
The kitchen layout needs to be planned well so that there is enough space for people to move around as well as to keep essential electrical appliances. You might see a number of gadgets and decorative pieces that look great in the picture. But functionality is key, and you have to keep that in mind if you wish to save money.
In fact, ensure that natural light can come into the kitchen space to light it up and make it look bigger. So, keep ample window space and do not cover them up completely.
6. Consider A Work Triangle
When you are working in a kitchen, you will have to constantly move from the cooking area to the prep station easily. Hence, you will have to ensure that the refrigerator, sink, and stovetop are in a triangle of sorts. Maintaining a work triangle is the easiest way to go around a kitchen without putting extra effort.
7. Do Pay Attention To Lighting
Check the spaces which get natural lighting to understand where to put the new lights. You will have to consider the high-traffic areas in the kitchen and place strategic lighting there as well. Ensure that the main spaces are highlighted, as you will need bright lights to see what you are cooking and chopping.
Also, it is best if you have white, warm white, and neutral colored lighting available so that the true color of the food is visible.
8. Keep A Note Of Corners
When planning a kitchen area, do not take over the corners completely. Leave enough space for the door’s clearance area and plan the space accordingly.
Kitchen Renovation Don'ts
Learn about all the things that you should not dowhile your kitchen is remodeled.
1. Do Not Stick With One Viewpoint
While working on kitchen cabinets, do not have a set of ideals in place from which you cannot deviate. With kitchen remodeled projects, a lot may not work out according to plan, even if you have a professional kitchen designer working for you.
A wall may be painted, and then you may notice damp spots. Or the wallpaper applied may not look good when compared to the space. This can happen because the images on the internet are often edited, and you may not be able to replicate them completely. Also, there may be more counter space in the image than what you have.
So, you may have to leave a few things off the list to stay within the budget. Or, you may have to increase the budget to fit all the designs in it.
Then there are light fixtures to take care of. Now a lot of houses do not have the right points for hanging lights. Also, if you do not have a false ceiling, then overhead lights cannot be placed. Now making a false ceiling may become very expensive. You can instead replace that with beautiful wall sconces and slightly deviate from the original plan.
2. Do Not Blindly Follow Trends
While designing your pantry space and cabinet space, do not just follow what is trending at the moment. Firstly, the magazines may offer tips that are too expensive. Also, you will want the main focal points to be something you love. The kitchen is a very personal space, and incorporating your own ideas will not only create the perfect kitchen, but you may save money as well.
So, do not be pressurized by trending materials and color schemes for the house walls, which you may not like in the long run. Also, for a small kitchen remodel project, do not opt for dark colors even if they are trending. Dark colors can make a small space look even smaller, which is not wanted.
Instead, plan the cooking area in such a way that it looks bigger and can fit appliances easily. You can use the same tone for all the walls and just highlight the backsplash and the furniture.
3. Do Not Ignore Storage
While undertaking kitchen remodels projects, remember to keep ample cabinet space for storage. You will need to keep all the kitchen equipment, appliances, and tools that are required while cooking. These important elements can make a space look clustered if left in a pile in the corner.
So, it is a good idea to add cabinets on top as well as the bottom of the cooking area. Also, you can use the space underneath the sink for storing cleaning supplies. Open shelving along with built-in pantries are used a lot nowadays, and you have ever-evolving possibilities to explore.
Further, remember that frequently required items should be kept towards the front, while other items can be stored inside upper or lower cabinets. A separate knife cabinetcan also be installed as well, which should be hidden from the kids.
4. Do Not Cramp The Space
Although you may want to fill the new kitchen space up with multiple features, do not end up cramping the space. Or else the kitchen will be rendered unusable, and you may not be able to get a lot of cooking done in it. There are several design features that look good in magazines but not in real life. For example, we do not believe putting a fur rug in a kitchen is a good idea.
The chef may easily drop something while cooking, and you may have to spend a lot of time removing stains.
5. Do Not Rush
Your dream kitchen will take some time to be made the right way, and you should give it that time. Keep checking the electrical and plumbing system to see if they are working well and get them fixed before the kitchen is renovated.
If you are planning on installing new plumbing or lights, then proper lines have to be made before painting. All of this may take a few days or a week more to finish, and we recommend giving it the extra time because the result will be worth it!
6. Do Not Reduce Counter Space
If you are going to use the kitchen frequently, then keep a lot of counter space. The countertop is used for chopping food and keeping dishes while cooking. Plus, you will want an extensive workspace with shelves on the side to keep all the essential utensils within easy reach.
Moreover, if you have a lot of space, make countertops of different heights. This way, you can get kids to participate in the cooking sessions without them disturbing your chopping and cooking process.
Kitchen Renovation Frequently Asked Questions ?
How to select the right contractor for the job?
First of all, you will have to make a list of the contractors who have a good reputation in your area. Then speak to them or visit their current job locations to see how they are working. Ask them about the safety measures that they are taking while at their job.
Also, do not be afraid to ask them for samples of their work. A good contractor will always share their previous samples willingly. Once you have finalized a few, talk about the budget and the scope of work. If all of them fit right, you can hire the contractor.
Some offer a free consultation before the job is taken, which may help you better understand the contractor’s work.
What kind of walkways to opt for in the kitchen?
When designing the layout, make sure that the kitchen pathways are at least 36 inches in breadth. It is best to keep it over 42 inches if the space allows. Also, in case two cooks are going to work at the same time, you will need a 48-inch pathway.
What color to opt for the backsplash?
The backsplash is one of the major focal points in a kitchen, and it must be done well. While selecting materials, opt for a quirky or a different color as compared to the walls. Also, you can play with textures and add a stone-like or marble finish.
If you are not looking to spend a lot, opt for simple ivory tiles and then add designer stickers along the edges. Keep a few plants in front, and you have a beautiful place to flaunt.
Now, before signing off, we will ask you to ensure that you read the reviews left behind on websites dedicated to kitchen remodeling. There are materials that look great but do not last long, and you do not want to be stuck with something like that.
Moreover, while choosing kitchen colors, select a few different shades. Even if you want to do your kitchen in neutrals, choose a variety of neutral shades for the room and then go forward.
Also, at the end of the day, have fun while you are at it. You will then end up with a space you and the entire family love to spend time in.
As people look for apartments with bigger homes, they realize how kitchen space has been compromised.
And, space in a house can be tricky; after all, it all comes down to what you own. These days, most of the homes have massive living rooms, dining rooms, and bedrooms but little kitchen space. Some people make do with smaller kitchens and lesser utensils, but what about people that have a ton of utensils but no place to keep them.
We are here to talk about just that. After extensive research, we have put together some unique and attractive kitchen hutch ideas. If you are struggling to find space in a tiny kitchen or want an elaborate centerpiece in a large kitchen, these ideas are ideal for you.
Now, time is of the essence, so let’s get straight to it.
Kitchen Hutch Ideas
What Is A Kitchen Hutch?
A kitchen hutch, in simpler terms, is essentially a shelf or cupboard for storage. These were quite popular back when there weren’t any cabinets or shelves integrated into the kitchen design. Since homes were simple back in the day, the hutches were just as simple. Moreover, they had to be traditional as a lot of people stored heirlooms in them too.
But now, as interiors are becoming more modern, storage spaces are following suit. This means a traditional hutch is not entirely needed as all storage areas are being built in. That being said, kitchen hutch ideas have also evolved to fit any modern interior. You can still have a hutch that can transform the look without taking up too much space.
Freestanding Hutch Ideas
This is ideal for people that have space to add another big piece of furniture. A traditional one, back in the early days, had a few shelves and storage cabinets. Now, even a conventional freestanding hutch comes in various shapes and sizes that people immediately gravitate towards. Here are some of the popular freestanding hutch designs you could use in the kitchen.
Bakers Rack Hutch
If you are looking for a traditional and vintage look, we recommend getting a baker’s rack-style hutch. This type of hutch has a mix of both shelves and cabinets, which are usually made of wood and a wrought iron frame.
It is called a baker’s rack because it was most commonly found in the homes of bakers back in the 17th century. As the frame was made out of iron or steel, it was ideal for storing hot goods like pies and bread as it would cool them down quite fast.
Additionally, back then, the racks would help showcase all of the baked goods the baker’s had to offer. This was when it became quite popular and to this day remains an excellent piece of furniture to show anything off - be it baked goods or house plants.
In terms of cost, it can be a bit expensive since it does not have much storage space. However, it is pretty appealing to look at and adds a great charm to any room it is kept in.
Buffet Hutch
If storage is a big deal for you, you must look at this kind of hutch. The buffet hutch can be kept in the kitchen as well as in the living room. It has an ample amount of space for you to store just about anything.
A classic buffet hutch usually has a few cabinets on the bottom, a platform in the middle, and another set of cabinets on top. One of the reasons it became quite famous is because people use this kind of hutch to store crockery and silverware in the living room. In most cases, the top cabinet has wooden or glass doors that reveal what’s inside.
These first started in Sweden, where the hutch was just a set of wooden cabinets with the top platform being used to serve food and drinks. With time, it became more appropriate to serve buffet-style meals on these platforms. This is why, despite the additional cabinets above the platform, there remains a ton of horizontal space to serve or store things.
Vintage Hutch
While on the subject of traditional hutches, how can we skip on the vintage ones? Hutches have been a part of people’s houses for many years, and in every decade, the design changes. What remains consistent is the simplicity of the design. If you are looking for something authentic to complement your traditional kitchen, we suggest a vintage one.
Vintage hutches can have designs from any era like the ’50s, ’60s, or ’70s that will give the kitchen an edge. Additionally, you can remodel it a little bit and add some modern elements, but the charm lies in the simple designs. Frankly, it is bound to stand out in an otherwise new-age kitchen.
We recommend getting one of these from a local flea market, as that’s when you can genuinely look at the artistic simplicity of the piece. All vintage hutches are handcrafted carefully and have a lot of intricate designs. This is why most of these pieces are unique and one of a kind.
Seeing it in a market rather than a catalog, you will get a better idea of the storage space as well. However, it is common to see that most vintage cabinets can provide a lot more storage compared to the mass-produced modern ones.
The only downside to getting antique pieces is that they can be very expensive. Since most of these date back many years, they are as authentic as they can be. The cost of labor and maintenance of such a piece brings the total buying price to a lot. But, it is something worth having if you have the money to spare.
Contemporary Hutch
Just because a hutch is an old concept does not mean you have to get one that is traditional and vintage. These days tons of hutches are made for more than just storing fine china and crockery. Some of the modern variants can also store wine bottles, glasses, and microwaves.
Design-wise, the modern ones can be minimalistic, which allows them to blend effortlessly into any interior. There are also plenty of glass elements like cabinet doors, mirrors, and even shelves incorporated into the design to amp up the look.
Contemporary hutches can also be buffet-style making it easier to store larger appliances like coffee machines and microwaves. One of the most popular ones that have a modern style is a craftsman-style hutch. These are not handcrafted but are manufactured in a way that gives them a rugged, hand-made look.
Contemporary hutches are a great addition to homes where people want a modern variation of an otherwise old concept. Since there is not much detailed work like with antique pieces, the price may not be too high either.
The only downside to most contemporary pieces, especially craftsman-style hutches, is that they are quite large and need a ton of space. Make sure your kitchen can accommodate it without blocking the flow of the room.
Built-In Hutch Ideas
The next type we are going to talk about is the built-in hutches. As apartments become smaller, designers have successfully incorporated elements of a hutch into the kitchen or other parts of the house. This has allowed homeowners to enjoy ample storage space without compromising the overall space in the house.
The only issue is that if you’re building the interior from scratch, creating a built-in hutch can take a lot of time and planning. Plus, you can’t move it around once it is done, so it is essential to be sure of the location.
We’ve found some interesting built-in hutch ideas for you to look into the next time you remodel the kitchen.
By The Window
One of the most popular hutch ideas is building hutch shelves around kitchen windows. This is especially common in houses with big kitchen windows where there is a ton of space around them to incorporate shelves or cabinets in.
Another beneficial factor of having a built-in hutch near the kitchen window is that you can style it according to the kitchen. Whether you are trying to give it a modern look or a traditional one, the whole kitchen can be styled uniformly, which is not the case with a freestanding hutch.
Built-In Cabinets
Similar to built-in shelves, homeowners are not opting for built-in cabinets as opposed to cabinet freestanding ones. Designs like these are quite an asset in the kitchen since it allows the homeowners to store everything and keep the kitchen looking clean.
Moreover, having a freestanding cabinet in the kitchen can spoil the flow of the kitchen, especially if there is no space. Hence, a built-in one can ensure every bit of space is utilized without tampering with the natural flow of the room.
Shelf-Style Hutch Ideas
Apart from traditional cabinet hutches, incorporating shelves has become quite popular. Many homeowners are adding shelves to existing hutches or over platforms to create a hutch-like look. The idea is to add more storage space without adding more furniture that can minimize the space.
The only downside to a shelf is that it may not be the safest or most practical option. If you need to store fine china or any type of expensive crockery, we recommend anything with glass cabinets. Shelves are open and do not have any kind of cover, so it is best to keep pots and pans on them for easy access.
Does this sound like something you would like to incorporate in your kitchen space? Take a look at some of our ideas on shelved hutches.
Side Shelves
If you already have shelves and are looking for more ways to optimize some leftover space, add some more shelves. This creates a beautiful modern hutch design in the kitchen and is ideal for storing things. Homeowners keep pretty much anything on shelves from bottles, mugs, and even plants to amp up the room.
Side shelves are also ideal in situations where there is space between two cabinets over the platform. This creates a makeshift buffet hutch which is practical and also appealing to look at.
Crate Shelves
If you are the kind of person who has a ton of crates and has no idea what to do with it, use it to make shelves. These can be attached to kitchen cabinets or installed independently on the kitchen wall. The idea is to take these crates and turn them into a DIY project for the kitchen.
It goes without saying that creating a hutch-like design will have to be over a platform. Additionally, you can make it look even better by staining it with your favorite color. Not only does this look a lot better, but it adds a rustic element to the kitchen.
Rustic Shelves
Apart from using crates, you can also use regular wooden planks for a rustic shelf-style hutch. For these, you can either stain old wooden planks or purchase some to give the home a rustic and elegant look. This look is even better when the rest of the kitchen interior is lighter, and there are many other wooden elements.
Another exciting thing about the rustic shelves is that we have seen them as a common design in more modern homes. This goes to show that rustic shelves are not only in old school homes, but new homeowners are also looking into and incorporating them.
Pegboard Shelves
Pegboard shelves are a somewhat new concept, but they are convenient and ideal for people who need more functional aspects in the kitchen. It is not always pleasing to look at, but it is an excellent addition for people who need quick access to cooking utensils. The idea here is to take a pegboard and add shelves or a hutch to it.
These can be of multiple types like metal and even wooden. If you like DIY projects, a wooden pegboard with dowels is beneficial as you can add as many shelves of various sizes. Additionally, we find this type of hutch quite flexible in design. The base of the hutch remains the same while the shelves can be changed, making remodeling the kitchen relatively easy.
Brass Shelves
These types are simple yet elegant. Hutches can be challenging to decorate when you have different kinds of pots and pans that might not look good in a cabinet or all-white wooden shelf. This is where brass shelves come into the picture. Since these shelves are so simple in their make, it is easy to blend them into any interior.
The only thing to be wary about with this kind of hutch is that it can be easy to overcrowd the shelves as they are open with no cabinets. As long as you are mindful of the overcrowding, there is no reason it shouldn’t be a part of the kitchen.
Corner Shelves
Finally, the best way to maximize space and use every nook and cranny of your kitchen is by adding a shelf in the corners. The space between two cabinets where the walls meet can often be too large and ideal if you need more storage space. Just get a couple of shelves and install them above the kitchen platform to make a makeshift hutch.
Certain homeowners have titled walls that can make the room look sharp, especially the corners. Adding corner shelves to the kitchen can soften the room’s look and create a smooth, even look.
The Need For A Hutch
One of the main reasons people still opt for hutches in the various spaces of the house is to maximize space. There are plenty of enormous hutches, but with the design industry flourishing, there are quite a few hutch designs that are ideal for small spaces. So the first and most important reason to get a hutch is to utilize small spaces.
Secondly, a hutch can be used not just to display the expensive silverware that you get on your wedding day but many more things. This could range from plants to mugs to even old cookbooks. Additionally, a lot of homeowners like utilizing a hutch to display antique ornaments.
Accentuating Your Hutch
Back in the day, hutches were used for a particular purpose which is not the case anymore. As we previously mentioned, they can be used to store a lot of other things as well. Even when placed in the kitchen, it does not have to only showcase kitchen utensils and plates.
When it comes to adding a hutch to the kitchen or any part of the room, it is essential to remember that it becomes the highlight of the room. To modern interiors and bring it out, even more, you can accentuate the way the hutch looks. We have put together some exciting ideas to look into to highlight the hutch in the kitchen.
Creating A Formal Look
If you are planning to go down the formal and traditional route with your hutch, we suggest using it only to store your fine china and expensive cutlery. This can be quite attractive when you have a kitchen with light interiors and a minimal design, as it gives the whole room a delicate look.
Another way to create a minimal and elegant look to highlight your china would be to use a freestanding cabinet with glass cabinet doors. This type of hutch can efficiently display the china or anything you keep inside.
Throw It Back - Vintage Style
Irrespective of whether you have a traditional home or a modern one, adding a blast from the past always brings out the look of the room. Especially when it comes to kitchens, you can easily add a vintage hutch that will accentuate the room, making the hutch a focal point.
Additionally, it looks even better when you have wooden cabinets. We recommend a freestanding buffet hutch made out of wood to give that old-school look to your kitchen. These hutches are easily found in antique stores or flea markets and can help you recreate a Tudor-style home.
Open Hutches For An Open Look
It is no secret that an open design allows for more light to enter and makes the room look airy and spacious. Open shelves can have a similar effect in the kitchen and also allow easy access to anything stored. If you have an otherwise open kitchen with light-colored interiors, having open shelves can make it look more spacious.
Another way to utilize open shelves is by having them under the kitchen platform and hidden. This can be done when there is no space on the kitchen walls, but more storage space is needed. Many homeowners like to have some extra hidden storage that ensures the kitchen’s look is not affected.
Putting Mugs On Display
A lot of people store expensive crockery, pots, and pans in their hutch, but we have another interesting idea. Why not get a hutch that is designed explicitly for mugs? If you have an extensive collection of accent mugs, don’t let them sit in some cabinet hidden from the world. Instead, set them up on a hutch as storage and décor.
The good thing about this is that it can be done in any type of hutch - built-in, freestanding, or shelves. You can even go down the rustic path and get a crate-type hutch to store the mugs in. Not only will this give you proper storage, but it gives you even more room since the rack of mugs will have a proper place.
Plus, as there is a decorative element to this, you have the freedom to get creative with how it looks.
Adding Plants To The Hutch
Typically, hutches are used to store utility things, but new homeowners are using them for decorative purposes. While the bigger freestanding hutches are still mainly used for plates, glasses, and whatnot, the smaller ones are considered for decorative elements.
Be it in the kitchen or the living room, if you have a hutch near the window or corner shelves, adding some plants to that hutch adds a pop of color. Here, plants can be added as part of any shelf with other storage items, or you can have a separate frame for plants on the side.
Lighting Is Key
One more great way to accentuate the look of the kitchen is by adding proper lighting to the hutch. Since a hutch is usually the kitchen’s main attraction, you must add adequate lighting to bring more attention to it. Furthermore, the lights not only make it look good but will allow you to see better as well.
An interesting thing we have found homeowners do these days is remodeling old cabinets into hutches with proper lighting. Say you have an old cabinet that is not being used, and you do not wish to discard it; it can easily be used to create a modern hutch. All you need to do is use just the shelves in the kitchen or remove the shelves from the cabinet and fit a wine rack in.
Once these elements have been added, install appropriate lighting, and you will have a brand new hutch on your hands. In terms of color options, we have found that light-colored hutches can be well illuminated with warm white lights. On the other hand, darker hutches look better with cool white lights.
However, this is not set in stone, and it comes down to preference as well. The idea is to make sure you find the perfect balance between décor and lighting. If you have a color preference for the lights, staining the wood to match the lighting is also a viable option.
Kitchen Hutch Buying Guide
Now that we have covered the different types of hutches and how they can be accentuated, let’s move on to buying one. As you probably can tell, there are many different types of hutches, made with other materials and different styles. So, how do you even pick the ideal one? That is precisely what we are here to answer.
Since hutches need to have a balance of functionality and style, it is essential to pick a well-balanced one. Read on below to know some of the important features you must look into when looking for the ideal kitchen hutch.
Size
This is one of the most important things to look at when buying a hutch. The size of the hutch depends entirely on how much space you have in the kitchen. Since the kitchen is a room where there can be more than one person, there must be a lot of space to walk and move around.
Additionally, every kitchen has a flow. There is a certain order to things when it comes to working in a kitchen. The last thing you need here is to have a massive freestanding hutch getting in the way of things. We recommend measuring out the dimensions of the kitchen before you select a piece.
Furthermore, measure the space you intend to keep the hutch in. The reason you should have both sets of measurements is so that you can discuss what the ideal size should be with professionals.
Price
You might have noticed that we have mentioned price time and again in some of our hutch designs. This is because pricing is also a very crucial aspect to take into consideration. At the end of the day, there is no point in buying a hutch that will take away most of your life’s savings.
This is why it is crucial to know the different types of hutch designs available as the price differs according to that. As a general rule of thumb, older hutches will automatically cost more because it is more likely to have been handcrafted. That being said, factory-made hutches can also be expensive but never as much as an antique.
If you want to have an authentic and traditional piece to give a vintage look to the kitchen, then we suggest heading to the flea market. However, a contemporary style hutch will be a much better option if you are working with a smaller budget.
Design
We may have mentioned this repeatedly, but a hutch tends to become the center of attention in any room. This is why the design of the hutch is so essential. However, the design and style of the hutch must match the interior of the kitchen as well.
Usually, with a traditional-style kitchen, it can become hard to incorporate modern elements. This is why antique pieces are much better suited in such situations. Similarly, in a contemporary kitchen, an overly old-school hutch can look a bit odd. In such cases, it is much better to have a mission-style or craftsman-style hutch as it has a balance of modern and traditional.
Let’s go into a little more detail about this.
Built-in vs. Freestanding
One of the most significant design decisions would be to pick between a built-in hutch and a freestanding hutch.
When it comes to freestanding hutches, there is a lot of flexibility to move them around and place them. If you are the type to move around a lot, having a freestanding hutch is an excellent investment. It is something that can be taken along while shifting houses or even moved if the house is being renovated.
Moreover, they are easy to assemble and are usually delivered to the door when buying a new one. But, they can take up a lot of space and can be challenging to carry around without the proper means. And, if you are moving houses, there is no guarantee that it will fit in the new home.
A built-in hutch design takes a lot of time and planning. Some houses have a set area to create a hutch-like space, but if not, it has to be integrated into the kitchen. We recommend looking into this only if you have a small kitchen with no space for a freestanding model.
It is challenging to get the same kind of flexibility you get with a freestanding model since these designs cannot move around. But, it is ideal to utilize small spaces and create more storage without disrupting the flow of the kitchen.
Shelf Vs. Glass
This is the next design aspect that you need to look into when buying a hutch. Built-in hut designs are very shelf forwards so that you will notice a ton of shelves - on the side, between cabinets, and sometimes, under the platform. While, on the other hand, glass cabinets are very prominent in freestanding hutch designs.
Now, the main thing here is to ascertain what the hutch is being used for. We suggest opting for shelves if you need the stored items to be easily accessible. If you want a hutch to store pots, pans, or even decorative items, shelves are a much better option. However, be wary that these items are likely to collect dust, so don’t store anything that requires high maintenance.
On the other hand, fine china, antiques, or anything expensive should be stored in glass cabinets. This is because it is much easier to have valuables in glass cabinets in terms of general maintenance. This prevents it from collecting dust and also reduces the chances of breakage.
Decor vs. Function
Ultimately, it all comes down to whether you want a practical hutch or one to show off a few collectibles. The type of hutch is mainly dependent on the functionality. That being said, practical hutches can be used for decor, but the more practical they are, the bigger they tend to be.
If you are looking for a hutch to store many items, be it crockery, utensils, or decorative items, opt for one with ample storage options. Ideally, a hutch like that will have a ton of drawers, cabinets, and shelves. The purpose of the hutch will be to keep as many items on it as possible, and the design will ensure it is accessible to all.
Many homeowners like to store valuables in hutches for their guests to see, and if that idea appeals to you, then the design will be different. Most decor-based hutches are smaller and have glass mirrors, cabinet doors, and lighting to highlight the ornaments. On the other hand, a hutch that is solely for decor purposes will be smaller and more delicate.
Additional Features
Since hutches are evolving, the design and display options are changing as well. No rule says practical hutches cannot have attractive features. That is why you will notice many hutch designs having similar elements - glass, hanging racks, side shelves for plants, etc.
We have found that having a mirrored back in a hutch gives the illusion of the hutch being more spacious. In addition, having little lights incorporated into the design also accentuates the look.
At the end of the day, it all comes down to how you would like to bring attention to the hutch in the kitchen.
Kitchen Hutch Ideas FAQs
What can be displayed in a kitchen hutch?
Back when hutches were necessary, people used to store pots, pans, and other cooking utensils in them. But now, since things have changed, modern homeowners can store all sorts of items. This is partially depending on where it is placed as well.
If you keep the hutch in the kitchen, it can still be used to display pots and pans, etc. However, when it is in the living room, it can be used to display decorative items, valuable ornaments, and even used to keep plants. Additionally, a lot of people use it to display family photos over various generations.
Should I use a glass cabinet for food storage?
A pantry is not something everyone has in the house, so food storage can easily be done in a hutch. If you have a buffet with a glass cabinet and some shelves, dry food like rice, cereals, and so on can be put on display. A lot of people even use one shelf of a hutch as a spice rack.
The only thing to remember here is that this is only ideal when the hutch has a glass cabinet. Storing these items in an opaque cabinet will only increase your work. This is because you will have to open and shut the cabinet every time to check if an item is there.
That is why it is much easier to use a hutch as food storage when it has a glass cabinet.
Can I store beverages in a hutch?
Modern and antique ones are ideal if you want a new bar, especially when it is a buffet-style hutch. This is because it can not only store beverages but also the glasses needed for the same beverages.
A lot of modern hutch designs have wine racks integrated into them, which makes them much more manageable. However, if you are looking to turn your hutch into a bar, we suggest adding a few extra shelves. This can specifically be done in the corners to extend the hutch if there isn’t enough space for bottles.
Ideally, drinks that do not need to be served cold are best kept in the hutch, such as wine and spirits.
What is the ideal place for a hutch?
A hutch, although traditionally used in a kitchen, can now be placed anywhere. The main thing to remember is the purpose of the hutch and what you intend to store in it. Be it a freestanding, built-in, or shelf hutch, all of these can be incorporated in a room with ample space.
If you want the hutch to store kitchen items you need every day, we suggest keeping it in the kitchen. Keeping it outside in the living room can be impractical and will break the flow as you cook. For décor and display-only purposes, the hutches are better off in the living or dining room, where they can be a focal point for the guests to see.
Final Words
And there you have it, a comprehensive guide on 12 kitchen hutch ideas. We hope this has been informative and can help you through the selection and buying process.
Before we go, we would like to order one last piece of advice. Buying a new hutch is an easy path, but it can end up costing a lot. We would recommend looking into purchasing a second-hand hutch and renovating it. This is ideal for people working on a budget who want an attractive display and storage cabinet.
On that note, we shall now sign off. But we will be back with many more such guides. In the meantime, let us know which of these ideas stood out for you the most.
Do you consider yourself a bookworm? You may be looking for ways to consume as many books as possible within a short timespan. Fortunately, e-readers have made this possible.
A true bookworm understands the pleasure of sifting through hundreds of books in a library. The sensory pleasures of touching, smelling, and turning the pages of a book are often absent in e-readers. So, you may wonder why most avid bookworms are now turning to e-readers rather than physical books.
Well, the reason is simple yet nuanced. We will tell you all about it in the sections below. However, this guide will elucidate the differences between the two most popular e-readers - the Kindle Paperwhite and the Nook Glowlight.
If you have been thinking about purchasing one but are confused between these two products, don't worry. Read on to find out all you need to know about these two highly popular e-readers.
Kindle Paperwhite vs. Nook Glowlight
In the year 2007, Amazon began developing its first-ever Kindle. It started as a user-friendly e-reading device that has massive battery life and provides an excellent reading experience for avid readers.
However, it wasn't till late 2012 that the first-ever generation of Kindle Paperwhite came out. The Paperwhite was reasonably priced and had fantastic features, making it extremely popular amongst readers of all generations.
Meanwhile, one of the largest book companies in the world - Barnes & Nobles, developed their first-ever e-reader called the Nook in 2009. Most people seem to believe that this move was an attempt to save the company from shutting down or experiencing immense losses. This may be true; however, the Nook soon became a trendy device amongst book lovers.
Those who enjoy reading books may be wondering if it's the right time to go digital. The dilemma is understandable since most experiences are now digital, and you may want to preserve the sanctity of book reading by sticking to physical books.
That said, there are several benefits of switching to e-readers which you cannot experience through physical books. Before we begin exploring the two most popular e-readers - the Kindle Paperwhite & the Nook, let us tell you why you should consider switching to an e-reader.
Why Should You Consider Buying An E-Reader?
Access To More Books
This is a phrase that sounds like music to every book lover's ears. Although nothing is stopping you from buying as many physical books as you want, there is the issue of storage space and cost.
With the advent of e-readers, the amount of space required to store one, a hundred, or even thousands of books has decreased exponentially. A single e-reading device can efficiently hold thousands of book titles without running out of space. Moreover, you can delete books to make room for newer ones.
Although most e-reading devices have their own repository of books that you can access, you can also download books from the internet and read them. Essentially, the entire world (or rather, its books) is at your disposal.
It Is Cost-Effective
The pleasure of visiting a bookstore or library, spending hours finding the perfect titles, and finally exchanging money for your new book is incomparable. That said, you often end up spending more money than you would like on new books.
If this sounds familiar and you are looking to curb the expenditure, buying an e-reader may be the best solution. With e-readers, you have access to thousands or even millions of free ebooks.
Furthermore, the ebooks you purchase online typically come at a third of the original prices. You can also choose to 'borrow' ebooks from online libraries, which could either be free or cost very little.
In this way, you end up saving significant amounts of money and have easy access to an enormous online repository for free books.
A Single Charge Lasts For Days
One of the most concerning issues with getting yet another device is frequent charging. Most devices like phones and tablets require daily charging, which, let's face it, can get slightly annoying.
If you are worried about adding yet another device to the daily charging list - don't be. One of the best aspects of e-readers is their massive battery life. Both the Kindle Paperwhite and Nook Glowlight have 8-hour battery lives. And unless you spend 8 hours a day reading, you can expect to charge the device once every few days or weeks, depending on the usage.
However, if you decide not to use the e-reader for a few days, you won't come back to find it dead. Typically, an e-reader has a long standby time, lasting for weeks with a single charge.
Environment-Friendly
You know how more books correlates to more cutting of trees? Well, with e-readers and ebooks, you can effectively do your part to stop the felling of trees for paper. Furthermore, it reduces wastage and pollution that may occur if people decide to throw away or burn books. All new books are released in e-format available over the internet, enabling you to make eco-friendly choices without giving up reading.
It Fits Everywhere
Avid book readers hardly go anywhere without a book in hand. Whether you're going to the bank or for a cup of coffee, or even to meet a friend at the park, it's unlikely that you will travel without a book in stow.
However, this habit can get particularly challenging if you have too many things to carry and not enough space. The introduction of e-readers has eliminated this issue.
Most e-readers are incredibly sleek and handy. Moreover, they fit easily into a purse, backpack, or even large pockets. The best part is, you can carry thousands of books within a single e-reading device.
Furthermore, you don't need to worry about your 'books' getting wet in case of sudden rain or snow. This is especially true if you purchase a water-resistant e-reader or buy a cover that can protect it against water, UV rays, and dust.
You Can Change Fonts And Text Size
This isn't something you would think is crucial; however, imagine coming across a beautiful novel that you can't get into because of its text size. Unfortunately, with physical books, this is something most readers learn to make do with.
With e-readers, however, you can change not only the text size but also the font. Furthermore, you can customize line spacing, space between letters, margins, how you want to scroll, the background and text color, etc.
This feature is one of the most important and crucial features of e-readers. Being able to change text size and font can completely transform your reading experience, especially if you have trouble reading small text.
Zero Distraction
Many may argue that you can enjoy eBooks on phones and tablets, so why should you opt for a dedicated e-reader? Well, the answer to this is ridiculously simple.
The biggest issue with using phones and tablets is that you are bound to get distracted by calls, text messages, and social media notifications. Try as you may, at some point in time, the annoying 'pings' from social media accounts are bound to break focus. Before you know it, you will have scrolled through pages and pages of Twitter, Instagram, and other social media platforms.
Those looking for a distraction-free reading experience will appreciate the minimalism of e-readers like the Kindle Paperwhite and Nook Glowlight. Unlike phones and tablets, a dedicated e-reader does not allow you to lose focus from reading by bombarding you with social media notifications and phone calls.
Kindle Paperwhite vs. Nook Glowlight
Now that you understand the advantages of e-readers, it's time to help you choose the right one. There are dozens of e-readers in the market; however, the right one depends on an individual's preferences, likes, and budget.
In this guide, we will compare the two most popular e-readers - Amazon's Kindle Paperwhite and Barnes & Nobles' Nook Glowlight. We have divided the guide amongst factors like design, display, resolution, features, ecosystem, and other essential features.
Design
Both e-readers offer a distinctly different design, and the choice is ultimately a personal preference. The Kindle Paperwhite is rectangular and has a sharp, sleek appearance. It features a solid black design with soft corners and a matte black body. Its matte finish is prone to attracting fingerprints, so if you plan on using it regularly, you may want to consider getting a case for it.
On the other hand, the Nook Glowlight has a distinct square shape and features silicon-trimmed edges. This makes the device easier to grip. Moreover, unlike the matte black Kindle, the Nook features an off-white color which can take a while to get used to.
Most users would agree that the Kindle's black color offers better contrast while reading. That said, the Nook's off-white shade has a classy appearance but can take some time to get used to. Of course, the white Nook requires you to be a little more careful while handling it regularly, or it may end up with unwanted stains and marks.
How To Turn Pages
The most significant, defining difference between the Kindle Paperwhite and the Nook Glowlight is how users interact with the device. For starters, the Nook has implemented buttons on the bezels of the device, which can be pressed to turn pages. These are called the page-turning buttons, and they are immensely popular amongst users.
On the other hand, the Kindle Paperwhite uses haptic feedback to turn pages straight from the screen. This is called PagePress, and it relies on the touchscreen navigation on the Kindle screen.
Moreover, the Nook features a capacitive home button that you can use to navigate back to the home screen. The Kindle, however, has no home button or page-turning buttons.
Whether you like the touchscreen display or the button feature depends on personal preference. You can also flip through several pages at once by holding down the page-turning buttons, which might be an interesting way to turn pages.
Size & Weight
When it comes to the size and weight of both devices, they are eerily similar. The Nook, however, is slightly broader and bulkier than the Kindle Paperwhite, which is marginally longer.
That said, although the Nook looks bulkier than the Paperwhite, it weighs nominally less. The Nook weighs 175 g, while the Paperwhite weighs 182 g - which is not much of a difference.
However, the difference is felt primarily because of the design, grip, and comfort of both devices.
Similarly, the Paperwhite measures 6.6″ in height, 4.6” in breadth and is 0.32″ thick. The Nook measures 6.5″ in height, 5″ in breadth and is 0.4″ thick. There isn't much difference between the two, making them very similar in their outer structure and design.
Screen
One of the most important factors to consider when purchasing an e-reader is its screen. In this section, we will compare the screens and displays of both devices to understand which one is right for you.
Both devices come in a handy 6-inch display and on-built light features. However, the Kindle is known to innovate and develop its designs continually. With the most recent Kindle Paperwhite, you will find a display rate of 300 PPI. Again, this is just slightly ahead of Nook's 212 PPI; however, this marginal difference can make all the difference to a user looking to buy the right device for themselves.
Another essential factor to consider is that the Paperwhite comes with an IPX8 waterproof rating. The Nook features both a waterproof and dust-proof design; however, it does not feature an IP rating.
When it comes to choosing between the two, it is essential to consider your needs and requirements. Those who plan on taking their e-readers into the bathroom to read may prefer the waterproof design of the Kindle Paperwhite. However, if water-resistance isn't a factor to consider, the Nook may be an ideal option.
Keep in mind that users have reported the touch responsiveness to be slightly better on the Kindle than the Nook. That said, the Nook is a tad brighter than the Kindle Paperwhite, on its highest brightness setting.
As you can see, there is no right or wrong choice. Both devices offer similar features that are marginally different from each other. However, the one you like better depends on personal choice and budget.
Battery Life
Whether you opt for the Paperwhite or Nook, battery life is something you won't have to worry about. Both the devices boast an impressive 8-hour battery life. However, keep in mind that this refers primarily to the screen usage time. As such, you can leave both the devices uncharged for weeks at a time without worrying about them running out of charge.
Ecosystem
The next thing we want to talk about is the Kindle Paperwhite vs. Nook Glowlight ecosystem. The number of available books and genres may be the topmost deciding factor when considering the best e-reading device.
Well, the Kindle Paperwhite seems to win in this category because of the vast number of book titles it hosts. Currently, Amazon's Kindle holds about 6 million book titles, vs. the Nook's 3 million.
Another factor to consider is that the Kindle Paperwhite book costs are slightly cheaper than the Nook Glowlight. Now, it's not much of a difference. However, the number of bestsellers you will find on the Kindle is significantly more than the Nook.
Coming to non-mainstream books, both the Kindle Paperwhite and Nook Glowlight have separate sections where writers can publish their own content. So, if this is something that you are interested in, both platforms are well worth exploring.
Other Distinguishing Features
Now that we have compared the top features of the Kindle Paperwhite and Nook Glowlight, we can talk about some of the distinguishing features between them. To begin with, we will talk about all the unique features offered by the Kindle Paperwhite and then go on to the Nook Glowlight.
So, let's begin!
Kindle Paperwhite Features
Reading Technology
One of the best aspects of the Kindle is its in-built Bookerly technology. This technology beautifully crafts the font on the screen of your Kindle device. You can choose from various fonts and text sizes to make your reading experience as comfortable as possible.
Not just that, the Bookerly technology allows you to choose from various modern or traditional fonts which you can easily switch between, offering the optimal reading experience.
In-Built Dictionary
Don't you hate it when you are forced to type a new word into Google or whip out an old-fashioned dictionary to find the meaning of a word? Well, with Kindles built-in dictionary, you don't have to.
Finding the meaning of a word you don't know is incredibly easy. All you need to do is to hold down the word on the screen, and it will instantly show you its meaning. Moreover, you don't need to be connected to the internet for this - allowing access to the dictionary no matter where you are.
Moreover, you can highlight specific parts of the text and make notes on it, or save certain parts of the text like quotes if you wish.
X-Ray Feature
The next feature we want to tell you about is the unique X-ray feature of the Kindle Paperwhite. Similar to the in-built dictionary, this feature allows you to view information about a character, a topic, an event, a place, or any other item in the book.
You can essentially learn more about the various aspects of the book and examine its foundation and nuances.
Web Browsing Capability
The Kindle Paperwhite has limited web browsing that allows you to find out what other readers think of the book you are reading. Moreover, you can sign-in through your Goodreads account to find out more about books and read reviews without hassle. The Nook, however, does not feature any form of web browsing.
Furthermore, you can add parental lock and control features that limit the kind of books you want kids to read. On the other hand, the Nook simply features password protection that can be used to restrict purchases.
Audiobooks
Although many of the older generation Kindle Paperwhite models do not support audiobooks, the newer generation ones do. This is especially beneficial for those who want to pick up a book where they left off but don't necessarily want to read. The audiobook feature works excellently, and it syncs automatically, enabling you to begin reading where you last stopped the audiobook.
Amazon Prime
Having an Amazon Prime account can be a wonderful addition to your new Kindle Paperwhite. The account enables you to explore various book titles and genres and buy books at a lower price. Moreover, you even have the option to read book samples before purchasing them if you wish to.
Another benefit of having an Amazon Prime account linked with your Kindle Paperwhite is that you can download books through the Prime account and have them synced automatically with the Kindle device.
You don't need to go through a long process to download or sync books as everything is synced automatically with all the devices where you have Amazon Prime installed. Furthermore, you have the option of downloading several free ebooks with the Amazon Prime account, which will automatically end up on the Kindle Paperwhite.
Export Notes To Email
Have you ever come across a particularly intriguing part of a text or a quote on a book that you want to save for future reference? Well, with the 'export to email' feature, you can do this conveniently!
This is an in-built feature that you can use straight from the Kindle Paperwhite. Highlight the portion of the text you wish to send, and then click on the 'export to email' option. You can choose between different formats like PDF or a simple format which you can open on a spreadsheet.
Reading Speed Tracking Feature
Another notable feature of the Kindle Paperwhite is the reading speed tracking. As the name suggests, this feature automatically processes your average reading time and tells you how much time remains to finish a chapter.
You can easily customize the feature to show the amount of time you have left in a chapter or the entire book. Moreover, you can check the location of the page on the book. This tells you how much you have left to read.
Explore
Much like the synopsis of a book on its back cover, the explore option allows you to explore the book before you begin reading it. Here, you can find all the information you need to know about the author, a summary of the book, and whether there are any prequels or sequels to it.
Nook Glowlight Features
Now that you know everything you need to about the Kindle Paperwhite, it's time to move on to the Nook Glowlight. Much like the Kindle, this device has several unique built-in features that can make your reading experience better. Here are some of the top in-built features you can explore.
Nook Reading App
The Nook Reading App is a free feature that comes with your Nook device. Once you get this app, you can sync all the Nook books amongst various devices that have the Nook Reading app. Much like the Amazon Kindle app, it allows you to sync downloaded or deleted books, add bookmarks, notes, and pick up where you left off from any device.
Download eBook In Various Formats
With the Kindle Paperwhite, you are somewhat restricted to exploring the book options available within the Kindle app. However, the Nook Glowlight allows you to download EPUBs, which are ePublications of books found online.
Many may argue that the addition of this feature immediately makes the availability of different books wider on the Nook than the Kindle Paperwhite.
However, we can let you in on a little secret which Kindle doesn't want you to know. You can download ebooks in formats like PDF and Mobi on the computer, which can then be sent to your special Kindle email address. However, you may need to connect the Kindle to the PC for this feature.
You can also use this feature by downloading ebooks on the computer or tablet in PDF or Mobi format and then sending this to your Kindle using a special software. That said, the process can be somewhat tedious and annoying, which dissuades most readers from indulging in it.
Screen Temperature Settings
A particularly vital feature that is missing from the Kindle Paperwhite is the screen temperature setting. Essentially, this setting on the Nook Glowlight allows you to reach warmer tones on the reading device, making the reading experience more enjoyable and softer for the eyes.
Although the Kindle Paperwhite allows you to change the brightness, the overall look of the screen resembles paper. Moreover, the in-built light, which is directed towards the screen rather than your eyes, helps reduce eye strain but doesn't emit a soft, warm light.
LendMe Feature
Another excellent feature of the Nook is the LendMe feature. This allows you to borrow books for 14 days at a fraction of the original price, which is excellent if you want to read a short book but don't necessarily want to purchase it.
That said, the Kindle Paperwhite allows you to borrow books from the public library. This process is relatively effortless and seamless, which is why many users prefer it to the LendMe feature of the Nook.
Final Words
As you can see, both the Kindle Paperwhite and the Nook Glowlight have their strengths and weaknesses. However, the device you buy will ultimately depend on personal preference.
That said, the Nook Glowlight is available at a slightly lower price than the Kindle Paperwhite. Many may argue that certain Kindle features make it slightly superior to the Nook, allowing Amazon to charge the extra cost for it.
Let us know which e-reader you like better - the Kindle Paperwhite or the Nook Glowlight. Till next time, happy reading!
Turkish kilims were really popular in the past, history repeats itself. More and more homeowners are enjoying their unique beauty and design, and find a way to fit them in their contemporary and modern homes. Does the kilim makes an impression on you too? Are you thinking about getting one for you living room, bedroom or hallway? In this article you are going to see how well they fit in the modern furnishings, and you will definitely head to the store to get yours as soon as possible. Check out the Traditional Kilim Rugs That Are Making A Huge Comeback and add some texture and color in your home. Their bright colors will enliven the area and the geometric patterns will break the monotony of the plain and minimalist decor!
These kilims are here to stay on the long run, so don't have second thoughts about getting yours as soon as possible. They become the focal point in the room and it's the first thing that you will notice when you enter the room.
The kilims are a shortcut to adding a dose of the Mediterranean and Middle East style into your living area. They are made of wood and are very original and authentic. They may also cost you more money than the ordinary rug, but it's definitely worth it!
The warm colors of the kilim give the room both harmony and contrast. We have to mention that the wool is dyed naturally with vegetables. The kilim offer a visual interest and makes the room an enjoyable space with a relaxed ambiance.
Even if you have decorated your home in a modern style, the kilim will fit in effortlessly. Plus, it will make your living area stand from the rest of the crowd and everyone will be asking you where you have got it from, believe me!
If you think the atmosphere in the room is so dull and it needs something to attract the attention, then you definitely need a kilim. Maybe it's not the first thing that comes to your mind, but once you add it into your interior you will be glad that you have.
Light translates into life. It has utmost importance in our homes, it influences our state of mind and therefore it plays a huge role in design, ever since the first sun-ray entered a cave. Natural light shapes our interiors and an equally important manner so does artificial light, especially in cloudy days or small apartments that simply lack the comfort of immense windows.
Contemporaneity brought forward smaller living spaces and while these often meant less natural light, infinite opportunities arrived with to artificial light, diy lighting fixtures of all kinds are surfacing around the internet, thousands of world class designers are launching products meant to enhance our living quality each day. In this permanent movement every possible item on the Mother Earth draws the attention of design enthusiasts and in the following article we will be cover a quite peculiar one, Jellyfish Pendant Lights, thus highlighting the immense array of options, opportunities. Jellies, or jellyfishes are soft-bodied free swimming aquatic creatures defined by an umbrella-like dome and trailing tentacles, they`re often transparent an extraordinary intriguing in shape and materiality, these creatures have roamed the seas for more than 500 millions and they are today the oldest multi-organ animal known to mankind.
In design, their transparency and movement have been an inspiration for years, they are also highly popular in cartoons thus channeling the attention of the little ones. The water creatures have inspired the world for thousands of years and in the following article they will continue to do so through a series of jellyfish lighting fixtures, these are meant to entice little ones and anchor sea-themed designs, cast a glance.
It goes without saying that these will not fit any decor, they`re not going to surprise any individual nor be the subject of thousands of diy projects yet the exercise of researching a sculptural shape drawn from nature surely cannot be challenged. The soft-bodied creature is an extraordinary source of inspiration and in the right medium the right jellyfish pendant light will surely shine, children will definitely be fascinated by colorful LED jellyfish lights.
What do you think? We would love to hear from you in the comment section below!
Given Japan's unique position in the world, it's no surprise that foreigners are fascinated by the country, culture, and societies of the Japanese people.
Whether it's Japanese food, anime, or its cultural elements, it has continued to perplex people worldwide, and the finest styles have become a part of a trendy lifestyle. One such fast-emerging trend is Japanese décor, especially the bedroom designs, both traditional and modern.
Minimalistic Japanesethemes have gained immense popularity with the proliferation of bedroom designs. Why? Probably because it’s all about sophistication and simplicity, making them aesthetically pleasing and appealing.
So are you planning to redecorate your bedroom with Japanese-style elements but are confused about what to choose? Don’t worry- we have prepared a list of some traditional and modern Japanese bedroom ideas for you.
Without further ado, let’s get in!
Traditional Japanese Bedroom Ideas
1. Zen Interior Design
What Is Zen?
Zen is a Japanese interior design trend, but more than that, it’s a philosophy about a person living in harmony with the world. Japanese culture pays homage to its historical traditions, instilling a sense of Zen among people and establishing peace with nature.
In this design, there is greater incorporation of greenery and nature within structures, and you will notice an abundance of natural light and open spaces. A Zen bedroom is intended to be meditative, tranquil, aesthetically pleasing, and visually balanced.
To have an aesthetically pleasing room, it is important to stick with light colors. It ensures a serene and calm sentiment so that you can easily breathe without any distractions. Earthy tones are generally preferred over gaudy and vibrant colors to maintain peace.
Similarly, to amp up tranquility, which is an essential essence of these traditional Japanese bedrooms, you should ensure natural light is let in as much as possible. Also, these bedrooms are established in places that are quiet and closer to nature. In simple words, you should have a serene environment around your room.
In case you do not have access to floor-to-ceiling large windows, then installing rattan pendant lighting will help keep the room remain well-lit always. You’ll indeed feel a sense of serenity and peace.
The most important aspect of this Japanese-style bedroom design is to keep minimum clutter. Often easier said than done, having a distraction-free room will evoke calmness in your bedroom. Without any confusion or distraction, you can simply focus on the moment without shifting your attention to other things. This is what sets an average Japanese bedroom apart from the rest.
How to Design The Bedroom In Zen Style?
In order to give your bedroom a full-fledged Zen style, you must clear everything and introduce the bare minimum. Just include main elements like a light, a low bed, and a nightstand. You can also hang some very neutral artwork and low tables. Known as Chabudai, these floor tables are most common in Japan and are generally used during summer. In winter, they are replaced by Kotatsu, which has a heater installed underneath.
Additionally, you will need to evaluate negative symbolisms or items in your room that don't suit the environment. For example, if you are looking for more headspace, make sure the surface is not cluttered.
Lastly, make sure to surround yourself with nature. You can keep small Japanese plants known as Bonsai trees. These are traditional Japanese art and science forms used to create miniature trees in small vessels or pots. Scaling whole trees into a miniature version makes it very aesthetically appealing.
2. Japanadi Interior Design
If you are an appraiser of “Hygge” and minimalist principles, then chances are that you have already started experimenting with the Japanadi style.
In order to design your room in this style, focus on natural materials like bamboo or wood pieces, which bring in a feeling of simplistic and natural beauty. We also recommend bringing greenery and plants or using muted colorslike pale green on your bedroom walls for giving your home a sense of outdoor living.
Similar to the Zen style, reducing clutter is also crucial in achieving a Japanadi style for focusing on open interior spaces and clean lines. However, if you live in a busy household and struggle to achieve a minimalistic look, try “faux minimalism” with natural containers like baskets, boxes or folding screens. Try to hide your extra items and maintain a clutter-free space.
To get the best of both worlds, draw on the coziness of Scandinavian design with soft pieces and warm textures while maintaining the elegance of Japanese interior design. As both styles focus on utilitarianism, you can establish a calm and serene space in your bedroom.
Japanadi decor focuses on craftsmanship, you should look for low Japanese furniture made of solid and long-lasting wood that will adhere to your decor for years. At the same time, we’d urge you to choose materials that are sustainable and don’t harm the planet.
Although both Scandi and Japanese decor aren’t new, the combination of these two as a single concept is a trend that's becoming popular quickly
3. Feng Shui Bedroom Design
What Is Feng Shui?
If you are looking to have a Japanese-style bedroom, you should definitely consider Feng Shui design as an option.
The bedroom is the most crucial part of your home, as you spend most of the time there sleeping or doing other leisure activities. While sleeping, your body goes into a passive state and gets affected by all the energies. So, designing your bedroom in a feng shui style can have a significant impact on your body and mind. Here’s what you need to do to feng shui in your bedroom.
As you’d probably expect, your bed frame and headboard play a crucial role in optimizing feng shui. This is mainly because wood oozes supporting and positive energy when sleeping. Moreover, they help eliminate negative radio frequency signals emitted by wireless appliances like cell phones, computers, and televisions from your energy field. But it will be important to keep these appliances away from your bedroom altogether.
Designing The Bedroom in Feng Shui Style
With respect to design, you should keep low furniture in your Japanese-style bedroom, like floor tables, low chairs, and beds. Make sure to place your bed against a solid wall as it will provide you with psychological protection and support. Aside from that, try to keep a clear vantage point of the doorway from the bed, thereby ensuring that the energy doesn’t flow quickly.
Avoiding clutters in your traditional Japanese bedrooms is always crucial, as it allows the energy to flow freely and rejuvenate you while sleeping. We recommend you to have some kind of storage for storing items and stick to soft items like blankets, linens, and pillows.
Feng Shui-style bedrooms generally opt for green and light blue colors. If you try to invoke passion in the bedroom, have splashes of red, while if you seek vitality and rejuvenation, neutral and earthy colors will best suit the purpose.
Like other elements in a traditional Japanese-style bedroom, the paintings need to be minimalist as well. They differ from the others owing to their emphasis on minimalism, as the focus of the artist lies primarily on core elements and significantly reducing or eliminating the background. Some examples of such paintings are the ones including bamboo, birds, Japanese symbols, or “Kanji”, and might recite Japanese poetry, known as “Haiku.”
Other than these, arranging your books on a bookshelf is vital. Books serve to be a great source of energy and stimulate our minds. So, for a night of sound sleep, try moving your books out of the way.
4. Family Countryside Japanese Design
Do you live in a large family and share a bedroom with others? In Japan, most family members stay in a single room due to their tiny houses and limited space.
In order to design your bedroom in a traditional Japanese style, you’ll need futons and a tatami mat under the bed. The Japanese futon is a conventional mat laid straight on the floor. Also known as Shikubuton, it is the most common type of bedding found in most Japanese homes.
Tatami mat is a traditional Japanese mat used in most homes of Japanese people and is covered by laguna, which is a design weaved from soft rice straw. These mats are of standardized sizes, with their length being twice their breadth. In other words, the length-to-breadth ratio is 2:1.
Unlike Western bedrooms, local Japanese people sleep on traditional mattresses placed on the floor or a low bed. It is considered a standard norm in Japanese society.
Other than that, you can also have a platform bed or Japanese floor bed for your bedroom. Its unique design and minimalist design set it apart from other beds. These are only a few inches from the ground and occupy less floor space.
Traditional Japanese homes were lit by lamps and other light sources, mainly because electricity wasn’t invented yet. Even today, you will see many Japanese homes with similar lighting, powered by electricity. Appropriate lighting is always essential for a family countryside bedroom design.
You can have nightstands or paper lanterns that emit a warm light. Not only will they radiate positive energy but they will also help maintain a serene and peaceful environment.
Additionally, if you have decorative items in your house, make a wooden shelf to keep them arranged and avoid any kind of clutter in the bedroom.
5. Mid-Century Japanese Bedroom Design
This is probably the most minimalistic and simplistic Japanese-style bedroom you will see on our list. The room has only four things: a table, a chair, a bed, and a bonsai tree! Although there are only a few items in this room, it still looks beautiful and amusing.
Huge wooden sliding doors, also known as screen dividers, are used in these rooms. Given that Japanese people emphasize privacy, finding these screens in every household is eminent. The most common Japanese screen dividers are byobu and shoji. It is not the case with Western designs, which prefer to divide their rooms by placing a solid wall.
Byobu are folding screens found primarily in Japanese homes to create separations in rooms or create a sense of privacy. These are primarily decorated with Kanji or other forms of calligraphy found in Japan. Wood is primarily used for making the frame of Byobu, while the screens are made of paper, bamboo, etc. However, such materials make them sensitive to rough use, and slight pressure on the screen is enough to damage them.
Shoji, another type of sliding door, is also ubiquitous in Japanese households, including urban areas. However, the screens of Shoji are not as delicate and fragile as its counterpart and are made of solid traditional material to increase their toughness. Similar to Byobu, minimal calligraphy or art is used to decorate the screens.
Regardless of the materials used and increased durability, these screens need to be handled with care as they are essentially just flat layers of millimeters-thick materials.
These bedrooms are undoubtedly one of the most inherently relaxing rooms. Apart from partition screens, these Japanese bedrooms need to be clean and organized. Additionally, you need to ensure that the right amount of natural light enters the room, provided through skylight doors and windows.
Best Modern Japanese Bedroom Ideas
1. Floral Japanese Style Bedroom
This bedroom design is more on the traditional side with a modern twist. Beautiful arrangements and floral bedding give a stunning look to your bedroom. Similar to conventional design, these modern Japanese bedrooms boast floor or platform beds with lower height and adorn them with floral pattern bed sheets, placed near long and skylight Japanese-style windows. Also, an artificial sakura flower in vases on low tables brings Japanese-style vibes to your entire space.
As mentioned earlier, having a well-lighted room provides a wide array of benefits to your body. Primarily, it improves your sleep by helping your body regulate the circadian rhythm and serves as a natural cue to regulate melatonin production, which makes our body alert and active. As seen in the image, you can add Japanese-style lamps to make your room well-lit and brighter at night.
Tatami mats are ubiquitous in a contemporary Japanese bedroom style. These mats are made of rush grass and straw, bound with a plain border fabric. If you want to give your bedroom an authentic yet modern look, these mats are a must. Besides, if you live in cold regions, it is better to have a mat to avoid feeling cold at night.
Apart from delivering a classy look to your modern Japanese home, it presents several benefits, ranging from supporting your back while sleeping, regulating humidity to being eco-friendly and biodegradable. Also, its maintenance is effortless, and its long-lasting nature helps maintain the look for a longer time.
If you wish to paint the walls, go with subtle blue tones or any color that fits perfectly with your bed.
2. Tatami Room
If you share your room with siblings or other family members, this modern Japanese-style bedroom will be an ideal design for the space. This tatami room features an en suite interior vogue.
As you have seen, a contemporary Japanese bedroom doesn’t have an attached bathroom, but you can include it if needed. Also, the room is filled with wooden furniture seen in most bedrooms. The primary reason for having wooden furniture lies in creating a unique ambiance of a room, and as compared to other materials, it is easy to clean, and maintain, and is long-lasting.
Similar to other designs, this one also features a low bed, complemented with a basic lacquered or bamboo dresser. You must ensure that only essential furniture catering to functional needs is introduced within the room such that there is no clutter and the theme remains constant.
The minimalist and simple mattress fits perfectly with this Asian interior design. Featured with three futon mattresses and Tatami flooring, this bedroom is essentially Japanese with a Western touch. Futon mattresses can be placed directly on the floor or with Tatami mats underneath.
Furthermore, the room features a cloth hanging rack, linen, heating, and other essential items required on a daily basis in an organized manner. As with Japanese bedrooms, the ambiance is also an essential principle of the particular design. Establishing a tranquil and serene environment around you will not only keep your mind at bay but also help concentrate on the impending task, in turn boosting the overall efficiency.
3. Mystical Anime Bedroom Design
Anime is popular not only in Japan but people all over the world are crazy about it. Having an engaging story, spectacular visuals, and relatable characters is the reason behind its massive popularity. If you are one of them, you’d want to design the room with an anime theme and design as favorite Japanese anime characters.
Whether your room is large or small, posters are a great and easiest way to start decorating your space. Posters from the same major television series or different movies can be put on walls. This modern Japanese-style bedroom will readily inflict anime vibes without investing much or damaging the walls. Added to it, you can also add colored lighting effects for making your bedroom much more lively and animated.
To complement the traditional Japanese beds, you can add a unique anime bed headboard to make it more comfortable and cozy. For creating this, print out some anime posters or pictures in varied sizes and glue them on walls just behind the bed.
Want something calm and contemporary? Just select one of your favorite anime characters and use it as wallpaper for your Japanese-style bedroom. Keep everything else in a simple design for keeping the wallpaper stand out. The furniture in the room is to be made with wood and a small bonsai plant can be kept for enhancing the beauty of the room.
Lastly, place a nightstand or a lamp with changing colors or string lights to add a soft touch to your bedroom. It can make your space heaven for anime lovers.
4. Luxurious Japanese Style Bedroom
A luxurious Japanese-style Bedroom is perfectly suitable for those who live in sky-high buildings. Laid with luxurious design and all facilities, it includes some Japanese elements for delivering its essence, such as skyline windows, traditional Japanese furniture, and screen doors.
This idea is for someone who wants Japanese style in their bedroom and doesn’t wish to change the ambiance and interior of their space. These rooms are very spacious and provide you with the liberty to customize and have the room of your dreams.
The advantage of planning a luxurious bedroom is a combination of exclusive sophistication, greater comfort, and relaxation in the desired way. You can paint the room the color you choose, black or gray. When selecting a black mansion bedroom, you can paint your bedroom wall black with a contrasting floor color.
Also, you can use gray color in combination with neutral hues for adding boldness and brightness to your room. Coordinating with it, you can add wooden and modular furniture to your Japanese-inspired bedroom to give it a futuristic and aesthetically pleasing vibe. The inclusion of wooden furniture also goes well with your Japanese theme.
Don’t be shy to play around with calligraphies or artwork in your empty space. If you want to keep on with the Japanese theme, make sure to keep it a simple and clean one. This helps to maintain serenity and tranquility in your space.
Tranquility and Quietness in Japanese Bedrooms
The essence of traditional Japanese bedrooms is rooted in Zen philosophy, which emphasizes tranquility and simplicity. Quietness is a crucial element in this context, symbolizing peace and serenity. The design principles aim to create a calm environment free from loud, distracting noises, contributing to an atmosphere of relaxation and mindfulness.
Soundproofing becomes an essential aspect of achieving this tranquility. By reducing the intrusion of exterior noises, homeowners can maintain a serene atmosphere in their Japanese-style bedrooms. Methods of soundproofing can range from structural alterations to the use of specific materials known to dampen sound, like tatami mats. Tatami, a traditional Japanese flooring material, not only adds to the authentic aesthetic but also offers a natural sound barrier due to its composition and density.
Understanding the relationship between tranquility, quietness, and Japanese bedroom design allows homeowners to create a space that not only embodies visual Zen principles but also delivers an authentic, peaceful auditory experience. For those seeking to minimize the noise in their home, incorporating soundproofing techniques into the design can significantly contribute to maintaining the peaceful ambiance central to Japanese bedrooms.
Final Words
With this, we have reached the end of the best Japanese Bedroom design (traditional or modern) that you can give.
As you can see, a wide range of elements is to consider when creating a Japanese-style bedroom. It’s imperative to remain familiar with Japanese culture and traditions in the form of Feng Shui and Zen. We recommend you start by decluttering your space and then design the bedroom with the ideas mentioned earlier.
Japanese furniture decorations, ambiance, & traditional style bedding are crucial aspects of every Japanese bedroom. When it comes to decorating in Japanese style, less is more concept is much more applicable to give you a more relaxing time to spend in.
You’ll discover that the fewer the belongings, the more the focus is on what’s essential, which in turn allows you to stay energetic throughout the day. We will now sign off to come back the next time. Till then, take care!
The trouble is since these lamps gained popularity, some places started selling cheap knock-offs in place of the real ones. This is quite a bit of a problem since a lot of people purchase these for the health benefits. The fake ones not only have no positive effect on your health but sometimes also cause health-related issues. A lot of them have lead in them, and that is highly toxic to your body.
If you spent your hard-earned money on a lamp, you deserve a real one with the real benefits. So, in case you just bought a new Himalayan salt lamp and are not too sure about its authenticity, here are some ways you can confirm if it is a real one or a cheap knock-off.
How to Tell If Your Salt Lamp is Real | Authentic Guide
Unique salt lamp is made from Natural Himalayan salt...
Once lit the lamp will emit a calming Amber color
It has a lot of positive reviews
Several sellers sell their salt lamps and other wares on places like Amazon. So, the first thing you can do to confirm your lamp's authenticity is to check the reviews on Amazon and other websites. Since a lot of people already believe in its miraculous health benefits, almost every salt lamp available on these websites have been tried and tested by the believers.
So, you could go the smarter way and read the reviews and check the ratings and see if the product has really positively affected the buyers' health and happiness before you order one for yourself. But in case you couldn't wait and have already bought out without the proper research, make sure you at least check the websites now to confirm what you have is the real deal.
If a lot of people who have already bought the product from the seller claim that they are now reaping the benefits since they bought it, you are probably good to go.
It can be traced back to the Himalayan ranges
The salt on these lamps come directly from the Himalayas, at least the real ones do. So, one sure fire way to determine if your lamp is original would be to trace where it comes from. If your manufacturer provides you with certificates or access to such information, chances are that they are trying to trick their buyers.
Here, you must remember that there is a big difference between where the product has been put together and where the salt has been mined. The salt on these lamps needs to come directly from the Himalayan mountain ranges. The Himalayan ranges are the one and only proven source of these salts.
The light is not uniform or bright
This is extremely natural because the salt crystals will cause the light to refract at different angles. This basically means that your Himalayan salt lamp will not provide the same uniform brightness as all the other normal lamps in your house. And it's not even meant to do that because these salt lamps are not supposed to look normal or feel normal. They are special, and they look the part.
The light given off by the original Himalayan lamps is usually muted and slightly dull. These lamps are not supposed to light up entire rooms. If your one actually works like any other lamp in the house and lights up entire rooms, it is probably a knock off.
So, in case you recently bought one of these lamps and they seem to provide uniform lighting and brightness. Unfortunately, it is probably a fake. Maybe you should demand your money back at this point.
They are not very durable
Again, this is extremely normal. Original Himalayan salt lamps are very fragile and have to be treated that way. They chip off or break easily during shipping, which means a lot of them are lost during the delivery process. But, in case the one you bought has rolled off the table at least once and has shown no signs of distress, it is pretty much a fake.
Original Himalayan salt lamps break or chip off easily. Even a tiny amount of pressure might cause the salt crystals to fall off. So, in case the one you have shows no sign of wear or tear no matter what it faces, it is almost definitely a fake. Needless to say, though, do not just drop your lamp on the floor to check its authenticity. It might lead to unpleasant results.
It is pretty expensive
Yes, this one's pretty strange and will probably make you very unhappy. But it is true nonetheless. Since mining these salts in the Himalayan ranges and then making and transporting the lamps is not cheap. And that’s why the original Himalayan salt lamps are usually very expensive.
There is also the fact that a lot of the shipment is broken or damaged during transportation. So manufacturers need to use more expensive methods of transport.
If you recently came across a sale that offered you a lucrative deal on these salt lamps and you were able to get it very cheap, there are high chances that the one you so lovingly bought is a fake. This is especially true if you bought a white crystal lamp instead of the usual colored varieties. White crystal ones are rarer and, hence, more expensive.
Moisture affects it badly
It is made of salt and is supposed to react badly to moisture. The fake ones will hardly show any signs of wear even if you wash them. But if you have an original Himalayan salt lamp, the moment it gets in contact with water, it will start weeping.
One good way to determine if you actually have the original product would be to dip a piece of cloth in water and touch the surface of the lamp with it. If you see minor discoloration and some of the salt gets on the piece of cloth, you can rest assured that you have an original salt lamp.
If your lamp shows any signs of hygroscopy (or sweating), you should know that it is extremely normal for an original salt lamp to react that way when they come in contact with moisture in the air.
You start experiencing the positive health benefits
While there are many non-believers out there, every buyer of an original Himalayan salt lamp will tell you how the lamps have miraculous health benefits. One might choose not to believe it, but the science behind this lamp is real.
The salt in the lamp purifies the air so much that people with asthma and other breathing issues face an immediate improvement. It also helps with people's dust and other allergy issues by cleaning the air and making it easier to breathe in.
But, if even after buying the lamp, you are not literally breathing easy, there might actually be something wrong with your lamp. You should be reaping the astounding number of miraculous benefits of having this lamp around since the moment it first crosses your threshold, and if you indeed see no such difference, the chances are that your lamp is a fake one.
The seller has great return policies
Look, the manufacturers get it. These lamps are very fragile things that need to be always handled with care. So, there is a huge chance that it might get damaged while it is being shipped to you. And that’s why all the people who sell original Himalayan salt lamps have excellent return policies.
You spend a lot of your hard earned money while buying these and the manufacturers have got your back.
So, if the seller you are buying or bought the lamp from does not offer you any sort of coverage in case of damages during shipping and transport, you are probably dealing with a fake. The ones who sell fake Himalayan salt lamps have got to be extra careful when dealing with customers. If they are found out, they know that the customer will want to send the lamp back and they cannot have that.
Any seller who sells original Himalayan salt lamps will have no such worries and will offer you extremely viable return policies. They know what they are giving you is the real deal so there will be no dissatisfied buyers. Also, even if the lamp is indeed not a counterfeit, you must always remember how fragile they are.
They might get damaged during shipping, so it is very important you go to a seller who has a good replacement or returns policy in place.
Salt Lamp Is Real Final words
As you can very well see, it is very easy to get tricked into buying a counterfeit Himalayan salt lamp these days. So, one must be extremely careful when putting their money into buying one of these. Make sure you research the manufacturer well before you actually invest in buying a lamp.
Read reviews on websites and check the ratings. Also, if you are skeptical about the health benefits offered by these lamps, you can read up more about it on the internet. Hopefully, you will soon be convinced of the fact that these are indeed worth buying.
In the end, no matter what, do not get tempted into buying a lamp just because someone is selling them cheaply. You will only be left disgruntled and unhappy with the buy later.
When you have spare paint cans or bottles lying around the house, it is important to know whether they are inflammable.
Some paints may seem completely harmless until the time you realize that they are not. That’s because they may contain elements that make them combustible, thereby posing a threat to your safety. But does that mean you stop using them? Not at all!
What you need is the right kind of knowledge that helps you understand which paints are inflammable and which are not. With a good understanding, you will be able to use and store them safely. And once you take proper precautions, there’s nothing to worry about.
The enthusiasm to learn more about paints must have brought you here, and you are at the right place. In this guide, we discuss the major types of paints and their characteristics. This will help you understand them better and enable you to use them more efficiently.
So, without any more delay, let’s dive right in!
What’s Flammable And What’s Not?
Truth be told, there is no one answer to this question. Almost all paints are different from each other and they exhibit different characteristics. Whether a paint is flammable or not is determined by the kind of solvent that is present in it. The solvent holds the various ingredients in the paint together and helps in delivering the color and texture.
Paints that are flammable contain a good amount of solvent that gets transferred to the walls after you are done painting. And once the painting is over, you can smell the solvent evaporating from the walls. This is when you need good ventilation to ensure that you do not breathe in any harmful chemicals.
If you end up in a windowless room for hours right after it has been painted, there’s a high chance that you will inhale toxic chemicals. And that can cause serious damage to your lungs.
In case you have any difficulty in understanding if a paint is flammable or not, there’s a small trick that can help. Always remember that water-based paints are not inflammable and are completely safe for use.
On the other hand, aerosol paints come with propellant pressurized cans that enable you to deliver an even layer of paint. However, it is this feature that makes them inflammable. So, you must take proper care when working with one.
Are Acrylic Paints Flammable?
Acrylic paints are completely water-based, so there’s no chance that they will be inflammable. They usually don’t contain any trace of flammable oils in it, and the water content acts as an emulsifier.
When you are using acrylic colors that are water-based, you can easily wash them with soap. This makes maintenance pretty easy and does not require you to come in contact with toxic elements. And when you are using acrylic paints, there is no need for a thinner, which can be quite inflammable.
However, this in no way means that it is safe to put acrylic colors on your body or put them in your mouth. In case you accidentally put some on yourself, try to remove it immediately.
Actually, acrylic colors are pretty non-toxic when used on regular surfaces. Each brand has a different drying time, and you would get all the details printed on the instruction manual. On average, it does not take more than a day’s time for acrylic paints to dry.
That said, we’d still suggest that you use acrylic paints in well-ventilated space. This is because the other chemicals present in it might make you feel suffocated.
Are Spray Paints Flammable?
Spray paint is highly flammable, and you must take proper care when handling it. Just like soda is pressurized in the can, so are spray paints. They are highly pressurized and contain a good amount of butane and propane gasses. These two elements work as propellants.
You might be wondering why to use a propellant in a spray can? Well, it is the gasses and the pressure that help the color come out of the can with much ease. The moment you press on the nozzle, the pressure gets released, and the paint gets pushed to the bottom of the spray can.
Once the pressure is put on the valve, it reaches the end of the can and enters the dip tube, and comes right out of it. This way, the paint comes out of the nozzle, and there’s some amount of propellant in it too. And this is what makes the spray color pretty flammable.
At other times, the paint comes out of the can in the form of a uniform mist. Propellants contain particles that repel each other, which means that the longer they stay, the further the mist will be repelled.
Make sure that you apply the paint in a way that the repelling is uniform for the color to get used properly. The further the nozzle is placed from the canvas, the better will be the application and the spread. And ensure that you take proper care to not puncture the can, as that would release all the pressure at one go. This will make all the contents come out at once.
Are Oil-Based Paints Flammable?
Oils are flammable, and so are oil-based paints. They catch fire easily because of the solvents present in them. A lot of users choose to use latex paints instead. But, there are indeed many users who still prefer to use oil-based paints. However, more and more people are getting inclined towards using latex paints today.
People are looking for other alternatives because of the restrictions that many states place on the use of oil-based paints. Because of the limits, getting hold of these paints and their disposal both become pretty challenging. Other than that, most oil-based paints have chemical solvents that give rise to volatile gases.
As a result, some states do not allow users to dispose of oil-based paints in toilets and drainage. Without proper measures, they can create quite some trouble in the water treatment plants. Paint thinners also need to be carefully disposed of as they might give rise to a fire if not handled properly.
However, this is not the case in every country, and there are many places where painters choose to use oil-based colors. If you are planning to do the same, we only recommend that you handle it with care. When you do that, the risks become considerably less.
Are Latex Paints Flammable?
Latex paints, like acrylic, are composed of water-based components and acrylic polymer, which makes them entirely non-flammable. Apart from the polymer microparticles that are used as binders in both types, there’s hardly any difference between the two.
As we have mentioned in the previous section, a lot of people are selecting latex as a better alternative to oil-based paints. So, you will get to see many people opting for it to color their indoor and outdoor walls. The shift in preference seems justified as latex paints are not at all harmful to the skin because there are no toxic elements in them.
Latex paints that you use today are made of synthetic resins, which do not easily expand or contract as oil paint does. Even if you come in contact with them, they are not harmful and can be easily washed off. But make sure that you do not ingest them or purposely paint your body with one.
The other advantage is that latex paints are porous in nature and as a result, they don’t not trap moisture. However, ensure that you give the primer some time to dry off before putting in the latex paint. Otherwise, the final output will not be nice.
Paint Safety Recommendations
It is not like flammable paints cannot be worked with. However, you need to know the correct ways of handling them. Be it flammable or non-flammable color; you need to know how to use them well.
Efficient Storage
Make sure that you store the paints well to ensure that they do not cause any problem. And while storing them, remember to not put the flammable variants near a heat source. Even a tiny mistake can lead to big troubles in situations like this.
Apart from that, remember to not smoke near the paint and maintain the highest amount of safety. Consider keeping a fire extinguisher nearby. If you store the pigments well, their chances of catching fire are significantly less. So, try to keep them away from kids and pets and try disposing of them at a toxic dumping site if they are flammable.
Effective Ventilation
To prevent fire or uneasiness caused by toxic chemicals in paints, it is essential that you work in areas that are well-ventilated. We understand that it is not always possible to set up an outdoor workshop. In that case, try to work near the windows and keep them open. If you still feel a little stuffy, it is best to install a fan in the room to improve air circulation.
Proper Cleaning
As we have mentioned before, there are many paints that contain toxic substances. So, it is best to clean the work area and yourself after you are done working for the day. Any uncleaned trace may cause a lot of damage.
Also, do not forget to clean the ladders, cleaning cloths, and tools in your workshop.
Final Words
With that, it’s a wrap for today.
We hope that you had a great time learning about the different types of paints and understanding how to handle them best. One must pay good attention to paint quality, but that does not mean that there is no need to neglect your safety.
All paints are different and exhibit different characteristics. And before you start working with them, it is essential that you know whether they are inflammable or not. In case they are, you can take the necessary measures to stay safe. With good knowledge about paints, it will get easier for you to use them without any hassle.
If you have any further queries, feel free to reach out to us in the comments section below. And for more exciting reads, keep a watch on this space.
Be it a pro or a beginner, every gardener seeks the best methods to improve plant growth.
Now, there are a ton of products available in the market, promising desired results, but most don’t live up to our expectations. And the others instill in us the fear of chemicals seeping into the garden’s produce.
Understanding your plight, we’re here to introduce you to a safer alternative to these products. Mushroom compost is one of the most widely used types of soil amendments that’s capable of fulfilling every gardener’s needs.
But is it good for tomatoes? Here’s where you’ll find out.
After spending hours on research, we’ve managed to create this informative guide, which provides relevant information about the use of mushroom compost in growing tomatoes. Furthermore, we’ve highlighted the common problems associated with tomato plants followed by the benefits of mushroom compost.
So, without further ado, let’s begin!
What Is Mushroom Compost?
Before coming to the conclusion of whether or not mushroom compost is good for tomatoes, it makes sense to get to know its composition. Let’s start by tackling the common misconception that mushroom compost comprises real mushrooms as its primary ingredient.
It’s rather a combination of organic materials, such as peat moss, hay, hulls, chicken manure, corn cobs, and others. However, the ingredients used to make mushroom compost may vary, depending on the source. And the desired output is obtained after each component is estimated and thoroughly combined.
That said, making this compost is as simple as soaking finely cut straw in water. A mix of the organic materials is combined with the straw and then placed in the hot compost pile for around 30 days. The straw serves as structure and food to bacteria, while the chicken manure, urea, and peat moss provide the required nutrients.
With bacteria thriving, the heat rises to more than 160 degrees, which, in turn, kills any pathogen or weed seed present in the straw. Consequently, after several weeks of moistening and turning, the pile darkens, indicating that the mushroom compost is ready to use.
The compost can then be used as an amendment to enrich the soil, raise its pH value, and retain moisture. It’s also widely used in commercial mushroom facilities to grow crops and later sold to landscaping businesses, agricultural businesses, and farm co-ops for resale.
Is Mushroom Compost Good For Growing Tomatoes?
By now, you’re well aware of mushroom compost, its ingredients, and the chemical process involved in its formation. So, it’s time we answered the most crucial question forming the foundation of this guide - is mushroom compost good for tomatoes?
Without beating around the bush, using this compost type to grow tomatoes can definitely prove to be beneficial. It’s rich in several minerals and nutrients that are crucial for the growth and development of the tricky fruit.
On that note, let’s discuss the common problems associated with growing tomatoes before highlighting the benefits of using mushroom compost to eliminate the issues.
Problems Associated With Growing Tomatoes
It’s not easy to grow tomatoes since they’re prone to diseases. But interestingly, the common problems faced by tomato plants can be addressed by mushroom compost as well.
This section will help you identify the plant disease and its cause so that it’s tackled no later than it appears.
Blossom End Rot
Lack of sufficient water or calcium leads to dark blotches at the end of your tomato plant, commonly known as blossom end rot. It may also be caused by a lack of calcium in the soil, contributing to soil dry-out.
The use of mushroom compost helps retain enough water for the plant. Plus, it adds nutrients and minerals like calcium to the soil to overcome this problem.
Tomato Blight
Most varieties of tomatoes are resistant to tomato blight, but a few variants, commonly grown in regions with wet climates, are susceptible to this problem. So, if you notice the fruits and leaves of your plant rotting prematurely, try spraying liquid mushroom compost. It acts as an excellent aid for protecting the tomato plant.
Mold
Yellow patches on the leaves of the plant are an indicator of leaf mold. It contributes to the loss of tomatoes, so try growing a plant variant that’s naturally mold-resistant and make sure you keep the area ventilated.
Of course, the use of mushroom compost as mulch is another excellent way of addressing this issue. It helps the plant resist mold and kills pathogens in the soil.
Benefits Of Using Mushroom Compost For Growing Tomatoes
As you already know, mushroom compost is a proven type of soil amendment used for mushroom cultivation. It’s rich in nutrients and helps tackle common problems like mold, blossom end rot, and tomato blight, allowing tomato plants to thrive well.
Here we’ll be listing and discussing a few more reasons why using mushroom compost is beneficial for the growth of tomatoes.
Early Growth-Stage Protection
Mushroom compost is not only rich in minerals like calcium, but it also increases the soil’s alkaline content in the early growing stages of your plant. As such, it protects the crop from diseases from the get-go.
Food For Plants
When compost is laid as mulch or mixed with the garden soil, nutrients are slowly released to serve as food for your hungry tomato plants. That’s not all; the soil amendment stimulates beneficial microbes to promote growth.
Natural Anti-Bacterial Protection
If not addressed promptly, pests and pathogens can cause a nuisance by killing plants. But tomato growers can always use liquid compost, which is also referred to as mushroom compost tea, to protect their plants from various bacteria and diseases naturally.
Superior Weed Control
Let’s face it; no one likes having to deal with pesky weeds growing in their vegetable or fruit garden. Luckily, mushroom compost comes to our rescue.
A thick layer of compost blocks weed growth, overcoming the constant struggles gardeners have to deal with during the tomato planting season.
Generates Sufficient Drainage
Often gardeners end up overwatering their tomato plants, which eventually leads to the rotting of roots. And if the soil isn’t compacted with proper drainage, water-logging and root drowning further add to problems.
Remember, tomato plants grow well in moist but well-drained soil. So, give the soil what it needs to promote the growth and development of the fruit by adding mushroom compost. What’s more, the compost can help improve chalky, compact, and clay-based soil.
Organic Soil Amendment
We’ve already explained the process involved in making mushroom compost. As such, you must be aware that it’s organic, comprising all-natural ingredients, including peat moss, hay, and chicken manure.
That said, mushroom compost is safe to use; you need not worry about chemicals seeping into your tomatoes at any point in time. It neutralizes the alkaline content of the soil and adds nutrients as per the tomato plants’ needs.
No Foul Odor
You might presume that since mushroom compost comprises domestic animal manure as one of its primary ingredients, it produces a foul odor. However, that’s not true; it does smell musty, but it doesn’t stink.
Gardeners can use their bare hands to mix this compost in a container bag without throwing up. And once it’s added to the garden soil, the musty smell slowly disappears. So, you need not worry about your tomatoes smelling unpleasant when they’re ready for harvest.
How To Use Mushroom Compost For Tomatoes?
Now that we’ve already concluded that mushroom compost is highly beneficial to the growth of tomatoes, let’s talk about how it should be used.
To answer the question, it can be used just like you’d use any other compost. All you have to do is mix it in with the soil in your tomato plant pots. You may even fill a grow bag with compost and plant tomatoes in that.
Mushroom compost is known for its high water retention rate. So, there’s no need to worry about your plants drying out due to lack of sufficient water in the soil even if you fail to water the soil every day. It always manages to keep the water level constant.
You can also grow tomatoes in your garden using mushroom compost. Create a mulch layer by spreading compost evenly on the top layer of the soil with the help of a rake or hoe. This will help trap moisture and protect your tomato plants.
And for treating diseases like tomato blight and leaf mold, spray compost tea, a dark-colored fluid rich in nutrients and minerals used to fight fungus and bacteria seen in garden vegetables. It’s relatively easy to make from the compost pile; just dump a trowel of compost into a bucket of water and allow it to stay for a day or two.
Does Mushroom Compost Burn Plants?
There’s a common notion surrounding mushroom compost, stating that it can burn plants. Is it true? Well, it is, to a certain extent.
Newly germinating seedlings and tomato plants that are sensitive to alkaline are at a higher risk of burning because of the high soluble salt level in mushroom compost. This is why professional gardeners always suggest mixing compost with garden soil to protect the plant from damage.
However, you may also reduce the risk of burning by allowing the compost to sit for at least a few months before use. Another way to protect your plant is by allowing the freshly applied mushroom compost to stand uncovered during winter for curing.
Final Words
There’s no doubt that mushroom compost can benefit your tomato garden in different ways. And it serves as a smart and affordable choice when it comes to soil amendment.
From retaining moisture in the soil to adding essential nutrients like calcium, this organic produce fulfills all the requirements for promoting the growth of tomatoes. However, it’s important to note that tomatoes grown in compost alone are susceptible to damage due to the high content of soluble salts.
So, make sure you mix the right amount of mushroom compost in garden soil and remove unwanted weeds prior to application. On that note, we come to the end of this informative guide.
Here’s hoping we were able to help you grow healthy tomatoes using mushroom compost. We’ll definitely be back with more useful guides related to gardening.
Till then, you’re welcome to reach out to us in case of any queries related to the topic.
Branding dominates purchase, whether you like it or not!
No matter how big or small your investment is, there's no good reason why you wouldn’t like a branded commodity. After all, who doesn’t like owning products that are from a popular brand? And let’s face it, when your neighbor says she has a particular brand’s bathtub, it only makes you more proud of your decision!
But in doing so, there’s possibly no reason why you’d compromise utility and cost-efficiency. That’s why the actual value of a product will always depend on its utility and durability.
That being said, there are a few brands that strike the right balance between quality and pomp. And one such brand that makes us keep coming back to its products is Kohler. We just can’t get enough of their plumbing fixtures!
But in case you’re still wondering if buying a Kohler product will be worth your hard-earned bucks, read our factual reasons for speaking highly of this brand.
Is Kohler A Good Brand?
Where Did It All Begin?
Before we walk you through the deets, allows us to shed some light on the brand’s inception. In 1873, John Micheal Kohler, an immigrant from Australia, along with his partner Charles Silberzahn, spent $5,000 to buy the Sheboygan Union Iron and Steel Foundry from its owner and Kohler’s father-in-law, Jacob Vollrath.
Shortly afterwards, they began producing various items, including pieces of ornamental iron like cemetery crosses and settees, and castings for furniture factories and steel farms under the name “Kohler.” However, it was in 1883 when the brand got its big breakthrough.
John applied enamel to a horse trough made of cast-iron and was able to build the brand’s first-ever bathtub. Since then, plumbing fixtures is what Kohler has been best known for. Although the brand has had its share of controversies over the years, their top-notch products have earned the trust of customers worldwide.
Kohler’s Product Line
Kohler has tried its hand in different specializations, but its bathroom and kitchen fixtures are the main products that run synonymous with the brand name. Almost all of the company’s plumbing fixtures are available in various hardware, DIY, and home improvement stores across the States. And its iconic bathtub remains one of the top-selling products to this day!
But that’s not all; Destination Kohler, the company’s real estate and travel wing, owns several properties in the US and Scotland. In 2017, the brand acquired Clark Energy - a US-based company specializing in end-to-end production of engine-based power plants. Apart from that, Kohler is also the authorized GE global distributor for its reciprocating engines.
Is Kohler A Good Brand?
To answer it in a single word, we will say a big yes! There’s no doubt that Kohler demands all your attention when you think of buying a plumbing fixture. But what makes the brand worth all this praise? Let's’ find out!
Tradition Of Quality
For a brand that has been in the market for more than a century now, you can completely trust it to meet all your plumbing needs. Be it toilets, faucets, or bathtubs, Kohler has got it all. But what appeals to us the most is the quality of their products. The brand puts equal effort in maintaining and improving product quality in accordance with present and future requirements.
For instance, Kohler toilets are a very popular choice in the US, which directly competes with other leading brands like American Standard, Woodbridge, and Toto, among others.
User Reviews
A simple online query about any Kohler product will fetch a lot of positive reviews, which is a testimony of the brand’s positive presence. And there are a couple of good reasons for that. In 2015, Kohler created a walk-in division, which put on display the engineering of bathtubs that are specifically designed for users with disability or mobility issues.
This range became popular rather quickly and earned the brand a reputation for being considerate to all sections of the society. Its creations are sold via independent dealers throughout the country.
In the same year, The Builder Magazine named Kohler as the ‘best quality’ and ‘most used’ brand in the bath accessories category. It also bestowed the brand with the top spot in the list of ‘most used’, ‘customer brand familiarity’, and ‘quality rating’ for the whirlpool bath fixtures range. Moreover, the brand creates customized artist works with hand-painted sinks and toilets.
Raging International Success
As we have mentioned multiple times, Kohler has successfully created a name for itself in the global market, thanks to its range of quality products.
Visit any home improvement store in Asia or Europe, and you will likely find Kohler as one of the mainstay brands that they have on offer. In fact, many users say that it’s the ‘Apple equivalent’ of bathroom fixtures. Now that’s what we call reputation!
Beyond that, Kohler created a joint venture called Kohler-YinXiang Ltd.in China in 2007 to manufacture small-scale gasoline engines. The brand intends to import these engines, rather than manufacturing them in the country. Likewise, Kohler’s UK subsidiary is the Gloucestershire-county-basedKohler Mira Ltd., which is best known for its Mira showers.
Plus, Kohler has an active involvement in various development projects with other countries like Australia, India, France, and Singapore, among others. What else can possibly speak of its global popularity?
Ever-Evolving Technology
Modern life is incomplete with technology, and Kohler understands this like no other. Recently in 2022, the brand unveiled a line of ‘Kohler Connect’ products (at the year’s CES convection), consisting of smart connected products like mirrors, bathtubs, showerheads, shower valves, and toilets.
These fixtures will be equipped with WiFi, voice assistance (compatible with Google Assistant, Apple HomeKit, or Amazon Alexa), and app control support, thanks to the brand’s own Kohler Konnect App. To that end, the company’s engineers are using the Microsoft Azure Cloud System, and Kohler has already spent millions for this purpose, with more investments to follow.
It’s worth mentioning that the brand’s love affair with technology began in the early 20th century when it started making drinking fountains with a ‘bubbling valve’. These valves later came to be known as bubblers, which helped with the vertical motion of water.
Corporate Social Responsibility
Kohler’s activities are ably helmed by a group of socially conscious administrators, executives, and managers. Consequently, the company is continuously striving to give back to the community and the planet as a whole. In their 2017 Sustainability And Stewardship Report, the brand put forward their progress in creating more energy-efficient and eco-friendly products.
Besides, the company puts continual efforts via its Habitat For Humanity Project that builds homes for the underprivileged. In addition, it holds regular drives for providing clean and safe water through the Kohler Run For Charity event. And it had also lent a helping hand for victims of the Mexico earthquake in 2017.
Apart from that, it supports various charities and NGOs worldwide, which are involved in pushing for relevant advocacies.
Warranty
Unless stated otherwise, all Kohler products come with an automatic limited warranty of one-year. This also covers defects in design and material for one-year post-installation. Besides, there are several other additional warranties for different products, which are available on the warranty page of the brand’s official website.
Controversies
To give you a fair picture, it only makes sense for us to list down some of the infamous controversies that have troubled the brand.
In 1998, the company planned to buy back all shares that didn’t belong to the family. For this, each family member was required to exchange their shares for unsalable limited rights share. However, the company was yet to become a public-traded firm, meaning the number of floating shares were less.
Going ahead with the plan, Kohler offered a sum of $54,000 per share, an evaluation which was challenged by several shareholders. Not only that, the IRS (Internal Revenue Service) filed a prosecution case, which was ultimately won by the company.
The very next year, Kohler found itself in the midst of another controversy when the US Department of Labor alleged that the company practiced discriminatory hiring against females. Prior to this, the company did formally announce that women employees should have a minimum height of 5’4’’ (the average height of an adult female).
Owing to its obligation to the government, Kohler was barred from implementing this hiring criterion. They settled the case and hired more than 100 from among the 2,000 women candidates who applied for a position between 1994 and 1995.
In The Late 2000
A few years later in 2005, China’s Labor Watch accused Kohler China Co. of violating workers’ rights in its Foshan factory. The welfare organization accused Kohler of implementing excessive work hours, low wages, insufficient overtime compensation, and uncompensated work injuries, among other things.
Perhaps the last controversy erupted at the beginning of this year when the company settled a multi-million dollar lawsuit. The US Department of Justice, the Environmental Protection Agency, and the state of California filed a complaint as the company’s small engine production violated the Clean Air Act and California law.
Where Can You Buy Kohler Products?
Popular e-commerce websites like Amazon, Wayfair, and Houzz can be surfed for almost all of the brand’s products. But if you prefer taking a detailed look, feel free to walk into any Kohler or major home improvement store in any part of the country.
Final Words
There you have it! We hope that this guide could tell you why we think Kohler is a good brand. Sure, it didn’t have a smooth evolution, but the brand has done a commendable job in maintaining and improving the quality of both its products and services.
This is evident from the fact that Destination Kohler has been appointed as the official tourism agency for the Village of Kohler, Wisconsin.
At the same time, we also agree that Kohler might not be as famous as some of its American competitors, but there are still plenty of reasons why you should choose it over others. Plus, it has always been a forerunner in engineering products for the future. So, try a Kohler product today and decide for yourself.
One of the greatest things about technology is that it has resulted in all kinds of convenience for our lives. We have everything from the best means of communication through our smartphones to robotic vacuum cleaners that take away all the effort we never want to put into keeping our homes clean.
In fact, it is not uncommon to find robots doing the work that we never wanted to do ourselves. Robots first came around when we created machines to take on more intricate tasks like shaping, cutting and welding in factories. The machines offer better precision and take away a lot of the physical labor we would otherwise invest in performing various tasks. This saves us a lot of time, money and effort, so we can focus on other important things.
Nowadays, robots are becoming more commonplace. You can find them in homes carrying out household chores. One of the most dreaded chores is sweeping and vacuuming the floors and the iRobot Roomba models make life a lot simpler for us.
We are going to take a look at and compare three of the best iRobot Roomba models: 675, 680, and 690. This will give you a better idea of the qualities these devices bring with them, so you can make the best buying decision for your home.
At first glance, you might think that all three models have little to no difference between them. Each model looks similar and it would not be surprising to assume that they have minor improvements. Our detailed look into all the three models will tell you exactly how different they are from each other, so you know which one offers you the best value for your money, based on your needs.
Capacity volume - .6 liter. Works with Alexa for voice...
Clean and schedule from anywhere with the iRobot HOME App;...
Roomba needs little introduction itself since it is one of the first robotic vacuums that came into existence. The iRobot Roomba 675 is a good example of the company’s engineering ingenuity.
The first aspect we are going to look at in this comparison guide is the filtration system. There is a removable dirt bin in the 675, which is capable of holding 0.6 liters of debris, which is significantly large for robotic vacuum cleaners. The bin does not just contain dirt and debris, but it also houses the filter.
The frosted and net-style filter is a standard filtration media. It can trap a decent range of small and large particles. Pretty much a standard filter, you need to replace it every couple of months. The filter is not an HEPA-filter, so it might not perform very well in a household where you have pets.
680
The filter on the iRobot Roomba 685 is a lot better at capturing and retaining super-fine dust particles as it sweeps and vacuums the flooring. This model features the same construction with a removable dirt and dust bin, which is capable of holding the dirt and debris collected. It also comes with a standard filtration system.
The finest dust and debris like pollen, pet dander, and microscopic bugs require something super-fine like a HEPA filter and unfortunately, the 680 does not feature that.
Sleek, premium design complements your home décor; Includes...
3 stage cleaning system and dual multi surface brushes pick...
While both the 675 and 680 have substantial filters, the iRobot Roomba 690 beats them because of one vital factor: it boasts a HEPA filter. The filtration system on the 690 is far more efficient at capturing and eliminating up to 99% of the microscopic particles as small as 0.3µ.
People who suffer from allergies or those with pets will really appreciate this cleaner because of the HEPA filter.
When you have a HEPA filter in place, you can never go wrong. Of course, a premium feature like that entails premium pricing. If you are a homeowner who does not have pets or experience breathing problems due to allergies, you might be better off with the 675 or the 680. For those who really need to get something comprehensive in taking care of microscopic dirt and debris, the 690 is definitely the way to go.
iRobot offers several ways to connect to the 675 and control it. For people who prefer straightforward controls, there are several buttons on the unit itself, along with indicator lights that tell you about the functions and battery life.
Those who want their home appliances to be smart and compatible with Amazon Alexa and Google Home devices, you will really love the 675. You can pair the vacuum to any of these two AI assistants and you can control the device without even having to touch it.
You can even enjoy Wi-Fi connectivity without the need of a virtual assistant by installing the iRobot App on your Android or Apple smartphone. Use the app to decide on an automated cleaning schedule. You can even set the device to send you push notifications on your phone about the status and minute-by-minute update on the device’s cleaning efforts.
680
The iRobot 680 should offer you the convenience of WiFi connectivity and the use of a smartphone app to allow you to control the device remotely. After all, having a robotic vacuum cleaner is only as good as the convenience it provides, right?
It is unfortunate that the iRobot 680 does not offer WiFi connectivity or control through a smartphone app. You can still press the buttons on the device itself so that it has an automated schedule to work with, so the 680 is not entirely cumbersome.
The 690 does not just give you Wi-Fi connectivity options with the robotic vacuum cleaner. You can connect it with your Amazon Alexa or Google Home to make the appliance a much smarter device, which you can control through simple voice commands.
You also have the option of using an app on your smartphone to set the schedule, based on your convenience.
Having a smart vacuum cleaner that can automatically clean your home is the kind of convenience you expect when you get a robotic vacuum cleaner. In terms of maximum convenience, the 675 and the 690 definitely have an edge over the 680 that does not offer WiFi connectivity or smartphone connectivity.
With these portable robotic devices, it is really important that they are able to take on the function of cleaning the home comprehensively whether or not you are around. That is the whole point of getting an automated machine, right?
Well, there will come a point when the battery will run low. The iRobot 675 has sensors, which allow it to navigate back to the charging port when the battery is low and the device stays there until the battery gets back to 100%. The device does not resume where it left off, if it had to recharge during a cleaning cycle.
680
The iRobot 680 is similar to the 675 when it comes to its low battery level and charging situation. When the appliance has a low battery level, it will head back to the charging dock on its own and stay there until the battery is fully recharged.
Unfortunately, the device will not resume picking up where it left off, if the battery became low during a cleaning cycle. The device will sit and wait at the charging dock until you get back home and set it off on the cleaning cycle again.
Just like the 675 and the 680, the iRobot 690 will return to the charging dock when the battery becomes low. After the device recharges, it will stay there until you provide it the command to resume cleaning. Of course, that does not mean you need to be home in order to operate the device.
When the battery is charged, the device will send you a push notification on your smartphone if you have an internet connection. You can decide to set it off to resume the cleaning cycle. You can send it a command and it will get right back to work.
If you have ever looked at robotic vacuum cleaners before, you might have heard about iRobot’s three-stage cleaning system. This is a simple configuration in which there is a powerful suction flow, two brush rolls below and one side brush.
On a smooth surface, almost any robotic vacuum can do a good job. The real test is in cleaning carpets. The brush rolls, right next to the suction inlet, work together by spinning in the opposite direction to loosen up dirt and debris from carpets. The smaller brush is rubberized to help pick up dirt more efficiently. The 675 does not disappoint when it comes to the performance on a thin carpet.
680
The iRobot 680 delivers flawless results on hardwood floors and tiles. However, when it comes to cleaning carpets, it is a major disappointment. The brushes and suction power are pretty good, but they are incapable of providing a great job of cleaning carpets.
The 690 does not come with specialized features for cleaning carpets, but it is definitely a device that boasts the kind of power to clean at least thin carpets. It has more than enough suction flow to pick up debris and microscopic organisms that its brush rolls dislodge from between the fibers.
If the floors in your home do not primarily consist of shaggy and thick carpets or rugs, any of these three will work out well for your needs. Of course, if your home has pets and you need a device that is able to pick up dust mites, pet dander and dirt particles from thin rugs, the iRobot 690 is definitely going to be your best bet.
Remember that you can get other models, which are better equipped to deal with carpeted floors than these three.
A virtual wall is essentially a barrier that you can set, which will prevent the robotic vacuum cleaner from passing through. Some people want to keep their robotic vacuum cleaners limited to a particular room, or keep it from wandering into areas of the house where they do not need it. Placing a virtual barrier near the locations will make sure that the robotic vacuum cleaner remains in the allocated area. The 675 does not feature that option.
680
The iRobot 680 also does not feature the virtual wall setting. This means you cannot expect it to avoid going to a particular area until and unless there is something physically blocking its path.
The iRobot 690, on the other hand, does have this incredibly convenient feature if you ever need it. You can set up the virtual wall to limit the areas where the vacuum cleaner will go to clean. If you have a particularly problematic area where you need spot cleaning, you can set up the virtual walls to limit the device to that particular area.
While you might think the virtual wall is a pretty big feature, it really does not matter a lot unless your requirements are very specific. The 675 and 680 models still offer comprehensive cleaning and the only difference between them and the 690 is that they do not discriminate whose room they are cleaning.
Roomba 675 Vs 680 Vs 690 Bottom Line
We do feel that at the end of the day, the winner between these three models is quite clearly the iRobot Roomba 690. While we would not call the iRobot Roomba 675 or the iRobot Roomba 680 exactly obsolete, they are slightly outdated as compared to the 690.
The 690 is far more convenient to operate. All you need to do is connect it with your virtual assistant or smartphone through an app to give it remote commands. You can set its cleaning schedules based on your convenience without having to even touch it and you get all the push notifications for the device status right on your phone.
All three models are quite good, but based on the features of all three models, we would suggest going for the iRobot Roomba 690.
Whether you're an avid gardener or have recently developed a green thumb, you must've dealt with annoying weeds. There is an effective way to fight them - landscape fabric.
While some gardeners prefer using chemical products and sprays to eliminate weeds, others might use weed picking tools for the job. However, if you're looking for a convenient and effective option to help you fight weeds, landscape fabric is a good choice.
The best thing about using this weed control method is that it is cost-effective and easy to install. Moreover, the fabric is breathable, allowing your beautiful garden to grow while effectively discouraging weed growth.
With several options of landscape fabric in the market, gardeners can choose according to their requirements. Whether you want woven or non-woven fabric depends on how you wish to grow your garden.
Now, let us tell you all about installing this effective weed barrier.
How To Install Landscape Fabric For Weed Control
What You Need
Landscape fabric
Garden hoe
Steel rake
Hammer
Utility knife
Landscape fabric staples
Plants (optional)
Mulch and other ground covers (also optional)
Step 1 - Start By Removing All Vegetation
The first thing you'll need to do is remove all forms of vegetation using a garden hoe or steel rake. Remove any plants, grass, and weeds along with their roots. Ensure that you dig deep enough to remove the roots - this is important, as you don't want to leave anything behind in the soil. Leaving any roots or small plants can cause them to grow over the landscape fabric.
You may also choose to kill the vegetation instead by using a broad-spectrum herbicide. Make sure to follow the manufacturer's instructions carefully when doing this. Also, keep yourself safe by wearing any protective gear you might need.
Step 2 - Clearing & Leveling The Soil
The next step is to clear the soil of any remaining roots, dead leaves, and debris. Use the steel garden rake (bow rake) to remove twigs, leaves, roots, stones, debris, and sharp objects from the soil. Throw away the collected rubbish material and level the soil using the rake.
Step 3 - Carefully Place The Landscape Fabric
Now comes one of the most important steps - cutting the landscape fabric to size. Lay down the landscape fabric parallel to the leveled soil and measure it carefully. Try and be as accurate as possible when doing this. Ensure that you cut enough landscape fabric to cover the area you have just leveled.
Use the utility knife to cut large pieces out, according to your measurements. It is practical to cut out slightly more fabric than your precise measurements, as you can always trim it later. However, cutting it too close to the measurements and then having less material to work with can be an issue.
You might require more than one row of landscape fabric. In this case, we suggest that you overlap the fabric by at least 6 inches (although the recommended overlapping is 3 inches).
Most landscape fabrics have two sides - one shiny and one dull. Ensure that you lay out the fabric on the soil with the right side up. Weigh down the fabric using stones or any other heavy object to get a precise measurement.
Step 4 - Securing The Landscape Fabric With Staples
Once you are satisfied with the measurements and layout, secure the landscape fabric using staples and a hammer. Drive each staple down into the ground about 10 feet apart, doing so along the edges and seams. Once this is complete, you can trim the fabric as needed for more accuracy.
Step 5 - Use Plants Through The Landscape Fabric (Optional)
Laying just the landscape fabric in your garden can look odd and out of place. This piece of fabric, though practical, can ruin the aesthetics of your garden.
To avoid that, you can choose to pot beautiful plants along the surface of the fabric. It helps to have an idea about where you want to plant them, what kind of plants to use, and how many you want. However, keep in mind - the fewer holes you make in the fabric, the better.
Taking the utility knife, make small, X-shaped incisions in the fabric. Ensure that the holes are not too large - just big enough to fit the root ball of the plant.
Have a tub or bucket beside you when you dig the soil, dumping it into the tub rather than on the surrounding fabric. Carefully place the plant in the hole, pouring soil around the root ball. Tamp the soil, remove any excess air, and lay the flaps around the plant's base snugly.
Step 6 - Add Mulch [Optional]
Simply scattering potted plants around the landscape fabric might look out of place. To cover the fabric and bring together the aesthetics of the garden, add mulch (or any other ground cover).
Make sure to add just about 2 inches of cover, and not more. You can also opt for natural mulch such as pine needles, wood chips, stone, rubble, etc. Spread it evenly, smoothing out the mulch with the rake. Do this carefully, so you don't puncture or tear the landscape fabric.
Things To Consider Before Buying Landscape Fabric
As with any product in the market, there are various types of landscape fabrics to choose from. Depending on your requirements, you can choose from woven and non-woven fabrics. Moreover, the appropriate material for an annual garden would be vastly different from what is appropriate for a desertscape or flower bed.
There are a few essential things you must consider before purchasing the right landscape fabric. From material to thickness, durability, and even cost, here are some factors you need to consider:
Woven Landscape Fabric
Woven landscape fabric or perforated fabric is made from natural materials like paper, burlap, or linen. They can also be made of manmade materials like polyester. These fabrics are made while keeping the 'movement of water' in mind. They are poros and breathable, allowing water to penetrate easily through them.
Woven fabrics are ideal for vegetable gardens or any soil which grows vegetation. The breathable material allows water to penetrate and soak the soil, thus encouraging plant growth.
This fabric also locks in the moisture from the soil, discouraging it from evaporating. It keeps the soil rich and moist, allowing the healthy growth of plants, vegetables, and grass. This makes woven fabric ideal for flower and vegetable beds growing in dry, arid climates.
Non-Woven Landscape Fabric
As opposed to woven fabrics, these landscape fabrics are designed to suffocate all kinds of growth and vegetables. Although they allow little breathability, it is not enough to encourage any sort of growth.
Non-woven landscape fabrics are typically made of polypropylene or polyester. It is mostly non-porous and doesn't allow the movement of water. It effectively eliminates the growth of weeds, but along with it, it also harms shrubs, plants, and the root system of trees.
This fabric is ideally used for stabilizing the soil behind paver patios, crushed stone walkways, or retaining walls.
UV Damage
You will also find various types of landscape fabrics that offer UV protection. Of course, there is an added cost to this.
Suppose you don't want to spend the extra money on 'UV protection,' good news! It is relatively straightforward to create your own DIY 'UV protection barrier.' Using 3 to 4 inches of mulch and other ground cover material will protect the landscape fabrics effectively.
Thickness Of The Material
Whether you opt for woven fabric or non-woven, there are varying levels of thickness offered by different manufacturers. Depending on how you plan on using the fabric, consider the thickness of the material before purchasing.
Although thicker landscape materials might cost more initially, it is also more durable, stable, and long-lasting. The thinner landscape fabrics are more affordable but are prone to tearing.
Consider the amount of foot traffic the fabric may eventually receive. If you plan on installing the fabric in an area where there will be constant walking, it is safer to opt for a thicker fabric.
How To Maintain Landscape Fabric
Landscape fabric is an effective and affordable method to control the growth of weed and stabilize the soil. Although it works perfectly fine on its own, most gardeners often opt for a ground covering, like using mulch, stones, or plants. This is done only for aesthetic and decorative purposes.
The fabric is breathable; however, it discourages weed seeds from germinating in the soil. Moreover, it ensures that any weeds that do happen to germinate do not push their way out (from the fabric) and ruin your garden. Many of these fabrics also prevent ants, insects, and other pests from destroying vegetation.
Here are a few tips that will help you maintain your landscape fabric.
Remove and Reorganize Mulch
If you decide to lay mulch over the fabric, you should be prepared to maintain it. The organic mulch will inevitably break down into the soil below. This supports the germination of grass and weed seeds. To prevent this from occurring, you need to replace and remove organic mulch periodically.
It helps to keenly observe the organic mulch, looking for signs of choked debris and soil. When you notice this, remove the mulch immediately and replace it with new organic material.
Clean & Maintain The Fabric
Conversely, if you decide not to cover the fabric with any material, there is a different kind of maintenance in order.
Soil, dust, dirt, and debris will inevitably fall onto the landscape fabric. Over time, it will get dirty. Moreover, if there is rain or snow, the fabric may face some damage. In these cases, it is imperative to clean the surface of the landscape fabric regularly.
Any soil or dust that blows over the fabric can support the germination of weed seeds. To prevent this, you need to clean the surface by dusting or sweeping the debris away. It goes without saying that you need to be careful not to tear or damage the fabric material.
Cleaning Stone Ground Covers
You may also opt for stone or rubble ground covers. While these instantly improve the aesthetics of the garden area, they also require periodic cleaning and maintenance.
When it comes to stone ground covers, raking them every once in a while is an excellent way to keep them clean. Hose them down with a garden hose every few weeks. You can always choose to replace the stone or rubble and lay completely new ones, adding a unique element to your garden.
Maintaining The Plants
Finally, if you decide to place plants intermittently (making holes in the landscape fabric and planting them), this is what you need to do.
The plants require water, sunlight, and food to thrive. Generally, people plant beautiful flowers and plants in the soil under the fabric for aesthetics. In order to maintain the aesthetics, you need to tend to the plants as you normally would.
It is important to keep a close eye on the plants, ensuring that they get enough water and food. Trimming and pruning will keep the plants looking beautiful, fresh, and vibrant.
Benefits Of Using Landscape Fabric
Weed Control
The primary reason to use landscape fabric is for weed control. As you might already know, weed growth is detrimental to the health of your plants. Weeds are capable of stealing nutrients from other plants. This causes your beautiful vegetation to become stunted and hungry for nutrients.
Installing landscape fabric ensures that small plants can thrive without weeds taking away their nutrition. Once these smaller plants grow large, their thick foliage does not allow sunlight to penetrate down to the soil, which the weeds require to grow.
It also helps your plants to bear more fruits, flowers, and vegetables, as the weeds do not eat away at their nutrients.
Erosion Control
Landscape fabric can do much more than control weed. It also controls the erosion of soil due to rain, snow, overwatering, or wind. The soil remains protected under the covering of the fabric. However, since the fabric is breathable, the plants and soil do not suffer underneath, receiving adequate amounts of water, sunlight, and food.
In places that receive large amounts of rainfall, soil erosion is extremely common. A lot of vital nutrients are also lost this way. Furthermore, soil erosion can damage your property. Laying landscape fabric under a layer of mulch can prevent this from occurring.
Environment-Friendly
If you want to maintain a beautiful garden, getting rid of weeds should be topping your priority list. Well, there are several ways to get rid of weeds. Applying chemical weed killers is one way. You can also manually pick out the weeds using various tools available in the market.
The problem with applying chemical weed killers is that you not only effectively kill the weeds but also harm the plants and soil. Moreover, the stronger a chemical weed killer is, the more it will damage its surroundings. Most of these weed killers are potent, toxic, and not environmentally friendly.
Opting for manual weed removers is an option; however, this can be laborious and time-consuming. Moreover, it does not eliminate weeds from growing back - only removes the ones which have already grown out.
Landscape fabric is the ideal solution to this problem. It is cost-effective, environmentally friendly, and lasts for months or even years.
Keeps Mulch In Place
The landscape fabric is an effective way of keeping mulch and other organic covering material from sinking into the soil. If you want to decorate your flower garden with stones, pebbles, or rubble, laying them on landscape fabric will keep them in place.
Furthermore, cleaning the mulch, stones, and rocks is much easier if the fabric is below it. It allows you to hose down the stones without allowing the dirt and dust to sink into the soil.
Helps The Soil Retain Moisture
If you live in a dry, arid climate, then dry soil can be a big problem. This kind of soil doesn't support the growth of various types of plants, flowers, and fruits. Extreme heat can also cause moisture from the soil to evaporate.
Landscape fabric is an easy and effective way to prevent that. Although the fabric is breathable and porous, it does not allow moisture to evaporate from the soil. This retained moisture keeps the soil moist, fertile and encourages healthy plant growth.
Easy To Install
As you might have noticed in our guide above, installing landscape fabric is relatively straightforward. Once you get the measurements correctly, all you need to do is cut, trim, and install the fabric over the soil. Of course, you can always get professional help for the same.
Final Words
Now that you know how to install landscape fabric, do you think you will get it for your garden?
Once you learn to install and maintain it (as we have illustrated in our guide above), landscape fabric can be a blessing in disguise. It is one of the most affordable, convenient, and long-term solutions you can opt for. Since it is environment-friendly, you don't need to worry about affecting the soil or plants around your garden.
With that, we have finally reached the end of our guide. Wish you good luck for installing landscape fabric in your garden!
A proud garden owner knows how important is every piece of it; he knows how personal and extraordinary his garden is and how much time he invested in it. He knows that every piece of greenery contains life and every piece deserves attention. Following the same chain of thought he knows that absolutely every piece of wood wears significance and throwing away an old window or door that once protected the individual in its home would be an unforgettable act and as a result we are showcasing underneath beautiful diy upcycled gates that have previously been used in the owners home.
DIY Upcycled Garden Gates
It goes without saying that results are simply extraordinary, doors and windows to small heavens in all their green glory. Cast a glance at the ideas showcased below and think twice before throwing an old door or window from now on. We would love to hear your opinion on the matter in the comment section below.
#1 Two Toned Green Doubled Door Protecting a Heaven With a Shabby Chic Design
#2 Old Wagon Wheel Adding Personality
#3 Up-cycled Bike Opening The Door to Heaven
#4 Small Old Window Protecting Greenery and Splendour
#5 Simple Old Window Opening "Le Jardin"
#6 Old Church Window Welcoming Curious Eyes
#7 Superb Garden Corner Welcoming Greenery
#8 Transparent Headboard Decor
#9 Colorful Old Doors Used as a Double Gate
#10 Old Tools Up-cycled Creatively Into a New Garden Door
#11 Creativity Unraveled in Sculptural Garden Door
#12 Pink Door Sheltering a Beautiful Flower Pot
#13 Small Red Door From Old Headboard
#14 Old Doors and Windows in New Setup
#15 White Window Presenting Inviting Scandinavian Decor
#16 Simple Metal and Wood Composition
#17 Old Metallic Headboard Transformed Into a New Fence
#18 Wood Sheltering Metal in Perfect Equilibrium
#19 Wood and Metal Gates Can Work Extraordinary Well
#20 Fairy Tale Land Protected Beautifully
#21 You Shall Not Pass Into The Green Land
#22 Simple Small Old White Window Guarded by Small Twigs
What do you think? Metal and wood are working beautifully together, the perishable coziness and warmth of wood being boldly backed up by the rustic rust of metal in a mature and complete composition. Old windows, doors and headboards alike are excellent new garden gates and fences, welcome them properly in your greenery and keep the door open for new memories.
There are plenty of us who have the tendency to save up on items every day, corks, plastic boxes, wine bottles, all of them cluttering up in our garage or closet with the hidden intent on our part to find someday a purpose for them. In most cases this will never happen but a creative imaginative DIY-er will find ingenious solutions for almost anything. Once in a while we enjoy a good glass of wine with friends and family and corks tend to be thrown away for having lost their primary purpose. Today we are proposing quite a fun idea: Ingenious Wine Cork Architectural Planters For Your Little Plants. You can actually nestle succulents and propagations in wine corks and even transform them into fridge magnets, bringing thus a little bit of greenery in a new unexplored territory. The cork itself, a knife, a magnet and a glue gun is all that is required for such a creative little craft. Cast a glance at our collection and next time you enjoy a bottle of wine think twice before throwing the cork away.
Ingenious Wine Cork Planters
Learn the step by step tutorial on how to make DIY WINE CORK PLANTERS
What do you think about the creative idea of recycling corks into planters? Which one is your favorite? We invite you to share your ideas freely in the comment section below.
Inflatable pool volleyball nets, like the Intex Pool Volleyball Game, are generally made from top-quality materials that do not tear, ensuring you have a great time in the pool. They are available in various sizes, and will surely amplify your playing experience.
If you're looking for a fun, new way to exercise and rehabilitate the body, you can invest in the best pool volleyball nets for a fun workout in the pool.
It is a fast-paced game that's easy to set up and can keep you and your friends entertained for hours. Also, remember that the pricing for pool volleyball sets varies a lot. There are lots of options, from low-cost models to more expensive ones.
Complete inflatable volleyball set for the swimming pool
Inflatable poles are easy to deflate and store
What we like
Comes with a repair patch
Made of durable plastic
Takes less than ten minutes to assemble
Available in two colors
What we don't like
Inflatable volleyball is too light
Product Review
If you are looking for an inflatable pool volleyball net that will make your kids want to enjoy more time in the pool, this option can be a great pick.
Because of its steady and durable build, you can keep it in the pool for long hours without having to worry that it will get damaged. It is made of 0.25 mm thick vinyl that enhances stability and provides better side support.
Not to mention, there are additional grommet bags and pole bases that add all the necessary weight. And to make maintenance easier for you, the manufacturer has included an inflatable volleyball and repair patch. That way, your kids can enjoy some fun swimming pool games without you having to spend a hefty amount.
And lastly, do not forget that it is best suited for use by children above six years of age. In case they are older, they might find the inflatable volleyball a bit too lightweight.
Material: Plastic/ PVC | Weight: 2.2 pounds | Size: 4 x 10 x 12 inches
SUPER VALUE. Inflatable Pool Float Set includes an...
REAL FUNCTION. The pool volleyball net needs to use the 2...
What we like
Easy to inflate
Affordable option
Works with most electron pumps
Comes with child safety features
What we don't like
No net included in the package
Product Review
Are you in search of the perfect inflatable pool float set? Then look no further, as we have the top suggestion for you. The package is filled with a number of pool toys that will help you successfully create an inflatable volleyball court. In the package, you will find basketball hoops, two weight bags, and an inflatable volleyball and basketball.
Moreover, what requires a special mention is that this pool float set covers quite a large area. We measured and gathered that the court covered around 105”x28”x35”. On the other hand, the inflatable basketball hoops measured around 27”x23”x27” approximately.
And when it comes to durability, this product is a great bet! The product is made of high-quality raft material and is safety test approved. The only problem that you might face when buying this item is that it does not come with a net.
Material: High-quality raft material | Weight: 4.77 pounds | Size: 12 x 11 x 4 inches
What makes this product stand out among its competitors is its stellar build. It is made of eco-friendly, non-toxic, sturdy PVC material. This is what makes it perfect for a summer-themed party where your kids can use it worry-free. Rest assured that even after heavy use, it will remain without scratches and easily last for a long time.
Furthermore, the pool floats will not give you a hard time when you set them up. There are two straps installed at two ends of the volleyball frame that let you adjust the net according to your convenience. Also, you will find two sandbag anchors in the package that helps keep the inflatable court in place.
Be it birthday parties or school pools - this product is ideal for all situations. It meets all necessary safety standards, and you can rest assured that your children are safe when playing with it. The only bummer is that it keeps deflating from time to time.
Material: Polyvinyl Chloride | Weight: 3.26 pounds | Size: 11.77 x 9.84 x 3.66 inches
Inflatable Pool Float Set includes an Inflatable Volleyball...
The Inflatable Volleyball Court measured Approximately...
What we like
Comes with two weight bags
Inflatable volleyball and basketball hoops
Top-quality raft material used
Perfect for kids and adults
What we don't like
No instruction booklet provided
Product Review
Sloosh Pool Floats are perfect for a day out in the pool, and both adults and kids can play with them. It comes with an inflatable volleyball court, two weight bags, and inflatable basketball hoops. That’s not all, you will find additional inflatable volleyball and basketball in the package.
If you are wondering about the size, let us tell you that the volleyball court measures 105 x 28 x 27 inches. Plus, the hoop stands 27 inches tall with a 23-inch diameter hoop, and it has a durable carry bag that is perfect for storage or carrying to the beach.
That is not all; the product is made from top-quality raft material, which does not tear easily. So, you can expect the pool float to last for a long time. And it is perfect for kids and adults alike. The product meets the US child safety standards, and it is considered to be non-toxic. All kids above the age of three years can play with it.
The only drawback is that the packaging does not contain any instructions for setup and installation.
Material: High-quality raft material | Weight: 6.01 pounds | Size: 11.85 x 11.73 x 5.47 inches
SPLASH NET AIR: Splash into the ultimate pool day with...
MAKE A SPLASH: Splash Net Air is 9.5 ft wide and designed to...
What we like
Fast inflation
Resists tipping over
Sturdy built
Suitable for everyone
What we don't like
Deflates fast under heavy use
Product Review
For enjoying a splash net sports game with the kids in the pool, there’s nothing better than this product. To ensure that kids of all ages can have fun with this, the package contains two volleyballs and not one. One is of standard size, and the other one is a large volleyball.
Moreover, to make it easy to inflate and deflate this item, the manufacturer has used rapid valve technology. Because of this feature, you can inflate or deflate the net ten times faster than traditional valves. So, if you are looking for a pool volleyball net that can be instantly set up, this is the one to go for!
What requires special mention is the fact that this item is 9.5ft wide and is pretty stable. It is designed in a way that it floats in the pool without turning over. And because of its sturdy construction, you have lesser chances of tripping and falling.
There’s only one problem that you might encounter when using this. With heavy use, the net seems to deflate quite fast.
Material: Plastic | Weight: 5.9 pounds | Size: 12.83 x 11.1 x 5 inches
Things To Look For When Purchasing Pool Volleyball Net
1. Design
Apart from purchasing a super value pack, it is always essential that you focus on getting an inflatable volleyball court of your choice. So, it is essential that you choose the color variant you like. Before making a pick, we suggest discussing with the kids what you should get for the house pool.
Most of the options that we have mentioned on our list come are available in a range of colors that you can pick from.
2. Pool Type
Not every pool is the same, and you will have to select a pool net accordingly. Pool basketball or volleyball will be fun only when the volleyball net you choose is right for the kind of pool you have and if it meets the required safety standard.
Good news for in-ground pool owners! You have plenty of choices and can purchase any type of pool volleyball net that you want. All types of nets are compatible with these pools.
However, if you have an above-ground swimming pool, your options will be rather limited. For these types of pools, the only option that you have are the inflatable models. Wondering why the above-ground pools have a dearth of options when it comes to volleyball nets? Well, as the name suggests, these pools do not have a ground to which you can anchor the nets.
So, when you cannot fix the nets to the pool grounds, the only option that you are left with is inflatable variants.
3. Net Types
Broadly water volleyball nets come in two variants- floating and fixed. While fixed nets are stuck to the pool edges permanently, floating nets are not. There’s no doubt that the advantages offered by fixed nets are noteworthy. Because the nets are fixed to the pool ground, there’s hardly any chance that the net will float away in the middle of a game.
However, they do have some disadvantages too. Unless you have prior experience, these nets are pretty heavy and take a bit of time to set up. So, when it comes to portability, these are not the best choices.
But, in this regard, floating nets are a great buy. They are lightweight and can be easily transferred from one place to another. Even for floating nets, you get two variants- inflatable and ones that are fitted-over floating devices. As mentioned earlier, the major challenge that you might face with floating nets is to keep them in place throughout the game.
Unless you use proper anchor sandbags, there is always a chance they will get displaced. But what makes up for this inconvenience is that you can easily carry this net around. You can carry it to your school classroom or take it on a weekend camping trip.
Simply put, portability, ease of installation, and pool type are some of the most important things to take into consideration when purchasing pool volleyball nets.
4. Pool Dimension
Before deciding on what kind of inflatable pool volleyball net would be good for you and your kids, first measure the pool dimension. Not all the nets on the market are of the same dimensions, and you will need to read the package carefully to know the exact details.
Only when you know the exact pool size can you begin to hunt for the perfect volleyball net that will be compatible with the pool.
5. Type Of Set
Your kid might be interested in trying a few types of water sports and not just stick with volleyball. If that is the case, you can opt for sets that offer a combination of basketball and volleyball. In case your kids enjoy both games, it is best to invest in a combination set like this. However, keep in mind that they are a bit pricey when compared to solo sets.
If you have a money crunch, or your kids prefer to stick to playing volleyball, simply purchase a solo swimming pool volleyball set.
Inflatable Pool Volleyball Net FAQs ?
How high should an average pool volleyball net be?
Pool volleyball nets need to be around 2.5-3 feet in height. However, if the pool has a depth of 3.5 to 4 feet, then the net needs to be at least six to seven feet high.
How to play pool volleyball?
You will need an inflatable volleyball net to play this game. It is played in two teams, mostly comprising of one to four players. One of the teams is chosen to serve initially, and they serve for two consecutive rimes. After that, the other team that did not serve first, gets to serve twice. The game continues in this fashion. The first team that scores eleven points gets to win the match.
For water volleyball, how deep should the pool be?
There’s no direct answer to this question, as the right depth of pool for water volleyball is simply dependent on the height of the players. If your kids play this sport seriously, you should get them to the sports pool, which is mostly around 3.5-4 feet deep.
Some may argue that the pool is not too deep. But ideally, that should be the case. The depth should be moderate, and your kids must be able to jump up and down the water comfortably. When the water level is too deep, jumping and swimming while the game is on might get difficult for little ones.
Top Inflatable Pool Volleyball Net Verdict
When looking for the best volleyball net set for your pool, the main thing to remember is that it should be fun and durable! After all, if you're spending money on the kit, then you will want it to last at least a few years.
In our opinion, the Intex Pool Volleyball Game is the best on the market because it's durable and will stay in place throughout your games. Or if you want something for the entire family to enjoy, then JOYIN Inflatable Pool Float Set may be better.
Hope you have fun in the pool!
The kitchen is one of the essential rooms in the house! No home is complete without a kitchen, and no kitchen is complete without the necessary equipment.
As times have progressed, people are looking for faster, cleaner and more efficient cooktops. Induction cookers have gained popularity in the last few years because of their efficiency and eco-friendly attributes. However, they can get a little complicated to use. So, understanding the different settings and what it takes to make it work is essential.
That is why, we are here today with a short guide on induction cooktops that will talk about the power consumption, usage, voltage, and temperature settings. After reading this, we hope you find it easier to use and manage that new induction cooktop that’s waiting in the kitchen.
Time is of the essence, so let’s get right to it!
Induction Power Consumption, Usage, Voltage, Temperature Settings
A lot of people prefer induction cooktops because of the variety of temperature settings they offer. Plus, shifting from one temperature to another is effortless. This is because the induction cooktop is faster and more responsive to any changes. It is also an excellent option for all those clumsy cooks that suffer a burn or two every time they cook a meal.
Now, let’s go into a few specifics regarding these cooktops.
Power Consumption
In terms of power consumption, induction cooktops are known for being energy-efficient. These cooktops can also maintain the temperature that has been set more precisely than other cooktops. Additionally, a lot of high-end inductions cook food twice as fast as regular cooktops.
When it comes to energy efficiency, nothing beats an induction cooktop. Not only are they eco-friendly, but induction cooktops also have a higher energy delivery rate of 84%, which is a lot more compared to gas and electric cooktops. A gas cooktop converts around 44% of energy and an electric cooktop can only deliver around 74%.
Usage
Induction cooktops really change the whole cooking experience. One of the best things about using one is that it is very responsive. So, if there is a need to change temperatures or any other setting quickly, it can be done without spoiling the food.
Another great thing about induction cooktops is that they are safe to use around kids and pets, and are easy to clean. Since the cooktop uses electromagnetic heat and not actual fire, it will be relatively cooler than regular cooktops. Pots and pans still become hot and need to be handled with caution, but they cool down rather quickly once the cooktop is off.
Induction cooktops usually have a very smooth surface that does not get too hot so anything that spills will not stick. This makes it easier to clean with just a wipe.
Voltage
Mostly all induction cooktops are compatible with a common standard voltage supply, making them easy to use in any country. Most countries have a voltage supply of 230V ± 10% and are classified as their standard supply. However, in certain countries like the US, Canada, Japan etc., the standard is 100-120 V.
Since varying countries have varied common standard voltages, the induction cookers are rated 120V or between 200-240V, giving it more flexibility in usage.
It will be beneficial to remember that the more burners an induction cooker has, the higher amps circuit will be required to plug it. Induction cooktops with single burners usually need a 15 amps circuit, while something a little bigger like four burners will require at least 40-50 amps.
Temperature Settings
The variety in temperature settings is what sets induction cooktops apart from the rest. The range of temperature is not fixed for every cooktop as it depends on the brand. However, it is vital to ensure that it meets your requirements; so, check the temperatures available before buying it.
Usually, these cooktops offer cooking temperatures that are as high as 4,000 watts and as low as 500 watts, thereby making it easier to cater to everyone. Moreover, the fact that the temperatures can be changed at a rapid speed ensures precise cooking.
Cookware For Induction
This is a pressing concern for a lot of potential buyers. If someone has been using gas cooktops for a long time, they hesitate to shift to induction. After all, who wants to buy a whole new set of cookware, especially if they already have a ton of it?
It is possible to use some of your old cookware with induction cooktops. If there are any pots and pans with magnetic bottoms, i.e., made up of steel or iron, those will work just fine. There is no need to buy new cookware unless of course, you want to!
We recommend having a look at new cookware for the induction cooktop with an open mind. It may not be necessary to purchase, but it is quite beneficial to have. Induction cookware can also be used on gas cooktops, and in fact, will cook the food better and more evenly.
Final Words
And there you have it! That’s everything you need to know about induction cooktops to get started. We hope this short guide has made it a bit more clear and will allow you to take the first step towards using an induction cooktop.
We shall be back soon with more such informative guides. Until then, keep cookin’!
Laying a deck, building furniture, making a custom frame out of trim pieces, minor repairs - impact tools are perfect for all your DIY projects.
Whether you’re a weekend warrior or a professional woodworker, having the right tools in your toolbox will let you complete all DIY tasks quickly. While looking for the best impact tools, you must have stumbled upon impact drivers and impact wrenches.
So, how do you know which one to go for? Choosing the correct impact tools for your tasks is certainly a challenge. To be honest, even professionals need help at times when selecting impact tools for their workshops.
But, fret not! To help you decide between the two, we’ll discuss the two impact tools and their plus and minus points. Thus, you’ll be able to compare them and choose the best one for your DIY tasks and home renovations.
So, without further ado, let’s jump right into the deets.
Impact Driver vs. Impact Wrench
Whether you are quick-fixing minor things in the garage or building a cabinet, impact tools are a must-have in your standard toolkit. With patience and practice, you can quickly become a pro at handling such tools.
Once used solely by professionals and mechanics, impact drivers and wrenches have become the go-to tools for DIY enthusiasts and hobbyists. The two impact tools are highly powerful, and are identical to each other in terms of looks and functionality. Not only do they use similar rotating motions to generate force, but they also generate a lot of noise while operating.
However, both high-torque power tools are quite different in terms of power and the jobs they can perform. This is why you must make sure to invest in the right one for your jobs.
Whether you have to drill through wood, metals, or even bricks, impact drivers are perfect for all your drilling tasks. Unlike regular drills, they feature a high-torque power that allows you to drill through anything and everything.
Although an impact driver looks similar to a cordless drill, it is quite different in terms of functionality. The torque of impact drives generally ranges between 1500 - 1800 in. lbs. For those who don’t know yet, the torque power of the impact driver is measured in inches and pounds.
One of the best things about the impact drivers is that they mitigate the risk of reactionary torque. This means despite the heavy torque, your wrist will not twist while drilling through surfaces.
Features Of Impact Driver
Impact drivers feature a 1/4-inch hex socket along with bits that are specifically designed to withstand the additional stress that an impact driver exerts upon it while drilling. Thus, you can use a variety of bits to drill through whatever you want.
Also, impact drivers feature variable speeds, making them the perfect addition to your toolkit or workshops. Whether you have to drill through tough materials or softer materials, impact drivers allow you to adjust speed according to the task at hand.
Impact drivers are highly versatile and can be used for a variety of projects. Have to drill long screws on wood? Impact drivers will drill them through smoothly and efficiently. So, if your next project involves building cabinets or dressing tables, use impact drivers to carry out your tasks with ease.
Not only for drilling screws, but you can also use them for removing screws stuck on wood, metals, or bricks. Also, if you want to remove corroded screws from outdoor fences or old cabinets, you must use impact drivers, as they are decent enough to remove rusty screws.
While looking for power tools for DIY tasks, most people look for compact tools because they are portable. Thus, impact drivers are compact tools that make them perfect for small garages or workshops. Also, because they are compact, you can tuck them anywhere in the garage after use.
What’s more, impact drivers are usually cordless, and they run on batteries. Therefore, impact drivers will be your savior for the day for workshops and sites with power shortages.
What Could’ve Been Better With An Impact Driver?
After using impact drivers for quite some time, we found that it works pretty well for hard-to-reach areas. However, we found out that they are rather noisy. Therefore make sure to use ear protection while using this tool.
Moreover, the impact drivers lack clutch, which is found in almost all power drills. For those who don’t know, a clutch prevents the tool from drilling after reaching a particular torque level. Therefore, the absence of a clutch means that the screw might drive deeper than you want it to. However, you can avoid this by working carefully.
Pros
Easy to fit in tight spaces
Significantly lighter than regular drills
Efficiently drills through both tough and soft surfaces
Flexible as you can change bits according to projects
Impact wrenches are slightly different from impact drivers. Unlike impact drivers, they are designed for heavy-duty tasks. That’s why they are primarily found in garages and workshops. If you’re looking for a power tool that will help you in loosening and tightening lug nuts.
More powerful than impact drivers, the torque of impact wrenches is measured in ft. lbs. With its torque range of 150 - 1400 ft. lbs., the impact wrench definitely packs a powerful punch. That’s why you’ll find them more in the hands of a car mechanic than a DIY enthusiast.
Moreover, its pneumatic-powered variant is popularly used in garages, mainly because they are highly powerful and work incredibly quickly. Along with mechanics, they are used by construction workers in assembly lines. As such, they aren’t something that you can use for your average DIY renovations.
Features Of Impact Wrench
At times, lug nuts may be too tight, or a screw head might be worn away. In such situations, regular wrenches are of no use. Thus, impact wrenches are what will allow you to loosen such lug nuts with ease.
Featuring a square anvil, impact wrenches are compatible with sockets rather than bits. Moreover, they are available in every standard socket size. While its 1/2” drives are most common, the 3/4” and 1” drives provide the most power for industrial tasks. Its 3/4” drives work perfectly for tightening or loosening lug nuts in tight, cramped spaces.
Because it features a powerful motor, you can exert intense pressure to twist the lug nut in a short burst of about 5 seconds.
Moreover, you can loosen and tighten rusted fasteners, bolts, and lug nuts smoothly and quickly. Unlike regular drills, impact wrenches deliver high torque power that efficiently tightens and loosens nuts with minimal exertion by the user.
To be honest, there isn’t any lug or nut that impact wrenches cannot handle. Therefore, they aren’t suitable for your DIY home renovations but are perfect for your garage and workshops.
The Four Variants Of Impact Wrench
Impact wrenches are powered in four ways. Let’s take a look at them.
Corded
The corded ones require an electrical outlet to function. You’ll have to plug it into an electrical outlet to carry out all your tasks. These are suitable for garages and workshops.
Cordless
Meanwhile, the cordless ones do not require any electrical outlet to operate. They run on batteries which require charging between the uses. Therefore, they are ideal for construction sites where electrical outlets aren’t available.
Air-Powered
Next, air-powered or pneumatic variants of impact wrenches remove lug nuts and bolts incredibly quickly. They are very popular among race mechanics.
Hydraulic
Not as popular as the other three variants, the hydraulic-powered impact wrenches rely on low-pressure hydraulic power sources. In terms of performance, they are similar to the impact driver. You just have to press the trigger for the machine to begin functioning. Thus, it is user-friendly.
Because of their high torque power, the hydraulic-powered impact wrenches are pretty heavy. But, just like impact drivers, they are designed in a way to prevent strain on your hands. However, it features a 1/2” standard square drive rather than a hex collet. Also, don’t forget to wear ear protection to protect against any damage due to the noise.
What Could’ve Been Better With An Impact Wrench?
We have noticed that this power tool isn’t suitable for amateurs and novices because of its high torque output. Therefore, we recommend the newbies use this only under an expert’s supervision.
Another minor drawback is that it is pretty noisy like an impact driver. Therefore, don’t forget to put on ear protection while using this. Also, it isn’t suitable for DIY home renovations but perfect for all your garage and workshop chores.
Pros
Can loosen even the most stubborn lugs and nuts
Ergonomic design that doesn’t strain wrists
Works incredibly quickly
Available in 4 different varieties
Cons
Unsuitable for amateurs, novices, and newbies
Not for DIY home renovations
Pretty noisy
Impact Driver vs. Impact Wrench Differences
Of course, you cannot buy both impact tools. This is why we’ll be comparing the two power tools in detail. This will help you make an informed decision and choose the best one according to your projects and needs. So, let’s begin.
Driving Styles
The first difference that we noticed between the two tools is the driving style. Impact drivers are compatible with only 1/4-inch hex shank bits because they feature a ¼-inch hex shank. Meanwhile, impact wrenches feature square drives that are compatible only with sockets. However, some impact wrenches feature a 7/16-inch hex, which is commonly used by utility workers.
No matter how much the impact drivers differ in performance, shape, and styles, they all feature the same ¼-inch hex collet. Moreover, they are available in various designs. Whether a right-angle impact driver, a standard pistol grip design, or a pressure-driven palm design, you can choose anything you want.
On the other hand, the arena of impact wrench is broader than that of the impact driver. The impact wrench offers endless varieties of models. Whether you are looking for a 1/4-inch impact wrench or the one featuring a 3/8-inch, the impact wrench has it all.
However, the most popular impact wrench available on the market features a 1/2-inch drive size. You’ll come across this variant of an impact wrench in almost every woodworker’s workshop.
Alternatively, when you’re looking for high torque output impact wrenches, the one featuring 1 inch and ¾-inch drives is the one you must opt for. These are perfect for all your heavy-duty tasks.
Moreover, when looking for impact wrenches on the market, we recommend looking only for the mid-torque and the high-torque because they will be ideal for all your tasks. If you’re a professional constructor or a DIY warrior, we suggest going for a small, compact impact wrench featuring mid-torque power. It will let you complete all your tasks smoothly and efficiently.
From pistol-grip style, ratchet-style, to utility impact wrench featuring a 7/16-inch hex collet, the impact wrench is available in a variety of styles on the market. You can choose the best one based on the nature of your tasks.
Usage
After discussing the driving style, let’s move to the usage of both the impact tools. Now, before choosing any tool, you must know what they are designed for and whether they are suitable for your needs or not. That’s why keep in mind the nature of your task.
An impact driver is used to drive screws into the surface. Therefore, they’ll be perfect for use with fasteners that need driver bits. Moreover, just by changing the bits, you can use them for drilling.
On the other hand, the impact wrench is ideal for hex-head fasteners. As such, they are perfect for loosening and tightening lug nuts, bolts, and rusted fasteners. Moreover, they are compatible with sockets rather than bits.
That’s not it! The driving styles are highly flexible, and you can customize them to meet your requirements. You can turn your impact driver into a mini impact wrench by simply adding nut driver bits along with socket adapters. Now, you can simply go about handling hex head fasteners.
Moreover, there are impact socket adapters that allow you to join 1/4-inch bits to impact wrenches. However, you must keep in mind that this will limit the versatility of your tools. Therefore, you should buy the appropriate tool, albeit you can use these hacks when in a hurry.
Power
When it comes to power, there isn’t much difference between the two impact tools.
Impact drivers are found in two variants: corded and cordless. These are most commonly used by professional constructors and woodworkers. The cordless models feature max batteries of 12v, 18v, and 20v.
As they run on batteries and don’t require electrical outlets for operation, you can easily use them on job sites that suffer from power shortages. Plus, they are portable, so you can carry them from your garage or workshop to anywhere and work conveniently. Thus, they are ideal for workshops and garages.
Moreover, the corded ones are rarely found on the market. They are also available in different volts. However, the main issue with corded variants is that it only operates on electrical outlets sites.
Unfortunately, not all job sites have electrical outlets. Thus, it is of no use on such sites. We recommend opting for cordless ones to carry out all your tasks smoothly and efficiently.
Similar to impact drivers, an impact wrench has both corded and cordless variants. Along with that, they are also available in air-powered (pneumatic) and hydraulic variants. Cordless variants of impact wrench are popular among DIYers and enthusiasts, while experts, professionals, and woodworkers use the pneumatic variants.
Unlike impact drivers, the corded impact wrenches are the best because impact wrenches are known best for their tremendous torque. However, no cordless impact wrench can generate torque as high as a corded one. Corded impact wrenches are excellent for all your heavy-duty tasks, while cordless ones are perfect for light tasks.
Compared to the standard impact wrench, pneumatic ones are slightly less expensive. However, if you don’t have an air compressor, you’ll have to invest in one. All in all, the pneumatic impact wrench is best suited for garage and workshop owners.
Torque
In terms of torque, the impact wrench edges over the impact driver. With its torque range of 150 - 1400 ft. lbs., you can fasten and loosen bolts, lug nuts, or rusted fasteners in a breeze. Meanwhile, some impact drivers have proven to be more powerful than impact wrenches.
As already stated, the torque of an impact driver is measured in inch-pounds as against the feet-pounds of impact wrenches. We found some impact drivers delivered more than 2000 in-lbs (165 ft-lbs), which is excellent. As such, this makes it perfect for your garage and workshops.
On the other hand, the impact wrenches are packed with high torque of around 200 ft-lbs. It is because of this aspect that you can change car tires easily. Moreover, impact wrenches with a torque output of about 400 ft-lbs are perfect for all your garage activities.
Speed Range
When it comes to speed, impact driver edges over impact wrenches. We tested a few impact drivers and found that their maximum speed exceeded 3600 RPM, which is pretty great. In contrast, the speed of some outstanding impact wrenches was just 2000 RPM.
But, the narrative changes when you throw in the pneumatic variant. The pneumatic impact wrench beats the impact driver with speed over 8000 RPM. Put simply, the impact drivers are faster than the impact wrenches but definitely slower when the pneumatic impact wrenches walk in.
Size
Mostly, impact drivers and impact wrenches are similar in size. This is because both the impact tools are built on similar foundations. However, to be precise, impact drivers are much more compact and lightweight than impact wrenches. Of course, the pneumatic variants are an exception.
When it comes to impact wrenches, their weight and size depend upon their power levels. You can also estimate the weight of the impact wrenches by the size of the drive.
Having said that, the compact models feature 1/4-inch drivers while the high-torque and mid-torque impact wrenches feature 1/2-inch drivers. On the contrary, 3/4-inch and 1-inch drives are featured on the larger models.
Safety Measures Using Impact Driver And Impact Wrench
Using power tools is no child’s play. Hands down, both the impact tools are handy tools designed to ease complex tasks of drilling and fastening or loosening lug nuts.
No doubt, power tools save a lot of your time and effort. However, you must always take safety measures while using them. Otherwise, you can fall into a dungeon of mishaps that can lead to life-long sorrow. Also, if you’re a novice or a newbie, make sure you use power tools under guidance.
In this section, we’ve laid down a few safety measures that you must follow while using the impact tools. So, let’s dive in to see the safety measures.
Go Through The Instruction Manual Carefully
All power tools come with a detailed instruction booklet. And the impact drivers and impact wrenches are no exception. The instruction booklet is specifically included to provide the users with all the necessary information on the device, its safety, and maintenance.
Before starting with your tasks, go through the user’s guide. You’ll get all the necessary information such as installing the device, turning on/off your device, on the user’s guide.
Declutter Your Workspace
Remember, you’re dealing with power tools, and honestly, they are pretty unforgiving. This is why you must clean and declutter your workspace to avoid any trips, slips, or falls while using the impact tools.
Wear Protective Gear
Protective gears are a must while handling power tools. Therefore, you will have to wear safety glasses, nitrile gloves, a protective shield, and headgear. However, you may skip this if you’re doing some quick-fix repairing and renovations, but make sure to wear them for all other heavy-duty tasks.
Moreover, protecting your eyes is always a priority. Therefore, we recommend wearing them every time you work with the impact tools.
Maintain Your Impact Tools Properly
Although it might seem to be tedious, maintaining your impact tools is necessary. Not only will it make your tools more efficient, but maintenance will also enhance their longevity. Here are some things you can do weekly to maintain your tools.
Regular performance checkup
Ensure all the nuts and screws of the tools are securely attached
Grease the bits and sockets
Replace all the broken and worn out parts
Clean all dust and debris from the tool
Unplug The Tools When Not In Use
No matter which impact tool you’re using, make sure you always unplug it after use. Also, you should never change the bits of sockets while the plug is on because if accidentally turned on, it might lead to dangerous accidents.
Impact Driver vs. Impact Wrench Buying Guide
While knowing the two impact tools helps a lot, choosing the correct one still remains a challenge. There are certain factors that you must look out for before picking one for your projects.
To make things easy-peasy, we’ve discussed all the important factors in this section. Take a look.
Brand
Impact tools are a one-time investment. You buy them once and enjoy their life-long services. Therefore, we suggest you only go for a well-known brand because they manufacture top-notch quality tools. Moreover, they also offer excellent customer services along with years of warranty.
Although buying from a well-known brand might cost you a few bucks more, it will be worth the investment. Hence, it is better not to compromise on the quality when it comes to buying impact tools.
Accessories
While buying either the impact wrench or impact driver, you must always consider what accessories the package contains. This is because accessories are very important when it comes to impact tools.
If you don’t get complete accessories while purchasing, you’ll have to spend a little more later. Thus, you can avoid this by buying a complete kit. Batteries, bags, extra bits, sockets - make sure you get a complete kit to avoid spending any money in the future.
Battery
Those going for corded models might skip this, but it is of utmost importance if you’re going for a cordless model. Check how much time the batteries will take to charge completely because you wouldn’t want to go for an impact tool that will take a whole day to charge but drain only in a few hours.
Moreover, make sure you check the batteries included in the package. Ideally, an impact tools package consists of two batteries. So, make sure they are there.
Weight
Not to forget, weight is of utmost importance. Before buying any impact tool, make sure you consider the weight of the tool, especially if you’ll be using it frequently. For DIYers, enthusiasts, and hobbyists, a lightweight impact tool would be perfect. Therefore, go for only the one that’s significantly lighter in weight to avoid straining your hands.
Meanwhile, heavy-duty tasks call for powerful motors. Those featuring a sturdy and powerful motor will be significantly heavy. Therefore, heavy machines would be ideal for workshops and garages.
Technology
There are quite a number of brands out there that use modern technology to design their tools. Therefore, you can go for them to make your tasks easy. If you’re going for an impact driver, we suggest you go for the one with an LED lighting system. This will allow you to drill through materials even in the darkest room or job site, without any difficulty,
However, there are also tools featuring Bluetooth connectivity or built-in apps to track the performance of your tool. You can get an impact tool loaded with such features by paying a few bucks more. It will ensure your tasks are all the more fun and enjoyable.
Safety Features
While choosing an impact tool, you must remember that dealing with them is not child’s play. Therefore, safety is very important. There are tools out there that offer more safety than others. Hence, you must only go for the ones that offer more safety features to ensure your safety.
We recommend you go for tools offering automatic cut-off or shut-off options in case the tools get hot or once the battery is fully charged. Also, tools that prevent dust from getting into the mechanisms would be a great option. This will ensure your tools last for years to come.
Impact Driver vs. Impact Wrench FAQ
Q1. Are Regular Drill Bits Compatible With Impact Drivers?
No, the regular drill bits do not go along well with impact drivers. You’ll have to buy bits specifically designed for use with impact drivers.
Q2. Can Impact Drivers Remove Lug Nuts?
Although you can use impact drivers to remove lug nuts, we recommend you avoid using them. It’s better you use impact wrenches for removing and fastening lug nuts.
Q3. Are Electric Wrenches Better Than Air-Powered Impact Wrenches?
If you’re looking for impact wrenches for your garage or workshops, air-powered impact wrenches are any day the best bet. They are highly powerful and last longer than other impact wrenches. But, they come with an expensive price tag.
Meanwhile, if you don’t deal with cars and are looking for an impact wrench for other tasks, the electric impact wrench is sufficient for all your needs. Therefore, it depends on the nature of your task and use.
Q4. How Long Do Impact Wrenches Last?
To be honest, impact wrenches last for quite a long time. However, maintaining them frequently, taking good care of them, and handling them properly will enhance the longevity of the impact wrenches. Thus, it all depends on how you take care of them.
Q5. Do Impact Drivers Wear Out?
Not only impact drivers, but all power tools will wear out if you overuse them and do not take care of them. However, impact drivers are pretty tough, and so they won’t wear quickly. We recommend you read the instruction booklet carefully and follow the maintenance tips to ensure you don’t run into any problems.
Summing It Up
In a nutshell, impact driver and impact wrench are perfect power tools for all your DIY tasks and home renovation projects. Whether you are a garage owner or a hobbyist who loves to build furniture, impact tools are a must-have in your toolkit.
Overall, if you’re building a wooden cabinet or completing your DIY project, an impact driver will be an excellent choice for all DIY and renovation projects.
Meanwhile, if you frequently tinker with cars in your garage or work on construction sites, the impact wrench is perfect for all heavy-duty tasks. Hopefully, after reading this guide, you’ll be able to pick the correct impact tool for your tasks.
But if you ask us our opinion, an impact driver is a much wiser choice for all your DIY tasks, compared to the impact wrench. With that, we shall take your leave.
Nobody likes soggy food and meltwater greeting them every time they open an ice-cooled box. It is time for a solution.
With the all-new Igloo Iceless Thermoelectric Cooler, you do not have to worry about ice or meltwater anymore. It uses electricity to cool drinks and snacks, so you need not use ice or cooling gel at all. This makes the product light and provides more space for you to keep drinks inside.
Although this product has a few faults, it will ensure that you have a smooth experience wherever you go in a car or an RV. Without further delay, let us get into the details so that you can understand why we like it.
Read our Igloo Iceless Thermoelectric Cooler review today, and get ready to hit the road with your favorite drinks!
Swing-up bale handle with comfort grip for easy carrying
Molded-in side handles for two handed carrying or lifting....
Why Buy This Product?
We have listed the top features of this product in the section below. Read on to know all about them.
Storage Space
The best part about this cooler is that there is a lot of storage space even though the body is compact. This is because no space is taken up by ice, and the entire space can be used to store drinks.
Plus, the body is light, and you can keep a number of cans at once. The 26-quart product can hold 32 cans of 12 ounces each. You can keep 26 - 28 quarts of fluids and snacks inside without worrying about space. That will be sufficient for 2-3 people on a hot day.
Weight
The cooler weighs 9-10 lbs. in general, and that is pretty light, according to us. Now, this is the weight when it is empty; you can expect it to be a lot heavier when you fill it up with drinks and snacks.
To help you carry it around, there is a swing-up handle. This, along with a curved design, makes it easier to carry single handedly.
In case there are a lot of snacks inside, the handle is long enough for 2 people to hold it at one time.
Plus, the body is compact, and you can keep it in between both the front seats in a car. Portability is not an issue at all, and you can enjoy your chilled drinks on a hot spring afternoon in the wild.
Cooling
This product will help you keep your drinks at 36 degrees Fahrenheit lower than the outside ambient temperature. This means that you can use it easily in a place with temperature less than 90 degrees Fahrenheit, and the drinks will stay perfectly chilled.
Now there could be a few problems in case the area is very hot. This is because the drinks will only be cool and not completely chilled. For example, if the temperature is 100 degrees Fahrenheit, then your drinks will be kept at 64 degrees Fahrenheit.
So, yes the drinks will be a lot cooler but may not be chilled. This should not be an issue for anything other than ice creams.
Power
This product comes with an 8-foot long power cord that can be attached to a portable generator or a car. If you are using a portable generator, connect it to the DC outlet, and it will keep your drinks cool.
But remember that if you are attaching it to your car with the engine turned off, turn on the engine after 2 hours. This will ensure that the battery is not drained completely.
On the other hand, it is possible to power it in a hotel room or your home via an AC outlet. In this case, you will have to purchase an AC power convertor from the company. This is not very expensive but purchase it depending on your needs.
Purpose
If you plan to buy a cooler for a family of 3-4 people who will be accompanying you on road trips, then this is the perfect option. It will meet the needs of everyone and can hold a number of juice and beer bottles at the same time.
We took it as a personal cooling device on long trips, and it ensured that we had a chilled drink at all points in time.
Price
Although this is not a cheap product that is priced very less, it provides value for money. It does not need any ice in the long-run, and you save a lot of money buying packets of ice every time. If you go on long trips often, this will indeed be a cost-effective option for the years to come.
Plus, you can always keep this product plugged in without needing to stop for purchasing ice. We were very happy with this factor as it saved us time while on the trip.
Size
There are 2 sizes of this same product available, and you can make a choice based on the number of people in your family. If you have 1-2 people, then the 26-quart option is perfect, and it will provide ample space to keep all your drinks and snacks.
On the other hand, for a larger family or a group of friends, the 28-quart one would be a great option. It is a bit larger and will hold your drinks well.
Efficiency
One of the major reasons why we prefer this over standard ice coolers is the absence of melted water. Ice keeps melting over time, and the water often gets into food packaging. This might not only destroy the food but may also make the ice chamber smell.
But the Igloo iceless thermoelectric cooler will provide you with a safe space to store your food without any ice. Just plug it in, and your drinks will stay cool even at high temperatures.
What Could’ve Been Better?
Iceboxes have often been used as a seat for kids when on a picnic. However, this product cannot be used as a seat at all. Be very careful as the entire mechanism can be destroyed even if some amount of weight is placed on the lid.
But remember that the structure is pretty sturdy in general. It is just that the cooling mechanism is placed right inside the lid, and there are perforated vents on top and below. If you sit on this box, then the plastic of the vents will touch its fan, and that will immediately make it malfunction.
So, if you have pets or kids, keep them away from this cooler. Place it at a height, and that should ensure that your toddlers will not reach it at all.
Pros
Compact and portable body
Easy to maintain
Consumes less power
Plenty of storage space
Cons
Cannot be used as a seat
Igloo Iceless Cooler Buyer’s Guide
When purchasing a cooler, you need to keep certain points in mind. This will help you make the right choice without regretting later. In this section, we have listed them down in detail.
Size
We believe that size is a major factor while selecting a cooler. You would not want to be stuck with a bulky option when you just need it for a few drinks for the ride.
The cooler should be sufficient enough for you to keep your drinks but should not offer extra space as that will add to the weight and size. Since these are generally made for traveling purposes, you would not want to carry extra weight.
So, first, decide on the number of people and snacks that you need to carry and then decide upon the size.
Weight
Check how much the cooler weighs without anything in it. It should be light and easy to carry by itself. If you opt for a bulky product, then it might become very difficult to lift with drinks in it. We will always recommend getting a light item and then filling it up.
Also, check if there is a handle on top. The handle should be able to take the weight, and you should be able to carry it around easily. We would suggest looking for long handles which can be held by 2 people in case the box becomes very heavy.
Cord Size
We will recommend purchasing a product that comes with a long cord. This will help you while charging as the power outlet could be far from the ground. You do not want to be carrying an extension cord on trips, and hence this is necessary.
Also, coolers will mostly connect to a DC outlet, but you can connect them to an AC outlet, too, with a convertor. So, purchase a converter along with the product if you are going to charge it through an AC outlet.
Although the cooler works very well, it may not be suitable for very hot places. The drinks will then be cool and not chilled. But despite these minor drawbacks, this is a very cost-effective option that offers value.
Plus, it is compact and easy to take around. It will fit into any car, and you can have it plugged in to ensure chilled drinks throughout the ride. This is the best personal cooler option in our opinion, and it has indeed touched the adventure spirits in us.
Having said that, we will now take your leave, while you get ready for the next outdoor adventure!
When it comes to design, the feminine side is usually the one that tackles the issue, adding soft delicate touches to a home. Creating a masculine bathroom or adding bold touches to one to make it more male gender friendly is quite easy though. Colors and tones play a crucial role, alongside materials and accessories. Bold darker tones are often used, all complemented and toned down with accents of warm wood to soften the rough edges. Geometric furniture designs will take the place of organic, baroque pieces whilst neutral shower curtains will replace floral choices.Add industrial decorations such as a rusty old lighting fixture and choose dark faucets for a strong contrast. Dark blues, grays, bold green, concrete, metal, all come together and merge into elegant yet edgy designs. Get inspired from our choices below and learn how to create a masculine bathroom.
How To Create A Masculine Bathroom
1. industrial insertions will add an edgy touch to your bathroom design
Use a bold unusual color of sink and a color neutral tone for the walls, all complemented and toned with the warm hues of the wood counter.
Unless it’s a kinetic log splitter, there’s a hydraulic system behind the enormous wood splitting power!
And to keep it that way, the machine needs a fair bit of maintenance. Not only does this involve regular servicing, but it also requires you to know what oil and fluid type is best suited for the system.
Much to the relief, most manufacturers of log splitters explicitly state the kind of oil or fluid to be used. But what if you don’t find that during an emergency? What are the best alternatives out there?
To answer these questions, we’ve documented everything you need to know about hydraulic fluid and splitter oil.
So, let’s proceed!
What Is Hydraulic Fluid?
Before we give you the deets about log splitter oil recommendations, let’s start with hydraulics. As complex as the term may sound, hydraulic is a pretty simple concept. It’s used to explain the relationship between fluids and how they function under certain conditions.
Simply put, hydraulic fluid is a pressurized fluid, which can be used to power an engine. Thus, hydraulic log splitters use the power or force generated by this fluid to operate. Furthermore, a hydraulic system consists of 4 main components, namely:
Reservoir
Like any other reservoir, it stores the fluid for transferring later to the engine. Along with that, it also produces heat and eliminates unnecessary air.
Pump
The pump moves the fluid through the reservoir and works on the basic principle of fluids moving through pressure. In fact, this part is responsible for creating mechanical energy within the system.
Valves
Valves serve the dual purpose of directing fluid movement and controlling the engine operation. Depending on the design, the valves may be engaged using electric, hydraulic, pneumatic, manual, or mechanical methods.
Actuators
Based on the system, the actuators look different from one model to the other. However, their basic purpose is to convert the hydraulic energy to mechanical energy for the engine.
Why Should The Hydraulic Fluid Be Changed?
As you go about operating the splitter, it’s natural for the hydraulic fluid to lose its quality. Exposure to oxygen, high temperatures, and contamination are some of the most common factors responsible for fluid degradation. Moreover, the release of various byproducts (including acids) deposits on different parts, eventually corroding the surface.
All of this ultimately correlates to decreased productivity to the extent where the splitter may even stop working altogether. Plus, several troubleshooting problems can be resolved by keeping an eye on the fluid level and quality. Hence, it becomes vital to change the fluid regularly.
Generally, it’s advisable to change the fluid per 100 hours of operation. But if the splitter has been idle for too long, it’s highly recommended to change the fluid before the next use. And if you have noticed a milky looking grainy substance in the fluid, change it immediately. The exact time of change is recommended by almost all manufacturers.
What Type Of Hydraulic Fuel Should Be Used?
Different manufacturers recommend different types of hydraulic fluids, which depends on the overall mechanism. And in the following sections, we talk about the two most widely used categories.
Non-flammable
Not only are non-flammable fluids less prone to ignition, but they also contain some natural chemicals that don’t encourage foam formation. Without foam, the hydraulic system runs efficiently without the risk of dirt buildup. Beyond that, there’s a synthetic sub-type that runs the risk of corroding the internal parts.
Flammable
Flammable fluids are essentially oil-based and are meant to supply more power to the hydraulic chambers. Furthermore, it prevents erosion but at the cost of a sticky buildup. Other than that, a hydraulic leak with flammable fluid and near a hot engine is a sure shot formula for an accident! So, many brands opt for the non-flammable variant.
Viscosity Index
Any discussion about hydraulic fluids isn't complete without mentioning the viscosity index, represented by an ISO number. The viscosity of a fluid is nothing but its level of resistance to flow. The higher the viscosity, the more time it will take for the fluid to pass through an opening. Plus, it will have a thicker consistency, correlating to difficulty in processing.
Quite understandably, low viscosity refers to a thinner fluid that’s easy to process by the hydraulic chamber. However, the weather and temperature can also affect the viscosity, making a low viscous fluid thick until it's heated.
So, you may choose a thinner fluid for low temperatures and a midrange or thicker variant for regular or high heat generation use.
Fluid Classification
The varied properties and performance of a fluid are expressed by some abbreviations on the package. If you see any of the below-mentioned letters on the bottle, know that they are referring to:
HL- antioxidant, anti-rust refined mineral oil
HM- anti-wear features
HR- VI (viscosity)Improvers that work in a wide range of temperature
How To Change Hydraulic Fluid?
Despite having varied designs, the steps involved in changing the hydraulic fluid of a splitter remain more or less the same. Begin by placing an adequately large container or vessel underneath the reservoir to collect the existing fluid. Make sure that it has a broad mouth so that there’s no spilling.
Also, it’s probably best to place an old rag or cardboard below the container to prevent the surface from getting stained.
Next, carefully pull out the suction pipe located at the bottom of the reservoir. The right method to do it will be mentioned in the instructions manual. Once done, remove the delicate inlet filter and clean it using a soft cloth or paper towel. Ensure that it doesn’t retain any bristle or fiber from the material.
Unscrew the drain pipe and allow the fluid to flow out into the container. This may take some time, so be patient. In most cases, the reservoir has a capacity of 3 gallons, while the entire hydraulic system can hold up to 4.7 gallons. To be on the safe side, get a bucket or vessel with a 5-gallon capacity.
It’s now time to refill the reservoir. Place a funnel above the fill tube and steadily pour the required amount of the recommended fluid. Be careful not to overfill. The dipstick will come in handy for gauging the fluid level. Later, close the drain plug and tighten the fill tube.
Since it’s not unusual to trap air during the entire process, use the control handle to engage the wedge and move it back and forth a few times. This will get rid of any air inside the system. Check for the fluid level again and fill it up to the dipstick mark if necessary.
Should The Hydraulic Filter Be Changed?
Going back to our point about cleaning the filter, a hydraulic filter is used to remove sediments, which can otherwise accumulate on the hydraulic chambers. When a filter stops working, you will notice sticky buildup along the walls of the hydraulic system. This may be a good time to get a new filter.
Again, the filter you opt for will depend on the log splitter, but you may also choose one that’s universally compatible. Whatever be the case, keep an eye for features like durable design and efficient filtering of harmful sediments.
Difference Between Hydraulic Fluid And Oil
Although both may come across as similar, hydraulic fluid and oil are two different things. While the latter is an individual substance, the fluid is a mix of several other fluids like water, salt solutions, water-oil emulsions, etc.
Moreover, oil is highly flammable and not suitable for use near any ignition source. When the oil passes through the high pressure of the hydraulic system, it’s likely to form a spray, which can then easily ignite.
Both oil and fluid are essential components for running a hydraulic system. Not only do they help in power transmission, but they also act as lubricants while doubling up as coolants. Beyond that, fluids find a wide range of use, especially for power brakes, steering purposes, and as a driving force in log splitters.
Since fluids are the primary source of power transfer, it’s crucial to have the right kind of fluid at the right level for uninterrupted machine use.
Types Of Engine Oil
Just like fluids, every brand recommends a specific engine oil to be used. That said, it’s not a bad idea to understand the types of oil available on the market. Based on the source, engine oils can be divided into two main categories, viz., mineral and synthetic. While mineral oils are extracted from minerals, synthetic oils are man-made in laboratories.
A lot of homeowners prefer to have synthetic oil for older machines as it has a reputation for being a more efficient lubricant.
Additive Options
Almost every engine oil has some kind of additive that makes it capable of dealing with a said situation. For instance, you may notice certain abbreviations or terms on the package, which tell you about the condition the oil is made for. The most common ones include:
AW
AW or Anti-Wear oil is a good option to prolong the service life of the splitter, protect and lubricate the parts. Furthermore, AW oil can be divided into AW 32 or AW 64 categories based on their temperature and viscosity.
AW 32 (light duty oil) is ideally meant for ambient temperatures between -20 and 50-degree Fahrenheit. Similarly, AW 46 (medium duty oil) is suitable for temperatures ranging between 25 and 70-degree Ferenheit.
In an ideal scenario, an AW 32 oil uses less energy, thereby running the splitter cooler and inflicting less wear-and-tear. But if you need to regularly operate the splitter in hot weather, we’d suggest taking some ‘cool breaks’ between use.
Besides, you will also find an AW 64 (heavy duty oil) variant used mainly for heavy load hydraulics.
Cold Flow
Used for very cold or freezing temperatures.
Anti-Foaming
The presence of certain substances in oil can contribute to a foam-like consistency, thereby reducing the overall quality. Anti-foaming agents help mitigate this effect making the oil safe and efficient for use.
Antioxidant
Antioxidant oil aids the reduction of sludge deposits and extends the use of the splitter between oil changes.
Anti-Rust
Anti-rust motor oil utilizes a protective coating to negate rust formation.
Environment-Friendly
Also known as biodegradable oil, it’s typically made from rapeseed or other vegetable oils for minimum harmful exhaustion.
Changing The Engine Oil
Now that we’ve talked about changing the hydraulic fluid, let’s take a look at how to change the engine oil. The first step is to let the engine cool completely. For a safer experience, schedule the oil change at least a couple of hours after the last use. And before you begin, touch the engine to ensure that it doesn't feel warm.
Like the hydraulic fluid change, the next thing to do is place an oil pan or any other container under the engine drain pipe. Detach the pipe and let the oil flow out. You can also remove the dipstick to make the drainage faster. Replace the drain plug once the reserve is fully empty.
Use a funnel in the dipstick hole to refill the reservoir with the preferred motor oil. Remove the funnel to check the oil level and, if required, pour some more but never overfill. Finally, lock the dipstick.
Irrespective of the brand and other specifications, the best engine oils offer high performance with anti-wear properties. Besides, they are lightweight and help extend the life of the internal components, including the filter.
Some Other Tips
Since some fluid is absorbed by the cylinder and hoses, it’s always advisable to keep the reservoir full, even when the splitter is not in use. Empty reservoirs will invariably damage the system, which may, in turn, break the warranty conditions.
At the risk of repetition, never overfill the reservoir. The heat generated during operation may make the fluid to overflow and eventually lead to a fire. Ensure that there’s just the right amount of fluid in the system.
Tighten the dipstick properly after a check or refill to prevent air leak.
If not stated otherwise by the manufacturer, make it a point to flush the engine pistons and reservoir with kerosene. This will get rid of any buildup.
Final Words
That’s it from us for today’s guide!
No matter the type of log splitter, the fluid level will definitely demand your attention. With regular fluid and oil changes, you can cut down on professional maintenance costs. And hopefully, we’ve been helpful in this regard.
On that note, it’s time for us to wrap up the guide. But before we leave, here’s one last tip: don’t mix your fluids. You may get away without any damage if the fluids have the same viscosity, but there will be severe problems if you end up mixing a non-foaming with a foaming type.
The HVLP and the LVLP spray guns are two of the most popular spray guns available on the market in 2022.
However, a ton of people do not know the differences between these two spray guns. If you are not an expert, we do not expect you to know all the subtle differences since both these guns look quite similar.
So, in this guide, we are going to take a close look at both these spray guns so that you do not end up making the wrong choice while buying one. Our team of experts has extensively tested both these spray guns and have shared the details with us.
After reading this article, we are confident that you are going to know all the nitty-gritty of both these spray guns.
So, without any further ado, let us get right into it.
HVLP vs. LVLP Spray Guns
HVLP Explained
An HVLP is one of the most commonly used spray guns out there. HVLP means “high-pressure-low-volume.” In simple words, these spray guns are capable of producing high volume output using very low pressure.
What this actually signifies is that you basically spend less material while maintaining high color quality. HVLP spray guns are known to produce around 100 CFM at 3-8 PSI.
However, their pricing is a little higher than LVLP guns since they use a lot more compressed air. HVLP spray guns come in handy for people who are inexperienced and for DIY purposes.
Keep in mind - they are not the best choice when it comes to professional purposes as they perform a lot slower than LVLP spray guns. Furthermore, they use larger compressors and often do not work well with thicker paints.
HVLP spray guns save a lot of materials and avoid wastage because of their high volume, which allows the paint to end up only on the surface. Also, they are ideal for projects that demand immediate solutions. Since it is one of the most commonly used spray guns, it means tech support and training are readily available.
Advantages Of HVLP
It is great for beginners and DIY projects
High-quality finish
Less material waste
Appropriate for being used on metallic surfaces
Disadvantages Of HVLP
Requires larger air compressors
It does not work well with thicker paints
Works slower than LVLP spray guns
LVLP Explained
LVLP spray gunsare some of the premium options on the market. LVLP means “low-volume-low-pressure.” This type of spray gun is popular for delivering top-notch transfer rates, which means premium finishes and less waste. Additionally, it demands just about 10 PSI, which essentially means that you are free to use any kind of air compressor with this spray gun.
LVLP spray guns perform best with thinner paints. So, if you intend to apply metallic paints or work on surfaces that are sticky, we suggest going with HVLP spray guns. When it comes to design, finding out the differences can be quite challenging since there is not much. If you have a keen eye, however, you will definitely be able to spot the subtle differences.
Both HVLP spray guns and LVLP spray guns are built ergonomically in order to reduce fatigue levels.
Advantages Of LVLP
More affordable than HVLP spray guns
Uses lower PSI
Works perfectly with waterborne paints
Sprays a lot faster
Does not need a very big air compressor
Disadvantages Of LVLP
Its pattern size is very small
It does not work well on sticky surfaces
HVLP vs. LVLP - The Differences!
In this section, we will delve a little deeper and find out the exact points of differences between these two popular spray guns. You will have complete knowledge of both HVLP and LVLP spray guns after you go through this section.
Transfer Efficiency Rate
The transfer efficiency rate of spray guns varies from model to model; it also greatly depends on the kind of spray gun you are using - HVLP or LVLP.
Talking about transfer rates, LVLP spray guns do a better job as they can transfer up to 80%, which essentially means that there will be less paint wasted. Hence, it makes LVLP spray guns a more environment-friendly option.
As far as HVLP guns are concerned, the transfer efficiency rate is expected to linger around 65% to 70%. Since the transfer rate is lower than LVLP spray guns, it is a less efficient option. A lower transfer efficiency rate basically means more paint is wasted.
However, both LVLP and HVLP are a lot better than traditional spray guns that provide a transfer rate of barely 35%.
Width Of The Fan Patterns
The width of the fan patterns is yet another major difference between HVLP spray guns and LVLP spray. Not only does it affect its overall performance, but it also affects our comfort of using these products.
When it comes to the width of fan patterns, HVLP spray guns are the clear winners as they offer a larger pattern width than what LVLP spray guns have to offer. An LVLP spray gun usually offers a width between 8 and 10 inches which is deemed small.
Even though this might not be the biggest issue for most people, it is worth keeping in mind, less pattern width means more painting time. It becomes particularly more important for people who are starting new, smaller width fan patterns that affect the quality.
Usability
Usability is more of a subjective thing. What seems easy to use for you may not necessarily be easy to use for somebody else. It all boils down to the experiences you have of using a spray gun.
That being said, HVLP spray guns have been on the market for a long time. As we have already mentioned, you are likely to find better training and tech support while using HVLP spray guns simply because they have been around longer.
On the other hand, LVLP guns are quite new in the business, and there is a high possibility that a lot of people have not used this variant. So, when you buy this spray gun, keep in mind that you are not going to find tech support and training that easily.
We would strongly advise you to buy spray guns from a reputed brand as they provide detailed instructions, be it HVLP or LVLP spray guns.
Pressure
The pressure needed to operate both these spray guns is a very prominent difference between them. As the names suggest, HVLP spray guns provide a high volume but a low pressure which means it requires a big air compressor to do the job.
The lion’s share of HVLP spray guns works at around 20 CFM and 50PSI, which implies that you would need nearly an 80-gallon tank. On the other hand, LVLP guns will work between a range of 10 and 25 PSI and 5 CFM, and this is where LVLP spray guns beat HVLP spray guns.
With an LVLP spray gun, you are free to use any air compressor, making them the more suitable option.
Cost
Both HVLP and LVLP spray guns come in different brands and models, so the prices keep varying. You can expect to get the lower-end models of both these products for under a hundred bucks. However, if you are looking for a brand that offers better specifications and advanced features, then you will have to spend more money on HVLP spray guns than LVLP.
The price of a quality HVLP spray gun can go above $500, whereas top-notch LVLP guns barely hit beyond $400. Also, keep in mind that while buying an HVLP spray gun, you will need to buy a larger air compressor as well, which makes it all the more expensive.
HVLP Spray Guns Are Best For:
Both HVLP and LVLP spray guns are some of the best spray guns out there. Not only do they perform a fantastic spray-painting job, but they are also quite efficient. However, both these guns work on different mechanisms, and hence they are perfect for different scenarios.
HVLP spray guns are perfect for people who do not have much experience in spray painting. Since their spraying rate is on the lower side, it is ideal for DIY projects. HVLP guns tend to waste materials, and hence they are not recommended for professional purposes as they increase the cost of the overall project by a lot.
Furthermore, HVLP spray guns require larger air compressors which makes them less mobile. So, it is better to use HVLP spray guns at home rather than on-site.
LVLP Spray Guns Are Best For:
Since LVLP spray guns are not that common, learning how to use them can be quite a hassle. This is why they are not ideal for DIY projects and people who have very little knowledge of spray painting.
LVLP spray guns, however, are perfect for professionals since they require small air compressors and waste a lot fewer materials. Not only are they portable, but they spray super fast as well. All these factors make them the absolute choice for professionals.
The transfer efficiency is like the cherry on top as it makes them the ultimate cost-saving spray gun option for professionals.
Frequently Asked Questions
What are the safety tips I should keep in mind while using a spray gun?
Safety should be your prime concern! It does not matter what kind of paint you are using, you must always go through the instructional manual first. Most of the elements in the paint are toxic, so you need to ensure that they do not make their way up to your lungs, eyes, or skin. Here are a few points to keep in mind.
Wear safety glasses
Wear oversized clothes to fully cover your legs and arms
Wear nitrile gloves
Most importantly, wear respirators
Ensure that you do your spray-painting job in an open area or at least in an area that is sufficiently ventilated.
What should I mix with the material?
You need to thin down the material before using it so that it can easily go through the spray gun. You can mix fluids like lacquer thinner water or acetone with it to make it thinner. Ensure that your material is neither too diluted nor less diluted.
How can I increase the lifespan of my spray gun?
Increasing the lifespan of your spray gun is very easy; you need to clean it daily. Do not jerk the trigger as it may lead to trigger jams. You also have to ensure that you use good quality nozzles and needles.
Furthermore, if you are a user of coarse materials like Carc, then we would suggest you get a spray gun that has a metal body.
How many years does a spray gun last?
If you have bought a good quality spray gun, it should last for at least a decade, provided you take proper care of it. We would suggest you buy a spray gun with corrosion-resistant materials.
What are some of the best spray gun brands?
Some of the best spray gun brands are
Astro Pneumatic Tool
Spray It Up
Campbell Hausfeld
Final Thoughts
There you have it! We hope you know everything about HVLP and LVLP spray guns now. As we have already mentioned earlier, both these spray guns are for different purposes, so there is not really a winner.
If you are looking for a spray gun for DIY projects, go with an HVLP and if you are looking to use it professionally, go with the LVLP. But before we sign off, we would like to share a couple of pro tips with you.
When it comes to paint spray tools, irrespective of the one you choose to use, you need to keep safety as the topmost priority. Long story short, always wear protective gear while undertaking all your paint projects.
Also, any tool will only last long if you maintain it properly. And HVLP or LVLP spray guns are no exceptions. So, regular cleaning and upkeep will help you make the most of your purchase.
We really hope you found this article helpful. With this, we wish to take your leave; see you soon!
Are you trying to revamp your room by repainting some old furniture? Are you confused about which HVLP spray gun to buy for optimum results?
Worry not, because we have got you covered!
As you probably know, HVLP spray guns are the ideal equipment for your home and professional painting needs. They not only give quicker results than brushes but also cause much less of a mess than their high-pressure counterparts.
In this article, we have handpicked the 9 best HVLP spray guns available on the market today. Apart from detailed reviews of each of our recommendations, you will also find a buyer’s guide to simplify your decision-making process.
So, what are we waiting for? Let’s dive right into it.
This HomeRight HVLP spray gun in the variant “Super Finish Max” provides a very professional quality finish on all surfaces you use it on. It’s ideal for DIY paint projects of all shapes and sizes because of its adjustable mechanisms that help you customize your paint flow. This spray gun is also one of the more affordable high-quality options out there.
PAINT SPRAYER FOR COUNTLESS DIY PROJECTS: The HomeRight...
ADJUSTABLE SETTINGS TO SUIT ANY PROJECT: You can adjust the...
Why Did We Like It?
This spray gun is not only great for more intricate DIY projects but also other larger projects such as painting furniture, cabinets, and so on. It has easily adjustable spray settings and alternative spray tips that allow you to customize the material output and paint flow according to the needs of the project.
Since the spray gun functions on 450 watts of power, it offers a rather powerful spraying experience, making it a versatile product for a variety of projects. It also comes equipped with a cleaning brush that makes the process of cleaning a lot quicker and more efficient.
That’s not all; the USP of this product is the 2-year warranty and highly-rated customer service provided by the company. The spray gun also has a rather large paint capacity (39 fluid ounces) that facilitates longer spraying without having to refill very often.
What Could’ve Been Better?
While this sprayer claims to require little to no thinning of the paint before use, a few customers seemed to have experienced the exact opposite. The tips that this spray gun comes equipped with are very tiny and therefore easy to lose. It is especially easy to lose them down the sink while you’re cleaning. Hence, we recommend having a dedicated plastic bowl to keep and clean your tips in.
Pros
2-year warranty available
Easy to clean and maintain
Superior quality finish
Versatile and can be used for a variety of projects
Next up, this Fuji paint spray gun has an unconventional design and is one of the very best HVLP options available on the market. The product has professional precision and very high durability, which is why it is also one of the most expensive products on the list.
Professional non-bleed Spray Gun with Adjustable Pattern Fan...
1.3mm Air cap set installed
Why Did We Like It?
One of the biggest reasons why this product is so popular is because of its strong and sturdy build as compared to other spray paint models. Moreover, the gun provides a very uniform and precise spray pattern, and an adequately fast spray speed, making it one of our top contenders!
Moving on, we love how this product is non-bleed, which means the moment you release the trigger, the paint automatically stops flowing, thereby avoiding any potential mess. The 25 feet hose that comes with it has an air control valve that significantly reduces overspray and bounceback as well.
Also, this model of the Fuji Spray gun is convertible, meaning it can be switched between the bottom feed cup and gravity feed cup for ease of use. That’s not all; it has an ergonomic stay-cool handle and is very easy to disassemble and clean, which has quickly made it a fan favorite.
What Could’ve Been Better?
While this HVLP spray gun is one of the best 2-spray systems out there, it is significantly heavier - weighing 26.1 pounds. The price of this paint gun is also significantly higher than its counterparts, but we feel that it’s well worth its high price.
This spray gun, while being one of the lowest-priced spray guns on this list, is also one of the highest-rated. It uses high volume low-pressure technology to provide a smooth and consistent finish on all surfaces, from doors to decks to furniture.
HVLP PAINT SPRAYER: The Control Spray Max paint sprayer uses...
USE WITH A WIDE VARIETY OF MATERIALS: Powerful two-stage...
Why Did We Like It?
Like most spray guns on this list, this too has customizable settings to control and optimize the pressure and flow of the paint. Furthermore, the air cap of this tool is adjustable, thereby allowing you to choose your spray pattern - round, horizontal, or vertical.
Moving on, a feature that sets this spray gun apart from the rest is its stationary base and lightweight build that significantly reduces hand fatigue. Since the turbine is placed on the ground, it makes it a lot more convenient to hold the tool for extended periods of time.
That’s not all; we love how affordable this tool is compared to its counterparts with the same features. So, if you’re looking for a budget-friendly HVLP spray gun that has high performance and a year-long warranty, this is the one for you!
What Could’ve Been Better?
This tool works optimally only with light materials like stains or thinned-down paints of different kinds. This makes this tool less than ideal for people looking for thicker coverage on their projects. However, this does not compromise the overall performance of this spray gun.
Pros
Professional, consistent finish with minimal overspray
If you’re looking for a spray gun that has one of the most professional finishes, then this is the one for you. It comes equipped with the latest atomization technology and delivers a superior finish on most surfaces. This product doesn’t come with a motor though, so ideally it’s for someone who is just trying to replace the paint gun from their set.
The New HVLP Finishline 4 series from Devilbiss offers the...
Achieve superior results with its precision machined air cap...
Why Did We Like It?
This HVLP spray gun is most well-known for its high-precision spraying capabilities and is one of the top picks of working professionals. It comes with precise fluid nozzles and high-quality air caps that enable it to deliver superior results. From auto-body work to painting kitchen cabinets, this gun can provide top-notch results.
While it may be on the expensive side, the precision with which it delivers the spray paint is unmatched by most other guns. What’s more, its anodized internal passages make it very easy to clean and maintain while using it on a regular basis.
Also, this spray gun is comparatively lighter than its alternatives, which is a major benefit in our books! So, once you pair this gun with a high-quality air compressor, there is next to nothing that it can’t achieve.
What Could’ve Been Better?
As we mentioned earlier, this spray gun is mostly used by working professionals. One of the major reasons behind this is that there is a certain level of experience and technique required to use it to achieve optimum results. Hence, if you’re a beginner looking to invest in a spray gun, this is not the one for you.
Earlex, just in case you didn’t know, is one of the leading brands of spray gun equipment. The Earlex 5500 is designed specifically for automotive work, serious woodworking, and light contractor work. Long story short, this is another HVLP spray gun that is ideal for professional rather than home environments.
SEMI-PRO PAINT SPRAYER: The Earlex Spray Station 5500 is...
ACHIEVE THE PERFECT FINISH: The professional metal spray gun...
Why Did We Like It?
One of the most impressive qualities of this spray gun is the user-friendly performance that makes it ideal for both working professionals and beginners alike. This, coupled with its sturdy and long-lasting building, makes it an ideal investment for many woodworking enthusiasts.
Furthermore, this spray gun is extremely convenient to carry around because of its handle along with the onboard storage for the hose and the gun. Its all-metal paint gun with stainless steel tip and powerful turbine provides a more polished finish on wooden surfaces as compared to its other counterparts.
Moving on, the innovative push-and-click spray pattern adjuster in this tool allows you to quickly shift between the various spray patterns. It also has a paint flow control dial and comes with a pick-up tube for overhead and downward spraying. This, along with its high non-bleeder gun control features, comes in especially handy while painting with a wide variety of water-based and oil-based materials.
What Could’ve Been Better?
This gun is specifically designed for small to medium-sized woodworking projects, thereby restricting its use. If you’re looking to attempt more versatile projects, then this HVLP spray gun is not the one for you.
Yattich is one of the best brands of HVLP guns on the market today. Its products are not only very affordable but also perfect for home use and smaller DIY projects. The 191 model has a unique design aimed at enhancing user experience. It has a double layer of insulation that makes it very safe to use outside of a professional environment.
【3 Spray Patterns & 5 Nozzle Sizes】Paint sprayer can be...
【Perfect Design For User Experience】Detachable, making...
Why Did We Like It?
This model of the Yattich Spray gun is known for its large variety of nozzle sizes and unique trademarked copper composition. These copper nozzles are not only more versatile and durable, but they also avoid blockage, which reduces resistance and can extend the life of the motor significantly.
What’s more, these spray guns are extremely versatile and can be used on a variety of surfaces, ranging from craft steel and walls to wood. Its suction tube can be easily adjusted according to the angle at which you require it to spray, while its customizable spray modes add to the ease of use.
If that wasn’t enough, this spray gun is quite affordable, thereby making it a rather ideal investment for anyone interested to purchase it.
What Could’ve Been Better?
This product is majorly made of plastic, so it is not as long-lasting as its metal counterparts. This could also be an issue for more environment-conscious consumers who do not wish to invest in plastic equipment.
Wagner is one of the leading companies to manufacture the HVLP spray gun and is best known for its versatility in the same. And that can be said about its model FLEXiO 890 that gives a high-quality consistent finish on projects of all textures and sizes.
PERFECT FOR A VARIETY OF PROJECTS: The FlexiO 890 paint...
PORTABLE PAINT SYSTEM: The turbine sits on the ground,...
Why Did We Like It?
This model of Wagner is built like a high-performance professional spray gun while being priced at a comparatively lower rate, which we love. It’s built ideally for home-improvement projects and can be used both indoors and outdoors with relative ease.
One of the best features of this spray gun is its integrated storage which allows you to easily store the hose and nozzles within the system after usage. Since the turbine base is stationary, this spray gun avoids hand fatigue and has a long 11.5-feet flexible air hose that allows you to cover more area with ease while working.
Apart from being user-friendly, this spray gun has one of the fastest spray speeds amongst all the other products in this guide. This means it can cover a larger surface area in a relatively high-quality shorter period of time making it a very good painting tool. You can also use unthinned paints of all kinds in this spray gun which sets it apart from all its competitors.
What Could’ve Been Better?
The nozzles of this spray gun tend to require cleaning at regular intervals. This makes it kind of a hassle to use, especially for larger projects. The spray tip of this equipment is also not very precise and tends to overspray frequently.
Next up, this model is called the Earlex 6003 Pressure. Known for its professional finishing capabilities and high durability, it’s no surprise that this spray gun is one of our topmost recommendations. Its powerful motor and onboard gun docking system has made this tool gun one of a kind.
HVLP SPRAY SYSTEMS: The Earlex SprayPort 6003 HVLP paint...
PERFECT FOR WOODWORKERS: Designed for the serious woodworker...
Why Did We Like It?
This spray gun is ideal for people looking for a high-performance and durable tool that can spray everything from milk paints to varnishes and lacquer. It is also designed specifically for users who engage in serious woodwork, so it delivers a flawless finish in all its projects.
Moving on, the nozzle of this spray gun is non-bleed and precise, which along with its pressure-fed gun, stay-cool handle, and dual adjusters provide maximum performance. Not only that, but its 360-degree rotating air cap allows you to spray even the most difficult crooks and crannies with ease.
Furthermore, its 25 feet Hyperflex hose gives this stationary spray gun maximum maneuverability in and around any project area. Earlex also provides customers with a 2-year warranty and highly rated customer service which is always a pro in our book.
What Could’ve Been Better?
While this spray gun is marked on the more expensive side, most customers agree that it is well worth its price. Some customers have pointed out that the paint gun is prone to spitting which may hamper the final finish of projects in certain cases.
This gravity-feed HVLP spray gun is great for a beginner in painting projects looking for an affordable tool that gives high quality and consistent finish. It works best on wooden projects ranging from cabinets to door frames and smaller furniture. The product also comes with bonus accessories that include a cleaning brush, a spanner wrench, and a pressure gauge.
High-Performance Car Paint Spray Gun – This 1.4mm fluid...
Comprehensive Adjustment Controls – This automotive paint...
Why Did We Like It?
This paint spray gun is made for the typical DIY user and can cover regularly to heavy-duty work. Hence, it is very easy to operate even without prior experience using paint sprays. Users rated it rather highly, mentioning that the more you get used to it, the better finish it provides.
Also, it is entirely made of stainless steel and hence very durable. And it comes with the expected one-year warranty and decent customer service. Apart from that, the lightweight build of this tool gives it high maneuverability and provides a beautiful consistent finish on all surfaces.
The 1.44mm spray nozzle it comes equipped with is great for most painting projects. However, you can also replace the nozzle with other differently-sized tips available on the market. This product also has full control over air pressure and spray pattern thanks to its adjustable control knobs.
What Could’ve Been Better?
The gun comes equipped with only one kind of tip which is kind of a let-down for people who do want to be able to do a variety of projects. This gun also works optimally better with thinned paints and pigments which could prove to be another letdown for users.
Pros
Ideal for basecoats
Lightweight and portable
Very easy to use
Durable
Affordable
Cons
Only comes with one tip
Not great with thick paints
HVLP Paint Spray Guns Buyer’s Guide
That brings us to the end of the list of our top 9 picks of the best HVLP paint spray guns. But we understand that 9 options may still seem like a lot to pick one out of. For this reason, we’ve compiled an in-depth buyer’s guide discussing factors to look out for that should help you make this decision.
Spraying Speed
Most HVLP spraying guns have a lower rate of painting speed as compared to their higher-pressure counterparts. Even within the options for this spraying, different tools have different spray speeds. So, you must decide how quickly your project needs to be completed and buy one of these accordingly.
Nozzle/Tip Size
The nozzle and tip at the end of the spray are what determine how smoothly the paint will be applied on any surface. A larger nozzle will help you cover a larger surface area at once while a smaller one will help you zero in on details.
Some guns come equipped with multiple nozzles and tip sizes and that gives the spray added versatility. Hence, depending on the kind of project, you’ll have to choose a spray gun accordingly.
Paint Adaptability
HVLP spray guns have different levels of adaptability when it comes to the kind of paint or lacquer you want to apply on a certain project. If you’re going to be working with a lot of different thicknesses of paint, you’re going to require a spraying gun that supports it. Some guns come equipped with a thinner funnel that helps you thin down paints to the required amount before use.
Adjustability
These spray guns also come with a variety of customizable and adjustable options such as rotating air caps and boost power dials. These variations help you adjust things like the spray rate and help you achieve different types of finishes and patterns.
Length Of Hose and Capacity
If the paint sprayer has a stationary base, then you will require a long hose in order to easily walk around and work in your station. You should also prefer a spray gun that has a larger cup capacity so that you don’t need to waste much time refilling it.
Cost
One last factor to consider while buying an HVLP spray gun would cost. Different brands of spray guns have marked them at different prices. Higher-priced products will usually have more professional level equipment with additional features. However higher price does not always mean higher quality, and hence one should study the features in detail before deciding which one to invest in.
Verdict
With this, we come to the end of our comprehensive guide to the best HVLP spray guns. We hope it will now be easier for you to pick the ideal product for your needs. But if you need another nudge in the right direction, read on.
To summarize, the YATTICH 191 is the most affordable as well as DIY-friendly spray gun. So, if you’re a beginner looking for a low-budget and easy-to-operate product, this is the one for you.
On the other hand, if you’re a professional looking for high performance, high quality and a flawless finish, then Earlex 0HV6003PUS and Fuji 2203G are ideal for you.
Before signing off, we would also like to give honorable mentions to the Earlex HV5500 and TCP Global G6600-14 for their high customer reviews and versatility. Wagner 052902, alternatively, has the fastest spraying speed among all the paint guns on this list.
The Husqvarna YTA24v48 needs no introduction as it's one of the coolest lawnmowers on the block. But is that reason enough to buy it? Unfortunately, this is a discontinued product, and not available in the market. No, other updated products are also not been known.
Well, we don't want to rush you into making that decision right away, as we'd like users to be fully informed before investing in this mowing machine. Obviously, it's an advanced power tool and comparatively more expensive than conventional lawnmowers.
Therefore, we have a lot of features to discuss and points to make in this comprehensive review so you can make an informed choice. However, before we begin, we want to assure you that we tested this product across different parameters to gain a fair understanding of its pros and cons.
So, let's dive into the deets without further small talk!
Husqvarna YTA24v48 Review
Husqvarna continues to be a reliable household brand as it has gained the trust of its customers over the years through consistent quality and performance. And the YTA24v48 model is no exception, so the following are the points we want to discuss to familiarize you with the product.
Performance
To begin with, we want to focus on the engine of the model as ultimately, it's the power source that provides superior cutting performance, making short work of yard maintenance. On that note, the YTA24V48 pedal tractor mower runs on Briggs & Stratton Intek V-Twin engine, generating all the horsepower needed to take care of an acre or more of land.
Also, the model incorporates a high-tech debris management system and mechanical compression release technology to streamline cutting functions. Furthermore, it also comes reinforced with air induction mowing technology, which enhances the airflow, ensuring that the blades yield consistent trims.
Getting the machine started is no hassle at all, as it features a choke less start for instant activation, so all you have to do is turn the key and go. This element will especially appeal to busy homeowners who want to wrap up the job with minimum effort and waiting time.
However, the best part is that this unit can be fitted with trailers, snow blades, brushes, and more, further adding to the versatility of this mower. What supports multi-appliance compatibility is the mower's cruise control and fast pedal-operated automatic transmission enabling steady speed and unhindered mobility.
Word of caution - do not attempt driving this mower over a substantial incline as the machine may fail to make the climb. Despite offering stability and balance across even ground, the mower just cannot navigate over steep terrains. Believe us when we say this, every time we tried to make the ascent, the engine stalled shortly after.
Ease Of Use
Despite its heavy set design, the Pedal Tractor mower is a breeze to operate and pretty straightforward in terms of functions. For starters, it has an ergonomic seat that offers great comfort and control to the users. Once you take on the driver's seat, the lawn essentially turns into a driving zone, which you can maneuver at a chosen speed.
Between the handy cup holder and armrests, this mower is practically a joy to drive, which is unlikely to happen while working with walk-behind models. To further add to your convenience, the unit includes a charging port and electric clutch for improved user experience.
Cut Quality & Options
We are very impressed with the unique cut quality of this machine. Long story short, it features a 48-inch cutting deck providing wide swaths and consistent trims with each pass.
What supplements the precise mowing function is the fender mounted deck lever, spring assisted for smoother operation, and high accuracy. Another thing we liked about it is its top speed of 2.5mph, meaning you finish mowing in a snap once you get the hang of using the machine.
Cutting quality alone is not enough as a heavy-duty motor should also provide superior discharge functions. That being said, the Fast tractor side-discharges and collects clippings efficiently in the attached BioClip kit. Furthermore, it has mulching capabilities as well, so depending on your requirements, that can be a feasible thing to do.
Safety Features
When it comes to user safety, you can always rely on this brand to come up with intuitive features, ensuring a risk-free experience. That being the case, this mower includes a pressure-sensitive switch located beneath the seat, which shuts down the engine and deck as the driver leaves the saddle.
Moreover, the unit has powerful, bright headlights providing high visibility and monitoring functions. Also, you can extend the working hours on the yard, well after the sun goes down because of these high capacity lights. Lastly, it incorporates a Reverse Operation System (ROS) that instantly stops the blades while backing up, for additional safety.
Warranty
The Husqvarna Yta24v48 Fast Tractor comes with a trio of warranty packages that looks comprehensive from the get-go. Besides the three-year limited warranty, a five-year coverage plan takes into account the front axle, frame, and chassis. However, what impresses us most is that the manufacturers back the deck with a 10-year consumer warranty.
What Could've Been Better?
At the end of the day, no piece of equipment is perfect, and they're bound to have one flaw or the other. However, when it comes to lawnmowers, if you're looking for a high-end model, it's best to ascertain the effectiveness and quality of individual parts before investing in an option.
When we tested the YTA24V4824V, the experience was not entirely smooth as we found minor electrical and mechanical issues. Even if we let that bit slide, we don't like that the mower cannot scale sloped terrain. This could be a major inconvenience for users wanting to mow across uneven grounds or inclined paths.
Given the price of the item, this can be a deal-breaker for a lot of buyers as people would expect it to seamlessly navigate across varying terrain.
Pros
Runs on high capacity Briggs & Stratton Intek V-Twin engine
Maximum achievable speed of 2.5mph for faster cutting
Three-tier warranty packages, increase value for money appeal
Ergonomic seat with armrests and a cup holder
Multiple safety features providing risk-free operation
Cons
Mower fails to work on inclined surfaces
Unit suffer from minor electrical and mechanical issues
Husqvarna YTA24v48 Verdict
Despite the flaws, we agree that in the case of the Husqvarna YTA24v48, the pros outweigh the cons. Therefore, if you have a large green space to groom, you must consider this reliable option for neat, professional-looking cuts.
Also, it's pretty low maintenance, so you don't have to worry about costly tune-ups in the long run. Lastly, when you're going for a high-end option, durability is an essential factor that you cannot overlook. With this unit, you'll be tending your lawn for a long, long time, and it will be years later when you need a replacement.
Plus you're getting a great warranty with the package, so you can't really complain about minor faults here and there. So go ahead and get yourself this tractor model.
Also, don't forget to let us know in the comments section below about your experience.
Grow tents are one of the most popular methods of growing plants indoors.
However, when using grow tents, ensuring that your plants have enough moisture at all times can be challenging. This is where humidifiers can be beneficial.
Residential humidifiers come in all manner of sizes and styles, and it is possible to find many options designed to fit in small growing spaces, such as grow tents. However, selecting the one that best meets your needs from many options is easier said than done.
It is a task that requires both time and effort since different types of humidifiers have their advantages and disadvantages. To help you out, we’ve compiled this in-depth review and guide listing the best humidifier for grow tent on the market.
Furthermore, we’ve included a buyer’s guide to help make your task easier. So, without further ado, let’s dive in.
We will be starting with the HCM-350/HCM-35-TGT from Honeywell. For those who do not know, Honeywell is one of the most famous American manufacturers of a wide range of home and office solutions. Unsurprisingly, it is also the manufacturer of top-notch humidifiers for growing plants, offering innovative features and excellent performance.
EVERYDAY COMFORT – This humidifier for home features...
Why Did We Like It?
The HCM-350/HCM-35-TGT is undoubtedly one of the best humidifiers for grow tents, coming from a brand well-known for quality products that offer a great experience. It comes with a range of innovative features such as a wicking filter and UV technology that can improve air quality.
That said, the UV technology ensures up to 99% germ-free humidification. Similarly, the QuietCare technology makes sure that the device operates noiselessly, so you do not need to worry about getting disturbed.
Another excellent feature that makes the HCM-350 an excellent product suitable for grow tents is its continuous operating capacity; it can run for up to 24 hours. And since it is a dishwasher-safe product, cleaning it is incredibly easy.
Furthermore, you can easily adjust the moisture output with the help of the three settings to ensure your plants have the optimal amount of moisture.
What Could’ve Been Better?
Performance-wise, it is hard to find a better product on the market currently. However, this warm-mist humidifier might not be the best option for those with a humble budget. It is one of the costlier options you can get, and several more affordable alternatives are readily available.
Our next item on the list is the HME020020N model from HOmeLabs, another prominent brand dedicated to developing high-performance home and kitchen products. At first glance, the HME020020N is a compact humidifier that provides indoor plants the required amount of moisture they need to grow.
Our hOmeLabs personal air purifier has a filter with 99.97%...
Our rigorous, 4-stage filtering process includes a...
Why Did We Like it?
The HOmeLabs HME020020N is one of the most efficient humidifiers we tested while compiling this list. It has a 99.97% efficiency rating that provides the required amount of moisture and ionizes the indoor air for reducing odor. These work with customizable fan settings that allow you to select between low power and high power settings as and when required.
This product comes with clear instructions that help you easily install and use it without any hassles. What is more, the HME020020N measures 6.7 x 6.7 x 7.5 inches, an ideal size for small grow tents.
The humidifier also has an indicator light to let you know when it is time to change the filter. Furthermore, HOmeLabs has excellent US-based customer service that you can quickly contact through email, chat, or phone. They are highly efficient in helping you resolve any issues that you might come across.
What Could’ve Been Better?
Once again, we could not find any significant downside to this impressive product. We only wish the manufacturer had included an option to turn off the blue light that turns on while the machine operates. It can be a slight nuisance at night if you place the humidifier in the bedroom.
The Pure Enrichment PEHUMIDIF has been specifically designed to provide exceptional performance with excellent features at a great price point. It is one of the premium products that can easily be used in grow tents for providing plants with the required amount of moisture.
Instant Dry Air Relief: Ultrasonic cool mist technology...
Year-Round Comfort: High and low-speed settings combined...
Why Did We Like It?
The PEHUMIDIF is one of the humidifiers that can easily be used all around the year. It comes with a 360-degree mist nozzle that makes it easy to balance and regulate the moisture level in your grow tent, creating the ideal conditions for plants to thrive.
This cool-mist humidifier also has a sizeable easy-fill tank that is ideal for use in various spaces, such as bedrooms, offices, etc. Due to the large-sized tank, it can provide plants with enough moisture without requiring frequent refills.
Another thing that we liked most about the PEHUMIDIF is that it comes with all the accessories required. These accessories, such as the AC power adapter, disk cleaning brush, and a replacement cap, can be quite costly when you go out to buy them separately.
Additionally, the manufacturer provides a guaranteed five-year warranty on this humidifier, which makes it one of the best available options.
What Could’ve Been Better?
The only drawback that users may notice about this otherwise impressive product is that it lacks a separate accessory filter for the water. However, it is an extra component that is not required for the operation of the machine. You can even get it for free by posting a review online.
The Crane EE-5301 is one of the most attractive humidifiers capable of impressive performance, thus offering an excellent choice for use in grow tents. Essentially, it is a cool-mist humidifier that can operate for long hours and comes with a huge tank to prevent the air from drying out.
TRANQUILITY: Experience the tranquility of a well-humidified...
ADJUSTABLE HUMIDITY: Take control of your environment with...
Why Did We Like It?
While searching for the best humidifier for a grow tent, we came across the Crane Drop Ultrasonic Cool Mist Humidifier. Among the several impressive features, the 360-degree cool-mist lid immediately caught our eye. It allows users to send the mist in any preferred direction and can be helpful for plants that require a more considerable amount of moisture.
Furthermore, this grow room humidifier comes with variable output settings, allowing you to easily adjust the amount of moisture required at any time of the day. On that note, the standard-setting is ideal for spaces as large as 500 sq ft. When placed in a grow tent, it can quickly provide complete coverage, creating the perfect environment for your plants.
Regarding the design of this product, this ultrasonic cool-mist humidifier features a detachable bottom fill tank that allows you to clean the tank easily at periodic intervals. Similarly, the cap and water level sensor are easily removable for added convenience.
What Could’ve Been Better?
It is one of the best ultrasonic humidifiers for growing plants indoors that also offers a sleek polished design and durable build. Unfortunately, the dehumidifier does become noisy after a few months of use. However, it is an excellent choice to go with if noise is not a major issue.
Unlike most other humidifiers, the Levoit ultrasonic cool-mist humidifier has been explicitly designed to be suitable for growing plants using grow tents. Its ultrasonic technology ensures a uniform spread of fine mist that keeps the tent moisturized so that your plants have enough moisture and can bloom and blossom.
Most humidifiers that people use for growing plants are general-purpose products placed in a grow tent. WIth the Levoit ultrasonic humidifier, the manufacturer has focused on making it specifically suitable as a grow tent humidifier.
This ultrasonic cool mist humidifier has an effective range of up to 376 ft² / 35 m², making it an ideal choice for a grow tent. Not only tents, but you can also use them in grow rooms since they offer complete coverage with their uniform spraying technology.
Moreover, the product is equipped with unique features, including an essential oil tray. Indeed, you can now enjoy the benefits of aromatherapy while providing your plants with adequate moisture.
Also worth mentioning is the four-liter tank that enables the machine to perform all day efficiently, while the auto shut-off feature turns it off when the tank is empty.
What Could’ve Been Better?
The one thing you need to remember when going for this product is that it is not compatible with smart outlets. That is why it is not possible to operate the humidifier remotely. Needless to say, don’t forget to check for compatibility before going with this option.
The Raydrop Cool Mist Humidifier is an ideal choice if you are looking for the perfect combination of style, a compact design, and stellar performance. Moreover, the slim and practical design includes a powerful spray that makes it great for any grow tent.
The slim design is the most striking feature of this grow tent humidifier that separates it from similar products. This design makes it widely applicable in all sorts of spaces. Even if you have a small grow tent, the Raydrop cool mist humidifier will fit in with ease.
This humidifier also comes with a dial knob control, enabling you to select the moisture output conveniently and make adjustments as required. Besides that, the smart indicator lets you know when there is no water left in the tank. And, the shut-off feature will automatically turn off the device in such situations.
Plan on getting a humidifier for a long continuous operation? You will be delighted to know that this cool mist humidifier can run continuously for up to nine hours. Also, it makes very little noise so that you won’t get distracted or disturbed.
What Could’ve Been Better?
The manufacturer has included a small window in the tank so that users can see how much water is left. Unfortunately, the window is too dark to see the water level in practice. However, this minor design flaw does not affect the working of the device.
Reliable, innovative, and high-performing — the Pure Guardian H964AR is an excellent ultrasonic cool mist humidifier that can easily control humidity levels indoors. It is incredibly easy to use and promotes healthy plant growth with its excellent coverage.
Provides 15-70 hours of run time depending on setting and...
Filter-free Ultrasonic Technology quietly disperses a fine...
Why Did We Like It?
The Pure Guardian H964AR is one of the most dependable products we found that made providing indoor plants moisture a simple task. It comes with a one-gallon tank that can easily cover spaces as large as 320 sq. ft.
Besides offering superior coverage, this ultrasonic humidifier can run continuously for up to 70 hours. In the case of extremely dry indoor conditions, this device is one of the most effective ways of ensuring that your plants do not die from a lack of water.
Another impressive feature is the clean tank, which does not allow mold to grow on the tank surface, a common problem with such products. Furthermore, the aromatherapy tray allows you to add essential oils to the tank to create a pleasing and calming environment.
Add to that a low-water indicator light and a night light feature, and you get one of the best products in the category.
What Could’ve Been Better?
It is also one of the more compact humidifiers you can get at this price point. However, in our experience, we found this product to be comparatively difficult to clean. The tank does not come with handles, making it difficult to hold for cleaning purposes.
Vicks is a household name, generally known for over-the-counter medications. However, what many people do not know is that the American brand also manufactures a range of excellent home products, such as this V745A/V745-JUV humidifier. It is one of the best grow tent humidifiers that offers easy operation and powerful performance.
Breathe Better, Live Better - Maintain ideal humidity levels...
Portable, Easy to Use and Clean - With a top fill, 1 gallon...
Why Did We Like It?
Unlike most products on our list, the Vicks V745A/V745-JUV is a warm mist humidifier that releases a fine spray for maintaining the desired humidity levels. What makes it especially suited for a grow tent is its ease of use, helping you effortlessly maintain humidity levels at 40-60%.
We really liked the filter-free design, which helps in saving effort and time since you do not need to change filters. Combine this with the wide tank opening provided for easy filling and cleaning, and you get one of the best grow room humidifiers on the market.
This humidifier comes with a one-gallon tank that allows it to run continuously for up to 24 hours. You can simply place it near your plants in the grow tent and let it run. Furthermore, it operates without noise and the two different settings are great for adjusting the moisture levels easily.
What Could’ve Been Better?
As with most warm air humidifiers, the Vicks V745A/V745-JUV is also highly susceptible to mold growth. To prevent that, you will need to clean it very frequently. One way to prevent mold growth is by using purified or filtered water, which hinders the growth of fungi.
If you are looking for a humidifier that can be used for long hours continuously without the need for monitoring, the Everlasting Comfort cool mist humidifier is a great choice. It is an ultrasonic humidifier with a 1.6-gallon tank and comes with an excellent replacement policy.
COLD MIST AIR HUMIDIFIERS FOR BEDROOM: Our ultrasonic...
LARGE ROOM HUMIDIFIERS FOR HOME: Our cool mist humidifier...
Why Did We Like It?
This ultrasonic cool mist humidifier is one of the most powerful items on our list and can operate continuously for up to 50 hours. This feature makes it an excellent choice for promoting healthy plant growth indoors.
Equally impressive is the fact that it can easily cover spaces as large as 500 square feet, efficiently removing dry air to improve the humidity level. It is one of the cool mist humidifiers that come with an essential oil tray, enabling you to add pleasing fragrances to the water.
Furthermore, this is a filterless humidifier, helping you save effort and time while providing your plants with the required amount of moisture.
You will also be pleased to know that the Everlasting Comfort humidifier comes with a two-year replacement warranty. In case you encounter any issues, the manufacturer will quickly replace the product or parts, or provide a complete refund.
What Could’ve Been Better?
There is no doubt that this device can easily last for many days without refilling. According to the manufacturer’s claims it can last for up to six days, but it only lasted for five during our testing phase. It is still a reasonable period, and you won't be disappointed with this product.
As we near the end of our list, it is time to introduce to you the Magictec Cool Mist Humidifier. Magictec is an American manufacturer of high-quality home products for comfortable living. This product is one of the best cool mist humidifiers on the market that is great for growing plants indoors.
Magictec is known for its quality products that offer impressive performance, and this cool mist humidifier is no exception. It comes with a 2.5-liter water tank that can be quickly filled from any sink. It is large enough to allow the humidifier to operate continuously for 24 hours.
Then, there is the 360-degree humidifier mist nozzle that you can use to direct the mist in any direction you require. This feature doubles as an air humidifier for grow tents since it can even reach plants kept away from the humidifier.
Included with the adjustable misting settings is the power-saving auto shut-off feature which helps turn off the device when the humidity level is not too low. You can save on power bills easily while getting the best output with this device.
Finally, the device operates at less than 30 decibels, making it an excellent whisper-quiet option on the market.
What Could’ve Been Better?
These cold-mist humidifiers are highly effective in improving relative humidity levels in any space. However, it comes with a complicated water tank that requires a lot of effort for removing, refilling, and reinstalling it. The manufacturer should work on the design to make it more user-friendly.
Coming to the final product on the list, the Vornado HU1-0048-43 is an exceptional product that comes with an innovative design and intelligent humidification function. It is a powerful humidifier that can easily be used for growing plants in a grow tent by controlling the humidity level in any room.
INTELLIGENT HUMIDIFICATION — EV100 senses how much...
Why Did We Like It?
The Vornado HU1-0048-43 comes with deep pitched blades that work efficiently to pull large volumes of dry air with the help of the 360-degree air intake. The device also offers complete humidification of all spaces with the help of the signature Vortex action.
The HU-0048-43 also impressed us by its intelligent sensing technology, due to which it can estimate how much humidity and circulation is required. This device can easily maintain the humidity level that is ideal for your indoor plants.
Furthermore, the simple push-button controls help you select from 3 different fan settings and six output levels, depending on the preference. The fan can be set to low, medium, or high, according to how much moisture the plants require.
Another impressive feature is the SimpleTank System that makes refilling and cleaning the device very easy, helping you save time and effort.
What Could’ve Been Better?.
While the Vornado HU-0048-43 performs as the manufacturer claimed, the included humidistat does not display the humidity levels very accurately. We tested it using other products, and the humidistat was off by a significant margin. If you are not concerned about the working of the humidistat, then this is an excellent product.
Pros
Easy to use
Efficient performance
Attractive design
Superb build quality
Cons
Inaccurate dehumidistat
Humidifier For Grow Tent Buying Guide
Now you know about the best humidifiers available on the market for use with grow tents. However, knowing about them is winning only half the battle.
Several factors need to be considered when buying a humidifier for your grow tent. We’ve compiled a detailed buying guide that lists all these essential factors in the following section.
Going through them will help you understand the elements that should be considered before making a purchase.
1. Humidifier Type
One of the first things to consider is the type of humidifier you plan to get. Generally, humidifiers can be broadly classified into warm mist and cool mist humidifiers.
Warm mist humidifiers are also known as steam vaporizers and are generally the cheapest option on the market. However, they do use more energy than cool mist humidifiers. On the other hand, most humidifiers available on the market are cool mist humidifiers,
Cool mist humidifiers may use evaporative technology or ultrasonic technology. For providing your plants with enough moisture, both types of humidifiers can be a great option.
2. Humidifier Size
The size of a humidifier plays a crucial role in determining several aspects of using a humidifier. It affects how long the device can function, where you can place it, what is its water holding capacity, etc.
For grow tents, which are smaller in size, humidifiers having a compact form factor are the best choice, while you can use larger humidifiers in grow rooms. Smaller humidifiers are also more portable, so you can easily move them about as required to ensure that all your plants are getting enough moisture.
You need to be careful when selecting a humidifier, as getting a very large one can lead to extra condensation on surfaces, which can be detrimental to plant health. Larger humidifiers can also lead to too much moisture in the atmosphere, leading to the growth of mold as well. Smaller
3. Tank Size
The size of the tank directly influences how much water a humidifier can hold. The bigger the tank, the longer the period for which a humidifier can run. Larger tanks also help save time and effort since you do not need to keep refilling them at frequent intervals.
Generally, small-sized humidifiers have a water holding capacity ranging from 200 to 300 ml and can run for 12 hours. You will need to refill the tank about twice a day in such cases. On the other hand, humidifiers with 6-liter tanks can even run continuously for 60 hours.
However, just as is the case with the humidifier itself, a smaller tank is much more manageable and portable. It can also be cleaned quickly and easily. You will need to select between a more manageable or a large capacity tank.
4. Ease of Use
Easy to overlook, ease of use is a significant factor when buying a humidifier. Before buying, you should check how easy it is to empty and refill the tank and operate the humidifier. Many devices offer several settings that let you make precise adjustments as required.
Also, when looking to use it for growing plants indoors, make sure to check how easy it is to move about. In the case of humidifiers that utilize evaporative technology, make sure that the wick is economical and straightforward to replace. Additionally, the controls should also be user-friendly and should not require technical know-how to operate.
5. Maintenance
The level of maintenance that a humidifier requires is also one of the most important things to consider. The easier to maintain a humidifier, the more convenient an option it is. Maintenance involves cleaning the device and taking other steps to ensure that it can run for as long as possible.
You can find humidifiers that come with easily removable tanks, caps, and other components that make them very easy to clean and maintain. Additionally, spare parts such as caps and tanks should be easily available on the market for a product that you plan to use for a long time.
6. Additional Features
Manufacturers offer various features to provide a good user experience for their customers. These features may be in the form of night lights, automatic turn-off functionality, mist adjustment, and more.
Night lights are an aesthetic feature that can help you sleep better at night. Additionally, they can also enable you to see how much water is left in the tank. Similarly, the mist adjustment feature allows you to control the amount of mist being dispersed by the humidifier.
The auto-shutdown feature is one of the most useful features that automatically turns off the device after a specified time or when the water tank becomes empty. It can also help extend the life of your humidifier, as running on an empty tank can damage it.
Several options on the market offer different types of features. However, keep in mind that a greater number of features also results in a higher cost. Alternatively, it can even make the user experience unnecessarily complicated.
7. Customer Service
The first thing to look for in this case is how easily you can contact the manufacturer. The manufacturer’s customer service determines how easily and quickly issues can be resolved. They may provide different means of contacting them, such as by phone, chat, or email.
Also, speak to other buyers to know how quickly and effectively the manufacturer resolves any issues. The manufacturer’s ability and willingness to honor warranties and guarantees and offer replacements or refunds all form a part of the customer service.
8. Budget
Last but not the least, your budget will determine which humidifier is the most suitable for your needs. Generally, larger humidifiers and those that offer more features are more expensive. Smaller humidifiers may be more affordable, but make sure such products do not compromise quality and performance.
To be safe, select a product that is neither too costly nor misses out on too many features for the best experience.
Verdict
Now, it is time for us to wind up. It’s been an exciting ride, and we hope you enjoyed reading our guide as much as we did putting it together. But before we go, we would like to let you in on our favorites from the list.
Our top pick would have to be the Honeywell , which offers excellent performance with unparalleled ease of use. Then, there is the HOmeLabs , which is more suitable for those who want a customizable option at a great price.
Finally, you have the Pure Enrichment PEHUMIDIF, which comes with a great warranty and all the accessories included in the box. With that said, it is time for us to sign off. Be sure to leave a comment below and let us know what you think of our favorites.
In this tech-driven day and age, a drawing tablet is an indispensable tool in any graphic artist’s arsenal.
Not only have these amazing products made designing digital art a smooth breeze, but the level of efficiency and accuracy they offer is simply unmatched. And the best part? They are available in various sizes, allowing users to choose as per their requirements.
Thus, if you are a graphic artist, going for such a product would certainly be a wise decision. However, since the market is flooded with various cheap brands that offer below-par performance, choosing the right one can seem like a daunting task.
That’s why we have compared two of the most renowned drawing tablet brands, Huion and Wacom, to help you decide which one would be a better option for you. And to make matters a bit more interesting, we’ve provided detailed reviews for some top-quality drawing tablets from both brands.
So, make sure you read the entire article!
Huion Vs Wacom | Brand Overview
Huion was founded in 2011 in China and is best known for manufacturing and designing LED light pads, pen display tablets, and a range of other interactive input devices. It is dedicated to optimizing user experience and bringing their requirements to life, which is why it has customers from across the globe, including the USA, Japan, Canada, and more.
On the other hand, Wacom is a Japanese brand founded in 1983 that mainly focuses on producing graphic tablets and other related devices. Also, it is known for offering solutions to top educational and medical companies and top-notch user interface technologies. The brand has many creative customers globally, from auto-design and manga to cinema and animation.
Huion Vs Wacom | Detailed Comparison
Here, we have provided a detailed comparison between both brands.
1. Multi-touch And Express Keys
Multi-touch enables graphic tablets to identify different points of contact at the same time. Thus, it helps improve the functionality of the device, especially when it comes to zooming in and out and rotating. You can enjoy this feature in Wacom tablets across its Cintiq and Intuos series but not on any Huion tablet.
But even though it is a handy feature, it is certainly not a must-have like the express keys, so it is not a deal-breaker for most people.
Speaking of the express keys, they are common in pretty much every drawing tablet as they are useful for functions such as zooming, saving, and undoing. The main difference usually lies in how many buttons the drawing tablets come with. Generally, you get to see more buttons on bigger tablets, which can help make the workflow easier.
Now, as far as Wacom graphics tablets are concerned, all of them sport such functional keys, with Wacom Intuos pro featuring a unique touch ring. This touch ring enables you to zoom in and out by simply sliding your finger on the wheel. Huion tablets also come with express buttons except for the 420 models.
2. Connectivity
There are mainly two types of connectivity available on the market: wired and wireless.
If you are someone who has to spend a significant amount of time working outside or away from the desk, make sure to choose a wireless option. However, if your work is mainly desk-oriented, a wired model, we think, would be a better option.
Moving on, the Bluetooth connectivity available in Wacom Intuos models do better than the 2.4Ghz RF wireless in some Huion tablets, as the former can be connected wirelessly. On the other hand, the 2.4Ghz wireless technique of Huion means that you will have to plug it into the USB adapter.
Thus, it can be safely said that Wacom beats Huion in terms of connectivity.
3. Design
Both Wacom and Huion tablets feature aesthetically pleasing designs. If you compare the Huion Kamvas 22 Plus with the Wacom Cintiq 22, you can see that both of them are essentially screens without express buttons like other drawing tablets.
However, you can get a Wacom express key remote featuring 17 customizable keys and a touch ring for the Wacom model. Unfortunately, the Huion Kamvas model doesn’t offer a matching accessory. You will have to connect it with an Android device and then work on the graphic tablet.
Apart from that, both the models feature an adaptable stand that enables users to adjust the height as per their requirements. However, the Wacom stand is more flexible as it has an angle adjustment ranging between 16 and 82°.
The Huion stand does a great job as well, with an adjustment range between 20 and 80°, but certainly doesn’t match the flexibility offered by the Wacom stand. Therefore, Wacom is a notch better than Huion in terms of design.
4. Pen/Stylus
The stylus/pen is perhaps the most important of a graphic tablet. And in order to get the most out of your product, always ensure that it comes with a battery-free digital pen.
Such pens are not just durable and easy to use, but they also last longer. And unlike the ordinary styluses, they don’t use batteries but the inductive current from the tablet’s surface to power themselves.
Almost all Wacom models come with battery-free styluses. On the other hand, Huion provides them only in its Kamvas tablets, but don’t worry; you can purchase them separately. Also, both types come with express keys and pretty much work the same way.
Apart from that, another important factor that you should consider is how the pen erases. Graphic tablets such as the Cintiq Pro from Wacom come with a unique feature that allows users to turn their stylus upside down and erase the art. However, other digital pens from the brand need the artist to push aside the button to erase the drawing.
Nevertheless, Wacom’s Pro models allow for the most natural erasing motion. Plus, with Wacom tablets, users can customize the pen functions through the tablet properties. A pen tilt feature, for instance, detects the angle at which the tool and the drawing tablet are inclined. This results in natural-looking pen, brush, and eraser strokes in apps that support tilt sensitivity.
While talking about digital pens, it is difficult to keep their nibs out of the conversation. Both Wacom and Huion tablets come with extra nibs so that you can replace them when they wear out with time. Additionally, Wacom tablets come with flexible nibs, made using soft plastic in addition to the ordinary ones, which we are sure a lot of users love.
Lastly, it is worth noting that Wacom tips are not compatible with Huion tablets and vice versa.
5. Display
When comparing the displays, the tablet monitor size is a crucial factor to consider as it directly determines the cost of the tablet.
The Kamvas tablets from Huion boast outstanding colors. In fact, the Huion Kamvas 22 Plus features a 140% sRGB color gamut, which, we must say, is quite impressive. This is because of its special Quantum Dots Technology, which offers a 1:1,200 contrast ratio on the screen.
You might be surprised to know that it is the same technology used in Samsung OLED panels, making it one of the best displays for drawing tablets. The same thing goes for the Huion Kamvas Pro 16, which has a 120% sRGB color coverage, slightly better than the 96% of the Wacom Cintiq 16.
Finally, both Wacom and Huion tablets include matte, anti-glare displays that make them easy to use under bright lighting conditions.
6. Pressure Sensitivity
Both brands design their drawing tablets with top-notch pen pressure sensitivity that ensures they offer a natural and fun drawing experience. Thus, it means the amount of pressure a user exerts on the screen determines the heaviness/lightness and thinness/thickness of the lines they draw, just like a real pen.
Although, when the number of levels crosses 1,000, it becomes very difficult to point out the difference between the devices. This is because all drawing tablets can pick up details from even the minutest of variations in the applied pressure.
However, since Wacom and Huion are two of the leading manufacturers of drawing tablets, they offer at least 2,048 pressure sensitivity in their digital pens. Therefore, it is pretty much useless to compare the level of pressure sensitivity between the two brands, as you will barely find any difference.
7. Resolution (LPI)
Measured in lines per inch (LPI), the pen resolution of a tablet dictates how well the tablet can detect minor changes. Newer drawing tablets can capture up to 5,080 LPI, thereby offering artists an incredible level of detail. However, even a tablet with 1,270 LPI can provide enough detail to capture projects perfectly well.
Although there are differences between the Wacom and Huion tablets in this aspect, both of their pen resolutions are sufficient for most users.
8. Performance
When it comes to performance, the tablets of both brands are outstanding. Wacom offers a refined texture on their drawing tablets, which is neither too smooth nor too rough to draw on. On the other hand, Huion tablets aren’t as smooth as Wacom tablets, yet they still work well.
9. Warranty & Support
Usually, Wacom and Huion drawing tablets are backed by a one-year warranty. But the tablets from the Wacom Pro series provide a two-year warranty. And while Wacom offers 24/7 online chat and phone support, Huion provides support through email, Skype, and chat. Thus, in terms of warranty and support, Wacom beats Huion.
10. Price
Huion tablets are economically priced. So, naturally, that makes them a perfect choice for newbies that want to use the tablets occasionally and for those on a limited budget.
On the other hand, Wacom tablets tend to be three times costlier than Huion tablets. That is because they do a better job, be it in terms of providing customer service quality, multi-touch functionality, pens, etc. Not to mention, Wacom tablets are made using high-quality and durable materials and therefore can resist rough usage and drops better than Huion tablets.
Huion Vs Wacom | Top Drawing Tablets
Here, we will be taking a look at some of the top drawing tablets from both brands to help you make an informed purchase.
1. Top Drawing Tablets For Professionals
These are the best drawing tablets for professionals from both brands:
Pro-level Picture Quality: Enjoy the 4K UHD (3840x2160)...
Precise Color Expression: Featured with industry-leading...
Apart from providing one of the best digital drawing experiences, the Huion Kamvas Pro 24 can meet all your online teaching needs by allowing you to use various teaching software. Artists and online tutors from all across the world have praised this device for its highly functional features. So, let’s dig a little deeper.
Why Did We Like It?
Straight off the bat, this pen display tablet boasts a full laminated screen, which minimizes the parallax effect and delivers an incredible aesthetic experience. Coupled with this is an anti-glare glass that lessens the distracting glare caused by the ambient lights and enhances the brightness and viewing angles of the display.
Thus, the pen tablet not only enhances your drawing experience but also protects your eyes from the harmful “glare” effect.
Apart from that, it comes with a battery-free pen, which allows you to work continuously for prolonged periods without having to worry about the pen running out of juice. Furthermore, the pen supports the tilt function, thereby offering a natural drawing experience with top-notch accuracy, which is no less than a bonus in the books of professional graphic artists.
Additionally, this Huion tablet sports two touch bars and 20 customizable express keys, allowing users to scroll the page or zoom in and out of the canvas without breaking a sweat. And the best part? It is designed for right and left-handed users, unlike ordinary pen tablets.
Last but not least, the HUION KAMVAS Pro 24 is backed by a one-year warranty. So, you don’t need to worry about defects and technical issues; at least for the first year, the brand has got you covered.
Stunning 23.6" touchscreen display with 4K resolution so you...
True-to-life color with 99% Adobe RGB & 97% sRGB color...
Now, let’s talk about the Cintiq Pro 24 from Wacom, which is meant for designers and artists looking to add a revolutionary pen-on-screen drawing experience to their PCs. Sporting a beautiful 4K display, this Wacom drawing tablet brings a powerful array of capabilities, which professionals wouldn’t want to miss out on.
Why Did We Like It?
We were impressed with almost everything this Wacom tablet had to offer. However, what caught our attention right from the start was its 4k display, offering spectacular viewing angles and incredible color accuracy. Therefore, users can see every minute detail of their artwork. On top of that, it is etched, thereby reducing reflections and glare while offering a tactile and distinct drawing experience.
The graphics tablet offers users one of the most advanced digital pen performances. With four times higher pen pressure sensitivity and accuracy than the previous Wacom pens, the Pro Pen 2 offers unmatched results in creative control. Thus, you can rest assured that it will provide a realistic pen-on-paper feel to help you achieve outstanding results.
Moving on, the express key remote sports 17 customizable buttons within easy reach, which is great. But especially fascinating are the radial menus and the on-screen keypad that further offers one-touch shortcuts. Naturally, one of the best graphic tablets that any professional graphic designer can hope to get their hands on.
Pros
Offers top-notch pen performance
Delivers spectacular viewing angles and color accuracy
Reduces reflections and glare
Offers decent battery performance
Cons
Sports an expensive price tag
2. Top Drawing Tablets For Beginners
These are the best drawing tablets for beginners from both brands:
Android Supported - HUION H610 Pro V2 is compatible with Mac...
Innovative Tilt Control System - Provide you better pressure...
If you are an amateur hobbyist or a new designer looking for an affordable yet quality drawing tablet, then the HUION H610 PRO V2 is for you. With no software or fiddly drivers to download, the product makes for a practical solution to all those who have little to no experience of using a drawing tablet. Keep reading to know all the features on offer.
Why Did We Like It?
First things first, the drawing tablet features eight programmable express keys, which provide easy access to your set shortcuts. Thus, it not just helps improve your efficiency but also saves you precious time. Additionally, the product works with drawing programs such as Clip Studio, Illustrator, Paint Tool Sai, Photoshop, which gives it an edge over other tablets in a similar price bracket.
Plus, it comes with OTG connectors out of the box that let you effortlessly connect the drawing tablet to your Android device and draw on the go. So, compatibility should be the least of your worries with this product.
With the highly advanced pen tilt technology, its PW100 battery-free pen performs like traditional markers, pencils, and brushes. Thus, you get to have more fun while drawing. And since it is battery-free, you can start working immediately without charging.
At under 3 pounds, it is ultra-thin and portable, thereby making it easy for you to put it in a bag and carry it around wherever you want. Finally, it sports an affordable price tag, which ensures it delivers good value for money.
Pros
Good value for money option
Boasts a lightweight construction
Supports a wide range of drawing applications
An ideal choice for beginners and amateur hobbyists
Wacom Intuos Small Graphics Drawing Tablet: Enjoy industry...
Works With All Software: Wacom Intuos tablet can be used in...
The Wacom Intuos CTL4100 has been specifically designed for those who are fairly new to editing photos, writing, or drawing on their Android device or computer. Sporting a large drawing area, this drawing tablet helps bring your best ideas to life. From our experience with this product, we can assure you that it has almost everything that would help you get creative digitally.
Why Did We Like It?
To begin with, it comes with a pressure-sensitive pen that offers both control and top-notch accuracy at the same time. Plus, it has been designed for both right and left-handed users, making it an instant hit among the masses. Oh! And did we forget to mention that it’s battery-free? Thus, you can use it whenever you want without any issues.
Additionally, the two programmable express keys on the pen and the four on the drawing tablet deserve special mention as they keep your favorite shortcuts at the push of a button. Now, users owning a Chromebook will be glad to know that the drawing tablet has been tested to the compatibility standards of Google and hence is compatible with a Chromebook.
Lastly, when you register the product on the computer, you get access to premium software like Clip Studio Paint Pro, Corel AfterShot Pro 3, and Corel Painter Essentials 8. Overall, one of the affordable yet high-quality drawing tablets currently available on the market.
Pros
Comes with a top-quality pen
Available at a reasonable price
Sports a fairly large drawing area
Easy to use
Cons
Takes a while to install the necessary drivers
Verdict: Huion or Wacom?
So, which is a better brand, Huion or Wacom?
In our opinion, a Huion drawing tablet, in many ways, can perform as well as a Wacom drawing tablet for an affordable price. So, if you have budget constraints, we strongly recommend going with Huion as it has some really exceptional options in its repertoire.
Also, if you will be using the drawing tablet to enjoy your hobbies rather than professional purposes, go with Huion without a second thought.
However, if you want the absolute best experience and your budget permits, then Wacom would be the brand to go with. That is because Wacom tablets come with better styluses, sport a durable construction, and offer top-notch customer service quality. Not to mention, 4K resolution and multi-touch functionality are also available on some Wacom products, but not on any Huion tablets.
Hopefully, now you will be able to make the right choice as per your requirements. So, on that note, we’ll call it a wrap. Until next time, take care!
A standard size for water volleyball is about 30 ft. x 60 ft., which can be limited based on the players involved. Visual boundaries can be set if the pool size exceeds the play area.
If you’ve ever attended a pool party, then you know how exhilarating a game of water volleyball can be. Slinging a ball over the volleyball pool nets to score a point is probably the best feeling for any water sports enthusiast!
But if you want to play water volleyball at home, knowing the size and shape requirements of the pool is important. So, let’s see how wide your pool needs to be for playing volleyball with family and friends.
Factors Governing The Ideal Water Volleyball Court Size
It goes without saying that a water volleyball court must match the players using it. That is to say if the players can’t play comfortably and have fun on a court, the court size is far from ideal.
So, here are the factors you should consider when sizing a pool up for a game of water volleyball.
1. Swimming Potential
Movement in water is slower and more tiring than on land, which makes it important to consider how well the players can swim. If the players are not experienced swimmers, a shallow pool that isn’t particularly large will do just fine.
At the other end of the spectrum, experienced swimmers may need more room to maneuver in, making a standard water volleyball court ideal.
As for people with moderate swimming experience, like me, they can play in a medium or standard-sized pool. The only point to note is that such people will receive quite the quad workout during play.
2. Player Age
Younger players will need a more shallow water volleyball court than older and taller players. As such, pool safety becomes a much larger point of concern for children than for adults.
Thus, water volleyball courts can be deeper for adults than for children, seeing how the former are typically taller and more experienced with swimming. For children, the upper limit of volleyball depth is around two feet.
3. Player Stamina
Water volleyball is a true test of how well your cardio exercises are working, as I found out during my first game.
People in strong cardiovascular shape will be able to perform well in shallow or deep waters, as well as larger volleyball courts. Such people have built their shape through daily exercises, be it on land or in water. Those who skip cardio exercises? Not quite so.
Those who are not in peak cardio shape will require a smaller or shallower pool for them to have fun with the game.
Water Volleyball Court Size
The standard water volleyball court size is 30 ft. x 60 ft., but it needn’t necessarily match for you to host a game comfortably. These measurements are similar to the sand court, but your pool needn’t be as large since movement is less in water than on sand.
That said, your pool needs to be large enough to accommodate all the players. You don’t need to follow the Olympic guidelines for a simple backyard game, and the court can follow suit. After all, it’s no fun if players don’t have enough room to maneuver around comfortably.
For a 3v3 game, your pool can be about 16 x 24 feet for each player to comfortably move around in. This size is also not so large as to become an issue when switching sides mid-match.
Water Volleyball Court Depth
Water volleyball courts are not particularly deep, being about four or five feet deep at most. Depending on the age and stamina of the players, this depth can be lower, with the shallowest water volleyball courts being about two feet deep.
The Ideal Pool Type For Water Volleyball
You can use in-ground or above-ground pools for water volleyball, so long as they are the right size. The only place where they differ is with the net installation kits, which affix to the pools differently. And if you want, you can make the volleyball net a permanent fixture.
Tip
You may want to note how you keep the pool clean, as certain cleaning compounds can corrode metallic mounting kits. This is particularly the case if you use salt water for pool cleansing, which can seriously damage an in-pool mounting kit.
The Best Size For A Water Volleyball Net
The standard net width for water volleyball is 24 feet, but it doesn’t necessarily have to match or exceed the width of the pool. Feel free to install a net that fits the best with your pool size and game requirements, provided that the net can be installed comfortably.
As for its height, a standard volleyball net stands at 7’11 ⅝” (seven feet, 11 and ⅝ inches) in a typical water volleyball game. You can also customize the net height so that players don’t have a tough time launching the ball over.
Pool Shape
The pool shape can make or break the possibility of being able to play water volleyball comfortably. Rectangular or oval pools face no issues, providing ample room for everyone involved to partake in the activity comfortably.
But dimensions alone don’t make for a good water volleyball court. There must be an equal amount of space on either side of the net, so neither team has their movements restricted. Hence, I do not recommend round pools and other abstract shapes, as they can hinder this equal playing field.
Setting Up Boundaries
If you have a differently-shaped pool with a large enough area to accommodate both teams in an equal capacity, you may want to establish boundaries. Indicators that float on the water can act as said boundaries, and if the ball lands outside, it can be considered out-of-bounds.
In case you don’t have such boundary markers, you can improvise and put chairs, shoes, or spare poles as visual indicators for the boundary.
Where Can I Buy A Pool Volleyball Net?
Sports stores typically have pool volleyball nets available for purchase, with a wide range of net types and sizes. You may also find nets in retail stores like Home Depot and Walmart if you’re looking for a quick purchase without worrying about pro-quality nets.
If you so wish, you can come up with DIY pool volleyball net ideasto serve as a makeshift net. This can be as simple as a pole on either side of the pool to something more elaborate, such as a suspended cloth mesh.
Warning
If you want to use a backyard volleyball net for water volleyball, remember that beach volleyball nets are differently sized. They are larger than what is needed in a typical game of water volleyball, making them unfit for the purpose.
How Wide Does A Pool Need To Be For Volleyball Conclusion
A water volleyball court can be as large as 30 ft x 60 ft, but it can be sized as per player preferences. The court size and depth can be altered to suit everyone involved, and if the pool is larger than the court, you can set visual boundaries.
All you need to remember is to cater to the ability and skill of the players you host. After all, having fun is the priority in a game of water volleyball, and the court should not deter that.
So, set up your own house rules, plant a net smack-dab in the middle of the court, establish boundaries and play away!
While it is not child’s play, wiring an outlet is not impossible either!
Wiring a 220-volt outlet can be a tad bit risky if you do not know how to go about it. Since you are dealing with electrical points, you must go by the book.
But on the bright side, once you master this process, you will be saving so much money that would otherwise have to be paid to an electrician.
We have detailed the process in the form of steps to make it easier for you to follow.
Read on to know the process of wiring a 220 outlet!
How to Wire a 220 Outlet For a Welder
Step 1
It is essential to first switch off the circuit breaker. The breaker must be powered off, and the handle needs to be locked. After all, the primary circuit cannot be functioning during the process. Once you have made sure that this is done, move on to the next step.
Step 2
Firstly, remove the metal cover. This is important to get access to the breakers. After making sure that the circuit breaker is dead, plug in a 50 amp two-pole breaker into the box. The box should be able to support a two-pole breaker. Check beforehand if there are two spaces available to put in the two.
Once you are done determining, you can go ahead and hit the hardware or the electrical supply store. You need to purchase a breaker, some electrical wire, and an outlet.
Step 3
It is time to attach the flush mount to two gang boxes on the wall surface. Make sure that it is adequately fixed and cannot be moved (use screws for this purpose). After you are sure the gang boxes are in place, proceed.
Step 4
This is a crucial step - it is time to fix the wires. You must have a minimum of 6 inches of wire already inside the receptacle box. Some sheathing should remain exposed in both boxes. This includes the circuit breaker box and 2-gang box.
Now using that same cable ripper, you need to slowly pull out about 6 inches of the plastic sheath off the wire. The wire is the same one that is used inside our 2 gang box. Once you have achieved this, move on.
Step 5
It is time to pull out 12 inches of the plastic sheath of the wire used. Use the same cable ripper to do that. This part of the wire will go inside the circuit breaker box. Please maintain the exact measurements while conducting the process.
Step 6
Here you would need to strip off 1 inch of the sheath with the wire stripper. Be careful not to strip off any more than that.
Step 7
It is time to fix the wires. Bring one end of the wire inside the circuit box and connect the other end inside the 2-gang box.
Step 8
The next step involves implementing the wire connection. First, concentrate on the wire inside the 2-gang box to provide a connection with your outlet. To make this happen, you will require 3 wires - a black, red, and a bare one.
The bare one is the ground. There will also be a fourth white wire, but it is neutral, and you need to skip using that. To prevent any mistakes, wrap the white wire with electrical tape and seal it securely inside the 2-gang box.
Step 9
After the wires are in place, put some non-corrosive agent at the tip of all those wires. This will keep the connection from corroding.
Step 10
Now take the black, red, and bare wire and connect them to a receptacle. Hook up each colored wire against the correct screw. The black and red wire should be attached to the two-prong terminal, while the bare one needs to be connected to the ground terminal.
Place it with the screw facing up and now put the cover back on. You need to fix the cover properly to ensure that the job looks professional.
Step 11
After you are done, connect the three wires to the breaker. Here you will again have the white wire which you need to fold and keep securely inside the box. These wires need to be stripped, and the non-corrosive stuff has to be attached to the end.
Step 12
It is time to hook up the ground wire. Also, hook up the black and red wire in accordance with the breaker manual, and you are done.
Conclusion
When you go over to a hardware shop to buy the required products, make a note of the quality of the specified products you are purchasing. An overloaded circuit can be extremely hazardous and can cause a fire to erupt, or someone could get electrocuted. The whole equipment could also be damaged in one go.
Always choose a breaker rated at or above the required amperage for your welder. The gauge wire for the circuit size should also be perfect. Also, choose an appropriate outlet to match your welder’s plug. If you are not sure which one to go with, ask the dealer for help.
And with that, you are good to go - you can now proceed to set up your outlet.
Different pool testing kits are available to test the chemistry and water quality in a swimming pool. However, the instructions for using each test kit usually vary, and not all kits offer accurate readings of the pool chemicals.
When it comes to testing the chemistry and quality of your pool water, you need only the best pool test kit offering impeccable accuracy.
Testing water health is the best way to regularly maintain and take care of your swimming pool. Merely checking the water temperature isn't enough for proper pool maintenance. Instead, you'll need to conduct thorough chemical tests using the right pool testing kit. Today, we'll discuss how pool testing kits work.
Why Do You Need To Test Pool Water?
What's a swimming pool without water? A large hole in your backyard!
But simply having water in your pool isn't enough to enjoy a fun and relaxing time. You need to make sure that the pool water is clean and healthy to avoid health risks.
Multiple people use swimming pools at any given time, especially if it's a public pool. So, it's crucial to test the pool water and treat it regularly to keep it crystal clear and prevent the spread of infectious water-borne diseases. Plus, clean water can significantly enhance your pool experience while preventing erosion and damage to the pool itself.
What Are The Tests To Check Pool Water?
If you want to keep the pool water sparkling clean and maintain its water chemistry, you need to ensure that certain factors are kept in check. The water chemistry of a clean and healthy swimming pool should have the following characteristics:
Water pH: 7.4 to 7.6
Total alkalinity: 80 to 120 ppm
Calcium hardness: 200 to 400 ppm
Free available chlorine: 2 to 4 ppm
Bromine: 3 to 5 ppm
Cyanuric acid: 30 to 50 ppm
Metals: 0 ppm
Phosphates: 0 ppm
Total dissolved solids (TDS): 0 to 2,500 ppm in non-salt pools
Pool kits might show slightly different results when testing the pool water, but that's usually normal. Try to adjust the water chemistry levels regularly to keep them as close to the ideal range as possible. If you test and treat the pool water regularly and consistently, there's no need to worry.
Special Pool Tests
Standard pool testing kits can accurately perform four or five tests, such as pH, total alkalinity, chlorine, and acid demand test. However, there are specialty tests that come in handy under certain circumstances.
For instance, the biguanide test strips work for the biguanide water treatment systems present in some pools. These test strips determine the pool pH, sanitizer levels, calcium hardness, and alkalinity. Similarly, you should use a salt test strip to test the salt levels in saltwater pools. You'll also need to check for chlorine if there's a salt-chlorine generator.
Furthermore, you need a phosphate test kit to check the phosphate levels of the pool water. Phosphates can leach into the pools from lawn fertilizers or other sources and can cause algal growth. On the other hand, if your pool surface shows water stains, you can check for metals, like iron and copper, using special test strips.
You can also use a DPD kit to test for chloramines. A ShockCheck test strip will help you determine when to perform shocking to get rid of chloramines. At the same time, you can use the SafeDip test meter to check the TDS levels of your pool water.
Warning
People often ignore discoloration of the pool walls, but it signifies algal deposition. Your pool water will need frequent testing and super-chlorination to remedy the situation.
What Are The Different Pool Test Kits?
Different standard test kits are available to test your pool's water chemistry and chemical levels. These standard test kits are primarily responsible for testing the pool's pH, acid and base demand, chlorine, and alkalinity. So, let's take a look at these different test kits for your pool maintenance.
1. Pool Test Strips
Test strips are the most inexpensive way to test your pool water, and they are fast, fairly accurate, and easy to use. There are some basic testing strips that you can use to check the individual chemical levels while testing pool water. But it's best to use the 7-in-1 or 4-in-1 testing strips to carry out several tests using one test kit to check different pool chemical levels.
One of the standout features of these testing strips is they are super simple to use. You can dip them in your pool water, shake off the excess water, and get the readings within seconds. Most test strips are color-coded, so you can quickly identify which strip to use for a particular water test. They also have an easy-to-read guidance chart on the bottle for your reference.
2. Liquid Test Kit
A liquid test kit is more accurate than test strips when measuring the pool water's chemical levels. If you want to compare these liquid titration pool test kits vs. strips, the former is more expensive than the latter but offers a complete and superior testing solution.
These kits come with chemical reagents, which you add to the collected water sample drop by drop. You can determine the pool water testing results depending on the amount of reagent added and the water sample's subsequent change in color. Some liquid testing kits are low-maintenance and easy to use, while others, such as the DPD test kit, need careful maintenance.
3. Digital Pool Testers
People often ask - are pool testing strips accurate? They are not 100% accurate, and that's why you have digital water testers. These digital testers are the fastest and most accurate at detecting the chemical readings of your pool water. They usually come with an LCD display, a waterproof housing, and a memory chip to record and view previous test results.
Unlike other water tests, you don't need to color-match the water sample. Instead, you can get the digital readings straight from the device. You can use digital testers having electrodes to detect the pool chemical levels because these testers can offer the most accurate readings.
There are also hybrid digital water testers that use a reagent or test strips to determine measurements. These digital testers are better at reducing any margin of error related to determining results with your naked eye. Plus, they are excellent for pool owners having color blindness.
Warning
Keep in mind that any digital pool tester will be more expensive than regular test strips and liquid test kits. So, if you want to purchase a digital tester, always consider your budget.
How Frequently Should You Test Pool Water?
Even though there's no thumb rule, it's best to test the pool water once a week. You can increase or decrease the chemical levels of your pool water after testing it. However, if you use the swimming pool frequently or the water shows some clarity issues, you might require frequent pool water testing - around twice or thrice a week.
Moreover, some pool owners prefer to test the chemical levels of their pool water on a daily schedule. You can stick to the following schedule to test your pool water:
Chlorine test: Twice or thrice a week
pH test: Twice or thrice a week
Acid demand test: Whenever the water pH requires adjustment
Total alkalinity: Weekly, but also test it when the pH level changes
Total hardness: Once a month
Cyanuric acid: Once a month
TDS levels: Once a month
The levels of other components, such as phosphates and metals, usually change much more slowly, so you can test for them once a month under normal circumstances. Most standard test kits are enough for fulfilling your weekly pool testing requirements. However, you might need to buy a larger or more robust pool water test kit for accurately conducting the monthly tests.
How To Test Pool Water Using A Kit?
The type of pool test kit you choose will depend on your budget and the kit's accuracy. Although test strips are the most affordable, they are not ideal for getting accurate readings. On the other hand, digital readers show the most accurate readings but can be pretty expensive.
Liquid testing kits offer the ideal balance between price and accuracy since they are much more accurate than test strips but a lot cheaper than digital testers. So, we've discussed the steps to use a standard 4-in-1 liquid kit to test the residual and free chlorine, pH level, acid demand, and total alkalinity of your pool water.
1. Collect Water Sample
Dip the tester in your pool and draw the water sample from at least a depth of 18 inches to get accurate readings. Since the chemical levels can vary based on the water depth, ensure to maintain the 18-inch depth measurement while collecting the sample.
Fill the vials until the water reaches the line marked as "fill" because you need to maintain precise pool water to test the solution ratio to get accurate readings.
2. Test For Residual And Free Chlorine
To test the water sample's residual and free chlorine levels, add some drops of the chlorine testing solution to the vial. Follow the dosage chart to add the right amount of the solution.
Some test kits come with chlorine tablets instead of a liquid chlorine solution to determine the free chlorine level. In that case, add the number of tablets mentioned in the instruction guide to your water sample.
Next, close the vial caps and shake the vials gently to mix the solution or tablets with the water. After a few seconds, you can see the color of the water sample changing. Now, compare the color inside the vial with the provided color chart on the tester to get the free chlorine reading.
Then, wait a few more minutes before comparing the colors again to check the residual chlorine level. Some popular test kits come with different solutions or tablets for the free and residual chlorine tests, so make sure to follow the instruction guide closely.
3. Test pH Level
Clean and rinse the tester thoroughly and take a new water sample like before to perform the pH test. Then, add one drop of sodium thiosulfate solution to the water sample, a chlorine neutralizer, for the pH testing and swirl the vial gently.
Next, add five drops of the red phenol indicator and mix it with the water sample by swirling it to see the color change for an accurate pH reading. Now, compare this color with the color standards provided by the tester to detect the pH levels of the pool water.
Warning
Don't conduct this test if your pool water's residual chlorine level is more than 3.0 because the pH reading won't be accurate. Adjust the residual chlorine to the standard range before checking the pH.
4. Test For Acid Demand
Take a sample of the water you used for the pH testing to accurately test for the acid demand. Slowly add the acid demand titrant and carefully count every drop while swirling the sample between each drop.
Keep adding the titrant until the sample color matches the 7.4-indicator on the tester. Check the acid dosage chart to evaluate how much acid you must add to the pool water to adjust its pH balance.
Warning
Avoid this acid demand test if the water's pH is more than 7.5 and its residual chlorine level is more than 3.0. Bring the residual chlorine to normal levels before this test.
5. Test For Total Alkalinity
Rinse the tester and fill the vial upto its lower alkalinity line with a fresh sample of your pool water to test for total alkalinity. Now, add one drop of the chlorine-neutralizing solution and mix it well to get accurate readings. Then, add one to three drops of the total alkalinity indicator solution (blue in color) and swirl the vial or test tube until the sample turns blue.
Next, add the titrant solution drop by drop and carefully track the number of drops you're adding. Keep adding the titrant until the water in the vial changes to light green or light yellow. Lastly, multiply the total number of drops of the titrant you added by 10 for total alkalinity.
Warning
Don't test for total alkalinity if the water's residual chlorine level is more than 3.0. Adjust the chlorine to a proper range before performing the TA test.
What Are The Common Mistakes To Avoid While Using Pool Test Kits?
There are certain things to keep in mind to avoid common mistakes while purchasing and using a pool test kit. For instance, don't buy excess pool chemicals because they expire over time. The reagents in a liquid testing kit usually last around a year.
Furthermore, it's best to avoid using test strips because they don't produce accurate results, and the chances of error are high. Also, if you're using a liquid kit, you can buy replenishment bottles to replace individual testing solutions once they run out instead of buying a whole new kit.
How To Use Pool Test Kits Conclusion
After going through the guide, you must've gathered a better understanding of how the most popular test kits work in detecting the chemical content of your pool water. That said, we highly recommend using a liquid testing kit because they are easy to use, accurate, and fairly affordable.
However, as a pool owner, if you want professional testing, you can collect the water samples and take them to a local pool store. You can also purchase special testing supplies to test for metals, phosphates, total hardness, salt, and other chemical compounds in your pool water.
No matter which chemical tests you perform or what test kit you choose, always maintain consistency and regularity to maintain good water health in the swimming pool. Also, if you enjoyed reading this informative guide, don’t forget to check other articles like “how do wireless doorbell systems work” on our website.
Until next time!
An angle grinder must be used at the right angle and with the right pressure for the particular job. At the same time, you must maintain all the safety precautions to use the tool for cutting or grinding different materials with ease.
There’s no denying that an angle grinder can be a very useful tool for cutting through metals and other materials. However, using the tool properly is the key.
And without the proper knowledge, even the best power tools won’t work well and become a threat to you. So, today, we will tell you all about how to use an angle grinder and what are the important points that you must keep in mind for the best results.
How To Choose An Angle Grinder?
As you may already know, an angle grinder is a versatile tool that can help users tackle multiple tasks like sharpening your lawn mower blade, cutting metal, or removing excess mortar and cutting through rusted bolts. Besides, you can use it on flammable materials, sheet metal and more.
Depending on the type of task, the angle grinder can be equipped with either a cutting wheel or a grinding disc.
For example, if you're working on wooden projects or plan on using one as part of your regular work, look for one with a larger blade size so that the tasks can be completed quickly.
But if you want to use an angle grinder for metalworking projects such as cutting down rebar or welding together pieces of scrap metal (like when building fences), then opt for a model with a shorter blade. Aside from that, choose an angle grinder that has a good quality motor with smooth bearings and the best angle grinder attachments so that it runs quieter and smoother. This will make it easier to control when working with heavier materials like stone or concrete—and easier on your arms!
If you're looking for versatility (or if the tool is going to be used by multiple people), get one with variable speed control settings. And always start with the lowest speed setting to reduce the chances of injuries.
Steps To Use An Angle Or Hand Grinder Correctly
First and foremost, make sure the angle grinder is set up for your needs. For example, if you're using an electric angle grinder and need to get into tight spaces, choose a smaller disc with less power. Likewise, if you want to work on metal or concrete surfaces, we’d advise going with an aluminum oxide grindstone disc rather than diamond grit one.
Next and most importantly: wear personal protective equipment like work gloves, as some materials can cause injury even if they don't cut your hands open immediately. And you may also choose to wear ear mufflers, too.
Aside from that, don’t forget to use the blade guard attached properly, especially when cutting steel.
Step 1
Make sure the angle grinder is switched off unless you’re completely ready to use it. Otherwise, you may risk injuries and damages from the sudden spinning blade or grinding wheel.
Step 2
Make sure you have a firm grip on the tool at all times so that it doesn't slip out of control , especially when working with maximum speed on the electric motor. We’d strongly recommend clamping down the material on the work surface so that it doesn’t move when you start working on it.
Step 3
Make sure that you are using the right size disc for the job, which is suited for the job and rated for use with the particular model of the angle grinder. Using the wrong disc can result in overheating or electric shock, both of which can be dangerous and cause injury or death.
Step 4
Clean the sides of the disc and spindle nut with a wire brush so they're nice and shiny. This will help prevent overheating (which can damage your tool) as well as reduce friction (which could cause slippage during operation).
Step 4
Now, hold the angle grinder with both hands. This way, you will have a firm grip on the same and will be able to operate the machine in a safe way. Never take your hands off the machine as that might lead to serious injuries.
Allow the angle grinder to reach its full speed before you make it come in contact with any metal or wood. This will ensure the optimum production of your machine for rendering precision cuts.
As for the pressure application, we’d suggest starting with light pressure, unless you’re working with a thicker material. You can always apply more pressure later to achieve the desired result.
Step 6
Always keep the cutting disc moving so as not to leave any part of yourself exposed for too long.
Step 7
While the movement of the cut will depend on the cut you’re making, keep rotating the disc slowly in circular motions in order to maintain control over it while working.
Safety Precautions To Be Kept In Mind
Safety is important to everyone, but it's especially important when operating a power tool like an angle grinder.
Hence, always ensure that you wear the right-sized safety goggles before starting out. It's also a good practice to wear long sleeves and pants while using one. All these will help minimize your exposure to the flying debris while cutting or grinding the materials.
On that note, grab a dust mask if you don’t want to inhale the smaller particles.
Another thing to keep in mind is that using an angle grinder around construction sites will need you to be more careful. Loose clothing, like jackets or pants flapping around can become entangled with rotating parts or the lawn mower blades within your tool's housing causing injury if not careful enough attention paid!
The answer to this is yes, you can. However, you first need to determine whether your angle grinder is compatible with one by checking the diameter of your current rotary tool. If it measures between ¼ and ½-inch in size, then it should be able to support a wire brush attachment. If not, consider upgrading to a more powerful machine with larger dimensions.
For the unversed, a wire brush is a tool used for cleaning and polishing metal objects. It consists of a piece of wire with abrasive tips that removes rust, dirt, paint and other particles from surfaces.
Wire brushes are made from different kinds of metal wires such as steel or brass. They can be attached to an angle grinder using a wrench or Allen wrench depending on the type of attachment you need.
These brushes come in several different sizes, each with its own set of uses. So, you should know what type of brush is right for your needs before using it.
Firstly, you need to determine the size of the brush, as they come in different diameters. And you’d want to get one that fits your machine perfectly so that it doesn't slip or fall off when using it on different surfaces.
To determine what size of wire brush you need, just measure around the circumference of your current one and then add 2-3 cm (1 inch) for good measure.
If you don’t have an angle grinder and are considering purchasing one, we highly recommend it. This is because the standard drill bit that comes with most corded drills mayl wear out quickly when used for installing wire brushes.
That’s why you'd want a sturdy tool like an angle grinder that can withstand constant downward pressure (as the bit works its way on the surface).
How To Install The Wire Brush On Your Angle Grinder?
Before you start, you will need to determine how the brush attaches to the grinder. This can be in a variety of ways, but there are a few general rules to follow.
For one, if the brush is a large screw-on attachment or has threads on its backside, it will probably go overtop of the handle of your grinder. But if it has two holes for screws and no threading on its backside, then it will likely be held in place with two metal clamps that go around the handle of the grinder.
Once you’ve determined the installation spot, secure the brush onto your angle grinder using a wrench. For this, loosen the nut on the rear of the angle grinder, which is located behind the wheel guard and in front of the power cord. Then, slide the brush into place between this nut and its housing.
Make sure that there's enough room for you to tighten it later, but don't over tighten it. You’d still want to be able to get both hands on it easily when you're installing or removing it from the angle grinder.
Next, you need to set the angle grinder at the right speed for the job. This will depend on the type of material you're cutting and how hard it is.
Generally speaking, a slower speed will make it easier for the brush to cut through whatever you're working on. However, if you start with a higher RPM (revolutions per minute) for a material that’s too soft or thin, it may get damaged.
Moreover, the angle grinder may end up getting overheated to interrupt your work. Not only that, but it may also get damaged prematurely.
To determine what speed will work best for you, try taking an old piece of metal that has been painted over many times. Use the brush attachment on it at different speed settings until you find one that works well enough but doesn't damage the metal.
Is Your Angle Grinder Compatible With Different Accessories?
Another thing that you’d want to check is if your power tool has any existing mounting holes on its body that would allow for easy installation of an accessory such as a wire brush. If not, don't fret! You can still add one by drilling through the center of its side handle—but doing so will require some extra work on your part.
This will require buying some drill bits, based on the size of the slots or holes that you need to make. Make sure that the drill bits should be able to hold up against whatever type of material makes up the attachment's outer casing (aluminum or steel).
Can You Use An Angle Grinder On Wood?
Another very frequently asked question is can you use an angle grinder on wood? Well, if you're an experienced carpenter or keen DIYer, you'll probably already be aware that angle grinders aren't just for cutting through metals! These powerful tools can also be used to cut wood, so long as you take the necessary precautions.
However, the speed of the blade determines its power when working on wood. The faster the blade spins, the more powerful it is and the better it can cut through different densities and thickness of wood.
Apart from that, there are a few other factors to look into before starting work.
For example, you should first consider the type angle grinder that you need for the job. Electric angle grinders are generally more popular and powerful, but they cannot be used in wet conditions. On the other hand, compressed air-powered angle grinders are less powerful but can operate in wet conditions.
The second thing to know is that electric grinders tend to be quieter than their pneumatic counterparts. This can be a great advantage if you will be working on your lawn or an open space without troubling the neighbors too much.
Using Angle Grinders For Sanding Wood
Many DIY enthusiasts and even professionals prefer using angle grinders to sand wooden surfaces. This is a good way to smoothen out the surface as well as remove marks and stains before using the wooden blocks or slats for building furniture or fences, among other things.
The best disc for this purpose is a flap disc, which is made from overlapping sandpaper sheets surrounding its center. It has a large surface area to sand more wood at one go, helping you complete the job quickly and more efficiently. Besides, it’s among the most inexpensive angle grinder attachments.
Flap discs come in different variants depending on their thickness (or grit), so you can choose one according to the thickness of the wood.
Are There Any Limitations To Consider?
Of course, there are some limitations when cutting wood with an angle grinder. For example, an angle grinder will struggle with hardwoods as they are too tough and dense for the tool to cut through easily.
So, be careful when using an angle grinder on wood, and make sure you follow all the safety tips we've given above. If you're not sure how best to use your angle grinder with wood, then seek expert advice from someone who has used it before.
How To Use An Angle Grinder Conclusion
That’s everything we had for you today!
It’s true that angle grinders aren’t very difficult to operate, but that doesn’t mean you should let your guard down at any point. If you think you're losing control of the tool, switch off the power immediately and readjust the grip or angle.
Likewise, if the blade is vibrating too much, switch off the grinder, let the blade stop completely, and use the angle grinder tools to tighten it. This should put you back on track!
We will be back with more such reads. Till we meet again!
If you have never been in a sauna, you are missing out on one of the most relaxing experiences out there.
It is not only good for your body but also your mental health. The heat helps fight depression and will provide you with much needed benefits. Be it a solo session or one with a friend or family member; you will gain a lot out of it.
But if it is your first time, certain things need to be kept in mind to use the sauna right. Have you been embarrassed to ask your friends about it? If so, let us guide you through the nitty-gritty.
The safety measures have been carefully detailed down and are followed by the tips to remember. We have also made a note of the types of sauna baths so that you have complete knowledge about it.
Without further ado, let’s get going!
How to Use a Sauna Right
Safety Measures To Take
Regardless of whether the sauna is public or private, some measures should be taken to ensure that you remain safe. Go through the following points carefully, and you should not have anything to worry about.
Consult A Doctor
Many health issues could get aggravated because of high temperatures. So, consult a doctor before you enroll for a session. If you have high blood pressure, heart failure issues, diabetes, or unstable angina, doctors will advise you not to go for these sessions or limit it to 5 minutes.
Make sure that you cool down slowly, so the body can adjust its temperature, and there are no sudden changes. Doctors may also advise you against saunas if you are on medication. The change in temperature may not work well with it, and you may be asked to wait for some time until your dosage is over.
Further, if you are feeling under the weather, it is best not to expose your body to such high temperatures. Book your sessions once you are feeling well again.
Besides, if you are pregnant or planning to conceive, there might be complications that may arise, and consulting a professional is a must beforehand.
Avoid Being Intoxicated
First of all, you must stay hydrated as you will be exposed to a large amount of heat. Drink water before and after the session and stay away from any form of intoxication.
As a rule of thumb, do not drink alcohol or indulge in any form of drugs before and after the bath. Recreational drugs are also to be avoided as that might make you feel too hot or too cold. Avoid having any large meals too before the bath, as that may make you feel ill.
Build Up Your Tolerance
It is best to limit your time to 10 or 15 minutes at maximum. If you are new to it, try for 5-10 minutes per session and then slowly increase it to 15. It is best to build up tolerance slowly and see how much your body can take.
There is a chance that you may fall ill if you decide to spend 15 minutes or more for the first time. Different individuals have different tolerance capacities, and you got to understand yours. Always remember that you can leave the room if you feel ill at any point.
Affects Sperm Count
Saunas can have an effect on your sperm count as it leads to the rise in temperature of the scrotum. If you regularly take steam baths, the sperm count may be reduced temporarily, which could be problematic for those trying to conceive.
Avoid Sudden Change In Temperature
According to the Finnish sauna tradition, one has to dive into icy cold water after the steam bath in order to cool themselves. While this might work out for some, it is not a suggested method for anybody with a health condition. If you have a weak heart, diabetes, or you are pregnant, avoid this altogether.
In fact, ensure that the change in temperature is gradual, as we already mentioned. Otherwise, you may feel dizzy or unwell. If this happens, leave the sauna, sit outside, and breathe deeply. Ask for a glass of water, which will help in hydrating the body.
This should not be a concern for those who go for frequent sauna sessions, as their bodies will already be used to the heat. In fact, some people want a quick change in temperature and believe it is good for the skin. As a precaution, it is best to take tiny steps towards this and see if your body can adjust well too.
Things To Be Left Outside
It is vital to remember that you cannot carry any electronic devices inside the room. Leave your mobile phones, watches, and any smart device that you have outside. This is because the heat can mess up the hardware and can damage your gadgets.
Most places will already have ambient music for you to enjoy while you are inside. Even if there is none, this is the best time to enjoy the silence.
Also, make sure that every piece of jewelry is removed from your body. This is important because metal heats faster and may lead to skin burns.
Besides, if you have been thinking of applying cream or lotion beforehand, do not do so. It will only clog your pores up, and this destroys the whole purpose. The skin needs to breathe freely. Once you are done with the session, wipe your face with a towel to clean off the excess oil that is released.
Avoid Heavy Workout Prior Sessions
While a post workout sauna sounds very relaxing, it is important that you keep a gap between your sessions. After finishing heavy exercises, make sure that you indulge in lighter activities like walking or cycling post which you can enter the hot room. This will help your body get back to its normal pace and your pulse to stabilise.
Also, it is best to get done with the exercise before you go for a session. This is because your muscles will be very relaxed and it might be harmful to indulge them in heavy exercise just after.
Beside, your energy levels also reduce and you will not find the enthusiasm to go ahead with a strenuous workout.
Saunas can be dehydrating and will leave your body heated up. Exercising could lead to overheating and may make you feel light headed or dizzy. So, if you do have to exercise, drink a lot of water post your session and relax for a while before you begin. This will give your body enough time to rejuvenate and prepare for the upcoming activity.
Tips To Remember
Having a sauna at home is one of the best things to happen to you! There are almost no rules that you need to follow, as you will not be sharing the space with strangers.
But if you are going to use the same sauna with others, it is vital that you abide by certain norms. Read on to know more about it.
Always read the instructions carefully before entering the heated room. Every sauna will have some specific rules that will be written out outside, and it is best to have a look at them beforehand.
In case you are going to a gym sauna, make sure to take a shower after working out and before you enter the hot room.
Try to always reach on time. Public saunas will have specific timing, and if you are late, you will miss out on some precious minutes which could otherwise be spent relaxing inside.
Ask about the kind of clothing that is expected to be worn inside. The gym officials will be able to help you out with it. In some places, nudity is not looked down upon, and you can leave your clothes behind. But in others, you will have to opt for a bathing suit or a towel.
Do not throw wastes of any kind inside the room. This will include bandaids, pins, or hand gear too.
Avoid exercising in a public sauna. We know how beneficial hot yoga can be but it is not something to pursue in a public place. Either do it in your own houses or join a hot yoga class.
Always enter quickly. Saunas are rooms where the temperature is controlled, and hence it is made to remain airtight. Some amount of heat escapes whenever someone opens the door, and hence you need to enter quickly.
You might feel extremely comfortable inside but follow the decorum and try not to stretch inside if there are other people in it.
Whether you are nude or wearing clothes, remember to never sit on the bench directly. Because it is a shared space, always carry a towel on which you can sit and carry it when you exit.
It is best not to have loud discussions. Imagine coming to a public sauna to relax, and then finding two chatty women gossiping about their family lives right beside you!
Stay away from arguments and fights while inside.
Grooming inside the sauna is not a good idea. Stay away from shaving, tweezing, or combing your hair.
How Does A Sauna Function?
There are different methods of saunas that are popular today. The Turkish method involves using wet heat and will have steam bathing rooms. These are very popular and are designed to function like large hot baths.
The Finnish model, on the other hand, uses dry heat along with steam. There are buckets kept with ladles, and you can pour some of the hot water from a bucket in addition to the dry heat. There are other models, too, which uses only dry heat. We have listed down the different methods by which this heat is generated below:
Steam
This basically involves the Turkish style saunas, which use steam that has been created from hot water. The humidity levels are elevated due to this, and you will be able to enjoy wet heat. We found that steam baths are the most popular among the other options and are not only restricted to Turkey.
Electricity
When it comes to health centers, gyms, and clubs, heating via electricity is very popular. They use electric heaters to heat up rocks in the room, which then help in maintaining the high temperatures.
The major difference between steam and electricity is that the latter produces dry heat and maintains low humidity levels. You will not sweat as much while your body gets the heat needed.
Wood
There are some places that still prefer using older traditional methods to heat water. This involves burning wood to heat rocks or produce embers, which then maintains the temperatures. Water is generally ladled onto sauna rocks every few minutes to keep them warm and to add to the humidity constantly. You will mostly find these in boutique hotels and old clubs.
Infrared Lamps
These produce the lowest temperature among all the other methods. If you like the temperatures to be around 140 degrees Fahrenheit and not go any higher, this will be a great choice.
So, these saunas utilize lamps to create electromagnetic radiation. The radiation, in turn, heats up one’s body and not the room. There is a major difference between this and its peers, as you can book sessions that last between 45-60 minutes. Since the heat is lower, one can spend more time in it.
Dry Heat v/s Steam Rooms
Steam rooms are mostly airtight and small to preserve the heat. It is usually made of tiles or acrylic, which can withstand high temperatures and constant moisture in the air. You will also find generators that are the primary addition to the room and convert boiling water into steam.
These rooms are extremely humid and are kept at around 110 degrees Fahrenheit with 100% humidity. This will make you feel hotter, and you will probably perceive the temperature to be around 150 to 190 degrees Fahrenheit.
Rooms with dry heat work a little differently. If infrared lamps are used, you can settle in one position, and your body will be heated accordingly. There is no moisture involved in the process.
In other cases, sauna rocks are generally used which emanate heat leading to the rise in temperature of the whole room. Also, the temperature rises towards the top of a room, and hence most saunas will have seats at different heights. If you are a beginner, it is best to sit at a lower bench and then slowly move towards a higher seat.
Final Words
Saunas can provide a very relaxing experience and will help you release stress. When half the world is facing major health problems because of work-related pressure, this can be the perfect option to make sure that your health stays fine.
Also, it will be a great help for anybody who is into strenuous physical activity. The heat will soothe muscle pain and help your nerves relax. You must already know how relaxing a hot bath can be. Now, imagine if the benefits could be doubled with humidity rising to 100%!
But yes, please remember to consult a doctor in case you have any health problems. We cannot stress on this enough as it may lead to serious complications if your body is not prepared to deal with such temperature changes.
With this, we will take our leave, and we hope you have an enjoyable sauna session. Let us know if you have any further queries in the comment section below.
When mincing meat for your spaghetti bolognese, classic lasagna, and sloppy joes, the best home appliance is a manual meat grinder.
The question now is:how to use a manual meat grinder?
To help you find the answer to that question and have you use your manual meat grinder properly, here is a complete guide for beginners. Let's get grinding!
In using the meat grinder, these are the things you need to remember: preparation, grinding, and cleaning.
Here are the six quick steps to using a meat grinder!
1. Fix the Meat Grinder
First, you must assemble the meat grinder and fix its position on a stable surface intended for it or your countertop.
Ensure that every part is properly attached before using them. You can even crank or rock the meat grinder to ensure its stability.
2. Prepare the Meat
Afterward, ready the meat you will run through the manual grinder machine. To help you, here is how you can prepare your meat:
Trim the cartilage, excess tendon, and excess fat of your meat
Cut your meat into smaller pieces with a cutting knife
Put your pre-ground meat without excess fat in the freezer until it feels cold
Once you get the cold meat out of the freezer, you can proceed with the next step.
Tip
Putting it inside the refrigerator or fridge will help keep the flavorful-essential fat intact.
3. Get the Bowl Ready
The next step is to get a bowl and position it under the exit end of the manual meat grinder.
Bear in mind that the bowl you will use to catch your fresh ground meat should have the following characteristics:
Sterilized
Clean
Dry
Large
One of the expert tips we can share is that freezing your bowl can do the trick if you don't have a sterilizer. Just ensure you put in the clean bowl to freeze for at least 10 minutes.
4. Start Grinding and Crank the Meat Using the Handle
Lower the first piece of meat chunks into the manual meat grinder using a meat pusher to guide it through the hopper. Then, rotate the handle to push ground meat out through the exit.
As you continuously rotate the handle, simultaneously insert, in a gradual manner, the remaining meat pieces. Repeat this process until you have transformed your protein into delicious ground meat.
5. Remove the Last Few Bits of Meat from Your Grinder
Once you've run all your meat into the manual meat grinder, it's time to clear it out.
To do this, you will need moist bread pieces. These bread slices will be inserted into the manual meat grinder as you did to the meat.
With this process, you get to sweep the remaining meat from the meat grinders to save on cleaning time and make the process more hygienic.
6. Disassemble and Clean the Meat Grinder
An indispensable part of using the manual meat grinder is disassembling and cleaning its parts after every use.
When cleaning the manual grinders, make sure that you wipe the nooks and crannies, or else the following may happen to your manual meat grinders:
become rusty
develop molds
get infested by insects
attract rodents
develop stinky smell
Aside from wiping it clean, please ensure the grinders' parts are dry before you store them properly in your designated storage space.
How to Assemble a Manual Meat Grinder - A 4-Step Guide
Of course, before you can use manual meat grinders, there is a need to assemble the equipment. Here is a step-by-step guide to assembling manual meat grinders:
1. Clean the Meat Grinder Components
In assembling, you should always start by cleaning the manual grinder. Here is how you can clean it thoroughly and correctly:
Disassemble
Soak the metal and steel parts in warm soapy water
Hand-wash all the components
Clean the internal and external parts of manual grinders
Dry with a cloth
2. Fix the Handle
After cleaning the grind machine, you can proceed by fitting the handle into the main body of the meat grinder.
The key here is to fix it as tightly as possible because wobbly handles will make grinding difficult. It can even damage your grinder.
3. Fix the Grind Plate and the Cutting Blades
When the handle's in place, fix the grinding plate and the cutting blade. In doing this, ensure you use the appropriate plates and blades to easily cut the meat pieces perfectly for your burgers.
4. Mount the Meat Grinder
The last step in assembling meat grinders is to place them on the kitchen surface or anywhere that will stabilize them. Also, the surface where you will put the meat grinder must be firm for quality results.
How Does a Meat Grinder Work?
A meat grinder machine uses its plates and blades to slice cold meat into the desired texture and shape based on what type of plate and blade you incorporate.
For this, the smaller the holes are in the plate, the better the meat quality it produces.
You then use a hand-cranked mechanism to spin the blade that finely chops the meat. This crank is secured by a screw and a built-in clamp. It's connected to the auger to grind the meat.
Essential Parts of a Meat Grinder
To help you get acquainted with the grinding machine, some of the important factors to know are its parts. A grinder consists of the following:
Auger
Chopping blade
Grinding plate
Handle or hand crank
Hopper
Ring
Screw and clamp
Is a Manual Meat Grinder Worth It?
Yes, a manual meat grinder is worth it because of the following advantages:
Straightforward process when using a manual meat grinder
Easy grinding of meat chunks used for cooking in any food or recipe (e.g., sausage)
Space-saver
It can be used to mill vegetables, a fruit, and a bone
Common Problems When Using Hand Crank Grinders
You can also encounter some problems when you use a manual meat grinder. Some of these problems are listed below:
You need a helping hand to maneuver the hand crank while you insert the meat or vice versa
If you're not careful and don't use a pusher, you may lose your fingers
Manual vs. Electric Meat Grinders
If you're torn between using a manual grinding machine or an electric meat grinder, here are the things that you should know:
A manual grinder will save you money because it's cheaper
A manual grinder is not dependent on electricity, lowering electricity costs
A manual grinder is lightweight compared to an electric one
Tip
To know the best manual meat grinder and the best meat slicers, check out these articles!
Manual Meat Grinder FAQs
The following are the frequently asked inquiries about manual meat grinders:
Are Manual Meat Grinders Worth It?
Due to the required labor, manual meat grinders are best for people who won’t need to process much meat at once.
Yet, they are significantly less expensive than electric meat grinders, making them an excellent choice for people on a tight budget.
How Hard Is It to Use a Manual Meat Grinder?
Because most manual meat grinders only require turning a crank to grind meat, they are simple to use.
Yet, if you have to handle a lot of food at once, the design’s simplicity can also be one of the largest obstacles because it can lead to hand and arm fatigue.
How Do I Choose a Manual Meat Grinder for My Home?
The best meat mincers and grinders should have strong, heavy-duty motors, a large cutting group, and anodized aluminum and stainless steel construction to withstand corrosion.
A crucial component is a switch that reverses the flow to clear obstructions.
Is Bellemain Meat Grinder a Reliable Brand?
It is easy to assemble, take apart, and clean up. The best hand meat grinder brand out there is this one. Amazing quality is present.
Now that you know how to use a manual meat grinder, you'll be able to grind meat efficiently, even if you're not a butcher. Cooking and meat-based recipe work have now become even more accessible.
Remember that the key to using a meat grinder is summarized in these three processes: preparation, grinding, and cleaning.
Wondering how to work that clamp meter? We're here to help you with the ultimate guide, specially drafted keeping beginners in mind.
Let's just start by saying that operating a clamp meter is pretty simple once you figure out all the subtle mechanisms. Also, you're already halfway there if you know how to use a general-purpose multimeter.
But, then again, it's essential to know the minor differences between the two, which will help you decide better while testing and troubleshooting.
Furthermore, this nifty gadget benefits users in numerous ways and is the least complicated when it comes to handheld tools. So if you're a serious DIY-er or tech enthusiast, it's time you learned all about this super cool gadget.
Now without further ado, let's begin.
What Is A Clamp Meter?
Long story short, a clamp meter is an advanced variation of a digital multimeter, but the primary points of difference between them are the design and capabilities.
The former has a jaw-like structure on the business end that enables contactless measurement of current and voltage. So basically, you can 'clamp' this top part around conductors (like a wire) to detect the current flowing through it.
That being the primary working principle, new age clamp meters perform multiple functions for measuring several quantities and come with features that simplify troubleshooting and analysis. But most importantly, they are equipped with safety measures for convenient use.
Since you neither have to plug testing probes to live circuits manually nor disconnect the system to record a measurement, clamp meters truly ensure safe applications overall. And that's why it's no surprise that they have become one of the indispensable tools in a technician's kit.
Chief Differences Between A Clamp Meter And A DMM
Before you begin using a clamp meter, it's critical to understand how it's different from a digital multimeter (DMM). Following are the key notable dissimilarities...
Firstly, a digital multimeter mainly measures voltage, but it has some current measuring capabilities. On the other hand, a clamp meter does just the opposite, meaning it's ideal for measuring current, but falls short when it comes to voltage.
Secondly, DMMs are high-resolution devices, calculating in units like millivolts and milliamps, whereas clamp meters only measure to the nearest tenth or hundredth. The latter usually works fine for electrical work, but don't expect minute measurements.
Lastly, DMMs are far more accurate and provide users with direct readings, but they're comparatively much slower and not that safe.
Therefore, it's wise to have both the tools at your disposal, though for certain situations, clamp meters are crucial.
Basic Components And Structure Of A Clamp Meter
Before we get into the nitty-gritty of using a clamp meter, it's essential to learn about the basic components of the unit. Following is a list of major components commonly found on most clamp meters.
The clamp – the jaw-like appendage on the top, which is wound around conductors to detect and measure current (and other parameters)
Tactile barrier – A prominently visible zone that protects your fingers and hands from electric shocks
Hold – A switch on the side that freezes display reading until pressed again
Dial – Turned for changing quantity and resolution
Display screen – Usually LCD
Backlight button (optional)
Min-max button – Measure the highest, lowest, and average magnitudes of specific quantities (generally available in most models)
Inrush current button – Negates inrush current from any measurement (optional)
Shift button – Enables users to select multiple functions on the dial
Lever – Used for releasing the jaw
Alignment marks – The conductor ideally should be positioned between these two marks
Input jacks – Most models usually feature three jacks
These are the components that you will usually find in most digital clamp meters. However, based on the model that you buy, the elements and functions may vary.
How To Use A Clamp Meter?
Since analog models are mostly out of use, we suggest investing in a digital model with multiple features and improved user safety.
Also, in the following guide, the steps elucidated are for measuring DC amps or AC amps only. For all other quantities, the procedure is similar, but you'll have to select the respective function on the dial.
Steps to Follow While Using a Clamp Meter to Measure Current
Step 1: Turn ON the meter and remove the probes (if connected)
Step 2: Select the AC or DC function using the dial. At this point, the display should show a jaw sign, which confirms that the measurement is being recorded through the clamp (read the manual to see how your unit indicates this)
Step 3: Open the jaws using the side lever and insert the conductor through which the current is to be measured. Usually, technicians do this one-handed while they note the measurements with the other one.
Step 4: Close the jaws and level the conductor between the alignment signs inscribed on the top structure. However, If these signs are missing on your model, try to adjust the conductor to the center of the clamp.
Step 5: The display will now generate the appropriate reading. Users may modify the resolution as per requirements, but most meters do so automatically.
We recommend taking measurements from conductors that are adequately insulated. Do not measure around live wires as that could result in a fire hazard.
A Side Note For Clamp Meters With Flexible Current Probe
Some models also come included with a flexible current probe, which is used to measure current and voltage of conductors in tighter places that are inaccessible to the rigid clamp.
So first, connect the other end of the probe to the unit and then proceed.
The process after that is similar, with the only change being that you have to ensure the probe is correctly wound and then attached back to the meter.
Select the appropriate function (meters with this accessory usually have a separate feature on the dial). The display will then instantly show the corresponding data.
Few Useful Tips While Measuring with a Clamp Meter
We want to ensure that you have a smooth experience using the tool from the get-go. That's why here a few tips for the first-time users that will come in handy while working on your initial projects.
While measuring current, do not clamp around two conductors simultaneously as the current flowing through them will cancel each other (if they are passing in opposite directions). So make sure always to use the tool on a single conductor
Always put on industry-standard safety gloves while operating a clamp meter
Disconnect the test leads/probes before using the clamp meter to measure current deploying the jaws
Make sure to keep your fingers behind the tactile barrier at all times
In most models, the reader will indicate if the current measured is below 0.5 A
We recommended using the "zero" function while measuring direct current, which removes DC offset from the measurement, providing accurate results
When results seem inaccurate, always check the selected function first before checking anything else
Maintaining The Clamp Meter
Let's be real — clamp meters will pinch your pocket. Naturally, you'd want to ensure that yours lasts as long as possible.
How do you do that? First off, start by storing the unit in a secure place. It can be inside a drawer, toolkit, or car compartment. Also, you should keep the meter in a clean, dry area to avoid the risk of rust. Besides, ensuring the meter itself is clean is equally essential as dirt and grease will affect the accuracy of readings.
Furthermore, it's best not to put anything on top of the meter that would push the jaws out of alignment. In case they're not appropriately aligned, the magnetic circuit won't close. Although most digital clamp meters have self-aligning properties, it's better to be safe than sorry.
Do not, at any point, start using your meter to pry things apart. That self-aligning mechanism will only fix so much.
Conclusion
Clamp meters have become popular tools among professionals and DIY enthusiasts, primarily for two reasons - safety and convenience. That being said, clamp meters enable electricians to bypass the traditional method of cutting into a wire, and inserting test leads into the circuit to record in-line measurements.
Those jaws of the meter not only provide contactless functions but also allow users to work without compromising on safety. And the best part - it is not mandatory to shut off the circuit carrying current, which was otherwise necessary while applying old techniques.
On that note, we've come to the end of this comprehensive guide, and we hope you have all the information you need to get cracking with your new gadget.
So, take out your new tool and measure away. But if you get stuck with something, just refer to this guide for a quick fix.
Till next time!
Rollers and brushes can take a backseat now that the Wagner Spray Gun is here!
No disrespect to these age-old tools, but the new generation of high-volume low-pressure paint sprayers are re-defining how DIY-ers paint their homes. From highly detailed cabinets to large rugged surfaces like popcorn ceilings, the Wagner Spray Gun gets paint into all the nooks and crannies.
And, all this in a fraction of the time it would take to roll paint over home exteriors or brush between the crevices of furniture. Needless to say, the finishing on projects will have neighbors asking for your painter’s number.
But, of course, the new hand-held spray guns from Wagner are easy-to-use for professionals and amateur painters alike. In case you are using the Wagner spray paint at home, remember to thin the latex paint during prep.
Follow this guide to know how you can do it yourself!
How To Thin Latex Paint For A Wagner Spray Gun
There are a slew of options to choose from when it comes to paints for your Wagner Spray Gun, but one thing is for sure – they all have to be thinned before use.
Failing to do so will leave you with a clogged nozzle that takes some hard scrubbing and about 15 minutes to clean. Frustration aside, this is enough time for dried paint marks to form – thus, undoing the even finish and time-efficiency promised by the spray gun.
At the same time, thinning the paint too much will leave you with wastage and an ugly mess. With that being said, it is important to follow this guide meticulously. So, without further ado, let's get started by preparing the paint!
Step-By-Step Guide
Step 1| Prep The Paint
For the first step, you will need your choice of latex paint, of course!
Prepping the latex paint means ensuring that there are no lumps and bits stuck to the bottom or sides. These hateful little clumps are a direct ticket to a clogged nozzle, so don’t look past them.
Begin by holding the can of paint by its handle and swinging it back and forth for about a minute. Usually, store-bought paints come premixed and don’t need any more mixing, so unless your paints have been lying around for some time, you can afford to skip this step.
However, premixed or not, you should use a wooden stir stick or a mechanical stir stick to mix the paint once the lid is off. While stirring, make sure that the paint at the bottom has been mixed well and is not clumpy.
Step 2| Pour
The next step is to pour about a quarter of the prepared latex paint into a clean paint bucket.
At this point, use a stir stick to lift some of the paint and let it drip into the bucket. The visibly heavy drops mean it is still too thick to go into the spray gun. With that being said, you are looking for a paint that has a runny consistency, and which drips down in one long line resembling a string.
Step 3| Add Water And Conditioner
To reach the target consistency, start by adding a little bit of water at a time. Additionally, you can add a conditioner like Floetrol for a smoother finish.
As a rule of thumb, ½ a cup of water for every gallon of paint is the recommended number. However, it’s best to start with an ounce – adding more if the need arises.
While experienced painters can usually tell just by looking if the paint is done, beginners may have to experiment a bit. But, don’t be too nervous about getting it too thin. After all, you can always add some more paint to the mixture to thicken and fine-tune it gradually.
Step 4| Mix
Using a wooden stir stick, keep stirring and lift it occasionally to check the consistency.
Keep in mind that a powerful stir stick attached to a drill may be a swift method to mix thick paint, but it might also create air bubbles if used on this diluted mixture. And as you may already know, air bubbles will disturb the evenness of your paint job in the long run.
Now, once you are done concocting the mixture and it forms a long runny line, move on to the next step for the ultimate consistency test.
Step 5| Testing Consistency
To know if you have reached that sweet spot between too thick and too thin, you can go about it two different ways. One is by running the paint through a mesh funnel, while the other utilizes a viscosity cup.
The funnel test is the go-to method for more seasoned painters, although the latter provides a more accurate picture. Moreover, some paints are sold with a viscosity cup as part of the package itself. However, it is worth noting that mesh funnels also serve the purpose of filtering out any contaminants and paint flakes that may clog up the spray nozzle.
Nevertheless, if you have a funnel with a thin spout, then pour down some of the paint through it into the bucket. In case it doesn’t run through smoothly, add some more water and mix again before testing.
On the other hand, if you are planning to use a viscosity cup, then make sure to have a stopwatch ready before beginning. Once ready, dip the cup inside the mixture and lift it instantly. At the same time, start the clock and stop it as soon as the viscosity cup completely runs out of paint.
Ideally, the time it takes for the cup to become empty should be about 35 seconds. However, anything between 25 and 40 seconds will do the job.
Optional Step
Once you are successful with the consistency test, don’t forget to jot down the ratio of water to paint that has been used. In fact, do this the first few times and experiment a bit with the ratios. And before you know it, you will be eyeballing quantities and mixing like a pro.
And, that’s it – you now know how to thin latex paint for a Wagner Spray Gun! To maximize every spray painting experience, read ahead to learn about some neat tips that you won’t find anywhere else.
Tips And Tricks
Using Old Paint
You don’t need to go out of your way to buy a fresh can of paint if you already have some lying around the house. However, old paint tends to coagulate and form big globs that need to be broken down.
To do this, grab the can holder and sway it back and forth for a few seconds. After this, hold it in front of your chest with the back end facing you. What you want to do is shake the sediments that have been collected at the bottom. Now, do this by simply shaking vigorously in a front-to-back motion for about a minute.
Additionally, you can pour the paint through a funnel to get rid of dirt, debris, and big chunks of paint that may have dried up.
Mixing With A Wooden Stir Stick
Apart from preventing air bubbles that would come from a mechanical stir stick, mixing water and paint manually provides a feel of the paint thickness against the stir stick. In other words, you can tell if the paint is thin enough and mixed well just by stirring it around.
In fact, just a few sessions of thinning latex paint, and you won’t even have to do any tests anymore!
Consider Weather Conditions
Temperature and humidity – both can affect how much, or how little, thinning agent has to be added for the perfect consistency. Heat and humidity, especially, are every painter’s worst enemy as they dry up latex paints in no time. On the other hand, lower temperatures decrease the adhesive properties in paint.
The best way to combat these inconsistencies is by following the instructions on the spray gun and setting the airflow accordingly. Moreover, if you are painting during summer, it is highly advisable to thin and work with small quantities of paint before beginning another batch.
Using A Conditioner
As mentioned earlier, the Wagner Spray Gun is suitable for all types of paints, although the paints will need to be thinned accordingly. Latex paint is water-based so it mixes well with water.
However, oil-based paints would require you to buy commercial paint thinners from the market. At the same time, you cannot use these paint thinners on water-based products.
In case you do want an oil-based finish on your latex paint jobs, Floetrol is one fan-favorite you can trust. To cut things short, Floetrol is a paint conditioner that leaves a shiny and professional finish on spray paint projects, while also making paint more workable under extreme weather conditions.
Test Patches
Apart from the two consistency test options mentioned in the step-by-step guide, there is yet another test that your paint mixture must pass to be certified ready-to-use.
Yes, we are talking about a patch test. Go ahead, get a piece of plywood or any surface that can stand upright. Then, test-spray on this patch and wait for it to dry.
Overly thinned latex paint will be runny, messy, and unable to cover the area where it has been sprayed. Other signs are drip marks and a long drying time.
On the other hand, paint that resembles the texture of an orange peel after drying needs to be thinned more. In the end, the right consistency will have you spraying mist-like paint that creates even layers that don’t run.
Frequently Asked Questions
Can paint thinners be used as a thinning agent for latex paint?
Latex paint is water-based, whereas commercial paint-thinners are mostly reserved for oil-based paints. In other words, paint thinners and mineral spirits are petroleum-based products that will completely strip the adhering properties of latex paint.
With that being said, unless you want to completely ruin your latex paint, don’t think about using paint thinners. Water-based paints like latex paint have been formulated to be best suited with water – hence, water is your safest and most readily available option.
Why is my latex paint not covering my wall even after thinning?
Although there are other signs to look for like runny lines of paint, the most common reason for less coverage is over-thinning. Apart from this, you should check if the product is from a trusted brand and not damaged.
In case it turns out that the paint mixture is too thin, simply begin by adding little amounts of paint to it and mix the contents together with a stir stick. After this, follow the viscosity tests given in the guide and adjust some more if the need arises.
Do I need to hire a professional to paint with latex paint and an HPLV spray gun?
Hiring a professional is always a good idea, but it is far from necessary! The new generation of HPLV spray guns, such as those by Wagner, are small, hand-held, and easy to use devices. However, research well before you begin spray painting if you don’t want to have a frustrating experience.
Perhaps, the most important rule to follow is thinning the paint before spraying. Other than that, forgetting to check whether the spray gun itself is compatible with latex paint is a common rookie mistake.
Moreover, humidity, air pressure, temperature, and the type of spray gun you want to use – all of this will alter the required water to paint ratio for thinning latex paint. Needless to say, it might take some time to become an expert at spray painting with latex paint, but it can be done!
Do all paints need to be thinned before painting with a Wagner Spray Gun?
Generally, all kinds of paints need to be thinned when used with a Wagner Spray Gun because the nozzle has been engineered to diffuse thin, mist-like layers of paint. Naturally, a thick consistency clogs the opening and dries up.
Water-based paints like latex and acrylic are thick so they undoubtedly need to be thinned and filtered out. At the same time, oil-based paints such as enamels, despite being a thinner variant, still need to be thinned to prevent the spray gun nozzle from choking.
Final Words
While most people preach “think before you say,” a seasoned spray painter swears by “thin before you spray.” And, rightly so!
Using a Wagner Spray Gun is one of the fastest ways to get a gorgeous and even coating of latex paint in any part of the house. But, you can’t get there unless you know how to efficiently thin each batch of paint.
And now that you have our 5-step guide and handy tips to lead the way, the only thing left to do is practice and trust the process. Just remember to write down the ratios of water to paint each time you finish a batch.
Also, now that you know how weather can tip the balance even in tried-and-tested concoctions, making notes about it next to the findings is a great exercise. With all this in mind, soon enough you will discover the secret formula for thinning latex paint, come rain or shine.
In the absence of a testing kit, the amount of chlorine present in pool water can be tested using distilled water and red cabbage. Testing strips, liquid test kits, and digital testers are other reliable methods for testing chlorine levels in pool water.
Having the best pool test kits at your disposal allows pool owners to test chlorine levels of swimming pool water.
Besides, these kits are useful for testing total alkalinity, pool salt, calcium, bacteria, and other contaminants. But how would you test pool water when these kits aren’t available? – That’s what this guide is all about.
We’ll walk you through some DIY ways to test your pool water without a kit. Let’s dive in, then!
Why Should You Test Your Pool Water?
Testing the pool water regularly will help you maintain its water chemistry, but that isn’t the only reason you should conduct a pool test. By testing your pool water on a regular basis, you can prevent the growth of algae and bacteria in the water. And since our skin is highly sensitive, swimming in pools with low pH or high chlorine levels and bacteria can cause irritation.
Additionally, if the water contains a high amount of chlorine or is acidic, it can damage the pool walls and corrode its metal parts, like ladders and rails. The high acidity of water is especially problematic if you have a heated pool because it erodes the copper element of the heater very quickly.
How Frequently Should You Test Your Pool Water?
Several factors determine how frequently you should test your pool water, but ideally, the initiative should be undertaken at least once a week. But in seasons when the swimming pool is used more frequently, such as in summer, it’s advisable to test the pool water twice a week.
You must also consider testing your pool water after rain and heavy storms since such phenomena can alter its chemical balance. As a pool owner, you must test the water whenever you notice muddiness or a color change.
The frequency of pool water testing also depends upon the types of tests you conduct. For instance, pH and chlorine tests must be conducted twice or thrice a week, whereas testing alkalinity once a week is enough. Furthermore, cyanuric acid must be tested no more than once a month, and acidity testing should be done whenever you need to adjust pH levels.
Testing Your Pool Water Without A Kit
Want to test the chlorine levels of your pool water but unsure how to do without a kit? Well, don’t worry, for we have mentioned some of the most effective ways that you can adopt to test pool water in the absence of a testing kit.
1. Distilled Water And Cabbage Method
To test chlorine levels in pool water with this DIY method, you’ll have to have red cabbage and distilled water, which can easily be purchased from the market. You will also need a strainer, pot, clear container, and knife, all of which are household items.
The first thing to do is to cut the cabbage leaves into small pieces and pour the distilled water into a pot to boil. Once it starts boiling, immerse the cabbage in the water and let it boil for at least 30 minutes. Keep stirring the solution with a spoon or ladle every now and then; after 30 minutes, the crystal-clear water will turn purple.
Then, strain the purple water to remove the cabbage leaves from the solution and get some water from your pool in a container to conduct the test. Next, add just a few drops of purple water to the pool water container.
After a few minutes, you’ll notice the water changing its color depending on the pH level of the water, helping you determine the amount of liquid chlorine present in it. Higher amounts of chlorine can reduce pH levels and make the water acidic.
If the water becomes slightly red, it is acidic, but if it turns light green, it is alkaline. In case the water remains purple, it is neutral. If you have any doubts, use a pH test chart to understand what the color changes indicate.
DIY Tip
To make things easier, you can make your own DIY pH indicator using filter paper as a testing strip. The process will involve soaking the paper in the cabbage water and letting it dry. Once it dries, put a small amount of water onto the strip, which will change its color depending on the pH levels of your pool water.
2. pH Testing Strips
Strip testing is among the easiest and most cost-effective methods of testing your pool water and provides quick and accurate results. Basic test strips test pH, chlorine, and alkaline levels, but others can test copper, iron, salt, and more. Some testing strips can test as many as seven chemicals.
To test the chlorine level, take a sample of the pool water and simply dip the testing strip into it. The test strip will change color depending on the pH level, and the color can be compared to the indicators on the pH chart. These indicators are also mentioned on the back of the bottle of the testing strip.
For those wondering, are pool testing strips accurate, let us tell you that they are highly reliable and can eliminate human errors effectively. Hence, you can use them to test chlorine in the absence of a pool testing kit.
3. Liquid Test Kits
Another method of testing pool water is to use a liquid test kit, which offers even more accurate results than testing strips. To use such kits, you need to add certain reagents to the sample of pool water, which may include phenol red and orthotolidine (OTO).
For testing the pool water using a liquid test kit, collect samples of the water in vials included in the kit, ensuring you fill them up to the fill line. Once the vials are filled, add a few drops of the required reagent to the water sample.
Make sure to check the instructions that come with the kit to know how many drops need to be added for testing different chemicals. After the reagents have been added, shake the vials to mix them with water, and then compare the color of the resulting mixture with the provided color chart. You may repeat the process if need be and use different reagents for testing various chemicals.
And if you’re wondering, “do pool test kits expire,” let us tell you that most come with a shelf life of more than two years.
4. Digital Testers
Pool owners can use a digital water tester to test pool water and check the free chlorine or pH levels present. While such testers tend to be more expensive than other types, they offer certain advantages over other testing techniques.
Digital testers offer an accurate reading of the chlorine levels, so you won’t have to depend on the pH scale to determine the pH levels. One advantage of digital testers is that you won’t have to refill them, which adds to their user-friendliness. Though expensive, they are reusable, making them a cost-effective option compared to liquid test kits and testing strips.
There are different types of digital testers– some need to be dipped into the water sample, while others come with testing strips. In the latter case, a testing strip is dipped into the pool water and later inserted into the tester to get a reading of the chlorine present in your pool.
How To Test Chlorine In Pool Without Kit Final Thoughts
Whether you have stone, PVC, or concrete pools, regularly testing pool water is crucial to make sure it is safe for swimming. In the absence of a pool test kit, you can try using these methods for testing chlorine and pH levels.
These simple DIY methods will help you maintain proper pool chemistry, prevent bacteria and other microorganisms from thriving, and keep it safe from corrosion. And if testing pool water every week or so seems like a challenge, it’s best to hire professional pool maintenance service providers for the same.
With that, it’s time to call curtains for the day. No matter which testing method you opt for, you can rest assured that the results will be accurate.
See you later!
The yellow color is the most cheerful color in the world, and we can spot it all around us in nature yet few modern homeowners decide to add it in their homes in some daring and bold ways nowadays.
Are you thinking about adding this lively color in your home?
What do you say about a yellow sofa?
The yellow sofa would naturally become the focal point in the room and thus it's going to set the tone for the rest of the home. We invite you to scroll down through the photos below and see How To Style Around A Yellow Sofa. Watch out, these interiors are contagious, and you won't stop thinking about a yellow sofa after you see curated gallery, believe me!
neutral tones
If the rest of your home is decorated in neutral tones then the yellow sofa is the perfect pick for you since it will spice up the decor and will break the monotony in the room.
When you add a yellow sofa in your living room there are no boundaries when it comes to choosing the rest of the colors to incorporate in your living space. Choose colorful artistic pieces, pillows, carpets and other small details which will make your home playful, cheerful.
The exposed bricks and the sofa in the happiest color are a perfect match, they create a vivid and warm atmosphere in the living room that all family members will greatly enjoy!
When you combine this sofa with blue or emerald green walls, you are bound to get some fascinating living areas which are super modern and contemporary. These contrasting colors catch the attention immediately and create an impression that will last !
What do you think about the simple ideas below on how to style around a yellow sofa? How would you do it? We would love to hear your thoughts in the comment section below!
Hey there coffee lovers! I believe that many of you have tons of coffee cups of different sizes, shapes and colors in your homes, so if you are running out of place for storage, stay tuned. Here I'm going to show you How To Store Coffee Mugs In Excellent Ways, so you have them right within the reach of your hand.
We are all rushing to enjoy a coffee early in the morning and we want all the mugs to be easily accessible. These designs are really affordable, you don't have to spend a fortune to make them. If you are up for a DIY project, find your inspiration in the photos below!
The first idea showcased below invites you to create your mug storage by using wood pallets and old spoons to make hooks for your coffee mugs.
If you want to show off the beauty of your coffee mugs, choose a design that makes them easily visible. The one below should definitely be shortlisted.
You don't have to do much to get yourselves a wonderful mug storage. All you need is a huge piece of wood and lots of hooks. The project won't take you more than 20 minutes.
The composition looks extraordinary, simply beautiful.
There are people who want to keep their mug behind closed doors, so if you are this type of person maybe the best way to store your mugs is to keep them in a drawer.
Here comes one of my favorite ways for coffee cup storage. A peg board! You can have fun with it and color it so it can match the rest of your decor, it allows you to store hundreds of mugs.
The heart-shape coffee mug storage is just perfect for those who want to show their love for coffee to everyone who visits their home. Use wood and some hooks to make this stunning design.
Source
All of these designs are awesome, and you may even find it hard to pick just one design of them all. If you are having a hard time deciding, then we suggest you to have another look and see which idea will fit best into your living space!
Woodworkers do not believe in wasting any part of the wood, especially if the piece is beautiful. However, sometimes, the wood can become too soft to use.
Wood stabilizing will help in using up all the parts of wooden planks, ensuring almost zero wastage. Since wood is a precious resource today, this is something that artisans and woodworkers prefer to do.
Now there is a lot of information about this process on the internet, and you might initially find it too confusing. So, we decided to create a guide for you about how to stabilize wood.
All the information regarding the types of wood and the different stabilizing methods used have been listed down for your benefit. We will begin by explaining the process in general so that you have a clear understanding of what you are dealing with.
So, grab a cup of your favorite beverage and read on!
How To Stabilize Wood
What Do You Mean By Wood Stabilizing?
Wood is not always very hard, and softwood can easily be damaged. Hence, wood stabilizing becomes necessary to ensure that they last long and remain protected from moisture. To create a stable and hardened piece of wood, you will need to inject softwood with resin.
Once you have injected it, the resin will fill up all the air pockets and gaps in between the grains in the wooden block, hardening the wood from within. You can then add a layer of resin to the top to provide a glossy layer that will prevent moisture from entering.
The Process Of Stabilisation
Before you begin the process of stabilization, remember to consider the desired hardness that you aim to achieve. For example, if you want to make a wooden toy from hardwood, then the toy could turn out to be very heavy, making it difficult to play with.
How To Prepare For The Stabilisation Process?
Some steps need to be taken before you start with the stabilization process. First of all, keep all the required materials in one place. If needed, make a note of the items needed beforehand and check the list again before beginning work. This is important as otherwise, you will have to stop work in between to find the missing material, and that could hamper the workflow.
Next, you will have to do a thorough checkup of the equipment that you plan to use. This means checking and cleaning every part so that all the dirt is removed. Dirt can cause problems in the curing process, and hence, clean up becomes an important step. Also make sure the equipment is working fine and will be able to cure the resin well.
Other than that, you will need all your safety gear in one place, which involves gloves, glasses, and an apron. Resin can spill, and it will be very difficult to get the marks out of surfaces. Hence, we will recommend that you cover the surrounding area well before starting off.
Clean your hands well and rinse off any container that you have used with the resin as soon as the job is over. It is best not to let the resin or any other stabilizing medium stick anywhere as that could then be very difficult to remove.
In case you are going to use a vacuum chamber, check the machine well for any kind of damage before beginning the curing process. The machine has to be in perfect condition in order to stabilize the wood well.
Moreover, we’d suggest keeping the tools in a place where you can access them easily. This would ensure that you have a smooth and error-free process.
How To Stabilize Wood?
With Epoxy Resin
If you are working with softwood, then using epoxy resin is a great idea to stabilize the wood. When mixed with hardener, epoxy resin will form a hard layer to cover the surface of the wood and keep it safe.
For best results, process the wood at 20 degrees Celsius. However, you should know that this type of resin will not seep into the wood, and hence, the entire piece will not be hardened.
Now before you begin working, the wood needs to be prepared, and you will have to clean it well. Ensure that there are no small pieces of wood sticking out from the sides. Then sand the top if possible to have a clean surface.
If dirt gets stuck inside the resin layer, it will look unattractive, and naturally, you would not want that. Hence, the wood has to be thoroughly cleaned before stabilizing it.
Furthermore, we will recommend wearing gloves during the entire process so that you do not get any of the fluids on your hands. Once you are wearing proper gloves, get some thinner and mix it with the epoxy resin.
Now you already know that the resin does not penetrate wood well by itself as it is thick. The thinner is needed so that it can penetrate the surface to some level and ensure that the wood hardens a little more.
With Thermal Hardening Resin
The thermosetting resin is another great alternative that can be used to harden softwood. It will penetrate the topmost surface of the wood, and the heat will soak in, hardening the entire block at once. But you will have to be careful about not letting any moisture interrupt this process.
Moreover, the wooden piece has to be completely dry before this process can begin. Since this method requires some heat to be added, you might have to put it in the oven. In this regard, we will recommend heating the oven up to 104 degrees Celsius and then drying the piece for the next 24 hours inside the oven.
This will remove all the moisture and will ensure a smooth hardening process. Remember that one of the reasons behind adding resin is to keep moisture away. Hence, you should ensure that the piece contains none of it before resin is added.
Cactus juice is another type of thermal hardening resin, which can be used after mixing with other necessary chemicals. Remember that it needs to be stored in a dry place, as otherwise, the chemical properties of the fluid might change.
Also, we will add a small tip here: when the stabilization process is done, clean all the tools and equipment with soapy water immediately. If you let the remains dry up, then they might be difficult to remove later.
With Vacuum Chamber
Another way of stabilizing wood is by using a vacuum chamber for the purpose. Now, if you do not have a vacuum chamber, then purchasing a new one is a good idea. Please select one, which will remove moisture from the wood as well as cleans the epoxy fluid. It should be able to eliminate all the organic material and essential oils from the fluid so that it is perfect for use.
Next, you will need to decide upon the capacity of the vacuum chamber before purchasing one. This is again a personal preference and will depend upon the kind of projects that you need it for.
Moving on, this method is generally used for rotten or old wood, which has been damaged by moisture to some extent.
With Wood Hardener
In case the softwood is damaged, then many people stick to using wood hardeners for the purpose. This is a transparent fluid that is largely used by wood artisans for their products.
And the major reason behind its popularity is that it does not change the color of wood at all. Instead, it will just add a transparent layer on top, which will make the wood hard and will protect it from moisture.
However, there is one problem here, and that is the wood hardener does not penetrate into wooden surfaces. That would mean that it would not harden the entire block of wood but would only protect the sides. So, it will stabilize the wood to some extent, but you may need to use some other agent for the complete protection of wood.
With Thermosetting Resin
When the resin is cured at 95 degrees inside an oven, it is known as a thermosetting resin. The wood needs to be dried completely before the process can begin. Hence, you can use the oven to dry the wood at 104 degrees Celsius for 24 hours. Then use the resin to cover the wood and the pores will absorb it slowly.
You will need dry wood, a vacuum pump, a vacuum chamber, aluminum foil, an oven, hardened resin, and a coloring agent, along with proper safety gear. Collect all the items needed and then start curing the wood.
How To Use A Vacuum Chamber?
The most common method of stabilizing wood is by using a vacuum chamber. We have divided the process into steps so that it is easier for you to understand.
Step 1| Laying The Wooden Pieces
The first step in this process involves laying out all the wooden pieces in the chamber. Now there is a chance that after laying them in place, they might float or move away. To prevent that from happening, you can use an anti-float mat. This would keep the wooden planks in place, and you can move on to the next step.
Step 2| Filling Up The Resin
Next, you will have to pour the resin onto the wooden planks in the vacuum chamber. We will recommend pouring in 15 mm and seeing if all the pieces are well soaked. You can fill it up to 30 mm so that the woods are deep inside the resin. This would ensure that the planks would soak up a lot of resin, and that would make the wood harder.
Step 3| Air Extraction
After the resin has been poured, you can close the vacuum chamber. Then the air extraction will begin, and all the air trapped within the wooden pieces will be released and extracted. Once the air is sucked out well, the resin can enter the blocks.
You will soon see the resin boiling once the vacuum chamber is closed. This process should begin right after extracting all the air. Also, make sure that the resin does not foam too much while boiling.
Step 4| Letting The Wood Sit
Once the process has been completed, allow the wood to stay in the container for a while before taking them out. Also, open the lid of the chamber carefully as it would be extremely hot.
Step 5| Drying The wood
Then you will need to take the woodblocks out from the chamber and allow them to dry. Keep them on a paper towel and let them stay in the open. While they dry, we will ask you to immediately pour the resin from the chamber into an airtight container.
You can store it in a dry place, and the resin will last for a long time. It can be used again for stabilizing wood the next time you plan the process. Also, wash all the equipment used immediately with detergent and water. They should be cleaned immediately as it would be easier to remove all the resin while it is still hot.
Step 6| Using An Aluminum Foil
Once the wooden pieces have dried, you will need to wrap them in aluminum foil. The shiny side needs to be on the inside, and the matte one should be facing you on the outside. Wrap the wood well so that the foil clings onto the wood.
Step 7| Heating The Oven
The oven has to be preheated before the wood can be placed inside. To do this, set it at a temperature of 71 degrees celsius and wait for it to get heated. Once the oven is hot, you will need to put the aluminum-covered wood blocks inside. Here, you might lose some amount of resin from the surface, but that should not cause an issue.
But if you are losing too much resin, then you would know that the surfaces had not dried well. Hence, please wait for enough time before placing the wooden pieces in the oven.
Moving on, after they are placed inside, leave them there for an hour and a half to bake.
Step 8| Removing The Foil
You can remove the foiled wooden pieces from the oven when they have been baked completely. Then you can wear your gloves and remove the foil from the wood. Now, this process can be difficult as the foil might not come off easily.
In that case, you can use a knife or any sharp tool to poke the foil. Then the foil can be pulled off from the top of the wooden pieces.
You will be able to see how the pieces have become hard, and there should be a huge difference from when they had been put in the oven.
What Types Of Wood Can Be Stabilized?
All types of wood cannot be stabilized as they do not have equal absorbing capacity. However, there are certain types of wood that come with larger pores, and these work the best. As the pores are bigger, the density is lower, making the wood perfect for stabilizing.
The stabilizing medium can be poured over the wood to make it harder and better protected. Plus, the big pores will provide more space for the medium to settle, and that would make it harder. So, the major types of wood that can be stabilized are,
Beech
Polar
Birch
These types have larger pores, and the resin can easily settle in them. That provides the final product with a good structure, and you can then use the stabilized wood for multiple purposes.
Moreover, you can use coloring dyes with the stabilizing medium, and the finished product will look beautiful. MMA can be used along with resin to get the desired color and shine. If you are confused, ask the local store, and they will tell you about the popular colors that are being bought.
However, there are some wood types that do not work with a stabilizing medium at all, and they are softwood, olive, ebony, and rosemary. These have tiny pores and an oily nature that prevents them from absorbing the stabilizing medium. Also, if the wood has a lot of tanning medium, then it will not stabilize as there are very limited empty pores remaining in the wood.
What Is Stabilized Wood Used For?
Craftsmen and artisans who work with wood often stabilize wood before using them to make items. If you are wondering what stabilized wood can be used for, think of all the things that you would use good quality wood for.
The list would range from knives, dishes, pans, bowls, frames, and other daily use objects. These need very tough wood as otherwise they can easily get damaged or break over time.
Tips To Remember
Please remember that taking out all the air from the wooden plank is essential before moving forward. The more the air leaves from the deepest of pores, the more resin can get into the spaces. That would make the wood harder and better protected against moisture or damage.
Next, keep an airtight container ready to store the excess resin from the vacuum chamber. If you are prepared beforehand, then you will end up saving a lot of resin, which can easily be used again.
Additionally, the stabilization process should be done under controlled conditions to prevent the wood from hardening up too much. While hardwood is what you require, if it is too hard, then it cannot be used for many purposes. You might not be able to cut or carve it well.
Also, hardened wood can become very heavy and difficult to manage. Imagine writing with a very heavy pen and then facing hand fatigue every now and then. So, keep these factors in mind before you actually purchase a product.
How To Stabilize Wood Frequently Asked Questions
In this section, we will be listing down some of the frequently asked questions about stabilizing wood. This should help in clearing up your queries too and hence, read through carefully.
Can Water Enter the Wood After Stabilizing?
Yes, while stabilizing fills up the pores, wood can still absorb water and puff up. This happens through capillary action, and the water stays stored inside, destroying the wood. Hence, please make sure that you keep the wood in a safe and dry place.
You could also add a protective resin layer on the sides of the wood after the furniture has been made. This would protect the wood from moisture and water to a great extent, and you do not have to worry about accidental spills.
How Much Time Will The Entire Process Take?
The time period will largely vary depending on the type of wood, the density, and the weather conditions. You can expect it to take 6 to 24 hours and hence, do not plan anything in the next 24 hours. The resin needs to cure well, and you will need to keep a watch on the entire process while it happens.
Moreover, if you are working with high-quality wood, then it can easily take 24 hours to cure well. This is because all the air needs to be pulled out and eliminated so that the pores become free. Then the stabilizing medium can fill them up easily.
However, if you are working with lower quality wood, then you will need around 6 to 8 hours for curing.
Can You Use Glue Instead Of Resin?
Yes, you can use PVA glue instead of resin for stabilizing wood but be careful with the amount. It can be too thick, and hence, you would need to add some water to make the consistency thin. The softwood can then be soaked in this mix for the night before you take the wood out and dry them.
Final Words
Stabilizing wood might have seemed like a job that is best left to professionals, but after reading this guide, you should be able to do it on your own. Just keep all the ingredients handy and follow the instructions.
If necessary, you can check up videos on YouTube to see how the process looks. We will also recommend taking the help of another person so that the work is done flawlessly.
One person can keep a note of the instructions while the other can focus on the job at hand. Having said that, it is time to wrap up as we are sure that you have a clear idea about the wood stabilizing process.
Let us know if you have any doubts in the comment section below. We will try to address them in our next guide.
Have your reel mower blades gotten blunt lately? Hate it when that happens. But what if instead of tossing it away, you could sharpen its blades?
Well, as busy home homeowners, we like our tools being ready for use at all times, and when it fails to work, we either replace or try to fix it. Not all appliances can be repaired, but you can definitely fix things when your reel mower’s blades hit a snag.
Even though these blades are designed to retain their sharpness for a long time, they eventually wear and stop working altogether. While that's unavoidable, there are several effective ways to sharpen a reel mower's blades. And you can do it yourself by following a few simple steps and taking some precautions beforehand.
Without further ado, let's get down to business.
How to Sharpen Reel Mower Blades?
Safety Measures Before The Job
You don't need to hire a handyman or a technician to get the job done, but you need to follow certain safety procedures. So, before we discuss the sharpening methods, we want to elaborate on the precautions. Here we go...
Make sure that the reel is secure.
Do not, at any point, place your hands on the cutting edge.
Avoid all distractions while going through the process.
While sharpening the blades, wear well-fitted clothes and take off all jewelry. This is necessary as with loose-fitting clothes and jewelry, there's a risk of the mower parts getting hooked on to them.
Wear resistant and non-slip footwear as well as full-length pants to keep your legs covered and protected at all times. While sharpening the blades, it's essential not to wear slippers, sandals, or any type of shoe that will leave your feet exposed.
Wear a face shield and safety glasses. While sharpening the blades, a lot of tiny metal particles, sand, stone bits, and other small matter will fly around and may reach your face. Hence, you must cover your face, especially the eyes, properly to avoid any injury.
All these measures are ways to ensure a safe experience and prevent any mishap or injury. So, it's best that you follow this basic routine before getting started.
File As a Sharpening Tool
This is by far the most cost-effective method of sharpening reel mower blades. It's pretty easy and helps you hone the edges of the blades until they regain sharpness.
Get rid of the debris
Before using the files, scrape off the stone chips, sand and other debris stuck on the blades. For this task, you can use a wire brush or a coarse sandpaper. After you finish cleaning, put the mower on a workbench or tabletop and chock the wheels with a piece of wood so that they don't move.
Secure the blades and file
Lock the blades in position by inserting a broom handle through the mower's blades. Thereafter, press the toothed end of the metal file on the bevel edge of the first blade. Angle the file and simply scrape on the blade between 3 to 6 times, dragging it down towards the end of the beveled edge.
Work till the midpoint and beyond
Continue filing your way down the blade until you reach the midpoint, repeating the brushing motion. Since the blades twist, you'll have to stop near the midpoint, remove the broom handle and reposition the reel to work on the rest of the first blade. Continue filing the blade applying the same motion but now start from the other end of the tool.
Repeat on all blades
Once the entire blade is sharpened, reposition the reel so you can perform the same course of action on the second blade, third blade, and so on, until all of them have been sharpened.
Finish with a lubricant - Once you're done with the blades, lubricate them so that they resist rust. You can either spray lubricant directly on the edges of the blades or apply some on a rag and then wipe it down the edges.
How to Sharpen Reel Mowers Blades Using A Sharpening Compound
Using a back-lapping sharpening kit is yet another quick and productive way to sharpen dull mower blades. The kits usually come with a handle and the sharpening compound. That being said, sharpening compounds are grainy substances which when applied to the mower's cutting edges sharpen them as the blades rub against each other.
This procedure involves attaching the handle to the driving gear of your reel mower, then using a paintbrush to apply the sharpening compound on each blade. Coat the blades generously and make sure to apply on all the blades. After that, push the reel mower backwards so that the blades rub against each other and regain their sharpness.
The reel can be driven back manually, but it is somewhat a tedious process, requiring a lot of effort. However, you always have the option of using a power drill to crank the reel more quickly, which speeds up the process, making it less stressful.
How to Adjust the Blades of a Reel Mower
We often mistakenly assume that the blades of our reel mowers have become dull, and need sharpening. But this may not be the case always as misalignment of the blades can also hinder the smooth operation of the mower. Fortunately, with these simple steps, you can realign the blades and resume work in a snap.
Below are some tips on how to adjust the blades of your reel mower:
Step 1
Lay your mower on a flat surface like a tabletop or a workbench. Wedge the wheels to prevent any movement.
Step 2
Spin the reel to determine the type of adjustment necessary (they are not the same always). While spinning, if you hear a screeching noise, it's an indication that you have to reposition the blades away from the cutting edge. However, if it spins loosely, then you must move the blades nearer to the cutting bar.
Step 3
After ensuring the type of adjustment needed, if the blades need to be moved nearer, place a flathead screwdriver in the screw hole and tighten the screws. Conversely, if the blades need to be positioned farther away, unscrew the bolts a little until the desired distance is achieved.
Step 4
While tightening or loosening the screws, make sure it is done a little bit at a time. If it's too much, the blades may be over-adjusted.
Step 5
Turn the screws of the cutting edge in the direction opposite of the reel screws. This should also be done slowly, bit by bit, to prevent over-adjustment.
Step 6
Continue spinning to find out other adjustments needed.
If this procedure is followed correctly, you can quickly fix any misaligned blade. If the blades are still blunt, then you should sharpen them employing any of the methods explained above, to get the mower working once again.
Conclusion
It is totally unnecessary to pay a professional for a job that you can complete yourself in the comfort of your home. That being the case, reel mowers are bound to get blunt with use over time, so it's best that you master the skill to undo the damage.
However, before we leave, we once again advise caution as sharpening any tool should be done carefully by following all the safety measures. If, at any point in time, you feel uncomfortable handling sharp parts, it's best to ask for help.
On that note, we've come to the end of this guide, and we hope we can answer all your queries.
Let us know in the comments section below if you have more tips to share.
Thought that rusty bow saw from your grandpa’s garage will give up on you? Well, you are in for a surprise!
Buying the required tools for any project is just half the job done. Depending on the type of tools, we must clean and sharpen them regularly. Proper maintenance ensures durability and peak performance in the long run. After all, such tools are quite expensive, and who would want to shell out all that money only to discard them after a few uses?
Regular sharpening of cutting tools not only increases their lifespan but also makes your job easier. Believe it or not, a sharpened saw works three times faster than an unsharpened one. Thus, you will need less force and time to cut through that log of wood. However, sharpening a bow saw is no child’s play, so we are here to help you with that.
Bring out your tool kits, and let’s get to work!
How To Sharpen A Bow Saw?
Observe The Blade
The edge of the blade consists of a combination of teeth. The cutting teeth are triangular, and the raker teeth are shaped like fishtails — both of these need to be sharpened differently. Before beginning the process, we recommend that you wear work gloves and take all safety measures to prevent injuries.
In addition, check that the bow saw does not bear specialized hardened teeth. If it does, a regular saw file will not work on it; you will need a diamond file instead.
Filing
If the bow saw has been sharpened before, chances are its teeth may be uneven. The shorter teeth are no longer able to reach the object you want to cut, requiring more effort from the user. Therefore, it is essential to file/ trim the blade so that its teeth retain the same shape and height.
Set up the saw in a vise with the edge of the blade pointed upwards. Now, take a flat file and run it back and forth across the blade until all the teeth reach the same height. At this step, you need not worry about the rakers that are shorter than cutting teeth.
Sharpening The Cutting (Triangular) Teeth
Use a slim taper file or any three-sided file to sharpen the cutting teeth. Try to maintain an angle of 75 degrees and do not exert unnecessary pressure. Each tooth should get no more than 3-4 strokes of the file. This step is crucial, so we recommend that you do not rush and work on one tooth at a time.
If the bow saw has been frequently sharpened before, it may not show much results, and you could require a new one. In other circumstances, this time-consuming process will produce a visibly significant difference.
Sharpening The Raker (Fishtail) Teeth
Unlike the cutting teeth, the fishtail rakers should be sharpened into chisel tips. Ensure that you maintain a 90-degree angle while sharpening the raker teeth. As mentioned before, we do not recommend putting too much force on the file, and the bow saw should remain put throughout the process.
Finishing Up
Now that we are almost done, it is time to set the cutting teeth. Note that this step does not include the raker teeth. We recommend using adjacent cutters to alternate and set each tooth. Point the edge outwards while doing so. This step is essential for widening the kerf and achieving better friction.
Check The Results
Test your bow saw on a piece of wood or anything that catches your fancy. It is highly likely that your saw cuts more smoothly and quickly than it used to. If that is not the case, you may need to sharpen the blades further.
And that is how you resurrect your ancient bow saw! But hold up… You would not want to repeat this tedious task time and again now. Right?
Of course, sharpening is part of the maintenance and needs to be done periodically to increase the longevity of your cutting tools. But in our fast-paced world, where everyone is in a rush, who has the time to sharpen a saw after every few months?
Hence, before we sign off, here are a few maintenance hacks that will keep your saw in top-notch condition. Note that these steps will be beneficial for bucksaws, pruning saws, and other sharp tools as well.
Bow Saw Maintenance Tips
Proper Storage
Since these cutting tools are made of metal, keeping them away from humidity and heat helps a great deal in maintaining their sharpness. Thus, whether you hang them in a garage or keep them in a toolbox, saws must be stored in a cool, dry, and dark place.
Lubrication
Remember to lubricate the blades after each use to prevent rust and maintain the sharpness of your bow saw. There are tons of options to choose from, with the most popular ones being gun oil and paste wax.
Furthermore, always read the instructions of the lubricating agent before using it since all of them have different procedures. While gun oil can be wiped off immediately, paste wax needs to sit on the blade for a while. Not following the correct lubricating procedure can cause more harm than good.
Oiling
While the blade of the saw does the most work, the handle needs some attention too. Especially, wooden handles must be oiled regularly, if not after every use.
Note that this step is different from lubricating the blade. While the blade needs to be wiped off immediately or after a while, depending on the lubricant, it is not the same with the handle. Let the oil stay on the handle as it acts as a protective layer against dust and moisture.
Additionally, if you notice some rust on the handle where it touches the blade, pull it apart and clean the area. You can opt for sandpaper or steel wool to scrape off the rust and stains if any. Finish it off with oiling.
Removing Rust
In case the blade of your bow saw starts rusting, a razor blade can come in handy. Take off the handle and lay the blade on a flat surface. Keep the razor at a low angle and run it over the saw blade. Be extra cautious since you will be working with two sharp objects, so it is best not to speed up.
There may be some stubborn stains on the blade but nothing that a steel wool or sandpaper cannot handle. Simply rub it over the stains, and they will be gone in no time.
Using The Bow Saw Correctly
Other than proper maintenance, using it the correct way also helps in getting the most out of your handy bow saw. Hence, here are some useful tips and tricks on using your bow saw correctly and safely.
Uses Of Bow Saws
Bow saws are ideally meant for cutting small and medium-sized logs of wood and branches. While bigger bow saws, often operated by two or more people, can tackle large pieces of wood, a regular bow saw is not meant for that. Limit your bow saw uses to camping, sculpting, minor carpentry, etc.
Sharpness And Friction
Always start a project with a clean, and sharp bow saw. As mentioned earlier, use a lubricant and oil to clean it. This maintains the perfect amount of friction between the blade and the object in every use.
Cutting Branches
Start by making an undercut below the branch before cutting it. Cut it gently by drawing the bow saw back and forth. Be careful about your hand that is stabilizing the branch or any other object. We recommend keeping your hand about 10 inches away from the blade.
Protective Gear
If possible, always wear protective boots, gloves, hats, and goggles while working with a bow saw. After all, it is better to be safe than sorry.
Carrying A Bow Saw
While carrying a bow saw, hold the handle with the edge facing away from your body. If you happen to be near children, be extra vigilant while handling the sharp tool. Try maintaining a safe distance of at least 10-feet from them.
Do Not Work Alone
It is best to have someone around while you work with a bow saw to avoid hazardous mishaps.
Conclusion
There you have it! A clear step-by-step tutorial of sharpening a bow saw with maintenance tips. Although sharpening is a long-forgotten skill, there is no harm in honing it, especially if you enjoy woodwork. Not to forget the boost of confidence and self-satisfaction that comes with doing something all by yourself!
So, fetch that abandoned bow saw which is collecting dust in some corner of your storage. It is time to give it a makeover with your newly learned skill!
A new cast iron skillet is an investment you won’t regret. Cast iron skillets are safe and versatile cookware for making the most delicious food you can ever imagine!
Whether cooking on a stovetop, baking in an oven, or grilling outdoors, cast iron pans can be used well!
But cooking with cast iron is not always the easiest. Some maintenance is required to keep this type of cookware in mint condition.
Worry not; there is no reason to get intimidated. This article will show you the easy steps to season cast iron skillets for perfect use every time. Keep reading!
Before diving into the steps to season cast iron cookware, let’s first understand what cast iron seasoning is all about.
You might think we’re adding salt and pepper to a new pan. Besides, isn’t that what “seasoning” in cooking is all about? In this case, no.
The oven seasoning process involves creating a protective coating for your skillet by heating incredibly thin layers of fat or oil. In short, seasoning is carbonized oil baked onto cast iron.
As the oil heats, the fat bonds to the metal and converts it into protective plastic. This is the process called polymerization.
You probably imagine getting a greasy coating. But the ideal result after you season a cast iron is a hard, blackened skin that protects metal from corrosion.
The seasoned surface becomes a hydrophobic protective layer, creating an easy-release cooking surface. Its nonstick surface makes cast iron skillets better than today's best non-stick pans.
Creating this thin layer of protection works not only for cast iron cookware, but you can also season the cooking surface of carbon steel pans.
How to Season Cast Iron Pan in 5 Steps
Although most new cast iron skillets will come pre-seasoned, seasoning cast iron with additional layers of protection will only increase the lifespan of your new cast iron pan!
Many cast iron cookware sites will give you similar steps on how to season cast iron. They're pretty straightforward to follow.
Later, it would be best to pop your skillet into a hot oven. Preheating the oven to 230 ºC (450ºF) ahead of time is best for better time management.
Step 2: Wash and Dry Your Pan
Have you heard of comments saying soapy water will destroy the surface of your cast iron pan? Although there is some truth to it, a little soapy water to get your cast iron skillet ready for seasoning won't hurt.
Prepping to season a cast iron requires the smoothest surface possible. Some soap, hot water, and a brush to clean the entire pan will do the trick.
Make sure to remove all food particles on the surface. A chainmail scrubber or pan scraper gets the job done faster.
If your cast iron pan is rusty, grab a ball of steel wool and scrub off all tough rust spots to create a clean pan.
After a good wash and scrub, dry the skillet with a fresh paper towel. Make sure to remove all lingering water droplets.
You don't want any surface moisture on there. To ensure it is completely dry, put it on the stovetop for a few minutes to remove any excess water.
Once your skillet is neat and dry, add a small amount of neutral cooking oil to the skillet.
We suggest unsaturated cooking fats like flaxseed, grapeseed, sunflower, or vegetable oil. These are easier to spread compared to saturated fats like shortening or lard.
Although flaxseed oil results in a nicely seasoned cast iron skillet, be wary that it has a very low smoke point at just 225 ºC (437 ºF). Your kitchen may get a smoky atmosphere during the baking process. And because of this, we don't always recommend it.
Next, use a paper towel to coat the entire pan, including its top, bottom, sides, and handle. Remove any excess oil. A thin coat should do.
Rub the cooking oil all over and buff thoroughly, so the pan doesn't look the slightest bit greasy. Any excess oil will make the pan sticky after heating.
Your oven temperature should be at 230 ºC (450ºF) by now. It's time to place your cast iron skillet upside down and bake for about an hour.
Oven temperatures might vary depending on the cooking oil you use. Some advocate changing oven temperatures during seasoning, especially as it gets a little smoky in your kitchen.
Make sure to keep your space ventilated when this happens.
Placing the pan upside down may cause a few oil drips. Feel free toset a large baking sheet or aluminum foil under the skillet for easier cleanup.
After baking, give the pan some time to cool. It will be extremely hot. An oven mitt will come in handy!
At this time, the oil will polymerize and form the first of many plastic-like coatings for your cast iron.
Step 5: Repeat 3 to 4 Times
After your first hour of heating, you should have a good initial layer from your own seasoning.
Take your cast iron out of the oven and repeat step 3. Rub your pan with more oil, buff it out, and pop it back in the oven for another 30 minutes.
Perform the oiling and heating process for a 3rd and 4th time. Once you are done, switch off the oven and let the pan cool with the door closed.
You should now have a polished, non-stick black surface. Your cast iron pan is seasoned and ready for cooking!
What Are Common Mistakes When Seasoning Cast Iron?
Seasoning cast iron is not that difficult once you get the hang of it. But there are still a few mistakes people overlook. Here are a few:
It is a common understanding that soap can deteriorate the nonstick characteristics of your cast iron skillet.
However, many experts have agreed that a little soap to clean your cast iron cookware is fine. Just make sure to rinse it before oiling and heating it fully.
A seasoned cast iron skillet should remain perfect for cooking for a long time. But a word of caution, avoid cooking acidic foods on it for long durations. This can increase the chances of corrosion on your skillet.
If you need another cookware for your pizza recipes, you might want to check out the Best Portable Pizza Oven and Best Wood for Your Pizza Oven.
Heating the pan after oiling is crucial, so the oil bonds to the pan to become a protective layer of seasoning. This should be done at least 3 to 4 times.
Your cast iron pan is stronger than you think! They can last for generations.
It is unlikely you'll scrape off the surface with your metal utensils. If you notice black pieces flaking off, that's most likely burnt bits of food from your previous cooking session.
When Should You Get a New Cast Iron Pan?
Well-seasoned cast iron cookware is known to last ages. Many families even pass it on from generation to generation, along with their secret recipes.
You are seasoning your cast iron cookware every time you use it. So every use should strengthen the bond to the metal.
However, avoid using cast iron for cooking highly acidic foods like long-simmering tomato sauce. This eats up its protective coating.
If you notice food sticking more often, the black patina wears off, and it is time for a re-seasoning.
If a crack appears in your cast iron pan, it's time to give your cast iron skillet a rest.
Even a hairline crack will expand and contract when heated and cooled. This can eventually cause a split which is extremely dangerous when it happens while you are cooking.
Cracks are also breeding spaces for bacteria and rust. Consuming food cooked from a broken cast iron skillet is already a health hazard.
Testing countless methods to season cast iron pans is unnecessary. You've got this article to guide you in our tried-and-tested method on how to season cast iron.
Follow the easy steps above and avoid common mistakes. You should get the hang of it soon!
Just remember that a well-seasoned cast-iron skillet used frequently allows the building of new layers of seasoning every time. Your skillet should stay in your family for generations to come.
What are you waiting for? Get busy seasoning and cooking in the kitchen now!
You probably have a globe at home which you don't use anymore. Most kids get globes when they are at school, and later they put it somewhere away and simply don't use it anymore. If you have a globe at home, and you are looking for some fun DIY projects, you are at the right place.
Here you will see How To Repurpose A Globe In A Fun Way and give it a second life in no time and with ease. These crafts are super easy and they don`t require experience or particular skills, so you may want to give some of them a try. Scroll down and make a pick!
If you love hanging plant holders, this is the perfect idea for you. The globe will come in handy here perfectly well, and you will have a planter that is one of a kind.
Did anyone said barbecue? Barbecue time is the best time spent with family and friends. If you want to update your old barbecue and give it a brand new look, here's how you can do it without spending a cent!
Just color the globe in one color and add flower decorations to it if you want to get an eye-catching decorative piece that will make a statement in your home.
What do you say about coloring the globe in chalkboard paint? In this way you will have a wonderful surface where you can write your favorite quotes daily and motivate yourselves and the people around you!
Yes, the globe can be easily transformed into a clock! Just make a tiny hole, and insert the clock mechanism from an old clock, and you will get a unique teller of time!
Do you have the habit to save money? If yes, this way to repurpose the globe is the ideal for you!
Many people turn the glove into a lighting fixtures, and there are many varitations to this purpose. You can check them all out and pick your favorite!
I totally love this design! The globe is repurposed in such a way, that people can leave their cards on the party they are attending in it. If you are hosting a party soon, this is a cool idea that you should try.
Which is the design in which you would love to repurpose your globe? We would love to hear from you in the comment section below!
As essential as wood glue is for any DIY woodworking project, it comes with a couple of negatives too.
And the worst of them is when it accidentally drops on hardwood flooring or spills over a workpiece during a project. Removing it might be quite a struggle, something that every DIYer is acquainted with. But at the end of the day, you need to get done with the removal.
Don’t worry; there are some effective methods to tackle this mess, too, as with other materials. And that’s what we’ll tell you about in our extensive guide. Just follow these accurately, and you’ll be relieved from the headache of wood glue spills.
With all said and done, let’s begin!
How to Remove Wood Glue
Some Essential Tips And Quick Tricks
When it comes to removing wood glue, the first thing to keep in mind is that all glue products on the market aren’t the same. Each has its own set of characteristics, and when used on wood, it might create a different kind of glue mark that you must remove.
While using wood glues, they often drip from the bottle or tube and form globules that can be difficult to remove immediately. However, once they harden a bit, you can remove them more easily with the help of a mechanical procedure.
All you need to do is take a scraper or chisel and chip away the unwanted globules, which will take just a few minutes. But the only sticking point with this procedure is that some paint might also be removed, or the wood surface might get damaged sometimes.
Another possibility is the glue getting blotched and forming undried lumps that might filter into cracks and spread out on the wooden surface.
You can adopt several methods to tackle such stains, which include using warm soapy water and wiping off the glue. Again, you need to be extra careful while wiping the glue off as certain wood surfaces can get damaged easily. That’s why it will be best to use a less abrasive technique that will preserve the wooden surface.
Proven Methods For Removing Wood Glue
To ensure that wood glue is removed effectively, it’s essential to consider the wood surface you’re dealing with. That’s because every technique might not be suitable for all types of surfaces.
However, there are two proven methods that will be equally effective on any wooden surface. And we’ll begin by discussing these procedures.
This process works wonderfully in softening and removing powerful vinyl glues and is quite simple. Just set your hairdryer at a particular heat setting and position it above the part with the dried glue for about five minutes.
And you’ll soon find the glue softening and loosening out. Once you spot this, scrape or peel the glue off the surface, and it will be back in its original form. Thus, applying heat is the best technique when you need to remove dried and hardened glue.
If the surface you’re working on is slightly raised and the glue covers a fairly large portion of the area, this method can prove to be quite useful. It requires you to soak a cloth in hot water and place it on the site stained with dried glue. Let it soften for some time, and then scrape off the softened glue from the surface.
Brake cleaners can be found in any hardware store, so you won’t have any difficulty fetching such a product. For this method, you just need to spray the cleaner onto the stained area and then clean it with a dry cloth till the glue is totally removed.
Sometimes, spraying once isn’t enough, so you’ll need to do it several times to ensure that all the glue is softened and can be wiped out easily.
Other Materials You can Use
If the glue turns dry in some hard-to-reach areas on the surface and you require removing it, some other materials can be used for the same. Your choice will vary according to the surface that you have to clean and the stubbornness of the dried glue.
Here are some materials that can be beneficial for getting rid of the unwanted wood glue:
Ammonia
Vinegar
Acetone
Salt and lemon
Methylated spirits
Special glue removers
Choosing The Best Wood Glue Remover
If you opt for a glue remover among the above products, choosing the right product becomes important as not all are equally suitable for your purpose. So, these are factors you should consider while making a choice.
Ingredient
Glue removers come with a particular active ingredient that makes removing sticky substances easy. While some are formulated with chemicals, others consist of natural ingredients such as soy or citrus oils.
Remember that apart from being truly effective in removing the glue, the product must also be safe to use. Speaking of chemical-based removers, these emit a strong odor and have a harsh formulation that’s harmful to the skin. On the other hand, citrus-based removers come with a pleasant fragrance and are much safer to handle.
That’s why you must read through the reviews to ascertain whether the product is efficient as well as safe to use.
Form
Adhesive removers are available in the form of liquids and sprays, so you can choose between either form as per your convenience. Liquid removers are the best to go for in case you mostly work in areas with limited ventilation since they don’t produce chemical odors. But if you work in well-ventilated spaces, sprays will be perfect for the job.
When you’re working with raw or bare wood, you must ensure that the surface doesn’t have any unwanted marks after the removal procedure is complete. Using some particular materials will make sure no damage is caused to the surface.
1. Using Baking Soda
Firstly, soften the undesirable glue on the wood surface using a hairdryer and then scrape off the softened part with a spatula. Follow this by mixing some baking soda with hot water and spreading that paste all over the unwanted marks of glue on the surface. You’ll have to wait for around 15 minutes and then wash the entire surface with soapy hot water.
2.Using A Nail Polish Remover
Though it might sound surprising, the chemical used to remove nail polish can be quite beneficial for getting rid of wood glue. But make sure that the remover doesn’t have acetone, as that will create unwanted marks on the surface.
Using this product is quite simple, as you just need to apply some of it on the area which has the glue and allow it to set in for a few minutes. After this, you can use steel wool, emery paper, or steel sponges to take off the softened glue from the surface.
Working With Painted Wood
If you need to remove glue from painted wood, it will require much more work than what we’ve discussed till now. The extra effort lies in trying to protect the underlying paint from any damage or removal. For this, you’ll have to start off by removing the bigger chunks of hardened glue with a hairdryer or plastic spatula. Then you may follow any of the two techniques described below:
Again, this fact might seem surprising, but cooking oil is indeed excellent for getting rid of wood glue. You can access some cooking oil anytime you want since it’s available in every household. And most importantly, it will never damage either the bar wood surface or the underlying paint.
Soak a piece of cloth in some cooking oil and wipe it over the area with the wood glue. You’ll also need to apply a little elbow grease along with the oil. Finally, wash the wood surface with warm soapy water, and you’ll soon find that the wood glue has been removed.
Another non-toxic yet highly effective way of removing wood glue is by using vinegar. Take a piece of cloth, soak it in vinegar, and pat it softly on the part with the glue. This will cause the glue to loosen from the surface. Now, take another cloth piece, dip it in hot water, and wipe it over the surface. The loosened glue will then come off easily. But in case there’s still some glue left on the surface, use the steel wood to wipe that off.
Dealing With A Range Of Wooden Surfaces
The wooden surface that you’re working with might not always be of the same type. Moreover, it might be used in different furniture and other parts of the house, such as floors and decks. All these types of surfaces have different applications, and hence you will need different methods to remove glue from them.
1. Hardwood Surfaces
While using wood glue for your projects, you will often find some spills on the floors, and in case they’re made from hardwood, getting rid of it can seem difficult. However, there’s a way you can get through this task, but you need to be very cautious at every step. That’s because hardwood flooring is more prone to damage than other materials.
Here’s how you’ll have to proceed:
Step 1
Begin by softening and loosening the dried glue with a hairdryer. Then scrape off the softened glue from the hardwood floor using a spatula.
Step 2
Mix some baking soda with hot water and apply the paste to the glue stain on the floor. Wait for some time to let it sit in.
Step 3
Now, wipe off the undesirable stains using a cloth soaking in warm soapy water.
2. Wooden Tables
Simple items in your kitchen such as salt and lemon will be enough for removing wood glue from any wooden table. A solution of lemon and salt is highly effective in getting rid of glue stains and won’t have any adverse effects on the wood.
All you need to do for the procedure is squeeze a little lemon juice on the area stained with glue and leave it to soak in for around 15 minutes. Follow this by sprinkling some salt on the area and let it work for some more minutes. As a result, the glue will loosen and can be lifted off quite easily using a spatula.
3. Waxed Wood
You’ll require using a slightly different process when you’re working with waxed wood, and it has lots of wood glue stains. These are the steps you must follow for removing wood glue from such surfaces:
Step 1
Use absorbent paper or paper towel to cover the glue stain.
Step 2
Then heat an electric iron and run it all over the paper or towel so that the glue softens. Be careful not to heat the iron too much as it may burn the paper in that case.
Step 3
The paper will now absorb the softened glue stain, and the surface will soon be clear of all the glue.
4. Parquet Floors
Parquet is a rare and appealing flooring type that consists of a geometric mosaic of several wood pieces assembled to create a decorative effect. And like hardwood floors, this type is also easily affected by undesirable glue stains. To get back the much-loved original look of a parquet floor, you can proceed in two different ways as per the form of glue used.
In case the stains have been caused by a solvent-based glue, they will be much simpler to deal with. Just use a scraper to remove all the unwanted glue chunks. Then apply a paste of warm water and baking soda to the affected area and clean it off with a cloth.
However, removing vinyl glue will be slightly more difficult as it’s much more brittle in nature. Begin by removing the worst of glue stains using a spatula and finally wipe the area with a clean cloth. Remember that you should use the spatula gently as applying more force might end up damaging the floor.
5. Teak Wood
Teak is a particular variety of hardwood that is widely used for making furniture of different kinds. The aesthetic appeal of this variety and its high termite and moisture resistance make it an ideal fit for the purpose.
But teak is still prone to being stained by wood glues. Hence, in case you’re struggling to remove wood glue spills from your favorite teak furniture, the following procedure can do the trick:
Step 1
First and foremost, you’ll have to soak a sponge in warm water and wipe it gently over the glue stain.
Step 2
Follow this by dipping some balls of cotton wool in methylated spirit and rub over the stain gently so that it comes off.
Step 3
In case you find the wood surface to be slightly uneven after cleaning off the stain, use some sandpaper of fine grit to smoothen the surface.
6. Varnished Wood
Varnishing a wooden surface provides it with a layer that can be damaged very easily. As such, while removing glue from surfaces, you should be gentle throughout the procedure.
First, you’ll have to soak a piece of cloth in warm water and dab it gently over the stained areas. But if this doesn’t work, you can try applying cooking oil in the same way. And in case the stains still persist, you can use white spirits as these won’t affect the varnish. Dip a piece of cloth in the spirit and rub it over the stains gently, and they’ll surely soften and come off.
Removing Wood Glue That’s Still Wet
It’s always better to treat glue stains while you’re working with wood pieces, as they are less stubborn and hence easier to clean. Plus, treating them then and there also saves the effort and time you’ll have to put into it later on.
This procedure requires you to soak a piece of cloth in warm water and then wipe the glue off the surface. But in case there’s a large glue blob on the surface, you should ideally let it turn slightly dry and then remove the blob with a spatula. If you find that glue has turned too hard, apply some acetone on it, and you’re good to go.
After you’ve looked at various methods to use for removing wood glue, let’s look at some essential things you need to know about working with wood glues.
Preparing Wooden Surfaces Before Applying Wood Glue
When starting a woodworking project, you’ll naturally aim to create perfect fixtures and joints and cuts to ensure the perfect outcome. As such, it’s essential to prep your wood pieces so that you’re able to achieve long-lasting bonds using wood glue.
Gluing Edges, End Grains, And Faces
For gluing each of these parts of the wood pieces, you must create pockets, dovetails, or a tenon and mortise joint as per the space you need for the job. Usually, face and edge gluing is easier since there is more surface area for the wood to create a bond. But to use the end grain, you’ll definitely have to create any of the joints or fixtures that we mentioned.
Sand The Wood
Remember that wood glue bonds best to wood pieces that are properly sanded or smoothened. But in case there’s a finish such as a sanding sealer on the surface, the glue won’t bond well and create a weaker fixture.
Hence, make sure you check all the wood pieces for any such finish before you start the work. If you come across such a finish, you must remove it completely.
Precautions To Take While Working With Wood Glue
Using Masking Tape
You can avoid unnecessary glue spills by using some masking tape. All you need to do is tape off the section where you’ll have to apply the glue. This way, the tape would prevent excess glue from spilling over other portions of the surface or onto the floor.
Check The Instructions For Application
Most of the glue products available nowadays come with a manual containing certain instructions for application. Some might have the instructions mentioned on the label over the tube or the bottle.
Either way, you must go through these instructions carefully. These often include the ideal amounts to be used for different purposes or a certain standard amount applicable in all cases. So, adhering to the prescribed amounts will help prevent the possibility of a glue spill. You should also work in batches instead of applying the glue over a large portion at once.
Another thing to make a note of is the time for which the glue can be left open without drying up. Keeping it open for a long time may cause it to dry completely, thereby rendering it useless.
Furthermore, some dried glues might emanate toxic fumes that are harmful to the body, so it’s best to fasten the lid or cap the moment you’re done using the glue.
Using Proper Tools
Try spreading the wood glue using a trowel as that will help apply more precise amounts on the wooden surface and will also keep the hands protected. If glue comes in contact with the hands, it may cause irritation or might even lead to burns or rashes on the skin.
Wearing Protective Gear
Many wood glue products have toxic chemicals such as formaldehyde included in their formulation. Hence, you need to adopt certain protective measures to prevent any accidental injuries. The parts that need to be protected are your eyes, respiratory tract, and skin. As such, you should wear safety goggles, a respirator mask, and a pair of safety gloves.
Dispose Of The Glue Safely
Once you’ve finished using the glue, make sure to dispose of the container safely. You must not pour the remaining amount down a drain or in a sink, as that can clog parts of your plumbing system and will also contribute to polluting waterways.
The Area Must Be Well-Ventilated
Exposing yourself to wood glue for a long time can lead to headaches and breathing problems. Moreover, it might contribute to the development of more dangerous diseases in the long term.
This is why it’s essential to work in a room that’s well-ventilated. All harmful odors and fumes produced by the glue can then drift away quickly, ensuring that there’s only fresh air to breathe in.
How to Remove Wood Glue Frequently Asked Questions
Q1. Can Wood Glue Be Sanded?
Yes, you can sand down wood glue to flatten the bumps that it may leave behind. You can also sand the wood after removing glue stains to achieve ultimate smoothness, as we’ve mentioned earlier.
Yes, you can remove Titebond glue with acetone, even though it’s much stronger than most other products. Start by moistening the glue with a damp cloth and then wipe it off with another cloth soaked in acetone.
Final Words
With that, it’s a wrap for today!
We hope you’ve developed a much clearer idea about how to proceed with removing wood glue from various wooden surfaces. So, resume your projects on a fresh note by steering clear of all the extra glue stains on the wood pieces. Nothing can go wrong this time around!
Here’s a last piece of advice for you. While purchasing any product such as acetone, glue remover, or a brake cleaner, make sure you read some online guides. That’ll help you zero in on a good-quality product.
We’ll be back soon with more intriguing guides, so watch out for this space. Till then, all the best!
Are you tired of ugly spray paint stains ruining the beauty of your concrete slab?
If the stain has been on the surface for ages, the chances are that it has become stubborn over time and thus more challenging to remove. However, it is not an impossible task. With a bit of help from DIY techniques, you can easily get it removed in no time.
But, the market is filled with thousands of equipment and materials that promise to take stains off the concrete. And this can often lead to confusion.
So, today, in this guide, we talk about the seven most effective methods you can implement to remove paint easily. We give you a detailed step-by-step breakdown of the processes and discuss the pros and cons of each technique.
Instead of rushing to the supermarket looking for materials that would save the concrete, you should first look for what is available in the house. It is not too much of a difficulty to find soap, water, and a stiff bristle brush for the job.
Trust us when we say that it is a great idea to give this method a try as it is the most economical way to deal with the problem. If the affected area is small, this should work perfectly!
What You’ll Need
For this process, you will need materials that you can find within the house. If you do not, getting one from the supermarket would not be too troublesome.
The most important thing you need to procure is a scrub brush with stiff bristles, two buckets, warm water, and mild soap. If you are working outdoors, what is required is a garden hose and, if indoors, a mop and a bucket.
And do not forget to get yourself some protective gear like safety goggles, respirators, or light-duty gloves.
How To Do It
The first thing that you need to do is remove excess dirt by wiping down the area meticulously. After that, make sure that you put on your protective gear correctly and check for any discrepancies.
Now go ahead and add warm water to a bucket. In the second bucket, mix some more warm water with a few drops of dish soap, just to get the solution a little foamy. Now wet the affected area on the concrete with warm soapy water.
Once that is done, dip the stiff brush in the soap solution and move it over the concrete, applying pressure in a circular motion. Use a paper towel after that to soak up any paint that comes off and wipe the area clean with warm water.
If you are working indoors, mopping the area one more time would be a good idea.
Pros And Cons
The best thing about this method is that it is the most cost-effective way to treat the issue as you are most likely to find all the materials to be present in the house. Secondly, it does not involve any toxic material to remove the paint from the concrete.
However, the major downside to this technique is that it involves a very mild solution and can take a considerable amount of time and effort to remove the paint. If the color has stained the concrete a long time back, the chances are high that it will not be entirely gone.
Considerations
You should consider going with this option only if the paint splattered on the concrete is relatively fresh. If you are wondering why, let us explain.
Concrete is highly porous and tends to absorb color quite fast, and as a result, the paint settles deep into it. Once settled in the intricate grooves of the concrete, it gets hard to remove it with a mild soap solution. But it is always worth a try as a first measure before getting the big guns out!
Moreover, keep in mind that you might have to repeat this process a few times to see the results. If it does not work in the first two tries, you can also add white vinegar to the solution to make it stronger. A lot of people suggest that it is a great agent in removing difficult stains.
But if you do choose to try it, make sure that you mix it in the right proportion. When not done correctly, it tends to strip the coating of the concrete, leaving it dull and famished. We suggest that you do a spot test to check how it affects the concrete you are using it on. This can save you from the trouble of damaging the entire slab and realizing it only when it is too late.
Moving on to the brush, make sure that their bristles are stiff so that you can scrub the slab vigorously. But that does not mean that you select a wire brush! If you do, that might leave permanent scratches on the concrete.
After you are done using soap and water, if the stain is still present, it means that you have to experiment with something else to get rid of it. In such an instance, you can give graffiti removers a try!
Graffiti removing materials effectively penetrate the paint structure and loosen its grip from the concrete or other surfaces. They are available in the market in various forms, such as wipes, pastes, aerosol cans, and even liquid solutions. To use it in the best way, we suggest that you carefully read the instructions on the label.
What You’ll Need
Before you start with the process, there are a few items that you have to buy. As you can already guess, the first and foremost thing that you would need is a graffiti remover. For this, select any variety that you desire and your budget permits.
Apart from that, you will require a brush with stiff bristles, warm water, one bucket, and disposable cloths or absorbent paper towels. Do not forget to get some protective gear before starting with the process. And like the previous method, if your affected area is outdoors, get hold of a garden hose.
How To Do It
The first step in the process is to clean the area to remove unwanted grime and dirt. And since this process involves chemical materials, it is best to put your protective gears on soon.
And once that is done, apply the graffiti remover on the affected areas. But before applying, read the label carefully so that you add it in the proper proportions. When done, let the mixture sit for a while. After that, take the stiff bristle brush to scrub the area clean and take the paint off by moving the brush in a circular motion.
As the paint starts coming off the concrete, use a disposable piece of cloth or a paper towel to wipe the area. Apply warm water from the bucket to give it a final rub, and use a hose if the concrete slab is outside your house.
The ideal thing to do is to keep repeating the process until the paint is entirely removed. If you are working inside the house, consider mopping the area one more time once you are done.
Pros and Cons
It is true that you do not need to break the bank to buy a graffiti remover. They are generally inexpensive, and you get plenty of options to choose from. And even though they are chemical products, they are not too harsh. Definitely not as strong as paint thinners.
If you use it judiciously, two to three scrubs should be good enough to get the paint off from the concrete unless it’s years old!
A significant drawback to this method is that it is pretty time-consuming. And we suggest that you do not start with the process when you are in a hurry. Depending on the remover you use, it might take 20 minutes or more between two applications before scrubbing away the colors.
And as we have mentioned before, it does require multiple applications to show its effectiveness.
Considerations
Before you start applying the graffiti remover, study the surface well. If it is vertical, keep in mind that trigger sprays will make the paint slowly drip down, causing the color to spread further.
To avoid such a situation, make sure that you do not oversaturate. And to stop the paint from spreading, you can consider using painter’s tape and plastic sheets. It is simple, and all you have to do is tape the surface under the paint and attach a drop cloth to prevent the area from run-offs.
And as we have mentioned before, graffiti removers are chemical products, so do not forget to put your protective gears on!
Strippers and thinners are highly effective in breaking down or ‘thinning’ the paint on various surfaces, even concrete.
Paint thinners come in solvent forms, which means that they can efficiently dissolve substances, and paint is no different. Besides thinners, there are other solvents that people use to remove paint, such as turpentine, denatured alcohol, acetone, and the likes.
Even though paint strippers are manufactured differently than paint thinners, they are also ideal for getting rid of the paint. They are available in two forms mainly: non-caustic variants that won’t harm your skin and chemical solvent-based formulas.
What You’ll Need
To begin with, you’ll need to get your hands on an effective paint stripper or a thinner. There are many options that are available in the market. Other than that, what you will need is a piece of clean disposable cloth and gear to protect you while working.
How To Do It
By now, you should know what the first step is. Yes, you guessed it right! Take a piece of cloth and wipe the affected area clean to ensure that there is no dirt.
Before you start with the process, it is essential that you check the working area to see if the ventilation is good and that you’re protected. Since you are working with strong chemicals, it is crucial that you take proper care to avoid accidents.
Make sure that you read the label carefully and go through the instructions minutely. This will help you understand in what proportions you should apply the solvent. Following the guideline, apply the thinner to the affected portions of the concrete. Use a clean piece of cloth to wipe the paint off once you are done.
Repeat the process a few times until the color comes off entirely.
Pros and Cons
If you are removing paint off concrete for the first time, going ahead with this process is a good idea. It does not involve using any materials that are too expensive and does not require high-level skills to ace the game. The application and cleaning process is relatively simple!
However, it does pose some danger unless you are careful. Paint strippers and thinners are mostly solvents and are thus flammable. So, make sure that you keep them away from heat sources and do not use them to light candles or smoke a cigarette around them.
And if you are working indoors, you will have to be more cautious as the vapor stays and travels through the house for a long time.
Moreover, they can leave a damaging impact on your skin. So, it is not just enough to wear gloves when working with these solvents. We recommend that you use a cloth to cover your entire arm.
Considerations
First and foremost, your safety is of utmost importance to us, and we recommend that you keep the area well ventilated when working with thinners. Make sure that you cover your nose, mouth, and all exposed areas of the body well. Unless you take proper care, these elements have the capacity to affect your respiratory system and skin too.
It is a good idea to go for soy gel strippers as they are a more organic way to get rid of the paint. The advantage of using this is that you can avoid the unpleasant pungent odor and the risk of damaging your skin.
Coming to paint thinners, you can take the help of cloth to easily blot the affected area on the concrete instead of applying it directly. Using this technique helps you to gain better control.
And if the surface you are applying it on is vertical, do not forget to protect it from run-offs with painter’s tape and plastic drop cloths.
Moving on, one good way to replace paint thinner is using mineral spirits. Comparatively, they smell less than thinners and have a good history of successfully getting rid of paints.
The deeper we go into this list, the stronger the chemicals become. On a scale, this is somewhere in the middle and is an effective solution. TSP, or trisodium phosphate, is a proven chemical used for paint removal.
There are many variants that are available online. However, if you do not want to wait for long, it is best to get it from a local hardware store. When you hit the market, you will find that TSPs come in two forms: liquid and powder. Take the one that suits your requirements the best.
What You’ll Need
It goes without saying that you will need a good quality TSP, either in liquid or powder form. Besides that, the other things required are a stiff brush, one big bucket, one small bucket, and warm water. Do not by any chance undermine the importance of protective gear while using this. So, don’t forget to get your hands on some safety goggles, work gloves, and a mask.
How To Do It
First things first, make sure that you clean the affected area well before you proceed with this method. Unless it is free of dirt and grime, the chances are high that the TSP won’t function properly.
After that, cover yourself with protective gears to ensure that the chemical has no detrimental impact on you. Follow the instructions and put the product label to the T to understand how to dilute it well. This is a very crucial step, and you cannot afford to mess up here as that might damage the concrete.
Now dip the brush in the solution and scrub the affected concrete well with it. Let the solution sit on the stone for around 25-minutes before you scrub it again. Do it a few times before cleaning the area with warm water.
If you are working outside the house, using a hose is a good idea to help you get the job done considerably fast. Keep repeating the process until the paint ultimately comes off the surface. And to give it the final polish, wipe it with a paper towel or a piece of dry cloth.
Pros and Cons
There’s hardly any doubt that using TSP is one of the ideal ways to remove color stains from concrete or other surfaces effectively. And the best part is that it is readily available in the market, comparatively cheap, and does not require the skills of a scientist to dilute it and apply. If you want to find a shortcut, there are even no-rinse TSP options available, and you can give them a try!
However, TSP suffers from one significant downside: it is a toxic solution. So, it is mandatory that you take utmost precautions when using it.
Some local governments have banned the use of TSP completely, and some have restricted the extent of use. It is a good idea to check the regulations to make sure you are breaking no laws.
Considerations:
Homeowners will unanimously agree that TSP is a great agent and acts as one of the most effective cleaners and paint removers. And it is equally excellent when it comes to dealing with old paint stains.
But you should not forget that the chemical included in it is highly toxic, and thus you should handle it accordingly. It can cause severe damage to the environment through surface runoffs. So, we suggest that you give alternatives like borax powder a try. It is not as strong as TSP, though.
Moreover, we recommend that you not use TSP on windy days if applying outdoors. The wind may carry the product to the nearby trees and plants and cause irreversible damage to them. You should try to confine the product to the affected area as much as possible.
Moving on, TSP has a strong odor and can damage your lungs if inhaled directly. To avoid such problems, always put on your respirator mask before commencing with the work.
One added tip, TSP, and pressure washer make a powerful combination in getting rid of paint stains. And that takes us to the following method we have on our list.
A pressure washer or a power washer is a piece of equipment that sprays a concentrated, fast squirt of water. This is a great way to remove stains and substances from various surfaces. And it works very effectively when it comes to getting rid of spray paint from concrete.
What You’ll Need
For this, you have to do some basic research to figure out whether you should buy an electric or a gas power washer. Apart from that, you will require big plastic sheets and waterproof clothes. And last but not least, do not forget to get yourself some protective gear.
How To Do It
The first thing you have to do without fail is to put the gears on to protect yourself from unwanted harm. After that, please read the instructions on the washer label carefully and assemble it.
Make sure that you choose the desired nozzle depending on the stain size. Now stand 10 feet away from the area and point the jet straight at the stain. Keep changing the spraying angle and apply it back and forth on the concrete. Repeat the process until the paint is entirely removed.
Pros and Cons
This method is ideal for users who want to remove paint stains from large concrete pieces. Because you do not have to do it manually, it saves time and effort too. And if you end up combining it with TSP or a graffiti remover, you will see the results even faster.
Additionally, they help you save water. By replacing the garden hose with a pressure washer, you can save 80 percent extra water.
However, if you are on a tight budget, this might not be the perfect option for you. Power washers are expensive devices, and you need to either invest in buying them or renting one. And it will take you some practice to understand how to operate it best.
Considerations:
Pressure washers generally come with a set of nozzles that are color-coded to indicate the force of the water stream. If you are using it to remove paint, go with size 15. It is ideal for getting rid of color stains. However, if the paint is too stubborn, you can start with size 40 and slowly notch it down.
When opting for a device, make sure that its capacity ranges between 2,000 to 3,000 psi. The gas and electric variants come with varied capacities, and you must choose one that offers the right amount of power needed for paint removal.
Before you start working with it, make sure that the water flow is good. If it is not, then the sprayer won’t have the adequate power to remove the spray paint off the concrete.
Additionally, take your time and do not rush when you are working with power washers. And ensure that you do not stand too close to the affected area and keep a minimum distance of 10 feet. You can, however, gradually move closer to get the best results.
Also, it is important that you keep in mind that this is a powerful tool that releases strong water jets. Protecting yourself with gears and having a solid grip on the sprayer at all times is an absolute must. If you are not careful, the water jet can slice through your skin.
When you are using it, the best thing to do is keep the pets and kids away to ensure their safety. We always recommend that you take some training before you start using a pressure washer. And with so many tutorial videos available on the internet, it is hardly a task anymore.
To make use of this process, you need to acquire some skills first. If you have not used a sandblaster before, you’ll surely need some training. It has the capacity to remove concrete layers, so you understand that knowing the proper techniques is essential.
In case it is not done correctly, it might damage the concrete permanently.
What You’ll Need
For this purpose, you will need a sandblaster, ideally a portable one with a power of 50 psi. Apart from that, what is required is sandblasting media such as coarse sandblasting sand.
Once you have gathered these things, get hold of a dry-wet vacuum (suitable for indoor/ outdoor activity) or a power washer (outdoor purposes). And most importantly, do not forget your protective gear.
How To Do It
First and foremost, check if the protective gears are adequately secured to ensure that your skin and respiratory system encounter no harm. Now place yourself 1 foot far from the area that is affected and switch on the sandblaster.
Once you turn it on, adjust the nozzle and use it back and forth to target the affected area. Keep doing this until the paint starts coming off. After that, use the vacuum cleaner to clean the concrete dust left behind after you are done.
If you are cleaning a concrete slab outdoors, you can even use a power washer to clean the area.
Pros and Cons
What we like most about this product is that it is effective and does not consume much time. If you are familiar with using a sandblaster, it will be a cakewalk.
However, we must warn you that it is a pretty expensive process. You will either need to buy the equipment or rent one, depending on your convenience. And it also generates a lot of dust and requires heavy vacuuming, adding to a lot of extra work. Getting a suitable vacuum further adds to the expenses.
Additionally, keep in mind that this method is only suitable for people with advanced technical skills. If you have never used a sandblaster before, we recommend that you take training courses first.
Considerations:
As we have already mentioned, this equipment generates a lot of concrete dust. It is because it uses compressed air mixed with coarse sand to get rid of the topmost layer of the stained concrete.
So, it goes without saying that you have to ensure that you are well-protected not to encounter any harm from the powerful sandblaster. Nobody wants to get their skin pelted with sand particles or get coarse dust in their eyes. We recommend that you protect your entire body before starting with the work.
Also, we have noticed that it is best not to point it at a particular area for too long when using this device. You will get the best results when you keep moving the tool instead of focusing it on a point. If you do that, the chances are that the top layer of the concrete will suffer extreme damage.
Moreover, if you have no prior experience using this device, it is best to hire a professional who would get the job done with precision. You need proper knowledge about grit and air pressure to get the best result. In case you are not sure how it works, getting someone to help you is the best bet!
We have reached the end of our list, and there was no way we would have skipped out on this method. Angle grinders are one of the most effective methods to get spray paints removed from concrete surfaces.
It is pretty similar to a sander and allows you to attach various grit wheels in order to handle different projects. Again, we would say that you should skip this method unless you have prior experience of using this machine.
If not done correctly, the chances are that it will drastically alter the concrete surface structure. And if lady luck is not on your side, the damages might be permanent too.
What You’ll Need
For this purpose, you will require a good-quality angle grinder that comes with a shroud and a paint stripping wheel. Apart from that, you will need a vacuum cleaner or a pressure washer. And do not forget to get your hands on some protective gear while you are at it.
How To Do It
To begin, you need to ensure that the area is completely clean and devoid of dust or grime. Once you are done with wiping the place clean, put on your protective gears before proceeding further.
Move yourself a few feet away from the area that has the paint stain and switch the device on. Slowly move towards the spot and switch on the grinder. As you reach closer, press it lightly on the affected area and move it in a circular clockwise motion.
We recommend that you keep repeating the process until the stain comes off ultimately. Once it does, use the vacuum cleaner or the power washer to clean it.
Pros and Cons
For those familiar with using an angle grinder, removing paint stains will be a cakewalk. It is one of the quickest and most straightforward solutions for getting rid of stubborn spray paint stains from concrete. And as this method involves grinding color off the concrete surface, there’s no need for harsh chemicals.
However, a significant downside to this process is that it involves the use of heavy-duty equipment and thus calls for suitable protective gears. Now, these gears can drive a hole in your pockets as they are expensive.
Additionally, it requires advanced DIY skills to make use of this method. If not done correctly, you may end up causing permanent damage to the concrete. And once you are done, you will be left with a heap load of concrete dust, cleaning which is pretty labor-intensive.
Considerations:
Grinding and sandblasting are quite similar when it comes to generating dust. And for that reason, wearing a respirator for protecting your mouth and nose is an absolute must. We suggest that you also put on a well-fitted eye protector to avoid the dust from entering your eyes.
It is also a good idea to put on some heavy-duty gloves or padded clothing to prevent your hands from getting hurt. To reduce dust, there’s one good solution. You can attach a shroud with the grinder, which basically works as an in-built vacuum taking off the concrete dust.
Also, as we have mentioned before, grinding and sandblasting are pretty similar. So, it is best to not concentrate the equipment on a particular area for too long. Keep moving the tool in a circular clockwise motion.
And you have to either buy or rent a machine before you can start with the process. If purchasing one exceeds your budget, it is great to hire a professional who can help you with the task.
Moreover, it is good to keep a vacuum handy to ease your cleaning job once you remove the paint stain!
Things To Know
The processes will work the best only when you understand what you are getting into. You have to know the workings of the paints and the structure of the concrete.
Remember that concrete is highly absorbent because it is porous, so spray paints stain easily by reaching the deeper pockets of the stone. We recommend that you address the stain problem as soon as it happens to stop the color from entering deep into the layers.
That would just make it more challenging to get rid of the stain!
But while you are at it, do not forget to take care of the concrete. If you are not cautious, the paint-removing solutions might have a detrimental impact on the stone.
Make sure that you do not leave any chemical solution on the concrete for too long. Use a soap and water mix to wipe it off. Otherwise, it will start eating away at the concrete. Toxic chemicals that have the power to dissolve the paint can easily cause permanent damage to the stone.
And note that something that can dissolve concrete can easily affect your health too. While working with them, make sure that you do not come in direct contact with the chemicals and do not make the mistake of inhaling them.
Final Words
And that’s all we have for you today, friends.
We had great fun compiling all this information for you. And we hope that you could learn a good deal about removing spray paints from concrete surfaces from reading this comprehensive guide.
All these processes that we have mentioned are relatively simple to perform and will help you effectively get rid of the stains. However, some of them require some expert-level skills, nothing that a training course wouldn’t equip you with.
With that, it’s a wrap. Keep a watch on this space for more exciting reads. And write to us in the comments section below if you have any queries.
With super-strong adhesive properties, Gorilla glue is currently the number one glue on the market.
Capable of drying in a flash, there’s literally nothing that this glue can’t fix. You may have seen some Gorilla glue disasters on TikTok and reels since it has been in buzz lately. And that is why it is risky to use, especially when you’re a clumsy person.
If you are a frequent user of this glue, it’s essential to stay alert and know about the cures if you have any spilling accidents. Once spilled, it dries within a blink of an eye and is tough to get rid of.
We have put together this informative guide, which will come in handy if you somehow get gorilla glue on your skin. We’ll talk about several methods and small tricks to get you through it.
Without further ado, let’s get right into it!
Gorilla Glue 101
The authentic formula for this trademark water and temperature-resistant wood glue was first used back in the 1990s. It is a versatile adhesive and can be used on a range of surfaces, including wood, stone, ceramic, foam, concrete, glass, and more. The glue tends to expand three times its original volume after curing and changes to a tan color.
Although it triples over after drying, the glue is not recommended for filling gaps. The original formula is hundred percent pure and doesn’t contain any fillers or plasticizers. Despite being suitable to apply on several surfaces, the manufacturers advise not to use it on rubber and polyethylene.
After developing the original product, the company diversified a little and produced more adhesives like gorilla construction glue, gorilla tape, gorilla wood glue, and many more. The possible hazards of using the glue are skin and eye irritation, allergic skin reaction, and breathing difficulties on inhalation.
Why Is It Dangerous?
We discussed all there’s to know about this superglue in detail. Now, we’ll move on to its potential dangers. Its super sticky adhesive bonds make it a menace for the skin. Once spilled, it gets lodged inside the skin pores and cannot be removed easily. This blocking of pores won’t allow your skin cells to breathe and will ultimately lead to dead skin.
It is important to remove the blot before it gets the time to dry. Gorilla glue has a fast-drying formula, and it will be a huge pain to remove after setting. The waterproof nature of the adhesive is a boon while using it on projects but simultaneously creates a lot of problems in case of accidental spilling.
The water-resistant composition of the glue doesn’t allow the water molecules to come directly in contact with the adhesive. As a result, vigorous washing with water is futile for removing it. But don’t you worry, we know a lot of tricks to get rid of it, and we are now going to share them with you.
How To Remove It From Skin?
First and foremost, do not panic because it’s alright, silly accidents happen all the time, and we’ve got your back. There will most likely be two scenarios. First, the glue is still wet, and you have just enough time to get it off. Second and worse, it has already dried and hardened.
When It’s Still Wet
It is a rare chance that you’ll be able to remove the glue while it’s still wet, but there’s no harm in knowing and being prepared. You’ll have to trust your reflexes and be really quick for this.
When you are working on any project or doing anything that involves the use of Gorilla glue, as a rule of thumb, keep some paper towels, napkins, or dry cotton cloth nearby. In case of spillage, try to wipe off the glue as much as you can from the skin while it’s still soft and gooey.
The next step will be washing it off using soap and water. Take a generous amount of soap and lather it on the skin. We recommend using liquid soap since soap bars create friction, and we don’t want that.
If you can keep some soap and a basin full of water around while working, then it’s perfect; you’ll be able to get it off even quicker. Most likely, there’ll be some residual glue even after washing thoroughly. Exfoliate your skin using some salt or sugar. Exfoliation opens up the skin pores, and the adhesive will leave the skin.
So much vigorous washing will leave your skin dry, so make sure that you moisturize your skin well. But that said, remember not to overdo it! The glue will eventually come off with more washes. Overdoing will only damage your skin further.
Let’s move on to discuss ways to remove the glue when it has dried on the skin.
When It’s Dried
If the glue has already dried, don’t worry. There are lots of easy ways to get it off without damaging or irritating your skin.
The Citrus Method
For this method, you can use any citrus fruit. Limes, oranges, lemons, grapefruits, etc., all will work well. Easy and affordable, this technique is hundred percent organic, and you won’t have to use any chemical products. The vitamin C and acidic juices of the citrus fruits break down the adhesive forces of the glue and remove it from the skin.
Slice the fruit in half and squeeze out its juice in a bowl. Dab some nectar on some cotton, or simply use your finger to apply it to the affected area. After a few minutes, you’ll notice the glue disintegrating. Repeat it as many times as you need to until it’s effective.
Once you get rid of the glue, wash the area under some warm and soapy water to remove the residual juice. If your skin has been a little damaged, the acidic nature of the fluid will sting a little. Wash your skin until it stops stinging.
The Scrubbing Method
You can ward off the glue by using things that are very easily available in the house. You can rub it off using some coarse sugar or salt, or you can go for a pumice stone. Pumice stone is an effective and traditional tool for scrubbing. However, if you have sensitive skin, then this method is not for you.
Take some baby oil and apply it over the glue in a circular motion. The spot should be entirely immersed in oil. Doing this will soften it down, and glue will start losing its stickiness.
Scrub the area with a wet pumice stone gently. Do not apply too much pressure because skin abrasions are the last thing you’ll want after already damaging your skin with gorilla glue.
After a while, the glue will start to flake off. Use your fingers to remove it when this happens. Carefully remove all the flakes with a light hand. When satisfied, keep the affected area under running warm water until all the oil is washed away. You can also soak it in soapy water if possible. Repeat the process until all the glue is removed.
The Vegetable Oil Method
Instead of using any toxic or aggressive material, you can also make the glue vanish using some ordinary cooking oil, almond oil, or baby oil. The method is simple, but as we are using a natural product instead of any chemical substance, it’ll take a lot of time to disintegrate the glue.
Take any oil of your choice; we suggest olive oil since it's the best for skin, and pour it on a clean cloth. Rub it where the glue has dripped on the skin for four to five minutes. Leave the oil on the area for a little while. Eventually, the glue will start peeling off. Remove all the flakes carefully by hand.
You can either wash the oil from your skin or leave it be so that it can cure the damaged skin. You won’t have to apply any other moisturizer since oil will do the job itself.
The Special Mixture Method
Straight from our grandma’s kitchen, we have a special home remedy to fight off that stubborn glue from your supple skin. What is this antidote? Keep reading to find out.
The recipe is very simple and requires just three ingredients. You will need vinegar, washing soda, and some liquid detergent and will be done within ten minutes.
Take a basin and fill it with about one and a half to two liters of water. Add three to four tablespoons of vinegar to it. Then add two tablespoons of ten percent baking soda and a few drops of liquid detergent. Mix the contents nicely until you get a homogeneous solution.
Once the mixture is ready, you can drench a cloth in it and wipe the affected area, or you can directly immerse that part in the basin. The glue will lose its hardness and get dissolved in the solution. Vinegar is acidic in nature, while washing soda is basic, and both can be a little damaging for your skin.
It is a home remedy, but it’s not one hundred percent skin-friendly as you would expect it to be, so do not leave it on the skin for too long.
The Alcohol Method
Alcohol has adhesive degrading properties and therefore is an efficient agent for dissolving the glue. Rubbing alcohol is more suited for sanitization and is skin-friendly, too, so use that instead of regular alcohol.
Take a bowl and fill it up to the brim with warm water. Add some soap to it, preferably liquid. Mix it well until bubbles appear. If you have the glue on your hand, then immerse it in the bowl for a few minutes or until you can visibly see the glue softening. For other parts, soak a clean cotton cloth in the water and rub it on the glue.
Once softened, take a cotton swab and wet it with some rubbing alcohol. Wipe the affected area with the swab until the glue comes off. Wash the skin with warm water and soap to remove the residual alcohol. Gently moisturize your skin after cleansing to avoid dryness.
The Acetone Method
Acetone is an organic ketone compound that is colorless and volatile. It has a pungent odor and is used in many products like nail paint remover, cosmetics, etc. Therefore, if you don’t have crude acetone available or have sensitive skin, you can use nail paint remover.
First, clean the affected area with soap and water and leave it wet for a while. Pour some acetone on a cotton swab or ball and brush it over the glue in circular motions. This method is quite similar to the rubbing alcohol one, except that acetone is more effective on the glue and extremely drying for the skin.
Keep rubbing until the maximum glue has come off. Rinse the skin thoroughly with lukewarm water. Acetone will leave your skin really dry, so avoid using soap or any irritating products for a while. Just put on some rich moisturizing lotion and leave it at that.
The Goo Gone Method
Goo Gone is a proficient adhesive remover that safely removes not just gorilla glue but a number of gooey messes like wax spots, markers, tar, crayons, label and sticker residues, chewing gum, etc. The original product is for surfaces only, but the topical range is safe for the skin.
Goo Gone Topical keeps the skin moist because it has an emollient in the formula. It counteracts any possible irritant in the formula and is mellow on the skin. Let us get to know how to use it.
Well, it’s simple. Just splurge out the solution on a dry towel or cotton balls and put it over the glue. Keep it like that for three to four minutes. When the glue melts down, simply wipe it off, and you’re done.
Since the product is skin-friendly, you won’t need any other preventive or curing methods. However, do wipe away the solution and put on a light salve if you have irritable skin.
The WD-40 Method
The next method is a little harsh on the skin, so turn to it only when you urgently need to take off the glue and don’t have any other options left. WD-40 is a silicone-based cleansing spray. This spray can also help you get rid of grease, sticker residue, and gum, along with gorilla glue.
Spray the aerosol onto a cotton swab or clean towel and hold it over the glued area. Keep it in place for five minutes. After removing the cotton, you’ll see that the glue will start peeling off. Repeat the process until you are satisfied with the result. We’ll advise you against spraying WD-40 directly on the skin, so don’t rush into that.
Be very cautious while using the spray because it can irritate your skin and eyes and incite allergic reactions. Be sure not to inhale the droplets because it can lead to breathing difficulties and asthmatic triggers.
The Razor Method
If you spilled the glue on a flat part of your body and are desperate to remove it, then this is an ideal method for you. Follow it only when you are entirely sure about your shaving techniques and feeling a little adventurous.
Take some cold water in a bowl and dip the affected skin area into it. When skin is wet, put on the shaving cream and lather it a little. Once you’re happy with the foam, go ahead and shave the glue from the skin.
Pay attention to the area you’re shaving, and avoid being reckless with it. The chances of peeling off your skin are fairly high, but so is the removal of the glue flakes.
The Hand Lotion Method
This technique is for small spillages on hands and other accessible body parts. You can either use a lotion or petroleum jelly. Put on a generous amount of moisturizer on the skin and leave it at that for twenty minutes.
The glue will begin to peel off after some time. This method is simple but very time-consuming. Don’t depend on it in case of big splotches, and go for the other methods listed above instead.
How To Remove It From Fingers?
To make things even simpler for you, we decided on discussing ways to remove the glue from the fingers separately. Since most of the work is done by your creative hands, most disasters happen there, especially if you have butterfingers.
Immersing Method
Take a container large enough to dip your fingers comfortably. Fill it with any of the solutions given above. You can opt for the special mixture of baking soda and vinegar or vegetable oil; however, we suggest acetone diluted with water.
Now immerse your fingers into the container and stay like that for three to five minutes. When you are done with the dipping and feel the glue soften, try to pry the fingers apart using the other hand. If you are unable to do so, then go for another round of immersing.
After sufficient soaking, exfoliate your fingers using a scrub. You can use coarse sugar or salt for this purpose too. The glue will come off way more easily after softening. Wash your hands properly using warm soapy water and compensate for the skin damage with some medicinal cream or lotion.
Using A Pen Or A Pencil
This method is rather impulsive and will only work if you have a light coat of glue on your fingers. Squeeze a little lemon or orange juice over the bond to loosen it, then insert a pencil between the fingers and roll it forward. That’s it, yes, it’s that simple.
However, we advise not to push with too much pressure if the glue hasn’t softened out properly. Doing so might lead to painful skin abrasions, and you wouldn’t want that.
How To Remove It From Other Surfaces?
When you accidentally get glue on your skin, the stakes of getting it on other things lying nearby are high. You might spill it on your clothes, on the floor or the furniture. To err is human, to fix it, divine! Let’s get to know how to fix it!
From Clothes
Trying to remove the glue while it’s wet will only spread it further, so put on your hat of patience and sit this one out for a while. When the glue has dried, lay the cloth piece on a hard surface and try working it out using your fingers.
Use lemon juice or acetone to ease it out from the fabric and do it very gently. When you’re done, go ahead and wash the cloth with warm water and detergent, unless it is a delicate dry-clean material.
From Wood, Metal, Glass, or Floor
For all of these surfaces, we recommend using the Goo Gone or WD-40 spray mentioned above. Both of these products are effective and will help you save a lot of time and effort. When you buy a Gorilla glue, be sure to invest a little in preventive measures too.
Frequently Asked Questions
How quickly does Gorilla glue dry?
The glue starts drying the moment it touches any surface, and the little spots can dry entirely in under a minute. On surfaces with huge pores, it takes about fifteen to twenty minutes to dry; however, the curing period extends up to twenty-four hours.
What’s the best technique for using Gorilla glue?
The plausible answer lies not in the technique but in practice mainly. You’ll get the hang of maneuvering the tube after using it for a while. However, you can try to handle the adhesive bottle such that the nozzle stays opposite to your hand. You can keep a hard surface below the tip at all times, a coaster or a lid, for instance.
How can we dissolve the Gorilla glue?
The glue is water and temperature-resistant, so that doesn’t work well. Other solvents like acetone, paint diluent, and isopropyl (rubbing alcohol) effectively disintegrate the adhesive bonds of Gorilla glue. If you don’t have these at your home, you can use citrus fruit juice and vegetable oil.
Conclusion
Prevention is indeed better than cure. While working with gorilla glue, it is essential to keep your preventive measures in check. We sincerely hope that this simple yet informative guide will keep you prepared for those nasty glue accidents.
We have finally reached the end of this guide on getting rid of Gorilla glue from the skin easily and safely. Now, the next time you make an error, don’t panic, take a deep breath, and follow one of our simple methodologies straightaway.
With that being said, we bid you goodbye. See you next time!


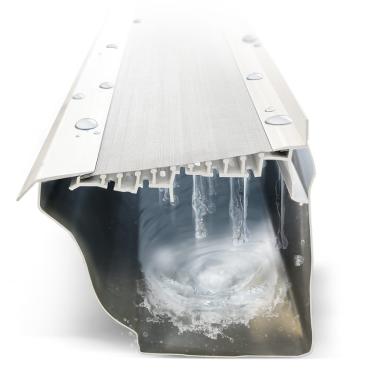


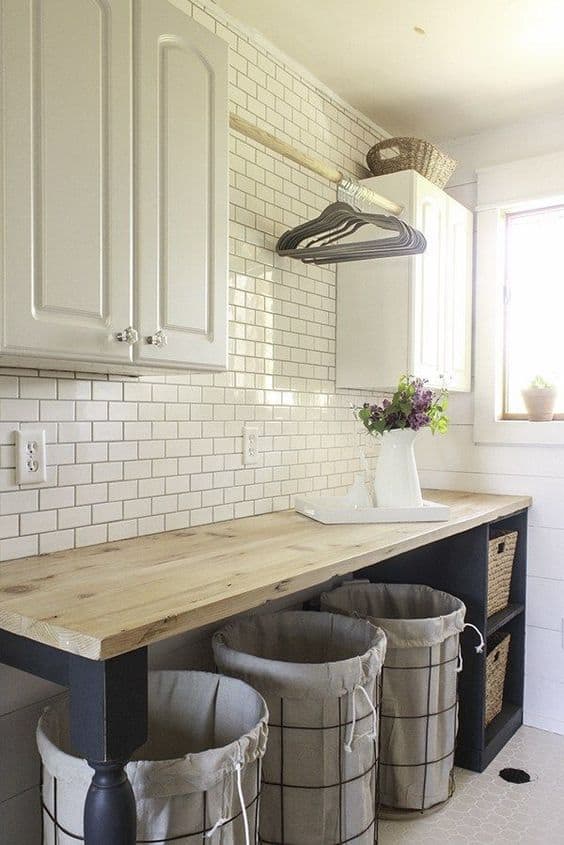
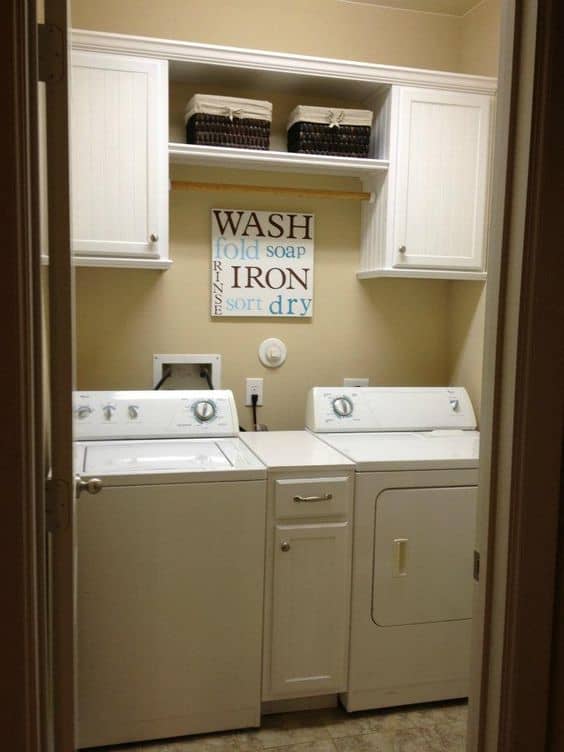


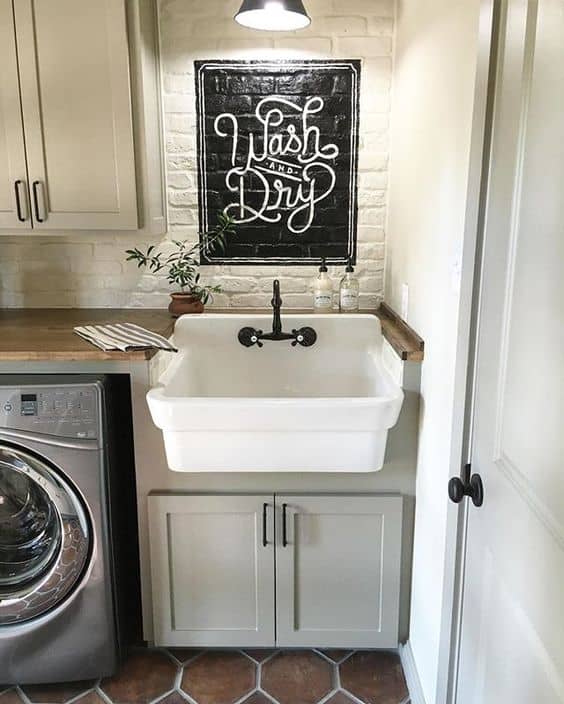
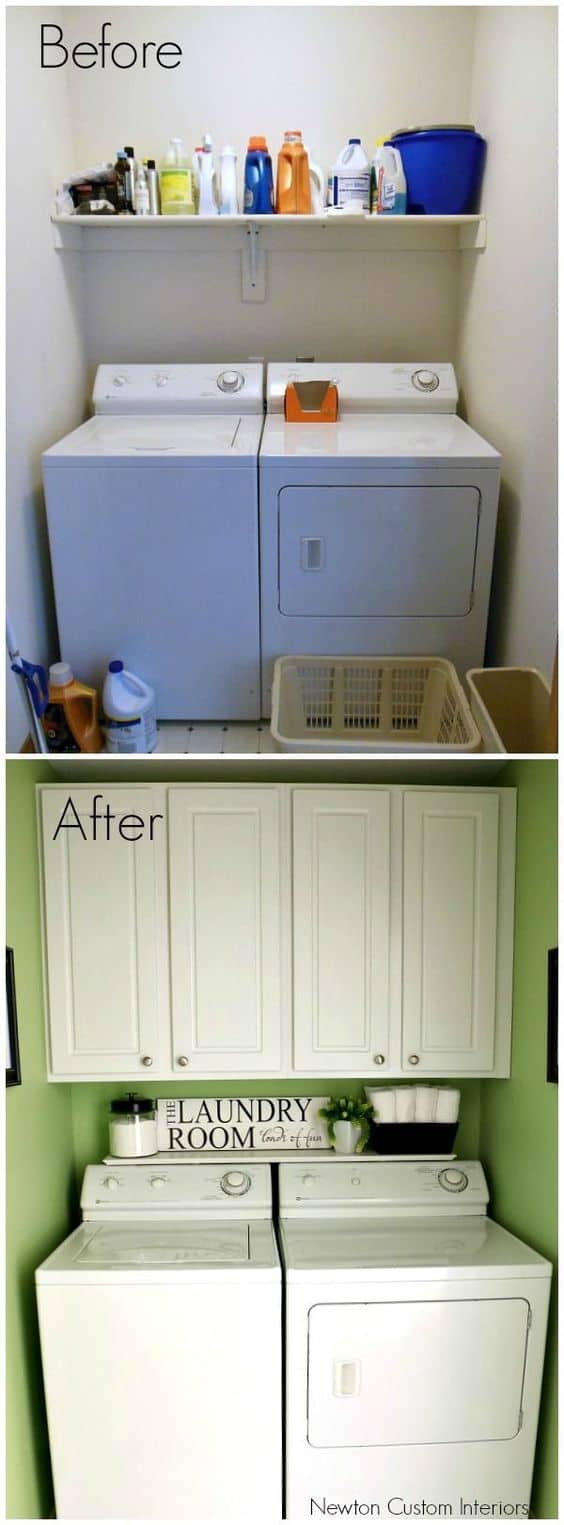


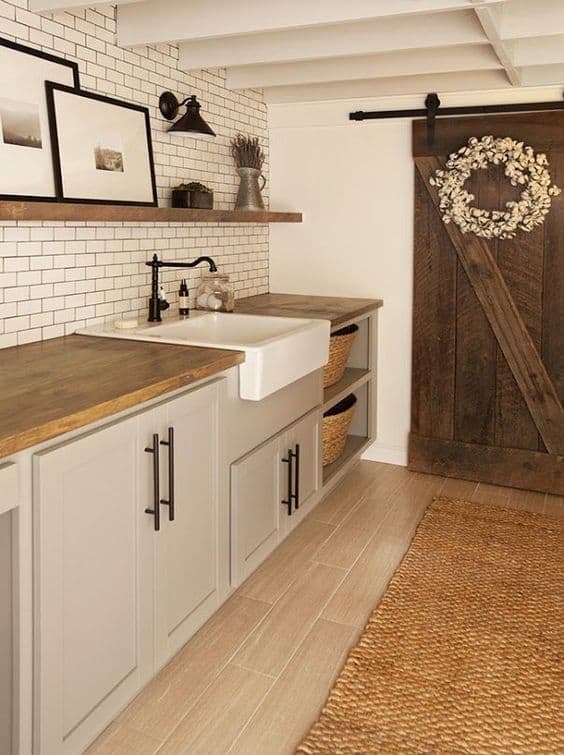
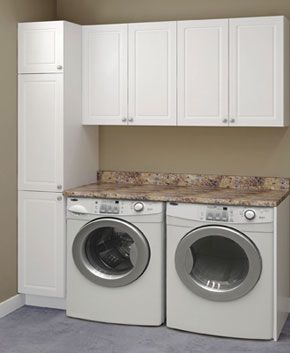


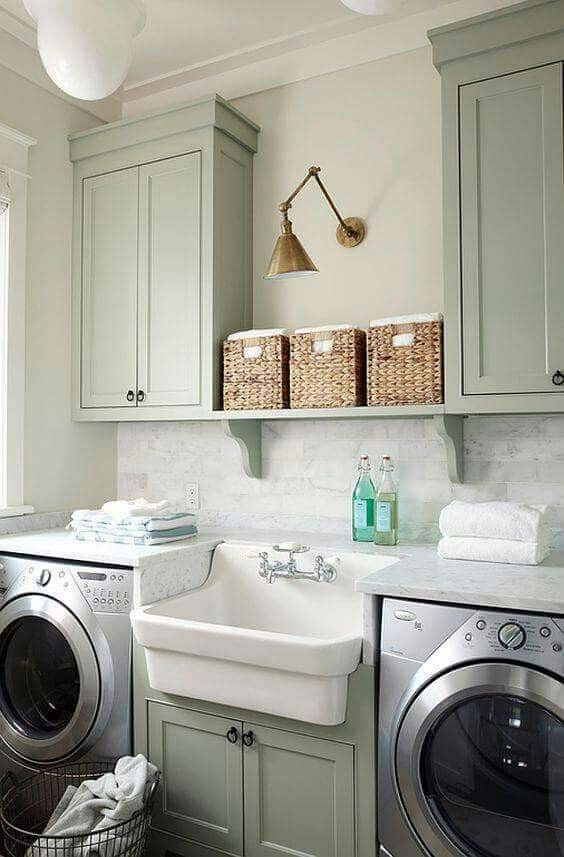


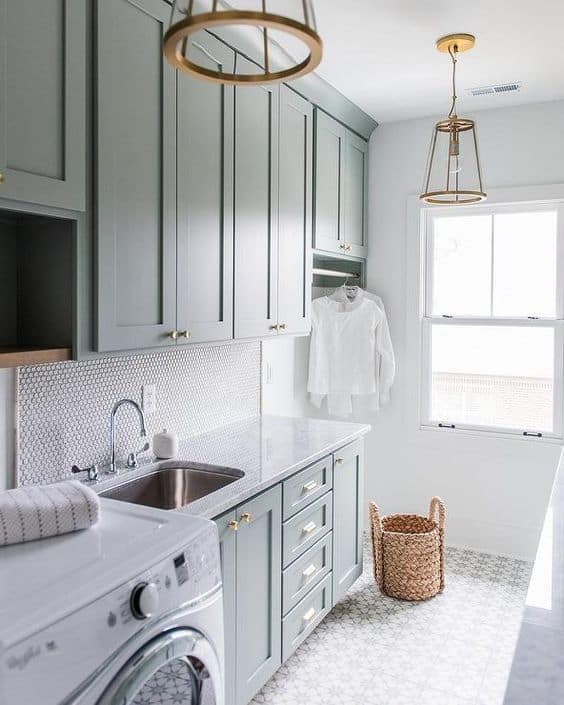


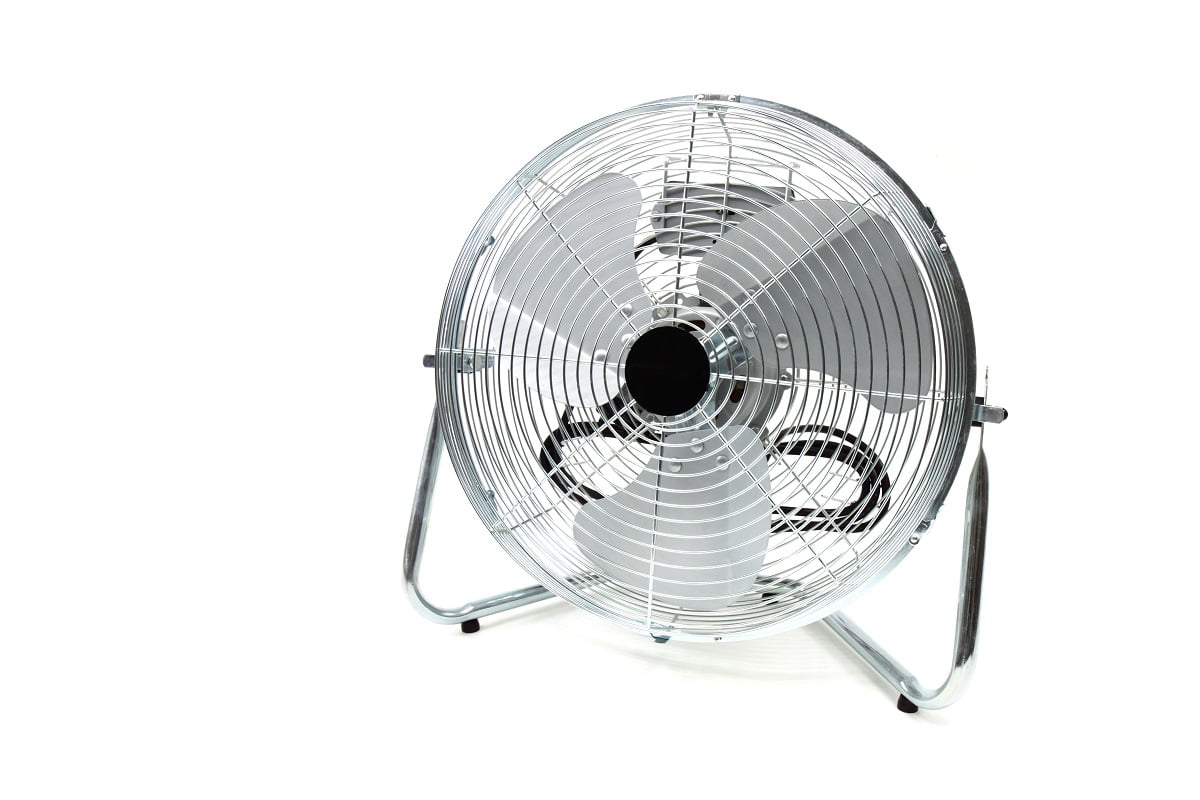


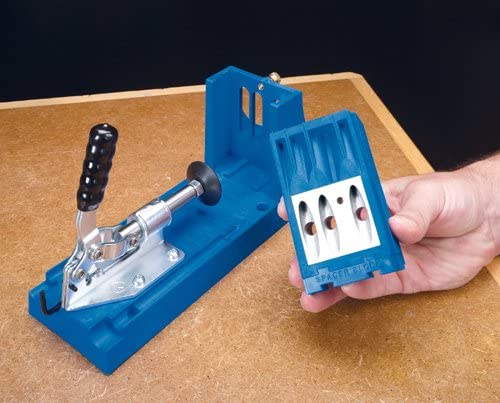
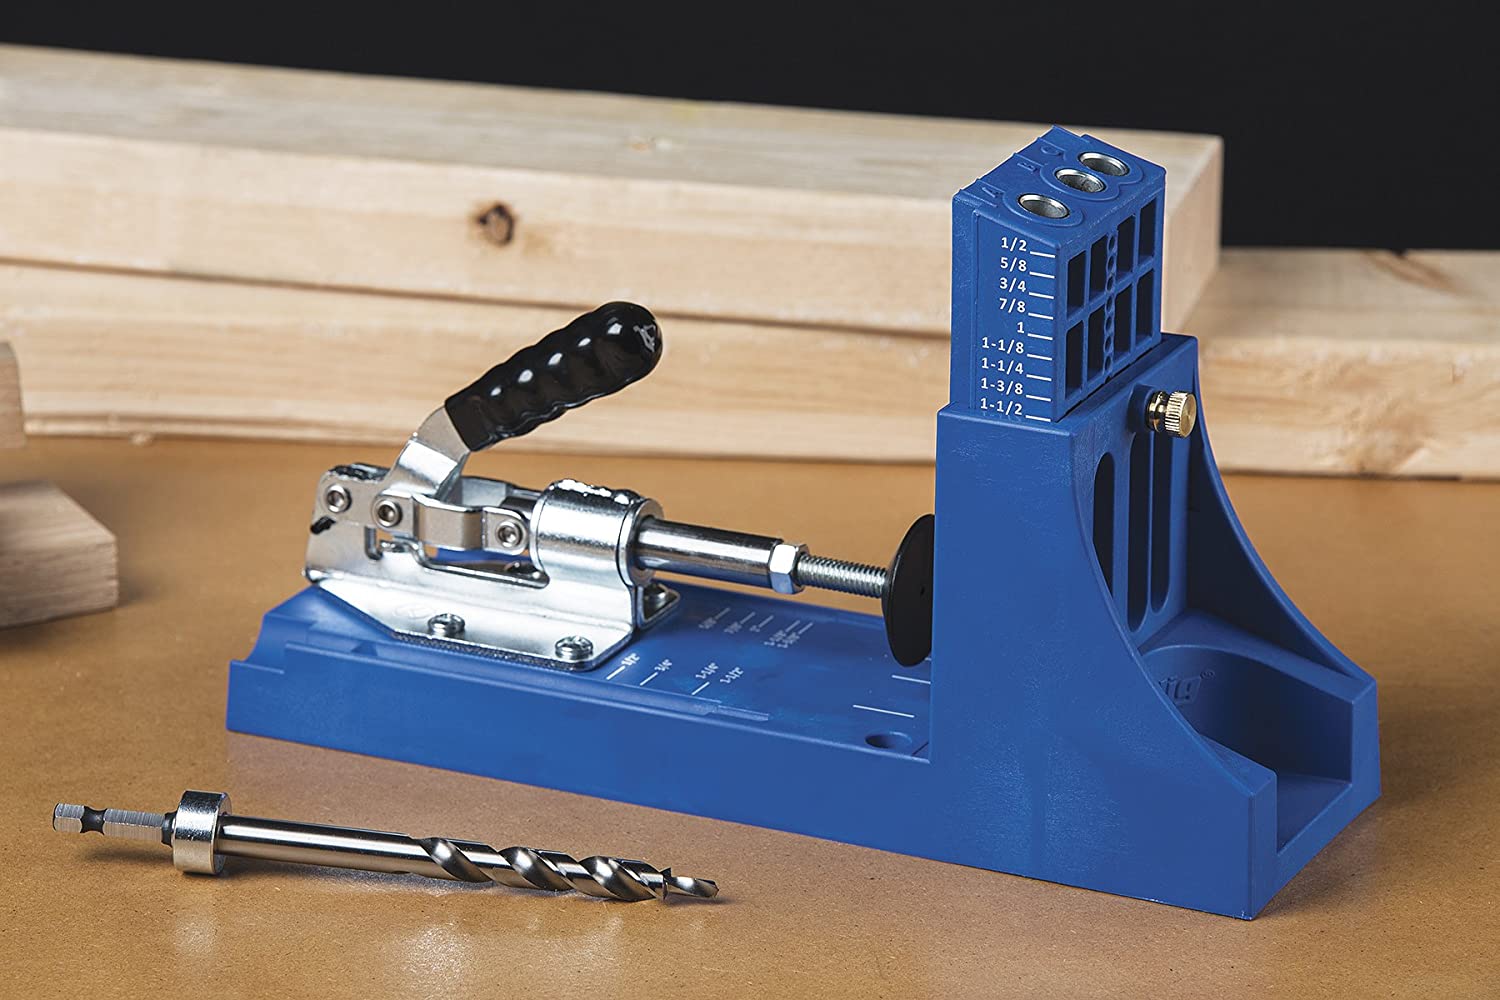


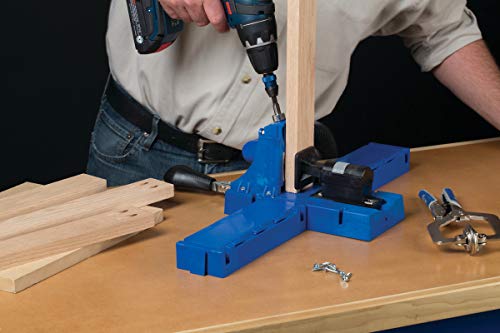
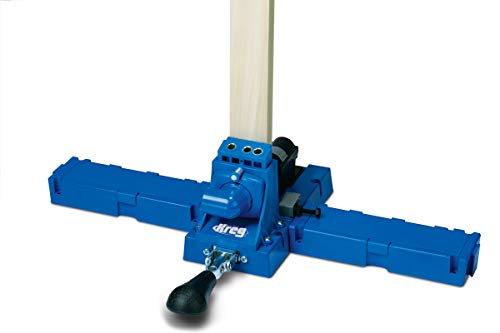
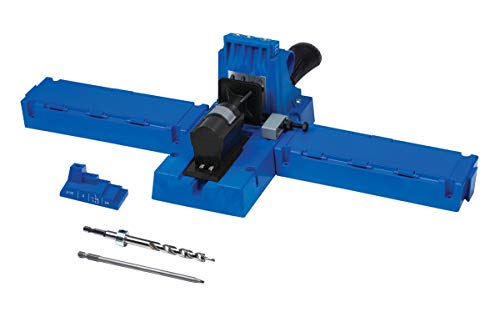

![11 Best Kreg Jig Pocket Hole Alternatives To Consider [Reviewed]](https://homesthetics.net/wp-content/uploads/2021/08/Best-Kreg-Jig-Pocket-Hole-Alternatives-011.jpg "11 Best Kreg Jig Pocket Hole Alternatives To Consider [Reviewed]")

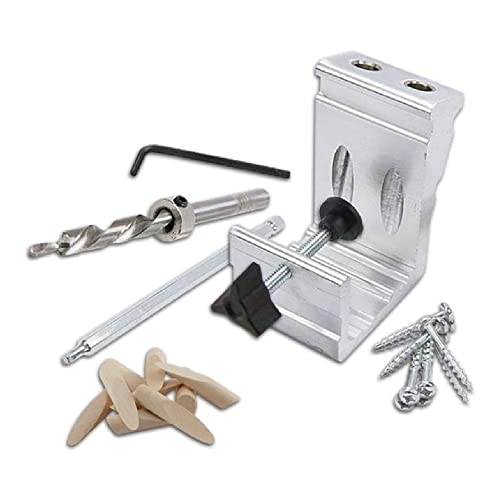


![Kohler Santa Rosa Toilet Review [All You Need to Know]](https://homesthetics.net/wp-content/uploads/2021/05/Kohler-Santa-Rosa-Toilet-Review-01.jpg "Kohler Santa Rosa Toilet Review [All You Need to Know]")


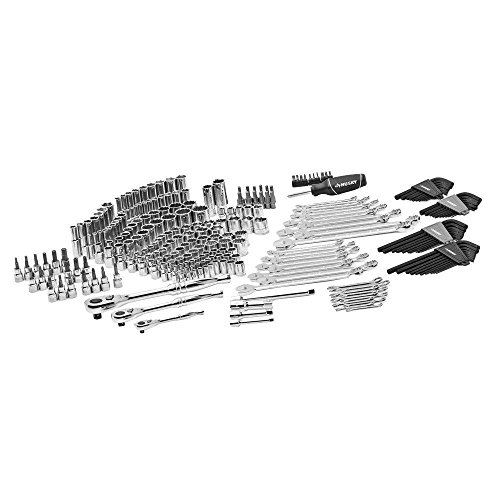


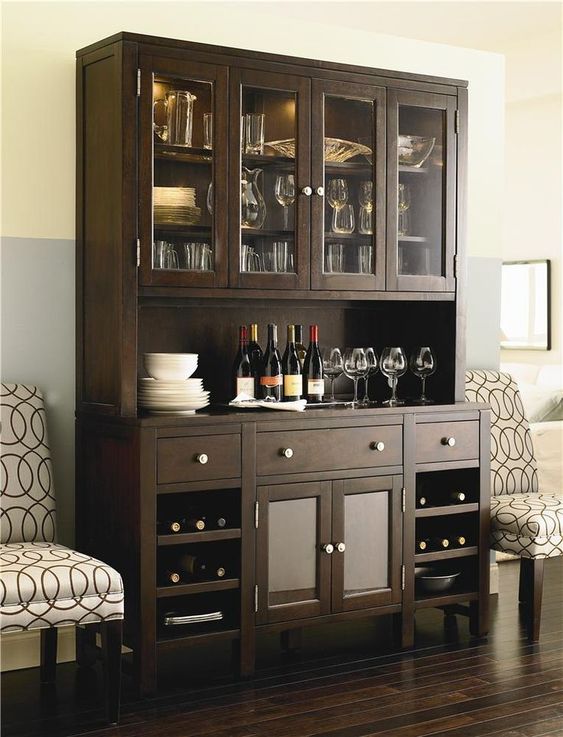

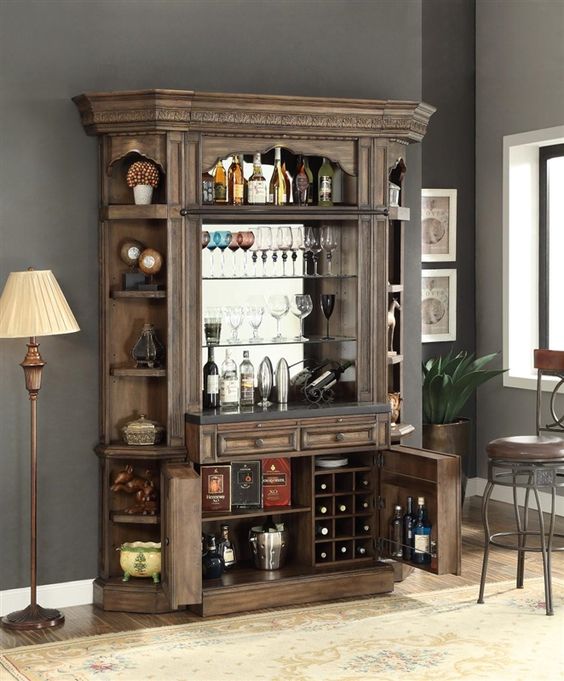


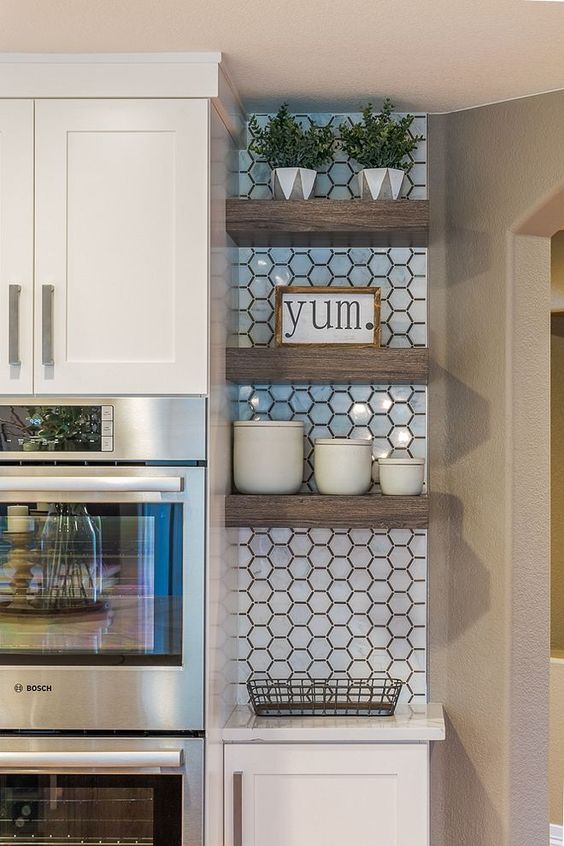
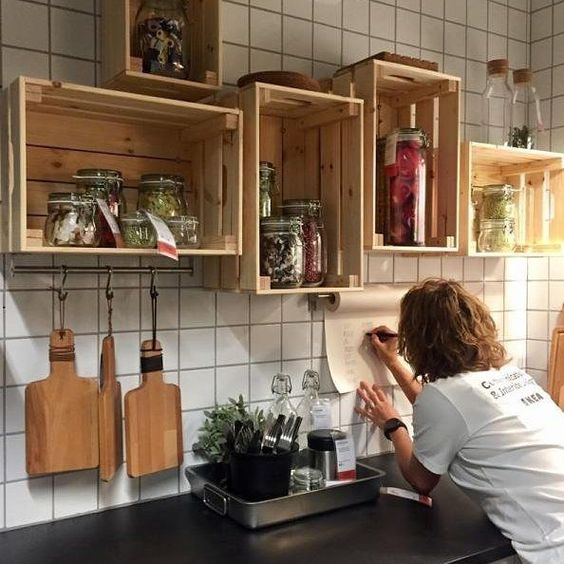


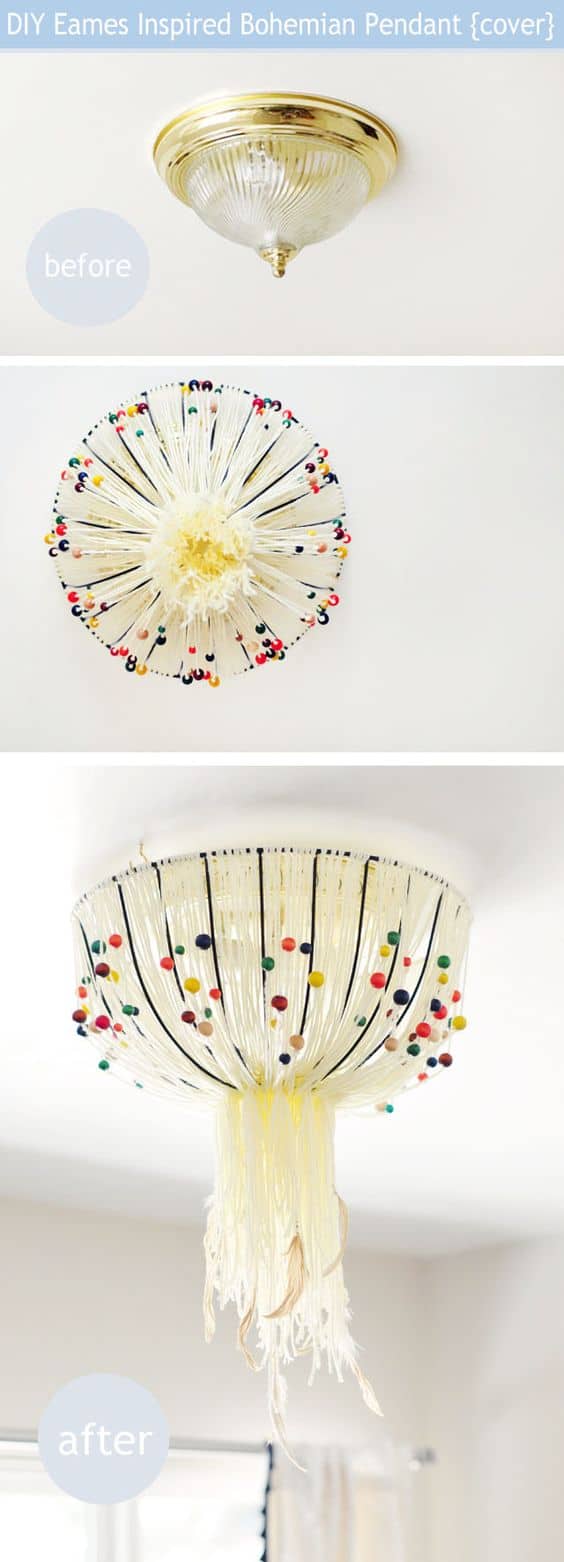


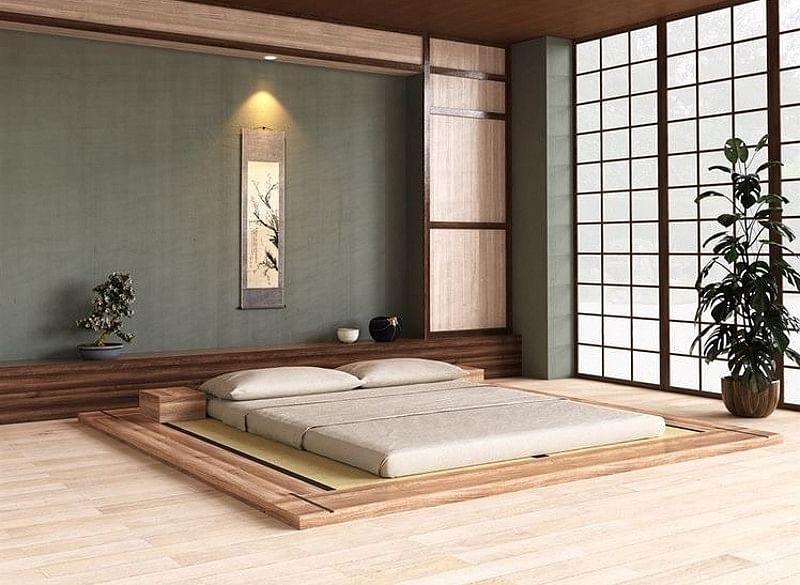


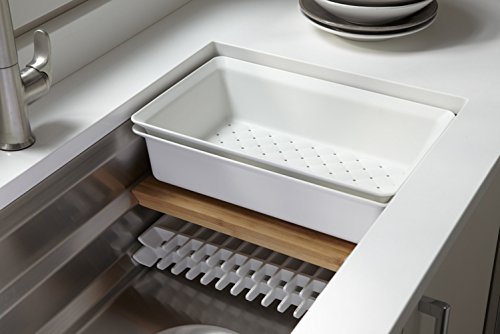

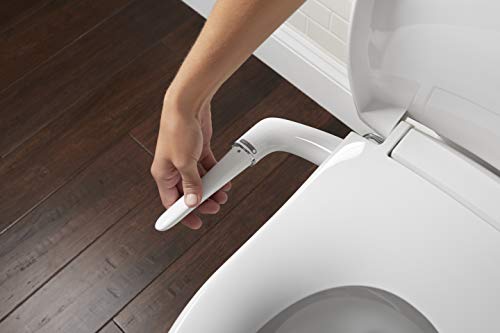


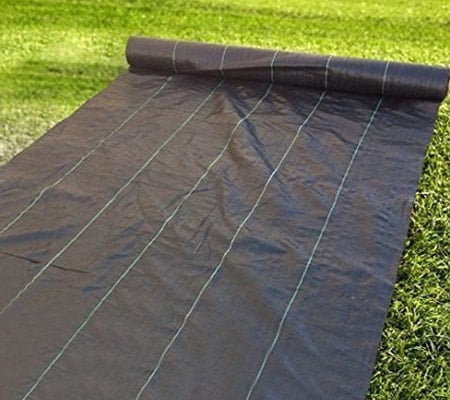
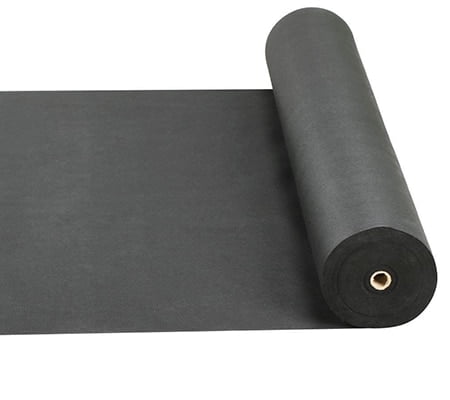

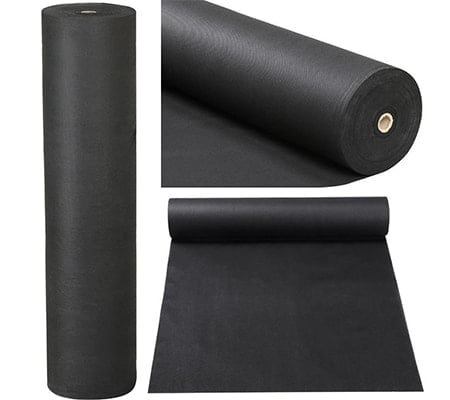


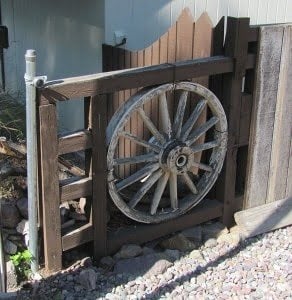


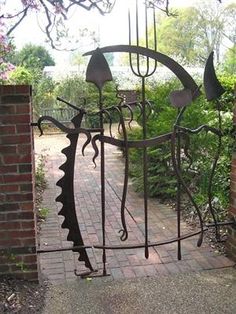
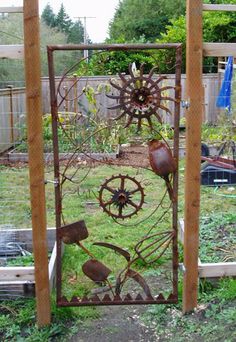
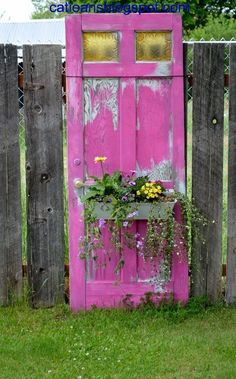


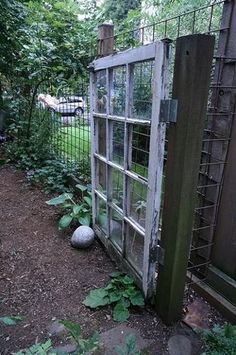
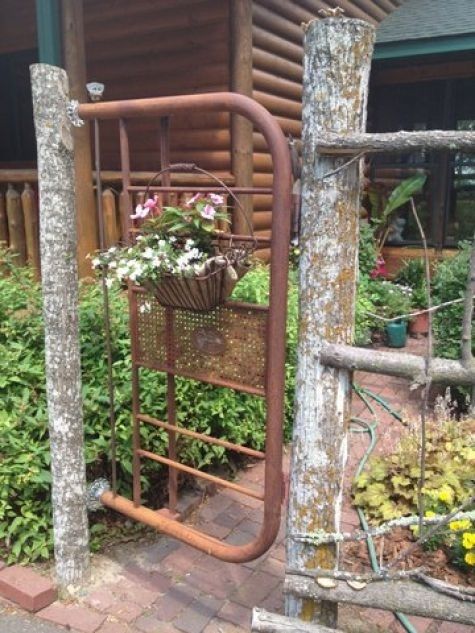


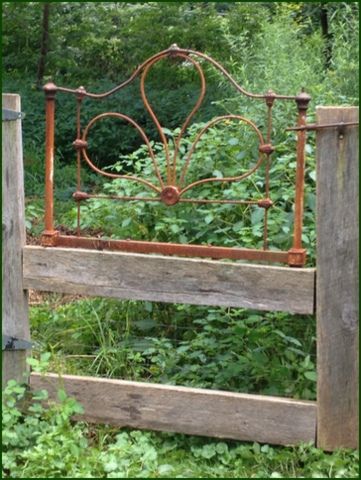

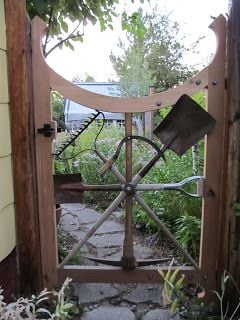
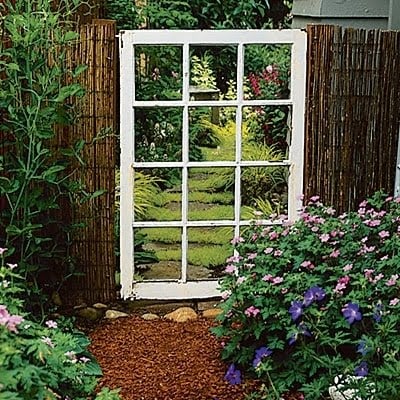


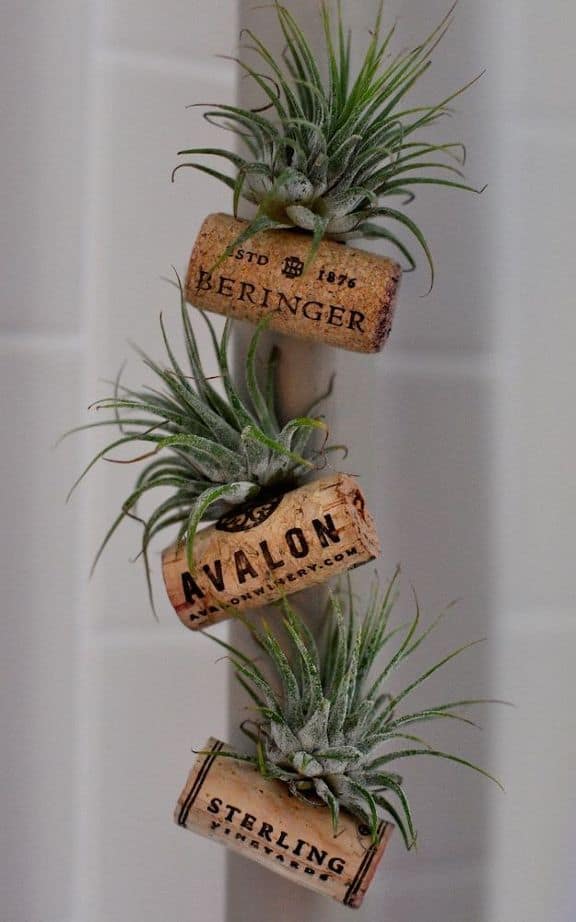

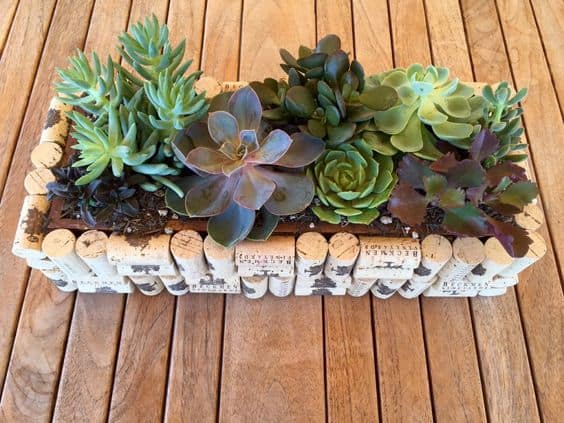


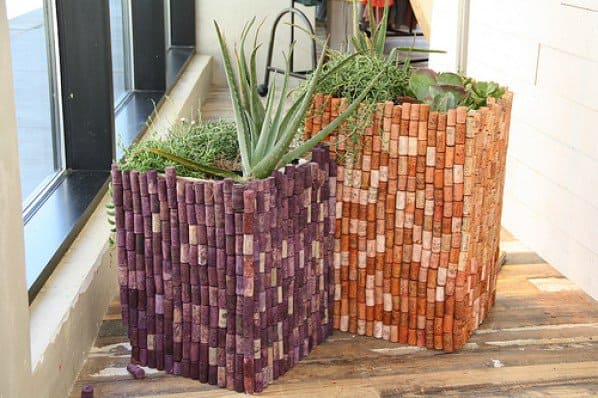


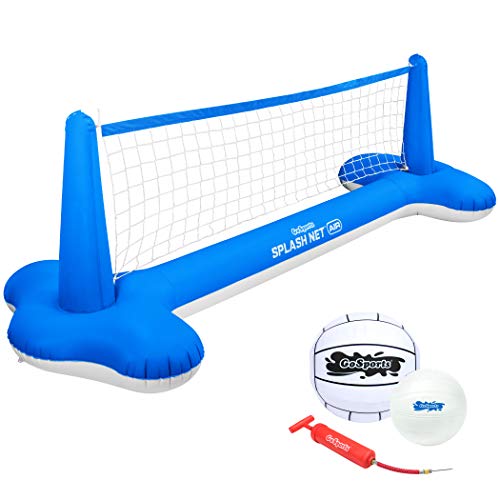


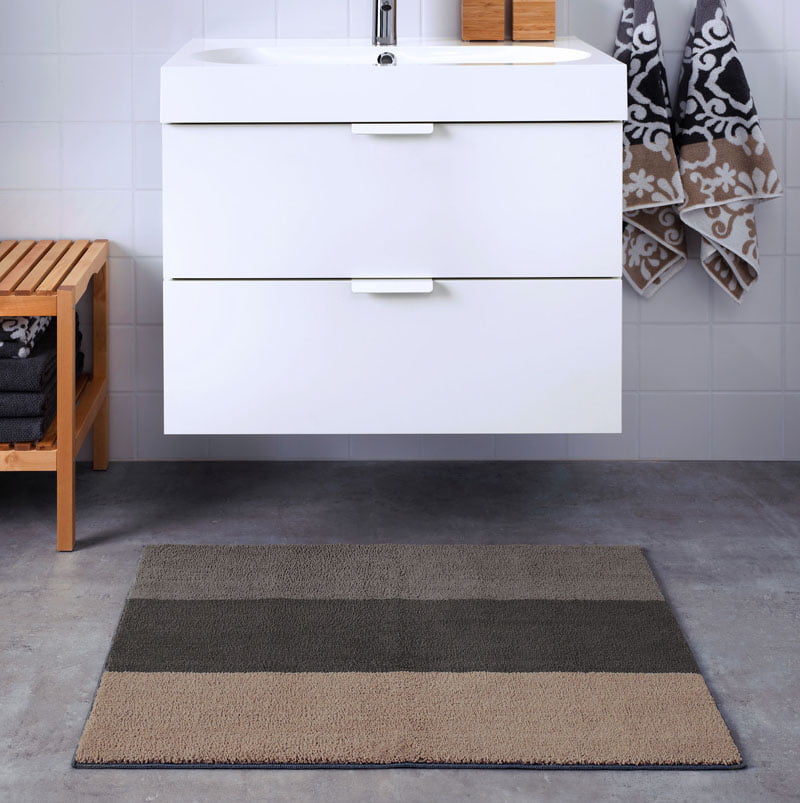
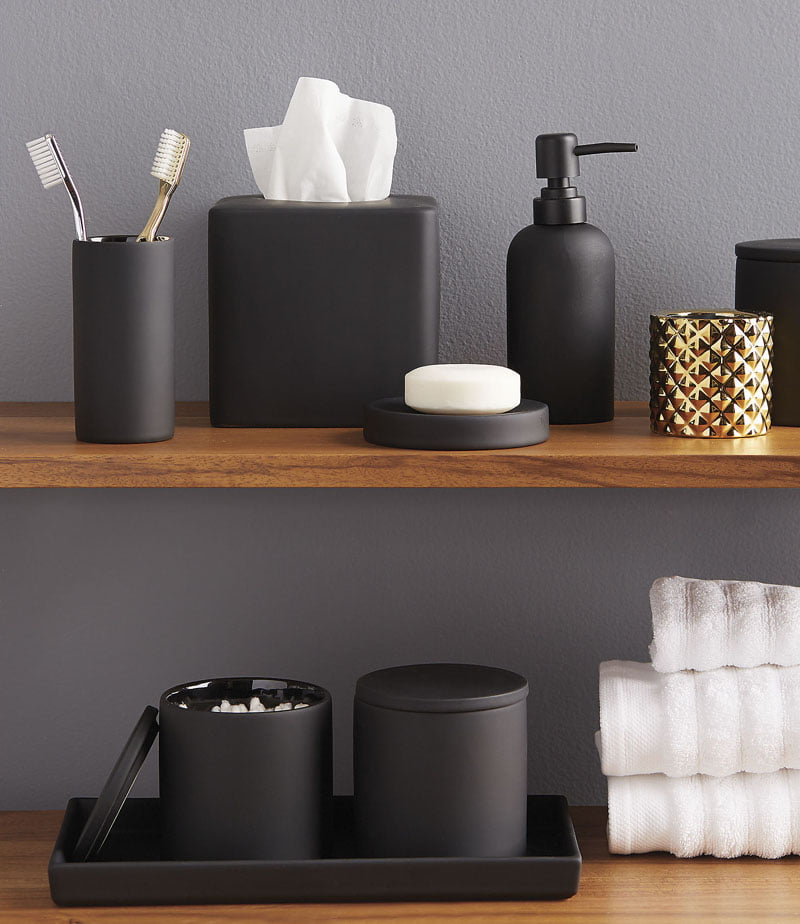


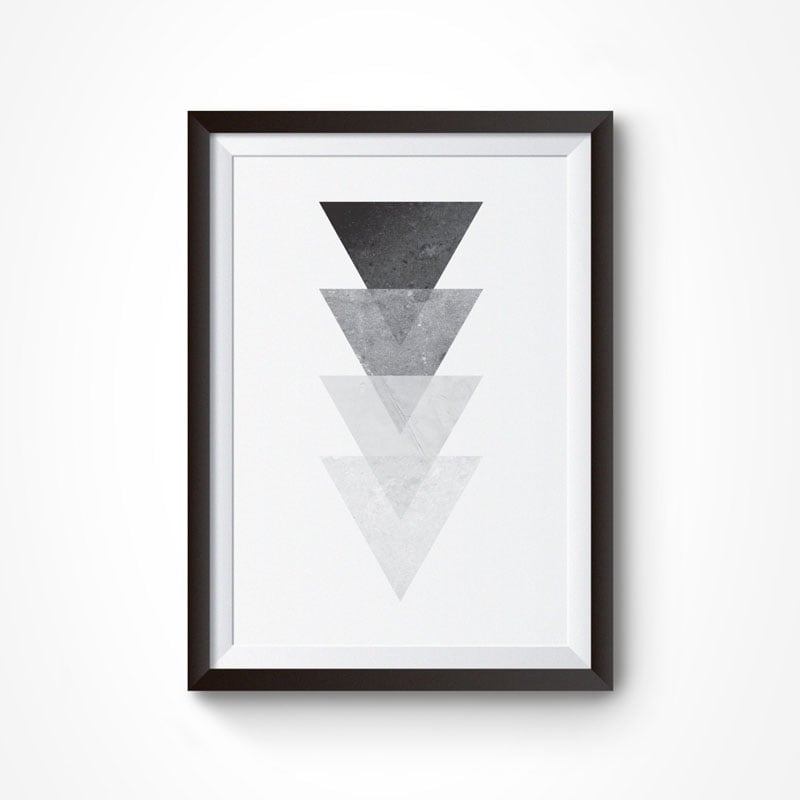


![HVLP vs. LVLP [All You Need to Know & Winner]](https://homesthetics.net/wp-content/uploads/2021/06/HVLP-vs.-LVLP-01.jpg "HVLP vs. LVLP [All You Need to Know & Winner]")


![9 Best HVLP Spray Gun [Review & Buyer’s Guide]](https://homesthetics.net/wp-content/uploads/2021/07/Best-HVLP-Spray-Gun-0011.jpg "9 Best HVLP Spray Gun [Review & Buyer's Guide]")

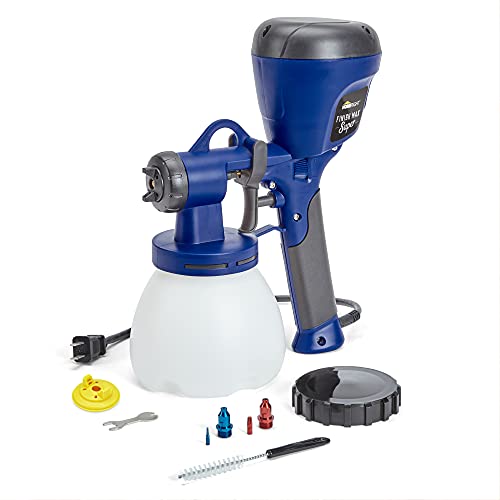

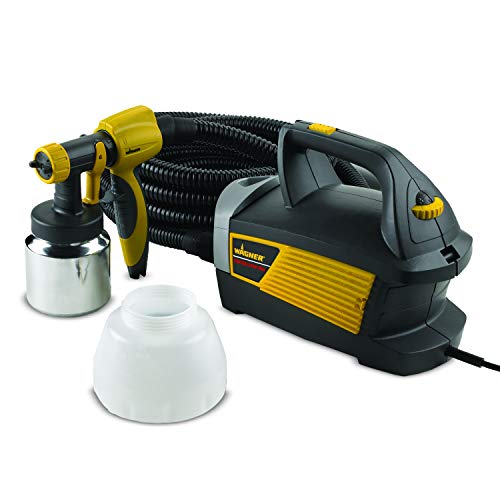
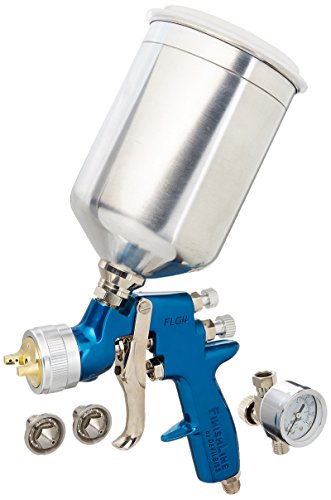


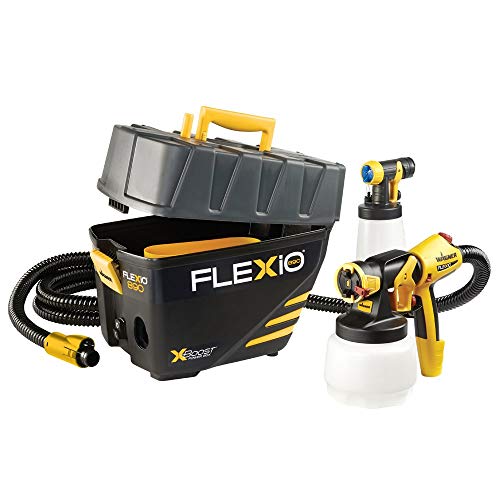
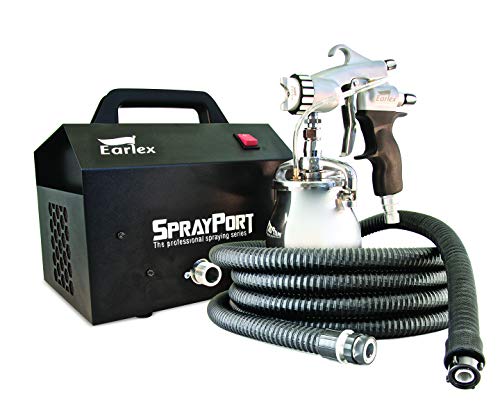
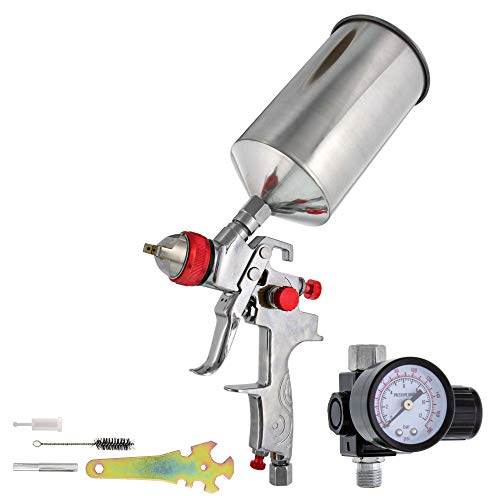


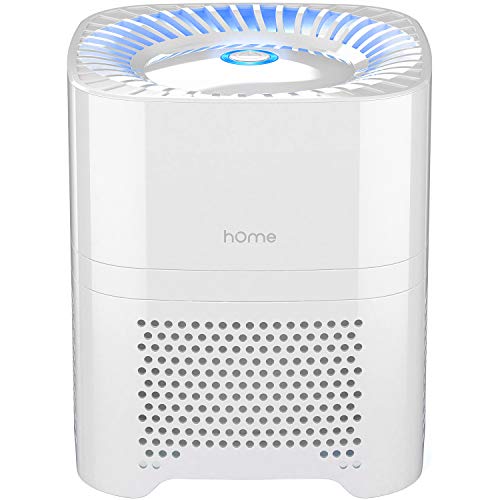
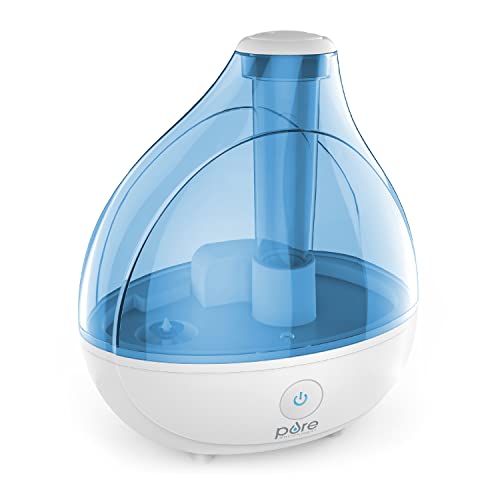
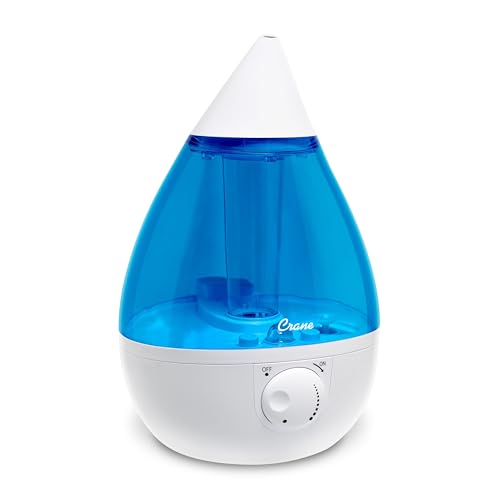


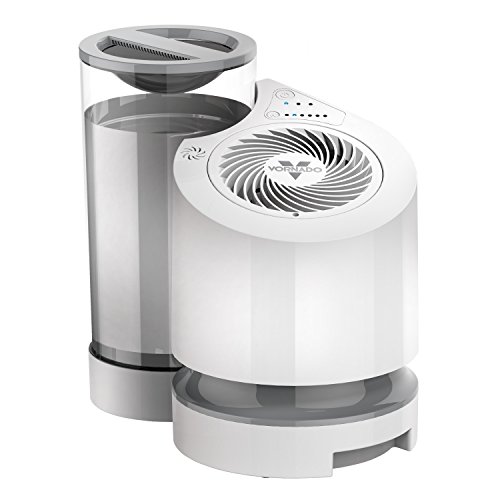


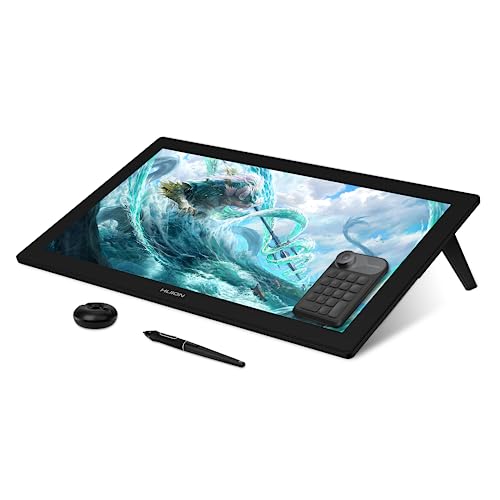

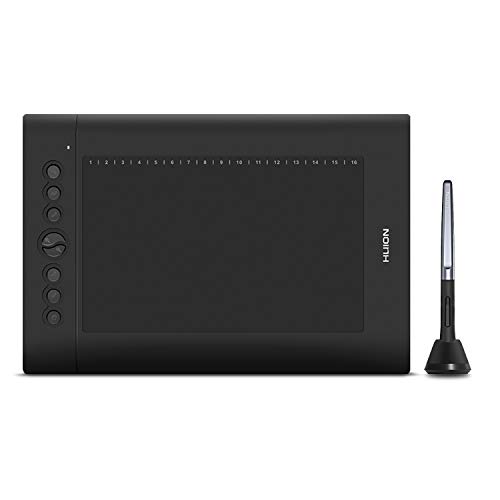
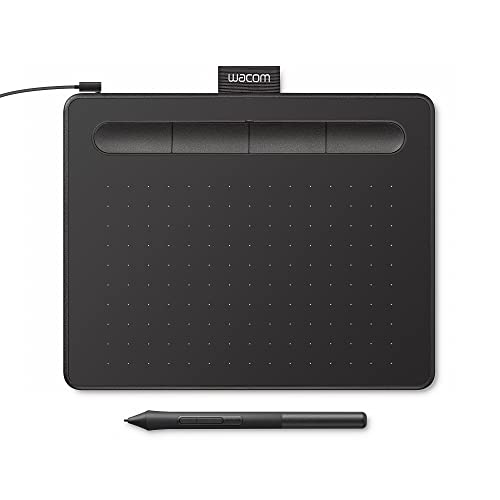


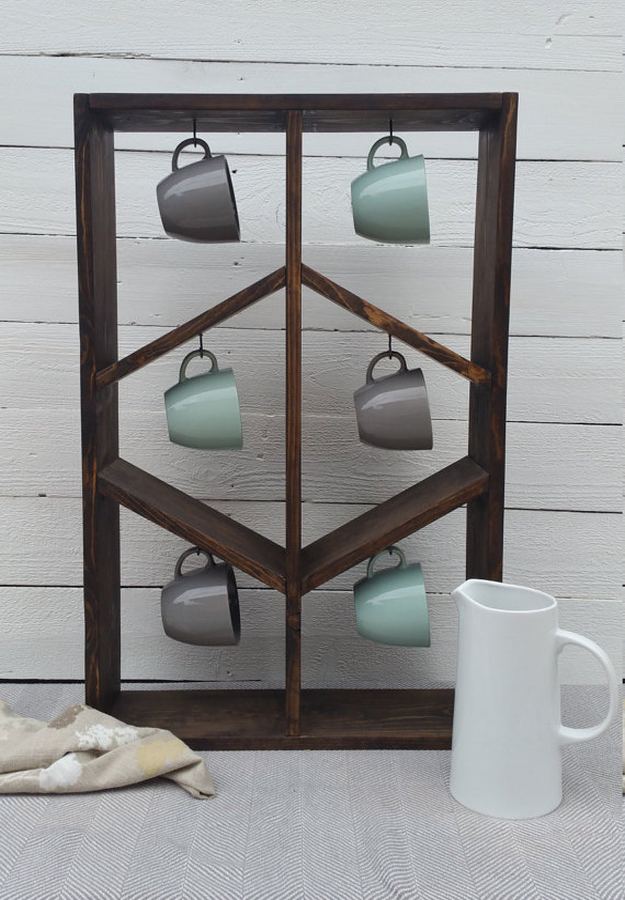

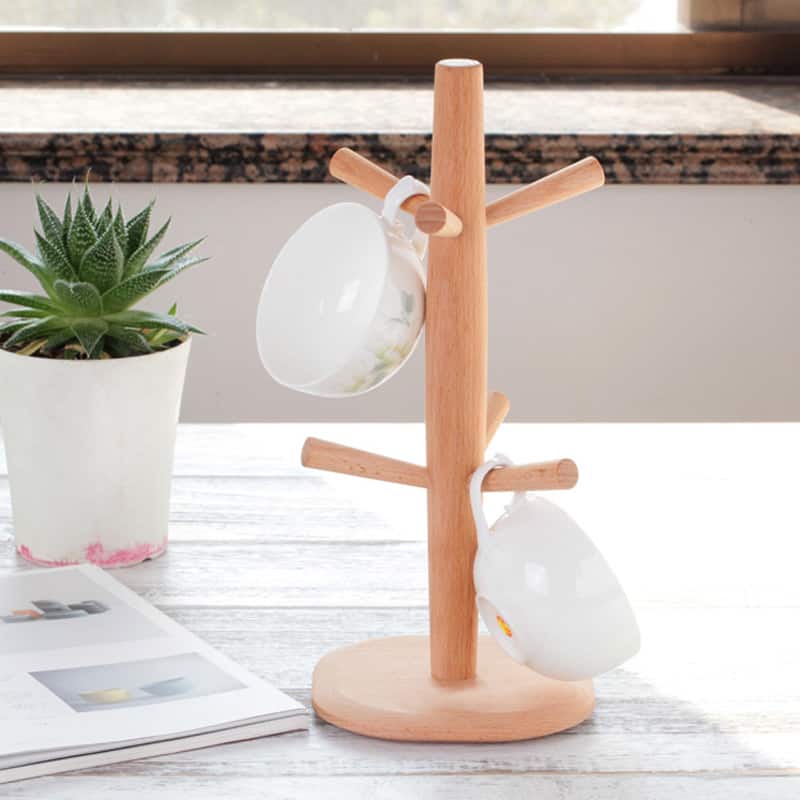


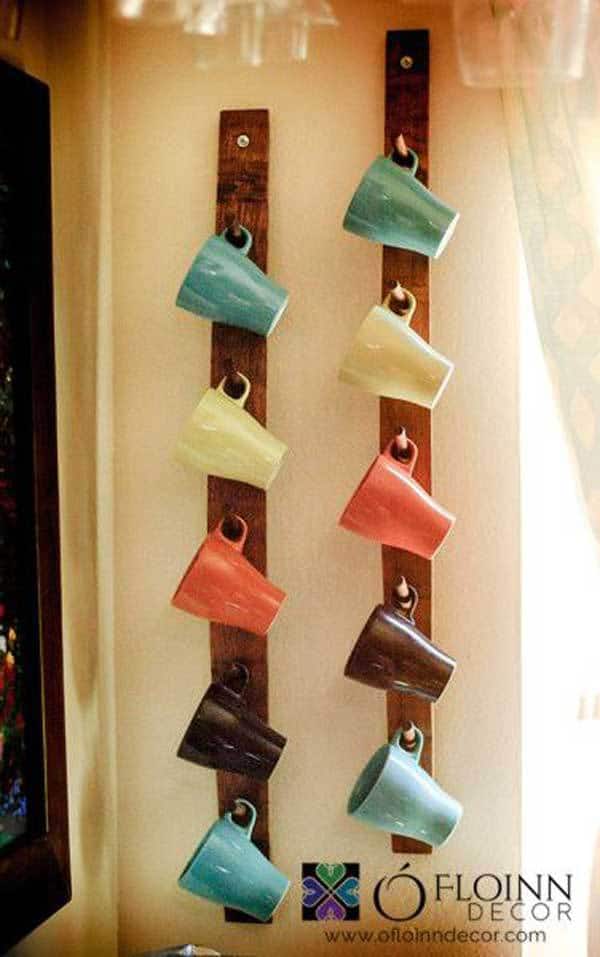


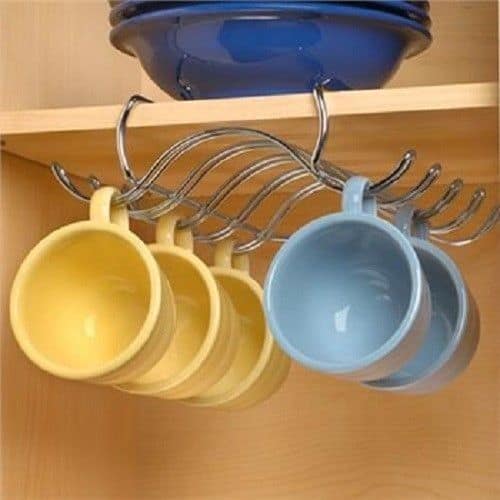


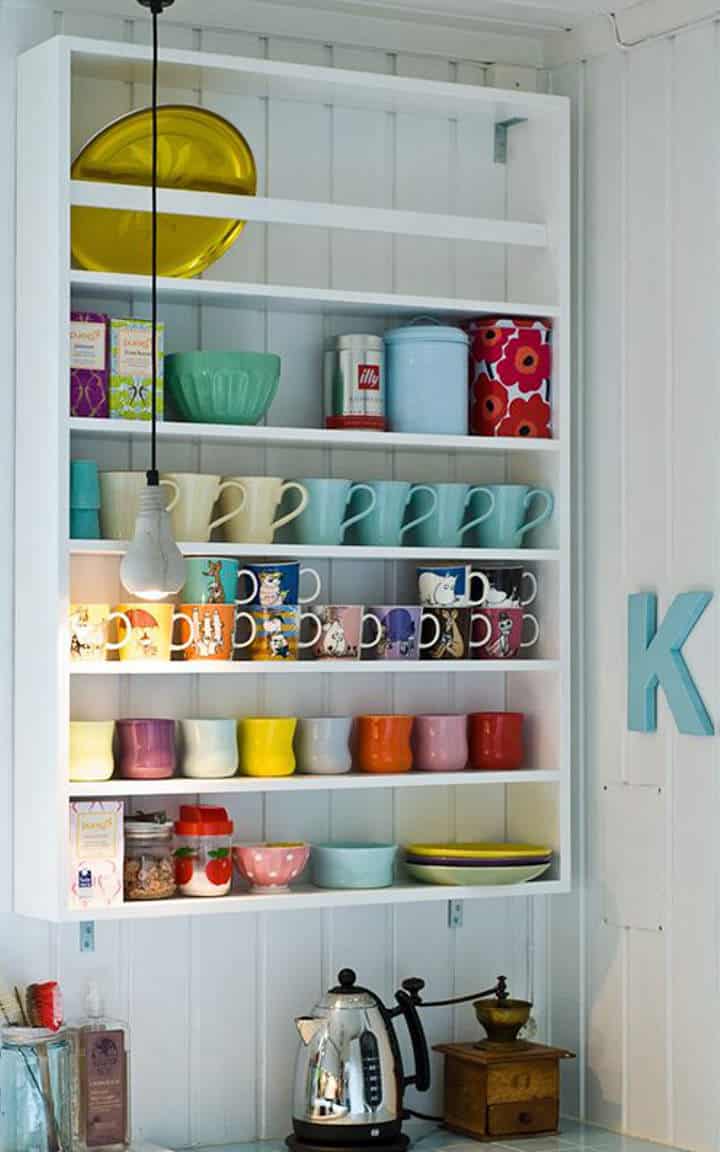


![How To Stabilize Wood [All You Need To Know]](https://homesthetics.net/wp-content/uploads/2022/01/How-to-Stabilize-Wood-1.jpg "How To Stabilize Wood [All You Need To Know]")

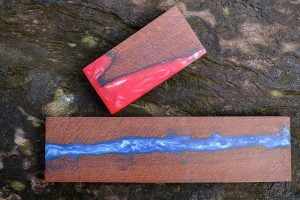


![How to Season Cast Iron: A Cast Iron Skillet Guide [2024]](https://homesthetics.net/wp-content/uploads/2023/04/How-to-Season-Cast-Iron-1.jpg "How to Season Cast Iron: A Cast Iron Skillet Guide [2024]")


![How to Remove Wood Glue [Removing Wood Glue 101]](https://homesthetics.net/wp-content/uploads/2022/01/How-to-remove-wood-glue-1.jpg "How to Remove Wood Glue [Removing Wood Glue 101]")


![How to Remove Spray Paint from Concrete [7 Methods + Guide]](https://homesthetics.net/wp-content/uploads/2021/06/How-to-Remove-Spray-Paint-from-Concrete-011.jpg "How to Remove Spray Paint from Concrete [7 Methods + Guide]")