I know how much you love DIY projects especially those that recycle old objects. In this article you are going to see some Outstanding Ways To Reuse Glass Bottles in some really functional and decorative ways, you are going to be surprised by the array of possibilities in which you can recycle the bottles. If you have plenty of them in your home, the ideas below will get your inspiration going!
If you miss decorative objects in your home, now you don't have to spend money on new ones cause you can simply make them on your own. Use black spray to update the look of the old bottles, and then decorate them according to your personal style.
Get the birds into your yard, by offering them food with this lovely DIY project. Now you can make a bird feeder in no time by recycling a glass bottle.
If you are a chandelier lover, I believe that this is the project that you will choose to make. The bottles will help you create a cozy ambiance in your home. What are you waiting for? Get down to work and reinterpret the design!
By using washi tape you can give the bottle a chic and cool look and they can easily be turned into vases. Decorate your own ones, and display your floral arrangements in a fantastic way.
Have you already found the DIY crafts that you are going to make and repurpose the glass bottles in your home and yard? If you are still having second thoughts, then scroll through the photos once again or cast a glance over these wine bottle crafts, these glass diy projects, or these methods to repurpose glass insulators; also make you learn how to cut a glass bottle!
The kitchen is known to be the heart of the home and that's why we should do our best to decorate it in the best possible way, after all, we know very well that the most delicious meals are cooked here and you are going to spend a great deal of your time in this room. We ought to decorate it in a cool, cozy atmosphere that fits us.
The modern kitchen designs that follow are really stunning and it's hard to pick a favorite reason for which today we will showcase black and wood kitchens only so we`ve curated ideas that are meant to boost your inspiration. Scroll down through the photos below and see the Outstanding Black and Wood Kitchens That Will Add Style To Your Home.
They are all-time favorites and I'm sure that you are going to like a handful from the first glance !
It doesn't matter what style wears the rest of your home, these designs are going to blend in with anything.
Even if the space for your kitchen is small, don't hesitate to go for a black and wood design. The strong contrast will emphasize an unique atmosphere that will distract the inhabitant from the room`s boundaries. It is recommended to keep the ceiling white to emphasize the feeling of space.
These designs will charm you as soon as you enter the room, the black color is so sophisticated and glamorous that it has the power to captivate your attention immediately.
If you are considering an unique design for your backsplash, we suggest you to go for a wooden one, beautifully paired with the counter top. You will create a great focal point in and continuity that sill further contrast with the black elements, a beautiful, dense balance.
The black and wood kitchens are currently a hot trend and lots of homeowners decide to incorporate them in their homes. Are you considering them as well? The photos that follow will help you to make a pick!
If you think there's too much black in these designs, feel free to add white elements here and there. They are going to fit in with the rest immediately through contrast and your kitchen space will seem larger, lighter, airier.
I'm totally in love with these designs and i have already picked the one that i'm going to recreate when i'm doing some renovation in my home, have you ?!
Black and wood look amazing in high gloss, don't they?
Here's another example where the white color is added in the combination, and we have to admit that the designer pulled off an extraordinary design, great depth and splendid balance !
Aren't these designs truly fascinating? How do you like them?
What do you think about the cool black and wood kitchen designs above? We would love to hear your thoughts in the comment section below!
Outdoor mats are a great way of improving the appearance of your home while also preventing the entry of dust and dirt.
Unlike indoor mats, purchasing mats for the outdoors requires more research as many additional factors need to be considered. For instance, outdoor mats must be tough and resistant to harsh weather conditions. At the same time, they need to ensure that dirt from shoes does not enter the house.
We understand that shopping for outdoor mats isn’t a fun task; most people do not have the time to go through a list of the best options available. That is why we bring you our curated selection to help you select the right product.
Not only that, but we have also included a buyer’s guide that will inform you of the factors you should consider while selecting a doormat. So, without further ado, let us dive right in!
Let us start with the Plus Haven Coco Coir Door Mat, which is made of 100% pure coconut coir, one of the most durable natural fibers. These fibers help the mat easily capture dirt, moisture, and other particles, thus preventing them from entering your home.
Attractive Design: The eco-friendly material has a...
Indoor and Outdoor: The rug is designed specifically for...
Why Did We Like It?
To begin with, this coconut coir mat is a heavy-duty mat that can withstand regular traffic without shedding. The 0.60" thick pile also ensures that there are no see-through patches.
This outdoor mat is an excellent option for those who wish to follow a sustainable lifestyle because the coconut coir is a renewable material produced by hand. Now you can keep your house clean, and your planet too.
Not only that, but the fibers of this doormat have excellent water-resistant capabilities, making it a great option if you live in an area that sees heavy rainfall. On that note, it can be very useful for preventing any wet marks — sunshine or rain.
Also, as far as maintenance is concerned, this outdoor doormat is also very easy to clean. You only need to vacuum it once in a while to keep it in good condition.
What Could've Been Better?
It was nearly impossible for us to find any downsides to this impressive doormat, which is excellent for outdoor and indoor use. However, we would like to point out that the dye used in this product is pretty strong and can even stain the area where the mat is placed.
We bring you the Ubdyo Extra Durable outdoor doormat, an excellent product for the holiday season. This Christmas-themed doormat comes with rubber stripes and artificial grass that provide an attractive appearance to the mat while preventing the entry of dust and water inside.
Leak-Proof And Non-Slip: Our premium outdoor rug is backed...
Why Did We Like It?
First of all, we were very impressed by the design of this outdoor mat. Ubdyo has rightly named it a functional smart design as it offers an attractive appearance while effectively capturing dirt particles.
This durable doormat has been manufactured in such a way that it will last a long time, even if your home witnesses a regular stream of visitors. Besides that, the raised pattern ensures dirt from shoes is completely scraped off when a person steps on the mat.
Furthermore, cleaning the product is simple and only requires you to spray water on the outside of the rubber doormat and shake it off. Alternatively, you can simply vacuum this product or wash it with warm water.
You will also be glad to know that the rubber backing is leak-proof and provides a non-slip design. So, you can ensure that there are no accidents even when the floor is wet.
What Could've Been Better?
Once we tested this product, we found that this doormat is incredibly thin and can easily be rolled up like paper. And while it does not compromise durability, some customers may prefer a thicker doormat, especially outdoors.
DII is a brand that has been manufacturing high-end products for homes for over thirty years, offering quality items for a great experience. The CAMZ11552 is a classic example of just how good their products are. It offers a timeless design with excellent dirt capturing capabilities for both indoor and outdoor areas.
100-Percent Natural coconut coir fiber face provides the...
Why Did We Like It?
We came across the DII CAMZ11552 while searching for an indoor-outdoor doormat and are happy to say it did not disappoint. This versatile product can be used in several locations, such as patios, garages, porches, etc.
Constructed from coconut coir, this is one of the best outdoor doormats when it comes to sturdiness and durability.
At the same time, the fibers of this doormat also do an excellent job of keeping dirt and debris out. And thanks to their water-absorption quality, this outdoor doormat is ideal for areas with frequently wet weather.
Furthermore, if you love customizing the look and appearance of your home, this product is available in several different colors and designs. It is great for adding style and personality to your entryway.
The CAMZ11552 also comes with non-slip PVC backing that prevents slipping by keeping the mat in its place in all conditions.
What Could've Been Better?
We loved the DII CAMZ11552 for its versatility, durability, and multiple design options. Unfortunately, these excellent features come at a significantly higher price. Indeed, this doormat is one of the costlier options on the market and may not be an ideal choice for those with a tight budget.
The 8541848335 model from Gorilla Grip is one of the best options on the market for those who are looking for a low-profile door mat. It comes with a premium build, a 100% natural rubber border and backing, and a woven polypropylene fabric center for welcoming guests in style.
THE ORIGINAL WEATHERMAX ALL SEASON DOORMAT: Gorilla Grip's...
STAIN, WEATHER AND FADE RESISTANT: constructed to withstand...
Why Did We Like It?
The Gorilla Grip 8541848335 model is manufactured by Hills Point Industries LLC, a manufacturer dedicated to bringing customers household products at affordable prices.
At the same time, this premium product offers excellent value for money, superior construction, and an appealing design. It also features a beveled border that helps trap moisture, mud, and dirt, preventing them from creating unsightly tracks indoors.
This outdoor doormat is also available in a wide range of stylish patterns and colors, making it easy to find a product that matches your home's decor. Not only that, but the design is also flexible enough to allow you to place the mat in various locations, such as living spaces, lobbies, and even office spaces.
Other than that, the low-profile design of the 8541848335 model from Gorilla Grip makes it excellent for doors and entryways with a low clearing. That said, you can easily use it in areas that are unsuitable for thicker rugs.
What Could've Been Better?
The only flaw we noticed with this otherwise excellent product is its relatively strong rubber smell, which emanates from the rubber backing and beveled borders. However, the smell tends to fade away with use and will completely disappear after a few weeks.
Outdoor doormats are not only meant to prevent dirt and grime from tracking into your home but are also one of the first objects guests come across while visiting. They can help create the right kind of impression, which is why the Barnyard Designs Welcome Doormat is a great choice.
Many of you must have heard of Barnyard Designs. It is a brand that focuses on designing and developing home decor products that make life easier and more comfortable. The Welcome Doormat from the brand offers an excellent way to greet guests while also making a bold statement.
One of the things that we liked most about this front door mat was the size. The Welcome Mat is one of the largest outdoor doormats that we could find on the market, which is great for capturing dirt and debris from a wide area.
This front door mat comes with a non-slip rubber back and is completely waterproof and weather-resistant. Not only can you use it in different weather conditions, but you can also clean it easily by washing it with a garden hose.
Another thing to mention is the excellent durability, which is why this doormat will last for several years.
What Could've Been Better?
This Welcome Door Mat from Barnyard Designs offers a delightful experience, making it difficult for us to find any significant drawbacks. If we had to nitpick, we’d say that this welcome mat does not come with a finished edge, so you will need to place a rug underneath it for a better grip.
Moving on to the next product on the list, we bring you the BeneathYourFeet outdoor doormat, one of the highest-rated products on the market. It is a multipurpose door mat that comes loaded with several exciting features that will be incredibly useful for your home.
CHARMING MATS FOR YOUR HOME: our outdoor mat is made of...
TRAPS DIRT WELL: the concave word and convex border helps...
Why Did We Like It?
There are many reasons why we decided to include this product on our list, the first of which is the excellent construction. The BeneathYourFeet mat is made of premium PVC material, making it one of the most durable products in this segment. Even with heavy use, you won't be needing a replacement anytime soon.
Furthermore, the concave embossed word and the convex border work flawlessly for trapping dirt and mud from shoes and feet of pets. We tested out the product and were delighted to see that it could even trap snow as well, making it suitable for all weather conditions..
The manufacturer has also made it very easy to clean the mat. The simplest way is to shake the mat outside, and the debris will fall off. Otherwise, you can also use a broom to sweep away the particles or use a vacuum cleaner.
What Could've Been Better?
While testing out the mat, we discovered that the non slip backing works very well on dry surfaces to prevent slipping. However, the manufacturer advises using the mat only on dry surfaces as the backing is not very effective. Water under the rug can cause slippage.
A steadily increasing number of manufacturers are now offering products that meet sustainable standards, as demand for them is multiplying. Sierra Concepts is one such brand, and its SC105, made of eco-friendly material, is one of the finest outdoor doormats that you can buy right now.
Includes 2 Indoor Outdoor Floor Mats: Enjoy two amazing...
Durable, Safe & Easy Maintenance: Cleaning and maintaining...
Why Did We Like It?
The Sierra Concepts SC105 is the perfect option if you are looking for the best value for money option on the market. It includes two indoor outdoor floor mats in a set, helping you save money without compromising on the product quality.
The mats are available in a large size and are made of high-quality polyester and recycled PVC materials. These recycled materials provide additional sturdiness to the mat while also preventing moisture leaks.
Additionally, the PVC material provides a non-slip backing to the mat, which reduces the chances of slipping by keeping the mat in place.
Moreover, these outdoor doormats have a ribbed surface ideal for scraping dirt and mud off dirty boots and feet. As mentioned earlier, the SC105 is an indoor outdoor welcome mat and can withstand different weather conditions reasonably well.
Additionally, there are multiple color options available for use with different types of decor.
What Could've Been Better?
These heavy-duty mats are undoubtedly one of the best ones we tested while compiling this review. The only concern was that they were prone to slipping if water got underneath. It is recommended not to keep them on surfaces where water can go under the mats.
We are nearing the end of our list, so it is time to introduce you to the MontVoo Front Door Mats. MontVoo is well known for its range of home and kitchen products. This welcome mat is another excellent product from the brand, offering premium quality with exceptional performance.
Water Absorbent&Dirt Trapper: Terry polyester surface with...
Natural Rubber Backing: Crafted with a textured heavy-duty...
Why Did We Like It?
MontVoo is one of the newer entrants in the home products industry and is rapidly making a name for itself through its extremely high-quality home products. This doormat from the brand is one of the best ones we came across, suitable for heavy-duty use and offering multipurpose functionality.
It comes with a non-slip rubber backing, which helps it stay in its place on all types of floors. We tested the mat on marble, concrete, and even wood and were impressed with the results. Additionally, the A-class absorbent polypropylene surface that absorbs moisture from shoes and feet.
Since the mat is highly resistant to weather and seasonal changes, you can also use it in several types of different locations. Besides performing well in rainy weather, we also found that it does not fade even when exposed to direct sunlight for prolonged periods.
What Could've Been Better?
There is hardly any drawback worth mentioning about this product, which offers the perfect combination of durability and versatility. The only thing we wished was there were more attractive designs and colors to select from. The available patterns are somewhat limited compared to what the competition is offering.
The Chichic Entrance Door Mat is the final product on our list, but don't let that fool you. This fantastic product has a high-quality construction that ensures long lasting durability and impressive performance. The unique fabric also provides it with an attractive design, so you can impress visitors easily.
Material and Unique Design: Made of sturdy rubber; flocked...
Why Did We Like It?
Starting with the design, the Chichic Entrance Door Mat comes with a flocked fiber surface that helps provide it with a beautiful appearance. Not only that, but the fabric is very effective in trapping dirt due to the patterned grooves.
You can place this mat near the front door, back door, porch, and other similar areas, and it will stay in its place due to the excellent rubber grip backing. The chances of anyone slipping due to this mat are extremely slim.
This durable doormat is also available in different sizes suitable for various types of locations. One thing that we liked most about this mat is that maintenance is effortless. It can be easily cleaned by either sweeping, vacuuming, or washing it with a garden hose.
Furthermore, the firmly stitched edges provide it with an elegant look while ensuring additional durability.
What Could've Been Better?
This mat is one of the costlier options currently available on the market. Those who are willing to spend that much can get an excellent product with superb features. However, if you think the price is too much, it would be better to look for more affordable alternatives.
Pros
Beautiful design
It can be used in many different areas
Sturdy construction
Suitable for heavy usage
Cons
Costly
Outdoor Doormat Buying Guide
We have listed the best outside doormats that are available on the market. To make your task even simpler, we also include a buyer's guide. This guide lists all the critical factors that should be considered before making a final decision. Read on to learn more about these factors.
1. Build Material
One of the primary considerations when purchasing an outdoor doormat is the type of materials that it is made up of. Manufacturers use different materials, such as polyester, coir, recycled, etc. Each material comes with different advantages and disadvantages.
For instance, polyester is easy to clean and slip-resistant, while coir offers a more natural look and is environment-friendly. On the other hand, recycled rubber is non-porous and long-lasting.
2. Shape And Size
Outdoor mats are also available in different shapes and sizes, even unique ones like round, oval, semicircle, etc. Since mats are meant to be used in various locations, the numerous options make selection easier.
It is recommended to select that mat size that can fit comfortably in the required space while ensuring proper coverage and protection. The shape can be selected based on personal preference, looking at what might be most suitable for the existing decor.
3. Surface Of Doormats
The surface of the doormat not only determines how the mat looks but also how effective it is for capturing dirt and grime. For instance, ribbed textures are highly efficient in capturing mud particles and help the mat stay in place. Different mat surfaces can be used with various types of decor.
Verdict
Outdoor mats are the perfect solution for preventing dirt from tracking into your home while also adding to your home decor. We hope you found our review-based guide helpful in selecting the right product to keep your indoors clean and outdoors more beautiful.
Before you go, check out our favorite products from the list. Firstly, the Plus Haven Coco Coir Door Mat is our overall favorite as it is suitable for heavy-duty use and is a sustainable option.
And if you are looking for a versatile and low-maintenance option, then the Ubdyo Extra Durable outdoor doormat might be more appropriate. Finally, DII is an excellent choice for those who want multiple color options and a sturdy build.
With that, it is time for us to sign off. Until next time!
Traditional orbital sanders do their jobs remarkably well but generate massive amounts of debris and dust during the sanding process.
And continuous exposure to wood dust and debris may affect your health. You may experience skin and/or eye irritation, asthma, allergy, reduced lung function, and even nasal cancer.
This is why you must have a power tool for doing your renovationor sanding project. Interestingly enough, jobs like cleaning dirt, varnishing, removing old paint, and many others can be done easily using a sander. However, the real issue lies in finding the perfect one for your needs.
We understand that finding the best sander can be a difficult task, as the market is filled with numerous options. But fortunately, we have done our research and prepared an exclusive list of the five best orbital sanders available on the market.
Without talking much, let’s dig in!
Listed below are the Best Orbital Sanders With Vacuum Attachment:
DeWalt: The DeWalt DEW6423K compact power tool excels in dust collection. Lacks a customizable adapter for dust collection process enhancement.
Makita: The Makita BO5030K is well-suited for prolonged tasks with its ergonomic design and added handle. Higher cost and weight may be noted.
Black & Decker: The Black & Decker BDERO100 is an affordable compact sander ideal for occasional use. Struggles with speed control due to a fixed speed system.
Milwaukee: The Milwaukee Electric Tools 2648-20 M18 boasts flexible and user-friendly pad-changing features. Regular maintenance may be required for the hook and loop system.
Bosch: The BOSCH ROS20VSC Excellently sands curved surfaces and offers micro-dust filtering. Notable for a lengthy filter cleaning process.
Here's the list of the 5 Best Orbital Sander With Vacuum Attachment for cleaner and healthier sanding projects.
1. DeWalt
An industrial tool company, DeWalt is an American-based worldwide manufacturer of hand tools and power tools for manufacturing, construction, and woodworking industries, as well as for DIY projects. Being operational for nearly 100 years, they have delivered quality and innovative solutions to their customers. Similarly, the DEW6423K is a heavy-duty yet powerful orbital sander that delivers exceptional performance.
This petite, Dewalt random orbit sander is regarded as one of the most powerful units. Now, you may look for a bulky and heavy-duty sander thinking it’d be powerful, but having a smaller one will help you in sanding small and tight corners.
Small-sized sanders are more liable to produce wood dust, chippings, and other debris while sanding, and this increases the chances of them entering your eyes and lungs. However, this model comes with a dust collector bag that collects these particles efficiently. Additionally, its locking mechanism allows you to attach the vacuum hose while working with the sander.
Not only that, but it can also operate in the 8,000-12,000 OPM range, allowing you to speed up your cleaning process.
Besides, the rubber cover on the switch makes for a comfortable and soft grip top while protecting the sander from dust. Hence, this tool ensures a faster yet more efficient sanding process.
It was almost impossible for us to find any drawbacks of this small yet powerful orbital sander. However, we would like to point out that this tool does not include an adapter to allow you to customize your dust collection process. Other than that, it is hands down one of the best sanders on the market.
What We Like
Compact, lightweight, and efficient
Excellent dust collecting system
Rubber cover makes a stronger grip
Low vibration
What We Don't Like
Doesn’t have an adapter for customizing the dust collection process
Power Source: Electricity | Dimensions: 10.38 x 7.25 x 6.2 inches | Weight: 3.94 pounds | Amperage: 3A | Speed: 12,000 OPM
2. Makita
Makita designs and develops some of the best and most highly-rated professional and industrial products for its clients worldwide. The BO5030K is a classical, and heavy-duty tool from Makita suited well for complex and lengthy jobs like sanding hardwood floors.
If you plan to start a lengthy and challenging sanding project, the Makita BO5030K will come in handy. Its ergonomic design and rubberized grips ensure a stress-free working experience even when you’re working for more extended periods.
It's a common saying that the more the merrier. Likewise, this sander comes with an extra handle for added support and control when sanding small and tight spaces.
Other than comfort, its powerful 3-amp motor with ⅛-inch output ensures speed is never a concern for you. Also, it has different speed settings from 4,000 to 12,000 OPM, which suits different user requirements.
Last but not least, the package includes a vacuum-port adapter and dirt-collecting bag that allow for easy customization according to their sanding needs.
This heavy-duty orbit sander can be a tad expensive for some users. However, its durability and long-lasting guarantee ensure your investments do not go to waste. Other than that, some might find it heavy to handle and difficult to operate.
What We Like
Long, comfortable, and easygoing handle
Two-finger trigger for better efficiency
Has a variable speed control system
Swirl-free finish
Rubber grip
What We Don't Like
Might be too heavy
A bit too expensive
Power Source: Electricity | Dimensions: 15 x 7 x 10 inches | Weight: 2.87 pounds | Amperage: 3A | Speed: 12,000 OPM
3.Black & Decker
For over a century, Black + Decker has been delivering innovative solutions to its customers worldwide. Their vast product portfolio and quality customer service have enabled them to gain a top position in the industry.
Some people might look for budget sanders for occasional use, and this is where the Black + Decker BDERO100 comes in. So, without further ado, let’s get into the details.
Are you looking for a quality orbital sander that is small, powerful, yet budget-friendly for performing your complicated sanding tasks? Look no further, as this tool by Black + Decker is perfectly tailored for your needs.
This model is another innovative and durable option that is one of the best available on the market. With a powerful 2-amp motor and 12,000 OPM capacity, carrying simple tasks will be hassle-free.
It also comes with a vacuum attachment with a dust collector switch, ensuring no dust or debris enters your body.
In terms of usage, a comfortable, rubberized handle allows you to get a firm grip and perform your task quickly and seamlessly. Plus, its compact design and lightweight ensure a swirl-free finish, even on curved surfaces.
The only flaw with this otherwise quality product is the absence of a speed control system, which means the speed is stuck at 12,000 OPM. But rest assured, you will be able to perform your simple household task without any hassle.
What We Like
Lightweight tool
Compact design ensures a smooth finish
Dust-sealed switch
Reasonable price
What We Don't Like
Fixed speed
Power Source: Electricity | Dimensions: 7 x 5 x 6 inches | Weight: 3.16 pounds | Amperage: 2A | Speed: 12,000 OPM
4. Milwaukee
The next entry on our list is a powerful yet lightweight orbital sander by Milwaukee. Whether you’re looking for multiple speed settings, an attached universal vacuum hose, or an efficient dust cleaning, it's got all covered. Besides, the rubber top and ergonomic design deliver a comfortable working experience to a user.
This random orbit sander is integrated with a 3-amp variable-speed motor and lightweight design. This efficient, versatile, and flexible tool will come in handy in most situations.
In terms of functionality, its adjustable speed feature becomes a crucial feature for multitasking, and you can also choose between 7,000 and 12,000 OPM. A one-finger on/off switch is added to the unit, making its operation much more effortless.
One thing that sets it apart from its peers is that it allows both loop and hook along with the PSA system to change the rubberized pad. Its convenient and lightweight design does not tire out your hands even after working for a long time.
Last but not least, it comes with a combination of filter and dust canister along with an attached universal vacuum hose, which means cleaning up post-work won’t be an issue.
After testing the product, we found that the loop and hook require regular cleaning. Also, the price might come as a burden for many. However, going by the design and the features it offers, spending those extra bucks is entirely justified.
What We Like
Easy pad changing
Variable speed control option
High speed motor
Excellent ergonomic design
What We Don't Like
Hook and loop requires regular maintenance
Power Source: Battery | Dimensions: 6 x 11 x 7 inches | Weight: 2 pounds | Amperage: 3A | Speed: 12,000 OPM
5. Bosch
Bosch is a manufacturer of unique solutions, and with its umbrella of brands, it intends to make people’s lives better in any way possible. Regardless of the surface, the random orbit sander from Bosch will provide you with the best solutions. This powerful tool is suitable for both polishing and sanding, even on curved surfaces.
Bosch has outperformed expectations with its premium and high-quality sander. Its 2.5-amp motor with vacuum attachment can attain up to 12,000 OPM. Added to it, its ergonomic design with rubber hose ensures comfortable design and that you are completing your tasks hassle-free.
Most of the sanders available market has one primary issue: their inability to work on curved areas. Fortunately, the Bosch sander is integrated with a disc attachment mechanism, ensuring its impeccable performance on curved and plain surfaces.
Its padding is rubber, which provides a firm grip and makes sanding in corners much easier. Moreover, it is a top-class dust collecting system. Using this tool will enhance dust cleaning efficiency and make the process hassle-free.
Lastly, you also wouldn’t need to purchase a separate adapter to attach vacuum with this one.
The random orbital sander by Bosch is laid with impeccable and exciting features, which makes it the best in business. However, the sole flaw we found in this unit is that it takes a considerable amount of time to clean the filter.
What We Like
Smooth finish
Unique filtering system filters microdust particles
Excellent swirl marks removal
Easy sanding discs attachment system
What We Don't Like
Takes a long time to clean the filter
Power Source: Electricity | Dimensions: 9 x 5 x 6 inches | Weight: 3.5 pounds | Amperage: 2.5A | Speed: 12,000 OPM
What Is the Best Orbital Sander With Vacuum Attachment?
The selection of the most suitable orbital sander with a vacuum attachment can be made easier by comparing critical parameters. These parameters include the type of power source, the physical dimensions of the sander as measured in inches (length x width x height), the overall weight indicated in pounds, the electrical current used (Amperage), and its operating speed specified in Orbits Per Minute (OPM).
Buying Guide For The Best Orbital Sander With Vacuum Attachment
Now that we have provided a list and a comprehensive review of the best random orbital sander with vacuum attachment, it might have given you some idea about picking the right one. But let’s dig deep into the aspects to be considered before purchasing an ideal orbital sander.
We have prepared a comprehensive buyer’s guide to help with the process. So, continue reading.
Speed
The first aspect you need to look at is the speed of an orbital sander. Two types of speed options are present in products currently available on the market, variable or fixed. In variable speed sanders, speed ranges from 4,000 to 10,000 OPM.
Fixed speed sanders, on the other hand, are inexpensive than variable-speed ones but their range is fixed. You wouldn’t be able to perform versatile tasks using these.
Moreover, you need to be aware of its speed and usage using a fixed-speed sander. These sanders are generally available in 12,000 OPM, which lets you perform only a particular set of tasks.
Interestingly, a 4,000-6,000 OPM sander is suitable for working with or polishing soft materials, whereas 6,000-12,000 OPM sanders are for a good finish. So, it will depend purely on your choice. But, we suggest you go for variable-speed ones if you have an adequate budget.
Power
Motor power is another crucial aspect if one opts for a quality electric orbital sander attached to the vacuum. Simply put, a powerful motor power ensures better performance.
Sanding speed is directly controlled by motor power, and therefore if you want to complete your work efficiently and effortlessly, a powerful motor will be most suitable. Usually, the sanders available on the market have their power in a range from 2 to 5 amps, and the more the merrier.
Dust Collection
When it comes to choosing the best orbital sanders with vacuum attachments, you must consider the dust-collecting ability as well as the mechanism that is used. Sanders available on the market come either with a plastic see-through canister or cloth bag.
Choose one according to your preference but importantly, the focus must be on how quickly and effectively the vacuum can suck up dust. Some products come with an attached dust canister, such that no dust remains uncollected.
Vibration And Noise
Vibration and noise do not determine how effective and better a sander is. This is why some of the top companies are offering vibration control features in their units. Vibrations can affect the quality of polishing of the finished project. Even if your sander does not have one, a simple rubber grip can help solve the problem.
Usually, most random orbital sanders working above a speed of 14,000 OPM produce greater noise and vibrations. But if you want a regular model, just look at its product details.
Weight
Orbital sanders are available in different weights and you will need to select one according to its use. For example, if you are going to use it on a daily basis, lightweight sanders are a no-brainer.
On the other hand, heavy-duty random orbital sanders are mostly used for industrial purposes, so you can just have an easygoing sander for your use. Just make sure, it presents all-sufficient features.
Cord Length And Grip
Similar to the above criteria, if you are looking for a sander to use daily, it must have extra handles and a soft grip for better control. Just holding the handle will give you an idea of the grip it will provide. Also, make sure that grip helps reduce vibration as much as possible. Apart from the grip, you also need to get an idea of its cord length, unless you opt for a cordless one.
Random orbital sanders with long cords are always preferred during sanding, as they don’t need a separate extension cord. An ideal cord length stays between 9-12 feet and anything more or less can be an issue.
Apart from that, some units also feature extra handles for added palm grip to allow easy one-hand maneuverability. In case you have to do a lot of sanding, go for a unit with a two-handle grip for seamless operation.
We hope by now, you have developed a clear idea about top-notch orbital sanders. As it primarily depends on how you use it, we leave you to select the best one.
Before signing off, we'd like to share some of our preferences. So, if you are looking for a heavy-duty and long-lasting unit, the Dewalt random orbital sander will be an ideal choice for you. Its small size and high power make it a suitable choice for someone who wants a long-lasting product for regular use.
On the other hand, if you are looking for a powerful, easy-to-use yet budget-friendly unit for occasional use, take a look at the BDERO100 model by Black + Decker. Its compact design and powerful 2-amp motor ensure you carve your wood efficiently.
Now, it's time we leave the choice to you. Hopefully, you find a perfect match and when you do, let us know about it. But do not forget to wear a dust mask before starting the work. Signing off with best wishes!
Are you a woodworking enthusiast confused between buying an orbital and palm sander? Well, you’ve come to the right place!
Whether you are a seasoned professional or someone just starting out in the woodworking game, a sander is an essential tool to own. It not only helps you shape wood but also enables you to remove leftover paint and varnish to create a smooth and paintable surface.
Although sanding is a process that can very well be achieved with sandpaper and a little manpower, it is not always the ideal way to do it. Most experienced woodworkers will always prefer owning a sanding tool to sanding by hand, especially when working on larger projects.
This is chiefly because sanding by hand can be very tiresome, especially since it requires you to exert a large amount of force continuously. Hence, in this context, sanders come in particularly handy because they drastically reduce the exertion required while providing a more professional finish to the process.
Orbital Sander Vs Palm Sander
There are many different types of sanders available on the market, such as disc, belt, drum, oscillating spindle sanders, etc. But the two variants that we will primarily be focusing on today are the commonly used orbital and palm sanders.
Both these power tools are almost equally efficacious and popular amongst professionals and DIY enthusiasts alike. So, how do you figure out which is the better tool to invest in? Well, that’s what we’re here to help you figure out.
While both tools are essentially handheld sanders, they differ in how they are structured and function. Hence, to make this choice a little simpler for you, we have compiled this guide detailing the important features and differences between the two.
First off, we will start by providing you with one-to-one introductions and details regarding both types of sanders. After that, we will discuss the critical differences between them to help you understand the features that set them apart. So, without any further ado, let’s jump right into it, shall we?
More runtime and capacity over standard units delivered by...
The cordless impact driver has an optimized application...
An orbital sander is a tool that works by spinning small sanding plates in circles (also known as orbits) against wooden surfaces. They are substantially sized and ideal for sanding and finishing large wooden projects.
Now, there are mainly three kinds of orbital sanders available on the market: standard, random, and finishing orbital sanders. The standard orbital sander is built with square-shaped pads and enables users to sand difficult-to-reach edges and tight corners with particular ease.
On the other hand, the random orbital sander has round pads that facilitate a separate sanding process, leaving zero marks behind after usage. And finally, the finishing sander is smaller or compact in nature and is meant specifically for sanding tricky edges and corners.
The first classification of sander discussed above is what people usually refer to when they speak of “orbital sanders”. This type can be further classified into subcategories differentiated according to the size and shape of their sanding pad. The two most popular ones are quarter-sheet orbital sander and half sheet orbital sander.
While the first variant can be fitted with a quarter sheet of sandpaper, the second is supposed to be equipped with half a sheet of sandpaper. Moreover, the former provides users the chance to get four usable pieces out of one sheet of sandpaper. And the latter only provides two usable pieces. Hence, the main difference between them is the size and not the device’s functionality.
These sandpaper sheets are usually attached to the sander with a spring or metal clamp system that holds the paper against the sanding pad. Both these sanders move in the same tight orbital motion and hence facilitate faster sanding and material removal.
Features
Power And Speed
Amps usually measure the power of any device. However, to measure the power of an orbital sander, one also needs to look out for its ‘orbits per minute’. This measurement represents how fast the sander rotates; the standard rate is around 10,000 orbits per minute.
The higher orbits per minute automatically signify a higher speed of the device, which is perfect for sanding large wooden projects in a short period. However, the fast pace of the sander offers less control and may lead to more sand marks being left behind on the surface of the finished wood.
A few orbital sander models come with speed customizations that can be handy when you require more control while sanding a tricky area. In contrast, a faster-paced sander will always facilitate faster sanding and project completion. Hence, when considering a unit, buying one with speed customizations is always a better option.
That being said, a drawback of this sanding tool is that it is not powerful enough to remove wood material and shape surfaces effectively. Hence, this is a good option to consider when you want to actively avoid sanding too much wood from the project while you’re at work.
Handles And Grip
There are quite a few varieties of handles and grips available for orbital sanders. The Pistol-grip, for example, is considered the most preferred option by professionals. It requires you to use both hands simultaneously, where one is used to direct while the other is used to apply pressure.
Other than that, there are the unusually structured jug-grip handles. This kind is usually better suited for projects where you might need to reach under a wooden piece to sand it. Finally, we have the most common handle, also known as palm grip handles. These are the most lightweight options equipped with a comfortable grip that makes them easy to use.
Sandpaper
Orbital sanders are very versatile when it comes to the installation of sandpaper. They support both Velcro as well as peel-and-stick design applications that make attaching sandpaper extremely easy.
Additionally, you don’t need to buy any special kind of sandpaper for this particular sanding tool because it already supports all the standard types of sandpaper. Hence, you can use pretty much any sandpaper you get for operating this device.
Corded/Cordless
They are available in both corded and cordless variants. The choice between the two kinds usually depends entirely on the user. Some people prefer the cordless type to eliminate the disturbance of the cord getting in the way of their work. However, one letdown of this variant is that you will need to charge the batteries regularly between usages.
Alternatively, although a little trickier to maneuver, the corded sander is usually much more powerful than its cordless counterpart. It further requires no charging intervals and hence can be used for sanding multiple projects for extended periods of time.
Dust Collection Mechanism
The formation of dust is a natural outcome of sanding any wooden surface. Therefore, sanding with a device as fast as the orbital sander can create a lot more dust than people can handle. Hence, most models of this equipment come equipped with relatively robust and dynamic in-built dust collection mechanisms.
The dust collection system is usually either passive or vacuum powered. A passive dust collection mechanism usually involves attaching a dust collecting bag to the regular vacuum hose to aid dust removal. Alternatively, a vacuum-powered mechanism works by automatically sucking up the dust while you’re operating the device.
What Can You Use It For?
An Orbital sander is a sturdy piece of equipment that works best with big expansive projects. The larger the project, the better performance this device will deliver. Furthermore, its ability to reach tricky corners and grooves makes it ideal for finishing projects like wooden staircases.
If that wasn’t enough, this sander is also excellent at stripping off the remaining paint or varnish from a project. So, other than stairs, it also works remarkably well on second-hand furniture you plan to redo or other similar projects.
What To Look Out For?
As we mentioned earlier, the term “orbital sander” in this article automatically refers to the standard orbital sander specifically. It is, however, common for newbies in the woodworking game to get confused between the standard and random orbital sander because of their similar structure. Hence, we wanted to make sure you understand the difference between these two types before moving on.
The round-shaped sanding pads of the random orbital sander make it functionally entirely different from its standard counterpart. While the former provides a cleaner finish with no sanding marks after use, they cannot sand deeper corners and edges as effectively as the latter. This device is also constructed with varying speed customizations that enable users to pick a particular speed for their project in hand.
Alternatively, the square-shaped standard orbital sanders do not have any such additional features and speed customizations. The speed of this device is set at a constant high speed that facilitates quick and efficient project completion. However, it also tends to leave behind sanding marks on the wooden surface, which the former does not.
Pros
Has high speed thereby covers large projects fast
Square shape allows it to fit into project corners seamlessly
Works effectively in tricky and tight spaces
Cons
Leaves sanding marks behind sometimes
Not capable of shaping wooden projects effectively
SMOOTH FINISH: pad dampening system designed to eliminate...
EASY DISC ATTACHMENT: through Bosch's signature Hook and...
Palm sander, also commonly known as sheet sander, is a small and compact power tool used to shape and finish woodworking projects. It derives its name from the compressed structure and size of the device that easily fits in the palm of your hand.
This power tool provides a smooth and subtle finish on wood and is ideal for projects that you don’t plan on painting. Hence, this is a rather popular tool in carpentry workshops that build furniture with the original wooden finish. It’s a versatile piece of equipment that can be used on a variety of projects depending on the kind of sandpaper that you choose to utilize.
Much like the orbital sander we discussed above, this one also has a square or rectangular sanding pad. This particular shape enables the sander to reach corners and other tricky spaces with relative ease.
Furthermore, all palm sanders are available in two standard sizes: quarter sheet and half sheet. The first is operated with a quarter sheet of sandpaper and provides four workable pieces from one sheet. The second operates using half sheets of sandpaper and hence only provides two workable pieces from a sheet.
When it comes to the motion of this sander, it has a circular and patterned back and forth movement. It oscillates and vibrates in the user’s hand at a low speed giving you more control over its general direction. Additionally, this device is very affordable, making it quite ideal for novice woodworking enthusiasts to invest in.
However, one of the drawbacks of this machine is that it does not have a very effective dust collection mechanism. Although constructed to minimize the formation of dust, most models are unable to eliminate the dust entirely.
Features
Power And Speed
palm sanders are comparatively gentle tools that run on an average power of 2.0 amps. Most models of this sander thereby have a motor ranging between 2-3 amps that are great for a versatile set of projects. Purchasing a tool with more than 3 amps of power consumption is essentially a waste of money because this device works optimally in low-power settings.
When it comes to speed, a palm sander has no customizable variations provided. It functions at a relatively low constant speed that naturally consumes less power. However, this low speed usually lengthens the process of finishing a project. Hence, it is not considered very ideal for shaping or finishing substantially big wooden projects.
Handles And Grip
palm sanders are constructed with a lightweight and compact body that is easy to maneuver and control. Hence, they do not require a variety of handles on them to operate with ease.
Some models, however, come equipped with a comfort-grip handle that makes it more comfortable for users to hold on to. And, as we all know, handles are integral in providing users with a safe and enjoyable operation experience.
Sandpaper
This sanding power tool is compatible with all kinds of regular sandpaper, making it as wonderful and hassle-free to operate as its counterpart. Standard sandpaper is also really affordable and thereby makes the sanding process rather budget-friendly.
However, one thing to note regarding the palm sander is that it consumes a lot of sandpaper during operation. Equipped with hook and loop fasteners, this piece of equipment operates while continuously feeding on sheets of sandpaper.
Hence, you’re required to constantly feed the sandpaper into the machine as you work. This thereby substantially increases paper consumption, forcing you to invest in more sandpaper in the long run, which can be draining for the pockets.
Corded/Cordless Machine
palm sanders are also available in both corded and cordless formats. The cordless devices are all battery operated and thereby optimize the maneuverability of the machine. Apart from that, most cordless sanders use batteries that can be interchangeably used with other power tools. This will enable you to use the same battery for multiple power tools, which can come in very handy.
One way to ensure that your tools function on the same battery is by buying products from the same company. For example, if all your power tools are from the company DeWalt, then the chances are that they are compatible with the same kind of battery as well.
Now, purchasing a battery-operated sander also implies that you will need to recharge and change the battery between uses. However, since the palm sander does not consume that much power, it usually runs on a single set of batteries for much longer.
Dust Collection Mechanism
The dust collection system of a palm sander isn’t as robust or effective as we would like it to be. This is, in fact, one of the main drawbacks of this particular variant of sanding tool.
In most cases, you will need to fit your sander with a separately purchased dust bag. These bags are freely available on the market; however, it is vital to look through user reviews to ensure it has reliable sealing technology.
A handful of palm sanders also come equipped with vacuum-based dust collection mechanisms. However, these models tend to be more expensive than their standard counterparts. We additionally recommend looking for a sander model with pre-sealed filters and switches meant to protect the device from the dust it creates.
What Can You Use It For?
A palm sander is an ideal investment for people who either don’t see themselves using sanders very often or only require them for small projects. The flexibility and versatility of the product enable you to use it on a variety of DIY projects. Hence, it’s also a great choice for woodworking hobbyists who require portable, compact, and lightweight tools that are both easy to store and budget-friendly.
The small size of this sander enhances the overall precision provided by it. Hence, it doesn’t leave any sanding marks on the surface being finished and it’s also good at removing material and shaping wood effectively. This property makes them the perfect tool to sand down a previously treated or painted project.
Furthermore, the sander is the ideal tool to purchase when working on projects that won’t be painted or refinished after sanding. This includes certain types of furniture that are meant to maintain their original wooden finish.
Pros
Lightweight and compact structure
Compatible with standard or regular sandpaper
Budget-friendly price tag
Does not leave sanding marks after usage with practice
Cons
Consumes a significant amount of sandpaper
Not ideal for larger projects
Not equipped with a very robust dust collection mechanism
Differences Between Orbital Sander And Palm Sander
Now that we’ve given you a comprehensive idea regarding how each sander functions, we can highlight the most significant differences between them. This comparison will provide a clear picture and help you ascertain which sander is the better option for investment.
Shape And Size
As we discussed earlier, orbital sanders are square in shape and much more heavy-duty in size as compared to a palm sander. Alternatively, the latter is usually rectangular in shape and is more lightweight and compact in comparison. Both are equally good at sanding and finishing difficult-to-reach or inaccessible corners because of their four-sided sanding pad.
Furthermore, the orbital sander is usually preferred by seasonal professionals and workers in the woodworking industry. However, the substantial size of this machine makes it less than ideal for home-based woodworkers to invest in.
In this context, the palm sander becomes a good alternative for DIY enthusiasts to invest in. These are not only lightweight and easy to carry, but they are also effortless to store in cramped or limited woodworking stations and other spaces.
Sanding Motion
The sanding motion of a palm sander is a back and forth movement paired with a circular pattern movement. Compared to this, the orbital sander has tight circular and elliptical motions that help it clean and shape the surface faster. The distinct way each of these sanding power tools moves has a huge influence on its functionality, and hence is a significant difference to note between them.
The fast motion of the orbital sander, while allowing it to cover more surface area in a long time, also gives it a more unpolished finish. The high speed also makes it difficult to maneuver the machine in the direction that you want it.
Speed Of The Sander
As we previously established, the orbital sander has a more tight orbital motion that leads to a comparatively fast-paced movement. The average orbital sander makes about 10,000 orbits a minute, which, as you can probably tell, is impressively high.
When compared to the above, the palm sander is a relatively gentler and slower device. The slow speed lends it higher precision but also makes it time taking and exhausting to sand large surfaces.
Project Specifications
The sizable and heavy-duty construction of the orbital sander along with its enhanced orbiting speed, make it ideal to sand large projects. Other than that, the square or rectangular-shaped sanding pad gives you access to difficult-to-reach corners and flat edges.
As compared to this, the palm sander is only recommended to be used for small to medium-sized projects. It is, however, equally good at sanding inconveniently placed nooks and crannies of a project
Furthermore, since the orbital sander leaves swirly sand marks on the surface, you should only use it on projects that will be repainted or refinished. Otherwise, the scars left behind may give an unprofessional look to the project. Compared to this, palm sanders provide beautiful and smooth finishes on most surfaces. Hence this is the ideal device to provide the final finish or a wooden project.
Sanding Finish
As we mentioned earlier, the lower speed and gentler motion of the palm sander gave it precision that is unmatched by its orbiting counterpart. This precision further enables the device to provide a more subtle, fine, and smooth finish on a variety of different surfaces.
Furthermore, it has the ability to leave no swirly sanding marks on the surface, as long as it’s used right. However, it might take some practice before you can create completely flawlessly sanded surfaces. Additionally, this sander has really good shaping and removing capabilities and is ideal for removing old paint and varnish from surfaces.
On the other hand, the orbital sander, while being high speed, tends to leave a lot of swirly textures behind. This is an even more common phenomenon when used the wrong way.
Hence, during operation, it is crucial to sand in the grain direction of the given piece of wood. If users are not cautious about this, it will end up leaving some really stark cross-grain scratches on the surface that are difficult to remove later.
Furthermore, although this device can cover a large surface area easily, its enhanced speed disables it from doing so with precision. Hence, this is not the product you’re looking for if you’re planning to attempt pre-painted surfaces. Similarly, this device is also not very effective in removing material and shaping surfaces when compared to its counterpart.
Price Points And Features
The price of a palm sander is decidedly lower than that of an orbital sander. This can be attributed to a variety of reasons, however, there are only two main ones. Firstly, the orbital sander is markedly bigger than the former and secondly, it comes equipped with a lot more adjustable features and mechanisms. This includes its innovative and robust dust collecting mechanism as well as its customizable speed options.
What’s more, this sander also comes with a variety of different handle options. Some models of this device come equipped with a jug-grip handle that is specifically designed to enable inversion. This process gives you access to sand the underside of any given project. This feature is exclusively available in orbital sanders. However, not all orbital sanders are equipped with the jug-grip handle and hence are capable of performing it.
The palm sander, compared to this, is structured rather simplistically and lacks most of the inbuilt mechanisms of its counterparts. While certain models may have a dust collecting mechanism installed within themselves, it usually requires users to buy the disposal bags separately. Lastly, it also only comes with one type of
Maneuverability And Usage
As we mentioned above, the orbital sander has a rather substantial build and structure. The enormity of this device thereby hinders the overall maneuverability of the same. And since directing and controlling the sander is crucial to the finish it provides, most people find it quite challenging to operate optimally.
Consequently, numerous models of this device come equipped with a variety of different handles. The pistol-grip handle, for example, is a dual grip handle constructed to give the user more command over the device. However, even with its enhanced handling features, this device is admittedly more difficult to control.
The palm sander, as compared to this, is incredibly easy to maneuver and operate. Since the stature of this device is substantially smaller than its counterpart, it’s perfect for most beginners and woodworking novices to try their hand with.
Moreover, the lightweight structure of this device in no way hampers its finishing and shaping performance. Additionally, this should not be operated with too much body pressure. The excess pressure usually eliminates the tool’s spinning motion, thereby reducing the overall quality of your finish. Hence, it is recommended you allow mostly the tool’s weight along with only a little bit of pressure from your hand to work the tool.
Which One To Choose: A Clear Winner?
With that, we’ve come to the end of our list of differences between the orbital sander and the palm sander. Both devices have some rather compelling and impressive features to consider. But how do you decide which device is the better one?
Well, we’re of the opinion that you’re asking the wrong question. The right way to approach this dilemma is not by asking which device is better but rather which device is more useful for your needs?
Now that you’ve glanced through a detailed analysis of both these popular sander models, it is clear to see that they each provide different functionalities. So, if you’re someone looking to expand into the professional woodworking field, the orbital sander might be better for you. The same is true for any and all people planning to attempt substantially large-sized projects.
Alternatively, if you’re just starting out in the woodworking game or just do them for fun, you might want to consider purchasing the palm sander. They’re easy to store and even easier to operate making them a wonderful beginner-friendly piece of equipment. Apart from that, this sander is the single best device to purchase for people who only attempt small to medium-sized projects.
Lastly, it is also crucial to remember that both sanders require a fair amount of practice to provide optimum results. However, the orbital sander is always more challenging to control and therefore only recommended to be used by professionals.
Final Thoughts On Orbital Sander Vs Palm Sander
So, it’s clear that both the orbital and palm sander are unique in their functionalities. The best way to determine which product is the best for you is by matching them to your personal project specifications and requirements.
If you are a seasoned woodworker trying to decide between the two, we would recommend you go for the orbital sander. Since it’s comparatively versatile and equipped with more features, it comes in handy while finishing a variety of woodworking projects.
However, this recommendation is only relevant under the assumption that you will mostly be handling large projects. If you’re a professional who specializes in smaller projects, then the palm sander is undoubtedly the better option.
Hence, it’s evident that there can be no clear overall winner between the two. But hopefully, with the help of this guide, you can ascertain which of the two is your best bet!
Oil pastels are vastly different from all other mediums and yet it is versatile enough to be used in a huge variety of painting scenarios.
They provide fluidity in motion and consistency in texture simultaneously. This is why plenty of artists prefer oil pastels as their medium of choice.
Pastels
If you are not familiar with oil pastels, you should know that there are two types of pastels - soft (chalk) pastels and oil pastels.
Soft Pastels or Chalk Pastels are the same ones that you used as a kid in school. Oil pastels, in fact, share a lot of similarities with soft pastels which we'll get to in a moment.
Oil pastels are constituted out of pigments, and the oil that runs through these pigments is linseed oil.
The linseed oil lends these pastels a smooth consistency which is similar to oil paints. Thus oil pants are widely regarded as a painting medium, even though you are actually drawing with them.
Oil pastels have a distinct resemblance to soft pastels, but in many ways, they are also very similar to crayons.
Their Similarity to Soft Pastels
Because oil pastels consist of an oil binder, they are less powdery than soft pastels.
Oil pastels are less powdery than soft pastels, because of the oil binding in them. Thus, it will be tough for you to blend different colors with a finger or a blending stump.
Oil pastels can even be used to make layered paintings. However, if you end up applying too much, the colors are bound to get muddled. In fact, the top layers might start pulling out colors from the layers underneath it.
Their Similarity to Crayons
The first layer of oil pastels on a piece of paper always look like a crayon painting. At this point, the color doesn't yet have the fluidity that is associated with oil pastels.
Fortunately, as you load on more layers on top of the first layer, you start to get that buttery texture which lets you mix and blend the colors with much more dexterity.
Here, in this article, we'll write out a few basic oil pastel techniques which should help you get started and then provide you a bunch of resources on how to get better.
But first, you need to decide on your choice of painting paper.
Surfaces for Oil Pastels
There are several choices of painting surfaces for every painter from paper to canvas to cardboard. However, for oil pastels, you would mostly prefer paper.
The texture and the weight of the paper determine the quality of the painting as well. The papers differ in varying degrees of thickness and surface grain.
Artists generally paper rougher papers with high thickness because it can absorb more layers of colors without wilting. So if you want to make a detailer, multilayered painting, rough papers are the way to go.
Smoother surfaces have more shine and gloss to them, but they can't absorb multiple layers of paint as well as rougher papers.
Oil Pastel Techniques
It's best to illustrate with an example. Suppose you want to paint a pear with your brand new pastels.
Your first step is to create an underpainting
Before you start painting, your first job is to create a loose and basic underpainting with a basic color scheme.
This is more similar to an initial drawing rather than painting. The overall shapes and structures of your painting should be drawn out here.
Layer your colors
Create layers with different colors, so that they blend together to give your painting depth and detail. To know which colors blend the best and which layers should be put on top of one another, you just have to keep on practicing.
Add in color slowly
Be careful that you don't add in too much color all at once. Be sure you let the paint dry out for a bit and then put in additional coats of paint unless the paint might get muddied.
Put in a background color
If you want your pear to stand out and you want to create a sharp contrast, you can color in the background with a bright color. This will also highlight and clean up the edges of the pear as well.
Now that you've got the basics panned out, it's time to move on to bigger and better things. For that purpose, we have compiled a list of tutorials that should be a big help to you on your journey.
Oil Pastel Video Tutorials
Rules of 3’s With Patrick Neumann
The first one on this list is this entertaining video tutorial by Patrick Neumann. What he does in this video is he tells the viewer to implement the Rule Of 3s in their paintings.
Rule Of 3
Most people use their oil pastels to color a certain section with only one color, thereby forming only one layer. What this does is it makes the painting look childish as there is no detail or depth.
What you should do is, instead of using one color, use 3 separate but similar colors to color the same section in your drawing. This will give your painting that much needed layered oil paint-feel.
Which Colors to Use
You should use colors which are analogous to one another and which would go well together like greens and blues or reds, purples and blues.
You should avoid colors which are far away in the spectrum, like red and green or orange and blue.
How To Paint
Now when you paint you should remember to paint in a dashy or blobby way, not all over the surface like a crayon. This will leave some blank space in between your color applications.
This white space should be filled in with subsequent applications of color. Keep dasing and leaving spaces in between. Your third and final layer should fill in all the last remaining blank spaces.
Painting in this fashion lets your colors blend in seamlessly. Don't be afraid to put in colors. Just do it and let loose. You're doing this for yourself anyway. So just have fun with experimenting.
How To Draw An Apple By Matt Fussell
Drawing an apple is the staple beginners painting in any form of painting. However, it's not just a subject for beginners - it's also an opportunity for experienced artists to showcase their talents.
Why Apples?
An apple can allow for a full range of colors - meaning it can have several different shades of red in it and it can also have blacks and whites over the surface as well.
Because an apple can support such a wide range of colors, it's a favorite among painters everywhere.
So How Do You Start?
You start by painting in the darker areas first. You can use colors like dark rose, rose grey and yellow ochre as well. If you want to make your colors particularly dark, you can put in a dark brown.
Remember to not paint like a crayon but rather lightly touch the paper with the paints - dab, not scrape. Remember to make sure there is enough empty space where you can put in other shades of color later on.
How To Put in Shades And Layers
The most useful tool in your arsenal here is the colorless blender. The colorless blender has the binder of the paint but no pigmentation. It is used to make the colors blend with each other more seamlessly.
Her is an example of how the blender is used:-
Because the light is coming and hitting the apple in a certain way, there are certain lighter areas and shadowy areas. To make the shadowy areas darker, you put on a few touches of black over a dark red and then use the blender to blend those two colors together.
Similarly to make the lighter parts more prominent, you can add in layers of white and if you want to increase the intensity, you can add in some yellow ochre as well.
The Finishing Touches
Once the apple is finished, you need to paint the shadow that is cast by the apple and the background. The tutorial teaches you how to create a subtle, lukewarm shadow with a light blue that does not overshadow the rest of the painting.
Finally, the stem of the apple is drawn by an application of Burnt Sienna, brown, white and black. See what we meant by a whole range of different colors and their shades.
Finally, a white background is painted to clean up the edges of the apple and bring it to the forefront.
How To Paint Van Goghs The Starry Night
This isn't exactly a tutorial on how to start with oil pastel painting. Instead, it's a tutorial on how to reproduce Van Gogh's Starry Night.
Start By Drawing
This tutorial starts with a detailed description of how to draw this iconic painting with a pencil. First, you draw the tree in the middle, then the houses and the mountain line in the background. The initial drawing also involves drawing the stars, the moon and the swirl pattern in the sky.
The first layer of coloring
Next, come the basic colors - you fill in the tree, the mountains, the moon, and the stars. Keep your first layer of coloring light. Make sure you use the side of the pastels instead of the head, such that the coloring is more diffused.
Make sure it's a deeper shade of yellow on the stars and the moon. These colors won't change much.
Adding Definition
You need to draw the current that goes around the sky. Use dark bold blue lines to make dashes along the sky, mountain edge and the houses as well.
Next, you use a white pastel to de-emphasize the blue colors and put in more of a swirling, fluid sky feeling which is the hallmark of this painting.
Put in a darker green and brown on the cypress tree and finally, take out the black. Although it's dangerous to use too much black, it's great for painting lines and adding in darker values of a color.
Oil Pastel Use Demonstrations By Kaitlin Niznik
If you're new to oil pastels, you must first figure out what to buy. There are plenty of choices in the market today, and anyone would get confused as to what to buy.
This video lists out 4 popular brands. Depending on your budget, you can choose any one of the 4.
Different Oil Pastel Brands
The first brand on display is the Portfolio Water-soluble oil pastels. They are very affordable and student-grade. If you're starting out, you can buy them to get a feel of what oil pastels are like.
Or you can keep them as spares to use in a large drawing which require a large amount of paint.
The next one is the Van Gogh water pastels. They are slightly more expensive and a little harder as well. Paint quality is good, but these pastels are a little hard.
However, the most premier Water pastel goes to the Sennelier Oil Pastels. They are absolutely top of the line and are really fluid and super easy to work with.
Widely regarded as the best in the market, they are often compared to lipstick.
The painters favorite, however, is the Mungyo Gallery Soft Oil Pastels. They are available in full boxes of 48 colors - and this comes at a cheap price.
They are creamy enough yet affordable. If you can splurge just a little, this should be your choice of pastel.
Scrapers
Next, this video tells you what scrapers are and what they are used for. They are used in the process of subtraction. If your painting has several layers of single or multiple colors, the scraper can be used to scrape out the top colors and top coats.
The scraper can be used to create magnificent subtraction pieces, which the painter shows how to do in the video later.
Color Shapers
Color shapers have rubber heads, and they are used to make sharp lines in your painting. They are used whenever strong lines are required.
Blending Stumps
Blending stumps are extremely important, and they are used to make colors of different values blend together to form one seamless gradient of different values of color.
Blending stumps are absolutely necessary to showcase the play of shadow and light on a painting.
Landscape Drawing
Oil pastels work great in landscapes. Because of the relative ease in layering, oil pastels are great for painting landscapes with a wide range of values.
You can put on the initial layers pretty quickly by a broad application of paint. These areas can then be reworked to build up additional depth and detail in the paintings.
Also, because of the added versatility of oil pastels, you can use them to put in a variety of effects, most notably, you can add an impressionist feel to the paintings. This makes the painting your own - and not just a reproduction of somebody else's work.
Books On Oil Pastels
You'll find loads of great videos online on Youtube, but there are a few books out there as well, which can really help you become a better painter.
Many consider this to be the definitive book on Oil Pastel painting. This book covers everything about oil pastel painting, starting from the most rudimentary and going up to expert level guides.
What Does This Book Have?
Every page of this book is jam-packed with useful information. It provides meticulous step-by-step illustrations that show you how to use your pastels to achieve nearly any effect you desire.
It covers all oil pastel painting techniques like layering, scraping, washing, blending, and scumbling to achieve an endless variety of effects from delicate lines to very fluid swirls of color.
It even has sections on how to make your own pastels, work with molten pastels, and also use oil pastels in arts and crafts and mixed media.
Featuring the author's work and the work of 40 different artists, this book really has something for everyone.
This is the second book on our list, and it also provides a number of invaluable lessons on how to work with oil pastels.
What's Special About This Book?
Where this book really scores a lot of points is that it takes a step-by-step approach to painting various subjects from flowers to animals to portraits to landscapes.
The steps are written out in such a way, that the reader can go through the first few steps and come up with a moderate, well-defined painting. Anybody can follow the first few steps.
But you can choose to take that painting even further and make it even more realistic and detailed if you keep following the steps. The steps get more involved and intricate as you go along and you may come across a large number of words you haven't heard before like gesso or ground medium.
We weren't entirely sure whether we should include this book in our list because it talks about painting with oil, pastels, and watercolors but not oil pastels per se.
However, we decided to include it as we thought going through the contents of this book would be immensely useful for someone who likes drawing portraits and wants to get better at it.
What Does This Book Contain?
This book will first teach you about the essential elements of painting. You'll begin with learning up the essentials first - drawing, value, color, composition, and edges.
Then you'll learn how light and shadow affect these principles, and then you apply them to create a perfect reproduction of the skin tones of your subject.
You'll also learn about the four major skin color groups - Caucasian, African American, Asian, and Hispanic. You'll also learn how to create skin tones using multiple combinations of these skin color types.
This book also illustrates the differences in tone and texture between males and females, and how your skin changes as you grow older.
Most importantly, you'll learn how light and it's temperature affect the color of the skin of your subject - and how this effect varies depending on whether it's natural or artificial light. If there's light, there must also be a shadow, and there are several elements involved in the painting of shadows as well.
Online Courses In Oil Pastels
Reading and learning by yourself is great, but if you want a structured learning environment with a course that teaches you everything you need to know in an organized fashion, look towards online courses.
Udemy and other online platforms are making it easy and convenient for everyone to learn painting and only at a fraction of the cost involved with traditional classes.
Here are a few courses that we want to share with you.
This course is mostly meant for kids aged 8-12, but if you're looking for a basic, rudimentary course that you can get through fairly quickly, this course is the best.
Why Is It Good?
This course has 7 art projects that are great for initiating you into the world of oil pastel painting. Apart from teaching you how to paint, they will also teach you how to express yourself and create a capacity for self-reflection and guide you to view the world in a certain way.
The teacher has 20 years of experience in art studios and elementary classrooms, so she has a good grasp on how to teach something from ground zero. All the projects are laid out in a detailed, step-by-step manner, which is easy enough for anyone to follow.
You might find the drawings a little childish and simplistic, but it's still an excellent course. It's best if you and your little kid both sign up for this course together. It'll be a good bonding experience.
Jerry’s Artarama Free Pastel Art Lessons
If you want a comprehensive library on oil pastel painting, make your way to Jerry's Artarama.
It's not just oil pastels, Jerry's website has a load of details about painting supplies - like canvases, surfaces, easels, and whatnot.
Apart from that, they have a number of free lessons on how to use oil pastels for painting. These clips cover all the basics, and some are quite advanced as well.
For example, they've got a video on how to do blending and crosshatching. Then there are videos on plein air drawing and also, how to draw perspective pieces and reflections on objects.
This is a real treasure trove of painting information and is also simultaneously, a good store for buying painting supplies.
Final Words
Oil pastels are a great medium for painting. They are not as hard to paint with as oil colors, yet they are versatile enough to be used in a variety of painting applications.
They are especially great for layering and are used to make individual pieces with complex and intricate shading.
There are plenty of tutorials available online which will help jumpstart your painting journey. But obviously, patience and practice are the biggest teachers. So stay dedicated, and I promise, you'll see great results soon.
It is common knowledge that oil painting commenced centuries before acrylic painting was even invented. After all, famous paintings like the Mona Lisa were done using oil paint and the procedure of mixing small amounts of color to bring about the desired effect.
Acrylic painting according to history did not begin until the early 1940s and is basically a water-based paint that is preferred by many amateur painters because it can take as little as 15 minutes to dry, whereas oil paintings can take as long as weeks because it is thicker, is totally combustible and should be used in a well-ventilated area ensuring also to keep kids at bay.
One of the good things about working with water-based paints like acrylic is that they can be thinned, unlike oil paints which cannot. It is however possible to use acrylic paint in an oil painting as well as an undertone. It’s similar to painting a house, where one has to use a primer before applying the last coat of paint. In the same manner, acrylic paint can serve as a primer for an oil painting to give it a more enhanced finish.
As oil paintings did come first, and made history, today we are going to enjoy some oil paintings today as inspiration, cast a glance and do let us know below which you've enjoyed the most!
Oil Painting Ideas
Oil Painting Photo Action Designs
This portrays a woman playing a musical instrument. The picture shows a person in action, and this looks truly gorgeous. You can settle for 4-5 color types and play with them throughout.
Modern Oil Painting
If you are looking for a modern design, this one will fit the bill. It has a blue doorway-like structure in the middle, followed by an abstract background. There are a number of colors used to make it very vibrant.
Dirigible – Oil Painting Design
This has an oil painting that has a giant airship along with buildings in the background. It looks like a fantasy image set in ancient times.
Oil Painted Background
Up next is a beautiful picture with a light-colored center and dark swirls around it. One can decipher it as the end of a tunnel where light is pouring in. It gives off a very positive vibe and will look great with a yellow or white-toned wall.
Rooster Dance Oil Painting
If an impressionistic, modern, whimsical art piece is on your mind, try this rooster out. It is a printed piece originally created by Karen Tarlton and you can use this as an inspiration to create something as vibrant and beautiful.
Klimt The Kiss Oil Painting
This is known to be one of the most romantic paintings ever painted. It had been originally created between 1907 and 1908 and still stands as a beautiful and innovative creation.
Portrait of A Girl
If you want to stick to painting humans, this is a great idea. The artist has used only 3 colors, red, black, and peach, and played around with these tones. This resulted in a gorgeous and vibrant picture of a woman in red.
Black Light Forest Oil Painting Poster
The walls of the house reflect your personality and hence you can put up a vibrant picture if that matches. Paint this scenery of a forest on a quiet autumn afternoon and you will cherish it for a long time.
Dancing Girl
Do you want a human figure in your portrait? You can try this beautiful picture of a girl dancing in the woods. The main colors that have been used are shades of yellow and black. A splash of red in the middle enhances the picture.
Nature Canvas Painting
If the hills bring you peace, you can choose this remarkable painting of mountains and a river flowing in between. The sky is painted with clouds and the sun-rays come from in between them.
Girl With Flowers
If you find bright colors to be attractive, this is going to be a great option. You can paint a woman with a basket of roses in a yellow hue. The color makes the picture stand out and it shows impeccable shading work.
Freedom – Acrylic Oil Painting on Canvas
This art piece is an exact depiction of freedom with a girl running away toward the light. It shows hope, and paired with a beautiful white dress, the picture catches the eye immediately.
Oil Paint Effect Package
Do you want to work on digital painting but use oil paintbrushes? This package allows you to paint letters and shapes with oil paint texture. You can play around with objects, layers, shades, and colors to create your own unique pieces.
Reproduction by Picasso
If you think canvas art is your forte, this is a beautiful example of a colorful abstract painting. It has a number of colors and is very vibrant.
Abstract Background
If you are a fan of abstract artwork this one can be a great inspiration. It seems a number of colors and it looks like they have been splashed across the canvas. A vibrant and contemporary work, this design goes well with 21st-century houses.
Nature Walk
Love nature and forest trails? This is another example of a forest scenery where a path leads on. It is empty but looks extremely tempting. The colors are bright and the picture seems very optimistic.
Elegance – Hand-Painted Artwork
We loved the color play in this picture. A girl stands in a fog of colors and she looks beautiful in a white dress. Red color complements the white and the dark brown of her hair stands out.
Minimalist Modern Painting
Do you find shapes attractive? Then this is a modern art piece that will look appealing with stripes of blue, grey, and white. The blue stands out from the rest and is very easy to paint.
Greenwood Painting
If you have a mid-century designed home, this painting will look great in it. It has an old-world charm and the colors that are used are subdued to provide the effect.
Painting Hummingbird
This is a painting of a hummingbird which is made mostly with dots. It has a number of colors but none of them overpower the white background. We feel that it will work very well with minimalist decor.
Pro Oil Painting Action
Do you want an oil-painted image but do not have the patience or the expertise to create one? This is a great way to transform your images into oil-painted ones within seconds in Photoshop.
Abstract Art-Original Painting
This is a gorgeous example of blue, mustard, and white put together. It has splashes of all colors and is painted to match well with minimalist decor.
Oil Painting Abstract Art On Canvas Heavy Texture
If you are enchanted by the color blue, this is a painting that you will like. Made with umpteen shades of blue, it looks very attractive and can be an accent piece on a statement wall.
Painting Of A Woman
The light and shadow effect is perfectly done in this picture of a woman. The lovely shades of yellow and brown are painted with utter finesse. Also, it is not very vibrant and will be a classic addition to your walls.
Original Gray Painting
Up next is a mystical creation with shades of yellow and grey. The colors fade into each other, providing an enchanting abstract painting for you to enjoy.
Oil Paint: Spiderman
If you have a spiderman obsession like some of us, then you will really like this design. It has an image of spiderman with a shadow play in the picture.
Yellow flowers
This piece of artwork can be created on Photoshop cc. You will have to take an original picture and edit it with an oil paint effect to get this result. A quick and easy way to turn a beautiful picture into a painted one.
New York Rain Textured Oil Paint Work
This is a beautiful scenery that can be painted on canvas. It is a moment captured from Central Park and painted in a number of colors.
Beach Sunset Painting
The vibrant blue of the ocean and the sky looks very attractive in this picture. It brilliantly captures the heart’s desire to be on a beach, by the sea. A bunch of red flowers stands in contrast while adding to the scene.
Black & White Oil Paint
There are 2 ways to go about this painting. You can create it with the help of Photoshop CS6-CC or you can paint it from scratch. If you want to recreate it on photoshop, remember to choose a picture with distinct lines. A low quality image will not work.
Hiding: Oil Painting
Do you love realistic paintings? If so, this is going to be a great option to get inspired from. The shadow falls beautifully and the placement of the hands is brilliant. You can see the subtle shine of oil colors helping in achieving perfection here.
Abstract Art Mixed Colors
If you want an abstract painting with colors that match your decor, this is a great idea. It has a brilliant color mix and if you plan to recreate it, you can use different shades but remember to blend them well at the edges.
Portrait Of A Face
This is another way of creating an oil-painted image in photoshop. It is for digital enthusiasts and you can create eye-catching old oil paint pictures within a few minutes.
Oil Painting On Canvas Fabiano Millani
Up next is a sensuous piece painted so carefully that it almost looks like a real image. Look at the detailing and the shadows that this artist has created. This picture could be a great inspiration if figures are to be drawn.
Nasmyth Alexander Artistic Painting Canvas Oil
Are you looking for a mystic scenery of the mountains with a house on top? This has a very picturesque scenery made with subdued shades. We were immediately reminded of summer afternoons by the creek.
Oil Paint Stratagem
If you want to work with the old-world charm, this can be a great art piece design to hang in your living room. It has a man with a cowboy hat and gun which reminds us of the old countryside.
Intimate Engagement – Beautiful Oil Painting On Canvas
This is a beautiful picture of a couple dancing with a musician behind. If you want to frame a romantic moment from your life, this is going to be a great source of inspiration.
Fine Art Print Beach Babes
Love the beach? A great way to show your love is to keep a painting of the beach. Multiple shades of blue with traces of white and yellow have been used to bring this scene to life.
Love Lost – Hand-Painted Oil Painting on Canvas
We loved the surrealistic vibe that this painting has. It is made from shades of yellow and red and makes for a beautiful art piece. It will match well with white minimalist decor.
Gold Leaf Silver Leaf Fall painting
How would you like golden leaves painted against a midnight blue background? Yes, it evokes royalty and sophistication and the white and grey compliments them well.
Modern Figurative Oil Painting
Do you want a painting that will fit well with modern decor? This oil painting has a woman standing in front of a dresser with her bedroom in the background. It is modern and chic and the overall blue hue creates a dreamlike appearance.
Custom Dog Portrait
Are you a dog lover? If so, this is a realistic dog portrait that you will love. Painted against a dark background, the face stands out and we loved the expression.
Abstract Original Oil Painting On Canvas
Here we have another example of abstract art with 2 humans in it. Painted to give you good vibes, it has layers of yellow and depicts a romantic scene.
Mediterranean Evening Harbor: Korean Fine Art
Next, we have one of our favorite hand-painted art pieces of a gorgeous Mediterranean evening with pretty cottages, greenery, and a harbor too with warm lighting at different places. It is pleasant to look at and seems to be a dream-like scenario.
Original Fruit Still Life Oil Painting
What about a bright yellow peach painted in summer colors? It is painted on Blick cotton duck canvas and high-quality Grumbacher oils are used. You will love the realistic picture and the details that are present in it.
Final Words
Bright colors catch the attention of people more while subdued and pastel shades will create a relaxing ambiance. Remember this while you decide on the kind of oil painting that you wish to have. Also, pair it up well with the surroundings and it will stand out for sure.
If you are going for pop colors, a minimalist or light-color-themed room will match well. However, in case you’re looking at paintings made with white or pastel shades, these can be good additions to a cozy room.
With this, we come to the end of our discussion. Let us know about your favorite ideas in the comment section below.
With work-from-home turning into a semi-permanent solution that’s here to stay, the search for a private workspace continues to soar high.
Employees of different companies are taking over bedrooms and basements to set up their home offices. But that’s not a feasible solution as the rest of your family members also need their personal space.
That’s why people are turning to their backyard sheds to work remotely while being free from the confinements of their bedrooms. These structures serve as the perfect dedicated workspaces once they’re equipped with the right furnishing and office essentials.
On that note, are you planning to use your garden shed as your home office? Well, we’re here to help you out. Through this guide, we’ve explained the steps involved in converting your cabin log or wooden shed into a perfect office.
So, without further ado, let’s begin!
Steps To Convert Your Shed Into A Perfect Office
The ongoing pandemic has allowed people all over the world to see the concept of working from home in a different light. Employees are expected to work remotely through the end of the year and into the beginning of next year, if not longer. That's why a dedicated workspace within the boundaries of your house is the need of the hour.
But that doesn’t mean confining yourself to your room. Whether you’re a freelancer, full-time worker, or running a business, you can prevent distractions while working by transforming the garden shed into your dream office.
That being said, we’ll now be taking you through a step-by-step guide on how to convert a shed into a perfect home office. So, let’s get right to it.
Step 1| Planning
Before you begin the conversion, it’s important to plan the kind of home office you want, based on the type of work you do. Think about how you’ll use this space and list out the items required for the purpose.
Suppose you need to constantly use a laptop or a computer for work. In that case, your shed will need a secure and constant supply of power. Similarly, take account of what needs to be done prior to using the shed as a dedicated home workspace.
Step 2| Getting The Required Equipment & Office Essentials
Now that you’ve decided on how you’ll be utilizing your shed, it’s time you thought about acquiring the necessary essentials. Consider crucial factors like the furniture, accessories, and storage you’ll need, depending on your job profile and work requirements.
For instance, if you’re a designer or artist, you’ll need a desk or table to draw, sketch, or sculpt. Along with this, you’ll require plenty of natural light and a comfortable chair to get you through the day.
What if you’re a writer? In that case, you may not require a large desk space; instead, you’ll need more wall space to install bookcases or whiteboards. You may also consider getting your garden office space equipped with a fridge and kettle for quick access to much-needed refreshments.
The possibilities are endless; just make sure you utilize the entire space while keeping your work requirements in mind. What’s more, ensure that the shed has access to water and a stable internet connection. It should feature the right type of light fixture, including spotlights, strip lighting, and lamps.
And don’t forget to ask yourself, “Will I need an open-plan design or a multi-room office?”
Step 3| The Design Selection
Do you plan on using your shed for work regularly throughout the year? In such cases, your priority should be to insulate the building and make sure it’s fully weather-proof.
Your shed can be at risk, especially if you’ll be storing electronics inside it during the cold winter months. That’s why it’s crucial to ensure that it’s structurally sound and fully weather-proof.
Having said that, let’s now take a look at the two most popular garden office shed designs for you to consider.
Log Cabin
A log cabin is the perfect example of a luxury shed office, offering a high-quality space for you to work from all year round. There is a wide range of design and style options to choose from based on your style preference and work requirements. You may consider opting for a log cabin with multi-room or open-plan designs.
Wooden Sheds
If you’re in search of a reliable home office, a wooden shed is probably your best bet. It comes in a wide range of designs to suit individual style preferences with ample space for alterations.
There’s no need to worry about factors like durability as windowed wooden sheds built using groove cladding and overlap are stronger and more weather-resistant than the others.
Step 4| Size & Layout Of The Shed
You’ve already listed out the furniture and office essentials you wish to have inside your garden shed. But how can you be sure that all these items will fit without looking too clumsy? This is why planning the layout and size of your new home office space is a must.
First things first, when purchasing or building a shed, consider the size of your garden to estimate the space it will take up. And if you already own one, ensure that you invest in the furnishing of the right size so that each item fits well.
Sheds are available in a variety of sizes so you can easily find a suitable garden office, depending on how big your garden is. That said, let’s take a look at the three primary shed sizes for you to consider.
Small Office Shed
You don’t really need a large shed to convert into a workspace. A small office shed is ideal for storing a desk and your office essentials, especially if you don’t really need a space to work remotely every day or have a small garden.
Wooden sheds ranging upwards in size from 4 x 6 square feet are primarily used as garden offices. You may also consider maximizing the space in your garden by installing a shed in the corner of your garden.
There’s no need to worry about the longevity of your office space. You can easily purchase a small log cabin featuring a more durable and better-quality construction.
Medium Office Shed
Suppose you need to keep a hefty amount of office essentials and equipment, including multiple bookcases and desks. In that case, a medium-sized garden office shed is ideal. It will provide ample space for you to work in peace, along with room to store items like printers and files.
A 10 x 8 square feet windowed wooden shed will provide sufficient space for placing a desk and storing office equipment. The windows will allow plenty of natural sunlight to enter the premises, creating a comfortable environment for you to work in. You may also consider opening the windows to ensure proper ventilation throughout the garden shed.
Large Office Shed
In case you need a large office space for starting your own business, you can save costs by investing in a log cabin. It serves as the perfect solution, providing you with a spacious area to work remotely at a fraction of the cost.
That said, you can choose a cabin from a wide range of designs and styles to suit your garden and individual preferences. The contemporary pent-style shed is ideal for modern gardens, while traditional and reverse apex designs perfectly complement traditional gardens.
You’ll find log cabins offering an open-plan multi-room design that’s perfect for separate offices and storing equipment and office essentials in different areas. These workspaces also provide you with the choice of multi-purpose bedding.
Now, suppose you desire a combined office space for work, relaxation, and entertainment. In such instances, the need for a shed with three separate pods should be highlighted.
All you have to do is ensure that these cabins come with dividing walls and two sets of double doors. The inclusion of these features will allow you to access separate areas for different purposes without being disturbed.
Step 5| Assessing Your Garden Shed’s Condition
This is another crucial step as it involves assessing the condition of your garden shed to check whether it’s fully watertight or if it requires any kind of alteration. Analyze the roof felt and look out for tears while ensuring that it’s securely attached.
You’ll also need to test the doors and windows of the space to make sure they’re in the right shape. That’s not all; we’d advise you to empty out the shed completely to look for signs of mold, leaks, wood rot, or dampness. And the assessment should be done before you begin converting the particular space into a home office.
In case you’re not sure about the stability of the shed, seek assistance from a professional builder. You may even consider purchasing or building a brand-new shed or cabin log for the purpose.
Step 6| All Set - Begin The Conversion
Once you’ve made all selections and assessments, you’re set to convert your garden shed into your dream workspace. Start by treating the exterior of the cabin to make it waterproof. This will safeguard it from the risk of dampness and damage, which, in turn, extends the overall lifespan of the shed.
Next up, the only thing left to do is transform it into a real office for you to work from remotely during the ongoing pandemic and even after that if needed. For this, you’ll need to think about the following factors and features.
Heating
Working remotely from your garden shed during the cold winters or any time of the year for that matter can be uncomfortable. To make it a pleasant experience, you’ll need an electric heater, which is portable and can be easily mounted on the wall.
You may even consider using tube heaters as they take up very little space and are cost-effective and safe ways to keep your shed warm. Heating your garden workspace will also prevent damps and keep your electronics and important documents from getting damaged.
Lighting
You’ll obviously require adequate lighting to work in, irrespective of the presence of sunlight. The various types of lighting will complement your office needs differently. For instance, halogen lights help in providing overhead lighting, but they can also be used for track lighting and as adjustable spotlights.
On the contrary, desk and floor lamps serve as cheap and portable lighting options for decorating your new garden shed workspace. At the same time, the versatile LED lights can be used as spotlights to make specific areas of your home office brighter.
Electricity
Like any real office, your dedicated home workspace will need electricity to run your laptop, charge phones, and power lighting. It’s better to contact a professional electrician to carry out all the electrical work of your shed; instead of trying to do them yourself.
Prior to them making the electrical connections, provide relevant information on how many sockets and light switches you need. Also, let the electrician know about all the equipment you plan on working off the electric mains.
However, if you don’t really use electronic gadgets and appliances, this step can be skipped.
Insulation
In order to protect your shed from dampness and other damage and keep them warm, have its ceiling, floor, and walls insulated. You should also soundproof the building, especially if you work in the music industry or enjoy working with loud music.
Step 7| Set Up A Well-Organized Storage Area
Image9
You’ll require a well-organized space to minimize clutter and maximize your overall work productivity. That’s why it’s important to assess how big your shed is and how much storage space is needed for the purpose.
The installation of open shelving units will help in the utilization of space in tall sheds, providing more room for you to walk and work. You can also use wall-mounted pegboards to optimize the wall storage of your shed, while clear storage containers stacked together are perfect cheap storage alternatives.
They are perfect for storing chargers, paperwork, ink cartridges, and other office essentials, keeping them close at hand. We also encourage the use of metal strips for holding metal objects such as scissors if you plan on utilizing your garden office as a practical space.
And those who have small sheds can use the space for storing items by repurposing old items. For instance, attach a spice or wine rack to the wall for organizing pens, paperclips, and document tubes. On the other hand, hanging a shoe rack behind the door can help keep small items in one place so that you do need not to worry about misplacing them.
Step 8| Decorate Your Garden Office Shed
Once you convert your shed into a workspace, it’s quite obvious that you’ll be spending the majority of your time working in it. That’s why it’s important to enhance the feeling and aesthetic appeal of the space by decorating every nook and corner according to your style preferences.
We’ve provided a few tips to help you out, so take a look.
Add A Pop Of Color
Now, whitewashed walls are indeed a popular trend when it comes to modern office sheds, but you may also stick to light and vibrant colors. You don’t have to bother much about the exterior; it can be painted in any of your favorite colors. Just ensure it complements the garden and the surrounding area.
The Personal Finishing Touches
You can create a homely feel to your garden office shed by adding photo frames or other personal items to its walls and your desk. In fact, framed posters are great inclusions to enhance the vibrancy of the space. They also help in covering up old cupboard doors.
Adding A Bit Of Greenery To The Place
Sheds can be brought to life by adding a touch of greenery. Plants not only make your workspace look good, but they also help detoxify the air, creating a better environment for you to work in.
However, if you are not someone who can take proper care of plants, we’d recommend getting artificial plants. You won’t have to work hard to keep them alive!
Make It Comfortable
Converting a garden shed into a proper office space will enable you to work in peace without any distractions. So, you’d definitely want it to be comfortable at all times.
Adding a rug and suitable furnishing with cushions can help in ensuring optimal comfort while you spend time in your home office.
Final Words
It’s a known fact that the year 2024 has drastically changed the way we live. With everyone working and learning from home, there’s been a shortage of personal space for the rest of the family members.
This has led to the popularity of garden shed offices, which have proven their worth as comfortable, dedicated workspaces for one or more members of a family. And seeing the current scenario, we’re sure that sheds will continue trending even in the coming years.
On that note, we have reached the end of our step-by-step guide to converting your shed into a perfect office. Here’s hoping we were able to provide all the required information to help you.
With this, we’ll take your leave. Till next time, stay safe!
Whether you are working from home or in the office, you need to have an ergonomic office chair to sit for prolonged periods without back pain.
However, the problem is that the wheels of most of these chairs are abrasive and can cause irreparable damage to your hardwood floor and carpet with time. For this reason, you need chair caster wheels that are specifically designed to be used on carpets.
Having said that, choosing a quality option that glides smoothly and sports a sturdy construction is easier said than done. With many factors to consider and the availability of a ton of options on the market, zoning in on a single product can be pretty complicated.
That’s why we decided to help you out in the selection process by putting together a list of the top 7 office chair casters on the market. Don’t worry; it was only after hours of research and testing that we provided detailed reviews for each of our recommendations.
So, without further chit-chat, let’s begin.
1. Lifelong
Lifelong is a popular brand known for manufacturing innovative and high-quality products useful in our day-to-day lives. The BL-2374 Office Chair Replacement Wheels are yet another quality addition to its versatile repertoire. Made using industrial-grade steel, this product sports unmatched durability to stand the test of time.
To begin with, this desk chair-wheel replacement is not going to smudge, damage, or scratch your floors. With them, you can enjoy a safe and carefree glide across the carpet, tile, vinyl, laminate, and hardwood floors. Hence, you no longer have to use office chair mats once you buy this product.
Additionally, these heavy-duty chair wheels are constructed from industrial-grade steel, ensuring that they are durable enough to withstand the test of time. Thus, we think it’s pretty safe to say that they are the last office chair wheels that you will buy.
What’s more, they work with most office chairs, which is great. However, we strongly recommend that you check the size of your wheel stubs before ordering to avoid unpleasant surprises.
Lastly, the brand claims to offer a full refund in case you are not satisfied with the performance of these LifeLong office chair wheels. This shows that the manufacturers have shown faith in their products.
Without a doubt, these replacement caster wheels are a great substitute for the abrasive wheels most chairs come with. However, it’s important to note that these chair wheels add to the height of the chair. Thus, if you have it on the lowest setting, installing these wheels will raise you a little bit, which might be an issue for shorter people.
What We Like
Sports a steel construction
Offers carefree and quiet rolling of office chairs on carpeted floors
The Office Oasis is one of the leading manufacturers of rollerblade office chair wheels in the US, so we thought it would make sense to add the OAS-1010. Encased with smooth and soft polyurethane, these caster wheels are safe to use on your carpet floors and hardwood floors.
First and foremost, the Original Rollerblade Chair Wheels are easy to install. This is because they come in a universal standard size and can be used as replacement wheels for almost any rolling chair. All you need to do is pull out the old ones and pop them in. Rest assured that there are no tools or DIY expertise required.
Additionally, the rollerblade wheels are encased with smooth and soft polyurethane, making them safe to use on tile, carpet, and hard floor surfaces without leaving any marks or scratches. So, you won’t have to spend money on buying a desk chair mat to protect your hardwood floors.
Talking about the build quality, these heavy-duty caster wheels are made of high-grade steel, which ensures they can support up to 650 pounds without breaking. On top of that, they are backed by a lifetime warranty. Therefore, you can return them for a full refund if they don’t live up to your expectations.
We couldn’t find any considerable downsides to this product during our usage, and maybe that’s why it sports such a steep price tag. Therefore, it may not be ideal for those on a tight budget. However, given the performance it brings to the table, we’d recommend it nonetheless.
Our next pick is a great product from the house of BF Brightfield. The CW-2 Office Chair Caster Wheels sports precision ball bearings with polyurethane tires to give you a silent and smooth roll. Let’s learn more about what these smooth casters can offer in the following sections.
The sturdy and reliable construction of these heavy-duty casters is what caught our attention right from the start. Their entire support bracket including the internal parts is constructed from high-grade steel, offering years of hassle-free rolling and durability to withstand weight up to 650 pounds.
A major issue with most office chair wheels is that they often damage hardwood floors and carpeted floors as they use quality and cheap materials. But that’s not going to be a problem with these caster wheels because they are sheathed with polyurethane, which ensures that they don’t leave marks or scratch wood floors.
Apart from that, it can be installed easily without any tools, which is great. But especially pleasing is the fact that it is backed by a 1-year warranty, saving you from spending hefty amounts on repairs and replacement for the first year.
Overall, these are some of the best caster wheels for office chairs that we have used so far.
Many disgruntled customers have complained that they tend to hang up on thick carpets when changing direction, which is, no doubt, disappointing. But, given the budget-friendly pricing of this product, we don’t think most buyers will mind this minor inconvenience.
STEALTHO is an American leader in office supplies committed to meeting our requirements with its line of highly functional products. On that note, allow us to introduce the 8541740421 Replacement Caster Wheels from the brand that sports a slew of features that work to provide ideal user convenience.
For starters, these office chair caster wheels are safe for all floors, including carpet, tile, linoleum, hardwood, you name it. Naturally, that makes them an ideal replacement choice for your traditional office chair wheels.
As for the build quality, it couldn’t be more durable. The wheel body is made from high-quality tool steel, which has been shaped at a temperature of 3,000 degrees; that’s why it can withstand up to 660 pounds. Thanks to the industrial-grade elastic urethane of these caster wheels, you can move the office chair easily, without leaving scratches or marks on your floor.
Furthermore, users worried about stumbling at night will love its glowing function, which can help them determine the location of the chair when it’s dark. Thus, it gives these wheels an edge over other options in a similar price range.
First of all, the caster wheels are opaque and not semi-translucent as advertised, which is annoying. Also, we noticed that it’s not silent; they tend to make a squeak now and then when smooth rolled. Other than that, we felt it was a little overpriced, so it’s certainly not for everybody.
Next, we’ve chosen these highly functional office chair caster wheels from ATOMDOC, which are a great option if you want your new office chair wheels to glide smoothly every time. Customers from across the world have praised it for its pragmatic features. From our experience, we can assure you that you will be more than happy with its performance.
This caster-wheel set could be your best bet if you want to stop damaging the carpets and wood floors with low-quality chair wheels.
With it, you can enjoy smooth gliding on the low carpet floor, tile floor, and even your hardwood floor throughout the day without using a computer chair floor mat. This is because the office chair caster wheels are encased with a soft polyurethane material that ensures the wheels don’t leave marks or scratches on any surface.
On top of that, they are highly durable and sturdy. The bracket and all-metal bearing rod are constructed from high-quality polyurethane, enabling them to provide years of durability and smooth rolling. Besides, each caster wheel has a maximum weight rating of 110 pounds, which is truly remarkable, given the budget-friendly pricing of the product.
Lastly, they are easy to install; you don’t need additional hardware or tools to set them up. Simply pull out the old wheels and push the new ones in, and that’s about it.
During our research, we didn’t find any relevant information related to the warranty of this product. As such, we can’t tell for sure if it is backed by a warranty or not. Moving on, we noticed that the replacement caster wheels are not so easy to roll on thick-padded carpets, which honestly left us frustrated.
Now that we are nearing the end of the list, here’s another product from Omyoffice that you should consider. Affordable and suited for home and office use, these Office Chair Caster Wheels are always easy to control and firm when rolling. Obviously, there’s a lot more on offer, so keep reading.
For us, the USP of these caster wheels for desk chairs is the high-quality polyurethane construction. This ensures they can protect hardwood, slate, laminate, ceramic tiles, and other hard material floors from scratches and damage. As such, you won’t have to use an office chair mat anymore to secure your expensive floor.
We were also impressed with the 1,000-pound weight-bearing capacity, which means it’s safe for a heavyweight person sitting on an office chair. Plus, they are easy to move and control despite their stable construction, which is no less than a bonus in our books.
Apart from that, these chair wheels offer an easy and quick installation; just take out the old ones and pop them into the slot till they are firmly fixed. Therefore, it’s safe to say that they can be used as replacement wheels for most office chairs and stools.
While the brand has a responsive support team, it didn’t back the product with an actual warranty, which was annoying. So, you might have to make additional expenses on repairs and replacements if they break down in the near future.
This table highlights a range of office chair caster options, detailing item weight (in lbs), material type, wheel width (in inches), weight capacity (in lbs), and stem size (in inches).
Now that you have gone through our top recommendations, were you able to make a choice? If not, there’s nothing to worry about as in this section, we have explained a few important factors that’ll help you choose the right product based on your requirements.
We strongly suggest that you read the entire thing carefully; otherwise, you might miss out on a few important things.
1. Stem
One of the most important factors you need to consider when purchasing a set of office chair casters is the stem. It’s best to go with those wheels that come with universal stems as they are known to fit most office chairs. Most office chair wheels today feature universal strength, but still, make sure you confirm it before buying.
2. Size of the Wheel
This is another crucial factor that you cannot afford to ignore when choosing caster wheels. Ideally, you would want to go with larger wheels as they can move effortlessly on thick carpets. That’s because the bigger the surface area of the wheel, the better it can handle the friction that occurs when it touches the carpet.
It goes without saying that if you have a thick carpet, smaller chair wheels will have a tough time rolling around. Plus, bigger caster wheels are more sturdy than the smaller ones, which is all the more reason why you should go for them.
3. Design
The design plays a massive role in how quietly and smoothly the chair casters will glide on the floor. Besides, it determines how much weight they can carry.
There are mainly 2 kinds of wheel designs: twin wheel casters and single wheel casters. The former features two small wheels in one set and is mainly used under office chairs, while the latter features a single wheel and is commonly used in industrial furniture.
As far as office chairs are concerned, the twin-wheel design is perfect for them as it allows for more even weight distribution.
4. Build Quality
The build quality of the wheels should be durable and sturdy as they are subjected to constant movement through the chair. Thankfully, most caster wheels available today are made with high-quality steel and polyurethane that ensures longevity, so you don’t need to worry about it too much.
That said, don’t forget to check the specifications to confirm the materials used in constructing the wheels before buying.
5. Warranty
A warranty ensures that you don’t have to shell out a hefty amount for repairs and replacement if the product stops working down the road. So, it makes sense to go with a set of caster wheels that are backed by a warranty.
Even though more often than not, they are durable and can withstand heavy weight, a warranty provides much-needed peace of mind.
How do I choose the right casters for my office chair?
To choose the right casters, consider factors like the type of flooring in your office, the weight capacity of the chair, and your mobility needs. Hard floor casters are suitable for smooth surfaces, while soft wheel casters are better for carpeted floors.
Can I replace the casters on my office chair?
Yes, most office chairs allow for caster replacement. Ensure compatibility by checking the size and type of the existing casters before purchasing new ones.
How do I remove and install new office chair casters?
To remove casters, gently pull or pry them from the chair base. For installation, align the stem of the caster with the socket on the chair base and push until it clicks into place.
How often should I replace my office chair casters?
The lifespan of casters depends on factors like usage, weight, and caster quality. Generally, consider replacement every 3-5 years or sooner if there is noticeable wear or damage.
Can I use office chair casters on a hardwood floor?
Yes, specific casters designed for hardwood floors are available. They typically have soft, rubberized wheels that won't scratch or damage the surface.
Can I use casters with a locking mechanism on my office chair?
Yes, casters with a locking mechanism are suitable for those seeking to prevent their chair from rolling when stationary. This feature is particularly useful in situations where stability is important.
If you are worried about the chair wheels ruining the look and feel of your expensive floors, then a set of quality office chair casters is a must-have.
On that note, it’s time for us to sign off. But before we do, we’d like to let you in on our favorite products from this list to assist you even further.
For us, the Lifelong is the best overall because it is ergonomically designed and offers an easy installation. Additionally, theOffice Oasis is a great choice as it is one of the few products that is backed by a lifetime warranty and safe for all floors.
And if you are looking for a product that can withstand heavy weight, we highly recommend that you go with the BF Brightfield.
Do let us know in the comments below if you agree with our top picks. Until then, it’s a wrap.
In this Nutribullet vs Vitamix comparison, I'll try to help you decide which brand offers the better blender FOR YOU.
We all know about Nutribullet's famed Magic Bullet and its versatile cup that can produce a yummy smoothie and sauces. That said, it can't make you a hot soup like Vitamix blenders.
So, which brand should you choose? Keep reading to find out!
As we all know, Nutribullet has a vast selection of blenders. To name a famous few, we have the Nutribullet Pro series, Nutribullet Blender Combo, and Nutribullet Rx.
Similarly, Vitamix provides a wide range of products. Their Ascent series is a well-known favorite, while their Explorian line caters to those with a limited budget.
To compare the performances of these two brands in this Nutribullet vs Vitamix showdown, I examined the Nutribullet Smart Touch Blender Combo and the Vitamix 5200 in particular.
They're comparable in terms of power, capacity, and functions. However, keep in mind that this isn't a fully fair comparison as both units do different things at drastically different price points.
Let's begin!
Type
The Nutribullet Smart Touch Blender Combo combines a full-sized and personal blender with great features designed for various quantities and everyday use.
Its motor is powerful, and it comes with pre-programmed settings for maximum convenience.
The Vitamix 5200 is a more powerful blender designed for various heavy-duty uses with a large capacity and a tamper to help with thicker ingredients.
Capacity
The Nutribullet Smart Touch Blender Combo comes with a 64 oz pitcher and two single-serving cups, allowing it to handle both small and large quantities.
The pitcher's bigger capacity is excellent for batch prepping or entertaining guests, while the single-serve containers are convenient for on-the-go use.
Similarly, the Vitamix 5200 has a large capacity of 64 oz that can handle huge quantities of ingredients. However, Vitamix's single-serve containers need to be purchased separately.
Dimensions
The Nutribullet Smart Touch Blender Combo has a more compact design. It measures 10.7" x 8.1" x 17" and weighs around 8.3 lbs.
This makes it easier to store as it requires less space in your kitchen.
The Vitamix 5200 is larger with dimensions of 20.5" x 8.75" x 7.25" and a weight of around 11 lbs.
However, it isn't ridiculously huge that it would take a lot of real estate on your countertop.
Price and Warranty
The Nutribullet Smart Touch Blender Combo is an affordable blender, making it an accessible choice for many. It comes with a 1-year warranty.
The Vitamix 5200, meanwhile, is one of the more expensive models, but its quality and durability are exceptional.
When investing in this high-end kitchen tool, it has a more extended 7-year warranty for your peace of mind.
Mode
The Vitamix blender offers more control over your blending experience with variable speed options.
It is more flexible with textures and consistency. Aside from smoothie recipes, it can easily make nut butters, frozen desserts, and hot soups.
The Nutribullet Smart Touch offers several pre-programmed modes, making it easier to blend specific ingredients.
However, though it can blend smoothies perfectly, it may struggle to blend hot soups due to its limited temperature capacity*.
Note
Nutribullet Rx is a model that provides a heating function.
Noise Level
The Vitamix 5200, though very much audible, operates at a quieter level of around 82 decibels while still offering excellent blending power.
The Nutribullet Smart Touch Blender Combo is also powerful, but it can be rather loud and emits between 91 and 97 decibels, depending on the mode.
Cleaning
The Nutribullet Smart Touch Blender Combo and the Vitamix 5200 are both relatively easy to clean.
The Nutribullet cups and pitcher are dishwasher-safe, while the Vitamix has a self-cleaning function.
However, the Nutribullet's extractor blade can be trickier to clean as it isn't dishwasher safe, and the motor base needs to be wiped down with a damp cloth.
Smart Features
The Nutribullet Smart Touch Blender Combo offers excellent features such as Bluetooth connectivity, smart touch controls, and the ability to conveniently customize presets.
Additionally, it has a safety feature that prevents it from operating if the pitcher or the lid is not securely locked in place.
The Vitamix 5200 is a more straightforward blender and doesn't have such smart advanced features. However, it does come with a speed control dial for precise blending control.
Accessories
The Nutribullet Smart Touch Blender Combo comes with multiple accessories, including various-sized cups, lids, blades for different functions, and even a book of recipes.
In contrast, the Vitamix 5200 has fewer extras included. It comes with a wet and dry blade container, a tamper, and a cookbook.
Speed Settings
The Nutribullet Smart Touch Blender Combo has a variety of speed settings, including four pre-programmed settings, variable speeds up to 10, and even a pulse function.
The Vitamix 5200, on the other hand, has a variable speed dial that allows users to adjust the blending speed from 1 to 10 to a high-speed option.
Materials
The Nutribullet Smart Touch Blender Combo and Vitamix 5200 are both well-built and made of high-quality materials.
The Vitamix 5200 features a stainless steel body and blades, while the Nutribullet Smart Touch Blender Combo has a plastic body with stainless steel blades.
That said, the Vitamix seems to have a more heavy-duty and robust build quality compared to the Nutribullet.
Motor
The Nutribullet's 1200-watt motor is strong, but the Vitamix blender has a more powerful motor with a 2-horsepower machine, ultimately delivering better performance.
Though both can blend frozen ingredients, for example, the stronger motor on Vitamix gives smoother textures and more consistent blends.
Nutribullet Blenders: An Overview
Nutribullet is a brand that specializes in making budget but powerful blenders for healthy living.
Their product line includes personal blenders and full-size blenders, with the Nutribullet Pro, Nutribullet Rx, and Nutribullet Combo being some of the popular ones.
Nutribullet first gained recognition with its first blender, the original Magic Bullet, a versatile kitchen gadget that can make smoothies, juices, and even grind coffee beans.
Nutribullet stands out in the market because it focuses on making smoothies accessible and easy for people to adopt healthy habits into their daily routines.
Their blenders are primarily designed to handle many ingredients and create nutrient-dense blends that support a healthy lifestyle.
Nutribullet offers a range of accessories, including cups and blades, to make the process even easier.
Some users find parts of the blender to be challenging to clean
Vitamix Blenders: An Overview
As the leading brand in the high-performance blender market, Vitamix offers more power than probably all other brands of blenders with their 2-horsepower motors.
Vitamix blenders are favored by serious home cooks and professionals due to their versatility, ease of use, and exceptional blending capabilities.
Another standout feature is their variable speed control, which allows users to adjust the speed and texture of their blend to their desired consistency.
The Vitamix Ascent 3500 is one of their most popular models. The Vitamix Ascent line offers advanced features like Bluetooth connectivity and self-cleaning technology.
The Vitamix Explorian E310 has a relatively lower cost but exceptional performance. For those looking for a compact option, the Vitamix One is a newer model that takes up less space.
While Vitamix blenders tend to be pricier, they are worth the investment thanks to their exceptional performance and durability.
Exceptional power can handle almost any ingredient
Variable speed for precise blending
Durable and long-lasting
Versatile use (hot soups, nut butters, dough, etc.)
Excellent customer service and warranty
Cons
Vitamix blenders are expensive
Some users find the interface confusing
May have difficulty blending small quantities
May require additional attachments for specific tasks
Alternatives to Both Blender Brands
As I mentioned, Vitamix vs. Nutribullet isn't a totally fair comparison. Let's look at other blenders that are comparable:
Ninjaand Nutribullet are both popular personal blender brands. Ninja models generally have more powerful motors and larger-capacity jars.
Ninja may be preferable for users who want to blend larger quantities or more challenging ingredients.
On the other hand, Blendtecand Vitamix are comparable in terms of their powerful motors, variable speed dials, and high-quality build.
Blendtec may be preferred over Vitamix for its unique jar design, pre-programmed blend cycles, and slightly lower price point compared to Vitamix. Read this Vitamix vs Blendtec rev for a more detailed breakdown.
Which Blender Brand Should You Choose?
When deciding between Nutribullet vs Vitamix, consider your budget and intended use.
Nutribullet is incredibly affordable and suitable for personal use, with a compact size and cup for making smoothies.
Conversely, Vitamix is a full-sized blender with a stronger motor and variable speed controls. However, Vitamix, across the board, comes at a higher cost.
Aside from making green smoothies, Vitamix is also ideal for making other recipes like nut butters, hot soup, frozen desserts, and sauces.
If you're looking for a budget-friendly machine with simple recipe options, go for Nutribullet.
If you're willing to invest in a kitchen appliance for a broader range of culinary applications, Vitamix is the better choice.
FAQs Related To Nutribullet Vs Vitamix
Here are some answers to questions many people want to know regarding Nutribullet vs Vitamix:
Why Do Professionals Always Use a Vitamix Blender?
Professional chefs prefer Vitamix blenders because of their powerful and versatile machine options, which can handle various cooking and kitchen tasks other than making smoothies.
It helps chefs save time and effort in cooking by achieving smooth and consistent results every time.
If you’re serious about cooking and choosing between Vitamix vs. Nutribullet, go with the former.
While the Smart Touch Combo, Nutribullet Rx, Nutribullet Combo, and Magic Bullet are all impressive in their own rights, they can’t quite compare to a Vitamix in pro applications.
Is the Nutribullet Blender Combo Good for Crushing Ice?
While the Nutribullet Blender Combo is capable of blending smoothies and crushing ice, it is still recommended to use a small amount of liquid, such as water, milk, or juice, to help the blender do its job.
The blades of the Nutribullet Combo are robust and designed to crush ice, but it’s important to follow the manufacturer’s instructions to avoid any damage.
Nexgrill and Weber are 2 of the best manufacturers when it comes to quality gas grills. We can already say that choosing between these products is quite difficult. With the introduction of these products, Nexgrill and Weber have been able to establish a reputable name in the market for grilling and barbecues.
To help folks make a sensible, informed purchase decision, we decided to put together this budget grills product comparison that answers all your questions. We are going to discuss two of the top-selling models i.e. Nexgrill Grill and the Weber Spirit II E-210 and by the end of the review, you’ll be in a better position to decide which product is the better choice for you. First, however, let’s begin with individual reviews for these products.
Weber Spirit II E-210
The Weber Spirit II E-210 44010001 is among the latest and top-selling products from the Weber brand. You will find that this product comes with a 2-burner grill and a very sleek design.
1. Grill Size
The Weber Spirit II E-210 has a total workspace area of 450 square inches and about 360 square inches of these are used for the primary cooking space. The remaining space of 90 square inches is dedicated solely to the warming rack.
2. Cooking Power
The Weber Spirit II E-210 features 2 burners that are made of stainless steel and will be capable of delivering total heat outputs of as much as 26,500 BTUs/hour. This also means that for every square inch of the grill, there will be an equal spread of about 73 BTUs/hour. (26,500/360).
3. GS4 Grilling System
The Weber Spirit II E-210 has a GS4 Grilling System that ensures a reliable and easy grilling experience for users. For this very reason, the GS4 system consists of 4 important components. These components consist of the grease management system, flavorizer bars, powerful burners, and infinity ignition.
4. Side Tables
Another important and user-friendly feature of this product is the folding side table. With the help of this, you can always keep your platters, tools, and seasoning handy or even benefit from a little extra space while you barbecue. These side-tables, however, won’t cause you any problems when you want to store your grill away because all you would have to do is press a button and fold them in.
Nexgrill Grill
In our budget grills product comparison, we decided to include the Nexgrill since it is a great substitute for the Weber Spirit II E-210. This product can also be bought with 2 steel burners that are made of stainless steel. It also features extra side tables on both sides of the unit. These side tables can also be folded down to give you more work space or for easy storage.
1. Durability
The Nexgrill is made from corrosion-resistant materials, making the product more functional and with increased operational life. Other than this, the product consists of 2 porcelain iron casts that ensure that the grill can be cleaned easily.
2. Heat Output & Size
As mentioned before, this product also has 2 burners that can deliver a consistent maximum heat output of 15,000 BTUs/hour. The cooking space offered by this product stands at about 385 square inches plus the extra 65 square inches for the warming rack. This means that the overall coming area of the product stands at 450 square inches.
3. Versatility
One feature that gets a lot of love from most grillers is its ability to operate on propane as well as natural gas. The Nexgrill also features an infrared technology which will be able to provide its users with different cooking methods for different conditions.
Nexgrill Vs Weber
If we were to compare the Weber to the Nexgrill with regards to heat output, then we can assure you that the Weber will be a clear winner. This is because of the fact that the Weber has the ability to deliver a cumulative heat output of 26,500 BTUs. The Nexgrill model is left behind by just a notch as it stands at 15,000 BTUs/hour.
Other than this, both of these products are set apart, despite many of their similarities, by their price tag. The Weber Spirit II E-210 has a larger price tag as opposed to its competitor and both of these products have the same cooking space at 450 square inches. Both of these models also have a really great design but the Weber series may only explain its premium price with its ultra sleek design that makes it look really sophisticated.
With regards to cooking performance, the Nexgrill has definitely made its way to the top. The Weber Spirit II E-210, however, has an ace due to its infrared cooking technology. Weber does have some tricks up their sleeves too because of their really innovative flavoring bards that help ensure a really delicious food for users.
Besides all of the above, the Weber series also offers its users a quality grease management system. This system makes cleaning the product much easier while the infinity ignition makes things even more user-friendly. To end it all, the fuel gauge and temperature indicator in this product are very simple to understand.
Final Verdict for Nexgrill Vs Weber
If you still can’t decide on what to buy from our budget grills product comparison, then we believe you need the Nexgrill. This grill will give you a better heating output at a lower price. If, however, you want some of those brilliant extra features for a heftier price, you still wouldn’t have made a wrong decision!
The Google Nest wireless doorbell is one of the best wireless doorbells that features easy installation and cost-effective functions. But the wired option may be more suitable if better video resolution and field of view are a priority.
If you’re looking for the best wireless doorbell, chances are you’ve come across the Nest line of devices from Google.
These include both wireless and wired options and offer some exciting features, but many people find it confusing to choose between the two. That’s where this guide can come in handy to learn about the advantages of each option before making a decision
About Google Nest
The Nest brand was originally founded by Matt Rogers and Tony Fadell, former Apple employees, in 2010 and specialized in the development of smart home devices. In 2014, Google purchased the company and merged it with its home devices unit in 2018. All Google Home smart devices were rebranded as Google Nest devices in the same year.
Since 2019, Google Nest has become a household name synonymous with smart home devices, among which the best known is the Nest Learning Thermostat. This device automates the process of water heating, as well as controlling the temperature of the room.
Another popular device is the Google Nest Smoke and Carbon Monoxide Detector, which detects fires quickly and can be controlled using a smartphone. It also includes a smoke alarm and can inform you about the location of the fire.
Then there are the Google Nest cameras for indoor and outdoor purposes. These come with glass lenses and need to be connected to the main power supply to function smoothly. All Google Nest devices are compatible with various smart home products from the brand, and might even work with devices from other brands.
Common Features Of The Nest Wired And Wireless Doorbells
1. Colors And Design
The wired and wireless Nest doorbells feature a similar design, which makes them a popular option. This modern and elegant design is well suited for most contemporary homes and includes standard drill holes for installing the doorbells easily with the existing doorbell system.
They are also available in multiple colors, and Google has used the snow white, ash gray, linen beige, and ivy green options for both wired and wireless versions. Depending on which color you pick, the device can stand out or blend in with the surroundings.
2. Video Recording
The Nest line of doorbells features excellent video recording, which can help you know who is at the door. This includes night vision recording as well but the resolution of the videos recorded differs slightly between the two devices.
Additionally, the camera can be turned on or off depending on the location, and its functionality can be enhanced with the Nest Aware subscription. This turns on the Face Detection feature and is available for both wired and wireless options, but it is more useful in the case of the former.
3. Functionality
Despite belonging to different generations, the Nest wired and wireless doorbells function in a similar manner. When someone presses the button on the device, a message will appear on their smartphone, which can be answered directly. In case you cannot answer, there is a selection of premade messages that you can use.
Both devices feature a Quiet Time function for disabling the chime functionality for short periods when you are not at home. These smart doorbells utilize machine learning to differentiate between people, pets, packages, and even vehicles.
4. Compatibility
Both the Nest wired and wireless doorbells are only compatible with Google Assistant smart devices. This means that you won’t be able to use them with other assistants like Alexa or Siri. However, the recordings of the wired version can be viewed using devices like Amazon Fire TV and Echo Show.
Google Nest doorbells work with your existing chime, which can be used instead of smart speakers for alerts. And both devices work flawlessly with Google Smart Speakers to announce who is at the door. The doorbells even work Nest Hub, Google Nest cameras and other smart devices from the company.
Differences
While most of the features and functionality remain the same, there are a few differences between the wired and wireless Nest doorbells.
1. Dimensions
Both the battery-powered and wired Nest doorbells have similar designs but slightly different dimensions. The wired Nest doorbell is smaller, with a height of 5.15 inches, compared to the 6.29 inches of the battery-powered Nest doorbell. Also, it has a width of 1.6 inches, which is slightly more than the 0.94 inches of the wireless version.
The depth varies of the wired Nest doorbell is 1.1 inches while the battery-powered unit has a depth of 1.81 inches. This difference in dimensions is due to the built-in battery of the wireless model.
But these subtle differences are usually only visible if you place both models next to each other.
2. Video Quality And Field Of View
The most significant difference between the Nest battery-powered doorbell and the wired option lies in the video recording quality. While the wired Nest doorbell can record videos at a 2K resolution, the wireless one is limited to 1080p Full HD recordings.
Similarly, the wired Nest doorbell offers a 180-degree field of view while the second-generation wireless version comes with a 145-degree field of view. It even records videos in portrait mode, compared to the wired option that records it in landscape mode.
Keep in mind that the camera capabilities directly affect the cost of the device, which is why the wired Nest doorbell is costlier than its successor.
3. Installation And Removal
Despite coming with a built-in battery which makes the wireless version slightly beefier than the wired option, installing it is easier. It can be screwed onto the wall outside the house with the help of an angle wedge without much effort, or you can wire it into the existing doorbell circuit.
The wireless option can also be removed easily whenever required, such as in situations where you might be planning to move.
In contrast, for installing the wired Nest doorbell, you will need a 16 to 24V AC transformer. It may also require an internal chime to provide sound alerts without relying on speakers powered by Google Assistant. But you may need to hire a professional to get it installed.
4. Storage
Storage is an important factor to consider when buying a device such as a smart doorbell. Ideally, the device should provide an event video history that can be viewed easily whenever required. However, more and more manufacturers are making this a premium feature.
This is also true in the case of Google, which offers the Nest Aware subscription for its smart devices like doorbells. The subscription provides 30-days of video history along with the capability of detecting people or packages, which makes it especially useful for the wired option since it lacks offline storage. It even includes a feature to call emergency services while providing intelligent alerts.
On the other hand, the wireless doorbell allows you to record 3 hours of video without additional storage. Since this feature does not depend upon WiFi, it can prove quite handy. The wireless doorbell further comes with object detection to record packages, people, and vehicles. However, it does not offer 24/7 recording, only available with the wired version.
5. App Control
Despite the two Nest doorbells coming from the same brand, they are controlled using different smartphone applications. The wired Google device is managed using the Nest app, while the battery-powered one can be controlled with the newer Google Home app.
As for ease of use, the Nest app is a bit easier to use than Google Home, especially when it comes to finding recorded videos. But the company has announced that it plans to combine the best features of both apps into a single one in the future.
6. Performance
Specifications aside, differences exist in the real-world performance of both video doorbells. The wired Nest doorbell can record videos in landscape mode in 2K resolution, with sharp image quality, well-exposed lighting, and details that are not obscured by shadows.
In this case, the only exception is fast-moving videos, where some details may be lost. On the other hand, the Nest battery-operated doorbell records videos in 1080p in portrait mode, with a 145-degree viewing angle. Images, while being well-balanced and clear, are overall inferior in quality compared to those taken by the wired doorbell.
The wired Google Nest doorbell can also send notifications to your Google device or smartphone quickly. But the battery-powered version requires more time to perform such actions, especially if it isn’t hardwired.
7. Cost
The wired Nest doorbell comes with certain features that are missing from other options, such as higher video recording resolutions and a wider field of view. Because of that, it costs more than the wireless variant, which despite being newer, is more cost-effective.
Nest Doorbell Wired Vs Wireless FAQs
Can the Google Nest doorbells detect noise?
The audio detection feature is present in the wired Nest doorbell, which can detect loud noises but cannot detect low sounds. Once it detects such noises, the device sends a notification to your Google device.
But this feature is not available in the battery-powered version, though its motion sensing capabilities can be enhanced using the Nest Aware subscription. Alternatively, you can pair it with the Nest Hub to search for sounds.
How is the Ring wired doorbell different from the wireless version?
If you’re confused about the Ring doorbell wired vs wirelessoptions, here are a few differences between the two. The Ring wired doorbell, also known as the Ring Pro, has a 160-degree field of view, compared to the 155-degree viewing angle on the wireless option.
It also has a smaller form factor, though that does not affect its functionality, and inbuilt LED lights for higher-quality videos.
Is it possible to use the Nest doorbell without an existing doorbell?
The answer to this question depends upon the type of Nest doorbell you plan to install. In the case of the Nest wired doorbell, it needs to be connected to the existing doorbell system of your home.
Meanwhile, the battery-powered option can be installed directly if it is installed wirelessly. But if it has to be hardwired, then it will also require an existing doorbell system.
Can you use more than one Google Nest doorbell?
You can use more than one Google Nest doorbell; however, the maximum number of such devices should not exceed 10 per home. And this includes both wired and wireless doorbells.
The number of doorbells you can actually use will depend on your internet bandwidth, with higher bandwidths supporting more devices.
Is the Google Nest doorbell waterproof?
Both the wired and wireless Google Nest doorbells come with an IP54 rating, which means that the devices are protected against water sprays and dust. That said, the IP54 rating does not make these devices waterproof, and they should not be submerged or soaked in water. The doorbells can tolerate splashes of water, such as from rain, but nothing more than that.
Nest Doorbell Wired Vs Wireless Conclusion
Both the Nest wired and wireless doorbells offer different advantages and are suitable for various needs. This means selecting between them is ultimately a matter of personal preference, so you need to consider which factors are most important.
For people who require easy installation and removal, the Nest wireless doorbell is a better option. It does not require hiring professionals for installation and can even be removed if you plan to move. The only downside is that the device has to be taken down every time it has to be charged.
On the other hand, when you’re looking for a device with impressive video recording capabilities, the wired option is a better choice. The 2K video recording and a wider field of view deliver a better experience but comes at a higher price point.
Those willing to spend a little extra should go with this option, while others can save more by choosing the wireless one. There are several other manufacturers offering smart doorbells, such as Ring, Arlo, and more. And it is a good idea to make comparisons, such as the Arlo wired vs wireless doorbell, and comparing them with the Google devices to make a decision.
Tip
If the Nest doorbell keeps going offline, restart the modem and WiFi by unplugging the power cords. Wait for 30 seconds before replugging the cords and check the doorbell video stream to see if you are back online.
Awe-inspiring bedrooms overall are easy to find in the internet era yet finding something tailored to your chain of thought remains difficult to find; we are all unique, it is known, it is natural to seek unique solutions.
More often than not we overlook the great importance of the bedroom yet today we address this exactly and you're here because we have a common point of interest, and one of great beauty that is, we're searching for inspiration on navy blue bedroom ideas!
Yep, this awesome color has inspired a lot of people, the very dark shade of blue is timeless and thus here to stay!
If you are wondering, the name of navy blue in contrast with white was worn by officers of the British Royal Navy ever since 1748 and was subsequently adopted by other navy groups rapidly, in the 19th century already being the usual color of sailor's uniforms back then entitled marine blue.
The earliest use of the term navy blue goes back to 1840, when Oxford English Dictionary surfaces a citation from 1813.
In the meantime, the former blue uniforms of the United States Navy and many other navies around the world changed to black as better response to combat fading.
So after this brief history you still have an interest in this awesome color?
Brilliant, let's proceed, cast a glance on our collect of navy bedroom ideas and please do leave your valuable feedback in the comment section below!
Navy Blue Bedroom Ideas
1. Navy Dark Blue Bedroom With Golden and Copper Accents
The elegance and stability of the navy blue is here enhanced by herringbone patterned wooden floors and herringbone gray rug both adding dynamic to an otherwise still interior, neutral palettes are used on textiles while rose copper and golden accents are being inserted on the light fixtures to increase the sumptuousness of the interior.
Image via nighslee.com
2. Rattan and Ochre Tone Support the Navy
A very earthy interior anchors the bedroom above to the ground, ochre tones earthen the bottom half of the picture while navy blue contrast the stark white walls contrasting the bottom half with the vastness of the oceans and/or the skies, one limit defines the other, one elements supports the other.
Yes, navy blue might be a difficult color for small spaces but there are solutions, in the example above, wooden floors anchor it while stark white embrace it with airiness, an additional glass gallery offers a small storage space backed by a mirror that bounces the light through out the interior even further emphasizing the feeling of space.
One ought to have an affinity for the blue color palette to express it throughout the bedroom so epicly. The interior above exudes elegance and sophistication beautifully. White wooden floors support it along with white fur and a white painting swimming in blue; together they bring airiness in heavy yet splendid interior.
Navy blue can be translate into sheer luxury, the right palette beautifully tied to an airiness ambiance with golden accents creates an image like nothing else, cast a glance over the image above. Nothing looks unattainable or hard to find right? The deep blue bedding here beautifully highlights and accentuates the whole.
Source Unknown
6. Bring Navy Blue in Through Textiles
All white, light wooden floors, birch airy nightstand and rattan light fixtures create a space that breathes and exude light in superb atmosphere. In this setting, the royal navy blue steps in through two elements, a bed cover and a pillow and that's it, a versatile insert with superb aesthetics.
7. Eclectic Mixture of Elements Bound by Navy Blue
A rustic bench holds magazines and candles modern round wall art, wooden pieces contrast black and white picture frame. Neutral tones are used throughout yet everything comes together aggregated by the navy blue, subtle wooden textures and neutral textiles support with airiness beautifully.
A simple bedroom that highlight it's Scandinavian inspiration through a splendid ambiance, everything is simple yet everything matters in here, textiles, furs, chromatic balance and rustic wood in equilibrium.
Image via blog.apartminty.com
9. Fresh Navy Blue Flooded by Light
A youthful vibration is of-course brought in by the floral duvet and pillow covers, this is anchored into elegance with the herringbone wooden floors and stripped navy blue bed, everything screamss sophistication, everything is flooded by light.
The right colors are sometimes enough yet when they're doubled by the right texture, things change. Gaze for a second on the vibration of the wallpaper in the image above, it seems far away, old yet dynamic, a sober elegance that enhances other shades of blue.
Source Unknown
11. Modern Dark Navy Blue Bedroom Design
Yes, the radiator brings the retro accent in but the rest of the furnishings are modern, simple and elegant. Navy blue contrasts white and wood here too, natural matches of the tone. In the bedroom above, the splendid drawings subdue everything and rightfully.
12. Navy Blue Interior With Intricate Patterns
A rather simple interior is here spiced up but small intricate details at textiles level and material level, notice the light wooden floors paired with the wired bed frame and lightness of the room. Despite the amount of dark shades, the interior remains balanced, light on its feet.
Image via Pinterest
13. Sumptuous Navy Blue Bedroom With Golden Accents
Chic interior brought in which really exquisite one of a kind looking items shine; navy blue walls are flooded by light, golden accents complement beautifully where white bedding and pink armchair create contrast.
Spices, spices all over isn't it? A multitude of different complementary blue patterns sparkled the interior above, they are different but they work somehow without blending one into the other, a fact that might distress one and please the other, how do you feel about it?
Do note the beautiful vaulted ceiling and the immense amount of light, great assets to blue spiced up interior!
15. Golden Retro Accents Defining a Dark Blue Bedroom
Yes, the golden accents are key here, they're the cherry on the top of a balanced natural materials and royal colors, notice the rug and how the multitude of wooden textures blend together to serve the navy blue god and his golden trinkets!
Wooden nightstands and white taupe tones complement really beautifully a navy blue accent wall, golden nightstands once more add a pinch of glamour to a sober ambiance.
Two really sophisticated tones tones that exude sophistication in a dance of colors. A combination hard to pull off and easy to love and hate; what do you think?
Source Unknown
18. Navy Modern Bedroom With Wooden Wall Art
A recipe of wood, gray and lightness paired with navy blue is bulletproof and here too it fits like a glove. Notable, the wooden trunk slices of wood art enhance with coziness and warmth.
by Denis Krasikov
Source Unknown
19. Gray, White and Blue Bedroom
Gray on the floor, white on the ceiling, navy blue in the back in a room flooded by light; everything simply spectacular. Accents here are brought through texture, black and white at pillow level; through color on the blanket and small round pillows and through materiality at the giant knitted duvet end on the bed. Flowers add organicity all around.
Balanced, what do you think?
Image via Pinterest
20. Sober Tones of Navy Blue
The humongous knitted blanket strikes again! In this setting it meets different tones of dark blue that leave little room of anything else; in here artwork receive more attention and the atmosphere is extraordinary sober, elegant, masculine.
In the image above, the bedroom is defined by the stark contrast between white and navy blue splendidly enhanced by light and a small pattern on the bed cover, despite the small interior, the high contrast unloads the dark navy color easily in a splendid ambiance.
Image via Pinterest
22. Natural Navy Tones
The color palette here is a far more more mature, the navy tones are a tad more subdued, in a more elegant balance with the grey and wood presence around.
Image via Pinterest
23. Light Navy Blue Bedroom in Contrast
With a lighter tone of navy blue, one can can find the contrast with white and gray in a less intense, more delicate bedroom interior design. The vibrant interior is supplemented by geometric patterns a great deal, note the pillows, bed cover and nightstand lamp.
Image via Target
24. Balanced Bedroom With Navy Blue Accents
Simple interior design, wire-frame nightstand emphasizing the airiness and feeling of space along with white wood bedding where simple navy accents create contrast.
Natural materials and extraordinarily elegant, delicate patterns define a bedroom above, one in which the navy blue color handles the contrast at a chromatic level without taking the first seat in the space. Note the density of natural elements, wooden textures, fur on the chair, vegetation by the mirror.
Earthy tones on the small half slide into shades of pink to create a more feminine presence near a masculine navy blue color, artwork make their presence felt in an epic position, note that all art pieces are white or black and white.
Image via Pinterest
27.Navy Blue Bedroom Interior Detail
This is a splendid bedroom that aims to create focus on a couple of great elements: the black and white rug, wire-frame nightstand with wooden top, blank wall art on navy blue wall, suspended greenery in rope and small but golden nightstand by the bed, have you seen the pillows too?
Note the wall to ceiling detail, the bedding, the fluffy cloud lighting fixtures and even the texture on the navy blue, they all bring in a unique, familiar vibe to a rather simple but certainly not dull interior. How much do you think the navy blue wall contributes to this ambiance?
30. Naturalness at Home in Navy Bedroom
The greenery, rough floors and powerful contrast make the whole space, gaze at how little it takes to create an extraordinarily powerful, vibrant atmosphere!
31. All Navy Blue Bedroom Design
This might not be everyone's cup of tea but it certainly is extraordinary beautiful and shatteringly beautiful space. It is dense, masculine and extraordinarily elegant! One could argue that the nighstand in this picture is unfit for the interior, what do you think?
32. Navy Blue Bedroom With White Base
Here a tall white base breaks the connection between splendid wooden floors and a great shade of deep blue, note how all the tree elements now enter in contrast one with the other, an harmonious contrast for which the wick basket and super plant as a nightstand has only words of praise, just like us.
33. Earthy Tones in Blue Bedroom
Neutral taupe tones come in to root a room down to the ground, a white base disrupts the between wooden floors and navy blue wall yet here the rug stops the contrast abruptly further enhancing the taupe presence in bottom half of the room.
Source Unknown
By now you should have an idea of what is trending around the navy blue color and how you would like to proceed.
In short, navy blue works extraordinarily when contrast is created around it or when it dominates the room completely, it is a tone far too powerful color to sit in a position of uncertainty.
The most common mixtures include natural materials, wooden floors, stark white walls and a lot of light to balance the darkness brought by this serious tone. If you would like to create more sophisticated contrasts, rose gold and golden accents are brilliant, a more feminine presence that complement and contrast the scene at the same time are the pink shades!
Navy blue whether it's as a dark blue, deep blue or marine blue hue, is a difficult but beautiful and sophisticated color, what do you think?
How would you use it?
Looking forward to hearing from you in the comment section below, happy redecorating!
Gas grills come in all shapes and sizes. From the small compact grills to the large grills that cater to larger families. But, how do you know which grill suits your needs? In this article, we are going to take a look at one of the large grill options that are available in the market today. In fact, if you’re looking for a large gas powered grill then the Napoleon Prestige Pro 500 is an easy choice.
80, 000 BTU's, 4 Stainless Steel main burners, 900 in total...
Dimensions: 66.50" W x 25.50" D x 51.75" H (Lid Closed)...
While the brand Napoleon is a relatively new arrival in the niche of high-quality gas grills, the brand has made quite a splash in the industry by releasing one great product after the other. This puts the Prestige Pro 500 in good company.
With the Prestige Pro 500, Napoleon is looking to make its entry in the large grill niche that caters to large families or commercial use. For this, the company has decided to go with extra-large cooking space along with six burners that make cooking fast and hassle-free.
Napoleon has had a good track record of delivering premium quality grills at an affordable price and the Prestige Pro 500 is no exception. From the looks of it, the company has gone the extra mile in making sure it delivers a superior product that’s all set to become an instant hit with its fans.
Specifications
Six stainless steel burners
900 square inches of a total cooking area
Four stainless steel burners: 80,000 BTUs.
Side burner: 14,000 BTUs
Rotisserie kit with smoking channel: 18,000 BTUs
Four caster wheels
The Design
Like all the other grills by Napoleon, the first thing you are going to notice is the premium quality feel that this grill offers. The company has used 100% stainless steel for the body and frame of the grill, which gives it a top-shelf look right off the bat. But, another selling factor of the Prestige Pro 500 is its imposing design which will easily stand out in any setting. The high-grade stainless steel grill can easily pass off as a commercial unit in terms of both style and functionality.
Talking about style, the Prestige Pro 500 offers a large cooking space that’s larger than most other grills that are available in the market today. Its sleek design and smooth edges make it a great choice for families that have small kids or just don’t want to get cut by sharp stainless steel metal.
The Prestige Pro 500 features interior lighting which is a nice addition to the overall design. The addition of a cutting board across the sizzle zone infrared burner is also a nice addition and allows you to hook useful utensils and tools off the side.
But, the reason we are all here is because of the impressive cooking capacity of the Napoleon Prestige Pro 500. The propane/gas grill features up to six burners and can pump out an impressive 80,000 BTUs in cooking power.
The cooking area features an infrared side burner that’s used for searing along with an infrared rotisserie-style rear burner. The Prestige Pro 500 also features detachable stainless plates, making hibachi style cooking possible. In total, users get up to 500 square inches of cooking space with 260 square inches of warming area.
The Features
Six Stainless Steel Burners
Napoleon boasts of being one of the most powerful gas grills that are available in the market today. The six primary burners can generate an outstanding amount of heat for faster more efficient cooking. If you’re searching for a grill that has a large capacity and makes you cook fast then the Napoleon Prestige Pro 500 should be a no-brainer.
Built-In Electronic Ignition
Napoleon has decided to go with a built-in electronic ignition system this time around. This simple tweak has made a major difference in the overall experience of this grill. With the help of the new electronic ignition system, users have complete control over the primary burners and the rear rotisserie burner as well. This ensures you get to cook more foods at different temperatures quicker than most other gas grills, making it the ideal choice for large families.
Oversized Warming Rack
As if all these features weren’t enough to get buyers to purchase the Prestige Pro 500, the company has also included a super large warming rack, which makes this the ideal grill when hosting parties or large get-togethers at home.
Heavy-Duty Accu-Probe Temperature Gauge
The Napoleon Prestige Pro 500 features a heavy-duty Accu-Probe temperature gauge that makes it easy to find out just how hot the grill is before cooking.
Other Features
The Napoleon Prestige Pro 500 grill offers a complete grilling experience in more ways than one. From the easy to use side storage shelf that makes it easy to store away utensils or other accessories neatly to the nifty drip pan which is easily detached to get rid of the grease, juices or moisture collected from the grill. You also get a large storage space that features a bottle opener and built-in ice bucket. In short, the Prestige Pro 500 just makes it easier to carry out any type of cooking you would normally do in a grill outdoors.
Multiple Warranties
It’s clear that the Napoleon Prestige Pro 500 has been designed and built to last you a lifetime. This can be seen with the impressive ten-year warranty that the company offers for its stainless-steel burners. Other warranties include a five-year warranty for the stainless-steel sear plates and other parts. You also get a three-year warranty for the rotisserie burner coupled with a 50% discount on burners you purchase for five years.
Pros
Great quality of burners and large cooking space gives full marks in utility
Build with stainless steel provides a classic look and is easy to clean
With inbuilt illumination, gives you the freedom to cook any type of food whether at daylight or night
Large storage cabinet
Four heavy-duty caster wheels that lock in place
Cons
The price tag
Napoleon Prestige Pro 500 Conclusion
With the Prestige Pro 500, Napoleon has managed to deliver a superior product that’s unlike anything that is available in the market today. You get a premium quality 100% stainless steel grill that offers extra-large cooking space for versatile cooking and all the bells and whistles you would want to have in an outdoor grill.
A couple of years, decades ago napping at work would have constituted solid grounds for being fired out of some offices yet things are massively improving with the advance of technology today. Thanks to this insanely rapid growth you can actually take a nap at work. In fact, tech giants such as Google or Facebook are installing napping pods in their offices to encourage you to have this healthy refresh at your workplace. The simple idea behind this new epic trend is that a swift nap will actually increase your productivity as they rejuvenate the mind and body.
The most common presence in the trend are the EnergyPods envisioned by MetroNap, they look futuristic, greatly fit for a tech setting. In the following article we will go to through a couple of nap pods that might fit your workplace, cast a glance.
A nap pod in the wild awaits a subject to immerse into deep sleep.
a break with capsule pods
As previously mentioned, the EnergyPods are the most popular choice when it comes to these refresh capsule, they are basically C-shaped pods that have the bottom part extended to accommodate the taller individuals.
In certain workplaces there are dedicated napping rooms where one could rest peacefully.via Wellbeing Workout
The napping rooms sometimes include simpler setups like camp tents, pillows and blankets in a cozy cabin-like atmosphere that is meant to calm the individual and soothe its nerves, this is the case with the HootSuite napping room in Vancouver.
In Sidney the Google offices have tailored epic fluffy compartments for quiet work time, and they`re naturally being used as nap pods too. If you feel the need to work in a more comfortable setting sometimes though, you can do that here, you can find refuge in a small comfortable pocket and work in peace.
The nod pods sometimes take an odd space-travel inspired shape. Above three pods reside in a London office, they were installed in a room with a soft light in the attempt to make the refresh session easier, more efficient. This London office also features a small lounge, showers and a kitchenette thus encouraging one to feel at home, especially when a deadline is ahead and every creature comfort matters threefold.
You can stack nap pods too, nestle comfort in your company.
Podtime offers great customization options, and while the base poly-carbonate tube remains constant the company could choose from things that range from the technology in the tube up to the doors and light of the pod.
Capsule sleeping is already quite spread around the globe reason for which in the following section we will cover a few from various offices, we will start with the Facebook offices in Seattle. In this particular design the capsule is entered differently, on the long side thus making sleep far more accessible. It goes without saying that the capsule looks really comfortable, we would grab that pillow right now, wouldn`t you?
via The Daily Telegraph
Another sleeping pod has been noticed in the land down under, in this case, the pod is being used by Australian footballers, the ones that make the team entitled Sidney Swans. These capsules are especially useful for athletes when they have more than one training a day, it allows them to rest and refresh in between easily.
via Robert Aberman and Daily Mail
In particular scenarios in which getting to and from work becomes significantly difficult the approach of sleeping in the workplace has been adopted by certain companies. In 2012 the Summer Olympics have buzzed London beyond belief and for some business that cannot be interrupted Interxion installed their space pods, the PodTime capsules mentioned above, in the attempt to make the commute easier or eliminate it completely during those Olympic traffic times. Employees were able to take an hour nap after work to leave the office when things cooled down a bit or could have come in early to avoid it.
In Japan, people that are unable to reach their home for more than a couple of hours of sleep are occasionally using capsule hotels around the workplace to maximize their sleeping time. In this way they avoid running home and from home the next day for two-three hours of sleep, businessmen use these when 24 hours in a day are not enough.
One sure imagined once in the library that a nap would be the cherry on the top, a small break after hours of reading awesomeness would have been purfect before you would re-engage the world of written knowledge. The Library Australia’s University of Queensland has read your mind, a student now luckily can take a short sleeping break in full comfort using the EnergyPods, this ought to encourage studying and the time spent in the library itself.
EnergyPods can be found in the United States libraries too, the last example of a pod in universities comes from Wesleyan University in Connecticut, naturally, in a student library. You can enjoy a short nap in a super comfortable reclined seat, surrounded by soothing sounds and rhythms and a privacy visor.
Epic Dedicated Napping Space
In the start-up culture and tech companies in particular,world-wide, the versatile space is a must. Sleeping and relaxation areas get a great deal of attention, as they`ve proved that they can increase the productivity, health and well being of the employee. In the following section we will present relation areas from various office around the world.
Capital One Lab in San Francisco offers elevated sleeping nooks only accessible through a ladder, every bunk includes a soft mattress and various amenities meant to encourage you to relax whilst offering you the opportunity to read your mail, newspaper or book in silence.
In Pittsburgh at Google things are different, an immense rope area offers you the opportunity to sleep in full comfort, you are in your office, elevated off the ground in thin air, surrounded by pillows and invited to rest, sounds like a pretty good selling point for the office.
In certain offices the small space will not allow one to enjoy a sleep in a regular bed, in these cases there are alternatives, the Ostrich Pillow is one of them. Various workplaces around the world have stocked a few of these to encourage their employees to rest. They look weird and funny, they are comfy and they block sound and light, they encourage sleep. You can order one for yourself and try it out, if the current office is not offering you nap options you could use this one in your launch break for a quick 20 minutes refresh.
If your workplace lacks a sleeping option and the Ostrich Pillow simply ain`t enough to put you to sleep certain establishments have been envisioned for you, you get out of your office when need be and simply go to sleep somewhere, above illustrated, Natureland, offers reflexology sessions, you can get a massage, spa-like treatment and a nap in full comfort, happy times for folks living in Singapore.
Napping in the office might not work in every industry or every workplace but the trend not only encourages sleep and relaxation but a less stressful work environment altogether, something that will be surely felt in absolutely every job at a certain point as we get closer to robots that will start to replace stressful, irritating jobs. What do you think is going to happen next in the workplace environment and how do you see the napping pod trends? We would love to hear from you!
Covering the best options available today, we are here to guide you through this process of buying the ultimate shop vac for your needs.
With a wide range of options in the market, we know the dilemma you may face over choosing a vac for your garage. There are differences in specifications and features, and it is a task to look through seemingly endless lists.
So to make your life a little easier, we surfed through hundreds of reviews to come up with the best of the lot.
Every product has its benefits, and we have tried to cover all the aspects of the devices recommended in this guide. There is a product for every need, and we are confident that you will be able to find the perfect fit for your workshop.
Without further ado, let's proceed.
Most Powerful Shop Vacs For Your Workshop & Garage
If you are worried about big messes around the house, this product will blow all your worries away. With a powerful 5.5-peak horsepower motor, the device cleans up efficiently and leaves us with nothing to worry about. We can end each day with a clean workshop.
With SVX 2 motor technology, this shop vac runs extremely quietly and prevents you from getting any kind of unwanted hearing problems. You can carry on a conversation with the device switched on.
Also, we loved how the design was extremely user-friendly and loved by a lot of customers according to the reviews we had gone through. We especially liked the secure latch system, which prevented any kind of unwanted injury.
To add to all that, the device came with a tank drain and multi-placed handles. This allowed for easy draining after you are done cleaning. And what’s more, with the handles, you could easily lift it and carry it around.
Lastly, this device sucks up light dust and debris very efficiently, which front and side blowers cannot do. This machine is specially designed to be able to achieve this. Our workshop remains spic and span when we leave every day, thanks to this device.
What Could Have Been Better?
Though the product was excellent and met all our expectations, the hose that came along with it was made of cheap material. At times, we were worried that it may break at any point if it is pulled too hard. This was a slight inconvenience for us, but not a deal-breaker.
If you have a small workshop with many narrow places that get dirty but are extremely difficult to clean, fret no more because this machine will take care of those woes. This shop vac is made to clean up narrow spaces with a long thin hose, which is designed especially for this purpose.
With a powerful 6.0 peak HP motor and a 14-gallon tank capacity, this machine works amazingly well with messes created in narrow areas. We work with wood a lot, and the debris tends to settle behind furniture and the workbench. With this wand in hand, the task of cleaning becomes very easy.
Also, we were very happy with its tank capacity as the bigger it is, the better it worked to clean up large messes in one go. In fact, this 19.8" x 19.8" x 25.8" product is known to be one of the largest available on the market.
Lastly, we were pleased with the filtration capacity of this device. It is designed with three layers to suck up the tiniest of particles easily. This will ensure that all the dust is cleared from your workshop.
What Could Have Been Better?
The device is one of the largest in the market, and that makes it a pretty heavy machine. Thankfully it comes with wheels for easy portability, but it is tough to lift and thus is not a good device to carry up the stairs.
If you are searching for a small machine for your smaller needs of cleaning up dust or dirt, this could be a remarkable choice. With a strong four-horsepower motor, this device is easy to maneuver, and even a kid would be able to carry it easily.
【STRONG SUCTION& HIGH PERFORMANCE 】4 HP motor provides...
【VERSATILE】Multiple accessories and 15 ft cleaning...
Why Did We Like It?
This machine ranks high on portability. Not only can you carry it easily with a handle on top for convenience, but this machine also allows you to gently swivel it around with swiveling casters attached. We would drag it when required up the ramp to our workshop, and the machine would not show any signs of damage.
To add on, the machine comes with a dual filtration system. This ensures that most pollutants and dirt are trapped and do not go back into the air. This also leaves the air clean and dust-free. Since we are allergic to dust, this machine proved to be a boon.
Further, the vac cleans up both dry and wet messes in a jiffy. It may look small to you, but there are no complaints about its functionality.
What Could Have Been Better?
Though the machine worked really well for us, we have one complaint. The power cord was really small, and it was challenging to take it anywhere without carrying an extension cord along with it. We recommend you keep one handy if you are choosing this cleaner.
Worried about where to store the vac in your workshop? What if you could mount your vac up on the wall and use it? The Shop-vac 1.5 Gallon can be mounted up and saves a lot of space. If you have a small shop and there is no floor space to keep a vac, this product is precisely what will fit your needs.
COMPACT POWER: This wet/dry vacuum offers the power of a...
ACCESSORIES INCLUDED: This wet/dry vac includes 1.25"...
Why Did We Like It?
The best thing we liked about this model is that we did not need to carry it around. Instead, the machine could be mounted onto a wall, and the extensions provided along with a 7 feet long hose could be used to reach the corners of your room.
To add on, the package included one crevice tool, one dual floor nozzle for the floor area, which was carpeted, one round brush, and one gulper nozzle. The multi-functionality of this vac impressed us a lot. Like the previous model, this device came with sufficient storage space, and we could easily store extensions inside the body of our machine.
To add to the features, this model came with an 18 feet long power cord, which gave us yet more space to move the vac or mount it. All in all, this vac did not leave us much to complain about.
What Could Have Been Better?
One issue we faced was with the storage capacity. If there is a considerable amount of water or waste that has to be taken in by the vac, the liquid tank capacity will not be sufficient. We had to empty it and complete the task in parts when we had to remove water after heavy rain.
If you face severe dust allergies and need to make sure that the garage is clean at all times, this machine will do the job. With a vast tank capacity, you can clean the tank at the end after a whole day, saving time while you work in a clean environment.
Backed with a 5-Year Limited Warranty, this stainless steel...
Accessory bag and hose storage keeps vacuum attachments...
Why Did We Like It?
The best part about this device is that it does not make too much noise. It is one of the quietest machines in this list with a noise level of 77 decibels at max.
Our garage is very close to the main house, and the kids wake up every time we try to clean. With this machine, we can finally clean in peace without disturbing anyone.
Also, the wheels attached to the device are large, allowing it to be pulled easily on different terrains. A rougher terrain cart is attached along with a robust stainless steel drum and a stable platform. This makes sure that the machine does not tip over even if it wobbles.
Moreover, it can clean up both dry and wet messes easily using a hose with a 2.5-inch diameter. The different nozzles given with the pack ensure that all your needs are met efficiently.
What Could Have Been Better?
With a capacity like this, the machine works brilliantly. But it is more expensive than most of the devices in the list. If you do not have a problem paying extra, then this device is a great option to choose from.
This device will solve all your woes related to electrical points. If you do not have ample charging points in your shop or garage, this product could make life a little easier. DEWALT has come up with this master machine, which can run on batteries as well as via a cord.
Plenty of Storage - 2-gallon tank capacity provides enough...
Why did we like this?
With its dimensions being 17.2" x 12.3" x 13.1," we can easily call it compact and easy to move, But even though it is smaller in size, it works like a beast. We have had no complaints about the functionality of this product.
Further, our workshop is in the outhouse, and it has only one charging point, which is usually used to power appliances. This device appeared as a boon for us as we could clean the place without having to switch off any running appliances.
Also, the batteries are reliable and last for a considerable amount of time. You do not need to worry about changing the battery too frequently.
Like most vacs, this one also comes with additional benefits like an extension wand, a carpet attachment, a crevice tool, and a wide nozzle tool, making it very simple for us to reach and clean the absolutely hidden corners of the room.
What Could Have Been Better?
We were excited to have ordered this vac but were very surprised to see the battery or the power cord did not come with the machine. We had to order it separately, thus leading to increased expenses. This is not too problematic now that you already know of it and can order the batteries and cord together.
If you are looking for a smaller machine that can be carried about with ease, this device is a great choice. While being small, it is still very powerful and has excellent suction abilities. We had a great time using this product and could easily store it in the workshop itself.
This machine is known for its portability. It's constructed with only 17.8 x 12.5 x 17.1 inches in size and is 13.5 pounds of weight. You can imagine how light that is. If you have a two-storied workshop and you need to carry the gadget up and down the stairs, this device will be perfect.
It also comes with a storage box inside the body, which enables you to store the power cord. You no longer need to worry about it hanging outside and becoming a hassle.
To add on, the device has unparalleled suction capacity. This is a small device that works like a beast. Moreover, pressing a button can turn the portable vacuum into a leaf blower! You can use this to clean away fallen leaves from your porch or shed roof.
What Could Have Been Better?
The one thing we were not happy about is the tank capacity. It was only 5 gallons and cannot be used to take in large amounts of waste at one time. It needed to be cleaned out frequently. If you need a machine for smaller tasks and you do not plan to use this often, then this product is the right choice.
If you are looking for a device with a large hose to be able to take in larger waste items, this will be of great benefit. We had to clean up screws and pieces of wood while working, and this machine did it in a matter of a few seconds.
HEAVY-DUTY: Powerful 6.5 Peak HP provides extra power for...
BUILT-IN BLOWER PORT: Rear blowing port on this wet dry vac...
Why Did We Like It?
What we really liked about this device is that not only is the hose wide enough, it also is 180 degrees flexible and can be used to move around efficiently. You do not need to worry about kinking, and the device enables free movement.
Also, we had to clean up a lot of water after a mishap, and this device easily took in a few gallons of it without having to be emptied. Thanks to the large tank capacity, you can rest assured that the tank would not need to be cleaned too often.
So if you are looking for a high-capacity machine, this vacuum cleaner will serve the purpose of three types of nozzles to help you clean different items.
What Could Have Been Better?
It is essential to provide a manual whenever a machine needs to be assembled. The only thing which disappointed us is that no instruction manual was provided along with the pack. This made the installation and assembly process very tiresome. We had to search for instruction videos for it.
Pros
Extra power to suck up large items easily
Quick and efficient cleaning grass clippings or leaves
We wanted a powerful machine that would clean up wood debris and dust in our garage. By the end of the day, there would be debris everywhere, and this machine did an excellent job with it. The Porter-Cable PCC795B helped us clean up the mess. It worked like a wizard, and everything was cleared up very quickly.
The cordless shop vac has a powerful suction for quick...
The PORTER-CABLE vacuum has a portable 2-gallon tank with...
Why Did We Like It?
With one of the most powerful suction pumps, this machine cleaned up debris in a jiffy. Also powered by a 4 APM power battery, this device runs cordless for 24-28 minutes efficiently without having to replace the battery. Similar to the previous product, we liked this feature and believed it to be a great addition to our workspace.
To add on, with a 7 feet long soft hose, we were quickly able to reach otherwise unapproachable corners of the space. The material used for the hose allowed it to be more flexible than normal hard ones. Also, we were not afraid of snags that could occur with other hoses.
We also appreciated that the vac not only cleaned dry and wet wastes but could also be used as a blower, thus making it useful to clean up the front porch or backyard. You need not worry about fallen leaves anymore as this machine will be able to blow them off your porch.
What Could Have Been Better?
We faced some minor glitches with the suction pump as sometimes our machine would slow down, leading to the consequent slowing down of its pump. This had occurred once or twice with us over four months. It is not a giant problem, but you can talk to customer service beforehand.
If you want a powerful cleaner that will take care of all your cleaning needs without taking up too much space, this is the device to go with. This Vacmaster model is sturdy and comes with wheels for easy maneuverability. Let's get to the major features.
Converts to Detachable Blower with One-Hand Release and...
Max Blowing Speeds of 210 MPH
Why Did We Like It?
Equipped with wheels and a top handle to make it easier to carry and move the device, this can also be used as a leaf blower for your front and back porches. We had leaves strewn all over the roof of our garage, which we removed easily by just holding up the vacuum and switching on its leaf blower mode.
Also, with sturdy polypropylene construction, this vac has a strong body and can sustain very frequent usage without getting damaged. Our kids once overturned it, and there was absolutely no damage done.
Lastly, this product comes with a wide range of accessories to make the job easier. These include a crevice tool, two extension wands, a car nozzle, a blower adapter, an 8-inch utility nozzle, a blower nozzle, an air/noise diffuser, a reusable foam filter sleeve, and a standard cartridge filter. What more could you possibly want?
What Could Have Been Better?
The one thing which did not satisfy us was the power cord, which could have been longer. Though the device is easily movable, the power cord does not allow a lot of it. Also, this machine is comparatively noisier than most other machines, which makes it difficult to be used at odd hours.
While this is a smaller model and is not as powerful as the previous one, it does pack a punch when it comes to medium-sized messes. We did not need a premium machine as we were only going to tackle accidental messes. This device helped us do the job wonderfully.
The best part about this device is the price. While it comes with all the basic necessities, it does not burn a hole in the pockets, and we were so glad.
To add on, it also offers a blower at an attractive rate. We did not need the device frequently. It was on events when we would be completing some DIY projects or required to clean the backyard in autumn when this device came to use. And needless to say, it worked so well.
Also, with a 6-gallon capacity, the tank is small but good enough for cleaning dirt and dust, both dry and wet. While working, we realized that it does not make too much noise. This was an added benefit we got. All in all, the product served us well.
What Could Have Been Better?
We were unhappy with the absence of a drain port. A drain port would have easily enabled us to empty the tank, but without it, the task becomes time-consuming. But again, the product has a number of features, and at the price range it comes with, we could ignore this disadvantage.
If you are looking for a wall-mountable product, this device will impress you without a doubt. This a wet-dry vacuum that is easy to store and will be an excellent fit for smaller garages or workshops. This machine is extremely convenient to use and will take care of the complete cleaning of your space.
The one thing we loved about this product is the large diameter of its hose. This made it possible for us to pick up large debris while the pack also came with a narrower hose. This hose allowed us to reach the hidden corners of the place without any additional effort.
Also, we were very happy with the suction capacity of this vacuum, even with the extended hose attached. This is one of the strongest reasons for us to buy this product as we have seen suction capacity falter with other products the moment an extension wand is attached.
To add on, this product is compact and has a 5-gallon tank capacity. The smaller size will allow you to control it easily. Moreover, we could leave the vacuum mounted on the wall and use it to clean spider webs and dirt from the ceilings of the workshop and garage. There was no need for any additional effort.
What Could Have Been Better?
We were happy with the features of this product, but we had issues with the noise level. The machine works loudly and could be a hindrance if you want to use it at odd hours when people are sleeping. If your workshop is soundproof, then there's nothing to worry about.
If you want a good vacuum but do not have the budget to buy a premium one, this shop vac will not disappoint! While it functions well, it was well within budget, and we were thrilled to use it. It also works as a vacuum and a leaf blower together.
Blower Feature; Built In Portable Leaf Blower; Onboard...
Cord Length: 18 Feet; Hose Size: 2.5" Diameter
Why Did We Like It?
A blower wand comes with the pack, which on attaching to the main machine converts this vacuum to a perfect leaf blower. We used this blower to clean flower beds outside our garage. Also, if you want to keep your kids engaged, use this to create leaf piles in which the kids can jump in.
To add on, a 120-degree elbow accessory comes with the pack, which enables us to use the blower to quickly clean out overhead gutters without the need for ladders. Moreover, a crevice tool is also included, which makes it easy for us to reach tight spots.
Lastly, this product comes equipped with an 8-inch utility nozzle, an ergonomic elbow grip, a blower nozzle, and a concentrator nozzle, which made it super easy to do multiple types of cleaning with one device.
What Could Have Been Better?
This machine works exceptionally well for dry waste but is not suitable for wet waste. It does not have a foam sleeve, which helps separate damp waste, and thus, we did not use it for anything which was not dry. This was a little disappointing.
Pros
Easy to maneuver
Cleans wet/dry messes and spills
Good value
Cons
Doesn’t include foam sleeve for wet pickup
Most Powerful Vacs Buyer's Guide
Now that you know about the 13 most powerful vacs in the market today, half of your work is done. But you still need to know the basics that have to be kept in mind before buying a vac. We will provide an informative list dealing with the possible queries you might have while choosing a cleaner.
Motor
Do you need a machine for picking up minor waste like dust or dirt particles? If that is so, a cheaper device with a less powerful engine will be sufficient.
But if you are looking for a machine to meet more extensive needs like picking up screws, wooden bits, and pieces of water, you would need a more durable motor. A larger and more powerful device will come at a higher cost but will solve the purpose efficiently.
Power Cord
If you have a single power point in the workshop, you would need a longer power cord. This might seem like a very petty thing to keep in mind, but in the long run, this happens to be crucial. A long power cord will ensure that you can move the device easily, and there is less risk of tripping over.
Battery
Having a battery-operated device is always beneficial. This will keep you prepared for any emergency or power cuts that you may face. Make a note of the number of power points you have in your workshop or home.
If you do not have too many, select a vac that is battery-operated. This will save you the hassle of a power cord altogether while giving you the same functionality.
Accessories
This is something you should pay attention to. Some of the essential accessories you are probably going to require are an extension wand, a crevice tool, and a detail brush. Make sure it is coming with the package
Also, there are different nozzles provided for different types of usage. See to it that the package includes this too. If not, buy them separately and then calculate the costs. Most vacs come with this basic set.
Storage
A vac with inbuilt storage is always beneficial. Look at how the accessories are to be stored as most machines will have onboard storage, which is beneficial. You would not want to keep the extensions separately as it leads to taking up more storage space.
Also, if you have a smaller workshop, it is easier to store the parts inside or along with the machine's body to save space.
Noise Level
If a vac makes too much noise, it can be a hindrance to your neighbors or your household members. Also, working at odd hours becomes difficult because of the fear of waking others up.l So it is best to select a machine that makes little to average noise. This will not only make it easier on your ears but will keep your neighbors happy too.
Verdict
We have finally reached the end of this guide and it is time to buy the best shop vac for your needs. This is a difficult choice to make, considering that all of these devices have their sets of advantages and disadvantages.
But if we had to choose our favorite, the Shop-Vac 5989500 is a clear winner with great tank size and easy portability. The engine is powerful, and the machine makes very little noise. It is a wonderful choice to make, and we were very happy with its remarkable features.
Coming to our other favorite, if you are looking for a device that works well as a vacuum as well as a leaf blower, the Vacmaster VFB511B0201 is a winner in this category. It is small and easily portable while it functions wonderfully.
It is time to gear up and order your favorite. Make work-life a tad bit easier with a vac of your choice.
Remember those painstaking days of sweeping driveways and yards with nothing but a broomstick, after a massive storm?
Who doesn’t? With that came quite a lot of back pain. And often a not-so-clean driveway, or whatever you wished to clear up. This is why when leaf blowers came to the scene, people left their brooms for good and embraced this nifty device!
What’s even more impressive is, the invention of this smart device led to the easy solution of hundreds of other jobs.
Well, let’s say, garage cleaning. Even a decent mid-range leaf blower can tidy up your garage or workspace, including all its tight corners almost as efficiently as vacuum cleaners. Or, have you ever tried cleaning your car with it? Do it sometime. It works wonders.
If we keep listing the utilities, we will be here for a while. And so, without any further ado, let’s begin with the reviews.
Most Powerful Leaf Blowers
From corded electric to battery-powered and gas-powered options, this list encompasses a range of models to suit different preferences and requirements. So, if you're ready to take your leaf-clearing game to the next level, here's the list of the 8 best leaf blowers that will make your outdoor maintenance a breeze.
Toro is one of the go-to brands when it comes to gardening equipment, and they’ve always remained true to their tagline. ‘Keeping yard work simple’ is something that each of their products adheres to, which is why we chose the 51621 model.
Let’s now find out whether this leaf blower can fulfill your needs.
Superior blowing and mulching proven by controlled...
Powerful up to 250 mph degree. 350 CFM blow mode and 410 CFM...
Why did we like it?
To begin with, the Ultra Plus Leaf Blower weighs around 9 lbs, which definitely can’t be considered lightweight. But what amazed us is its uniform weight distribution throughout the length of its body, which leads to minimum hand strain. Moreover, its 3-in-1 versatility of being a blower, a vacuum, and a mulcher is further enhanced by a maximum airspeed of 250 mph.
One thing to note is that you shouldn’t confuse this vacuum feature with the functioning of a vacuum cleaner. What this triplet combo does is, first, it blows the leaves, and with the vacuum option, you can suck them all into a bag. Finally, with the mulcher, you get to grind the leaves further, to make it ready for composting.
And the variable speed technology doubles down on the blowing process with the 3 specialized nozzles. Talking of which, the 3 nozzles comprise a power insert, a concentrator, and an oscillating nozzle. While the first is for optimum speed, the concentrator nozzle is narrower to create a more reliable flow of air, best suited for blowing the corners and crevices. The oscillating nozzle maneuvers the air from left to right, which increases the full blowing path.
And one last point about the mulching mechanism is it can reduce almost all the collected leaves into bits and pieces of 0.5 inches. So, overall, it’s a perfect leaf blower for households.
What could have been better?
First, let us tell you this is an excellent leaf blower. But we found some minor pitfalls with this product and one of them is the short cord length. So, to cover your entire garden area, you gotta buy an extension cord. Moreover, some people mentioned this device is too powerful for them to handle, as, at full throttle, it leaves the hands shaking.
Pros
Easy controls
Variable speed
Different nozzles for different speeds
Highly versatile
Leaf collection bag included
Cons
No extension cord included
Power Source: Corded | Motor Power: 12 A | Max Air Speed: 250 MPH | Airflow Cap.: 410 CFM | Weight: 8.9 lbs | Noise Level: 68 dB | Vacuum Function: Yes
If the previous model had a short cord and wiring issue, this brushless leaf blower from Greenworks has removed the hassle of cords altogether. And needless to say, this is one product the environmentalists would love.
The Greenworks Pro model takes a clear lead when it comes to choosing one of the most powerful cordless electric blowers. Well, no fossil fuel usage means zero carbon footprint, so you can rest assured you are doing absolutely no harm to the environment by taking home this axial blower.
Coming to its features, the device doesn’t have precise variable speeds, but 3-speed changing settings. And it’s noteworthy to mention that on speed 1 the battery will last for a generous 70 minutes, for speed 2 it’s up to 28 minutes of continuous runtime, and the highest speed works for only 12 minutes. We believe for most, the first-speed setting should suffice; and unless your lawn is covered with wet leaves, you don’t need to access the higher-speed settings.
The highest speed works excellently on corners and crevices of walls. Talking about speed, the maximum air velocity is 125 mph, while the airflow volume maxes out at 500 CFM. So, despite being a cordless model, we have very little room to doubt its performance.
Moreover, what’s even better is its noiseless operations. While most corded and cordless blowers make a hell lot of noise, Greenworks performs everything like a breeze at less than 60 dB. And powered with a quick-top-up battery, you’ll never get stuck in the middle of your leaf-blowing sessions due to lack of power shortage.
What could have been better?
Well, this is a pretty great model with ingenious technology. But here’s a minor error with the weight/size balancing ratio. The thing is, the batteries of this model are quite heavy, and the blower gets a bit dizzy in your hand once loaded. Still, with a little bit of maneuvering, you’ll get used to this minor disorder pretty soon. Nothing to worry too much about!
Pros
Brushless motor
Cordless
Lightweight
3-speed settings for versatility
Noise-free operations
Cons
Weight/size imbalance
Power Source: Battery | Motor Power: 80 V | Max Air Speed: 125 MPH | Airflow Cap.: 500 CFM | Weight: 8.9 lbs | Noise Level: 60 dB | Vacuum Function: No
Well, while we were reviewing those rugged, all-rounder snow blowers of this company, we wondered about their other outdoor home care products. And incidentally, we stumbled upon 2 Husqvarna models, which we have included in this list, each having its own USPs.
The 125B handheld blower is one of our favorites because of the optimal packaging of features in a mid-range model. Now, let’s find out whether this leaf blower can suit your needs.
The first aspect that caught our eye about the 125B model is its lightweight and compact build. It comes at a weight of mere 9. 4 lbs and is also considerably slimmer than other gas-powered models. Moreover, the blower tube is intricately designed to minimize stress on the hands by reducing the rotation force your wrist gotta apply. And as it’s quite lightweight, women and people with bone-degenerative diseases would love operating this device.
Coming to its other features, the model features an air volume of 425 CFM, which is more than what’s required to blow out not just leaves, but also twigs and sticks. And its 170 mph maximum speed is an expert at hitting out at any kind of debris with optimum force, careful not to spread the piled heaps and turn your garden into a further mess.
And finally, the blower comes with 2 different nozzles: one is circular, and the other is high-velocity. Additionally, you’ll also get a cruise control that maintains uniform speed throughout the operational time. This comes to great use when someone is blowing through a large area such as an estate or vast swathes of golf fields.
What could have been better?
We don’t know why Husqvarna left this fault in their design, but it’s really not that great for lefties. That’s because the fan is located on the right, and if you aren’t being careful and also a lefty, the blower will suck your clothes right in. We hope the 125B gets a fresh upgrade real soon. Otherwise, the world will miss out on a great leaf blower just because of this minor pitfall.
Pros
High max speed
Easy controls
Very lightweight
Minimum strain of hands and wrists
Very compact
Cons
Not suited for lefties
Power Source: Gas | Motor Power: 2.1 HP | Max Air Speed: 180 MPH | Airflow Cap.: 692.17 CFM | Weight: 22.5 lbs | Noise Level: 94 dB | Vacuum Function: No
Well, as promised, we are here with another model of Husqvarna. It’s a mid-range model that comes to great use because of its versatility. If you start listing all its features one by one (don’t worry, we’re here to do it for you), the product becomes all the more irresistible.
Its USP lies in the fact that it has an X Torq engine, which increases fuel efficiency and reduces harmful exhaust emissions.
Let’s start with the utility of the X Torq engine. Well, as the company comes with 325 years of designing homecare products, they always manage to come up with some ingenious technology or the other. And Husqvarna’s patented Torq engine works like a pro in minimizing gas usage and emissions by up to 60%. And consequently, the output increases by a decent 20%.
It wouldn’t be an exaggerated claim to make that this is one of the most fuel-efficient gas snow blowers currently on the market. What’s more, despite a weight of 22.5 lbs, the device has its weight distributed with utmost precision, and with the shoulder and waist straps, you won’t even feel anything weighing down on you while wearing the blower.
Talking about its speed, the air velocity maxes out at 215 mph, one of the highest among all the blowers we have reviewed thus far. And just like the 125B model, there are 2 nozzles here as well that can produce 431 and 191 CFM of air volume to suit a wide array of jobs. Moreover, with variable speed, cruise control, and auto-return stop switch, the smooth workflow that this model delivers is unparalleled.
What could have been better?
Errmm, noise! Too much noise from a robust little beast. It produces a significant amount of whirring sound, hitting close to 90 dB, and that’s a bit annoying. The 125 B model makes significantly less noise than this but lacks in versatility when compared with the 150BT. But you can overrule the noise factor by the rest of the features it has to offer.
Pros
Easy to start
Perfect ergonomic design
Variable speed
High maximum speed
Patented X Torq engine for reduced emissions
Cons
Difficult to assemble
Noise
Power Source: Gas | Motor Power: 2.1 HP | Max Air Speed: 251 MPH | Airflow Cap.: 434 CFM | Weight: 22.5 lbs | Noise Level: 94 dB | Vacuum Function: No
There’s a saying that no one gets more excited than a Spanish commentator when he sees a football about to reach the goal. And the same goes for us when we see Dewalt products. The thing about this company is not just about how renowned it is. The fact that it never ceases to improvise and invent brand-new technology is what fills us with wonder.
The XR Brushless blower is another popular product in the company’s long line of prestigious power, construction, and home care tools.
Battery operated leaf blower gets up to 400 CFM of air...
High-efficiency brushless motor maximizing run time and...
Why did we like it?
Honestly, when we saw Dewalt has come out with a brushless motor leaf blower, we instantly sought to review it. And sure enough, as expected from the company, the durability and efficiency of the motor are many times more than the other blowers in this price range. On top of that, what amazed us was its noise and gas-free operations with a smooth startup, just at the pull of a trigger.
Its lightweight design combines with the axial fan to regulate an air volume of 400 CFM and a maximum speed of 90 mph. Well, you may think this is quite lower than the other cordless blowers, but as it’s an axial fan, things are different here. If you aren’t aware, axial fans compensate for this low speed with its high flow rate.
One major point of departure from the other backpack models is its intelligent battery placement. We have seen even famous brands like Husqvarna failing to include this feature in their models. But Dewalt pushes through another step to balance the entire unit perfectly so that there is no hand and arm strain even after long hours of usage.
And talking about longer spans of work time, the cruise control feature maintains a constant speed quite efficiently.
What could have been better?
The difference between axial and centrifugal fans doesn’t show any significant change in their performance, except the fact that axial fans tend to be a bit on the noisier side. So, yeah, this model is a bit noisy, but the way it handles leaves entirely compensates for this pitfall. There is no question about the machine’s performance.
Pros
400 CFM power perfect for medium-sized patios, garages
Low maintenance
Gas-free
Large bow tube to cover a large area
Variable speed with speed lock
Cons
Noise
Power Source: Battery | Motor Power: 20 V | Max Air Speed: 90 MPH | Airflow Cap.: 400 CFM | Weight: 7.1 lbs | Noise Level: 61 dB | Vacuum Function: N/A
Like the Toro 51621 model, here we have another corded electric leaf blower from the legendary Black+Decker. Very few need a separate intro for the manufacturer as we all know how they earned and consistently kept the spotlight on themselves.
As they never fail to come out with some of the most user-friendly, technologically-advanced, high-end products, we thought to review one of their leaf blowers.
HEAVY DUTY ELECTRIC BLOWER AND MULCHER - High-powered 12 amp...
3 TOOLS IN 1 - Blower, vacuum, and mulcher keeps the yard...
Why did we like it?
Yeah, the 51621 Toro model matches quite a lot of features with this model. First of all, it’s a 3-in-1 blower-vacuum-mulcher model that will carefully tend to all your leaf-blowing needs. Second, it also comes with a collection bag, where the device collects all the mulched leaves after shredding them to pieces.
And to add to the user’s convenience, the secure tool-free mode changing facility allows swapping between blower and vacuum in seconds. What’s more, Black & Decker understands the hassle of wires, which is why they have included a built-in cord retainer to keep the extension in its place and enhance uninterrupted usage.
Furthermore, the 12-amp motor makes 50% less noise (according to company claims) and delivers an air volume of 385 CFM. This combines with a massive airspeed of 250 mph (with 2-speed selections) to clear out driveways, sidewalks, decks, and garages of all debris. Last but not least, the 2 speeds are for collecting flower beds and matted leaves, both of which demand different rates to ensure proper assembling of all debris.
Oh, the mulching feature! Well, this model will keep all your mulching needs at bay because it can mulch 16 bags of leaves down to 1. So, why waste money on fertilizers when Decker has you covered with perfectly ground 0.5” mulched leaves?
What could have been better?
We faced no performance issues with this product, as expected from the manufacturer. However, the collection bag is made of cloth, which is why it leaves a heck lot of dust behind. This is a serious downside because the soil will cover you from head to toe. So, keep some dust-resistant suits handy for the task.
Pros
3-in-1 model
Lightweight
Efficient mulching
High CFM
Low Noise
Cons
Collection bag leaves dust behind
Power Source: Corded | Motor Power: 12 A | Max Air Speed: 250 MPH | Airflow Cap.: 400 CFM | Weight: 8.1 lbs | Noise Level: 68 dB | Vacuum Function: Yes
Kobalt is another well-renowned company that has recently gained a lot of following among American households because of its durable homecare products. And when we saw that this leaf blower comes with a massive 630 CFM, we were frankly quite astonished. Instantly we checked the price tag, and that amazed us even more.
Check out this 80 V model from Kobalt, which pretty much fits the definition of convenience.
Well, like the Dewalt model, Kobalt also incorporates an axial fan in this cordless blower. This forms the very core of the high flow of the model, which is, as we mentioned before, 630 CFM. Moreover, this axial blower has an excellent runtime of 75 minutes on the lowest setting. The Greenworks model we chose has a runtime of 70 minutes, and Kobalt stretches it to a few more functional minutes, that too at a lower price.
Talking about its power, the 2.5 Ah battery hits the motor to give airflow of up to 140 mph, which perfectly suits heavy dirt, debris, and leaves of all sizes on most surfaces. So, driveways, patios, backyards, rooftops, this intelligent device covers them all!
Finally, with a variable speed trigger, the highly efficient brushless motor system provides excellent power and torque but with zero noise. What’s more, the lightweight design of 9 lbs moves like a feather in your hand, making all leaf-blowing and cleaning tasks a complete cakewalk.
To sum up, this is a device with straightforward controls, some great features of convenience, and extreme power.
What could have been better?
Although the battery proves its worth in the neutral mode, in the turbo settings, the juice drains out pretty quickly. This is one fault of the product, which caused a bit of annoyance, but considering the extensive CFM, it seems like a reasonable tradeoff.
Pros
Powerful brushless motor
Convenient controls
Very high CFM
Noise-free operation
Lightweight
Cons
The battery runs out fast in turbo mode
Power Source: Battery | Motor Power: 80 V | Max Air Speed: 140 MPH | Airflow Cap.: 630 CFM | Weight: 8.9 lbs | Noise Level: 74 dB | Vacuum Function: No
How is it that power tools or homecare products’ lists fail to accommodate a product from Worx? Ermm, nope. Their products are so compelling, they list only ‘Worx’ by including a Worx tool! And the manufacturer has proved its worth once again with this unique turbine leaf blower. Check out this model, and thank us later in the comments.
TURBINE FAN TECH: WORX engineers figured out how to get a...
TWICE AS FAST AS PRO BLOWERS: Professional-grade gas blowers...
Why did we like it?
Worx has made an outstanding entry into the world of leaf blowers with an insane turbine motor, the kind they put in jet engines. Well, what is it exactly? The motor comprises a hyper-stream nozzle and a dynamic flow design that can push a large amount of air at an extremely high velocity. This is the reason behind its impressive 600 CFM and maximum air velocity of 11 mph.
What the device lacks in speed, is well compensated by the outstanding air volume. Worx has set a benchmark with this motor type as it can shift huge piles of wet leaves from a distance of about 8 ft. Most leaf blowers of this price range would probably fail to achieve this feat.
We also like the fact that every aspect of this blower speaks of convenience. First, the 2 variable speeds cater to a clearing of tight corners and pavements as well as large, open lawns. Second, its lightweight build combines with the ergonomic single-handed operation to reduce any chance of difficulty during all blowing activities.
And the hyper stream nozzle has another function, which is to concentrate all the air volume into a specific area of a smaller radius. This increases the leaf-clearing efficiency a lot more than the other models of this price range.
What could have been better?
The only pitfall that we found about this trailblazing model is its short cord length. Being a corded model has this disadvantage, but we think everything can be accommodated when a turbine jet engine motor enters the scene!
Pros
Excellent CFM
Very convenient
Super-fast assembling
Lightweight 6 lbs design
Cons
Corded
Power Source: Corded | Motor Power: 12 A | Max Air Speed: 110 MPH | Airflow Cap.: 600 CFM | Weight: 7.2 lbs | Noise Level: 75 dB | Vacuum Function: No
These high-performing leaf blowers have been carefully shortlisted from a wide array of products. And if you’ve gone through tool-hunting before, you must have an inkling of what lies in store! Out there, in the market or on the web, it’s difficult to find any difference between the marketing strategies of various companies.
More often than not, false claims overwhelm you before getting time to think about the specific needs which inspired the search in the first place. This is why we wanted to skim through the few basic features one needs to keep in mind. If none of the products from this list suit your needs, read these few guidelines, and then hop into the market.
CFM
Here’s what you need to know about this characteristic: the higher, the better. But that’s what they tell you as well, right? Well, CFM stands for Cubic Feet per Minute, and it’s the central choosing criteria for leaf blowers. It’s a measure of the amount of air the device can blow in a single minute, and a higher CFM ensures your leaf-blowing process is not just neat but smooth as well.
MPH
Many fancy marketing gimmicks carefully brush past the CFM and show the MPH instead. No doubt, the MPH factor is an important one, but not more than CFM.
Anyway, that being said, as you must be knowing, MPH stands for mile per hour. In other words, it’s an indicator of the force with which the device will push the leaves, and with increasing MPH, the power increases as well.
But here’s the catch. If a device has a large pushing capacity (more MPH) but doesn’t have enough air (CFM) to push the leaves, it actually lowers the productivity of the blower.
So, always keep in mind to have a delicate balance between these two factors. And once you get the hang of these 2 aspects, the rest of it is a cakewalk.
Looking for comprehensive kits
We always advise people to look for those blowers that come with a waist and shoulder strap, different types of nozzles, and of course, a long hose. Moreover, if you’re looking at wired models, make sure you buy one that has a long cord or one with durable extension facilities.
The focus should be on what eases your job the most, and other than the device, these small parts go a long way in fulfilling your convenience quotient.
Powerful Leaf Blowers FAQ's
What types of leaf blowers are available?
Leaf blowers are available in three main types: gas-powered, electric corded, and battery-powered. Gas-powered leaf blowers provide high power and mobility but require gasoline and emit exhaust fumes. Electric corded leaf blowers offer consistent power but require access to an electrical outlet. Battery-powered leaf blowers are portable and eco-friendly but may have slightly lower power and limited battery life.
Are leaf blowers noisy?
Leaf blowers can produce varying levels of noise depending on their power source and design. Gas-powered leaf blowers tend to be the loudest, followed by corded electric blowers. Battery-powered blowers are generally quieter. It’s important to follow local noise regulations and consider using hearing protection when operating a leaf blower.
Can leaf blowers be used for other tasks besides clearing leaves?
Yes, leaf blowers can be versatile tools that can assist with other tasks. They can be used to clear grass clippings, remove light snow, clean debris from gutters, and even aid in drying surfaces. Some models offer attachments or functions that allow them to convert into vacuums or mulchers for collecting and shredding leaves.
Are leaf blowers environmentally friendly?
Gas-powered leaf blowers can have negative environmental impacts due to noise pollution, exhaust emissions, and fuel consumption. Electric leaf blowers, both corded and battery-powered, are generally more environmentally friendly as they produce zero emissions during use. Battery-powered leaf blowers are the most eco-friendly option, especially if powered by renewable energy sources.
Can leaf blowers cause damage to surfaces or plants?
Improper use of leaf blowers can potentially cause damage to delicate surfaces, such as fragile plants, flowers, or mulch beds. To minimize the risk, adjust the blower’s power settings, avoid directing the air stream directly at plants, and maintain a safe distance from fragile objects. It’s important to follow the manufacturer’s instructions and exercise caution when using a leaf blower.
Can I use a leaf blower to remove wet leaves or debris?
Most leaf blowers are designed to handle dry leaves and debris more effectively. While some models may have the power to handle light moisture, it is generally recommended to avoid using leaf blowers for wet or heavy debris as it can clog the blower and reduce its performance. Wet leaves are often best removed manually or with a specialized vacuum attachment.
Conclusion
We are at the end of this extended piece and have a hunch that at least one of these listed products would suit your needs.
But, we also understand that choosing from a wide array of equally compelling choices is not just confusing, but a painstaking task. The worst part is, anxiety creeps in because we’re always apprehensive about getting our hands on the ‘best’ product.
So, here’s our final verdict for the day.
If you’re looking at decent-budget models, the Worx model is a clear winner due to its extensive leaf-blowing capacity and insane technology. But the Dewaltand Black & Decker models aren’t a lot behind and impressed us with their unique features. Still, Worx blew us away!
And among the high-end models, we’d choose the Husqvarna 150 BTmodel due to its unique X Torq engine that maximizes productivity and minimizes fuel consumption.
We hope you found this extensive guide pretty useful. Tell us if there’s anything that we missed or any trending product that you’d like us to review. All in the comments!
Are you looking for an economical heating option that warms you up, but doesn’t hurt the pocket?
Space heaters are one of the best alternatives when it comes to heating requirements. More energy efficient than centralized systems, space heaters are a great choice when adding that extra layer of heat to your home or workspace.
But with a mind-boggling collection of heaters out there, it can become challenging to choose the right one. So to help you with that task, here’s a list of the eleven most energy-efficient space heaters you can consider in 2024.
And what’s more, we’ve also included a lengthy buyers’ guide that can help you make the right choice among the ones listed. So stick around till the end.
Let’s not wait anymore and dive right in!
Best Energy Efficient Space Heaters
Whether you need a heater for your home office, bedroom, or living room, these heaters have been chosen for their exceptional energy efficiency ratings and positive customer reviews. Without further ado, here's the list of the 11 best energy-efficient space heaters to keep you warm while being mindful of your energy consumption.
Mr. Heater’s reputation precedes it, and the MH9BX is no exception. With a sleek design, red-black color scheme, and portable form factor, this is one heater that ticks all the right boxes. And it runs on propane, which makes it more cost-effective.
POWERFUL RADIANT HEAT: This portable gas heater provides...
IMPROVED SAFETY FEATURES: The propane buddy heater has...
Why Did We Like It?
The first thing that caught our eye regarding this model is that it runs on propane. This promises independence from electricity grids and usability in the face of power outages. It’s also an excellent solution for outdoor use.
Operating the device is easy due to the presence of a simple rotary knob and the Piezo ignition button. The device is completely portable and has a foldable handle that makes transportation and storage a simple matter. Further, the ceramic burner tiles installed on shock-absorbing insulation allow the device to handle any shock received during transport.
But perhaps the defining feature of this unit is the automatic safety mode, which includes auto-shutoff features in the event of being tipped over. The unit also has a low oxygen safety shutoff, and an auto-shutoff mechanism in case the pilot light goes out. It further boasts of a high-temperature wire guard.
What Could’ve Been Better?
In this otherwise excellent product, two points of concern stood out for us. The first is that the device doesn’t come with a thermostat that allows one to control the temperature; the second is that none of the controls of this unit are digital. But if you choose to look past these two relatively minor points, this is one of the best heaters money can buy.
Pros
Multiple heating modes
Excellent safety features
Powered by propane
Suitable for use anywhere
Cons
No thermostat for temperature control
Heating Technology: Radiant | Heat Output (BTU): 4,000 - 9,000 | Heating Area (sq. ft.): Up to 225 | Oscillation: No | Timer: No | Remote Control: No | Safety Features: Oxygen depletion sensor, Tip-over protection
Lasko is yet another brand that comes with a positive reputation, and the ceramic series doesn’t disappoint. With designer looks, an ornate stand, and multiple operating modes, this is one heater you certainly want to consider.
Blends into Your Decor - with a stylish body and finish this...
Adjustable Thermostat - allows you to adjust the heater's...
Why Did We Like It?
The Lasko model is one of the most competitively priced units on the market and comes with built-in safety features that caught our fancy. The unit provides three temperature settings that allow you to adjust the level of heat you desire. To make things even more efficient, it uses a ceramic heating element for heating large spaces.
The most noticeable feature of this unit is its outstanding designer looks. A far cry from traditional box-type heaters, this model proves that a space heater needn’t be boring. The ceramic jar shape accentuates the elegance of the model, while the ornate stand adds a dash of old-world charm. Couple that with the four available modes of operation, and you’ve got a real winner here.
The unit can be operated using electronic controls or via remote, and the digital thermostat makes things more efficient. This means you don’t have to get off the sofa to change settings. The device also has an auto-shutdown feature that comes into action in case of overheating. And we’d like to mention that though the unit has a wide heating range, it’s surprisingly noiseless for a device of such power.
What Could’ve Been Better?
This model gets full marks from us except for the fact that, unlike the MH9BX, this one doesn’t have a tip-over shutoff feature. Other than that, there’s nothing else to detract you from purchasing this beauty.
For those of you searching for a space heater that’s also pretty cool, the Dyson AM09 is the one to go with. The stunning design, brilliant colors, and unique features make this unit one of the most coveted heaters in the market. And what’s more, it can act as a cooler as well, so you actually get two for the price of one.
Year-round use: quickly heats the whole room in winter with...
Patented Air Multiplier technology effectively projects...
Why Did We Like It?
Like every Dyson product, this device comes with patented technology that promises the best service all the year-round. The heater has an extensive range and operates quickly to heat any space within a small amount of time, while the powerful fan cools you down during those scorching summer months.
Safety and efficiency are the hallmarks of this product, and we don’t mean it lightly. There are no exposed heating elements that can lead to accidents, and the device automatically shuts down when it is tipped over. It also scores on the efficiency front through the use of an intelligent thermostat, which monitors the ambient temperature and adjusts the heating levels accordingly.
But that’s not all! The AM09 also features a sleep timer, and a handy remote control, and also comes with a Quiet Mark Accreditation. Overall, a device worth the buy.
What Could’ve Been Better?
There really can be nothing to complain about a product as fantastic as this, but if you ask us, the price tag is a bit steep for regular buyers. However, with so many features that’s only to be expected. Bear in mind that this is a heater as well as a cooler, so the price point is justified.
If efficiency is the crux of your search, then De’Longhi is one of the brands you should definitely consider. The HMP1500 Mica uses micathermic technology to quickly and efficiently heat any surroundings. This makes it one of the most cost-effective heaters on the market.
QUIET HEATER - Best for medium and large rooms, the...
MAXIMIZE EFFICIENCY - This De’Longhi heater converts 100%...
Why Did We Like It?
The first thing that catches your eye about this model is its slim look. Room heaters are generally known to be bulky devices, but this one is slim enough to slip into a backpack. But that doesn’t mean it compromises on quality. The device uses a dual combination of convection as well as radiation and reaches the maximum operating temperature in about a minute.
The HMP1500 has triple heat settings that offer you the flexibility of choice. The two power modes allow you to control the amount of electricity consumed, and the thermostat monitors the room temperature and adjusts according to your specifications.
Coming back to the thinness of the product, it’s the micathermic technology that holds credit for the ultra-thin design of the product. This makes it simple to pack, store, and transport. To further facilitate moving this product, there is a set of wheels that allow it to be slid easily from place to place.
Apart from ease of transport and efficiency, De’Longhi doesn’t compromise on the safety side of things. The device comes with a thermal cutoff to prevent overheating, and there’s an automatic tip-over function that guards against accidents. The unit also flaunts power and caution indicator lights for extra protection.
What Could’ve Been Better?
In spite of the slim design, the device is surprisingly heavy. This makes the use of the wheels a necessity when moving the unit from one location to another.
Pros
Multiple heat settings
Super-thin design
Overheating protection
Automatic tip-over switch
Cons
Slightly Heavy
Heating Technology: Mica | Heat Output (BTU): 1,500 | Heating Area (sq. ft.): Up to 300 | Oscillation: No | Timer: No | Remote Control: No | Safety Features: Thermal cutoff, Tip-over switch
This is perhaps the cheapest device on this list, and also the smallest. But don’t go judging it by these two parameters. The UberHeat Ceramic Heater from Honeywell is a powerful little beast that can heat up a room in a jiffy. Don’t believe us? Just take a look below.
ENERGY EFFICIENT HEAT: The UberHeat Ceramic Heater offers...
EASY TO USE: Ideal for tabletop or floor placement, this...
Why Did We Like It?
As mentioned before, this model is compact and lightweight, so it can be moved from one room to another with ease. But surprisingly, it delivers a sufficient quantity of heat wherever it is placed. The powerful 1500-watt heating system is responsible for this stellar performance, and that won our hearts over, just as the price won over our pockets.
The device comes with dual low-wattage heat settings and a programmable thermostat that can deliver the exact temperature that you desire. On the looks front, the device has a compact feel and stands almost alarm-clock-like on two non-slip rubber feet. The housing is plastic but doesn’t get heated one bit in spite of prolonged use.
Finally, safety has been made a top priority of this product. The device features overheat auto-shutoff as well as 360-degree tip-over protection that shields the unit from damage. And the energy-efficient settings contribute towards lowering your power bills. So it’s a win-win deal for anyone.
What Could’ve Been Better?
After seeing such exquisite products as the Lasko and Dyson series on this list previously, the simple black-and-white appearance of this product might seem a bit bland. But we don’t want that to dissuade you from buying this otherwise fantastic product.
Pros
Powerful heating function
Programmable thermostat
Auto shutoff and tip-over protection
Easy to store and transport
Cons
A bit low on the design quotient
Heating Technology: Radiant | Heat Output (BTU): 1,500 | Heating Area (sq. ft.): Up to 150 | Oscillation: No | Timer: No | Remote Control: No | Safety Features: Overheat protection, Tip-over switch
We are back again with another stellar product from the house of De’Longhi, and it doesn’t get any better than this. A fully functional radiator-based heater, this device simply epitomizes the concept of efficient heating and maintenance-free operations.
Digital control panel with LED display for easy selection...
De'Longhi Exclusive: 75% more radiant surface area than...
Why Did We Like It?
The very first thing that’s noticeable about this product is the patented, high-quality steel chassis that houses the unit. This makes the device extremely durable, and as a result, it requires very little maintenance.
The design of the housing is also unique in that it features thermal slots that maximize heat flow into the surroundings, and at the same time, prevent the unit from getting warmed up. With 1500 watts of pure heating power, you can expect every corner of your space to get heated to perfection.
The device comes with an electronic display that records and shows the ambient temperature. Also, the adjustable thermostat allows up to three heat settings that give you the freedom to customize your heating profile.
As far as safety is concerned this unit scores full marks. The thermal shutoff works flawlessly to prevent overheating, and the permanently sealed oil reservoir never needs refilling. So that’s one less thing you have to worry about. And finally, the entire arrangement comes on top of a four-wheel assembly, so moving the device around is simply a matter of rolling it along.
What Could’ve Been Better?
Again, we’d like to mention that this De’Longhi product too is heavier than it looks, so the wheels are required. Also, the price point is a bit too high, but that’s only expected, given the premium quality of the product.
Yet another product from Lasko, the 5586 tower heater heats as good as it looks, maybe even better. Offering 1500 watts of heating capacity, this one is the perfect blend of form and function. With a sleek, futuristic design and fully digital controls, this is a product to watch out for.
✅【2 QUIET SETTINGS】This portable tower space heater...
✅【BUILT-IN TIMER】The auto off timer function allows...
Why Did We Like It?
Lasko prides itself on efficiency and safety, and this device ticks the boxes in both aspects. The ceramic heating element houses built-in safety features that guarantee peace of mind, and the programmable thermostat with an easy, eight-hour timer makes for a smooth operation. Add to that an elongated heating element, wide oscillating area, and deep penetrating push velocity to drive the heat, and you’ve got the perfect device for the purpose.
Coming back to the safety features, the self-regulating safety ceramic element and cool-touch housing provide protection from accidents. Further, the electronic control panel makes adjusting the setting on this unit a breeze. And if you feel too lazy to get up and do the needful, there’s always the remote to use.
What Could’ve Been Better?
One of the important features that we couldn’t find on this device is the auto-shutoff, which we feel should have been incorporated. Other than that, there’s nothing that should prevent you from going with this option.
As far as portable heaters go, Dr. Infrared is a trusted brand and is very popular with customers. The heater uses infrared technology to warm up your space and hence is incredibly energy efficient. It also comes with a range of other nifty features, as listed below.
Can heat up a large room with Auto Energy Saving Model With...
Dual Heating Systems featuring infrared quartz tube + PTC...
Why Did We Like It?
With a vintage radio-like theme and visible electronic display, this heater does its job superbly. The model has an excellent heat distribution system that spreads the warmth across a wide space effectively and efficiently.
A significant difference between other room heaters and this unit is that while most heaters heat the air in a room, this product works by heating individual objects. The ambient heat from the objects then contributes to the overall temperature. This results in significant power savings in the long run.
Besides infrared heating, this model also comes with excellent safety features. There are no exposed heating elements, so it’s perfectly safe to use around children. Also, it has a tip-over protection system and overheats guard that makes it doubly safe.
Apart from the above, the model boasts of a dual heating system, a programmable timer, and remote-controlled settings. Add to that the super-quiet operation, and you’ve got the perfect heater for your home.
What Could’ve Been Better?
This is one room heater where anyone would be hard-pressed to find a fault, with so much packed into it. But the very feature-richness of the device adds to its bulk, and makes this unit take up considerable space. But considering the fact it has wheels attached, portability shouldn’t be a problem.
Pros
Infrared heating technology
Digital thermostat
Multiple heating modes
Noise-free operation
Cons
Slightly bulky device
Heating Technology: Infrared | Heat Output (BTU): 5,200 | Heating Area (sq. ft.): Up to 1,000 | Oscillation: No | Timer: Yes | Remote Control: Yes | Safety Features: Overheat protection, Tip-over protection
This model from LifeSmart Offers you safe and secure heating for larger rooms. Perfect for big houses or office spaces, this heater uses infrared quartz elements to provide all-around heating. Efficient, effective, and pocket-friendly, this heater is yet another stellar product that you can consider buying.
3 heat settings: 1,000w / 1,500w / and ECO-maintains a...
Why Did We Like It?
The defining feature of this product is the infrared heating technology that warms up even large office spaces in a short while, yet saves on the electricity bill. The device has three different heat settings that can be used as per your requirements and a 12-hour start-stop timer for extra control.
Further, the unit comes with a remote-controlled digital thermostat that can be used to change heat settings without you having to get up. It also houses a lifetime washable filter and an Eco Setting that uses only 500 watts to heat a smaller space.
Finally, the entire arrangement is housed in a stylish metal cabinet that doesn’t get heated despite the ambient temperature. And as the device uses infrared heat, no fuel residue leaves a significant carbon footprint. And unlike other convection heaters, it doesn’t dry out the air, thus preserving atmospheric moisture.
What Could’ve Been Better?
Because it packs so many unique features in a single unit, this product is a heavy one. And while we do wish that it were lighter, we are grateful for the EZ Glide casters that make moving the unit a simple task.
As we near the end of this list, we are going to present you with two options from either end of the price spectrum. Our first choice is the ceramic space heater from Brightown which comes with a modest price tag. But that doesn’t mean it’s low on features, as the following sections will make clear.
Superior blowing and mulching proven by controlled...
Powerful up to 250 mph degree. 350 CFM blow mode and 410 CFM...
Why Did We Like It?
This portable heater epitomizes value for money; it comes with three heating modes (High Heat/Low Heat/Cool Blow) that give you year-long operation. Quiet and powerful, the soothing, radiant heat that this device provides is calming as well as comfortable.
The compact dimensions of this device make it ideal for both indoor as well as outdoor use, so camping nights needn’t be cold anymore. You can also use it in an office setting as the noise level is very low and will not cause any disturbance.
And finally, despite the low price point, this device does not compromise on safety. It offers both over-heat as well as tip-over protection, and this makes it an ideal choice for domestic environments. And as far as efficiency goes, you can rest assured that your bills will be lighter when you use this product.
What Could’ve Been Better?
The only thing we wish this device had was an included remote control; that would’ve made things easier. But at this range, you certainly can’t expect the entire world. Still, it doesn’t hurt to wish, does it?
Pros
Adjustable thermostat
Lightweight and portable
Multiple heat settings
Excellent safety features
Cons
No remote control
Heating Technology: Radiant | Heat Output (BTU): 1,500 | Heating Area (sq. ft.): Up to 200 | Oscillation: No | Timer: No | Remote Control: No | Safety Features: Overheat protection, Tip-over protection
This is as advanced as room heaters get. This Heat Storm model is WiFi-enabled so that you can control and change the heater settings right from the comfort of your smartphone. You can also monitor room temperature and make adjustments accordingly. Now you don’t have to return to a cold house anymore! But wait, that’s not all.
(Wall Mounted Heater Only.) Wi-Fi enabled makes it possible...
Tip-Over safety shut off, Touch screen with digital...
Why Did We Like It?
The heater delivers a whopping 1500 watts of power, which allows you to heat a 300 square feet area as a primary heat source. The device can act as a supplemental heat source and can quickly warm up to 750 square feet. The infrared technology of this unit allows smooth and even heating, and doesn’t leave a significant carbon footprint.
And it’s also wall-mounted, which means there’s no need to occupy floor space. This makes it perfect for both home and office environments, where placing a large heater might become cumbersome.
Finally, the unit also has excellent safety features; the grill is safe to touch, and the body and walls do not heat up even after prolonged use. So it can be safely installed in homes where there are kids.
What Could’ve Been Better?
There isn’t much to find wrong with this product, but still, we’d have preferred it if the price tag had been a bit lower. But since this is almost a smart device that’s internet-enabled, we’re sure you wouldn’t mind parting with a few extra bucks.
Pros
WiFi connectivity
Wall-mount design
Advanced safety features
Infrared heating element
Cons
A tad on the expensive side
Heating Technology: Infrared | Heat Output (BTU): 5200 | Heating Area (sq. ft.): Up to 150 | Oscillation: No | Timer: Yes | Remote Control: Yes | Safety Features: Overheat protection, Tip-over protection, WiFi connectivity
Best Energy Efficient Space Heaters Comparison Table
Buying Guide For The Best Energy-Efficient Space Heater
So now you know all about the thirteen most energy-efficient space heaters of the year...but does it mean you should go out and get one? Even thirteen is a sizable number to choose from, and you are sure to have trouble deciding which one to go with.
To help you along that path, we’ve got the following buyers’ guide that is sure to come in handy when making the decision. This guide will help you to understand the many factors that you should keep in mind while choosing the right heater for your purposes. It’ll also clear some details about the finer points of room heaters.
So, let’s start!
The Room Size
The first thing that you need to keep in mind when choosing a room heater is the size of the room where you will be using it. The room size plays a crucial role in determining the energy efficiency and heating effect of your device. So before you settle on that room heater, take the time to consider the dimensions of the room, and make the choice accordingly.
Once you know the size of the area that you are going to heat, check out the wattage of the heater. Typically, a room heater uses 10 watts of power to heat each square foot of space. So once you know the room size and the heater wattage, it’s merely a matter of basic math to calculate whether a particular model will suit you or not.
Keep in mind that the above is only a general rule, and heating capacities vary based on the type of technology that the heater uses as well. This is what we are going to discuss next.
Type Of Heater
The next important factor to consider while settling on a heater is the kind of heating technology the heater uses. And while multiple heater styles can be found, typically every heater falls under one of the following four categories:
Convection heaters, provide uniform, large-area heating.
Radiant heaters, provide targeted heating and are more suited for smaller spaces.
Fan Heaters, which use an internal fan to circulate the heat.
Micathermic heaters provide all-around, energy-efficient heating and also economize on space.
Based on your needs, the type of heater that you choose will vary.
Also, another factor that you should consider is whether you need to get a floor heater or a wall-mounted heater. Standing heaters are usually bulky and take up a lot of space, but they are portable and can be moved from one room to another. So if you are looking for a portable option, then you can easily go with this variant.
If, however, you are looking to save floor space, then you should opt for a wall-mounted variety, such as the Heat Storm or Steibel models on our list. These are usually attached to the wall and hence offer significant space savings. Perfect for homes or offices with a lot of furniture.
Safety Aspects
Unless heaters are properly monitored, they can quickly turn into hazards at home. Hence, the safety features are something that you should always pay special attention to. Look for features such as cool-to-the-touch surfaces, automatic shutoff in case of tipping, and overheat sensors.
These components are essential not only for the safety of the device but also of your property and loved ones. If safety is the top factor on your mind, then you can go with Brightown, Duraflame, or De’Longhi, to name a few.
The Noise Levels
Being the electrical appliances that they are, heaters often emit a considerable amount of noise. While almost all heater models give off a particular volume of sound, some models are notorious racket makers. Noise is usually a severe irritant in the boardroom as well as the bedroom, so the place where you plan to use it should determine your tolerance level.
Usually, fan-based heaters are known as noise-makers, so if you are using the heater in an office environment, be sure to go with a baseboard heater or an oil-filled radiator as these make less noise. But if you are looking for a fan heater minus the noise, then go with the Stiebel Eltron model on our list.
Energy Efficiency
This, of course, has been the common thread in our discussion. If you are concerned about energy conservation and want to save on the power bill, be sure to compare energy efficiency figures before making the decision.
Energy efficiency is determined by two primary factors: the heating technology that your heater uses and the dimensions of the room where you are going to use the device. However, additional features such as multiple heating modes that allow you to conserve energy can also contribute towards energy efficiency.
Other add-ons such as programmable thermostats, adjustable timers, and low-wattage heating can also contribute towards lowering power costs.
Fuel Type
Finally, the last and most vital factor that you should consider while choosing the right heater for your purposes is the type of fuel used. While the term ‘heater’ invariably brings the electric variety to our minds, there are, nonetheless, different makes of heaters available. Some of these are discussed below.
Electric heaters are the most common type of heaters that are used. Simple to use, these can be run from your home or office power supply, or even on rechargeable batteries. Some models can also be integrated with your centralized heating system. Electric heaters are the most energy-efficient and least polluting of the lot.
But if you are looking for a cheap option, then go with propane heaters, such as the Mr. Heater model mentioned above. The great advantage of propane heaters is that they don’t need to be used near a power source; this makes them perfect for outdoor use.
Energy Efficient Space Heaters FAQ's
How do energy-efficient space heaters save energy?
Energy-efficient space heaters incorporate various features and technologies to save energy. These include programmable timers that allow you to set specific operating hours, thermostats that regulate temperature and prevent overheating, and advanced heating elements that deliver efficient heat output. Additionally, some models have built-in sensors to detect when the desired temperature is reached, automatically turning off or reducing power consumption.
Are energy-efficient space heaters cost-effective?
Yes, energy-efficient space heaters are designed to be cost-effective in the long run. While they may have a higher upfront cost compared to conventional heaters, their energy-saving features help reduce electricity consumption, leading to lower energy bills. By heating only the specific areas or rooms you need, energy-efficient space heaters allow you to reduce overall heating costs in your home or office.
Can energy-efficient space heaters be used as the primary heating source?
Energy-efficient space heaters can be used as a primary heating source for smaller spaces or individual rooms. However, they may not be suitable for heating an entire home or large areas. It’s important to consider factors such as the size of the space, insulation, and climate conditions when determining if an energy-efficient space heater can adequately serve as the primary heating source.
Can energy-efficient space heaters help reduce carbon footprint?
Yes, energy-efficient space heaters can contribute to reducing your carbon footprint. By consuming less energy compared to traditional heaters, they help conserve resources and reduce greenhouse gas emissions associated with electricity generation. Choosing energy-efficient models with eco-friendly features, such as timers and programmable settings, further enhances their environmental impact by optimizing energy usage.
Conclusion
Thank you for reading our comprehensive article on the best energy-efficient space heaters. We hope it has given you some valuable insights and helped you figure out the best option for your needs. After thoroughly analyzing various factors, we've narrowed down our top three recommendations.
Out of these 11 best Energy-Efficient Space Heaters, here are our top three recommendations:
1. Mr. Heater MH9BX Buddy is an ideal option for those who prioritize safety features, portability, and a heating solution that runs on propane. The automatic safety mode, foldable handle, and ceramic burner tiles make this heater incredibly convenient for both indoor and outdoor use.
2. Lasko Ceramic Designer Series is a good option for anyone who wants an energy-efficient heater that also boasts a sophisticated design. In addition to multiple heating modes and a digital thermostat, this model stands out with its elegant ceramic jar shape, beautifully accented by an ornate stand.
3. Dyson AM09 Fan Heater is the right choice for those seeking a versatile and stylish heater-cooler combo. With patented technology, a sleep timer, a remote control, and a Quiet Mark Accreditation, the AM09 delivers fantastic performance all year round.
Your satisfaction is our priority, and we genuinely hope that your choice among these space heaters brings you the perfect blend of warmth, energy efficiency, and design. We appreciate you taking the time to explore our recommendations and wish you a cozy and comfortable experience with your new energy-efficient space heater!
What better way to relax and unwind than swinging on a hammock on a summer evening? If this is on your mind, read on!
We have listed down our favorites when it comes to hammocks with intricate details mentioning the advantages of buying each and what it is meant for. Choosing the one that fits you and your needs will not be an issue anymore.
Be it a hammock needed for camping purposes or one that you want as a part of the decor in the house, we have got multiple options! Get surfing and take a step towards being the proud owners of a hammock as you skim through the list of the best hammocks to swing in 2024.
Most Comfortable Hammocks
Get ready to elevate your lounging experience and embrace the blissful embrace of these exceptional hammocks. Here's the list of the 7 best comfortable hammocks.
If you are looking for a travel-friendly hammock that would fit easily into a bag, the Eagles Nest Outfitters hammock is for you. Be it taking a vacation on a boat, heading out on a hike in the mountains, or exploring the wilderness, this hammock is going to be your best option.
Ready for some me time: The SingleNest is the perfect...
Adventure ready: Weighing only 16 ounces, the SingleNest...
Why did we like it?
We loved the parachute design of this hammock. Made with high-strength breathable 70T high-tenacity nylon taffeta, this product is sturdy with a capacity of 400 lbs and dries off quickly in case you face a sudden downpour. So, there is no need to worry about unexpected spills because the hammock will dry before you know it.
Those days are gone when you would take an hour to set up a hammock. Now it is quick and convenient, making it feel like a breeze!
Talking of convenience, equipped with a compression stuff sack, the hammock can be packed off easily and rolled into a softball. It can fit into your luggage or rucksack, thus making it perfect for traveling and hiking.
When the roads are long, and you are tired, what better way to relax than on a hammock letting the breeze play with your hair? This is the exact feeling we got when we took this hammock with us on our hike.
What could have been better?
The product comes in 24 color shades, thus giving one a lot of options to choose from, but the color combinations may vary from the image provided online. Therefore you may not get the exact shade you want.
Also, the hammock straps did not come with the product, and we had to buy it separately.
Pros
Can hold up to 400 lbs
Strong aluminum Carabiners
Quick-drying material
Compression sack makes it easily portable
24 color choices
Cons
Straps not included
Material: Nylon | Weight Capacity: 400 lbs | Dimensions (L x W): 9' 4" x 4' 7" | Suspension System: Attached carabiners | Spreader Bars: No
This hammock is our choice when it comes to relaxing in utter comfort. Feel the solace of sleeping on a swinging bed when you want to spend a lazy day in the backyard with a glass of your favorite drink. The hammock is known for its ‘cocoon’ effect making it one of the most comfortable choices in this list.
No products found.
Why did we like it?
Made with high-quality colorfast 65% cotton thread and 35% polyester, this product could be left outdoors without any issues as they are easily washable and dries off quickly. It could survive for years outside in your backyard and still look new. Also, it is fashionable and becomes a pretty nice addition to your decor.
Coming to how much the hammock can take, it has a 475 lb capacity, which is pretty much a lot, and we did not need to worry about a collapse.
Also, the bed resting area, which is 98 inches long and 59 inches wide, provides enough space for one to roll over while on the hammock. We could easily fit in books and a lunch bag with us on the hammock. You can get your kids or your pet too since they are easily cleanable and dry off quickly. One does not need to worry about any sort of soiling.
What could have been better?
It took us a while to get the hammock to accommodate two people. The hammock needs time to stretch, and it took us two weeks to do so.
Also, the hammock cannot be machine-washed and needs to be washed by hand. But again, one can easily remove spills and you can only wash the specific area instead of washing it completely.
Pros
Can take up to 475 lbs
Free bag provided
Extremely comfortable
Soft colorplast cotton fabric
Child and pet-friendly
Cons
Cannot be machine-washed
Is not made of waterproof material
Material: Cotton | Weight Capacity: 400 lbs | Dimensions (L x W): 10' x 5' | Suspension System: Included ropes | Spreader Bars: No
Imagine taking a day off to laze in the sun with your partner or cozy up in the evening by the fireside on a hammock; the Lazy Daze Double hammock is the perfect choice to make. Be it a romantic evening or a day of snuggling with a book; this hammock is the coziest choice in the market.
Lazy Daze Hammock Combo, the weather-resistant double...
Self standing hammock stand is constructed of heavy duty...
Why did we like it?
We couldn’t resist the soft 100% weather-resistant cotton/canvas fabric with which this hammock is made with. The supple fabric made it a treat to lie down in. Also, the material is strong and durable, and it could take up to 450 lbs weight.
You don’t need to stress about trees to tie the hammock to because this one comes with two sturdy ropes, which can be linked to two 9 feet heavy rods. The gauges are weather and rust-resistant, and even if you leave it outside, the body will remain as shiny as ever.
The stands are lightweight and easily portable, thus making it easier for you to handle them and move them whenever needed.
The hammock comes in 12 different shades and designs, and we chose our favorite according to our backyard decor, you can do so too.
What could have been better?
The hammock is massive, and the additional gauges make the package bulky if you are looking to transfer it or take it on a trip. This hammock works best if you buy it for your home, but it may not be a viable choice to make if you are a frequent traveler.
Are you a person who equally enjoys chilling in your front yard or watching the stars from your private patio? Do you enjoy traveling to different places? Whichever you choose, this is the best choice available in the market. With its versatile design and features, all you need to do is set it up for a beautiful and comforting experience.
Cozy & Spacious: Made from 100% USA-sourced cotton, the...
Heavy-Duty & Durable: The 9-foot stand is constructed from...
Why did we like it?
We were amazed by the materials used to make the Vivere Tropical Double hammock. You could choose from 100% cotton, polyester, or Sunbrella fabric, all of which are of supreme quality, and it feels lovely to lie down on. The fabric is tightly woven with 100% extra thick and soft material, which provides additional comfort and like the previous option, it can take up to 450 lbs.
We were so excited about the stands which came with the hammock as we did not have proper trees to tie the hammock to in our front porch. The legs are zinc coated for extra strength and are rust-resistant.
The space here is also large enough for two people to fit in. It is kids friendly too as it is easily washable, so you can leave your kids and pets to play on the hammock.
Talking about the colors, the hammocks come in 12 different shades and designs, which are pretty attractive.
What could have been better?
The weight is a bit of an issue as it is bulky, considering it comes with gauges. Although there are hooks provided for easy convenience, it can be a little tricky to attach the rope to the hooks. The price of the product is on the expensive side, but you are paying for supreme quality making it worth the price.
Pros
Available in three variants
Space-saving steel stand
Strong zinc-coated legs
Premium Fabric quality
Carrying case provided
Cons
On the expensive side
Bulky
Material: Cotton | Weight Capacity: 450 lbs | Dimensions (L x W): 9' x 4' 7" | Suspension System: Included steel stand | Spreader Bars: No
Want to feel like you are lying down in the middle of a desert observing stars? The same comfort and luxury can be achieved with the Pawley's Island Original Collection hammock. You can relax and lose yourself in dreams for hours while the hammock provides you with all the solace you need.
[DURACORD ROPE]: Synthetic blend that is soft as cotton with...
[OAK SPREADER BAR]: Premium Oak hardwood that has been...
Why did we like it?
The Pawley’s Island rope hammock is made from hand-woven, mildew-resistant DuraCord soft spun 3-ply polyester rope, which has a continuous weave, thus making it very durable even when left outside.
To add to the sturdiness, the hammock comes with custom-designed spreader bars made from seasoned solid oak. This makes the hammock very durable as well as classy to look at, with a maximum capacity of 450 lbs.
We were impressed by the heavy-duty zinc-plated rings and chains to be used to suspend the hammock. These are also rust-resistant, and all you need are two trees or posts to attach them with.
To add to the classiness, the Pawley’s Island hammocks come in 7 color varieties, including oatmeal, brown, coastal blue, garnet, green, meadow, and tan. Some of the colors are uncommon, giving you the option to have a very different but exotic-looking hammock in your backyard.
What could have been better?
After using the hammock for a few months, we noticed that the materials used to make the bed are not meant to be left outside for days. Try storing it inside so as to keep it from wearing away too quickly. Also, the cords are very tightly woven at the top of the hammock, making the bed part slightly stiff.
Pros
Handwoven soft-spun polyester 3-ply rope
Sturdy design
Solution-dyed colorfastness
Seasoned solid oak spreader bars
Rust resistant
Cons
Expensive
Tightly woven cords add stiffness
Material: DuraCord fabric | Weight Capacity: 450 lbs | Dimensions (L x W): 13' x 4' 7" | Suspension System: Included ropes | Spreader Bars: Yes
If you are looking for a cozy afternoon nap under the sun, the quilted weave hammock is for you. Made from soft all-weather OLEFIN acrylic fabric, this is the bed of your dreams, and it comes in a beautiful shade of navy blue, which makes it look all the more comfortable.
Our Soft Weave Hammocks are woven from soft, all-weather...
Fabric thread is solution-dyed, so the color isn't applied...
Why did we like it?
Since the weather fluctuates way too often, we wanted something which will withstand the forces of nature. This product is made with all-Weather and Solution-Dyed Synthetic DuraCord Fabric, which makes it resistant to rotting, mold, and mildew.
The fiber used to make the padding of the hammock is non-absorbent. It lets the liquid drain off and thus does not make the hammock wet. This makes the hammock an excellent choice for areas with sudden rainfall.
Further, the hardware is zinc plated and would not rust even if kept outdoors. It also helps increase the overall life of the hammock. Brazilian teak hardwood has been used to make the spreader bars adding a very premium feel to the product.
Also, it is pretty extensive and can hold two people easily considering the upper weight limit is 450lbs. You can relax with a drink alone or with a special one, your choice!
What could have been better?
The presence of padding and spreader bars makes it difficult to transfer this hammock from place to place. Although it is perfect for your backyard or porch, using it for excursions or holidays would be tough. This was the only major glitch we had with this product, which was otherwise a perfect hammock.
Pros
Soft all-weather acrylic fabric
Zinc plated spreader bars
Non-Absorbent fabric
Cumaru Spreader Bar
Cons
Pillows and stands are sold separately
Expensive
Material: Polyester blend | Weight Capacity: 450 lbs | Dimensions (L x W): 13' x 4' 7" | Suspension System: Included ropes | Spreader Bars: Yes
Want to go hiking in the forest but are scared of mosquitos and insect bites? Well, the Everest double camping hammock was our choice when it came to camping and excursions in the wilderness. Equipped with a mosquito net to safeguard you, this one will keep you swinging without any worries.
When we are out in nature, we want the experience to be therapeutic and not stressful. This hammock gave us the pleasure of comfort in places where bugs are inevitable. You get the comfort of your home while you are sleeping somewhere in the middle of a forest!
When it comes to space, this hammock is enormous, allowing two people to easily fit in while a single person will have ample space to turn and roll around. It can take up to 400 lbs and thus will not be a hindrance if you want to take in your pet too.
Another prominent feature would be that it is effortless to install and set up. The hammock can be folded into a bag, and it is pretty light and easily portable, and reversible. We could take it camping without having to pull a giant bag with us at all times.
What could have been better?
This is the most viable option for you if you are a frequent traveler, but it is on the expensive side and will cost you more than most other hammocks. Also, the zipper is not ideal, making it a slight hindrance to entering it with the zipper opening only two-thirds of the way.
Pros
Great endurance and versatility
Mosquito and bug-free hiking
Attached side pouch
Detailed instruction manual
Cons
Expensive
Zipper doesn’t unzip completely
Material: Nylon | Weight Capacity: 400 lbs | Dimensions (L x W): 9' 10" x 6' 3" | Suspension System: Included straps | Spreader Bars: No
Now that you know the top ten hammocks available in the market today, you have taken a step towards getting your hammock. To make the final step, equip yourself with the buyer’s guide, which will give you details of the factors to keep in mind before you finalize on a hammock.
Portability
Some hammocks are meant mostly to be kept in one place as the gauges become too heavy to take with you on the move, while others are portable and lightweight and could easily be carried. Depending on your purpose to buy the hammock, make an informed decision.
If you are looking to decorate your backyard, go with a hammock with beautiful wooden gauges that you do not need to move often. If you want easy mobility, go for a lightweight model.
Single v/s Double capacity
One of the most important things to keep in mind is if you need the hammock for yourself or do you plan to share it with someone. If you are undecided, it would be safer to go with the double model as it comes with ample space in case you change your mind later.
Again, if you like to travel and hiking is on your list, then it is best to buy a single hammock, which is more portable and is easier to carry.
Rain tarps and Mosquito Nets
There are hammocks where you can lie down under the open sky without any form of hindrance and then there are those that provide you with mosquito nets and rain tarps. If you plan to be going to a beach or party in your backyard, the open hammocks would be your best choice.
This is because you do not want the view of the open stars to be restricted in any way. If you are looking at going to deep caves or forests, hammocks with layers of protection are what you should opt for.
Water-resistance capacity
Keep this in mind, especially if you intend to travel a lot with the hammock. If the material used to make the hammock does not dry quickly, it will cause a problem for you. Look at quick-drying or water-resistant materials to have a hassle-free hike.
Single strap v/s double straps
Some hammocks come with a single strap, which may be sturdy but still invokes a risk if a lot of weight is put on the product. In such cases, tie it lower. Double straps ensure double the safety, and thus you can tie the hammock higher as there is no fear of falling.
Spreader bars v/s non-spreader bars
Hammocks with spreader bars are stretched out, and it is good to relax for a while, chill by the pool or sunbathe. But it may get a little uncomfortable if you intend to sleep on it.
Hammocks with no spreader bars will mold to your body, thus giving you a cocoon-like feeling, and you can rest much more comfortable in it. If you have issues with getting into a hammock, this is your best bet, as it is pretty simple to climb into it.
Most Comfortable Hammocks FAQ's
What is the most comfortable material for a hammock?
The most comfortable material for a hammock depends on personal preference. Cotton hammocks are soft and breathable, while polyester hammocks are durable and quick-drying. Both materials can provide comfort when properly designed and constructed.
Are hammocks suitable for sleeping overnight?
Yes, hammocks can be suitable for sleeping overnight. However, for comfortable overnight sleeping, choose a hammock with a wider and longer design, supportive fabric, and proper insulation options such as an underquilt or sleeping pad.
How do I hang a hammock properly for maximum comfort and safety?
To hang a hammock properly, find sturdy anchor points such as trees or posts. Ensure the hammock is hung with a slight sag for proper body contouring. Use reliable straps or ropes, ensuring they are securely attached and adjusted to the appropriate height and angle.
Can hammocks be used indoors?
Yes, hammocks can be used indoors if you have suitable anchor points such as exposed ceiling beams or sturdy walls with proper hardware. Indoor hammocks can provide a cozy and unique seating or lounging option.
Are hammocks suitable for children?
Hammocks can be suitable for children under proper supervision. Look for hammocks with appropriate size, weight capacity, and safe design features. Ensure that children understand and follow safety guidelines while using hammocks.
Conclusion
Thank you so much for taking the time to read our article on the best comfortable hammocks out there. We hope it has been an exciting and insightful journey for you, as it was for us testing and experiencing each of these hammocks. We truly believe that finding the perfect lounging spot to unwind and relax is essential for everyone, and having high-quality hammocks makes it an even more enjoyable experience.
We had a wonderful time testing these stunning products and providing you with this comprehensive list of hammocks, tailored to meet your specific needs. Remember, hammocks aren't just a luxury; they are an essential part of relaxation and rejuvenation, and having the perfect hammock can significantly enhance the way you spend your leisure time. So go on, treat yourself, and indulge in one of these beauties – it's time to sit back, relax, and enjoy the weightless bliss of a comfortable hammock. Happy hammocking!
Before getting deep into mold-resistant paints and what’s best for you, let us first understand mold.
It is basically a fungus called hyphae that grows on any surface of our house. And it can grow anywhere, whether in the form of fuzzy white spots on the floor, slimy black (mold) spots on the curtain, or slick orange film in drains. These molds can be detrimental for your health, especially if you have asthma or allergies. Besides, constant moldexposure can lead to irritation in your skin, eyes, nose, lungs, and throat.
However, using mold and mildew-resistant paint will help avoid these problems. So, we decided to search the market and shortlist the five best paints that can prevent a mold outbreak in your house. If the plethora of options have left you confused, then you’re at the right place. So, without further ado, let’s jump in!
Listed below are the best mold-resistant paints:
Rust-Oleum 276087: The Rust-Oleum 276087 water-based paint has a fast-acting formula that ensures swift mold elimination. Its drying time of 30 minutes is the quickest among the options. It doesn't cover as much area (160 sq ft) as the Fiberlock Aftershock does.
Fiberlock Aftershock: This water-based paint with a coverage area of 250-400 sq ft, has a 1-hour drying time and offers robust mold resistance that has been trusted for over three decades. The application is limited to only interior surfaces.
Rust-Oleum 5001: The Rust-Oleum 5001 is an oil-based paint that features a highly effective mold-resistant formula. It has a drying time of 1 hour and it adheres well to numerous surfaces, which gives it an advantage over water-based paints when it comes to application versatility.
KILZ 239041: A water-based paint that ensures high-quality mold resistance. The 1-hour drying time makes it comparable to Fiberlock Aftershock and Rust-Oleum 5001. Drawback: coverage area of only 75-100 sq ft.
KILZ LLC 13510701: The KILZ LLC 13510701 is a water-based paint and primer combo that dries in 1 hour and covers an area of 250 to 400 sq ft, competing closely with Fiberlock Aftershock. The limited warranty is a weak point.
1. Rust-Oleum 276087
The Zinsser range from Rust-Oleum can make all your painting projects successful. From repairing cracked paint to killing mold, it has a solution for everything. As such, the Rust-Oleum 276087 (Zinsser mold killing primer) is a protective primer specially formulated to kill mildew, mold, odor-causing bacteria, and fungi.
If you’re looking for mold-resistant paint that works faster to eliminate mold formations from your home, then this product is worth looking into. Its effective formulation will cut down on your application efforts as well.
Being an Environmental Protection Agency-registered antimicrobial, it guarantees to prevent mold growth in the future. Additionally, you can cover a large area with just a single can of this paint, which will save you from making a hefty investment. It also gets dry to the touch in 30 minutes and can be recoated within 1 hour, ensuring faster project completion.
Apart from that, it can be used alongside any topcoat and is ideal for combining with Zinsser perma-white. You can easily wash the paint using soap and water, so maintenance wouldn’t be a problem.
There aren’t a lot of disadvantages of this product which bothered us. Although you can get a long-lasting color with this Zinsser primer and prevent mold formation, you will need to work fast with its application, as it tends to solidify very fast.
What We Like
Effectively hinders the growth of mold, mildew, or fungus
Water-based product
Odorless
Can kill existing mold
Applicable for indoors and outdoors
What We Don’t Like
Need to work faster as it tends to solidify fast
Volume: 32 fl oz | Paint Type: Water-based | Finish Type: Matte | Color: White | Coverage Area: 160 sq ft | Drying Time: 30 minutes
For more than three decades, Fiberlock Technologies has been designing and manufacturing products to address environmental, health, and safety hazards. Fiberlock Aftershock, a premium product, is the first-of-a-kind fungicidal coating that kills mold and mildew on pre-cleaned surfaces.
This premium Fungicidal coating is tested and verified to resist and kill mold, mildew, and fungus on pre-cleaned surfaces. Furthermore, its EPA registration confirms preventing any future outgrowth of fungus, thereby promising to keep you safe and healthy.
Being a low-VOC product, it helps reduce allergy-causing toxins as well as the concentration of contaminants in groundwater, landfills, and even in the ozone layer. And much like its predecessor, you can easily clean this paint with the mere use of water and soap.
Apart from that, its low-odor formulation means you can breathe fresh and clean air. The brand also suggests that you can use this mold-resistant paint on interior surfaces such as wallboard, plaster, concrete, drywall, primed metal, wood, and galvanized metal.
We could not find many improvements that could be made to this product and customers seemed reasonably satisfied with it. The price is also pretty budget-friendly, but it would have been much better if it could have been applied on exterior surfaces and for HVAC systems.
What We Like
Effectively kills molds
Low odor and low VOC
Water-based product
Can be applied to any interior surface
What We Don’t Like
Cannot be used on exterior surfaces
Volume: 128 fl oz | Paint Type: Water-based | Finish Type: Satin | Color: White | Coverage Area: Smooth Surfaces: 250-400 sq ft, Porous Surfaces: 150-300 sq ft | Drying Time: 1 hour at 70°F
3. Rust-Oleum 5001
As stated in one of our previous product reviews, Zinsser can be applied to remove mold and stains effectively and quickly from any surface. Similarly, the Rust-Oleum 5001 is an oil-based mold-resistant paint by Zinsser that will provide more durability compared to your traditional waterproofer.
The Rust-Oleum Mold-resistant paint is designed to repel mold, mildew, and water. With an oil-based formula that has a low odor, it can easily be washed, and you would not feel suffocated surrounded by walls painted with it.
Apart from that, it is proven to block 34 PSI of water pressure and is backed with a lifetime guarantee and a 5-year guarantee for its antimicrobial and water-resistant properties, respectively.
Apart from its mold-resistant capabilities, applying this paint can give your house an elegant and graceful look. It does come in a bright white color and gives your wall a smoother finish, especially when paired with a mold-killing primer. And once applied, the paint dries within an hour, which means you can complete your project quickly.
Last but not least, you can apply this mold-resistant paint on dry, wet as well as masonry walls.
There are a lot of advantages to using the products in terms of ensuring a mold-free home. However, this product would have been much better if it was a tad bit less costly and affordable for most users.
What We Like
Formula consists of mildewcide
Oil-based paint with low odor
Moisture-resistant finish
Suitable for any mildew or high moisture surface areas
Twice the strength than other waterproofing paints
What We Don’t Like
It can be a bit costly
Volume: 128 fl oz | Paint Type: Oil-based | Finish Type: N/A | Color: Bright white (tintable) | Coverage Area: N/A | Drying Time: Within 1 hour
KILZ offers standard and high-quality waterproofing products that not only protect your home from bacteria and germs but also give it an elegant look. Likewise, this interior or exterior basement and masonry waterproofer by KILZ will suit all your expectations and limit your exposure to mold.
Are you worried that the exterior of your house is not as beautiful as the interior? It is because it has to deal with a copious amount of pollution and rain. Similarly, our bathroom also gets exposed to a lot of water daily, leading to the formation of molds and other fungi.
In this case, applying this waterproof paint by KILZ will not only protect your walls from odor-causing bacteria or germs but will also help keep your house beautiful. The use of a nanotechnology formula in the color can resist water and give the walls a glossy look. Moreover, its low-odor waterproofing property provides a durable and long-lasting finish.
Lastly, the extra coverage on offer will let you cut down on the additional costs of purchasing more paint for covering the entire house.
You cannot use a KILZ waterproofer over mold-resistant paints or latex-based paint. Hence, it’s important to remove other stains before applying this one. You shouldn’t be bothered much about it when building a new house, as the walls are fresh in that case. But old walls need to be cleaned before applying this paint for ensuring a smooth finish.
What We Like
Excellent coverage
Long-lasting and durable
Protection from mold and mildew
2 times more water-resistant
What We Don’t Like
Cannot be applied over existing paints
Volume: 128 fl oz | Paint Type: Water-based | Finish Type: Matte | Color: White | Coverage Area: 75-100 sq ft | Drying Time: 1 hour (to touch)
5. KILZ LLC 13510701
KiLZ has been utilizing EPA-registered ingredients in their mold-killing primers and paints to guarantee lifetime protection from mold. And this high-quality, alkali-resistant paint offers extraordinary concealing properties with water repellency. Along with that, its coal smoke color will render a dazzling look on your walls.
Imagine using paint as both primer and paint, which will reduce any additional investment for buying a primer. If you feel the same, then this mold-resistant paint by KILZ will be an ideal choice for your home.
For one, the formula is effective to counter mold and mildew growth. Once it has been applied to your walls, the mold will get trapped inside and get killed. Apart from that, its self-priming texture gives your surface a decorous and water-resistant finish. You will get a natural-looking texture with this water-based acrylic latex color; the only thing to keep in mind is cleaning the surface before applying the paint.
Furthermore, you can cover nearly 250-400 square feet with one gallon of this paint, depending on the surface texture. It means your costs get lowered further without compromising on quality or performance.
You might receive a limited warranty on this mold-resistant paint in terms of its antimicrobial and water-resistance capabilities. Besides, you might need to apply several coats for getting the desired look and to prevent it from fading over time.
What We Like
High-quality water-based paint
Mildew-resistant finish
Accentuates all textured surfaces for a natural look
If you're searching for the best mold-resistant paint, below is a comparative table of volume measured in fluid ounces, paint type, finish type, color, coverage area in square feet, and drying time in hours and minutes.
Mold and mildew-resistant paints contain strong fungicides that destroy molds. These fungi thrive on humidity and will need to be dealt with quickly before they affect your and your family’s health. But you can’t pick any mold-resistant paint at random, which is why we have curated this buyer’s guide with the key factors to keep in mind before buying one.
Areas of Application
The rooms most vulnerable to developing mold include toilets, bathrooms, kitchens, laundry rooms, or utility rooms with less or no ventilation. Hence, such paints should be applied to areas where the deposition of water or moisture is very high.
Aside from that, you may use them for your basement or workshop to get mold-free walls and reduce the chances of mold growth there.
But as all brands do not create similar paints, you need to check the formula before going ahead with a product. We’d also suggest opting for a brand that offers more than two years of warranty on their paints.
Remember that mold-resistant paint should be applied to dry, clean, and mold-free surfaces. Using it where you already had mold formation can help avoid future problems. But before its application, the surface needs to be cleaned thoroughly.
However, it might not kill the ones already growing on a surface. So, applying it on such surfaces may, well, be a waste of money. Also, it is to be kept in mind that anti-mold paints do not guarantee mold growth in the future, especially in case of excessive water damage or flooding.
Durability
The durability of mold-resistant paint determines how long it can protect the walls from mold formation. Naturally, this factor is a significant concern for homeowners. Besides, anti-mold paints are costly, so users need to emphasize this particular aspect.
Agencies like the EPA conduct checks to test the durability of these paints and whether they will be effective in the longer term. And the results can give you an idea about the expected longevity of the product. So, it will be viable for you to look out for EPA-registered paints.
Additionally, many paint manufacturers provide guarantees over these products based on their longevity. Such policies basically depict the quality of ingredients being used. The more extended the warranty, the greater the quality, and vice versa.
Undercoat
There is more to mold-proof paints than just applying them on a surface. It will be much more effective if used as an undercoat, thereby making it serve as a mold-killing primer. Although it might increase the cost, it will provide increased protection against mold and mildew.
This method is especially recommended for areas most vulnerable to molds, like in a bathroom, where mold spores can create major problems.
Additives
Instead of purchasing pure mold-resistant paint, some people opt for buying mold-resistant additives and mixing them into ordinary paints. This might seem a cheaper option for many, but you will need to ensure that everything is mixed correctly.
We’d suggest getting professional help for mixing and painting such products. They have adequate knowledge about the mixture ratios and the right application method.
Coverage
As stated above, you will need to ensure that the surface is free from any mold and mildew before you start painting. It can turn out to be a time-consuming task, but it is the most crucial step. If you fail to clean the surface, the paint might not deliver desirable results.
Plus, you will find that mold-resistant paints work better when applied in a thin rather than a thick coat. In some cases, a single coat of paint over the undercoat may seem just perfect, but in other cases, you may need to apply two or three coats for it to be effective. Hence, it’s feasible to buy a paint that provides more coverage.
Cost
Mold and mildew-resistant paints are more expensive than regular ones and are available in various-sized containers. And truth be told, the high prices are inevitable, as it performs a specialized job and uses specific ingredients fit for the purpose.
That said, you can cut down on your costs by browsing around hardware stores or options to find the best deals.
Nature of Paint
A quality anti-mold paint must be alkaline and breathable, free of any organic elements. Hence, paints that contain tempera or other crude oil derivatives need to be discarded. This is because microorganisms will proliferate if the walls have a lower pH level.
While purchasing an anti-mold paint, it needs to be ensured that it contains ingredients like vinyl resins, transpiring, and antibacterial, antifungal or antimicrobial agents that are water-repellent.
Application Methods
Once you have selected the best mold-resistant paint, don’t forget to check the application instructions provided by the brand. This will also help you keep the specialized tools handy for the purpose.
An anti-mold paint is usually applied just like any other paint. Hence, you can use either a roller or brush to apply the coats.
Now since most paints are white in color, you can add a colorant, but not more than 5%. But before that, make sure to have tools like a paintbrush, masking tape, paint roller, personal protective equipment, and painting sheets.
Is mold-resistant paint toxic?
Mold-resistant paint toxicity largely depends on the specific formulation. Some paints could contain biocides or other chemicals that may be harmful if inhaled, ingested, or come into prolonged contact with the skin. Always use them in a well-ventilated space and follow the manufacturer's safety instructions.
How does mold-resistant paint work?
Mold-resistant paint works by containing chemical biocides or natural substances that inhibit the growth of mold, mildew, and other fungi. These components work by making the environment nonconducive for such organisms' growth. Despite being applied on the surface, these anti-mold agents permeate the paint layer and remain effective for several years, providing long-lasting protection against mold and mildew.
Are mold-resistant paints completely effective against mold?
Mold-resistant paints' effectiveness against mold largely depends on environmental conditions including humidity, temperature, and ventilation. While these paints can significantly inhibit mold growth, they are not entirely foolproof. Optimal mold prevention generally requires a combination of mold-resistant paint and other measures, including proper moisture control and ventilation.
Can mold-resistant paint cover existing mold stains?
Mold-resistant paint is not designed to cover existing mold stains. It can inhibit the growth of new mold, but existing mold and stains should be thoroughly cleaned and removed before applying mold-resistant paint. This ensures the paint's effectiveness and prevents further spread of the mold.
Can mold-resistant paint be used in all areas of a home?
Mold-resistant paint can be used in any area of a home, but it is especially beneficial in spaces prone to moisture and humidity, such as bathrooms, kitchens, laundry areas, basements, and attics. Despite its wide range of applications, it is not necessary to use it in areas where the risk of mold growth is minimal unless there are specific concerns about mold in those areas.
Can mold-resistant paint be used outdoors?
Yes, mold-resistant paint can be used outdoors. It is particularly useful in climates with high humidity or in areas prone to moisture, such as exterior walls, foundations, and decks. When selecting a mold-resistant paint for outdoor use, it's crucial to ensure that the product is also designed to withstand weather and UV exposure.
Is it hard to apply mold-resistant paint?
It is not typically hard to apply mold-resistant paint, as the process is similar to applying regular paint. That being said, proper surface preparation, including cleaning and mold removal, is essential for the effectiveness of the paint. Follow the manufacturer's specific instructions for the best results.
Will mold-resistant paint prevent mold forever?
Mold-resistant paint does not prevent mold growth forever. While it significantly reduces the risk, the effectiveness decreases over time, particularly if the root causes of mold, like persistent moisture, are not addressed. Routine inspection, proper ventilation, and moisture control are crucial alongside the application of mold-resistant paint for long-term mold prevention.
Are there eco-friendly mold-resistant paints?
Yes, there are eco-friendly mold-resistant paints available on the market. These products are typically formulated with low VOCs (volatile organic compounds) and use natural or mineral-based ingredients to deter mold growth, offering a more environmentally friendly alternative to traditional mold-resistant paints. As always, verify these characteristics with the manufacturer before purchase.
Understandably, selecting an appropriate mold-preventing paint from a huge collection can be a daunting task for you. But we hope that our reviews of the best mold-resistant paints available on the market will ease that job.
It’s time for us to wrap up today’s guide. But before that, here’s a quick recap of our favorites.
For us, the Rust-Oleum 276087 is the most suitable option, as it ensures mold-free walls and renders a classy and glamorous look to them. Plus, the paint dries in less than 30 minutes, giving you the added advantage of completing the painting job faster.
You can also opt for Fiberlock if budget is not an issue for you. It is the first anti-fungicidal paint that kills existing mold and prevents mold from growing in the future.
Ultimately, it comes to your needs and requirements. So, you will also need to look into your budget and room decor before selecting an appropriate paint.
And we will see you next time!
When we say the word sleek to mind come simple and minimalist designs with neutral or simple color schemes. The beauty of these subtle interiors will take you by surprise as soon as you see them. Their elegance will never go out of style, and your home will never be out of fashion.
In this article you can see the Modern And Sleek Interiors That Will Leave You Speechless, so maybe you'll get inspired for the next home renovation, who knows!
For these designs less is more, so keep that in mind when you start decorating!
Sleek designs are just perfect for the open-floor homes as these emphasize their simplicity, thanks to these simple designs your home look a tad more breathable, bigger and far more spacious.
I'm totally in love with these simple kitchen designs, they are the perfect settings to cook delicious meals!
When you stick to two-there colors in one room you will get a good looking interior that will look clean and stylish. If you decide to go for a simple design expression, remember not to go for lots of colors because you can certainly overdo it!
Sleek kitchens look super expensive and glamorous, this space is dominated by edgy lines that highlight a glamorous, expensive atmosphere.
When it comes to the color of the walls, we suggest you to leave them white as the space will look airy, serene. You can play with a grey or beige statement wall but keep in mind that colors should never challenge the extraordinary neutral atmosphere created.
As previously stated, the neutral color scheme is popular with these interiors, but it's not a mistake to incorporate a lively color that will brighten and enliven the space. yellow through pillows and an ottoman are beautiful chromatic accents in the interior design below.
The clean, edgy lines are common in sleek home designs, if you want to design your home in a sleek design there's one rule worth considering : use no curves!
Keep it simple and you can't go wrong with these interiors, simplicity is the new black. The simple and sleek designs are a hot trend nowadays and it isn't planning to go anywhere soon!
What do you think about the interior designs above ? We would love to hear your opinion in the comment section below !
Having the right cutting tool in your workshop is integral to completing any DIY or professional-grade project.
As such, while you’re choosing a cutting tool, you need to be extra careful to ensure that it’s perfect for the kind of projects that you’ll engage in. But the problem lies in the availability of a huge variety of such tools on the market. This makes users confused between those that are somewhat similar to each other.
Two such commonly confused cutting tools are circular saws and miter saws. Though both of these are highly efficient, they are different in many ways. And many users often tend to choose the wrong one for their jobs owing to insufficient knowledge regarding their features and applicability.
That’s why we’ve put together this guide to clear any such confusion once and for all. So, without further ado, let’s dive right in!
Miter Saw vs. Circular Saw
To clearly understand the differences between these two cutting tools, you’ll first need to have a fair idea about each of them and an overview of their usage. That’s why we’ll begin by giving you a brief introduction to these two types.
This power tool comes with a circular and flat blade that rotates at top speed, enabling you to cut a variety of materials, including plastic, plywood, and metal. Its operation is also pretty straightforward, and you can get it in both cordless and corded variants.
Notably, some users refer to it as the mobile version of a table saw due to the structural similarities between the two.
Another significant advantage of going for this cutting tool is that it’s relatively cheaper than the other high-end power tools on the market. This is why you can find it in nearly all garages and workshops. If you’re a DIYer interested in woodworking or carpentry, you’ve surely come across the handheld version of a circular saw by now.
Specialized for making accurate miter cuts and crosscuts at the desired angle, miter saws also come with circular blades but are mounted on the arm powered by swivel action.
This lets you move the arm, and consequently, the saw to the left and the right to make different angles as per the need. The arm is, of course, locked in place after being positioned at the angle you require. You can use miter saws to cut doors or picture frames, crown moldings, cupboards or fences, window casing, and in many other applications as well.
Differences Between Circular Saws And Miter Saws
Kinds Of Cuts
Miter saws and circular saws are different cutting tools since their working mechanism enables them to make very different cuts.
Firstly, speaking of a circular saw, it’s an all-round tool as it can make a wide range of cuts. This makes it suitable for a variety of jobs. If you are experienced in working with different materials and have a certain extent of technical knowledge, you can use this saw to make almost any type of cut.
In fact, it can even be used to make bevel and miter cuts, for which you’ll normally use a miter saw.
On the other hand, a miter saw is a specialized tool for making angled cuts, as we mentioned earlier. This might make you wonder about the purpose of this type since circular saws can also be used to make miter cuts. But actually, the speed and accuracy of the miter cuts differ a lot, with miter saws giving rise to more accurate cuts at a greater speed.
In comparison, it is more difficult to get an accurate and straight cut using a circular saw. It will actually require a great deal of practice to get the cut right, and the chances of making an error are naturally much higher.
Working Mechanism
Let’s start with miter saws this time. In the case of these cutting tools, the blade drops from above the material you’re dealing with to make the cut.
Note that the blade comes down in a slow and controlled motion, with the workpiece held onto a fence to provide a precise angle for the cut. This angle is between the plane of the longest edge of your workpiece and that of the blade.
Furthermore, this saw has a miter index which lets you change the blade angle with the fence. While the majority of miter saws allow for precise one-degree changes in the miter index, some provide “stops” that let you set the miter index quickly to the commonly used angles.
Coming to circular saws, they use a toothed blade that spins around an arbor-like structure to cut materials of different kinds. Usually, the blades of the saw come in different designs based on the material to be cut. And to keep the workpiece level and steady while it is cut, there is a plate in the middle which surrounds each side of the saw.
Easy Of Use
Any saw, or for that matter, any kind of tool, should ideally be easy to operate. This is why it’s a crucial factor to consider while you’re trying to know the differences between circular saws and miter saws.
Notably, the miter saw is a step ahead of the circular saw in this regard as it allows much greater control during a cutting job while keeping your hands at a safe distance.
Miter saws also let you adjust the direction of the required angles according to your requirements, which is beyond the abilities of a circular saw. As such, you can use this exceptional feature to make a variety of useful fixtures. These include the interesting wooden arrows which are fixed on the wall to enable easier navigation at any place.
Apart from this, certain features common to both the types of saws include finger triggers to operate the blades and a slight kickback when the motor starts functioning.
Versatility
Versatility is one of the most important features that both DIYers and professionals seek in a cutting tool. After all, a versatile cutting tool can manage almost all the cutting jobs that they might have to complete from time to time.
The circular saw outperforms the miter saw with regard to versatility since it is capable of making many different kinds of cuts, as we mentioned earlier. So, having this tool at your disposal is enough for the cutting work concerning any woodworking or carpentry job that you have at hand.
On a side note, the process of achieving a straight rip-cut using this saw is slightly more lengthy than the other cuts. You’ll first have to get a straightedge cut from the edge of a hardboard sheet and then clamp it on the material to utilize it as a jig. Another alternative will be to get ready-made guide rails as that would assist you in making accurate straight cuts.
In comparison, the applicability of a miter saw is limited to only specialized jobs. That’s why it won’t be suitable for making long rip-cuts and cutting large plywood pieces.
Rather, those who are planning to build something that needs a great deal of trimming should invest in a miter saw as it will make such jobs easier, more accurate, and faster. These include projects such as making small tables, other furniture (for the finer trimming), photo frames, and decks with 2x6 or 2x4 wood pieces.
Portability And Storage
Portability is a major factor for DIYers who require working on a range of projects in different parts of the home. It’s also important for professionals who need to travel to different places for their work. As such, you’ll have to consider your needs in this regard before choosing the type to go for.
Circular saws are ahead of miter saws in this criteria as well since they are generally quite small and lightweight. As a result, you can move the former quite easily, especially if you own a cordless one, and can keep it in the car with equal ease.
But for moving a miter saw, you will need to put in more effort as it is much heavier than a circular saw. Speaking of easy storage, a miter saw will need a stand or a table to be stored efficiently. In contrast, a circular saw can be stored even in very limited spaces since it’s quite small and compact.
Cost
When you’ve set a particular budget for purchasing a cutting tool, considering its price is also essential. Generally, circular saws are priced much lower than miter saws, so you’ll be able to find several good-quality models within an affordable price range.
On the other hand, truly efficient miter saws cost significantly more. We’d suggest browsing through sites like eBay or craigslist as you might find some relatively affordable models there.
Prior Skills Required
For using a cutting tool, you should be aware of any prior skills required. After all, that would ensure you can handle the tool properly to achieve the desired results. But this may not be applicable in the case of all types of cutting tools.
For instance, using a miter saw doesn’t require any prior skill but just needs going through the guide coming with the model to understand its operation properly. The setup for this saw is also fixed, and there are multiple functions available such as that for setting up the different cutting angles. All these factors make the usage smooth and convenient.
But handling a circular saw will need more skill since it doesn’t come with such automatic functions as in a miter saw. So, you will need to understand some crucial requirements like the force that needs to be applied, its motion, and keeping the balance while you’re driving it in an angled manner.
Additional Features To Look Out For
Considering that each type of cutting tool is available in lots of variations, here are some additional factors you need to consider while choosing the ideal model.
The Blades
It’s the blades of a cutting tool that ultimately do the job, so it’s a must to take into account the several aspects associated with the blade. Be it the diameter or the type of the blade; these aspects can create much difference in the variety of cuts that can be made using the tool.
You must keep in mind the project you’re working on and the cutting needs for the same to choose a suitable saw. Generally, a saw with a blade diameter of 6-10 inches is ideal for use in home DIY projects. But if you’re working on a more heavy-duty project, it's better to go for a larger diameter.
Power
Both the saws that we’re dealing with are motorized tools, so the power that they use determines their cutting ability through different materials and their working efficiency. So, the higher the power of a tool, the more cutting jobs you will be able to complete. For instance, a high-power saw will be able to cut through quite a few stacks of lumber easily.
But the quantity might not always be a huge concern for a small home project. In that case, you should look for a tool with a reasonable power capacity to match your requirements.
Brand
Irrespective of whether you’re going for a second-hand or a first-hand cutting tool, you should always choose a reliable option. After all, the saw that you’ll buy will be a long-term investment, and you should be sure that the tool is manufactured by a reputable brand in the first place.
If you haven’t dealt with cutting tools in the past, you may not be acquainted with the brands on the market and various aspects associated with them.
In that case, it’s best to inquire about the replacement, warranty, and return policies offered by the brand and check the customer reviews for its products.
To make an efficient choice, you can even discuss these factors with a local woodworker near your place. They'll surely be able to throw light on the brands that can be trusted and offer beneficial policies to ensure maximum customer satisfaction.
Safety Features
Safety considerations are crucial when you’re dealing with cutting tools. Hence, it’s mandatory to check the safety provisions offered in any saw. Note that such safety features will vary based on the model you’re dealing with. There may also be some additional attachments for ensuring further safety of the users.
Precision
You would always want the cutting jobs to be as accurate as possible to ensure the ultimate result meets your expectations. This is why accuracy is indispensable to cutting tools and should always be considered while choosing a suitable saw. However, the extent of accuracy required will vary based on whether a project is light or heavy-duty.
While some miter saws have laser guides or LEDs to enable improved accuracy, circular saws require additional tools for measurement to increase precision.
Safety Tips To Adopt
Getting the most precise cuts at a faster speed for all your projects is, of course, the priority, but ensuring your own safety is no less important. That’s why you must understand and diligently follow certain safety precautions and tips prior to using power tools like circular saws and miter saws.
So, in this section, we’ve compiled all such essential safety precautions and tips for using these two cutting tools.
A. Circular Saw
Performing A Saw Check
Before you start the work, it’s a must to check each and every part of the saw to ensure it’s working in the right manner.
First of all, you should check its retracting lower guard as that will make sure proper retraction as well as recovery. The lower guard is an essential safety feature built into a circular saw. As such, if you spot any defect in the lower guard, you should first get it corrected before using the tool.
On a side note, you should always ensure that the saw is not plugged into the socket while you’re checking it. And if it’s a cordless circular saw, remove the battery before checking it. This way, the saw will never be switched on accidentally while the checking is on.
Using Safe Depth Settings
Setting the depth of cut food matching the thickness of the workpiece is another thing you need to be careful about.
While adjusting the depth, take care to ensure that too much of the blade is not exposed below the workpiece. In effect, the lowermost tooth of the blade must not extend by more than ⅛ inches beneath the workpiece. When the depth of cut is set in this manner, you can always get a safe and precise cut.
Hold It Properly
Holding the circular saw properly is essential for operating it in the right manner and also ensures your hands are always safe while you’re using it. Note that circular saws are available in both right-handed and left-handed variants based on how you must hold them.
So, if you’re a right-handed person, you should always go for a right-handed circular saw. You must hold the main handle of such a saw with the right hand and the knob or auxiliary handle with the left hand. Keep in mind that both hands must not cross each other while you’re using the saw.
But if you opt for a left-handed circular saw, your hands will always cross each other, which is not the ideal case and is also not very safe. Your hands might be sprained accidentally while you’re using the tool. Likewise, left-handed users should always go for left-handed circular saws.
Use A Sharp Blade Only
While you’re cutting any material using a circular saw, you’ll have to direct the tool through the cut and not force it through the material. If you sense that too much effort is needed to make cuts using the saw, or it has to be forced through the material, then you’re applying dull blades in all probability.
Using dull blades will make your cuts imperfect and will require much more effort to make each cut. So, make sure that the blades that you’re using can cut through the material easily.
B. Miter Saw
Use Safety Clamps
Using a safety clamp is crucial while you’re applying a miter saw for your cutting jobs. These clamps secure the wood or any other material while cutting, thereby preventing it from slipping accidentally. So, you can carry out your cutting jobs pretty smoothly without such concerns.
The clamps ultimately ensure the cuts are even, smooth, and highly accurate.
Use Blade Guards
The blade is the part of the miter saw that you should handle with the utmost care, as any negligence might cause fatal injuries. That’s why it’s always better to use safety attachments such as blade guards. A blade guard covers the outer edge of a saw blade and lifts up when the blade touches the material.
Notably, blade guards are available in opaque and transparent varieties. Going for the latter variety is better as it would allow you to see the spot where the blade hits, which is regarded as a beneficial feature by most professionals.
Dust Extraction
The dust that’s accumulated while using a miter saw must be disposed of to prevent it from flying up the ears, mouth, or eyes suddenly. It might also trigger a fire hazard if you don’t remove it from the saw. So, having a dust collection system in a miter saw is really essential.
In case your miter saw comes with a dust bag, you must learn the process of attaching a shop vac to the saw to enable an effective system of dust collection. Apart from providing protection against flying debris, an extraction system also contributes to extending the service life of a miter saw.
Don’t Forget To Depress The Lockout Trigger
A lockout trigger is actually a safety switch on the handle that you must depress to allow the saw blade to spin. Using such a safety feature ensures the saw is never turned on accidentally. So, the saw blade will be turned on only if you press the switch and depress the lock trigger at the same time.
Extension Cords
Though standard miter saws don’t come with extension cords, you will need to use one if you’re working with the saw in different parts of a room. You should note here that it’s essential to check whether the extension cord you’re planning to use can handle the amperage of the miter saw.
Final Words
Don’t you find it much easier to distinguish between a miter saw and a circular saw now? So, pick the ideal one for your projects and get the ball rolling! But if you still have any queries in this regard, feel free to reach out to us in the comments section below.
Before we bring down the curtains, here’s the last point we’d like to share with you. The applicability of circular saws and miter saws is different, as evident from the points we’ve discussed in the article.
While the former can handle more common types of cuts, such as crosscuts and miter cuts, the latter is useful for more skilled and angular cuts. So, neither of the two can be labeled as being superior or inferior to the other.
With this, we’ll call it a day. We’ll come up with some more interesting content soon, so stay tuned!
There has been a recent rise in the number of people buying the "miracle" that is the Himalayan salt lamp. No matter where you look, online or offline, there are believers everywhere. Indeed, people who have already bought it and been using it for some time now, swear by its miraculous healing abilities, the best Himalayan lamps out there make wonders apparently!
Salt lamps are known to cleanse the air of the home they are in and make it more breathable and pure. When turned on, its ions are converted to negative ions, similar to what happens before a rain-storm, and those ions deal with all the pollution in the air that made your lungs weak and you unable to stop coughing.
These pretty little lumps of miracles will deal with your allergy, asthma and mood swings while at it. So, it is no surprise if you are a recent convert looking to buy one of these for your own home or office. But, pretty and effective as they are, you need to take care of a few things while buying them so you can avoid knock-offs and other messes.
Don't Make These Mistakes When Buying a Salt Lamp
Here's a list of things you need to keep in mind so you can avoid making mistakes when buying a salt lamp:
Research well
It stinks, yes, but you need to do these before you spend a big stash of your hard-earned money on these lamps. If you are buying them from an online seller or website, read the reviews and check the ratings. Learn to differentiate between fake and real reviews and proceed accordingly.
Any website that seems to have a crowd of buyers and fans and has a lot of good reviews is usually good to go. If you are still a little skeptical about the usefulness of the said product, read up. The reviews will usually have stories that happy customers have shared after they brought the lamp into the house. There should be a lot of tales of vanishing allergies and better mental health.
This serves two purposes: one, this way you know that the seller is selling the real deal and two, it should convince you of the effectiveness of buying these lamps.
Don't look for cheaper options
When buying an original Himalayan salt lamp, there are no cheaper options. These lamps might not look like it, but they have been painstakingly mined from the vast cavern and tunnels running under the ranges of the mighty Himalayas. This is not just the regular salt you keep on your table.
So, in case you found a seller somewhere who seems to be selling really cheap salt lamps, Houston, there might just be a teeny bit of a problem. Salt lamps are extremely fragile and expensive to transport. That, combined with the mining, means that these cannot come cheap.
If they do come cheap, rest easy knowing that yours is probably a fake, especially if it is a white crystal lamp and not the colored ones. The white salt crystals are rarer and, hence, more expensive. If you get this one cheap, you are not going to be happy to know that it is definitely a fake.
So don't look for the cheaper but the best options while buying these lamps. Don't worry. These last you a lifetime so it's not like you will have to buy another one soon.
Don't go for the brightest options
All that glitters is indeed not gold. As a rule, salt lamps are not very bright by nature. They cannot even hold a candle to your regular fluorescent light, and that's just how it should be. The different crystals of your salt lamp will diffract and refract the light in different ways, so all you should be getting from your lamp is a dull, warm glow and nothing that lights up the entire room.
The heavier and bigger ones usually give off even less light so you have to be careful when you are buying a new lamp. Check if it works as a regular fluorescent light. If it does, go to a different seller because this place is selling knock-offs.
Don't be worried if your lamp weeps a little
If you looked at a lamp at a friend's place and it seemed to be sweating puddles, don't reject their seller thinking something is off. After all, this is completely normal behavior for your lamp. Original Himalayan salt lamps tend to sweat a lot.
What you must remember here is the fact that these lamps are basically big lumps of salt. And this is how salt normally reacts to moisture. So, you will notice a lot of sweating in your lamp if you live in an especially humid area.
Don't worry. You can easily avoid this by leaving the lamp on all the time. The Himalayan salt lamps consume very little energy, so you don't need to worry about the environment or your electricity bills. Also, they are not a fire hazard so you can easily leave them on all the time.
Leaving your salt lamp on all day every day will ensure that crystals stay heated up and do not absorb too much moisture. So you will never face the sweating problem again.
Don't dunk it in water to check its authenticity
Seriously, though, don't. Don't use too much water when checking if the lamp is real. Better yet, use other methods to confirm its authenticity.
Too much water may damage the electrical parts of it. Also, because salt lamps are basically lumps of salt, they do not handle moisture well. So, if you dunk it in water, it will absorb all that moisture and well, melt. At least then you will know that your lamp is real.
So, you see, buying a salt lamp is perhaps less easy than you thought it would be. But hundreds of people who have actually bought it swear that it is worth the effort. Just keep the points above in mind, and you will be good to go.
You need so many things to decorate a good-looking dining room, but do you know what is the first thing that people notice when they enter yours? The dining chairs! That's why we decided to pay special attention to dining chairs, we`re going to talk about them a little today. It's not easy to choose the design of your dining room table and chairs because there are lots of things that you should take in consideration such as design, style, color, comfort and of course quality. If you are having a hard time picking them, and you can't decide on a single design, then we suggest you to choose various of them. The playful game of chairs is a hot trend nowadays, so take a look at the Mismatched Chairs That Will Add A Unique Touch To Your Dining Room.
If you want to try out this trend, but you don't have the guts, then we suggest you to add only two mismatched chairs to your dining table. In this way you will still have mismatched chairs, but you will keep the symmetry and your dining room will still look elegant and gracious.
Mismatched chairs don't always require different designs. Sometimes you can stick to a single design but go for different colors. I really like the gradient change of colors to the chairs in the dining room below. How do you like them?
What do you say about sticking to the same color but going for different chair design? Be creative and go for some fun and modern designs that still tie the whole dining room together.
Three on three! This is the perfect balance for your dining room. The wooden chairs add warmth to the space while the blue ones give it a more modern and contemporary look.
The strong contrast of mismatched chairs looks incredibly interesting and fun and your dining room will never look boring. They will immediately grab your attention and you will be fascinated by their striking beauty.
These chairs will help you add character to the dining room, so take the risk and go for a more dramatic look. Play with different colors and textures, and see how the chairs transform the space with ease.
When you are choosing the chairs for the mismatched look keep in mind to always check the height of each chair and choose chairs of similar height. You probably don't want your guests to bob up and down all over the place.
The mismatched chairs can be found in all of the styles, so don't have second thought about your room, but just go for it.
The possibilities are endless when it comes to mismatched chairs, so let these photos serve you as guidance when you are decorating your dining room.
Light shapes everything in a spectacular manner. Light creates ambiance. Light coming from within an item creates one of the most mesmerizing atmosphere that we can experience. Paper star lanterns gracefully suspended into air, exuding fragility, beauty and sophistication while being lighten from within. Brilliant. Mindblowing beautiful Star-Shaped DIY Lanterns will be covered in the detailed guide showcased below, these are meant to beautify your interior and exterior in a spectacular inexpensive personal manner.
These simple diy masterpieces have been realize using Silhouette but you can use any other cutting technology at hand, laser cutter included. A free pdf template can be downloaded below. The instructions are exactly the same. The guide covers a simple basic star lantern as the one showcased below but you can materialize absolutely any design you envision.
The pieces already cut that have been showcased below are a little different from the ones provided in the template, the ones that you will print and cut yourself. The instructions are the same though and for a better understanding, the three different pieces below have been labeled A, B and C.
Pieces A and C are different because they feature a small hole through which you will introduce a thread that will later tie the star together, they are different because basically piece A wears the hole near the outside edge while piece C wears it in the middle.
Piece C and A will be cut one time each while piece B will be cut three times for this tutorial.
If you have the possibility add dotted lines for a smooth professional fold. You can use a needle to dot it a little yourself if you do not have any other method at hand.
In this tutorial a double-sided cardstock has been used for explanatory purposes, basically the right side is the dark blue one while the wrong side side is the light blue one. After cutting the five pieces of star out of your print, lay them down with the wrong side up and the long flap close to you to begin the folding of the four long folds away from you.
To ensure smooth connections between volumes open the entire piece out again and with the right side up this time fold both short flaps toward you.
The piece A, the one with the hold on the edge, will be the first tasting glue, apply paper glue on the single long flap. You can also apply tape in these areas but the holding power of glue is recommended.
Lay the piece down now and press the outside edge over the glued edge to glue it into place.
Now simply repeat the process for all five points of the start, finishing it with the C piece. If you maintain this order you will basically have them dried in the order you need them for the next step when you are going to glue them together.
Now to glue the five points into the desired shape we should respect the order A-B-B-B-C. This is utterly important because the piece A and C have those small holes adjacent to each other, these pieces will not be glued together. Start with A, which hopefully, is the first piece that you have glued together and apply glue to the two bottom flaps.
Insert the two glued flaps in the interior of another two plain edges, part of a piece B, as shown below.
Hold them into place until they dry out properly.
Repeat the process, apply glue to the two flaps of the piece you have glued on. Repeat the process for all the remaining B pieces.
Now for the ending point of the star it might be easier for you to just fold the entire star accordion like and with caution glue the C piece one flap at a time whilst holding them into place until they dry.
At this point it should as showcased below. Between A and C a gap remained, this will allow you to fold the star flat for storage later on. Most paper lanterns brought from a store will arrive folded in a similar manner. If you want only to hang it and have no intent in storing it later on you can just glue it together for good.
To hang it through a thread or string make use of a needle and a long piece of monofilament thread that looks invisible; insert the needle into one of the holes as displayed below.
The illustration below will explain the procedure better.
Get the needle out through the other hole. This will leave the loop hanging out of the first hole, allowing you to insert the needle back through the loop.
After pulling out the thread simply tie the piece together, closing the gap and offering the viewer the illusion that it "floats" in the air magnificently.
You are done! The extraordinary diy paper lantern has been materialized. It is extremely easy and yet extremely rewardful. What do you think?
Below, through the Silhouette program little stars have been added to beautify the star. You can enlarge the stars or change the model in this one and customize it in a great manner.
The one showcased below had consistent cut outs which have been filled with tracing paper.
The next star is extremely beautiful and delicate yet very sturdy because it has been realized out of watercolor paper, the cutouts have been doubled by tracing paper here as well. Sensible and special.
You can always trespass boundaries and go the extra mile, below different paper lanterns are basically respecting the same thread of thought, both have been shaped out of plain white cardstock yet one has been painted into a copper color.
This last piece has been modelled after Pottery Barn’s Bronze Star Luminary. This as well has been cut from cardstock and spray painted copper. You can now purchase the cutting files for this lantern in the Etsy shop here)
We would love to hear your opinion in the comment section below. This extraordinary tutorial has been the work of Debbie from http://www.meandmydiy.com/ and we would like to publicly thank her for sharing such extraordinary tutorials on her blog, we would like to thank her for the extraordinary amount of knowledge that she shares with the rest of the world.
We can spot pallets all around the home and yard when we are decorating with DIY projects, and we have to admit that they make some awesome up-cycling projects which allow you to have new decorative objects on a low budget. If your budget is limited this Christmas, don't be desperate because you can decorate your home in some pretty stupendous ways by using pallets. You will find these Mind-Blowing Christmas Pallet Projects That Will Give A Festive Touch To Your Home really amazing and would love to give them a try immediately.
If you have pallets in your basement that are just collecting dust, it's time to put them to a good use and beautify your home for the holidays. Everybody is going to love the cheerful and creative ambiance in your home, trust me! Now get some ideas from the photos below!
Making a Christmas wreath has never been easier! Get some pallets, cut them in small pieces of different size, color them in the festive colors and use nails to stick them them together. Add a nice final touch with some burlap and red ribbon!
Does your home miss a Christmas tree this year? The alternative designs that require pallets come in abundance, and you can choose the design you like the best from the plenty of trees in this article.
The pallet Christmas trees are great both for the home as well as your backyard. Do you feel like going big this Christmas with decorations? Fill your yard with these adorable trees and brag to the neighbors that you have done them yourselves! They will certainly envy you and compliment you on the good work!
Express your Christmas wishes in a super creative way by making a sign out of pallets and writing your message on them. It's an unconventional way of saying Merry Christmas that everybody will notice for sure!
I can't describe the uniqueness of all these Christmas trees, and I find it really hard to pick a favorite. All of them look totally fabulous, so see which one will fit the best in your existing decor and copy the design.
Source
Do you love these pallet projects as much as we do? I hope that you have put your eyes on your favorite decoration and that you are going to give it a try pretty soon!
Want to add something different to your house? The good thing is that mid-century style furniture knows no age and does the job perfectly well.
You can add some bold patterns to your plain and dull wall or accessorize the cabinets with some contemporary utensils or glazed pottery. Or, you can just add something like a classy mid-century leather sofa that straight away catches anyone’s attention who enters the room.
Moreover, contemporary furniture like mid-century modern style leather sofas might just transform the look of your living room. And many options are available on the market to choose from. However, if you don’t know much about antique pieces, don’t worry. We have curated a list of recommendations available for you.
Without further ado, let’s dig in!
Top 19 Mid Century Modern Leather Sofas
1. Wells Leather Sofa
This Wells mid-century design sofa looks both modern and rustic, as its cushions are tucked into a slim frame, supported by sturdy iron legs. Its leather is kiln-dried and benchmade using plywood molding or similar techniques to prevent wrapping. And the cushions made from high-resilience foam ensure a relaxing seating or resting experience.
With an 84"Wx35.5" Dx31"H dimension, this sofais a perfect fit for any average-sized room. It is tailored with top-stitching, and the armrests are made of French seams, giving it a classy appearance while also ensuring its durability. Besides, the application of waxes and oils during the finishing results in an heirloom patina, which provides the leather with a glowing look.
It also features FSC certified wood from forests that are managed responsibly to be socially beneficial and environmentally sound. Plus, this mid-century sofa comes in three fabric colors, which are bound to create a timeless look for your room.
Looking to impress your guests? Then this classy mid-century modern sofa by Vonanda, made of handmade leather, will get the job done for you.
The company promises timeless comfort through select leather upholstery and wide arms while also creating a casual yet modern vibe. Its sumptuous cushioned soft backrest and seat with high-density foam provide consistent support and relaxed comfort. Hence, it provides ample space for you to call over your friends and enjoy a game of football together!
Apart from being classy-looking, its Eucalyptus and plywood-made frame provides structural stability and durability. The slender metal legs of this sofa adds to its exquisite elegance and are also easy to clean underneath.
Lastly, you can easily disassemble and transport it through small hallways and doors, which is an added advantage. Overall, this mid-century design modern sofa is well crafted that aligns with your room decor and guarantees matchless comfort to render a stunning look to the room.
This mid-century modern style sofa by POLY & BARK is made of semi-aniline or full-aniline dyed Italian tanned leather cushioning. The cognac tan dyed non-pigmented leather highlights the hide's natural beauty. Over time with use, the leather will scuff to develop into a vintage patina, giving it a glossy and classy look.
Moreover, the leather used for the different parts are unique and vary in color depth. The entire body is supported on a solid wood frame, and cushions are made of high-density foam with polyester filling, which deliver a relaxing sitting experience. Likewise, its legs are made of solid rubberwood with a simple walnut finish for a classy and modern look.
4. Antone 81'' Square Arm Sofa
If you’re searching for a soft, cozy, and welcoming vibe in your room, then this square arm mid-century sofa by Antone may just be the perfect choice. You can spend hours relaxing in front of the TV with your friends or family, thanks to the space on offer.
It’s made from genuine leather with intricate details, meaning the high-quality construction makes it both long-lasting and maintaining them won't be much of an issue. Additionally, the buttoned back cushions, chic tapered legs, and high-quality finishes contribute to the charm.
Apart from that, its removable cushions make sure you won’t lose anything precious under the sofa. The company provides its customers an option to customize the finishes for the wooden legs, with more than 30 options to choose from.
5. Ambler 81” Square Arm Sofa
Spice up your room with this vibrant-colored square arm sofa by Ambler. This mid-century modern style model aligns well with almost any room with its sleek yet attractive design. It’s available in six colors and with three materials options for tapestry. Not only that, but you can also customize the leg finishing according to your preferences.
We loved how the velvety cushion makes for a soft, feathery texture. Besides, the clean and simple look with a generous seating space make it an attractive choice for anyone.
Maintaining a mid-century sofa sometimes feels like a herculean task, as the corners and cushions attract a lot of dust. However, cleaning this couch feels like a breeze, thanks to its removable back and seat cushions. Plus, its square arm design and edgy solid wood legs allow you to play with more geometry in the space.
6. Ari 56.5" Genuine Leather Square Arm Loveseat
This mid-century modern style sofa keeps it classy and straightforward without compromising comfort. It is a perfect piece that stands out within your room and is worth considering if you want a premium-looking yet affordable furniture. Plus, it delivers an opulent look to your living room or office space if used as a central piece.
Italian-made top-grain leather upholstery is the secret behind its flawless look, and the utmost comfort comes from high-density foam-filled leather cushions. Just picture yourself sitting on a sofa with a glass of champagne in your hand and classic songs being played in the background. Heavenly, right?
Aside from that, it’s made from kiln-dried hardwood, which provides some much-needed sturdy support and makes it durable in the long run.
7. Aric 82" Genuine Leather Square Arm Sofa
When solid hardwood is combined with top-grain Italian leather, it results in this luxurious leather arm sofa by Aric. This intricately designed furniture adds a stylish look as well as comfort to your living room, thanks to its feather and polyester fiber cushions.
Furthermore, maintaining it won’t strain your nerves, as you can simply remove the cushions and back seat and use a dry duster to remove the dirt. You don’t have to stress much about the dust deposited on cushions and leather covers either.
The plywood and pine frame provides a sturdy and robust look to this sofa, and the solid wooden leg makes for added durability. Moreover, the webbing suspension ensures that the cushion doesn’t get displaced. Hence, you can now immerse yourself in elegance and comfort without the fear of slipping off the couch.
Overall, this mid-century design sofa offers comfort and relaxation and creates an elegant look for your living room or office space.
8. Lancaster Loveseat
Lancaster Loveseat combines a classic-looking handcrafted mid-century sofa with a modern design that brings a sophisticated vibe to your living room without burning a hole in your pocket. Its detailed design and sleek design will make it the showstopper of any room.
If you are a fan of intricate and small details, the metallic accent of the legs will appeal to you. Available in three color options, it features a button-tufted and single-cushion seat so that you can select one according to your room design. Also, its low-profile multi-density Dacron wrapped foam cushions ensure that you feel comfortable whenever you remain seated.
This hand-crafted and hand-stitched lawson sofa has the potential to win you over at first sight and is a suitable choice if you’re looking for a mid-century modern sofa.
This modern and designer loveseat by Signature design makes your room look stylish and elegant while bringing in comfort. Wrapped in caramel faux leather, it sets the scene for comfortable and easy living.
Its quality-built cushion is made of high-density foam and polyester upholstery, which adds to the comfort. Beyond that, its metal seat base and faux wood finish account for optimum durability.
Aside from a 2-over-2 cushion, it features non-reversible back seat cushions, track arms, chic stitching, bolster pillows, and tapered legs, which add to the mid-century flair. A pro-tip: try adding white faux fur on to this sofa for optimum comfort.
Lastly, disassembling and reassembling this model feels like a walk in the park. Simply attach the legs, and it’s ready to use.
10. Renae Genuine Leather 89″ Tuxedo Arm Sofa
Now feel like a Hollywood personality and transform your living or office space with this mid-century modern style tuxedo sofa by Renae. With mesmerizing details and elegant silhouette, this Italian-made furniture looks more exquisite with time.
The cushions are filled with duck feathers and high-density foam, which ensure you can glide over it for a comfortable experience. Other than that, it boasts a full-aniline or semi-aniline dyed-leather tapestry for a vintage and unique patina, giving your sofa a super glossy look.
Also, with the availability of several color options and diamond-tufted backdrops, it perfectly delivers the essence of mid-century decor.
It is available in five color variants so that you can choose a perfect shade for your space. Long story short, the solid construction, top-quality materials, and a refined look merge in this piece to make your room space stand out.
11. Deirdre Leather Sofa
A stylish mid-century sofa in the center of the room always acts as a focal point, whether you’re watching a cool Netflix show, hosting a game night, or dining with your friends. And this Deirdre leather sofa, designed with sleek features, tapered legs, and a high-density cushion, will serve the exact purpose and help you indulge in style and comfort.
You can keep things classy and simple with this piece. Its genuine leather merges with a solid wood frame to make it fashionable and durable. Additionally, cleaning the sofa also won’t feel like a daunting task when you can just dust the dirt away, thanks to its removable cushions.
12. Lidia 88'' Genuine Leather Square Arm Sofa
The mid-century furnishings enthusiasts will love this leather square arm mid-century sofa by Lidia. Beautiful genuine leather combined with clean lines and tapered legs makes this piece a must-have in your rooms. It will add sophistication and elegance to any home design, so it’s up to you if you want a regular product or one that stands-out from others.
In terms of durability, it features a kiln-dried and solid hardwood frame combined with high-density foam padding that ensures lasting comfort. Also, the mid-century modern style sofa is available in two gorgeous brown shades or a sumptuous gray tone, which perfectly complements the brown walnut legs for an inspired and cohesive design. The Italian-made leather makes it more durable and easy to clean.
So overall, this timeless piece of furniture is all you need for style and comfort. It's time you get cozy and feel inspired.
13. Rivet Aiden Mid-Century Modern Tufted Loveseat Sofa (74”)
Rivet is an Amazon brand that delivers a mid-century-inspired sleek leather sofa designed to impress. Now you get a combination of comfort along with durability with this beautiful piece of engineering.
A tufted bench seat cushion, tapered wood legs, softback cushions provide just the right mixture of contemporary edge and comfort. Along with that, a solid hardwood frame supports high-density foam padding for extended durability.
Like other leather sofas in this extensive list, cleaning this unit is easy due to its removable and reversible back cushion. Its seat cushion is fixed to the base to secure its position and doesn’t slip down. Plus, it comes in a wide selection of colors, so you can select one that fits your room design.
Lastly, an added advantage of this mid-century modern sofa is that it’s easy to assemble. You require only 15 minutes or less to assemble this piece.
Zinus is committed to developing high-quality, comfortable, and easy-to-assemble love seats and leather sofas that deliver elegance to your living room and fulfill your desire to create a dream house. A person on the search for a mid-century modern sofa will love this product.
The upholstery is made of durable fabric, whereas its padded and soft velvet back cushions are made of high-density foam, ensuring a comfortable seating experience. Plus, its hardwood frame wrapped in supportive foam cushioning makes it long-lasting and durable. And it comes with a one-year warranty.
An added advantage of this mid-century sofa is its easy and tool-free assembling. Just follow the instruction manual that comes along, and you can assemble the couch in just 15 minutes without using any tools. Lastly, its removable soft back cushions allow you to clean the unit efficiently within minutes.
The mid-century modern sofa by Modway is upholstered in quality polyester fabric and complements well with your room design. It serves as a center of attraction where you can just relax, watch movies and sports, have a conversation, or sip a steaming cup of coffee or tea.
In terms of construction, it boasts four cherry-colored solid wood legs to deliver a sturdy feel. Along with that, a solid hardwood frame supporting foam back cushion ensures long-lasting durability and added comfort. It always adds a welcome presence in your home.
Many mid-century sofas available on the market require to call upon a specialist or a professional to assemble, or if you’re able enough, it will take a large chunk of your quality time. However, assembling this piece feels like a breeze, as it takes only 10 minutes to do so and wouldn’t need additional tools.
With a futon sofa in your room, there is always a struggle to accommodate other furniture or beds there. But, with a Nouhaus Module convertible mid-century sofa, there is no struggle, discomfort, or settling on a design. With several furniture options and designs, it has taken the comfort of mid-century living to a whole new level. By merging a room couch with a proper mattress, it feels good as it looks.
The mattress is breathable and made of supportive latex, so days of hard crossbars, unforgiving foam, and squeaky springs are long gone. As the piece is “bed at night and sofa at day”, it brings everlasting comfort and functionality into your space.
Now you can easily impress your guests with this beautiful and elegant piece of furniture. Being a luxury piece, you will get upholstery in high-quality and won’t have to settle for less. It also comes in various fabric colors and designs, you can choose one that suits your vibe best.
Many convertible couches present complicated setups and hardware, which badly hurts your fingers. With this unit, you can turn your mid-century sofa into a bed in just three steps. One of those steps is just throwing out your velvet cushions. That’s how easy it is. When the product reaches you, attach the legs to make it a sofa and lounge, in style.
17. Lisson Genuine Leather 85” Square Arms Sofa
In Vintage Brown or Cognac Tan, the square arms sofa by Lisson adds a welcoming vibe to your home. This sofa is so mid-century with a solid wood frame and tapered wooden legs in a gorgeous honey brown shade. You won’t go any wrong with this piece if you’re looking to bring on mid-century styles to the living room.
With respect to comfort, it doesn’t go any wrong with high-density foam cushions supported by Pirelli webbing. Along with that, a pigmented leather tapestry will soothe your eyes. As time goes on, it won't lose its charm, and the gorgeous vintage tone along with full-grain leather highlights its beauty and continues to do so.
18. Mary Genuine Leather Reclining 52″ Square Arm Loveseat
The stylish and comfortable piece of mid-century modern furnishing is an option to look at. A top-notch grain leather and high-density foam ensure durability as well as comfort. Whether you are trying to have a nap after a hectic day of work or just want to have a bucket of popcorn to watch a cool movie, it’s sure to deliver the intended relaxation. Now push back and relax, as this couch can recline.
With respect to the design, hand-stitched details deliver an enchanting look, complemented by the tapered legs with a coffee brown finish. Its appealing color easily blends in and adds warmth to your site.
A mid-century convertible couch bed by DHP Paxson boasts a stylish linen upholstery with a low-profile design that makes it ideal for small living spaces. Being a convertible couch with a soft back cushion, it easily and quickly transforms into a bed. Also, its spit-back design provides multiple comfort positions so that you can have a sound sleep there.
Other than that, its legs are made of solid wood that supports the sofa, and padding underneath it protects your beautiful floor from scratches and scuffs. Its assembly is also pretty simple, which takes 10 minutes.
How To Select A Mid-Century Modern Style Leather Couch?
The primary characteristics of any mid-century modern sofa are its simplicity, shape, natural finishes, impressive crafting, clean lines, tapered legs, and bold colors. With a comprehensive collection of mid-century leather sofas available on the market, you will definitely get overwhelmed. So, continue reading to know more about looking for while shopping for a mid-60s couch.
Simple is beautiful and this furniture is a worthy example of that. If you do not want fastidious and vibrant colored furniture, it is the one you need. Clean lines, sleek design is essential here. These couches are full of angles, texture, woods, shape, graphic design, leather, lines, and whites.
High-level crafting ensures the longevity of your furniture and modern designers are paying utmost importance to the fact. For genuine vibes, we recommend having natural wood finishes amongst which teak is the most popular material to be used in these.
When buying a sofa, ensure the frame is durable enough and the cushion is comfortable enough. Also, if you have seen a picture of a mid-century room, you might have got an impression of floating pieces. The reason is short and tapered legs.
Furthermore, many mid-century style couches are easy to clean so you would prefer that. And, top-grain leather upholstery tends to get better with time in many of them, so it would also be a viable choice.
Final Words
Comfortable and appealing, a mid-century modern-style sofa is worthy of investment. So, if you value sleek design elegance and want to create some antique vibes for the living space, you know what to choose. These pieces are available in an offline or online shop at varying prices so that you can purchase from anyone accordingly.
We hope our extensive list of options gives you some ideas about elements that you could incorporate into home decor. Hope you’ll be able to select an ideal mid-century sofa for your home. We’ll continue to bring you valuable ideas to make your space appealing and glamorous. So, keep an eye on this space.
Is it really that difficult to keep your kitchen utensils organized in one place? Well, not if you get your hands on a kitchen microwave shelf.
Besides helping you store your microwave oven, it can provide ample space to keep other important utensils and appliances. Plus, microwave shelves can add a touch of aesthetic appeal to the décor, which is why they have become a must-have addition in all modern American kitchens.
Hence, going for such a product would certainly be a wise decision. However, with the availability of many options on the market, choosing the ideal model that is space-efficient and easy to assemble is easier said than done.
That's why we thought of making your job easier by putting together a list of the top 11 microwave shelves currently available on the market. So, without further ado, let's begin!
Mind Reader has been manufacturing sturdy kitchen organization accessories for years, and the MIC3T-SIL 3-Tier Microwave Shelf Counter Unit is yet another great addition to its repertoire. It is packed with practical features that help keep your items organized, leaving you more space in the kitchen.
Sleek and Modern Design: The chrome plated metal...
Maximize Counter Space: With three tiers of storage, this...
Why Did We Like It?
For starters, it sports a sturdy construction. It can withstand the weight of microwaves and other kitchen utensils without breaking a sweat. On top of that, it features rubber feet for a non-slip grip, so rest assured, the chances of this metal shelving breaking down are next to zero.
Besides microwave ovens, this metal rack is also an ideal choice for storing other appliances such as toaster ovens. Not to mention, it comes in handy as an organizer for pantry and kitchen condiments, accessories, and utensils. It's safe to say that it is a multi-purpose product and can be used anywhere to create more storage and space.
Additionally, it has a minimalistic design and can easily complement the décor of most kitchens. So, no matter what your kitchen looks like, this item will surely help you to add a touch of class to it.
What Could've Been Better?
While testing out this product for this review-based guide, we couldn't find any significant drawbacks initially. However, soon we realized that it could fit only small appliances on its shelf. So, if you have an extra-large microwave, this product is not for you.
Next up, we have the Kitchen Baker's Rack from Bestier, a brand that is dedicated to designing high-quality products that meet our day-to-day needs. Sporting 4 spacious shelves, this product provides ample room for storing a range of kitchen items such as plates, vegetables, and appliances. Read the next few sections to know about it in detail.
【Multifunctional Bakers Rack】 This kitchen bakers rack...
【Pull-out Design & Extra S Shaped Side Hooks】This wood...
Why Did We Like It?
To begin with, this wooden rack comes with 3 extra side hooks that make it easy for hanging dry towels, cooking spoons, and other small utensils. With this product, you can store and pick appliances such as microwave ovens and stand mixers more smoothly, thanks to the pull-out design of its top-shelf.
As far as the build quality is concerned, it is made using a top-quality P2 board, making it sturdy and waterproof. Coupled with this is a solid metal frame that is strong enough to withstand the weight capacity of your kitchen tools. Hence, you can rely on this product for a very long time.
What's more, it comes with both movable wheels and adjustable feet, so you can assemble it the way you want without a hassle. Most importantly, besides being useful in the kitchen, this product can also be a perfect fit in garages, dorms, apartments, and other areas in need of storage.
What Could've Been Better?
The installation is a bit tough, so you might need to hire a handyperson to assemble it. Also, the instructions provided in the manual are not clear, which makes the installation even trickier. We tried doing it ourselves, but it took a while to get it right.
Founded in 2011 in China, Tribesign is one of the leading manufacturers of top-grade and eco-friendly furniture. On that note, allow us to introduce you to the 5-Tier Kitchen Bakers Rack from the brand that can add more storage to your kitchen, bathroom, or bedroom.
【Everything In Its Place】: Come with a total of 3 bottom...
Why Did We Like It?
First and foremost, it is multifunctional and can be used as a kitchen stand, wine board, bathroom cabinet, spice rack, microwave stand, etc. Rest assured, this product is high on utility and can easily harmonize with other furniture in your room.
Furthermore, this microwave rack sports 2 top shelves and 3 bottom shelves, making it an ideal storage option for eat-in kitchens. It is also suitable for holding ovens, microwaves, and all other kitchenware that you can think of. Needless to say, it'll help keep your kitchen tidy.
Beyond that, it is super easy to assemble. You won't require any professional to put together this beautiful kitchen shelf, just follow the step-by-step instructions and set it up instantly! Lastly, you'll be glad to know that it is backed by an 18-month warranty, so you don't have to worry about damages for the first 18 months of its purchase.
What Could've Been Better?
We don't have much to say against this exceptional microwave rack except cry out against its steep price tag. So, if you are on a tight budget, it may not be what you are looking for. Other than that, the product met nearly all our expectations, so we'd recommend it.
Our next item is the Pusdon Extendable Microwave Oven Rack, which can be adjusted according to your requirements to conveniently store a microwave oven or other appliances and save space. From our experience with this product, we are confident that you'll be delighted with what it has to offer.
Expandable Microwave Rack! The length of this microwave...
Easy to Assemble! Pusdon extendable kitchen counter shelf...
Why Did We Like It?
The most notable feature of this product is its durable carbon steel construction, which is both anti-rust and heat resistant. Due to its stable build quality, it has a robust load-bearing capacity of up to 55 pounds. So, you can put a variety of items on it such as bottles, microwaves, dishes, condiments, and a lot more.
It also comes with all the necessary instructions and tools that make the installation a breeze. And unlike ordinary microwave shelf wall mounts, it doesn't require any drilling, all you need to do is place it on a flat surface, and you are good to go.
Furthermore, we loved its retractable design that offers additional storage space and allows the rack to adapt to the size of nearly all microwaves with ease. So, no matter how big or small your microwave is, it'll fit just fine.
What Could've Been Better?
First of all, we didn't find any information related to the warranty offered by the manufacturer, which is quite annoying. So, we can't tell for sure if it is secured by a warranty or not. Other than that, we felt it lacked visual appeal. As such, people in search of aesthetically pleasing racks may not choose this one.
Pros
Sports a durable build quality
Installation is super easy
Offers decent storage space for microwaves of all sizes
Anyone searching this list for an affordable yet sturdy microwave shelf can't go wrong by choosing the MaxxCloud Microwave Oven Rack Kitchen Shelf. Sporting an aeronautical aluminum body, this product can truly hold weight up to 80 pounds. Want to know more? Then keep reading.
The dimension wall-mounted rack is 23.6'' x 15.5''(60cm x...
Why Did We Like It?
An affordable combination of durability and longevity, this rack shelf has the potential to easily stand the test of time. It comes in two sizes: 23.6'' x 15.5'' and 19.6'' x 15.5'', both can bear weight up to 80 pounds. This means you can keep all your kitchen essentials in one place.
We were also impressed by the sleek and simple design of this product, which makes it stand out from the other options mentioned on the list. The simplicity of the design further allows users to use it in different spaces such as kitchens, bedrooms, and dorm rooms without looking odd.
Lastly, we liked that it comes at a budget-friendly price, ensuring it delivers good value for money for the customers.
What Could've Been Better?
Unfortunately, the installation of this product is not that simple. Why? Well, for starters, it doesn't come with an assembly instruction manual. And on top of that, the seller cannot be contacted for any assistance, we tried calling them several times, but they just didn't take our call.
Therefore, we suggest hiring a professional to get the installation done.
Denkee is a renowned home appliance brand dedicated to developing and manufacturing high-quality and premium home essentials. And the 5-Tier Kitchen Baker's Rack from the brand is certainly no different. This product features an adjustable height design and lets you make the most of its storage space to keep your home organized and tidy.
First things first, the shelf is easy to install. You can set it up in no time with just a simple wrench. Besides, all the metal storage shelves are sturdy and don't wobble at all, so you don't have to worry about it falling apart after it is assembled.
In addition, what deserves to be mentioned is its adjustable height design, which enables you to adjust the height of each shelf as per your requirements. This shelf rack can expand your storage space both vertically and horizontally to keep it tidy, neat, and organized.
As for the build quality, it couldn't be more sturdy. This storage shelf is constructed using dent-resistant carbon steel, which offers superior durability and strength. As a result, it can hold up to 500 pounds of weight, which is undoubtedly a lot!
Finally, it features 360-degree universal wheels underneath, which makes it pretty convenient to move and easy to position.
What Could've Been Better?
Honestly, this product exceeded our expectations in pretty much all aspects, and we don't have much to complain about. However, we would have preferred it if it came with small lips around its edges to ensure the items don't get pushed back and fall off. But other than that, it is truly a rack worth paying for.
We'll not be wasting any time introducing you to Mind Reader, as we've already included a quality product from this brand. As far as the 1TCOUMIC-BLK Microwave Oven Rack Shelf is concerned, it can help keep your utensils organized, leaving you enough room in the kitchen.
Save counter space: This microwave and toaster oven rack...
Sturdy construction: This chrome-plated utility shelf is...
Why Did We Like It?
The minimalistic design of this product is what caught our attention right from the get-go; it ensures it can match most kitchen spaces easily. Plus, with this rack in your kitchen, you can easily keep all the essentials organized vertically, which allows for more room in the kitchen.
The build quality is sturdy and can easily take the weight of small appliances such as small microwave ovens and toasters. On top of that, it comes with plastic hanging hooks, which you can use to hang lightweight items such as oven mitts. Sounds impressive, doesn't it? Keep reading; there's more to it.
Since it is made of metal, it's fairly easy to clean; all you need to do is wipe it with a soft cloth, and you are done. Overall, it is one of the top-rated microwave shelves currently available on the market.
What Could've Been Better?
A few users complained that some of the plastic hooks were missing from the box; instead of 6, they got only 2. So, make sure you check all the parts of this product thoroughly to ensure that all of them are in the box.
Our next product is a microwave shelf from the house of Lanliebao, a relatively newer brand. But don't let that fool you into thinking that it is not good; in fact, it is a notch higher than a lot of options on this list. So, let's find out what it brings to the table.
Say Yes to A More Practical Kitchen - Get these industrial...
Simplify Your Routine - These supreme stainless steel wall...
Why Did We Like It?
This premium stainless wall shelf can be used to store a range of items, which saves space and the time you would spend in finding the items. It can withstand weight up to 120 pounds and can easily hold small things like plates and spoons to heavy kitchen appliances like microwave ovens and toasters.
Furthermore, it is easy to install, comes with minimal hardware, and can be effortlessly assembled by DIYers, which is an added advantage in our opinion. What's more, it is corrosion-resistant, and hence it can last for years to come without rusting.
However, the best part about this product is that it sports a universal design, so it can be used anywhere, from kitchens to garages to janitorial rooms, you name it. Additionally, it comes in various sizes, allowing you to pick the one that meets your requirements.
What Could've Been Better?
While testing out the product, we noticed that the microwave oven didn't sit right due to the large gaps between the bars, which is quite disappointing. But if you can look past this minor flaw, we bet you will be most satisfied with the results.
Now that we are approaching the end of the list, here's another microwave rack from Armocity that you should consider. Featuring 3-tier open storage shelves, this product allows convenient access and extra storage to various items in the kitchen. Now, obviously, there's a lot more to it, so keep reading.
【Good Choice for Your Kitchen】Armocity microwave stand...
【Kitchen Space Saver】The kitchen rack with 3-tier open...
Why Did We Like It?
Straight off the bat, it comes with 3 open storage shelves, which provides ample storage space for your dishes, spices, utensils, pans, vegetables, and other kitchen items. Coupled with this are 10 durable hooks that can be used to hang gloves and towels, making your kitchen neat and organized.
Coming to the build, it is durable, having a high-quality wooden construction and a sturdy frame that is meant to provide stability and a long lifespan to this product. So, don't worry, it is a long-term investment that won't need to be replaced anytime soon.
Users who are not good at pulling off DIYs will love that it is easy to install. Not only is the structure of this product simple, but it comes with a detailed instruction manual to help users install this kitchen organizer in minutes.
What Could've Been Better?
In all honesty, the packaging choices of this shelf could have been better. When we removed the product from the packaging, it was covered in fiberglass, which was annoying. We had to clean the entire room after installing it. Apart from that, we don't have any gripe against this product.
Pros
Sports a durable build quality
Installation is super easy
Can be used to store a wide variety of kitchen items
If you are searching for a product that looks different from other ordinary kitchen racks and microwave shelves, then you would love this item for sure. Meet the Stainless Steel Microwave Shelf from AmGood, which can hold up to 200 pounds to ensure your microwave stays safe and secure on it.
Dimensions: 18 in. Deep x 24 in. Long x 11.5 in. High....
Made with 18 gauge 430 rust resistant stainless steel.
Why Did We Like It?
The most advantageous feature of this unit is its build quality. It is made using 18-gauge stainless, which makes it tough and durable. As a result, it can easily support both lightweight and heavy ovens without any difficulty whatsoever.
Furthermore, it is available in 3 sizes, giving you the option to choose the one that would best suit your requirements. No doubt, it will help you keep your microwave within reach. Another thing that we liked about this product is that it takes up less space than a conventional stand or a microwave cart, which is nothing less than a bonus.
Even though it is not an adjustable shelf, it can easily withstand up to 200 pounds of weight. So, you can rest easy knowing that your microwave oven will be secure and steady.
What Could've Been Better?
Unfortunately, this product doesn't offer much in terms of aesthetic appeal. Yes, it does look different than conventional microwave and counter space shelves but fails to add a touch of elegance to the décor. So, this is not for those that want their racks to turn heads.
This list would have been incomplete without the Ideaglass Microwave Oven Stand. It is a handy kitchen organizer that can help you get double or even triple storage space in your kitchen. So, let's dig a little deeper.
Oven Spice Stand: Microwave rack easy to store medium size...
Thicken Iron: Made of 3.5mm iron. Strong, maximum load to 40...
Why Did We Like It?
The best part about this product is that it is suitable for any storage, be it a bathroom, kitchen, or study room. Besides, it is easy to assemble, so you can set it up wherever you want in less than a minute for convenient storage.
Apart from this, it is built durably with multiple layers of protection for a longer lifespan, which is great. Even though it's not the largest in size, it is powerful and can easily withstand the weight of various items such as bottles, condiments, canned foods, and bread makers.
What's more, it comes with an anti-slip footpad, which prevents it from slipping or scratching the counter space. Overall, it is one of the best-selling microwave shelves out there.
What Could've Been Better?
The only thing we didn't like about this product is that it doesn't come with an adjustable shelf, which is kind of a bummer if you ask us. But apart from that, we didn't find any downsides to this otherwise exceptional product.
Pros
Sports a durable build quality
Has an eye-catching design
Can be set up anywhere for storage
Reasonably priced
Cons
Doesn’t come with an adjustable shelf
Microwave Shelves Buying Guide
We are pretty sure that by now you’ve gone through all 11 products, so were you able to make a choice? Well, it’s not that simple. In order to purchase the right microwave shelf, there are a few factors you need to consider. Fret not; we have explained all of them in detail in the following few sections, so keep reading.
1. Number Of Shelves
Ensure keeping an eye on the number of shelves your product comes with. If you only intend to keep the microwave and nothing else, then you can go ahead and buy a model that offers limited space. However, we would suggest opting for a model that comes with 2-3 shelves at least.
Trust me; these shelves will come in handy as they can help you manage your kitchen utensils and appliances more efficiently. So, the more the shelves, the better.
2. Material
Most microwave shelves are made of three materials: wood, metal, and steel. While metal and steel provide durability, wood adds class to your décor. However, the prices vary depending on the material. If you think you can take care of a wooden shelf, go with it. Otherwise, metal and steel are good options as well.
3. Weight Capacity
While purchasing a shelf, you’ll see different weight capacities mentioned on different models. Usually, they are between 50 pounds and 500 pounds. Needless to say, the more the weight capacity of the model, the heavier items it can hold. So, make a choice depending on your needs.
However, more often than not, it’s best to go with a model that offers a higher weight capacity instead of a lower one.
Verdict On Microwave Shelves
Before we sign off, we'd like to mention our favorites from this list. So, let’s do a recap.
The Mind Reader is the best choice overall, as it sports a durable construction and offers good value for money. Closely following this model is the Bestier Kitchen Baker's Rack, which is a great option if you are looking for a shelf with a pull-out design and can be used in various other places for storage.
And if you want a microwave shelf that is easy to assemble and high on utility, we highly suggest going with the Tribesigns 5-Tier Kitchen Bakers Rack.
On that note, it is time to call the curtains. Until next time, bye!
The interlock switch is connected to the door latch to ensure that the microwave oven only works when the door is closed.
When the interlock switch isn't functioning, the microwave doesn't recognize whether the door is open or closed.
This issue is relatively common, often caused by a faulty door switch.
To fix it, you will need to repair or replace the microwave door.
Remember
Unplug your microwave and ensure the capacitor isn't running before attempting to repair your appliance.
Faulty Door Interlock Switch
A microwave door tends to have two or three interlock switches that enable uninterrupted functioning.
A proper door switch activates power to the other microwave components and interrupts power when the door is opened.
The interlock switches are attached to the door latch. Metal prongs connected to the interlock switches detect whether the door is open or closed.
In case of an open door, the prongs are responsible for ensuring the microwave does not turn on. As a result, a faulty door latch can mess up the interlock switches' mechanism.
The primary issue with this kind of malfunction is that the interlock switches remain pressed even when you open the door.
It means that when the door opens, the lamp relay closes to turn on the light AND the fan. Usually, only the light should be triggered.
Warning
A faulty door can result in burn injuries for microwave users and can even affect nearby electronics.
Heat-Sensitive Switches
Some microwaves have switches that are heat-sensitive.
Even trace amounts of heat from your hand or other appliances can trigger the switches.
To prevent this, keep your faulty microwave away from potential heat sources (e.g., stoves,hotdog rollers) and use a cold object to press the buttons.
If this method resolves the problem, then heat may be the cause. Otherwise, it can be a different issue altogether.
You can also repair a faulty door by replacing the switch. In some cases, you may have to get multiple switches replaced.
Be careful with the electrical parts and discharge the terminals of the high-voltage capacitor before you begin disassembling.
Take Note:
A microwave can still shock you even if it's unplugged!
Follow this guide if you plan on replacing or fixing your faulty door switch at home:
What You’ll Need
Screwdrivers with different bits
Replacement switch
Extra switches
Optional silicone spray
Step-By-Step Guide
Remove the cover at the top of the microwave. Don't attempt to open up parts of the door since you don't need access to that area.
Disassemble the mounting screws of the control panel and circuit board using the screwdriver. Check the microwave's manual to know which screwdriver to use.
Take out the panel covering the control board or the keypad. The circuit board, which controls the microwave, lies behind this panel.
Unscrew the screws of the front electric panel to access the switch assembly. You can find the switch assembly between the control panel and the hollow of the microwave.
Depending on the model, you might find multiple switches. GE microwaves typically have a monitor switch and two more relay door switches.
Carefully remove the switches with black ends from the switch assembly.
To find the faulty door switch, test each button by pressing on them.
If the button sinks down and gives a click, then it's working. But if the switch remains flat, you'll have to find a replacement.
Remove the old switch and install a new one when you've found the faulty part. Identify the exact model, buy, and install it.
To install the new switch, attach it to the wire connector and snap it until it fits.
Ensure the switch is aligned to the frame as you secure it with screws.
Place the control panel back and reassemble the parts back. Simply reverse the process to replace everything.
Plug the unit and test whether it is functioning correctly by heating room-temperature water.
Open and close the door to check whether the fan and the interior light are functioning correctly.
You know you've fixed your microwave when the fan no longer runs while the door is open.
If it still turns on even with the door open, there might still be issues with your unit.
Contact a professional or contactcustomer servicesif the same issue persists.
How Does a Microwave Fan Work?
Much like other electrical components of a microwave, the fan gets triggered when the door latch connects with the switch.
A faulty door switch can affect the functionality of the fans.
Most microwave models in the market have two fans. There's the vent fan that filters out the steam from the stove of the built-in microwave.
There's also a cooling fan circuit on the right-side panel that regulates the temperature of high-voltage components.
Look for the Fan Motor
You can find the motor belowthe oven lamp.
Most modern microwaves, like a GE microwave, have three switches.
The primary interlock switch (bottom switch) and the lamp relay on the control board need to be closed for the motor to work.
Microwave Fan Is Running FAQs
Below are related questions about malfunctioning microwaves:
Why Does My Microwave Fan Turn On by Itself?
If you notice your microwave automatically running without your intervention, it’s most likely due to the change in temperature.
Your microwave may have a built-in thermostat that detects temperature changes that can be harmful to your unit.
It will set off the cooling fan and keep running until your microwave cools.
Is it Safe for My Microwave Fan to Turn On when the Door Opens?
A microwave that’s running when the door is open is a potential health hazard because it emits microwave radiation.
Exposure to high levels of microwave radiation can cause painful burns.
However, if only the fan is on, it should be fine, as it’s a different operation with a separate switch.
If your microwave is malfunctioning, it might be a case of faulty switches and latches.
The switch may be pressed permanently, causing different electrical parts of the unit to turn on automatically.
Repairing the microwave yourself is doable and convenient! Just be careful when accessing each component, and keep your unit unplugged.
But if you'd rather have a new microwave, check out this article on what size microwave you need for your kitchen.
Who doesn’t like a hot plate of food after a hectic day?
Fortunately, you don’t need to wait for more than a few minutes for hot food with microwaves around. While heating food has become a piece of cake with microwaves, keeping the dinner plates from breaking inside the microwave is a different story altogether.
Regular ceramic plates cannot withstand the high temperature inside the microwaves and tend to crack and break more easily.
Moreover, you can’t use particular plastic or paper plates as they’ll melt or burn at high temperatures. And that’s where microwave-safe plates enter the picture. With these, you can safely heat food in the microwave without worrying about breaking the plates.
But, choosing suitable microwave-safe dishes can be overwhelming. So, we’re here to talk about the best microwavable dishes to help you with your decision.
The first product on our list is the dinnerware set from Amazon Basics. It is an 18-piece set that includes microwave-safe dishes and bowls. The modern and elegant design will go beautifully with any dinner table setting and is ideal for a warm and hearty meal with your family during the festive seasons.
18-piece dinnerware set in White Porcelain Coupe provides...
AB-grade porcelain combines a lightweight feel with durable...
Why Did We Like It?
Never judge a book by its cover. Although the saying is true, we were initially attracted to the elegant and modern design of this white coup-colored set that can go well with any modern dinner table decor.
And it is not just about the looks; the dinnerware material is AB-grade porcelain that is perfect for everyday use. The high-grade porcelain dinner plates and bowls are both lightweight and durable. Plus, the dinnerware set contains dinner plates, dessert or salad plates, and bowls that are enough to serve six people, making it ideal for small family gatherings.
Additionally, the AB-grade porcelain makes the dinnerware set freezer-safe, dishwasher-safe, and microwave-safe. Not to mention how the plates and bowls can easily withstand a temperature as high as 575℉ without getting any cracks. Hence, you need not worry about cracking these plates every time you try to use them for heating the food inside a microwave.
What Could've Been Better?
The only drawback to this dinnerware set is that it has only enough pieces to serve six people. A single set cannot be of any service in large family gatherings. So, if you’re planning to entertain many guests for a lovely evening dinner, you may need pieces from other sets.
Next up is the beautiful multicolor rice bowl or soup bowl set from Duoluv, which is entirely eco-friendly. The bowls are made from organic and natural wheat straw fibers and do not contain plastics or other toxic materials, making them a sustainable and fashionable solution.
The most impressive feature of the bowls is their durability. That said, they are almost unbreakable, even if you drop them on the ground. And the sturdy dinnerware material makes them microwave and dishwasher-safe. Also, the bright colors of the bowls are beautiful. So, if you have kids at home, they’ll have a fun time eating from these colorful bowls.
Furthermore, they are safe for kids as they contain no harmful chemicals or plastic. The organic materials ensure the health of your kids and the entire family. Plus, they are incredibly lightweight, which makes it very easy to handle these bowls for everyday use.
What’s more, you can simply use soap and warm water or chuck them inside a dishwasher for a thorough cleaning. Additionally, the bowls are suitable for microwave ovens as they do not become too hot. Moreover, they are deep enough to be used as cereal bowls, rice bowls, or even soup bowls without any spills.
What Could've Been Better?
Although the bowls are microwave-safe, they cannot withstand high temperatures for a long time. You won’t face any problems if you’re trying to quickly heat a bowl of soup. However, these bowls might start to melt inside the microwave in the case of more intense and prolonged heating of food.
The third product on our list is the microwavable cookware set from Rapid, which makes cooking your favorite bowl of ramen much easier. Indeed, gone are the days when you needed a pan and a stove to cook delicious instant noodles.
ONE TOOL TO RULE THEM ALL - You won't need stoves or boilers...
EASY PEASY COOKING - Enjoy hassle-free cooking with our...
Why Did We Like It?
This microwavable cookware is ideal for cooking ramen if you’re running late and have less time on your hands. Cooking ramen has never been easier — all you need to do is add the ramen with some water and chuck the bowl inside the microwave oven, and you’re done. It is that simple and hassle-free.
Also, the dinnerware material makes this bowl a perfect choice for reheating food in the oven. If you’re feeling lazy and not in the mood to cook, you can use this microwavable bowl to reheat the leftover food from last night after taking it out of the freezer.
Moreover, cleaning the cookware is super-easy. It is dishwasher-safe, so you can just put it inside the dishwasher if you don’t have the time to scrub it with soap and water. Thus, to sum it up, this product is excellent for microwave use and can save you a lot of time and energy while cooking.
What Could've Been Better?
While the bowl is ideal for quickly whipping up a delicious and warm plate of ramen in the microwave, it is not suitable for long-term uses. So, if you’re thinking of using this bowl for heating food for years to come, think again, as it is not designed for long-term uses.
Moving on with our list of best microwave-safe plates, we have the microwave collection noodle bowl from Sistema. It is ideal for cooking noodles, pasta, stew, soup, and many more dishes. In other words, this versatile cooking equipment does away with the need for pots, pans, and stove tops.
Noodle Bowl designed to cook pasta, Soup, stew, and more in...
Steam release vent on lid allows for splatter free heating
Why Did We Like It?
The noodle bowl is entirely safe for use as it is made of 100% virgin plastic-free of phthalate and BPA. Also, the plastic material makes it microwave-safe. So, you need not worry about ingesting harmful chemicals every time you heat or use this bowl for cooking.
Another nifty addition is the easy-to-use locking clips that help keep the food fresh and hot. On that note, the product can double up as a lunchbox. Additionally, the high-grade plastic material of the noodle bowl ensures that the cookware stays cool to the touch even after reheating. It also comes with easy-lift tabs to safely open the bowl.
Moreover, the noodle bowl has a steam release vent on the lid, which prevents the food from splattering everywhere during heating. Thus, you can rest assured that it won’t leave behind any unwanted spots inside the microwave oven.
What Could've Been Better?
Although the noodle bowl comes with easy-to-use locking clips, it is not exactly leakproof. If you’re using the bowl to store food in the freezer, you won’t face any trouble. But, if you’re planning to carry food in this bowl for traveling, be sure to pack dry food to avoid spills.
The fifth product on our list is the beautiful wheat straw 16-piece dinnerware set from Narve. It is 100% organic and eco-friendly and comes without toxic, harmful substances. In fact, the dinnerware set is BPA-free and contains food-grade PP material to make it increasingly sustainable and safe for use.
Dinnerware Set: Contains 32 pieces of lightweight,...
Microwave and Dishwasher Safe: Plates and bowls are...
Why Did We Like It?
The 16-piece dinnerware set has a rich and elegant design that can go well with any modern dinner table setting and tableware. Apart from the stylish design, the set is extremely lightweight, making it ideal for everyday use.
Plus, it is completely non-toxic and free of any harmful chemical substances; the wheat straw fiber makes this dinnerware 100% organic and eco-friendly. Furthermore, the material is almost unbreakable, even if you drop the plates. On that note, this durable plastic material makes it a microwave-safe dinnerware set.
Additionally, the set comes with 16 pieces of different plates, bowls, and drinking glasses, which you can use on different occasions. So, if you are planning a family gathering or a picnic with your kids, this dinnerware set can be a perfect choice.
On top of that, the manufacturer offers a 100% money-back warranty with this product.
What Could've Been Better?
Getting off food stains from this dinnerware set can be a messy ordeal. It is suitable for serving kids’ food, but if you’re planning to serve spaghetti or spicy food on these plates, you’ll have difficulty removing the stains after dinner. That said, it takes up food stains very quickly and turns yellowish after a while.
The next product on our list is the dinnerware set from Stone Lain, which comes with a hip and trendy stoneware design. The stoneware material offers an earthy and organic feel to the dinnerware set. The fashionable and cool design of the set makes it an ideal choice to amp up your dinner table decor.
16-Piece Dinnerware Set - Stoneware is hip, cool and trendy....
Dinnerware Service For 4 - Includes 4 round dinner plates, 4...
Why Did We Like It?
We were majorly attracted to the stoneware material of the dinnerware set. It is unlike any other dinnerware material that we've come across. The stoneware offers an organic look to the set that is both unique and elegant. Furthermore, the color combination of green and cream goes beautifully with the stoneware design of the dinnerware set.
In addition to all that, it is perfect for a small family gathering. It comes with four salad plates, four dinner plates, four bowls, and four drinking glasses. Hence, the dinnerware set is ideal for serving four people at a time at any dinner party.
Plus, when we talk about the stoneware material, it is not just about its elegant look but also about its high quality. The dinnerware set is made of top-quality stoneware that offers excellent durability to the pieces. And that's why this is one of the best microwave-safe dinnerware sets. It is also dishwasher-safe, so you'll hardly face any trouble cleaning it.
What Could've Been Better?
Although the dinnerware set is quite attractive and microwave-safe, it is not lightweight. It weighs 23 pounds, making it heavier than other microwave-safe dinnerware sets. You need to be very careful while handling it so that you don't drop and break the set owing to its heavy weight. Hence, it is not suitable for everyday use.
The seventh product on the list is the microwavable dessert bowls from Mora Ceramics that come in an attractive vanilla white color. They have a solid pattern that reminds you to hit the pause down on your busy life and have a pleasant and peaceful meal. This bowl set also comes with a lead-free ceramic glaze.
IT’S TIME TO HIT PAUSE AND EAT: This is more than a bowl....
LEAD FREE ALL NATURAL GLAZE: We know that lead is a poison,...
Why Did We Like It?
Mora ceramic plates are made from ceramic that comes with 20% stronger Paladin clay that adds to the durability of the oven-safe plates. They have no added colors or other toxic substances, so you need not worry about ingesting any harmful materials while using these bowls. These ceramic dinner plates also come naturally lead-free, ensuring your safety.
Additionally, the design of the bowls helps you to save space while storing them in your kitchen cupboard. You won't even need to clear up any extra space. You can just safely tuck them in a corner. The clean and modern design of the ceramic bowl also makes you enjoy your meal a little more. Also, the rounded edges of the bowls make them chip-resistant.
Plus, the crystallized scratch-resistant formula makes the bowls ideal for daily use. You also get superb customer service and easy refund and replacement with this product. If you are not happy with the product, you can simply contact the customer service team and apply for a refund or replacement. It is that simple.
What Could've Been Better?
Even though the bowls are microwave-safe, they tend to get a bit too hot if you keep them long inside the microwave oven. They are safe for quick heating. But, if you're planning to use these bowls for prolonged and intense heating, they might crack inside the microwave. So, you have to be extra careful while using these bowls in a microwave oven.
As we move on to almost the end of our list, we have the high-quality glass casserole from Zyer that is ideal for preparing microwave food. It is made from tempered glass, which is often considered the best dinnerware material for making hot food inside microwave ovens. So, it can be a great choice if you're looking to buy new oven-safe cookware.
MADE FROM TEMPERED GLASS: This glass casserole dish can...
2 IN 1 DESIGN: The lids as serving dishes too so they will...
Why Did We Like It?
The most attractive feature of the glass casserole is that it is non-porous and doesn't attract any food stains or absorb any food odor and flavor. You don't have to worry about the glass casserole turning yellow after a while due to food stains.
The non-porous glass material also makes it very easy to clean the casserole. You can simply use some soap and a sponge or just put it in your dishwasher. Furthermore, the glass lid helps avoid splattering the food while cooking. It also helps to keep the food fresh and store it safely in the freezer.
Plus, it is an all-purpose glass casserole that can be used to cook delicious chicken stews to mouthwatering baked potatoes. It has the perfect size to whip up a sumptuous meal for your family without any hassle. Additionally, the glass casserole is a space saver. You can stack your dinner plates and bowl over the flat surface of its glass lid.
What Could've Been Better?
The major drawback of this microwavable casserole is the substandard quality of the glass material. It is not made from food-grade tempered glass, which naturally questions the durability and safety of the product for preparing food inside the microwave oven. So, you might notice cracks and breaks on the glass casserole owing to its poor quality.
Finally, the last product on our list is the wheat straw dinnerware set from Homienly that comes with 20 pieces of unbreakable microwave-safe plates, bowls, and cups. The set is reusable and 100% BPA-free. It is non-toxic, odorless, and environment-friendly. So, it can be a healthy alternative to regular ceramic plates and dinnerware sets.
20PIECES & 4 COLORS: This dinnerware set(service for 4)...
Why Did We Like It?
The dinnerware set is reusable and made from sanitary wheat straw fiber, making it completely eco-friendly. The synthetic structure of the wheat straw is highly durable, which makes the dinnerware set literally unbreakable. So, rest assured, it won't break that easily if you drop it like a regular porcelain dinner plate.
Furthermore, the 20-piece dinnerware set is ideal for hosting a large dinner party. It is available in four different colors, adding to its attractive factor. Also, the modern style and design of the set help it go with any tableware decor.
And most importantly, it is extremely lightweight and safe for microwave ovens and dishwashers. It can withstand a temperature of 248℉ for five minutes inside the microwave. Additionally, you can use it safely in the dishwasher for two whole hours. It is also more than adequate for dinner parties, picnics, and even camping trips.
What Could've Been Better?
The only thing that irked us a bit about the product was the size of the bowls and cups that came with the dinnerware set. When you purchase a dinnerware set, you expect cereal bowls. But, these bowls were more like dessert bowls or soup bowls at best. And, the cups were in no way like regular coffee mugs. They were much smaller, which can be an inconvenience.
Pros
100% natural material
Unbreakable structure
Dishwasher and microwave-safe
Multiple uses
Cons
Bowls and cups are pretty small
Microwavable Dishes Buying Guide
There are a number of factors at play when we talk about selecting the best microwavable dinnerware set. You can't just randomly choose a dinnerware set based on a whim. It can be a pretty time-consuming task.
So, to make your job easier, we have discussed some of the key features that you can consider before making the final purchase. Let's take a look!
1. Material
You get a lot of options here - stoneware, porcelain, microwave-safe plastic, wheat straw, and even-tempered glass. These materials can be perfect for cooking and heating food in the microwave.
Stoneware dinnerware sets are pretty tough and durable. In comparison, wheat straw dinnerware sets are 100% organic and natural without harmful toxic substances. So, it comes down to your preferences.
2. Utility
Well, if you're buying microwavable dishes, utility is a significant factor to consider. You can't use porcelain or stoneware dinner sets for cooking purposes. They can only be used for heating and serving food.
However, glass casseroles or wheat straw bowls can be used for whipping up quick ramen or stew. So, it is best to decide whether you want cookware or a dinnerware set before selecting and purchasing the product.
3. Design
When it comes to selecting the right microwave-safe dinnerware set, design plays a major role. You want the dinnerware set to go with your dinner table setting.
Beige or white-colored porcelain dinnerware sets are always a safe option. They come in a modern and elegant design that usually goes with any dining room décor. So, try to choose a dinnerware set whose design will go well with your existing tableware.
Verdict
Choosing a suitable dinnerware set that won’t break inside your microwave oven can make you waste hours on pointless window shopping. Anyhow, we hope our article has helped you gain a better perspective regarding the best microwavable dishes that are trending in the market today.
If you ask us about our favorites, we’ll point you straight toward the Amazon Basics and the DUOLUV dinnerware sets. They are attractive, durable, and won’t crack inside the microwave oven. So, go ahead with our top picks to prepare and serve a fresh and hot oven-cooked meal today.
But, you can always roll up your sleeves and do some more research before choosing your favorite microwavable dinnerware set.
And on that note, we’ll be signing off. Let us know about your favorite microwavable dinnerware sets. Take care, and we’ll see you next time!
Buying the perfect cookware set can often be quite tricky as there are so many options out there on the market.
However, in this article, we have focused only on Mauviel and All-Clad. Both these brands produce some of the top-notch cookware on the market. Mauviel is a premium French cookware brand, whereas All-Clad is the biggest cookware producer in the US.
Apart from this one fundamental difference, there are several others that you need to be aware of before making your buying decision. Both Mauviel and All-Clad are very premium brands, so you must know all the nitty-gritty before you think of investing in one.
We are pretty confident that this informational guide will make it a lot easier for you.
So, without wasting any further time, let us dive right into it!
Mauviel vs. All-Clad | All You Need to Know
Mauviel Cookware
Mauviel is one of the best brands that manufactures copper cookware. It was founded by a French artisan, Charles Mauviel, in 1830. Famous chefs from all over the world strongly recommend this brand of cookware, and since it is French, it is highly classy as well.
Not only are Mauviel products beautiful, but they are handmade too. So, when you are buying Mauviel cookware, you are buying a piece of art, in a way.
Some of the famous Mauviel products are M'Heritage, M'Minis, M'Tradition, and M'Passion.
Advantages Of Using Mauviel Cookware
In this section, we will look at two of the biggest advantages that Mauviel cookware offers.
Made Of Copper
The biggest advantage of using cookware by Mauviel is that they are made of copper. Copper conducts electricity and heat better, and therefore, it becomes the number one choice for chefs and cooking enthusiasts.
Copper heats up and cools down very quickly but it does not have the ability to retain heat, unlike stainless steel or iron. Hence, giving you the power to control the temperature. However, copper is very useful while cooking on one-pans as they require heat changes very quickly.
Overall copper is a very good conductor of heat, but it is also a very malleable material, which is why you need to take extra care of it.
Super Elegant
Besides being very productive, Mauviel's products are also famous for their elegance; they are like showpieces for your kitchen. However, keep in mind that the exterior of these cookware demands regular polishing to maintain the shine.
M'Heritage is Mauviel's most popular series of copper collections. Note that Mauviel M'Heritage cookware is not totally made of copper. The exterior is made of copper, whereas the cooking surface and the handles are made of stainless steel.
As you know, copper is a highly reactive material that is why the cooking surface is made of stainless steel.
All-Clad Cookware
All-Clad is a famous American brand of cookware that was founded by metallurgist John Ullam. It specializes in producing stainless steel cookware.
Moreover, it is not like most American brands that get their products manufactured in China; instead, it produces all its products right here in the United States.
It does not matter if you are a newbie or a full-time chef; All-Clad ensures that all your cooking needs are met. Some of its famous products include Copper Core, D3, and D5. All these cookware sets are made of highly durable stainless steel.
If you do not want stainless steel, we recommend you check out their C4 Copper collection. They feature a copper exterior and a steel handle; the combination of durability and heat conduction takes your cooking experience to the next level.
Advantages Of Using All-Clad Cookware
Here, we discuss two of the most significant advantages that All-Clad Cookware has to offer.
Stainless Steel Makes Them Highly Durable
All-Clad cookware is made of stainless steel, which makes them highly durable. But, do keep in mind that the core is either made up of aluminum or copper because stainless steel is not a good conductor of heat. All-Clad ensures that the exterior is made of stainless steel to offer durability, whereas the interior is made of a layer of either aluminum or copper.
Another advantage of stainless steel is that it is non-reactive, which is why you can cook acidic food on it like tomatoes. Unlike copper, the little fragments of metal do not stick to your food.
Furthermore, stainless steel does not require high maintenance or regular polishing to prevent rusting. It also does not require extensive cleaning; just water and dish soap do the job.
Ability To Switch
One of the biggest advantages of using All-Clad cookware is its ability to switch from stove to oven. A few recipes require this kind of treatment, and All-Clad makes sure that this happens without any problem. You can easily use them with a temperature up to 600 degrees Fahrenheit.
Similarities Between Mauviel and All-Clad
Even though both these brands are a lot different from each other, they have certain similarities. In this section, we are going to take a look at the top three similarities between these products.
Warranty
Both these brands offer a limited lifetime warranty on all their products. This warranty safeguards you from any fault on the manufacturer's end.
Durability
Both Mauviel and All-Clad offer extremely high-quality material for their products that ensure they last a very long time. This makes it very easy for us to handle them on a day-to-day basis.
Mauviel and All-Clad are famous for copper material and stainless material, respectively, that are bound to last you for a lifetime. Products of these brands are often passed onto the next generation in families.
Cleaning
Even though both Mauviel and All-Clad promise to be dishwasher safe, we strongly recommend that you wash them with your hands to avoid scratching or causing any harm. Dishwashers usually generate a lot of heat which may tarnish your cookware.
Comparison
Below we have compared some of the key features of Mauviel and All-Clad cookware. This will give you comprehensive knowledge of both brands.
Design
Mauviel and All-Clad are poles apart when it comes to design. The most noticeable part is the exterior; All-Clad flaunts brush steel or polished exterior; on the other hand, Mauviel's exterior is made of copper.
The stainless steel used in manufacturing All-Clad cookware is eye-catching and sophisticated, making it perfect for most kitchens. Mauvile's cookware looks more like a showpiece as the eye-catching copper takes its visual appeal to the next level. However, they may not match well with a conventional kitchen.
The Mauviel M'Tradition lineup presents some of the most prepossessing cookware with a special kind of hammered finish, whereas all cookware by All-Clad features smooth finishes and not any hammered finish.
However, the popular D3 collection by All-Clad offers flared edges to secure dip-free pouring. The mini D3 design is perfect for apartment kitchens. Besides maximizing space, it helps in the organization of the kitchen as well.
Mauviel does not offer flared pouring rims in any product. Flared rims are prone to spills, but they do a fantastic job in transferring food to the plate. They also provide the option to choose from a wide variety of handles like bronze, iron, and steel, whereas in All-Clad products, handle options are limited to stainless steel only.
While some prefer the bright stainless steel look of All-Clad, others may prefer the hammered copper polish of Mauviel cookware more.
Overall, it does not matter which brand you choose as both of them are capable of offering functional yet prepossessing designs.
Price
Both Mauviel and All-Clad are premium cookware brands. So, do not expect budget-friendly options from them. You do not buy cookware every month so consider it as a long-term investment. The cookware that these brands provide are some of the best in the business, and they will last you a lifetime.
One of the main reasons both these brands are so expensive is their production houses in the United States and France. Labour is not cheap in these countries, unlike China, and also the materials used for production are of top-notch quality, so you pay a premium price.
Normally, Mauviel cookware costs more than All-Clad's, but it mostly boils down to the model that you are comparing.
Frying Pan Shape
The pan shape affects the cooking a lot, in fact the shape of a pan decides the cooking surface area, ease of use, and liquid evaporation. As far as Mauviel is considered, it looks a lot like a conventional french skillet. The cooking surface area is 7.25 inches wide, but it does not come with a pouring lip.
Coming to the pan shape of All-Clad, it is one of the best. The lip of the pan is rounded, which lets you pour pan juices quite easily. Furthermore, the cooking area is 7 inches wide, which allows you to cook big amounts of food.
Weight And Thickness
The thickness of cookware mostly depends on the number of layers it comes with. Mauviel uses only two layers, one is of stainless steel, and the other one is of copper, whereas All-Clad uses several layers of 3 layers of metal.
Mauviel frying pans weigh around 1851 g and are between 2.40mm and 2.45 mm thick. Mauviel frying pans are slightly heavier than All-Clad because of the copper build quality. Copper ensures that your food is less prone to steaming.
On the other hand, All-Clad frying pans weigh just around 1253 grams and are thick by 1.66mm. It features three layers of metal which include aluminum, stainless steel, and copper and is relatively thinner than Mauviel, which means it heats up pretty quickly. All-Clad pans are great for making sauces.
Cleaning
Cleaning is an important factor while choosing the perfect cookware for your kitchen. However, most premium cookware sets are not dishwasher safe, so, we strongly recommend washing the cookware with your hands.
Since Mauviel is made of copper, it is not at all dishwasher safe. The copper polish is bound to become dull with the passage of time. To bring back the mirror-like finish, you need to polish it on a regular basis. All in all, Mauviel cookware requires high maintenance.
All-Clad cookware is dishwasher safe, and the stainless steel does not lose its gloss. However, we recommend you wash it with your hands since it may get scratches in the dishwasher.
Mauviel vs. All-Clad: Top Cookware Sets Compared
In this section, we have compared some of the best models of both Mauviel and All-Chad. We strongly advise you to read this part thoroughly to have a better understanding.
M'Cook 5-Ply vs. D3
The M'Cook by Mauviel features a 5-ply construction. More the layers, the better it is for increased warp resistance and efficient heat distribution.
The All-Clad D3 does not fall behind either; in fact, it is one of the best stainless steel cookware available on the market. It features a 3-ply construction, consisting of a layer of aluminum which is sandwiched among layers of stainless steel.
The bonding and cladding technology of this cookware ups the game by providing better heat distribution. The heat flows evenly throughout the cooking surface, which eliminates the chances of the bottom portion getting deformed.
Both models feature drip-free rims to keep your sides clean. The handles are made of stainless steel, which makes them extremely durable. Talking about the D3 model by All-Clad, it can stand a temperature of up to 600 degrees Fahrenheit whereas M'Cook By Mauviel can withstand temperatures up to 680 degrees Fahrenheit.
We have decided to go with Mauviel's M'cook as it sports a superior built quality and can withstand higher temperatures in the oven.
M'Heritage Copper Vs. Copper Core
These two models are for people who take a keen interest in design and are also more than willing to pay for it. Mauviel's M'Heritage and All-Clad's Copper Core are two of the most expensive sets of cookware on the market. Both M'Heritage and Copper Core offer a lifetime warranty.
Both Mauviel and All-Clad took different ways to make use of copper in their cookware. The M'Heritage copper features a 2-ply construction that includes 10% stainless steel on the interior surface and 90% copper on the exterior.
All-Clad decided to do things a little differently by sandwiching a layer of copper between stainless steel and aluminum.
The copper line gives it a very modern look, but Mauviel wins the race when it comes to looks. Both these models are oven-safe. However, the copper body of Mauviel only lets it work on induction cooktops.
We have decided to go with All-Clad's Copper Core because it works on all stove tops.
M'Cook 10-Piece Vs. D5 10-Piece
Both these cookware sets deliver superb performance and are two of the most popular cookware sets available on the market.
Mauviel's M'Cook has a slight edge over All-Clad D5 as it can withstand temperature up to 680 degrees Fahrenheit, whereas D5 can stand up to 600 degrees Fahrenheit.
Both cookware sets feature drip-free pouring rims and are suitable for all cooktops. However, the difference lies in the contents of each set. Mauviel is kind enough to include a non-stick pan which comes in really handy when cooking fishes or eggs.
All in all, both cookware sets do a decent job. We have decided to go with Mauviel's M'Cook as they provide a non-stick pan with its set.
The Winner
Both Mauviel and All-Clad offer some of the best cookware sets in the whole world. So, choosing a single brand is really quite a task. Both these brands belong to the premium category, and hence they offer exceptional design and quality. If you purchase either of them, you have already made a good choice.
However, the perfect brand totally depends on the budget, the cooking style, and the design expectations. If you prefer the look of copper and want your frying pans to be able to heat up and cool down quickly, we suggest going with Mauviel.
If you are more into conventional-looking cookware sets that require very little maintenance and last a lifetime, go with All-Clad.
Our group of experts has used both these brands for a few days, and according to them, All-Clad beats Mauviel cookware. The reasons are pretty clear and simple. Firstly, All-Clad cookware is way more durable than Mauviel cookware; the stainless steel does not disappoint one bit. If you can maintain it properly, it will serve you a lifetime without any doubt.
Even though Mauviel's products look elegant, our experts did not like that these cookware sets need to be maintained daily. You need to polish them almost every day to keep their shine intact and most home cooks do not have the time to do all that.
Furthermore, All-Clad is the world's leading brand in producing stainless steel cookware sets. While All-Clad's products are expensive, they are also very cost-effective. So, we recommend you buy All-Clad cookware sets.
Frequently Asked Questions (FAQ)
Below are some of the frequently asked questions regarding Mauviel and All-Clad that needed answering. We suggest you go through these questions and answers to further clarify all the doubts.
Are both these cookware oven-safe?
Yes, both these brands are oven-safe. Most All-Clad products can withstand temperatures up to 600 degrees Fahrenheit, whereas Mauviel products can withstand temperatures up to 680 degrees Fahrenheit.
Should you use copper for cooking?
Copper is known as one of the best conductive metals on the face of the Earth. They require a very short time to heat up, and the heat distribution is very even. However, keep in mind that they react with food that has a high acidic concentration.
Does the thickness of the copper pan affect cooking?
Yes, the thickness of the pan does affect cooking; in fact, the thicker your copper pan is, the better it is. For best results, a copper pan should be at least 2 mm thick. We do not recommend thin copper pans as they may heat up quickly but will leave spots. Thicker copper pans tend to distribute heat in an even manner.
Another advantage of using thick copper pans is that they have good thermal capacity. Thicker copper pans take time to heat up, but they have the ability to store more heat than thinner copper pans.
Why are Mauviel cookware sets so expensive?
There are several reasons why Mauviel cookware sets are so expensive. Firstly, they are manufactured in France instead of China; the manufacturers ensure that the highest production standards are maintained.
And moreover, Mauviel cookware sets are like pieces of art; the sheer beauty of these products will take your breath away. Mauviel values tradition and heritage, which is apparent in the craftsmanship of its M'Heritage cookware sets.
Why are All-Clad cookware sets so expensive?
All-Clad is one of the leading manufacturers of cookware sets in The United States. They are popular for their clean stainless-steel aesthetic. The Copper Core line up of this brand features a five-ply construction.
Coming to the cooking surface, it is made of 18/10 stainless steel. The exterior is made of 18/0 stainless steel, whereas the core is made of aluminum with copper sandwiched in between. All these factors make All-Clad cookware set one of the most expensive cookware sets in the world.
What factors determine the price of cookware sets?
You must know by now that not all cookware sets are priced evenly. Some are affordable, whereas some belong to the premium segment. There are certain factors that determine the prices of brands. They are:
Construction quality
The construction quality of cookware sets hugely impacts the prices. In general, multi-clad cookware is priced higher since multiple layers of metal are involved in the construction.
Material used
Cookware sets made of expensive materials such as copper and stainless steel tend to be more expensive than cookware sets made of economical materials.
Brand value
The brand's goodwill plays its part in determining the price of a product; it is no different when it comes to cookware. Brands like Mauviel and All-Clad have a long history and tradition of serving top-notch cookware. As a result, they come at a premium price.
Country of manufacture
Brands that are manufactured in Europe and The United States are more expensive because the cost of labor in these countries is higher than in China. And, also the materials used in these countries are of better quality.
Where can you buy them?
You can buy both brands of cookware sets from their respective websites. They are also available on e-commerce stores such as Amazon, Williams Sonoma, Wayfair, and Macy's.
What is the process of cleaning a Mauviel pan?
Cleaning a Mauviel pan is very simple; you have to soak it in soapy water for at least 15 minutes and then use a sponge to rub it. Keep doing it until the copper pan becomes shiny. We strongly advise you against using a dishwasher as Mauviel products are not dishwasher safe.
Conclusion
There you have it! That was all you needed to know about Mauvielvs. All-Clad. Both these brands offer some of the best cookware sets in the world.
However, do note that being more expensive does not mean better quality. You need to take into account other factors before making the buying decision, such as the construction quality and durability.
We hope this guide has given you some valuable information regarding Mauviel and All-Clad cookware. For further queries or feedback, kindly leave a comment down below.
With that, we wish to take your leave. Until next time!
When it comes to architectural design, it is not simply engineering; it is an art. For this reason, buildings do not look similar though their sole purpose is to create a living space. A roof of a building is essential both aesthetically and structurally. A roof is the most vulnerable section of a building which protects against environmental hazards like ice, snow, rain, hail, fire, and heat.
There are various roofing styles like Mansard, and different roofing styles became extremely popular. Though the Mansard roof style came into existence in the 16th century, it was widely popularized in the early 17th century and made many comebacks even after the period. The Mansard roof is also referred to as a curb roof or French roof.
What is a Mansard Roof?
Definition of Mansard Roof
A Mansard roof is a type of roof characterized by having four slopes, two of which are nearly vertical and two of which are much more shallow. It is often used to create additional living space on the roof, especially in older and more traditional buildings.
When it comes to technical terms, you can call a Mansard roof to be a four-sided hip-style gambrel roof. A gambrel roof has two sides with two slopes, and the bottom slope is much steeper than the upper slope. The hip roof style features straight, gentle slopes extending downwards on all four sides to the walls. This structure is more like a tent. So, if you combine these two styles and have a four-sided roof with two slopes with the upper slope flatter than the bottom one, a Mansard roof is created.
Being flatter, the upper slope of the Mansard roofs can rarely be seen from the ground, and it provides maximum space beneath the roof. The dormer windows extend on the lower slopes of the Mansard roof typically like the gambrel roof architecture which creates a habitable area often referred to as a garret. The Mansard roofs can be convex, concave, or straight-angled in shape.
This structure gives you a traditional look and is most commonly used in barn houses. In Germany and France, both Mansard and gambrel roofs are referred to as Mansards.
The steep-sided style and the double-pitched styles are the two primary styles of Mansard roofs. The drainage system of water and snow makes the key distinction between these two styles. The longer and sharper the slopes are the better will be the drainage system. The double-pitched style, on the other hand, forms a reasonable drainage system as compared to the former.
Slate tiles and wooden shingles are the stereotypical materials used for making a Mansard roof and people who love the conventional way, prefer to use these materials while other types of tiles and shingles can also be used for increased durability and cutting down maintenance costs. So, you can use zinc or copper shingles for the steeper part of the roof. If you are using asphalt shingles, you need to use them in a regular pattern.
This design of Mansard roofs is not only used in some famous historical buildings, commercial buildings, or private homes but also used in locomotive designs as well because it gives an added usable space in a typical train car. The Australian Commonwealth Railways CL class and two Victorian Railways hopper wagons featured Mansard roofs.
History of Mansard Roof
The Mansard roof was popularized by the famous French architect, Francois Mansart (1598 - 1666) who used this distinctive style in many of his works. During the Baroque period (1600 - 1750), he used this technique of roofing extensively to create chateaus and grand townhouses which caught the eyes of the people. The term “Mansard” means a roof that has two slopes on all four sides where the lower slope becomes steeper than the upper one and was named after him. You can also use this term to refer to space or attic under this kind of roof structure and not just only the shape of the roof.
However, Francois Mansart was not the creator of this unique style. This accreditation goes to Pierre Lescot (1510 - 1578) who used this roof style in 1550 as a part of the Louvre Museum, the largest art museum in the world in Paris, France. After the initial popularity, the Mansard roof was revived during the re-building of Paris and became an extremely fashionable feature in architecture for most of the buildings during the Second Empire (1852 - 1870), a period during the rule of Napoleon III.
The usage of the Mansard roof in architectural designs became so increasingly popular that it was not limited to only in France. It was used in England and Italy and later spread in the entire Europe. Slowly, the Mansard roof style was adopted to construct buildings in many other Western countries including Canada and the United States of America since it was relatively easy to repair hail damage to roofs due to its design. It was commonly used on Victorian-style mansions and other grand homes. The roof has become less popular in recent years but is still seen in some modern homes.
The roof is favored for its distinctive look and its ability to provide extra living space at a smaller cost while still offering increased living interior space, insulation, and footprint efficiency combined with unique aesthetic value. The roofs are also a good choice for areas prone to heavy snowfall since the steep pitch helps to shed snow.
Mansard Roof Advantages
Extra usable space - You will always want to add a few stories or make an attic inside an existing building with almost zero need for extra support and masonry. The Mansard roof gives you that luxury as it provides you the additional space because of its virtually vertical slopes. Even if you need an extra master bedroom, you will have the flexibility to include one when it comes to comparison with using other popular styles of roofing like Hip roofs or Gable roofs. So, if you are planning to add rooms in the future to your existing home, choosing the Mansard roof will be a perfect choice which will give you that extra space required.
Suitable for both rural and urban areas – The Mansard roof is ideal for both rural and urban areas as it suits well in any kind of property creating a usable space. This style is primarily preferred in urban areas as it gives you the option to expand upward because you will generally not get the space to expand your building outward.
More light and better heat distribution - The dormer windows are most commonly used as they stretch along the full length of the bottom slope allowing more natural light to enter. Also, this additional space created with the use of the Mansard roof supports efficient and superior heat distribution which makes the building more comfortable.
High-class look with modern design elements - This classical and elegant style of roofing which is an important part of the French architecture that became increasingly popular during the period of the Renaissance not only gives you the option of the flexibility of adding more rooms but also gives a sophisticated look. Modern builders use quality insulation and specialty materials to create Mansard roofs which can last longer than other roof designs while the Mansard roofs of older times primarily used non-resistant and heavy materials. With no need to worry about rusting or parts falling off from the roof, you can enjoy the modernized Mansard roof in your business or home.
Cost savings - The Mansard roof not only helps a lot to save your costs from building a separate room or attic in the usable space which it creates but also cuts down your heating costs as it distributes the heat evenly in your building with proper shape and sealing. If the framing is made of metal shingles, it increases durability and also maximizes the sealing of the roof. Though initially, it would cost more for the setup, it will save a lot of money for maintenance in the long run. Also, the modern design elements of the Mansard roof make it affordable for homeowners.
Mansard Roof Disadvantages
Challenges from local laws - There might be different requirements for getting a permit to use this Mansard style of roofing depending on your area. There may be different taxes that are implemented in various locations as the Mansard roofs add to the total square footage of the building. Also, in some locations, there is a restriction set in the height of the Mansard roofs in order to protect against any structural damage. So, if you are planning to use the Mansard roof design, you need to research thoroughly the local laws that apply to this style of roofing.
Long-time involvement and high installation cost - It takes longer to install a Mansard roof with more materials and labor as compared to other roofs. Also, the process to build a Mansard roof is quite complex and requires the involvement of specialists in the field because you will not want the quality to be of a lower standard. These things add to the increased installation costs and difficulties which can be a huge problem for homeowners wanting a Mansard roof with a low budget. If you are using metal shingles for building a long-lasting Mansard roof, it will lead to even higher installation costs though it will support your maintenance costs in the long run.
Low weather resistance - The Mansard roof is not ideal for resisting extreme weather conditions like areas receiving heavy rainfall or snow. Due to the flatter upper slope, the drainage system of the roof is not good enough. Water or snow can accumulate which can result in dampening or leakages from the roof. The roof may even fall off in case heavy snow gets accumulated which can be tragic.
So, homeowners will have to keep an eye during heavy rainfall or snow in order to protect their roofing and building.
High maintenance and repair costs - With low resistance to extreme weather conditions, this roofing system also needs to be well maintained and kept in regular check which adds to high maintenance costs. In stormy areas, a lot of debris will get collected on the flatter portion and if not cleared over an extended period of time, it might cause damage in the long run. As you need experts with this roofing style, it not only adds to higher maintenance and repair costs but for some, it might become a hassle too.
The protruding design of the dormer windows causes more exposure to the environment, so they will often require maintenance. They are prone to develop structural problems or damages if neglected. This will add to increased maintenance costs and will become a burden on your energy costs as well if you have faulty dormer windows.
Mansard Roof vs Gambrel Roof
Many people confuse the mansard roof type with the gambrel roof type; however, these two roof types have distinctive features that you can recognize when you look closely. Gambrel roof architecture is a version of a gable roof, but the gambrel roof has two slopes on each side, rather than the one slope on a typical gable roof.
This style of roofing is not common on homes, but you can see it on barn houses and on Scandinavian design homes occasionally.
A mansard roof is a hipped roof, similar to the gambrel roof in that it has two angles on each side, but it has a roof on all four sides of the house, rather than just two, like a gambrel roof.
There are four main types of mansard roof designs that are commonly used:
Straight mansard roof - This type of mansard roof has a nearly vertical lower slope and a smaller upper slope that may not be visible from ground level. Dormer windows are often added to provide natural light and ventilation to the upper floor.
Convex mansard roof - With this style of mansard roof, the lower slope curves outward, resembling the shape and curvature of a bell. This design provides extra space in the attic rooms which makes the interior space feel airier, and cozier too.
Concave mansard roof - This French Roof type features a flat upper slope and a steeper lower slope that curves inward and thus it doesn't offer as much space as other mansard styles. Regardless, it has a rich architectural history and was commonly used in historic mansions and heritage buildings.
S-shaped mansard roof: This roof style combines the convex and concave roof lines, starting with a curve inward and finishing with a curve outward.
Mansard Roofs Design Considerations
Types of shingles on the Mansard roof
Roofing materials are different from house to house but mansard roofs require a specific type of roofing material due to their slope, and exposure to harsh weather conditions, waterproofing needs on this type of roof are extremely important, and a bit more difficult to create a tight seal between shingles on steep surfaces.
Traditionally, mansard roofs were covered with slate tiles, which could be precisely positioned by the roofer to facilitate water drainage and also provide an aesthetically pleasing look. Thanks to the advancement of manufacturing technology, in recent years, synthetic shingles or lightweight wooden options like cedar shakes have gained popularity thanks to their reduced weight and resistance to sliding down the roof over time.
Asphalt shingles or metal tiles are options as well but although they may be cost-effective, some experts caution that asphalt shingles may be too heavy for a mansard roof's slope.
Climate
Mansard roofs are ideal for areas with cooler climates as they allow for extra insulation and boost extra protection against the elements but are not ideal for extreme conditions with a lot of rainfall and snow as the flat portion at the top can cause water infiltration issues.
The extra attic space and the slope of a mansard roof can help keep a building warm in the winter and cool in the summer.
Building Height
The height of the building is an important factor when considering a mansard roof. The roof’s steep pitch will require a taller building for it to look aesthetically pleasing but it also maximizes the interior space of the building.
The extra height provides more usable space inside the building, as the slanted walls of the mansard roof provide additional storage and living space, this aspect is the driving factor behind the popularity of the mansard roof since its inception.
Cost
Mansard roofs are more expensive than traditional roofs due to the extra materials required for their construction such as additional insulation. The labor costs associated with building a mansard roof can also be higher than those for a regular roof but so is the interior space obtained, the extra height of the building necessary for a mansard roof will also add to the overall cost but it maximizes the interior space without changing the building footprint.
Homes with Mansard Roofs
The mansard roof type stands out from all other roofing styles due to its regal beauty and unique aesthetics and brings to the table the potential for more interior space.
We have gathered some stunning photos of mansard roofs, both outside and inside to exemplify that mansard roofs have an elegant, familiar look worth considering, cast a glance.
Mansard Roof Exteriors
A mansard roof is easily identifiable due to its distinctive design and iconic look, the mansard-style roof has been around for centuries and is still popular today, appearing on both old and new buildings, let's take a look at some examples.
A large historic home built in red brick cladding stands tall. A front porch, bay windows, and a splendid blue metal roof add to the charismatic home above showcasing its concave mansard roof. Several large windows bring natural light into the loft area of the concave French roof.
Straight mansard roof
Another red brick urban home, now with a straight mansard roof featuring grey shingles, the straight mansard roof featured on this modern townhouse has a small upper slope not visible from the street level. This mansard roof one could argue misses the historic charm but it's an extremely fitting roof style for a modern home, one that many architects are embracing today.
Convex mansard roof
A rounded mansard-style roof is an example of how architectural design changes the built environment, a simple curvature adds extra space in comparison with a straight roof and is embellished greatly with roundness.
To say that mansard roofs are not used that much anymore is not an understatement, but the historic style still is extraordinarily present in heritage sites and is popular still in Europe, where square footage is more expensive and the cost of a single mansard might be lower than a regular roof.
In the example above the straight mansard roof with gray metal slates allow the addition of rather large windows and creates linearity in the vertical plane, greatly emphasizing the windows below through the contrast of the metal sheets whilst complementing them with the window proportions.
Mansard Interiors
Mansard roofs have come into existence to boost interior spaces, and here they are today, doing just that. When you add a mansard roof, you encounter advantages and disadvantages but you certainly gain additional living space that can be anything, from storage to artist studios, you name it.
In this Chalet in Krkonoše designed by Znameni Ctyr Architekti, small bedrooms can be found on the higher levels, most of which are attics and mansard roofs. These bedrooms receive natural lighting through smaller windows in the gables and dormer windows, while technical windows in stone pedestal walls complete the overall look.
Office in an upper loft
via InStyle
These days, a single mansard roof space can become an open space office, as people often take advantage of the extra square footage to create a sensible, secluded workspace. The flat roof can be fitted with large skylights, making this space incredibly bright and perfect for pretty much anything.
Benefits of Installing a Mansard Roof
The French roofs or Curb roofs are known for their energy efficiency, as they are designed to keep heat in during the winter and keep it out during the summer. This can help to reduce energy bills, as the roof will act as an additional insulator. Mansard roofs also have a longer lifespan than other roofing materials and are not as susceptible to damage from severe weather. A françois mansart is relatively easy to install as it does not require complicated framing or engineering and adds additional interior space with reduced costs.
Last but not least, thanks to its unique design, a mansard roof can add a sense of style and character, and charm to a home, and thus it still is a desirable choice for homeowners today, centuries later.
What is the Mansard Roof FAQ
What is the purpose of a mansard roof?
Mansard roofs were created and designed to maximize upper-story space while minimizing the amount of taxes paid due to the height of the building. Therefore, builders were able to add additional room without increasing the overall height of the building and thus, reduce the amount of taxes they had to pay.
Are mansard roofs good?
Mansard roofs provide extra loft space compared to hip or gable roof designs, making them an attractive option in terms of aesthetics. However, there are some drawbacks to consider before investing in a mansard roof, as with any other kind of roof the biggest of which is the added building complexity and the need for better waterproofing and overall superior, more expensive construction materials.
What is the life expectancy of a mansard roof?
Mansard roofs equipped to sustain snow and rain can last up to a century, whereas asphalt tends to last between 20 to 30 years. Copper is often used due to its resilience to damage caused by heavy snow and rainfall.
Why are French mansard roofs gray?
The primary roofing material for most French roofs is sheet metal, either zinc or copper, when these materials are exposed to the elements they are weathered, zinc takes on a gray color and copper will become light green in hue.
Is a mansard roof a hip roof?
Yes, a mansard is a type of hipped roof, consisting of four sides with a gambrel–style design.
Is a mansard roof flat?
No, a mansard roof is not flat but it does have a smaller slope of around 30 degrees, which cannot be seen from street level, thus appearing flat. The small portion at the top, the flatter portion at the top, which is not flat, is the reason why mansard roofs are not recommended in areas with a lot of snow.
What pitch is a mansard roof?
The mansard roof has two slopes to consider – the lower one with an angle of about 70 degrees, and the upper one with an angle ranging from 30 to 36 degrees.
Do mansard roofs need gutters?
Gutters are the best way to control drainage from upper roofs, but not all mansard roofs were built with gutters at their base. Therefore, at times, we must find alternative methods to direct the water away from these roofs or spread it out over a larger area when working with a historic building equipped with a mansard-style roof.
Conclusion
As we come to a conclusion, it is pretty evident that the biggest advantage you get with Mansard Roofing is the flexibility of adding rooms in the future due to its distinctive design. Even after knowing all the disadvantages, many people in the modern world prefer Mansard roofs for their advantages and a traditional classy look.
Undoubtedly, mansard roofs have stood the test of time and are now, centuries later, architectural heritage.
Have you ever been hit with a puff of nostalgia, to have a traditional fireplace in your house for you to warm up against the cracking wood and crackling fire as the cold, hard, winter wind blows against the windows and creates a low, resonating, whistling hum throughout the night?
Many of us indeed do. But, what can one really do? Building a traditional brick and mortar hearth isn’t easy anymore. You need to break down a section of the wall, create a hollow area in it, prepare a cavity that is robust enough to withstand the high temperatures and not buckle under the pressure. Such major refacing and customization also takes a lot of money, and only threatens the structural integrity of your wall.
Malm Fireplace 101
What is a Malm Fireplace?
Malm has known this wish of yours since the 1960s and continues to provide easily installable fireplaces that require minimal changes to the look and feel of your house, all that while adding a unique element to its decor with the futuristic yet vintage looking beautiful fireplaces. What’s more, these fireplaces never need to touch the ground. They are suspended in the air with the long chimney nozzle acting as a harness and a pillar for them.
These vintage appearing, freestanding and floating hearths have their birthplace near the wine country of California, another place that brings to your home an extra slice of elegance and beauty, with the delicious wine coming in long nozzled wine bottles. Malm has been carefully designing and manufacturing its fireplaces in Sonoma County since the past fifty-seven years.
Like Harley Davidson and Triumph build their motorcycles with an extra care for the design, and melt both tradition and modernism for perfect balance, Malm too crafts the fireplaces with an outlook bent on impressing every eye that beholds the hearths. The designers behind the fireplaces are inspired by the appeal of postmodernism and offer the hearths in a range of colors like clay, camel, ash, almond, terracotta, slate gray, black, blue, forest green and white. They also have specialty finishes, from stainless steel to porcelain, brass, and nickel to matte black, glass and copper plating.
Malm not only has a variety of models, it also takes orders from customers for customized fireplaces that are designed uniquely for the one ordering. And these designs come in an assortment of sizes, from standard to large units. The designers encourage customers to sketch or create designs the customers feel are appealing and suit their decor, or work with Malm’s designers to create something really exotic. All in all, Malm has designed over three hundred and fifty such unique fireplaces for both personal and office use, wowing customers all along.
But, aesthetics is not the only element of focus for the company. Quality control is rigorously regulated. Substandard materials are a clear no. After all, any compromise in quality can result in hazardous accidents.
Quality
Malm fireplaces are of high quality and high minded design, but what also makes them stand out and in demand is the fact that they are extremely efficient and compatible with the rapidly fluctuating lifestyle of the modern world. It is true that people simply do not have the same amount of time to invest in preparing a fireplace as they did before. You could blame it on the rise of social media, or the longer work hours, or the clear inability to do beyond one absolutely must.
Malm knows this. It is a wholesome investment of your time and energy to heat up a traditional brick fireplace. It does take many hours to heat it up sufficiently enough to warm your house and even then a lot of heat is wasted with the downside of the heat radius not being as far reaching as one would wish.
A Malm fireplace has a very high rate of heating, and it radiates the heat in equal measure around it without wasting any energy. Moreover, you can have a clear look at the fire from any angle, helping you regulate it when needed and also giving you a view you desire.
Apart from creating custom models commissioned by aficionados who want a fireplace that’s entirely unique, Malm does offer a variety of exquisite designs with their own special upsides. The Carousel, The Spin-A-Fire, The Fire-Drum, Zircon and the Lancer are the main options, with several sub variants available in both firebrand and gas options.
The Carousel
This freestanding fireplace comes in two models. One is the standard and long used wood burning option, and the other is the more efficient gas burning option.
The Wood Burning Carousel Fireplace is mighty in both its design and its performance. This wood burner has a patent that makes it extra special. The internal design of the fireplace provides an almost complete burn while keeping the ash pollution to a bare minimum. It is a model that is touted to be one of the finest works of Malm and brings a sense of pride to the owner of it. The Wood Burning Carousel is available in porcelain colors, satin and matte, and in stainless steel and solid brass.
This model is substituted by its gas-burning relative. The Gas Carousel hadn’t come into being for twenty-eight years after the vintage Wood Burning Carousel was crafted. A gas burning fireplace saves you the hassle of buying wood for the hearth. And even though it has a fundamental difference from its cousin in terms of basic functionality, it does not compromise on both design and quality. It has more varieties of color than the wood burning carousel, with up to ten decorative options that are painted upon satin brass or porcelain.
Moreover, it comes with a remote control system for ignition and can be installed anywhere in the room, either against a wall or in a corner or freestanding in the center of the hall. And it does not need to keep a big distance from combustible materials either, with only a 6’’ clearance required.
The Spin-A-Fire wood burning model is as appealing in its look as the firebrand that burns within in. It comes in both indoor and outside air models, and need to have a clearance of 24” from combustible walls. It comes in a couple of varieties. A plated variety needs a 6” all-fuel chimney while a porcelain and black variety needs an 8” all-fuel chimney, both measurements when attached to the top of the hood.
Efficient in its burning and long lasting in its sheen, the Spin-A-Fire is available in brass and nickel as well. The Spin-A-Fire, like the Carousel, is available in two variants: firebrand and gas. Both firebrand and gas variants are not free-standing models.
The Fire-Drum model is a beauty to behold. Malm’s very seventies looking model has a twenty-eight inch interior diameter to its drum-like huge opening area. It is lined with refractory brick to help you have combustibles at a closer distance of 8” without increasing the risk of fire hazard. Every Fire-Drum piece comes with a fire screen and it is featured in brass, copper and nickel plating with porcelain and matte black color options. The piping section has two pipes of the same color as the drum and comes with a recommended grate.
The Fire-Drum comes in a few models. Fire-Drum 3 is the basic model while the Fire-Drum 2 is more aesthetic in its appeal. The Fire-Drum 2 has a close wall clearance and is constructed using heavy gauge steel. Both models are not difficult to assemble.
The Fire-Drum 2 and 3 come in gas variants too, with the G suffixed beside the numbers on catalogs. The gas variants are cleaner, more efficient and far more convenient to use than the firebrand variants. They are also more stylish and have artificial logs that resemble real wood embers glowing in the fire to dissuade you from feeling the lack of a real wood burning aesthetic. These logs, made out of ceramic, are so realistic that they give off the look of coal and embers.
The gas variants are available in matte black, and all porcelain colors and a fire screen is included with both. The interior diameter and the viewing opening are same as the firebrand variants.
The metal hood of the fireplace radiates more heat, and it has a safety pilot system. You can use either LP gas or natural gas for burning the fire, and the fire can be regulated with a thermally actuated damper. The wall clearance is just 3” and the diameter of the heat radiance is large.
The Zircon model comes in four options. The Zircon 30”, the Zircon 34”, the Zircon 38” and the Zircon 34” Gas.
The Zircon 30” variant has a conical shape to it and brings much-needed warmth to your house. Like the Fire-Drum model, it is available in all then porcelain colors as well as the standard matte black one. It has a lift-off screen and two sections of pipe, along with four refractory bags from Malm.
The Zircon 34” variant is larger than the Zircon 30” but offers the same features as its smaller cousin and is available in all colors, unlike the largest of the three, the Zircon 38” which can only be bought in the standard matte black color.
As mentioned before, Malm does provide its customers with the option of custom designing their fireplace, including completely glass panels that through their clarity provide an unhindered view of the fire. The finishing of these custom designs have oil finishing options too, apart from the standard matte, porcelain, stainless and bronze finishing. These customisations can be as high as thirty-six feet and have bases as wide as hundred square feet. All custom designs are not tough to assemble and are easy to ship.
Legacy Of The Fireplace
According to Donna Gunther, who is the founder and owner of a Los Angeles based design company named Surfing Cowboys, the Malm fireplace could not have reached its popularity if not for the coincidental rise of prefab housing mass production. Commercial fireplaces were not a thing, and once they did become popular in the eye of the public, newer design elements and color schemes were introduced to complement and play along with the pop-like vibrancy of interior decoration that boomed throughout the 60s to the 80s.
The colors, at first expanded upon to create a variety and invite more buyers, have formed an identity of their own, standing out in-house decor amongst furniture pieces. While the fireplaces are available in a large palette, some customers like to go for even zanier and rarer color schemes and choose to repaint the fireplaces, even though they run the risk of weathering and cracking up. It is recommended to look for the colors more than doing it yourself.
Even though on purchase you receive a detailed booklet telling you everything about each model, from the dos and don’ts to the how-to section, it is always recommended to install the fireplace with the help of a professional fireplace installer. Malm and companies of its ilk do provide provide installation options.
If you live in an apartment or housing area, you will need to check for permissions before you go ahead and purchase a fireplace that looks prettiest to you. Some places do not give permissions to install fireplaces and it might make you come under legal fire later on if you do so.
The Malm fireplace perfectly combines funk and vintage hues for your house and is, by all means, the ideal housewarming gift for someone you love.
In the age of central heating systems and growing adverse temperatures, traditional fireplaces simply have nowhere to call home, except for where they have been created long ago. A Malm fireplace, in both its firebrand and gas versions, is the perfect reintroduction of the fireplace tradition.
A cordless drill is undoubtedly one of the most important tools in a DIYer’s arsenal. As such, it becomes crucial to choose a top-quality model.
Over the years, cordless drills have become significantly popular because of their versatility and high efficiency. Meaning, most DIYers prefer using them to conventional corded models. However, choosing a suitable unit that is durable and compactly designed is not all that simple.
There are quite a few essential things to consider, and with the availability of numerous options on the market, the selection process can get a tad complicated. So, to help you in the quest of purchasing a quality cordless drill, we have compared two exceptional models from two best-selling brands on the market: Makita and Dewalt.
These two brands have established solid goodwill with their wide range of power tools; hence, they are the top choice for DIYers. Without any further ado, let’s find out which one is better.
Makita vs Dewalt Drill
Before diving into the differences, let us take a brief look at the history of both brands so that we can understand how they have attained popularity.
Makita-built motor delivers 250 in. Lbs. Of max torque
Matika is a very popular Japanese power tool brand that has been operating since 1915. It was founded by Mosaburo Makita in Nagoya City in Japan.
During that time, it specialized in the manufacture and repair of motors. However, as time passed, it started taking an interest in other areas and designed its first power tool in 1958, a portable electric planer.
Soon after that, it started producing other power tools such as circular saws, groove cutters, and electric drills. Finally, in 1978, it released its first cordless drill, which was considered one of the best in the early 80s.
Then, by 1985, it set its foot in the US by opening an assembly and manufacturing plant in Georgia. And as of 2022, Makita has its manufacturing hubs in over 50 countries all across the globe.
Its high-quality products and top-notch after-sales service have made it one of the leading brands in the power tool industry. This is why to compare the best models we have included a drill from this brand.
High performance motor delivers 300 unit watts out (UWO) of...
As far as Dewalt is concerned, it was founded in 1924 in the US by Raymond Dewalt.
The first product from the brand was a saw called wonder worker, which could be configured in 9 ways. Apart from this, the brand also dealt with the manufacture of jointers and mortisers.
In 1992, a series of portable power tools were launched by the brand with the aim to target professional woodworkers and residential contractors. And after 2 years, they introduced cordless tools, which included the two most powerful models at that time.
Naturally, the 5 3/8” cordless saw and the 14.4-volt cordless drill/driver were extremely popular.
Fast forward to 2000, it bought two companies, the Emglo Compressor Company and the Momentum Laser to further increase production. Unsurprisingly, in 2001, it became one of the best-selling brands of power tools and other accessories.
Since then, it has embarked on a new journey by introducing its first lithium-ion tools while the brushless motor was added to the lineup later in 2013.
Different Types of Drills
These are the most common types of drills available on the market.
Drill Press
A drill press falls under the most powerful category of drills. It is stationary and used to make numerous holes in one go.
The biggest advantage of using this drill is that it can create accurate holes, making it suitable for several projects. So, you will find that it is mainly used in factories and workshops.
Hammer Drill
This kind of drill functions quite like a jackhammer. It utilizes punch motions in order to drill through tougher materials, like metal, concrete, or stone, which a conventional drill can’t get through.
Drill Drivers
As far as drill drivers are concerned, they are the most commonly used ones, and they are highly versatile in their operation. Not only can they drill holes, but they also work as a driver to loosen and tighten screws.
These drills are ideal for being used at homes for a wide range of purposes, including setting up furniture and drilling walls. With drill drivers, you can easily change the screwdrivers and the drill bits as per the requirements of the material you are working on.
In this section, we will review and compare both models to find out which one performs better and which brand has more credibility. We decided to choose these two models because they are considered highly functional and versatile, and appropriate for renovating homes.
So, without wasting any more time, let’s jump right in!
Mechanical 2-speed transmission (0-500 and 0-1,900 RPM) for...
BL Brushless motor delivers 440 in.lbs. of Max Torque
Accurate, versatile, and equipped with a slew of important features, the Makita XFD061 is an affordable option suitable for nailing DIY projects easily. Boasting a top-grade brushless motor, this model is perfect for those looking for a drill with a flawless power-to-weight ratio. So, let’s dig a little deeper.
Key Features
Speed: 1,550 RPM
Weighs 3.8 pounds
Extreme protection technology
Built-in LED lights
Metal gears and gear housing
Brushless motor
Why Did We Like It?
According to us, the main highlight of this product is its Extreme Protection Technology. This helps the product resist dust and water when used in tough job site conditions, thereby ensuring its longevity.
It weighs under 4 pounds and is one of the lightest models on the market; hence, you can use it for extended periods without any hand fatigue. Not to mention its soft rubberized grip handle, which further adds to the comfort and ergonomics of using this unit.
Apart from this, it features a 2-speed transmission, allowing you to use it for a wide variety of applications. Coupled with this is a 530-inch-pound of maximum torque, ensuring that it offers up to 50% more speed and power and work per charge.
As far as the battery is concerned, it is highly efficient and comes with overload protection, which protects the battery from overloading and overheating. It comes with built-in LED lights with afterglow for illuminating the job site when there is no other form of lighting available. Lastly, it is backed by a 3-year warranty.
What We Didn’t Like About It
During our usage period, we found out that the battery takes an hour to charge, which is a little longer than other options in this price range. We were also a bit disappointed that it comes with a bag and not a hard case. Apart from these two issues, the product works perfectly.
Now, we will be taking a look at the Dewalt DCD777C2. This brand is one of the most popular brands of power tools globally; hence it doesn’t need any sort of introduction. As far as this product is considered, it is a true testament to the brand’s quality. It features a lightweight and compact design and is suitable for working in tight areas for extended periods.
DEWALT drill with brushless motor delivers more run time...
This power drill is compact (7.52" front to back)....
Key Features
Weighs 2.6 pounds
Measures 12.5” x 3.75” x 9.81”
Torque: 500-inch pound
Speed: 1,750 RPM
Why Did We Like It?
We were quite impressed with the various practical features of this product. It sports a brushless motor, for starters, which means you can expect it to offer a longer run time than those with conventional motors. It weighs under 3 pounds and is lightweight, so you can use this model for working in tight corners for extended periods hassle-free.
What’s more, it features an ergonomic grip handle, which is comfortable to hold and offers optimal tool control and ideal balance. Hence, you can use it for longer hours at a stretch without experiencing any hand fatigue. Like the Matika XFD061, this one, too, comes with built-in LED lights, which come in handy while working in lower light conditions.
As far as the power is concerned, it is equipped with a robust motor that can deliver up to 340 watts out. This ensures that it can easily complete a wide range of applications without breaking a sweat. Finally, it comes at an affordable price, which ensures that it delivers excellent value for money.
What We Didn’t Like About It
While testing this product, we noticed that it drains the battery comparatively quicker than the Makita model. Also, it doesn’t feature a battery-level indicator, which is again disappointing. But, other than that, we were mostly satisfied with its results.
Pros
Backed by a 3-year warranty
Lightweight
Sports an ergonomic construction
It comes with an affordable price tag
Supports fast charging
Powered by a robust motor
Cons
Doesn’t come with a battery level indicator
Consumes battery quickly
How To Choose A Cordless Drill?
While purchasing a power drill, you need to keep a few important factors in mind so that you can choose the right model. In this section, we will be taking a look at these features in detail.
Speed
Speed, measured in RPM, is one of the most important factors that you should consider while buying a cordless drill. Less speed is required for drilling holes into softer surfaces and for driving screws, whereas high speed is required for drilling holes into tougher surfaces.
If you are a professional woodworker, you would want to choose a model that features a 2-speed switch and a trigger with changeable speed control. This would allow you to tweak the speed from 0 RPM to the full range as per your needs.
Power
As far as the power is concerned, it is measured in torque. It is nothing but the force that makes the drill rotate. Hence, the higher the torque, the faster the rotation. On that note, we recommend going with a higher torque setting if you have tougher materials for drilling through, like bricks.
On the other hand, if you have delicate materials to drill through, choosing a lower torque setting would be more appropriate. It would minimize the amount of damage done on the surface.
Battery
Another crucial aspect that should be kept in consideration is the battery of the drill. In this day and age, most cordless drills feature nickel-metal-hydride batteries, also known as NiMH batteries. They are small in size but last longer than the traditional Nicad batteries.
NiMH batteries are also known for being less hazardous at the time of disposal than the Nicad variant, as they don’t feature the highly toxic cadmium. Both Makita and Dewalt drills come with NiMH batteries, and they have set the trend for other manufacturers to adopt this technology as well.
Handles
When buying a drill, you should always go with a model that comes with a ruggedly built and easy-to-hold T-handle. Before the invention of cordless drills, most drills would have pistol grips, which were not that comfortable to use.
A T-handle, on the other hand, provides optimal balance and prevents hand slippage from the drill. Plus, they are popular for reaching tight corners, as your hand is in the center, thereby not creating an obstruction.
However, when it comes to driving large screws and heavy-duty drilling, a pistol grip would be more appropriate, as it allows you to apply more pressure.
Tips To Drill Safely
Without a doubt, cordless drills help accomplish projects smoothly and efficiently, but if you are not careful enough and don’t take the required safety measures, accidents can happen. Here, we shall be looking at a few essential tips that you can follow to drill safely.
Wear Eye Protection And Safety Clothing
You must always wear eye protection and safety clothing while drilling. Ensure that you are not wearing heavy jewelry or baggy clothes, as they could come in contact with the drill when you lean over, thereby leading to accidents. And don’t forget to wear safety glasses or goggles to ensure that your eye is protected from flying debris.
Ear Protection Is A Must
If you are a professional woodworker who has to drill daily, then you should probably wear ear protection. An electric drill works at 90 dB, which is sufficient for causing hearing damage. When it comes to cordless drills, wearing ear protection is not mandatory as they are generally very quiet.
Wear Masks
Don’t forget to wear masks, as they are crucial for protecting your lungs. While drilling, you are exposed to high amounts of crystalline silica, which ends up causing respiratory diseases like silicosis. Wearing a dust mask prevents your mouth and nose from getting in contact with the dust, thereby minimizing the chances of catching respiratory diseases.
Having said that, if you work for prolonged periods, then we would suggest using a respirator, as it would provide the ultimate protection against various dust-related diseases.
Select The Correct Drill Bit
In order to drill safely, you must be well acquainted with the process of drill operation. Using a bit that is made of the wrong material can seriously damage the surface you are drilling. If you are drilling a wooden surface, a general-purpose bit would be appropriate.
Similarly, if you are drilling materials made of concrete, brick, or stone, then using a masonry bit would be the way to go. For drilling surfaces like glass, porcelain, or glazed tiles, you would have to choose a diamond or carbide-tipped drill.
Therefore, you should have in-depth knowledge of the various types of drill bits available on the market and the materials they drill.
Pilot Holes
Making pilot holes are essential for getting better results. It prevents the drill bit from slipping off the surfaces and thereby minimizes the chances of damage to the surface.
Apply Steady Pressure
While drilling, you must ensure that the drill is stable and then push it slowly into the surface. However, if you need to apply excessive pressure, that means you have chosen the wrong bit for drilling the hole.
Prevent Overheating
Drilling causes a certain amount of heat due to friction, but you must ensure that it must not get your drill overheated. To avoid overheating your drill, start with a lower speed and then gradually increase it. While drilling harder materials, ensure that you use low speed and keep pausing from time to time to allow it to cool down.
Tips For Maintaining Cordless Drills
Here are a few cordless drills maintenance tips that you can follow to ensure that it lasts for a very long time.
Consider Using Sharp Bits
Try using sharp bits whenever possible, as it drills through the surface of the material easier and faster. Plus, it doesn’t put much strain on the drill as well.
Store Your Drill In A Dry Place
You must ensure that your drill doesn’t come in contact with water, as it can easily rust the motor and the chucks. So, you should always keep your drills in a cool and dry place, like a shelf, where it is safe from moisture.
Clean Your Drill After Using It For Prolonged Periods
Make a habit of cleaning your drill from time to time in order to avoid clogging.
Let It Cool Down
When you are drilling holes through tougher surfaces, make sure that you take small breaks in between to avoid overheating the drill.
Never Keep It On The Ground
You should refrain from keeping your drill on the ground while working on a site project; otherwise, grass, sand, or dirt may enter it, thereby damaging the internal parts. Plus, we strongly recommend reading the instruction manual that comes along with the drill, as it will help you gain clear insights on the maintenance of your product.
Makita vs Dewalt Drill
Does the DCD777C2 from Dewalt come with driver inserts or drill bits?
No, they don’t. Driver insert and drill bits for this model are sold separately; hence we suggest buying a separate screwdriving set and drill bit sets for meeting your requirements.
Does the battery of Makita XFD061 drain when not used for prolonged periods?
No, the batteries don’t drain when not used for prolonged periods, as they are made of lithium-ion. These types of batteries are popular for holding charge longer than older cell technologies. According to some users, they were able to use the drill right away after storing it for months.
Can the Makita XFD061 be used with other Makita used?
Yes, it can be used with other 18 V Makita batteries.
Verdict: Makita vs Dewalt Drill - The Winner
With that, we have come to the end of our informative guide. Both the Dewalt DCD777C2 and the Makita XFD131 are exceptional cordless drill drivers, especially because of their high performance, ease of use, and affordable price range.
Either one would be an ideal choice for those who want to renovate their homes. However, after reviewing and comparing both models in detail, we have decided to go with the Dewalt DCD777C2. It is more compactly sized and lightweight than the Makita, without compromising on performance.
Furthermore, the DCD777C2 features two batteries, which means you don’t have to wait too long for it to charge. Considering all these facts, we have named Dewalt DCD777C2 the winner, even though it was a very close call.
Thinking about Christmas this early in the year might seem over the top and useless but we cannot help ourselves but dream about the glorious magic this holiday conveys.Family gathering around the fireplace, drinking hot coco and sharing stories, the delicious smell of home made cookies and the beuatiful delicacy of the Christmas tree colorful decorated and nestling over an abundance of gifts. Joyfulness, happiness, lots of smiles, these are what describe the winter season best .So, with this magical spirit in mind, we cannot stop thinking about our next crafting project meant to complete this picture and we are talking here about creative DIY Christmas cards projects and ideas, all lovely, imaginative and beautiful in their own manner. It is a wonderful thing to be able to personalize your gifts for your loved ones, to leave your mark on them and make them unique, one of a kind, special. We have collected over 90 DIY Christmas card ideas from where you can surge inspiration. Find guidance in the links featured under each craft or simply use the suggestions to create your own take on the project. Make card crafting a family event and teach your little toddler how to make special diy Christmas cards for friends and family. Enjoy!
Creative DIY Christmas Cards
1. cardboard paper and button snowman Christmas card
via tallwavehightide
A red ribbon can look anything look more festive, don't your agree?
In the end, we would love to hear your opinion on the above creative diy Christmas cards presented as well as your favorite choice. Leave your valuable feedback in the comment section below.
The most staggering DIY projects in the world have to do with wood regardless of its shape; whether we talk about diy wooden pallet projects,diy driftwood crafts or various reclaimed wood projects the texture of the material simply beautifies the scene through coziness and warmth. Magical DIY Tree Stumps are breathtakingly beautiful as well, surprising with sturdy volumes organized by texture, tree stump DIY projects can easily become the focal point in your decor as with little to no effort you can use them as side tables and coffee tables.
Through mass and volume the coziness warmth of the wooden texture is able to disrupt simple minimalist design lines in a subtle manner complementing the spatiality without changing the ambient. The most common use for tree stumps in diy projects are side tables and coffee table, these requiring the least processing power to materialize. Cast a glance at the gallery showcased below and pick your favorite craft to start.
Wooden DIY projects are carrying a great responsibility and tremendous potential and we are sure that the crafts showcased above have highlighted this properly. We would love to hear your opinion in the comment section below on how do you use wooden elements in your décor.
3D printing pens, also known as 3Doodlers, extrude heated plastic filaments to create three-dimensional objects, allowing users to draw and build in mid-air. Commonly used in fields like art, design, and education, they are ideal for creating intricate models, prototypes, and artistic projects. These pens feature adjustable temperature settings, speed controls, and ergonomic designs, making them versatile tools for professionals and hobbyists. In this guide we explore the top 3D pens, highlighting their unique capabilities and ideal use cases for unleashing creativity in three dimensions.
MYNT3D Super 3D Pen
The MYNT3D Super 3D Pen is designed to elevate ordinary artworks into 3D creations with its user-friendly and ergonomic design.
Standout Features:
Stepless speed slider
Three ABS filament choices
Replaceable nozzle design
This pen's step-less speed slider allows precise control over the material flow, making it perfect for intricate designs. The sealed ultrasonic nozzle prevents clogging, ensuring durability. The pack includes a touch pen, USB cord, AC adapter, repair tools, and a manual, providing everything needed to start working immediately.
After using the 3D pen for a month, we noticed that it heats up when used for an extended period, making it challenging to work with. It has to be left to cool down before proceeding.
What We like
Detailed manual
Sleek and easy to use
Suitable for all ages
One-year defect protection
What We Don't Like
May heat up after prolonged use
MYNT3D Professional Printing 3D Pen
The MYNT3D Professional Printing 3D Pen features advanced functions like an adjustable feed and large OLED display for temperature tracking, enhancing the creation of three-dimensional objects.
Standout Features:
Three rolls of ABS filament
Adjustable temperature from 230 to 240 degrees Celsius
Large OLED display
This pen offers adjustable speed and flow control, enabling fine-tuned settings for effortless drawing. The pack includes three ABS plastic filaments, an adapter, a touch pen, and a one-year limited warranty. It's also portable, and connectable to a power bank for outdoor use.
We had some queries about using the product and tried contacting customer service to get our issues resolved. But we were still waiting for someone to answer our phone on multiple occasions when we tried reaching out.
What We like
Slim and ergonomic design
Nozzle replacement tools included
Speed and flow regulation
Works with PLA filament
What We Don't Like
Inefficient customer service
SCRIB3D P1 3D Printing Pen
The SCRIB3D P1 3D Printing Pen, suitable for both beginners and professionals, comes as a ready-to-use kit.
Standout Features:
Stepless speed slider
Ceramic nozzle
Auto switch-off
This kit includes three PLA plastic colors, an instruction manual, a power adapter, and a stencil guide. It features stepless speed and temperature control, ensuring optimal performance. The pen's auto-sleep feature prevents overheating, making it safe for extended use.
When you switch on the 3D pen to start drawing, you may have to wait for a while as it takes time to warm up.
What We like
Works with PLA and ABS
Equipped with indicator lights
Minimal clogging
Ideal for intricate projects
What We Don't Like
Takes time to warm up
3Doodler Start+ Essentials (2024) 3D Pen
The 3Doodler Start+ Essentials (2024) 3D Pen is ideal for kids, with no hot parts and a cool nib, promoting safe and creative play.
Standout Features:
Detailed activity guide
Child-friendly plastic
No wires
This pen promotes STEM learning, with safe, child-friendly plastic and a safe-to-touch nozzle. It's portable, charging in 30 minutes, and comes with an activity guide and stencils to inspire creativity.
We noticed discrepancies in the extrusion speed, which led to occasional clogging. Clean the nib with a cloth if clogging occurs.
What We like
Enhances learning curve
Charges in less than 30 minutes
Templates and stencils provided
No risk of burning
What We Don't Like
Clogs occasionally
3Doodler Create+ 3D Printing Pen
The 3Doodler Create+ 3D Printing Pen offers versatility with a range of colors and a booklet of templates, making it ideal for personalized art projects.
Standout Features:
Extra templates
15 colored plastic filaments
Activity guide book
This pen supports ABS, PLA, and flexy plastic, and features a dual drive for speed control. The plastic hardens instantly, making it easy to work with 3D structures.
While the 3D pen works well, it is relatively expensive, and we recommend it for professional use.
What We like
Smooth drawing experience
Dries instantly
Does not heat up
Non-toxic and safe plastic
What We Don't Like
Relatively expensive
SCRIB3D Advanced 3D Printing Pen
The SCRIB3D Advanced 3D Printing Pen offers a sleek design and multiple speed options, making it beginner-friendly.
Standout Features:
One-year guarantee
Two colors of 15 meters each
Free stencil guide
This pen features an LCD display with speed, temperature, and flow controls. It's designed for easy use, with a clear manual and safe operation.
The 3D pen tends to heat up and dribble sometimes. Hence, letting your kids use it alone can be dangerous.
What We like
Excellent for beginners
Different speed options
LCD screen with buttons
Ergonomic design
What We Don't Like
Can dribble sometimes
MYNT3D Basic 3D Pen
The MYNT3D Basic 3D Pen is a simple, user-friendly option for hobbyists and DIY enthusiasts.
Standout Features:
ABS and PLA compatible
Sealed nozzle
Detailed user manual
This pen offers essential features for 3D creation, with speed options for intricate designs. It includes a power cable, ABS filament, and a stand, ready to use with a USB AC adapter.
The 3D pen has a unique USB cable that is not easily replaceable. Handle the cable with care to avoid needing a replacement.
What We like
Clog-free experience
Easy to use
Budget-friendly
Ideal for gifting
What We Don't Like
Replacement cable not readily available
MYNT3D Junior2 3D Pen
The MYNT3D Junior2 3D Pen is designed for kids, featuring a cool body and good grip for safe use.
Standout Features:
Ergonomic design
Battery-powered and rechargeable
Low-temperature nozzle
This pen is safe for kids, with a low-temperature nozzle and ergonomic design. It's battery-powered, with a sealed nozzle and user guide for easy use.
This 3D pen does not work with PLA and ABS filaments. It only supports PCL plastic filaments, which limits compatibility.
What We like
Safe for kids
Detailed user guide
Does not clog easily
One-year defect protection
What We Don't Like
Doesn't work with PLA and ABS
Are 3D printing pens useful?
Yes, 3D printing pens are useful in modeling, prototyping, and crafting because they can create detailed and intricate designs, repair or modify existing 3D prints, and facilitate freehand drawing in three dimensions thanks to their adjustable temperature and speed controls.
What can I build with a 3D pen?
With a 3D pen, you can build models, sculptures, jewelry, architectural prototypes, educational tools, and artistic creations. The versatility of 3D pens allows for both simple and complex designs.
Does a 3D pen stick to glass?
Yes, 3D pen filament can stick to glass surfaces. However, it's recommended to use a release agent or tape to ensure easy removal of the finished product.
Are 3D pens eco-friendly?
3D pens can be eco-friendly if they use PLA filament, which is biodegradable and made from renewable resources like corn starch or sugarcane. However, the eco-friendliness depends on the type of filament used.
What surface is best for 3D pens?
The best surface for 3D pens is a non-stick, heat-resistant mat or a piece of parchment paper. These surfaces prevent the filament from sticking permanently and allow for easy removal of the finished product.
Does a 3D pen melt plastic?
Yes, a 3D pen melts plastic filament (such as PLA or ABS) to allow for drawing in three dimensions. The filament is heated inside the pen and extruded as a semi-liquid, which solidifies quickly to form 3D structures.
Paper recycling is the easiest form of recycling and thanks to its texture, sensibility and unicity, paper is one of the most graphic materials in upcycling as well. Whether you stack piles for recycling or upcycled paper in little projects, you should never simply throw them away to a regular bin. Be the change that you want to see in the world and start by recycling a few piece of paper, you will feel better and you will certainly do the world a tremendous favor regardless of the quantity recycled or upcycled. Further on to encourage the small movement that we are trying to trigger we will showcase more than 30 DIY paper art designs that will enhance your decor with ease if materialized. These are of course just the tip of the iceberg and you should use them as a starting point in your endeavors.
Below we will link a few other interesting paper art articles that we think you'll find interesting, throw a look and let us know what do you think.
#1 Old Books Transformed Into Sculptural DIY Paper Art
#2 Colorize Your Home With Beautiful Paper Lanterns
#3 Add a Sculptural Geometric Piece on Your Blank Walls
#4 Make a Paper Garland
#5 Simple Colorful Hearts Hanged on a String Can Change Everything
#6 Origami Paper Composition Can Send Very Powerful Messages
#7 Light Meets and Enhances Paper Composition
#8 Origami Star Patterned Sheet of Paper
#9 Kirigami Display of Skill Showcased in a Wave
#10 Drop of Color on a Gray Mass
#11 Extraordinary Origami Piece Composed Out of Hundreds of Pieces
#14 Colorful Origami Lucky Paper Stars Composition
#15 Simple Purple Paper Butterflies Wall Art
#16 Flower Composition in Classic Interior Design
#17 Geometric Colorful Ensemble
#18 Extraordinary Colorful Origami Curtain
#19 Colorful Kirigami Koi Wall Art
#20 Breathtaking Vintage Composition Showcasing Paper Flowers
#21 Paper Medallions and Flowers in Superb Composition
When we see glamorous interior designs in the magazines, we all take a deep breath and wish we had them in our homes. If you are considering the idea to decorate one room in the house in a more luxurious style, we suggest you to go for the bedroom design.
These Luxurious Bedrooms You Would Wish To Sleep In will charm you with their elegance, comfort and style. They will give you a pampering feeling, and you will feel like you are on seventh heaven. Scroll down through the photos below and lose yourselves in a daydream!
Whenever you are staying in a hotel, probably you are wishing to stay in the deluxe suit, so why don't you bring it into your home? These bedrooms require a spacious room because there are so many things that could be incorporated here to achieve the dramatic look. The king-sized bedroom is a must, and the satin bedding too!
As you can notice from the photos so far, the luxurious bedrooms feature a big, glamorous chandelier which adds up to the luxurious feel. The lighting fixtures can make or break an interior, so choose yours carefully.
The neutral colors can help you make an enjoyable ambiance, and this is the key to the good-looking hotel rooms. They will help you to create a bright and cozy environment which you will enjoy for sure!
Elevating your bed on a platform is another luxurious feature which will make you feel like you are climbing the throne when you go to bed.
Cushions, curtains and carpets are essential for the luxurious bedrooms, so don't keep them off the whole picture when you are decorating these lovely bedrooms.
If you are a lover of the bold and dark colors, then go for them because they will help you create a stunning bedroom with dramatic effects. Lighting plays a crucial role here, so pick it smart!
The purple color is considered to be a royal color, so you are going to notice a lot of luxurious purple bedrooms. If it's your favorite color feel free to add it in your bedroom area, but remember not to overdo it.
Lots of spacious and luxurious bedrooms have separate seating areas for enjoying their morning coffee, reading their favorite book before going to sleep or have intimate chats with their significant other. If the space allows you, add two armchairs and a coffee table, get your bedroom on a higher level!
Aren't these bedrooms simply stunning? In which one would you like to sleep and relax in your home? Pick your favorite and recreate the astonishing designs!
Nothing beats a good, fresh meal with a cold brew after a hard day’s work.
Except, of course, a good fresh meal during work. That’s the best of both worlds.
Most construction workers, in the limited lunch-time they get, have to resort to soggy, damp and stale pre-packed meals in paper wraps (if you like dirt and dust with your meal) or to Burger King drive-throughs, which proves to be expensive and time-consuming.
A solution to this problem would be to get yourself a cooler which would keep your food fresh, cool and tasty. But which one?
To answer that, we’ve compiled a list of the 7 best lunch boxes and coolers for construction workers.
Best Lunch Boxes And Coolers For Construction Workers
Lunch box keeps cool up to 30 hours; main compartment has a...
Cooler supports up to 300 pounds (136.1 kg); not only does...
The first item on our list is the Klein Tools 17-Quart Tradesman Pro. Klein, a manufacturer of quality work tools, offers this model in 9-quart hard cooler and 12-quart soft cooler variants as well. It comes with a shoulder strap, 300-pound capacity, a provision for holding bottles and tools and a convenient lid.
Experience
In our experience, the Klein Tradesman Pro is a great cooler for carrying your meal to the site. The build quality is excellent and we found it to double up as a stool without any worries.
On the inside, it has a lining of foam which keeps food cool for up to 12 hours without any hassle.
It comes with a nylon strap for easy carrying. In our experience, we found the strap to be sufficient for carrying up to 150 pounds, if you plan to carry more than that, it might break.
We did appreciate the provision for tools, bottles, etc. on the lid, which opens to 180 degrees (or can stay put at 90 degrees, if you so wish).
Pros
Excellent build quality means it doubles up as a stool
Keeps food cool effectively for long periods
Has a provision for tools, bottles, medicines, phones, etc.
Convenient lid
Cons
Nylon strap, while a useful feature, is prone to breaking if you plan to carry large loads
Patented tent shaped locking lid helps prevent spills
The Playmate Cooler is Igloo’s offering to the fiercely competitive lunch cooler market. It comes in only one 14.8-quart size. It features a patented tent-shape, a lid that swings open either side and a comfortable grip molded onto the carry handle.
Experience
In our experience, we found that the Igloo playmate cooler reminded us of lunchboxes of yore with its tent-shape and dual-tone exterior, giving it a distinct identity.
The funky design, finished with a texture, houses a lunch box large enough to carry most of the items you’ll be taking to work, such as your food, phones, bottles, etc. and we found that it keeps them reasonably cool as well.
The Playmate’s pièce de résistance, it’s lid that opens either, is incredibly convenient; that means you don’t have to reach over or change sides every time you open it. However, we’re not so sure about the locking mechanism, which seemed a little flimsy to us.
RUGGED AND VERSATILE – From our proprietary MuleSkin...
24+ HOURS OF COOLING – Ultra-tough Muleskin Exterior and...
The IceMule Pro Cooler is different to the other coolers we’ve mentioned so far as it is a soft cooler, as opposed to a hard cooler. A soft cooler’s construction resembles a fabric whereas a hard cooler is made of a solid material like plastic.
Coming to the cooler itself, the IceMule is the jack of all trades and has a ton of features, read on to know what how experience was.
Experience
In our experience, the IceMule Cooler is a BMW if the other coolers are Corollas.
It comes packed with a ton of features, such as a TriFold seal for cooling, MuleSkinEV layers for twice the thickness of other soft coolers, AirValve for bleeding the air out of the layers of insulation and reinforced back straps, as this is a backpack-cum-cooler.
It has a 21-quart capacity, which is truly massive, but despite that, the IceMule remains relatively light and is very portable.
Pros
Twice as thick as other soft coolers
AirValve for bleeding the air out
Incredibly portable
Massive 21-quart capacity
TriFold seal for supreme cooling
Waterproof
Cons
Inner lining is prone to tearing after repeated use
Vacuum bottle keeps liquids hot for up to 40 hours, cold for...
Locking handle holds bottle in place
The 7QT Heritage Cooler is reputed company Stanley’s rather nostalgic offering to the cooler lunch box market. It is a hard cooler and comes with a 1.1-quart thermos (which locks into place on the handle). It is a petite, portable offering for those looking to transport food and drink only.
Experience
In our experience, the Stanley proved to be a great choice for those looking to carry naught but their food and drink to the construction site.
It’s USP is its steel thermos which conveniently locks into place within the carry handle. We found it perfectly adequate for keeping items cold or hot (as the case may be) throughout the day, irrespective of weather conditions.
The cooler itself comes with thicker insulation than its rivals, is compartmentalized on the inside and its lid doubles up as a tray, making eating and drinking from it easy. Plus, the build quality is excellent, just as expected from Stanley.
The small capacity may put some off, but considering the objective the 7QT seeks to achieve, we can forgive it.
Pros
Thermos included and locks into place
Compartmentalized cooler for keeping food items separate
Thick insulation for long-lasting cooling
>Lid doubles up as a tray
Excellent fit and finish
Cons
Small capacity might be a deal-breaker for some
No extra features other than the thermos; very spartan
Built for the Outdoors: Tough and durable, the Carhartt...
Compact & Portable: Perfect for outdoor adventures, this...
The Carhartt cooler, more specifically, the Carhartt 358100B, is an excellent choice for those looking for a durable soft cooler which looks attractive as well. You have a choice of three colors, namely, brown, camo and black, making this cooler more stylish than the others.
Experience
In our experience, the Carhartt proved to be an excellent soft cooler for those who find a hard cooler too cumbersome. It stays true to the Carhartt color schemes and looks beautiful, especially in Camo.
It is made of Polyester and is compartmentalized to keep food items separate. It is also waterproof and easily repelled water during our testing. The top contains pockets which are excellent for holding water bottles. The insulation on the inside is adequate and keeps food items cold for long hours.
It comes with a nice carry-strap and we have no complaints from it.
Pros
Attractive color options to make it stand out
Adequate insulation
Compartmentalized storage area
Waterproof
Carry-strap works well
Cons
Insulation could’ve been thicker for peace of mind
Some may not prefer the strap over a handle
How to Keep your Lunch Cool on Hot Days
Keeping your lunch cool and fresh is essential to having a delicious meal, but it has some health benefits as well. Preventing excessive heating of your meal will prevent bacterial growth, so it’s important to keep it frosty. Here are some tips to do exactly that:
Put your cooler in the fridge
Let your cooler chill in the fridge while you enjoy your well-earned time off as this will prevent excess heat from accumulating in the cooler. While a cooler’s job may be to keep food and drinks cool, why not cut it some slack, right?
Put your bottle in the freezer
After putting your cooler in the fridge, put your bottle in the freezer. The principal remains the same, we want to prevent excess heating of your drink as much as possible and for as long as possible. It will also help in cooling the inside of your cooler.
Use stainless steel
Stainless steel is great for carrying your meals and we recommend buying stainless steel containers only as they cool down very quickly in fridges and freezers and are not prone to rusting, making them a healthy option.
Use an ice-pack
Using an ice-pack will go a long way in keeping your food, even inside your cooler. It is recommended to use one at the very least but the more you use, the better. They will keep your food cooler, fresher and just as tasty!
Lunch Boxes And Coolers Conclusion
It’s very important to keep your food cool during those hot, sweaty days to preserve taste and freshness and also to prevent bacteria buildup. A cooler goes a long way towards keeping your food cool and all of the items listed here are great buys.
A passionate gardener’s OCD is triggered in an instant when they find out that their tree branches are out of shape.
Pruning trees is quite a satisfying DIY task we enjoy during the weekends, but it can be stressful if we don’t have the right equipment. So, what makes it so hard to choose the right pole saw to get the job done without any hassle?
Undoubtedly, the disastrous combination of a wide variety of products to choose from and very little information about what makes an ideal pole saw. Ultimately, we end up going for the cheapest ones without knowing what we’re buying.
But don’t worry, we’ve handpicked the top 10 longest and best pole saws for tree pruning to help you make a smart purchase. Also, we have included a buyer’s guide in the end, to help you acknowledge the anatomy of the longest pole saw, so don’t forget to check that out.
So, with that being said, let’s get to the list of products!
Sun Joe is an internationally renowned brand that specializes in manufacturing trailblazing equipment at a meager price. We’ve recently tested its all-new SWJ802E model, one of their best-selling longest pole saws in the market. As expected, this product left a considerably good impression on the grounds of user convenience and flexibility.
The product had initially surprised us with its immense flexibility, which helped it earn a thumbs up from us. To be more precise, this model comes with an adjustable head that can be bent into 3 angles - 0 degrees, 15 degrees, and 30 degrees. This feature makes it possible to reach unconventional areas with ease and make the cuts in numerous positions.
Now, although it’s an electrically powered device, it was surprising to find that the model doesn’t come with any tangling wires. Instead, the cables are configured inside the frame preventing us from the stress of handling the wirings while using the saw. Furthermore, it offers a flexible pole that can be extended up to 9.4 inches, adding one more star in terms of user convenience.
Noteworthy to mention, the SWJ802E model is exceptionally lightweight for a motor-operated saw machine, as it weighs only 7.9 pounds. Thanks to that, our arms weren’t fatigued at all after using the saw for a considerably long time. We’re also satisfied with its low noise levels, which altogether provided us with a satisfying user experience. We would rate it 5 stars.
In spite of its high user convenience features, the manufacturers failed to facilitate a considerably long power cord with this model. Due to this, the electric socket has to be incredibly near to the workstation. Otherwise, this wouldn’t work. Furthermore, it’s a bummer to know that the model requires regular oil refills.
Although Worx isn’t one of the biggest power tool brands in the market, it’s an appropriate option to consider if you’re a beginner with a low budget and zero experience. The most prominent example here is the Worx WG309; a multifunctional pole saw that left us in awe with its advanced features.
To begin with, this model offers an extended 10” bar, which can be wielded very quickly to the saw. This extended stick makes pruning the high branches of trees a lot more comfortable and enjoyable. Also, we have to mention how this model is built with sturdy plastic and metal, which combine to enhance its durability by a fair deal.
Now coming to its USP of multifunctionality, you can easily use it as a pole saw by attaching the stick, which helps in cutting the hard-to-reach tree branches with ease. Also, you can remove the stick and use the chainsaw to trim the small branches precisely.
Also, when it comes to cutting efficiency, we found the WG309 to be more effective than its competitor, the SWJ802E unit. We’re saying this because the model comes with an advanced 8-amp motor that provides higher power to get the job done quicker. Furthermore, the manufacturers have raised the bar higher for user comfort with a rotatable handle, making it easier to auto-lubricate the device.
While testing the model, we found the top of this product to be a little heavier than the bottom. This uneven distribution of weight makes it a little uncomfortable to carry around for a longer time. It is probably the only advantage the SWJ802E has over the WG309 unit, as it’s quite lightweight.
If you’re even a bit experienced at shopping for power tools, you’re probably familiar with the goodwill of Black & Decker. This brand has set the standards a lot higher for innovations with its all-new LPP120 pole saw. This product features, without an argument, one of the longest-lasting batteries we’ve come across.
This model strives for user comfort and portability, to begin with. Most of the pole saws, for instance, the JW280E unit, limit usability to a certain extent with their short power cords. On that note, this model exterminates this issue with its cordless feature, enabling it to be used without being dependent on any external power source.
As this brings us to its battery life, we have to mention that its 20V MAX Lithium-ion battery has impressed us with its extended coverage. To be more precise, its battery is capable of lasting 5x times longer than the regular NiCad batteries, giving it an instant advantage over most of the other products in the market. This model can also make up to 100 cuts in a single charge, which makes it pretty user-friendly and convenient as a pole saw.
Coming to its efficiency, this cordless pole saw offers us a decently long reach of 14 ft, which seems sufficient for tree pruning most high branches. Also, the chainsaw can cut as deep as 6” when it comes to softwood, which speaks for the power of its motor.
This model is quite efficient at cutting through softwood; however, unfortunately, that’s it. The saw isn’t even half as useful when it comes to cutting through hardwood, which means that it can’t be used for heavy-duty cutting tasks. Nonetheless, it still makes a decent piece of personal equipment.
Oregon is best known as the manufacturers of high-end and powerful tools and is mostly recommended by professionals. We had the opportunity to test its PS250-E6 model personally, and we must say, it has changed the way we used to view pole saws. It’s one of the most potent pole saws you can find if you’re willing to go a little above your medium budget.
There’s a common saying among professionals that the cordless pole saws aren’t nearly as powerful as the corded saws. However, the PS250-E6 model seems to cut through this stereotype with its impressive chainsawing power with ease (no pun intended). To be precise, these cordless pole saws boast enough power to slice through 8-inch trunks like butter, despite being cordless.
Honestly, this model comes packed with so much power that it may seem overkill for typical yard jobs. That’s why we’d strictly recommend this model if you’re trying to enter into professional woodcutting or gardening. Now, this model also beats the Black & Decker model with its extended 15 ft long reach, making it even more favorable for heavy-duty work.
Also, we have to compliment the manufacturers for coming up with such a unique design to make it easier to carry around. The thing is, the product weighs approximately 13.5 lbs., which is a little heavy for a pole saw. However, the Mid-mount motor helps distribute the overall weight of the product evenly, making it a lot easier to carry and use for a long time.
Although there’s not enough scope to complain about this rather splendid pole saw, we’re not entirely satisfied with its noise levels. It can get deafeningly loud at times, for which we’d recommend the users to wear noise-cancellation headphones for safety.
Moving away from an electric saw a bit, we’d like to introduce you to one of the highest-rated gas powered saws in the market. The MAXTRA 2-stroke gas pole saw appears to be specially built for handling heavy-duty cutting tasks. If you’re all about power and efficiency, you have to check out its beast of a 42.7 cc motor!
The main feature that makes pruning trees more comfortable is the ability to make necessary adjustments in the chain tensioning. The MAXTRA product supports this feature precisely, making the chainsaw a lot smoother and easier to work with. Furthermore, we’ve found a small air filter at one end of the model, which helps in extending the longevity of the product by a great deal.
We have to say, It’s indeed a smart way of protecting the engine from overheating and similar issues. Furthermore, this model comes with an extended 10-inch pruning bar, which helps us trim hard to reach overhead branches with precision. We’re also quite impressed with the chain brake on the bar, which can save the user from numerous accidents other than keeping the fuel tank full.
However, it doesn’t end there, as the manufacturers seem to take user safety to a new level with a broad set of additional accessories. For starters, the tool kit comes handy at fixing the minor engine errors/malfunctions. Which otherwise (if overlooked) can damage the model in the long run. Furthermore, the chain cover and shoulder strap also make it a lot safer for us to use these cordless pole saws.
There’s a significant problem with this model- it’s nearly impossible to use it for a longer time. To begin with, this product is too heavy to be a handheld saw. Also, its noise levels are intolerable; however, the manufacturers provide free mufflers to protect our ears while using this device.
If you’re looking for moderately efficient pole saws for small personal jobs at a meager price tag, try the TrimmerPlus TPP720 model. This product beautifully bridges the gap amidst semi-professional pole saws and DIY personal equipment without breaking the bank. We strictly recommend this product to beginners, considering how easy to use it is.
This one is an appropriate handheld manual pole saw that fits your budget and provides sufficient power to get your DIY tasks done. As this product is gas-powered, it doesn’t require any electrical power source to run, giving it a higher advantage in terms of portability. Moreover, we don’t seem to have any complaints about its efficiency either, as it provides sufficient power for a product at this reasonable price tag.
Furthermore, we’ve found that this model comes with an impressive long reach of 12 ft., which makes it simply appropriate for small-end jobs. It also has a maximum cutting depth of 4 inches and can cut through softwood with precision. Although, what we’ve liked more is that the chainsaw also supports non-factory parts, especially manual poles, which can be useful at extending its reach by a fair deal.
Last but not least, we have to mention how ultralight this product is for a pole saw. While most of the products on our list weigh an average of 10 lbs, this model weighs around 7.1 lbs. without fuel. It also features an ergonomic grip and design, making it 2x times more manageable for us to use this product for a long time.
One can say that the USP of this product is that it provides sufficient power needed for DIY personal jobs, and we’d even agree to some extent. But in the long run, the product falls short in terms of consistent performance. We can’t guarantee that it can last for years to come, because it’s incredibly low-priced. Also, it delivers very little power if compared with our other recommendations.
Jameson Tools is a brand that doesn’t need an introduction when we’re speaking of top-end equipment that makes our lives easier. Speaking of such innovations, we’ve recently tested its newest pole saw range, the LS-6PKG-6 unit. We’re quite impressed with its double-pulley feature, which makes tree pruning easier than it has ever been.
If you’re into authentic vintage-designed equipment, the LS-6PKG-6 model is something you must have in your storeroom/garage. We can say that it’s highly durable because this model is built with sturdy wooden material. However, on the downside, some may assume that this wooden-built material would appear to be a little heavier than other plastic models.
However, it isn’t true as the product features a center of gravity right below the middle point, which makes it easier to carry around and use. This model further takes the cake with its double-pulley system that gives us complete control of the device while pruning trees. We’ve found this model to be quite suitable for heavy-duty jobs, and recommend it for professional use.
The secret behind it is its 16-inch sharp saw blade, which slices through the hardest of woods with precision. Here’s a little trivia- the blade design is inspired by the infamous marine predator, aka Barracuda fish. Furthermore, the product also comes with three 6’ poles that enable the saw to reach up to a maximum height of 18 ft., if assembled.
Although the design is pretty stylish, it isn’t very convenient to work with. The manufacturers could have done a better job of designing the grip. And that’s because we were struggling to have proper stability while gripping the bottom, which isn’t a satisfying user experience.
Silky Saws is often recognized as a “classic innovator” amongst professionals, as they offer the best-looking industrial models for heavy-duty jobs. The HAYAUCHI 177-02-41 model outshines every other product in the market when it comes to pole reach. Nonetheless, this model still has a lot more to offer in terms of cutting efficiency.
There are a lot more new features that this model brings to the table. For instance, it features sturdy aluminum poles that offer higher durability while giving us complete control of the blade. Also, noteworthy to mention, this beats the LS-6PKG-6 model in terms of pole reach, as it comes with a maximum range of 26 ft. With this much height, the model enables us to prune the toughest of trees in a jiffy.
Furthermore, the 177-02-41 also provides the user convenience that the LS-6PKG-6 had failed to address. In other words, the bottom of its pole comes with a rubberized grip and advanced end-shock absorbing technology. This makes the model a lot more ergonomic and makes it very comfortable to work with. Furthermore, the saw blade features a groundbreaking RETSUME technology that helps us cut through hardwood with precision.
Despite such advanced features, this machine is quite compact and weighs as little as 7.35 pounds (including the blade cover), making it easier to store. Also, although we were a bit skeptical about its stability due to its high reach, this product appears as highly stable at its maximum height.
To be honest, there’s nothing to complain about the 177-02-41 model when it comes to overall performance and durability. Nonetheless, this product appears to be a little pricey in comparison with other products on our list. It would’ve been better if the manufacturers could lower the price tag a bit so that more people can afford it.
Milliard Tools Co. is always one step ahead of the game and has established a name for itself with its groundbreaking products. We’ve recently tested its 6-16 ft extendable pole saw, and we’re quite satisfied with its flexibility and user comfort. Under a considerable price tag, this doesn’t seem quite bad for a medium-duty tool.
This pole saw, without a doubt, takes the cake when it comes to looks. This model is built with fiberglass material with a glossy grey finish, making it very pleasing aesthetically. Furthermore, the fiberglass also makes sure that the product will last for years to come and make medium-duty easier. On top of that, the pole body allows it to be extended up to a maximum height of 16 ft, giving us a decent reach.
Coming to its cutting efficiency, the model features a 14-inch long pole blade with 1.2 mm thickness. Fun fact- the saw blade is built with premium carbon SK5 steel, and it is sharpened on three different sides, which makes it very slick and razor-sharp. Furthermore, the unit also comes with advanced cutting teeth, which helps in achieving a greater grip while cutting the branches.
We’re also quite impressed with how the blade offers a cutting depth of 1.25 inches, without going anywhere close beyond its limits. So, if you have plans to cut some thick branches, this product can get the job done with precision.
It’s quite unfortunate how this product struggles with stability. It isn’t honestly the most extended pole saw we’ve come across till now; we’ve tested longer pole saws that have offered higher stability. On the other hand, this product appears to be highly unstable when it is extended fully.
The ultimate product on our list, the Fiskars Power-lever tree pole pruner, defines simplicity and convenience at its best. Fiskars is primarily known for its simplistic and flexible designs, and its 12 ft tree pole pruner carries forward this legacy with some cutting-edge features. Most importantly, its advanced Power-lever technology is something to look out for!
Where should we begin? It’s an ideal pole saw when it comes to trimming small branches and pruning hardwood with precision. We were quite amazed by its power-lever feature, a unique technology that doubles the power of cutting that any normal tree pole pruner provides in the market. This way, the job gets done a lot quicker and easier.
It also offers a maximum reach of 12 ft, making it easier to prune the overhead branches. Although it isn’t the longest pole saw we’ve featured in our list, it’s still satisfactory enough to finish medium-duty jobs. Furthermore, Fiskers offers high-quality steel that is guaranteed to remain unaffected by rust and corrosion for a lifetime. It’s a 15-inch long pole and is coated with a low-friction finish that makes it quicker to cut through hardwood.
The 12 ft pole is adequately locked with a quick-release thumb lock that offers higher stability while working. Also, after the job is done, one simple press of thumb can release the establishment as well. Last but not least, the pole is built with premium fiberglass material that assures us high durability.
It’s not the most advanced product, as the manufacturers maintain strict adherence to simplicity and convenience. So, even if it may be ideal for beginners and DIY enthusiasts, it may not be the best option for regular professionals. Also, this model offers a maximum cutting depth of 1.5 inches, which is too little for heavy-duty use.
What We Like
Can reach up to 12 ft
15-inch razor-sharp steel blade
Advanced power-lever technology
Easy to use and store
What We Don't Like
Not recommended for heavy-duty tasks
Longest Pole Saw Buyers Guide
Trust us, being introduced to the best pole saws doesn’t make you an expert at choosing the best one instantly. It’s like being told to choose between a V12 and a V16 engine when you don’t even know what horsepower stands for.
But, don’t worry; we’re here with the nitty-gritty of pole saws that you should keep in mind while buying one in our extended buyers’ guide. We’ll begin with the types of saws and further explore the key factors to double-check while buying a pole saw.
Types of Pole Saws
Mainly, you’ll find four types of pole saws in the market, such as-
Corded electric pole saws- These are an ideal for the homeowners, as they are incredibly lightweight, low-priced and run on electricity
Cordless electric pole saws- These serve the same purpose as the corded electric ones, except for offering higher portability and user convenience
Gas-fueled pole saws- These are more appropriate for the professionals, as these are very powerful and can be used anywhere without being dependent on a power source
Manual pole saws- These are very basic in terms of specifications, and are suitable for pruning and trimming gardens
Now, coming to the key features, you have to keep these following factors in mind while buying a pole saw!
Cutting depth
First and foremost, a saw that doesn’t offer you a satisfying cutting thickness has ultimately zero value in terms of usability. If you’re a professional, you should aim for the models that provide a minimum depth of 5 inches. Otherwise, if you’re a regular homeowner, 1.5-2 inches will do.
Maximum reach
The key benefit of using a pole saw is that it can reach heights that you cannot usually. On that note, always make sure that you’re buying a model that offers a minimum height of 14 ft. Otherwise, it wouldn’t be of much use to you.
Weight
Remember that you have to hold these products upwards for a long time while working. In this situation, it is wise to opt for a lightweight pole saw, which otherwise will leave your arms fatigued after a harsh pruning session. Plus, a lightweight model also helps in maintaining higher stability, which is fundamental while using a pole saw.
Our Verdict on Longest Pole Saws
Pole saws aren’t as simple as they were 7-8 years ago; technology has evolved rapidly, and so has this piece of equipment.
There are specs you’ve never heard of before, and it’s better to be guided by an expert opinion while buying a pole saw. On that note, we hope that our extensive guide has been of help to you. Now, let’s run a final highlight of our top picks.
If you’re prioritizing pole length the most, we’d recommend you to buy the Silky 177-02-41 model that offers an impressive reach of 26 ft. If you’re looking for a lightweight model, the Sun Joe SWJ802E unit weighs as less as 7.9 pounds. If you want a pole saw with the most profound cutting thickness, the Oregon PS250-E6 model can cut through 8 inches with precision, cutting thick branches comfortably has never been easier.
With that being said, we take your leave for now. But, we’ll be back soon with more exciting product recommendations to make your lives easier.
Leaf blowers are hardly the most complicated appliances, but do you have a clear idea about the speed rating or type of blower you want?
Well, there are certain factors to consider while buying a lightweight leaf blower, which also ensures high efficiency and desirable results. That's why to make things easier on your part, we went on a spree and tested multiple models from different brands.
It was only after a lot of groundwork and research that we ended up with 13 lightest weight leaf blowers for home use. Also, to ensure fair ranking, we individually checked the functions and features of each item, thereby bringing only the best onboard.
Reigning in position number one, the Husqvarna 350BT is designed to make life easier with its compact design and convenient operations. If you've been using this brand, then you already know that it has a longstanding reputation for making high quality and efficient yard tools. And on that end, our top model is another superb addition, worth every penny.
To begin with, the 350BT cordless leaf blower allows you to choose the style and features that best fit the job. Therefore, we recommend this appliance to landowners who have a considerably large outdoor space to look after.
We are impressed with the application of x-torq engine technology in this unit that reduces harmful emissions by up to 75% and increases fuel efficiency. Also, since it's not dependent on electricity, users can freely move around in the yard without tripping over an extension cord.
Besides, this handheld unit, unlike wired models, can easily access hard to reach places like gutters and rooftops. Apart from that, we like the ergonomic design of this lightweight leaf blower that minimizes stress on the arms and hands. Long story short, this product features anti-vibration dampeners that absorb the vibration and reduce arm fatigue.
All in all, the 350BT is quite the show stopper and is excellent for stress-free yardwork.
What Could've Been Better?
Well, we hardly have any complaints about the performance and design of our first pick, but the only catch is the hefty price tag of this unit. Therefore, if you have the budget, you'll undoubtedly appreciate the product as the price issue aside, this lightweight leaf blower can truly work wonders.
Our second product from the house of Makita has everything you would want in a lightweight unit and some more. That said, with this item, the brand has also made its mark in the yard maintenance department, and we recommend using it if you're looking for something easy to use.
Variable speed (0-18,000 RPM) for optimum speed control
Up to 12 minutes of continuous operation from a single...
Why Did We Like It?
Not all of us need a commercial-grade lightweight leaf blower for basic yardwork, so if you want an affordable unit for a small lawn, the DUB182Z will surely impress.
First off, this mini model packs a lot of power despite having a compact size and it is capable of producing a maximum air velocity of 179 MPH. Now, that's a remarkable number on such a low-price unit and more than sufficient for average-sized homes.
We especially like the variable 3-speed motor that allows you to customize settings and work at a comfortable pace. Even though it is not as powerful as our top model, the adjustable speed feature enables you to clear out outdoor spaces quickly and easily.
Other than that, we like the anti-static design of this appliance that prevents any buildup of static electricity. However, what we like the most about this product is that it weighs only 3.9lbs, meaning you can swish this around as much as you like without tiring your arms.
What Could've Been Better?
In spite of so many positives, this mini device couldn't bag the first spot, mainly for its limited capacity. If large, overgrown trees surround your property, then this lightweight leaf blower will most likely fall short. Therefore, we suggest buying it only if you're looking for an economical blower for low-density leaf removal projects.
The Toro 51585 Leaf Blower is a sleek, well-made unit that will amaze homeowners with its high functionality and smooth operation. So, if you're expecting a high accumulation of leaves on the premises come fall, we recommend investing in this reliable machine that can clear off any yard in a jiffy.
Why Did We Like It?
Buying a low-priced appliance makes sense only when you don't have to compromise too much on quality. And, when it comes to this Toro item, we are absolutely stoked with its features, capacity, and reasonable price tag.
For starters, it weighs a manageable 4.6lbs and sports a durable built, ideal for heavy-duty cleaning jobs. Even though it is a corded unit, we like the easy maneuverability it provides with the help of the long nozzle.
Other than that, we like the 2 adjustable air speed controls, conveniently located on the handle, allowing on-demand access every time. Furthermore, the dual settings are especially useful as the low-speed mode offers greater control in tight areas, while the high-speed mode wraps up the job with increased power.
Lastly, if you need a high capacity model for clearing leaves and debris from driveways, sidewalks, and yards, consider this option for optimum performance.
What Could've Been Better?
We are impressed with the overall functioning of this leaf blower and couldn't find many flaws with its design, either. However, it does not work very well on wet leaves as it lacks the required capacity to clear them. Nevertheless, it's still a viable option, especially if you're on a tight budget.
If you think that we've run out of cordless options, we'd like to introduce the BLACK + DECKER LSW221 battery operated leaf blower to surprise you as your fourth candidate. However, in addition to the wireless operation, this model is chock full of features and ensures high efficiency and desirable outcome, regardless of the application.
Up to 130 MPH sweeping easily clears debris from hard...
Lightweight design of just 3.7 lbs
Why Did We Like It?
First and foremost, we like the neat and no-frills design of this leaf blower that enables easy operability across the yard, porch, or driveway. The lack of extraneous detail also contributes to the low weight of the unit and helps reduce arm fatigue.
What we like best is its low-noise functioning that allows you to engage in long cleaning sessions without inviting annoyed glances from neighbors. So if things get notably worse after a full-blown storm, you can rely on this lightweight tool to deal with the maintenance job, quietly and efficiently.
Furthermore, we are impressed with its 130 MPH speed capacity, which is enough to sweep away leaves, grass clippings, and debris from sidewalks, lawns, garages, and other hard surfaces. However, what we like best about this machine is its battery system, which can be used interchangeably with other devices from the brand.
Moreover, the batteries can preserve charge for up to 18 months, so you can keep it idle a whole season and still work with a full charge later.
What Could've Been Better?
We are, for most parts, satisfied with the performance of this battery-operated unit, but then again, there's a reason it's called a sweeper and not a leaf blower. The only concern is the capacity of this unit, which is nowhere close to a gas or electricity-powered model. Nevertheless, it still is a decent option for mid-sized properties that require limited cleaning.
Pros
Sleek lightweight leaf blower
Enables noiseless operation
Interchangeable batteries; can be used with other tools from the brand
The WORX Hi-Capacity Blower is one of the most versatile items on our list that has us thrilled with its phenomenal capacity and suite of innovative attachments. Therefore, if you're looking for a cordless leaf blower that can access the most to hard-to-reach places without the need to move a single thing, get cracking with this one.
cordless convenience to quickly clean up your deck,...
clears hard to reach places, ideal for hard surfaces
Why Did We Like It?
Our fifth pick is a 3-in-1 model that serves as a sweeper, blower, and cleaner, streamlining multiple jobs around the house. Obviously, we're very impressed with the 8 unique parts that can be fitted to the machine for a range of blowing and vacuum functions.
That being said, the device comes with a rechargeable 20V lithium battery and accessories, including two tubes, extended hose, dust nozzle, detail brush, dust brush, and a wide nozzle. Besides, you also get a deflator attachment that can be used to deflate rafts, pool toys & mattresses.
What we like best is that you can use this dependable machine for cleaning applications both inside and outside the home. Meaning, its 120 MPH capacity is sufficient not only to blow leaves and twigs off the yard but is also good enough to clean furniture and windows. Furthermore, this lightweight leaf blower is perfect for blowing off debris collected in your workshop, shed, or garage.
What Could've Been Better?
We love this light-duty gadget for its superior range of functions and that too at an affordable price point. However, we would've liked it better if the battery capacity on this was slightly better since some jobs demand a longer runtime. Regardless, it's a great little machine to have around at home for dealing with regular chores.
Pros
Works as a blower, sweeper, and cleaner
Deflator attachment can be used to deflate mattresses and rafts
Blows off debris accumulated in the garage and shed
Suitable for cleaning dust on windows and furniture
Greenworks has truly set the standard for high efficiency and performance with their 40V Variable Speed cordless leaf blower. Homeowners looking to fix their outdoor spaces quickly will love this smart-looking device that can deal with leaves in a snap. Long story short, our sixth entry is designed to impress from the get-go with its superior functionality and features.
40V SWEEPER: Perfect for clearing leaves and debris off hard...
150 MPH / 135 CFM: Delivering powerful performance with a...
Why Did We Like It?
To begin with, this model from Greenworks is best suited for small to mid-sized projects around the yard, driveway, or rooftop. As busy homeowners, we understand the need for high-performance tools that can wrap up the job effortlessly. That's why we recommend this wireless device as it does not require you to pull cords to begin function.
The quick electric start makes things much easier, while the seamless battery operation eliminates the hassle of gas refill and risk of spillage. Furthermore, with this machine, you no longer have to worry about being labeled as the annoying neighbor as it packs a lot of power without emitting ear-numbing noises.
Apart from that, we love how low maintenance this model is, demanding just the bare minimum - battery recharging and safe storage. And that's all it takes to keep this robust and reliable yard tool going; sweeping and gathering leaves and debris in a blink.
What Could've Been Better?
The primary drawback of this Greenworks unit is that the included battery is not powerful enough. Meaning, while using it in the highest speed setting, you'll get only 14 minutes of runtime per full charge. To get more out of this product, you can buy an aftermarket 40-volt battery for further extending uninterrupted operation.
Pros
Highly productive device for small to medium size projects
We're halfway through our recommendations, and now is a good time to introduce the Ego Power+ Electric Blower. On that note, we're very impressed with this ergonomically designed model, engineered to provide unmatched user comfort and experience with excellent functionality. So if you expect your unit to work like a charm with minimum effort, we suggest investing this option.
Let's just begin by saying that this cordless leaf blower looks like something straight out of science fiction movie. And that's not something you get to say often about a leaf blower. However, we're not all caught up with looks as we find this unit exceptionally powerful owing to its turbine fan-enabled technology.
To explain further, this electric rechargeable blower can give fierce competition to gas-fueled contenders as it surpasses the later in performance while also ensuring user comfort. Furthermore, this handheld beast can take care of any unwanted leaf accumulation on the property without the clamor, chaos, or vapor.
But the best part about it is the 3 variable speed setting, providing convenience and customization as per the situation demands. Depending on the setting, you can get a good 1 hour of runtime wherein the built-in brushless motor generates enough power to get the job done.
Lastly, we're impressed with its reduced structure and climate-safe construction that further adds to the overall level of efficiency.
What Could've Been Better?
We've no complaints regarding the design or capacity of this model as it has delivered amazingly on both departments. However, we would not recommend this model for considerably bigger properties since it lacks that kind of horsepower. Nevertheless, it's a remarkable product and does an excellent job of clearing away buildups.
Pros
Well designed model for higher user comfort
Performance comparable to premium gas-powered units
Comes with 3 velocity settings
Brushless motor technology yields high performance
For our eighth slot, we've picked this handy, cordless leaf blower from the house of KIMO. that facilitates seamless one-handed operability and provides multiple convenient features. It has been carefully engineered for enabling users to carry it anywhere effortlessly without tiring out the arms. So if you're looking for something compact and dependable, invest in this one.
First off, this eye-catching green unit from KIMO. also doubles as a vacuum cleaner with a highly effective suction mechanism. But since it's primarily a leaf blower, we would like to highlight it's impressive power capacity, sufficient to blow off wet leaves, little rocks, and even snow on your car.
Therefore, you can use this model round the year and not just for clearing leaves during fall. Apart from that, we like the 4.0 Ah battery, ensuring an uninterrupted blower application for up to 30 minutes. And honestly, that's a serious flex as most other battery-operated units at this price range works for less than 20 minutes on a single charge.
Furthermore, this portable option can be quickly converted into a vacuum device without changing any parts. So if you need to clean up pet hair, biscuit crumbs, and dust on the window, the suction feature can take care of it all. Also, this model comes included with reusable collection bags for convenient disposal after cleaning.
What Could've Been Better?
We are delighted with the 2-in-1 blower and vacuuming functions of this small yet powerful unit. However, this product is a little too expensive compared to other portable models on the market. Therefore, we recommend buying this only if you don't find a cheaper and equally efficient cordless alternative.
Pros
Model doubles as a vacuum cleaner
4.0 Ah battery ensures extended run time
Can be used to clear minor snow accumulation
Capable of blowing off wet leaves and little rocks
The Dewalt Brushless Blower is built like a tank and yet loses no marks when it comes to portability. Obviously, this product is from a reputable brand that manufactures some of the best power tools in the market. And we're pleased to say that this sturdy appliance has checked more than a few boxes.
Battery operated leaf blower gets up to 400 CFM of air...
High-efficiency brushless motor maximizing run time and...
Why Did We Like It?
Like all Dewalt products, the DCBL720P1 also comes in the iconic yellow, and black get up. But the most discernible feature is the axial fan design on the rear end of the blower that significantly contributes to the overall performance of the unit.
So if you have some heavy-duty leaf clearing to do, you'll appreciate its highest capacity of 400 CFM of air volume at 90 MPH. And since the unit runs on a 5.0Ah lithium-ion battery, you can expect high air output combined with extended runtime.
Furthermore, we're very impressed with the ergonomic design of this model that's built to maximize productivity and reduce stress on the arms. Besides, this portable gadget ensures high functionality and seamless operation without having to deal with fumes and mechanical noises.
Also, unlike a lot of other battery-operated models, this product comes included with the charger so you can use it straight out from the box.
What Could've Been Better?
We wouldn't have complained so much about the price if this model had more features apart from the basic functions. That being said, it's a costly item that sure packs a lot of power and delivers superbly well. But if you're not in a mood to splurge on leaf blowers, this may not work.
We may seem a little partial to Greenworks products, but a list of lightweight leaf blowers would be incomplete without the PRO 80V model. That being the case, our tenth pick is a powerhouse, ensuring top-notch performance right from the beginning. Therefore, regardless of the situation, you can expect this beast to deliver and amaze.
Greenworks has been making a lot of waves recently with this 80V cordless leaf blower, designed to yield excellent performance regardless of the speed setting. This commercial-grade power tool is ideal for homes with large outdoor spaces, as it can tackle the most demanding jobs across variable terrain.
Moreover, we're very impressed with its superior air output fuelled by 80V 2Ah Lithium-Ion battery. Besides, when it comes to runtime, the PRO has bowled us over with 70 minutes of uninterrupted operation while on the lowest speed settings. Also, with a full charge, you can use it on medium and high-speed modes, which runs for 28 and 12 minutes respectively.
Apart from the 3 variable speed options, we like the cushioned overmold grip that provides comfortable and secure hold while sweeping across the yard. And since it's rated at only 60 dB, you can confidently use it in neighborhoods and corporate parks with noise ordinances.
What Could've Been Better?
Despite being conveniently portable, this unit is quite a handful, with the battery sticking out from the rear. We would've liked it better if the tool came with a storage accessory like a hook or a strap. Therefore, we recommend buying this tool only if you've sufficient storage space to keep the appliance readily accessible.
Pros
3 variable speed settings; high, medium and low
Cushioned overmold grip maximizes comfort
Suitable for large outdoor spaces
Commercial grade model meant for heavy-duty application
The Bosch ALB 36 LI Cordless Leaf Blower provides maximum mobility, allowing you to access hard to reach places in a snap. However, we don't get convinced by just looking at the brand name, but when we tested all the functions, we were impressed with its high capacity and intuitive controls.
Cordless freedom, no longer confined to the limitations of a...
Variable speeds of 170 - 250 km/hr. Note: Battery and...
Why Did We Like It?
First things first, this slender appliance is fuelled by a 36V 2.6Ah battery, providing maximum power with less weight. To further add to the convenience, the AL 3620 charger that comes with the model features three indicative lights to signal whether the unit is charging, charged, or exhausted.
Furthermore, the appliance comes equipped with an intelligent Syneon chip that controls the current and voltage equation to prevent overheating, thereby increasing lifetime. Also, to streamline the clearing process, the ALB features a bent-tube nozzle to facilitate the best angle for blowing, without having to stoop.
Other than that, the device features a red button that allows you to take the tube apart from the main body, enabling secure storage. Whereas the minimalist controls on the unit make it user-friendly even for the least tech-savvy of all. All in all, it's an excellent acquisition that can be used for multiple garden cleaning jobs.
What Could've Been Better?
We are pleased with the easy operability of this appliance and like the add-on features incorporated into the model. Our only gripe is the runtime on this cordless leaf blower, which is far from the best. That being said, if you can overlook this hassle, it's still a reliable tool for yard maintenance.
Pros
Syneon chip technology prevents overheating
Equipped with a bent tube nozzle for a better angle
User-friendly and intuitive controls
Red button takes apart the unit for convenient storage
The DUB183Z is a compact, low noise leaf blower that runs on Makita's standard 18V batteries. So if you're looking for something handy to clean the garden or sweep the workshop after finishing a job, we recommend using this tool for efficient and desirable results. Also, since it's pretty easy to use as well, you'll like to keep this for home use.
Up to 18 minutes of continuous operation at high speed using...
Variable speed (0-18,000 RPM) for optimum air volume control...
Why Did We Like It?
The first thing you'll notice about our 12th guy is the compact proportions that allow convenient operation and storage. The controls are minimal, including a black variable speed trigger that you've to press for the desired velocity. Also, there's a thumbwheel located behind the trigger that offers access to 3 air volume settings: low, mid, and high.
Long story short, when you move this thumbwheel, the motor inside runs faster and generates more power for better cleaning. Apart from that, we like the long blower nozzle with a flat end, enabling comfortable use while standing upright. Furthermore, the comfortable, rubberized soft grip adds to the easy operability of the appliance by ensuring maximum control.
Even when used in the highest air volume setting, this model works almost soundlessly. Therefore, you can confidently use it even if you live in the quietest of all neighborhoods as it does the job without causing a din.
What Could've Been Better?
Since this model comes without the batteries, you have to spend more on buying the brand's 18V batteries. This is an additional cost you could've otherwise avoided, but then if you use other power tools from Makita, investing in this model makes sense as you can use the batteries interchangeably.
Pros
Convenient and intuitive controls
Soft rubberized grip for a comfortable experience
Flat end nozzle enables seamless functionality while standing upright
Now that we've reached the end of our list, we would like to finish off with this high-performing model from the house of Avid Powers. It is easily one of the most budget-friendly options available in the market and yet offers all the power and versatility you need for light-duty yard cleaning chores.
【Meet Your Needs】Lightweight Cordless leaf blower easily...
【High Performance】Up to 140 MPH/155 CFM; No-load speed:...
Why Did We Like It?
This might be the last item on our list, but that's not a comment on its quality or features. That said, we're impressed with this highly portable cordless blower that can successfully sweep away leaves, sticks, and debris even from hard surfaces like driveways, garages, decks, and porches.
Furthermore, we like the rubberized blower handle that facilitates one-handed operation while the lock-on button ensures less fatigue while in use.
Also, this leaf blower runs on a 20V battery that generates a maximum motor speed of 12500 RPM. Given the price, that's quite decent, as the motor is capable of producing air velocity of up to 130 MPH, which is much higher compared to other budget options.
Apart from these specs, we like that the battery features a real-time indicator to point out present capacity. Also, it comes with a USB port for charging cellphones. These are add-on features that we very much appreciate as they increase the value for money appeal.
What Could've Been Better?
Given the price and capacity of this product, obviously we do not expect anything above and beyond basic functions. Nevertheless, we would've preferred if it provided a longer runtime, which is sometimes necessary even for light-duty yardwork. Other than that, it's a great model if you need something functional within a low budget.
Pros
Generates air velocity of up to 130 MPH
Battery features a USB for charging phones
Battery comes with a real-time charge indicator
Rubberized grip enables one-handed operation
Cons
Not the best runtime
Lightest Leaf Blower Buyer's Guide
Knowing the 13 lightest weight leaf blowers is hardly too much information.
Nevertheless, we don't want to leave you all confused and worked up with all this detail. That's why to help you figure out which one of these options will work best, we put together this comprehensive guide. Also, we want you to make an informed decision while investing in a model, so you don't get stuck with a machine that's not much use.
We have carefully listed the various factors you need to consider when buying a portable leaf blower. Read on to know more…
Type of Leaf Blower
Usually, you get to choose between cordless battery-operated options or wired electric or gas-powered models. Ideally, to ensure convenience and mobility, we recommend using cordless options. However, not all cordless leaf blowers can deliver the same air volume capacity as gas-fuelled ones. Therefore, check the specs before picking either of the two alternatives.
Battery Voltage
If you decide on buying a battery-operated, cordless leaf blower, check the voltage offered by the model. That being said, you can expect better performance from appliances with a higher battery voltage rating. This includes options like 20V or 40V battery system enabled leaf blowers. You can also find options with 80V ratings, which are considerably more expensive than the standard 20V models.
Airflow and Speed
The primary mechanism of a leaf blower depends on how much air can be produced and at what speed. That's why it's imperative to verify the airflow and speed rating of a model before buying one. The numbers, in this case, are critical as they give you a fair idea of the clearing capacity of a machine.
The airflow generated by a leaf blower is measured in CFM (cubic ft/min), and the higher you go, the more efficient it gets. Similarly, options with higher airspeed can do the job better as well.
Size and Weight
Obviously, all the 13 items on our list are portable and lightweight leaf blowers, meaning you can comfortably maneuver them across the lawn, driveway, garage, or porch. However, while buying a leaf blower, make sure that the selected model has some measures or technology to reduce stress on the arms. You should also weigh in the ergonomics of the model so that you can use the machine comfortably with easy access to the controls.
Additional Features
Some models come with rubberized grips for a secure hold and one-handed operability while others come with angled nozzles, allowing users to stand upright. While these are not must-have features, we recommend looking for them as they can provide comfortable user experience and improve overall efficiency of the model by streamlining yardwork.
Verdict
Nobody likes to spend hours in their yard, cleaning out leaves and debris, so if you have the right appliance, you get to accomplish the job much quicker. Therefore, you can now quit laboring and confidently choose the best lightweight leaf blower from our all-star collection and keep your outdoor space spic and span.
On that note, we have come to the end of this comprehensive review and guide about leaf blowers. And we hope you were able to select a suitable option that'll best meet your needs from our itemized reviews.
When it comes to expressing your creativity freely, opting for a subject such as canvas painting ideas seems like a viable option. Art in its many forms has a great ability which can be easily underestimated. It can get under your skin without you even noticing it, becoming an essential part of our beings and daily life.
Every single DIY project you start has the potential to become a work of art if enough dedication spirit and love are given. Painting in general has been proven to exude calming effects, thus providing a wonderful method of relieving daily stress and disconnecting from the outside world.
As a beginner in the canvas painting world, one must accept from the very start that a set of basic rules apply here as in any other domain in order to obtain the desired end results. So today we'll be starting with a set of basic rules revolving around Canvas Painting Ideas and the right choices you should take to start on the right track for your easy canvas painting projects.
The very first and basic mistake everyone makes at the beginning of this art is the rush of jumping into the painting act itself without the right preparations for the working environment and materials used. As I am sure many of you have done in the past, I was used to buying a pre-stretched canvas or canvas board from a library and starting the piece right away, on the black slate, which I have found out can be a huge mistake from my part
One of the fundamental techniques used in painting is covering the white canvas with a solid paint color called a "toned ground" or "colored ground"
The reasons behind this choice are numerous. A toned ground will provide a background for your work of art which will result in a more professional-looking piece, giving you more speed and efficiency in the painting process . There are two methods of applying the colored ground to your canvas. The first one is opaque and the second is a transparent stain, an Imprimatura. We recommend you to start with the opaque finish and work from there on. As for the colors themselves, it all depends on your choice of subject and the results you are looking for. Earth colors such as umber or yellow ochre are the best choices for landscapes and for the beginner level. Yellow ochre might seem like a bold first choice but can provide a balanced background on which you can build on the different acrylic layers that will compose your work. If you are still not sure of this choice, you can add some Titanium white to the mixture to tone it down.
What is the best paint to use on a canvas?
As we are working our way up from the beginner level, we recommend you to start with basic Acrylic paint. "Acrylic paint is a fast-drying paint containing pigment suspension in acrylic polymer emulsion. Acrylic paints are water-soluble, but become water-resistant when dry. Depending on how much the paint is diluted with water, or modified with acrylic gels, media, or pastes, the finished acrylic painting can resemble a watercolor or an oil painting, or have its own unique characteristics not attainable with other media."
As Acrylic is based on adding, you can count on the colored ground you have added to your canvas to do the work for you. It will temper the hues and help you observe the true tones of the paint you add in comparison to a blank white canvas which will play tricks on your eye.
How much do I dilute my acrylics?
A percentage of 40-50% water is accepted from most manufacturers. More than this you will be diluting some of the acrylic adhesive qualities, which are essential in order for the paint to really attach to the canvas and on each added layer. After gaining some experience with basic Acrylics you can opt for other paint sets which come already diluted from fabric and provide a consistent layer.
This amazing piece by Michael Shapcott used different techniques of applying the paint layers, resulting in a rich explosion of tones and creativity. We can all agree this level is very difficult to reach, but we can aspire to greatness.
Further on we'll explore some of the different techniques you can choose in your Canvas Painting Ideas Projects.
So what is your take on these easy canvas painting ideas? Is it something you would dare to try on? We would very much like it if you would share your ideas and personal canvas painting ideas and projects in the comment section below.
Drawing, painting, sketching have been proven to have an immense beneficial effect on the human psychic and body alike. They spark creativity, engage imagination, provide a calm, a repetitive technique that establishes rules, lines and patterns, an oasis of relaxation and control in a chaotic world.
Getting started with a new painting requires a few preliminary steps you ought to take: finding theproper paints, the desired work surface according to your wishes and deciding on the design path you are going to take. Today we will journey through the land of acrylic painting and we will Learn The Basic Acrylic Painting Techniques for Beginners.
We will start our journey by exploring a few techniques involving applying paint, mixing the right colors and tones, layering and many more creative procedures that lead to the perfect acrylic painting.
The basic materials- an acrylic brush, a piece of paper and acrylic paint are the essential elements that can be mixed to create an unbelievable painting. Let's go over a few techniques that will provide a variety of styles of creating your desired creation.
1. Dry brushing
Acrylic paints come in very strong pigmented tones and unless diluted by water, the tones you will obtain on canvas or paper will be rather strong. When using the dry brushing technique, the effect will be one of uneven brush. You could use water to smooth the edges and soften the touches but if you are looking for texture and direction, choose this simple basic technique.
2. adding water
Acrylic paint can be used in a similar manner to watercolor when enough water is added to the mixture and offers a translucent coat to the used paper. Take into account though that unlike watercolors which can be diluted again on paper after having dried, acrylics dry and set on the paper or canvas forever, mistakes cannot be erased, tones cannot be changed.
3. stippling
This techniques consists of applying layers of various tiny paint dots to create depth in an imagery as well as texture. Imagine creating an autumn forest out of an array of lovely coppery tones using this technique.
Take a rather large brush, get it fairly wet and flick paint onto your surface. This is how the lovely splattery effect creations are made, adding texture and somehow delicacy to your painting. You can even use this technique to ensemble an abstract piece in an array of complementary tones.
5. Dabbing
Dabbing involves applying paint by using a corner of a sponge or a piece o paper towel. It is often used to add accents and movement in cinematic creations.
6. Detailing
When trying to detail an eye or the strands of a feather a very small delicate brush should be used. White acrylic is preferred to add light and reflections to the creation, as well as pure black and grays for shadowing. Delicacy and patience are essentials for perfect results.
If you have always wondered what the exact role of a palette knife was, you will now know that it is commonly used to apply thick layers of paint and create texture and volume. It is a very easy technique, accessible to everyone and can result in very artistic creations. The difficulty lies in having the patience of allowing the first layer to dry before using the palette knife to add more paint, in order to avoid scrapping involuntarily your base, palette knife painting is a patience game and a pure form of art.
Basic techniques for building a painting
Every art creation requires time, dedication and commitment. Acrylic painting is no different and requires a mixture of techniques and layers to obtain that complex intricate final effect. Mastering all of them takes time but each one will add a new depth to your art piece.
The under-painting technique
No matter what you might think, every painting starts with a sketch of the final image, you must trace some boundaries that will help you in your painting process. It is common to use a color in contrast with the ones you will actually use for the piece. In the end you can opt to cover the lines up and mask any trace of the sketch or to make use of it and actually emphasize it, it is only up to you and your style.
Artists use the under-painting techniques regardless of expression, from abstract art to detailed portraits. Needless to say that there are artists that do not use it but for beginners is extraordinarily useful and encourages creativity and productivity at the same time.
Glazing
You can incorporate a matte medium into your paint and apply the paint in thin multiple layers in order to obtain the desired tones.
Layering is the simple technique of starting the painting with big portions of uni colors and adding more and more layers of paint and increasing the detail level. Similar to oil painting, the layering technique requires patience and waiting for each layer to dry out before applying a new one in order to preserve the purity of the colors.
If you are a beginner acrylic painter, you should start by mastering the technique of painting in blocks of colors. Sketching the basic shape will come in handy. Use distinct shapes associated with different tones and try to stay inside the traced contour.
There is no big secret behind mixing acrylic colors: you simply use a palette knife to mix the desired hues, acrylic paint makes it that simple!
Only partially mix colors
For a complex painting effect involving more than one tone of acrylic paint, use the palette knife to partially mix the colors desired, then apply them using a rather dry brush to avoid mixing the tones.
Use a family of tones
You can choose the primary tone you are going to use throughout the design and use white to obtain various tones that will come in handy when trying to add depth, details, texture and shadows. Preparing your acrylics before starting the process is a great idea but keep in mind to not mix large portions at once, they will only dry out before you manage to apply them.
Acrylic Painting Ideas for Beginners
Now that we have browsed through a series of acrylic painting techniques, enjoy the beautiful collection that follows featuring simple and creative acrylic creations
What is your take on acrylic painting? We would love to see your artwork so feel free to share your creations with the rest of the DIY community in the comment section below.
Today you will learn to create something extraordinary, something that can change the way you envision and materialize designs in a great manner. Today you are going to learn how to transfer pictures onto wood with wax paper. Through a simple, fast, and inexpensive procedure you can materialize absolutely any wooden surface with absolutely any image or text that you can think of. The possibilities are endless and the results are staggering, a vintage-like feel will be embedded now into the item in an extraordinarily beautiful manner.
You will only need wax paper and a printer for this tutorial and, as printers are all around the world, all you have to do is to find some wax paper at a local shop and you are good to go.
It is worth mentioning that the printer should be inkjet, not laser.
If you are using a Silhouette Cameo for the transfer we have featured in an article on Homesthetics the Best Heat Transfer Vinyl [HTV] Options right here!
Take the roll of wax paper and cut just a few sheets of a standard paper size for the printer. In most cases A4 will do but if you need a bigger surface try A3 or A2 .
Pick your lovely subject, a smooth, preferably a light coloured piece of wood. It is worth trying on multiple pieces before you go ahead and try on the one that you want to imprint. Find a decent resolution for the image you are going to print. If you have found just a small size online you can check the whole web for other size of the picture with tineye.com, a reverse image search engine. Pick the best resolution in the results for print.
Once you have the image ready it is time to reverse it. Just flip it horizontally through any photo program you have on your computer. You will probably find a few web based programs as well to help you with it.
Now simply put the cropped piece of waxer paper into the printer and click paint.
Keep in mind that waxed paper is quite thin and it may require a normal A4 as support. If you manage to print on it without support be careful to gently guide it as it comes out of the printer to avoid rolling accidents or jamming the printer. The ink must remain intact.
It is time. Position the image exactly where you need it on the wood and make sure that the wood is unfinished, if the surface is glossy it won`t work. Try it out on a piece of salvaged wood, a bench or vegetable box for example.
Once you position the image you can`t relocate it so make sure you know where it will go. You can even draw some guiding lines to aid you.
Hold the piece of wax steady and tight on the wood and slowly, carefully swipe the edge of a credit card or something similar across the image; in this manner you will push the ink from the wax paper onto the wood which will absorb it.
Push hard enough on the wax paper to make sure you get results yet not so hard that you rip the waxed paper. If you consider yourself skillful or experienced with the process you can gently lift the paper to see if it works well.
If everything worked well you are probably speechless now, glancing on the beautified piece of wood. Congratulations.
More examples materialized with the same process :
After the ink is all dried out you can now finish the surface to enhance the item`s life span. The tear and wear will look great on the vintage piece too but it is your call entirely. Any sealer will do the trick so do not waste money on special items. Needless to say, extraordinary photographies can be transferred for the ultimate gift. Everything can now become wall art. Keep that in mind.
What do you think about this technique? We find it extremely creative, it changed the way we see certain items now and it opens up limitless possibilities.
Christmas festivities involve decorating and lighting up your home inside and out. But how should you store the lights for next year after Christmas?
Icicle lights are an indispensable part of Christmas décor all over the world. They are used for lighting up the interiors as well as exteriors. And with a dash of creativity, these lights add an excellent and almost surreal look and feel to any home.
Icicle lights look stunning but can be problematic to store once the holiday is over and routine life resumes. They are not the sturdiest lights, and if not stored safely, they might get damaged.
The most common problem that icicle lights pose is tangling up in a bunch of frustrating knots. So, how do you store icicle lights in a tangle-free, safe, and convenient manner?
Read on to learn the three best products that will help you store icicle lights after Christmas!
Listed below are the best options for icicle light storage containers from our list:
Adams Christmas Light and Cord Wind Ups. Adams Christmas Light and Cord Wind-Ups are polypropylene wind-ups that efficiently keep lights, extension cords, and garlands organized and tangle-free; they prove to be compact in storage bins and extend the durability of icicle lights.
Trademark Home Extension Cord or Christmas Light Reels with Bag. Trademark Home Extension Cord or Christmas Light Reels with Bag ensure a convenient, durable storage solution for Christmas lights and extension cords.
Elf Stor Light Storage Bag with Steel Reels. Elf Stor Light Storage Bag with Steel Reels, designed with high-quality welded steel, allows for safe, clean, and organized storage of about 200-foot strings of icicle lights with their user-friendly design and smooth finish.
Adams Christmas Light and Cord Wind Ups
Adams, USA offers wind-ups made from polypropylene that allow you to keep your lights, extension cords, and garlands organized and tangle-free.
These wind-ups from Adams are not only a thing of beauty but are very efficient for storing icicle light strands. Using them will save significant space in your storage bins and maintain the useful life of the somewhat delicate icicle lights.
The wind-ups from Adams feature a simple design that can be effective for storing bulky strands including bulb covers and wire gauges. To make the most of this useful tool, you can wrap two to three icicle light strands on a single wind-up. If the lights exceed the handles on either side, it is not a concern. Essentially, Adams wind-ups serve as an upgrade for anybody who has been accustomed to wrapping an icicle light strand around cardboard and using tape to secure it.
Adams offers wind-ups in a festive green color in two variants – a 2-piece pack and a 4-piece pack. The 4-piece pack can hold up to 100 feet of light strands. The 2-piece pack weighs 3.52 ounces and measures 16.5 x 3.9 x 1 inch. The durable handle allows for easy winding and storage. Adams wind-ups are an excellent option to store icicle lights after Christmas.
Trademark Home Extension Cord or Christmas Light Reels with Bag
Trademark Home Collection offers the String & Store Christmas Light Reels, which is a set of four durable plastic reels in a zippered storage bag. Each of the four reels can hold two 100 mini-light strands or one 150-icicle light strand. You can use the reel to store extension cords also; making this set a must-have for storing all your Christmas lights.
The set includes reels in a subtle green color, and the bag comes in a festive red color. The packaged product weighs 2.5 pounds and measures 10.2 x 9.2 x 9.2 inches. The storage reels have a sturdy build and will help you store your lights conveniently for the next couple of years at least.
To use this product optimally and enhance the storage space, wrap the light strand on the reel so that the wire rests on the spool without the light bulbs sticking up. This will also make taking the lights out much more comfortable and tangle-free when you have to use them next year.
Elf Stor Light Storage Bag with Steel Reels
The Elf Stor Christmas Light Storage Reels and Bag come with two sturdy reels made from high-quality welded steel. Each reel measures approximately 11.75 inches in diameter and 5.75 inches high. The bag has durable green nylon handles, allowing you to maneuver and transport stored lights easily.
The bag and reels collapse and will enable you to store them without using much space when not in use. The packaged product weighs about four pounds and measures 12 x 12 x 12 inches.
Each of the storage reels has a reinforced seem and can hold up to two 100-foot strings of icicle lights. The Elf Stor Storage Bag provides a practical, convenient, and easy way to store your lights and keep them safe, clean, and organized through many Christmases.
The reels feature a user-friendly design that includes space in the center that functions as an axle and allows you to wind or unwind the lights quickly and seamlessly. Also, the reels have a smooth finish, and there is no way your icicle lights will snag or get stuck while winding or unwinding.
Useful Tips for Using Icicle Lights
There is much more to icicle lights than just storing them efficiently. Here are some valuable tips to guide you through the entire process of using, saving, and reusing icicle lights:
Check the Power Source and Test the Lights – The power source for indoor lights can be a regular outlet, but for outdoor lights, it should be from a Ground Fault Circuit Interrupter [GFCI] outlet. You should also test your lights and check that the entire strand is working before putting it up.
Exercise Caution during Installation and Removal of Lights – Use a sturdy ladder, get help from a friend or family member, and do not keep the lights connected to a power source while installing or removing them.
Managing Wires and Extension Cords – Whether indoor or outdoor, keep extension cords and wires along the walls and use the correct length to avoid anybody tripping over them carelessly. If you cannot keep it along the wall and it must go through a central space, consider taping it to the floor. In the case of exterior lighting, check that the extension cord is rated for outdoor use.
Use a Light Timer – Conserve electricity by using a light timer to ensure that the lights are not on the entire night. A light timer can be set to turn on the lights after the sun goes down and to turn off at midnight.
Indoor vs. Outdoor Lights – In the case of exterior lighting, more caution is advisable. You should check that the lights are water-resistant and have a tag marked Underwriters Lab (UL), which proves that the light meets national industry standards with the American National Standards Institute. The lights should be rated for outdoor use.
Before The Lights Go Out
The three storage products reviewed in this list, and the five essential tips for using icicle lights are sure to give you all the information you need to make Christmas décor safe and convenient.
Knowing how to manage the installation, usage, removal, and storage of icicle lights before the festive spirit kicks in will prevent any accident or hindrance.
Do you love to paint, but end up with hard bristles every time after the job is done? Well, you need not worry anymore!
Cleaning the paintbrush is a crucial part of the painting process, and often one is too tired to do it immediately. This leads to hardened brushes, which then become difficult to clean. Now, we believe that the bristles need some love and maintenance so that you can work with them for years to come.
Having said that, we decided to create this guide to help you understand how to soften a hard paintbrush.
Now, remember that it is easier to clean this product while the paint is wet rather than when it has completely dried up. But you can still transform and make the bristles more pliable with the right method.
Read on to learn all about it!
Material Needed For The Process
There are some materials that are key to cleaning bristles, and you need to have them in place before beginning the process. Most of these are already available at home, so you would not need to spend anything extra on buying them separately.
You will need hot water for this purpose and we will suggest keeping a bottle or a container of hot water next to you before beginning. Also, you may need to reheat the water at different stages before use. So, it is best if the bottle or the container is microwave-safe or can be put on a stove directly.
This has to be bought separately, and we would suggest that you wait and see if it is needed. If the brush is completely hard and has been left like that for a long time, you will probably be needing a thinner. In such a case, get one beforehand so that you do not have to pause in between.
Steps To Soften A Hard Paint Brush
In this section, we talk about softening a hard brush. The entire process has been divided into steps for your benefit, and we will recommend going step-wise to see the best results.
Step 1| Using Hot Water
First of all, you are required to put the brush bristles in warm water, and you could add a little amount of soap to it. The aim here is to liquify some amount of the hardened paint slowly. If you see that none of it is melting, then increase the temperature of the water and bring it to a point where you can just touch it without getting burnt.
This should be able to melt some parts of the paint and loosen the bristles a little. You can also try using some coconut oil if the water does not work at this stage.
If you have some coconut oil lying in your house, heat it and apply it to the bristles. This could help in loosening the bristles and ensuring that some of the paint is released. However, do not worry in case there is no oil, as the next steps will take care of the paint.
Step 2| Application Of Soap
The previous step should make bristles slightly more pliable to get it ready for the next step. Here you will need a lot of dish soap, which should get in between the bristles and lather well.
Now, it is expected that most of this soap will roll off the surface, but if you keep adding more, it will eventually get into the bristles. Once that happens, the bristles should start loosening up a bit and If nothing happens, proceed to the next step and see if that helps.
Step 3| Swirling The Brush
This is a fun step, especially if you love playing with colors. So, take a glass jar or any container that you deem fit and fill it up with soapy water. The container might get some paint stains, so try not to use a decorative item for this.
Once the warm soapy water is inside the jar, fill it up with more dish soap. Now pour water till the water level submerges the brush bristles completely, and then start swirling with it inside. The sides of your jar will help in getting some of the paint out.
Swirl till you see the color of the water changing. This is not only satisfying to look at, but you will be able to see the color actually coming out.
Step 4| Rinsing With Water
Once you have swirled enough, it is time to wash the bristles again. The vigorous swirling should help in making the brush more pliable. Use warm water and soap to wash the bristles now. Here we would recommend not settling for cold water as it will not help in removing paint completely. It is mandatory that you heat the water before using it.
Are you still not seeing any results? Do not worry, as the next step will take care of it.
Step 5| Lathering With Fabric Softener
If you have reached this step, you must be looking to remove more paint or make the brush more pliable. For this, it is time to use a more concentrated solution - a fabric softener. If you do not have it at home, you can replace it with vinegar too. It will get the job done, considering the acidic content in it.
Step 6| Removing Excess Paint With A Comb
A brush comb can come in handy at this stage, and you can get a cheap one from an online store in case you do not already have one. This could prevent you from having to scrub the bristles with soap, vinegar, and water repeatedly as the brush will fasten up this process.
It will also ensure that the soap or softener gets deep into the bristles and help in making them pliable. Think of very tangled hair and how conditioner helps in loosening it up. Yes, this one works in a very similar way, but you will have to put in more pressure and effort in this case.
We will recommend that you begin with combing the softener through the bristles slowly. Add extra softener after you have started combing to ensure that it gets between the bristles.
Step 7| Rinsing
Once you have applied the softener well, rinse it with warm water and check the progress. If you see improvement, then you can keep repeating the above steps of applying vinegar or softener, soap, and water. This should clean the entire brush in some time, and you would not need to apply the next steps.
However, if the brush is still hard and unwilling to bend even a little, move on to the next step.
Step 8| Application Of Paint Thinner
Fabric softeners are supposed to work really well in general, but they may fail in case of resistant paint. If you do not want to repeat the previous steps and are seeing no improvement, then it is time to move to something even stronger. Here, we are going to introduce paint thinners, which are highly caustic and are available in concentrated form.
Now before you start using it, remember that you have to be very careful with this stuff, and it is best to take all kinds of safety measures beforehand. Wear a mask, goggles, and gloves to prevent the thinner from getting anywhere near your eyes, mouth, or hands. This can cause serious damage, and we will recommend not proceeding without these measures.
Having said that, once you have the safety gear in place, you can put some of the thinner or mineral spirits into a bowl or container made of glass. Pour till you have enough liquid to cover the bristles completely.
Now dip the bristles and let them stay for around 10 minutes before checking again. If you see a slight progress, keep it that way for some time, and you can go up to 1 hour if necessary. Keep swirling once in a while but ensure that the liquid does not splash.
Step 9| Rinsing Again
After the bristles have been soaked for enough time, remove them from the liquid and rinse them again in warm water. This is where you need to check for progress, and you will see it. The bristles should have been softened by now, and there will be a major change from before.
Step 10| Repeating Fabric Softener
If the bristles are still hard in some places, add some more fabric softener to them. It is best if you create a diluted solution and then dip the brush in. Keep it for half an hour to 60 minutes, and then rinse it well. Your brush should be in better condition now.
Additional Tips To Help In The Process
There is more than one way to remove paint, and in this section, we will discuss a few more. If you are wondering how to go about it, we will suggest that you first try out with materials that are already available at home. If the paint does not go, then purchase a thinner, spirit, or softener.
Using A Moisturizer
Moisturizer or baby lotion can provide a solution to make the bristles pliable, and you can try it out before purchasing a paint thinner. This will be available in your houses but ensure that the formula is not greasy. If it becomes greasy, then the functionality of the brushes may be affected at a later phase when you use them.
To go forward with this, you will need a little amount of baby lotion or moisturizer and you need to apply it to the bristles. Ensure that the bristles are completely coated with it and keep massaging till it reaches the ferrule. If you do this in the right way, you should be seeing results within 2 minutes.
Once the paint comes off, you can wipe the bristles with a napkin. This will remove any excess amount of grease too. Just keep moving the napkin in a circular motion from the bottom to the tip of your bristles. Apply some amount of pressure but ensure that the bristles are not being pulled.
Different Paint Types
So, there are different types of paint, and each will require a different method to remove them after hardening on bristles. If you have used lacquer, then you will find lacquer thinners in the market that will help in the liquefaction process.
On the other hand, water-based paint is the easiest to remove and will only require soap and water. In case you need a stronger substance, fabric softeners should work well, and you would also probably have them in the house already.
Next, for oil-based paint, you can try using mineral spirits and a brush comb. While if you have used shellac primers, then you will need denatured alcohol to clean it off.
To know more about the type of paint you are using, read the back of its tin. The type of base will be mentioned, and the manufacturers also write about how to remove it. You can buy a cleaning solution accordingly, and that should do the job.
White Spirits
White or mineral spirits are often available, and they are commonly known as brush cleaners. These have a lower content of toxic elements like sulfur and VOCs, and the odor will not bother you anymore. Yes, they are more expensive than paint thinners but are more effective too.
To use this, you will have to pour some of it in a glass jar and then dip the bristles in. Ensure that it does not touch the ferrule and keep it that way. You can cover the top with a plastic bag so that no fumes are released into the air.
Then keep it in any external environment like your yard, garage, or shed. Let it sit for a day or 2, and then remove the plastic to see the progress. The paint should come off the bristles and fall into this solution.
Move the brush around to dislodge any remaining paint bits before putting it in another container filled with spirits. The previous one should already have a lot of paint in it, and this one will take care of any remaining bits. Keep it overnight, and the entire amount of paint should be removed by the next morning. Lastly, rinse it in hot water, and you will have soft bristles again.
While you are at it, remember to keep the container away from kids and pets. You can hang it or keep it at a height where they cannot reach. This is because any form of consumption of the fluid could be fatal.
Final Words
We hope that you feel a lot more confident now that you know how to get brushes back to their original form. This will help you take care of any other hardened ones in the future, and you can be confident about not having to throw them out.
Also, it is best if you immediately clean brushes after the painting process before they harden completely. This will make your job easier as the paint will come off fast. Plus, this increases the durability of the unit and will ensure that the bristles stay soft and in place for years.
What’s more, you do not have to purchase a new brush for every project, saving a lot of money. With this, we will say our goodbyes, and we hope you have a fun time painting.
Ever wondered how people have gorgeous plastic bags with eccentric designs or how brands print their names and logos on plastic bags? Allow us to tell you!
Printing on plastic bags has become popular now, more than ever. Those of you who have reusable plastic bags should consider adding a creative touch to them to make them stand out.
If you have a small business or are trying to build a brand, printing on plastic bags will help spread the word! Now, the question is, how do you get this to happen? Don’t worry, we have got you covered.
Without further ado, let’s talk about all the deets.
How To Print On Plastic Bags
Selecting A Method
The first thing to consider before moving on to the printing is what method would be appropriate, based on the reason for printing.
Printing for long-run productions where there are many bags requires an economical and time-efficient method. The most common commercial method of printing is called flexography.
However, if you are looking to print one bag as a hobby or a manageable amount of bags for your small business, opt for screen printing as it is more suitable for short runs.
Flexography
Flexography is quite common among people printing large quantities of bags for commercial purposes. It takes lesser time and is cost-efficient since the printing is done on a large scale.
In this method, a design is impressed on a printing cylinder, and an uncut roll of plastic passes between rollers that have an adhesive.
The design is then imprinted as the material passes. Once it has been fully imprinted and dried, the plastic goes through the rollers again so that it is separated to create freshly designed individual plastic bags.
This type of printing method is also widely applied to create many labels and plastic coverings of day to day products. It allows the usage of multiple colors as opposed to screen printing.
Screen Printing
For shorter runs of plastic bag printing, screen printing is the ideal choice. It can also be done at home and does not need heavy-duty equipment.
The only issue with this process is that it is a little labor-intensive but it is worth the effort. In screen printing, individual plastic bags are printed as opposed to uncut plastic rolls in flexography. And usually, one color is used for the design.
To screen print on a plastic bag, the bag has to be placed on a flat surface. It is crucial to ensure that the bag is stable and secure.
Next, a metal screen is lowered onto the bag, and the ink is applied by dragging a squeegee along the length of the screen. Once the design is printed, it is placed on a surface to dry.
The great thing about this method is that it can be done at home. So, if you are looking to advertise your brand on bags or try it as a hobby, it is unnecessary to start doing this on a commercial scale.
Screen Printing At Home
To do this at home, the same method mentioned previously can be followed. Since that was a commercial process, you might have to use additional material for smoother printing.
You will need an emulsion liquid mixed with a sensitizer to soak the design in, and cardboard papers to separate the bag’s two sides so the ink doesn’t get transferred.
While spreading the ink with a squeegee, do not apply force, and don’t worry if the design does not print right. It’s absolutely fine to repeat the spreading process till it is printed clearly.
To dry the bag, it can be placed on a flat surface and left to dry, or a blow dryer can be used as well.
Plastic or Paper Bags
Paper bags are reusable and are also a great alternative to plastic bags, but it might not be cost-efficient for people who are starting a new business.
Reusable plastic bags are a cheaper alternative not just to produce, but they can also be bought at lower rates. Plus, a lot of reusable plastic bags are usually lying around the house that can be easily used.
Additionally, plastic bags have a certain uniformity in terms of material. They will not be adversely affected with ink, while paper bags tend to get rigid after the ink dries.
Heat Press
Apart from flexography and screen printing, a heat press can be used on plastic bags with thicker material, which allows them to tolerate a certain amount of heat.
A heat press is a machine where the design is printed onto the material using heat and pressure. Although it is commonly used on fabrics, plastic bags are also being printed on using this method.
Using a heat press is reasonably straightforward, but there are a few points to keep in mind while choosing to use a heat press machine.
Choosing The Right Bag
Since a heat press uses high temperature and pressure to apply the design, it is crucial to pick the right kind of plastic bag.
Polythene bags will not be able to withstand the heat and will instantly melt. So, it is advised not to use those if a heat press is your preferred method of printing.
Instead, use polypropylene bags for the heat press method as the material is thicker and more heat-resistant. Long story short, there is a lower risk of these bags melting in the process.
Choosing The Right Temperature
Now that it has been established that polypropylene bags are a better option, let’s talk about the temperature of the machine. These bags may be heat-resistant, but there is still a need to be careful while putting them under the machine.
It is advisable to start the process at a lower temperature and then gradually increase it if the design is not printed correctly.
Choosing The Right Machine
Printing using a heat press requires a lot of control and accuracy. And, to tie in all the points above, the right machine has to be used. If you plan on doing this at home, make sure that the machine used gives enough flexibility to alter the temperature based on the requirement.
Additionally, the pressure aspect is also vital in this method. Whichever machine you opt for has to allow adequate pressure to be applied. And, the plates have to be flat to avoid creasing the bag.
Final Words
With multiple methods to choose from, it may seem challenging to understand and grasp all the processes entirely, but it gets easier once you select one and start.
While printing on plastic comes with its own set of complications, it is not as difficult as it seems initially. Once anyone gets the hang of it, it opens up doors to more experimentation and creativity.
Moreover, it is a great way to use those reusable plastic bags that are sitting and collecting dust at home.
We hope that this guide we have created gives you a better idea about the printing process and methods. Feel free to reach out if you still have any doubts.
Is your heat press machine all grimy and sticky after recent applications? It's time to clean up that mess before it interferes with your designs.
If you're running a graphic merchandise shop, you'll need to keep the machine clean at all costs. Any residue stuck on the platens could harm your work as it tends to superimpose itself on subsequent applications.
While it's unnecessary to clean the heat press every time you imprint garments, mugs, tiles, etc., we recommend performing a weekly cleanse without fail. The best part is that it takes very little time, and you can do it using tools available at home.
However, not everyone is aware of the process. So, if you're looking to learn how to clean your heat press machine, here's a step-by-step guide.
Let's begin.
Cleaning A Heat Press Machine
Items Required For The Task
Cleaning a heat press requires very few items, and usually, they are all available at home. Following are the things you'll be needing for the job.
A clean piece of cloth
Non-abrasive cleaner (liquid hand wash or dish soap)
Abrasive cleaner
Heat-proof hand gear
Towel
Bucket or container
Steps To Clean Teflon-Coated Machines
Follow these instructions for cleaning heat press machines with a Teflon or non-stick coating.
Step 1
First things first, unplug the heat press from the electrical power source and let it cool down if it was used recently. This is a cautionary measure, and you should follow it without fail to avoid accidents and injuries.
Step 2
Take a bucket or a sterile container to mix some liquid cleaner with warm water. You don't want to over-dilute the solution as that will produce little to no results. In this case, you'll have to use a non-abrasive cleaner, and as such, a liquid hand wash or dish soap should work fine.
Step 3
Once your cleaning solution is prepared, dip a clean, dry piece of cloth in it and use it to wipe across the press platens.
Important note: Do not at any point in time apply an abrasive liquid cleaner to your non-stick or Teflon-coated heat press. This can severely damage the unit and negatively impact its functionality.
Alternative Method
If the above process failed to provide desirable results, and it could not clear away all the residue, follow the steps explained below.
Step 1
Plug the heat press back into the outlet and this time, let it heat up for a few minutes.
Step 2
This bit is important for your safety, so do not skip it. Wear a heat-proof hand protection gear and carefully wipe off the residue using the same soapy water solution. In case there are some leftovers after the first cleaning, this application will deal with it.
Step 3
Once you're done, turn off the machine and let it cool.
Step 4
After the heat press reaches room temperature, use a piece of soft cloth to rinse the platens with cool water. This will take care of any soap residue lingering on the surface.
Step 5
Follow up by wiping other parts of the heat press to get rid of any fingerprints or dust.
Step 6
Finally, dry the machine with a clean towel and use it for the next applications.
Steps To Clean Machines Without Teflon Coating
Obviously, not all heat press units have platens with non-stick coating. But, don't worry, we have covered that too. Follow these steps to clean a heat press without Teflon coating.
Step 1
Start by disconnecting the heat press from the electrical outlet and let it cool down to room temperature.
Step 2
Unlike models with non-stick coating, here, you'll have to use an abrasive cleaning product that will successfully remove all residue from the platens. The cleaner essentially works like mild sandpaper and gently scrapes off the residue.
There are several such products available on the market, but if you want some suggestions, we recommend Comet, Ajax, or GoJo. This application requires some elbow grease, so be prepared to scrub the heat press with a soapy solution containing water and any of these products.
Step 3
After the scrubbing session, plug in the heat press and let it heat up. Wear the heat-proof hand gear and carefully scrape off the remaining residue on the platens. Doing so will help you eliminate any bits and pieces left after the previous step.
Step 4
Turn off the machine after getting rid of all accumulations and allow it to cool down. Use a clean, soft piece of cloth dipped in cool water to wipe the platens. This will get rid of soap particles stuck on the surface.
Step 5
Follow up by wiping down other parts of the heat press with a damp cloth. This will remove any fingerprints or dust gathered over time.
Step 6
Lastly, use a towel to dry the heat press machine.
Final Words
That's all from us!
Now that you know how to clean a heat press machine, we hope you'll be able to keep it in pristine and good working condition throughout. However, before you get to work, here's a piece of advice.
Make sure that the soap solution or water does not come in contact with internal electronic parts. Otherwise, it can lead to serious damage and might even put your machine out of use. Also, wear the right safety gear while cleaning the machine as you don't want to risk an injury. On that note, we'd like to take your leave.
Till next time!
Today we continue our DIY backyard furniture projects with one that will fit the great farmhouse bench we have proposed you. We will offer you a set of guidelines that will teach you How To Build A DIY Patio Table With Built-in Beer/Wine Coolers perfect for the warm seasons spent outside in the garden. We have often encountered this amazing project on our daily searches for appealing creative ideas for you to get inspired from and we have decided that there is no better time than spring to try out this inspired DIY project. Take it step by step follow the instructions below and prepare your backyard for the party season.
Required Materials
Wood-$75 from local lumber yard
Wood glue- $5 from Home Depot
Wood filler- $7.50 from Home Depot
Wood screws (1-1/4″)- $10
Wood screws (2-1/2″)- $10
Sandpaper (110 grit)- $8 from Home Depot
Two plastic planter boxes- $24 from Home Depot or Amazon
The design has been created and sketched out in SolidWorks and as coolers planter boxes have been used, allowing the melted water to drain perfectly.
This option was the easiest solution, cheap enough so you can change it anytime you want to or in the case the planter breaks during winter season due to temperature changes.
Follow these instructions step by step:
Acquiring the wood is the first logical step you have to take. If you do not have the skill or tools to cut the pieces yourself you can ask for the wood to be cut at the exact dimensions you require for a small fee, which makes to entire process easier.
Sanding is the next step you are required to take.
Using the Kreg Jig put pocket holes in both ends of eight of the top center boards (2X4 @ 1′ 11-3/4″), the other four will be used for the lid and do not require these holes. Use this website to walk you through the set up and how to use it.
Take all the top board and arrange them on the floor with the pocket holes facing up and insert the planter boxes in their corresponding place upside down. Make sure there is enough space to be able to remove the boxes from their place.
Apply the wood glue you have chosen to the end of the Kreg Jigged top center boards. Unite the top center boards to the middle boards through the pocket holes using the 2-1/2″ wood screws.
Repeat the process for the two side boards attaching them to the center boards. Use the Kreg Jig to make holes down the top long boards. Draw with a pencil the points where the side and middle boards unite with the long board (two spots at each junction were pocket holes will be made). Make six pocket holes on every top long board.
Apply wood glue then unite the long side board through the pocket holes using 2-1/2″ screws.
The flower boxes need a wooden box to hole them in place. Screw together the sides of the boxes and add glue between the uniting surfaces. Be careful to align everything just right before using the 1-1/4″ screws to attach them.
Use a pencil and counter bore bit, mark off and counter bore five even spaced holes on both long sides of the box.
Place the box inside its support and take the box supports (1X4 @ 2′ 1-1/4″) and set them up against the wooden box so it is flush on both ends and also siting on the flat surface (the same as the plastic pb).
Use 1-1/4″ screws to attach the box support boards to the wooden box and add wood glue.
The most difficult part is to attach two of the cross beam boards to the box assemblies before assembling the table skirt. Measure and make the centers of both the cross beam board and the short box side of the wooden box. Use a T-square to make nice straight lines at the proper lengths.
Use a clamp to hold it in place and add wood glue before clamping.
Unite the cross beam board to the wooden box using eight 1-1/4″ screws. Place the box assemblies and table skirt boards on top of the facedown table top. Mark out the placement of the needed pocket holes to attach the skirt to the table top. Use the Kreg Jig to make the pocket holes at the drawn marks.
Wood glue the table skirts and unite them to the table top through the pocket holes.
Next pull up the box assemblies, add wood glue on the areas that make contact with the table top and placethem back down. To unite the cross beams to the table skirt drill two counter bored holes at each junction. Use1-1/4″ screws to unite all eight junctions together.
Make sure you line up the legs (2×4 @ 2′ 5-1/4″) and the outer long skirt (1X4 @ 5′ 2-1/4″). Attach the outer long skirt by first applying wood glue to the backside and screwing it together through the inside using 1-1/4″ wood screws.
To attach the legs raise the table onto sawhorses and add wood glue and use 4 1-1/4″ wood screws in each corner, using a clamp to hold things together.
You can now turn your table and set it onto your legs. Cover the remaining holes with wood filler. The final step in this section is to sand the table in order to prepare it for the finish.
The final part of the construction step is designing the two lids which were made from two of the center boards attached together in 4 sport through pocket holes with 2-1/2″ wood screws and wood glue.
To lit them up easier cut a hole through them by using a 1-1/2″ hole saw bit.
Part II: Staining and obtaining the finished product
Required materials:
Benite wood conditioner (1 quart)- $16.75 from Dalys
Wood stain (1 pint, Dalys’ 45 cherry)- $10.45 from Dalys
SeaFin Teak Oil (1 gallon)- $53.95 from Dalys
3M Final Stripping Pads-$2.41 from Dalys
110 grit sand paper
Sponge brushes-About $3
Rags/ old t-shirts-Free
Disposable cup
Tools needed:
Electric sander
Total finishing Cost: $86.50
Total Overall Cost: $226
Instructions:
Use a clean sponge to apply Benite wood conditioner on each corner of the surfaces which will protect your table from outdoor weather. Remember to wipe out the excess and let the conditioner dry out for 24 hours.
For the rest of thethe wood conditioner and staining process see the following link: Farmhouse Table
We hope you will find this creative process interesting and appealing and we would love to see your own DIY projects as well. Feel free to share your thoughts and opinions in the comment section below.
But by the end of the process, the time invested is always worth it.
Well, almost always.
There are times when the painting does not turn out as desired and that can lead to disappointments. Of course, a big part of it depends on the artist’s skills and expertise but there are other contributing factors which help them deliver wonderful results.
In order to accomplish incredible body-painting art similar to those of professionals, there are a few things you need to carefully take into consideration. Most importantly, there are methods, which we will discuss in a moment, that are the key essentials to great artwork.
And in today’s article, we are going to show you some of these factors which will help you become a better body-painter.
Learn How to Body Paint
Paint Materials for Body Painting
Some years ago, body-painting consumed a lot of time and energy due to the lack of proper materials. Luckily, we are in an era where body-painting is made easy because of the development of advanced tools and options.
Following are a few materials that help speed up the painting process and make the art more vibrant.
Airbrush makeup is one method that’s expensive, yet succeeds in speed, quality, and safety.
If you’re looking for paints that last longer and won’t crack easily, you can rely on this option.
Artists working with an airbrush find the process to be faster than working with traditional palettes. The difference lies in the type of paint and the process itself.
While traditional cake paints come in a pan, airbrush makeup comes with a compressor which uses air to spray the paint, hence, making the process faster. If you want to take on this profession, you would want to choose this because it will take lesser time to finish a single project.
The only disadvantage is that these are comparably more expensive than regular paints. Also, they require long training and a lot of skills before producing precise body paintings.
Before buying, make sure to look for brands which is specialized in producing makeup airbrushes because that’s how you’re guaranteed to get the best.
The Airbrush Grade Prosthetic Cosmetic, known as AGPC, is one of the best paint options for body-painting. It falls within the airbrush makeup category, yet it has amazing features worth mentioning.
If safety is the first priority to you, then you would consider going for this as it does not cause irritation or allergies. Not only that but it also stays on the skin for a long period of time until you wash it with water and soap, where it will come off easily.
The makeup will last for two days maximum without breakage, making it suitable for big occasions.
For the removing process, all you need to do is apply powder (preferably talc) and then wipe it off with a damp cloth or sponge.
Since this is a professional grade airbrush, the price is very expensive. We do not suggest this option if you are a beginner. But if you have had enough experience in the field of body-painting, you might want to use this for your best projects.
Ordering in bulk will save you some money, although it is still costlier than most body paints. Within these containers, you’ll get a range of high-quality colors.
One of the things we love about textile acrylics is that they are non-toxic and are free from chemical additives, ensuring safety to use on skin for a very long period.
These paints are designed to be used on fabric with the help of an airbrush. Besides being non-toxic, another reason we chose these for body-painting is because of the flexibility.
Since these paints are meant for fabrics, they hold very high flexibility, which means they stick on to the skin without peeling off easily, even when having to move a lot.
The second best thing about these paints is that they are very affordable and are very easy to use or remove.
They also maintain a high level of versatility. The first one you already know is that they can be used for body-painting as well as for airbrushing on fabric. Secondly, they are also suitable for using with paintbrushes.
When using this paint, be sure to work in thin coats until you’ve got a full coverage because using thick layers in one go can cause the paint to crack.
Another alternative to traditional paints is a marker which is safe for kids.
Safe and non-toxic markers are specifically meant for kids, who always end up with paints on themselves. Therefore, they are perfect for body-painting because the color stays on the skin until it is washed away.
However, using a marker to paint the whole body will take almost the same amount of time as using paint cakes, or even longer. That is why we would recommend using wide-tipped markers for the purpose of body-painting. The tips can range from 8-12mm wide.
The one thing that makes these markers superior to other paints is that the color won’t peel off and contains high flexibility. However, it can fade once it gets in touch with water, sweat or any moisture.
Last on the list is the liquid latex which is very popular as a medium for creating special effects in the world of makeup. It used to come in classic skin color.
Today, there are multiple other colors available for artists to choose from.
The original idea is to create a quick clothing option but somehow, it has found its way to body-painting, where its utility is much more applicable. Working with liquid latex creates a lesser mess if compared to other body paints. Moreover, it sets quickly, given that it lasts very long.
However, liquid latex by itself does not complete body-painting. Instead, it acts as a base for colors to rest upon. With this base, multiple textures can be achieved - and that’s what makes this additive essential for professional body-paintings.
And the best thing about this medium is that you can use any paint on it once it’s primed with skin-colored foundation.
Crucial Steps to Take for Face & Body Painting
Now that we’ve seen some of the best paint options for body-painting, it’s time to take a look at these three important steps for successfully accomplishing a beautiful work of art.
Preparing the skin
This is the first step to take when using any kind of paints. While some may think that this step is not truly necessary, it does, however, offer a lot of benefits.
Why prepare the skin?
The first thing you should know is that our bodies secrete oils. The presence of these oils makes it hard for the paint to stick on the skin as they repel it.
Not only do they resist water-based paints but oils are responsible for accumulating dust on the skin and increasing the chance of bacterial infections, especially when you have to put on the paints for a long period of time.
Therefore, to prevent these potential problems, we suggest taking a bath./shower before the painting process to clear up all the existing dirty oils from the skin.
You will also see that the paintings come out more beautifully on clean skin.
Let us now take a look at the step where the painting process actually begins.
Planning the painting
It is important that you first plan out how the painting will look like on your body.
While the design looks good on paper, it might not actually be the same when it actually touches the skin.
Planning beforehand allows the rest of the painting process to flow with a lesser chance of errors.
A simple way to properly plan your painting is by drawing outlines with water-based paints on the body first. Even if you make mistakes then, it’ll be easier to wash it off.
Brushes are important no matter which types of paints you’re using. There will always be minor details which need the touch of a brush.
Keep in mind that certain brushes work better for certain purposes. For instance, synthetic brushes are a great option for water-based paints as they are more flexible when they’re wet.
On the other hand, natural brushes tend to lose their grip on water if they are used extensively.
The purpose of a sponge is to blend the paint and spreading it evenly across the surface.
But not just any sponge will do. Some sponges with inferior quality with loose pores can release a lot of water that can mess up the paints. We would recommend going for the best quality with tighter pores.
You can accomplish a lot more with a good sponge. For instance, it will speed up the painting process and give you better blending results.
The size of the sponge will be according to your preferences. However, we would suggest going for a medium-sized one that’s about 3 or 4 inches for proper dabbing.
When working on smaller areas, have a set of tiny sponges ready with you.
We have talked about the importance of setting spray as a base and a barrier to the preparation stage. Now, we will see why it’s needed for the finishing part.
As the name suggests, setting spray is used to set the paints so that they stay longer on the skin.
When the painting is done, spray a little amount of it throughout the body and give it some time to set before touching the paint.
What it also does is prevent the colors from washing off when sweating, giving the overall painting an even and beautiful finishing.
If you are preparing for an all-day occasion, we highly suggest using a setting spray as it will make the paints stay in place for long hours.
Test the paints
This is where “prevention is better than cure” applies well.
It is always safe to first test the paint in a small area of your body and wait for a few minutes to see whether your skin shows any kind of reaction or not because there are skin types which are very sensitive to paints.
If it’s your first time getting body painted or if you’re just trying out new paints, then you should consider taking this precaution.
Do not risk going for paints that cause even the slightest itch on your skin because that will only create bigger problems, and you would have to see a dermatologist afterward.
The same thing applies when using latex as well.
Removing paints
Different paints require different methods of removing. We will show you how some paints can be removed efficiently when it’s done.
For water-based paints
Removing water-based paints is pretty simple but there are things you need to look out for.
Washing with water alone can increase the chance of infections later, especially if you used cheaper paints. So we suggest using soap too to make sure your skin remains clean and healthy. Also, avoid using wipes for removing paints.
For oil-based paints
Cleaning oil-based paints require you to put in some effort because using only soap and water will take a long time.
Instead, there are solutions to help speed up the cleaning process. Some samples are body cleansers and baby oil. Using these with your scrub will help clean up all the oil on your body. Finish up with a warm bath afterward.
Makeup removers also make a great solution for washing tough oil paints off your body.
The last important step which you need to take is to moisturize the skin after cleaning so that rashes won’t develop.
If you are the one who’s getting body paint, make sure to ask the painter about how the cleaning process should be. It is always safe to ask them because some oil paints are different from the other.
How to Get Your Body Painted
If you have never experienced body-painting before and want to try it for the first time, check out some of these things which you may want to know beforehand.
Look for an expert
Getting your whole body painted sounds like fun. But the not-so-fun part about it is if the body starts to show signs of allergy or irritation.
In order to prevent such cases from happening, look for painters who are experts in this field. You can also ask for recommendations from people who have tried body-painting before.
It is important that you feel relaxed during the process. Make sure to find one whom you feel comfortable with, especially those of the same gender in case you feel nervous about exposing your body to someone.
Shaving
This is is a very vital part of skin preparation. Some paints do not stick well when there’s a lot of hair on the surface.
However, the big problem lies in the paint-removal part. If there is hair, the paints won’t come off easily. It can even get painful when removing it with force because paints, especially latex and airbrush acrylics, get very sticky on hair.
So the first thing you need to do is make sure whether shaving or waxing is better. Consult with the painter beforehand.
Select the design
Make an appointment with the painter to select a design.
Do this as soon as you have decided to get a body painting so you won’t rush the process later on and be satisfied with the long-hours work.
After selecting the design, we would recommend sketching it roughly before proceeding to the actual painting.
Fill up your tummy first
As we have mentioned, painting a whole body can take long hours. So, it is always better to first fill your stomach with food that will satisfy your hunger for a long period of time. Besides food, also make sure to hit the bathroom before the process begins.
Doing this will allow the work to freely flow without any interruption in between.
Have a room ready
You probably will not want to work in an area where there’s a lot of activities going on. First of all, there is a tendency that your work will get interrupted, and secondly, you might not feel comfortable exposing your body when there are too many people around.
In order to avoid these situations, getting a separate room will be a very good idea.
Clothing
Remember to only wear loose-fitting clothes when the painting session is done. This will prevent the colors from smudging of fading away.
Family in white shirts covered with different paints stands outside in the evening
How to enhance your body-painting skills
Body-painting is an activity which anyone can do for fun at any time. But for those who are willing to master this art, it requires practice and consistency.
Give yourself some time to practice on a regular basis because through practice, skills are also acquired. As you improve, so will your skills and knowledge. However, what truly matters is your passion towards the art.
And that’s it for today’s post! Thank you for your time!
The delicious roasted smell of fresh coffee in the morning is what gets most of us though the day. But what if you could use this incredible brew to create works of art? We are talking today about using coffee in painting techniques as the primary solution instead of the classical acrylic, oil, watercolor or tempera paint. You can use the solution following the same basic principles used in watercolor painting, a resourceful medium able to create texture, shadows, gradients and depth. Lets set The Basic Coffee Painting Techniques For Beginners.
Techniques and tips to watercolor are used in coffee paintings
USING TREATED PAPER
Treated paper such as waxed paper will modify the behavior of the coffee mixture and offer a new set of textures and possibilities at a slower drying pace.
CREATING GRADIENTS
Gradients are easy to obtain and, similar to water-coloring, you can use a wet surface technique which is easy to control or the dry paper technique which will require more attention from your part.
THE BLEED EFFECT
Allow the coffee mixture to drip on your design and create vintage looking backgrounds.
THE BLOOM EFFECT
Use coffee of different intensities and allow the drops to mix in an incredible bloom effect.
ABSTRACT PAINTING
Splashes, flicks of the brush will create very modern, abstract creations that can beautifully contrast with a classical in between the lines creation.
ADDING DETAILS WITH A NON-WATERPROOF PEN
Finish off a piece by adding contrast with a non-waterproof pen and add a touch of water in the end for an interesting unique appeal.
1. Start by arranging your working space
Set all of your required instruments and materials on the working space and at your disposal. You can use instant coffee to create different intensities for your solution and add more water until you reach the optimum medium. Acquire a variety of brushes varying from the classical flat brush you are going to use to cover large surfaces faster to delicate slim pointy bushes for inserting precise details. Have a pencil and an eraser near for sketching your future creation and a role of scotch tape to secure the watercolor thick absorbent paper to prevent it from wrinkling.
2. Take a glass of clean water and a flat brush
You can take any size of paper, depending on what you are about to create, a glass of fresh clean water and a rather large flat brush. Set your working area somewhere in the sun for faster drying or if you must work indoors use a blow-drier to speed up the process. Coffee painting, similar to watercolor painting is all about adding more and more wet layers and having the patience to allow each layer to dry and the color to set.
3. Prepare the paper and fix it to your working ground
Take the piece of paper and secure it in place with scotch tape. Then take the flat brush and water and fill the paper until it is glistening. This technique is called the wet surface watercolor wash and can be used for coffee painting as well. You could start with a coffee layer applied uniformly to use as your background and construct your design from there on.
4. Use clean water to create splashes on your colored ground
After having applied the first coffee layer as a background you can create texture by applying water drops and splashes. The clean water will dilute the coffee and push it to the corners of the created shapes. The same principle can be applied to coffee drops used for accents.
6. Create a basic raw sketch
You can start the hole process by sketching your future design before fixing the paper or you can improvise and get creative step by step. We have sketched a basic undetailed scene on which he have added several layers of coffee mixture and water.
7. Add colorful accents to make everything stand out
We have added turquoise watercolor accents that complement the hues of the coffee mixture. We have used masking fluid to preserve certain areas clean and white.We we are not interested in preserving a clean contour of the drawing ad allowed the solution to float over edges and merge but, as a beginner, you should master the technique of coloring in between the lines before trying more liberal approaches. One great advantage of using coffee mixtures is the fact that you can always correct mistakes with more clean water and a piece of paper tissue.
Coffee Painting Ideas And Projects
Now that we have gone through the rather simple process of coffee painting, delight your senses and allow yourself to get inspired by a few wonderful professional coffee painting creations.
Create urban landscapes using coffee
A delicate fairy scenery
A surreal coffee portrait created on a vintage piece of paper
Reviving the natural from a cup of coffee
Leaving your fingerprint with a twist
A superb representation of a romantic city
The geek in you brought to life in coffee
With one swift motion you can bring things to life
Beautiful depiction of textures and depth
What do you think about the creative idea of using coffee to paint? Is it something you have tried or would dare try? We would love to hear your opinion on this topic in the comment section below.


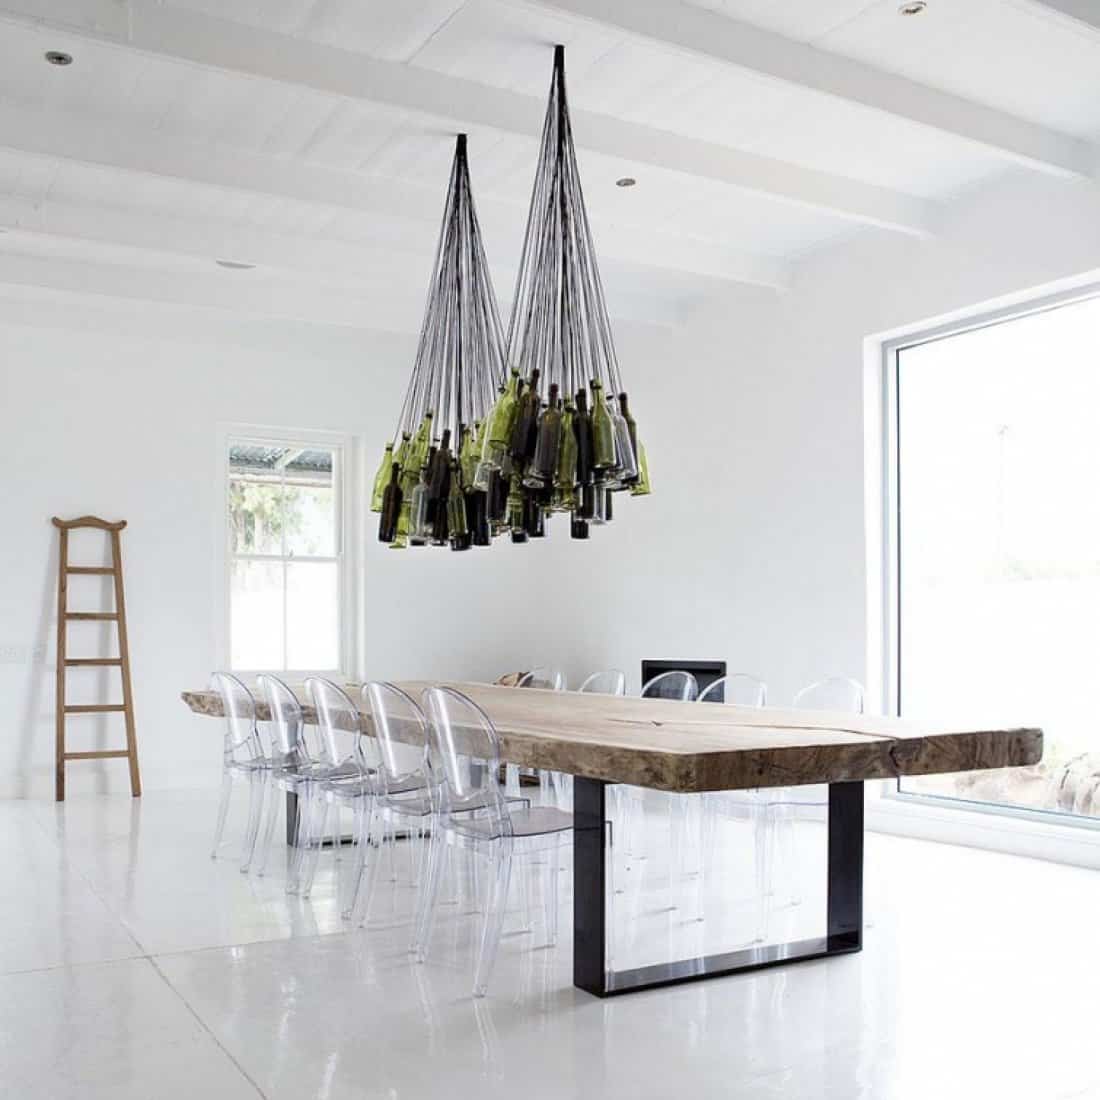
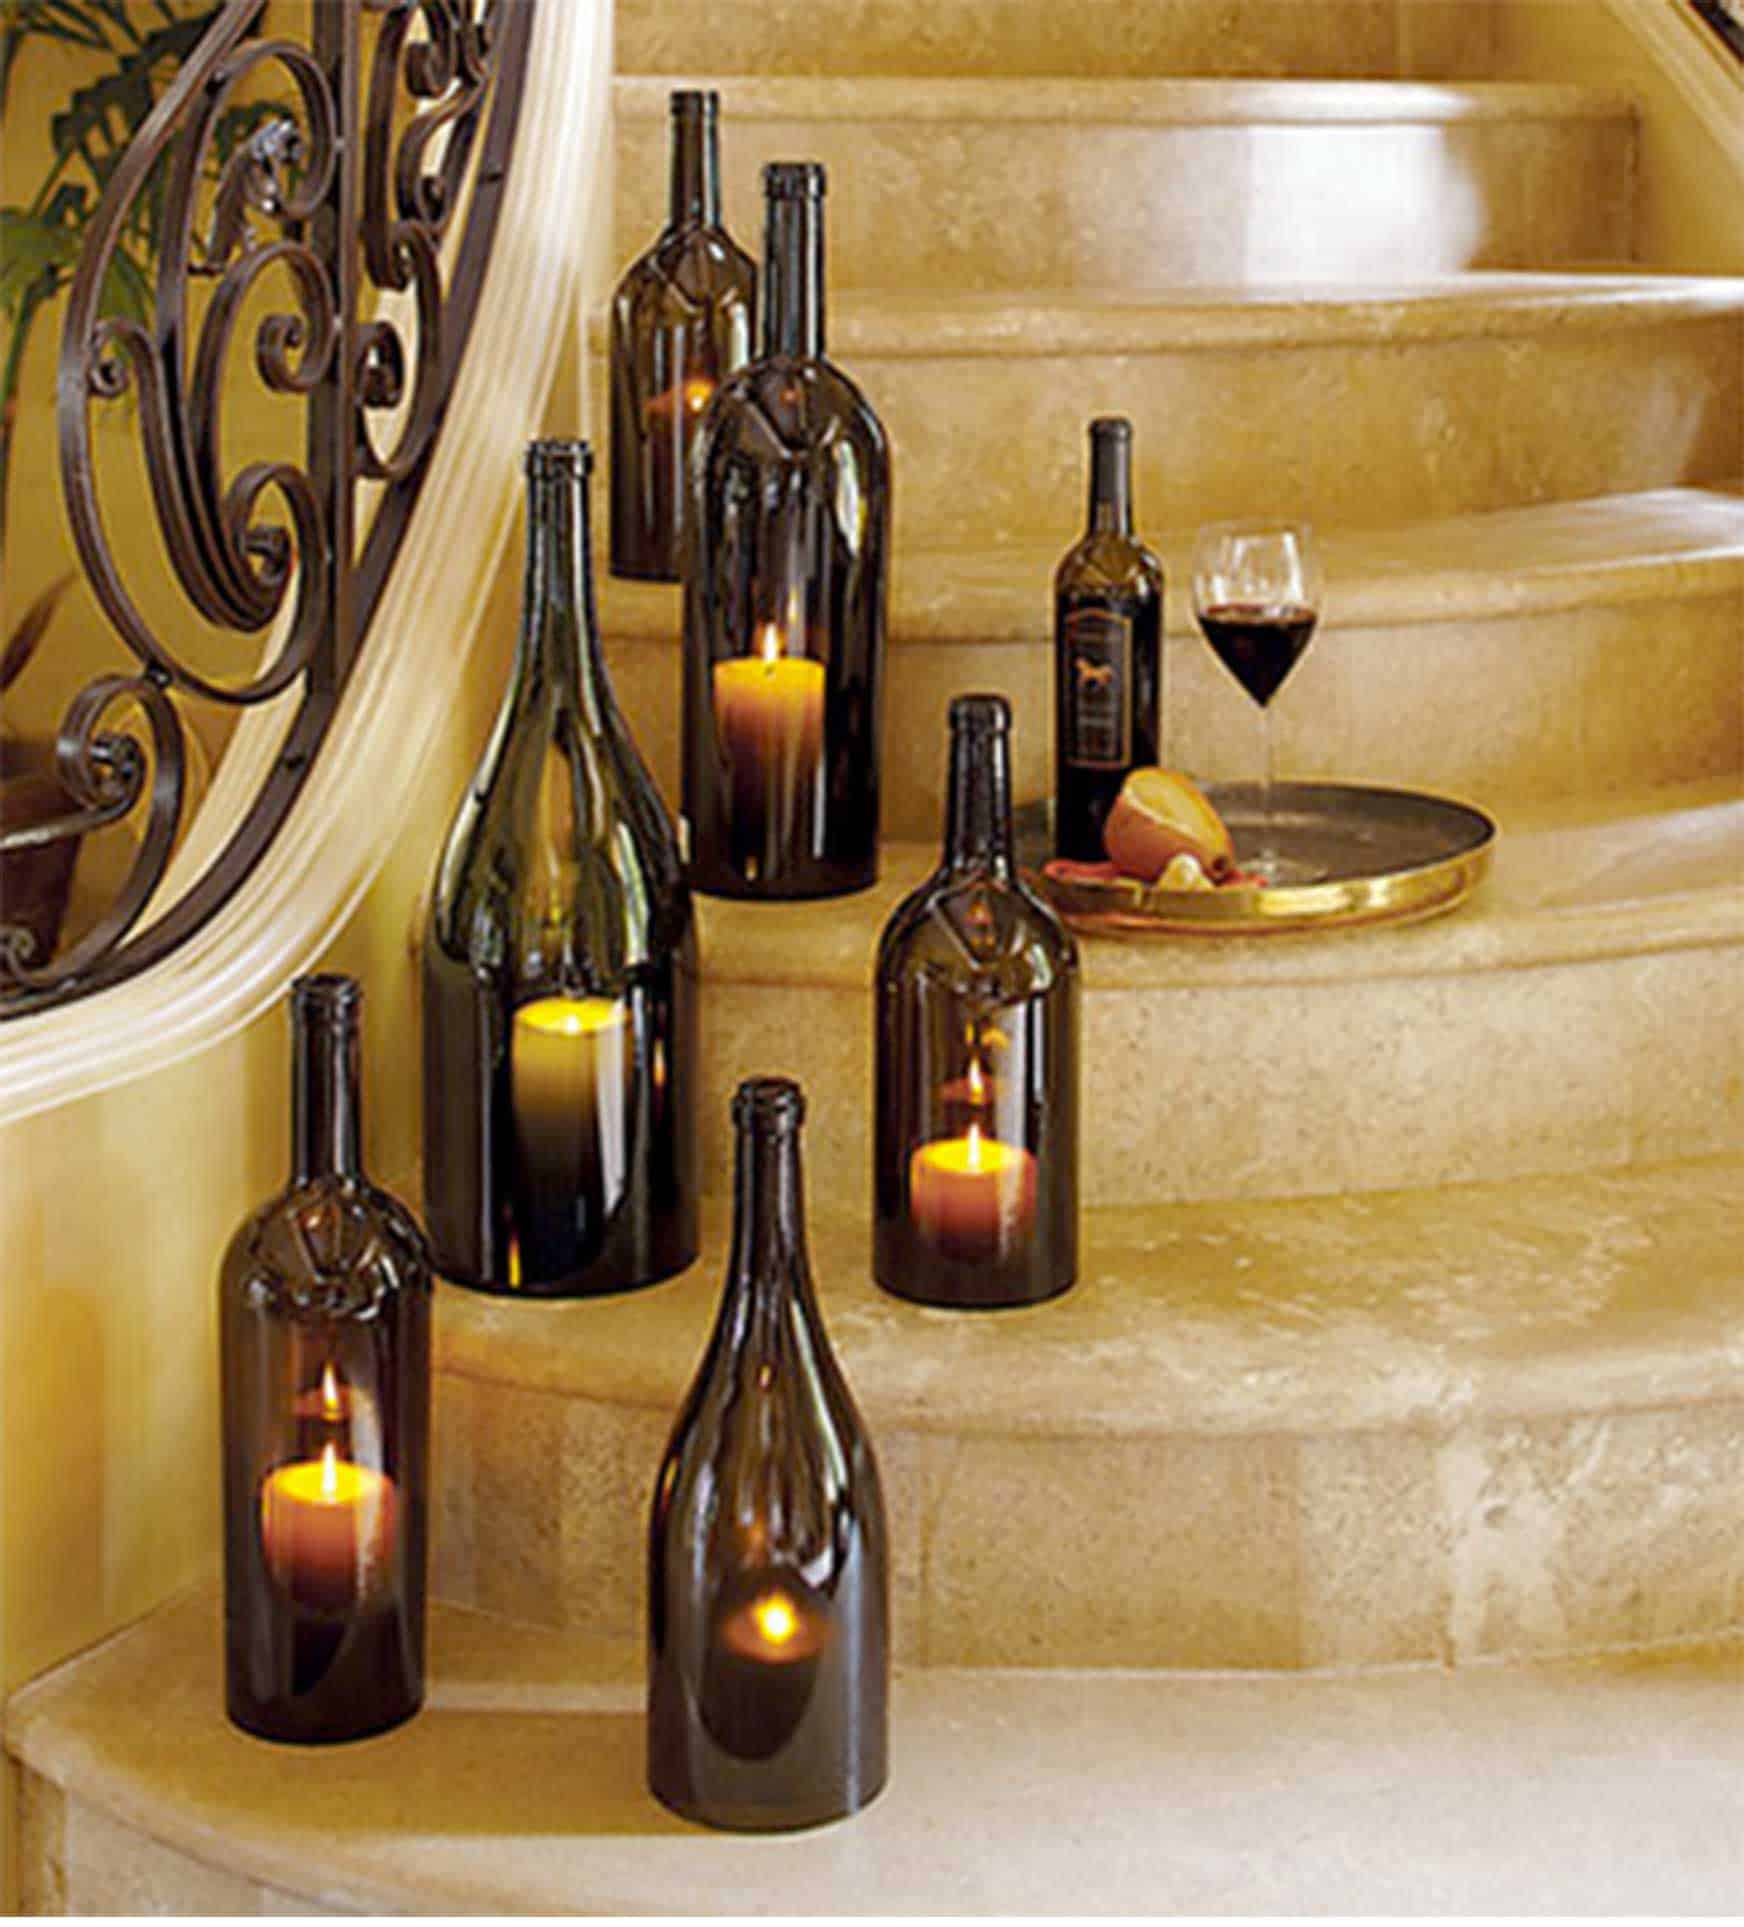


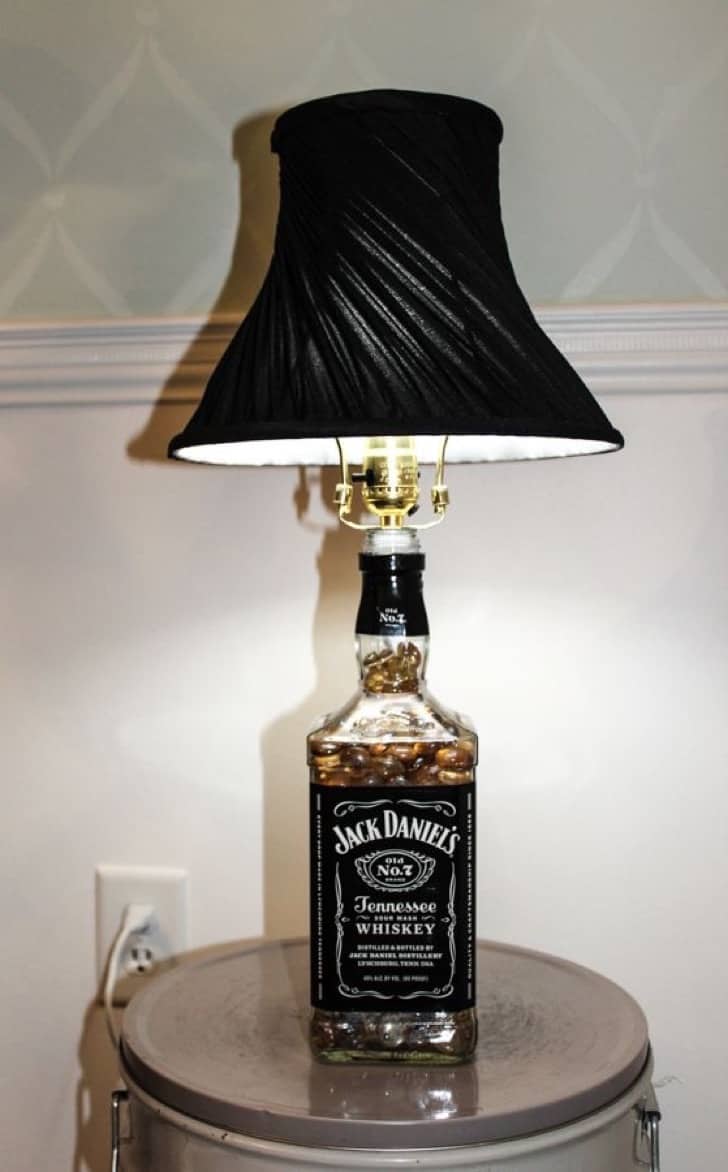
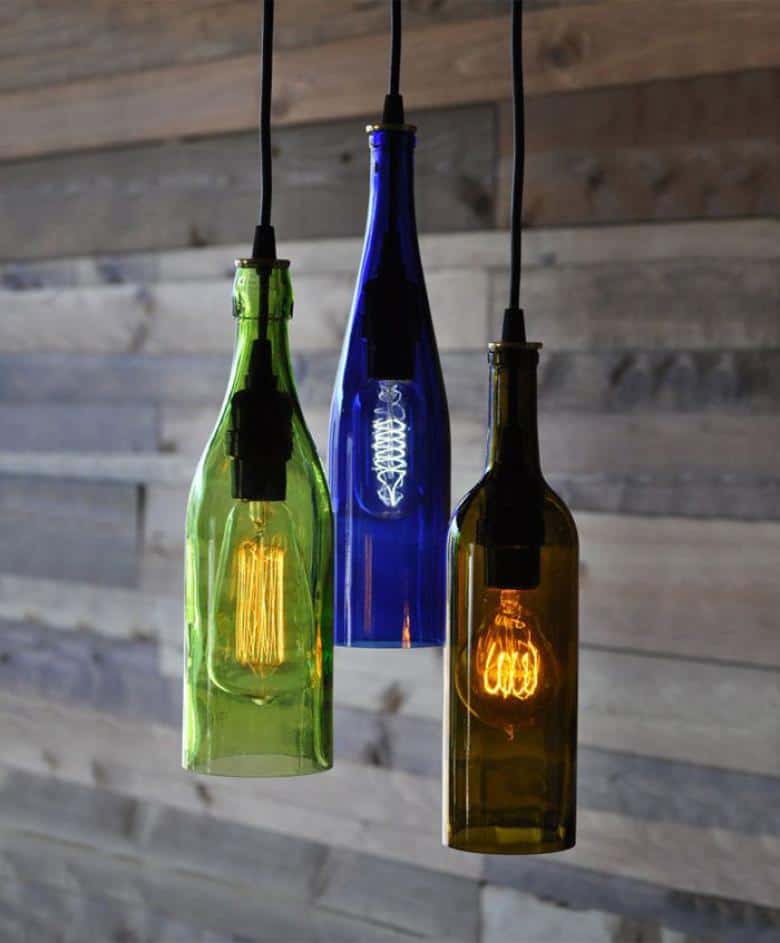

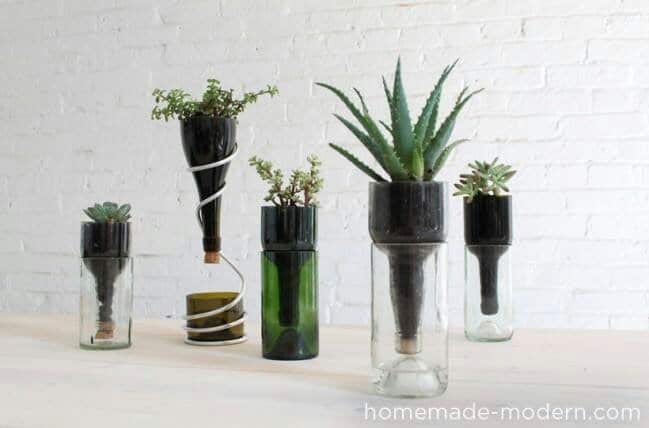
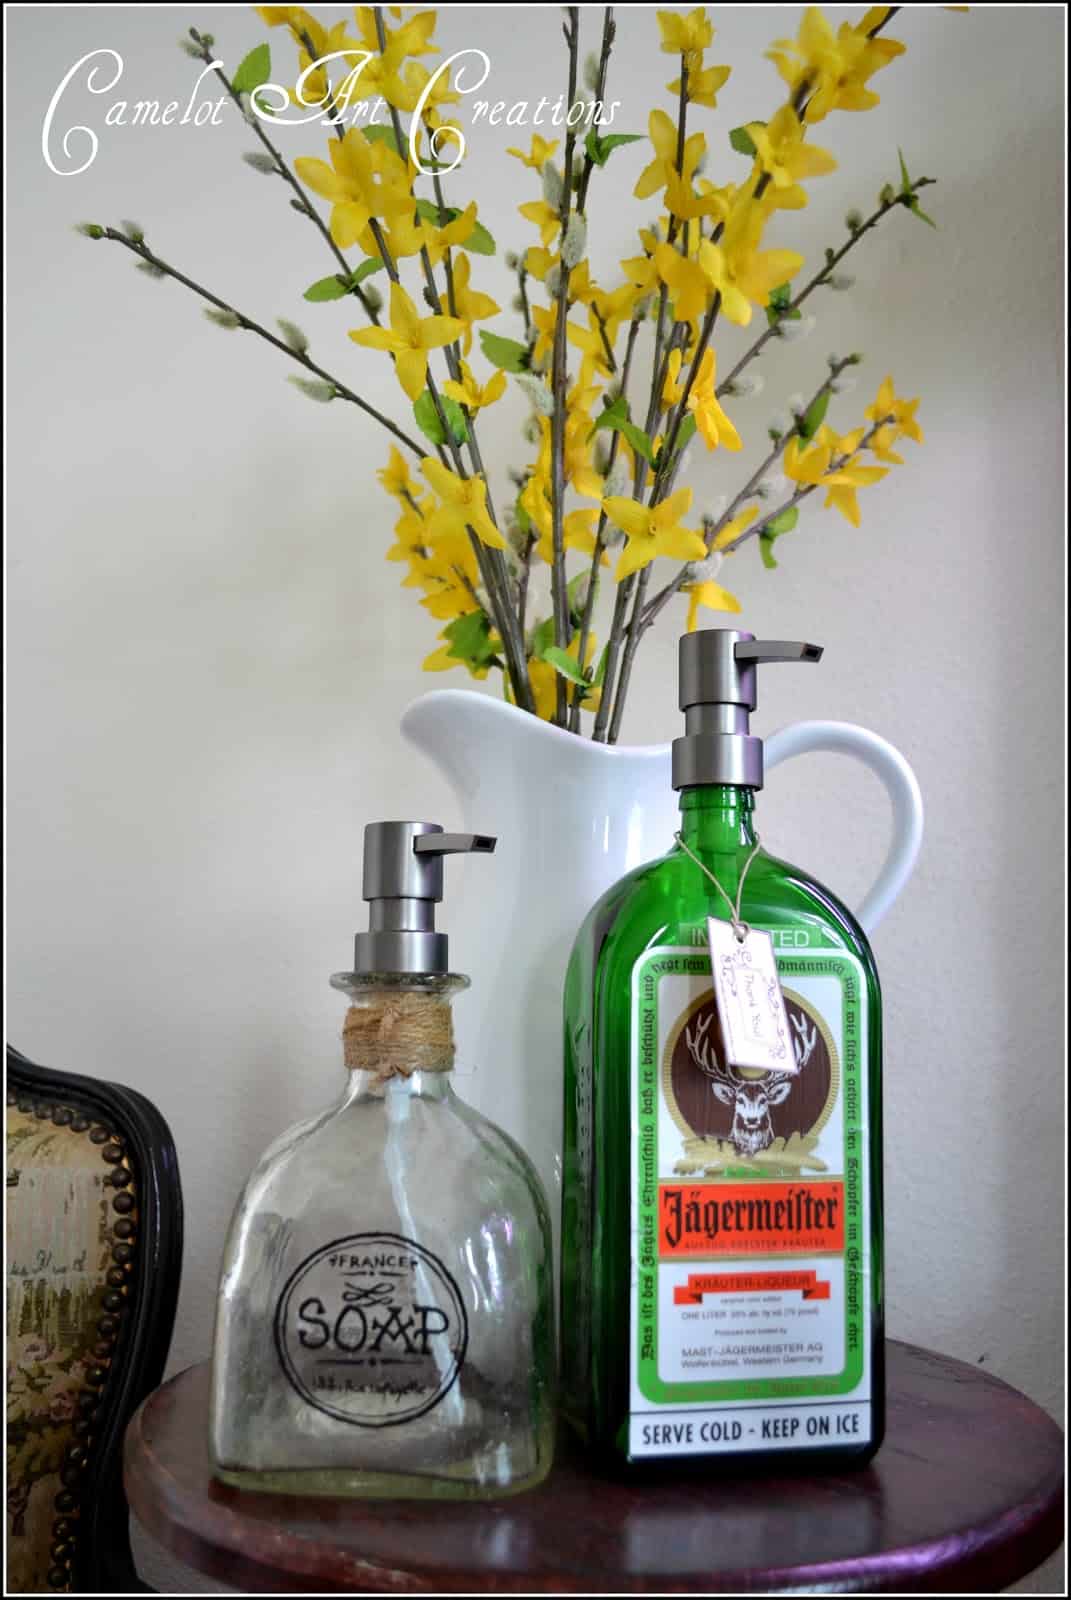


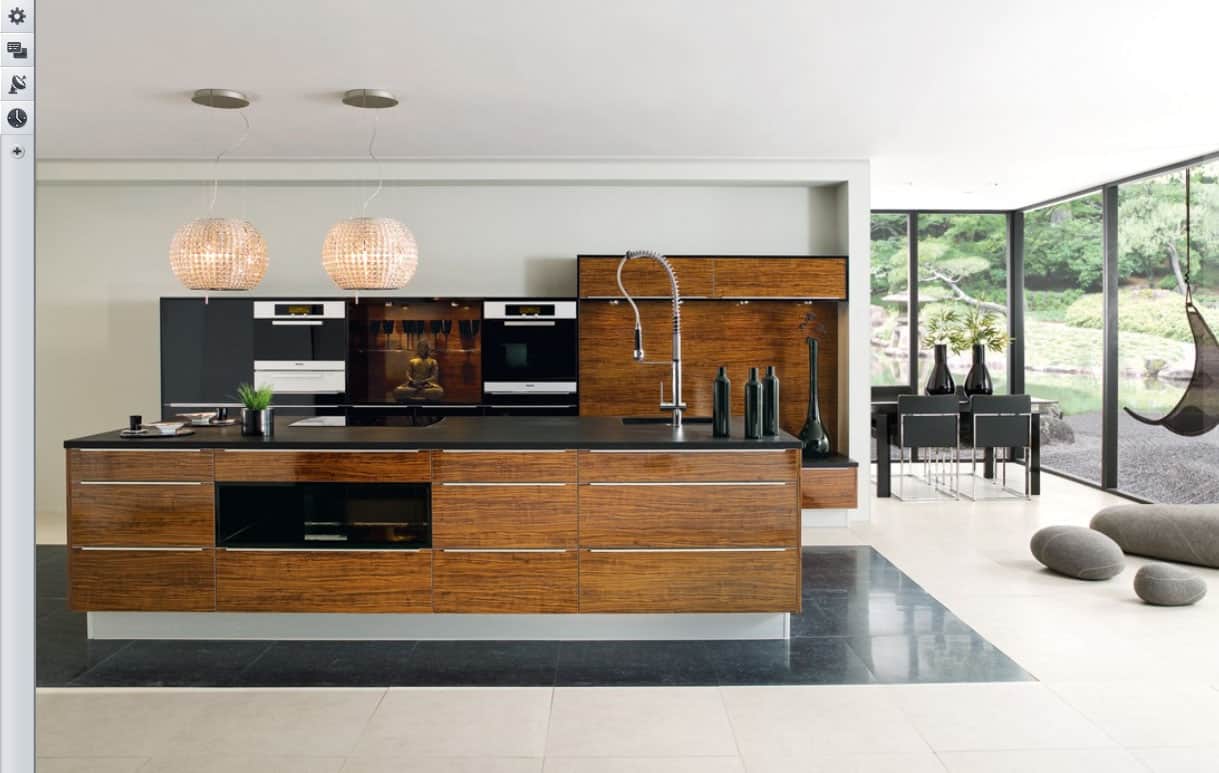

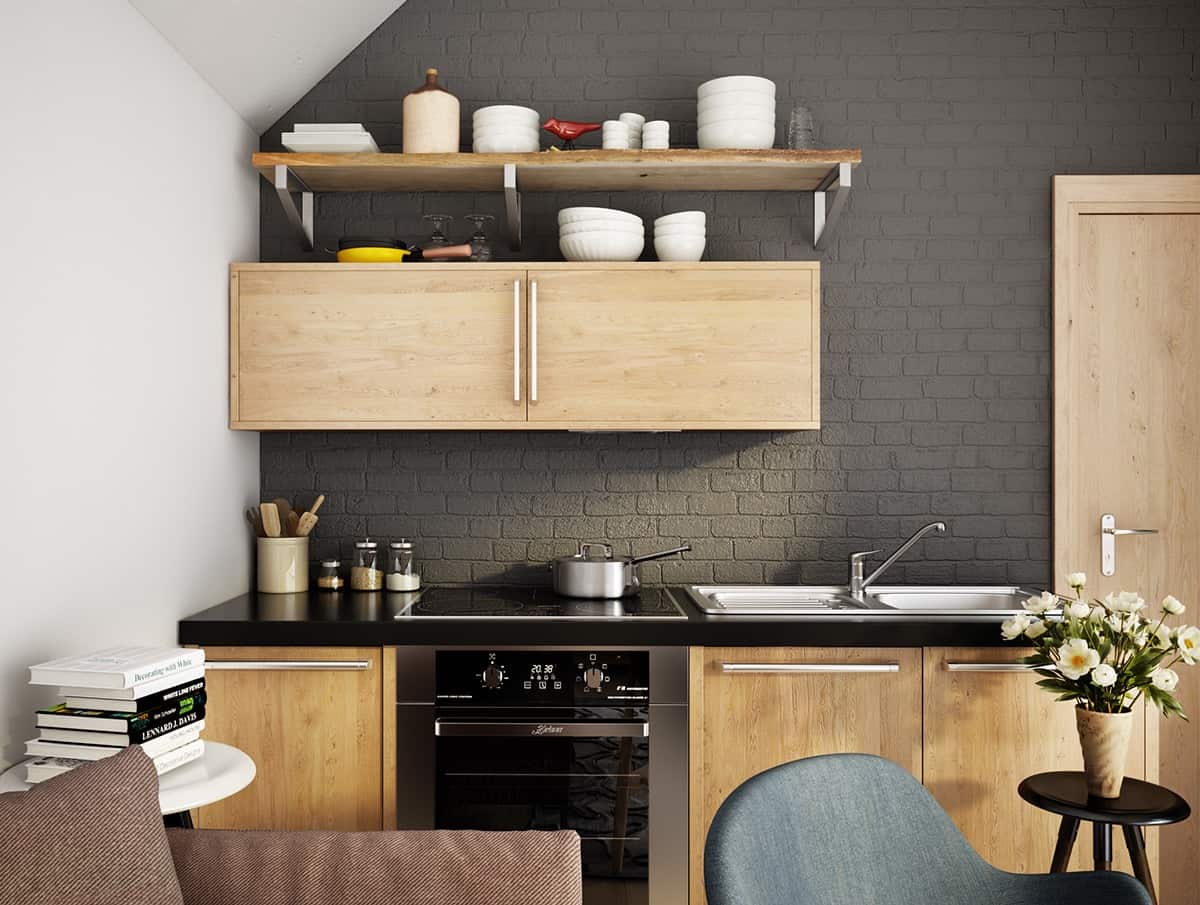


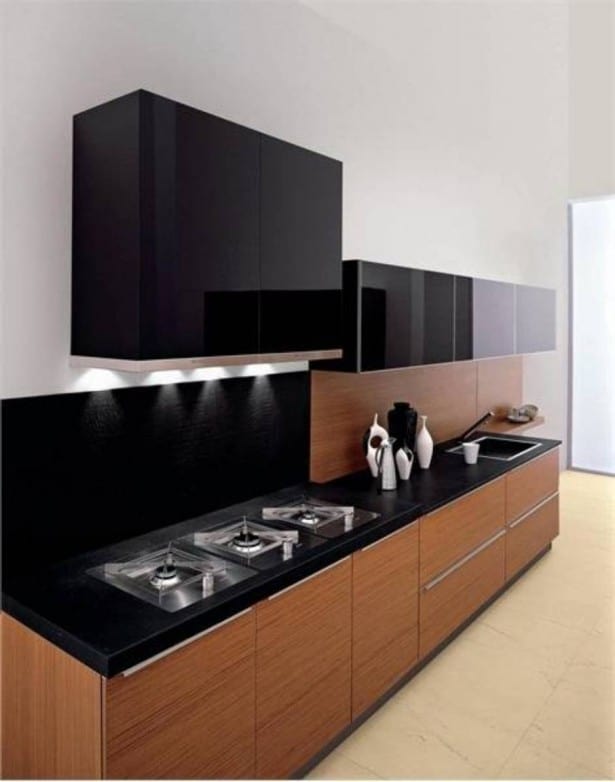

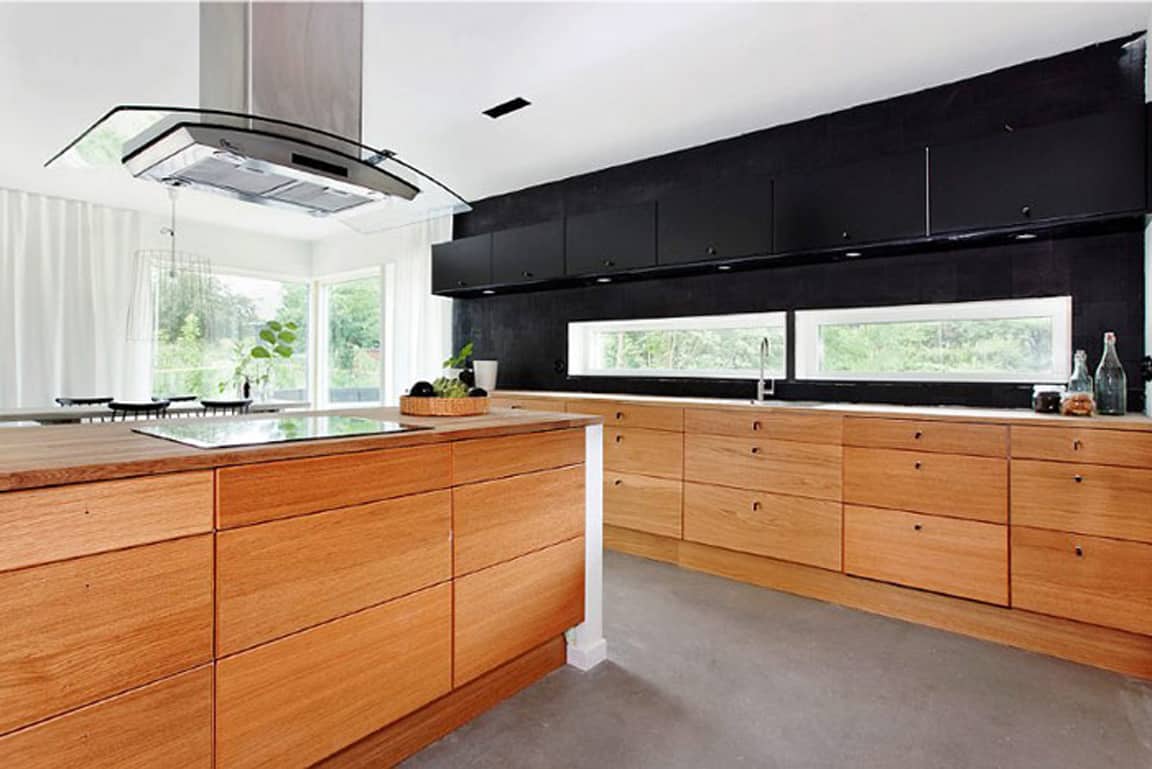

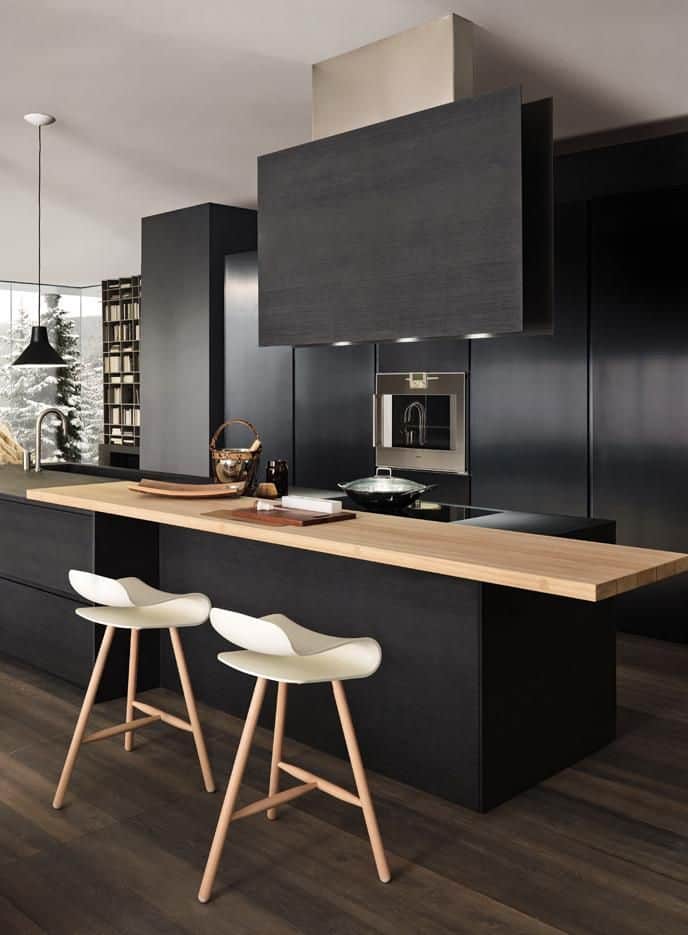

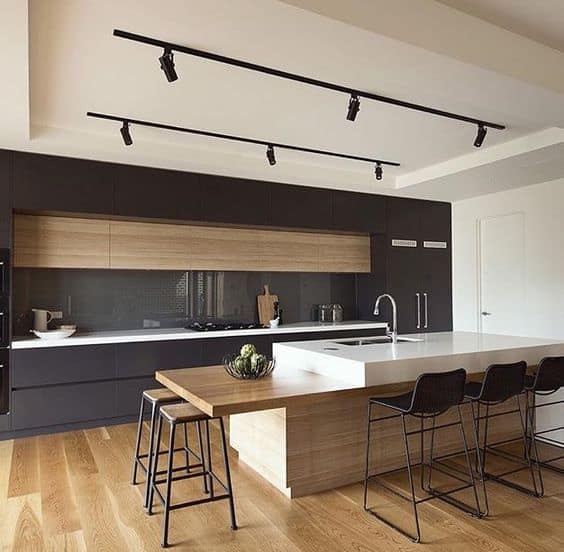
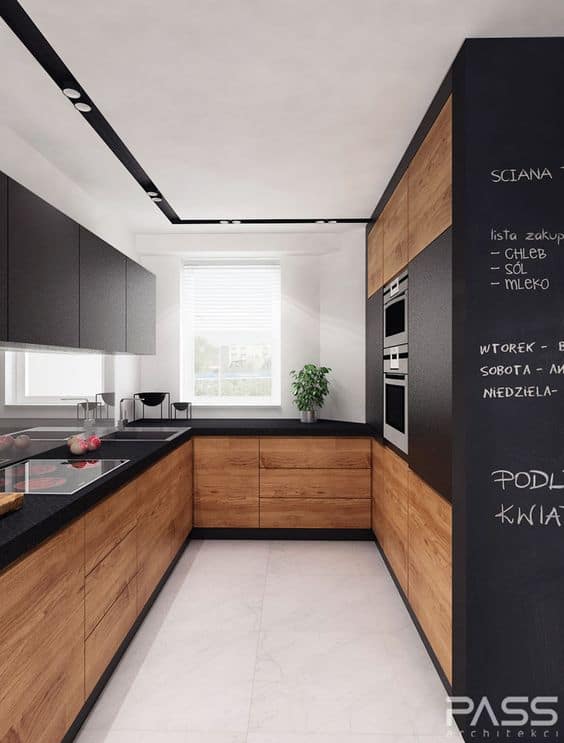
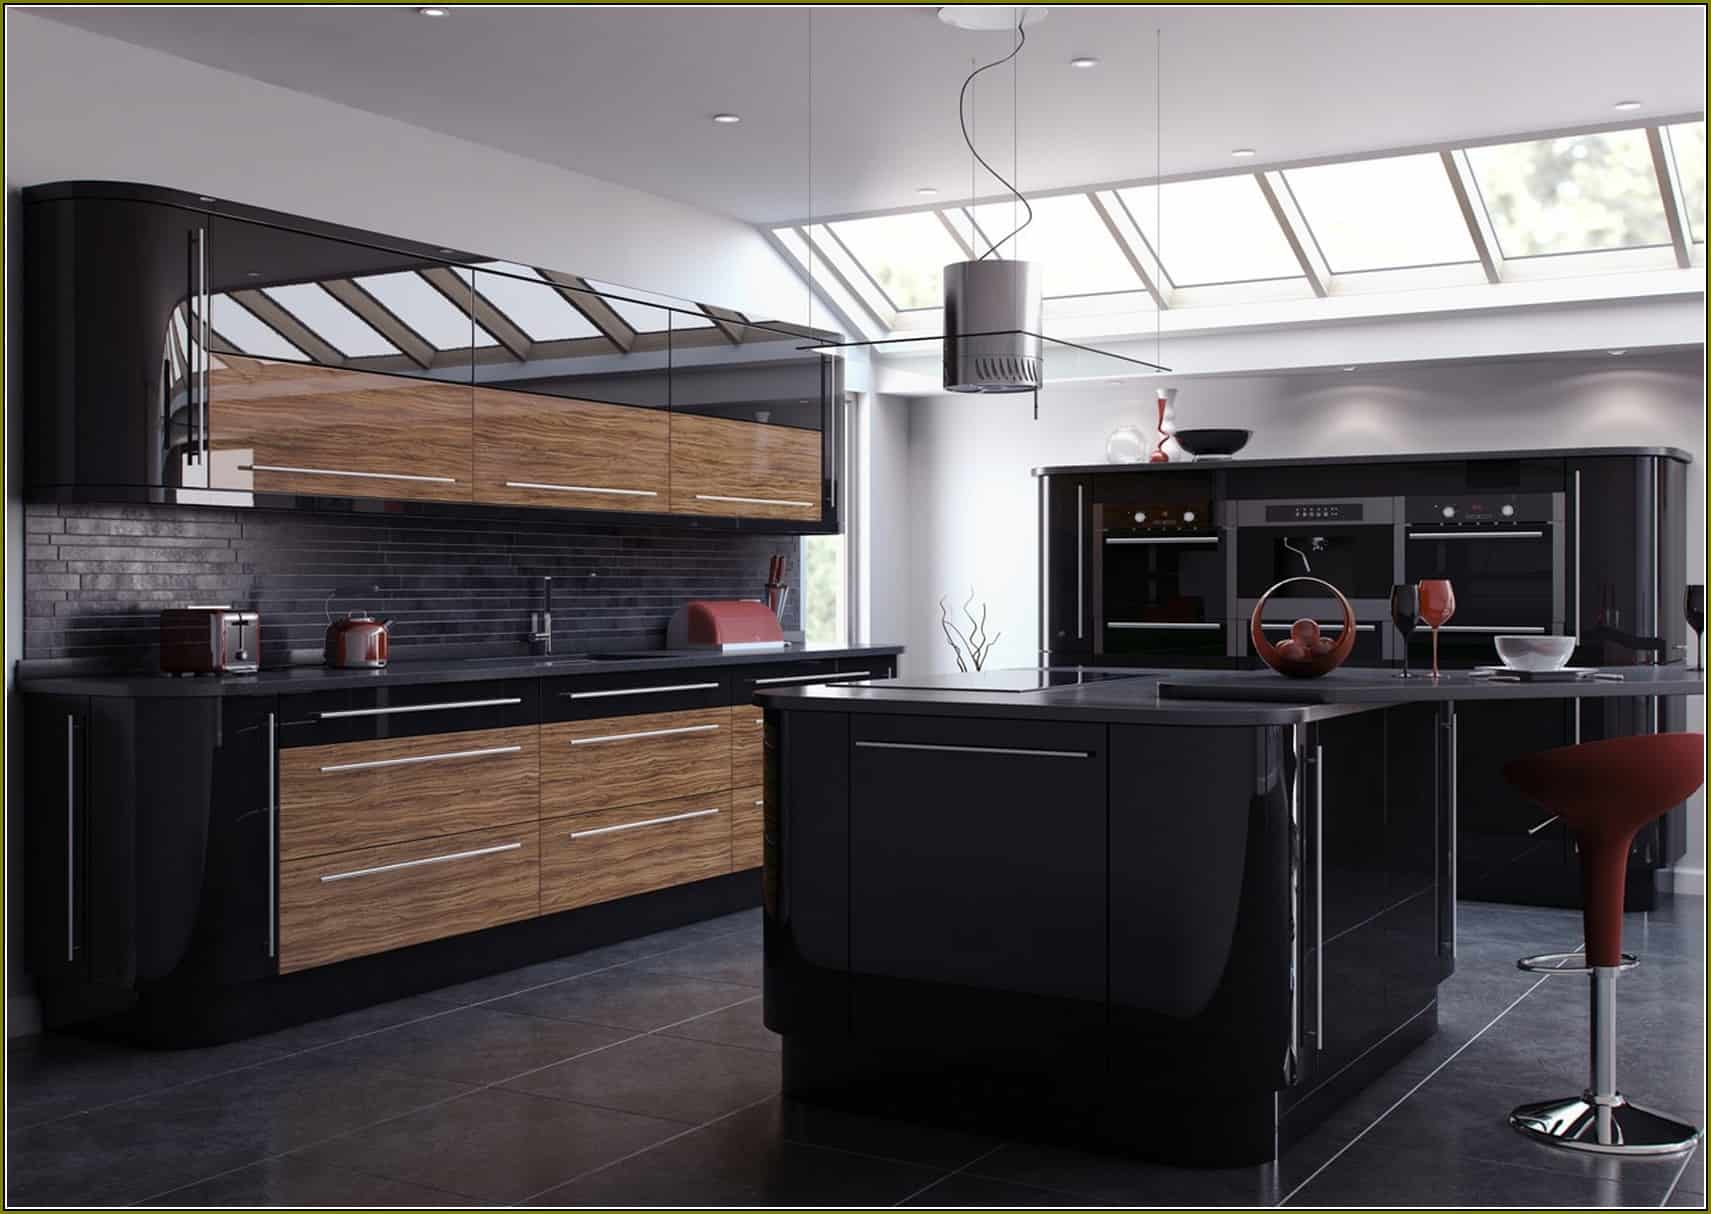


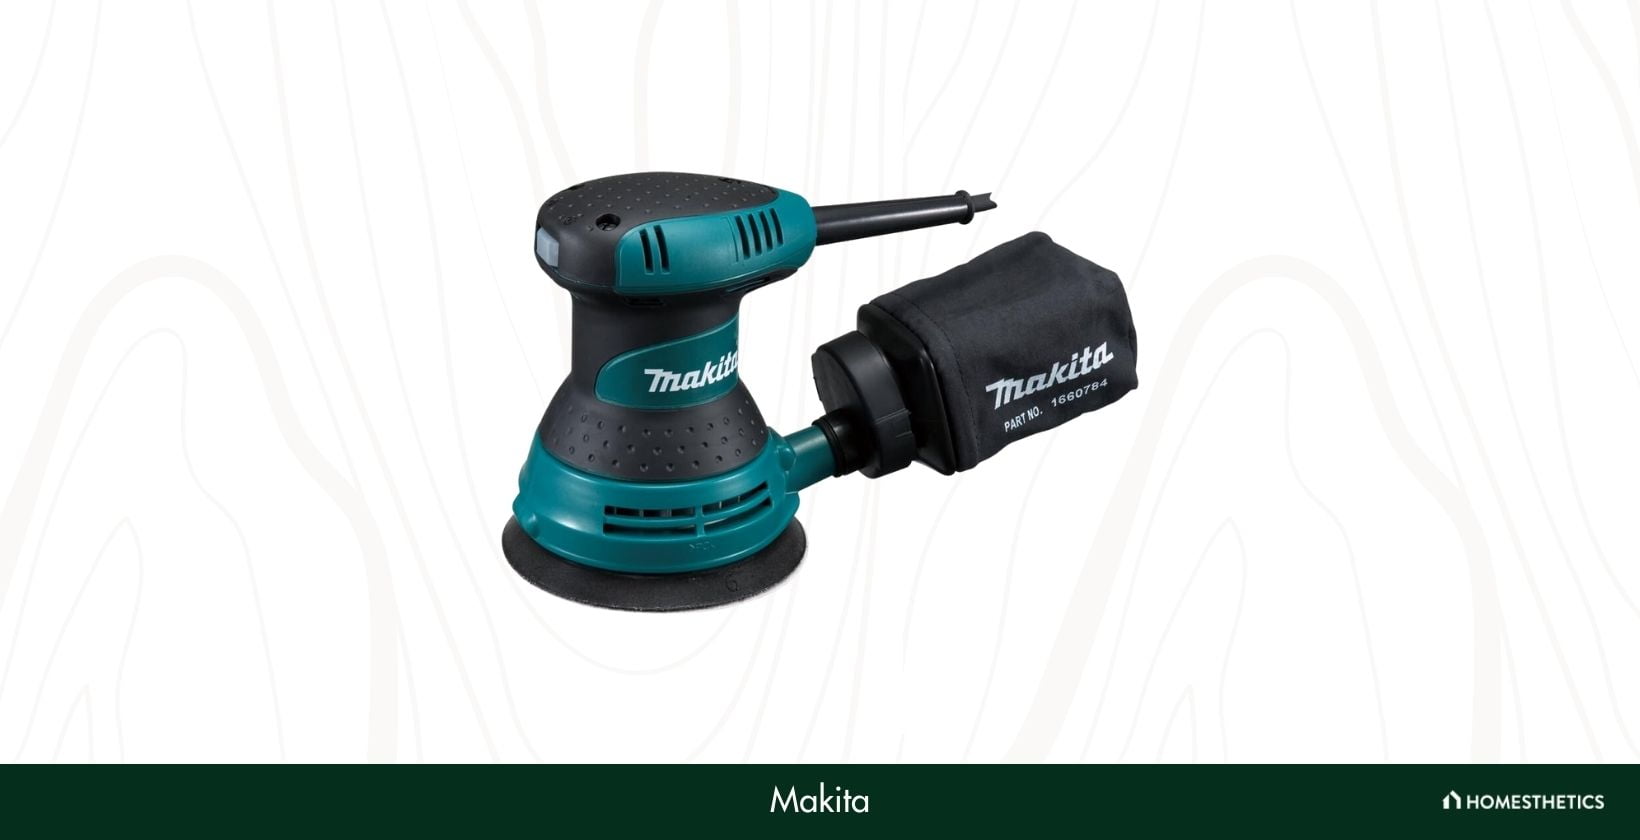
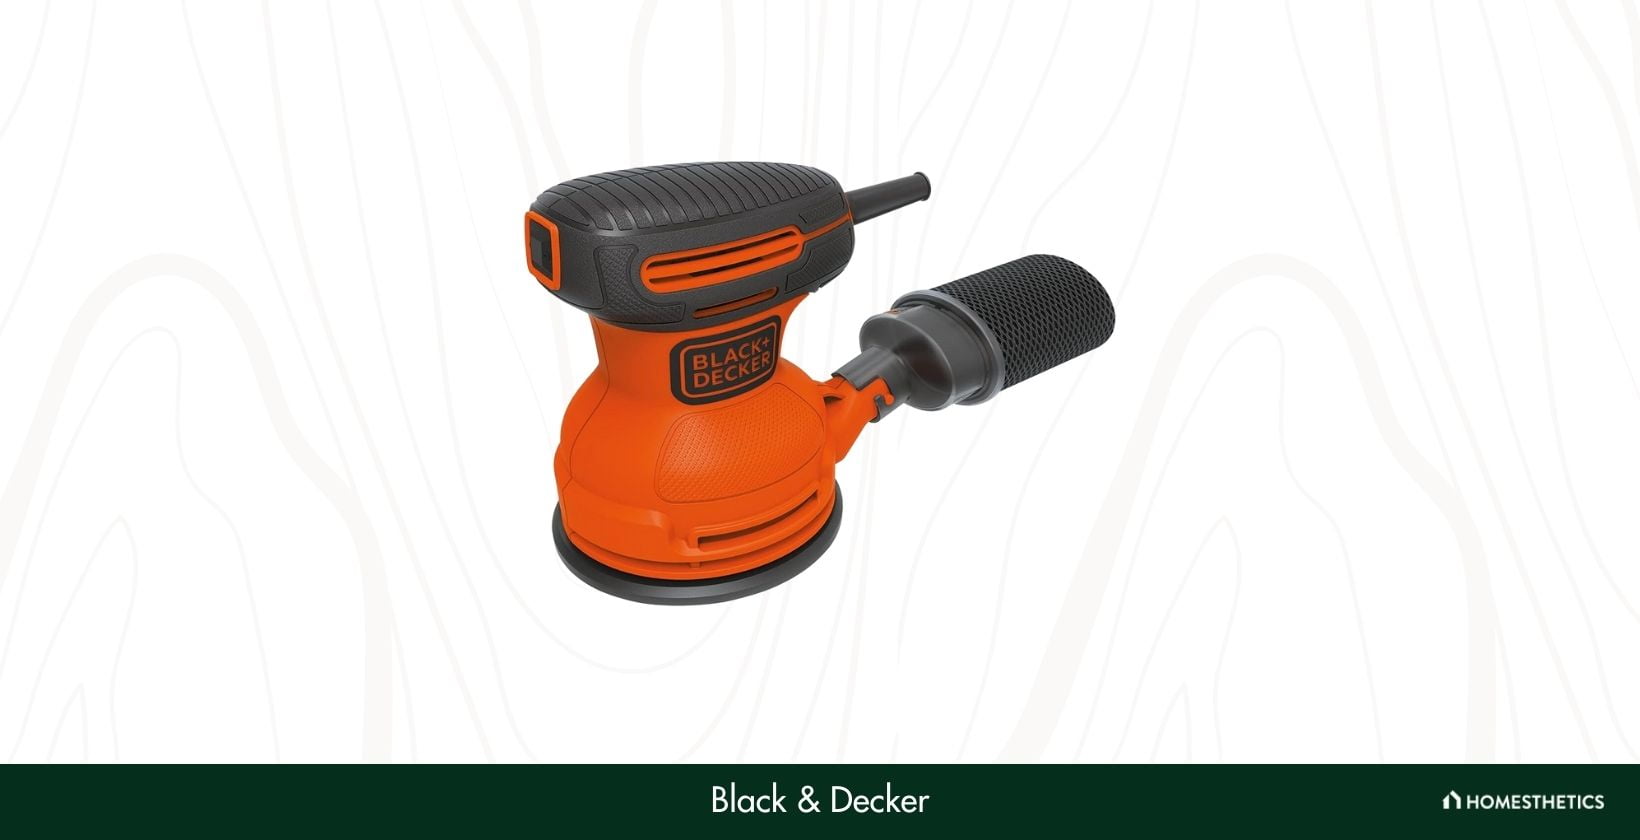
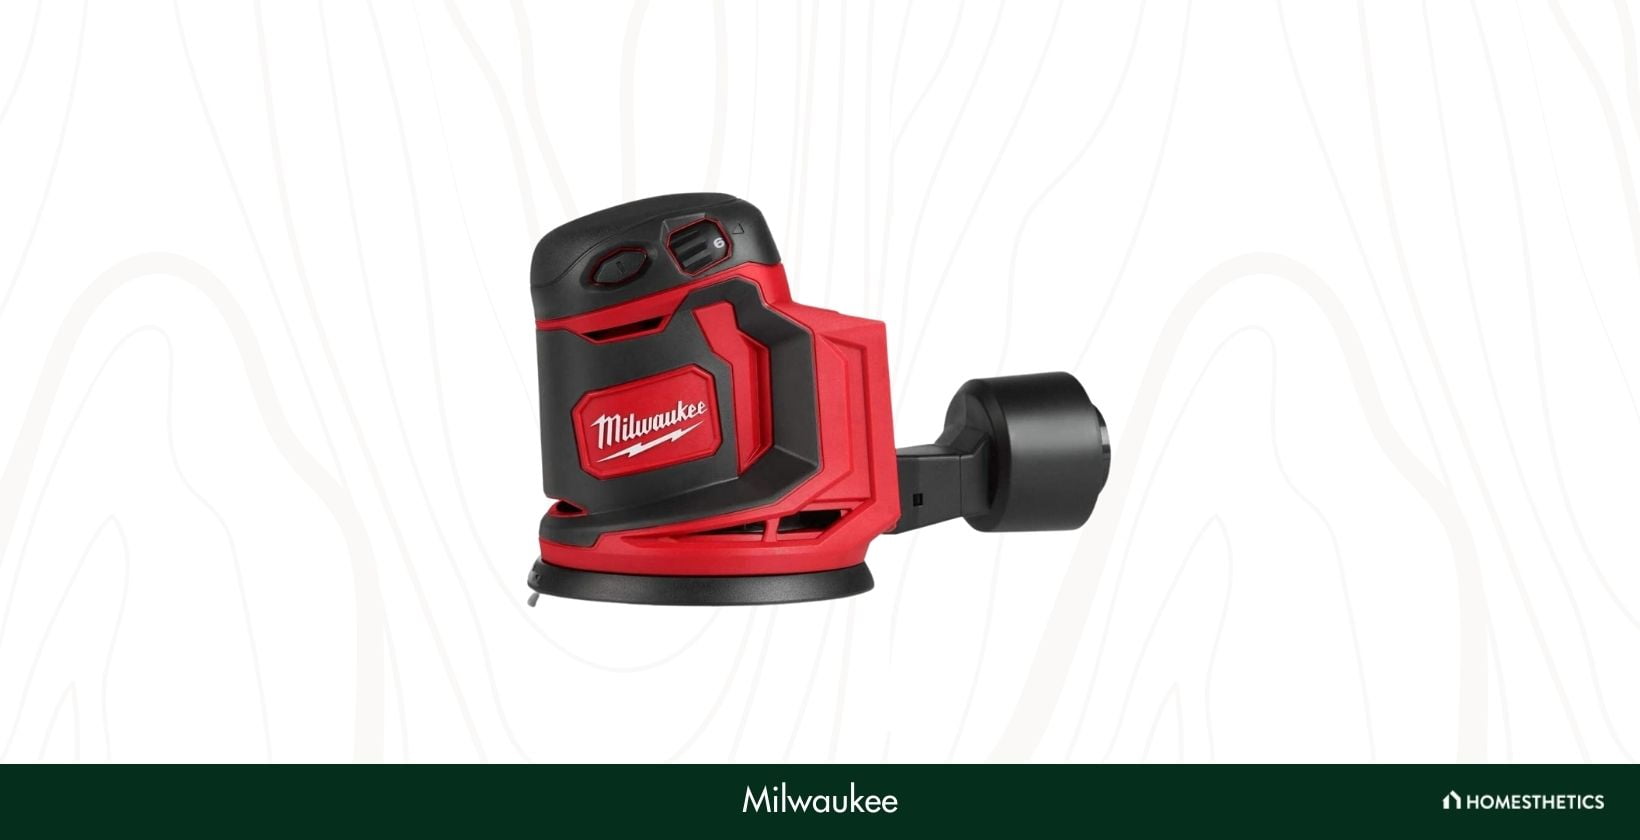
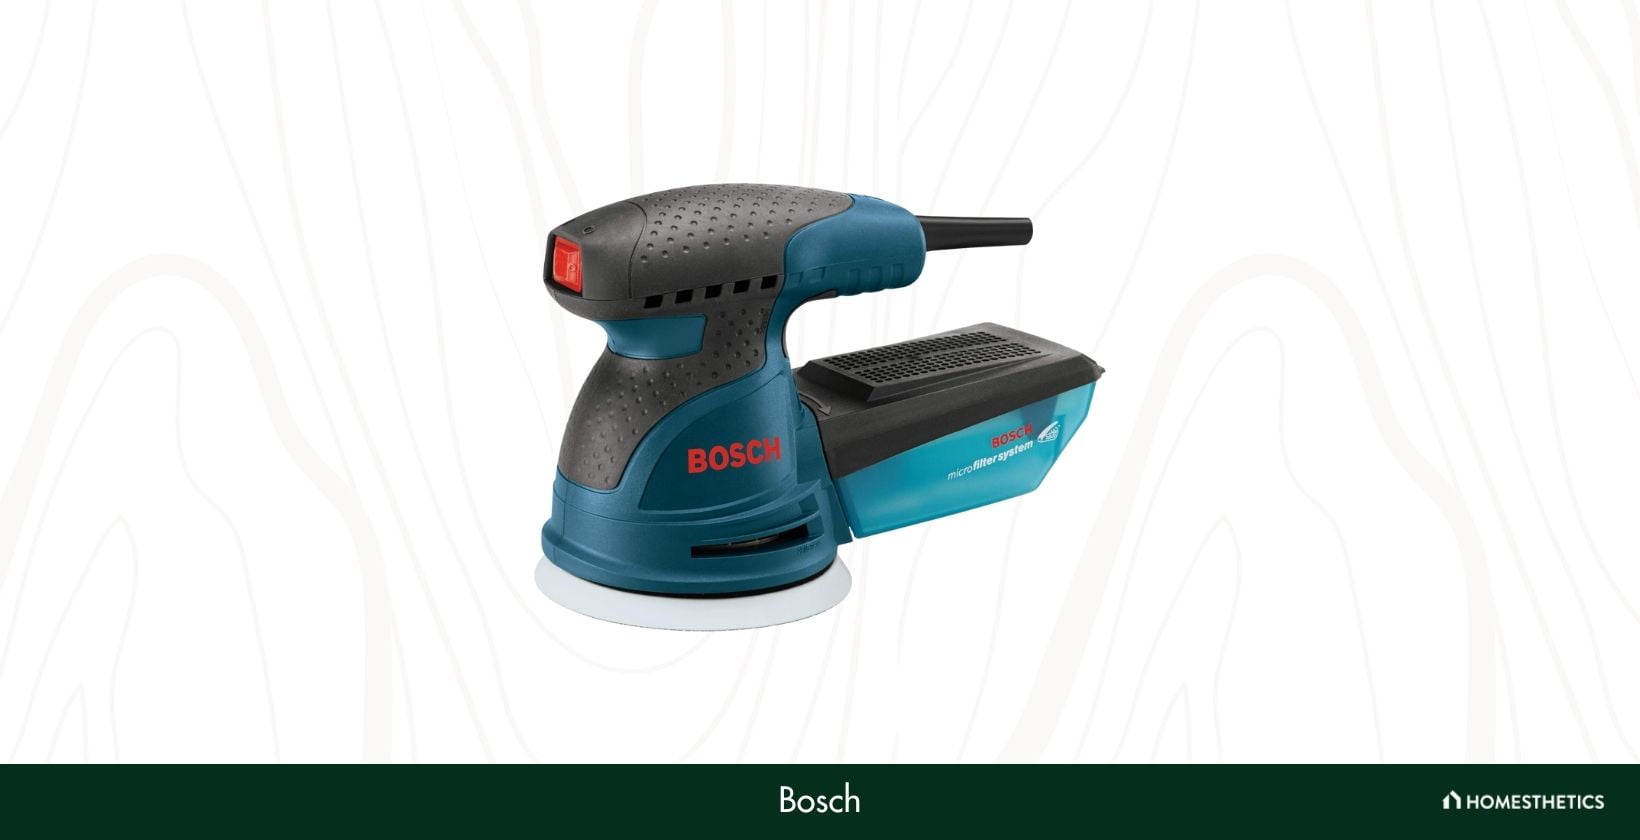


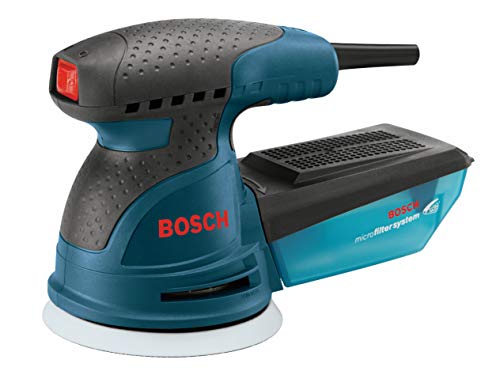
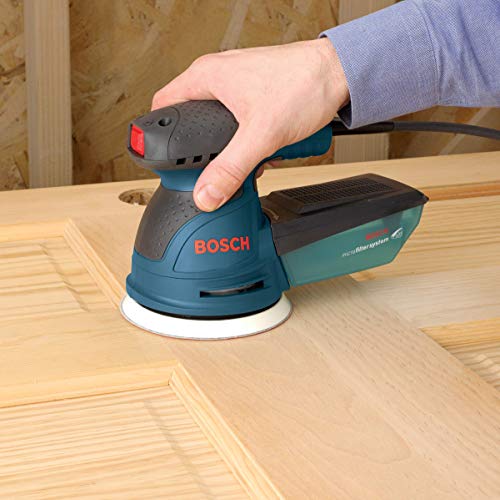


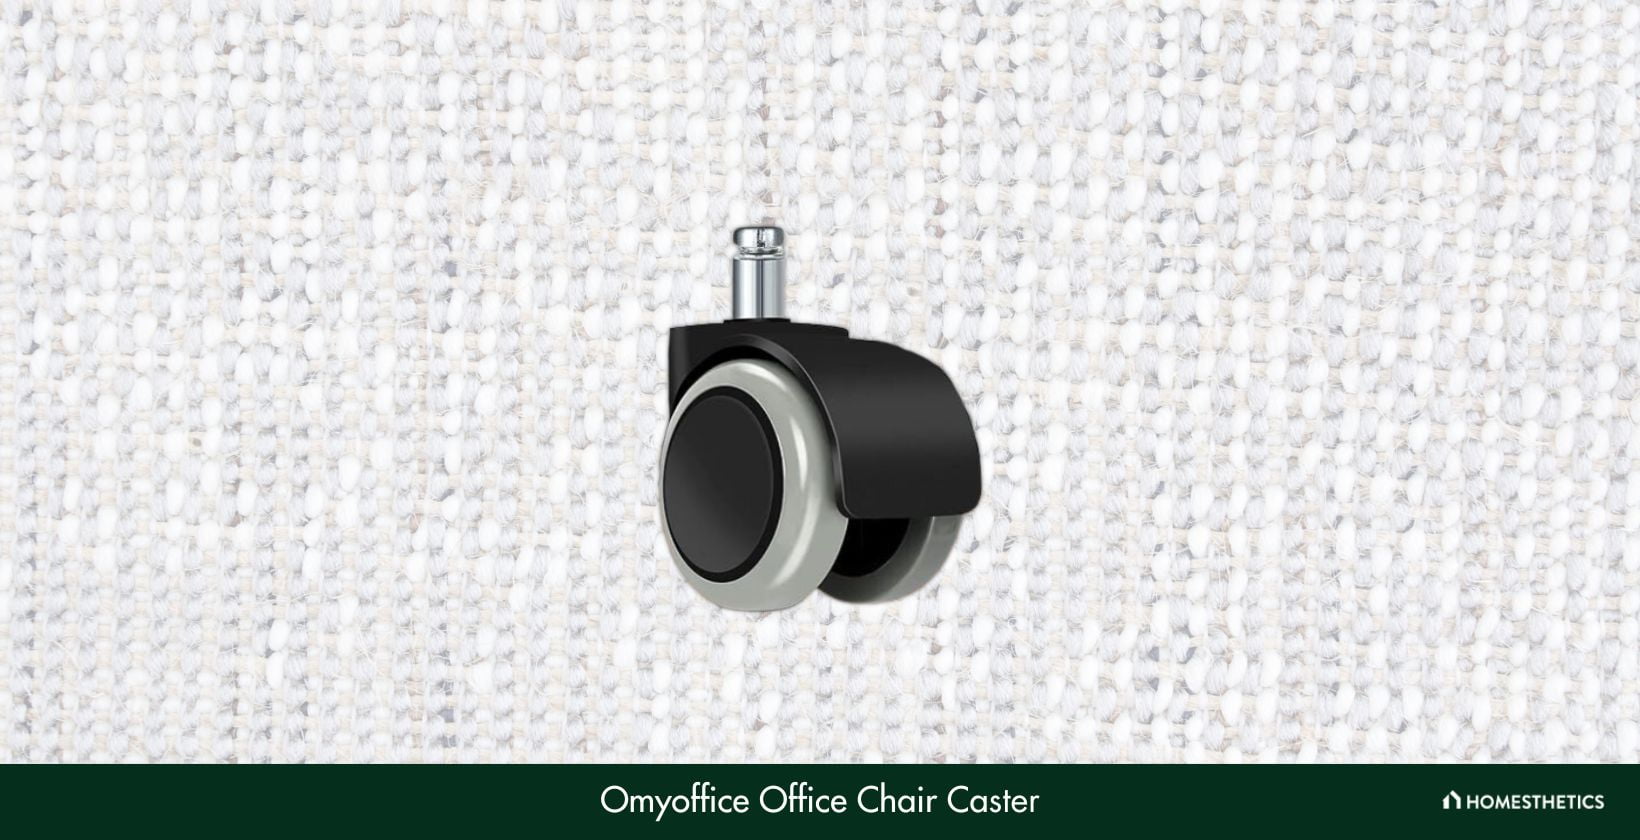


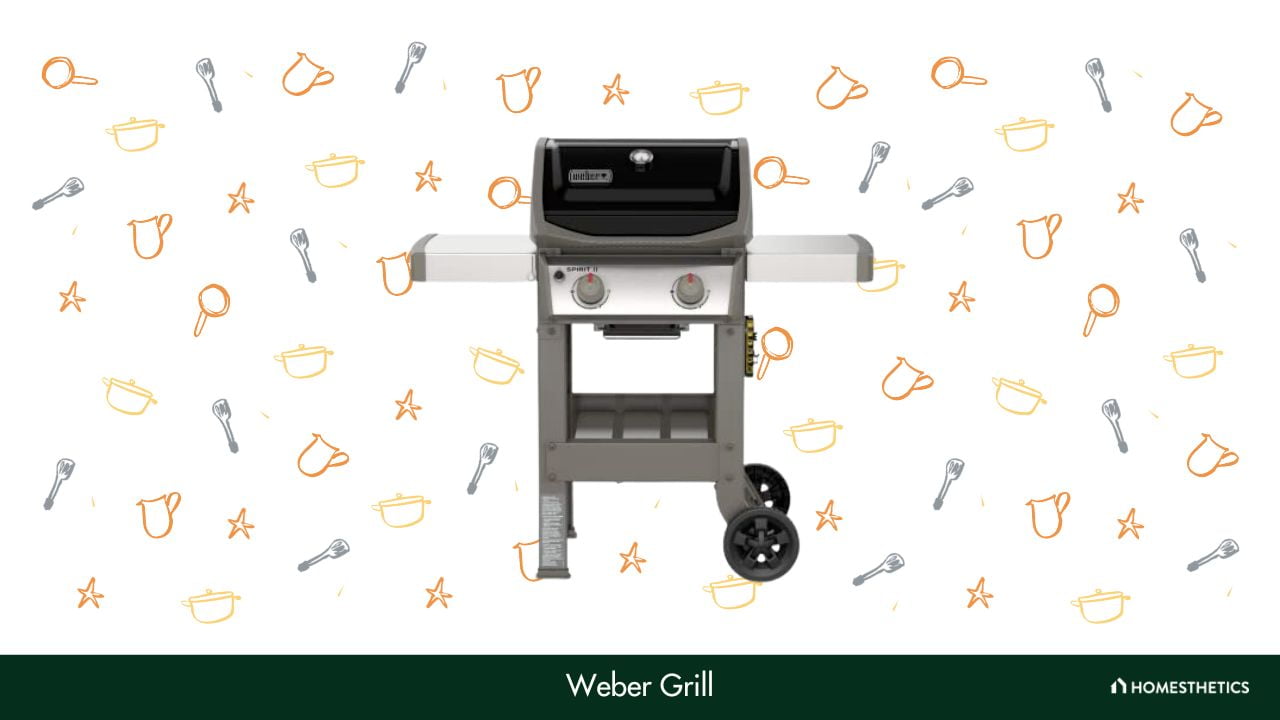
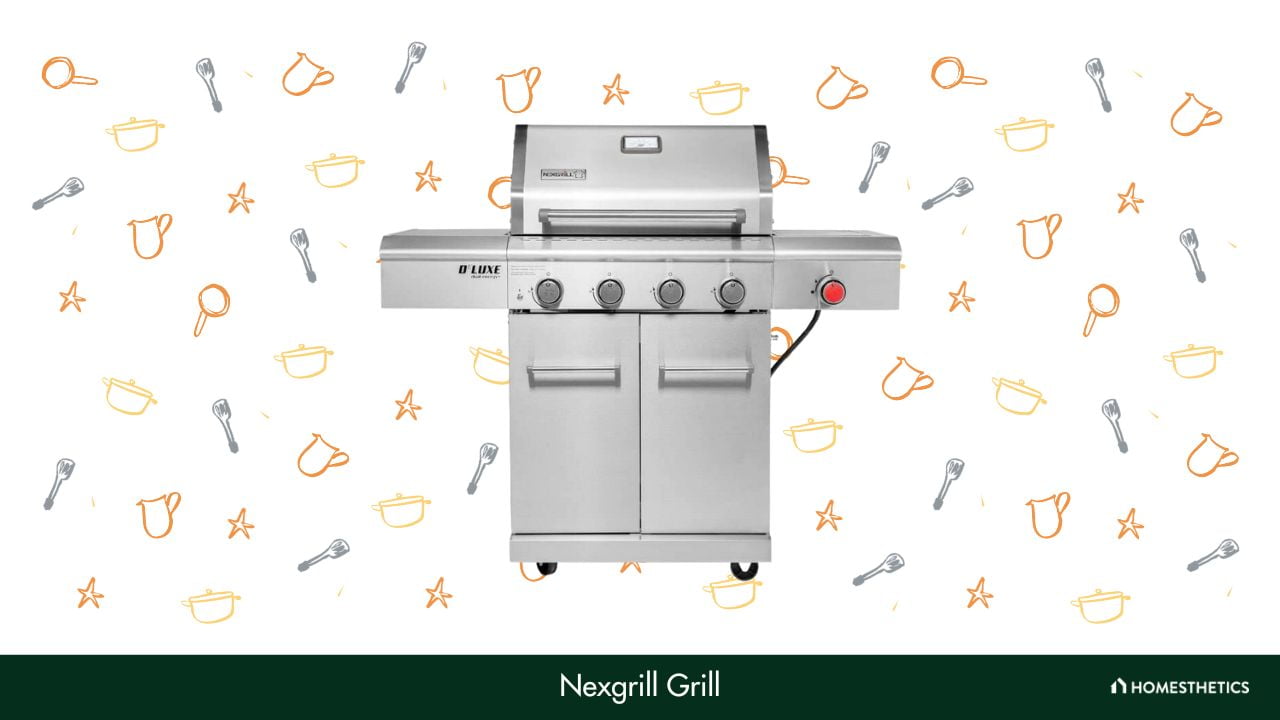


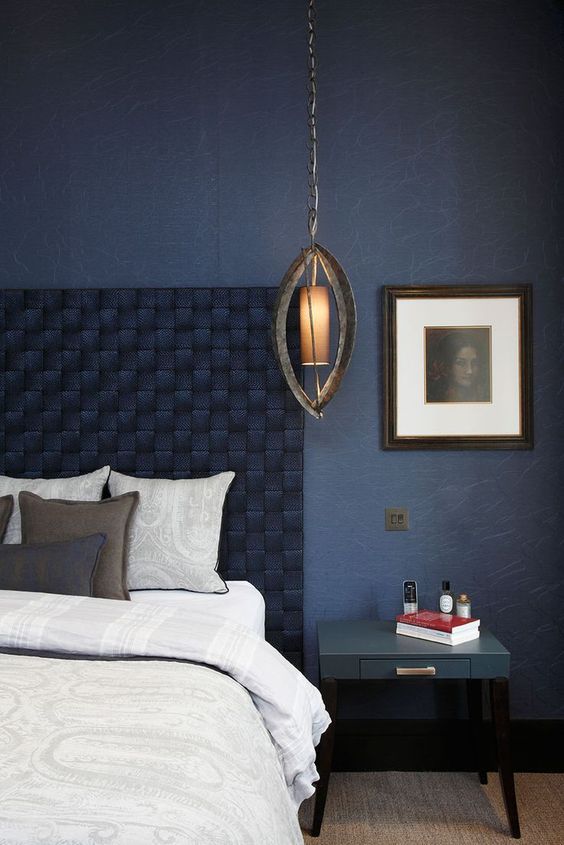

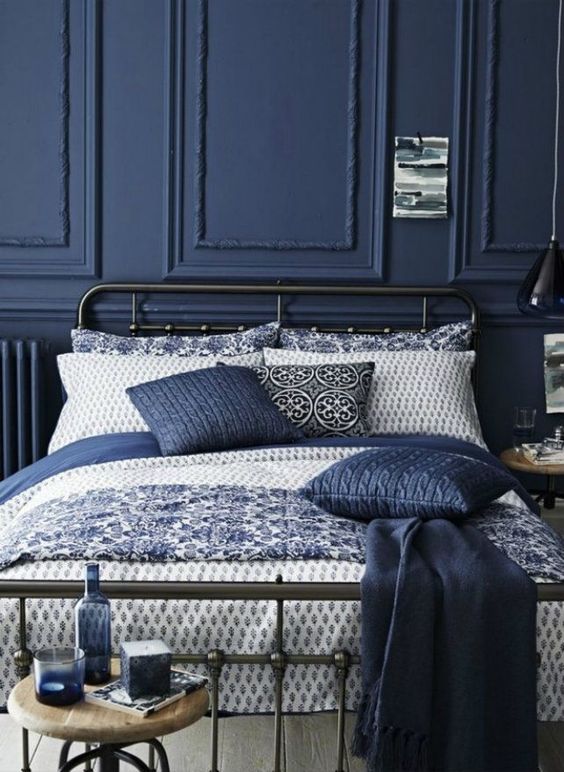


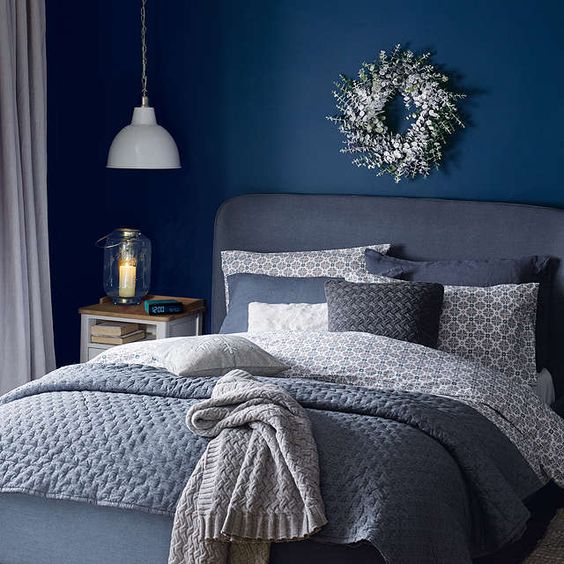


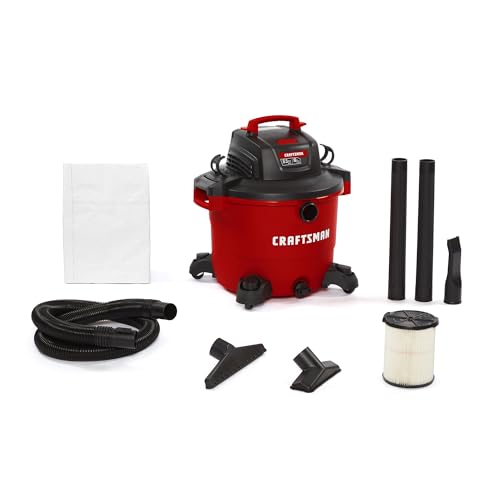


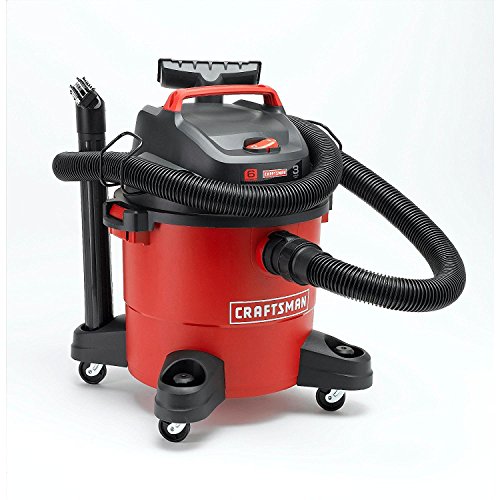
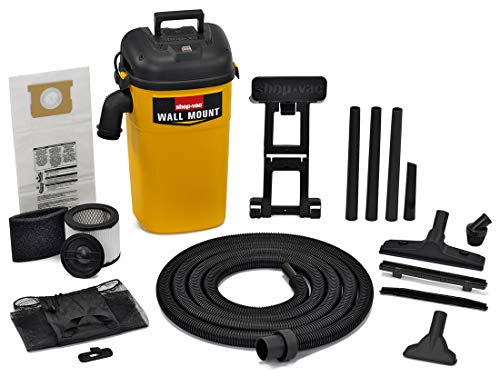


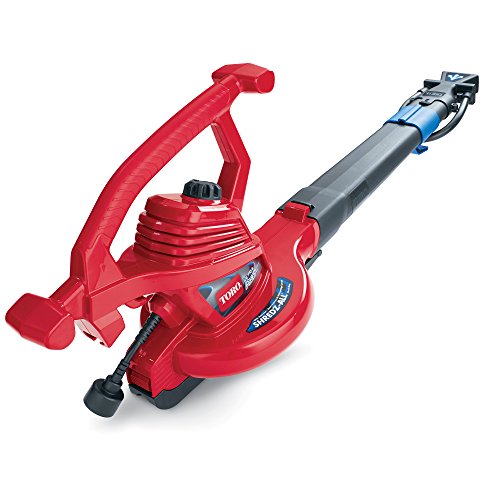
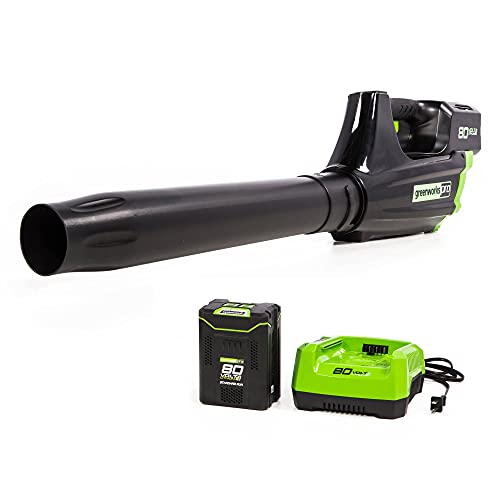
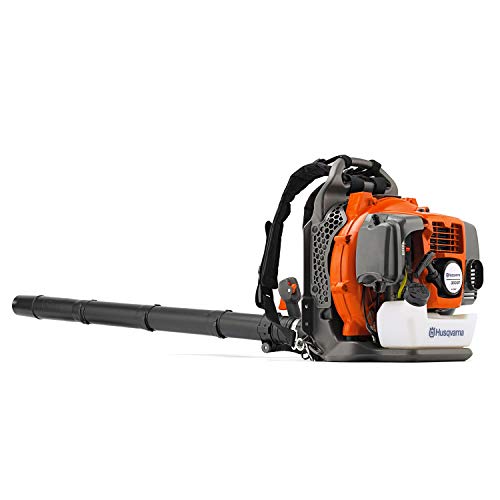
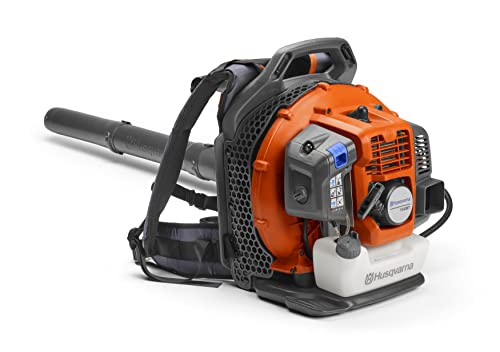


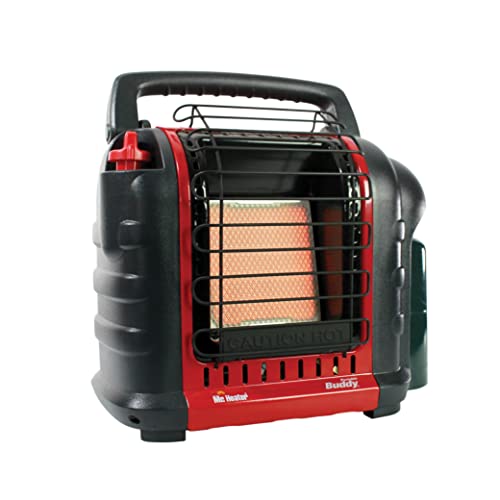
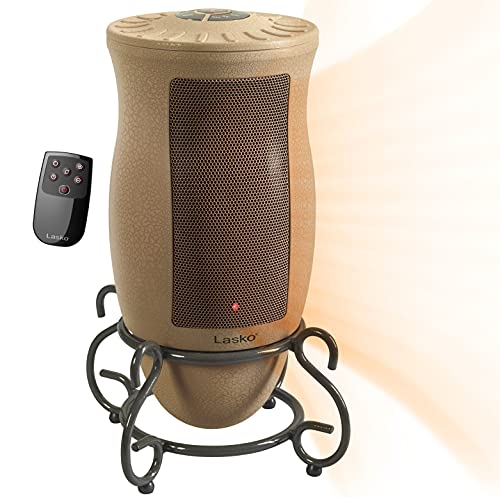

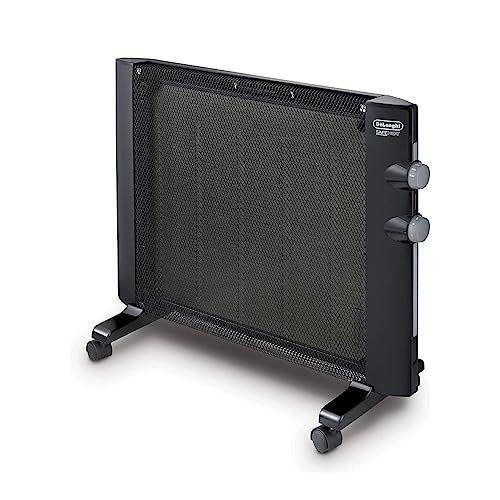

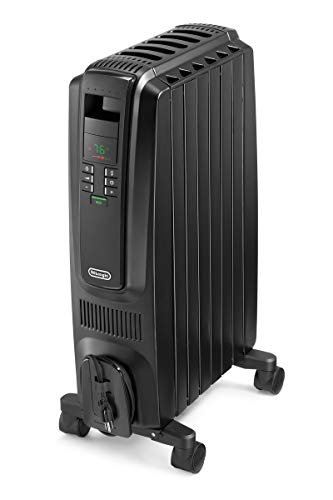

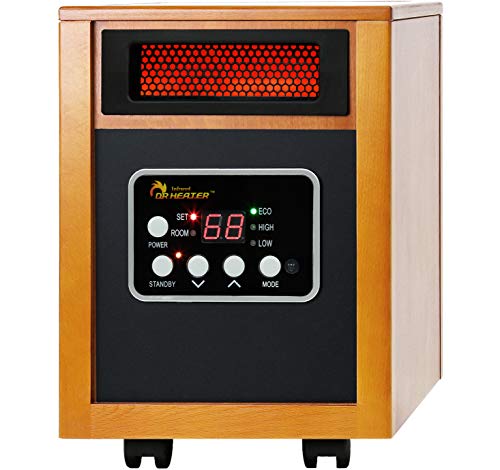
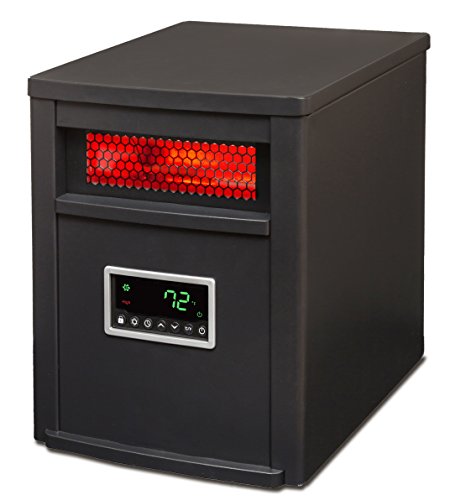


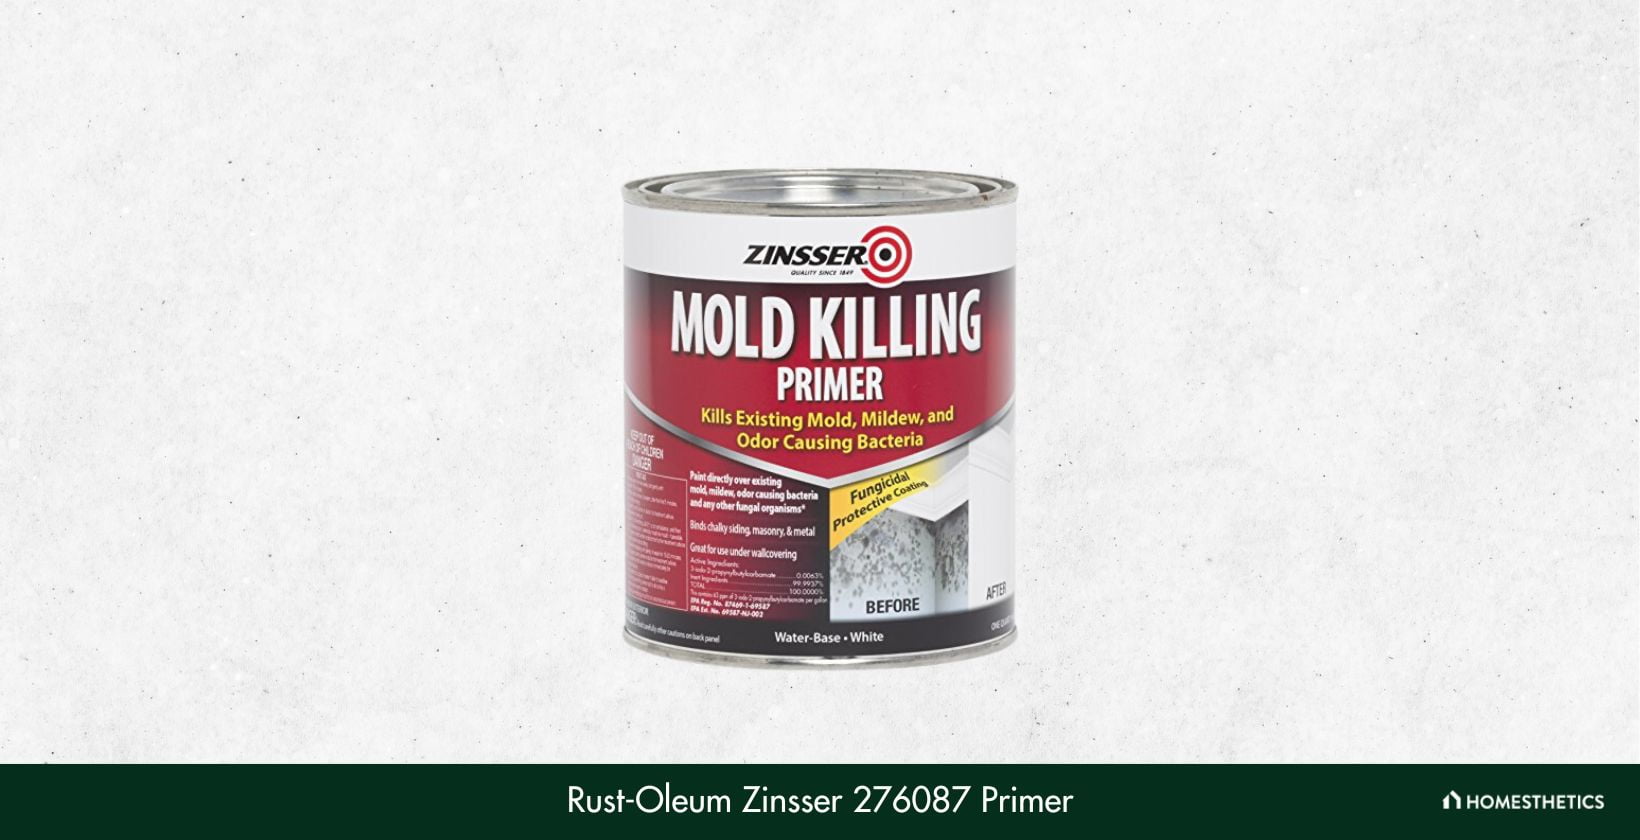
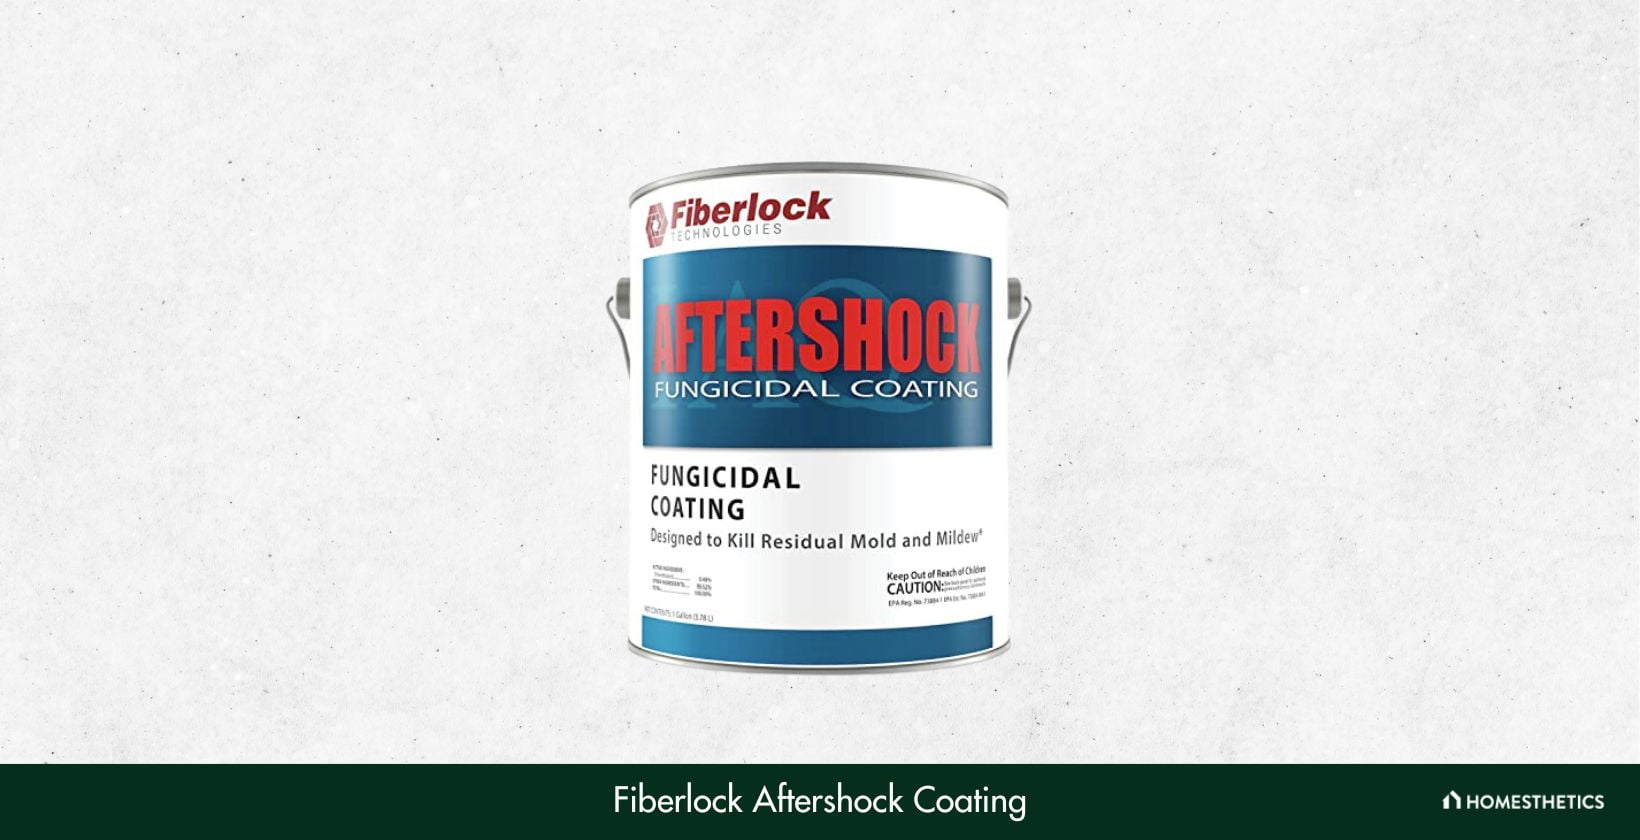
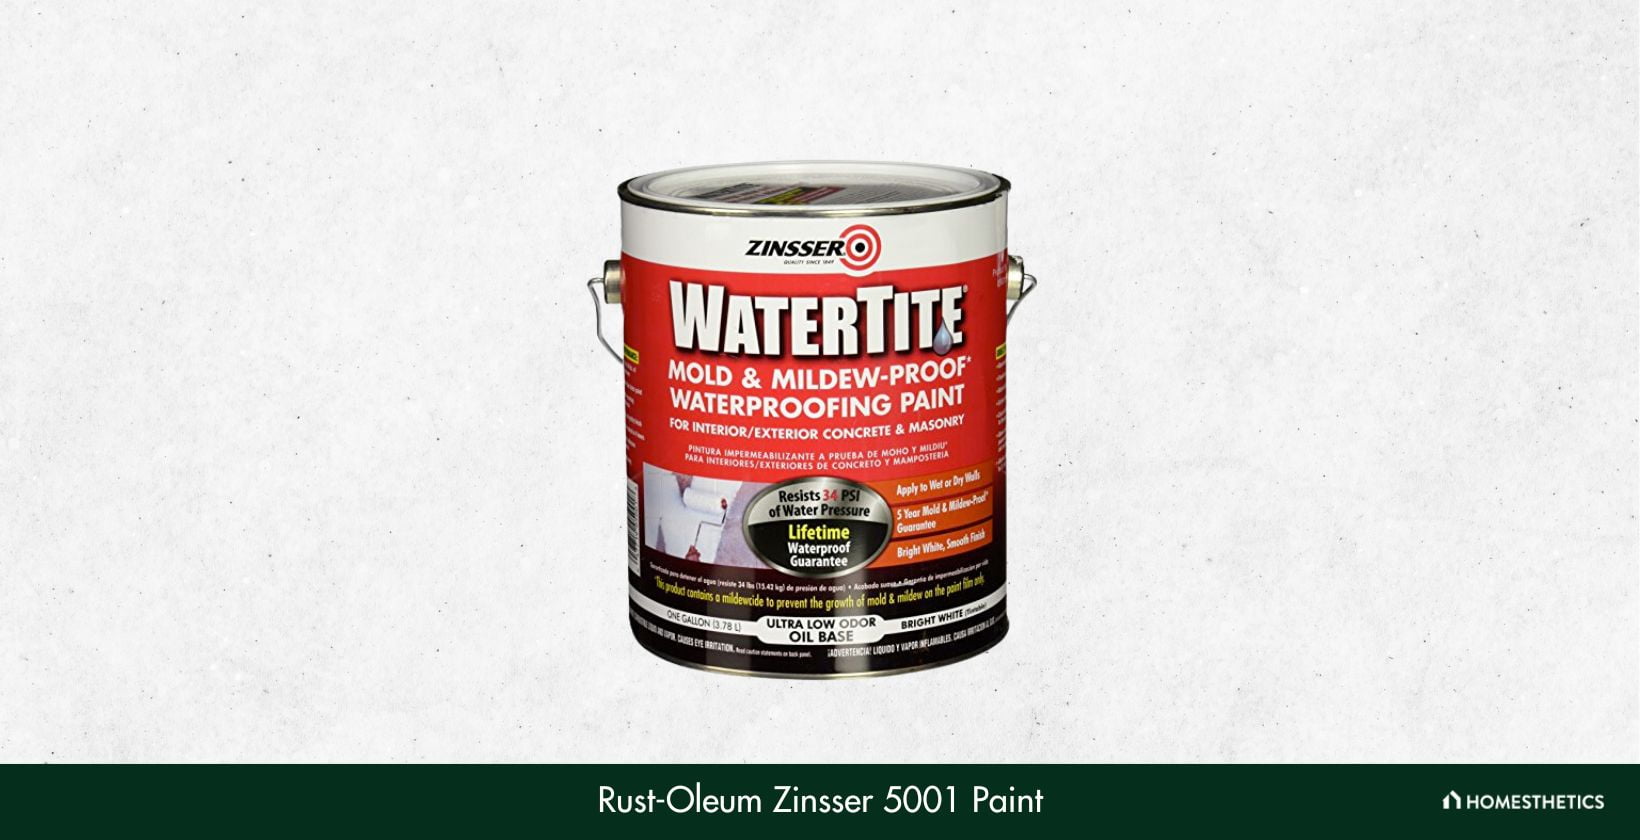
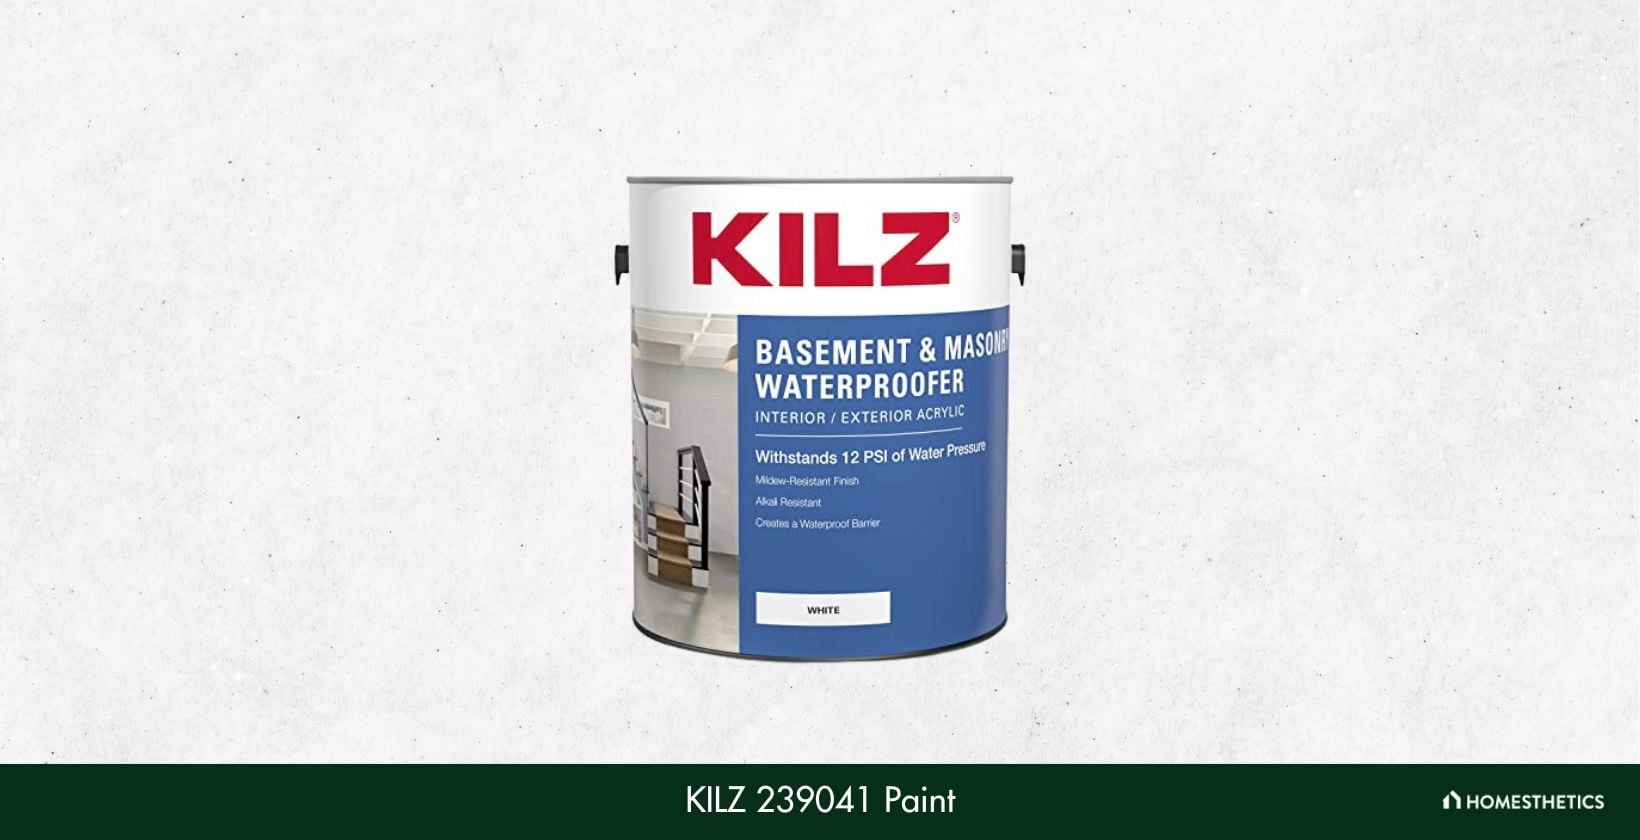


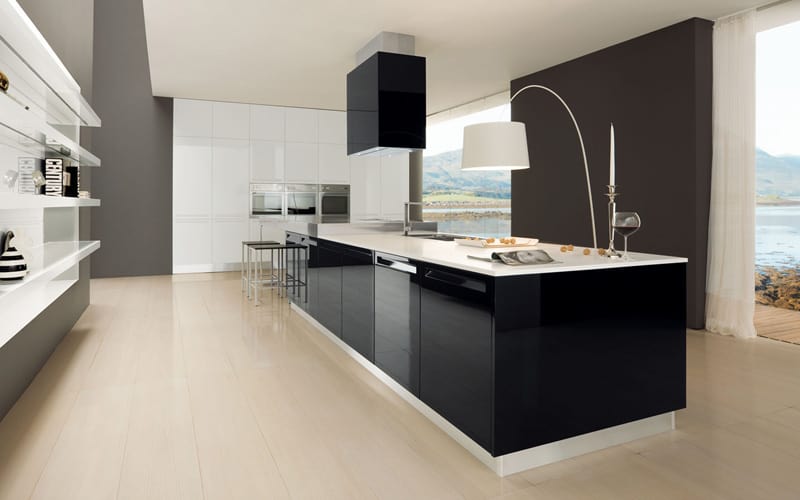


![Miter Saw vs. Circular Saw [Differences & Winner]](https://homesthetics.net/wp-content/uploads/2022/01/miter-saw-vs-circular-saw-1.jpg "Miter Saw vs. Circular Saw [Differences & Winner]")

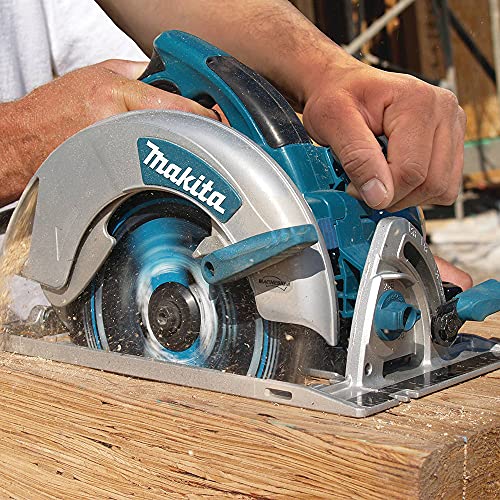

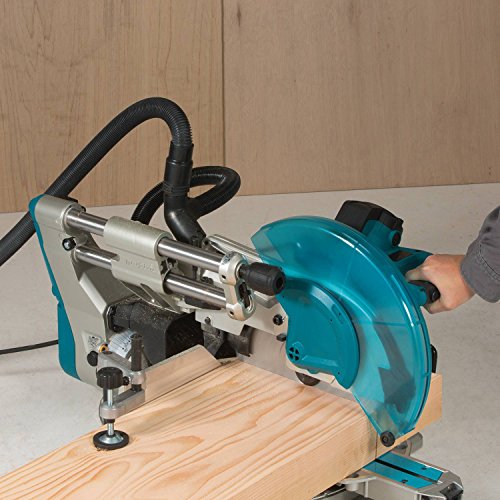

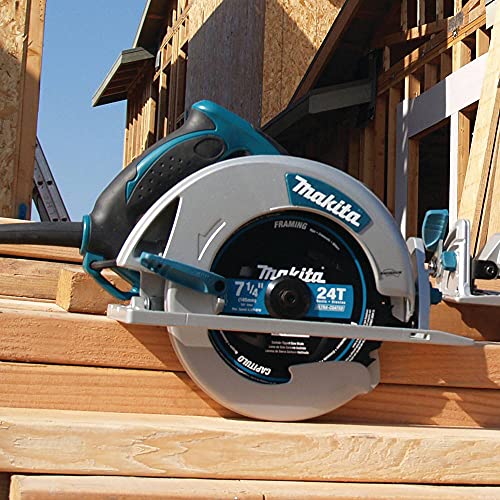

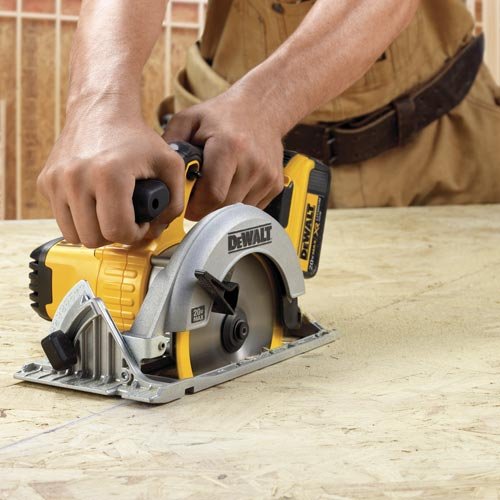
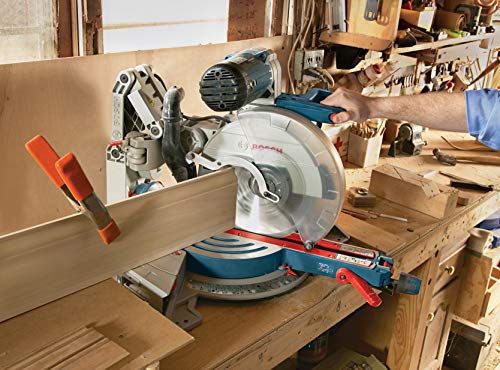


![Mindblowingly Beautiful Star-Shaped DIY Paper Lanterns That Will Beautify Your Special Moments [Printables Included]](https://homesthetics.net/wp-content/uploads/2014/11/Mindblowingly-Beautiful-Star-Shaped-DIY-Paper-Lanterns-That-Will-Beautify-Your-Special-Moments-Printables-Included-homesthetics.jpg "Mindblowingly Beautiful Star-Shaped DIY Paper Lanterns That Will Beautify Your Special Moments [Printables Included]")


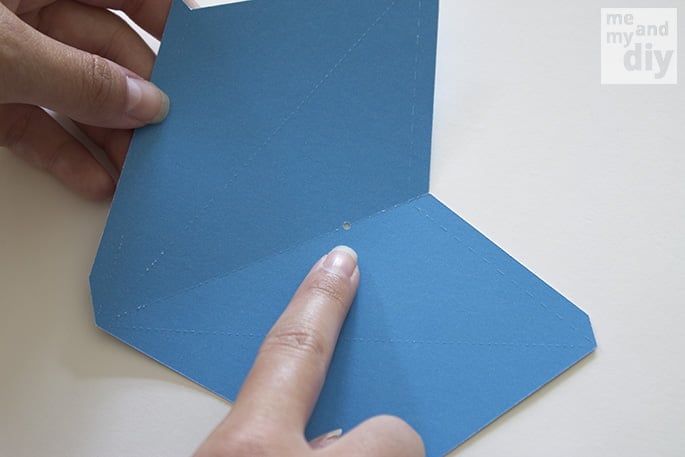
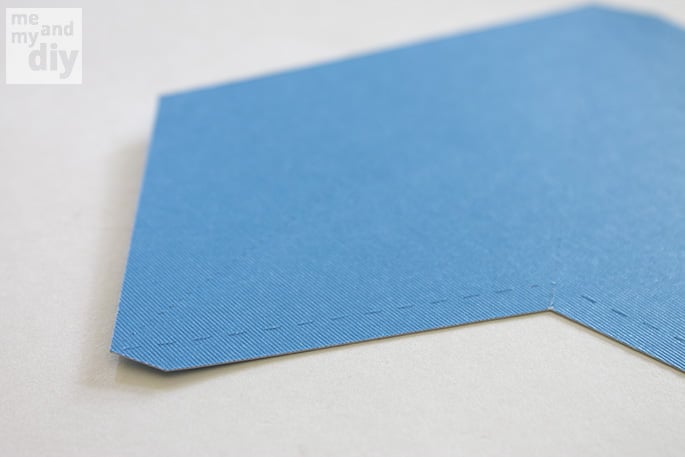


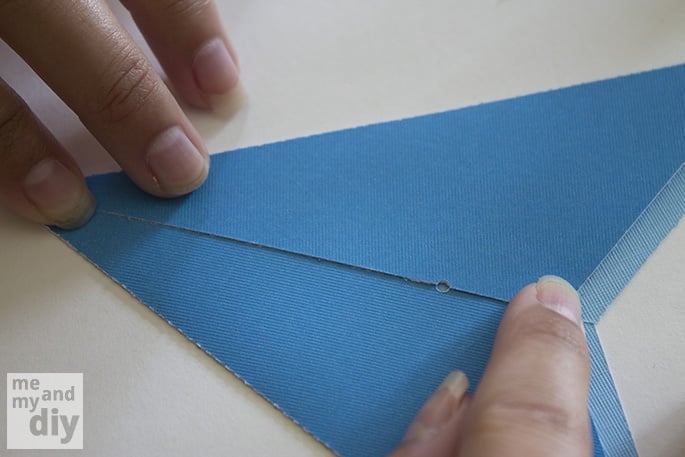


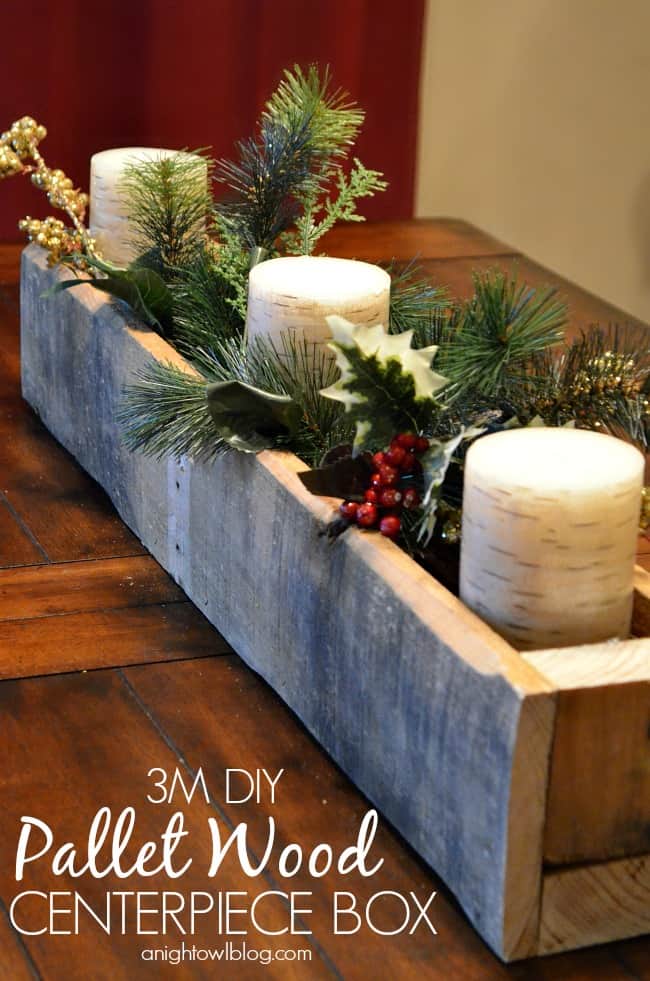


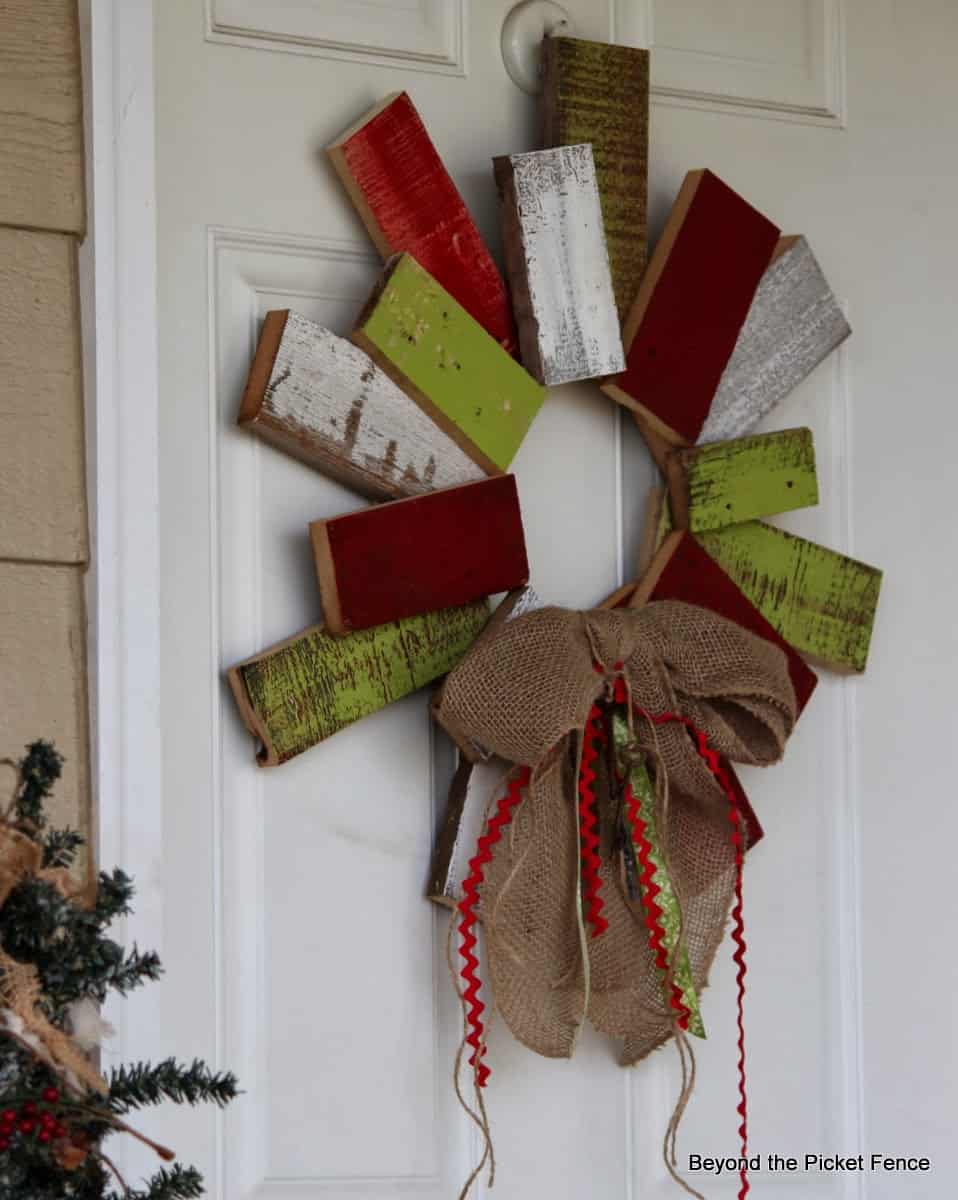


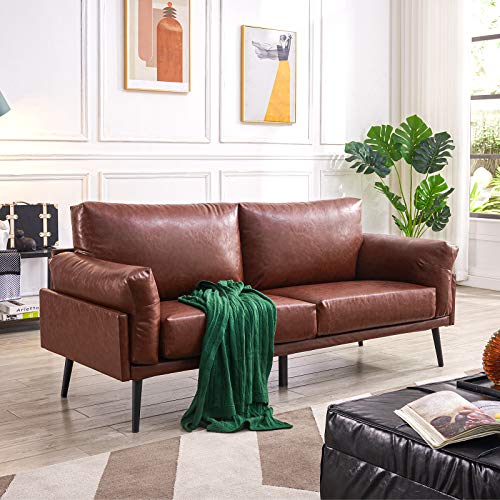

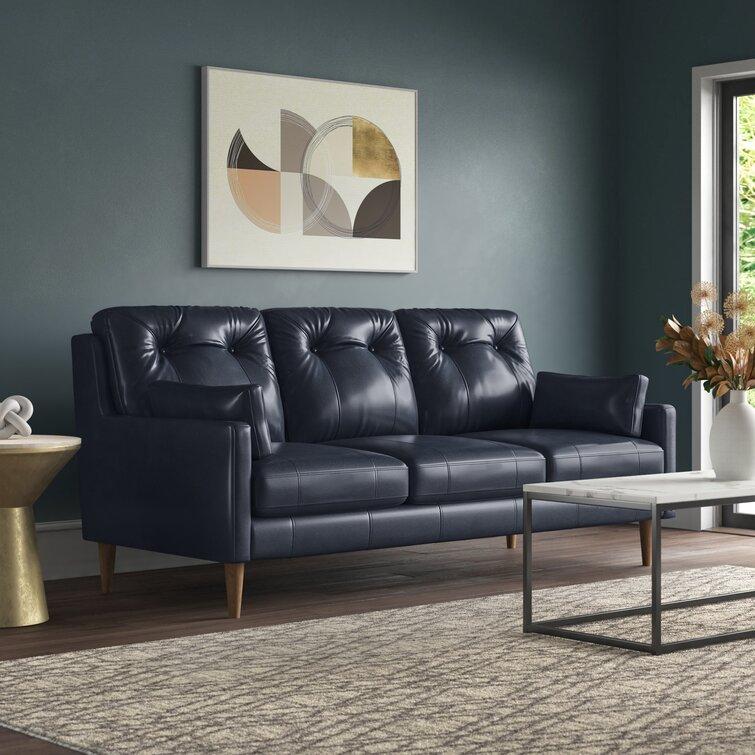
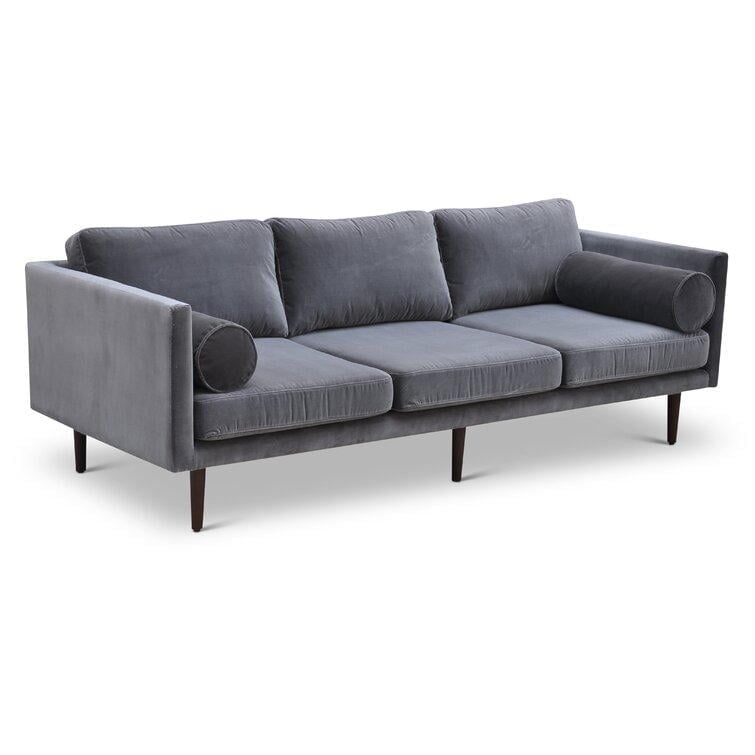
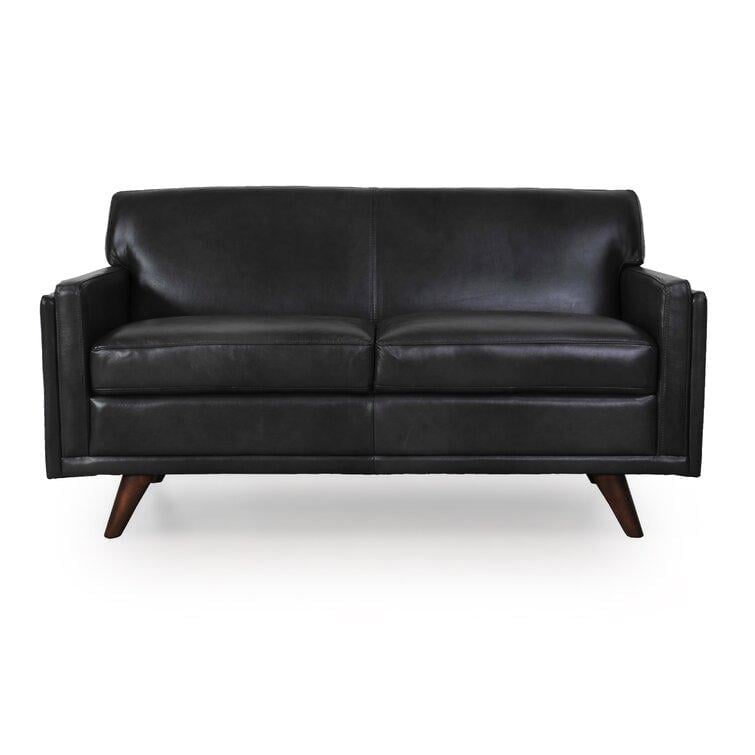
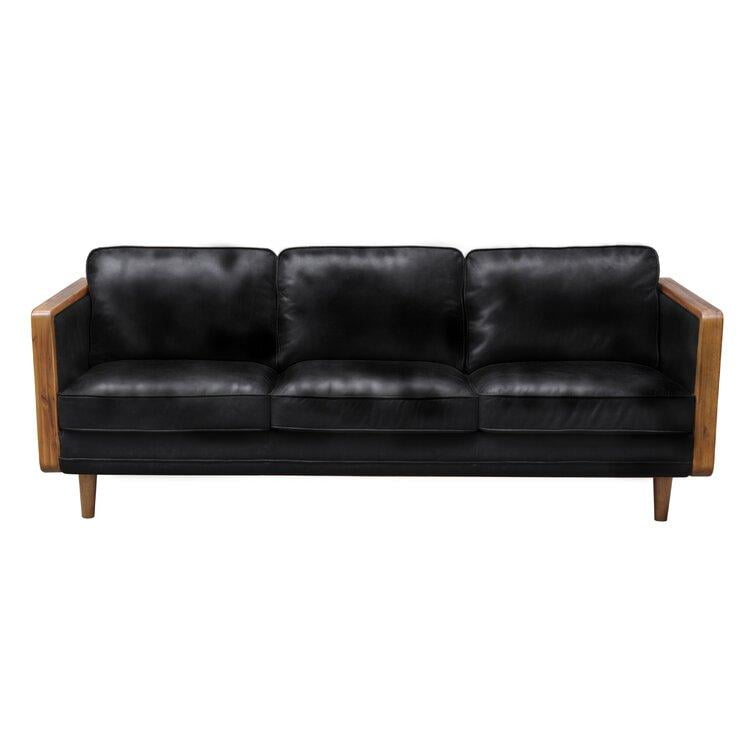
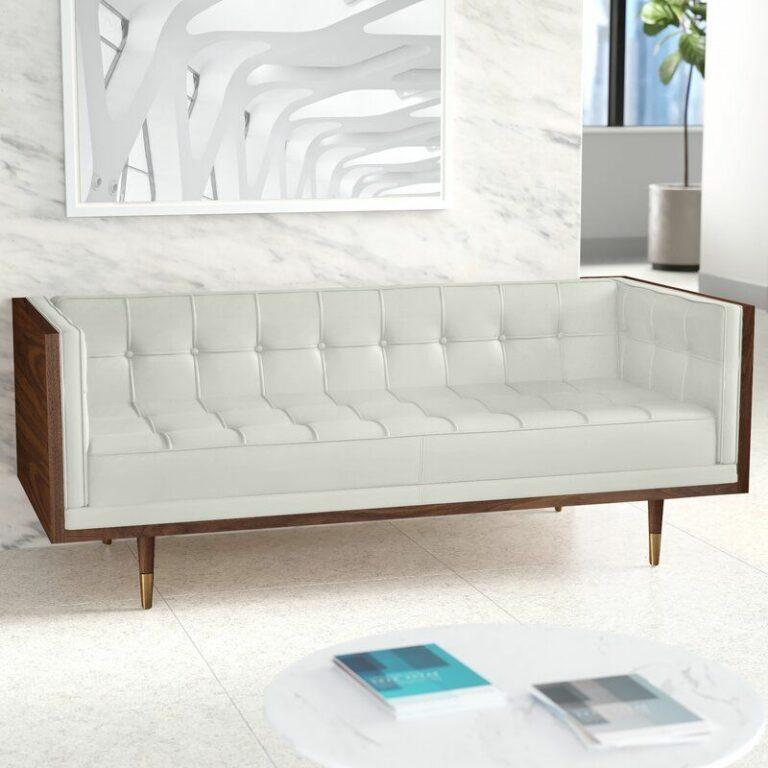

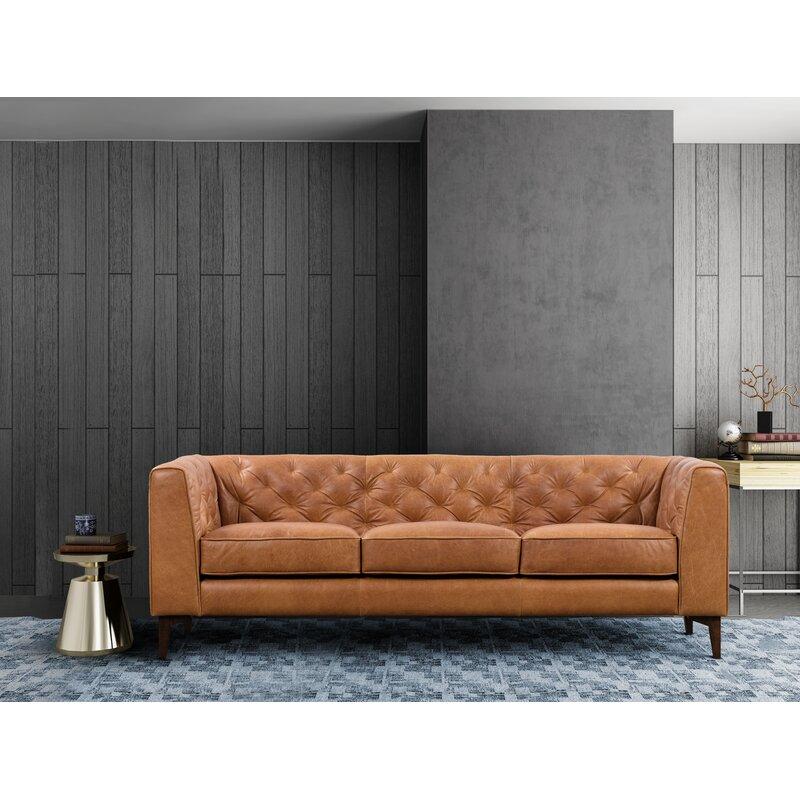


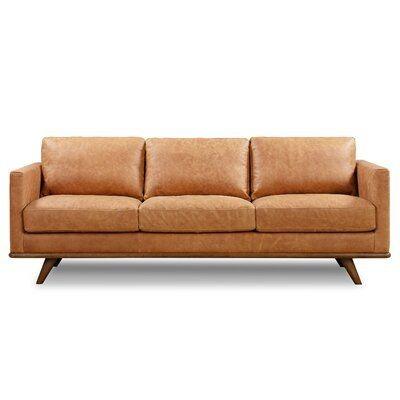


![Microwave Fan Turns On When Door Opens [Case Closed!]](https://homesthetics.net/wp-content/uploads/2023/04/Microwave-Fan-Turns-On-When-Door-Opens-002-300x169.jpg)


![Mauviel vs. All-Clad [All You Need to Know & Winner]](https://homesthetics.net/wp-content/uploads/2021/06/Mauviel-vs.-All-Clad-01.jpg "Mauviel vs. All-Clad [All You Need to Know & Winner]")


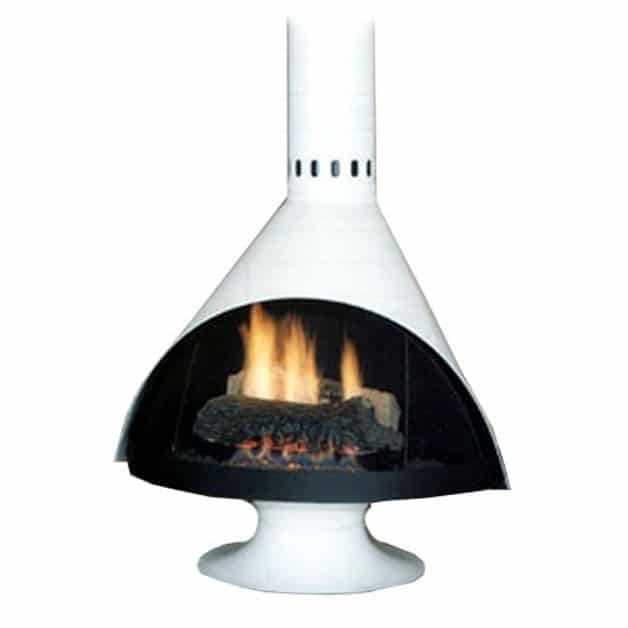
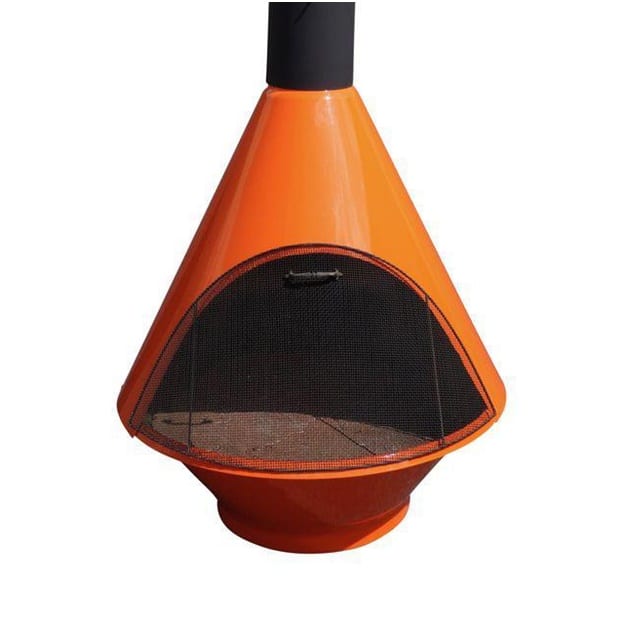
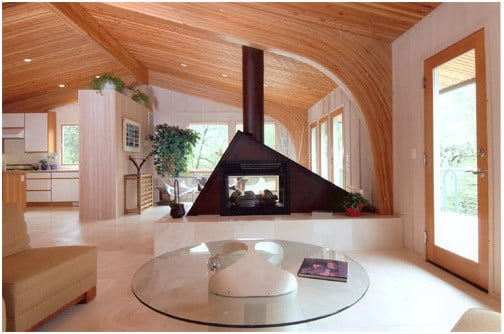


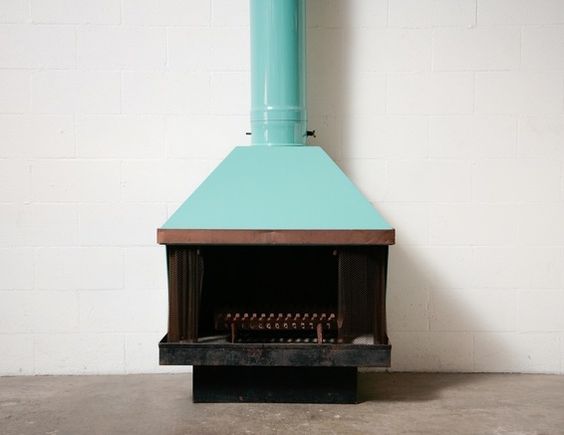


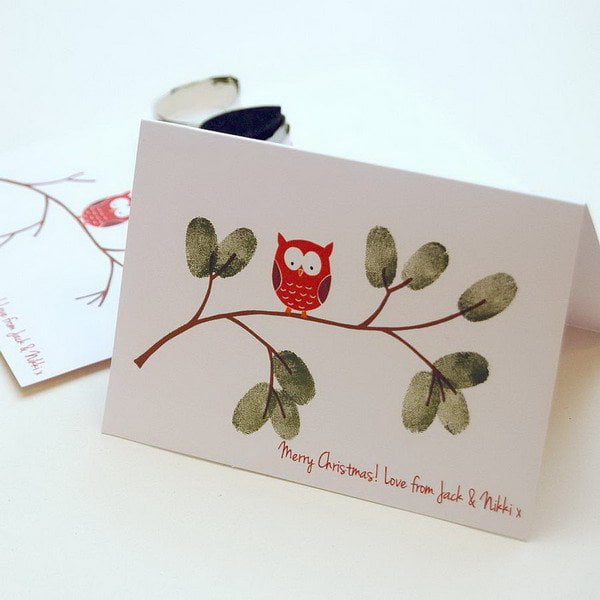


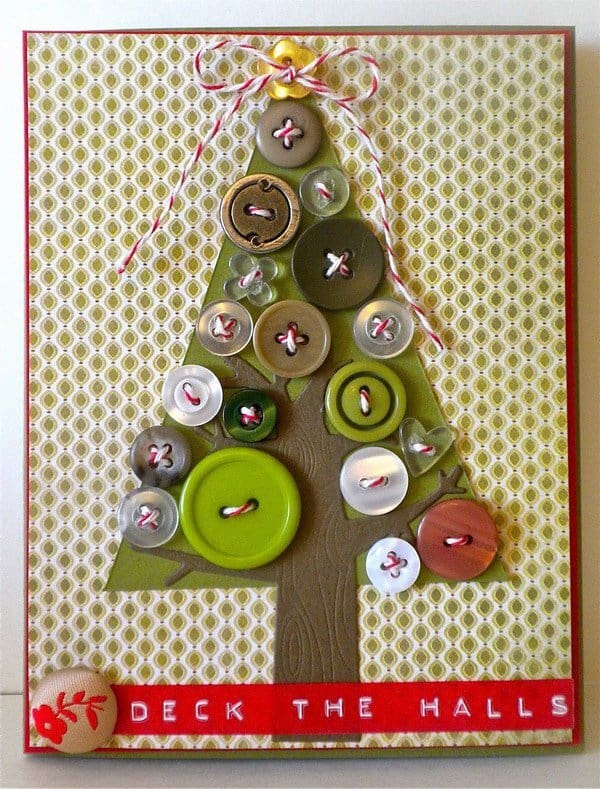


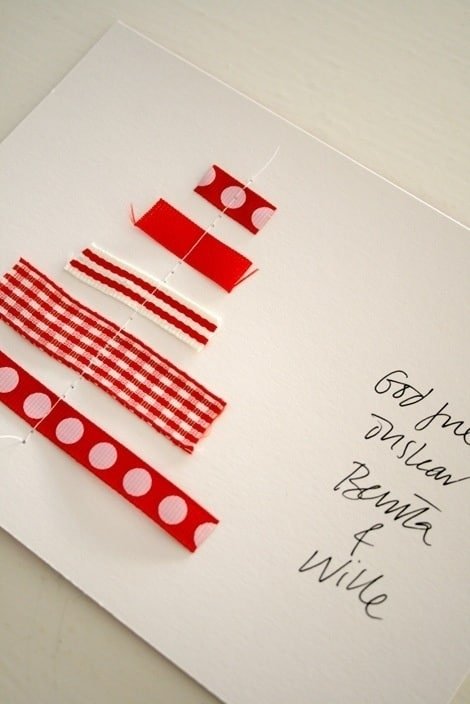


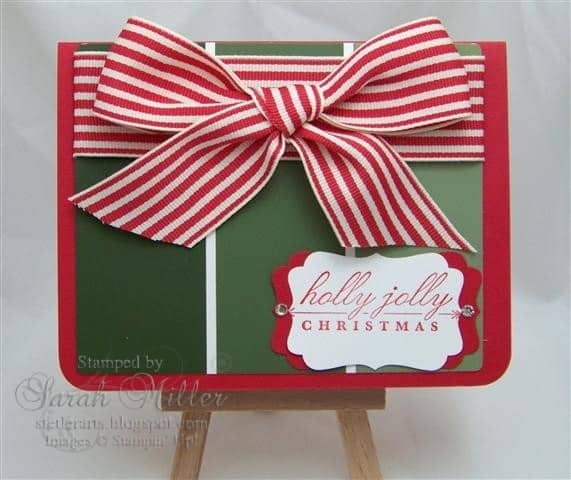


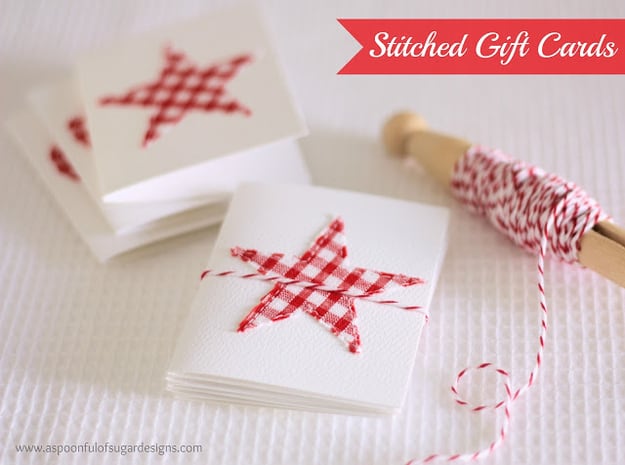

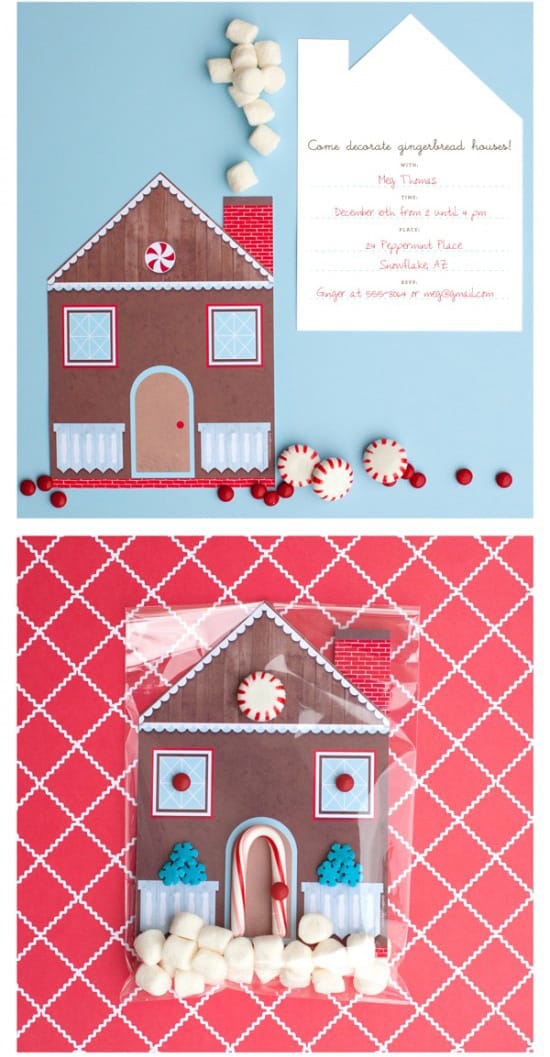

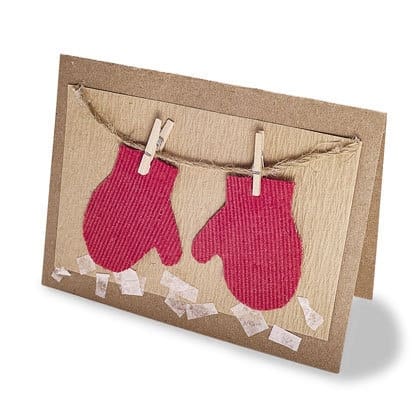


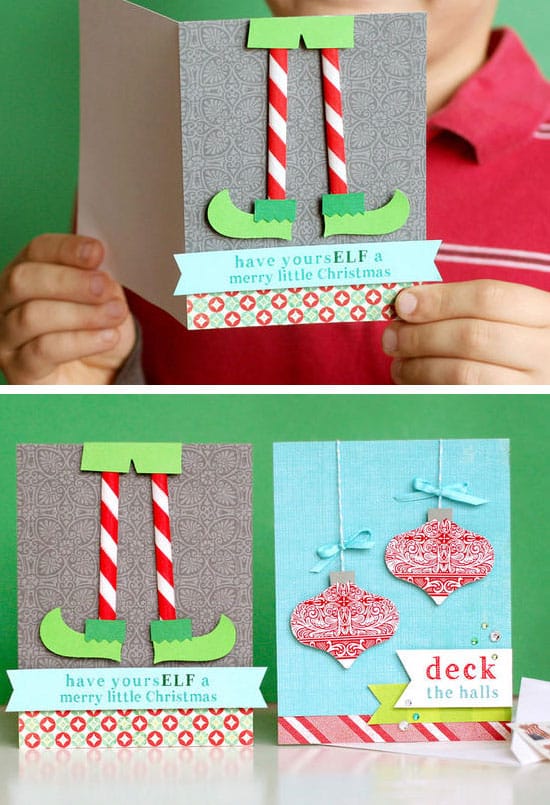

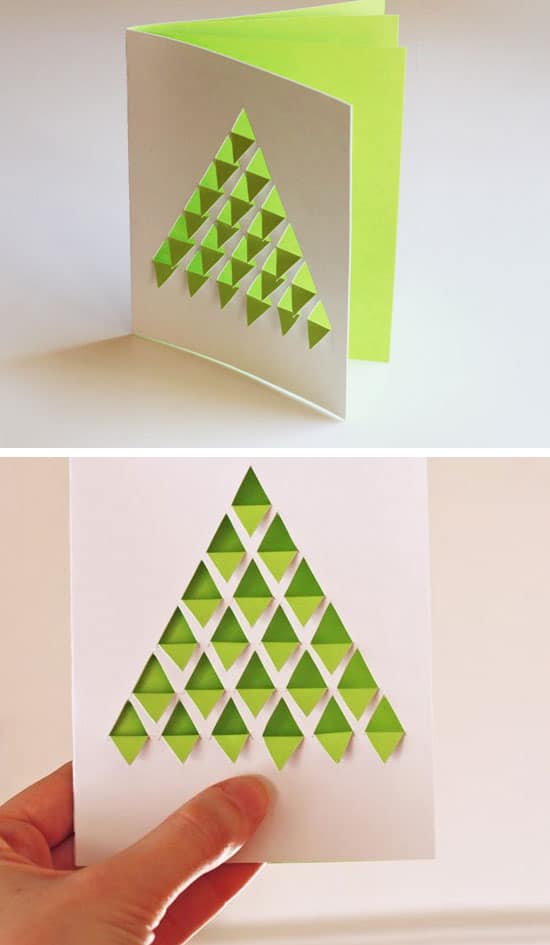
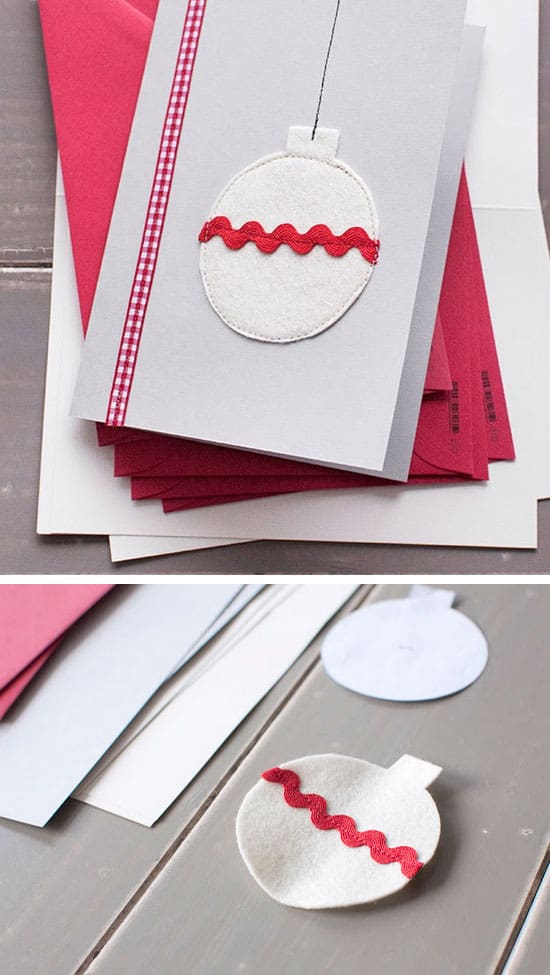
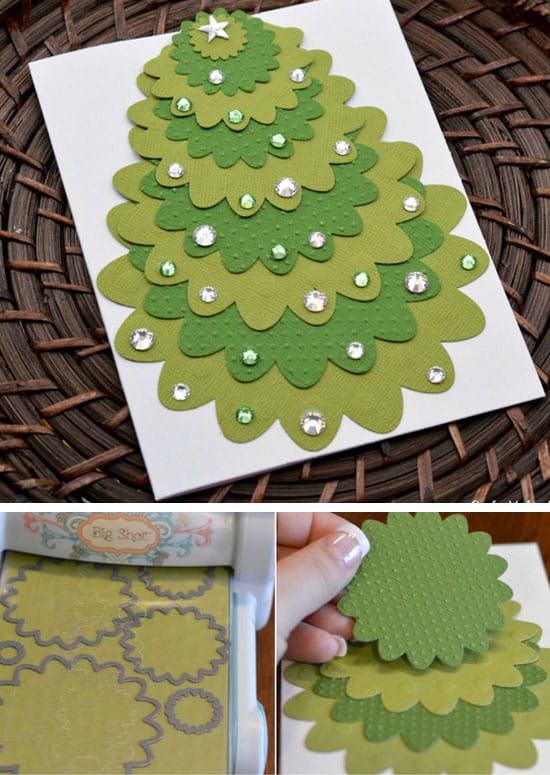


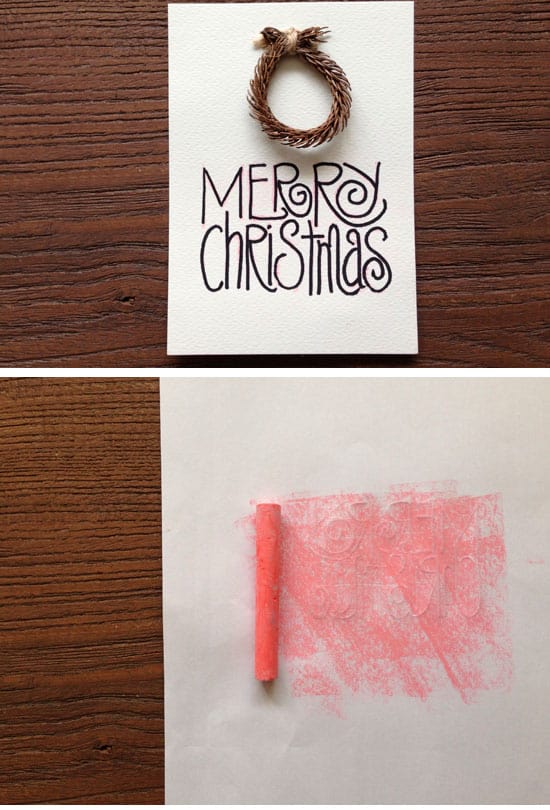


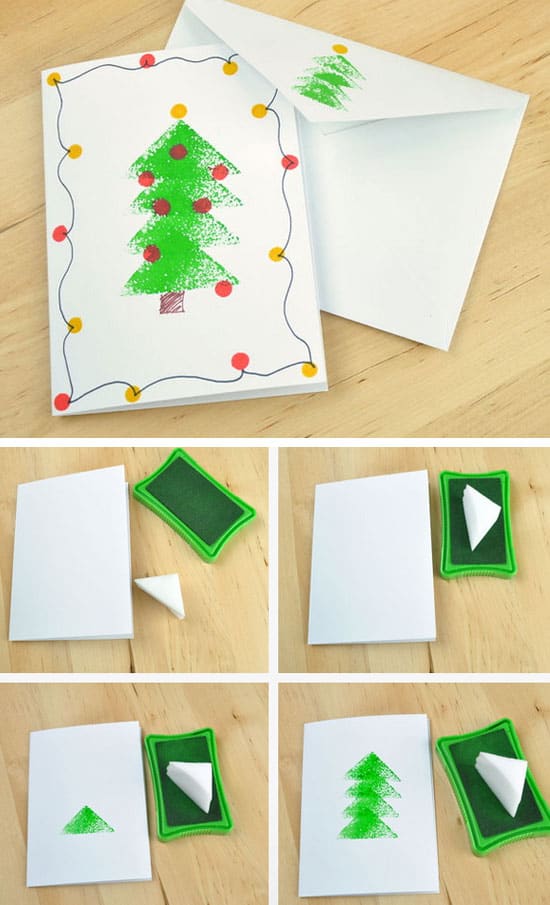


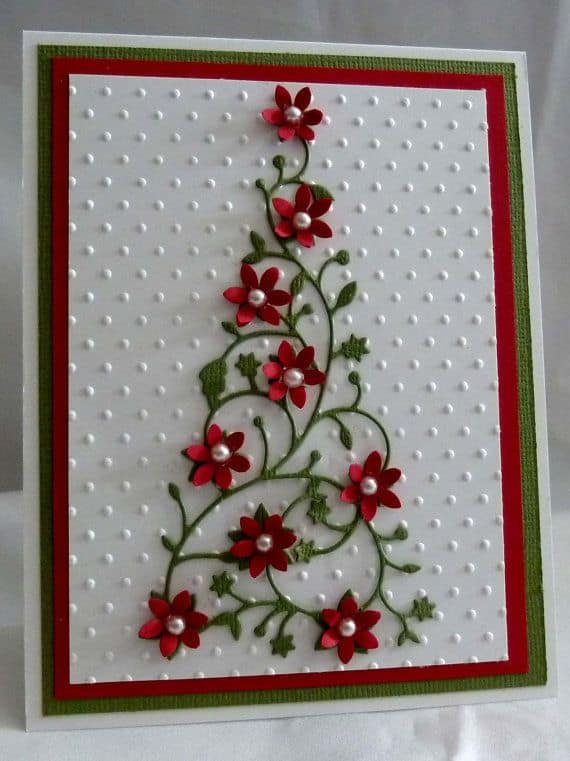


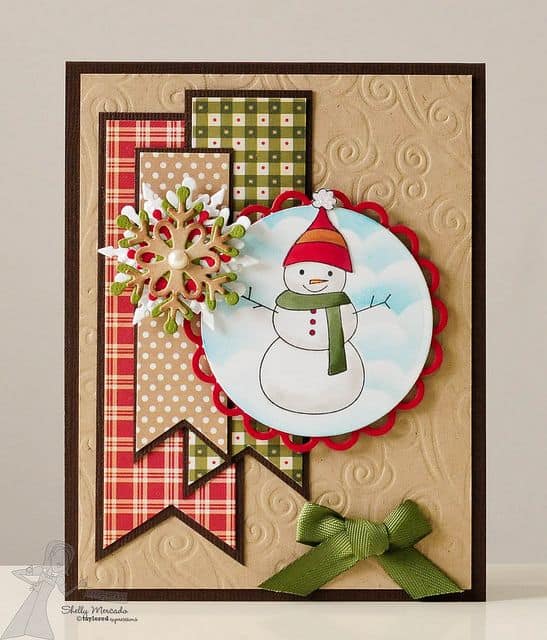


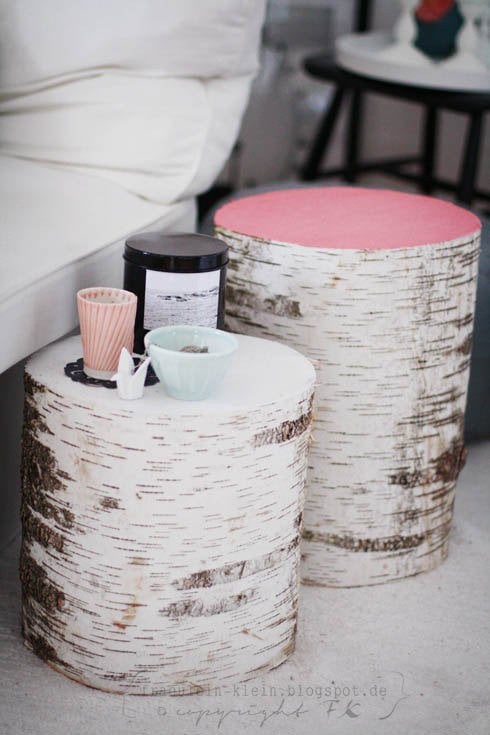


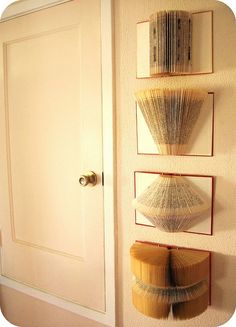

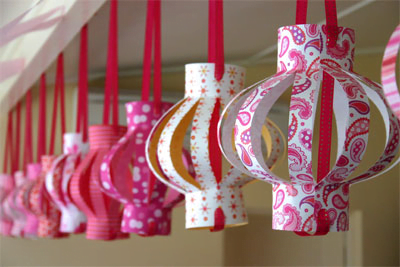
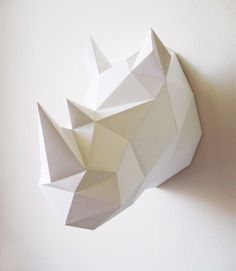


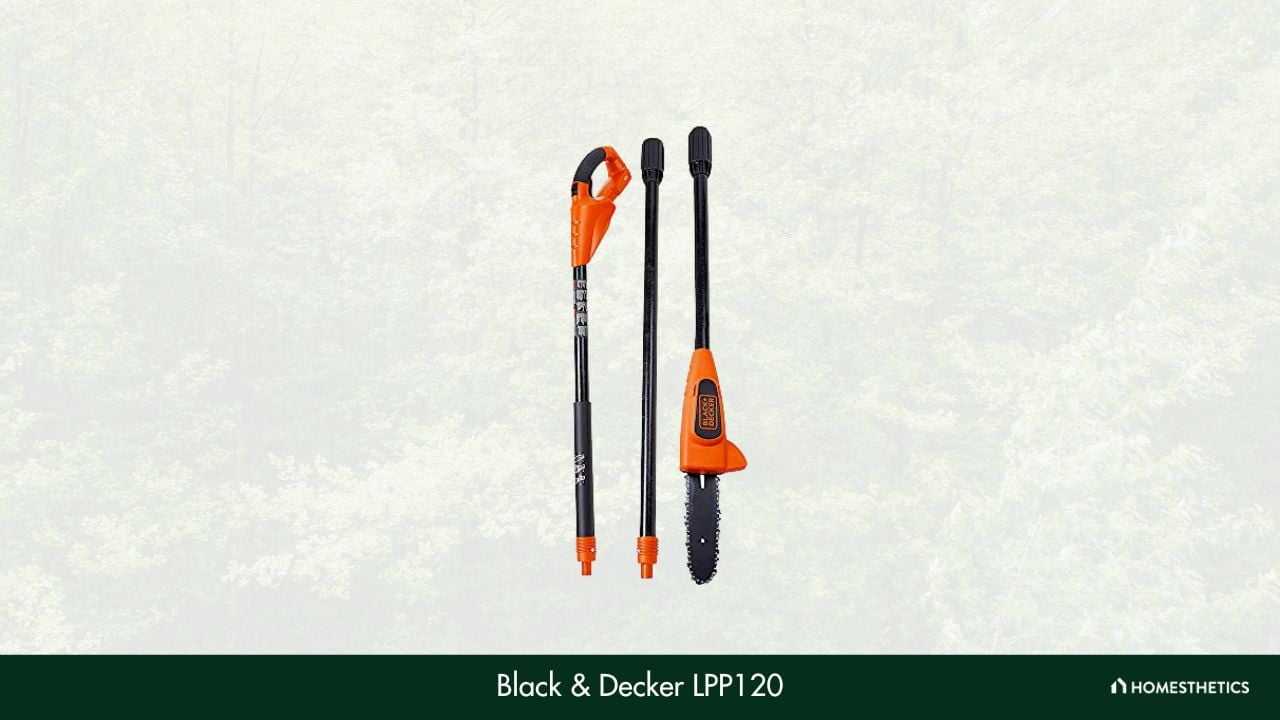


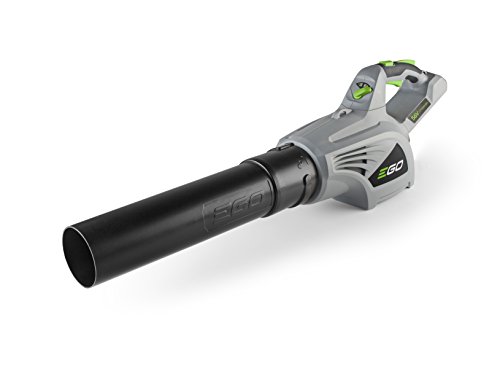


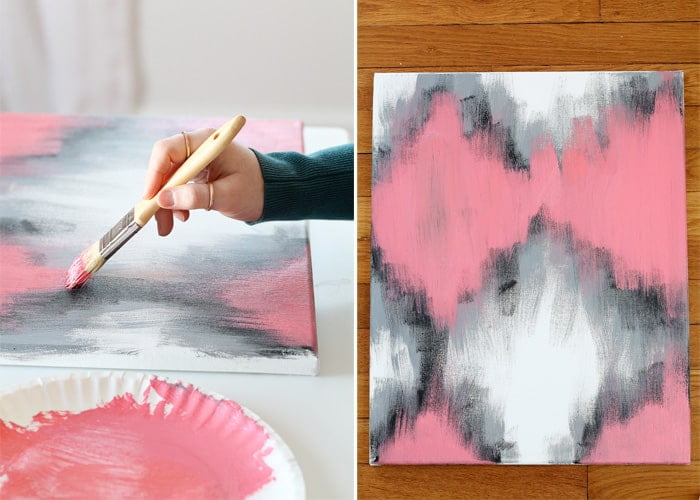


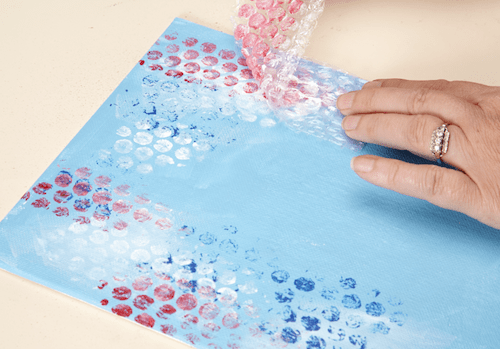


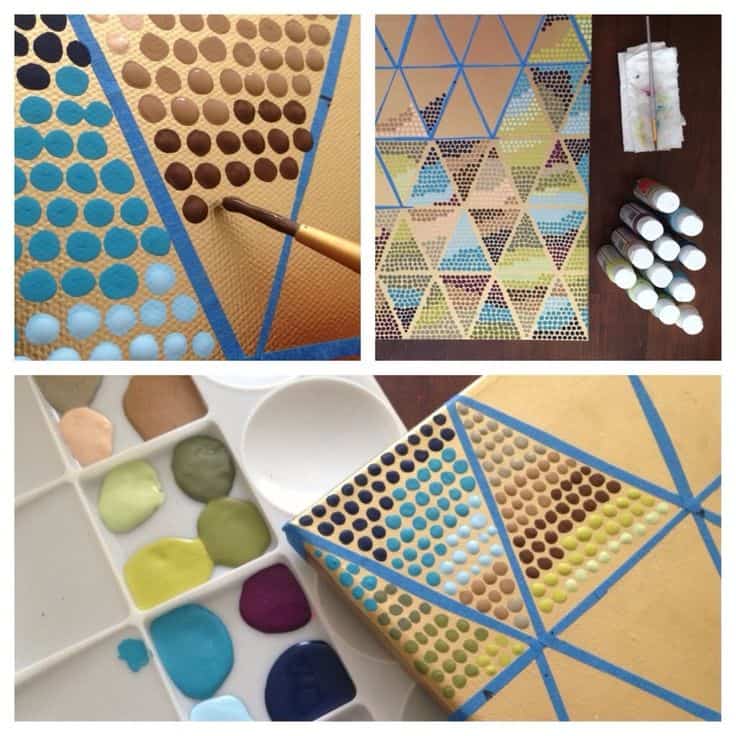


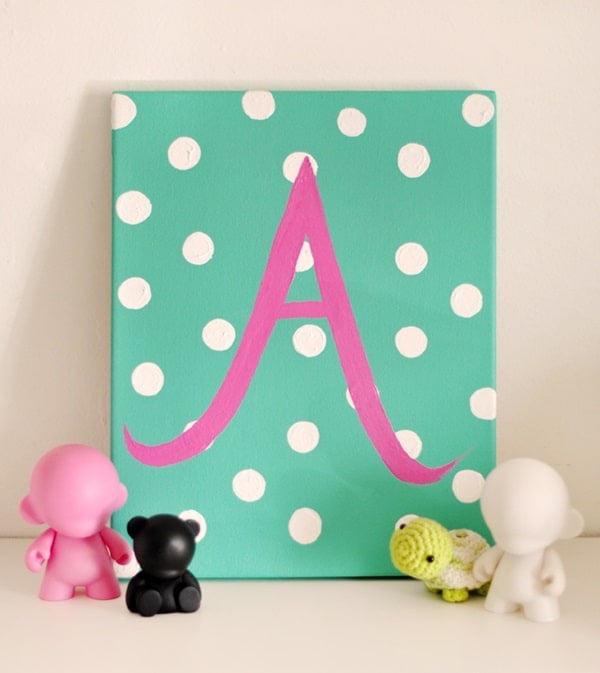


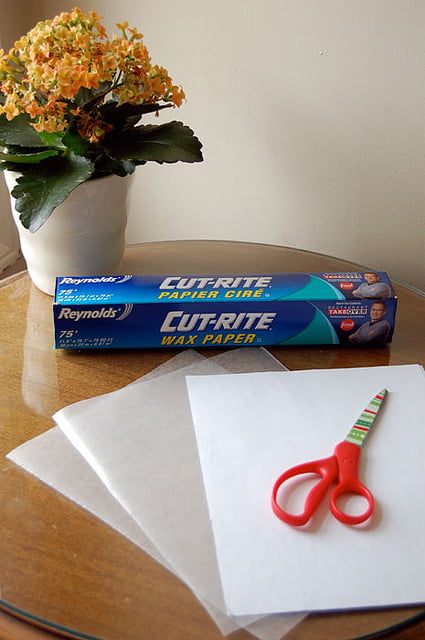


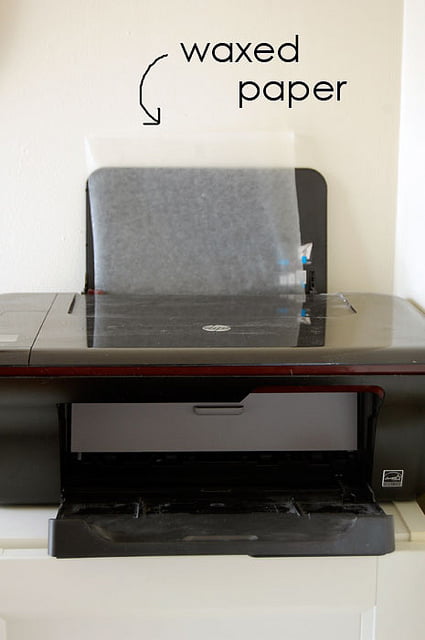
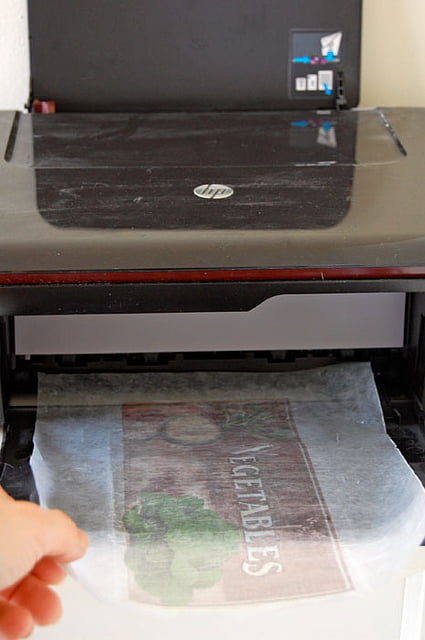


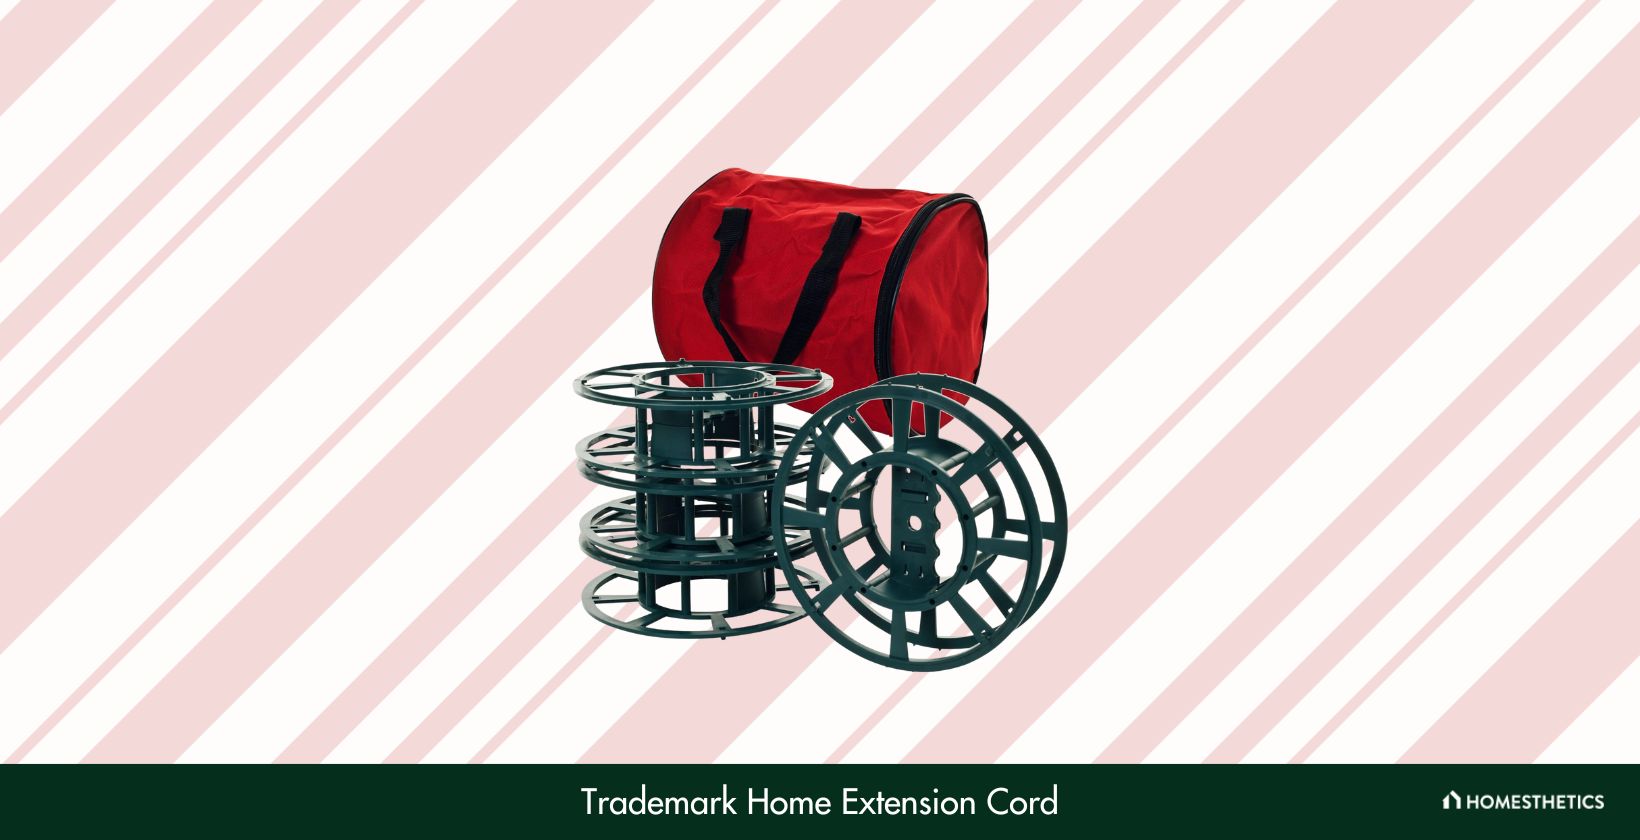
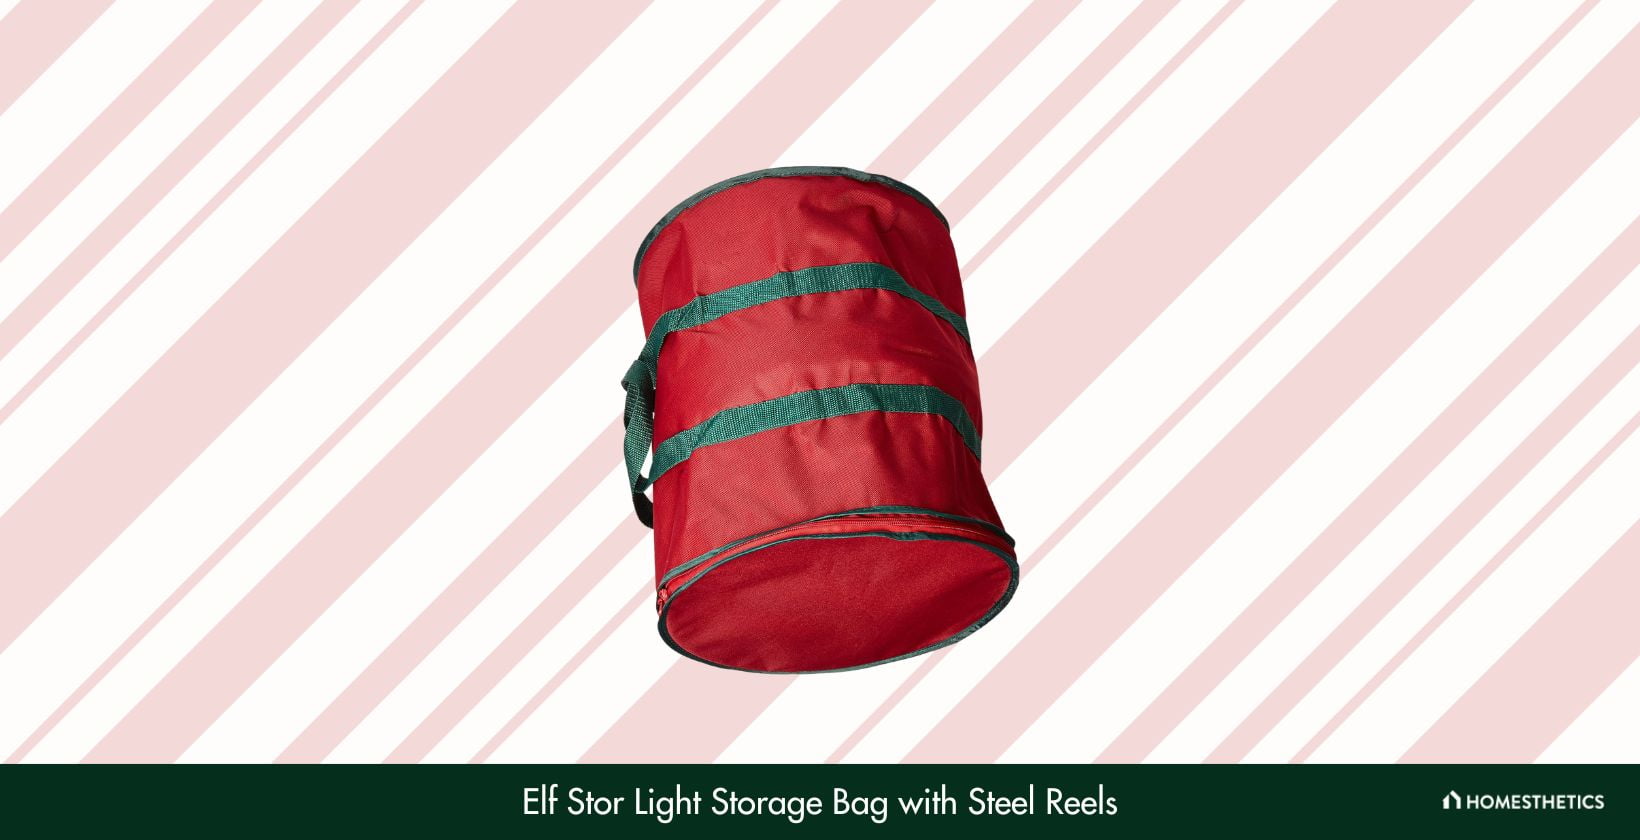


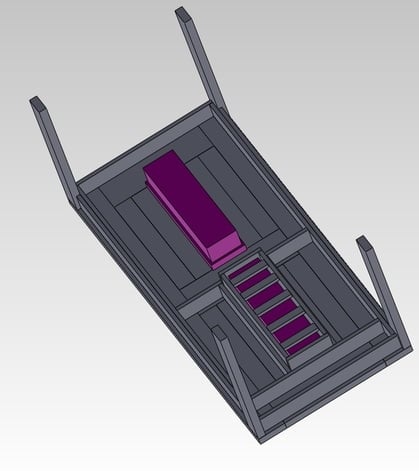


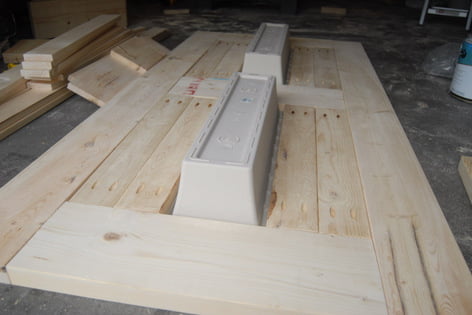

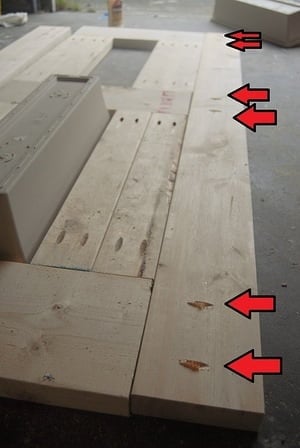

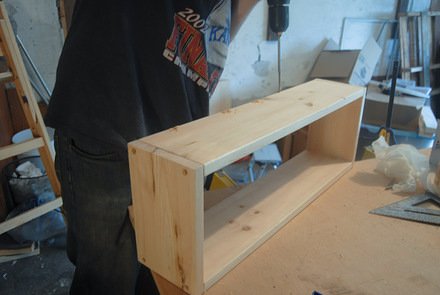


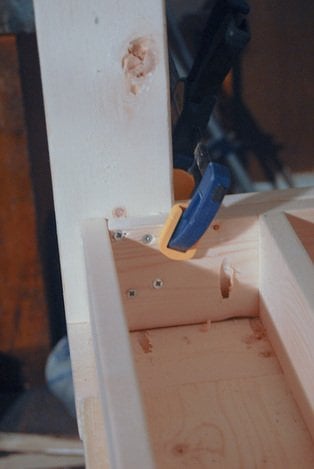


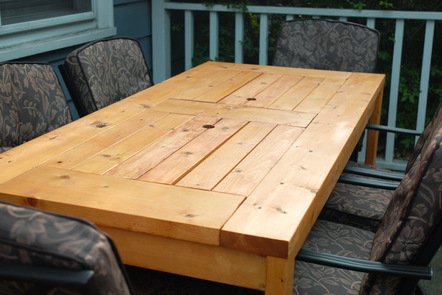


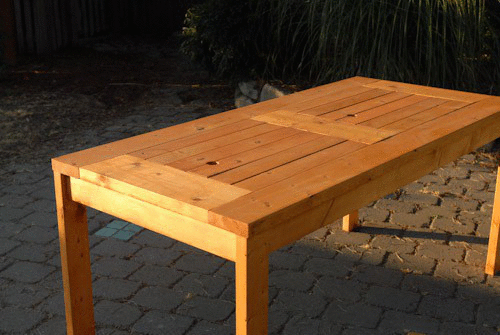


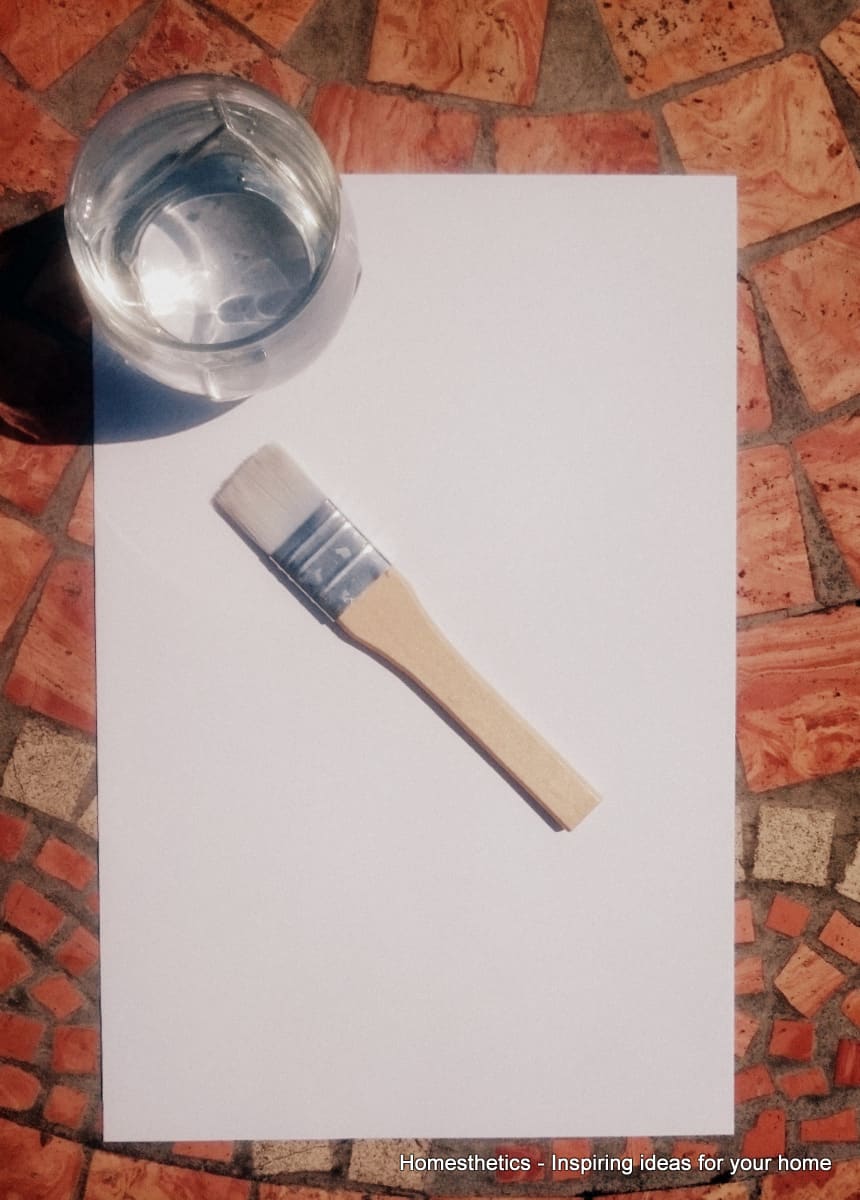


