Imagine returning back from the office and not being able to relax because of the hot weather. Yes, it does sound like a disaster.
Having the right temperature in your personal space is very important. Not only will this keep your mind at peace but will also help you cool down after the entire day's work. Now you may already have air conditioners, but if the space is larger, then the cold air may not spread around evenly.
And that is where an air circulator fan comes in! It can help promote the movement of air to provide you with a blast of cold air from several feet away.
So, today, we will review the Honeywell HT-900, the HT-904, and the HT-908. We will also be pointing out the similarities and the differences among them so that you find it easier to take a pick.
Let's get going!
Honeywell HT-900 Vs HT-904 Vs HT-908
In this section, we will first talk about each of the models individually and then compare them with each other. Before beginning, we should tell you that they are pretty similar and come with a range of similar or common features. But again, there are some noteworthy differences, and we will be discussing them too.
This is one of the smallest corded electric circulator fans, which offers powerful performance and can be placed anywhere in the room. It measures 10.9 x 6.3 x 10.9 inches and is easily portable. You can place it at any corner, and it will help in circulating the air to provide a relaxing atmosphere.
Plus, the Honeywell HT-900 is pretty powerful, so you can feel the gush of air from 25 feet away. The speed of the fan can be adjusted and there are 3-speed settings to choose from. Also, it is equipped with a pivoting head that can move up to 90 degrees. We found that it is a perfect fit for small to medium rooms.
Moreover, this air circulator fan is one of the cheapest options available in the market which will easily fit it into your budget. At the same time, you can save on energy bills while improving the airflow in the house .
In hindsight, the Honeywell HT-900 air circulator fan sports an aerodynamic turbo design that allows better air circulation.
SMALL FLOOR OR TABLETOP FAN – Honeywell TurboForce HT-904...
FEEL THE POWER – Honeywell TurboForce fans have an...
The Honeywell HT-904 functions a lot like the HT-900, and it comes with a number of similar features too. But when it comes to the design, the HT-904 looks more aesthetic and comes in a beautiful white color.
This powerful air circulator fan sports a compact build and can even be mounted if needed. You can tilt the head of the fan up to 90 degrees to facilitate better air circulation.
Another important feature is that it can be used with an air conditioner to help save energy. When you switch it on, the fan will circulate the cool air to effectively bring down the temperature in the room. The AC can then be switched off after a while, and the room will remain cool for a long time.
Other than this, we were very happy to see that it works quietly, just like the HT-900, so rest assured that you won't have to deal with loud noises.
MEDIUM FLOOR OR TABLETOP FAN – Honeywell HT-908 TurboForce...
FEEL THE POWER – Honeywell TurboForce fans have an...
The Honeywell HT-908 is one of the more expensive options when it comes to turbo-force air circulator fans. And although it may require you to stretch the budget by quite some bit, it is more powerful than the other two options and can cover a larger space. So, if you have a big room, then this is a good option to opt for.
But despite having a bigger build and design, it can still fit on tabletops, chairs, and desks. This air circulator fan comes with a pivoting head and 3 fan speed settings like the previous options. So, you can choose a speed depending on your air flow needs. The air flows with force, and you will be able to enjoy the efficiency fan from about 32 feet away. Talk about being powerful!
But as we have already mentioned above, it features a heavy-duty design, meaning it will weigh more the other two options (5.7 pounds, to be precise) that we have listed. So, you can place it on one side of the room and enjoy the pleasant air that will be cooling you down from a distance. Furthermore, this air circulator fan can keep the entire area cool without making too much sound.
Honeywell HT-900 Vs HT-904 Vs HT-908 Buyer's Guide
1. Size And Weight
The Honeywell HT-900 and HT-904 are both small in size, with a slight difference between both. You will notice that the HT-900 measures 10.9 x 6.3 x 10.9 inches while the HT-904 model measures 11 x 6.46 x 11.22 inches. On the other hand, the Honeywell HT-908 is bigger in size and measures 14.4 x 8.1 x 15.2 inches.
Now, the last Honeywell model would still fit on tabletops, but you will need larger table space for sure. You will not be able to place it on small side tables by the bed.
Moving on to the weight, while the HT-900 weighs 2.6 pounds, the HT-904 weighs 3.7 pounds, and the HT-908 model weighs 5.7 pounds. The last product is the heaviest, making it slightly less portable.
2. Noise
A powerful turbo force air circulator fan shouldn't be making a lot of noise while it controls air movement and regulates the air flow. The best part about Honeywell products is that they are quiet when compared with other air circulator fans.
The Honeywell products are all known to make 25% less noise than competitor brands, and hence, you will not be disturbed by the noise level. The quiet functioning is well-loved by customers as we could comprehend after reading the reviews.
3. Color
While the Honeywell HT-900 is available in black color, the HT-904 turbo force air circulator fan comes in an attractive shade of white. Both of them sport a very sleek design and are well-suited to be kept on tables, near sofas, chairs and can also be wall-mounted.
You can choose a color based on the wall and furniture shades in the room. Let us tell you that both are beautiful, but customer reviews suggest that people like the white shade more.
On the other hand, when compared with the HT 908, customer reviews suggest that the black color of this product is well-loved. Hence, we believe that your choice depends on personal preferences and the space that needs cooling.
4. Design
Overall, we found that the design of all the Honeywell air circulator fan models is similar, and they look nice. The Honeywell models sport a modern design with a fan that does not show too much. Also, there are grills on the front side to prevent any accidents in case you have a child at home.
We will still recommend keeping pets and kids away from the fan as you would not want them to put any of their body parts inside through the gaps.
Spotting The Major Differences
Now you know that there are some key similarities among the Honeywell HT 900, HT 904, and HT 908, while they have some different features. One of the top differences is that the Honeywell HT 900 and the Honeywell HT 904 can be wall mounted if needed because they are lightweight and small in size. However, the Honeywell HT-908 is larger and cannot be mounted up on the wall.
Another major difference is with the movement of air. While the first 2 products can cover an area of 25 to 27 feet, the last product can cover an area of up to 32 feet. So when considering the larger fan model, you can feel the air from far, and hence, you will not need to keep moving the product.
So, if you wanted to mount a fan on a wall, then the first 2 air circulator fans would work well. However, there is a difference in color, and that could be a determining factor for you.
Honeywell HT-900 Vs HT-904 Vs HT-908 Final Word
Regardless of the Honeywell model you purchase, if you want the air circulator fan to last for a longer time, then take good care of it. That would involve taking the fan apart and cleaning the parts every few months.
The blades of the fan may catch a lot of dirt, and hence, regular cleaning is necessary. Learn about how to take the fan apart and then do the cleaning yourself.
So, we have finally reached the end of this guide, and it is time to sign off. We are sure that you will be able to purchase the right one from the 3 Honeywell options given above.
Let us know if you have any further queries in the comment section below, and we will try to address them in our next guide.
Working out can be super satisfying, but going to the gym every single day can be a pain and might cost a fortune, just like the best home gym equipment. Even building a proper workout area at home can get really expensive. But do you know that you can have a gym set up at your home with a few materials and a lot of enthusiasm to get handy with things? However, the most basic of things such as a squat rack would cost around $400, even when they’re found on Craig’s List.
If you’ve always fancied having your very own squat rack in your home gym but were skeptical about the budget, worry not! Here are 13 ideas to make a great Squat Rack idea to try by yourself.
Homemade Squat Rack Ideas
Wooden Squat Rack Simple Yet Sturdy
Wood is one of the materials that are easily available. So, just keep your squat rack simple and minimalistic, with some planks of strong wood, a metal bar and some screws. And voila, you have a basic, simple yet really sturdy rack that’s ready for some workout.
This is the easiest and most cost-efficient way to build a squat rack, if you’re really running low on your budget, or need a power rack set up urgently, then a bucket rack is the one thing you can resort to.
All you would be needing is two five-gallon paint buckets, some concrete mix, wooden planks, hammers, nails, and wooden glue. By setting up the wooden planks as a frame with the help of hammers and nails, and fixing them in the concrete mixture, which is placed in the paint buckets, you can make a cheap DIY squat rack.
If you are blessed with enough space at your home and don’t want to compromise with the size of the squat rack, yet keep it well within the budget, then you could go for this kind of setup.
With the help of a few basic tools like wood, tape measure, electric drill, hand saw, and nails, you could work on this project by yourself. It could be perfect for a garage, or if you have some extra square feet at your home, no need to get the fanciest all-in-one gyms, you can have a simple rack to get started in the comfort of your own home.
Now this one is for those who don’t have a lot of space at home. You could simply use the wall as an extension for the squat rack. Also, it doesn’t need to go to the hardware store and buy a lot of supplies. Just take in a few planks of wood and nail it to the wall strategically, with the help of the hammer, and you’re done.
If you’re a huge fitness fanatic but are under budget constraints, then you can actually make this squat rack and pull-up bar at your him with just a few supplies.
All you have to do is get some scrap wood that can be braced against the wall and then make marks according to your needs, drill the holes, and create cradles for the bars so that you could accommodate your weight bars as well. Interesting, right?
Fifty dollars and very little space – that’s all you need to make this sweet little squat rack. All you need is to get some wood and follow the blueprint in the tutorial to make it.
Well, you might not be able to put some extreme weights in there, but you could curl up anything around the 300-pond range in there.
Don’t even have a little space to fit in your gym equipment in your house, but badly want to have that squat rack for a long? With this super compact metal rack, you can just fix it in this fully functional squat rack and a pull-up bar, and it won't even take up a lot of your wall space. Why not give it a try?
If you have a spare room and a whole lot of time on your hand, you can just have an entire private gym set up for yourself, with your own squat rack and lifting platform, for just a little under 300 dollars.
In case you’re skeptical about the weight that wooden racks hold, you could build a sturdier one instead with the help of metal pipes, and this project would work best in your garage.
Galvanized pipes are a great choice for this kind of squat rack, where you could attach the rack to the wall with hinges, or any rotating attachment. While the bottom part can be fastened to a winch or similar cable and then placed in an upward position. You could even suspend some pipes for the ceilings as pull-up bars if you want.
This kind of squat rack has a really sturdy base built with lots of wood and can be used both indoors and outdoors, depending on the space available, and your preferences for working out.
Here’s another cheap wooden squat rack project with a bench that you can make with less than sixty dollars. Also, it needs very little space as it is braced against the wall.
Using both pipes and wood together can make a really great heavy-duty power rack. You would be needing a whole bunch of wooden planks, pieces, nails, pipes, safety bars, pull-up bars, and other building tools. It would take quite some planning and time for the building, but you would really be happy with the end result.
This is one other way to make a simple squat rack with materials under 100 dollars. Most of the items could already be lying in and around your home, if not, you could get them at the stores. The method involves making frames with planks of wood and attaching them together with support. And it can easily take up to 400 pounds on the rack.
So, the next time you think of setting up a workout station at your place, stop shelling out a lot of money on buying commercial gym equipment. Make a squat rack using these Squat Rack Ideas and save a lot of dollars.
In this chaotic world highly driven by consumerism we rarely get the chance to see something different, something rare; and we are happily blessed with such a piece we instantly recognize the item as something extraordinarily expensive, a limited edition piece of furniture, a car or some sort designer item that few individuals in this world can afford. Things are changing and manufacturing and crafting gain extraordinary values as they represent the individuality of each and everyone materialized in custom, unique, one of a kind objects.
Now is the time to take on diy projects, from simple to complicated, from colorful to elegant and subdued ones, we are to shape the universe around us rapidly, we are to design our lives.
In gallery that follows we have presented splendid homemade cell phone case ideas that we have find interesting, intriguing and easy enough to recommend for a fast craft in the evening or Sunday afternoon. Cast a glance, surge inspiration and leave your valuable feedback in the comment section below.
Homemade Cell Phone Case Ideas
1. ice cream homemade phone case
It might look sweet, delicious yet it is not edible.
There are few things in this world which cannot be improved with lace and a simple phone case ain`t one of them. Choose the right color to bring the lace delicate look forward and enjoy your new phone case !
A clear case can receive the splendid brush treatment, whether you are experienced or just starting out this homemade surely is worth a chance; you direct everything from the colors up to the painting.
Washi tapes are known to be responsible for thousands of truly inspiring diy projects ideas around the inter-web and yours may be next one, simply pick up the washi tapes that you find interesting and start playing around !
Source Unknown
8. colorful polka dot homemade case
Polka dots in one or multiple colors can go beautifully on a clear case, you choose the density and colors, you enjoy your new case.
A craft session with the little ones may present them creatively how they can repurpose various textiles and pieces of paper into new items thus saving the plant a bit of energy; this can be a super creative lesson on sustainability and responsibility.
In a few minutes salvaged textiles that you no longer need can become super awesome ice-cream or pieces of cake able to contain your phone in color and style.
Simple, graphic, splendid results can be obtained with colorful sharpies, you can customize a bland phone case beyond belief, choose the pattern, the illustration, the colors, get coloring !
via Unexpected Expectations
12. DIY felt homemade case
Easy to work with and available inany possible color, felt can make wonders regardless of application and homemade cases are no exception.
It can be that simple ! You need to print to scale different patterns or motivational messages, cut them out and position them between the phone and the case.
It goes without saying that the pattern can be changed to fit your design idea and that the studded case itself can be realized on any bland case, regardless of the phone`s manufacturer.
Simple designs that can be realized fast are presented above; a one-hour session for an enthusiast DIY can easily result in two to three homemade cell phone cases that he or she can be proud of. What do you think? How would you personalize your case and what`s your favorite design from the selection above? We would love to hear from you in the comment section below!
Charles Dickens once said, Spring is that time of the year when the sun feels like summer, and shade feels like winter – all at once.
I mean, who wouldn’t love that cozy warmth the sun brings after all those chilly days and long nights, except, of course, the west coast where winter is tolerable?
And when all that snow is thawing, finally paving the way for the bloom of beautiful flowers and the lush greenery everywhere, you’d just want to welcome the spring with open arms. So, when you are letting in the warmth of your heart and soul, don’t you think it’s time to dust off the cobwebs in your house and prep it up for the new season?
Worry not! I am here with 19 amazing yet simple ideas that would amp up your home for the upcoming spring! Here we go!
Why to just let all the furniture stay at a single place all the time – they aren’t nailed to the ground or anything, right? So, just work with the placement of the couches, sofa, coffee table and other furniture around your house. And to pep it up a bit, just put in some fresh flowers in a vase and place them on the center table, or on one of the corners of the house. This gives it a completely fresh look without even having to buy new furniture altogether. So, you hit two birds with one shot – giving your home a makeover and saving big bucks!
There might be some, if not a lot of repairs to do in your house, as things tend to break all the time, especially if there are little kids around. And winter might not be the best of times to repair it, given the cold weather which makes you lazy. So, once the season is up, it’s time to crawl out of your couch and finish these repairs that have been pending for a while now.
Just take a pen and paper, and jot down all the things that need to be fixed – be it floorboards, fence, AC units, or just the squeaky doors. Don’t let them stay as they are; pick up those tools and work on them so that you can relax in the beautiful spring weather without any worries.
Clean Up All the Windows and Let the Light In
Often, when we take up the job of cleaning our houses, we tend to forget the windows. And when you look at it, you can notice tiny stains, nose prints or those cute little paw prints if you happened to have a pet.
Why leave it behind, just put some gloves on, get some Windex, and some paper towels and wipe the windows clean. And since, it’s going to be spring; it doesn’t hurt to open them up and let some fresh air, and warm sun in!
If you have a garage at your place, it’s an unstated fact that you just throw everything in there during winters, to avoid staying in the chilly outdoors. Now that the season has gone, it’s time to pick those things up and place them where they belong. Also, just throw away the ones that you don’t think you’d be needing anymore and stock up the garage with gardening supplies, as you would need them more often than before. And don’t worry about the time, you’d just be needing one afternoon to get the garage back in place.
Since the outdoors are cold during winters, the patio furniture would be affected severely. It would end up developing a thick coat of debris, and if there’s a lot of snow, the dampness will ruin the wood. So, make sure your patio furniture is clean again by power washing them or cleaning them as you could be spending a lot of time outdoors during the Spring!
Get on with Gardening – Plant Herbs and Seasonal Plants
If you’re into gardening, then you’d surely be excited about spring – I mean, it’s the season of bloom and bewitching colors. And I am sure you would be thinking of all these flowers growing again and rich green foliage around the yard, which makes your place much more beautiful.
While you’re at it, why don’t you try something different? Planting something other than regular flowers? Try growing seasonal fruits, vegetables or herbs in your yard, and make it functional in addition to adding beauty to your place.
Courtesy of Stacey Doyle
Clean the Gutters
If your house happens to be around a lot of trees, then there’s a high chance that your gutter is cluttered with pine needles and other random leaves, which must have accumulated over the winter. And if spring brings along some showers, which it can during the April month, it is likely that the whole thing could be blocked. So, this is the right time to take out that ladder of yours and work on cleaning the gutters. In case you can’t do this on your own, it’s always better to get ahold of a professional.
Clean the House, the Driveway, and the Deck
Clean!
Clean!
Clean!
That should be your mantra before spring arrives. Winter sure does get a lot of clutter into your house, and there’s no way that you can clean everything regularly in all that cold.
So, once the season is phasing out, pick a day and maybe rent a heavy-use vacuum cleaner to clean your home. And while you’re at it, don’t forget to sparkle the driveway as well as the deck. This gives your whole house a great face-lift. Also, try washing your cars, who’s there to stop, huh?
Replace the Batteries of Carbon Monoxide and Smoke Detectors
It is strongly advised to change the batteries of the detectors (Both smoke and carbon monoxide) in the house to ensure that all the safety measures are up to the mark. Since you’re cleaning up everything at home for the spring, why not take care of this, too? I mean, you could just replace the batteries for once and forget until next spring, and also, who knows, this might save your life some day.
Do a Deep Clean of Bathrooms and Kitchen
Let the glowing warmth of the sun reflect in your house by cleaning it until it sparkles. This includes deep cleaning of your kitchen as well as the washrooms in the house. Dust the cabinets, take out your appliances and clean them before putting them back in place. As for the washrooms, clean the sink, commode, and the taps thoroughly. Also, work your way through to the blinds. Because a house is not truly clean until every thing is shiny – be it powder rooms or countertops.
Jason Briscoe@jbriscoe
Organize your Fridge and the Pantry
Why leave the places which store your food throughout the year? Since the cleaning of the house is in full swing, take an hour or two to look into your fridge and pantry too. Throw out the expired products, clean the racks and make a list of the things you would need for the upcoming season.
Also, when you are rearranging the leftover pantry, try organizing them according to categories – like sauces, dairy, vegetables, fruits, etc. This not only helps you reach things easily but gives a certain amount of happiness to the perfectionist in you.
Declutter and Organize
This applies to all the rooms in the house. Once the winter is done, declutter your rooms, take away everything that you don’t need and throw it in the trash or donate the stuff away. Now organize everything by storing them into different boxes, and label them according to the groups. This should be able to help you reach things during a future need, without much hassle.
However, this task occupies a significant amount of your time, given there are multiple tasks and more than one room in the house. So make sure you have a good two weeks or more in your hand to work on it and get all the stuff in place.
Winter is ruled by dark shades, be it in clothing or bedding. Because you know, dark colors keep you warm. So, once the season is done, it’s time to store all those dark sheets, thick duvets, blankets, and pillowcases. Welcome the new season with new, and lighter shades of bedding. You can even use pillows with light colors and floral prints, instead of wool or other thick fabrics. Try and make the spring-summer and fall-winter look of bedrooms thematic for your satisfaction. Also, keep a thick blanket handy by the bed in case one of the nights get chilly (you never know!).
This is one of the most important things you should do at the end of every season, let alone Winter. However, winter-spring closet cleaning holds more significance because of the radical shift in the wardrobe.
With Winter gone, it’s time to lose all the dark shades of clothing, the sweaters, mufflers, jackets, and mittens. Instead, it’s time to bring in lighter shades, floral prints, tee shirts, shorts and other light-fabric dresses.
Also, it’s time to give away the stuff you don’t need. Just don’t hoard the things you’re never going to wear and know that they’re of no use.
Upgrade the Pillows
This might not come across as the first thing you would want to do while making your home spring-ready. But trust me, your furniture and bedding get a completely different look if you do one small thing – change the pillows!
Most households go with velvet, tweed or silk pillows as they look good throughout the year. But let’s be honest, are they perfect for the spring summer months? No!
So, it would be great if you could give your pillow casing a makeover too, like what you do to your wardrobe – using breezy fabrics and little prints on cotton. This brings in a lot of change.
Stephen Di Donato@sdidonato
Make Use of Foliage
A lot of people opt for various types of fresh flowers and ornamental leaves when it comes to decorating the living rooms. Why don’t you give it a refreshing twist by throwing traditional flower arrangement for a toss and use foliage instead?
You could use leaves of banana, palm, and philodendron to make a statement look. Just put these up in huge decorative vases with some water, and you’re done! A beautiful and quirky look to your living room welcomes everybody.
Also, if you take care of these properly by changing the water regularly and trimming the stems below, then they can stay fresh for really long.
I know it might sound confusing to you, but what I meant is that it’s time to go shopping for some color. Spring, as we know, is the season of vibrant hues, and getting some of it into your house is never a mistake.
Just hit the home décor story near your house and get some cheap vases and other decorative items in bold accents. I bet they will bring in the brightness of your living room.
It’s not unfamiliar that Spring is a season associated with the aroma of nature – be it blooming flowers, buds, or leaves. Let your home too, reflect the same zest during the season. Just get some citrus, rose, lavender or any other floral-scented candles or potpourri to ensure that your place always welcomes others with warm, breezy aromas of the spring.
There is nothing that gives a better look to a place than a new paint or wallpaper. In case you have some budget for the makeover and want to give a new look to your house, at least the living room, try getting a lighter shade of paint or wallpapers with patterns that are easy on the eye.
If you cannot afford the whole house or a room, you can just stick to a particular place, like one side of the wall, the back of your bookshelf, or maybe even the ceiling of the room.
What do you think ? We would love to hear how you prepare for spring !
If you love to party, then start right here with these home bar ideas to fully enjoy the experience. Entertaining at home is an exciting way to show off your personal style. Whether you want to replicate the experience of having a night out on the town or create the feeling of an intimate bistro wine bar, these design tips can make you and your guests feel very special.
The entertainment of guests is not the only advantage, the other benefits to having your own home bar is the convenience, privacy and security it affords you. Whether you choose to have a glass of wine after work or a brandy after dinner, nothing compares to the comfort of knowing you can fully relax and enjoy the moment. For some the idea of having a home bar is somewhat like a dream, but making it come true is much easier than you might think.
The first step to using any of these home bar ideas is to determine how much space you want to use: a seated bar for two to eight people will need more space than a single wall wet bar. Next, consider where you want it to be located; a wet bar will need plumbing to operate efficiently. Your personal decorating style comes into play for the design of your home bar.
If you are considering a seated home bar, the best area would be one that you can use exclusively for this purpose. Location wise, one of the most popular home bar ideas is to dedicate the basement area. This home bar style sparks images of a place to retreat from the world and indeed it can be the center of your entertaining universe. However there are many ways that your seated home bar can be designed to blend into your living room as well.
On the other hand, if seating is not part of your design, the numbers of home bar ideas are even greater. There are wonderful materials available for creating a traditional single wall wet bar with cabinets for glassware, an under mount sink with a decorative tile backsplash. A single wall home bar can be designed to fit into a small space using the corner of a room, an alcove or even a closet. For a larger expanse, you can use wall hung cabinets for glassware with refrigeration and storage units for wine, mixers and liquor bottles.
via enjoycolorfullife.tumblr.com
Elements of Your Home Bar Design
Due to the demand by homeowners and apartment dwellers alike, interior designers have focused on home bar ideas that creatively extend the use of a room. For example, you can design a home bar into your kitchen decor with a wood cabinet to hold glassware, an icemaker and drawers to hold liquor bottles and utensils along with a wine refrigerator. Wood is not the only material you can use: there are many home bar ideas for designs that utilize stainless steel, marble or granite laminate as well as leather.
Designers will more than likely suggest that wherever you decide to have your home bar, it should have a theme and be designed with materials that match your personal style. Choosing a theme begins by considering how you enjoy spending your leisure time. For example, if you are a movie buff, a dramatic theme of a black wood bar topped off with a silver marble counter, black leather and chrome chairs with spot lighting would reflect a cinematic tone perfectly.
Using a particular sport as the focal point is another popular theme. For the car racing enthusiast, home bar ideas use vibrant colors such as red and black or white and blue for the walls and furniture to add contrast. A glass counter top on a stainless steel bar and racing flag check board design on bar stools enhances the feeling of excitement.
When you are incorporating your home bar design into a living room entertainment center for instance, attention to seating arrangements is important. You want to ensure that it’s accessible without being open to damage. Using a console for your home bar is convenient, however you need to keep in mind the number of stock items you want to store. Selecting from the variety of home bar ideas that are available depends a great deal on this factor. If you want to keep a vast wine collection along with many bottles of liquor, you may need to complement the console with a standalone wine storage unit.
Storage and shelving systems are the two elements of home bar ideas that receive the most attention after selecting a theme. The shelving system relates directly to the amount and type of glassware you have to store. Your glassware depends on the type of wine and liquor you will keep in stock. Champagne flutes, brandy snifters, shot and wine glasses for a party of eight along with mixing equipment can easily fill a cabinet.
Your new entertaining feature can be realized with low costs, get creative.
via Pinterest
Your home bar can be nestled in the most beautiful settings, emphasize your current outdoor features.
While the theme is the focal point in the multitude of home bar ideas, one element that is often overlooked is lighting. Matching the lighting fixtures to your theme is key to creating the right mood for relaxation and entertaining guests. Even for a small home bar, you need enough illumination for the counter and the surrounding area to focus attention as well as make it easy for you to prepare drinks. One elegant way to accomplish this is to use recessed lighting in the ceiling, especially above the counter or the wall trims of a single wall home bar area. To add light to a seated bar you could use small frosted hanging lamps. For a more traditional style basement bar, Tiffany lamps are a popular choice to bring a touch of elegance to the area.
Hiring an interior decorator is one option you have to find the perfect way to express your personal style. There are an unlimited number of home bar ideas to use when you are ready to design an entertainment area where you and your guests will love to spend leisure time and we have selected a quite impressive gallery to surge inspiration from. Cast a glance at the gallery below.
Penny covered home bar design offering a push, luxurious vibe to your home bar at a low cost.
Modern living area envisioned by Ryan Street & Associates. Simple delicate texture tailored in an airy atmosphere.
Home wooden bar design ready to greatly enhance your parties.
Awe-inspiring home bar design with intricate textures.
Extensive bar design by Jauregui Architects.
Circular home bar design in the Diamond Star Ranch In Eagle, Colorado .
Modern living area with home bar by Star Daun Curry
Sumptuous home bar design surrounded by a library. Elegance at its best.
All wood bar contrasting with the white and blue textiles on the chair with a subtle elegance.
via Home Bunch
Black and white built-in home bar design saving a lot of space and greatly emphasizing entertaining options.
Home bar design in the McCaffrey Lake Cabin - Lake Point, Shaver lake, California - RMT Architects
Splendid eclectic decor featuring elements of great design. R-R Ranch -- Lodge by Miller Architects
Intricate elements and decorations in a basement home bar design, multiple intricate textures contributing to a dense, unique composition.
Airy home bar design flooded by light.
Granite home bar counter top in a highly luxurious living space.
via basementandbeyond.com
Chick and creative home bar design idea for a small parties. Highly personal and graphic design language.
Small home bar design with extensive options.
Flashy Hollywood living area with an extravagant home bar design.
Luxury at its best.
Shabby chic composition on a home bar design. Simple, delicate elements.
Fabulous spatiality dressed in vintage clothes. Elegant mixture of elements shaping a great home bar design.
Neat space saving home bar design featuring everything one would need in for festive entertaining.
Circular elegant and luxurious home bar with expansive views.
Reclaimed wood home bar design in red with industrial bar stools. KuDa Photography.
Attic man-cave design featuring industrial elements and intricate textures by Robert A. Cardello Architects
Natural textures emphasizing a luxurious home bar design.
Extravagant and vibrant home bar design by Denise Richards .
Industrial minimalist design in neutral tone nestled in a basement man cave. Jauregui Architects, Interiors & Construction: Portfolio of Luxury Custom Homes
White, light wood and gray are great combo. Basement Renovation by Princeton Design Collaborative
Impressive rustic home bar design ideas beautified by wooden textures.
Unique mixture of elements and colors in a contemporary home bar design.
Sculpted wooden home bar in an elegant décor. Jauregui Architects, Interiors & Construction: Portfolio of Luxury Custom Homes
Mosaic and marble home bar design emphasizing a living area.
Simple wooden kitchenette featuring a home bar.
Wooden texture defining a classic interior design of immense beauty - Jauregui Architects, Interiors & Construction: Portfolio of Luxury Custom Homes
Supreme luxury in the Old Tahoe House by OOA Design
Elegant marble bar counter top defining the interior.
Extensive living area in stone and wood featuring an beautiful home bar and dinning area.
Home theater and game room in neighbored by a beautiful wet bar.
Extensive wine cellar in the basement including an elegant bar.
Lorenzo-Castillo. An insanely luxurious home bar filled with glamour.
Simple bar framed in an noble wood, functioning as a great transition towards the kitchen.
Elegant home basement bar nestling luxury.
A sober elegant man cave with an impressive bar and pool table.
Eclectic compositions can easily tailor breathtaking scenarios.
Hip roofs have been a popular choice from ancient times and continue to be a hit design today. But did you know there are multiple varieties of it?
Every house is not the same and has different requirements. With the different kinds of hip roofs available, you will find simple and complex options. These have been prevalent since the 18th century from the early-Georgian era. The French then took up this style, and you will find it in their colonial architecture.
This kind of roof is not only pleasing to the eye but helps keep the houses safe from storms and hurricanes. Their slanted surfaces prevent water from accumulating and make sure that most of it slides down. That is why these types of roof structures are very commonly used in hilly areas.
Moving on, we will begin with the 5 hip roof variants in the next section. It will be followed by 18 examples of the top styles that you can try out.
So, without further ado, let’s dive in!
Types of Hip Roofs And Styles
Simple Hip Roof
You will find simple hip roofs in most houses, and it is indeed the most common variant. There is a ridge in the center, and that creates 2 triangles on the 2 sides. The other 2 sides form polygons, which complete the structure. We found this to have a symmetrical design with the slant being the same on all sides. The triangular sides are also known as hip ends.
This type of roof is generally used if you do not want a lot of attic space. Since both the sides drop immediately from its center, there is minimal space in the attic, and you might not be able to store many things in it.
One disadvantage with these types of roofs is that they are prone to leakage. We would suggest that you cover up the ceiling of your attic with a protective water-resistant covering if the area is very prone to rainfall.
Pyramid Structure
A pyramid hip roof is one that has equal triangles on all sides. There are 4 triangles that are created, and they all meet at one point which is the center. The slant on all of its slides is the same, and its top juts upwards. In most cases, the pyramid structure is placed on a square walled house, and the peak rises just in its center.
You will find these roofs generally over gazebos and pavilions, and they work well in preventing leakage and mold growth. This is because there is no place for the water or snow to accumulate on top of the structure. Anything that falls on the roof will slide off, thanks to the gradient slopes on all sides. This makes it perfect for houses in rain-prone areas and in the mountains.
Half Hip Roof
Half-hip roofs are one of the most stable forms when compared to their peers. These have the ability to deal with high wind and cyclone-like conditions while keeping the concrete or wooden structure below it safe.
Also known as a clipped gable roof, these consist of a gable with its upper part being replaced by a small hip. These work best with a gutter that you can attach on the sides. The gutter will go around the house and help remove excess water from its roof very quickly during heavy showers.
This kind of structure contains the benefits of both a gabled and a hip roof. They are popular in Europe and became a part of houses in Germany, Austria, Slovenia, and Denmark. A part of southeast England also sees this structure a lot.
Hip And Valley Roof
If you are aiming for the traditional look, hip, and valley structures may be precisely what you want. Many contractors recommend this kind of structure if you live in areas with heavy rainfall or in those that are prone to storms. They can stand against tornados, too, and will keep you protected.
Another great benefit is that they allow for an attic big enough to fit in a lot of items. If you have great storage needs or want a skylight, this will be a great choice.
But yes, the problem that occurs is with leakage. Fully adhered underlayments are problematic as they can cause massive leakage. Make sure that you add leaks to the roof insurance plan to stay fully secured.
Cross-Hip Roof
Up next is another well-known type of structure called the cross-hip roof. This has gentle slopes on its sides, and the hip roofs form an ‘L’ structure. There are 2 hip roofs involved in this, which are placed perpendicularly to ensure that the building can stand against high winds. A gutter can be placed around the house, and the seam on top extends to form a valley.
These were very popular, especially during the mid-1800s when ranch-style structures and homes were trending.
But the only issue here with this kind of roof is that the attic space is reduced. Since the slant of the slope is inwards, the attic remains very small, and you cannot fit much into it.
Red Fairytale Hip Roof House
Remember that red wooden house by the brook from your fairytale books? Yes, it has a hip roof, too, with enough space for a chimney on top. The chimney is placed in a fairy glade, and the house is within a forest. It is covered by trees on all sides, and there is a freshwater brook in front.
Although the house is mostly made of red bricks, the hipped roof is in a lighter shade of brown. It provides ample space for a big attic, and there is a gutter around the roof side. We found this to be the perfect place to relax and unwind. The structure makes for the ideal retreat and can be used by people who want to make a house to retire to during holidays.
Gray Stone Structure
Are you a fan of stone structures? This house gives off a beautiful and elegant vibe with its chic walls and roof. The walls are made of stones with a touch of wood, and the reflective windows add to its look.
We loved the charcoal and smoky grey color of the hip roofs. It complements the white stone walls of the structure. The roofs can tackle heavy rain, and they will protect the house in case of storms or hurricanes.
Ultra Modern House
If you have the wealth, this is the kind of house you would want to splurge on! We agree that it looks gorgeous, and the several hip and valley roofs that you will see on its top add to the elegant structure.
The surface of the roof is made of a material that shines. It is a kind of metal that reflects light and looks beautiful at night. You must have also noticed the spotlights all around the house. This enhances the structure and highlights certain parts of the building.
The big glass windows and panels complement the textured walls and roof. If you look closer, the roof has a certain pattern on it, which makes it stand out. It is balanced by the large expenses of plain glass to achieve the perfect combination.
Countryside Cottage Structure
Now that we have already discussed an ultra-modern house let’s talk about a simple house. Some people prefer simplicity, and we have the perfect design for you. With shining white walls, this is the perfect mid-century designed living space that you can boast of.
The roof has silver shingled hips that add to its design and make for a perfect room in the attic. You can provide our teenagers with ample privacy and give them the attic room space.
It can also be used for making art or a music room for that matter! You will also find additional storage space because of the multiple hips. The house in itself is very spacious, and the color provides a warm and inviting space.
You will be able to spot a proper L-shape and cross-hipped structure. This is a great example of both and fits well with the countryside vibe. It helps cover large structures which are spread over a considerable area.
Triangle Time Structure
Up next is a house that has a number of straight lines and triangles. When you see the house from the front, you will notice the number of triangles that are a part of its roof. The triangular hip ends make this house unique and add to the plain white walls.
Look closely and tell us whether it will look as attractive without the hipped roof? Probably not! The warm color tones of its wall complement the silver-gray color that its roof has. It is painted with a very eye-catching color, and the horizontal lines add to the design.
If you add some spotlights just below the roof at multiple places below the gutter, it will light up and create an even better structure at night.
Colonial Hip Roof
If you want a countryside house that looks elegant as well as royal, this is a great example. You will find beautiful white walls along with a roof which is colored brown. The earthy tone goes very well with white and works for large structures. There is a sense of continuity, even if it takes a huge amount of space.
This has the vibe of old churches, but with reflective windows, it looks more homely. You can team it up with a beautiful front porch and a lovely back garden. The hip and valley roof, along with the white-walled structure, works well for wealthy farmers and countryside lovers. This would also work as a holiday home or your summer retreat.
Georgian Mansion
Do you find Georgian architecture attractive? If this is where your heart lies, you can make this perfect winter retreat right in the middle of a forest or near the countryside. This was a design that was very popular during the 18th century in England. There is a low-angled hip roof structure that is complemented by large windows.
The white stenciled windows are an incredible example of old England designs, and the white chimney columns add to it. The house in itself is made of small bricks that complement the white and grey roofs.
Crimson And Grey House
Are you an art enthusiast or a DIY artist? This house may just provide you with all the inspiration that you need. It has a unique design with half the surface made of river stones, and the other half is painted a dark shade of crimson.
This is paired with a grey-hipped roof on top to finish the look. The windows are rectangular and extend towards the sides more. You will also notice a number of hips around the roof, which provides the structure with more shape and form. This will work for a city house as well as the countryside.
14 Charcoal Hip Roof Structure
The best part about this house is its sweeping roof, which takes up half the space. It looks brilliant and catches a lot of attention. The dark grey roof is paired with a cream-colored structure that has tall windows. The doors and windows have reflective surfaces and dark grey borders, which enhance the look further.
The color palette that is used here is brilliant, with its stormy grey complementing the cream very well. The sweeping dark roofs can have recessed outdoor lights towards their bottom, which will enhance the light and dark color play further.
Green Half Hip Roof Home
Do you want your house to look cozy and comfortable? We have the perfect option for you, and it is in a shade of green. Pastel shades of green are used to make the house, and it is painted on wooden walls.
If you see the roof, you will notice the half-hipped roof design, which adds to its look and is made with bricks. It also has a chimney, which is again made of bricks and goes well with the countryside look. The white outlines and windows make the house look extremely elegant.
Another special characteristic of this house is the gabled entrance. It looks extremely good and makes the entrance stand out. This could be the perfect autumn or winter retreat.
Neo-Georgian House
Do you want to create a fusion of modern and classic designs? This is the structure that you can aim for. It is an excellent blend of contemporary design and Georgian architecture, which together create a masterpiece.
The walls are painted a light shade of beige, and it also has a roof that is rectangular shaped and expands on both slides. The windows are perfectly square-shaped, enhancing the symmetry of its structure. It is indeed very symmetrical as the entire house is rectangular in shape too.
Add some manicured lawns in the front, and you have the perfect space to flaunt.
Grey On Grey Home
Are you a fan of subtle colors? This pale grey house might just be what you are looking for. It has pale grey walls with a warm beige complimenting it. The roof is extensive and covers a lot of areas. Painted in silver grey, it will perfectly cover a large house and looks very attractive.
Also, you can pair it up with a manicured lawn or garden. Throw a party in the front while the house looms behind. It would be the perfect summer retreat in the countryside.
Colonial Hip Roof House
If you were looking for that perfect quaint house that uses rustic warm colors, this might be a great choice. It will provide you with a classic rustic look that will remind you of the good old days. No, this structure does not have anything contemporary about it and will help keep the old-world charm alive with white walls and beige windows.
The roof is made of brown bricks, and there is a chimney on top, which adds to the beauty of its design. Remember those farmhouses from the 80s movies? This will give you the same experience with a colonial aura. The peaked roof adds to the symmetry and works very well with shrubs and trees around.
Little Gray House
If you want a quaint small home, this is a great design to aim for. We loved the stylish exteriors, and pale colors have been used to make it look bigger. You will have neutral tones being used for the walls of this house while the roof is made of gray shingles and consists of hips. This dark grey color looks great with lighter-colored walls.
The deck is painted white and consists of vertical bars, which provide a much-needed pattern to the otherwise solid colors that this house is painted with. It will look best with manicured lawns, and you can host barbecue parties in it.
Red Brick Villa
How does a vibrant red house sound to you? If it appeals, then you will love this house made of red bricks. It has a very warm vibe, and the roof balances the vibrant red with a darker and cooler shade of it. It has a shingled red-hipped roof with a valley in between.
This will also give you a lot of attic space, and you can use it for storage or for music practice. One can also build a skylight and set up a bedroom because of the vast flat space on it.
Neo-Palladian Hip Roof Villa
Are you planning to build a villa for yourself? This Neo-Palladian design will impress you a lot. We were very delighted with the giant and majestic windows along with arched doorways. The red walls and the dark grey-hipped roof look brilliant together. You can see multiple hips, and it flaunts a hip and valley roof style.
We also loved the patterns around doorways and windows, which are painted white and stand in contrast with the light red wall. If you have seen English Aristocratic houses of the past, this one will look very similar to that design. It creates the ideal space for large families to live and works well with sprawling estates.
Coral Pink Hip Roof House
If you like colors, this hip and valley roof design will be an excellent choice. The house looks very attractive with a bright red-hipped roof with white walls to complement it. There are multiple skylights, and you will be able to see the sky while lying on the bed. And since the slopes are board, you will easily be able to make a room in the attic.
It is also bright enough to stand out among other houses. Look at the picture, and you will see how you first noticed this one before the grey-colored houses situated around it.
Cream And Grey Roof
Finally, we have a cream and grey color combination that works out very well for the countryside and small towns. The cool gray shade of the hipped roof is balanced by the pale cream color of its walls. Although both are neutral shades, they combine to form a very elegant structure. The doors are painted a dark red color, which provides the house with a splash of vibrancy.
Also, if you look from afar, you will notice how the roof together forms a triangle-like structure, which provides proper symmetry to the house. The windows are made of dark-colored glass, which works well with the pale cream color.
Hip Roof Types & Styles Buyer’s Guide
Now that you know all about hip roofs and their styles let’s move on to some general points that you should keep in mind. You must have realized that there are pros and cons to every roof style and type, and each one differs in its slant, attic space, and more.
We have written about the common points to remember before making a purchase. This should guide you to make an informed decision.
Attic Space
This is a very important consideration while making the roof. A common complaint with this kind of roof is that they might not provide a lot of attic space. A hipped roof that drops down immediately will provide very little space, and you should think twice if you plan to store a lot of items in the attic.
Hip and valley roofs and half-hip roofs provide more space and may work out better if you want to make a bedroom in the attic or use it for storing items.
Process Of Installation
Although hip roofs are known to prevent water and snow from accumulating on top, they have to be installed properly to eliminate leakage. Since there are many joints, each one has to be covered and installed by professionals. Instead of trying to do it on your own, get professional help, and that should prevent leaks.
Also, if you see any leakage happening, consult a professional and get it fixed immediately before the damage deepens.
Ventilation
Hip roofs are known to provide ample ventilation, and hence our house will not heat up too much. If you have problems relating to claustrophobia, these kinds of roofs might be exactly what you need. The homeowner also can create a corner or a crow’s nest to add to the attic space.
Cost
Hip roofs are generally more expensive than gabled roofs because of the large amounts of material needed for construction. They are also more expensive because of the complex structures that often need to be created for larger houses.
You might have to create a complicated system of rafters and trusses, which is not going to come cheap. However, we would say that the money is well spent and you will be getting a beautiful house at the end of the day.
Final Words
Hip roofs are known to be versatile, and you can choose your own style from the multiple options that we discussed above. You can also combine and create a unique style that reflects your personality. The best part about these roofs is that they can help provide your contemporary-style structures with a traditional or a classic touch.
These provide more aerodynamics than flat-roofed structures and will keep the house safe. After all, there is a reason why they are still popular after 3 centuries since they were first used.
With this, we have come to the end of our guide. Let us know if you have any further queries in the comment section below.
Unique salt lamp is made from Natural Himalayan salt...
Once lit the lamp will emit a calming Amber color
What is A Himalayan Salt Lamp?
A Himalayan Salt lamp, unlike the salt which we get from the sea, is mined from Pakistan by skilled workers. Since it is unique to this region, it is important to find out about the origin of the salt lamp before buying it. Mined from harsh conditions, these lamps are not exactly cheap. They are very aesthetically pleasing, very soothing to the eye.
What are these lamps used for?
Himalayan Salt Lamps have multiple uses. These work as the excellent source of air purifier since it is composed of salt, and naturally salt helps in absorbing moisture and purifying it by the process of hygroscopy. The purified air is then released into the surrounding and helps in better breathing. This, in turn, helps asthmatic patients breathe better and reduces the chances of allergies. It helps in strengthening your immune system too.
The salt lamp helps in spreading positive energy around it and helps you sleep better; this is due to the release of negative ions. With the soothing glow emitted from the salt lamp, it automatically helps to calm you down and spread a peaceful aura around the house. It is also very aesthetic and works an as wonderful home décor.
Where could you purchase the salt lamp from?
Even though these lamps are available in few shops around the country, the best deals are found online. These websites offer a wide range of collections, with specific features, slashed process, and reviews from valued customers. The reviews are helpful in narrowing down your search and give a very good idea about the quality of the product. Moreover, these websites have very good customer service and responsive sellers who will give you guarantee for the product.
Why does your salt lamp ‘sweat'?
Salt should always be stored in a cool and dry area. Otherwise, it starts dissolving and gets moist. The same applies to the salt lamp too. It should be kept away from hot and humid areas, and enclosed places which are prone to heat. Keeping your salt lamp switched on prevents it from sweating. When not in use, it should be neatly packed in the air-tight packet and stored away. Do not ever immerse your lamp in water, or it will slowly melt away!
The salt lamp should never be exposed to any source of water, and when required to be cleaned, it should either be patted dry, or a moist cloth should be used to clean the accumulated dust.
Does the lamp need to be switched on to work?
The lamp usually consists of a bulb which is not LED and has heating properties. Heat helps in effective functioning of the salt. Hence, the lamp does need to be switched on to work. The negative ions of the salt are released only when the lamp is on. The salt lamp also tends to ‘sweat' if it is not switched on, and this may affect the salt lamp.
How to take care of the salt lamp and clean it?
Since the lamp is made of salt, it is very delicate, and thus you should be careful as to how to handle it. It should be kept strictly away from kids as well as pets. The possibility of your salt lamp to break, if it gets knocked over is very high and also, keep it away from sharp edges, since it may chip easily.
As for cleaning your salt lamp, it is normal for your salt lamp to accumulate dust and dirt, and the proper way to clean it is to switch off the lamp, use a moist cloth to wipe it away. Make sure never to make it completely wet, or it will spoil your lamp. Salt lamps also need to be wiped off, when it is ‘sweating.' In case it gets very wet, dry it under air or strong Sun for 4-5 hours.
What size and how many lamps would you require for different sized rooms?
For the salt lamp to work properly, it is important to remember the size of the room. A large room cannot be expected to be cleaned with a small salt lamp. The reference which is used is, to use one pound of the salt lamp for 16 square feet area. Following this rule, roughly, your salt lamp should work fine.
Where can you keep the salt lamp?
Since the salt lamp has multiple health benefits, using it in most dry areas of the house is helpful. You could purchase many salt lamps. It is very effective when kept in bedrooms, living room, study area or even your dining room, office spaces, etc. Make sure to keep it away from bathrooms and kitchen, as it may get wet or spoilt.
The lamp imparts effective positive energy around it, but its utility will only be visible when it is kept on par with the size of the room.
How to store your lamp when you are not using it?
When not in use, the salt lamp is instructed to be wrapped carefully in plastic and keep it airtight. The cord should be kept separately to prevent damage to the lamp. Keep away your lamp from the vicinity of children or anything remotely moist, and you will see the results after you unpack it. Brand new!
Which lamp is better-Pink or white or grey/black?
Even though all the three types are very rare, the black variant is the rarest of all, and obviously the most expensive. The benefits differ a little bit, and so does the light and intensity which it emits.
What features you should look for when you are making your purchase?
You should always remember to buy something which is feasible and has excellent customer reviews and satisfaction. The features are an important factor too, and some features that you should look out for are- the type of bulb that comes along, whether the intensity could be adjusted, the weight of the lamp, its safety instructions, where it has been mined from [the original being from Pakistan] and its brand certification.
How long will the salt lamp last and will it expire?
Salt is a mineral, never expires. The longevity of these salt lamps is forever, provided it does not break or melts. Proper care and maintenance go a long way, and it applies to the salt lamp too. The bulb needs to be changed from time to time, the lamp should be clean, and it should be away from moisture.
These lamps don't have an expiry date, so you don't need to worry about it going bad!
Real Himalayan Salt Lamps are rare and need some effort to find the best ones. However, they are quite affordable when measured by the health benefits it imparts. Aesthetically enhance your room, or give it a soothing glow while you work, or do your daily chores. These lamps have been proven to an extent to positively affect the human body and boost the immune system. Most doubts about its features are usually cleared by reviewers on websites, so keep a lookout for that!
What are your thoughts on Himalayan Salt Lamps? Feel free to ask more about Himalayan salt lamps, we will do our best to address it!
We find a lot of articles on the internet about things that supposedly have health benefits. Some of them are true, some of them aren’t. Thing is, there’s not many ways of identifying which ones are legit and which ones are just false claims and click-bait. This is especially true when it comes to stuff like Yoga, spiritual healing and such. One such subject of debate is Himalayan salt lamps.
You’ll find that many people, especially on the internet nowadays are going around telling you how Himalayan salt lamps are excellent health boosters. Fortunately for you, you’re in the right place and this article will help you recognize fact from myth about Himalayan salt lamps, so read on and find out yourself.
Unique salt lamp is made from Natural Himalayan salt...
Once lit the lamp will emit a calming Amber color
What are Himalayan Salt Lamps?
First of all, the question in the minds of many of you will be “what are Himalayan salt lamps?”. So let us begin with that. Himalayan salt is salt harvested in Pakistan. To be precise, it is pink salt harvested from the Khewra mines in Pakistan. This pink salt is said to be millions of years old and a lot of people believe these have a lot of health benefits associated with them.
Himalayan salt lamps are created by inserting bulbs inside large chunks of this pink Himalayan salt. It generally contains smaller amounts of Sodium than regular salt. However, it does contain traces of Iron Oxide and small amounts of calcium, magnesium and potassium.
What kind of Health Benefits do they claim to possess?
You will find a lot of articles on the internet claiming Himalayan salt lamps come with a bunch of Himalayan salt lamp health benefits and are good for your home. Most of these health benefits are related with the kind of environment salt lamps create and how they affect it. The health benefits generally include:
They improve the quality of air around them
Himalayan Salt is said to emit negative ions which are said to absorb pollens, dust, smoke and several other contaminants, thus improving the quality of air around them and becoming especially beneficial to people suffering from allergies, asthma and other such illnesses.
They act as mood boosters
It has been claimed that Himalayan salt lamps are great mood boosters because of the negative ions they emit. This is because negative ion play a role in producing biochemical reactions that increase serotonin once they reach the bloodstream. Serotonin is a chemical that helps in regulating a person’s mood.
They help you sleep
Another regularly made claim is that Himalayan Salt Lamps help you sleep better. It is said that positive ions drain energy levels and reduce the supply of blood and oxygen to the brain, which leads to irregular sleep patterns. Since Himalayan salt lamps generate negative ions, they are said to counter this effect and help you sleep better.
Reduce electromagnetic radiation
We live in a world surrounded by electricity and this leads to a large amount of electromagnetic radiation around us which can be harmful for our health. Negative ions apparently neutralize this radiation and ionize the air around you. And that helps in nullifying electromagnetic waves by balancing the amount of positive and negative ions in their environment.
Are these health benefits real?
The real question that must be asked is are the claimed health benefits real? Well here’s the thing. Most of the health benefits claimed by Himalayan salt lamps are associated to the negative ions they release. While there is ongoing research on how effective negative ions really are when it comes to personal health, there is no evidence in support of these claims yet.
Basically, there is no real evidence as far as medical research is concerned that Himalayan salt lamps is actually good for your health. The improvements in lifestyle from having a Himalayan Salt lamp in your house may not, in most cases even be because of medical reasons.
You might buy a Himalayan salt lamp and you might even notice an improved lifestyle but that may not all be down to any supposed medicinal properties in Himalayan salt itself. They’re more therapeutic properties than anything. So why must you buy Himalayan salt lamps and are there any benefits associated with them at all? Let’s find out.
They are attractive to look at
Himalayan salt lamps are really attractive to look at. They emit a warm pink-yellow glow that is really soothing and mellow, especially at night and this genuinely lightens the mood around them. They’re also great substitutes to waxy candles which you’d use for occasions like candle-lit dinners or when there is no electricity and you don’t have a night lamp or inverter to keep your house lit.
Their pretty and soothing glow is what actually therapeutically improves your mood and not the negative ions they release. Researchers have studied that people with depressive symptoms and unstable moods report improvements in their conditions when exposed to negative ions.
However, the link they found between negative ions and a person’s mood is not dose related and thus, cannot be proved to work effectively all the time. Moreover, we don’t even know if Himalayan salt lamps release the amount of negative ions required to calm a person down enough. The improvements in mood are basically related to color and light therapy.
Great night lamps
Himalayan Salt lamps act as great night lamps. There are many people out there who don’t like sleeping in complete darkness at night and thus prefer a night lamp. You can always go for a Himalayan salt lamp instead of an electronic night lamp.
The pretty and ambient glow emitted by Himalayan salt lamps feels really nice and might also help sleep faster because of the dim, hazy but relaxing color and low brightness of the lamp. They also require much less maintenance than scented candles and other such illuminants which are used for the same purpose.]
As unique décor
Another reason you’d want to have a Himalayan salt lamp in your house is as unique decoration made out of a rare mineral from a specific part of the world. It makes your house look that much more artsy and the vibes are pretty nice. You can show off to your guests and friends about the pretty lamp in your house that uses Pink salt from a specific salt mine in the Himalayas.
All in all, we’d urge you to be skeptical about the health benefits a lot of articles and hard-sellers of these pretty lamps claim. You can buy them for whatever reason but don’t buy into the health benefits claim. You might just notice a number of those benefits but those are down to therapeutic reasons and not medical. So you’d best take these claims with a *drumroll* pinch of salt.
They’re pretty nice novelty objects to own at the end of the day and are worth the price just because of the uniqueness of their functioning. It's always nice to have some decorative luminance in your house just for the sake of it and we’d urge you to try these out because they’re quite beautiful to look at.
The only thing is they’re not necessarily beneficial to your health.
Who knows, researchers might just find some weight to these claims someday though.
Home is where the heart is, and everyone would want to build a home where they could head back to, after a long hard day and relax. Himalayan Salt Lamp has been a trendy product which has been used by many. With its multiple benefits, this lamp can help in transforming your home into a peaceful abode where you would want to return to, every day!
Apart from having multiple benefits, it is essential to understand that these are different from regular salt in their composition as well as mining. It holds the same property of salt, being hygroscopic, which means it attracts water molecules.
Unique salt lamp is made from Natural Himalayan salt...
Once lit the lamp will emit a calming Amber color
Hygroscopic nature
Since the salt is hygroscopic, it attracts a lot of moisture from its surroundings, as a result of which, the dirt, smoke, and other allergens get purified around it. When heated, the salt lamp keeps the air around it clean, which is why the lamp too needs to be cleaned from time to time. This mostly helps individuals who have respiratory problems like asthma. When the surrounding air is clean and free of pathogens and dirt, breathing becomes easier and is automatically beneficial for our health.
Negative Ion source
The salt lamp is an excellent source of negative ions, and negative ions have a lot of benefits for our body and well being. It helps in higher oxygen flow to your brain, it keeps away irritants from the air and keeps you refreshed. This gives the same effect if you spend a lot of time in nature. However, the negative ion which is released by the lamp is in minimal amount. Hence one lamp may not be sufficient for an entire house. The negative ions released also helps in increased secretion of serotonin, better blood flow, and overall well-being.
Source of Light
Being a lamp, it apparently gives off the glow. The Himalayan Salt Lamp gives off a very subtle dim glow which is very soothing to the eye and the soul. It helps in lighting up any dull and mundane corner of your house- whether it is your living room, bedroom or your kitchen. It has also been proved that it helps in better sleep when compared to blue light, as the radiance is much more soothing.
Mood upliftment
The Himalayan Salt Lamp gives off a wonderful orange and pink glow, and along with that it also releases negative ions, which is proved to be responsible for uplifting your mood. Over-all it boosts the healthy lifestyle of an individual. It also combats allergies, hence adding to another reason for uplifting your mood. It helps mainly for people who suffer from SAD or seasonal depression syndrome.
Neutralizes electromagnetic radiation
This is the radiation which is emitted by all the electronics in the house and creates a lot of static energy around it. It leads to increased amount of stress, loss of concentration, fatigue, proneness to cancer, and reduces the body's immune response in the long run. The negative ions of the lamp can help in neutralizing this radiation, but only to an extent.
Aesthetic
Apart from all the health benefits of the salt lamp, it is also very aesthetic. It automatically adds to the décor of the house and helps in bringing out the colors. The lamp being of different shapes and sizes could also be placed anywhere around the house and is a great addition to your knick-knacks.
Photo Courtesy of Annie Tarasova
Real vs Fake Himalayan Salt Lamps
With variants of the Himalayan Salt Lamp in the market, it is very difficult to differentiate between the real and the fake product. Real Himalayan Salt Lamps have some distinctive features which differentiate them from the fake ones, and it is wise to research thoroughly before making a purchase. From the size or the color and the effects it has- below is a guide as to how to choose the best real lamp for your home.
Color
Usually, the real Himalayan Salt Lamp has a darker color. The color is typically a combination of pink and orange. 100% authentic Himalayan Salt Lamps are usually specified, and this should be checked before making a purchase. Fake Himalayan Salt Lamp would have a distinctive color, different from the real one, like the light pink ones with black spots. They would have other salts and chemicals admixed with it. So make sure to check the ingredients.
Size
Usually, a good lamp would be a little large and bulky, as the lighter versions not only have the possibility of being fake but also does not impart the benefits of the salt lamp. The larger the lamp, the better is its cleansing property. It should also be kept in mind that you cannot place a tiny salt lamp in a large room and expect to feel its benefits. The size of the room is also a determining factor to differentiate between a real and fake lamp.
Surface texture
A rough surface is one of the indications for checking the quality of the product. Roughly surfaced lamps not only look good, but they also have the better quality of air purification and neutralization. A polished lamp has a lesser surface area, hence smaller benefits.
Bulb type
The type of bulb used for the lamp should be checked before purchasing it. Only when a heat producing bulb is used, the salt lamp would work and impart its soothing effects. An LED bulb does not work. The wattage of the bulb should be steady, depending on the size of the lamp. Anything which would not produce enough heat is possibly fake. Also, it is not supposed to illuminate the room; it only provides a light glow.
Flexible return policies
Since these lamps are made of salt and a bulb, the possibility of it breaking is very high. The guarantee period offered with the lamp, along with the return policy tells a lot about the genuineness of the product. It is a definite point to consider before making a purchase.
Durability
You cannot expect that your salt lamp would accidentally hit the floor and not break. If that happens, it is quite obviousit is a fake. It is salt! It is supposed to shatter.
White Himalayan lamp
Yes, they do exist. However, the real ones are costly, so a low priced one is a definitive fake. The white Himalayan salt lamps are way better in quality than the pink ones and can never be cheaper.
Origin
The salt is rumored to be mined from parts of India and Khewra, Pakistan, so it is essential to check on the origin before making the purchase. There are various products which are sold off by the same name, hence being scammed is very common.
Non-benefitting
If you owned the salt lamp for a very long time, you spent almost every day in the same room with it, and yet you haven’t experienced any of its benefits, you probably have been scammed! The salt lamp should not be moisture resistant, and nor should it make you feel like there is no calming effect. The lamp is supposed to ease you down, reduce stress and also benefit your health when used in the right size.
Check for yourself
If you are highly doubtful of the quality of the Himalayan Salt Lamp you just purchased, you could test it for yourself. Since it is salt, it is mean to melt under water. If you try and wash the Himalayan salt lamp, under hot water essentially, the size of the lamp will change. The lamp will start to melt. If running under the water leads to no changes to the lamp, it is a fake and should immediately be returned.
Perspire
Following the theory of hygroscopy, the slat lamp is supposed to sweat and release moisture because it is hygroscopic. If it is dry when exposed to moisture, it is undoubtedly a fake!
Oddly cheap
If the lamp is sold at an odd and reasonable price, it is mostly not real. The Himalayan salt is a mineral which is difficult to mine, and it could not possibly be coming at a low price.
Read-up
It is highly advisable to read through reviews of all the customers, good or bad, before purchasing the salt lamp. The reviews say a lot about the product and how real it is and thus help in the long run.
These are some of the benefits as well as tips to know the real deal from the fake and while it is an investment, the salt lamps are perfect for the overall health and well-being of an individual and surely are worth the hype!
Whoever invented the air compressor must have been too lazy to work. Otherwise, who thinks of using air as a one-stop solution for all household and industrial tasks?
And perhaps, they became active in the process of inventing this ingenious device! Jokes apart, an air compressor is an enormously versatile device. It doesn’t leave even an iota of doubt over its performance and leaves you to marvel.
From cleaners to spray painters, and from nailers to impact drills, every other job becomes so easy with air compressors. But finding the right one of your choice is tricky, and this is where we come in.
As you scroll down, you will find some of the best high CFM air compressors and a definitive guide that details our selection process.
So, what are you waiting for? Let’s jump straight into the nitty-gritty.
Makita MAC5200 3.0 HP Big Bore Air Compressor. Makita MAC5200 offers quiet operation and a powerful motor, enabling it to accommodate two airguns simultaneously, although it's on the pricey side.
California Air Tools CAT-4620AC. California Air Tools CAT-4620AC impresses with its energy efficiency and exceptionally quiet operation, offering stable performance, yet falls short in terms of portability due to the lack of wheels.
Powermate Vx PLA4708065. Powermate Vx PLA4708065 is excellent for heavy-duty applications with a high-capacity motor and large gas tank, but it does not include a power cord.
DeWalt DXCMV5048055 Two-Stage Cast Iron Industrial Air Compressor. DeWalt DXCMV5048055 leverages its two-stage design for high performance in heavy-duty tasks, but it is not portable and has a high price tag.
BOSTITCH Pancake Air Compressor BTFP02012. BOSTITCH Pancake Air Compressor BTFP02012 delivers value for money with high capacity and the ability to enhance connected tool performance, but it operates with a bit of noise and takes a longer time to build pressure.
To help you make an informed decision, we have compiled a list of the 7 best highest CFM air compressors available in the market. Get ready to discover the top-notch options that offer unmatched airflow for all your compressed air needs. Here's the list of the 7 best highest CFM air compressors.
1. Makita MAC5200 3.0 HP Big Bore Air Compressor - Best for Power and Low Noise
We don’t have much to say about Makita, which is dominating the power tools industry with some of the top-notch hammer drills, OMTs, workbenches, etc. That’s why we chose the powerful Big Bore air compressor that’s engineered for increased compression, faster recovery, and almost no noise. Let’s see why this is one of the best air compressors on the market right now.
Frankly, what impressed us the most about the MAC5200 model is its Big Bore engineered pump cylinder and piston. Also, its 3 HP engine can perform exceptionally well compared to its size, and as it comes with an in-built thermal overload detector, it works as a protective shield of the internal circuit.
Moreover, the product comes with a tank of 5.2 gallons, which is adequate for a wide range of air tools, both light and heavy. But if you’re looking to jack multiple appliances at the same time, it would be pretty tough for this tool to handle it. And talking about capacity, the MAC5200 scores high with its maximum air pressure of 140 PSI. At 90 PSI, it rises to 6.5 CFM, and at 40 PSI, it delivers a decent 6.9 CFM.
If you’re not a fan of numbers, let us tell you this is quite an impressive count as it allows you to run two air guns simultaneously, and that too without getting jammed. Makita takes care to make quiet and portable air compressors that don’t make noise above 90 dBA. Its oiled pump adds to the low-noise factor while the wheel-and-handle-kit makes the product very easy to carry around.
So, in short, this is an excellent buy for heavy-duty as well as medium-scale users.
The only factor that bothered us about the product was its price. If you have a tight budget, this is not a model to look for. But the catch is, this is a product that has earned every penny of the price tag. Yet, we believe, many won’t be able to afford it.
What We Like
Noise-free operation
High-quality motor
Very portable
Can accommodate 2 airguns at once
What We Don't Like
Price
Maximum PSI: 140 | Horsepoewer: 3 | Tank Capacity: 5.2 gallons | CFM @ 90 PSI: 6.5 | Noise Level (dB): 90 | Oil-Free: No
2. California Air Tools CAT-4620AC - Best for Energy Efficiency and Quiet Operation
When it comes to California Air Tools, you can rest assured that all your air equipment is going to have a field day. It’s also the king of noise-free operations, as it heavily borrows from the latest trends in the industry. They have mastered the race for the best air tools by constant adaptation, improvisation, and overcoming all obstacles with excellent customer service.
Well, just because the company is well-renowned doesn’t mean each of its products is top-notch. But the CAT-4620AC mesmerized us with its new 2 HP motor that’s designed to draw less than 14 amps of power.
Although not as yielding as the 3 HP Makita, this motor runs a massive oil-free pump (so less maintenance and even less mess) whose operational capability is 3,000 hours. When such a durable pump joins an air pressure of 125 PSI, the combo makes the device all the more versatile. At 90 PSI, the compressor generates an air volume of 5.3 CFM, which is pretty great for connecting more than two air tools.
And as for the quietness factor, California Air Tools always sets the bar high. Like the Dewalt model, the CAT-4620AC also performs with a whisper of not more than 70 dBA. So, you can complete all your pending garage tasks this weekend with this quiet little bird, and no one will bat an eye.
As for its weight, the machine seems a bit bulky. But the major downside of this product is its absence of wheels. Sure, you can do almost everything with this compressor with the help of a connecting cord, but it’d be bad luck for those who require it to move around. We believe CAT will improvise very soon and add a pair of wheels to this design.
3. Powermate Vx PLA4708065 - Best for Heavy-Duty Applications
Till now, we had talked about mid-range models that would at best qualify as bridge or intermediate-level products. But here we have Powermate Vx, which is one of the largest air compressors capable of handling very heavy-duty tools and multiple applications with utmost smoothness. Let’s have a look at its features, and you’ll have an idea of all its uses.
This dude right here is one of the big bosses of the industry. Just have a look at its specs boasting of a 4.7 HP 240 V motor, but which draws a mere current of 15 amps only. This means, that despite a massive engine strength, it doesn’t crave too much energy to function. So, win-win for all!
As for its capacity, the compressor gives out a maximum pressure of 155 PSI, and when the mark hits 90, Powermate delivers a massive air volume of 14 CFM. Needless to say, this is a higher number than most other heavy-duty compressors can achieve.
But it can also handle a significantly more significant number of air tools such as ratchets, impact drills, spray guns, double nailers, you name it.
The best part about this compressor is each part of it complements the other to provide the user with a smooth air passage. The 80-gallon tank facilitates constant airflow, and its durable steel body is designed to last for years.
It combines with the oil-lubricated pump, a full cast-iron body, and a crankcase to give you an air compressor that ensures a smooth workflow in all kinds of job sites.
Well, this is a top-notch model, no doubt about that! But there are two minor issues we faced with it. First, there is no power cord included in the package. And second, this is pricey with a whole lot of noise. But being a compressing monster, we can’t complain too much about its roar. Still, if you aren’t a professional, it may not suit your value-for-money quotient.
What We Like
Heavy-duty motor
Very high CFM
Extremely durable body
Gas tank of 80 gallons
Smooth workflow without jamming
What We Don't Like
No power cord included
Maximum PSI: 155 | Horsepoewer: 4.7 | Tank Capacity: 80 gallons | CFM @ 90 PSI: 14 | Noise Level (dB): 55 | Oil-Free: No
4. DeWalt DXCMV5048055 Two-Stage Cast Iron Industrial Air Compressor
Well, we thought of adding another high-end model from a more renowned company. And who can score any higher than Dewalt, in terms of fame and quality of its products? Its previous model mentioned in the list lies somewhere between a semi-pro and a professional compressor. But for those looking for some heavy-duty work, the DXCMV5048055 can be your go-to!
Before getting into the nitty-gritty, let’s understand the inner mechanism of a 2-stage compressor. Everyone knows the 2-stage is so much better than the single-stage ones, but where lies the difference?
Well, 2-stage compressors draw air into a cylinder, compress it in a single-piston stoke, and push it into a smaller piston of even higher pressure. This doubles the maximum pressure the device can generate before it’s sent to the tank. As you’ll see, this is a 471-pound stationery model that maxes out at 175 PSI air pressure to give you a 17.5 CFM of air volume at that level.
So, for this compressor, not just larger loads, but handling multiple pneumatic tools such as sandblasters, and hydraulic jacks, is a cakewalk. Moreover, with a TOPS (Thermal Overload Protection System) equipped motor, any heavy electrical passage is easily dismissed, and Dewalt’s patented pump design takes the overall working temperature a couple of notches down.
Talking about the motor and the storage tank, they left us with no complaints and only high performance. A 5 HP motor and 80 gallons of air capacity add to the versatility of this device, and as mentioned above, it can handle too many heavy-duty tools at once.
Trust us, this model will last you for years without a single chance of tailback. Still, what’s gonna hurt you is its price. Yeah, 2-stage air compressors are costly, and on top of that, very few models are portable. So, one’s a huge price, and the second is portability. But then again, there’s only so much we can ask from a high-quality compressor such as this.
What We Like
5 HP high-capacity motor
The motor is also TOPS-equipped
Very high CFM
Can handle many heavy-duty tools at hand
What We Don't Like
Not portable
Pricey
Maximum PSI: 175 | Horsepoewer: 5 | Tank Capacity: 80 gallons | CFM @ 90 PSI: 17.9 | Noise Level (dB): 55 | Oil-Free: No
5. BOSTITCH Pancake Air Compressor BTFP02012
Winning the tag of Amazon’s Choice is a prestigious title, but that’s not the only reason behind choosing this pancake air compressor. Bostitch has been producing fastening and pneumatic tools since 1896, so from a company, it has become a legacy of trust and quality. This air compressor only adds to that long line of top-notch products.
From its very first appearance, this model looks compact and tidy and also comes with a detailed manual on assembling, usage, and some FAQs. Moreover, its pancake-shaped dome comprises the storage area of the device, while for easier readings, the compression technology is located at the top.
As for its capacity, its large belly has a capacity of 6 gallons, which is unusual for pancake compressors. It maxes out at an air pressure of 150 PSI and 90 PSI, it can hit up a decent air volume of 2.7 CFM, making it suitable for operating an extensive array of power tools such as impact drills, ratchet drivers, spray guns, double nailers, etc.
Noteworthy to mention, Bostitch comes with a high-flow regulator and couplers that enhance the performance of the tool and every other device that you attach to it. Moreover, its complete package of air hose, blowgun, and nozzles of different sizes increases its versatility manifold. This is a comprehensive tool kit that will easily attach power tools of all sizes and save you the hassle of running around the market, looking for bits of specific sizes.
Well, this is one of the most compact yet high-performing compressors out there. But there are some minor faults that we’d like to point out. Despite the noise dampeners, it runs with quite a bit of noise, and that’s a complete bugger. Moreover, its pressure-building time is close to 3 minutes, and that can affect the momentum of your job.
We just couldn’t settle with only one model from Makita. Although most of its air compressors are incredibly versatile, we feel the MAC700 hits up the highest scores in terms of all the yardsticks. Coming from one of the most reputed brands, it’s bound to have some unique features that make this product stand apart from the rest of the crowd.
Let’s begin by explaining the adjective we used in the intro: versatile. Well, you can attach any power tool to the model for jobs such as spray painting or sanding because it comes with a tank capacity of 2.6 gallons and a maximum pressure of 130 PSI. This combination proves excellent for enhancing the versatility quotient, as at 40 PSI, it gives a decent air volume of 3.3 CFM.
Frankly, the crux of this device’s success lies in the powerful motor that comprises a durable pump made of cast iron. What’s more, it comes with a big bore cylinder and piston that translate to better compression and far less noise emission. Added to that, the air and pressure holding capacity increase significantly with larger bores. So, Makita has got you covered with its foolproof internal mechanism.
And finally, its low current drawing feature drastically minimizes the chances of a short circuit, or tripped breakers, and protects the device from random voltage fluctuations.
There’s no doubt that this is a brilliant, compact model that you can use in professional workspaces as well. But, and this is a difficult checkpoint to cross, its 70 lbs weight is a serious downside in terms of portability. We mean to say, that no one wants a compressor on a job site that costs them back pain, and this is precisely where the MAC700 falls short.
What We Like
Very versatile
Low risk of short circuit
Cast iron build of the gas tank
Quiet operation
What We Don't Like
Heavy
Maximum PSI: 130 | Horsepoewer: 2 | Tank Capacity: 2.6 gallons | CFM @ 90 PSI: 3.3 | Noise Level (dB): 80 | Oil-Free: No
7. California Air Tools 10020C
We are back with an elder brother of the CAT-4620AC, and it’s 10020C. California Air Tools do not need much introduction owing to their reputation of making some of the quietest and coolest air compressors. What’s more, they are loaded with too many features, which make these devices a complete package of convenience, power, and versatility.
Here’s a one-liner that can aptly describe what we feel about this product: A highly portable compressor that comes with a 10-gallon air tank, and that makes less than 70 dB noise with a powerful 2 HP engine. This compressor felt like it was a perfect candidate to outperform any other model within the price range.
Talking about its construction, the compressor sports a user-friendly design that includes easy controls, twin air pressure gauges, and dual quick connectors. What’s more, everything is accessible from the control panel situated in front of the durable steel cage.
At a rating of 90 PSI, the CFM hits as high as 5.3, which means plenty of power for various garage pneumatic tools such as ratchets, drivers, wrenches, etc. One trailblazing feature of this model is its improved motor performance. California Air Tools has introduced an efficient motor, an SP 9421 pump in the compressor that features improved heat dissipation and increased duty cycle.
That’s why the 2 HP motor allows longer compressor run times with minimum recovery periods. Finally, despite being an 80 lbs hefty device, its durable back wheels make it perfectly easy to travel all around your workspace.
Although the cleanup system has been improved, many users have still found it cumbersome as the manual drain valve is hard to open. So, if you can, replace the manual valve with a more straightforward pull cable drain valve to further ease your waste-water cleaning mechanism.
Compiled beneath is a table that systematically analyzes the salient features of air compressors boasting the highest Cubic Feet per Minute (CFM). The table considers vital specifications such as maximum pressure (in PSI), horsepower, tank capacity, CFM at 90 PSI, noise level (in dB), and whether the device is oil-free.
With so many trailblazing features, it’s only normal to get confused! But what’s even more confusing is the market out there that calls you with all its fancy gimmicks the moment you step in to look for something. Although we made sure to increase everyone’s needs in this list, you just might not come across the product of your choice. Also, indeed, every other claim made by many companies doesn't stand firm in the long run, and they fail to keep their promises.
But don't worry about that! We have got you covered with our extensive buyer’s guide so that you know what elements to look for and what NOT to look for when buying an air compressor.
Let’s start with the basics, shall we?
PSI
It’s the amount of air pressure force given out by the compressor, and its abbreviation is ‘pounds per square inch.’ There will be times when you’ll need a product of higher PSI if you gotta connect more than two heavy-duty air tools. For simple air devices such as ratchet drivers, pneumatic drills, or ½ inch impact drivers, something that goes up to 130 PSI could fit just right.
But for heavy-duty industrial-grade tools, you're gonna need something higher than the above-normal range. This is where the PSI factor comes into play.
Understanding your requirements
‘Why should I need a compressor in the first place?’ Yeah, this is the primary question one needs to ask before even hitting the search bar with ‘10 best air compressors’. Everything depends on your choices, and it’s not advisable to start hunting for the best tools for that’d be just blind rummaging.
So, sort out your needs first. Here are some basic questions to begin with:
Am I using a compressor to power pneumatic tools or some heavy machinery?
Am I going to need something low-key just for household purposes?
How much tank capacity am I going to need, and how long am I gonna use it each day?
This is just the beginning of the list to help you get sorted, but you get a rough idea of what to ask yourself, and how to.
Knowing the different types of compressors
Once you are sure that you DO need a compressor, it’s time to get into a bit of serious research. Don’t worry, we’ll help you out here.
Compressors can be mainly of two types: reciprocating and rotary screws. And most of the ones we covered here are reciprocating piston types. Here the piston moves up and down and also comprises a one-way valve on its top. Rotary screws work differently as they’re designed for continuous use and can run consistently for up to several minutes.
Now, piston compressors come in single-stage and dual-stage. Single-stage compressors max out at 150 PSI, whereas 2-stage models can go much higher over 200 PSI. And do not confuse all dual-piston compressors with being 2-stage compressors. To differentiate between these 2 kinds, look at the size of the pistons. If one is significantly smaller than the other, it’s a dual-stage model.
Single-stage compressors work great for most pneumatic tools, spray guns, glue guns, caulk guns, inflating tires, etc. In contrast, dual-stage compressors are best suited for industrial-grade work, which includes a combination of some of these devices alongside heavy-duty air tools.
To be more specific: Defining CFM
For those that don’t know, CFM is Cubic Feet per Minute, but there are certain angles to this denominator that we’re going to discuss now.
Always look for the Standard CFM (SCFM) number, which is measured at 14.5 PSIA in 0% relative humidity, at 68 degrees F.
If you need to know how much CFM you require, add up all the SCFM of the air tools that you’re likely to use regularly. And then add 30% of that sum to it for a buffer. This would be the perfect guessing of how much CFM you need, and without looking for the SCFM, just going by the numbers written under product info won’t be of much help.
How do I determine the CFM requirements for my tools?
To determine the CFM requirements for your tools, you need to check the tool’s documentation or consult the manufacturer. Most tools specify their CFM requirements, which will help you choose an air compressor with a suitable CFM rating.
Can I use multiple tools simultaneously with a high CFM air compressor?
Yes, a high CFM air compressor is capable of running multiple tools simultaneously, provided that the combined CFM requirements of the tools do not exceed the CFM rating of the compressor.
Are high CFM air compressors suitable for home use?
High CFM air compressors are generally more suitable for professional or industrial applications rather than typical home use. However, if you have specific high-demand tasks or extensive DIY projects that require increased airflow, a high CFM compressor may be beneficial.
What maintenance is required for high CFM air compressors?
Maintenance requirements for high CFM air compressors typically include regular oil changes, filter replacements, checking and adjusting the belt tension (if applicable), and ensuring proper ventilation and cooling to prevent overheating.
Can I upgrade the CFM rating of my existing air compressor?
No, you cannot significantly upgrade the CFM rating of an existing air compressor. The CFM rating is determined by the design and specifications of the compressor pump and motor. If you require a higher CFM, you would need to invest in a compressor with a higher CFM rating.
We believe you’ll find the perfect compressor of your choice among these products. But don’t get disheartened if you get confused midway, and now you have a tie of around 3 to 4 products at hand.
We all have been here at some point in our lives when choosing between the best of the best products. So, to make your life a bit easier, here’s our final selection of the top 1% of the top 1%.
There’s fierce competition between the 2 models of Makita and California Air Tools. If you’re hoping for top-notch performance from a mid-range model, which also caters to your budget, you can go for anyone between MAC5200 and CAT-4620AC.
And for high-end models, the clear winner from this list is the DeWalt DXCMV5048055. It’s a 2-stage air compressor with the most top-notch features, and the very high CFM count fits all kinds of industrial air tools. But while thinking about it, the Powermate model is also befitting for most heavy-duty jobs.
We hope we answered all your questions today.
We welcome your comments to improve this list and also to know what we are missing from the current industry trends
A well-lit garden or a porch looks welcoming and helps keep the house safe, but it can consume a lot of electricity.
That is where solar lights come into the picture. The best solar spotlights are equipped with a built-in photocell sensor to detect the brightness level outside. It allows the solar spotlights to switch on when the sun sets and switch off after sunrise.
You can let these solar lights work on their own, and they will not increase the energy bills at all. Just pay the one-time cost and then let the solar spotlights work independently. In this guide, we will discuss the best high-output solar lights and their pros and cons.
So, read on!
Best High-Output Solar Spot Lights
To help you find the finest options available, we have curated a list of the 10 best high-output solar spotlights. Get ready to brighten up your outdoor world with these exceptional lighting solutions. Here's the list of the 10 best high-output solar spotlights.
Are you looking for solar lights that would brighten the lawn at night without you intervening? Well, then you are at the right place. This URPOWER 4 LED Solar Light will help you light up your lawn every evening without incurring any additional costs. So, let’s see what else it offers!
2 Brightness Levels: Low light mode (10hrs) / high light...
Separately Adjustable Light & Solar Panel: The solar...
Why Did We Like It?
This is one of those solar spotlights that enables the user to adjust the brightness as and when needed. Additionally, the solar panels installed in this device are pretty broad, and the battery does not take too long to get fully charged.
Also, note that both the light head and the solar panel are totally adjustable. Once you install it, your outdoor space will be flooded with bright light after sunset. You can modify the solar panel and set it in a way that it gets maximum sun exposure.
Moreover, this solar spotlight gives you ample options when it comes to installation. You can use stakes to stick the lights on the ground, or you can even consider mounting them on a wall. For that, however, you will need some screws.
What Could've Been Better?
After a few months of using the product, we noticed that the plastic color had started to fade. So, if you are placing it in areas that receive strong sunlight throughout the day, you might reconsider as that might lead to the color fading a bit.
Are you on the lookout for outdoor solar spotlights that are sturdy and easy to use? Then, it is best that you try the InnoGear Solar Lights. This is one of the best solar spotlights that we tried; with highly adjustable features, it managed to impress as well.
Independently Adjustable Light & Panel: Other solar lights...
Improved Brightness & 2 Working Modes: With super...
Why Did We Like It?
These outdoor solar spotlights allow the user to adjust the light as per their requirements. If you want a brighter light, you can change these solar outdoor lights to meet your needs and very well use them as landscape lights.
The solar panels in this set are made in a way that captures direct sunlight in the best possible way. All the light heads are adjustable and can be rotated up to 90 degrees, thereby enhancing the lighting range considerably.
This is one of the brightest solar spotlights that we tried, and we can say with conviction that it is super-efficient. The company has upgraded its technology, which has helped increase the conversion rate by almost 30%. And the best part is that the moment the sun rises, they get switched off automatically.
What Could've Been Better?
A fair warning: these solar landscape spotlights won’t work the best if they fail to harvest the sun’s energy properly. Simply put, unless there is direct sunlight, they will take a long time to get charged. They can be used for landscape lighting only if the space receives ample sunlight.
One of our top recommendations for a high level of brightness is the Linking StarRay Solar Landscape Spotlights. The lights are of supreme quality and are known to be IP67 waterproof. You will love this eco-friendly option that will consume very limited energy and can work for 30,000 hours.
[Larger and Flexible Solar Panel] Enjoy faster charging with...
[Super Bright & Energy Efficient] Solar lights outdoor...
Why Did We Like It?
This spotlight pack comes with two installation options to choose from. You can either use a wall bracket or a ground stake to keep the solar spotlights in place. To place it directly on the ground, you can insert the stake and then attach the spotlights. Otherwise, fix the wall bracket with the help of screws to the wall.
Moving on, you will get two brightness modes, and you can choose between high light mode and low light mode. The dusk-to-dawn solar spotlights can detect the brightness around and then settle for the mode needed. It will switch on by itself when the area becomes dark and will switch off when the sun rises.
Plus, there are 16 lamp beads with a 90 degrees beam angle that can produce 650 lumens of 6500K light output, which should be enough to light up a single spot. You can then adjust the angle of the light. It is adjustable up to 90 degrees vertically and 180 degrees horizontally.
What Could've Been Better?
You should know not to place these spotlights in partially lit areas. They have to be placed right under the sun so that they can receive proper sunlight and get charged. If you put it in partial sunlight, the light will only last for two to three hours at night, which may not serve your purpose.
Enjoy your evening walks peacefully with the Nekteck Solar Lights, an advanced lighting option. It will meet all your lighting needs in outdoor spaces, and you can rest assured that the backyard will be lit up throughout the night. Plus, the adjustable angle will make sure that the doorway is never in the dark.
Upgraded 4th Generation Solar Lights & Panel—The Advanced...
Highly Resistant for all kinds of weather- Nekteck solar...
Why Did We Like It?
First of all, you can safely use outdoor solar spotlights as they are weather resistant and can withstand temperature fluctuations. You will be happy to see that they will work well in frost, snow, sleet, and rain. There are two ways to install the spotlights; you can mount them on walls or stick them on the ground.
Next, there are two brightness modes to shift between. Four LED bulbs present inside offer high and low modes that can meet all your lighting needs. The lights can remain on for six to ten hours, depending on the charge level. Also, it will switch on and off automatically, saving you a lot of work.
To top it all, the light angle can be adjusted up to 180 degrees to achieve the right amount of illumination. Specific dark areas can easily be highlighted thanks to this feature.
What Could've Been Better?
The outdoor solar spotlights are not sealed very well, and we have noticed dust accumulation inside. Now, you can clean it off, but that can be highly time-consuming. Hence, make sure that you cover the top with something while installing.
Another brilliant pair of lights that can always ensure that your doorways or gate area are lighted up is the LEREKAM Outdoor Solar Spot Lights. The bright cool white color is perfectly splendid and will keep peeping Toms away at night. You can also use a battery or a USB to charge the device.
Cool White Solar Spotlights Outdoor: A nightly light show!...
3 Brightness Lighting Modes: LEREKAM 40 LEDs solar outdoor...
Why Did We Like It?
One often wonders what to do in cloudy weather when there is no chance of solar-powered spotlights brightening up the pathway at night. That is because they do not get charged, but this product is different. Here, you get a rechargeable battery with a USB port for charging.
Next, you can opt for three brightness levels, which include high, medium, and low lighting. The battery will last for 8 hours on high mode, 15 hours on medium mode, and 25 hours on low lighting mode.
Also, take into consideration that the spotlights will light up the way with 40 LEDs and a 360 degrees lighting angle along with a 120 degrees big solar panel that is adjustable.
That is not all, as solar lights come with a waterproof exterior, and they can light up trees and bushes. Many use these lights to highlight parts of the landscape.
What Could've Been Better?
While you will get a USB-powered battery and wire, no wall plug is provided to use with it. Now, this should not be a big issue as plugs are commonly found around the house. If not, take the USB wire to a nearby electronic store and get a plug that fits.
Now that we have reached the middle of the list, it is time to introduce the Claoner Solar Spot Lights. These are highly efficient and can work automatically when the sun sets for the day. We have used it beside the pool, and the entire area remains lit up throughout the evening.
🏡【Cold White Solar Spotlights】Brighter 32 LEDs with...
🏡【High-efficient Solar Panel】The outdoor solar lights...
Why Did We Like It?
The product is made with ABS plastic, which is very durable. It can sustain high impacts and is made to be waterproof. You can use it in a place with a high level of rainfall, and it will still light up the porch in the rain.
Moreover, like most solar lights, this one can be installed in two ways, you can either mount it on a wall with screws or stick it in the ground.
To top it all, the solar spotlight comes with three brightness levels, which can last for different amounts of time. The low light mode can be used for 24 hours, medium lighting for 12 hours, and high lighting mode for 6 hours. This spotlight will detect the brightness level of the surrounding by itself and will adjust accordingly.
What Could've Been Better?
This solar spotlight features batteries that cannot be removed, and you will have to dispose of the entire light if the battery malfunctions. However, this does not affect productivity, and we will not hold it as a drawback.
Up next is a brilliant set of lights that can light up the deck or patio at night. The Billing Solar Spotlights can be stuck into the ground or mounted on a wall wherever necessary. You will love how easy it is to fix the lights in place.
Upgraded Solar Spotlights Outdoor 3000K warm white light,...
Bright Solar Lights for Outside- Each solar spotlight is...
Why Did We Like It?
The product features an IP67 waterproof design, which means that it can sustain adverse climatic conditions. You can use it in places that see a lot of rain and snow. Plus, it can add to the lighting and decoration of the place. It can also be used as a security landscape solar light.
Moving on, the color of the light is warm white, which adds a beautiful glow to the garden. You can install the lights easily on the ground, and they are adjustable up to 90 degrees.
Adding on; you can switch between the two lighting modes easily with one button. The low bright mode will be able to light up the area for 15 hours when charged fully. And if you use the high brightness mode, you can keep the light switched on for around 10 hours.
What Could've Been Better?
In case you are going to use these spotlights to light up the garden and trees in it, you should know that they work well for shorter plants but not for taller trees. Hence, you will need stronger lights if you wish to light anything taller than ten feet.
If you are looking for an all-weather lighting option, then the Magictec Solar Spotlights will be a great choice. The option comes in a pack of two and will light up your pathway or trees in the yard. Plus, these solar lights are well-known for their durability and energy efficiency.
Solar-Powered Convenience: Fully powered by the sun,...
All-Weather Durability: Engineered to withstand rain, heat,...
Why Did We Like It?
The best part about these solar spotlights is that they are adjustable, and you can change the direction vertically by 90 degrees. Plus, the solar panel can be rotated up to 180 degrees when needed. This should give you a stunning lighting experience.
Moreover, you will love the warm light glow of the solar spotlights. There is a built-in light sensor in every model, which automatically detects the brightness level outside. It will then light up when needed and switch off when the sun rises in the morning again.
On the other hand, the solar-powered lithium-ion battery is very powerful and rechargeable. It will provide power for 10+ hours once it is fully recharged.
Also, the body is made of plastic and is waterproof. You should be able to use it in bad weather conditions.
What Could've Been Better?
Remember that you will be getting a warm light that will provide a subtle glow. Please do not expect this solar spotlight to be very bright. It works best as accent lighting and if you need to light a pathway. But for pathways, you will need a few lights to install along the way.
Do you wish to change the color of your spotlights depending on your mood? The ROSHWEY Outdoor Solar Spotlights will allow you to do just that with its brilliant range of colors. These are made with ABS plastic and can be a part of your garden for a long time.
Solar Powered: Our solar garden lights last about 6-10 hours...
9 Working Modes: Colored solar outdoor lights provide 7...
Why Did We Like It?
There are seven different colors that you can toggle among depending on your mood and requirement. Plus, there are two auto color-changing modes that can be used for special occasions. The lights are perfect for a wide range of applications like Halloween, Christmas, or Thanksgiving.
Moreover, the solar panel, which is attached to the lights, can be rotated at an angle of 180 degrees vertically and 360 degrees horizontally. That would mean that they can capture the sun's rays well and use natural light to generate energy.
Adding on, the solar-powered spotlight pack comes with a 45-day money-back guarantee and a 12-month warranty. Hence, you can purchase without worrying about functionality. In case of any issues, you can call up customer service immediately.
What Could've Been Better?
The solar spotlight is pretty big in size, and you will not be able to hide it after installation. Since it has to be installed directly under the sun, the big head of the unit will always be visible. The brand could work on this and make it a little smaller.
Another super bright option that can light up patios very well is the Brightown Solar Spot Light. You will find two lights in one pack, which should light up the front of the house. The glow spreads over a large area, making it possible for people to see around in the dark.
【 Super Bright & Natural Light Solar Spotlights 】: The...
【 Energy-saving & 360° Adjustable Solar Garden Lights...
Why Did We Like It?
To begin with, this product is easy to install and will last for a long time. It is made of ABS plastic with triangular patterns on the side. The floor insert material is also very strong, and you can easily stack it on the ground. We found that this outdoor light can last for up to 1000 uses.
Moving on, the solar lights come with a 600 mAh battery, which is rechargeable. It is an eco-friendly and energy-saving option with a large solar panel. Just make sure that the solar panel is placed right to capture the most amount of light, and you should have no other problems.
Additionally, the color is naturally white, and each spotlight is equipped with 30 lumens of LED lamp beads.
What Could've Been Better?
It is best to read the description of the product well before purchasing. This option is pretty bright, but it will only last for eight hours or less. Hence, it will turn off sometime in the middle of the night, which can be a problem if you are going to use them as security lights.
Buying Guide For The Best High Output Solar Spot Light
By now, you must have noticed that most of the lights are pretty similar, with minor differences among them. This might lead to confusion, and you may be unable to make a choice. In this section, we will talk about the factors that need to be kept in mind while making a choice. These should help you distinguish among the top products, so read carefully.
1. Illumination Distance
What is the area that you want to illuminate? You might want to highlight a tree in the garden, or you might want to throw light on the pathway. The illumination area varies for different solar lights, and you should select one that will fit your purpose.
In case you want a light for garden plants, then check for solar garden lights online which may work better for highlighting specific spots.
2. Weather Proofing
Since these are outdoor light modes, they need to be resistant to bad weather conditions. This is especially true for areas that see rough weather often. So, while purchasing, please check for the IP rating and only buy products with a high IP rating.
According to us, IP65 should be your starting point, and you can choose any solar spotlight, which is above that rating. Anything below that will not last for a long time.
3. Light Modes And Types
You will generally find cool white light, warm light, and other light color options when it comes to solar spotlights. Now, if you wish to add a warm glow to the backyard, warm yellowish light can be used for accent lighting. On the other hand, the cold white light will be brighter and will work better as a security measure.
Then there are options where you can toggle among a few colors. These work very well for festivals and pubs. You will also find solar path lights which can help in lighting up pathways leading up to the house. However, if you wish to install solar lamp posts, then there are separate options that can be placed on the streets.
High Output Solar Spot Lights FAQ's
What Is The Maximum Distance That A Solar Spotlight Can Illuminate?
You can light up an area that is 100 feet away from the light with very high-quality spotlights. Please check the distance the light can cover before purchasing so that all the dark zones are well-illuminated at night with the lights you buy.
Does a Solar Spotlight Have A Motion Sensor?
Some spotlights can have motion sensing technology which will turn on the lights automatically for about 20 seconds in case movement is detected. This is generally done by a PIR motion sensor that can detect and scare intruders when needed.
These can sense movement from 55 feet away, but again, these motion sensors will not be present in all solar spotlights.
How Long Does A Solar Panel Take To Charge?
You will have to install these solar panels in a sunny outdoor space for them to generate and store energy. Now, to get fully charged, it will take around 12 hours of exposure to the sun. However, you might need to charge for two days initially if the solar panel is not of very high quality.
Conclusion
This has been quite a long read, and we will give you a moment to take it all in. But before we can leave you to it, let us take you through our top choices one last time. The URPOWER 4 LED Solar Lights Outdoor, is a great option if you are looking to light up the porch in the evening.
With this, we have reached the end of this guide, and it is time to say goodbye. You will find othersolar-powered dusk-to-dawn lights on the internet which can also help you out.
Hidden gun storage furniture is anything that can covertly store firearms within it.
It can be in the form of a couch, entryway bench, or even a gun concealment clock! You can store other valuables in it too, but its primary purpose is to hide a firearm.
Unlike gun safes, gun concealment furniture is easier to access, which is why they’re so popular.
But if you’re confused about which one to get, let’s get started with this guide on the best hidden gun concealment furniture. We’ve even included a brief buyer’s guide to help you purchase the ideal hidden gun storage furniture, according to your needs and preferences.
Listed below are the Best Hidden Gun Concealment Furniture:
PS Products: A versatile clock with a concealed compartment for hiding valuables, the PS Products Concealment Clock is elegantly designed to blend with any decor. A notable downside is its packaging which unfortunately hints at the clock's concealed feature.
Sauder: The Sauder Lift-Top Coffee Table is distinguished by its hidden compartment large enough to hold a sizable firearm. Its rustic finish suits any decor, but it requires a relatively complex assembly that could be inconvenient.
American Furniture: This piece from American Furniture Classics 504 Entryway Bench provides extraordinary storage capacity for up to 5 long guns. Despite its impressive storage and seating functionalities, packaging and product condition on delivery have been points of concern.
Tactical Traps 35S: Tactical Traps' 35S Compact Concealment Cabinet stands out with its strong security feature, using a state-of-the-art RFID system. Its assembly is straightforward and quick, though the quality of the included foam could be improved.
Bellewood Cabinet: The Bellewood Customizable Nameplate Gun Storage Cabinet impresses with its customizable design and secure storage feature. Its flexibility and customization are its key strengths, but the complex installation process, particularly the confusing video guide, is a notable weakness.
Here's the list of the 9 Best Hidden Gun Concealment Furniture, perfect for discreetly storing firearms and other valuables in stylish and accessible ways.
1. PS Products Concealment Clock
First up on our list is the concealment clock from PS Products, which is a nifty way to hide your gun. It's elegant outlook and practical shape make it fit in with pretty much any kind of décor. This won’t just tell the time but will also keep dangerous and valuable items away from prying eyes.
One of the things we liked about this product was its smooth finish. It is made of engineered wood with a mahogany stain and is easy on the eyes. You can place it on a desk, bookshelf, or mantelpiece, and its sturdy base will ensure that it won’t tip over and fall.
Further, the clock face panel can be opened to reveal a felt-lined compartment that stores money, jewels, and important documents. There is also a keyhole at the back of the unit, which helps keep the clock panel securely closed by using magnets.
We also like how even though the unit has been designed primarily as a hiding spot for a small weapon, it is efficient at telling the time and uses an AA battery. Like any traditional clock, it uses roman numerals and keeps time with a precise quartz movement.
We liked how the product was big enough to accommodate a small gun easily. However, when we received the package, it came in a brown box with “Concealment Clock” emblazoned on it. We felt that such lettering gave the game away, and the packaging should’ve been more discreet.
What We Like
Fits in with any kind of decor
Protects belongings from scratches
Doubles up as a clock
Smooth finish
What We Don't Like
Non-discreet packaging
Material: Wood | Dimensions: 13.25 x 9.5 x 6.25 inches | Weight: 5.29 pounds | Style: Classic | Shape: Rectangle
2. Sauder
The following entry is a lift-top coffee table by Sauder, which is also one of the pricier items on our list. It measures 21.13” x 52.81” x 5.06”, weighs 70.5 pounds, and is ideal for keeping a large-sized firearm within its hidden compartment.
First off, we liked the rustic finish of this coffee table. It has been meticulously carved and polished from all sides to give it an elegant look, which makes it ideal for your bedroom or a lounge. It has also been crafted with the latest styles and color trends and has a beautiful char pine finish.
In addition to that, the top part of this coffee table can be lifted to reveal a hidden storage that can be used to keep a firearm if you have one. You can also use it to store television remotes, board games, blankets, and other household items.
What’s more, the table also has open lower shelves which can be used to keep magazines, showpieces, and other essential items on display. The top of the table is sturdy, and if you sit on the ground, you can easily use it as a writing surface or keep a laptop.
Though this product was a great addition to our den, we did notice one thing that could be worked upon. Since this is an expensive product, we expected minimal effort to put it together. However, the assembly was a little complicated and time-consuming, to our dismay.
What We Like
Rustic and polished look
Sturdy
Can store larger-sized firearms
Fits in with any kind of decor
What We Don't Like
Assembly was tedious and time-consuming
Material: Wood | Dimensions: 43.15 x 19.45 x 19.02 inches | Weight: 65 pounds | Style: Transitional | Shape: Rectangle
3. American Furniture Classics 504
This stately piece from American Furniture Classics is next up on our list, and we must say, it is awe-inspiring. This measures 54 x 17 x 30.5 inches, weighs 95 pounds, and has been manufactured in Vietnam! It’s also a little on the pricier side.
This product is a multipurpose entryway bench that is both attractive and functional. The seat measures 48.5 x 15.75 inches and is easily large enough for three people to sit on! You can keep it near the entrance of your house, and it can be used to store things, as well as sit.
One of the key highlights of this product is the cleverly-designed, lockable storage. This storage area has a removable accessory tray and can store up to 5 long guns. This is more than any product on this list, so if you hunt, for instance, and have a lot of firearms, then this product is for you.
We also liked the finish of this solid wooden bench, which additionally has wood veneers and a remarkable slat design. Moreover, the storage area is lined with felt, ensuring that whatever you keep inside remains scratch and dent-free.
We paid a lot for this product, so our expectations were high. However, to our chagrin, we saw that the box was severely damaged on arrival, and due to wear and tear, the product itself was visible. Additionally, the seat of the bench had a hole! We ended up having to get it replaced, which was quite tedious.
What We Like
Multipurpose
Removable accessory tray
Can store up to 5 long guns
Storage area is lined with felt
Attractive finish
What We Don't Like
Package damaged on arrival
Seat had a hole
Material: Wood | Dimensions: 54 x 17 x 30.5 inches | Weight: 95 pounds | Style: Classic | Shape: Rectangle
4. Tactical Traps 35S Compact
Tactical Traps is a reputed American company known for making high-quality concealment cabinets. The 35S Compact is no different and measures 22.5” x 10.2” x 4”. It also has a smart storage space inside that can safely store your firearms away from prying eyes.
We were mighty impressed that the hidden compartment could only be accessed with a state-of-the-art RFID system. So this means that the secret trap door located within the cabinet could only be accessed with a key card. How cool is that! This product wowed us with its superior functionality and top-notch security.
Interestingly, the unit also has a backup mechanism in place. This means that if you were ever to lose the card, the emergency lock-out protection could help get you back in! This is a great way to keep dangerous firearms away from the reach of children.
Another thing we liked was that despite its purpose, the unit could blend into the décor of any room. It is made of handcrafted wood and has a smooth, layered finish. Additionally, it can also be assembled within just 10 minutes without needing any extra support or sheetrock cutting.
The product’s exterior was just as expected, and the key card also worked well. However, we did notice that the foam that came with could’ve been of better quality and was a tad flimsy. As a result, we needed to upgrade it.
What We Like
Attractive LED display
Comes with trimmable foam to fit weapons, magazines, etc.
Emergency lock-out protection
Blends with every kind of decor
Takes only 10 minutes to assemble
What We Don't Like
Foam could’ve been of better quality
Material: Wood | Dimensions: 10.25 x 22.5 x 4 inches | Weight: 10.03 pounds | Style: Modern | Shape: Rectangle
5. Bellewood Designs Hidden Gun Storage
Bellewood is a brand that makes locally-manufactured quality products. This product is a hidden gun storage cabinet that masquerades as a customizable nameplate and is made of real wood. It measures 3.5” x 9.5” x 18.5 inches and is available in multiple colors.
We liked the elegant, wooden design of this product. In addition to that, it also featured a pine and stained finish, which was quite aesthetically pleasing. The makers of this cabinet have crafted it to fit right in with any kind of décor!
Yet another thing we liked about this was the customizable foam insert that could be additionally procured if told to the manufacturer. Interestingly, the foam consisted of numerous perforated squares that could be easily parted to hold any item.
What’s more, the unit also came with soft-close, slow-motion hinges that ensure that the cabinet door doesn’t slam and draw attention. There’s also a handy integrated magnetic lock that makes sure that only people with the locking key can open the cabinet. This keeps dangerous firearms out of the reach of children!
The cabinet can be mounted on a wall and comes with an installation and usage video to help the users to mount it. However, we did feel that the video could’ve been a little easier to understand, which would’ve made the mounting process less complicated.
What We Like
Wall-mountable
Blends in with any kind of decor
Secure and comes with a locking key
Protection from scratches and dents
What We Don't Like
Complicated installation video
Material: Wood | Dimensions: 18.5 x 10.5 x 4 inches | Weight: N/A | Style: Modern | Shape: Rectangle
6. PS Products Mantel Concealment Gun Clock
Now we have yet another concealment clock from PS Products, which has a unique design. It appears to be a classic mantel clock but features a hidden storage compartment. This can be used to store firearms, valuables, and important documents. The dimensions of this clock are 16” x 5.5” x 9”.
Primarily, we liked how this clock doesn’t give the game away and looks indeed like a real clock unless you know better! It is decorative and fits right into most kinds of décor. The unit is made of engineered wood and has a mahogany stain finish, which gives it an elegant and appealing vibe.
The hidden storage is located behind the face of the clock and is ideal for keeping handguns away from prying eyes. It can be unlocked using a hinge and magnetic clasp. What’s more, the storage space is lined with felt to protect your belongings from scratches and other kinds of damage.
Though marketed as hidden storage, the clock is functional as a clock too and features a quartz movement. It runs on two AA batteries that are helpfully included with the product itself!
Since the clock is marketed as a hidden storage unit, we expected that the fact that it has a small space inside wouldn’t be apparent. However, we were disappointed to see that the lock that secures the space was visible to the naked eye if one looked a little hard. Repositioning the clock is a makeshift remedy for this issue.
What We Like
Attractive
Blends in with every decor
Made of engineered wood with a mahogany finish
Batteries included with the product
What We Don't Like
The lock of the hidden storage is a little too evident
Material: Wood | Dimensions: 7.5 x 14.5 x 4 inches | Weight: 2.2 pounds | Style: Classic | Shape: N/A
7. Casual Home 615-65
Casual Home is a brand that is four decades old and is reputed for making furniture that lasts the test of time. This particular product is part of their Kennedy Collection, which is focused on creating long-lasting concealment furniture with a timeless appeal. This unit measures 15” x 46” x 30” and is made of solid wood.
One of the things we appreciated greatly about this table was that it is sustainably sourced. The Casual Home 615-65 strikes the perfect balance between environment-friendly and consumer-friendly and has a durable design that is attractive and functional.
In addition to that, the table does a great job of blending into the décor. It gives off a very unassuming and innocuous appearance, and the drop-down compartment stays squarely tucked away unless it's explicitly unlocked.
The unit also ensures that all the belongings you choose to store in the hidden storage remain insulated from dents and scratches. It features a felt-lined drawer that provides a soft resting space for your firearms. The hidden storage is also easy to access but not too easy either- which ensures that your firearms don’t go into the wrong hands!
The table blends in perfectly with the décor, and its dimensions are that of any standard coffee table. However, we felt that the hidden storage space was far too less compared to the large size of the table. So, it wasn’t a viable storage space for a mid to large-sized firearm.
What We Like
Sustainably sourced
Durable
Blends into the decor
Protection from dents and scratches
What We Don't Like
The size of the hidden storage compartment was too less
Yet another quality product from Casual Home is the 615-77, a nightstand with hidden storage. It measures 25” x 20” x 27” and is made of wood. It can efficiently hide your firearms so that they are right beside you in the bedroom should anything untoward occur.
To begin with, we liked how the hidden compartment is easy to access yet not obvious due to its smooth, gliding surface and magnetic trigger design. Moreover, the compartment inside is lined with felt that protects any belongings you keep inside from scratches.
In addition to that, the nightstand has two drawers and a large open shelf. These can accommodate your other bedside essentials like books, keys, and wallets. This ensures that you can keep potentially hazardous and private items away from prying eyes without raising suspicion.
Another thing we liked about this product was its rich mocha finish and sophisticated design, allowing it to blend seamlessly with any kind of décor. It blends classic with the modern while providing long-lasting durability and security.
The product was pretty easy to assemble and looked great when finished. However, the screws provided to assemble it were a bit short and ended up stripping out the hole. We were lucky enough to have longer ones, but we hope the manufacturers take this into consideration.
What We Like
Lots of space to keep bedside essentials
Rich mocha finish and sophisticated design
Durable
Protects valuables from scratches and dents
What We Don't Like
Short screws that strip away the hole
Material: Wood | Dimensions: 25 x 20 x 27 inches | Weight: 47.5 pounds | Style: Modern | Shape: Square
9. Tactical Traps 52R Original
This gun shelf from Tactical Traps is useful for keeping any firearms you store away from the reach of children and other strangers. The exterior of the shelf measures 46” x 13” x 5”, and the product as a whole weighs 9 pounds. Additionally, it is made of wood and can be mounted on a wall.
Tactical Trap is a reputed brand that makes top-notch products, and this shelf is a prime example of that. It has a hidden storage space that is easily accessible with a modern RFID locking system. So, a key card is used to access the secret compartment, making it perfect for storing a firearm.
We also liked the dark walnut finish of this wooden shelf, and it looks attractive. Its versatile aesthetic makes it ideal for use in any space, and it blends right into every kind of décor. Furthermore, it looks and feels high-end and can be installed in just 10 minutes.
It also has a mechanism to help you access the secret space if you lose the key card. Additionally, an LED light provides ample visibility if you’re trying to operate the hidden gun safe in the dark.
The shelf comes with foam that lines the hidden space to soften any inside items. However, we felt that the foam could be a little more perforated, which would make it cleaner and tighter than the current one they have.
What We Like
Secure
Protection from getting locked out
Attractive finish
LED for use in low light
What We Don't Like
The foam wasn’t as soft
Material: Wood | Dimensions: 46 x 13.5 x 5 inches | Weight: 23.3 pounds | Style: American | Shape: Rectangle
What Is the Best Hidden Gun Concealment Furniture?
In the realm of furniture designed for concealed firearm storage, subtle differences in factors such as materials used, dimensions, weight, style, and shape can affect the suitability of each option to an individual's needs. The following table is a comprehensive comparison of some notably exceptional hidden gun concealment furniture. Each item is evaluated based on the material it's made of, its dimensions (measured in inches), weight (specified in pounds), along with its style and shape characteristics.
Buying Guide For The Best Hidden Gun Concealment Furniture
1. Usability
All the products on our list are diverse and can be used in different home areas. They aren’t exchangeable, and some are additionally wall-mountable. We personally prefer storing our firearms on the wall, so we’d recommend the Casual Home 615-77, which expertly hides the firearm and holds other essentials too.
2. Size of the firearm
Maybe you have a small handgun. Or, maybe you own a long-sized weapon. We feel that storage space for a long firearm could accommodate a small one too, which is why we recommend the American Furniture Classics.
We’ve finally reached the end of our list, and we’re sure you must be spoilt for choice! But as we mentioned above, keep in mind the size of your firearm and the space available in your house while deciding what to go for.
According to us, the PS Products Concealment Clock provides maximum value for money and offers handy storage space. But, if you own a longer firearm, then the Sauder is a great fit.
We hope our guide helped you make up your mind. We’ll see you again soon with another one of these!
The best solutions are usually right there in front of you, exposed, in plane sight. This applies to kitchen storage as well, unused space can sit under the sink, under the upper cabinets or near your fridge. The solution showcased below is perfect for storing knives at your grasp, highly organized, hidden from children for safety. The pull-out knife drawer can be realized easily and it can save valuable counter space.
How to create the knife drawer
First thing first, materials, you will need 8 linear ft. of 3/4 in.x 1-3/4 in. hardwood that matches your cabinet, 2 linear ft of 1-1/8 in. hardwood, 1 ft. x 2 ft. of 1/4 in. hardwood plywood and one pair of 12 in. full extension drawer slides as a mechanism.
Carefully measure the space under the cabinet, this will ensure the quality of your end result. Now cut the supports (G) that will fit this space and protrude almost 1/16 in. underneath the cabinet. Carefully size the drawer by subtracting approximately 2-1/2 in. for the slides and 1-1/2 in. for two fixed slides (D). From front to back the dimension should be the minimum required for a 12 in. drawer slide.
Next step is cutting the drawers`components (A, B, C, E ). Assemble the drawer by using pocket screws, finish nails or glue. Rout the bottom end of the drawer frame with a 3/8 in. carefully rabbeting the bit set 1/4 in. deep. You can square the corners with a chisel. Next nail in plywood bottom with 3/4 in. brad nails. A centerline of 3/4 in. from the bottom edge on the fixed sides (D) and the drawer sides (b) should be drawn next. Screw the drawer slides now and flush to the front.
To ensure durability and grip both glue and screw the under-cabinet supports to the fixed slides. Install the entire drawer assembly next. Glue the drawer pull (F) , probably in the center behind the drawer front and finish the drawer in the end to match your cabinets. Congratulations now you have finished an extraordinary assemble that will enhance your living quality for you and your family whilst improving your cooking experience by eliminating the counter knife support.
What do you think about the Hidden Cabinet Knife Drawer? We would love to hear your opinion in the comment section below.
Tired of working with glues that fail to work in high temperatures? If so, it's time for you to try heat-resistant adhesives for better results.
While working on projects, finding the best glue is key to making them long-lasting. This is especially true when you want glue for an object facing high temperatures, such as exhaust pipes.
Having said that, there are various types of heat-resistant adhesives available on the market. So, it can make choosing the best heat-resistant glue a bit confusing, especially if it's your first time buying one.
Hence, we thought of coming up with this informative guide to suggest some excellent adhesives we tried out that can withstand extremely high temperatures. And, there's a buyer's guide to help you make a well-informed decision.
So, without further ado, let's get started!
Listed below are the Best Heat Resistant Glues:
Gorilla Construction Adhesive: The Gorilla Heavy Duty Construction Adhesive excels in quick bonding and all-weather durability. Its strong, waterproof, and low-odor performance is partially offset by the effort required to squeeze out the glue from the tube.
J-B Weld Metal Adhesive: The J-B Weld High-Temperature Resistant Metal Adhesive distinguishes itself with its extreme heat resistance and unique tub packaging. The small quantity of glue supplied may not suffice for larger projects.
Rutland 500°RTV: The Rutland 500°RTV High Heat Silicone shines in environments demanding heat resistance up to 500°F. The single-use packaging of the adhesive could lead to wastage for smaller applications.
Henkel Corporation Loctite Stik n' Seal: The Henkel Corporation Loctite Stik n' Seal Extreme Conditions Adhesive provides precision in the application and a strong bond on wet surfaces, characterized by its low odor once dried. It does come within a packaging setup that users might find challenging to open.
Rutland 600-Degree RTV: The Rutland 600-Degree RTV Silicone Seal Cartridge meets the requirements of extreme heat conditions going up to 600°F and works well as a sealant. The adhesive is high in quantity but lacks waterproofing characteristics.
1. Gorilla Heavy Duty Construction Adhesive
There are very few people who aren't aware of the varied glue products manufactured by Gorilla. This one is the heavy-duty glue that helps bond various materials, including glass, metal and even plastic. It comes with all-weather resistance to maintain the bond under all conditions. So, let's have a look at it.
Right off the bat, we were impressed by the quality of this glue. It's a 100% waterproof formula, so you would be able to use it to bond objects that may be regularly exposed to rain or water. On top of that, this is an all-weather glue, so the bond does last even when with high temperatures, and it's, in fact, heat-resistant.
Furthermore, one of the best things about this glue is that it has a low odor. So, if you are looking for a glue that would be able to bond fabric or the rubber sole of your shoe, this would be a good choice. This feature also makes the glue useful for those who feel nauseous around pungent products.
What's more, on application, this glue is able to hold materials together in just 30 seconds. And, within 24 hours, you would be able to use the glued surface or object without worrying about it separating.
Even though this is one of the best heat-resistant glues available on the market, our only gripe is with the tube. It takes a bit of pressure to get the glue out while applying. This can be slightly problematic for anyone with arthritis or low mobility in their hands.
What We Like
Durable bond
Versatile usage
Easy to use
Convenient small packaging
What We Don't Like
You need to apply pressure to squeeze out the glue
Material: Hybrid adhesive | Dimensions: 11.9 x 7.9 x 2.4 inches | Weight: 9.9 oz | Cure Time: 24 hours | Waterproof: Yes
2. J-B Weld ExtremeHeat High-Temperature Resistant Metallic Paste
Are you looking for a useful metal adhesive that comes with high-temperature resistance? If so, try out this product from J-B Weld, as it has been designed to bond metal surfaces even in extreme temperatures. Moreover, it's from a reputed brand that has been present on the market for a long time.
To begin, what we really liked about this adhesive was the packaging. Rather than a messy tube, this temperature-resistant glue is packaged in a small tub. So, you can easily use a spatula to scoop it up and apply it on metal surfaces without needing much time.
Another great thing about this adhesive is its versatility. You can use it to bond various types of metals and even repair cracks or holes. On top of that, after the adhesive has dried completely, you can drill or sand it according to the requirements of a project.
Furthermore, this high-temperature glue is devoid of solvents or VOCs, which are harmful to our bodies. And, as a non-flammable formula, it's safer to use compared to some other similar products.
Overall, this is an excellent adhesive to use if you are looking for one that can withstand high temperatures. However, the only problem is its small size. Even though a bottle of it might be useful for tiny projects, you will need to purchase multiples to finish larger projects or bond larger surfaces.
What We Like
Best for bonding metal
Easy to use
Strong adhesion
Great for repairing cracks
What We Don't Like
Small quantity
Material: Metallic paste | Dimensions: 1.57 x 1.57 x 2.05 inches | Weight: 3.04 oz | Cure Time: 20 hours | Waterproof: Yes
3. Rutland 500°RTV High Heat Silicone
Rutland is a well-known brand when it comes to buying stove maintenance products. Keeping the heat in mind, Rutland has come up with this silicone-based heat-resistant glue that works well for many other projects. The best part is that it can be used easily by anyone looking forward to bonding different materials.
Right off the bat, we were impressed by the packaging of this adhesive. It comes in a handy tube with an extended tip at the end for easy application. If you're getting the glue to attach fireplace inserts or ceramic tiles around the fireplace, this adhesive would be a good option.
Now, coming to the heat resistance of this adhesive, it's able to withstand temperatures up to 500°F. The upper limit is good for working on different surfaces, including rubber, glass, cement, metal, brick, and stone. Moreover, the bond is durable yet flexible to match the needs of specific projects.
Furthermore, while buying heat-resistant glue, you need to find more about its color, and this glue comes in a black finish. Hence, you can use it on similar colored surfaces without worrying about painting over the glue.
To be honest, this is one of the best glues with heat resistance that we have tried. But, the only problem is that it comes in single-use packaging. This is great for someone looking forward to using the whole glue at once, but it will cause wastage for tiny projects.
What We Like
Versatile usage
Cures in room temperature
Easy to use packaging
Strong permanent bond
What We Don't Like
Single use application
Material: Synthetic | Dimensions: 2.13 x 2.13 x 7.75 inches | Weight: 3.2 oz | Cure Time: 20 hours | Waterproof: No
4. Henkel Corporation Loctite Stik n' Seal Extreme Conditions Adhesive
When it comes to getting adhesive for any project, one of the brands that can be trusted is Henkel Corporation. The Loctite adhesives from the company have always been a rage, and this heat-resistant glue is no different. So, let's check out all the features that make it a worthy product.
A common problem seen in adhesives is that of messy applications, especially on narrow surfaces. But, that won't be a problem with this adhesive as it comes with a precision tip. With the right pressure, you can place the tiniest dots or lines of glue on a surface for mess-free bonding.
However, the best thing about this heat-resistant glue is its ability to bond wet surfaces. So, if you have any materials that would be in regular contact with water, this glue would be the right choice. Henkel Corporation recommends using it on windows, gaskets, weather-stripping, as well as to use on boats or cars.
Furthermore, this adhesive becomes inert once dried, so you can easily use it around your household without worrying about safety. And it has a low-odor formula, making it perfect for anyone who doesn't like strong smells.
We don't really have any drawbacks regarding the adhesive itself. However, we would have liked it even more if Henkel Corporation provided it with better packaging. It's quite challenging to remove the tube from its cardboard and plastic housing before you can start using the product.
What We Like
Easy to use
Versatile usage
Odorless
Good for wet surfaces
What We Don't Like
Hard to remove from its packaging
Material: Silane-modified polymer | Dimensions: 4 x 8 x 1 inches | Weight: 0.1 oz | Cure Time: 24 hours | Waterproof: Yes
5. Rutland 600-Degree RTV Silicone Seal Cartridge
You must have guessed by now that Rutland has one of the best heat resistance ranges when it comes to adhesives. Compared to the product we have already mentioned, this has one of the highest heat resistance capabilities. So, let's check out all its features to know if it would be helpful for you.
Let's start by mentioning the most important quality of this glue. The temperature resistance of this product is up to 600°F, making it great for projects where the surfaces would have continuous heat exposure. Even the brand recommends this for use near ovens, fireplaces, stoves, and heaters.
Additionally, this adhesive is suitable for bonding multiple surfaces and can work as a sealant. As the bond is tough yet flexible, you can expect the glue to last for a long time. It even has the power to prevent smoke or gas from preventing stoves and ovens.
Moreover, we like the amount of product that you get. 10.3 fluid ounces or 304 milliliters is enough to use in several projects, and you only need the tiniest amount to form a strong bond.
To be honest, we cannot question the high-temperature resistance of this adhesive because of its superior quality. However, the only thing missing in this glue is the feature of water resistance. Even though it can stop small leaks, we wouldn't trust it for repairing water pipes or similar surfaces that regularly come in contact with water.
What We Like
Good for dark surfaces
Flexible and durable bond
Great for crafting
Fast drying
What We Don't Like
Not waterproof
Material: Silicone sealant | Dimensions: 1.88 x 1.88 x 11.25 inches | Weight: 12.8 oz | Cure Time: N/A | Waterproof: Yes
6. J-B Weld HighHeat 500 Degree Epoxy Putty
When searching for the best heat-resistant glues, we didn't come across many epoxy-based options. But, this product from J-B Weld has to be one of the most popular epoxy putty adhesives available on the market. And, we liked that it works at a diverse temperature range to make the product great for versatile projects.
Are you tired of epoxy putties that can't resist higher temperatures? Don't worry, as this one from J-B Weld is one of the best high-temperature adhesives with an epoxy base. When applied, the putty can withstand a continuous high-temperature of up to 450°F and an intermittent heat of up to 500°F.
However, the best part of using this epoxy putty is that it's three times stronger than the other options available on the market. So, irrespective of what project you are working on, this putty wouldn't develop cracks.
Furthermore, this is one of the fastest drying epoxy putties we have come across. It takes only an hour to dry, and the hold is pretty strong. You can also expect it to have a functional cure within eight hours, but it's better to wait 24 hours before using the glued area.
This isn't a drawback of this particular adhesive, but there's a learning curve associated with any epoxy putty. As a beginner, you'll need to get a hold on how to get the perfect consistency or thickness to make the surfaces stick. However, applying this putty is pretty straightforward once you get the hang of it.
What We Like
Great for sealing and crack repairs
Good quantity
Strong bond
Versatile
What We Don't Like
Has a learning curve
Material: N/A | Dimensions: 2.4 x 3.9 x 7.5 inches | Weight: 6.4 oz | Cure Time: 8 hours | Waterproof: No
7. Krazy Glue Maximum Bond Super Glue
When it comes to looking for the best adhesives, most of us gravitate towards a brand like Elmer's. This is another great glue from the house meant to have heat, shock, and impact resistance. So, we definitely had to include this versatile product in our list of best heat-resistant glues.
Most of us are tired of using super glue tubes that don't seem to work or have fragile bonds. But, things are going to be different on using this Krazy Glue as it's meant for the maximum bond. Apart from drying pretty fast, the glue doesn't budge even when you put pressure on it.
However, the best thing about this glue has to be the thick no-run gel consistency. If you have been trying to find glue for vertical surfaces, this Krazy Glue would be a great choice. The ultra-thick consistency also lets you bond uneven and mismatched surfaces.
What's more, this versatile heat-resistant adhesive works for both porous and non-porous surfaces like ceramic, stone, cement, plastic, rubber, and vinyl. So, you don't need to worry about buying multiple tubes of glue.
Coming from the house of Elmer's, this Krazy glue is a great product. But, it's priced higher than other similar products available on the market. We expected a bit more product for its price, especially as it's recommended to be used for big projects. So, your costs may go up when buying multiple tubes of this glue.
What We Like
Helpful applicator
Works with versatile surfaces
Great for porous materials
Glue dries fast
What We Don't Like
Expensive
Material: Plastic | Dimensions: 0.75 x 2.75 x 7 inches | Weight: 1.1 oz | Cure Time: N/A | Waterproof: No
8. Permatex High-Temp Red RTV Silicone Gasket
Are you tired of changing gaskets and finding that they break in a few days? Don't worry, as Permatex brings to you a unique adhesive that's meant to work as a gasket. It can withstand extreme temperatures, making it perfect for taking the place of most gaskets you will come across in everyday life.
When it comes to gaskets, a common problem seen with them is cracking under high temperatures. But, that won't be a problem when you use this adhesive as it forms a tough and flexible bond that can resist cracking. Similarly, the bond won't shrink when the temperatures begin to drop.
Moreover, this OEM-certified adhesive can be layered on pre-cut gaskets to increase its durability. It's suitable for heavy-duty use, and the bright red color makes it easy for you to see the adhesive during application.
Further, one of the best things about this product is the straightforward application process. Just clean the surface of any dust and oil before applying the product to get the best bond. And, the glue dries in 24 hours, making it quite useful to be used in everyday objects.
One of the only drawbacks of this product is that it isn't made of sensor-safe silicone which can be a let down for some. But, don't worry, as Permatex has a similar product in its extreme temperature resistance range that would work well.
What We Like
Available in bigger sizes
Easy-to-use applicator
Wide temperature range
Fast drying
What We Don't Like
Not sensor safe
Material: N/A | Dimensions: 1.25 x 3.81 x 8 inches | Weight: 3.21 oz | Cure Time: 24 hours | Waterproof: No
What Is the Best Heat Resistant Glue?
Heat resistant adhesives, integral to many industrial and household applications, are gauged based on material type, dimensions, weight, curing period, and water resistance. The table below outlines detailed specifications of seven top-rated heat-resistant glues. For reference, dimensions are indicated in inches, weight in ounces (oz), cure time in hours, and a yes/no marker indicates whether the product is waterproof.
When choosing the best heat-resistant glue, you need to know some essential points that'll help to make the right decision. As mending or bonding materials are often based on specific projects, skipping any points may leave you with completely unusable glue. So, let's check out these key points.
1. Curing Time
One of the most important things to check while buying any adhesive is its curing time. Even though it may vary between brands, you need to find a glue that has a curing time based on your project. That's because if the adhesive you chose has a speedy curing time, the threshold to change the placement is quite low.
In the case of gorilla glue or super glue, the drying time is very low. Having said that, even though most glues would hold the materials within seconds, it still needs to cure for 24 - 48 hours to set completely. So, keep these things in mind before making your choice.
2. Viscosity
Another point to note is the viscosity of an adhesive. You might find some glues to be too thick while others have a more watery consistency. It's common to skip thinking about the viscosity, but this point is essential as you need the right glue to work on vertical surfaces.
Most of the glues that have watery consistently don't work for vertical surfaces as it drips down and makes it hard for the surfaces to bond. A tip is to check for glues that specifically mention working on mismatched and vertical surfaces to get the right glue with proper viscosity.
3. Temperature Resistance
Even though a glue might be listed as a heat-resistant adhesive, it may not be able to stand the high temperatures. Hence, whenever you look for a high-temperature adhesive, try to find its working threshold. If you are going to use the glue on a surface that gets extremely hot, then opting for a heavy-duty construction adhesive might work better.
4. Materials To Bond
Hands down, this is the most crucial feature to check in any adhesive to get the desired bond. Most brands do specify the materials that can be bonded using the glue. You need to make sure that the glue will create a permanent bond that wouldn't crack or separate under pressure or high temperatures.
Moreover, while working with some materials like metal, glass, and rubber, you would need to buy special glues to make the bond long-lasting. These days, there are several options for adhesives that can be used on multiple materials.
5. Other Features
Along with the points that we have already mentioned, there are some other things you may need to find out about glue. The first one being, its suitability for indoor and outdoor use. Another thing to check for is shock and impact resistance. Without this, your project can crack when put under pressure or in extreme temperatures.
Furthermore, if you are getting the glue for working on kitchen utensils, make sure it's food safe and dishwasher safe. At the same time, look for waterproof adhesives for the bond to last for long.
And, if you're sensitive to smell, always go for adhesives with a low odor formula to avoid discomfort while working.
So, that's everything we had to tell you about getting the best heat-resistant glue for your projects. We do hope that you will get your product of choice from our suggestions. However, do remember that varied projects may call for special adhesives for the best bonds.
Among our recommendations, we would suggest the Gorilla heavy duty construction adhesive looking for bonding different types of materials at an affordable cost.
On the other hand, the J-B Weld ExtremeHeat high-temperature resistant metallic paste is excellent for bonding iron, steel, or other metals. But, you may need to get multiple bottles for bigger projects.
With that, we come to an end. Do let us know if you have any queries regarding any of our suggestions.
Till then, goodbye, and take care!
Tired of trying to find the best heat-resistant glue for metal objects to fix? Some substrates demand stronger adhesives to be bonded, and this is where heat-resistant glue helps. These adhesives bond different materials and are essential to many industrial, commercial, and manufacturing applications.
As these adhesives can resist extreme temperatures, they are extensively used for automobiles, batteries, and various electrical items that need to operate in high-temperature conditions. These adhesives are also suitable with various other materials like rubber, ceramic, etc.
Let’s take an example of bonding metal to wood; here heat resistant adhesive is a must. Because without proper adhesion, the metal or wood can tear off. If you search for highly-rated glue for metal to wood, you can find most of them are heat-resistant.
But, with all that information, you must be wondering which is the best heat-resistant glue that will fulfill all your needs. You can opt for super glue that works on metal, but remember, not every adhesive for stainless steel is resistant to heat. That’s why we have compiled this list to help you choose the best heat-resistant glue among all the options out there.
So, without further ado, let’s get started!
Listed below are the 5 best heat-resistant glues for metal from our list:
J-B Weld ExtremeHeat: This heat-resistant metallic paste from J-B Weld provides a strong bond that can withstand high temperatures, replacing the need for torch welding. Its main advantages include its environment-friendly, non-flammable formula, versatility in metal repair, and capacity to seal and repair pipelines and appliances extensively.
Rutland Silicone Sealant: This heat-resistant silicone adhesive works excellently in highly humid areas. It creates permanent rigid and flexible bonds with various materials, including metals, plastics, rubber, and ceramics, and its dark color helps it blend in with surfaces such as granite and stone countertops.
Henkel Corporation Loctite Stik n' Seal: Distinguished for sticking and sealing in extreme conditions, this adhesive from Henkel Corporation is ideal for outdoor objects. It resists harsh weather, moisture, UV rays, and extreme temperatures. It bonds a range of materials, even wet surfaces, making it perfect for outdoor repairs.
J-B Weld 8297 HighHeat: Known for its high performance, J-B Weld HighHeat epoxy glue is versatile and known for bonding various materials under extreme temperature conditions. Its high resistance to temperature fluctuations, fast curing time, and post-curing versatility are its main selling points.
KDGENG Metal Repair Gel: An excellent welding substitute, KDGENG's metal repair gel creates a strong, permanent bond on smooth, clean metal surfaces. Set apart for its high-temperature resistance and ease of use, it provides a durable bond suitable for repairing anything made from metals.
Here is the list of the 5 best heat-resistant glues for metal that can be used to securely bond metals together, even in the toughest conditions.
1. J-B Weld ExtremeHeat - Best for High-Temperature Repairs
The first heat-resistant glue we have for you is the 37901 heat-resistant metallic paste from J-B Weld, a brand well-known for manufacturing metal adhesives. This heat-resistant metallic paste was developed as an alternative to torch welding, and as promised by the brand, it can withstand temperatures as high as 1300 °C.
This J-B Weld high-temperature resistant metallic paste is formulated to repair metals like steel, iron, and other metal surfaces at maximum temperatures. This easy-to-use glue is non-flammable as it contains no solvents or VOCs, making it environment-friendly.
Also, this adhesive is water-based, which means it will not harm your health if you are exposed for a long time. It’s also very lightweight and requires less time to create a stronger permanent bond than steel.
The best part about this glue is that it provides a powerful bond after being cured. And, the cured glue can go through drilling, machining, or sanding. Moreover, this glue is also suitable for repairing crevices, tiny gaps, cracks, and holes in pipelines or appliances, etc.
One major drawback of this metallic paste is that it doesn’t handle expansion well. Many customers have pointed out that even though the glue provides strong adherence, it cracks open where the expansion happens in exhaust manifolds and fireboxes, which is an inconvenience.
What We Like
Inexpensive product
Fast-bonding formula
High-temperature resistant
Environment-friendly
What We Don't Like
Cracks under expansion
Quantity: 1 Container | Volume: 3oz | Set Time: 1 Hour | Cure Time: At Least 24 Hours | Dry Color: Gray | Resistance: Withstands Up to 1000°F
2. Rutland Silicone Sealant - Best for Humid Areas
The heat-resistant silicone glue from Rutland can be an ideal choice if you are searching for an adhesive that can work in extremely humid areas. This silicone adhesive will work to create a permanent bond and seal any item.
This silicone adhesive from Rutland forms rigid and flexible bonds and works well with a range of materials including metals, plastics, rubbers, and even ceramics.
So, whether you’re looking to seal a gap between your stove and the counter or trying to repair a chimney, this is the product you can bank on. It cures to form a tough and strong seal, which ensures the longevity of the joints.
We also like how the formula is water-based, which means any stains or spills can be wiped away easily. The dark color ensures it blends in with surfaces such as granite and stone countertops.
The one flaw we found was that the product emits a nasty smell like vinegar upon application. However, the good news is that it goes away after some time, so you shouldn’t have to bother about it for long.
What We Like
The dark color makes it less noticeable
Best for humid areas
Works on smooth surfaces
Easy to apply
What We Don't Like
Smells like vinegar
Quantity: 1 Tube | Volume: 2.7fl oz | Set Time: N/A | Cure Time: 24 Hours | Dry Color: Black | Resistance: Withstands Up to 500°F
3. Henkel Corporation Loctite Stik n' Seal - Best for Outdoor Objects
The next item on our list is the Henkel Corporation 1360784 Stik n' Seal adhesive, which has a Flextec formulation that bonds surfaces faster than any ordinary household adhesive. Its low odor, which contributes to a safer work environment, sets this product apart from other glues available on the market.
One of the many reasons why we like this product is because it creates long-lasting bonds even in the most extreme conditions. This adhesive has excellent resistance to harsh weather, moisture, UV rays, and extreme temperatures, making it a reliable product for fixing outdoor objects.
Also, this heat-resistant adhesive seals and repairs almost all materials, including glass, mirror, ceramic, plastic, wood, fabric, concrete, metal, and porous surfaces. It’s also capable of creating a solid bond on wet surfaces.
This adhesive is an excellent option for sealing or repairing wooden frames and other household materials. Besides that, you can use this glue for creating crafts and DIY projects at home because it provides a superior bond that is hard to break.
The one problem we faced when using this glue is that while dispensing it from the applicator, it tends to roll into a glob. This can quickly harden and block the applicator opening, making it tough to use.
The J-B Weld High-Heat 500 Degree Epoxy Glue is a versatile, high-performance adhesive designed for bonding various materials under extreme temperature conditions. Known for its strength, heat resistance, and durability, it has become a top choice for individuals and professionals alike. We put it to the test and evaluated it based on the factors that matter most to users.
The J-B Weld High-Heat 500 Degree Epoxy Glue performs exceptionally well in bonding different materials such as metal, plastic, PVC, wood, concrete, ceramic, tile, and fiberglass. Its strong formula creates a high-tensile-strength bond that withstands temperature fluctuations.
With impressive continuous heat (450°F) and intermittent heat (500°F) resistance, it remains functional under demanding conditions.
The glue requires just an hour to set and about 8 hours to cure fully, providing convenience to users who may want to sand, paint, or drill the coated surface. Its fast curing time and post-curing versatility are standout features.
The only noticeable drawback of the J-B Weld High-Heat 500-Degree Epoxy Glue is that it does not dry clear. Instead, it cures to a machine gray color, possibly affecting the aesthetic of certain applications. However, if appearance is not a primary concern, this issue should not deter users from choosing this high-performing adhesive.
This set of glues from KDGENG is an excellent substitute for welding as it can repair cracked or damaged metals without any blemish. Formulated to create a strong and permanent bond, you can use this adhesive to glue all smooth and clean metal surfaces.
The KDGENG metal repair gel is a premium adhesive that can withstand high temperatures of up to 150 ℃. This glue provides an extremely solid and long-lasting bond when it gets fully cured. Just give it 24 hours, and it will become strong enough to be machined.
Furthermore, this adhesive is easy to use. You just need to mix the two pastes, apply the mixture to a surface, and allow it to dry for a few hours. Note that you must follow the volume ratio of 1:1 for the glue to cure effectively.
Another great aspect of this product is that it can be used for repairing anything made from metals, such as filling in casting defects, cracks in plumbing, or even fuel tank repairs. Overall, this is one of the better metal adhesives on the market today.
It was hard for us to identify a limitation of this product. But in the end, we discovered that this product doesn’t have a scraper to mix the two products and apply it to a surface. The only solution to this is buying or DIYing one.
What We Like
Aging resistance
Waterproof insulation
Easy to use
Suitable for all metal surfaces
What We Don't Like
Scraper not included
Quantity: 2 Tubes | Volume: 3.52oz Each | Set Time: N/A | Cure Time: 24 Hours | Dry Color: Light Gray | Resistance: Withstands Up to 302°F, Resists Aging, Waterproof Insulation
What is the Best Heat-Resistant Glue for Metal?
In this section, we present a detailed analysis of the finest heat-resistant glues tailored for metal applications. The subsequent table outlines a comparative study that focuses on essential characteristics, including Quantity, Volume, Set Time, Cure Time, Dry Color, and Resistance.
Withstands Up to 302°F, Resists Aging, and Waterproof Insulation
Buying Guide for the Best Heat-Resistant Glue for Metal
You might have picked the glue that meets all your requirements by now. If not, then don’t worry. We are far from the finish line. To ensure you end up with the right glue, below are some FAQs and a buyer’s guide that will answer all your doubts about heat-resistant glues.
A. Higher Temperature Resistance
Before buying any metal glue, you need to check its ability to resist breakdown at higher temperatures.
The best heat-resistant adhesives are formulated to resist higher temperatures exceeding 300 ℃. So, it’s best to ensure that the metal glue you buy has the highest heat resistance.
B. Drying Time
Another significant factor you must consider before buying any metal glue is drying time. This will depend on the type of project you are working on, but the faster the drying time, the more efficient the work will be.
C. Exposure to Environmental Elements
You must know that environmental factors might affect the bonded surfaces. Metal glues should stay put if the repaired surface is exposed to dust, water, heat, and other elements. However, some adhesives crack when they are exposed to extreme heat.
For this reason, when choosing the best metal adhesive, it’s essential to keep weather resistance in mind. Any glue that’s not weather-resistant is one you should avoid.
What are heat-resistant adhesives?
Heat-resistant glues are formulated to resist higher temperatures of over 300 ℃. These adhesives are alternatives for welding metals which is a costly as well as a risky process.
Are heat-resistant adhesives durable?
Heat-resistant adhesives are highly durable sealants that retain their strength even when exposed to extreme temperatures. They can also withstand aggressive environments because of their thermo-oxidative stability and their resistance to chemical reactions.
Are hot glue and heat-resistant glue the same?
Hot glue is partially heat-resistant. This means the temperature resistance varies depending on the formulation.
In recent times, the use of various types of epoxies for a wide range of applications has skyrocketed.
Epoxy has become a panacea for all creative quests, from repair to home decor and even art. Since there is such a wide range of uses for epoxy, manufacturers have also started offering different types of epoxy products for other projects. There are all-purpose epoxies, weatherproof epoxy products, heat-resistant epoxy resins, and many more.
Selecting the correct type of epoxy is not easy, especially for those who are first-time users. This fact is especially true if you are looking for heat-resistant epoxy for your project. There are several factors to be considered. This article will help you learn how to find the right type of heat-resistant epoxy, helping save both your time and effort.
Let us get down to it then!
All About Heat Resistant Epoxy
Is Epoxy Resistant To Heat?
Epoxies are a class of chemicals that includes adhesives, plastics, and other similar materials. Since it is a vast class of compounds, different epoxies come into use in almost every industry.
One of the most common uses of epoxies is as an adhesive, usually in structural and engineering applications.
The most common epoxy resin available on the markets is usually used for DIY projects, such as repair work, art pieces, jewelry making, etc. This standard epoxy is resistant to heat up to a specific temperature and distorts if the temperature rises further.
High-temperature epoxy resins are a different type of product that is specially manufactured to withstand extreme heat. Such epoxies are usually required for applications where high physical strength is needed, as these compounds can withstand high stress without getting distorted.
You can easily find heat-resistant epoxy resins on the market, suitable for DIY projects such as making coasters. These resins can endure a reasonable amount of heat but are not ideal for extremely high temperatures.
How Much Heat Can Epoxy Resin Endure?
The standard epoxy resin available for home projects can withstand temperatures ranging from 150°F to 300°F for a short duration. On the other hand, heat-resistant epoxy can endure extremely high temperatures of up to 600°F. The resistance varies slightly depending on the product and the manufacturer.
What Is A High-Temperature Epoxy Resin?
Heat Resistant Epoxy Resin is a particular type of compound specially manufactured for industrial applications, such as automobiles, aircraft, etc. It is also used for larger projects like coating kitchen countertops to protect them from heat.
Industrial applications include mechanical and electrical repairs, generally in aircraft and automotive industries. Other industries where this epoxy resin is highly usable include communications, marine sectors, industrial control equipment, etc.
High-temperature epoxy resin is also used in structures and composites. In such applications, a bonding agent, sealer, or coating agent is generally used. Therefore, the epoxy needs to be highly durable and long-lasting for such purposes.
Using this epoxy along with a high-temperature surface coat helps create tough, durable, and high-resistant equipment.
Temperature Limits For Epoxy Resin
The standard basic epoxy generally used for DIY projects can withstand low heat temperatures ranging from 68°F to 195°F. If it is subjected to temperatures higher than this, its molecular structure will start to change.
It can assume a rubbery surface instead of its solid glass-like texture. This leads to softening of the epoxy and distortion in its shape. That is why it is highly recommended to use a potholder or coaster on epoxy surfaces to keep articles such as hot beverages.
The situation is entirely different in high-temperature epoxy resin, as it is specially manufactured to withstand temperatures up to 600°F. As mentioned above, this range depends upon the individual product as well as the manufacturer.
Companies generally manufacture high-temperature epoxies with added fillers such as quartz. It is also common to reinforce such epoxy resins with elements like titanium, enabling them to endure extremely high temperatures.
There are several advantages that a high-temperature epoxy resin offers. It enables applications that are not suitable for regular epoxy. Some of these advantages include:
It is the perfect product for creating incredible designs and finishes for tabletops and countertops.
The epoxy resin is ideal for use on various surfaces in the kitchen, bathroom, table, etc., renovation or restoration.
Stone Coat Epoxy resin is one of the most durable resins and provides excellent durability and strength.
It is also flame retardant, helping prevent fires and slowing down their spread.
One of the best things about this product is that it offers a highly polished finish and an even and flat surface.
The manufacturer has altered the epoxy formula to make it resistant to UV rays as well, making it suitable for surfaces exposed to sunlight.
Finally, the product is food-safe, allowing you to use it conveniently in the kitchen.
There are also high-temperature epoxy resins available that are vegan and cruelty-free.
High-temperature resin epoxies work well with silicone molds and are an excellent option for artwork.
The clear-drying property makes such resins suitable for a wide variety of applications.
Such resins are also highly resistant to chemicals like sulfuric acid, marine environments, humidity, and corrosion.
Disadvantages Of High-Temperature Epoxy
High-temperature epoxy makes it possible to complete extremely high-temperature projects at home. However, there are a few things regarding the product that you should take into account:
The high-temperature epoxy may acquire a yellow tint after curing, making it unsuitable for projects that require a transparent appearance.
In some instances, additional heating methods may be required during the curing process, increasing the overall time to complete the project.
High-temperature epoxy resins are generally more expensive than basic epoxy.
Prolonged use of epoxy can also lead to skin infections and allergies such as dermatitis.
Even a slight deviation from the provided instructions affects the heat resistance capacity of the resin.
Preventing Reduction In Temperature Resistance
There are several methods to reduce the temperature resistance of the epoxy resin. The first thing is to ensure that the mixing ratio is correct, as any change in that can alter the nature of the resin.
Similarly, it is essential to adhere to the manufacturer's instructions, such as the time required for mixing the resin and hardener.
Adding additives such as pigments, colors, or ink automatically reduces the resin's temperature resistance. To prevent this from happening, apply a clear topcoat that will improve the epoxy's heat resistance properties.
Some Useful Tips For Working With Heat Resistant Epoxy Resin
For getting the best results, it is always advisable to follow the manufacturer's instructions as provided with the product. Deviating from the instructions will result in an undesired outcome. Here are some valuable tips to help you through the process:
It is crucial to mix only the amount of resin required for the project to allow enough time for proper application.
Proper preparation is necessary before starting the project, as time is critical during the process.
Using a worktable of the correct height will help avoid back pain while and after working.
Wipe the workspace clean using Isopropyl Alcohol to remove dust particles before starting.
Both the temperature and humidity can have unwanted effects on the final product.
Cold temperatures can cause the product to acquire a sticky or waxy appearance.
Warming the resin before mixing with the hardener can prevent the epoxy from getting a tacky texture in colder temperatures.
While working on a large flat surface, use a trowel or leveling tool to spread the resin evenly.
If using a paintbrush during the process, ensure that it is of good quality to prevent shedding any bristles.
Another option is to use a brush with dark bristles, which will be easier to spot and remove from the mixture.
If the mixture has bubbles, remove them using a toothpick or blowtorch. Hold the blowtorch about 20 cm away to prevent dimpling.
While using a blowtorch, ensure that you start it at some distance away from the project to prevent dust particles from blowing onto it.
If there are any alcohol inks added for coloring the resin, avoid using a blowtorch to remove the bubbles.
Use a blow dryer at the highest heat setting to remove bubbles from colored resins, though this process requires more time to complete.
After completing the project, please leave it to cure in a dust-free place.
Remember that adding pigments or powders to the resin will change the chemical structure of the resin, reducing its toxicity and heat resistance.
Make sure to add a clear topcoat to enhance the heat resistance of the project.
For cleaning up wet epoxy that is leftover, use acetone with a clean cloth.
In case the epoxy has dried up, use a blowtorch to heat it and a flat trowel or screwdriver to scrape it off.
The choice of high-temperature epoxy depends on the surface to be coated, and it needs to be able to withstand heavy use and extremely high temperatures. Stone Coat is one of the most popular brands offering an excellent high-temperature epoxy resin.
About Stone Coat Epoxy
The basic epoxy resin commonly used for DIY projects is not suitable for highly high-temperature applications. Stone Coat Epoxy makes it possible to complete such tasks efficiently.
Working With Stone Coat Epoxy Resin
Stone Coat Epoxy Resin is an excellent product for Do It Yourself home projects. To learn how to use it properly, look for step-by-step instructions and video tutorials that will help you through the entire process.
Besides DIY enthusiasts and hobbyists, this product is also convenient for contractors and designers. With this superb product, it is possible to completely renovate old tabletops and countertops, making them more durable and functional.
One point to keep in mind is that the maximum pour depth for each coat is ⅛ inch (3 mm).
Advantages of Stone Coat Epoxy Resin
Stone Coat Epoxy Resin is one of the best high-temperature epoxy resins on the market. Using it offers several benefits, such as:
It helps save money on the renovation of old tabletops and countertops when you take the DIY route.
The entire process of using the product is easily explained through an easy-to-understand training video.
The epoxy resin is entirely environment-safe
It does not contain any VOCs (Volatile Organic Compounds)
Using this product will provide you with a completely scratch-resistant surface, highly durable and easy to clean.
Surfaces where this product is used, such as tabletops and countertops, can withstand temperatures as high as 500°F.
You also get a non-porous surface that is completely clear.
Steps To Follow While Using Stone Coat Epoxy Resin
Here we lay down some steps that are required to be followed while using Stone Coat Epoxy Resin.
Accurately measure the hardener and resin in a 1:1 ratio.
First, mix the compounds thoroughly for the required amount of time, then add colors and additives, followed by the mixing process again.
Use a flat leveling tool and a blowtorch to remove any bubbles after applying the color coat.
Wait for 24 hours after applying the color coat before applying the clear coat.
Use sandpaper to sand down the surface and a wet cloth to wipe away the dust.
It takes around seven days for the project to get completely cured.
Once the surface is ready for use, ensure that you keep it clean and avoid scrubbing.
Final Words
While the basic epoxy resin is good enough for most DIY projects, heat-resistant epoxy is the only solution for extremely high-temperature applications. Generally, these are only used for industrial applications, but some manufacturers such as Stone Coat Epoxy Resin also make them available for home projects.
There are several advantages of using high-temperature epoxy resins, and you get fantastic results if the instructions are correctly followed. High-temperature epoxy resin can help remodel, renovate, and restore old surfaces to give them new life. We recommend using it for all high-temperature DIY projects.
We are signing off now. Be sure to leave a comment below!
Pedro Friedeberg was one of the most famous designers from Mexico, known primarily for his surrealist works that included ancient and religious symbols.
One of his most well-known pieces, the Hand Chair with Foot, became a cultural symbol in the 1960s and 1970s. It was essentially a wooden chair designed in the shape of a hand, with the palm acting as a seat and fingers for the back and sides.
Most experts agree that this is his most groundbreaking artwork to date. On that note, Friedeberg’s hand chairs serve as an excellent furniture piece if you want to add some vintage style to your home décor.
And due to the popularity of this iconic carved unit, you can find similar items from other manufacturers. To help you find the one that best suits your needs, here is a list of some excellent hand chairs for your home.
This hand chair undoubtedly takes inspiration from Pedro Friedeberg’s Hand Chair with Foot and resembles a hand with the palm facing the front. It is made of a solid granite block and has been hand-carved with the utmost skill and care.
According to the seller, this piece was constructed during the 1970s and is still in excellent condition. After all, being built from granite, this chair retains its solid and stately appearance, making it suitable for outdoor use as well.
If you are looking for miniature hand chairs, then this pair of vintage carved hand chairs is a perfect choice. Needless to say, the size makes them ideal for use as children’s chairs, sculptural decorations, or even conversation pieces.
As for the units themselves, these chairs are made of wood, and its origins can be traced back to the late 1970s. And since these are available in a set of two, you can use them as functional seating or just as home décor.
Perhaps one of the best-looking hand chairs on the market, the Silver Hand Chair offers a unique look to your living space. This hand chair was manufactured in the Mexico region during the late 1960s and has retained its excellent quality.
Besides being hand-carved to perfection, it comes with a soft silver finish that sets it apart from similar products on the market. This silver appearance provides an elegant accompaniment to other pieces of furniture and accentuates your living space.
This piece is a hand chair that takes inspiration from Friedeberg’s sculptures, but also creates its separate identity. That said, the fingers that form the chair’s back are narrower and straighter than those on other hand chairs, creating a more sophisticated look.
It is made of hand-carved wood, and even the base has been designed as a shirt cuff with buttons. What’s more, its distinct folksy look provides an edge that sets it apart from other projects by Friedeberg.
5. Carved Walnut Pedro Friedeberg Style Hand Chair
While most hand-foot chairs are not designed with comfort in mind, serving more as decorative fixtures, this Carved Walnut Hand Chair is an exception. It has a more extensive, thicker base than most other hand chairs, allowing you to rest comfortably.
The manufacturer has used high-quality walnut wood to hand-carve it, giving it unique wood grain patterns. As an added tip, you can create a contrasting theme by using this hand chair with a white background.
6. Sculptural Wooden Hand Chair In The Manner of Pedro Friedeberg
One of the hand chairs manufactured in Mexico during the 1960s, this sculptural wooden hand chair is the perfect addition to your furniture collection. Despite being over 60 years old, it still manages to retain its original warm platina. So, if you are a collector looking for a unique product from the 1960s that pays tribute to Friedeberg’s works, this is the one to go with.
7. Pedro Friedeberg Mahogany Wood Hand Chair Surrealist Mid-Century Modern
You’ll be delighted to know that the following product is one of the original pieces from Pedro Friedeberg. It is made from high-quality mahogany wood and is a great piece for decorative purposes.
Despite being a product from the 1980s, it is still in excellent condition and a perfect piece for decorative purposes. Not to mention how the artist’s signature in black ink is still visible at the bottom as a proof of authenticity.
8. Rare Editioned Bronze Hand And Feet Chair By Pedro Friedeberg
This hand and feet chair from the ‘80s is one of the best examples of Pedro Friedeberg’s surrealist works. Instead of a single hand, this chair features two hands and feet joined at the center.
It has a cast of bronze and a design that represents Mexican folklore tradition to perfection. What’s more, it is one of the rarest pieces that survive today, with only nine rare-edition chairs being produced originally. You can also find Friedeberg’s signature on one of the legs.
9. Pedro Friedeberg Style Carved Hand Chair Sculpture
If you are unwilling to spend a hefty sum on getting one of Friedeberg’s original designs, this Carved Hand Chair Sculpture is a great alternative. It is an eye-catching sculpture that will help you accentuate any space effortlessly.
The sculpture is made of premium quality wood and can serve as a great conversation starter. This functional sculpture can also be used for seating purposes, with the fingers serving as back and armrests.
10. Mexican Carved Hand Chair In The Style Of Pedro Friedeberg
Those who are looking for a studio-carved hand chair are sure to love this hand chair. It was crafted in Guadalajara, Jalisco, Mexico, during the 1960s. The chair comes with rich details, such as an intricately carved love line and lifeline. It even has richly detailed fingernails, folds, and joints of the palm.
Additionally, the base is in the form of a two-button cuff with a decorative vine that adds to the beauty of this sculpture. This sculpture is ideal for use in all types of settings, both outdoors as well as indoors.
11. Carved Hand Chair In The Style Of Pedro Friedeberg
This hand chair is an excellent mid-century modern product belonging to the 1970s. Just like the previous product, this one also has some finely crafted details. The fingernails on this hand chair are exceptionally crafted, and it is also made of superb quality wood.
As far as carved furniture is concerned, this is one of the most delicate pieces on the market. It is one of the hand chairs manufactured in Germany and is still one of the most exotic pieces to get.
The Gold Hand Chair is another piece of art from Friedeberg’s original works. It has a wooden base covered with a gold leaf and is a fantastic example of the artist’s skill. It makes for the ideal interior decoration item and is a must-have for collectors of rare sculptures and decorative pieces.
This hand chair comes with a certificate of authenticity signed by the artist. Additionally, you can find the signature at the base of this Pedro Friedeberg hand chair.
Black is the perfect color if you are going for an understated look, and this hand chair in black is especially suited for that purpose. It is available as part of a two-piece set, but you can also purchase only one.
Besides serving as a great showpiece, this chair can also be functionally used for sitting purposes. For areas such as porches, this hand chair in black can help create the perfect look. You can even use this superb hand chair in your living or dining rooms, or out on the porch.
It is much easier to find Friedeberg’s hand chairs than his hand and foot chairs, which is why this carved Mexican walnut hand foot chair is one of the rarest products to find. This chair was produced by Friedeberg in Mexico City during the late 1960s using the best quality walnut lumber.
The walnut wood also provides an excellent appearance to the hand and foot chair. It also comes with a branded signature of Friedeberg at the base of the sculpture.
The Gilt Hand Chair is one of the hand chairs that is made to order by the artist. It is made of wood, with a gold leaf covering for a gilded appearance. Besides making for a stunning piece of artwork, you can also use this hand chair for sitting purposes.
The base of this gilded chair has an unusual flat surface, and the chair is accompanied by Friedeberg’s signature as well as a certificate of authenticity. This chair can be customized according to your preferences, with different colors, materials, and styles.
As the name implies, this iconic hand foot chair is one of the most well-known hand and foot chairs. The sturdy and solid wooden base has a coat of red paint that stands apart from the rest of Friedeberg’s sculptures.
The artist’s signature appears on the thumb of the chair and has also been burned into the chair at the bottom. Unlike most hand and foot chairs This hand foot chair was also manufactured in Mexico and is the perfect symbolization of the 1960s era.
Final Words
With that, we’ve reached the end of our list of the best hand and foot chairs on the market. These hand and foot chairs not only serve as excellent décor pieces but also provide great functionality.
Not to mention how some of them are incredibly rare and very hard to find. For collectors and art enthusiasts, this list might come in handy for finding coveted items. Anyhow, these hand and foot chairs complement all types of settings, both indoors and outdoors.
So, if you are planning to redecorate your home, get a hand and foot chair that suits your style.
Related Links
To carve wood would translate into removing layers of wood in order to obtain a particular shape envisioned, it is the reverse of wax or clay sculpturing, practices in which the material is added and then shaped to generate the desired form, in wood carving material is subtracted.
Carving is a technique known to mankind for thousands of years yet in recent years with the mass produced items the traditional practice of hand carved doors becomes a niche form of art for the enthusiast only. Immense authenticity and originality defines a hand carve item and to emphasize on this sentiment we have curated a selection of brilliantly intricate hand carved doors meant to feed your imagination.
An old door that stood the test of time, it shaped memories exposed through the withered paint on its surface has now been used as a canvas, the tree illustrated brings forward the pure wooden essence of the material in a highly sculptural and graphic form, a piece of art.
Architectural artifacts of the past emphasize the world with such wonders everyday, all around the world the historical city centers showcase exemplary doors towards the past.
Hand carved doors are commonly used by the rustic design line, in contemporaneity they`re commonly envisioned for wooden cabins, rustic chalets often portraying wildlife or the natural habitat in which the construction resides.
Memories of the past, messages and stories infused into wood carved doors that have beautified our existence for centuries and will continue do so for years to come.
Trees sculpt the windows of a hand carved door, a common element, they represent the pure essence of the material, a reverence to it and the surrounding natural environment in which these piece of artwork often reside.
A whimsical entrance that sculpts trees around painted glass, ensemble that seems inspired by the realm of Tolkien, it can emphasize an extraordinary fairy-tale ambiance.
via indulgy.com
Natural stone and wood kept together by iron, a much appreciated recipe from the past.
Wood carving is something unique, intricate, and spectacular, a door of this kind encapsulates the experience of the sculptural in a beautiful piece of art that will change your facade to an extraordinarily beautiful extent. How do you see wood-carved doors and what`s your favorite design from the gallery above? We would love to hear from you!
Saws have been in use for centuries and like everything else, have evolved with the advent of technology!
We're sure your dad's garage will have these tools tucked in somewhere. After all, their functionality has made them akin to a family heirloom.
It isn’t surprising in the least, though, that these saws are often confused. The hack saw and bow saw, in particular, are usually used as substitutes.
Although they are very similar in appearance, they have different cutting needs. With its fine-tooth, the hack saw is mainly meant for cutting metal, whereas the bow saw, with its wide blade, is designed for trimming wood.
We understand how indistinguishable these two saws are and have decided to help you by compiling this guide. Here, you will find everything you need to know about the differences, functions, and advantages of these two types of saws.
So, without further ado, let’s cut to the chase!
Difference Between Hack Saw And Bow Saw
We don’t want to straightaway jump into details without giving you a brief overview of the two saw types. Out here, we have listed their significant differences.
Function
The fundamental difference between the two saws lies in their purpose. The hack saw is used to cut metal, steel, and some plastic materials, as mentioned earlier. Even though it can cut wood, it is not as efficient as the bow saw, which is designed especially for woodwork. It can cut logs, firewood, prune trees, and carve wood as well.
Design
At first glance, the two saws might look very similar. However, their blade types are poles apart. The blades of a hack saw are serrated and small to ensure precision. The bow saw has a coarse wide blade that can cross-cut branches.
Despite their differences, both tools are manually powered, need proper blades, and you are required to follow the same precautions while using them. Furthermore, both these tools have an ergonomic design and are easy to operate and carry around.
Now that we’ve laid out the fundamental differences, it is time to delve individually into these two saws and their features.
What Is A Hack Saw?
The hack saw has a metal frame and comes with a thin blade that is best suited for cutting plastic, steel, and metal. Since these three materials are used almost in every sphere, the hack saw becomes a versatile tool with numerous uses. Not just this, it can also cut wood.
Now, it’s time to talk about the blade. The hack saw can have multiple blade options with different configurations. The TPI or tooth density of the blade ranges from 14 to 32 teeth per inch. It has jagged edges and points forward since the hack saw operates on the principle of pushing stroke instead of pulling stroke.
The material used to make the teeth is vital because it improves the cutting and tooth life. Usually, the teeth are fashioned either out of high-speed steel or high-carbon steel.
If you want to cut large items, aluminum or some other soft metal, you must use the 14 teeth per inch blade. The standard tooth density of the blade for cutting metal is 18. Moreover, a blade with 24 TPI can easily cut steel plates, whereas the 32 TPI blade can cut hollow sections, pieces, and tubes.
Moving on, we must talk more about the hack saw’s distinctive bow-shape, which holds the blade under tension. It is fashioned out of metal, usually steel, and has a strong handle, which comes with pins for attaching the blade. The standard blade has a length that varies between 250mm to 300mm, but if the saw’s frame is adjustable, it allows for various blade lengths.
Understanding The Hack Saw’s Uses
Now that we’ve spoken about the hack saw's blade and frame, it’s time to talk about its uses. It is a handy cutting tool and can be used efficiently for a variety of tasks. We’ve listed examples of a few things that can be cut using this tool:
Electricians and plumbers often use hack saws for cutting plastic conduits as well as plastic pipes.
Can cut stainless steel items like steel pipes, bars, or rods.
This hand-powered tool sizes copper pipes, shortens curtain tracks and helps in roller blind adjustment.
Can also cut wires and cables; since most of these wires have copper or other similar metals, the tool can cut through them with ease.
Before you start working with the hack saw, choose the perfect blade for the task. Moreover, you should securely place it on the frame for safety reasons and smooth operation.
Believe it or not, these tiny steps will make your job much more comfortable. Also, the blade is readily available and can be changed with little to no effort.
The hack saw is an exceptionally efficient and economical tool and can be used in sawing a wide range of materials. Low capital investment is required in their operation, and the tool’s maintenance cost is also low.
Furthermore, it is compact and portable and allows you to do the job at any time and any place.
When trying to make a very detailed cut, a hack saw will give you much more precision than a power saw ever could. You can focus, be slow, and very deliberate.
Frequently Asked Questions About Hack Saws
What Is The Best Way To Use A Hack Saw?
We're sure you think using this tool is pretty simple, but we'll stop you right there because this cutting tool requires perfect focus and accuracy.
The best way is to secure the blade on the frame and point the teeth forward. The blade should be rigid, and you must always cut using long, stable strokes. Also, use the entire length of the blade to get precise results.
How To Maintain A Hack Saw?
The hack saw is made of metal and should always be cleaned and dried after each use. It can also be lightly oiled as a further precaution and frequently inspected to ensure all bolts, nuts, and blades are in proper order.
Furthermore, store the tool in a cool, dry place to avoid rusting.
Why Are Different-Sized Teeth Used For The Blades?
Different-sized teeth offer different levels of cutting power. Larger blades with fewer teeth are better suited for tough materials. For more refined work, we have smaller blades with more teeth.
What Material Is Used For Making The Blades?
Typically, hack saw blades are made of high-speed stainless steel. This is because they are tough and abrasion-resistant. Due to their accuracy, strength, and resistance to breakage, they are used in making tools and cutting blades.
What Are The Different Types Of Hack Saw Frames?
Hack saw frames are usually of two types- solid and adjustable. The solid frame can accommodate only a standard blade length. In the adjustable frame, we can fit varying lengths of the blade.
What Is A Bow Saw?
A bow saw is an ancient tool. It's been used by carpenters forever and there's a good reason for it.
It is a crosscut saw, which comes with a metal frame. It is ideal for woodwork, especially for straight or curved cuts. Unlike the thin hack saw blade, it has a broad blade attached to the handle, far less dense and whose tension can be adjusted using a twisted cord or a turnbuckle.
The blade of this cutting tool is removable as well but is not readily available. This is one reason why the hack saw is often preferred over it. However, some good-quality blades get sharpened easily.
Bow saw usually require two different types of blades-one meant for cutting dry wood and the other for greenwood. Some blades serve both purposes.
The tool has a sturdy frame and usually comes with a knuckle protector. It is easy to cut wood of nearly any size or thickness, and the results will be way more precise than what a hack saw could offer. It can cut firewood, branches, hardwood, and softwood flawlessly. However, the bow saw cannot cut steel or plastic.
Furthermore, unlike the dense TPI of the hack saw blade, the bow saw blade is comparatively less dense. Besides TPI, it also relies on tooth angle to get a precise cut. Ideally, 60 degrees angle can cut hardwood, and 45 degrees angle is recommended for softer woods.
Before we move on to its uses, we’d like to talk about the tool's working mechanism. It needs to be moved back and forth across the surface that needs to be cut, in short, swift strokes.
Understanding The Bow Saw’s Uses
There are many advanced tools available today, but the bow saw’s efficacy and simplicity remain unmatched. Given below are a few examples of things that the bow saw can cut:
Bow saw is often used by carpenters since it can cut through wood quickly. It helps in the construction of chairs, tables, and similar types of furniture.
Moreover, it assists in gardening work. It can easily trim overgrown branches from your plants.
This hand saw can also prune bushes and shrubs with ease.
The cutting tool can saw logs with accuracy.
You can take the bow saw on your camping trips. The wood that is cut using this tool can make a wood stove or a fireplace.
The bow saw is known as the woodworker’s essential tool. So, it is highly unlikely that you won’t be satisfied with the results once you start using it for intricate woodwork.
Besides, they are sturdy and efficient and do your work without wasting any fuel or energy.
It is a man-powered device, and even though working with it is pretty easy, don't get carried away; you must always be vigilant and prioritize safety.
Frequently Asked Questions About Bow Saws
What Is The Best Way To Use A Bow Saw?
The best way to use a bow saw is to secure your hand with cut-resistant gloves and use a pencil and ruler to mark the part that needs cutting.
Once that is done, hold the saw firmly at the right angle and use short rhythmic strokes to cut the wood.
There’s not much to it except precision and experience.
How To Maintain A Bow Saw?
Proper maintenance of the tool will increase its lifespan. Therefore, you must clean the handle and blade, dry it off, and then apply some oil for lubrication. The saw should be stored carefully and preferably hung.
Which Type Of Saw Is Best For Cutting Curves?
Bow saws cut curves quite efficiently and are used in wood carving as well. Besides, circular saws work efficiently too.
What Are The Type Of Blades Found In Bow Saw?
There are two types of blades found in bow saw- peg tooth blades designed to cut hard, dry wood and peg and raker tooth blades that cut through wet wood.
What Are The Types Of Bow Saw Frames?
Steel is the most popular frame material due to its sturdiness, but sometimes wood is used too.
Conclusion
That’s all from us, folks! We hope this guide helped you understand the fundamental differences between hack saws and bow saws. To utilize a saw to its full potential, it is essential to understand what purpose each one serves.
Although both have their unique functions, there is no denying that the hack saw has broader applications. However, unlike the hack saw, which tends to leave hacking marks behind, the bow saw cuts much cleaner.
It is essential to be vigilant while using either of these two saws to avoid any kind of injury. That’s why we’ve given detailed instructions on how to use these tools efficiently.
So, now that you know everything about the two saw types, we hope that you'll get them out of the storage, and start using them very soon.
Rain gutters are an integral part of most homes, especially in areas that receive heavy rainfall. We're here to help you choose the right gutter.
Gutters are not only a necessary means to keep rainwater away from your home. The primary benefit of a gutter is to keep your home safe from water damage; however, there are several other benefits of installing them.
If you have been thinking about installing gutters in your home but are unsure of the right kind, don't worry. We have curated a comprehensive guide to help you learn about the different types of gutters, and finally, pick the right one for your home.
So without further ado, let's get started!
Gutter Types
How Does A Gutter Work?
It doesn't take a genius to figure out how gutters work. Essentially, these handy devices collect rainwater which slides down slanted roofs and channels water into the ground. This is done with the help of the long downspout of the gutter.
Of course, most of the time, gutters help collect much more than rainwater. They also help trap dead leaves, twigs, dust, and other debris. Although they are one of the essential aspects of a home, they are largely ignored during maintenance and installation.
Most homeowners might argue that their homes do not need a gutter; however, its absence can be detrimental.
If you are thinking about buying a new home, consider installing the right gutter on your roof. Without this, your home may end up suffering several types of water damage, flooding, and other conditions.
Without the right gutter system, rainwater will likely collect on your roof, causing mold, rot, and extensive damage. Furthermore, the rainwater that manages to slide down from the roof will end up pooling at the foundation of your home. Again, this leads to several water-related damages and conditions.
Does Your Home Need A Gutter?
Before we dive into the section on the different types of gutters, let us determine whether or not your home could benefit from one. As such, experts recommend installing gutters, as they have plenty of benefits. However, we will let you decide for yourselves.
Here are a few questions to consider which will help you determine whether your future home requires a gutter installation or not:
Does Your Roof Have An Overhang?
Most home roofs are built with an overhang to protect the home from damage. Typically, an overhang should measure at least two feet or more. However, if your new home does not have an overhang or it extends only a few inches, you need to consider installing a gutter.
Without an adequately long overhang, any rainwater that trickles off your roof will likely collect at the foundation of your home. This not only damages the foundation but can also cause severe damage to your basement.
As the rainwater seeps below the surface, the structural integrity of your home is compromised. Over time, it can lead to significant issues for your home and the surrounding area.
Not to mention, the collected rainwater can also damage flowerbeds and other plant life near your home.
Do You Live In An Arid Climate?
You might be wondering why you need to install a gutter in arid climates. Well, consider the fact that most of the moisture and humidity in the area gets naturally evaporated. Moreover, there is very little rainfall, which can cause severe drought-like conditions.
In situations like these, it is beneficial to save as much water as possible. Installing a rain gutter in these climatic conditions can help you trap rainwater, which can be used at a later stage for various applications.
That said, those living in arid climates can consider skipping a gutter installation if they wish.
Does Your Area Receive A Lot Of Rainfall?
Conversely, if you live in a region that experiences heavy rainfall, installing a rain gutter is a must. Without this, you risk damaging your home. Not to mention drenching anyone who happens to walk by your house!
Does The Surrounding Landscape Slope Upwards?
All you need is a basic understanding of gravity to know why it is vital to install a gutter if the surrounding landscape slopes upwards. Suppose your future home is in the middle of or at the bottom of a region where most of the surrounding landscape slopes upwards; rainwater will likely pool near your home during specific periods.
This can cause extensive water damage to your home as well as the surrounding areas. To prevent this, you need to install gutters that will strategically direct rainwater away from your home and deposit it at an adjacent downward-sloping site.
Types Of Gutters
There are dozens of gutter types to choose from. However, the kind of gutter you decide to get for your home does not depend singularly on its aesthetics. Instead, you need to consider its functionality.
In this section, we will talk about the different gutter types. We have divided them into categories based on their shape, the material used to make them, their construction, color, and size.
Based On Shape
K-Style Gutters
We begin the list by introducing you to the most popular type of gutters for homes - K-Style gutters. These gutters have been used in most homes for over 50 years because of their reliability, ease of installation, and functionality.
A fascinating tidbit about this gutter is that they do not get their name because of their resemblance to the letter "K." This is a common misconception which most people have.
In actuality, K-Style gutters get their name from the fact that they are listed as option "K" in the national association, which lists the common types of gutters available.
These gutters are immensely popular due to their aesthetics. It might sound strange to some people, as you don't generally expect gutters to be aesthetic. However, K-Style gutters typically have very decorative fronts and curved designs, making them a relatively aesthetic addition to your home roof.
These gutters are found in various shapes and sizes, giving homeowners plenty of options to choose from. Furthermore, they are said to look similar to crown moldings, which are optional decorative pieces that many homeowners add to their ceilings.
Pros
Aesthetic design
Easy installation
Durable and long-lasting
It can hold more water than other gutter styles
Cons
Susceptible to corrosion
Half-Round Gutters
Moving on to our next style, we want to talk about the half-round gutters. As the name suggests, this gutter style looks like a tube cut in half.
These gutters are the next popular choice after K-style gutters. Although they are not as popular as the previous type, homeowners looking for a functional gutter that isn't overly flashy will appreciate this one.
These gutters are extremely useful in trapping rainwater effectively and channeling it towards the ground. That said, its open style also makes it prone to trapping dead leaves, twigs, and other unwanted debris.
If you opt for half-round gutters, keep in mind that you need to regularly clean and maintain it. We admit it; regular gutter cleaning can be overwhelming, not to mention messy and complicated. We recommend hiring professional gutter cleaners who can come over once in a while to do the job expertly.
Those who have a keen eye for detail may notice half-round gutters featuring in most historic or traditional-style homes. These gutters were immensely popular prior to 1960, after which K-style gutters became the rage.
Pros
Traps rainwater effectively
Adequate space to store large amounts of water
Simplistic style
Customizable options
It can be installed with hidden hangers
Cons
Prone to trapping unnecessary debris
The curved design does not sit flush against boards
Fascia Gutters
If your home does not have a pre-installed fascia board, fascia gutters may be an ideal option. This is because fascia gutters play the dual role of acting as a gutter as well as a fascia board. So, you don't need to worry about separately installing the board if you don't already have one.
Moving on, fascia gutters are immensely popular because of how easy they are to customize. Homeowners who care deeply about personalization tend to opt for fascia gutters. Furthermore, these gutters generally have a sleek and contemporary appearance, making them ideal for modern homes.
A common issue most homeowners face is with their rafter rails. Not only do they compromise the aesthetics of your home, but they also leave space for water or small animals to enter.
Installing a fascia gutter eliminates this issue. Once you install these gutters, the edges of your rafter rails will not be visible. Not just that, the gutter does not leave any space for water or animals to enter, making it safer for your home.
Lastly, fascia gutters are not sold in separate sections like most other gutters. Instead, they come as a long stretch of aluminum that is installed on your roof. Although this makes installation slightly more tricky, not to mention expensive, it produces a robust and seamless bond.
Pros
Seamless design
Easy to customize
Prevents water seepage and damage
Hides rafter rails
Cons
Costly professional installation
European Gutters
If you like the minimalist appeal of half-round gutters but are looking for something a little more decorative or durable, consider European Gutters. These gutters look very similar to half-round gutters but feature an additional lip. The lip protrudes and is distinctly visible, the look of which many homeowners seem to like.
Another distinct feature is its prominent half-round hanger. These features add an extra layer of class and appeal to your traditional gutters, which is why they are a popular choice amongst homeowners.
You can also opt for European gutters made of copper, which are known to age well. These gutters initially have a shiny, distinct appearance when they are first installed; however, as they age, they get a distinctive patina that is visually pleasing.
Another reason to opt for these gutters is their durability. Typically, European gutters have a solid construction and are built with high-endurance materials. This makes them ideal for regions that experience severe rainfall, storms, and wind.
The sturdy construction of European gutters enables them to withstand adverse climatic conditions. They are less likely to suffer damage or get cracked, ripped, or torn in adverse weather conditions.
Finally, if you are tired of little critters building their nests and homes in your gutters, don't fret. The unique design of European gutters makes it tricky for small animals to build their homes, as it does not have the same level of protection as other gutter types.
These gutters also allow more rainwater and debris to flow towards the downspouts. This means that they are less likely to get clogged and require periodic cleaning and maintenance.
Pros
Wider curves allow more water to flow
Less likely to clog
Not ideal for animals to build their homes in
Aesthetically pleasing
Cons
Not conducive with gutter guard systems
Victorian Ogee
As the name suggests, the Victorian Ogee gutter system is inspired by 19th century Victorian gutters. Although the original style of gutters was made of cast iron, modern Victorian Ogee gutters have several other options.
That said, these gutters follow the same style and aesthetics of the original ones, making them ideal for installation in traditional homes.
One of the most significant advantages of these gutters is that they are very low maintenance. You also have several sizes and options to choose from, so you can customize them to fit your home perfectly.
This is especially beneficial for those who are looking to install new gutters into their homes or replace their old ones.
Victorian Ogee gutters are also known as "Old Gothic" gutters. It is evident that they get this name due to their distinctive, old-fashioned, Gothic appearance. If you are a fan of old, Victorian architecture, these gutters can be the ideal addition to your home.
A few essential factors to note about them are that they cannot be bought off the shelf. As such, you need to find the right professional to custom-build them for your home. Furthermore, these gutters are typically shallow, which means that they cannot handle massive downpours.
The gutter style is ideal for small homes or homes built in a region that doesn't experience heavy rainfall. So, those living in arid climates who are fond of old-style, traditional gutters can consider this a perfect addition to their homes.
Based On Material
Aluminum
Aluminum gutters are by far the most common material used for making all types of gutters. The primary reason behind this is that they are lightweight and easy to install. They are also available in different thickness options, giving you the freedom to choose the right one for your home and environment.
Those who care about color coordination will also love the versatility of aluminum gutters. As such, you will find these in several color choices. You can customize them to any size, shape, and color you wish.
Let's not forget, aluminum is extremely affordable and can be easily found in most local hardware shops or online stores. Furthermore, this lightweight material is easy to install, making it ideal for DIYers.
Of course, you can always opt for professional installation services, but even that will not cost you too much.
Aluminum gutters are mostly weather-proof and can withstand all types of climatic and temperature conditions. Furthermore, they are not prone to rust and corrosion, eliminating the need for costly repairs and replacement.
Pros
Availability of colors
Easy to customize and install
Affordable
It does not rust or corrode
Cons
May dent easily
Vinyl
If you thought aluminum gutters were affordable, check out vinyl ones. These gutters typically cost less than aluminum while holding similar properties. They are incredibly lightweight and easy to install, making them very popular for DIY gutter installation.
Another incredible thing about them is that they are available in an array of colors. However, if you don't find the right vinyl gutter for your home, don't worry. You can easily have them painted any color you wish, perfectly matching the aesthetics of your house.
A common issue with aluminum gutters is that they are likely to dent or bend. However, that concern is eliminated with vinyl.
Vinyl gutters are made of very durable plastic that can withstand heavy rainfall, storms, and winds. Moreover, they are not prone to corrosion and rust, which is certainly an advantage you’d like in gutters.
A major advantage of choosing colored vinyl gutters is that they are less prone to showing scratches and marks. In most cases, unpainted vinyl gutters are excellent for those worried about scratches being visible.
Please note that if you opt for painted vinyl gutters, scratches may likely show up on them.
All said and done; there are a couple of things to keep in mind when opting for vinyl gutters. For starters, they are prone to fading when exposed to constant, direct sunlight.
Moreover, ensure that you don't purchase cheaply constructed vinyl, as this will make the gutters prone to sagging with age. They can also get brittle if they are exposed to continual adverse climatic conditions. That said, this is not something you need to worry about if you opt for high quality vinyl.
Finally, vinyl gutters snap together very easily during installation. While you can install these gutters by yourself with ease, we recommend getting professional help.
Pros
Easy to install
Very affordable
Color options available
Anti-rust and corrosion
Cons
May fade with sun exposure
Zinc
Moving on to the next material, you have zinc gutters. Although these gutters will cost you significantly more than aluminum or vinyl, they are incredibly durable, solid, and built to last for at least five decades.
Keep in mind that zinc gutters are likely to last for 50 years with proper care and maintenance; however, their longevity is slightly compromised if you live near the ocean. This is primarily because of salt in the air that affects the integrity of zinc over time. Although they are not ideal for these regions, you may still consider them as an option.
In most cases, zinc gutters also contain small amounts of titanium and copper. Moreover, these gutters are generally left unpainted and do not come in a variety of colors like other gutter materials.
However, this can actually work to your advantage. As zinc ages, it develops a distinct and appealing patina that enhances its aesthetics. Of course, it is essential to stick to regular cleaning and maintenance routines to ensure that it ages well.
You may find zinc gutters featured in high-end or traditional, historic homes. This is primarily because of how reliable and durable the material is and how well it ages. Furthermore, since these gutters can last for decades, they are considered a smart investment.
That said, we must mention that zinc gutters almost always require professional installation. This is because their joints have to be welded using professional tools, and it may be hazardous to attempt doing so on your own without professional help.
Pros
Long-lasting and durable
Aesthetic
It does not rust or warp easily
Ages well and develops a beautiful patina
Cons
Requires professional installation
Copper
The next alternative you can explore for your home gutter is copper. Since these gutters are more expensive than aluminum or vinyl, most people avoid installing them. But look closely, and they do have several advantages of their own.
Installing copper gutters has a set of benefits that are worth the price. For starters, you don't need to worry about painting copper, as it is popular for its natural color and sheen. That said, keep in mind that it develops a slight greenish patina as it ages.
Many people prefer the natural, old-world appeal of aged copper, so this greenish tinge isn't necessarily a bad thing. Moving on, another benefit of installing copper gutters is that they are not prone to mold, mildew, fungus, and rot. Just ensure that they are installed correctly by a professional, and these common conditions will be the least of your worries.
Pros
Ages well
It does not require an additional coat of paint
Sturdy and long-lasting
Not prone to developing mold, mildew, or fungus
Cons
Not the most inexpensive choice
Galvanized Steel
Galvanized steel gutters are made of steel and covered with a thin coating of zinc for extra protection and durability. These gutters have a very simplistic appeal; moreover, their shiny look can make them appear quite classy.
Typically, galvanized steel gutters are solid and can withstand adverse climatic conditions. That being said, we should also mention that this material is slightly more prone to rusting, so it is essential to maintain them well over time.
Furthermore, although these gutters are known for their high endurance and strength, they are prone to minor scratches. Unless you maintain them well, they may get easily damaged due to rust.
Homeowners who plan on installing galvanized steel gutters should be prepared to partake in a regular cleaning and maintenance routine. You can do this yourself or hire professional help. Otherwise, you’ll have to spend on frequent repairs and replacements.
Another vital factor to keep in mind is that it is best to get them professionally installed. Of course, there is no harm in doing it yourself, but incorrect installation can lead to rainwater getting pooled near your home due to improper channeling and drainage issues.
Pros
Aesthetic and stylish
High strength and endurance
Long-lasting
It can be painted over
Cons
Prone to rusting if not maintained and cleaned frequently
Galvalume
If you liked the look and appeal of Galvanized Steel gutters but are looking for an alternative that isn't prone to rust, consider Galvalume gutters. The first thing you need to know about it is its composition.
As you may already know, steel is one of the best options for gutters. This is due to its inherent strength and durability. However, galvalume steel uses a patented coating made of zinc, aluminum, and silicone that enhances its strength and resilience.
Moreover, this patented coating is known for its anti-rust and anti-corrosion properties. The zinc particles also add to its resilience, ensuring that your gutters last for decades without much issue.
Unlike Galvanized Steel gutters, you don't need to worry about the reaction of the material when it is exposed to heavy rain or sunlight. Furthermore, it is relatively easy to customize this material and build the most appropriate gutters for your home.
Pros
Strong and resilient
High endurance to weather conditions
Aesthetic appeal
Easy to customize
Cons
Requires expert installation
Based On Construction
Sectional
As the name tells you, sectional gutters consist of numerous sections that are joined together to build a gutter system for your home. Typically, several sections are taken and trimmed down to fit each other perfectly. The various sections are then joined using connectors.
One of the advantages of sectional gutters is that they can be easily manipulated to fit any home. No matter how long or wide your roof is, sectional gutters can be customized to fit each home perfectly.
Installation of these gutters is extraordinarily straightforward and convenient, and many DIYers do it on their own without professional help. That said, these gutters are prone to leaking if not installed correctly, which is why we recommend hiring an expert.
Pros
Easy installation
Can be cleaned and maintained without hassle
Affordable
Can be customized on the spot
Cons
The connecting portions may cause leaks if not installed correctly
Seamless
The other alternative to sectional gutters is opting for seamless gutters. As you may guess, seamless gutters automatically eliminate the worry of leaks and seeps, thanks to the absence of seams or connectors.
These gutters are typically custom-made to fit each home. As such, they are costlier than sectional gutters but may provide more value over time. Seamless gutters are made of one large piece of material and only have connectors at the corners, joints, and downspouts.
Furthermore, these gutters are typically very strong and are built to last for decades. You can also choose between a plethora of colors. This gives you more flexibility over the final look you wish to achieve.
Pros
Reliable and leak-free
Color options available
Custom-made to fit your home
Sturdy materials used
Cons
Expensive
Based On Size
5-Inch
The most common gutter size you will find on the market is 5-inch gutters. This is most commonly found in K-Style gutters. Fortunately, this gutter size is adequate for most homes as it can easily handle rainfall, leaves, and other debris collected in the gutters.
However, if you live in a region that experiences heavy rainfall, you might need to opt for larger gutters.
That said, if you want to stick to 5-inch gutters for convenience or aesthetics, there is another solution. Opt for wider downspouts which can carry more water away from your home.
6-Inch
6-inch gutters are not the largest size gutters you can opt for. However, these large gutters are often adequate for most homes that cannot make do with 5-inch ones.
You may find 6-inch gutters for most half-round gutters as this size is the most convenient for the shape. If you think you might require more oversized gutters, we recommend speaking to a professional about it.
Several factors like the amount of rainfall you receive, its intensity, and the pitch of your home can determine the correct gutter size. Keep in mind that larger gutters do not always mean better drainage. In fact, opting for gutters that are too large may be detrimental and can affect the aesthetics of your home.
Based On Color
Bold
Unless you live in an HOA that restricts bold gutter colors, you can opt for any color gutter you desire. Keep in mind that certain gutter materials cannot be painted; however, most of them can.
Consider the general color scheme and aesthetics of your home before choosing a bold gutter shade. You can ask an expert about this as they might be in a better position to recommend the right gutter color for your home and personality.
A bold gutter shade can instantly add to the aesthetic appeal of your home, distinctly transforming its appearance.
Neutral
Opting for a neutral gutter shade instead of a bold one doesn't mean you aren't adventurous. In fact, several neutral colors can look better than bold, bright shades. The right neutral tones can instantly add class and appeal to your home, especially if you can complement it well with the rest of your domestic decor.
Gutter Type Buyer's Guide
Now that you know all about the different gutter types, you may be wondering which one to choose. With the availability of options, making the right decision can often be overwhelming.
Fortunately, we have curated a guide to help you choose the right gutter type for your home. Take a look!
Longevity
When choosing the right gutter type for your future home, consider how long you want it to last. If you don't mind replacing it once every few years, you can opt for aluminum or vinyl. These are relatively inexpensive to replace, and you can switch gutter styles if you need to.
However, if you want to make an investment that will last you for decades, consider more durable and reliable materials. Copper and zinc are ideal materials to opt for, while galvalume is also a good option.
In terms of the gutter type, it is best to take professional advice when choosing this. Although you may like the aesthetics of a certain gutter style, it may not be suitable for your home.
Need
You also need to consider whether or not a gutter installation is required for your new home. Those living in arid climates have a choice not to install them. However, if you live in a region that experiences rainfall, we recommend installing one.
We have added a short guide in the section above that will help you determine whether your home requires a gutter or not.
Ease Of Installation
Do you enjoy DIY installations, or do you prefer to leave it to the experts? Either way, it is a vital consideration when choosing the right gutter for your home. Certain gutters call for professional installation, so keep this in mind when selecting them.
Budget
Last but not least, you need to consider a budget when choosing the right gutter for your home. Some gutters are affordable and long-lasting, while others are more of an investment.
Conclusion
With that, we are finally ready to wrap up our guide.
Hopefully, this helped you understand the different gutter types in the market. When choosing the best gutter type for your home roofing, consider its durability, aesthetics, and whether it is suitable for your region and environment.
If you have any further questions, feel free to leave a comment below. Until then, take care!
Centuries ago, chairs were a symbol of class and pride! In fact, the earliest chairs found in Egypt were only used by the highly reputed and wealthy members of society.
Cut to today and chairs are an essential part of our household. Based on comfort and style, there are a plethora of variants to be found. And one of our favorites is the bean bag chair.
These comfy seats can easily become a part of any setup, be it at home or the office. So, having one shouldn’t be only a thought anymore. But what if, instead of rushing to the store, you make one at home?
Yes, you can very well do that! Making a bean bag chair is easier than it sounds. Even if you aren’t a DIY lover per se, try your hands on this one. So, we’ve curated this ultimate guide about making a bean bag chair.
Without further delay, let’s dive in!
Guide To Making A Bean Bag Chair
The history of bean bag chairs dates back to 1969 with their invention by a group of Italian designers. Then called ‘sacco’, these chairs were designed to have a pear shape and were stuffed with thermocol balls. As its popularity grew, designers came up with news shapes and sizes to provide maximum comfort for varied body types.
Manufacturers today rely on washable fabric and eco-friendly filling to ensure a longer life span. Not only can this type of material be cleaned easily, but it’s also more resistant to regular wear and tear. However, in doing so, they don’t overlook the style factor!
Similarly, you can also make a bean bag chair for optimum comfort, that too, without compromising on style. All you need is patience, basic sewing knowledge and some handy materials, mostly lying around the house.
In the following sections, we walk you through the basic steps of making a bean bag chair. But before that, here are the materials that you will need:
Outer fabric
Filling
Scissors (preferably the tailoring ones)
Pencil for marking
Measuring tape
Needles/sewing machine and threads
Zipper (if you want the zipped type)
Material & Filling Preference
When selecting the fabric, make sure that it's durable and feels comfortable on the skin. For this reason, users generally prefer to opt for denim or fleece. Additionally, they also add to the aesthetic appeal of the bean bag chair.
Likewise, the filling should be equal parts comfortable. While you can always opt for polystyrene or polypropylene beans, shredded muslin fabric or old clothes can also be a good alternative. Apart from that, you can also invest in shredded memory foam. Whatever be the filling, it should provide the right amount of support according to your preference.
One way of doing so is adjusting the quantity of filing being stuffed, but don’t choose materials that will form lumps under your body weight.
Steps For Making A Bean Bag Chair
Now that you have an idea about how to select the material, let’s take a look at the steps involved:
Step 1
For the first step, cut two rectangles and two circles of your preferred fabric. The size of these cutouts will depend on the overall size of the bean bag chair. In our case, each of the circles had a circumference of 170 inches, and the rectangles had dimensions of 87 inches x 32 inches.
If you’re not confident about your measurement skills, you can also opt for a sewing pattern with the required dimensions.
Step 2
Place the two rectangles in a way that the corresponding sides face each other. Line the edges as perfectly as possible and secure them with pins. Once done, begin sewing with one of the shorter ends. The resultant fabric should be a rectangle with three open sides.
The important thing to keep in mind here is that while lining the sides, make sure that the right or ‘pretty’ sides of the fabric are facing each other.
Step 3
Next, take a circle and pin its edge to one of the longer sides of the sewed rectangle. Here again, ensure that the right sides of the two fabrics are facing each other, and start sewing. For best results, try to keep the seam allowance between a quarter and half an inch. However, in case of heavier fabrics, the seam allowance should be larger than that.
After sewing the entire circle along the rectangle’s long side, sew the shorter ends of the rectangle together.
Step 4
Similar to step 3, take the second circle and line it with the other long end of the rectangle. This will form the base of your bean bag chair. But this time, don’t sew it all through the edge. Leave sufficient room for the filling to go inside the chair.
While you may also sew this opening after filling the bean bag, we’d recommend installing a zipper here. This will make it easier to replace the filling as and when required.
Step 5
In case you’re adding a zipper, secure the zipper with pins on the open edges of the chair’s bottom and zip it shut. Then unzip it to about a finger’s length. Don’t open all the way through. Take one side at a time, and begin sewing. As you move forward, continue unzipping the zipper a little bit at a time until all of it is sewn in place.
Since all the fabric has been stitched with the pretty sides facing inside, put your hand through the zipper, hold the fabric and bring it out. This will put the right side on display. Then add the filling of your choice and shut the zipper.
Your bean bag is ready!
Some Important Tips
Before we leave you to make the necessary preparations, here are some words of advise that will make the entire process even more convenient:
Try to get hold of a sewing machine for faster and more accurate sewing.
To make perfect circles without a sewing pattern, take a pen and tie a string to its nip. The length should be the radius of the desired circle. On the open end of the string, secure a chalk or marker. Place the pen in the center of the fabric, and hold the string taut. Move the chalk around to complete a full circle.
By following the above steps, you can also stitch an insert bag. In that case, make sure that it's smaller than the bean bag.
Final Words
That wasn't too difficult, was it?
With basic sewing skills, making a bean bag chair won’t be the most challenging job. So, start practicing! After all, there’s a certain charm about handmade furniture.
On that note, it’s time for us to say goodbye. Hope you had as much fun reading this guide as we had putting it together. We’d love to hear from you in the comments down below.
The natural habitat has a tendency of slipping in into our concrete lives in one way or another despite our attempts to surround ourselves with artificial materials. Our roots and ancestry lead us back to the heaven nature offers and depicts and we slowly but steady start to re invite greenery indoors. Today we are talking about tips and tricks of growing olive trees indoors, a specimen that has gained huge popularity over the recent years do to its high dry air and soil tolerance and extreme adaptability to any home environment, making it a very beautiful and delicate house plant. In their natural habitat, the olive trees thrive at heights of 20 ft(6 m) but indoors space will limit yours at about 6ft tall(1.8 m), pruning keeping the plant under your control in a compact beautiful shape. The gray green leaves infuse a delicate Mediterranean atmosphere to your home, suitable to Scandinavian decors, modern ones or classical alike. Small white flowers will complete the perfect magic of the olive tree in summer, followed by its delicious fruit we all love so much and appreciate.
Guide To Growing Olive Trees Indoors
Pruning Tips and tricks
Maintaining your olive tree compact and perfectly arranged uses the pruning technique used in the maintaining of all fruit trees. You have to use a pair of sharp pruners to cut the stem at a 45° angle, 1/4-inch above a leaf node (where a leaf attaches to a stem). As a result, the tree will branch right below the cut, thus thickening the tree's crown.
Each spring new growth appears moment when you are supposed to prune the tree again to obtain a beautiful shape and keep the plant itself healthy.
Re-potting the plant should be done in spring season in pots that allow a proper drainage of the soil. Too much water in the soil will result in root rotting and plants dying.
Useful facts about olive trees
Origin: Mediterranean region
Height: the olive tree can reach up to 10 ft (3 m) when grown in a container. If you leave in an apartment you can opt for a dwarf variety that can reach up to 6 ft (1.8 m).Use the pruning technique to keep the tree's crown compact or opt to shape the olive tree drastically to obtain an olive bonsai.
Light: The olive tree prefers full sun so make sure to rotate the plant to obtain an even growth on each side and to allow the plant to get as much sun as possible all around.
Water: During spring season the olive tree is in the growth phase.Make sure you water thoroughly and allow the the top 5 cm of soil to dry out between watering. During the winter season when the plant stagnates and is dormant water rarely.
Humidity: The olive tree can resist very dry environments.
Temperature: Opt for an average to warm 65-75°F/18-24°C temperature. You can keep your tree under the summer sun without problems and It will tolerate a minimum of 40°F/4°C during winter.
Soil: You can choose a cactus soil mix which is high in sand, highly draining.
Fertilizer: Apply every 2 weeks in spring and summer with a balanced liquid fertilizer diluted by half.
Propagation: You can grow an olive tree from seeds or you can try to propagate through stem although it it fairly difficult. During spring take stem tip cuttings, dip cut end in hormone rooting powder and place in moist potting mix.
Now that we have found out a few tips and tricks on how to grow an olive tree indoors, lets delight our senses with the delicacy and splendor an olive tree brings in your abode. Enjoy!
An airy neutral interior design will accept and claim an olive tree beautifully.
Galvanized buckets and the olive green will make a wonderful contrast, delicate in its beauty.
Dark stained wood nestling life in this serene decor.
Pastel tones and old plants illustrations are completed with a wicker basket containing the delicate olive tree.
An olive tree placed near your bed will freshen up the atmosphere.
Dress up your olive tree pot in a white cloth sack.
A stone pot for a tiny bonsai olive tree.
An olive tree will complement a modern minimal approach to interior design.
Create a composition out of your relaxation spot by including an olive tree.
Neutral tones can be balanced with an olive tree tone.
Bring to life a dull corner.
An all black and white decor deserves a subtle color insertion.
Coppery or gold tones complement the olives.
Wicker, natural fibers, discreet gold hues and an olive tree to complete the design.
Green tones and grey hues match each other with grace.
The real Mediterranean vibe brought in a home.
Fresh Scandinavian interior decor hosting greenery and life.
Weathered wood with incredible texture loves the addition of delicate olive green.
Exposed concrete walls and floor allowing the furniture and decorations speak for themselves.
You could even create an olive corner with various sized plants.
Notice how beautiful the contrast between the stone pot and the olive tree leaves is.
Have we made you curious about this exotic plant? Feel free to share your thoughts in the comment section below.
Curious to know more about the popular Guardian Protection Home Security? Could it be the right choice for you and your family?
Well, these questions will take some time to answer as this home security system has numerous features and benefits. After going through its excellent customer feedback, we were intrigued to find out what the hype was all about.
Is this home security system apt for everyone to use, or does it cater to specific target audiences? What are the benefits it offers, and do they outweigh its flaws? We are here to discuss these questions through our in-depth review.
Of course, our review and guide aren't based solely on customer reviews and our research. We also tested it out for two weeks before coming to a conclusion. We understand how vital home security is to you and want to introduce only the best system for your family's safety.
So, sit back, and let us tell you all about our findings.
Guardian Protection Home Security Review
About the Brand
Guardian Protection strives to make life just a little easier for you by giving you one less thing to worry about - your family's safety. The company prides in its customized approach to each customer, providing personalized solutions from their experts. With 24/7 monitoring, rest assured that Guardian Protection is working hard for your security, even when you are sleeping.
The company was founded in 1950 in Pittsburgh, providing security to jewelry stores. Within the next two decades, its popularity shot up, making its way up to the Inc 500 list of the fastest-growing companies in America.
As they improved their technologies and customer service, it was not surprising to see them rising through the ranks. From featuring in the list of the top 100 security system companies in SDM Magazines to receiving the Monitoring Center of the Year Award in 2015 and 2022.
Currently, Guardian Protection is the largest privately-held security company with over 1,000 employees and 265,000 satisfied customers.
Pricing And Standout Features
Guardian Protection strives to create packages for everybody - whether you live alone, with your family, travel frequently, or need security for your business. Moreover, you can customize the packages to fit your specific needs.
Here is a breakdown of the basic packages:
Standard Package - $34.95/mo
Essential Package - $49.99/mo
Premium Package - $499 upfront
Features Offered
Guardian offers several features that equip homeowners and business owners to keep a strict eye on overall security and safety. These features and technology have been developed to create a seamless integration with your smartphones and other smart devices. While their smart home security systems are relatively standard (and slightly expensive), there are a few which we really liked.
Wireless Systems
Almost everything we own is now wireless - from our phones to speakers, charging devices, computers, and even our home security. All of Guardian Protection's systems and features are wireless. No drilling into walls, no messy wires, and no opportunity for criminals to cut the cords.
Tamper-Proof Sensors
A relatively small but essential feature introduced by Guardian Protection is their Tamper-Proof sensors. These sensors immediately set off alerts if anyone tries to disable them. It will alert you discreetly about an invader trying to tamper with your systems so that you can take immediate action.
24/7 Professional Monitoring
This is probably the most important feature you can have on your home security system. The 24/7 professional monitoring keeps your home security system connected to their servers and monitoring centers. In case of any emergency, the agents are immediately notified and can take action within seconds.
Touchscreen Controls
Built to look and function like a tablet, the Guardian IQ2 Touchscreen Control Keypad is a great feature. The built-in panic button, weather display, and picture snap features are highly coveted and loved by customers.
The Different Systems & Equipment
Now that you know a little bit about the standout features offered by Guardian Protection, you're probably curious to find out more. Well, let us tell you about the different systems they offer, along with their advanced equipment and technology.
Smartphone & Device Control
An excellent feature offered by Guardian Protection includes their smartphone and device control system. With a simple setup process, your home security system will be synced with your smartphone, computer, laptop, and other devices such as your smartwatch, tablet, etc.
You can efficiently set up customized security features and alerts for your home security system. The integrated systems allow you to keep track of your home security, no matter where you are in the world.
Moreover, the Smart Home Automation system allows you to keep track of all your passwords, schedules, alerts, reminders, and much more. A simple push of a button or a swipe on your screen can control all the features no matter how far away you are.
Indoor Wi-Fi Cameras With Night Vision
Do you spend a lot of time away from your home? Or maybe you're planning a long trip and need to keep an eye on your property. The indoor wireless camera with night vision will equip you to do that effortlessly.
The night vision cameras work beautifully to provide crystal clear video images that you can watch on your devices' screen. Furthermore, the video footage is recorded so you can go over it any other time.
Geo-Services
Want to arm or disarm your system, but you're still far from home? Or maybe you need to turn off the lights at home, which you forgot to do on the way out? With the Geo-Services system, you can.
Control all your home security as well as home command features right from your smartphone, no matter where you are located. Moreover, you can draw a virtual fence around your property and arm certain security features while you're away, just for added protection. With the geo-services system, the security systems can get activated or deactivated based on your smartphone's location.
Video Analytics
Wondering what that pesky creature is that's chewing up your shrubs when you're not home? Are you suspicious that a stranger is walking around your property or trying to enter in your absence? With the outdoor camera system, you can watch exactly what's going on when you're not around.
It not only detects any movement but also records it in crystal clear quality. Moreover, the night vision feature does the same - even in the absence of daylight or artificial lights.
Mobile Alerts
One of the most advanced and popular security features offered is the Mobile Alert system. Customers can personalize their home security system and sync it up with their smartphones.
You can now receive immediate alerts on your mobile phone in case of any alarms, sensors going off, or any other emergency. It allows you to act on the spot without wasting a second, increasing safety and security for your home.
Guardian Protection Equipment
Depending on the kind of package you decide to purchase, you will be given some of the best, most advanced equipment to facilitate your home security.
The standard equipment includes the following:
Fire/medical security
Geo-Service
Mobile arm/disarm
Smash & crash protection
Text & email alerts
24/7 monitoring
Along with these, you can also get additional security equipment, as mentioned below. All these features and equipment add to the safety and security of your family or business.
110-dB Siren
Carbon Monoxide Sensor
Guardian IQ2 Panel
Room Temp Sensor
Smart Door Lock
Smart Garage Door Opener
Smart Thermostat
Video Doorbell
Smoke & Heat Detector
Indoor Camera
Outdoor Camera
Glass-Break Detector
Now that you can see the impressive list of systems and equipment offered to you by Guardian Protection, you can pick out the ones you might need the most. However, keep in mind that while the immense selection is great, it can also turn out to be quite costly if you're not careful.
To keep things within a budget, it is crucial to make a list of all your requirements first, and your budget, and then pick and choose from the options. Get the best home security you need without burning a hole through your pocket.
Why Buy This Product?
Hopefully, the exhaustive list we created above helps you decide what kind of features and security systems would best fit into your needs. One of the best things about Guardian Protection is the fact that every customer has the luxury of personalizing their security systems.
This gives you the freedom to choose what you want and leave the rest and gives you control over your budget. Now that you know what kind of features and equipment to expect, here are some compelling reasons why we think you should buy this product.
Professional Installation
While the installation process is not free of charge ($99), the entire process was extremely professional and effortless. A Guardian technician is sent over to your home within a few days after you subscribe to their home security system. Each technician is highly trained and an expert at their job, so you can rest assured that you will receive top-quality service and products.
The installation process itself is relatively quick and does not require any intervention from your end. The expert professionals will complete the installation process in no time, making your home safe and ready.
Excellent Customer Service
One of the most important aspects of any home security system is its customer service. What good is home security if you cannot get in touch with their executives any time you require help?
Fortunately, the Guardian Protection team is always ready to help you. They provide reliable 24/7 customer service, which is prompt, accessible, and available at all times. That being said, if you are someone who enjoys the DIY approach, you might find their service slightly lacking.
While their customer support is impeccable, they don't have much in terms of How-To articles, troubleshooting guides, or tips on how you can work your way around the system independently. Of course, this isn't much of an issue when you weigh it against their prompt and reliable service.
Guarantees
Another compelling reason why we think you should buy Guardian Protection is the generous guarantees they offer. Surprisingly, you won't find many competitor brands in the market that provide the same guarantees as Guardian.
One of the guarantees offered by them is a $500 cover for your insurance deductible, in case you have a break-in into your home or office while their services are armed and monitored.
We especially like their Home Relocation Guarantee, which promises you a free installation and setup in case you decide to move to a new home (and continue subscribing to their home security services).
If you don't have your own home and frequently rent and change residences, you will appreciate this guarantee. Of course, it is advisable to speak to their customer service representatives to get details on the guarantees and services.
Long-Lasting Equipment
When purchasing a home security system, it's obvious that you want it to last you for years to come. Guardian Protection has built all its systems and equipment, keeping this in mind. Not only are their products durable and long-lasting, but their services are also easy to use and accessible.
One of our favorite features was the IQ2 touchscreen controls, which allowed us to arm or disarm our home security system using easy touchscreen controls. Along with that, we also loved the Home Automation features, which were excellent for day-to-day use in and outside our homes.
Never again will you suffer the consequences of your absent-mindedness! With easy controls on your smartphone or tablet, you can control all the switches and alarms of your home - even when you're away.
Wallet-Friendly Options
We understand if you are one who prefers functioning on a budget. Not everyone has extravagant funds that they can spend on lavish home security. Guardian Protection earned our respect with their customizable options and budget-friendly subscriptions. Of course, if you can afford to pay a higher amount for increased security, you can always change your subscription details.
The entire process is easy, and you will be guided by their brilliant customer service team at all steps.
What Could've Been Better?
After going through our extensive review, you surely won't be surprised to know that Guardian Security is the largest privately-held security company amongst competitors. That being said, we understand that nothing comes without its flaws - and so does Guardian Protection.
We had a few bones to pick, the first being that they don't have any options to purchase their security systems online. To do this, we had to speak to a customer service representative. Now, this wasn't a terrible experience; in fact, it was the opposite. However, we would've liked to have the option to do it online.
The second issue we had was that their website did not contain any informational articles, guides, or troubleshooting options to have a DIY experience. Again, we appreciate the fact that their impeccable customer service provided us with assistance at any point during the day or night. For some customers, the absence of DIY options could be a turn-off.
Lastly, we noticed that although their 24/7 monitoring and response team were very prompt, they took a few seconds more than competitor companies did. If we were to make a comparative study, we would mention this as an issue, but otherwise, it seems fair.
Pros
Excellent customer support
Long-lasting, durable equipment
Budget-friendly as well as lavish security options
Generous guarantees
Advanced Guardian IQ2 Touchscreen Control Keypad system
Cons
Cannot purchase their system online
Lack of informational articles and guides
Guardian Protection Home Security Buyer’s Guide
We hope we have answered most of your questions regarding Guardian Protection Home Security. We have almost come to the end of our guide, but before we leave, we would like to tell you a few factors you should consider before buying a home security system.
Professional Monitoring
When looking for a home security system, it is crucial to purchase one that provides 24/7 professional monitoring. While self-monitoring is always an option, it is not a feasible one. The reason you would buy home security is so you can rest assured that your home is safe when you are away.
If you need to monitor your home every few hours, it eliminates the entire point of opting for additional security.
Budget
We acknowledge that most people need to run their lives on a budget. Unless you have set aside a substantial amount of money for home security, you're probably looking for budget options in the market.
It is important to go through all the features, equipment, and systems with a fine-tooth comb. You can opt-out of anything which you feel you don't require in your home. Additionally, you can add a few more features or systems if you think it is necessary. Have a budget in mind beforehand, so you don't end up spending an exorbitant amount.
Complete Smart Home Setup
Most people have made the wise choice to switch to smart home devices. These not only make our lives easier but are also necessary in terms of home security and protection.
When choosing the best home security system, opt for one which offers a complete smart home setup. You should be able to sync all your smart devices to your security system so you can control everything with the touch of a button - no matter where you are located.
Customer Service That Just Keeps On Giving
Customer service is arguably one of the most important aspects of any purchase. So when it comes to your home security, make sure you pick one that customers have reviewed to have excellent customer service.
You should personally have a chat with their customer support team, so you have a fair idea about how they function. When you are in need of help, you should be able to rely on their excellent customer support team.
Guardian Protection Home Security FAQ
Is There A Contract Involved?
Yes. Guardian Protection Home Security offers various contracts which last from 36-months to 5-years, depending on customer needs. Surprisingly, their contracts last longer than contract lengths provided by most of their competitors.
Is There Any Money Back Guarantee?
No, there is no money-back guarantee. However, as we mentioned earlier, there is a $500 cover toward your insurance deductible, which they offer in case your home gets broken into while their systems are active and monitoring your home.
How Can You Cancel Guardian Protection Home Security?
If you wish to terminate your contract with Guardian Protection Home Security, you can do so by getting in touch with their customer service representatives. They are available 24/7 over the phone, and it is effortless to get in touch with them for any assistance you require.
That being said, we should mention that their cancellation policy is pretty strict. Typically, customers are locked into a minimum one-year contract. In case you wish to cancel your security system, you will be obliged to pay termination fees, which might be a little high. It makes more sense to wait and complete your contract with them.
Are Their Systems Wireless?
Yes, all of Guardian Protection’s systems are wireless. You don’t need to worry about drilling into your walls, dealing with messy cords and wires, or even the risk of criminals cutting the cables to your security system.
What Are Their Response Times?
Unfortunately, this is an area where we think Guardian could do with some improvement. Although their response time is less than 60 seconds, which is excellent, it is still slower than industry standards.
What Are Their Video Capabilities Like?
Guardian Protection offers both indoor wireless video cameras as well as outdoor ones. Moreover, they are equipped with night vision so that they provide you with crystal clear, color images and videos even during the night.
However, they offer just one indoor and one outdoor camera. If you wish to equip more in your home or office, you will have to purchase additional equipment from their company.
Is There A Self-Monitoring Option?
Unfortunately, no. The only monitoring options they have are their excellent 24/7 monitoring systems, watched over closely by reliable professionals. Although there is no self-monitoring option, we must point out that their remote monitoring was impeccable and had no system flaws.
Do They Offer Professional Installation?
Yes. Guardian Protection offers professional installation services that are prompt, reliable, and inexpensive. You have to pay a one-time fee, which will cost you $99. With their Home Relocation Guarantee, you will enjoy the benefit of free installation and setup if you decide to move homes.
What Is The 7-Day Orientation Period?
Guardian understands that it often takes a few days for homeowners to get comfortable with their new security systems. Keeping this in mind, they have developed the 7-day orientation mode, which allows you to get comfortable with your new system’s functions and features. During this period, you don’t need to worry about any false alarms and related fines.
Once you feel comfortable enough to turn off the orientation mode, the home security system will work as expected. They will be obliged to alert emergency responders in case of any emergency.
However, keep in mind that Guardian will alert the emergency responders in case you have monitored smoke or carbon monoxide detectors. This will be done regardless of your orientation mode being turned on or off.
Guardian Protection Home Security Verdict
We understand how important home security is, and so does Guardian Protection.
Their systems have been designed by experts who have their own families and understand the ever-present need for safety and security. Keeping affordability in mind, they have created various systems and subscriptions which are apt for all kinds of buyers.
After using their home security system, we were pleased with the overall performance. Even the slight flaws they had did not outweigh the tremendous benefits we enjoyed from their security system. As such, we believe that Guardian Protection is an excellent choice for most people.
This brings us to the end of our guide. Until next time, stay safe!
Isn’t it heartbreaking to see stains and dirt collecting around your bathroom tiles and on your favorite tabletop? Today we are telling you how to prevent it.
Bathroom tiles becoming slippery and kitchen countertops getting stained is nothing new to homeowners. But it is necessary that you know how to protect these beautiful accessories that you have installed in your house.
Today, we are going to take you through the 7 best grout sealers that can help you tackle the problem. In this guide, we are going to discuss the products in detail, along with their respective pros and cons. We also have a buyer’s guide at the end to help you better understand what to buy.
So, without any further delay, let’s dive right in!
Listed below are the Best Grout Sealers For Shower:
Aqua Mix Sealer: The Aqua Mix Sealer's Choice 30882-4 is exceptionally user-friendly and quick drying, this Sealer's Choice is food-safe for kitchen application, despite requiring multiple coats due to thin consistency.
Black Diamond Stoneworks: The Black Diamond Stoneworks NG-PT Granite Sealer is noted for its versatile surface compatibility and compact spray bottle design. Dark granites may show a cloudy residue post-application.
Miracle Sealants 511QT6: The Miracle Sealants 511QT6 Sealer offers deep, long-lasting protection across broad surfaces and boasts a slip-resistant feature, albeit at a higher cost.
StoneTech: The StoneTech CECOMINOD080896 Heavy Duty Grout Sealer distinguishes itself as a multi-surface non-acidic sealer that provides a natural look after drying. It is less ideal for larger areas due to its coverage limitation.
Miracle Sealants GRTSLRAEROCS: The Miracle Sealants GRTSLRAEROCS Grout Aerosol Spray is praised for its swift, invisible protection across a diverse range of surfaces. Its packaging quality is an area highlighted for improvement.
1. Aqua Mix Sealer's Choice 30882-4
For anyone who is looking for a water-based formula that is perfectly suited for sanded grout, the Aqua Mix Sealer's Choice is an excellent option. It is super-convenient to use and delivers a crystal-clear look once it dries up.
To know more about the product, keep reading!For us the most important thing is the ease of use and this item aces it. It can be used by amateurs and professionals alike without any prior knowledge. Even if you have not used it before, you can use it to seal grout without much hassle.
Moreover, you can use this formula anywhere you need to without having to worry at all. It sinks deep into the grout but ensures that it does not get discolored. Nobody likes formulas that are acidic and risk discoloring the grout.
The formula is also food safe, and thus you can use it in any place you please, even in the kitchen, without the risk of poisoning. Also, the mixture dries up and cures pretty fast. In less than 48 hours, it delivers a clean and almost natural look. It is an excellent choice if you are looking for fast results.
After using this product a few times, we can say that there are hardly any complaints that we can make about the result it delivers. However, we have to tell you that the formula is a little thin, and you will have to put a few coats to get the desired result.
What We Like
It can be used by everybody
Safe around edibles
It does not discolor the grout
It dries up quite fast
What We Don't Like
The product is a little thin
Suitable Surfaces: Sanded Grout | Dimensions: 5.5 x 2.5 x 7.8 inches | Weight: 2 pounds | Fast Drying: Yes | Strong Odor: No
2. Black Diamond Stoneworks NG-PT Granite Sealer
The Black Diamond Stoneworks NG-PT Granite Sealer is a blessing for all looking for a formula that is more than a grout sealer. In case you are working on a project where different kinds of hard surfaces need protection, it is a multipurpose sealant like this one can come to your aid.
The bottle in which the product is packaged is extremely convenient to use and very portable. It is a 16 ounces spray bottle that is quite compact and very suitable if you need to get light touch-ups or work on small projects.
Furthermore, what makes it multi-purpose is the non-toxic and non-corrosive formula. Because of this, you do not have to restrict yourself to using it on just grout. You can very well use it on granite, cement, or other kinds of stones that might need surface protection.
On top of that, the fact that it is food safe makes it suitable for kitchen tops. You can add that extra layer of protection to your kitchen granite to prevent scratches and also make it skid-proof. Additionally, the application is very simple: just use the sprayer on the desired area and wipe off the excess formula.
Some users have complained that it leaves a cloudy trail when used on dark-colored granites. This is not new to grout and granite sealers. However, to prevent such a problem, we suggest that you spray the product on a small area of the granite or the grout before using it on the entire area.
What We Like
Great packaging
It can be used on multiple surfaces
Prevents scratches
Very simple to use
What We Don't Like
It makes the stone look a little cloudy
Suitable Surfaces: Granite, Cement, Stones | Dimensions: 4 x 2 x 8 inches | Weight: 1.2 pounds | Fast Drying: Yes | Strong Odor: No
3. Miracle Sealants 511QT6 Sealer
Next up on our list, we have the Miracle Sealants 511QT6 Sealer. This is quite different from the regular formulas that are available on the market. It takes the grout depth into consideration and seeps deep within to provide more extended protection to the grout and the surrounding tiles.
What really stood out for us about this product is the long-lasting protection that it provides. This sealer is a solvent-based formula that goes deep into the grout layer and thus provides longer-lasting protection from decay and damage.
It is most suitable to be used in areas that become slippery due to regular water usage. Because of the slip-resistant finish, it provides the tiles, you and your kids can play in the rooms too without fearing a fall.
Moreover, it can also help you to reduce the time and energy that you spend on cleaning. It deposits a protective coating on the grout and the surrounding tiles, thereby reducing the chance of them catching stains. With this, your tiles will look brand new for a very long time.
Well, we have been using this product for a while now, and we must say we’re pleased with the performance. However, we need to mention that it is a little pricey as compared to the standard ones available on the market. But the result it delivers is totally worth the price.
What We Like
Provides long-lasting protection
Prevents slipping
Protects from stains
Quite easy to use
What We Don't Like
A little pricey
Suitable Surfaces: Tiles | Dimensions: 7 x 3 x 4 inches | Weight: 1.75 pounds | Fast Drying: Yes | Strong Odor: No
4. StoneTech CECOMINOD080896 Heavy Duty Grout Sealer
The StoneTech Heavy Duty Grout Sealer is quite a popular name on the market because of the versatility it provides to the users. You can even try it on marble, and it will show no discoloration. The formula is non-acidic and can be safely used on a range of surfaces without you having to worry that it will damage them.
If you are worried about water or oil-based stains, this product can completely take care of that. One coat of this on your tiles and they will be resistant to stains and water spots for a very long period of time.
However, it is the versatility that this item offers which caught our attention in the first place. It is fit to give protection to grout and other varieties of stones such as granite, marble, ceramic, and the likes.
Moreover, its water-based formula is highly effective when it comes to protecting the grout against any form of stains caused by water or oil. It provides solid protective layers against stains, thereby reducing the effort that you have to otherwise put into cleaning them.
Additionally, once it dries up, it delivers a very natural look. When put on granite or grout, it does not make it cloudy or give it a bulky appearance. Your guests won't be able to really tell that you have applied a sealer!
The only glitch with this item is that it has a relatively smaller coverage in comparison to the other sealers that are out there. It can only cover 1,000 square feet of area and thus becomes quite unsuitable for commercial purposes. However, if you have a small bathroom or a residential area, the quantity is quite sufficient.
What We Like
Highly versatile
Increases the durability of the tiles and grout
Helps to prevent stains
Dries up quite fast
What We Don't Like
Quantity is less is used for commercial projects
Suitable Surfaces: Granite, Marble, Ceramic, Various Stones | Dimensions: 7.95 x 4.65 x 2.56 inches | Weight: 2 pounds | Fast Drying: Yes | Strong Odor: No
Looking for a fast and effective way to seal grout? The Miracle Sealants GRTSLRAEROCS Grout Aerosol Spray is here to your rescue. This item is unique in its capacity of providing an invisible layer of coating to your tiles and grout. Thereby keeping decay and stains away for a long time.
This item will totally eliminate the need to buy multiple sealers that you end up purchasing for different surfaces in your home.
You can use this indoors or outdoors, on new and old grout, and on a variety of hard surfaces and stones. The formula is designed to give protective layering to all such surfaces.
Moreover, the way this item is designed, the application becomes very convenient. It comes in a 15-ounce spray bottle that helps to keep consistent pressure to ensure that you get equal and even coverage.
You do not need any separate tool to apply the solution and can directly spray it from the bottle.
Additionally, we have to say that we were quite impressed with the coverage that such a compact sealer sprayer provides. It can easily cover 250 linear sq feet of area without much trouble, and that, too, provides an even coating.
The best thing is that it penetrates the grout layer quite fast and seals it for a good amount of time.
After using the item, we have no complaints about its performance. However, it would have been better if it was packaged well. The box it arrived in was not very sturdy, and there was a chance that the liquid could have spilled.
What We Like
Can be used on a variety of stones
Very easy application
Impressive coverage
Cures and dries up quite fast
What We Don't Like
Packaging can be better
Suitable Surfaces: Hard Surfaces | Dimensions: 10 x 2 x 5 inches | Weight: 1 pound | Fast Drying: Yes | Strong Odor: No
6. Tuff Duck Granite Sealer
We have almost reached the end of the list, and next up, we have the Tuff Duck Granite Sealer. We were quite impressed by the sheer strength that this sealer exudes. It creates a protective layer to prevent porous stones and grouts from catching stains and getting damaged.If you are working on a bigger project, what is needed is a solution that can provide a high-quality coat and also penetrate deep within the layers of grout and stones.
The quantity is good enough for you to take on projects as large as 800 sq feet. And even after you are done, you will have some leftovers. You can use this for touch-up purposes later.
Additionally, the solution contains a multi-purpose formula that works to protect both the grout and surrounding tiles from decay and stains. We say it is very versatile because it is suited to protect not just grout but a variety of natural stones that are porous in nature.
The sealer is designed to penetrate to the end layer of the natural stones and make sure that all the pores are covered to prevent moisture from accumulating. It also prevents unwanted bacteria formation.
We do not have any significant complaints against the product apart from the fact that it has a pungent odor. We suggest that you wear a mask or cover your face while applying it to the grout to avoid the strong smell. Also, consider moving your pets away from the area when you are applying the sealer.
What We Like
Can cover big areas
Provides a top-notch coat
Works on grout and tiles alike
Prevents bacteria formation
What We Don't Like
Has a strong smell
Suitable Surfaces: Porous Stones | Dimensions: 8 x 4 x 8 inches | Weight: 8.69 pounds | Fast Drying: Yes | Strong Odor: Yes
7. Clean-EEZ Grout Sealer
As a well-regarded product in its category, the Clean-EEZ Stone & Grout Sealer offers a user-friendly solution for sealing grout and unglazed natural stone tiles, particularly in the shower and bathroom. With a simple application process and a formula designed to resist both water and oil-based stains, this product aims to keep your tiles in pristine condition.
However, it's important to note that despite its above average 4.5 out of 5-star rating from over 1,400 reviews, some users have noted it may take multiple coats to achieve perfect waterproofing results.
Taking on the role of a user, we discovered multiple appealing aspects of the Clean-eez Stone & Grout Sealer. With its straightforward application method, all you need to do is apply it to the grout using a paintbrush, wait five minutes, and then wipe away any excess. This makes it an excellent choice for individuals who are new to DIY projects.
Secondly, its versatility extends to multiple areas of a home, including bathroom tiles, shower surrounds, and natural stone. Additionally, its low-odor formula was a refreshing change, thereby contributing to a more pleasant user experience.
Despite the numerous strengths of the Clean-eez Stone & Grout Sealer, there are areas for potential improvement. A significant sector of the user feedback observed that optimum waterproofing required 3-5 coats of the sealer, an effort that may be time-consuming and resource-intensive to some users. Streamlining the effectiveness of the product might save users time without compromising the sealing quality.
What We Like
Easy application for beginners
Works on various surfaces, including bathroom tiles and natural stone
Vivid colors
Low odor formula for user comfort
What We Don't Like
May require multiple coats for full waterproofing
Suitable Surfaces: Natural Stone | Dimensions: 10.35 x 5.28 x 3.43 inches | Weight: 2 pounds | Fast Drying: Yes | Strong Odor: No
What Are the Best Grout Sealers for Shower?
Grout sealers are instrumental in protecting your shower tiles from moisture, preventing mold growth, and prolonging their cleanliness and color. This article presents an in-depth comparison of some of the best grout sealers for showers available in the market. Characteristics such as their suitability for various surfaces, physical dimensions (length x width x height), weight, fast drying capability, and the presence of a strong odor have been examined.
Buying Guide For The Best Grout Sealers For Showers
Now that we have spoken about the features and the pros and cons of the 7 top grout sealers, we hope it will help you decide better. But we understand that you still might have some doubts lingering in your mind.
Knowing about the features is not enough, and there are a few more factors that you need to take into consideration when deciding to buy one. And in this section, we are going to take a look at some of these factors.
Let's see what they are!
Surface
When deciding which product to go for, it is very crucial that you first inspect the surface that you are going to use it on. In case you are working on a big project, we recommend that you opt for a gallon-size sealer.
How big of an area a pack of sealer can cover is clearly mentioned on the packages, and it is advisable that you read carefully before buying. To give you an estimate, a standard grout sealer should cover somewhere around 1000 ft to 4000 feet for every gallon of solvent.
Resistance To Oil And Water
While choosing an option, it is smart to go for one that is oil or water-resistant, or both. It is a rare combination, but if you are thorough with your research, you will surely find a good one.
If you are planning to use the grout sealer in the bathroom, where there is regular use of water, you should buy one that is completely water-resistant. On the other hand, if your goal is to provide protective layering to your tabletop or kitchen countertop, oil-resistant formulas are preferable.
Simply put, depending on the place where you use the sealant, you should opt for one that serves the purpose.
Longevity
What good is a sealer if it is not long-lasting? Well, re-application is always possible, but that becomes costly and time-consuming.
Go for one which is durable! We have seen that the non-penetrating sealers tend to relatively last a longer time span when compared to the penetrating formulas. However, penetrating solvents come with a range of benefits that you might not want to miss out on.
To find the ideal one, you will have to find a good balance. Jot down your requirements, and read through the descriptions of all the products mentioned earlier to see which one will be the perfect fit.
Grout Color
Depending on your aesthetics and décor, you can either opt for a sealer that provides an invisible look or one that has a hint of color. If you are not a great fan of your existing grout color, this is a great chance to get the color changed.
But if you have a colored grout line that you like, simply choose a transparent coat that only adds sheen to the lines. The major aim here is to not change the color but make the existing one look more shiny and attractive.
That's all my friends!
After going through this comprehensive read, we hope that you can make a better choice. We also hope that you had as much fun reading about the products as we had fun experimenting and compiling the information.
We promise to be back with more such interesting reads for you. But before we say our goodbyes, we would like to let you in on our favorites. Aqua Mix Sealer's Choice 30882-4 takes the award for being the best overall.
With that, it's a wrap. Let us know about your favorites in the comment section below.
Until next time, take care!
It isn’t surprising that lathes are known as the “mother of machining tools” because they can be used for diverse purposes.
And, if you’ve been working in the metal manufacturing industry for quite some time, you must have surely heard praises about the Grizzly lathe. For over 30 years, Grizzly Industrial has been manufacturing all kinds of machine tools, power tools, and hand tools. So, if you are considering a lathe from Grizzly Industrial, then you are most likely to end up with either the G8688 or the G0602.
To be honest, both these lathes are sturdy and highly durable. But, how do you know which will be the ideal one for you? To help you decide just that, today we’ll talk about the two lathes and discuss their features.
So, without further delay, let’s dive straight into the deets. Shall we?
Grizzly Lathe Review
The Grizzly Brand
Since 1983, Grizzly Industrial has been manufacturing top-notch tools and equipment for the metal and wood manufacturing industries. You can browse through the wide variety of tools offered by them to choose the best one for your task. All Grizzly tools are quite user friendly and allow you to complete your tasks in a breeze.
Speaking of durability, Grizzly Industrial tools are robust and well-built to tackle all your metal manufacturing tasks. Also, their machines have been awarded for excellent quality.
If you are worried about the prices, then let us tell you their tools are reasonably priced. Plus, their customer services are always there to assist you in case of any issues, which is a bonus.
Whether you are manufacturing with metals or working on a new construction project, a good lathe is the need of the hour to carry out your tasks in a smooth and efficient manner.
Both the G8688 and the G0602 by Grizzly Industrial are among the top-notch models for all your metal needs. Be it cutting, drilling, shaping, turning, sanding, knurling, or deformation, you can carry out any task you need.
These tools will help you in shaping those metal pieces without any hassle. You can trim off those extra parts with these machining tools and carve an excellent piece for your use. Further, due to their compact size, these mini metal lathes are extremely portable.
If you are a hobbyist looking for a good lathe for all your metal tasks, then the G8688 is an excellent option to consider. This mini metal lathe is one of the most durable options available on the market, thanks to the top-quality components used in manufacturing it.
Featuring a single-phase motor, it allows you to complete whatever metal task you have at hand smoothly and efficiently. Also, its 3/4 HP motor offers 110 volts for your metal shaping tasks.
What’s more interesting, is that it has been designed with a space of 12 inches between centers. So, whether you have to deal with bite-sized materials or medium-sized tasks, you’re good to go with this lathe.
To put it in a nutshell, the Grizzly G8688 mini metal lathe packs a lot of punch into a tiny tabletop package. Also, the handy features of this lathe are coupled with quite an affordable price tag. So, if you are a beginner, DIYer, hobbyist, construction contractor, or workshop owner, then this unit is perfect for carrying out all your tasks.
Key Specifications Of The Grizzly G8688 Mini Metal Lathe
Even if you are just a beginner with not much experience in metalworking, you can still use this mini metal lathe to carry out your latest project. Because of its compact size, you may store this anywhere you want.
What you’ll love about this lathe is that it has a thread dial indicator. This will particularly delight those who have just ventured into metalworking and find it difficult to detect the exact size of threads without a guide.
We must also mention this lathe’s variable speed, which starts at 100 RPM and shoots up to 2500 RPM. With this speed, be prepared to achieve more accuracy and perfection in all tasks. It even allows forward as well as backward motion.
Here are the key specifications of the Grizzly G8688 mini metal lathe:
Features a 250 watt, single-phase, 2.8 A/110 V motor
12 inches of distance between centers
7 inches swing over bed
Spindle speed varies from 0 - 2500 RPM
0.78 inches spindle bore (20mm)
Thread dial indicator
5/16 inches maximum tool bit size
Multiple thread pitches
2-34 inches cross slide travel
2-½ inch tailstock travel
Weighs 74 lbs with dimensions of 13 x 30.2 x 13 inches
Key Features Of The Grizzly G8688 Mini Metal Lathe
It would be unfair of you to expect this lathe to perform heavy-duty tasks. But you must not underestimate the device, for it performs impeccably with both medium and small size tasks as compared to others in the same range.
Its single horsepower motor is more than enough for hobbyists and the amateurs to carry out their tasks. Let’s have a look at the features of this lathe to know why it will be an ideal option for you.
Engine
We were caught on the hop when we saw this petite lathe carrying out so many tasks like the wind. No matter what task you have at hand, this lathe carries it out effortlessly. Although it might not be an ideal choice for heavy-duty tasks, it is an excellent option for small-scale jobs.
For novices, hobbyists, and amateurs, this single-phase motor of 250 watts will help you work quickly as a wink. Though we agree that its motor isn’t very powerful, it is definitely a cut above other comparable products.
Capacity
This mini metal lathe is a perfect example of the saying that big things in life often come in little packages. We were pretty pleased with its potential to maneuver turning techniques like beveling, facing, shaping, and bifurcating.
What we found more interesting is the versatility of this Grizzly lathe. If the amateur in you wishes to make screws, small rivets, or any other pneumatic tool, then you must trust this lathe for outstanding results.
Featuring a long spindle of 12 inches in diameter with 7 inches of swing diameter, you can make these objects for your home, and even for commercial purposes.
Variable Speed Control
If you are a professional using lathes for years, you must know the importance of variable speed in the lathe. Thankfully, the Grizzly G8688 mini metal lathe is featured with variable speed controls.
Also, its ability to scythe in both forward and reverse directions makes it an excellent lathe for all the beginners out there. As such, you can use it at no matter which speed you want. It is an ideal addition to your workshop if you are the one who has little experience with lathing.
Design And Longevity
The compact size of this mini metal lathe is quite appealing. Since not every workshop is large, the G8688 lathe is designed to fit your small workshop perfectly. Although small in size, it is highly durable and built to last.
While using this lathe, we did not notice any major vibration as is the case for other lathes. Although it just weighs about 74 lbs, it does an excellent job of absorbing vibration. If you have to carry out small projects, then this would be an ideal pick for all tasks.
Cutting threads and creating tiny brush pulleys is what we loved doing with this lathe, and we were quite pleased with the result it produced. Despite its compact size, it can tackle threads ranging between 8 to 72 TPI-33 inches.
Threading Gears
Though the threading gear of this lathe is made of plastic, you will find it significantly better than others on the market. You’ll find these gears come with a host of benefits such as corrosion resistance. Also, plastic gears are a treat for your ears, for they significantly reduce the noise.
The plastic threading gears perfectly complement the compact design of this lathe machine. Since it is explicitly designed for light metal turning tasks and for smaller workshops, you’d find these plastic threading gears a perfect fit.
What’s more, you will find that the gears are more forgiving than the metal ones as they are easy to replace. Also, we were quite pleased with the four-position turret post because it is ergonomically designed.
Performance And Power
Its compact size mustn’t be taken lightly, for this mini metal lathe delivers a powerful punch when it comes to metal turning tasks. You can throw any metal task at it from medium to large and see how it works. For the novices and the small workshop owners, this brings a lot of versatility to the table.
If you’ve been eyeing the G0602 Benchtop Metal lathe by Grizzly Industrial for a while, then you’ve stopped by at the correct place. This gilt-edged benchtop lathe is super easy to use and is superbly built.
Grizzly has designed this lathe with a robust motor so that you can get the ball rolling for all the tasks that you’ve got to accomplish. Plus, you’ll be delighted to use this lathe for all your turning tasks because of its 0% vibration feature.
Highly striking is its ability to carry out all the metal turning tasks you need; kudos to Grizzly Industrial for polishing up its tools. Moreover, this is an incredible tool with a backsplash guard, a 1 HP motor, thread dial, a dedicated switch for reversing the spindle, and a chip tray. It’s built with all the features you’d be needing for accomplishing any small metal turning tasks.
To put it in a nutshell, this model features all the power of a full-sized lathe with the convenience of tabletop storage. Its 14 amps of power will churn out your metal and wood projects like magic. Further, its user-friendly operation makes it an ideal pick for all the amateurs, novices, and experienced workers.
Key Specifications Of The Grizzly G0602 Benchtop Lathe
If you are just venturing into the field of metal turning and looking for a good lathe to carry out all the metal tasks, then you are good to go with the G0602 benchtop metal lathe. This 10 by 22-inch tabletop lathe works well with tough materials.
It allows you to work with a variety of materials, even plastic, without any hitch. This is only possible because of the tool’s bit which is versatile enough to bisect or shape a variety of materials. Also, you can adjust the rotation speed as you want.
On top of that, its V-way bed provides you with just the kind of support you need while dealing with metals. It also ensures that your lathe lasts almost a lifetime.
What is more interesting, only premium quality materials are used for designing this lathe, so we can vouch for its longevity and durability. As such, you can count on it for years to carry out all your metals tasks. Overall, it is highly versatile, and even allows you to mold engines.
Here are the key specifications of the Grizzly G0602 benchtop lathe:
Features a single-phase 1 HP motor
22 inches of distance between centers
9-½ inches swing over bed
Spindle speed ranges between 150 - 2400 RPM
25 mm of spindle bore
Inch thread ranging between 8 - 72 TPI
Maximum bit size of 1/2 inches
Metric thread ranges between 0.25 to 3.50 mm
6-1/2 inches cross slide travel
2-½ inches tailstock quill travel
Weighs 432 lbs with dimensions of 46 x 22 x 21 inches
Key Features Of The Grizzly G0602 Benchtop Lathe
Unlike the previous product, this lathe works well with tough materials. This makes it perfect if you have been working with lathes for years. Rest assured, you won’t be disappointed. Let’s explore the features of this lathe to know why it would be an ideal choice for experienced metalworkers.
Design And Longevity
Whether you have a construction project at hand or some DIY work, you can complete all related tasks that you want with this ergonomically designed lath. Adjusting the speeds, and changing the bits isn’t much of a hassle while using this lathe; you can do all of this easily. Also, its strong and sturdy V-way bed provides excellent support while working.
Although this benchtop lathe is slightly heavier than the Grizzly G8688, you can store it wherever you wish to after completing your work. Be it on the top of your old cupboard or somewhere in the garage, this lathe can be stored easily. Featuring a chip tray to gather debris and a backsplash guard for the oil, this benchtop metal lathe is a perfect addition to your workshop.
It is without a doubt an excellent lathe for metal turning tasks on the market. Also, because it is made from cast iron, the vibration generated is subdued straight away. This means you can work with your metal pieces steadily without any significant disturbance.
Variable Speed Controls
For those who look for perfection in every arena, this Grizzly G0602 lathe will please the perfectionist within you with its accuracy and precision. As against other lathes, the speed range of this lathe is quite impressive.
If you think switching speeds is a pain in the neck, then this device will let you switch from 150 RPM to 2400 RPM in no time and work smoothly without any hassle. While using this for metal turning, you can easily adjust the speeds as per your convenience. This ensures precision and accuracy in your tasks. Just turn the knob, and you are good to go.
The Gearing System
We found the gearing system of this benchtop metal lathe quite impressive. The Grizzly G0602 lathe is featured with a precise gearing system consisting of a spindle bore of 1-inch. This gearing system ensures that the lathe works impeccably without posing any hindrance while turning metals.
As already stated, the six variable speeds contribute to smooth functioning. You don’t need to fret about the speed since the gearing system takes care of that. Just select the appropriate speed setting, and you’re good to go.
Sturdy Motor
If you are a professional metalworker or a woodworker, then this would be best for all your tasks at hand. Since it features a powerful motor, you can use this benchtop lathe for turning tough metals. And on account of its 1 HP motor of 110 volts, you can carry out all the tasks with ease.
Unlike other metal lathes, this one has made turning out metals a relatively easy task mainly because of its robust and solid motor. So, we highly recommend this Grizzly G0602 if you are on the lookout for a lathe to work with tough metals without any hassle.
Grizzly G8688 vs. Grizzly G0602 - Which One To Choose?
Grizzly Industrial has been offering top-notch quality lathes for years, and the raving customer reviews stand testimony to this fact. Both the Grizzly G8688 and the G0602 lathe are outstanding lathes and perform impeccably well.
Both are robust and durable metal lathes. But, how do you choose between the two? So to make things easier, let’s explore the pros and cons of each in detail. After going through the following, you’ll have no doubts regarding which would be better for your particular needs.
Why Prefer The Grizzly G8688 Mini Metal Lathe?
The Grizzly 08688 lathe works exceptionally well if you have small or medium-sized metals to deal with. Moreover, its compact size makes it ideal for those who work in small workshops. It will allow you to perform all your small to medium-scale tasks in a breeze.
The variable speed ranges offer perfection in all your work. So, we’d recommend all the novices and amateurs to go with this lathe to carry out all their tasks easily.
Pros
Variable speed
Packed with a plethora of features
User-friendly
Compact in size
Cons
Unsuitable for tough materials
Why Prefer The Grizzly G0602 Benchtop Lathe
The Grizzly G0602 comes packed with a host of features that makes it an ideal choice for all the experienced workers out there. Its powerful motor makes it a durable product and it’s highly versatile due to its six variable speed options which allow you to work with almost any material.
Also, it delivers perfect cuts, making it an ideal choice for all the perfectionists out there. And, if durability is a significant factor in your purchase decision, then don’t worry; this product ticks all the right boxes in that department.
Pros
Highly versatile
Strong motor
Durable
User-friendly
Features six variable speeds
Cons
Slightly on the expensive side
Can be used only on top surfaces
Summing It Up
When it comes to lathes, Grizzly never disappoints us. Both the G8688 and the G0602 metal lathes are excellent tools for turning metals. As a result, it is extremely difficult to pick a winner between the two. While both the lathes enjoy certain advantages over the other, the Grizzly G0602 Benchtop Metal Lathe certainly outshines G8688 in terms of features and uses.
The Grizzly G8688 is perfect if you are a novice or an amateur dealing with small materials without much experience, while the G0602 goes well with tough materials. Ultimately, it all boils down to your needs and the nature of your task. Not to mention the fact that your experience level also plays a part in it all.
With that, we come to the end of our comprehensive guide; hopefully, you will be able to make an informed choice. And, keep your eyes glued to this space for more such informative content.
Airless paint sprayers have significantly improved the process of painting large areas over the years. As such, it is imperative to choose the right model.
Unlike traditional rollers, using a paint sprayer offers a ton of benefits. For starters, it creates less mess during painting while it helps in achieving an even application without much hassle.
However, with the availability of a ton of options on the market, choosing the right model that is durable and delivers precise results might not be that easy. So, to make things easier, we bring you two exceptional models from Graco, one of the leading manufacturers of top-quality paint sprayers.
According to DIYers and professional painters, the X5 and the X7 paint sprayers from the brand are the best-selling options currently available on the market. For this reason, we have provided a detailed comparison between these two so that you can finally decide which one to purchase.
Firstly, Graco is the leading manufacturer of paint sprayers in the United States. It is a billion-dollar company that makes paint sprayers from the consumer level to advanced spraying equipment.
Now, coming to these two products, they are under the consumer brand, Magnum. We found that they are made in the US and have 770 service centers spread across the country. Both are highly functional and help achieve even finishes with minimum overspray, which is why they are popular among DIYers and professional painters.
Magnum X5 vs Graco X7 Differences
Despite being products of the same brand, both these models are different from each other in terms of functionalities and other important features. In this section, we will be looking at some of the major differences between these two products so that it helps you choose one over the other.
The Graco X5 can spray up to 0.27 gallons of paint in a minute, whereas its counterpart can spray 0.31 gallons in a minute. This clearly shows that the X7 model is slightly ahead of the former in terms of spraying capacity and coverage.
Below is a comparison chart that will help you understand the differences between the two models better.
Graco Magnum X7 Graco Magnum X5
Maximum tip size: 0.017”Maximum tip size: 0.015”
Flow rate: 0.31 GPMFlow rate: 0.27 GPM
Hose: 100 feet longHose: 75 feet long
Weight: 26 pounds Weight: 19 pounds
Dimensions: 19” x 15” x 37”Dimensions: 14.5” x 12.75” x 19”
As you can see, there are quite a lot of differences between the two models. Even though the differences might not seem significant, it can drastically affect the results.
You will find that the Graco Magnum X7 is much bigger than the Graco Magnum X5 in size, making it an ideal choice for professional painters working on heavy-duty projects. Naturally, it is a bit heavier than the Graco X5, but you can move it around your project hassle-free, thanks to the built-in wheels.
While the Graco X5 supports a maximum hose length of 75 feet, the Graco X7 supports a maximum hose length of 100 feet. This means that the Graco X7 is a notch ahead in terms of mobility as well. However, as far as the power is concerned, both models deliver a similar output.
That said, to make things easier for you, we have reviewed both the Graco X5 and the X7 in detail in the next segment. You would be pleased to know that it was only after extensive research and testing that we have provided detailed reviews.
Just right for DIY Homeowners and Remodelers looking for...
Ideal for projects up to 10 gallons in size, allowing you...
It comes with fully adjustable pressure, which gives you the liberty to control the paint flow as per the project's requirements. This makes the product highly efficient, keeping the overspray to a bare minimum.
We should also mention the robust stainless steel piston pump, as it lets you spray unthinned paint at high pressure. Meaning, unlike most paint sprayers on the market, you don’t have to go through the hassle of diluting the paint with water before spraying.
Another advantageous feature of the product is its suction tube, which directly sprays from the paint bucket. It comes in handy when painting large projects but as far as the usage is concerned, Graco guarantees that it can spray up to 125 gallons per year.
Apart from this, it features a flush adapter, which you can easily connect to a garden hose for easy and quick cleaning in case of clogging issues. Hence, you can efficiently use its 0.38 mm nozzle, which is good enough for nailing medium to light painting projects.
Moving on, it supports a hose length of up to 75 feet. So, it is ideal for both outdoor and indoor projects, as it gives you the extra reach needed sometimes. Plus, with a flow rate of 0.27 GPM, it offers a stable operation, maintaining optimal painting speeds during your painting sessions.
Now, users worried about durability will love its stainless steel construction, which makes the product less susceptible to daily wear and tear. Hence, it stands the test of time with ease.
Lastly, coupled with the durable build quality is a 1-year warranty, ensuring that you no longer have to worry about leaks and defects; Graco has you covered!
Featuring a 0.43mm-nozzle, it can deliver smooth and precise finishes. This means it is suitable for painting a wide range of surfaces, including fences, decks, and home interior.
It sports a wheeled cart design, making it highly mobile, and allowing you to move it around effortlessly as per the project requirements. Also, it has a pressure capacity of 3,000 PSI, which in our opinion, is sufficient enough to handle the most complicated projects.
With a flow rate of 0.31 GPM, it can paint large surface areas easily. Now, this is something that professional painters will truly appreciate about this product. As far as the build quality is concerned, it is made of stainless steel, making it durable and long-lasting, just like the Graco X5.
What’s more, it can spray up to 125 gallons of paint per year like its smaller brother, thereby being consistent in its performance. Apart from this, it comes with pail hooks, letting you store paint cans on the apparatus of the product itself. This practical feature comes in handy when you need to refill the paint can when working on a large project.
Moving on, one of the best parts about this product is the PushPrime technology, which provides reliable and fast start-up with just a push of a button. This unique technology lets you start painting without any delay or unnecessary hassle. Coupled with this is an adjustable pressure control knob, which allows you to tweak the amount of paint being sprayed.
Lastly, it is backed by a 1-year warranty, which ensures that you don’t have to incur additional expenses for replacement or repairs.
Pros
Backed by a 1-year warranty
Can cover large areas with ease
Delivers precise and smooth finishes
Easy and fast start-up
Durable and long-lasting
Cons
May not be appropriate for painting small areas
Graco Magnum X5 vs Graco Magnum X7 Detail Comparison
Now that we have reviewed both the products in detail let us make a side-by-side comparison, so that you can decide which option would be perfect for you. We strongly recommend reading this part very carefully; otherwise, you might miss a thing or two.
Precision
When it comes to precision, both models deliver satisfying results. Both can cover a wide variety of indoor and outdoor surfaces. However, the Graco X5 is more precise than the Graco X7 because of its compact and lightweight design.
The tip of Graco X7 measures 0.17” in diameter, whereas the Graco X5 has a slightly smaller tip, measuring 0.15” in diameter. Having a larger tip ensures that it can spray more paint on large areas. So, in this regard, the Graco X7 is better than the Graco X5.
Power
Both the paint sprayers feature a maximum PSI rating of 3,000 PSI as far as power is concerned. Hence, both are capable of handling large painting projects that demand precision.
While the Graco X5 has a flow rate of around 0.27 GPM, the Graco X7 has a flow rate of 0.31 GPM. A slightly better flow rate of the Graco X7 helps it paint larger areas within a shorter period of time.
So, if you usually paint big, time-consuming projects, the Graco X7 paint sprayer would be a better choice for you than the Graco X5. Similarly, the X5 would be the ideal choice if you get small projects that aren’t that time-consuming.
Size
The Graco X5 is smaller than the Graco X7 in size. The Graco X5 sports a stand underneath, whereas the Graco X7 is mounted on a wheeled cart, which makes it easier to move around at convenience. Nevertheless, both the models are easily portable, allowing you to take them to the worksite without any hassle.
You should consider the requirements of your project and the importance of mobility while working on that project and then make your decision.
Durability
Talking about durability, both models are made using top-grade stainless steel. This means that you can expect both of them to last a very long time despite consistent usage. Also, one of the best things about stainless steel is that it is anti-corrosive in nature, which means you don’t have to worry about rust formation.
Overall, both the X5 and X7 from Graco can be used for prolonged periods, which is why both the models are highly sought-after by professionals as well as DIYers.
Usability
In terms of usability, both paint sprayers perform smoothly. They are easy to handle and feature the special PushPrime button, which allows for a faster start-up than most other options out there. Also, they are engineered very well to prevent clogging and to reduce overspray.
It does not matter if you are a seasoned pro or a novice venturing on your first painting project; using both the paint sprayers is easy. Overall, both the Graco X5 and the Graco X7 are highly comprehensive, which is why they are such popular paint sprayers in the paint industry.
Airless Paint Sprayer Buyer's Guide
Let’s face it; choosing the right airless paint sprayer that meets all your project requirements is not all that simple. In this section, we have mentioned a few important points that you should keep in mind in order to make an informed purchase.
Easy Clean-Up
You should always go with a model that is quick and easy to clean.
Usually, painting tools are quite difficult to clean, mainly because they come in contact with a wide variety of compounds that can affect the color and create clogging inside. This is why you have to factor in your cleaning equipment and the frequency of the product’s use. In the case of an airless paint sprayer, the nozzle requires the most attention.
So, if you are a professional painter, you may want to go with a model that allows for an easy and faster clean-up.
Project’s Location
The location of the project is an important factor that you should consider when buying an airless paint sprayer. This is because some paint sprayers are just not appropriate for indoor use.
Since spraying paint involves letting out paint particles into the air, it possesses various health risks. Furthermore, certain models may not be rated for being operated inside the house. Hence, it's best to keep a check on the product listings in order to be sure.
Likewise, you should know the type of power outlets you might have access to in the worksite. Airless paint sprayers need some form of power source to work. Some models have extended reach than others, so you need to keep these factors in mind to ensure that you can paint the project without any difficulty.
Compounds Used
Another crucial factor that will be determining your purchase is the kind of compounds you want to use since not all sprayers have the potential to function with every compound. That said, you should always go with a model that supports almost all the compounds, including thin latex paints and residential paints.
We would strongly advise you to read the airless paint sprayer's operational guidelines before purchasing to confirm whether your compound works with it or not. Also, you might need to dilute your compound a bit to bring down the viscosity level so that it can be sprayed smoothly through the paint sprayer.
Control
Painting projects require broad coverage, when painting fences and walls, or fine precision detailing, when painting cars or staining a cabinet. As such, you should always consider the kind of project in hand, and then purchase a model that lets you finish them effectively.
Nowadays, most airless paint sprayers feature variable settings that let you alter the spray fan’s size to a large width for greater coverage or a narrow width for detailing. So, you should check the maximum and minimum width of the model you intend to purchase to ensure that it meets the project's requirements.
Ease of Use
Ease of use is always a vital factor when you are purchasing any type of tool. And an airless paint sprayer is no exception. Not only does it influence your safety, but also your ability to finish the task efficiently.
When it comes to airless paint sprayers, you should always choose a model that fits in your hand properly. You should be able to work with it for longer periods at a stretch without discomfort or hand fatigue. Therefore, consider the product’s weight and build quality before buying.
Plus, you should avoid going with models that come with a paint container attached to the gun as they are generally very heavy and can hinder your work. It is always best to go with a model that pulls paint directly from the paint tub, as they are a lot comfortable to hold and help in delivering precise results.
Portability
Portability might not be the first feature that comes to your mind when talking about airless paint sprayers; however, it is just as essential as the other features. In airless paint sprayers, portability does not work the same way as it does in other cordless tools, as they need to be connected to a power source to function.
So, for airless paint sprayers, portability generally comes down to their power cords and the paint hoses they feature.
If you are moving a lot while painting the project, consider going with a model that supports over 20 feet long hoses. This will allow you to move around while working without moving the base from one place to the other.
Added Features
Like any other tool, airless paint sprayers also come with some added features that enhance their performance. Most of the models let you tweak the flow of the spray in circular, vertical and horizontal shapes, and the spray fan’s size as well. Plus, with some models, you even switch out the nozzles to produce different effects.
How To Maintain Your Paint Sprayer
Since buying a paint sprayer requires quite a bit of investment, it is imperative that you learn how to maintain it. Maintaining your paint sprayer will not only make it last longer but also keep its efficiency levels and performance high. In this section, we have shared some tips that will help you maintain your product.
Strain The Paint
You must strain your paint in order to prevent debris from clogging the nozzle and the spraying tips. You can do it by simply pouring paint through the stainers to the paint bucket before spraying.
Look Out For The Valves
Taking care of the valves is a must when it comes to maintaining an airless paint sprayer. A polished valve keeps the sprayer in a better working condition, and aids in priming. Make sure that you clean the valve assembly thoroughly with water and a bristle brush.
However, if you notice the paint sprayer dripping after cleaning it, it is time to replace the valves.
Ensure The Paint Doesn’t Come In Contact With The Motor
While painting, ensure that the paint doesn’t come in contact with the sprayer’s motor. If there are some accidental spills and splatters, clean them up immediately. This is because any paint that accumulates on the exterior surface of the motor starts acting as an insulating cover and can cause the product to overheat.
So, to prevent this from happening, you can use a motor cover while you are working. It will protect the exterior of the motor from paint that might come in contact with it.
Keep The Filters Clean
Ensure that you clean the filter screen of your paint sprayer from time to time. You can use a light bristle brush to get rid of the debris from the screen. Also, there is a filter that prevents debris from entering the gun’s tip; make sure you clean that as well if you see the spray patterns getting distorted.
Don’t Forget To Use Fluids
If you are not going to be using your airless paint sprayer for more than a couple of days, ensure that there is no water inside the pump. Since most of the product’s components are made of corrosive materials like steel, they can easily rust if kept in contact with water for prolonged periods.
Furthermore, make sure that the water does not freeze in the pump; otherwise, it may cause irreparable damage to the paint sprayer. This is why you should use industry-grade and manufacturer-recommended fluids before storing your paint sprayer to avoid these issues from taking place and confirm that it is in good shape.
How To Use A Paint Sprayer Efficiently
Here are some tips on how you can use a paint sprayer efficiently.
Mix The Paint
Mixing the paint allows for a smoother experience when using a paint sprayer. So, ensure that you stir the paint well before spraying. Not only does it prevent clogging, but it also helps in delivering a smooth finish to your project.
Wear Protective Clothing
Make sure that you wear protective clothing so that the paint doesn’t come in contact with your skin. Also, wear face masks to prevent inhaling the toxic fumes from the paint. We also strongly recommend wearing eye protection, as you would not want to expose your eyes to dangerous fumes.
Mind The Weather
You should never paint while it is raining outside, as the water can ruin your project. We would suggest that you keep a check on the weather updates, so that you can plan the painting session accordingly.
Keep A Close A Watch On The Settings
Change the nozzle settings to suit the requirements of the project. A broader setting covers a larger surface, whereas a narrow setting is required for a precise finish. To achieve a superior effect, make sure that you keep the sprayer’s tip 6 to 12 inches away from your project’s surface.
Clean-Up
Nobody wants to leave a mess behind when they are done painting, so clean-up is a must. We strongly recommend you go through the sprayer’s instruction manual in order to clean it up nice and easy. Furthermore, ensure that there is no clogging inside your sprayer; otherwise, you will face problems spraying paint the next time.
Practice
This is important for people who are starting new. The best way to practice is to paint old walls. If you think the results are sloppy, keep trying until you get good at it. This will help you master your skills greatly.
How To Minimize Overspray
For any airless paint sprayer, overspray is a major problem that needs to be solved with ingenuity. Here are tips on how you can minimize or control overspray.
Proper Arrangement
It doesn’t matter if you are a professional or an occasional DIYer; some mistakes are bound to happen because of lack of attention. As such, it is mandatory to cover your furniture and other essential items with tapes, newspapers, or plastic sheets before starting the spray painting process.
Method
Ensure that you keep the spray gun at a distance of at least 25 cm away from the project’s surface. Also, try to hold the tip at a perpendicular angle towards the surface. Keep in mind that in order to achieve a better finish, you need to pull the trigger and move the spray gun from side to side simultaneously.
Size Of The Nozzle
Consider the project’s size and then select the nozzle size accordingly. For example, if you are painting a room, a medium-sized nozzle would do just fine. However, if you are painting the exterior of a home, you will need a larger nozzle in order to complete your task quickly and efficiently.
Selecting the right nozzle for the right job can reduce the overspray to a great extent.
Pressure
You must never apply excessive pressure, as it is one of the major causes of overspray. Always ensure that you are using a device that has an ideal pressure setting; the spray fan pattern should have constant coverage of the project’s surface. To perform this, you can raise the pressure slowly until you get an even surface coverage.
Create Your Own Spray Booth
This is one of the most effective ways in which you can reduce overspray. Creating your own backdrop or a spray booth helps in preventing paint from spreading all over the project. To create a spray booth, you have to tape numerous sections of cardboard together and keep it behind the project you are working on.
Note that the size of the paint booth will vary from one project to the other. Hence, the bigger the project, the larger the paint booth.
Graco X5 vs X7 Comparison
What type of extension cord should You use with the Graco Magnum paint sprayers?
We strongly recommend going with a 12-gauge extension cord that is under 100 feet long.
What are the types of compounds that can be used with the Graco Magnum paint sprayers?
Both the Graco Magnum X5 and X7 can spray a wide variety of compounds, including primers, stains, solvent-based and water-based paint. Basically, all the compounds that can be easily cleaned with mineral spirits are compatible with the two models. Now, as far as the compounds that don’t work are concerned, they include elastomeric, texture-based materials, and solvent-based lacquers.
What is the price of the Graco X5 and the Graco X7?
Both the models are available on the market at under $500.
How to know if a tip is worn out?
In the initial days of purchase, spray tips provide an oval spray pattern. However, with time, the tip starts to wear out, and the oval shape slowly transforms into a circle, spraying more paint into a smaller area.
Another way to know if your tip is worn out or not is if you start observing the effects of tails or fingers. Usually, a RAC V tip, like the one that comes with the Graco X5 and the Graco X7, will last for approximately 125 gallons per year.
However, it greatly varies on the type of paint that is being sprayed by the painter and the pressure at which they are spraying.
What is Graco X5’s and X7’s country of origin?
Graco is an American brand that takes immense pride in manufacturing all its products in the US. In fact, you are going to find logos of the American flag on both these devices.
What are some other popular brands of airless paint sprayers?
Apart from Graco, some of the other popular brands of airless paint sprayers are : –
Wagner
HomeRight
Dusichin
Why does my airless paint sprayer’s motor keep turning off automatically?
When you release the trigger, the motor will turn off. Again, when you pull the trigger to spray, the motor will turn on. This is how airless paint sprayers function; it eliminates the loud constant noise generated by the motor and increases the longevity of the device.
However, if the motor runs when you release the trigger, that means it is not primed.
How often is it required to clean my airless paint sprayer?
You should clean it thoroughly after every use.
Graco X5 vs X7 Verdict
With that, we have come to the end of our informative guide. Now, coming to the main question - which model is the clear winner? Well, we would have to say it is the Graco Magnum X5.
There are many reasons why the Graco X5 is a better option than the Graco X7. For starters, the Graco X5 is more lightweight, precise, and affordable than its upgraded version. Not to mention, its 75-feet long hose gives it enough mobility and is sufficiently long for reaching all the surfaces of your project.
Even though the Graco X7 looks like a better option, it is not. The 100 feet long hose does not seem important as it already sports a wheeled-cart design, which makes it easy to move around anyway. Overall, we feel that the Graco X5 is a notch higher than the Graco X7 in most aspects.
So, that’s all for now. Until next time, take care!
It’s 2022, and we have a variety of wood glues in the market, and some of them are stronger than the wood itself!
Specialized glues for various repair tasks have recently cropped up, so if you’re looking to do some joinery work, you could look into using wood glue instead of clunky tools. It may sound like a far-fetched dream, but you’ll be surprised at just how effective an adhesive can be!
But, there are many brands available in the market, so how do you figure out which one to get? After a lot of research, we narrowed it down to the Gorilla wood glue and the adhesive from Titebond, which are the leading products in this field, in our opinion.
So, without further ado, let’s jump into this guide on Gorilla wood glue vs. Titebond, and let’s see which one is the better pick of the two!
1.Gorilla Glue
First, let’s look at this wood glue from Gorilla, which is multipurpose and can be used on different kinds of wood. It is ideal for soft or hardwood surfaces and natural wood composites. Plus, Gorilla is a reputed American company known for making quality products, and this glue is no different!
This wood glue is also suitable for DIY projects and is one of the most popular products available in the field of wood glues. Interestingly, it looks white when you look at it in the bottle, though it has a slightly deeper shade when it dries.
Moreover, Gorilla wood glue is a PVA, water-based glue. As such, it is easy to use and fast-acting, taking only half an hour to clamp and one day to cure. It is a user-friendly adhesive, and you also have the option of sanding off extra glue that might have spilled over onto the surface of where you were working.
Another fun fact about this wood glue is that it matches type ii ANSI and HVPA guidelines. This means that it's a breeze to use the glue outdoors since it's water-resistant and unaffected by mold. In addition to that, it doesn’t contain any added dyes, making it relatively safe.
What’s more, it’s suitable to use around food items and in the kitchen since it has been approved by the FDA.
Steps to Use
Step 1
Ensure that the surfaces you need to glue together are clean and dry. Also, make sure that they’re evenly cut and free from dust specks.
Step 2
Give the gluing process a trial run before applying the glue. Hold the pieces together and mark out how you want them to stick.
Step 3
Next, you have to add just the perfect amount of glue to the wood surface. This is probably the most crucial step since using too little glue will not provide a strong bond. However, applying too much glue might make things messy and tedious.
Step 4
In order to achieve an even distribution of glue, squirt a bit onto one spot and use a glue brush to spread it.
Why Did We Like It?
First off, Gorilla Wood Glue is easy to clean up if there’s an accidental spill. All you need is water and a washcloth, and you’re good to go. We also like how the glue is ultra-non-toxic and, thus, safe for people of all ages to use. So, if your children need to use it, there’s nothing to worry about!
Another remarkable fact about this product is that it doesn’t corrode or lose its adhesion even if exposed to sunlight or rain. So, we can say that the gorilla wood glue is waterproof! In addition to that, it can withstand both hot and dry weather and thus, is heat resistant.
We also liked how it expanded once used, making it strong and long-lasting.
What Could’ve Been Better
Despite all the advantages of the gorilla wood glue, we did, however, feel that it isn't as durable. Sometimes it dries up in the bottle itself if it hasn’t been used for an extended period of time. A probable reason for this could be the fast curing time of the glue, which kickstarts the drying procedure the moment it's exposed to any air.
Another thing the manufacturers could work on is the fact that this product does not work as efficiently with projects that require gaps to be filled.
Important Points To Be Kept In Mind
The glue can’t be used for heavy-duty projects with a structural focus (like load-bearing) but can be used to reinforce mechanical fasteners.
The glue is to be strictly used with wood and can’t be employed to stick plastic together.
Since Gorilla Wood Glue is PVA-based, it doesn’t foam.
It comes packaged in an attractive bottle with a nozzle that prevents excess glue from squirting out.
2. Titebond Glue
The other wood glue on our list is this one from Titebond, which is well known for its outstanding results when it comes to heavy-duty woodworking projects.
One of its most distinctive features is that it takes very little time to set. It needs one hour to clamp, which is exceptional, considering that it can pull off heavy-duty activities seamlessly. Titebond also adheres to type i ANSI and HPVA specifications which means it has superior resistance to water.
Titebond, too, has been approved by the FDA when it comes to indirect contact with food, and it’s relatively non-toxic as well. This is a helpful feature to have in case children come in contact with the glue.
Additionally, if you’re a messy worker and tend to glue yourself while working, fear not! Titebond can be easily washed off clothes when it still hasn’t dried up. This is important because Titebond isn’t a transparent glue- it looks yellow while in the bottle but turns to a brownish color post-use. This factor is also quite thoughtful- due to its brown finish, it blends right in with the wood.
Another fun fact about this product is that it is PVA glue, and thus, it doesn’t expand or foam. As a result, Titebond provides better adhesion than other kinds of polyurethane glues available in the market.
Steps To Use
Step 1
Make sure that the wood surface is clean before you begin working with the glue. A portable band saw may be used to make the edges clean and sharp. We recommend against using a handsaw since that leads to uneven edges, which create issues when you try using the glue.
Step 2
Next, it is imperative to ensure that the wood contains a moisture content of less than 6-8%. Additionally, the humidity of the workspace also needs to be below 50% for optimum results.
Step 3
Once the preceding steps are followed, the glue is ready to be applied. Take care to apply just the amount necessary- not too much and not too less. Applying excessive glue will result in the adhesive spilling over and creating a mess, whereas scarce application will result in a weak bond.
Step 4
Once the glue has been squeezed out onto the surface, it must be spread as evenly as possible with a glue brush.
Step 5
Lastly, hold the newly glued surfaces together using a clamp, and make sure to apply just the right amount of pressure. The glue might ooze out from the joining point if you press too hard. Conversely, a lack of pressure will lead to a bond that might break.
Why Did We Like It?
For starters, we liked how the setting time of this glue is minimal, which also means it takes significantly less time to clamp. Titebond wood glue is also solvent-resistant and thus, can be used pretty easily outside.
A highlight of using Titebond glue to bind your wooden items together is that the bond produced by the adhesive is stronger than the wood itself! Moreover, it’s a piece of cake to clean up any extra spillage on the wood- it just needs to be sanded out. You can, additionally, use water to clean up any remaining mess.
What Could’ve Been Better
To our dismay, though the glue makes pretty strong bonds, it cannot be used in cases where a lot of loads is to be born or structural joining is needed to be done. Moreover, one must take care of the conditions under which they are storing the glue. If kept at a very low temperature, the glue begins to thicken.
We also ran into another problem while using this adhesive. Right around the glue joint surface, we noticed a stain. This marred the look of our project significantly and was rather disappointing.
Important Points To Be Kept In Mind
In case the glue gets on your clothes, dampen the area immediately and wipe it off while it’s wet.
Ensure that the moisture level doesn’t go above 10%.
How are the Wood Glues Similar to Each Other?
1. PVA-Based
The major similarity between the two wood glues is that both are used for wood-to-wood adhesion and are PVA-based. This means that they don’t foam or make the bond weaker on application.
2. Waiting Time
In addition to that, the waiting time for both glues is similar. You have to wait 24 hours before you can safely test the strength of the bond.
3. Reaction To Low Temperatures
Another likelihood between both the products is that none of them react well to low temperatures and might become ineffective if exposed to a cold environment.
How are the Wood Glues Different from Each Other?
1. Time Taken To Create Bonds
One of the key differences between the products is that the Gorilla wood glue takes longer to create bonds. Whereas, Titebond sticks almost instantly upon application and takes far less time.
2. Scope Of Use
Apart from that, the scope of use of both types of glue also differs from each other. Titebond works most effectively with grain surfaces, and Gorilla Glue performs well on surfaces that are cross-grained.
3. Color
Moreover, as we mentioned above, Titebond tends to leave a brown color once applied, whereas Gorilla Glue is whiter.
4. Shelf Life
Titebond also has better longevity since it has a greater shelf life. Unfortunately, Gorilla Glue tends to dry up faster because it reacts more strongly with the atmosphere.
5. Strength Of Bond
Perhaps the most crucial difference is that Titebond is superior when it comes to spreading the glue. It has more viscosity, which is why it percolates into the pores of the wood and creates a sturdy bond. Comparatively, Gorilla Glue is thinner and doesn’t spread as well.
So, this means that Titebond has a stronger bond than Gorilla Glue since the latter can get shaky at the joints after some time has passed.
Conclusion
So, how do both products stack up against each other? After an in-depth analysis of the features of both the adhesives, we can see that Titebond comes out on top. Though Gorilla Glue has its advantages, it ultimately loses to Titebond in terms of overall functionality.
Titebond bonds almost instantly have a lot of glue strength and provide a strong bond. When it comes to adhesives, time taken and the strength of the bond are the most important factors to be considered, and Titebond makes a clean sweep in both categories.
However, if you’re looking to get something that doesn’t have a distinct color, you could consider the Gorilla wood glue. Since it dries clear, it will ensure that the appearance of your project remains unsullied.
With this, our guide concludes, and we bid you adieu. We hope you found it valuable and unbiased, and we shall see you again soon with more of these.
Take care and stay safe!
Choosing the correct adhesive for your next DIY task can be a bit challenging.
There are endless options on the market, so how do you choose the best one for your task? We understand your dilemma, and so to help you choose the correct one, we’ve narrowed down our options to Gorilla Glue and Super Glue.
Honestly, the glues of both brands provide excellent adhesion and are versatile. Plus, they are the crafter’s favorite. They work as paper, wood, plastic, leather glue and much more. And so, deciding which one is the best of the two types of glue isn’t as easy as pie, particularly when both are the best. And so, deciding which one is the best of the two types of glue isn’t as easy as pie, particularly when both are the best.
And so, to ease your task, we’ll walk you through the two types of glue, what’s good and what’s bad. So that you can compare the two products and choose the best one for your needs.
So, without any further ado, let’s jump right into the deets!
Gorilla Glue Vs Super Glue
No matter what task you have at hand, there’s always a tool in the market to help you complete the tasks in a breeze. And so, for all the carpenters, woodworkers, DIYers, enthusiasts, or even hobbyists, there are adhesives to ensure a firm and durable bond to all your wooden projects.
And no matter what project you’re working on, firm and durable bonds are what you must be looking for. We decided to give a shot to the two of the crafter’s favorite brands, Gorilla Glue and Super Glue.
If you’ve been in the woodworking line for quite some time, you must be aware of the two brands. No doubt, the adhesives of both brands are of top-notch quality and are the go-to brands for all the crafters and woodworkers.
Both brands manufacture adhesives that are safe to use at home and are pretty much identical in terms of performance and efficiency. But, they are unique and also differ from each other in quite a few aspects. Of course, you would like to invest in a brand that will provide firm and durable bonds. So, let’s dive into the two products to know which one will be the best for your DIY tasks, simple repairs, and other woodworking projects.
A Glance At Gorilla Glue
Whether you are looking to fix delicate toys or your living room cabinets, Gorilla Glue is perfect for fixing anything and everything. Because of its strong adhesive strength, you can also seal porous surfaces with this.
Be it sanded woods, metals, ceramics, plastics, or glass surfaces, Gorilla glue can pretty much stick to whatever you throw at it. Plus, the wide variety of glues offered by Gorilla Glue is impressive.
If you want to mend the fences of the garden or quick fix the cracks on the door, you’ll have to go for the glue suited for outdoor applications. Not all glues can withstand all elements, and only outdoor glues can provide you with the much-needed durability and firm bonds to your surfaces.
As such, the Gorilla Glue Original works perfectly for mending the exteriors, thanks to its resistance to extreme temperatures. What’s highly impressive is that the glues of Gorilla brands create the toughest bonds when exposed to moisture or water on surfaces and act efficiently to create a lasting and durable bond.
Features Of The Gorilla Glue
If you are on the lookout for mending the cracked lights or wooden surfaces, then Gorilla Glue is perfect for tackling all your bonding needs. With its quick drying time combined with its sheer versatility, Gorilla Glue has transformed the world of woodworkers.
So, let us explore the features of Gorilla Glue to understand what makes it the go-to brand for all the bonding needs of the crafters and professionals.
Versatility
Plenty of brands offer glues of excellent adhesive strength, yet, everyone tends to go for Gorilla glues because they can bond almost anything. Whether it is wood, metal, plastics, rubber, leather, or any other material, Gorilla Glue’s excellent adhesion works efficiently to bond anything you want.
Because of its sheer versatility, this glue is a must-have for all your quick-fix, DIY tasks, and woodworking projects. Plus, Gorilla Glue does an excellent job in manufacturing a variety of adhesives for different bonding needs.
Irrespective of your needs, the Gorilla Glue is perfect for all your needs. Whether you are looking for a quick-drying glue or one with excellent adhesion strength, Gorilla Glues are ideal for all your bonding tasks. Also, you can use this for both exterior and interior surfaces.
Gorilla Glue is most preferred by crafters and professionals because of its versatile nature. From fast repairs to quick-drying, Gorilla Glue is an excellent choice for all your bonding needs.
Durability
One of the most striking aspects of the Gorilla Glue is its high durability. They are 100% water-resistant and can withstand the elements, so you can use them for bonding the exterior surfaces.
No matter what you’re looking to fix, you can trust Gorilla Glue for all the repairing and the DIY tasks. Its adhesive strength can bond your surfaces stronger than the wood itself. For any wood-to-wood tasks, the Gorilla Glue is an excellent option because of its exceptional bonding power.
Plus, while curing, the Gorilla Glue expands up to 3 - 4 times, resulting in strong and durable bonds. If you are on the lookout for non-breakable and long-lasting bonds, then Gorilla Glue will be an excellent choice for all your bonding needs.
Drying Speed
Gorilla Glue is quite popular among woodworkers and enthusiasts because of its sheer versatility. It has been designed to adhere to a variety of surfaces. The drying speed of the glue depends upon the temperature of your room or environment. However, it takes more or less 24 hours to dry completely.
After applying the glue on the surface, it requires clamping. Additionally, clamping with heavy substances will ensure better cinching. Plus, it dries natural wood color. Humidity and temperature also play a significant role in determining the curing time of the glue.
Gel glue formula: Our thick, no-run Gorilla glue gel formula...
All purpose glue: Gorilla Super Glue is formulated for...
This Gorilla Super Gel glue is our absolute favorite because of its fast-setting formula. Plus, its unique gel consistency makes it perfect for all kinds of applications. The Gorilla glue packs quite a powerful punch in its 20 gms of adhesive bottle.
Why Did We Like It?
We absolutely loved this glue’s unique gel consistency, which makes it perfect for vertical applications. It is extremely difficult to bond such surfaces without the adhesive creating a mess everywhere because of dripping. But thankfully, this glue doesn’t drip, thanks to its no run control formula.
Moreover, the glue dries pretty fast. It stands true to its claim of drying within 10 - 45 seconds without any clamping. Furthermore, it features an anti-clog cap so that the glue doesn’t dry up and can be used hassle-free.
Furthermore, it is highly versatile and can be used on a variety of surfaces. Be it ceramic, leather, rubber, wood, plastic, paper, and other similar surfaces. Also, the 20 gms of glue is sure to last long for only a few drops will bond your surfaces in almost no time. Whether you’re a DIY person, crafter, or hobbyist, this glue is perfect for all your bonding needs.
What Could’ve Been Better?
The Gorilla Super Glue does an outstanding job in bonding almost anything and everything. However, the 20 gms adhesive isn’t an ideal option for professional woodworkers or even large projects. So, if you’re working on large projects, we recommend you buy in large quantities to ensure the tasks are completed smoothly, without running out of glue.
Pros
Works excellently for vertical surfaces
Nozzles do not clog
Dries almost in no time
Impact resistance
Cons
Multiple packs are required for large projects
A Glance At Super Glue
While Gorilla Glue works best for bonding the porous surfaces, the Super Glue will give you exceptional results on vertical and bumpy surfaces. Belonging to the Cyanoacrylate family (CA), the Super Glue is perfect if you have to bond small surfaces or those areas which call for extra precision.
Super Glues dries in a fraction of time and leaves a clear finish. And so, after spreading the glue, you need to act quickly while the glue is wet to ensure efficient bonding. Super Glue is available in a variety of sizes and forms. With such diverse varieties, you can choose the perfect glue for your bonding needs.
Those which are gel-based ensure more controlled application, thanks to their nozzles. They are ideal if you have to bond small surfaces or areas. The nozzles are designed in a way to let you control the flow of the glue.
But, if you’re looking for an adhesive for sealing and bonding challenging cracks or gaps, then Liquid Super Glues are perfect. Because of their thin consistency, they dry faster than gel ones. Also, you can apply them with a brush. Super Glue is a well-known brand, and its adhesives are most commonly used in the medical and industrial fields.
What’s highly striking is the unique bonding condition of these glues, thanks to their cyanoacrylates. These glues dry and bond best in the presence of moisture. They form tight bonds instantly when exposed to water or moisture. Plus, they are only minorly toxic, so you don’t have to worry much while using them.
So, because of cyanoacrylates, you can use this to bond the moisture-prone areas without worrying about the bonds. It forms tight bonds in almost no time. All in all, Super Glues are perfect for all your woodworking, DIY, and crafting projects.
Features Of Super Glue
Accidents do happen, no matter how careful you are. And when that favorite coffee mug of yours drops accidentally or somebody knocks over those precious ceramic pots, doesn’t your heart sink a little?
And so, Super Glue has designed various adhesives to fix all those common cracks and breaks. They are super easy to use, and their adhesive strength works efficiently to mend all the cracks and gaps.
So, let us dive into the features of the Super Glue to know why they’d be ideal for all your bonding needs.
Versatility
Because of their high versatility, they can bond any surface or material you want to. Unlike other glues, which have difficulty bonding uneven and bumpy surfaces, the Super Glue bonds those surfaces efficiently. As such, you can use this for your woodworking projects.
Also, the presence of moisture or water is necessary for efficient mending surfaces. And so, you can use them to bond porous surfaces. But, this isn’t much of a concern because the moisture in the air works in tandem with the glue to provide firm and durable bonding to your surfaces.
Super Glue is perfect if you’re looking for an adhesive to fix the cracks and gaps around your home. For all your DIY projects, crafts, and household work, this glue is excellent for it sticks almost whatever you throw at it.
Drying Speed
If you are a professional woodworker, you must know that no two types of glue have identical drying speeds. All the other glues that we tried dried after the evaporation of the liquid. However, this isn’t the case with Super Glue - it dries pretty quickly.
Super Glue dries immediately when it comes into contact with moisture. As such, this doesn’t mean you need to add water to make the Super Glue work because the moisture in the air is sufficient to let the glue do its job.
Since the super Glue is one of the fastest drying glues, this means you need to act fast enough on your surfaces to avoid any mistake while gluing.
No other glue in the market dries as fast as Super Glue. So, if you are in a hurry to complete DIY projects or looking for a quick fix, Super Glue is the perfect option to go for all your bonding needs.
Staying Power
Super Glue is compatible with almost any material and surface but mainly works best for uneven surfaces. Also, it dries in virtually no time. Its staying power further complements the versatility and the drying power of the glue.
DIYers, hobbyists, and crafters have been using this for ages because of its holding power. It can almost hold anything and everything because of its unique bonding characteristics. The high strength of cyanoacrylates makes it perfect for even exterior applications as it can withstand high temperatures.
Also, it does not require any heavy substance or pressure for clamping because of its high performance. So, whether you are a DIYer, hobbyist, or crafter, Super Glue is perfect for all your bonding needs because of its plenty of staying power.
Original Super forms the strongest bonds on clean breaks of...
Super Glue for wood, ceramic, fingernails, metal, pottery,...
Irrespective of your needs, this Super Glue 15187 is there to help you out with all the woodworking tasks. Its fast-drying formula ensures that your surfaces are bonded instantly. Additionally, the multi-pack is perfect for reusability.
Why Did We Like It?
The Super Glue is extremely useful in repairing any accidental fractures that might occur on your surfaces. It dries clear after application, thanks to its transparent color. As such, you can use this on anything you want without worrying about the stains.
Be it ceramics, pottery, jewelry, metals, fingernails, or any other material you want. Its ease of use makes it perfect for all DIY jewelry crafts, enthusiasts, and hobbyists.
What makes this Super Glue great is its precision applicator. You can apply the glue to any challenging cracks and gaps you want without worrying about dripping or damages due to the running formula. This allows you to work and bond materials with utmost precision.
Plus, any extra glue peeping out can be easily sanded away. Also, with its fast-drying formula, your materials will be bonded within 10 - 30 seconds. Lastly, this super glue offers quite a great deal. With the multi-pack of 12 tubes, they are perfect for reusability.
What Could’ve Been Better?
While testing the product, we did not come across any significant drawbacks. However, our only gripe is the packaging of the product. Although it comes in sturdy packaging, it is pretty challenging to slit the box.
But later, we figured out that the box is meant to be pulled apart into two pieces. Apart from that, the product works exceptionally well.
Pros
Dries clear after application
If excess can be sanded
Allows utmost precision while working
Bonds materials within second
Cons
Unpacking the glue is quite a challenge
Gorilla Glue Vs Super Glue Buying Guide
By now, you know almost everything about the Gorilla Glue and the Super Glue. But, have you decided which one’s best for your tasks? Of course, it isn’t that simple. With both the brands offering high-performing glues with excellent adhesive strength, it is pretty challenging to choose one.
And so, we’ve put up this buyer’s guide to help you decide between the two brands. We’ve discussed all the essential factors which you must consider while buying adhesives for your projects.
Interior or Exterior Use
The first and foremost thing that you should keep in mind is the nature of your application. Not all glues are formulated for both interior and exterior applications. Some are designed for the outdoors, and some for the indoors.
If you’re looking for bonding exterior surfaces, you must go for adhesives that are water-resistant and can withstand the elements. The Gorilla Original Glue is perfect for all exterior and interior applications because of its excellent adhesive strength.
Meanwhile, the Super Glue’s adhesives aren’t ideal for exterior uses but provide excellent adhesive strength for bonding minor repairs, cracks, and non-porous surfaces. So, if you’re looking for a versatile adhesive, the Gorilla Glue is what you must go for. The Gorilla Glue stands out in terms of versatility of application.
Toxicity
Irrespective of which brand you are using, adhesives can be dangerous. But, not all glues are detrimental to health. Because of their fast-drying power, most of them can stick to your hands, whereas others do not. And so, while choosing an adhesive for your use, you must consider its toxicity.
Gorilla Glue consists of harmful fumes which if inhaled, can lead to permanent lung damage. Also, they are dangerous to use around pets or kids. And so, it must be used in a well-ventilated space.
Meanwhile, the Super Glue is not as toxic as the Gorilla Glue. The fumes of the Super Glue aren’t as dangerous as the Gorilla ones, and they also do not cause any damage to your lungs. And so, the Super Glue stands above the Gorilla Glue in terms of toxicity. It is pretty safe to use and not as dangerous as the Gorilla Glue.
Cleaning
While working with adhesives, spills do occur, making bonding a messy affair. And so, while choosing glue, you must consider whether cleaning is a breeze or a challenging task. Mostly, the adhesives can be easily cleaned with a splash of water and a wet rag. However, there are even those which are difficult to clean.
While testing the two adhesives, we found the Gorilla Glue was relatively easy to clean. Rubbing a wet rag was enough to clean the spills. Meanwhile, the Super Glue isn’t as easy to clean as Gorilla Glue, but it isn’t impossible.
In case of spills, you need to pour rubbing alcohol on the surface and let it sit for some time for the glue to loosen its grip. However, in terms of cleaning, the Gorilla Glue stands above the Super Glue. And so, it will be ideal for all your household needs.
Gorilla Glue Vs Super Glue Summing It Up
With that, we have come to the end of our comprehensive guide. Both the brands manufacture top-notch quality glues, and so it is extremely difficult to pick a winner.
Both the Gorilla Glue and Super Glue have certain advantages over the other, and so, ultimately it all boils down to the user’s needs and preferences.
After extensive testing and research, we’d recommend Gorilla Glue because of its unique formula and versatility. Super Glue will be ideal if you’re looking for an affordable and less toxic option for fixing minor repairs or DIY projects.
Let us know your opinions in the comment below. Till then, take care!
Nobody loves to spend their weekends cleaning their backyard garden or porch. And that’s why any equipment that simplifies this job sells like hotcakes.
Pressure washers may not be the center of attraction of home maintenance tools. Nonetheless, these products come in handy while taking care of interior/exterior cleaning and maintenance tasks. And the fact that not everyone is truly aware of these products makes it even harder to shop for one.
But if you’re reading this, it’s evident that you’ve heard of the Honda GCV160 Pressure Washer somewhere before. Well, the GCV160 is highly recommended by professionals and hundreds of satisfied customers for being an absolute value-for-money product.
We also decided to board the wagon and personally test this much-talked-about pressure washer.
With that being said, let’s check out the things that we liked about it the most.
Gonda GCV160 Pressure Washer Review
We’ve known Honda as the Steven Spielberg of power tool brands - evergreen, and always ahead of its time. There’s hardly another global brand that has prioritized household needs more seriously than Honda, and what better way to prove it than dissecting the main features of the GCV160?
In short, this product is a surprisingly efficient medium-duty pressure washer that can simplify your house cleaning jobs with its superior performance. We’d recommend it to any property owner searching for reliable maintenance tools under a meager budget.
To paint a clearer picture for you, we’ve discussed some of its key features briefly, so let’s check that out!
Efficient Honda Engine
Beginning with the critical aspect of every pressure washer, we’re very impressed by how smartly the GCV160 motor is engineered to prioritize regular customer needs. Yes, this product features one of the smoothest Honda motors by far, which speaks volumes about its reliability.
Furthermore, the GCV160 motor stands out to be an efficient 4-cycle engine, which saves you from the hassle of mixing oil and gas. It’s pretty astounding how this product combines high-end performance and fuel-efficiency to finish your task within a surprisingly quick time.
It’s 161 cc motor is, without a doubt, an absolute beast of an engine that can produce a maximum of 2800 PSI operating pressure. Long story short, this unit provides enough force to make cleaning your dirty lawn or floors as easy as ABC.
Onboard Accessories
When it comes to versatility, the GCV160 is stacked with loads of accessories on board. First and foremost, its water release nozzles are attached to the front, which is supported with a nozzle guide on the rear. If you have never tried pressure washing before, you’re bound to find its nozzle guide extremely useful. Also, we’re thrilled to find out that this unit features multiple nozzles.
The three main nozzles are angled at 0, 25, and 40 degrees to deliver sufficient water pressure in hard-to-reach areas. The manufacturers also offer a soap nozzle to add a neat finishing touch to the job, which makes it an excellent companion for heavy cleaning and maintenance.
Last but not least, its onboard detergent tank is undoubtedly a much-needed upgrade we’ve wanted to see in pressure washers. Not only does it reduce the extra work for you, but it also mixes the detergent with water in a downstream fashion at a 20:1 ratio - that too, automatically.
Amateur-Friendly Control
You might be intimidated by its professional-level specs and performance, and wonder whether it may be suitable for beginners. Honestly, the Honda GCV160 bridges the gap between industrial-grade engineering and amateur-friendly user control. It’s so easy to operate that you could hand it to a 13-year old to clean the floors for pocket money!
Operating this product couldn’t be any simpler; you’d only require to press its large on/off switch to control its operation. Its pull cord is also a lot smoother, compared to most of the other pressure washers. It’s popular as a “single-pull cord” machine because it only takes a gentle and swift pull for the GCV160 to be straight off to the races.
Apart from that, controlling this model while pressure-washing isn’t rocket science either. You’ll find an easy-to-operate power control gauge on its lance, which lets you conveniently rotate and control how much pressure you’d require while cleaning a particular surface.
Key Performance
Although the Walt commercial-level pressure washer gives quite a stiff competition to the GCV160, this product beats the former at essential fundamental criteria. The thing is, it is quite lightweight for a medium-duty model, which sets it apart from most of its competitor models in the market.
That’s why professionals always recommend it, considering how easy and convenient it can be to carry around while working. Thanks to its ultralight body, using the Honda pressure washer for a long time doesn’t stress out your arms either.
And as we’ve mentioned already, its powerful Honda motor delivers sufficient power to finish medium-duty jobs precisely. We tested it by washing front yards, backyards, and patio tiles - and this product didn’t disappoint even a bit!
But that’s not all; apart from it’s operating pressure, its 2.3 GPM speed is enough to wipe out stubborn stains from cement surfaces, which makes it a total value-for-money product.
Maintenance And Warranty
This product arrives at your doorstep in a stainless steel frame, covered with hard plastic material for higher product durability and safety. We’re quite satisfied with how less it asks for maintenance.
Cleaning/fixing the GCV160 twice a month would suffice for it to operate precisely, so we’re giving it a thumbs up for convenience. Also, the manufacturers cover this product with a 3-year extended warranty period, so don’t be stressed about early damages.
What Could Have Been Better?
Apparently, its high-performance motor suffers from a heating issue. Most of the buyers have complained about how quickly its engine heats up after being used for a while, which makes it a bit inconvenient for long-term usage. Make sure that you’re not coming in direct physical contact with the engine, to be safe.
Being deafeningly loud has also been a prevalent issue across multiple Honda tools. We understand that powerful motors mostly tend to produce loud noise. However, it gives this unit a slight disadvantage compared to the Walt commercial-grade pressure washer, considering how quiet the latter is relatively.
Pros
Authentic high-performance motor
Lightweight and portable design
Fuel-efficient and smooth operation
3-year warranty period
Suitable for beginners
Cons
Can get pretty loud at times
Quick heating issue
Verdict
For those who value reliability and world-class performance the most, the Honda GCV160 serves as an appropriate product that turns monotonous cleaning tasks into fun activities.
Its motor efficiency is second to none, and its fuel efficiency adds the perfect icing on the cake. We’d recommend this pressure washer if you’re searching for durable equipment under a reasonable budget.
And this concludes our Honda GCV160 review. Which product would you want us to review next? Drop the names in the comments section below, and our next review might be about it.
Anyhoo, we’ll return soon with more useful and unbiased product reviews, so stay tuned!
Struggling to fix the ABS and PVC pipes in your bathroom? Try gluing the pipes together as it can work wonders while fixing plastic pipes.
However, don’t mix up the glue while using it because even though ABS and PVC are both plastic pipes, they are very different. Hence, you cannot use PVC glue on an ABS pipe and vice versa.
But, how does PVC glue differ from ABS glue, and how can you use this glue to fix the pipe fittings? We are here to answer all these questions and much more. In this article about glue that works on ABS And PVC, we’ll cover all the necessary details related to fixing pipe fittings with glue while talking about glue that works on ABS and PVC pipes.
So, without further ado, let’s get on with it!
What Are PVC Pipes?
One of the most popular alternatives to metal pipes is polyvinyl chloride or PVC pipes. This high-quality plastic pipe fitting is durable and soft, making it an ideal replacement for metal pipes. Furthermore, they are highly affordable, so you don’t need to break the bank while installing them for your plumbing system.
Also, you don’t have to face the issue of burst pipes or leaks with PVC pipes. Hence, they are commonly used in the main water supply line for supplying water to your kitchen and bathroom.
It is also widely used in sewage and irrigation systems. On top of this, the high-quality soft and flexible plastic material of the pipe makes it pretty easy to mold.
Naturally, a PVC pipe can fit anywhere in the building for plumbing work. Plus, the lightweight plastic material of the pipe makes it much easier to install compared to metal pipe fittings.
What Are ABS Pipes?
Acrylonitrile Butadiene Styrene or ABS pipes are like the close cousin of PVC pipes. In terms of the plastic material of the pipe, ABS is very similar to PVC, but the former has a much softer texture and black color. And owing to the soft texture, ABS pipes can easily fit in small and tight spaces.
Also, ABS pipe fittings are highly durable and ideal for transporting cold water. So, they are often used in the plumbing system of drains and underground sewage lines. Plus, the ABS pipe is much better at carrying hot water than PVC pipe fittings. However, it is not resistant to temperatures higher than 160℉.
On top of this, ABS is a thermoplastic resin, which makes the pipe soft and eco-friendly. It has also been possible to manufacture ABS pipes from recycled plastic. On the downside, the ABS plastic material can be pretty noisy. Hence, most local codes don’t permit the installation of ABS pipes in buildings. But, these are very common in sewer and drainage systems.
PVC Pipes Vs. ABS Pipes
Both PVC and ABS pipe fittings are pretty easy to work with if you compare them with metal pipes. They are easy to repair and replace, and you can simply glue them up. However, they have some unique and distinct features that set them apart.
For instance, PVC pipe fittings are easier to cut through when compared to ABS pipe and are much easier to glue. In contrast, ABS pipes are more resistant to extreme temperatures than PVC.
On the contrary, you need a higher temperature for ABS glue to adhere to ABS plastic material while fixing ABS pipe. But, it is much more durable than any PVC pipe. Thus, you can choose to go for PVC or ABS based on your plumbing requirements.
Solvent Cement For Plastic Pipes
The modern plumbing system is mostly plastic. So, when you’re trying to fix any pipe in the modern plumbing system, it is best to have a clear idea about solvent cement primer or glue. Most plastic fittings are usually joined by using glue or solvent cement. Thus, better be safe and careful while using those because you don’t want to deal with any leaky water lines in your house.
Usually, glue is used to put together ABS, PVC, and CPVC pipes. But it is most commonly known as all-purpose cement or transition cement when you use it on different plastic pipes.
Most importantly, the plumbing cement is not interchangeable. Each pipe has its own cement, and you have to stick to using it while joining the pipes.
For instance, the green glue or the green cement works exclusively on PVC. It can also help join ABS with PVC, but it does not work only on ABS. So, even though you can use it to join PVC with ABS, you cannot use it to weld ABS pipes with each other.
Does PVC Glue Work On ABS Pipes?
We’re sure you’ve realized by now that there are distinct differences in the ABS and PVC plastic materials. Thus, never try to use PVC glue on ABS pipes. It won’t work, and you’ll be doing more harm than good to your plumbing system.
But say, you have a water drainage system containing both ABS and PVC pipes. Under such circumstances, you can use the green PVC glue to attach the two piping systems. You can only use this green glue to attach PVC with ABS.
Can You Interchange The Glue In Plumbing?
According to the modern plumbing rule, interchanging the glues is strictly prohibited. You cannot mix and match the glues while using them on different plastic pipes. The PVC glue is only for PVC pipes. And similarly, the ABS glue is only suited for ABS pipes.
The two plastics have different characters. So, you won’t be able to make the glue stick to the plastic materials if you use it on the wrong pipe. You can only interchange the glue when you’re joining ABS and PVC pipes together. Otherwise, you can’t do it.
PVC Glue Vs. ABS Glue
PVC glue or PVC cement works quicker than ABS glue. It adheres to the PVC pipe material faster and takes only 30 seconds for the PVC glue to dry up after its application on the PVC pipe. After 15 minutes, the glue hardens, following which you can use the pipes after two hours.
On the other hand, applying the ABS glue takes at least two hours to dry off completely, and it hardens after 24 hours. So, there’s no way you can use the pipe within that time for supplying water. But, on the positive side, ABS glue is much more durable and long-lasting than PVC glue.
Final Thoughts
Fixing pipes can be tricky if you don’t know what to do. Anyhow, after going through our article about glue that works on ABS And PVC, we hope you have a better idea about fixing PVC and ABS pipes using suitable glue.
Just make sure to take safety precautions when you’re working with such chemicals to avoid potential injuries. Wear your goggles or gloves for protection, and you should be fine.
With that, we’ll sign off. Take care, and we’ll see you next time!
Silicone glue is one of the most commonly used adhesives in household applications. Hence, it's crucial to choose a premium-quality product to get optimal results.
However, buying a quality silicone glue that offers permanent flexibility and protects against stains caused by molds may not be that easy after all. There are many factors to consider, and with the availability of a ton of options on the market, choosing an ideal one can be challenging and time-consuming.
So, to make your task simpler, we have handpicked and reviewed the 5 best silicone glue options currently available on the market after hours of extensive research and testing. Plus, we have included a buyer's guide towards the end of the article to help you make an informed purchase.
So, without further ado, let's jump right in!
Best Glues for Silicone
Here is the list of the 5 best glues for silicone that you can use to create a strong and durable bond.
J-B Weld is one of the leading manufacturers of high-quality adhesives for plastic, wood, metal, and general-purpose use. And on that note, let us introduce you to the 31310 All-Purpose RTV. This silicone glue is designed for use in mechanical or household applications and may deliver satisfactory results every time.
Clear Silicone Sealant & Adhesive: Is A General Purpose...
Why Did We Like It?
As a piece of adhesive from a 40-year-old brand, we are happy to say it lives up to our expectations.
This product delivers a durable seal that can stand the test of time with ease, making it an ideal adhesive for automotive and household applications. Plus, it is available with a wide variety of color options, thereby enabling users to choose a shade as per their requirements.
Now, the major issue with most sealants and adhesives is that their beads are susceptible to mold and mildew growth that tend to affect the bond of your project. But you don't have to worry about that with this product, as it tackles the issue beautifully with the inclusion of mold and mildew-resistant features.
Lastly, it sports an affordable price tag, which makes it an ideal buy for those on a tight budget.
What Could've Been Better?
It is undoubtedly one of the best options on the market, given its durability and affordable pricing. However, while testing this product, we found that the nozzle of the tube tends to clog up pretty quickly, which was a little disappointing. But other than this, it does the job quite conveniently.
For over 70 years, GE Sealants has dedicated itself to designing innovative and top-notch sealants for all our home sealing projects. And the Silicone II Household Glue & Seal from the brand is the perfect example of a reliable option that can deliver optimal results on a range of surfaces. Keep reading to know more.
We were quite impressed with what this glue has to offer. For starters, it can be used on multiple types of surfaces, which include wood, painted surfaces, fiberglass, ceramics, and a lot more. Hence, you will be able to use this product for all types of projects.
It forms a durable and flexible coating that doesn't tend to shrink or crack over time; this means you can rely on it to stay intact for a very long time. Also, it is super easy to apply, which is no short of a bonus for people who are new to DIY applications.
On top of that, this glue is backed by a limited lifetime guarantee by the manufacturer. This enables you to return the proof of purchase for a refund if you are not satisfied with the results. And finally, it has a low odor, which you will barely be able to smell while using it.
What Could've Been Better?
During our period of usage, we didn't come across any significant downsides to this product that would affect the results. That said, we did notice that it takes a while to completely dry, which might be an issue for people that don’t like waiting too long.
Our next pick is an effective product from the house of Beacon, a brand well-known among DIYers for its range of adhesives, sealants, and coatings. Equipped with a slew of features that work to deliver a permanent seal, the 318OZ Advanced Craft Glue from the brand is an option you wouldn't want to miss out on.
Crystal clear waterproof provides instant grab which dries...
Great for all kinds of hobby and craft projects
Why Did We Like It?
This product is known to resist water and provide a tough seal that lasts a lifetime; hence it is appropriate for bathrooms and areas that come in contact with water. However, you can use it on other surfaces as well, including plastic, metal, fabric, or wood as per your requirements.
We loved the fact that it dries up pretty fast, so you don't have to wait around for too long. And the best part is that even though it dries up fast, it still allows time for moving pieces in place if required. As such, if you feel the need to make small corrections to your project, don't hesitate.
Apart from this, it is priced quite reasonably, ensuring that it delivers good value for money. Overall, it is one of the top-rated glues for silicone on the market.
What Could've Been Better?
The only drawback of this otherwise exceptional glue is that the packaging material used is poor. When it came to us, the packaging was warped, and the glue was leaking. This was a bit annoying, to be honest, given the brand's popularity.
Next, we have included the 8212302 Max Strength Clear from Gorilla, one of the most popular glue brands in the country. It helps deliver an outstandingly durable seal in all weather conditions. Obviously, there’s a lot more to it so let's take a closer look.
Our strongest formula: This heavy duty glue is 2x stronger...
All purpose glue: A waterproof glue formulated for virtually...
Why Did We Like It?
For us, the main highlight of this glue is its non-foaming formula, which ensures a crystal-clear seal that is extremely heavy-duty. Needless to say that it can withstand all weather conditions with ease without shrinking or developing cracks. So, be it winter or summer, you can use this product without worrying about its durability.
On top of that, it is 100% waterproof and can work even underwater; now, this is something you don't get with the normal glues on the market. From tiles to ceramics to drywalls to woods, it can be used on a wide variety of surfaces. This means that you can use this product for different DIY projects without hassle.
Not only that, but we also loved how easy this product is to work with and apply. All you need to do is unscrew the nozzle and place it in a caulk gun, and you are good to go. Lastly, it has a low odor, which is something we truly appreciate.
What Could've Been Better?
We couldn't find anything faulty with this product. That said, we would have really liked it if it had a faster drying time. Unfortunately, it takes quite a long time to dry. But since this doesn't comprise the results, we'd definitely recommend it.
GE Sealants & Adhesives brings you their Advanced Silicone Sealant, a highly reliable and premium product designed to meet various adhesive requirements. Focusing on durability and resistance, this silicone glue is formulated to withstand various environmental factors, such as freezing, UV exposure, and water, ensuring a long-lasting seal.
No products found.
Why Did We Like It?
This silicone adhesive has been tested in extreme conditions, proving that it does not shrink or crack with temperature fluctuations. It can be used on metals without leaving a discolored blemish, offering versatility across applications.
Additionally, it provides protection against stains originating from mold, mildew, and water damage. With its permanent flexibility and strong adhesion, this sealant offers an exceptional solution for various sealing jobs.
What Could've Been Better?
While it offers many benefits, there are some limitations to using this adhesive. For example, it cannot be painted, which may be a concern if aesthetics are important for the project.
Moreover, it requires a caulking gun for application, which may not be convenient for everyone, especially first-time users or those without easy access to the required tool.
Pros
Weatherproof
Resists freezing and UV rays
Will not shrink or crack from temperature fluctuations
Now that you have gone through all 4 products, are you able to make a choice? Something tells us you are still confused about which product to go with. Well, to be honest, we are not surprised as just the brand names, specifications, and a few pros and cons are barely enough information when buying the best silicone glue.
You see, there are a few other factors that you need to keep in mind in order to make the right choice. The following buyer's guide will help you in selecting the product that will meet all your requirements. As such, we strongly recommend reading the entire section carefully; otherwise, you might miss a thing or two.
Color Tint
More often than not, silicone glues are available in a wide range of color options. So, before buying, check the color mentioned on the package and ensure it's the same as the color of the surface on which you are going to apply it.
However, if you get confused, simply go with the 'clear' color option, as they work well on most surfaces.
Drying Time
The drying time is a very crucial factor that you must consider when buying the right glue for silicone. In most cases, it is advisable to go for a fast-drying product so that the users don't have to wait around too long.
That said, slow drying also helps on certain occasions, especially when there's a need to make small corrections in a project. Slow drying time allows time for moving pieces if required. So, choose as per your requirements.
Waterproof
Your silicone glue should be able to resist water, especially if it's used in bathrooms. Otherwise, water will affect the strength of the bond, and eventually, it might shrink and crack. So, before buying, make sure you check the specifications to ensure that it is resistant to water.
Versatility
Versatility is also an important factor that people often tend to overlook. Since buying silicone glue requires a significant investment, you will want to make sure that you can use it on multiple projects and a wide variety of surfaces without any difficulty. So, be sure to check the surfaces it adheres to before buying.
Steps To Glue Silicone
If you are a first-timer, you need to know the process of bonding with silicone glues. In this section, we have explained each step in detail.
Materials Required
You will need the following items to glue with silicone
Clean-up liquid
Soft cloth
Caulk gun
Silicone glue
Surface Preparation
Before you start with the process of bonding the silicone, make sure that the surface is thoroughly cleaned and free of debris. You can clean it by using water or other cleaning agents such as acetone and isopropanol.
Once you are done cleaning, let the surface dry entirely before you start the silicone bonding process. If the surface has uneven areas, ensure that you fill them up. After that, you can prepare the cartridge and put it together with a caulk gun for use.
The Process Of Bonding
We strongly recommend practicing on a piece of cardboard before applying the silicone glue to the surface. If you are able to handle it properly, you can start by applying silicone beads on one side of the surface. If the surface is too big, make sure that you use more silicone glue and lay down the beads tightly.
Now, you can join the two surfaces by exerting high pressure. If you notice some silicone glue escaping, be sure to pick it up with your finger or a spatula and wipe it off using a soft cloth.
Allowing It To Dry
This is the part where you wait. The drying time mostly depends on the silicone glue you have used. So, refer to the instruction manual that came along with it to know the drying time. In general, it takes about 24 hours for silicone adhesives to completely cure.
That said, if you can afford to wait a few more hours, we suggest you do it.
Glues for Silicone FAQs
What does ‘RTV’ mean in silicone glues?
RTV stands for Room Temperature Vulcanization. If your silicone glue is an RTV one, it means it will start curing as soon as it is exposed to air.
Can silicone sealants be painted on?
Unfortunately, glues for silicone are not paintable, unlike latex-based glues, also known as caulks.
What is the right temperature for applying silicone glue?
For best results, it’s important to apply silicone glue at room temperature.
Conclusion
So, we have finally reached the end of our review-based guide and you know that choosing the right silicone glue is not complicated.
You just need to consider a few factors to make the right buying decision. But before we call it a day, we will let you in on our favorite products from this list.
The J-B Weld is the best model overall, mainly because it sports an affordable price tag and provides a durable seal. Moreover, the GE Sealants Silicone II Household Glue & Seal is a great option if you want a product that has a low odor and is backed by a lifetime warranty.
But if you are in search of a product that dries up in a jiffy and can be used on several surfaces, you can't go wrong with the Beacon. With that, it's a wrap. See ya!
No matter how much we try to maintain our shoes, we can’t expect them to remain as good as new over the years.
Thus, if a shoe becomes worn out or its sole detaches, fixing it the right way is what we can do. But running to a nearby cobbler every time your shoes start showing problems can be quite a hassle. Isn’t it?
Instead, what if you had good-quality shoe glue at home to fix the problem? You will just have to take out the leather glue every time a repair is needed, apply it as per the instructions on the pack, and you’re good to go! Hence, purchasing shoe glue is always a better alternative.
But we understand that there’s an overwhelming number of options available, which makes the task of choosing a truly efficient glue quite difficult. That’s why we’ve put together this guide to the ten best options you can find on the market.
So, let’s get started!
Best Glues for Shoes
Here is the list of the 10 best glues for shoes that can be used to repair your shoes, reattach soles, and keep your favorite shoes looking their best.
Finding it difficult to deal with a tear in your favorite office shoes? You can trust this super-strong Gorilla Super Glue gel to get the job done. Be it thick leather shoes or boots, the formula is equally effective for all heavy-duty footwear, which is why it’s among our top recommendations.
Gel glue formula: Our thick, no-run Gorilla glue gel formula...
All purpose glue: Gorilla Super Glue is formulated for...
Why Did We Like It?
The best thing about using this glue is its controlled gel formula, which ensures you are able to apply just the desired amount on a particular spot. So, you can very well forget about any messes or inconsistent applications!
The anti-clog cap adds to its efficiency, as it prevents the glue from drying out. Furthermore, its strong formulation resists any impact to facilitate a long-lasting hold. That’s why you can rest assured that the shoe, once fixed, won’t give in easily.
Another wonderful addition to its features is its fast-setting property, as it dries to the touch in just about 10 to 45 seconds. Also, you don’t need to clamp the joined part after applying the glue.
Last but not least, the glue is super-easy to use as you just need to shake the tube once, hold it above the part to be repaired, and tap it for release.
What Could’ve Been Better?
We only wished the glue came in a larger-sized tube, as this one might not last for more than a month if used regularly. But as far as its performance is concerned, we have no complaints since it does a great job.
Pros
Prevents messes or inconsistent applications
Cap prevents drying out of the glue
Facilitates a long-lasting hold
Easy to use
Cons
Small-sized tube
Quantity: 1 Bottle | Volume: 0.71fl oz | Set Time/Dry Time: 10 to 45 Seconds | Cure Time: 24 Hours | Dry Color: Clear | Resistance: Resists Impact
If you prefer using a specialized product for shoe repairs, look no further than this Shoe Glue from Boot-Fix. Coming with one of the best formulations on the market, it’s completely safe for use on any footwear material you can think of. So, bringing this home will rule out the need for any other shoe-repairing glue.
Instant Bonding: Boot-Fix Glue creates a strong, durable...
Clear & Flexible Finish: the shoe glue dries clear and...
Why Did We Like It?
This professional-standard glue is mainly composed of cyanoacrylate, known to be among the strongest adhesives in the world. Its extremely fast-bonding property and colossal strength set it apart from other compounds used in glues.
Another noteworthy feature is its specially formulated viscosity that can bond with different kinds of footwear materials. As such, this shoe is the best bet when you have to work on a range of shoe repair projects.
And if you’re wondering about the drying time, let us tell you that it ranks high in this regard, too, as the repaired shoe becomes ready for use within minutes. Plus, you won’t require clamping the bonded part for this product as well.
We also loved how the bonds are entirely waterproof and equally efficient in withstanding icy cold winters and blistering hot summers.
What Could’ve Been Better?
You’ve got to watch out for the packaging of this glue, as the plastic bottle and even the cap might arrive damaged sometimes. This is most probably due to wear and tear during delivery, and it’s best to report such issues to the manufacturer and request a replacement. But performance-wise, this one gets a perfect score from us.
Pros
Fast-bonding glue
Bonds well with different footwear materials
Short drying time
Entirely waterproof
Cons
Poor packaging
Quantity: 1 Bottle | Volume: 0.7fl oz | Set Time/Dry Time: 10 to 45 Seconds | Cure Time: 5 Minutes | Dry Color: Clear | Resistance: Waterproof, Resists Hot & Cold Temperatures, Moisture
Our next pick is another top performer among shoe glues, thanks to its unique formulation that has been praised by many. Packed with a slew of beneficial features, it offers the ideal strength and durability that you need for any of your shoe repairs. So, let’s move on and learn more about this incredible glue.
Rubber Toughened: Loctite’s most durable cyanoacrylate...
No Drip Or Run: No-mess formula is ideal for vertical...
Why Did We Like It?
With this glue at your disposal, you can be confident of getting ultra-flexible, water and impact-resistant bonds in any type of shoe. And what does the trick is its unique rubber-toughened formulation that you’ll find in only a few brands.
So, after your favorite pair of scandals is fixed with this glue, the bond will remain intact no matter how frequently you’re wearing them.
Another feature that really appealed to us was the patented side-squeeze design of the bottle which facilitates absolute accuracy and precise dispensation. Plus, the screw-on cap with a self-piercing opening ensures the nozzle is always clog-free and retains the freshness of the glue.
Not to forget its super-gel formula, which sets fast and is transparent, thereby maintaining the look of the bonded area perfectly.
What Could’ve Been Better?
In case you have to work on several shoes, the amount of glue in one tube might not be sufficient as it’s just 0.14 fl oz. So, it’s best to buy quite a few tubes during each purchase. We felt the manufacturer needs to look into this aspect as it might lead a section of the customers to adopt another option instead.
Pros
Ultra-flexible and impact-resistant bonds
Accurate and precise application
Cap keeps nozzle clog-free
Retains the look of the bonded area
Cons
Less glue content
Quantity: 1 Bottle | Volume: 0.14fl oz | Set Time/Dry Time: 15 to 30 Seconds | Cure Time: 12 to 24 hours | Dry Color: Clear | Resistance: Resists Water, Impact, Shock, Vibration
Dealing with the toughest of shoe repairs is not a problem with this Super Glue from Krazy Glue by your side. Its versatile formula can help fix your shoe anytime and anywhere, just that you need to tuck it along with other essentials during any trip.
Krazy Glue Home & Office formula is perfect for office...
The brush-on applicator provides excellent surface coverage...
Why Did We Like It?
To begin with, its brush-on applicator seemed to us to be the most beneficial feature. This applicator provides a sufficiently wide coverage that can also be controlled on both hard-to-reach spots and larger surfaces. So, the Krazy Glue makes it easy to tackle all bonds, big and small.
You also don’t need to worry about the freshness of the brush over time as the anti-clog bottle ensures it stays intact, with the bristles staying loose. In addition, the bonds are formed “Krazy fast,” with the shoe becoming ready for use within a few minutes.
But you must be wondering about the durability of the bonds at this point. Well, even that’s spot on since the fixed spots remain super-strong for the years to come.
What Could’ve Been Better?
Packaging can be an issue with this glue, as the package might arrive torn in several places due to wear and tear during delivery. More importantly, this might sometimes affect the glue bottle as it may become exposed. That’s why it’s essential to report such issues to the manufacturer as soon as possible.
Halfway through our list, we’ve included this highly versatile glue that’s a pro in handling any shoe repair job. Also from Gorilla, this product is especially popular for its ability to bond separated shoe soles strongly and permanently. Many customers have even testified of its ability to fix hiking shoes most efficiently.
Fast Grab Formula: Bonds in seconds, no clamping required.
Why Did We Like It?
When it’s about repairing a fault on the front portion of a shoe, we often think twice before using glue and prefer to get it done by a professional. But this product won’t land you in that dilemma since it comes in a crystal-clear form. So, rest assured that your shoes won’t look different after they’re fixed.
We were also impressed by the flexibility that this glue offered, as the bonded part never felt stiff, and the shoe wasn’t uncomfortable to wear. Plus, its strong formulation gives it the ability to create bonds with ultimate strength.
And the icing on the cake is its completely waterproof property which rules out concerns of the bond getting weaker on coming in contact with rainwater.
What Could’ve Been Better?
Perhaps the only drawback of this glue is that it takes more time to dry than several other products. You’ll have to wait for at least 24 hours to let it cure completely. So, if you’re looking for a quick fix that would make the shoe suitable for use within minutes, this wouldn’t be your best bet.
Pros
Doesn’t alter the look of a shoe
Provides flexibility to the bond
Ultimate strength in all bonds
Completely waterproof
Cons
Longer drying time
Quantity: 1 Tube | Volume: 3fl oz | Set Time/Dry Time: In Just Seconds | Cure Time: 24 Hours | Dry Color: Clear | Resistance: Waterproof
Offering great bonding power, this glue has been a favorite of all cobblers for decades. So you can count on this product to bring back any shoe to its old form. You can even order the glue in bulk or a gallon-full of it; just contact the Barge customer support, and they’ll make sure it’s delivered to your place.
Once you try this cement, you'll see why it's considered one...
Industrial use, all purpose cement provides a strong bond...
Why Did We Like It?
First of all, the TF Cement is effective on a range of shoe materials, including cotton, neoprene, and leather. This is a property you’ll rarely find in any other glue on the market, as most of them are too tough for relatively softer materials such as cotton.
Furthermore, the product is totally waterproof and free from the harmful and pungent chemical, Toluene, commonly used in many adhesives. It even takes as little as 20 minutes to dry completely, and in the next two minutes, you can put the shoe on and start your journey!
Another big advantage is its bigger size compared to other shoe glues, as it comes in a 2-fl oz bottle that’s enough to last for around six months.
What Could’ve Been Better?
We felt the design of the glue tube could be better, as it may sometimes lead to inaccurate dispensing on smaller spots. So, you must be careful while using glue to repair a minor fault in any shoe.
Another specialized glue to look out for, the Gear Aid Shoe Repair Glue can make all your shoe repair jobs smooth and efficient. It’s the perfect choice for any biker, mountaineer, or sportsperson as they might often be faced with tears or other such faults in their shoes while in action.
Make long-lasting repairs and seal leaks on hiking boots,...
Use this durable urethane adhesive (formerly Freesole) that...
Why Did We Like It?
The highlight of this glue is the double-urethane formulation that provides absolute strength to any bond and ensures it stays intact over time. Thus, it dries as a flexible, tear-proof, and rubbery joint, and your shoes remain in good shape despite years of use.
Another great benefit is the clear formula, which prevents any transformation in the appearance of a shoe after its application.
Added on to this is the exceptional abrasion resistance, which is rare to be found in shoe glues. It makes the product ideal for specialized shoe repair jobs such as rebuilding worn-out heels or creating work boot protectors.
Moreover, its waterproof property shields the bond from weakening due to sudden contact with rainwater or moisture. As for the size of this glue, that’s also bigger than many other products on the market, which is why it can easily last for at least six months.
What Could’ve Been Better?
The longer drying time taken is a factor that puts it behind other glues with similar features. This product takes at least 8 hours to cure totally, so you’ll have to wait till then to wear your favorite pair after it has been fixed.
Pros
Provides absolute strength to any bond
Dries as a flexible, tear-proof, and rubbery joint
Are you a boot lover seeking a super-effective adhesive meant for boot repairs? Then this is surely one of the best products you’ll find out there. This Boot Protector Guard has been praised by lots of boot lovers across the country as it works like magic each time, keeping your boots in the perfect shape.
PROTECT SHOES AND BOOTS – Tuff Toe Boot Guard protects...
EASY APPLICATION ON ALL SHOES – Tuff Toe black shoe glue...
Why Did We Like It?
First and foremost, this glue creates bonds offering excellent heat and abrasion resistance so that your boots never weaken despite repeated use in a tough work environment. What makes this possible is the use of ballistic-grade technology in the manufacturing process, which provides great intrinsic strength to the adhesive.
Speaking of the formulation, its two-part polyurethane content is highly versatile and suitable for a variety of boots and other shoe types as well. So, be it fixing a pair of gorgeous stilettos, rugged hiking shoes, or even combat shoes, this glue will get the job done.
Even the flexibility of the bonds is commendable as your boots feel just as cozy and flexible as they were before the application. Lastly, the brand takes pride in sourcing all the raw materials and manufacturing the product entirely in the US.
What Could’ve Been Better?
We found its application procedure to be a bit complicated and lengthy, though the steps are mentioned in detail in a manual provided in the package. So, you need to be very careful with each of the steps and see to it that the application is accurate.
Pros
Offers great heat and abrasion resistance
Highly versatile
Bonds are flexible
Indigenously made
Cons
Complicated application procedure
Quantity: 1 Double Syringe | Volume: N/A | Set Time/Dry Time: N/A | Cure Time: 24 Hours | Dry Color: Black | Resistance: Waterproof, Resists Up to 742°, Fire, Puncture, Stain, Abrasion
The Amazing Goop II Max is great at establishing firm and extremely long-lasting bonds on a range of shoe materials. Thus, keeping this adhesive at home will suffice for all the shoe repairs you might need from time to time. To know more about all its features, move on to the next few sections.
Uv Inhibitors-Resists Yellowing Or Cracking Through All...
Flexible-Does Not Become Brittle Even In Cold Weather
Why Did We Like It?
The most significant feature of this glue is undoubtedly the presence of UV inhibitors which help prevent the yellowing or cracking of the bonded part during all weather conditions. Plus, the bond remains equally flexible throughout and doesn’t turn brittle even if it’s exposed to cold weather.
And if you wish to polish or paint the shoe after it’s fixed, you can easily do it without having to worry about its impact on the bond strength. The bond will be as strong as ever, and the shoe will look as good as ever!
Also, the glue is perfectly waterproof, implying that the bond won’t be affected by moisture or rainwater at all. And like a few of our other recommendations, it comes in a 2-oz bottle that’s enough for completing several shoe repairs for six long months.
What Could’ve Been Better?
This glue includes certain harsh chemicals in its formulation, which makes it a bit riskier to handle than many other adhesives. So, it’s best to wear gloves while you’re working on this product. Apart from that, we were quite satisfied with its performance.
Pros
Prevents yellowing or cracking of the bond
Provides great flexibility
Bond isn’t affected by moisture
One bottle lasts for 6 months
Cons
Includes harsh chemicals
Quantity: 1 Tube | Volume: 2fl oz | Set Time/Dry Time: N/A | Cure Time: N/A | Dry Color: Clear | Resistance: Waterproof, Resists -40°F to 180°F, UV, Cold Weather
Towards the end of our list, we’ve included the Shoe GOO, another reliable option specially meant for shoe repair jobs. It delivers a pretty decent performance in fixing all kinds of problems in shoes ranging from damaged heels to detached soles. Coming with a variety of effective features, there’s a lot you can do with this simple product.
Straight off the bat, its strong formulation bonds really fast to create a permanent joint that remains intact for years. It also provides resistance to abrasion and ensures better adhesion than most other products out there.
What’s more, it acts as the perfect sealant to patch the smallest of holes in your shoes accurately. And the bond is entirely waterproof and stays secure even through rough weather conditions.
Furthermore, this glue can be used on gloves and skateboards as well. Note that the latter requires an adhesive that offers extra traction, and this product fits the bill perfectly.
Last, but not least, it’s made entirely in the US, which makes it the ideal option for users who always prefer indigenous products for all purposes.
What Could’ve Been Better?
The much smaller size of this glue tube is its only downside, owing to which it may not last for more than a month if used frequently. So, purchasing several tubes at once will be the best way out in this regard.
Making the right choice is of paramount importance when you’re looking for shoe glue. That’s why it’s important to consider some key factors that impact the performance of these products. Making a hasty decision might lead you to derive only partial results from the product. So, here are the points that you need to keep in mind while choosing a suitable shoe glue.
Drying Time
This is a crucial consideration to make while picking the right shoe glue. While some products require you to wait for hours before they dry, it’s just a matter of seconds for others. So, your choice would depend upon whether you want the shoe to be fixed within a short duration or not.
Note that larger shoe repairs like re-attaching the sole will need glue that’s more flexible, which may take much longer to dry. Likewise, smaller shoe repairs can be fixed easily using super glues that dry quickly.
Shoe Material
The shoe glue must, of course, be suitable for the material of the shoe that you plan to use it for. So, while going through the details of a product, make sure it’s suitable for the types of shoes that you have at home. And in case you are looking to repair a specialized shoe, take extra care to ensure that you’re going for the right glue.
Versatility
You should also remember to refer to the instructions from the manufacturer about whether it can be used for multiple shoe materials or not. Also, a versatile glue should be effective for small as well as large shoe repair projects. That’s why you should check the customer reviews to ensure the product can handle both types.
Impact Resistance
You would always want the repaired shoe to remain intact throughout its use. Thus, the bond created by the glue should offer enough impact resistance to ensure that the shoe stays in good shape. For ascertaining this, you will need to refer to the customer reviews again to find out what customers have to say regarding the resistance offered.
Glue Color
Ideally, shoe glue should come in a transparent and clear form so that the repair isn’t visible. That way, the look of a shoe will be retained. Or you can opt for colorful glue products if your shoes are embellished or vibrant.
Glues for Shoes FAQs
What types of shoes can I repair with shoe glue?
Shoe glues can generally repair various types of shoes, including athletic, casual, dress, and work shoes. Performance may vary based on material and quality.
Can I use shoe glue on both leather and synthetic shoe materials?
Yes, there are many shoe glues available that work effectively on both leather and synthetic materials. Always check the glue label for recommended materials.
Can shoe glue be used to fix tears in the shoe fabric?
Shoe glues can often repair small tears in shoe fabric. However, the effectiveness will depend on the fabric type, location, and extent of the damage.
Can shoe glue repair sole separation?
Yes, shoe glue is particularly effective at repairing sole separation. Apply the glue evenly and follow the manufacturer’s instructions to ensure a long-lasting bond.
Can I use shoe glue to attach shoe accessories?
Shoe glue is suitable for attaching a variety of shoe accessories, such as patches, studs, spikes, and ornaments. Ensure proper adhesion by following the manufacturer’s instructions.
How do I apply shoe glue to my shoes?
Thoroughly clean the area to be glued, apply a thin layer of glue according to the manufacturer’s instructions, press the pieces together, and clamp if necessary. Allow the glue to dry for the recommended time.
How do I remove excess glue from my shoes?
To remove excess glue, gently use a fabric or a brush moistened with a compatible solvent. Depending on the glue, this may be rubbing alcohol or acetone. Always test a small area first to ensure no damage.
Conclusion
With this, we have reached the end of our guide.
We hope you’ve been able to zero in on the most suitable shoe glue by now. But in case you’re still hesitant, we’d suggest recapitulating your needs and going through the buyer’s guide once more. This will surely help clear all your doubts.
Before we wrap up, we’d like to share with you our favorites from the list. If you are searching for a product that’s specially made for handling shoe repairs, the Boot-Fix Shoe Glue will be an ideal choice.
However, if you have no such preferences and are searching for a truly effective glue suitable for a variety of shoe repairs, it will be best to go for the Gorilla 7700104.
Let us know whether you agree with our verdict in the comments section below. See you soon with more interesting guides. Till then, take care!
Plastic is a tricky material to work with, especially when bonding them to each other or other materials.
With so many types of glues available, it can be hard to determine which is the right one for the job. Most plastics are pretty flexible, which can, in turn, affect the strength of the bond. However, certain glues and adhesives have been formulated explicitly with the nature of plastic in mind.
Whether you are working on a large project like repairing boats or a smaller craft project, using the right adhesive can make a world of difference. And to help you find the best glues for a plastic surface, we have compiled the top options as well as a guide on how to pick the best one.
With that being said, let’s get into it!
Best Glue For Plastic
So whether you're repairing a broken plastic item or creating a new plastic project, you can be confident that these glues will do the job right. Without further ado, here's the list of the 7 best glue for plastic.
Making repairs and fixing chips and cracks is a cinch with this Gorilla super glue at your side. It can be used on various materials, acting as either wood glue or plastic glue, making it a truly multi-purpose option. A high-strength bond that lasts can be achieved with a drying time that is much faster than common adhesives.
Anti Clog Cap: Keeps glue from drying out. It's Gorilla...
Why Did We Like It?
Working with the Gorilla super glue was a breeze, thanks to its thick formula. Most glues have a thin consistency that makes applications a bit messy at times. But we didn’t face any issues while applying this one on plastics and different materials, even for vertical orientations.
Another handy feature is an accessory that Gorilla included in their glue sets. A metal tip helps keep the nozzle free from buildup. Of course, the amount of buildup is also controlled by the anti-clog design of the tip, unlike other adhesives that can prevent any glue from coming out of the package.
As for the strength of the glue, it is a potent adhesive that can bond in no time at all. Gorilla claims that the glue can achieve a strong bond in less than a minute. This means no clamping is required to fully cure the glue.
What Could've Been Better?
Although the Gorilla glue has a thick consistency, it can impact its accuracy on the target material. This is mainly due to the design of the bottle which is difficult to wield with one hand to get the glue out.
Pros
Versatile use
No clamping needed
Fewer harsh chemicals
Fast drying time
Cons
Formula is difficult to extract
Type: Cyanoacrylate | Material Compatibility: Metal, Plastic, Wood, Ceramic, Leather | Set Time: 10-30 sec | Cure Time: 24 hours | Max Temperature Resistance: 200°F | Waterproof: No | Bond Strength: 3200 PSI
This two-part epoxy from Loctite has a unique design that eliminates measuring and mixing the two parts for application. It can be used on various materials, like plastic, metal, and glass, even acting as a filler that provides a strong bond.
A crucial step in getting the strongest bond possible out of an epoxy kit is mastering the ratio that each part should be mixed. But Loctite solves this by including both in a syringe design that mixes the parts for you. For those who are not as experienced in working with epoxy, this can save you an extra step in the application process.
Moreover, the nozzle design controls the amount of epoxy coming out as well as the pressure. The limiter helps for a more stable application that is especially useful for precise work and eliminating clogging.
Additionally, the formula is incredibly robust in its resistance to various external factors. From the water, and moisture to solvents and chemicals, it can hold its bond with ease. As a bonus, it can be treated after curing for sanding or painting to achieve a seamless, clean look.
What Could've Been Better?
One downside to using a self-mixing epoxy is the limit on how often you can use it. Loctite only includes two nozzles in this kit, so if you plan to use it beyond two projects or sessions, you may want to stock up on extras.
Pros
Waterproof formula
Does not shrink
Can be tinted, painted, and sanded
Easy application
Cons
Only two nozzles included
Type: Epoxy resin | Material Compatibility: Metal, Plastic, Ceramic, Wood | Set Time: 5 min | Cure Time: 24 hours | Max Temperature Resistance: 212°F | Waterproof: No | Bond Strength: 2500 PSI
Bonding in seconds, this super glue from Rhino Glue is both versatile and robust. Whether you are bonding plastic, cement, or glass, there is little that the Rhino superglue can’t handle. The unique clear formula helps in precise applications to help you get the strongest bond.
Rhino Glue is a more Durable adhesive that is 2X faster than...
Bonds in seconds plastics, vinyl, wood, rubber, metals,...
Why Did We Like It?
One benefit to using a clear consistency super glue like this is seeing where the glue is actually being applied. This is especially helpful if you are working on small pieces or want a clean result. It can also help create a more cohesive bond between the two surfaces, as you can apply it to only the contact areas.
Furthermore, once the glue has been allowed to dry, its waterproofing and impact absorption properties can help extend the bond's lifespan. They also protect the underlying surface from potential damage from moisture or undue pressure.
Applying the glue is an effortless process, thanks to the simple squeeze design bottle, and it dries out within about 20 minutes. Compared to other adhesives, this drying time is incredibly fast for the resulting bond created.
What Could've Been Better?
It should be noted that this particular bottle from Rhino Glue does not have the largest of capacities. If there is a large area to be covered, or if it is needed for extensive use, buying a couple of bottles at a time is recommended.
Pros
Precise application
Stress-resistant bond
Fast bonding time
Easy to use
Cons
Small volume bottle
Type: Cyanoacrylate | Material Compatibility: Metal, Plastic, Wood, Ceramic | Set Time: 15 sec | Cure Time: 24 hours | Max Temperature Resistance: 200°F | Waterproof: No | Bond Strength: 3300 PSI
A two-part epoxy cold weld system from J-B Weld, this Marine Weld is ideal for surfaces that may see regular contact with water. Plastic, cement, and other such durable surfaces will benefit from the strong bond that can enhance their durability against external damage.
J-B WELD MARINEWELD: A two-part epoxy cold weld system that...
CURE AND SET TIME: After mixing the tubes at a 1:1 ratio, it...
Why Did We Like It?
First and foremost, this epoxy glue from J-B Weld is extremely resistant to chemicals and moisture. The formula was designed to be used on marine surfaces, so it is safe to say the waterproofing capabilities are second to none.
Apart from that, it can be painted on, sanded, molded, and even drilled once cured. All these options allow a cleaner finish that can potentially hide the seam of the surfaces. If aesthetics are a priority, manipulating the bond can make for a seamless, high-quality result.
Additionally, it has a straightforward application process in terms of the mix ratio of the epoxy and hardener. A one-to-one mix means you can easily gauge how much of each part is required to get the job done.
What Could've Been Better?
Although this particular epoxy is excellent at resisting moisture and water, impact and stress are another story. The bond itself is strong; however, it is susceptible to cracking under extreme pressure or constant abrasion. Those planning on using this epoxy on high-contact surfaces especially should take note of this.
Pros
Water and chemical-proof formula
Applicable on a range of materials
One-to-one mix ratio
Dark grey color once cured
Cons
Susceptible to break under heavy force or abrasion
Type: Epoxy resin | Material Compatibility: Metal, Plastic, Wood, Ceramic | Set Time: 4-6 hours | Cure Time: 15-24 hours | Max Temperature Resistance: 550°F | Waterproof: Yes | Bond Strength: 3960 PSI
Testors have formulated this glue as an adhesive plastic model cement that grips rubber particles with ease. It is exceptionally effective at joining different plastic types, from flexible plastics to more robust surfaces. Packed with an extra tube and four precision tips, this makes for a soil glue kit.
Bonding plastic can be challenging, especially when working with different kinds of plastics. And this Testors cement glue can help you achieve just that with absolute ease. Thanks to its specially designed formula, it is meant explicitly for plastic surfaces, be it hard or soft plastics.
Furthermore, it does not involve a lengthy application process. It can be applied straight out of the tube using one of the included precision tips. There is no need to struggle with mixing, lining up the glue, or cleaning up any excess.
So long as the cap is replaced after every use, the formula won’t harden or become unusable. This incredibly long shelf life makes it a value purchase that lasts for a long time.
What Could've Been Better?
While using this plastic cement glue, there was an issue with the structural integrity of the tube while storing it away. The tube needs to be rolled up to prevent the formula from coming out consistently, which may cause small tears to form along its edges. And the resultant gaps can potentially dry out the formula prematurely.
Pros
Easy-to-use tube design
Create a strong and permanent bond
Precise application
Specially manufactured for bonding plastics
Cons
The tube may get damaged if rolled up
Type: Cement | Material Compatibility: Plastic, Metal | Set Time: N/A | Cure Time: 24 hours | Max Temperature Resistance: N/A | Waterproof: No | Bond Strength: N/A
Krazy Glue takes a unique approach to apply adhesives with this super glue that incorporates a brush into the cap’s design. Using a brush to apply glue has several benefits that can create a lasting bond between various materials.
Krazy Glue Home & Office formula is perfect for office...
The brush-on applicator provides excellent surface coverage...
Why Did We Like It?
Truly a one-of-a-kind bottle design, the brush attached to the bottom of the bottle’s lid does come in handy when applying the adhesive. For one, it makes covering a larger area much more accessible than using traditional methods. It can also be spread better and evenly, so the bonding strength is pushed to its full potential.
Furthermore, the bottle design of the superglue limits the frequency of clogs. A tight fit on the lid ensures the glue doesn’t dry out prematurely. As an extra layer of security against clogging, the bristles on the brush are designed to not bunch together into clumps.
As for the application process of this super glue, it couldn’t be more straightforward. Simply dip the brush into the formula, then run it across the surface. The brush does all the work of making an even layer, giving you more control over where it is being applied.
What Could've Been Better?
While using a brush as an applicator can have its perks, it also limits the bottle to this single method. There were instances of the brush becoming detached, in which case the formula becomes inaccessible without a precise nozzle for application. This risk should be considered if you are contemplating using this method of application.
Pros
Simple application
Reduced frequency of clogging
Wide surface coverage
Bristles don’t clump up
Cons
Brush adhesion can come undone
Type: Cyanoacrylate | Material Compatibility: Metal, Plastic, Wood, Ceramic, Rubber | Set Time: 10 sec | Cure Time: 24 hours | Max Temperature Resistance: 180°F | Waterproof: No | Bond Strength: 2600 PSI
With low viscosity, this instant adhesive from 3M is a solid glue for plastic or any other substrate. The formula is manufactured to cure quickly on these materials without causing too much distortion. Rounding off the package, a unique pinch container helps keep the adhesive flowing for easy application.
Bonds to a number of substrates, including plastics and...
Precise application: pinch container for a precise drop or...
Why Did We Like It?
3M has designed this container to be easily accessible to make one-hand applications more manageable. A pinch is all that is needed to pull out the adhesive from the container. Depending on the amount of force applied, the formula will come out as drops or a steady bead for precise or ranged application.
Additionally, the formula has a low viscosity, which works well in the case of plastics and other similar materials. By permeating the surface, the resulting bond is much deeper and solid than a superficial surface adhesion.
Keeping the curing time to a minimum is another one of the benefits of using this adhesive. The workflow can be kept moving without having to wait for the adhesive to fully cure.
What Could've Been Better?
As stated before, all that is needed to pull the formula from the container is a pinch with varying degrees of pressure. Combined with the low viscosity, this feature can cause cases where the adhesive is prematurely ejected and cause a mess. Hence, caution should be practiced while using this particular adhesive.
Pros
Fast curing time
Durable, lasting bond
Low viscosity formula
Precise application
Cons
Formula is ejected quickly
Type: Cyanoacrylate | Material Compatibility: Plastic, Rubber | Set Time: 10-30 sec | Cure Time: 24 hours | Max Temperature Resistance: 180°F | Waterproof: No | Bond Strength: 1500 PSI
The best plastic glue is the one that can form a solid bond that lasts. Before you settle on a particular adhesive, there are a few factors to consider to find the right glue for your use. To ensure you have the best quality bond, keep these factors in mind while making your decision.
1. Types Of Adhesives
Among the many adhesives on the market, there are mainly two camps that plastic glue options fall under. The first is epoxy adhesives that demand more attention in the application. The second would be standard superglues that are comparatively easier to use and apply.
Plastic bonding using an epoxy putty mixture can be challenging for those who are unfamiliar with the procedure. However, there are specially designed bottles that can aid novices by mixing the proper ratio for them.
On the other hand, super glues make for a much simpler plastic bonding experience. As far as the various application processes of glue for plastic, this is relatively straightforward. Simply uncap the nozzle and apply the formula to the desired surface.
2. Durability
Tensile strength and various resistance to external factors are crucial features to look out for in adhesives. An impact-resistant bond, for example, keeps the plastic parts together even when exposed to trauma. Sealants are a type of adhesive that can be applied to the surface of the material to add increased durability and resistance against specific factors.
Additionally, a water-resistant adhesion is a valuable feature to have, especially on a non-porous material like plastic. A water-resistant glue for plastic acts as a barrier to protect the underlying material.
While heat may be essential to fully cure the adhesive, too much can distort the plastic. That is why a heat-resistant formula is recommended if the treated surface is to be exposed to high temperatures.
3. Ease Of Use
Factors like how easily the adhesive can be cleaned up and the time taken to dry can significantly impact the user experience. Depending on your needs, these features can be adjusted to find a suitable match for you.
Among adhesives, there are various degrees of drying and curing times involved. There is a rubber instant adhesive on one end of the spectrum that can chemically bond and dry instantaneously. On the other end, some glues may take a few hours to fully cure.
The glue dries at different speeds, depending on the flexibility of the material. With more flexible surfaces like fabric and plastic, the material must be broken down to some degree to attain a strong bond.
Furthermore, cleaning up excess applications of these adhesives can be a chore if you are not careful. Common methods include mineral spirits and denatured alcohol that are rubbed on after the glue dries. Steel wool or warm soap water are other popular cleaning methods used on other materials to have a more professional, finished look.
Glue For Plastics FAQs
Can you use hot glue on plastic?
Hot glue can be used on some types of plastic, but it may not be the best choice for all applications. It is great for bonding two surfaces quickly but may not hold up well over time if the plastic is exposed to moisture or high temperatures. For a stronger bond, consider using epoxy glue.
What type of glue is best for bonding plastic to metal?
For bonding plastic to metal, a strong and durable adhesive is recommended. Epoxy glue is a good choice for this application as it forms a strong bond between the two materials.
Can you use super glue on plastic?
Yes, superglue can be used on plastic. However, it may not be the best choice for all types of plastic as it can become brittle over time and may not hold up well under stress. For a stronger bond, consider using epoxy glue.
How do you remove glue from plastic?
To remove glue from plastic, you can use a solvent such as acetone or rubbing alcohol. Apply the solvent to the glue and allow it to sit for a few minutes. Then, use a scraper or a cloth to remove the glue. Be sure to wear gloves and work in a well-ventilated area.
Can you weld plastic instead of using glue?
Welding is not an option for bonding plastic as it can melt the plastic and cause damage. Glue is often the best option for bonding plastic. However, some plastics can be heat-welded using specialized equipment and techniques.
Conclusion
Hopefully, you now know a bit more about the different types of plastic bonder adhesives available and how to choose the best one. Finding high-quality glue and creating permanent bonds to adhere to plastic can be challenging. All that is left now is to choose the right one for you.
Our all-around choice has to go to the Gorilla Gluefor a thicker formula that is easy to apply and stumps many adhesives. However, if you are looking for epoxy, the self-mixing Loctitebottle design is effortless to work with.
Whether you are looking for a quick repair or a long-term project, suitable glue in the right hands can make all the difference. Invest in the proper tools, and you’ll be sure to get the job done in no time at all!
Although we as a society are shifting towards a plastic-free environment, we have not managed to remove all its uses, have we? However, today's discussion is not going to be about plastics that we use every day. Instead, we'll be discussing the creative subject of 3D printing.
Any 3D printing job is not possible without high-quality glue, so we've curated a list of the best adhesives for bonding PLA.
PLA or polylactic acid is a biodegradable form of plastic that is safe for the environment. Since it is thermoplastic, we can use it to mold and shape it into various forms. This is why it is a favorite amongst those who like to create 3D models with printing.
So, without further ado, let's find out which glues are best suited to bond PLA and other plastics for 3D printing.
Best Glue For PLA
Whether you're looking to join two PLA parts together or fix a broken 3D-printed object, these glues will help you get the job done. So, without further ado, here's the list of the 9 best glue for PLA.
We had to include one of the most popular glue brands on our list. This particular model is the 7501201 by Gorilla, which is a pretty versatile product. The distinctive feature of this product is that it has a dual dispenser. Find out more about it below.
2 ways to dispense: Our classic clear Gorilla glue with 2...
All purpose glue: Gorilla Super Glue is formulated for...
Why Did We Like It?
First off, we liked the tough impact this glue has on various types of materials. It might not be visible to the eye, but the product has unique rubber particles that increase holding strength.
Another noteworthy feature of this glue is its multipurpose nozzle. The dispenser can be switched to a nozzle or a brush whenever you need it. This added option gives better control and accuracy when applying a fine or delicate line. The fine bristle brush is perfect for controlled coverage making the application process mess-free.
Moreover, if you want to use the brush applicator, all you have to do is unscrew the cap. Next, wipe the brush on the inner rim of the bottle to remove the extra glue. Finally, you do not need to wait for long after application since a thin coat of the product dries within a minute.
What Could've Been Better?
When it comes to critical issues, we didn't think there were any significant ones worth mentioning. However, we do believe it is essential to note that if the packaging is faulty, you may receive a glued-up packet. This might cause issues in applying since it will have dried up.
Pros
No clamping required
Quick and easy to use
Fine bristles for easy application
Mess-free
Cons
Faulty packing may dry the glue
Type: Cyanoacrylate | Material Compatibility: Metal, Plastic, Wood, Ceramic, Leather | Set Time: 10-30 sec | Cure Time: 24 hours | Max Temperature Resistance: 200°F | Waterproof: No | Bond Strength: 3200 PSI
Next, we have the Thick Viscosity Glue by the brand Glue Masters. This is an industry-strength cyanoacrylate adhesive that comes in bottles of 2 ounces each. If you are looking to add all-purpose glue to your tool or repair box, this is the ideal candidate for that.
Firstly, what's unique about this product is its viscosity. The product is pretty thick, so there is no chance of it running and spilling around while applying. In fact, this option has the perfect viscosity and gluing power for all types of materials like wood, paper, glass, plastic, and metals.
Apart from that, if you like DIY projects, there are various ways in which this glue will help you. It's the perfect option for making and completing dolls, models, and puzzles for kids and adults. This clear glue is pretty much all you need for creating new toys or mini models of planes, trains, and boats.
Also, this product comes in handy for carrying out repairs in and around the house. In that sense, it is a beneficial addition to your toolbox. The 2-ounce container should be enough to handle big or small fixing jobs. Finally, it easily handles household repairs like shoe fixing and small carpentry projects involving wood.
What Could've Been Better?
While some online reviewers claimed that this product was the best and gave excellent value for money, there were some who were not happy.
A major concern among users was that this glue did not adhere correctly to fabrics and plastic. When we tried it ourselves, we noticed that it did not manage to bond fabrics. Well.
Pros
No-spill formula
Glues all kinds of surfaces
Many bottle varieties
Cost-effective
Cons
Does not bond fabric
Type: Cyanoacrylate | Material Compatibility: Metal, Plastic, Wood, Ceramic, Rubber, Leather | Set Time: <10 sec | Cure Time: 24-48 hours | Max Temperature Resistance: 200°F | Waterproof: No | Bond Strength: 3000 PSI
Here we have a unique gluing solution called "Bedweld" by Layerneer. This product is described as a professional-grade 3D printing adhesive. Each bottle of fluid glue comes in a packaging of 4 ounces each. This is the perfect solution if you are having trouble with parts warping or detaching from the printer bed.
THERMAL DYNAMIC COATING - Based on science, works like...
LONG LASTING - Print several times on a single coating;...
Why Did We Like It?
Right off the bat, we liked the super-strong formula, which is designed to help you if you have challenges related to printing and printer beds. Essentially, "Bedweld" is intended to enhance the print surface so that it grabs hold of the most critical first layer. This step occurs when the build surface is hot and the adhesive clings onto it with a "gecko-like" grip.
And, after the print is done, the coating changes as the printer bed cools down and relaxes its hold allowing the user to remove parts. The good thing is that detaching will not require any tools, so there is no need to worry about chipped glass or broken pieces.
Apart from that, we need to discuss the unique applicator that allows for smooth application creating zero messes and spills. Once you apply the product, the coating dries quickly to form a film over the surface, which is not sticky and thus does not leave any clogs or residue on the nozzle.
What Could've Been Better?
There were many reasons why we liked this product which is why we may have overlooked some of its flaws. But, that does not mean that this product does not have any. There was one incident in which we realized that the glue sticks to glass alright but sometimes fails to stick to ABS or PLA.
Pros
Parts stick to each other when cooled
Long-lasting solution
No odor
90-day manufacturer guarantee
Cons
Does not stick to ABS and PLA
Type: Adhesive | Material Compatibility: 3D Printing Bed Surface | Set Time: N/A | Cure Time: N/A | Max Temperature Resistance: N/A | Waterproof: Yes | Bond Strength: N/A
Up next on the list, we have the 15187 model by the brand Super Glue. This brand has been a well-known and trusted option for adhesives in the market since 2005. It is available for purchase in 0.48-ounce tubes, but you can grab the 12-pack offer online.
Original Super forms the strongest bonds on clean breaks of...
Super Glue for wood, ceramic, fingernails, metal, pottery,...
Why Did We Like It?
One of the features we liked about this product was its durable formula which formed the strongest bonds on various materials. Do you want to bond ceramic, metal, plastic, china, jewelry, or pottery? If yes, then you will find many good uses for this product.
Another thing we liked about this option was its fast-drying formula which takes not more than 10 or 30 seconds to set. Of course, the drying time does change a bit depending on the material that needs to be glued together. We found that glass, ceramic, china, and pottery bonded pretty quickly at 30 seconds. Meanwhile, metal and wood took up to a minute to set and harden.
Furthermore, this product comes in small tubes which are easy to hold and maneuver. Additionally, the nozzle is well-designed and precise, which prevents any unwanted drips and leaks while applied on a surface.
What Could've Been Better?
We actually liked this product as it managed to bond surfaces efficiently as advertised. However, we did have complaints about the packaging. The 12-packet container that it comes in was too tight and required additional tools to open it.
Pros
Reusable storage
Versatile glue
Paintable and sandable
Low cost
Cons
Poor packaging
Type: Cyanoacrylate | Material Compatibility: Metal, Plastic, Wood, Ceramic, Rubber | Set Time: <10 sec | Cure Time: 24 hours | Max Temperature Resistance: 200°F | Waterproof: No | Bond Strength: 3200 PSI
Another glue we decided to include in our list of best glues was the 1363589 model by Loctite. The glue comes in small bottles with 0.48 ounces of product per packet. This super glue has the consistency of gel for smooth application, and it sets clear.
Rubber Toughened: Loctite’s most durable cyanoacrylate...
No Drip Or Run: No-mess formula is ideal for vertical...
Why Did We Like It?
Let's start with what we like the most about this product. This instant adhesive is rubber toughened which resists jarring and impact, if any. It also can withstand moisture and freezing temperatures and scoring sun, making it an excellent glue for outdoor projects.
The next thing we liked about this glue is its versatility. You can use it to bond materials like metal, rubber, wood, ceramic, leather, paper, and plastic, among other things. And, even though the glue bonds well, it allows the user some time to move around the materials. It doesn't dry instantly, so you can use this for projects that take longer to set and arrange.
Moreover, if talk about the applicator, it is designed to be firmly in your hand, giving a sturdy grip. This makes it suitable for use over long hours too. Apart from that, you need not worry about any yellowish layer of the film appearing after the glue dries because it is absolutely transparent after drying.
What Could've Been Better?
When we first used this product we were quite satisfied with the results. The glue stuck two parts of wood efficiently, and after drying, it did not move from the place at all. However, the disappointing part was when we tried sticking plastics. It refused to dry and remained in liquid form for the longest time.
Pros
Can be used on most surfaces
Builds strong bond
Durable product
Impact and water-resistant
Cons
Does not stick plastics
Type: Cyanoacrylate | Material Compatibility: Metal, Plastic, Wood, Ceramic, Rubber | Set Time: 10-30 sec | Cure Time: 24 hours | Max Temperature Resistance: 212°F | Waterproof: No | Bond Strength: 3200 PSI
Here we have another high-quality glue that is specially designed to bond plastics. Generally, this product comes in a packaging of 5 fluid ounces per piece, but there are also other sizes for you to choose from. Read on to find out more about this product.
If you are looking for a glue that effortlessly bonds with plastics, this option might be a perfect choice. This glue bonds with rigid PVC, ABS, styrene, butyrate, and polycarbonate to themselves as well as to each other. In short, you can expect this product to work as an adhesive for all types of plastics and porous surfaces.
Along with that, the formula is a robust solvent cement for bonding acrylic with a tensile strength of 1700 pounds per square inch. In fact, the formula is so tough; it can withstand freezing temperatures as well.
However, this product does not dry instantly, and that doesn't have to be a disadvantage. There are some projects where you need to be careful about the placement of wood or plastic so that it aligns evenly. That is when a slow drying glue saves the day; it allows you to work carefully without the stress of the adhesive drying quickly.
What Could've Been Better?
Overall, we liked this product and thought many people working with plastics could use it too. However, there seems to be some issue with the packaging. We ordered two boxes and one of them came damaged. The glue tube was punctured and leaking, and we couldn't replace it.
Pros
Low VOC content
Adequate viscosity
Moderately priced
Dried clear
Cons
No replacement policy
Type: Solvent-based | Material Compatibility: Acrylic, Polycarbonate, ABS, PVC, Nylon | Set Time: 5-10 min | Cure Time: 24 hours | Max Temperature Resistance: N/A | Waterproof: No | Bond Strength: N/A
Yet another glue we included in our list is the CECOMINOD040301 model by the brand Starbond. The product is available in tubes of 2 fluid ounces and a bunch of different nozzle sizes. Read on to know more about its gap-filling and repair properties.
✅ PREMIUM SUPER GLUE, SINCE 1988: For over 33 years,...
✅ GLUE LIKE A PRO: Great for gap-filling applications,...
Why Did We Like It?
The first thing we need to mention is that this product is quite popular for its repair and gap-filling properties. It is a premium ethyl cyanoacrylate superglue that has industrial-grade strength. Since the glue is thick and viscous, you can pour it into gaps to even out a surface. The perfectly viscous solution measures 2000 cPs making it the same thickness as fresh honey.
Moreover, these properties make it the perfect solution for heavy-duty bonding. It is no surprise that you will find it used for fletching in archery and fragging coral reefs. Moving on to the accessories, the product comes with different nozzle types which do not clog over time.
Finally, this brand is trusted mainly because of its long shelf life and lifespan. It even manages to tolerate sub-zero temperatures if it is sealed correctly.
What Could've Been Better?
We didn't find any significant flaws to point out because the high-quality adhesive managed to glue everything and anything. However, the only thing we noticed was that it took too long to dry on some surfaces. We tried to bond a broken plastic toy, and it took more than an hour to dry.
Pros
Long shelf life
Clog and mess-free
Affordable
100% replacement guarantee
Cons
Dries slower on some plastics
Type: Cyanoacrylate | Material Compatibility: Metal, Plastic, Wood, Ceramic, Rubber, Leather | Set Time: <10 sec | Cure Time: 24-48 hours | Max Temperature Resistance: 200°F | Waterproof: No | Bond Strength: 4000 PSI
Next, we have one of the few types of glue we reviewed which were not in liquid form. As the name suggests, this 3D Printer Glue Stick by ACEIRMC is specially designed for bonding 3D elements. Read on to find out its applications.
Let's start with the unique features of this adhesive. It is essentially a solid green gum that is non-toxic, acid-free, and easy to apply. The product is highly viscous and dense, making it easy to solidify after application.
Moreover, the application is pretty easy too. First, spread the glue on the hotbed printing area and allow the cooling process to finish. Just lightly apply the glue to the printing bed; there is no need to cover the whole surface. Once the build plate has cooled down enough, gently release the 3D print. And that's it! It's this simple to use this glue for prints.
Also, the glue stick lasts for a long time, with one stick being more than enough for over 100 prints. You can also use these glue sticks to remove 3d models easily and apply them in various crafts, projects, and artworks.
What Could've Been Better?
When we picked this up at the store, we had a few doubts about its quality because of the glue stick appearance. However, it worked just fine for us! But not everyone had the same experience; some online reviews did not find the adhesion strong enough to make 3D prints.
Pros
Non-toxic and acid-free
Easy release and application
Perfect for multiple uses
Affordable
Cons
Not reliable
Type: Adhesive | Material Compatibility: 3D Printing Bed Surface | Set Time: N/A | Cure Time: N/A | Max Temperature Resistance: N/A | Waterproof: Yes | Bond Strength: N/A
Here we have another glue meant explicitly for 3D printing and heated print beds. One bottle comes in a packaging of 4 fluid ounces per bottle. Also, this adhesive can be used in multiple types of hotbeds; read ahead to know the details.
ALL-IN-ONE 3D PRINTING GLUE STARTER PACK: The Prevailent...
COMPATIBLE WITH MULTIPLE FILAMENTS: This 3D printing...
Why Did We Like It?
We liked this product for various reasons, but the feature that it is designed for stood out to us the most. The adhesive is perfect if you need to glue PLA, ABS, PETG, and TPU. It also works on borosilicate glass, PEI, BuildTak, Kapton, and other bed surfaces.
Furthermore, since this is a starter pack, you get valuable tools for beginners and advanced users alike. The package includes a detailed quick-start guide, a custom sponge brush, leveling cards for hot and cold leveling, and a beveled spatula.
In essence, the T-80 was specially engineered to solve common problems which arise in 3D printing projects. It takes care of warping issues and helps to realize the parts when complete. Finally, this adhesive is hassle-free and pretty easy to clean and wipe. Also, it is water-soluble, non-toxic, chemical-free, and virtually odorless.
What Could've Been Better?
Like the other glues on our list, we liked this brand and model too. But every product has its flaws, and the T-80 is no exception. While testing this glue, the first three prints turned out just fine, but the last print formed a warped product, raising questions about its consistency.
Pros
Overcomes warping issues
Odorless
Certified safe to use
Cost-efficient printing
Cons
Inconsistent product
Type: Cyanoacrylate | Material Compatibility: Metal, Plastic, Wood, Ceramic, Rubber, Leather | Set Time: <10 sec | Cure Time: 24-48 hours | Max Temperature Resistance: 200°F | Waterproof: No | Bond Strength: 2900 PSI
Now that you have seen the good and not-so-good aspects of each option, it's time to determine what makes a good glue for PLA. Here are a few things to keep in mind before finalizing on one glue-
Glue Flexibility
Different glues have varying degrees of viscosity, thickness, and flexibility. When we talk about flexibility, we mean the degree to which the product can mold into the surface or substance.
Adhesives like superglue are rigid, and you cannot manipulate them much. On the other end, you have liquid glues, which are more flexible and can fit into the tiniest corners and spread on surfaces evenly.
Drying Time
The drying time can vary from a few minutes to a few hours. The instant-drying ones will not require more than 5 minutes in total to settle and dry in small quantities. Others need to be left alone for hours and will require clamps to hold them in place to allow them to set.
If your project cannot be clamped, select a quick-drying option. But, keep in mind that you'll have to work way faster on these faster-drying adhesives.
Appearance
How obvious is your repair work going to look? This depends on a few factors. The placement of the repair seams and the finish of the glue contribute to the final appearance. Some adhesives leave a visible film or seam, which might not look smooth and even. Others leave a yellowish color after drying.
Considering these factors is essential if you cannot compromise on the appearance of your project. A clear-drying glue that spreads thinly and even is the most aesthetically pleasing for most 3D print works.
Effects Of Gluing
Some glues might undergo chemical reactions when bonding and sealing two pieces of materials. Some of them may heat up because of this chemical process. If the plastic or PLA can not handle additional heat, you'll have to be careful not to use these glues on your surface. If care is not taken, the soft plastics can melt irreversibly with the wrong adhesive.
Surface
In this article, we are mainly discussing the glues for PLA and plastics. However, if you are using these glues for other surfaces, it's better to check beforehand if they are compatible. Also, if your build needs to be sanded after glue, select an adhesive that has the ability to sand down if required.
Glue For PLA's FAQs
What is the best glue for PLA?
The best glue for PLA is typically a cyanoacrylate or epoxy-based adhesive. Cyanoacrylate glue, commonly known as super glue, is a fast-drying and strong adhesive that works well for small or intricate PLA projects. Epoxy-based glues provide a more robust and durable bond for larger or heavier PLA objects.
Can you use hot glue on PLA?
Yes, hot glue can be used on PLA, but it may not provide a strong bond. Hot glue can be a good choice for temporary or low-stress applications. However, for more robust applications, it is recommended to use a cyanoacrylate or epoxy-based adhesive.
How do you glue PLA together?
To glue PLA together, first, make sure the surfaces are clean and dry. Apply a small amount of cyanoacrylate or epoxy-based glue to one surface and press the two pieces together. Hold the pieces in place for a few minutes to allow the glue to dry and set.
Can you use acetone to glue PLA?
Acetone can be used to fuse PLA together, but it is not recommended as a glue. Acetone acts as a solvent, melting the PLA and fusing the pieces together. However, this technique is best used for joining large parts and not for intricate or small parts.
Can you weld PLA instead of using glue?
Yes, PLA can be welded together using a specialized 3D printing pen or welding tool. This technique melts the PLA and fuses the pieces together. However, welding is typically used for larger PLA parts and not for intricate or small parts.
How do you remove glue from PLA?
To remove glue from PLA, use a solvent such as an isopropyl alcohol or acetone. Apply the solvent to the glue and let it sit for a few minutes. Then, gently scrape off the glue with a plastic scraper or brush. Be careful not to scratch or damage the PLA surface.
Can you use PVA glue on PLA?
PVA glue is not recommended for bonding PLA. While it can work on some types of plastics, it does not provide a strong bond with PLA. It is recommended to use a cyanoacrylate or epoxy-based adhesive for bonding PLA.
Conclusion
So, here we reach the end of our reviews and buyer's guide. We hope our reviews helped you determine the good and the underwhelming aspects of each option. Ultimately, you can weigh the pros and cons yourself and decide on a final product.
Our favorite glue, however, was Layerneer 3D printing adhesive. It was the most versatile glue with a super firm grip for all kinds of home repairs. Another glue worth mentioning is the 7501201 model by Gorilla. We liked it because of the nozzle options, and the adhesive itself is durable.
While making jewelry, the first thing that you will realize is that you have to work with precision. But messy glues can cause problems in this case.
The best glue for jewelry is one of the indispensable tools that need to be in your craft box. Now, you will find a variety of jewelry glues on the market but not every option will give you the same results.
While some will provide you with a great option for jewelry repairs, others might work well for bead jewelry. Then there are products that will not turn yellow because of UV light. You can use these options for jewelry made for rough and everyday uses.
To make it easier to choose, we will recommend some of the top options, which will help you find the best glue for jewelry. We have also added a buyer’s guide towards the end to ensure that you make the right choice.
If you are into jewelry making with metal pieces, then Aleene's 21709 can be a perfect choice. It will offer you a hoard of benefits and also help you with all kinds of DIY projects. You can purchase one tube for making 2-3 pieces of jewelry.
This jewelry glue comes in a tube with a gel formula inside. It can flow smoothly and is easy to apply. It will flow out easily once you turn the tube towards the beads. We recommend using gloves and newspapers while working. Place the newspaper well before you keep the jewelry pieces on top.
To top it all, the glue for jewelry will dry to form a clear transparent layer that is very strong. It can be stretched, but the bond will not break. We used it for our art and craft classes, and it worked out well.
Next, you can use it on a variety of surfaces, including glass, metal, as well as stones. Plus, the nib of this glue is thin, so you can work with repairing old pieces of jewelry too.
What Could've Been Better?
This glue for jewelry will work out well, but you can have a very messy experience if you're not careful. Remember that the glue is in a gel form; hence, do not squeeze too hard. Once you learn the technique, it should not be very difficult anymore.
One of our top recommendations for jewelry making is the CAT PALM B-7000 Adhesive. It is perfect for metal jewelry and is known for its versatile usage. You can use it as a bead adhesive because of the precision that it provides.
★Using a needle design, can be opened after use, won't get...
★Multi Purpose,Able to permanently bond various...
Why Did We Like It?
To begin with, you will love the needle design that will prevent the tip from getting blocked. Also, this jewelry glue will work for multiple applications. You can permanently bond metal surfaces, paper, wood, cloth, nylon, textile, ceramic pieces, PVC, rubber, fiber, and cloth.
Next, this is the right jewelry adhesive if you are looking to create jewelry from various kinds of materials. Kids can use it for making jewelry with ceramic, wood, and rubber. You can also use it for minor jewelry repairs or as an instant glue adhesive.
Moreover, the glue will help you seal surfaces, which will prevent airflow. You can make jewelry last for a long time and ensure that the whole crafting process is smooth.
Moving on, this is an effective glue that can be used for mobile repairs along with attaching gemstones. It is specially formulated and can be stretched 900% more than its length without breaking the layer.
What Could've Been Better?
While the craft glue works for jewelry making very well, it does come with a limited shelf life. Please check the expiry date of the glue before purchasing. If you keep this in mind, then there should not be any further problems.
The G-S Hypo JA-GSHYPO is not only used for jewelry making but also can help bind non-porous surfaces well. So, if you are looking for glue that will help you put together beautiful pieces of jewelry of different types, then go for this.
Great for highly detailed work, perfect for small jewelry...
Why Did We Like It?
For starters, this jeweler’s glue will provide a very strong bond that will last for a long time. You can use it to put together pearls and beads on other surfaces. That’s not all, as you can attach a nice diamond stud firmly so that it stays in place.
Another important factor is that you will require very small quantities of the liquid to work. Jewelry pieces need very precise application along with neat placement of the beads. This glue cement will ensure that you can work with pearl jewelry and gold jewelry.
Moreover, this flexible glue will help you create art and craft projects along with creating jewelry. Not all glue can be used for versatile purposes; hence this stands out.
Plus, you will get a small tube that can be used to make 1-2 pieces of jewelry. That way, it will never dry up, making them a great option.
What Could've Been Better?
Rhinestones are often used in making jewelry but ensure that you do not use this jewelry glue with them. This is not the right adhesive for rhinestones as it may spoil the finish and the surface of it. Remember this while making a choice.
One of the best jewelry-making glue is the E6000 glue, which has brilliant jewelry adhesive properties. It is known for its industrial strength formula, which will help you work with all kinds of materials. Many professionals use this glue for making art pieces.
This is a waterproof glue that will work for all kinds of jewelry. The formula is very strong, and it can bind surfaces together easily.
Also, the best part about this product is that there are 4 tips provided in the pack. This will help you use the glue easily, even if 1-2 tips get blocked. You can work with the glue for a long time with the same amount of precision.
Moving on, the tips are very thin, ensuring that you can only squeeze out tiny drops of glue. This will make it easier to work with, especially when you need to attach tiny beads. It is a bead glue, but you can also use it for repairing jewelry.
That is not all; this great glue can stick fabric pieces as well as can be used for making jewelry with metal. Some customers have used it to fix screws in place, and it has offered a permanent solution.
What Could've Been Better?
While the jewelry glue will work well, the smell can be bothersome. This adhesive releases chemical vapors, so it is best that you wear a mask while working with it. Then leave the jewelry in a dry place for a week before you start using it.
One of the best glues for jewelry is the G-S Hypo GSHYPOGLUE, which works very well as a jewelry adhesive as well as for a host of other purposes. We wanted to design some jewelry with plastic for a kid’s art class, and it worked out very well.
Dries Clear: The cement dries clear for a clean look
Material Compatibility: Works with glass, ceramic, plastic,...
Why Did We Like It?
The jewelry adhesive properties work very well when you are using it with glass, metal, ceramic, and crystals. It will surely keep the beads or the tiny parts in place, making it one of the sought-after craft glues on the market.
Moving on, this glue will take very little time to dry. After application, wait for a few minutes, and you will see that a transparent flexible layer has formed on top. The best part here is that this will work well as a jewelry adhesive as it will not stick to your fingers.
Adding on, you will get 9 ml of the jewelry glue in the pack. This should help you work with a small or medium-sized jewelry project. Please close the cap after you are done to prevent the excess glue from drying around the mouth of the tube. You can use a nail polish remover to wipe the mouth if you see a lot of glue around the tip.
What Could've Been Better?
Remember that this jewelry glue will flow out easily. Hence it is recommended that you understand the dispensing rate of the tube before using it on fine jewelry. That way, you will know not to squeeze too much, and you can easily apply it with precision.
If you are looking for an extra permanent solution to use for your jewelry, then the Beacon Dazzle Tac JG1OZ will be a good option. It can help you create and repair jewelry pieces. We were very happy to see that this option worked out well with semi-precious jewelry.
Dazzle-Tac Jewelry Glue offers a robust, long-lasting bond,...
This unique glue formula dries crystal clear, ensuring your...
Why Did We Like It?
If you are trying to work with plastic or you want to attach a mirror to a frame, this will be a great option. It can glue all kinds of materials together, making it an ideal choice. That is not all; the layer will dry fast and will be flexible. You can rest assured that there is no chance of it breaking down.
Moving on, the jewelry glue will ensure that the layer is waterproof. It is also resistant to UV light, making sure that the layer will not turn yellow on exposure to sunlight. You can use it for mirrors, wire, beads, metal surfaces, mosaics, and stones.
Some people also use it for making jewelry for regular wear. We will recommend letting the glued pieces lay in a dry place for a few days before you start wearing them outdoors.
What Could've Been Better?
Before you use this product, you should know that the vapor can be harmful to humans. Hence, please wear a mask while working. We will recommend working in a well-ventilated area where the fumes can easily disappear. After the job is done, leave it for a few days before using the jewelry.
One of our final recommendations is the Lermity B-7000 Adhesive, which is known to be a multipurpose glue. If you were looking for a product that could take care of many projects at once, then this might fit you well. Read on to know all about its features.
This jewelry glue comes with a very thin tip that will help with fine and detailed application. It can be applied without creating a mess, making it easy to use. Just point the tip towards the exact spot and squeeze the tube.
Moving on, the glue will take around 3 to 6 minutes to dry to touch. But it will take approximately 24 to 48 hours to dry up completely. We will recommend leaving it alone for a few days before using the jewelry or any other product on which you are applying this glue.
Additionally, you can work with multiple surfaces, which include fiberglass, cell phones, rubber, plastic, metal, leather, PVC, ABS, textiles, sponges, and films, to name a few. This is a multipurpose glue that will save you the hassle of purchasing other glue types for different surfaces.
What Could've Been Better?
Since the formula is in a slightly runny form, you will have to be careful while using the glue. Please do not squeeze too hard, as that could lead to a lot of glue coming out at once. Press gently and test the flow of the glue before working with precious jewelry.
Jewelry making is known to be a great hobby for some, while others may want to do it professionally. The best glue for jewelry will ensure that you can stick all the parts easily without having to worry about a stone coming loose.
Now there are different pieces of jewelry, including bracelets, earrings, rings, and necklaces. You can either repair older pieces or create new ones from metal pieces. Knowing the purpose of your use is very important, and the following points will help you in choosing one from among the lot.
Time Taken To Dry
The drying time varies a lot with different brands of glue for jewelry. Now, if you have limited time or you have to finish working on a number of jewelry pieces in a short period of time, then the glue can be very helpful. These will dry within minutes, and you can go about attaching the next piece.
However, if you want the bond to be long-lasting, then let the jewelry glue rest for longer. Then it will harden up more, providing you with a better hold.
But remember, if you are a novice, it is better to select a glue that takes a longer time to dry. That is because you can make adjustments and place the parts in the perfect position. Then you can allow it to dry.
Tips
Please check the tips well before purchasing any jewelry adhesive. Not all glues will have a thin tip, which can make it easier to apply tiny amounts for jewelry making. You may need very tiny amounts for attaching small pieces of beads or diamonds. Epoxy resin glue may not be able to help you out, and you might need a gel-like formula with a very thin tip.
The best jewelry glue should be such that you are able to work without the jewelry adhesive running all over the surface. You will need good consistency, and you can test it on a different surface to understand the dispensing rate.
Strength
Jewelry that is worn every day may be exposed to a lot of rough usages. One thing that you need to remember while creating jewelry is that the glue should be strong. It should not be affected by high temperatures.
Moreover, most people wear their rings or earrings while taking a bath. Hence, the right glue should be able to resist water and other fluids. You do not want your beads or stones to become too loose very often, making strength a necessary factor.
Now there are superglues like gorilla super glue gel and epoxy glue on the market, which are very strong. Epoxy glues are used for making molded jewelry, while super glue or gorilla glue can help you fix almost anything. So you can choose them too if needed.
Glue Flexibility
A jewelry adhesive should be able to dry without becoming brittle. When a brittle layer is formed, then it can crack and lead to the beads falling off. More pressure might be created for the beads or the parts, but this can be avoided. Look for a jewelry adhesive that is flexible and can be used easily.
Glue For Jewelries FAQs
How do I remove glue from jewelry?
To remove glue from jewelry, you can use acetone or nail polish remover on a cotton swab or cloth. Gently rub the affected area until the glue starts to dissolve. Be careful not to use too much acetone, which can damage some materials like pearls or delicate stones. Additionally, be sure to rinse the jewelry thoroughly with water and dry it before wearing it again.
Can I use glue for repairing broken jewelry?
Yes, glue can be used for repairing broken jewelry. However, it’s important to use a strong and flexible glue that will hold up over time. E6000, Aleene’s Jewelry and Metal Glue, and Gem-Tac are all good choices for repairing broken jewelry. Be sure to clean the area to be repaired and follow the manufacturer’s instructions for the best results.
Is there a glue that works on all types of jewelry materials?
There is no glue that works on all types of jewelry materials. Different materials require different types of glue for the best bond. For example, E6000 is a good choice for bonding metal to glass or plastic, while Gem-Tac is better for bonding beads or stones to the fabric. It’s important to choose a glue that is specifically designed for the materials you are working with to ensure the best results.
Can I use super glue for jewelry making?
Super glue can be used for jewelry making, but it may not be the best choice for all types of jewelry. Super glue is great for bonding metal to metal or metal to plastic, but it can weaken over time if exposed to moisture. If you are making jewelry that will be exposed to water or sweat, you may want to use waterproof glue like Epoxy or Gorilla Glue.
Is hot glue good for jewelry making?
Hot glue can be used for jewelry making, but it is not recommended for high-stress areas or for attaching heavy beads or stones. Hot glue is best used for attaching small embellishments to jewelry pieces. However, it can easily melt when exposed to heat, so it’s not the best choice for pieces that will be exposed to sunlight or high temperatures.
What glue do jewelers use?
Jewelers use a variety of glues depending on the materials they are working with. Some popular choices include E6000, Aleene’s Jewelry and Metal Glue, and Gem-Tac. These glues are designed for jewelry making and offer strong bonds and flexibility.
Conclusion
The best glue for jewelry will always work out and will make it easy to create beautiful pieces. If you are not very confident about it, you can use a toothpick to apply the glue from the tube onto the item.
With this, we have finally reached the end of this guide, and it is time to take you through our favorites. The Aleene's 21709 is an incredible option for metal jewelry. But if you are looking for something to use for beads, then the CAT PALM B-7000 Adhesive will work well.
On the other hand, the G-S Hypo JA-GSHYPO will help in bonding porous surfaces. Let us know about your favorite jewelry adhesives in the comment section below.
The popularity of hardwood flooring is steadily increasing, with more and more homeowners opting for this classic option. Hardwood floors offer several advantages over other types of flooring, such as enhancing the look of your home, offering excellent durability, and easy maintenance. In fact, you can install hardwood floors without any professional help.
So, if you plan to install hardwood flooring at home, one of the first things to consider is the glue. The correct adhesive ensures the durability of the flooring and adds to the finishing.
On that note, selecting the right product can mean the difference between a successful and unsuccessful installation. However, choosing the best glue for hardwood floors from the many available options on the market can be quite challenging.
Listed below are the top 5 recommendations for the best glues for hardwood floors:
Roberts 7350-1: Facile application and robust adhesion across diverse flooring materials. Extended drying duration, albeit delivering commendable results.
DAP 142: Potent water-resistant bond coupled with low-odor attributes. Ambiguous instructions may challenge novice users.
Titebond 2104: High bonding potency, water-resistant, and extended shelf life. Elevated cost positions it as a premium choice.
Titebond 1415 III: Versatile with superior bond strength across applications. Bottle design may impede seamless application.
Whether you're a professional installer or a DIY enthusiast, here's the list of the 9 best glues for hardwood floors that will help you achieve a flawless and long-lasting installation.
1. Roberts 7350-1 - Best Versatility
Let us begin with a product from the House of Roberts, a premiere brand known for its high-quality installation tools, adhesives, and accessories. The 7350-1 is an excellent product that can be used for joining together a range of flooring materials and is also an environment-friendly option.
The Roberts 7350-1 glue is one of the finest products we tested and comes with a solid cross-linking formulation for installing tiles and planks indoors for your hardwood floor. It is compatible with a wide range of materials, including luxury vinyl tile (LVT), luxury vinyl plank (LVP), and even wood composite.
Additionally, it can create a solid bond with concrete and plywood, steel, marble, and other materials. One of the things we liked most about this versatile product is that it is effortless to apply and clean up. All you need is a trowel for application and soap and water for clean up.
Not to mention how the 7350-1 dries clear, leaving a polished and sophisticated finish. Moreover, the thickness of the glue makes it the perfect choice for using it for hardwood floors, as it enables application with great precision without running off across the surface.
We did not come across any significant downside to this excellent product during our testing phase. However, we wish that this hardwood floor glue did not take such a long time to dry, as it can even take over a couple of days. But the product redeems itself as it is firm and delivers excellent results.
What We Like
Very easy to use
Strong bonding
Versatile
Easy to maintain and clean
What We Don't Like
Long drying time
Adhesive Type: Polyurethane | Cure Time: 24-48 hours | Dry Time: 24 hours | Bond Strength: High | Heat Resistance: Yes (up to 150°F) | Waterproof: Yes
2. DAP - Best Water-resistance
Next up on our list is the DAP 142, a water-resistant multipurpose glue that is great for different types of flooring, including hardwood floors. DAP has been developing a range of caulks, sealants, and adhesives since 1965, and the 142 is another high-quality product that offers impressive performance.
We discovered the DAP 142 while looking for the best glue for hardwood floors with water-resistant capabilities and were delighted with this product. Besides creating a water-resistant bond, the 142 also increases shrink resistance during installation on hardwood flooring. This property allows you to reposition tiles or planks as required easily.
Another thing that you’ll like is that, unlike most adhesives, the DAP 142 is a low-odor and low-VOC product, which makes it one of the safest options available. Since it emits a low amount of VOC, it is ideal for use indoors and in all types of locations.
From a safety point, this item from DAP is also non-flammable. Besides being one of the safest options, this wood flooring glue is also very easy to clean and maintain. Just use some soap and water, and it will scrub off easily from unwanted areas.
Once again, we have nothing to say against this outstanding product. However, we would like to point out that the instructions are not very clear, which might be tricky for first-time users. However, other buyers have provided detailed instructions online to help you out.
What We Like
Powerful bond
Safest option
Reasonable pricing
Easy to clean
What We Don't Like
Unclear instructions
Adhesive Type: Polyvinyl | Cure Time: 24 hours | Dry Time: 30 minutes | Bond Strength: High | Heat Resistance: Yes (up to 150°F) | Waterproof: Yes
3. CalFlor - Best Durability
Moving on to the next product, we bring you the CalFlor GL82114CF, one of the most well-received glues for general flooring purposes. Apart from its water-resistant properties, this hardwood floor adhesive comes with a D3 certification, making it ideal for use indoors.
There are several things to like about the CalFlor GL82114CF, the first of which is its high-strength bonding capacity. This highlight makes it one of the best adhesives for hard surface flooring, including ceramic, concrete, and wood.
Not only is the GL82114CF strong, but it is also reasonably flexible once it dries. The flexibility also makes it more durable as your flooring can take a more significant amount of stress without breaking.
Also, this product comes with a D3 certification, which ensures that it is resistant to water and humidity. You can rest assured that your hardwood floor will not be affected by any short-term exposure to condensed water or give way to mold.
Other than that, this product from ClaFlor is a low-VOC option and comes with the FloorScore certification, making it an excellent choice to preserve indoor air quality.
The CalFlor GL82114CF is undoubtedly one of the best products if you want to glue hardwood floors. However, it does not perform well on luxury vinyl plank (LVP) material. If you are looking for a more versatile option, better alternatives are available on the market.
What We Like
Easy to use
Comes with safety certifications
Strong, durable bond
Low maintenance
What We Don't Like
Not suitable for LVP
Adhesive Type: Cyanoacrylate | Cure Time: Instant | Dry Time: 30 seconds | Bond Strength: High | Heat Resistance: No | Waterproof: Yes
4. Titebond 2104
Now we bring you an exciting product from Titebond, a leading manufacturer of high-quality products for hobbyists and homeowners. The Titebond 2104 is a dynamic product that promises solid and lasting bonds on all types of laminate and hardwood flooring with excellent results.
To begin with, the Titebond 2104 is one of the strongest adhesives that we came across for both laminate and floating floors.It can even be used on floors that lie over radiant heating systems without any issues.
It is also worth mentioning that 2104 has passed the ANSI Type II water-resistance test. In other words, the glue creates a highly effective barrier against moisture, providing stability and durability to your hardwood floor.
Another thing that sets the Titebond 2104 apart from the competition is its two-year shelf life, so you won’t have to throw out any leftovers. Also, it is entirely non-toxic and non-flammable, making it an environment-friendly option.
This wood floor glue has a low chalk temperature and maintains a strong bond. However, it dries to a white color, which may be favorable as it becomes easy to see and clean on all types of flooring. These include ceramic, concrete, and even engineered wood flooring.
We were very impressed by the performance of the 2104 wood floor adhesive from Titebond. However, the manufacturer has recently increased the price of this superb product, making it one of the costlier options on our list. Despite the cost, this product remains a fan-favorite due to its excellent results.
What We Like
Excellent bonding strength
Easy to apply
Can be stored for future use
Protects against moisture
What We Don't Like
Costly option
Adhesive Type: PVA | Cure Time: 24 hours | Dry Time: 20-30 minutes | Bond Strength: High | Heat Resistance: No | Waterproof: Yes
5. Titebond 1415 III
Titebond has mastered the art of developing high-performance adhesives for all types of flooring requirements. On that note, here is another noteworthy product from the brand — the 1415 III Ultimate Wood Glue. Specially designed for use with hardwood floors, this glue guarantees exceptional results.
While most of the other items on our list are meant for a wide range of flooring substrates, the Titebond 1415 III is designed to be used as wood glue. It creates a powerful bond with wooden surfaces and remains one of the best hardwood flooring adhesive options to get today.
That is not to say that the 1415 III does not offer versatility. In fact, you can easily use it for indoor and outdoor applications. It can be the perfect solution for redoing your patio or installing and repairing hardwood floors in the kitchen — or perhaps, both.
The 1415 wood glueis also waterproof and can be easily used on flooring frequently exposed to moisture. On that note, some customers have used it on surfaces other than flooring with success.
Also, if you are looking for an option that gives you a longer working time for repositioning and making adjustments, this is the ideal choice.
We could not find any drawbacks worth mentioning while testing the Titebond 1415 III. The only thing to note is that the large handle on the bottle is not required and gets in the way when applying the adhesive. Perhaps, the manufacturer should look into improving the design of the bottle.
What We Like
Wide application
Decent setting time
Waterproof bonding
Superior bond strength
What We Don't Like
Inconvenient bottle design
Adhesive Type: Polyurethane | Cure Time: 24 hours | Dry Time: 8 hours | Bond Strength: High | Heat Resistance: Yes (up to 200°F) | Waterproof: Yes
6. Roberts 1407-1
Another excellent product from Roberts, the 1407-1, is a wood glue that is specially manufactured for use with wood flooring, plain back parquet flooring, and acrylic-impregnated planks. It is a high-performance product meant for heavy-duty use and is excellent for hardwood floors that witness heavy traffic.
Being a product from the Roberts brand, we expected the 1407-1 to deliver impressive results and are delighted to say that it did not disappoint. Due to its high-strength bonding, this wood floor glue is one of the best adhesives for engineered hardwood floors.
Despite being developed for use with hardwood flooring, the 1407-1 can also be used on concrete, plywood, and acoustic cork underlayment. While testing the product, we found that it comes with an easy-to-apply bottle that makes it ideal even for first-time users.
Even more impressive is the fact that this product is LEED-compliant, making it one of the best environment-friendly options to get. Add to this the low VOC emitting property of this product, and you get one of the safest value-for-money options on the market.
While testing the product, we noticed that this glue has one of the strongest and foulest odors in the segment. It is highly recommended to use a face mask and keep your face covered while using this product. However, the odor fades away after a few weeks.
What We Like
User friendly
Value for money
Strong and durable bond
Safe to use
What We Don't Like
Emits foul odor
Adhesive Type: Multipurpose | Cure Time: 24-48 hours | Dry Time: 20-30 minutes | Bond Strength: High | Heat Resistance: No | Waterproof: Yes
7. Henry W.W Co.
The Henry W.W. Co. 12236 is one of the best adhesives for all types of wood flooring, including engineered hardwood floors and solid wood flooring. Featuring urethane-enhanced acrylic technology, this product offers a long working time and excellent bonding strength for a great experience.
The Henry W.W. Co. develops and manufactures high-performance resins and adhesives for both commercial and residential purposes. The 12236 urethane adhesive is one of the finest products from the brand that can be used on different types of wooden flooring.
We tested this product on engineered hardwood and solid hardwood floors with excellent results. It has an impressive initial grab and provides a long working time. So, if you need to make adjustments or reposition the planks, this is a great choice. It is also very easy to use, making it an ideal option for new users as well.
Additionally, the 12236 also provides an excellent moisture barrier, preventing moisture from entering your floor and ensuring that the wooden floor is intact. Furthermore, cleaning it up is also very easy. We used mineral spirits to clean it up after installation, and we’re happy with the results.
While we were very impressed by the performance of this excellent product, however, it is specifically meant to adhere wood to concrete. It is unsuitable for other purposes, such as gluing wood to drywall. For more versatile applications, we recommend going with another option.
What We Like
Easy to use
Flexible
Easy to clean
Provides repositioning and adjusting time
What We Don't Like
Only meant for wooden surfaces
Adhesive Type: Multipurpose | Cure Time: 24 hours | Dry Time: 30 minutes | Bond Strength: High | Heat Resistance: No | Waterproof: No
8. Bostik GreenForce
Our penultimate product for you is the Bostik Greenforce, one of the most potent hardwood flooring adhesives. This glue for hardwood floors comes with excellent bonding strength to keep your hardwood floor in place while also offering moisture control to prevent any damage to the flooring.
The superior green grab immediately caught our attention among the many impressive features that the Bostik Greenforce offers. Green grab refers to how effectively an adhesive can adhere to the wood plank on first contact. With this product, the wooden planks are set down and fixed in position, ensuring stability in your wood flooring.
Additionally, the manufacturer has developed this hardwood glue so that it does not let any moisture permeate through the subfloor. You do not need to worry about water spilling over your hardwood floors and damaging them.
What is more, we also like the fact that the Bostik Greenforce is a highly versatile product that can be used easily with almost any subfloor and flooring. You can use it over concrete, plywood, well-bonded vinyl, and more.
Being a highly effective product, it is vital to read and follow the instructions properly to get the desired results. This adhesive does not provide any space for experimentation, and you will not be able to get the desired results if you do not follow the exact results.
What We Like
Wide application
Protects against moisture damage
Easy to clean
Excellent bonding
What We Don't Like
No room for experimentation
Adhesive Type: Polyurethane | Cure Time: 24 hours | Dry Time: 2 hours | Bond Strength: High | Heat Resistance: Yes (up to 170°F) | Waterproof: Yes
9. DriTac
Coming to the final product, the DriTac CECOMINOD081282 is another excellent option if you are looking for hardwood flooring adhesives. It also works exceptionally well for installing engineered wood flooring, even in situations where other products do not work, and can be used for repairs over concrete as well.
The Dritac CECOMINOD081282 is one of the best glues for hardwood floors available on the market, and it is easy to see why. It is meant for repairing damages in hardwood flooring but works equally well for new installations, offering stability and durability to your wood floor.
One of the features we liked most about this product is that it comes with a refillable bottle that allows multiple uses. You can even store it for use on other projects later on.
Besides that, this glue for hardwood floors is also very efficient in creating a solid moisture barrier. It can help protect your flooring from water spills. What is more, you can even fill voids between your flooring and the subfloor with this excellent product.
The Dritac adhesive is reasonably easy to use and is one of the more cost-effective options on the market.
The Dritac CECOMINOD081282 comes with a syringe that tends to clog up and requires frequent cleaning during the application process. You will need to keep a small pin or similar object handy to unclog the syringe while working. However, performance-wise this hardwood floor glue does an exceptional job.
What We Like
Prevents moisture damage
Suitable for installations and repairs
Easy to use
Creates a strong bond
What We Don't Like
The syringe tends to clog up
Adhesive Type: Polyurethane | Cure Time: 24-48 hours | Dry Time: 4 hours | Bond Strength: High | Heat Resistance: Yes (up to 170°F) | Waterproof: Yes
What Is the Best Glue for Hardwood Floors?
This table compares key attributes, including adhesive type, cure time (in hours), dry time (in seconds/minutes/hours), bond strength, heat resistance (in °F), and waterproof properties, aiding in the selection of the optimal glue for hardwood floors.
Buying Guide for the Best Glue for Hardwood Floors
We hope you enjoyed going through our review-based guide for the best glue for hardwood floors, and it proved helpful in your search for the right product. However, there are still a few things that we need to share before you can get down to selecting a product.
Even after knowing about the best options, several factors need to be considered before you can find the right product. In this section, we will share with you some of these factors that can help select the right product.
1. Substrate Type
One of the primary factors to consider when buying flooring glue is the type of substrate you have. Substrate refers to the structure or material that lies directly below the wood flooring finish. Not all adhesives work well with all types of subflooring, which is why you need to select the glue that is most compatible with the subflooring installed.
For instance, some adhesives can be used to install flooring over plywood subflooring, while others can even work over radiant heating systems.
2. Flooring Type
Another equally essential factor is the type of flooring you plan to install or repair. There can be several types of flooring even within a particular segment. For instance, in the case of wooden flooring, you can have hardwood floors, engineered wood flooring, or even laminate wood floors.
The type of flooring will determine which glue works best for it. Some products work well on a wide range of floors, offering versatility, while others are limited to a specific type of flooring. The greater the compatibility between the type of floor and glue, the better the results.
3. Drying or Curing Time
The amount of time that glue takes to dry or cure directly affects how much time you get for the installation process. It also determines the amount of adhesive that needs to be prepared for each process stage. Furthermore, the curing time decides how soon the wood flooring is ready to support weight and can be put into use.
Adhesives with a smaller curing or drying time will make your flooring ready to use sooner. On the flip side, however, you won’t get much time for repositioning or adjustments with such products.
4. Location
For interior installations, adhesives do not need to withstand a large amount of weathering or environmental damage. Most options available can be used for interior flooring installations or repairs. On the other hand, for exterior environments, it is advisable to get glue that can handle stress from environmental factors, such as the sun, rain, snow, etc.
The location also determines the climate, which plays a critical role in the performance of the adhesive. Some adhesives work better in warm and humid conditions, while others are meant explicitly for hardwood floors in freezing temperatures.
5. Ease of Use
Ease of use is a vital factor to consider depending on how you plan to get your flooring installed or repaired. If you plan to undertake the installation or repair without hiring any contractors, get a product that can be applied easily.
Ease of use should also be considered if you are a first-time user. Those with prior experience using such products for repairs and installations can work with products that may not be very simple to use. However, even in that case, an easier-to-use option can help save a lot of time and effort.
6. Soundproofing
An important factor to consider when choosing the best glue for hardwood floors is the glue's impact on soundproofing. Certain adhesives can improve the soundproofing properties of the hardwood floor by filling the gaps between the floor and the subfloor, thus reducing sound transmission. This can lead to a quieter and more comfortable living space. Some adhesives on the market are specifically designed with sound-dampening properties and can significantly enhance the overall soundproofing performance of hardwood floors.
While choosing the best glue for hardwood floors, it is essential to look for products that specifically mention their soundproofing capabilities or are recommended for use with wood flooring systems that require enhanced soundproofing properties.
7. Cleanup and Maintenance
Flooring glue can be one of the most challenging things to clean. Fortunately, manufacturers are now paying attention to this and altering their formula to make the adhesives easier to clean.
Generally, water-based glues are easier to clean than solvent-based ones, but that also makes them more susceptible to moisture damage. Select the flooring glue depending on how much time you have to clean up the mess afterward.
Can I use regular glue for hardwood floors?
No, it’s not recommended to use regular glue for hardwood floors. Regular glue is not designed to withstand the weight and pressure of hardwood flooring and may result in a poor quality installation.
How long does it take for hardwood floor glue to dry?
The drying time for hardwood floor glue can vary depending on the type of glue used and the environmental conditions. Generally, most hardwood floor glues take anywhere from 24 to 48 hours to fully dry.
Is it necessary to glue hardwood floors?
Gluing hardwood floors is not always necessary, but it’s a popular method for securing the flooring to the subfloor. Gluing can provide added stability and prevent squeaking or movement in the flooring.
Can glue for hardwood floors be used for other types of flooring?
No, it’s not recommended to use glue for hardwood floors on other types of flooring. Different types of flooring require different types of adhesives, so it’s important to choose the right adhesive for the specific flooring material.
How do I remove glue from hardwood floors?
Removing glue from hardwood floors can be a difficult and time-consuming process. It’s important to use the proper tools and techniques to avoid damaging the flooring. Some methods for removing glue include using a heat gun, a scraper, or a solvent specifically designed for removing adhesive. It’s recommended to consult with a professional for the best approach.
With that, we’ve come to the end of our comprehensive review and guide to the best glue for hardwood floors. It is now time for us to leave you to make a decision, But before we go, here are a few of our top picks.
Our overall favorite is the Roberts 7350-1, which offers excellent performance and is LEED-compliant to boot. However, if you’re looking for a multipurpose option for your hardwood floor that is also moisture-resistant, then the Henry W.W. Co. is a better choice.
Finally, there is the CalFlor if you are looking for a safe and beginner-friendly option. On that note, we will be signing off. Feel free to leave a comment below and let us know what you think of our recommendations.
We use aluminum somehow or the other in our daily lives, and there might arise a situation when we need to bond it together.
Welding is one of the most commonly known ways of bonding aluminum together, but it is not the only way. Using aluminum epoxy is just as effective and way easier too. It is a faster process that doesn’t require any tools per se.
There is also no follow-up required if you’re using adhesive to bond metal together, and glue is more durable than an unskilled welding job. The only thing required is to use a two-component adhesive and have an appropriate workplace where the glue application can be carried out.
So, if you’re wondering which adhesive you should go for, we have selected some effective options available in the market and given them a try. Read on to know more about the best glue for aluminum.
Best Glue for Aluminum
These glues have been tested and proven to work well with aluminum, giving you the confidence to create your next masterpiece with ease. So, without further ado, here's the list of the 7 best glue for aluminum.
Let’s kick off this list with this versatile epoxy from Gorilla, which is compatible with aluminum, steel, wood, glass, ceramic, and more. Mighty tough and durable, this product can be used for household and automotive repairs. Its volume is 25 milliliters, and it comes inside an attractive tube.
5 minute epoxy: This epoxy resin kit in just one applicator...
Why Did We Like It?
Gorilla is a well-known brand that is known for making quality products, and this one is no less. Despite its diminutive size, the adhesive is incredibly strong and will last a long time. It is excellent at filling gaps and effectively filling spaces between uneven and vertical surfaces.
Additionally, it provides excellent adhesion for multiple surfaces and for when you need to repair heavy-duty products. It is clear and colorless and gives a clean finish to whatever you’re working with.
We really liked how this glue had a 5-minute set time, so you have enough time to reposition your things or simply correct a mistake. It is solvent resistant and can also withstand moderate exposure to water.
There are separate barrels of resin and hardener, so the epoxy doesn’t harden and ruin the glue. It is also convenient to use and comes with a syringe that dispenses glue evenly.
What Could’ve Been Better
Gorilla Glue is an excellent product; however, the 5-minute drying time mentioned isn’t always accurate for all cases. In the case of heavy-duty products, the dry time could be longer. Thus, people should be cautious when using the product post the 5-minute mark.
Pros
Strong and works with heavy-duty materials
Long-lasting and permanent bond
Allows time to reposition/correct mistakes
Easy to use
Cons
May take longer than 5 minutes to set
Type: Epoxy resin | Material Compatibility: Metal, Plastic, Wood | Set Time: 5 minutes | Cure Time: 24 hours | Max Temperature Resistance: 200°F | Waterproof: Yes | Chemical Resistance: Yes | Bond Strength: 3300 PSI
This is a classic product that weighs 5 oz and provides solid and long-lasting repairs to metal and other kinds of surfaces. It is mixed in a ratio of 1:1 and takes 4-6 hours to set and 15-24 hours to cure.
J-B WELD ORIGINAL PRO SIZE: Professional 5 OZ Tubes of the...
CURE AND SET TIME: After mixing the tubes at a 1:1 ratio, it...
Why Did We Like It?
Right off the bat, one of the things we like about this adhesive is that once the glue is set and cured, its color becomes dark gray. Dark gray is a generic color that mostly won’t sully the appearance of a product even if it shows.
We also really liked how it is steel enforced and dependable and has a tensile strength of 5020 PSI. This means that it can hold even weighty parts together. It can also withstand up to 550°F and is water resistant.
What's more, this adhesive is chemical-resistant and doesn’t corrode even if it comes in contact with an acidic substance. Due to all the reasons mentioned earlier, it can be used for household, automotive, marine, and mechanical repairs!
What Could’ve Been Better
J-B Weld is a company known for making quality products, and its adhesive was just as effective as we had envisioned it would be. However, when we had the product delivered to us, we noticed that only the epoxy resin was delivered, much to our dismay. We had to request the manufacturer to send the hardener separately.
Pros
Generic gray color upon setting that blends well with repaired products
Steel-enforced and dependable
Waterproof and can withstand high temperatures
Resists chemicals and corrosion
Cons
Package may be delivered without the hardener
Type: Epoxy resin | Material Compatibility: Metal, Plastic, Wood | Set Time: 4-6 hours | Cure Time: 15-24 hours | Max Temperature Resistance: 550°F | Waterproof: Yes | Chemical Resistance: Yes | Bond Strength: 3960 PSI
Loctite is an established company that is five decades old and manufactures super hardy epoxy that can be used for various projects. It has a volume of 59 ml and comes in a 2-part system consisting of an epoxy resin and a hardener.
Considering that Loctite is a veteran of adhesive and sealing solutions, we had high hopes for this product. And we are pleased to say that the Loctite 1360700 met them well!
When the epoxy resin and the hardener are mixed, they create a tough and strong adhesive and can even be used as a convenient alternative to welding. You can use it to glue aluminum and iron, steel, copper, pewter, and other materials.
It has a tensile strength of 3355 PSI and won’t fracture even if it has to hold together a lot of weight. The adhesive doesn’t shrink and is resistant to common fluids like diesel, gasoline, anti-freeze, motor oil, hydraulic liquid, and transmission fluids. This makes it an all-weather tool for maintaining and repairing machinery, appliances, pipes, etc.
We also love the metallic gray finish of the glue once it is fully cured.
What Could’ve Been Better
We liked the utility of this product a lot, but we had to return the product the first time we got it and re-order a fresh one from the manufacturer. This was because the first time we ordered it, the package we received was past its expiry date, and the epoxy had hardened within the tube and was unusable.
Pros
Effective alternative to welding
Metallic gray finish looks smooth and natural
Resists common household fluids
Does not shrink
Tough, strong, and heavy-duty
Cons
May send expired products sometimes
Type: Epoxy resin | Material Compatibility: Metal, Plastic, Wood | Set Time: 5 minutes | Cure Time: 24 hours | Max Temperature Resistance: 212°F | Waterproof: Yes | Chemical Resistance: Yes | Bond Strength: 2800 PSI
Another efficient product on our list is the adhesive from HY-POXY which weighs almost 7 ounces and packs a strong punch with its sealing skills. The package comes with two separate tubes for epoxy and hardener and makes for a great aluminum putty repair kit.
This product stood out because it is especially recommended and geared toward the aluminum material repair. And it did not let us down in that department.
The epoxy formulation consists of carefully selected pure aluminum particles, modified curing agents, and special high-quality additives. These provide the glue with great strength and durability.
What’s more, the easy application of each substance from its own tube ensures that the product doesn’t waste materials. Even a tiny amount can be dispensed from the tube, which makes it ideal for the repair of small items as well.
This product also fits into any toolbox and is especially popular among HVAC tradesmen, plumbers, and auto mechanics. It leaves an attractive, non-rusting, and non-magnetic aluminum finish once done.
What Could’ve Been Better
This product is easy to use and drill. It states that it takes 4-5 hours to cure in an environment above 40°F. However, after 14 hours in a room of 70°F, the mix was still soft and needed a hit from a blow-torch to dry it and make it machinable.
Pros
Geared toward the aluminum-based repair
Strong and durable
Fits into a toolbox of any size
Prevents wastage
Attractive finish
Cons
Dries a bit too slowly
Type: Epoxy resin | Material Compatibility: Metal, Plastic, Wood | Set Time: 5 minutes | Cure Time: 24 hours | Max Temperature Resistance: 180°F | Waterproof: Yes | Chemical Resistance: Yes | Bond Strength: 2500 PSI
Another quality product on our list is the Permatex 84109, which is versatile and easy to use. It’s a two-part adhesive with separate epoxy resin and hardener tubes, which can be mixed to create a tough adhesive with a dark gray appearance.
Versatile, easy-to-use, multi-metal dark grey epoxy adhesive...
Water and solvent resistant epoxy sets in 4 minutes with no...
Why Did We Like It?
If you are looking for an adhesive for gluing aluminum and other metals, this is for you. It sets in just 4 minutes and doesn’t require clamping. It can be used to drill, sand, thread, or file upon curing it.
We like how it is strong and reliable and can eliminate the need to weld or solder something. Such processes are technical, time-consuming, and need safety equipment, and this adhesive can effectively replace all of these.
If you’re worried that it might not be durable enough, fear not because it is resistant to water and solvents and has a tensile strength of 4500 PSI, which is relatively high. It can also withstand temperatures ranging from -60°F to 300°F, making it ideal for all types of repair work.
What Could’ve Been Better
Though this epoxy is supposed to have high bond strength and incredible durability, it, unfortunately, misses the mark a little. We noticed that it tended to not stick when used with heavy-duty goods but was effective on lighter appliances. We believe that the manufacturer can work on this factor.
Pros
Eliminates the need for welding and soldering
Resistant to water and solvents
Fast setting
Requires no clamping
It can be used with a wide range of materials
Cons
Doesn’t work as efficiently with heavy-duty goods
Type: Epoxy resin | Material Compatibility: Metal, Plastic, Wood | Set Time: 5 minutes | Cure Time: 24 hours | Max Temperature Resistance: 300°F | Waterproof: Yes | Chemical Resistance: Yes | Bond Strength: 3200 PSI
3M is an established company developing and perfecting adhesive sealants for marine applications for over five decades. So, for anyone looking to repair a boat or any kind of watercraft, this product is tailor-made for you. It can be used in any part of the water vessel- below the waterline, topside, and any other surface where a boat can run!
USE WHAT THE PROS USE – Extremely strong adhesive sealant...
BONDS PERMANENTLY – Ideal for sealing, bonding and...
Why Did We Like It?
We like how 3M has carved a niche for itself in the world of marine adhesion and does a great job at the repair and maintenance of marine vessels. This adhesive can bond trim, toe rails, and other fittings. Additionally, In case you want to seal boat hulls, hatches, hinges, or any trunk joint, this metal glue has got you covered.
This product includes a new generation of advanced polyurethane and silane-modified polymers and is specially designed to withstand the rigors of a marine environment. Using this adhesive will help the vessel resist weathering, shock, vibration, shrinkage, and even swelling, and it won’t sag or flow in vertical or horizontal seams. We were also impressed by how easy it was to apply the adhesive using a manual caulking gun.
All in all, the stellar quality of adhesion and its durability, strength, and temperature resistance are the biggest highlights of this product. And in addition to that, the adhesive doesn’t require any mixing, making it suitable for beginners.
What Could’ve Been Better
This product exceeded our expectations regarding its adhesion strength and effectiveness with marine appliances. However, the cure time taken is too long, and even after a lapse of around a week or so, the adhesive doesn’t fully cure and requires extra time.
Pros
Helps vessels resist weathering, shock, vibration, shrinkage, and swelling
Easy to apply
Durable, strong, and resistant to extreme temperatures
Doesn’t require any mixing
Cons
Very long curing time
Type: Polyurethane sealant | Material Compatibility: Metal, Fiberglass, Wood | Set Time: 48 hours | Cure Time: 7 days | Max Temperature Resistance: 200°F | Waterproof: Yes | Chemical Resistance: Yes | Bond Strength: N/A
Wondering what's the difference between this adhesive and the other from J-B Weld? The J-B Weld 8276, also known as the KwikWeld, is a fast-setting version of the original J-B Weld two-part epoxy. The difference lies in the time needed for setting and curing the glue and the tensile strength.
J-B Weld Kwikweld: A Fast Setting Version Of The Original...
Cure And Set Time: After Mixing The Tubes At A 1: 1 Ratio,...
Why Did We Like It?
If you’re looking to make repairs to metal and other heavy-duty surfaces at a fraction of the time needed by the original product from J-B Weld, this is for you. This takes 6 minutes to set, which is relatively less compared to the 6 hours needed by the original.
The KwikWeld also takes 6 hours to cure, whereas in the original, curing would have just commenced within this period!
Once cured, this adhesive turns dark gray, and it can be tapped, filed, sanded, molded, and drilled. It is hardy and can withstand pressure up to 3127 PSI and a temperature of 300°F.
Lastly, you can use glue on various surfaces like metal, plastic, PVC, ceramic, tile, and the like, and it is effortless to use, even by a complete novice.
What Could’ve Been Better
We noticed something strange as we were mixing the epoxy resin and hardener, but we could, unfortunately, find no explanation for this. Basically, we made two small batches of the mix, and one was ready to use within the specified time. However, the other didn’t mix well, and the dark gray color didn’t appear.
Pros
Takes very little time to set
Takes just a few hours to cure
Elegant color
Can withstand high pressure and temperature
Cons
Some batches may not set and cure within the specified time
Type: Epoxy resin | Material Compatibility: Metal, Plastic, Wood | Set Time: 4-6 hours | Cure Time: 15-24 hours | Max Temperature Resistance: 550°F | Waterproof: Yes | Chemical Resistance: Yes | Bond Strength: 3960 PSI
While picking the best glue for your work, we recommend that the following key factors be kept in mind:
1. Purpose
It is imperative to consider the intended use of the adhesive while buying the right glue. Some products might have less tensile strength and thus won’t be ideal for your project. Or maybe you want to fix a broken sail in a boat, and you need something waterproof.
Thus, you must read the properties of each product carefully to determine whether it is ideal for your work or not. For example, if you are looking for an adhesive to repair marine applications, 3M fits the bill.
2. Easy to Use
If this is your first time looking to repair using epoxy adhesive, we recommend that you get a product that's easy to use. For instance, one of the products on our list requires a manual caulking gun for application, which isn’t ideal for someone new to this.
We recommend the J-B Weld 8276 in this case since it is fast-acting and leaves little room for error.
3. Tensile Strength
This is probably the most essential factor to keep in mind because no one would want something they just repaired to fall apart! So, if you’re looking to repair something heavy-duty, it is recommended to go for an adhesive with high tensile strength.
As such, we recommend the J-B Weld 8281, which boasts a tensile strength of 5020 PSI.
Glue For Aluminum FAQs
Can you use super glue on aluminum?
Yes, superglue can be used on aluminum. However, it may not be the best choice for all applications as it can become brittle over time and may not hold up well under stress. Epoxy glue is a better option for bonding aluminum.
What type of glue is best for bonding aluminum to wood?
A strong and durable adhesive is recommended for bonding aluminum to wood. Epoxy glue is a good choice for this application as it forms a strong bond between the two materials.
Can you use hot glue on aluminum?
Hot glue can be used on aluminum, but it may not be the best choice for all applications. It is great for bonding two surfaces quickly but may not hold up well over time if the aluminum is exposed to moisture or high temperatures. For a stronger bond, consider using epoxy glue.
How do you glue aluminum to plastic?
To glue aluminum to plastic, you can use a two-part epoxy glue. Apply a thin layer of glue to the aluminum and plastic surfaces and press them together firmly. Be sure to follow the manufacturer’s instructions for the best results.
How do you remove glue from aluminum?
To remove glue from aluminum, you can use a solvent such as acetone or rubbing alcohol. Apply the solvent to the glue and allow it to sit for a few minutes. Then, use a scraper or a cloth to remove the glue. Be sure to wear gloves and work in a well-ventilated area.
Can you weld aluminum instead of using glue?
Yes, welding is an option for bonding aluminum. However, it requires specialized equipment and expertise, and may not be feasible for all projects. Glue is often a more practical and cost-effective option for bonding aluminum.
Conclusion
After meticulously trying out many different kinds of epoxy glues available, we had a tough time picking the winner. When making our choice, we decided to consider factors like strength, durability, and time to set and cure. We also kept in mind whether the product had limited or multipurpose use.
After much deliberation, the Gorilla emerged as the winner. Gorilla is a very well-known brand and lived up to our high expectations. It works well with heavy-duty products as well as lighter ones.
Another product we like is the J-B Weld 8281. It takes time to cure but provides the most tensile strength out of any products on this list.
This brings us to the end of our list, so do let us know your experiences with these products in the comment section. We shall be back soon with another article. Stay safe!
In the living room we spend most of our free time, cuddling on the couch, enjoying good conversation and coffee with family, friends, loved ones, it goes without saying that it is one of the most important spaces that we nestle in our shelters. In there, the sitting area is highly relevant, whether it`s a sunken area, a simple low sofa or an epic puf pouf and, close by side-tables and coffee tables provide the much needed support for tea, coffee and a good book.
DIY coffee tables are extraordinary regardless of their nature as the results depict items with memory, infused with meaning, numerous coffee table plans can be found online yet in the following article we are going to address glass coffee tables through a gallery carefully curated, the projects are not all DIY and while certain examples could definitely be crafted by enthusiasts we highly encourage you to manipulate glass with caution, all safety gear must be on at all times, get a friend involved, make a day of it !
Glass Coffee Tables
1. diy moss coffee table
Boost your living room aesthetics by bringing greenery indoors.
2. diy ocean layered coffee table
A design like nothing else, one that creates depth layer by layer through transparency, pitch black simply conquers the floor while teal clear waters are enchanting our eyes at the surface.
Source Unknown
3. reuse an old window
One old window can become an extraordinary coffee table, salvage different legs from the flea market, adjust their height and mount them on a beautiful shabby chic old window and you are good to go, its transparency and epic, experienced look will certainly be appreciated.
via thesuedesofa.com
4. balance in simple coffee table
It looks like a designer`s item, neat, high end, spectacular and yet it is easy to replicate, a number of 8 "complicated cuts" will create the playful balance displayed over which the glass counter-top settles.
via workshopped.com.au
5. Wooden beams and glass coffee table
If two immense wooden beams are not something you simply have around or you can salvage from a construction site feel free to use two logs instead, they`re naturalness ought to contribute to your setting and can be obtained far easier.
via krrb.com
6. sculptural transparent coffee table
A carpenter will say this is a swift, rapid project yet an amateur might be overwhelmed, call a friend, nothing worth obtaining is easy to obtain.
It beautifully emphasizes the feeling of space through a simple thin structure and a transparent top, the golden metallic finish ads a posh, luxuriant effect.
via horchow.com
12. wooden roots coffee table
Extraordinary sculptural, unique and alive. Roots can be used to shape something remarkable that will instantly redefine your living room.
You can use a wooden frame to showcase a steampunk mechanism between two layers of glass or acrylic thus creating an interesting focal point in your living room.
The transparent option here would be to remove the wood and allow light to bounce throughout the room, the wooden plank can also be replaced with a second layer of glass or a mirror to further increase light reflection yet the highly dense, cozy and warm texture above is certainly not something to overlook.
Coffee tables in general should never be overlooked yet glass coffee tables in particular ought to be one of the first things to consider in your design, they can be found in one shape or another in absolutely any design language, all emphasizing the feeling of space, all ready to bounce light throughout the room and amaze your guests with the illusions of suspension.
There are not few the ones that neglect the simple, humble garden fence that outlines our yard. There are not few that leave it in disgrace year after year until its wood cannot be saved anymore. It goes without saying that maintenance in our household should be priority number one, protecting every element in it and cherishing it as a necessary part of the bigger picture. We invite you to cast a glance in your yard and check the status of your items exposed to the elements. If greenery is not guarding them proudly we invite you to get creative with the 23 fence decorating ideas showcased below and complement them through greenery as things evolve.
23 Fence Decorating Ideas
#1 Furniture Elements Transformed Into Highly Creative Dragonflies
The wings have been salvaged from ceiling fans and the body is made from chair and table legs.
via lucydesignsonline.com
#2 Recycled Coffee Table With Functional Role Outdoors
The trellis is loved by gardeners and those who maintain yards all over the world. One might say it is a mainstay in most situations.
This hardscape has been defined as the backbone on which the garden mostly grows. Usually, the trellis takes not only numerous forms but also serves multiple functions. Be it simple structures where vining vegetation is lifted, to the more complex alternatives with elaborate and sturdier designs, the trellis is always useful.
Even back patios and pathways benefit from these installations, as they spruce up any location. While these installations can improve the aesthetics of a place, trellises can be expensive to buy. That is why we have prepared some of the best trellises that you can make for yourself.
Not only are they functional, but the process is easy too. You can rest assured that these trellis ideas will match whatever style you have in mind.
Now, let us dive into the details without delay.
DIY Pergola
Often pergolas are known as arbors or trellises. Not only can they be used as a structure that vines use for support, but also to define the space outdoors. You’ll see how they are functional as shades for cooling once you start using them.
Before making a pergola for crawling vines, it is best to know where the underground lines are located in your garden. Normally, you’d have to sink the footing so that it is one quarter the height of the desired post.
Honeycomb Trellis
If you’re in the mood to make your garden look good, then this trellis is the right way to go. The structure looks lovely as it is, and the hexagonal shape is sure to make your property look sleek and stylish.
Using a miter saw, you can easily make these hexagonal cuts. Then, you’d have to mount the trellis on the fence, ensuring that you’ve screwed in adequately into every one of the horizontal supports.
T-Post Trellis
The T-Post trellis is a rustic and sweet addition, which you can easily make using two T-posts. In addition, you can make use of twigs from poplar saplings as well as twine. Then, it is best to resort to zip ties to get additional strength for the trellis.
Using bigger branches towards the bottom and smaller ones at the top add a degree of strength to the structure. Alternating the thick ends as per rows brings a degree of stability too.
Fancy Trellis
Eager to show off the entrance to your house? Bank on a fancy trellis to grab the attention of everyone. If you drape it with a flower-like clematis, you’ll find the structure especially nice. While using these flowering vines, make sure the trellis is made of pressure-treated lumber. Having a sealer and stain will ensure it stands the test of time too.
Clematis Trellis
You might love the privacy offered by tall fences around the house, but they don’t always look good. Alter this uninspiring appearance, and feel free to jazz up the backyards by adding a clematis trellis. It gives an adequate amount of support to flowering vines, so they can climb high.
In order to execute this project well, cut the cedar boards into one-and-a-half inch strips so you get the right material for the trellis.
Trellis with Planter Box
For two projects in one, this installation is the right way to go. Here, you’ll see that a trellis is placed inside a handy planter box. There are casters that are mounted on the bottom of the box as well. Thus, there is no trouble in moving the entire thing.
We recommend adding drainage holes at the base, along with casters, so that the plants remain healthy too.
Wire Wall Trellis
In the event that your garden or yard has a brick wall, it might look quite dull as compared to the greenery around. But, there’s a great way to spruce up the look by adding a few vines to the wall. These crawling plants add the right dash of green, and if there are flowers, the overall look is further improved.
With the masonry anchors, cable wire, and eye hooks, you can create a great foundation for the vines.
Copper Trellis
A trellis made of copper pipes manages to encapsulate a feeling of delicateness and strong aesthetics at the same time. Although the assembly might feel like a tough task involving welding, you’ll end up finding that it is quite simple to put together.
We recommend having some strong glue handy to put together the parts. Once the vines begin growing, the entire installation will take on a shade of patina.
Rustic Trellis
Many like their gardens to look deeply charming while retaining the whimsical aesthetic. You’ll find the trellis has been made with green saplings, while they are bent into a certain shape. After they’re turned into hoops, these trellises are wedged between the large rocks for around two weeks.
Once dry, the ends are kept in wooden inserts that are buried in the ground on both sides of the walkway. You can also make sure the saplings are lashed together, using additional twine, just so that the structure is more stable.
Criss-cross Wall Trellis
Sometimes the garden might serve as a formal setting. But that doesn’t mean it can’t look good at the same time. You can easily resort to the criss-cross trellis that champions a degree of elegance.
There’s plenty of space for foliage to climb over, using some kind of support. You’ll see pink bower vines growing particularly well here. Sometimes, artwork or installations like fountains can also be highlighted using this structure.
Simply place the object at the center of the ‘X’ formed by the trellis. Thus, the entire thing becomes a frame, drawing your attention to the central piece.
Trellis Ladder
A ladder doesn’t just have a degree of utility but serves as a great decorative piece as well. You don’t just have to use the item as a trellis, but you can also create a degree of support. In order to do this, you can go about using a bunch of posies, or other decorations, based on the season.
Overall, this choice becomes a great addition to your patio or porch. If you craft the ladder from black birch saplings or limbs of other unique trees, there is a greater amount of visual appeal to the entire thing.
Garden Obelisk
Using this simple yet cheery obelisk trellis is an excellent choice. Thanks to its multifunctionality, you can pretty much do anything, from growing roses to turning it into a cage to grow tomatoes. No matter your need, this installation will come in handy,
As far as construction is concerned, make use of pine, so the structure is sturdy and long-lasting. For the finishing touch, you might even add a weather vane at the top. In some cases, the trellis is coated with Tung oil instead of using traditional paint.
Cattle Panel Trellis
In the event that you don’t have much room for gardening, you’ll see that the cattle panel trellis saves a lot of space. The design is rather intelligent, allowing you to use metal cattle panels.
Using these, you can grow a lot of vegetables and plants like cucumbers, beans, and pole peas. The way to install it is to trim the panel and make it in half. Then, make use of cable ties or hog rings in order to join them.
If you need to take the trellis out and store it for winter, then this option saves a lot of space as well. All you have to do is to fold the panes, and you’re good to go.
Freestanding Trellis
Combining efficiency, ease, and incredibly affordable materials, the freestanding trellis is preferred by several gardeners as a DIY project. Taken together, the raw materials come within $5 sometimes.
The cost-effectiveness can hardly be understood as the product spruces up the exteriors. You can make this trellis using furring strip boards, brad nails, and glue. Overall, the size can be customized to suit the sizes of different gardens.
Pea Trellis
The first thing about this trellis is that the ease of construction makes it stand out. Even kids love lending a helping hand to set it up quickly. You can make the frame out of four bamboo poles and join them with twine.
All you have to do is to run this twine up and down so that the frame stays together. As it remains taut, try to coax the peas a little and watch them take to the trellis naturally.
Vining Plant and Pea Trellis
You can build this trellis to be higher or shorter, and it is perfect for any vining plant or peas. Based on your needs, you might also decide to make these trellises thicker and sturdier. In that case, we recommend using better boards so the structural integrity doesn’t get compromised over time.
Trellis Planter
The trellis planter is smart looking and practical. At the same time, these structures add a degree of weight to your porches and patios. To make the build easier and faster, you can make use of latticework, which is prefabricated.
In order to give this installation a complete look, you can even consider adding a frame with lumber that is pressure-treated. Just place it all around the trellis, and enjoy the effect created.
Trellis Wall
These trellises are pretty as a picture and make blank walls look visually interesting as well. If you happen to add a bougainvillea creeping on this structure, it will become all the more aesthetically pleasing.
But, you have to keep in mind to have a few inches of space when installing the trellis so that the vines have space to grow out. Soon, you’ll see the trellis covered in pretty greenery, sprucing up the wall.
Pallet Cucumber Trellis
While growing cucumbers, you might face the problem of insects or rodents since they are close to the ground. With the help of the pallet cucumber trellis, these vegetables can now be given a degree of heightened safety.
It is extremely simple and easy to make these trellises using wooden pallets. All you need are two posts and some twine. Put together, the structure is firm enough and can be used to grow crops like radishes and lettuce as well.
Garden Tools Trellis
If you’ve been gardening for a long time, you’re bound to end up with a few broken tools which have no practical use anymore. Instead of throwing them out, you should try and make use of the worn-out items, like hoes, rakes, and spades, by making trellises. Apart from the utility, the installation also doubles as garden art.
First, you need to chisel the handles of the tools, so they’re shaped like a stake and can be driven into the soil easily. Then, attach cross slats across the handles, made out of scrap wood. Hold them together with the help of nails or glue. As the structure becomes increasingly weathered, it will look more charming too.
Chevron Lattice Trellis
The chevron shape never goes out of style, and if you add it to your trellis, you can be sure the installation will make your garden look all the more modern. Add a dash of flair with this structure, especially if you paint the entire thing black.
Using zip ties, you can add clay pots with flowers and plants to this trellis so that your garden becomes the talk of the neighborhood.
Modern Trellis
This option embraces the tenets of modernity by being slim and sleek. Even the lines offered are unfussy and simple enough. There is a great contrast visible due to the heavier and more traditional planters, which are placed behind such trellises.
In order to keep the look clean and bright, you can apply two coats of semi-gloss paint on the exteriors. For more ease, you might resort to sprayers as well.
Tiny Rose Trellis
Sometimes the answer lies in simplicity, and nothing proves this better than the miniature rose trellises. Here. You don’t need any elaborate design to get the job finished. Try these quaint options that don’t take up a lot of space but manage to look sophisticated at the same time.
If you have a smaller garden area or want to create the look of a comfortable nook, then this trellis is the right way to go. With a delicate framework, they’ll make your gardens stand out.
Bike Rim Trellis
In case you’ve got a bike rim lying around, taking up space, you can now use it to make an attractive trellis. You might be the person who prefers utility over decor, in which event, this choice is perfect for you.
Use some gardening twine along with the old bike rim for a functioning trellis that can support plants. Apart from the effectiveness, the process doesn’t cost too much money either, making it an endearing prospect.
Background Trellis
When you use the background trellis, you’ll notice how the structure supports the bushes which are in the background. At the same time, the potted plants seem to benefit from the location of the trellis as well.
Ultimately, it is a great example of how a framework can be well incorporated into the design of the garden. The cherry on the cake is obviously how these trellises easily spruce up the place.
Swooping Trellis
For those who want there to be a canopy effect in their gardens, the swooping trellis is the perfect option. There is a covered effect on the walkway, and the arches attract attention automatically.
Not only is the framework easy to make, but you’ll find the canopy covered in flowers and vines after a while. It makes the garden look and smell wonderful.
PVC Pipe Trellis
Gardeners are always on the lookout for new ideas for trellises. The PVC pipe trellis is a fantastic addition in such cases. It is a relatively easy DIY project involving PVC pipes and some gardening twine.
Not only is it easy to build, but the entire project doesn’t cost much either. All you have to do is look around the house for some raw materials.
Rough Trellis
Farmhouses or country cottages snuggled in the woods can make good use of this trellis. It adds a rustic look and has a lot of character. As compared to an ordinary trellis, this design is definitely rougher. While the rough trellis is certainly not traditional, it is considered to be a wonderful addition to most gardens.
Squash Arch Trellis
This is a nice spin on the ordinary arch trellis. You’ll find that it can support most vines and plants. But, using it to grow squash or pumpkins is especially beneficial in enhancing the overall beauty of the garden.
Thanks to these trellises, you can be sure that the vines will get all the support and sunlight needed. Once the blossoms become eye-catchers, you can be sure to earn praise for this smart DIY project.
Contemporary Trellis
This is a new take on the traditional trellises that most people are used to. Be it a chic getaway or a modern home; the contemporary trellis fits right in. It has a sleek design and happens to be smoother than many other variants.
Since the wood is painted, the colors are eye-catching, and the smooth texture makes it all the more gorgeous. If you’re looking to make a smart addition to your backyard, then this DIY project is the right way to go.
Creative Trellis
With DIY projects, the best bit is that you can always improve your creativity. This is most evident in some trellises, which look more like art installations. In the creative trellis, you can easily compile several trellises into a standalone concept.
Be it a porch, or a garden, or even against a wall, these creative trellises only look sophisticated, but they’re actually easy to assemble and install.
Trellis Bench
If you’ve got a pretty garden, it is understandable that you might want to spend some time sitting and looking at it. Instead of adding chairs or seating arrangements, you can always save space and opt for trellises with benches.
These designs are found mostly in country houses or properties with more sprawling garden areas. If you have parties or gatherings, then this seating arrangement can be perfect for highlighting those who are at the center of the party.
Moreover, the quaint bench is protected by the shadow of the arch and looks incredibly welcoming when installed properly.
Trellis Fence
The concept of a trellis fence is extremely nice and easy to execute at the same time. It is simple to put together with materials lying around the house. In essence, it looks like a tiny part of a fence with plants growing on it.
Enthusiasts can customize the item even further by using materials and colors of their choice. Basically, all you’d need is some wires or twine and wood to build this DIY trellis.
Japanese Wood Lattice Trellis
Add a dash of culture to your garden with the help of these Japanese wood lattice trellises. They effortlessly combine beauty and elegance. All you need is a little bit of patience and time to put together this structure. But, you shouldn’t feel daunted because the assembly process is relatively simple.
Once the project is wrapped up, you can definitely take a step back and appreciate how it enhances the overall appearance of your garden.
Vertical Planter Trellis
A vertical planter is often the way to go if you’re looking to save some serious space. These structures can easily support a lot of plants, making it simpler to care for them too. With the help of the vertical trellis, you can add a dash of efficiency to your garden.
Stack up the plants in this structure, and the trellis will support them as long as you need to. The installation is sure to catch the eye of everyone for its unique design. Making vertical trellises is easy too, and all you need are some basic tools and extra wood.
Willow Garden Trellis with Bench
You can make your garden look magical with the help of this willow garden trellis. Using willow wood, you can construct the structure. We recommend adding a bench to the entire installation, so it doubles as a natural seating arrangement.
Due to the material used, it feels like a natural extension of your decorations, which is why the enchantment is much more. Assembly is relatively simple, and the DIY project lasts for a long time without needing much maintenance.
Traditional Trellis
The slanted trellis happens to be a more traditional design that gardeners tend to go with. Once again, it is very simple to put together. All you have to use is some spare wood and twine. For those who don’t prefer to slant it, can always go for a hovering setup.
Normally, these trellises are great for growing tomatoes, pumpkins, and a variety of other vegetables.
Giant Trellis
If you’re planning to go big, then this giant trellis is the perfect option. You can take some time to create this highly unique design. If you have a side garden or even a yard, it is best to utilize the space with the help of this trellis.
Notably, the bigger the size, the more plants can be put on it.
Trellis with Lighting
This trellis comes with an incredibly cute design that would be best suited for an interior space. The mood lighting is incredibly funky and adds a bohemian touch to how plants are kept. Not only are the lights bright yet simple, but the plants benefit from the supportive structure of the trellis as well.
Now that you’re acquainted with some of the best DIY trellis ideas, it is time to apply these to beautify your lawns or gardens. Be sure that the installations look stylish and are crafted with longer-lasting materials.
If you want, you can further increase utility by adding benches. While some of the trellises require a larger degree of handiwork, others can be simply assembled with materials that lie around every household.
Depending on your requirements and the kind of aesthetic you’re going for, you can decide which trellis suits you the best. And with that, we will take your leave now. If you run into any problems with the assembly or choice of a trellis, then do reach out to us.
Goodbye for now!
arch and trellis, entwined vine and lantern in a beautiful Park in the summer.
Every day we encounter it, every day as we step through our garden we see our flower beds, our vegetable gardens, and naturally the lawn and flower bed edging ideas that support our curb appeal. Flower garden edging ideas and vegetable garden edging ideas can make a huge difference in our garden and it all comes to a simple concept, addressing two distinct areas by separating them or creating a transition between them.
It goes without saying that the landscape edging ideas that would fit your garden will probably not fit others yet happily there are a dozen to choose from, in the following gallery we have showcased 73 cool garden edging ideas that are worth considering regardless of budget, style or creativity, there is a little something in there fore each and everyone.
Solutions to one's garden edge can come in any material or combination of materials, there are no "rules", you will often encounter stone, concrete, brick, wood, tiles, metal, plates, glass, gabion, logs and, happily, all sorts of recyclable materials these days !
Up-cycling and recycling are key words in contemporaneity if we are to have a tomorrow to call future, up-cycling and recycling are words by which we stand for at Homesthetics and we would love to have you on our side, start by throwing an eye over the gallery below and please do let us know what do you think !
Garden Edging Ideas
1. Use Salvaged Wood to Edge Your Garden
One of the easiest methods to create an epic garden edge is through salvaged wood, possibly, pallet wood. The natural material will integrate seamlessly into any arrangement and it offers you infinite flexibility when it comes to design as other woody solutions will showcase in the gallery.
The image below showcases an extraordinary result, all you need is pallet wood; keep in mind that to you do not need to stress about its width or height when you cut these pieces to "size", the earth around them will help you with that.
Flat rocks are natural puzzle pieces and you happily get to arrange them in a manner that will benefit your garden and enhance your curb appeal, above they separate the lawn from leafy vegetation splendidly, would you like to change something?
You will need a certain shape to obtain the desired result as well as a particular concrete mixture that is allows you to play with it; it might seem difficult but a Home Depot consultant will surely you give you a couple of options. The possibilities are endless.
Stone options are one of the most used flower garden edging ideas due to their immense versatility and natural look, here assemble in an L-shape on two layers they border the flower pack splendidly.
You can create a splendid mosaic garden edge, it can contain bricks, river rocks and if need be, cement to keep it altogether, one could argue that there is no need though, earth s there to support you in [almost] any DIY endeavor.
Ohh the possibilities, the warmth of bricks and their versatility makes a case for them once more ! In this particular case, bricks have been placed on an angle, diagonally to create a rhythm and a certain dynamicity as result. It is also worth noting that the splendid design is completely non-intrusive and can be reverted or upgraded whenever you need easily !
via thechicsite.com
8. Shape organic Edges With Terracotta Cylinders
Terracotta lines have been used above to sculpt an organic path in which coziness resides through bricks, the splendid shape path creates a small ellipsoidal game that invites vegetation and greenery closer to the individual that glides on it, get creative and embrace vegetation in your own garden !
Patience in the process can go a long way, above a professional garden edge showcases a simple completed process, imagine how you would go about realizing this, we have two lines and a couple of pavement blocks, all balanced by sand, what can be simpler ?
This might require more patience yes and it does require a really cool material, metal sheets. While exemplary, keep in mind that the splendid metal sheets remain rather rough on the edges in most cases and children or pets can get injured if the roam the garden unattended. It goes without saying though that these are exemplar garden edges in terms of aesthetics.
If you consider a raised garden bed, options are even more extensive, steel panels can become garden edges just as beautifully as wooden pallets, both can be pierced here and if you want to place greenery in the vertical plane as well, option that we highly recommend.
via homeimprovementpages.com.au
12. Geometric Zig Zag Metal Edging
Yes, metal edges can function at any level, they`re exemplary regardless of their height; above the height varies just like the metal line varies through the garden thus creating a zig zag in both the horizontal and vertical plane.
via smallgardening.com
13. Use Gabions With Rock and Wood
Rocks, wood, they come in all shape and sizes, sometimes in the form of a gabion, here a really earthy one with colored rocks, wooden blocks and awesome vegetation surrounding the sculptural raised garden. Imagine the garden above 10 years from now, with its vegetation matured, a lush, splendid oasis in the making the example above is !
A gabion can also use shattered rocks that would occupy the volume evenly, the lack of wooden blocks here clears the design further and the small white sand simply aces the neat look, the balance between the elements is spot on, how do you see it?
Your curb appeal might benefit from an all natural look, it can be a flat stone edge, as showcased above. The splendid design is easily reversible, it can be easily changed, upgraded and it has little to no costs, how do you see it ?
via hoselink
15. Use a Clean Edge Near Your Patio
If you want a pitch-perfect edge, precision is what you`re looking for, here an offset of the terrace, naturally in wood, received splendid dark-blue shattered stone that creates a contrasting transition between the wooden terrace and the lawn, needless to say that once you create the offset, you choose the family towards which the stone goes.
via amazing gardens.co.uk
16. Use a Living Edge
Yep, a living edge! Sounds really great isn`t it? Well it is, it cannot be simpler, use vegetation to protect vegetation !
Yes, we notice the stone edging as well but is the green wall here that contains the vegetation first and foremost, the splendid transition is definitely worth considering !
Yes ! You can combine blue river rocks with white shattered rocks and metal edges to create a layered transition that becomes a graphical element in itself, how would you address such an arrangement of layers?
via modernindenver.com
18. Use Boulders to Shape Your Edge
In the splendid composition above both square pavement blocks and immense boulders have been used to contain splendid fresh greenery but it is the boulders that stand out and create depth in this example, is the boulders that raise the height and contain soil thus shaping slightly raised bed of greenery. The boulders could certainly emphasize a different material than pavement blocks or none, through their presence though you change the game for sure.
19. Combine Concrete With River Rocks and Boulders
Here even bigger boulders make a change, aided by what we can categorize as big river rocks and a third cement, concrete edge. The splendid tiered layering plays of mineral texture create a game that supports the greenery upstairs brilliantly, a simply awesome flower edge !
A pure beauty, gray blue boulders, white sand and lush vegetation growing through the boulders, a simple and clean look that will certainly be appreciated by many; if you`re just starting out, be patient, the splendid greenery will take its place, it will emphasize absolutely everything !
via secretgardenlandscaping.com
21. Use Railway Ties to Shape Garden Edges
Using salvaged materials is noble splendid and insanely resourceful ! Just look on how awesome these railway ties look, they seem filled with memory and wisdom, they enhance the yard through their presence and easily contain their raised soil and greenery to new heights, literally.
via gardeningschool.org
22. Edge With Vertical Railway Sleepers
If a uniform garden edge doesn't feel all that appealing to you, then why not go for a raised bed with individual sleepers placed vertically? Not only will the varying heights of the sleepers give it an unusual look, but impart a unique visual effect as well.
via kilgraney.com
23. Use Salvaged Wooden Beams
A decorative garden edge with salvaged wood is another amazing eco-friendly way of giving your garden that much-needed attraction. And you can see by the picture, how the maker was able to personalize the wood and craft it into a very fun and appealing design and give the garden a very unique touch.
Vertical rail sleepers even with their own unique style and visual appeal can feel rather bland and boring, that can dampen your garden's aesthetics. But painting your wooden edges and giving them different colors will make them look rather bright and funky. Best of all you get to color code and personalize it in whichever way you want,
via farmandfoundry.com
25. Wood Shaping a Raised Garden Bed
Raised garden beds can allow you to make your own little floral sanctuary from the comforts of your backyard garden. Just like the picture, accessorizing them with small pebbles and evenly cut vertical sleepers can create a very serene and beautiful effect that can calm the mind and help it to relax.
via growingdesigns.co.uk
26. Tree Trunks Can Guard Your Edge
With this garden edge and footwork, recycling is the main moto. Not one is the edge made with recycled tree trunks but the footway itself is constructed entirely out of recycled bottles. This imparts a rather traditional yet classical feel to the overall appeal of your garden and goes a long way in protecting the environment.
Wooden pallets can not only be used to make trellises for your tomato farm but can be significantly useful in making your garden edges as well. Its a very eco-friendly option and you can even use it to grow a few climbers as well by attaching the plant to it and training it to grow along it.
Brightly colored garden hoses woven around wooden stumps as a form of an edge for your garden is not only aesthetically pleasing but a functional option as well. Along with beautifying your garden, it will help keep those rather curious critters out, and keep your harvest safe if you were growing any.
Woven willow branch edging functions much like the woven hose edging but aesthetically, it's a timeless classic. And unlike the woven hose, it is not as durable or as incredibly sturdy, but nonetheless, it has a very earthy freshness to it and is very simple to make.
If you are willing to give the garden edge a very modern and industrial look, then the spike and connector edging can provide you with just that. It's a very simple idea, that screams practicality, all you have to do is get some 40 feet 12-inch spikes with a connector and hammer them in accordingly around your garden.
Give your garden a unique shape with this boundary, and you are all set.
Recycling your plastic and giving it a stony appeal can be a fantastic edge for your garden, especially around your precious flower beds. Not only is this a very cheap and cost-effective method but incredibly environment-friendly as well. Take the extra plastic from your home and mold them into a stone shaped foldable edge, we guarantee that you will be pleasantly surprised by the results.
Source Unknown
32. Use a Panacea Gothic Arch Border Fence
Gothic arches for raised flower beds can double as a garden edge. The intricate patterns of the arches with black bold coloring along with the intricate gothic design looks mesmerizing when surrounding your garden on solemn dusky evenings. You can either DIY those arches yourself with either wood or metal, or get them from any hardware store.
33. Unique Chine Plate Garden Edge
Perhaps you have expensive yet broken and worn out china dishes around the house. So instead of throwing them away, why not put them to good use? Forming a garden edge with them is a useful and effective idea. Just dig a trench, put them in and fill it back up again. The beautiful and glossy china is sure to brighten up the garden.
If you're a lot into flower plantations then this idea might just appeal to you. Terracotta pots can not only house your plants and flowers but make an excellent garden edge as well. And as a DIY project, even if you’re not much of a fan of pottery, they pots are extremely easy to make with sculpting clay, and you can shape it the way you choose to fit the size and structure of your garden.
Yes Bowling Balls! You heard us right. A very unique and out of the box idea isn't it? But if you ask us it is a very fun and funky way of accessorizing your garden. It makes for great garden edges while at the same time guarding your plants and flower beds. Bowling balls come in various shapes and sizes and the neon and florescent colors instantly groove up the place.
via beth evans ramos
36. Up-cycle Hubcaps into Garden Edging
For all the motor heads out there. An up-cycle hubcap is a really cool and modern way of edging your garden. And much like the china dishes, just dig a trench, plant them and fill it back up again. It has a very industrial avant-garde appeal to it, that allows you to give your garden your very own personal touch.
via beth evans ramos
37. Use Recycled Bicycle Wheels as Garden Edges
Free is when you turn junk into tools, and in this case into a fully functional garden edge. You can simply achieve this with old cans . But it is more traditionally done with worn out bicycle tires, that makes your whole garden feel unique and a conversation topic for all your social gatherings.
The Natural Garden edge is the simplest to make and is also a very fun DIY project for any gardening enthusiast. All you need is a shovel, a garden sheer and a weed cutter and you are all good to go. Instead of making your flowerbed above ground here, you dig them further down into the ground, leaving the garden a bit elevated.
You can even choose to accessorize the surrounding flowerbed with some brightly colored birdhouses or crop plantations.
This is where your home meets the resort. Just as the picture suggest, taking flat stones of various shapes and sizes and arranging them neatly around a raised flower bed, creates such an amazing garden edge concept that makes your home and backyard feel like its some five star resort. Just fill up the bed with vibrant trees and flowers and you will have the complete package.
40. Use Mineral Black to Edge Your Flowers
Taking a page out of the Gothic Arches, comes another concept that is sure to excite the Lovecraft in you. Flowers have an amazing ability of going incredibly well with a black surrounding. And just like the picture suggests a mineral black edging for your flower bed and garden provides a fantastic aesthetic atmosphere that can simply take one's breath away.
41. Shape Your Garden Through Your Path
Shaping your garden along a Crushed rock path is another interesting idea that has off late been growing in popularity among the suburban households.
Lay down a graveled pathway and let your trees grow unperturbed and wildly around it. A walk through this footway every now and can feel like a mesmerizing saunter through the wilderness.
Source Unknown
42. Use Chicken Wire to Shape A Natural Garden Edge
If you run a poultry farm, then you might just have a lot of leftover chicken coop wires lying around. And coop wires have been known to be great at making raised flower beds as well. These flower bed boundaries double as a garden edge and is a very effective way of delineating your garden boundaries.
The Calade paving is originally done by pebbles to form a garden path or driveways and terraces. But just like the picture, using large uneven rocks of different varieties can bring about an amazing visual effect as well. You can even try and use faux-stone facing or false brick with laying pavers and slabs to bring about the same desired result.
A lot like the bowling ball idea, a decorative garden edge made out of colored glasses might not look or feel as abstract as it sounds. You can either choose to go with deep blue or black glasses that can compliment any flower bed. Or use glasses of different colors to make your garden feel nice and fresh in the early mornings.
via pinterest
45. Use Rain Water to Create a Water Garden Edge
What's more amazing than turning your backyard into your own personal ecological park? And all of it is possible with just some rainwater and pebbles. Make a long meandering trench and line it up with pebbles, divert the rainwater collecting on your roof into it and you have an excellent water garden edge.
Perhaps the most traditional and widely used option on our list today. What's more simple than lining up some bricks into a Herringbone pattern and using it as an edge for your garden and flower beds? And it is quite efficient as well, while at the same time being a very durable structure. Additionally, you can use this as a footway as well that can help you to move around your garden.
via pinterest
47. Use a Wooden Log Garden Edge
Wooden log stumps have a very natural feel to them, and apart from providing you with firewood for your fireplace, they can be ideally used as a garden edge as well. And the round stumps need not be of the same size or shape, as long as it creates a well-marked boundary, its job is done.
Another way of using cut wooden logs and stumps as a garden edge is by stacking them up along the border in one neat file. We all know how important firewood gets during the winter, and instead of stowing the uncut ones away in the shed, you can look to dress your garden edge with it. It makes for a fine visual contrast with a foresty appeal.
A prevailing idea from the orient. Baboo sticks are quite hard, durable and versatile, and make for excellent garden edges. And if you have your bamboo plantation in the backyard, achieving this garden edge, would be absolutely free and effortless. White bamboo would be the best choice, which you can later paint and color code, personalizing it the way you want.
via pinterest
50. Salvaged Wheels Up-cycled
Let's take a trip to the past, shall we? Rusted out and damaged wheels from many years back can be easily salvaged and upcycled to produce a rather unique garden edge that screams history and timelessness. They can form support bases for climbers as well, and if you have a tomato plantation going, the wheels can be quite efficient as a trellis.
via pinterest
51. Use Horizontal Bamboo Garden Edges
This is more about making a pathway to create a garden edge and border, rather than focusing primarily on the border itself. It's another very unique use of the bamboo, but instead of trenching it into the ground, you lay it down horizontally to create a walkway out of it and make a rather mellow and elegant garden edge as a result.
via mastergardenproducts.com
52. Up-cycle Metal Pipe Garden Edges
A lot of old houses have worn out and rusty pipes lying around, some may even still be connected to the house's plumbing structures. But instead of throwing them away, why not up-cycle them into holding brightly colored gravels and pitting them into the ground to form a garden edge? We are confident that just like the picture it will look beautiful and elegant.
Now here is another interesting idea, the Tree Trunk with Succulent. Why just plant plain tree trunks and branches as an edge? You can grow succulents out of the moss on the trunk, it gives the branch a very unique personality, and as different branches will have a different type of succulent growing on it, your resulting edge will look very varied and colorful.
If making an edge out of vertical sleepers and raised crop beds don't feel all that appealing to you, then this option may just be the idea you are looking for. And its simpler too, all you have to do is make a flower bed around the garden, and by the picture, you can see that the results can be quite stunning indeed.
via pinterest
55. Create a Blue Colored Glass Garden Edge
Blue glass has a brilliant shine and gloss to it during the daytime, especially around dusk and dawn. You can dig a trench pathway bordering the garden and plant these glass shards in. During the twilight, it shines in a mesmerizing blue haze that can give your garden a spectacular sight to behold.
56. Use Layered Vegetation and a Slim Metallic Profile
A very modern and aesthetically pleasing design. Making a layered vegetation edge and giving it a slim metallic profile is quite a popular idea implemented by a lot of homesteaders who desire a fresh new look for their garden.
To make it even more attractive you can line the extremities of the edge with gravel and small pebbles, to highlight the plantation even further.
via pinterest
57. Rock Edge Doubled in Organic Ensemble
Another pleasing to the sight and inspired edge design idea is the Rock Edge Doubled in Organic Assemble. This concept is all about creating a visual contrast that instantly attracts the sight and pleases. Lining the pathway with rocks on both sides and issuing an organic assemble around it creates a very mellow and calming atmosphere.
via indulgy.com
58. Use Boulders to Shape Your Garden Edge
If boulders are more readily available to you than rocks and brightly colored pebbles then this concept can peak your interest quite a bit. Make a pathway out of crushed gravel, and line up the edges with big chunks of boulder rocks. And by the picture, you can safely that it doesn't look as awful as it sounds. But rather it looks very pretty and appealing to the senses.
This garden edge idea is all about the foot-way and the walk through it. And it is the sculpture that brings the garden to life and makes it feel like the background of some Victorian Romantic novel. The winding path, densely flowered sides and the archaic sculptures, make the walk-through feel like an exciting journey through time.
With colored tiles, you can make fantastic images and mosaics that will suit your personality and compliment not only your garden but your home as well. This is very a cost-effective and innovative way of decorating your garden edge with just the use of some everyday household tools and accessories.
Source Unknown
61. Bottle Cap Garden Edging is Always an Option
Taking colorful bottle caps and arranging them in unique patterns, can be a great garden edge idea as well. In the picture, you can see that the bottle caps are arranged in a manner that creates a fantastic style pattern that allows the creator to perfectly showcase his artistic talents and imagination. Moreover, you can use them as a walkway as well.
via pinterest
62. Simple Wooden Beam Flower Garden Edges
Wood beams and raised flower beds are the way to go for this garden edge idea. It's more about security than style really, but accessorizing it tastefully with the right choice of flowers for the flower bed can make it feel very bright and attractive.
The more you see Cor-ten steel in the garden, the more will it appeal to you. Cor-ten steel’s natural rust finish on fences, raised garden beds and retaining walls has a very urban appeal that gives your garden that modern look. And what makes Cor-ten steel so very beneficial in the garden–is that it becomes harder and stronger when exposed to weather over time.
As the name and picture would suggest, the concept behind this edge is very simple. You create a maze-like pathway around your garden in a swirling pattern and keep each grassy section at different elevation levels. This design just feels amazing for afternoon walks and weekend saunters.
via Pinterest
65. Corten Garden Edging
The Corten garden edging is one of the harder edge design to pull off, but can become pretty simple once you have a grasp on its basic concept. And the concept is fairly simple really, alternate winding grass elevations in a zig-zag pattern, where the elevation rises on the outskirts by mellows out in the middle.
Source Unknown
66. Rocks and Succulent Edging
A lot like the tree trunk and succulent concept, but a much more elegant and refined version of it. The rocks and succulent edging comes with varying pebbles that are small and brightly colored along with vibrant succulents that can be a fantastic garden edge or a beautiful accessory for your patio.
67. Flat Log Edging Ideas
If you have kids at home, then the flat log edging idea is sure to appeal to you. It will not only go as a great garden edge but its a hit with kids playground as well. And one of the most popular things a child does with a flat log edge is play skipping games. They try holding competitions to see who can go hopping around it the fastest.
via Pinterest
68. Glow in the Dark Tree Logs
Dress the logs of the garden edge with neon strips and see your garden come to life at in one of the most spectacular sites you will ever behold. The glow in the dark tree logs are can brighten up any late night social gathering, may it be for a late-night barbecue or an overnight camp in your yard, this edge is sure to make the evening magical.
via Pinterest
69. Japanese Slate Garden Edging
The Japanese slates function pretty much the same as the blue glass, but its overall aura and shine are more mellow and calming to the senses. Serenity is the key thought behind it, and the slates provide a contemplative mood to your garden which can help you relax everytime you decide to sit by your porch.
via Pinterest
70. Use Gabion Walls
A Gabion wall is a cage, cylinder or box that is entirely filled with rocks, concrete, sand or soil. They form very durable and sturdy garden edges, that you can use as a sitting bench as well. The picture shows a Gabion wall made of rocks with a wooden roof, which can be used as a sitting area in your garden.
via Tendance Gabion
71. Pebble with Slate Garden Edging Ideas
A pebble walkway alone can work perfectly well as a garden edge. But if you are looking to accessorize it a bit more, then adding some slates or tiles can be the way to go. Pebbles go extremely well with marble slates or grey tiles, that seemingly highlight its small round and bright features. But not only will this edge compliment the pebbles but your garden as well.
via Pinterest
72. Sea Shell Garden Edging
If you are a marine and sea life enthusiasts then this garden edge might just be your pick for the day. Bring the sea to your very own backyard with this very awe-inspiring garden edge idea. Dig a long winding trench around your garden and fill it up to the brim with sea shells clams and conches, and make your home feel like a seaside resort.
73. Three Minerals Garden Edging
Just as the picture and the name suggests, this garden edge is primarily composed out of 3 separate and unique minerals. Pebbles, rocks, boulders, steel, iron, granite...etc, there is a vast combination to choose from. The main inspiration behind this edge concept is to create a contrast through different color and type oppositions that creates a very attractive sight to behold.
via pinterest
How do you look these awesome ideas? We would love to hear from you! Keep in mind that after you uplift your garden edging game and your path to greenery, pavement sealers are recommended to both protect the look and enhance it once; on Homesthetics, we have reviewed the best pavement sealers here, cast a glance!
A garage is a pretty essential space in your home for various reasons.
It houses a lot more items than just your vehicle. For instance, you can also store miscellaneous items like sports equipment, holiday decorations, storage bins, seasonal items, and more. And because you only need these items a few times a year, your garage space slowly turns into an inescapable maze.
So, what do you do about it? You have to get into a ‘garage organization’ mindset and figure out the best garage storage system for you. Doing this will only make it easier to find what you need, as everything will have a designated spot. This way, you’ll be able to use your garage as it was intended.
So, let us take you through this list we curated of the best garage storage systems.
A good storage system allows you to neatly organize your items without taking up too much floor space. And with this Seville cabinet, you can easily store cleaning supplies, kitchen utilities, and a lot more while maximizing the storage space. At less than 1 square foot, this cabinet organizer is very space efficient.
17. 5" x 14" Shelving - Includes 3 solid-steel wire shelves...
Solid Steel Construction - Store up to 45 lbs. per unit, or...
Why Did We Like It?
If you’re looking to save space in your garage by adding a few racks for smaller products, then this cabinet organizer is ideal. Despite having a compact design, it can be easily hidden under your overhead storage racks or displayed by the doors where they’re more accessible.
You receive 4 poles, 3 shelves, 4 leveling feet, and 12 slip sleeves with this item. And while it may seem like a bit much to put together, it is easy to install. It shouldn’t take more than 20 minutes, and you wouldn’t need to use any tools either.
Moreover, the adjustable shelves allow it to be used for other purposes, such as doubling as a spice rack in the kitchen, a bathroom utility rack, or even a shoe rack for kids. Hence, you can save up more space in other rooms in the house as well.
What Could’ve Been Better?
While it is convenient if you’re looking to save space, portability with this product could be an issue. And if you move these racks around frequently, the wheels may lose their mobility. While they are replaceable, who would want to purchase extra wheels every time they fall apart?
Even if you have a clutter of things stored in the garage, you would want to avoid and protect them from any possible damage. Moreover, storing them on the garage floor can make them prone to water damage. And this overhead garage storage rack helps do just that.
Avoid water damage by storing your items off the garage...
Why Did We Like It?
Garages tend to be incredibly spacious, but if you’re not smart about how to utilize them, it just ends up becoming a huge mess.
And being unable to use the ceiling space can often escalate that problem. However, this model helps you utilize the space much more effectively without any hassle.
These racks are easy to install, and you can conveniently adjust the height according to the contents you want to store up there. Besides, they are designed to be stable and sturdy and can hold up to 600 lbs easily.
Plus, the adjustable drop-down feature allows you to optimize the rest of your space accordingly. You can also add hooks and clamps to the racks to store tools or bikes upright. Rest assured that the racks will keep everything safe from water damage, rodents, and insects.
What Could’ve Been Better?
There are specific instructions to be followed to have the best working environment for this product. If you don’t keep these instructions in mind before the installation, it could affect how these ceiling racks perform. Furthermore, they can’t be installed parallel to the joists.
Your garage storage most likely has a section specifically to keep your mops, shovels, and other garden tools. But they probably won’t stay upright and would end up taking up a lot of space, creating a mess. However, this storage system is sturdy and will hold onto all of your tools easily.
Tidy Your Home: 5 ball slots and 6 hooks design, organize...
Spring Loaded: Special spring clips design with rolling...
Why Did We Like It?
One of the many disadvantages of putting tools against your walls is that they can topple over or get tangled up easily. And that will only add up to the mess in the garage storage. But this garage storage system helps you hold your mops and tools in place, thanks to the hooks and balls design.
Additionally, you can store smaller tools like a fly swatter, rags, and more just as easily on the hooks. It is easy to install with just a few tools, and you will be able to mount this mop and broom holder in under 30 minutes.
Despite being made of plastic, this rack is strong and sturdy, and the ball bearings provide a lot of tension, making it easier to hold up to 10 tools. Overall, this multi-utility storage system will suit most garages.
What Could’ve Been Better?
Although the storage system rack can hold up to 10 tools each, it can’t accommodate bigger garden tools like a rake, a shovel, and more. You could still lean it against the product, but it won’t successfully hold it in place.
If you’re a gardening enthusiast, then our next pick may just be for you. Storing your long gardening tools can be a task, as they can topple over and end up taking up a lot of extra space. But the Rubbermaid storage system helps store them easily.
First and foremost, this garage storage system features special curved tubing that will securely hold your long-handled tools and keep them in place while you’re taking them out or putting them back in.
Apart from that, it features front clips that allow you to store your spades and brooms head-down, which in turn, avoids the rack from getting any heavier, making it all the more accessible. It also has clips that allow you to slide in storage from the side rather than sliding the tools from the top.
If you’re afraid about your tools sliding off this product, the base of the tower has a grid pattern that prevents any of this. Additionally, there are four casters to make moving your items a lot easier. Instead of individually moving each item, you can just slide all of them all at once.
What Could’ve Been Better?
This storage system claims to hold up to a certain number of products, but once you go past a certain limit, it tends to lean on to its sides a little. And while it doesn’t topple over, it won’t roll along the floor any longer if it is too heavy.
Pros
Special curved tubing
Front clips make storage easier
Base has a grid pattern preventing tools from falling
This storage system will help manage your garage space better by letting you store multiple heavy storage units. Not only does this help with better organization of the items, but it also means you have a lot more extra space for other items in the garage.
ORGANIZATION : Save room and maximize space with the Black &...
MADE IN THE USA : Choose sustainability with our...
Why Did We Like It?
A lot of the stuff we have in our garage storage tends to be pretty heavy-duty and ends up taking up a lot of space. But you’d seldom use any of these except for maybe once or twice a year.
However, this storage unit encourages heavy-duty storage. So, you can easily store all of your sports equipment, seasonal decorations, camping equipment, or gardening gear when not in use. In fact, each shelf can hold up to 200 lbs of items.
It is easy to install this product too. You don’t need any tools, and it shouldn’t take you any longer than 30 minutes to do it. The storage system is almost twice as heavy as any other plastic shelving unit, and it’s 30% more sturdy than these too.
But what if you have an uneven surface in your garage? The feet height of this product can be adjusted for added stability, making it easier to store these wherever.
What Could’ve Been Better?
The product can be paired with storage bins from the same company and is advertised to be able to accommodate 8 of these. However, the shelves are ½ -inch too small to fit them, which makes storing the bins a lot harder and slightly inconvenient.
Pros
Heavy duty storage
Weight capacity of 200lbs
Easy to install
Feet height can be adjusted
Cons
The storage bins aren’t compatible with the storage rack
A garage is a very big space to scantily store your tools, especially if you need them regularly. But with this storage rack, not only will you be able to store these tools somewhere convenient, but you can also store other items like shovels, backpacks, helmets, and more.
Maximum Tool Storage Capacity – Organize your garage with...
Adjustable & Customizable Wall Mount – Features a 45-point...
Why Do We Like It?
If you’re looking for sturdy storage solutions, then this storage rack would be ideal for various reasons. Built from heavy-duty steel, this rack can handle up to 300 lbs of gear. So, anything from your gardening tools, hammers, ladders, and more, the rack can accommodate it all.
This rack is space efficient since it allows you to store all the necessary items on the side of the wall and out of your way. It leaves a lot more room for other items, either directly under or around it. And this makes it even more convenient the next time you’re looking for your tools.
Installing this storage rack is very easy. All you need is a few power tools and a ladder, and you’re good to go. You wouldn’t need to measure anything either since the horizontal bar slides into the brackets easily. This is the ideal garage storage solution when it comes to keeping it organized.
What Could’ve Been Better?
While this storage rack seemed like the best solution to store all of our tools in one spot, it was the hooks that particularly drew us in. However, while the shorter hooks fit into the base just fine, the longer hooks did not line up with the holes in the metal base.
Pros
Strong and sturdy
Heavy duty steel body
Weight capacity of 300 lbs
Easy to install
Cons
The longer hooks don’t line up with the holes on the metal base
There is nothing new about storing your tools in the garage space, especially if there’s a designated workspace. But carelessly storing these in a tool chest isn’t the best way to do it. But at 10.5 square feet, this pegboard organizer allows you great tool board storage versatility.
When it comes to organizing your tools, there are various storage options. However, if you’re looking for something durable that can hold all the tools easily, then this pegboard organizer may fit the need. Not only does this let you store every type of tool you have, but this won’t easily bend or give away with the weight.
This product is easy to install with just the help of a couple of power tools, and if you’re looking to add some extra storage space, you can put a number of these panels next to each other to make a larger pegboard.
Most pegboards often look very fragile and aren’t that attractive, to begin with. But this product is stylish, very sturdy, and can be mounted to your wall. They also come with wall hangers, screws, hooks, and shelves that are cleverly designed and fit very well.
What Could’ve Been Better?
But regardless of how attractive the panels are, they ended up coming to us with every corner oddly bent. But that wasn’t the only thing that went wrong. We didn’t receive a few of the screws and wall hangers, which would make putting this up slightly difficult.
Pros
Easy to install
Extra storage option with multiple panels
Sturdy
Wall-mounted
Cons
Missing parts
Garage Storage Systems Buying Guide
Organizing your garage storage and giving it a much-needed makeover is essential for a lot of reasons.
And you get to avoid a lot of damage to your items. The items could either be insect-infested, rusting over, or just getting damaged due to being left on the floor too long. But you also get to have a neat garage space that’s convenient and accessible if and when you need to find something in there.
However, before you invest in any garage storage systems, there are a few factors to consider, and we’ve listed them down to help you find the best garage storage system.
Flexibility
When you reorganize the garage, it is to make it a lot more accessible. If it isn’t as easy to reorganize or switch around whenever you need to, it won’t work well in the long run. So, to ensure that your garage space is flexible and convenient for you, stocking up on cabinets with built-in wheels, stackable bins, and more would be ideal.
If you can’t move around items to accommodate things like vehicles, the space for a garage door to open, or even sports gear, then it would be difficult to store these items efficiently.
Functionality
A storage facility should be able to store all the things you want and need. Before investing in a garage storage system, take a moment to understand what the space should look like and what needs to be stored.
Prioritizing this process would help you understand what comes first. Whether it is changing up the space or cutting down on your items, only after you’ve gone through all of these steps should the garage organization system be purchased.
Sturdiness
You have to ensure that the garage storage is sturdy, as it should be strong enough to hold all the stuff you need it to. Apart from that, it needs to be adequately durable to deal with the daily wear and tear.
Hence, you should always look for durable materials that won’t give away as easily. It should also have a high capacity to ensure it holds as much of your stuff as possible.
Final Words
Organized garage storages make things a lot easier. Apart from avoiding a cluttered space, you have the freedom to store a lot more than junk in there. You can decorate it with lights to give it a unique look, or you could just organize and leave it as is.
Before we bid adieu, we wanted to bring attention to a few of our favorites. The Seville Cabinet Organizer would be our first choice because of the adjustable shelves and multipurpose use. FLEXIMOUNTS overhead garage storage rack would be next because of how conveniently it takes care of all the negative space.
And last, the mop and broom holder because we can stack our tools without worrying about leaving a pile of fallen tools.
We hope our list helps narrow down your options and find what’s best for you. Till next time!
Garages are important for providing shelter and protection to your vehicles. The make is very important of the garages as this decides the total space for storage and the capacity for optimal protection. If you have multiple vehicles, you will consider a design that will provide maximum space.
Garages in the past were primarily built separately in the backyard of the house and were referred to as detachable garages. With the increasing popularity of automobiles, garages are now mostly attached to residential buildings.
As the shed is of prime importance for your vehicles, you may hire an expert contractor to build your garage as well along with your home leading to increased costs. However, here is a list of DIY garage plans with detailed instructions that would reduce your total cost incurred to some extent.
Please note that local building codes always have to be considered whether you are creating this garage alone with your own two hands, with a professional, or with a friend by using a garage kit to save money and time.
Detailed DIY Garage Plans With Instructions
As homeowners, we often seek ways to maximize space and functionality while adding a touch of our personal style to our properties. Detailed DIY Garage Plans With Instructions is here to guide you on this journey, featuring an impressive collection of 23 carefully curated garage designs that cater to a variety of needs, preferences, and budgets.
Whether you're looking to build a simple, functional space or a multi-purpose garage with room for your workshop or home gym, these plans have got you covered. Each plan comes complete with step-by-step instructions and detailed illustrations, ensuring a smooth and enjoyable building experience.
Additionally, the use of garage design software streamlines the planning process, empowering you to create the perfect space tailored to your requirements. Get ready to embark on an exciting DIY adventure, transforming your property with a customized garage that reflects your vision and enhances your home's value.
1. Large Detached Garage
This is a detached garage and is also known as Garden Oak Garage and Workshop Plans. The plan is flexible to make a layout for two car garage, a two-car garage with a workshop, a three-car garage, and four car garage making this a plan ideal for anyone looking to make s large storage area. However, you need to have good carpentry skills to build a garage.
This free plan from Today’s Plans meets the regular standards and is ideal for average soil and weather conditions. However, it is always recommended to be reviewed by a building professional so that it is compliant with local standards.
This design from BuildEazy is often referred to as a Shell Garage. If you are in search of a plan where it will cost less to build your garage, this is the perfect plan for you as it does not require you to incur costs for the flooring. This garage gives protection to your vehicles and other items but might not be suitable for your items.
Before laying a concrete floor, this garage can be made. With some metal laid on the hard ground, it can serve the purpose of a garage floor indefinitely.
This detached garage designed by SDS-CAD Specialized Design Systems is a perfect design for not only providing space for the storage of two vehicles but also providing extra space for storing other equipment. The porch on the side of the garage adds a classy look to the garage providing a welcoming feel. You can also add a sitting area for relaxing outside.
This free garage plan from RONA is perfect for building a small storage place or garage for parking a single car with 16 x 22 feet in dimensions. If you invest more, you will be able to change the look, but the functionality of this structure remains the same. This plan requires some experience, so building contractors are recommended to lay the foundation for this project.
It usually requires ten days to complete the project and before starting, get in touch with the local authorities to know the local basic requirements and standards.
If you are looking for a basic structure for storing or protecting your belongings or vehicles, this free garage plan of 14 x 24 x 8 feet by SDS-CAD Specialized Design Systems is the ideal choice. Though very basic in structure, it has a nice look with a door, window, and garage door.
Another multi-functional and basic garage plan from SDS-CAD Specialized Design Systems allows you to park larger vehicles. On top of that, it provides extra space to store your other equipment and is preferred mostly by farmland owners who possess a truck and need additional storage space. The dimensions are 24 x 20 feet with a 7 feet garage door.
This is another single-car garage plan specially designed to create a workshop in the additional space it provides by MyOutdoorPlans that serves as an excellent functional addition to your property. You can park one full-sized vehicle and also a side entry door making the entrance and exit convenient. Proper planning is required to lay a strong foundation for the garage to be built so that it is durable. Also, durable lumber is recommended to be used in this plan like cedar, pine, or redwood.
This free detached garage plan from HowToSpecialist is a simple design and very easy to construct and follow the steps. When it comes to creating a small garage for one car, good quality materials and proper planning are required. It provides additional storage space for other tools or equipment. Also, you can fit a workshop in the garage.
This free garage plan includes a list of tools, materials, diagrams, and step-by-step building instructions. The diagrams can easily be followed as it includes the corresponding letters of the materials used.
This free plan for your garage is perfect if you have plans to build a garage for two vehicles. Many people prefer this plan because of its feasibility. The site also has man-free double car garage plans.
This plan from Call Cad Northwest (CADNW) not only gives you the opportunity to park two vehicles but also provides an excellent storage loft which is 5 feet tall where you can store your other belongings and is easily accessible from the right wall. It is a 24 x 24 feet garage with a personal door on the right side and six feet wide window.
This garage plan is shaped like a barn where you can keep a minimum of two vehicles. It also provides the space to keep your hay, farm equipment, feed items, and others. If you want, you can also include a workshop here even after parking two vehicles. You want to add this garage to your farmland that provides a large storage space. Also, this plan complies with all the required DIY standards.
This garage plan adds value to your property. It provides added space for other storage and meets all the general standards. This design, however, requires some expertise in construction. This pole-framing construction, however, reduces foundation, excavation, and site work. Free plans bring so much value to us all and this plan is an extraordinary example, with proper instructions that one could truly follow.
This is a multi-purpose pole barn designed by Today’s Plans that can be used as a one-car garage, tractor or equipment shelter, shed, backyard studio, or workshop. It provides storage space and is inexpensive to build which suits your budget and also meets all the general standards. If you have a good knowledge of post-frame building methods, then only you should try this plan as it is not recommended for beginners.
This is another two-car garage from Today's Plans that can serve the purpose of an equipment shelter, a backyard studio, or a workshop. This pole-frame structure serves many purposes and a unique addition to your property. The storage loft has an outside door that makes it convenient. The loft space is 420 square feet with a floor space of 560 square feet.
This free plan from Instructables offers a large garage to have because it provides the space to park many vehicles or can be used for other storage purposes. You can also add a workshop to this structure. This garage has a nice look with which you are sure to be satisfied. Moreover, this plan provides you with the complete process of not only building a garage from the ground up but also includes details of getting the permits and need-based hiring of subcontractors.
This free two-car garage plan from Western Construction can also be called as an Attic Truss Garage Plan. From this very name, you can identify that it gives you the opportunity to add a small apartment in the garage or you can use this additional space for storage purposes as well. This unique feature of this plan makes it very functional for its ability to hold other equipment and multiple vehicles.
This is a typical detached garage from Western Construction that goes well with the modern house. It can also be referred to as a Storage Truss Garage, and as the name goes, this two-car garage plan provides additional space to store other equipment and tools and also you can add a small workshop.
This Standard Truss Garage design provides space for parking two cars. This garage plan designed by Western Construction is detached giving you the leverage of using it as a workshop as well. It is a 20 x 22 feet garage plan with all the features including 16 × 7 feet steel overhead garage door, a steel garage service door, and a Vinyl Slider.
If you cannot afford any of the garages to protect your vehicles but need to make one very urgently to protect your investments, this is the garage that can help. Though it is not a traditional garage, you can build this to park your vehicle for protection or store your farm equipment. Here is a detailed video that shows how to build this kind of garage and if you already have the required materials available, this can be made for free.
Some homeowners prefer carport plans as it is very convenient to build with basic carpentry skills. The attached carport plan is an extended structural framework with the apartment where you can park your vehicle for storage. It also gives protection and allows better ventilation. The lumber that you choose should be very durable for this plan.
This plan is very cost-effective, and the shelter gives protection to your vehicles from bad weather. This also requires very basic woodworking skills. However, attention to detail is very important because of the many legal codes that you need to comply with.
This free plan is very convenient as it provides additional space to park two cars. This construction also takes very less time and can be completed on a weekend if you hire a company like the Valley Restoration and Construction team. Pressure-treated lumbers are recommended for this plan as they can withstand rough weather conditions.
Even if you are inexperienced but want to build a carport with a gambrel roof and have additional space for storage so that it looks great and is durable, you can accomplish this task within a weekend as it does not require much effort. You can use the storage space to keep extra tires or some other equipment you may desire to make this plan very functional.
Garage plans can be expensive due to factors such as design complexity, professional architects' involvement, customization requirements, and additional features like extra workspaces or storage areas. High-quality garage plans often necessitate more resources, labor, and expertise, resulting in increased costs for homeowners.
Do garage plans include material costs?
Garage plans typically provide a detailed outline of design and layout, including specifications on dimensions, building materials, and required construction techniques. However, material costs are usually not included in the plan itself. Homeowners should seek separate estimates for materials and labor costs to obtain a comprehensive understanding of the total project cost.
Do garage plans require permits?
Garage plans generally require permits, as they involve significant construction or modification to a property. Local building codes and regulations may vary, so it is essential for homeowners to consult with their local permitting office and comply with the necessary requirements. Obtaining permits ensures safety, and compliance with local regulations, and helps prevent potential legal issues in the future.
Do garage plans use normal garage doors?
Garage plans incorporate specialized garage doors for vehicle entry, which vary in styles, such as overhead, roll-up, or sectional doors. The choice of garage doors is influenced by factors like convenience, space constraints, and aesthetic appeal. Additionally, normal doors can be included for pedestrian access, depending on design preferences.
Do garage doors include soundproofing details?
Garage doors may or may not include soundproofing details, depending on the specific design and homeowner requirements. If noise reduction is a priority, homeowners should look for garage plans that incorporate soundproofing materials and techniques, like using weatherstripping, insulation, and specialized garage door materials that can minimize noise transmission.
If you are looking to build a garage but finding plans that cost an arm and a leg, here's a list of the free DIY Garage Plans that you may choose depending on your requirement and budget. Whatever you do, be sure to protect your vehicles and find additional storage space.
What do you think about the free plans above?
We would love to hear from you in the comment section below.
There’s hardly any space that can match the functionality of a garage!
Be it for parking your SUV, storing equipment, or doubling up for an in-house workshop; the garage can do it all! Naturally, you'd want to keep it safe from theft as well as the adversities of the weather. But does this always correspond to the traditional overhead garage door?
While we don’t discourage opting for the much-tried-and-tested alternative, there’s no harm in going for an efficient option that complements your modern home in every sense.
So, today, we’ve compiled a list of the top eight garage door alternatives, complete with their pros and cons. Whether you’re moving into a new home or simply looking to replace the existing garage door in your home, give it a read.
Now, without any further delay, let’s begin!
Garage Door Alternatives
Roll-Up Screen
We start the list off with something simple yet effective. Roll-up screens made from metal are a popular choice among homeowners for keeping their garage shielded from the sun and pesky insects. Plus, they are relatively inexpensive compared to traditional garage doors, as you can easily buy one online at an affordable price.
Moreover, installing a roll-up screen won’t require you to strain your muscles. It can be installed with basic tools in a matter of minutes, and rolling the screen up and down feels natural. However, we’d advise opting for one that uses magnets, so that you don’t face any problems while opening and closing it.
On that note, we’d also recommend getting a roll-up screen hardware kit as it contains all the right accessories required for the purpose. These often come with detailed instructions that will make the process absolutely hassle-free, this means you will not worry about garage door repairs anymore.
Despite praising roll-up screens for their affordability and practicality, there are a couple of downsides that can’t be ignored. Roll-up screens don’t have a locking system, meaning they can be rolled up easily. This also makes them incapable of trapping heat, which is something you’d not want, especially in winter.
So, if you’re someone who keeps a lot of valuable equipment in the garage or wants to keep it insulated all year round, then roll-up screens might not be the ideal fit for you.
Barn Doors
A solid wood structure like a barn door can be the perfect replacement for a conventional garage door. Its heavy-duty design is a more secure option than roll-up screens, and a simple latch-lock will keep your garage safe from unwanted intruders. Plus, these are quite capable of insulating the space on cold days.
Appearance-wise, barn doors render a distinct rustic charm, which will appeal to those who live for the down-home or countryside vibe.
Apart from that, there are a number of ways to go about this option. For one, you may decide to purchase an old barn door and restore it as required. Not only does this cut down on the overall remodeling effort, but it will also cost less.
On the other hand, DIY enthusiasts can take on the task of building one from scratch (there are various YouTube tutorials available). Although it won’t burn a hole in your pocket, this method does involve a fair bit of measurement and wood-cutting. But this shouldn’t be a problem for those who are familiar with the basics of carpentry.
You may even choose to buy a barn door hardware kit that should be available in any major hardware store. Since it includes both the tools and the door, the installation becomes somewhat easy. However, it will cost significantly more than the previous option.
Carriage Doors
Now that we are talking about DIY garage door alternatives, here’s another option to please the woodwork enthusiast in you. Carriage doors, too, have an old-school charm that provides your garage with a welcoming look.
Building a carriage door doesn’t require much work. First, construct a frame that perfectly fits the garage opening. Make sure you don’t leave any space between the floor and the frame. Next, cut vertical sections or boards to make the actual door. You’ll also need to add some hinges and a latch in the middle for the two doors to close together.
Some homeowners may also decide to build a little window on top of each door or add multiple small square windows for facilitating ventilation. Again, this will depend on how much effort you’re willing to put in for building the door.
The important thing to note here is that constructing a carriage door is a rather time-consuming task, even for the pro-DIY-ers. Thus, people who aren’t good at handling tools like hammers and saws may find it difficult to fathom the process. And if you’re running short on time, it’s probably better to look elsewhere.
Sheet Metal Doors
Sheet metal for a garage door may not paint the most visually pleasing picture in your mind, but it’s an efficient alternative nonetheless.
It’s a really inexpensive option that saves quite some money versus buying a traditional garage door. All you need to do is cut the metal sheet according to the size of your garage opening and convert it into a door by fixing some hinges and a handle.
The easiest way to go about building a metal sheet door is by employing the swing door design. Just like any other swing door in the house, this door will swing outwards on the hinges to give you access to the garage. Furthermore, a simple latch is enough to secure it firmly. However, be informed that this won’t create an air-tight seal, thereby affecting the insulation.
Many homeowners also prefer having a rolled-up metal sheet door, but building one the DIY way requires much time and effort. Considering that you have all the right tools and a decent work experience with metal, both options shouldn’t make you break the bank.
Sliding Doors
When it comes to user convenience, there’s hardly anything that can match the utility of a sliding door. It’s a no-brainer that sliding doors find a preference, irrespective of the garage size. The touch of class and sophistication on offer certainly amps up its appeal!
Like many other alternatives on our list, sliding doors also have a couple of different styles. The most common design is where two doors slide away from the vertical centreline of the opening. That being said, you may also opt for multiple narrow vertical panels on either side, which ultimately culminate in a bigger door. Furthermore, you can install a remote-controlled system for greater convenience.
Sliding doors are pretty expensive, and there are a number of things that should be kept in mind while installing one. First, the tracks don’t always sit firmly on the ground, which affects the overall orientation of the door. Hence, its weather-resistance ability is quite low compared to some other alternatives. Besides, the accumulation of dirt and debris requires frequent cleaning or even replacement.
Folding Doors
Folding doors have several advantages over conventional overhead doors in the sense that permit easy entry and exit while fully optimizing the space. Simply put, these doors don’t reduce the height of your garage, and neither do they narrow down the width of the garage opening.
Bi-fold doors, which are made of twin horizontal slats that fold outward and slide on a track, are generally preferred for small or medium-sized garages. When opened, both doors stack on either side to provide a completely unobstructed view. Thus, driving your vehicle in and out of the garage won’t require added effort. Moreover, they are available in a variety of materials, including UPVC, aluminum, and timber.
Larger garages may require a four-fold door to cover the entire opening, which operates in the same way as a bi-fold door with two extra slats on each side. Owing to the additional moving components, the four-fold variants usually require more maintenance and frequent servicing. Plus, a heavier material like aluminum can put undue stress on the rest of the structure.
Side-Hinged Doors
Side-hinged doors feature perhaps the most uncomplicated mechanism, and they can be either motorized or manually operated. If you don’t have a lot of space inside the garage to install a swing door, then a side-hinged door can be the perfect alternative.
Besides, there are almost zero chances of the door crashing on you, even if spring breaks. And these can be built from virtually any material, be it wood or metal. However, side-hinged doors aren’t entirely free from flaws.
In case you don’t have adequate space outside the garage, then these doors won’t be of any use as there won’t be enough space for them to open into. For instance, the door will invariably hit your car if it’s kept too close to the garage. Likewise, more than 6-inch snow on the ground will cause an obstruction for the door opening.
Tilt-Up Doors
In terms of appearance, tilt-up doors closely resemble overhead garage doors, except for a single panel instead of multiple horizontal sections. These doors are affordable, but they do come with a fair share of drawbacks.
Because they have a single heavy panel, regular lifting of the door puts a significant strain on the motor and other parts of the frame. Long story short, you can’t expect a long service life without hefty maintenance or replacement needs.
Unlike roll-up doors, tilt-doors kick out upon lifting, which again requires sufficient space on the outside. So, make sure that the adjoining driveway is kept free from potential obstacles for the door to operate smoothly.
Final Words
Now that you have a list of the best garage door alternatives, which one would you pick for your future home?
If you ask us, we’d say that there isn't a ‘one-size fits all’ policy. Choosing the right garage door alternative requires you to take into account various important factors like the available space, preferred material, budget, and additional considerations such as garage door soundproofing.
Roll-up screens are affordable, but may not be a very secure option. On the other hand, both barn doors and carriage doors require substantial woodwork knowledge and building time; buying a ready-made version may be a costly affair. Sheet metal doors are pretty secure and can be made either in the swing door or roll-up design. While a folding door results in an obstructed driveway, both side-hinged and tilt-up doors require sufficient clearance.
Soundproofing is another crucial element to consider, especially if you have a home workshop or use your garage for various activities. A well-soundproofed garage door can significantly reduce noise levels, providing a more comfortable environment for you and your neighbors.
With this comprehensive guide, we leave you to make the final call. But here’s a pro tip: regular maintenance will help you avoid an intensive garage door repair session in the near future. Remember to not only prioritize the design and materials but also the acoustic performance and functionality of your chosen garage door alternative.
There is nothing quite like a relaxing warm shower after a long hard day at work. You just cannot put a price on that experience.
This article is meant for those who are looking to elevate their shower experience with a design that is worthy of being featured in any modern sci-fi movie. And we have something for everyone. Be it ultra-luxurious, minimalistic and modern, whimsically futuristic, or showers with cool tech; we have them all. So, read along to get inspired to build your very own dream futuristic shower.
Effortlessly Futuristic - The Beautifully Simple Shower
Minimalistic, modern, and beautiful, these are some of the words that can aptly describe this cool shower design. This truly is a shower that you can envision in a home of the 2040s. The impressive part of this design is that it manages to look futuristic without any special lighting effects or hi-tech shower gadgets.
One of the design elements that certainly help with the futuristic appearance is the surreal frameless window. Needless to say, it is the most dominating element in this shower. The rest of the elements are minimalistic, and that results in an understated elegant look. An item we recommend you use to get this look is the KES X6223 Bathroom Single Handle Shower Faucet Trim.
More details at www.houzz.com
A Futuristic Shower With An Incredible Floor
If the last shower design was too simple for your taste, then you should surely check out this incredible shower enclosure. Although this shower looks quite ostentatious, it is mainly due to the highly contrasting floor and wall elements.
While this shower has large rainfall showerheads, we absolutely love the unique hand showers. However, the star of the show is surely the ingenious drainage system integrated into the floor. It is not only functional, but it also looks quite amazing, wouldn’t you agree?
All in all, this shower enclosure is tastefully finished, and all the elements along with the lovely blue accent lighting work cohesively to give it a futuristic vibe. We recommend using this product to bring about the futuristic look: SR SUN RISE SRSH-F5043 Bathroom Luxury Rain Mixer Shower Combo.
Diego Granese’s Masterpiece – The Amazing Loop Shower
The futuristic Loop Shower is not just meant to wow people with its amazing design; it is actually one of the most thoughtful and functional showers we have ever come across. How, you ask? Well, all the showerheads are positioned perfectly to offer you with the ultimate massage experience. Moreover, you can not only place it in an indoor environment but also install it outdoors. That is impressive to say the least.
Now that we have introduced the shower to you let us talk a bit about the man behind this incredible idea. The Loop was designed by Diego Granese for idiha Design,and we believe this is one of the most iconic shower designs in the contemporary world.
This shower can only be afforded by the highest echelon of the society. And if you are one such person, then go right ahead and click on the link mentioned below the illustration. The rest of us can only dream of experiencing this grandiose shower.
Take a look at this futuristic shower column. It looks absolutely stunning, doesn’t it? This particular shower column is the etoile 160 from HafroGeromin. It is the pinnacle of the etoile range and one of the finest shower columns from the luxury brand. Needless to say, it does not come cheap.
However, unlike the Loop Shower featured above, it is more reasonably priced. In fact, depending on the model, you will be spending somewhere between $ 1250 and $ 2700.
The top-of-the-line model featured in the illustration below comes with a dispenser, showerhead with chromotherapy, radio, thermostatic taps, handheld showerhead, three whirlpool jets, and two shelves. While the radio is surely a unique feature, we believe that the most impressive element of the shower column is the amazing showerhead with chromotherapy. In other words, the showerhead can change colors to adjust body vibrations to frequencies that result in health and harmony.
This stellar shower column manages to combine futuristic technology with luxury, and that surely makes it worthy of any high-end contemporary home.
More details at hafrogeromin.it
The Sleek and Minimalistic Shower
Few showers can be as cohesive in design as the one featured in the illustration below. Impressively, it does not have any ostentatious or high-tech elements, and yet it seems like it will feel right in place in any luxurious home 20 years from now.
There are a few elements which truly stand out in this shower, and those are the impressive showerhead with teal accent lighting, the wooden benches, and the wooden floor which also integrates the drainage system. In fact, the floor is quite similar in functionality to the second shower design featured on our list, and the wooden benches also follow the same design philosophy.
Use the product given below to get this system up and running.
Who said that you need cool accent lighting and hi-tech gadgets to make your shower look futuristic? Just take a look at this magnificent shower featured in the illustration below. Not only does it look extremely classy, but it also looks well-suited for an elite bathroom of the 2040s.
Although the shower cubicle looks fantastic, the standout element for us would have to be the glowing white floor. It truly looks mesmerizing, doesn’t it? To top that, we’re leaving you with an excellent suggestion as well!
Vertebrae by Paul Hernon - The Swiss Army Knife of Showers
Feast your eyes upon the Vertebrae. This is a shower from the future and for the future. Although this might not have the most elegant design, there is no denying the fact that this is the most versatile shower ever made. In fact, it is so much more than a shower.
The Vertebrae houses an adult shower, children’s shower, a module for flushing toilet, two storage units, basin along with shower controls, and last but not least, a toilet with two cupboards for toilet rolls and brush. This truly is the Swiss Army knife of showers.
This magnificent shower is the brainchild of award-winning designer Paul Hernon. Hernon designed the Vertebrae with small apartments in mind, and a versatile shower such as this can really save a lot of space. However, we must say that it does not come cheap. This product will set you back by at least $ 12,000. Then again, the Vertebrae is a revolutionary product and one that can make a major impact, if used across many homes.
The Brilliant Roca Cocoon Shower By Arina Komarova
Just take a look at this magnificentshower. Although the Roca Cocoon Shower and Bath exists in our current timeline, it looks more fitting in a high-end bathroom from the latest Blade Runner movie, doesn’t it?
This incredible shower was designed by Arina Komarova, and while it may be incredibly ostentatious, it surely does not lack any functionality. In fact, the Cocoon Shower integrates a bathtub, hydro massage, shower into a single enclosure. Moreover, it features a customizable lighting system that lets you set the mood for any occasion.
The Futuristic Shower Enclosure With A Comfortable Seat
If the last shower design was a bit too whimsical for your taste, then you surely need to check out this amazing shower enclosure from the future. This shower’s post-modern era vibe is surely due to its unique inverted D shape, and the cool blue LED lighting.
If you are looking to build a shower enclosure similar to this one, then we suggest you invest in a high-end hand shower as that would be the most comfortable while you are sitting down. Moreover, we believe that you should switch the standard blue LED light with a customizable RGB one.
If you already have a shower, feel free to use the seat given below.
Grandiose? Check. Futuristic? Absolutely. Opulent? Without a doubt. This epic shower designed by the Young Brothers is one among many incredible shower designs. Their resume is truly incredible.
Other than the Granite walls, we love the rainfall showerhead with integrated lighting. However, if we had to change something about this shower enclosure, then it would have to be the hand shower. We believe that a premium shower column with body jets and a minimalistic hand shower would look much better.
More details at youngbrosinc.com
The Ultimate Blend Of Industrial And Futuristic Design
Not everyone is after minimalist futuristic designs. Some people also love an industrial look. And this shower is exactly meant for those people.
This shower has a brilliant blend of industrial design with futuristic elements. We love how the rustic walls complement the hi-tech shower gadgets. It truly is a work of art.
Take a look at this sleek ultra-modern shower. Looks surreal, doesn’t it? Needless to say, the dominating element of this bathroom is the incredible shower cubicle. We absolutely love the rainfall showerhead with integratedteal accent lighting.
Notice how the colors of all the elements save for the lighting, falls only in the grayscale. That really makes it feel way ahead of its time.
Delta T17264-SS-I is an excellent model to achieve this look.
The Award-Winning Futuristic Bathroom By Jordan Smith
Tasteful use of colors in the grayscale means that you will almost certainly end up with a futuristic design.And this stellar bathroom does exactly that.
Although the design may not be as mesmerizing as the last one, it will surely appeal to those looking to build a medium-sized bathroom. Moreover, this futuristic bathroom has a cool trick up its sleeve. The blue tinted window you see in the background has the ability to change colors. Yes, that’s right! Now, now, before you get too excited, let us tell you that it can only switch between clear and blue. But,that is impressive nonetheless.
Cool blue LED lighting? Check. Tastefully finished Stainless Steel inserts? Check. High-quality shower components? Check. Ladies and gentlemen, we have the makings of awinner here!
This feels like a shower from a Sci-Fi movie, doesn’t it? Moreover, the impressive part of the shower is the fact that it does not need any lavish or hi-tech elements to look futuristic. It does so with the use of intelligent lighting and a stainless-steel door frame. However, if we had to add something to this stellar design, then it would have to be RGB mood lighting.
Get your own LED shower by clicking on the image right below!
The Futuristic Shower in an Upscale High-Rise Apartment
Have you wondered what a shower would look like in afuturistic upscale high-rise apartment? Well, wonder no more. Just take a look at this amazing shower design.
While the interior of the shower is quite incredible, it is the view outside that is truly mesmerizing. We can only imagine the sense of relaxation you would experience in this shower.
When it comes to theinterior, we absolutely love the rainfall showerhead with integrated LED lights. Even the wand-like hand shower looks quite fitting in this environment, doesn’t it?
However, if we had to change something, then it would surely be the windows. We believe that only frameless windows can do justice to the incredible view. And it would be even cooler if it hada frameless color changing window like the one from the “The Award-Winning Futuristic Bathroom by Jordan Smith” featured earlier.
More details at allarchitecturedesigns.com
The Perfect Blend Of Minimalism and Luxury
If you are someone who has not bought into the cool blue LED lighting craze, and want something that is luxurious and futuristic, then this shower design might just be it. This amazing shower manages to look futuristic with just the use of classy colors and premium shower components.
We absolutely love the contrast between the white tiles and dark wooden walls. It looks stunning, doesn’t it? Moreover, since this is a compact shower area, the placement of body shower jets on either side of the walls results in a serene experience.
As we progress through the timeline, our gadgets, homes, cars trend towards greater comfort and convenience. So why not showers? And this is exactly where the incredible laying down shower steps in.
This luxurious shower features six rainfall showerheads which are meant to cover the entire length of your body. On top of that, it also has a cool wand-like shower for added convenience.
All in all, the laying down shower is not only a lavish experience, but it also feels futuristic.
More details at www.providr.com
Be One With Nature With This Stellar Shower With Frameless Glass Walls
What better way to finish of our list than with this surreal shower! At first glance, it may seem like an outdoor shower. But, look again. Yes, this shower is covered by frameless glass walls which truly let you be one with nature while having the comfort and convenience of an indoor shower. We can only imagine the experience of taking a warm shower under a starry night sky.
Although this shower does not have any lavish elements apart from the frameless glass walls, it does come at a cost. And that would be the constant maintenance to keep the glass crystal clear. Then again, for an experience as amazing as this, we are quite sure that many would be more than willing to do so.
That brings our article to an end. We hope that you are now inspired to build your very own futuristic shower. And remember, simplicity is the key. You do not always need to install stupendous gadgets to make your shower feel ahead of its time.
If you live in an area with harsh winters and freezing temperatures then you are definitely thinking about incorporating a fireplace in your home if you still don't have one. The fireplace is a great solution for you when it comes to warming up your home and making it more cozy and enjoyable especially if it's big, open and spacious. The two-sided fireplace is perfect for the open-plan homes and will serve as a focal point in the area. Check out the Functional Double-Sided Fireplaces For Your Spacious Home and enjoy the warmth from two and more rooms in the home. Think about placing them between the kitchen and the dining area, the dining room and the living room or any other two rooms. Style your open space with class and recreate some of the designs below!
The double-sided fireplace will serve you as an amazing room divider and will help you define the areas in your home while keep the space open. You can enjoy the warming flames both from the living room and the dining room, and winters won't be so despised anymore!
If you really hate the cold temperatures during winter, the double-sided fireplace is a must for you. In this way you won't have to light a fire in two rooms in the house, and you will save yourselves both time and wood.
Despite having functional purposes, these double-sided fireplaces will also make your home more beautiful and stylish. You can decorate it with bricks, stones, tiles or leave it plain as it is. See which design will work best for your existing decor and copy the look.
Fireplaces have been a part from people's homes since ancient times and they are part from the modern homes as well. They are luxurious show stopper and they tend to grab everyone's attention.
What do you say about this super functional double-sided fireplace that has also storage in its design? The wood will be stored closely to the fireplace and you won't have to bother to go outside and grab wood when you need to fill in the fire.
Aren't these double-sided fireplaces just marvelous? Instead of warming a single room you will warm up the whole open-space in your home quickly and easily! Go ahead, add one in your home and you will never regret it! You will enjoy winters more and feel the coziness in your living space!
Possessing a house is easy, making it a home for yourself and your family is another matter entirely. Most of us tend to forget that our personality, style, choices are reflected by our abode, intentionally or not, willing or not, reason for which deciding on an overall decor scheme easy to implement and follow all around the house is crucial in achieving an uniform, complex and balanced interior design. Today we have chosen a funny topic, a funny pattern that can be used as a general theme in your decorating process: the polka dot decor.
Patterns, textures come in everyday to save a design, to give it complexity, depth, feeling and to transform a rigid form into a comfortable interior. The polka dot pattern can be used in such a manner if controlled properly and in the right amount. It can add character to a blank wall, freshen up an old piece of furniture or create the right delicate serene ambiance of a nursery. Let's take a look at a few polka dot decor ideas and how anyone can add this fun pattern to their home.
diy polka dot painted fabric tablecloth
If choosing the polka dot as a general theme for the home seems a bit over the top, try and add the pattern to several items used rarely such as a tablecloth. Suitable for fun parties, use fabric paint to add the colorful dots to a simple table cloth that will lively up your party decor in no time.
When throwing a dinner party, even the slightest tines detail counts. Invest time in creating delicate gold polka dot painted table napkins for an extra elegant touch.
Transform basic simple white party hats by adding colorful polka dots patterns. Choose a color theme or even better, allow the kids to decorate the hats themselves for a creative party.
As you might know by now we are truly adept at the recycling process. Here the basic mason jar has been transformed into delicate pastel flower vases with the cute polka dot pattern added gently.
If you are in search of the right polka-dot decals or the most colorful polka-dot wallpaper, search no more and make your own using paint and a round sponge.
Take a cheap basic $1 store mirror and transform it into something unique and rustic looking by adding a pallet wood frame painted and patterned with polka dots.
A burlap piece can be used as the base for a fragile lace polka dot table runner, the contrast will add more delicacy to the lace and enhance the pattern.
A pure white baby bedroom deserves some color and fun so choose a bright red polka dot fabric that will enhance the purity of the white ensemble and add a cute elegance to the room.
Are you bored of the same old kitchen cabinets? If remodeling the kitchen is not an option, make use of polka dot decals to transform certain areas of your cabinets such as the dishwasher.
Decorate the kid's room with colorful felt polka dot garlands. Teach them how to make them themselves.
Source
wooden striped and polka dot pumpkins for fall decor
Fall decor is something we invest time in each year so why not try something new this time? Create geometric wooden pumpkins and use patterns and paint to transform them into lively decor.
Last but not least, if you are bold enough and wild enough use bright hues and polka dot patterns to turn an old staircase into something fresh and childish.
Polka dots, stripes, chevron, no matte pattern, it is known that character comes in all forms and colors, even in the wildest ones. Have you ever considered using polka dots in your decor? Feel free to share your ideas on this topic in the comment section below.
Having a chest freezer can be a great asset - if you know how to make the most of it!
With some careful consideration and attention, you can maximize your frozen storage space to fit all of your frozen items without overcrowding.
Start by getting rid of anything that isn't necessary to store in the chest freezer. This will clear up valuable space that would otherwise go unused.
Then, consider organizing what is left over with baskets or dividers so that everything in your chest freezer fits neatly and accessibly.
With these tips and tricks in mind, you'll soon have plenty of freezer space for all your frozen needs - from frozen veggies to frozen pizzas, ice cream and more!
Freezer Organization Ideas to Make the Most of Your Chest Freezer
Knowing where and how to store things inside your chest freezer is important. An organized freezer results in a happier user!
You'll have more space to work with, and you don't have to worry about digging around to find your frozen pizza box.
Here are different ideas to help you start your chest freezer organization.
1. Take Everything Out From the Freezer Before Organizing
The first step to chest freezer organization is to take all your frozen foods out and see how much room you have.
Once you've cleared your freezer, take this opportunity to deep clean it using hot and soapy water. You can wipe the inside and remove any nasty stains and odors.
It will also help if you throw away items past their expiration date or are no longer in use.
2. Use Clear Containers or Containers With Clear Tops
One of the easiest ways to find frozen items is to put them inside clear containers. You can easily identify what they are without opening all the lids.
You can spot your chicken thighs and chicken nuggets immediately! As an alternative, we also recommend labeling your containers.
This way, you'll know which container is which, and you don't have to play a guessing game anymore in your chest freezers.
3. Utilize Vertical Space
Utilizing the vertical space of your chest freezer gives you more storage than you can imagine. You can stack things on each other and keep your freezer organized.
The best way to utilize the space is by putting your food inside containers or ziplock bags. Laying them on top of each other will be a lot easier.
More importantly, you can easily pull them out of your deep freezer without messing up your organization system.
4. Have a Freezer Inventory
We've all been in this position before where we blindly buy everything we can get our hands on in the supermarket. Do we need all of them? Not necessarily.
All this ends up in your chest freezer, some ending up unused or expired. To avoid this, inventory your deep freezer to know what items you have.
This will help you buy necessary items, leaving enough room for all your essential food items inside the freezer.
5. Label Everything
Label everything you can find inside your chest freezer to identify them easily. You can independently select the item you need without guessing what it is.
Consider your label maker as your best friend for this dreaded task. Alternatively, you can write directly on the containers using a dry-erase marker.
You can complete this task in no more than an hour and enjoy an organized freezer right after.
6. Freeze Flat
If you usually have a ton of leftovers in a day, consider packing them inside a vacuum seal freezer bag and freezing them flat. Label the bags and put them inside your deep freezer.
Freezing them flat helps you stack them on each other, leaving you with a more organized freezer, even if they're all just leftovers.
We also recommend that you freeze flat other food items such as broths and sauces. You can pull them from your fridge for your next recipes.
7. Vacuum Seal Bags
Vacuum sealing is one of the best tips that helped us organize our deep freezer. It left us with so much space compared to putting them in random takeout containers.
The whole process will take you only a short time to do! You'll also be able to put more food in your bins.
You can store them longer in your freezer bins without worrying about them getting spoiled. This idea is also perfect for the best mini freezers out there.
8. Organize Food by Expiration Dates
We hate wasting food, so we vacuum-seal our leftovers for future consumption. An important step in this process is finding out when they may expire.
You should put highly perishable items at the front, which must be consumed immediately. While those that still have a long way to go, you can store them behind the freezer.
It also helps to write down the expiration date on the containers or packaging. This saves you the trouble of always reading the fine print in the packaging.
9. Group Foods by Category
Grouping your food by category helps you know where to grab which item from. It's also a great way of memorizing the contents of your entire freezer.
Organize your freezer based on food items like vegetables, baked goods, meats, and more! You can create your system to help you familiarize yourself with your chest freezer better.
Create drawers and sort them properly, like putting the milk crates on the door shelf.
10. Create Zones for Different Foodstuffs
In general, you should place the meats in the bottom freezer. This ensures it doesn't leak over other food items if anything happens with the bag or container.
Vegetables must be placed in wire baskets or separate from the meat section. You can pack the veggies inside containers to prevent contamination.
You can put condiments on the door shelf of your fridge and other items that don't expire easily.
11. Use Different Organizers
Thankfully, there are a lot of organizers that can help you sort your freezer situation. Our favorites are boxes and zip-lock bags because of their versatility and reliability.
But we've also found a few other items to help organize your chest freezer.
Take your dollar store bins, wire shelves, magazine holders, and value pack boxes, for example. You can use them as deep freezer baskets and containers to sort and organize your food.
12. Rehouse Food Into Storage Containers
Don't leave your leftover food on a plate; pack it in a container instead. Doing this leaves you with more room for other items.
The same goes for other food items you plan to use later. Put them inside a bag and store them inside freezer bins.
Just be sure you don't keep them too long in your fridge to prevent any freezer burn.
13. Prep and Freeze Individual Meals
If you're fond of meal prepping, this idea is for you. Pack your meals individually to easily take them in and out of the freezer.
This is perfect for people who are always on the go without worrying about portioning their meals before leaving home.
You can conveniently store the individually packed meals in the top freezer storage!
How to Organize Other Types of Freezers
Are you having trouble finding the best way to store your items in the freezer? Withvarious shapes and sizes of freezers, there can be no one-size-fits-all solution.
That's why it's essential to know what type of freezer you have so that you can find the best way to organize your food!
We've compiled a few useful general tips on how to properly maximize your freezer's storage potential.
1. Side-By-Side Refrigerator Freezer
There's a special way of organizing your side-by-side freezer because it offers a lot of storage space. Even the doors have storage containers to put all your things.
One of the most important things to remember is never to put your important items on the door.
Tips for Organizing a Side-By-Side Freezer
Here are some tips to help you organize your fridge, yielding more freezer storage.
Stand things up and position your bags in a horizontal position.
Utilize makeshift drawers such as magazine holders and bins to organize your freezer.
Remember to label the shelves to make sure you can find your items easily.
Best Place to Store Your Food
The door shelf is the warmest spot in your freezer. It's the perfect spot for food that doesn't expire easily, like nuts and flour.
The top layer of your freezer is the best place to store baked goods, like cakes and bread. The bottom shelf should be reserved for meats and other items that leak easily.
Depending on how you want to organize your freezer, you can reserve the middle shelf for other items, such as veggies and ice packs.
2. Bottom Freezer Refrigerator
Bottom freezer refrigerators are small and compact. Therefore, keeping your freezer organized is a priority.
A great idea we can share with you is putting all your produce in separate tub containers. You can stack them on top of each other and take advantage of your freezers' depth!
Tips for Organizing a Bottom Freezer
Because bottom freezers have limited space, we've listed some of our favorite tips to help you get by.
Place organizers and baskets inside your chest freezers.
Purge and clean your freezer of any expired and unusable items.
Organize your freezer storage bins based on the group type.
Best Place to Store Your Food
For this freezer type, all your food ends up in the bottom of your refrigerator. But that doesn't mean you can't organize it properly.
Reserve the shallow upper drawers for items like your ice packs and butter.
The main drawer, on the other hand, should contain the bulk of your items, like your meats and vegetables.
3. Top Freezer Refrigerator
Your top freezer needs as many storage bins and deep freezer baskets as possible. Luckily, there are a lot of DIY ideas you can use as freezer storage.
Typical top freezers leave little room to store your things, making it hard to fit your favorite goodies.
Tips for Organizing a Top Freezer
Use freezer bins at the very top of your freezer.
Make sure to label your bins so you can easily identify them.
Group your bins according to the food category.
The door is the warmest spot, so avoid putting items that melt easily. Instead, utilize the space to store nuts, flour, and some of your dinks.
You can use the top shelf for your favorite veggies, waffle boxes, and ice creams. Just reserve the bottom shelf for your meats or leftover items.
4. Upright Freezer
Upright freezers are easy to organize since they provide enough room for your food, even in large quantities!
Just make sure you have an effective system that can help you keep your freezer organized.
Tips for Organizing an Upright freezer
Use one type of container only so stacking them will be easy
Make use of bins as drawers to keep things organized
Follow the storage and cooking instructions to be sure
Best Place to Store Your Food
We recommend putting your favorite pizza boxes on the top shelf. You can also include your leftover liquids like soups and sauces.
The bottom should be for items that leak easily to prevent any freezer mess up. This includes meat and ice cream.
As for the middle shelves, you can use them to put your chest freezer bins for your veggies and slices of bread.
Now that you know how to organize your chest freezer, what are you waiting for? It's time to start packing and start organizing the best refrigerators you have!
You'll have a lot of fun throughout the process and might even find it therapeutic. The results are worth it because it's one less clutter to clear.
We hope you enjoyed this article! Let us know which great tips we shared that you enjoyed the most.
Also, feel free to share this refrigerator organization idea with your friends and family who might be desperate for a freezer cleanup.
An ideal companion to all kinds of construction work, the Freeman PFR2190 Framing Naileris an exceptional product to choose.
Now, are you wondering what exactly constitutes a flawless nail gun? We will tell you that the right one fits into your work schedule effortlessly, helping to finish the task at hand in a breeze. But there are different factors determining if one is suitable considering the volumes and sizes of nails that are needed.
This device is designed to work with 21-degree full head nails and functions superbly for all kinds of installation and construction work. We have used it for subflooring, wall sheathing, and side installations and honestly, it works like butter, even on the toughest of surfaces.
Construction Applications: Designed for framing, subfloors,...
Compatible Nails: 21 degree plastic collated full round head...
This nailer impressed us with its wide variety of nails that it could work with. Its capacity ranges from 2 ⅜ to 3 ½ inches straight and ring shanks. Most fail to work with both of these types, but this one stands out.
And that wasn’t the only aspect of its versatility that impressed us, as it operated at 70 to 115 PSI. Known to be one of the most robust and dependable devices, it can prove to be a valuable addition in your arsenal. But how exactly? We will move on to its extensive bells and whistles to tell you just that.
Jamming
Now, if one says that a nailer will not jam, they are clearly under a misconception! Every nailer, however good, jams at one point, the only difference is its frequency. With Freeman, jams and misfires are rare occurrences, and every time they do occur, it is very easy to reload and begin working again.
Working with hard surfaces
The product works superbly well with wooden surfaces. You will feel like nailing through butter; such is the convenience provided. This level of smoothness is further enhanced by two fire triggers.
One of them is secured to the gun itself while the other is a rapid-fire trigger. If you are working with very hard surfaces that are usually difficult to penetrate, this rapid trigger will help immensely. This is handy for all kinds of jobs, from flooring and framing to wood box assembly, pallet building, and fencing.
Ease of use
Do you plan to work for long hours? Every professional knows how strenuous it may get for the hand while using a nailer for long. But this unit takes care of it with its brilliant grip and lightweight design. It is easy to lift and hold, and the grip is quite comfortable.
With a magnesium body and ergonomic, secure handle, what more could you be looking for! Also, it features anti-vibration comfort. This prevents the product from vibrating too much while working, thus, in turn, reducing the strain.
Depth Adjust
Those who are into professional drilling will know that surfaces vary in depth a lot. While some surfaces are easy to nail through, others may be very deep and may require more pressure. To make sure that you do not go wrong here, this product features a depth adjusting mechanism. You can customize the firing depth according to your needs to achieve consistency.
No-mar tip
While you are at your job, it is very easy to leave scratch marks on the surface that is being worked with. We have faced an issue with this many times, especially when the surface is smooth, and the tip of a device is sharp.
But with a rubber tip which guards the metal underneath, there will be no dents to worry about. You can always aim for a clean, professional finish thanks to this.
Now, if you are working with a slippery surface, the rubber can be removed too. Once you remove the rubber, you will be able to expose the teeth. This will help grip the surface better and make sure that there is no misfiring.
Prevents dry firing
These kinds of gadgets can often be damaged if they are fired without nails inside. It is not possible always to keep a count of the number of nails left in the chamber. But with anti-dry fire, no nails will be fired as soon as there are less number of them left. The stock needs to be replenished before the device starts working again.
Anti-dust cap
A significant problem for a nailer is the accumulation of dust inside the body. This happens especially when you need to store it for long. But with the anti-dust cap, the internal parts are well protected and remain clean even if you store it for long.
360-degree adjustable air exhaust
Another brilliant feature we cannot miss out on is the adjustable air exhaust. You can adjust it in such a way so as to keep the air away from your face while working. It can get quite annoying if the air flows directly into your face and may disrupt the work. But now it is 360 degrees adjustable.
Moreover, this can also be used to clean the work surface before you begin nailing. It will efficiently blow away dust and debris, letting you work in peace.
What Could've Been Better?
We found that though the anti-dry firing was beneficial in keeping the device from getting damaged, it also proved to be a bit of a hindrance. The gun would automatically stop without you realizing, and it would hang suddenly in between work.
We would have preferred it if there was a small window that let us view the number of nails inside. This would alert us if there were a lower number of nails, and we could work till the last nail before replenishing it. A window is essential, to say the least.
Another thing which disappointed us a little is that it has more recoil than other devices in the same range. This led to the plastic of the nails to fly off in any and every direction. This could hurt you, and thus you need to be careful while working.
Again, nothing is perfect, and we will not hold these two drawbacks against the exceptional list of features that accompany this product.
Pros
Compatible with nails ranging from 2 to 3 ½ inches
360-degree air exhaust
No-mar surface and no-slip teeth
Lightweight and durable
Interchangeable trigger for more power
Ergonomic grip for comfort
Tool-free finger depth adjustment
Cons
No window to view nails
More recoil than other devices
Framing Nailer Buyers' Guide
A good nailer can make or break your day. It has the power to allow you to work efficiently and quickly, or it may cause work to lag. So choosing the right sort of nailer is vital. Now it is not enough to know the names of the best nailers; you also need to make sure that it fits your specific needs.
We have listed down some of the essential points which you should keep in mind before making a purchase. Read on to know all about them.
Size of nails
There are many sizes of nails in the market, and different nail guns work with different sizes. It is crucial that you check the size of the nails you want to use and then go for a product. They vary in size capacity and cannot fit in nails, which do not fall under the mentioned size limit.
Heaviness
Imagine having to work for long hours with a heavy gadget? It sounds like a colossal task, right! People often do not pay attention to this in the beginning, but, in the long run, suffer a lot. Always choose a lightweight device that is easy to carry.
Also, bulky devices become a hindrance in case you are working with tight spaces. What happens is that space is already less, and a heavy and bulky machine cannot function in it. You will not be able to hold it properly and so it is best to choose something versatile enough to be used everywhere.
Firing methods
There are different firing methods that enable you to work smoothly. From contact or bump firing to single actuation, full-sequential and single-sequential firing, check the details of the device to know what your device supports.
While bump firing allows one to drive nails in succession, single sequential firing stops you from doing so. So you need to understand your needs before buying a device as it is very easy to go wrong here.
Safety features
Never ignore the safety features as any injuries with a malfunctioning device could be fatal. The 360-degree adjustable air exhaust is a useful feature because it prevents air from directly blowing into your face.
Also, the no-mar tip protects work surfaces keeping it safe from scratch marks made by the metal tip. Another thing to do is wear safety goggles because the plastic of the nails may come flying at you.
Grip
A good grip can help you a lot in the long run! The hand faces severe fatigue when working for long hours, and an excellent soft grip can work wonders to ease the pain. Always check on the grip and see the features it comes with.
An excellent choice would be to go for one which absorbs vibration from the machine and releases half the pressure build-up. Anti-vibration technology goes a long way in making sure that your hands do not face too much stress.
Freeman PFR2190 Verdict
If versatility is on your mind, you cannot go wrong with the Freeman PFR2190. With a hoard of features and top-notch quality, it gives you the most bang for the buck. We found it to be a pretty affordable device.
Also, the safety features and the ease of use is quite impressive. We have been using the product for almost a year now, and there are no signs of wear and tear. The body may be lightweight, but it is pretty sturdy and does not get impacted by bumps and jolts.
It is now time for you to buy one for your projects. If you have any further queries, let us know in the comments section below.
From sturdy timber workbenches to collapsible and portable designs, with this free workbench plans list you can create a functional and customized workbench inexpensively.
Imagine having your very own workbench, a dedicated space where you can bring your projects to life.
Well, guess what? Today, I am going to share the 19 best workbench plans that are available for free. With these easy-to-follow plans and some basic tools and materials, you'll be on your way to creating your own custom workbench in no time. So, let's get started.
1. The Timber Workbench by John Ostermann
The Timber Wood Workbench is a stunning example of craftsmanship and ruggedness. Constructed from hefty logs of pine, this sturdy workbench exudes a masculine appeal. The combination of wood and black pipes adds an industrial touch.
Careful attention was given to preserving the natural characteristics of the wood, such as the live edge on the front plank.
Feasibility-wise, it's a dream come true. The step-by-step instructions are clear and easy to follow, allowing anyone to build this with confidence. If you're building the Timber Wood Workbench, you'll want to make sure you have a good jointer to smooth out any rough edges.
As I explored the workbench plan further, it demonstrated careful consideration and attention to detail. From the initial selection of pine logs to the final assembly, each step was thoughtfully executed to create this sturdy and visually appealing plan.
2. Rolling Workbench by a Crafted Passion
For just under $35, you can have your very own workbench project set up, saving you tons of money compared to buying pre-built benches. The instructions provided are clear and straightforward, making it easy to follow along, even for beginners.
This easy workbench plan is designed to be portable, thanks to the use of swivel casters. It can easily be customized to include a built-in router table.
The detailed cut list and tool requirements are a huge bonus, ensuring you have everything you need before getting started.
Overall, it is a budget-friendly and practical solution for creating a well-organized workspace in your garage. And with a few minor tweaks, you can make it totally stand out as the ultimate workbench.
3. Dave Flanagan's Collapsible Workbench
This DIY workbench plan offers a major advantage: it's collapsible! When it is not in use, it conveniently folds to only a few inches, saving space in your workshop. This feature alone is a game-changer for those of us with limited storage space.
This folding workbench plan provides clear and detailed instructions with diagrams that make the construction process easier to follow. After giving it a go, I think it's definitely worth considering if you are in need of a collapsible workbench.
4. Workbench And Outfeed Table Plan by Jen Woodhouse
With just a few studs and sheets of MDF boards or plywood, you can construct this mobile workbench in lumber. Plus, the plan provides some handy tips along the way, like using magnetic strips to hold screws and drill bits and adding a second shallow and small shelf for easy access to power tools.
Another great aspect is the mobility of this DIY workbench. It's built by locking swivel castors, making it easily movable despite its large size.
After putting it to the test, I think this mobile workbench plan offers a solid foundation for a versatile and functional workbench. It's affordable, offers some clever features, and can be paired with a benchtop planer for added versatility.
5. DIY Workbench With Circular Saw by Fine Woodworking
This DIY workbench plan only requires a circular saw and a cordless drill. That means you don't need a whole arsenal of expensive power tools to get started. It also uses common lumberyard supplies and can be paired with an electric hand planer for added efficiency.
This workbench plan emphasizes simplicity and practicality and provides detailed instructions. The DIY workbench itself is described as rock-solid and includes a video specifically designed for woodworking.
I also loved the fact that they offer a free pdf download of the plan, so you can have it handy while you work. It's perfect for beginners, it's affordable, and it provides a solid and practical woodworking bench plan.
6. Rogue Engineer’s Easy Portable Workbench Plan
This do-it-yourself workbench plan comes with clear instructions, a cut list, and a printable PDF. You only require a few tools like a miter saw, brad nailer, and tape measure.
This workbench also includes storage space and is heavy-duty enough to handle a variety of tasks. Moreover, this heavy-duty workbench can be made in just 30 minutes.
It's an affordable and practical solution for those who need a portable and heavy-duty workbench. Definitely worth checking out.
7. DIY Workbench by Projects With Pete
This workbench plan provides a detailed list of supplies needed, including lumber, screws, stain, and more. DIY Pete does a fantastic job explaining each step, making it easy for beginners to follow along. The plan includes a video tutorial as well.
The design is practical and efficient. It has a spacious top, sturdy legs, and a bottom shelf for storage. The addition of a caster wheel allows for mobility, making it versatile for different work areas.
The plan emphasizes safety, which is a responsible approach. It's budget-friendly, well-explained, and offers a practical design.
8. Simple Workbench by Wayne of Woods
The design is practical and space-saving. Since it has no legs touching the floor, it's easy to clean and provides a solid work surface. It's especially great for confined spaces, like a garage. The top surface is made of particle board and is easy to customize for a larger bench.
The plan offers step-by-step instructions with accompanying images, making it easy to follow along. If you're looking to build a DIY garage workbench, this plan is worth checking out.
9. Garage Workbench by Lowes
This garage workbench plan is an excellent choice for those looking for an affordable and customizable DIY workbench project. It offers different dimensions and customization options to suit your specific needs. You can choose the depth, width, and height of your workbench based on the space you have available.
The instructions provided are clear and detailed, making it easier for DIYers of all skill levels to follow along. The plan covers everything from assembling the substrate and sending it to attaching the workbench rails and legs. It even provides formulas to help you calculate the size of the different components based on your desired dimensions.
It also includes casters for mobility, making it convenient to move around. It can be paired with a table saw for optimal results. This plan uses wood glue and a brad nailer to attach the shelves and provide extra strength and durability to the overall structure. The author also mentions outfitting the workbench with favorite power tools, showcasing its versatility.
Through my practical knowledge, I can say that this workbench plan offers a cost-effective solution for small workspaces. The instructions are clear, and the design is practical.
11. DIY Workbench by Handyman
The free workbench plan by Family Handyman is not only simple to build but also budget-friendly, costing between $51 and $100. It's designed for beginners, so even if you're new to woodworking, you can tackle this project with confidence.
The cutting diagrams and step-by-step instructions make it easy to follow. The workbench features a lower shelf or drawer for storage and offers the option to add accessories like a pegboard, a bench vise, and even a power strip.
The best part? It only takes about an hour or even less to build this workbench. So, if you are short of time but in need of a functional workspace, this plan could be perfect for you.
12. Sturdy Workbench by Ana White
The workbench plan from Ana White aims to provide a sturdy and functional workspace. It is designed to be beginner-friendly, so it's perfect for those new to woodworking. The plan calls for basic tools like a tape measure, circular saw, drill, and drill bits.
The construction process is straightforward and well-explained, with step-by-step instructions and clear diagrams. Ana White emphasizes the importance of safety and advises checking for squareness after each step, which is a great tip for ensuring accurate results.
Moreover, this workbench plan offers the know-how to customize the width of the bench by adjusting the length of the shelf supports.
The design of this workbench is relatively simple. It consists of upright members fixed to the wall, top and lower shelves, braces for support, and wire cable or chain to hold the top shelf in place when folded down.
You'll need some basic materials like wood, screw, and nails to bring it all together.
The wall-mounted feature is definitely a highlight, as it saves valuable floor space in a small workshop. Additionally, the folding mechanism allows you to conveniently tuck the workbench away when not in use. It's a clever solution for those who need a functional workspace but have limited room.
It's a great concept with space-saving features, but the absence of precise measurements and instructions is a letdown. If you're up for a challenge and enjoy improvising, this might be a fun project to tackle.
14. Simple DIY Workbench by Popular Mechanics
The plan starts off by emphasizing the simplicity of the design, using ordinary construction lumber, lag screws, dowels, and threaded rods. It's great for those on a budget or looking for a straightforward build.
One of the highlights of this plan is its flexibility. It encourages customization to suit your needs, allowing you to adjust the bench's height, size, and top material.
After giving it a go, I can say that this is a fantastic addition, as it lets you tailor the workbench to your specific requirements.
The instructions provided are clear and concise, making them accessible for DIYers of various skill levels. Additionally, the plan includes helpful tips and recommendations for tools and materials, making the project more manageable.
15. Simple Workbench by Octane Press
This plan promises a simple and sturdy workbench that can be built in 2-3 hours. The construction-grade pine lumber used in this plan keeps the cost down, making it an affordable option.
The instructions are straightforward, and as mentioned before, you won’t have to spend a ton. The plan includes a detailed cut list and provides tips on using the right tools, such as a circular saw and a cordless drill.
It offers a simple and sturdy design that can be customized to your needs. The detailed instructions and affordable materials make it accessible to DIYers of all levels.
16. Tablesaw Outfeed By WOOD Magazine
This workbench plan offers some impressive elements that make it stand out. It sits ¼" lower than a table saw, which makes it usable as a table saw outfeed table.
Another great aspect is the inclusion of drawers that slide out from both sides of the bench, providing easy access to all your stored tools and materials. It's always a bonus when a workbench offers ample space without sacrificing functionality.
The plan provides clear instructions, accompanied by helpful images, making it easy for both beginners and seasoned woodworkers to follow along.
From creating the end frames to drilling the mortises, the steps are well-explained, ensuring a smooth and enjoyable building experience. It combines practicality, functionality, and ease of construction into one fantastic package.
17. Knock Down Workbench by Woodcraft
The design of this workbench revolves around a bolt-together frame. The joints are secured with hex bolts, making them accessible to anyone with basic supplies. This design not only works well with hardwood but also with cheaper construction-grade lumber.
The plan provides flexibility in choosing the dimensions of the benchtop based on your intended use. It does provide guidance on calculating the frame size and the length of the stretchers.
You have the option to choose either soft maple or glued-up hardwood for the legs. Overall, this free workbench plan from Woodcraft offers a simple and sturdy solution for those in need of a reliable work surface. The design is well thought-out, and the instructions are clear and detailed.
18. DIY Kids Workbench by Fix This Build That
This kids' workbench is designed to be a functional and safe workspace for your little ones. The plan includes constructing a shelf beneath the work surface, perfect for storing tools and supplies. The materials required for this project are also easily available. Plus, there's a pegboard on the back for easy tool organization and cleanup.
What sets this plan apart is the use of hidden pocket hole joinery. This not only makes the construction quick but also adds to the overall attractiveness of the workbench.
After a thorough inspection of the plan, I am really impressed with this one, as the clear instructions and detailed diagrams make it easy for even a beginner to follow. The design is practical and safe for kids, and the use of pocket-hole joinery is a smart choice.
19. Classic Workbench by Allcrafts
This free workbench plan is suitable for someone looking for a traditional European-style workbench. It features both front and end vises with dog holes in the top. It can be constructed with dense hardwoods such as ash or oak.
The plan includes a recessed tool shelf, and you can adapt it to your needs. It also includes clear pictures and helpful instructions to assist you with the process. It is suitable for someone with basic woodworking skills. Overall, the plan is well-written and easy to follow.
Can a workbench be used with power tools?
Yes, a workbench can be used with power tools. It provides a stable and secure surface for operating power tools such as drills, saws, and sanders. Just ensure that you have enough space and a sturdy work surface to safely use the power tools.
How long does it take to build a sturdy workbench using free plans?
How long it takes to build a sturdy workbench using a free plan can vary depending on the complexity of the design chosen and your skill level. For a basic workbench, it can take anywhere from a few hours to a full day to complete the construction.
Are traditional workbenches suitable for beginners?
Yes, traditional workbenches can be suitable for beginners. These workbenches often use basic woodworking techniques like butt joints and are designed to be simple and functional. They are a great starting point for those new to woodworking projects.
How much storage space does a mobile workbench provide?
The storage space a mobile workbench provides can vary depending on its size and features. Workbenches with built-in shelves, drawers, or storage compartments offer more storage options, allowing you to keep your tools, supplies, and materials within reach and organized.
Are pocket holes used in basic workbench construction?
While pocket holes are not commonly used in basic workbench construction, they can be incorporated into the design if desired. Pocket holes provide a strong and concealed joint, which can be useful for attaching certain components or joining pieces of wood together. However, traditional workbenches often rely on simpler joinery techniques like adhesive, screws, nails, and butt joints.
Can a folding workbench be modified to include locking wheels?
Yes, a folding workbench can be modified to include locking wheels or casters. By adding locking wheels, you can enhance the mobility of the workbench, allowing you to easily move it around your workspace when needed and secure it in place when working on projects.
What are the benefits of a flip-top workbench?
The benefits of a flip-top workbench stem from its unique design that features dual work surfaces on one bench. With an integrated rotating mechanism, it facilitates seamless transitions between different surfaces or tool stations, making it extremely versatile. This design not only enhances workspace efficiency but also makes it highly functional and capable of managing various tasks or tools without requiring additional space.
These free workbench plans offer us an opportunity to embark on a woodworking adventure. They not only provide a blueprint for building a practical and functional workbench but also ignite a spark of inspiration and creativity.
The process of selecting the perfect design, envisioning the possibilities, and carefully crafting each detail is a true labor of love. As you follow the instructions and witness the pieces coming together, a feeling of accomplishment will fill in the air. The fact that you are not just building a workbench, but creating a space for yourself where your creativity can flourish, is truly inspiring.
As the workbench takes shape, it will become more than just a piece of furniture – it will become a symbol of your capabilities.
GIMP, the GNU Image Manipulation Program, is an excellent alternative to the widely used Adobe Photoshop for digital artists and designers.
Not only is it available completely free of cost, but it also comes with an extensive set of features and add-ons that makes it just as good as Photoshop when it comes to digital art and design.
While GIMP is primarily a photo manipulation program, it has become very popular among digital artists in the recent years owing to the extensive selection of brushes, plugins, and scripts that you can add to it without spending a dime!
However, you'd probably not be very impressed with GIMP's default set of brushes at first. Most of them are quite basic and limited as to what sort of art you can produce with them.
But the fantastic thing about GIMP is that it accepts both GIMP brush files, as well as Adobe Photoshop brush files. This basically means that you have access to both GIMP's extensive selection of brushes, as well as the entire set of tools from Adobe's library. So the availability of brushes and plugins for GIMP is absolutely staggering!
So if you are a digital artist working with GIMP and are looking for some cool brushes to enhance your art, we've got you covered!
Here are some of the best GIMP Brushes you can get online completely free of cost !
The GIMP Paint Studio, also referred to as GPS, was developed in order to emulate high-quality painting features within GIMP. Compared to a lot of paid digital painting applications, GIMP does lack a bit when it comes to digital painting, mostly due to the lack of good default brushes.
However, with great brush designs like these, doubled with superior brush engine settings, GIMP has undoubtedly closed the gap with some of the topmost digital painting applications out there!
The GPS brush set adds some crucial brush strokes and textures to GIMP that were not previously available. Every single brush in this set comes loaded with default presets that get loaded as soon as you select a brush. The number of presets is significant for a lot of brushes, and many of them even have complex sizes and pressure variations.
The behavior of every single brush in the GPS Brush Set is customizable through the ‘Tools' options panel. You tweak the presets according to your needs and even combine brushes with different presets.
You get a total of 102 brushes with the GPS Brush Set, all of which are great additions to your stock of tools for producing amazing digital art!
There's a ton of different Crack Brush Sets available out there, and one of the most popular among them is the FrostBo set of brushes. You get a total of 34, high-quality brushes in this set, all of which are customizable in size.
This set of brushes lets you generate some pretty amazing textures, something that is required by all digital artists in their work. While you can always download Creative Commons photos for adding textures to your work, there arises a lot of situations in which you need to generate textures through brushes.
The process of using these brushes is very obvious and straightforward, but the outcome is absolutely stunning!
When it comes to realistic-looking art, LJFHutch's Water Brushes can provide some of the most outstanding results when used appropriately!
A lot of artists often face problems while painting water using GIMP. This set of brushes was designed mainly to address this problem. They produce amazing photorealistic effects that can be utilized to paint some very real looking water in your art.
There are two different brushes in this set, one for painting water and another one for painting realistic looking grass. These are basically just ripples that can be added as highlights on top of any color to produce a more realistic effect.
These set of brushes were originally created for Photoshop, but thanks to GIMP's extensive support for Photoshop brush files, you can use them on GIMP as well. They are great for generating textures, as well as regular painting on GIMP.
These "brushes" have more in common with stamps rather than regular brushes because they don't really allow you to paint with "strokes." You need to do is choose a color and then stamp the splatters to generate textures.
You can use these brushes to create a base layer for further painting or utilize the different presets to generate textures as required.
The set comes with a total of 32 high-resolution splatter brushes and three high photo textures.
While you'd probably not find too much use of these brushes in your regular digital artwork, I felt this set was worth sharing simply because they are a great example of creative brushes!
This GIMP brush set was created by Chrisdesign using assets from the famous Fedora Art team member, Nicubunu. It's yet another example of how Creative Commons has expanded the availability of creative works for artists to use and develop further.
This set generates a whole set of playing cards as you paint. Use it in your next artwork to create something unique!
If you're planning on creating comic sequences, these brushes are a must-have in your inventory!
There's a whole range of Comic Bubble Brush sets available on DeviantArt for all those of you that need such brushes for your line of art. Almost all of them are highly customizable and come with a ton of presets to match all kinds of styles and requirements.
Even if you're someone that doesn't do comic sequences, you can find a use of these brushes in a variety of different artworks. Since GIMP isn't that great when it comes to line-drawn shapes, having these brushes can be extremely convenient if you need to use these things regularly.
These are some of the most useful brushes I've used in GIMP in a lot of the open-source work I did. These things have so much use in editing and creating content that they should have been provided in GIMP's default brush set.
The Arrow Brushes are fairly simple, yet infinitely useful. It is just a regular arrow that can be resized, given a color of your choice and then applied to any picture or artwork that you are creating.
These brushes are especially useful when it comes to creating tutorial and other types of informative documents. Simply using these arrow brushes can save you a lot of hassle while creating informative pictures, which you'd otherwise need to import in a software like LibreOffice Draw or Inkscape.
The direction of the arrows can also be changed very easily –
90 degrees points the arrow upwards
0 degrees points the arrow to the left
90 degrees points the arrow downwards
180 degrees points the arrow to the right
The Tango Arrow Brush is available for download on Slackermedia.
8. K04sk Brushes
This one is for all those of you that are into concept art, illustration work, character design, and other similar forms of digital painting. You can do some amazing things with this free to download set of brushes, provided you know what you are doing.
These brushes were initially developed for Photoshop but were later converted into a GIMP Brush set after their tremendous popularity. The K04sk Brushes are for advanced users and require a lot of practice to master. So if you're a beginner, you'd probably struggle at first with these.
However, if you give it enough time, you'd be able to master these and create some outstanding digital designs!
9. Digital Oil Brushes
If you're planning on replicating the feel of a real paintbrush on a digital platform, there are very few brushes that better at doing such a great job than these!
These brushes are simply brilliant in the way they emulate the feel and texture of oil painting. Digital Artists can make use of these brushes to impart a wide variety of unique effects to their work and even create paintings that come pretty close to oil-based paintings done on a traditional canvas.
There's a wide variety of customizations available to make them as convenient as possible. You can choose between wet and dry brushes, customize the sizes and even impart dirty or clean effects to your painting with these brushes.
With a total of 13 brushes included in this set, there will always be a brush to suit almost every style of painting you can possibly imagine.
When it comes to painting on a digital platform, it's pretty hard to emulate the traditional styles of painting unless you have access to a wide variety of sophisticated brushes. For this reason, the Artistic Brush Set was developed to allow digital artists to replicate a number of different styles, primarily watercolor!
Designed by a well-known contributor of artistic brushes named Chirsdesign, this set was developed mainly for GIMP artists. Every brush in this set has been designed using dry paintbrush and actual watercolors to make them as realistic as possible.
These brushes, when used appropriately, provide some outstanding final results!
If you're planning on doing a lot of graphic designing, then this set of texture brushes are a must-have!
Anyone with even a little bit of graphic designing experience knows how essential texture brushes are in this field. There's no end to the number of things you can do with a good arsenal of texture brushes at your disposal.
Even in traditional digital painting, these types of brushes are extremely crucial when it comes to generating customized textures on an artwork. With the right blend modes, opacity, and other settings, you can create some breathtaking artworks using these brushes.
This is one of the simplest yet highly versatile texture brush sets out there, allowing you to do a variety of things from smudging to regular painting.
12. Count Brush Set
If you're open to experimenting with different art styles and creating something unique, do check out the Count Brush Set containing 20 different brush styles.
You can use these brushes to add variety to your regular artworks, and even use some of the presets for painting. However, most of these aren't really made for painting. Most of these brushes are meant for adding textures to your painting or for giving final touches to a piece.
These brushes are quite unlike most of the traditional ones used for digital painting. It is best used for experimental painting and playing around with ideas.
This set of brushes is a game-changer for all those of you that are into character designing and creating comic sequences. Drawing hair on a digital application has never been easier thanks to these type of brush sets!
Most artists will agree that painting hair using the default brushes of any digital painting platform is a very complicated process. These brushes were designed to make life a little easier for those that struggle to draw hair digitally.
This Hair Pack Brush Set comes with a ton different presets, all of which are highly customizable. The size of blending and fly away brushes can be increased up to 1000px while texturing and layering brushes can go up to a highest of 500px. This makes the Hair Pack Brush Set an incredibly convenient choice for designing brilliant looking characters on GIMP.
These brushes can be incredibly useful in a lot of different scenarios to create realistic-looking smoke or for adding textures to an artwork. Explicitly designed for GIMP artists, this pack contains a total of 12 different brush strokes for creating highly versatile smoke effects.
These brushes are a must-have for all kinds of digital artists since smoke effects tend to be required very often in a lot of artworks. This set has three versions of smoke brushes-
This is one of the biggest collections of free GIMP brushes available for download. If you're looking for a wide variety of different brush strokes and patterns that will go along with a broad range of styles, this is an excellent collection of brushes to have.
This is one of those sets that every GIMP Artist should have irrespective of the skill level!
It has a total of 101 brush styles to suit a variety of different styles and concepts.
Originally designed for Adobe Photoshop, the Alex Ruiz Brush set is one of the most unique brush sets out there. This set is absolutely amazing when it comes to sketching, painting, and even rendering. There's just so much you can do with these brushes that it actually deserves an article of its own!
These brushes are surprisingly simple to use, yet they produce some of the most astonishing digital artworks when utilized by experienced hands. These custom brushes were designed from abstract shapes and are also great for experimental painting.
It includes plenty of different brush styles with a good variety of textured ink, pen and airbrush styles markings, apart from several complicated pattern brushes.
This is a set of brushes designed by the well-known artist Darek Zabrocki for professional digital artists working with a variety of different styles.
These brushes became widely popular among digital artists after the author posted a series of highly impressive speed paintings online. There were dozens of fans in the comments sections requesting Darek's brush set to be released which prompted him to compile this set of brushes on DeviantArt.
All the brushes in the set are of professional-grade and require experienced hands in order to be used appropriately.
Every serious digital artist needs this set of brushes added to their stockpile on GIMP!
These are some of the most versatile set of brushes that can be used to create a wide variety of artwork styles and concepts. They are especially useful for creating Manga drawings and comic sequences.
You might need to play around with these brushes a little bit before you get the hang of it, but once you do, there's no limitation to the variety of things you can paint using these brushes!
These brushes work best when used either with the pen tool or the bezier curves. They even replicate the "blot" effect of an actual pen at the beginning and end of every line/curve.
This set of brushes comes directly from the Artist’s personal pack and is one of the most versatile and diverse brush sets I’ve ever come across.
Every serious artist out there needs to check out this set, irrespective of whether you are a beginner or an experienced artist. There’s just so much to work with in this set, it's crazy!
No matter what your style, you’ll find a brush to work with in this set!
If your style of art requires you to paint a lot of animals, then this brush set can make your life a hell lot easier!
The Mane and Tail Brush Pack is great for drawing animal hair, especially horse tails and manes. While I agree that this is a little bit specific, but I’ve personally found this pack to be extremely convenient when painting animals.
So go right ahead and download this pack of brushes if you’re into painting animals.
21. Pencil Brush by Nari
DeviantArt user Nari has done an absolutely amazing job at making this set of easy to use and versatile brushes for GIMP.
It comes with a large and unique mix of styles which will allow you to add a lot of detail into any art piece that you are attempting, irrespective of the style that you're going for.
It has a lot more options in variety to choose from than the average 'free to use' brush packs that you get out there today. Each of the brushes and their varying textures allows it to be versatile enough to fit a variety of projects and will come handy for both private and professional purposes.
Originally Nari had included around 6 brushes in the pack, then extended it to 11, and gave them varying widths as well.
The sheer versatility of this pack makes it just perfect for serious GIMP artists, who are looking for some unique brushes to make incredibly detailed pieces.
However, this doesn't mean that beginners cannot get much use out of them. The brushes are quite user-friendly, and amateur GIMP artists can indeed get to learn a lot by using them
No matter which digital painting software you're working on, may it be Krita, FireAlpaca or even GIMP, drawing human hair and fur is one of the most difficult tasks to accomplish.
You may be able to represent a few strands quite well, but accurately getting a whole set of hair down is another ball game altogether.
And the right set of brushes actually do help to get human hair absolutely right. Now this brush set from the DeviantArt user el-L-en comes with 8 GIMP brushes which are specifically made to just create hair.
It's an amazing set to work with, especially for the more adept GIMP users, who are looking to make some very unique and detailed characters from scratch.
These brushes are not that easy to use, and you will need to have a solid grasp on most of the basic tools and features of GIMP to make the most of them.
So you are new to the platform, do look up some tutorials first, to help you get oriented with the brush styles and accurately represent hair the best to your ability.
It's not every day that you need to use a paint roller in your art piece.
Their use is rather limited in the field of digital painting, but there are moments when their unique texture is perfect for certain art styles and projects.
So if you're looking to make a detailed skyline on your next landscape painting, or thinking of ways to create a picturesque dungeon and cavern themed piece, then rolled paint will help you achieve that unique texture to make your art look very attractive and appealing to any onlooker.
The rolled paintbrushes from Redheadstock is made for both the updated versions of Photoshop and GIMP. And is it's more suited for use in GIMP 2.2 and above, you might experience some performance issues and bugs on the older versions.
Another fantastic aspect of this brush pack is that each brush style inside it comes with a wide variety of textures and width. So, apart from coloring versatility, it will allow you better control over all your pieces as well as the final layers and texturing of your art piece.
Jonas De Ro has made quite a name for himself in the DeviantArt community with some of his incredibly unique digital art and graphic design pieces.
And to help out the wider digital artist community with the GIMP platform, Jonas has created a massive brush set which includes a variety of styles from the more basic to the unique stroke textures.
The pack comes with over 40-50 brushes, and each of them has a rather unique feel to them, and are used differently as well as they vary in both stroke texture and width.
All the brushes in the pack can be subcategorized into 6 different sets:
Basic
Paint
Nature
Environment
Special.
Guides.
Out of all these categories, 'Guides' is the one that stands out more than the rest. The brushes here are used more to jot down an outline and set out ideas on the go and help you create a concrete theme for your next project.
The other brush categories are meant to take that concept and realize it in the form of a painting.
This entire set is simply one of the best for concept artists as well as storyboard painters. And as it's, perfect for character design, a manga and anime illustrator can indeed put them to good use.
If you are still very new to the field of digital painting and are much more familiar with your traditional sketchbook and charcoal pencils, then these pencil brush sets might just be all you need to get you well underway.
The real pencil brush set from Elmerucr feels a lot like graphite on paper and gives off this real pencil-like feel with every stroke.
This brush set comes with three different styles of graphite, which can allow you to fit these into a lot of art styles. Though not as varied as the Nari set, these pencils are versatile enough in terms of their texture and can help you get a lot done.
Their quality is rather high as well, and are also easy to use, making them ideal for both professional and personal projects.
They capture the traditional look of pencil on paper quite perfectly and can make your sketches feel very authentic indeed.
Conclusion
So there you have it, a list of the best free-to-download GIMP brush sets for digital artists of every skill level!
We have compiled some of the most popular and versatile brush sets that you can use to enhance your artwork and hopefully create some amazing pieces.
All of the brushes listed above are entirely free to download and can be used flawlessly on the latest version of GIMP. We hope that we've managed to help you out in finding some interesting sets for your work, and we wish you all the best for your future endeavors!
As you are reading this article, we are going to presume you know a thing or two about drilling holes.
Forstner bits and Spade bits are extensively used for this purpose. But which one does a better job? If that is the question on your mind, then welcome to our blog.
In this article, we are going to find out which tool does a better job. Apart from taking you through the basics, we will go into the details and comparison of these two tools, the purposes they serve the best, and how they differ from each other.
We are confident that you will have a clear knowledge of both these wood-cutting tools after reading this article.
So, what are we waiting for? Let us dive right into it.
Forstner bit is one of the most popular wood drilling machines. It was named after Benjamin Forstner in 1886, the person behind the invention of this tool. Forstner bits allowed woodworkers to make big holes without the lead screw and ensured that the workpiece was not damaged. In simple words, Forstner bit offers woodworkers cleanly drilled flat-bottom holes.
Moreover, Forstner bits are designed quite differently in this day and age than they used to be. You will find a sharp tip in modern Forstner bits instead of the lead screw and a split ring design. However, the purpose remains the same.
That’s not all; Forstner bits are used in places where the drilled holes demand absolute precision and neatness. For this, they are used with drill presses. Forstner bits can also be used with hand drills to gain further precision.
Spade bits are drill bits that are famous for boring holes in wood and have also been known as paddle bits in the past. They are mainly used for rough purposes where the speed is more important than the accuracy and neatness of the hole created.
Furthermore, Spade bits tend to splinter the wood while drilling through it. As a result, it is always recommended to drill the wood from both sides to achieve a cleaner finish. Spade bits are also used for making larger holes than those made by conventional twist drill bits. They usually come in sizes ranging from 1/4 inch to 1-1/2 inch.
Differences Between Forstner Bit And Spade Bit
There are a whole lot of differences between Forstner Bit and Spade Bit. We strongly recommend you go through this part to have a detailed understanding of both these tools.
Availability Of Sizes
Knowing how to choose a wood drilling machine is not enough; you need to be aware of the sizes they come in. That said, the size ranges of the tools mentioned above vary greatly. Forstner Bits come between 1/4 inch and 2-1/4 inch, whereas spade bits come mainly between 1/4 and 1-1/2 inches.
In general, however, Forstner bits give you a wider variety of options than Spade bits do.
Uses Of Forstner Bit and Spade Bit
The uses of both these products are quite different from each other. Forstner bits are used for drilling holes in hard material wood because Forstner bits are firm and solid. Forstner bits also come in handy in professional uses where the wood needs to be cut in a precise and decorative manner.
When it comes to Spade bits, they are mainly used for utility installation purposes that require drilling holes such as plumbing or drilling holes for electrical wires. Furthermore, spade bits prove to be more useful when one needs to drill a lot of holes in a limited amount of time.
Cost
All these products come from different brands, and that is why the prices vary greatly. This makes it almost impossible for us to tell which one of them is the most expensive and which one is the cheapest.
In general, however, spade bits are considered cheaper as there are no outer rims in spade bits, requiring fewer materials to be produced. Forstner bits are more expensive than Spade bits because it drills way better than Spade bits do, ensuring the accuracy and neatness it needs.
Neatness And Accuracy
If neatness and accuracy are not your priority while drilling a hole, we suggest going with a Spade bit as it facilitates drilling through the thickest of wood pieces. Also, it drills way faster than a Forstner bit. However, keep in mind that you need to take care of the workpiece as drilling it through spade bits is likely to make it prone to splinter.
And finally, if you are looking to drill only halfway through wood, we recommend going with a Forstner bit. Using it correctly with the help of a drill press will get you the neatest of cuts of the two options. A Forstner bit comes in very handy, especially when you are looking to make a flat-bottom hole.
Speed Of Forstner Bit and Spade Bit
When it comes to speed, Spade bits win the race by a mile. No doubt, Forster bits cut better with precision, but they are slow as it has a larger surface area.
On the other hand, spade bits have a lesser surface area, giving rise to less heat during drilling, leading them to be a lot faster than Forstner bits.
Winner
So, those were all the important details and comparison of the two products. But, don't you want to know which tool is the winner? Before we get to that, let us rewind a little bit and look at their differences if you are still not sure which one to choose.
Let us start with Forstner bits - they are useful in making flat bottom holes and also tend to deliver the neatest holes of the two.
Coming to Spade bits, they are the cheapest of all the two and are helpful in drilling rough holes through thick pieces of wood. Keep in mind; however, they do not deliver precision or neatness.
Keeping all the above points in mind, we suggest you go with Forstner bits because they are more efficient in cutting wood accurately. Even though they take a little bit of time and money, they are totally worth it.
Frequently Asked Questions [FAQs]
Here are some frequently asked questions about Forstner Bit and Spade Bit that need answering.
Which tool provides better results with a drill press?
Forstner Bit does a better job than spade bit when used with a drill press. Forstner Bit cuts precisely with its fine blade; it is much like a table saw. On the other hand, spade bits cut more like a chainsaw. When it comes to overlapping holes, you can drill them better with a Forstner bit.
With a drill press, the spade bits perform a lot faster, but they cannot match the versatility, neatness, and precision of Forstner bits. All these factors make Forstner the clear winner when it comes to drilling with a drill press.
Which wood-cutting tool is the most efficient?
Both Forstner bit and spade bit are efficient. However, spade bits are meant explicitly for high-speed use, and they also can be used to cut materials like aluminum and copper. Since they do not overheat quickly, they can also be used on plastic. The best part about spade bits is that they can be sharpened and even tuned up to create a cleaner cut.
On the other hand, Forstner bits are not meant for high-speed uses. They do not handle pressure very well, so you should be extra careful and use them at the slowest speeds. Forstner bits work well with drill presses because a drill press can control the downward force better.
So, while working on a rough construction, you must use spade bits, and for fine wood-cutting, go with Forstner bits.
Which wood-cutting tool cuts faster?
Hand downs, Spade bits do a better job in cutting wood faster. Since Forstner bit cuts wood precisely and accurately, they demand longer times. In contrast, Spade bits do not take as much time as Forstner bits because they have a lesser cutting surface area. They chop the wood with minor abrasion, so they have a faster cutting rate.
Which tool can drill slantwise?
Forstner can drill slantwise; the outer rim allows for that to happen. The rim blade gets stuck into the wood, which prevents any kind of movement or shifting.
On the other hand, you get only a pointy tip in the middle when it comes to the spade bit. This is why you have to apply extra pressure to ensure it does not move away from its position.
Which woodcutting tool does a better job in modifiable drilling?
While Forstner bits come in handy in drilling slantwise and precision drilling, Spade bits do a better job in modifiable drilling. A Spade bit lets you modify the form of the hole by simply tilting the sides. This adds to the customization as it enables you to sculpt a spot and even drill a very small hole.
Final Thoughts
So, that was pretty much all the details about Forstner Bit and Spade Bit. We are pretty sure that now you are confident enough to choose the best tool for wood cutting purposes. As a woodcutter, these tools are a must-have in the arsenal.
We hope this article has provided some valuable insights regarding these two popular wood-cutting tools. Each of these products performs better in their respective applications, so that is one thing you need to keep in mind before buying.
For further feedback or questions, drop a comment down below.
With that, we wish to take your leave. Until next time!


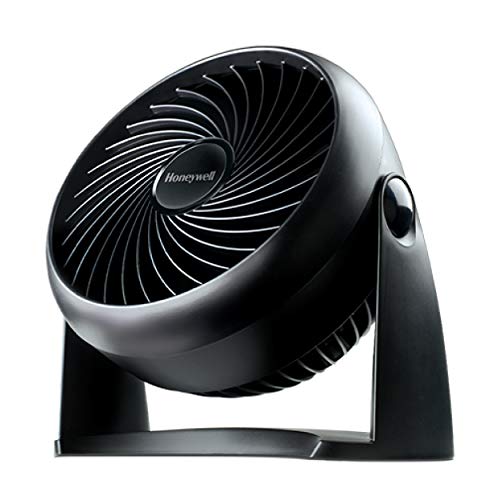

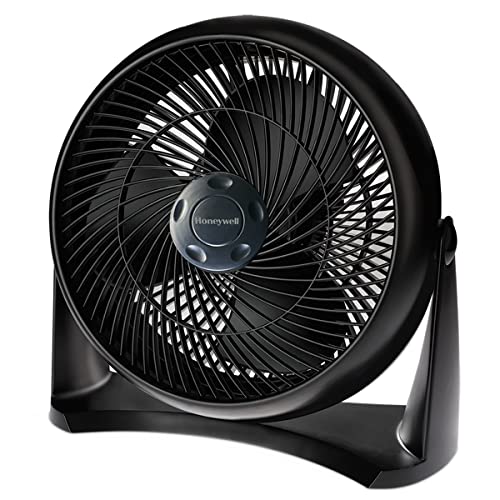
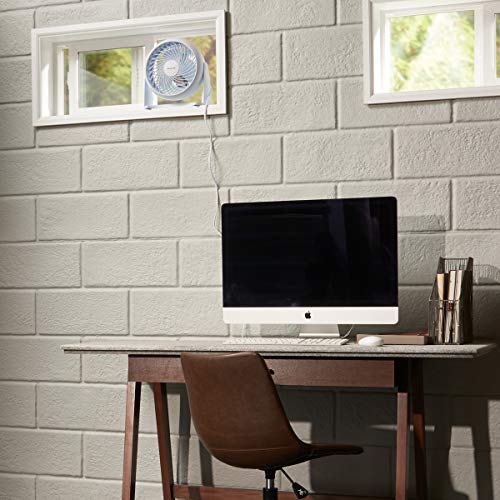


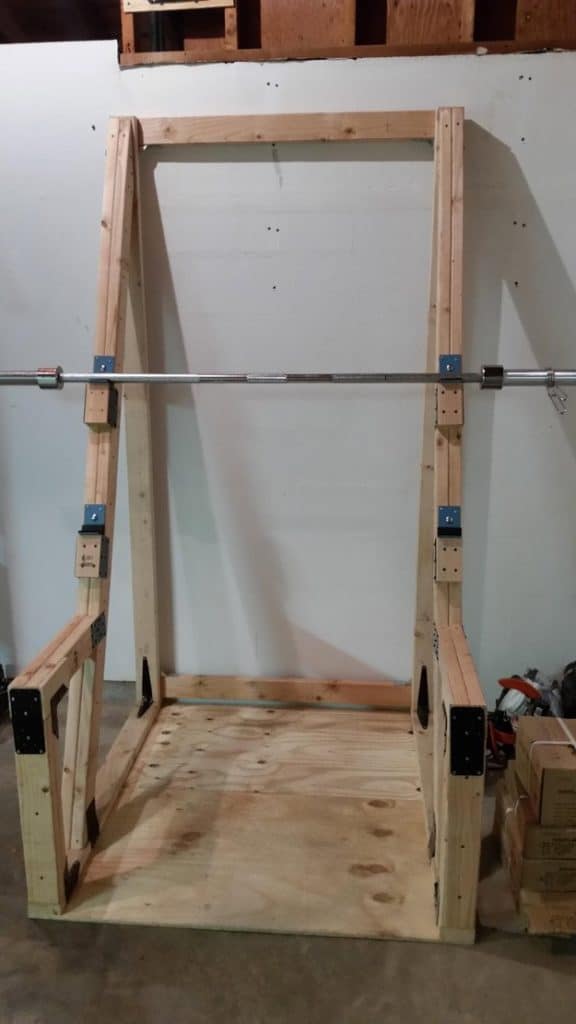
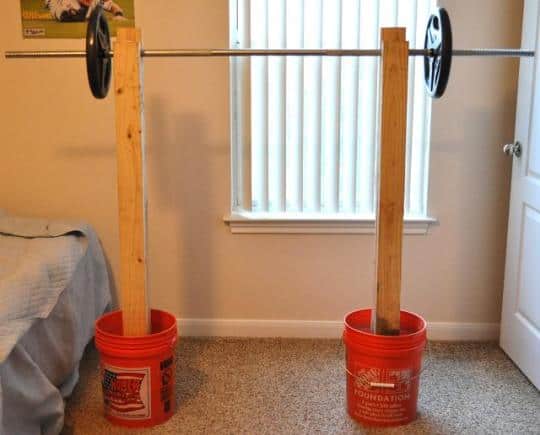
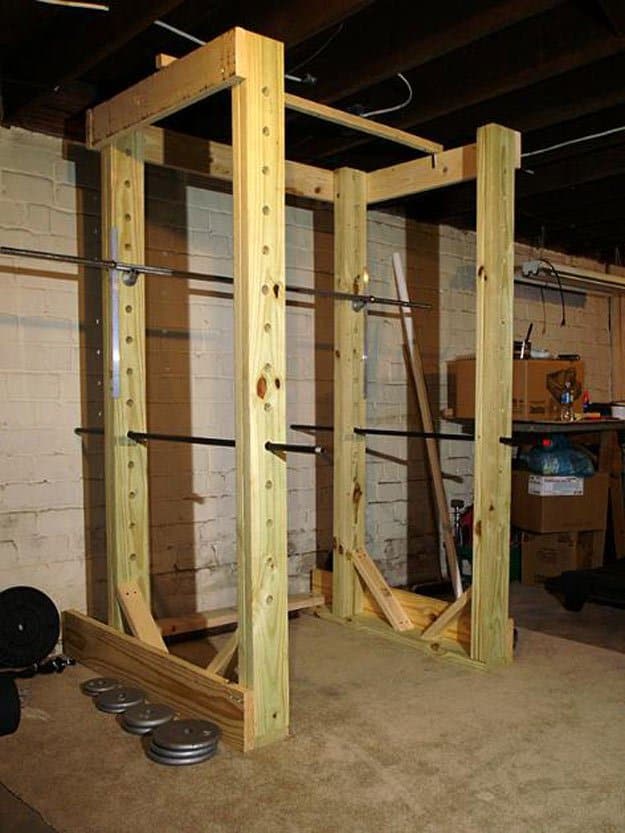
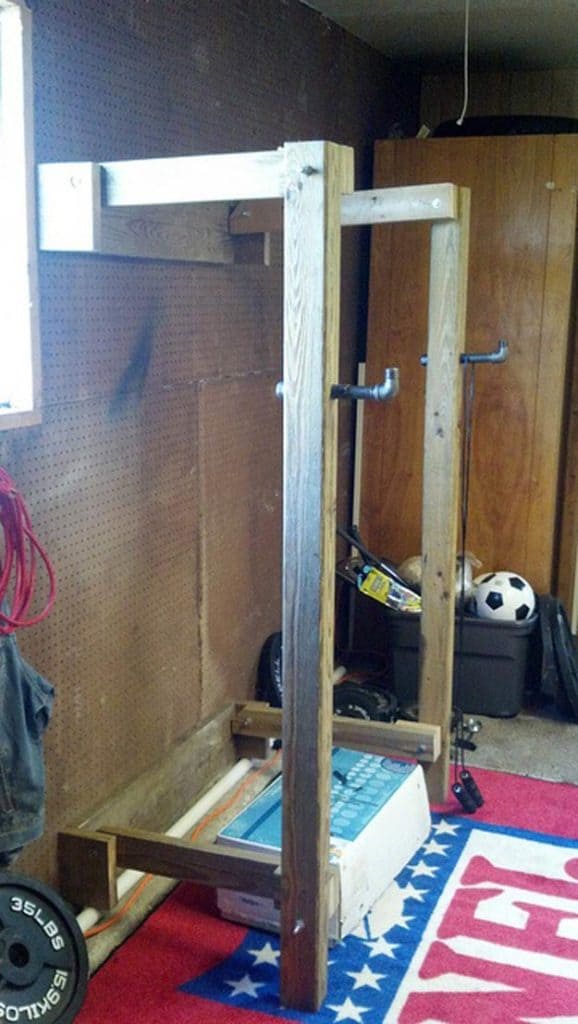
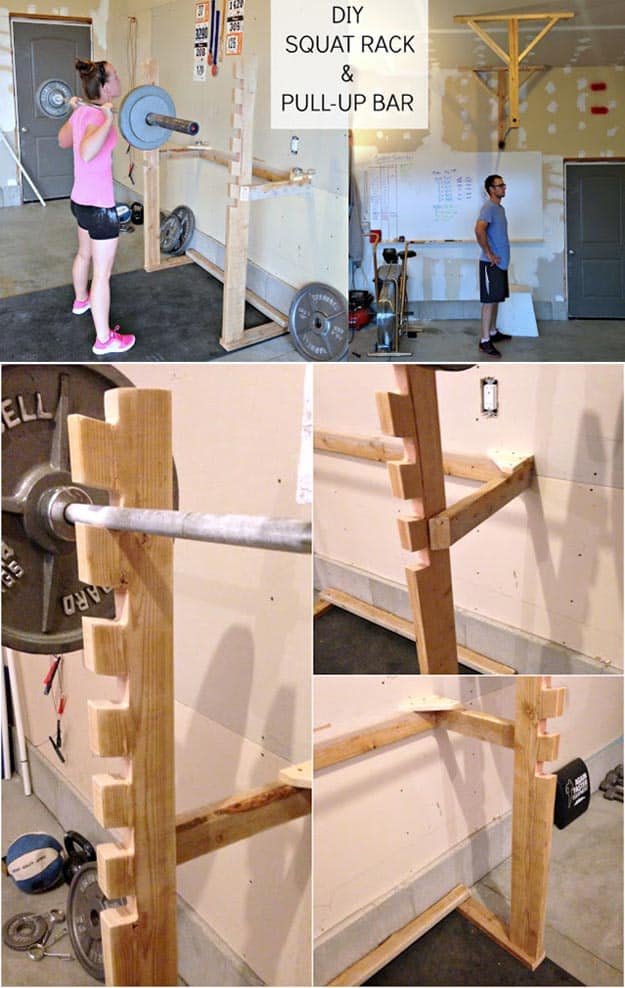
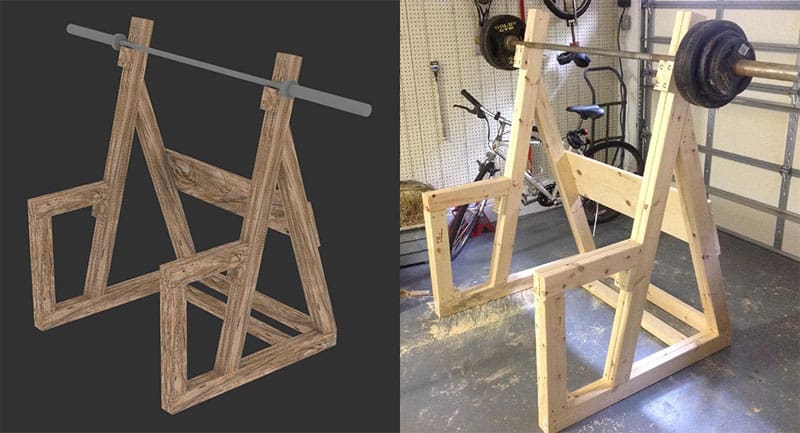
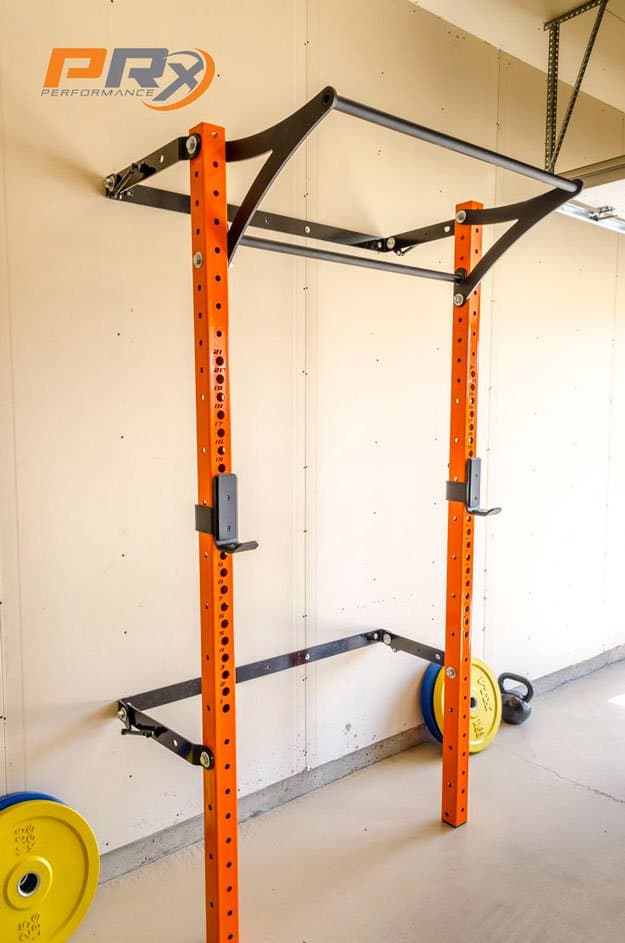
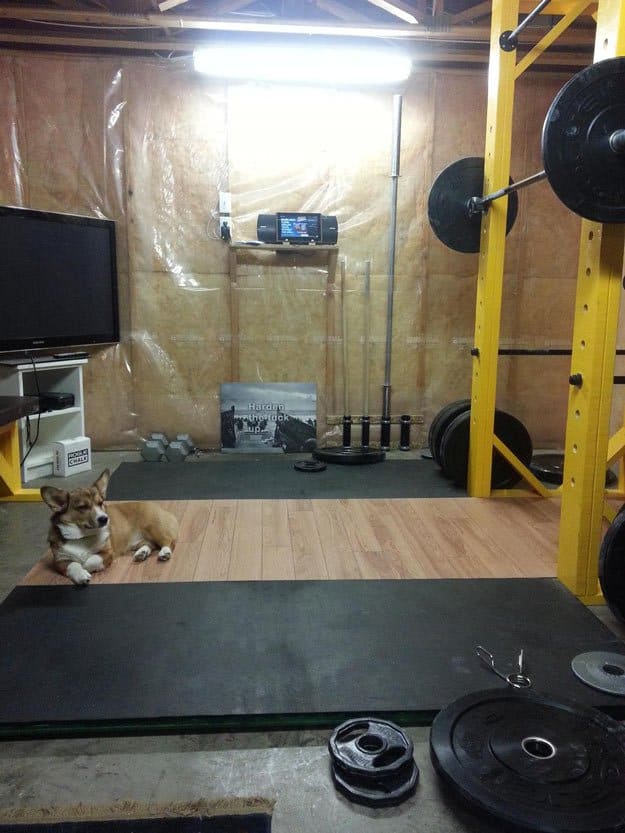
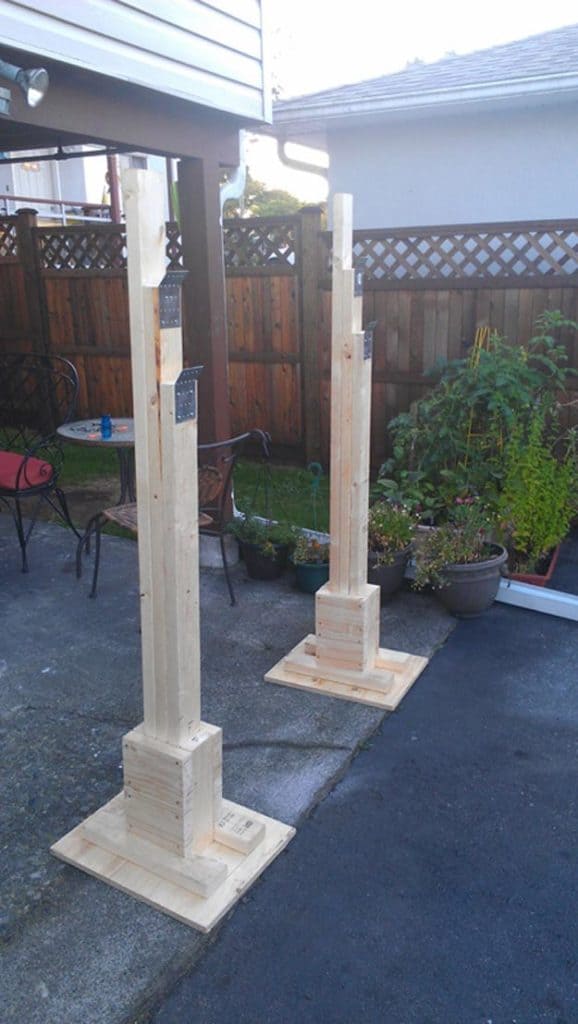
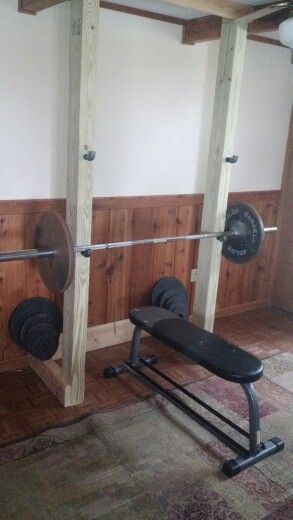
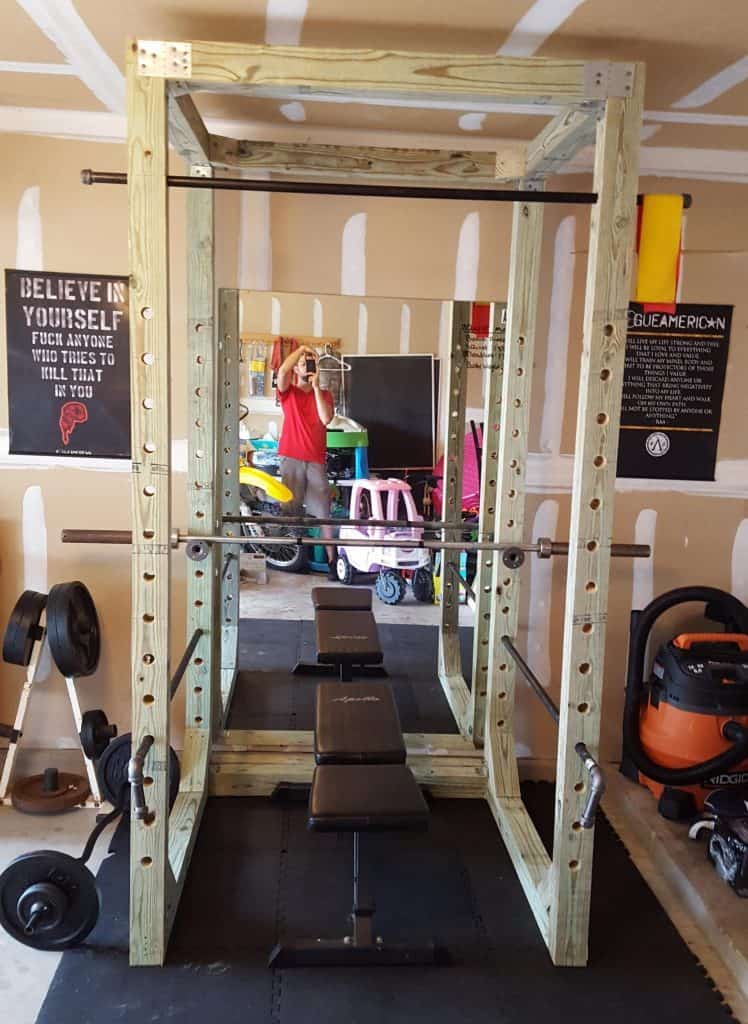
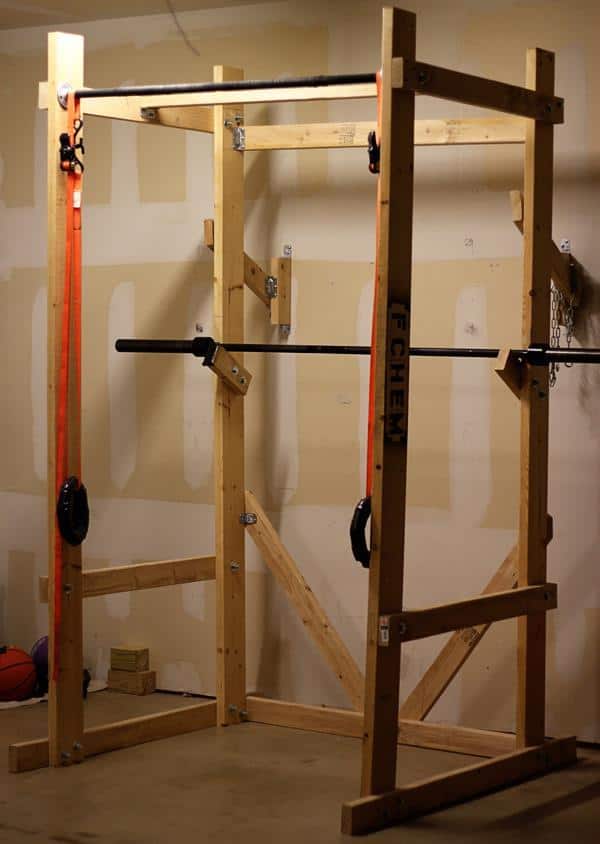

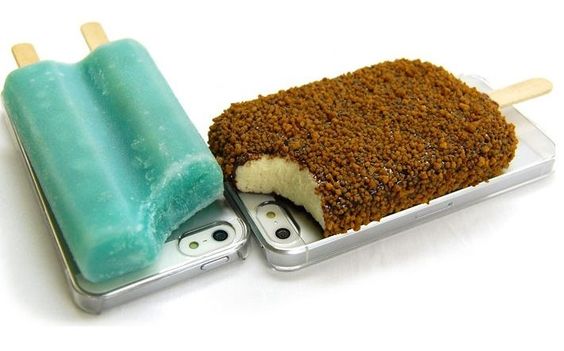

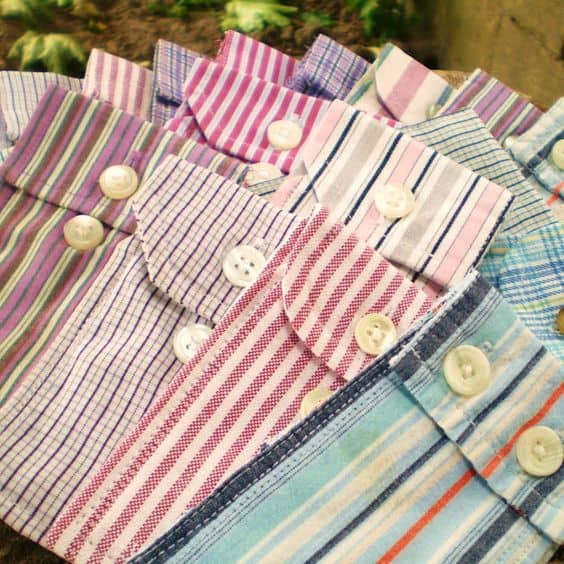

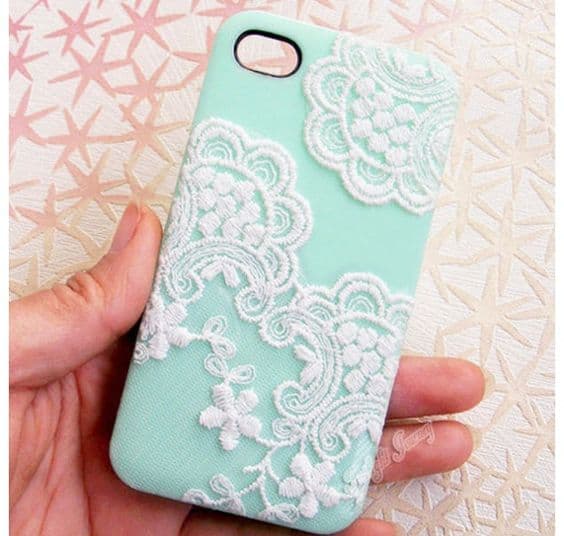

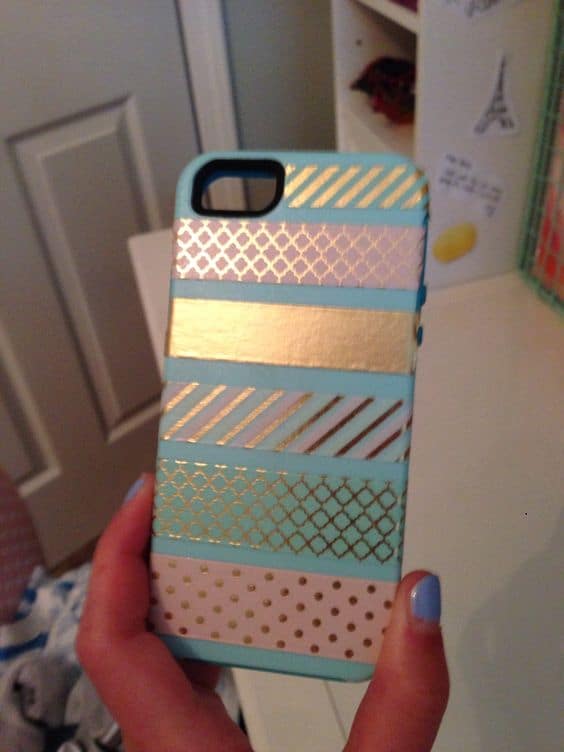
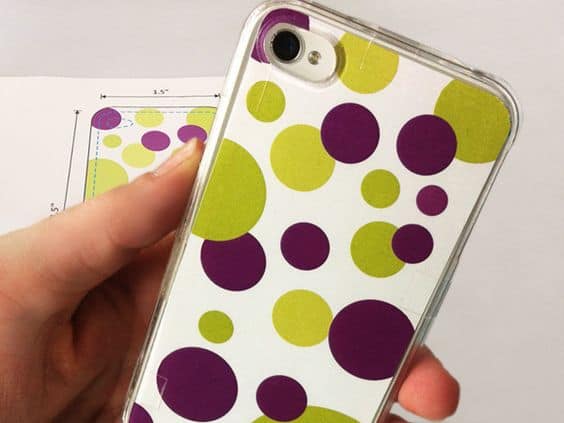


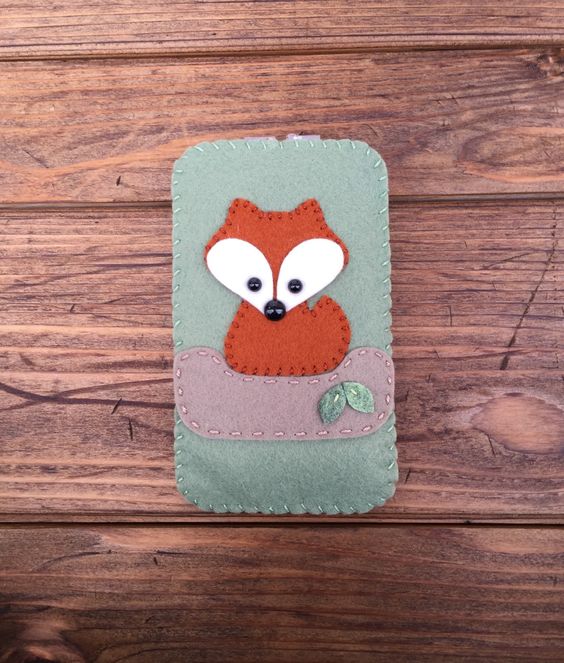
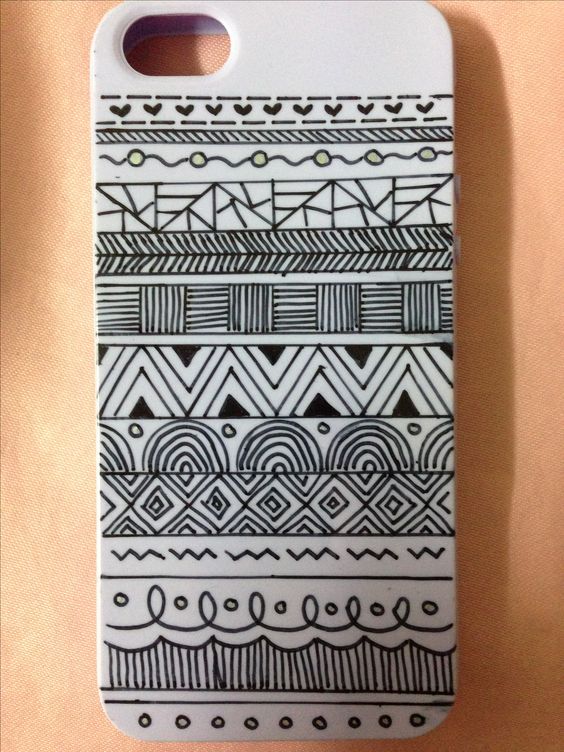


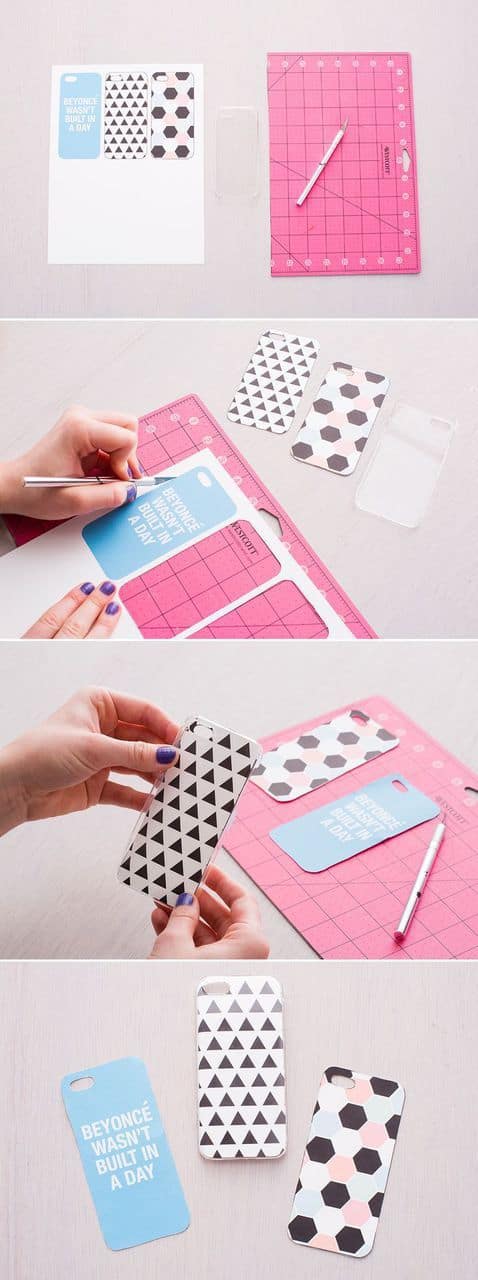
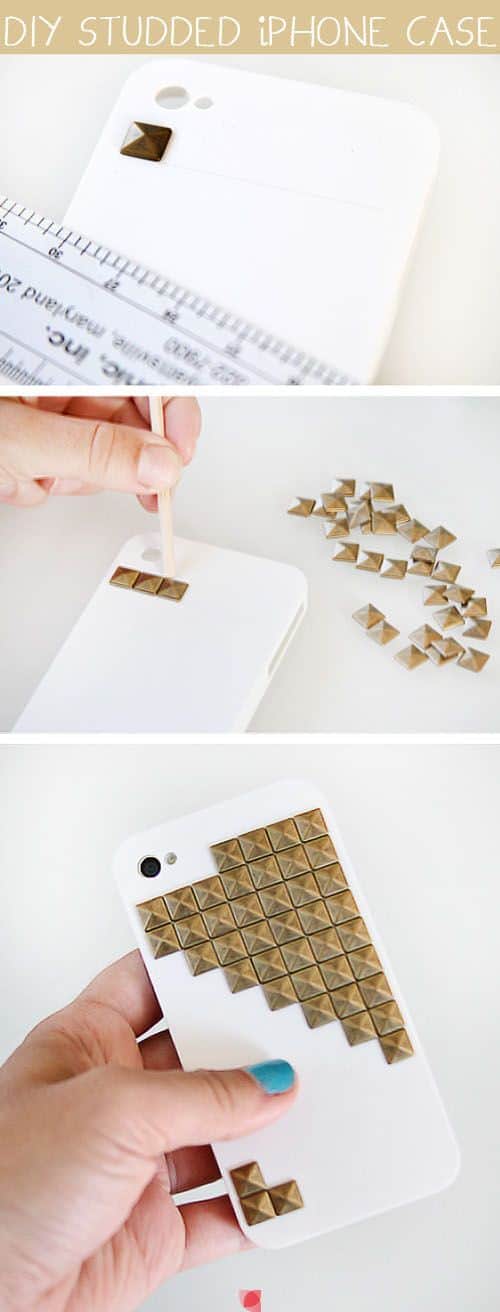

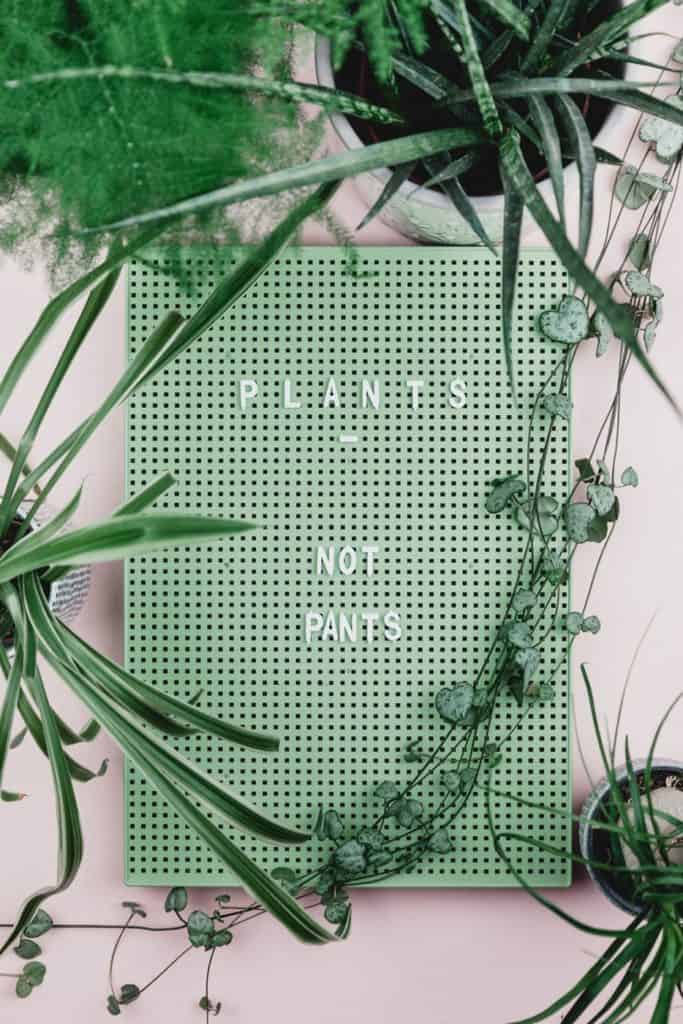
 via
via 


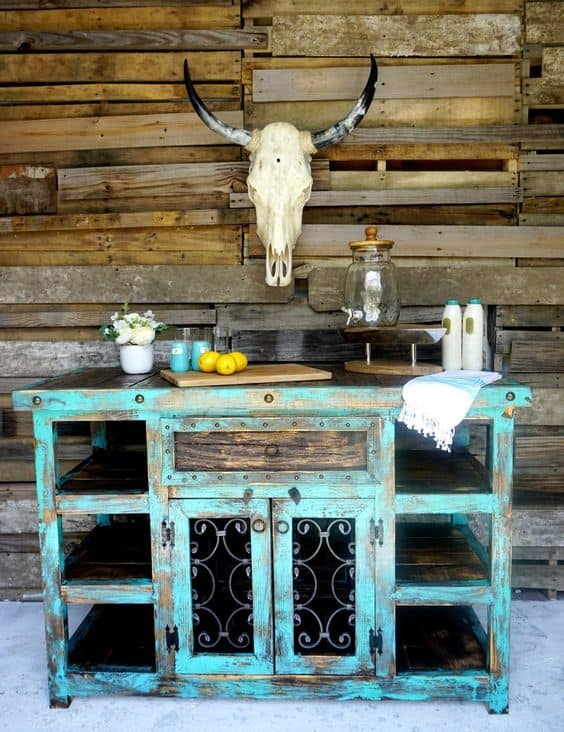

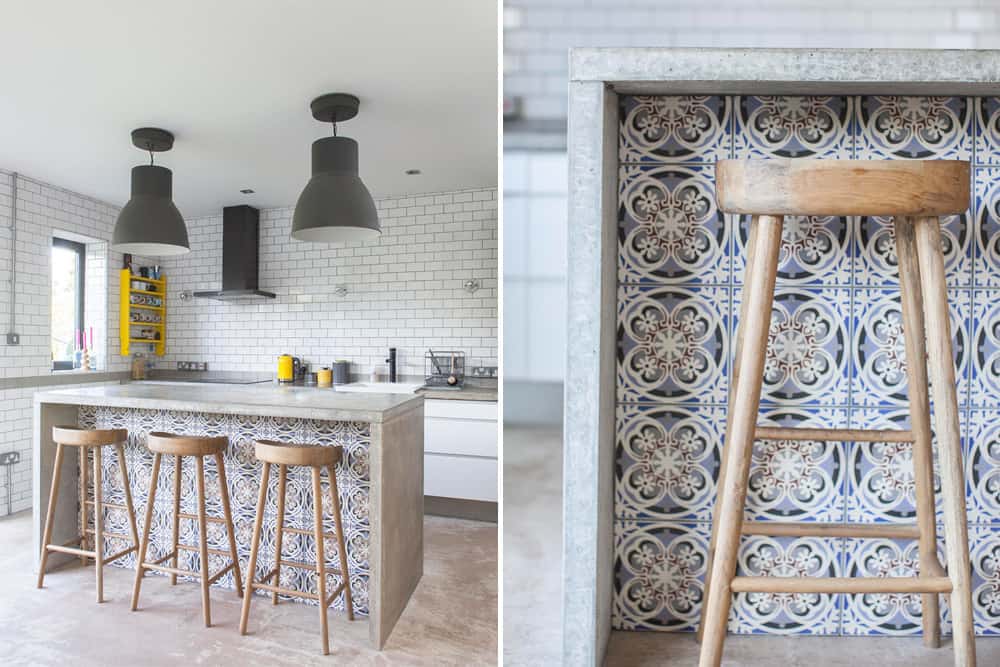
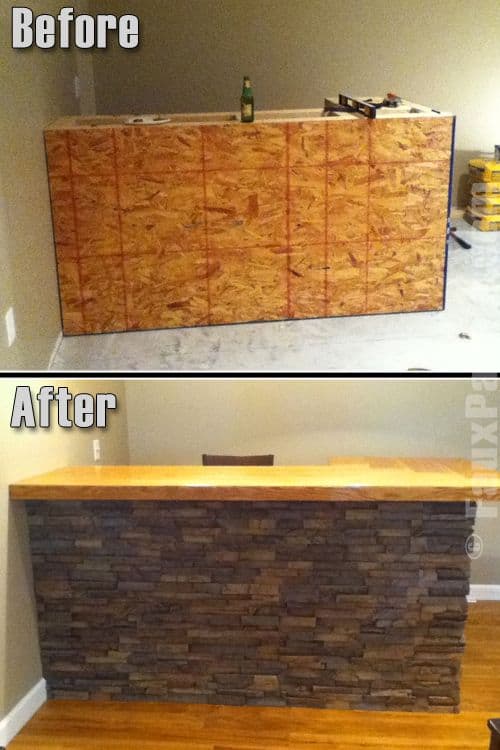


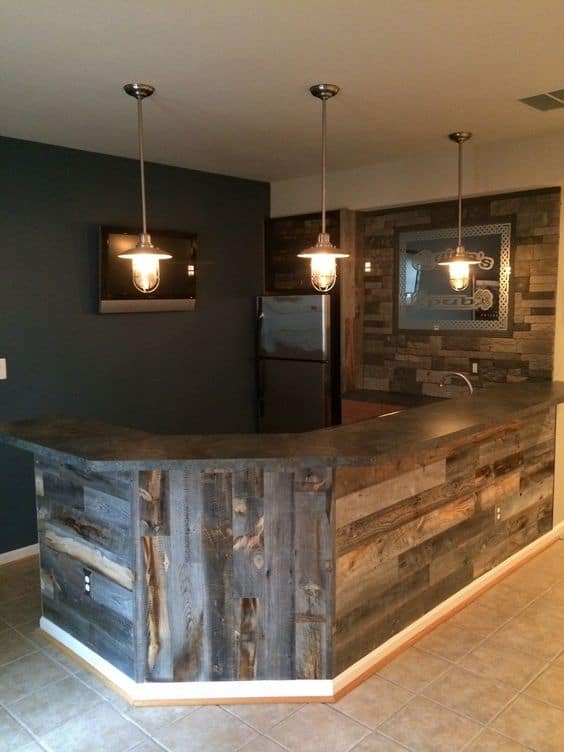

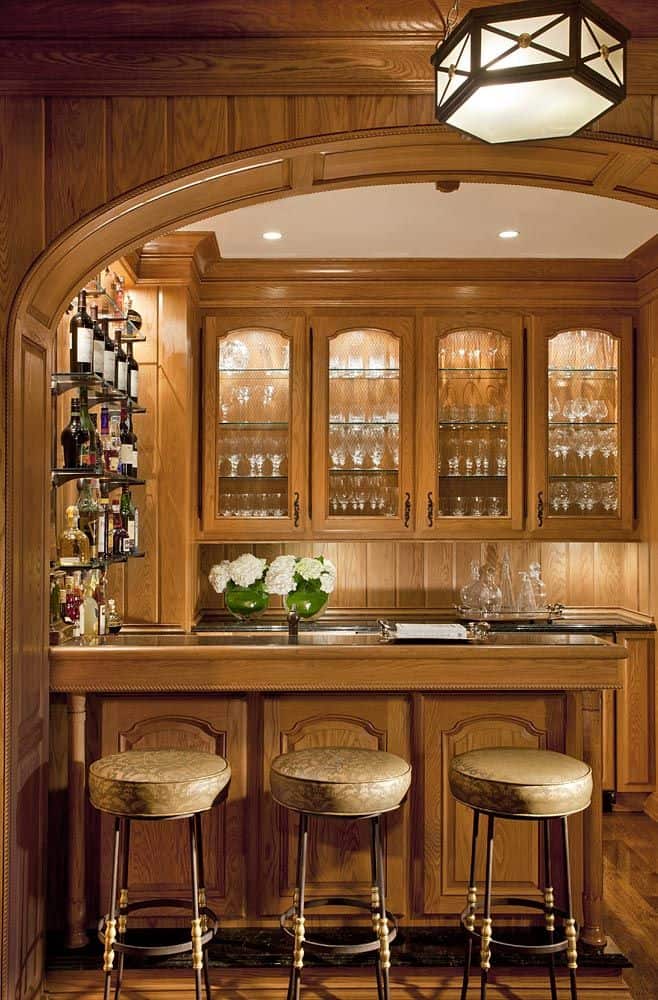
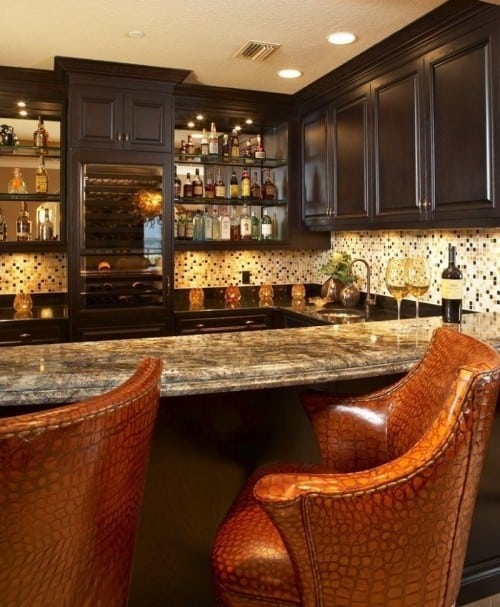


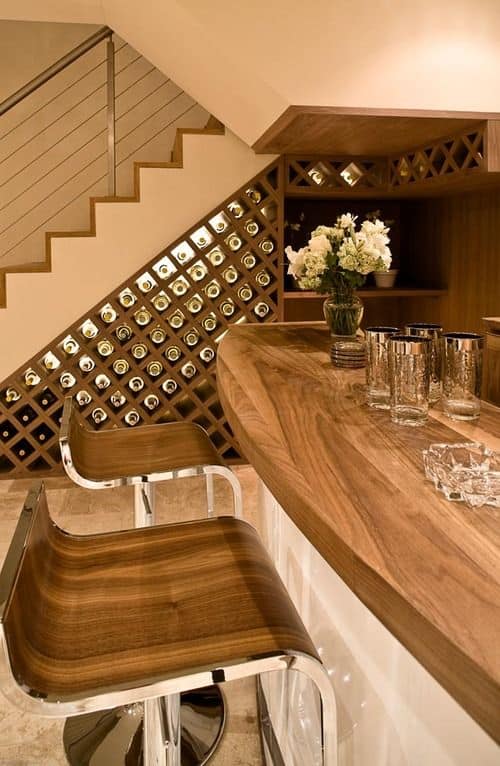


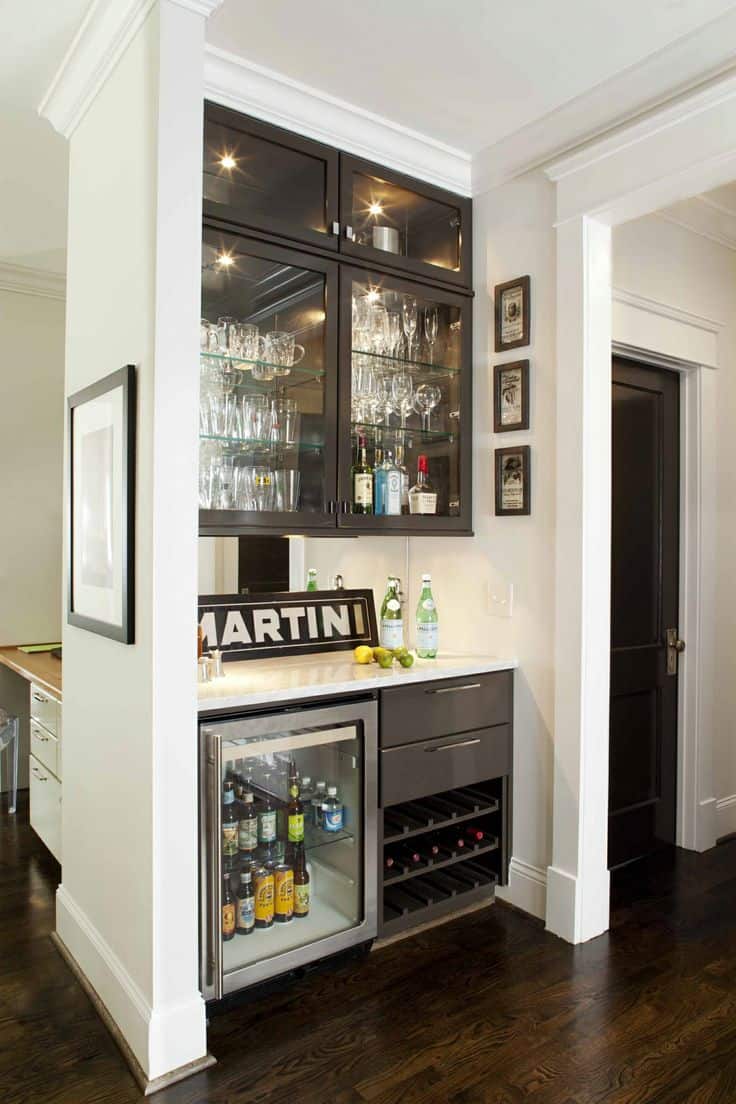


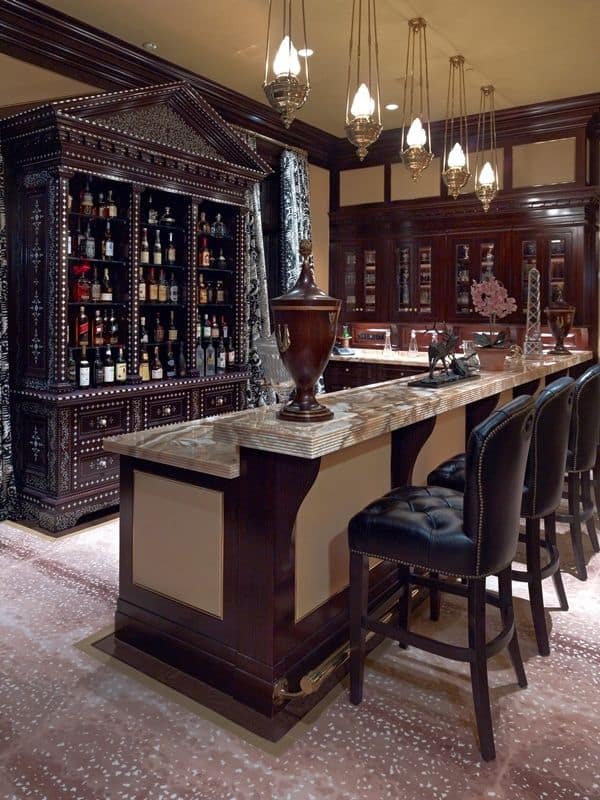

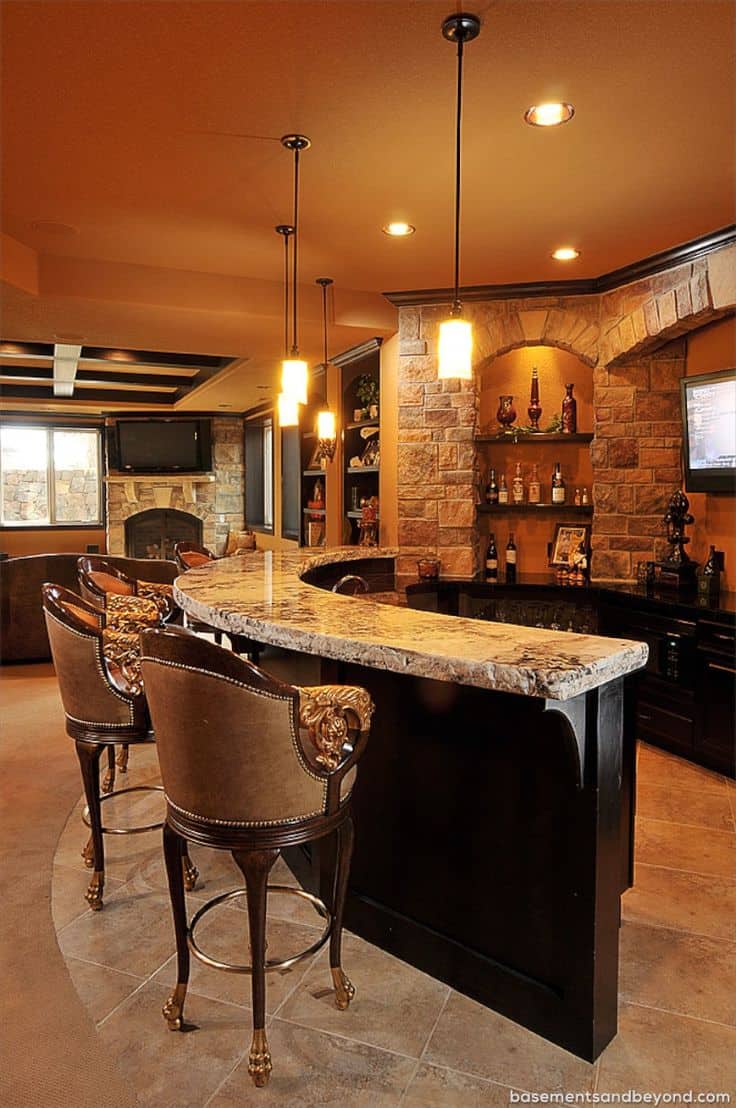


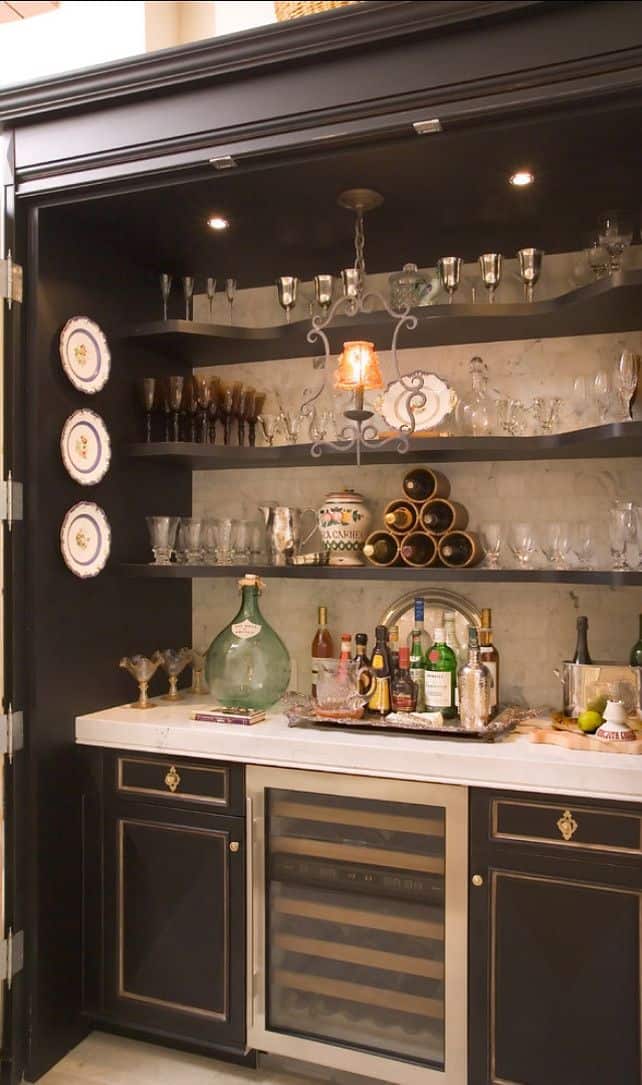


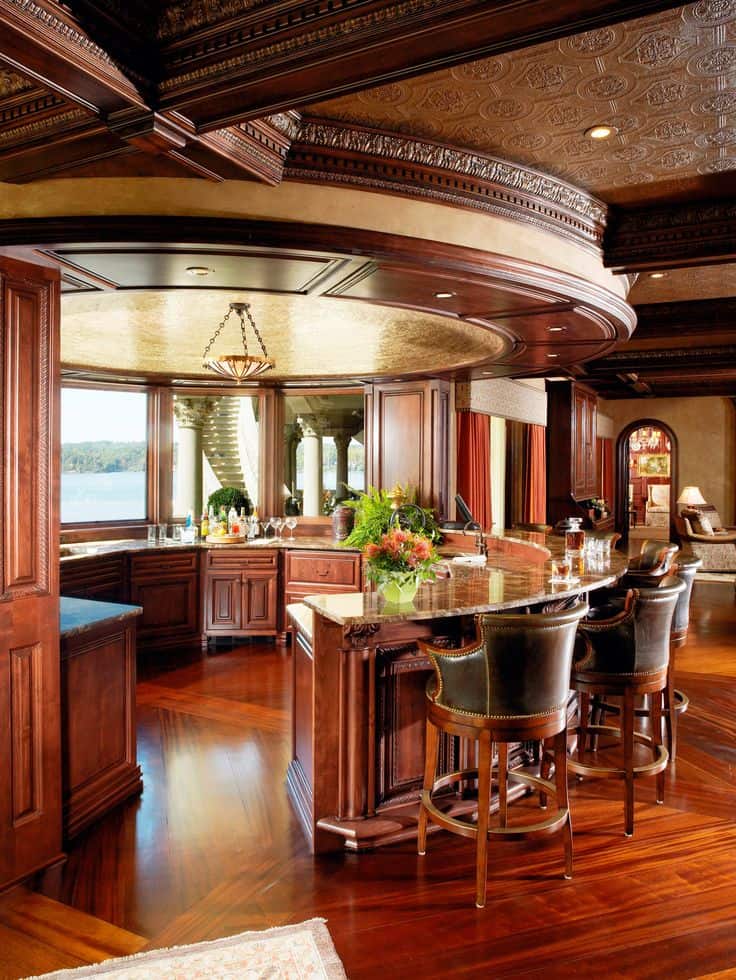
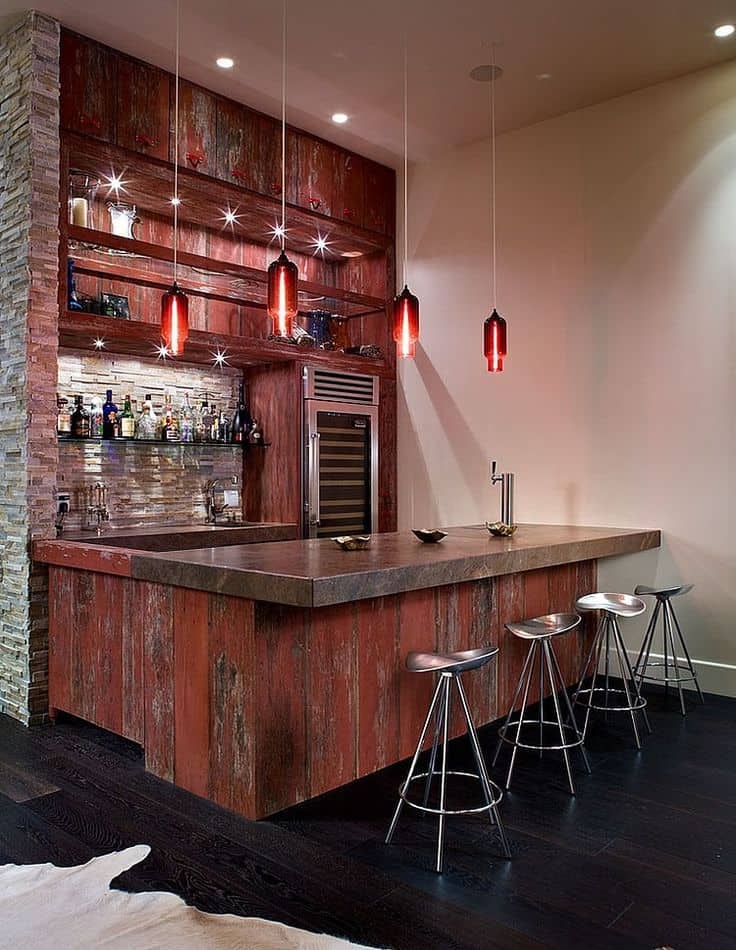
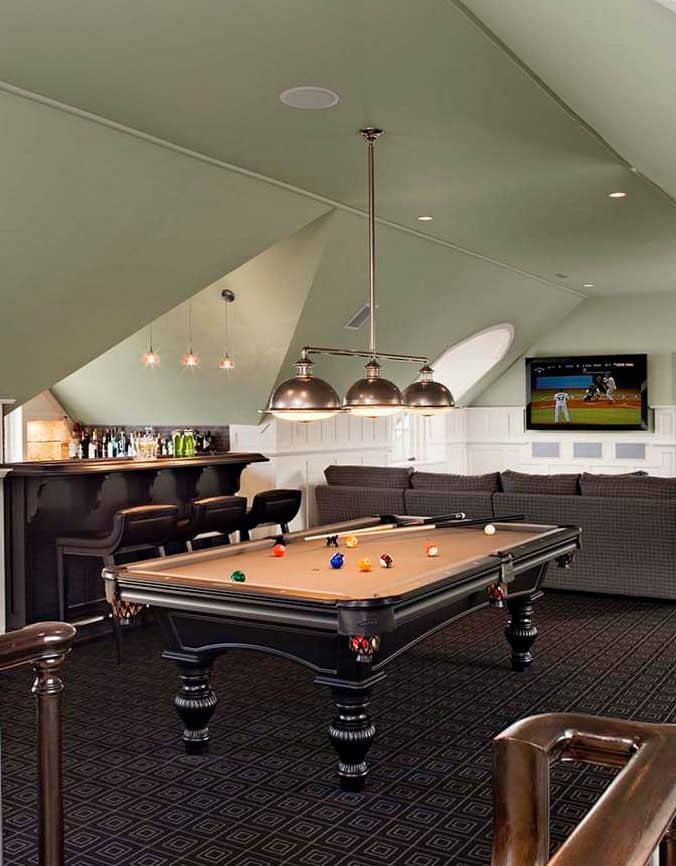


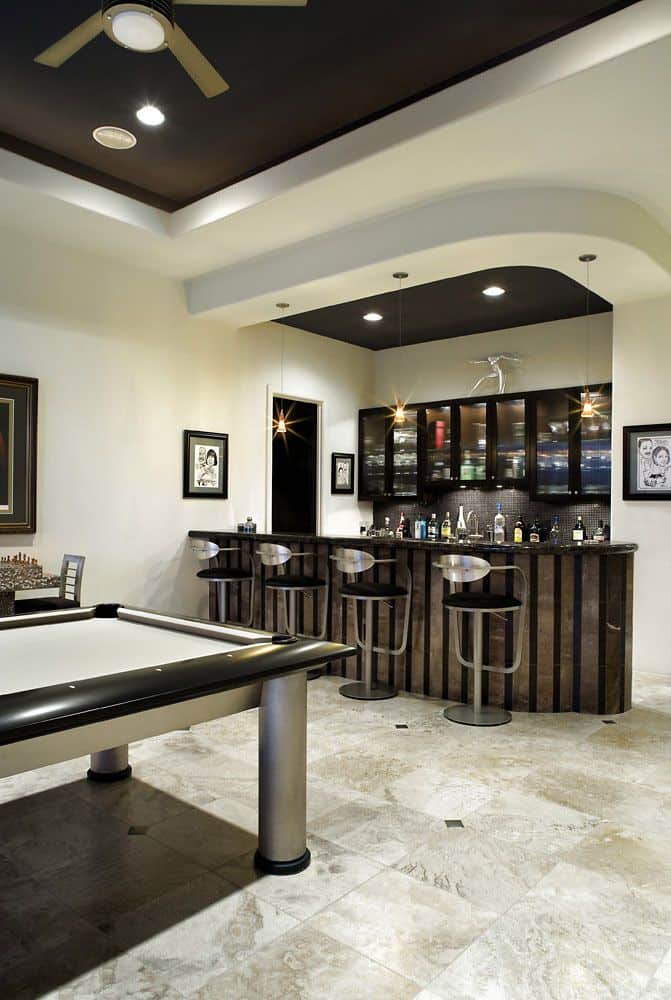
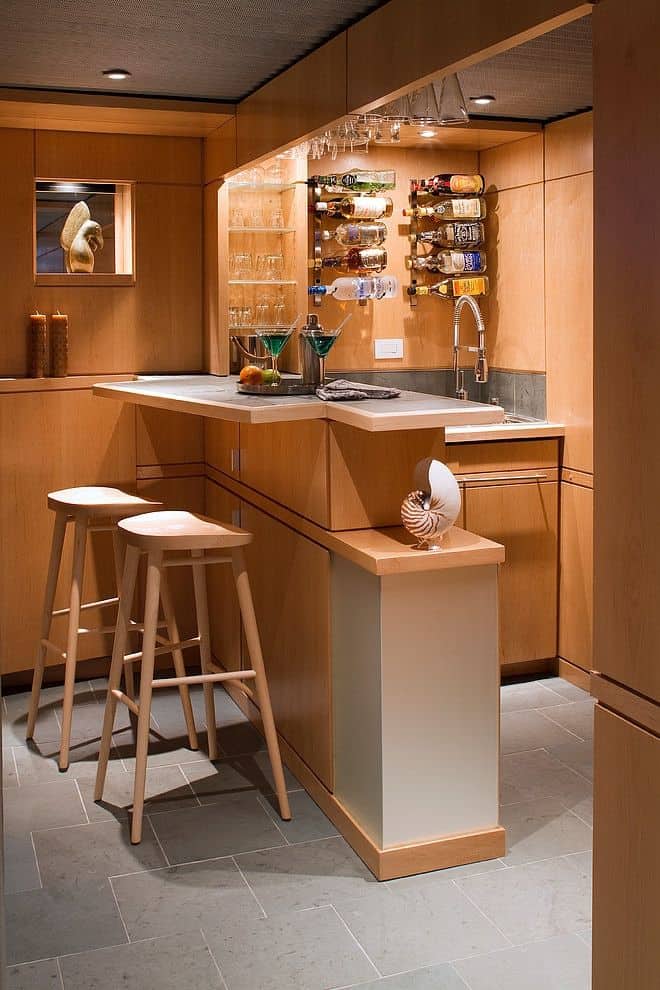

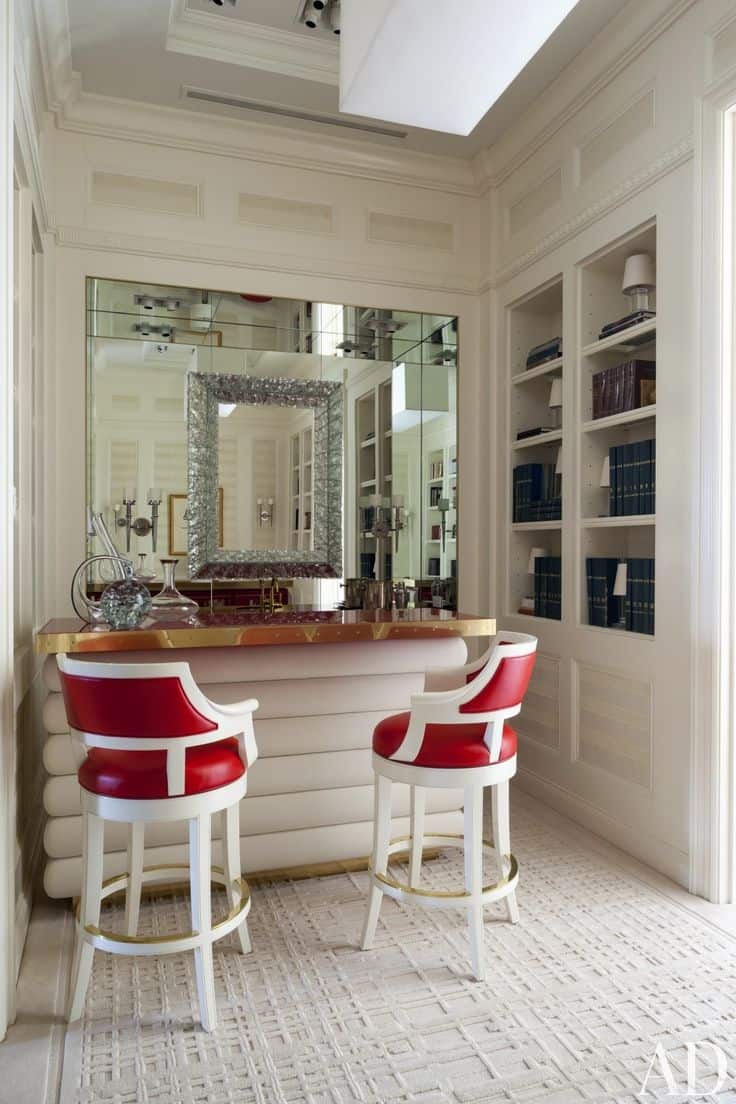
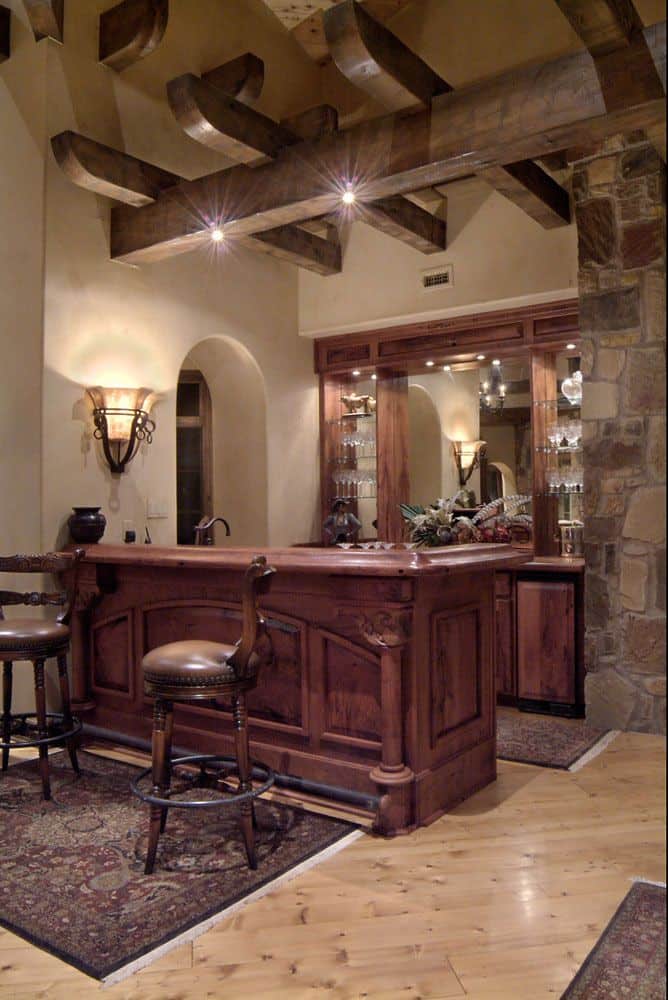
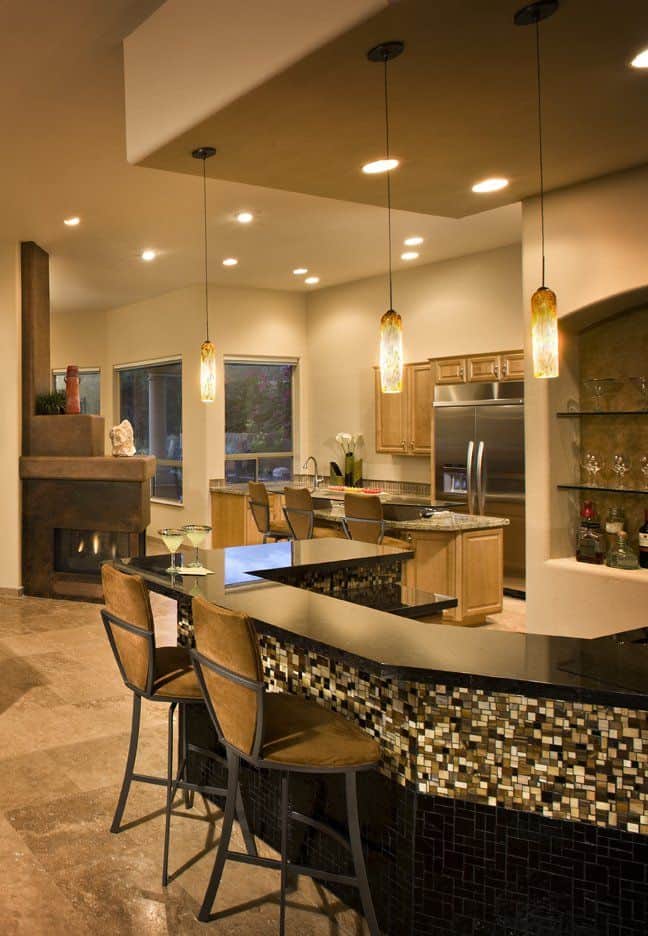

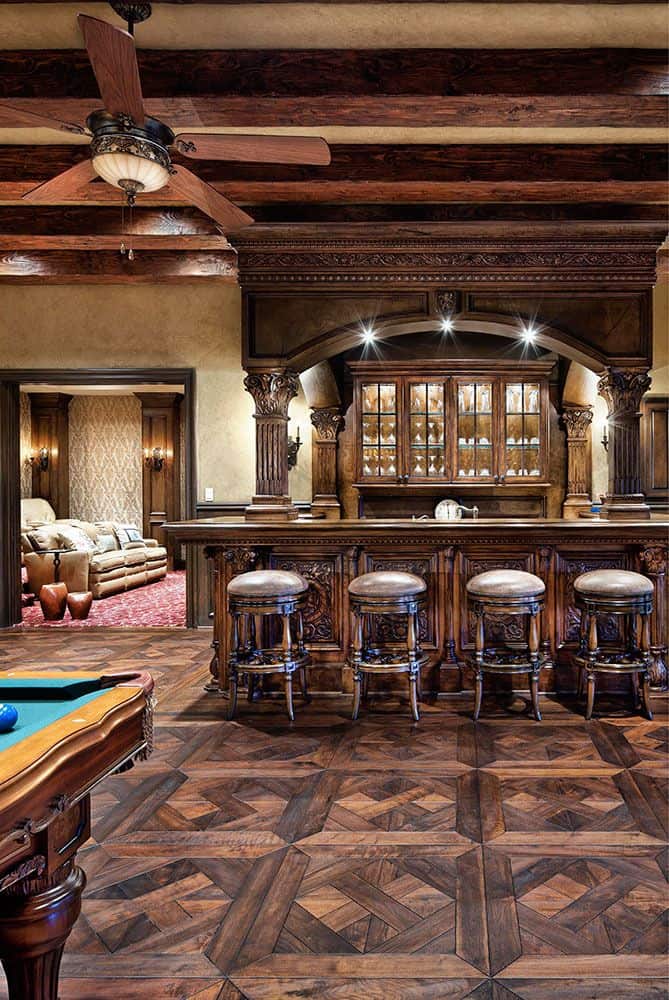
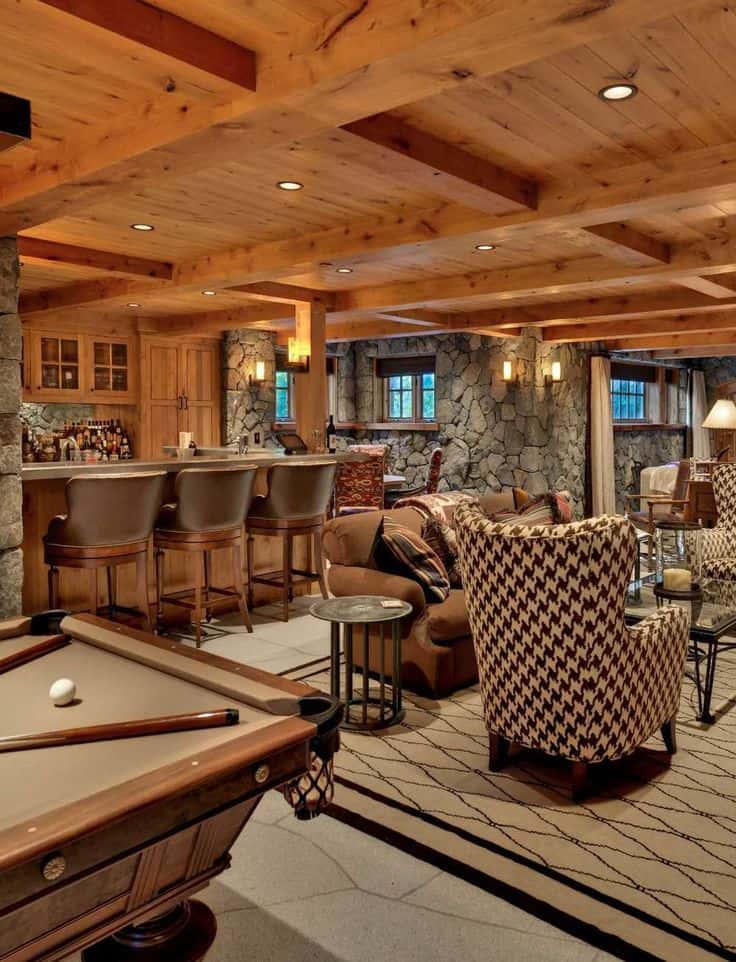
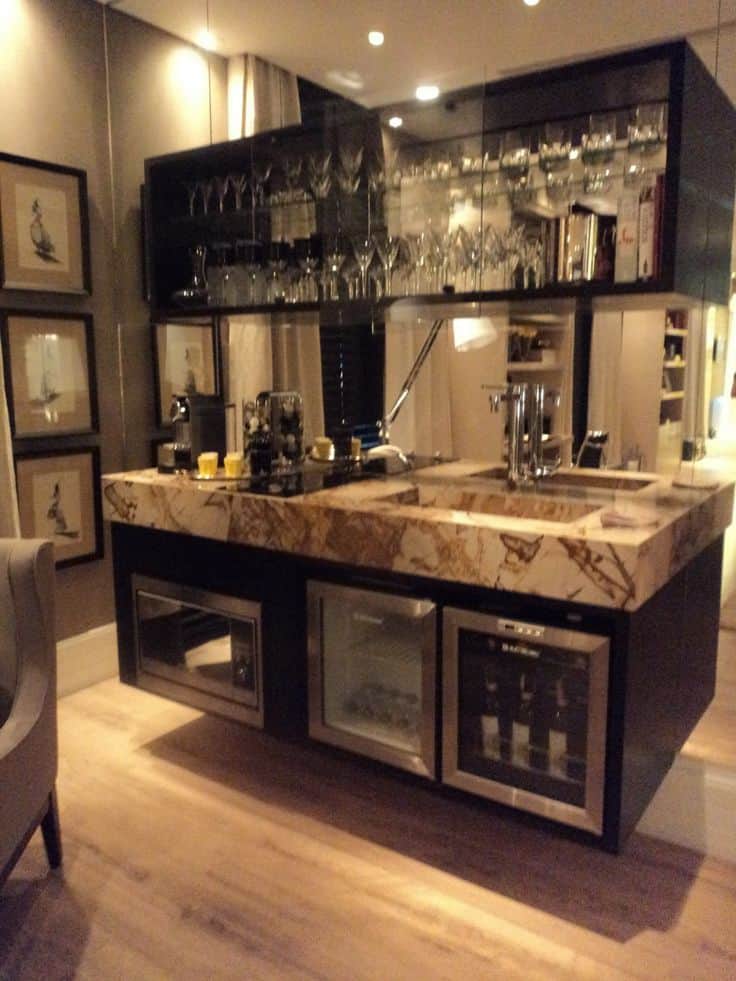
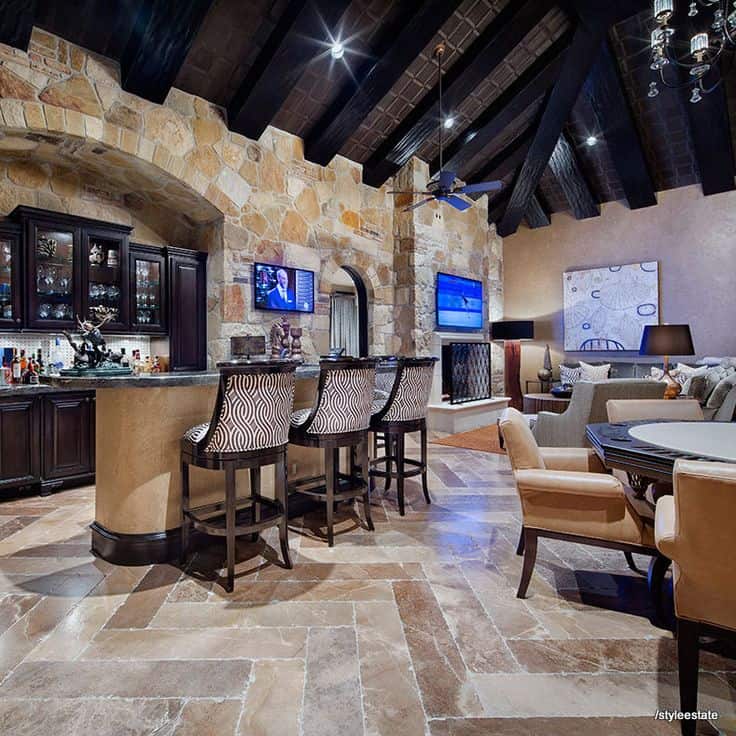

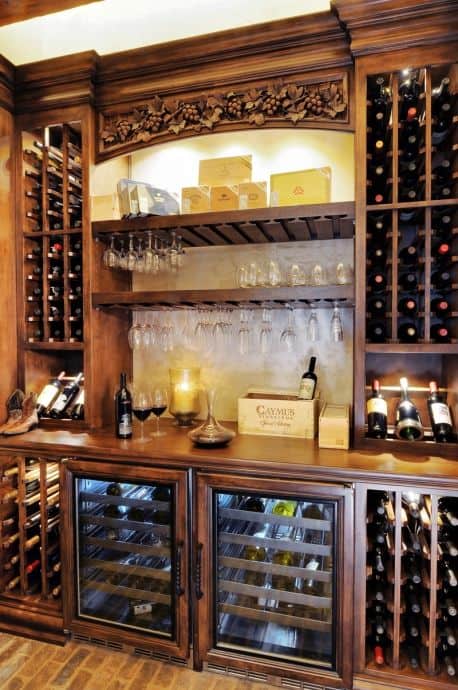
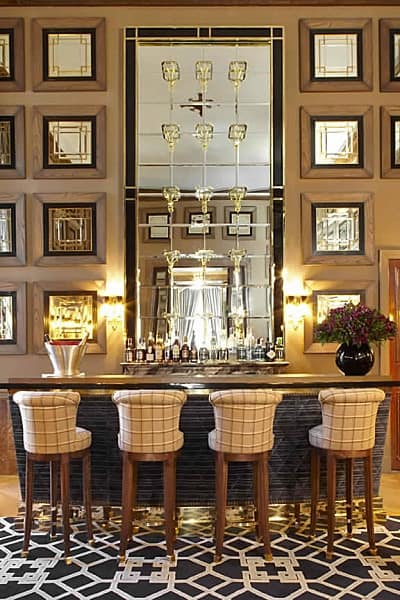
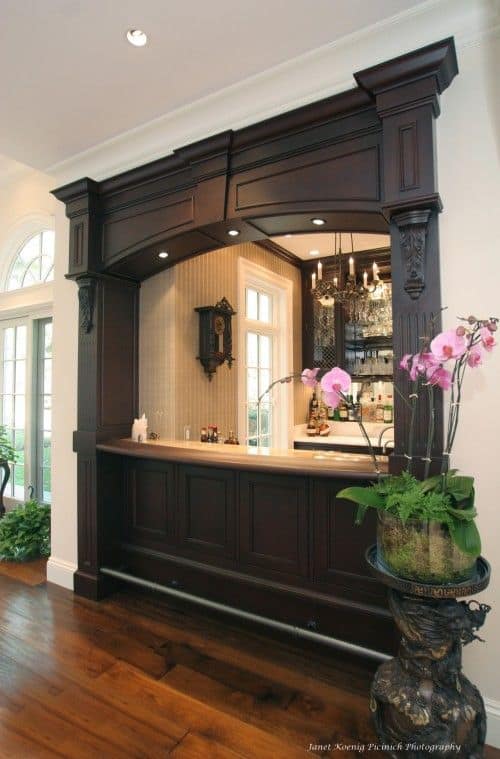
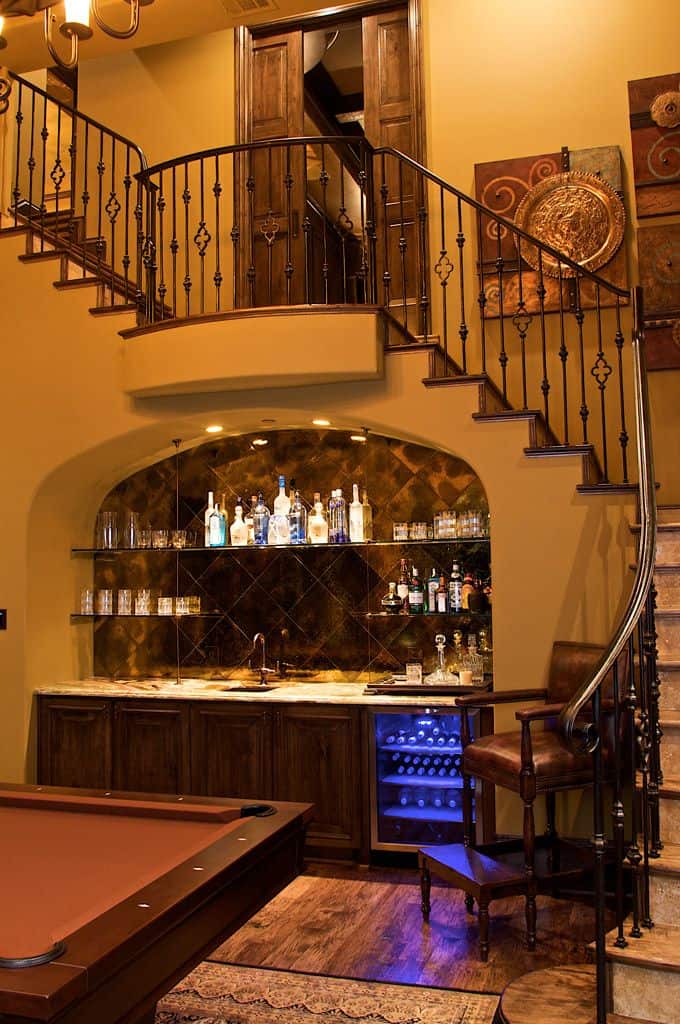

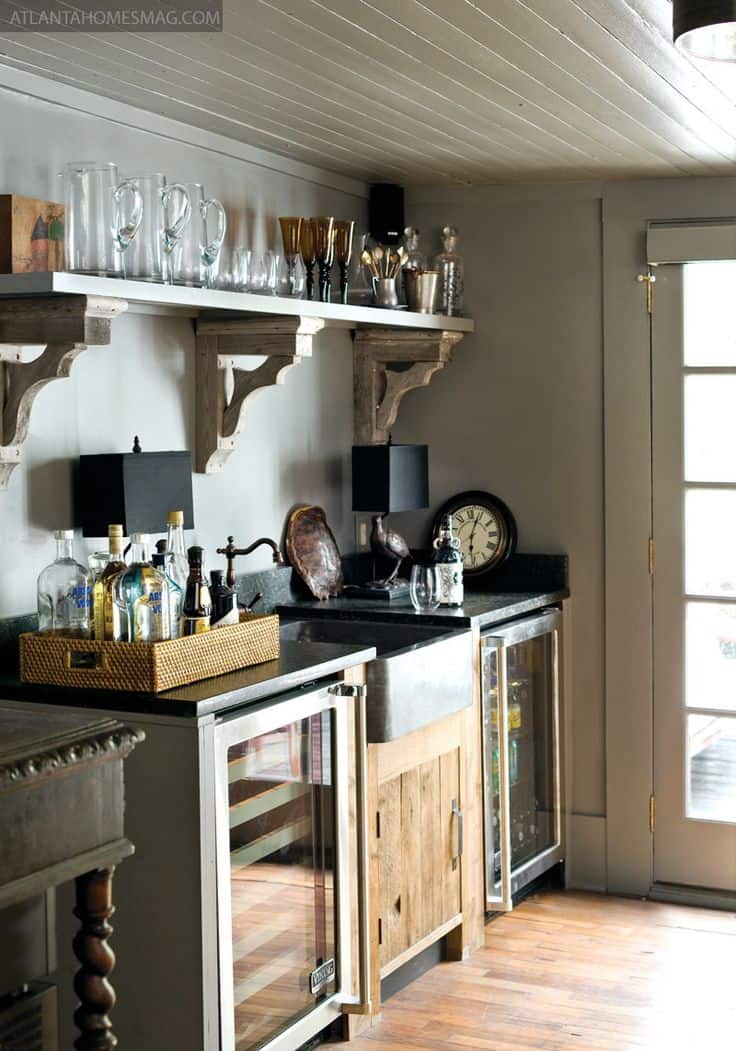

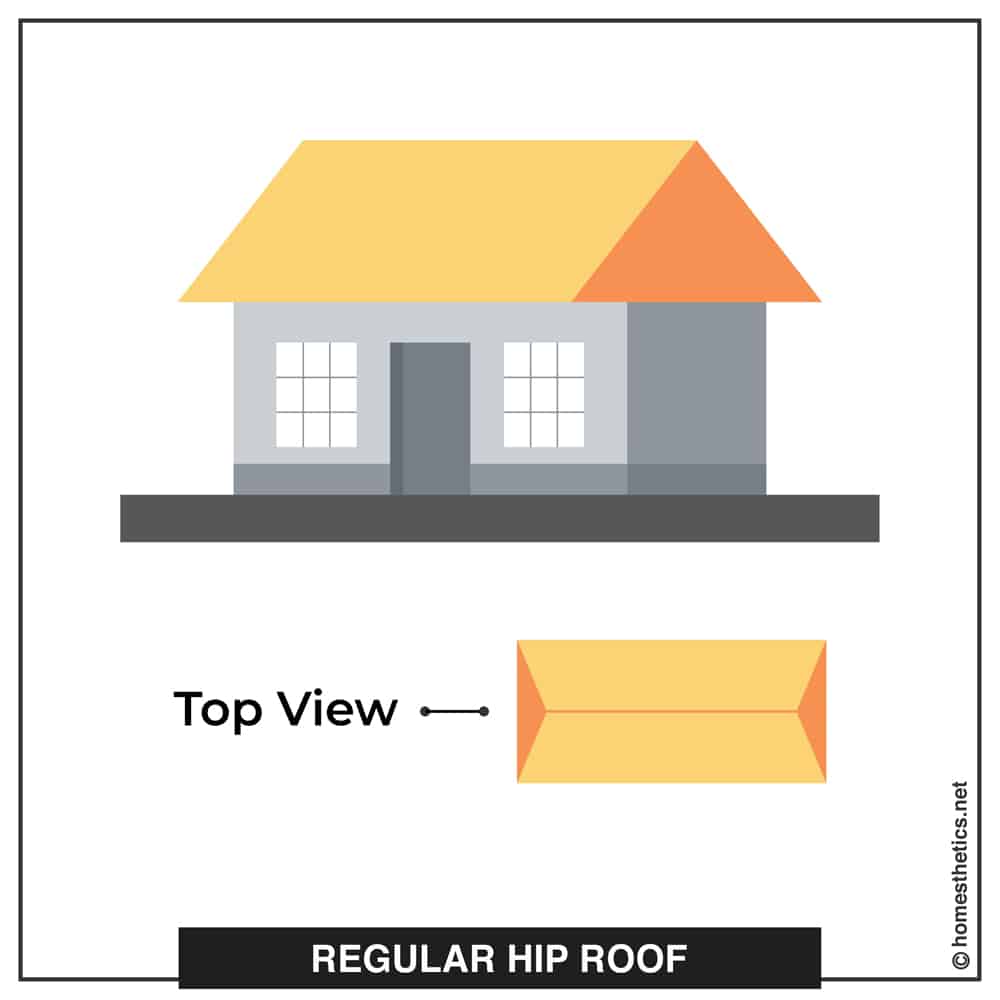
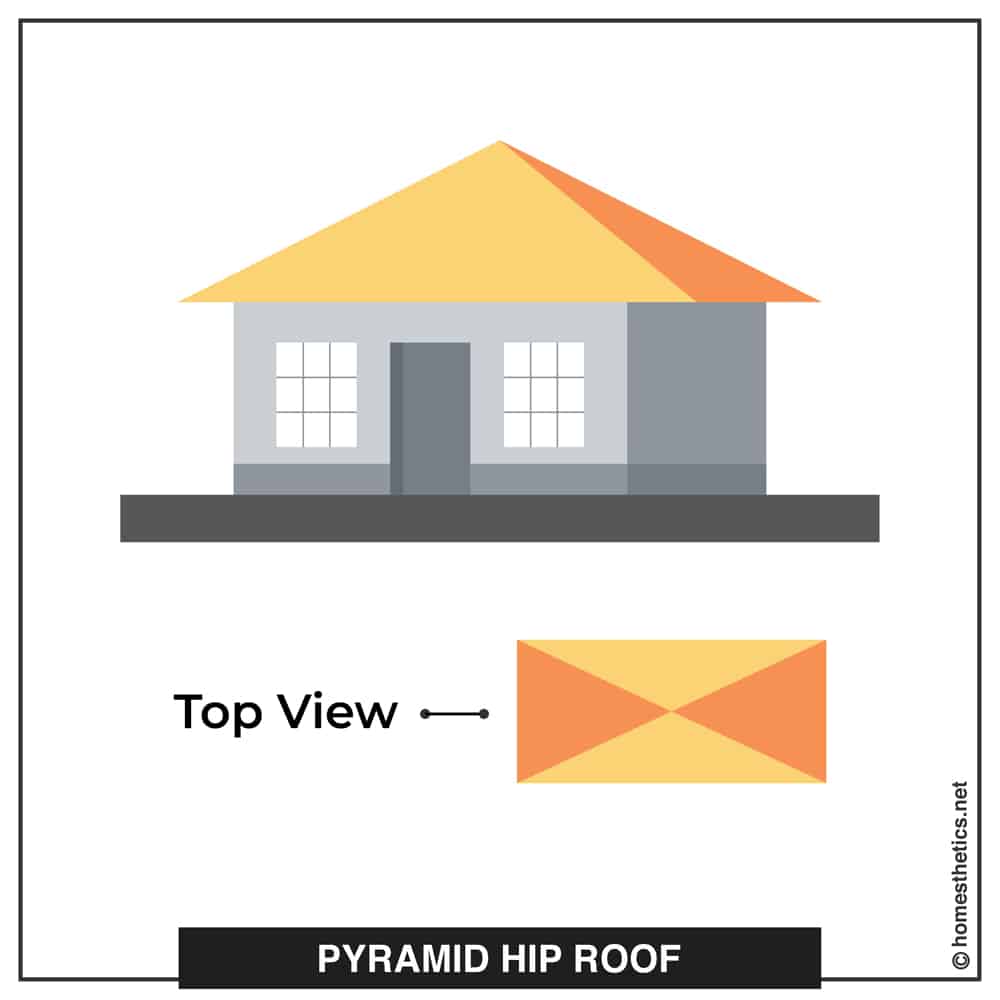
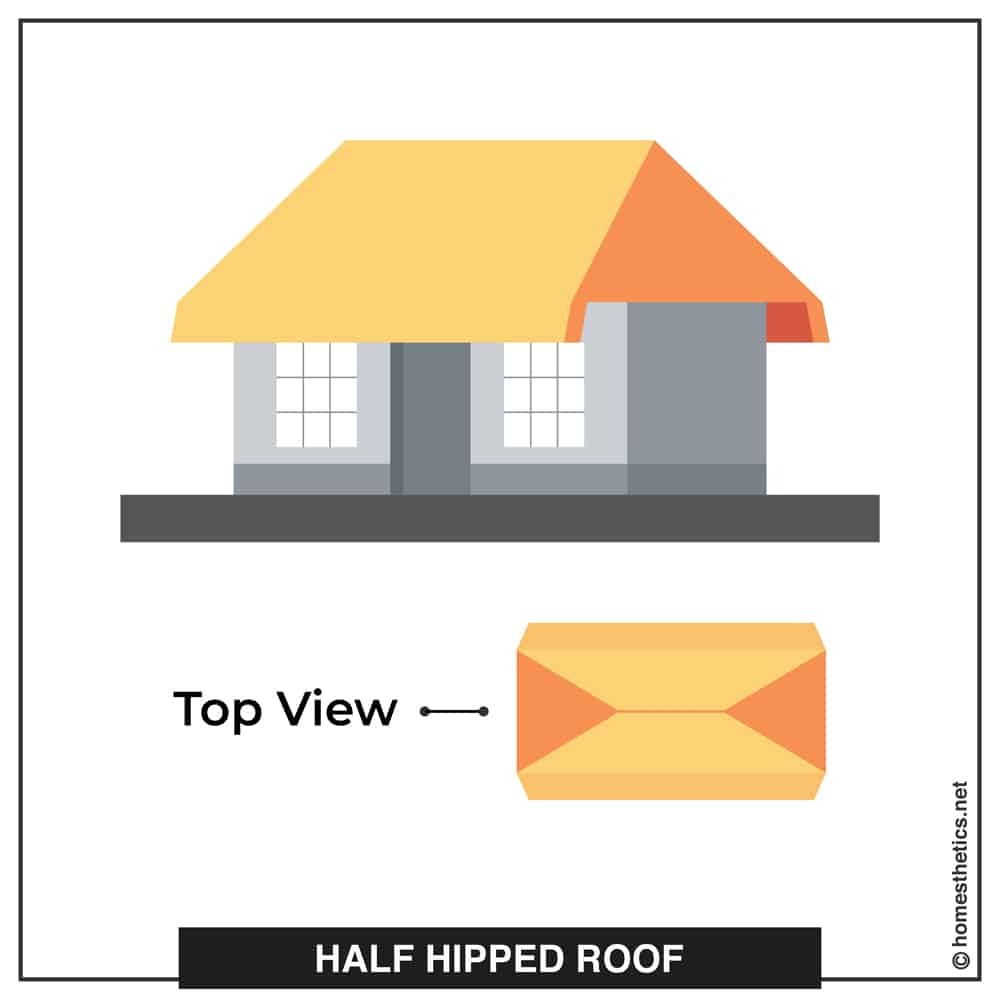
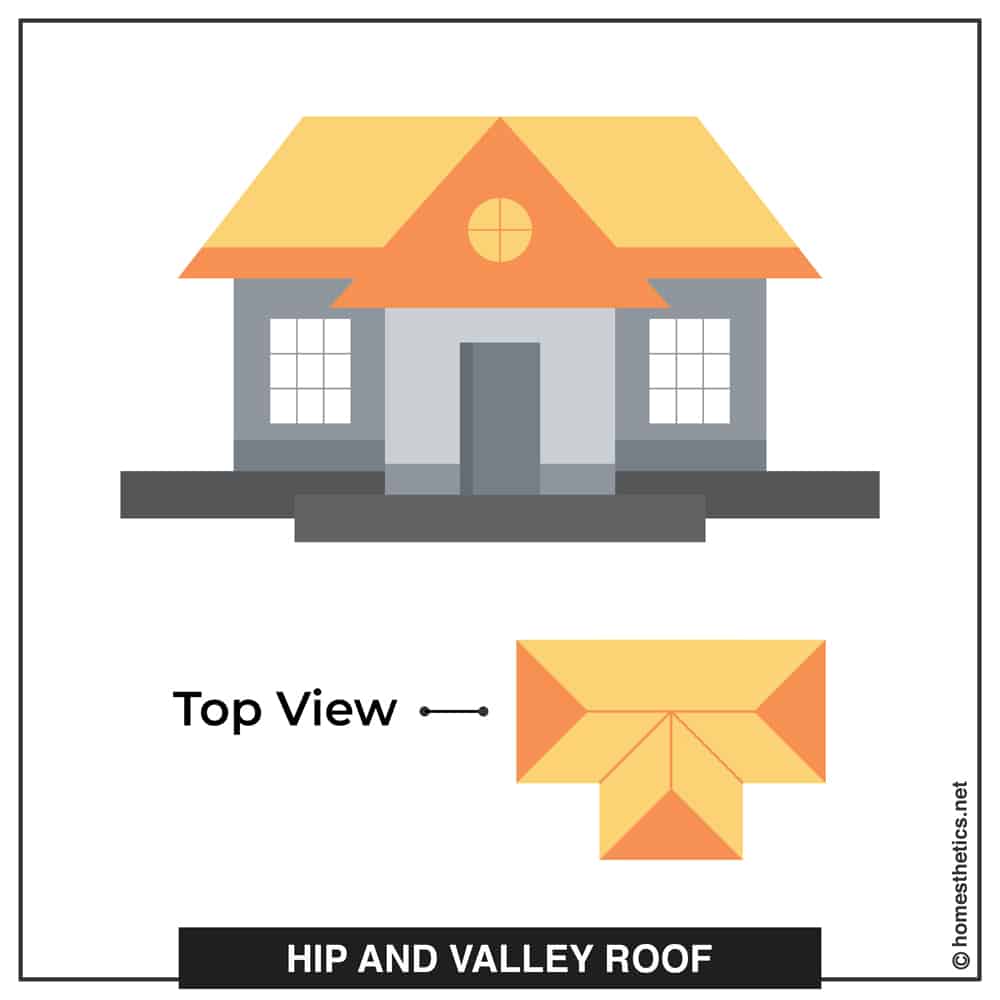
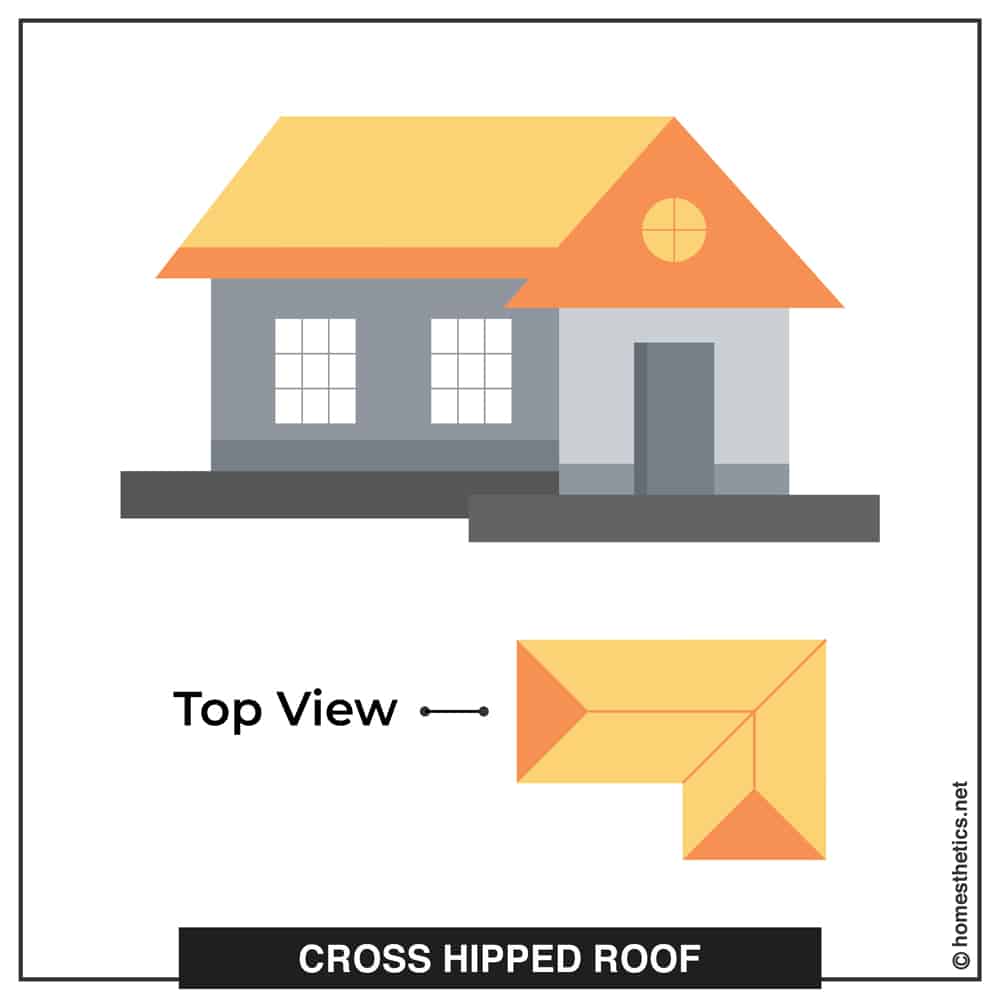
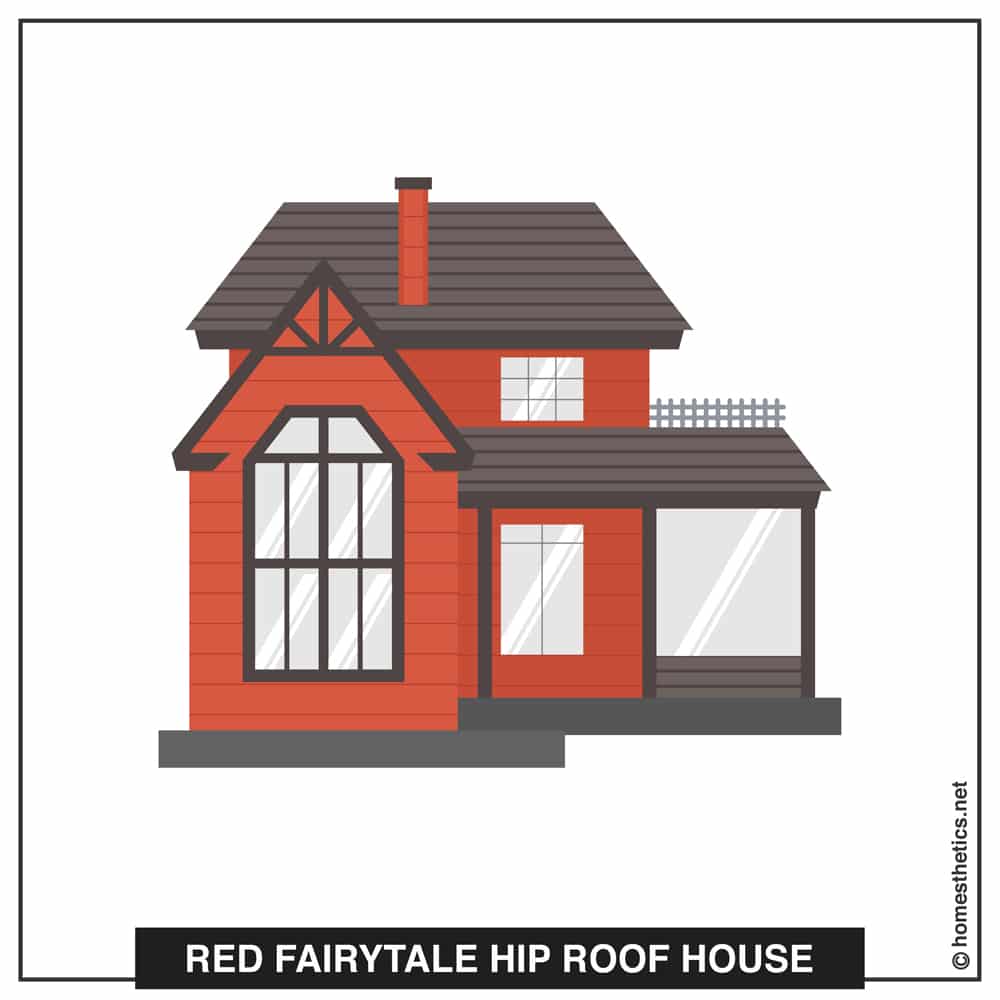


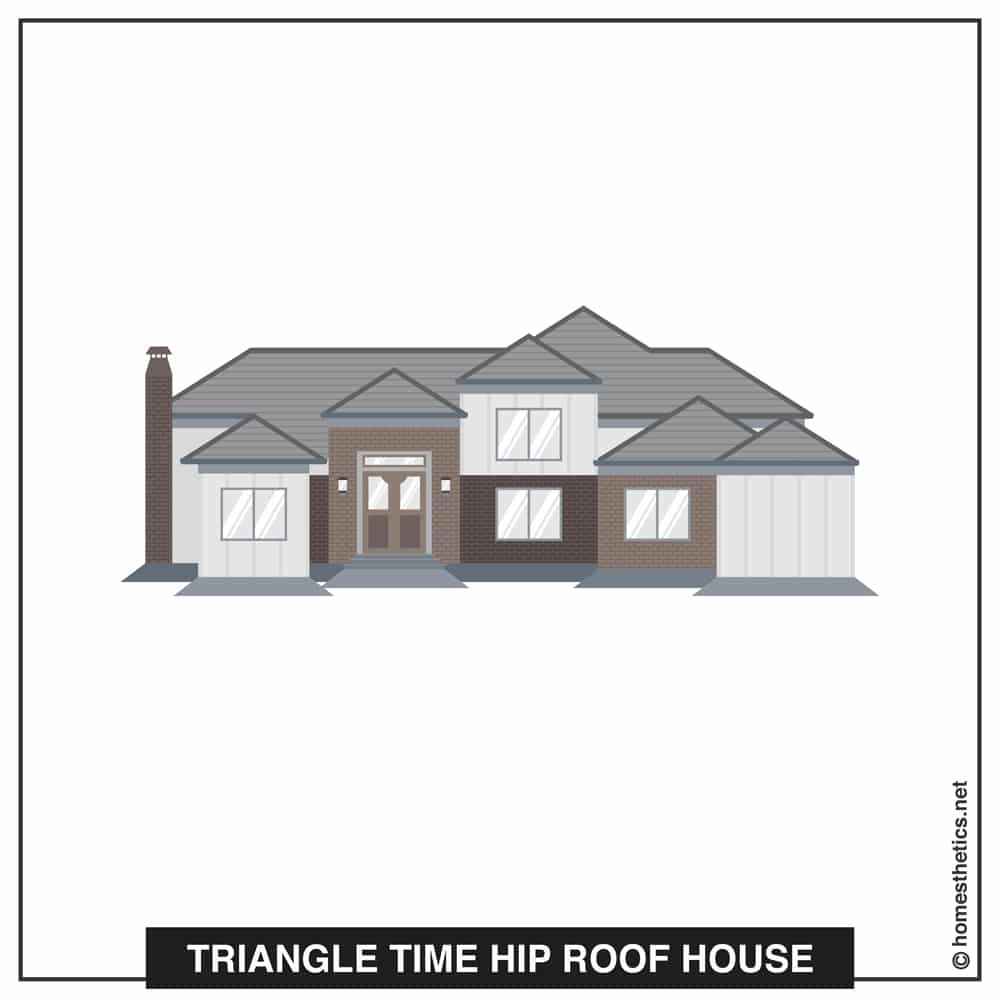
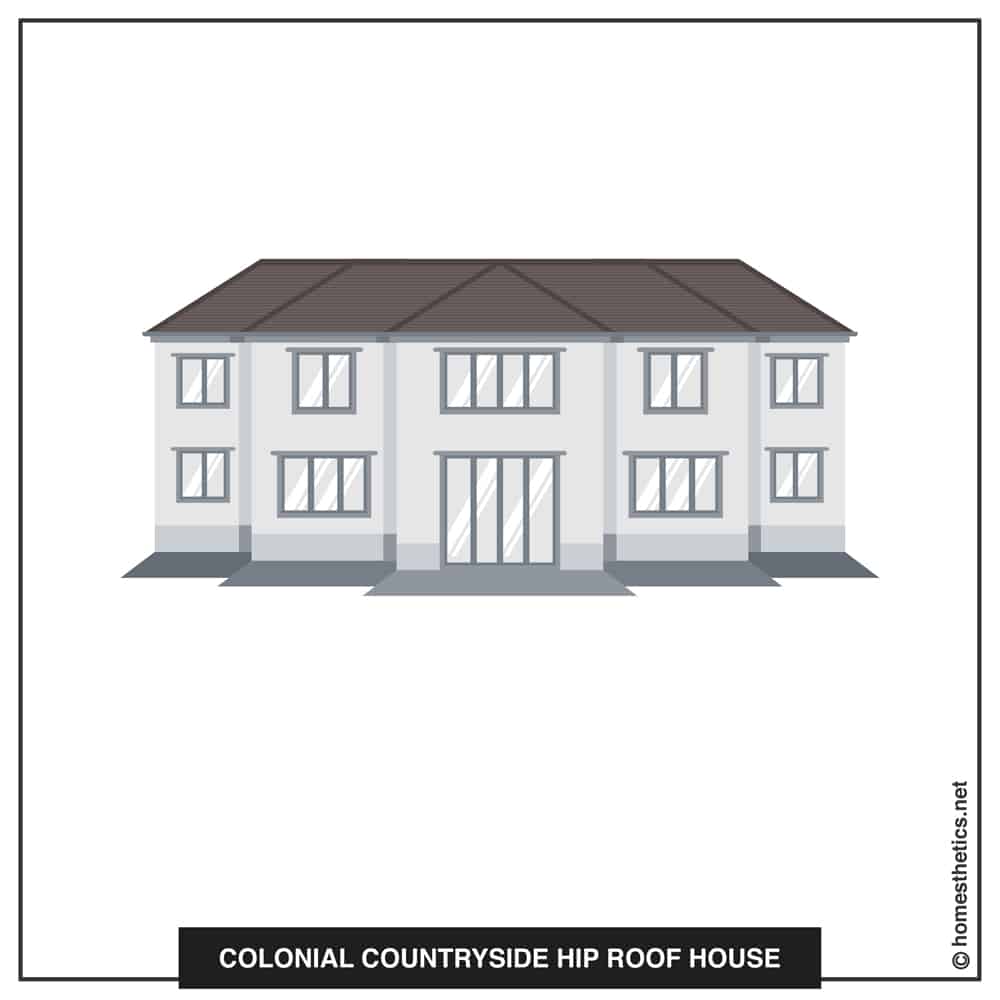
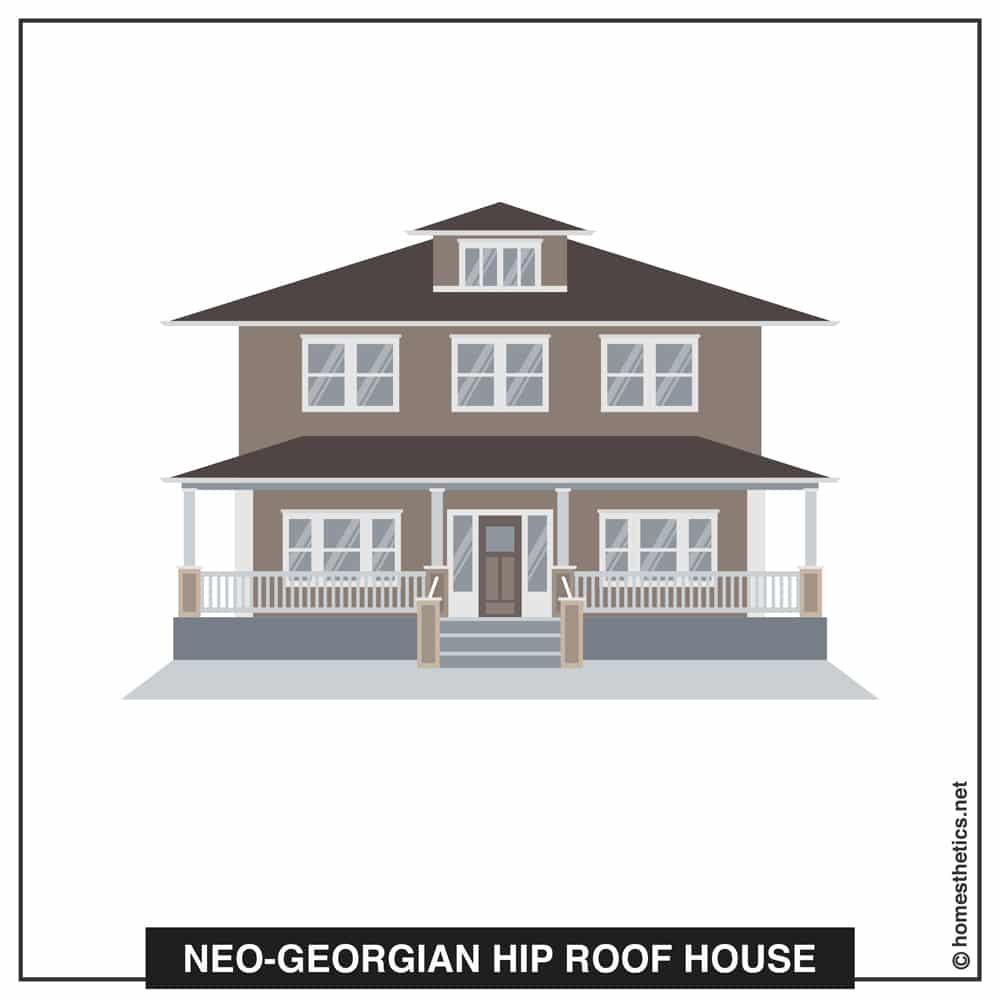
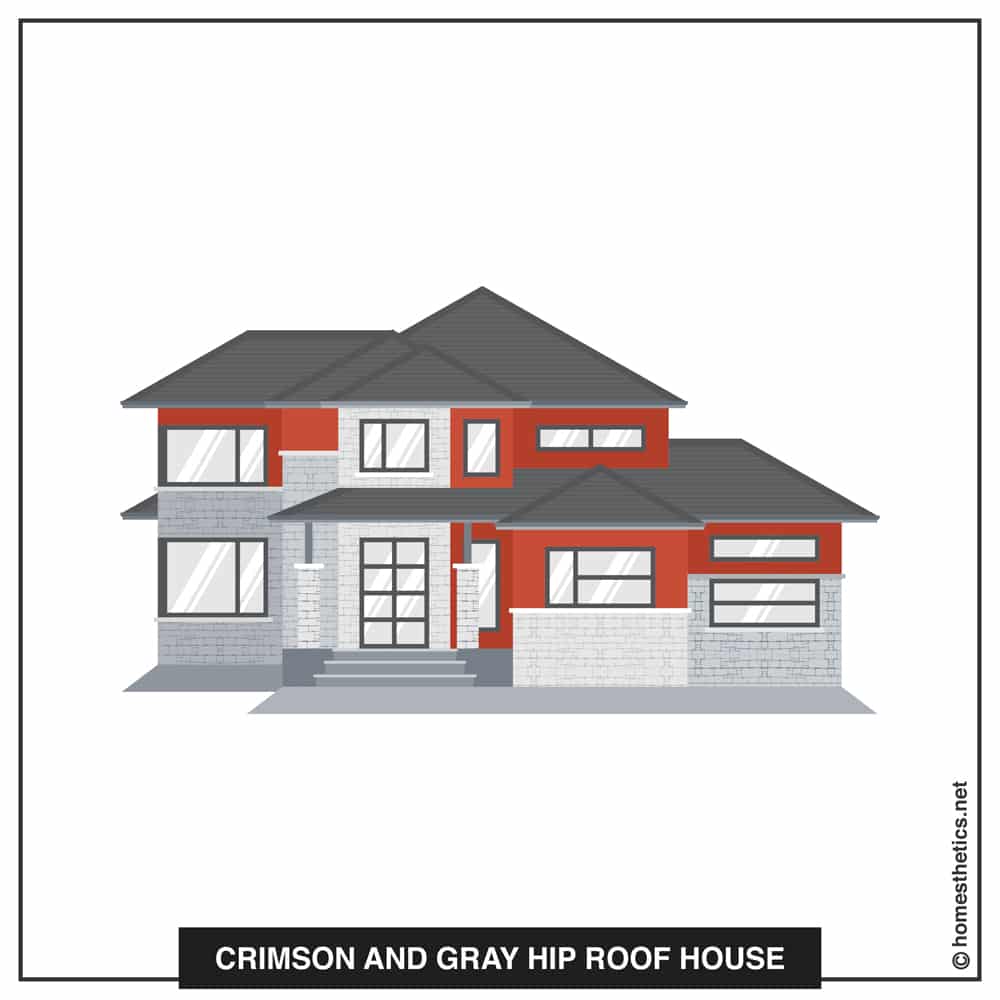
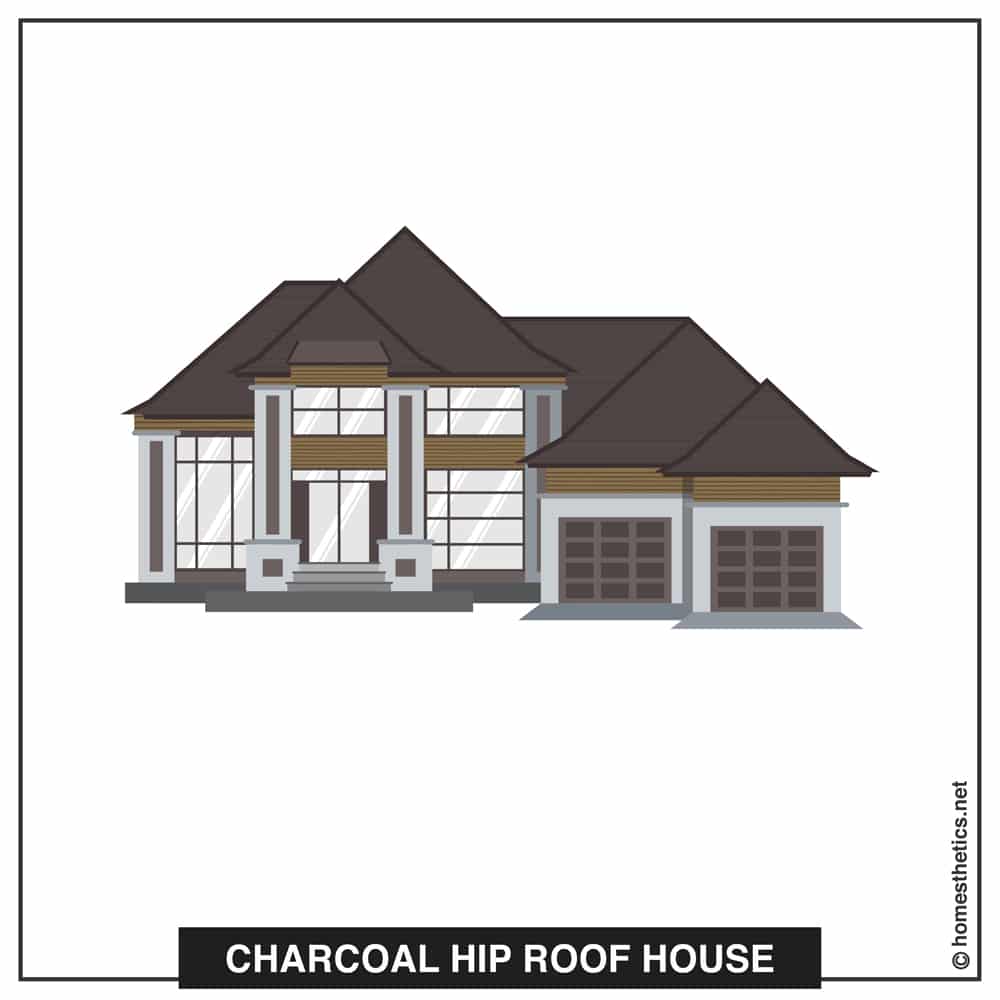
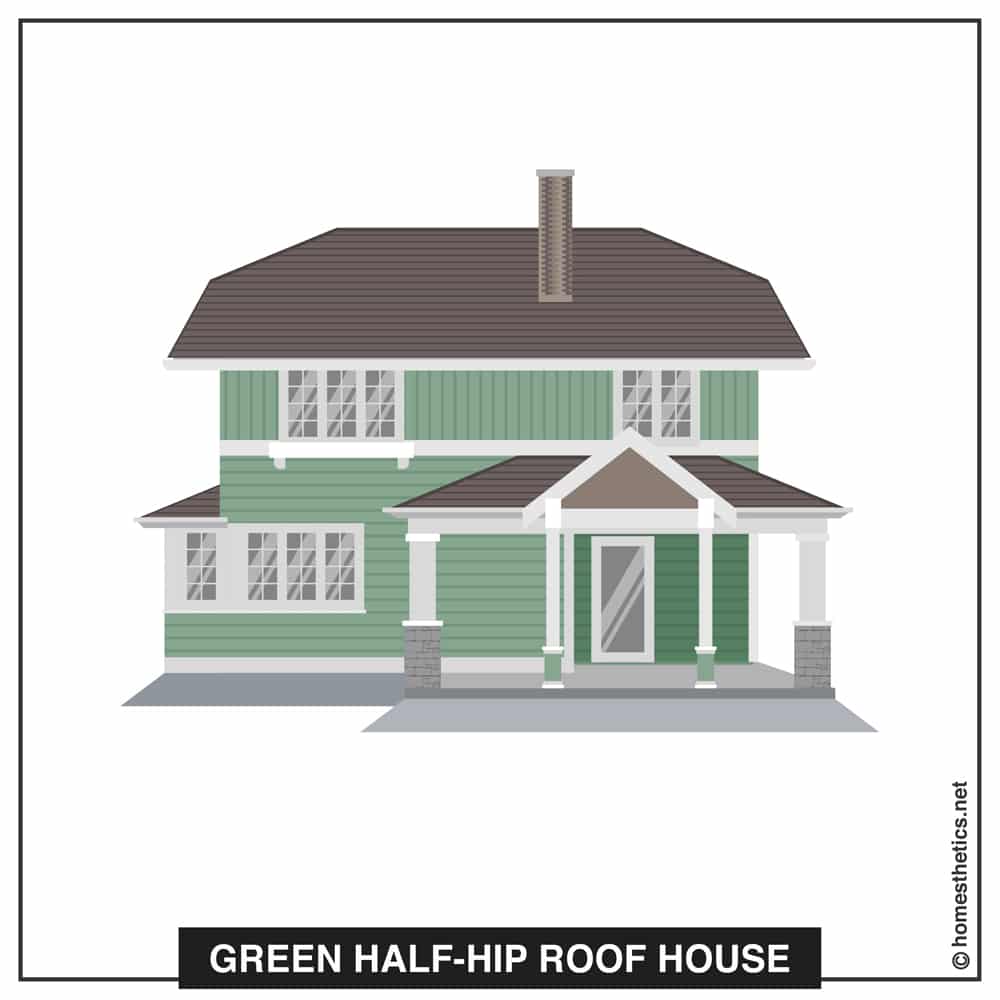

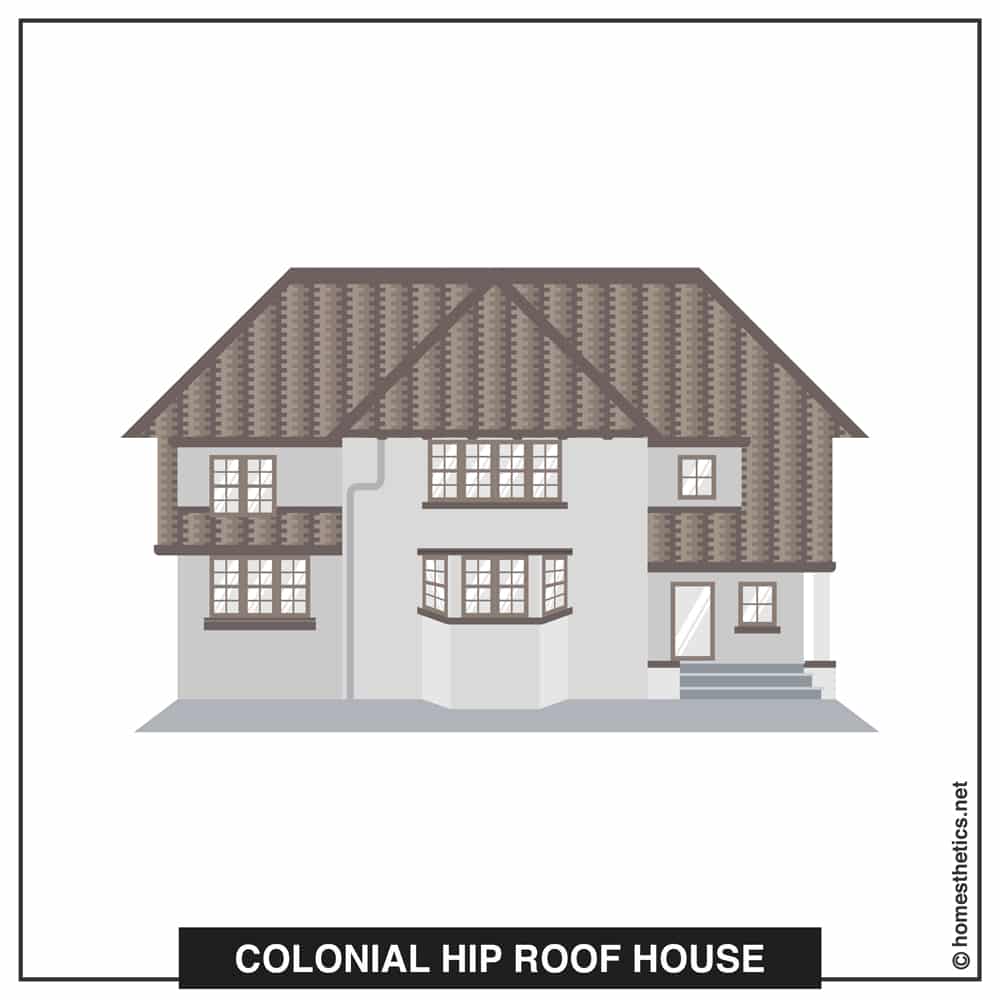
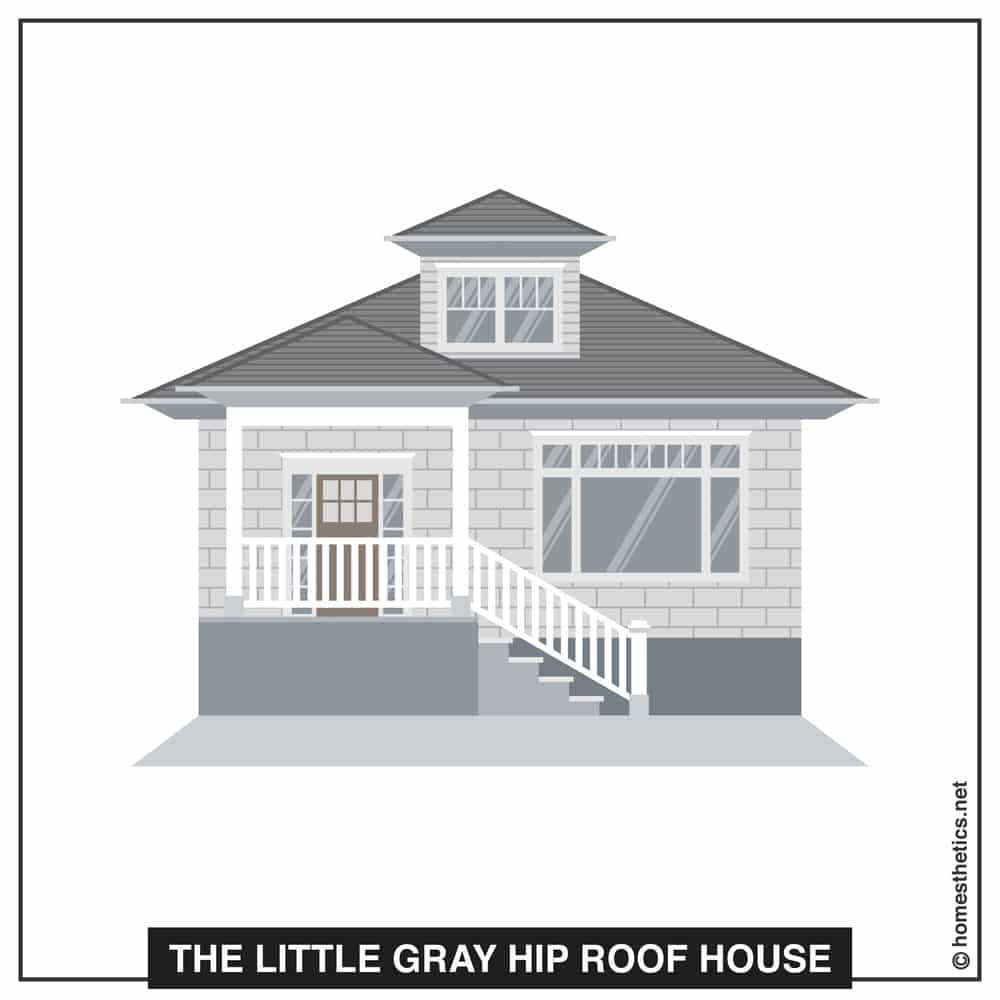
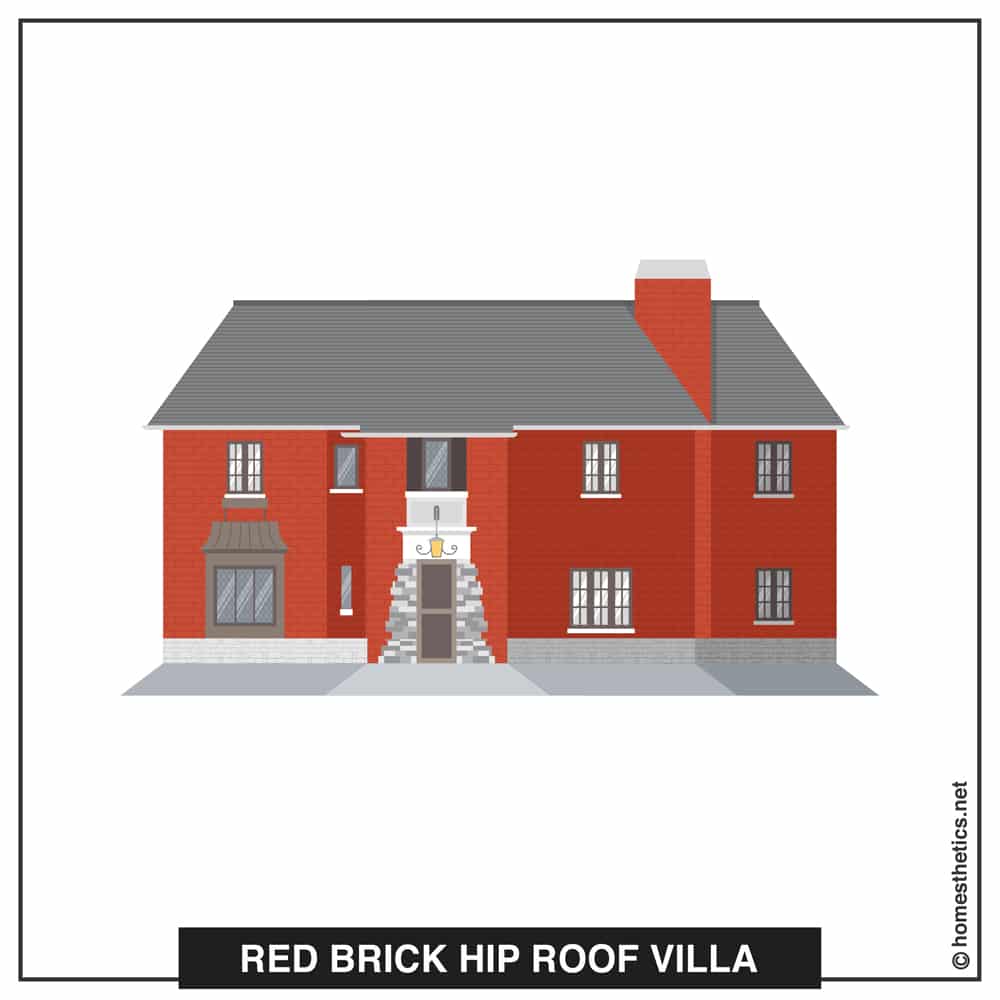

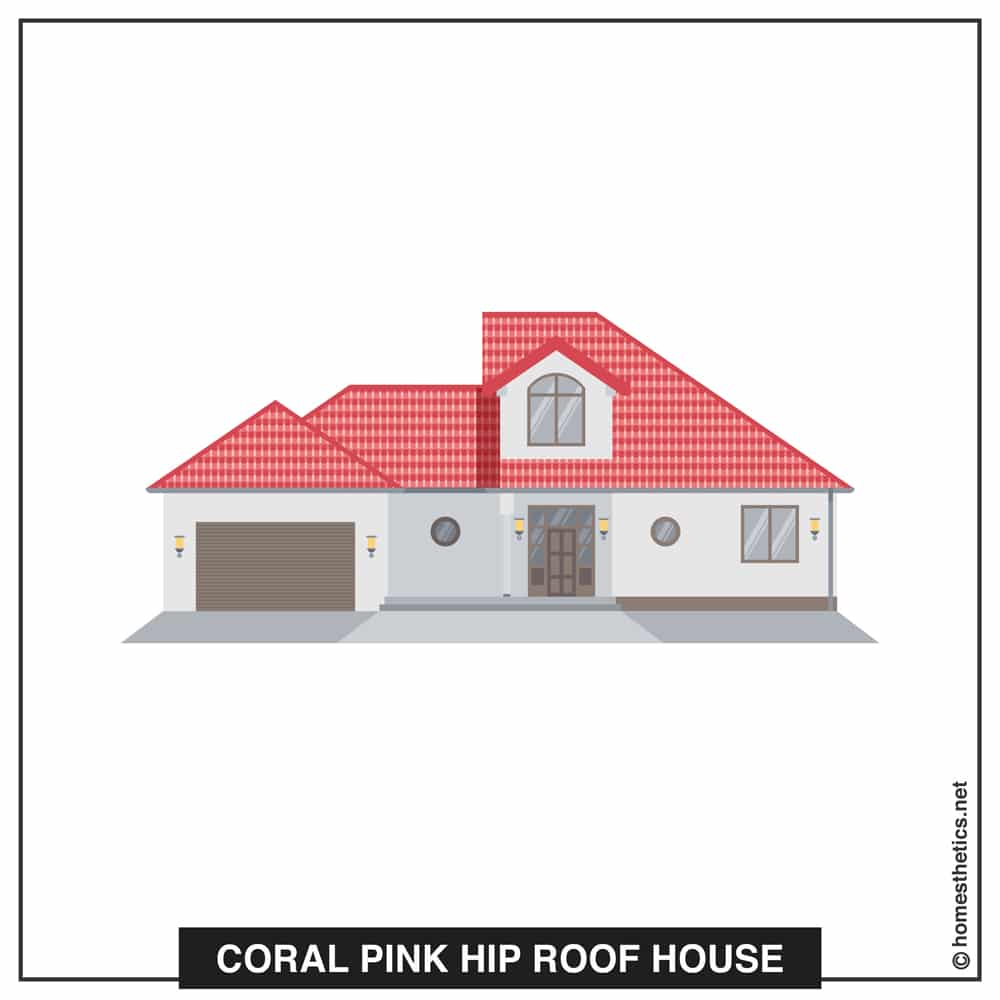
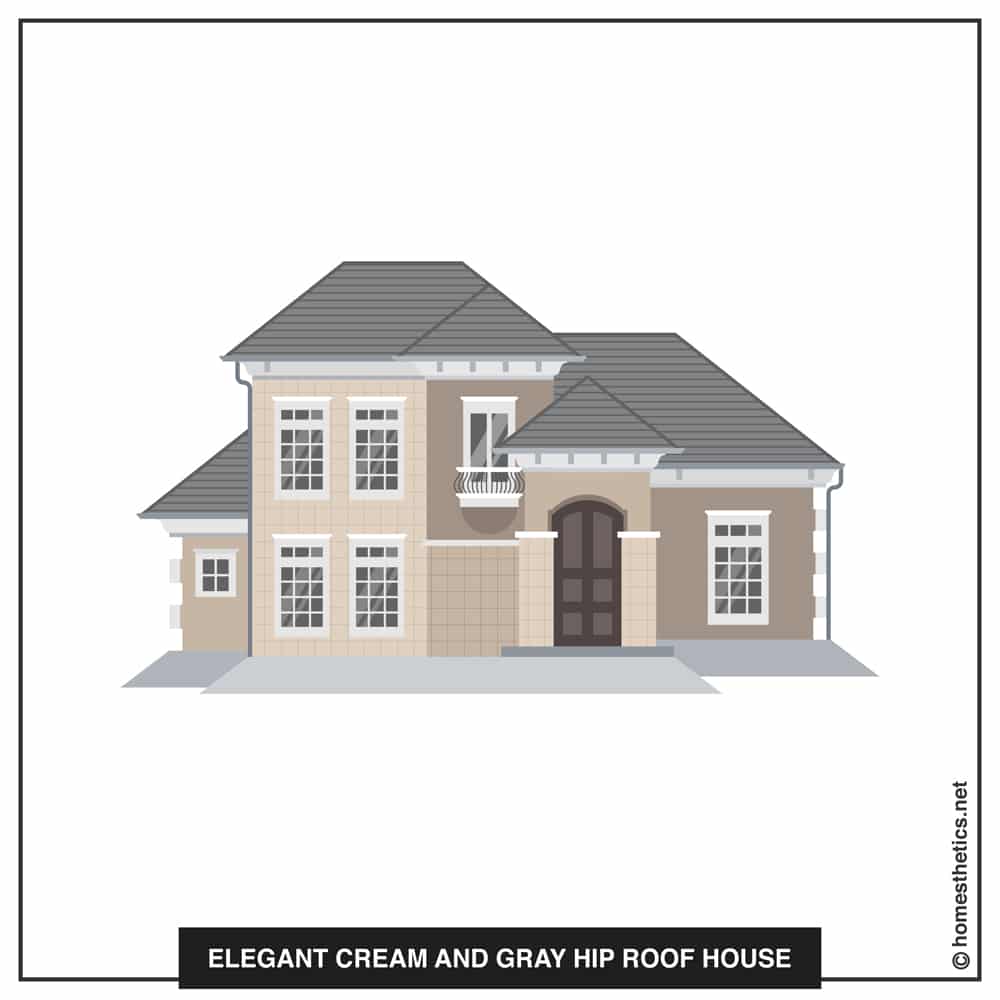


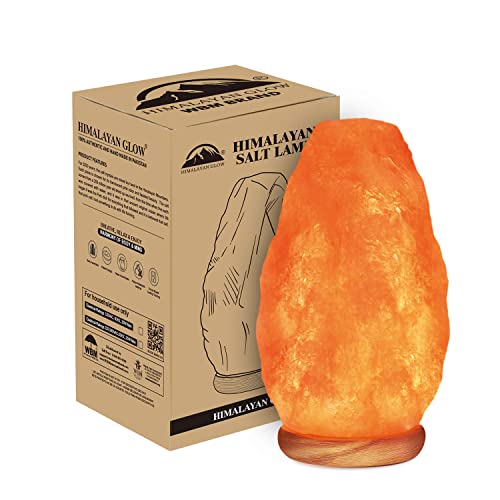

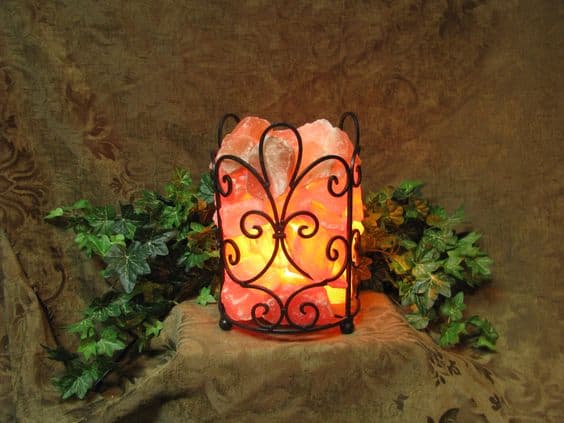


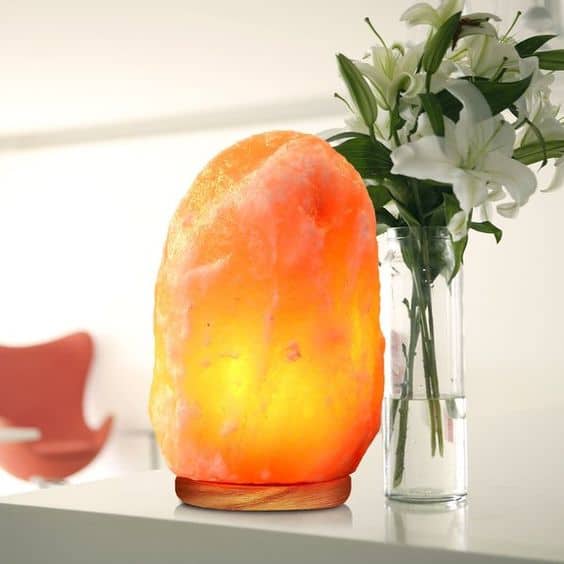


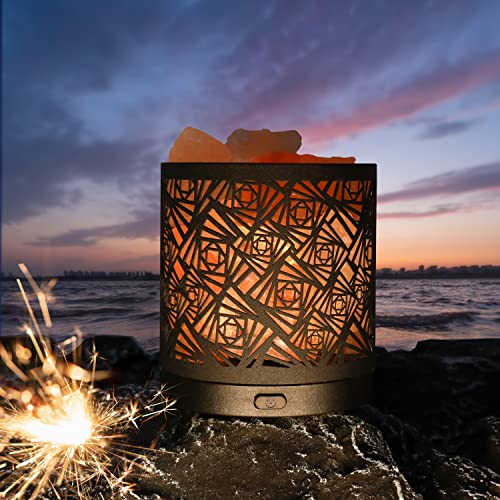


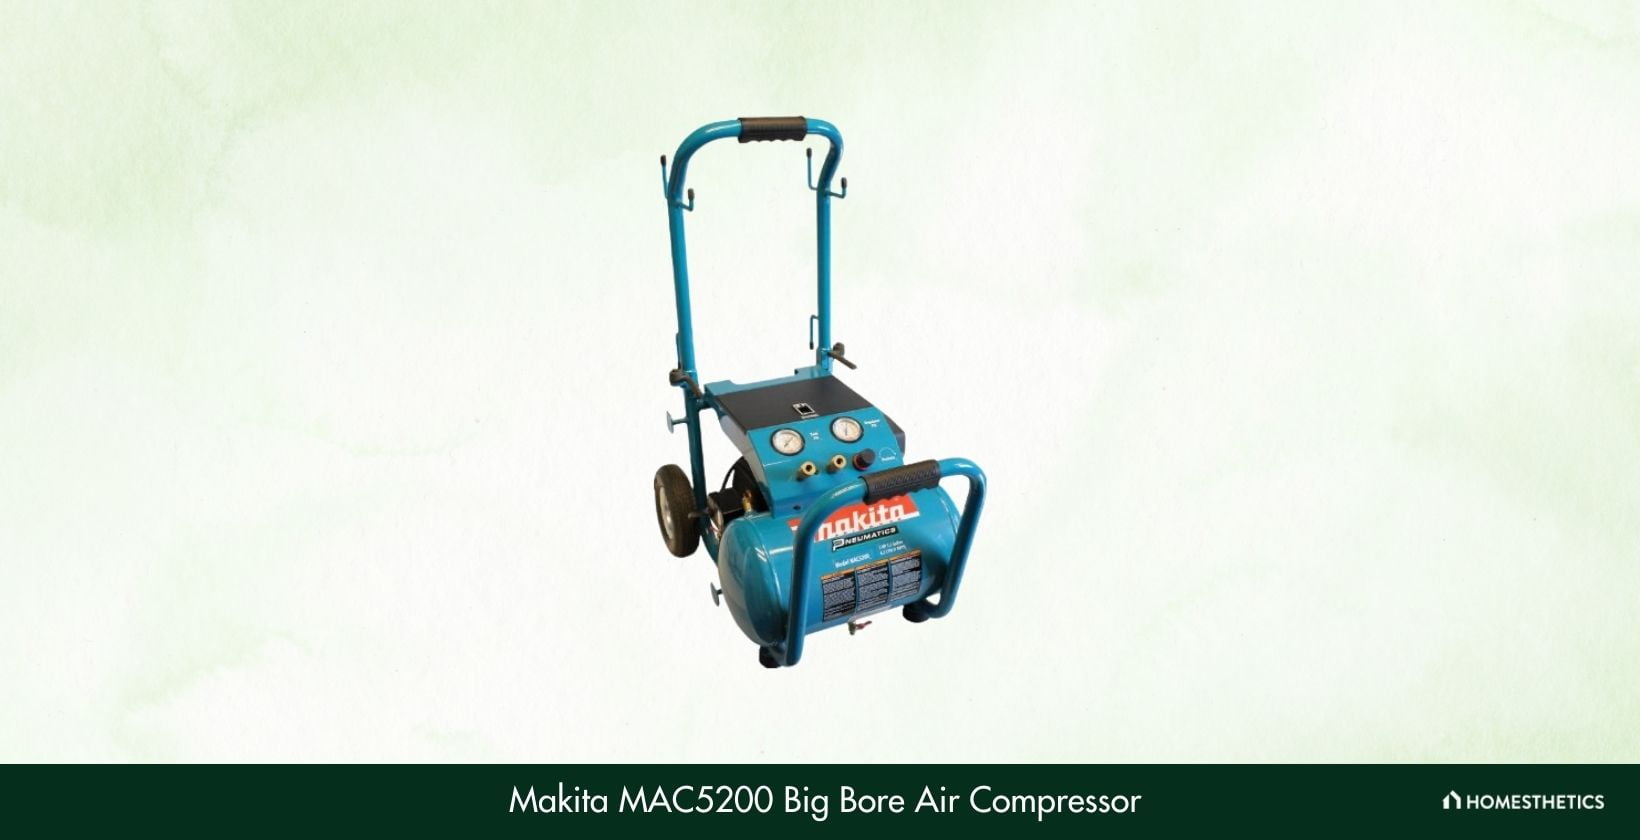
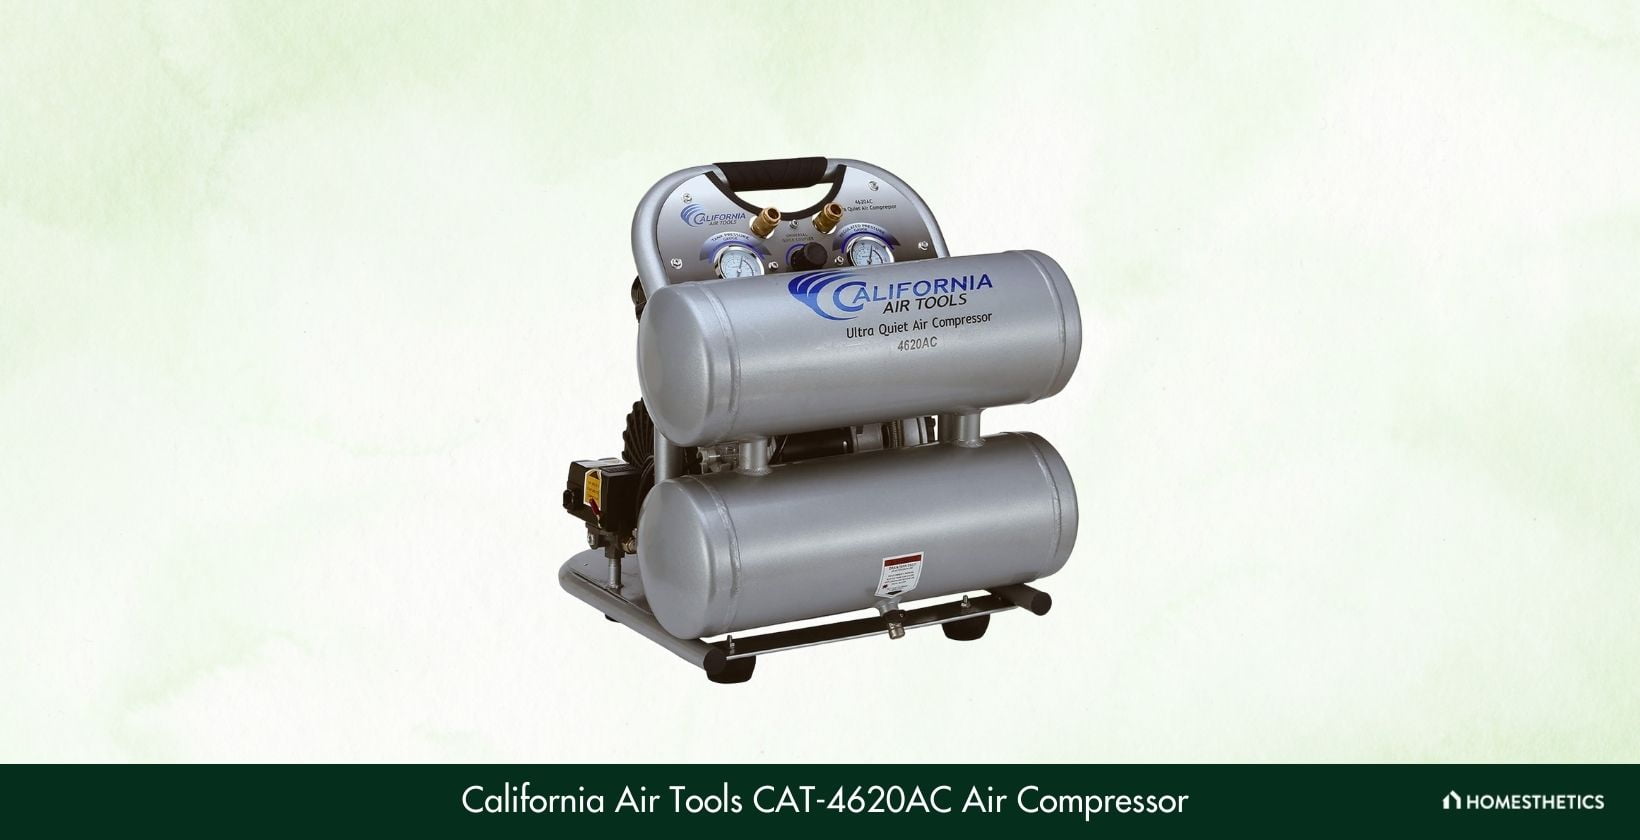
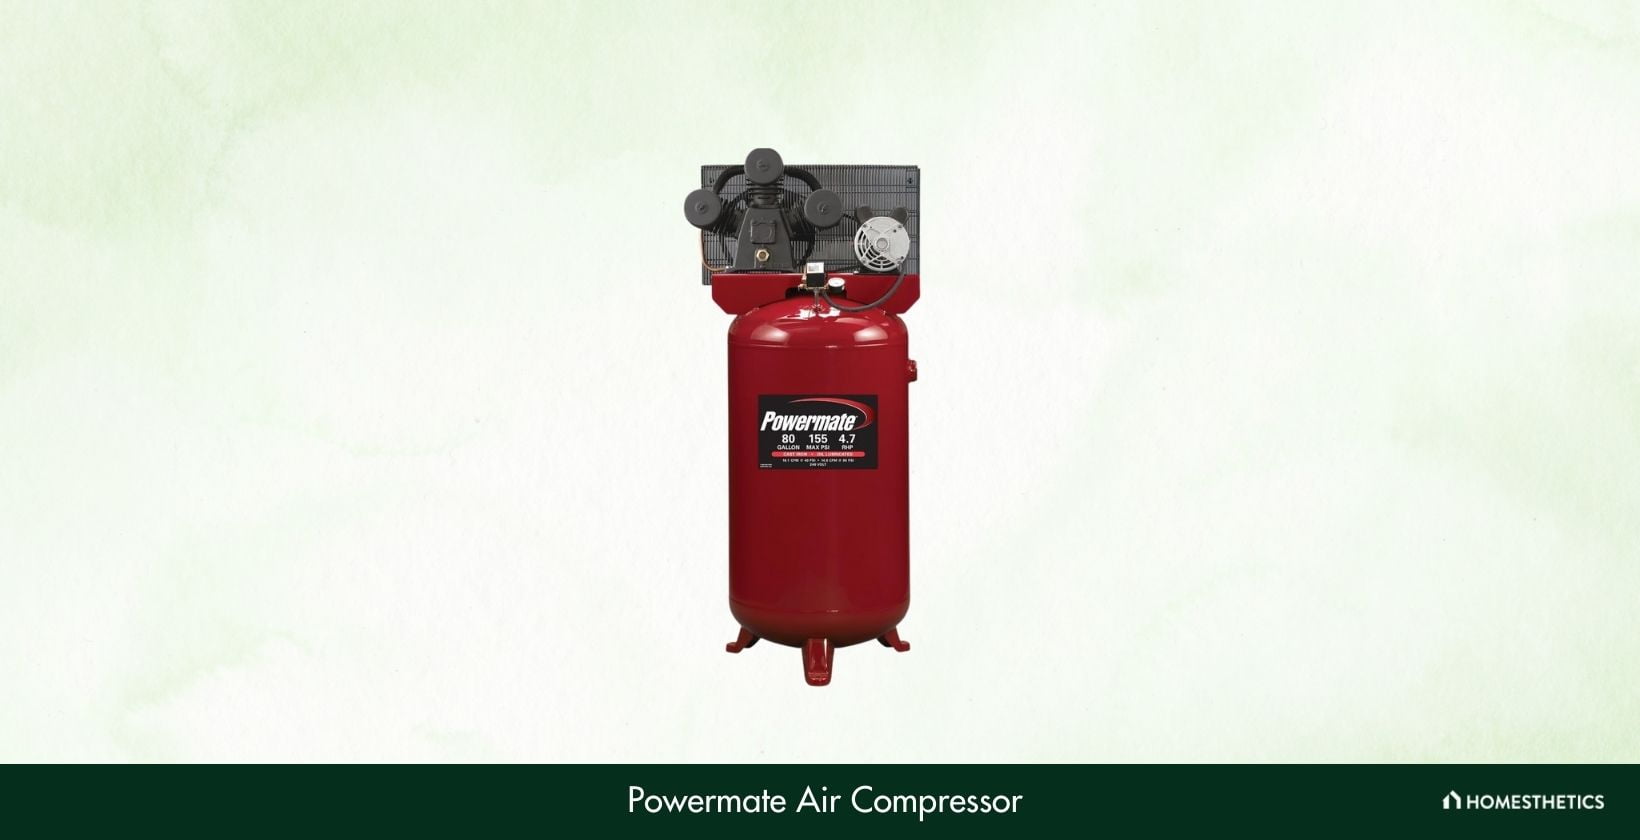
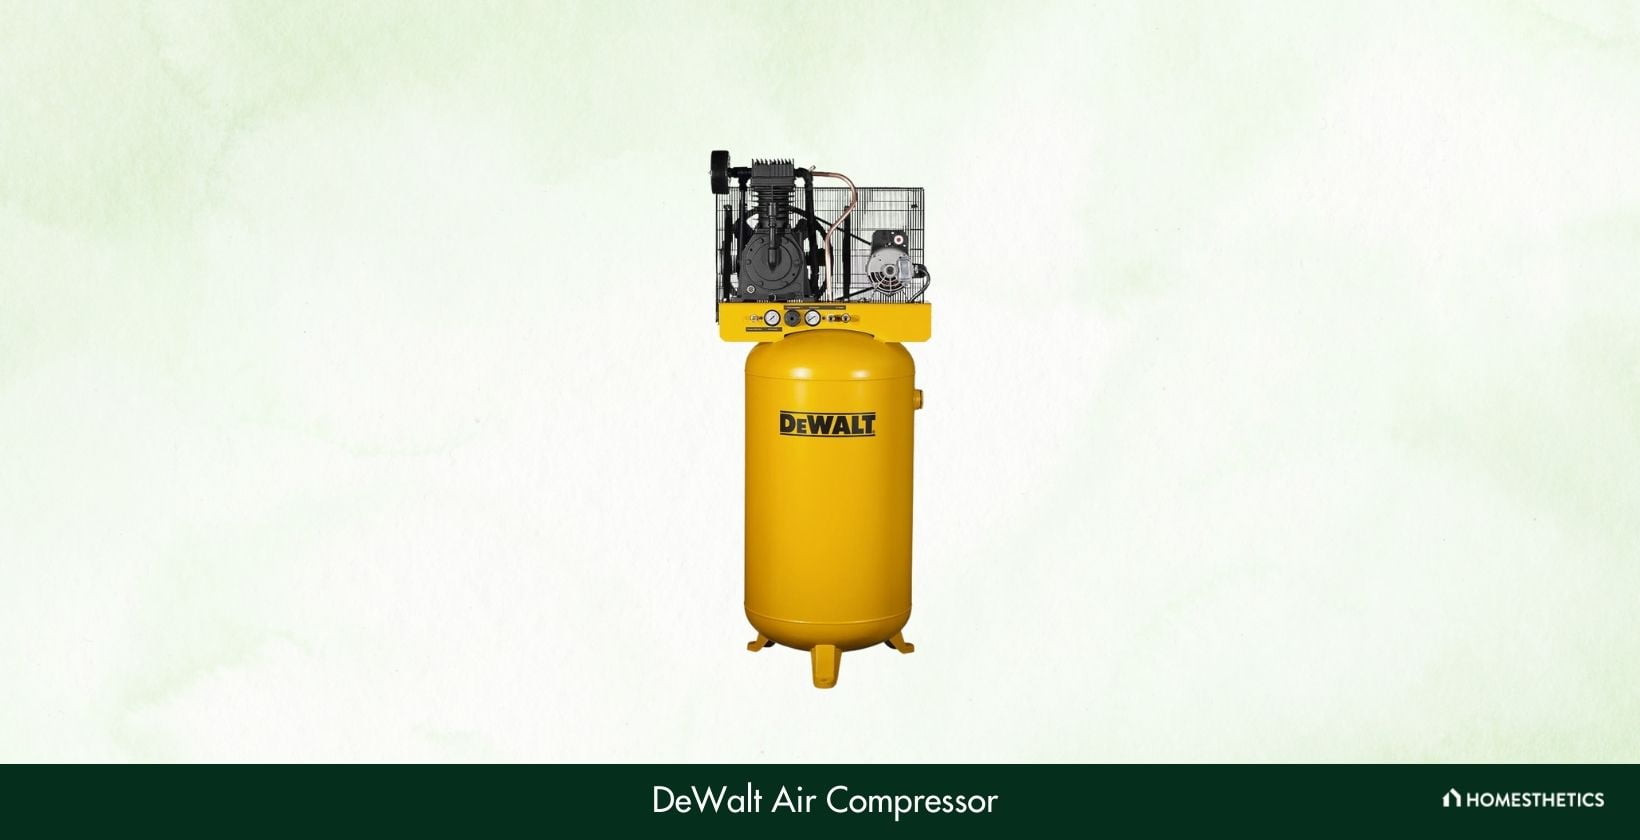
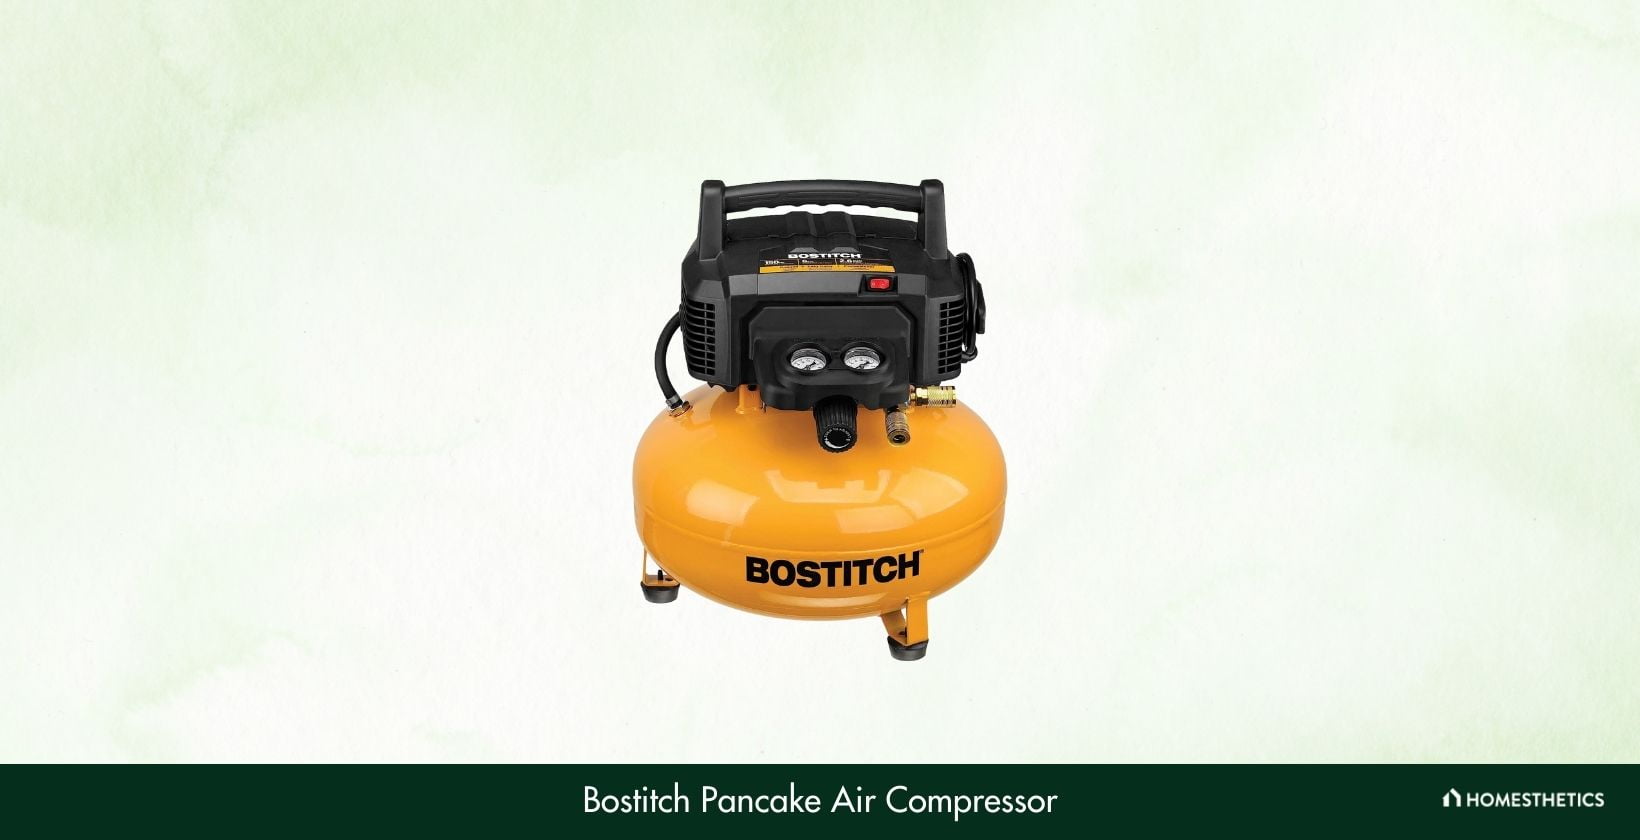
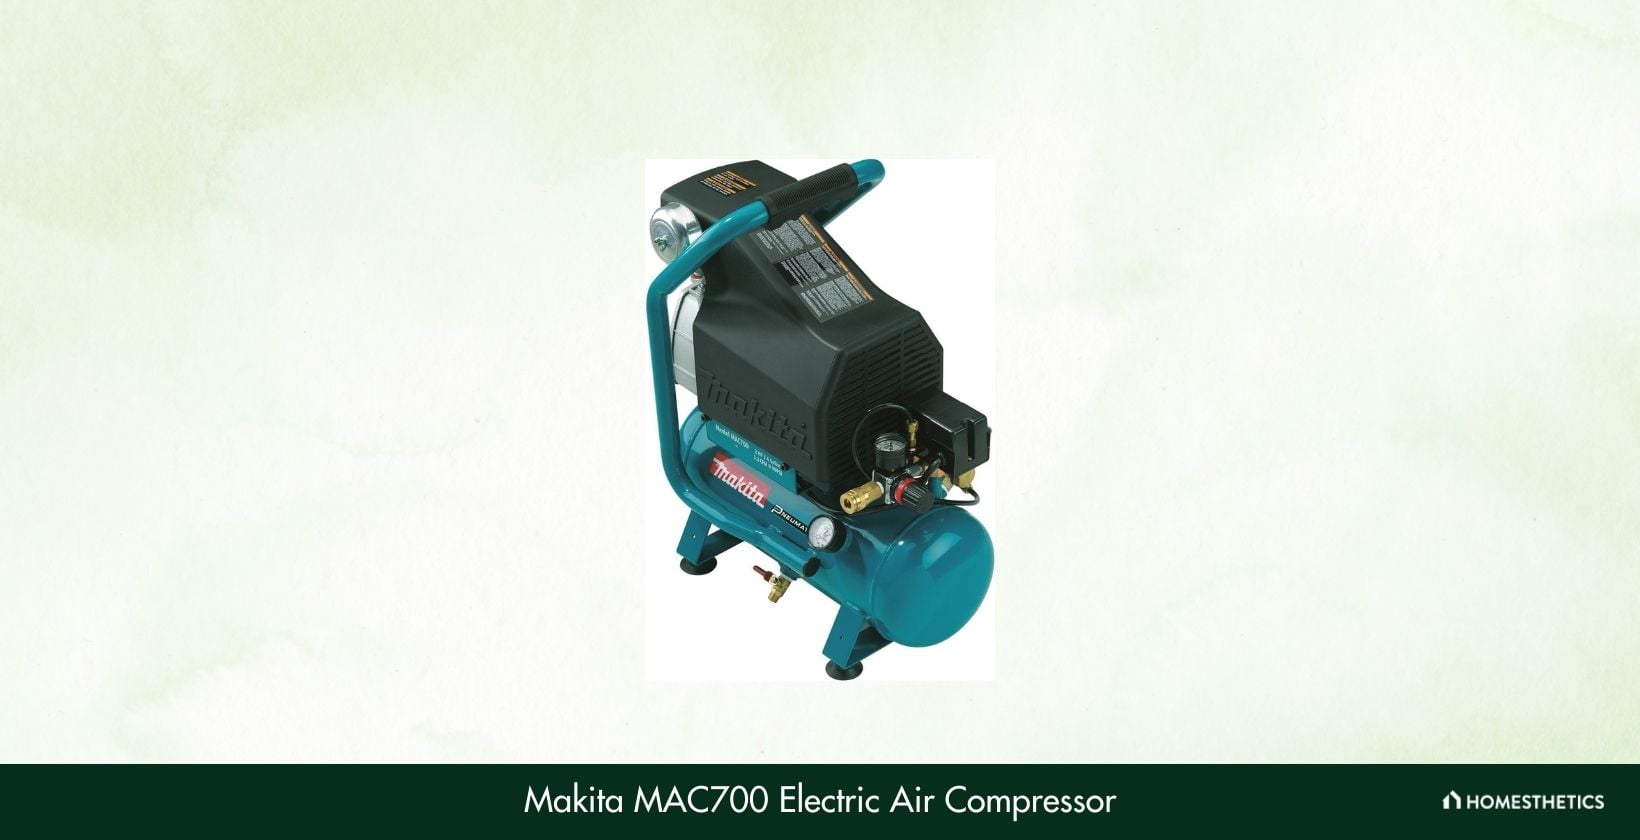
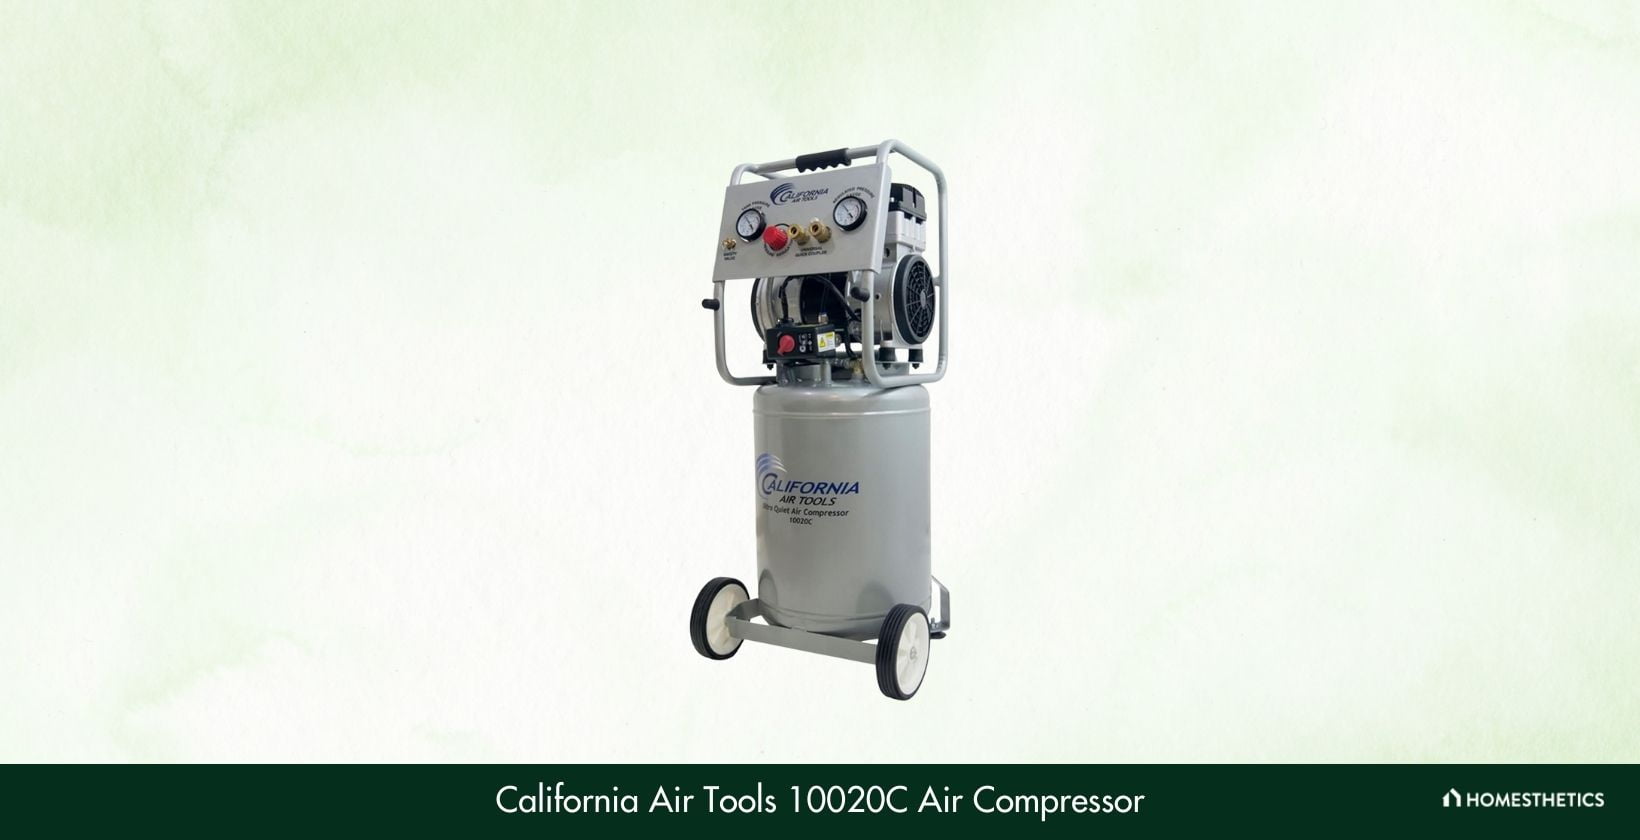


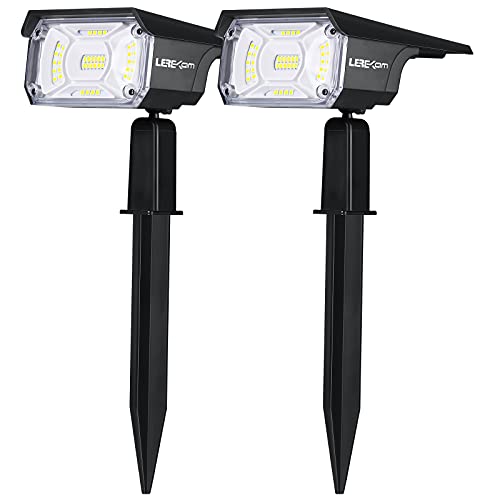
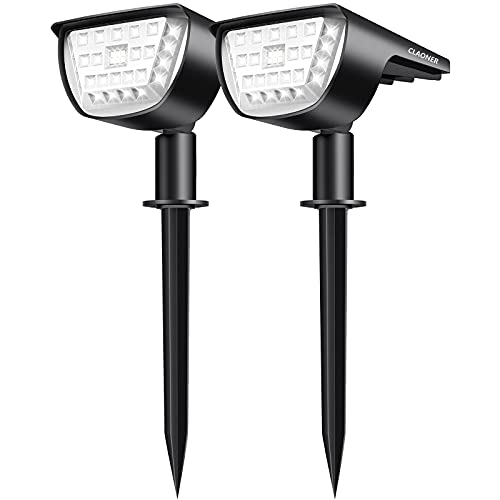

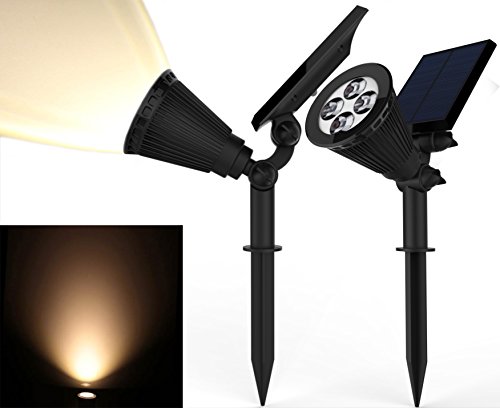
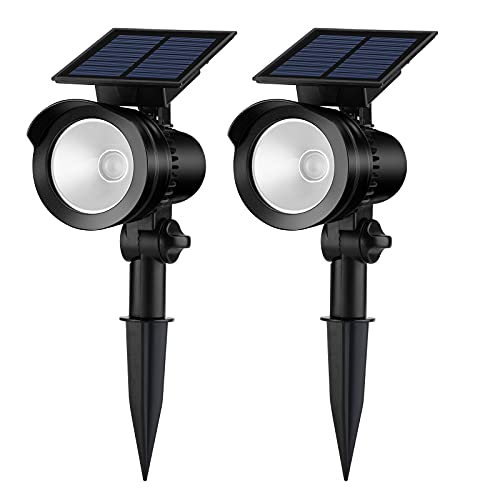


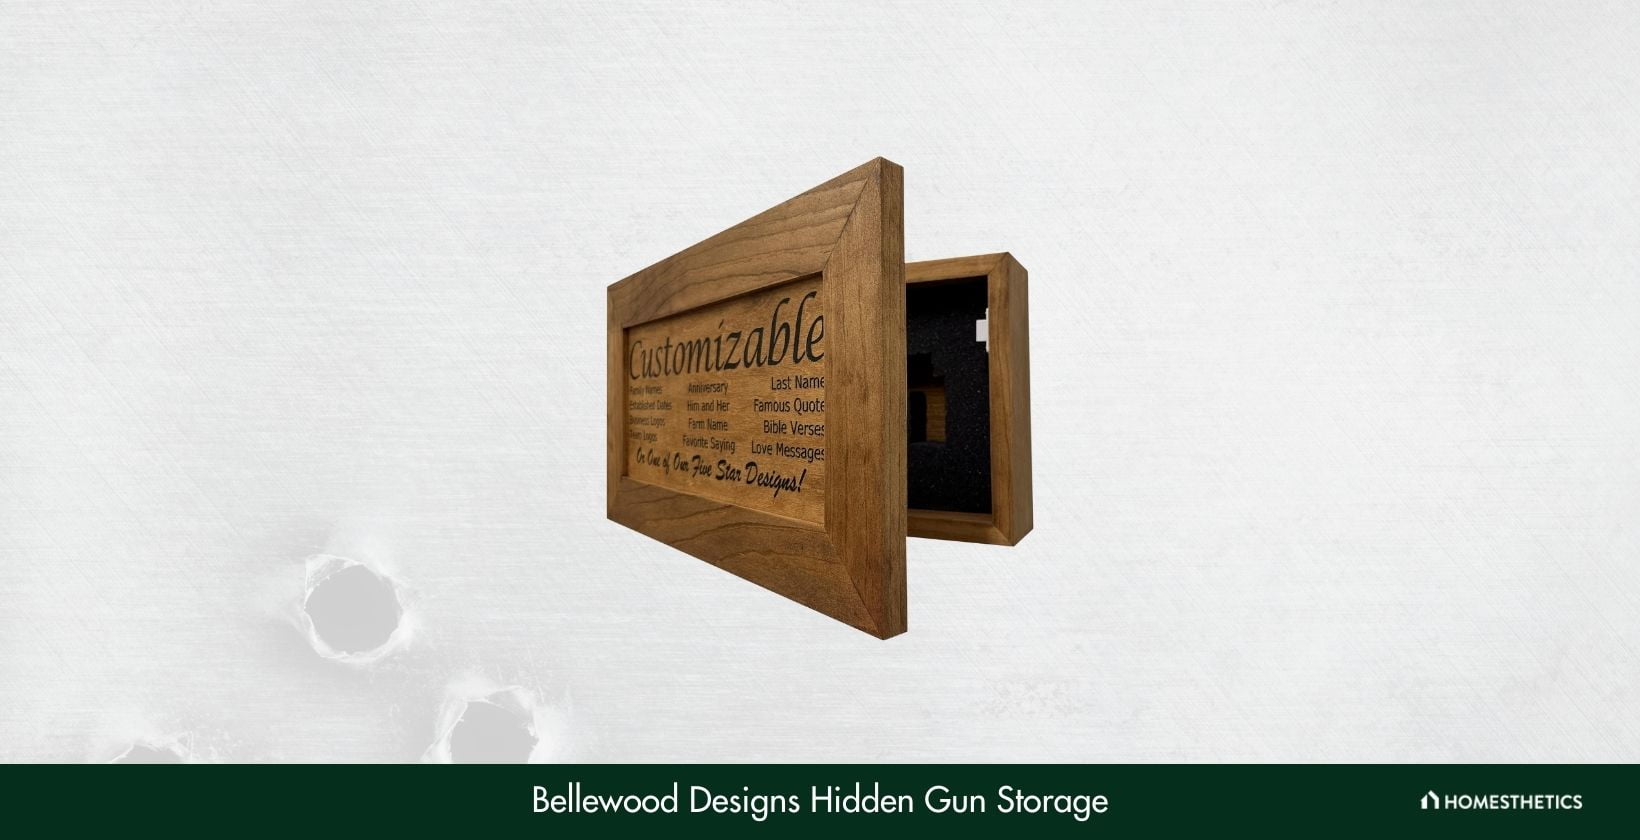
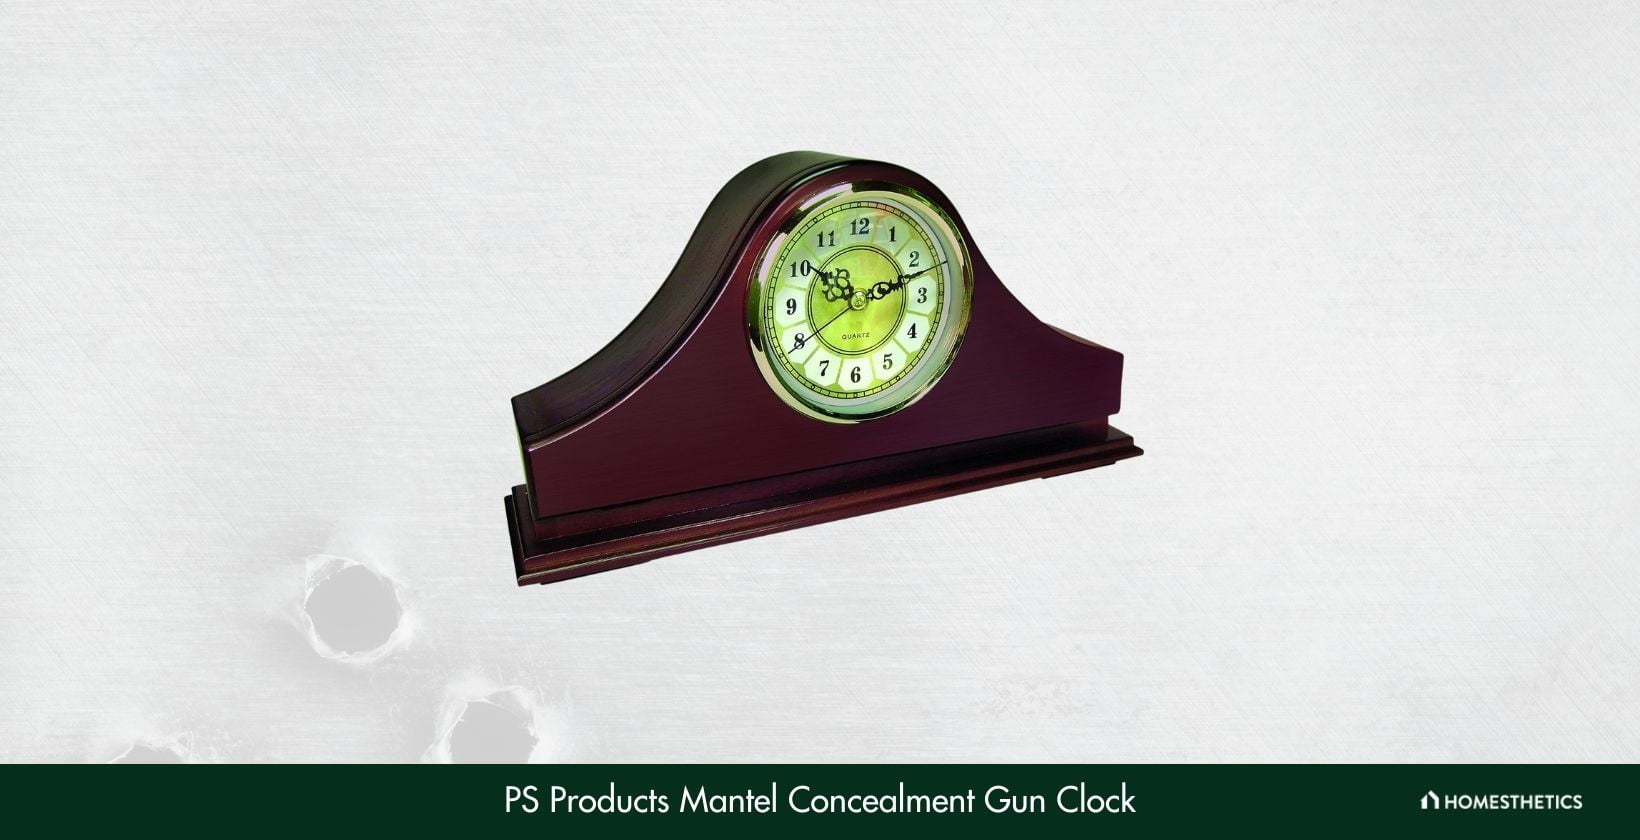
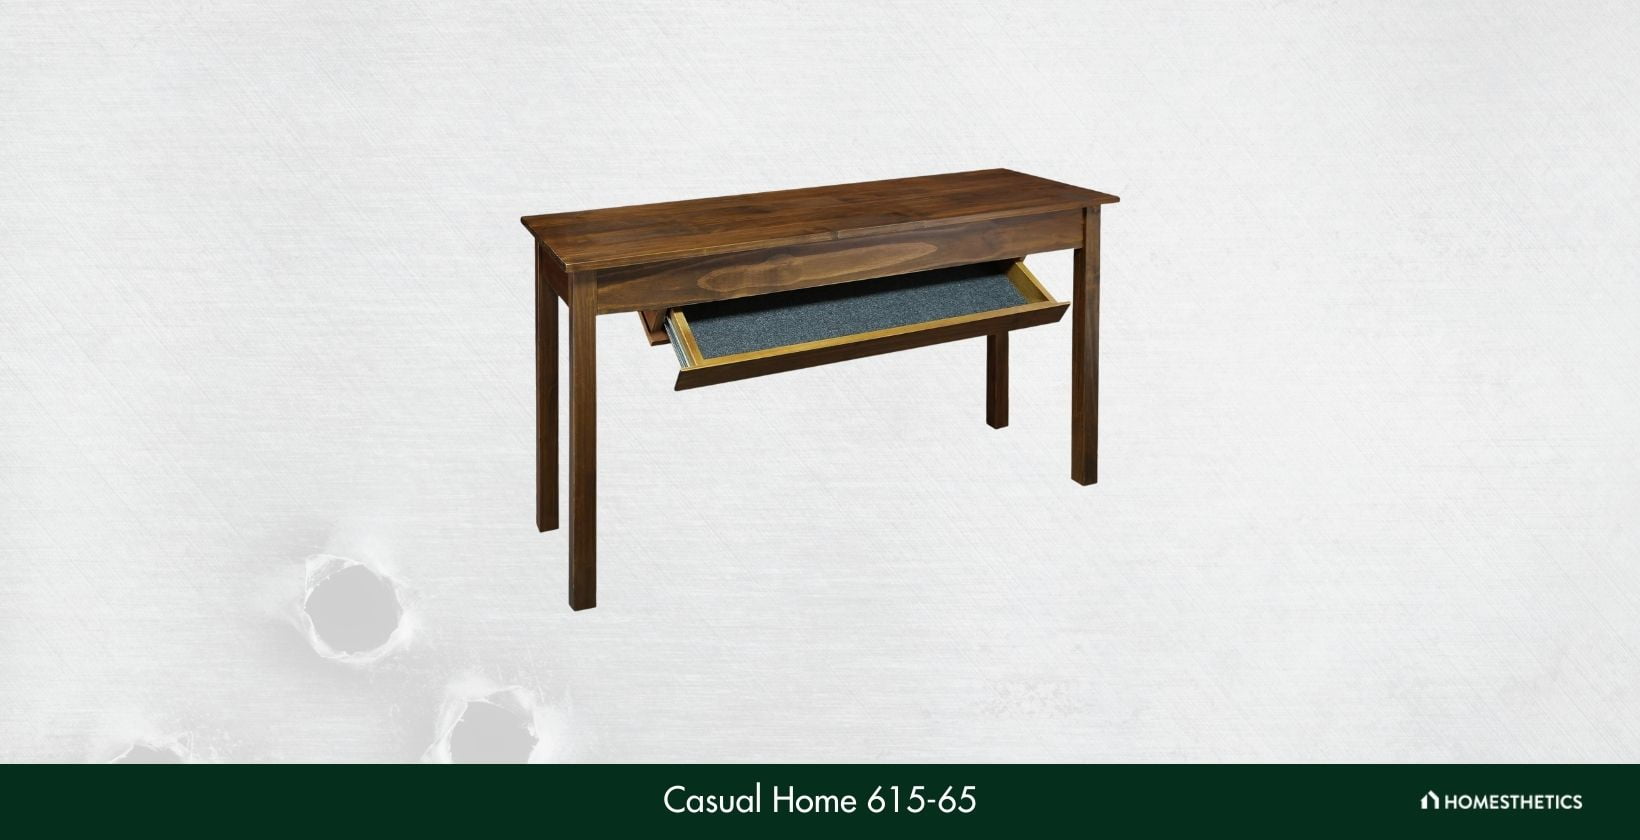
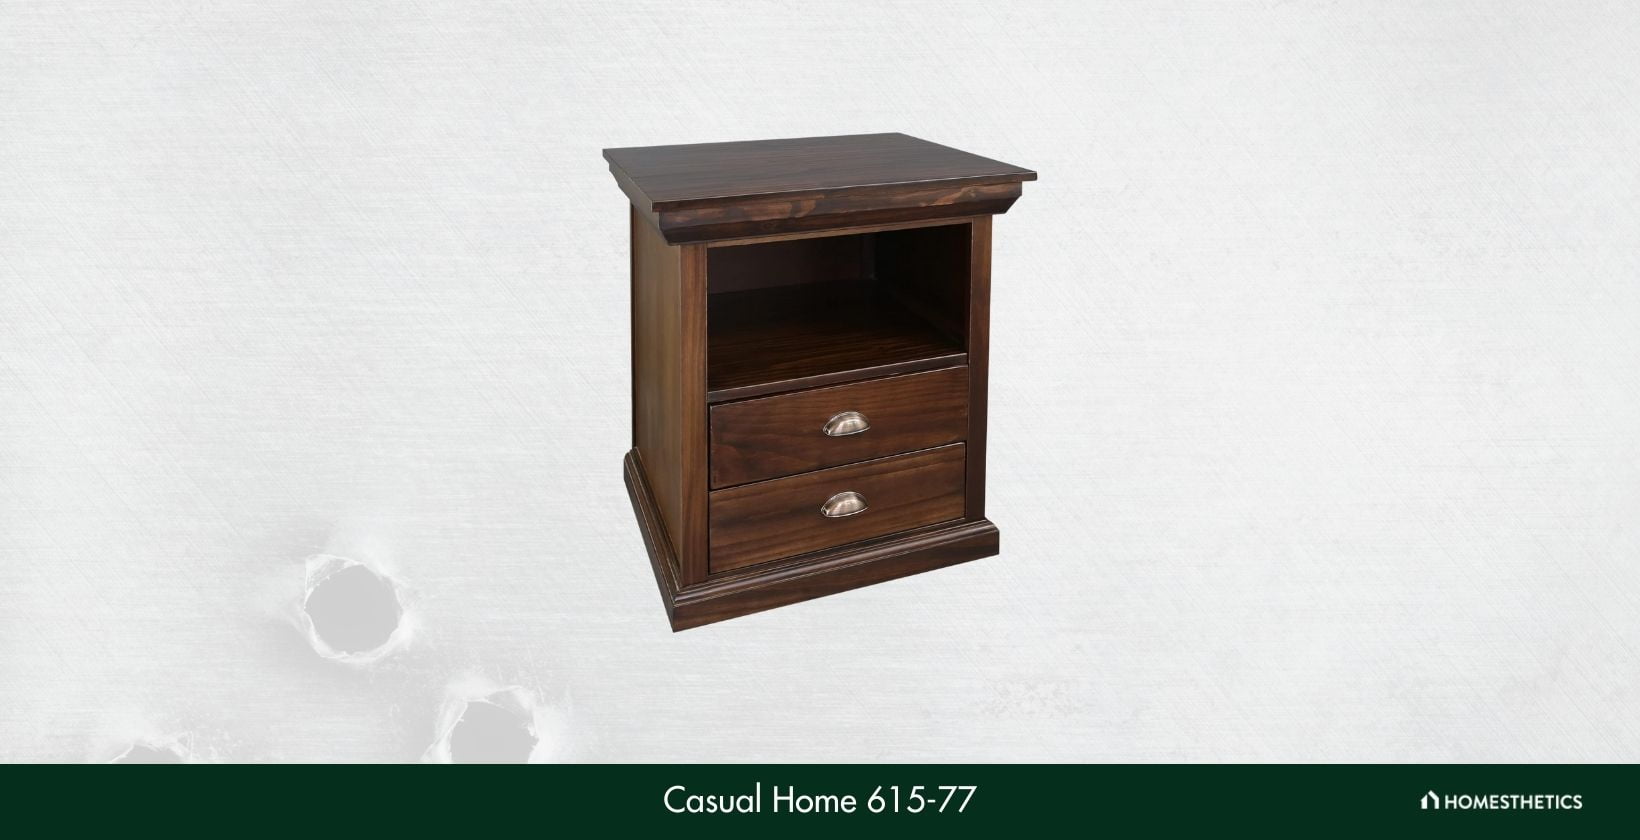


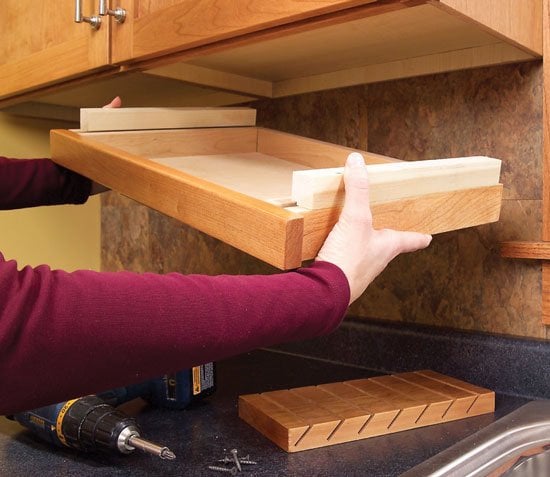
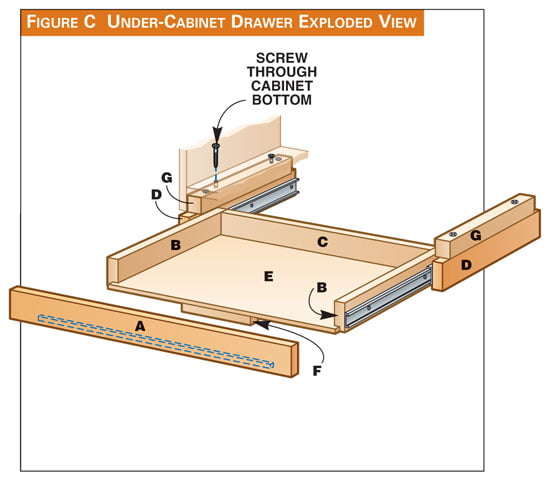

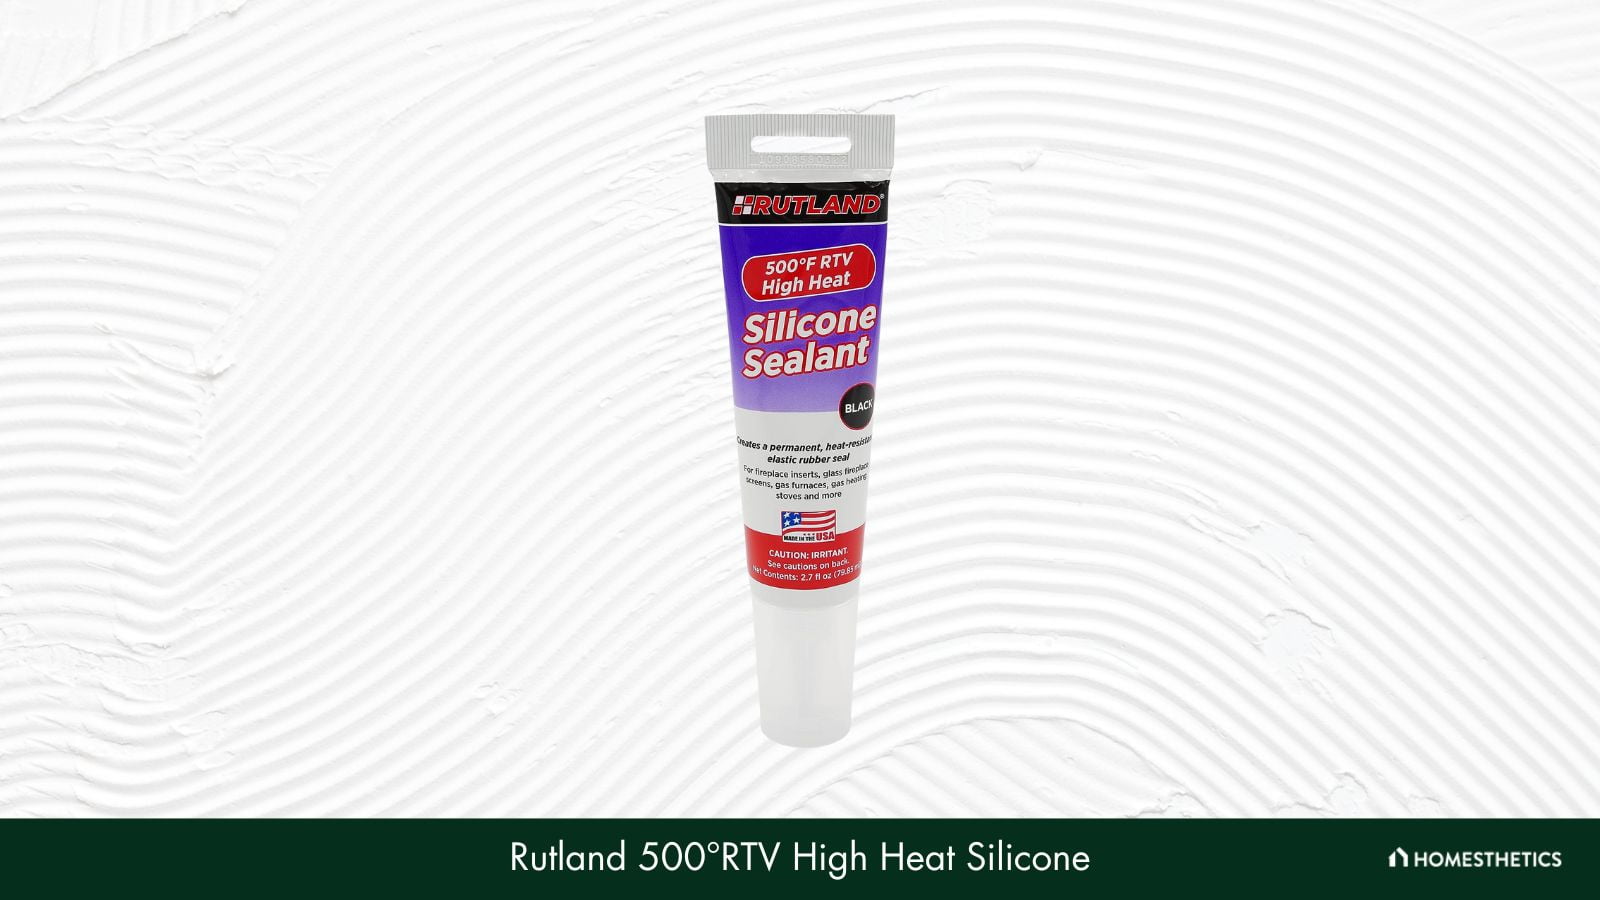
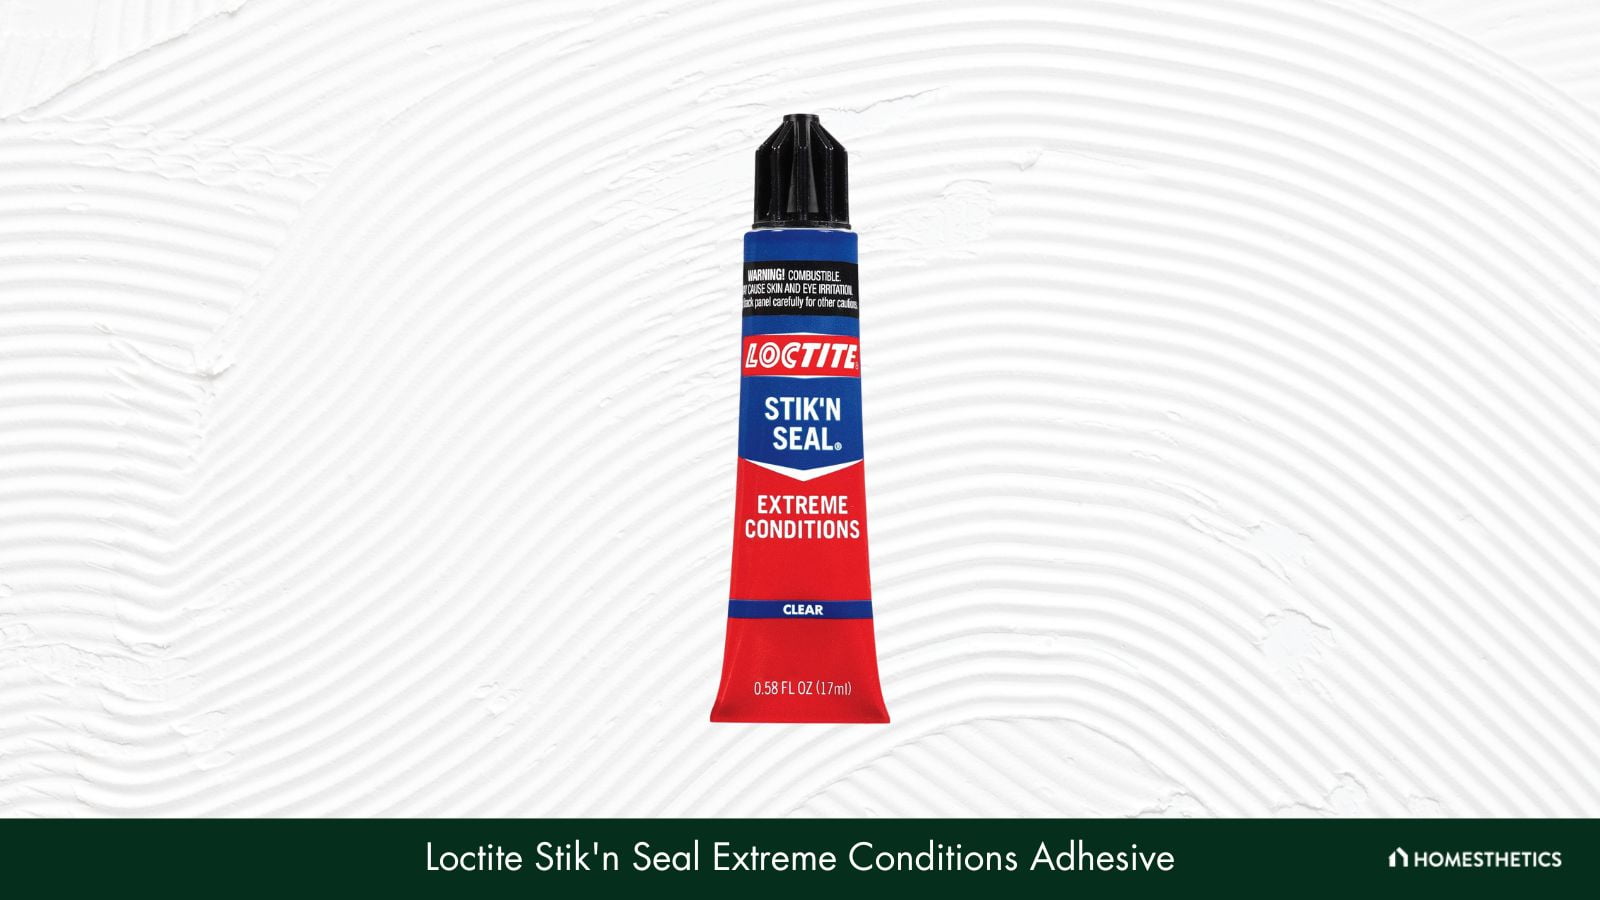
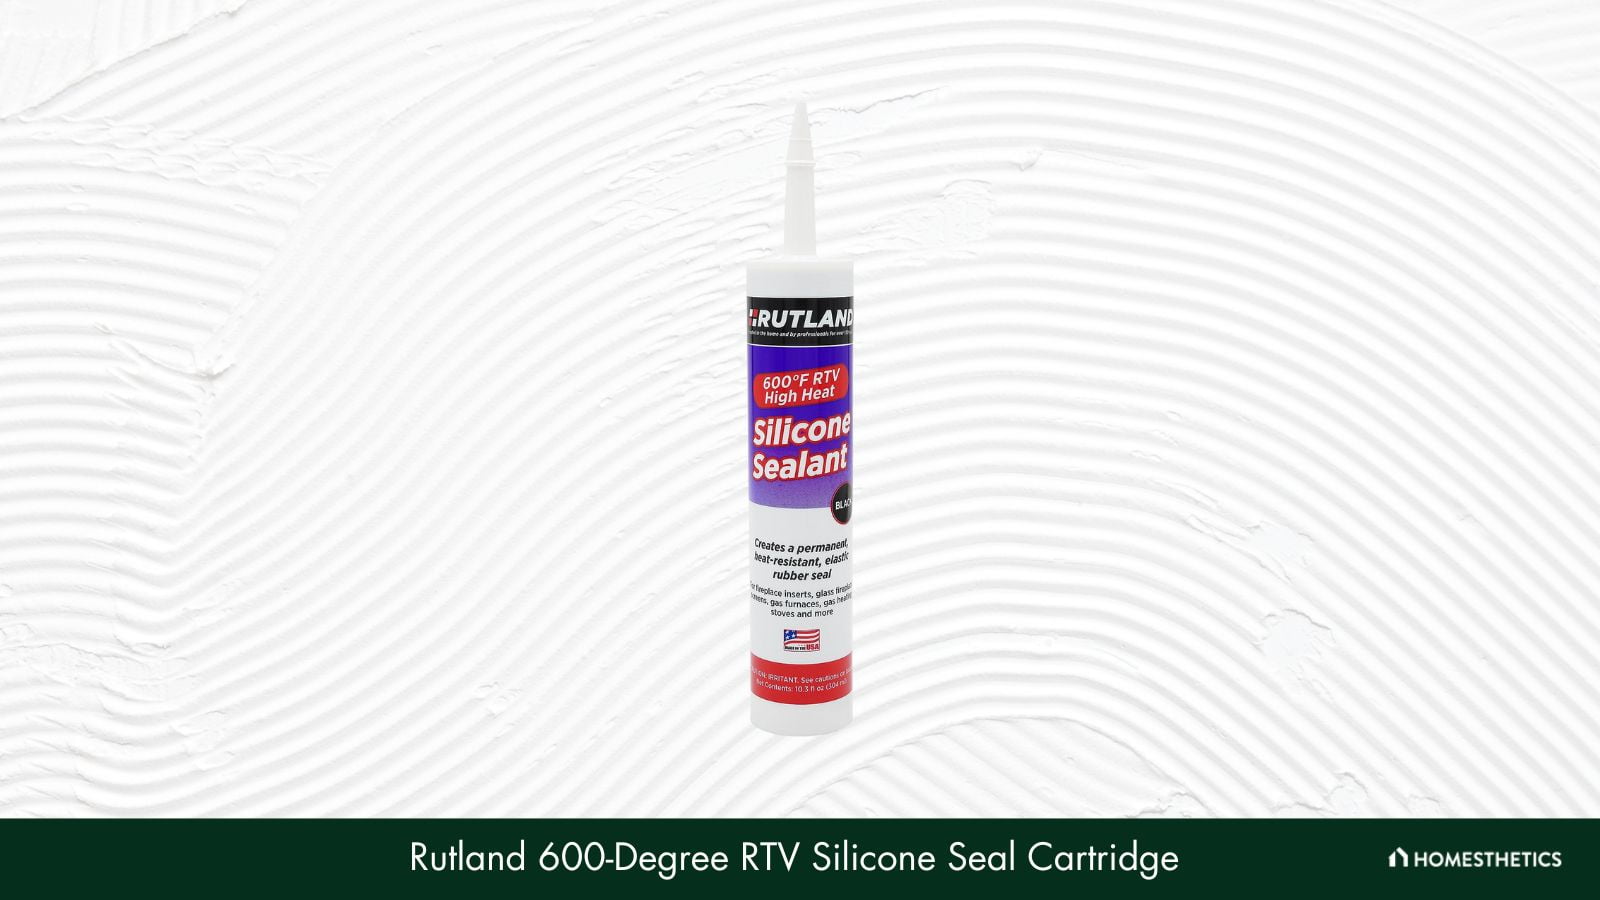

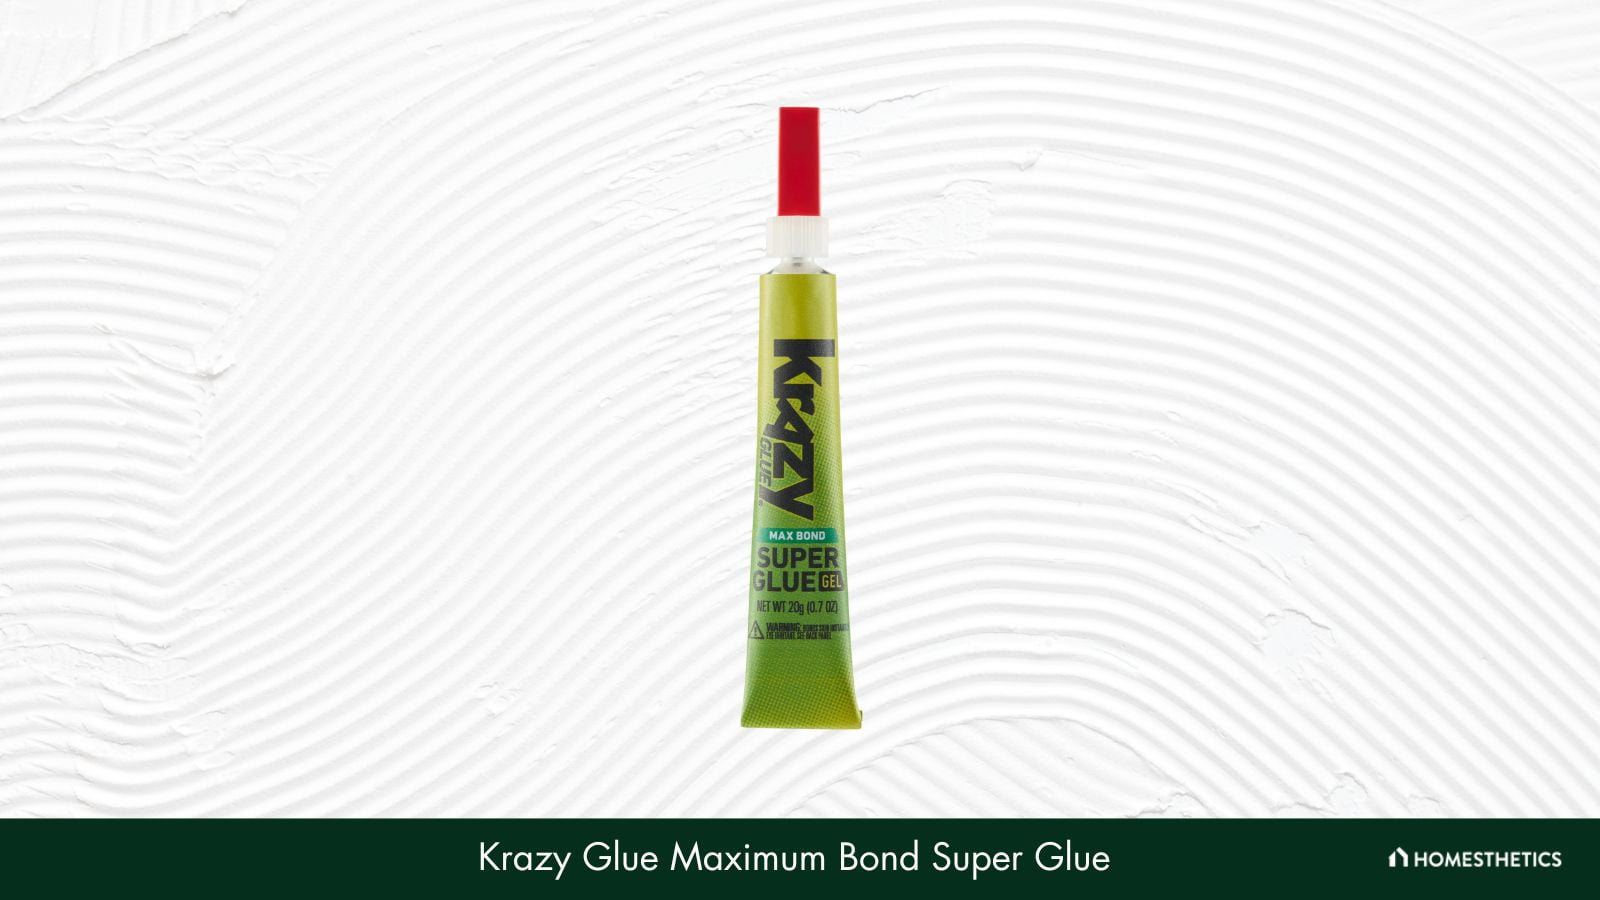
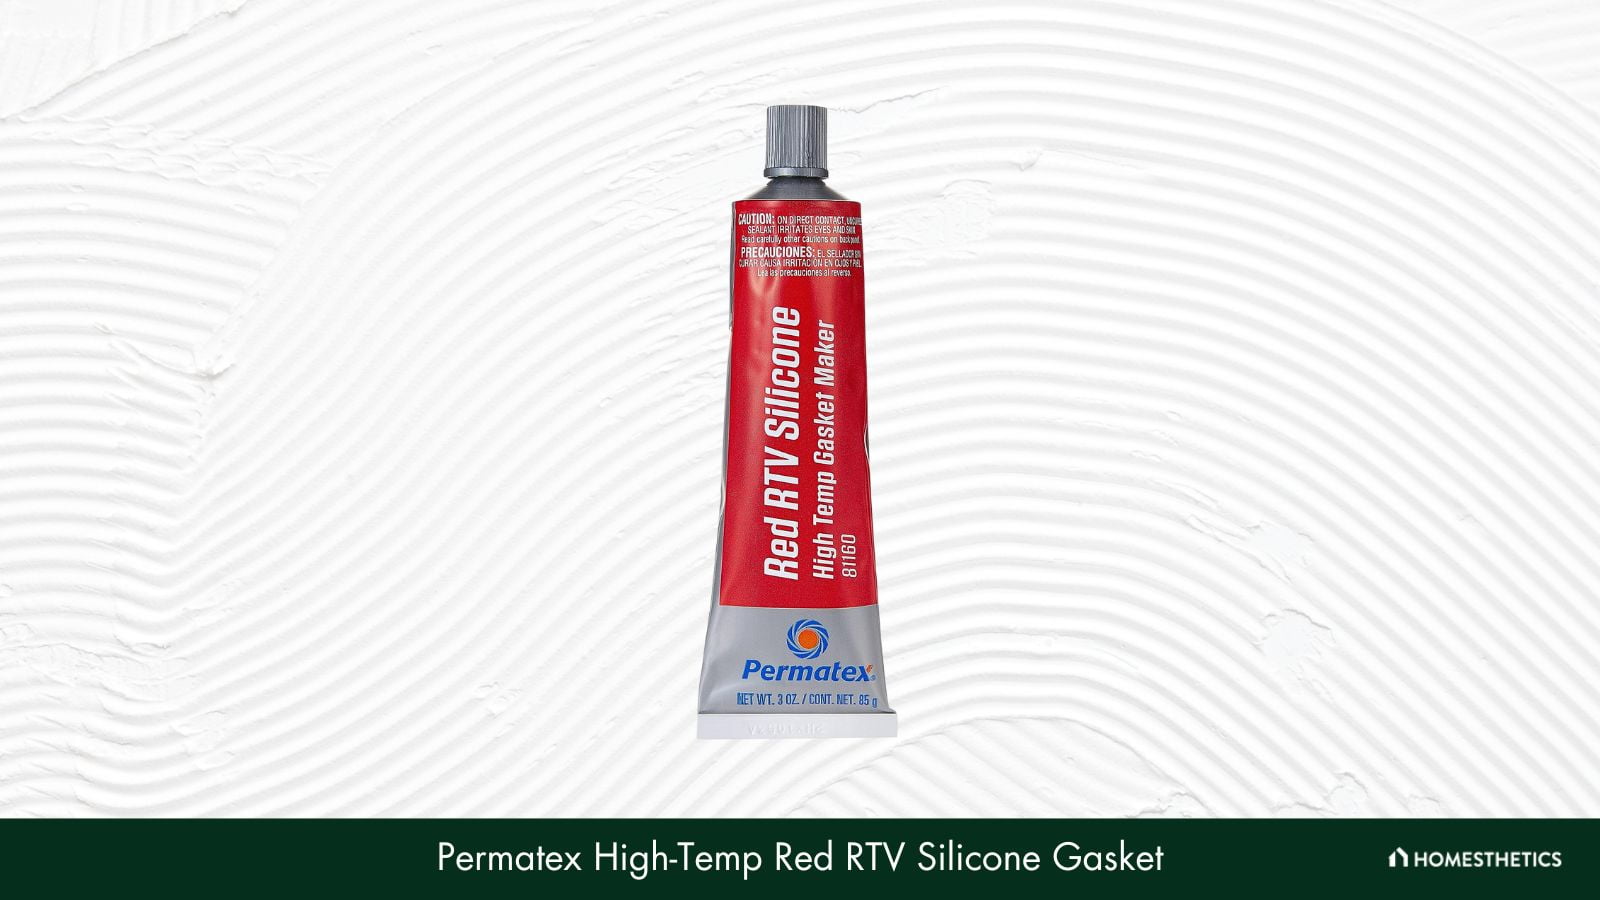

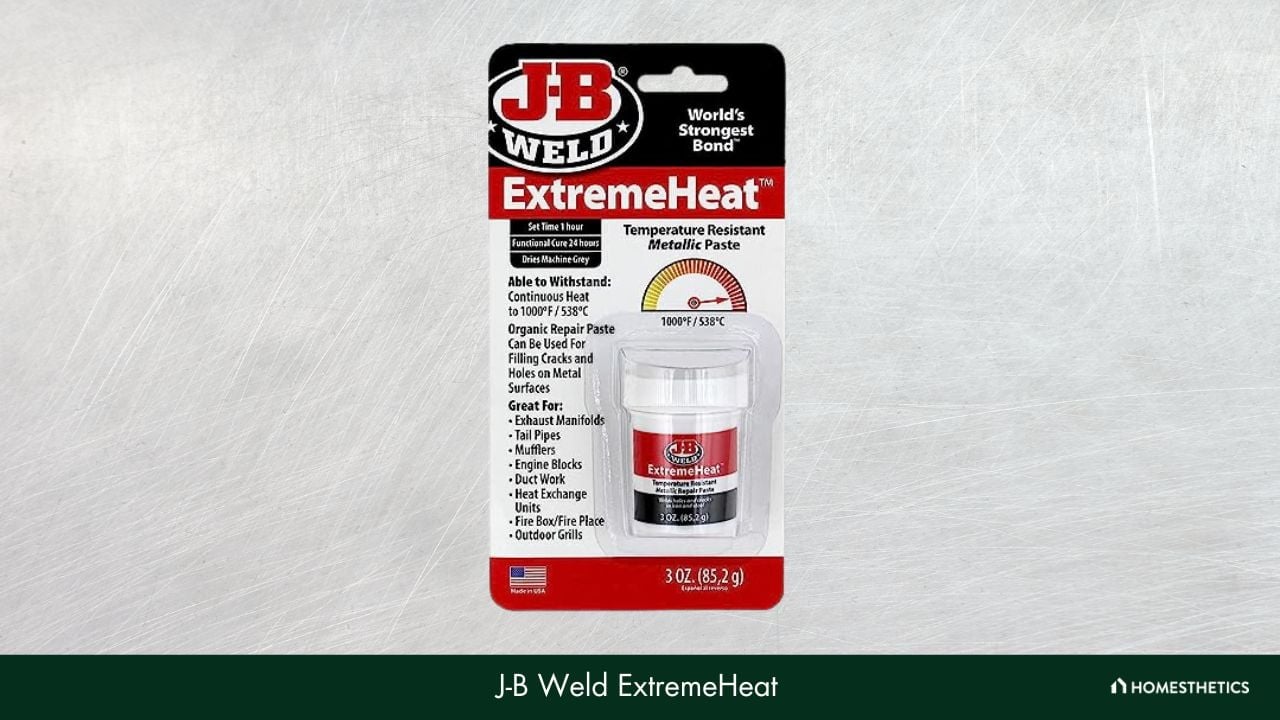
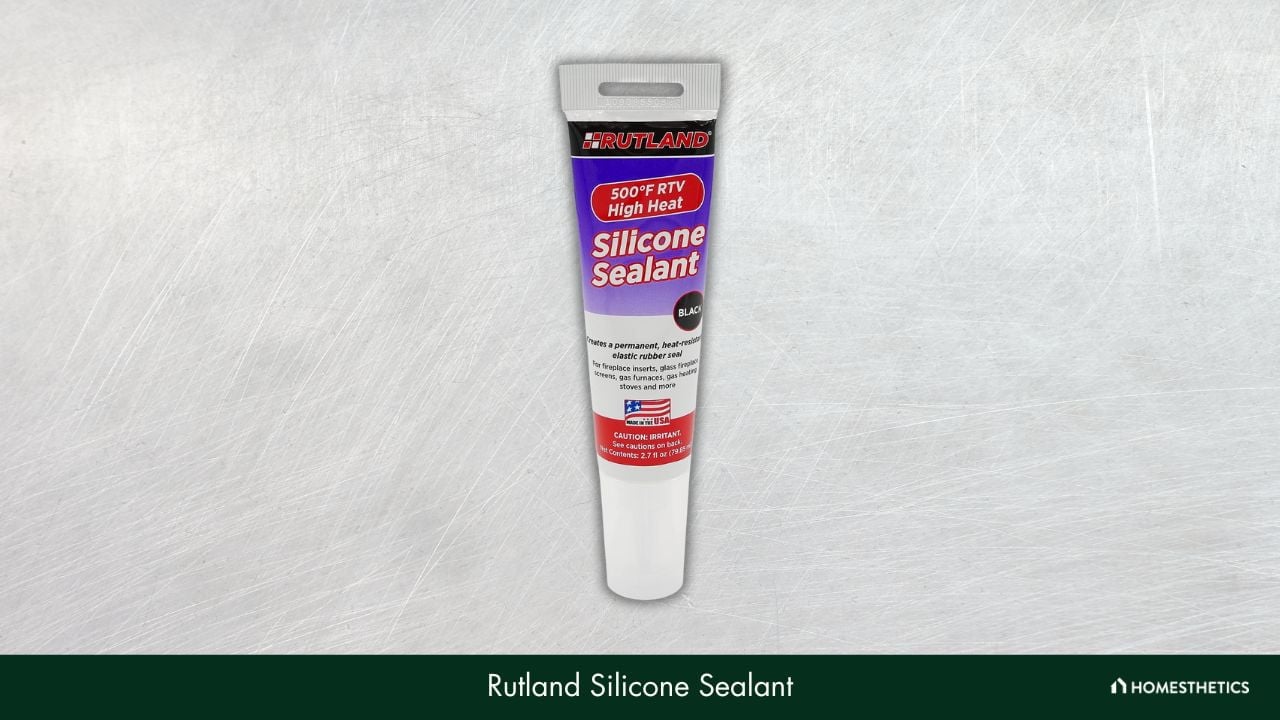
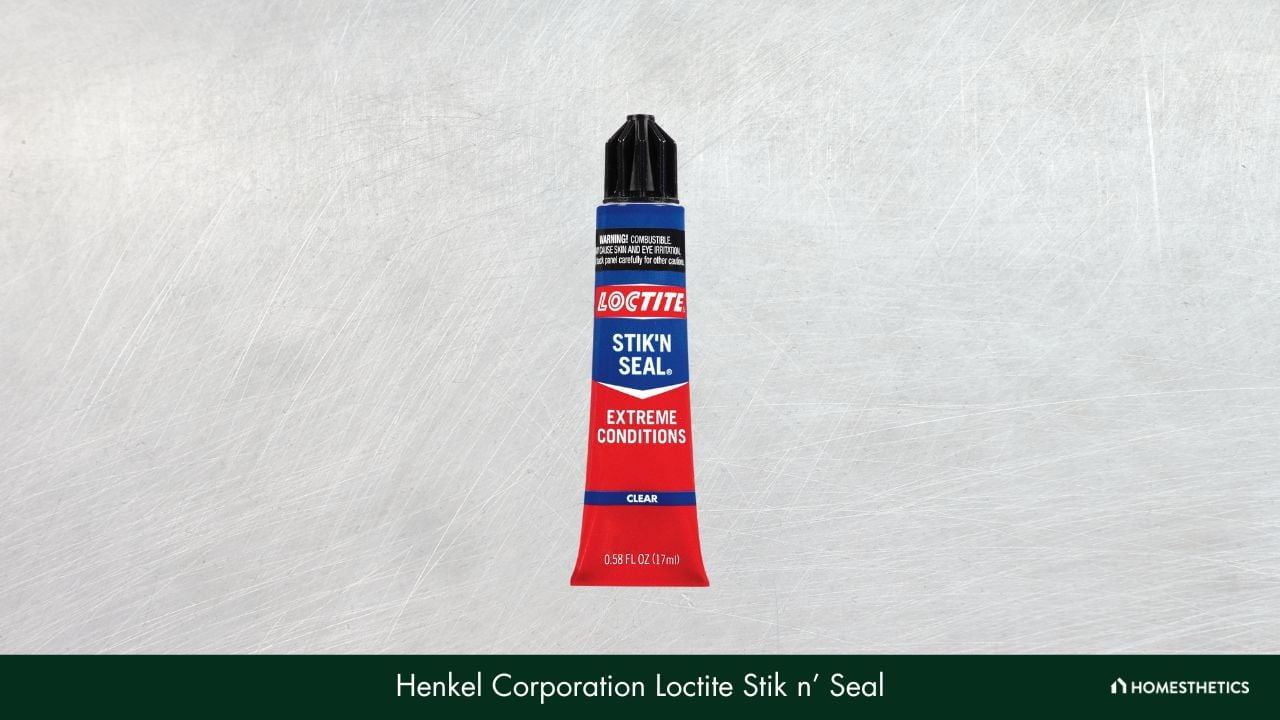
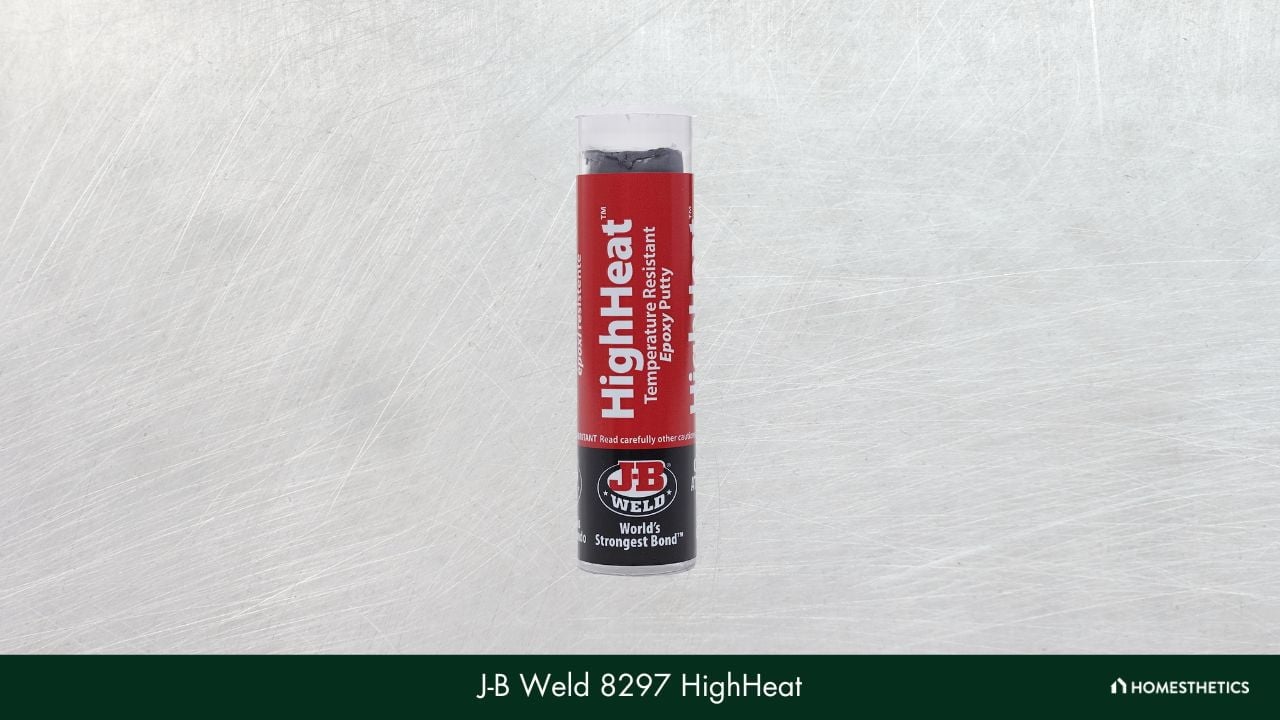
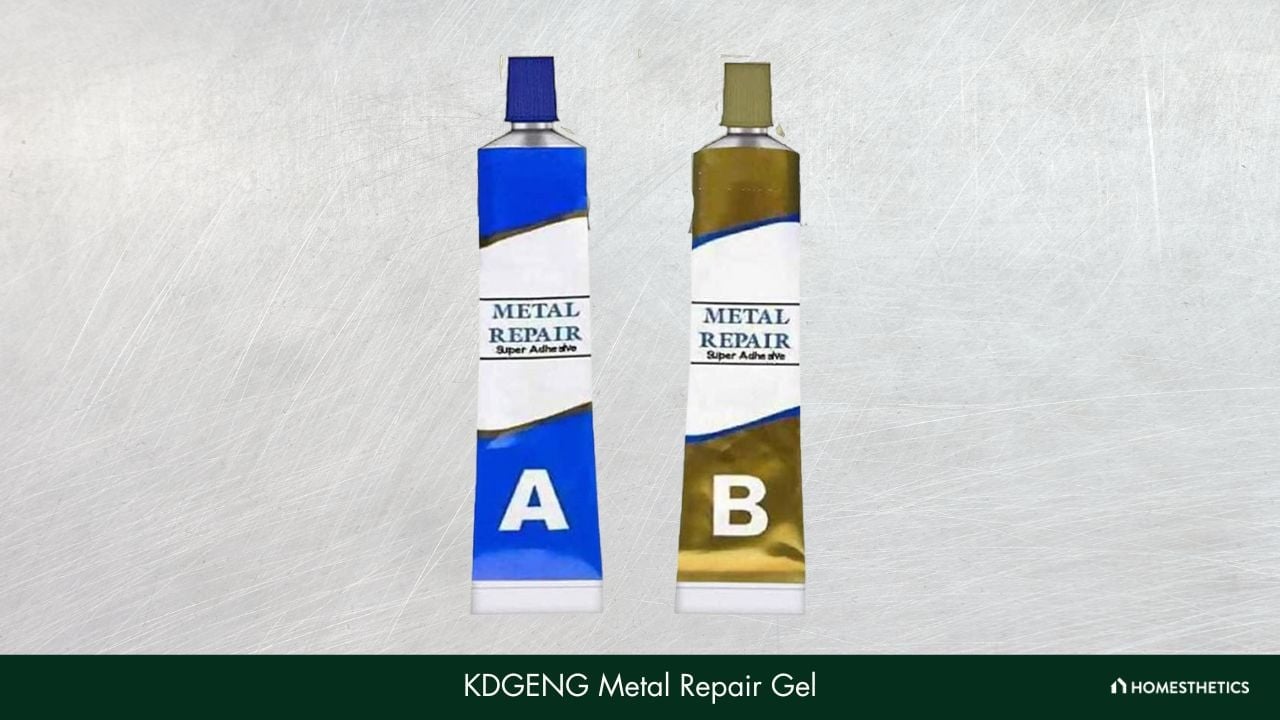
![Heat Resistant Epoxy 101 [A Guide for High Temperatures]](https://homesthetics.net/wp-content/uploads/2022/01/Heat-resistant-epoxy-2.jpg "Heat Resistant Epoxy 101 [A Guide for High Temperatures]")

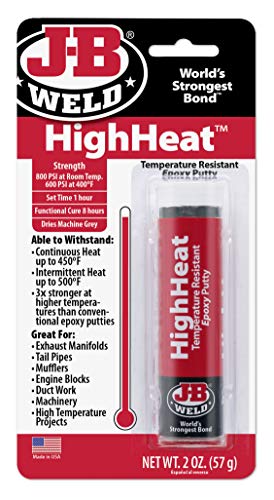


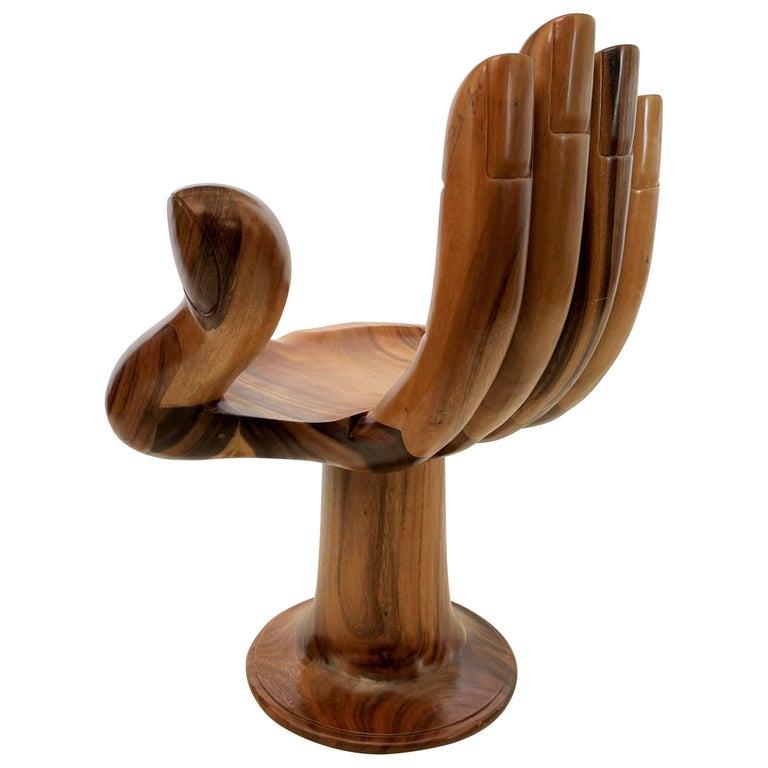

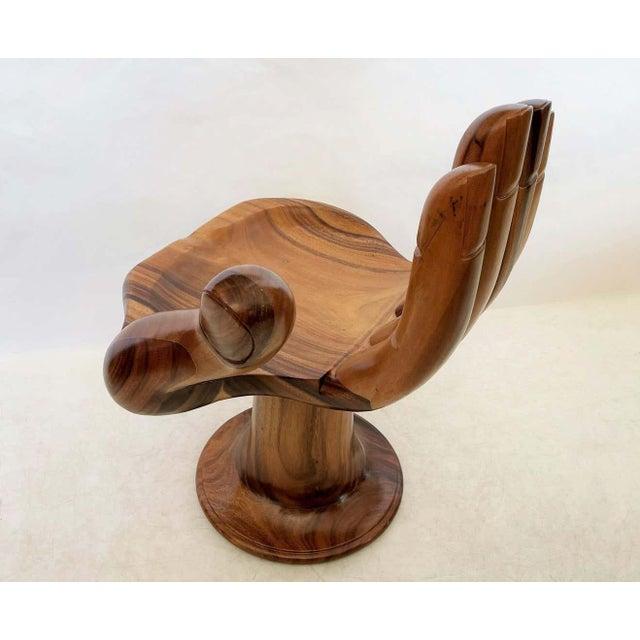


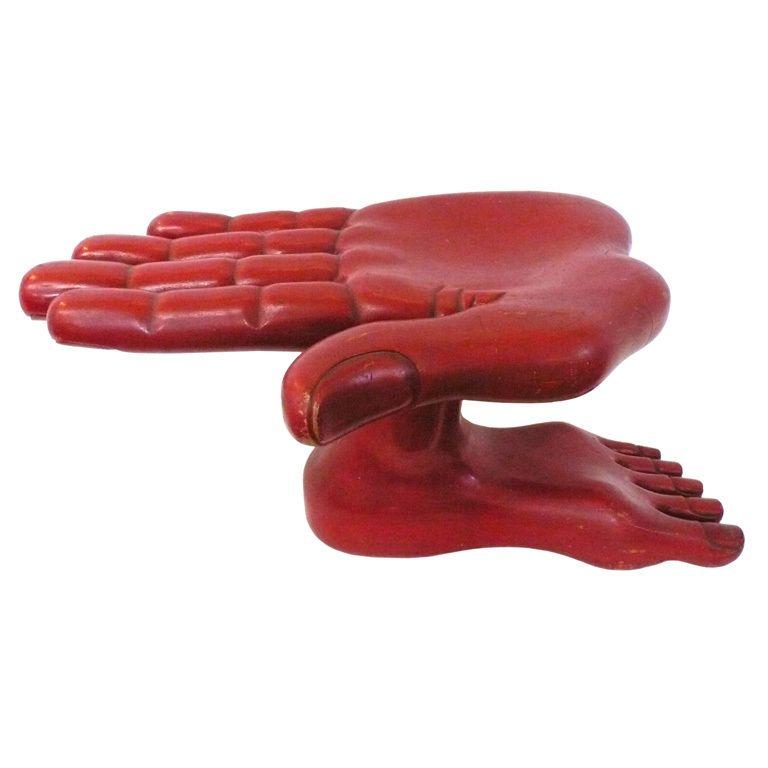


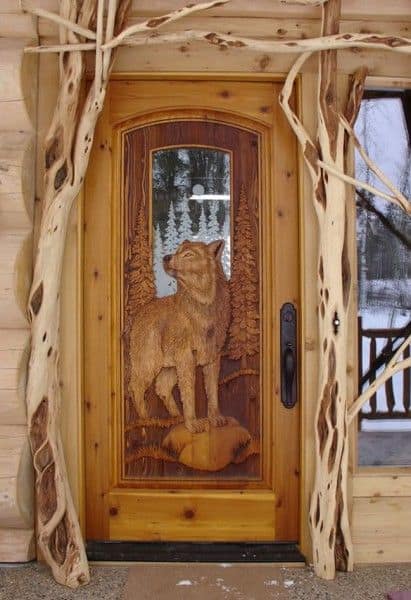
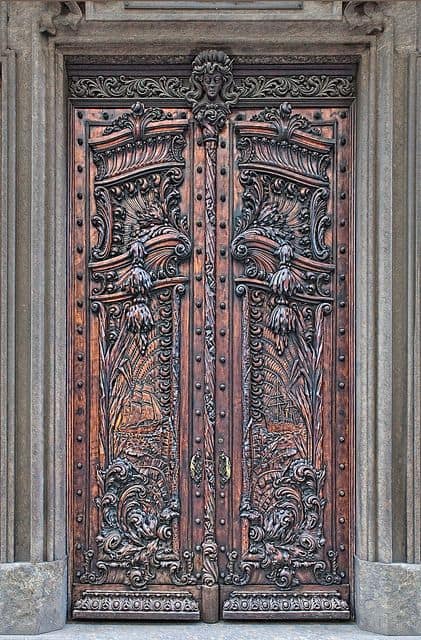
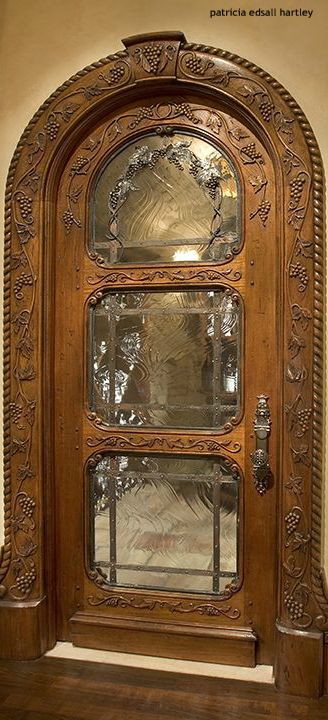


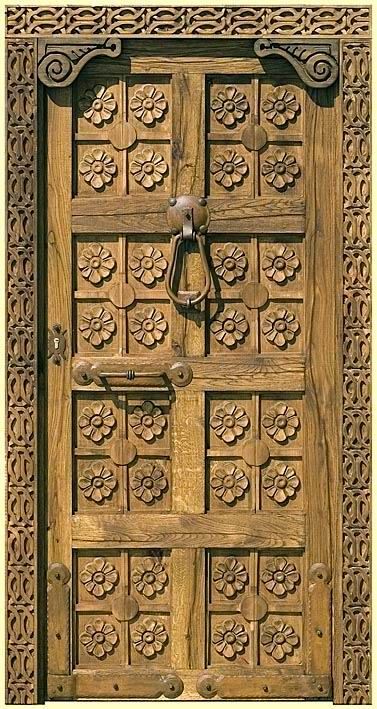


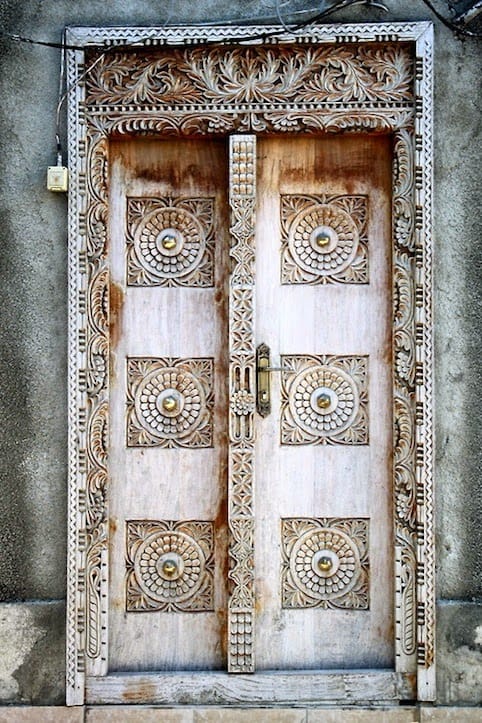
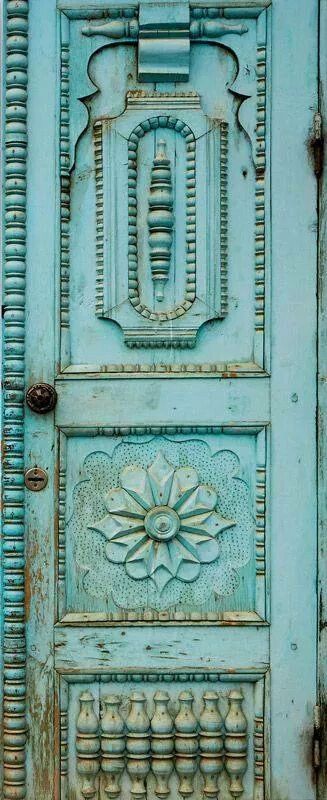


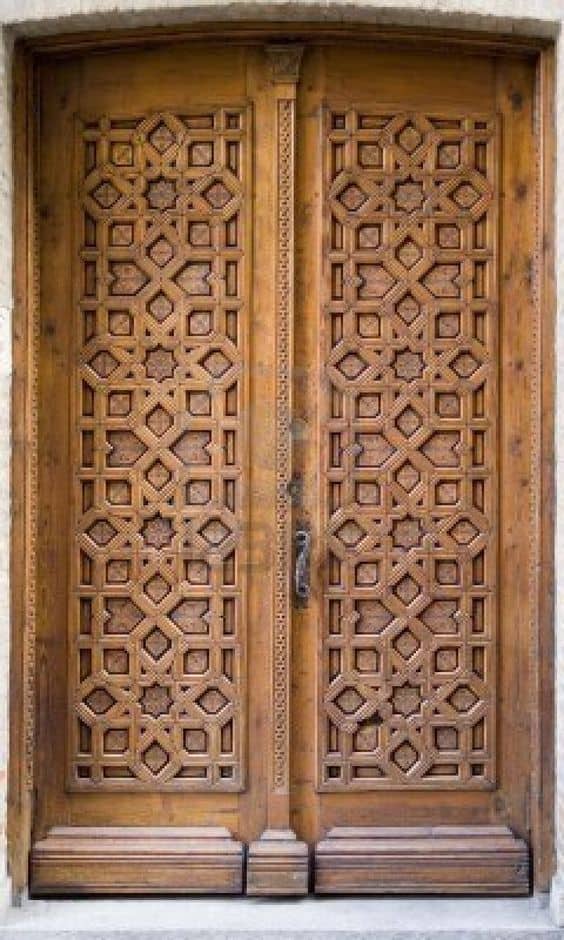
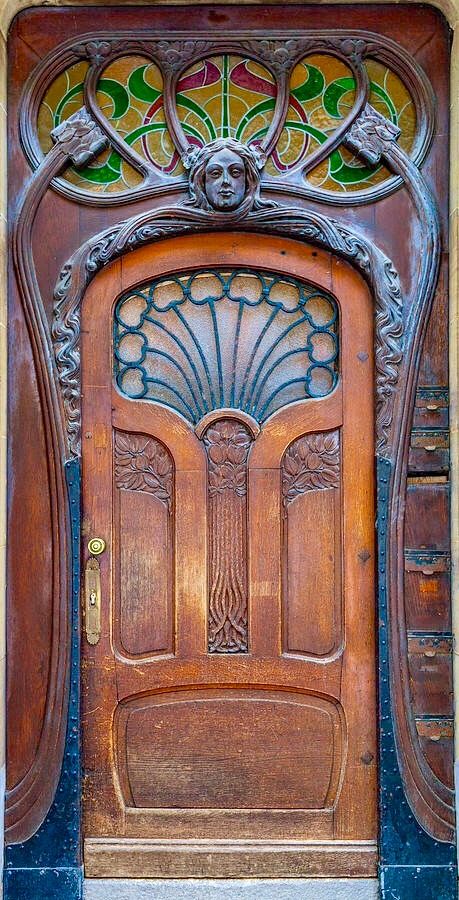
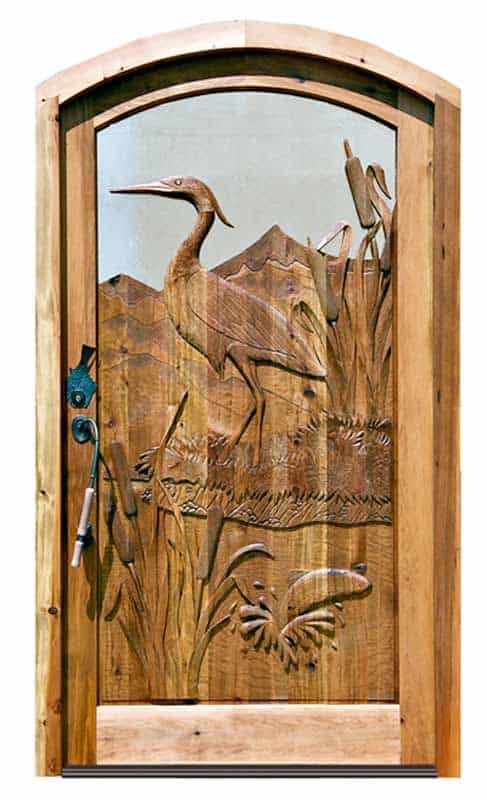


![Hack Saw Vs Bow Saw [All You Need to Know] [Explained]](https://homesthetics.net/wp-content/uploads/2021/03/Hack-Saw-Vs-Bow-Saw-01.jpg "Hack Saw Vs Bow Saw [All You Need to Know] [Explained]")


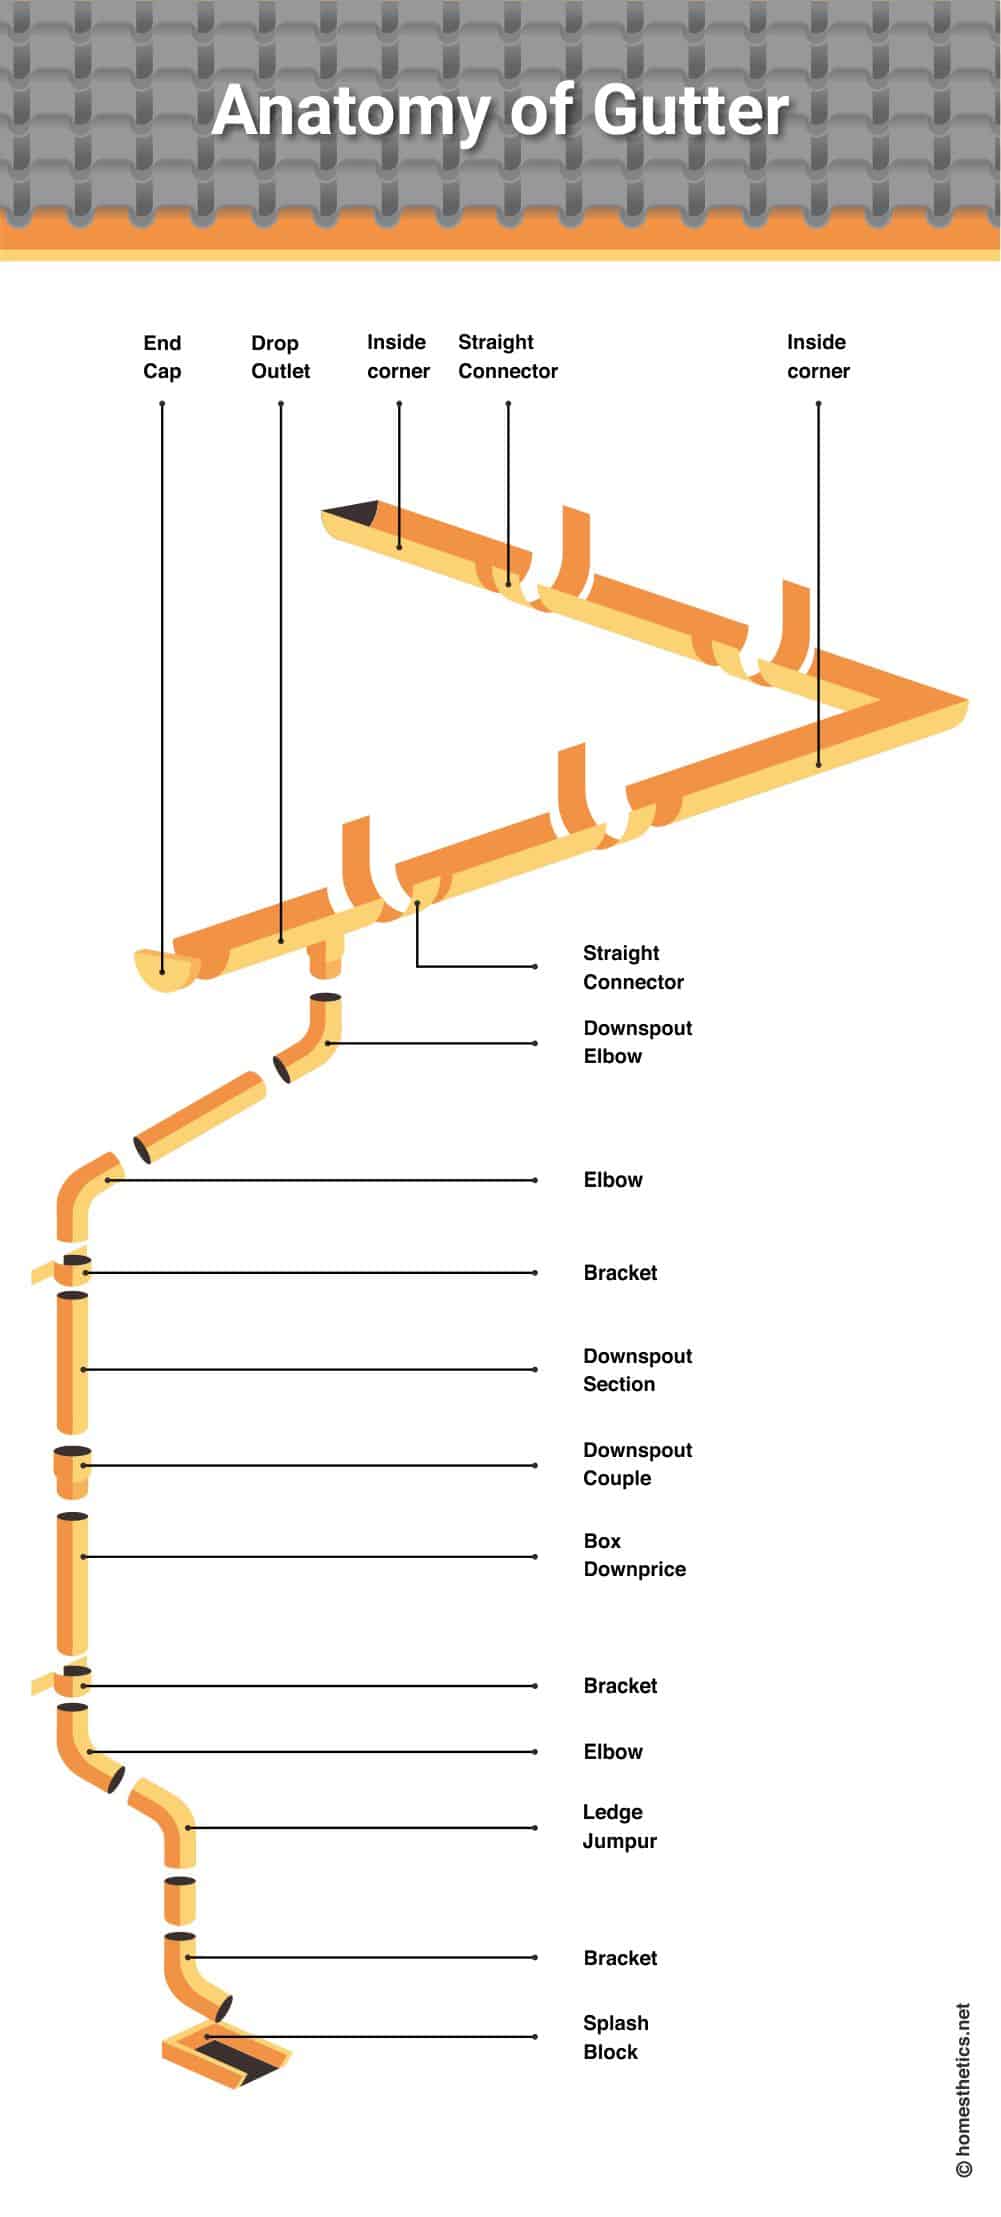
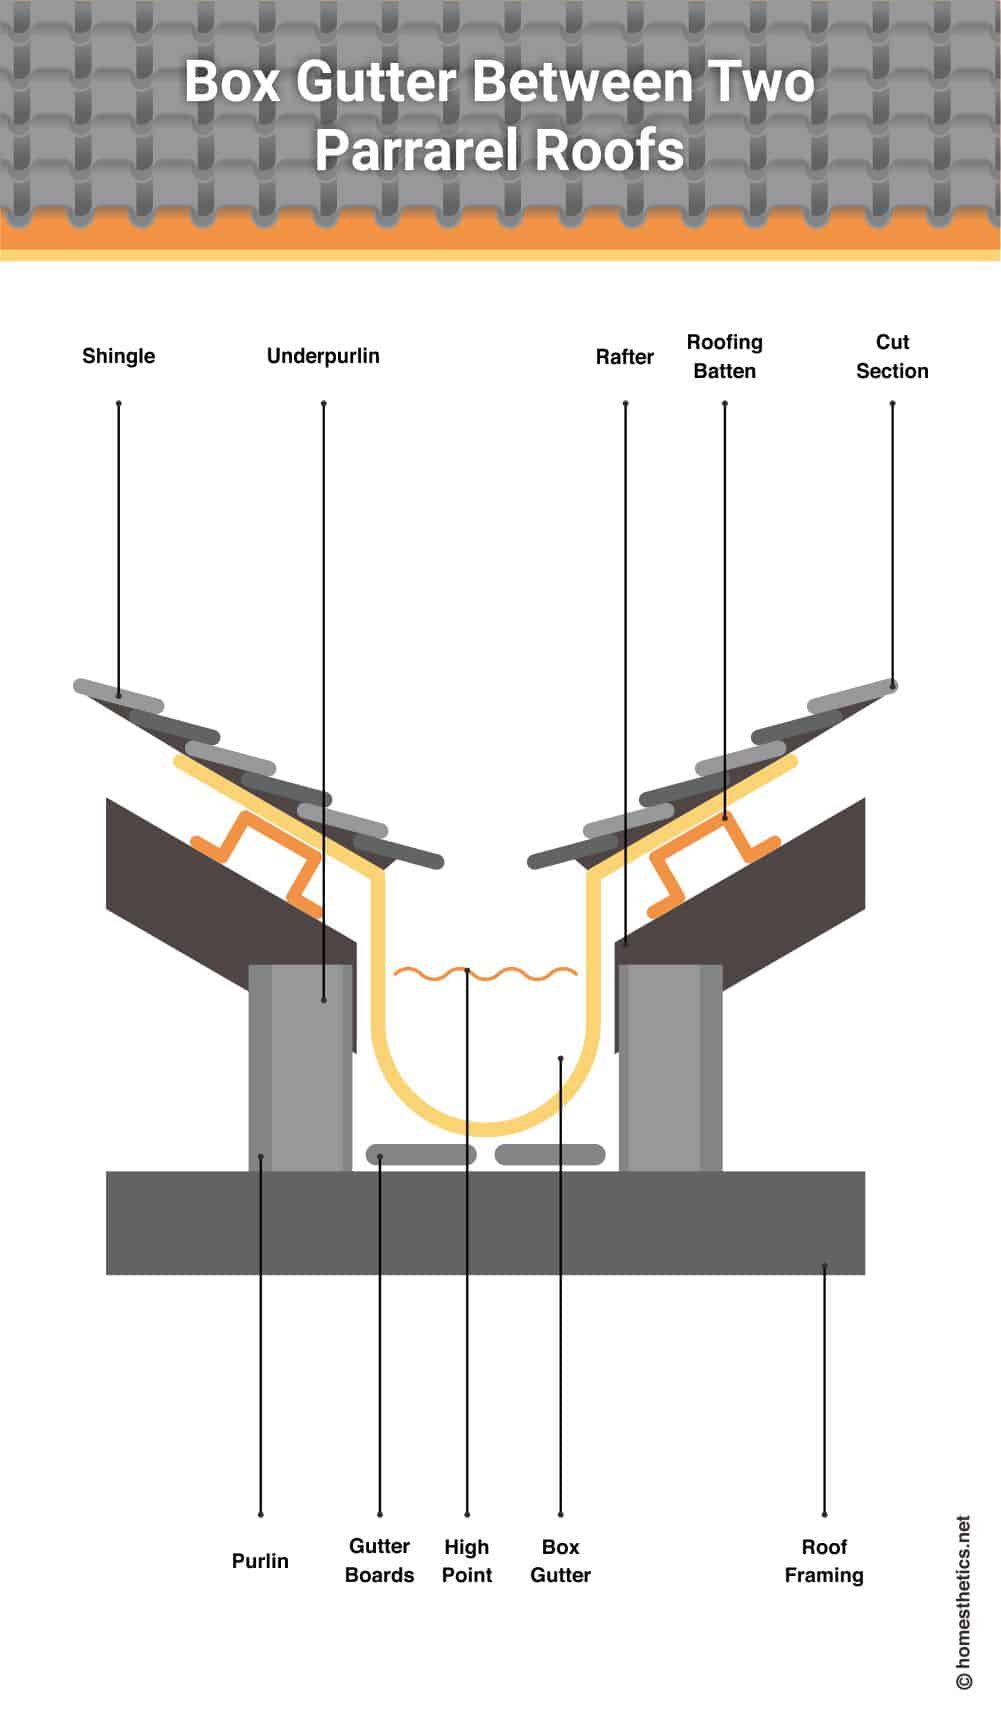

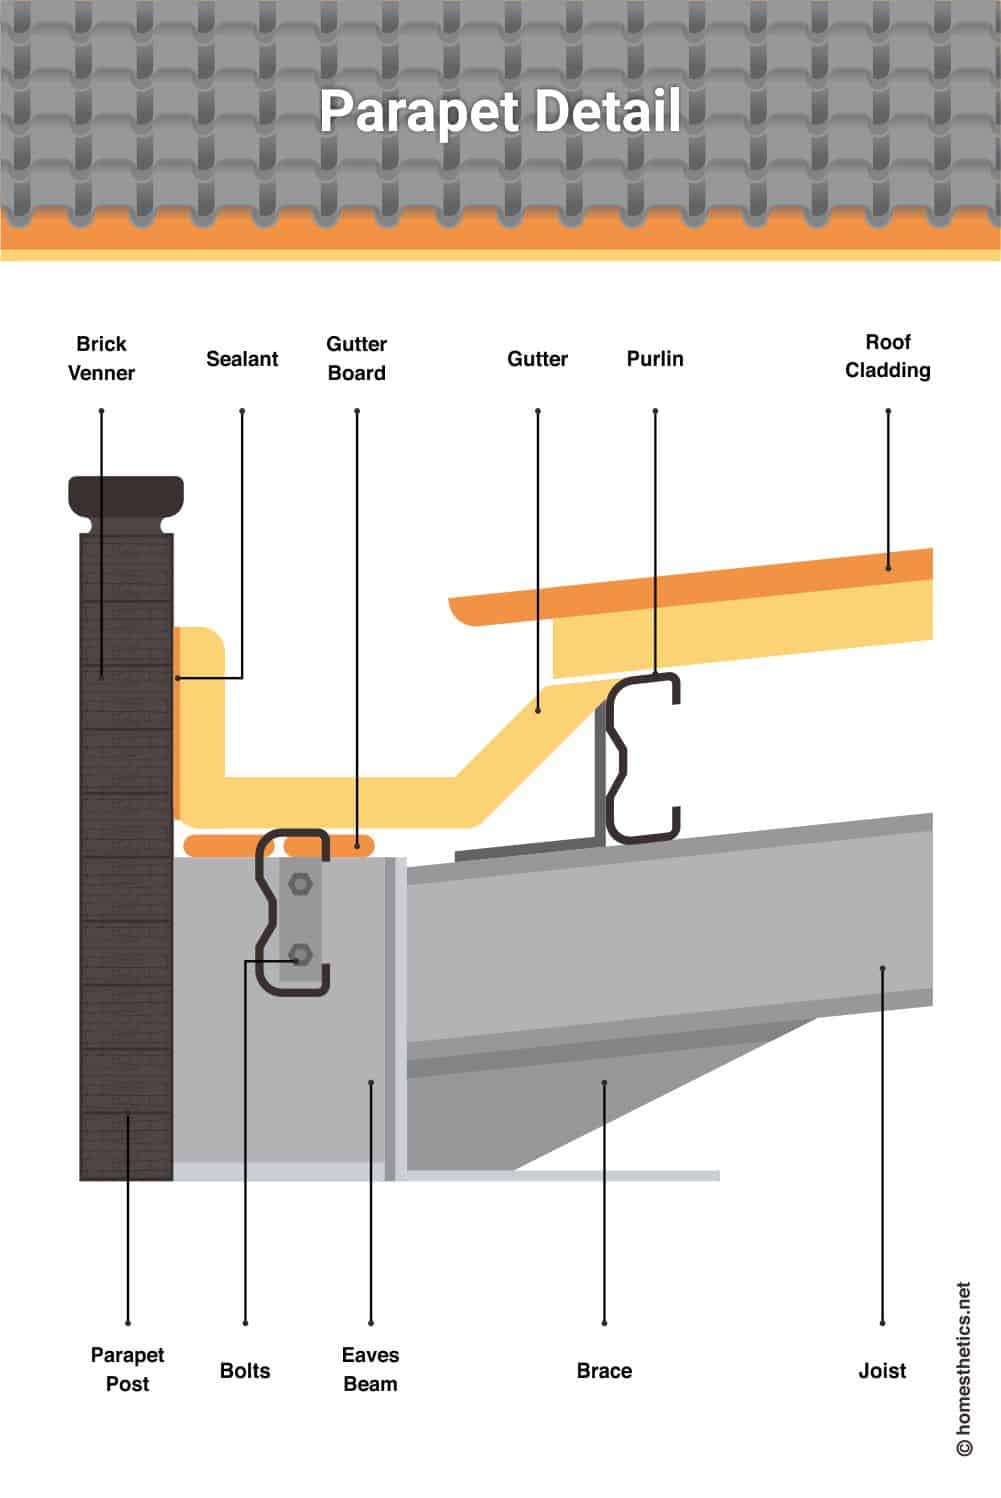
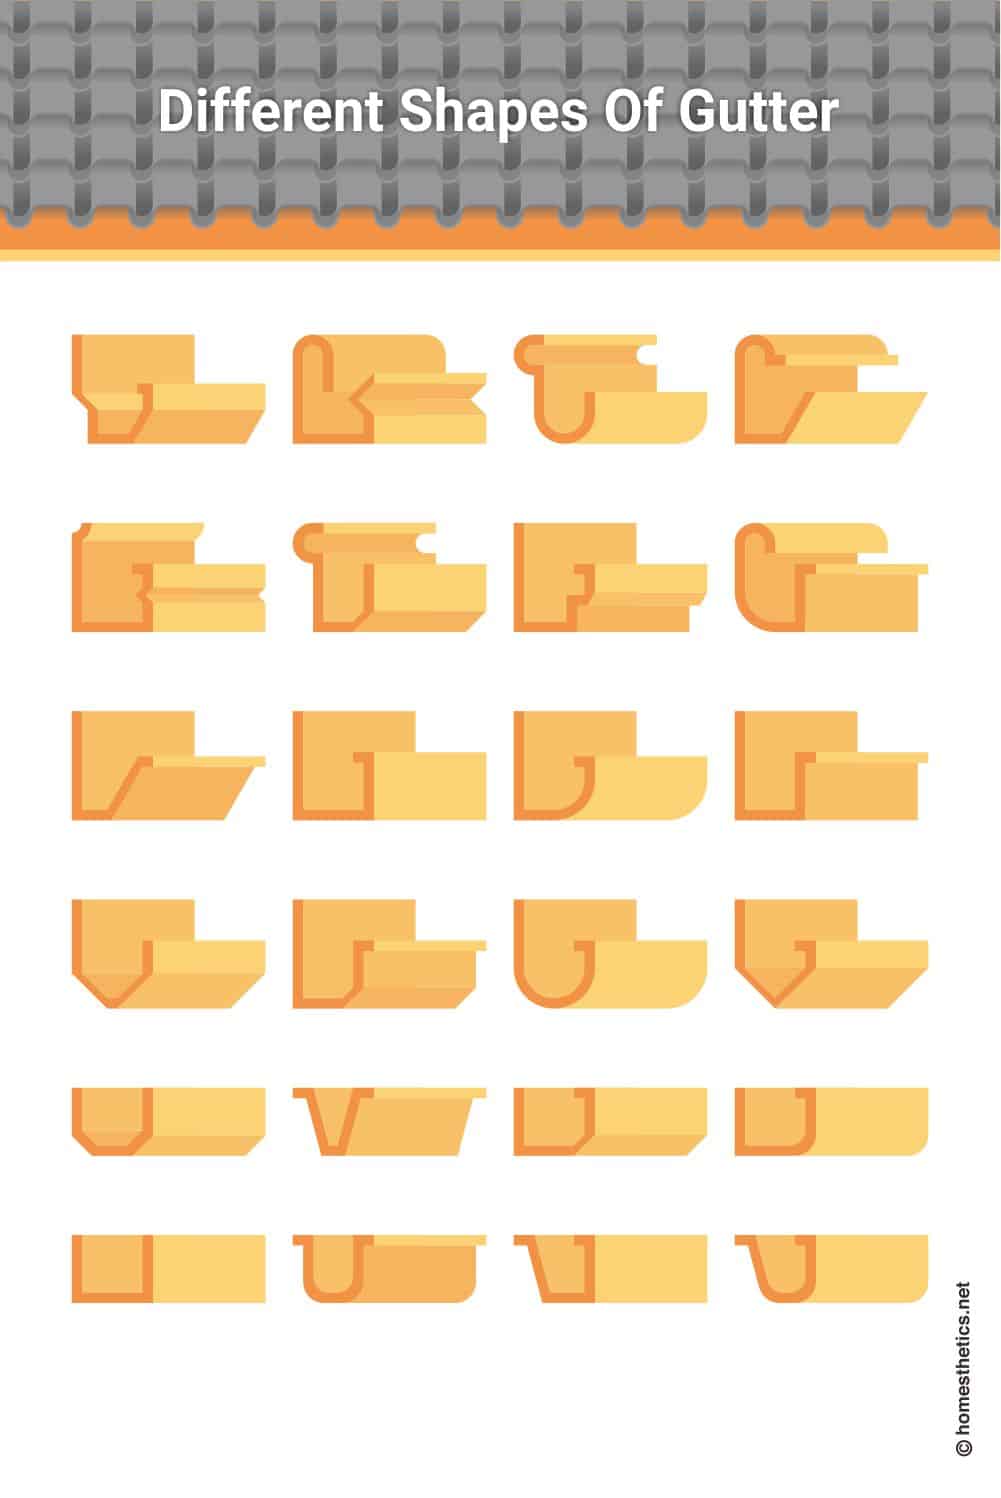
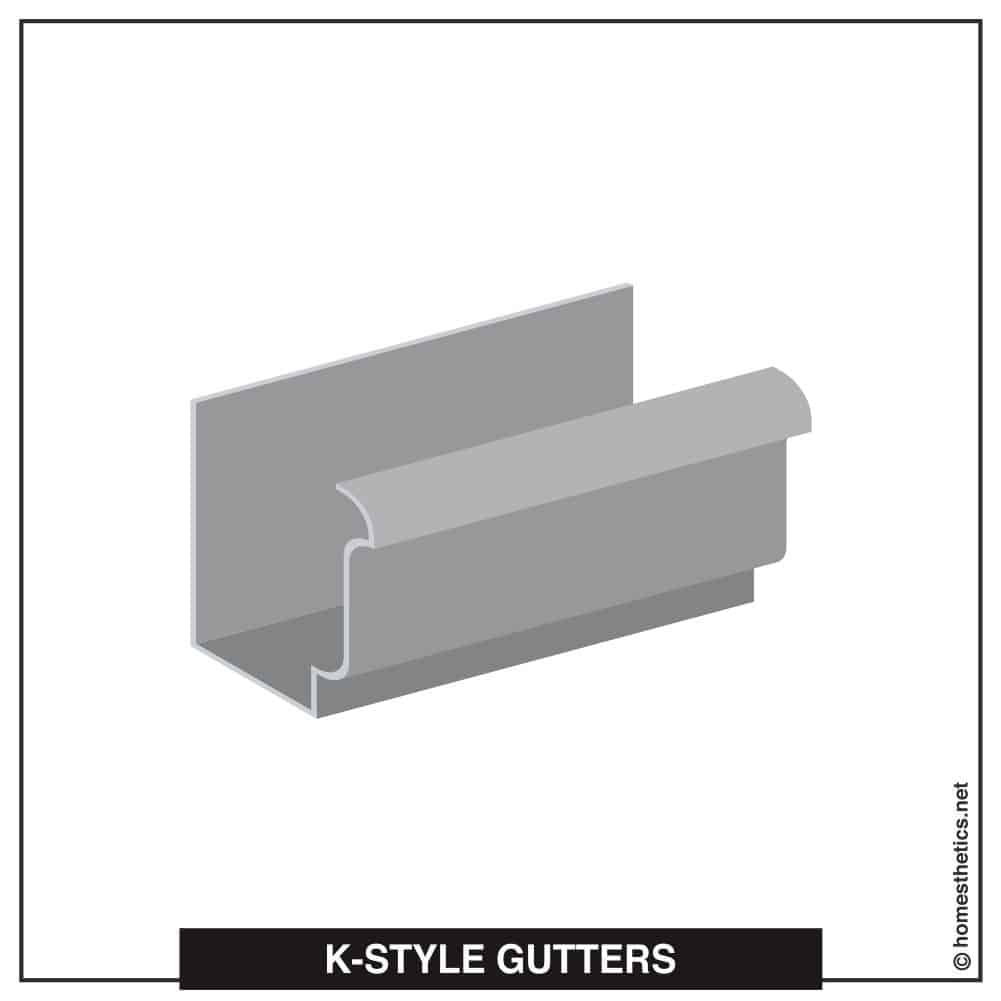
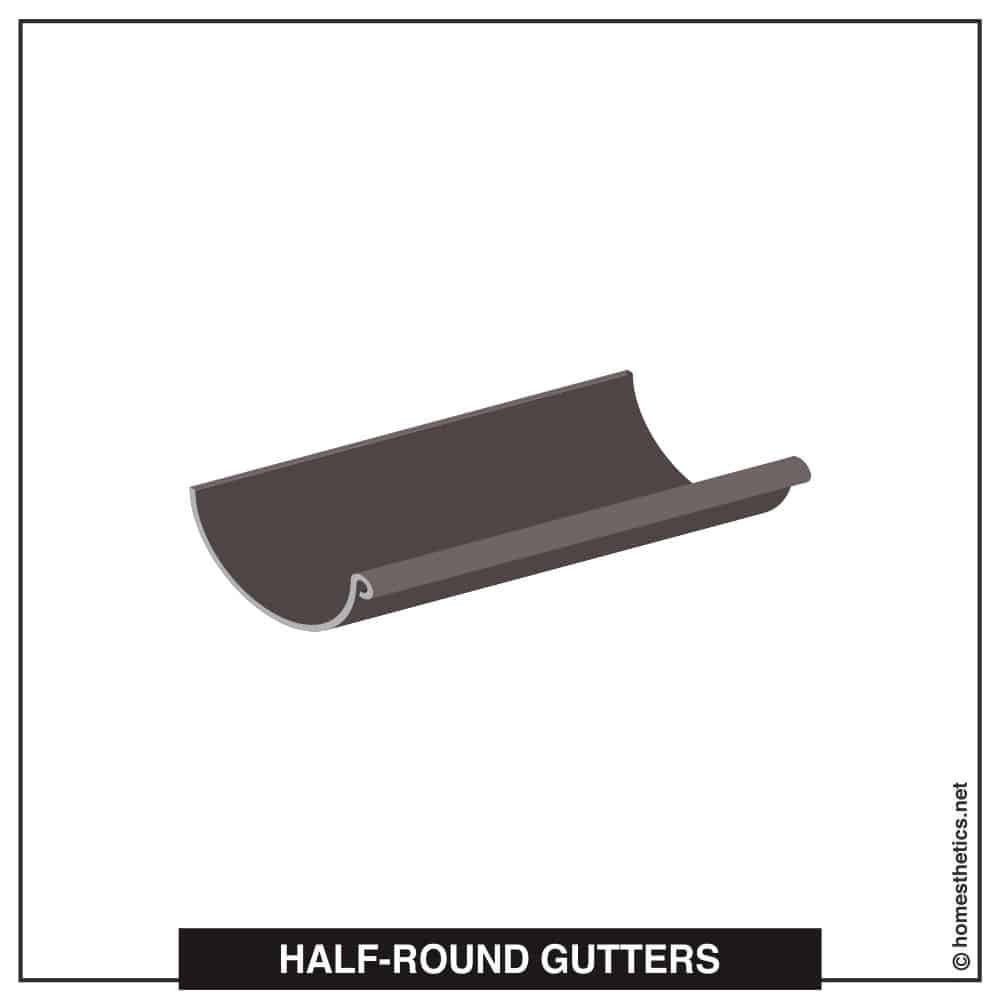
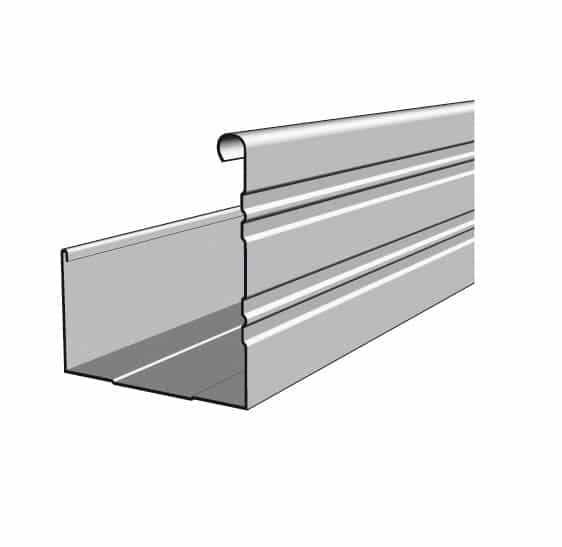
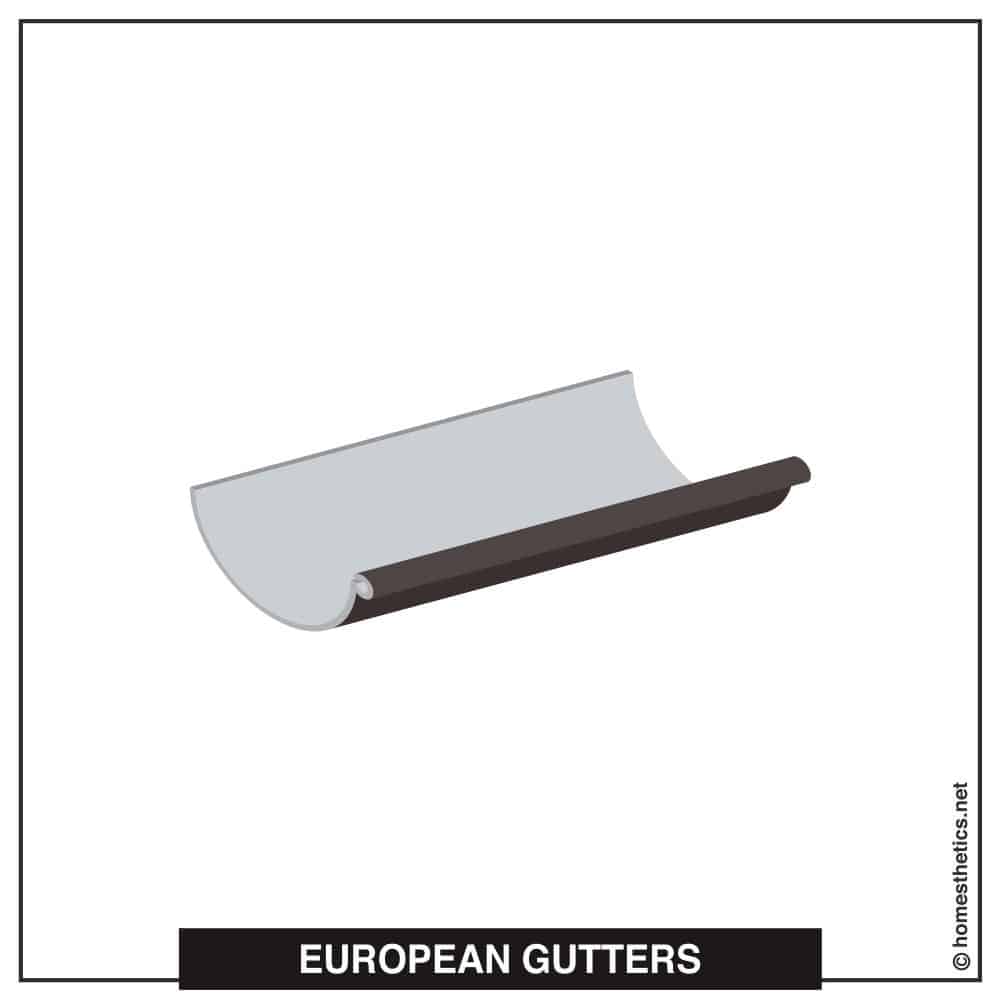

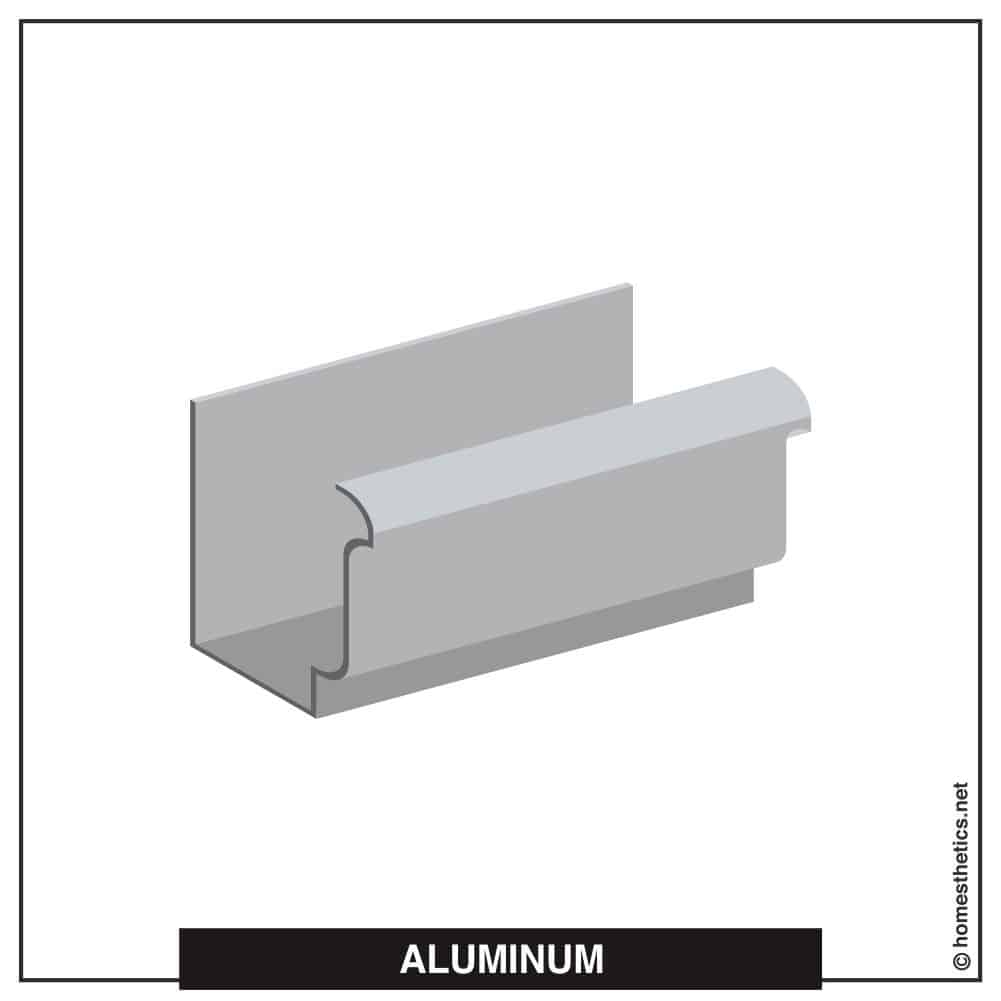
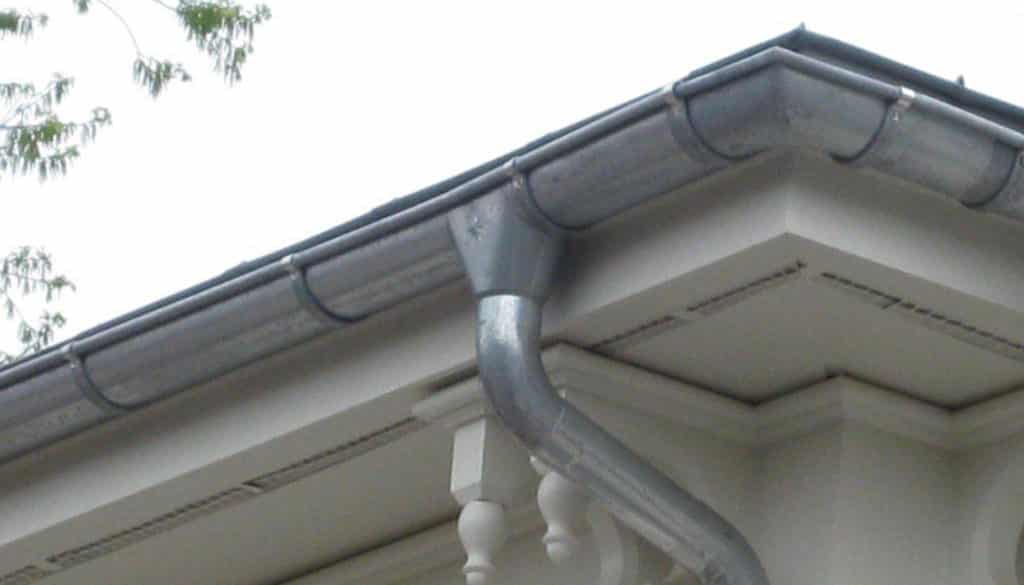
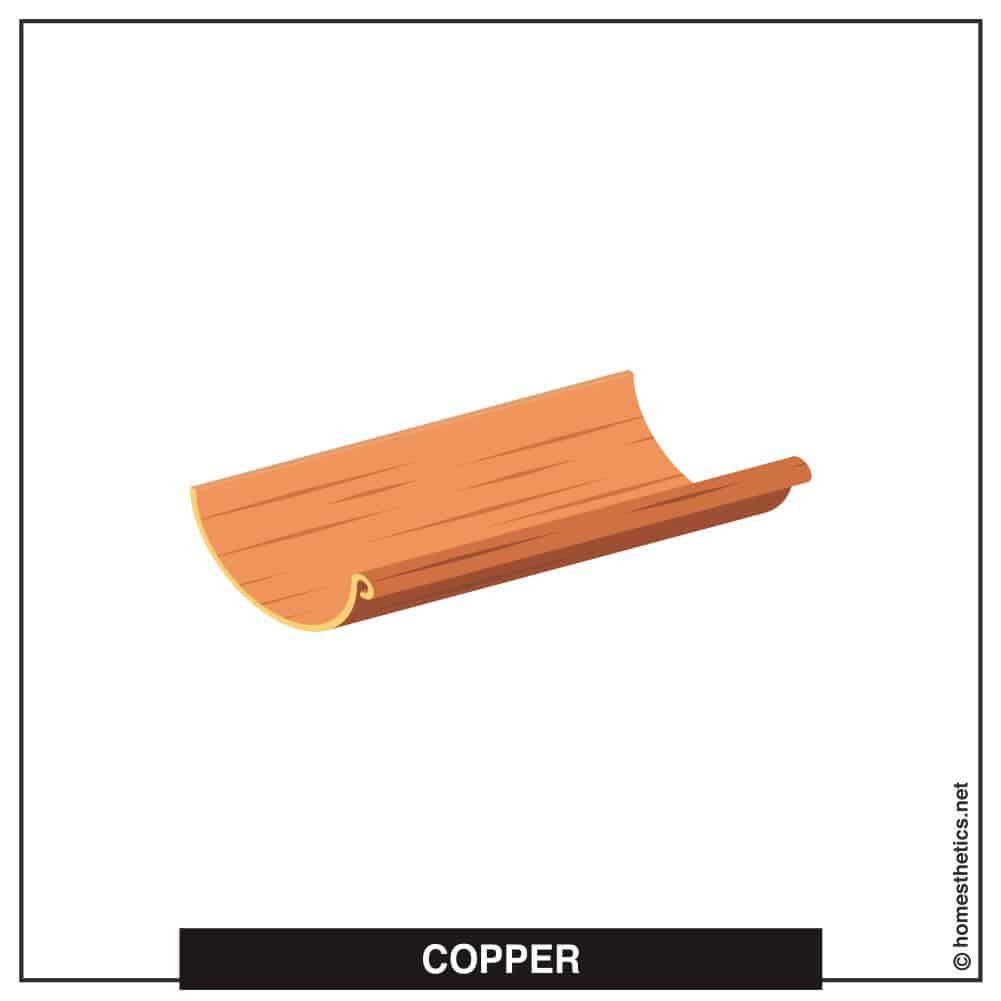
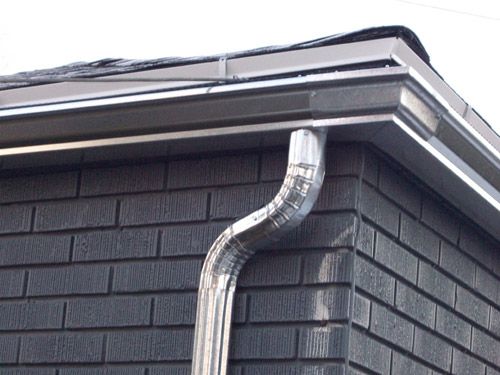


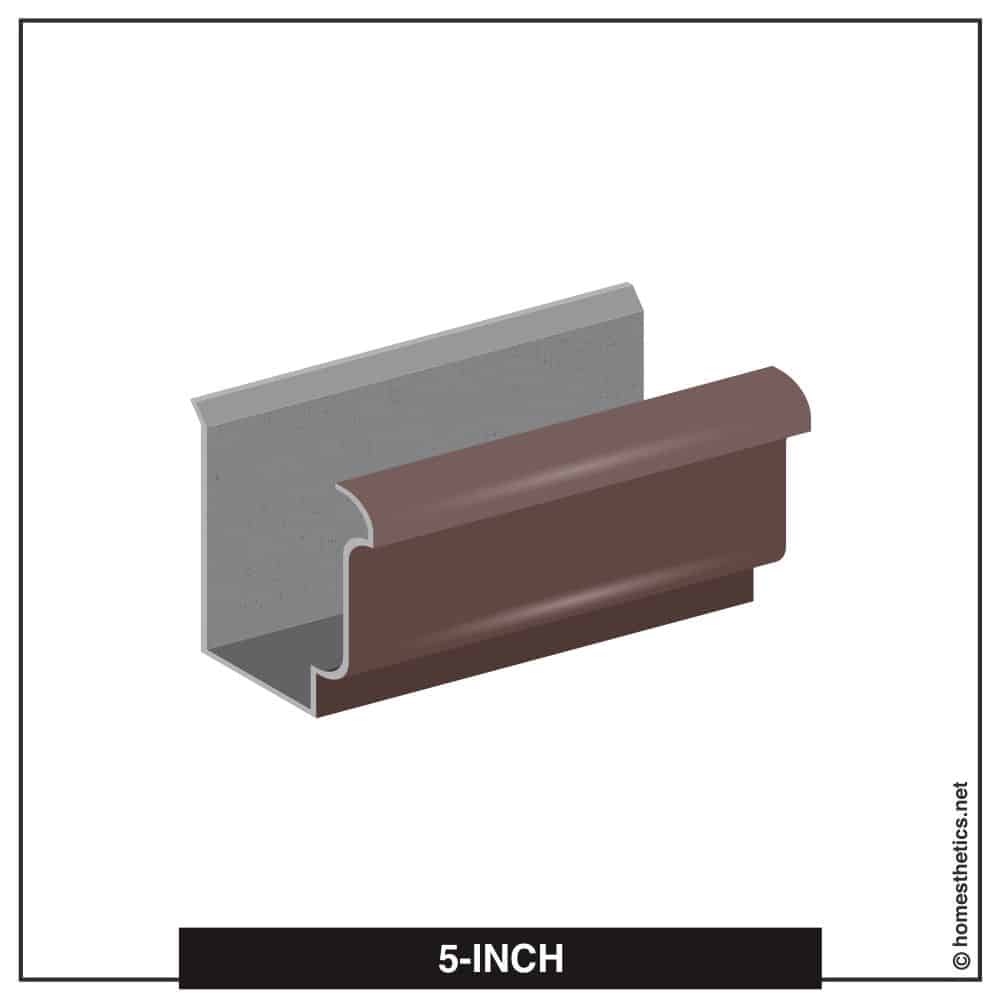
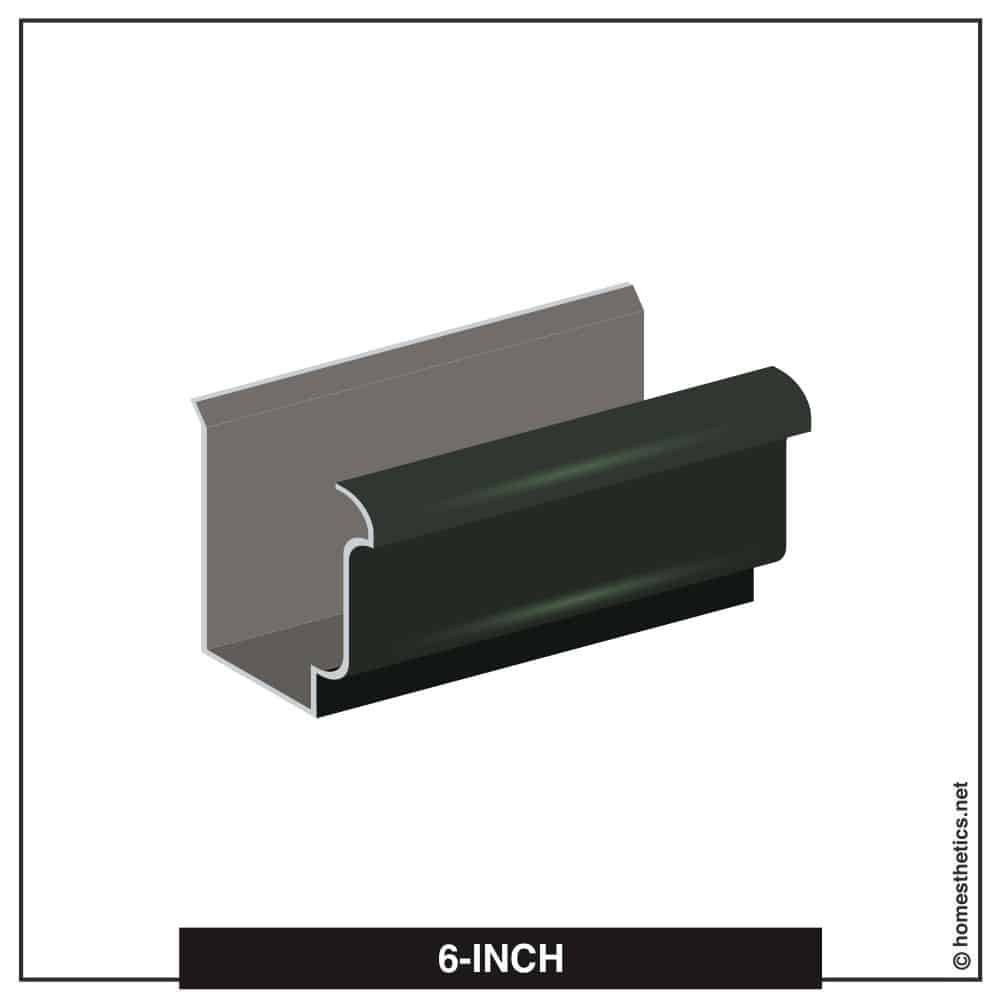
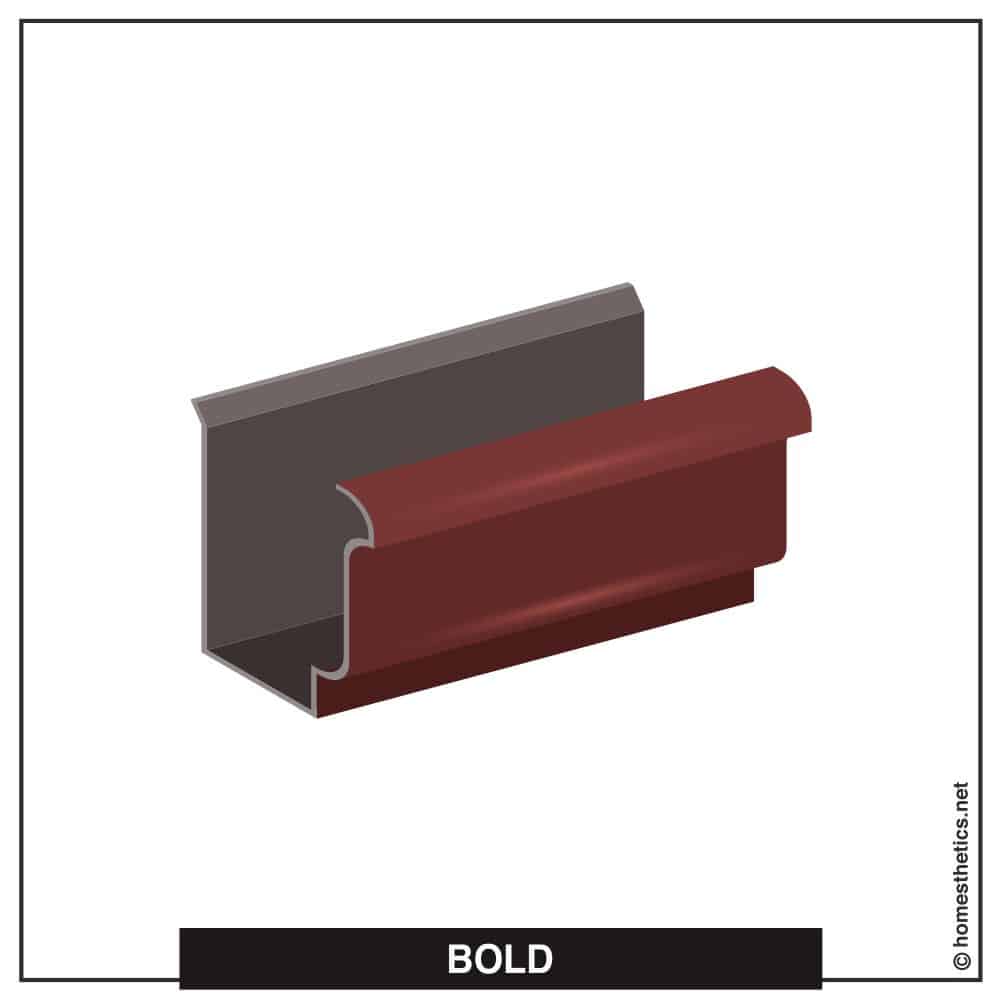
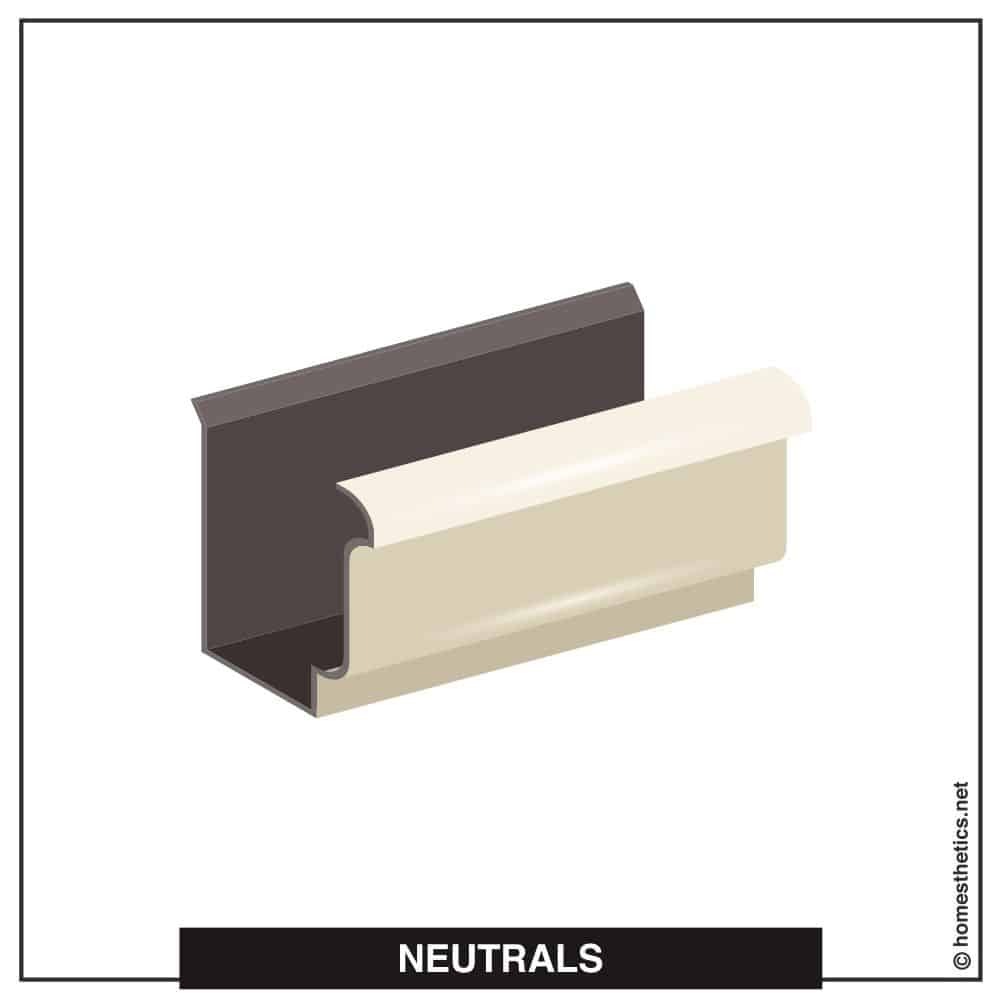


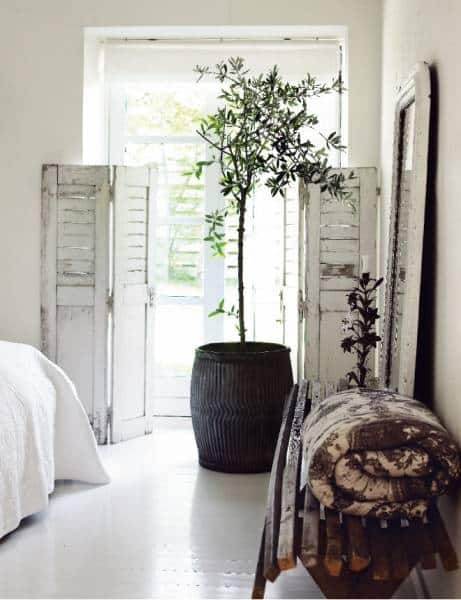
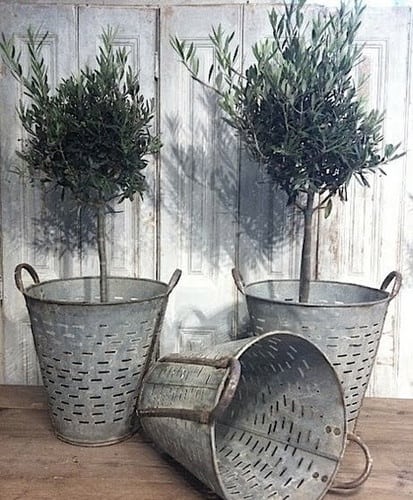

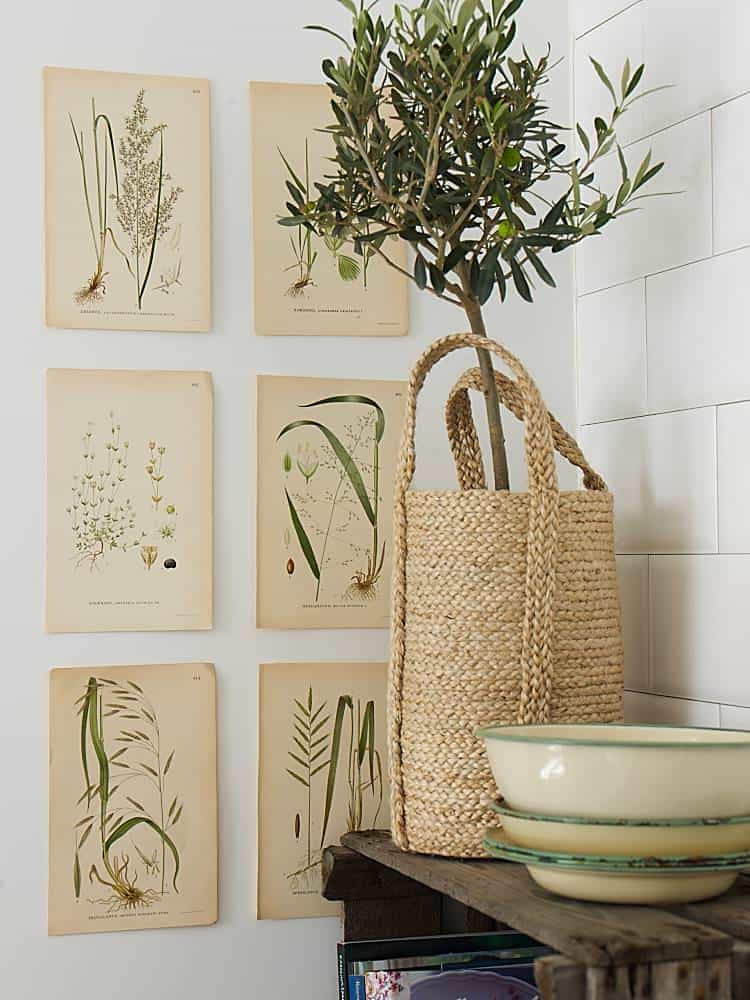

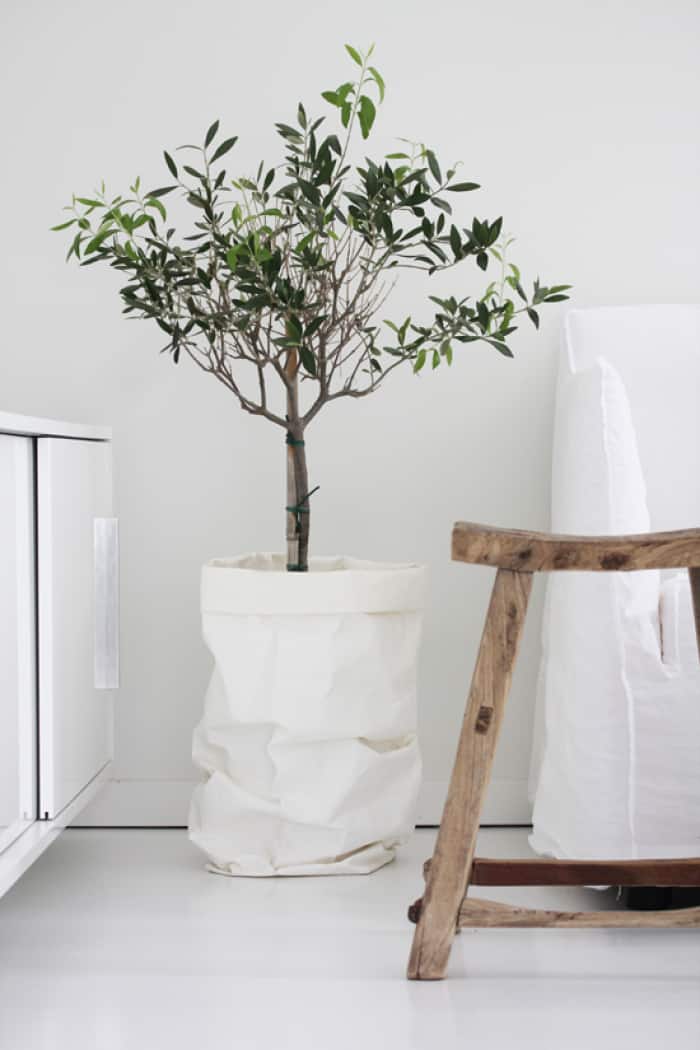
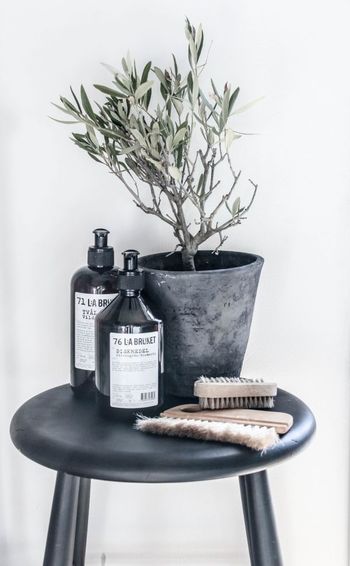
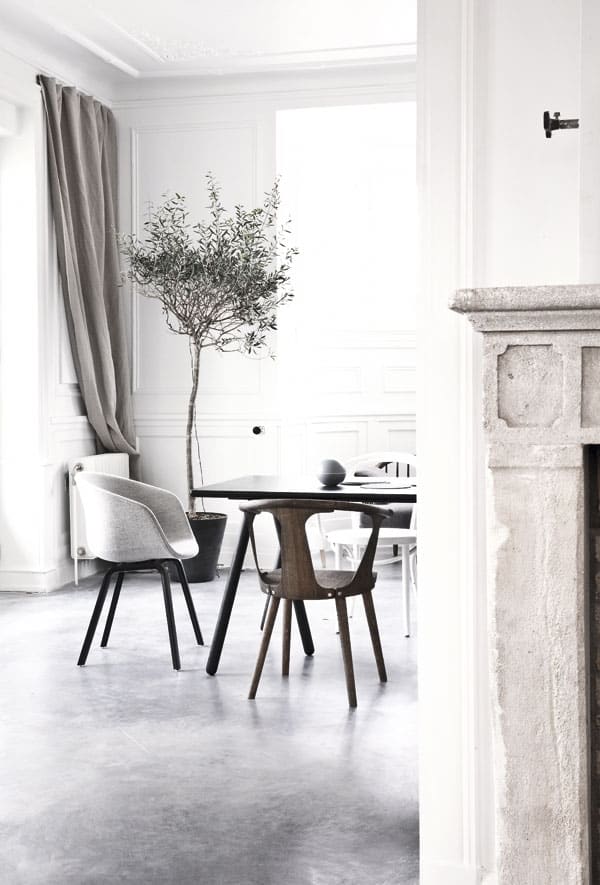
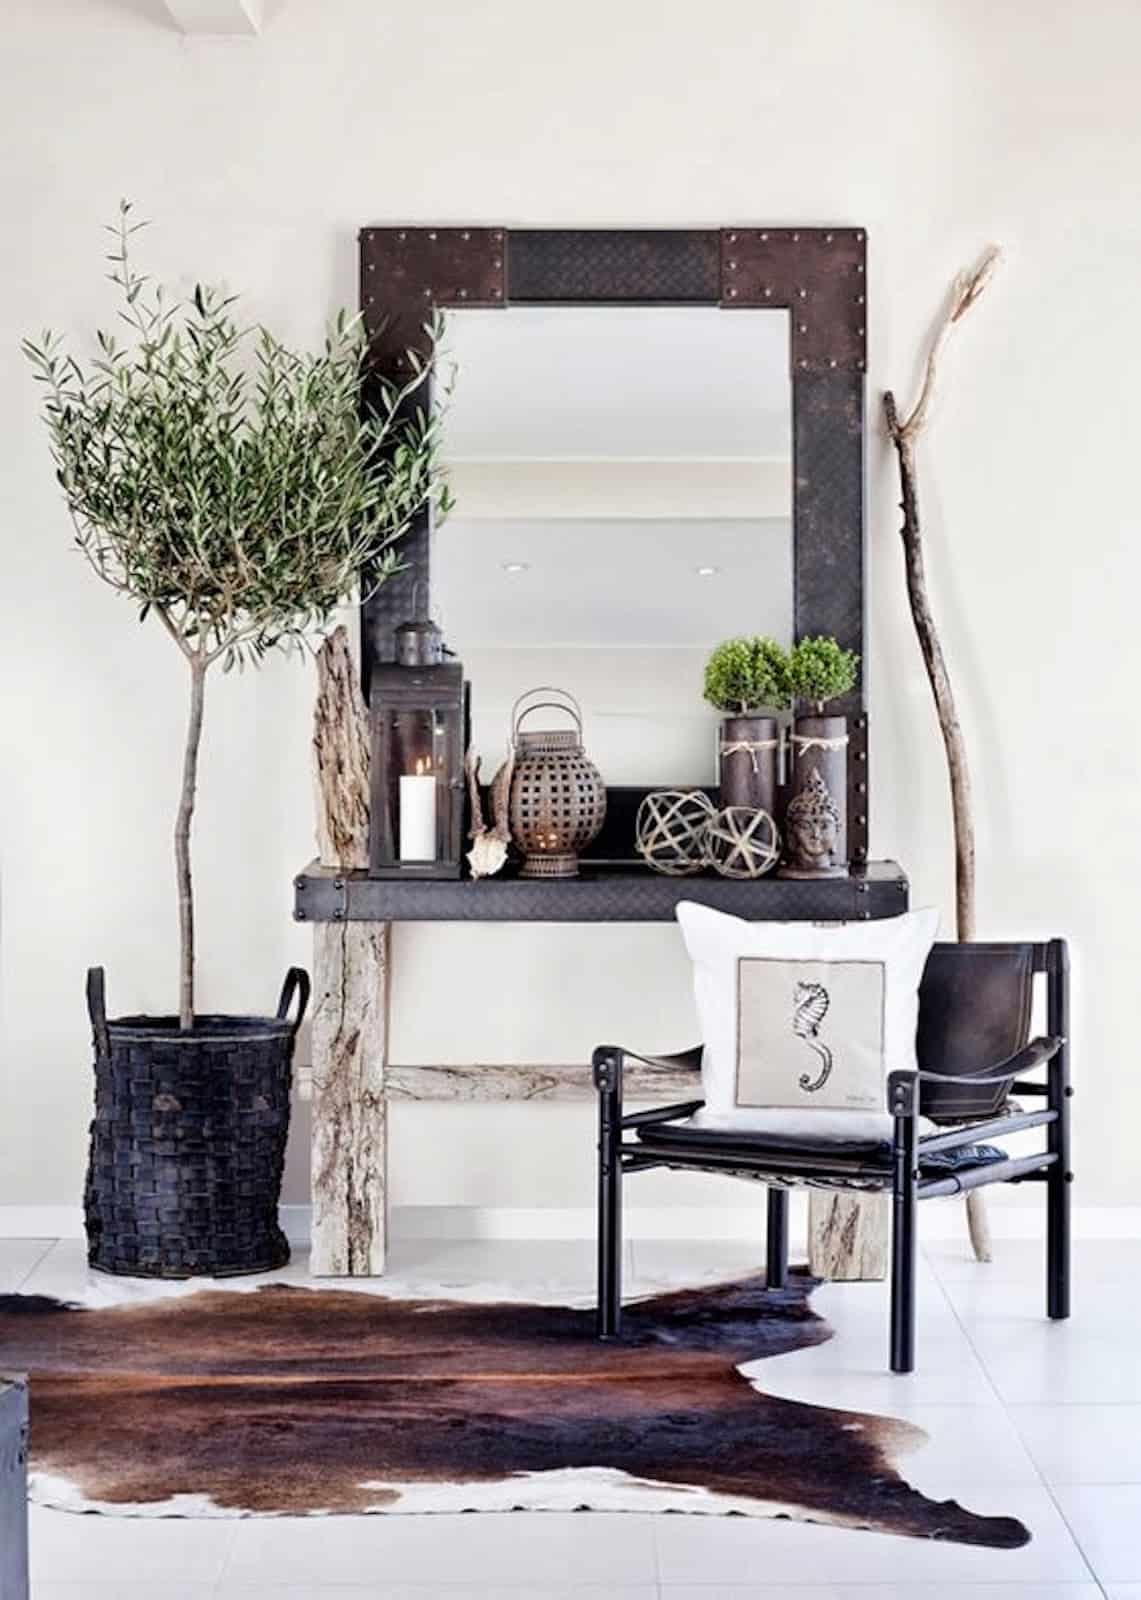


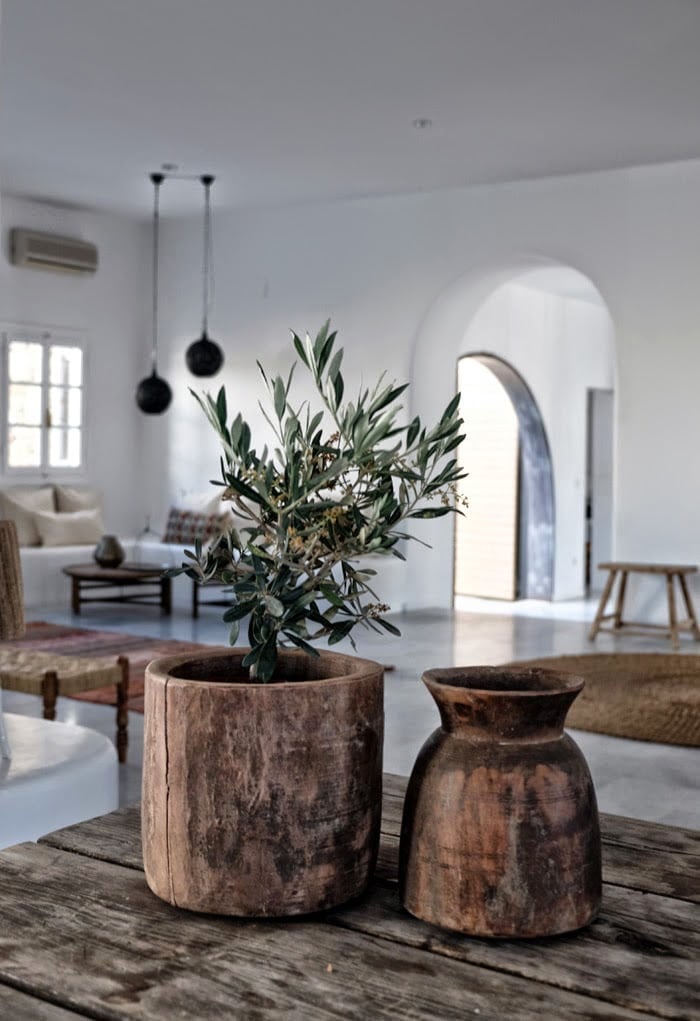


![7 Best Grout Sealers For Shower [Reviewed & Buyer’s Guide]](https://homesthetics.net/wp-content/uploads/2023/09/Best-Grout-Sealers-For-Showers-1.jpg "7 Best Grout Sealers For Shower [Reviewed & Buyer's Guide]")
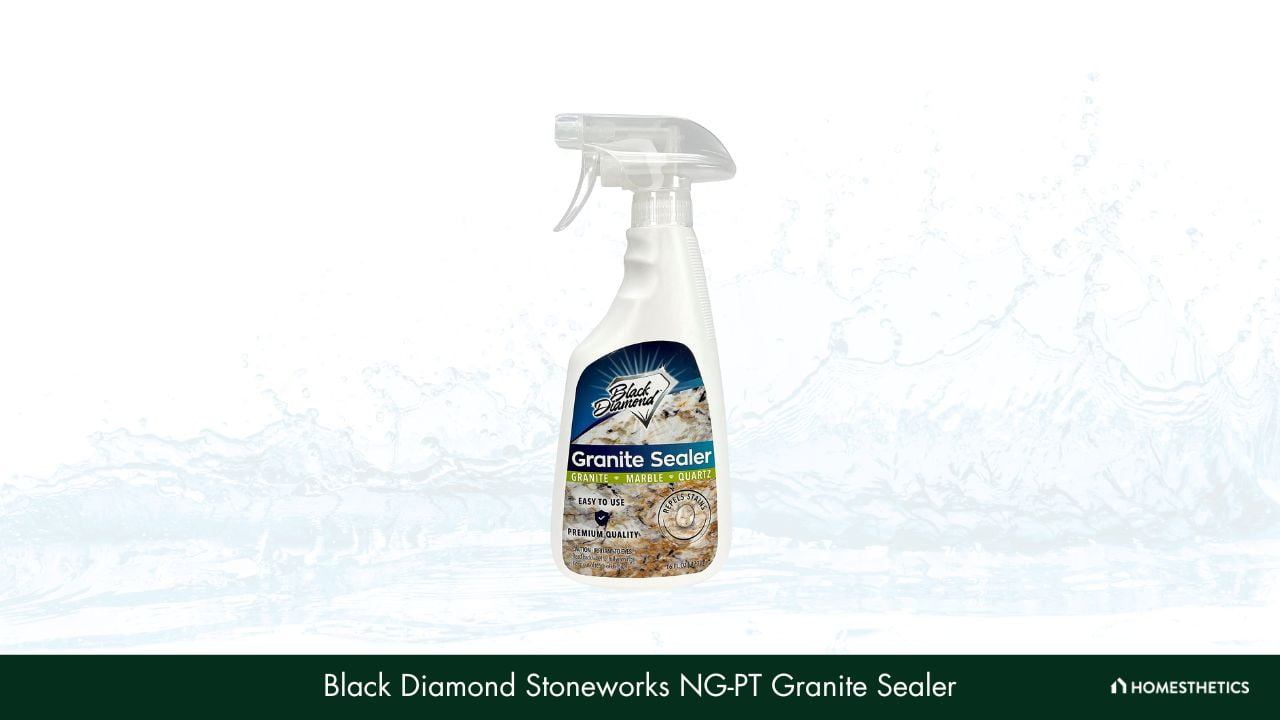
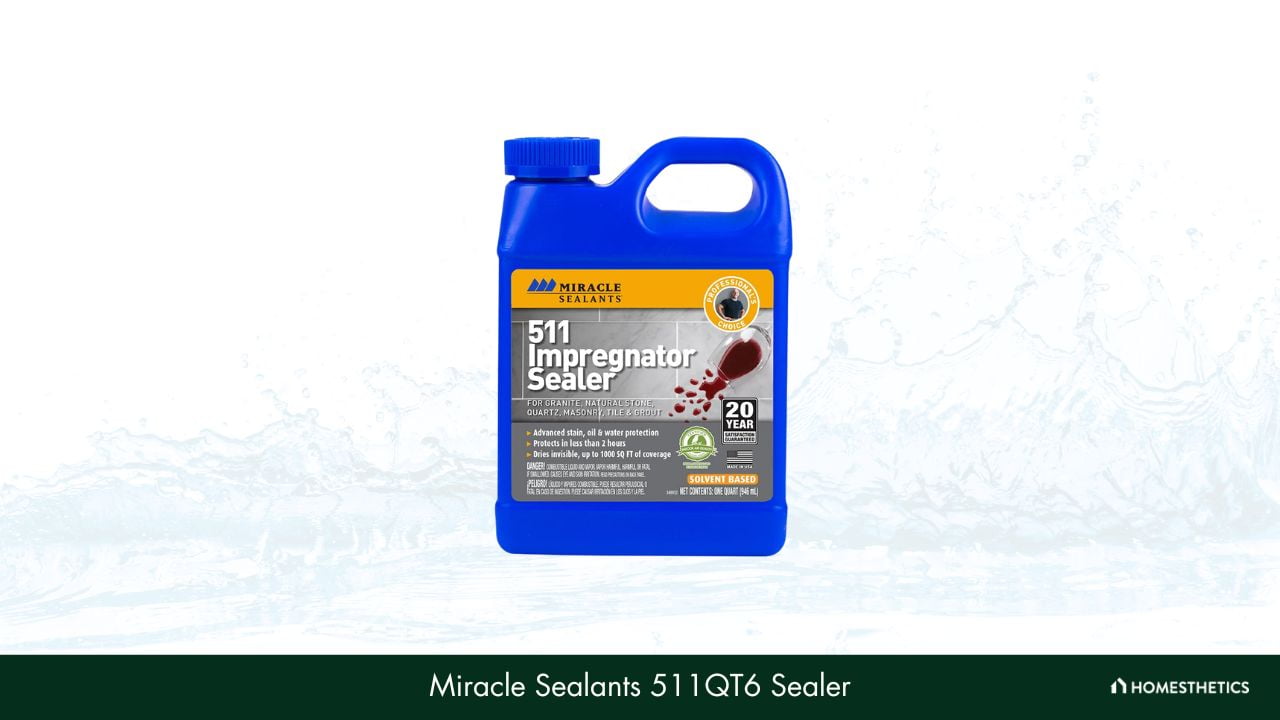
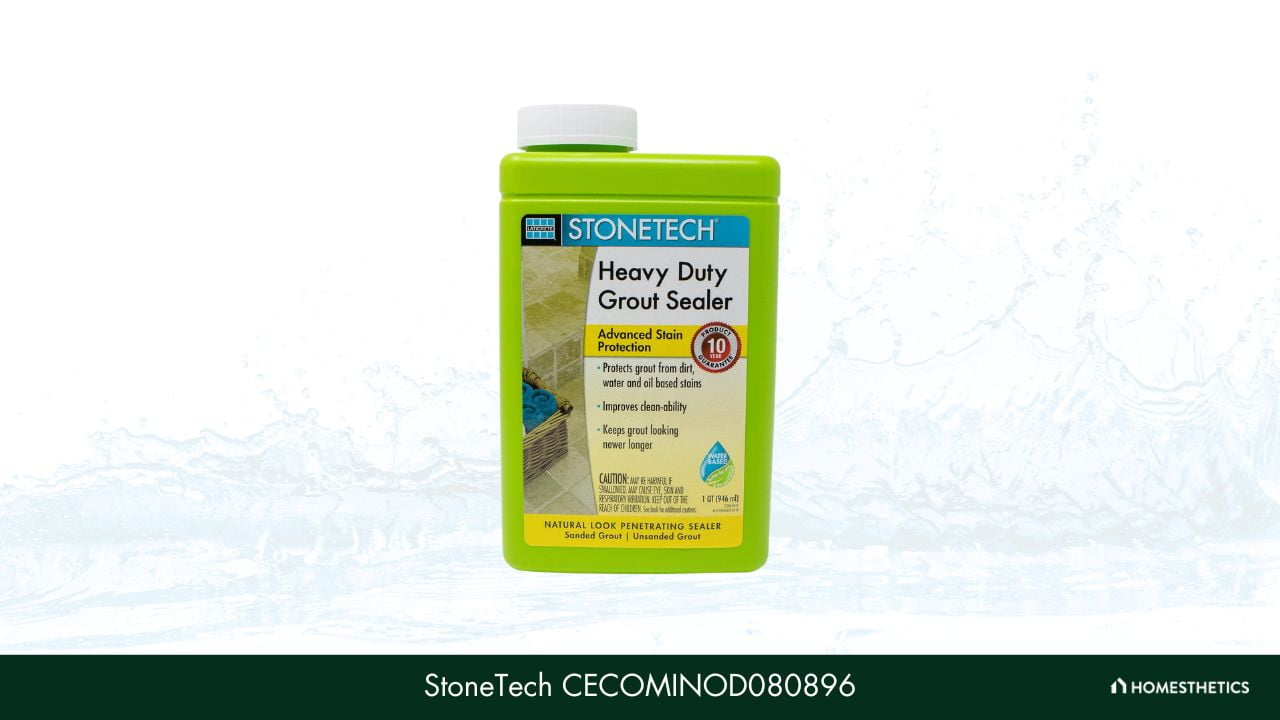
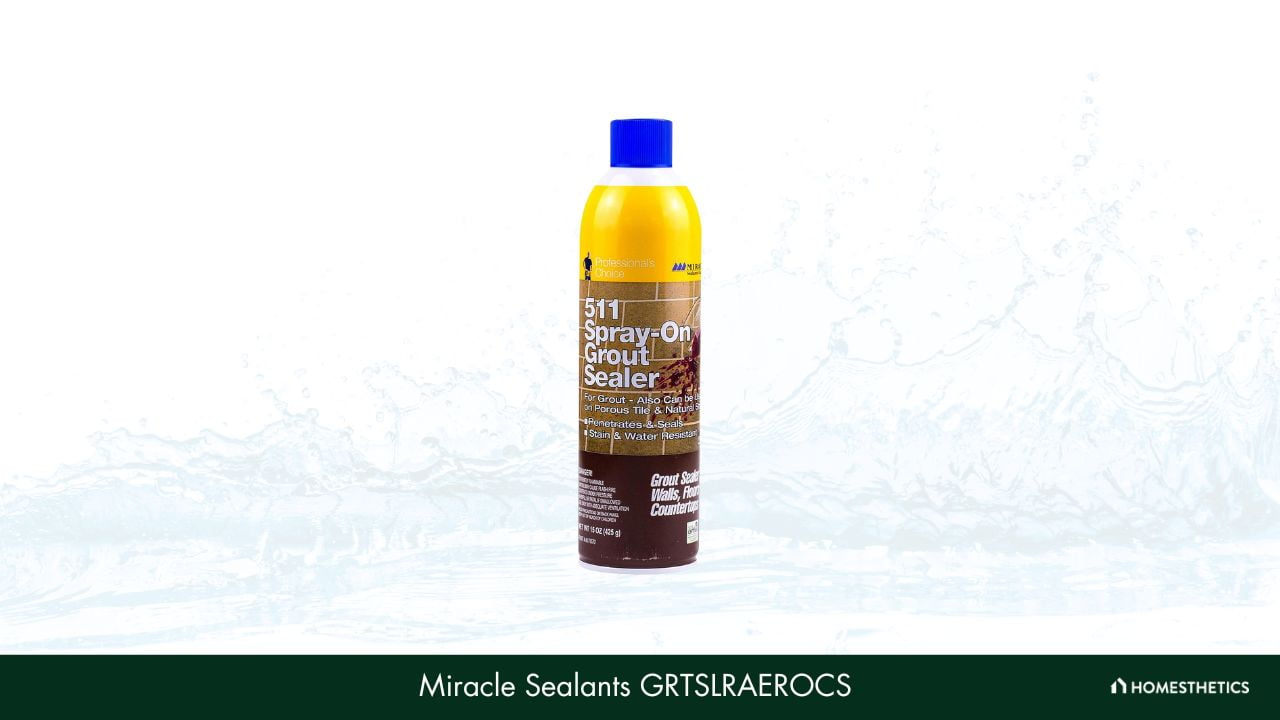
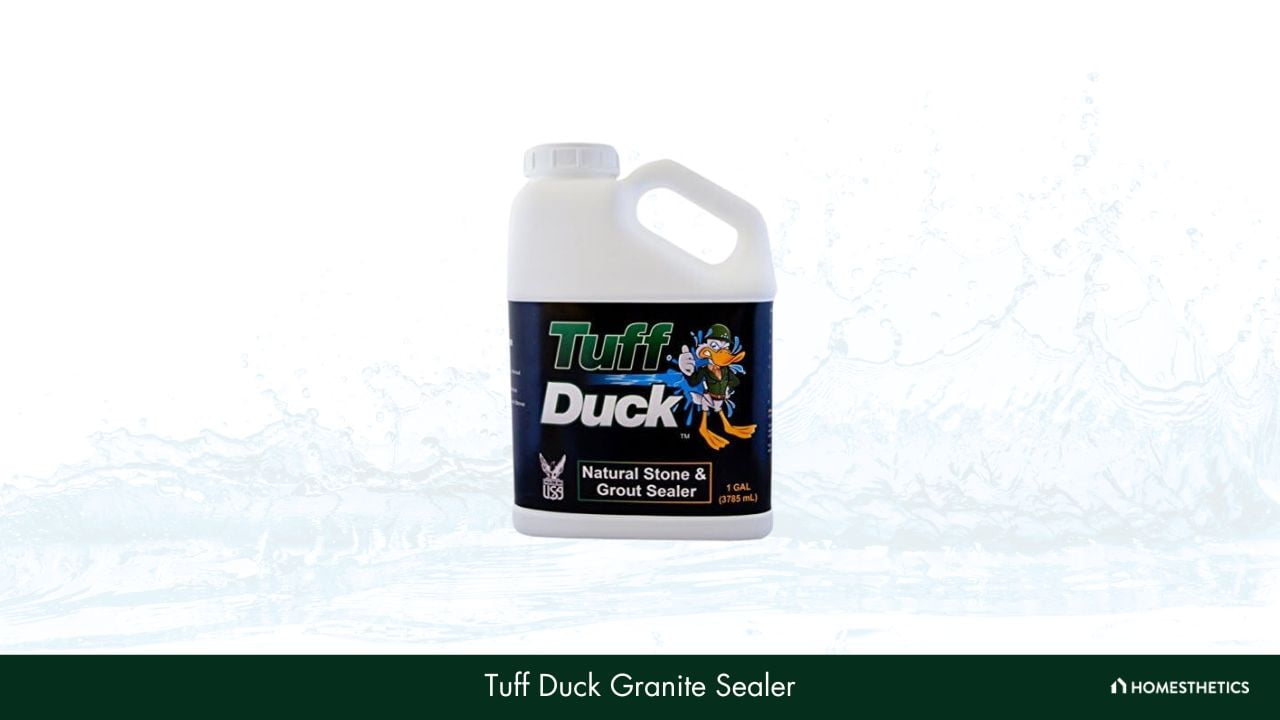

![Grizzly Lathe Review [Clear Winner?]](https://homesthetics.net/wp-content/uploads/2021/08/Grizzly-Lathe-Review-01.jpg "Grizzly Lathe Review [Clear Winner?]")

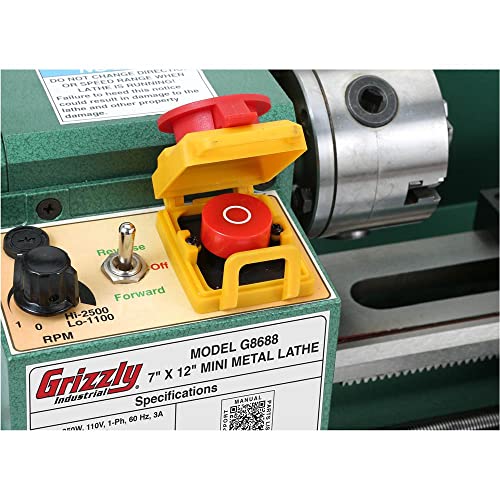

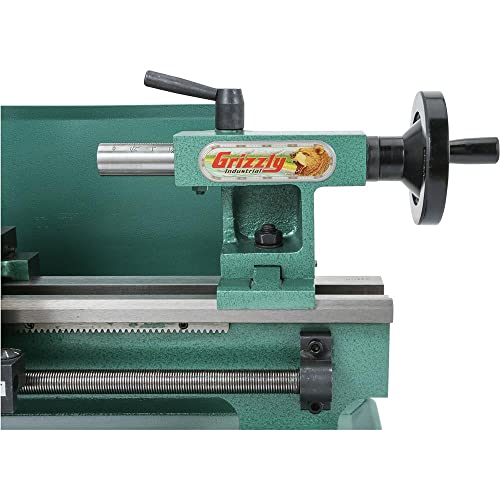
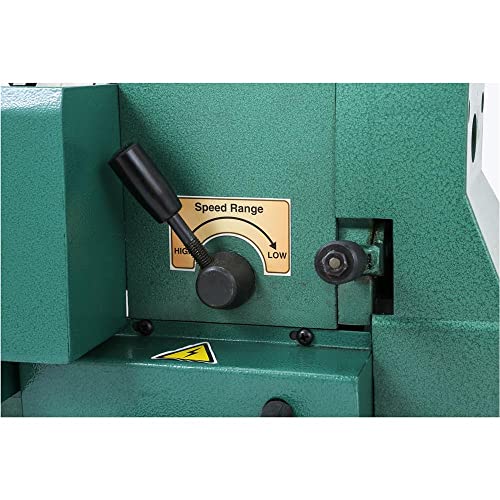

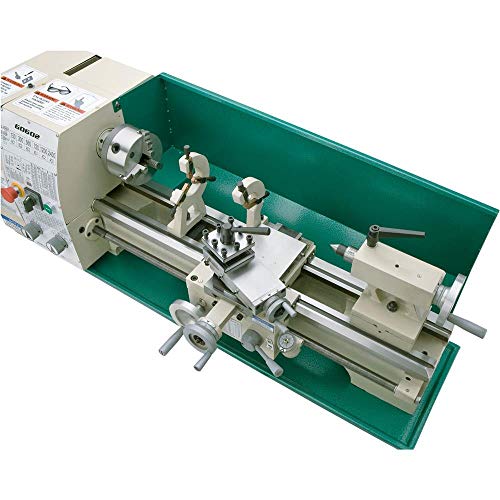


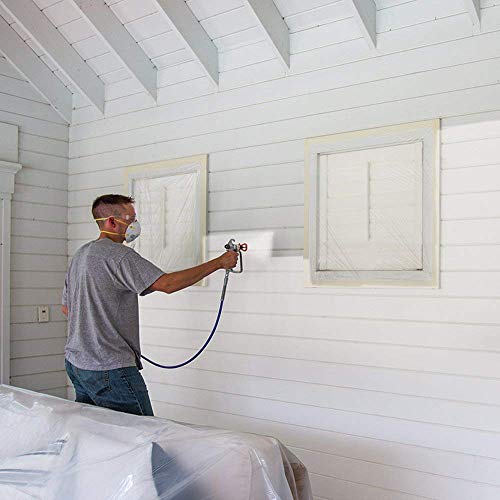


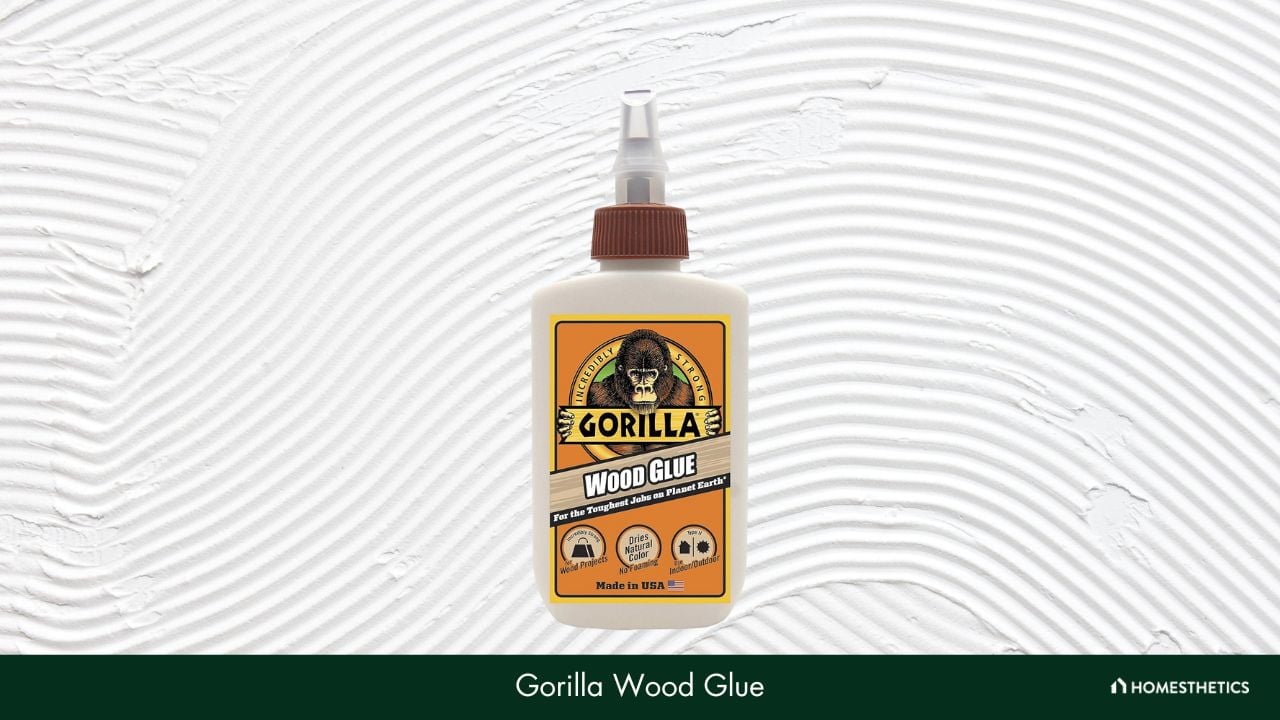
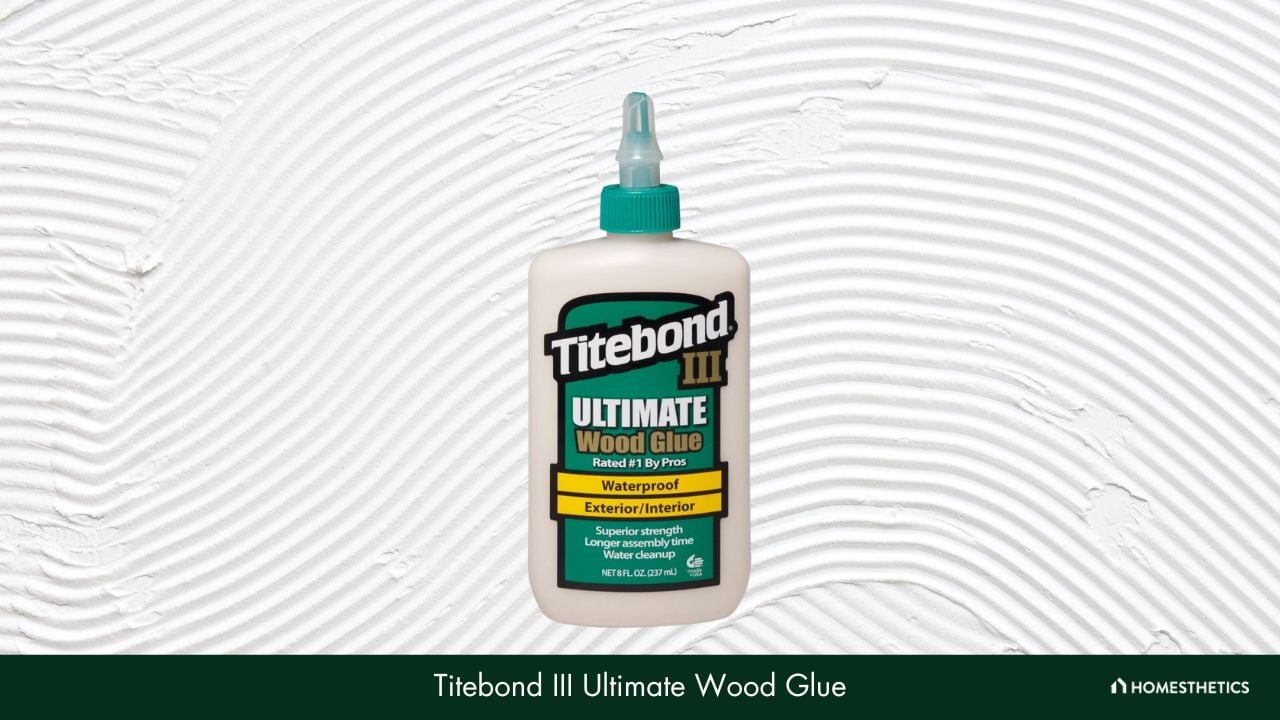


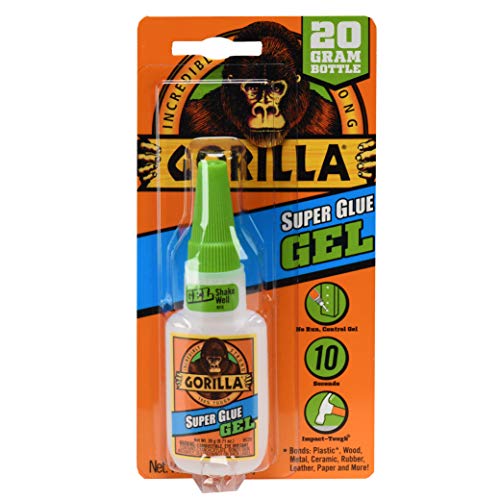


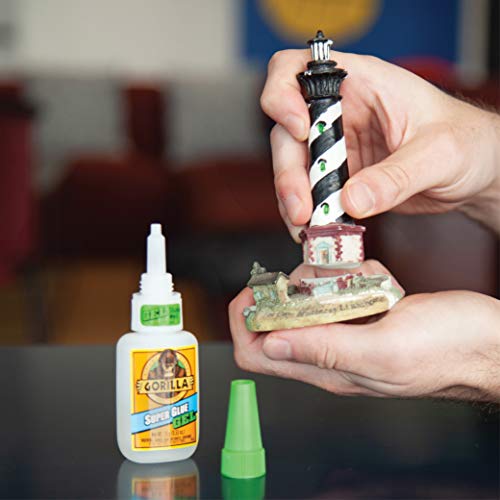

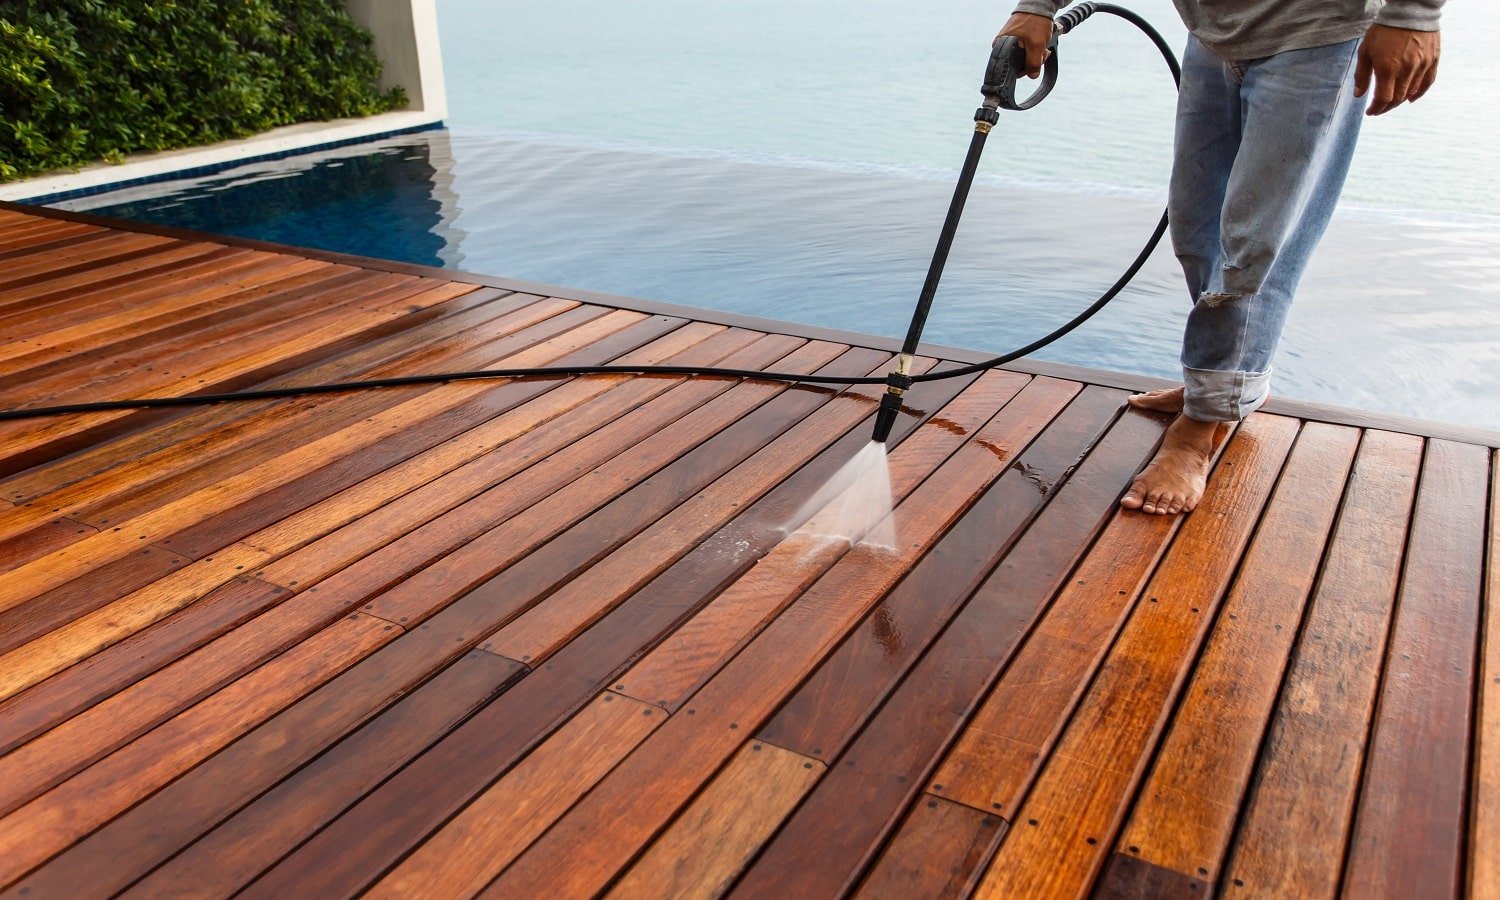


![5 Best Glues for Silicone [Reviews & Buyer’s Guide]](https://homesthetics.net/wp-content/uploads/2021/12/Glue-for-Silicone-1.jpg "5 Best Glues for Silicone [Reviews & Buyer's Guide]")


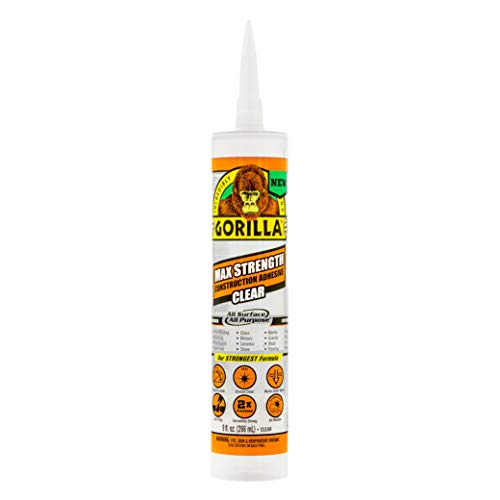


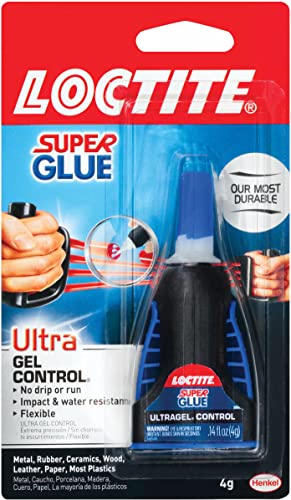
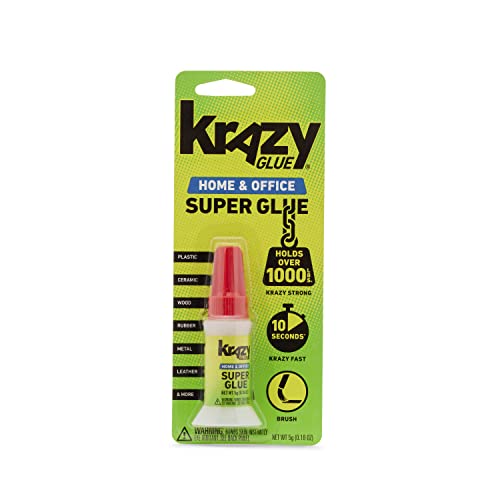
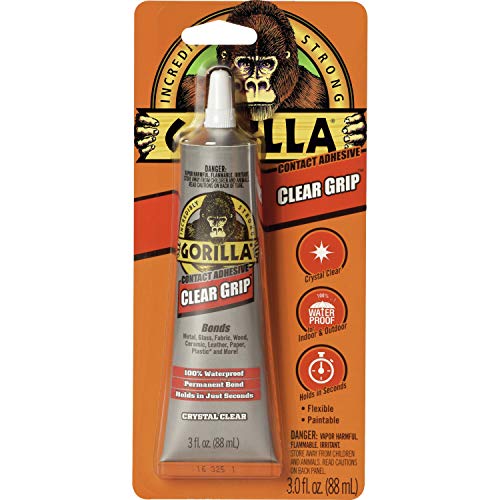
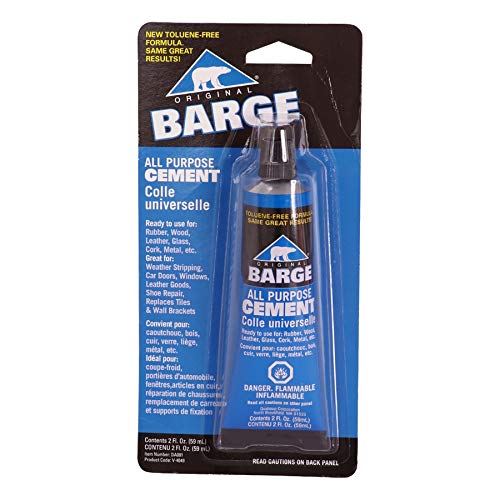


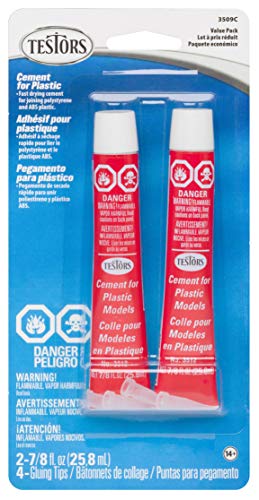


![9 Best Glue For PLA Of 2024 [Reviews & Buyer’s Guide]](https://homesthetics.net/wp-content/uploads/2022/01/Best-Glue-For-PLA-1.jpg "9 Best Glue For PLA Of 2024 [Reviews & Buyer's Guide]")


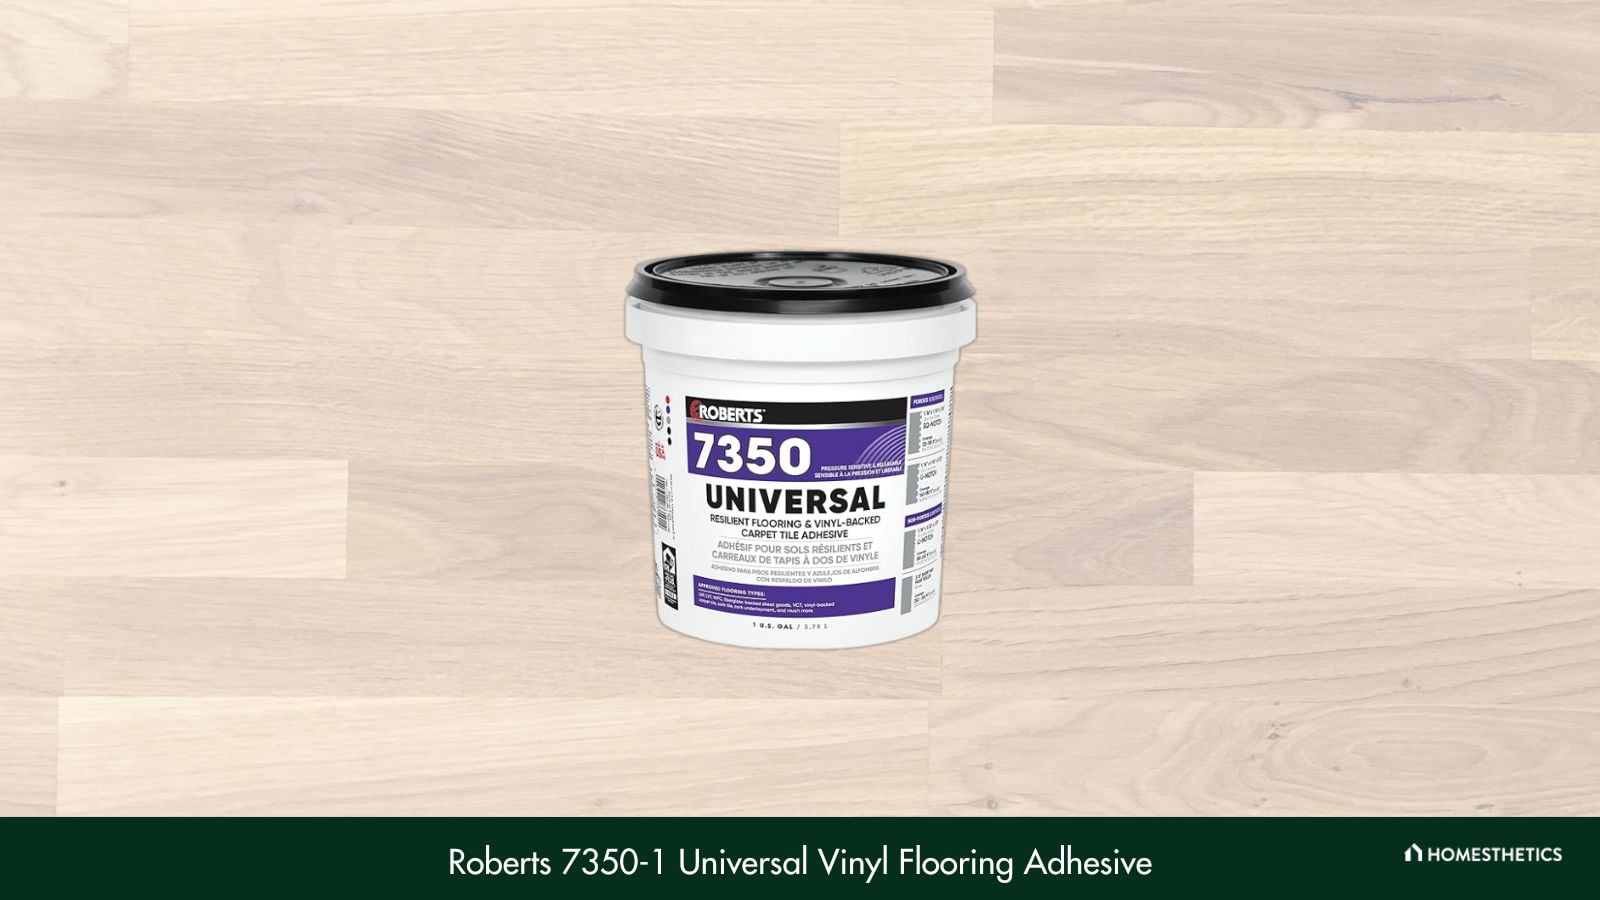
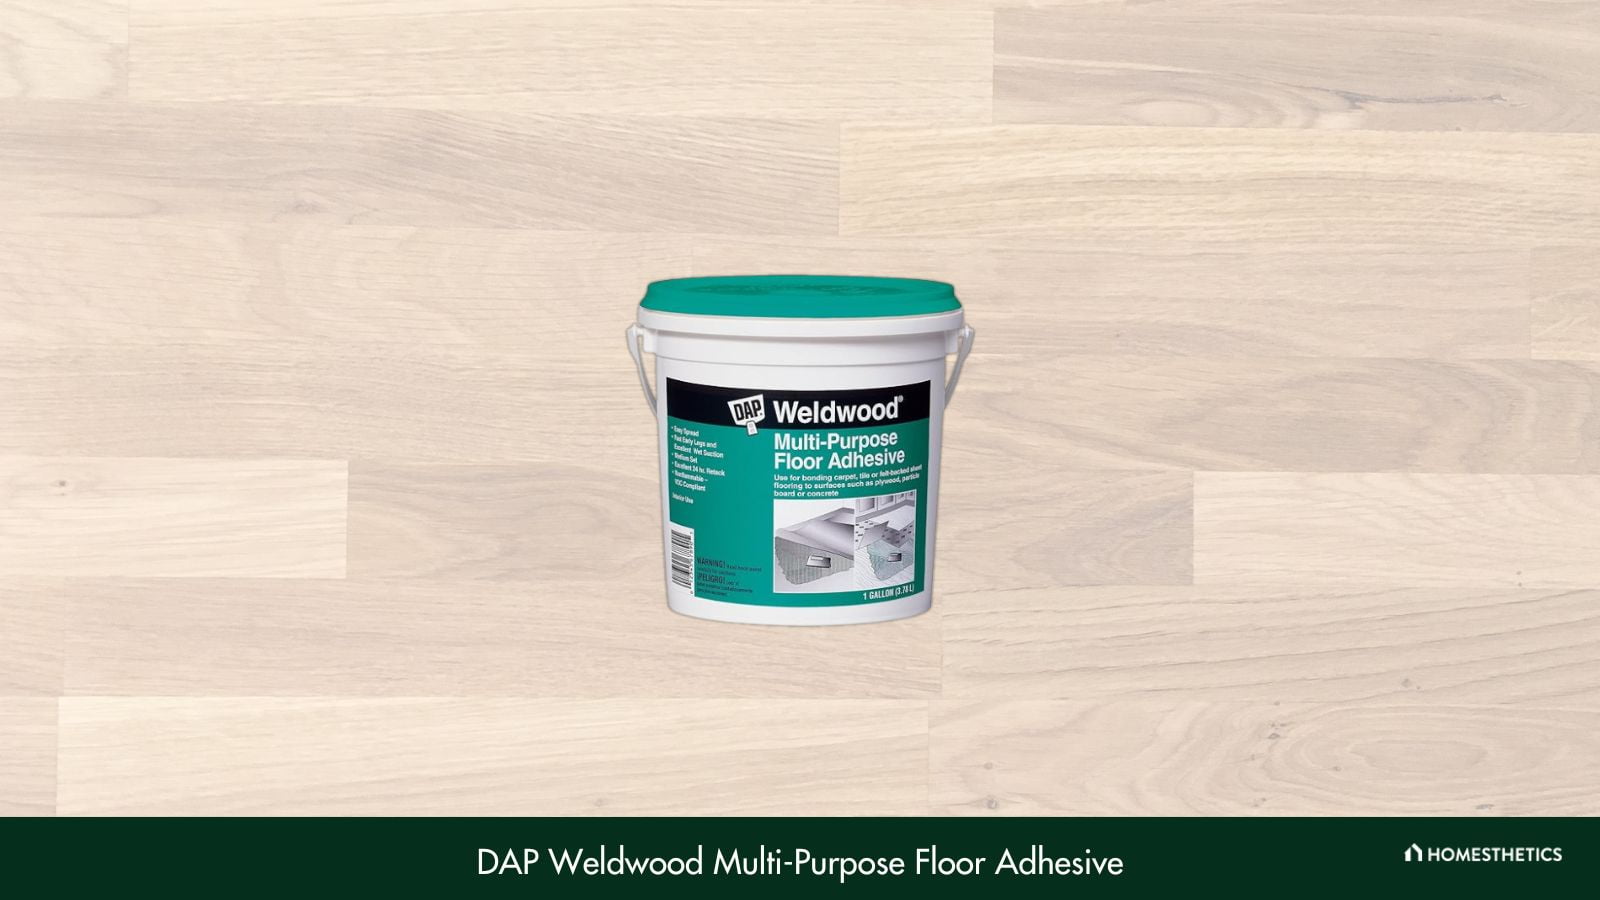
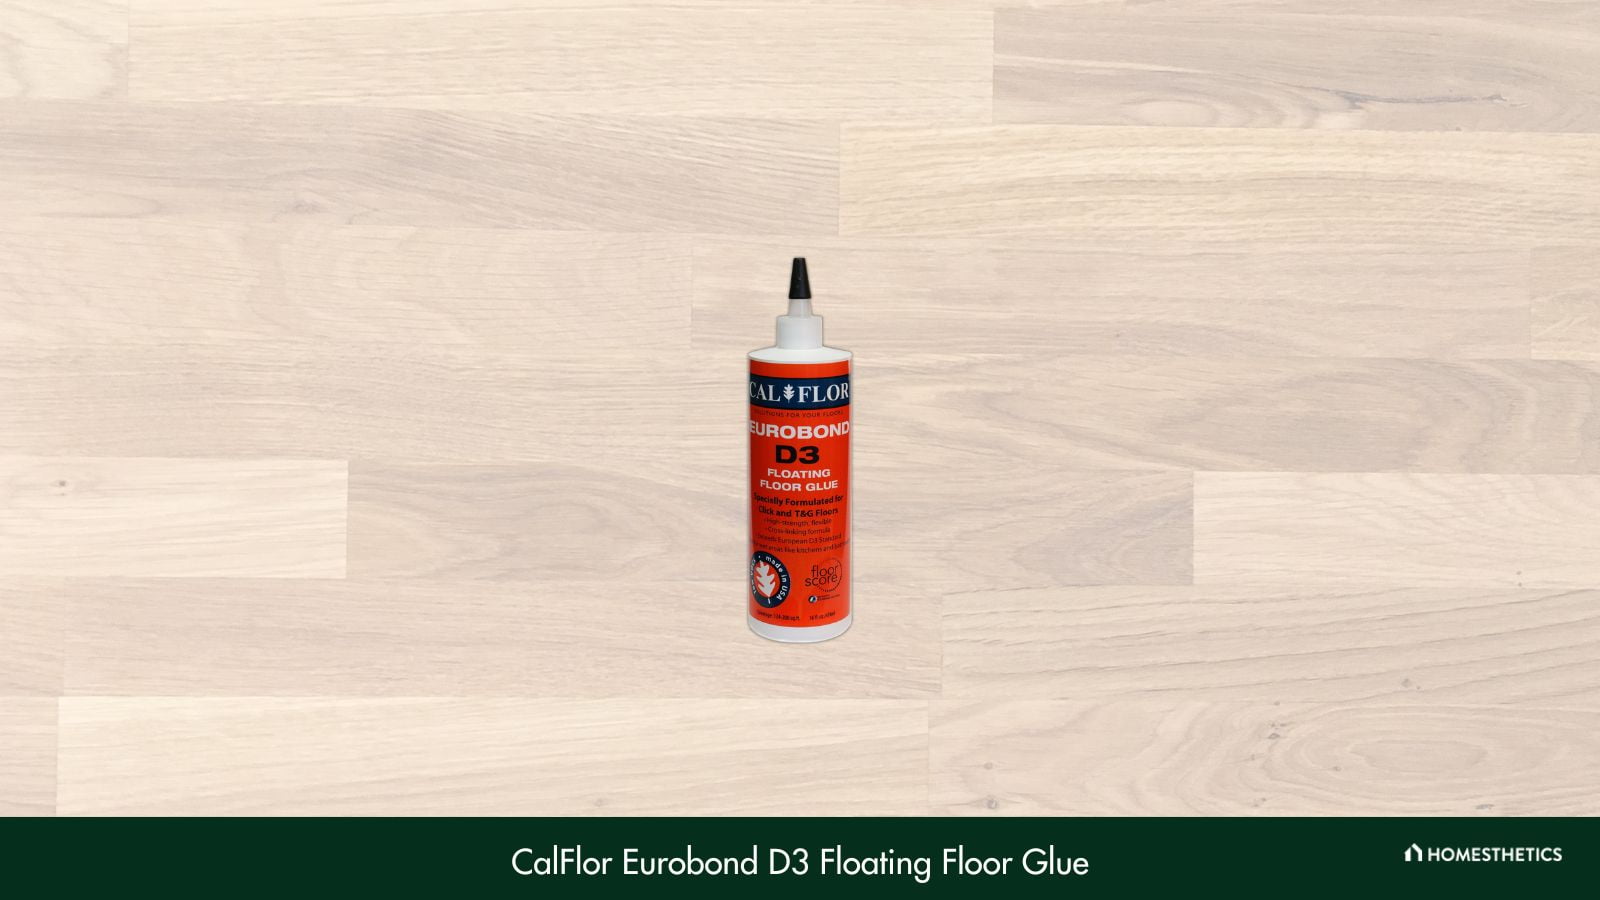
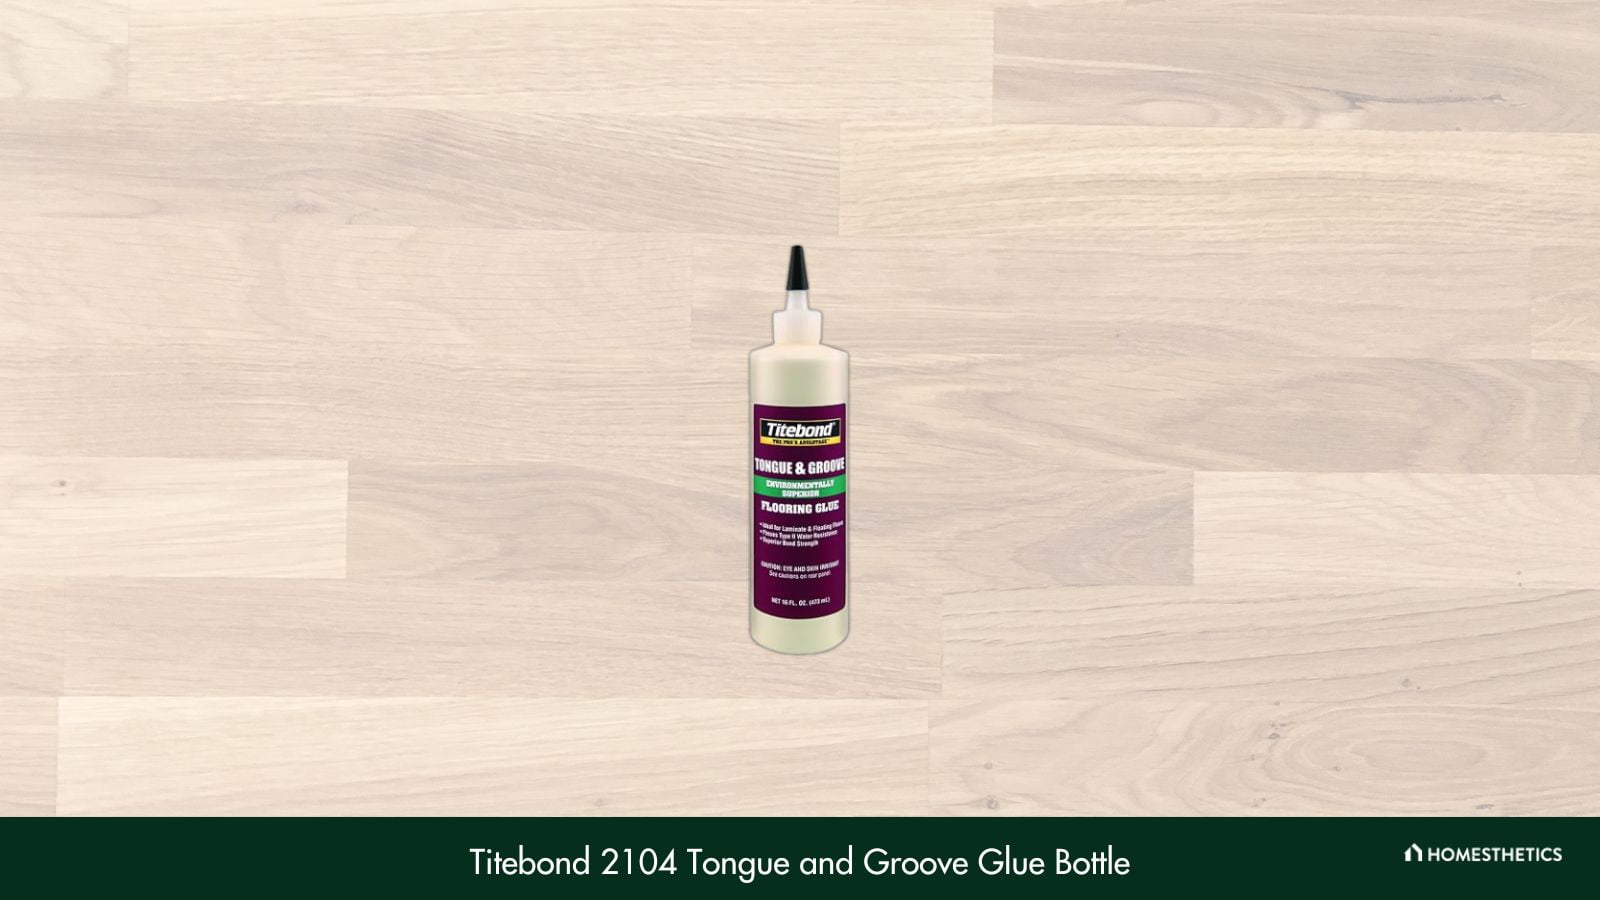
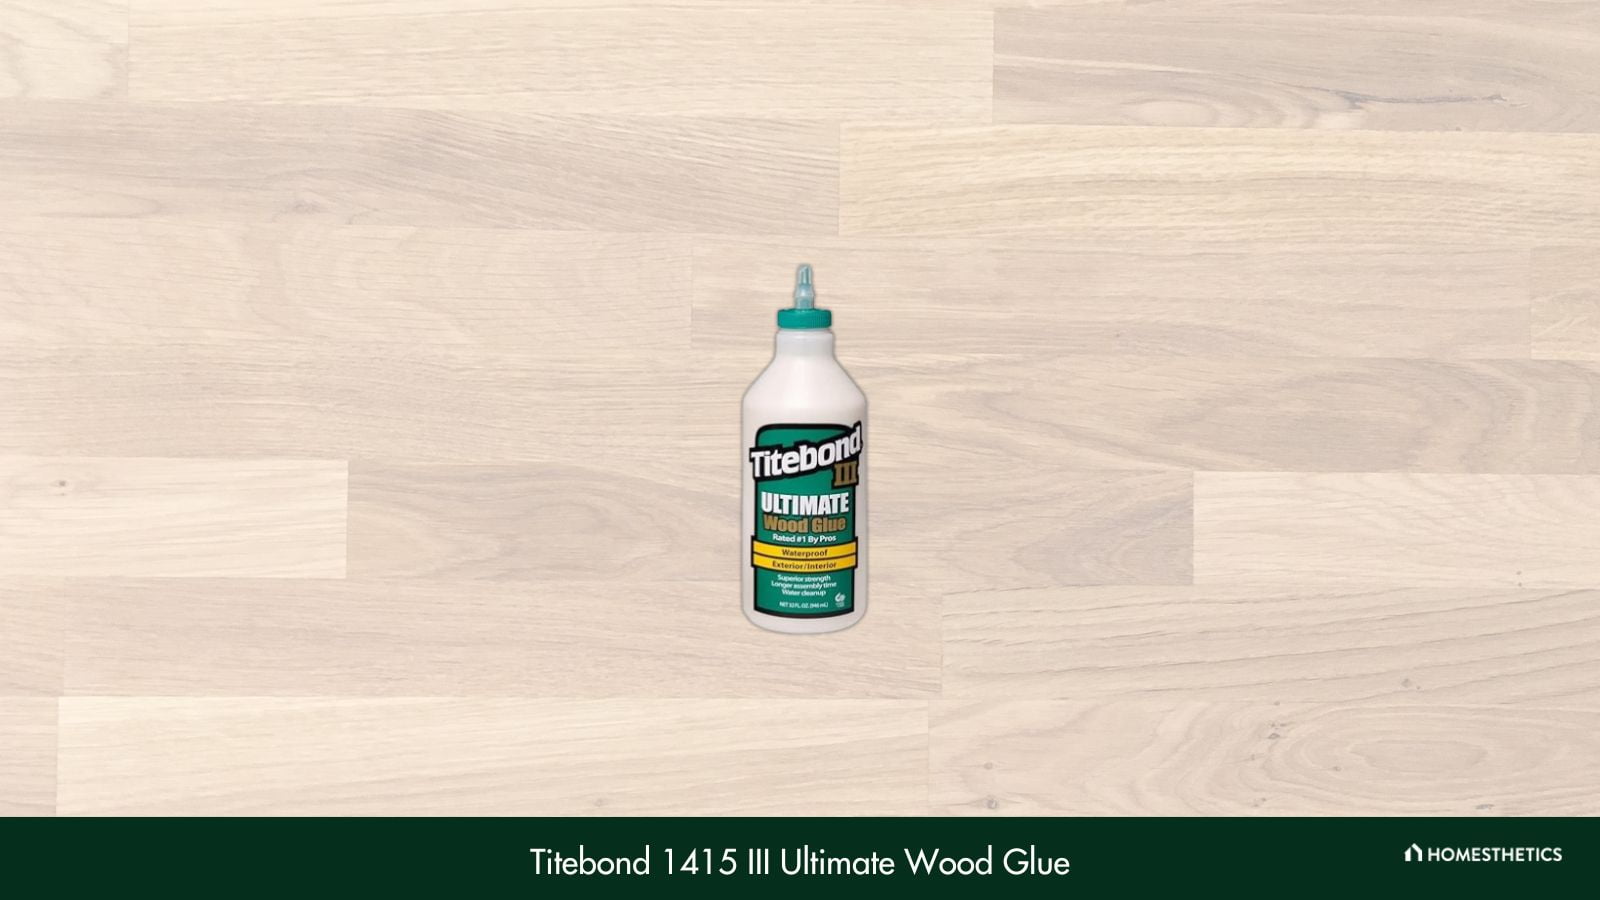
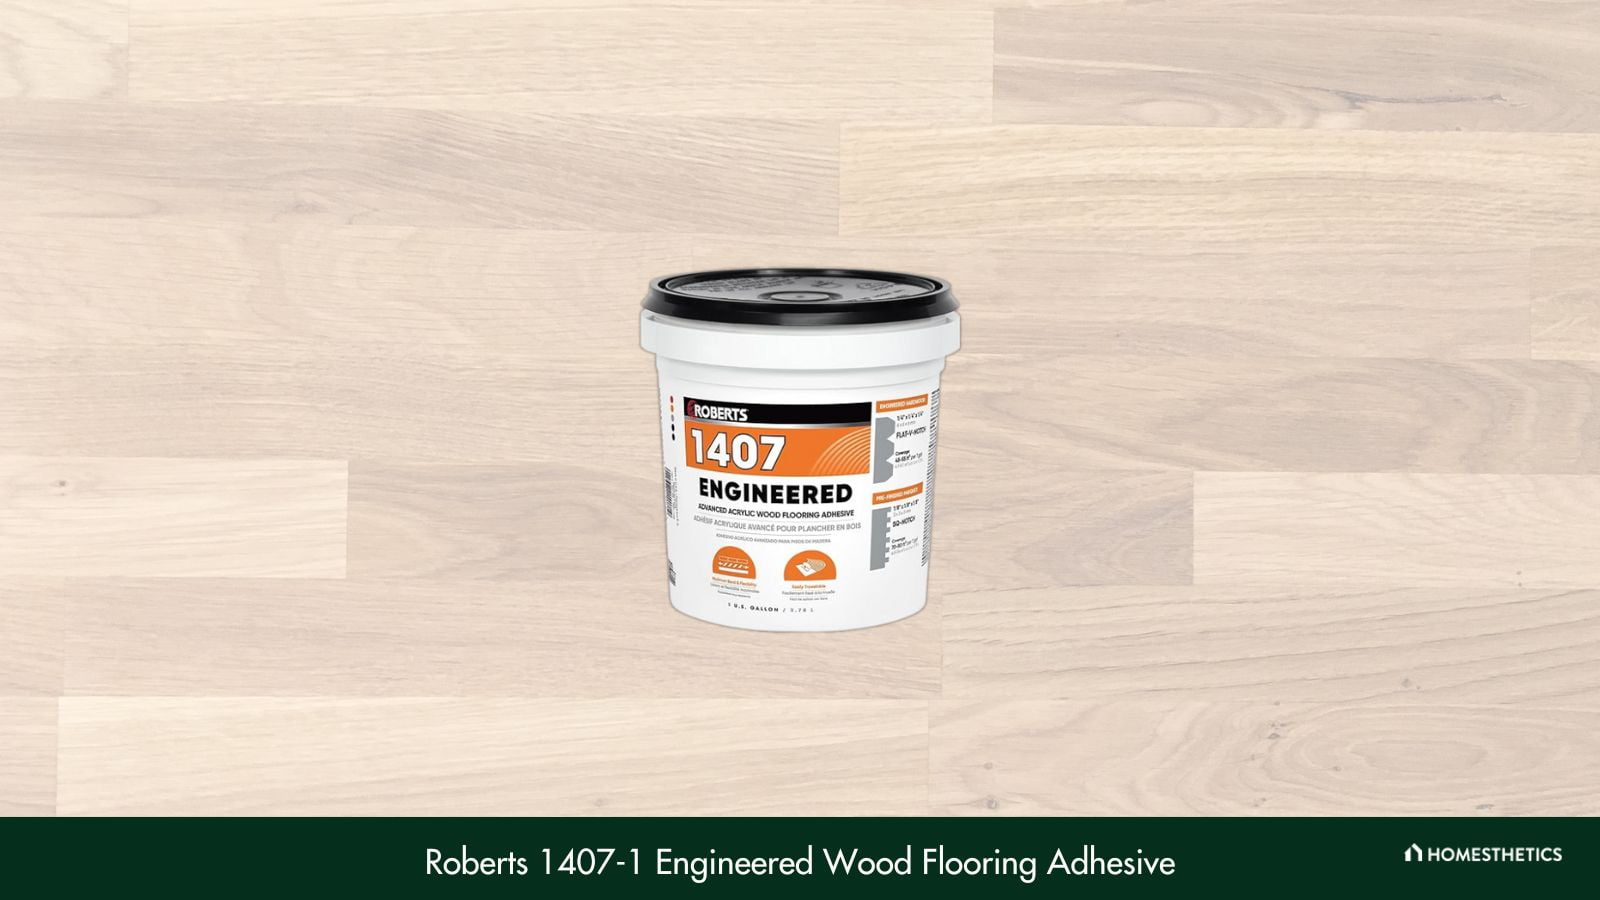
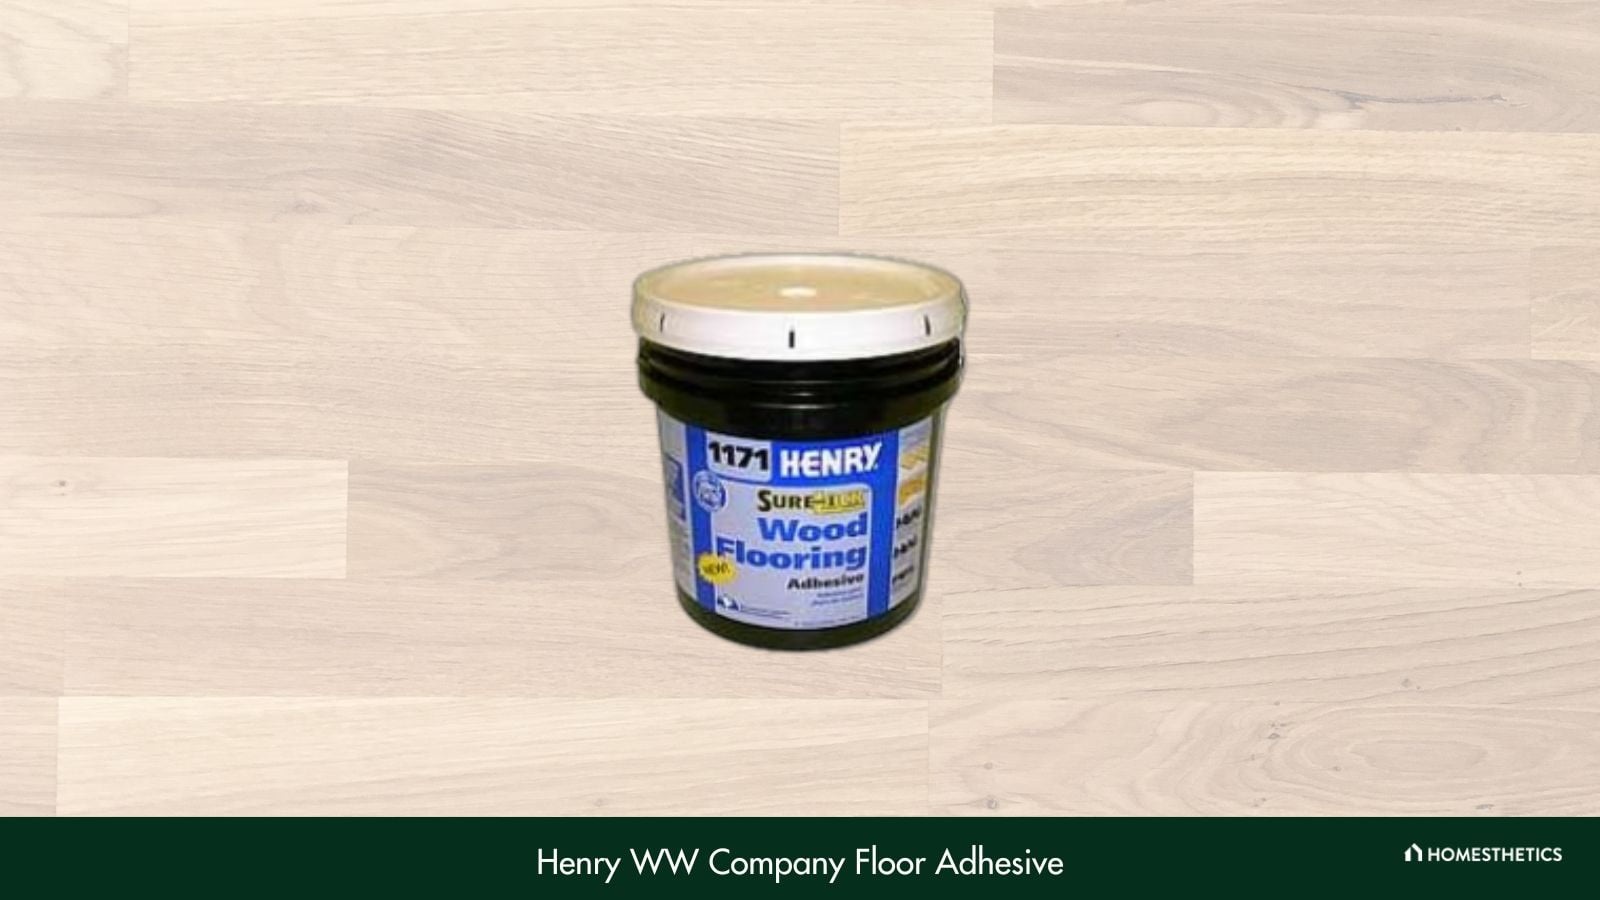
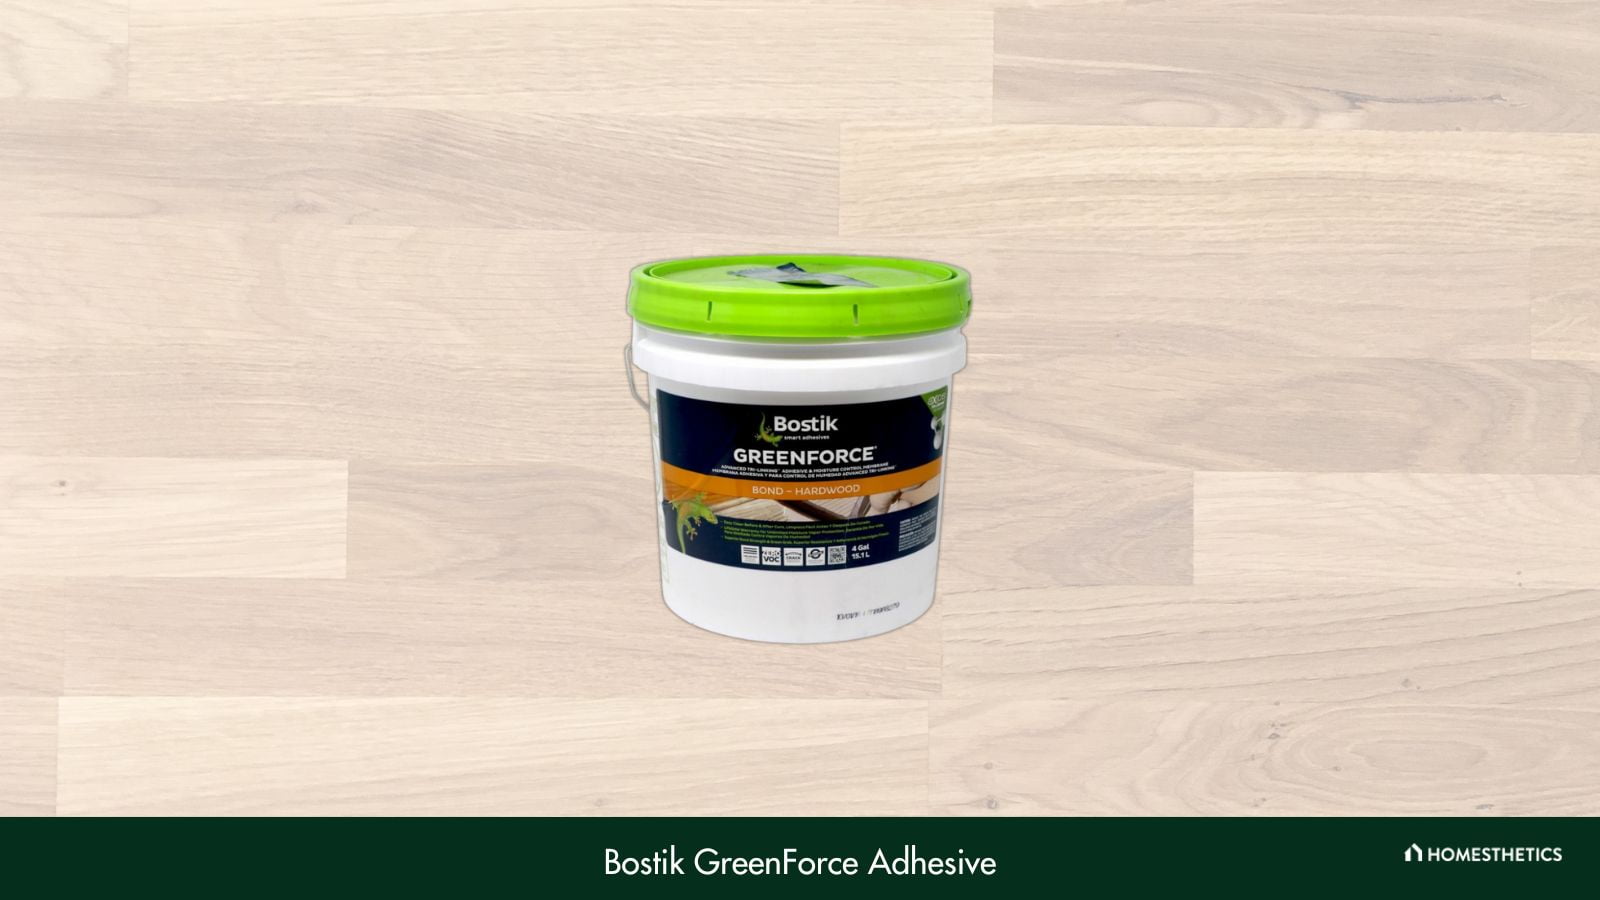


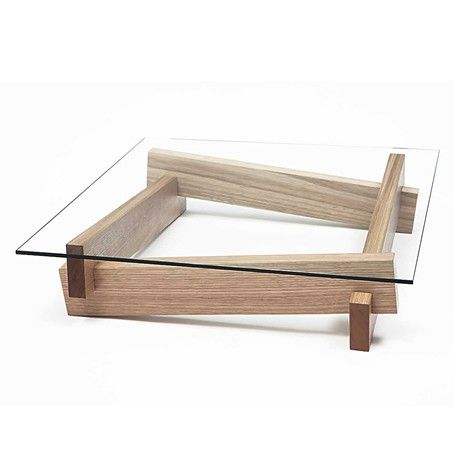
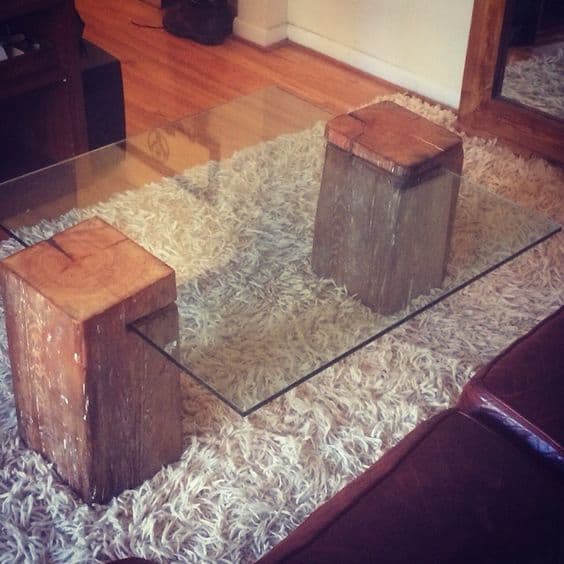
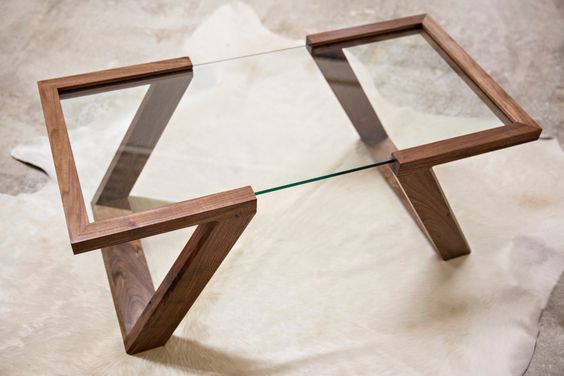
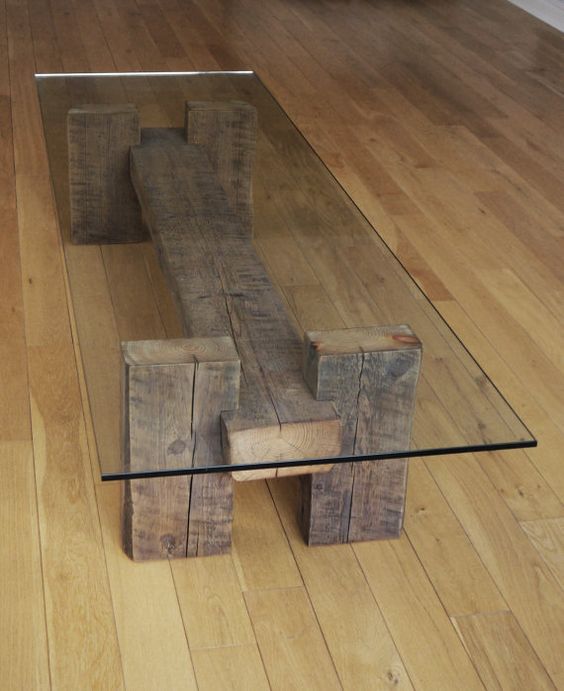
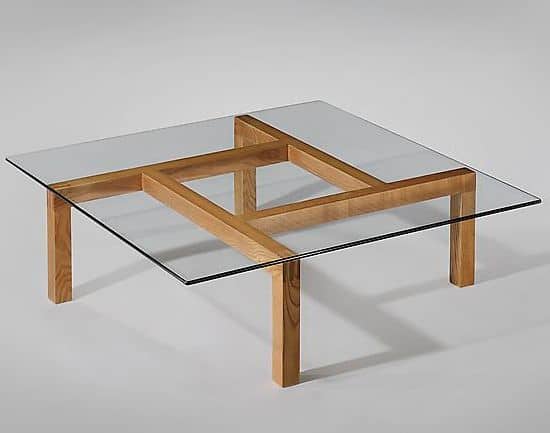
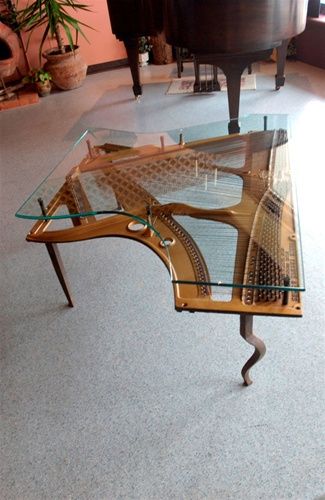
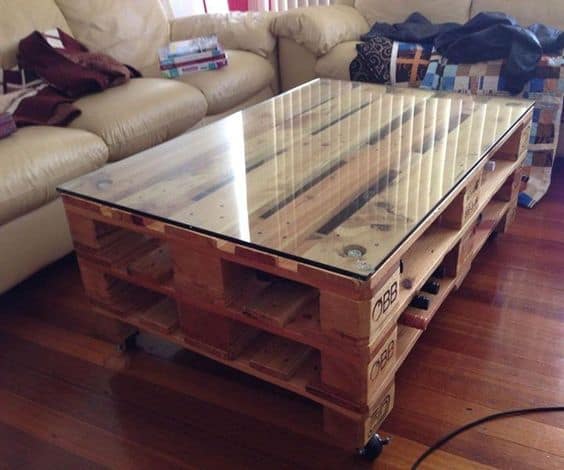
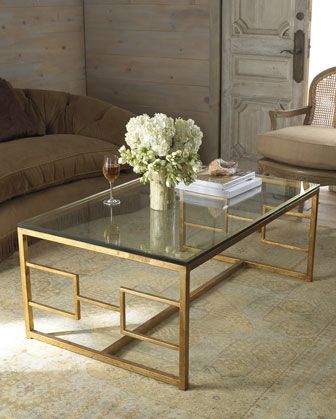
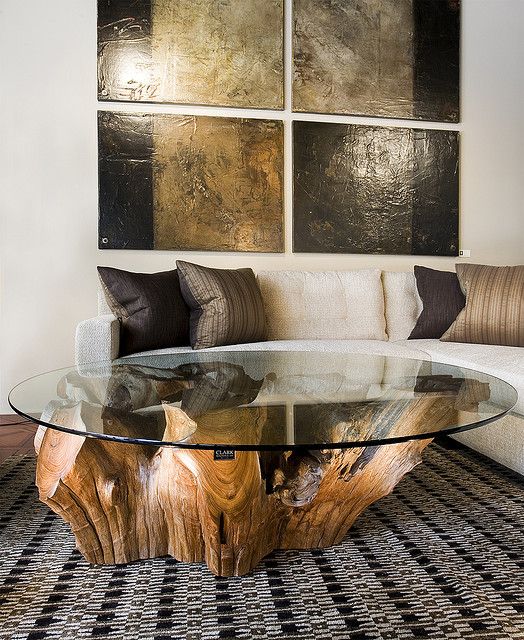

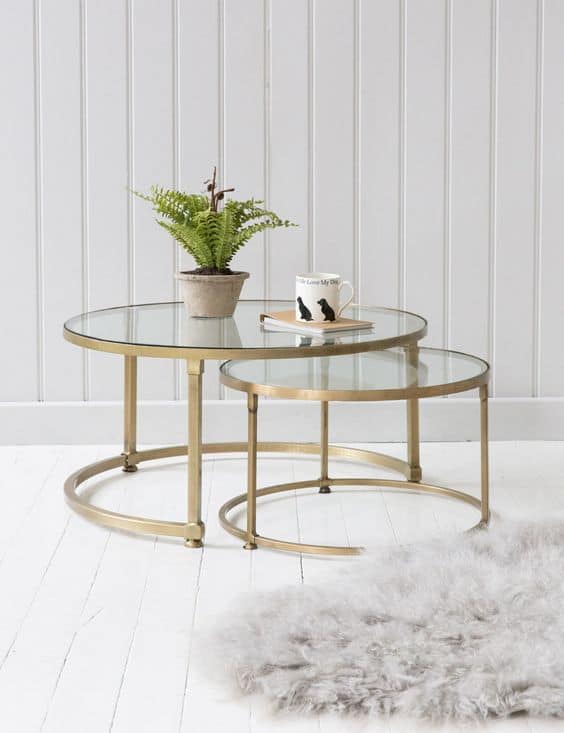
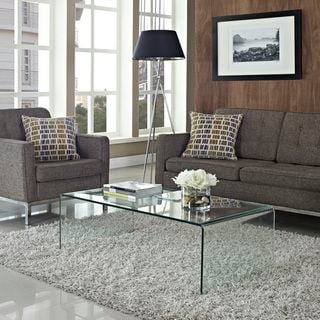

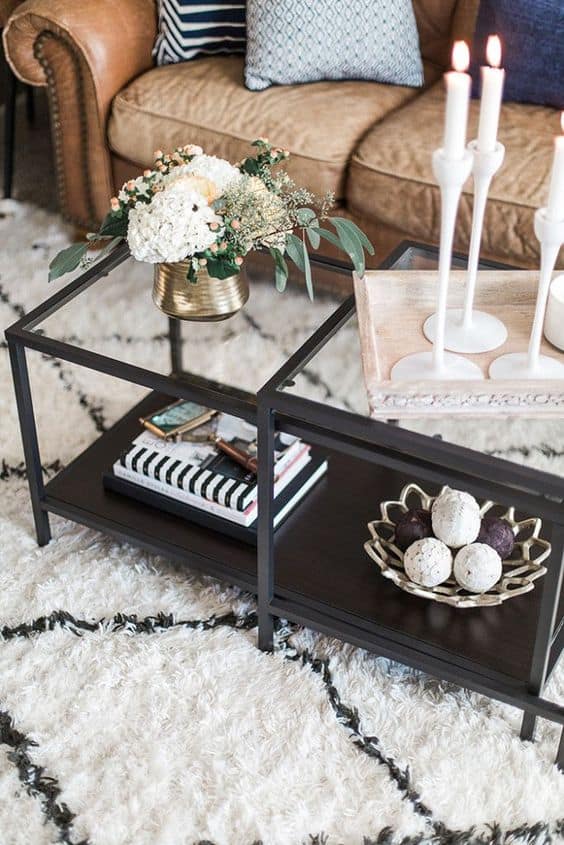
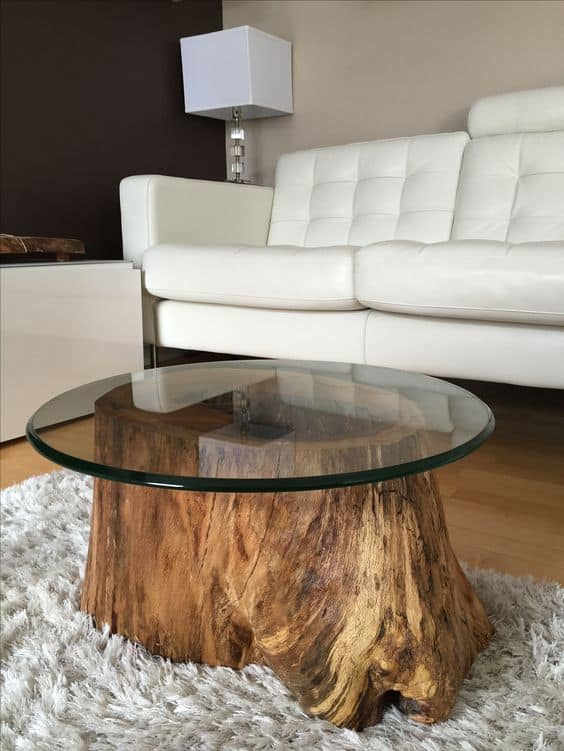
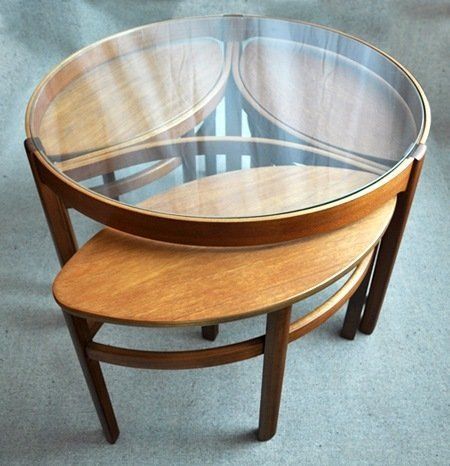


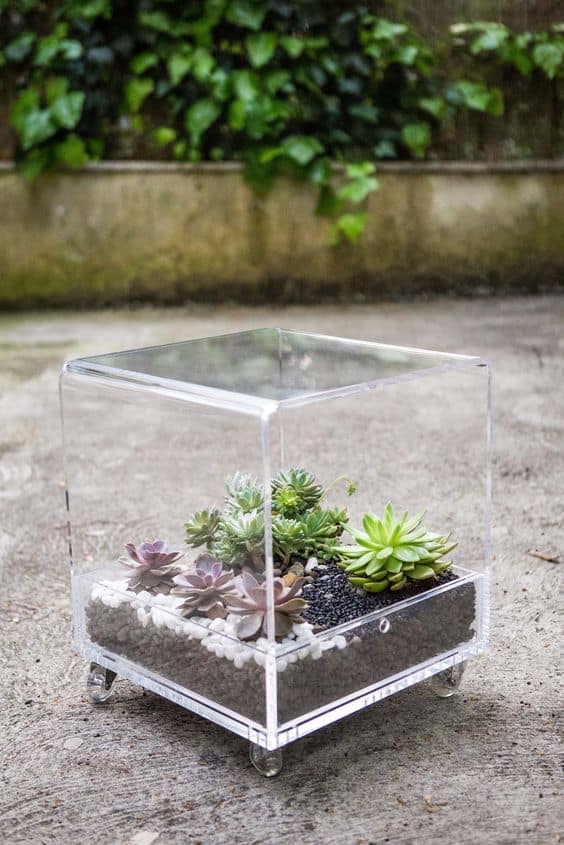

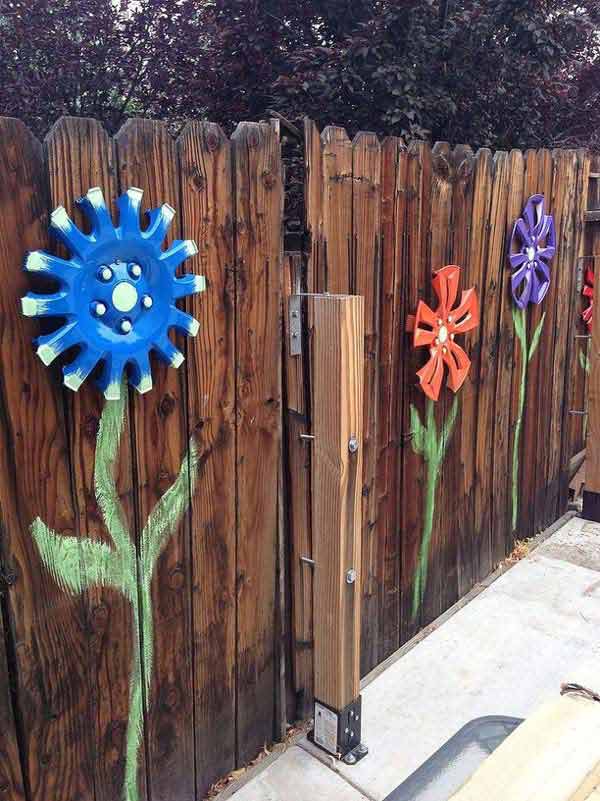
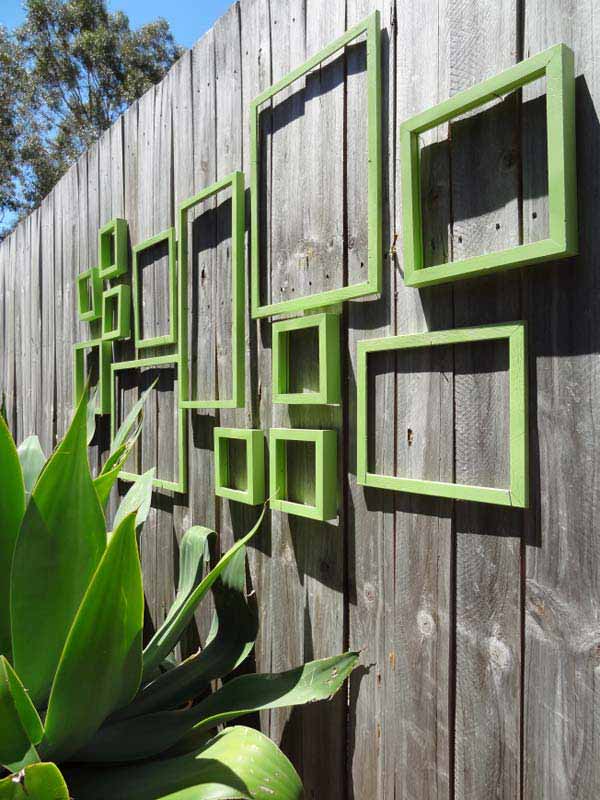
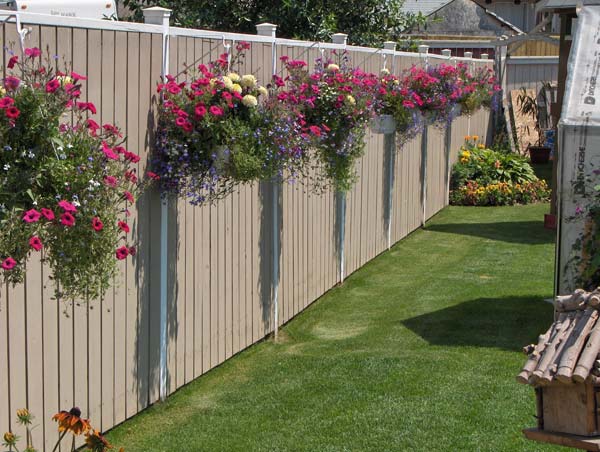
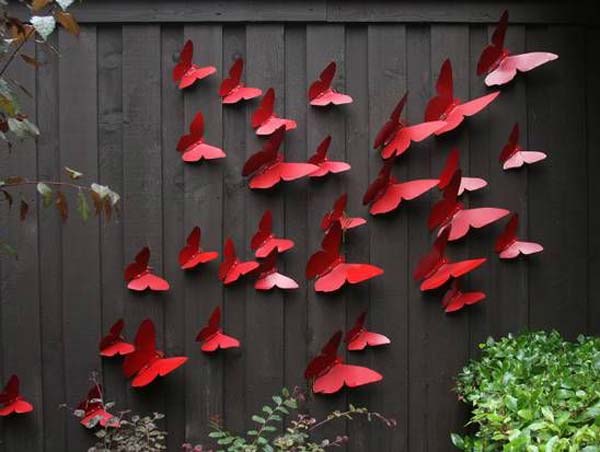
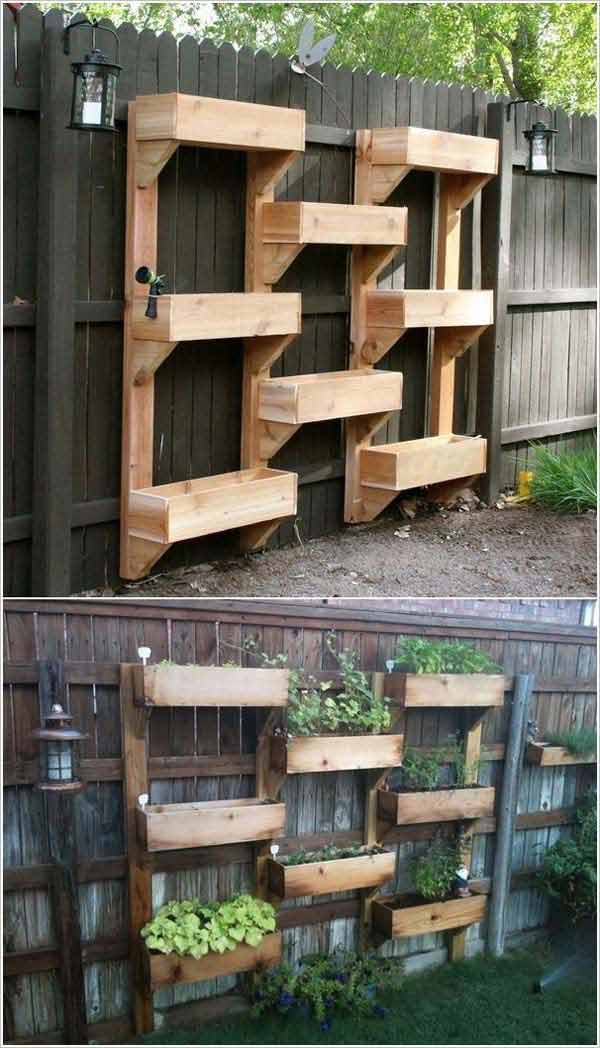
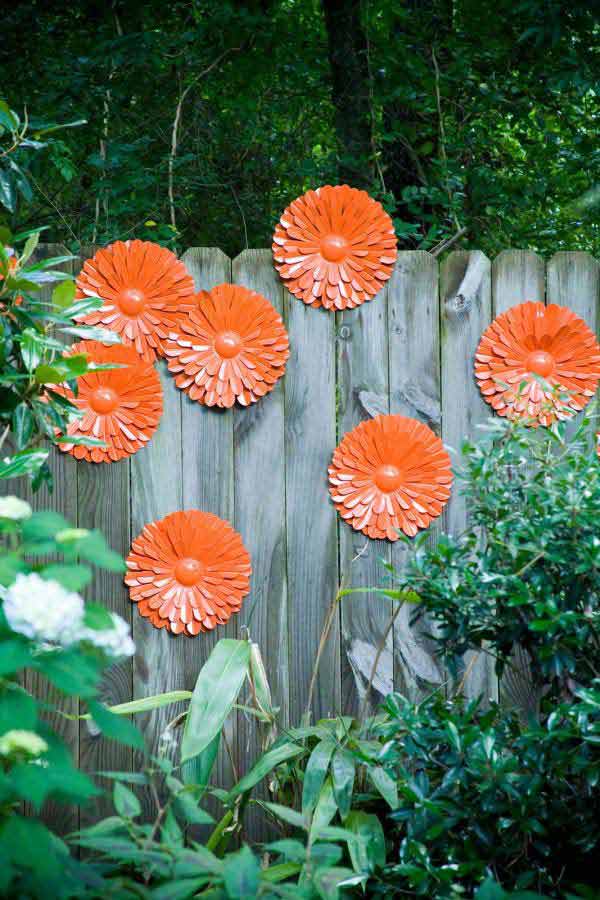
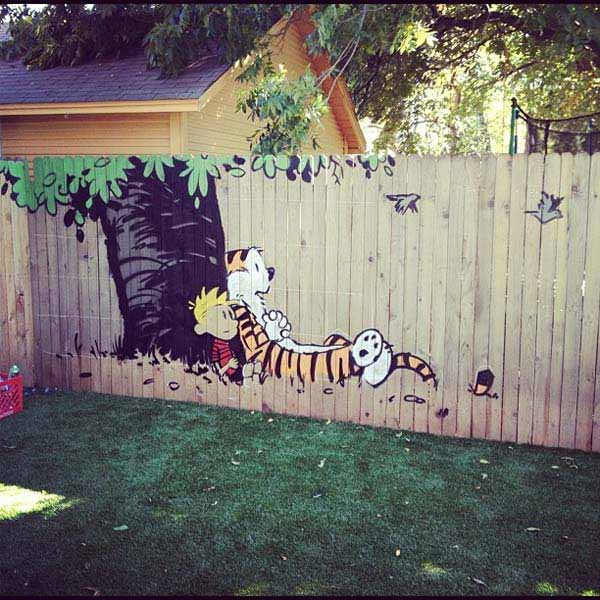
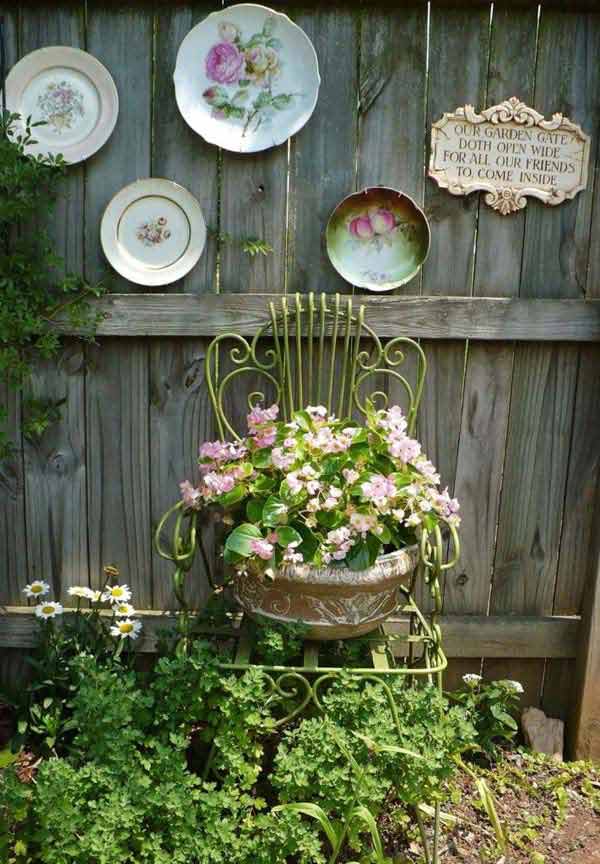
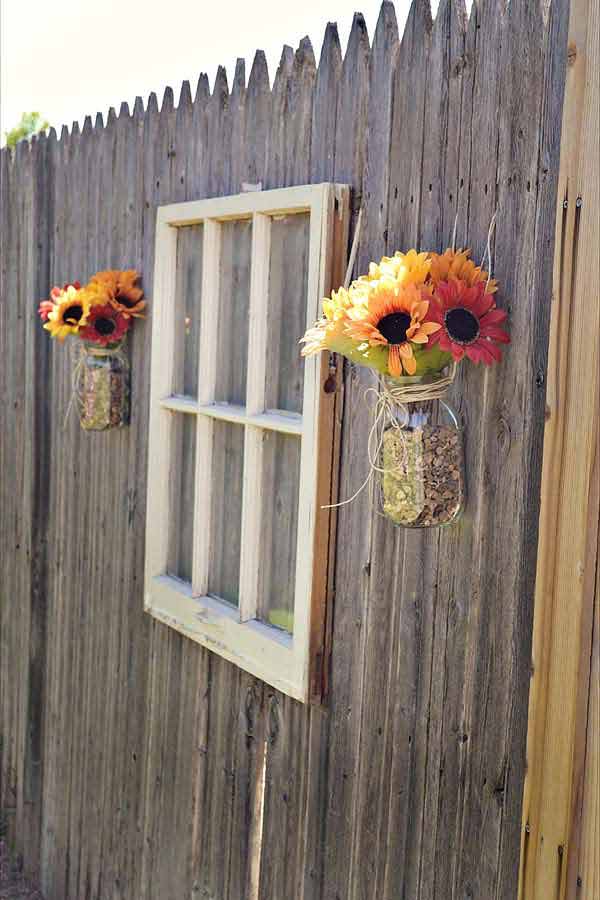
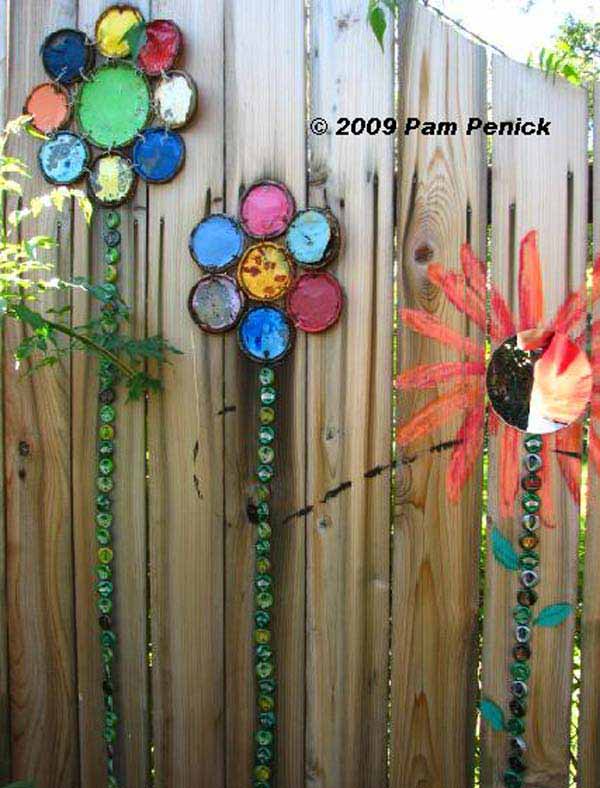
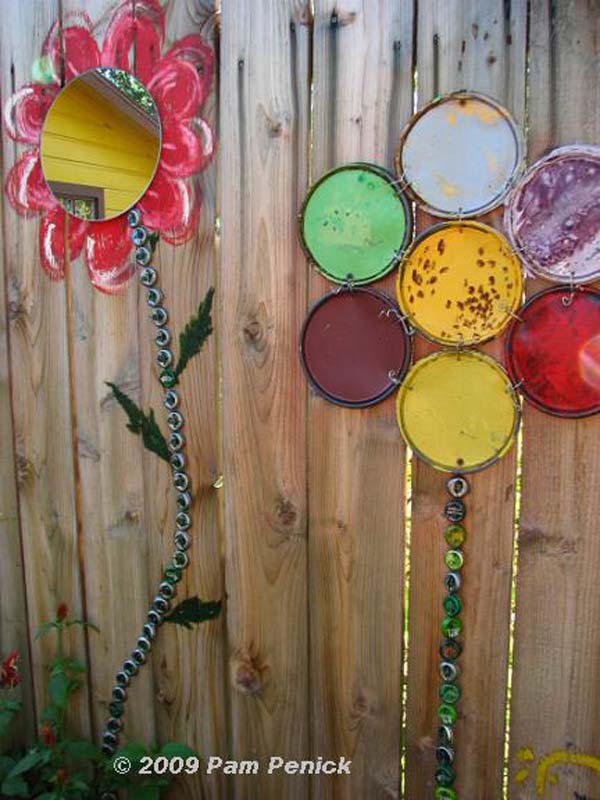
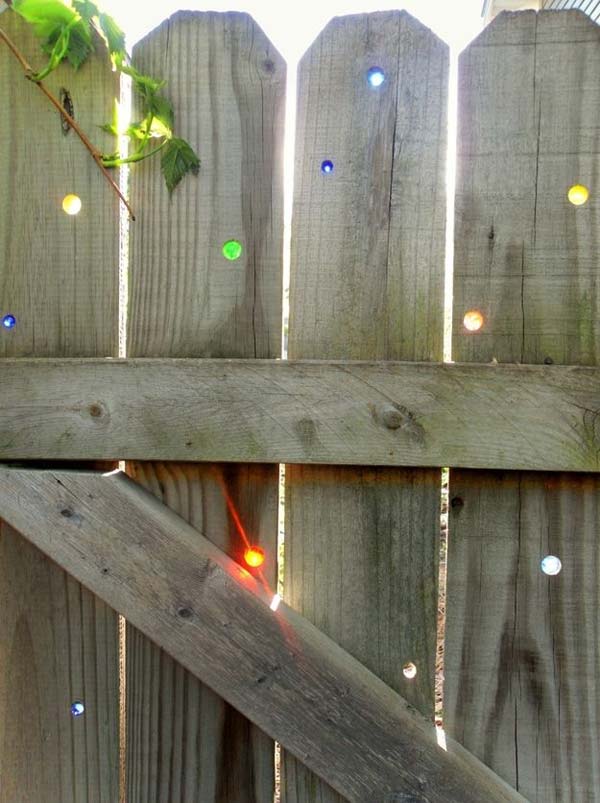
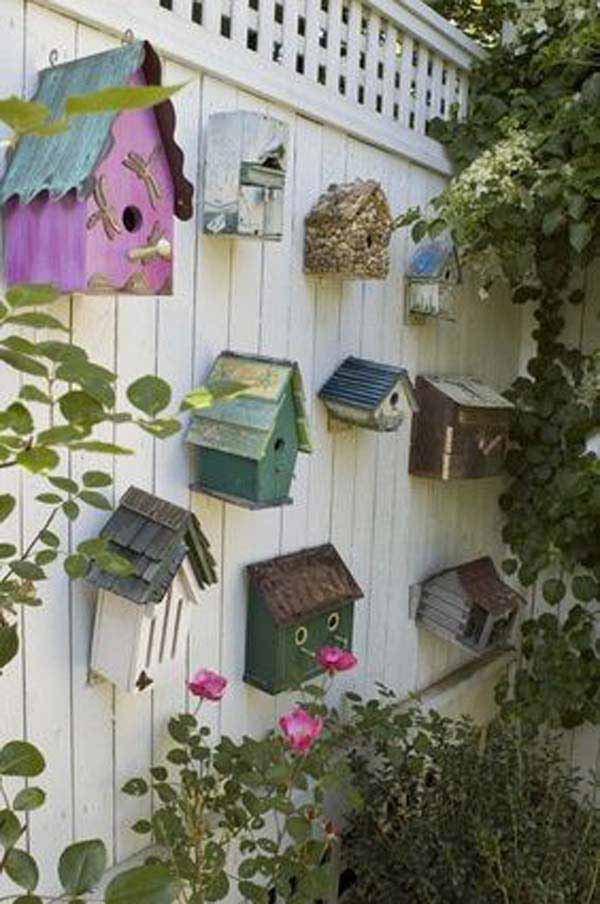
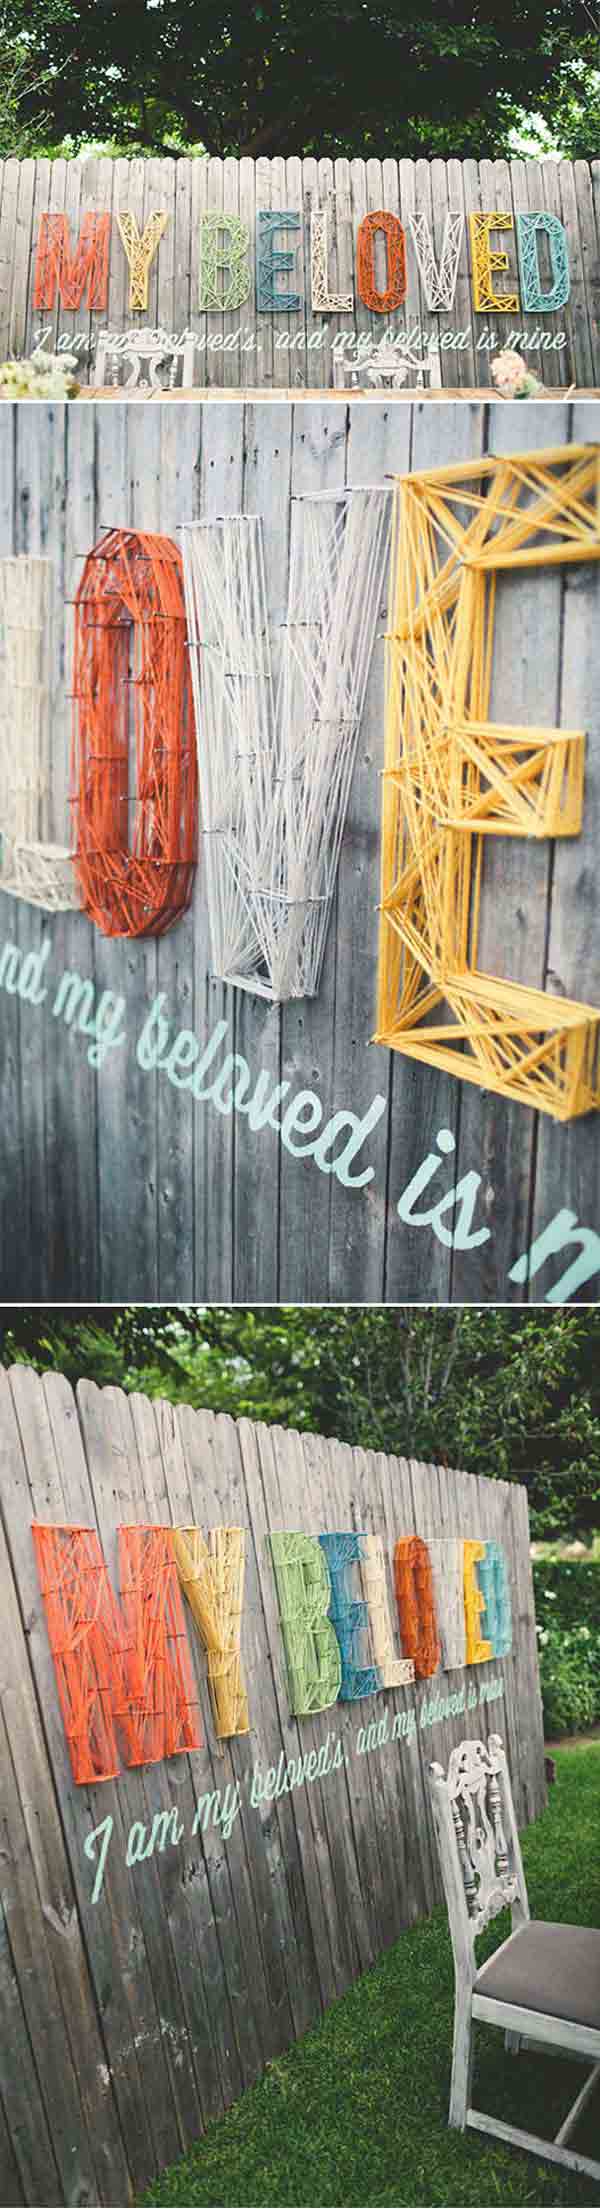
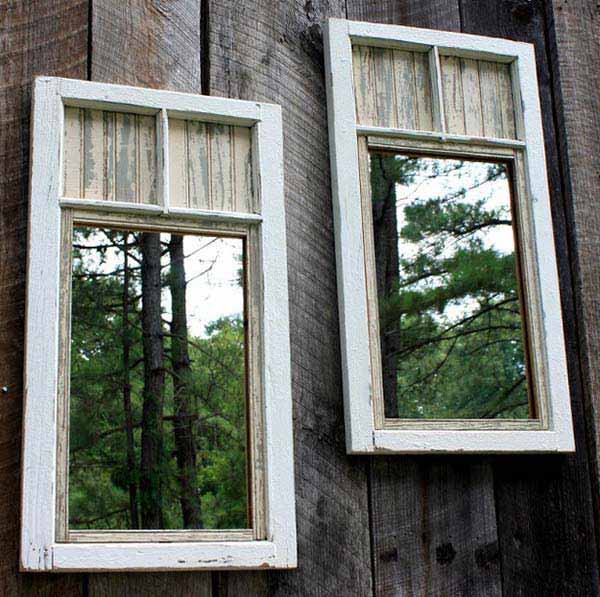


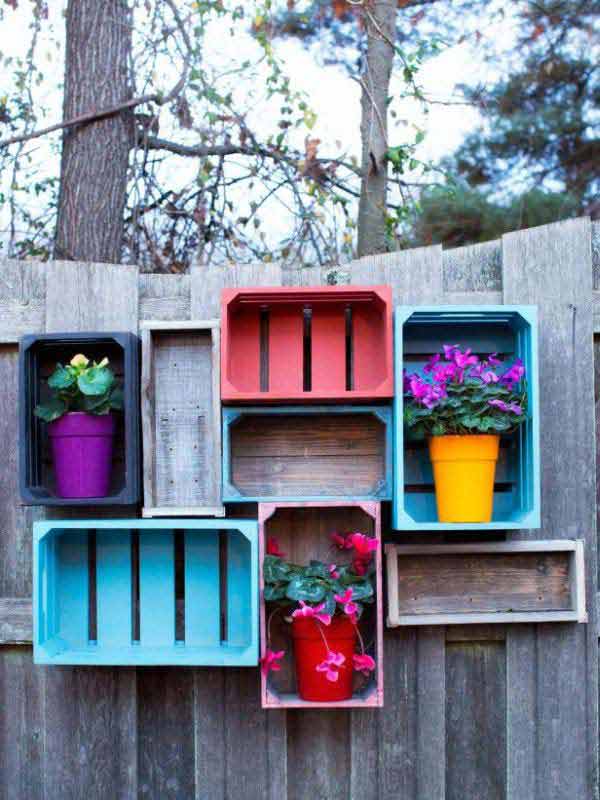
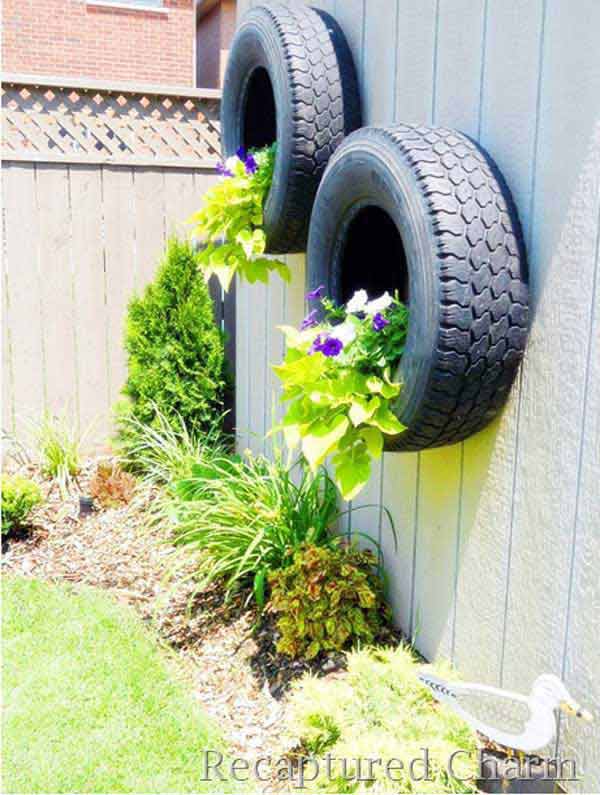
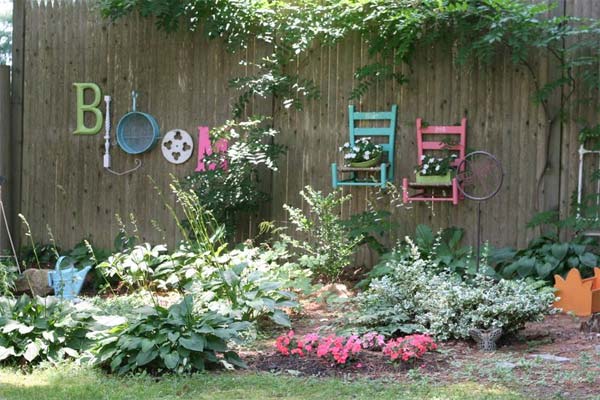
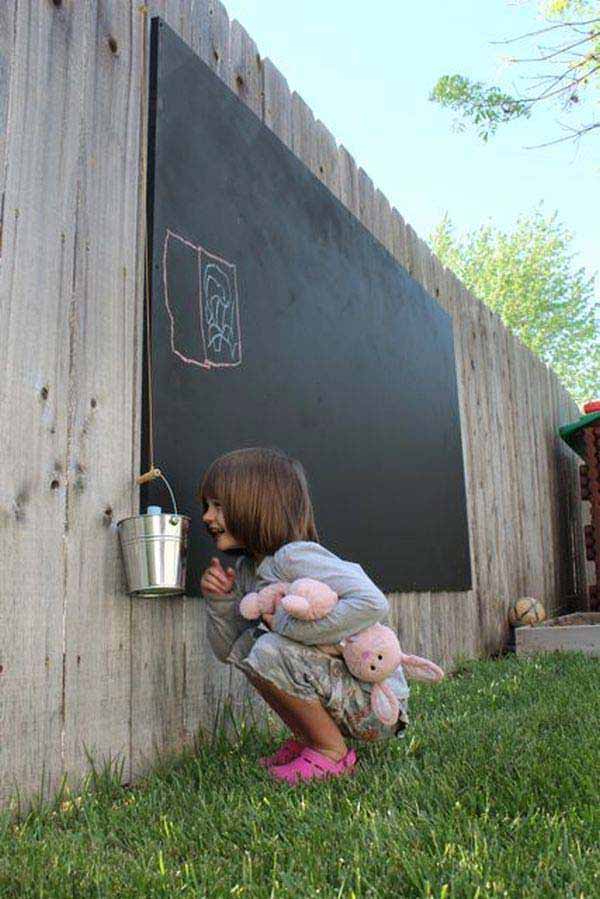
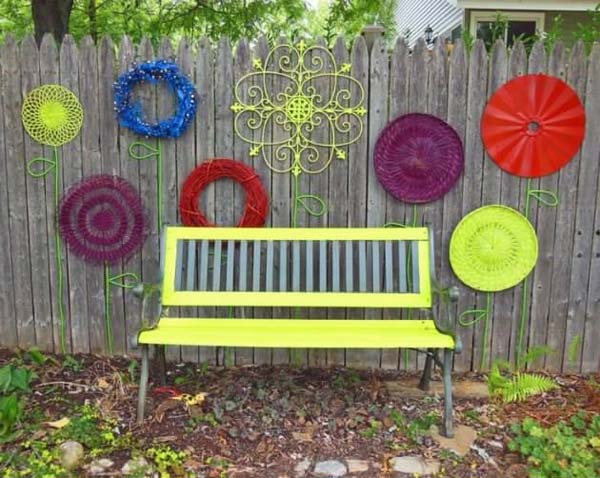


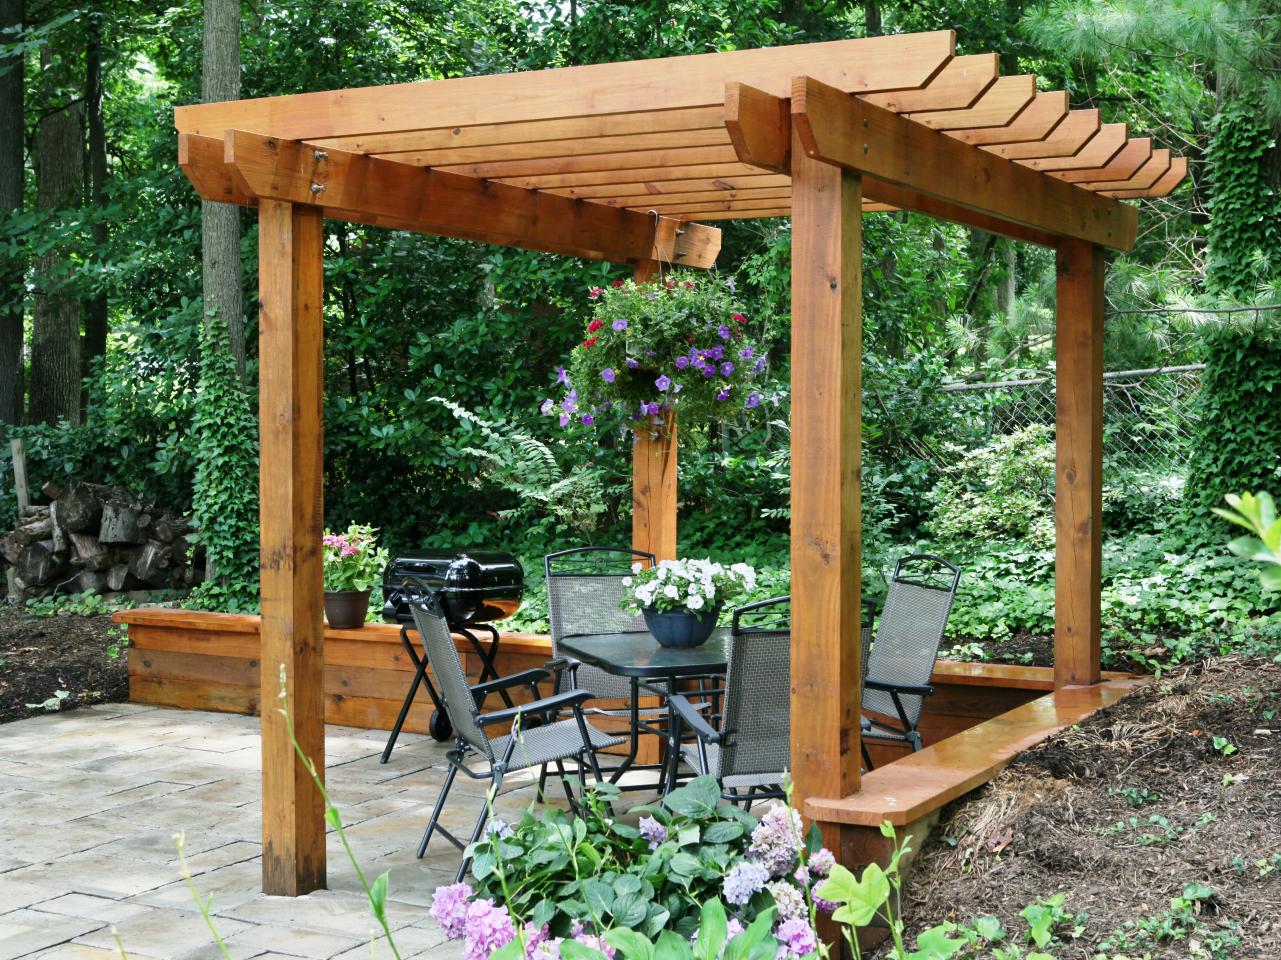


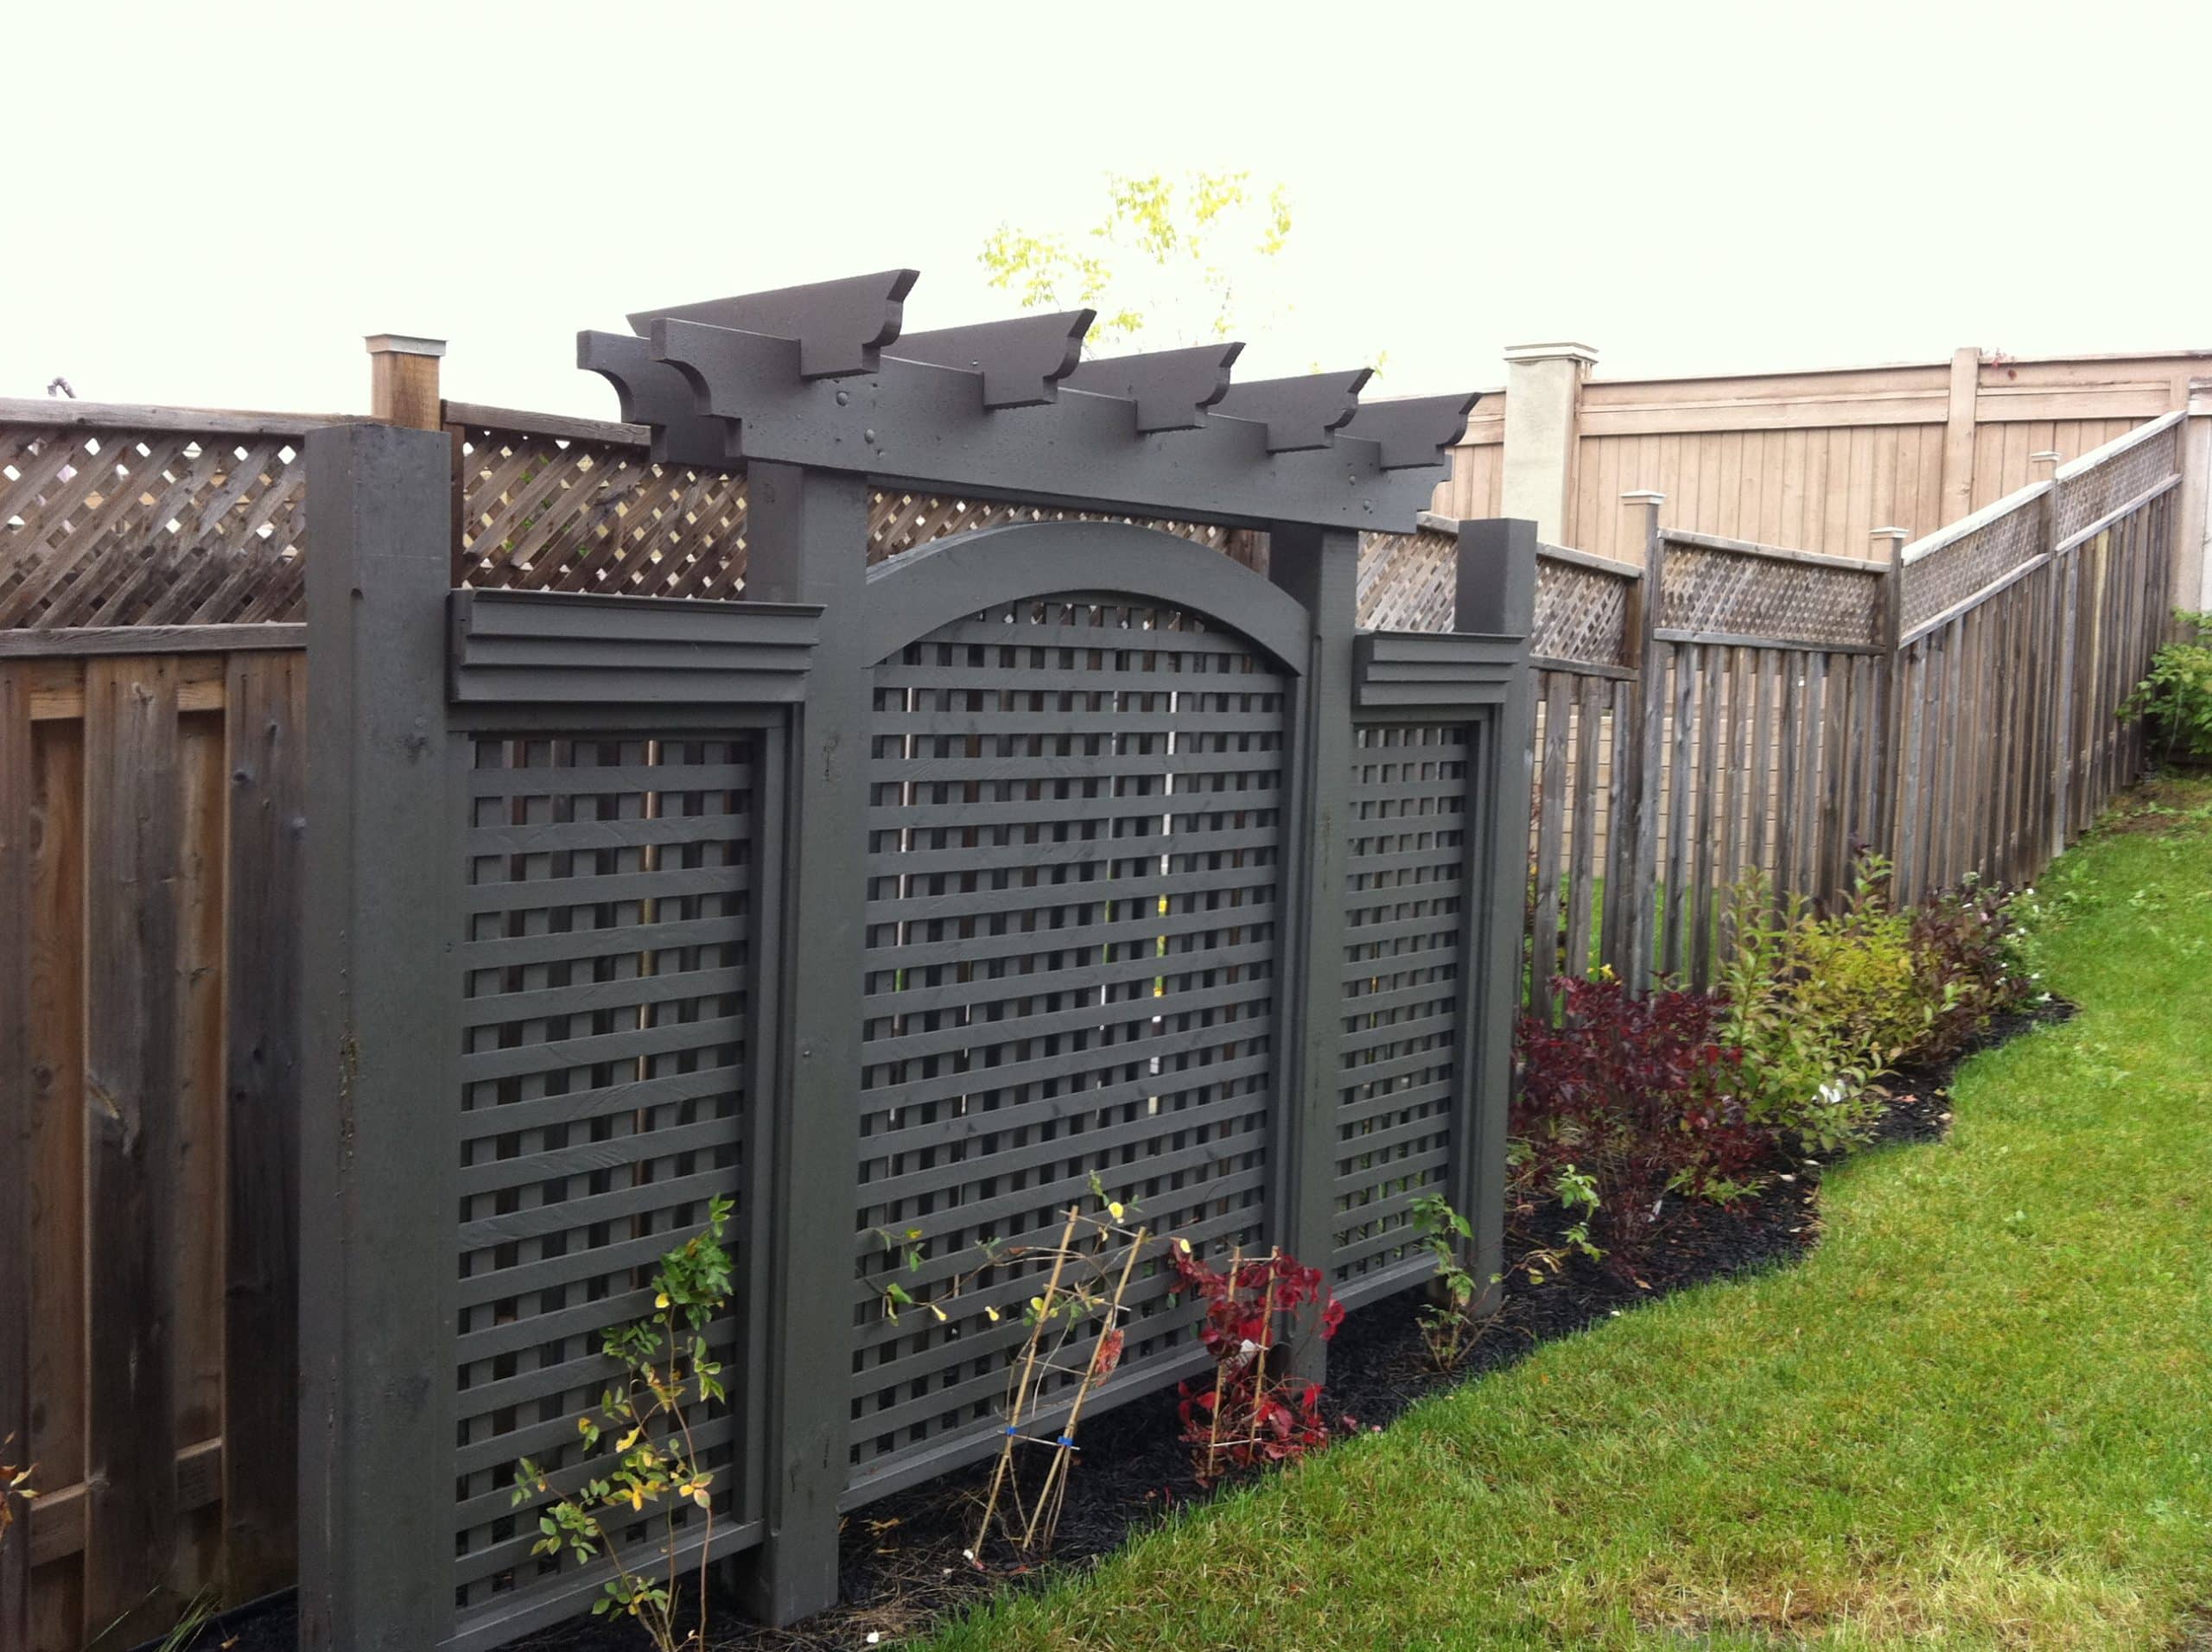
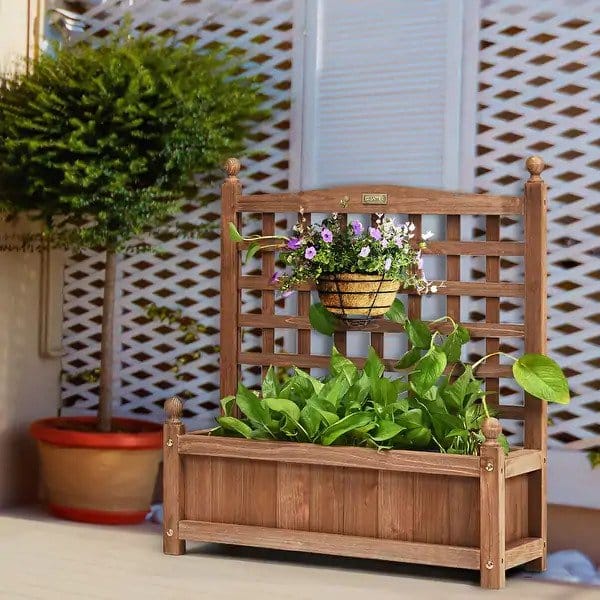
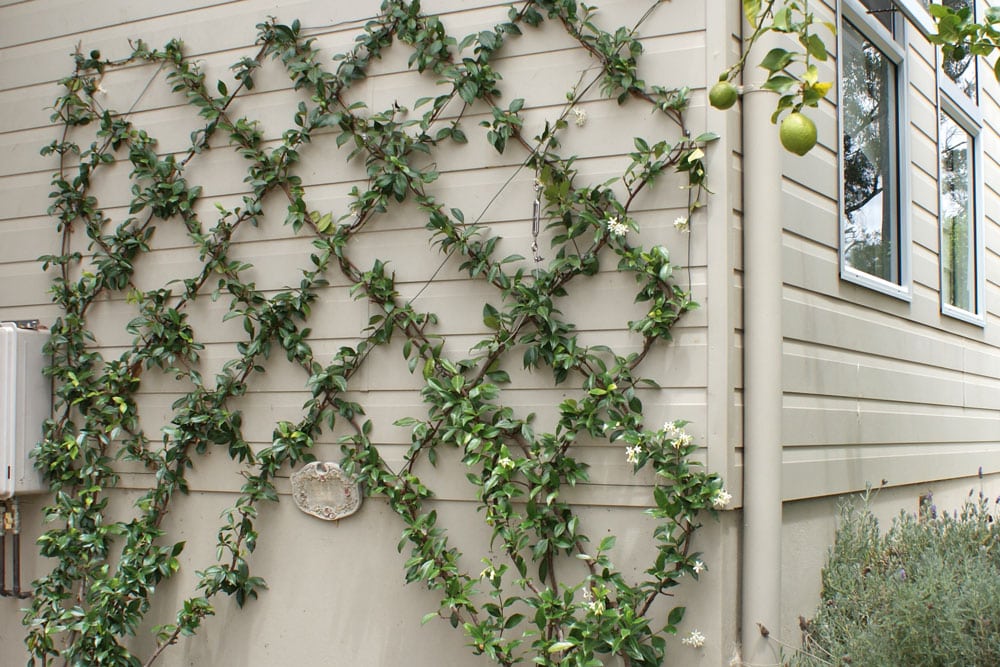
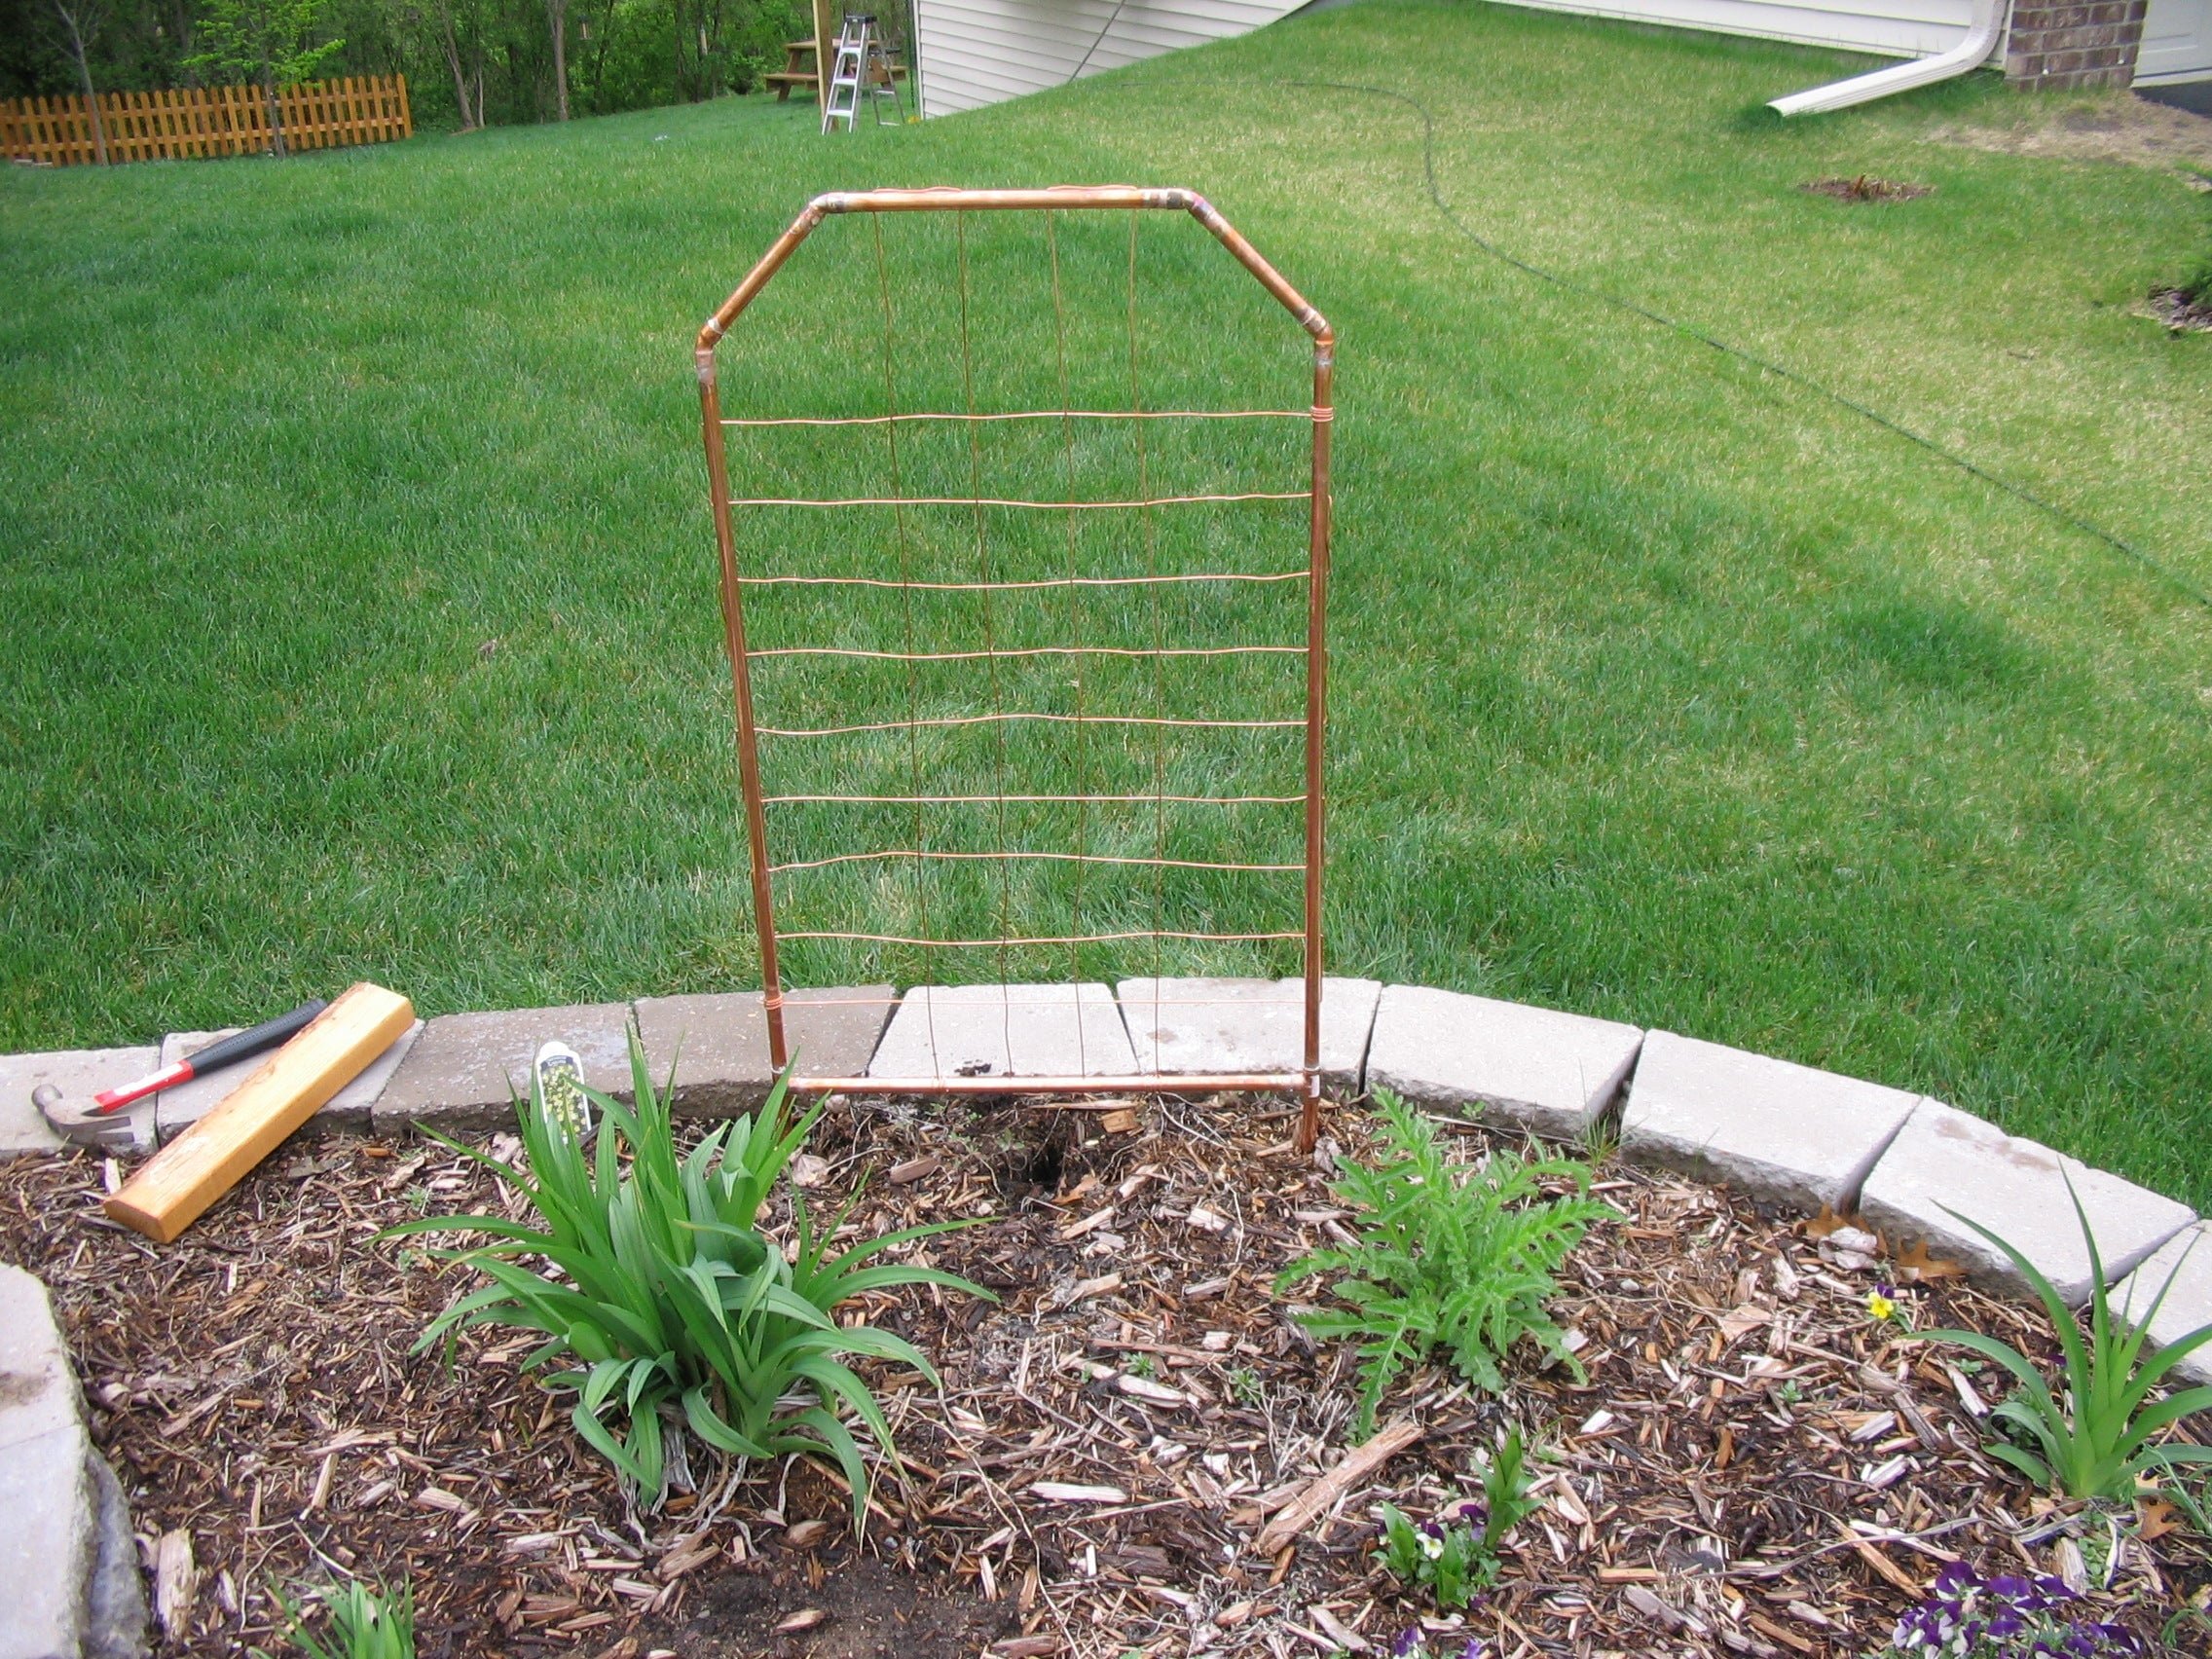
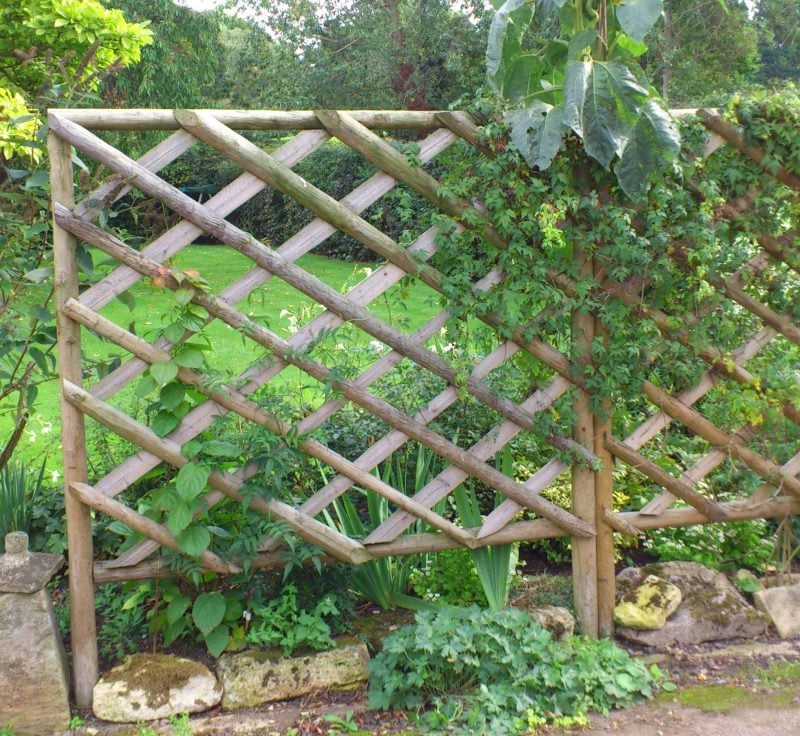
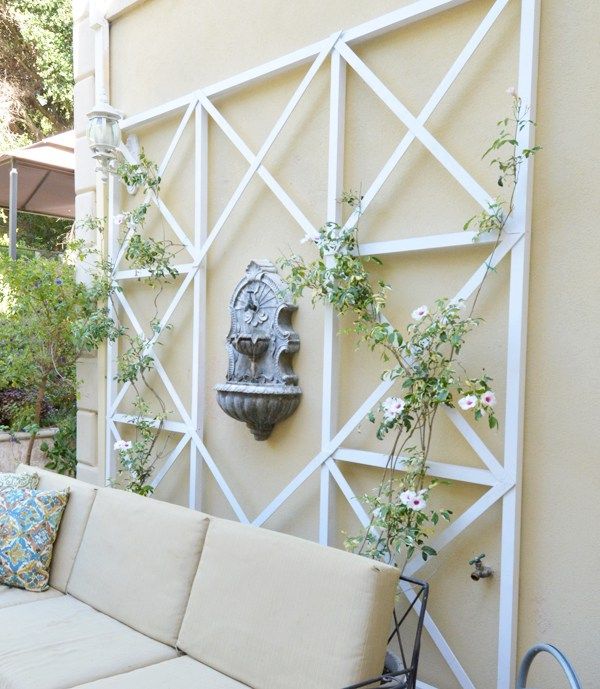


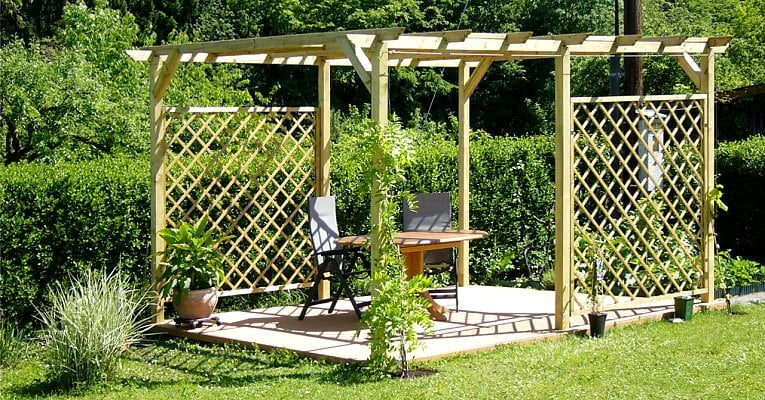


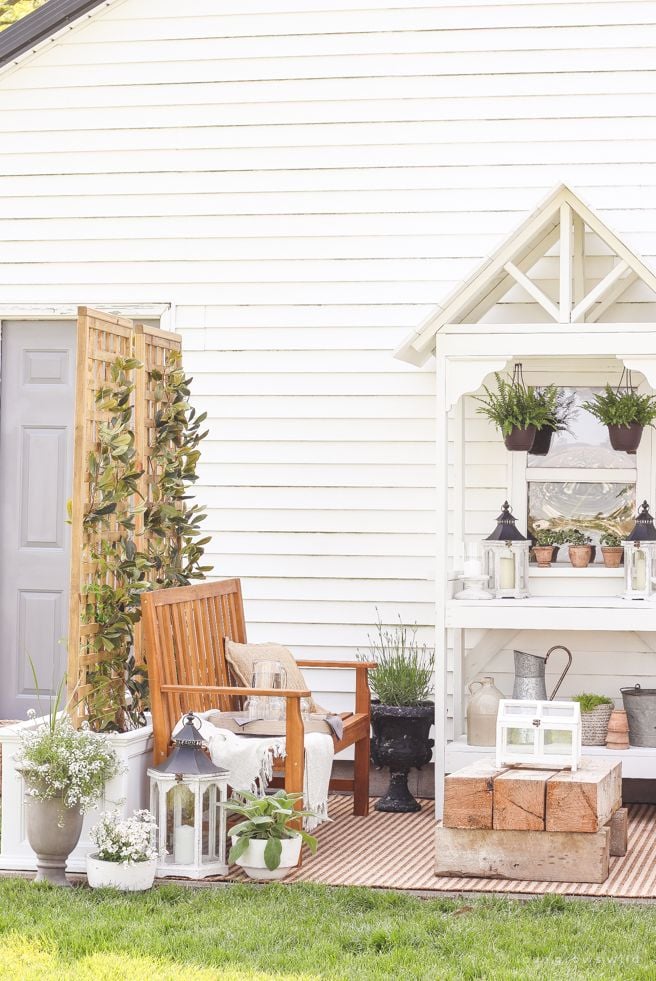


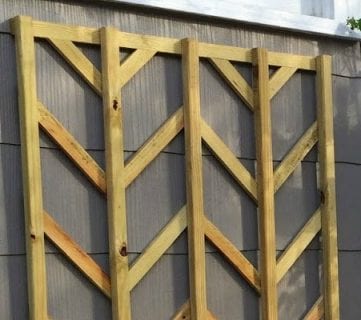
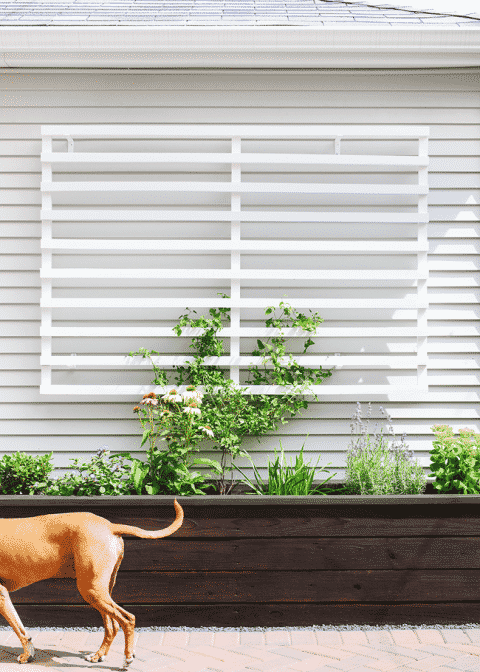
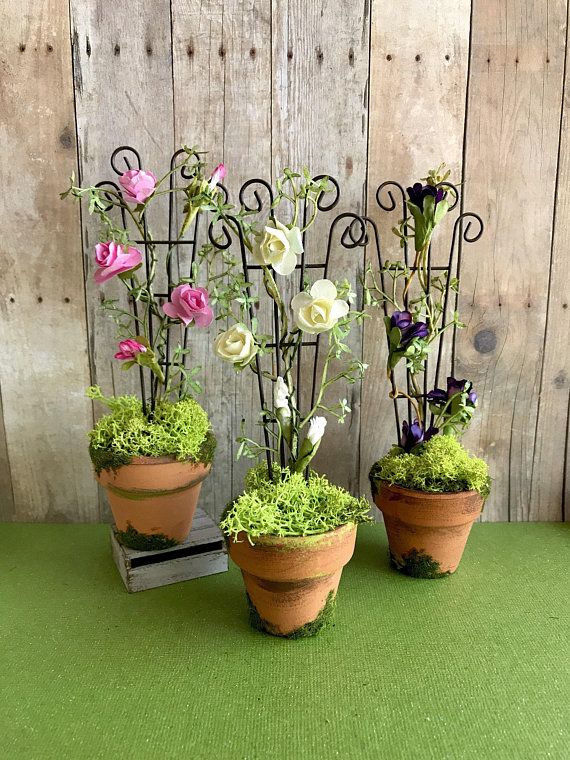


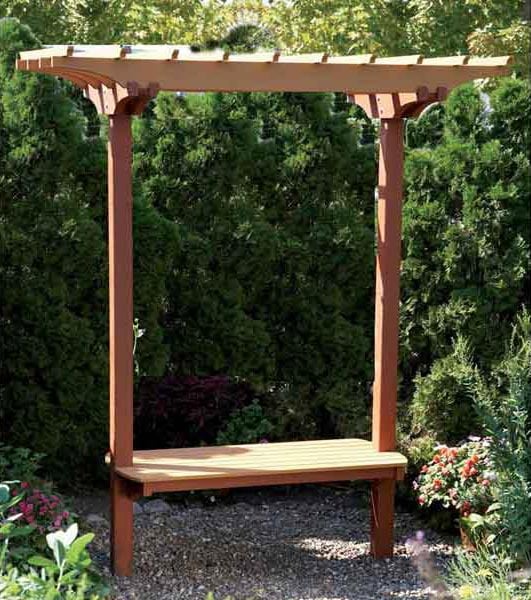
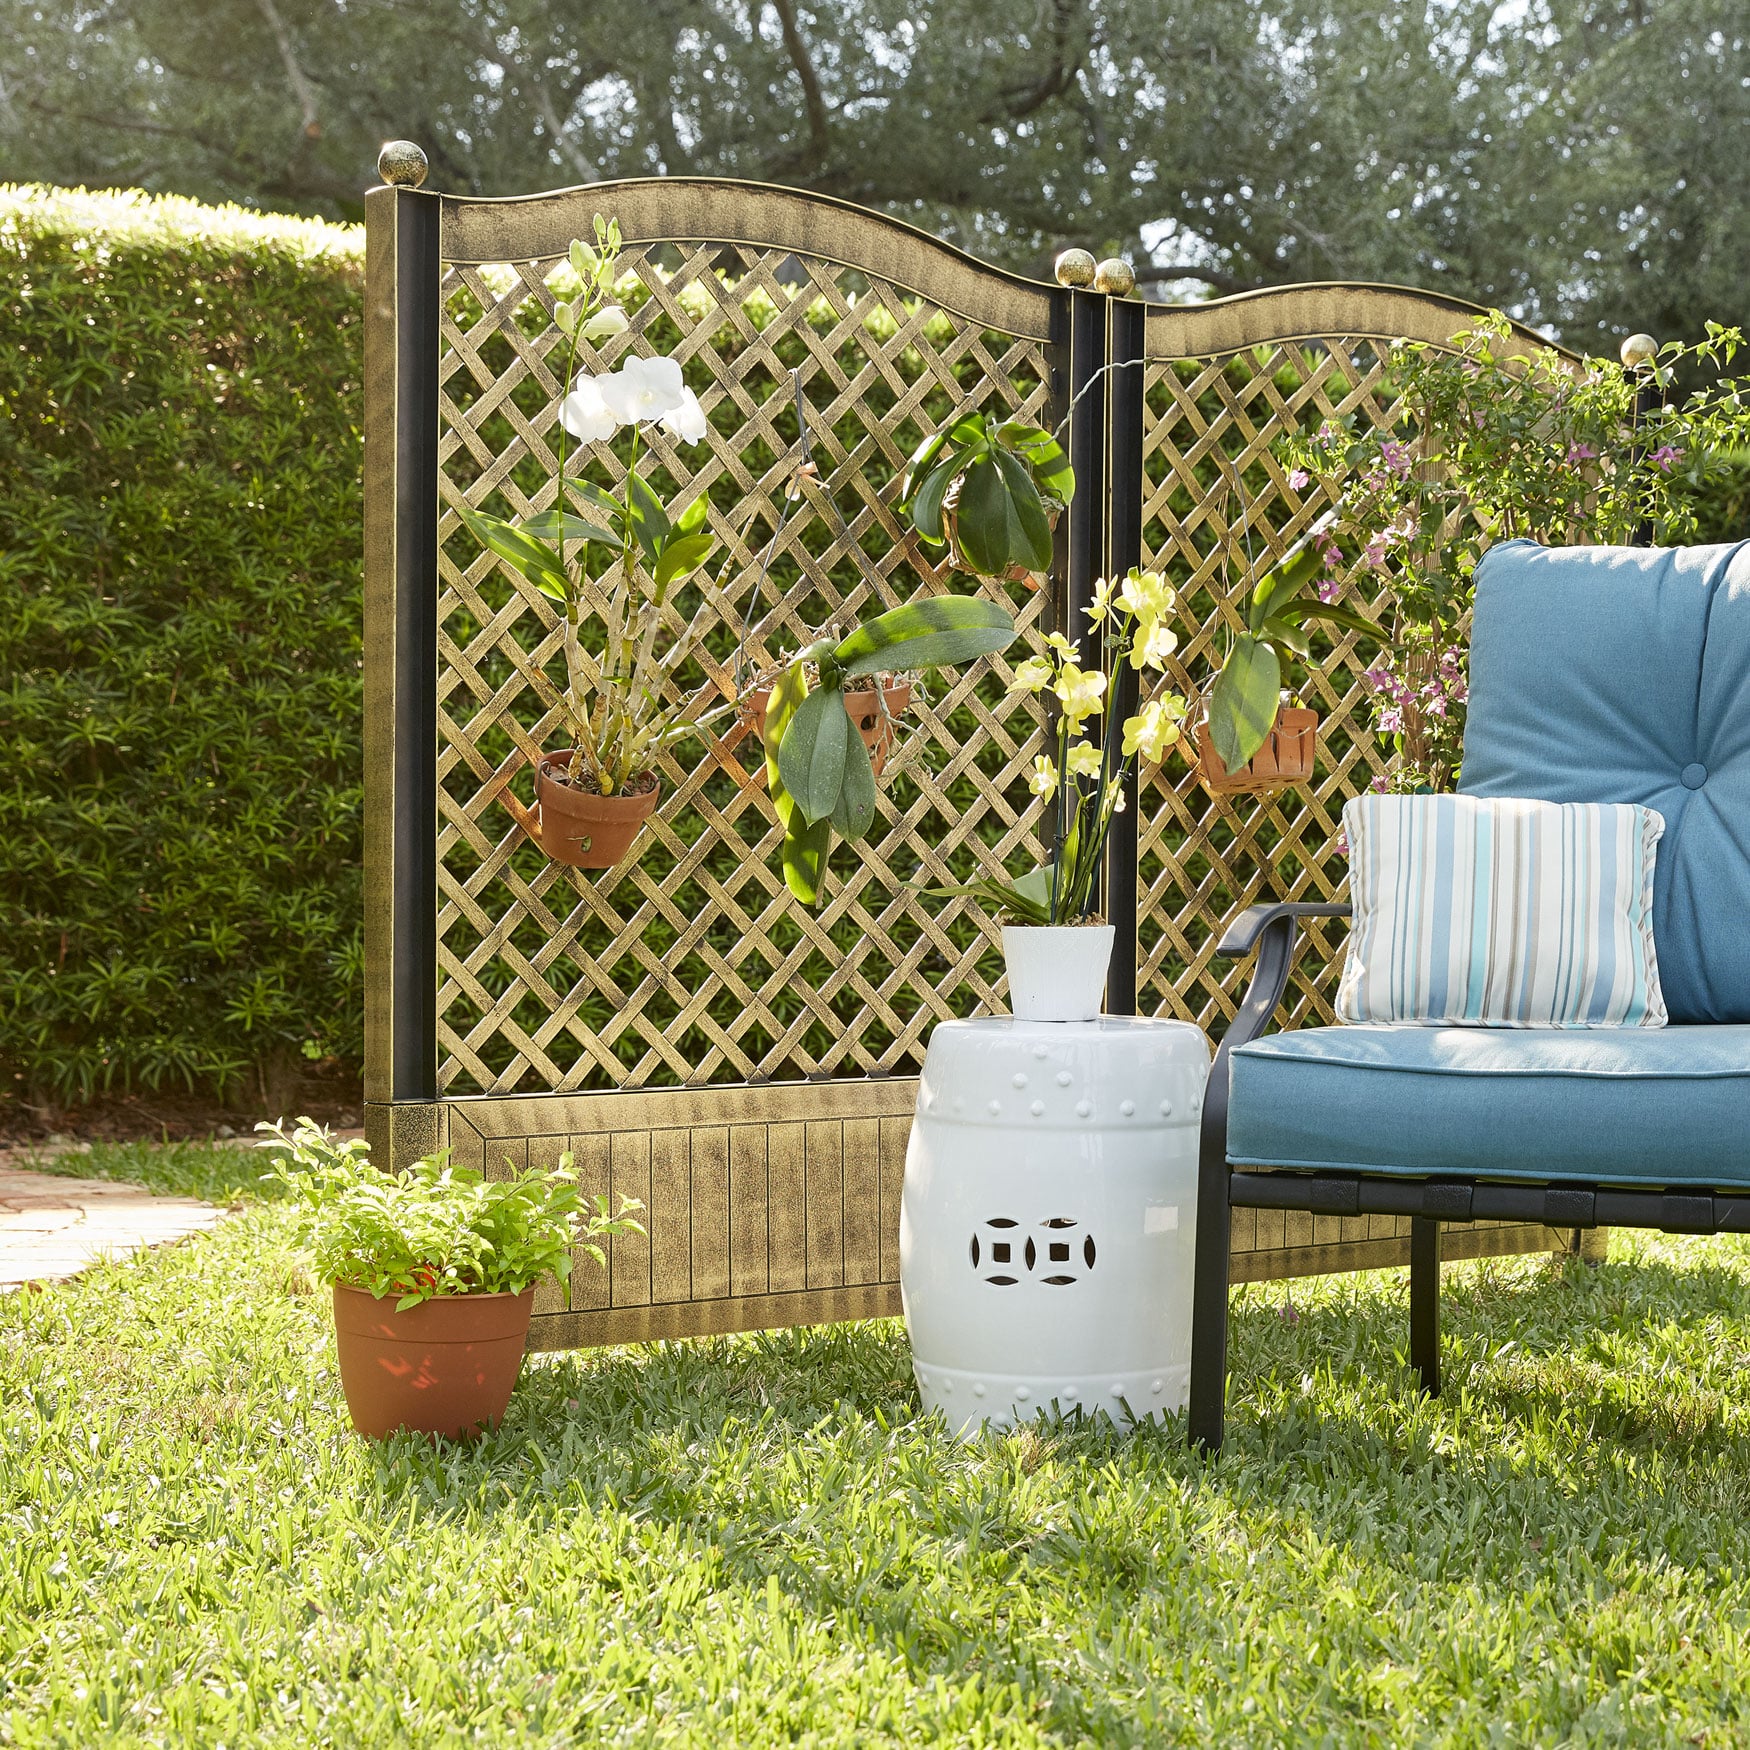


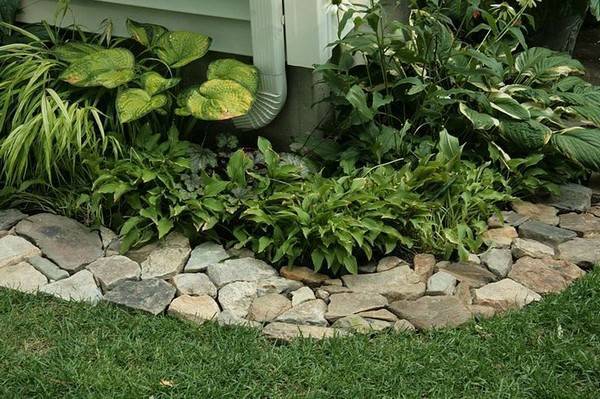
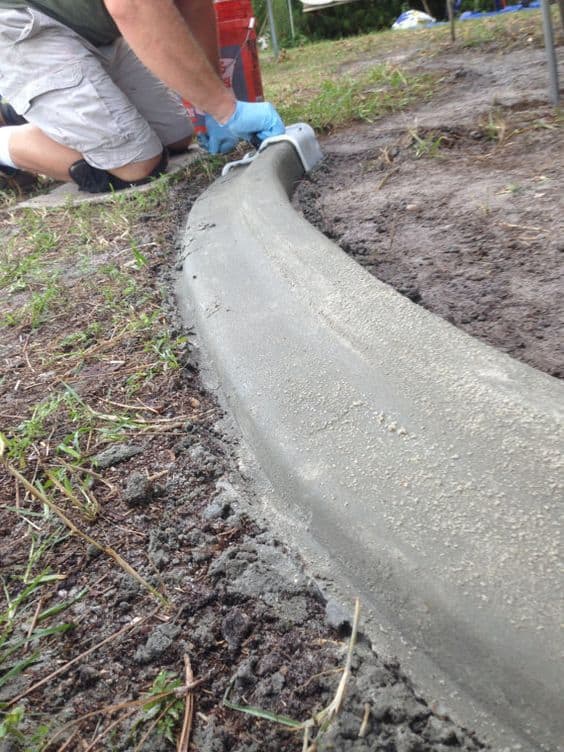

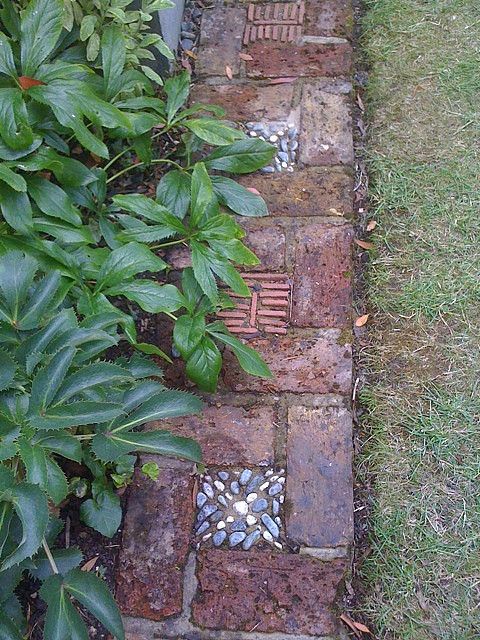
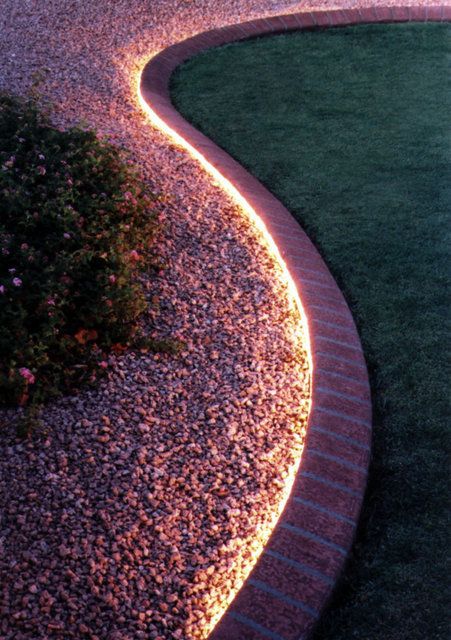
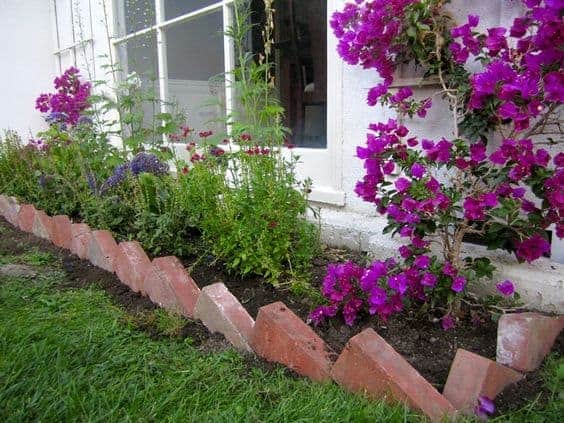
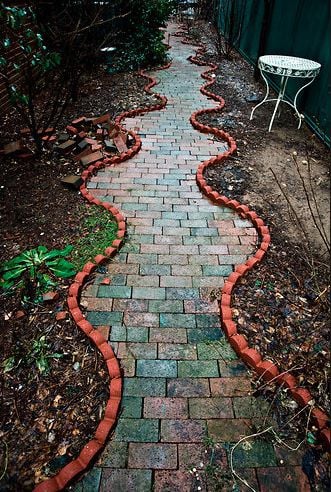
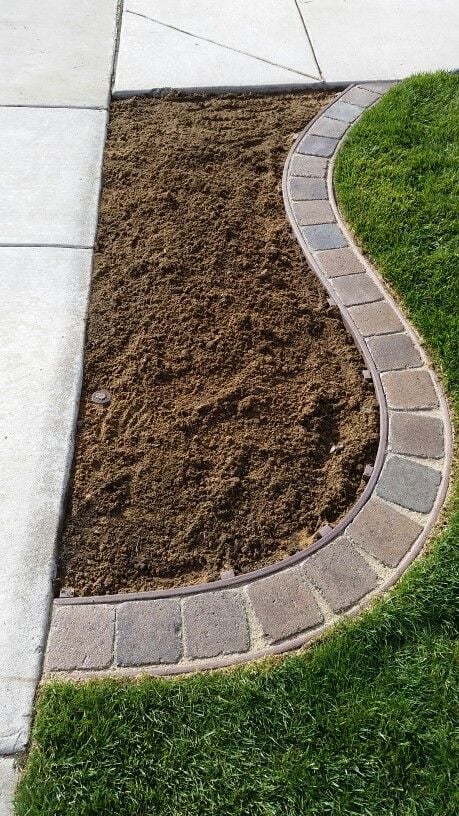
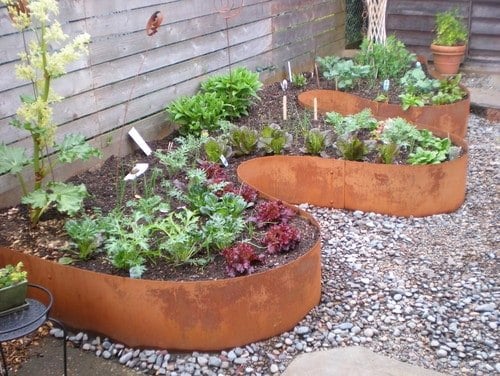
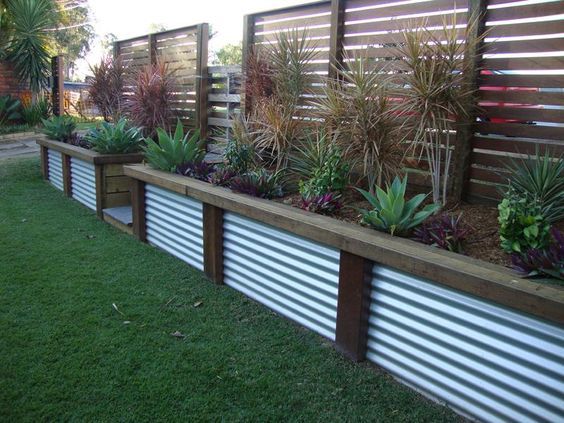

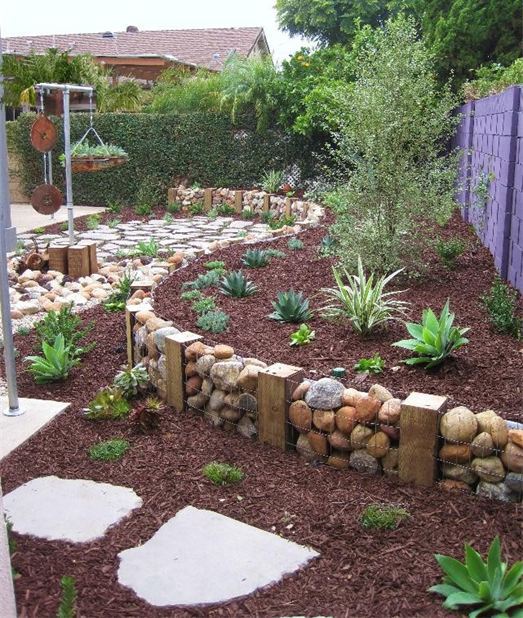


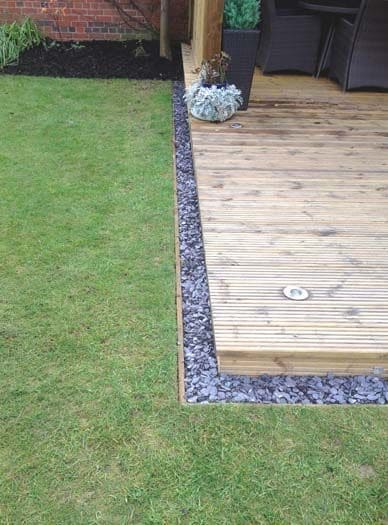

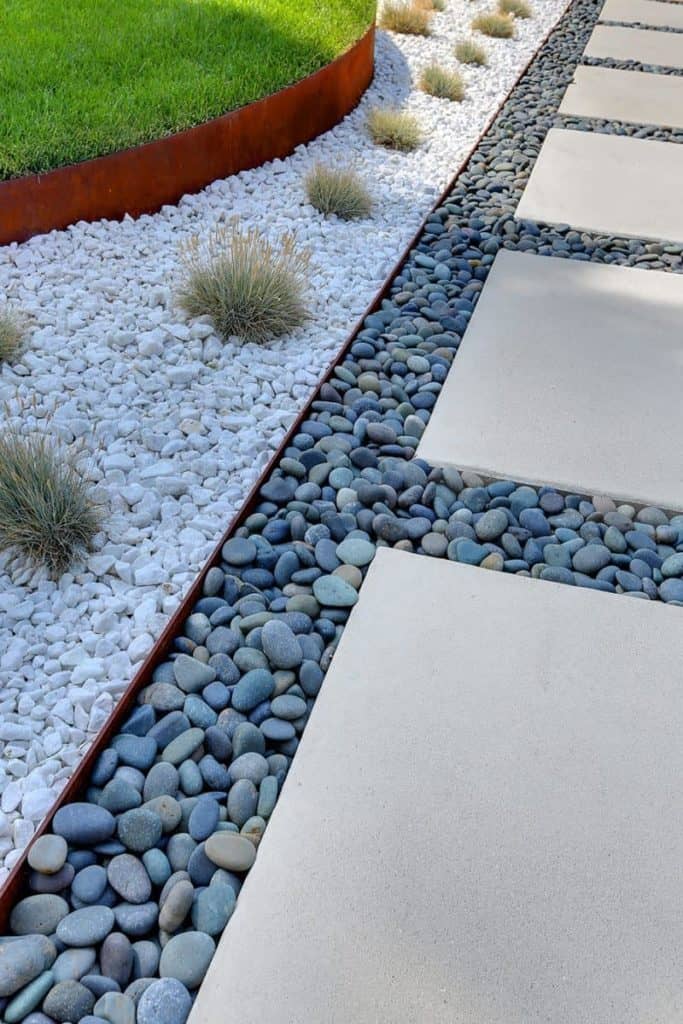


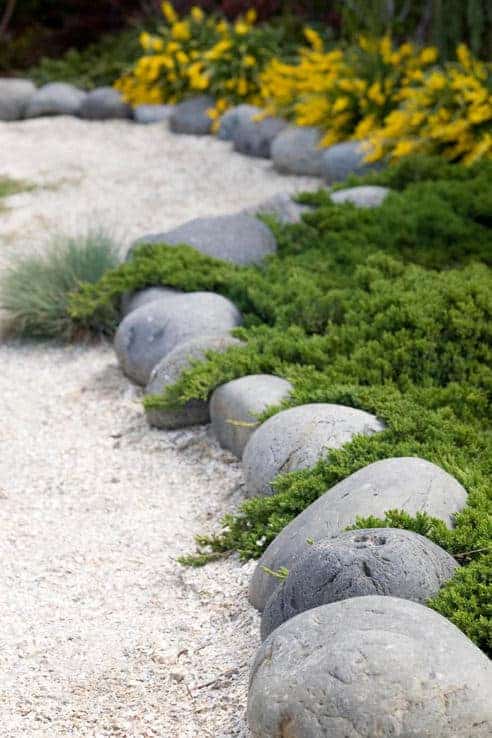
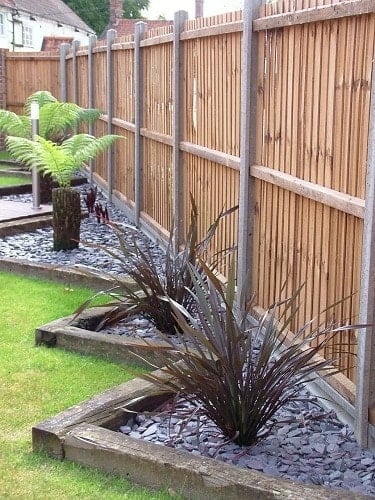
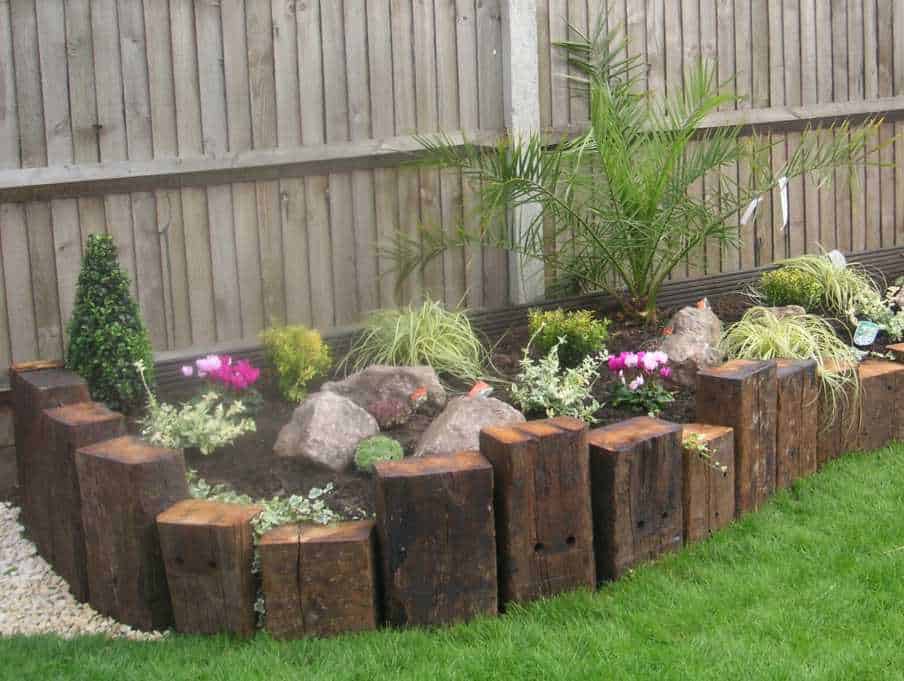


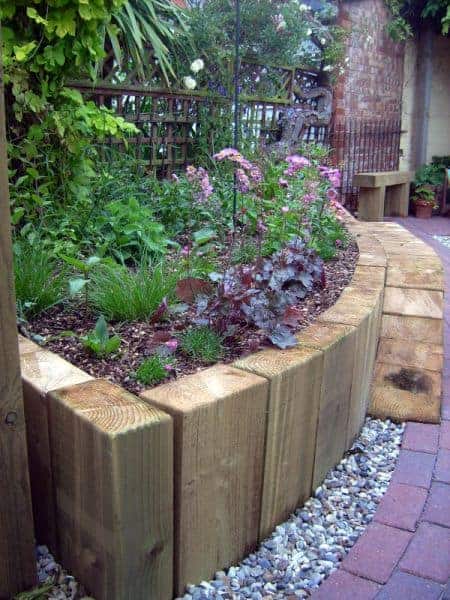


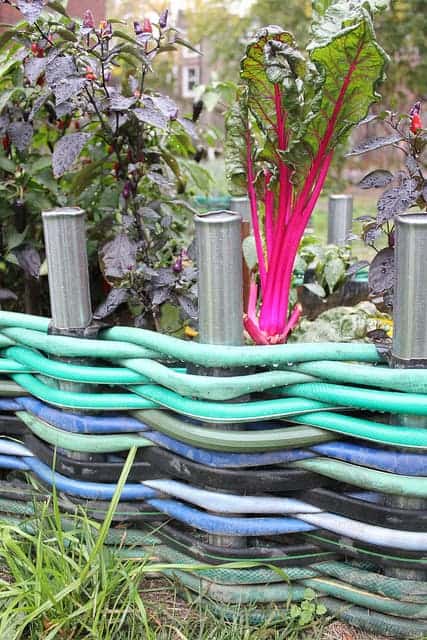
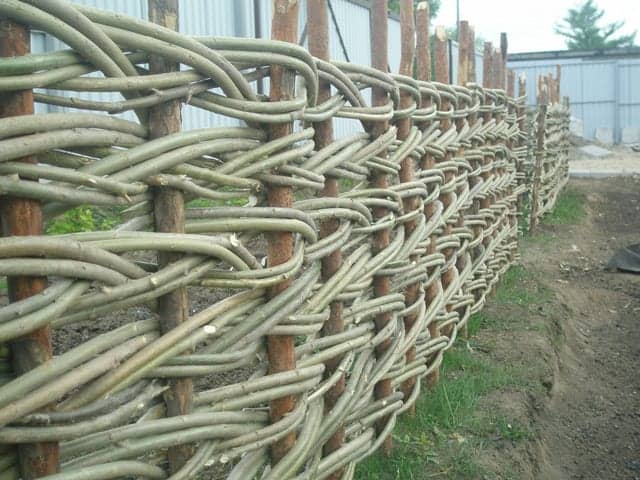

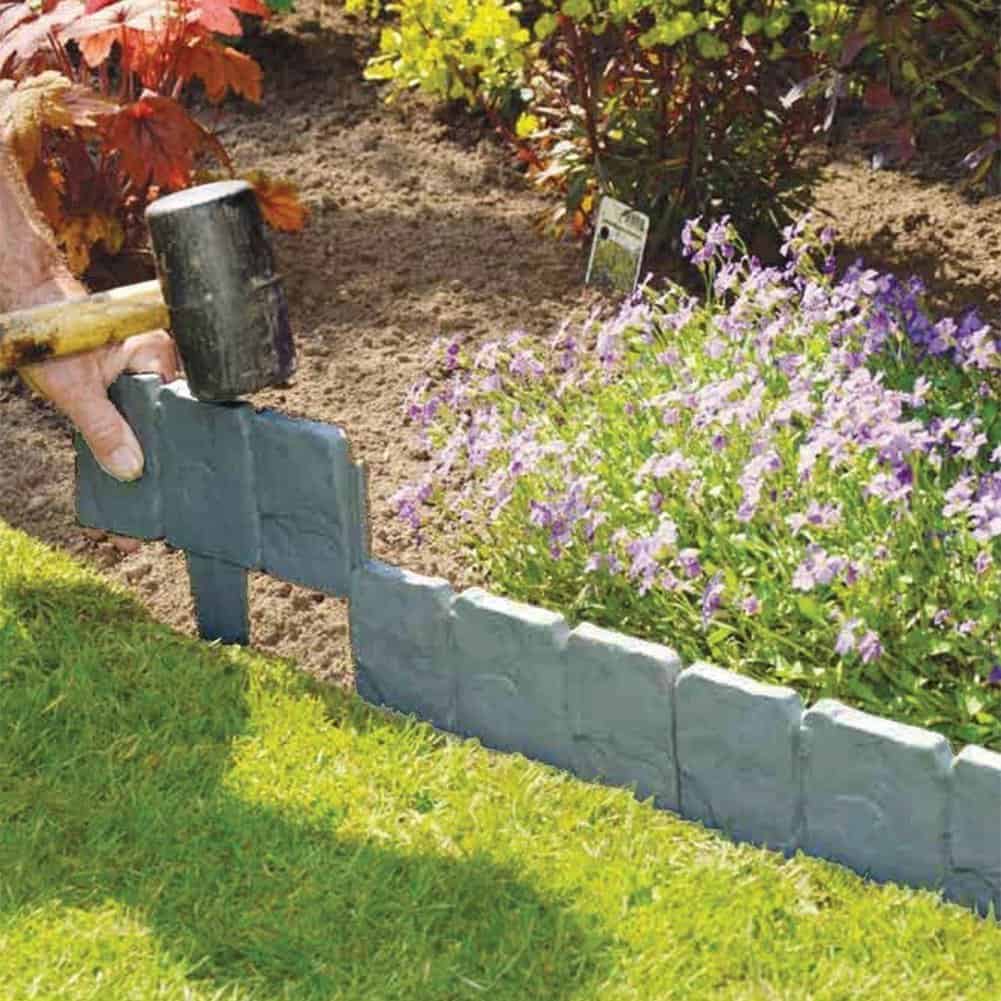
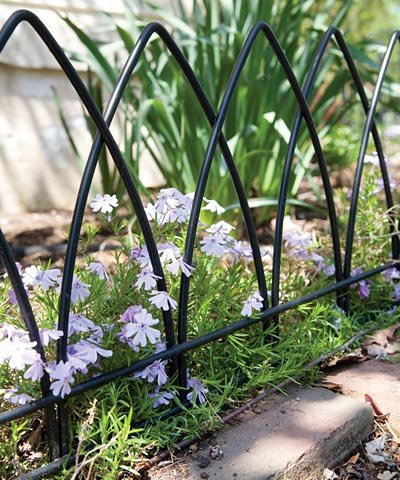
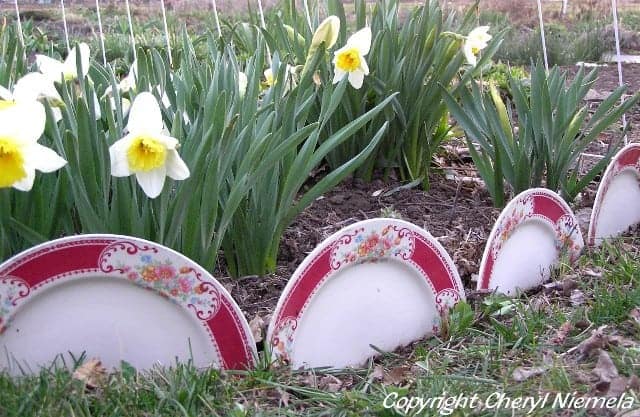
 If you're a lot into flower plantations then this idea might just appeal to you. Terracotta pots can not only house your plants and flowers but make an excellent garden edge as well.
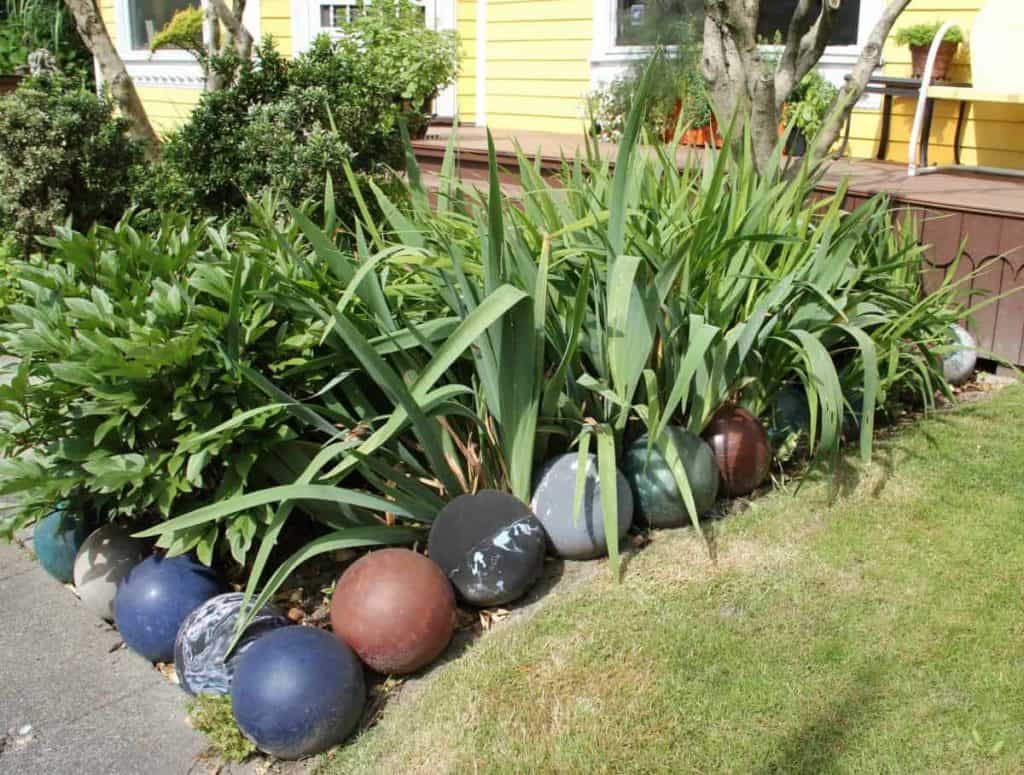
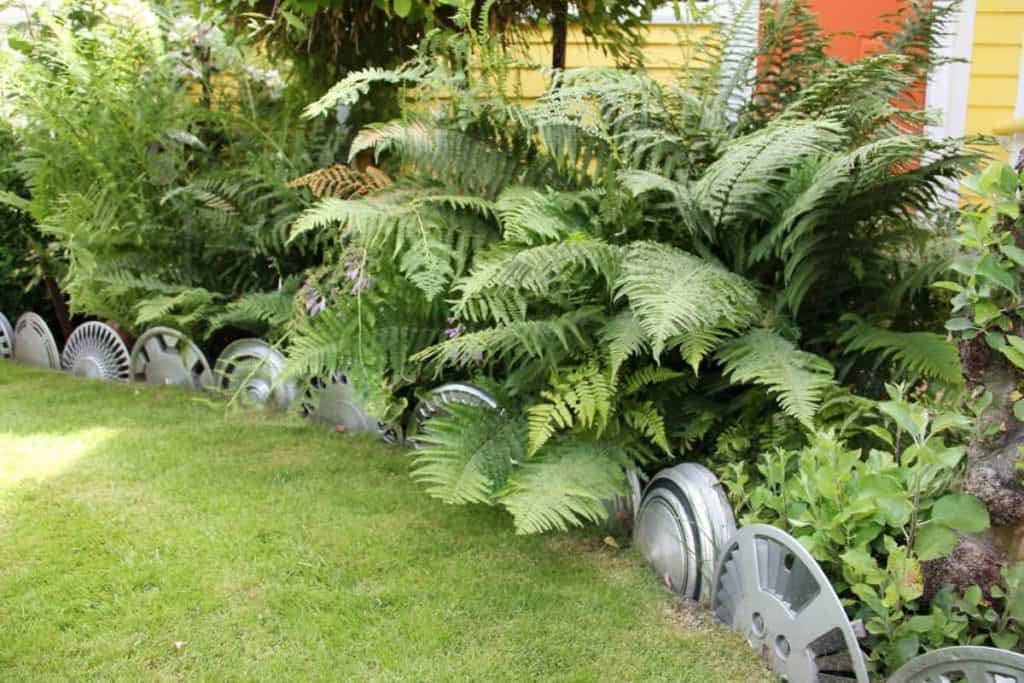
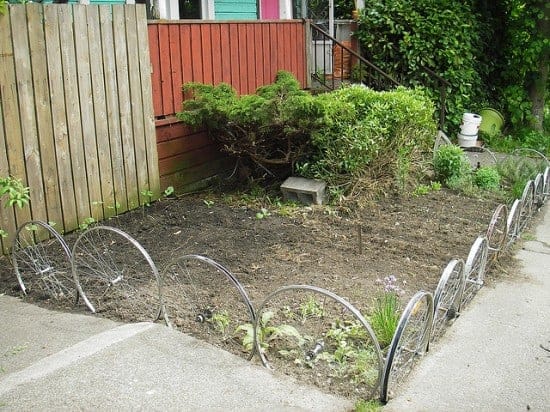
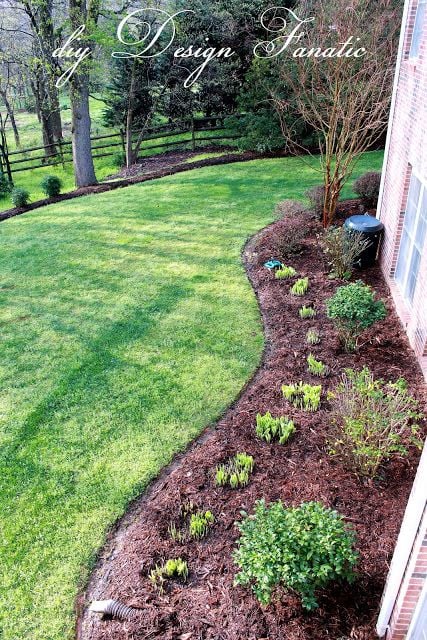

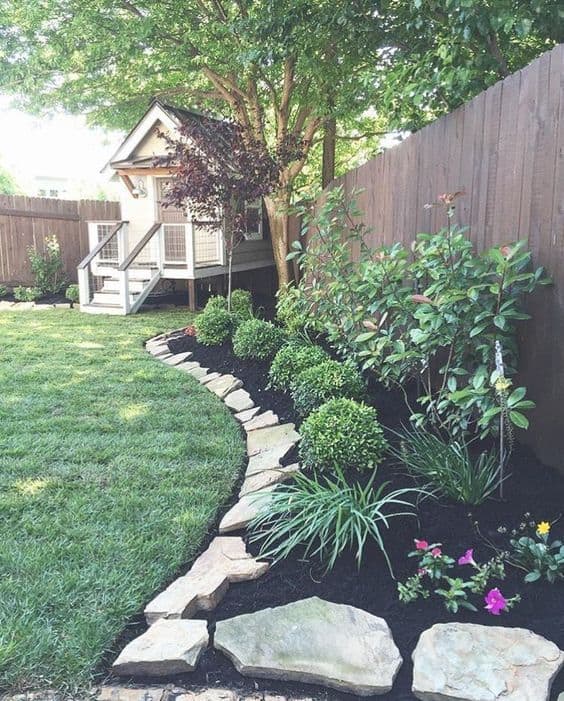
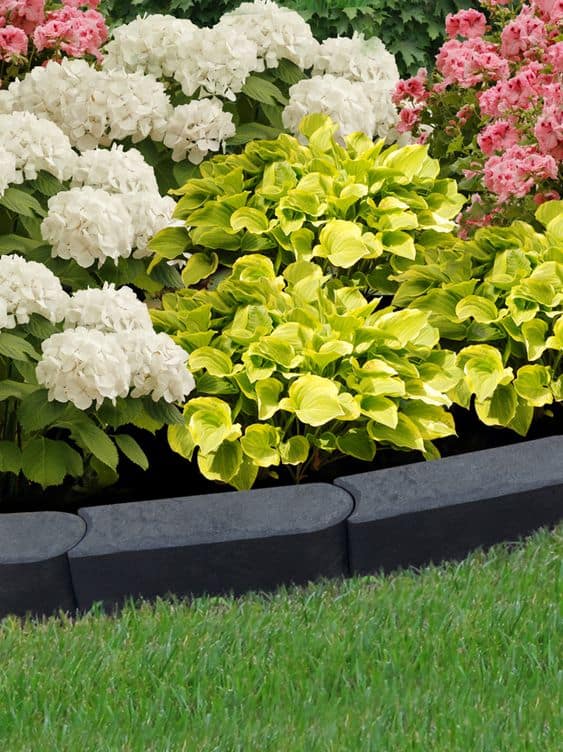
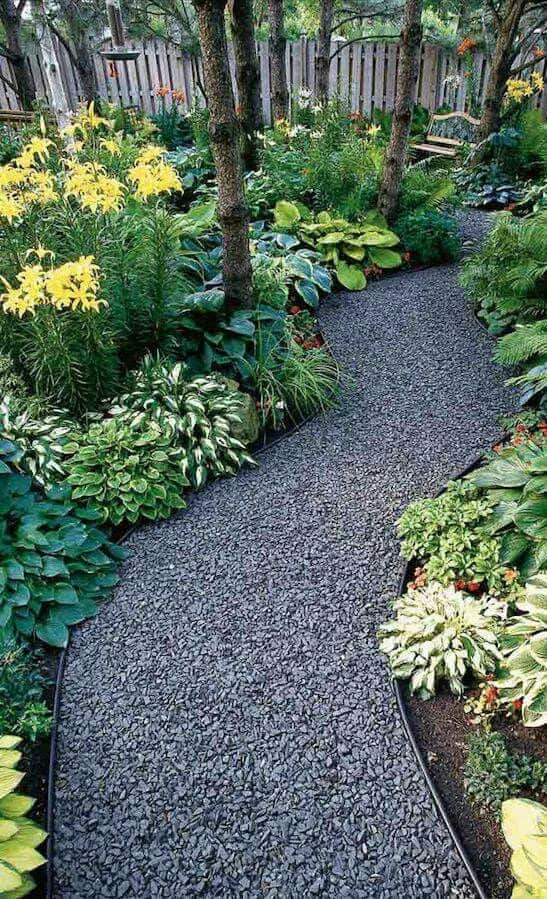
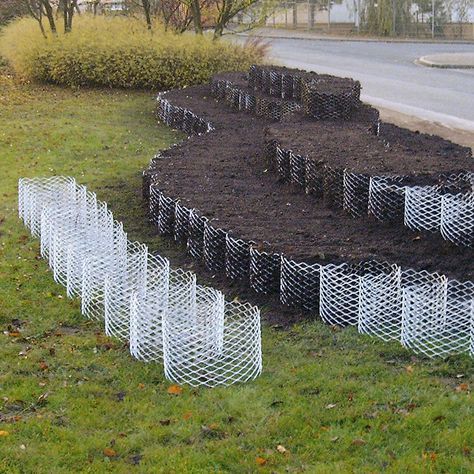


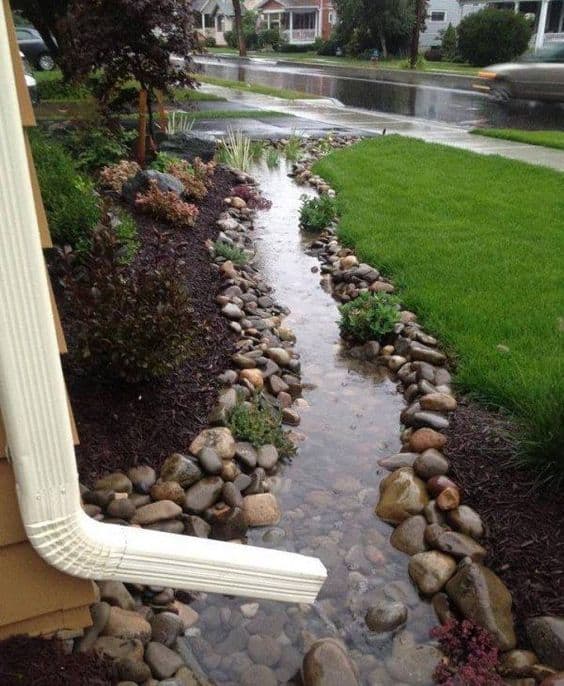


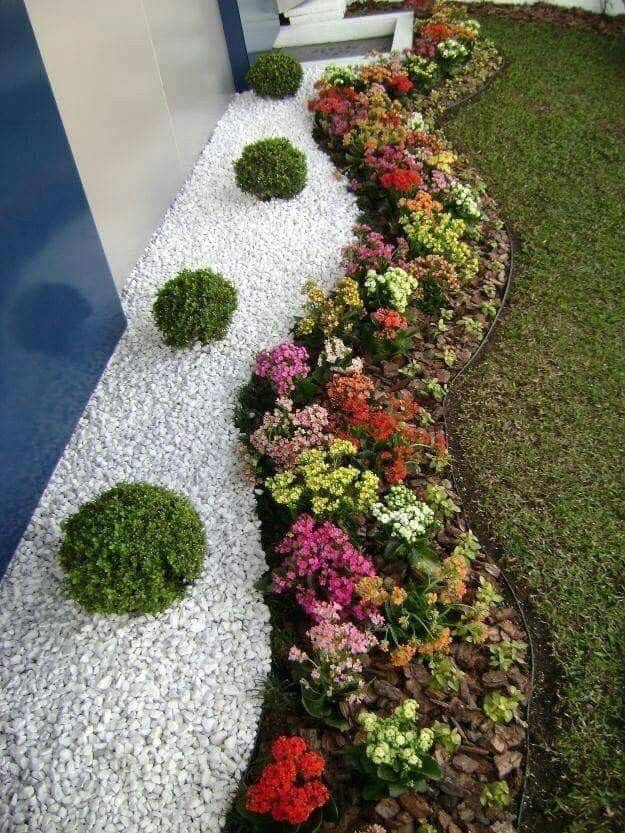

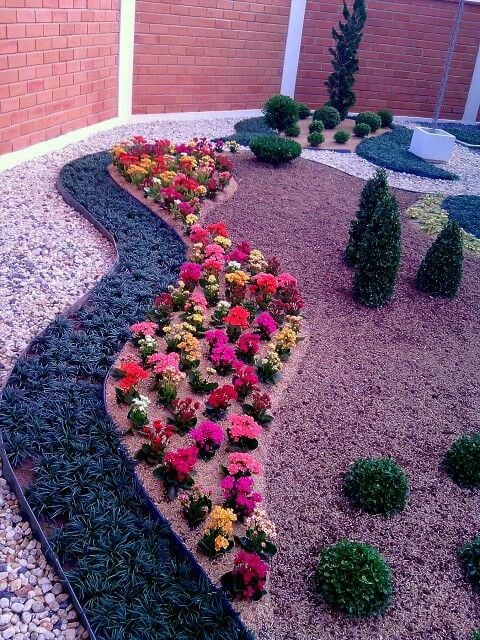
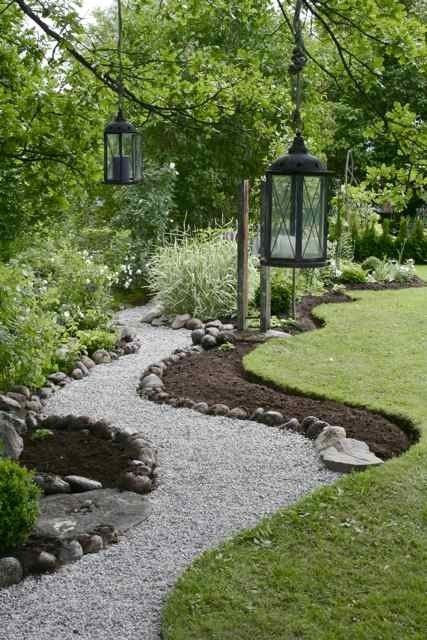
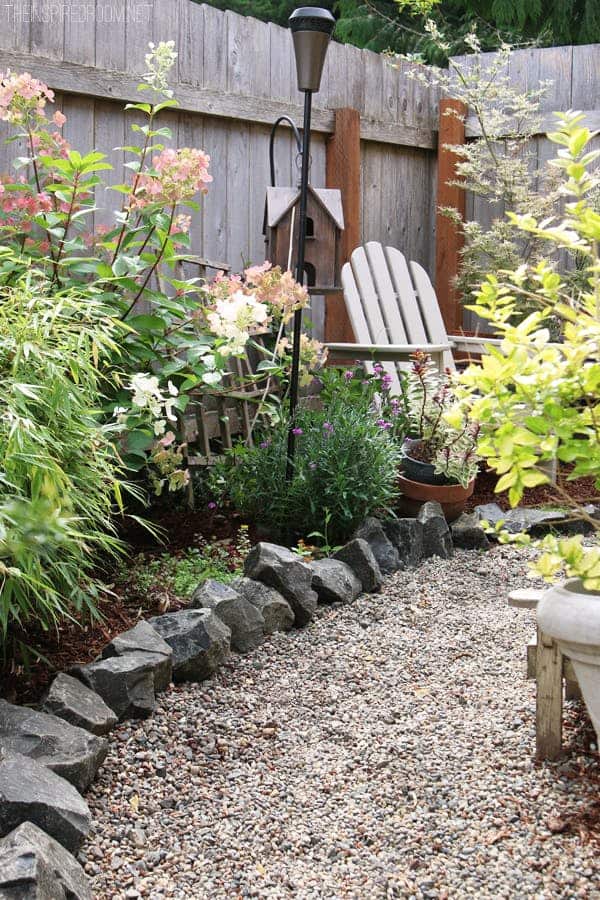


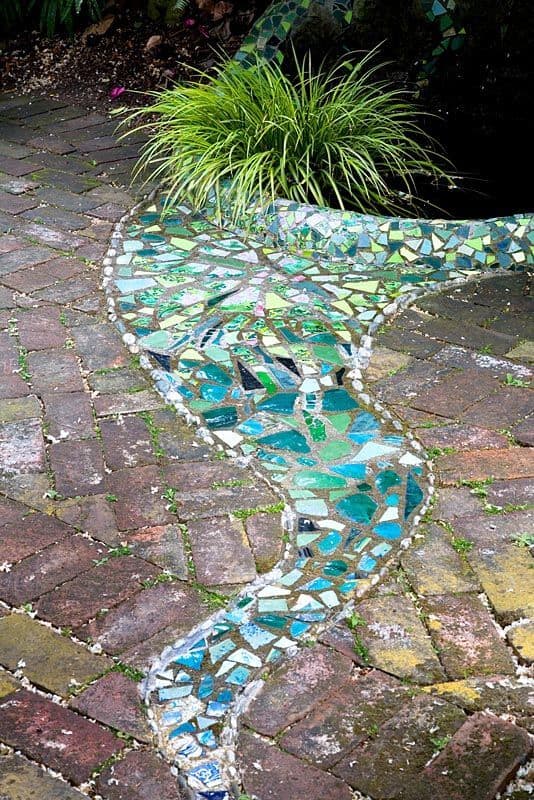

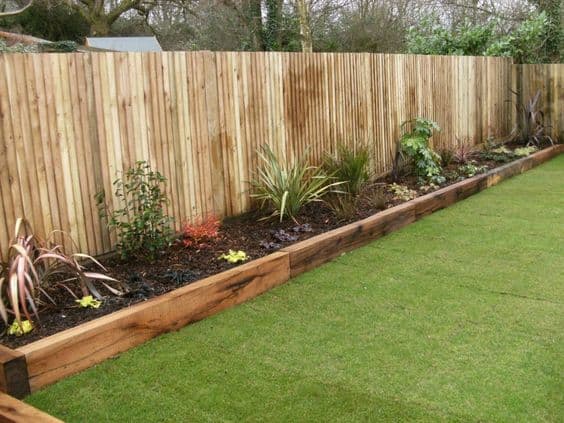
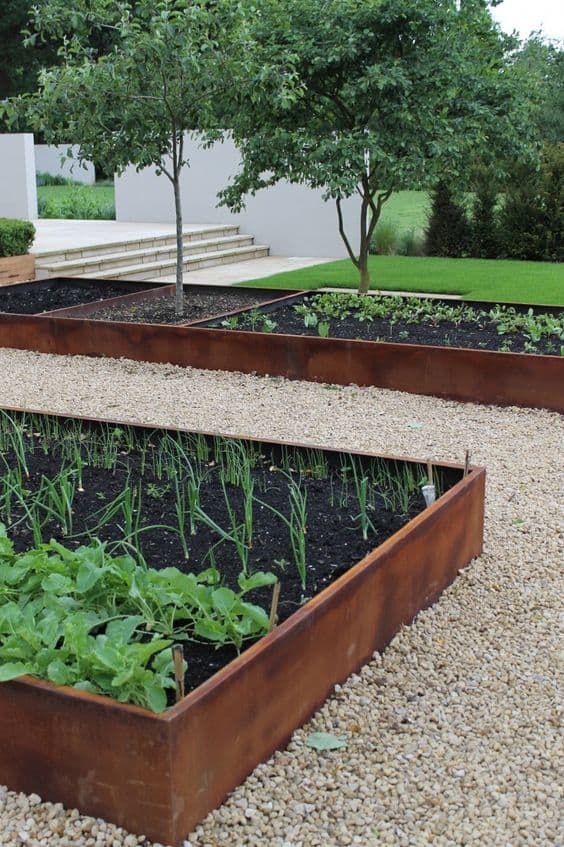

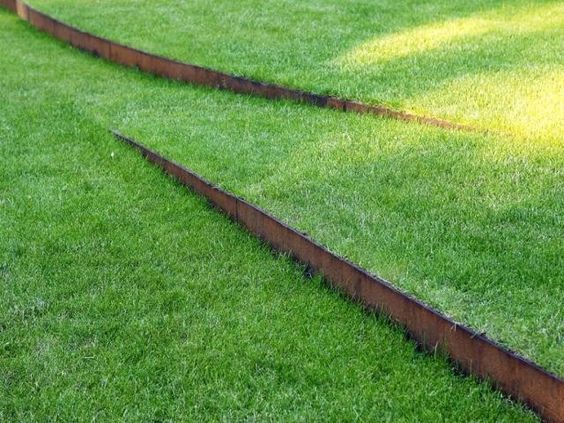
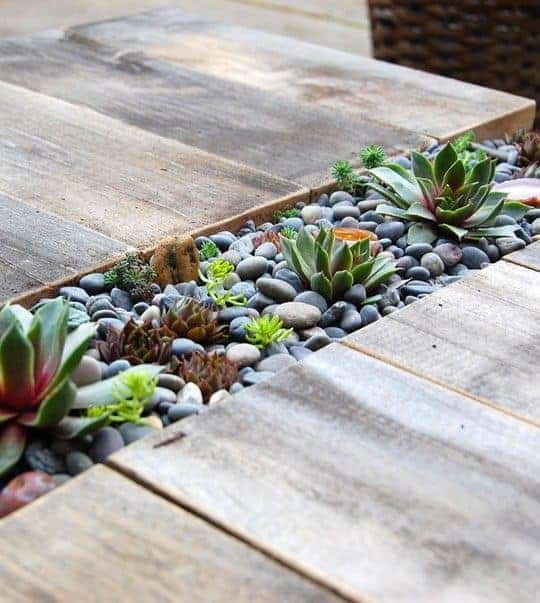


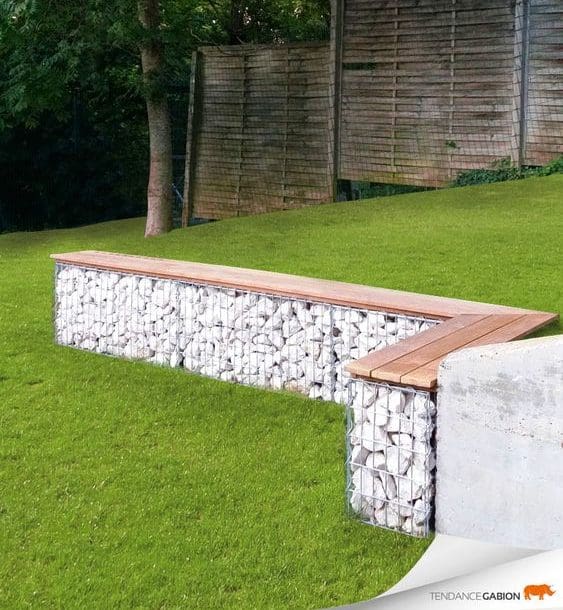
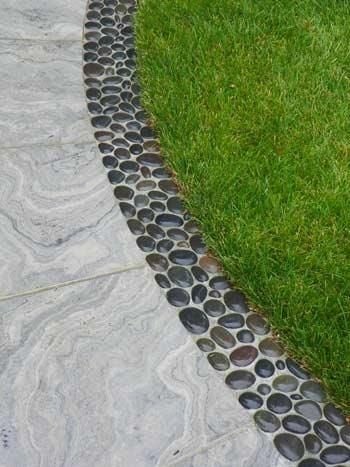

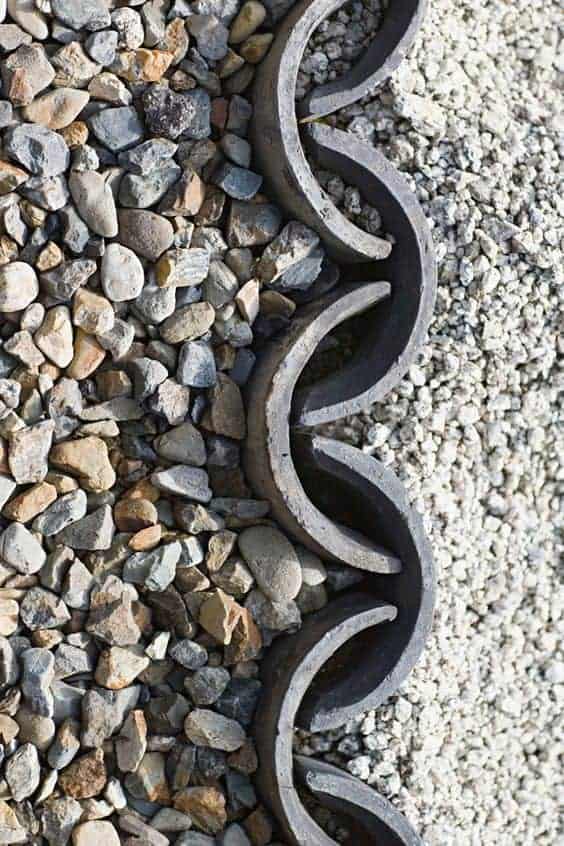


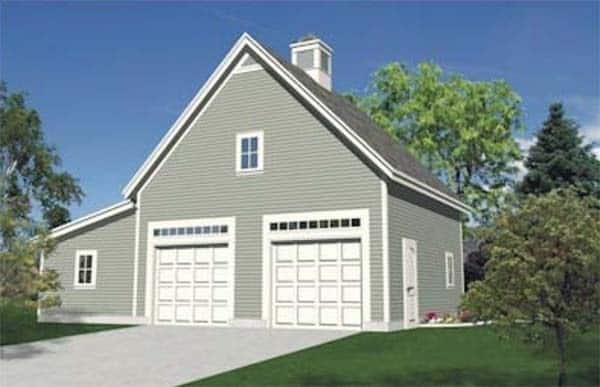


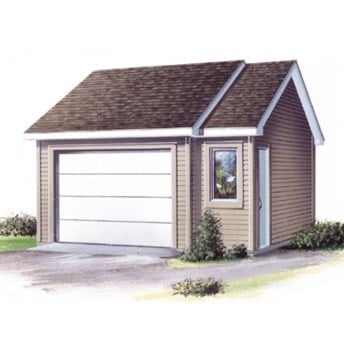
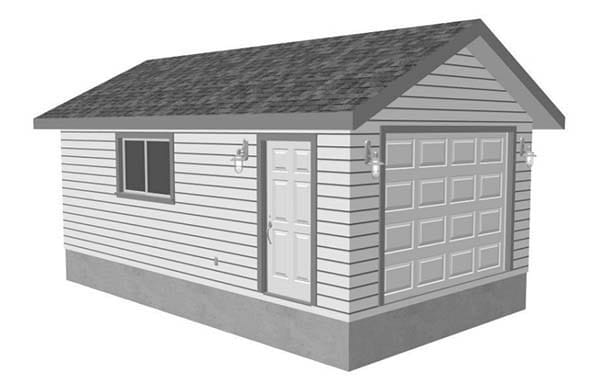

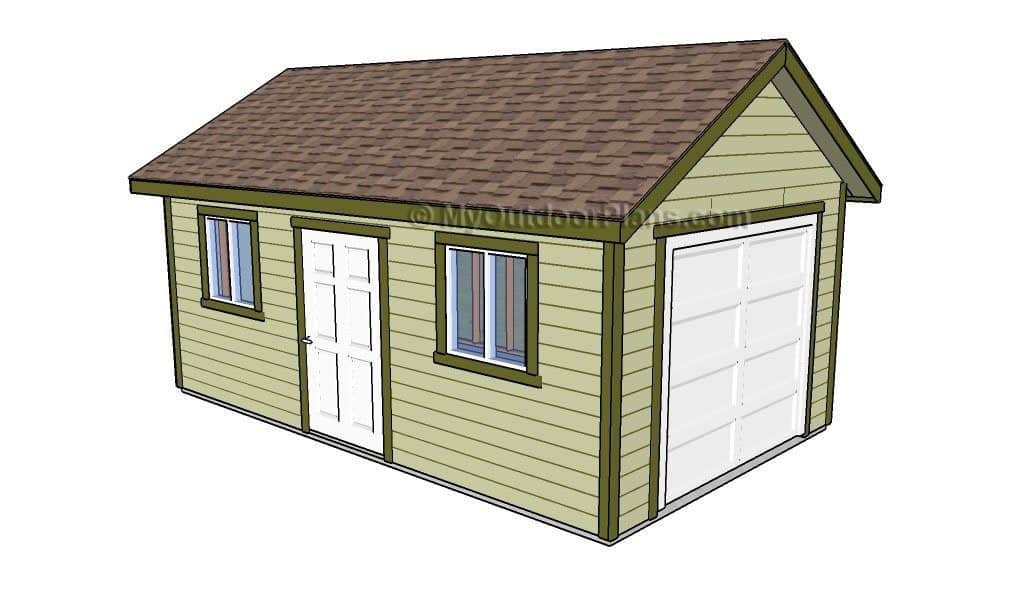
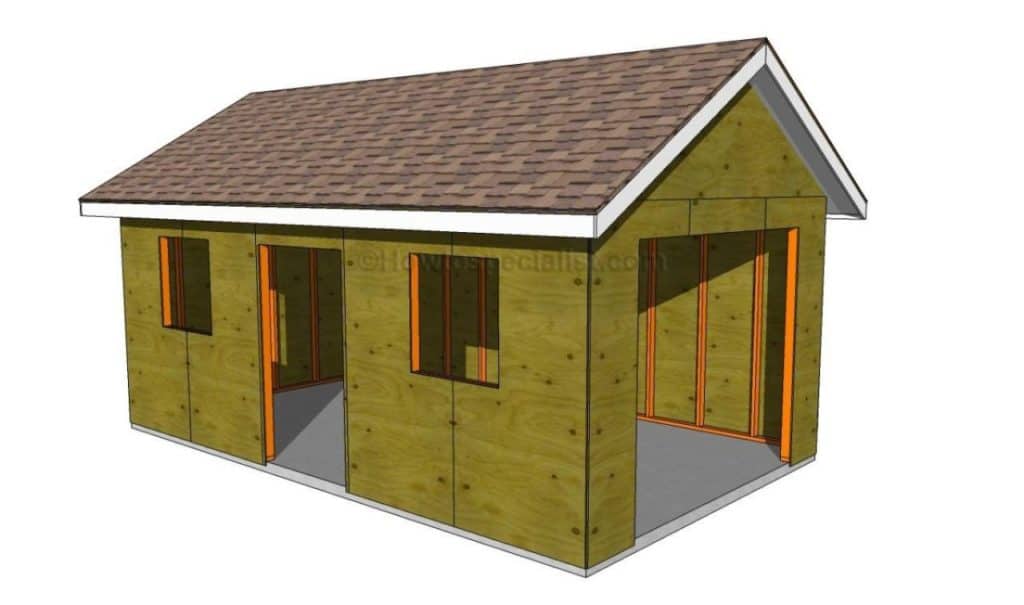
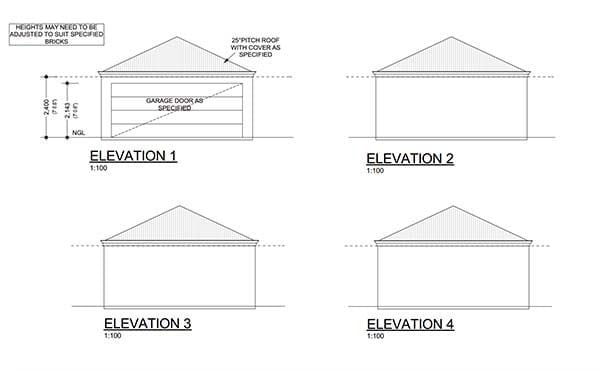
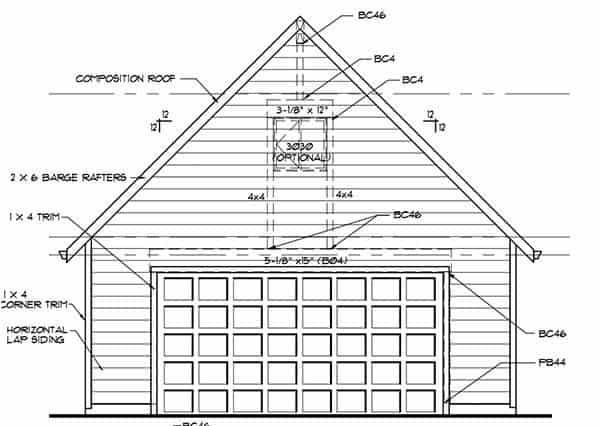


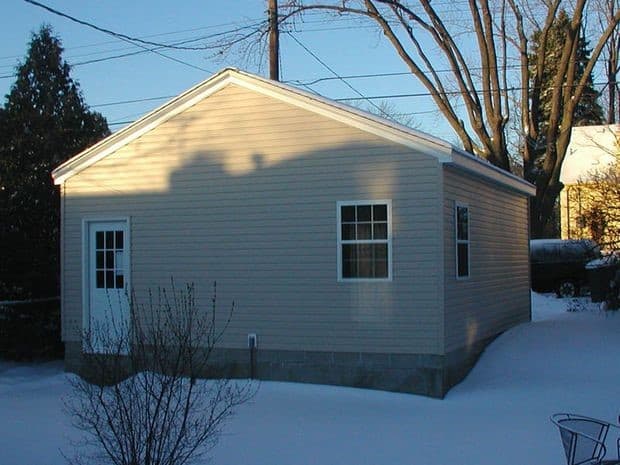
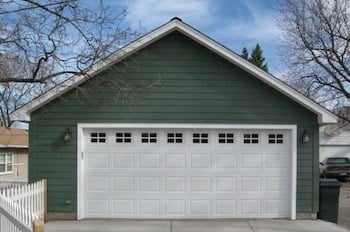

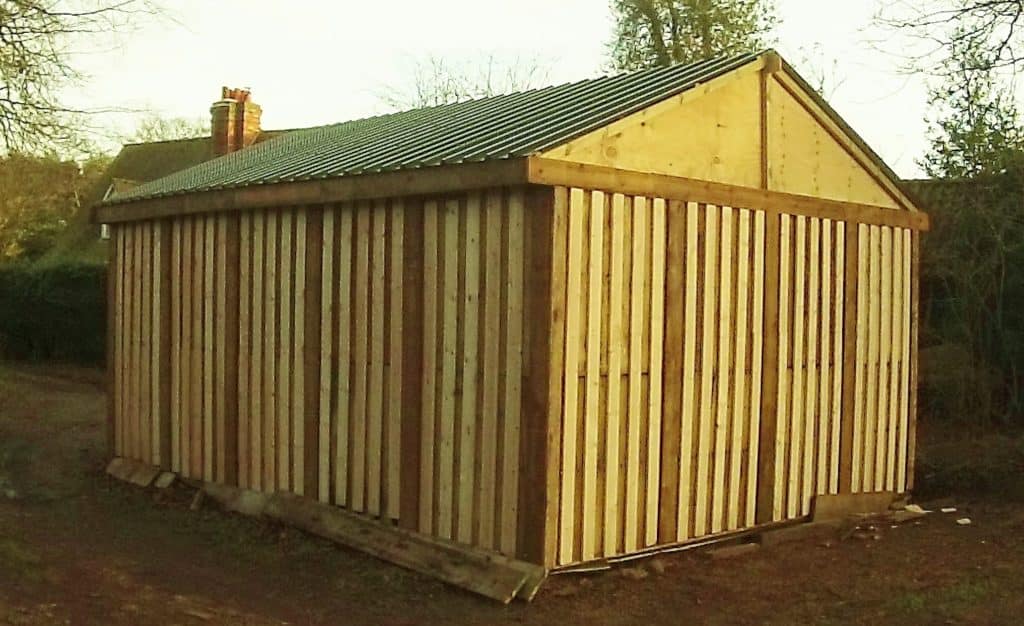
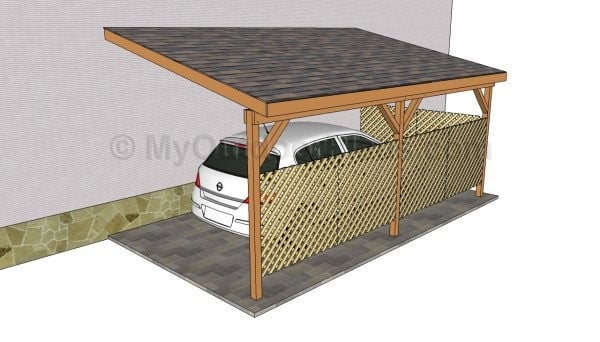
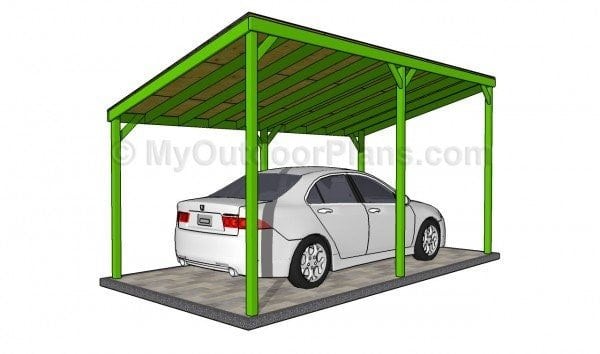


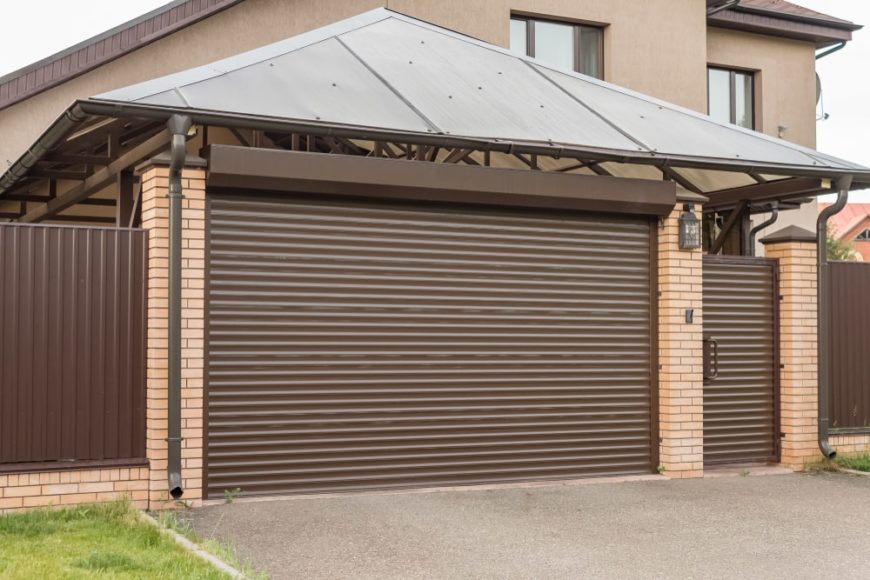
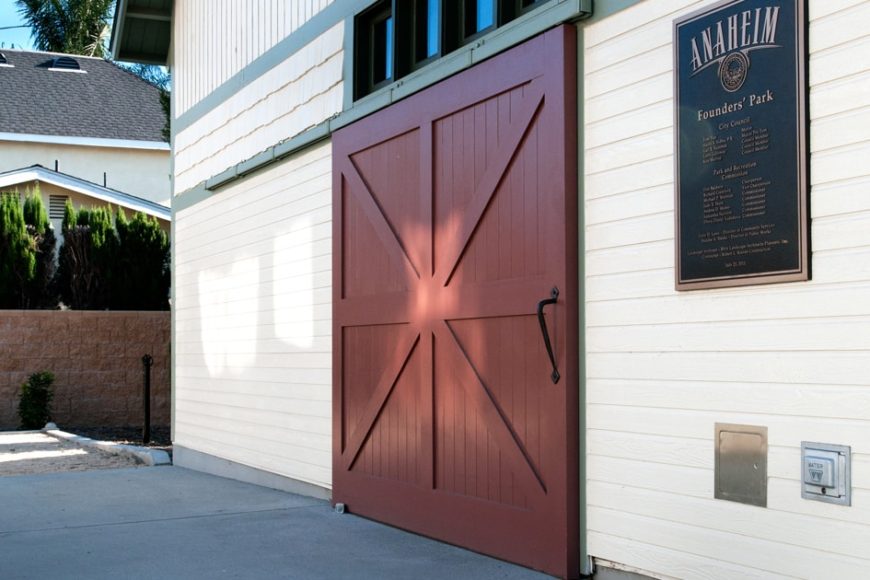
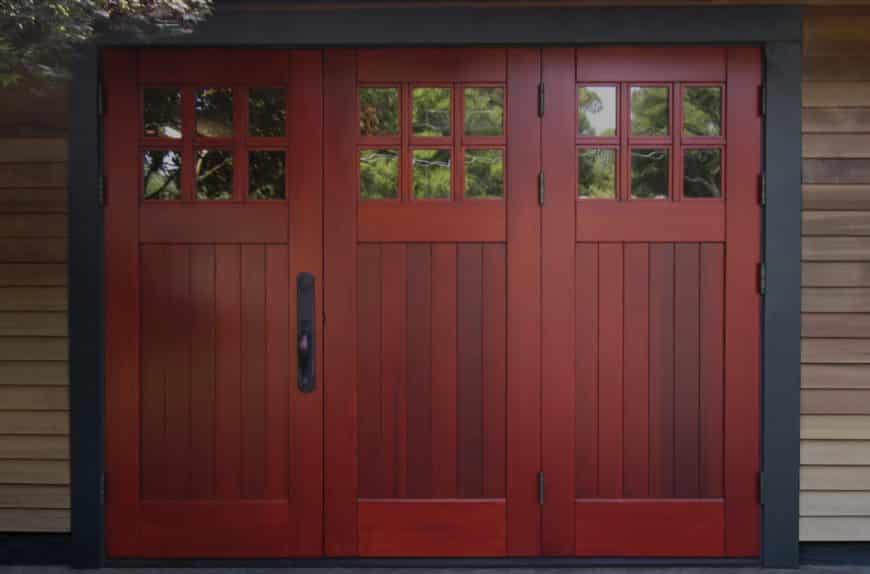
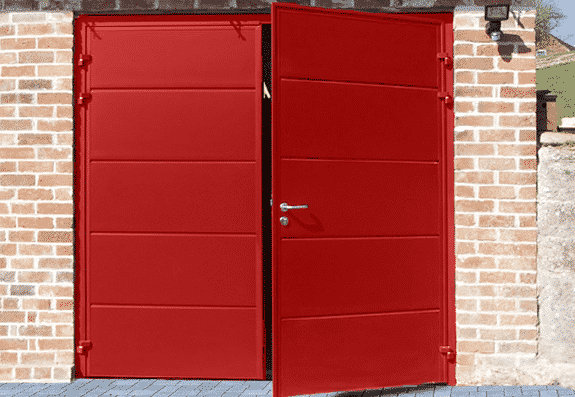
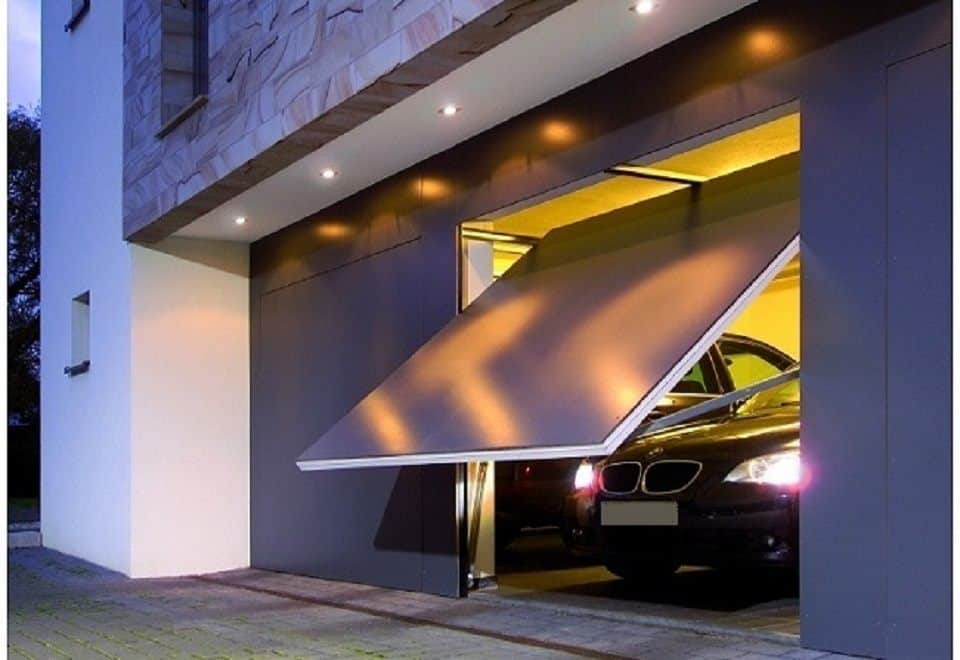


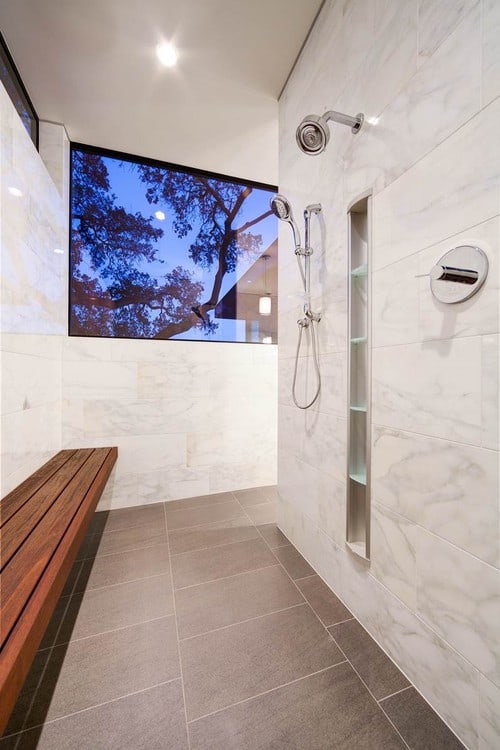

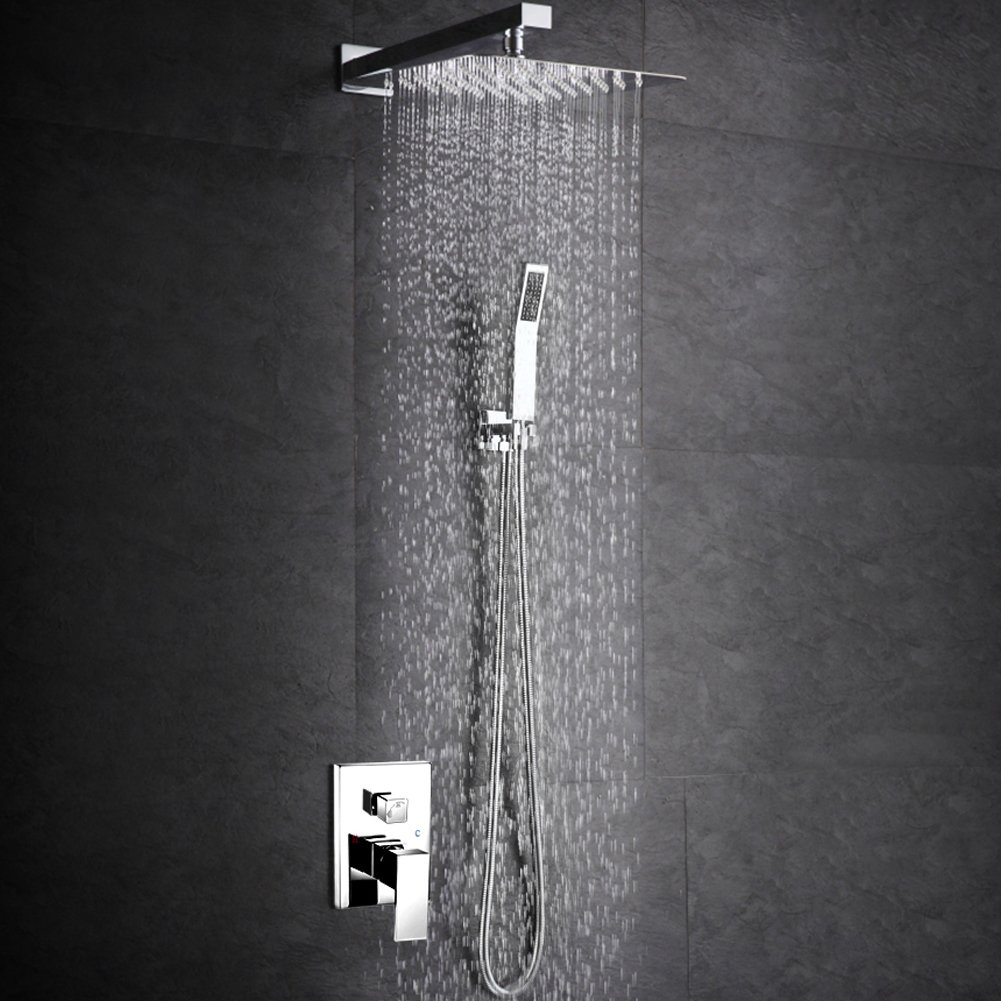
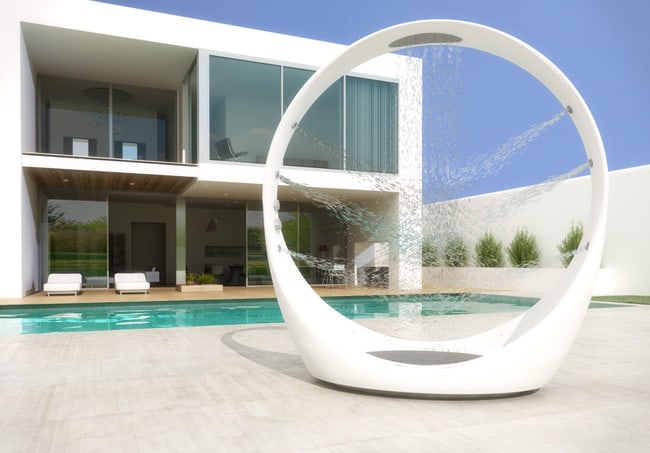
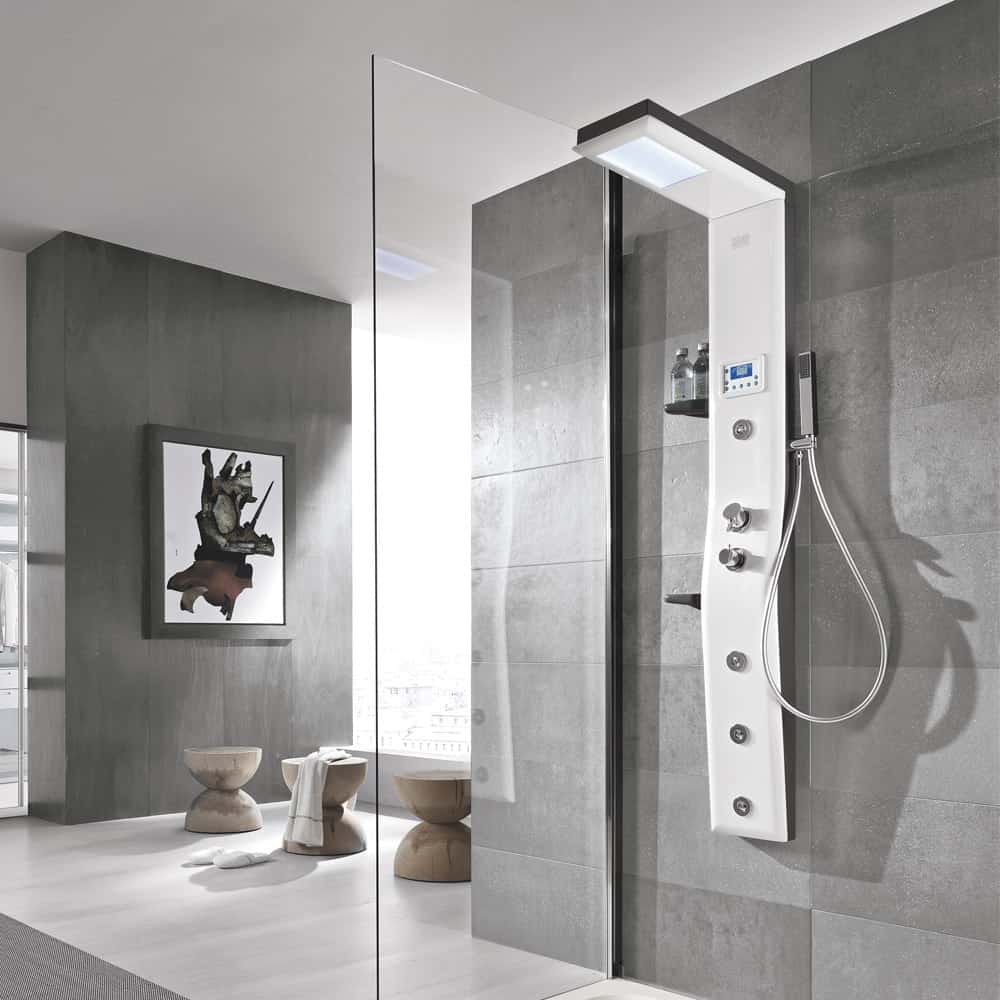
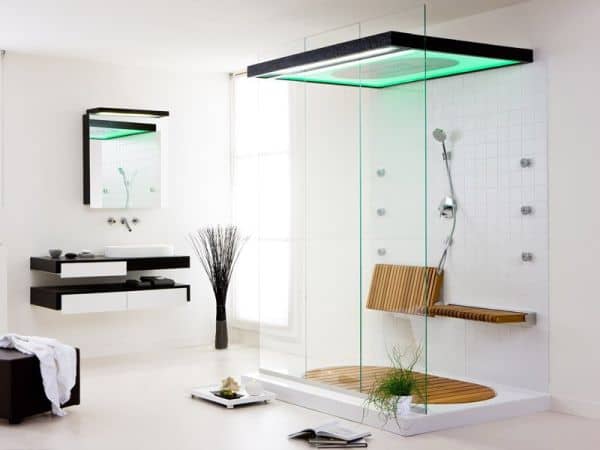


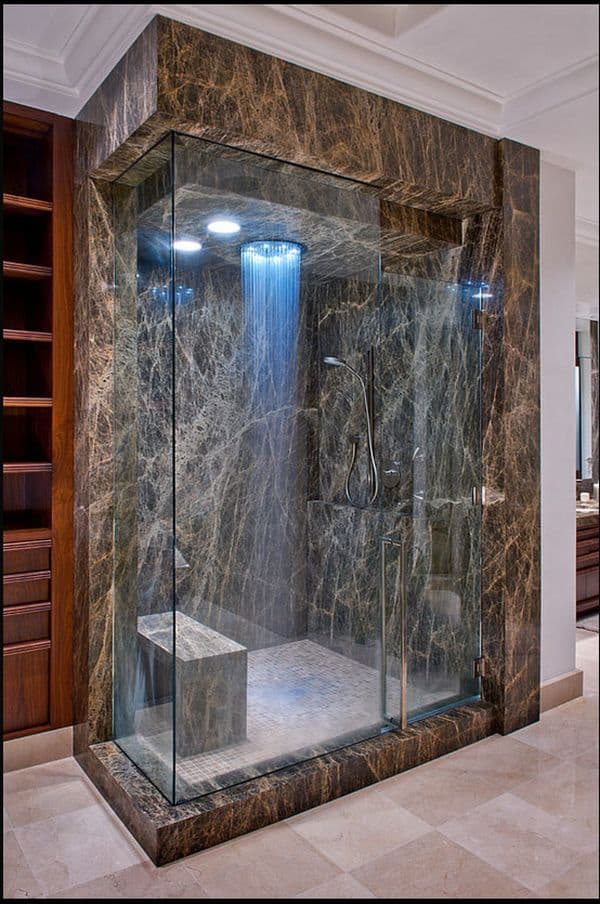
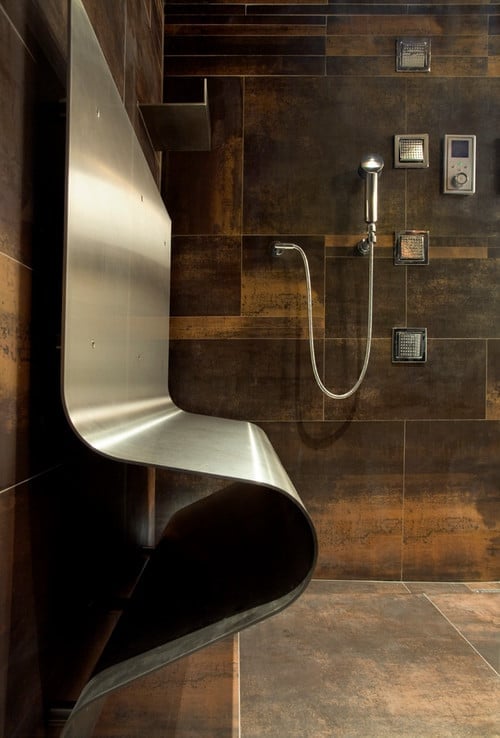
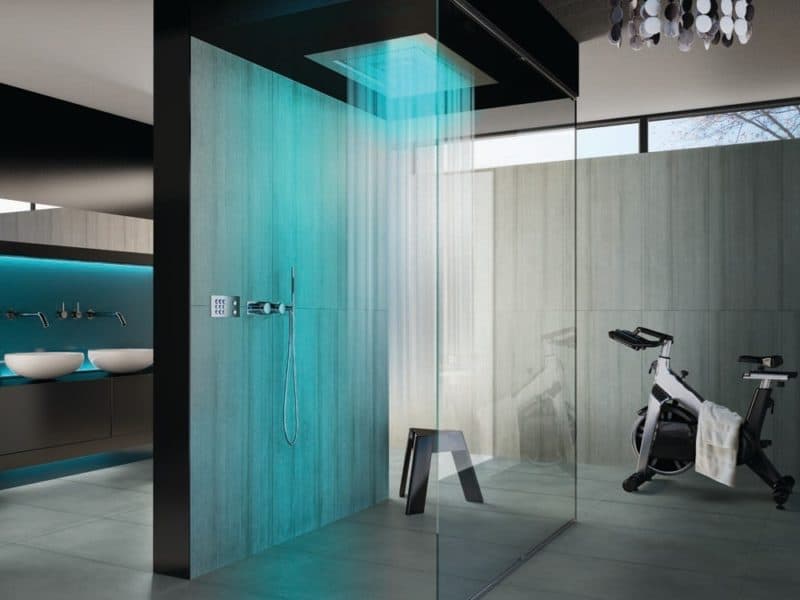
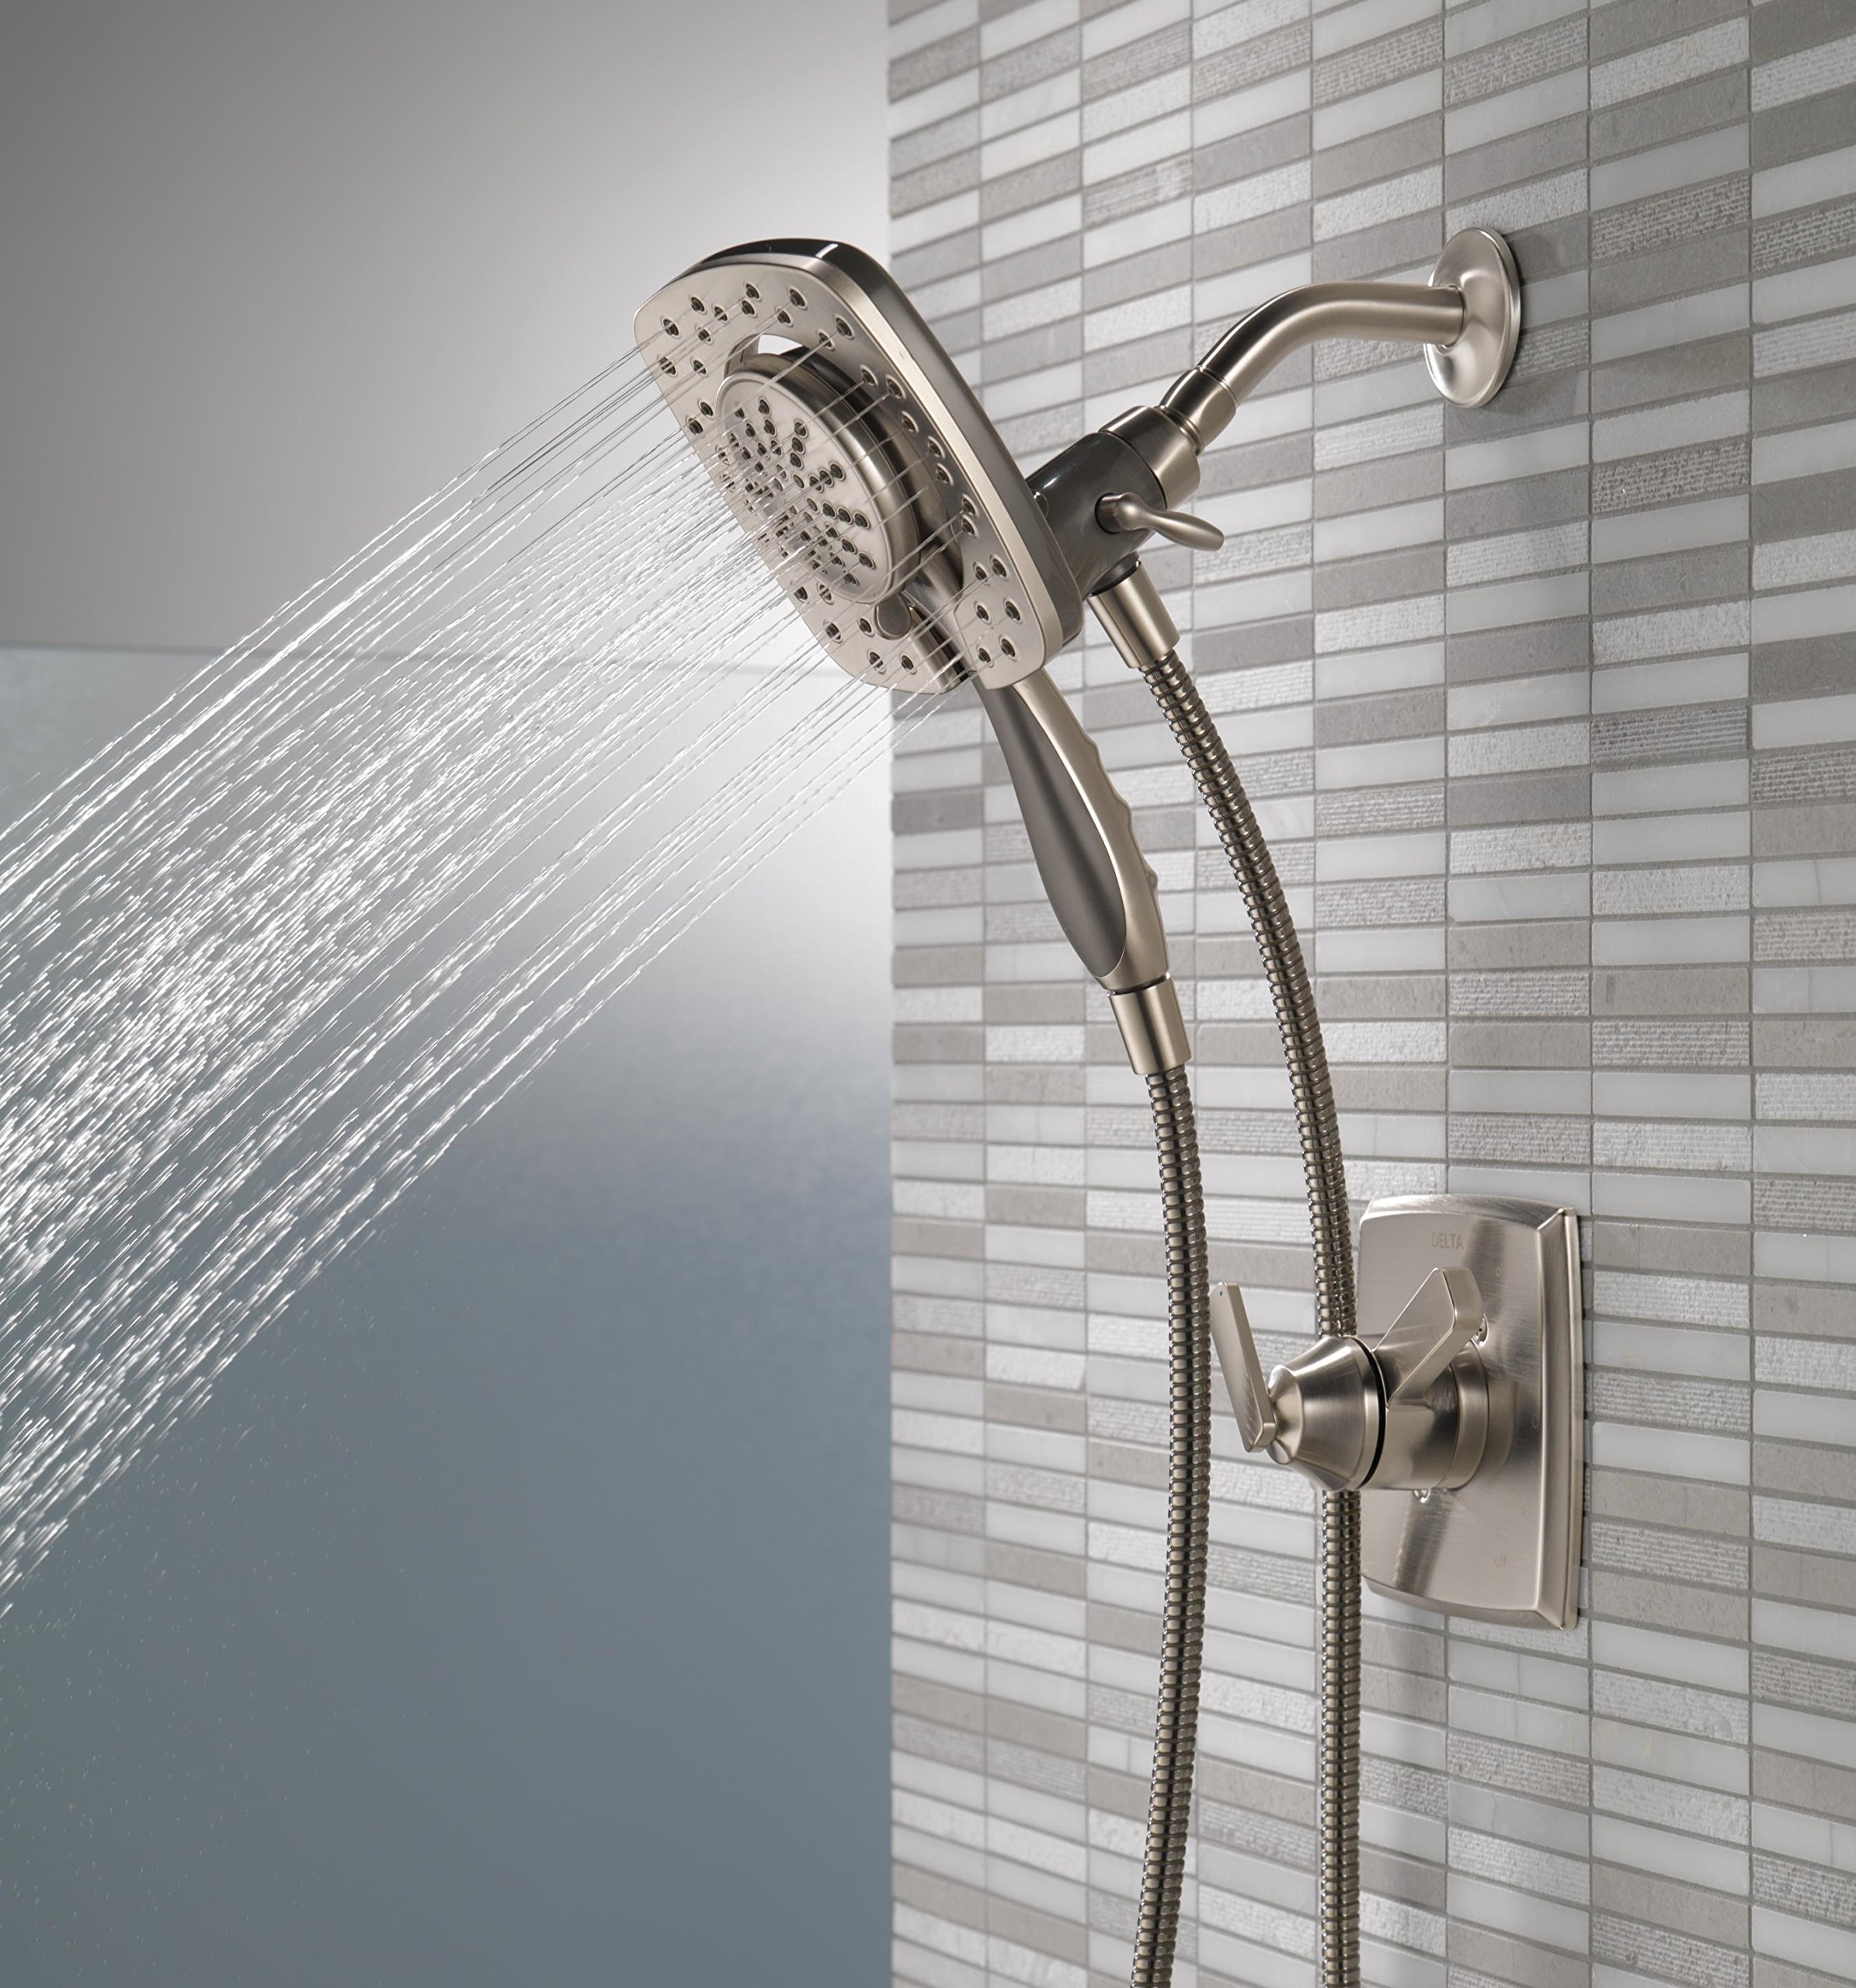


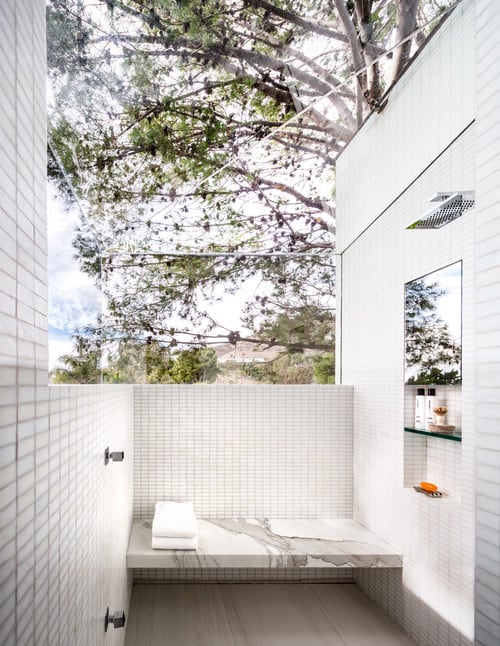


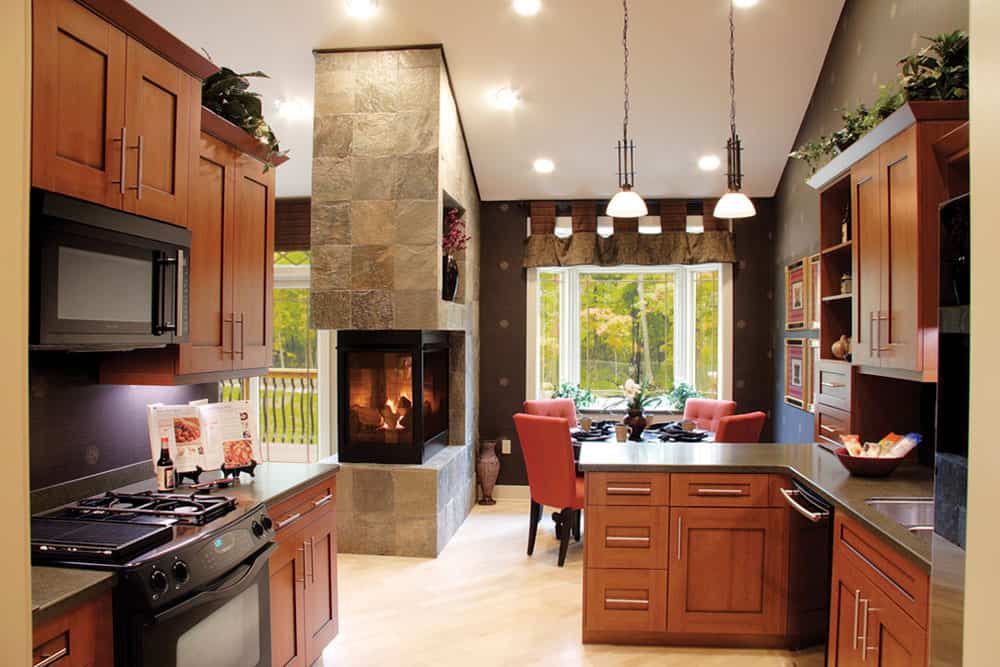
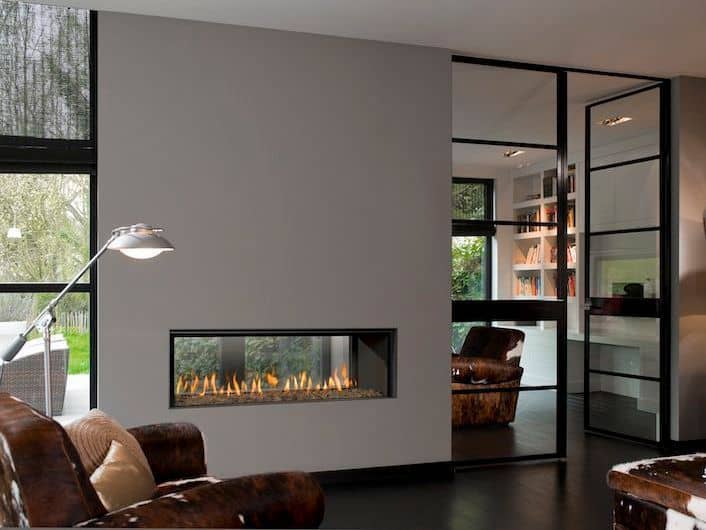
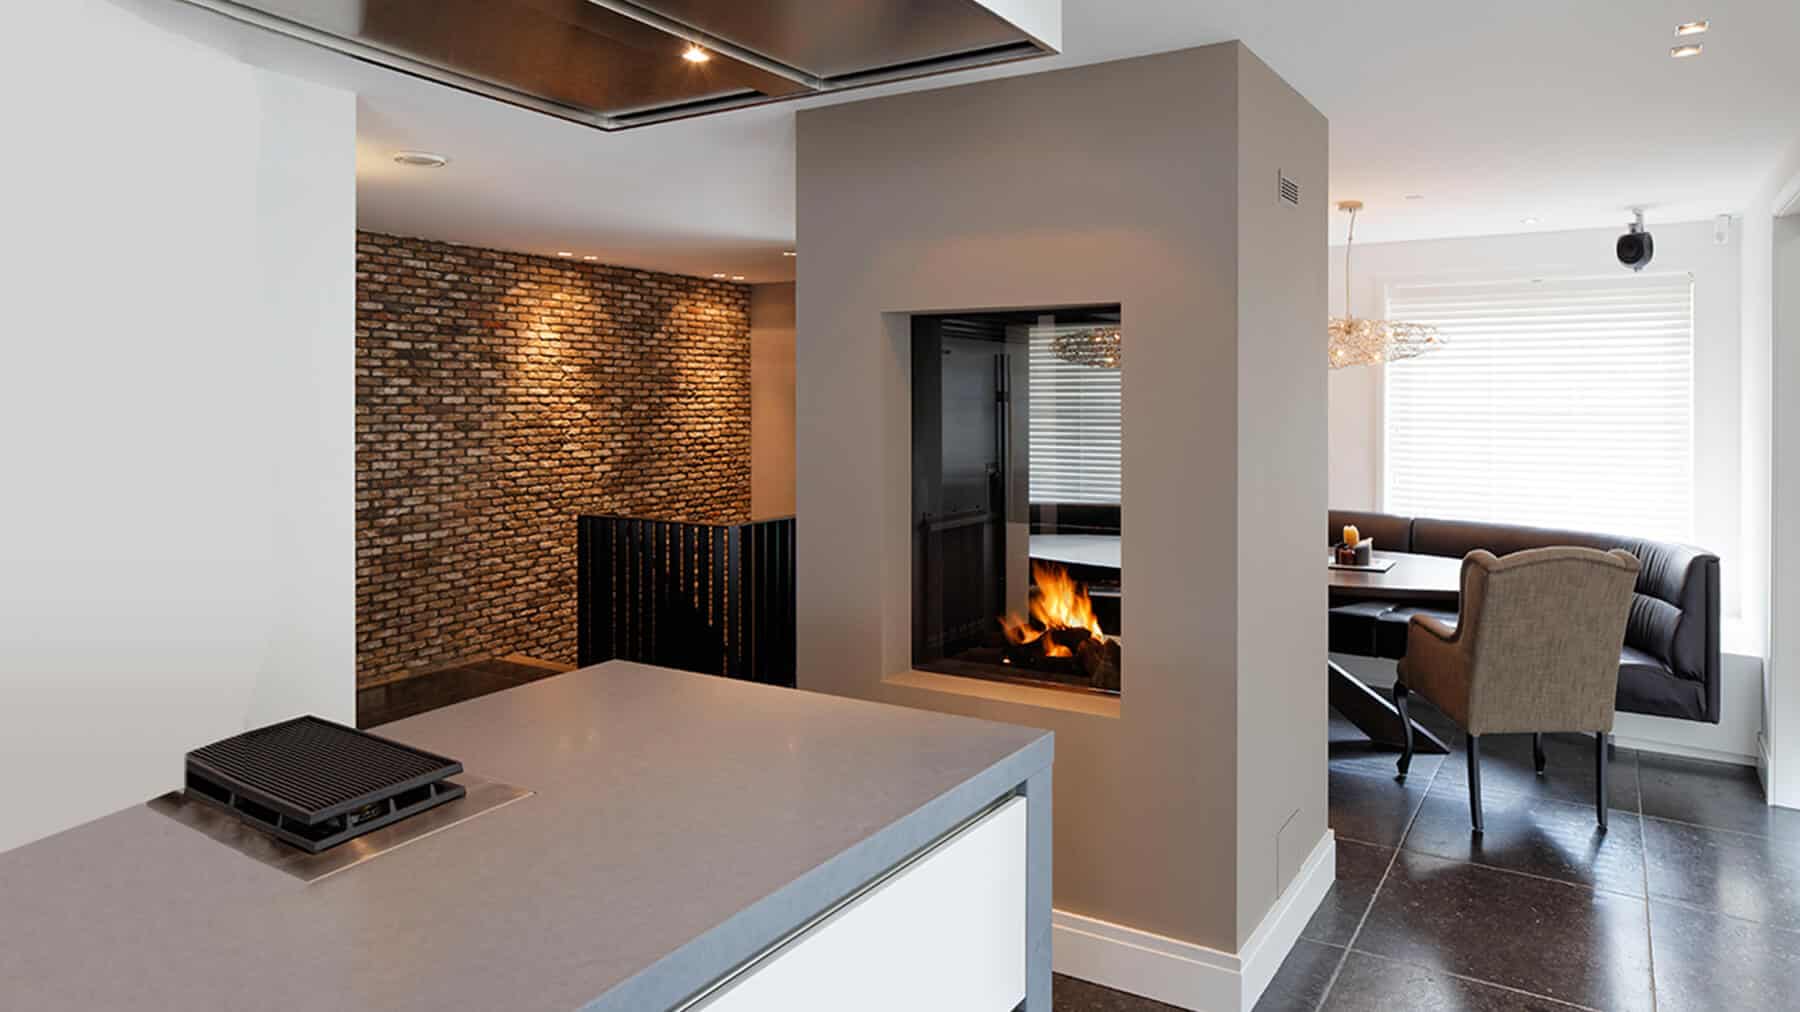
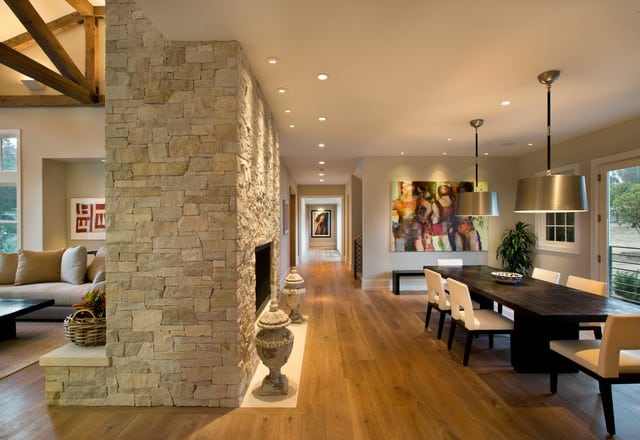

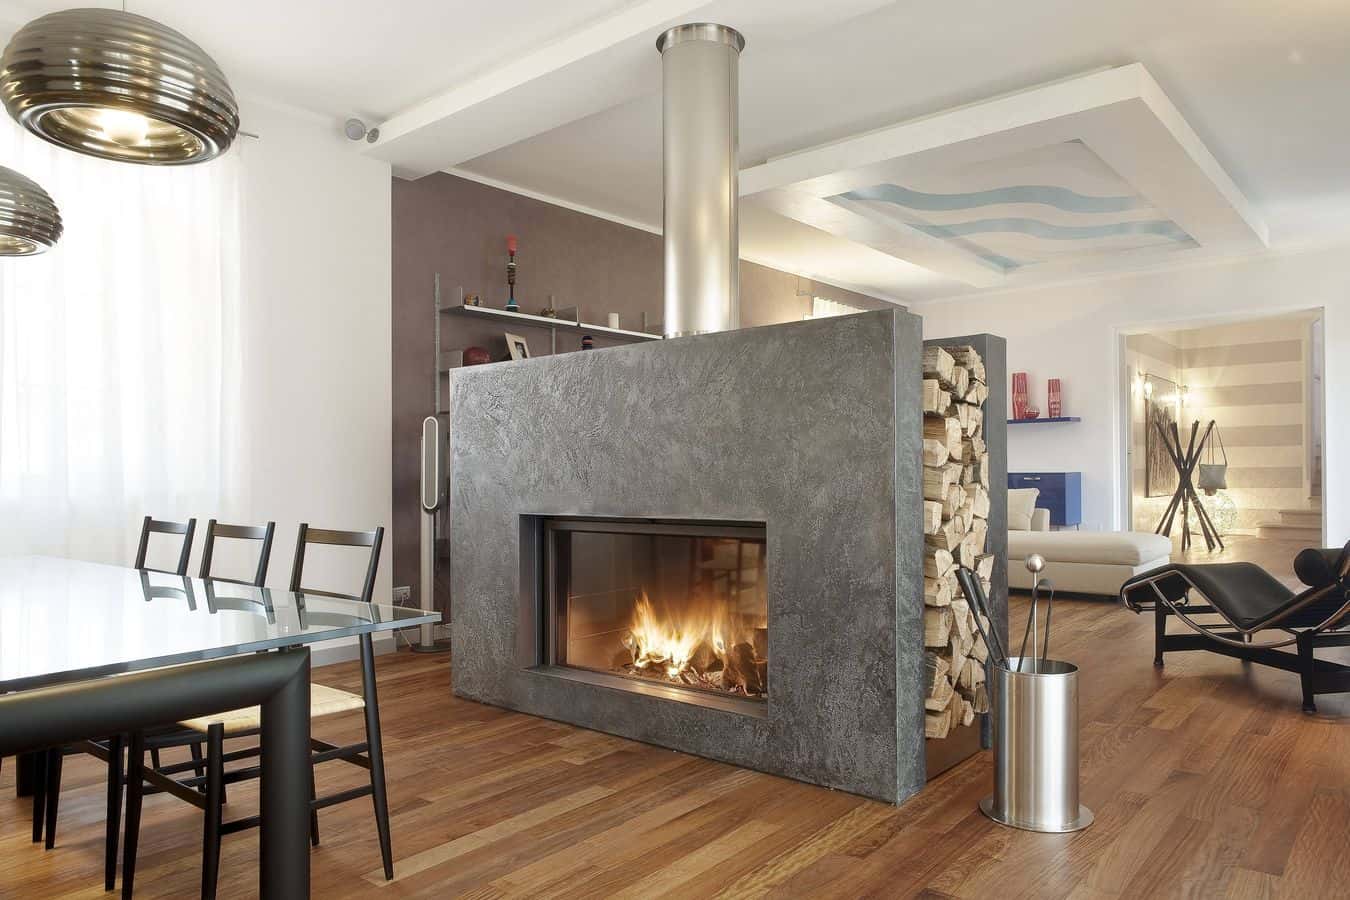
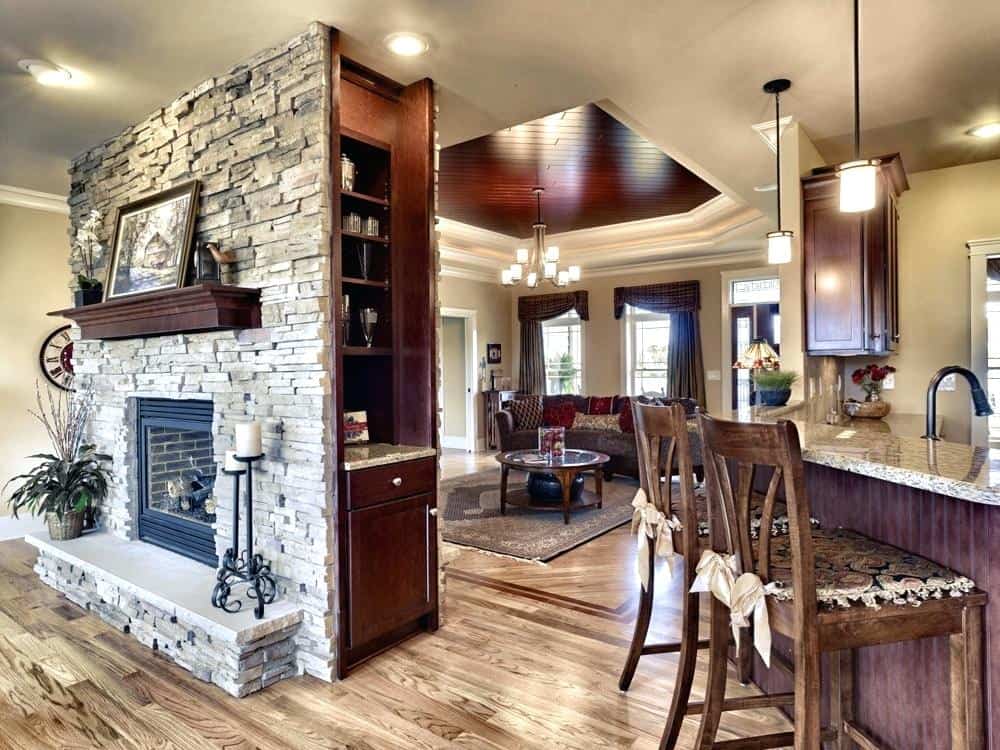
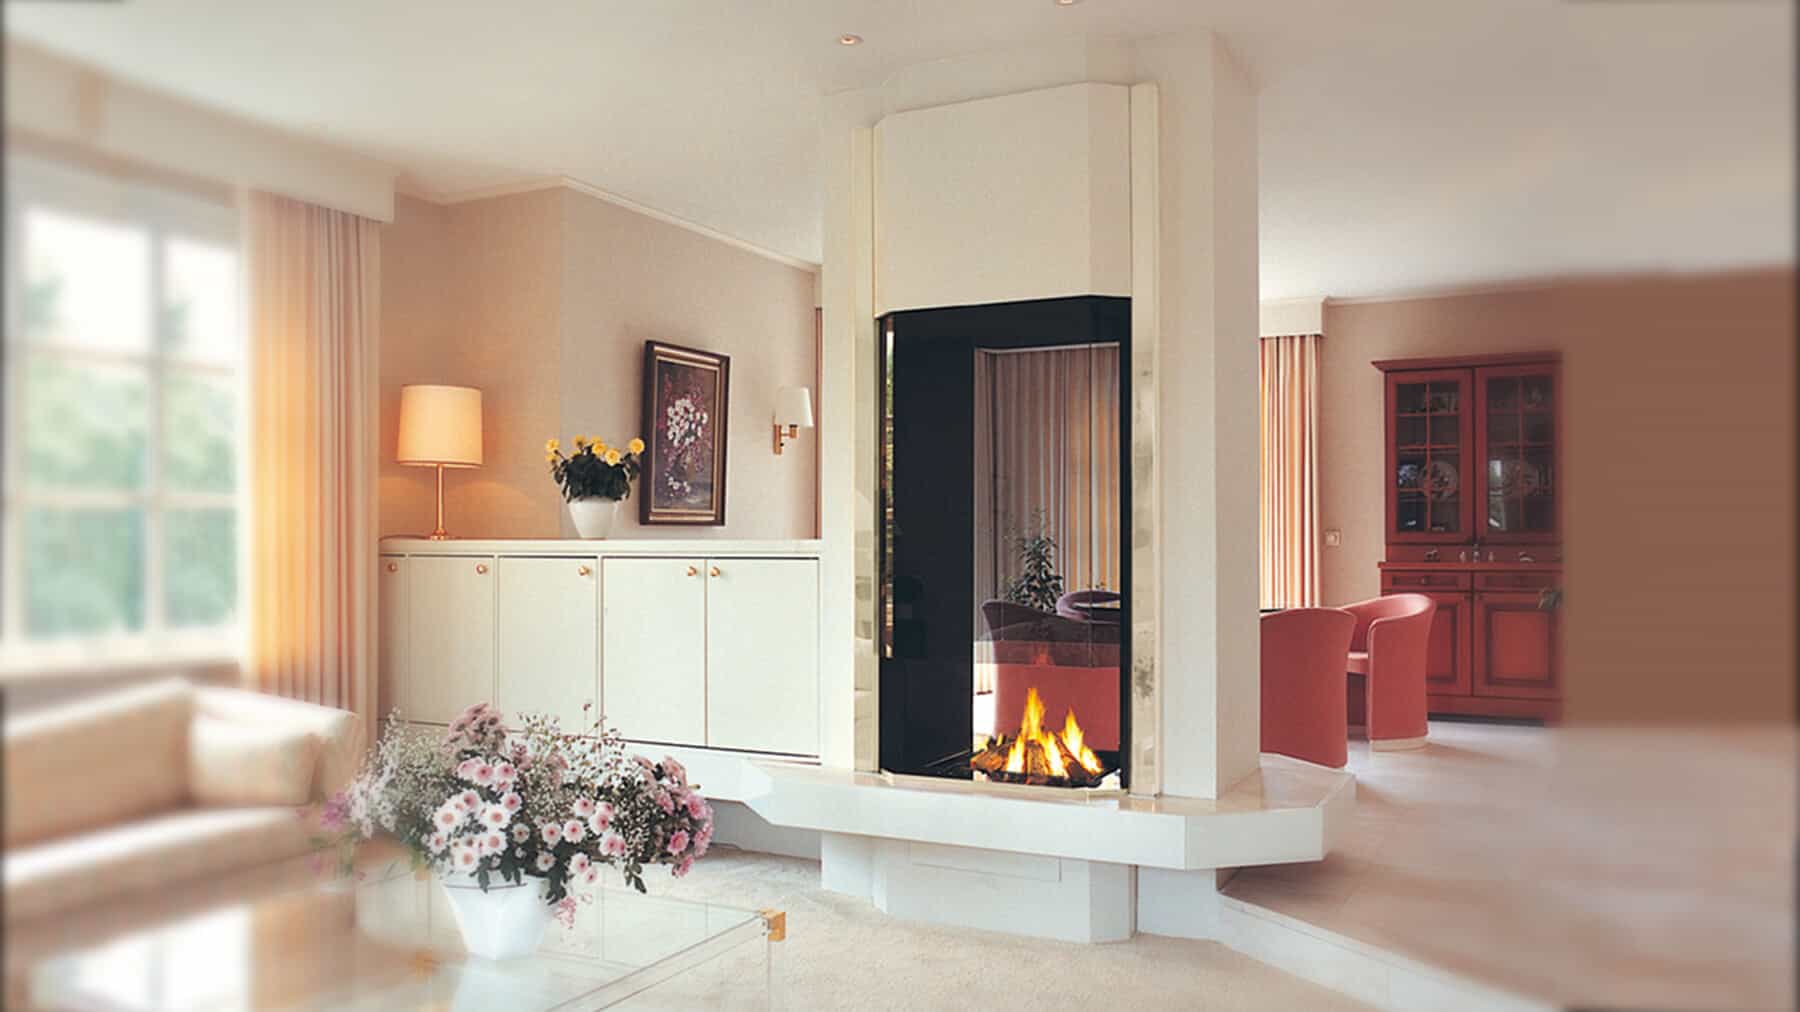
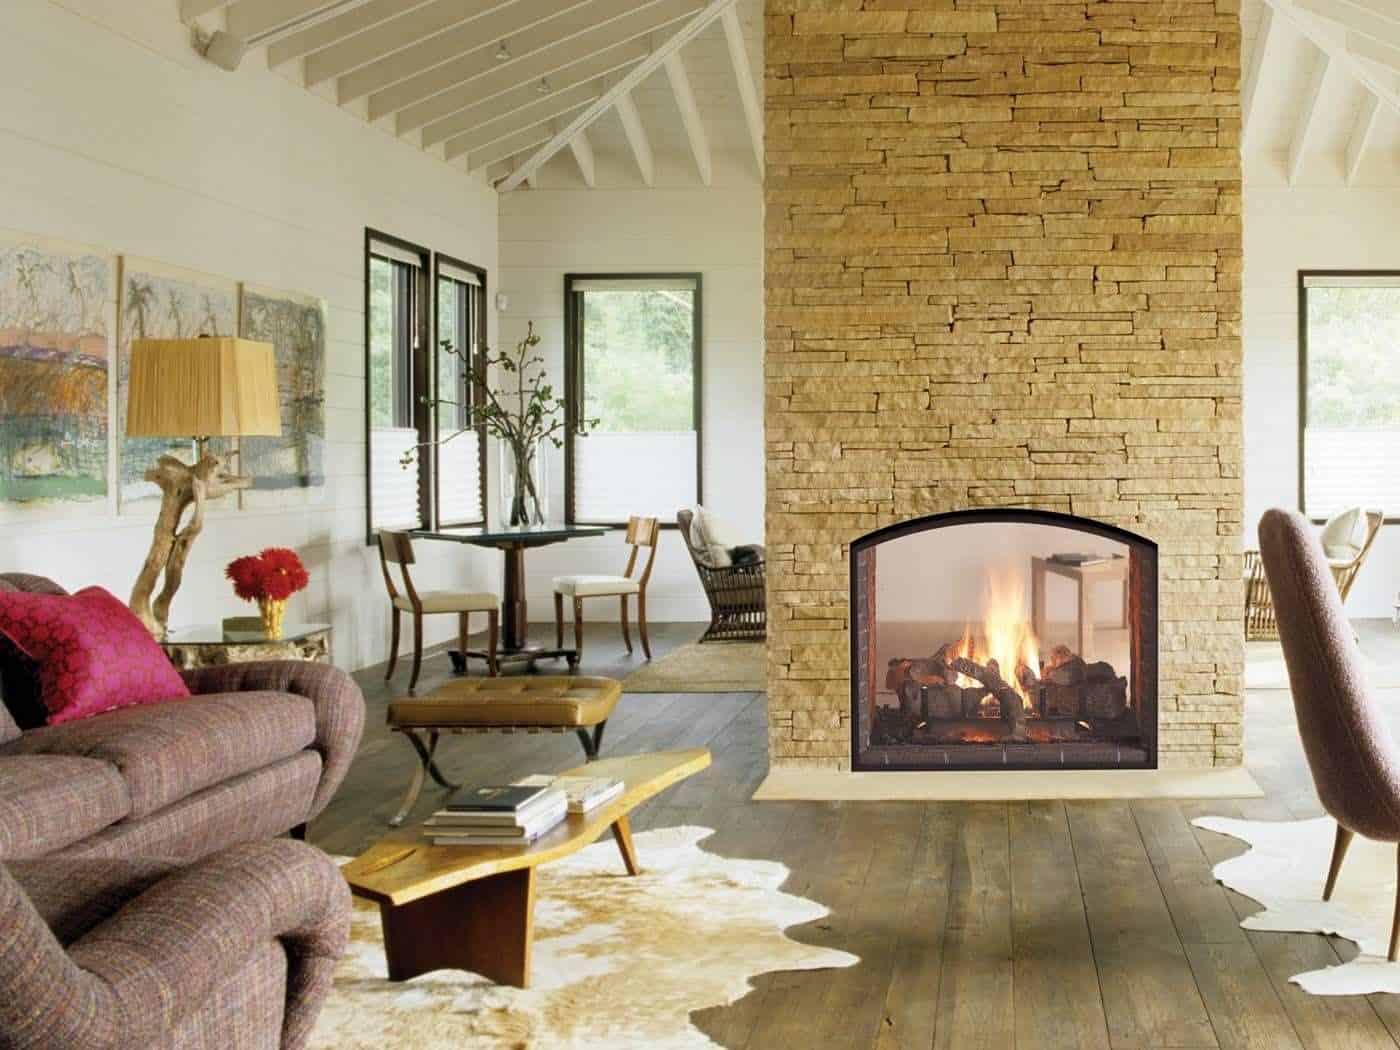


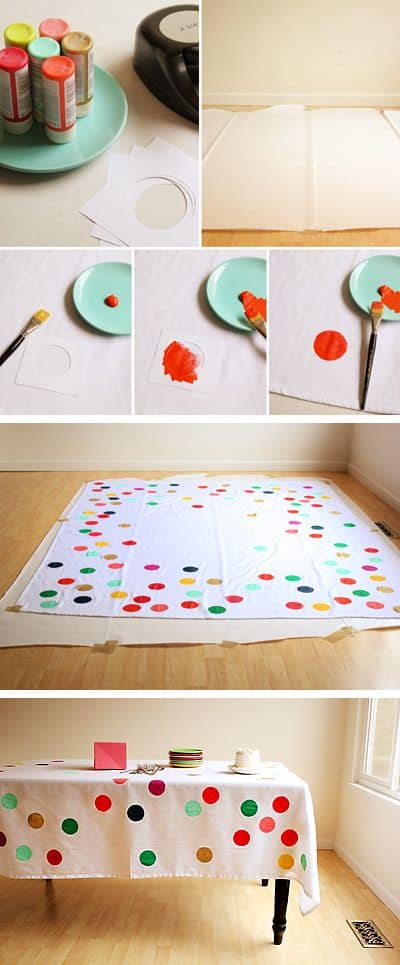
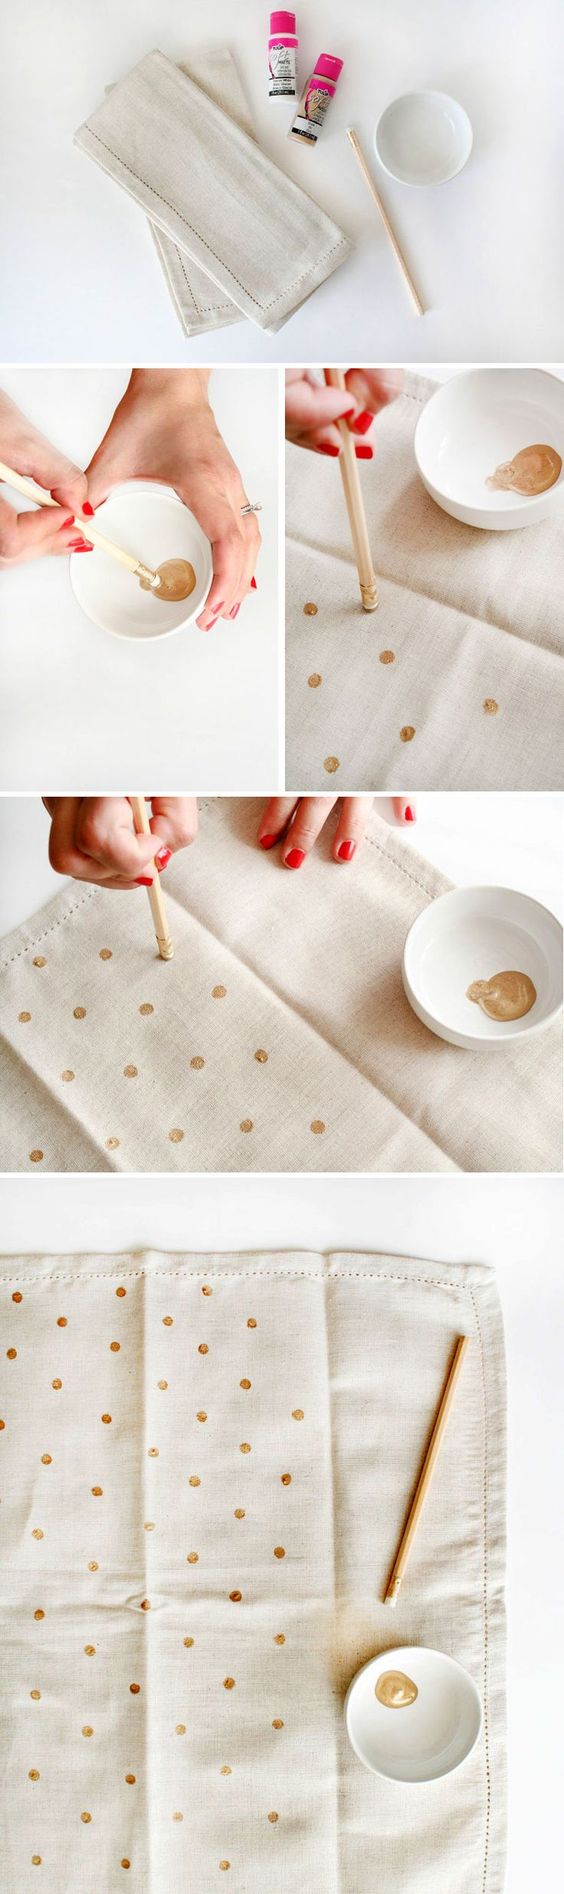

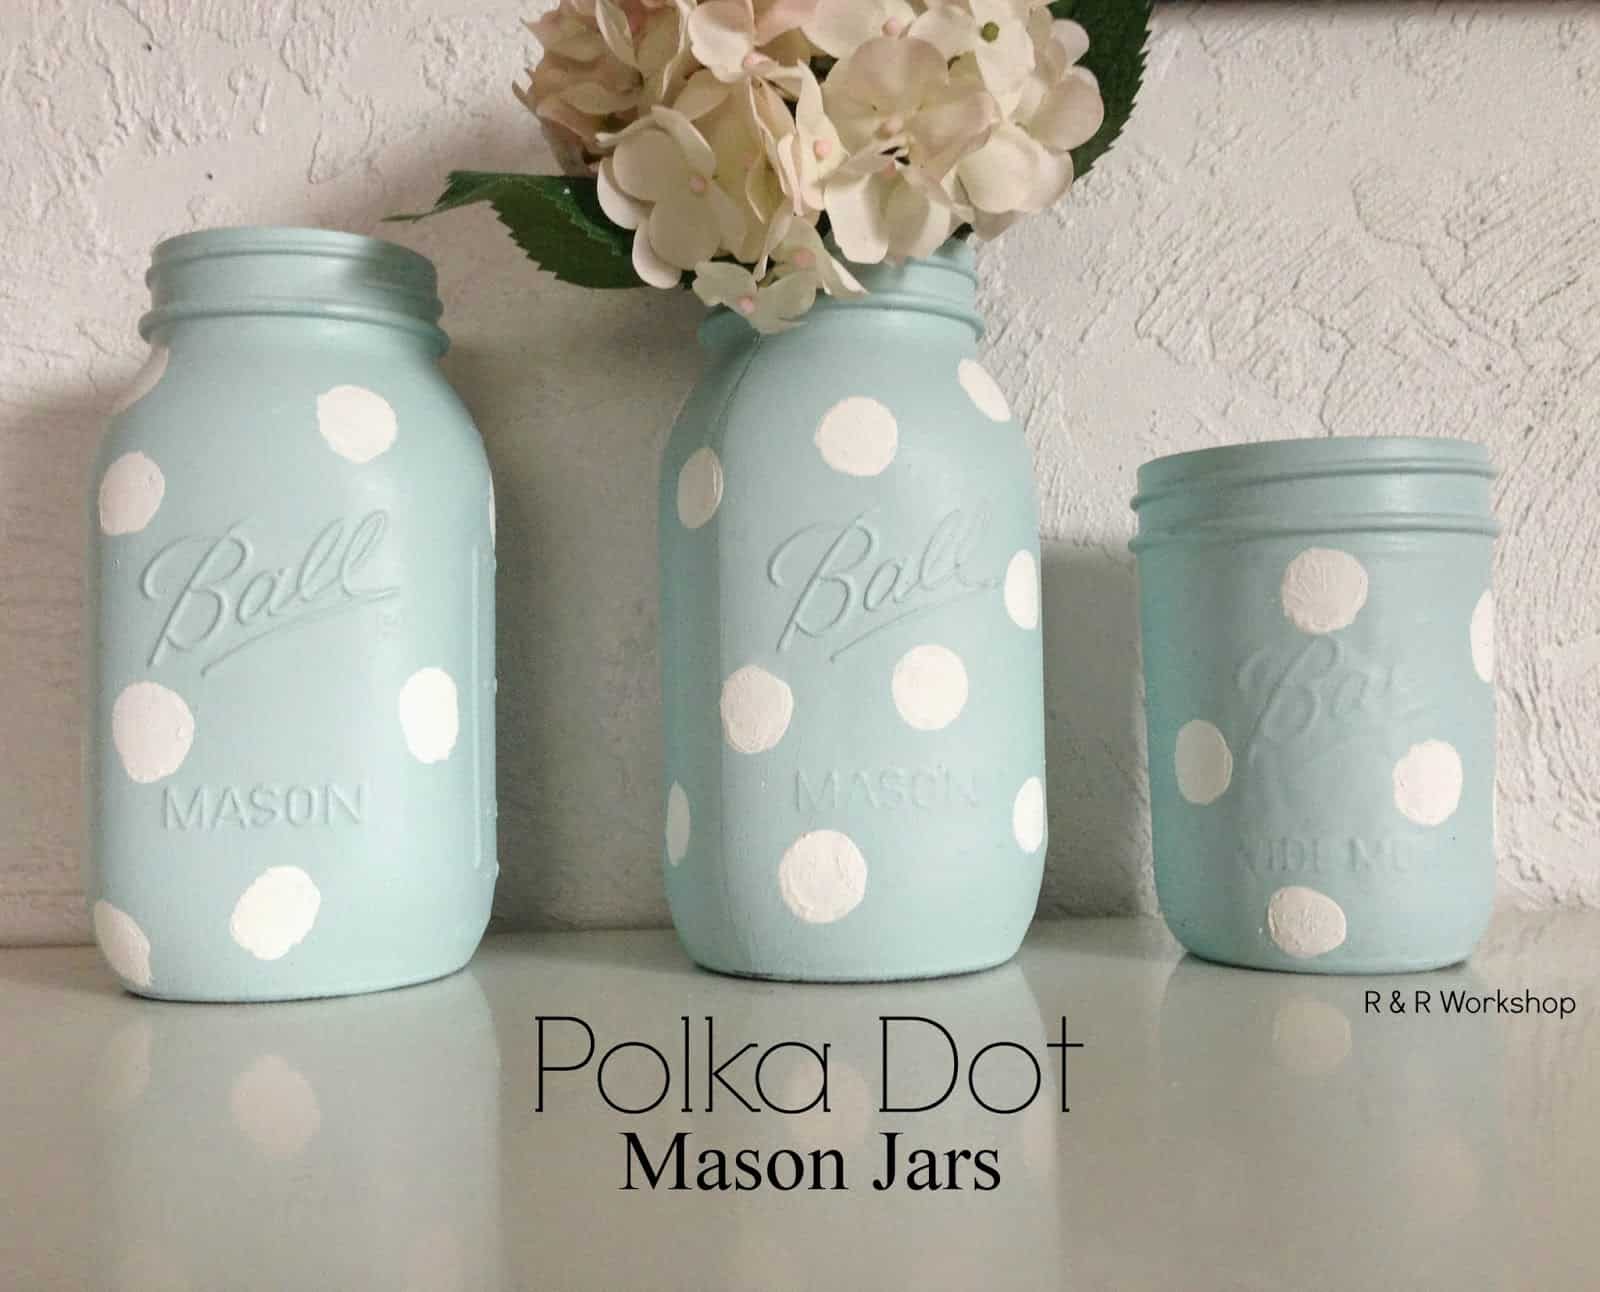
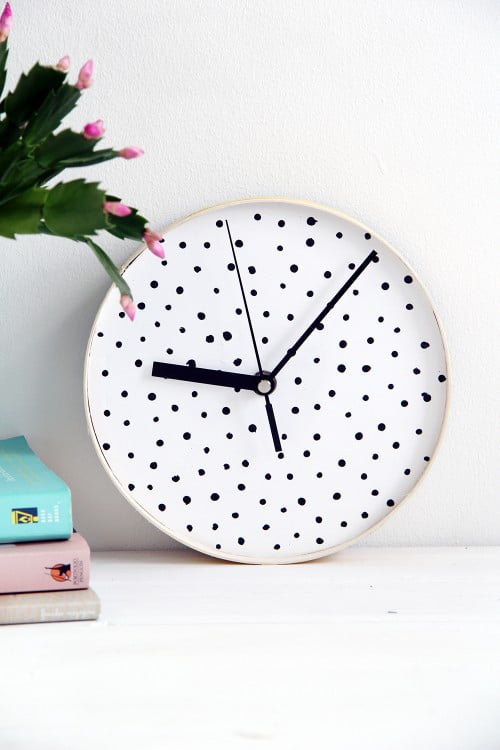
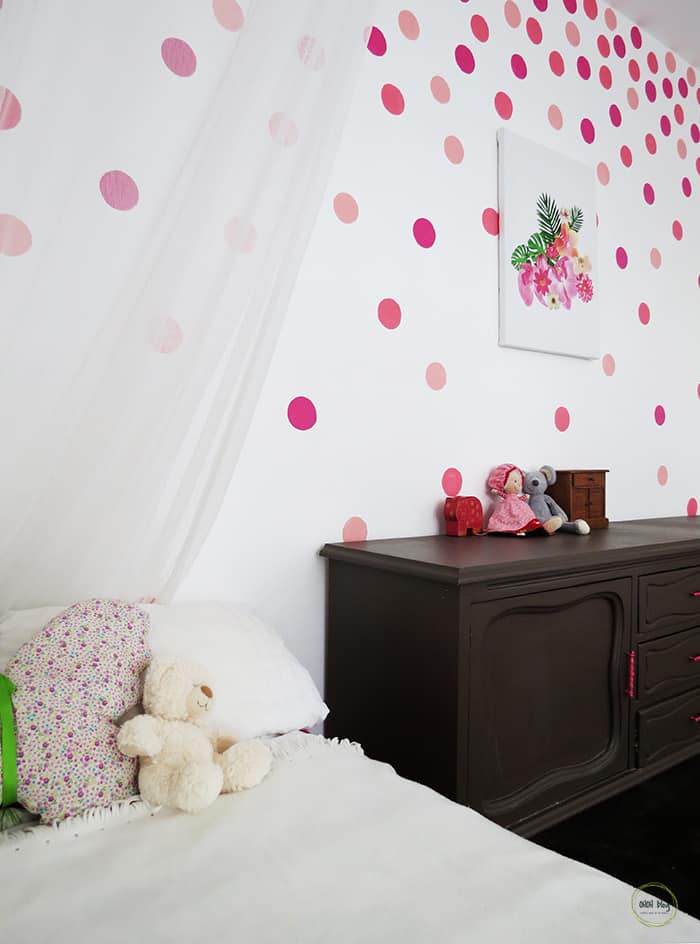
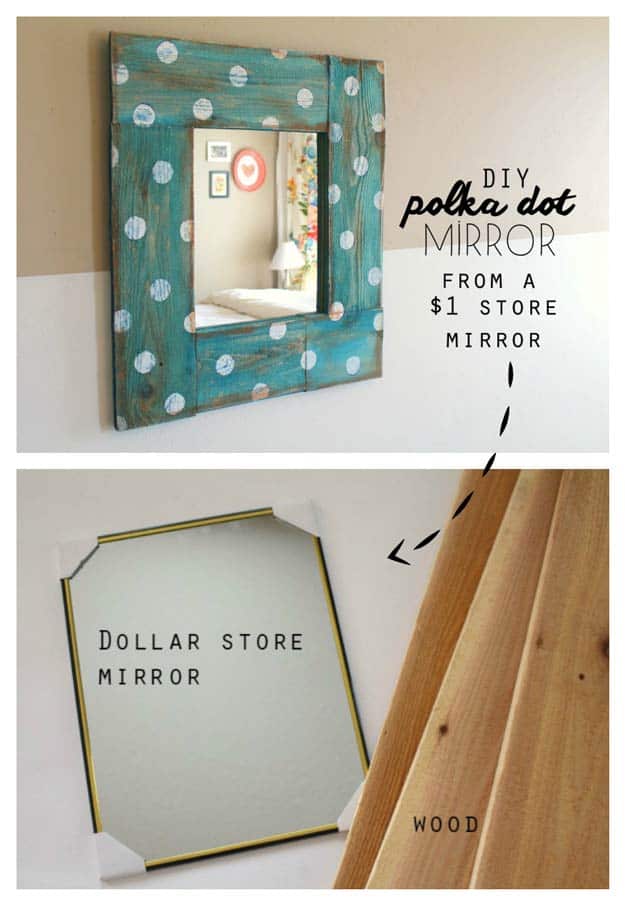

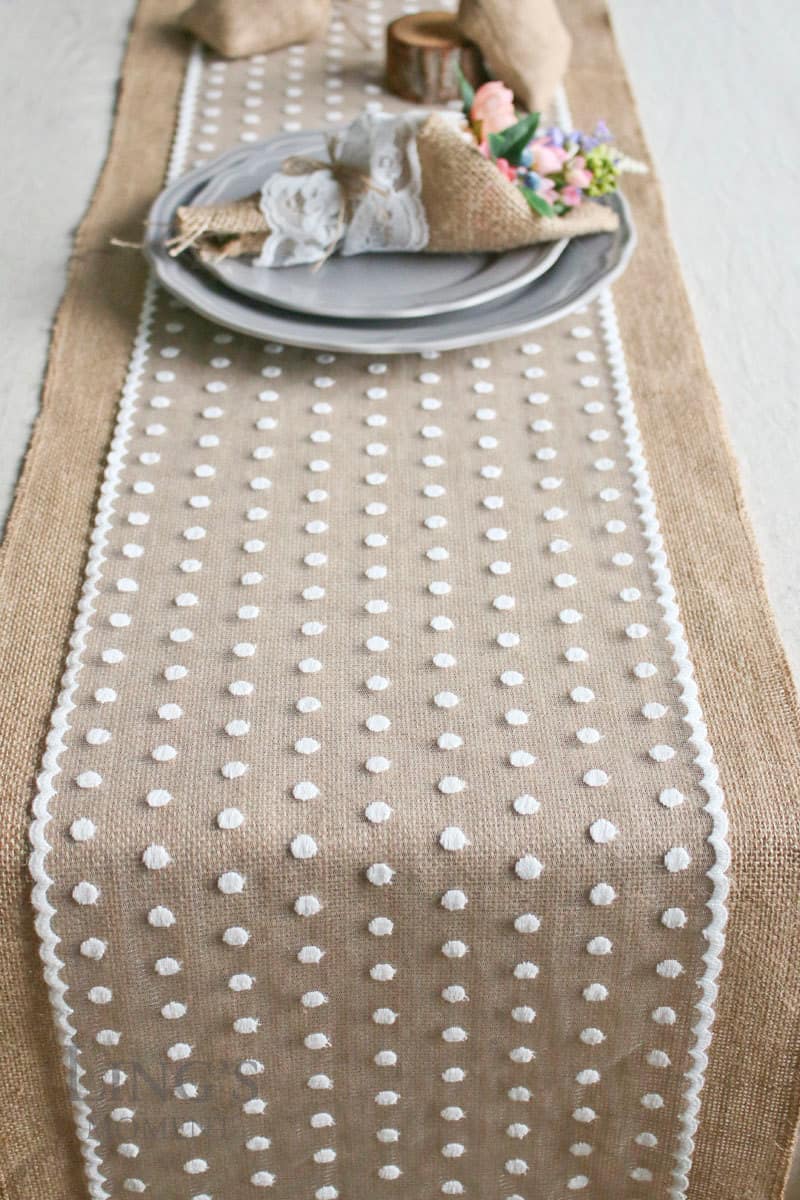
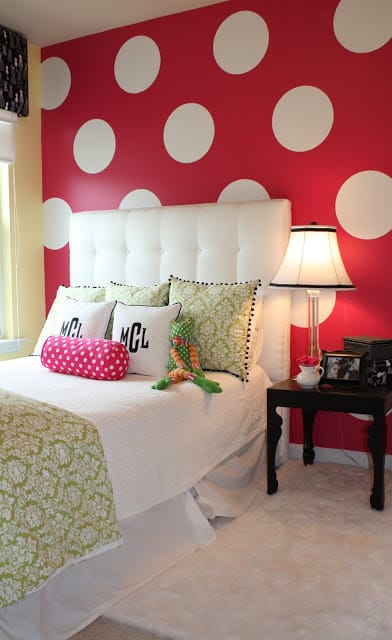
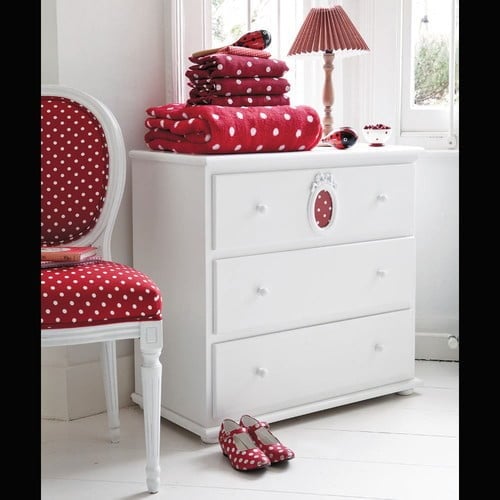


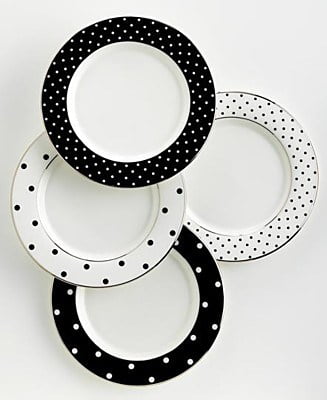
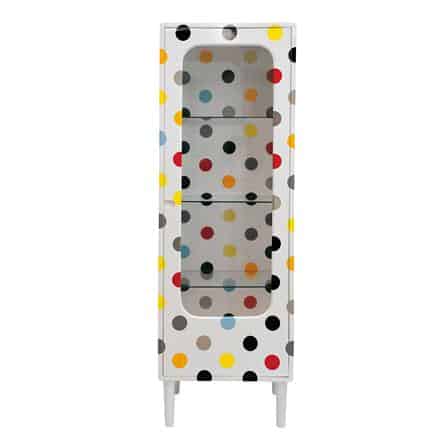


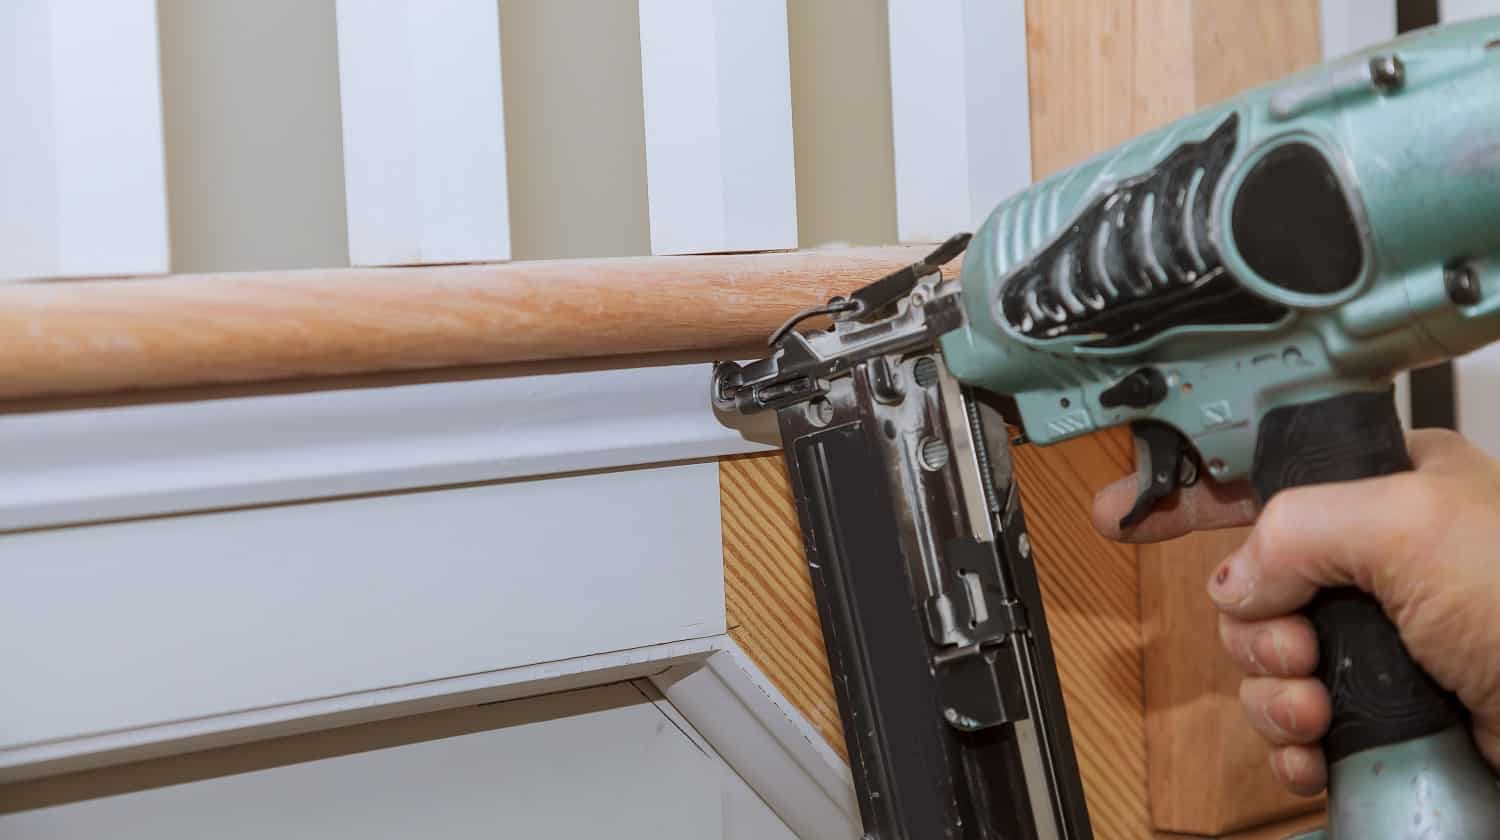
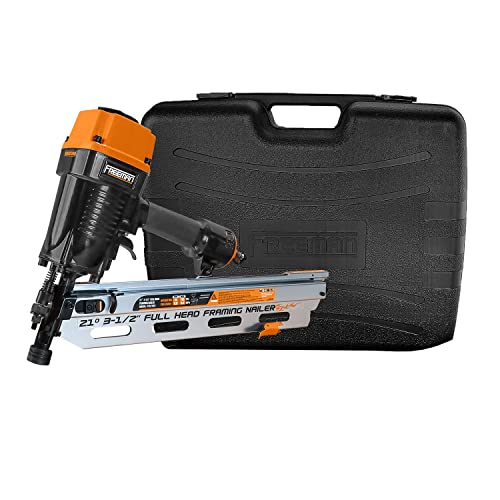

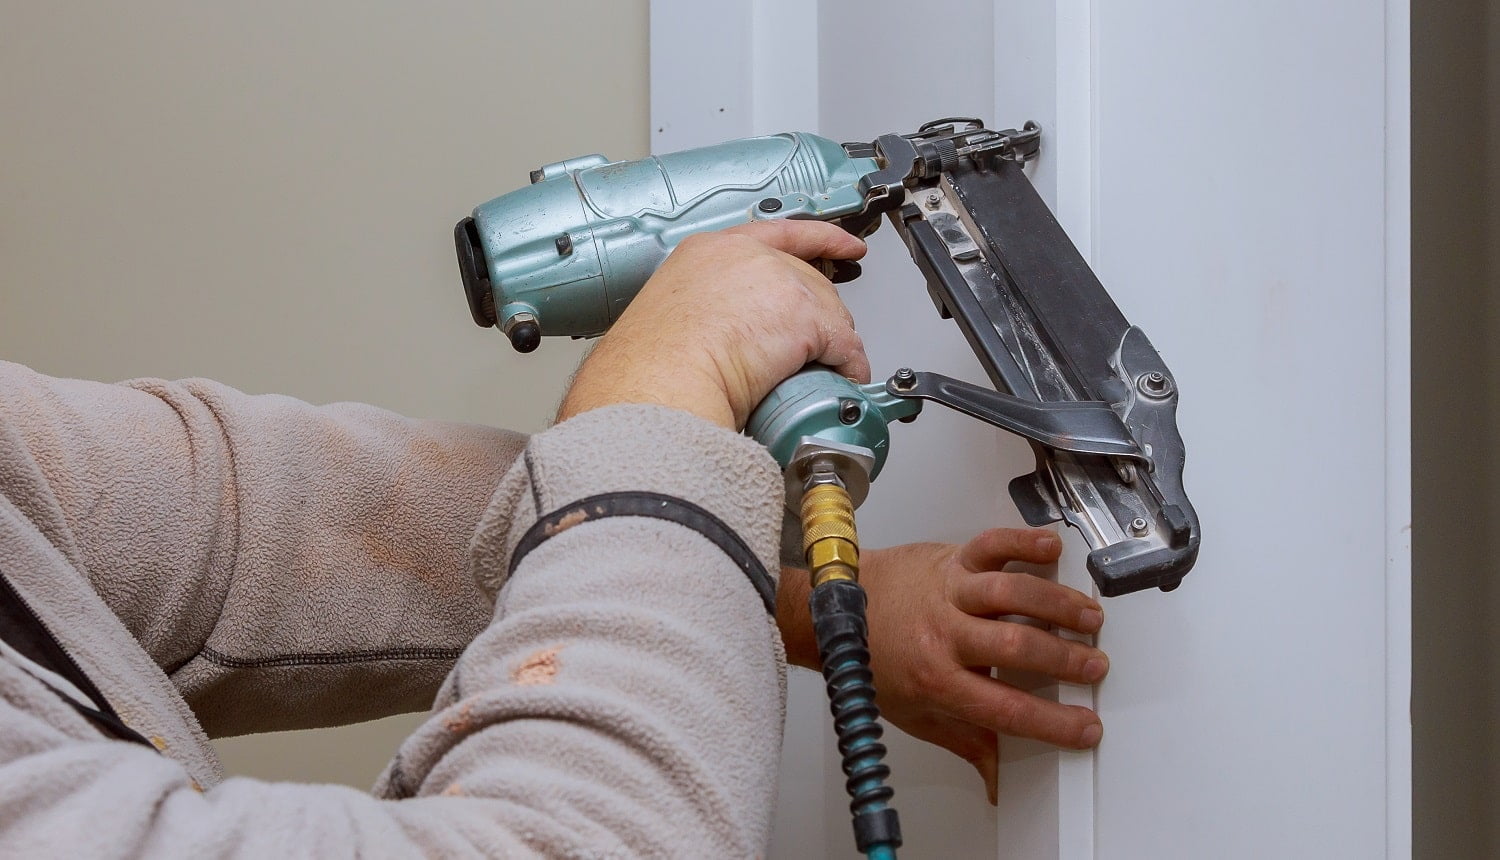


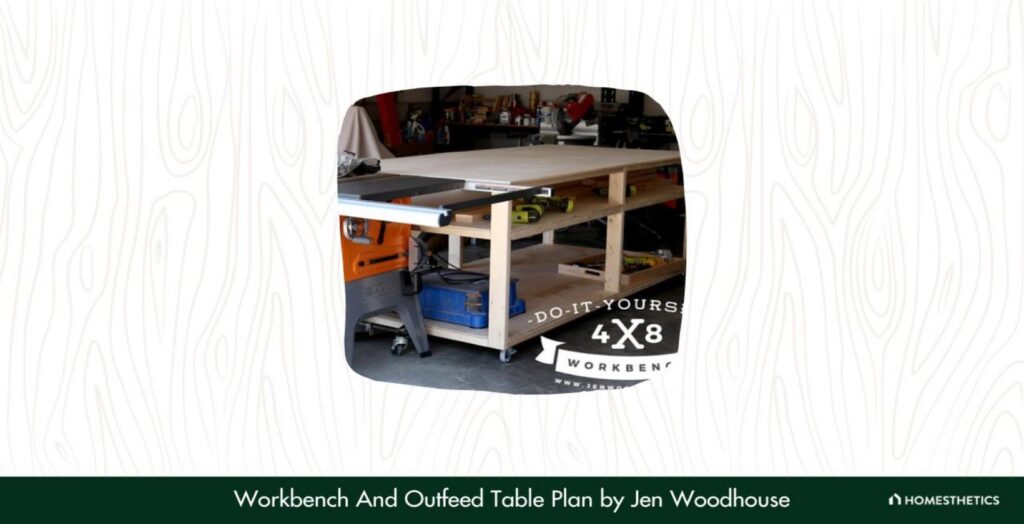
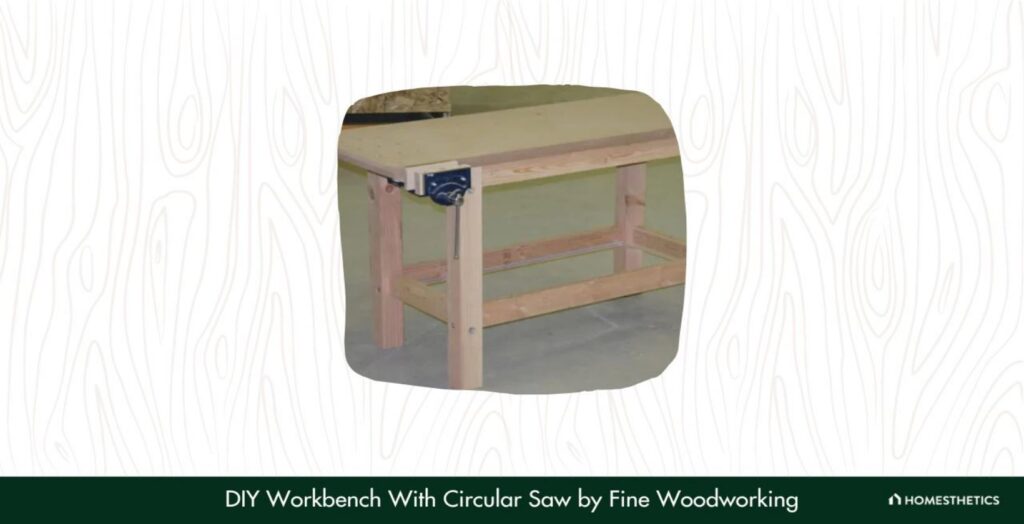
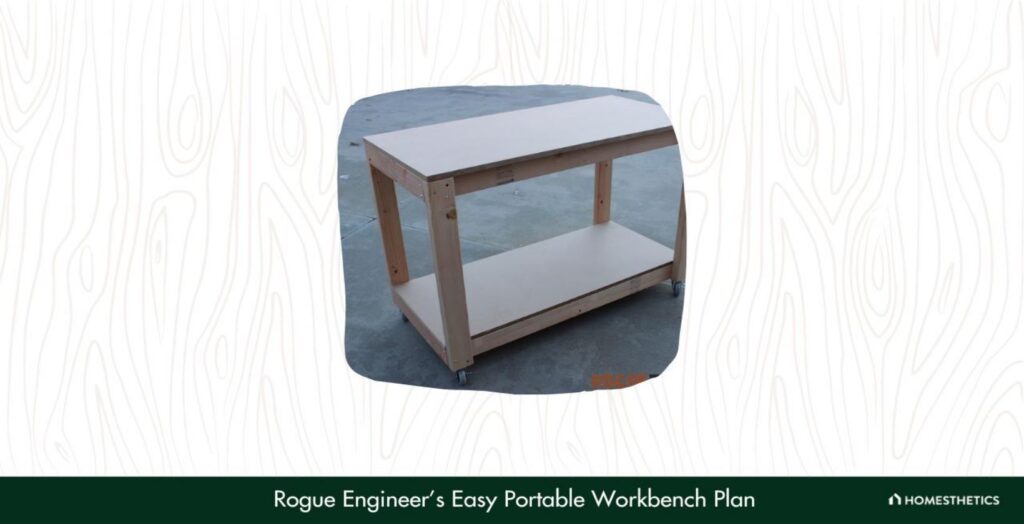
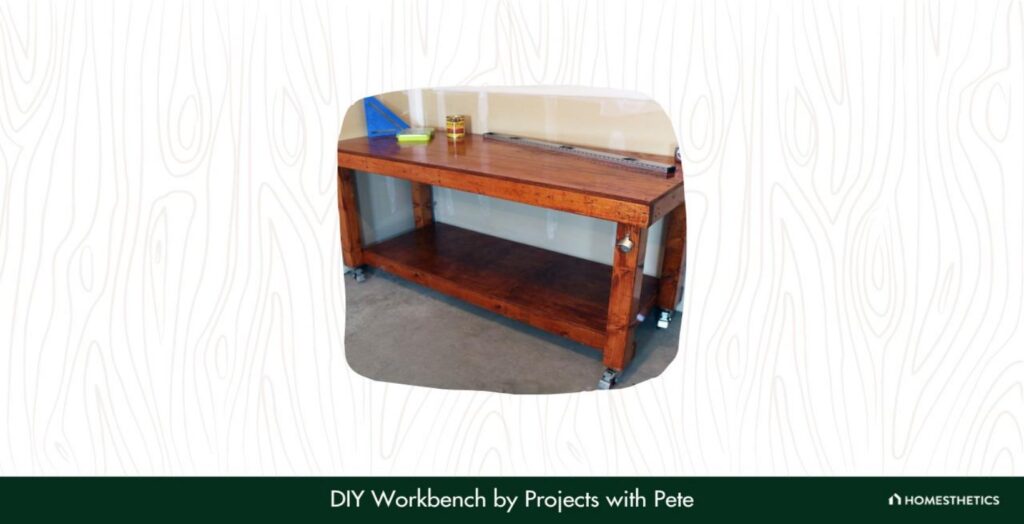
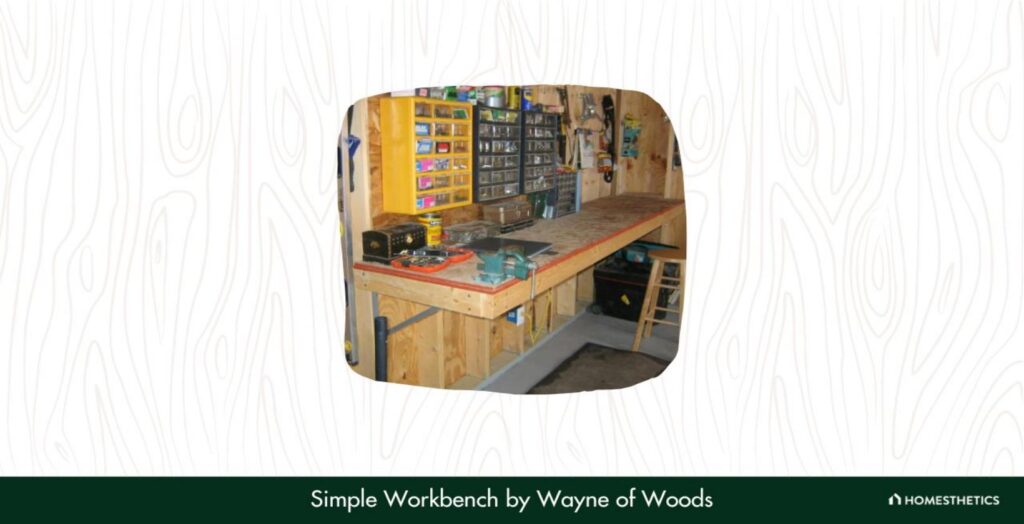
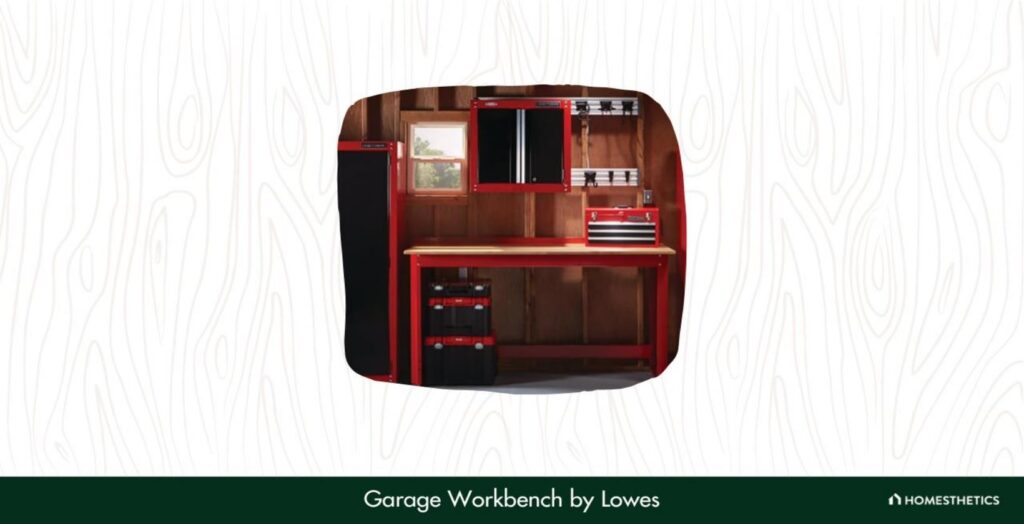

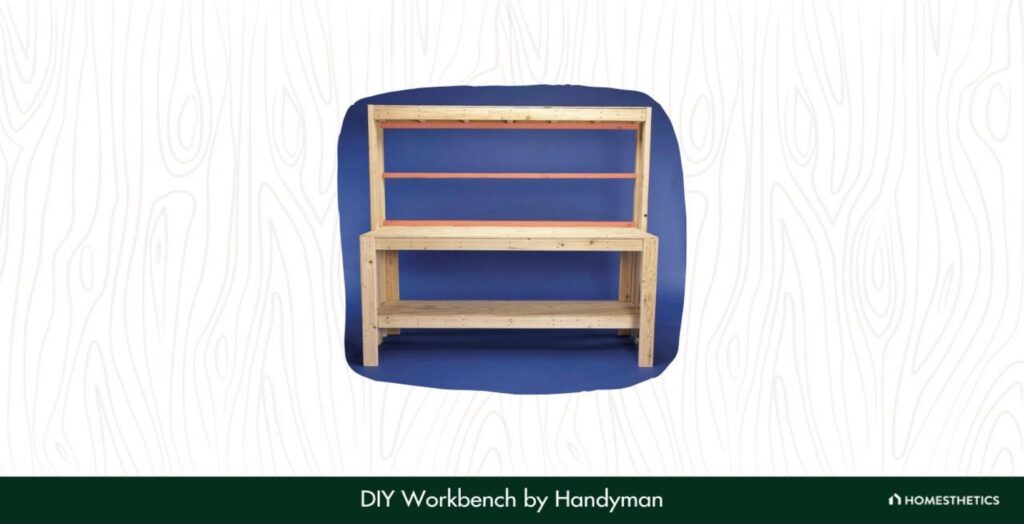
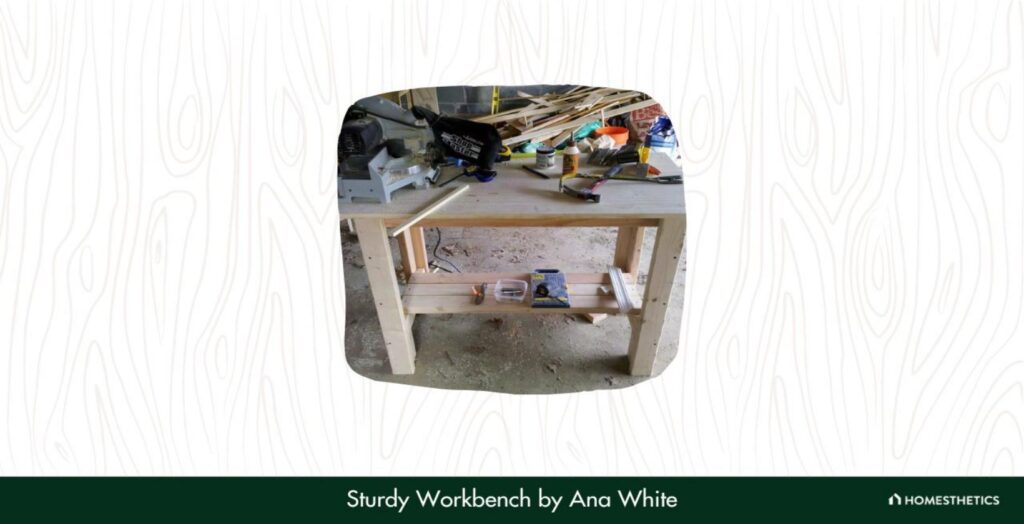
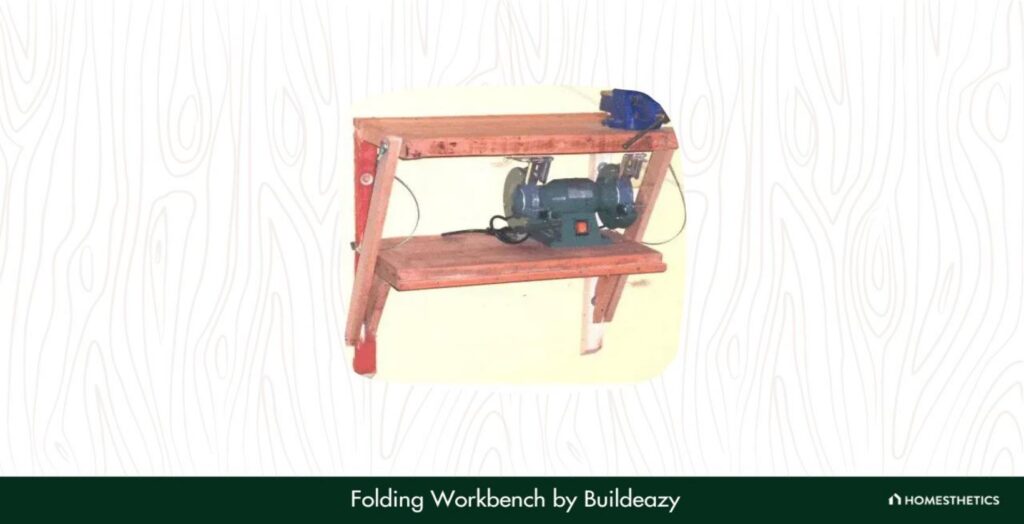
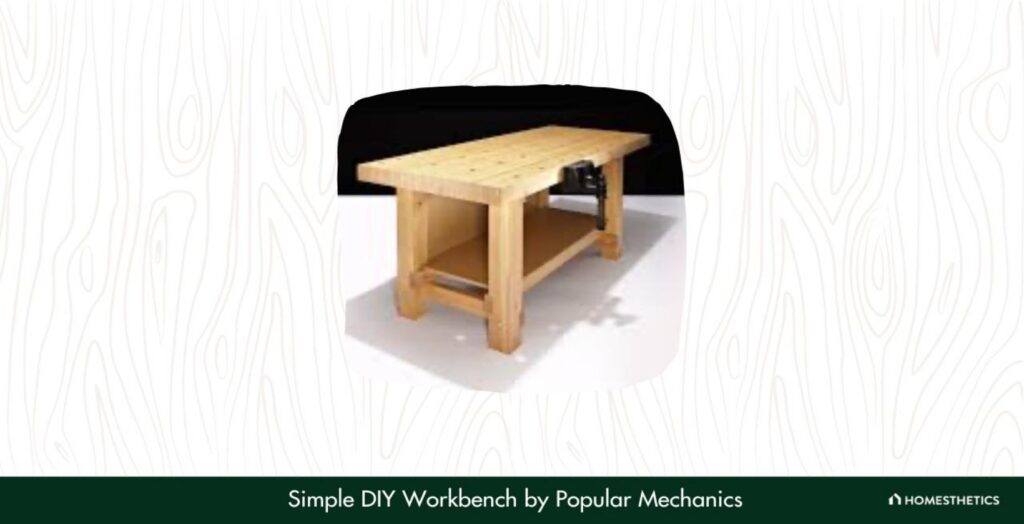
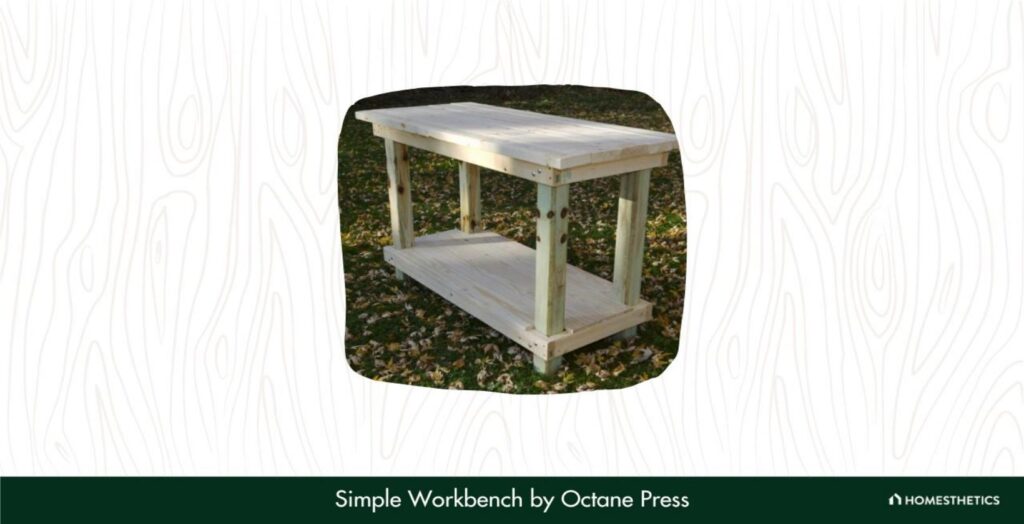

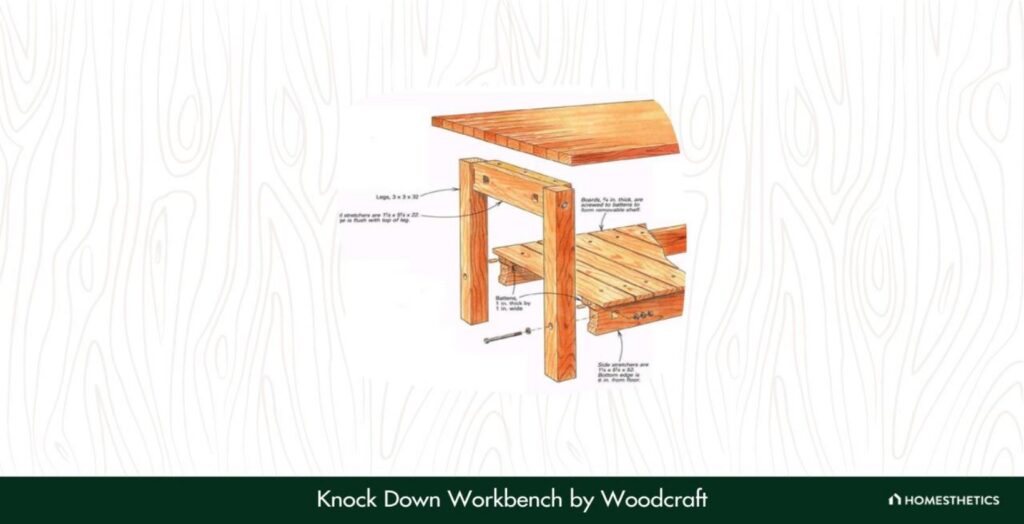
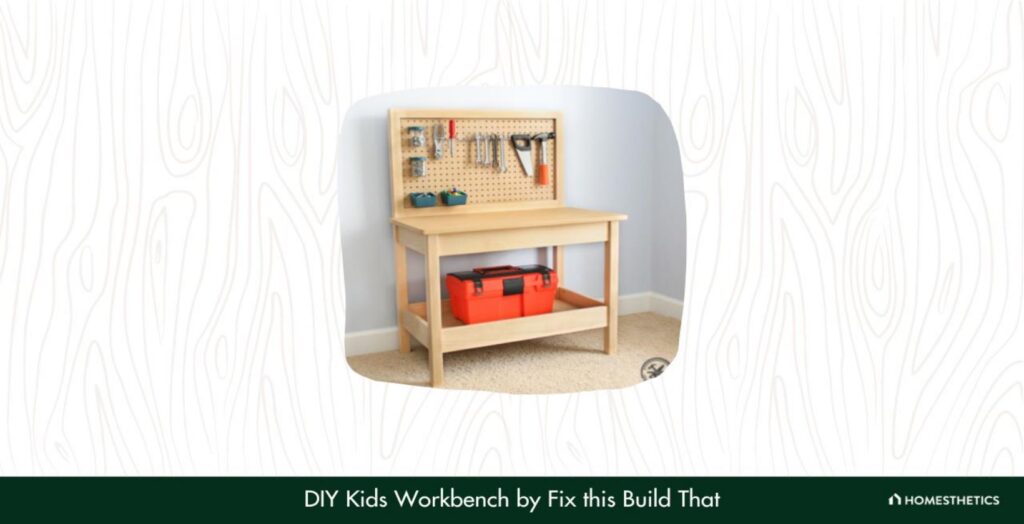
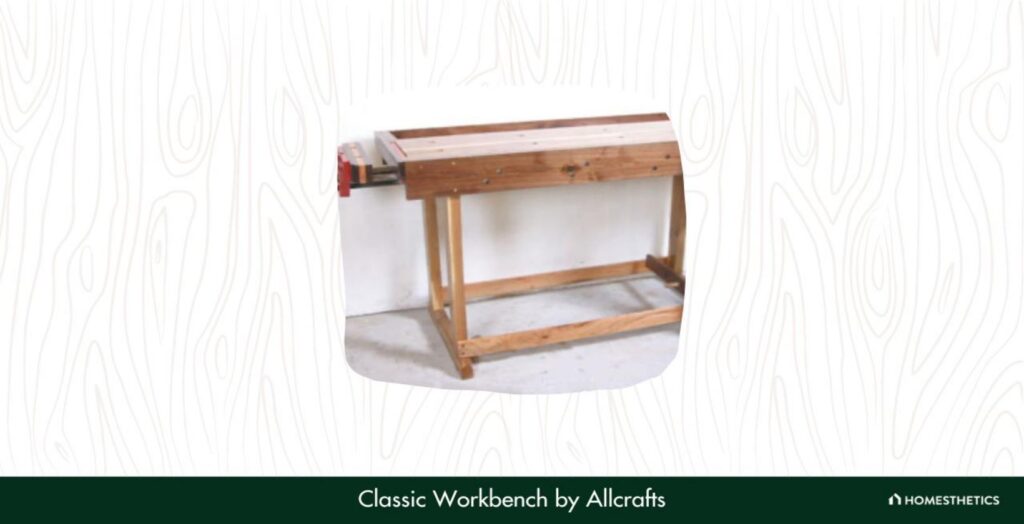


![Forstner Bit vs. Spade Bit [All You Need to Know & Winner]](https://homesthetics.net/wp-content/uploads/2021/06/Forstner-Bit-vs.-Spade-Bit-01.jpg "Forstner Bit vs. Spade Bit [All You Need to Know & Winner]")

